It’s Mother’s Day weekend which means that you and I and everyone out there should feel the slightest bit obligated to at least do a little something nice for your mom for the mere fact that you were borned. And really what better way to celebrate mom than with food… It really is the least that you can do. (I think mom’s also like flowers and cards and handmade pasta necklaces) My mom is defiantly about the food. (she has had her fair share or pasta necklaces) A many years back on Mother’s day, this sweet little girl (me) made her mother a special breakfast treat…blueberry scones. And ever since that day, for every freaking holiday, birthday, whatever day, my mother requests (demands) a batch of those scones. She is always saying that these are her favorite treat and that no one has ever made them as good as I do. (I guess that just reiterates that I am her number 1 child)
And for the last few months my mom has been up my butt, trying to get me to make her some. Not going to lie, I have been saying I’ll get her a batch, but for some reason, I haven’t gotten around to making them. So two birds here.. Make the scones and she gets off my back for a least a little while (a month.. maybe 2) and I give her a fantastic Mothers day gift that I know she will love.
So here they are , oh mother of mine. Blueberry scones!
The stuff. Flour, baking soda, baking powder and salt. A bit of sugar, vanilla, buttermilk, and butter (use vegan butter and nut milk if you want to make them vegan) And of course we need the blueberries which can be fresh or frozen. I usually use fresh, but the store I stopped at only had really big containers of fresh that were like $1000 dollars a piece and the organic frozen happen to be on super sale. So you know, the cheap in me won that battle. So into the bowl goes all the dry stuff; flour, baking powder and soda, salt, and the sugar. Give it a good whisk.
Now for my special trick for a perfectly distributed cold butter in a pastry. Freeze your butter and grate it!
With a large wholed grater, grate the frozen butter directly into the bowl with the dry, stoping a few times to toss the butter chunks around so you don’t end up with a huge pile of grated butter. When it’s all grated, gently toss around so the butter is evenly distributed. Now dump the blueberries into the flour mixture. Toss them around to give them a coat of flour. Add in the buttermilk and vanilla and give a little mix until liquid is absorbed. We are trying to handle the dough as little as possible.Turn mixture onto counter. It’s very loose, but thats what it should look like. Very gently and with as little handling as possible, gather dough up, knead a few times till everything just comes together. Press dough into a disk that is roughly an inch thick…. and it doesn’t need to be perfect. Cut the disk into even sized pieces. Do 6 big, 8 normal, maybe even 10 smaller. Whatever size you like. (I did 8) Place the scones onto a baking sheet, using a spatula to transfer, and sprinkle the tops with a little bit of sugar. Into a preheated oven for about 20 minutes.And when the scones look all nice and browned and a tester comes out clean. remove and either serve right away warm, preferably with huge cup of coffee or tea, or stick on a rack to cool before storing in air tight container.
Perfect to serve as a breakfast pastry, at brunch, or even as a dessert. A nice little treat for a special lady. (dudes can eat them too)
Happy Mothers Day Mom! Thanks for having me!
And Happy Weekend!!!
-C
Blueberry Scones
2 cups all purpose flour
1/3 cup sugar plus 2 tablespoons to sprinkle on top
1 teaspoon baking powder
1 teaspoon baking soda
1/2 teaspoon salt
1/2 cup (1 stick) unsalted butter frozen or really cold (use non dairy butter like Earth Balance for vegan)
1 cup blueberries (fresh or frozen)
1 teaspoon vanilla
3/4 cup buttermilk (use non dairy milk for vegan)
Preheat oven t0 400 degrees
In a large bowl, whisk together flour, baking soda, baking powder, sugar, and salt. Take the frozen butter and grate directly into flour mixture, tossing around to evenly disrupted. Add in blueberries and toss around till coated with flour, then lastly, add vanilla to buttermilk and mix into mixture until just barely coming together. Turn mixture out onto counter and with your hands, knead mixture a few times until it forms a solid dough. Shape into a disk and smoosh down until about an inch thick. Cut into 6-10 triangles and place on a non greases baking sheet and sprinkle tops with remaining sugar. Stick into oven and bake for 20 minutes or until tops start turning a golden brown and a tester in the middle of a scone comes out clean.
Remove from baking sheet and serve warm or let cool on a rack.
Mom gets first dibs, and if she is willing to share, eat one yourself with your face.
I can’t stop eating these. They are like little balls of crack and I am an addict.
Frozen peanut butter grapes… I mean, I just can’t stop.
So you say you have never frozen your grapes? Well you should. It’s the only way I like to eat them anymore. I was never a huge grape fan, but one day long ago, I discovered the wonder that is the frozen grape and it is amazing, Now whenever grapes are on sale at the grocery store, I buy way to many and end up filling our tiny little freezer with jars and bowls of grapes. Then whenever the mister goes to grab the bag of frozen peas for his sore back or knees, there is almost always a frozen grape avalanche. Why I don’t put a lid on those containers is even a mystery to me. Oh, now I remember.. I want easy access.Oopen the freezer, grab a few grapes, and go on my way… not having a lid to take off makes the process a little easier.
Then one day, the frozen grape game turned into something else, something a little more decadent and even more addicting. Where it came from, I do not know. Maybe it’s some subconscious throwback to a childhood full of peanut butter and grape jelly sandwiches, or maybe it’s just that fact that I think peanut butter can pretty much go with anything. But no matter why, I started dipping those frozen grapes into peanut butter and never looked back. And now when I have grapes, it’s all I want to eat.
I am warning you now, once you start making these, watch out, because before you know it, you will develop a frozen grape addiction too. And littles.. they are as easily addicted to these as well. I have seen kids that hate grapes go totally bonkers for these. Just so you know.
The stuff you will need. Washed and drained fresh grapes (green or red. I usually use red but the green were half the price and the red ones didn’t taste very grapie*) Creamy peanut butter, skewers, and a little bit of cinnamon or cocoa powder (optional)
*Note. When you are the store, try before you buy. You know what I mean, eat a few while shopping aground. I say this because not all grape are created equal. Some taste way better than others. I have bought grapes before that didn’t taste like anything or that have really tough skins, and those just piss me off, so eating a few will guarantee that your money is being well spent and that the grapes won’t disappoint you.
Ok, so now let’s make these bad boys.
Simple simple. Two grapes per skewer (or toothpick) Lay on a wax paper covered dish or pan and stick them in the freezer until frozen. When the grapes are frozen, melt peanut butter. Take a big glob and stick in a tall skinny cup or bowl and stick in the microwave or heat in a sauce pan and then transfer to a tall skinny vessel. Take frozen skewed grapes and, one skewer at a time, dip in the peanut butter. Cover with as much or as little of the peanut butter as you want and place on wax paper. If you are feeling feisty, add a sprinkle or cinnamon or even a dash of cocoa powder. Or, this may seem a little crazy, but garlic powder is so F*ing good.(it’s worth at least giving it a try) When all grapes are dipped, place back into freezer for another 10 minutes or so to let the peanut butter set up a bit.
Whenever your ready… Eat. And be so happy. And always keep a back stock of frozen grapes in the freezer. They are the best.
Keep it realz.
-C
Peanut Butter Freezer Grapes
the quantity is up to you, but I recommend making a shit ton!
Creamy Peanut butter (I use organic creamy from Trader Joes, or natural skippy)
Green or Red Grapes
Cinnamon and or cocoa powder (Optional)
Toothpicks or skewers
Wash grapes and skewer 2 grapes onto a stick. Place on a flat surface and stick into the freezer until frozen, which usually takes about an hour.
Once grapes are frozen, stick a big glob of peanut butter into a tall skinny vessel (Like a juice cup or a 4 oz ball jar) and warm to a liquid constancy in the microwave (about 30-45 seconds) or if you don’t have a microwave, stick in a sauce pan, warm on stove, and pour into a glass (what I do)
Remove frozen grapes from freezer and dip into melted peanut butter. Place on a wax paper line tray or pan and sprinkle with cinnamon and or cocoa powder, or not, or a few (whatever you want) and stick back into freezer for another 10 minutes.
Eat as many as you want… Make so many because you will become addicted!
So the mister wants to know…”Why would anyone ever buy those crappy english muffins from the store when they could be eating these?”
Good question…And we will all answer….”Never again! Because I now make the sickest E.M.s around.!”(E.M.s is the cool short way to say english muffins and now that you are going to make your own….man, your so cool!)
These E.M.s are perfect. Easy to make, not overly fussy, and you end up with a super yummy, extremely versatile, individually portion super sweet little disk of bread. And the best part is..nooks and crannies! I think that is why I decided to make these E.M.s, so Nick and I can talk the about nooks and crannies…(Sometimes we need light conversation)
We start with flour and salt whisked together in a bowl. The honey, yeast and warm water are getting on proofing in a jar. An egg waiting to be cracked, some milk, and 2 tablespoons of butter. All this good stuff equals…nooks and crannies!
Oh you like my nifty dough whisk….me too, I use it all the time. Maybe I should have a dough whisk give away ……maybe…..
Everything all mixed together, dumped onto a floured surface and kneaded for 10 minutes by hand…..If you have a stand mixer, you can use it if you want, but you are missing out on the fun of doing it by hand….
When the dough has been sufficiently kneaded, gather dough into a nice ball, coat with a little oil and place back into bowl. Cover with a towel and stick in a warm place to rise for about an hour or until it has doubled in size.
When dough has doubled, punch down and plop out onto floured surface. Dust the bottom of a griddle or in my case, two cast iron pans, with corn meal. Divide dough into 8-10 equal balls and smash into 2 inch thick disks.
Place on griddle or pans and sprinkle more corn meal on top of each E.M. Cover and let rise for another 15 minute.
Now the E.M.s have rested, turn the griddle (or pans) on to low heat. Once your griddle (or pans) gets hot, continue to cook that side for another 7-10 minutes, or until golden brown. Flip and cook other side for 10-12 minutes or until golden brown. Once browned, check for doneness with a thermometer. The inside should reach 200 degrees.( if you don’t have a thermometer, fork split one open and check…. you are going to eat it anyway) If the outside cooked faster then the inside, no worries, just pop them into the oven at 350 for 8-10 minutes. I had to pop mine into the oven for to cook completely.
Remove form griddle, let cool a bit, and ……Fresh, fluffy fat, fantastic….Everything and more that a real english muffin should be. Split open with a fork and……. the nooks and crannies! So spot on. Serve with anything your heart desires…I served these with whipped honey butter…. and eat the only kind of E.M. you will ever again eat. Grocery store english muffins be damned!
Enjoy and Happy Tuesday!
-C
English Muffins
Ingredients
2 1/2 cups unbleached all-purpose flour
2 teaspoons honey
1 teaspoon salt
2 tablespoon butter at room temperature
1 1/4 teaspoons active dry yeast
1/4 cup warm water
3/4 cup milk
1 egg
cornmeal for pan
Combine warm water, honey and yeast in a bowl to active..about 5-10 minutes or until yeast is foamy.
In a separate bowl, whisk together flour and salt. Mix in butter(I use my fingers) When yeast mixture is done proofing, whisk together mixture with the egg and milk. Add wet to dry and mix until just incorporated Dump out onto floured surface and knead dough for 8 minutes, adding a bit of flour whenever dough starts to get too sticky. Roll into a ball, coat with oil and place back into bowl and cover with a towel. Let rise for 60 minutes or until sought has doubled in size.
Once the first rise is done, deflate dough and divide into 8 equal pieces(10 for a slightly smaller muffin). Smoosh each ball into a flat disk, about 2 inches thick) and place on a cold cornmeal dusted cast iron griddle. (I used 2 cast iron pans) Sprinkle tops of muffins with more corn meal and let dough rest for another 15 minted. Turn burners on low heat. Let griddle get hot and continue to cook the muffins for another 10 minutes or until golden brown. Flip and cook opposite side until gold brown and remove from griddle. To make sure the muffins are cooked completely, stick an instant read thermometer into the center…it should read 200 degrees. (if you don’t have a thermometer, split one open… the tester E.M.) If the E.M.s are not completely cook, just stick in the oven on 350 for 5-10 minutes or until cooked throughout.
Remove and let cool. To serve, split open with a fork and give a light toast. Spread with butter, jam, peanuts butter, anything you want…maybe make E.M pizzas!

THE LOVELY CRAZY
September 19, 2015 by maximios • Blog
And for the last few months my mom has been up my butt, trying to get me to make her some. Not going to lie, I have been saying I’ll get her a batch, but for some reason, I haven’t gotten around to making them. So two birds here.. Make the scones and she gets off my back for a least a little while (a month.. maybe 2) and I give her a fantastic Mothers day gift that I know she will love.
So here they are , oh mother of mine. Blueberry scones!
Now for my special trick for a perfectly distributed cold butter in a pastry. Freeze your butter and grate it!
With a large wholed grater, grate the frozen butter directly into the bowl with the dry, stoping a few times to toss the butter chunks around so you don’t end up with a huge pile of grated butter. When it’s all grated, gently toss around so the butter is evenly distributed. Now dump the blueberries into the flour mixture. Toss them around to give them a coat of flour. Add in the buttermilk and vanilla and give a little mix until liquid is absorbed. We are trying to handle the dough as little as possible.
 Turn mixture onto counter. It’s very loose, but thats what it should look like.
  Very gently and with as little handling as possible, gather dough up, knead a few times till everything just comes together. Press dough into a disk that is roughly an inch thick…. and it doesn’t need to be perfect.
  Cut the disk into even sized pieces. Do 6 big, 8 normal, maybe even 10 smaller. Whatever size you like. (I did 8) Place the scones onto a baking sheet, using a spatula to transfer, and sprinkle the tops with a little bit of sugar. Into a preheated oven for about 20 minutes.
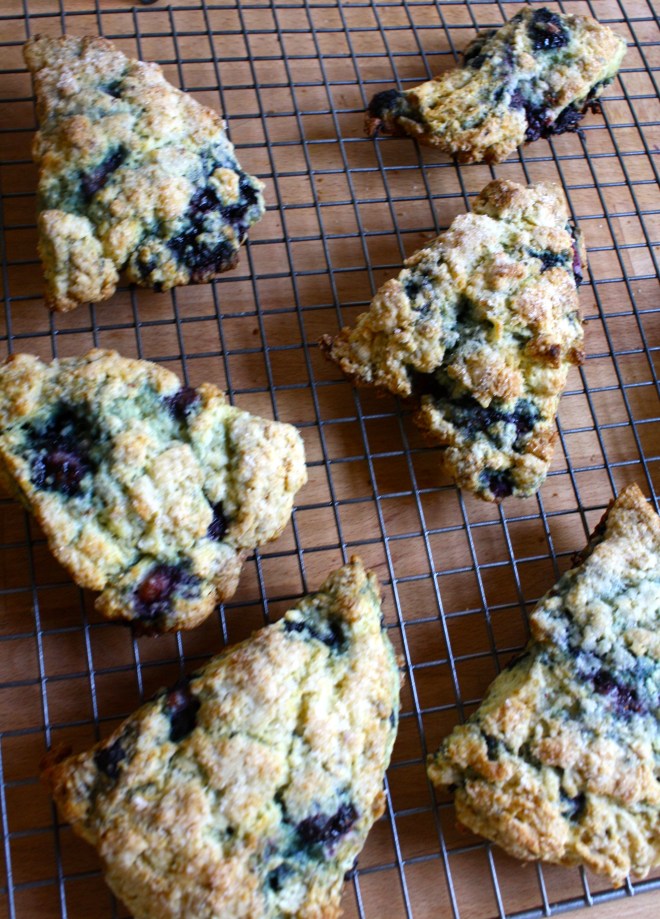 And when the scones look all nice and browned and a tester comes out clean. remove and either serve right away warm, preferably with huge cup of coffee or tea, or stick on a rack to cool before storing in air tight container.
Perfect to serve as a breakfast pastry, at brunch, or even as a dessert. A nice little treat for a special lady. (dudes can eat them too)
Happy Mothers Day Mom! Thanks for having me!
And Happy Weekend!!!
-C
Blueberry Scones
Preheat oven t0 400 degrees
In a large bowl, whisk together flour, baking soda, baking powder, sugar, and salt. Take the frozen butter and grate directly into flour mixture, tossing around to evenly disrupted. Add in blueberries and toss around till coated with flour, then lastly, add vanilla to buttermilk and mix into mixture until just barely coming together. Turn mixture out onto counter and with your hands, knead mixture a few times until it forms a solid dough. Shape into a disk and smoosh down until about an inch thick. Cut into 6-10 triangles and place on a non greases baking sheet and sprinkle tops with remaining sugar. Stick into oven and bake for 20 minutes or until tops start turning a golden brown and a tester in the middle of a scone comes out clean.
Remove from baking sheet and serve warm or let cool on a rack.
Mom gets first dibs, and if she is willing to share, eat one yourself with your face.
Frozen peanut butter grapes… I mean, I just can’t stop.
So you say you have never frozen your grapes? Well you should. It’s the only way I like to eat them anymore. I was never a huge grape fan, but one day long ago, I discovered the wonder that is the frozen grape and it is amazing, Now whenever grapes are on sale at the grocery store, I buy way to many and end up filling our tiny little freezer with jars and bowls of grapes. Then whenever the mister goes to grab the bag of frozen peas for his sore back or knees, there is almost always a frozen grape avalanche. Why I don’t put a lid on those containers is even a mystery to me. Oh, now I remember.. I want easy access.Oopen the freezer, grab a few grapes, and go on my way… not having a lid to take off makes the process a little easier.
Then one day, the frozen grape game turned into something else, something a little more decadent and even more addicting. Where it came from, I do not know. Maybe it’s some subconscious throwback to a childhood full of peanut butter and grape jelly sandwiches, or maybe it’s just that fact that I think peanut butter can pretty much go with anything. But no matter why, I started dipping those frozen grapes into peanut butter and never looked back. And now when I have grapes, it’s all I want to eat.
I am warning you now, once you start making these, watch out, because before you know it, you will develop a frozen grape addiction too. And littles.. they are as easily addicted to these as well. I have seen kids that hate grapes go totally bonkers for these. Just so you know.
*Note. When you are the store, try before you buy. You know what I mean, eat a few while shopping aground. I say this because not all grape are created equal. Some taste way better than others. I have bought grapes before that didn’t taste like anything or that have really tough skins, and those just piss me off, so eating a few will guarantee that your money is being well spent and that the grapes won’t disappoint you.
Ok, so now let’s make these bad boys.
Simple simple. Two grapes per skewer (or toothpick) Lay on a wax paper covered dish or pan and stick them in the freezer until frozen.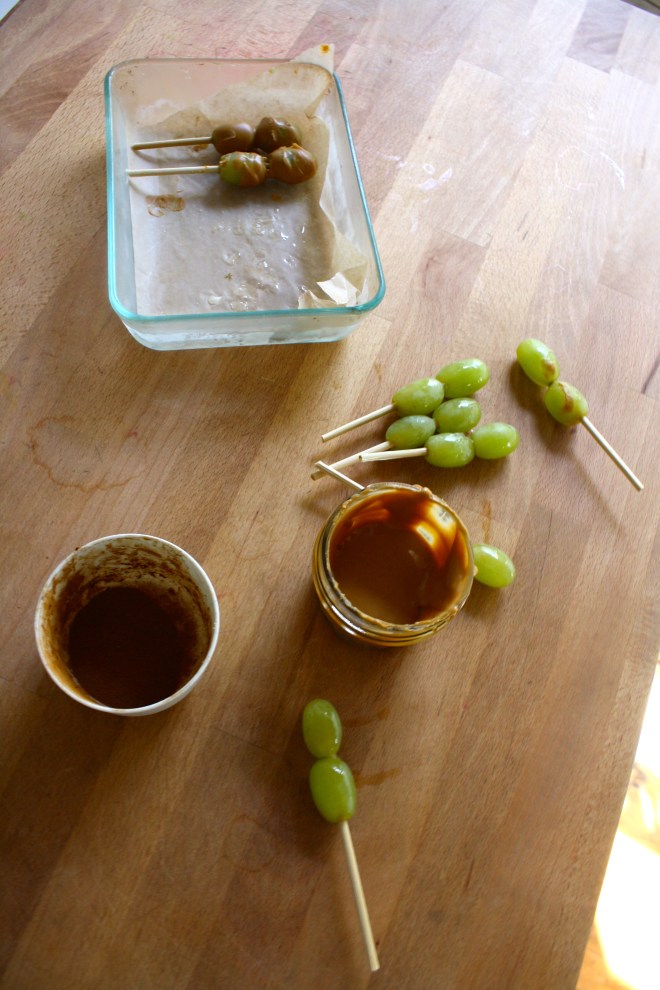 When the grapes are frozen, melt peanut butter. Take a big glob and stick in a tall skinny cup or bowl and stick in the microwave or heat in a sauce pan and then transfer to a tall skinny vessel. Take frozen skewed grapes and, one skewer at a time, dip in the peanut butter. Cover with as much or as little of the peanut butter as you want and place on wax paper. If you are feeling feisty, add a sprinkle or cinnamon or even a dash of cocoa powder. Or, this may seem a little crazy, but garlic powder is so F*ing good.(it’s worth at least giving it a try) When all grapes are dipped, place back into freezer for another 10 minutes or so to let the peanut butter set up a bit.
Keep it realz.
-C
Peanut Butter Freezer Grapes
the quantity is up to you, but I recommend making a shit ton!
Wash grapes and skewer 2 grapes onto a stick. Place on a flat surface and stick into the freezer until frozen, which usually takes about an hour.
Once grapes are frozen, stick a big glob of peanut butter into a tall skinny vessel (Like a juice cup or a 4 oz ball jar) and warm to a liquid constancy in the microwave (about 30-45 seconds) or if you don’t have a microwave, stick in a sauce pan, warm on stove, and pour into a glass (what I do)
Remove frozen grapes from freezer and dip into melted peanut butter. Place on a wax paper line tray or pan and sprinkle with cinnamon and or cocoa powder, or not, or a few (whatever you want) and stick back into freezer for another 10 minutes.
Eat as many as you want… Make so many because you will become addicted!
Good question…And we will all answer….”Never again! Because I now make the sickest E.M.s around.!”(E.M.s is the cool short way to say english muffins and now that you are going to make your own….man, your so cool!)
These E.M.s are perfect. Easy to make, not overly fussy, and you end up with a super yummy, extremely versatile, individually portion super sweet little disk of bread. And the best part is..nooks and crannies! I think that is why I decided to make these E.M.s, so Nick and I can talk the about nooks and crannies…(Sometimes we need light conversation)
We start with flour and salt whisked together in a bowl. The honey, yeast and warm water are getting on proofing in a jar. An egg waiting to be cracked, some milk, and 2 tablespoons of butter. All this good stuff equals…nooks and crannies!
Oh you like my nifty dough whisk….me too, I use it all the time. Maybe I should have a dough whisk give away ……maybe…..
When the dough has been sufficiently kneaded, gather dough into a nice ball, coat with a little oil and place back into bowl. Cover with a towel and stick in a warm place to rise for about an hour or until it has doubled in size.
Enjoy and Happy Tuesday!
-C
English Muffins
Ingredients
Combine warm water, honey and yeast in a bowl to active..about 5-10 minutes or until yeast is foamy.
In a separate bowl, whisk together flour and salt. Mix in butter(I use my fingers) When yeast mixture is done proofing, whisk together mixture with the egg and milk. Add wet to dry and mix until just incorporated Dump out onto floured surface and knead dough for 8 minutes, adding a bit of flour whenever dough starts to get too sticky. Roll into a ball, coat with oil and place back into bowl and cover with a towel. Let rise for 60 minutes or until sought has doubled in size.
Once the first rise is done, deflate dough and divide into 8 equal pieces(10 for a slightly smaller muffin). Smoosh each ball into a flat disk, about 2 inches thick) and place on a cold cornmeal dusted cast iron griddle. (I used 2 cast iron pans) Sprinkle tops of muffins with more corn meal and let dough rest for another 15 minted. Turn burners on low heat. Let griddle get hot and continue to cook the muffins for another 10 minutes or until golden brown. Flip and cook opposite side until gold brown and remove from griddle. To make sure the muffins are cooked completely, stick an instant read thermometer into the center…it should read 200 degrees. (if you don’t have a thermometer, split one open… the tester E.M.) If the E.M.s are not completely cook, just stick in the oven on 350 for 5-10 minutes or until cooked throughout.
Remove and let cool. To serve, split open with a fork and give a light toast. Spread with butter, jam, peanuts butter, anything you want…maybe make E.M pizzas!