Are you sizzling? Is that pool of water next to you , in fact, your own sweat?
Yeah, I feel you…..stupid heat wave.
During these long extended periods of heat and humidity, my body starts to revolt. I get bitchy, by skin get itchy, my head goes foggy, my stomach starts to refuse food. and I generally just feel like crap. I love the summer, but I am not, by any means, a hot, high humidity person.
So during this nasty bout of heat, I do what I can to find comfort. And one of my comforts is watermelon. I am pretty sure that watermelon is a magical fruit. A giant green oblong ball that when cracked open is the brightest, sweetest bright pink fruit.. I mean, thats pretty f ing magical. It can make anything better, and is one of the few things that I want to eat when its a million degrees outside without barfing.
Watermelon is my official heatwave food. Watermelon all day long (Is it bad that I could literally eat an entire watermelon all to my face, in one sitting? ) And because I am me, I like to spice it up a bit and slather a big glob of basil pesto to the melon…. and that makes me happy. Plus it makes the fact that I am eating nothing but melon seem a little more substantial.
Do you have a heatwave food? If not, try this….It will be your food.
The stuff. A big hunk of watermelon, basil, a lemon, olive oil and salt.
Stick the basil, the juice of the lemon, and a pinch of salt into a blender. Turn on and blend, adding just a tad bit of olive oil until a nice green pesto is made.
Prepare your melon. Remove rinds if you want and save for later.. (seriously, we can make gazpacho with it) and cut into inch thick chunks.
And now if your feeling it, stick a skillet on the stove and preheat on medium high. Once heated, place watermelon chunks on hot skillet and sear each side for about 3-5 minutes per side.
If you want to go fresh, just skip searing it. Me, I do a bowl of both.
And now slather the melon with the pesto
And go to town
Stay cool my friends!
-C
Watermelon
a bunch of basil
a lemon
salt
olive oil
Place basil, a pinch of salt and the juice of the lemon into a blender. Turn on and blend, adding in a drizzle of olive oil until pesto forms.
Preheat a lightly oiled skillet (or a grill) on medium high heat. Take your watermelon and remove rinds (save for later) and cut into inch chunks.* When heated, add the watermelon. LEt each side sear for 3-5 minutes, or until caramelized. Tarnsfrer to a bowl.
*Note. The seared melon is fantastic cooked then cooled. Also, I know some people blot out the juice before grilling, but I think that is a waste and I find unnecessary, but if you don’t want a juicy piece of cooke melon, by all means, blot out the juice..
It’s Mother’s Day weekend which means that you and I and everyone out there should feel the slightest bit obligated to at least do a little something nice for your mom for the mere fact that you were borned. And really what better way to celebrate mom than with food… It really is the least that you can do. (I think mom’s also like flowers and cards and handmade pasta necklaces) My mom is defiantly about the food. (she has had her fair share or pasta necklaces) A many years back on Mother’s day, this sweet little girl (me) made her mother a special breakfast treat…blueberry scones. And ever since that day, for every freaking holiday, birthday, whatever day, my mother requests (demands) a batch of those scones. She is always saying that these are her favorite treat and that no one has ever made them as good as I do. (I guess that just reiterates that I am her number 1 child)
And for the last few months my mom has been up my butt, trying to get me to make her some. Not going to lie, I have been saying I’ll get her a batch, but for some reason, I haven’t gotten around to making them. So two birds here.. Make the scones and she gets off my back for a least a little while (a month.. maybe 2) and I give her a fantastic Mothers day gift that I know she will love.
So here they are , oh mother of mine. Blueberry scones!
The stuff. Flour, baking soda, baking powder and salt. A bit of sugar, vanilla, buttermilk, and butter (use vegan butter and nut milk if you want to make them vegan) And of course we need the blueberries which can be fresh or frozen. I usually use fresh, but the store I stopped at only had really big containers of fresh that were like $1000 dollars a piece and the organic frozen happen to be on super sale. So you know, the cheap in me won that battle. So into the bowl goes all the dry stuff; flour, baking powder and soda, salt, and the sugar. Give it a good whisk.
Now for my special trick for a perfectly distributed cold butter in a pastry. Freeze your butter and grate it!
With a large wholed grater, grate the frozen butter directly into the bowl with the dry, stoping a few times to toss the butter chunks around so you don’t end up with a huge pile of grated butter. When it’s all grated, gently toss around so the butter is evenly distributed. Now dump the blueberries into the flour mixture. Toss them around to give them a coat of flour. Add in the buttermilk and vanilla and give a little mix until liquid is absorbed. We are trying to handle the dough as little as possible.Turn mixture onto counter. It’s very loose, but thats what it should look like. Very gently and with as little handling as possible, gather dough up, knead a few times till everything just comes together. Press dough into a disk that is roughly an inch thick…. and it doesn’t need to be perfect. Cut the disk into even sized pieces. Do 6 big, 8 normal, maybe even 10 smaller. Whatever size you like. (I did 8) Place the scones onto a baking sheet, using a spatula to transfer, and sprinkle the tops with a little bit of sugar. Into a preheated oven for about 20 minutes.And when the scones look all nice and browned and a tester comes out clean. remove and either serve right away warm, preferably with huge cup of coffee or tea, or stick on a rack to cool before storing in air tight container.
Perfect to serve as a breakfast pastry, at brunch, or even as a dessert. A nice little treat for a special lady. (dudes can eat them too)
Happy Mothers Day Mom! Thanks for having me!
And Happy Weekend!!!
-C
Blueberry Scones
2 cups all purpose flour
1/3 cup sugar plus 2 tablespoons to sprinkle on top
1 teaspoon baking powder
1 teaspoon baking soda
1/2 teaspoon salt
1/2 cup (1 stick) unsalted butter frozen or really cold (use non dairy butter like Earth Balance for vegan)
1 cup blueberries (fresh or frozen)
1 teaspoon vanilla
3/4 cup buttermilk (use non dairy milk for vegan)
Preheat oven t0 400 degrees
In a large bowl, whisk together flour, baking soda, baking powder, sugar, and salt. Take the frozen butter and grate directly into flour mixture, tossing around to evenly disrupted. Add in blueberries and toss around till coated with flour, then lastly, add vanilla to buttermilk and mix into mixture until just barely coming together. Turn mixture out onto counter and with your hands, knead mixture a few times until it forms a solid dough. Shape into a disk and smoosh down until about an inch thick. Cut into 6-10 triangles and place on a non greases baking sheet and sprinkle tops with remaining sugar. Stick into oven and bake for 20 minutes or until tops start turning a golden brown and a tester in the middle of a scone comes out clean.
Remove from baking sheet and serve warm or let cool on a rack.
Mom gets first dibs, and if she is willing to share, eat one yourself with your face.
Spicy, crispy cauliflower… um yes please. I really like cauliflower. The mister loves it, or at least likes it better than any other vegetable. So when he asked for spicy cauliflower, well yea I am going to make it because I am so nice and really, could I say no to a veggie request? (I might have said no if it involved deep frying) Also, I found fresh cauliflower on sale! ($2.25) I don’t usually cook fresh cauliflower, but I figured at that price, it wouldn’t be bad to cook a head. (If I am cooking cauliflower, which I do a lot, I just use frozen….casue it be waaaay cheaper)
Fresh, cheap and requested veggies….those are must makes. And the mister was happy with I handed him the plate of oh so lovely looking crispy crunchy loveliness. (I kind of like to make him happy…sometimes)
The stuff. Cauliflower, chopped and broken into pieces. Corn meal mixed with salt, pepper, onion and garlic powder, and because I made this for the mister, parmesan cheese. And in the green bowl, srirsachi and a little oil. The cauliflower gets a coat of the hot sauce and then tossed around in the corn meal mixture. Handling as little as possible, place coated pieces on a lightly oiled baking sheet and stick those suckers in the oven for about a half hour, taking them out and flipping half way.And take them out of the oven when pieces tuned golden brown, stik them on a plate, and serve immediately.
A bit of spice, a bit of crispy , a lot a yum. Serve with some crunchy veggies, maybe a squeeze of lemon and definitely some type of avocado situation.
A beer would be lovely too!
Have a fantastic weekend!
-C
Spicy Crispy baked Cauliflower
1 head cauliflower, chopped or broken into florets
1/2 cup corn meal
3-4 tablespoon sriracha or your favorite hot sauce
1 tablespoon olive or coconut oil
salt and pepper
Any seasonings you might like (garlic or onion powder, parmesan cheese, national yeast…. whatever floats your boat)
Preheat oven to 400 degrees
In a bowl, mix together sriracha and oil. In a separate bowl, mix salt, pepper, any seasonings you might like, and corn meal. Take cauliflower and toss in sauce to coat. Remove from sauce and toss around in cornmeal mixture till fully coated, but try not to hand too much so the coating doesn’t come off. Place pieces on a lightly oiled baking sheet and stick into oven. Bake for about 15 minutes, remove and flip pieces. Back into the oven for another 15-20 minutes (depending on you crispy preference) Remove when golden brown (or darker if you like) and serve immediately.
Cucumber, celery, and carrots are great accompaniments.. also a little mashed avocado or guacamole is much appreciated.
Peas scream spring to me. The bright green color with that nice bright fresh taste….. kind of like a fresh spring day. Ah spring, so lovely, so nice, so hasn’t made its way here yet. So I guess I am left to eat my spring. And what better way to highlight those lovely spring tastes? A fantastic pesto my friends, and it can be made lickidy split.
Pesto is one of those things that I am constantly making, and not just the kind most people think of with basil and nuts, I pesto everything..peppers, greens, carrots, squash. And yea, I used this post to make a pesto pasta dish, but pesto has so many other fantastic uses. Like as a sandwich or wrap spread or a dip for veggies and crackers. I have used it as a soup base, a pizza sauce, on roasted potatoes and marinated tofu with pestos. It can also be thinned down and used as a salad dressing. See, so many uses.
And this pea pesto is no exception. It has such a great light, almost fruity, super bright taste. I mean, it’s peas so it taste just like peas but somehow even better. It really works in my mouth. I could eat a bowl of this stuff and be happy.
Whatever you plan on using it for, make the pesto. You will be thanking me later.
Pesto Stuff. We got the peas, garlic, lemon, oil, cheese if you please, and salt. Take a handful of peas and set aside for later. Juice the lemon and take that and the rest of the stuff and stick in a food processor and puree until smooth.
Oh my, so green, so good. I first made it without cheese and scooped a little out for me. It was perfect. Like the most brilliant bright pea flavor ever. It made me happy. After I added in the cheese, the mister said it tasted even better…. so cheese or not, it’s going to be good!The pesto is made, and it only took about 2 seconds, now boil up the pasta. If you were a thinker, you could start the pasta and make the pesto while its boiling. (I wasn’t being a thinker) I used bow ties cause they are super cute, but use whatever pasta you’re feeling. Shells or the ones that look like little brains would be good options.
Once the pasta is cooked, strain, reserving about 1/4 cup of the water. Add that bit of water back to the pot, add in the pesto, give a stir and dump pasta back into the pot. Toss in a handful of peas, maybe sprinkle some cheese and give it a good crack of some pepper.
Into a bowl and served with a fork to eat it with. A super green fresh springy meal of happiness. And all under 15 minutes in the kitchen.
Oh you want to thank me for this…
Hey, not a problem….not a problem at all.
-C
Spring Pea Pesto and Bow Ties
Makes enough pesto to coat a pound of cooked pasta and have some left over for sandwiches or to spread on crackers.
1 lb. fresh or frozen peas (thawed if frozen)
1 lemon
4-5 cloves garlic
2 ish tablespoons of olive oil
1/4 cup parmesan, really or vegan (optional)
salt
1 lb (an average box) of bow tie pasta (use any whole wheat, vegan, gluten free variety)
Place peas, (remove a handful and set aside to toss into the pasta) garlic, the juice of the lemon, olive oil and the parmesan (if you are using) into a food processor. Blend until smooth. Taste and salt as needed.
Pasta… Boil per instructions on box. Strain pastas but save about a 1/4 cup of starchy water. Toss pasta, starchy water and pesto together, adding in the handful or more of the whole peas. Sprinkle with more parmesan and or cracked pepper ,if wanted, and serve in big bowls.
Use a fork. Eat, smile and be happy.
Before we get to the fries, I just want to mention that yesterday was one of those fantastic winter days that reminds me why I love living in Vermont. Pretty white snow everywhere, the sun was out, and 20 degrees without a gust of wind. The trash dog an I were even able to go for a little hike. It was so nice and soooo sooo needed! Anyways, the other day as me, my sister and the mister where putting together one more piece of Ikea furniture, (I am the master at Ikea assembling!) a little runs into the room and presents the mister with a Dominos pizza. Yup, a whole pizza just for him. Why you might ask? Well I guess my sister was delivered the wrong pizza and the place didn’t want it back and she didn’t want it, so she gave it to him.
A whole pizza to himself. I didn’t mind too much..he was just going to be eating it for lunch and dinner until it was out of the fridge. But for dinner I did want him to eat something of the vegetable matter that didn’t come out of a box. I was going to make him a big salad, but then realized that would mean sharing the last of the greens that I had for MY dinner and I was not about to do that, so I made him parsnip and carrot fries instead. No biggy, just some slicing, a little tossing and a bit of time in the old oven. And I figured I might as well make a nice sauce for those fries because I be so very nice.
The biggest problem that I ran into when I made these fries was that I didn’t make enough, so you should probably make twice as many as you think you will eat. If you end up not eating them all (which you probably will), well then you now have a great start for a soup or a nice addition to a salad. Either way, you will eat them because they are amazing and addicting… and as healthy as can be!
The carrots and the parsnips are all sliced up into big matchsticks and ready to be baked to crispy browned perfection. I added the oil to the pan to toss the fries in and then sprinkled with a fair amount of salt and pepper. If you don’t have and or want to use a cast iron pan, a baking sheet works just the same.
Oh saucy sauce stuff. Tomato puree, sriracha, and yellow mustard. Add a little bit of honey to lighten it up (can use brown sugar if keeping it vegan), a splash of apple cider vinegar and a couple minced cloves of garlic. Topped off with the smokey delightful spice of cumin. I cold eat this on everything…and I kind of did.
All mixed up in an oven safe dish, I stuck it into the oven for a about 8 minutes until it got a little bubbly, just to let all the flavors fuse together…
Fries are done, Sauce is ready. Served in super cute tea cups.(from now on I want to serve everything in tea cups.) A perfect side dish, snack, or even a light meal. It lead the mister to ask the question…What pizza?
Happy Day!
-C
Parsnip and Carrot Fries with Smokey Sriracha Sauce
Wash and trim carrots and parsnips and cut into large matchsticks (any shape is good, just make them all uniform) Toss with oil and sprinkle with salt and pepper. Place on cast iron pan or baking sheet and stick in oven for 30 or so minutes, and rotating after about 20. The fries are done when crispy and brown.
For the sauce. Mince garlic and add to all the sauce ingredients in an oven safe bowl. stick into oven for about 8 minutes until slightly bubbly and hot.
Dip fries in sauce
I was informed yesterday that if I was going to make tortilla chips, that I better make some sweet ass dips to go with them. I kind of agree… tortilla chips need dip… or better yet, two dips. Queso and guacamole. It’s what needed to be done, and so I did it.
Guacamole is amazing… anything avocado is amazing…this guacamole is amazing. White bean guacamole is amazing. And not that we really care, but this guac is half the fat then straight up guacamole. Plus it’s packed full of protein making it a kind of super duper, must eat all of it, kind of dip. And sweet potato anything will make me happy. Making queso dip with sweet potato and cauliflower is probably one of my best food combos so far. (after eating a butt load, I felt like I was a genius and made an amazing discovery) Again, not that we need it to be, but this is also a fat-free, vegan, gluten-free, super healthy, packed full of B12, fiber and nutrients, dip for all kind of dip.…. just another reason why you cannot feel bad when you finish off half a batch before you get a chance to stick it in a serving bowl. (I might have done that)
Here is what you need for a good time:
−These tortilla chips ….Check.
−Some Chopped Veggies (I want the veggies)…..Check
−Cauliflower Sweet Potato Queso.…Check.
−White Bean Guacamole…Check.
You are now ready for it. It being this party, that party, the Super Bowl, or a Wednesday afternoon.
To the left we have the makings for the cauliflower sweet potato queso.. Steamed cauliflower, a baked sweet potato, nutritional yeast, garlic, and chopped up red onion, red bell pepper and jalapeño. To make all you need to do it take the chopped peppers, onion, and garlic and sauté for a few minutes just to slightly soften and bring out flavors. While that’s going on, take the steamed cauliflower and sweet potato(skin off..but eat it, or save it for soup or feed it to the dog) and puree together with a blender or food processor. Add in nutritional yeast, about a tablespoon or two of hot water and, salt and pepper to taste. Blend for about 5 minutes until super creamy smooth. Add in sautéed stuff and pulse just enough to incorporated the veggies but not complete blend in. Stick in a bowl.
To the right we have white bean guacamole stuff. Two cups (or one can) rinsed white beans, one ripe avocado, a lime, a few cloves of garlic,(I also added a bit of garlic powered…I like my garlic) and some chopped up red onion and tomato. Place beans, garlic, avocado and lime juice in a blender or food processor and blend until smooth. Add salt to taste and toss in the chopped tomato and onion. Blend for sec to mix that in…Stick in a bowl
Perfect…
To think that both of these dips took about 10 minutes total to make. (I had pre baked the cauliflower and sweet potato) And for real, I would spend much more time if I had too because both of these dips are so freaking good, I definitely will be making these on the regular.
So there , dips for those sweet ass chips or whatever you want to dip or them spread them on.
And he guys…It’s FRIDAY! Have a fantastic day!
-C
White Bean Guacamole
2 cups white beans (or 1 can) rinsed and drained
1 ripe avocado
3 cloves garlic
1 lime
1/4 small red onion
1 small tomato
1-2 teaspoons salt
Finley chop onion and tomato. Set aside. Place the beans, avocado, garlic, garlic powder, 1 teaspoon salt and the juice from one lime into a blender or food processor and blend until smooth. Add a splash of water if needed to help keep things moving. Taste and add more salt if needed. When smooth, add the onion and tomato and pulse a few times to mix in. Scoop into a serving dish and finish with a squeeze of lime and a bit of chopped onion and tomato.
Cauliflower Sweet Potato Queso
1 1/2 cups pre cooked steamed or roasted cauliflower
1 medium pre baked sweet potato
1/2 cup nutritional yeast
1-2 tablespoons hot water
1/2 a small red pepper
1/4 small red onion
1 jalapeño
3 cloves garlic
salt and pepper
Finely dice the red pepper, jalapeño, onion and garlic and sauté in a skillet for a few minutes until slightly soften and fragrant. Take the pre-cooked cauliflower, sweet potato (skin removed), and nutritional yeast and place in a blender or food processor. Blend for about 5 minutes until creamy and smooth. Add in a tablespoon of water to keep things moving. When completely smooth, add in sautéed veggies and pulse a few times to combine. Scoop into a serving dish. If your feeling it, top with scallions and cracked pepper.
Serve dips with chips, veggies or anything you want. Also make great spreads for sandwiches and crackers too!
Pomeamole!! That’s what I want to call it, so that’s what it is. Guacamole with the addition of tiny little pearls of sweet and tangy juice.. I mean, come one, it can’t get much better. This is what happens when avocados are on super sale, I buy a lot…and then eat a lot….and then eat some more. I start to get a little crafty and, wa la.. add pomegranate seeds. I also inflict anyone eating around me with avocado, even if they believe that they don’t like it because that’s not possible. I know this because there was a time where I believed that I didn’t like avocados… and that’s just crazy. I remember the very moment I realized I was wrong. It was the first food Nick ever made for me. I was working at a pottery studio and wasn’t able to leave because of a raku firing and I was starving. My love saved me with a sandwich, and it was the best I had ever eaten. A sandwich that contained hummus, greens, sun-dried tomatoes, and yup, big slices of avocado. That sandwich change my life. I knew from that moment on…. I loved avocados……oh and that I loved Nick too. I know, we are so cute that you want to barf. Well go ahead, just do it before you eat the pomeamole.
It’s all pretty simple…One very tasty ripe avocado, about 1/2 cup of pomegranate seeds, a little chopped onion, a bit of chopped tomato, a lemon, a few cloves of garlic and a pinch of salt. It’s what dreams are made of.
Mash it all together minus the pomegranate seeds… As smooth or as chunky as you like it….
Fold in 1/2 the seeds
And top with the rest! And another squeeze of lemon… just like that. You can eat this magic with anything you want; chippers, rice cakes, tacos, toast, or even top a kale salad with a big scoop. …..we at it with carrots and broccoli. SO GOOD!
Pomeamole! (Pomegranate Guacamole)
Ingredients
1 ripe avocado
1/2 a small red or sweet onion
1/2 a small tomato
2-3 cloves of garlic
salt
a lemon or lime
Pit and scoop avocado into a medium bowl and smash until desired consistency. Finely chop onion, garlic and tomato and mix together with avocado and half the juice of the lemon. Fold in most the pomegranate seed. Top with the rest and the squeeze the other half of lemon on top.
You ever make dish, completely on the fly, just to use something up (I have a lot of ripe tomatoes) with no real expectation, just because… Then have it be one of the best freaking things that you have ever made? This salad is one of those things.. maybe not the best thing I have ever made, but definitely the best salad I have ever made…. this week.
A salad compiled of all things amazing, taking just a few minutes to make and is the perfect balance of uber fresh with baby spinach, raw kale, and crunchy quick pickled onions. Then adding a touch of warmth with the sweet and juicy seared tomatoes and big chunks of creamy avocado.
I mean, for reals. ……Best Salad Ever !!!! (this week)
Now let’s do this.
The Stuff. A big bowl of baby spinach and chopped up kale, a few sliced up roma tomatoes, some super thinly sliced red onion, half an avocado, red wine vinegar and salt and pepper. Before you do anything, place the sliced onions into bowl, sprinkle with a pinch of salt and add a few glugs of the red wine vinegar. You want the onions to sit in the vinegar for at least 5 minutes on the counter cause the longer they sit the more crispy pickly they get. (after eating onions like this, you will never want to eat them any other way) Lightly oil a skillet and preheat to a medium heat. Once the skillet is hot, sprinkle the tomato slices with salt and pepper and place tomatoes right on in, snugly, but not overlapping. Let cook for about 3-4 minutes, or until the bottoms start to brown. Flip and cook other side for another few minutes.Once the tomatoes are seared on both sides, remove them gently from skillet and toss them on top of the bowl of greens.
Take the pickled onions and toss those right on top, with any of the residual vinegar, add dice and scoop the half of avocado and toss that on in as well.And now eat the best salad ever (this week).
Make the day good!
-C
Skillet Seared Tomato and Quick Pickled Onion Salad
Serves 2 as a side, 1 for a hungry eater
2 large or 3 smaller roma tomatoes
1/2 of a red onion
2-3 tablespoons red wine vinegar
1 1/2 cups baby spinach
1 1/2 cups chopped kale
salt pepper
1/2 a ripe avocado
olive oil (to grease pan)
Thinly slice red onion and place in a bowl. Add vinegar into a and sprinkle with salt. Let sit on counter for at least 5 minutes, if not longer,
Slice tomatoes into 1/2 inch thick rounds and sprinkle with a pitch or salt and pepper. Lightly oil a skillet and preheat it on medium heat. Once the skillet is preheated, stick the tomatoes on it (watch out for splattering tomato juice) Cook first side for about 3 minutes or until the bottom has browned, then flip and do the same for other side.
One tomatoes are seared, place directly onto the greens. Now dump the pickled onions and residual vinegar on top. And dice up avocado and add that on top too.
Now eat your salad, fork or fingers…
And I know, ba-daaaamn. So good.
Hey there party people…It’s Sunday! Hopefully you all have some good plans for the day. Me, well I have a peanut butter and jelly lunch date at the park with some littles, a butt load of plants to stick into the ground, and hopefully drinking much to much coffee while basking in the glow of the very lovely world. (which has been on point all week with warm weather, sunny days, splashed with the perfect moments of rain) Everything is so green and lush and freshy, it’s hard to not to be full of happy and the feeling that anything is possible. It’s fantastical! Oh, and I got to give a shout out to my big sister for graduating from nursing school this week…Whoa HOO!!!!! (Does she realize she is from a family of hypochondriacs? Texting nurse Shannon……she is screwed.)
Summer here we come…It’s GO TIME!
Internet links from the week……
-Going to be making myself one of these this weekRail Road Totes.
-I could see doing somethinglike thiswith my family… If I didn’t kill them first.
-Interesting….What If Americans Ate Like South Africans And Vice Versa?
-I have felt like popping a few balls in my time.The Good Listener: Can I Deflate The Beach Balls At Concerts?
-My next project/living arrangement? (Hey, if we can live in a tiny room now, we can live in a tiny room on wheels)… The Vintage Nugget
-I can’ t believe this show was canceled, but thank the tv gods for Hulu….Hulu Saves The Mindy Project
-I am into all of these interiors atFrenchyfancy…..I wish I knew how to read french and wish I was that fancy.
A few pictures from the week….
The prettiest tree. LILACS!!!!!My yard these days..A wheel barrel full of strawberry plants. Pretty in purple
The mister and I harvested a frame of honey…So pretty
Have a great today!
-C
A couple of days ago, during a grocery store porous, I stumbles upon a produce item that I have not seen sold in stores before, Broccoli leaf. And I was kind of surprised to see that they were selling bunches of the leaf, organic, at 2 bucks a bunch. I was very excited ! But wait.. You can eat broccoli leaves? Heck yes you can! Broccoli leaves are fantastic. They taste kind of like broccoli, have a hearty texture like a collard, and can be used raw or cooked just like any other green. Its just one more super yummy green to add to your repertoire. So when I bring home something that I find to be a good score, like a bunch of broccoli leaves, I feel like I have to share it with the mister. (I am so nice) And this dish was how I shared them…. Tossed into a bowl of garlic raging pasta. The stuff…. A bunch of broccoli leaves, lots of garlic, pasta, olive oil, salt and a lemon. Pretty simple right? Fist off, get your water boiling for the pasta. Once its ready, drop a pinch of salt into the water and stick pasta in for the amount of time recommend by pasta box people. While the pasta is boiling, mince up the garlic (I used my garlic press) into a skillet and add in the oil. Stick on a burner on medium for a few minutes, stirring around to make sure the garlic doesn’t stick and burn. Once you start to smell the garlic, turn heat onto low, chop up the broccoli leaves (stems and all) and stir around until wilted and add in the juice of half a the lemon.When the pasta is cooked, remove a few tablespoons of starchy water and strain the noodles. Add water and pasta right into the skillet with the other stuff. Toss around, taste, season with salt and pepper. Go ahead and add some chopped tomato and or parmesan cheese if you want. And serve your amazingly amazing pasta. And make sure that you are ok with really smelly garlic breath…Casue it’s going to happen. Keep it good! -C
2 servings of your favorite pasta (spaghetti, penne, vegan, gluten free…..)
8 or so fresh garlic cloves
1/4 cup olive oil
salt and pepper
lemon (optional)
parmesan cheese (optional)
Start by bringing a pot of water to a boil with a pinch of salt. Add in pasta and cook per instructions on box. While pasta is cooking, mined garlic and add to a skillet with the oil. Place on a burner on medium heat and cook and stir until the garlic becomes fragrant. Chop the broccoli leaves (stems and all) into bit sized pieces and add to the garlic oil and toss around to wilt the leaves. Squeeze in some lemon juice. Once the pasta is done cooking, remove a few tablespoons of the starchy water and strain the pasta. Add the water and the noodles to the skillet, toss to evenly coat the pasta and call it down. Serve in a bowl or on a plate, topped with freshly chopped tomatoes and parmesan cheese if you so shall please and another little squeeze of lemon juice if you like. Watch your mouth.. it will be breathing out garlic like whoa.
What a week. Was it summer where you are this week as well? I mean jeez, talk about one extreme to another. Oh well, at least the world has turned green, the winter stuff is completely out of sight and I found the box that contained all of my shorts and summery clothes (pants and long sleeves in 90 degrees is just gross) And honestly, it’s been great. In between work, chores and just plan old being busy, we have manage to get a few bike rides and long walks in. Plus all the veggie starts are doing great, the flowers are coming up everywhere and life just has a little bit more of a relaxed feeling. So what if my allergies are turning my face into big red puff or that the past few night have been so hot that the act of sitting has caused me to break a sweat. I’ll take it.
Oh and I can’t forget….
Happy Mother’s Day ladies!!!!
Here I give you a few thing from the internet this week …
– I didn’t believe they were paintings at first. Hyper-realistic Cactus Paintings that Bristle with Detail by Kwang-Ho Lee
-I’ll take any one of these The 5 Fanciest French Press Coffeemakers We Could Find
-Love love the floors in This house.
-Spending a bit of time making summer camping plans here…Vermont State Parks. I can’t wait to get the tent out!
-I think this should be happening everywhere. Recycled Drinking Water: Getting Past the Yuck Factor
– And there is this. ABC Brings Muppets Back To Prime Time As News Emerges About Fall Shows
And that, here are a few pictures from the week.
My boys. I long socks and sneakers… these guys know cool. Took the super cutie cuties out for an ice cream cone.Our first bike ride picnic down on the waterfront. I love bike ride picnics!So many succulents. I didn’t actually buy any because I need to stop being a plant whore.I have made a batch of this stuff evey day this week. I can’t stop eating it, it’s like eating summer. So good
Have a wonderful day and to all that it applies to…
Happy Moms Day!
-C
Before we left for the weekend, I was was trying my hardest to empty the fridge out of all food with the intention of leaning it empty so I could leave it open to defrost while were were gone. Unfortunately I was not able to make it happen. What I did make happen was emptying it almost completely so that when we got home, we had pretty much no food in the house, except for a few things that probably should be eaten. Plus one of the last things that I want to do after sitting in a car for 6 hours is go to the grocery store, or anywhere for that matter, so I was determined to make with what wet had in the fridge:
Carrots
half of a gigantic kohlrabi
soy milk
iced tea
bananas that needed to be frozen
strawberries
Perfect! A few carrots and half of a gigantic kohlrabi.. plus at the hotel we were staying at, there were fruit bowls in he lobby full apples. Every time I went past the apples (which was a lot) I grab one or two, so I have a few apples (I actually have a lot of apples now). All the things I need for a super awesome salad slaw. Apples with their nice sweet crispiness and kohlrabi with its cabbagey, crunchy earthiness, tossed together with some vinegar, some toasted walnuts and some carrots, I mean, so freaking good. And to make it a bit more of a meal, I made some lentils to go with it. But the best part was there was no need to leave the house!!
The stuff… A huge hunk of a bigger then my head kohlrabi (or 2 normal bulbs). A carrot, an apple, toasted walnuts, red wine vinegar, and some salt.
Pretty simple stuff going on here. Just peel and julienne the kohlrabi, carrot and apple. (no need to peel the carrot or apple unless you want too) and stick it all into a bowl. I used my mandolin, which is one of my favorite kitchen tools ever, but if you don’t have one, a box grater works too.Sprinkle with salt and a good glug glug of red wine vinegar. Chop up the walnuts (some big chunks and some very small pieces makes for good eating), toss it all together and, well that’s it. But wait…. let it sit for a few minutes before serving to really let the flavors draw out.And there we have it. Super fast, full of flavors and crunchy texture. A salad slaw after my own heart.
Serve it as it or add to a bed of greens, rice, or lentils… and make sure to save at least as little… cause its an awesome little pre-bed snack.
Happy Week!!
-C
Kohlrabi Apple Walnut Slaw
2 medium sized Kohlrabis
1 medium apple
1 small carrot
1/2 cup toasted walnuts
red wine vinegar
salt
In a large bowl, julienne kohlrabi (after peeled) apple and carrot. Sprinkle with salt, add in vinegar. Rough chop walnuts and toss the whole bit together. Let sit for at least 10 minutes, if not longer before serving. (A great salad to make ahead of time)
Eat as is, or toss onto a bed of greens, plate of rice or a bowl of lentils.
Any left overs only end up tasting better the next day.
Last week pineapples were on sale everywhere……So I bought 5. Don’t judge
And I bet I am not the only one that got overly excited at $1.50 pineapple and bough themselves a few. We will just call ourselves opportunists. Now we have plenty of pineapples and don’t have to pay the $4 a piece prices. (Justification)
But if you don’t have a pineapple laying around, you must go get one. (Maybe if your lucky, there might still be some sales going on) because you must make this salad. I am on a mission to make everyone I know eat it because, for lake of a better way to say it…….It will rock your world.
Dill and pineapple are a serious match made in heaven. Pineapple, with its sweet, tangy, citrusness and dill with it’s super fresh earthiness. Mixed together with a few other helpers to create a fresh, clean, chunky, tangy, over the top, flavor. I could stop right there, but toss in a handful of lentils, some creamy avocado and a bed of kale…It’s like the best spring time, celebration on you tongue, happiness in you tummy, kind of salad.
A salad that will make you smile. (and maybe buy 5 pineapples)
Stuff for the goodness. We got the kale, some avocado because all salads should have avocado and some cooked lentils because, well, all salads should have lentils (or beans or nuts.. so you could totally something else) Then a few sprigs of fresh dill, a clove of garlic, red wine vinegar, salt and a bowl of chunked up pineapple. The pineapple, dill, garlic, red wine vinegar, a splash of water and a pinch of salt get blended in a blender or whatever blending device you use. Go as smooth or chunky as you like, I recommend going smooth, but leaving a little chunk, like half blended.
The prep is done, now compile. Kale in bowl, top with lentils,. Toss on avocado chunks, and, last but not least, the blended pineapple dill mixture.So good……So so good.
Happy Friday!!
-C
So Good Pineapple Dill Kale Salad
Serves Two
3 cups washed and chopped Kale
1/2 a avocado, diced
1 cup fresh pineapple chunks
1-2 springs fresh dill
1 tablespoon Red Wine Vinegar
Salt
1/2 cup cooked lentils (or any bean or nut will do)
Note. No fresh dill? You can use dried, just sub in 1 teaspoon for the fresh and after blending with the pineapple, let sit a little longer to really let the flavors meld together.
Place pineapple, dill, pinch of salt, vinegar and garlic into a blender or whatever you own that blends and blend stuff together, leaving it a little chunky. Let sit for 5-10 minutes.
Kale goes into a bowl and add the lentils and diced avocado. Pour the blended pineapple on. Toss around.
Now eat.
Peas scream spring to me. The bright green color with that nice bright fresh taste….. kind of like a fresh spring day. Ah spring, so lovely, so nice, so hasn’t made its way here yet. So I guess I am left to eat my spring. And what better way to highlight those lovely spring tastes? A fantastic pesto my friends, and it can be made lickidy split.
Pesto is one of those things that I am constantly making, and not just the kind most people think of with basil and nuts, I pesto everything..peppers, greens, carrots, squash. And yea, I used this post to make a pesto pasta dish, but pesto has so many other fantastic uses. Like as a sandwich or wrap spread or a dip for veggies and crackers. I have used it as a soup base, a pizza sauce, on roasted potatoes and marinated tofu with pestos. It can also be thinned down and used as a salad dressing. See, so many uses.
And this pea pesto is no exception. It has such a great light, almost fruity, super bright taste. I mean, it’s peas so it taste just like peas but somehow even better. It really works in my mouth. I could eat a bowl of this stuff and be happy.
Whatever you plan on using it for, make the pesto. You will be thanking me later.
Pesto Stuff. We got the peas, garlic, lemon, oil, cheese if you please, and salt. Take a handful of peas and set aside for later. Juice the lemon and take that and the rest of the stuff and stick in a food processor and puree until smooth.
Oh my, so green, so good. I first made it without cheese and scooped a little out for me. It was perfect. Like the most brilliant bright pea flavor ever. It made me happy. After I added in the cheese, the mister said it tasted even better…. so cheese or not, it’s going to be good!The pesto is made, and it only took about 2 seconds, now boil up the pasta. If you were a thinker, you could start the pasta and make the pesto while its boiling. (I wasn’t being a thinker) I used bow ties cause they are super cute, but use whatever pasta you’re feeling. Shells or the ones that look like little brains would be good options.
Once the pasta is cooked, strain, reserving about 1/4 cup of the water. Add that bit of water back to the pot, add in the pesto, give a stir and dump pasta back into the pot. Toss in a handful of peas, maybe sprinkle some cheese and give it a good crack of some pepper.
Into a bowl and served with a fork to eat it with. A super green fresh springy meal of happiness. And all under 15 minutes in the kitchen.
Oh you want to thank me for this…
Hey, not a problem….not a problem at all.
-C
Spring Pea Pesto and Bow Ties
Makes enough pesto to coat a pound of cooked pasta and have some left over for sandwiches or to spread on crackers.
1 lb. fresh or frozen peas (thawed if frozen)
1 lemon
4-5 cloves garlic
2 ish tablespoons of olive oil
1/4 cup parmesan, really or vegan (optional)
salt
1 lb (an average box) of bow tie pasta (use any whole wheat, vegan, gluten free variety)
Place peas, (remove a handful and set aside to toss into the pasta) garlic, the juice of the lemon, olive oil and the parmesan (if you are using) into a food processor. Blend until smooth. Taste and salt as needed.
Pasta… Boil per instructions on box. Strain pastas but save about a 1/4 cup of starchy water. Toss pasta, starchy water and pesto together, adding in the handful or more of the whole peas. Sprinkle with more parmesan and or cracked pepper ,if wanted, and serve in big bowls.
Use a fork. Eat, smile and be happy.
Happy St Patricks Day!!!! As a kid, St Patricks day always meant green milk, green eggs, and those nasty gold foil covered chocolate coins. (you know, from the pot of gold) Not to mention all the leprechaun hunting and pinching. In my family, if you were unlucky enough to forget to wear green, you ended up as a walking target. It all started out nice an innocent, a pinch here or there, but by the end of the day, someone would end up pinching a little to hard or maybe just one too many times and the game would go from pinches to punches.
Ahh, memories.
Now as an adult (kinda adult) St Patricks is celebrated a little differently. The little ones in the family still get their green milk (which they are told is leprechaun pee) and those nasty gold coins, but I think the pinching has stopped.( a great tradition lost) I myself don’t have any littles at home so no little leprechaun games or gross dyed food for me. Nope, in my house we celebrate with a few beers and a more traditional irish dish, Colcannon. Mashed up potatoes with cabbage and kale… I mean, can it get much better? It can when you use red potatoes and red cabbage. Not only is it so tasty tasty, but it is so pretty pretty. No need for green milk or nasty candy.
But I still make sure to wear green and you might find me doling out a pinch or two.
The stuff…. Super pretty red potatoes, red cabbage, shallots, kale, salt and pepper, and olive oil.
Note. If you do not have or want to use red potatoes, russet or white will work, it just won’t be as pretty.
Dice up the pretty potatoes and stick them into a pot and fill up with water and add in a good tablespoon of salt. Stick on high heat and bring to a boil, then turn the heat down to medium and cook those taters until super fork tender. (bring them to the edge of falling apart)
While the potatoes are boiling, chop up the cabbage, shallots, and the kale and stick into a big skillet with a good drizzle of olive oil. Sauté on medium heat until soft and tender.
Once the potatoes are super tender, drain the water and dump them into the pan with the sautéed veggies. With a potato masher or a fork, mash up the potatoes and mix in the veggies, adding a drizzle or more of olive oil as you go. (Start with a drizzle and work your way up until it tastes good to you) Salt and pepper to taste.
The most pretty pan of smashed up potatoes that I have ever seen. Eat as a side dish or even a light main dish. Fork is a good utensil to use, but I found that my fingers worked just as well.
Have a great happy day full of green, potatoes, and pinches. Maybe even a leprechaun or two!
-C
Red Potato Colcannon
5-10 Red potatoes Red Potatoes depending on the size (about 3 1/2 – 4 chops chopped)
1 Cup Chopped Red or Green Cabbage
1 Cup Chopped Kale
1-2 Shallots
Olive Oil
Salt and Pepper
Rinse and dice potatoes and place into big pot. Cover potatoes with water and add about a tablespoon of salt. Place on high high heat and bring to a boil. Turn heat to medium low and let potatoes cook until super fork tender. While potatoes are boiling, chop up cabbage, shallots and kale and sauté in a large cast iron skillet (or any skillet) with a good drizzle of olive oil. Once the potatoes are done, drain water and add potatoes to the skillet with the sautéed veggies. With a potato masher or fork, mash the potatoes and mix with the veggies, adding a drizzle or two (depending on your taste) of olive oil as you go. Salt and pepper to taste.
Serve from skillet or dump into a fancy dish with a big spoon.
Eat as a main dish or as a side….Good hot, warm and cold.
I probabaly have already told you, but August is for sure my favorite month of the year (well,one of my favorites)
There is bounties of bounties of fresh, sweet and colorful, oh so juicy, crispy crisp, just so f ing amazing, produce exploding all over the place. I have probably gained like 75 thousand pounds in the past month due to all of the fruits and veggies that I have been consuming. I am starting to consider it a full time job just to keep up with the eating.
Another reason why I love August so much is becauuse the days are still nice and warm, but the nights are starting to cool which means I get to make so much soup!!!!!.
This soup is the freshest freshy soup yet. Everything is from the farm and or the garden (except the salt pepper, vinegar and oil), some picked within hours of me making this.
. I am a lucky/spolied veggie brat.
Anyways. This soup. The fresh tomato base gives it a sweet, slightly acidic kick. So super creamy due to the lovely earthy stocks of the chard. Slightly spicy and earthy from the arugula* and chard green green. This soup… it just tastes so fresh and clean, yet hearty and satisfying. A perfect soup for a mid August night, eating outside, watching the sun slide behind the mountains and the temperature dropping just enough that you might want a light sweater. Or you can just eat it from the pot in the kitchen while watching TV. It’s good eating anyway you want.
*Here in America, it’s called arugula. Else where , it’s called rocket. I wish we all called it rocket, although I do like the name arugula, but for like my first born child or maybe a pet goldfish. Anyway, rocket is arugula, or vice versa.
Soup time!.
The stuff. Some big fresh tomatoes, a few stalks of chard, and a few handfuls of arugaula (aka rocket). A couple carrots, an onion, some garlic, salt and pepper and a bit of olive oil.. Oh, and I added some balsamic vinegar, which for some reason didn’t make it into the picture (sorry vinegar)
Start by removing the chard leaves from the stalks. Set aside leave with the arugula. Chop up the carrot, chard stems, onion and garlic and toss into a big pot with a drizzle of olive oil, a splash of water, and a sprinkle of salt and pepper. Stir around and stick o nthe stove on medium heat for about 10 minutes until the veggies start to soften up.
Now chop up the tomatoes into chunks and toss those right into the pot with the other stuff. Add in a few cups water and a few glugs of balazmic vinegar. Bring everything to a boil and then turn heat to medium low and place a lid on pot and let cook at medium heat for another 20 ish minutes, or until the tomatoes are falling apart.
Now that everything is all cooked up, blend it up.
And now take the chard leaves and the aruglula and chop into little pieces….into the pot they go.
Mix it all up.. and take the blender to the soup again….if you want a smaller sized bite.
Soup Into bowls..Then into mouth.
Happy August!!
And hey hey hey.. Have the best weekend!
-C
4-5 large fresh tomatoes
4 large stalks of rainbow chard
2-3 big handfuls of arugula
1 medium onion
1 large or 2 small carrots
4-5 garlic cloves
2-3glugs (about 2 tablespoons) balsamic vinegar
3 cups water
olive oil
salt and pepper
To start, remove stalks of chard from leaves and chop stalks, onion, carrot and garlic into chunks and place int a big pot with a drizzle of olive oil, a splash or water, and spinkle of salt and pepper. Place on stove on medium low heat sand cooke the veggies down until starting to soften and garlic is becoming fragrant. While that cooking, remove core from tomatoes and dice them up. Toss into pot with the cooked down veggies with the vinegar and water. Place a lid on the pot and let cook for about 20-25 minutes or until the tomatoes are falling apart.
When cooked, using with a hand blender or a normal blender, blend the soup until smooth. (if using blender, pour back into pot)
Now take the arugula and chard leaves and chop them into wee little picese and mix into soup. If you want to, blend the greens into the soup.. but not until smooth, unless thats what you want. Cook for another 5 minutes. Taste and season with more salt and pepper to taste.
Ladle into bowl and serve with lots of fresh cracked pepper, maybe a little balsamic drizzle or even some mustard (I at left overs with mustard and it rocked my world)
This past weekend, the mr and I were out and about in the sticks of Vermont and got an eyeful of this very familiar sight of corn fields forever. It’s just part of the landscape.. Blue sky, big lush mountains, little rives and big fields of corn. It is ever so lovely… and so telling. Tall high corn fields just means two things. 1.We will be eating lots of corn, and, 2. the summer is winding down. So soon we will be talking apples and root veggies, but until then, we will just eat the corn and revel in what I consider one of the best and most beautiful times of the year here in Vermont.
And after seeing all the corn (and we have been getting a bunch in the farmshare) I realized that I need to step up my corn game.
What better why to fancy up some corn then to fancy up the stuff people like to smother on it…. butter.
Whenever I think about butter, I think about my sister, the one that, as a little kid, used sneak to the kitchen and eat whole sticks of butter. This (to me) just seemed like a pretty gross option for a snack, but you know, whatever floats your boat I guess.
Bur after making making this coconut butter, I can see the draw, for I would sure love to eat the entire contents of a jar of this butter. (I have been eating a spoonful here and there)
Lime cilantro coconut butter.. Its my new thing…corn or not.
The stuff. We have some lovely, super fresh from the farm, corn on the cob. Then for the coconut butter we have , unsweetended coconut flakes, a lime, som ecilantro and salt.
Dump coconut flakes into a food processor. Turn to on and let it go.
After about 7 minutes… you coconut will start to clump together and look like this. And maybe you are like, “this shit isn’t going to happen”.. well be patent. Scrap the coconut off the sides and keep the processor going.. scraping down the sides whenever you need to.
And eventually, after another 8-10 minutes, it will turn into this.. a nice creamy buttery butter.
Now add in the zest of the lime, the lime juice, a pinch of salt, and cilantro into the butter. Turn processor back on until combined.
And you got yourself some freak yeah cilantro lime coconut butter… ready to smother your corn with.
This amount is good for 6-8 corn cobs… Any extra is excitlent on any veggies, bread, cake, or spoon.
And stick that butter in a jar.
I dare you not to eat a spoonful right now. (I licked the bowl down clean)
So I hope I am not being presumptuous when I think that you know how to cook corn. Or maybe you have a specific way you like to cook your corn. But just in case, husk corn and stick either in a pot and boil until cooked,(about 8-10 minutes) or like me, char on the grill, or under the broiler.
So cook some corn….And smother it with the butter.
And there you have it, some freak yeah amazing lime cilantro coconut butter smothered on some corn.
So good…..so good.
Have a great day!
-C
1 1/2 cups dried unsweetened coconut flakes
1 lime
1/2 bunch of fresh cilantro (about a 1/4 cup chopped)
salt
1 tablespoon coconut oil (optional)
freshly cooked corn on the cob
Note. Any extra butter is good on anything and everyhitng!!!
Place coconut into a food prosser and turn to on. Prosse until coconut start to stick to sides. Stop, scrap down bowl, then conuitne to process. Repet this until the coconut has turned into a creamy buttery goodness.
Add the juice, the zest, a pinch of salt, and the cilantro to the butter. Pulse until combined. If you want to add in a little coconut oil here to make it a little smoother, go for it.
Scoop into a jar. When your corn is hot and ready, smother butter all over.
And eat. There swill be stuff stuck in your teeth..Don’t worry about it. Think of it as a snack for later.
What is better for a bake sale then Oreo cookies? Oreo cookies made from scratch!.
So when my sister called and asked me to make something for my nephews bake sale to raise money for his basketball team, I couldn’t say no. (or I didn’t want to say no cause any good excuse to bake right!) Plus I had just found this awesome recipe on one of my favorite blogs, my name is yeh, for home made Oreos that I have been super excited to try, so it kind of worked out. But before I committed to the Oreo, I wanted to just double check with my nephew and see what he might want me to make because it was his bake sale.
This is the conversation we had. And yes, it was through text.
Me- “Hey bud, what do you want me to make for your bake sale? Cupcakes, cookies, donuts, or brownies”
Jack- ” Yea!”
Me- “Yea what?”
Jack- “Make that.”
Me- “Make what?….Hello!! What do you want me to make? Should I make Oreos?”
Jack- I WANT OREOS!”
Ok.. So it took a little while, but we got there. And after the the basketball game and the super successful bake sale..
ME-“Did you see the Oreos?”
Jack- “What do you mean?”
Me- “The Oreos I made for the bake sale…the ones you wanted me to make”
Jack- “There was a bake sale? I want Oreos”
Yup, that’s the attention span of my 13 year old nephew. Little shit head. But for real, I had so much fun making these cookies and I am definitely going to be making them again. Plus they were a super hit at the sale.
I am the best aunt! (and sister!)
Cookie Time! Whats going on here is brown sugar and butter have be beaten together until nice and fluffy Then a good big splash of vanilla and another 2 big splashes of coffee are added to that.(I sacrificed my last few sips of my coffee for these cookies) The dry stuff, flour, salt and cocoa powder, are whisked together, waiting to be added to the wet. Mix the dry ingredients into the wet and mix. I ended up just using my hand and kind of squish mixing everything together until in tuned into a nice lovely uniformed dough. Form the dough into 2 balls and give each a few kneads to get any air bubbles out. Place dough back into bowl and stick in the fridge to sit for 10-15 minutes( it makes the dough a little easier to work with)
Once the dough has had a little time to rest and cool, remove from fridge, one ball at a time. Place on a lightly cocoa or powdered sugar dusted surface and roll out the dough. Grab any size circle (or other shape) cookie cutter and get to shaping the cookies. Notice the tin can in the bowl? I could’t find my biscuit cutters anywhere but the can was the perfect size, and it worked really well. Keep a little bowl of either powered sugar of cocoa to dip the cutter in in between making the cookies. It really helps the dough from sticking and breaking.
When you have cut out your cookies, use a spatial and place them on a baking sheet. You can try to transfer with you hands, but you end up messing up the shape and most of them will break anyway.
Stick the cookies in the oven for about 15 minutes a batch and continute to roll and cut out the cookies until you have no dough left.
While the cookies are getting their cool on, make the cream filling. All you need is a stick of butter, about 4 cups of powdered sugar, some vanilla and a few splashes of heavy cream. Beat that all up until nice and creamy thick and spoon it into a pastry bag (I used a big old ziplock bag) to be piped on the cookies. Filling the cookies is for sure the best part. Separate the cookies into pairs and pipe a big blob of filling onto one of the two cookies. Take the names cookie and place on top, giving it a little smooth to the disperse the cream. Keep doing that until the cookies are all filled.
Stacks of cookies… Sold to the highest bidder! I was told that they sold out within the first half hour at $1.50 a pop….Should have charged $5…. for a good cause right?
And yes, even though he was being a space head and didn’t even care that I just made him like 50 bucks for his team, I still saved the kid one.He just had to give me either a hug or 5 bucks for it.
I got a hug. (I really wanted the 5 dollars)
-C
From Scratch Oreo Cookies
Adapted by Molly Yeh from My Name is Yeh!
The cookie (makes about 18 3 inch Oreos)
2 cups all purpose flour
1 cup cocoa powder
3/4 cup brown sugar
1 cup or 2 sticks soften butter (use earth balance for vegan)
1 teaspoon salt
1 teaspoon vanilla extract
2 tablespoons brewed coffee
The filling
1 stick soft butter (us earth balance for vegan)
2 tablespoons heavy or whipping cream (use a nut or soy milk for vegan)
4 cups powdered sugar
2 teaspoons vanilla extract
Cookies- In a large bowl cream together sugar and butter until light and fluffy. Add in vanilla and coffee and mix together. In another bowl, whisk together the flour, salt and cocoa powder. Add dry to wet and mix together unit a uniform dough forms. Dump out onto a lightly cocoa or powdered sugared surface and knead dough a few times. Split ball into two balls, place in bowl, and stick in the fridge for 15 or so minutes.
Preheat oven t0 325 degrees
When dough is chilled, remove one ball at a time, and roll dough out on a cocoa or powdered sugar dusted counter until its about 1/4 inch thick. With a round (any shape would work) cookie cutter, cut out as many cookies as you can. In between sits, dip cutter in a sugar and cocoa to keep the cookie from sticking. Transfer cut out cookies onto a baking sheet with a spatula. Take scraps, roll into a ball, and roll out again. Keep doing that until you can’t cut out any more. (You can either bake a weird shape cookie or just eat the dough)
Bake cookies for about 15 minutes or until the cookie has risen a bit and the tops have lost their glossiness and look cooked. Remove from oven and let cookies dry on a wire rack.
Make the filling
Filling- Beat together butter, sugar, vanilla, and cream until completely mixed and is at your optimal consistency. Add a drizzle more cream if you want to thin out or add more sugar for a thicker cream.
Stick the filling into a piping bag or ziplock bag an snip the end. With cookies in pairs, pipe a big dollop of filling onto one of the two cookies. Place the naked cookie onto the filled cookie and give a smooth to distribute the filling.
lick your fingers and eat a cookie.
If selling at a bake sale, charge $3 a cookie…. If it’s for a good cause.
I probabaly have already told you, but August is for sure my favorite month of the year (well,one of my favorites)
There is bounties of bounties of fresh, sweet and colorful, oh so juicy, crispy crisp, just so f ing amazing, produce exploding all over the place. I have probably gained like 75 thousand pounds in the past month due to all of the fruits and veggies that I have been consuming. I am starting to consider it a full time job just to keep up with the eating.
Another reason why I love August so much is becauuse the days are still nice and warm, but the nights are starting to cool which means I get to make so much soup!!!!!.
This soup is the freshest freshy soup yet. Everything is from the farm and or the garden (except the salt pepper, vinegar and oil), some picked within hours of me making this.
. I am a lucky/spolied veggie brat.
Anyways. This soup. The fresh tomato base gives it a sweet, slightly acidic kick. So super creamy due to the lovely earthy stocks of the chard. Slightly spicy and earthy from the arugula* and chard green green. This soup… it just tastes so fresh and clean, yet hearty and satisfying. A perfect soup for a mid August night, eating outside, watching the sun slide behind the mountains and the temperature dropping just enough that you might want a light sweater. Or you can just eat it from the pot in the kitchen while watching TV. It’s good eating anyway you want.
*Here in America, it’s called arugula. Else where , it’s called rocket. I wish we all called it rocket, although I do like the name arugula, but for like my first born child or maybe a pet goldfish. Anyway, rocket is arugula, or vice versa.
Soup time!.
The stuff. Some big fresh tomatoes, a few stalks of chard, and a few handfuls of arugaula (aka rocket). A couple carrots, an onion, some garlic, salt and pepper and a bit of olive oil.. Oh, and I added some balsamic vinegar, which for some reason didn’t make it into the picture (sorry vinegar)
Start by removing the chard leaves from the stalks. Set aside leave with the arugula. Chop up the carrot, chard stems, onion and garlic and toss into a big pot with a drizzle of olive oil, a splash of water, and a sprinkle of salt and pepper. Stir around and stick o nthe stove on medium heat for about 10 minutes until the veggies start to soften up.
Now chop up the tomatoes into chunks and toss those right into the pot with the other stuff. Add in a few cups water and a few glugs of balazmic vinegar. Bring everything to a boil and then turn heat to medium low and place a lid on pot and let cook at medium heat for another 20 ish minutes, or until the tomatoes are falling apart.
Now that everything is all cooked up, blend it up.
And now take the chard leaves and the aruglula and chop into little pieces….into the pot they go.
Mix it all up.. and take the blender to the soup again….if you want a smaller sized bite.
Soup Into bowls..Then into mouth.
Happy August!!
And hey hey hey.. Have the best weekend!
-C
4-5 large fresh tomatoes
4 large stalks of rainbow chard
2-3 big handfuls of arugula
1 medium onion
1 large or 2 small carrots
4-5 garlic cloves
2-3glugs (about 2 tablespoons) balsamic vinegar
3 cups water
olive oil
salt and pepper
To start, remove stalks of chard from leaves and chop stalks, onion, carrot and garlic into chunks and place int a big pot with a drizzle of olive oil, a splash or water, and spinkle of salt and pepper. Place on stove on medium low heat sand cooke the veggies down until starting to soften and garlic is becoming fragrant. While that cooking, remove core from tomatoes and dice them up. Toss into pot with the cooked down veggies with the vinegar and water. Place a lid on the pot and let cook for about 20-25 minutes or until the tomatoes are falling apart.
When cooked, using with a hand blender or a normal blender, blend the soup until smooth. (if using blender, pour back into pot)
Now take the arugula and chard leaves and chop them into wee little picese and mix into soup. If you want to, blend the greens into the soup.. but not until smooth, unless thats what you want. Cook for another 5 minutes. Taste and season with more salt and pepper to taste.
Ladle into bowl and serve with lots of fresh cracked pepper, maybe a little balsamic drizzle or even some mustard (I at left overs with mustard and it rocked my world)
My contribution to last nights dinner at my sisters…. Freshy fresh veggies spring rolls.I had about 30 minutes between work and getting over to my sisters house to throw something together so it needed to be something fast, easy, and something I could make without going to the store. She was making the main course (some teriyaki situation and rice) so I was doing up the veggies.
I had just bought a package of spring roll wrappers…. Bingo! The perfect and logical choice. I grab the wrappers, a variety of veggies and after spending 12 of my 30 minutes trying to scrub the oil based paint off of my face and hands, I still managed to completely prepare, construct, and take pictures of these lovely tasty spring rolls. and get over to my sisters in time for dinner.
Impressed?
Damn right!
The stuff. Carrot, beet, asparagus, red cabbage, and kohlrabi, which all (except asparagus, which I just cut into thirds) got cut into matchstick sized pieces with my mandoiln. Then there are the rice spring roll wrappers that we need to make the veggies into rolls. Also a bit of red wine vinegar to drizzle onto the veggies for a little extra zing. And lastly, soy, fresh ginger, and a couple cloves of garlic for a spicy salty dipping sauce.Start by having everything set out and ready to assemble. Fill a large shallow dish or baking sheet with really warm water. Working with one at a time,place a rice wrapper into water and let sit for about 10 seconds or until the paper starts to soften. Remove from water and place on a damp surface (just splash a little water on the counter) Take a little bit of everything and and place on the lower middle part of the paper. Fold in the sides first, then tuck and roll the wrapper as tightly as you can without ripping the wrapper.
Repeat until you have used up all you veggies.For the dipping sauce. Finely grate ginger and garlic and add to soy sauce. Stir… and it’s done.Freshy, pretty and fantastically delicious. And for real, took about 8 minutes to make. (I even had enough time to wash the dishes before we left!)
I am so awesome!
Hump Day Pow!!!!!
-C
Fresh Veggies Spring Rolls
Makes 8-10 but can easily be increased or decreased to desired amount
8-1o rice spring roll papers
Splash of Red wine or rice vinegar
1/4 cup soy or tamari sauce
2 cloves of garlic
teaspoon freshly grated ginger
1 medium carrot
1 medium beet
1/4 head of purple cabbage
10 thin fresh asparagus
1 small kohlrabi
Note… I used the veggies that I had in the fridge at the moment. If you have a bunch of veggies but not these particular ones, use what you have. Pretty much all veggies taste good inside a spring roll!
Gather your veggies and prep by either using a mandolin, a grater, or some sick knife skills, and julienne, shred, or slice you veggies into thin match sticks. Once all the veggies are prepared, sprinkle a little vinegar over the top.
For the rolls…Grab a large shallow vessel (a rimmed baking sheet works great) and add in warm water. Working one at a time, place the wrapper into the water for about 10 seconds or until the wrapper starts to soften. Remove and spread onto a clean, damp work surface. Gather a bit of each veggie that you are adding and place towards the bottom middle of the wrapper. Now fold the sides in over the pile of veggies. Then with the side closest to you, tuck and roll wrapper away from you, trying to keep it tight, but not to tight that it rips.. (Hopefully that makes since.) Place finished rolls onto a damp surface to keep from sticking and if not serving right away, drape with a damp towel or paper towel to keep from drying out.
For the soy ginger dipping sauce. Add grated ginger, minced garlic, and soy into a bowl and mix together. Serve with spring rolls.
Eat one, two, or a plateful. It’s nice to share but not a necessity.
And that’s how I know that this is a winner. As an awesome aunt, when I have any of my nieces or nephews, I feel the need to make something special for dinner, something that the kiddos might not get very often, but also keep it on he healthy side. I have 2 littles for the night which gives me the perfect opportunity for a trash food recipe. You know trash food, things like boxed mac and cheese, beefaroni in a can, or, in this case, sloppy joes.
Sloppy yes, trashy, not so much. These are made with beans and bulgur. No meat.
And I figured it is nice enough out that I can make the kiddos some messy food and then just bring them out back and hose them off… I mean, why not right?
The stuff… We start with onion and green pepper, chopped into pieces. Black beans, bulgur, can crushed tomatoes. Chili powder, garlic powder, a bit o apple cider vinegar (which I forgot to picture) ,and some salt and pepper. Oh and cheese if you want… Plus a bun of some sort is necessary. Toss the chopped onion and peppers into a deep skillet or pot with a drizzle of oil. Cook on medium heat until tender and toss in the spices. Give a stir. Add in the beans, bulgur, and tomato, a splash of vinegar. Stir it all up, cover, and let simmer for about 15 minutes, or until the bulgur has absorbed the liquid and is nice and tender.
If you are a bun toaster… toast while waiting. If not, just get the buns ready And Then dump a good heaping pile right onto a bun. Add some cheese, or not..and eat with wild abandonment, making sure to get as much on your face as you get in you mouth.
Fantastic Friday!! Live it up.
-C
Black Bean and Bulgur Sloppy Joes
2 cups or 1 can cooked black beans
1 16 oz can crushed tomatoes
1/2 cup bulgur
1/2 cup water
1 small onion
1 green pepper
1 teaspoon garlic powder
1 teaspoon chili powder
salt and pepper
a splash of apple cider vinegar
olive oil
4-6 burger or bulky buns
cheese (optional)
Dice the onion and the pepper and toss with a drizzle of olive oil into a large skillet. Sauté on medium heat until veggies become tender. Add in the spices, stir in and let cook for a minutes, then add in the beans, the tomato,water and the bugler. Cover skillet and let simmer until bugler becomes soft.
When the slop is ready, either toasted or not, scoop a generous portions onto buns. If so inclined, add some cheese.
Eat with hands… Sloppy is good.
Spicy, crispy cauliflower… um yes please. I really like cauliflower. The mister loves it, or at least likes it better than any other vegetable. So when he asked for spicy cauliflower, well yea I am going to make it because I am so nice and really, could I say no to a veggie request? (I might have said no if it involved deep frying) Also, I found fresh cauliflower on sale! ($2.25) I don’t usually cook fresh cauliflower, but I figured at that price, it wouldn’t be bad to cook a head. (If I am cooking cauliflower, which I do a lot, I just use frozen….casue it be waaaay cheaper)
Fresh, cheap and requested veggies….those are must makes. And the mister was happy with I handed him the plate of oh so lovely looking crispy crunchy loveliness. (I kind of like to make him happy…sometimes)
The stuff. Cauliflower, chopped and broken into pieces. Corn meal mixed with salt, pepper, onion and garlic powder, and because I made this for the mister, parmesan cheese. And in the green bowl, srirsachi and a little oil. The cauliflower gets a coat of the hot sauce and then tossed around in the corn meal mixture. Handling as little as possible, place coated pieces on a lightly oiled baking sheet and stick those suckers in the oven for about a half hour, taking them out and flipping half way.And take them out of the oven when pieces tuned golden brown, stik them on a plate, and serve immediately.
A bit of spice, a bit of crispy , a lot a yum. Serve with some crunchy veggies, maybe a squeeze of lemon and definitely some type of avocado situation.
A beer would be lovely too!
Have a fantastic weekend!
-C
Spicy Crispy baked Cauliflower
1 head cauliflower, chopped or broken into florets
1/2 cup corn meal
3-4 tablespoon sriracha or your favorite hot sauce
1 tablespoon olive or coconut oil
salt and pepper
Any seasonings you might like (garlic or onion powder, parmesan cheese, national yeast…. whatever floats your boat)
Preheat oven to 400 degrees
In a bowl, mix together sriracha and oil. In a separate bowl, mix salt, pepper, any seasonings you might like, and corn meal. Take cauliflower and toss in sauce to coat. Remove from sauce and toss around in cornmeal mixture till fully coated, but try not to hand too much so the coating doesn’t come off. Place pieces on a lightly oiled baking sheet and stick into oven. Bake for about 15 minutes, remove and flip pieces. Back into the oven for another 15-20 minutes (depending on you crispy preference) Remove when golden brown (or darker if you like) and serve immediately.
Cucumber, celery, and carrots are great accompaniments.. also a little mashed avocado or guacamole is much appreciated.
I was informed yesterday that if I was going to make tortilla chips, that I better make some sweet ass dips to go with them. I kind of agree… tortilla chips need dip… or better yet, two dips. Queso and guacamole. It’s what needed to be done, and so I did it.
Guacamole is amazing… anything avocado is amazing…this guacamole is amazing. White bean guacamole is amazing. And not that we really care, but this guac is half the fat then straight up guacamole. Plus it’s packed full of protein making it a kind of super duper, must eat all of it, kind of dip. And sweet potato anything will make me happy. Making queso dip with sweet potato and cauliflower is probably one of my best food combos so far. (after eating a butt load, I felt like I was a genius and made an amazing discovery) Again, not that we need it to be, but this is also a fat-free, vegan, gluten-free, super healthy, packed full of B12, fiber and nutrients, dip for all kind of dip.…. just another reason why you cannot feel bad when you finish off half a batch before you get a chance to stick it in a serving bowl. (I might have done that)
Here is what you need for a good time:
−These tortilla chips ….Check.
−Some Chopped Veggies (I want the veggies)…..Check
−Cauliflower Sweet Potato Queso.…Check.
−White Bean Guacamole…Check.
You are now ready for it. It being this party, that party, the Super Bowl, or a Wednesday afternoon.
To the left we have the makings for the cauliflower sweet potato queso.. Steamed cauliflower, a baked sweet potato, nutritional yeast, garlic, and chopped up red onion, red bell pepper and jalapeño. To make all you need to do it take the chopped peppers, onion, and garlic and sauté for a few minutes just to slightly soften and bring out flavors. While that’s going on, take the steamed cauliflower and sweet potato(skin off..but eat it, or save it for soup or feed it to the dog) and puree together with a blender or food processor. Add in nutritional yeast, about a tablespoon or two of hot water and, salt and pepper to taste. Blend for about 5 minutes until super creamy smooth. Add in sautéed stuff and pulse just enough to incorporated the veggies but not complete blend in. Stick in a bowl.
To the right we have white bean guacamole stuff. Two cups (or one can) rinsed white beans, one ripe avocado, a lime, a few cloves of garlic,(I also added a bit of garlic powered…I like my garlic) and some chopped up red onion and tomato. Place beans, garlic, avocado and lime juice in a blender or food processor and blend until smooth. Add salt to taste and toss in the chopped tomato and onion. Blend for sec to mix that in…Stick in a bowl
Perfect…
To think that both of these dips took about 10 minutes total to make. (I had pre baked the cauliflower and sweet potato) And for real, I would spend much more time if I had too because both of these dips are so freaking good, I definitely will be making these on the regular.
So there , dips for those sweet ass chips or whatever you want to dip or them spread them on.
And he guys…It’s FRIDAY! Have a fantastic day!
-C
White Bean Guacamole
2 cups white beans (or 1 can) rinsed and drained
1 ripe avocado
3 cloves garlic
1 lime
1/4 small red onion
1 small tomato
1-2 teaspoons salt
Finley chop onion and tomato. Set aside. Place the beans, avocado, garlic, garlic powder, 1 teaspoon salt and the juice from one lime into a blender or food processor and blend until smooth. Add a splash of water if needed to help keep things moving. Taste and add more salt if needed. When smooth, add the onion and tomato and pulse a few times to mix in. Scoop into a serving dish and finish with a squeeze of lime and a bit of chopped onion and tomato.
Cauliflower Sweet Potato Queso
1 1/2 cups pre cooked steamed or roasted cauliflower
1 medium pre baked sweet potato
1/2 cup nutritional yeast
1-2 tablespoons hot water
1/2 a small red pepper
1/4 small red onion
1 jalapeño
3 cloves garlic
salt and pepper
Finely dice the red pepper, jalapeño, onion and garlic and sauté in a skillet for a few minutes until slightly soften and fragrant. Take the pre-cooked cauliflower, sweet potato (skin removed), and nutritional yeast and place in a blender or food processor. Blend for about 5 minutes until creamy and smooth. Add in a tablespoon of water to keep things moving. When completely smooth, add in sautéed veggies and pulse a few times to combine. Scoop into a serving dish. If your feeling it, top with scallions and cracked pepper.
Serve dips with chips, veggies or anything you want. Also make great spreads for sandwiches and crackers too!
I eat vegetables like I breath air… constantly and almost mindlessly. Some people are addicted to sugar or coffee, but me, I am addicted to veggies. ( I am also extremely addicted to coffee) This is my truth, but I am ok with it.
All week long I have been hearing about this big game going on this weekend, something to do with a ball and running up and down a field….not quite sure, but I think it might be a big deal to some people.(I know it’s the Super Bowl, and I have heard about some deflated balls, but that’s the extent of my knowledge) I have also have been hearing a lot of party planning around this game, food planning, which is something that I do understand. So I wanted to bring a party snack to the mix, and because of my addiction, my mind goes straight to vegetable. I know that there is traditionally a lot of meat, cheese and hot sauce at these said parties, and that’s totally cool, but I think everyone wants to have a least one awesome meatless cheese-less piece of food to snack on during half time. So I give the people what they want.
So simple, fast and easy to make. Tasty and healthy as can be. Grab and eat with you hands…. and nice to look at. We got the whole package here.
Pretty much a little bit of everything that I have in my fridge….Shredded red cabbage, carrots, beets. Some sliced of red onion, tomato and red pepper. Hummus and a little mashed avocado
Yes, it may look like a mess, but that’s just me trying to make five different things at once. But really, making these wraps are simple simple. Just take rinsed and dried green or red leaf lettuce, smear on hummus and mashed avocado and pile on the veggies. Roll and stick with a toothpick to keep from unrolling. See…. simple.So many colors…… so much pretty. Wrapped and rolled…Sliced down the middle, just to see all the pretty inside.
These might be veggie wraps, but man, look at those sausage fingers…(hehehe)
Make for lunch, dinner, party, or snack. Eat them for breakfast, dessert or midnight nosh. Whenever, wherever…..YUMMY YUMMY YUM!
Happy hump day!
-C
Lettuce Wraps
Ingredients
Use whatever you want… but this is what I included in mine
Green leaf lettuce
Shredded red cabbage
shredded beets
shredded carrots
thinly sliced tomato
thinly sliced red pepper
thinly sliced red onion
hummus
avocado
With each wrap, take a large lettuce leaf and cut out the crunchy rib.(you can slice it up thinly and add to wrap. Smear leaf with hummus and smashed avocado, then layer on a bit of each of the veggies. Wrap or roll leaf in on the veggies and stick a toothpick in center to keep from unrolling.
Place on a plate and eat or share… Extras are fantastic to have in the fridge!
My contribution to last nights dinner at my sisters…. Freshy fresh veggies spring rolls.I had about 30 minutes between work and getting over to my sisters house to throw something together so it needed to be something fast, easy, and something I could make without going to the store. She was making the main course (some teriyaki situation and rice) so I was doing up the veggies.
I had just bought a package of spring roll wrappers…. Bingo! The perfect and logical choice. I grab the wrappers, a variety of veggies and after spending 12 of my 30 minutes trying to scrub the oil based paint off of my face and hands, I still managed to completely prepare, construct, and take pictures of these lovely tasty spring rolls. and get over to my sisters in time for dinner.
Impressed?
Damn right!
The stuff. Carrot, beet, asparagus, red cabbage, and kohlrabi, which all (except asparagus, which I just cut into thirds) got cut into matchstick sized pieces with my mandoiln. Then there are the rice spring roll wrappers that we need to make the veggies into rolls. Also a bit of red wine vinegar to drizzle onto the veggies for a little extra zing. And lastly, soy, fresh ginger, and a couple cloves of garlic for a spicy salty dipping sauce.Start by having everything set out and ready to assemble. Fill a large shallow dish or baking sheet with really warm water. Working with one at a time,place a rice wrapper into water and let sit for about 10 seconds or until the paper starts to soften. Remove from water and place on a damp surface (just splash a little water on the counter) Take a little bit of everything and and place on the lower middle part of the paper. Fold in the sides first, then tuck and roll the wrapper as tightly as you can without ripping the wrapper.
Repeat until you have used up all you veggies.For the dipping sauce. Finely grate ginger and garlic and add to soy sauce. Stir… and it’s done.Freshy, pretty and fantastically delicious. And for real, took about 8 minutes to make. (I even had enough time to wash the dishes before we left!)
I am so awesome!
Hump Day Pow!!!!!
-C
Fresh Veggies Spring Rolls
Makes 8-10 but can easily be increased or decreased to desired amount
8-1o rice spring roll papers
Splash of Red wine or rice vinegar
1/4 cup soy or tamari sauce
2 cloves of garlic
teaspoon freshly grated ginger
1 medium carrot
1 medium beet
1/4 head of purple cabbage
10 thin fresh asparagus
1 small kohlrabi
Note… I used the veggies that I had in the fridge at the moment. If you have a bunch of veggies but not these particular ones, use what you have. Pretty much all veggies taste good inside a spring roll!
Gather your veggies and prep by either using a mandolin, a grater, or some sick knife skills, and julienne, shred, or slice you veggies into thin match sticks. Once all the veggies are prepared, sprinkle a little vinegar over the top.
For the rolls…Grab a large shallow vessel (a rimmed baking sheet works great) and add in warm water. Working one at a time, place the wrapper into the water for about 10 seconds or until the wrapper starts to soften. Remove and spread onto a clean, damp work surface. Gather a bit of each veggie that you are adding and place towards the bottom middle of the wrapper. Now fold the sides in over the pile of veggies. Then with the side closest to you, tuck and roll wrapper away from you, trying to keep it tight, but not to tight that it rips.. (Hopefully that makes since.) Place finished rolls onto a damp surface to keep from sticking and if not serving right away, drape with a damp towel or paper towel to keep from drying out.
For the soy ginger dipping sauce. Add grated ginger, minced garlic, and soy into a bowl and mix together. Serve with spring rolls.
Eat one, two, or a plateful. It’s nice to share but not a necessity.


 It’s Mother’s Day weekend which means that you and I and everyone out there should feel the slightest bit obligated to at least do a little something nice for your mom for the mere fact that you were borned. And really what better way to celebrate mom than with food… It really is the least that you can do. (I think mom’s also like flowers and cards and handmade pasta necklaces) My mom is defiantly about the food. (she has had her fair share or pasta necklaces) A many years back on Mother’s day, this sweet little girl (me) made her mother a special breakfast treat…blueberry scones. And ever since that day, for every freaking holiday, birthday, whatever day, my mother requests (demands) a batch of those scones. She is always saying that these are her favorite treat and that no one has ever made them as good as I do. (I guess that just reiterates that I am her number 1 child)
 The stuff. Flour, baking soda, baking powder and salt. A bit of sugar, vanilla, buttermilk, and butter (use vegan butter and nut milk if you want to make them vegan) And of course we need the blueberries which can be fresh or frozen. I usually use fresh, but the store I stopped at only had really big containers of fresh that were like $1000 dollars a piece and the organic frozen happen to be on super sale. So you know, the cheap in me won that battle.
  So into the bowl goes all the dry stuff; flour, baking powder and soda, salt, and the sugar. Give it a good whisk.
 Now dump the blueberries into the flour mixture. Toss them around to give them a coat of flour. Add in the buttermilk and vanilla and give a little mix until liquid is absorbed. We are trying to handle the dough as little as possible.
 Turn mixture onto counter. It’s very loose, but thats what it should look like.
  Very gently and with as little handling as possible, gather dough up, knead a few times till everything just comes together. Press dough into a disk that is roughly an inch thick…. and it doesn’t need to be perfect.
  Cut the disk into even sized pieces. Do 6 big, 8 normal, maybe even 10 smaller. Whatever size you like. (I did 8) Place the scones onto a baking sheet, using a spatula to transfer, and sprinkle the tops with a little bit of sugar. Into a preheated oven for about 20 minutes.
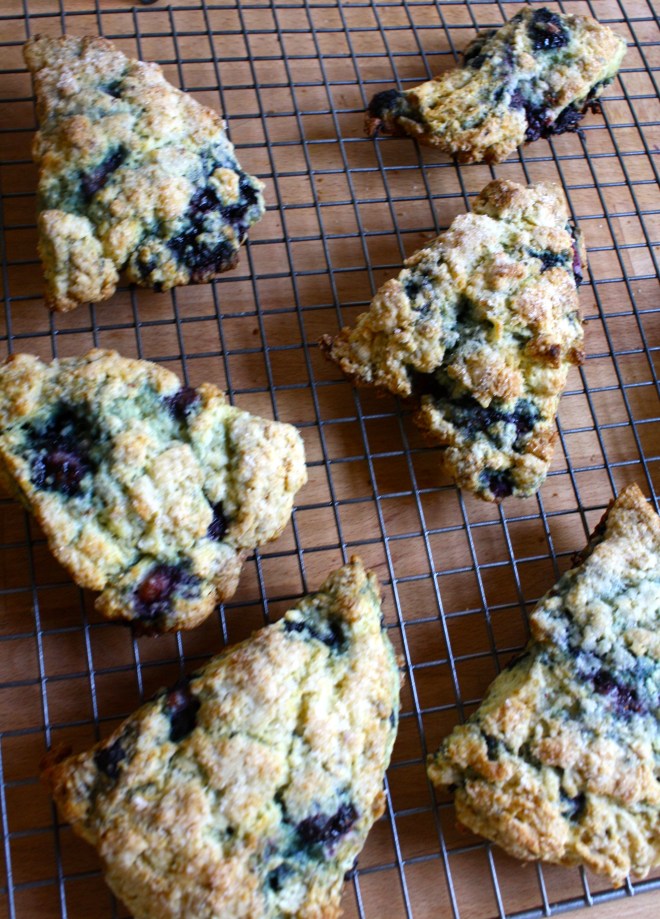 And when the scones look all nice and browned and a tester comes out clean. remove and either serve right away warm, preferably with huge cup of coffee or tea, or stick on a rack to cool before storing in air tight container.
 Spicy, crispy cauliflower… um yes please. I really like cauliflower. The mister loves it, or at least likes it better than any other vegetable. So when he asked for spicy cauliflower, well yea I am going to make it because I am so nice and really, could I say no to a veggie request? (I might have said no if it involved deep frying) Also, I found fresh cauliflower on sale! ($2.25) I don’t usually cook fresh cauliflower, but I figured at that price, it wouldn’t be bad to cook a head. (If I am cooking cauliflower, which I do a lot, I just use frozen….casue it be waaaay cheaper)
  The stuff. Cauliflower, chopped and broken into pieces. Corn meal mixed with salt, pepper, onion and garlic powder, and because I made this for the mister, parmesan cheese. And in the green bowl, srirsachi and a little oil.
  The cauliflower gets a coat of the hot sauce and then tossed around in the corn meal mixture. Handling as little as possible, place coated pieces on a lightly oiled baking sheet and stick those suckers in the oven for about a half hour, taking them out and flipping half way.
 And take them out of the oven when pieces tuned golden brown, stik them on a plate, and serve immediately.
 Peas scream spring to me. The bright green color with that nice bright fresh taste….. kind of like a fresh spring day. Ah spring, so lovely, so nice, so hasn’t made its way here yet. So I guess I am left to eat my spring. And what better way to highlight those lovely spring tastes? A fantastic pesto my friends, and it can be made lickidy split.
 Pesto Stuff. We got the peas, garlic, lemon, oil, cheese if you please, and salt.
  Take a handful of peas and set aside for later. Juice the lemon and take that and the rest of the stuff and stick in a food processor and puree until smooth.
  The pesto is made, and it only took about 2 seconds, now boil up the pasta. If you were a thinker, you could start the pasta and make the pesto while its boiling. (I wasn’t being a thinker) I used bow ties cause they are super cute, but use whatever pasta you’re feeling. Shells or the ones that look like little brains would be good options.
 Into a bowl and served with a fork to eat it with. A super green fresh springy meal of happiness. And all under 15 minutes in the kitchen.
 Before we get to the fries, I just want to mention that yesterday was one of those fantastic winter days that reminds me why I love living in Vermont. Pretty white snow everywhere, the sun was out, and 20 degrees without a gust of wind. The trash dog an I were even able to go for a little hike. It was so nice and soooo sooo needed! Anyways, the other day as me, my sister and the mister where putting together one more piece of Ikea furniture, (I am the master at Ikea assembling!) a little runs into the room and presents the mister with a Dominos pizza. Yup, a whole pizza just for him. Why you might ask? Well I guess my sister was delivered the wrong pizza and the place didn’t want it back and she didn’t want it, so she gave it to him.
 The carrots and the parsnips are all sliced up into big matchsticks and ready to be baked to crispy browned perfection. I added the oil to the pan to toss the fries in and then sprinkled with a fair amount of salt and pepper. If you don’t have and or want to use a cast iron pan, a baking sheet works just the same.
 Oh saucy sauce stuff. Tomato puree, sriracha, and yellow mustard. Add a little bit of honey to lighten it up (can use brown sugar if keeping it vegan), a splash of apple cider vinegar and a couple minced cloves of garlic. Topped off with the smokey delightful spice of cumin. I cold eat this on everything…and I kind of did.
  Fries are done, Sauce is ready. Served in super cute tea cups.(from now on I want to serve everything in tea cups.) A perfect side dish, snack, or even a light meal. It lead the mister to ask the question…What pizza?
  I was informed yesterday that if I was going to make tortilla chips, that I better make some sweet ass dips to go with them. I kind of agree… tortilla chips need dip… or better yet, two dips. Queso and guacamole. It’s what needed to be done, and so I did it.

 Perfect…
 To think that both of these dips took about 10 minutes total to make. (I had pre baked the cauliflower and sweet potato) And for real, I would spend much more time if I had too because both of these dips are so freaking good, I definitely will be making these on the regular.
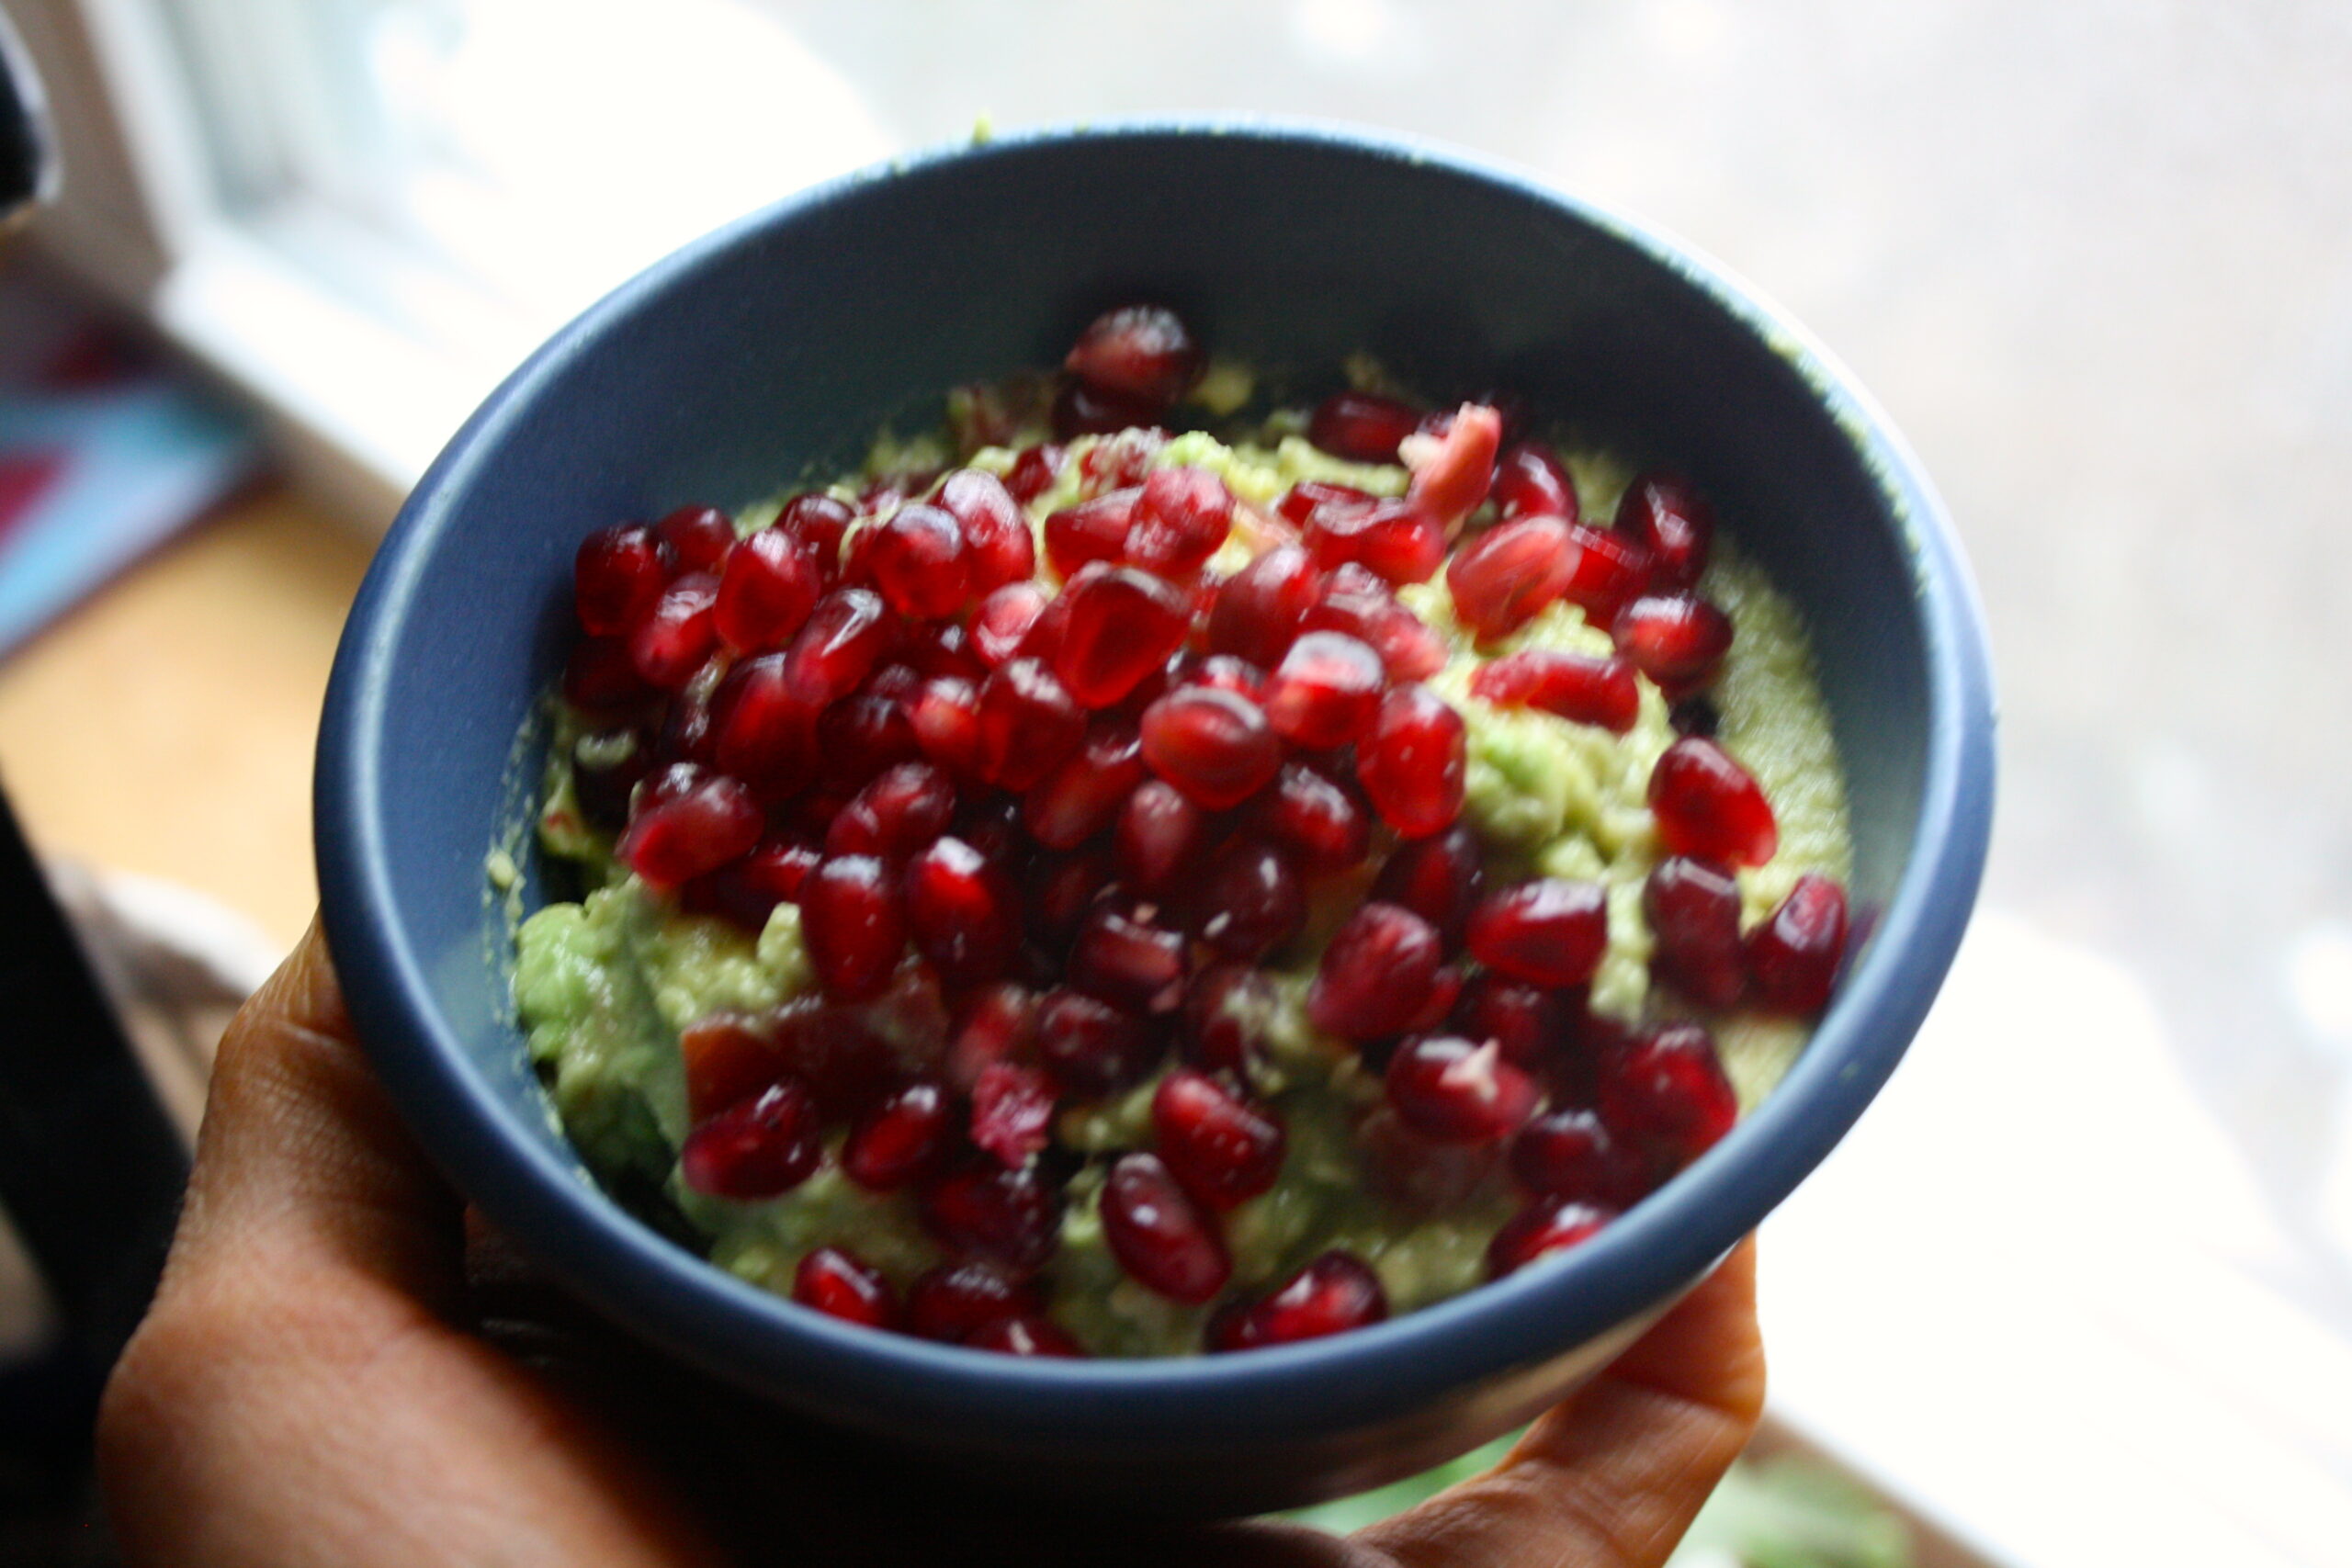 Pomeamole!! That’s what I want to call it, so that’s what it is. Guacamole with the addition of tiny little pearls of sweet and tangy juice.. I mean, come one, it can’t get much better. This is what happens when avocados are on super sale, I buy a lot…and then eat a lot….and then eat some more. I start to get a little crafty and, wa la.. add pomegranate seeds. I also inflict anyone eating around me with avocado, even if they believe that they don’t like it because that’s not possible. I know this because there was a time where I believed that I didn’t like avocados… and that’s just crazy. I remember the very moment I realized I was wrong. It was the first food Nick ever made for me. I was working at a pottery studio and wasn’t able to leave because of a raku firing and I was starving. My love saved me with a sandwich, and it was the best I had ever eaten. A sandwich that contained hummus, greens, sun-dried tomatoes, and yup, big slices of avocado. That sandwich change my life. I knew from that moment on…. I loved avocados……oh and that I loved Nick too. I know, we are so cute that you want to barf. Well go ahead, just do it before you eat the pomeamole.
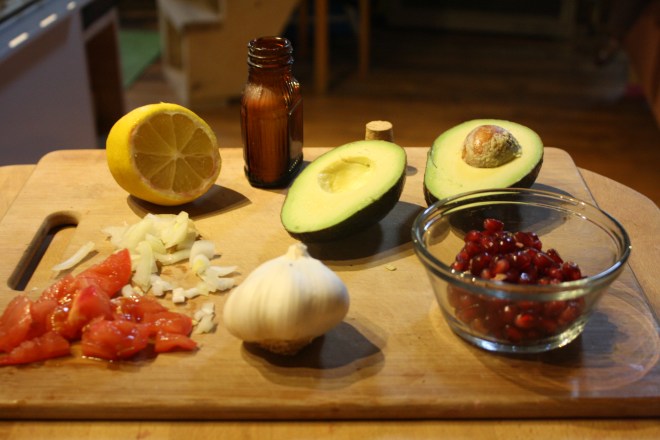 It’s all pretty simple…One very tasty ripe avocado, about 1/2 cup of pomegranate seeds, a little chopped onion, a bit of chopped tomato, a lemon, a few cloves of garlic and a pinch of salt. It’s what dreams are made of.
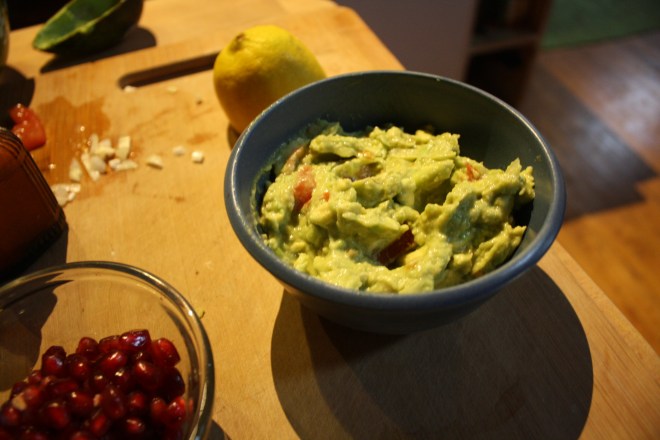 Mash it all together minus the pomegranate seeds… As smooth or as chunky as you like it….
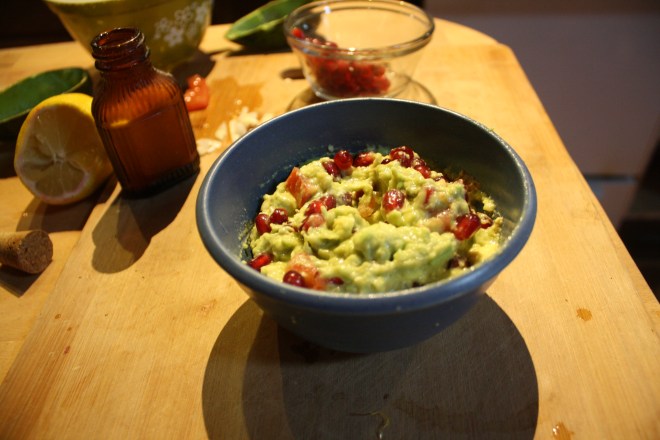 Fold in 1/2 the seeds
 And top with the rest! And another squeeze of lemon… just like that. You can eat this magic with anything you want; chippers, rice cakes, tacos, toast, or even top a kale salad with a big scoop. …..we at it with carrots and broccoli. SO GOOD!




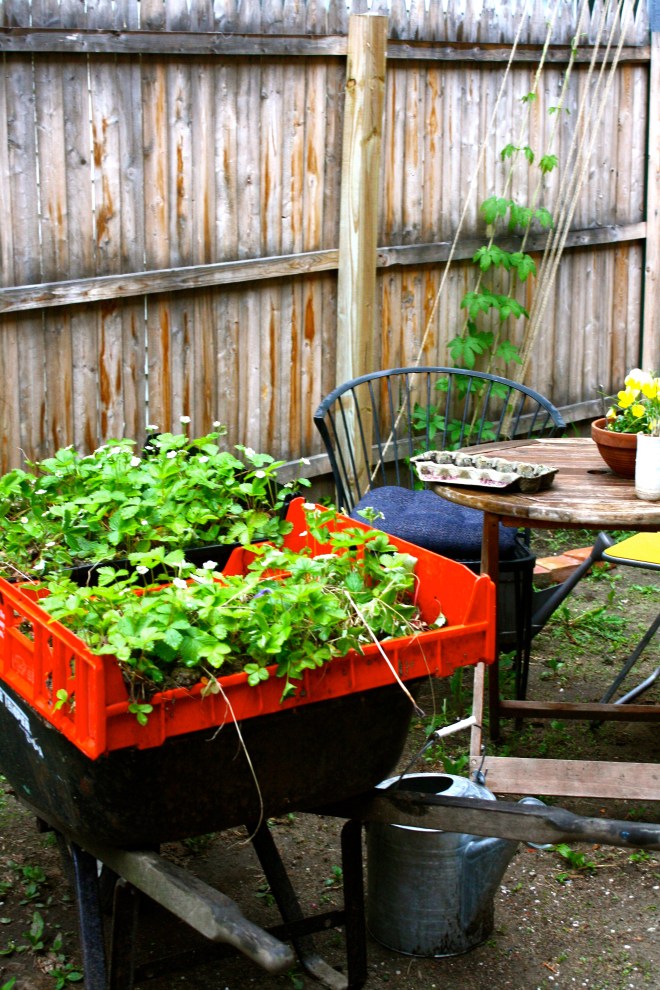

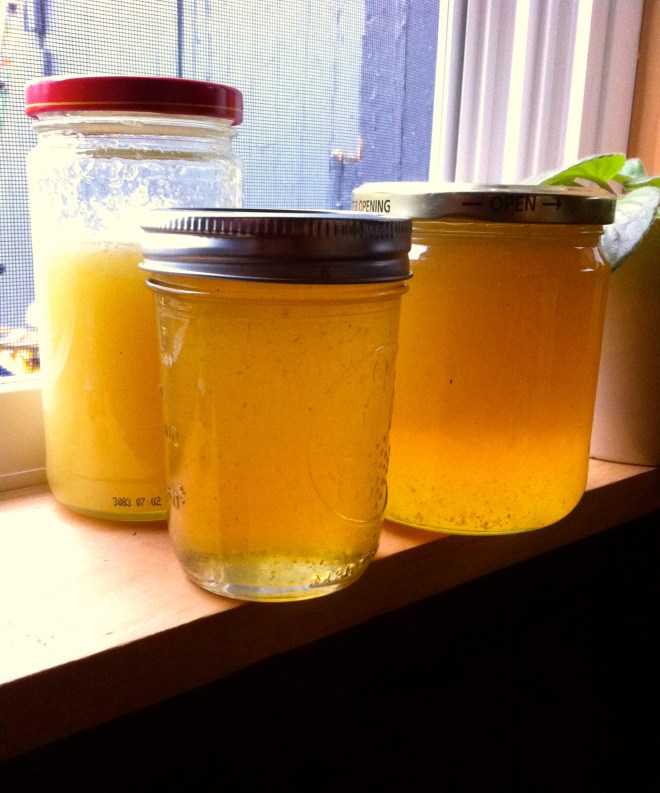
 A couple of days ago, during a grocery store porous, I stumbles upon a produce item that I have not seen sold in stores before, Broccoli leaf. And I was kind of surprised to see that they were selling bunches of the leaf, organic, at 2 bucks a bunch. I was very excited ! But wait.. You can eat broccoli leaves? Heck yes you can! Broccoli leaves are fantastic. They taste kind of like broccoli, have a hearty texture like a collard, and can be used raw or cooked just like any other green. Its just one more super yummy green to add to your repertoire. So when I bring home something that I find to be a good score, like a bunch of broccoli leaves, I feel like I have to share it with the mister. (I am so nice) And this dish was how I shared them…. Tossed into a bowl of garlic raging pasta.
  The stuff…. A bunch of broccoli leaves, lots of garlic, pasta, olive oil, salt and a lemon. Pretty simple right?
  Fist off, get your water boiling for the pasta. Once its ready, drop a pinch of salt into the water and stick pasta in for the amount of time recommend by pasta box people. While the pasta is boiling, mince up the garlic (I used my garlic press) into a skillet and add in the oil. Stick on a burner on medium for a few minutes, stirring around to make sure the garlic doesn’t stick and burn.
 Once you start to smell the garlic, turn heat onto low, chop up the broccoli leaves (stems and all) and stir around until wilted and add in the juice of half a the lemon.When the pasta is cooked, remove a few tablespoons of starchy water and strain the noodles. Add water and pasta right into the skillet with the other stuff. Toss around, taste, season with salt and pepper. Go ahead and add some chopped tomato and or parmesan cheese if you want.
  And serve your amazingly amazing pasta. And make sure that you are ok with really smelly garlic breath…Casue it’s going to happen. Keep it good! -C
 What a week. Was it summer where you are this week as well? I mean jeez, talk about one extreme to another. Oh well, at least the world has turned green, the winter stuff is completely out of sight and I found the box that contained all of my shorts and summery clothes (pants and long sleeves in 90 degrees is just gross) And honestly, it’s been great. In between work, chores and just plan old being busy, we have manage to get a few bike rides and long walks in. Plus all the veggie starts are doing great, the flowers are coming up everywhere and life just has a little bit more of a relaxed feeling. So what if my allergies are turning my face into big red puff or that the past few night have been so hot that the act of sitting has caused me to break a sweat. I’ll take it.
 My boys. I long socks and sneakers… these guys know cool.
  Took the super cutie cuties out for an ice cream cone.
 Our first bike ride picnic down on the waterfront. I love bike ride picnics!
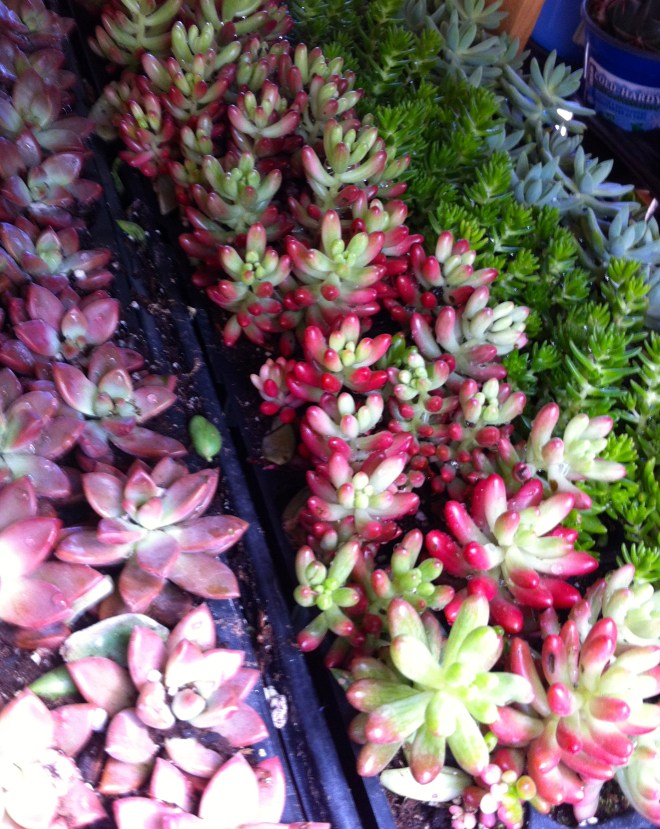 So many succulents. I didn’t actually buy any because I need to stop being a plant whore.
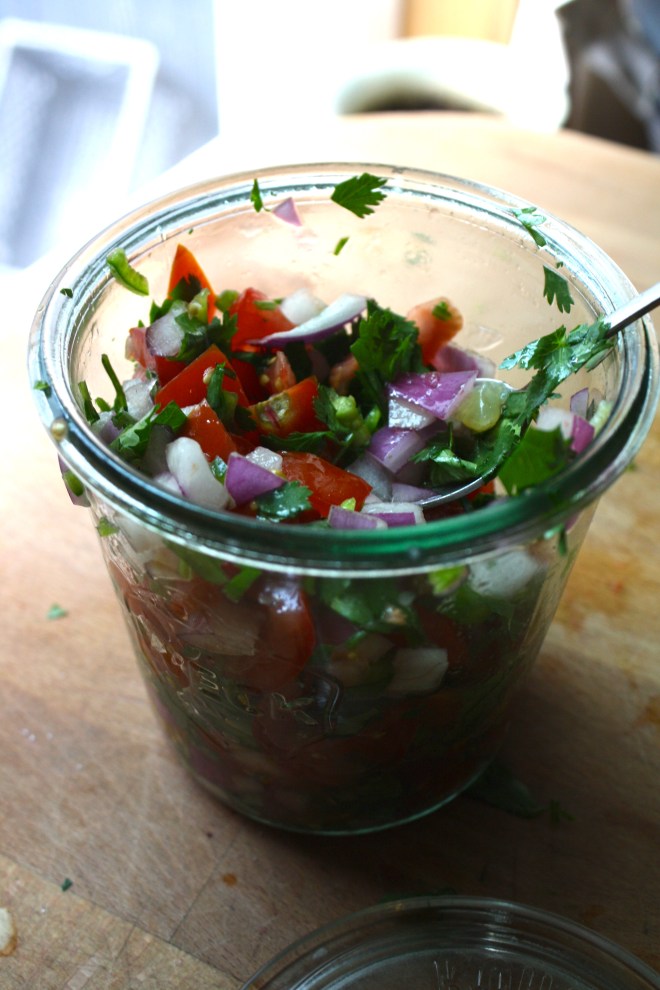 I have made a batch of this stuff evey day this week. I can’t stop eating it, it’s like eating summer. So good
 Before we left for the weekend, I was was trying my hardest to empty the fridge out of all food with the intention of leaning it empty so I could leave it open to defrost while were were gone. Unfortunately I was not able to make it happen. What I did make happen was emptying it almost completely so that when we got home, we had pretty much no food in the house, except for a few things that probably should be eaten. Plus one of the last things that I want to do after sitting in a car for 6 hours is go to the grocery store, or anywhere for that matter, so I was determined to make with what wet had in the fridge: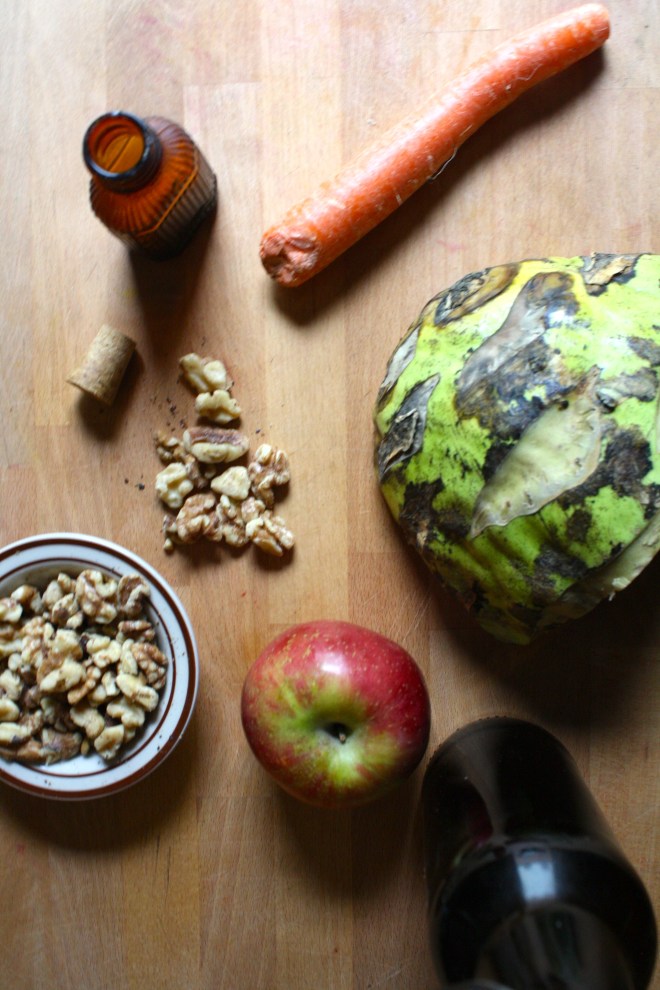
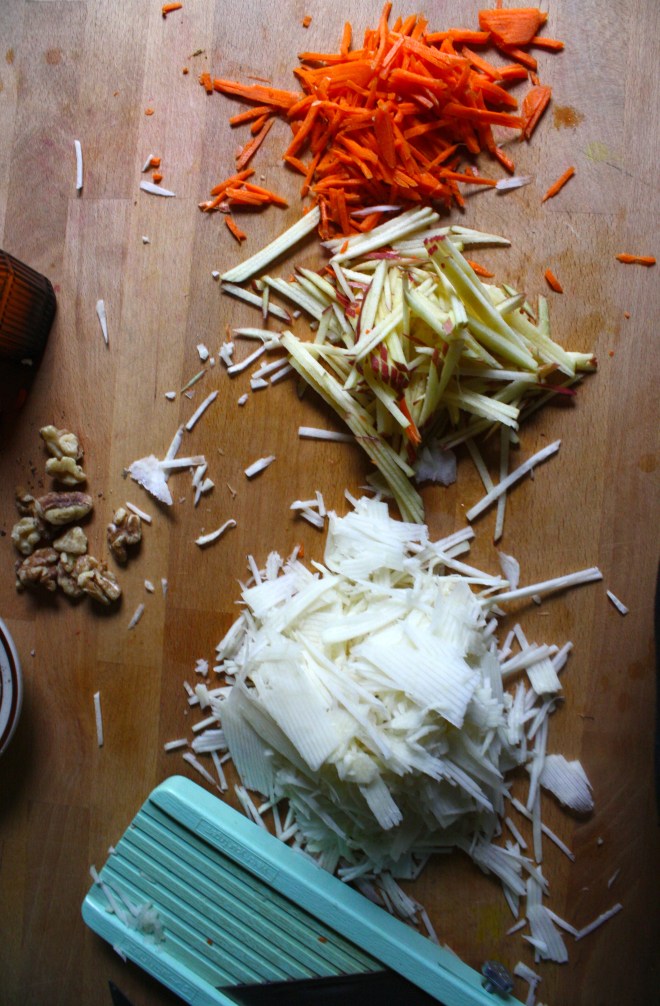 The stuff… A huge hunk of a bigger then my head kohlrabi (or 2 normal bulbs). A carrot, an apple, toasted walnuts, red wine vinegar, and some salt.
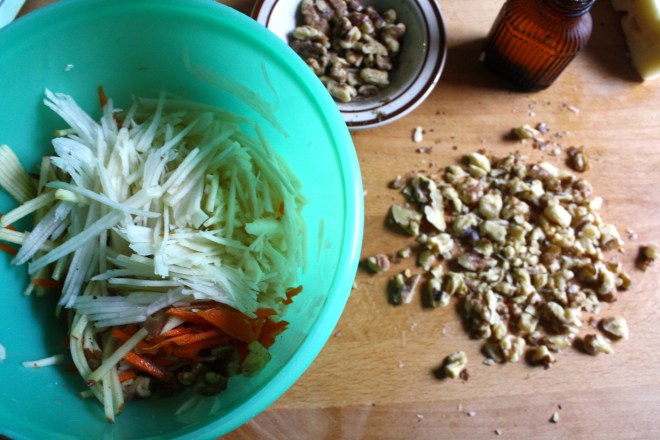 Sprinkle with salt and a good glug glug of red wine vinegar. Chop up the walnuts (some big chunks and some very small pieces makes for good eating), toss it all together and, well that’s it. But wait…. let it sit for a few minutes before serving to really let the flavors draw out.
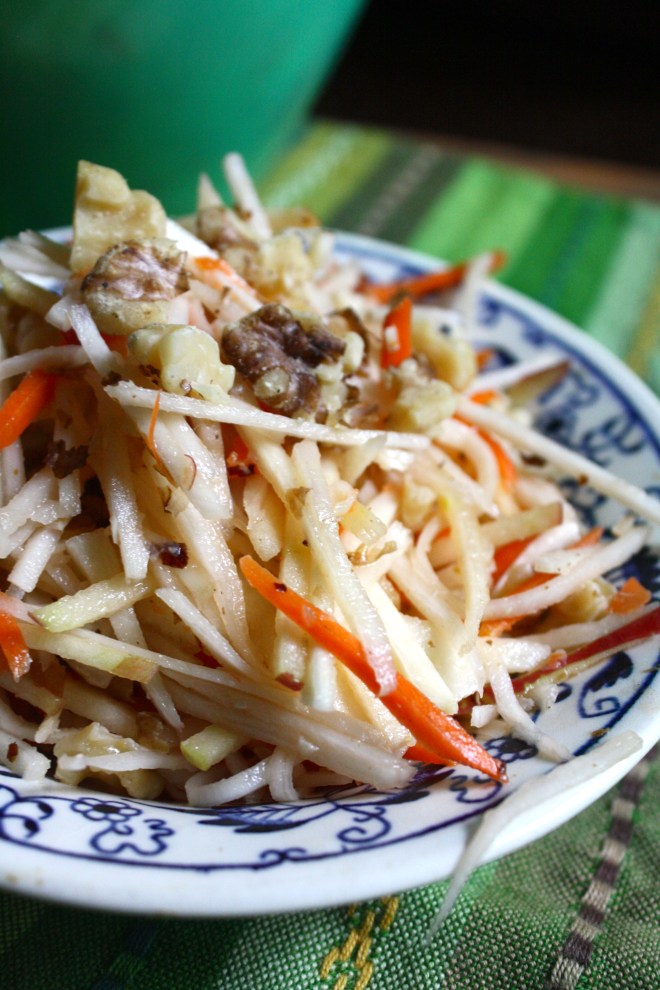 And there we have it. Super fast, full of flavors and crunchy texture. A salad slaw after my own heart.
 Last week pineapples were on sale everywhere……So I bought 5. Don’t judge
  Stuff for the goodness. We got the kale, some avocado because all salads should have avocado and some cooked lentils because, well, all salads should have lentils (or beans or nuts.. so you could totally something else) Then a few sprigs of fresh dill, a clove of garlic, red wine vinegar, salt and a bowl of chunked up pineapple.
  The pineapple, dill, garlic, red wine vinegar, a splash of water and a pinch of salt get blended in a blender or whatever blending device you use. Go as smooth or chunky as you like, I recommend going smooth, but leaving a little chunk, like half blended.
 So good……So so good.
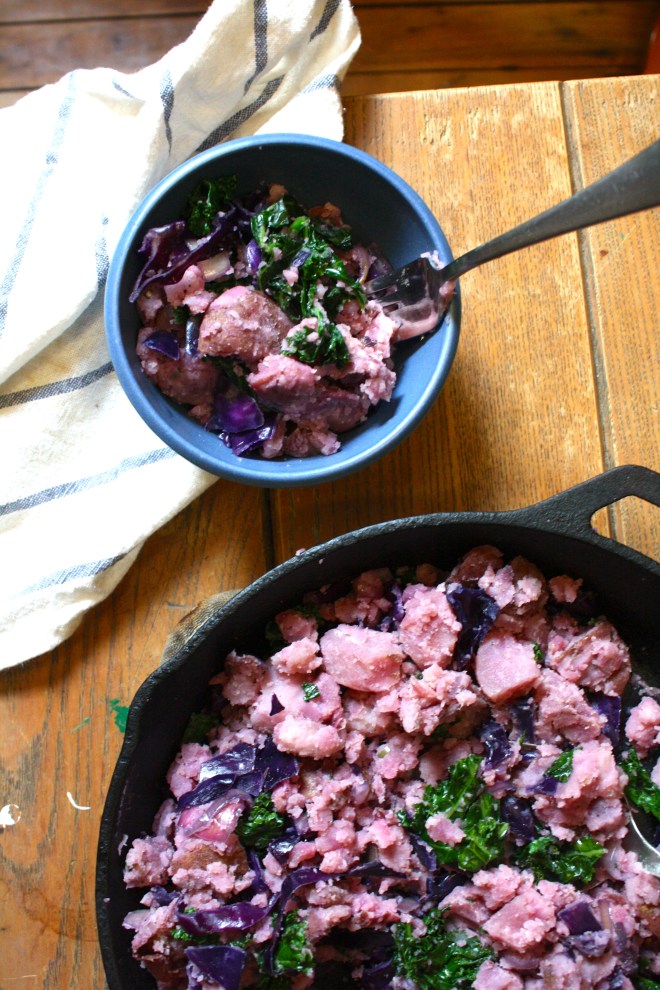 Happy St Patricks Day!!!! As a kid, St Patricks day always meant green milk, green eggs, and those nasty gold foil covered chocolate coins. (you know, from the pot of gold) Not to mention all the leprechaun hunting and pinching. In my family, if you were unlucky enough to forget to wear green, you ended up as a walking target. It all started out nice an innocent, a pinch here or there, but by the end of the day, someone would end up pinching a little to hard or maybe just one too many times and the game would go from pinches to punches.
 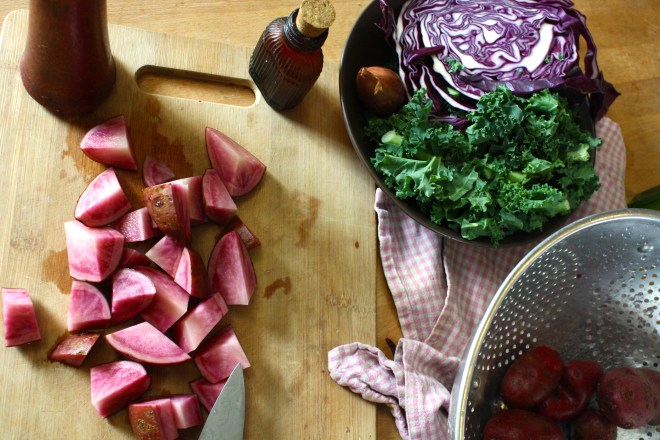 The stuff…. Super pretty red potatoes, red cabbage, shallots, kale, salt and pepper, and olive oil.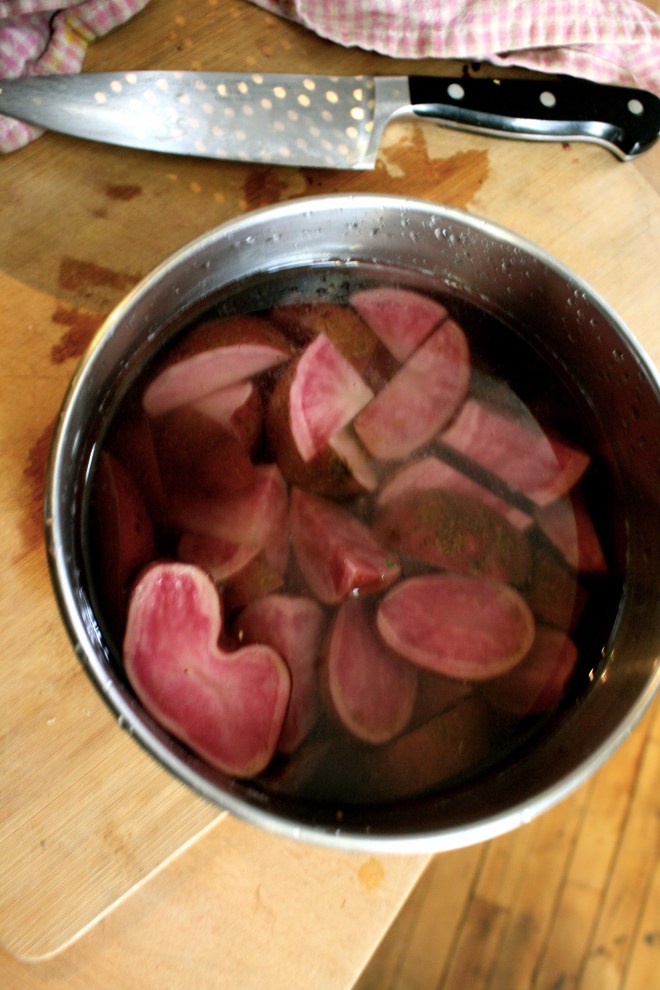
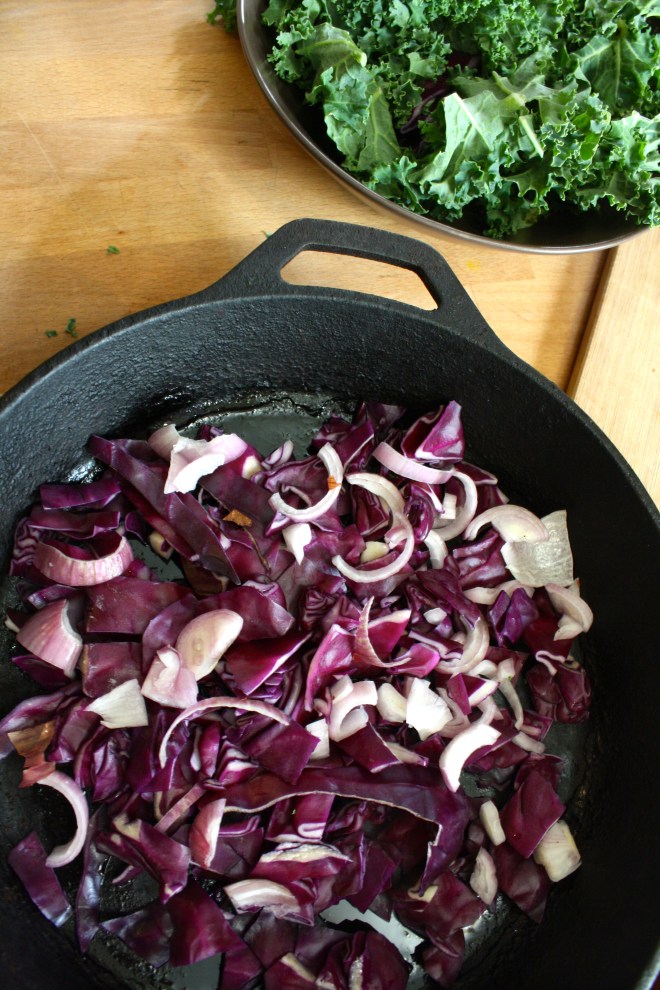 Dice up the pretty potatoes and stick them into a pot and fill up with water and add in a good tablespoon of salt. Stick on high heat and bring to a boil, then turn the heat down to medium and cook those taters until super fork tender. (bring them to the edge of falling apart)
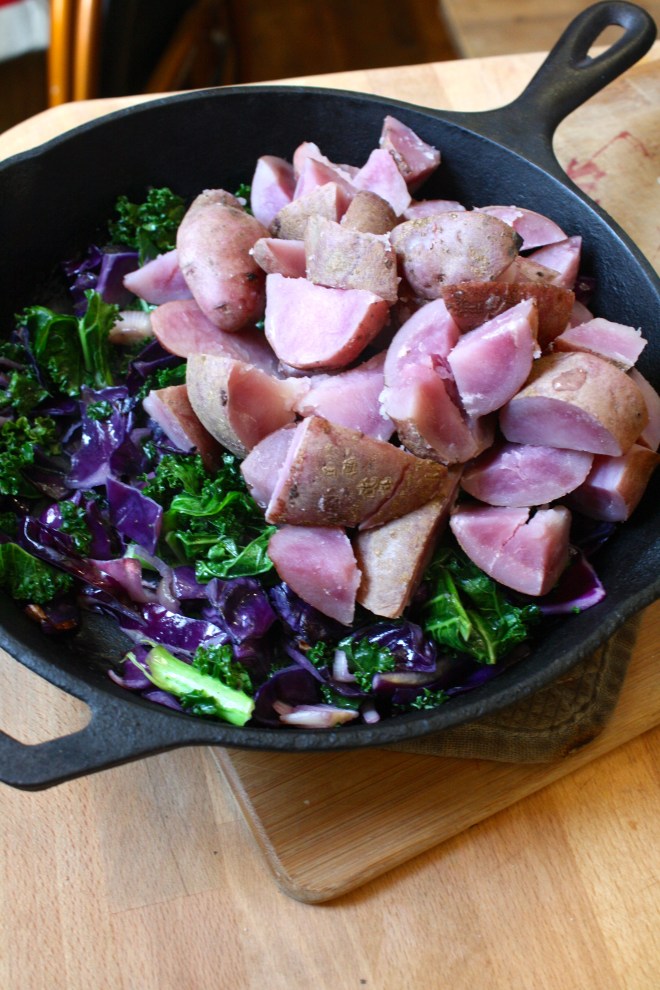 Once the potatoes are super tender, drain the water and dump them into the pan with the sautéed veggies. With a potato masher or a fork, mash up the potatoes and mix in the veggies, adding a drizzle or more of olive oil as you go. (Start with a drizzle and work your way up until it tastes good to you) Salt and pepper to taste.
 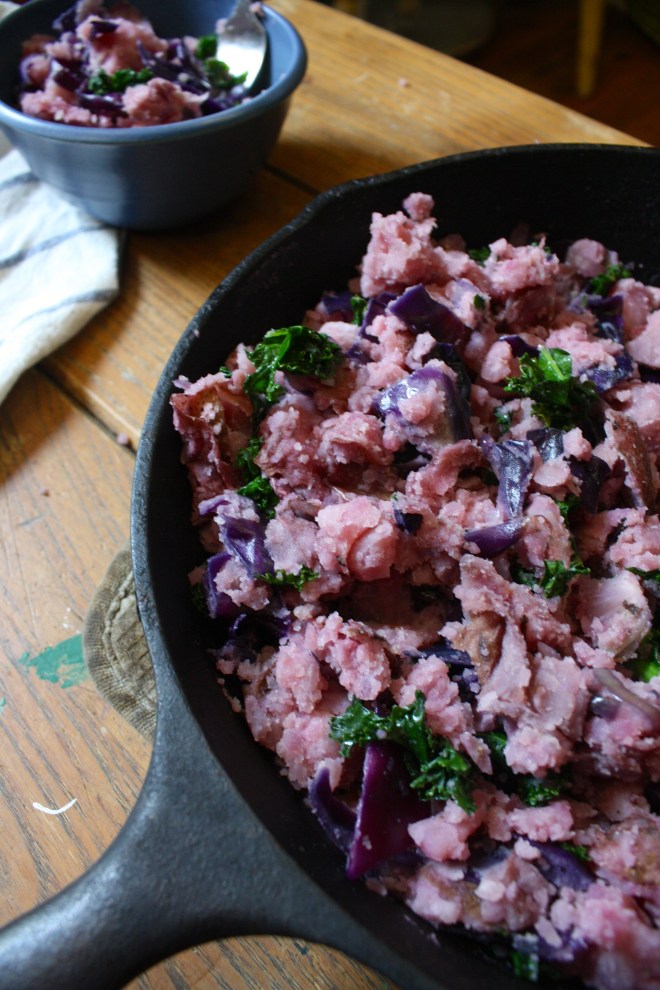 The most pretty pan of smashed up potatoes that I have ever seen. Eat as a side dish or even a light main dish. Fork is a good utensil to use, but I found that my fingers worked just as well.
 What is better for a bake sale then Oreo cookies? Oreo cookies made from scratch!.
 Cookie Time! Whats going on here is brown sugar and butter have be beaten together until nice and fluffy Then a good big splash of vanilla and another 2 big splashes of coffee are added to that.(I sacrificed my last few sips of my coffee for these cookies) The dry stuff, flour, salt and cocoa powder, are whisked together, waiting to be added to the wet.
  Mix the dry ingredients into the wet and mix. I ended up just using my hand and kind of squish mixing everything together until in tuned into a nice lovely uniformed dough. Form the dough into 2 balls and give each a few kneads to get any air bubbles out. Place dough back into bowl and stick in the fridge to sit for 10-15 minutes( it makes the dough a little easier to work with)
 Once the dough has had a little time to rest and cool, remove from fridge, one ball at a time. Place on a lightly cocoa or powdered sugar dusted surface and roll out the dough. Grab any size circle (or other shape) cookie cutter and get to shaping the cookies. Notice the tin can in the bowl? I could’t find my biscuit cutters anywhere but the can was the perfect size, and it worked really well. Keep a little bowl of either powered sugar of cocoa to dip the cutter in in between making the cookies. It really helps the dough from sticking and breaking.
  While the cookies are getting their cool on, make the cream filling. All you need is a stick of butter, about 4 cups of powdered sugar, some vanilla and a few splashes of heavy cream. Beat that all up until nice and creamy thick and spoon it into a pastry bag (I used a big old ziplock bag) to be piped on the cookies.
  Filling the cookies is for sure the best part. Separate the cookies into pairs and pipe a big blob of filling onto one of the two cookies. Take the names cookie and place on top, giving it a little smooth to the disperse the cream. Keep doing that until the cookies are all filled.


 And that’s how I know that this is a winner.
  As an awesome aunt, when I have any of my nieces or nephews, I feel the need to make something special for dinner, something that the kiddos might not get very often, but also keep it on he healthy side. I have 2 littles for the night which gives me the perfect opportunity for a trash food recipe. You know trash food, things like boxed mac and cheese, beefaroni in a can, or, in this case, sloppy joes.
 The stuff… We start with onion and green pepper, chopped into pieces. Black beans, bulgur, can crushed tomatoes. Chili powder, garlic powder, a bit o apple cider vinegar (which I forgot to picture) ,and some salt and pepper. Oh and cheese if you want… Plus a bun of some sort is necessary.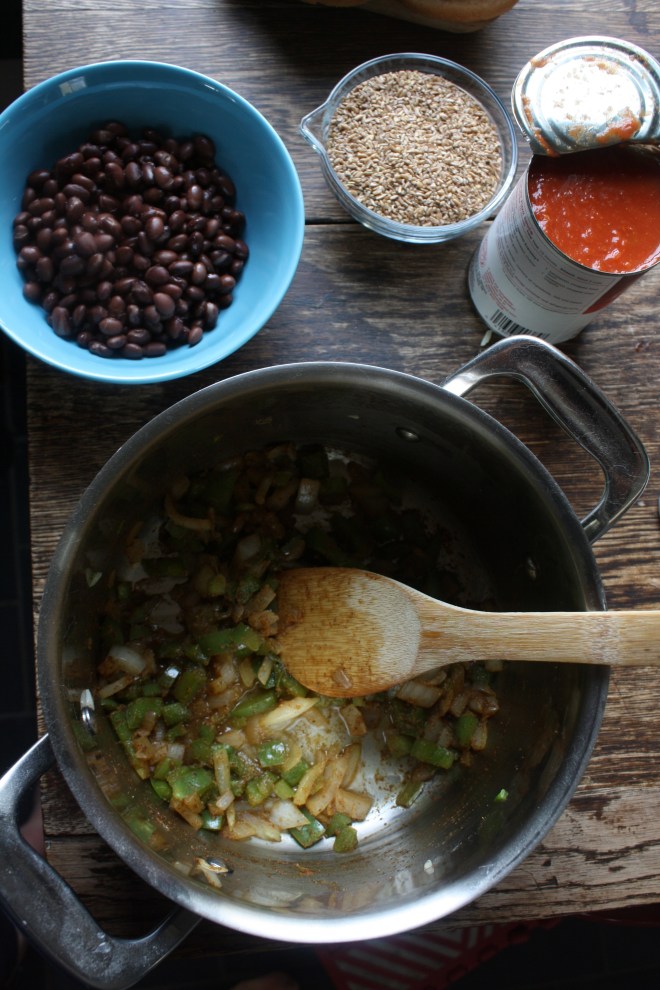
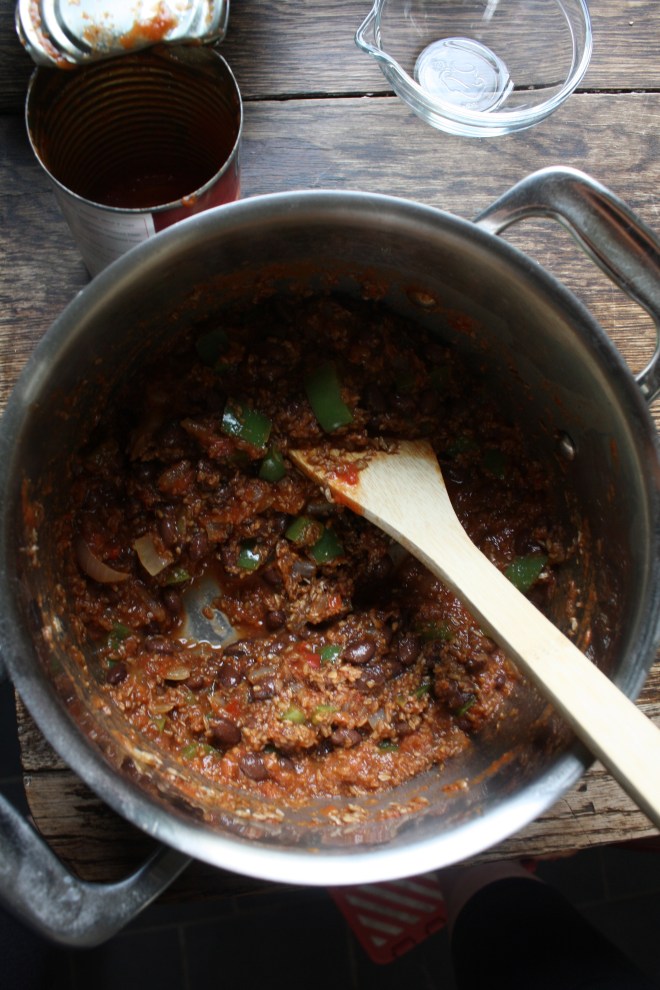 Toss the chopped onion and peppers into a deep skillet or pot with a drizzle of oil. Cook on medium heat until tender and toss in the spices. Give a stir. Add in the beans, bulgur, and tomato, a splash of vinegar. Stir it all up, cover, and let simmer for about 15 minutes, or until the bulgur has absorbed the liquid and is nice and tender.
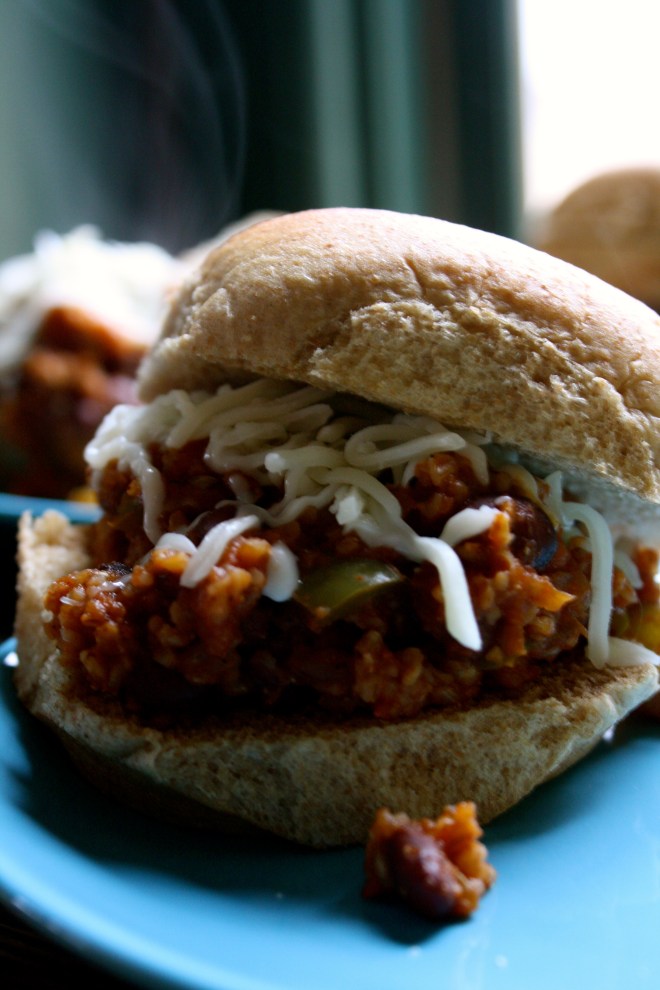 And Then dump a good heaping pile right onto a bun. Add some cheese, or not..and eat with wild abandonment, making sure to get as much on your face as you get in you mouth.
 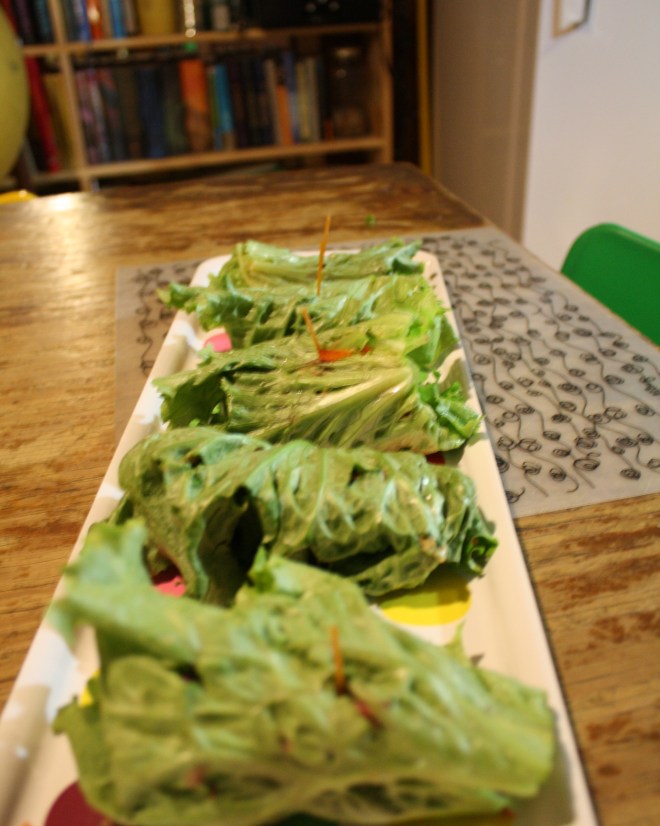 I eat vegetables like I breath air… constantly and almost mindlessly. Some people are addicted to sugar or coffee, but me, I am addicted to veggies. ( I am also extremely addicted to coffee) This is my truth, but I am ok with it.
 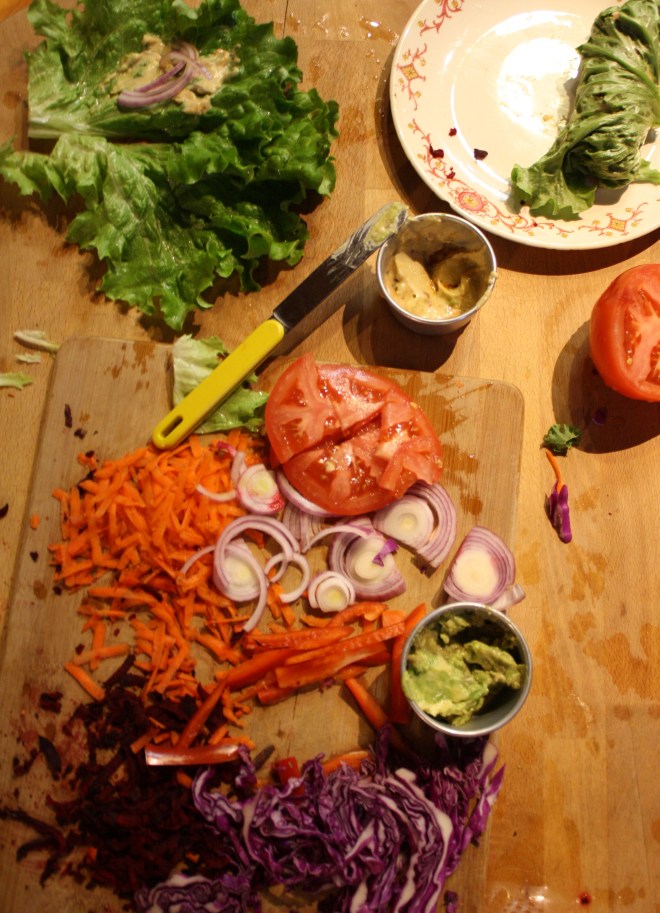 Pretty much a little bit of everything that I have in my fridge….Shredded red cabbage, carrots, beets. Some sliced of red onion, tomato and red pepper. Hummus and a little mashed avocado
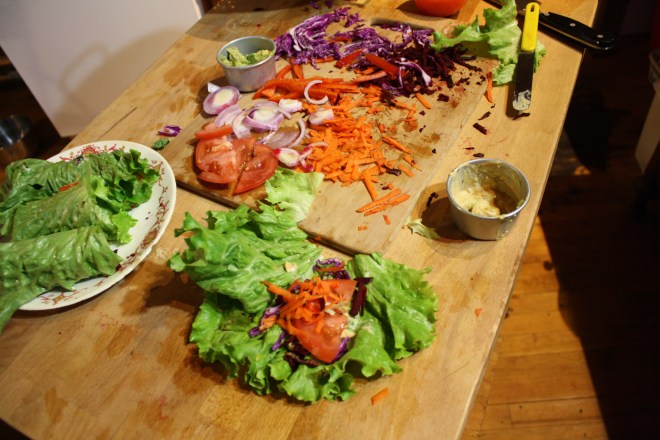 Yes, it may look like a mess, but that’s just me trying to make five different things at once. But really, making these wraps are simple simple. Just take rinsed and dried green or red leaf lettuce, smear on hummus and mashed avocado and pile on the veggies. Roll and stick with a toothpick to keep from unrolling. See…. simple.
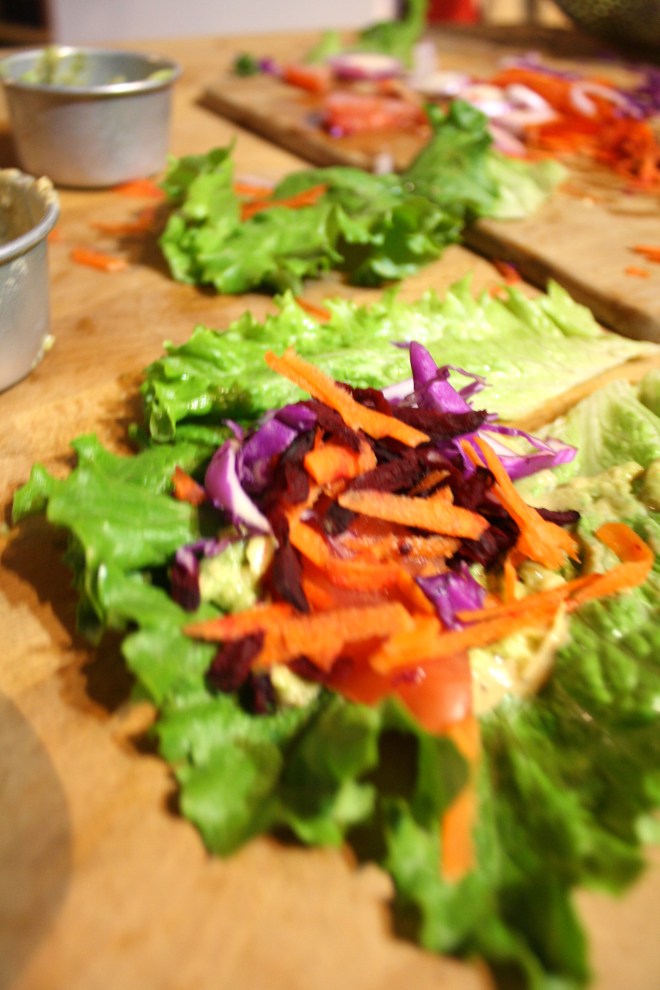 So many colors…… so much pretty.
 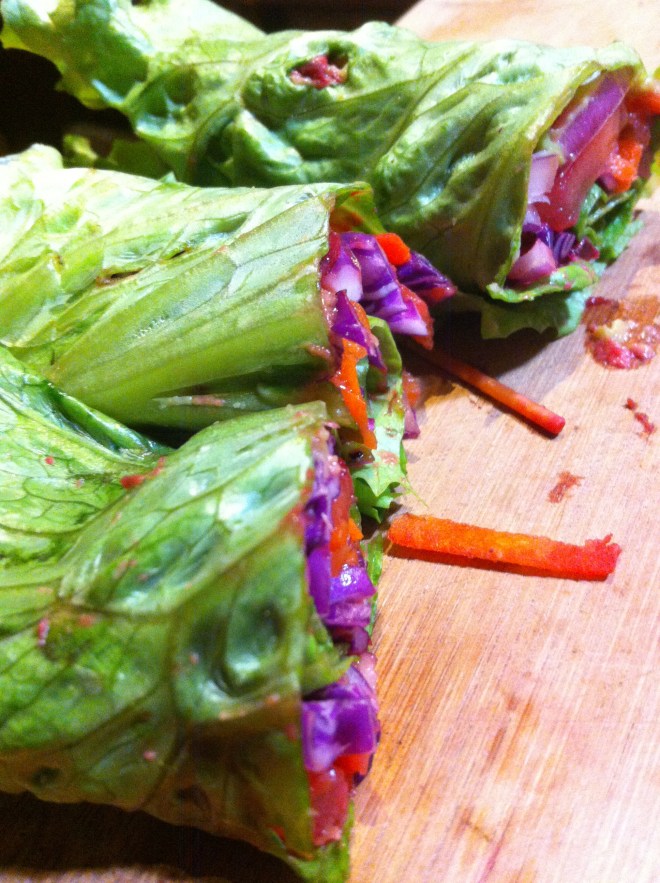 Wrapped and rolled…Sliced down the middle, just to see all the pretty inside.
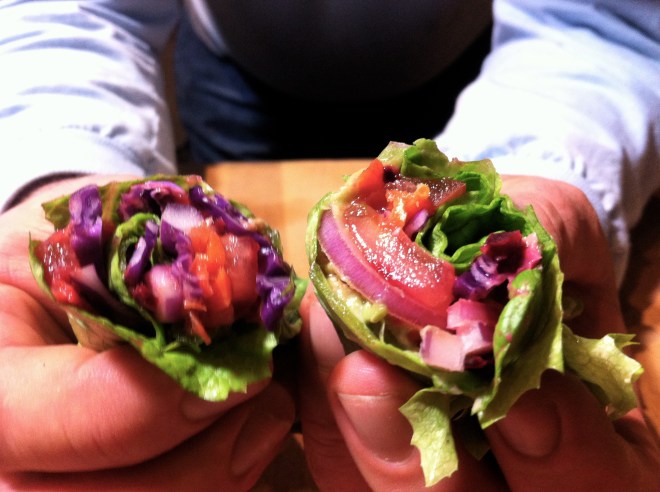 These might be veggie wraps, but man, look at those sausage fingers…(hehehe)
THE LOVELY CRAZY
September 19, 2015 by maximios • Blog
Are you sizzling? Is that pool of water next to you , in fact, your own sweat?
Yeah, I feel you…..stupid heat wave.
During these long extended periods of heat and humidity, my body starts to revolt. I get bitchy, by skin get itchy, my head goes foggy, my stomach starts to refuse food. and I generally just feel like crap. I love the summer, but I am not, by any means, a hot, high humidity person.
So during this nasty bout of heat, I do what I can to find comfort. And one of my comforts is watermelon. I am pretty sure that watermelon is a magical fruit. A giant green oblong ball that when cracked open is the brightest, sweetest bright pink fruit.. I mean, thats pretty f ing magical. It can make anything better, and is one of the few things that I want to eat when its a million degrees outside without barfing.
Watermelon is my official heatwave food. Watermelon all day long (Is it bad that I could literally eat an entire watermelon all to my face, in one sitting? ) And because I am me, I like to spice it up a bit and slather a big glob of basil pesto to the melon…. and that makes me happy. Plus it makes the fact that I am eating nothing but melon seem a little more substantial.
Do you have a heatwave food? If not, try this….It will be your food.
The stuff. A big hunk of watermelon, basil, a lemon, olive oil and salt.
Stick the basil, the juice of the lemon, and a pinch of salt into a blender. Turn on and blend, adding just a tad bit of olive oil until a nice green pesto is made.
Prepare your melon. Remove rinds if you want and save for later.. (seriously, we can make gazpacho with it) and cut into inch thick chunks.
And now if your feeling it, stick a skillet on the stove and preheat on medium high. Once heated, place watermelon chunks on hot skillet and sear each side for about 3-5 minutes per side.
If you want to go fresh, just skip searing it. Me, I do a bowl of both.
And now slather the melon with the pesto
And go to town
Stay cool my friends!
-C
Place basil, a pinch of salt and the juice of the lemon into a blender. Turn on and blend, adding in a drizzle of olive oil until pesto forms.
Preheat a lightly oiled skillet (or a grill) on medium high heat. Take your watermelon and remove rinds (save for later) and cut into inch chunks.* When heated, add the watermelon. LEt each side sear for 3-5 minutes, or until caramelized. Tarnsfrer to a bowl.
*Note. The seared melon is fantastic cooked then cooled. Also, I know some people blot out the juice before grilling, but I think that is a waste and I find unnecessary, but if you don’t want a juicy piece of cooke melon, by all means, blot out the juice..
Or if you don’t want to cook it, don’t
And lastly, toss in a big giant scoop of pesto
Now eat… eat eat eat.