I am not a fancy person by any means, like super, no frills, no one would ever consider me fancy. EVER.%u00a0With that said, I am always and forever a cloth napkin lady. I have a drawer full of them, in all sizes and color. I use one with every meal %u00a0(I am a sloppy eater).And napkin use is not just about functionality, it is also about looking pretty.%u00a0 When I go for a clean napkin, I like to pick one that looks good with the meal that I am eating. I think a pretty clean napkin really makes any meal just a tiny bit better. Does that sound weird? I don%u2019t know but this is just a little look into how my mind works.
And recently I have set a few too many of my kitchen textiles on fire (towels, napkins, and potholders) so I am in need of a few new, nice looking napkins.%u00a0
And let’s get this straight. Cloth napkins are not about being fancy, they are about wiping you hands and face with something lovely, that doesn’t need to be tossed into the trash after use. Cloth napkins are also a great way to add a nice splash of color tot a table settings or a nice doth barrier between your lap and all the food that ends up landing on it. I have even been known to do a cloth napkin-tuck into the shirt- type situation if I am eating something particularly messy and have on decent, clean shirt (doesn’t happen too often).%u00a0Cloth napkins also double up as a rag when the inevitable spill happens at the table. See, not just for fancy people. Cloth napkins just make sense. And sure, if you are introducing them at the Thanksgiving table that happens to set a bunch of guests, or maybe making a few, wrapping them up with a ribbon and gifting them for Hanukah to Christmas%u2026that would totally be cool and not at all showy and over fancy. You just seem like a leveled headed person that uses and or gifts totally cool and useful things. And whatever if it makes you badass for making them yourself%u2026. cause you probably are badass anyway.%u00a0
So if you got the desire and a little bit of time (this project is great to do while watching a good holiday movie) you should make yourself (or someone else ) some cool ass cloth napkins.
What you will need, besides a sew machine
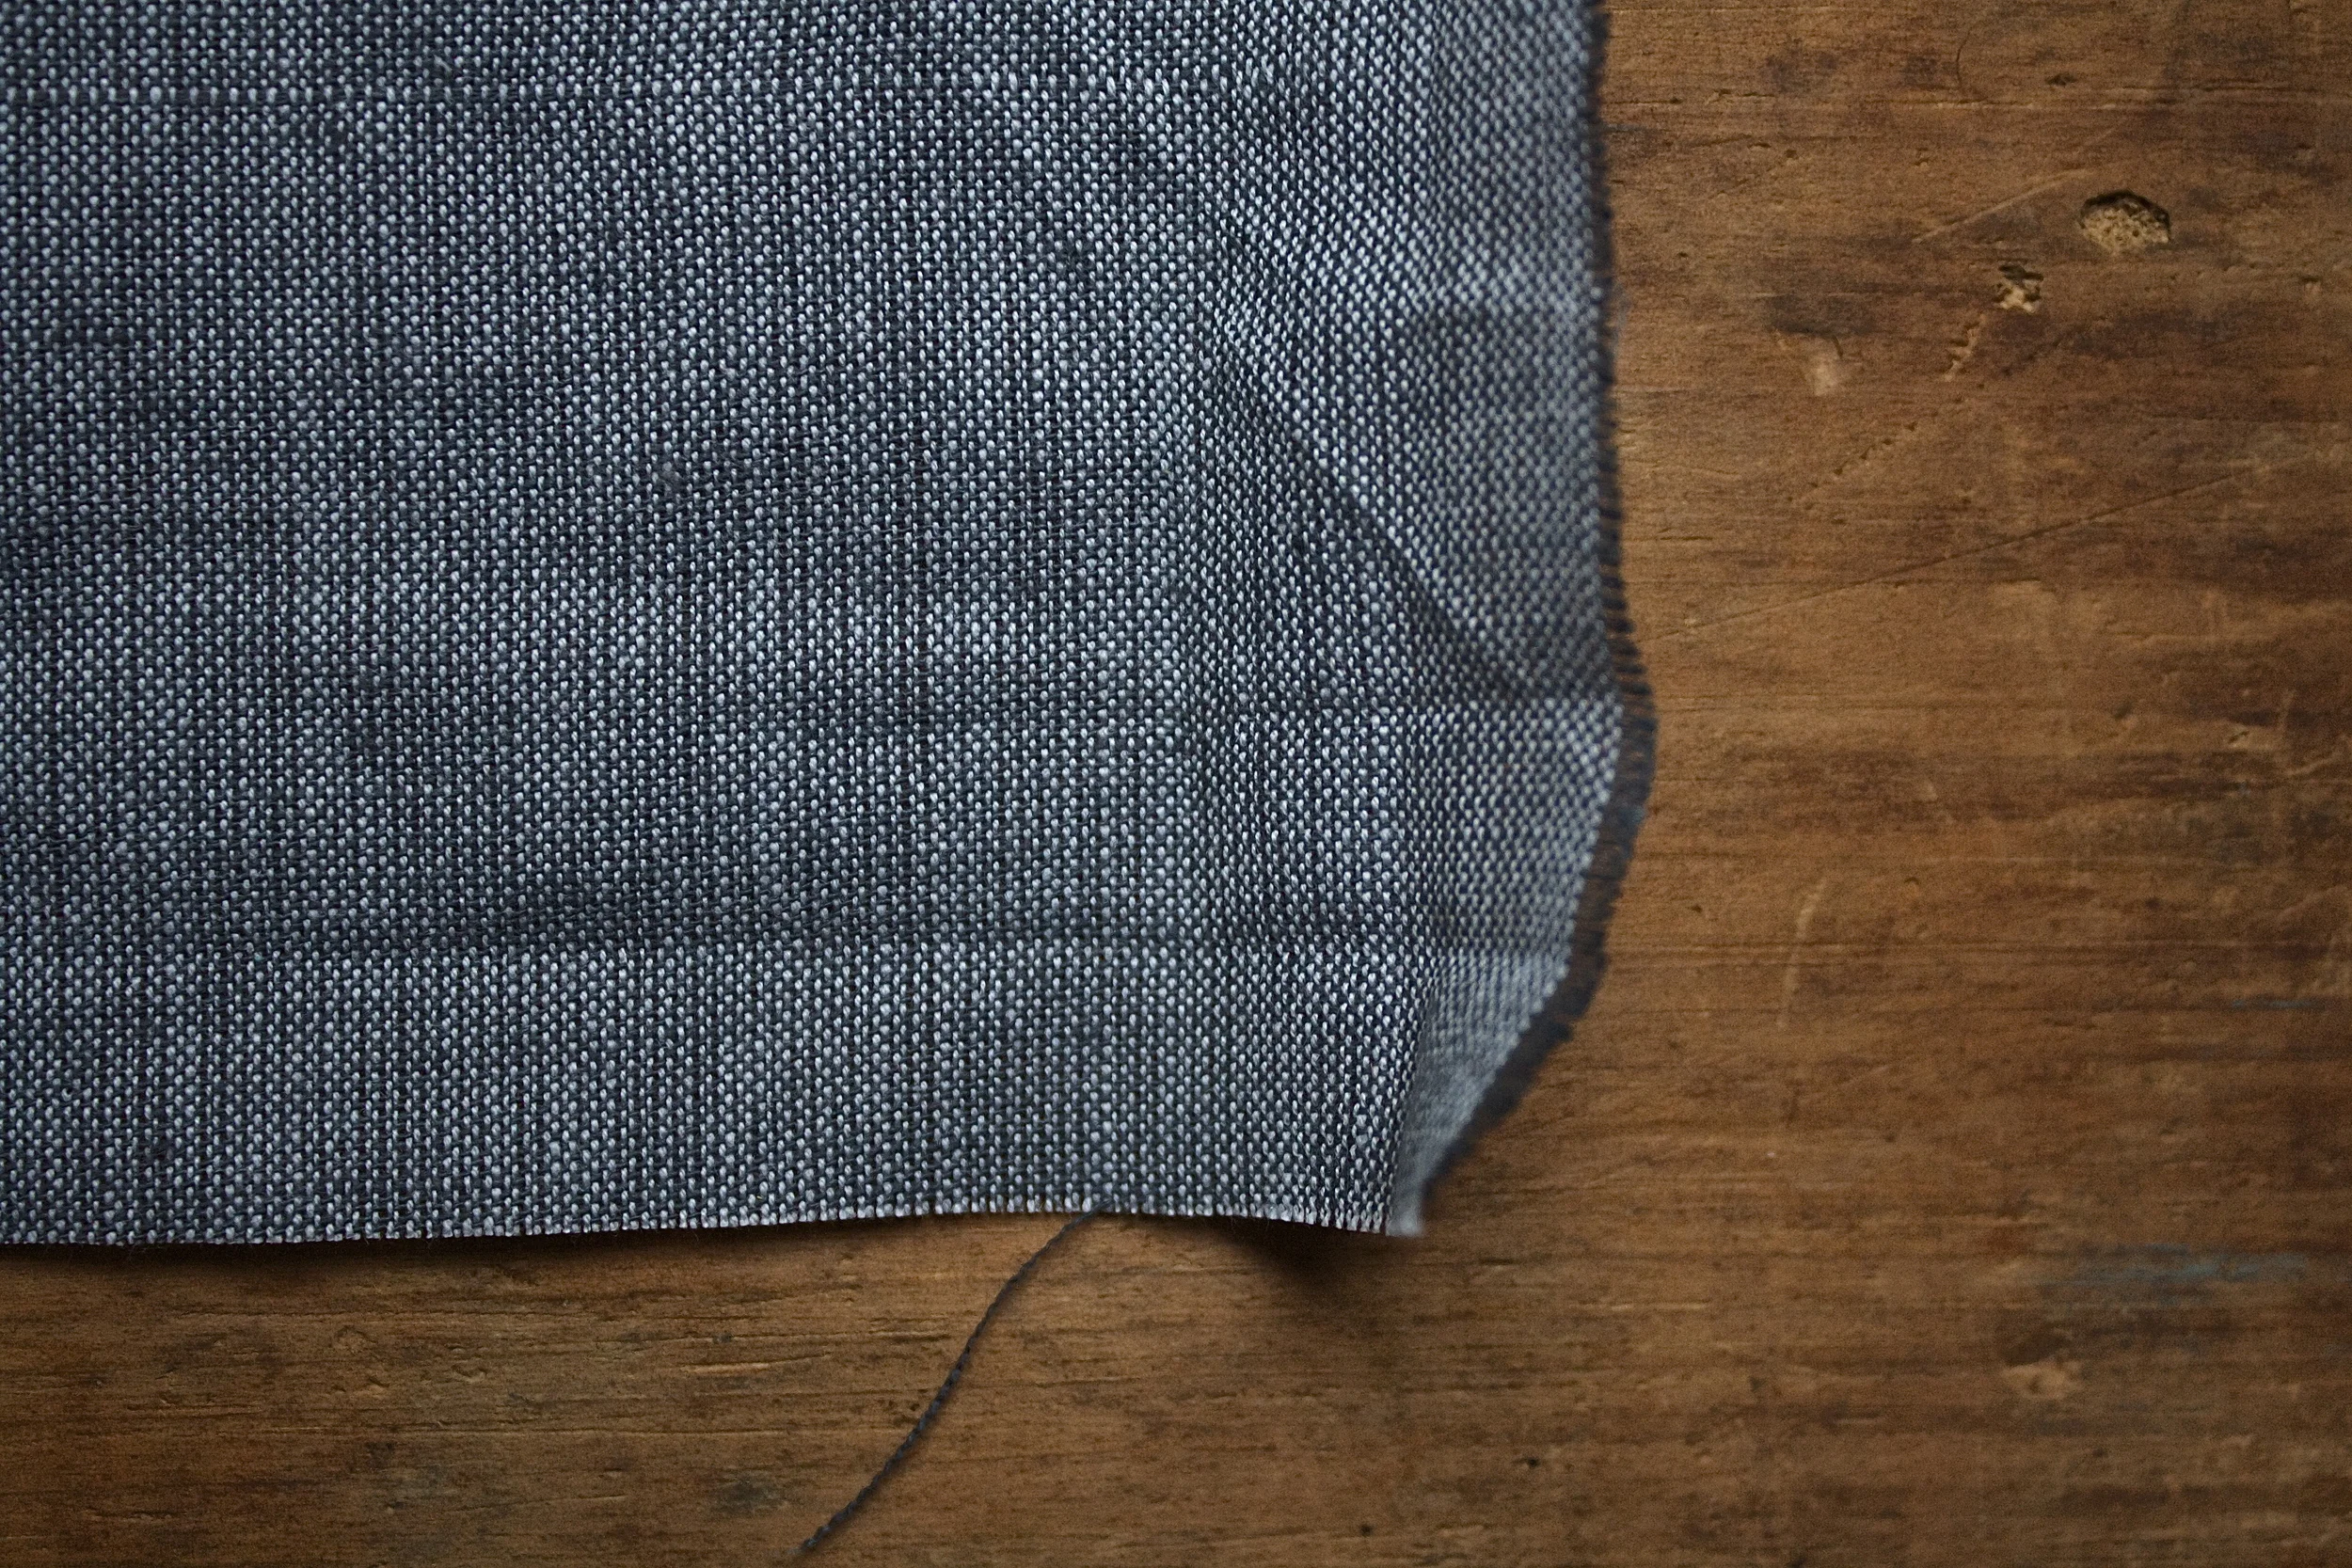
Cotton Fabric that you would like to wipe you face with.%u00a0I use around a 15-20 inch square piece per napkin but you can make it any size you want.. just as log as it has 90 degree conners So count how many napkins you ant to make and get hat touch in fabric.
scissors%u00a0
sewing pins
thread that looks good with your fabric
ruler or tape measurer
iron (optional)
Step 1.
Start by laying out you fabric flat, and if you want, run an iron over it to remove creases %u00a0(I would haven but my iron%u2026 can’t find it anywhere!)
When your ready, fold all the edges in 1 inch and crease with either an iron, or a flat edge (my ruler works great here)
Step 2.
Unfold last fold and the refold %u00a0each side 1/2 inch and crease.
. You now have 1/2 inch and a 1 inch crease on all sides of your fabric.
Step 2.
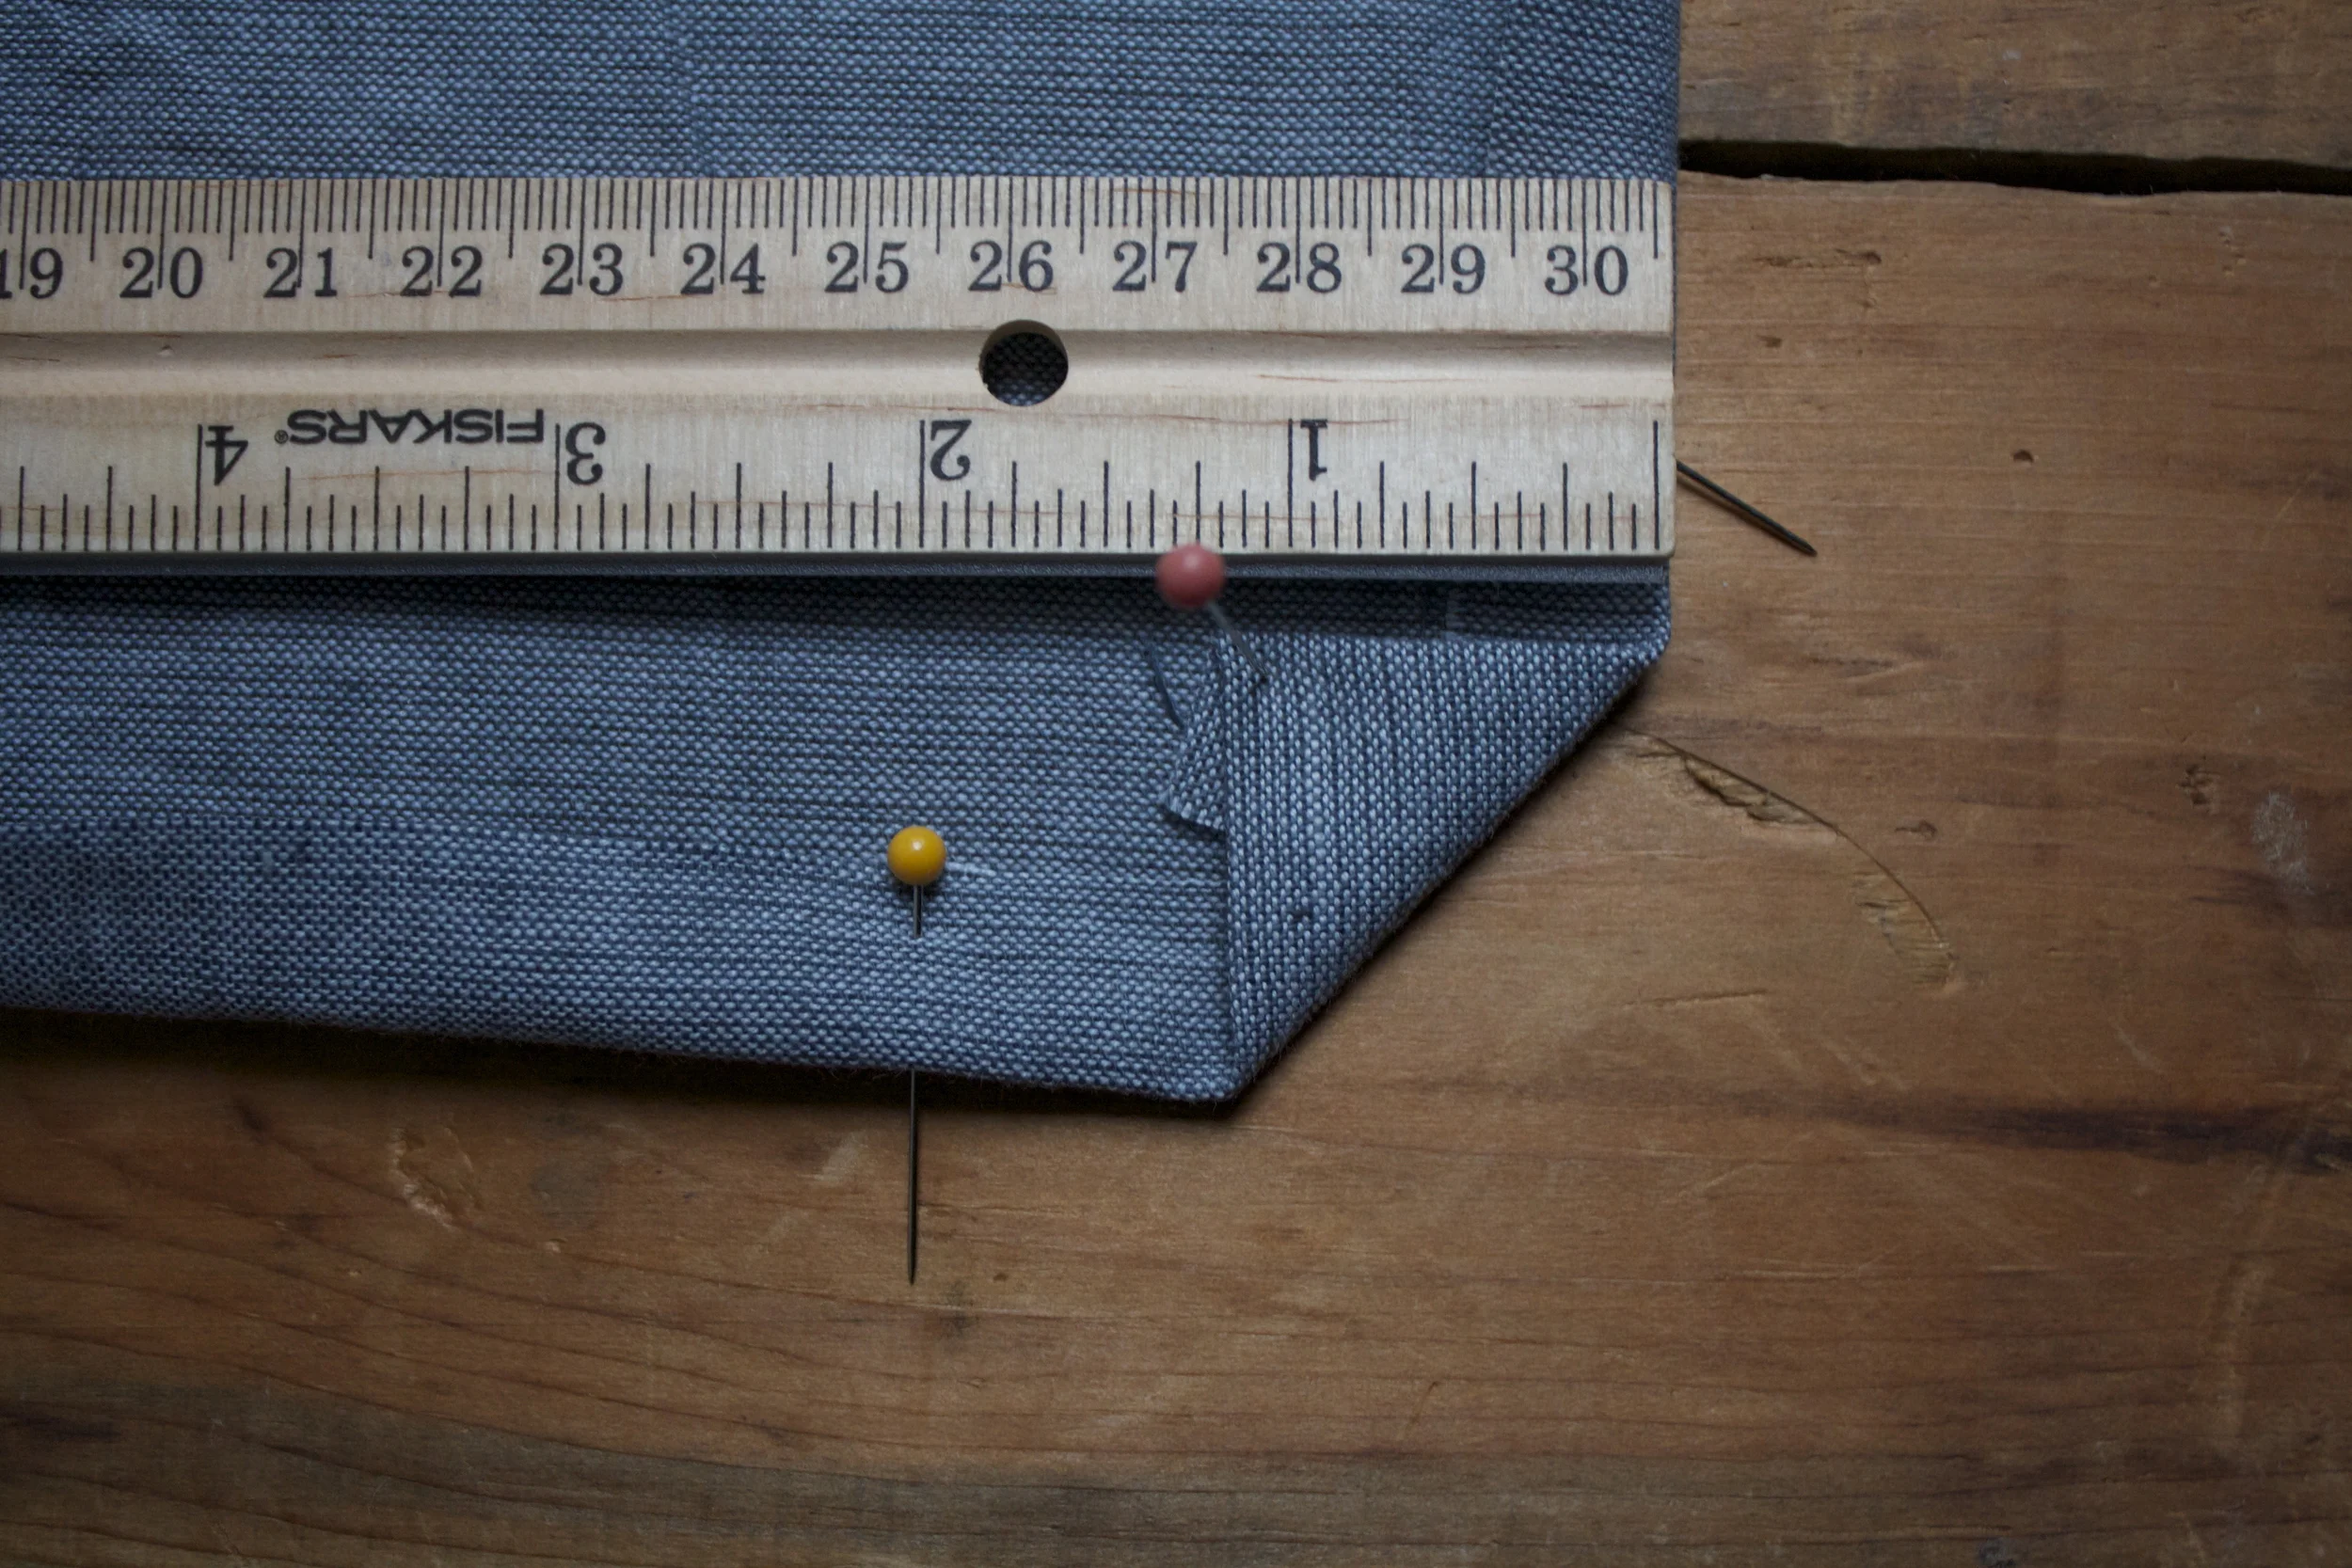
Now go back to the 1/2 inch crease and stick few pins in otto hold it in place.%u00a0
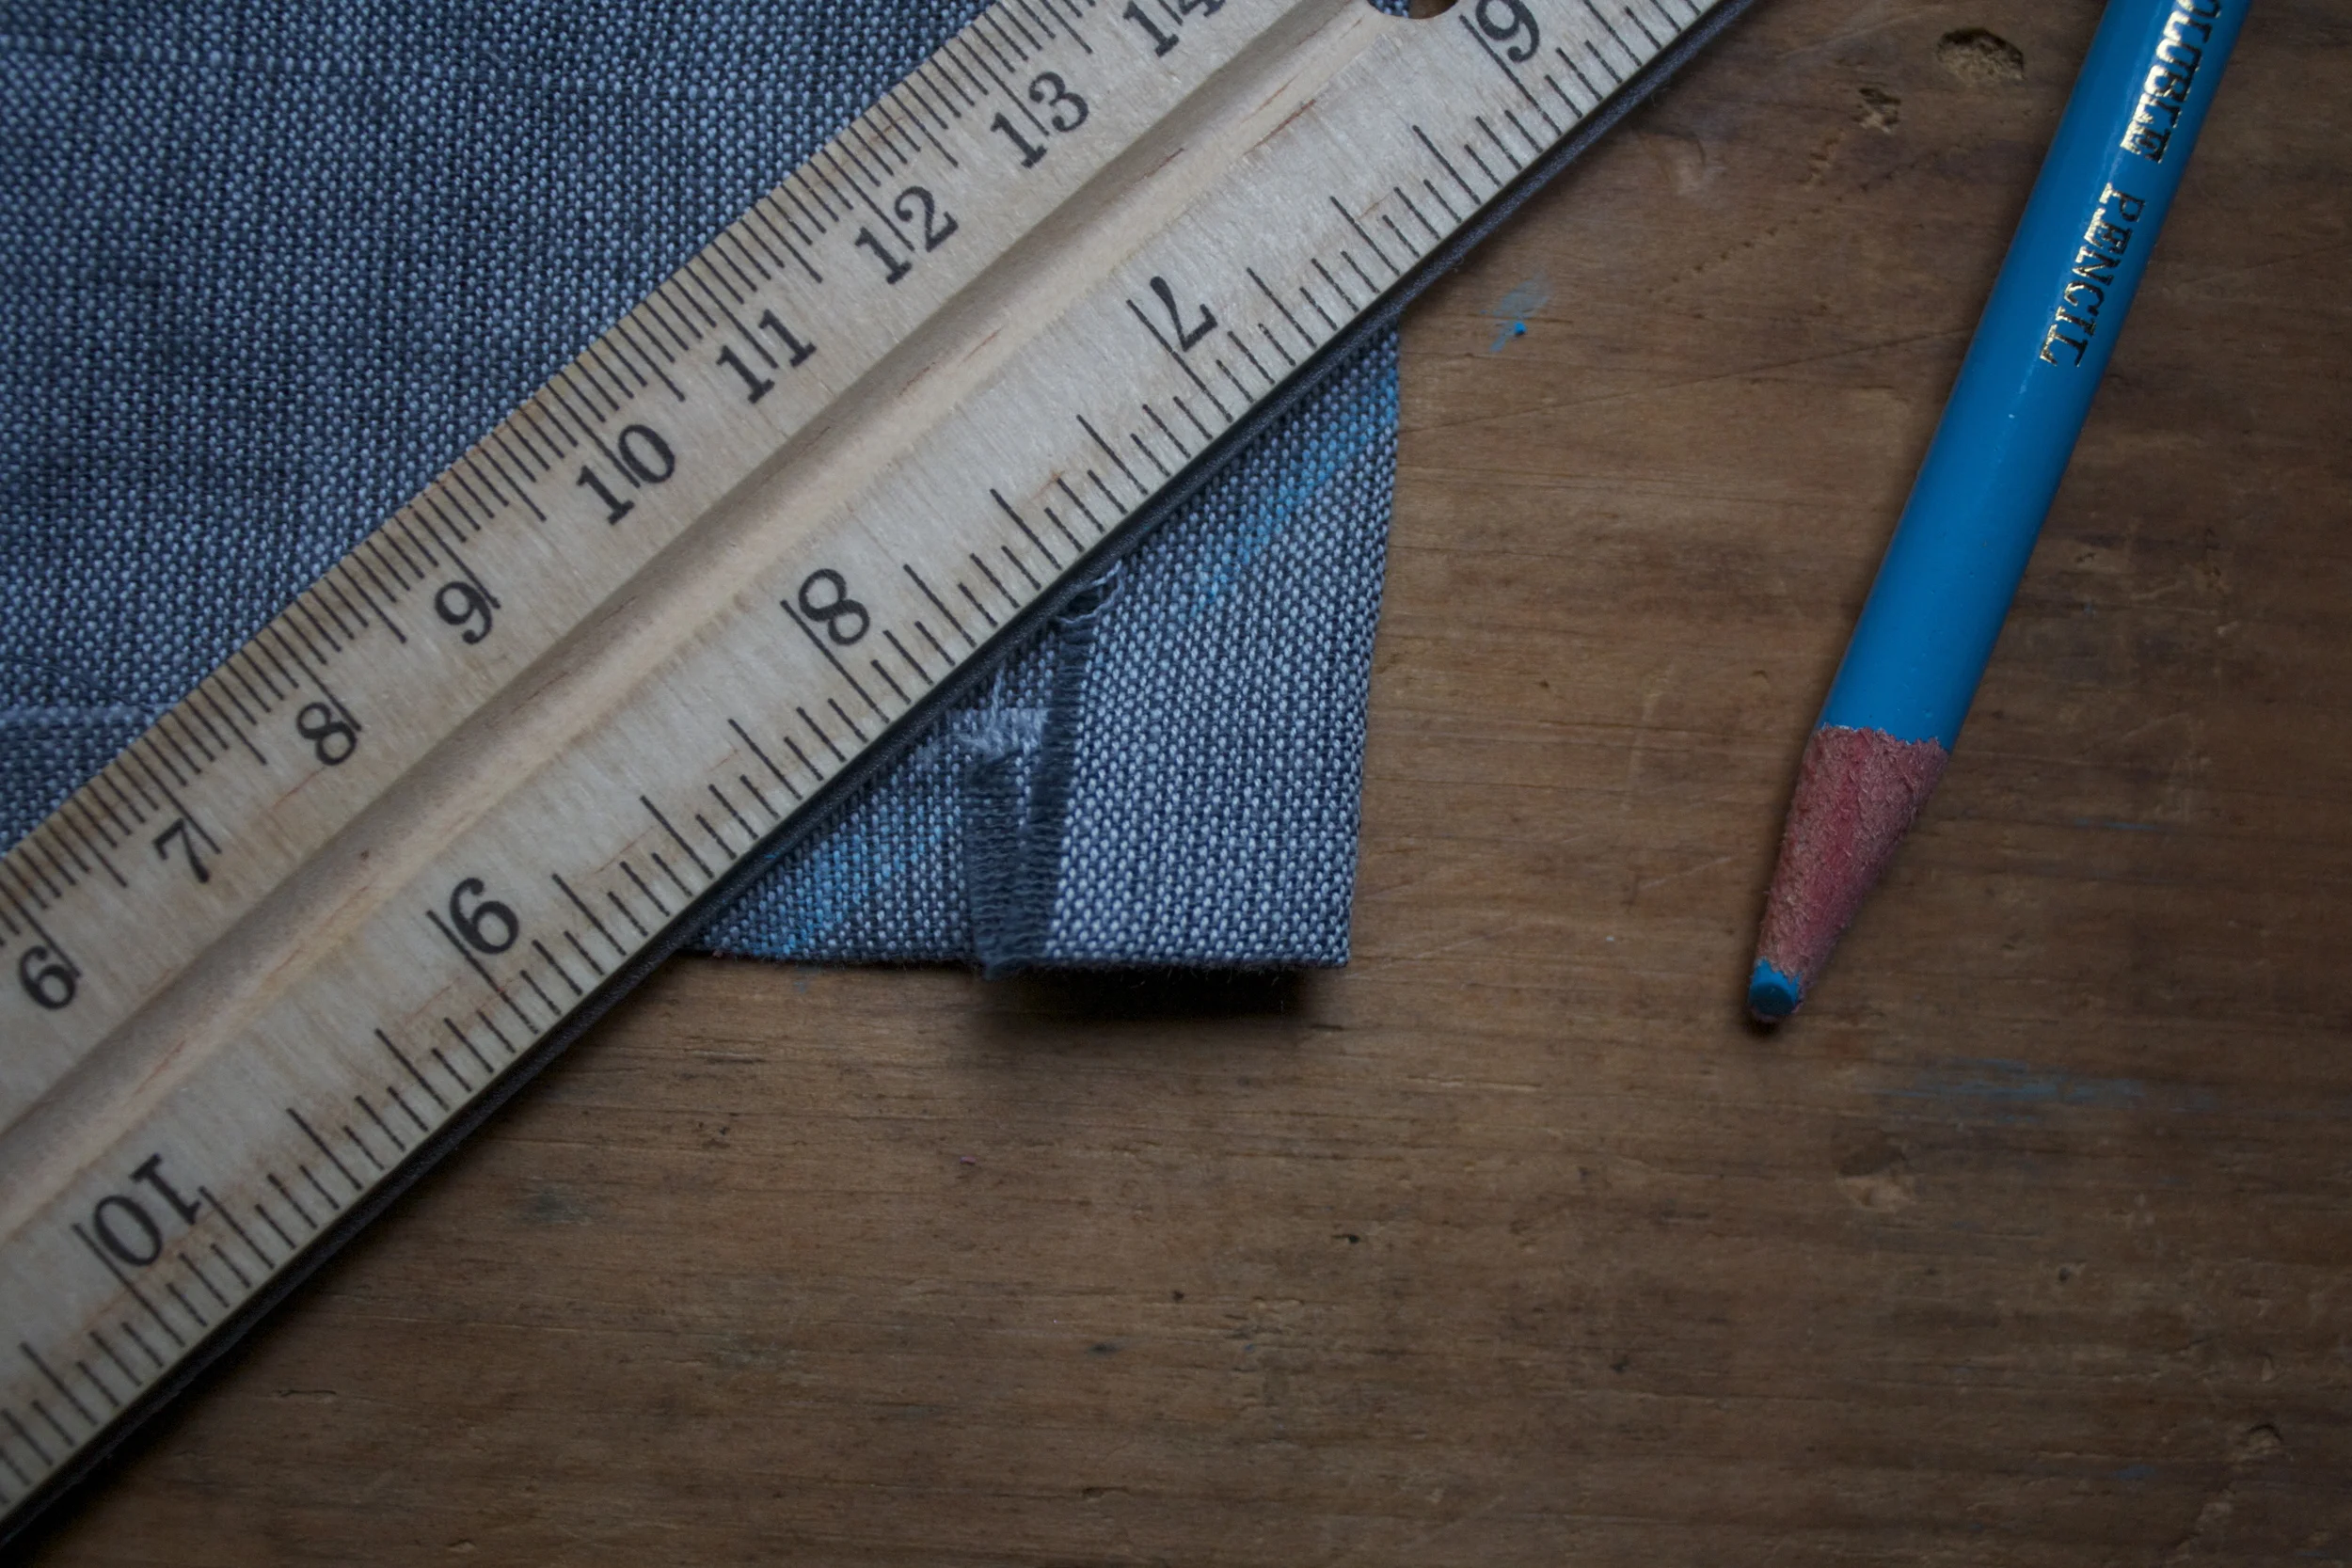
Start with any corner %u00a0and fold the corner over 1 inch and crease.%u00a0
Step 3.
Take a fabric marker and mark that crease Repeat with all corners.
Step 4.
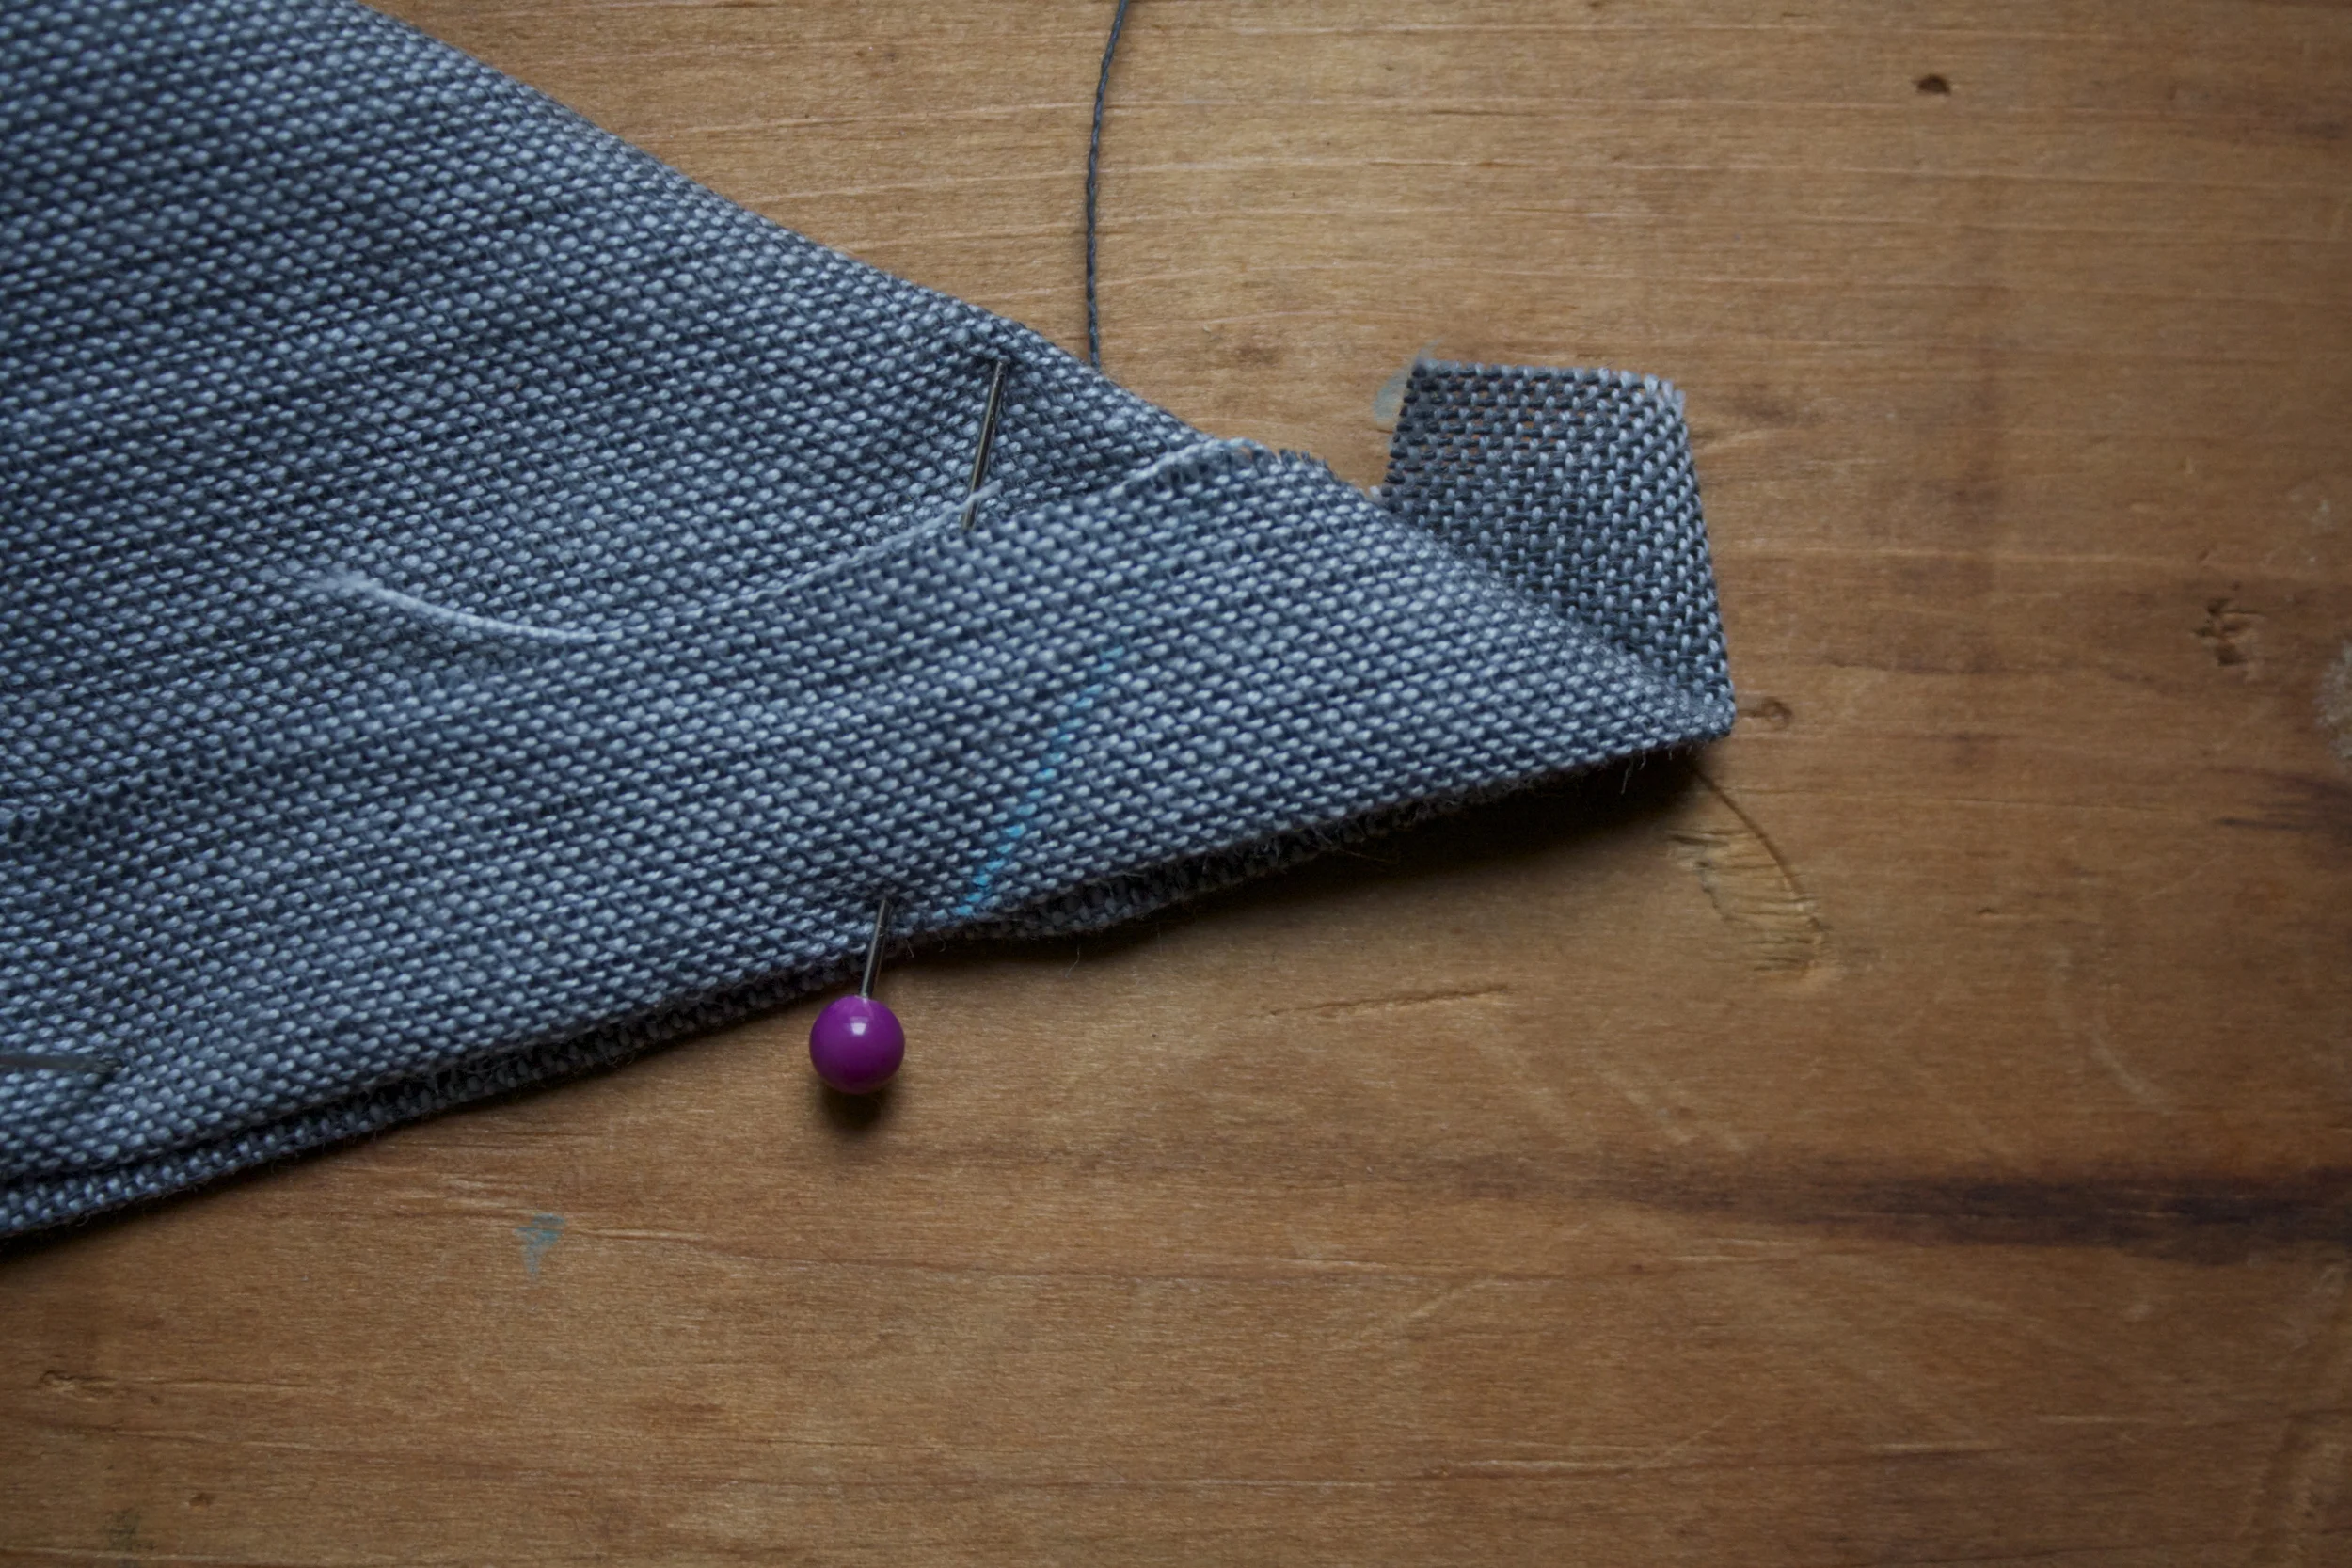
Grab a marked corner and fold the napkin in half, right side together,making sure the line you just marked match up, Stick a pin in it so it stays put.
Step 5.
Run a stitch through that line.
Step 6.
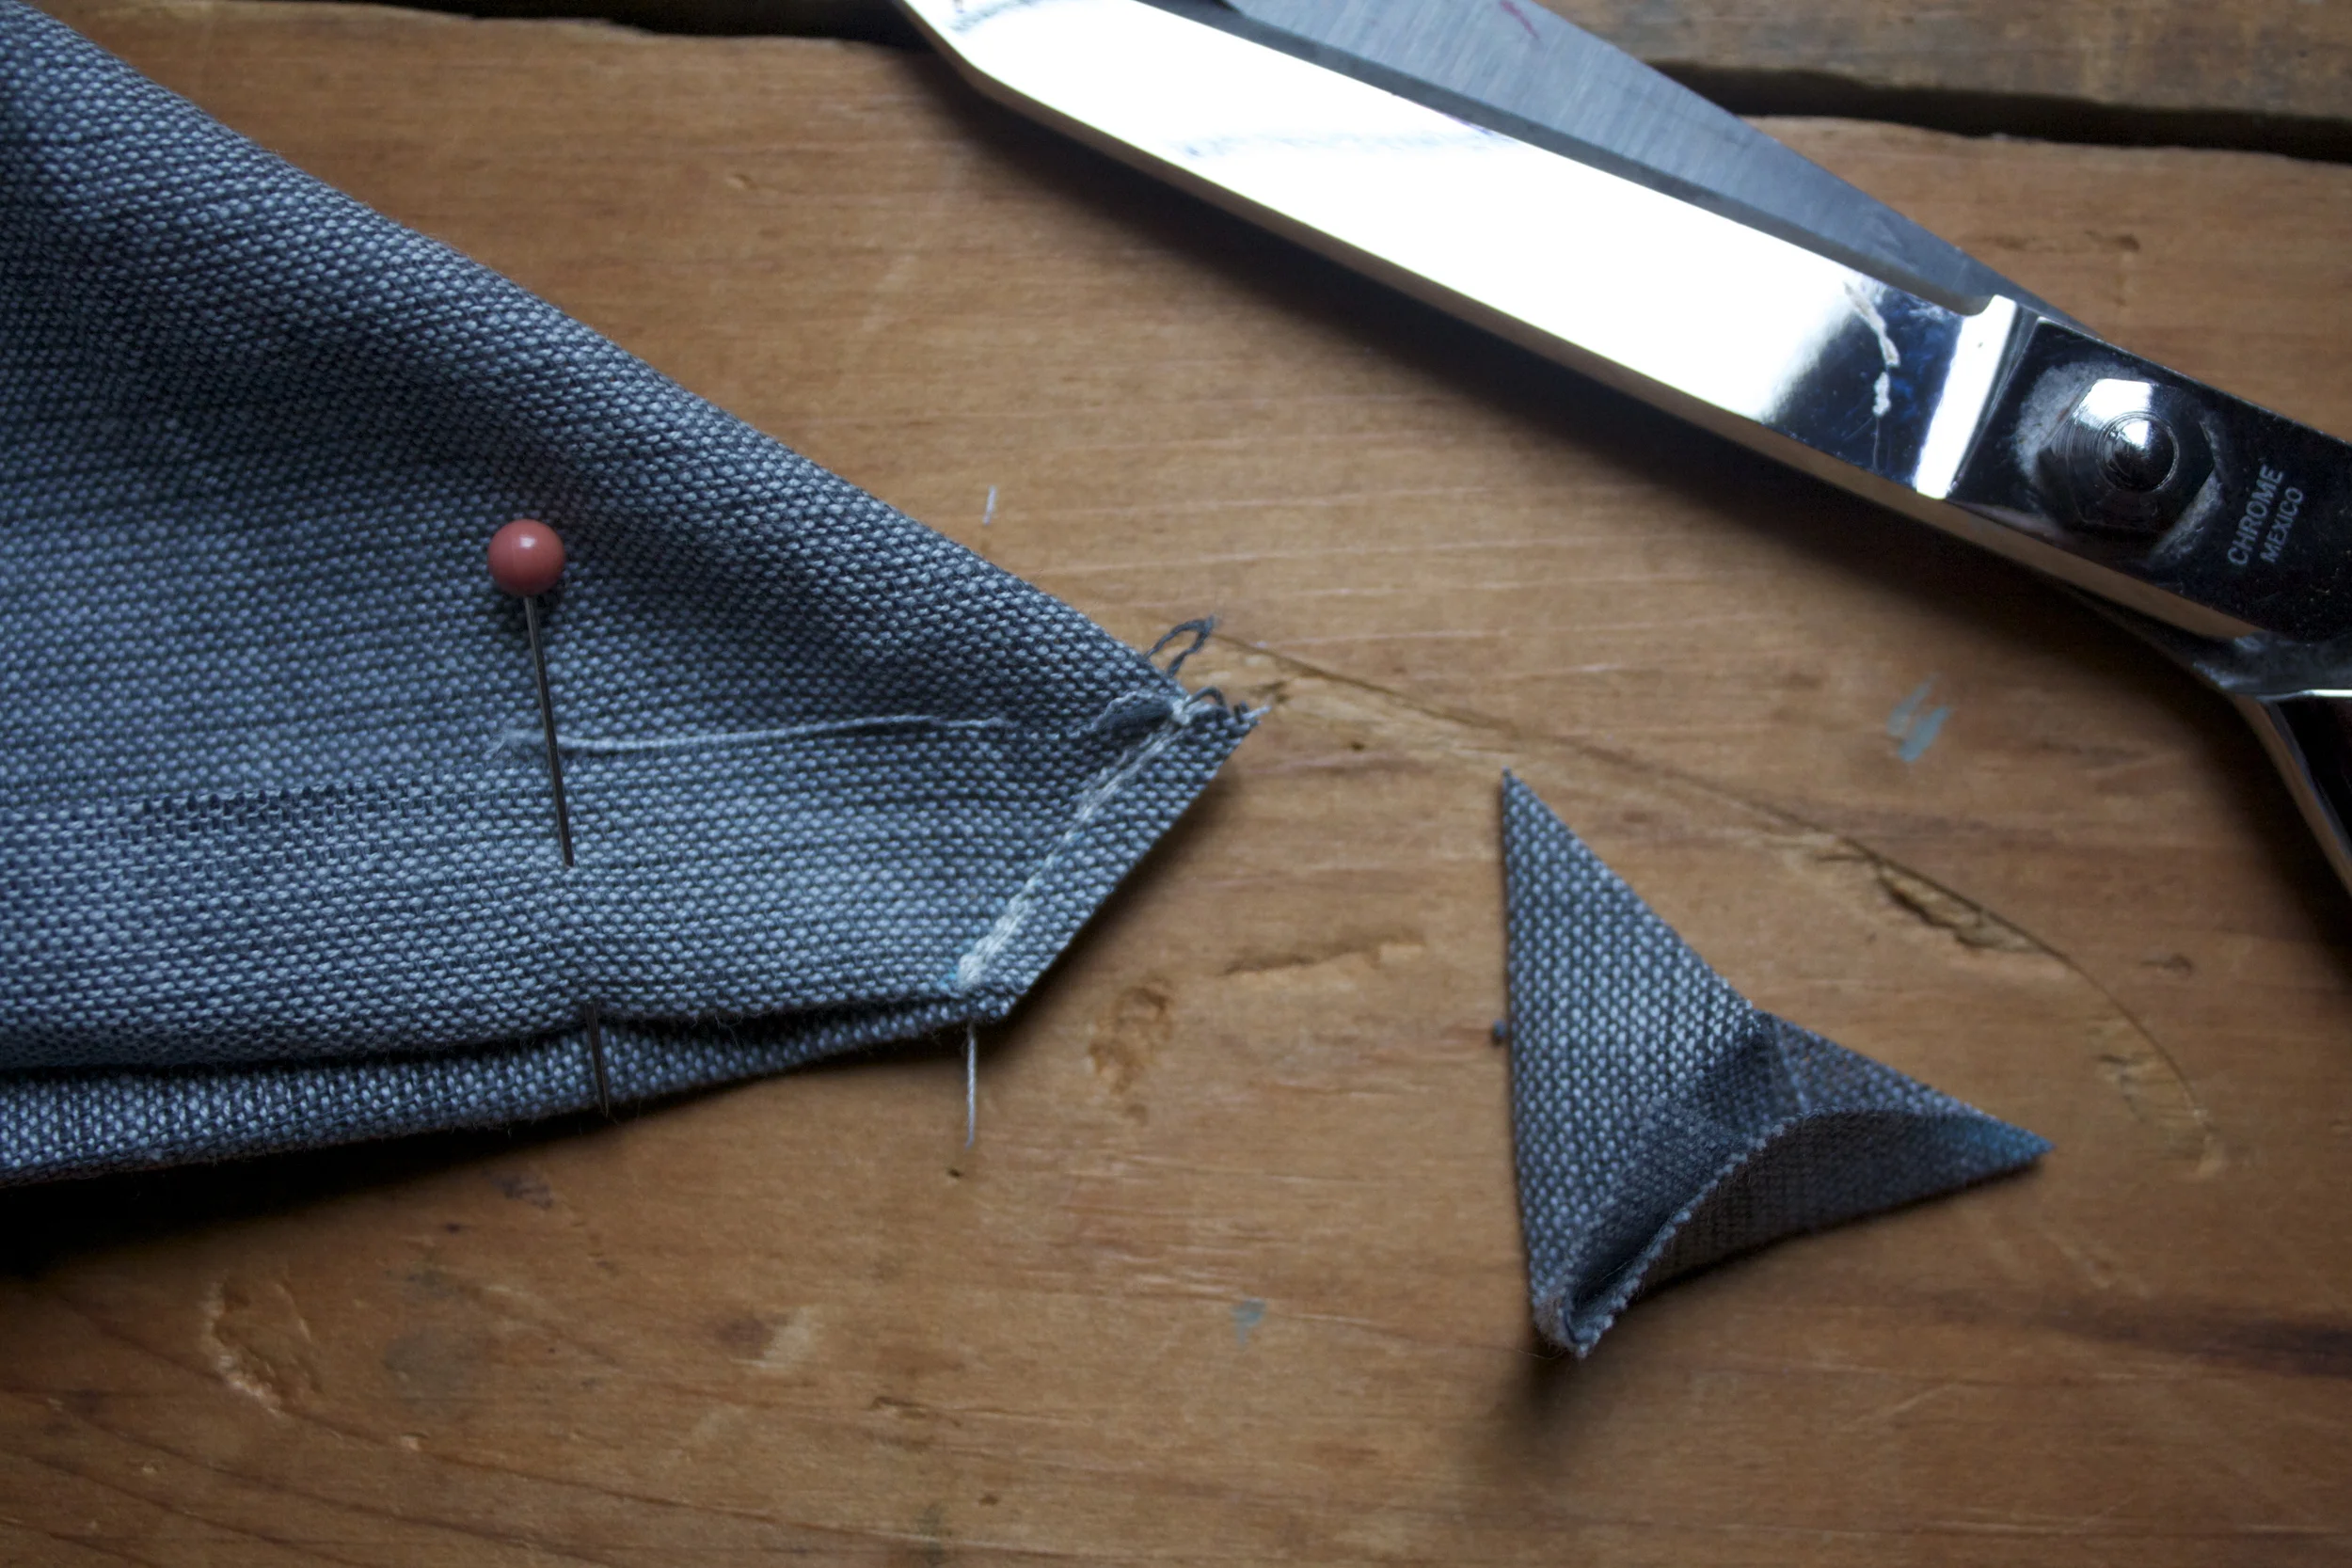
Snip off the remaining tip of fabric
Repeat step 3-6 with all corners.
Step 7.
And for the most fgratifing part,%u00a0fold over %u2026 Repeat to all corners
ALmost done!
Step 8.
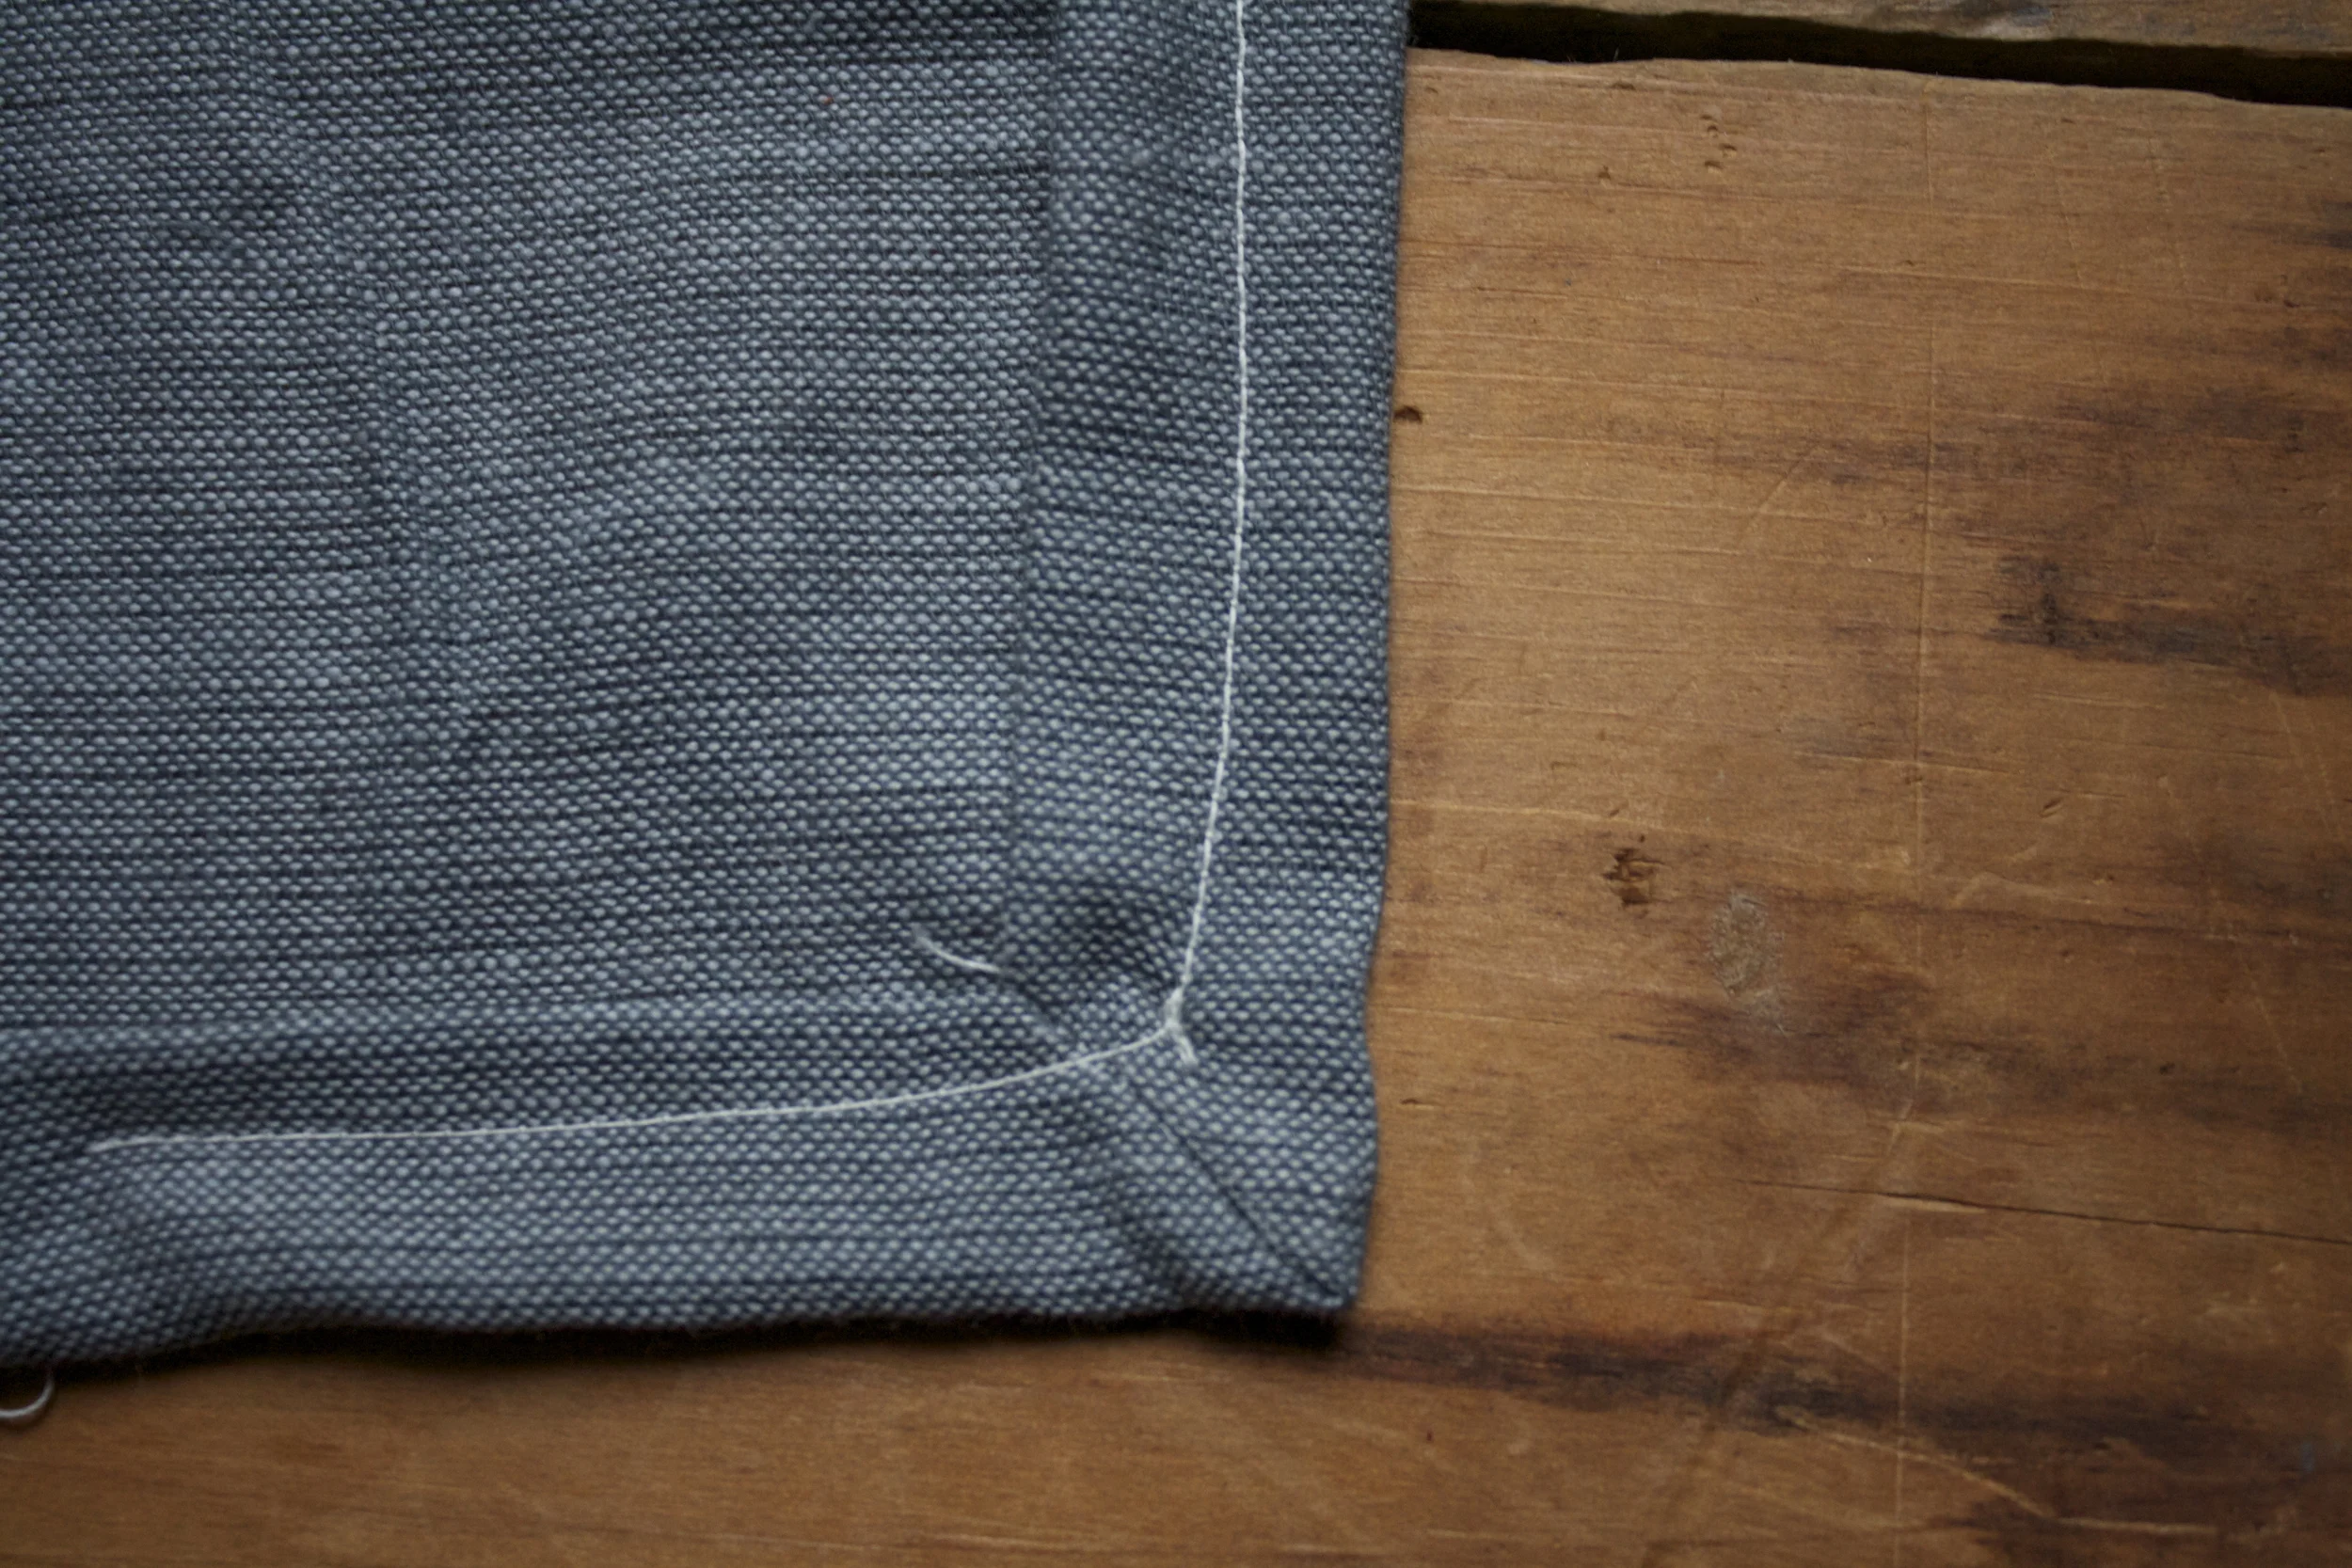
Lastly, run a nice stitch around the border. I went with a simple stitch, but if you are feeling a little zig zag or some other funky-ness your machine can do.. go for it.%u00a0
See, fancy(but not), pretty, made by you. napkins.. and they are so easy!%u00a0
Have fun and if you know me and end up making yourself some, let me know so I don’t end up giving you more napkins for the holidays.
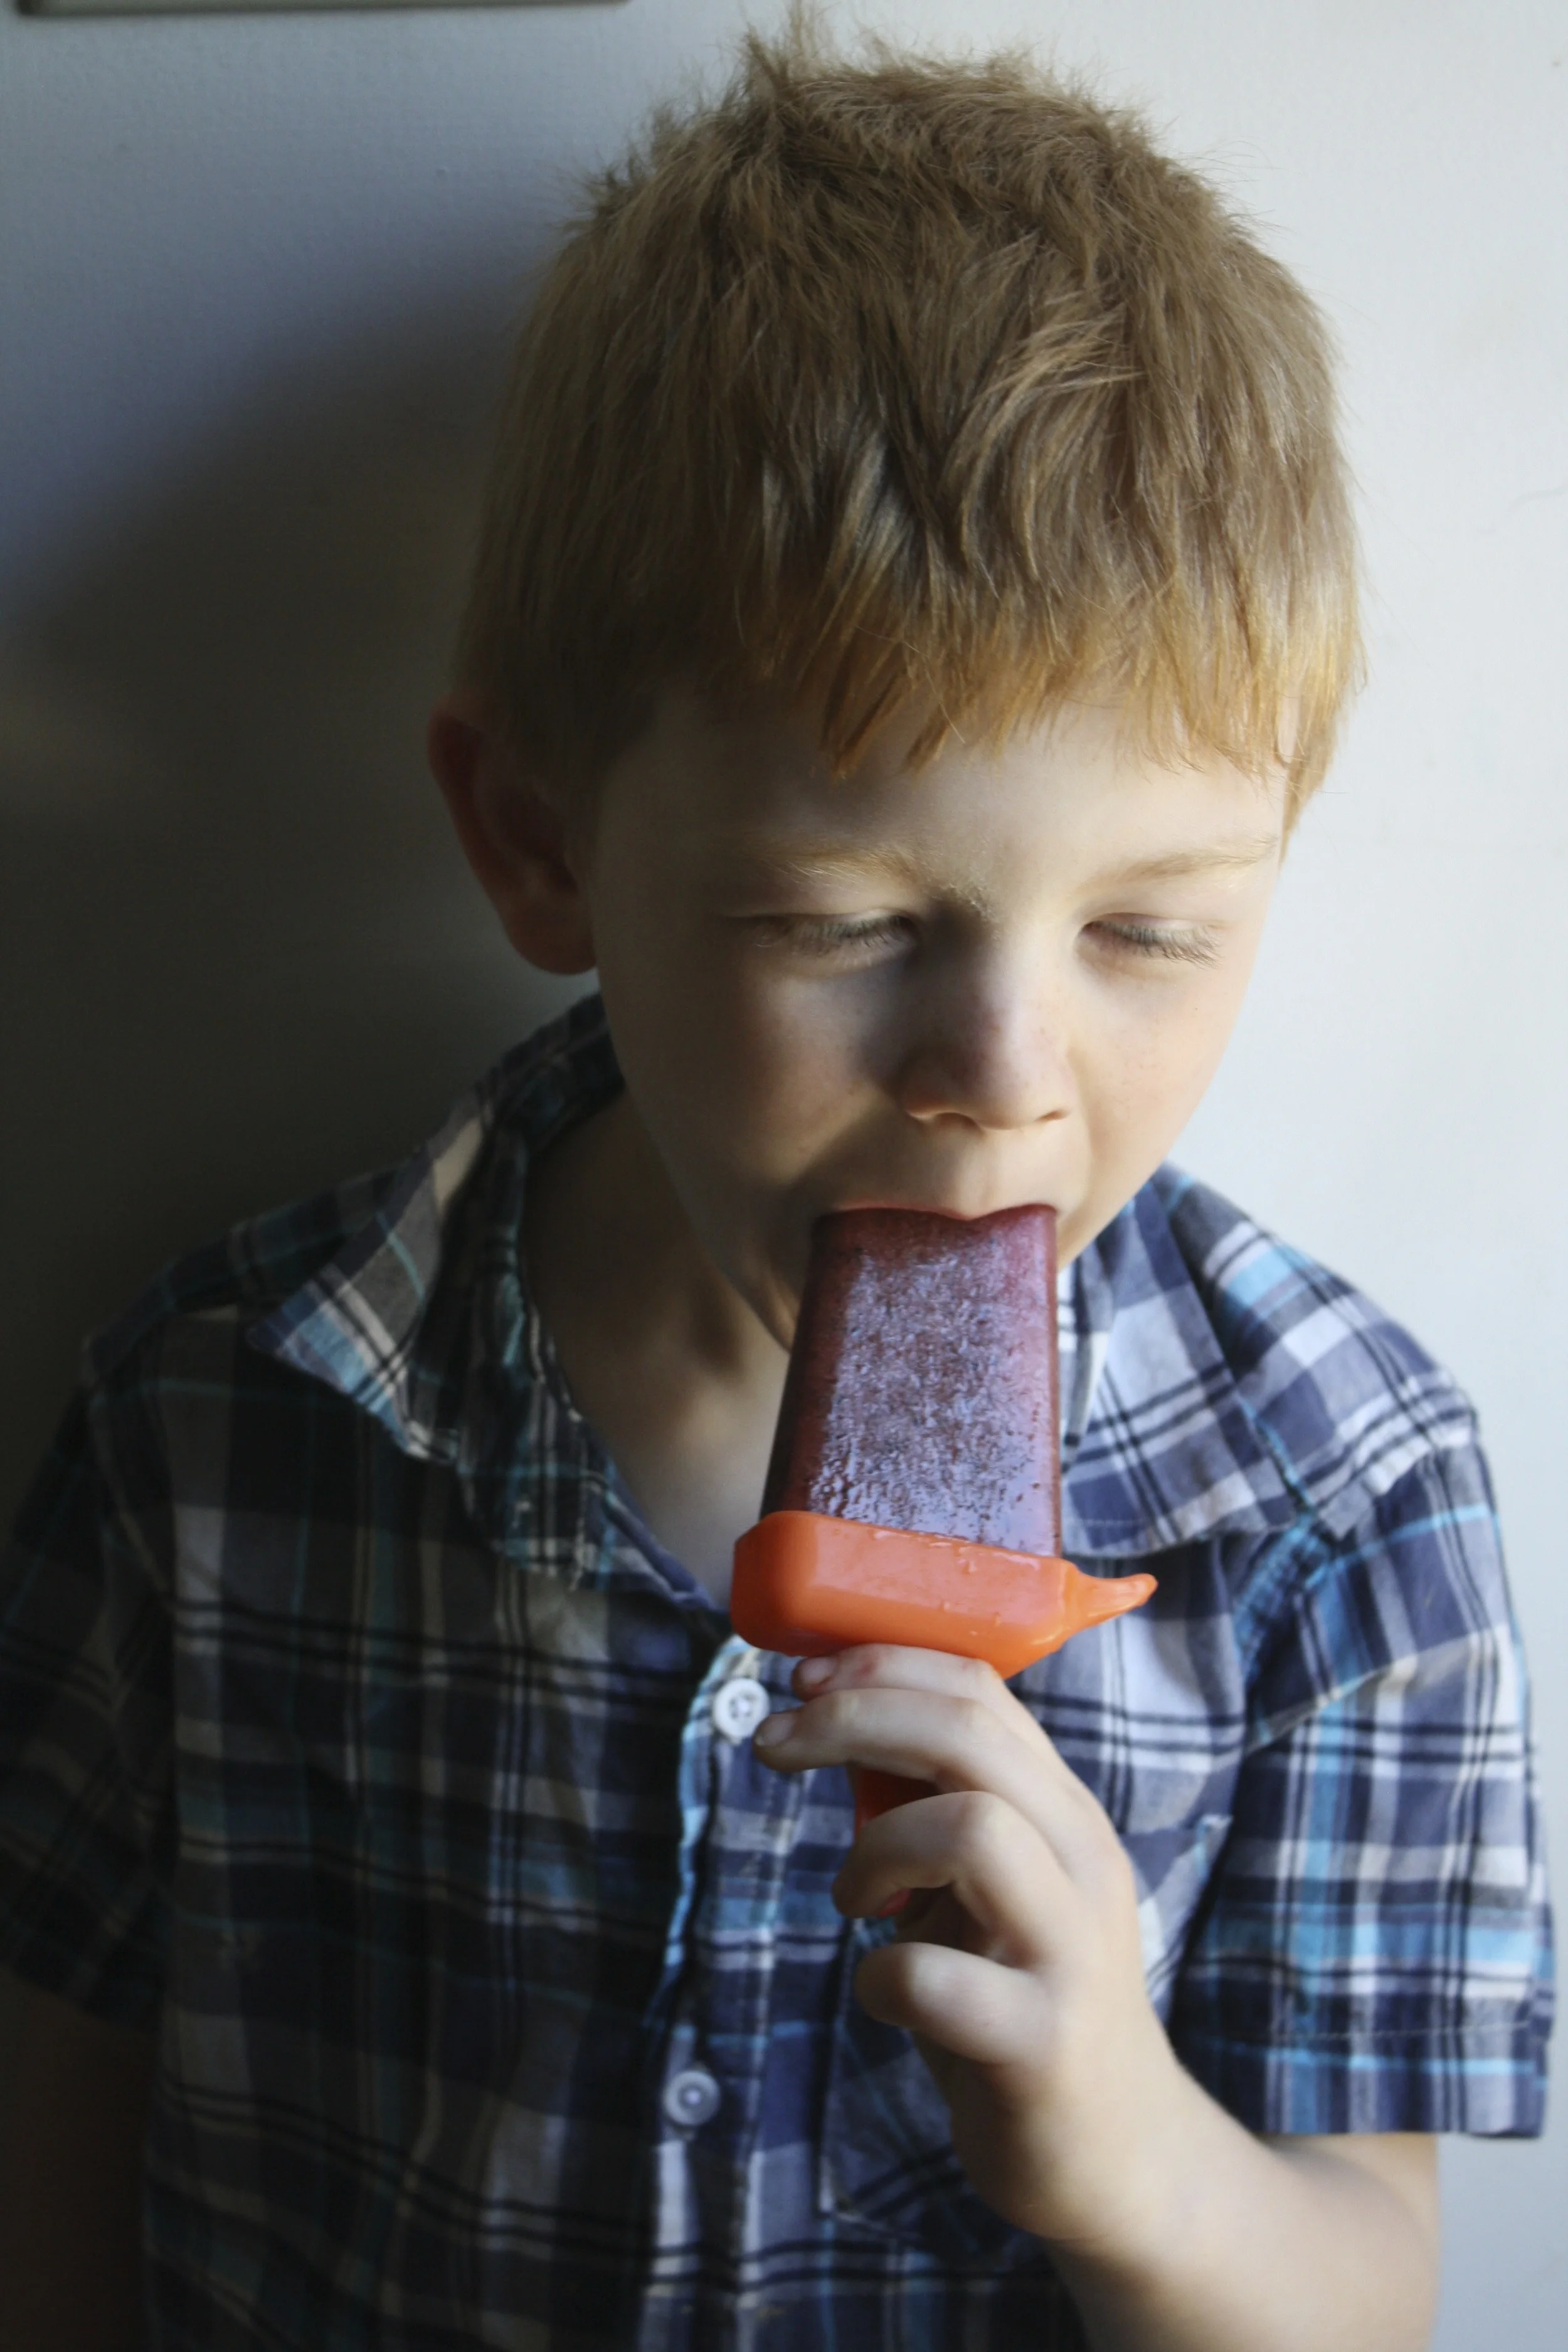
This little guy asked me to make him some%u00a0popsicles, and of course I said yes because, well look at him.%u00a0
So we made a date. A popsicle and playground date to be exact.
For these particular%u00a0pops, I decided to use watermelon, mainly because I had just broken into%u00a0one and once I open a melon, I have a race with myself as to how fast I can consume the in entire%u00a0thing. ( It’s a sick form of watermelon gluttony) But also because%u00a0the little was really really excited to hear that I%u00a0could in fact make%u00a0watermelon popsicles.%u00a0And the other stuff I added because I had it and it all tastes really good together.%u00a0
%u00a0I made the popsicles the day before %u00a0so they would be ready for our date.%u00a0%u00a0He came over, we ate lunch,(peanut butter sandwich and carrot sticks)%u00a0wondered around the neighborhood with the pup,%u00a0and made a quick stop at%u00a0the playground. (we only managed a couple runs on the%u00a0slide %u00a0before it was too hot and%u00a0our sweat had us sticking to the slide%u00a0and it was more of a painful scoot then a glide) We then%u00a0made our way home and rewarded ourselves for a walk well done%u00a0with these%u00a0amazing, super refreshing, and healthy frozen treats that I made just%u00a0for us. While we were eating the popsicles, our conversation turned to food. We talked about%u00a0all the different varieties of popsicle that we could make, and how we could eat them for breakfast, lunch or dinner because they are%u00a0made of only good things and are really healthy (he is really trying to eat healthy)%u00a0%u00a0It was the perfect ending to a fantastic afternoon with a five year old, or any human for that matter…
I would have a popsicle date with this kid every day
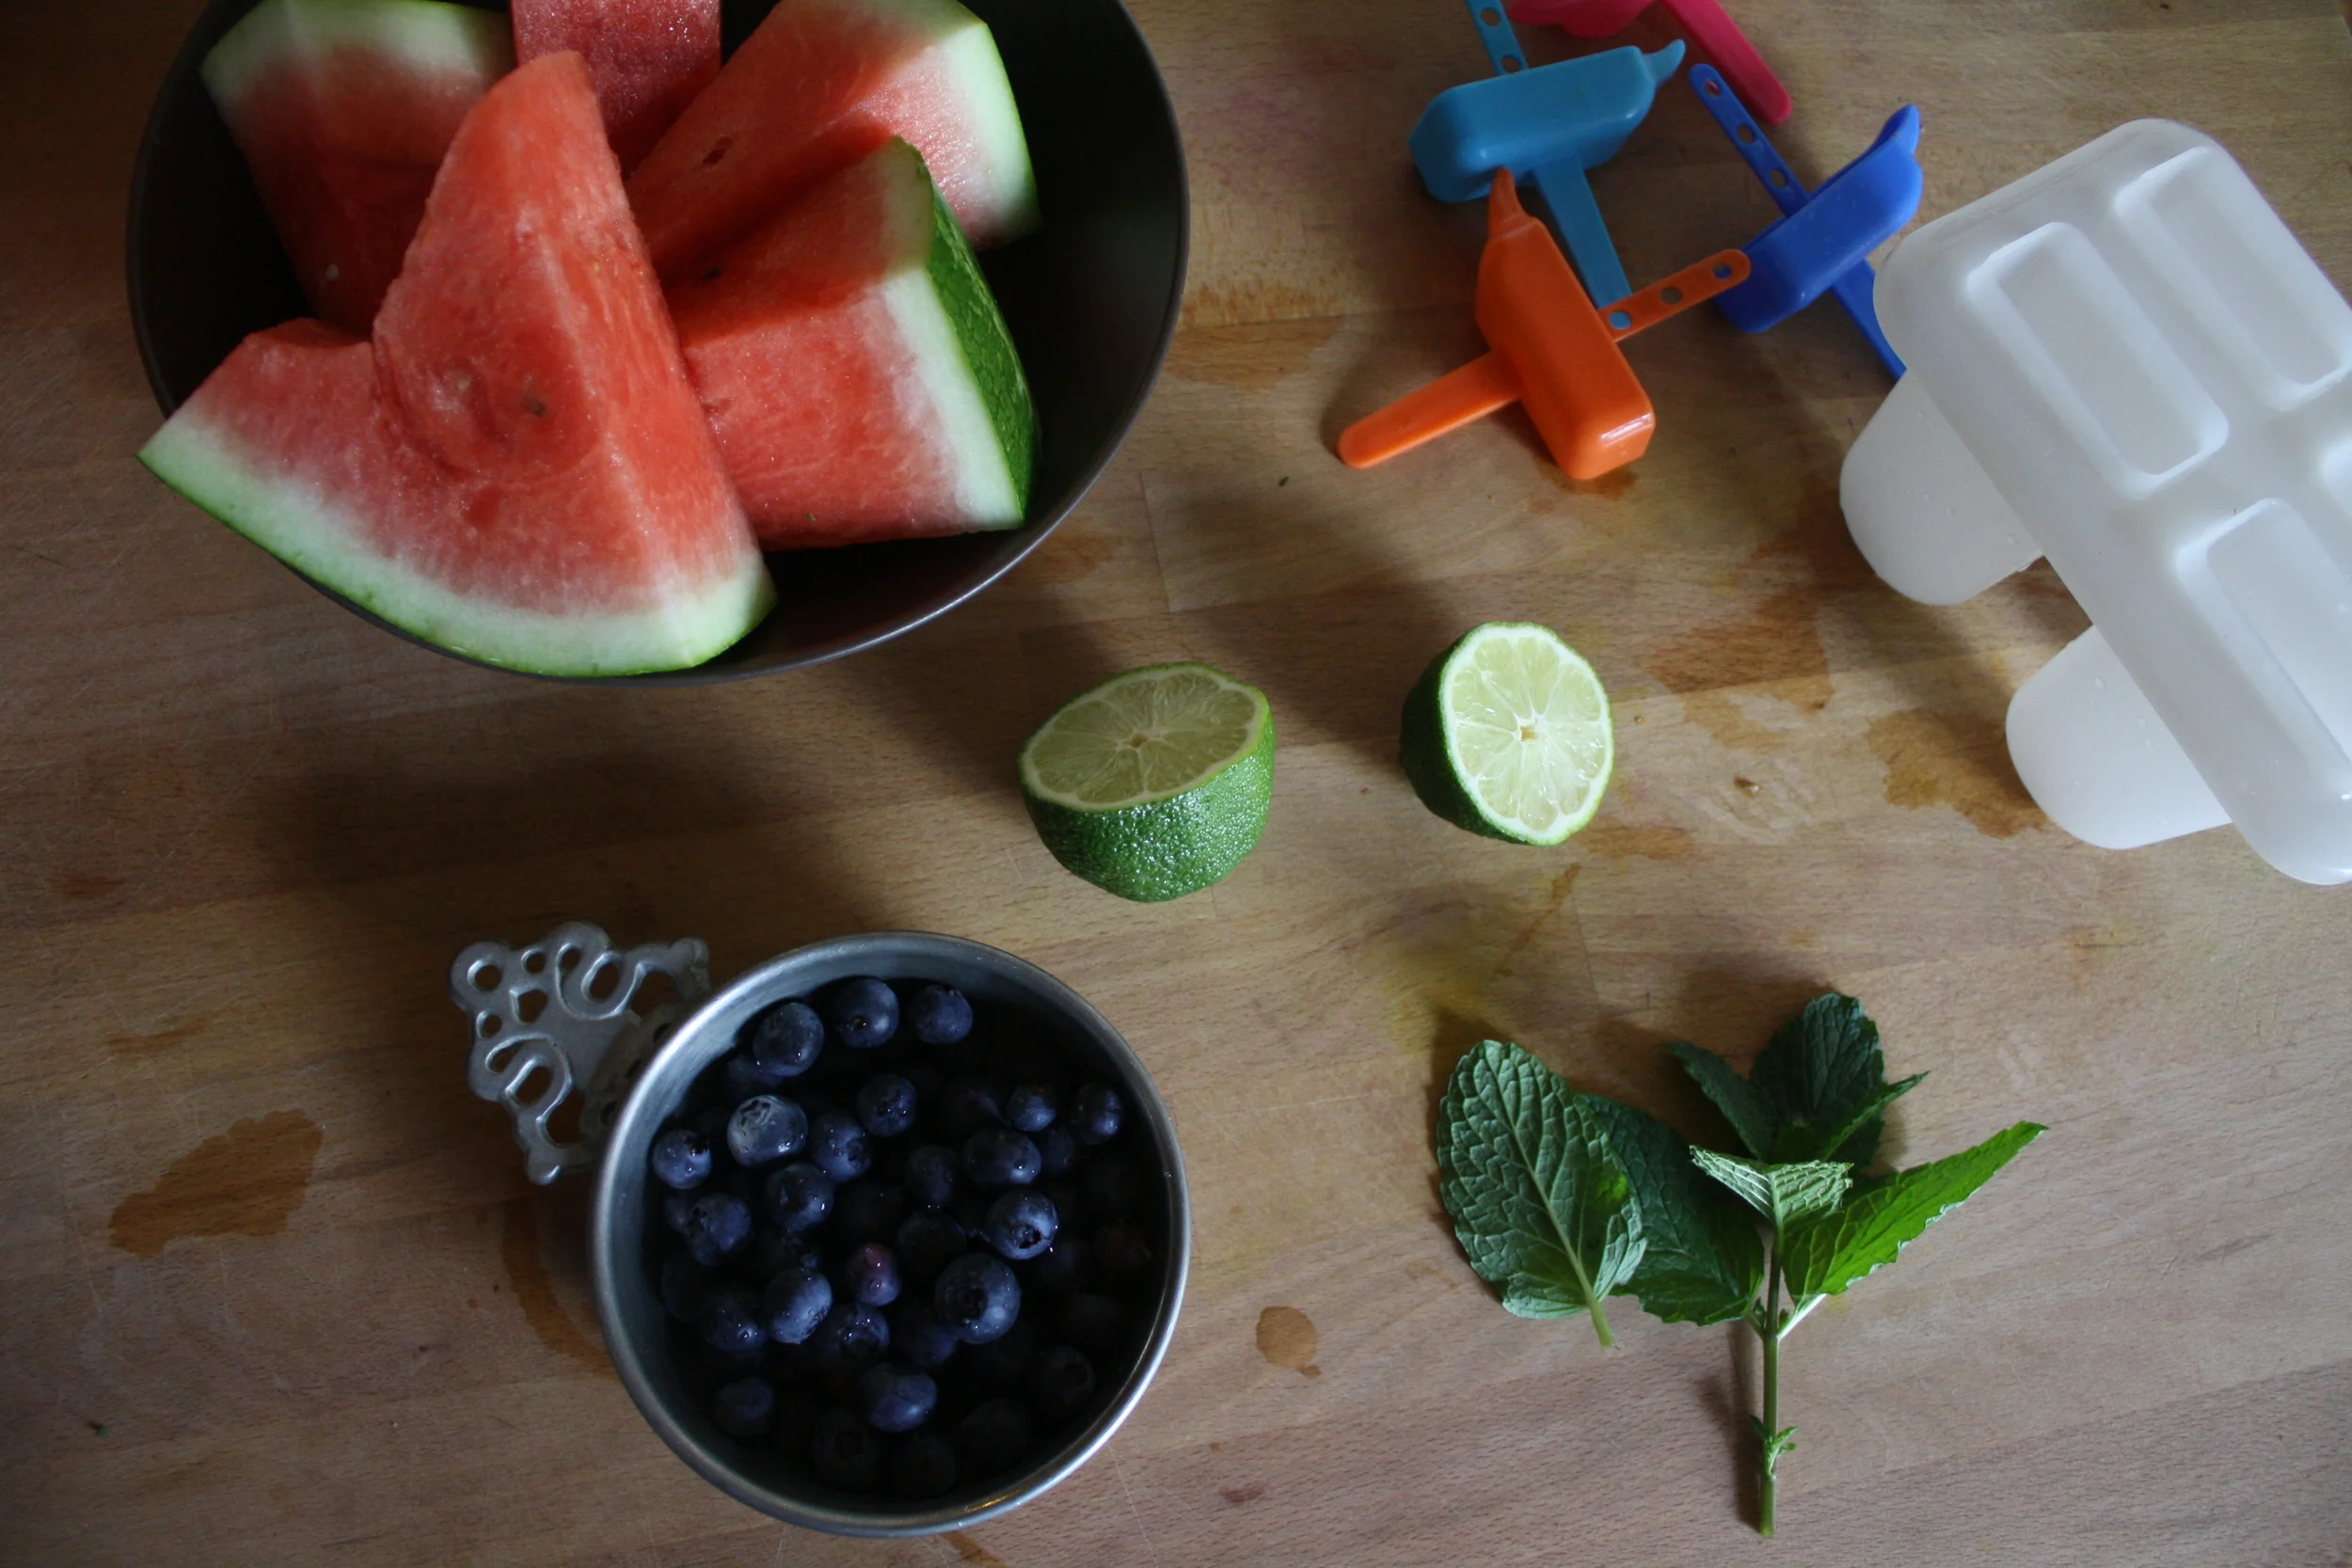
The Stuff. %u00a0Fresh seedless watermelon (make sure to have lots on hand cause you are going to be eating it as you make these), a fresh lime, a handful of blueberries and a sprig of fresh mint. And don’t forget%u00a0%u00a0a mold of some kind that form%u00a0the liquid into a popsicle (if you don’t have a mold, little paper cups work too)
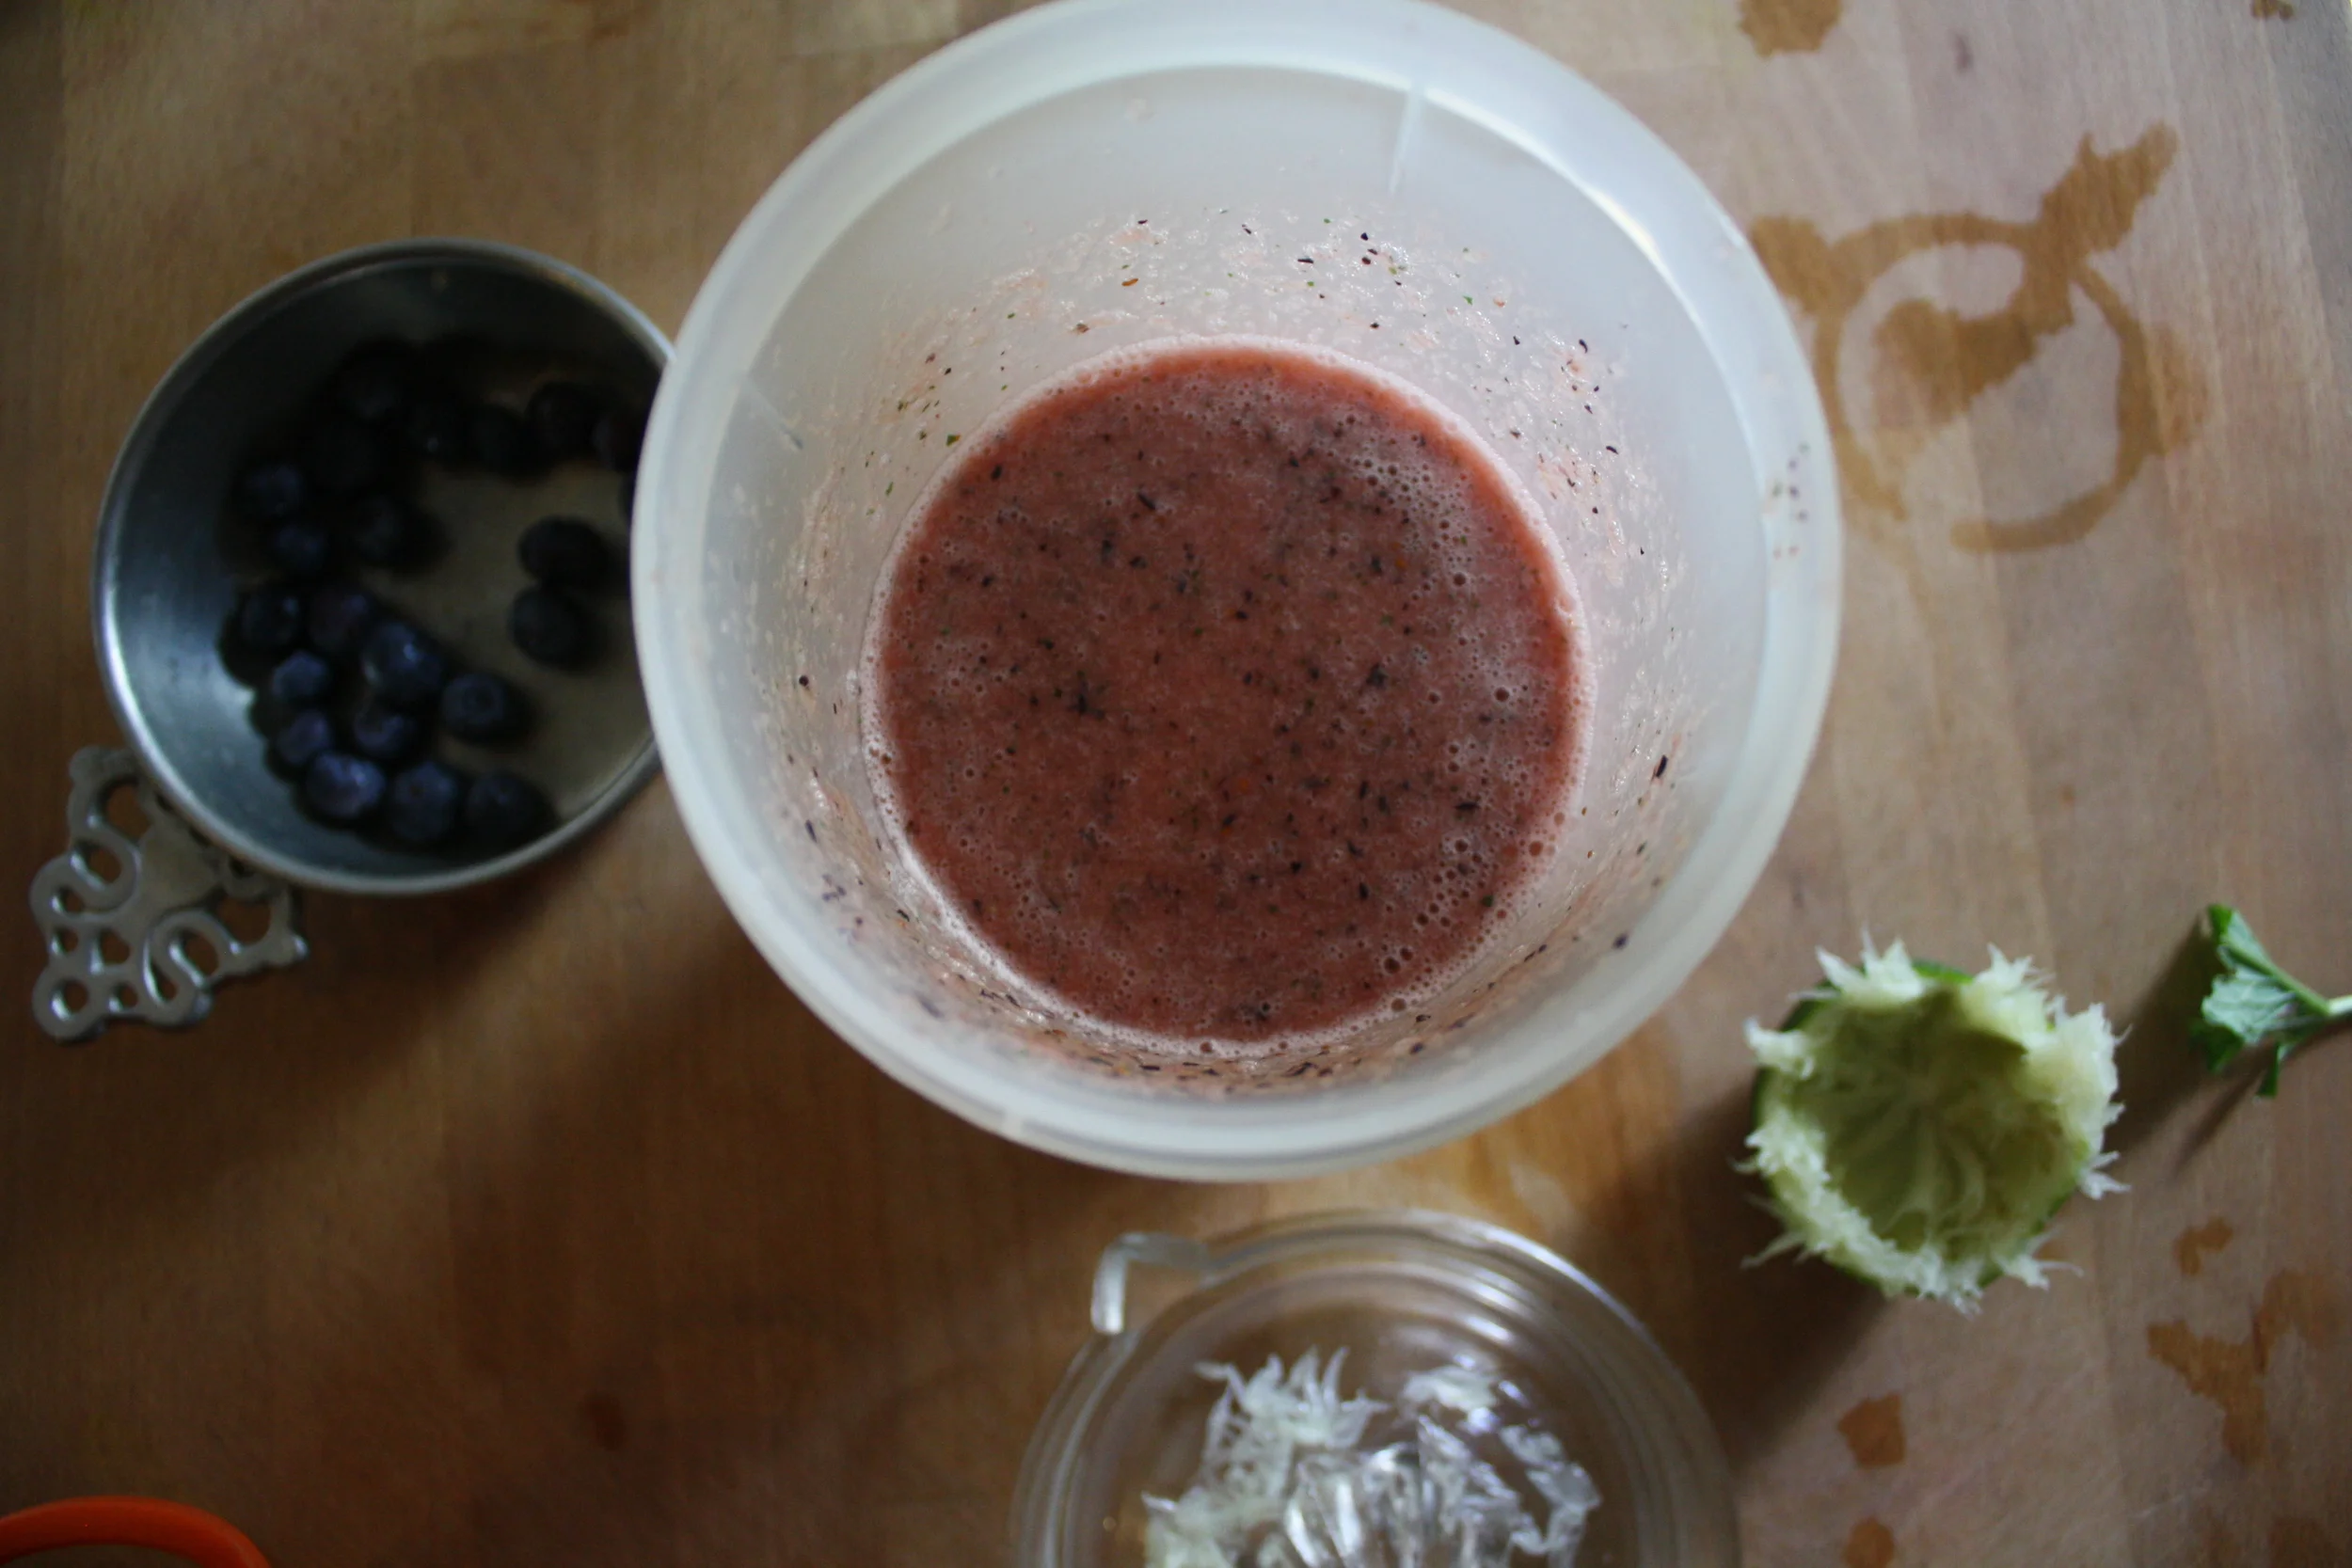
Remove watermelon from rind and cut into small chunks. Juice the lime and add that, the watermelon chunks, the mint and the blueberries to a blender or vessel if using%u00a0a hand blender) and blend everything%u00a0until smooth.%u00a0
Look at how pretty that is.%u00a0%u00a0And so tasty%u2026.%u00a0I am not going to lie and say that I didn’t make a little%u00a0extra to drink, cause I did.
Now pour the puree into your molds to the fill line%u00a0(follow the%u00a0instructions that your molds give you) and place into the freezer.
And yes Shannon, these are in fact, your popsicle molds. Don’t worry, I’ll bring them back soon. (I am thinking some type of booze infused situation)
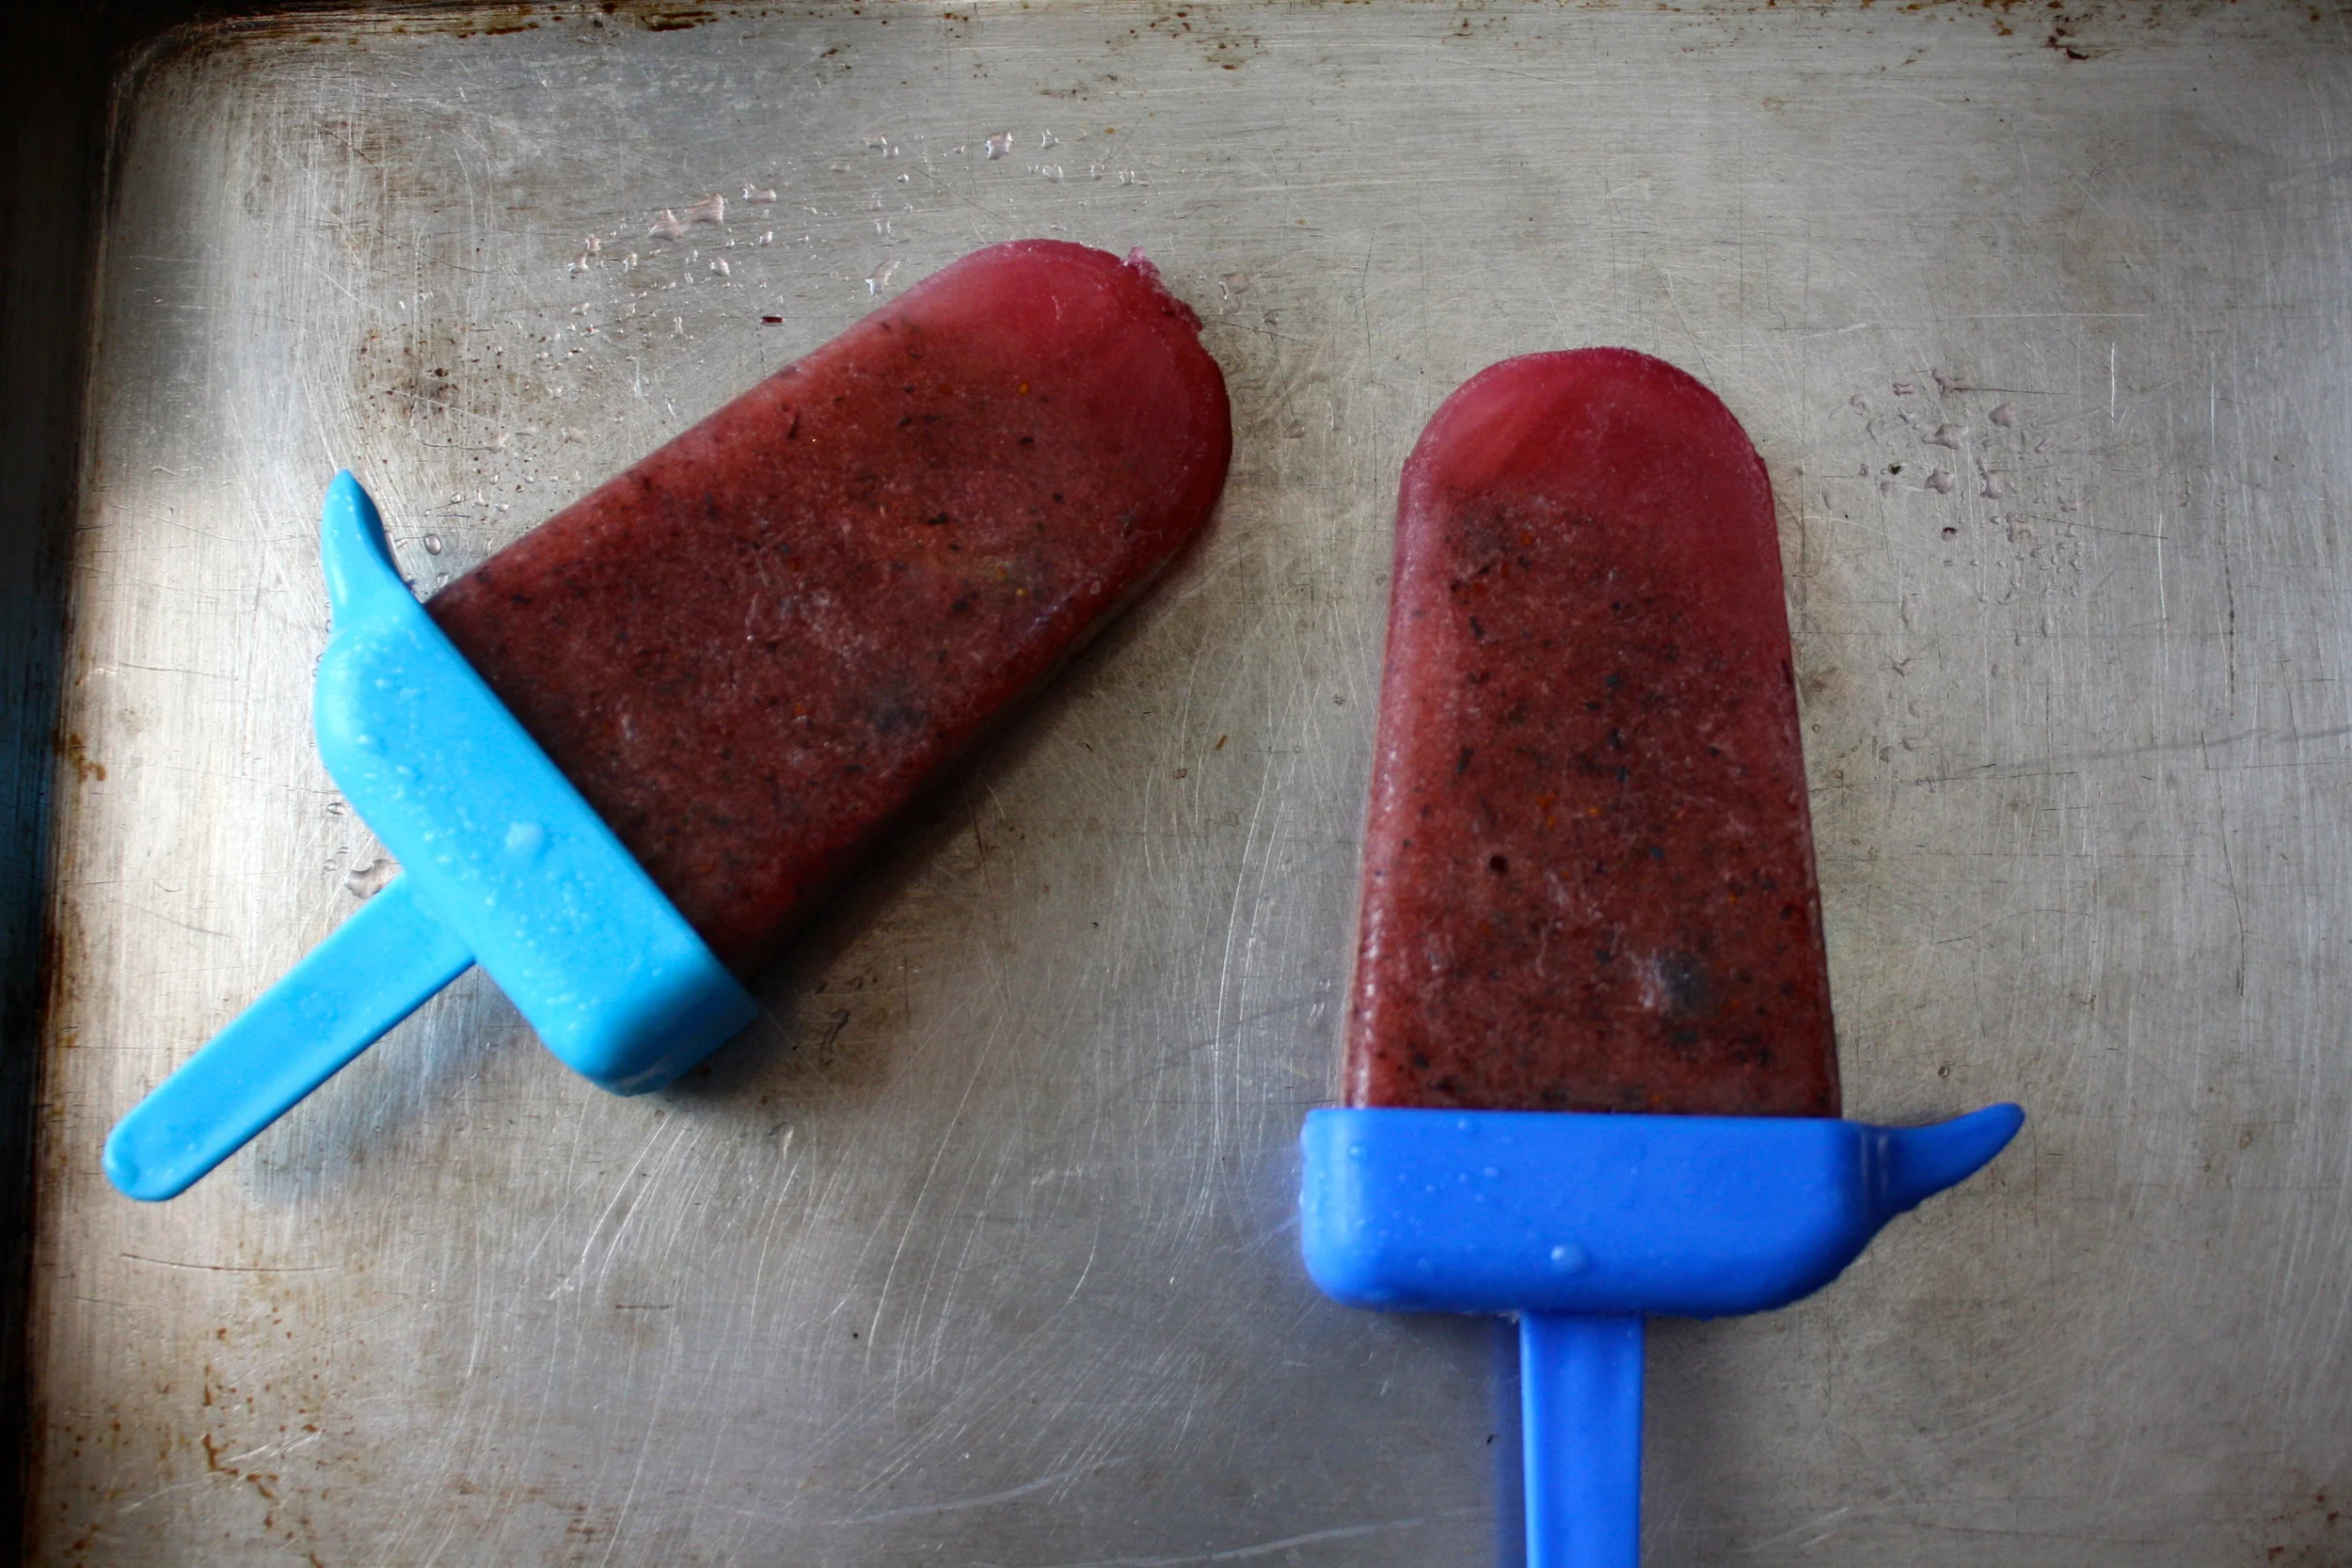
Once the freezer has done its job freezing%u2026 pop those suckers out.. (I let the mold sit on the counter for a few minutes so the popsicle pops out clean)
And heres to%u00a0the best popsicle date ever!
Happy Summer!%u00a0Happy Tuesday!
-C
A big chunk of seedless Watermelon (aboutt 11/2%u00a0cups)
1/2 ish cup of blueberries%u00a0(fresh or frozen)
Juice of 1 lime
a few fresh mint leaves
note. The popsicle mold that I used only needed 2 cups of popsicle juice. If you have a larger mold, just use%u00a0more of everything to get the amount you need
Remove rind from watermelon and add to a blender with the lime juice, mint and blueberries. Blend until eveytthing is pureed%u00a0and mixed all together. Pour liquid into popsicle molds and stick in freezer for at least 4 hours.
When ready to eat%u2026, pop those suckers out of there molds and%u00a0EAT!%u00a0
Last Sunday of August. Phew, we blew through this month fast.
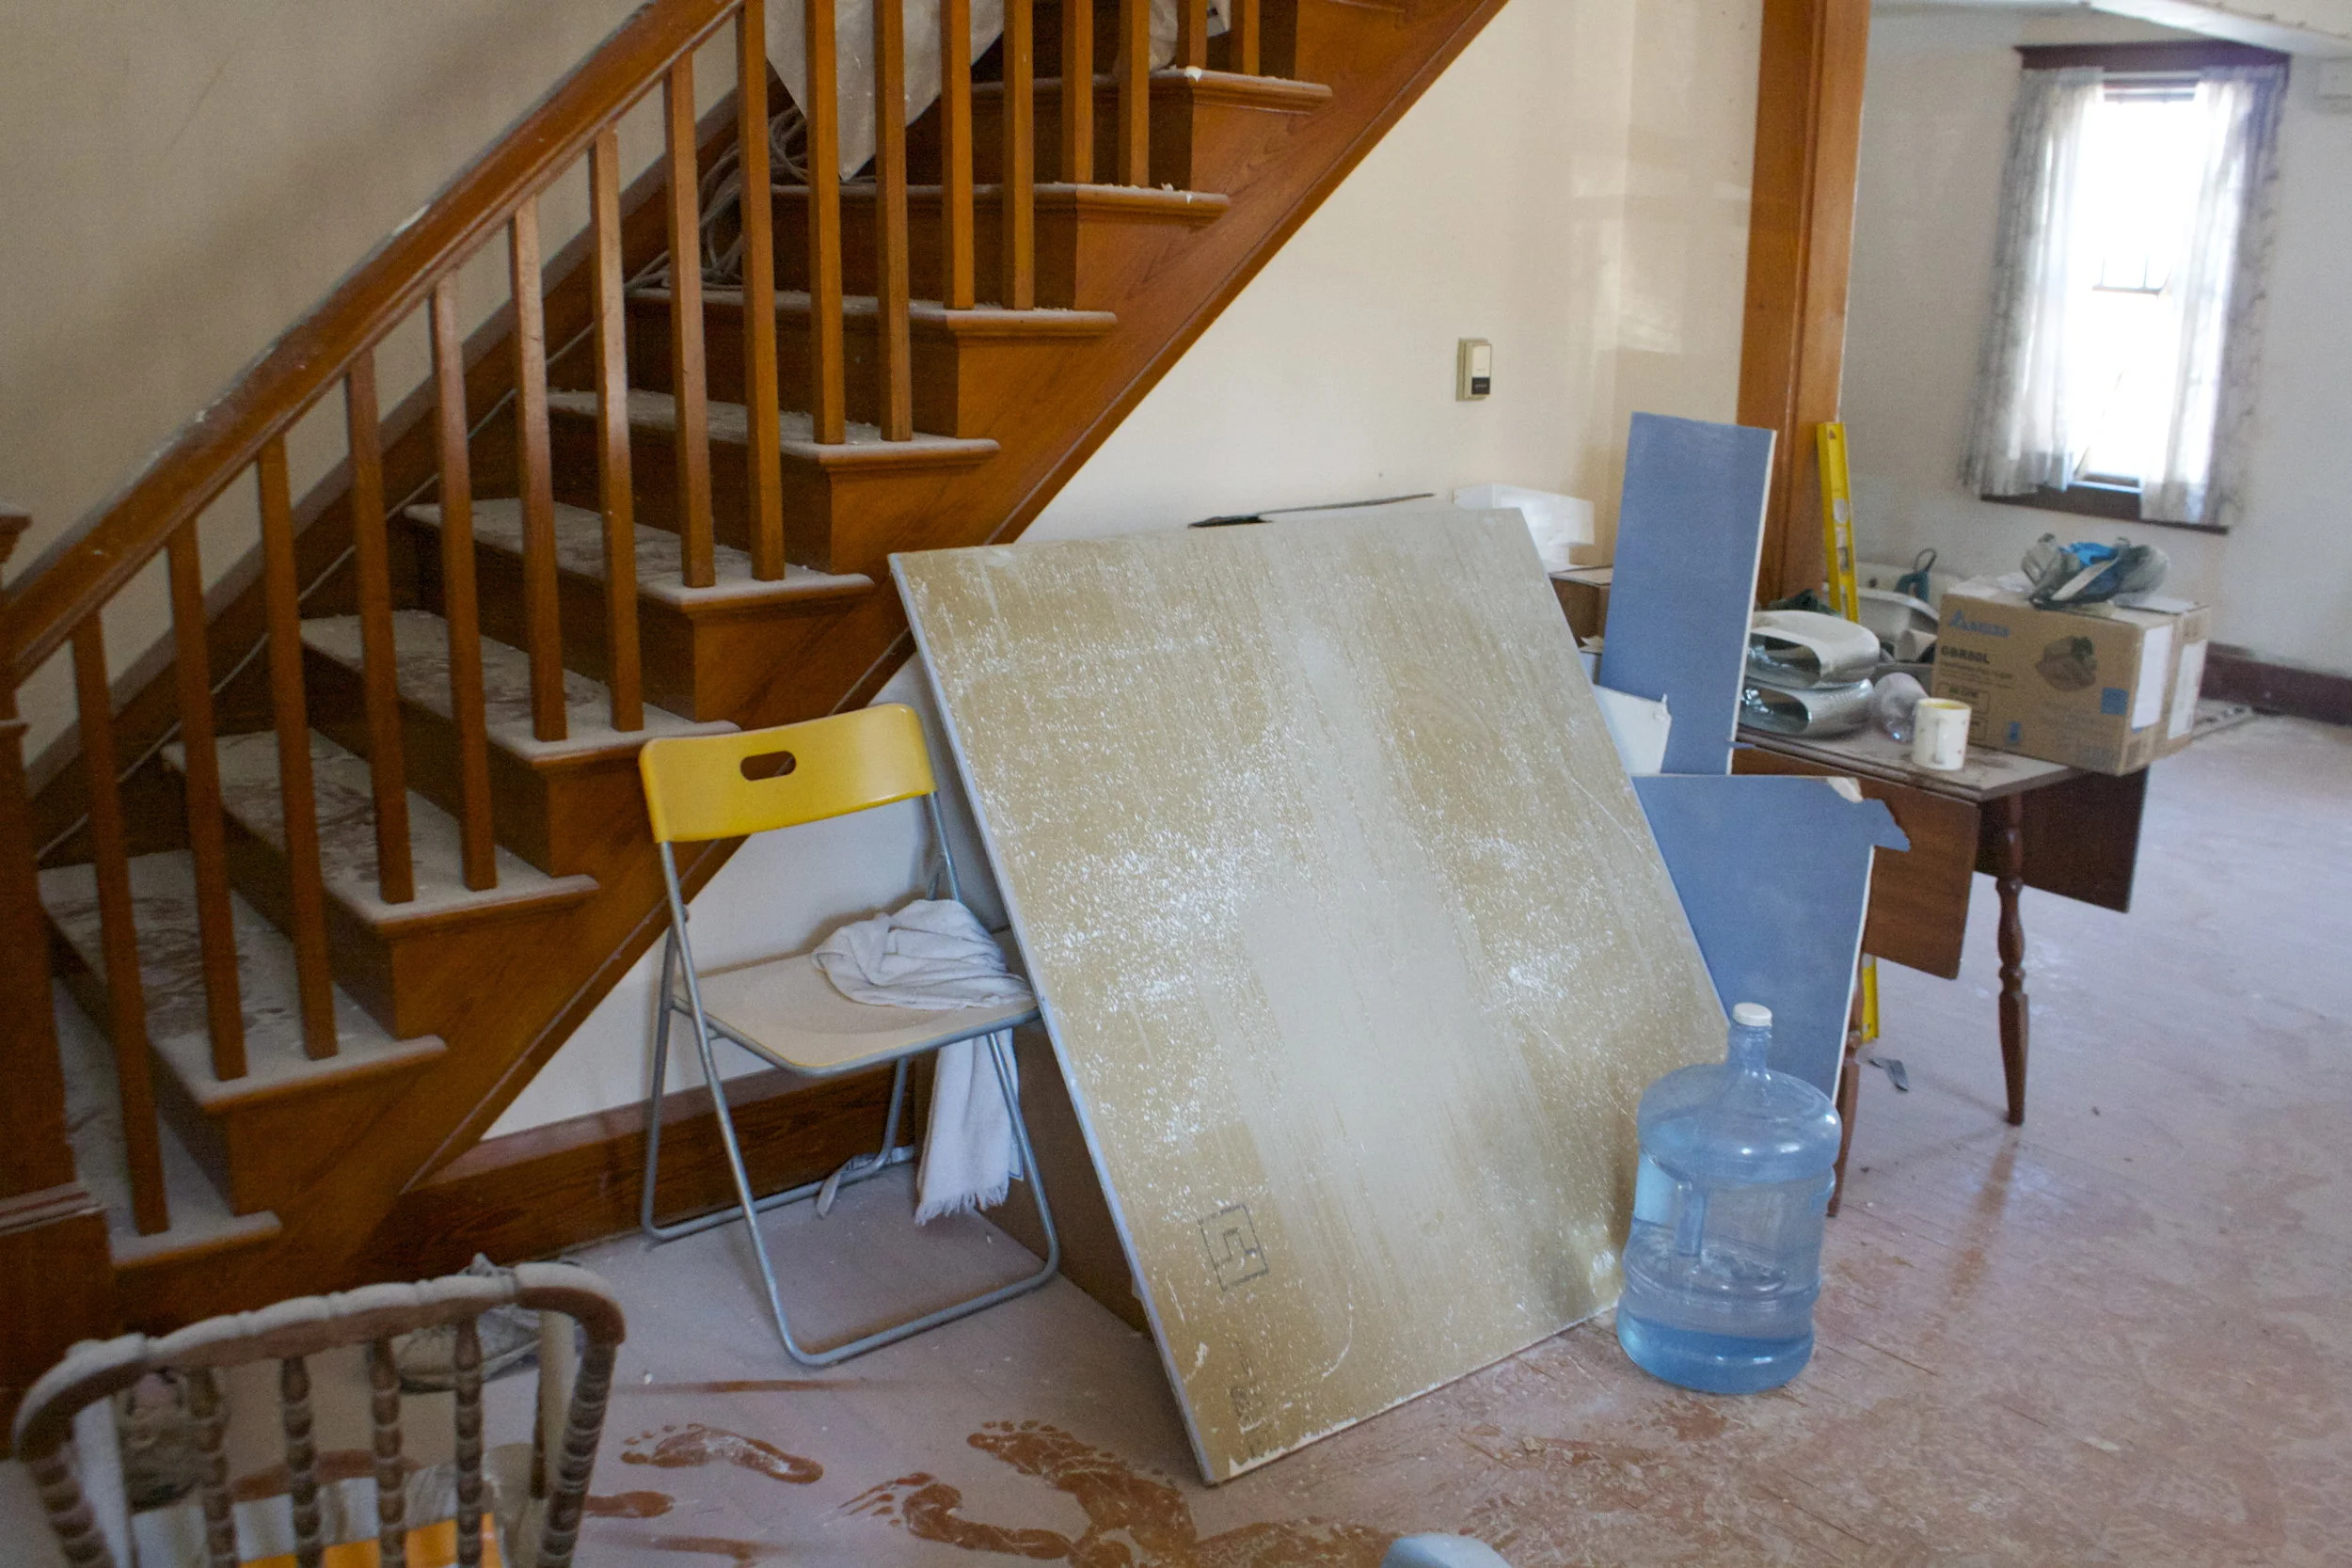
The past week has been one of many accomplishments. Things at the house are moving along with vigor. You can tell a real difference when you walk into the house because the entire first floor is covered in a thick coating of white dust that came from all the sanding upstairs. But hey, now those walls are all primed and ready for paint!
Highlight of the week. I was at the grocery store and there was local, freshly picked, paula red apple totes for sale. It’s officially apple time. I was so happy I bought like 10 pound and eaten half of them. Does this mean I can unpack all my sweaters and flannel sheets? I don’t know about you, but I am more then ready for some cool fall weather and just a change in season. This summer was hard (emotionally ans physically) and I am over it. Bring on the pretty leaves and warm apple cider, just don’t get to cold to fast before we get any heating installed in the house.
Speaking of heating. I think for today the mr is prepping the new boiler and on demand hot water heater at the house.( This guy, man he is like a superhero, he can do it all) l Me, I think I will be spending a good chunk of time just cleaning up dust. And I will make lunch and bring us coffee. I’ll be good at that.
Internet stuff for internet browsing if you want to browse the internet.
-To all those super duper , always obnoxiously happy people. You%u2019re Not Supposed to Be Happy All the Time
–Gorgeous Architectural Watercolors
–Why Do We Love Some Animals But Eat Others?. Think about it.
-We(or me) are picking paint for the house!!!! Going with all white walls but which white(there are thousands!) No-Fail White Paint Colors Edwards Droplet and Seed Pearl are nice.(but weird ass names) What do you think?
–10 INSPIRING CHILDREN%u2019S PLAYSPACES.%u00a0 Am I told old to play on these?
-Elmore Mt. Bread! Back in the early days, the mr and I used to save our pennies to buy fresh baguettes from them. Bread Grains: The Last Frontier In The Locavore Movement
-I am going to live forever! Friendships Might Not Help You Live Longer, But Family Does
–Tiny animals with tiny casts.
-I love this little bungalow
-And because we all love her of some version of her (don’t deny it) Britney Spears has been a pop icon for 20 years. To understand her, you need to understand her hair.
And a few pictures…I kept the camera away most of the week, didn’t want to get it full of dust.
I love me a good home. And lucky for me, my home is really good.
This week has been nothing but a little weird. We pretty much went from travel mode to real life mode within a day and we still have not completely shaken the post travel, kinda weird heady feelings. (I am still waking up at weird times in the night for a second wondering where I am.) I think part of it is that I have been feeling kind of sick ever since we got back and also all the crap we have to deal with is making real life feel a little stressful. (TAXES AAAAHHHHH!!!) But at the same time, everything about being home is fantastic. Lots of family time, lots of puppy and kitty time, and lots of just being home with a somewhat normal routine. I love to travel and see new places, but one of the best part of leaving is the coming back.
And my kitchen. Oh how I have missed it.
So today is a planed chill out and catch up on not catching up day. We must try not to achieve to much other then watching some tv, (I should finish the watching the first season of the fresh prince) reading, drinking more then to much coffee and just taken the day easy. And I might even bake something! We have all next week to be crazy busy.
And I hope the same goes for you too because you know you need it.
Here are some of the things that the internet has shown me this week.
-I NEED to go to this park. Maybe my next trip?
-Vegan Ben and Jerry’s has arrived!
-Love this loft and all of the plants.
-Someday I will have one of these rugs and life will be awesome
-Very much into a white washed workspace
-This House Costs Just $20,000%u2014But It%u2019s Nicer Than Yours
-Watch the rainbow bagels be made. So pretty
-Finally, I have been waiting for this. Two Scientists Have Attempted to Study Resting Bitchface
-Love me some plants
-Is %u2018Vegetable-Forward%u2019 Dining Really the Way We Want to Eat?
and pictures this week were few, so I will leave you with this one (a pre-trip angry kitty on the move)
Summertime is here, which means the days are long and hot, the drinks are cold and sweaty, and for the most part, people seem more relaxed and happy. And it also means we are growing and getting the bestest and freshest produce, including zucchini.
Yes! it’s zucchini time!
You might remember from last summer that I am kind of a zucchini junky. As soon as it starts to grow, I am eating/ hoarding it. I grow it, get tons from my farm share, and will happily take any or all of your extra zucchini that you can’t seem to eat. (I take all veggies for that matter) All of the surfaces in my house are covered with baskets full of zucchini. Open the fridge, a few zucchini will most likely fall out. Want to sit at the table to eat, you are going to have to move the mounds zucchinis to get to it. (No joke) It’s just so dang good and can be made into just about anything.
But with all the recipes with zucchini, all the ways to add it to this or make it into that, I think people tend to forget that zucchini can be just that, zucchini. Yes it is good to noodle with sauce or puree up with lentils, but honestly I think my most favorite way to eat it is just as it is, straight up raw zucchini, maybe a sprinkle of salt and pepper and if I have it on hand, a squeeze of lemon of a splash of vinegar. Nothing fancy (although you can make it look fancy) The best of summer,%u00a0 pure and simple.
So not really a recipe here, just reminder that sometimes simple can be the best and that zucchini can be eat plain and raw and that it’s delicious.
Keep it cool. Keep it simple.
-C
fresh zucchini
salt ,pepper
lemon juice or vinegar (optional)
cut zucchini (if you feel like cutting it) anyway you want. Place on a plate and sprinkle with salt, pepper and a splash of vinegar or lemon juice.
I am obsessed. For real. That might seem like a strong statement for a feeling about a food, but right now, it is truth. I spend more time then I want to admit thinking and drooling over Socca, which is, to those who do not know, the most basic chickpea flour pancake-y bread thing. Chickpea flour, water and salt. Cooked fast under the broiler in a screaming hot skillet. That is it. And it is amazing. Depending on how you make it, it can be creamy and soft or more cracker like with some crisp crunch to it. Either way, it is just so freaking good. Of course, what I am dreaming about regarding it is not just plan basic socca (which I have made 3 times in the past 3 days) but different flavored soccas (I have experimented with lot of seasoning, and they are all A+) with all sorts of different topping and using it in all sorts of different ways. But for now, I wanted to keep basic so we all know how good simplicity is. We will go from here.
There is no stopping me. There is no stopping the socca.
Now to my new favorite food, the socca.
Chickpea flour, salt and water. That is it. Mix it all up.
Batter all smooth and now in need of a rest. Half an hour or up to a day of rest is good.
Now to cook the socca. You need to use something oven safe like cast iron. The trick here is to preheat the skillet while you are preheating the oven. Crank oven to 450 with the skillet in oven and once the oven reaches temp, turn oven over to a high broil. Let the skillet get really hot for another minute or two then remove skillet from oven (carefully!!!) and give it a splash of oil. Don%u2019t preheat the skillet with oil in it or else it will start to smoke and get gross.
Now that you got a nice hot and oiled skillet, grab the rested batter and pour half of it in. Tilt skillet around to coat bottom then stick skillet back into oven under broiler and cook for 4-8minutes. ( It depends on your broilers strength and your preference for blisters)
Out from the broiler. Cooked and slightly blistered. I went easy on this one. The next one got a few more blisters.
2 soccas, one a little thicker then the other. One a little more blistered then the other. Both in my belly.
So many Soccas to come.
So. many. Soccas.
-C
makes two 10 inch soccas
1 cup chickpea flour
1 cup room temperature water
1/2 teaspoon salt
olive oil for pan
Mix chickpea flour, salt and water together into a bowl until smooth. Let mixture rest for at least half an hour or up to a day.
When ready to make the socca, preheat oven to 450 with a 10 inch oven safe skillet (I used cast iron but any oven safe dish would work) in oven.
Once oven reaches temp, turn oven over to broil and place skillet under it for a minute to really heat the skillet. Carefully, with oven mitts, remove hot skillet from oven and brush or pour a smidge of oil into the hot skillet to coat bottom. Pour in half the batter and tilt around until bottom is coated then place skillet back into oven under broiler and cook for 4 -8 minutes or until the socca starts to blister. (it kind of depends on your broiler so keep a close eye on it) Remove from oven and slip socca onto cutting board. Sprinkle with salt and pepper. Drizzle with olive oil if you like. Then all you do is cut and eat.
Left over socca can be stored in fridge and reheated in oven or toaster.
Note. IF you want a slightly thicker socca, use a 8 inch skillet. For a thiner, more cracker like socca, pour in 1/3 of the batter at a time (you will end up with 3 instead of 2)
Spring is here for reals, I think. No, it is here, it has just been a bit raw and maybe a bit more rainy then it really needs to be, but whatever, it is spring and it is good. Things are greener by the day, the temperatures although not exactly warm are still inhabitable and without cause for winter jackets (although I have still been rocking the mittens) and spring veggies are popping up all over. Things are looking good.
So last week I made a pie crust with the intention to make a veggie pot pie and stuck it into the freezer. When the time came to make said pot pie, I forgot to take it out of the freezer so the crust was not meant to be for pot pie (it will probably end up as a rhubarb pie%u2026we shall see). Without pie crust, I wasn%u2019t exactly feeling like I should make a pot pie, but a tart, well yeah, sure. A crispy and chewy crackery crusted thing with almond ricotta a spring veggies because that is where the mind went and what the mr agreed sounded good. (When I make up recipes I just start taking about ingredient and preparations and wait til the mr says %u201cYea, that loud good. I%u2019ll eat that %u201c He usually will say it right away and for anything. Very easy to please or he just doesn%u2019t care%u2026hum? )
And so the tart was made and the tart was eaten in all entirety for dinner by the mr alone. Usually when he eats all of something it means it was one of the really good things. Or he is really really hungry. But he said it was a really good thing. I trust him because I agreed. I got in a few spoonfuls of the almond ricotta mixture and it is really freaking good if I do say so myself (I could eat bowls of almond ricotta all day long).
Anyway, heres to spring and all things that are green and good.
To the tart.
The stuff. Flours (white and white whole wheat), baking powder, and a little salt in the bowl. Water and olive oil, blanched almonds, a lemon, a clove of garlic, asparagus, peas, frozen and thawed spinach, a small red onion, and salt and pepper.
Start with making the crust. Mix the dry together then add in the oil and water to form a dough. Knead dough a minutes until the dough is uniform and place back in bowl and cover. Dough needs a few alone minutes to rest. I can relate to that.
While dough is resting, make the almond ricotta. Almonds, garlic, the juice of the lemon, and a bit of water go into blender. Add in a pinch of salt and pepper too.
Blend until creamy and smooth.
Dump in the spinach and blend, just until combined.
Scoop ricotta into a bowl and mix in the peas. And sure give it another taste but try not to eat it all.
Grab the onion and slice it all nice and thin.
And after the resting time, grab dough and roll it out. Try for a rectangular shape or as rectangular as you can get it, but nice and thin. Thiner is better.
Place rolled out dough onto a baking sheet and poke the bottom with lots of little hole. Take ricotta mixture and spread evenly all over crust, leaving a 1 1/2 border all the way around.
Then top with the asparagus and more onions.
Fold over the edges of the crust, sprinkle with a pinch of salt and pepper, and into the oven it goes to bake.
And then it is baked. And ready to eat (after a few minutes of cooling).
Nothing left but to cut it up and eat it.
Spring. Green. Food.
Things are good.
-C
Makes a 8×12(ish) tart
For the Crust
1/2 cup all purpose flour
1/2 cup white whole wheat (can sub for all purpose)
3 tablespoon oil
1/3 cup room temp water
1/4 teaspoon baking powder
1/2 teaspoon salt
For the Almond Ricotta and Veggies
1/2 cup blanched almonds
1/4- 1/3 cup warm water
1 lemon
1 clove garlic
1/2 teaspoon salt and pepper or more to taste
1/4 cup frozen and thawed spinach squeezed of liquid
9-10 spears of Asparagus
1/4 cup peas (fresh or frozen and thawed)
1 /2 red onion
First make the crust. Whisk together the flours, salt, and baking soda. Add in the oil and water and mix until a dough forms. Form dough into a ball and knead for minute or two on counter then place dough back into the bowl and cover. The dough needs to rest for 10-15 minutes.
While dough is resting, make the almond ricotta. Place almonds, garlic, and juice of lemon into a blender. Start blending and add in the lesser amount of water, adding a little more until the stuff all starts to blend. Blend on high for a minute or two until the mixture is nice and creamy. Season with salt and pepper, blend a second to mix then add in the squeezed out spinach. Blend until mix together then dump or scoop the mixture into a bowl and mix in the peas. Then thinly slice up the onion.
Preheat the oven to 450
After doughs little rest, lightly flour a counter and roll it out, thin as you can, in a rectangular shape. Try for at least 12in x 16in. The rectangle doesn%u2019t need to be perfect. Rough is good.
Place the rolled out crust onto a baking. Take a fork and dock the surface (poke holes into it to prevent air bubbles). Take the ricotta and pea mixture and spread evenly on crust, leaving about a 1 1/2 inch border all the way around. Add a layer of sliced red onion and then take asparagus (trim off woody ends) and either lay on whole or break in half and lay on. Add more onions on top. Fold the border of the crust over the top. Sprinkle the whole thing with pepper and place into the hot oven.
Bake for 22-25 minutes or until the crust becomes a nice golden brown. Remove and let cool a few minutes
And then cut up and eat. Right away or at room temperature. Or some now and some later. All up you you.
Store left over in fridge in air tight container for up to a few days. the crust will not be crispy but more chewy. Can stick it back in oven for a few minutes to crisp it up.
Barb has been bugging me for a few months to make her pierogi and I keep telling her I will. But for some reason I just kept forgetting and ever time she came over for dinner I would just end up making her lentils . I make lentils for people when I care about them because lentils are perfect and I always figure she could use the nutrients. But finally, FINALLY, I remembered and figured it was about time. Time for Barb to get her pierogi. I got the ingredients, made up a plan, and went about making them thinking she was coming over for dinner. But guess what. She didn’t come over. After all that, she decided it was better for her to go to her classes and then go to her shift at work, that it was not a good idea to skip out on all that just because I decided to finally make her pierogi. Well whatever I guess.
And full disclouse, I don%u2019t think I made actual plans with her for the particular day that I made these pieorgi. I might have just assumed she was coming over%u2026. So maybe my bad. Good thing these things can be made ahead and cooked whenever. So I saved her half for whenever she does come over (today I think). I did make them for her after all.
Anyway. Pierogi. Pretty much a stuffed ravioli I filled these with the potato, chickpea, and onion mixture, tossed a little dill in for the hell of it, and there they were. The mr got the first half, covered in cashew cream. But I bet these would be equally fantastic with marinara sauce. Or ketchup? I could see that if you are into that sort of thing. Ha.
Also have to note. I keep wanting to write pierogies but I think that is wrong. Pierogi is the plural for pierog.. I think.
To the pierogi.
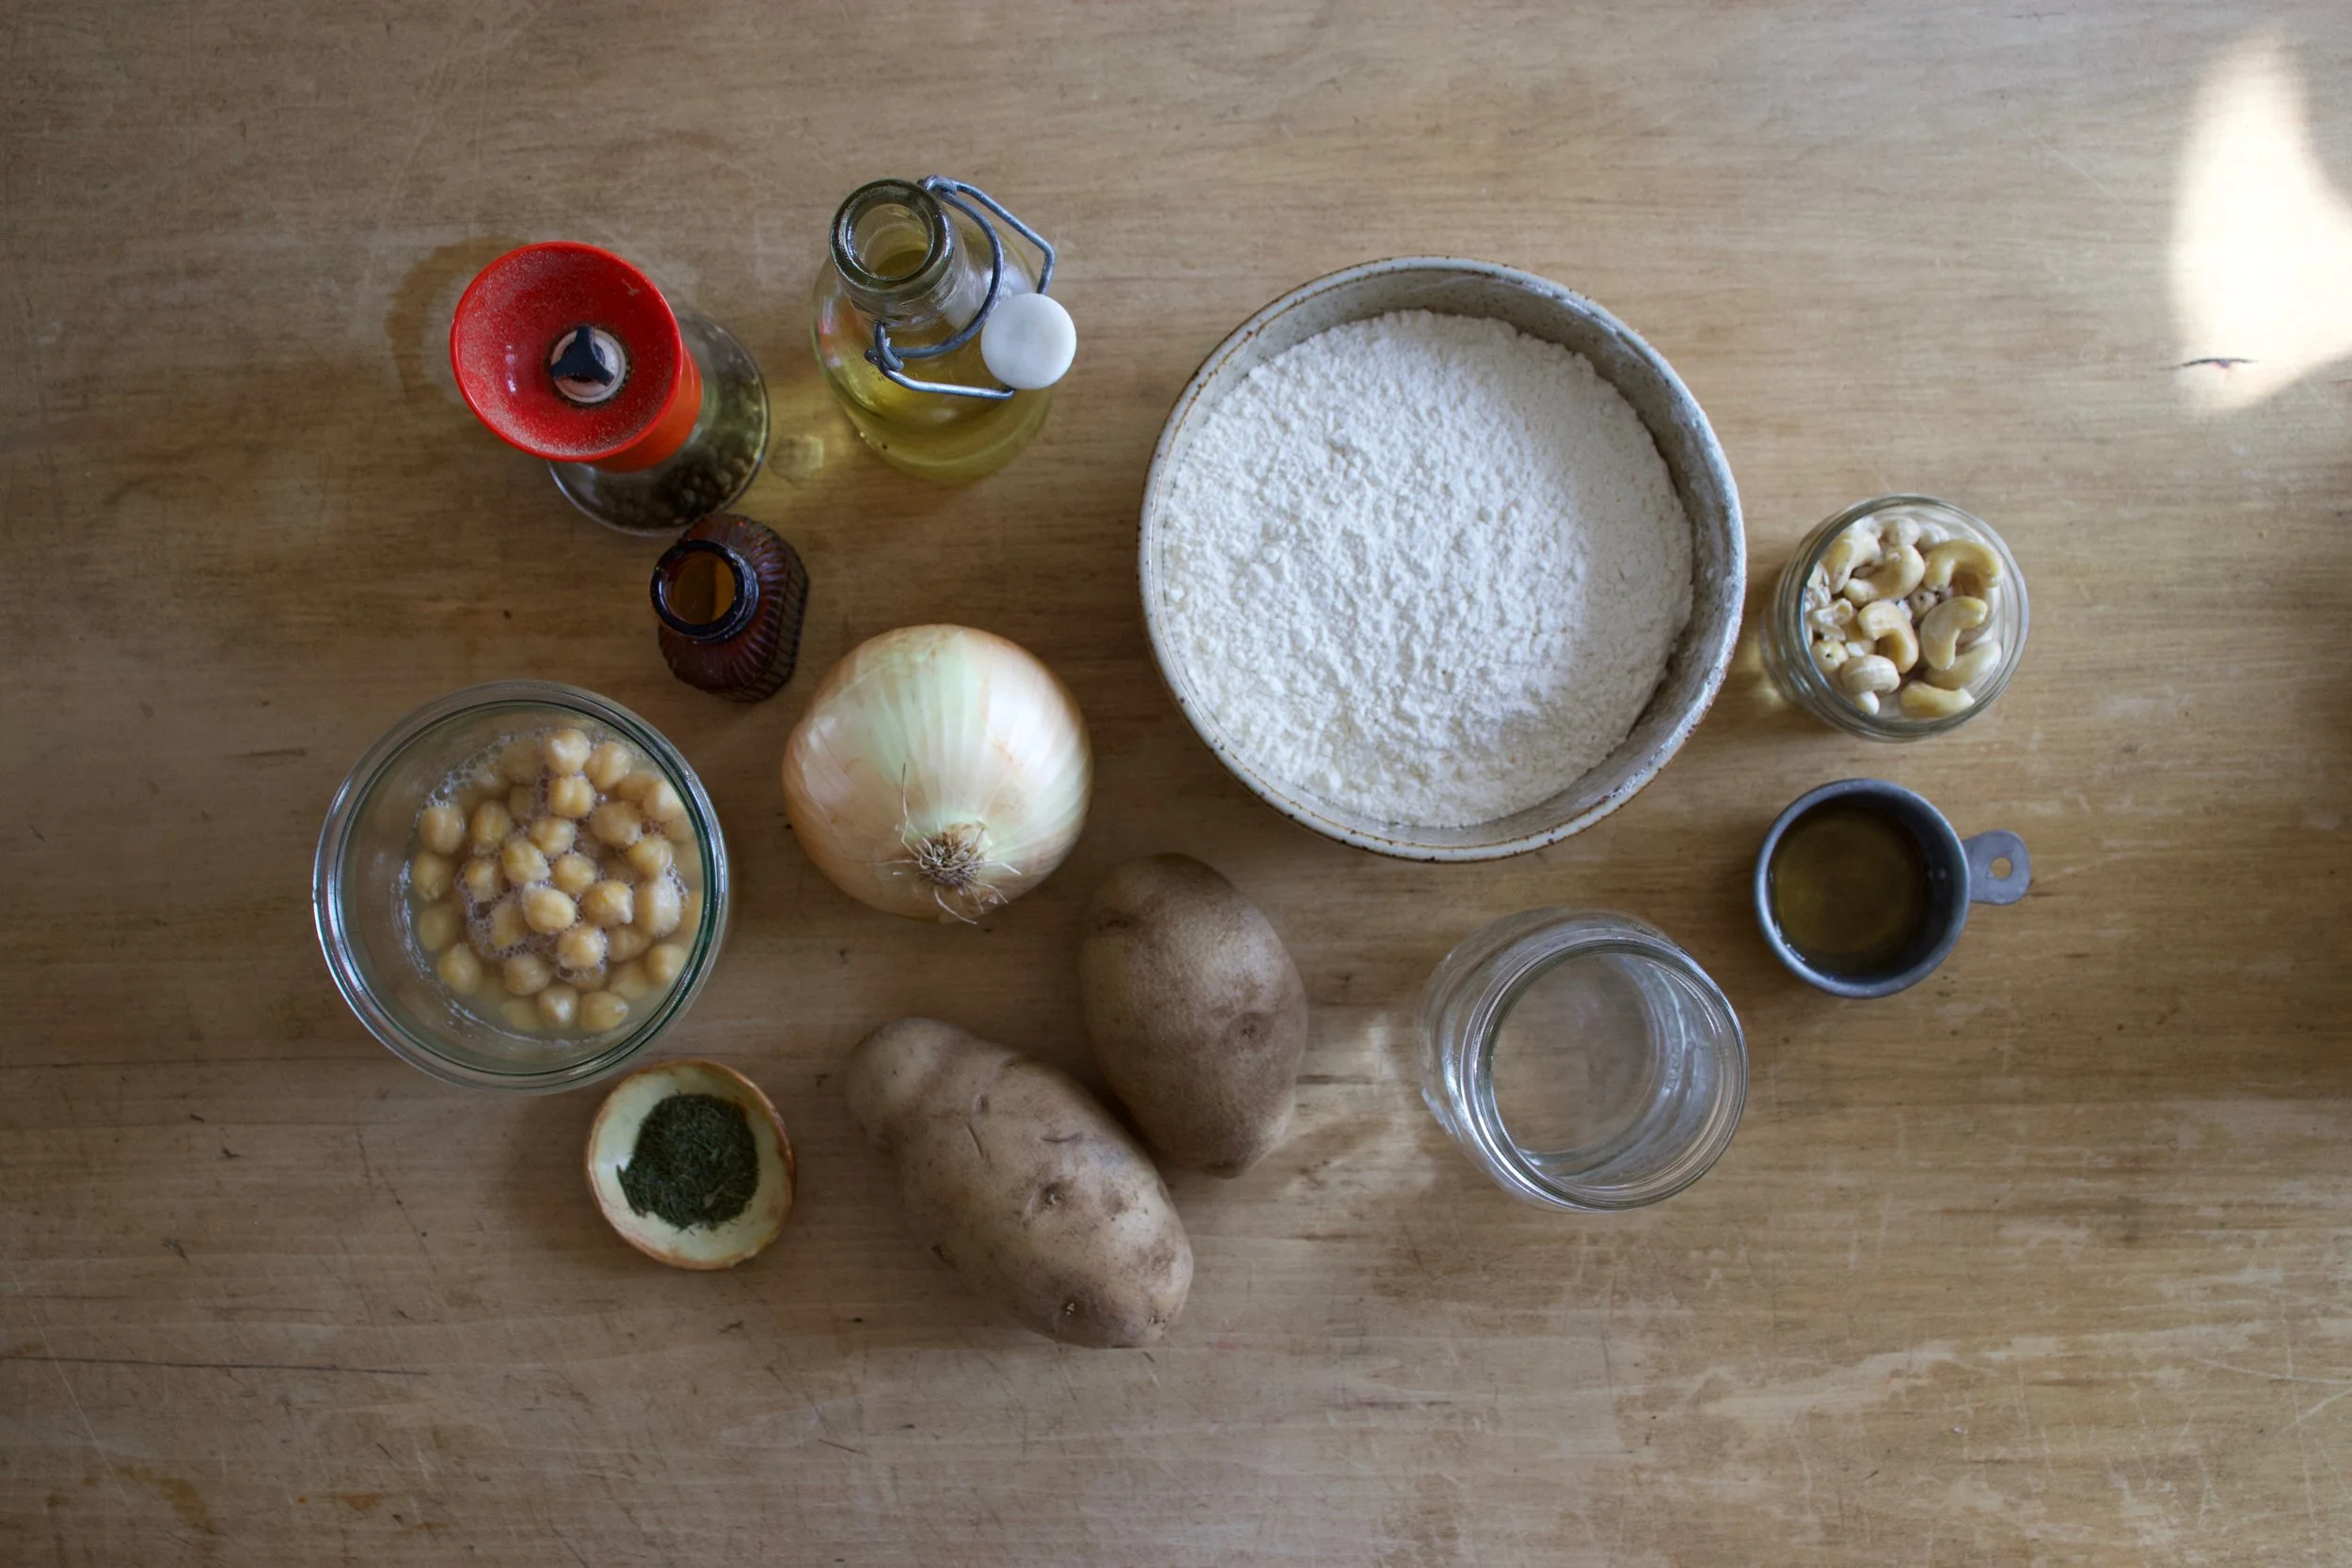
The stuff. Flour, oil, salt and pepper. Cooked chickpeas, a couple russet potatoes, a big onion, some dried dill (optional), warm water, soaked cashews, and a little red wine vinegar.
First make the dough. Flout, salt, water, and oil get mixed together until la shaggy dough is formed. Dump onto a floured surface ans give ut a good knead for a minute until lit comes together into a nice ball. Place dough back into the bowl (clean it out), cover it with a towel, and set aside to let the dough have little rest.
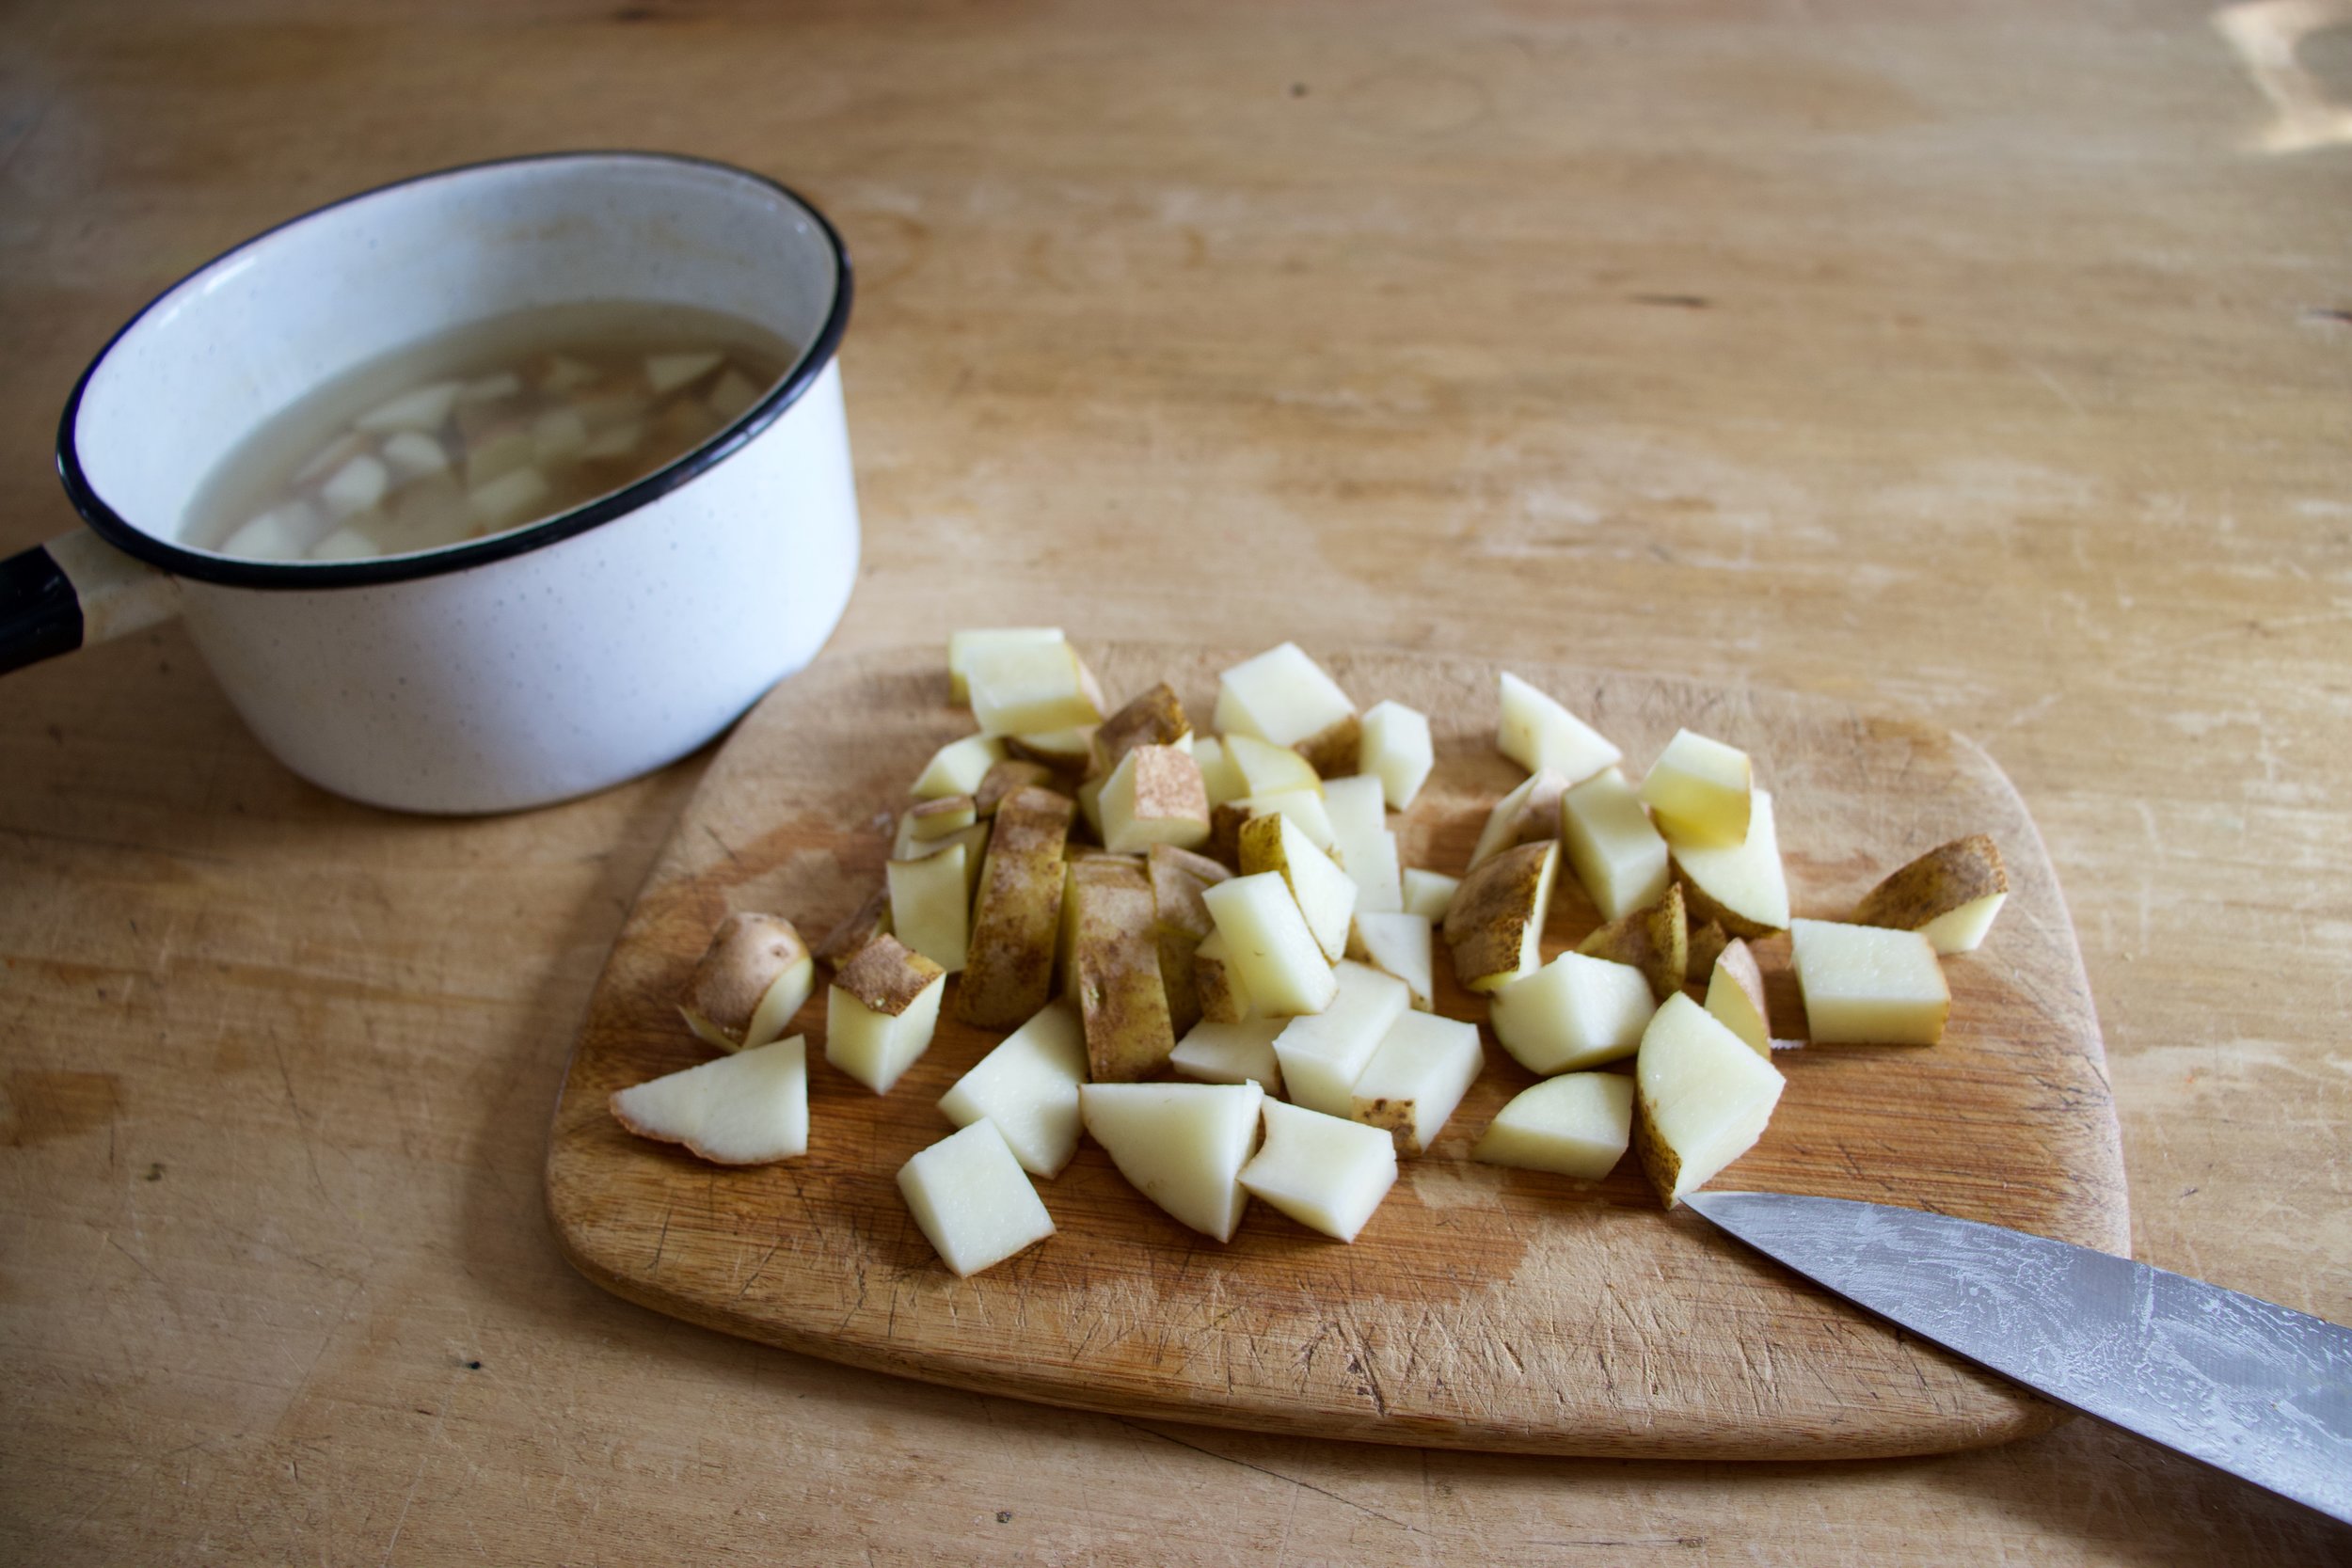
Meanwhile get the potatoes boiling. You are more then welcome to peel your potatoes but I don%u2019t. Chop the potatoes into small pieces, dump into a pot of cold water and cook them (boil until fork tender)
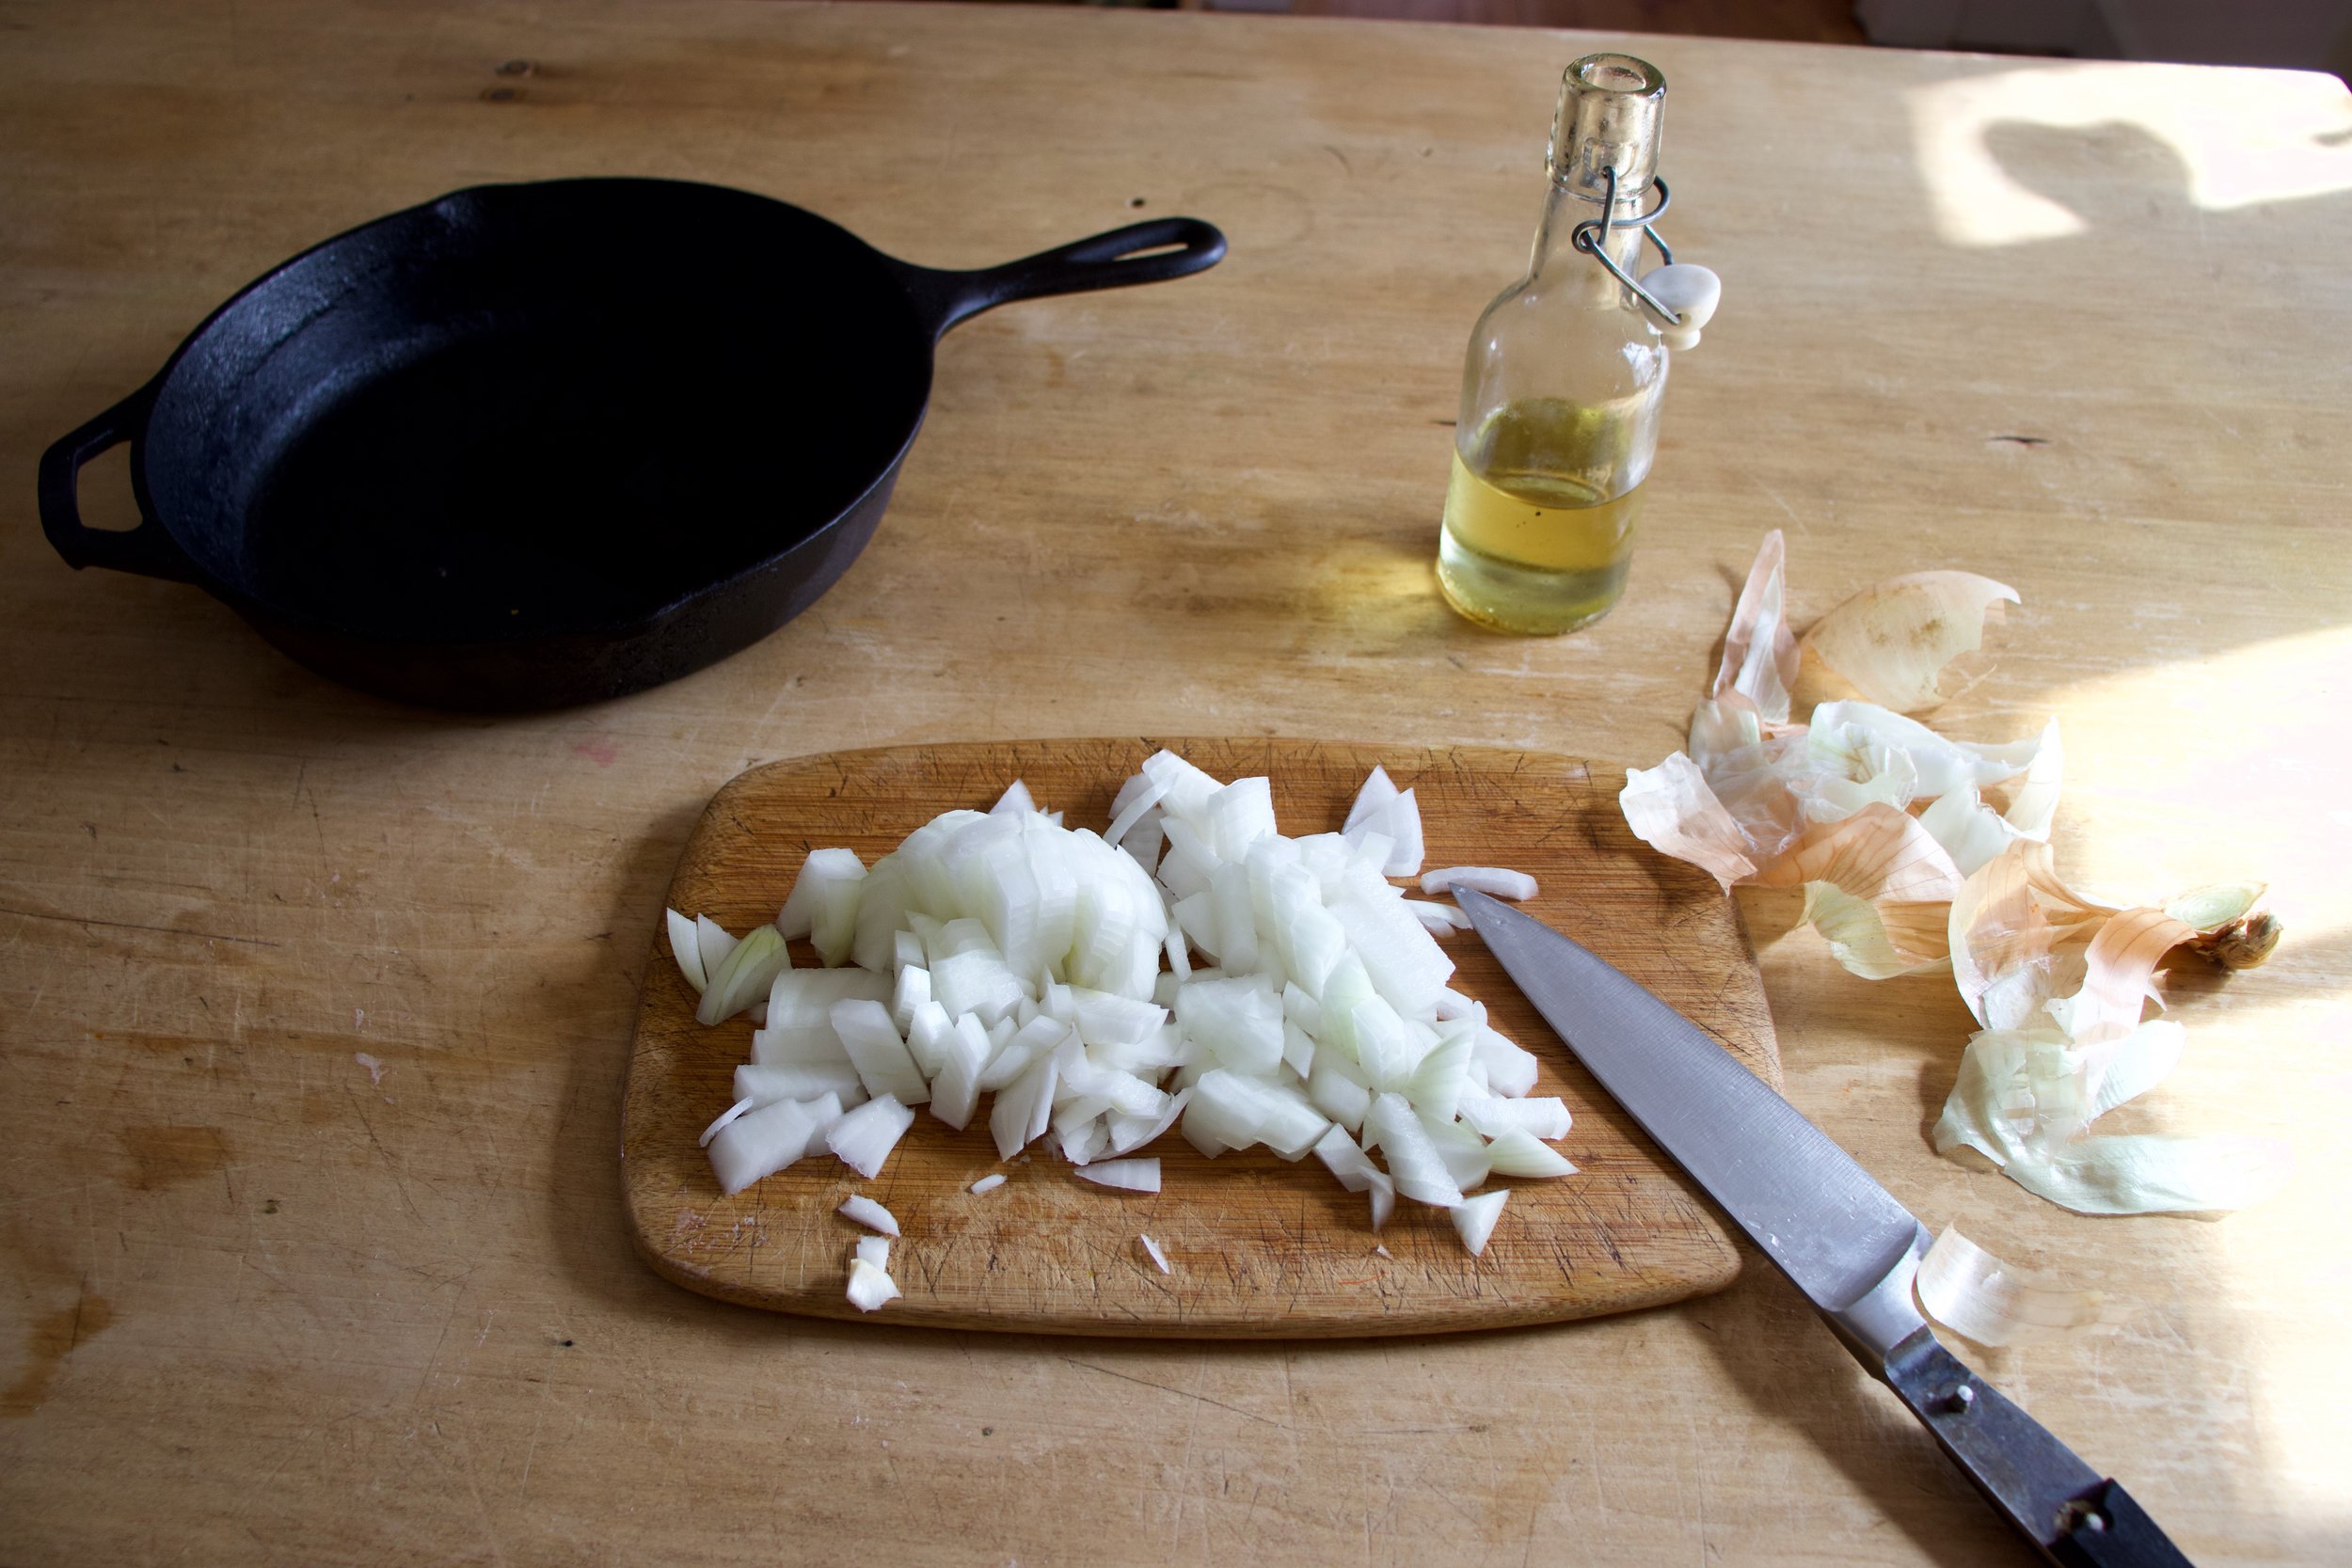
And cook the onions too. Chop the onion into small little bits and place in a skillet with a couple slashes of olive oil. Medium heat and a good stir until they are nice and golden brown.
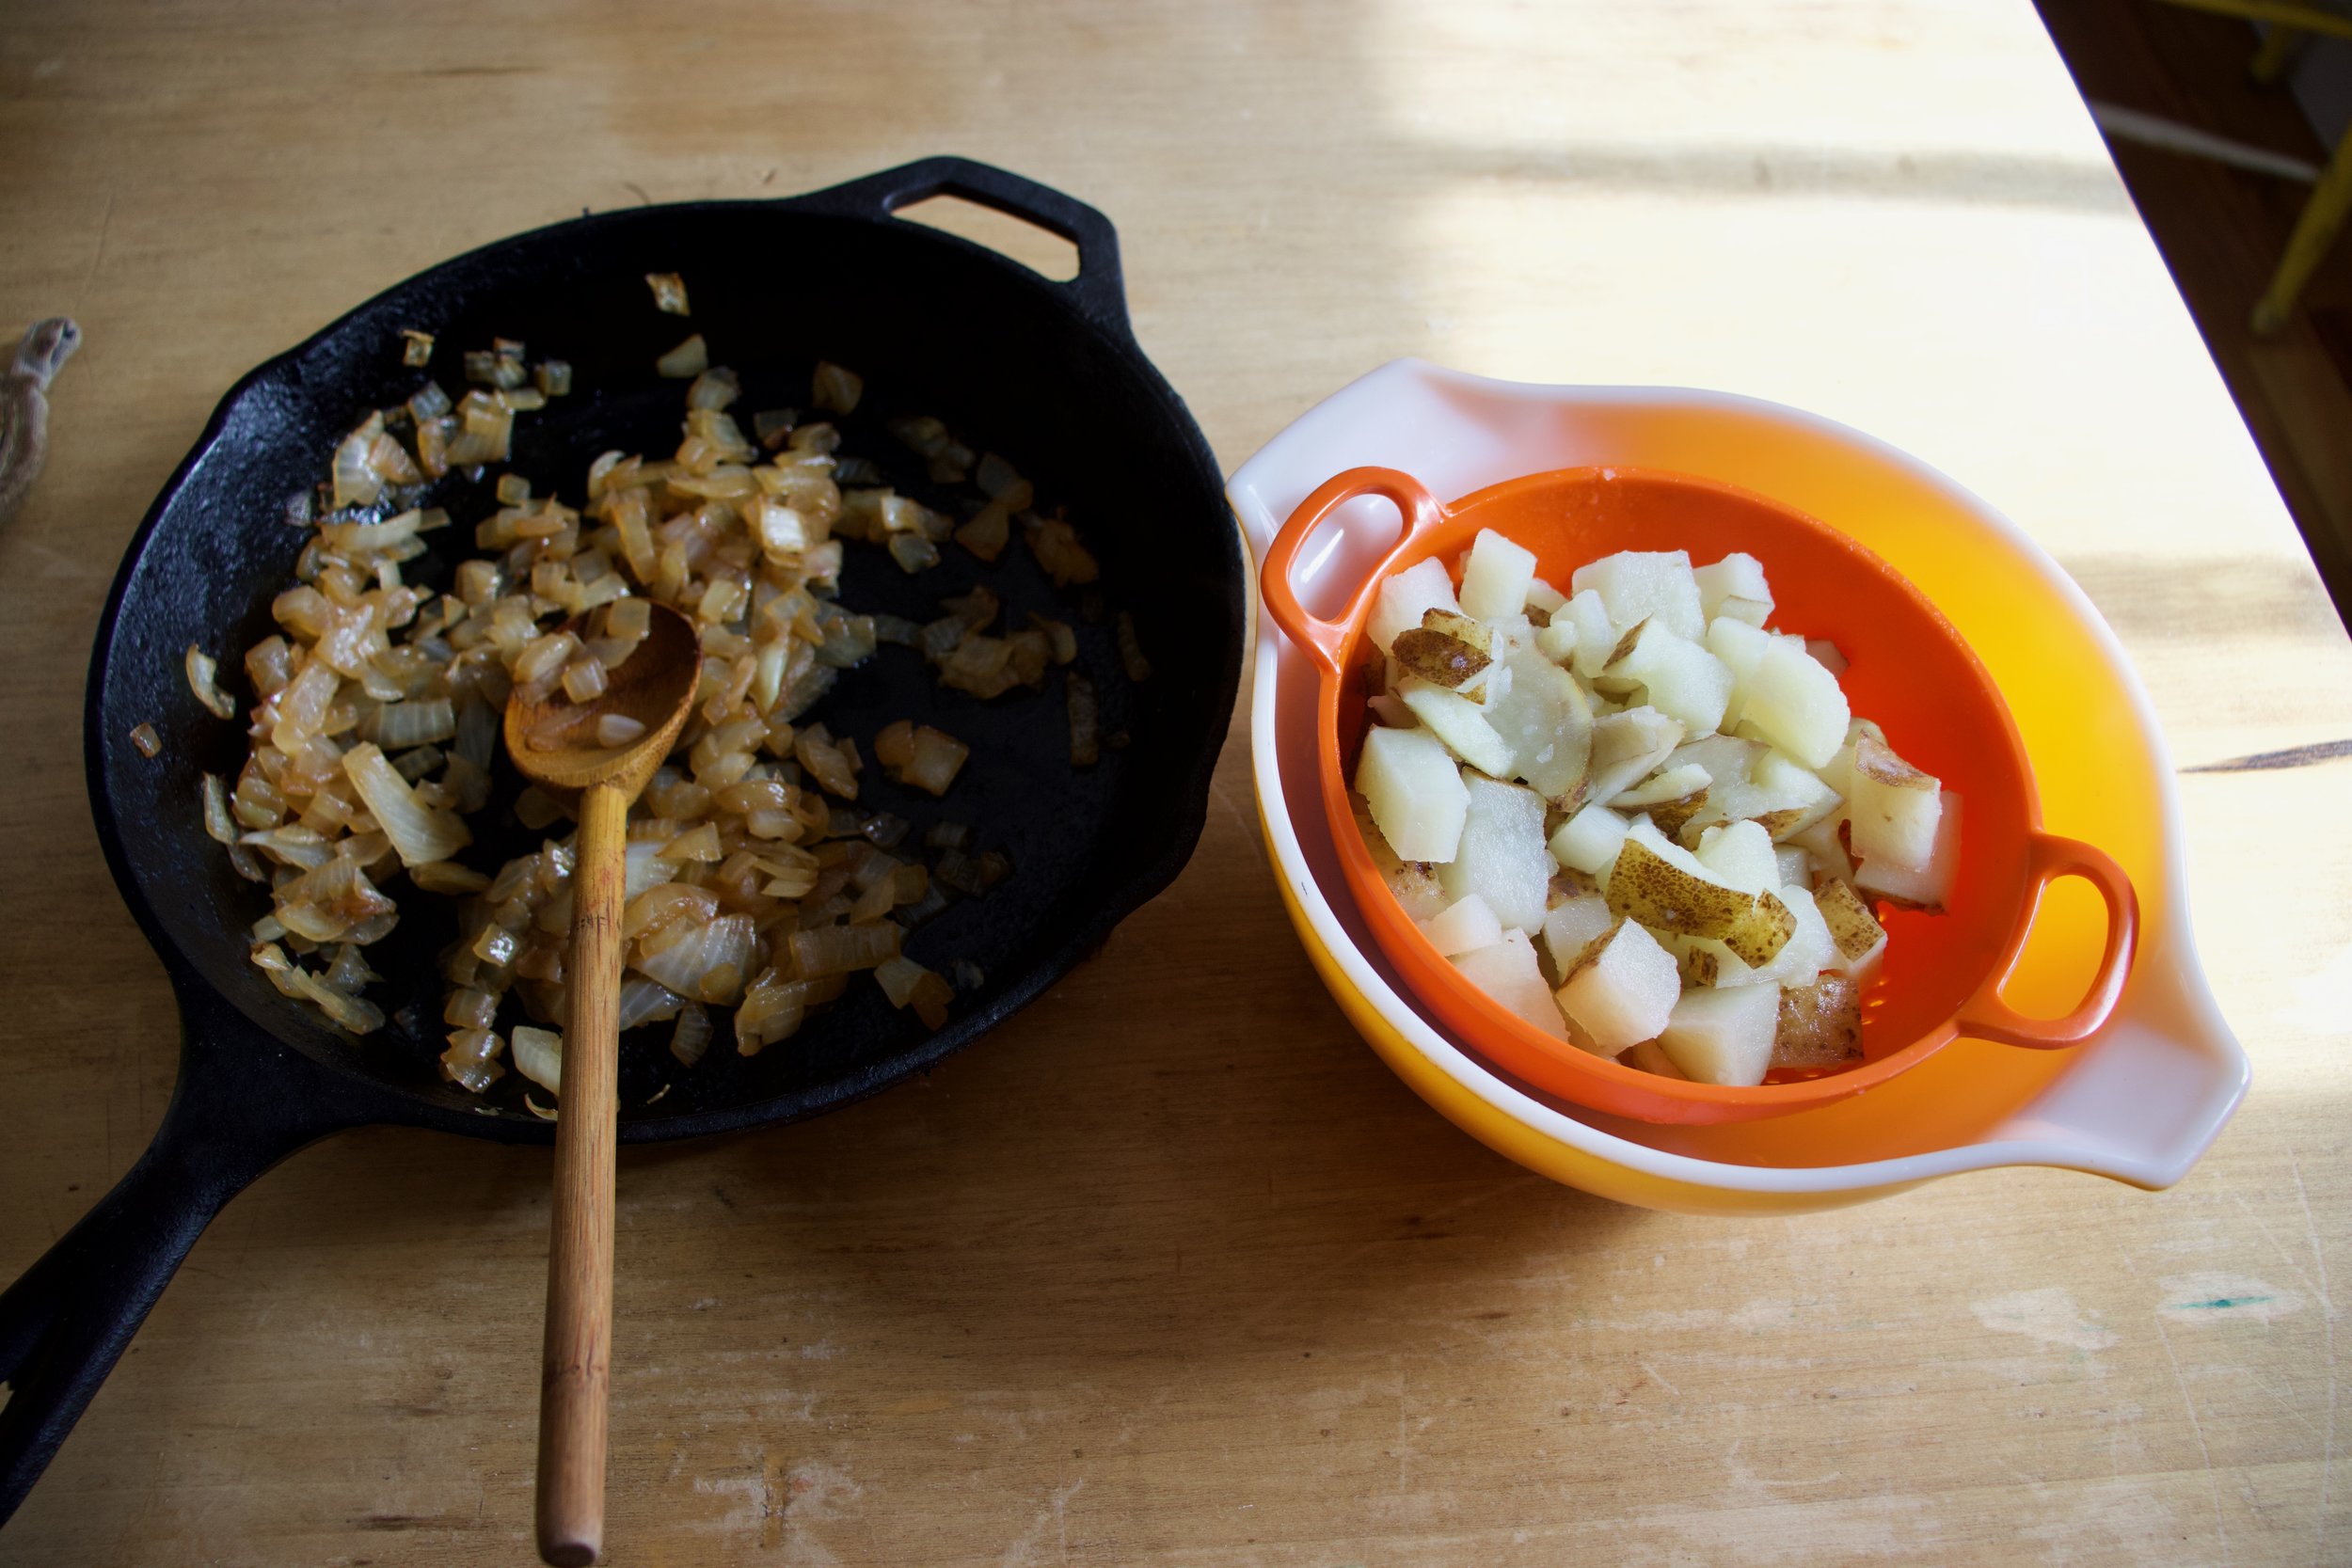
Cooked onions and cooked ans drained potatoes.
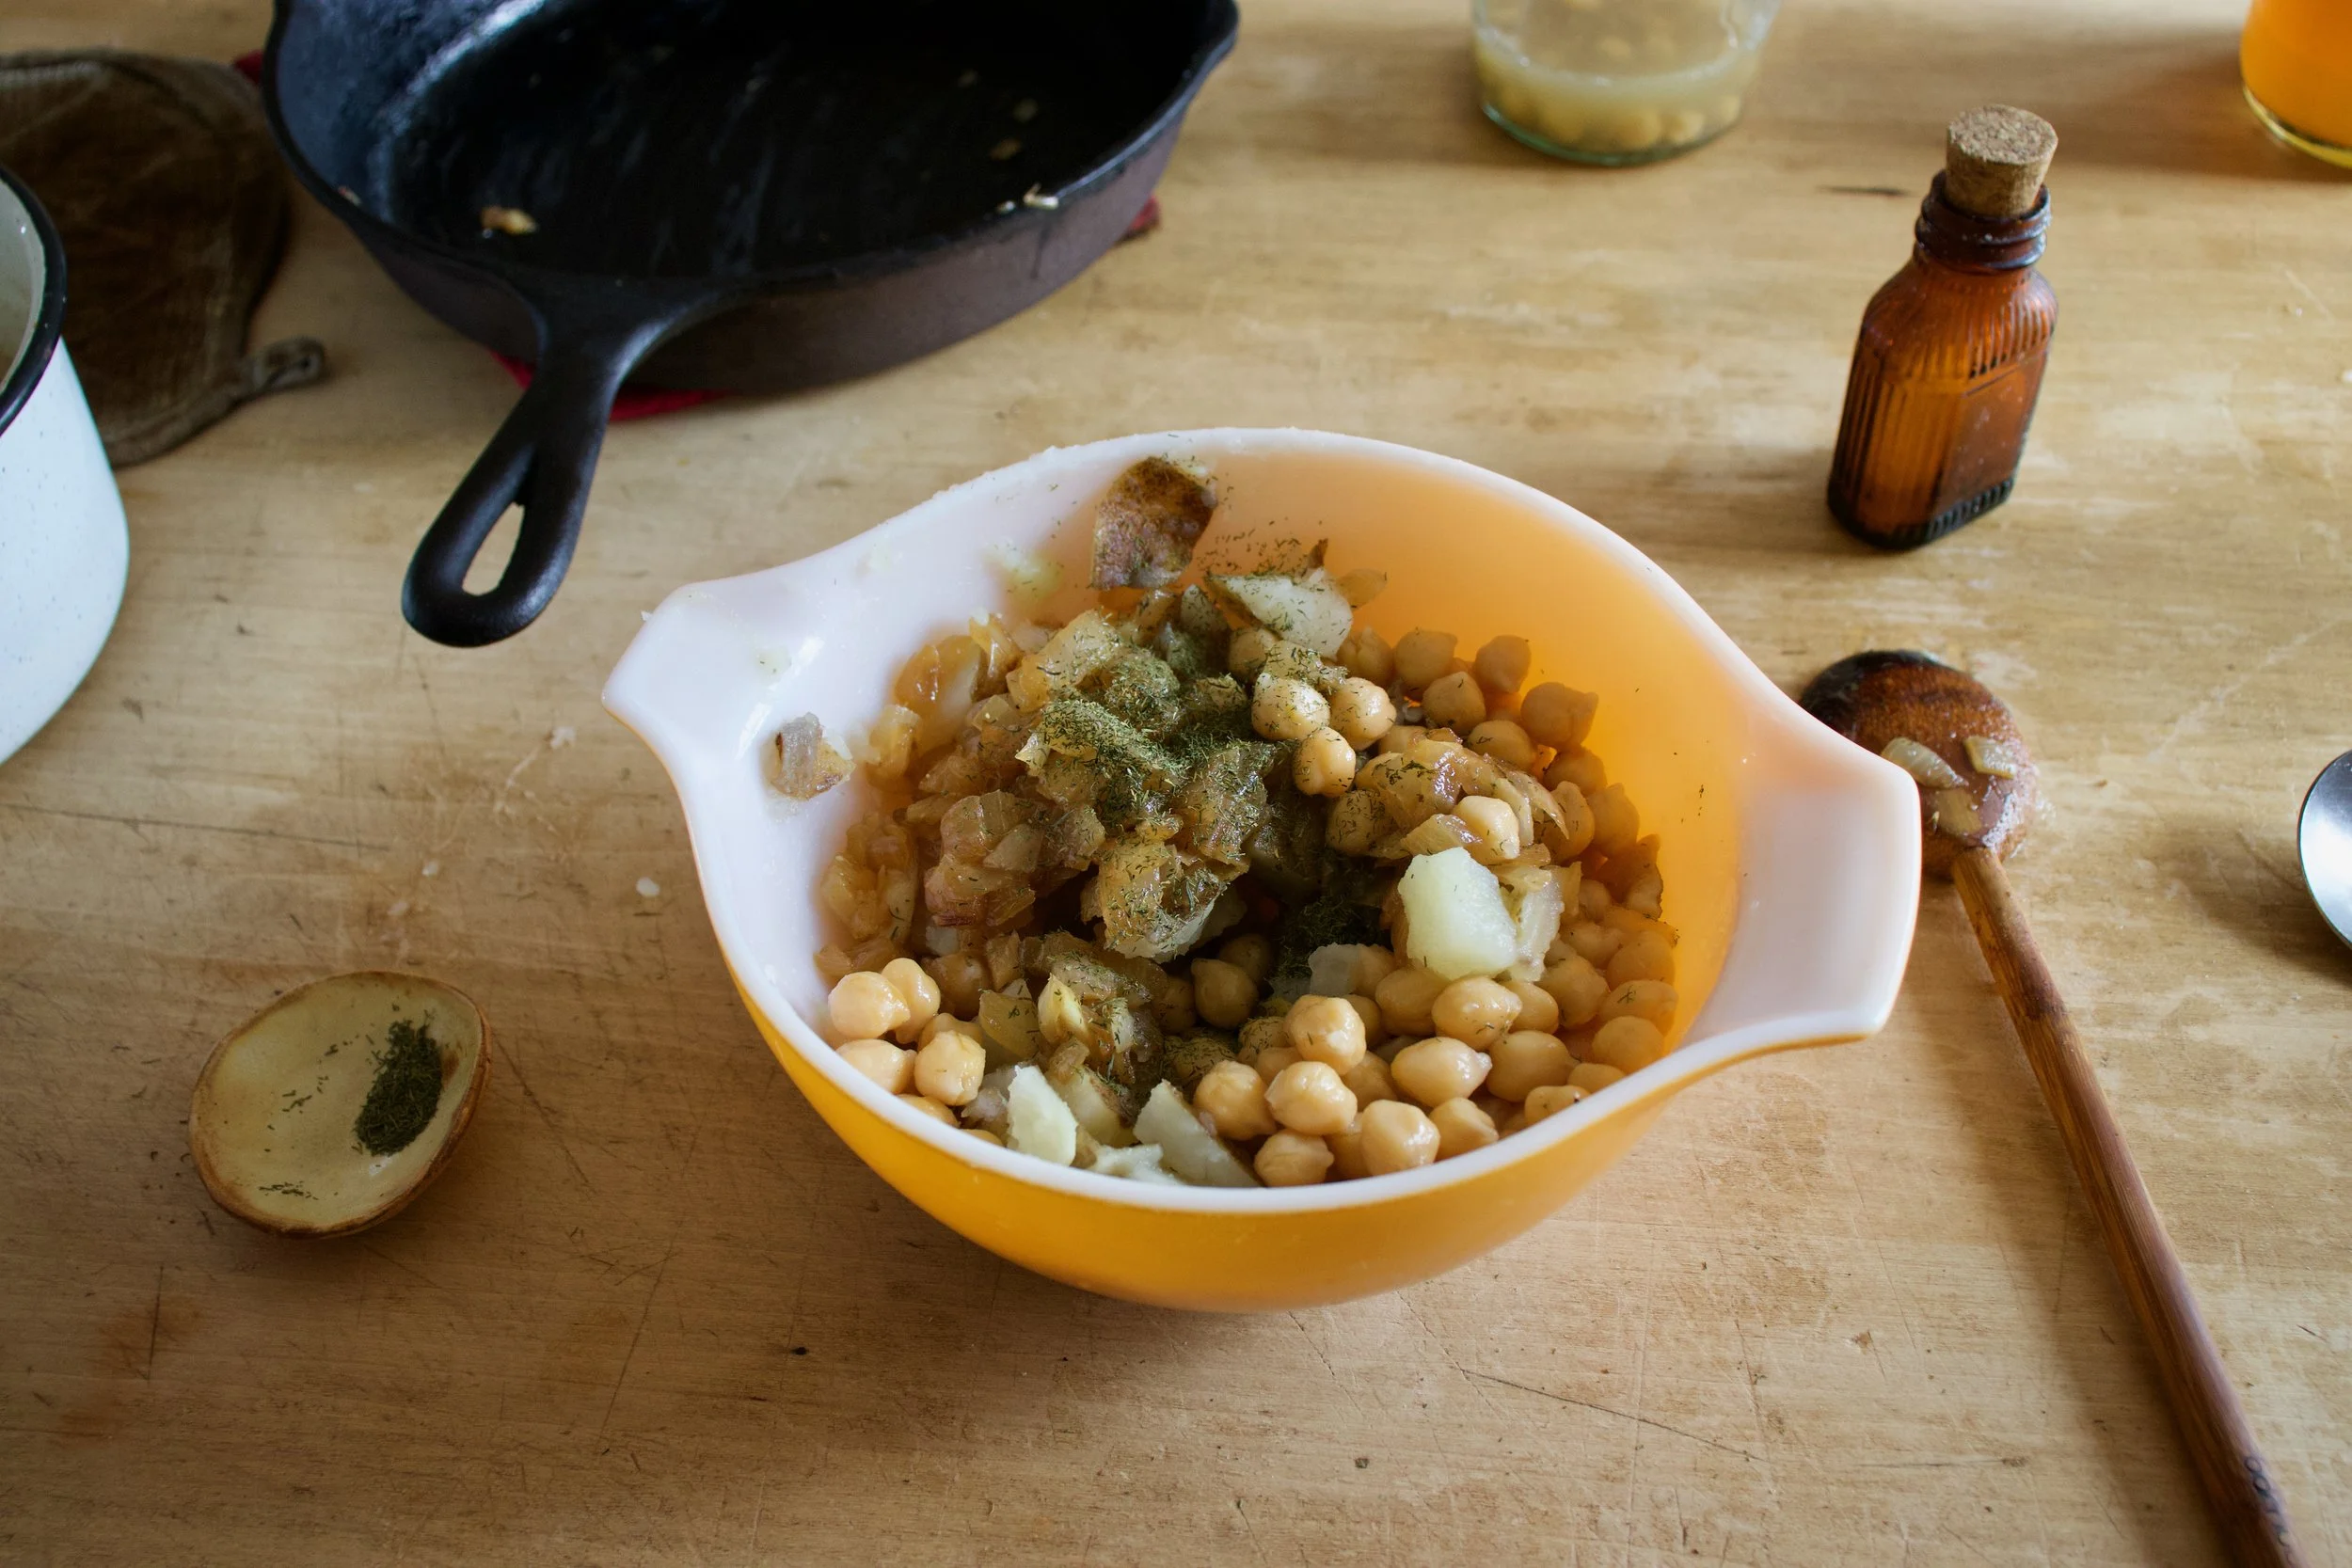
Now to make the filling. Add the potatoes, onions, chickpeas, and ill to a bowl. Sprinkle in salt ans pepper
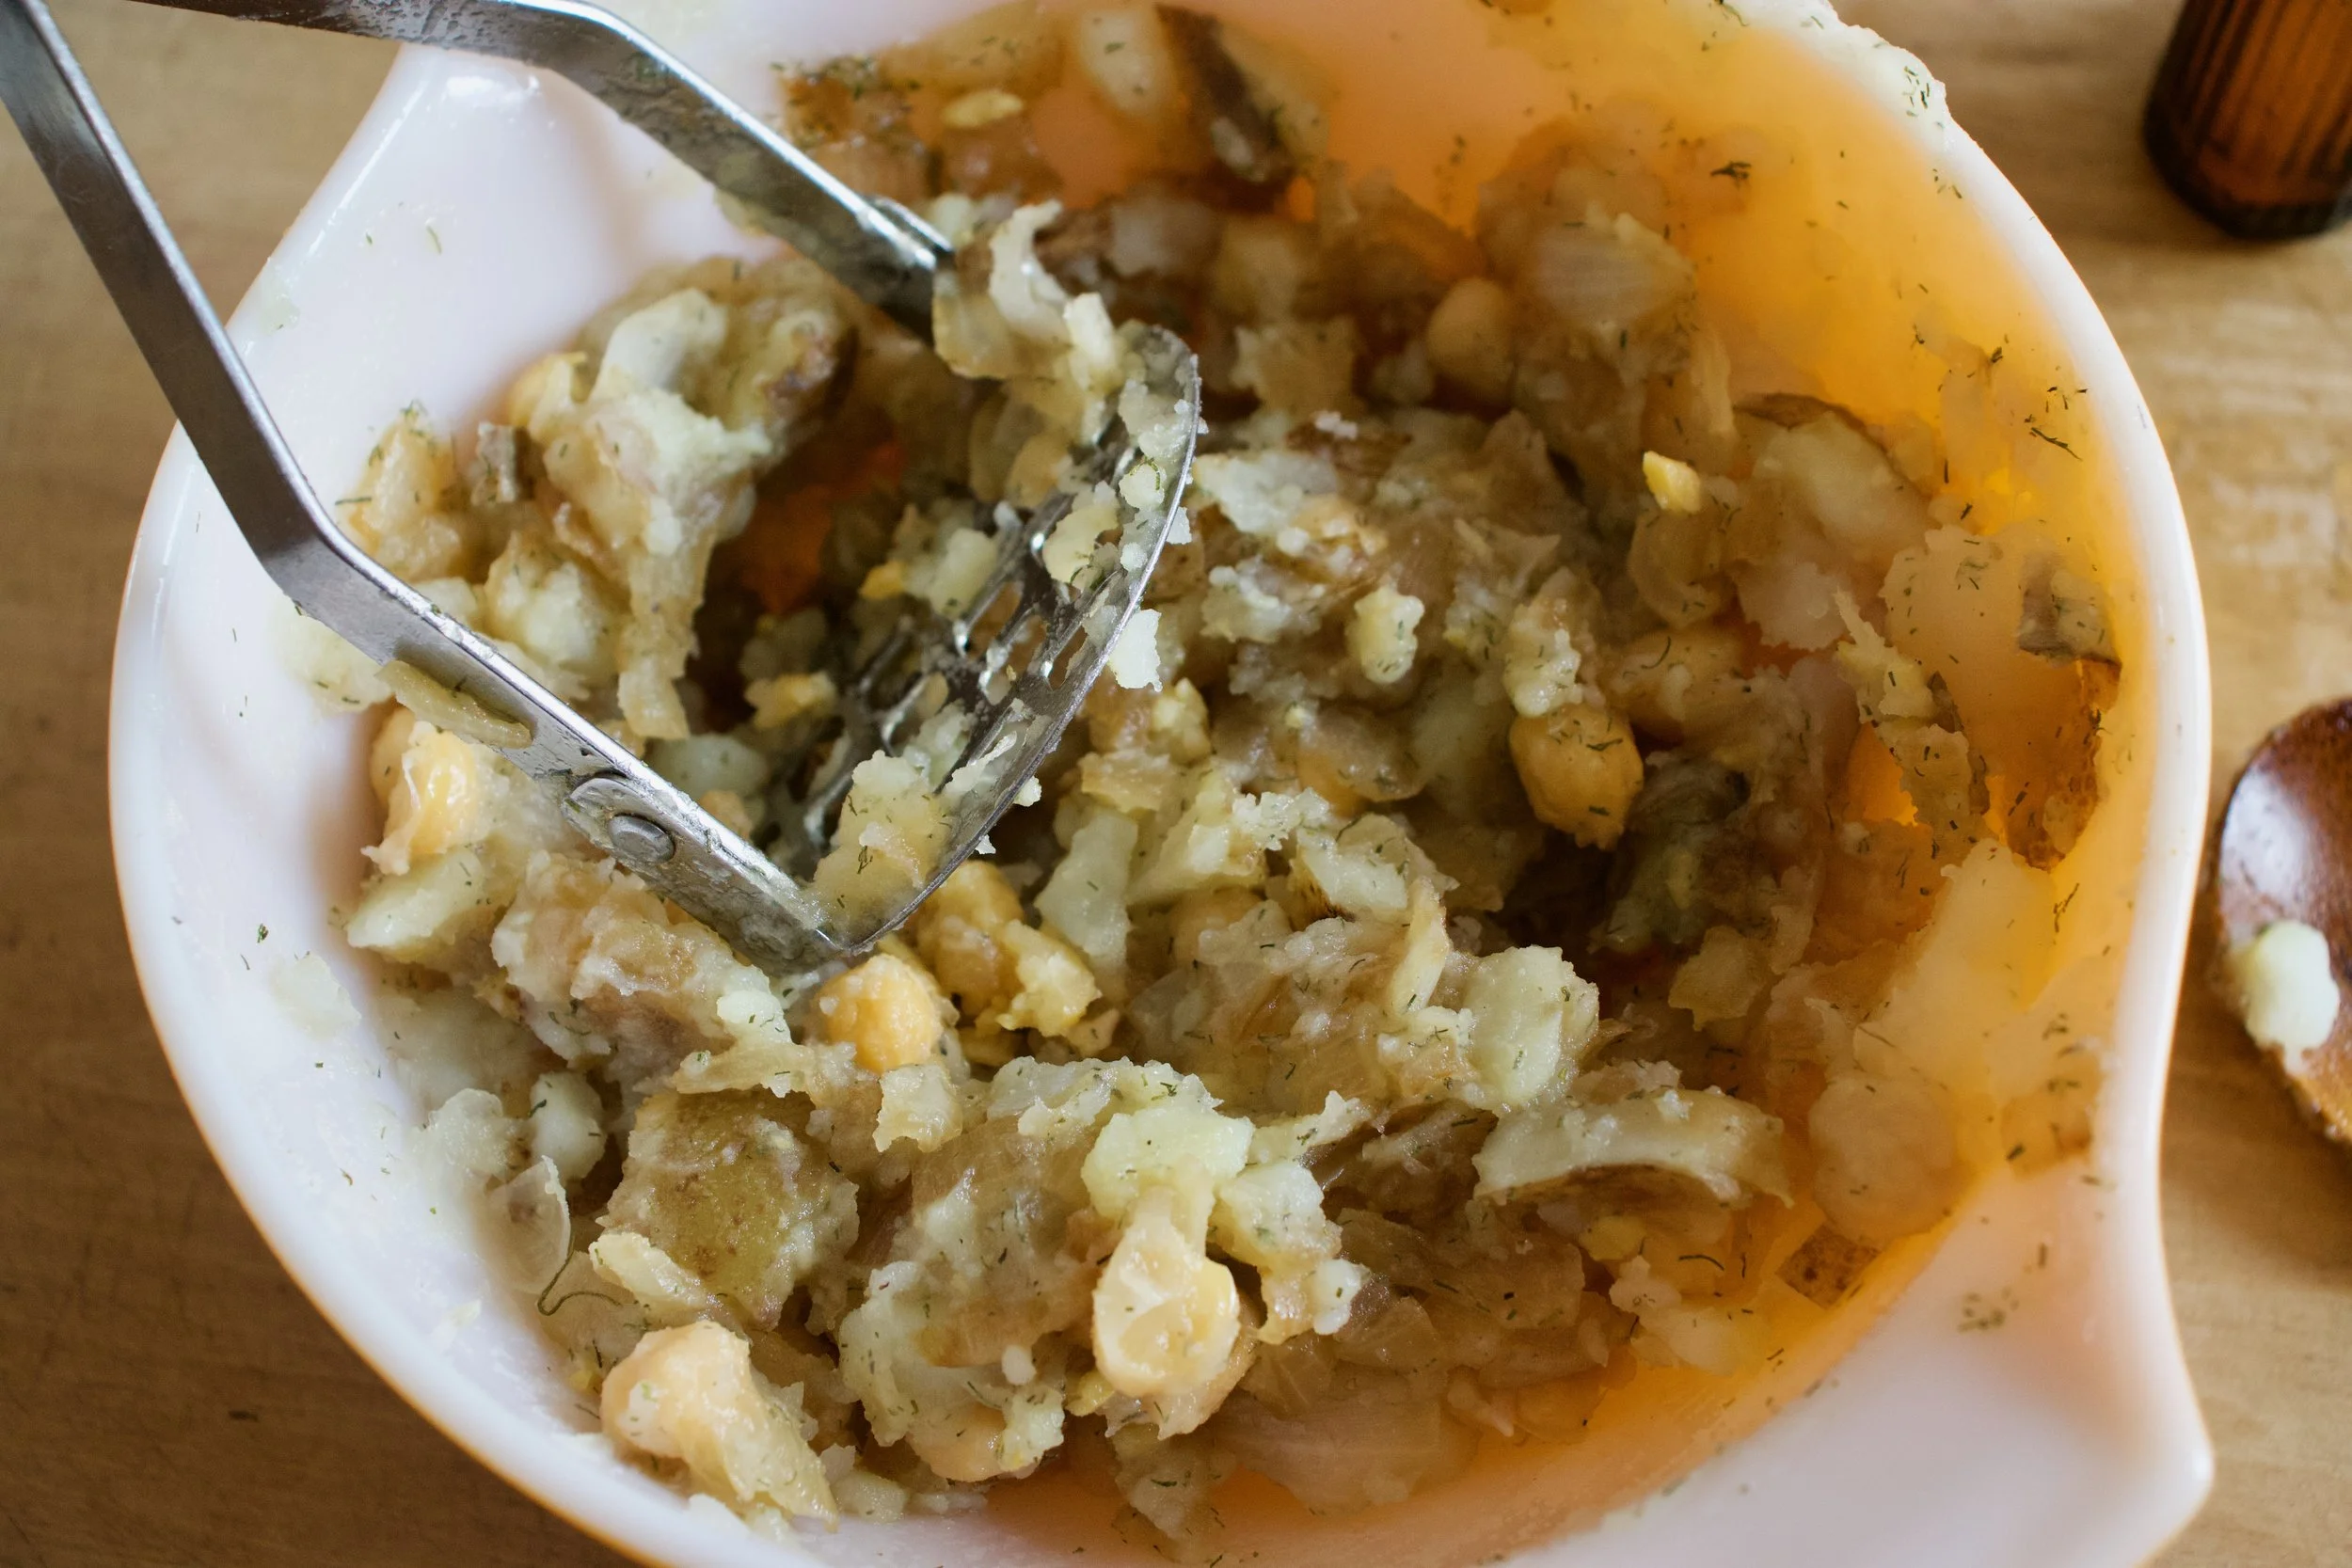
Mash it all together, small chunks are ok, but not big.
Taste and season with more salt and or pepper if needed. And stop eating all the filling, you need it.
Wen the filling is made, grab the dough, rolling pin, and a large biscuit cutter or a cup.
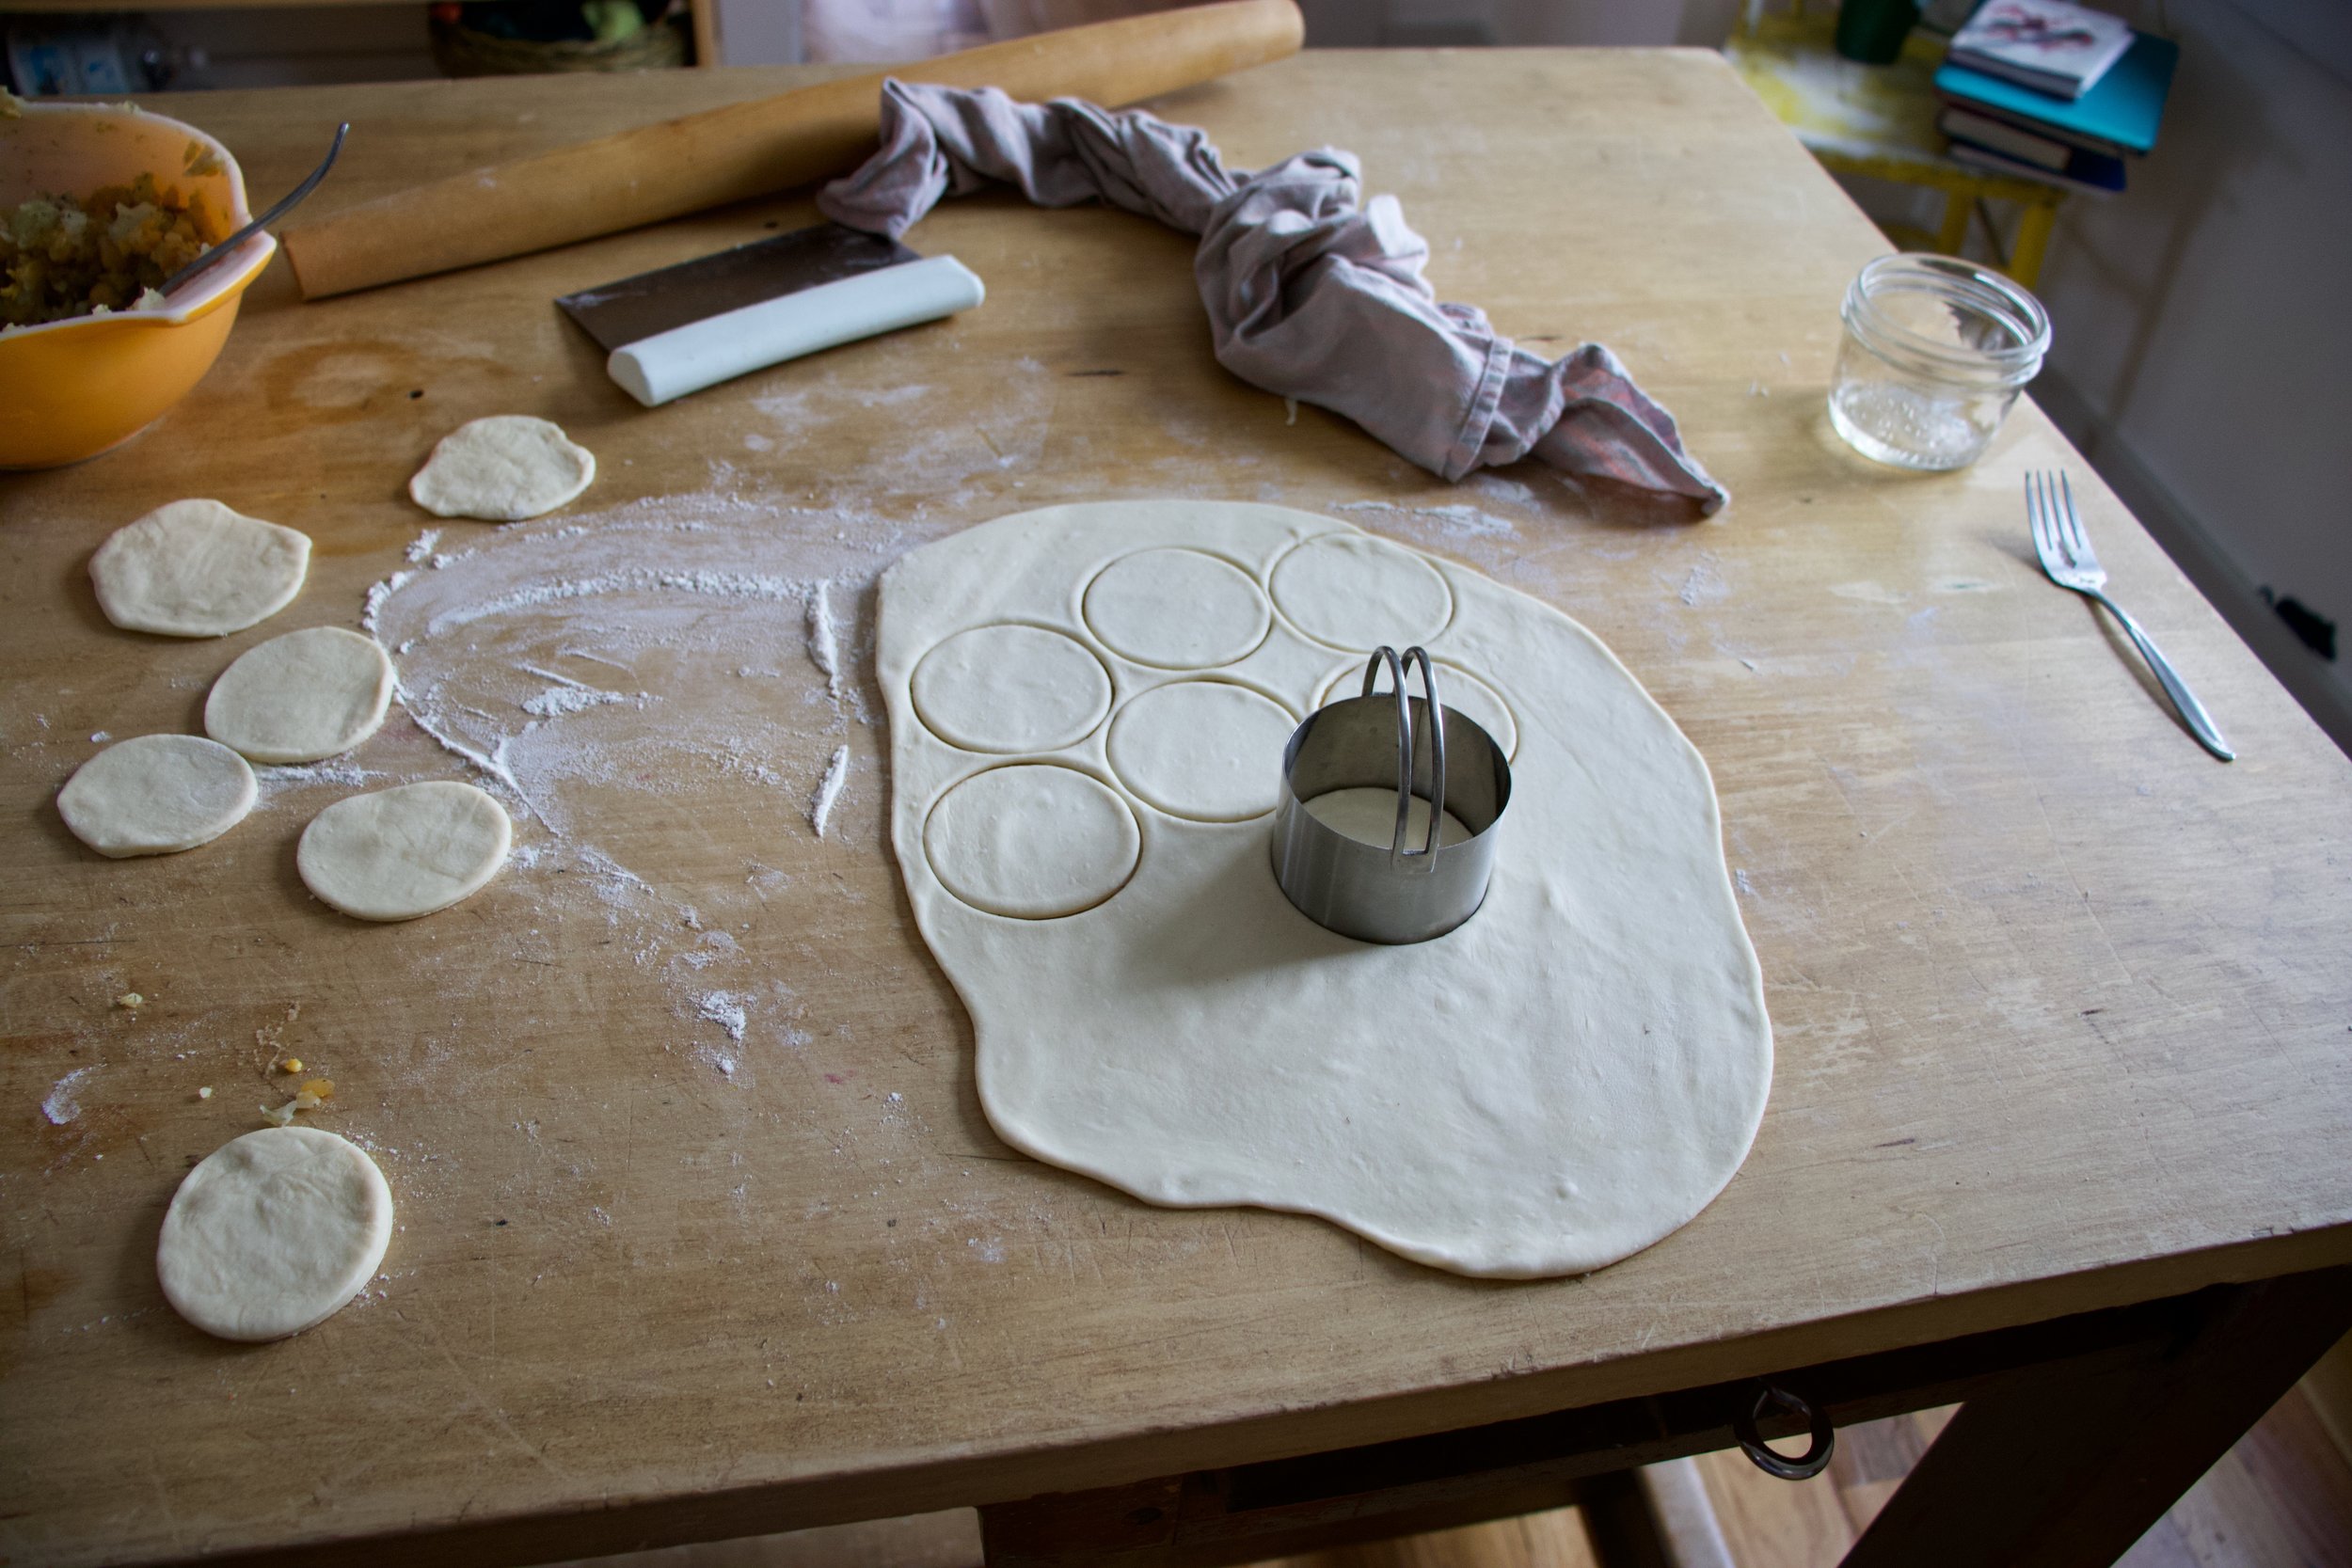
Roll out dough, then cut out circles.
And to make a pierogi, grab a dough disk, add a mound of filling, then fold in half and pinch closed. Simple. IF the dough doesn%u2019t want to seal, run a wet finger around the edge of the dough. That will do the trick.
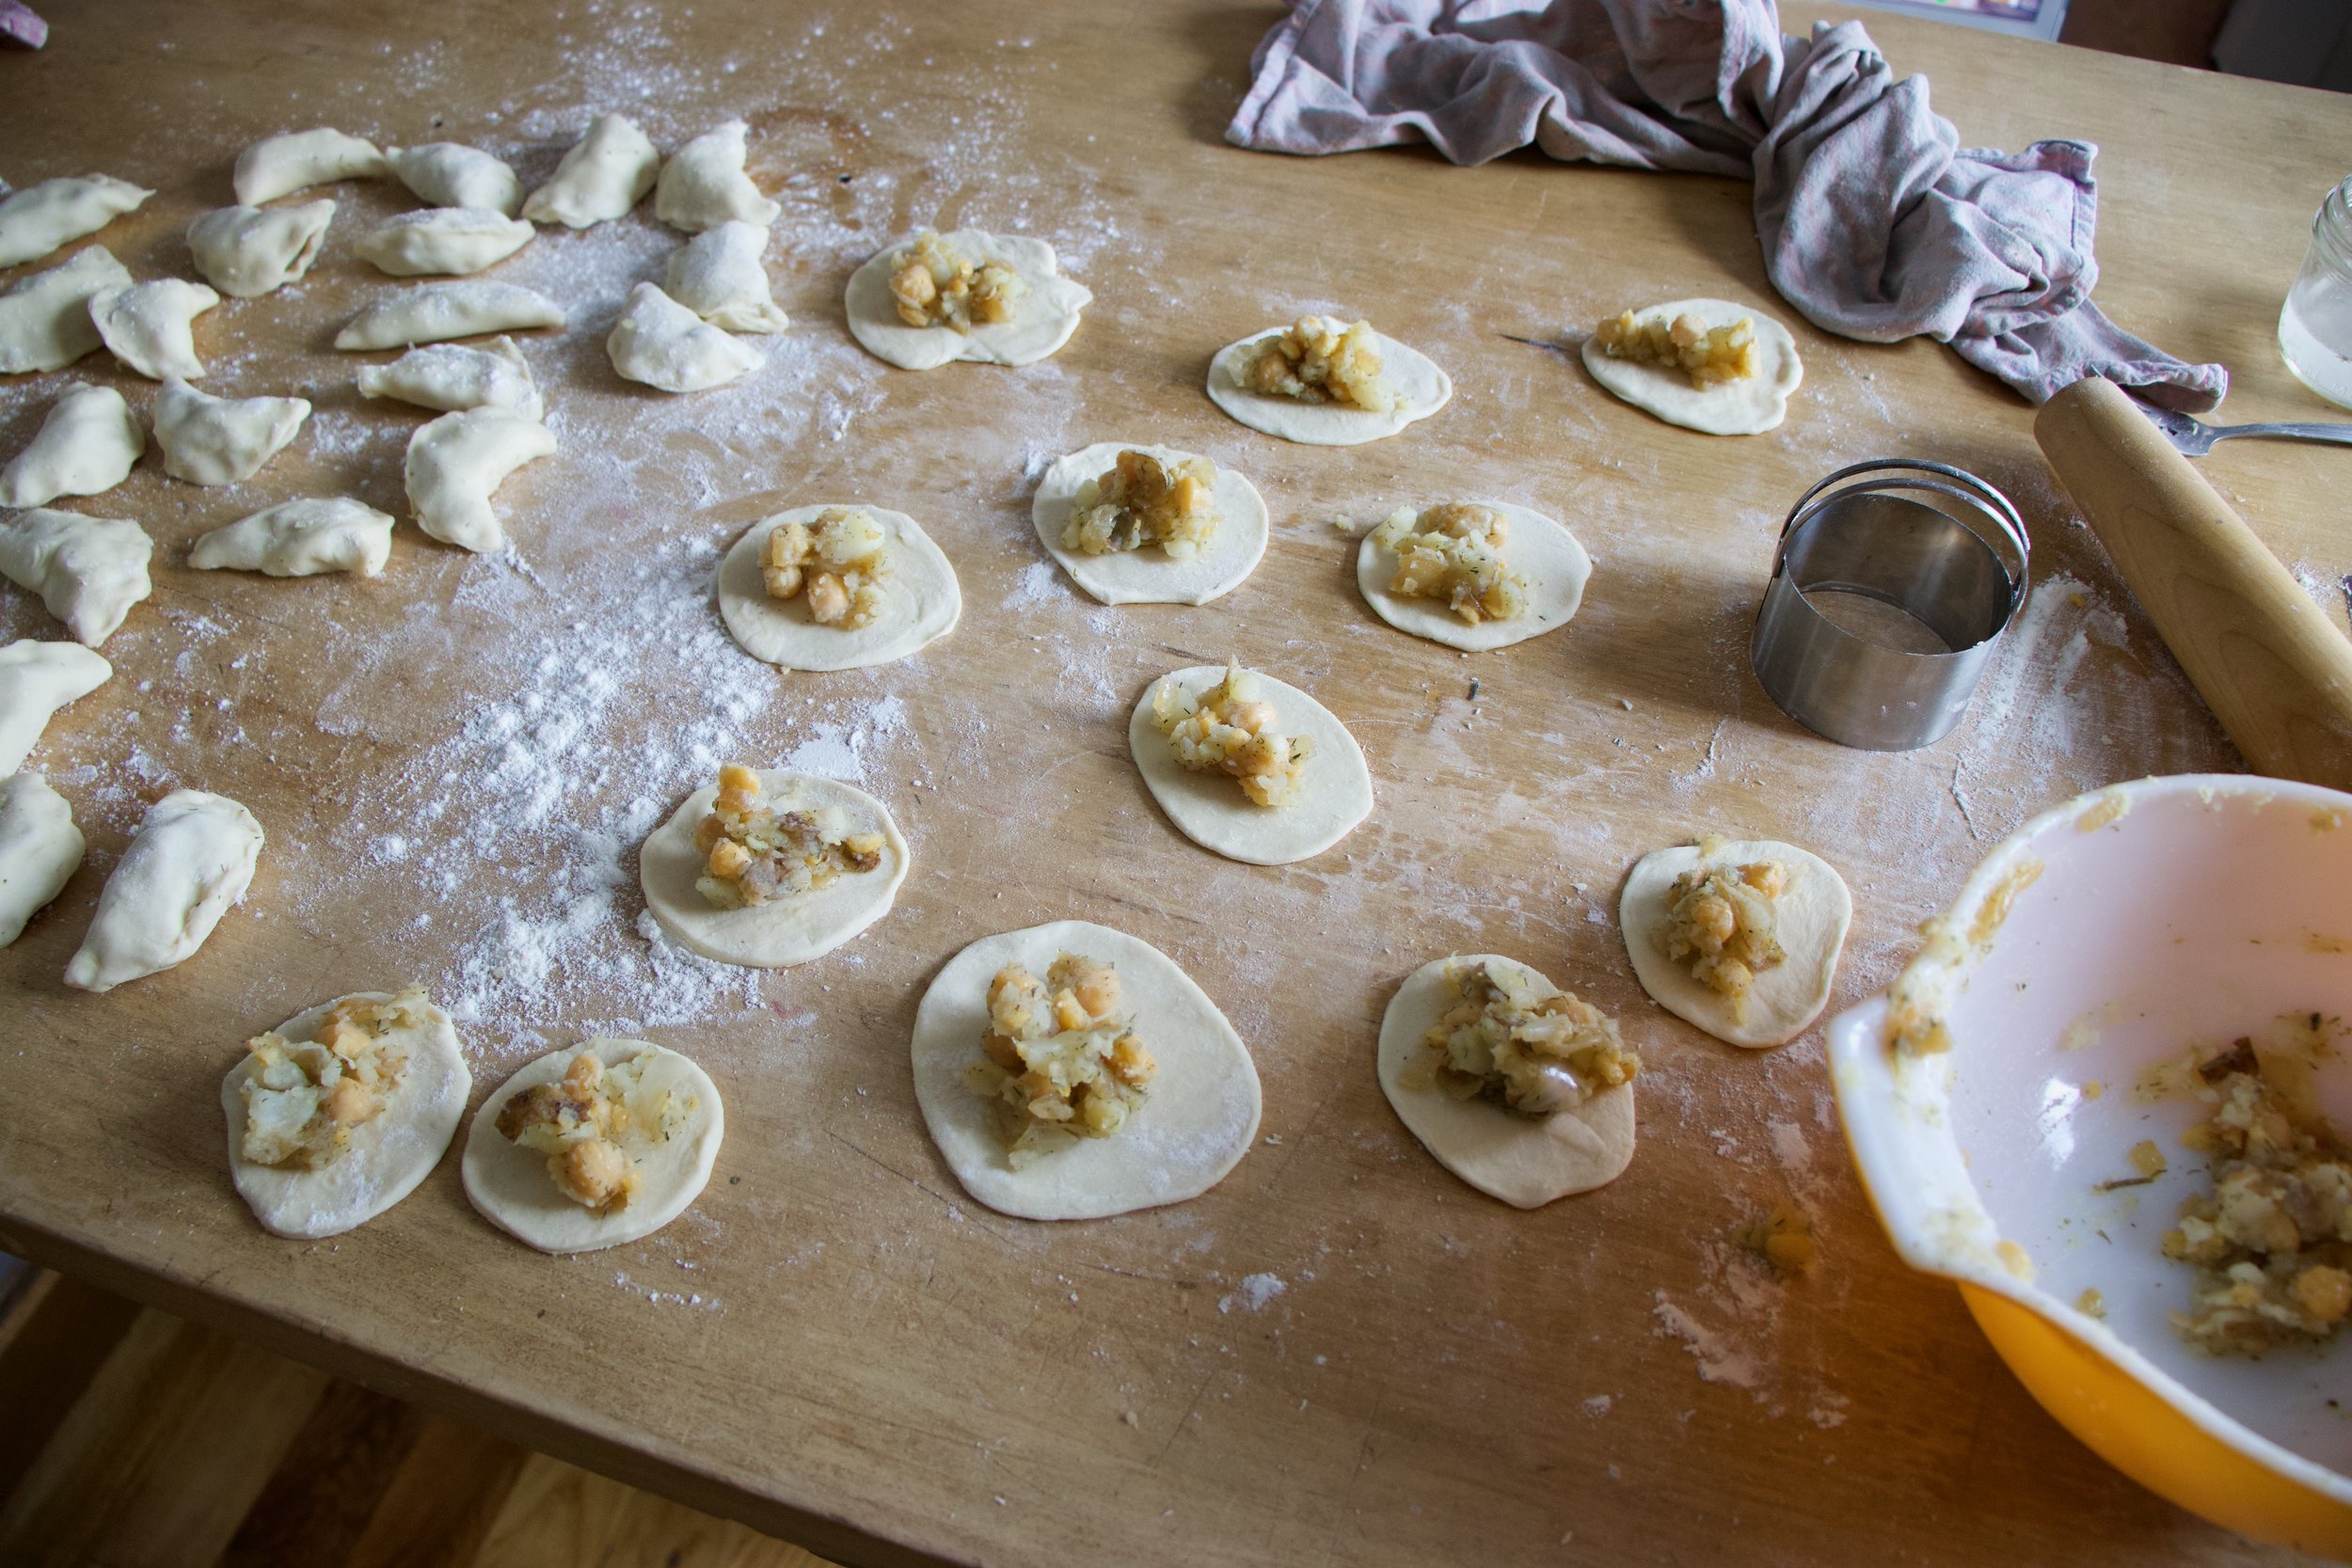
All made, and not perfect by any means but perfect to me. Once you have made them, they need a little rest before cooking. Just a half hour or so. Enough time to clean up the mess that you just made and ge ta pot of water boiling on the stove. This is also a good time to prepare some to save for freezing. Any that you do not plan on eating in the next few days, place on a lightly floured baking sheet and stick in freezer. Once frozen, remove from sheet and place in an airtight container or freezer bag and stash away for another day. They can also go I the fridge for 3-4 days without being frozen, just make sure that you give each one a good dusting of flour so they don%u2019t stick to each other.
Oh, and before you finish cooking the pierogi, make a the cashew cream. Place soaked cashews into blender with the vinegar and a splash of hot water. Blend into creamy and smooth. Season with salt and pepper and that is that.
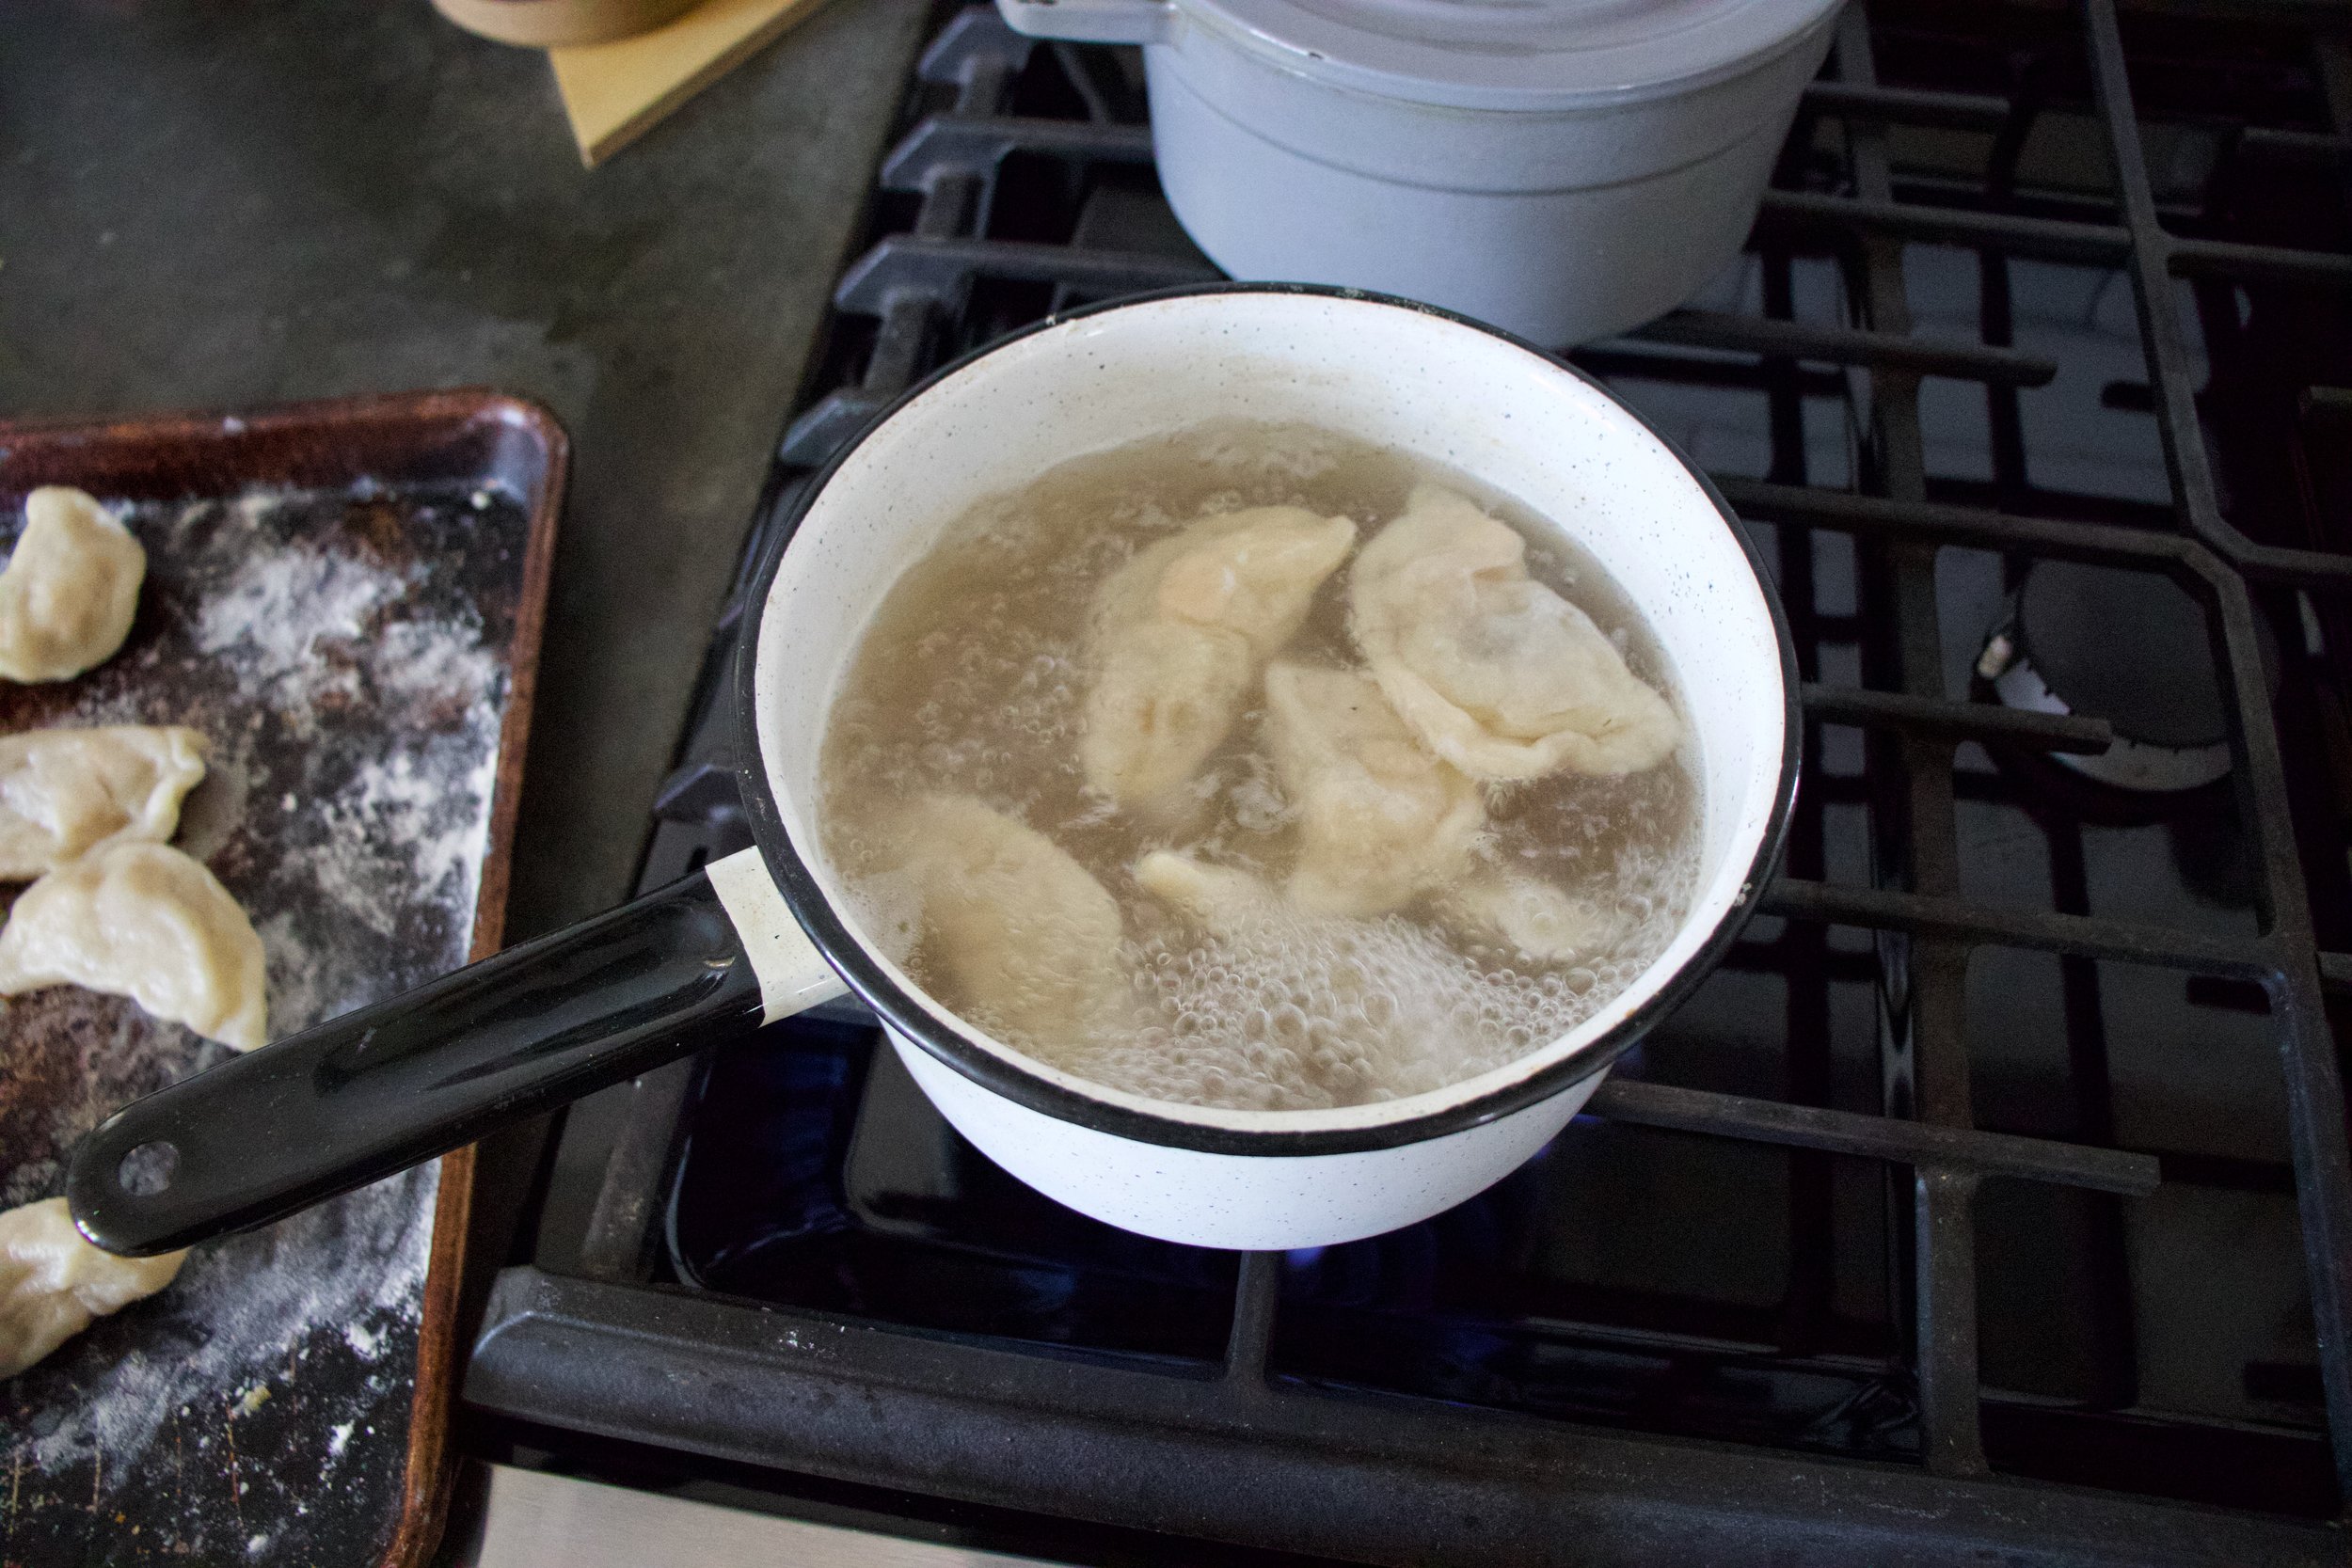
Now to cook those pierogies. Bring a pot of water to a rolling boil. Once boiling, drop (gently) the pierogies one by one into water. A few at a time as to not over crowed, boil until they start to float to the top, which should take 4-5 minutes. Once cooked, scoop them out and place them on a plate or pan while you boil more (if you are indeed cooking more)
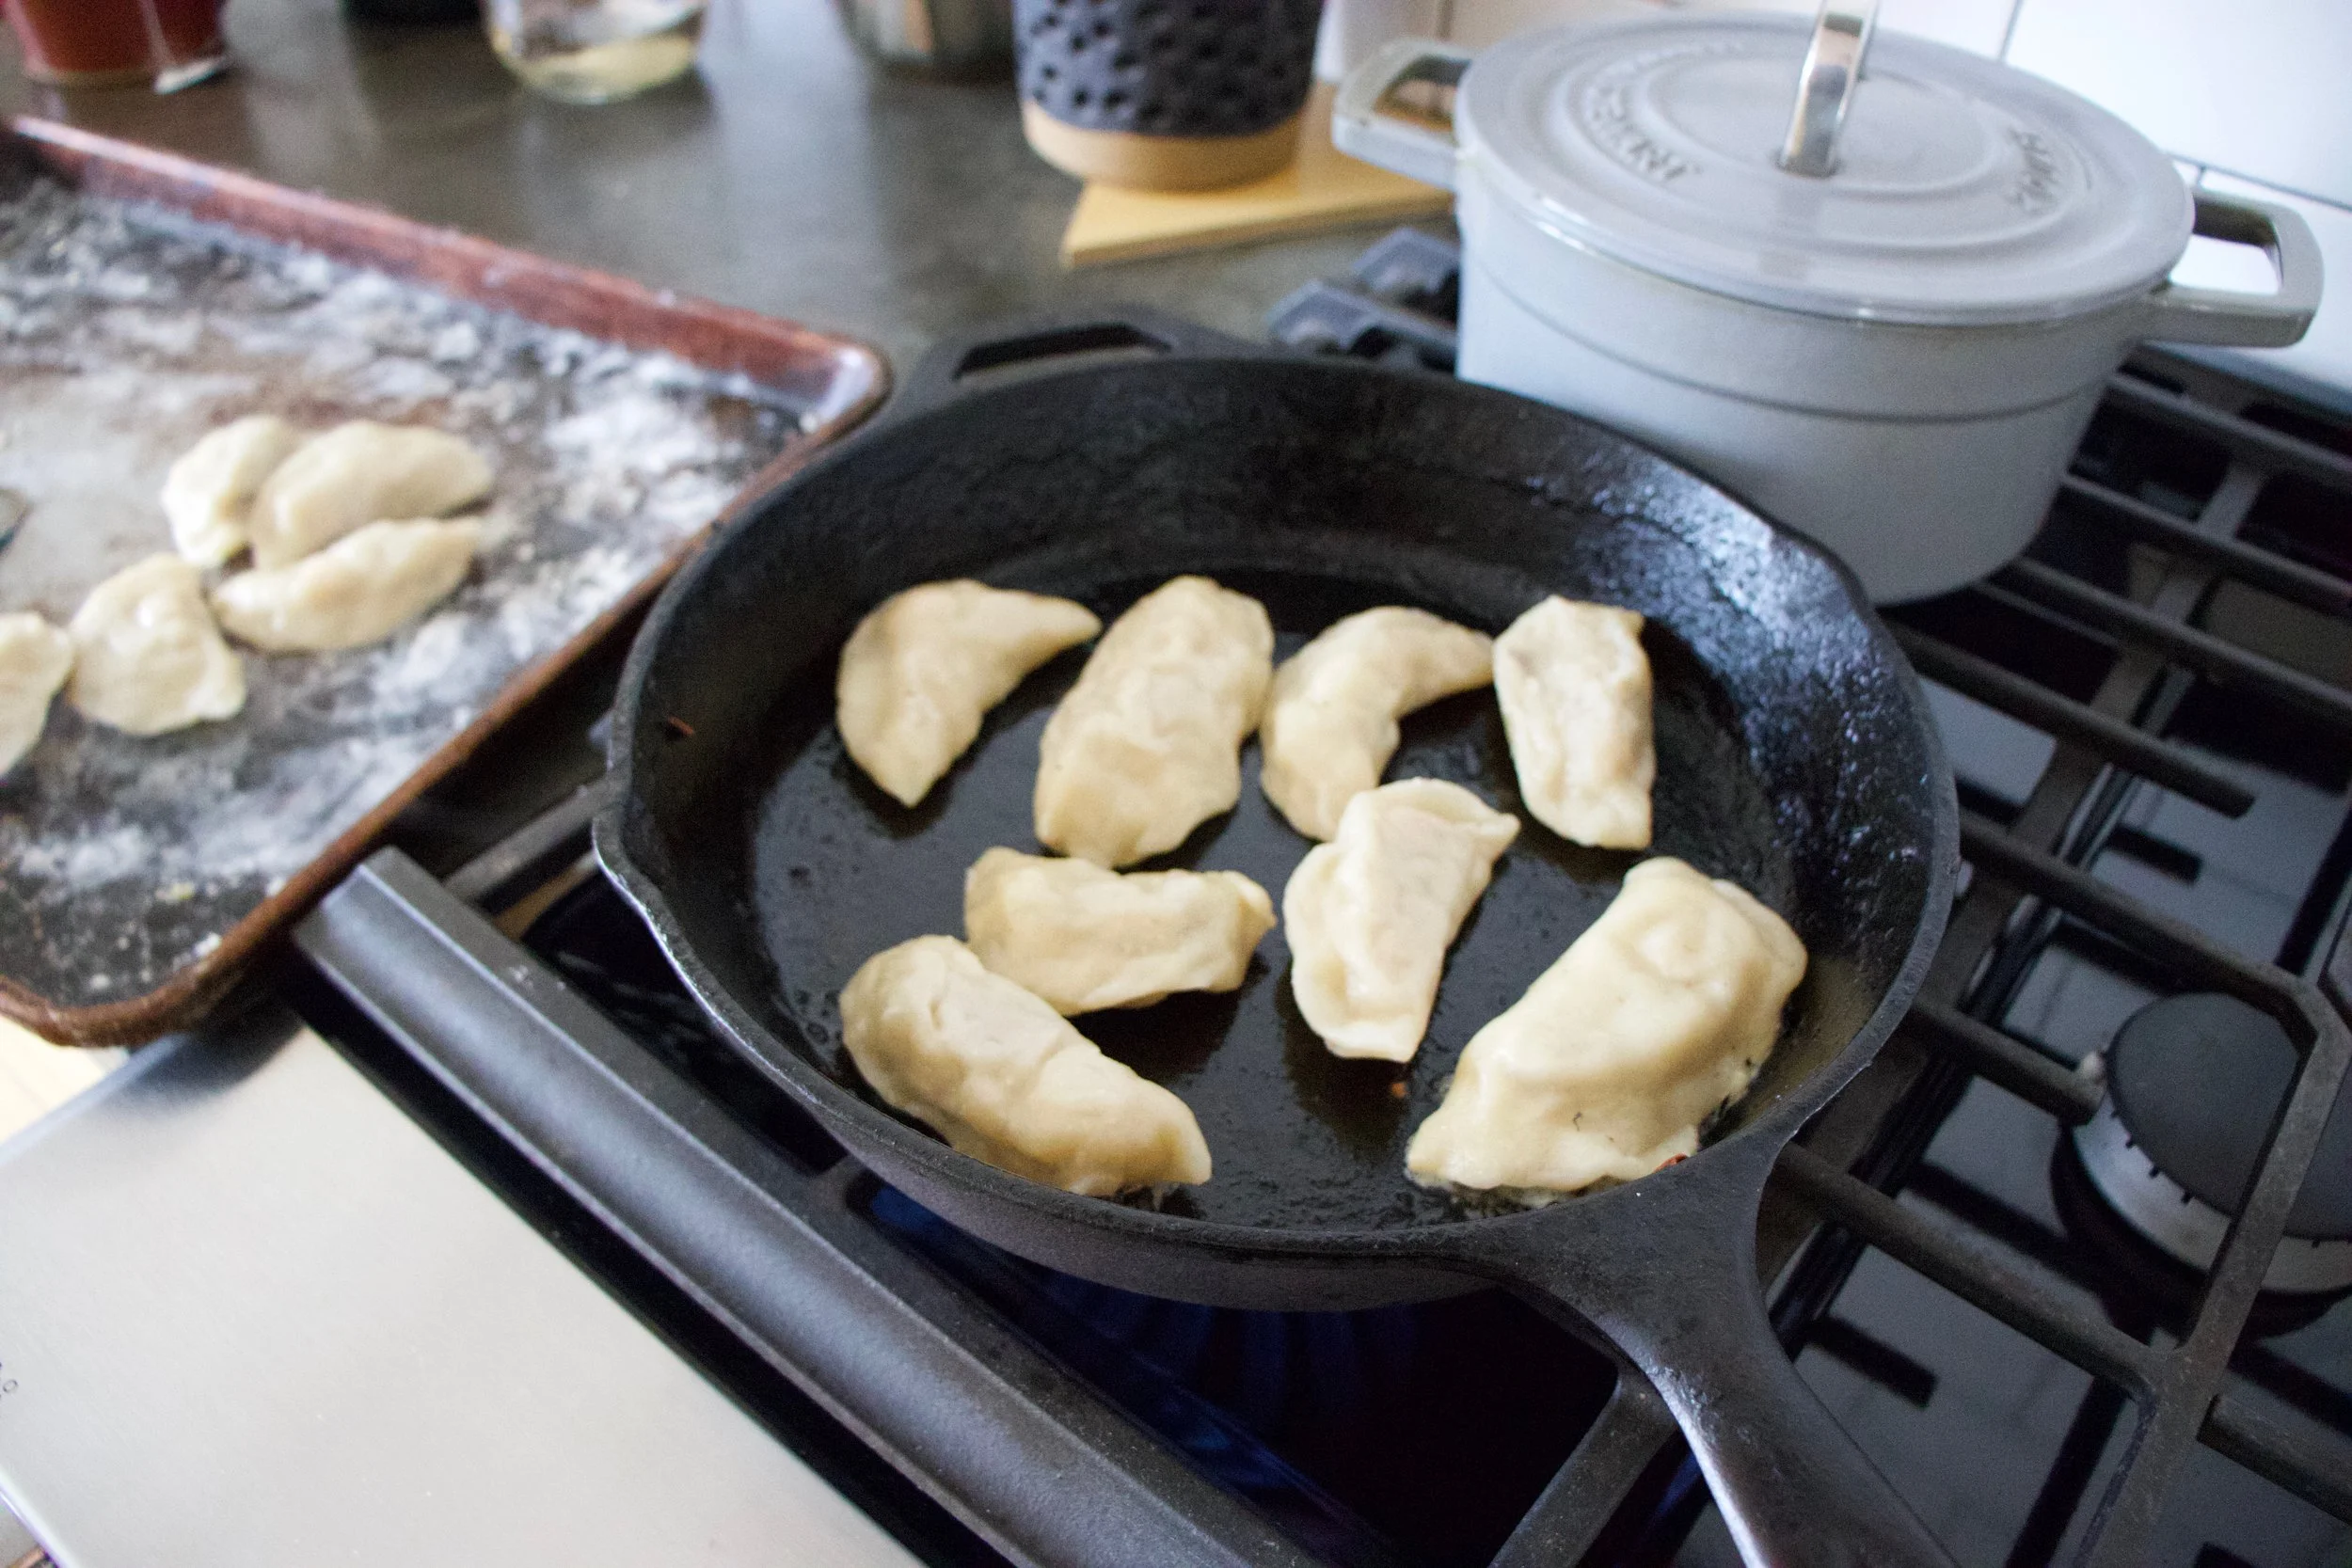
After the pieogies had a boil, they then need a little crispness (you can skip this step if you don%u2019t want them crispy). Use the frying pan you cooked the onions in and add a splash more oil. Heat on medium and when pan is hot, add in the boiled (not sopping wet) pierogies. Cook each side for 3-5 minutes or until nice and and browned then flip and cook the other side.
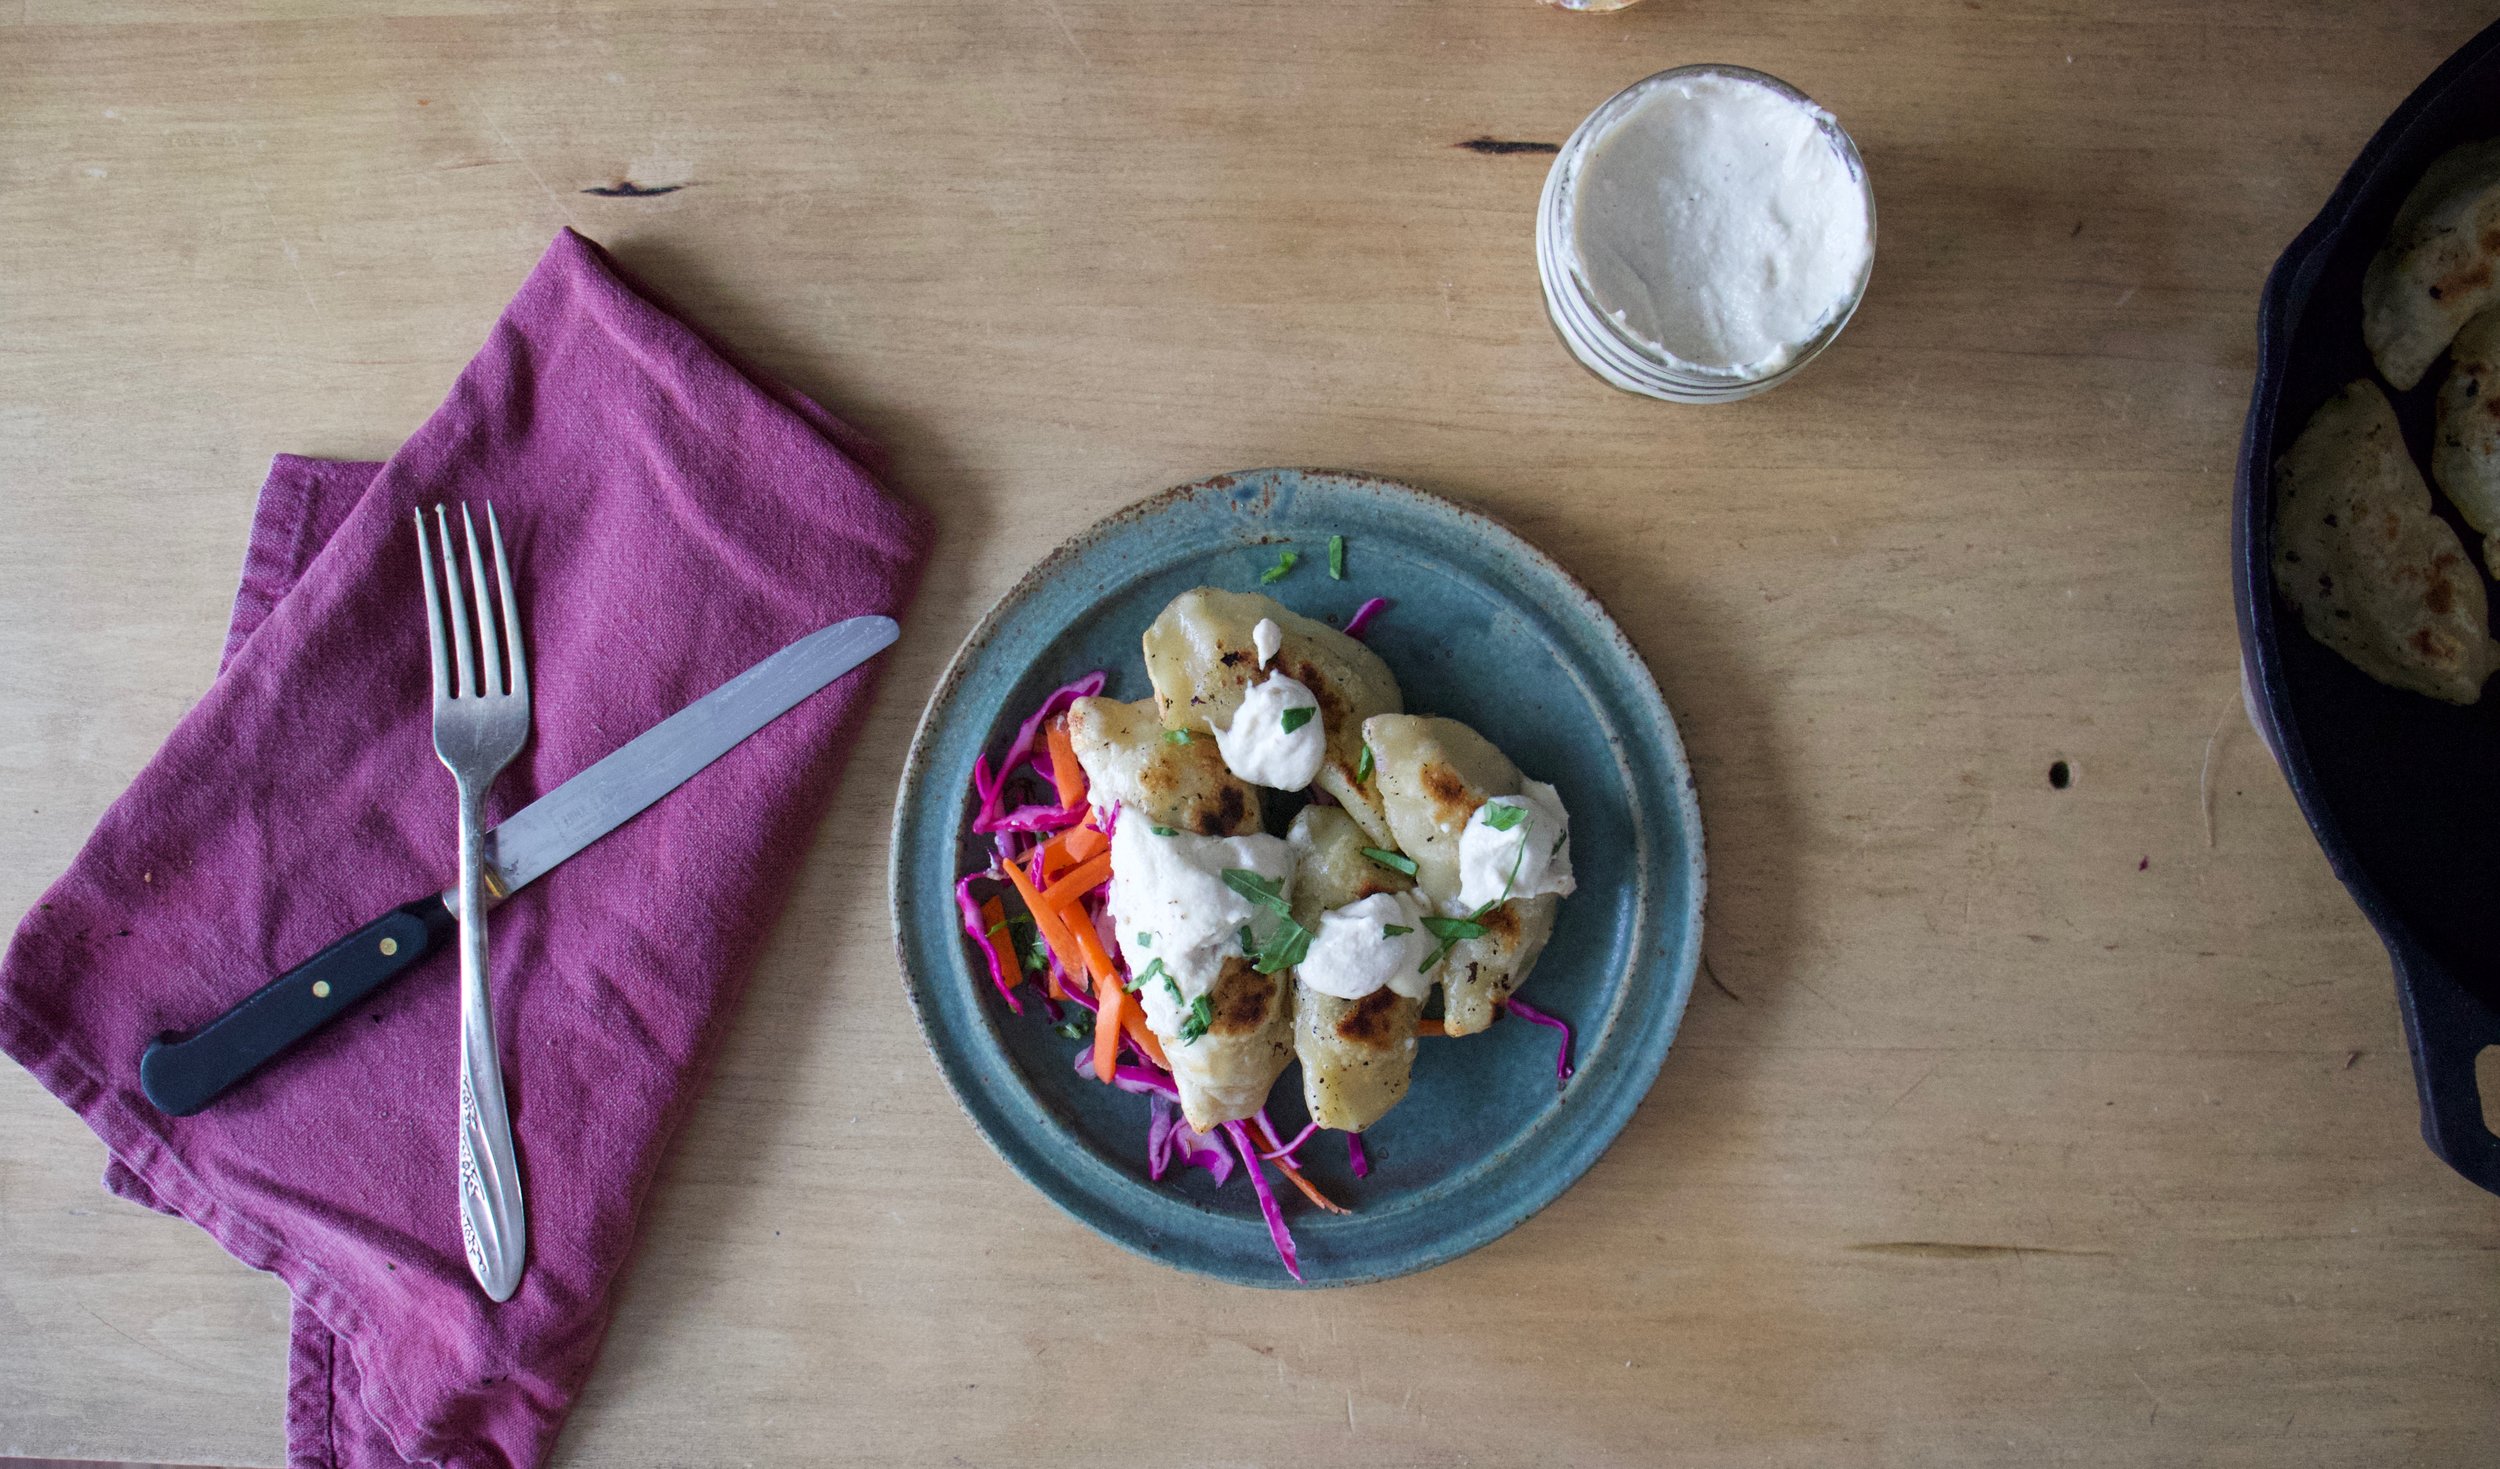
And then all is left is eating. layered on a bed of cabbage carrot slaw and dolloped with a good dollop of the cashew cream. Done and done and ready to for the face.
I don%u2019t know. Maybe Barb should have skipped school and work for dinner.. Just saying
-C
makes about 25
For the dough
2 3/4 cups all purpose flour plus more for dusting
1 cup warm water
1 teaspoon salt
3 tablespoons olive oil
For the Filling
1 large sweet or vidilla onion
2 medium sized russet potatoes
1 cup cooked chick peas
2-3 teaspoons olive oil
1 teaspoon dill (optional)
salt and pepper
For the Cashew Cream (Optional for serving)
1/2 cup soaked cashews (soaked for at least 1/2 hour)
2 tablespoons red wine vinegar
3 tablespoons hot water
salt and pepper
First off, make the dough. Mix the flour with salt then add in oil and water. Mix together until a shaggy dough forms then dump out onto a lightly flour surface and knead a few times to form a uniform ball. Place dough back into (cleaned) bowl and cover. Set aside to rest.
Once dough is made, chop onion into small little pieces and place in a large skillet with 2-3 teaspoons of oil. Stick on medium heat and cook until tender and browned. Also cook the potatoes. Chop the potatoes into small pieces (peel if you want but you don%u2019t need to) and place into a pot of cold water. Bring potatoes to a boil and cook until they are fork tender, almost falling apart.
Once potatoes are cooked, strain from water and place in a big bowl. Add in the cooked onion and the chickpeas. Sprinkle in dill if you are using and season with salt and pepper. Grab a potato masher or a fork and mash the mixture together. It can be a little chunky, but you don%u2019t want really big chunks. Taste and season if it needs it.
Filling is done so now grab the rested dough. Place dough on a lightly floured surface, cut in half, place one half back in bowl and roll the other out about 1/8 inch thin. Take a large biscuit cutter or a large cup and cut out circles. Gather remaining dough and re roll out. Do this until you can%u2019t. Repeat with second half of dough.
Once the circles are cut out, place about a tablespoon of filling into the center of each. Fold the dough in half and pinch closed. If the dough has dried out to much, brush a little water on the edge of circle to help it seal. Place the pierogi on a floured surface (so they don%u2019t stick) And don%u2019t worry if you have a little extra filling.. Just eat it.
When all the pierogi are made, let them rest for about 1/2 an hour. There are a good amount of pierogi here so if you want, stick some in a container and in the fridge to have in the next few days. Just make sure to flour them so they don%u2019t stick together. Or if you prefer, place however many you to want to save on a lightly floured baking sheet and stick in the freezer until frozen. Once frozen, place into a freezer safe bag or container. They will keep for a few months.
Also, before you finish cooking, make the cashew cream (if you want it) Just add soaked cashews to a blender with vinegar and the water. Blend until smooth and creamy then season with salt and pepper to taste. If the mixture seems to thick, just add a splash more water until it is a desired thickness.
To cook the pierogi, bring a large pot of water to a boil. Place pierogi, one at a time, into pot. 5-7 at a time as to not crowd them, and cook until they start to float. Remove the cooked ones with a slotted spoon and stick on a plate. Boil as many as you are going to eat. Grab a skillet and add a few teaspoons of olive oil. Heat to a medium heat and place the pirogies into pan. Cook each side for 4-5 minutes or until browned and crispy. Flip and cook the other side.
Remove form pan, place on a plate, dollop with cashew cream (if desired) and eat.
It happens every year. SO MANY TOMATOES! This is not a complaint, just a fun fact. And so for the forseeable future, besides canning and freezing tomatoes at a rapid pace, I will also be sticking them into everything. Enter here a tomato cracker. But who wants just a tomato cracker? I( bet some would love just a tomato cracker) But a tomato basil cracker, well that is something people will want. And yes, I have a buttload of basil at he moment too.. I cook with what I got!
Tomato basil crackers. First off, I needed to make a road snack for the mr and cut up chunks of raw tomatoes would not have gone down well with him, so I figured what better way to use up some tomatoes then a cracker situation because why the hell not.%u00a0%u00a0I was a little hesitant to use fresh tomatoes and not cook them or roast the in anyway before using them in the crackers, but I glad I didn’t. The tomato flavor really shines through, pairs beautifully with the basil,%u00a0and you get to skip having to deal with cooking down the tomatoes, which makes them all the more easy to make.
So I made the crackers and gave a baggie to the mr to eat, which he did right then and there (with some sweet ass baba ganoush because yes)%u00a0then packed a big bag for the road trip.%u00a0Not only was the mr chowing down, but my sisters were gobbling them up too, even the one who is gluten free. %u00a0That is good cracker validation.%u00a0
If you have never made your own crackers and you are a cracker person, now is the time to start doing it. I don’t eat crackers personally, but the mr and every one around me really seem to be cracker people so a while back I started to make them at home, and once you make a homemade cracker, the store bought ones will just not be acceptable anymore. But they really are super easy so you really should be making them at home anyway.. No pressure though.
The stuff. Flour, olive oil, tomatoes, fresh basil, and sea salt.%u00a0
Chunks of fresh tomato go into blender and get blended up all nice and smooth. Add in basil and oil and pulse until basil turns to little specks.
Pour the blended mixture into the flour.
Mix with a spoon until you can’t mix anymore then dump onto the counter.
Keeping the counter nice and floured, knead dough for a minute until it all comes together into nice ball.
Working with half of the dough at a time, roll out one of the pieces %u00a0about 1/4-1/8 inch thick.%u00a0%u00a0(really flour counter and rolling pin)%u00a0
And cut into crackers.. Shapes are up to you, but inch to 2 inch squares are easies to cut.%u00a0
Place crackers onto backing sheet. Before oven time and after oven time.%u00a0%u00a0They shrink and puff up a little bit in the oven. That is what a cracker is suppose to do. (but if you don’t like that you can prevent it by piercing the crackers with a fork before they go into the oven)%u00a0
And that’s it. Simple, and delicious.%u00a0
Crackers are looking all pretty like I am about to have party or something. I even made baba ganoush to serve with them. Lucky mr, he got to have this cracker party all to himself. Ha (He did not eat all of these crackers at once, that would be crazy)%u00a0
-C
makes between 100 -125 crackers%u00a0
3 cups flour
2 large tomatoes %u00a0( equal to 1 1/4 cup of tomato puree )
1/3 cup fresh basil leaves%u00a0
4 tablespoons olive oil%u00a0
About 2 tablespoons sea salt%u00a0
Remove core from tomatoes and place into food processor or blender. Blend until smooth and measure out 1 1/4 cups of the puree. Any left overs rs can be used as food later on. Dump measured puree back into blender and add in the basil and oil and pulse until the basil is in little pieces but not completely blended in. %u00a0Add flour to a big bowl then pour in tomato mixture and mix until a dough forms. Dump out onto counter and knead for a minute or two until dough is uniform in texture.%u00a0
Preheat oven to 400 degrees
On a floured surface, divide dough in half as to make rolling it easier, and roll dough into a rectangle that is 1/4- 1/8 inch thick. It is important to make sure the rolling pin and counter are well floured to avoid the dough from sticking. Once rolled out, sprinkle with sea salt and lightly roll the dough once more to kind of press the salt in then cut with either pizza cutter or a cracker cutter, or a knife, into 1 1/2 inch squares. The edges are going to be wonky shaped and you can either except them as they are or re roll and recut. (Note. IF you want your crackers to late flat and not puff up while baking, stab the crackers with a fork before they go into oven to create air vents. But honestly, most people really like the puffed up cracker)%u00a0%u00a0Place cut crackers onto a baking sheet and stick into oven. Bake for 15 minutes, checking after 10, until the crackers are golden brown. %u00a0Don’t forget to roll and bake off the other half of the dough!
Once crackers look good, remove from oven and place onto cooling rack. They will get crisper as they cool.%u00a0
Eat as many as you want. Store extra crackers in a airtight container or bag.%u00a0
Are you so excited that it is spring? I know I am. %u00a0But I am also realistic and know that even though it is “officially” spring, it is not going feel like spring here for a little while. There are still a few more weeks of potential snow storms and cold weather and then there is mud season before we really get to spring and things growing and green. %u00a0And plus there are still plenty of roots to finish up before we get into all the fresh spring veggies. You can’t plant broccoli and pea into frozen snow covered soil.%u00a0
I love me some root veggies, they are some of my favorite, although like every year around this time I am starting to tire of them. But what are you going to do? Stop complaining and stuff them into a spring roll with some lighter veggies and enjoy while you can because once the roots are gone, they are gone (until the fall).%u00a0%u00a0
These spring rolls are good, I mean really really good. The combination of the roasted roots with a fresh tangy mixture of crispy crunchy veggies and fresh ginger and soy and they are just really good.%u00a0When I made these, it was still vey cold outside so I even went an extra step and baked the rolls to give them a little crispiness to the wrapper %u00a0because crispy warm food is kind of nice when its cold out. Because it is still cold out.%u00a0
Happy Spring!!!
The stuff. For roots we are using beet, celeriac, parsnip, and carrot. Then we need onion, kale, cabbage, garlic, fresh ginger and rice spring roll wrapper. Also some sesame seeds, soy or tamari, apple cider vinegar, and a little oil or avocado oil.%u00a0
First thing to do is get the roots roasting. Cut the roots into !/4 inch thick disks %u00a0and place right onto a lightly oiled baking sheet then stick into the oven to roast until browned and tender.%u00a0
As soon as the roots are in the oven, chop the kale nice and small. Thinly slice the onion and the cabbage and mince and grate the ginger and garlic. Cute the carrot into very thin matchsticks.%u00a0
Toss it all into a bowl and mix with the soy and the vinegar… (this mixture is so very very good.. might just be a salad here soon)%u00a0
Don’t be gentle, toss with your hands. You can lick then after too.%u00a0
Roasted and cooled roots get a nice matchstick chop so they fit into the rolls.%u00a0
About time for assembly time. Damp wrapper with a pile of the %u00a0cabbage, kale, carrot, onion mixture and a few pieces of each of the roots topped with a sprinkle of sesame.%u00a0%u00a0Oh so pretty all waiting to be wrapped up.%u00a0
Fold sides over, fold bottom up, and roll nice and tight. Easy peasy.%u00a0
Place the rolls on a lightly oiled baking sheet. Lightly brush each roll with a little oil as well and stick them into the oven. After 10 minutes, flip them over was bake for 8 or so minutes more until both sides are lightly crisp.
And the they be done. Eat right away and serve with extra soy sauce.%u00a0
See, we are still happy to eat our roots. And spring veggies will be here before you know it.%u00a0
-C
make 6-8 spring rolls
1 beet
1 parsnip
a small bulb of celeriac (celery root)
1 carrot
1/4 head of cabbage
1 small red onion
2-3 kale leaves
1 tablespoon soy or tamari%u00a0
1 tablespoon fresh grated ginger
2 cloves garlic
%u00a02 tablespoons apple cider vinegar
tablespoon oil
about 2tablespoons sesame seeds
6-8 rice spring roll wrappers%u00a0
Preheat oven to 400.
Slice the parsnip, celery root, and beet into 1/4 inch thick %u00a0disks and place on a lightly oiled baking sheet. Bake for 15 minutes, flip, then bake for 10 or so more minutes %u00a0or until the veggies are browned and tender.
When the roots are in the oven, thinly slice the cabbage and %u00a0onion and toss into a bowl. Chop the kale into small pieces and thinly slice the carrot into matchsticks about 2-3 inches long. Place it all into the %u00a0bowl with the grated ginger, minced garlic, vinegar and soy sauce. Toss it all around and let it sit while the other veggies are roasting.
Once the roots have cooked, remove form oven and let cool. Keep oven on.%u00a0When they are cool enough to handle,%u00a0%u00a0slice the disks into matchsticks 2-3 inches long.
Time to assemble. Grab all the veggies
Take a shallow dish that can hold a little water and is big enough for a wrapper to fit and add warm water to it.
Keep your baking sheet from the veggies close and lightly oil it again.
Place a wrapper in warm water then place on a wet surface. (keep surface slightly wet or the wrapper will stick)%u00a0%u00a0Add a good pinch or so or the cabbage/kale/carrot veggie mix into the center of the wrapper then add a few of each of the matchstick roots on top. Sprinkle with sesame seeds and then roll. Once rolled, place on baking sheet.%u00a0
When all the rolls are made, lightly brush the tops with oil and %u00a0place into the oven and bake foe 10-15 minutes, flipping half way through
Remove from oven when each slide is lightly crispy and serve right away, preferably with more soy sauce to dip in.%u00a0
There is something about purple cabbage that makes me feel like I need to share it. It sounds weird , especially because I eat about a head of cabbage a day, but that is green cabbage. I barely buy purple cabbage because it cost twice as much and I really like green , but at farm share when you get to pick what color you want, I alway pick the purple. ( Side note. I used to call it red cabbage but have since stopped because it is very clearly purple and calling red just doesn’t make any sense)%u00a0
I also feel the need to do something a little more the chopping it up and eating it raw. So I make a little fancy. pretty, almond crunchy mustard type thing because that’s what I was feeling and I figure the mr would like it too. Note that I ended up using half a green and half %u00a0the purple because color is nice and also I ended up eating the other half of the purple before I could share it. But I caught myself before eating it all to may face and was proud of myself for thinking of others.%u00a0%u00a0
This dish is good, really really good.%u00a0. It has roasted cabbage which is alway great, but slathered with maple mustard and crunchy almonds.. it’s just freaking fantastic in all the ways. It also happens to be super easy to prepare and with minimal ingredients.%u00a0It makes for a great side dish, a main dish, and is great for sharing during the holidays that are just around the corner. Or if you are like me, not sharing and eating all afternoon long. (I did save some for the m for dinner because I am so nice)%u00a0
The stuff. Cabbage, red or green or a bit of both, stone ground mustard, maple syrup, almonds and pepper.
Easy peasy. Cut the cabbages about an 3/4 inch thick and lay them on a baking sheet. Pop it into the oven once it’s preheated.
While thats going on, mix some maple with the mustard and chop up the almonds.
After about 25 minutes, pull the cabbage out and flip them. Cover the top with maple mustard and sprinkle on the almonds. Stick the cabbage back into the oven and bake another 10-15 minutes, or until it’s roasted to your taste preference (I like it really roasted)%u00a0
Just look how pretty it is.%u00a0
Serves from a baking sheet but would look so lovely on a nice plater, you know, if you want to be extra classy.%u00a0
This cabbage situation is all of it.%u00a0
Have a great weekend and hope the Thanksgiving planning goes smoothly.%u00a0
-C
Makes about 6-8 slabs
1 head of cabbage (red or green or half of both)
1/4 cup stone ground mustard
2 tablespoon maple syrup%u00a0
1/3 cup raw almonds%u00a0
pepper to taste.%u00a0
Preheat oven to 425
Slice cabbage into thick slabs about 3/4 inch thick. Try to get them roughly the same thickness so they roast evenly. %u00a0Lay the cabbage on a baking sheet, not overlapping, and stick into the oven once it’s preheated. Bake for 25 minutes or until the bottoms of the cabbage are crispy.
While cabbage is roasting, mix mustard and maple %u00a0together and roughly chop the almonds. %u00a0
After %u00a0the 25 minutes, grab the cabbage from the oven and flip each piece. Cover the tops with the maple mustard and sprinkle on chopped almonds. Place back into the oven for another 10-15 minutes %u00a0and roast until the cabbage is as crispy as you like it.
Remove from oven, sprinkle with good pepper,%u00a0and serve. Extra maple muastd is welcomed to some. Any left over (but there won’t be any) is great eaten cold before bed %u00a0or tossed onto a salad for lunch the next day.%u00a0
I am finally getting to the point in the kitchen that I have stuff for food other then lentils and carrots. Slowly I am restocking all the food and spices that I have let myself run out of when we started the moving out process. It has been a great purge, especially for all of my spices, which I have (or had) so many of and some where maybe not as fresh as they should be. Slowly I have been dumping those not so fresh spices into the crock pot with beans and replacing with freshy fresh ones.
The other day I did a spice run at the coop. Bulk spices are the way to go but sometime I can get a little out of hand. A pinch of this, a cup of that. I want them all, but I was pretty good. Just a few for now, and nothing to crazy.%u00a0 One that I did get was dill, lots and lot of freshly dried dill (I might have gone a little overboard with the amount I bought. I guess I was worried I might run out of dill, but its ok, I will for sure use it.). What to do with dill? Well toss pretty much anything with some dill and vinegar and you got yourself a dill pickle of sorts which is great.%u00a0 I just so happen to have a pickle craving and not a pickle in the house so me and my abundance of dill went and pickled potatoes to make french fries. And I must say, these fries are freaking amazing.%u00a0 Everything fantastic about dill pickles and french fries all in one. Baked because I don’t fry things, and not at all french. These fries are just what I needed to hit my dill pickle craving and use up some of my abundance of dill.
Here’s to the pickle fries. Mouth puckering goodness!
The stuff. A few russet potatoes and some vinegar. Salt, pepper, garlic powder, onion powder, and dill are the spices to use. And olive oil, which is not pictured but necessary.
First off, cut up the potatoes into fries. Cutthe potato in half, then cut that half in half, then each half of half into strips… easy easy. Toss the now fries into a big bowl of cold water as you go. (It removes some of the starch so your fries are not soggy)
Stain the starchy water from the bowl then dump the vinegar in with the potatoes, tossing as you go. And now you wait. Stick the potatoes into the fridge for about 1/2 hour to an hour, tossing the them around ever 10 minutes or so. (the longer they are in there, the more vinegar they will absorb)
Now preheat. Strain the vinegar out of bowl, drizzle potatoes with olive oil and toss until evenly coasted then sprinkle on the spices.
Pretty potatoes, looking good enough to eat(but don’t eat raw potatoes, that is gross and will make you sick)
Single layer on a baking sheet, ready for the oven.
Baked until golden crispy and nice. Didn’t even wait for a plate, just some mustard and off we go.
Dill pickle french fries. So good.
Bye
-C
should serve 2 people
3 Russet Potatoes
1/4 cup white vinegar
2 teaspoons dill
1 tablespoon salt
1 teaspoon onion powder
1 teaspoon garlic powder
i teaspoon pepper
2-3 tablespoons olive oil
Rinse potatoes then cut lengthwise into 4 equal pieces. Then cut each slice into long strips about 1/2 inch . Place the cut potato into a bowl of cold water and toss them around to remove a bit of the starch. Drain the water then dump the vinegar onto the potato and toss around. Let sit for 30- 60 minutes in the fridge, tossing ever 10 minutes or so.
Preheat oven to 400.
Once the oven is hot, pour off the vinegar from the potatoes (can be reserved for cleaning) Drizzle the potatoes with olive oil, making sure they are evenly coated, then mix all the spices together and sprinkle all over potatoes. Place coated fries single layer on a baking sheet and into the oven they go. Bake for about 45 minutes flipping after about 25. Fries are done when they are golden brown and crispy.
Serve with ketchup, mustard or whatever you like on fries or pickles.
It’s strange to think that only a few years ago I was not a big eggplant fan. Before I started to experiment with cooking it myself, the only time I had ever really had it was when I was young and it was deep fried, like eggplant parm style. It just wasn’t for me.
So when I started doing my farm share 5years ago and were getting lots of eggplants, I knew I had to figure something out and try new ways of eating it. Well it turns out that I actually love eggplant, like a lot.%u00a0 I went eggplant crazy and for a while was eating a eggplant a day, either roasted or tuned into soup or cooked crispy into chips. And lots of baba ganoush, or what I think of as eggplant hummus (all the hummus stuff minus the chick peas). Smooth, creamy, rich and tangy. I have been know to make a batch and eat it all to my face in a sitting.( there is absolutely nothing wrong with that) It’s that good. And bonus. Being so super busy busy, this is just so dang fast and easy to make. 25 minutes and 20 of those minutes are the eggplant roasting, and you got yourself something tasty to eat. Plus if you have a few eggplant in the fridge that might have seen better days, turning them into the baba ganoush is a great way to go.
Baba ganoush, The name just says it all cause how could something called baba ganoush be anything other then awesome.
The stuff. A couple (or three) eggplants, a lemon, some tahini, garlic, olive oil and salt.
Eggplant get sliced in half and stuck onto a baking sheet to go into a super hot oven to roast. Some people oil it, I don’t, but you can if you want.
Brown and tender. Roasted to perfection.
Toss the roasted eggplant and the garlic into a blender. Add in the juice of the lemon, tahini, olive oil and a pinch of salt.
Blend.
So silky smooth. Taste and add any more tahini, salt, lemon that you want until it taste like it should taste to you.
And into a bowl it goes. Baba ganoush all up in your face. I highly enjoy a good dusting of some zataar on top, but even just a sprinkle of pepper, or sumac, sesame seeds or even thyme is nice. Or nothing, you don’t need anything.
A big bowl of baba served with some chippers (for the mr) and cut up veggies (for me!) I wanted to make pitas but just didn’t have the time. Oh well, next time.
Be careful, this stuff is addictive!
-C
Make about 2-1/2 cups
2 eggplants (or 3 smaller sized eggplant)
1 lemon
3-4 cloves garlic
3 tablespoons tahini ( more if you like)
1 tablespoon olive oil
salt
Zataar (optional)
Crank up the oven to 450
Slice eggplants in half and place on a cooking sheet and into the oven they go.
Bake for 25ish minutes, flipping over after 15 or so minutes, until the eggplant browned is nice and tender then remove from oven.%u00a0 Take the cooked eggplant and dump into a blender.(skin and all)%u00a0 Add in the juice of the lemon, the tahini, the olive oil, and a pinch of salt. Blend it all together until smooth. Taste and add more tahini and or salt if needed.( can even add more lemon too) Once you are happy with the taste, scoop into a bowl and serve with a good pinch of zataar seasoning (if your into it) and a butt load of veggies, pitas, chips or whatever you dip into you baba ganoush.
Winter squash season is in full swing. I have already started to hoard them in all the nooks and crannies around the house. There are sugar pumpkins on the stairs, buttercups on the floor and delicatas all over the counter. Ever meal, breakfast, lunch or dinner needs to have some squash. House rule.
This hear spaghetti squash has been sitting on a stool for about a week, looming in it’s size and just waiting for me to bake it off. The spaghetti squash at farm share have been bigger then a small child so I have been a little hesitant to bake it until the mr was down with eating it with me too.
What I love about this dish is that it is really simple and easy to make.We have been working later these past few days so when we get home, we really just want to eat and go to bed (not really….kinda really) The initial baking of the squash takes a little time, but its zero hands on and can be done ahead of time. And the rest, take like 8 minutes tops. Also a lot of time people forget that you can eat a spaghetti squash with things other then tomato sauce. (although that’s good too) But really, the sky is the limit. Squash goes with everything. %u00a0
So dinner. I had the squash and went with what I had in the fridge. Beans are great, fresh pico is amazing, all atop a big pile of some warm spaghetti squash. Well that is just what we call a winner. A winner dinner!!!
The stuff. A spaghetti squash (maybe go for a smaller sized one if you don’t want a lot of left overs) precooked or canned black beans, a red pepper, and some red onion. Also need garlic, cumin (crushed or seeds) salt and pepper, olive oil, and fresh cilantro. And lastly some home made or store bought pico de gallo or any of your favorite salsa.%u00a0
You don’t see it here, but the squash went into the oven about an hour ago to cook. I did nothing to it besides stab it once andjust stuck the entire thing right on in and cranked up the heat. Simple, easy.
Ok, so when the squash has been baking for a while, start getting the rest of thestuff ready. Small dice up the red pepper and the onion and toss it into a lightly oiled hot skillet to sweat down a bit.
Once the pepper and onion are nice and soft, toss in the cumin and minced garlic. Cook a little longer until the seeds and garlic are fragrant and cooked.
Add in the beans and mix it all around. Taste, add a little salt and pepper if it needs it, and set aside.
Spaghetti-ing the squash. I took it out of the oven when it was fork tender, sliced it in half on a baking sheet and let it cool off for just a minute. Scooped the seed out then scraped the cooked squash with a fork. Fun times, just watch you your hands, the squash is hot.
And your ready for food. Squash in a bowl, topped with some black bean mixture and a hearty amount of fresh pico. Serve it with lots (or none if you don’t like it) cilantro and a wedge of lemon(or lime)
This is some good stuff friends, some really good stuff.
Alright, now I have to get ready. We are taking a handful of the little pumpkin picking….A few more pumpkins to add to the stash.
-C
Serves 2-3
1 medium spaghetti squash
2-3 cups cooked black beans (or a can)
1 teaspoon cumin seeds (or crushed cumin)
a red pepper
a small red onion
2-3 cloves garlic
olive oil
1 cup fresh Pico de gallo or any of your fav salsa.
salt and pepper
a lemon or lime
fresh cilantro (optional)
To cook the squash. Preheat oven to 400. Grab squash a stab a small hole in it so when its baking it does bot explode (this has happened to me a few times) then stick the whole squash into the oven. Let bake for 45 minutes to an hour (depending on size) It is done when it is soft and fork tender. Once done, pull squash from oven, cut in half and let cool for a minutes. Once cool enough to handle, scoop out the seeds then start scraping the flesh with a fork to create spaghetti like strands.
For the beans. Small chop up the red pepper ans onion and toss into a hot skillet with a little splash of olive oil. Sweat the pepper and onion on medium heat and when they are close to done, mince up the garlic and toss that in along with the cumin seeds and a pinch of salt ans pepper (if needed) Keep cooking until the garlic is cooked and the cumin if fragrant.
To assemble. Grab a bowl and fill with a good amount of the cooked squash, top it with a big scoop of the black bean mixture and you desired amount of fresh pico or salsa. Add lots of extra cilantro and serve with a lemon or lime wedge to squeeze on top.
Now eat it.
Note….Any left overs make a fantastic cold salad or wrapped in a tortilla.
Every time I open the fridge, at least one (if not a few) come falling out from all the places that I have managed to squeeze%u00a0them in.%u00a0(the egg tray in the door is not a safe place for cucumbers) This is a slight problem, but a problem that I%u00a0kind of like having.
This past weekend I had planned on doing a bunch of pickling and canning. Like a whole day of music blasting,%u00a0dancing around the kitchen in a cute little apron with%u00a0wooden spoon in hand, (pretending its a microphone)%u00a0canning%u00a0all sorts of fruits and veggies that a piling up in massive amounts%u00a0for the winter months.%u00a0
That didn’t happen, and%u00a0I still%u00a0have a million cucumbers and not a whole heck of a lot of time this week to inact%u00a0my canning day day dream.
My simple solution. Cut um%u00a0up,%u00a0stick in a bowl with a%u00a0some fresh dill, a lithe%u00a0vinegar%u00a0and leave them on the counter%u2026.. %u00a0And watch as they disappear. It’s crazy. I find%u00a0if you leave a bowl of cut up anything on the counter, anyone that walks by will stop and eat a few pieces (if not the whole bowl) It’s a scientific fact (no not really, but maybe)
As for my blissful canning day. It will be happening soon. But until then, this is the way to go with those all those%u00a0cucks. (this works fantastic%u00a0will zucchinis too!)
The stuff. Cucumbers, onion, fresh dill, salt, pepper, and red wine vinegar.
Slice up the cucumber and onion and toss into a bowl. Spinkle with salt, pepper, and lots of fresh chopped up dill. Splash in the vinegar and toss it all around.
Let it sit on the counter for at least 2 minutes, but the longer they sit, the more pickley they taste.
And eat. %u00a0Leave on%u00a0the counter until they are all gone..which%u00a0won’t take too%u00a0long.
Enjoy the Tuesday!
-C
2-3 medium to large%u00a0cucumbers
1 medium %u00a0sweet%u00a0onion
a bunch of fresh dill
salt and pepper (fresh cracked is best)
red wine vinegar
Slice cucumber and onion into thin slices. and stick in a big bowl. Sprinkle with salt. pepper,%u00a0chopped up dill. Pour%u00a0on a few glugs of vinegar. Toss around, taste and adjust seasoning if needed and let sit on the counter for a few minute%u2026 or as long as you want*.
Eat all day long or until they are gone.
IF there are still cucumbers left over after 2 hours and you are worried about leaving food out all day %u00a0(I don’t worry, but that’s me), stick in the fridge until you ar ready to eat them.
That’s right, it’s October. Another month, another season. Jeeze time, slow the f down!
The week was another jammed packed crazy fest.%u00a0 We picked up 800sqft of flooring(that sucked moving) and bought more paint (pure freaking white). We finished laying all the tubing for the radiant floor heating, the radiators are painted, in place, and plumbed.%u00a0 The plumbers are coming tomorrow to give us a new boilers o we can use all these new heating devices. There were two birthday parties,(happy birthday Miley Lu and Alex) a day at the pumpkin patch and drawing flowers, and the constant running back a forth between hardware stores. I had the birthday boy over for breakfast and asked him what he wanted me to make him. Anything, and he chose eggs bacon and toast. I made the eggs and toast but was not willing to cook the bacon. Bad aunt maybe, but I wasn’t about to stink up my house with that. Just no. So I gave him chocolate chips and sprinkles instead. He was happy. Oh and my little (by giant) brother came home for the first time for the weekend from the military college dressed in military garb and looking all beefy and smart. Crazy what a month away from home will do to a person. I think he is much cooler now.(but don’t tell him that)
Maybe one of the best parts of the week…..Found my vintage yellow fridge! Oh how I love the craigslist. The mr and I went and picked it up yesterday. Had to load the heavy as hell fridge on top of the Volvo and drive 20 miles. It was terrifying . I thought the fridge was going to go barreling off onto the hood of the car or tip over and roll away. But we made it and now we are proud owners of a vintage yellow frigidaire fridge. It’s all sorts of fantastic.
So yeah, I am really tired today and feeling a little lousy this morning. I think I need to take it easy today, I can feel this turning into full on sick if I don’t catch it now. The mr and I need to clean up at the house and get ready for the plumbers, but other then that. Me and the couch are going to be friends today. Coffee, book, sleep. Sounds like a plan.
My internet finds from the week.
-Something I think about way too much. Now %u2014 And The Physics Of Time
–HOW A PERUVIAN FARMER IS GROWING 180 KINDS OF POTATOES
%u00a0-The FDA Is Finally Going to Update the Term %u2018Healthy...Finally
-WE should all know this because we should The top 7 ways a trip to Mars could kill you, illustrated
–The Sweet Emotional Life of Bees.This is true of most people too.
-I reek of garlic All. The. Time. Finally, Here’s Some Good News About Garlic Breath
-Ever wonder about take out containers? Chinese Food Delivery Containers, Explained
–Our Robot Overlords Are Now Delivering Pizza, And Cooking It On The Go. Or just make your own at home, but this is still kinda cool.
-The 11 Varieties of Winter Squash You Need to Know Cause its squash season
-The night comes sooner now so I can get outside to see the stars before my bedtime. A Meteor Shower and 8 More Can%u2019t-Miss Sky Events in October
WHAT! Is it really almost Thanksgiving? Got you dessert plan yet? Thanksgiving doesn’t have to be all pies, pies, pies… a cookie can be the perfect ending to any holiday meal. Don’t get me wrong, pie is awesome! I love to make pies, but whenever I show up to Thanksgiving dinner with the family, there are always maybe one or five too many. Yeah my mom thinks we all will eat 2 pies a piece This cookie is the perfect holiday combination. It says, yeah I am classy with my white chocolate chips. Cranberries are a nice seasonal flavor, and those pistachios.. this lady really went all out. WIth this cookie, you lose the formalities of pie. You don’t have to feel the pressure of eating piece after piece of pie. Eating cookies is a little easier. Grab a cookie and go for a walk. Have a piece of pie and chat for a while. Need little something.. well maybe another cookie. Watching a family movie after all the clean up and dishes are done? Why yes, a cookie is a no hassle movie snack. Bonus…Left overs are easily stored in tins or plastic baggies and there is no, Hey, where’s my freaking pie plate?
For real. People love these cookies but full disclosure: the small littles not as much. Their little mouths don’t yet appreciate the cranberries and pistachios as much as some folk. When we taste tested these cookies with the littles, the loved the cookie and they loved the white chocolate chip. A few(not all) picked out the cranberries and the $20 a pound pistachios. Needless to say, a batch of plan chocolate chip cookies always wins with the small people crowd.
If you are on dessert duty this Thanksgiving, I recommend making cookies.
So simple and so elegant. This combonation is the perfect balance of the sweet white chocolate, the tart cranberries, and the crunchy yum of the pistachio.
I don’t own a stand mixer… I know, it’s really sad, but I do have several littles who have lots of energy and are easily swayed to mix mix mix…Just give them the spoon and tell them they can lick it clean when they are done….. And so goes the sugar, butter, and vanilla..creamed together by the arms of babes. Makes the cookies taste better.
In goes the dry…These ladies knows how to stir!This guy got lucky. He got to stir in the goodies. I gave him his own bowl of chocolate for his skills. It’s important to pay the help.
So there you have it, a lovely cookie to share.
White Chocolate Chip Cran-Pistachio Cookies
Ingredients
1 cup (2 sticks) butter, softened
3/4 cup packed brown sugar
3/4 cup white sugar
2 egg
1 teaspoon vanilla
2 1/4 cups all-purpose flour
1 teaspoon baking soda
1 teaspoon salt
3/4 cup white chocolate chips
1/2 cup dried cranberries
1/2 cup pistachios
Preheat oven to 350
In a large bowl, cream together butter, brown and white sugar. Once light and fluffy, mix in both eggs and vanilla.
In separate bowl, whisk together flour, salt, baking soda. Slowly mix dry ingredients into wet. Add in the cranberries, pistachios and white chocolate chips. Mix until combined. refrigerate dough for 10-15 minutes before baking..
Drop dough on non greases cookie sheet. Place sheet on middle rack and cook for 9-12 minutes or until a slight golden brown.
Note: dough can be made up to a week in advanced and refrigerated.
Should make about 3 dozen… It really depends on the size you want.
Be Cool and Make Some Cloth Napkins — The Lovely Crazy
August 19, 2019 by maximios • Blog
I am not a fancy person by any means, like super, no frills, no one would ever consider me fancy. EVER.%u00a0With that said, I am always and forever a cloth napkin lady. I have a drawer full of them, in all sizes and color. I use one with every meal %u00a0(I am a sloppy eater).And napkin use is not just about functionality, it is also about looking pretty.%u00a0 When I go for a clean napkin, I like to pick one that looks good with the meal that I am eating. I think a pretty clean napkin really makes any meal just a tiny bit better. Does that sound weird? I don%u2019t know but this is just a little look into how my mind works.
And recently I have set a few too many of my kitchen textiles on fire (towels, napkins, and potholders) so I am in need of a few new, nice looking napkins.%u00a0
And let’s get this straight. Cloth napkins are not about being fancy, they are about wiping you hands and face with something lovely, that doesn’t need to be tossed into the trash after use. Cloth napkins are also a great way to add a nice splash of color tot a table settings or a nice doth barrier between your lap and all the food that ends up landing on it. I have even been known to do a cloth napkin-tuck into the shirt- type situation if I am eating something particularly messy and have on decent, clean shirt (doesn’t happen too often).%u00a0Cloth napkins also double up as a rag when the inevitable spill happens at the table. See, not just for fancy people. Cloth napkins just make sense. And sure, if you are introducing them at the Thanksgiving table that happens to set a bunch of guests, or maybe making a few, wrapping them up with a ribbon and gifting them for Hanukah to Christmas%u2026that would totally be cool and not at all showy and over fancy. You just seem like a leveled headed person that uses and or gifts totally cool and useful things. And whatever if it makes you badass for making them yourself%u2026. cause you probably are badass anyway.%u00a0
So if you got the desire and a little bit of time (this project is great to do while watching a good holiday movie) you should make yourself (or someone else ) some cool ass cloth napkins.
What you will need, besides a sew machine
Step 1.
Start by laying out you fabric flat, and if you want, run an iron over it to remove creases %u00a0(I would haven but my iron%u2026 can’t find it anywhere!)
When your ready, fold all the edges in 1 inch and crease with either an iron, or a flat edge (my ruler works great here)
Step 2.
Unfold last fold and the refold %u00a0each side 1/2 inch and crease.
. You now have 1/2 inch and a 1 inch crease on all sides of your fabric.
Step 2.
Now go back to the 1/2 inch crease and stick few pins in otto hold it in place.%u00a0
Start with any corner %u00a0and fold the corner over 1 inch and crease.%u00a0
Step 3.
Take a fabric marker and mark that crease Repeat with all corners.
Step 4.
Grab a marked corner and fold the napkin in half, right side together,making sure the line you just marked match up, Stick a pin in it so it stays put.
Step 5.
Run a stitch through that line.
Step 6.
Snip off the remaining tip of fabric
Repeat step 3-6 with all corners.
Step 7.
And for the most fgratifing part,%u00a0fold over %u2026 Repeat to all corners
ALmost done!
Step 8.
Lastly, run a nice stitch around the border. I went with a simple stitch, but if you are feeling a little zig zag or some other funky-ness your machine can do.. go for it.%u00a0
See, fancy(but not), pretty, made by you. napkins.. and they are so easy!%u00a0
Have fun and if you know me and end up making yourself some, let me know so I don’t end up giving you more napkins for the holidays.
Have fun!
-C