
THE LOVELY CRAZY
 Wowzers…Is it for real Memorial day weekend? Where has all the time gone? Let’s talk about a week gone by fast. My brain is on complete overdrive and I am having a hard time keeping it from exploding…SO MUCH TO DO! (Not bad stuff, just a lot of stuff) But lo, that’s life right? There is always a lots of “stuff” to do, but today I am going to try and let that stuff chill and maybe give myself a few hours of coffee, (so much coffee) reading a book in the sunshine, gardening, and just some overall chillin.
Hopefully.
And hopefully you party people out there will be able to do a little of the same, or at least the chillin part. It is a 3 day weekend after all (not for us, but whatever)
Some internet fun finds.
-Sleeping in a loft that I have to crawl to get to the bed… this Gallery of Gorgeous Attic Bedrooms makes me so jealous..
-This new startup wants to sell you ugly fruit and veggies. I still don’t get it, it’s not ugly, its awesome.
-So cool and reminds me of my late brother in law. Wet Fold Origami Technique Gives Wavy Personality to Paper Animals by Artist Hoang Tien Quyet
-Could this be my new home? And I love a good plant lady. BURSTING WITH PLANTS, A 1910 PORTLAND FOURSQUARE FOR A FLORIST AND BARISTA
-Its so weird how try this is. Going, Going, Gone: 30+ Items That Are Disappearing from Our Homes
-We are doing this is the humongus pot hole in front of our house(we want to anyway) Treats in the Streets: Artist Jim Bachor Fills Potholes with Ice Cream Mosaics
-Holy shit is this the mister. 5 Conditions That Afflict the Reluctant Dishwasher. (1 and 2 really hit the nail)
A few photos from the week Goodbye fiddleheads…. Hello ferns
 On our way to a geo catch…. And note clothing options for 2 in the afternoon. I am much fond of that little guy wearing a rain jacket without a shirt in when its sunny and 80 degrees. And a pink poke dot bath robe.. I mean, it’s so the cool thing to do.
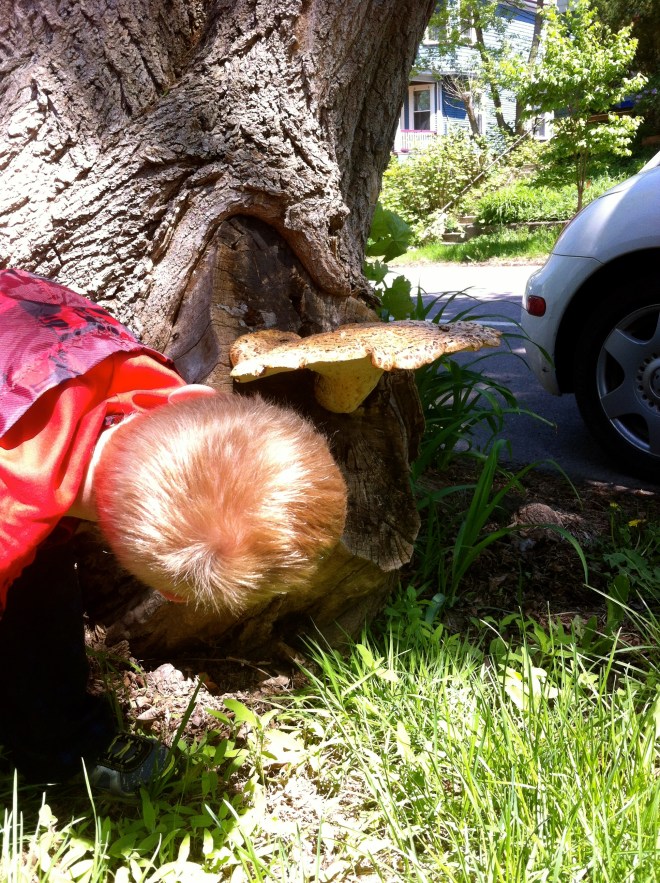 We didn’t find the geo, but we found this gigantic mushroom. Just as cool, maybe even cooler.
 I love brick and there is one street in all of burlington (that I know of) that has brick sidewalks. I like to walk down it a lot.
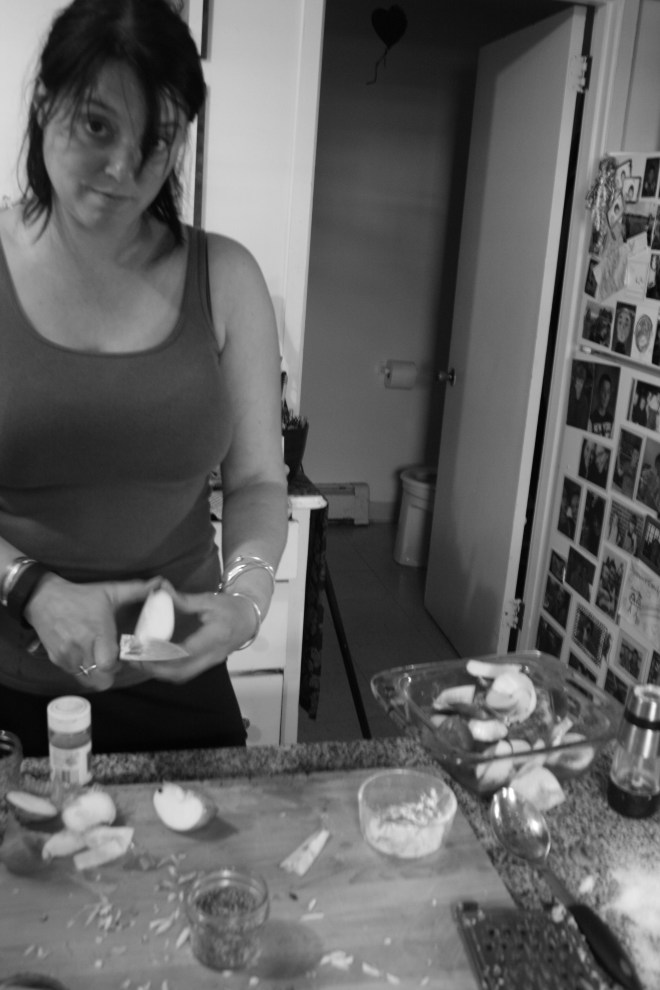 Nurse lady making food… I compare this to a big foot sighting. I have heard stories that she cooks,but have never actually witnessed it myself. (Just kidding….kinda)
Happy long weekend! (if you are lucky to have one!)
-C


My oldest sister graduated from nursing school this past weekend (wahoo!) and the friends and family had a party for her. I made these cupcakes for the party.But really, I made them just for her.
See, she is not a lady big on sweets. When I asked her what kind of dessert she wanted me to make her, she said if I could make a cake out of french fries, well that would be great. (I was close to making a french fry cake) But instead, I went a slightly different route and made cakes out of thing that I know she loves and can eat. Jalapeños because she is obsessed. Strawberries cause she likes her some fruit and are in season and I think, go with everything. Avocado frosting because she loves avocado and cornmeal because it makes the cakes a tad less sweet and a little more hearty. I also used GF flour cause she is GF.
Wow, I am the best sister. And here are a few more reasons why..
- I went to the party (I am not a big party person.. But I did have fun and her friends were cool)
- I changed into a clean outfit for her party (I really didn’t want to)
- I stayed out past my 6 (I made it until 7.. what!!!)
- I make her food
- I am awesome (I think so anyway)
So yeah. The cupcakes. The Nurse lady totally got down with these. I am pretty sure that I heard the words, amazing and oh my good, while they were being noshed on. The day after, the nurse lady told me that they were the talk of the party (bullshit, but thanks)
Whatever, I was just glad she liked them.

The stuff. For the cupcakes; cornmeal and some pre blended gluten free flour. Sugar, salt, baking powder and baking soda. Soy milk (use whatever milk you want) oil, apple cider vinegar, strawberries and a couple jalapeños . For the icing; an avocado, a lemon, and some powdered sugar.

This is not a hard batter to work, no need for a mixer or to cream anything, it can all be done with a wooden spoon.
First, preheat the oven.
Then trim and tiny dice the strawberries, remove seeds and tiny dice the jalapeños and toss it all into a bowl. Sprinkle with a bit of sugar.

In a large mixing bowl, whisk together the flour, cornmeal, baking soda and powder, salt and sugar. Then add in the rest of the stuff. Stir together until combined.Now fold in the chopped berries and jalapeños and scoop batter into a well greased (or lined) cupcake tin.
Stick into oven to bake…

Check cakes after 20 minutes and remove from oven when they are golden brown and a tester comes out clean when poked.
Remove from pan and place on a wire rake to cool.
While the cakes are a coolin, add avocado to a blender with the zest of half a lemon and the juice of that half of lemon and blend smooth. Add in the sugar and blend.
The icing should be thick, but spreadable. Using your judgement and you taste buds, add more sugar if the icing seems to thin or lemon juice if it seems to dry.
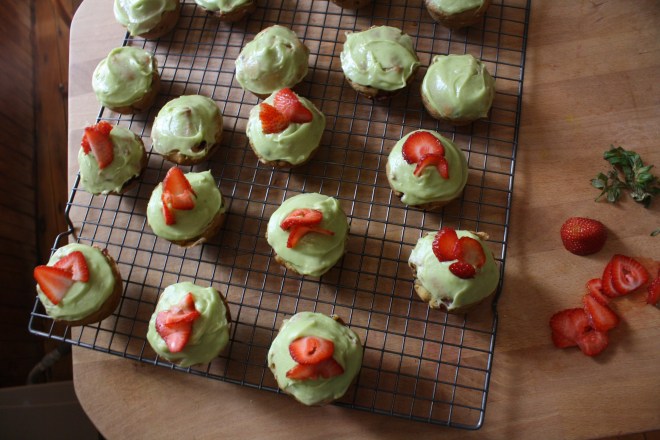
And once the cakes are cooled, spread with icing and top with sliced strawberries.
Your welcome Nurse Shannon!
Happy Friday!!!
-C
Jalapeño Strawberry Cornmeal Cupcakes with Avocado Frosting
makes 24 cupcakes
- 1 1/2 cup gluten-free flour blend (if you don’t need or want it gluten-free, just use all-purpose flour)
- 1 1/2 cups cornmeal
- 3/4 cup white sugar
- 1 teaspoon salt
- 2 teaspoons baking soda
- 2 teaspoons baking powder
- 1 tablespoon apple cider vinegar
- 2 cups nut or plant milk
- 1/2 cup oil
- 1 1/2 cups diced fresh strawberries
- 2 jalapeños
For the frosting
- 1 whole avocado
- 1/2 lemon (zest and juice)
- 2-2 1/2 cups powdered sugar
Pre heat oven to 350
Wash, trim and dice strawberries into little pieces and toss into a bowl. Remove stem and seeds from jalepenos and dice into small pieces.. add to bowl. Sprinkle with a little sugar.
In a large bowl, combine flour, cornmeal, baking soda, powder, salt, and sugar and whisk together. Now add in the oil, milk, and vinegar and mix together with a wood spoon until combined. Lastly, fold in the strawberries and jalapeños.
Scoop mixture into well greased (or lined) cupcake tin and stick into oven. Bake for about 20-25 minutes, or until cakes are gold brown and a tester comes out clean. Remove from oven, remove form tin, and sick on a wire rack to cool.
While the cakes are cooling, take the avocado, sugar, and the zest and juice of half a lemon and blend with your choice of blending drive until smooth. The icing should be thick enough to If the icing is to runny, add more sugar, or to thick, a little more lemon juice.
Now Ice cupcakes and top with sliced strawberries.
Eat for breakfast, lunch, dinner or dessert.
No utensils required, just some teeth.
 A couple of days ago, during a grocery store porous, I stumbles upon a produce item that I have not seen sold in stores before, Broccoli leaf. And I was kind of surprised to see that they were selling bunches of the leaf, organic, at 2 bucks a bunch. I was very excited ! But wait.. You can eat broccoli leaves? Heck yes you can! Broccoli leaves are fantastic. They taste kind of like broccoli, have a hearty texture like a collard, and can be used raw or cooked just like any other green. Its just one more super yummy green to add to your repertoire. So when I bring home something that I find to be a good score, like a bunch of broccoli leaves, I feel like I have to share it with the mister. (I am so nice) And this dish was how I shared them…. Tossed into a bowl of garlic raging pasta.
  The stuff…. A bunch of broccoli leaves, lots of garlic, pasta, olive oil, salt and a lemon. Pretty simple right?
  Fist off, get your water boiling for the pasta. Once its ready, drop a pinch of salt into the water and stick pasta in for the amount of time recommend by pasta box people. While the pasta is boiling, mince up the garlic (I used my garlic press) into a skillet and add in the oil. Stick on a burner on medium for a few minutes, stirring around to make sure the garlic doesn’t stick and burn.
 Once you start to smell the garlic, turn heat onto low, chop up the broccoli leaves (stems and all) and stir around until wilted and add in the juice of half a the lemon.When the pasta is cooked, remove a few tablespoons of starchy water and strain the noodles. Add water and pasta right into the skillet with the other stuff. Toss around, taste, season with salt and pepper. Go ahead and add some chopped tomato and or parmesan cheese if you want.
  And serve your amazingly amazing pasta. And make sure that you are ok with really smelly garlic breath…Casue it’s going to happen. Keep it good! -C
Broccoli Leaf and Garlic Noodles
- 1 bunch fresh broccoli leaves (about 3 cups chopped)
- 2 servings of your favorite pasta (spaghetti, penne, vegan, gluten free…..)
- 8 or so fresh garlic cloves
- 1/4 cup olive oil
- salt and pepper
- lemon (optional)
- parmesan cheese (optional)
Start by bringing a pot of water to a boil with a pinch of salt. Add in pasta and cook per instructions on box. While pasta is cooking, mined garlic and add to a skillet with the oil. Place on a burner on medium heat and cook and stir until the garlic becomes fragrant. Chop the broccoli leaves (stems and all) into bit sized pieces and add to the garlic oil and toss around to wilt the leaves. Squeeze in some lemon juice. Once the pasta is done cooking, remove a few tablespoons of the starchy water and strain the pasta. Add the water and the noodles to the skillet, toss to evenly coat the pasta and call it down. Serve in a bowl or on a plate, topped with freshly chopped tomatoes and parmesan cheese if you so shall please and another little squeeze of lemon juice if you like. Watch your mouth.. it will be breathing out garlic like whoa.

My contribution to last nights dinner at my sisters…. Freshy fresh veggies spring rolls.I had about 30 minutes between work and getting over to my sisters house to throw something together so it needed to be something fast, easy, and something I could make without going to the store. She was making the main course (some teriyaki situation and rice) so I was doing up the veggies.
I had just bought a package of spring roll wrappers…. Bingo! The perfect and logical choice. I grab the wrappers, a variety of veggies and after spending 12 of my 30 minutes trying to scrub the oil based paint off of my face and hands, I still managed to completely prepare, construct, and take pictures of these lovely tasty spring rolls. and get over to my sisters in time for dinner.
Impressed?
Damn right!


The stuff. Carrot, beet, asparagus, red cabbage, and kohlrabi, which all (except asparagus, which I just cut into thirds) got cut into matchstick sized pieces with my mandoiln. Then there are the rice spring roll wrappers that we need to make the veggies into rolls. Also a bit of red wine vinegar to drizzle onto the veggies for a little extra zing. And lastly, soy, fresh ginger, and a couple cloves of garlic for a spicy salty dipping sauce.Start by having everything set out and ready to assemble. Fill a large shallow dish or baking sheet with really warm water. Working with one at a time,place a rice wrapper into water and let sit for about 10 seconds or until the paper starts to soften. Remove from water and place on a damp surface (just splash a little water on the counter) Take a little bit of everything and and place on the lower middle part of the paper. Fold in the sides first, then tuck and roll the wrapper as tightly as you can without ripping the wrapper.


Repeat until you have used up all you veggies.For the dipping sauce. Finely grate ginger and garlic and add to soy sauce. Stir… and it’s done.Freshy, pretty and fantastically delicious. And for real, took about 8 minutes to make. (I even had enough time to wash the dishes before we left!)
I am so awesome!
Hump Day Pow!!!!!
-C
Fresh Veggies Spring Rolls
Makes 8-10 but can easily be increased or decreased to desired amount
- 8-1o rice spring roll papers
- Splash of Red wine or rice vinegar
- 1/4 cup soy or tamari sauce
- 2 cloves of garlic
- teaspoon freshly grated ginger
- 1 medium carrot
- 1 medium beet
- 1/4 head of purple cabbage
- 10 thin fresh asparagus
- 1 small kohlrabi
Note… I used the veggies that I had in the fridge at the moment. If you have a bunch of veggies but not these particular ones, use what you have. Pretty much all veggies taste good inside a spring roll!
Gather your veggies and prep by either using a mandolin, a grater, or some sick knife skills, and julienne, shred, or slice you veggies into thin match sticks. Once all the veggies are prepared, sprinkle a little vinegar over the top.
For the rolls…Grab a large shallow vessel (a rimmed baking sheet works great) and add in warm water. Working one at a time, place the wrapper into the water for about 10 seconds or until the wrapper starts to soften. Remove and spread onto a clean, damp work surface. Gather a bit of each veggie that you are adding and place towards the bottom middle of the wrapper. Now fold the sides in over the pile of veggies. Then with the side closest to you, tuck and roll wrapper away from you, trying to keep it tight, but not to tight that it rips.. (Hopefully that makes since.) Place finished rolls onto a damp surface to keep from sticking and if not serving right away, drape with a damp towel or paper towel to keep from drying out.
For the soy ginger dipping sauce. Add grated ginger, minced garlic, and soy into a bowl and mix together. Serve with spring rolls.
Eat one, two, or a plateful. It’s nice to share but not a necessity.
 My winter farm share is coming to an end this week. One more pick and then a three week stretch until the summer share starts… WHAT AM I GOING TO DO!!! Stock up as much as I can is what.
I have been strategic about the roots and veggies that I have chosen to bring home the past few weeks.(My farm lets you pick what you want) I know what I can buy at the store, things like carrots and potatoes, so I have been passing those up, but the roots like beets and celeriac… I have been bringing home baskets of those and hoarding them in the fridge and basement in preparation for the laps in farm fresh food and knowing that if I want to by these at the store it s going to coast me a million dollars a pound. (a for real million dollars)
Yup, lots of roots around here, especially celeriac root which is fantastic. I am kind of obsessed with celeriac, with its fibrous, knobby exterior, soft but almost meaty texture inside, and a flavor that is close to celery but so much better. I don’t know why it has taken me so long to do a posting featuring this amazing root vegetable (I eat it almost every day)
So here, an amazingly tasty, hearty but not heavy, celeriac recipe. Perfect for spring and the change into summer…. Mustard roasted celeriac with an fanatic split peas gravy that will have you licking you bowl clean.
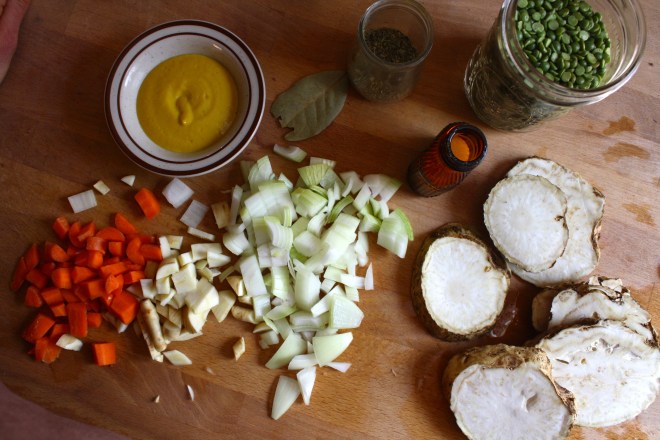 The stuff….For the split pea gravy we have a carrot, a parsnip and a large onion chopped into small chunks. Salt, thyme, a bay leaf and of course the split peas. Then there is the celeriac root* sliced into 1/2 inch thick rounds and some plain old yellow mustard .
*Note. I don’t peel my celeriac root. I really enjoy the fibrous exterior but realize that some don’t(The mister does not like it) so peel it if you want.
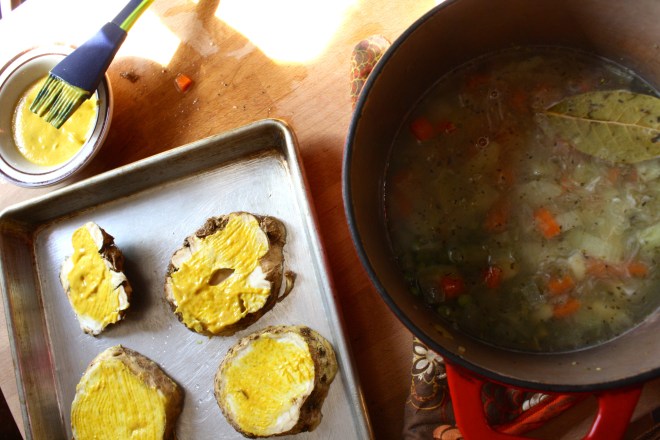 Toss the chopped parsnip, carrot, onion and the spices into a pot on medium heat and let veggies sweat a few minutes until tender. Add in the split peas and enough water to cover everything. Turn pot on high and bring to a boil, then cover and turn to low. Make sure to give the pot a good stir ever few minutes and add more water if needed
While the gravy is cooking, take the celeriac rounds and brush each side with yellow mustard, sprinkle with pepper, and place on a baking sheet. Stick into the oven to roast for about 25 minutes, flipping the rounds after about 10 minutes.
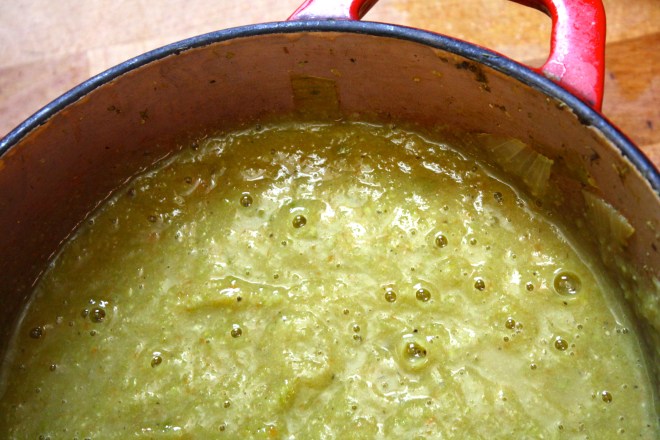 Once the peas have soften, remove the bay leaf and puree until smooth and oh so creamy. Taste and add more salt and pepper if needed. If you find that the gravy seems to thick, just add in more water until it’s the consistency that you want.
 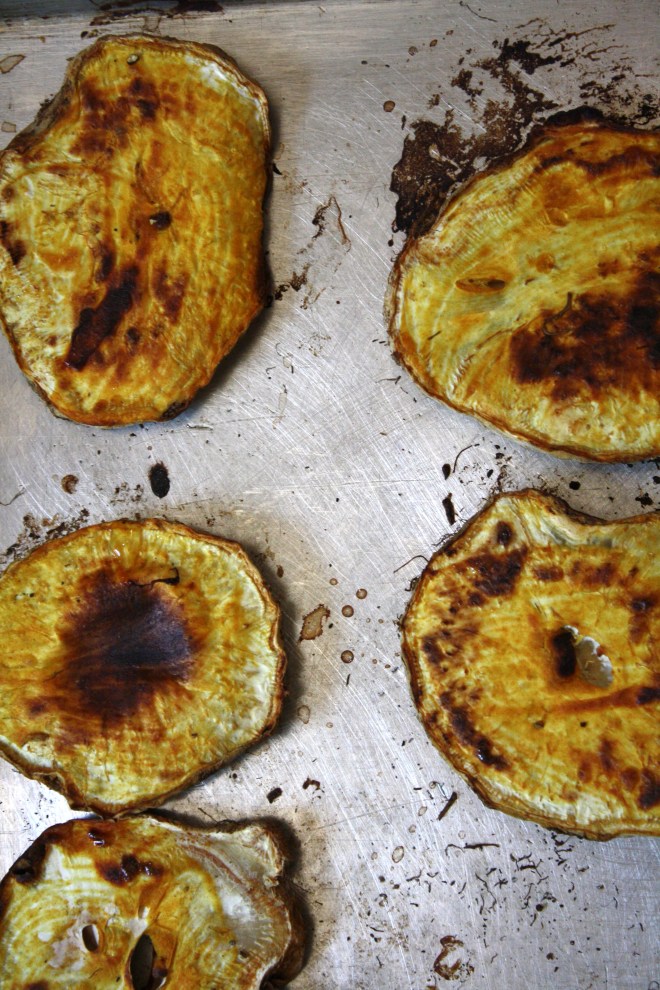 The gravy is made, the celeriac is roasted… now we are ready to eat!!
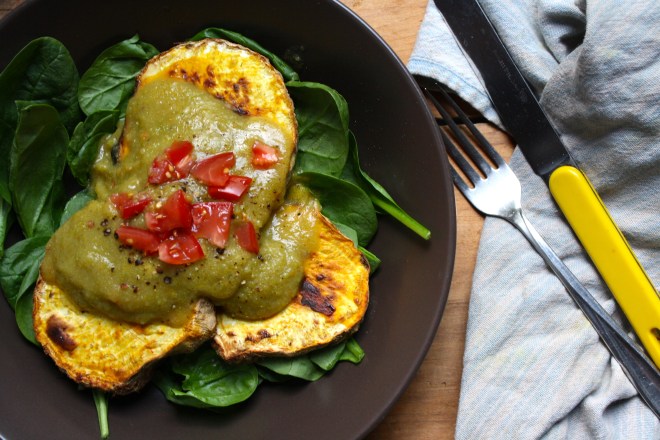
 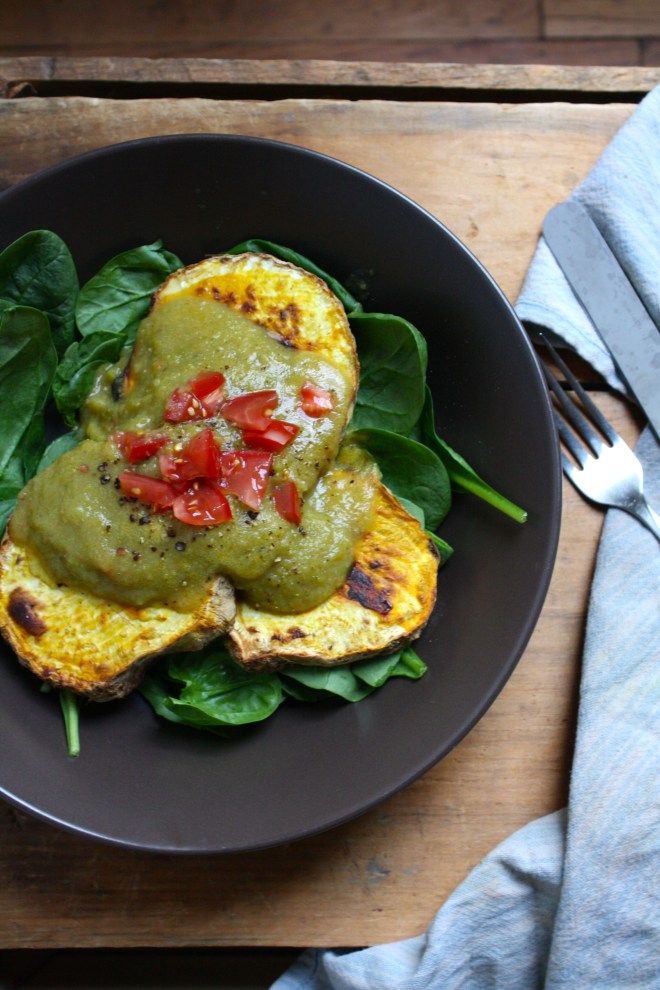 Stick the celeriac on a plate and dump good amount of that gravy right on top. Feel free to add a bed of spinach, or a grain or anything you want, because why not, and also some chopped tomatoes for a little acid and prettiness.
Serve with the fanciest knife and fork you can find. Extra yellow mustard and sriracha sauce are great condiments to have close by.
Happy Tuesday!
-C
Mustard Roasted Celeriac with Split Pea Gravy
- 2 medium celeriac roots
- 6 tablespoons mustard
- 1 large carrot
- 1 medium parsnip
- 1 large yellow onion
- 2/3 cup split peas
- 2-3 cups water
- 1 bay leaf
- 2 teaspoons thyme or italian spice mix
- salt and pepper
- spinach (optional)
- diced tomatoes(optional)
Preheat oven to 400 degrees
Small dice the carrot, parsnip and onion and throw into a large pot. Spinkle with salt and pepper, add in the thyme and bay leaf and add a splash of water. Stick on stove on medium heat and stir. Let cook until the veggies become soft and fragrant. Now add in the split peas and 2 cups of water. Bring to a boil then cover and turn heat down to medium low. Let cook until the split peas become tender (about 25 minutes) string on occasion and adding more water if the peas are not completely summered while cooking.
Once the peas are tender, let cool for a few minutes, remove bay leaf, and either dump into a blender or blend with an immersion blender until nice and creamy. If gravy seems to thick, add in more water.
Scrub or peel celeriac roots and slice them into 1/2 inch think rounds. Place on a baking sheet and brush mustard on both sides and spindle with pepper. Stick into oven for about 10 minutes, flip, then back into the oven for another 15 or so minutes, or unit the celeriac is tender.
When the celeriac is done remove from oven and stick a few rounds on a bed of spinach (or not, or any kind of grain or green you like) Top with a hearty helping of the gravy and toss on some chopped up tomatoes.
Eat with at knife and fork like a fancy person.
 It’s Mother’s Day weekend which means that you and I and everyone out there should feel the slightest bit obligated to at least do a little something nice for your mom for the mere fact that you were borned. And really what better way to celebrate mom than with food… It really is the least that you can do. (I think mom’s also like flowers and cards and handmade pasta necklaces) My mom is defiantly about the food. (she has had her fair share or pasta necklaces) A many years back on Mother’s day, this sweet little girl (me) made her mother a special breakfast treat…blueberry scones. And ever since that day, for every freaking holiday, birthday, whatever day, my mother requests (demands) a batch of those scones. She is always saying that these are her favorite treat and that no one has ever made them as good as I do. (I guess that just reiterates that I am her number 1 child)
And for the last few months my mom has been up my butt, trying to get me to make her some. Not going to lie, I have been saying I’ll get her a batch, but for some reason, I haven’t gotten around to making them. So two birds here.. Make the scones and she gets off my back for a least a little while (a month.. maybe 2) and I give her a fantastic Mothers day gift that I know she will love.
So here they are , oh mother of mine. Blueberry scones!
 The stuff. Flour, baking soda, baking powder and salt. A bit of sugar, vanilla, buttermilk, and butter (use vegan butter and nut milk if you want to make them vegan) And of course we need the blueberries which can be fresh or frozen. I usually use fresh, but the store I stopped at only had really big containers of fresh that were like $1000 dollars a piece and the organic frozen happen to be on super sale. So you know, the cheap in me won that battle.
  So into the bowl goes all the dry stuff; flour, baking powder and soda, salt, and the sugar. Give it a good whisk.
Now for my special trick for a perfectly distributed cold butter in a pastry. Freeze your butter and grate it!
With a large wholed grater, grate the frozen butter directly into the bowl with the dry, stoping a few times to toss the butter chunks around so you don’t end up with a huge pile of grated butter. When it’s all grated, gently toss around so the butter is evenly distributed.  Now dump the blueberries into the flour mixture. Toss them around to give them a coat of flour. Add in the buttermilk and vanilla and give a little mix until liquid is absorbed. We are trying to handle the dough as little as possible.
 Turn mixture onto counter. It’s very loose, but thats what it should look like.
  Very gently and with as little handling as possible, gather dough up, knead a few times till everything just comes together. Press dough into a disk that is roughly an inch thick…. and it doesn’t need to be perfect.
  Cut the disk into even sized pieces. Do 6 big, 8 normal, maybe even 10 smaller. Whatever size you like. (I did 8) Place the scones onto a baking sheet, using a spatula to transfer, and sprinkle the tops with a little bit of sugar. Into a preheated oven for about 20 minutes.
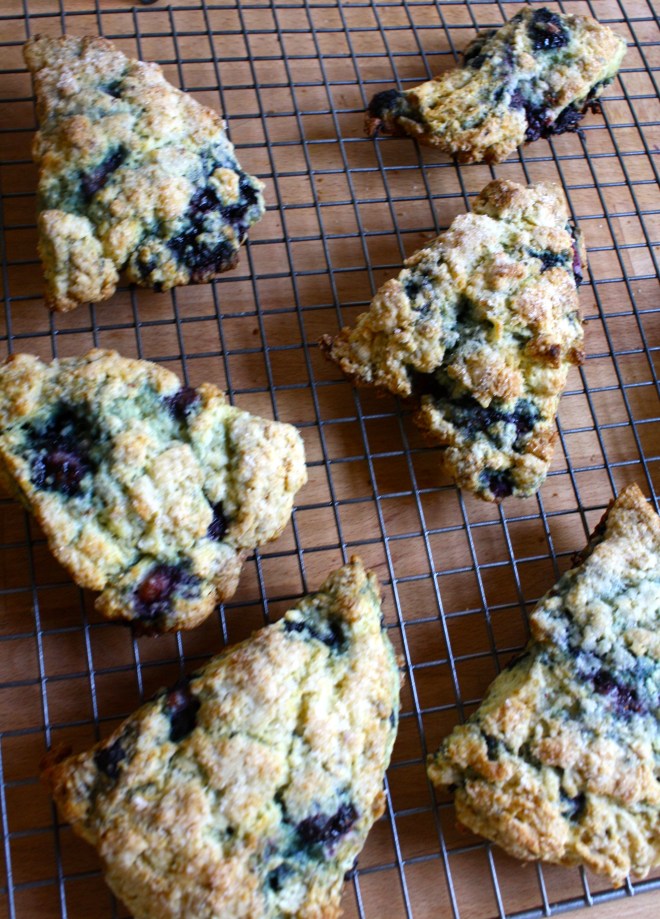 And when the scones look all nice and browned and a tester comes out clean. remove and either serve right away warm, preferably with huge cup of coffee or tea, or stick on a rack to cool before storing in air tight container.
Perfect to serve as a breakfast pastry, at brunch, or even as a dessert. A nice little treat for a special lady. (dudes can eat them too)
Happy Mothers Day Mom! Thanks for having me!
And Happy Weekend!!!
-C
Blueberry Scones
- 2 cups all purpose flour
- 1/3 cup sugar plus 2 tablespoons to sprinkle on top
- 1 teaspoon baking powder
- 1 teaspoon baking soda
- 1/2 teaspoon salt
- 1/2 cup (1 stick) unsalted butter frozen or really cold (use non dairy butter like Earth Balance for vegan)
- 1 cup blueberries (fresh or frozen)
- 1 teaspoon vanilla
- 3/4 cup buttermilk (use non dairy milk for vegan)
Preheat oven t0 400 degrees
In a large bowl, whisk together flour, baking soda, baking powder, sugar, and salt. Take the frozen butter and grate directly into flour mixture, tossing around to evenly disrupted. Add in blueberries and toss around till coated with flour, then lastly, add vanilla to buttermilk and mix into mixture until just barely coming together. Turn mixture out onto counter and with your hands, knead mixture a few times until it forms a solid dough. Shape into a disk and smoosh down until about an inch thick. Cut into 6-10 triangles and place on a non greases baking sheet and sprinkle tops with remaining sugar. Stick into oven and bake for 20 minutes or until tops start turning a golden brown and a tester in the middle of a scone comes out clean.
Remove from baking sheet and serve warm or let cool on a rack.
Mom gets first dibs, and if she is willing to share, eat one yourself with your face.


Yesterday I spent the entire day (ok maybe not the entire day), but a the better part of the afternoon defrosting my freezer. Sure, I do the occasional chip chop here and there, just enough from around the freezer door so it will close, but ever few months I notice that everything in the fridge is not staying cold and that the freezer is not freezing stuff. Thats when I know its for real time to defrost. So a few days ago when I noticed my bananas were turing to liquid in the freezer, I knew it what I had to do….Completely empty the fridge and melt/hack away the 2-4 inches of ice build up that accumulated. It is such a freaking pain in the ass.So on this defrosting day, I took all the stuff from the freezer, stuck it in a cooler, and the rest of the stuff, which is basically all veggies, I just tossed on the table. As I am hacking away with a metal spatual, a wooden spoon, and a constant rotation of pots of boiling water, I was thinking about dinner. I figured I might as well just eat up as much of the veggies as I could, you know, so I didn’t have to put them back in the fridge. And also, I was getting pretty annoyed because this particular defrosting session was taking way longer the anticipated, which made making dinner seem like another pain in the ass. I figured I might as well just eat everything that is already out on the table, which pretty much narrowed down the “whats for dinner” conversations because it was already all over the place. And so dinner was a humongo salad for me, and for the mister, I made him a monster of a veggie sandwich. (my salad was exactly the same stuff as the sandwich, minus the bagel) Easy, fast, super duper yummy, pretty and piled so high with tons of veggies that the fridge is pretty much empty now.
Look at the is beast. I don’t call it a monster sandwich for nothing.

The stuff included in this monster veggie sandwich..

Romaine lettuce, tomato, avocado for there is not real sandwich without them. Thinly sliced radishes, cucumber,a and onion for nice crispy crunch. Shredded beets, carrots, and purple cabbage to give more crunch and a bit of sweetness. Then of course there needs to be something pickled, so I used banana peppers cause they are the SHIT!! And lastly some hummus for a nice creamy finish (plus a bit of protein) and yellow mustard because mustard on everything is just right. Heres to a mountain if goodness that is no longer in the fridge! Served with a another mountain of roasted parsnips and carrots (more stuff from the fridge) and a tall glass of iced tea.
Lucky that today is farm share pick up cause the fridge is pretty much on empty.
Yea it’s Thursday!!!!
-C
A Monster Veggie Sandwich
Note. This is just a guide.. Feel free to use whatever veggies you fancy.
- Either a bagel, 2 slices of bread, or a big chunk of baguette (use a gluten free bread if you want or need too)
- Hummus- Homemade or store bought
- Mustard
- Something pickled like pickles, banana peppers , jalapeños or all three
- Lettuce, spinach or some kind of leafy green
- Tomato
- Avocado
- Onion
- Radishes
- Cucumber
- Shredded Carrots
- Shredded Beets
- Shredded Cabbage
To assemble. Ready your bread.. Toast if you want, and stick it on a plate
On either side, smear the hummus and the mustard.
Pick a side, start to stack by evenly disrupting veggies on top of veggies. Place the second piece of bread on top and giving a little smooth to keep it together.
And go at it. Cut in half or don’t. Have a napkin or a long sleeve ready to wipe your face.
 It’s been a long, packed, but very fantastic week. Everyday has been full of work, chores, family, and trying to get in a least one good bike ride or walk in. I made a list of a few important points to mention from the past week.
- Spring is real, not an imagined season in my head. (HOORAY!!!!).
- Banana ice cream is everyones favorite snack
- Planting things from seed and watching them grow is magic
- Riding a bike with kinda flat tires really sucks
- The little people in my family are the best most fantastic humans
- Don’t tell a 2 year that ants will bite her or you will end up caring that child around everywhere because she is afraid to walk outside (Anyone know good therapist for a 2 year old?)
Anyways, I am hoping to take it easy today, catch up on my coffee consumption, do a bit of gardening, reading, bike riding, all without pressure or expectations. Everyone should have a day for no expectations.
Some fun internet stuff from the week.
-I need an RV or camper. THE BRAVE // vintage rv renovation inspiration
-Who cares if not everyone is pleased, I would be if my lunch bags looked like this. These Parents Make Lovely Lunch Bag Art. Not Everyone Is Pleased
-So lovely. Urban Jewelry: New Lace Street Art by NeSpoon
-Alternative energy Woo Hoo! Tesla’s Powerwall Home Battery Wants to Make Fossil Fuels Obsolete
-I am really excited to make this… I have a feeling that I will be incorporating it into many of my recipes. ChefSteps’ Genius Roasted Onion Cream
-Another house that I could get down with.
And a few pictures….
 The mister and the worlds biggest crayon, which is made of scraps of blue crayons from all over the world. I could totally use a big ass crayon like this.
 The coolest most badass 95 year old lady that I know (I know a few), Grammy Stem. And the little, getting a lift. (I could have used a lift too!)
 Brothers. The guy in the green is my Dad.
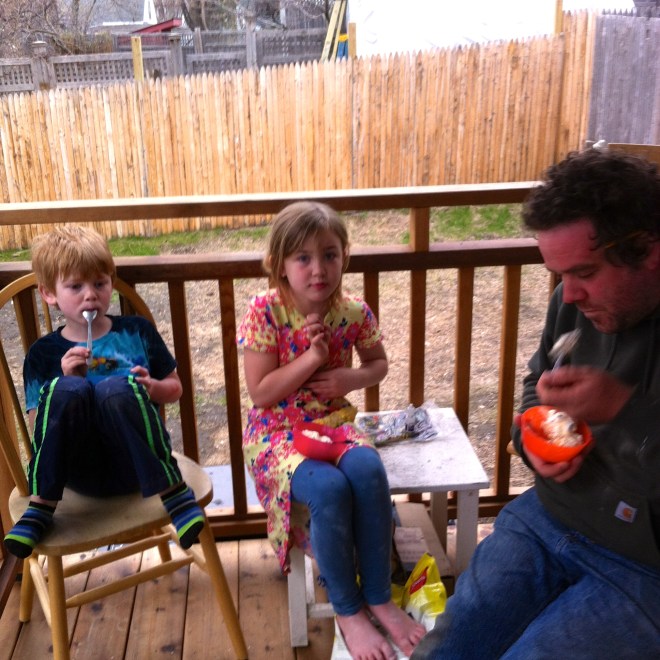 Aftre dinner ice cream break.
 The sky has been on point all week long
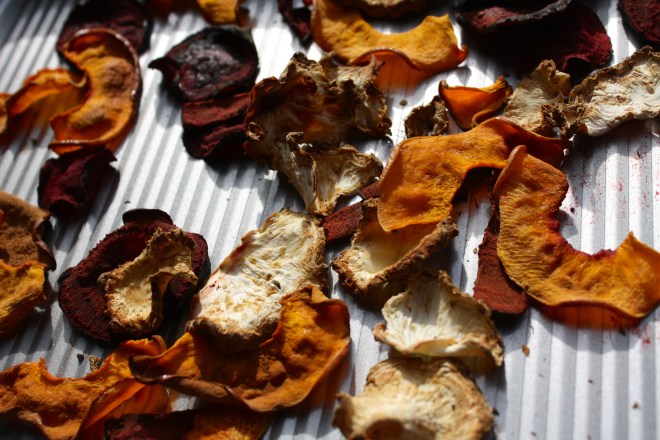 And made myself some veggie chips. The colors alone are delicious.
Have a great day!
-C.
 So its birthday season in my family.. Between September and April there is at least 3 birthdays a month to celebrate, and I usually make the cakes. What better way to share my beet booty then with a chocolatey beet cake. It helps that I went a little crazy at my last CSA pick up and brought home 8 lbs of beets. Yup, that is what I did and I don’t regret one single beet. So birthday+beets makes a happy birthday cake!


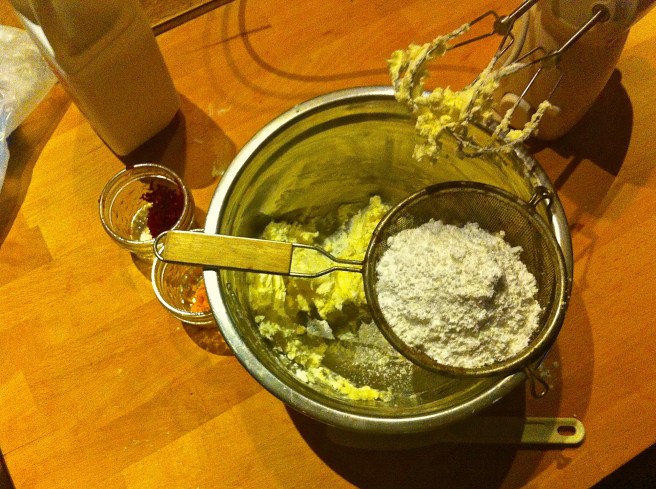
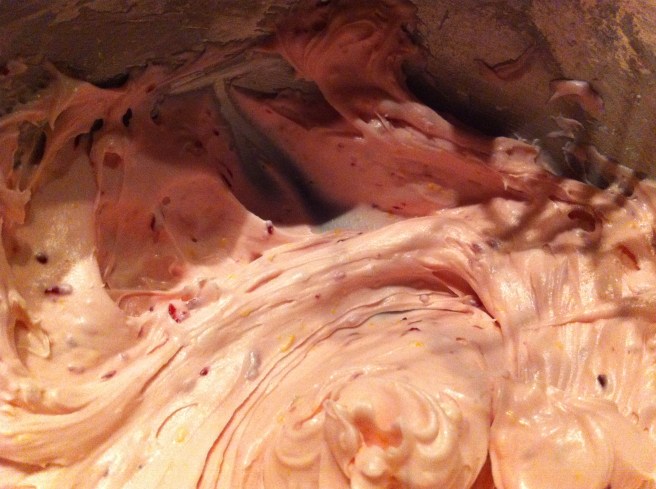
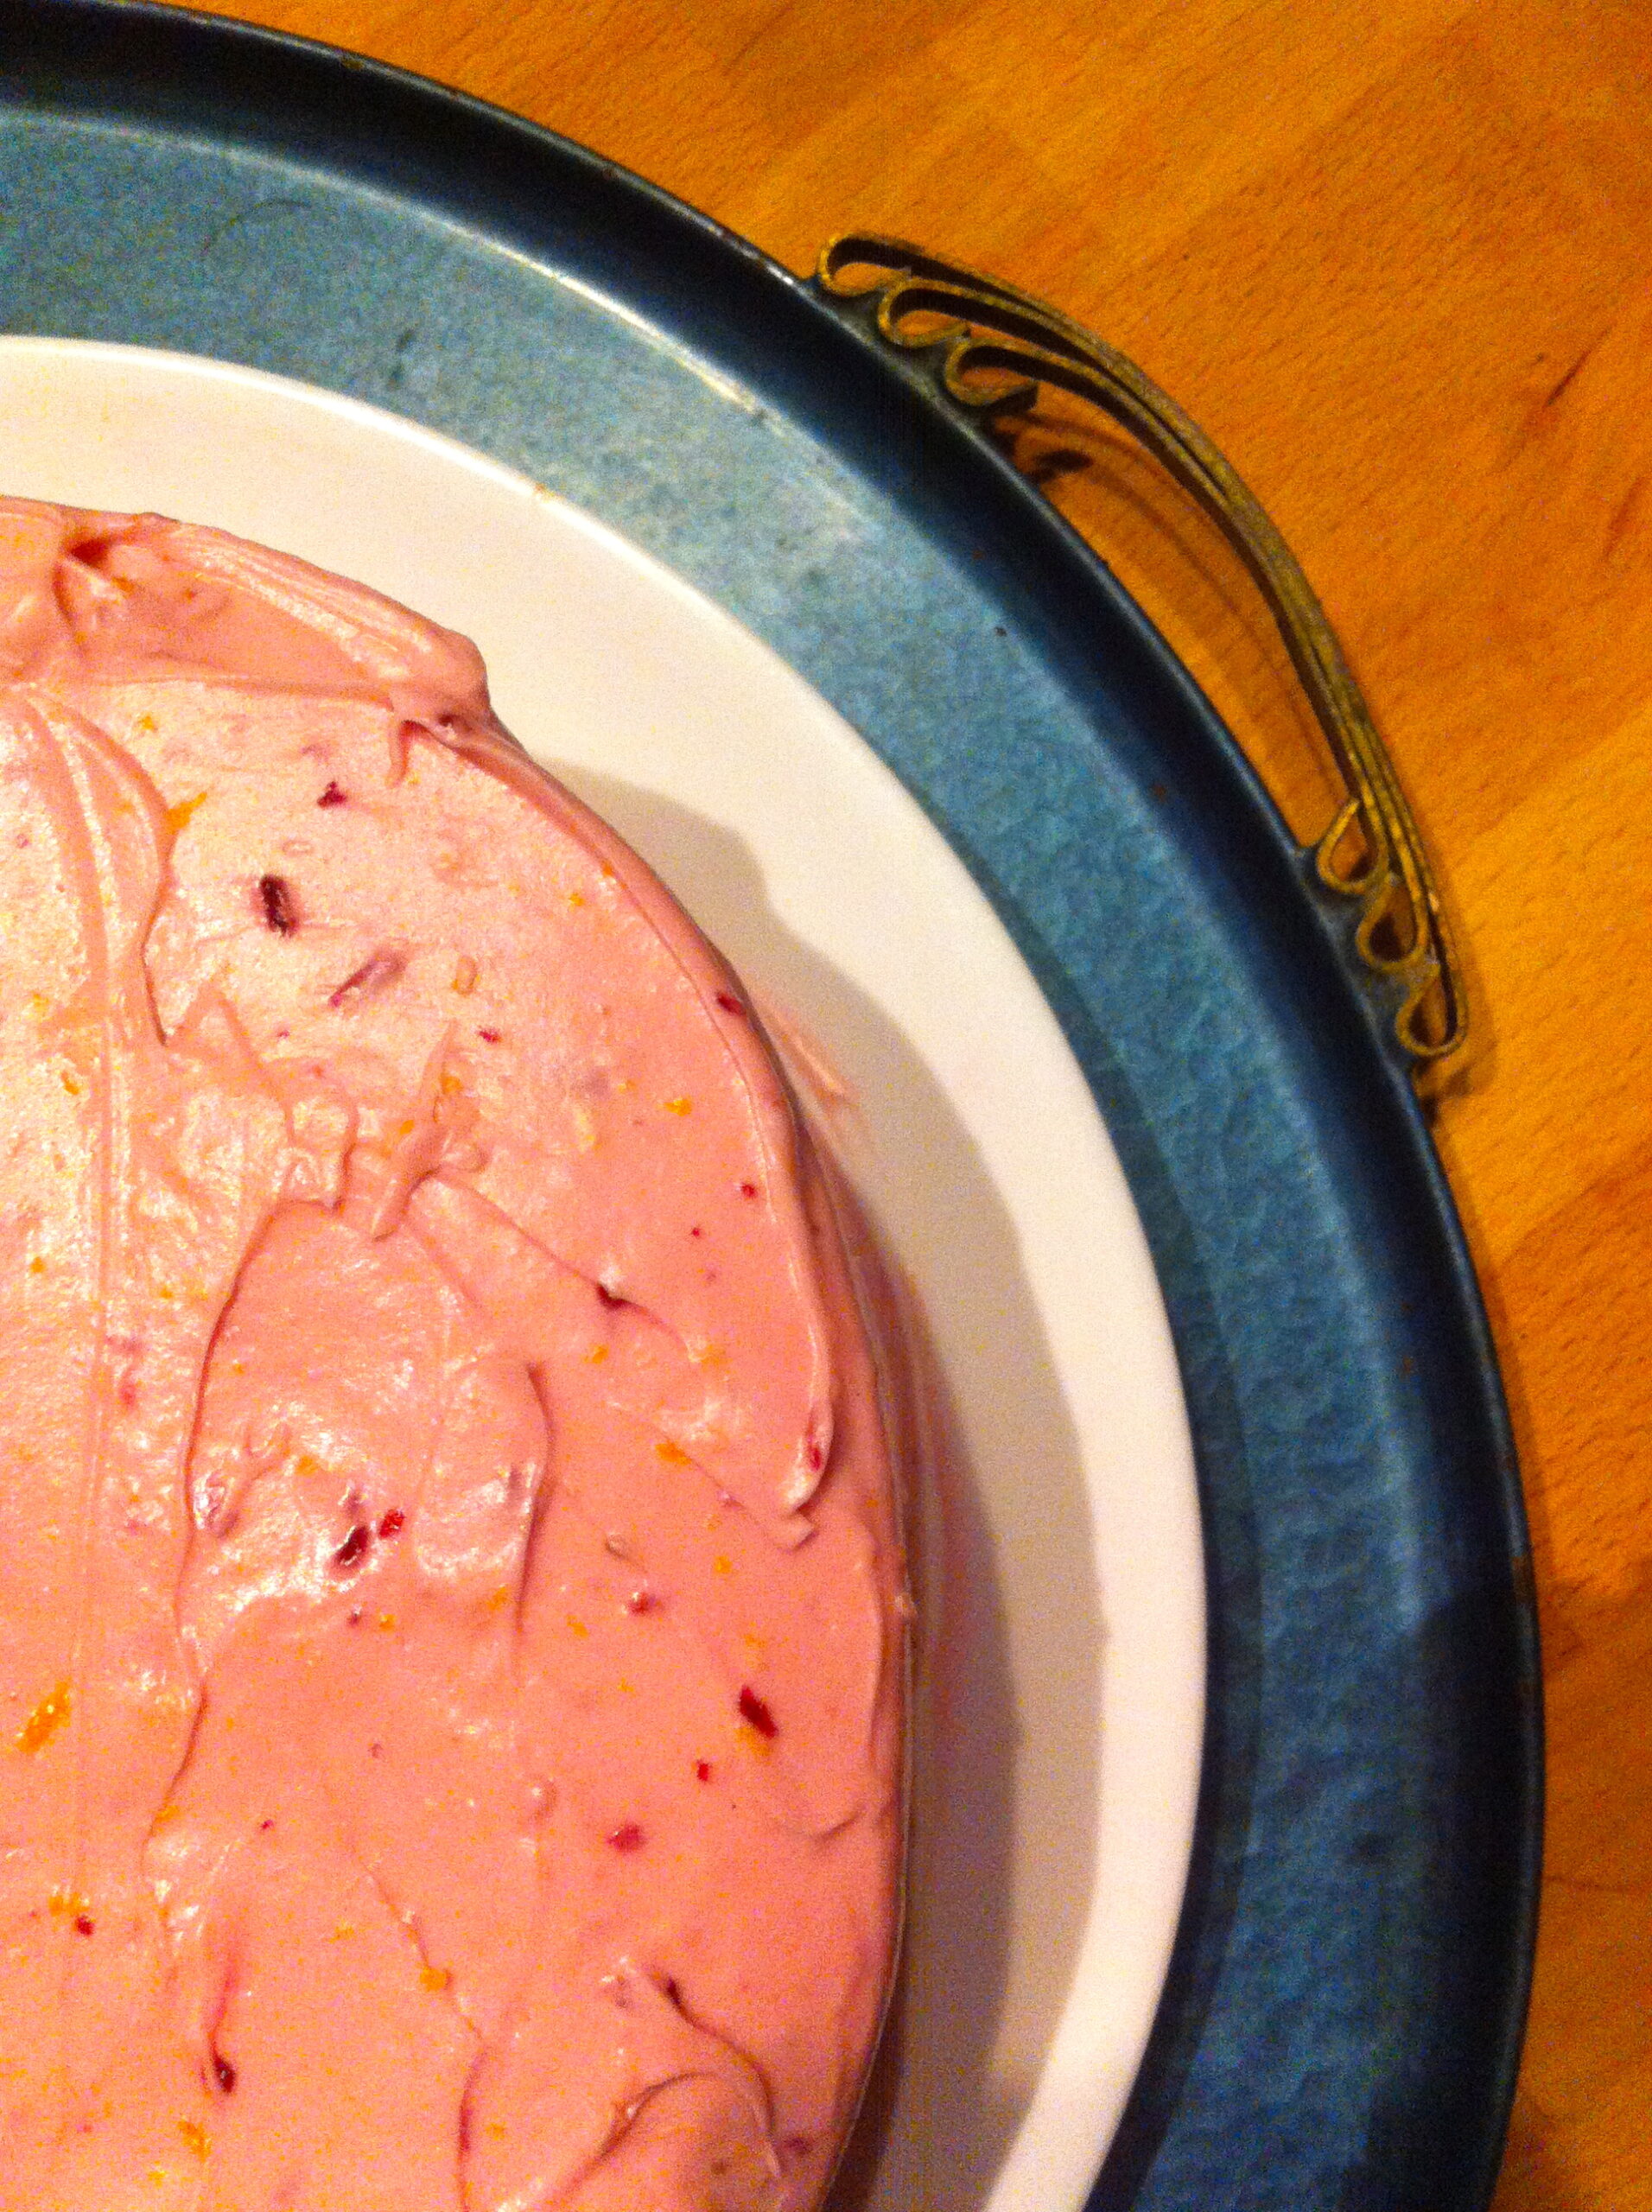


 I figured now is a good time to get this recipe out there before we get to far into spring and summer recipes because there is going to be a lot of banana ice cream filled recipe coming and I figured its a good idea to have the basic banana ice cream recipe ready for people to refer too. And because I made so much fantastic naner ice cream, I also made a cookies and cream naner ice cream for my sisters and the mister.
 The stuff you need for this ice cream…. Nice and ripe bananas, peeled and then frozen* That’s it.
 After all blended and smooth, either eat right away or scoop ice cream into a freezer safe container and stick in freezer. That’s the banana ice cream… And it is amazing and so so so so so addictive. I make a batch, think I am only going to eat a scoop, then find myself eating half of what I have made, but it’s ok cause it’s only bananas.
  One batch of banana ice cream, either freshly made, still in food processor or made ahead and placed in a food processor and given a good pulse to smooth it up.
 Now you have cookies and cream naner ice cream…. and everybody is happy.
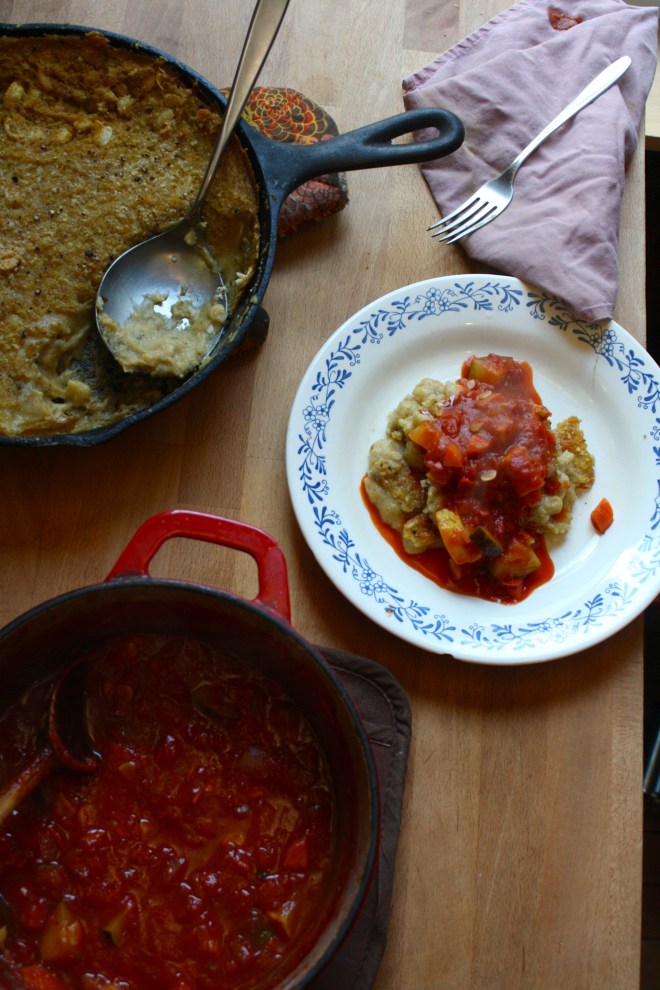 Is it really for real April? Where has all the time gone and where the hell is the warm weather? It’s not funny anymore. I am officially OVER winter! Ok, so now that I got that off my chest…..
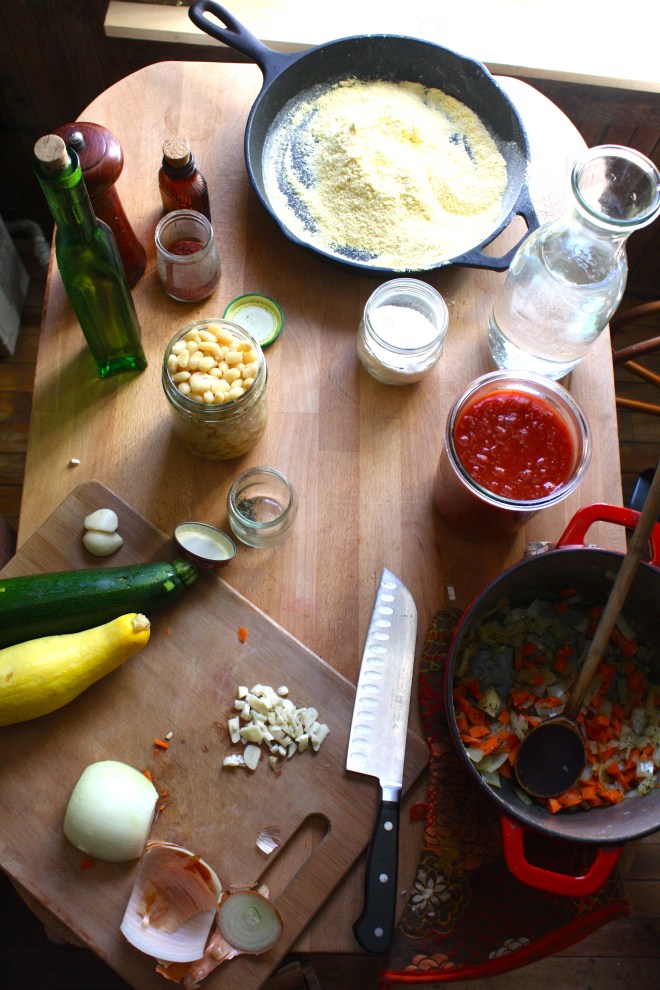 The Stuff. Cornmeal, water, navy beans and parmesan for the polenta. Crushed tomatoes, garlic, dried basil, onion, carrot, zucchini, and summer squash for the sauce. Salt, pepper, and olive oil all around.
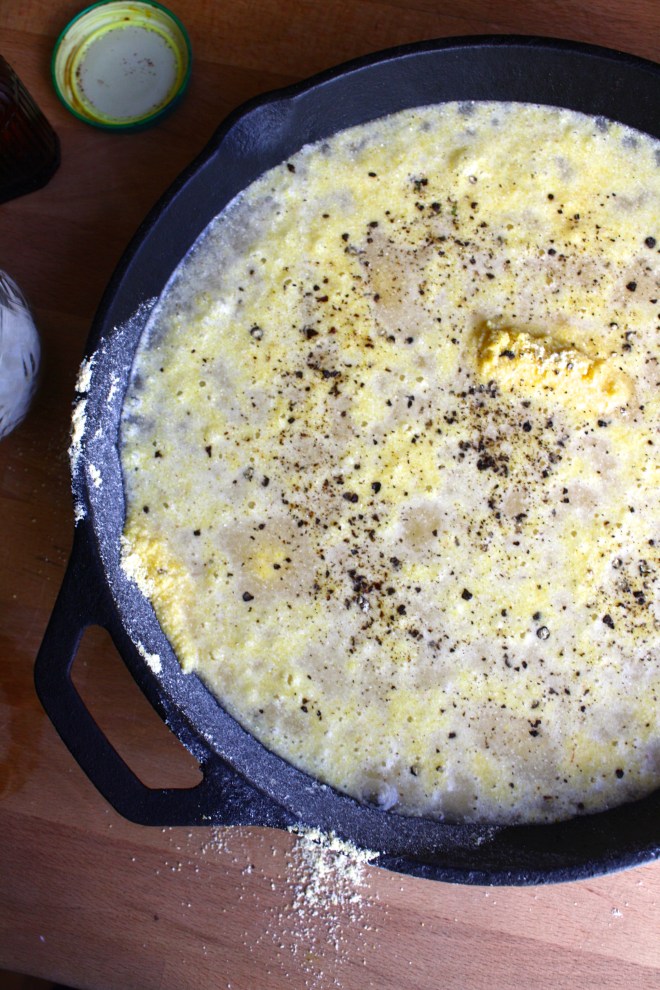 Cornmeal and water go into a cast iron skillet (or any oven safe dish) with a pinch of salt and pepper. Give it a little mix and stick it into the oven at 400 degrees .
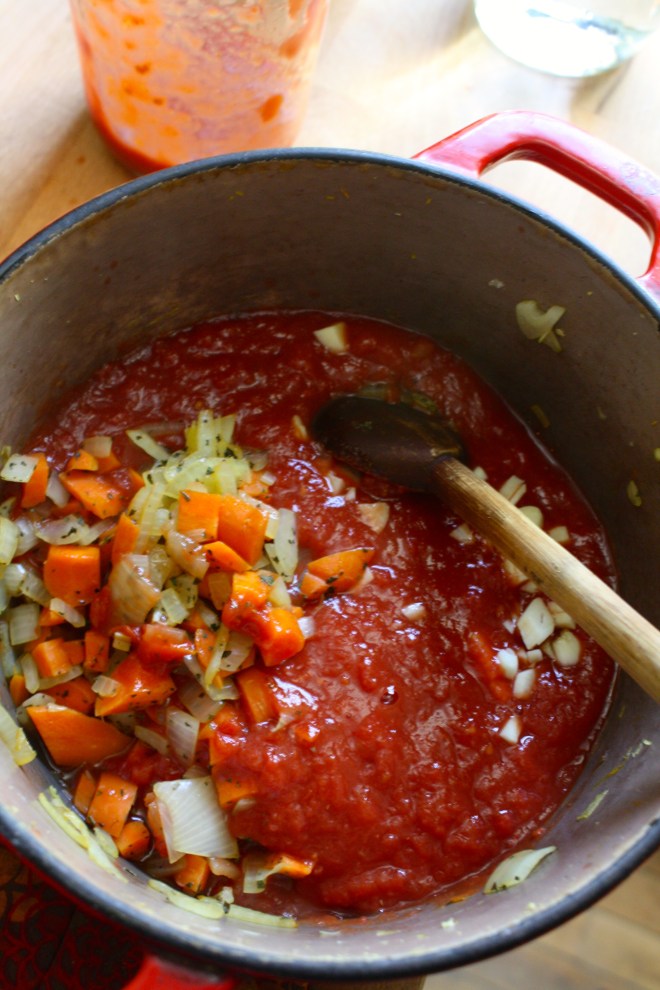 Once the polenta is in the oven, make the sauce. Chop up all the veggies and stick into a dutch oven or sauce pot with a pinch of salt, the basil and a good drizzle of olive oil. Stick on medium heat and let veggies cook down a bit. When the veggies are tender, add in minced garlic, crushed tomatoes and another drizzle or oil. Turn burner to lowest setting and simmer (giving it a stir every now and then) for about 45 minutes or until the polenta is done.
 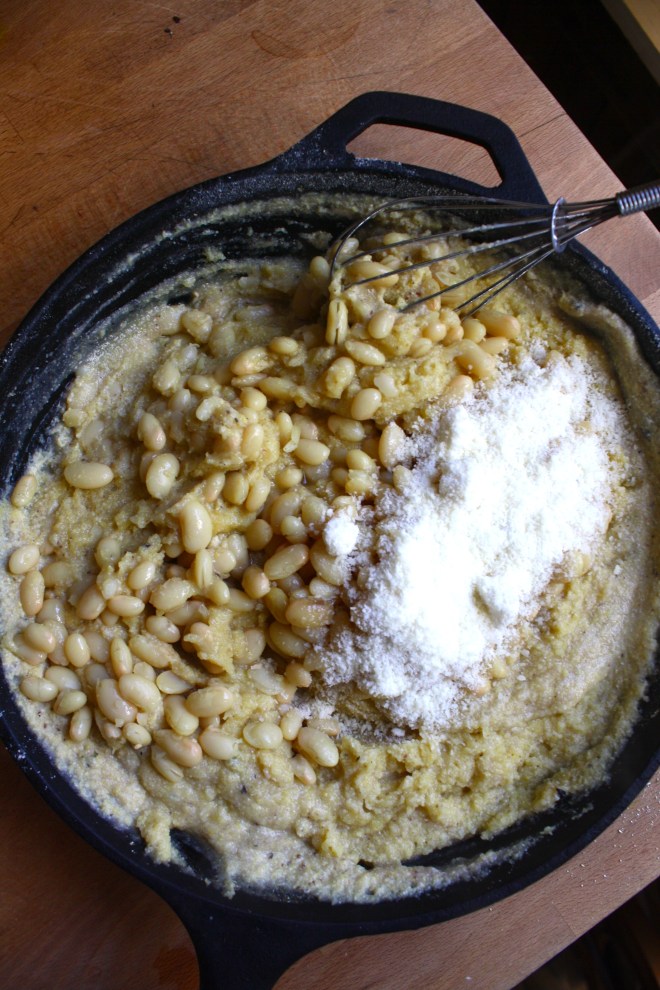 After about 30 minutes when the water had pretty much all cooked down, take the polenta out of the oven and stir in the beans, the parmesan, a tablespoon or two of olive oil and salt and pepper. Smooth top out and sprinkle with more pepper, parmesan and drizzle with a bit more oil. Stick back into oven for another 1/2 or until polenta has formed a crust and no longer giggles when you wiggle the pan.
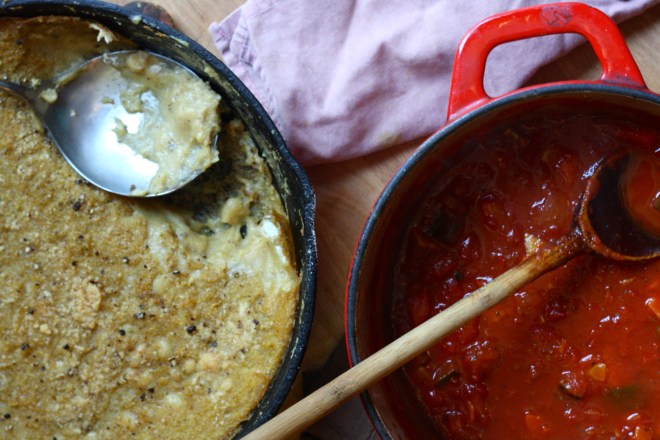 Pull polntna from the oven and let sit for at least 1o minutes.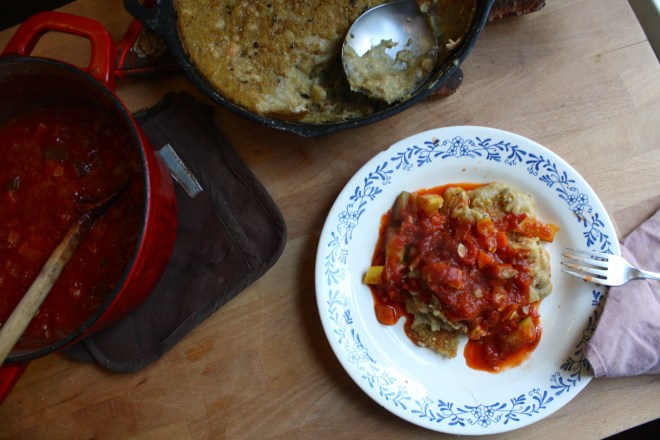
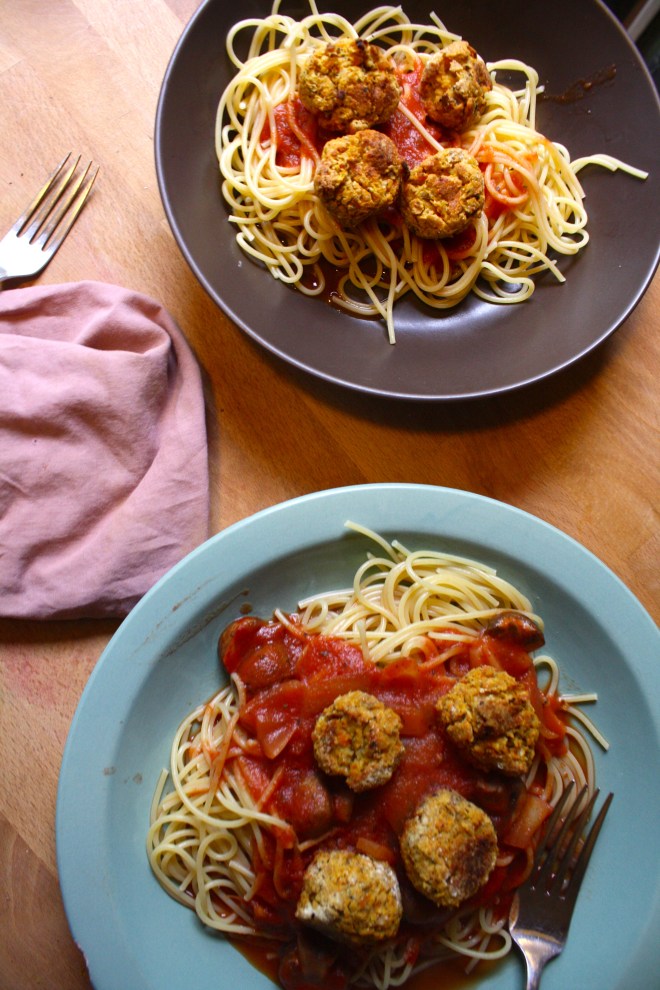 Last night I had my sister and her kiddos come over for dinner. Nothing fancy, nothing to complicated, just something fast and something that I knew the littles would eat. Spaghetti and meatballs, except replace meatballs were bean balls So they came, we played, did a little drawing and had a bit of first grad gossip. Then came dinner time when I was told by one little that she was not going to eat.. She had pasta for lunch. Well I made her sit anyway and she mainly just ate carrots (I was ok with that) Then the other little was all into his pasta and bean balls, 1 down, 3 more to go, when the mister let slip that the meatballs were not really meat. He ate around the remaining balls, said he didn’t want them anymore. And my sister, well she doesn’t eat anything that is not pizza.
 I feel like I don’t need to tell you how to boil pasta or heat up the sauce, so I left that portion of the recipe out. I have faith that you are capable in doing that part without my instruction.
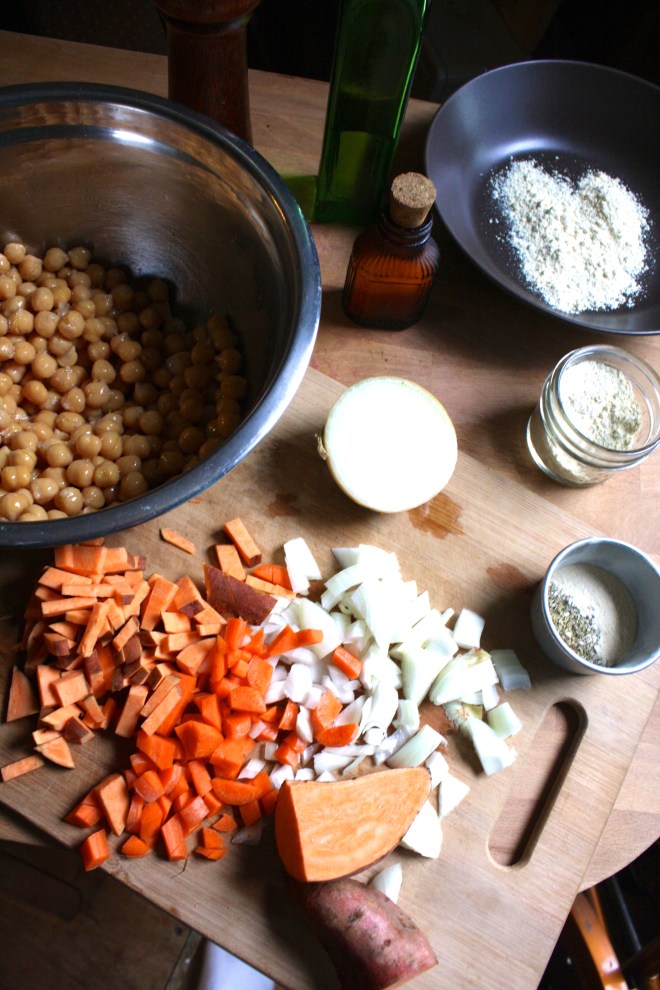
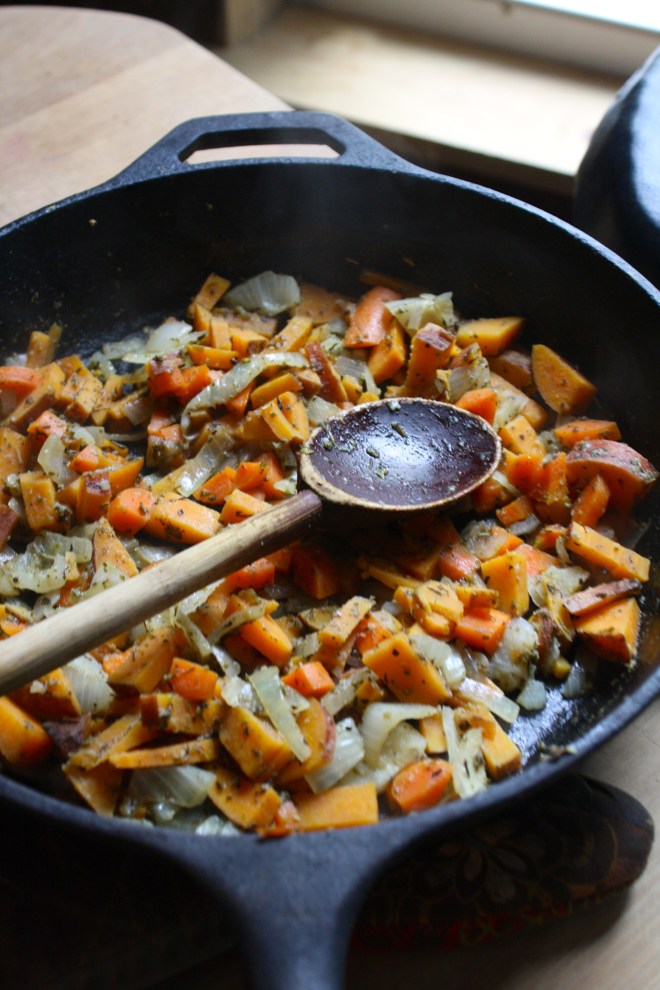 Small chop all the veggies and toss them and the dry spices into a skillet with a drizzle or two of olive oil. Stick on medium heat and add about 1/4 cup of water to pan. Top with slid and let veggies cook down until soft and fragrant.
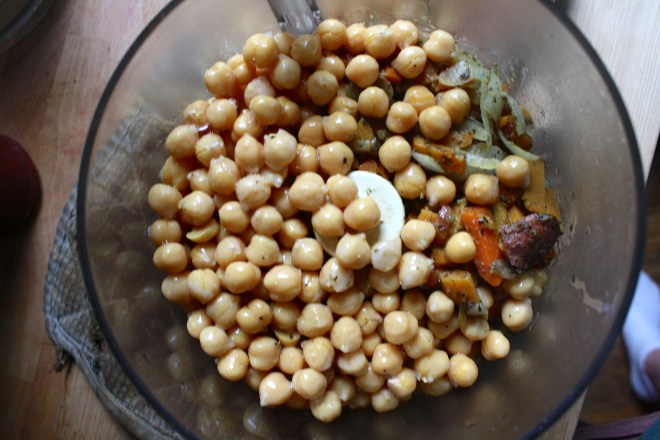 Add the cooked veggies to a food processor or blender with the rinsed and drained chickpeas.
 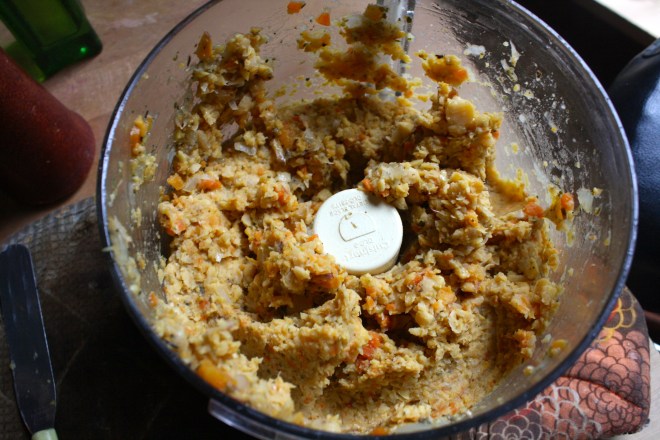 The mixture gets pulsed until combined, keeping a little bit of chunkiness. Now go warhead and taste the mixture. Add another pinch or two of salt , pepper or any of the spices that you think it need. Dump the mixture into a bowl and mix in the chickpea flour than stink the mixture into the fridge for a least a 1/2 hour. Cooling to off is really important to forming the balls. If you don’t, it’s much harder to keep mixture from falling apart and sticking to your hands.
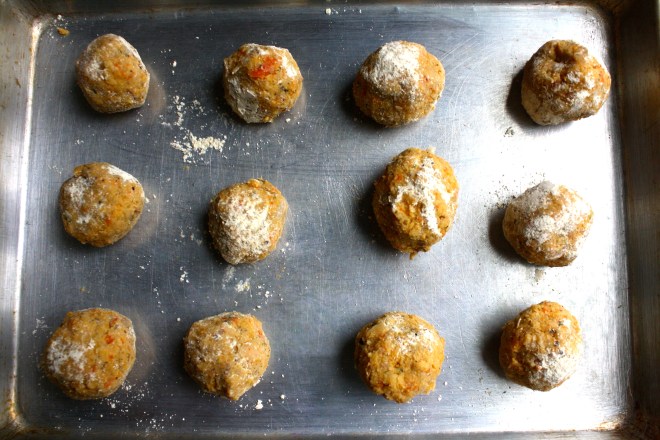 After the mixture has had time to cool and set, start rolling the mixture into balls roughly the size of ping pong balls. In a shallow bowl, add a few tablespoons of the chickpea flour with a pinch of salt, pepper and garlic powder. Take each ball and roll in flour and place each ball on a well oiled baking sheet. When the balls are all rolled, stick into the oven and bake away for about 30-40 minutes, flipping balls after about 20. After you flip the balls, get the pasta ready so its finished about the same time the balls are done.
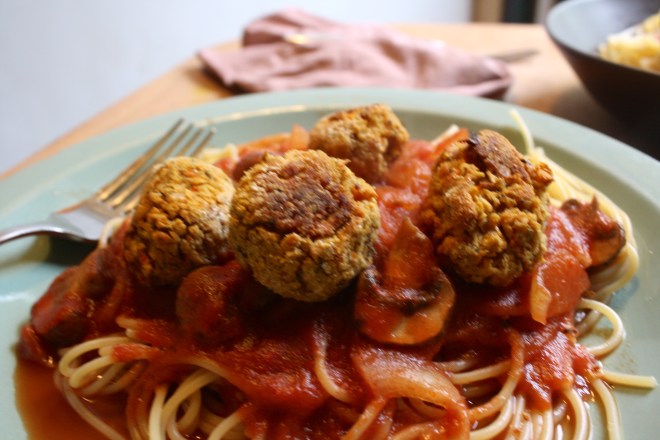 You pasta and sauce is cooked and the balls are all crispy and oh so nice.


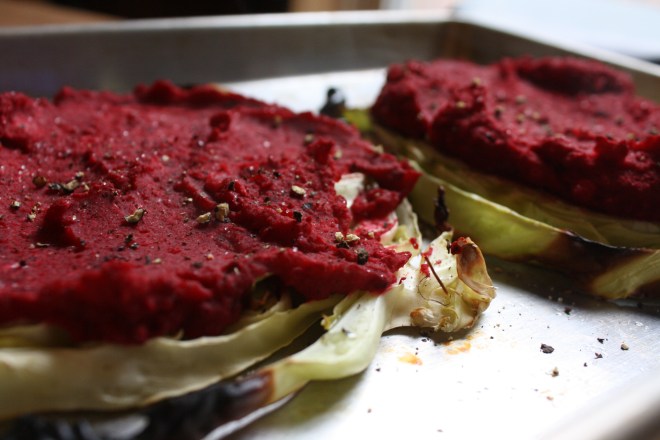 Being that it was St. Patricks day this week and lots of folks buy up a good amount of cabbage, I figured that this is a good time to get people to try one of my most favorite of favorite meals…..Beet bean and cabbage steaks. I love to play around with food, how to pair textures and colors plus tastes while trying to make whatever I am making healthy and balanced. This is one of my fav creations. And sure, this may seem like a somewhat weird combo, maybe a little like a extremely hippy dippy vegan fake meat thing, and you might be kind of right, but screw if it doesn’t taste like A-mazing. First off, notice how freaking dang pretty this thing is. The roasted beets bring a earthy hearty flavor but also pack a huge punch of color, especially when blended together with the ever so sweet white bean, which brings a nice mellow taste and a great serving of protein. (Beets and beans are meant for each other). Spread that brightly colored, tasty mixture onto of a huge slab of one of my favorites, roasted cabbage with all its crunch and cabbagy flavor and you got yourself a hearty healthy meal of deliciousness.
  Cabbage, white beans, and beets. There is a lemon involved, but it didn’t make it into the picture.
 Cabbage is cut into inch thick slabs… I like to us the inter most part of a cabbage head cause I like the core. But use any cut that you want. 2 beets are chopped into chunkers and both the cabbage and the beets are placed on a lightly oiled baking sheets, seasoned with salt and pepper, and stuck into the oven for 20-25 minutes at 400 degrees.
 Once the beets are tender and the cabbage is cooked to a nice withered golden pretty, take out of the oven, but leave the oven on. Leave the cabbage on the pan but throw the beets into a blender or a big bowl if using a hand blender with the white beans
 Beans and beets get pureed together. Add the juice of 1/2 a lemon (or the whole lemon, depending on your taste) and a pinch of salt and pepper. With a big spoon or spatula, scoop equal amounts of the bean/beet mixture on top of the cabbage steaks and spread around. Sprinkle with cracked pepper and place back into oven for another 5-10 minutes. (You could totally skip the second bake, but I like my cabbage well done and crispy)
 Oh ho boy… And with a good squirt of mustard to finish off… I could eat this all day, everyday
 WOO WHOA!! MARDI GRAS! I wish I was down in New Orleans today celebrating… and soaking up some warmth and sunshine, catching beads, maybe even taking my shirt off(?!!?)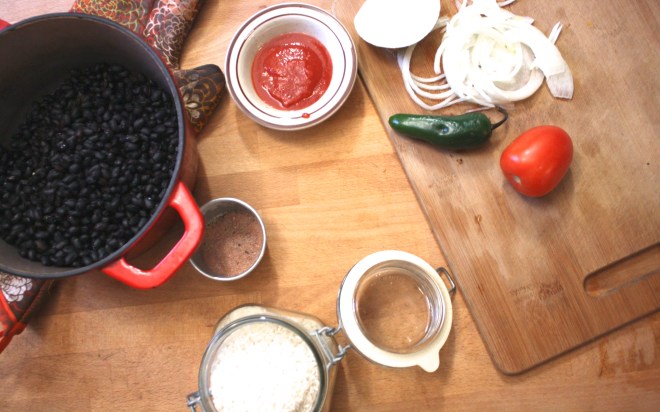
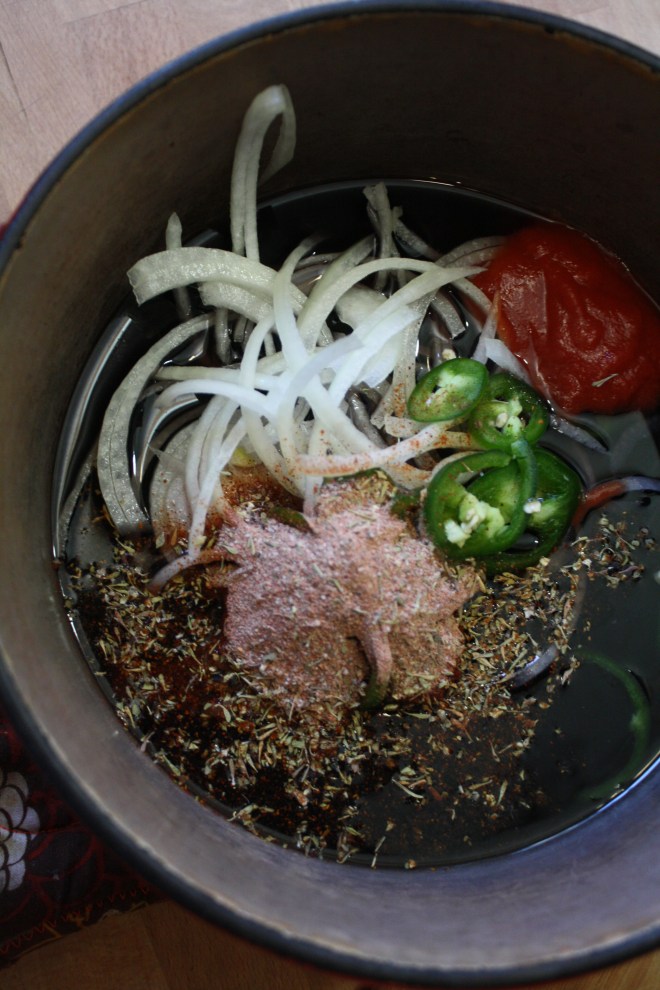
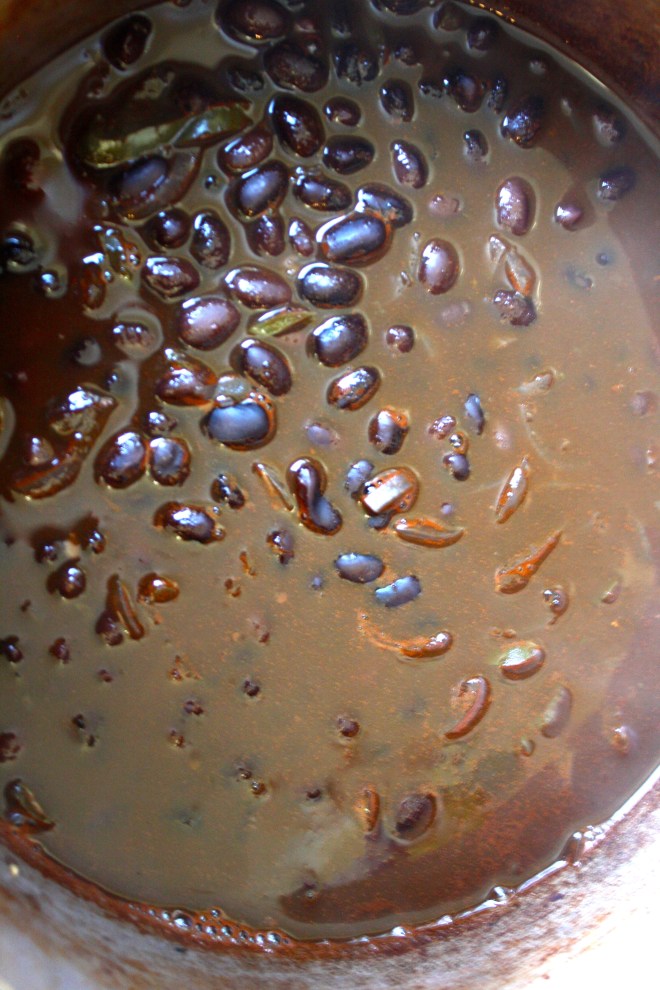 Beans are in a pot filled with water unit beans are completely sumerged. Add in the onion, jalapeño, tomato paste and cajun seasoning. Bring to a boil then cover with a lid and simmer for about 45 minutes….. After about a half hour, start up the rice. Water in pot with rice, bring to a boil, cover and simmer for 15-20 minutes.
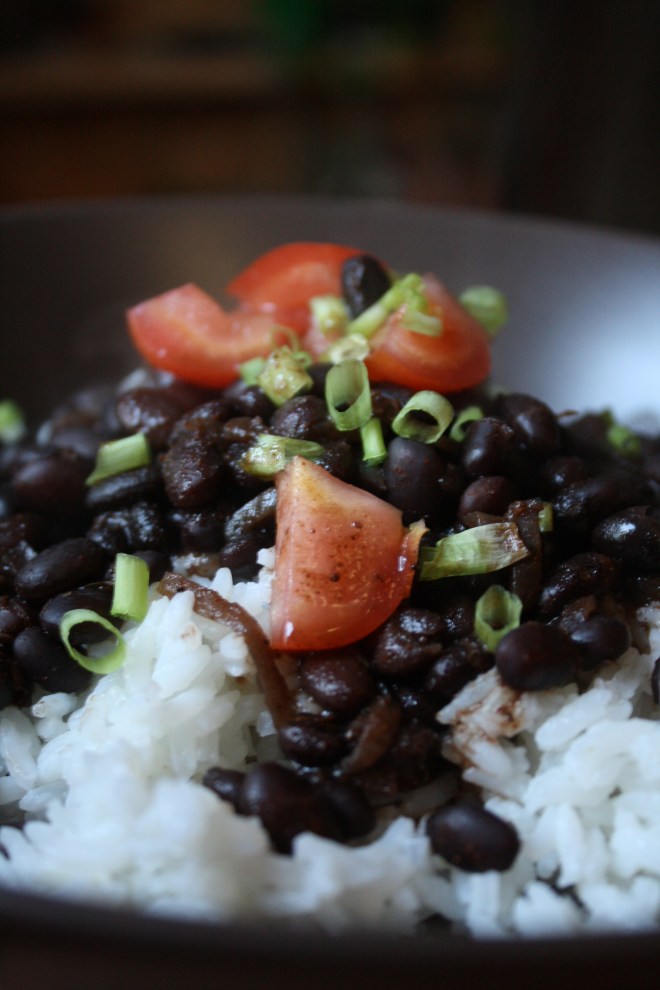
 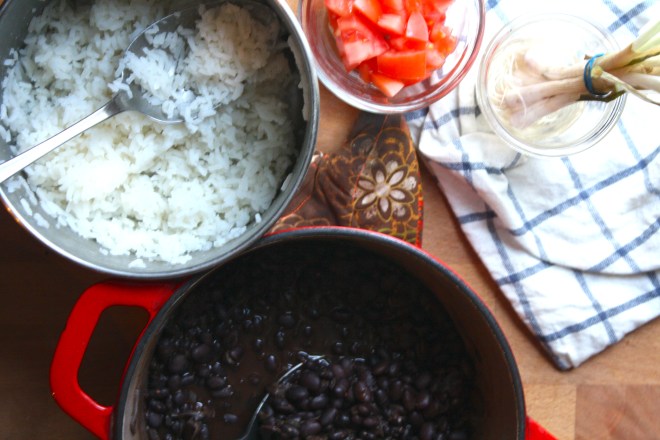 The rice is done and fluffed with at fork. The beans are cooked with just the tiniest bit of bite, bathing in a thick spicy tomatoey sauce. The chunks of onion and jalapeño have broken down and are hiding in every bite…. Oh so good!
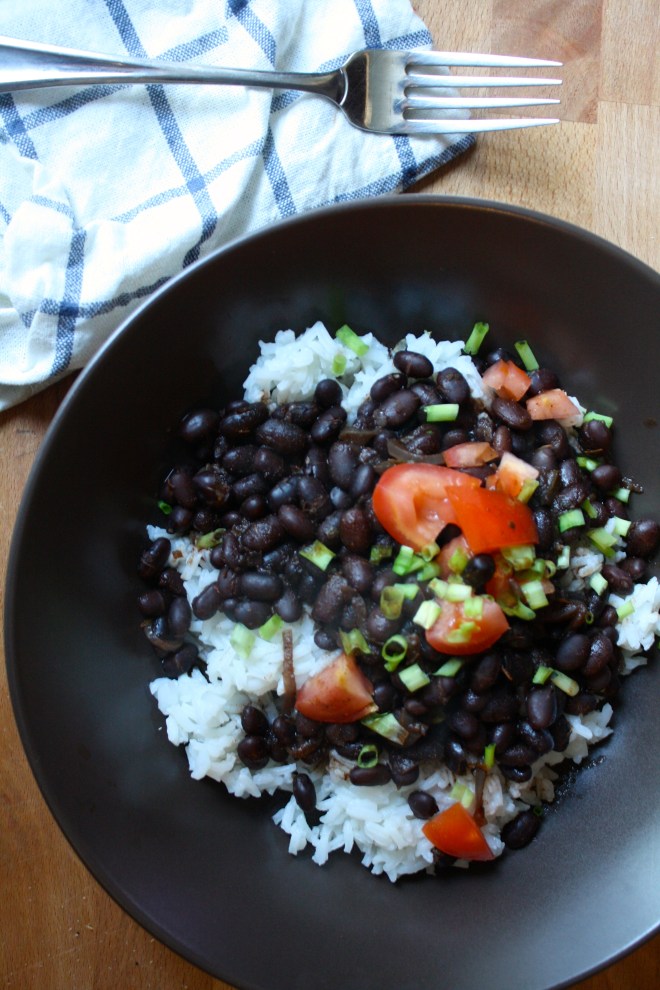 Bringing a little spice and nice to this crazy cold winter day or any fun festivities you may have planned.
  I was informed yesterday that if I was going to make tortilla chips, that I better make some sweet ass dips to go with them. I kind of agree… tortilla chips need dip… or better yet, two dips. Queso and guacamole. It’s what needed to be done, and so I did it.

 Perfect…
 To think that both of these dips took about 10 minutes total to make. (I had pre baked the cauliflower and sweet potato) And for real, I would spend much more time if I had too because both of these dips are so freaking good, I definitely will be making these on the regular.
 Don’t let the fact that these rich, fudgy, soft, oh so yummy brownies have beans in them scare you away, it just means that you can eat more, you know, like half a pan, and not think twice about it. (I think that is perfectly acceptable) And the carob. Well one of the things I always do for my birthday is to buy a new ingredient of some sort that I wouldn’t normally buy because it’s either too expensive or is hard to find. Carob is neither too expensive or hard to find, but I couldn’t find the really expensive stuff that I was looking for so I grabbed a bag of carob powder. If you have never tried carob, it’s a must. It’s kind of like chocolate, but more fruity, sweet, not bitter, and caffeine free, while still containing all the good health benefits as chocolate. It’s really good…..you will like it. (You can use cocoa instead, but then you are going to miss out on the awesomeness of carob and be left with a plain old normal black bean brownie)
 One bowl. Beans, oil, oats, baking powder carob and vanilla. I used an emulsion blender but a blender or a food processor does the same…..blend together until fully incorporated, smooth and creamy with little speckles of oats. It’s so simple and barely a mess to be made.
 Into a greases pan and into the oven for 25- 30 minutes…. Out of the oven when a toothpick comes out clean
 Let cool for at least 10 minutes (ok, maybe 5) and cut into squares of any size you like.
 Stacked on parchment….oh so pretty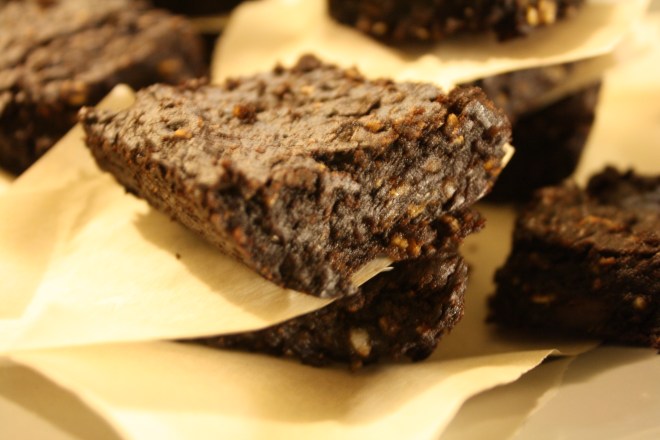
THE LOVELY CRAZY
September 19, 2015 by maximios • Blog
Maybe you, like me, went a did a little strawberry picking this past weekend. And maybe you, like me, pick so so many that now you have an overload of the most perfect, if not slightly too ripe strawberries staring at you, waiting to be eaten or, at the very least, cooked into some magical cake, pie, cookie, or whatever. But lets face it, its Monday and maybe we do not exactly feel the need (or have the time) to make a cake, pie, cookie or whatever tonight. So that leaves us with a crap load of strawberries that need to be dealt with.
And sure, we can freeze them, but maybe you, like me, already have a freezer full of other stuff. And just because we don’t want to bake a cake, pie, cookies, or whatever tonight, doesn’t mean we don’t want something amazingly tasty and fantastic.
So that brings us to this super easy, oh so pretty, and ever so tasty way to move those strawberries….. Stick them in the oven and roast them. So simple and really truly amazing. When strawberries are roasted, they turn so tender and fall apart and release all of their juices that turn into a sweet syrup. They become almost jam like, but the flavors are way better, more complex. And there is no need for added sugar or any other stuff because the flavors and natural sweetness of the roasted strawberries stand on their own.
A few ways to which you might want to use roasted strawberries that will make your life better: Dump onto ice cream, yogurt, or make a strawberry shortcake or a strawberry fool. Scoop onto a green salad, mix into a bowl of quinoa, marinate some tofu, or add to roasted veggies. You can mix into muffin batter, into oatmeal, or add to a layer cake. They make a fantastic PB and J and the syrup in seltzer is a tasty drink. You can pretty much use them for anything. But MY favorite way to consume these…a bowl, a little spoon, and my mouth. Nothing else needed.
And if you didn’t happen to go strawberry picking this weekend. It’s cool, just pick some up from the closest farm stand near you. You can tell all your anyone thats asks that you picked them yourself. (not a lie, just a stretch cause you did, in fact, pick them up yourself)
Yea for Monday and for roasted strawberries! (Or at least yea for strawberries.)
All you need…A big (or small) bowl of strawberries.
Rinse those pretties and place them on a parchment lines baking sheet. (don’t skip parchment… these suckers get super thick and juicy.)
Here is the thing. These strawberries are picked from the lovely farm I get my CSA from.(How badass is it that we have a PYO part of the share). They are not like super market berries that are extra firm with dirty unappealing green tops. These little organic lovelys have tender little green tops…. I eat them. If you do not wish to eat the greens, just top the berry off before roasting.
So the berries, stick them in the oven at 450 degrees and roast them for about 35-45 minutes (depending on the size of your berries)
Pull them out when they start to get dark and slightly charred and the juice is thick and bubbly.
And scrap the berries, juice and all, right into a jar.
Eat with anything, everything and with nothing at all.
Happy Monday
-C
Place strawberries, with or without tops (your preference) on a parchment lined baking sheet. Place in a 450 degree oven and roasted foe about 45 minutes or until the berries are soft, mushy, starting to charr and have lots of bubbly juice, . When done, remove from oven and let cooll for for about 5 minutes. Transfer berries, juice and all, into jar.
Eat right away or stick in fridge. Juices thicken up when cooled.
Keeps about a week in fridge, but I highly doubt it will last the night.