Whoa has It been a while since I have posted a recipe. Not that I haven%u2019t wanted to or that I haven%u2019t been making food, I just have been busy A.F. And truthfully I am as busy as ever but I happen to have my phone next to me when I was making this little casserole dish thing that I have made a few times now and I think it well worth a share.
What is it you ask? It is a creamy but dense chickpea base covered in tender roasted beets and onions with a lemon tahini drizzle. It is simple to make, super delicious, and can be tweaked in a million different ways to your liking.
Is it a fantastic dish to serve at say a Thanksgiving? Well yes, yes it is. You can serve it as a side or even make it bigger and have it as a sort of main dish. It%u2019s a good protein that is naturally gluten and grain free, vegan, and blah blah blah. What really matters here though is that it is damn tasty and also bonus, it is so siimple to make and can even be prepared a day in advance so no stress. We will take all the wins here.
-C
1 cup chickpea flour
2 cups boiling water
1 teaspoon salt plus more to taste
ground black pepper
2 teaspoons cumin (feel free to omit or use a different spice.Thyme or rosemary are equally delicious )
2 medium beets
1 large onion
a lemon
1-2 tablespoons tahini
teaspoon or so olive oil.
Note. This dish is excellent made and eaten right away but also gets even better (in my opinion) cooled and reheated. Also you can change up the veggie situation and use whatever ones you like.
Place chickpea flour in a bowl and slowly whisk in boil water with a fork so that there are no lumps. Mix in cumin and a teaspoon of salt and a pepper. Scoop batter into a lightly oiled 8X8 casserole dish (you can use a round cake tin or a cast iron skillet as well) and set aside to rest for a few.
Preheat oven to 400.
Grab beets and onion and slice in about 1/8 thick slices. Layer slices on top of chickpea mixture, making it look pretty if you feel like it. Once the veggies are layered, lightly drizzle the top with a teaspoon olive oil and sprinkle with a good pinch of salt and pepper.
When the oven is preheated, covered the baking dish and place in oven,. Bake covered for 1/2 hour then remove covering and bake for another 20-30 minutes or until the beets are nice and tender and a tester poked into the center of the dish comes out clean. Remove from oven,
Once it%u2019s out of the oven grab a little bowl and add the juice of the lemon to the tahini and mix. Season with salt to you liking.
Now serve. Drizzle the top with the tahini mixture and cut yourself a big old piece. Yes drizzle extra tahini on top. Sure squeeze on more lemon. You do you.
Store leftovers in fridge. Reheat in hot oven for 10 minutes..It gets crispy!
Black beans soup is eaten on the regular around here. Not always the same way but pretty much. Why screw with a good thing you know?
Now soup with dumplings. This is not (yet) a regular thing but I was making the usual blacken soup and planing on making corn bread to go with (in a pan) , when I had a moment of clarity and realized that I should just make the corn bread into dumplings and not have to deal with baking and another pan to clean. Duh. Why don%u2019t I do this more often?
And that is it. A black bean soup, nice and thick, with light fluffy cornbread dumplings cooked in one pot. Quick, easy and all sorts of delicious. Can%u2019t complain about that.
Now let%u2019s get to the soup and dumplings!
The stuff. For the soup there are bLackbeans, and onion, spices, a carrot, garlic, tomato paste, apple cider vinegar. For dumplings we have flour, baking powder, salt, oil, and plant milk. Salt and pepper too.
Start by dicing up the carrot and onion and mincing the garlic.
Dump all that you diced into a big pot, along with the spices, some salt and pepper, and about 1/2 cup of water. Place on stove and cook down on medium heat until the onion is becoming translucent and the whole pot is starting to smell fragrant.
Now add in beans and tomato paste and about 5 cups of water. Bring to a boil then turn down to medium an cook for about 20-30 minutes.
Soup. Cooked and all taste but one more little step.
Remove a third of the soup and blend until smooth and then add it back it.
Dumplings. Mix dry together then add in oil and milk. Mix together unit incorporated.
While soup is still on medium heat, scoop the dumping mixture right into the soup.
Place a loose side on top of pot ans let the dumplings cook util list and fluffy which will take about 15-20 minutes.
Cornbread dumplings looking all nice in the soup.
Then you eat it. Add some avocado on top of you want. Avocado is always a good idea.
-C
feeds 3-4
3 cups cooked black beans (or 2 16 oz cans)
1 large onion
1 good sized carrot
3-4 cloves garlic
1 teaspoon chill powder
1 tablespoon cumin
1/2 teaspoon red pepper flakes (or none if you don%u2019t like the spice)
1 tablespoon maple cider vineger
1/3 cup tomato paste
5 cups water
salt and pepper
Dumplings
3/4 cup all purpose flour
1/4 cup corn meal
3/4 cup plant milk
2 tablespoon neutral oil
1 teaspoon baking powder
1/2 teaspoon salt
Start by dicing up the carrot and onion into small pieces. Mince the garlic and then place the garlic, onion, and carrot into a large pot with the cumin, chili powder, and red pepper flakes, a good pinch of salt and pepper, and about 1/2 a cup of water. Place pot on stove on a medium low heat and sweat the mixture for about 10-15 minutes or until fragrant and the onions are slightly translucent.
Add in the tomato paste, beans , and 5 cups water. Bring to a boil then reduce to medium heat and let cook for about1/2 hour. Once soup has cooked down a bit and tastes delicious, remove form heat and carefully transfer 1/3 of the soup to a blender or jar (if using a hand blander) and blend until smooth. Add the blend soup back to the pot and turn the heat back on to medium low. Taste and add more salt and pepper if needed.
Now make dumpling mixture. Mix the dry ingredients together in a bowl then add in the oil and milk and mix until incorporated. Scoops the dumping mixture into the soup while the soup then place a lid loosely on the pot. Cook for another 15-20 minutes or unit the dumplings are nice a n fluffy.
And when they are done, remove lid, tun the heat off, and paddle soup and dumplings into bowl. Eat. Add sliced avocado for a little more yum.
I guess black eyed peas are good to eat on New Years because they bring you good luck or money or something. I have heard this and a lot of other food traditions but I don%u2019t really do New Years so I have never really actively thought about what I consume on the day. But when I went to ponder my bean selection ( I have so many varieties) I figured what the hell, why not make the stew I was about to make into a good luck black eyed pea stew. I mean I was already making it (I was leaning towards black beans) but If there is a chance that eating these delicious beans will give me a little extra luck (and or money) this year, well by all means I%u2019ll take it. And the stew because that is really what I was after.
This stew. It is thick and creamy from the sweet potato and beans, bright and light from the ginger and tangerines, and hearty because it is stew. It is a perfect stew situation to eat on any given day but especially nice on a cold winter evening. And I guess on New Years. Like today.
Now to the black eyed pea stew!
The stuff. Cooked black eyed peas. a sweet potato, some kale, a few tangerine, an onion, some garlic and ginger, tomato puree, and salt and pepper.
Start with chopping up the onion, mincing the garlic and ginger, and dicing up the sweet potato.
Toss the onion, garlic, and ginger into a big pot and add in a splash of water or oil and a pinch of salt. Place on medium heat ans cook until tranlucent and fragrant. Add in the sweet potatoes, tomato puree, and enough water to completely submerge it all. Keep on medium heat and cook until sweet potties are fork tender. Add more water if needed.
In he mean time chop up the kale.
And juice the tangerines.
Once potatoes are tender, add in the black eyed peas, the kale and the tangerine juice. Add more water to completely submerge again. And keep on medium high heat and cook for another 10-15 minutes or went everything is all melded and cooked together.
Like this. A pot of good goodness.
All that is left is to scoop the stew into blows and eat it. Squeeze more tangerine juice on top too, it makes it nice.
Good luck all year long!
-C
2 cups cooked and drained black eyed peas
1 medium sweet potato
2-3 tangerines
1/2 cup tomato puree
1 small onion
2 cloves garlic
1/2 inch fresh ginger root
a few leaves of kale, chard, or collard greens
4-6 cups water
Start by dicing up onion and peeling and mincing up the garlic and ginger. Place into a large pot with about 1/4 cup of water or a splash of oil and stick on stove on medium heat. Cook the mixture for 5-8 minutes or unit fragrant and translucent. While that is cooking dice up the sweet pot into small 1/2 inch cubes then add them into the pot once onion mixture has cooked, along with the tomato puree and enough water to completely submerge in all. Stir and and keep on medium heat and cook for another 20 or so minutes or until the sweet potatoes are fork tender.
Chop up kale and juice tangerines.
Once the sweet potato is tender add in the rinsed and drained black eyed peas, the chopped kale, and the tangerine juice. Add a sprinkle of salt and pepper and more water to submerge it all again and keep on medium heat. Cook for another 20 minutes so that all the flavors have time to meld and turn into a great pot of stew. Depending on your preference for thickness, cook down more for thicker stew, or add more water to keep it brothy.
Once cooked, scoop into bowls, season with more salt and pepper, and if you have an extra tangerine, squeeze a little more fresh juice on top.
First off, I am not sure if this is technically a stew, or chili, or just a soup, but I think a stew so I am sticking to it.
Secondly, I don%u2019t give a flying f%$# what it technically is because whatever it is is so freaking good!
Lets talk about this stew and whats in it. Me and tomatillos are having a thing right now and I can%u2019t seem to get enough if them. They are bright and slightly sour, but also sweet with a bit of acidity, kind of like a unripe tomato but just better and taste fantastic. Then I got the pumpkin which is hardy and creamy and I will eat all day, everyday forever if I could. White beans which are also creamy and delicious, all in a pot with a good amount or cumin, some of this and that, cooked down to a delicious pot of stewed goodness.
And isn%u2019t stew just he perfect food for a nice crisp fall day? 100% yes to that and yes to this stew. It will make you happy, smile, and full.
Now to the stew!
The stuff. Fresh Tomatillos, a pie pumpkin, cooked white beans, an onion, a jalape%u00f1o, a couple cloves or garlic, cumin, chili powder, red wine vinegar, salt and pepper, and fresh cilantro.
Start with dicing up the onion, garlic, and jalape%u00f1o. Remove the seeds fro meh jalape%u00f1o to make is less hot.
Toss that stuff into a pot along with the cumin and chili powder, a pinch of salt, ans about a 1/2 cup of water. Place on stove on medium heat and start to cooke.
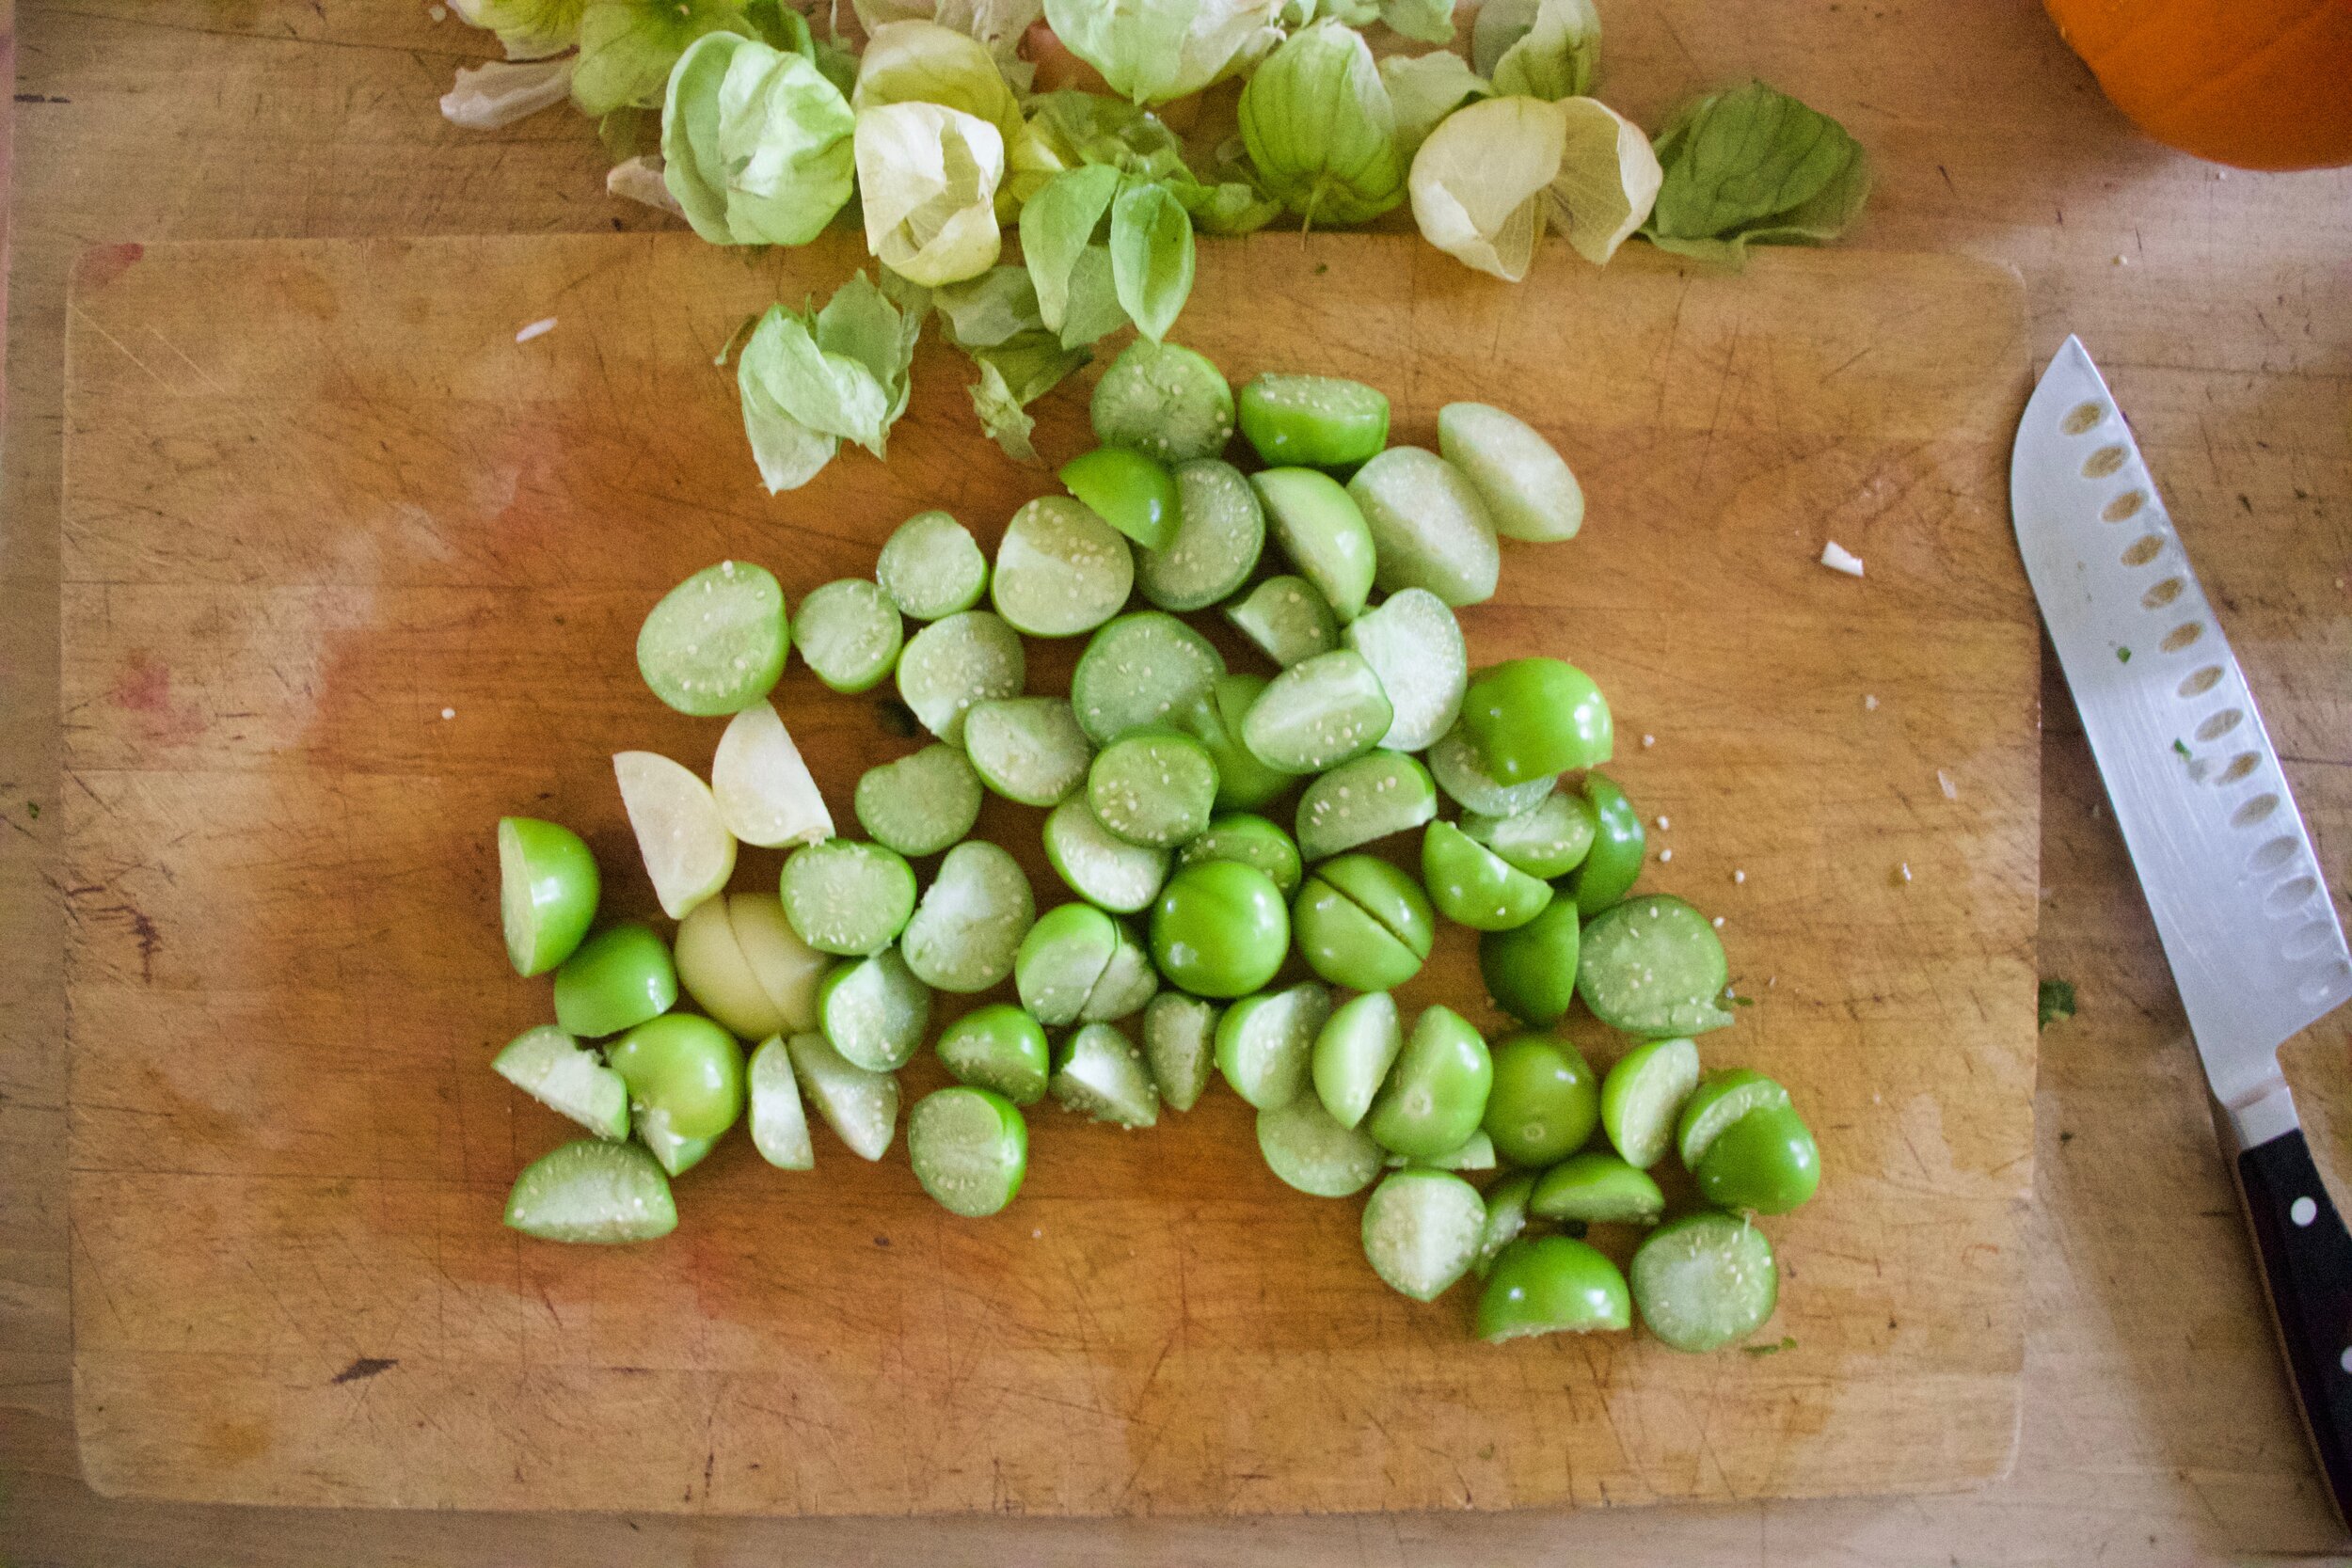
Husk, rinse, and halve tomatillos.
Once the onion and jalape%u00f1o mixture is cooked a bit like this%u2026
Add in the tomatillos and enough water to submerge the all. Place back on stove on high heat.
Now dice up pumpkin into inch sized cubed.
Now add the pumpkin and the white beans into the pot. Bring the whole thing to a boil once more, then turn the heat down to low. Cook for about an hour to hour and a half, string once in a while, until its cooked down nice and thick.
Grab a bowl, fill it up, top with fresh cilantro, and get down on it.
P.S. This is now my new favorite food
-C
2-3 good hardy servings
20-22 tomatillos (about 3 1/2 cups after husked and halved)
1 small pie pumpkin (3 1/2 cups cubed pumpkin)
2 cups (or 1 can) cooked and drained while beans
1 yellow onion
2 cloves garlic
2 tablespoons cumin
1 teaspoon chili powder
1 tablespoon red wine vinegar
6-7 cups water
salt and pepper
fresh cilantro
Start by dicing up the onion into really small pieces. Mince the garlic and cut the jalape%u00f1o up into small pieces (remove seeds) while you are at it. Place the onions, garlic, jalape%u00f1o,cumin, chili powder, and a pinch of salt into a pot. Add in about 1/2 a cup of water and place on stove on medium heat and start to cook.
While that is cooking a bit, husk, rinse, and halve the tomatillos. When the onion and garlic mixture has cooked down a bit, add the tomatillos to the pot along with a couple of cups of water (enough to submerge the tomatillos). Place back on stove on high heat and bring to a boil.
In the meantime, dice up 3 1/2 cups of pumpkin (remove seeds and save for later and don%u2019t peel pumpkin unless you really want to) into mouth sized cubes. Once diced up, add into the pot along with the with beans and vinegar. Add more water until everything is submerged (about 3-4 more cups) then bring pot back to a boil. Once boiling, reduce heat to low and let cook for about an hour to an hour and a half, stirring on occasion, until the tomatillos have cooked and thickened, the pumpkin is nice and tender, and the whole stew is nice and well, stew like.
And once it is cooked, taste for seasoning (add more salt and pepper if needed). Then ladle into a bowl, toss on some fresh cilantro then dig in.
Left overs store well in fridge for about a week. Its easy to heat up but really, cold stew is amazing!
Another heatwave. I tell you what, If I never live through another 90 + degree day, it will be too soon.
What to eat during a heat wave? Well maybe you don%u2019t care and have air conditioning in your kitchen so you cook whatever. I don%u2019t have air conditioning and after a few days of boiling temps, there is no freaking way I am turning on the oven. I can barely turn on the stove top to boil water, but I did, I boiled water, I just did it early in the morning before the temperatures starting rising again. (A pro tip for you.) That is one of the great things about pasta salad, you can make the pasta ahead of time. You can even make the whole salad in the morning and then you don%u2019t have to do a damn thing when it comes to dinner besides lifting a fork to your face, which I know can be a feat when all you want to do is melt, or slap at something, but still.
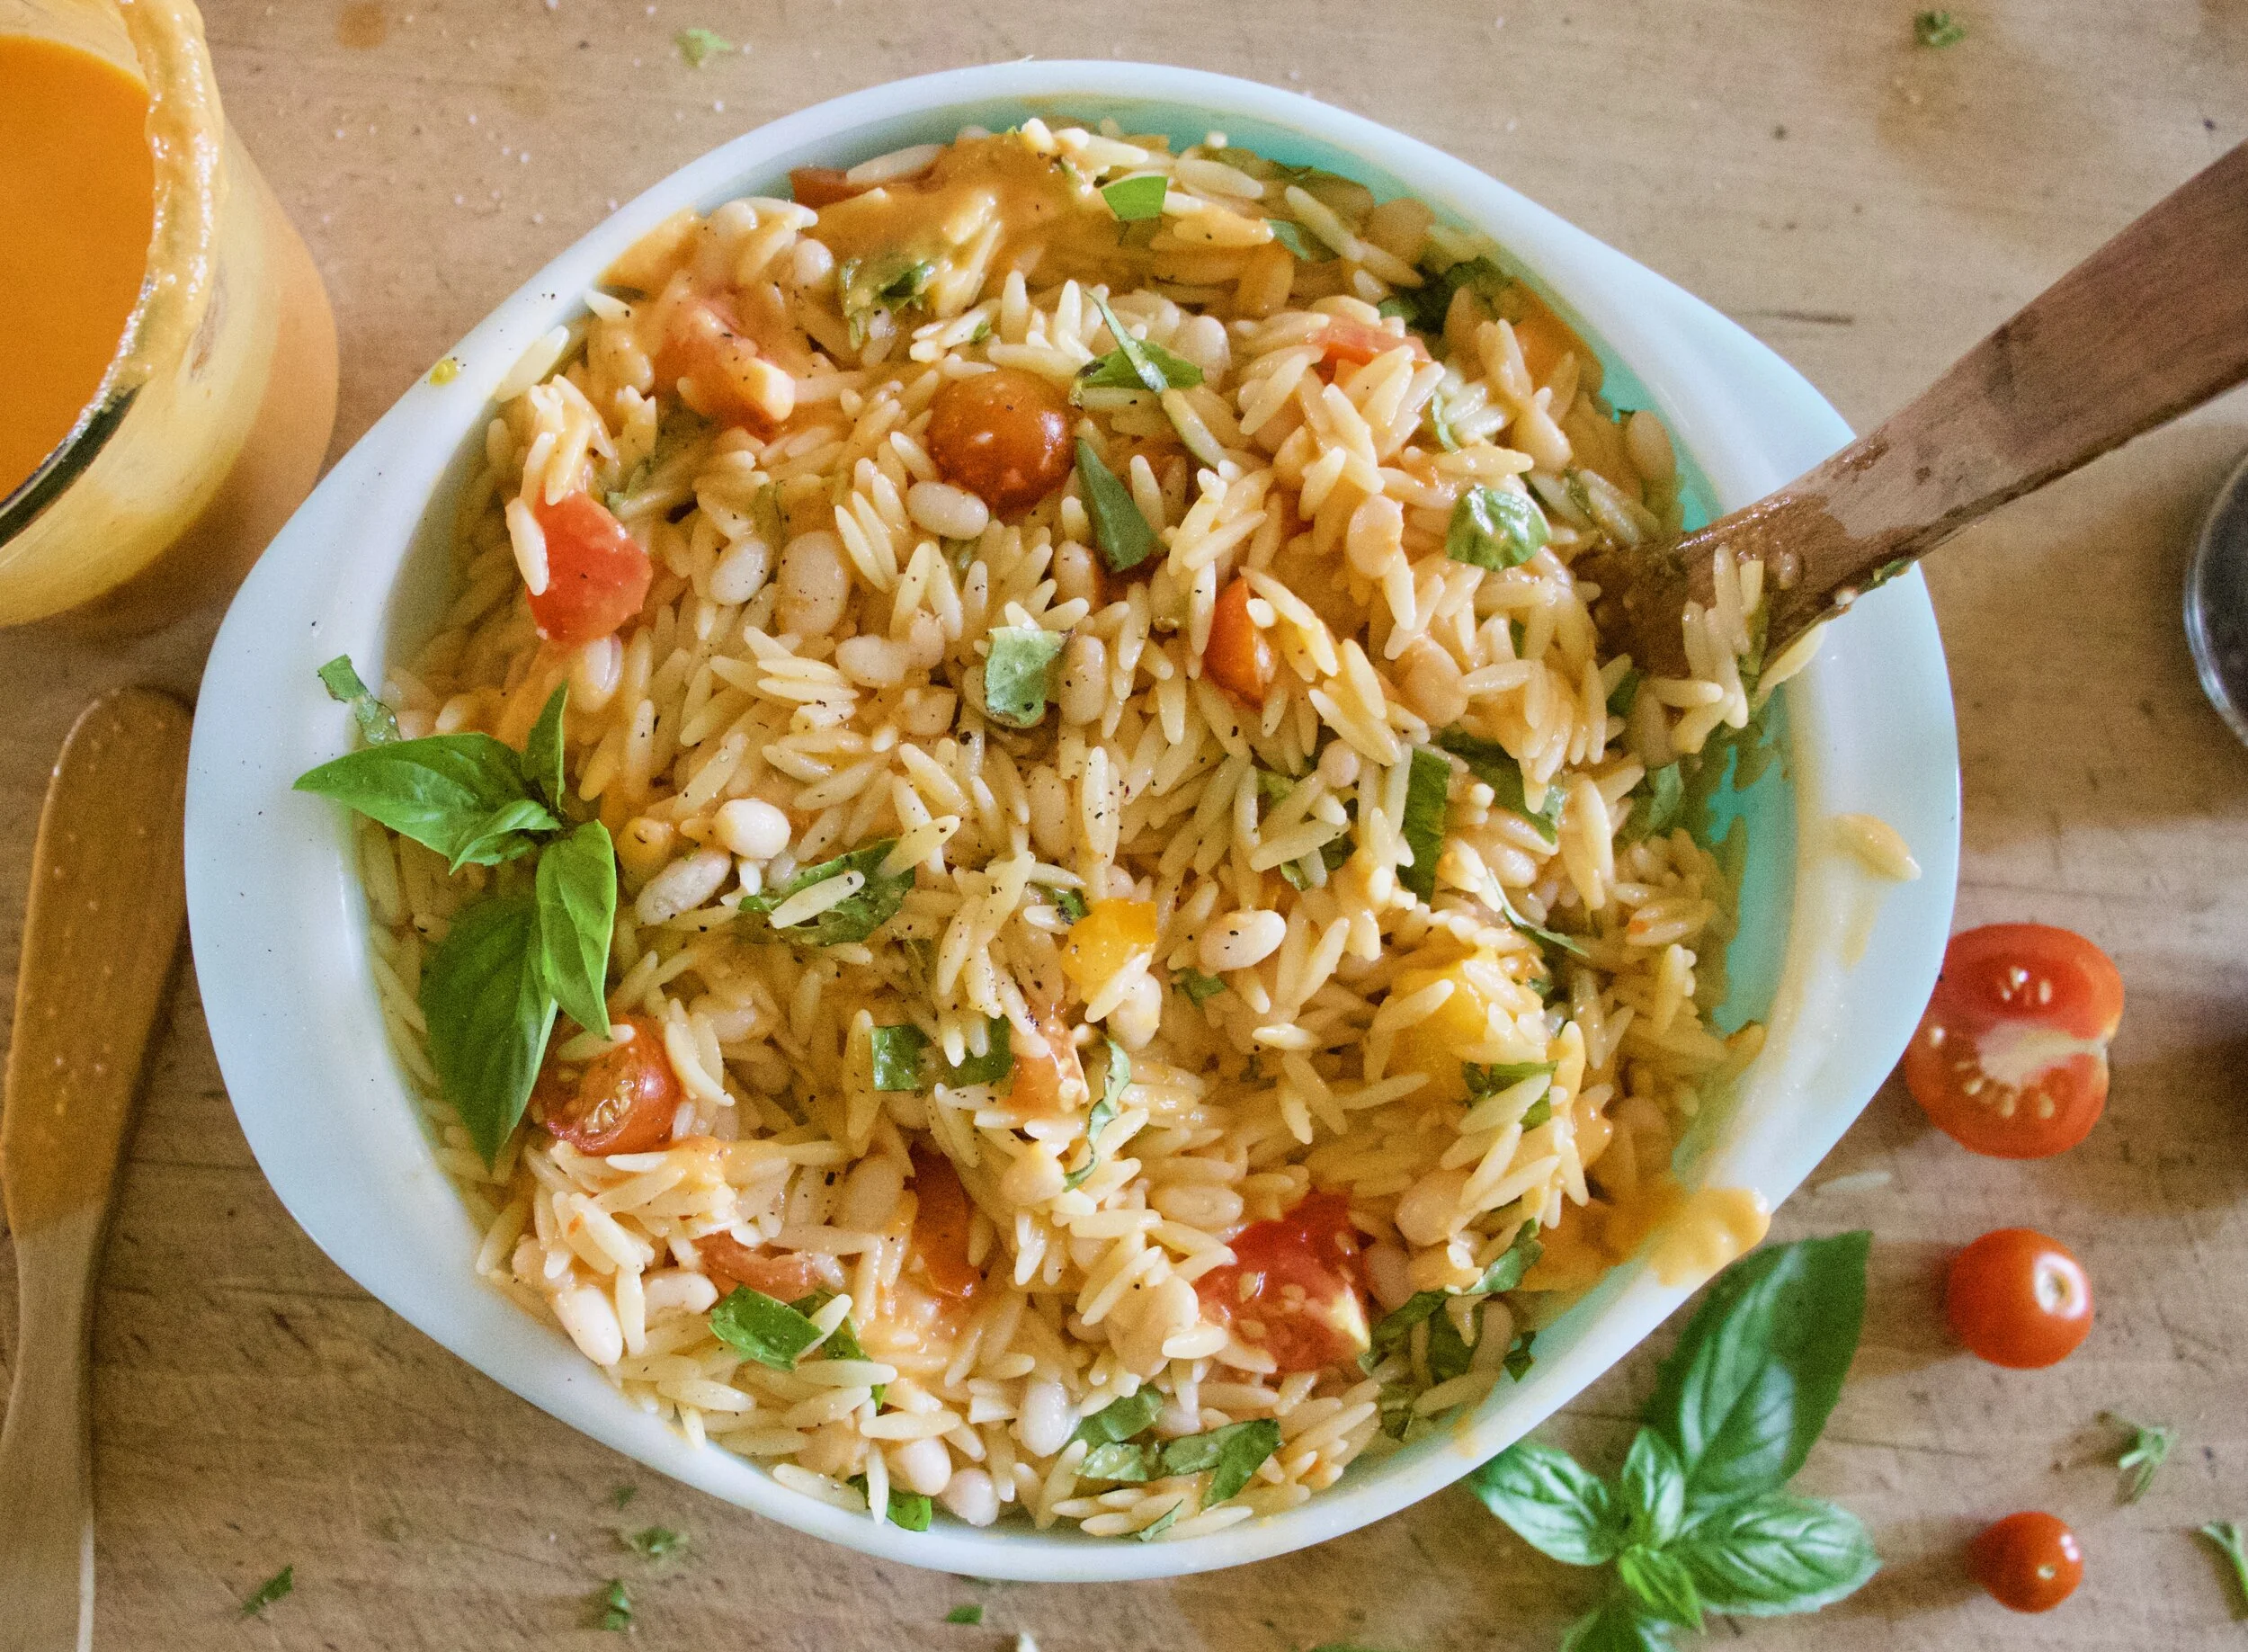
This pasta salad, well it is not you everyday pasta salad. It has beans, fresh basil, and a dressing that is made by blending up the most delicious seasonal tomatoes until rich and creamy and dumped all over the orzos. . It is probably going to be the best tasting pasta salad you will ever eat. The thing is, you really need to make it soon because sure you can get tomatoes all year round but don%u2019t do that. Do yourself a favor and make it now while the tomatoes are plentiful and at their peak of deliciousness. And also you don%u2019t have wait for a heatwave to make it. This is a good meal to have at the ready all throughout tomato season, and just in case, a heat wave.
Now to the pasta salad!
The stuff. Just picked tomatoes, some fresh basil, cooked navy beans, orzo pasta, olive oil, red wine vinegar, garlic, and salt and pepper.
Rough chop tomatoes into small pieces. Also peel and dice garlic into small pieces.
Place the tomatoes, garlic, and a good pinch of salt into a blender (I used a hand blender) and blend unit smooth. Add in the vinegar and oil and bend until the mixture starts to emulsify and becomes smooth and creamy.
Cook and strain pasta as instructed. Keep in on the al dente side.
Chop up basil into thin ribbons or whatever.
Then dump pasta into a large bowl. Add in cherry tomatoes ( I cut mine in half) and beans. Dump in half the sauce and mix around then mix in the chopped basil.
If you are eating it right away, add in the rest of the sauce. If you are keeping it for later, place pasta and sauce in fridge and a before you are planning on serving it mix in the remaining sauce.
Looks so good right! Season with salt and pepper to taste and then you know%u2026
Grab a bowl and eat it. Probably should grab a from too, eating this with your hands might get messy.
Stay cool friends!
-C
serves 2-3 as a meal or more as a side
2 cups dried orzo pasta (12 oz)
2 large heirloom tomatoes (about 2 cups chopped)
1 1/2 cups cherry tomatoes (or chopped tomatoes)
1/3 cup olive oil
2 tablespoons red wine vinegar
1 1/2 cups cooked and drained white beans ( I used navy but any white bean will do)
1 cup packed basil leaves
2 cloves garlic
salt and pepper
Start with making the tomato dressing. Rough chop the 2 large tomatoes into smaller pieces and peel and chop garlic. Place the tomatoes in a blender (or a large jar if using a hand blender) with the garlic and a good pinch of salt and a little pepper. Blend until smooth. Add in the vinegar and oil and continue to blend until the mixture becomes thick and creamy. Taste and add more salt and pepper if needed .
Prepare orzo pasta as instructed on package (make it al dente)
Grab basil and chop into smaller pieces.
Once orzo is cooked and drained, dump it into a large bowl. Add in the beans and cherry tomatoes (slice in half if they are on the large size) and pour in half if the tomato sauce. Mix unit incorporated. Toss in the basil.
Now if you are going to eat right away mix in remaining sauce. If you plan on refrigerating and eating later, save the remaining half of the sauce and mix it in right before serving.
Whats summer without some ice cream?%u00a0 That is no summer, that just sounds like Hell. And this past weekend I was pretty sure I was in hell because it was so mother f*ing hot and for a while, I had no ice cream (and no air conditioner)
We used to have an air conditioner. My mom gave us one a few years back because she was worried about washer (so nice she was worried about the dog and not me, but that’s cool) And we used it, not often, but when the temps got above 90, we would bust that mother out, hang blankets from the ceiling and create a little frozen ice box. Washers bed, the couch, and the tv were the only things in the box and it was fantastic.We would spend all day hanging out in the dark little ice box, cuddled on the couch watching tv. Washer would just lay there and I am pretty sure that he loved it just as much. But a couple years ago that air conditioner broke so now we don’t have one. So now when it’s mother f*ing hot, we are just really fucking hot. As for Washer, I send him over to my moms house. She has like 10 air conditioners. And the mr and I.. we bitch and complain and sweat and eat ice cream.
So I made this is my ice cream, a Colleen approved, oh so good I want to eat it for ever meal, type of ice cream. Nice and creamy with nice coconut oatiness. Its really pretty great.
And if there was ever a time when you woke up so hot that all you for wanted for breakfast was ice cream, well that’s completely cool, especially with this kind cause it’s kinda really healthy and made with oats and so it it definitely ok.
Here’s to ice cream all day, every day.
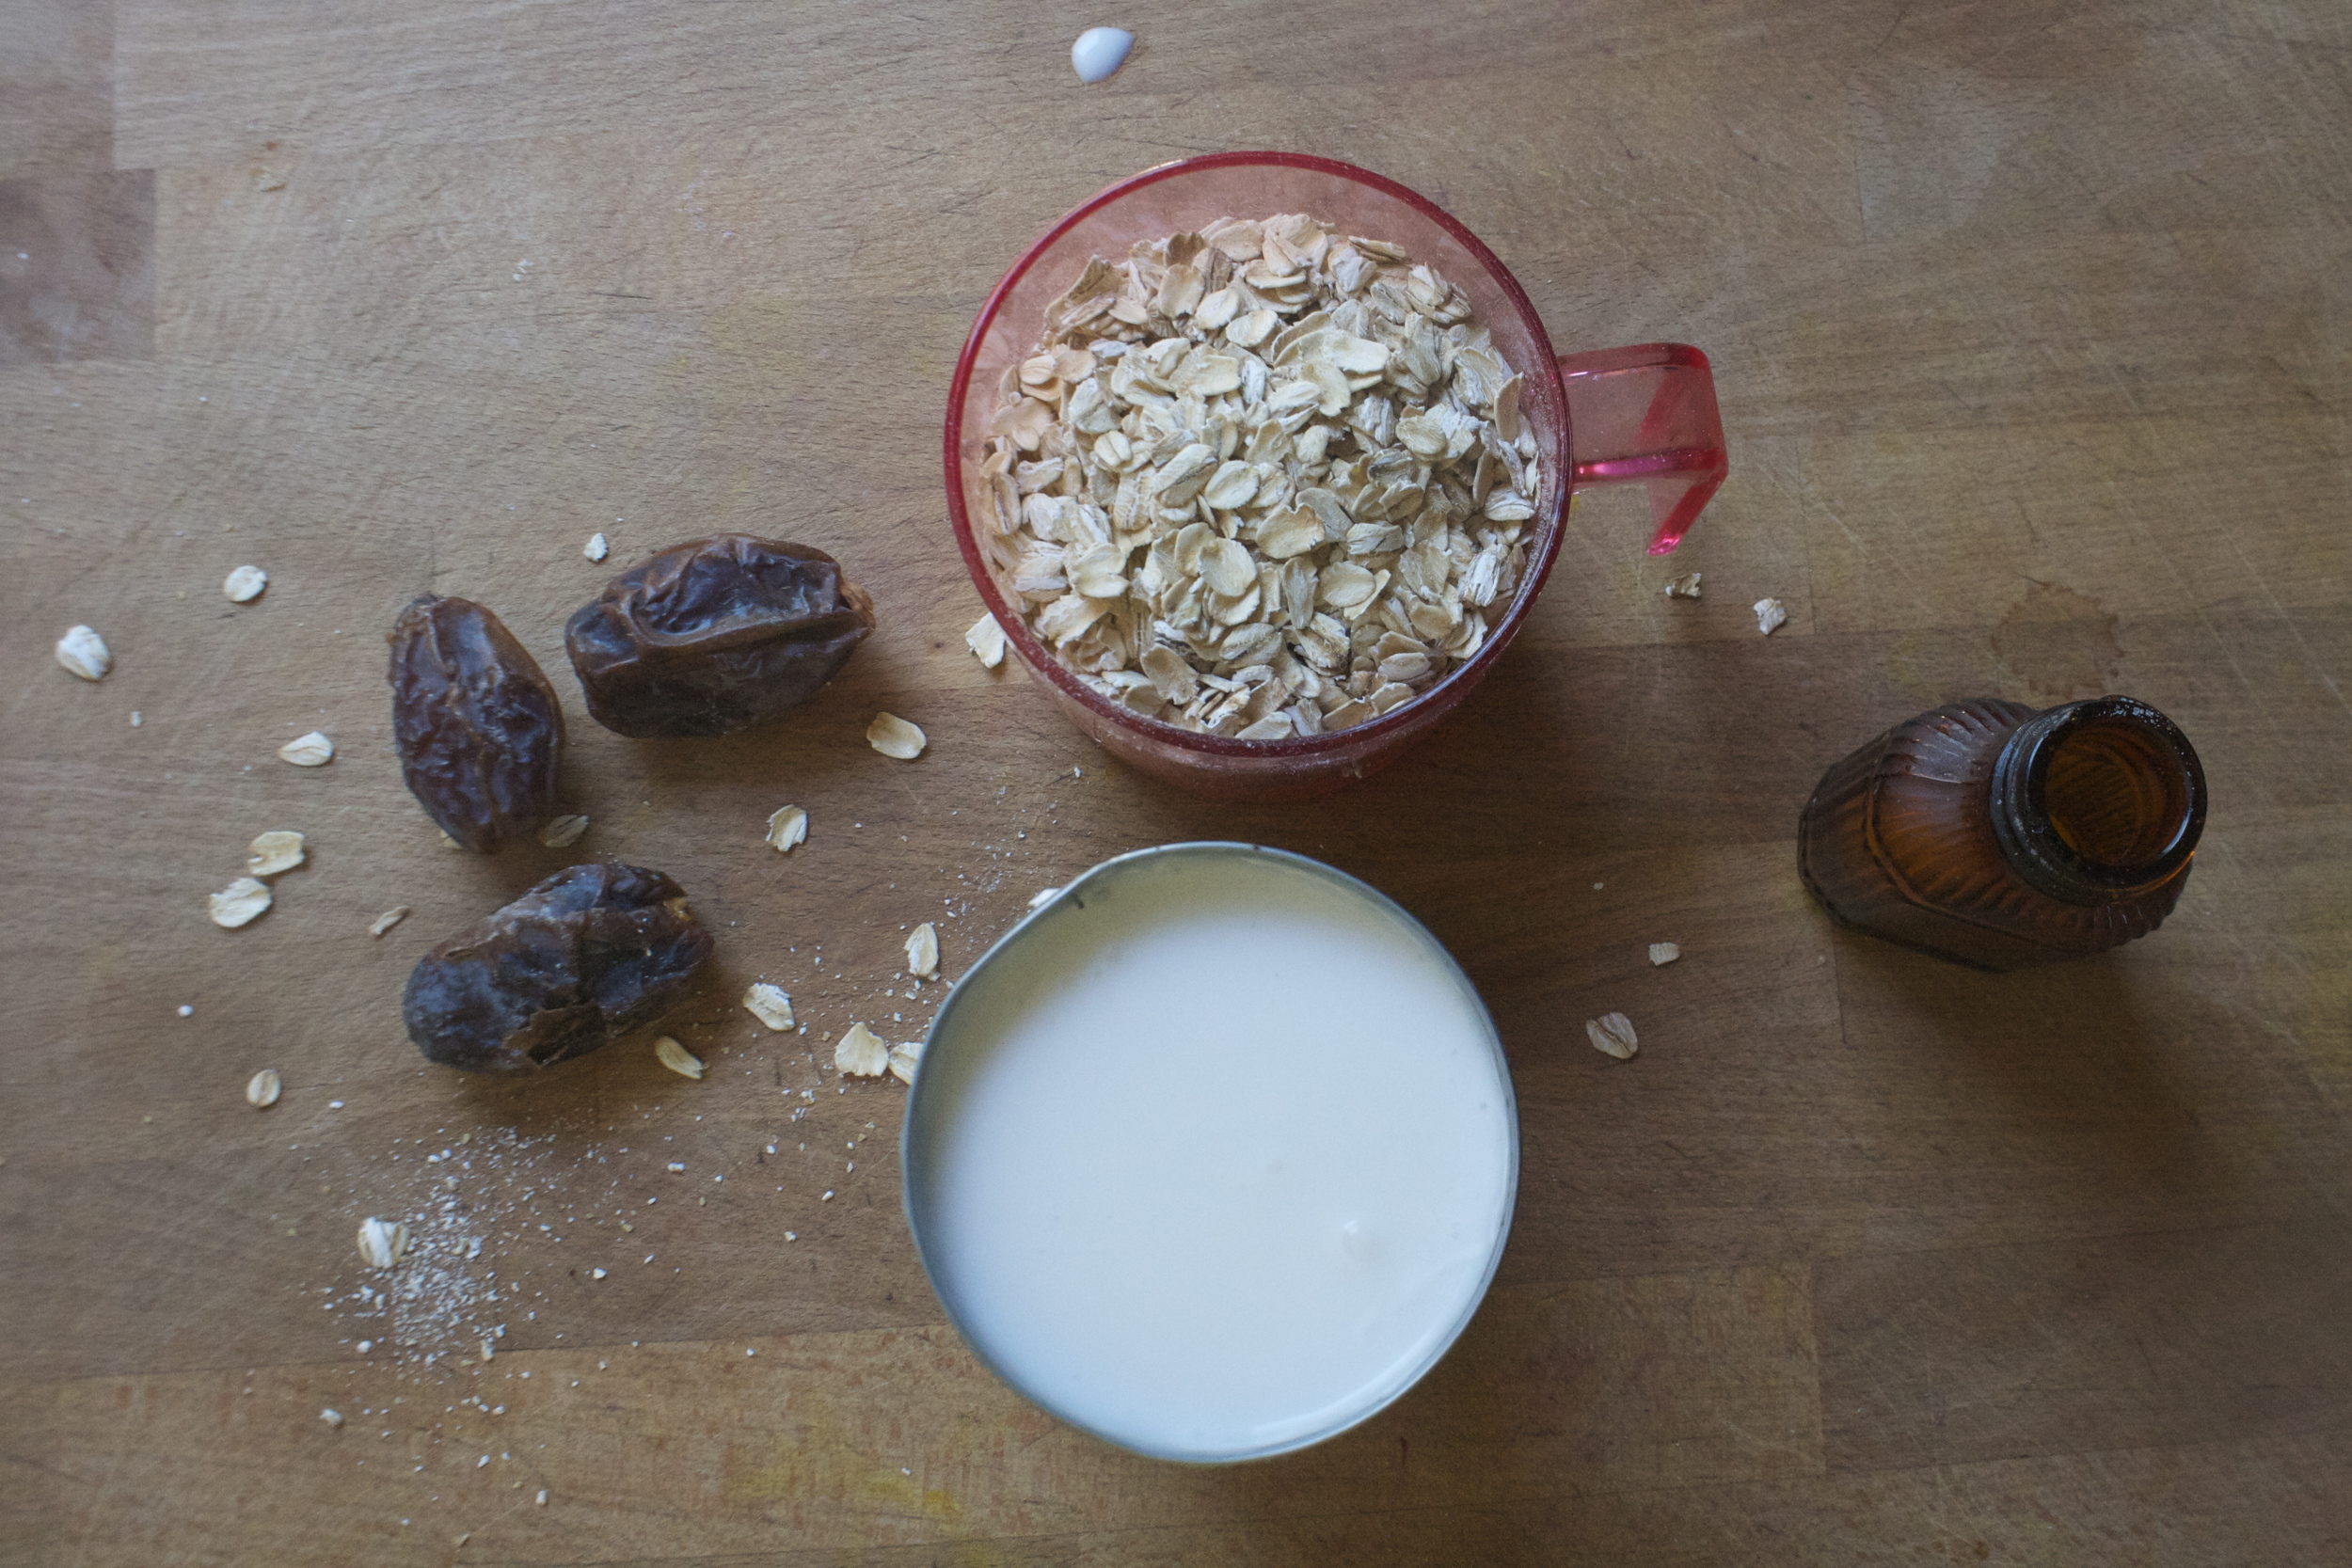
The stuff. We got a can of coconut milk, some old fashion oats, a few dates and salt. ( we need just a pinch) Also need a little water.
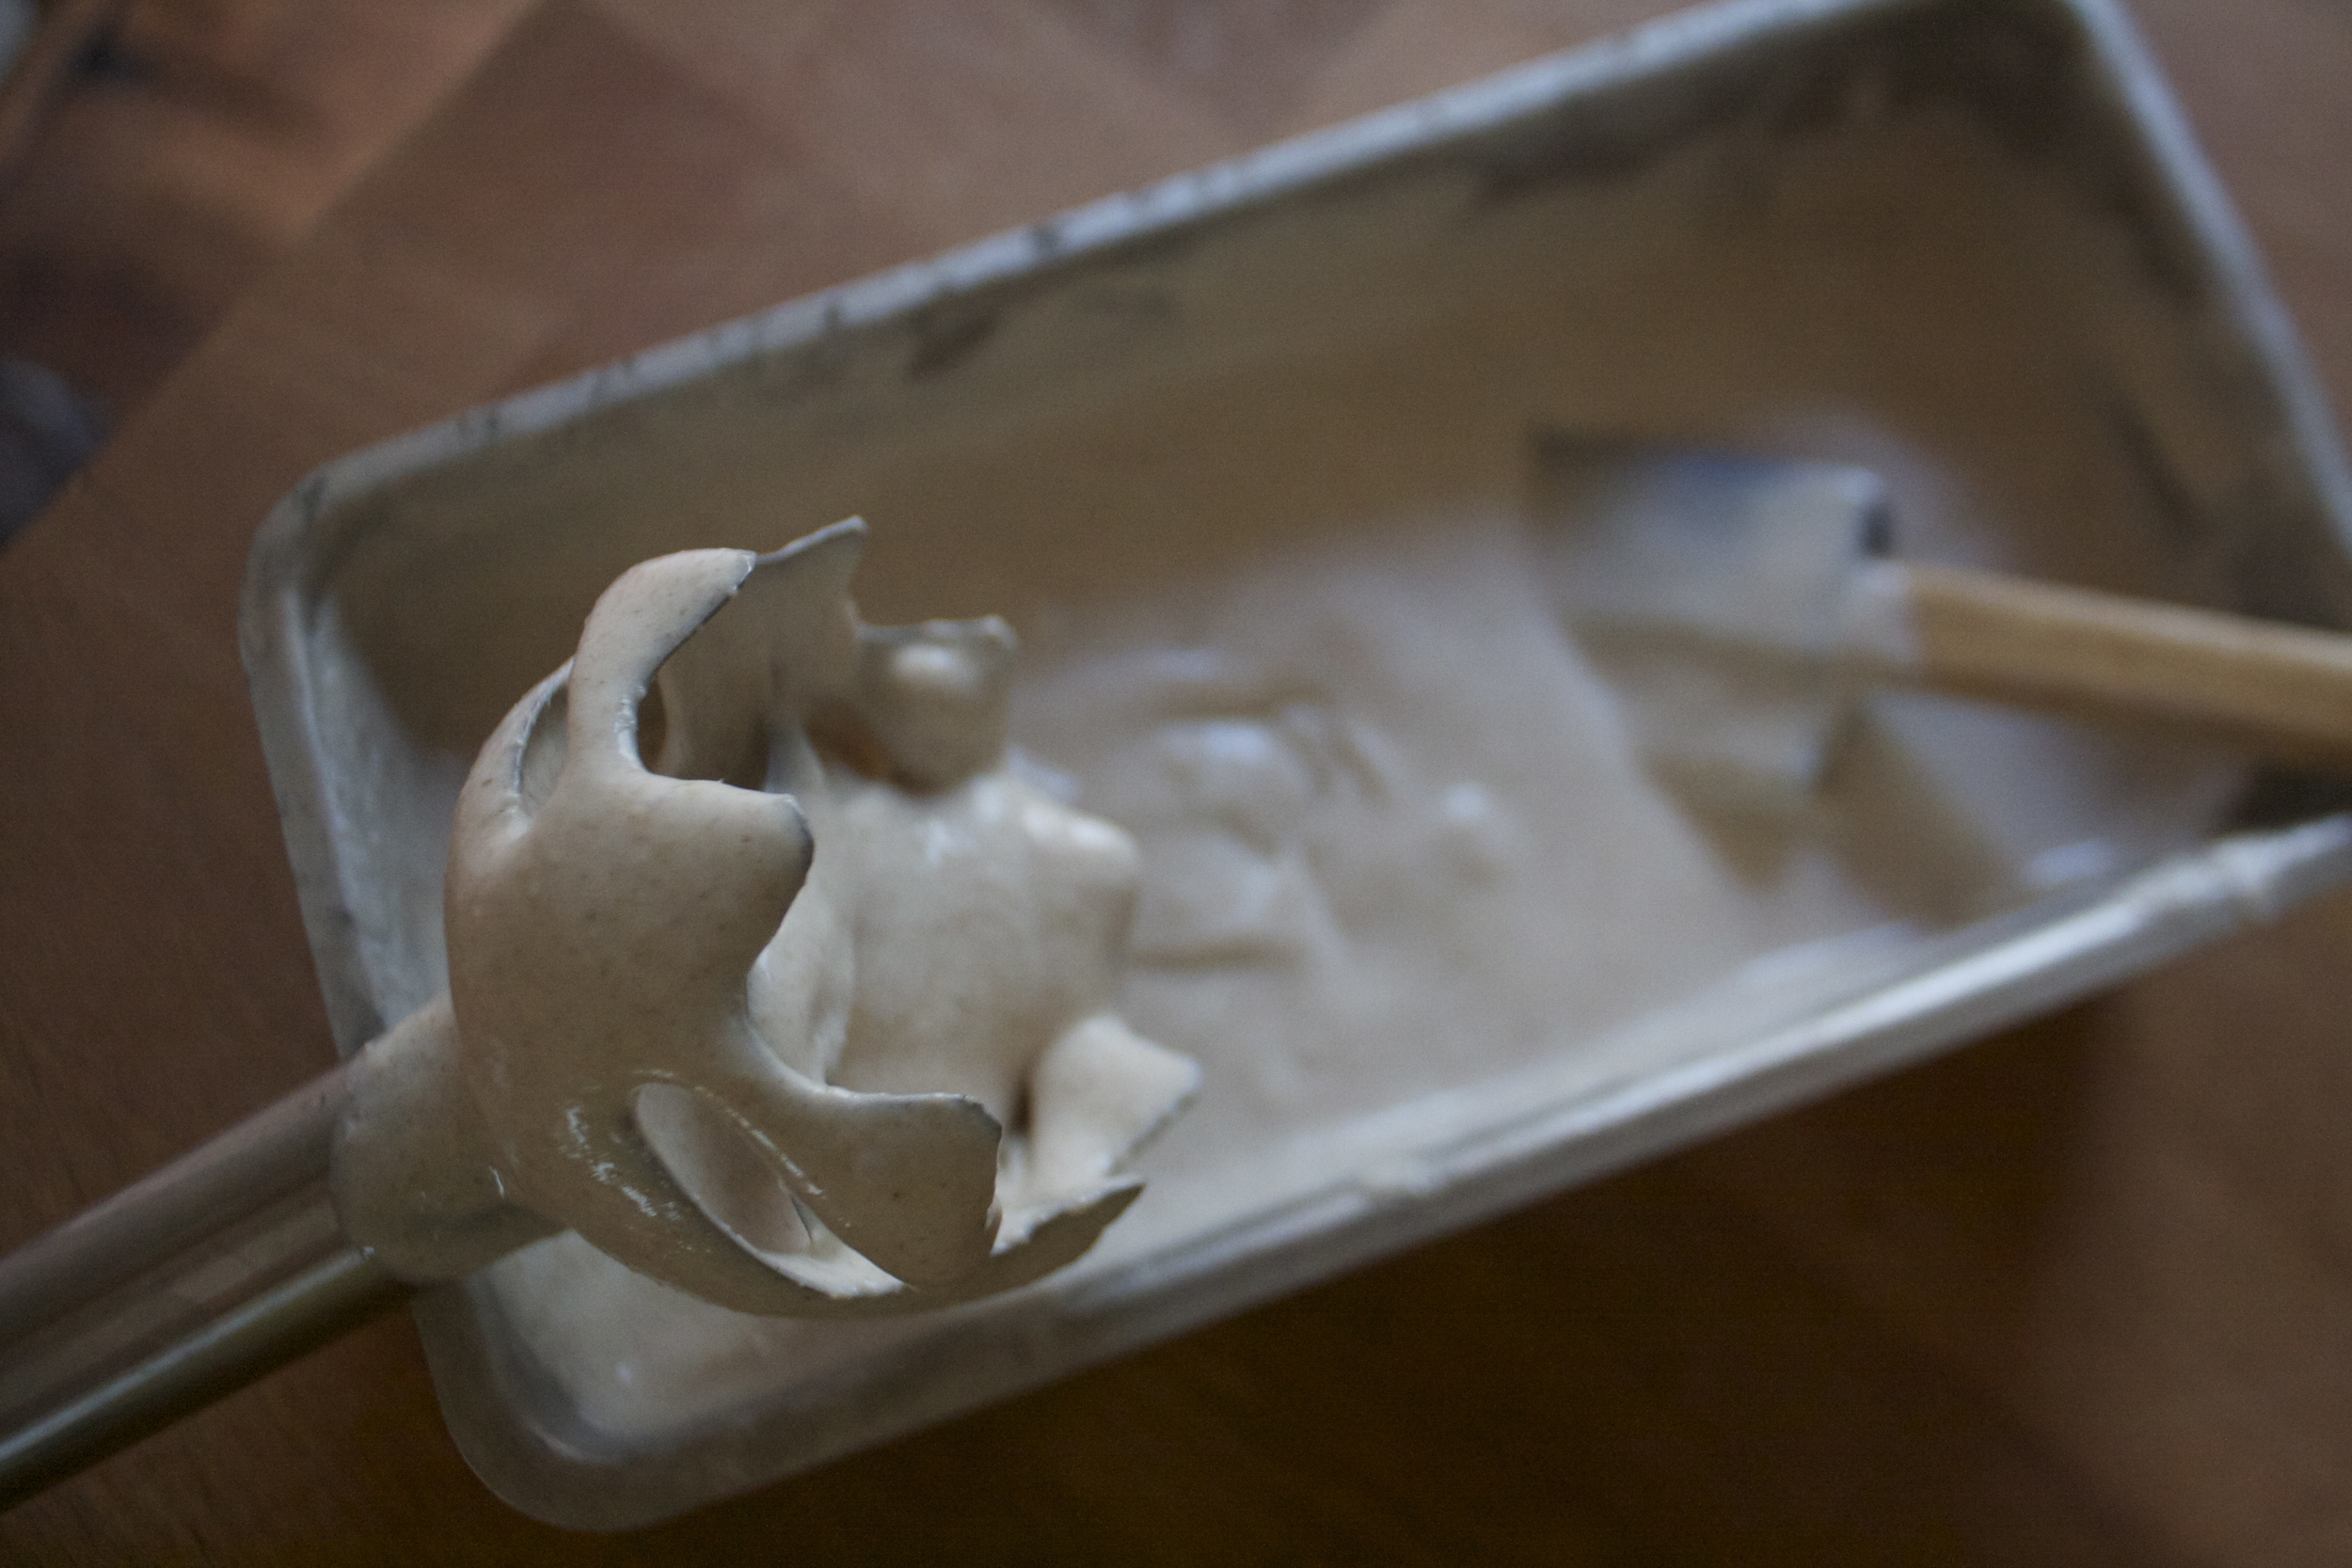
Pretty simple here, just dump the coconut milk, oats,the dates(make sure they are pitted) and a pinch of salt to a blender and blend the crap out of it. And keep blending until its all creamy smooth and oh so nice then stick the blender in the fridge.
After about an hour or so the mixture becomes super thick. Stick it back on the blender stand and give it one last swirl to make sure it’s all mixed up.
Pour/scrap mixture into a freezer safe container and stick it into the freezer… lick blender clean, watch you tongue and fingers.
After a hour or so, remove the kinda frozen ice cream and give it a good whip with a stick blender or if you don’t have, scrap the ice cream back into the blender, and give it a swirl, stick back into freezer container hen back into the freezer until frozen.
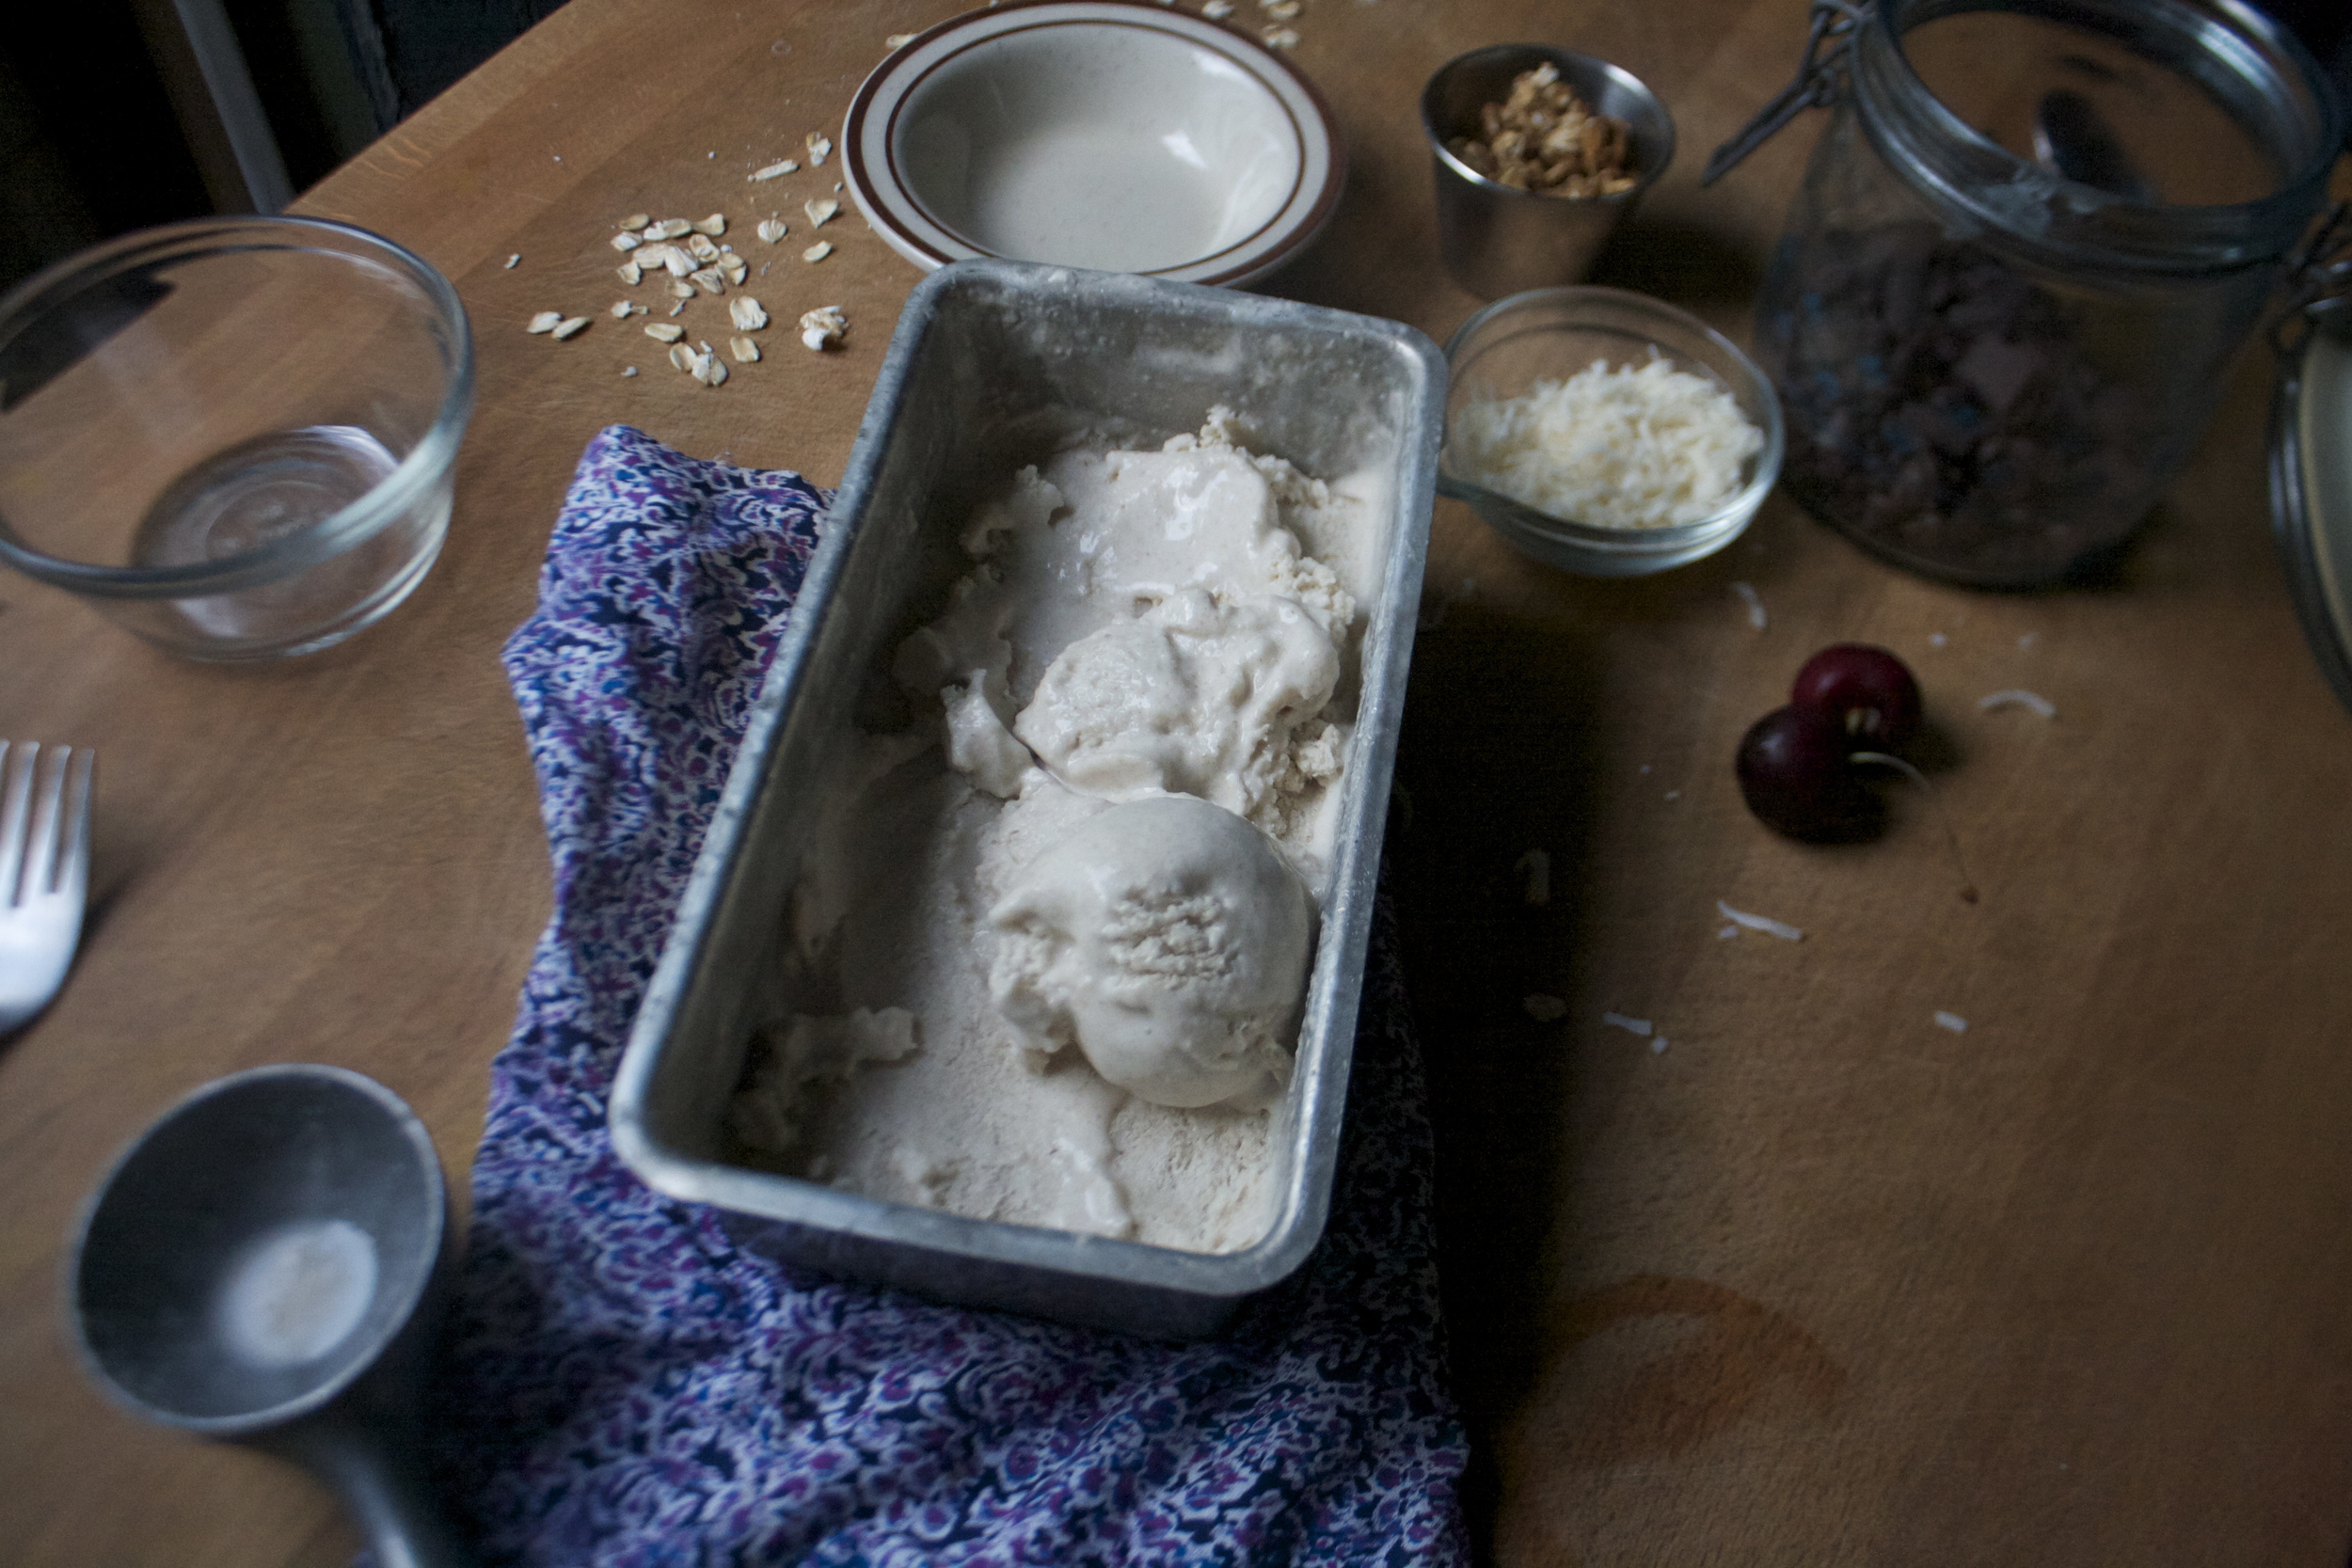
And when you are ready to eat, remove from freezer, let sit out for 5-10 minutes to soften enough to scoop and do what needs to be done.
Look at that. So good.
And not only dessert, but this could be your breakfast tomorrow….and every day from now on.
-C
1 can coconut milk
1/2 cup water
1 1/2 cups oats (gluten free if needed)
3-5 dates*
pinch of salt
*Note. I used 3 dates and found it sweet enough but I don’t like things too sweet. If you know you like things sweet, do 5. Also, if the dates are not super soft, soak them water for a little bit.
Grab your blender and place all the ingredients in it. Start blending and blend and blend and blend until all smooth and creamy. (It might take a few minutes.) And once it’s all blended up, stick the blender into the fridge .
After about an hour or so the mixture should have gotten nice and thick .Remove and blend the whole thing up once again and transfer the mixture to a freezer safe container. Place said container into the freezer. Let the mixture set up and get pretty close to frozen and remove from fridge and give it another good blend (I use my hand blender, but you can always scoop back into the regular blender to do it) Place back into freezer until frozen.
When you are ready for ice cream, remove for freezer and let sit out for 5-10 minutes until soft enough to scoop.%u00a0 It might be super hard at first but don’t worry, it soften up quick enough. I find scooping it easier with a ice cream scooper dipped in hot water….
Scoop it, add any toppings you want (toasted coconut and toasted oats are great) and then eat it.
Store left overs in freezer (duh) but place a piece of wax paper over the top to keep from freezer burn.
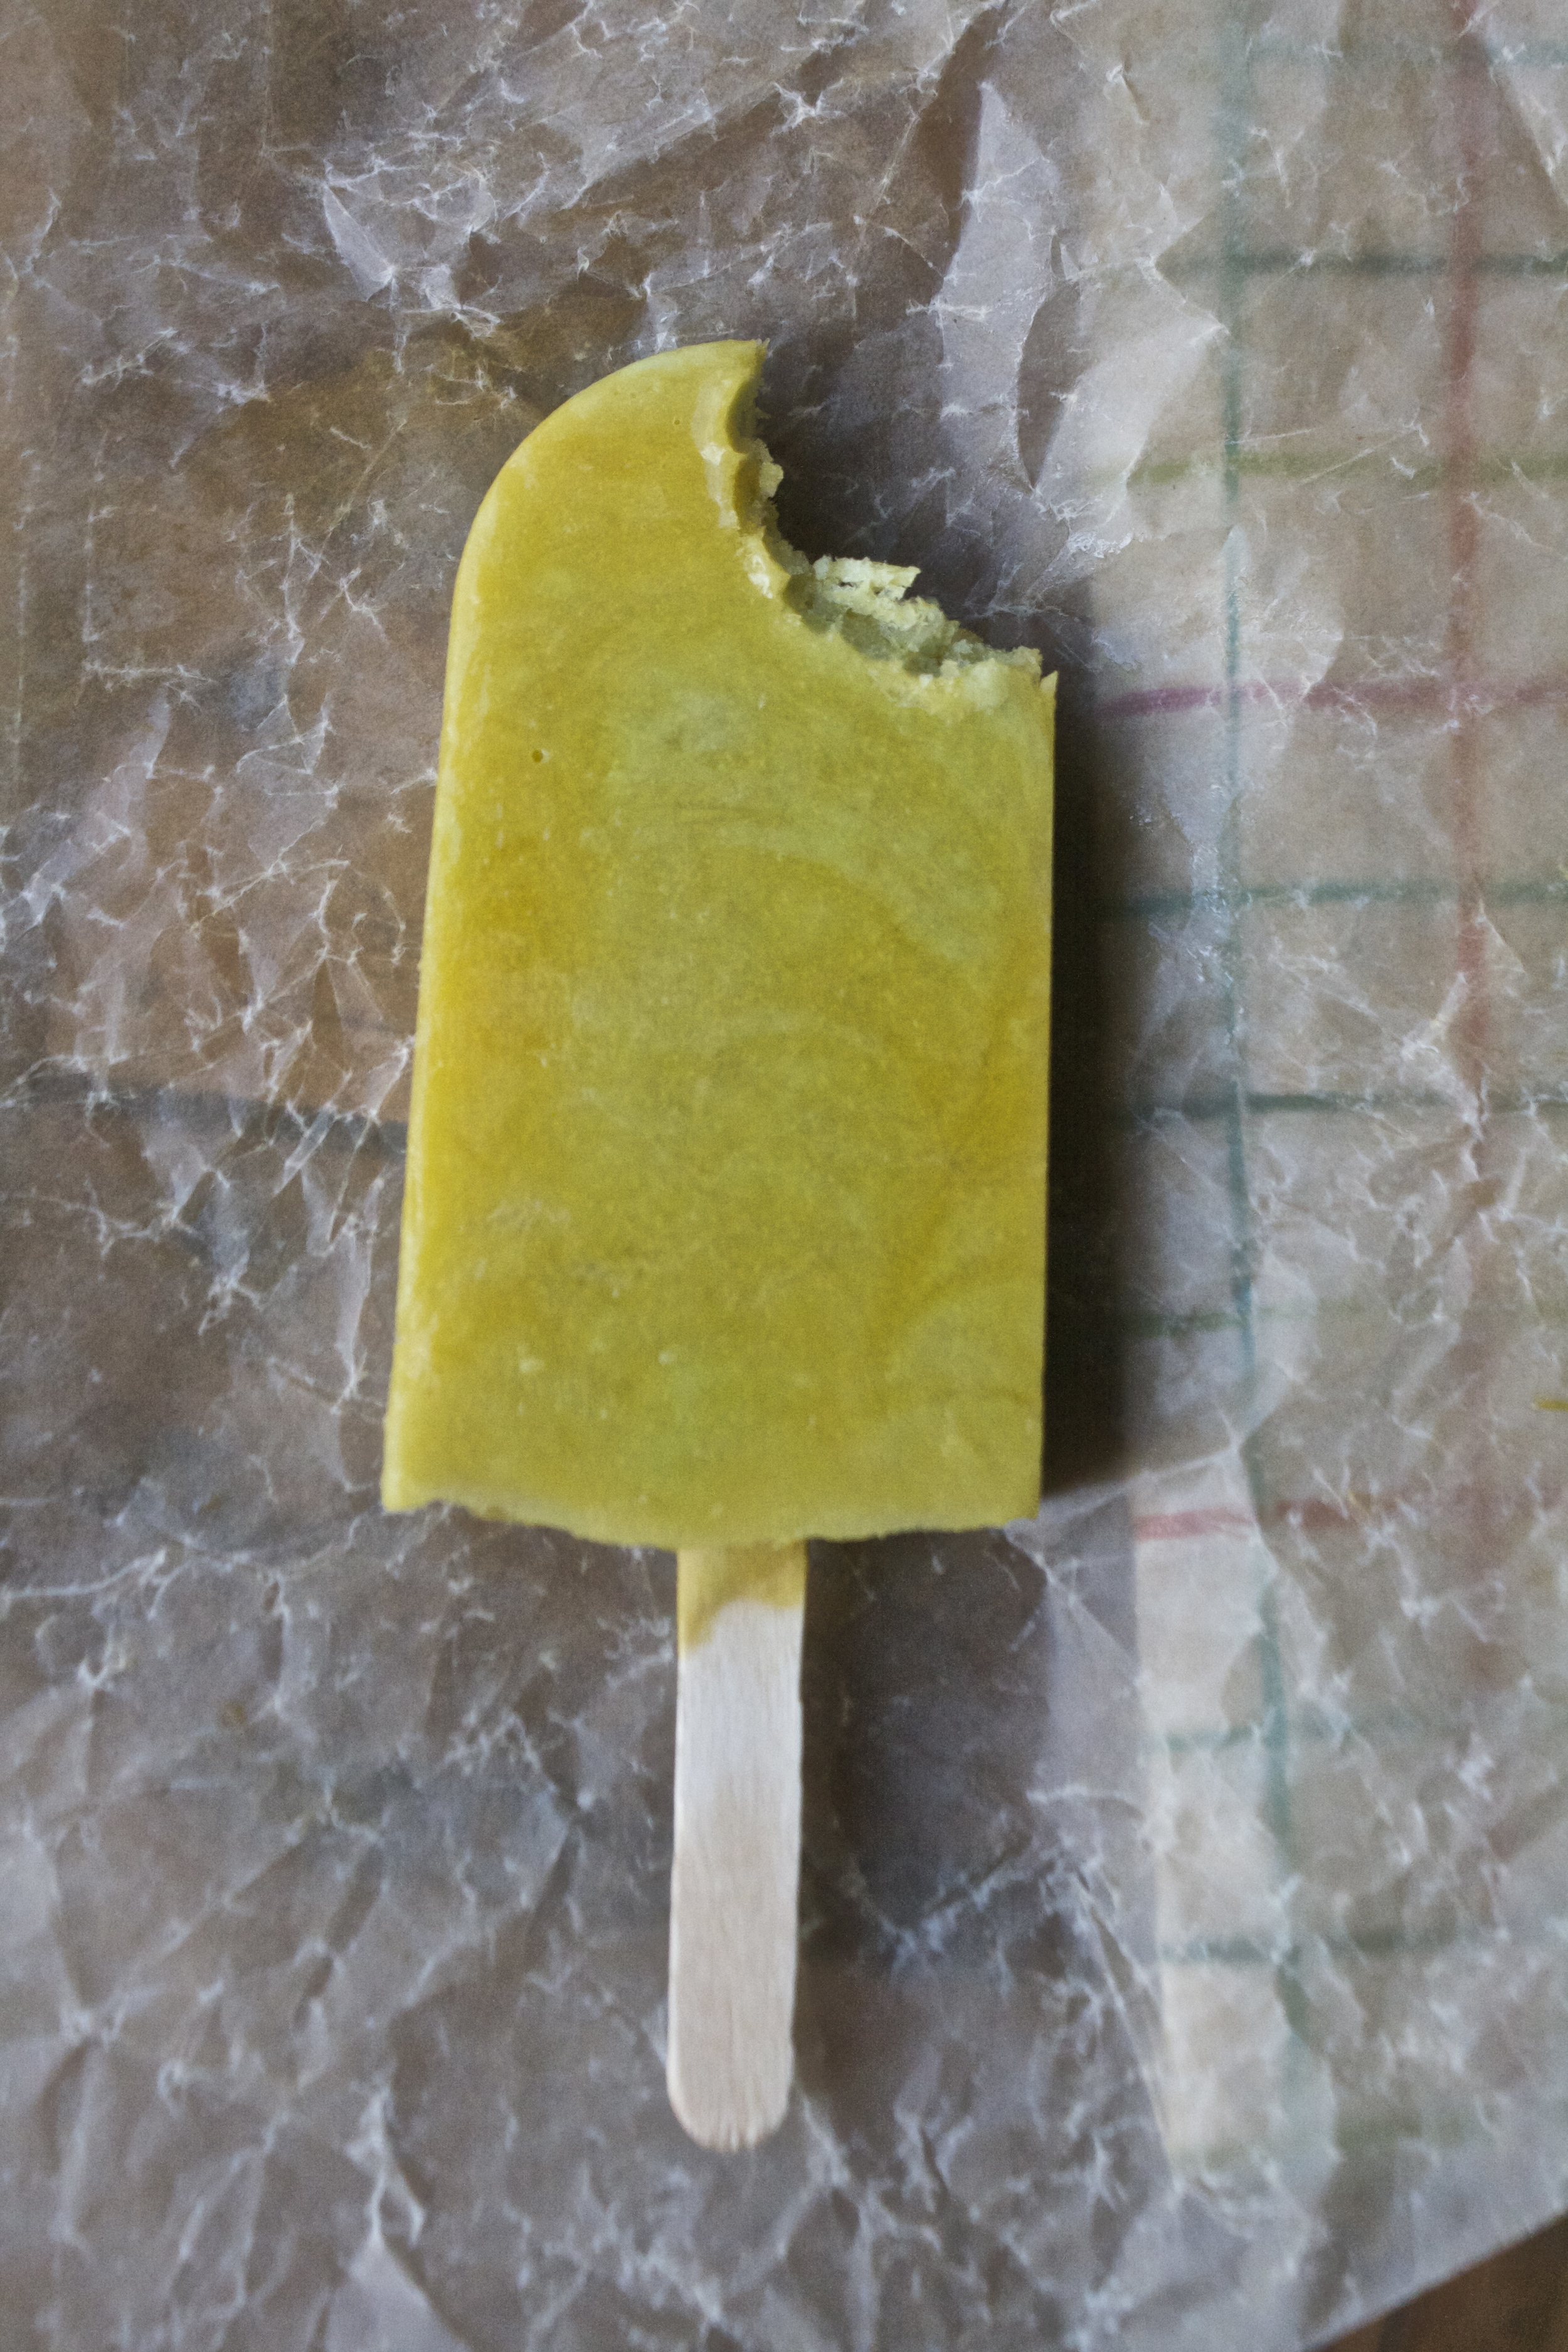
I was cleaning out the fridge and found that I had a good few really ripe avocados that were in need of eating ASAP. (I bought like 8 at once… super sale!) My first thought was I wish I could freeze these and save them for later. Then I thought well why the heck don’t I freeze them. So that’s what I did. I pureed them up, added a little lemon juice and stuck a jar of tangy green creamy goodness into the freezer and all throughout the week found myself standing in front of the fridge with a spoon scraping at the jar of avocado. It was so good. I even added a little fruit to it toward the end. Avocado and fruit = oh hell yes.
And now that is is officially spring we should be eating popsicles (right?!). I figured you guys are cool enough that I would share my new found love of frozen avocados and you would be down with it.
I know, some might think that plain old frozen avocado doesn’t sound amazing, but when you add a little sweetness and swirl it around with super sweet and creamy mango. Trust me, it’s freaking amazing. The flavors go perfectly together, and the texture, it’s almost like ice cream… SO GOOD! Anyway, I know that it might not be the perfect spring weather as of today, but the beauty of these is that you make them, freeze them and leave them until the perfect moment. Say a good long day of raking up all the cat poop that the neighbors cat has left in all your spring flower beds, or picking up all the recycling that has blow into the bushes all winter long. Maybe a day of cleaning out the closet or dusting the ceilings. Make these popsicles now and treat yourself to one after doing some kind of crappy spring chores, its what you need to do.. Or better yet, bribe a little with a popsicle to do your spring cleaning….. Yeah, I might just do that.
Or just make them and eat them… no spring chores required.
The stuff. A nice ripe mango and a nice ripe avocado. A bit of lemon juice (from half a lemon),%u00a0 a little maple syrup, and a some water.
Scoop the avocado into a jar and cut up the mango ans stick into a jar…..
Splash a little water into each jar and blend them up. (I used my hand blender. but use the blending device of your choice) Add the maple syrup to the avocado.. as much as you need, and if your mango is not super sweet, you can add a little to that too.
Scoop the avocado puree into the mango and gently swirl it around
Now pour/scoop the mixture into your popsicle molds. And because mine was thick enough, I was able to stick the wood sticks without them sinking.
Noe get them quick into the freezer
A good few hours (I didn’t even check until the next day but I bet 4-5 hours in a good freezer will do) the popsicles are nowposicles!!!!!
Pop them out of the mold (a few minutes on the counter and or a quick rinse under warm water) and do what needs to be done.
So creamy sweet and refreshing… This is a happy spring popsicle for sure.
Have a great day!
-C
Makes four 4oz popsicles
1 ripe avocado
1 ripe mango
1/2 a lemon or lime
1-2 tablespoons maple syrup (or any sweetener of you liking)
about 1/2 cup of water
Note.sIF your mango is not super sweet you might want to add a little maple syrup to thatto that as well. And depending on the actual size of your mango and avocado, you might find yourself with a little extra fruit puree…. so maybe an extra popsicle can be made or you can just eat it now.
Scoop avocado into a jar and cut and dice mango and place in a separate jar. Add maple to the avocado (and the mango if you want) and about 1/4 cup of water to each.%u00a0 With a hand blender, blend each until smooth ( or use a regular blender) Once both are blended, dump one into the other and gently swirl around. Pour mixture into popsicle molds, add the sticks and stick into the freeze. Keep freezing until frozen which should take at least 4-5 hours.
And once frozen, pop out of molds (run mold under warm water or just leave on counter for a few minutes) and eat them like it hot!
I eat a lot of hummus. Like a lot. Every day, all day long. (seriously, I am always snacking on veggies dipped in hummus) So I am sorry to all around me that my breath always smells.. (I blame all the garlic in the hummus.)
Recently, during a particularly browsey grocery shop, I ended up in the hummus case (I always end up there) and found a new hummus flavor.%u00a0 Pineapple jalapeno, WHAT.%u00a0 I grabbed it right then and there, convinced that hummus gods were rewarding me for all of my hummus eating and have made me my very own flavor.
Got home, tossed all the groceries into the fridge and busted open the new hummus, a bag of carrots, and went at it. Oh man, it was good.(to often the store bought hummus flavors are not so great) The flavors were all there, sweet and spicy, and creamy.%u00a0 It was fantastic, I ate almost all of it and I knew I had to make my own.
And I did and you know what, it was even freaking better! (Fresh it the best!)
So If you are a hummus person of any kind, this is a fantastic exciting flavor that will make you all sorts of happy.
The stuff for the hummus:%u00a0 chickpeas, tahini, olive oil, garlic, and salt and pepper. And for flavor add ins,%u00a0 fresh pineapple and a jalapeno pepper.
Chickpeas (rinsed and drained) go into the food processor with some tahini, the juice of the lemon and salt and pepper.. The garlic I actually pulsed in the processor first (to avoid big raw hunks) and some olive oil are also going in on this.
Blended until a smooth, creamy perfection.
Now for the fun stuff. Dice up the pineapple and remove seeds (or not) from the jalapeno and dice that up too
Toss it all (minus a few little pieces of garnish if you want) into that creamy dreamy hummus.
Pulse pulse pulse until the chunks of stuff are all incorporated . Make it super chunky or super smooth, up to you. I like mine kinda chunky, but not too chunky, if you know what I mean.
Into a big bowl, topped with a few little diced up pieces of jalapeno and pineapple, you know, for prettiness. And lots of cracked pepper.. Lots.
Now eat. With whatever ( I like veggies or just give me a spoon, Ican eat hummus all by itself)
Hummus for life!
-C
Makes about 2 1/2cups
2 1/2 cups cooked chickpeas (one can)
2-3 cloves garlic
2 tablespoons tahini
1 lemon
2 tablespoons olive oil
3/4 cup fresh pineapple
1-2 jalapenos
salt and pepper
Rinsed and drain chickpeas. Add garlic and a little olive oil to the food processor and pulse until the garlic is a little minced. Add in the drained chickpeas,%u00a0 tahini, a sprinkle of salt ans pepper, the juice of the lemon and another tablespoon of olive oil and blend until smooth.
Dice up pineapple into smaller chunks and remove seeds (if you want) from the jalapeno and chop that into smaller pieces . Add to the hummus and pulse until combined. You can leave it chunky or blend until smooth. Just stop blending when you reach you desired consistency . Garnish with more chopped pineapple and jalapeno and lots of freshly ground pepper.
Serve with whatever you eat your hummus with.
Store left over (there probably won’t be any) in a container in the fridge.
I am on full fledged baking mode. I bought the Costco sized bag of flour, stocked up on spices and chocolate chips, and am counting down the days to when all the littles come over for the cookie decorating party. But I am also trying to pace myself because I don’t need to have cookies, cake, and candies all over the house quite yet. The season is young and the time for stuffing your face with all the candies and cookies awaits. Until then, (next week sounds about right) sensible baking like bread and scones (yes, scones are sensible)
The other morning I woke up and was very determined that I must make scones. I don’t really know why scones, maybe it was the news of Prince Harrys engagement %u00a0(the dream of being princess is now dead)%u00a0%u00a0but it was a fierce determination..%u00a0 And they had to be cranberry because well, I have a tone of cranberries in the fridge. And I know I could have made them just cranberriy, but why not add a little chocolate. Still sensible in my book.%u00a0 So scones I did make. And after he shared one with Barb,%u00a0the mr has been eating them for breakfast which is just another reason why they are sensible…they are breakfast food.%u00a0
The stuff. Flour, baking soda, baking powder, and salt (all in the bowl). Sugar, coconut oil, cinnamon, soy milk and vinegar. And of course fresh cranberries and chocolate chips.
The sugar and cinnamon go into the bowl with the rest of the dry…whisk it all together. Oh, and preheat the oven.
Mix a tablespoon of vinegar into the milk so it starts to sour.
Coconut oil gets cut in to the mixture.. You want a course crumb, kind of like pea sized chunks of oil mix around in there.
And now rough chop the cranberries which is a little difficutl because they all want to roll away, but you can do it.%u00a0
I rough chopped the chocolate chips as well because why not.
Mix the cranberries and chocolate into the mixture until evenly incorporated.
Gently mix until the dough just comes together. Dump our onto a well floured surface.%u00a0
Pat the dough into a circle and flatten out until it’s about an inch and a half thick. Cut the circle into 8-10 equal pieces.%u00a0
Place the scones on a baking sheet and brush with a little milk. Pop them into the preheated oven%u00a0
Pop them out when they are all nice and golden brown.%u00a0
Place them on a cooling rack.
And watch them disappear or like a sensible person, eat one everyday for breakfast.%u00a0
Have a great weekend.
-C
makes 8-10 scones
2 %u00a01/4 cups flour%u00a0
1/3 cup %u00a0sugar
1 teaspoon cinnamon%u00a0
1 %u00a0teaspoon baking powder%u00a0
1 teaspoon baking soda
1 teaspoon salt
1/2 cup coconut oil
1 hefty cup fresh cranberries
1/2 cup chocolate chips
3/4 cup plant milk plus about a tablespoon more for brushing on top
1 tablespoons apple cider vinegar%u00a0
Preheat oven to 375.%u00a0
In a large bowl whisk together the flour, salt, baking soda, baking powder, cinnamon, and sugar. Add the vinegar to the milk and set aside. With a pastry cutter or 2 knives, cut the coconut oil into the dry mixture until it becomes a course crumb.%u00a0
Rough chop the cranberries and the chocolate chips (optional on the chocolate chips) and toss both into the bowl. Give it a quick mix to coat it all then dump in the milk. Mix until the dough comes together (DON”T OVER MIX) then dump the dough onto a lightly floured surface. Gather the dough into a ball and flatten out into a disk that is about and inch and a half thick. Cut into 8-10 equal sized wedged and place not a baking sheet. Brush the tops with a little milk and pop into the preheated oven.
Bake for 25 minutes or until the tops are all nice and golden brown. Remove from oven and place on a wire rack to cool.
And the best part, it’s as easy as eating way to many slices of pie! Roasted beets, rutabaga and sweet potato. A little salt…A food processor…no joke, so easy and it tastes so freaking good. A real show stopper. Everyone will whip out their phones to snap a pic.
Let me break this down for you. Rutabaga. Sweet Potato. Beet. That’s what I was working with. I chose these roots for color as well as for taste. Separately the flavors are amazing. Together they are out of this world. If you wanted you could omit any of these and sub in, lets say, pureed cauliflower, or maybe parsnips. I would stay away from potato, it’s a little to starchy, but maybe acorn or butternut squash. Oh man, now I want to make celeriac, carrot and acorn squash marble. Pureed vegetables are trouble for me. I can’t stop eating when they are around. I know, but don’t judge, instead lets prepare.
Peel the rutabaga..To be honest, I don’t peel, but this one that I got at the grocery store had a layer of wax on it…so yeah, I decided to peel that. You can also peel the beet if you want, but again, I don’t do that.
I diced up the baga and the beet, and tossed into separate pans to roast. I gave each pan a tiny splash of oil and a sprinkle of salt. The sweet potato, well that just got tossed into the oven as it was. I wouldn’t mix the beet with the rutabaga, the juice will turn it pink. Here the thing, If you want to boil or steam you veggies, go right ahead. I roast because I like the roasted flavor and its easier for me to throw things into the oven on a cast iron pan then to boil onto of my tiny stove. Bonus, I don’t wash my cast iron so less dishes! Just make sure with any method, your vegetables are cooked throughout and that they are tasty.
So you got a pile of roasted rutabaga, a pile of roasted beets and a baked sweet potato.
Remove the flesh from the skin of the sweet potato.. then eat it. Ok you don’t have to eat it but it is SOOOOOOO good. At least try it.I used my handy emulsion blender to puree everything but a food mill or a food processor is equally as good. Puree each root separately . Start with the rutabaga. Go to the sweet potato, then end with the beet. That way you don’t have to clean in between purees. Add little amounts of water when pureeing if it needs a little help to loosen up. Blend until smooth.
Three beautiful purees. My sister and I stood in the kitchen prior to preparing the plate and stuck our fingers in the puree. That right, and we licked then and went back in for seconds. In my family, as long as there is not disease being transmitted, a little bit of shared germs is ok. So now that you have tasted and tried not to eat to much of the purees, let’s get crazy….I just took a spoon and threw piles in that bowl. I could have done more of a checkerboard pattern to make it a more uniform marble, but I just went for it. Do it any way you want. Don’t be afraid, you can’t screw this up!I took a fork and kind of rain it throw the top to start the effect. I then took a cake knife and just leaved it out. That’s what I did and then I was done. After all the oohing and aching, I stuck the dish into the oven for another 10 minutes just to keep hot, but you can serve this at room temp as well. Now tell me that isn’t a thing of beauty. I fell in love. I want to puree and marble everything. This could be my thing.Empty bowl…Ok, I’ll admit I ate half of it..I couldn’t help it. Next time I will have to make a bigger batch.
P.S. You could totally make this dish today and serve it tomorrow. Just plastic wrap the top and refrigerate. When your getting ready for you meal, stick in oven for 20 minutes or until it’s the temperature you want it.
Happy Thanksgiving and Yeah!
Marbled Roots
Choose at least two, preferable three contrasting root vegetables. I;ll give you the version in the pictures.
1 large beet
1 medium rutabaga
1 large sweet potato
olive oil
salt
Preheat oven to 425
Dice rutabaga and beet. Toss with splash of oil and sprinkle of salt. Place on spereate baking sheets and move to oven. Place whole sweet potato in oven Cook until veggies are fork tender, usually about 40 minutes.
Remove veggies and place into separate containers and puree each veggie, starting with the lightest colored one. Add small amounts of water to help loosen if needed.
In a shallow casserole dish or pie plate, pile small amount of puree in dish, alternating the colors. With a knife, swirl the veggies around…Dont go to crazy or it will end up blended. You could stop here, I know, it looks amazing, but I finish it all off by taking a cake knife and smooth out the top.
Pop the roots back into the oven for another 10-15 minutes just to completely warm and meld the flavors together.
How cool are you now? People will be talking about you marbled roots for weeks.. maybe even until next thanksgiving.
Yesterday was my sisters 31 birthday. Yuck..If she is 31, what does that make me?( I am younger, but not by much) The ladies in my family have a really hard time with birthdays. We act like we don’t care, but we do. We say don’t do anything, it’s no big deal, but it is. Who cares that we are getting older……oh we care. We are all crazy.
So while the birthday lady who doesn’t care was out picking up her darling children, I showed up with ingredients for a cake from scratch..a bad ass bundt pan…and a bunch of beautiful sunflowers. I prepared the batter, popped it into the oven and me and my mr. proceeded to clean her house. Yup…#1 right here!
For real, I love my sister and I wanted to do something nice for her on her birthday. Pumpkin is nice. Pumpkin is not the conventional birthday cake. It’s a little different, a little spicy, much like my sister.
All the right stuff nicely measured out and the oven preheating.. I really like baking in her kitchen. She has the best light and a bunch of kitchen gadgets, lots of bowls, plus a dish washer. I miss having a dish washer.
Creaming the sugars with butter and adding the eggs…It took me like 20 minutes to find the beater which was in my face the whole time. I was looking for a white beater. Hers is black.I am oblivious.Here comes the pumpkin. I added the spices at this point. (This picture is awesome)
Beat in the flour and milk….and now you have cake batter. I made the mr. lick the spatula just to make sure the spices and stuff were right. He always says everything is right.
Greased and flour dusted bundt pan. This pan is my new favorite, another one of my junk store scores! If you use a shaped pan like this, really make sure you get every line greased or else… Dusting the greased pan with flour makes it easier to see if you missed a spot. Pour in batter and stick on middle rack in oven.
Pop it out of the oven when a tester come out clean and…TADA! What a beauty. I decided to forgo any frosting. The cake shape is too nice to cover. And bonus, since there is no frosting…didn’t have to wait for it to cool. Dug right into warm pumpkin goodness.
Look at those flowers. Trader Joes has it going on. We looked all over her house for a vase and good thing I found this one. Nick had cut the top off of a 2 liter of mountain dew and stuck the flowers in that. I mean, it worked, but I think the vase was the better choice. And did I mention I am a genius? We couldn’t find any candles so I cut pieces of a striped straw and stuck matches in them. Best on the fly candle creation ever!
Left with crumbs… Notice the finger marks in the powdered sugar? I bribed one of her littles with that sugar. I told her if she emptied the dish washer she could lick the plate clean. I am a fantastic sister!!!
Happy Birthday!!
INGREDIENTS
1 stick unsalted butter
1 2/3 cups all-purpose flour
1 tablespoon ground cinnamon
1/4 teaspoon ground allspice
1/2 teaspoon salt
1 teaspoon baking powder
1/2 teaspoon baking soda
1 cup white sugar
1/4 cup brown sugar
2 l eggs
1 cup Pumpkin Puree
1/2 cup milk
DIRECTIONS
Pre heat oven 350 degrees.
Butter a bundt pan or a 9-inch round cake pan.
Whisk together flour, cinnamon, allspice, salt, baking powder, and baking soda
In a large bowl, beat sugars and butter together until light and fluffy. Add eggs, pumpkin and milk and beat until combined. Mix in dry ingredients and beat until combined Pour batter into greased pan, and bake for 50 minutes to 1 hour or until a toothpick inserted i the middle comes out clean.
Remove from oven and let cool for a few minutes in pan. Remove from pan and dust with powdered sugar.
And there you have it a cake fit for a birthday, a holiday, or a breakfast on a Tuesday morning.
Oh boy we made it! Ate our way through another Thanksgiving. I hope yours was a good as mine, lot of family and friends…an abundance of pies, and lot of warm lovely goodness.
So now what?? Is there a butt load of laundry waiting to be washed and the floors are in need of mopping after dropping that pie? Are you eagerly anticipating the departure of your quests, in-laws, or your own departure from your current digs? Or are you just plan looking forward to getting your house clean and life back to normal? (I hear that).Maybe you are the guest and are dreading the day after food and booze hangover and don’t want to be rude, but don’t want to get out of bed. Well you are in luck cause I have declared this day, the day after Thanksgiving, Left Over Friday!
I always feel the great build up to any major holiday, get to the day, have a wonderful time, then feel the crash. My house is messy. I have used all of my clean dish towels and every dish and pan is in the wrong place in the kitchen. .I really need a rug for the front door to collect snow.(my floor is nasty) and the refrigerator looks like a food bob went off inside. There is so much to do and I need a break. For those who spend the week(s) before thanksgiving gearing up, planning, and stressing out about producing this one great feast for this one day of the year, I am suggesting to you and myself that we take this day to let it all out. A day of decompression. Go head, let everyone eat leftover pie for breakfasts. Why not stay in your pjs all day reading and drinking coffee. Maybe like me, you feel like cleaning. Go for it, but why not slap on some sweet tunes and a hit that stack of dishes dancing with no expectations. If you don’t get to all those pots, well there is always tomorrow. Say you are a guest, then maybe you try not to be demanding of your host(s) but suggest a hike or even a movie. And if you want to go shopping, well that one is on you. If it makes happy to shop with a bunch of crazy people, then go to town. Whatever you do today, just remember to take it easy.Do what makes you feel good.. It’s ok to take a break, to let things be, to enjoy your friends and loved ones, but let them take care of themselves and you take care of you.
Now Saturday..well there is no excuse. We both know that leaving those pots any longer and they might not ever be right again. You might not want you littles eating pie for breakfast lunch and dinner for the third straight day. Maybe you should do the laundry so you’re not using your bath towels to dry the dishes. And anyway, its time to start planing for the next major holiday craziness. Hey, I know I am already excited! Today I might even dig out some Christmas decor…but with no pressure, just cause I want to!
Take care of yourself and enjoy today.. Left Over Friday!!!!!!
Just a few ideas for the Thanksgiving leftovers…….
Mashed potato pancakes..Add an egg and a 1/4 cup of flour for every cup of mashed potato. Season with salt and pepper
Cranberry sauce and rolls….Spread the cranberry sauce on a toasted roll
Squash Soup….Throw into a big pot with a little veggie stock or water, even a bit of curried powder would be nice
Roasted Veggie Salad….Toss veggies together with a touch of vinegar and add to a bed of green.
Smashed stuffing cheese sandwich.…2 cups of stuffing and 1 egg. Mix and separate into 2 balls. Smoosh them down and cook each side in a frying pan. When both sides are cooked through, place a bit of you choice or cheese on one smash and top with the other. Let melt.
Turkey wrap…add a scoop of hummus and stick into a wrap with some greens
Pie yogurt…..Mix a slice into a cup of plain yogurt
Sweet potatoes… Save them. I’ll give you an amazing recipe tomorrow for a Sweet potato Coconut custard. It will blow you mind!
To know me is to know that I eat a shit load of lentils. And not just one kind, I eat them all, in all the ways, all day, everyday. Vegetables and lentils. That is my truth.
Lentil flour. One more way to consume the mighty legume. Blended while dry into a fine powder, it takes the lentil to a whole other level. You can use the flour in all sorts of things like bread, soup, even in baked goods. it really is a great flour to have on hand, especially if you are hungry and want to toss something quick and easy, heathy, and delicious together like these here pancakes.
These pancakes. All they are made of is lentil flour and pureed up zucchini and onion. Now that might sound a little on the dull side, but trust me here, they are far from dull. They are freaking delicious. And better for it that they take like 10 minutes from start to finish to make. And no oven which is necessary these days with all the stupid hot weather.
Anyway. lentil zucchini pancakes. Give them a try. They will probably become your favorite.
To the lentil flour and zucchini pancakes!
The stuff. Dry green lentils, a zucchini, and onion, salt and pepper, and a splash of oil.
Te make lentil flour. Place dried lentils into a high speed blender and blend until it turns into a fine flour.
Once you have the flour made, cut up the zucchini and onion into chunks.
Drop into the blender and blend until pretty smooth.
Dump puree into bowl and top with some lentil flour.
Mix until completely combined. The batter should be kind of thic but still spoonable. Also, season with salt was pepper here.
Heat up a skillet with a splash of oil. Once hot, scoop spoonfuls of batter into pan and spread it evenly about 1/4 inch thick. Cook first side fr 4-6 minutes or until nice and brown then flip and cook the other side until done. Repeat until batter is gone.
Now eat your amazing delicious lentil zucchini pancakes. I served with fresh salsa, and I have also made tahini dip and used hummus to smear on them which was also freaking amazing, but you can serve with whatever floats your boat.
-C
1 pound dry green lentils
1 large zucchini
1 onion
salt and pepper
splash of oil
Start with the by making the lentil flour. Place lentils into a high speed blender and blend until it has turned into a fine flour. You might need to stop the blender ever once in a while to move things around with a spoon (when it is turned off!). It should only take about a minute or so in a Vitamix, but maybe a few extra minutes if using a less powerful blender.
Once flour is achieved, dump into a jar with a lid. You probably won%u2019t be using it all right now.
Now grab the zucchini and onion and cut into chunks. Place the chunks into the blender and blend until smooth.
Dump puree into a bowl. Add about 1 cup of lentil flour and stir. IF the batter is really loss, add in another 1/4 cup or more to get the batter to a thick but spreadable consistency (kind of like hummus). Season with salt and pepper.
Grab a skillet and place on medium heat with a splash of oil. Once skillet is heated place spoonfuls of the batter in and spread around until between 1/2-1/4 inch thick. Cook fist side for 4-6 minutes or until a nice golden brown then flip and cook the other for a few minutes until browed. Repeat until batter is gone.
Place cooked pancakes on a plate, grab a fork and some savory type condiment (hummus, salsa, tahini, cashew cream) and eat.
If you were to ask me what my favorite winter squash would be, I would have to say that I couldn%u2019t choose, I love them all. But when I really, really think about it, when I look deep into my food soul, I could, and I think it would be pumpkin. Yup, pumpkin is my favorite.
Pumpkin is amazing and delicious, Not just as a pie or bread, but eaten in any way that any other winter squashed can be eaten. Fantastic in a soup or roasted or saut%u00e9ed. And yes, blended up into all sorts of baked goods. It tastes somewhat like butternut squash but less sweet and has a nice nutty, earthiness to it and pairs well with al sorts of great spices, not just pumpkin spice. If you haven%u2019t had it outside of a baked good, well then, make this. You are in for a really treat!
But don%u2019t carve a jack o lantern pumpkin then eat that. Those big pumpkins are not very tasty. Get a small pie pumpkin, those are ones to eat.
Now to the tomato stewed pumpkin!
The stuff. A sugar(pie) pumpkin, a couple nice big ripe tomatoes, a large onion, a clove or two or garlic, cumin and chili powder, vinegar, shredded cabbage, and salt and pepper.
Start with the onion. Cut in half and thinly shred about 1/3 or it. Small dice the rest Also mince up the garlic too.
Add the thinly shredded onion to the shredded cabbage and toss around with vinegar a little salt and pepper then set aside.
Place the diced onions, minced garlic, tomatoes, and cumin ans chili powder into a big pot with a splash of water and stick on medium heat on stove to start to stew the tomatoes.
While the tomatoes are going, cut up pumpkin. Just cut in half, remove seeds (save for roasting) and cut into small cubes. And sure, if you are not a fan of the skin (my favorite part) just peel the pumpkin with a potato peeler before cutting it up small. But really the skin, it is sooo GOOD!
Once the tomatoes are soft and mushy, add in the pumpkin. Keep on heat and place a lid mostly over pot. Let cook.
Soft and stewed and all sorts of everything good.
And then you scoop it into bowls, top with the cabbage slaw, sprinkle with pepper and fresh cilantro if you just so happen to have some, and eat it.
Yeah, pumpkin is my favorite.
-C
makes 2 bigger or 4 smaller serving
1 small sugar pumpkin (around 3 or a little more cups cubed)
2 large tomatoes
2 heaping teaspoons cumin
1 teaspoon chili powder
A few tablespoons water
1-2 cloves garlic
1 large onion
2 cups shredded red or green cabbage
2 tablespoons white vinegar
salt and pepper
Start with the onion. Cut in half and thinly slice a little more then half of the half. Toss with the cabbage, the vinegar, and a pinch of salt. Set aside
Dice the rest of the onion and place into a big pot. Grab tomatoes and dice them up as well and place them into the pot with the onions. Sprinkle with a pinch pf salt and pepper and add in the cumin and chili powder. Add 2 tablespoons of water and place on stove on medium heat to start to cook down.
While the tomatoes are stewing away, cut up the pumpkin. Just cut in half, remove seeds (and reserve for roasting) and dice it into small chunks. If you are not one to enjoy the greatness of pumpkin skin (it is really good) then before dicing it, just peel it with a potato peeler.
Once tomatoes have cooked down a bit, place the diced pumpkin into the pot. Add another tablespoon or so of water, mix around, partially place a lid on the pot, and let cook for about 20-25 minutes, stirring occasionally, until the pumpkin starts to fall apart. If at any time it seems like it needs more liquid, just add in another tablespoon or so of water.
Once it is all stewed up, remove from heat, scoop into a bowl or bowls, and top with the cabbage slaw that was made early.
Eat.
To know me is to know that I eat a shit load of lentils. And not just one kind, I eat them all, in all the ways, all day, everyday. Vegetables and lentils. That is my truth.
Lentil flour. One more way to consume the mighty legume. Blended while dry into a fine powder, it takes the lentil to a whole other level. You can use the flour in all sorts of things like bread, soup, even in baked goods. it really is a great flour to have on hand, especially if you are hungry and want to toss something quick and easy, heathy, and delicious together like these here pancakes.
These pancakes. All they are made of is lentil flour and pureed up zucchini and onion. Now that might sound a little on the dull side, but trust me here, they are far from dull. They are freaking delicious. And better for it that they take like 10 minutes from start to finish to make. And no oven which is necessary these days with all the stupid hot weather.
Anyway. lentil zucchini pancakes. Give them a try. They will probably become your favorite.
To the lentil flour and zucchini pancakes!
The stuff. Dry green lentils, a zucchini, and onion, salt and pepper, and a splash of oil.
Te make lentil flour. Place dried lentils into a high speed blender and blend until it turns into a fine flour.
Once you have the flour made, cut up the zucchini and onion into chunks.
Drop into the blender and blend until pretty smooth.
Dump puree into bowl and top with some lentil flour.
Mix until completely combined. The batter should be kind of thic but still spoonable. Also, season with salt was pepper here.
Heat up a skillet with a splash of oil. Once hot, scoop spoonfuls of batter into pan and spread it evenly about 1/4 inch thick. Cook first side fr 4-6 minutes or until nice and brown then flip and cook the other side until done. Repeat until batter is gone.
Now eat your amazing delicious lentil zucchini pancakes. I served with fresh salsa, and I have also made tahini dip and used hummus to smear on them which was also freaking amazing, but you can serve with whatever floats your boat.
-C
1 pound dry green lentils
1 large zucchini
1 onion
salt and pepper
splash of oil
Start with the by making the lentil flour. Place lentils into a high speed blender and blend until it has turned into a fine flour. You might need to stop the blender ever once in a while to move things around with a spoon (when it is turned off!). It should only take about a minute or so in a Vitamix, but maybe a few extra minutes if using a less powerful blender.
Once flour is achieved, dump into a jar with a lid. You probably won%u2019t be using it all right now.
Now grab the zucchini and onion and cut into chunks. Place the chunks into the blender and blend until smooth.
Dump puree into a bowl. Add about 1 cup of lentil flour and stir. IF the batter is really loss, add in another 1/4 cup or more to get the batter to a thick but spreadable consistency (kind of like hummus). Season with salt and pepper.
Grab a skillet and place on medium heat with a splash of oil. Once skillet is heated place spoonfuls of the batter in and spread around until between 1/2-1/4 inch thick. Cook fist side for 4-6 minutes or until a nice golden brown then flip and cook the other for a few minutes until browed. Repeat until batter is gone.
Place cooked pancakes on a plate, grab a fork and some savory type condiment (hummus, salsa, tahini, cashew cream) and eat.
I have been on a severe citrus kick lately. Oranges, limes, lemons, kumquats. I want it all and have been eating it all. A lot of it all. Espeically the oranges which are just so good right now. We have been going through bags of them faster then ever and I am not mad about it.
Which then brings us to chili. Chili is one of the things that I make on a very regular bases. It%u2019s beans, veggies, tomatoes, and a ton of spices. Easy as can be, most people like it, and I never get sick of it. I mean, how could you get sick of it, it is so good! Anyway. Chili, its great but have you ever added orange to it? Oh man is it amazing. Bright and acidic and sweet. The whole pot of chili just radiates more goodness, more intensity, more, moreness. (I know that doesn%u2019t make sense but you get it.) It%u2019s a whole new level of chili and I don%u2019t if there will ever be a time when I don%u2019t add orange to my chili again. Well at least during citrus season.
But enough about all that, what you really want is to just start making this orange black bean chili so you can eat it. I hear you, so I%u2019ll let you at it.
To the chili!
The stuff. Oranges, black beans, crushed tomatoes, an onion, a couple carrots, a pepper, and jalape%u00f1os. Also lots of cumin, chili powder, ground ginger, garlic powder, and salt and pepper.
Small dice up the pepper, onion, carrots, and jalape%u00f1os. Don%u2019t want it super spicy, don%u2019t add the jalape%u00f1os.
All that stuff gets tossed into a big pot along with all the spices, some salt and pepper, and a little water too. Place on stove to start cooking down the veggies.
Slightly tender and smells amazing.
Now add in the beans, the tomatoes, and the zest and juice of an orange. Mix it all up, set it back on stove and keep on cooking,
Now eat your chili, with extra orange slices to squeeze all over it of course. And maybe you want to serve it with some corn bread? That is entirely up to you, but who would be made about it?
-C
Serves 4-6 people
1 pound cooked black beans drained (about 5 cups or 3 cans)
5 cups crushed tomatoes (or 2 28oz cans)
2 oranges (navel or cara cara work)
2 carrots
1 large onion
1 bell pepper
2 jalapenos (optional)
2 heaping tablespoons cumin
2 tablespoon chili powder
2 teaspoons garlic powder
2 teaspoons ground ginger
salt and pepper
Start by chopping up the veggies. Small dice the carrot, the onion and the pepper. If using jalape%u00f1o, dice that into small little bits too. And remove seeds for less heat or leave them if you like it. Once that is all cut up, dump it all into a large heavy bottom pot along with the cumin, chili powder, garlic and ginger powder, and about a teaspoon or so each of salt and pepper. Add about 1/2 cup water, mix it all up, and place the pot on stove on medium heat and start to cook the veggies and spices until they begin to smell fragrant and are ever so slightly tender, which should take 5-10 minutes.
Now add in the beans, the tomatoes, and the zest and juice of one orange. Mix together and keep cooking on medium heat, partially lidded, for about 45 minutes to an hour, stirring once in a while, until the chili has thicken and tastes good to you.
Once done, season to taste with more salt and pepper and either stir the juice of the second orange into the whole pot or serve with slices of orange to squeeze on top.
Eat. Store any left overs in fridge. Tastes delicious cold too.
Every now and then I make something for me. All for me. This is one of those dishes that was not destined to be shared with anyone. That I had no one else in mind to eat besides me. No worring about what anyone else with think. Just a simple little dish that I was craving and wanting.
So I made it and man, was it so freaking satisfying. Cooking for oneself is very much a gratifying experience.
Celeriac, or also know as celery root. Have you ever had it? If not, well duder, you need to. It is in my top 3 favorite vegetables and that is saying a lot. So anyway, celeriac, has a slight celery taste, but also kind of earthy and nutty. It pairs well with anything that a potato might, but also is amazing on it%u2019s own. Roasted, steamed, raw. Just really fantastic. And it is in season so get on it and go find yourself some.
And lentils. In my top 3 favorite foods. Made them crispy because pureed celeriac and crispy lentils just sounded right and I love me crispy things. Again, I was making this dish fo me so crispy was happening.
Together, the creamy, delicious pureed celeriac covered with a bunch of spiced, crispy lentil%u2026.Amazing. Eating it, I couldn%u2019t have been happier. I did myself one good with this one.
I might even have to make it to share someday.
Now to the celeriac and lentils!
The stuff. A bulb of celeriac, some cooked lentils, salt and pepper, chili powder, garlic powder. mustard powder, and oil. (oil is optional)
The celeriac. Ok, so most people peel it. I actually get weird looks from people when I tell them I don’t , but let me do me, you know. So anyway. Peel it if you want, or not, just cut it up into chunks.
Place cut up celeriac into a pot and cover with water. Place on stove on medium heat and cook until fork tender.
Lentils meet spices and get mix all together. Add a pinch of salt and lots of cracked pepper too.
Spread now spiced lentils onto a baking sheet, pop into oven, and bake until crispy. Easy peasy.
And to puree the celeriac. Strain any extra water into a cup. Season with a pinch of salt and pepper and grab the hand blender (or regular blender) and blend it, adding back in some of the strained water as needed, to get to a consistency that you like. Me, I liked it pretty smooth, but also with a little chunk. Heck, you could leave it really chunky or go all out completely smooth. Up to you. Also if you want a creamier texture, add in a teaspoon or so of the olive oil. That is a taste preference. I didn’t add oil this time, but I have before. It%u2019s good both ways.
And there you have it. Add the celeriac puree to a bowl, top with crispy lentils, and garnish with something green if you want.
Then eat it.
Not going to lie. After this picture was taken, I busted out the spicy mustard and covered everything with it. And it was amazing.
-C
serves 1 as a meal, or a few as a side dish
1 1/2 cups cooked green lentils
1 large celeriac bulb (soft ball sized)
1 teaspoon chili power
1/2 teaspoon ground mustard powder
1/2 teaspoon garlic powder
salt and pepper
olive oil (optional)
Grab celeriac and peel if you want, or just give it a really good wash. Cut into chunks and place into pot. Add enough water to just cover the celeriac and place on medium heat on the stove. Cook until fork tender.
In the mean time, mix all the spices and a good pinch of salt and lots of pepper together with the lentils. Dump them and spread them out onto a lightly oiled baking sheet. Place in oven and turn to 400 degrees (you can start cooking the lentils while the oven is preheating). Bake for about 20 minutes or until lentils are crispy.
Once the celeriac is tender, strain water into a cup and either with a hand blender or a regular blender, blend until smooth, adding in some of the poured off water as needed. You can puree as smoothly as you like or leave a few chunks.. Also, you might want to add in a teaspoon or so of olive oil for a slightly richer and creamier taste. Season to taste with salt and pepper.
Ehen the lentils are done, take them from oven. Place large amount (or all) of the celeriac puree to a bowl, cover with some (or all) of the crispy lentils and that is that. Eat away.
Serving suggestion%u2026. Mustard. Any kind. So good.
When your sister drops off 50 lbs of beets, on top of the 50 lbs that you have to harvest that are growing in your garden, what do you do?
Well chips of course.
Yeah, chips. That%u2019s right. When I got home from camping on Monday and there was a humongous pile of beets sitting next to my front door, I am not going to lie, I was a little shocked. I mean there wasn’t just a few little ones. These beets were freaking huge, like the size of my arm, and so many. But pretty much right after my initial shock I knew what needed to be done. First, eat a few roasted, second, roast extra to freeze for later, and lastly, make a few bunches of chips.
Have you ever had beet chip? They are amazing. Crispy, crunchy, tasty as all heck. If you like beets, even in the slightest, you will love these. If you hate beets, well maybe don%u2019t? Either way, beet chips are the best chip. Wha’t%u2019s not to love? Pink, and chippy. Sweet, and salty. And then you add the fact that making beets into chips is a good way to get your veggies in and that you can eat a whole bowl full and feel zero guilt because you are just eating beets. Plus making beets into chips is a good way to use up any extra beets you might have laying around or that have been dropped off at your front door.
These chips, once they are made, will not last long. So when you do make them, know you will probably be making them again soon there after. Me, I have still have to harvest all my garden beets so beet chips are happening again soon. Real soon (like this afternoon!)
To the beets!
The stuff. Beets (these are Formanova beets but any variety works) salt and pepper ,and oil.
Ok so you need to cut these bad boys reallllllly thin. Like 1/15th a inch. So, what I am saying is, use a mandolin. If you don%u2019t have one, a knife will do, but you are going to have a hard time getting them as thin as you need to and all of them consistent so baking is going to be a little more tricky so maybe you should just go borrow or invest in a mandolin.
Grab baking sheets, oil, and salt and pepper. You can either dump the oil directly onto the pile of sliced beets and really toss to make sure each one has been coasted or do what I did which was I drizzled oil into my hands and rubbed each sliced beet between my oiled hands before placing on the sheet.
After you get them on there, single layered with no overlapping, sprinkle tops with a pinch of salt and pepper.
On the way into the oven.
After the oven. Baked for about 18 minutes. You really have to watch after the first 13 or so minutes to make sure you catch them at the perfect time. Crispy, but not burnt.
A side by side shot. Crazy shrinking will happen!
Oh man, so delicious. And so pretty!.
Let the chips cool before eating, you know, so you don%u2019t burn your tongue. Plus they crisp up a wee bit more.
Once cooled, pile them into bowl, and then eat them. And eat them all. They are only beets after all. And you won%u2019t be able to stop yourself anyway. Ha
-C
Makes enough for an evening of chip eating for 1-2 people
2 Large beets (think softball sized)
a tablespoon or two of oil (I used grape seed but really any would work)
salt and pepper
Note. Making these without cutting with a mandolin will be a pain in the ass. It can be done, but if you have a mandolin, use it.
Preheat oven to 350
With a mandolin, slice the beets about 1/15 inch thick. (No need to peel the beets unless you want to.) Once beets are all sliced, either drizzle them all with a tablespoon or so of oil and toss until all are coated. OR what I did and found worked really well was drizzled oil into my hands and rubbed each beet between my oiled hands as I was placing them on the baking sheets. Either way.
Now place oiled beets, single layered, without overlapping, on baking sheets. Sprinkle with a pinch of salt and pepper and place into oven. Bake for about 13 minutes without worrying then start to check every minute or so until the beets are a deep golden brown and crispy ,which will be between 15-20 minutes. Also, even though you cut them all the exact same thickness, some might crisp up faster so you should remove done chips as they happen. Once they are done, place on a rack to cool. And then do another batch. And not, they do crisp up a tiny bit more as they cool.
Once chips are cool and crisp, eat.
Store uneaten (how did you not eat them all?) chips in an air tight container. If you notice that they turned a bit chew, just place them back into oven while preheating oven to 300 then turn oven off and let sit in there for a few minutes.
Do you ever wake up first thing in the morning with a craving, a maybe somewhat strange food craving? Lately I have been waking up and within an hour of being up, I start to think about olives. My mouth starts to water and it%u2019s like I can almost taste the salty, briny, fattiness in my mouth, which in itself is kind of weird, but for me is really really weird because up until very recently I completely hated olives. Now, well now I just want to eat them all. And first thing in the morning.
I don%u2019t pretend to understand such things. My brain is going to do what it%u2019s going do. Tell me I like olives, well all right then.
Another thing I am desperately craving is freshy fresh greens which makes complete since because I always crave greens. I am still pretty deep in root veggies and cooked things because winter and Vermont and all, but all I really really really want to eat are buckets of greens. Any kind will do, but the sweet tender baby ones%u2026. So good.
And so I combined my two cravings, greens and olives and hit those craving like POW! BAM! POOF? A salad so simple yet so amazing and mouth watering. I outdid myself here.
To the bestest, most amazingly perfect salad yet!
The stuff. A big ol%u2019 bowl of greens. Black pitted olives, half an avocado, a lemon, toasted almonds, a chunk of red onion, a couple cloves garlic, and pepper.
Almond crumbs. Exactly what it sounds like. Place almonds into a clean food prosessor and pulse until they are crumbs.
Dump the almonds into a bowl. Don%u2019t bother cleaning it out, you are about to use it again. Olives, avocado, garlic, and all the juice of the lemon now get a go in the food processor. Pulsed together into a creamy, kinda of chunky but mostly smooth, mixture of amazing. Add a few tablespoons of cold water if the mixture seems really thick, but other then that, you be done.
Very thinly slice up red onion and slice up a few extra olives.
All here, all ready to go. Just got to toss it together now.
Greens, some slices olives and onion tossed all together in a good amount of the olive avocado goodness then topped with a hardy helping of almond crumbs. Fresh pepper to finish it off.
I was barely able to stop myself from eating it all before snapping a few pictures.
All of my cravings come true%u2026
It%u2019s salad time!
-C
Makes enough dressing and crumbs to feed 2-4 people
1/2 of a ripe avocado
1 cup pitted black olives
1 lemon
2-3 tablespoons cold water
1-2 cloves garlic
1/4 cup toasted almonds
2-4 large handfuls of fresh greens (I used a mixture of baby spinach, baby chard, and baby kale. Spring mix or even chopped leaf lettuce would be grand as well)
about 1/2 a small red onion
pepper to taste
Place almonds in food processor and pulse until they are crumbly. Not to fine, a few big chunks are good.. Remove and set aside
Roughly chop the garlic and place in the food processor (no need to clean it out after the almonds). Add in the avocado and most of the olives (leave few behind to slice up). Add in the juice of the lemon. Pulse until mixture is combined but with little specks of olive left.or completely smooth if you wanted too. Scoop out into a container. You want it to be slightly loos so it will mix well with the greens. If the mixture seems really thick, add in a a few tablespoons of cold water to thin out.
Grab the onion and remaining olives and thinly slice.
Now to assemble salad. Place a handful of clean greens into a bowl. Toss a some onions and extra sliced olives into greens. Add as little or as much olive avocado dressing as desired then sprinkle as much or as little of the almond crumbs all over that. Top with freshly find pepper
Then eat it.
Easy quick dinners are no joke because sometimes life happens and then you are hungry, then hangry, %u00a0then maybe yelling and or tears start and nothing is ever going to be good again. And then you eat and everything is A OK, but that time between tears and food can be long, especially when you just can’t think so one should have a least a good 2 or 3 good dinners up there sleeve (besides pasta) that can be made quick and easily to avoid the fallout of food deprivation.%u00a0This bowl of goodness here is one of those. And sure some people might not always have a sweet potato,%u00a0tahini, or chickpeas is the house %u00a0(I ALWAYS have a sweet potato or some type of winter squash and tahini and chickpeas…%u00a0they are staples here)%u00a0but with a tiny it of foresight, you can make these things happen too. And then you will make it and realize that you must have these ingredients on hand at all times because yeah, a good go to meal that will prevent the tears.
Admittedly I have made this for the mr but he is not that into it. Says he is not a huge fan of sweet potatoes. (what the fuck is wrong with him?) But me, I eat is and I eat it all.. The sweet potato/chickpea/tahini combination is classic fantastic. This hash is sweet potato sweet, a little chickpea crunchy, salty, savory,%u00a0and creamy citrusy. %u00a0It’s all sorts of goodness. I tossed this hash on a big bed of kale (any sturdy green would be good) and only good things happen in my mouth. So the mr.%u00a0might not like it but I am starting to realize (after 15 years) that my taste is far superior to his. Haha. (but really) %u00a0Quick and easy (and healthy) and good. %u00a0Make it once and it will turn into on of your go to dinners, unless you don’t like sweet potatoes. In that case there is pasta.%u00a0
The stuff. Chick peas (I had just made a batch but if you don’t have any made already, grab a can) a sweet potato, an onion, a lemon, some tahini, and garlic Also some cumin and chili powder, olive oil, and salt and pepper.%u00a0
Preheat your oven and chop up the onion and sweet potato into mouth sized pieces.%u00a0
Toss the chopped stuff onto a baking sheet with the chickpeas.
Drizzle the whole shebang with olive oil and toss with cumin, chili powder, and salt and pepper. %u00a0
Into the oven it goes.
Half hour later it is all roasted and ready.
Oh quick, make this before the stuff is out of the oven. Tahini, minced garlic, a dash of salt, a bit of the liquid from the chickpeas and the juice of a lemon. Just stick it all in a cup or bowl and mix it around. Then it’s done.
Scoop the hash into a bowl (I like a large pile of greens underneath) and cover with the tahini sauce.%u00a0
Eat is all to your face.
-C
dinner for one, a side for two.%u00a0Very easily doubled or tripled.%u00a0
1 sweet potato
2 cups or 1 can cooked chickpeas drained but liquid reserved%u00a0
1 medium yellow onion
1 tablespoon cumin
1 teaspoon chili powder
salt and pepper
2-3 tablespoons olive oil
3 tablespoon tahini
1 lemon
1/4- 1/2 cup of aquafaba (chickpea liquid)
2-3 cloves garlic
Preheat oven to 425
Chop sweet potato and onion into mouth sized cubes and place on a baking sheet. Add the drained chickpeas and drizzle with olive oil and toss around. Sprinkle on the cumin, chili powder,%u00a0salt and pepper, and toss that around again. When the oven is preheated, slide the baking sheet on in.%u00a0
While the stuff is baking, mince the garlic and place it in a bowl with the tahini, the juice of a lemon, and a pinch or two of salt to taste. Add in 1/4 cup of aquafaba and mix it all around.%u00a0If to thick for your liking, add a little more of the aqaufaba until its a good consistency.%u00a0
Check the stuff in the oven after 20 minutes and give it a toss.%u00a0%u00a0Keep baking for another 5-10 minutes or until the sweet potato is cooked and starting to brown. Remove from oven and dump into a bowl (maybe on a bed of greens or rice) and drizzle all over with the tahini sauce.
Eat
%u00a0 I use to suck the juice out of the seeds (they are actually called arils)%u00a0of the pomegranate and spit out the actual seeds…%u00a0I thought that the seeds were poisonous. (I blame my sister for this .She is the one that told me that). %u00a0And it turns out that it is an actual thing. That other people think that the seeds are not edible, so I guess don%u2019t feel so duped.%u00a0But I leaned. The seeds, they are very much edible, and very much tasty. I love biting into a pomegranate seed, letting the juice flood my mouth, followed by a nice little crunch from the seed inside, just like little crunchy red jewels.%u00a0And the method of removing the seeds just makes them that much better. When you have to whack a fruit for it’s edible parts, it got to be good. And to make this clear%u2026.%u00a0to all the people out there that thick the seeds are poison%u2026 the seeds are NOT POISION. In fact, they are quite good for you.
Now that that has been established, we can get to eating these little pearls the right way.%u00a0 And being all holiday and jolly lala, I was thinking of some classic side dishes that are typical around this time.%u00a0 Creamed spinach came to mind, but that just seemed a little boring. That%u2019s where the pomegranate comes in. %u00a0You add pomegranate to anything and it%u2019s not boring anymore. Also I switched out the creamed part and replaced it with cashew cream, and spinach with kale%u2026 cause that%u2019s what I do. And the results are fantastic! Sweet, creamy, crunchy, earthy… All the best flavors. And even though I ate most of it hot, it%u2019s definitely a side that moves from hot to cold and still taste super great. Would even make a nice sandwich or maybe add a little bed of grains and you got yourself a nice little lunch.
But the again, you probably wont have any left overs
The stuff. A bunch of kale, some cashews that have been soaking for a little while,%u00a0 and a pomegrante %u00a0(I only used half of one). We also need us some more fresh water, a lemon, a few cloves of garlic and salt and pepper.
Remove the arils (thats what the juicy seeds ae called) by placing half the pomegranate into a bowl and whacking %u00a0it with a big wooden spoon. (martha stewart taught me this)
Strain the soaking cashews and dump them into a blender with the juice of the lemon, the garlic, some fresh water and some salt and pepper.
Turn blender on and blend until a nice smooth consistency
Chop up the kale and place into a really big skillet with a few splashes of water.
Once the kale has wilted, pour the cashew cream all over it.%u00a0
Add in the pomegranate %u00a0seeds
And get yourself a fork (bowl is optional( and eat.%u00a0
Creamed food never tasted this good!
-C
makes 3-4 servings%u00a0
1 bunch (abut a pound) Kale
1/2 cup cashews that have been soaking in water for a little while
3/4 cup water
1 lemon
2-3 loves garlic
1/2 cup pomegranate seeds (about 1/2 a pomegranate)
salt and pepper to taste%u00a0
Take your pomegranate , slice in half, and place half seed sside down into a bowl. Take a big wooden spoon or something like it, and whack the outside of the fruit. The seeds will all fall out.. but check for any stuck seeds
Strain cashews from soaking waterand dump into a blender with the juice of the lemon, the garlic, %u00be cups of water, and a pinch or two of salt. Blend until a smooth a creamy cream. If you think the cream is to thick, add in another splash of water
After washing kale, chop it up into smallish pieces. (remove stems if you want.. I don’t,%u00a0I like the stems) Stick the kale into a large skillet with a few splashes of water and a sprinkle of salt and place on the oven on medium high heat. Stir around until kale is wilted and the water has evapotated. Pour on the cashew cream, mix around and top with the pomegranate seeds.
and eat..hot or cold. Its all good.
Sometime the best things in life are the simplest things. For example; a walk through the woods, a really pretty smooth rock, a perfectly timed 80’s ballad song for the last push during a workout, or falling asleep on the couch and managing to not drool all over the newly washed pillows.(You know what I am talking about). I mean, can one really ask for much more?
Same goes with food. The simplest foods can really the best. Take this cashews cheese for example. All it is is soaked and blended up cashews with a bit of seasoning to cheese it up. Nothing fancy, nothing labor intensive, just straight up and straight out. You can up the greatness by adding thick cuts of fresh, sun kissed, bright and happy tomato, and a chunk of fresh bread%u2026Not much better then that. So simple and yet so good.
%u00a0And bonus. No need to turn on any heating units in order to make this cause that would suck, given that we are again having another fucking heat wave.%u00a0
Agh stupid hot weather. STUPID!!!! But enough about that..
Cheese time.
The stuff. Cashews that be soakin for a while in some water, nutritional yeast (to give it that cheesy flavor), lemon, garlic, and salt and pepper. That’s for the cheese, but you are, and should, want to eat it with a large, so fresh and juicy, tomato and some kind of fresh bread situation. So you need that too!
Simple as can be. Strain cashews from soaking water and dump into a food processor with the garlic, nutritional yeast, juice of the lemon,%u00a0a pinch of salt and pepper, and a little water.%u00a0%u00a0Turn on processor.
And it’s done when its all smooth and creamy .Adjust salt and pepper to taste.
Tranfer %u00a0the goodness to a lovely jar%u00a0
And that’s that.. some cheese of the cashew.
But wait, you need to eat it.. Smear all over the bread situation, cut up the tomato, place big fat slabs directly onto cashew butter and spinkle with a salt and pepper.
SImply the best%u2026 Better then all the rest!
Happy today! Stay cool my friends%u2026stay cool.
-C
makes about 1 1/2 cups of creamy, cheesy goodness
1 cup of raw unsalted cashew soaked in water for about an hour%u00a0
1/2 cup fresh water
2-4 tablespoons nutrional yeast%u00a0
juice of a lemon
2-3 cloves garlic (optional )
salt and pepper
And not that you have to, but having some freshy tomatoes and some nice bread to eat the cheese on is pretty fantastical.%u00a0
After you cashews have been soaking for about an hour, strain water and add them and all of the other ingredients to a food processor. Blend until smooth and creamy. Scoop into a jar.
Eat some right away on a hunk of fresh bread with lots of thick cuts of fresh tomato and place the rest in the fridge.
The cheese will get a bit thicker after being refrigerated for a while.
Use on anything , in anything, or all on it’s own. Licking jar clean is encouraged.
It’s official, all of the littles started school yesterday%u2026%u2026HOORAY! (I say hooray cause school is cool and the start of school means it’s going to be fall so soon!. Also I like hanging out with the littles more when they are in school. There is more to talk about and any time away from school is cool time so they like to do more stuff and not just be summer bums)
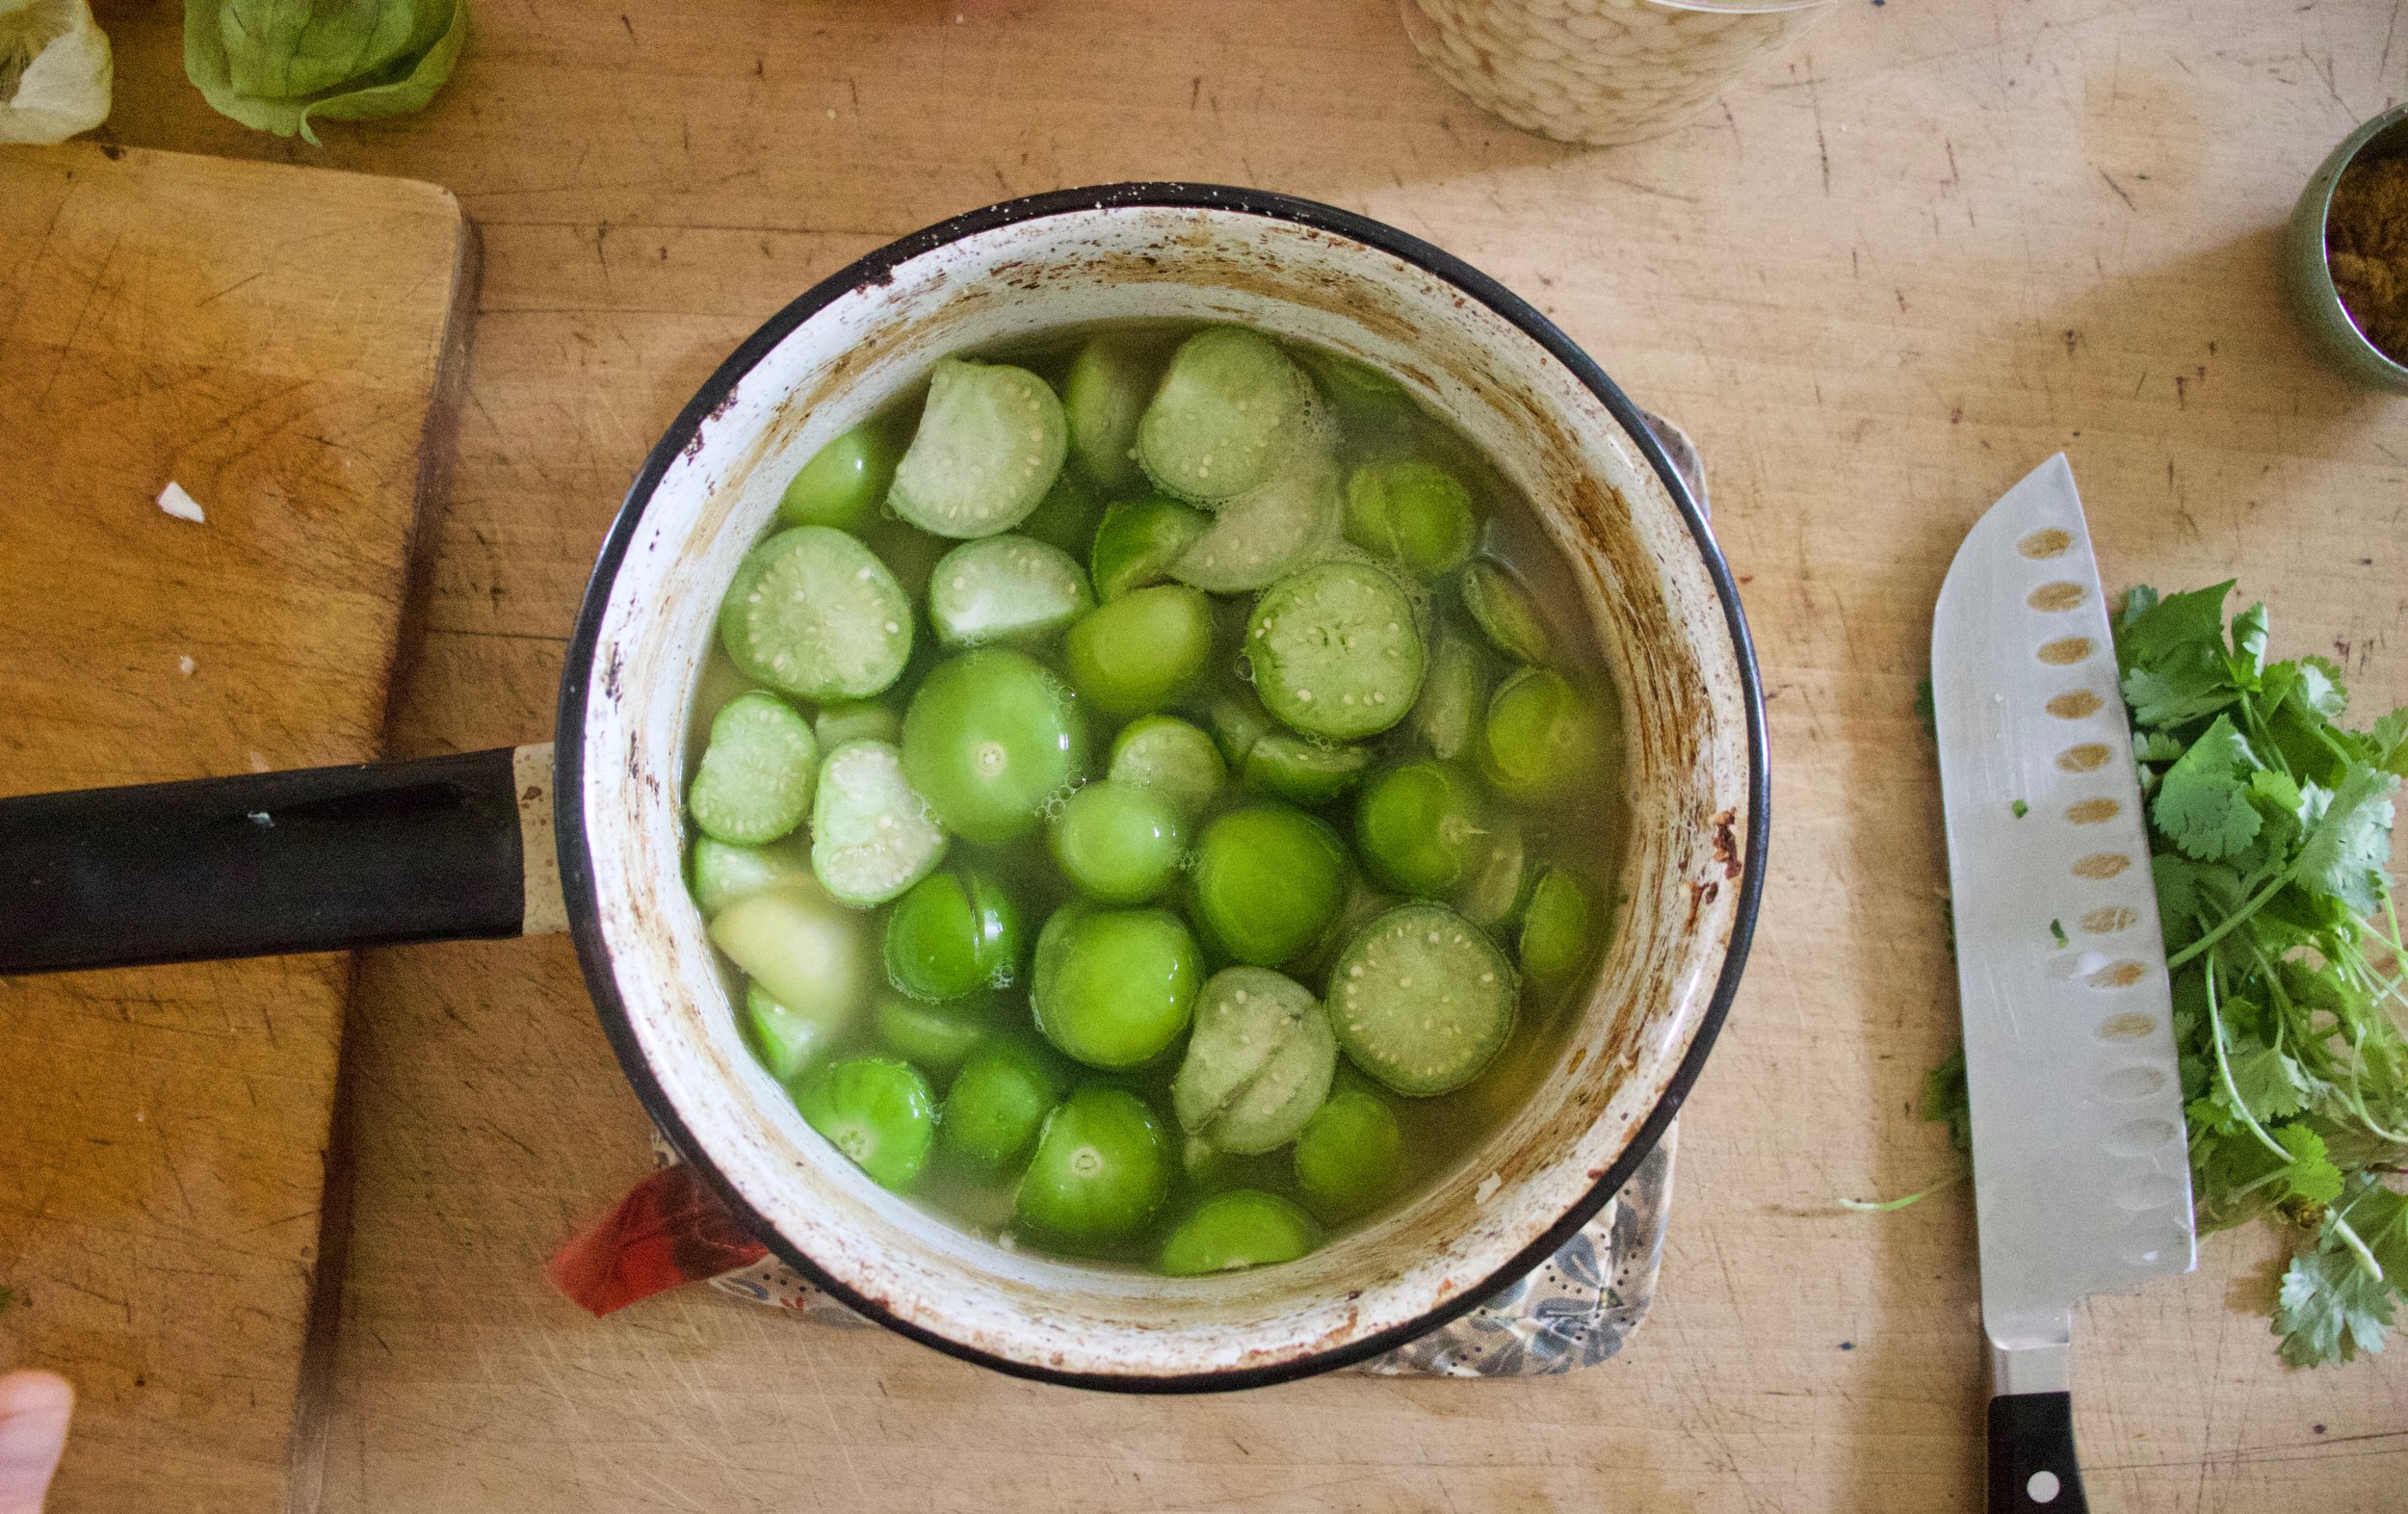
One of the littles had his very first ever day of school.%u00a0So me, being the bestest most awesomest aunt ever, made that little a celebration, hooray for school, banana ice cream cake.
This little %u00a0has been bugging me for a while now to make him an ice cream cake. It all started a few months ago when I gave him a bowl of banana ice cream and told him that when he sleeps over he can have ice cream for breakfast %u00a0That blew his little mind.%u00a0We then proceeded to have a converastawtion about healthy food and what was ok to eat for breakfast. (He is very interested in being healthy)%u00a0I then told him that whenever he sleeps over I would make a banana ice cream cake for breakfast cause bananas are healthy. But every time he is over,%u00a0I never seems to have enough bananas.
Well I had the bananas and there is no better excuse then the first day of kindergarten to make a cake.. A very delicious peanut butter banana ice cream cake! %u00a0And no, it wasn’t for breakfast, but the left overs can be! (there were no left overs here)
The stuff%u2026 Crispy rice cereal, peanut butter (I have some chiunky stuff %u00a0at the moment, but any nut butter is good) and 4 frozen %u00a0chopped up bananas.
Rice ceareal goes into a food processor with the peanut butter. Pulse until everything is all combined and starts to come togerter.
And ump the mixture into a spring for pan. If you do not have a spring form pan, a pie plate will work just as well.
Such a nice looking crust if I do say so myself. Now stick it in the freezer while you make your ice cream.
Frozen bananas go into the processor, get blended for a few mounters, and come out as ice cream%u2026. freaking magic!
Now dump the magic ice cream into the crust.
And smooth it all nice like..and into the freezer it goes until its frozen.
After a few hours, you take it out of the freezer, remove from the pan (or leave it in the pan)
And gather your toppings. A handful of the rice cereal, some melted peanut butter, and a little melted nutella. (use whatever you want.. fruit would be great, some nuts, graham crackers, sprinkles. You get the idea)
%u00a0Now,%u00a0Wait for it%u2026.
Go crazy! Toppings all over!
And serve up, and watch out.. I almost got my hand eaten for kids going for seconds..
Have a fantastic day and happy back to school. to littles and parents alike!
-C
Makes a 6 inch cake%u00a0
For the cake
4-5 frozen bananas
2 1/2 cups crispy rice cereal
4 tablespoon peanut butter%u00a0
To garnish (use any, all or none of what you would like%u2026 and maybe not the super sugary ones if a breakfast cake)
melted peanut butter
melted chocolate
Nutella
handful of rice cereal
fresh fruit
jam
coconut flakes
sprinkles
anything else you would like!
Place cereal and peanut butter into a food processor and pulse until crumbly and combined and starts to come away from bowl.
Dump mixture into a 6 in spring form pan (or if you not have one, a pie plate works too) and press it down evenly on the bottom. Stick into freezer
Take bananas out of freezer and place into food processor.%u00a0Blend until smooth. If needed, you can drizzle a tiny amount of water into it if you think it needs a little help to blend.%u00a0
Once smooth, take crust from freezer and dump the nanaer ice cream on top and carefully smooth it out. Stick back into freezer (a pier of plastic over to prevent ice crystals )for at least 2 hours, or until the ice cream has completely frozen.
When it’s time to serve, remove cake from spring form (or leave it in the pie plate).and drizzle the top with melted peanut butter, melted,%u00a0chocolate and another handful of crispy cereal. Or leave it bare. Or add sprinkles%u2026 the toppings are all unto you!
Eat like a camp, for breakfast or dessert.. Or eat some for dessert and then some for breakfast.
THE LOVELY CRAZY
January 25, 2023 by maximios • Blog
Whoa has It been a while since I have posted a recipe. Not that I haven%u2019t wanted to or that I haven%u2019t been making food, I just have been busy A.F. And truthfully I am as busy as ever but I happen to have my phone next to me when I was making this little casserole dish thing that I have made a few times now and I think it well worth a share.
What is it you ask? It is a creamy but dense chickpea base covered in tender roasted beets and onions with a lemon tahini drizzle. It is simple to make, super delicious, and can be tweaked in a million different ways to your liking.
Is it a fantastic dish to serve at say a Thanksgiving? Well yes, yes it is. You can serve it as a side or even make it bigger and have it as a sort of main dish. It%u2019s a good protein that is naturally gluten and grain free, vegan, and blah blah blah. What really matters here though is that it is damn tasty and also bonus, it is so siimple to make and can even be prepared a day in advance so no stress. We will take all the wins here.
-C
1 cup chickpea flour
2 cups boiling water
1 teaspoon salt plus more to taste
ground black pepper
2 teaspoons cumin (feel free to omit or use a different spice.Thyme or rosemary are equally delicious )
2 medium beets
1 large onion
a lemon
1-2 tablespoons tahini
teaspoon or so olive oil.
Note. This dish is excellent made and eaten right away but also gets even better (in my opinion) cooled and reheated. Also you can change up the veggie situation and use whatever ones you like.
Place chickpea flour in a bowl and slowly whisk in boil water with a fork so that there are no lumps. Mix in cumin and a teaspoon of salt and a pepper. Scoop batter into a lightly oiled 8X8 casserole dish (you can use a round cake tin or a cast iron skillet as well) and set aside to rest for a few.
Preheat oven to 400.
Grab beets and onion and slice in about 1/8 thick slices. Layer slices on top of chickpea mixture, making it look pretty if you feel like it. Once the veggies are layered, lightly drizzle the top with a teaspoon olive oil and sprinkle with a good pinch of salt and pepper.
When the oven is preheated, covered the baking dish and place in oven,. Bake covered for 1/2 hour then remove covering and bake for another 20-30 minutes or until the beets are nice and tender and a tester poked into the center of the dish comes out clean. Remove from oven,
Once it%u2019s out of the oven grab a little bowl and add the juice of the lemon to the tahini and mix. Season with salt to you liking.
Now serve. Drizzle the top with the tahini mixture and cut yourself a big old piece. Yes drizzle extra tahini on top. Sure squeeze on more lemon. You do you.
Store leftovers in fridge. Reheat in hot oven for 10 minutes..It gets crispy!
Black beans soup is eaten on the regular around here. Not always the same way but pretty much. Why screw with a good thing you know?
Now soup with dumplings. This is not (yet) a regular thing but I was making the usual blacken soup and planing on making corn bread to go with (in a pan) , when I had a moment of clarity and realized that I should just make the corn bread into dumplings and not have to deal with baking and another pan to clean. Duh. Why don%u2019t I do this more often?
And that is it. A black bean soup, nice and thick, with light fluffy cornbread dumplings cooked in one pot. Quick, easy and all sorts of delicious. Can%u2019t complain about that.
Now let%u2019s get to the soup and dumplings!
The stuff. For the soup there are bLackbeans, and onion, spices, a carrot, garlic, tomato paste, apple cider vinegar. For dumplings we have flour, baking powder, salt, oil, and plant milk. Salt and pepper too.
Start by dicing up the carrot and onion and mincing the garlic.
Dump all that you diced into a big pot, along with the spices, some salt and pepper, and about 1/2 cup of water. Place on stove and cook down on medium heat until the onion is becoming translucent and the whole pot is starting to smell fragrant.
Now add in beans and tomato paste and about 5 cups of water. Bring to a boil then turn down to medium an cook for about 20-30 minutes.
Soup. Cooked and all taste but one more little step.
Remove a third of the soup and blend until smooth and then add it back it.
Dumplings. Mix dry together then add in oil and milk. Mix together unit incorporated.
While soup is still on medium heat, scoop the dumping mixture right into the soup.
Place a loose side on top of pot ans let the dumplings cook util list and fluffy which will take about 15-20 minutes.
Cornbread dumplings looking all nice in the soup.
Then you eat it. Add some avocado on top of you want. Avocado is always a good idea.
-C
feeds 3-4
3 cups cooked black beans (or 2 16 oz cans)
1 large onion
1 good sized carrot
3-4 cloves garlic
1 teaspoon chill powder
1 tablespoon cumin
1/2 teaspoon red pepper flakes (or none if you don%u2019t like the spice)
1 tablespoon maple cider vineger
1/3 cup tomato paste
5 cups water
salt and pepper
Dumplings
3/4 cup all purpose flour
1/4 cup corn meal
3/4 cup plant milk
2 tablespoon neutral oil
1 teaspoon baking powder
1/2 teaspoon salt
Start by dicing up the carrot and onion into small pieces. Mince the garlic and then place the garlic, onion, and carrot into a large pot with the cumin, chili powder, and red pepper flakes, a good pinch of salt and pepper, and about 1/2 a cup of water. Place pot on stove on a medium low heat and sweat the mixture for about 10-15 minutes or until fragrant and the onions are slightly translucent.
Add in the tomato paste, beans , and 5 cups water. Bring to a boil then reduce to medium heat and let cook for about1/2 hour. Once soup has cooked down a bit and tastes delicious, remove form heat and carefully transfer 1/3 of the soup to a blender or jar (if using a hand blander) and blend until smooth. Add the blend soup back to the pot and turn the heat back on to medium low. Taste and add more salt and pepper if needed.
Now make dumpling mixture. Mix the dry ingredients together in a bowl then add in the oil and milk and mix until incorporated. Scoops the dumping mixture into the soup while the soup then place a lid loosely on the pot. Cook for another 15-20 minutes or unit the dumplings are nice a n fluffy.
And when they are done, remove lid, tun the heat off, and paddle soup and dumplings into bowl. Eat. Add sliced avocado for a little more yum.
I guess black eyed peas are good to eat on New Years because they bring you good luck or money or something. I have heard this and a lot of other food traditions but I don%u2019t really do New Years so I have never really actively thought about what I consume on the day. But when I went to ponder my bean selection ( I have so many varieties) I figured what the hell, why not make the stew I was about to make into a good luck black eyed pea stew. I mean I was already making it (I was leaning towards black beans) but If there is a chance that eating these delicious beans will give me a little extra luck (and or money) this year, well by all means I%u2019ll take it. And the stew because that is really what I was after.
This stew. It is thick and creamy from the sweet potato and beans, bright and light from the ginger and tangerines, and hearty because it is stew. It is a perfect stew situation to eat on any given day but especially nice on a cold winter evening. And I guess on New Years. Like today.
Now to the black eyed pea stew!
The stuff. Cooked black eyed peas. a sweet potato, some kale, a few tangerine, an onion, some garlic and ginger, tomato puree, and salt and pepper.
Start with chopping up the onion, mincing the garlic and ginger, and dicing up the sweet potato.
Toss the onion, garlic, and ginger into a big pot and add in a splash of water or oil and a pinch of salt. Place on medium heat ans cook until tranlucent and fragrant. Add in the sweet potatoes, tomato puree, and enough water to completely submerge it all. Keep on medium heat and cook until sweet potties are fork tender. Add more water if needed.
In he mean time chop up the kale.
And juice the tangerines.
Once potatoes are tender, add in the black eyed peas, the kale and the tangerine juice. Add more water to completely submerge again. And keep on medium high heat and cook for another 10-15 minutes or went everything is all melded and cooked together.
Like this. A pot of good goodness.
All that is left is to scoop the stew into blows and eat it. Squeeze more tangerine juice on top too, it makes it nice.
Good luck all year long!
-C
2 cups cooked and drained black eyed peas
1 medium sweet potato
2-3 tangerines
1/2 cup tomato puree
1 small onion
2 cloves garlic
1/2 inch fresh ginger root
a few leaves of kale, chard, or collard greens
4-6 cups water
Start by dicing up onion and peeling and mincing up the garlic and ginger. Place into a large pot with about 1/4 cup of water or a splash of oil and stick on stove on medium heat. Cook the mixture for 5-8 minutes or unit fragrant and translucent. While that is cooking dice up the sweet pot into small 1/2 inch cubes then add them into the pot once onion mixture has cooked, along with the tomato puree and enough water to completely submerge in all. Stir and and keep on medium heat and cook for another 20 or so minutes or until the sweet potatoes are fork tender.
Chop up kale and juice tangerines.
Once the sweet potato is tender add in the rinsed and drained black eyed peas, the chopped kale, and the tangerine juice. Add a sprinkle of salt and pepper and more water to submerge it all again and keep on medium heat. Cook for another 20 minutes so that all the flavors have time to meld and turn into a great pot of stew. Depending on your preference for thickness, cook down more for thicker stew, or add more water to keep it brothy.
Once cooked, scoop into bowls, season with more salt and pepper, and if you have an extra tangerine, squeeze a little more fresh juice on top.
First off, I am not sure if this is technically a stew, or chili, or just a soup, but I think a stew so I am sticking to it.
Secondly, I don%u2019t give a flying f%$# what it technically is because whatever it is is so freaking good!
Lets talk about this stew and whats in it. Me and tomatillos are having a thing right now and I can%u2019t seem to get enough if them. They are bright and slightly sour, but also sweet with a bit of acidity, kind of like a unripe tomato but just better and taste fantastic. Then I got the pumpkin which is hardy and creamy and I will eat all day, everyday forever if I could. White beans which are also creamy and delicious, all in a pot with a good amount or cumin, some of this and that, cooked down to a delicious pot of stewed goodness.
And isn%u2019t stew just he perfect food for a nice crisp fall day? 100% yes to that and yes to this stew. It will make you happy, smile, and full.
Now to the stew!
The stuff. Fresh Tomatillos, a pie pumpkin, cooked white beans, an onion, a jalape%u00f1o, a couple cloves or garlic, cumin, chili powder, red wine vinegar, salt and pepper, and fresh cilantro.
Start with dicing up the onion, garlic, and jalape%u00f1o. Remove the seeds fro meh jalape%u00f1o to make is less hot.
Toss that stuff into a pot along with the cumin and chili powder, a pinch of salt, ans about a 1/2 cup of water. Place on stove on medium heat and start to cooke.
Husk, rinse, and halve tomatillos.
Once the onion and jalape%u00f1o mixture is cooked a bit like this%u2026
Add in the tomatillos and enough water to submerge the all. Place back on stove on high heat.
Now dice up pumpkin into inch sized cubed.
Now add the pumpkin and the white beans into the pot. Bring the whole thing to a boil once more, then turn the heat down to low. Cook for about an hour to hour and a half, string once in a while, until its cooked down nice and thick.
Grab a bowl, fill it up, top with fresh cilantro, and get down on it.
P.S. This is now my new favorite food
-C
2-3 good hardy servings
20-22 tomatillos (about 3 1/2 cups after husked and halved)
1 small pie pumpkin (3 1/2 cups cubed pumpkin)
2 cups (or 1 can) cooked and drained while beans
1 yellow onion
2 cloves garlic
2 tablespoons cumin
1 teaspoon chili powder
1 tablespoon red wine vinegar
6-7 cups water
salt and pepper
fresh cilantro
Start by dicing up the onion into really small pieces. Mince the garlic and cut the jalape%u00f1o up into small pieces (remove seeds) while you are at it. Place the onions, garlic, jalape%u00f1o,cumin, chili powder, and a pinch of salt into a pot. Add in about 1/2 a cup of water and place on stove on medium heat and start to cook.
While that is cooking a bit, husk, rinse, and halve the tomatillos. When the onion and garlic mixture has cooked down a bit, add the tomatillos to the pot along with a couple of cups of water (enough to submerge the tomatillos). Place back on stove on high heat and bring to a boil.
In the meantime, dice up 3 1/2 cups of pumpkin (remove seeds and save for later and don%u2019t peel pumpkin unless you really want to) into mouth sized cubes. Once diced up, add into the pot along with the with beans and vinegar. Add more water until everything is submerged (about 3-4 more cups) then bring pot back to a boil. Once boiling, reduce heat to low and let cook for about an hour to an hour and a half, stirring on occasion, until the tomatillos have cooked and thickened, the pumpkin is nice and tender, and the whole stew is nice and well, stew like.
And once it is cooked, taste for seasoning (add more salt and pepper if needed). Then ladle into a bowl, toss on some fresh cilantro then dig in.
Left overs store well in fridge for about a week. Its easy to heat up but really, cold stew is amazing!
Another heatwave. I tell you what, If I never live through another 90 + degree day, it will be too soon.
What to eat during a heat wave? Well maybe you don%u2019t care and have air conditioning in your kitchen so you cook whatever. I don%u2019t have air conditioning and after a few days of boiling temps, there is no freaking way I am turning on the oven. I can barely turn on the stove top to boil water, but I did, I boiled water, I just did it early in the morning before the temperatures starting rising again. (A pro tip for you.) That is one of the great things about pasta salad, you can make the pasta ahead of time. You can even make the whole salad in the morning and then you don%u2019t have to do a damn thing when it comes to dinner besides lifting a fork to your face, which I know can be a feat when all you want to do is melt, or slap at something, but still.
This pasta salad, well it is not you everyday pasta salad. It has beans, fresh basil, and a dressing that is made by blending up the most delicious seasonal tomatoes until rich and creamy and dumped all over the orzos. . It is probably going to be the best tasting pasta salad you will ever eat. The thing is, you really need to make it soon because sure you can get tomatoes all year round but don%u2019t do that. Do yourself a favor and make it now while the tomatoes are plentiful and at their peak of deliciousness. And also you don%u2019t have wait for a heatwave to make it. This is a good meal to have at the ready all throughout tomato season, and just in case, a heat wave.
Now to the pasta salad!
The stuff. Just picked tomatoes, some fresh basil, cooked navy beans, orzo pasta, olive oil, red wine vinegar, garlic, and salt and pepper.
Rough chop tomatoes into small pieces. Also peel and dice garlic into small pieces.
Place the tomatoes, garlic, and a good pinch of salt into a blender (I used a hand blender) and blend unit smooth. Add in the vinegar and oil and bend until the mixture starts to emulsify and becomes smooth and creamy.
Cook and strain pasta as instructed. Keep in on the al dente side.
Chop up basil into thin ribbons or whatever.
Then dump pasta into a large bowl. Add in cherry tomatoes ( I cut mine in half) and beans. Dump in half the sauce and mix around then mix in the chopped basil.
If you are eating it right away, add in the rest of the sauce. If you are keeping it for later, place pasta and sauce in fridge and a before you are planning on serving it mix in the remaining sauce.
Looks so good right! Season with salt and pepper to taste and then you know%u2026
Grab a bowl and eat it. Probably should grab a from too, eating this with your hands might get messy.
Stay cool friends!
-C
serves 2-3 as a meal or more as a side
2 cups dried orzo pasta (12 oz)
2 large heirloom tomatoes (about 2 cups chopped)
1 1/2 cups cherry tomatoes (or chopped tomatoes)
1/3 cup olive oil
2 tablespoons red wine vinegar
1 1/2 cups cooked and drained white beans ( I used navy but any white bean will do)
1 cup packed basil leaves
2 cloves garlic
salt and pepper
Start with making the tomato dressing. Rough chop the 2 large tomatoes into smaller pieces and peel and chop garlic. Place the tomatoes in a blender (or a large jar if using a hand blender) with the garlic and a good pinch of salt and a little pepper. Blend until smooth. Add in the vinegar and oil and continue to blend until the mixture becomes thick and creamy. Taste and add more salt and pepper if needed .
Prepare orzo pasta as instructed on package (make it al dente)
Grab basil and chop into smaller pieces.
Once orzo is cooked and drained, dump it into a large bowl. Add in the beans and cherry tomatoes (slice in half if they are on the large size) and pour in half if the tomato sauce. Mix unit incorporated. Toss in the basil.
Now if you are going to eat right away mix in remaining sauce. If you plan on refrigerating and eating later, save the remaining half of the sauce and mix it in right before serving.
Store left overs in fridge for up to 5 days.