My winter farm share is coming to an end this week. One more pick and then a three week stretch until the summer share starts… WHAT AM I GOING TO DO!!!
Stock up as much as I can is what.
I have been strategic about the roots and veggies that I have chosen to bring home the past few weeks.(My farm lets you pick what you want) I know what I can buy at the store, things like carrots and potatoes, so I have been passing those up, but the roots like beets and celeriac… I have been bringing home baskets of those and hoarding them in the fridge and basement in preparation for the laps in farm fresh food and knowing that if I want to by these at the store it s going to coast me a million dollars a pound. (a for real million dollars)
Yup, lots of roots around here, especially celeriac root which is fantastic. I am kind of obsessed with celeriac, with its fibrous, knobby exterior, soft but almost meaty texture inside, and a flavor that is close to celery but so much better. I don’t know why it has taken me so long to do a posting featuring this amazing root vegetable (I eat it almost every day)
So here, an amazingly tasty, hearty but not heavy, celeriac recipe. Perfect for spring and the change into summer…. Mustard roasted celeriac with an fanatic split peas gravy that will have you licking you bowl clean.
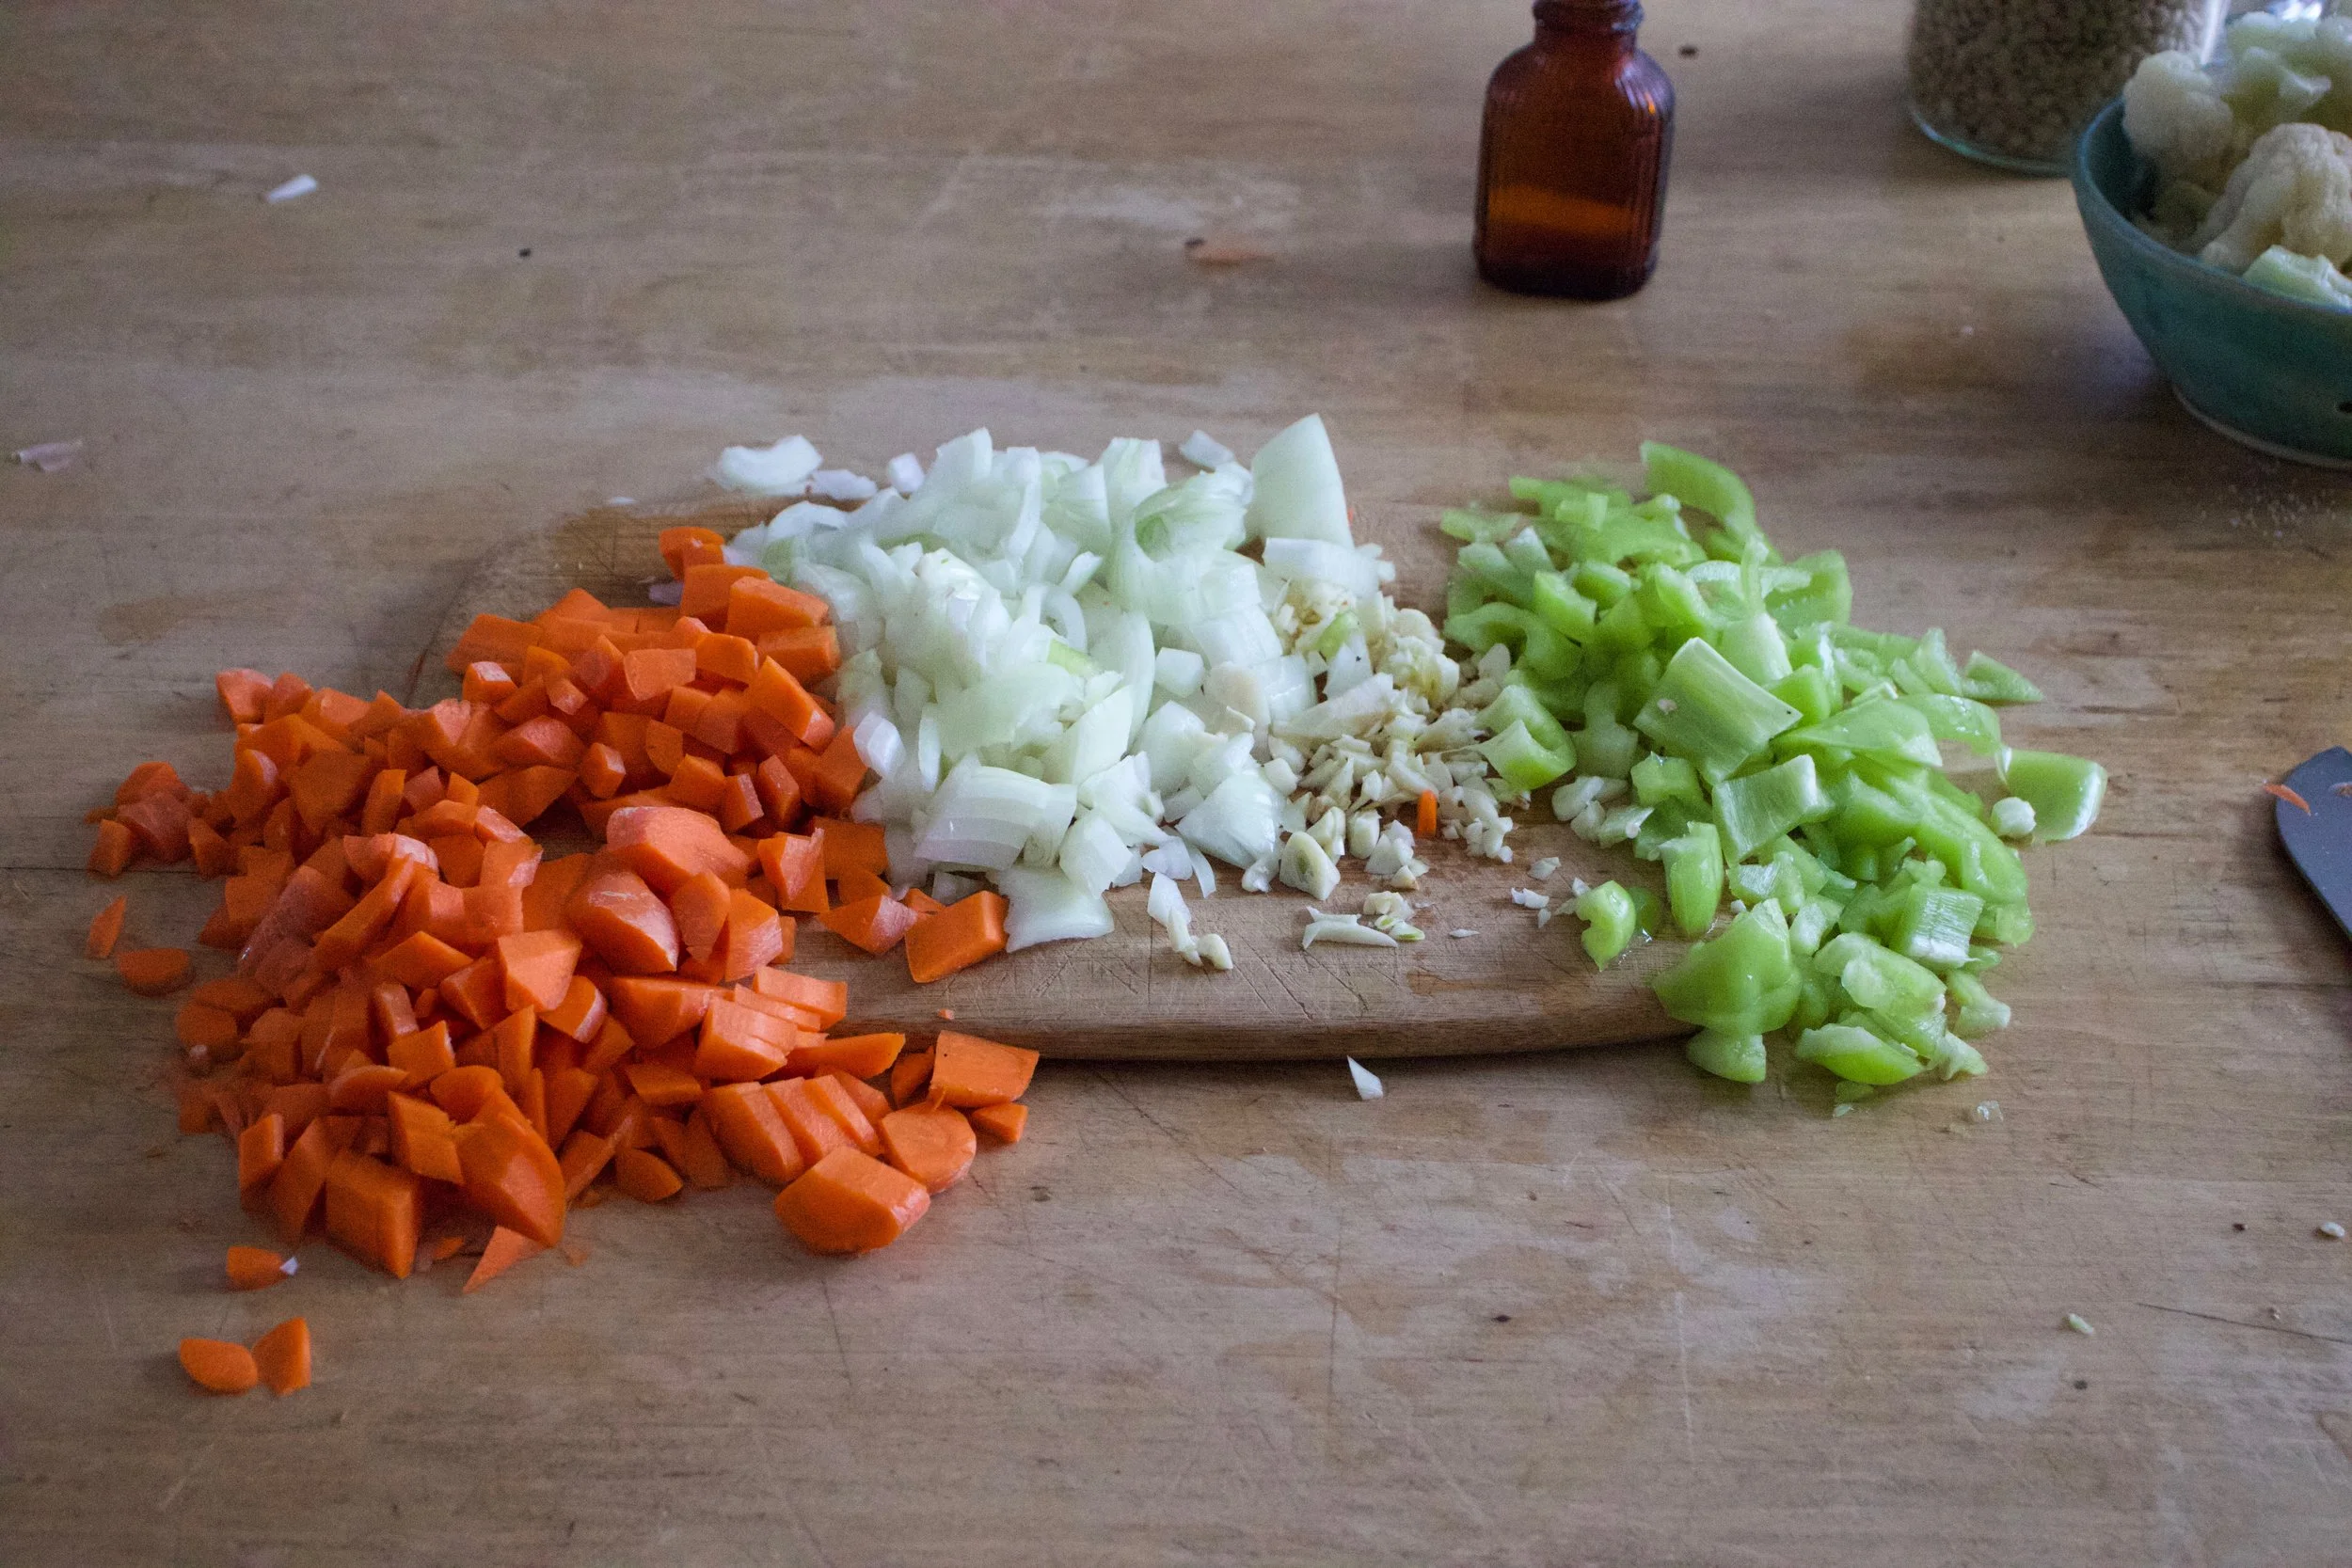
The stuff….For the split pea gravy we have a carrot, a parsnip and a large onion chopped into small chunks. Salt, thyme, a bay leaf and of course the split peas. Then there is the celeriac root* sliced into 1/2 inch thick rounds and some plain old yellow mustard .
*Note. I don’t peel my celeriac root. I really enjoy the fibrous exterior but realize that some don’t(The mister does not like it) so peel it if you want.
Toss the chopped parsnip, carrot, onion and the spices into a pot on medium heat and let veggies sweat a few minutes until tender. Add in the split peas and enough water to cover everything. Turn pot on high and bring to a boil, then cover and turn to low. Make sure to give the pot a good stir ever few minutes and add more water if needed
While the gravy is cooking, take the celeriac rounds and brush each side with yellow mustard, sprinkle with pepper, and place on a baking sheet. Stick into the oven to roast for about 25 minutes, flipping the rounds after about 10 minutes.
Once the peas have soften, remove the bay leaf and puree until smooth and oh so creamy. Taste and add more salt and pepper if needed. If you find that the gravy seems to thick, just add in more water until it’s the consistency that you want. The gravy is made, the celeriac is roasted… now we are ready to eat!! Stick the celeriac on a plate and dump good amount of that gravy right on top. Feel free to add a bed of spinach, or a grain or anything you want, because why not, and also some chopped tomatoes for a little acid and prettiness.
Serve with the fanciest knife and fork you can find. Extra yellow mustard and sriracha sauce are great condiments to have close by.
Happy Tuesday!
-C
Mustard Roasted Celeriac with Split Pea Gravy
2 medium celeriac roots
6 tablespoons mustard
1 large carrot
1 medium parsnip
1 large yellow onion
2/3 cup split peas
2-3 cups water
1 bay leaf
2 teaspoons thyme or italian spice mix
salt and pepper
spinach (optional)
diced tomatoes(optional)
Preheat oven to 400 degrees
Small dice the carrot, parsnip and onion and throw into a large pot. Spinkle with salt and pepper, add in the thyme and bay leaf and add a splash of water. Stick on stove on medium heat and stir. Let cook until the veggies become soft and fragrant. Now add in the split peas and 2 cups of water. Bring to a boil then cover and turn heat down to medium low. Let cook until the split peas become tender (about 25 minutes) string on occasion and adding more water if the peas are not completely summered while cooking.
Once the peas are tender, let cool for a few minutes, remove bay leaf, and either dump into a blender or blend with an immersion blender until nice and creamy. If gravy seems to thick, add in more water.
Scrub or peel celeriac roots and slice them into 1/2 inch think rounds. Place on a baking sheet and brush mustard on both sides and spindle with pepper. Stick into oven for about 10 minutes, flip, then back into the oven for another 15 or so minutes, or unit the celeriac is tender.
When the celeriac is done remove from oven and stick a few rounds on a bed of spinach (or not, or any kind of grain or green you like) Top with a hearty helping of the gravy and toss on some chopped up tomatoes.
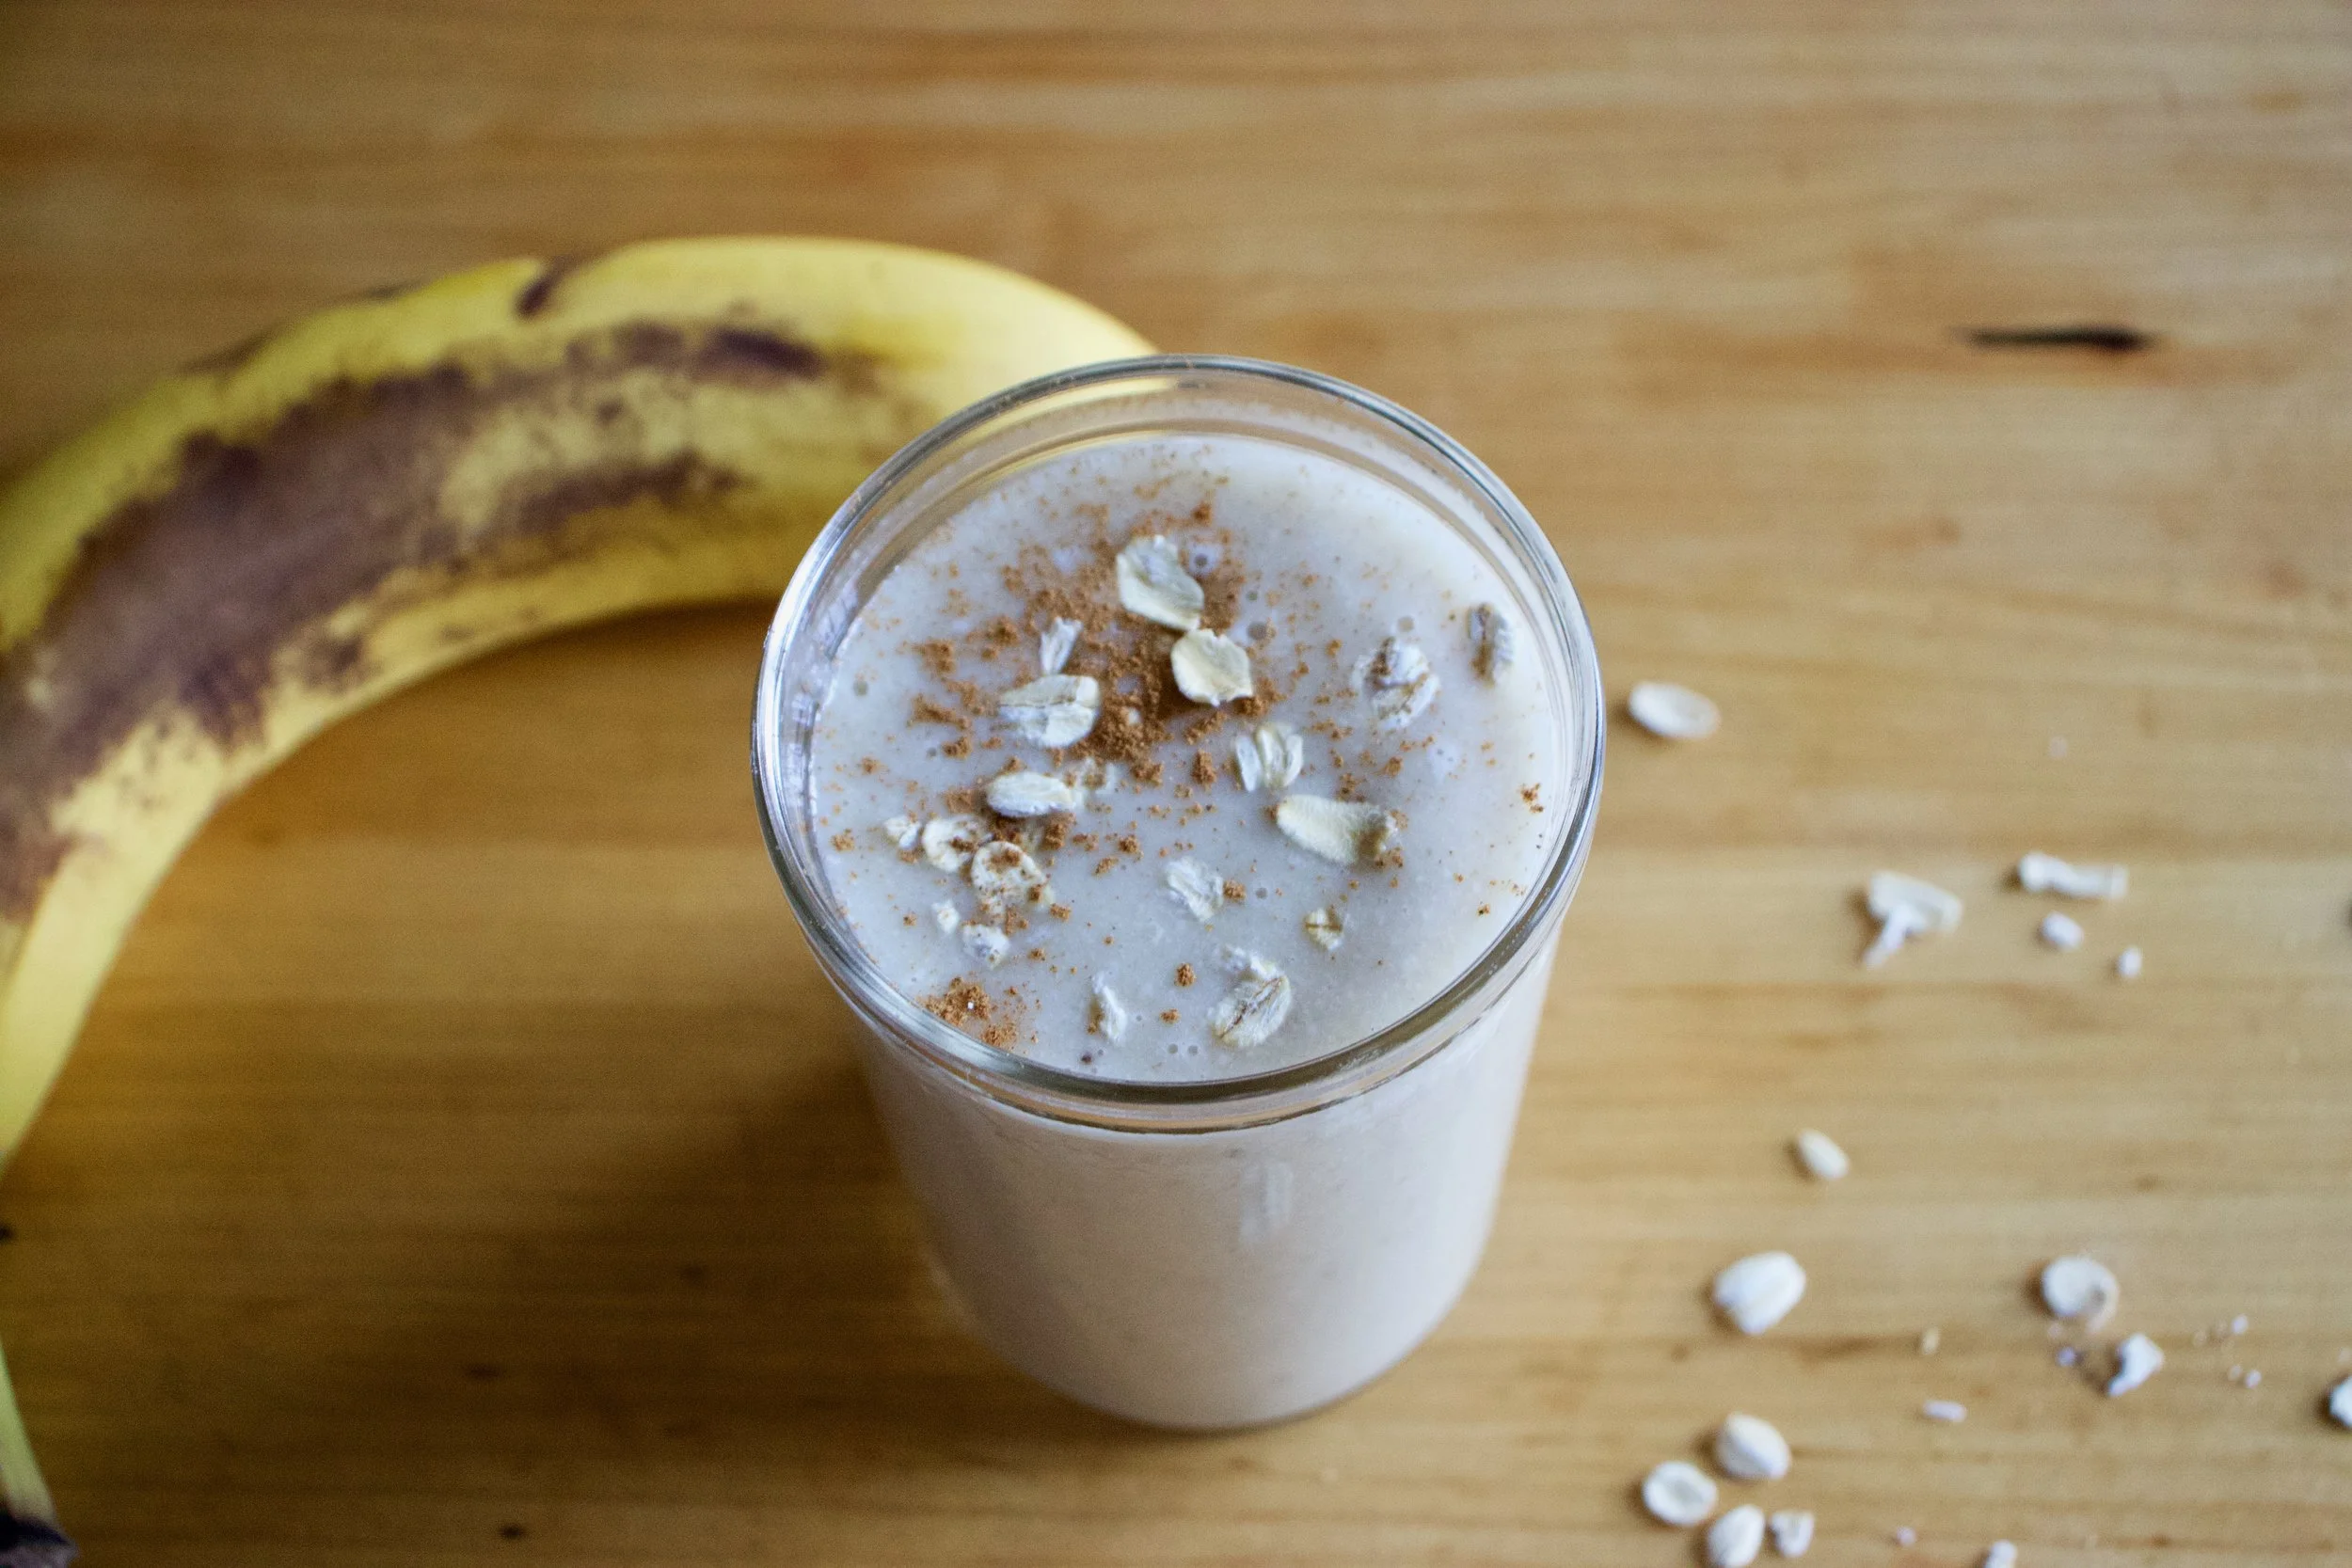
It%u2019s a smoothie. And no, we have never really been smoothie people in this house, but what can I say, sometimes smoothies happen, especially when you have about 20 ripe bananas in the fruit bowl with no room in the freezer and no need for 7 loafs of banana bread.
So I smoothied. And I like it (a lot).
This is a smoothie of simplicity. Nothing fancy. Simplest of simple. Straight to the point. And all sorts of good.
You might think, does this simple smoothie you speak of taste very good? Yes, yes indeed it does. It is all sorts of fantastic. Basically if you like creamy, nutty, oaty, bananery things, you will like this. And it%u2019s a perfect breakfast, snack, dessert, or just wanting a little treat like thing that is not garbage food. A smoothie of all smoothies with the most basic ingredients. And takes about 15 seconds to whip up. Can%u2019t complain about that.
To the smoothie goodness!
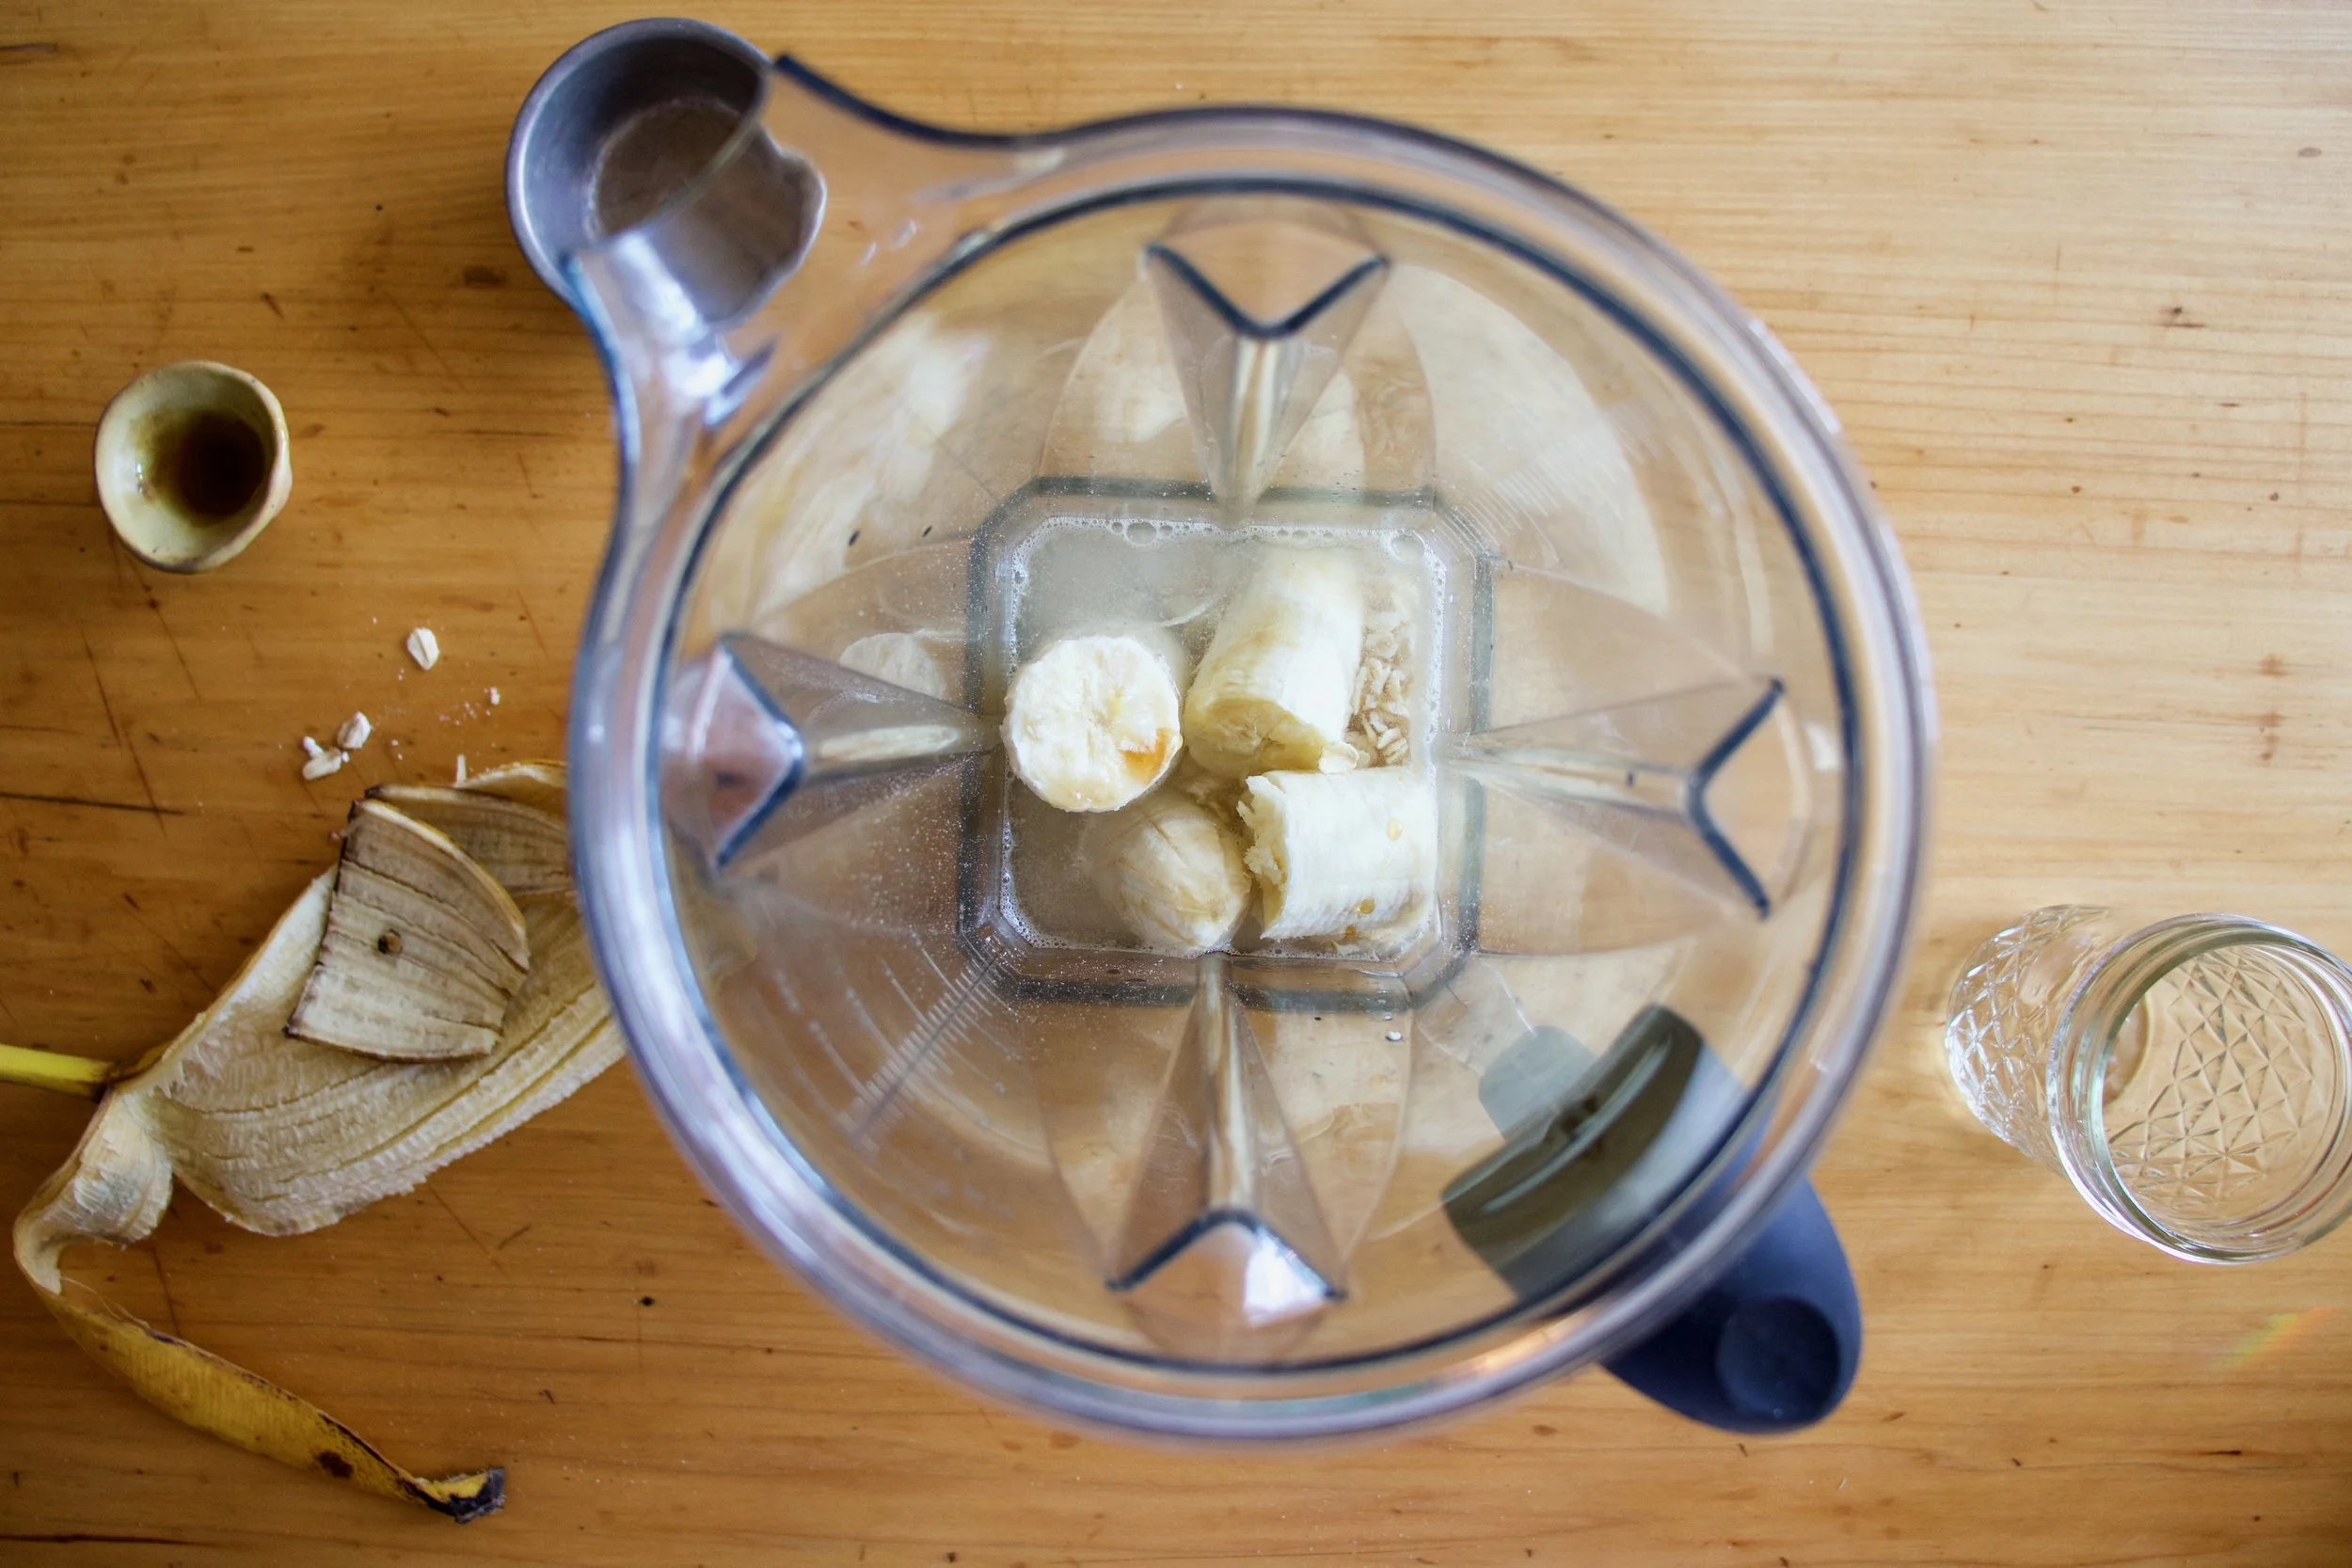
The stuff. A ripe banana, some old fashion rolled oats, a pinch of salt, water, and a smidge of maple syrup if you want it.
Everything goes into blender.
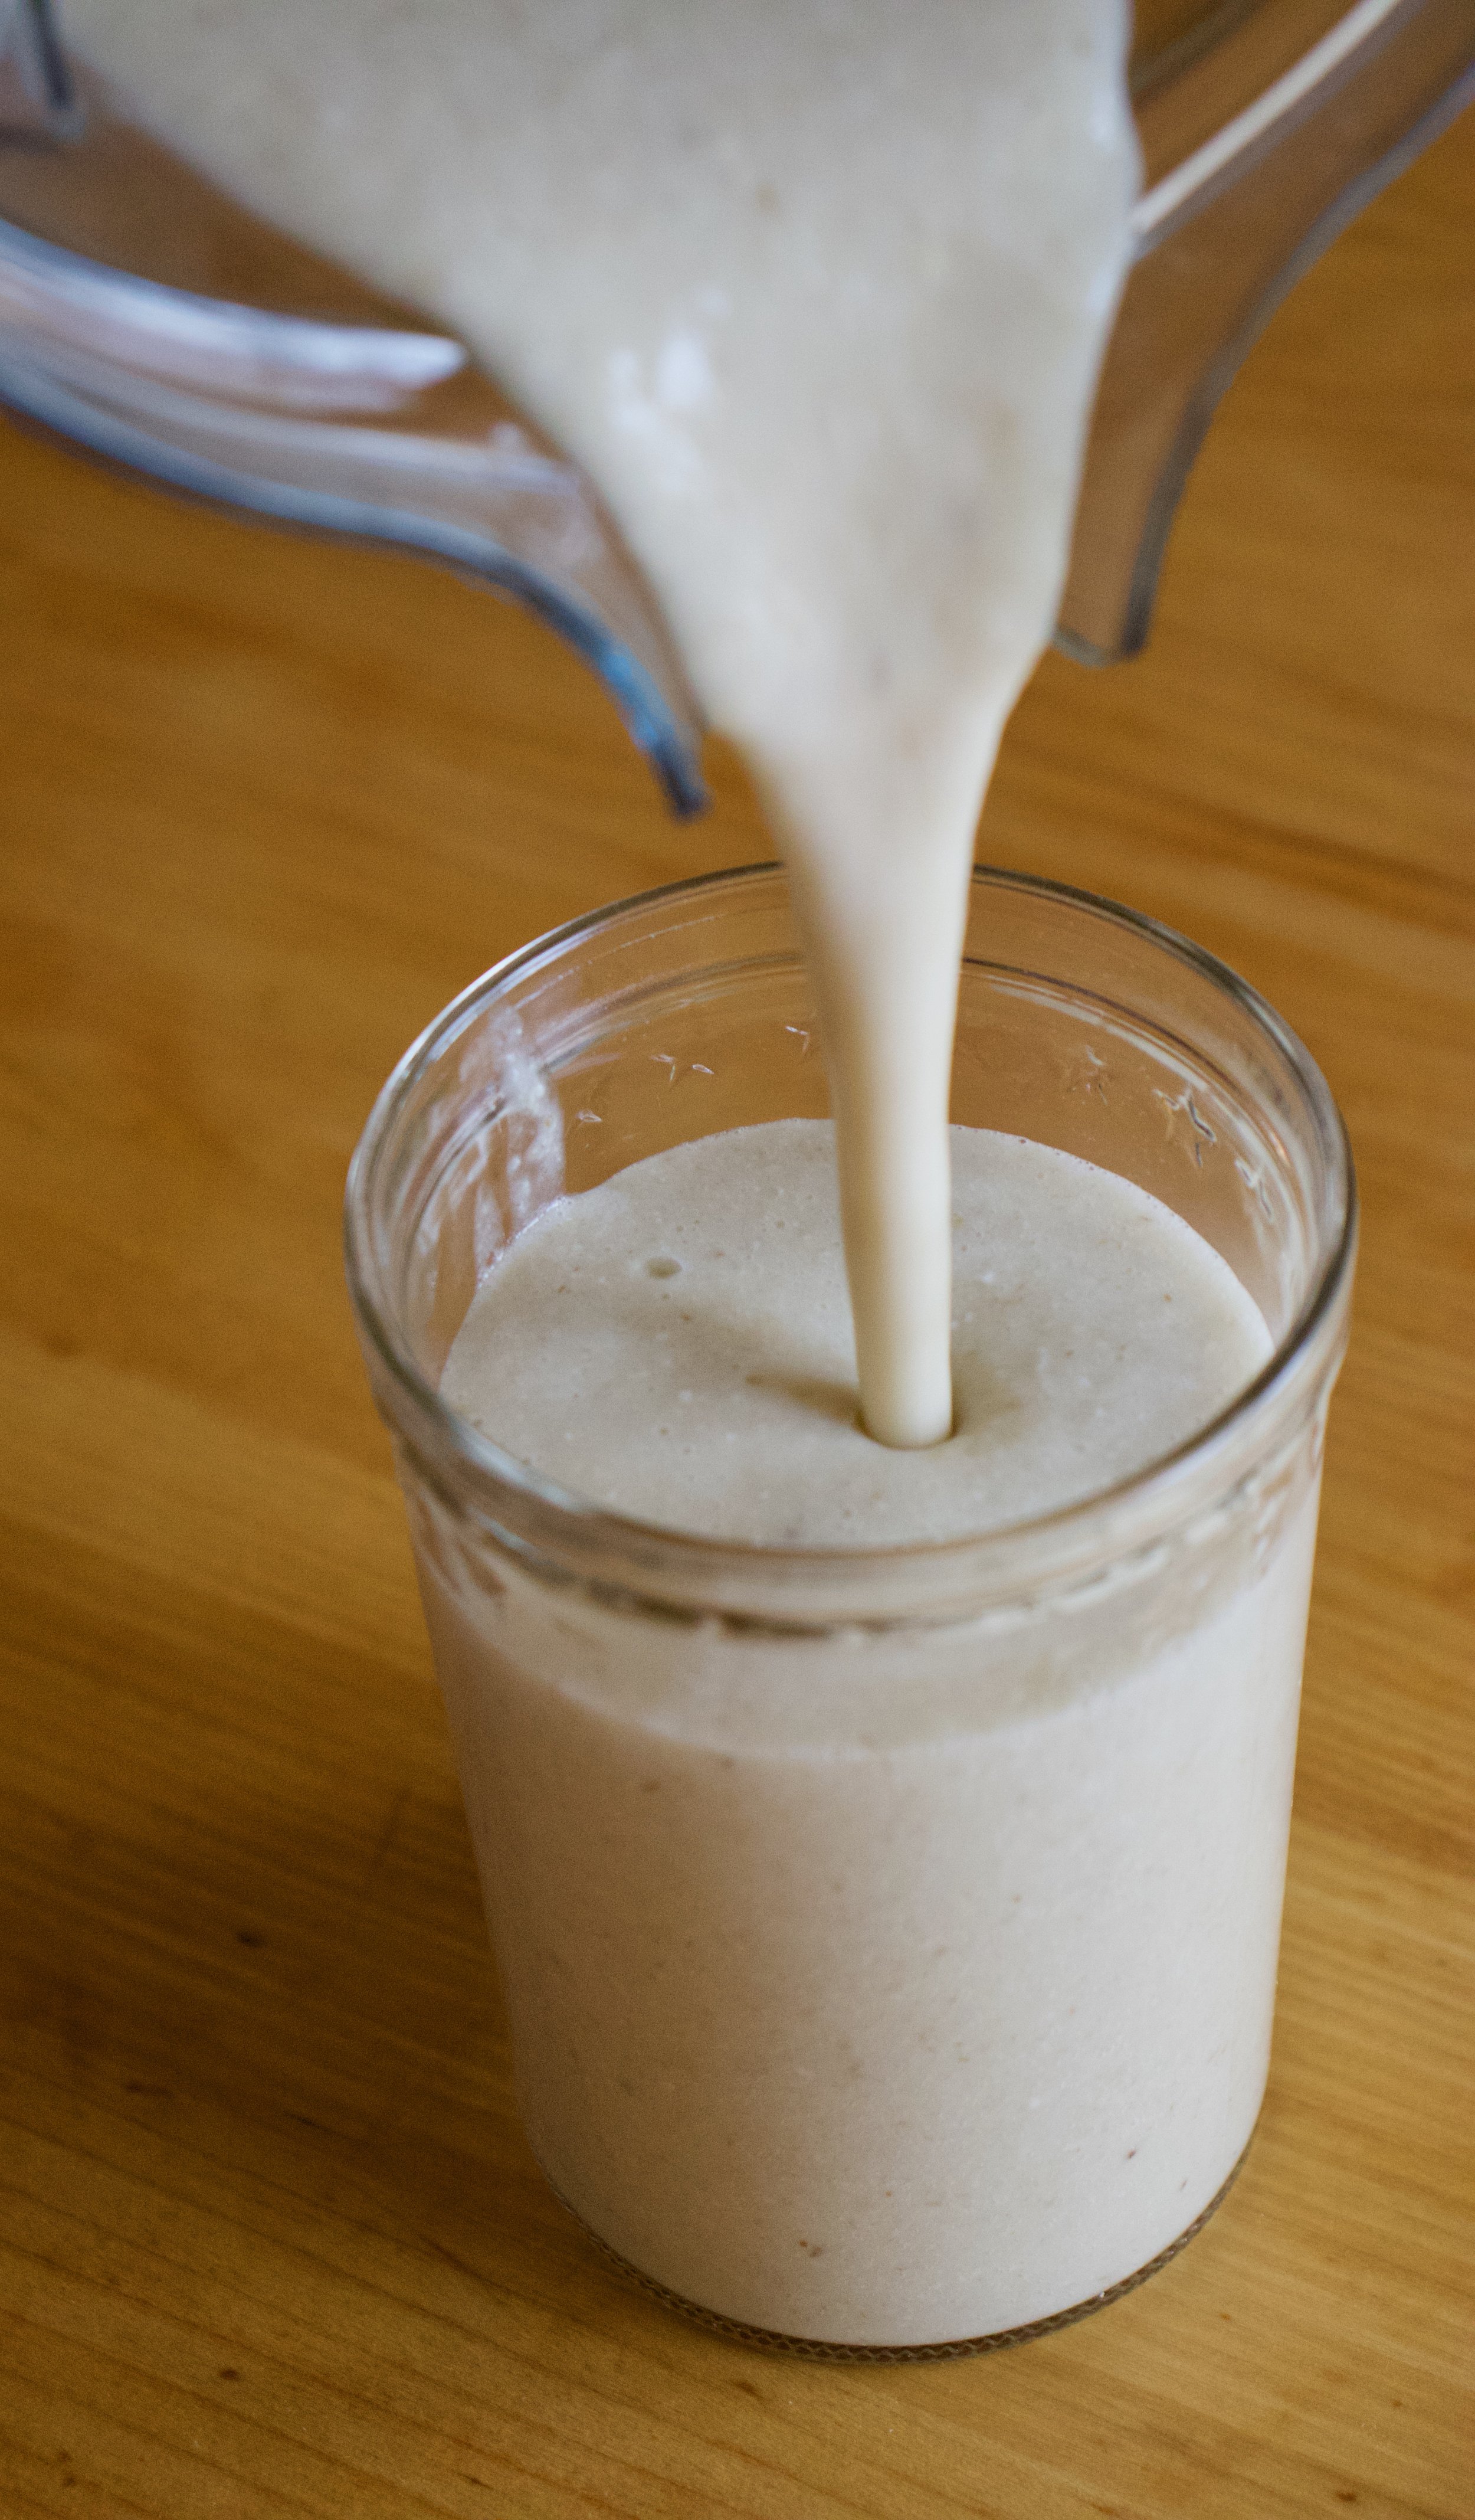
And blended until smooth. Hence the word smoothie.
Pour it into a cup (or if you are feeling primal, drink it straight from the blender%u2026 it%u2019s totally cool)
And done.
A banana oat smoothie.
Let the good time roll!
-C
makes 1 smoothie
1 very ripe banana
1/3 cup raw old fashion oats
1 1/2 cups water
pinch of salt
a tablespoon or two of any sweetener you like (optional)
a pinch of cinnamon (optional)
Place everything into a blender and blend until smooth. Pour into a cup, sprinkle with cinnamon if you wish, and drink right away.
All at once is how it goes. The garden is all star fantastic and just won’t quit.%u00a0 I find myself picking 4-6 cucumbers and the same in squash every morning. The tomatoes plant are a freaking jungle and there are so so so many tomatoes, all just about to ripen. The kale is doing it’s thing, growing big and green and I pick a few handfuls a day. And then there are all the beets and carrots and cabbage,chard, and kidney beans. It’s big, and prolific and amazing. I am much proud of myself for growing a shit load of awesomeness.
And then there is the farm share. I get all my garden stuff times 10. Tomatoes, cucumbers, zucchini, kale. Not to mention the corn, onion, carrots, and herbs and all the flowers. The food keeps on coming.%u00a0 I live in a house, with a big kitchen, with lots of counter and a full sized fridge, yet I still don’t have a place for it all. The squash overflow has now made it’s way to the dinning room. But I am not complaining.
The new rule that I have instated in the house. Every meal must contain at least two tomatoes, a cucumber, and some kale. Want a snack, grab a zucchini. You thirsty? well eat a cucumber. No joke. I get a little stressed out about how much food is around that needs to be eaten or canned, but that is good stress. I am on the lookout for a chest freezer to help with the stress. I promised myself that I would have one by now so I need to get on that asap.
Summer harvest. This is the time of year that I gain a few pounds. It’s a zucchini tomato belly for sure.
And this salad. I am a huge fan of the B.A.S (big ass salad). A big ass bowl of all the goodness from farm and garden plus some lentil protein and a little good avocado fat. Fresh and clean and delicious. Makes you feel all good when you eat it.%u00a0 So go for it. Eat yourself a B.A.S. you wont regret it.
The stuff. Cucumbers (that is a white cucumber and it’s really tasty) tomatoes, some kale, parsley, and cilantro. Also need some onion, cooked lentils, and at least half an avocado. Salt. pepper, and red wine vinegar for the finish.
Kale. parsley, and cilantro get a good rough chop and then tossed into a big ass bowl.
Cucumber, onion, and tomatoes get their turn next and chopped into mouth sized pieces. Into the bowl as well.
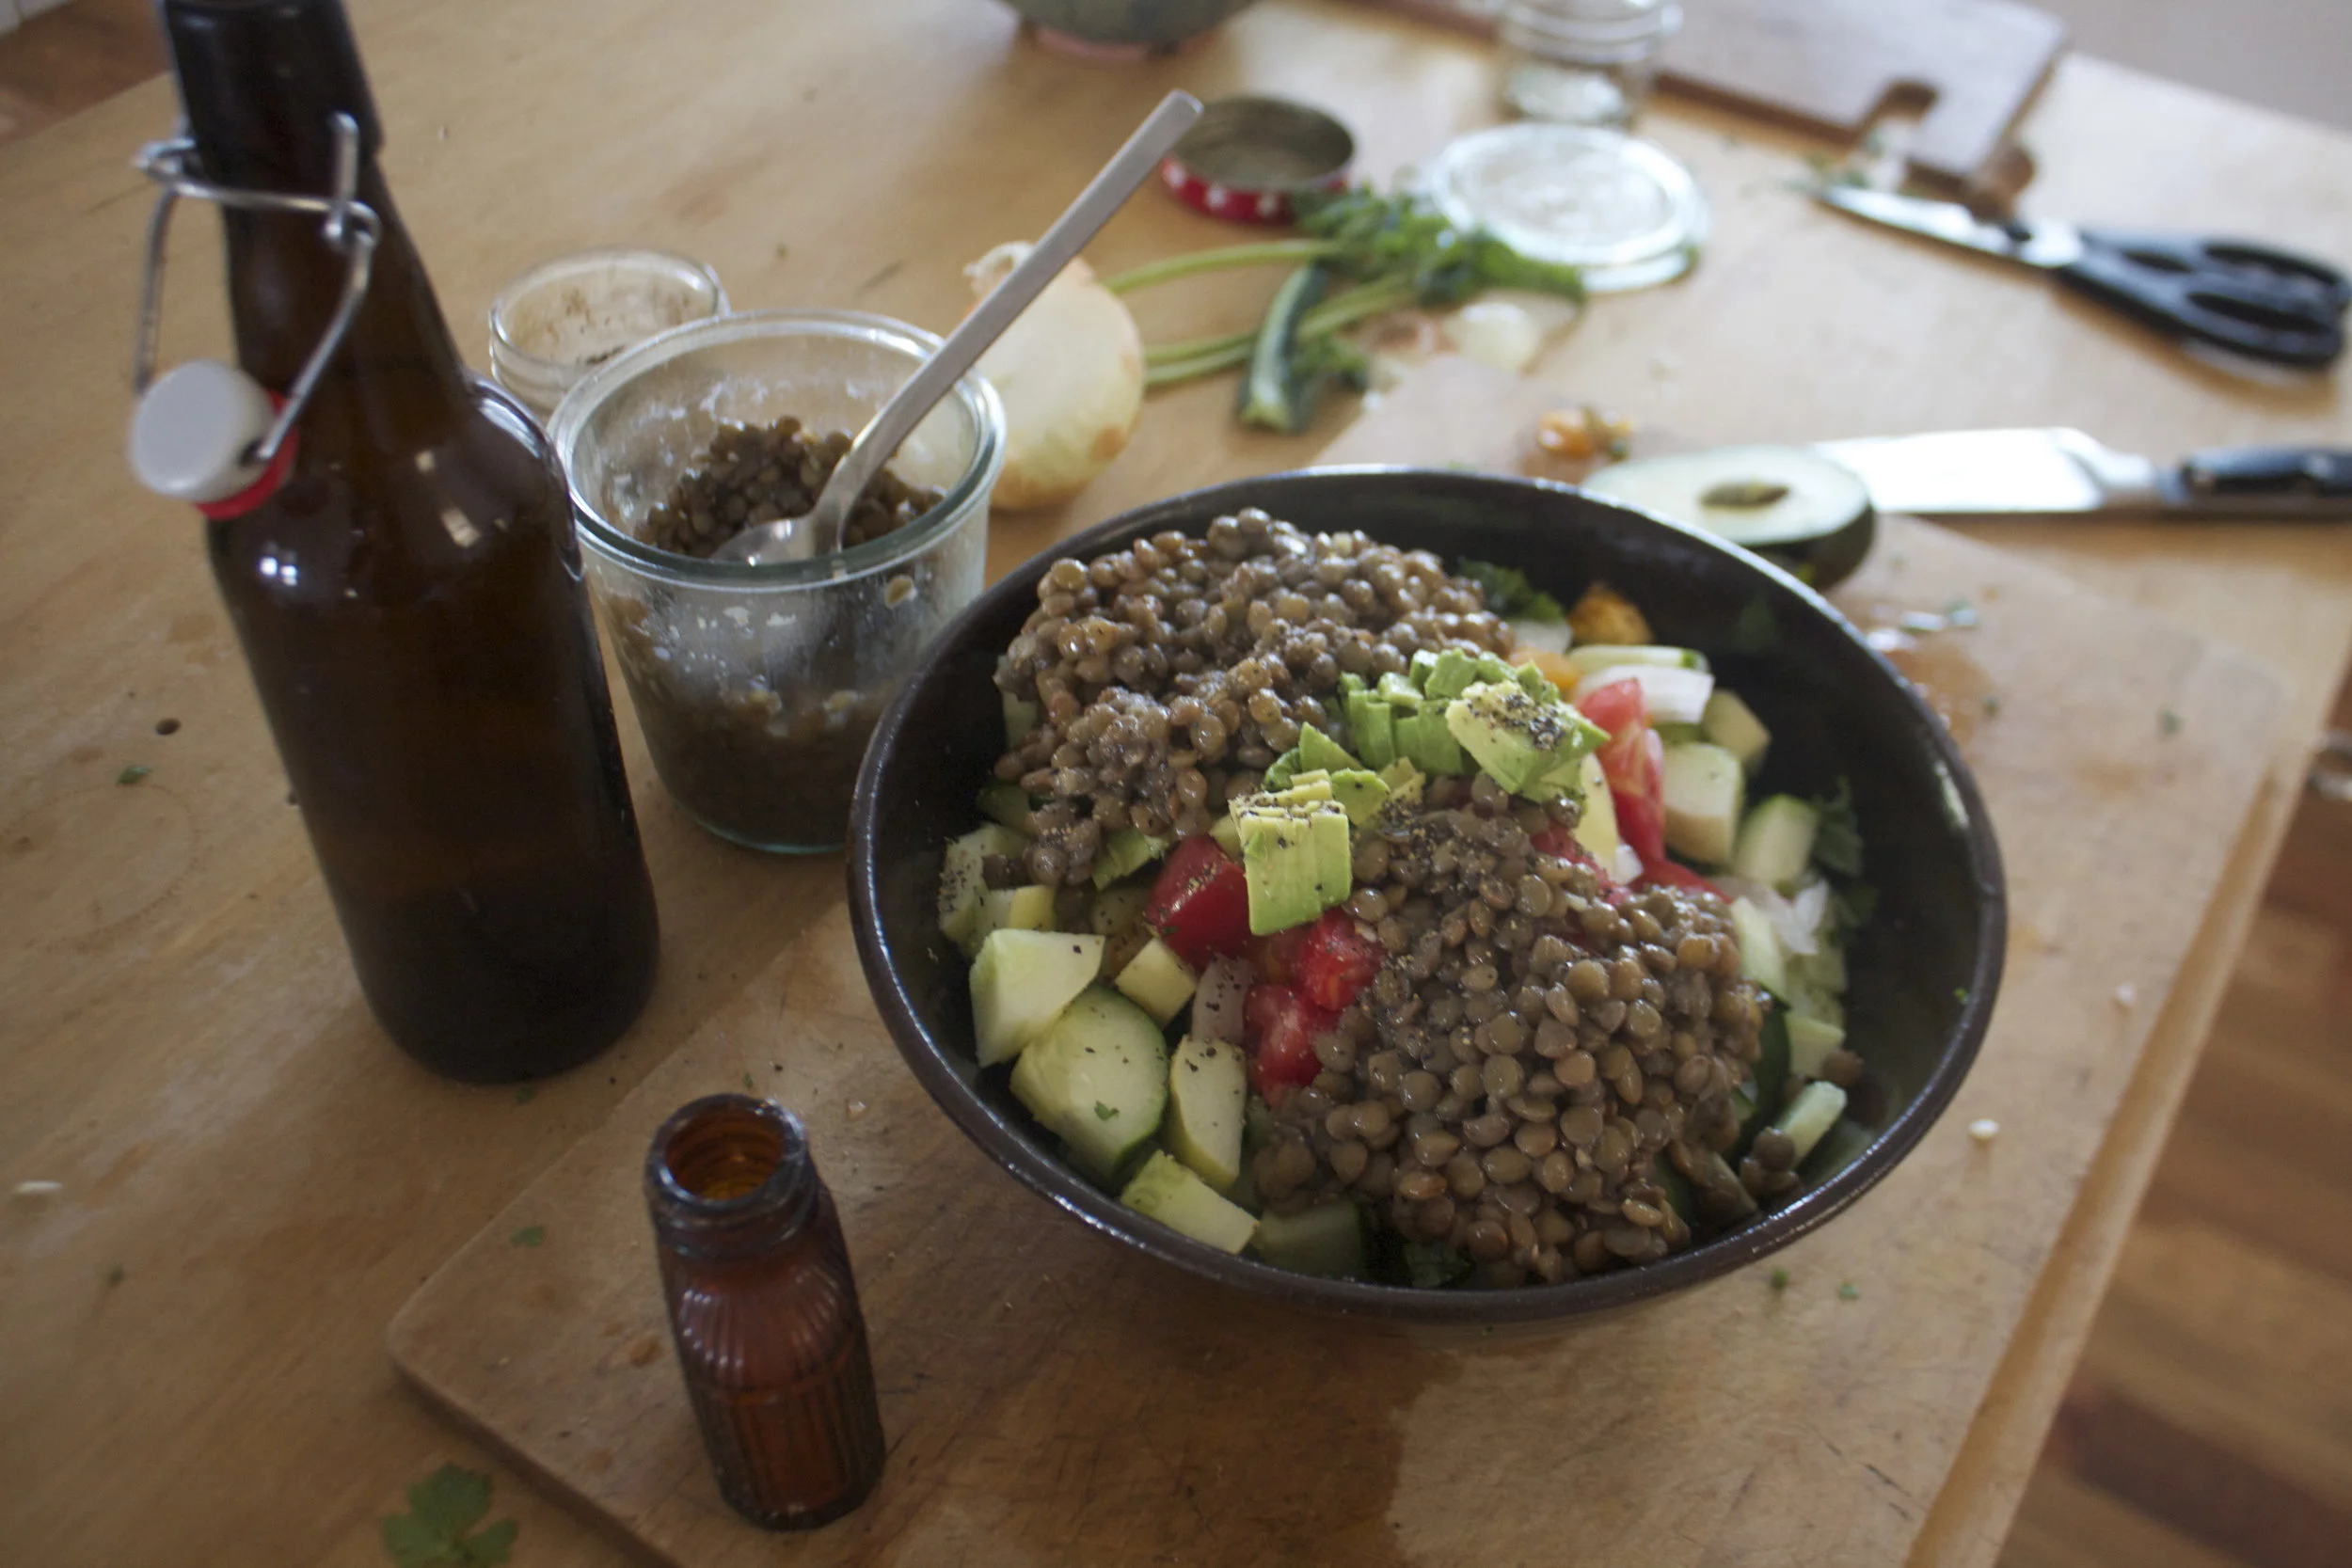
Top it all with cooked lentil, some avocado, and a glug glug of vinegar. Season with salt and pepper.
Now all you need is a fork.
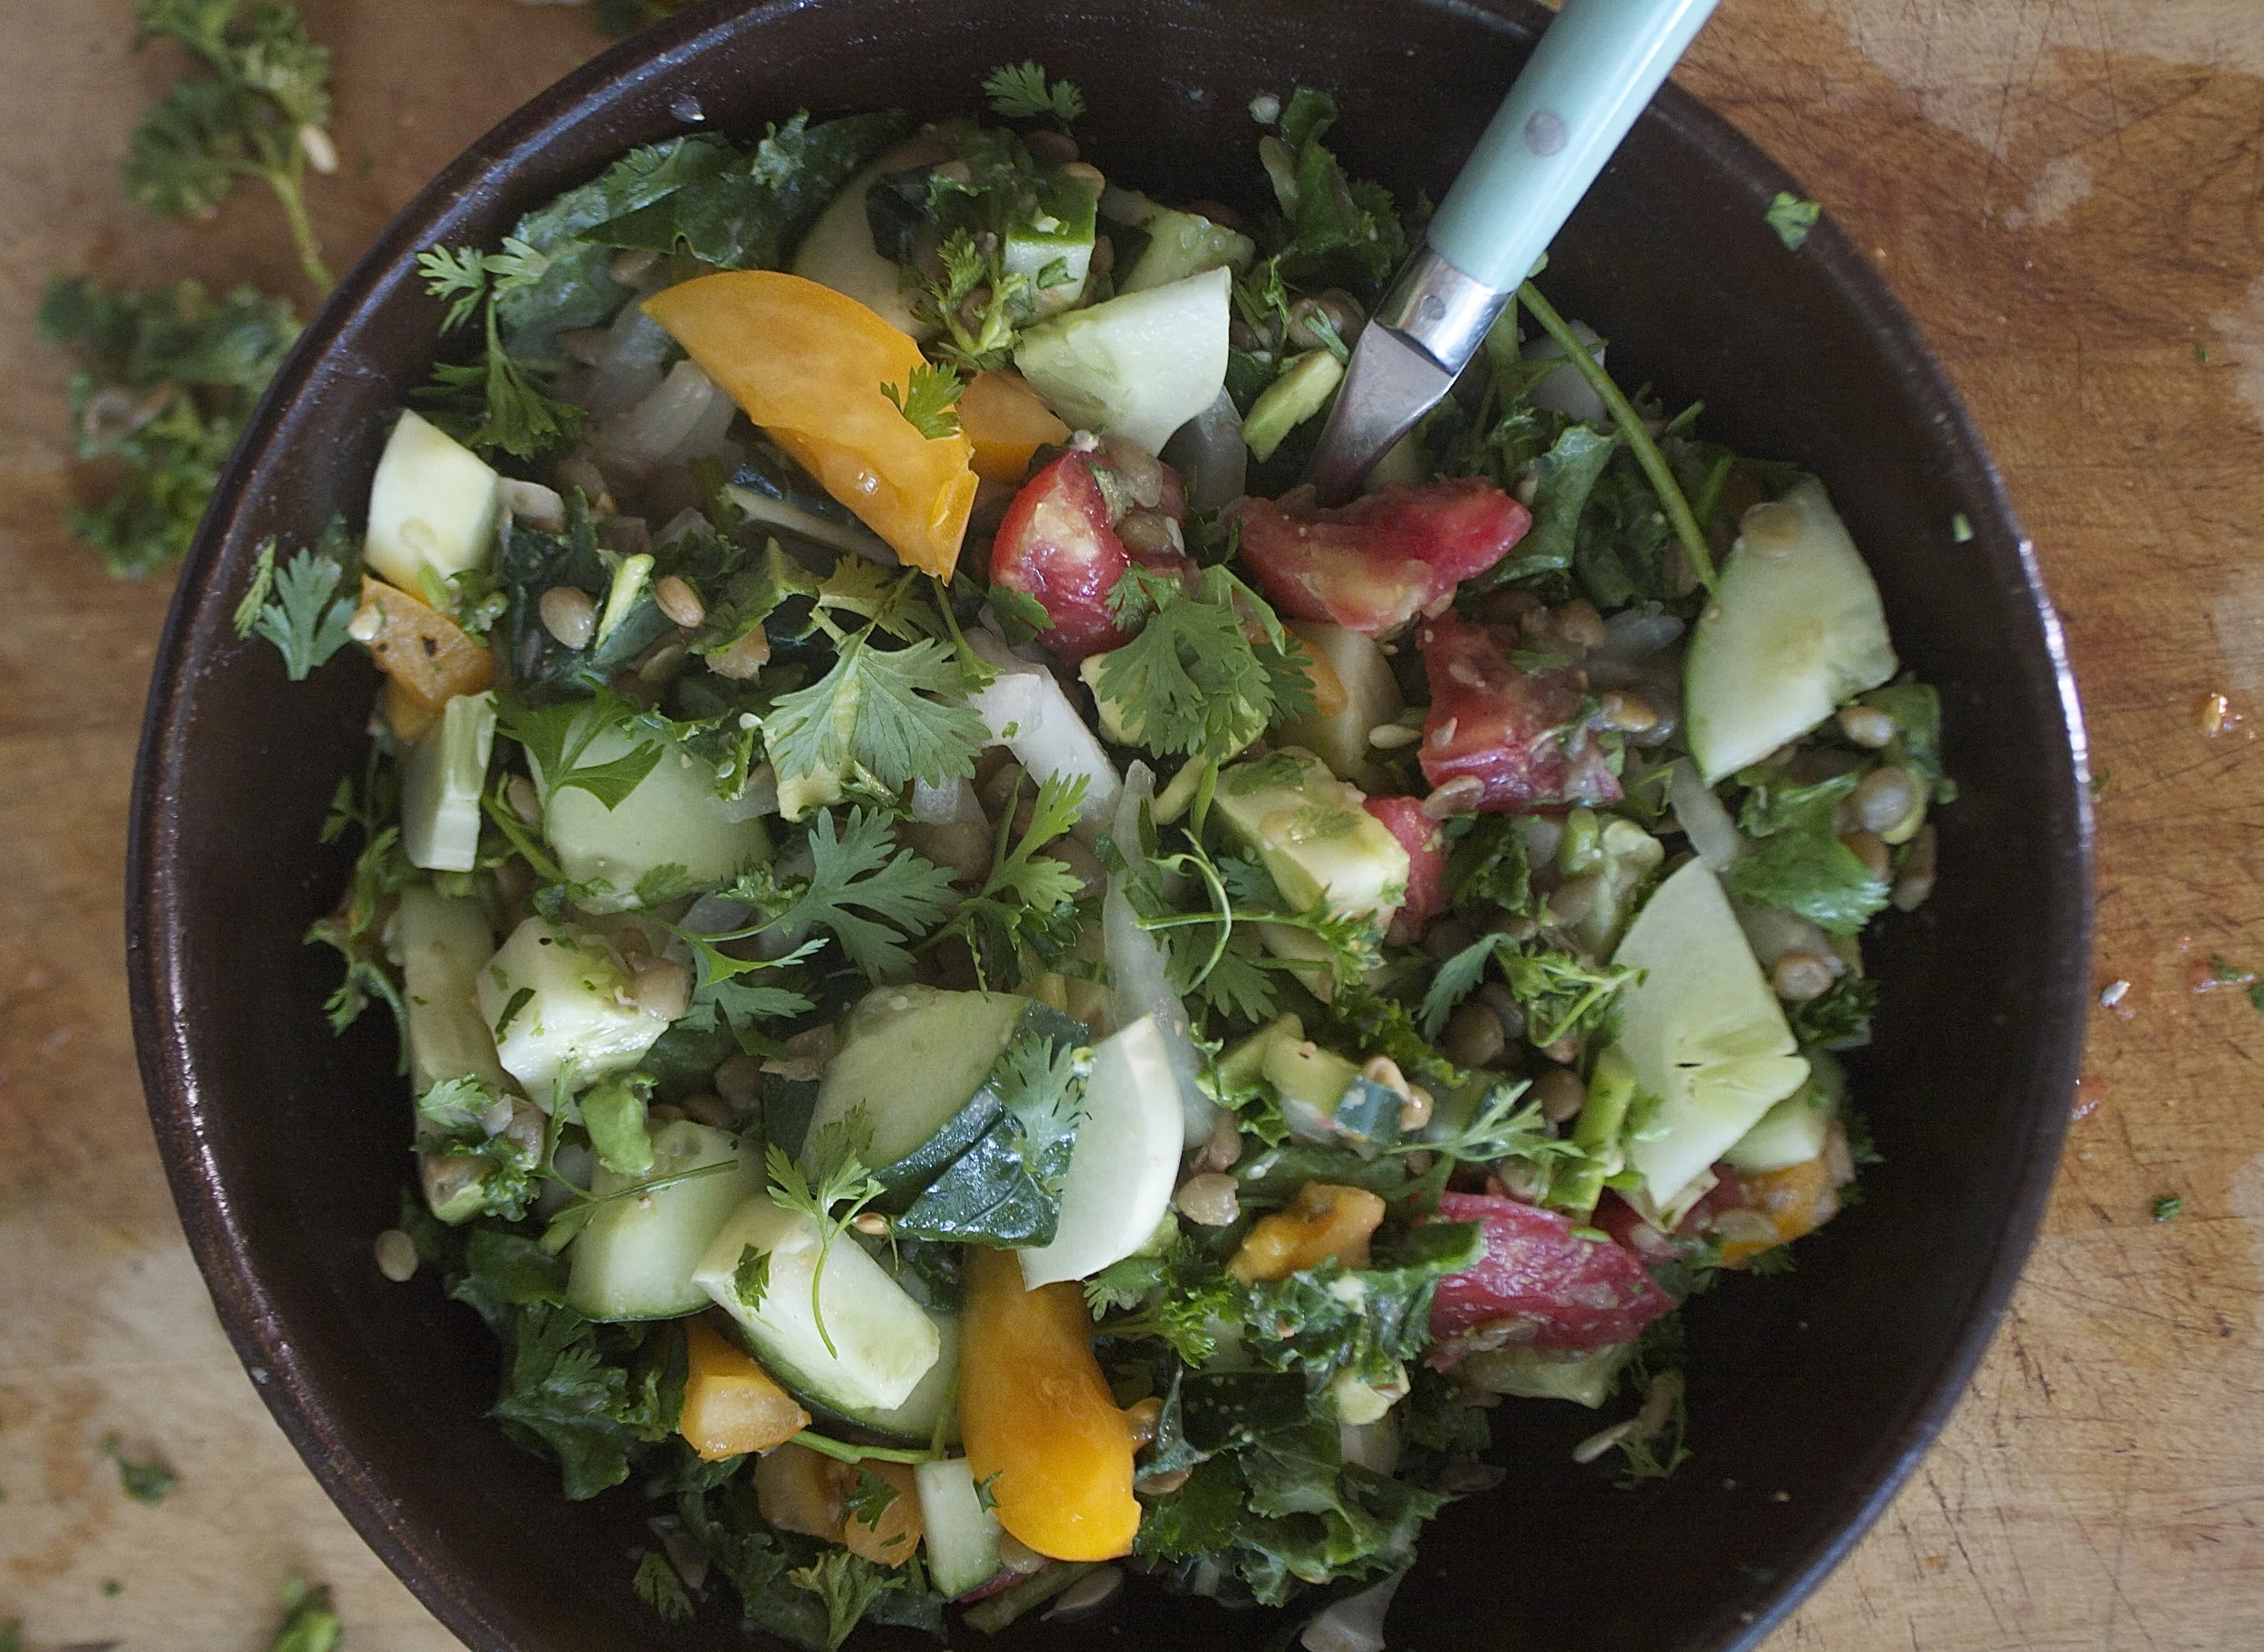
All the summertime in a bowl. Here’s to summer bellies!
-C
2 cucumbers
2 small or 1 large tomato
1/2 of an onion
1 cup cooked lentil
1/2 an avocado
3-4 large kale leaves
handful fresh cilantro
handful fresh parsley
red wine vinegar
salt and pepper
First off, grab a really big bowl. Take herbs and kale and chop into small pieces. Place in bowl. Next dice up you onion, tomato, and cucumbers into mouth sized pieces and toss those into bowl. Dump the cooked lentils on top of that and dice the avocado (I used half but you can use whole one) into little pieces and through that on too. Sprinkle with a pinch of salt and pepper and a glug (about a table spoon or two) of vinegar.
Now mix until all combines. Taste and if needed, add more salt, pepper, and/or vinegar.
Corn is the name of the game, and this game I won!
The mr doesn%u2019t much like to eat corn. But I do. And this time of year I get like 10 ears of corn every week from farm share, which is a lot of corn for one person to have to eat every week and sometimes I just can%u2019t do it. So every now and then I make something that I think the mr will tolerate, if not like, to get him to help me eat the stash of a hundred ears or corn that I have going on in the fridge.
These fritters helped me with that and I think with all the future corn that I will get from the farm. They are soooo good! The mr liked them! As for me, I couldn’t stop eating them and almost didn’t want to share because they we just so dang good. Sweet fresh corn, nutty and slightly chewy oats. Scallions. And that%u2019s pretty much it. So fresh and clean and yummy tasting. A summertime fritter situation that takes corn to a place where even the corn hater likes it.
Although who the hell hates corn? I know one person. One. And I live with him. Weirdo.
Anyway, to the fritters!
The stuff. Fresh sweet corn, old fashion rolled oats, and a few scallion. Also some ground flax seed, water, baking powder, salt and pepper, and a little oil.
Start with oats. Add most of what we need to a blender and blend until it becomes oat flour.
Then the corn. Remove the kernels from the cobs. Best way is to hold corn in a large bowl and cut downward. Don%u2019t want corn flying all over the place!
Add most of the corn you just cut off the cob to the blender with the oat flour, along with with flax and water. Blend until smooth.
Chop the scallions into thin and tiny pieces.
Now dump the contents of the blender into a bowl, add in the scallions, the baking powder, and the extra oats and corn. Mix it all up and then let the batter rest for a few minutes (like 10) so the oats have a chance to really absorb all the liquid.
And then to cook them. Heat a lightly oiled skillet to medium high heat. Once skillet is hot, drop scoops of batter into it. Cook for 3-4 minutes or until the bottom is a nice deep golden brown. Flip and cook the other side the same.
When fritters are done cooking, place them on a wire rack. So they don%u2019t get soggy.
And then serve them right away. I ate mine with fresh salsa. Definitely the way to go. So GOOD!
Now eat your corn.
-C
makes about 12 fritters
3 ears fresh corn ( about 1 1/2 cups of kernels)
1 1/2 cups rolled oats (gluten free if needed)
1/2 teaspoon baking powder
2-3 scallions
1 tablespoon flax meal
3 tablespoons water
salt and pepper
a little oil for skillet
Combine water and flax meal, mix and set aside.
Place 1 cup of oats into blender or food processor and blend for about a minutes or until the oats are a fine flour.
Grab corn and remove from cob. Best way to do this is to place corn vertically in a big bowl and cut downwards so the bowl catches all the kernels. Cut enough corn until you have about 1 1/2 cups of kernels. Also, garb scallions and chop into very small, thin pieces.
Add in a cup of the corn, the flax and water mixture, baking powder, and a pinch of salt and pepper. Pulse or blend until completely combined and the mixture is mostly smooth.. Dump mixture into a bowl and add in the remaining corn, chopped scallions, and oats and mix together. The mixture should not be runny, but also should not be dry enough to pack together. If the mixture seems too dry and tight, add in a tablespoon or two more or water. To wet, add in a small handful of oats.
Once batter is mixed, set aside for about 10 minutes to rest.
Grab skillet and place on medium high heat. Add a touch of oil to pan and make sure it evenly coats the bottom. Once pan is preheated, add scoops batter into pan (about 2 tablespoons each). Cook first side for about 3-4 minutes or until dark golden brown, then flip and cook the other sides for another 2-3 minutes until a dark golden brown. Remove from pan and either place on a wire rack or a plate. ( I recommend a wire rack just to keep them from getting soggy.)
Serve right away. Fresh salsa goes amazingly with them!
Any left overs can be stored in fridge and reheated in the oven.
Salad season is here. Green salads, fruit salads, potato salads, and grain salads. All the salads and we are not mad about it.
This is a good grain salad using millet, which I am sightly surprised to hear that a lot of people have never had. Millet is kind of like quinoa, but not. I cooks fluffy and looks kind of the same, and is gluten free like quinoa. I think the biggest difference is that millet is slightly softer and tastes a bit more nutty. It also is really good at absorbing liquid flavors.
But who are we to compare. The main thing is that it is nutritious and delicious so we will eat it.
Back to the salad. This is one of those grain salads that is good cooked and served warm but only gets better with a little age (like an hour or a day) in the fridge. Served hot or cold or room tempature, and is hearty enough to be meal like but is also a fantastic addition as a side to any of you meal plans. Like maybe a BBQ? Whatever the occasion, or non occasion, this is just a really good grain salad situation and I think you will be pleased, smiling all smiles while eating it.
To the millet salad.
The stuff. Millet, a couple handful of greens, a few mushrooms, an onion, dijon mustard, a little maple syrup, red wine vinegar, a lemon, a couple cloves or garlic, some toasted sunflower seeds, and salt and pepper.
Start by giving the millet a little toast, just enough to really up the nutty flavor and make it that much more yummy. It only takes a few minutes in a skillet on medium heat. Not an entirely necessary step, but you should do it.
Toasted millet goes into pot with water. Bring pot to a boil and then turn to the lowest simmer and cover.
While millet is cooking, get to the mushrooms and onions. Chop the onion thin and small and the mushrooms thin and small as well. Place them into the skillet with a drizzle of oil and place on medium heat. Mix around every now and then and cook until the mushrooms and onions are soft and a nice golden brown.
And make the vinaigrette. Minced garlic, mustard, vinegar, the juice of the lemon, and maple syrup get put into one place.
Mixed and now all is one.
Millet. Cooked and fluffed and ready to go.
Cooked mushrooms and onions go into the pot, along with the greens, the sunflower seed, and the vinaigrette. This step can be right away or you can wait a little while for things to cool as to not wilt the greens. Up tp you.
Mixed with love and hunger.
Even if you are making it ahead of time, just do yourself a favor. Grab a bowl, grab a fork, and get down on it.
-C
Seves 4-6
3/4 cup uncooked millet
2 cups water
1 sweet onion
3-4 big button mushrooms
Large handful or two of bitter greens like arugula, spinach or a mixture.
2 tablespoon brown or dijon mustard
2 tablespoon red wine vinegar
1 teaspoon maple syrup
2 cloves garlic
salt and pepper
handful toasted sunflower seeds
To start, toast millet. Dump the uncooked millet into a pan and place on a medium heat tt for about 5 minutes or until you start hearing the millet crackle.This gives the millet a slightly more nutty flavor but you can skip this step if you don%u2019t care.
Dump millet and water into medium pot. Place on high heat until water starts to boil then tun heat down to simmer and over. After about 15 or 20 minutes, when most of the water is gone, turn pot completely off. Let sit, covered for another 10ish minutes then take a fork and fluff it.
While the millet is cooking, cook the veggies. Grab the onion and slice it up into thin pieces. Clean off the mushrooms and chop them into small thin pieces too. Place the chopped stuff into the skillet with a drizzle of olive oil and a pinch of salt and place on a medium heat. Stir occasionally and cook for about 15 minutes or until the onion and mushroom are a nice dark, golden brown.
And make the mustard vinaigrette. Mince garlic and place into a jar or bowl with the vinegar, the mustard, the maple, and the juice of the lemon. Mix and set aside.
Once the millet is cooked, the mushrooms and onions are cooked, and the vinaigrette is made, all you have left to do is mix everything together. You can do this while things are slightly warm which will wilt the greens a bit, o let them cool so the greens stay fresh. Up to you. (I like the greens fresh)
Finally, dump cooked mushrooms and onions into pot with cooked millet. Add in the greens and sunflower seeds and drizzle the vinegertte all over. Toss around until fully mixed. Sprinkle with lots of fresh cracked pepper.
Then eat. Or place in a container to bring to the BBQ.
I am sadly at my last few bags of frozen garden foods from last season. As of now I have a bag of tomatoes, a couple bags of shredded zucchini, and a bag of rhubarb. Well, had a bag of rhubarb. I think I have eaten almost all of it already. My rhubarb patch better get up and producing stalks soon. And as for the rest of the veggies that I will require. Guess I am going to be surviving mostly on roots from farm share (we are getting a lot more greens though!!!!) and probably doing a bit more grocery shopping then I care too. A few more months. I can do it.
Anyway, enough about my freezer and lack of fresh produce problems.
Here in Vermont maple season is well on it%u2019s way making it a perfect time for anything maple. And rhubarb. Yeah I am using my frozen rhubarb from last year, but any time now (after the snow melts) there will be plenty of stalks for the taking. There will be so much maple and so much fresh rhubarb which are the perfect taste combination. Exciting times! And when added to oatmeal, things just get more gooder. (I know gooder is not a word but I think it should be) Oatmeal, especially baked, is the stuff where all gooder things start.
Have you had baked oatmeal yet? It truly is fantastic. Not at all gummy and gloopy like stove topped cooked oatmeal (but I like it like that too). It still has a good bite to it while still being soft and creamy and boy oh boy is it just the bees knees. With the addition of some crunchy almond friends, well even better. Trust me. If you are a oatmeal eater, you must try it baked. Best part is that it can be eaten as breakfast but also I have been serving it to the mr for dessert with a healthy drizzle of more maple. It%u2019s that good friends. From breakfast to dessert. Everyone is happy.
To the baked oatmeal.
The stuff. Old fashion oats, cinnamon, salt, baking powder, rhubarb (fresh or frozen), REAL maple syrup, some plant milk, a few flax eggs, a bit of tahini, and some almonds.
To start. Oats, cinnamon. salt, baking powder and almonds get a quick toss together in a big bowl.
If you rhubarb is not already chopped up into inch long pieces, do that. I already did before freezing it so yea me. Once its chopped, layer almost all of it (reserve a few small needful to toss on top) into a lightly greased 9×9 inch baking dish then cover evenly with the oat mixture.
In now empty bowl mix together the milk, the flax eggs, the tahini, and the maple until evenly incorporated.
Pour the wet mixture all over the oats and let it absorb.
Once the liquid is all absorbed , top with any left over almonds and the left over rhubarb. For good looks.
Pop into a hot oven to bake.
Golden brown with crispy edges. Rhubarb and maple baked oatmeal for all your maple, oaty and rhubarbie needs.
Fresh from the oven scooped warm into bowls. Top with extra maple if thats what you should want do.
Enjoy and happy maple season!
-C
Make a 9×9 pan of oatmeal
2 1/2 cups old fashion oats (make sure gluten free if need be)
2 1/2 cups fresh or frozen rhubarb chopped into inch long pieces
1 1/2 cup plant milk (water works but it won%u2019t be as creamy)
1/2 cup chopped almonds (optional)
Preheat oven to 375
Lightly grease a 9×9 inch baking pan (I used metal because it makes for crisper edges but glass works too) and dump 2 cups of the rhubarb in and evenly distribute on the bottom. In a large bowl mis the oats, the baking powder, salt, and cinnamon together. Mix in chopped nuts if you are using. Evenly cover rhubarb with oat mixture. In now empty bowl mix together the milk, flax eggs, maple syrup, and tahini until evenly incorporated. Pour mixture over oats. Let the mixture sit for a few minutes until the oats have abosbed all the liquid. Toss the rest of the diced rhubarb and a few more chop nuts to the top and pop into the oven to bake.
Bake for 30-40 minutes (shorter time for a wetter oatmeal, longer for a denser crispier oatmeal)
Once baked to your likeness, remove from oven and let cool for a few minutes just so it is not super hot. Scoop into bowls and serve warm with extra maple and milk or whatever you might want to serve with it.
Left overs last great in fridge for 3-4 days or individual portions can be frozen for a month or two. Just pop into microwave for a couple minutes to warm up.
Roasted veggies of any kind can get this girl in trouble. Place a sheet pan meant for many full of roasted veggies and watch out, I will probably eat them all. I can%u2019t stop, won%u2019t stop and you know what, I am not sorry, especially if its roasted brussel sprouts and squash.l I am grabbing at every last bit, especially all the really crispy, almost burnt pieces. Burnt food is one of my favorite flavors.
This dish is pretty basic, but also not. A slightly overlooked grain, spelt, makes for a hearty backdrop to the magic of roasted sprouts and squash, covered with a sunflower butter sauce which is a nice spin on a traditional peanut sauce. It%u2019s pretty easy to make and pretty to look at as well. A nice hearty and warming meal for all of those cold winter nights. And it%u2019s not going to make you feel heavy or gross, like if you sat and ate an entire lasagna. No, you will feel full and fantastic and ready for a cookie (it is the holidays after all).
The ingredients in this dish are mainly inspired by the half eaten jar of sunflower butter a friend of mine gave me at the gym, plus the fact that I have been getting a few stocks of brussel sprouts each week at farm share so we are eating them at ever meal, (plus I LOVE brussel sprouts) and me trying to use up all of the grains and such in the pantry before restocking anything more or new. A dish of convenience sure, but also a damn delicious one at that. With this being said, if you had a different grain you wanted to use, or an abundance of some other veggies that you have or prefer, well go ahead and use them. You do you my friend.
And really, I was thinking of you when I made this dish. Sometimes at this time of year people tend to forget to eat, or tend to eat on the not so healthy side. This grain bowl situation is just what your body is in need of. Simple delicious nourishment.
The stuff. Spelt that has been soaking in water for a while, half a butternut squash, brussel sprouts, a red onion. Also sunflower butter, a few cloves garlic, a lime, soy sauce, a touch of maple, salt and pepper, and olive oil.
The spelt will probably take the longest so get it on the stove. Strain away the soaking water and place into with fresh water. Bring to boil then reduce heat to a simmer. Place a lid on pot ans let it go.
Next, get to the veggies. Halve the big sprouts (small ones can stay whole) chop onion into chunks and cube the squash.
A drizzle of oil, a sprinkle of salt and pepper, and a good toss around and it ready for the oven.
Meanwhile, make the sunflower butter sauce. Its pretty basic. The sunflower butter, minced garlic, soy, maple, and juice of the lime all into a vessel that can hold it. Add a couple tablespoons of warm water to thin it out and done. Sunflower butter sauce. Easy Peasy.
After about an hour, your slept should be cooked (that sounds aggressive to me) Tender and chewy and just right.
The veggies should be roasted and done too. Crisp as you like ( I actually like mine even darker, but the mr does not so I went a light roast this time)
And it%u2019s all ready for you to eat.
Roasted butternut squash and brussel sprouts on a warm bed of spelt covered in sunflower butter sauce. Living the good life here.
Take care of yourself this week, and always for that matter. Eat some good food. Your body will be happy for it.
Bye.
-C
Serves 2-3
1 cup spelt berries (soaked in water overnight if you remember)
3 cups water
about 1/2 of a butternut squash
about a pound of Brussel sprouts
a medium red onion
1/4 cup sunflower seed butter (unsalted and unsweetened)
2 tablespoons liquid amionos or soy
1 teaspoon maple or honey
1 lime
2 cloves garlic
salt and pepper
olive oil
Preheat oven to 425
Place soaked spelt berries in a pot with water and a pinch of salt. Bring a boil then reduce heat, place a lid on pot and simmer for 45 minutes to an hour or until spelt berries are tender and all the water has been absorbed.
While spelt is cooking, cut sprouts in half (unless they are very small), cube the butternut into pieces about an inch big, and chop the onion up into chunks. Place all that you just chopped onto a baking sheet, drizzle with a teaspoon or two of olive oil and toss around. Sprinkle the veggies with a pinch or so of salt and pepper and pop into the hot oven. Roast for 40-45 minutes or until roasted to your desired doneness. (I like things a lot darker then the mr so I would leave my veggies in for closer to an hour)
For the sunflower butter sauce. Mince garlic and place into bowl or cup with the sunflower butter. Add in the maple, soy, and the juice of the lime. Mix together and add in a 2 tablespoons of warm water to thin out. Add more water if needed to get to a thick but pourable consistency.
Once the spelt is cooked, the veggies are roasted and the sauce is made, well you can assemble and eat. Spelt in a bowl, toss on some roasted veggies, and cover in the sauce. And then you eat it.
I feel like this salad is kind of a summery salad, or better yet, a salad that highlights all the best of what summer has to bring. All the fresh tender dill that is still growing (but not for long) , all the brightly colored and amazing veggies that are being harvested and are nearing the end (bye fresh cucumbers.) This salad might just be my little last hurrah of summer cooking before it is all root veggies and dried herbs and hot and hearty food. And not going to lie and say that I am sad to see summer go because I am so so ready for it to be over, but I will miss all the fresh fresh produce. And I will especially miss all the fresh dill because fresh dill is seriously the best.
Eat up what is left of summer now before it%u2019s too late!
The stuff. Quinoa, a bunch of dill, a cucumber, a pepper, an onion, and some cherry tomatoes. Also a clove of garlic, some salt and pepper, and red wine vinegar.
Mince the garlic, chop the onion, mince the pepper and the cucumber, half the tomatoes, and last but noblest, rough chop the dill.
All that goodness goes into. big bow, along with a sprinkle of salt and pepper, and the vinegar Tossed around and left to meld.
Uncooked quinoa with water turns to cooked quinoa
Quinoa meets the bowl of veggies
And after a good mix, viola!
You got yourself a yummers fresh dill and veggie quinoa salad.
-C
serves 3-5 as a side or 2 as a meal
1 cup uncooked quinoa
2 cups water
I bunch fresh dill (like a 1/3 cup chopped%u2026 But use as much as you want)
1/2 a small red onion
1 clove garlic
1 small Persian cucumer
1/2 of a sweet red or yellow pepper
handful or two of cherry tomatoes
4 tablespoons red wine vinegar
salt and pepper to taste
Start by cooking the quinoa. Place the water and the uncooked quinoa into a medium sized pot. Place on high heat until sorts to boil, then reduce heat to a simmer and place lid on the pot. Let cook for about 15 minutes, checking at 10 minutes, to see if all the water has absorbed. When it has, remove from heat and let sit for a few more minutes then fluff with a fork.
While the quinoa id cooking, mince the garlic and chop all the veggies into small little pieces. Place into a big bowl. Chop up the fresh dill and toss into bowl too, along with the vinegar and a good sprinkle of salt and pepper. Mix it all around and let sit on the counter for a little so the veggies get nice and vinegary. Once quinoa is cooked and fluffed, dump into the bowl and mix around. Season with more salt and pepper if needed. Eat warm or refrigerate and eat cold. It%u2019s defiantly one of those salads that taste great right away but tastes even better the next day.
I am one of those people that hangs out for far to long in the grocery store, mostly in the bulk section, looking al all the types of rice, and grains, and beans, and seeds, admiring the variety and colors and also wishing I was one of those people that had an extra $25 to drop on a pound of pistachios.%u00a0%u00a0(Them were some pricey pistachios fo sho.) I take my time, peruse the bins, maybe take a little taste or two, %u00a0and go for what I need. And maybe if something is on sale, get a little of that too. Things that usually make the list are spices,%u00a0oats, beans, maybe rice or quinoa, flours, and seeds. Pumpkin seeds were on sale so those were the seeds of choice and I also got some barely because when I was starting at all the grains,%u00a0it dawned on me that I don’t know many people that eat barley, or even care about it, which is a shame because it is awesome. It might not be trendy like farro or freekeh, but it is just as good, and damn if it is not a hell of a lot cheaper.%u00a0
With the barley and pumpkins seed in hand, I had the start of a salad. So I grabbed some oats, a few spices, some beans and ran away from the builk section, past the nuts before things got bad and I either a) got kicked out for eating my weight in cashews and almonds,%u00a0pretending to just need a taste, or b) paid the $25 for a pound of pistachios that I might not eat because I would need to save them for something really special because they cost $25 a pound. Then I grabbed veggies, walked around the wellness section for good measure, did another lap around the store just in case I forgot something, then finally made my way out of the store only to realize when I got home that I forgot something. (I always forget something)%u00a0
But I had all I needed for a barley salad situation so things went well. This is a fantastic salad. It’s quick and easy and tasty and good. Barley, tahini, veggies and pumpkin seeds… It’s all you need for a just right dinner, or a fantastic side to any meal. Or as a snack at anytime. Bring it to a BBQ, a graduation party, or a pot luck. it will get eaten, and if by chance you end up with a little left over, bring it on home and eat it for breakfast. It will still be just as good.%u00a0%u00a0
The stuff. Pearled barley, tahini, pumpkin seeds and garlic. And some red wine vinegar, salt and pepper, kale, a carrot, some cauliflower, a lemon, a red onion, and a cucumber. (you are not going to need the full amount of all these veggies)%u00a0
First off, cook the barley. The barley and water go into a pot, brought to a boil, then left on low %u00a0to cook until tender. Once cooked, strain away excess water
While barley is cooking (or is cooked) chop up the veggies into mouth sized pieces. I used half the cucumber, half the onion, some of the cauliflower, all the kale, and all the carrot. It’s not an exact measurement, you just want a good amount to toss into the salad.%u00a0
Barley in bowl, topped with the veggies and pumpkin seeds…. The pretty before the mix. You don’t need to add it like this, I just did it cause it looks good.
And the tahini sauce. Mince garlic and add to a jar or bowl with the juice of the lemon, vinegar, a pinch of salt and pepper and give it a really good mix.
Creamy, zippy, oh so good.%u00a0
Drizzle and toss the dressing with the barley and veggies.
And that’s that. Now you are ready for eating.%u00a0
Enjoy wherever this salad takes you.%u00a0
-C
If eaten as a meal, serves 2-3. As a side dish, serves 6-8
1 cup pearl barley%u00a0
3 cups water
1/4 cup tahini%u00a0
1 large lemon%u00a0
3 tablespoons red wine vinegar
2 cloves garlic
salt and pepper
1/2 of a cucumber%u00a0
1 small carrot
2 large kale leaves
1/2 of a red onion
1 cup of cauliflower florets%u00a0
1/4 cup toasted pumpkin seeds
Note. The vegetable amount and type is more of a preference. You could use all cucumber and onion or add %u00a0broccoli and pepper, just make sure to have a least 3 good cups of some chopped up color.%u00a0
Place barley and water into a pot and bring to a boil. Turn heat down to low and continue to cook until barley is tender, but not mushy, which should take about 45 minutes. Once cooked, strain excess water.
While the barley is cooking, chop all the veggies into small mouth sized pieces.%u00a0%u00a0And make the tahini sauce. Mince garlic and place in a bowl or jar. Add in tahini, the juice of the lemon, and the vinegar. Mix well until smooth then season with salt and pepper to taste. %u00a0
When barley is cooked and drained, let cool for a few minutes then place in a big bowl. Add in all the veggies and the toasted pumpkin seeds, then drizzle with the tahini sauce and toss all around. Season with salt and pepper to taste..%u00a0
Now eat still warm, or later at room renature, or place in fridge for it to get cold. It can be a filling meal or a great side dish.%u00a0It’s good all ways, any way.
Another note. This salad is great for parties and BBQ’s and can be made a day or two ahead. If you do make ahead, hold off on mixing the pumpkin seeds and the tahini sauce with the rest of the salad until you are about to serve it.%u00a0
The trees are on fire, the sky has been lighting up like a masterpiece and the temperatures have been on the cooler, crisper side. I am one lucky lady to be living in such a beautiful place. If you don’t know the awesomeness of fall in Vermont, you should put it on your life list cause it’s amazing and will bring you so many good feelings.%u00a0
Another super productive week for the books.%u00a0We finished laying all the hardwood downstairs then went straight to tiling the bathroom which was awesome cause it was my first real tiling project and now that floor is down too. But man did it do a number on me. The one thing the mr always bitches about are his knees, and now I now why. Kneeling on anything, especially cement board, for 5 hours pretty much will kill your shit. I might be a little whinny, but crap on a shoe do my knees hurt. (now I am done complaining) What else……..Oh yeah, a large quantities of construction waste was brought to the dump that has bee accumulating in large piles in the back yard..(that was fun) I invented a new sport, storage unit parkor (I am really good at climbing and jumping around packed storage units), and got to see the new little monster baby while doing it. Then my little brother came over for a while to help carry the cast iron bathtub from the backyard to the upstairs. (thanks Paul!)%u00a0 I even made a point during the week to stay home for just enough time to made donuts with sprinkles while I sat in front of the oven knitting cause I was freezing my ass off. And I ate 2 roasted pumpkins, an acorn squash, and a sweet potato this week. Feeling pretty good about life.
So I don’t know about today. We might or might not work. We may or may not run away to the woods.(I need to be with the trees for a while) Most likely both. But one thing is for sure, I will be icing my knees. And drinking a butt load of coffee. And eating the butternut squash I picked it yesterday. I am a winter squash addict.
The things I clicked on and reading doing the internet this week.
-Have you noticed the crazy moon lately? How to See the Hunter%u2019s Supermoon This Weekend
– How We Got %u2018Bark%u2019 for Dogs, %u2018Quack%u2019 for Ducks, and Other Words for Animal Sounds
-A classic pencil is so underrated. Trace The Remarkable History Of The Humble Pencil
-%u00a0Incredible Origami Animals.. Like super incredible
-Lots of sweetbread, muffins, and all sorts of baking things in my future. The Best Way to Store Quick Breads and Muffins
-This guy tasted a shit load of butter for his Fancy Butter Taste Test
–Photo Of An Elephant Snuggling An Ostrich because it made me smile and is really freaking cute
– Check out this This Triangular House.. Its pretty crazy cool
–Can We Trust the Cooking Methods on the Back of the Bag? Question everything!
–Bob Dylan Wins Nobel Prize, Redefining Boundaries of Literature.His words are beautiful.
I have had a shit ton of rhubarb in the freezer all winter and the other day I just needed it gone so I made a big old batch of rhubarb jam. I was actually saving the rhubarb to make the mr a pie for his birthday, but that was like 2 months ago and he ended up with ice cream sandwiches and that is why the rhubarb was still there. Oops. But now we have rhubarb jam. And I think I was feeling a little guilty about not making the pie so I, like the nicest girlfriend in the entire universe (self proclaimed yes, but so so true), used that jam to make little hand pies. And in the shape of hearts no less because hearts are amazing and it doesn’t hurt that it is Valentine Day next week.%u00a0%u00a0
%u00a0Valentines Day. What does that even mean? I think the primary meaning of Valentines Day is that all things should be in the shape of hearts. The rest is to be determined by however you may feel about the day. Whether you hate it or love it, (we love it, It’s an excuse to take the day off and cover the house in hearts) you get to make the day yours. Just make sure that whatever you do, you make it with hearts. And with pie.%u00a0
These heart pies make for great little additions to hand made Valentines day cards ( I see maybe for a kids class), are great for breakfast because they are basically just like heart shaped pop tarts,%u00a0or even for an evening of bindge watching Netflix with a loved one or by yourself. It’s pie my friends. Eat it whenever, and with whomever you want.
Also, hearts are not just for Valentines Day. And pie sure the hell isn’t either. They both just happen to work for the occasion.%u00a0
The stuff. Basically just pie crust things. Flour, a little sugar, salt, coconut oil, and ice water. Then you need jam. Jam or perseveres of any flavor(s)%u00a0%u00a0you like. I used grape and rhubarb and %u00a0had raspberry here, but I didn’t use it because I didn’t want to open it.%u00a0
Make the crust. Flour gets mixed with the salt and sugar %u00a0and the the coconut oil gets cut in until it %u00a0looks all crumbly.
The water is added %u00a0in tablespoons until a shaggy from forms.
Dump the dough onto the counter to gather all together and rest for a bit. Or if you like, wrap in plastic and refrigerate %u00a0for up to a day or two.
After the dough got a good rest, roll it out and cut your hearts out. (Not your actual heart. Please and thank you)
Half of the hearts get a dollop of jam
Then each heart gets a top and crimped together with a fork. Poke a little hole into the tops to allow for steam to escape then all of the hearts get stuck into the fridge (or place on the back porch) to get nice and cold for a bit.
%u00a0After the chill, off they go into the hot oven to bake and be.
Look at these cuties. A little jam overflow, but all is good.%u00a0
I decided last minute that they needed a little something. Powdered sugar, lime zest, and lime juice. The easiest of glazes. You could do lemon, or vanilla, or almond, or even melt a little chocolate and drizzle that on. Next time I will do chocolate because because.%u00a0
Drizzle that glaze all over.%u00a0
There you have it. The cutest little hand pies ever .
Share if you like, or just eat them all. They are your hearts so do what you will.%u00a0
-C
makes 18 %u00a0three inch pies
2 1/4 cup flour
1 teaspoon salr
1 tablespoon sugar
8 tablespoons ice water
3/4 cup solid coconut oil
about 1 1/4 cups of some sweet ass jam (any kind you have)
1 cup powdered sugar
1 lemon or lime%u00a0
Combine the flour, salt and sugar in a large bowl. add coconut oil in large chunks then with a pastry cutter or a fork (I used a fork) cut the oil into the flour until the flour looks crumbly and there are lots of tiny little chunks of coconut oil throughout the mixture. Add in 5 of the tablespoons ice water, toss around, then add in another 3. Mix around until the dough starts to come together when squished. If it still seems too dry, add in a tablespoon or 2 more water. (I always end up using a little more in the winter months) You want the dough to just be able to come together. Dump dough onto counter and press and smoosh dough into a ball. Let dough sit for 1/2 hour or wrap in plastic and place in fridge and using within the next day or two.%u00a0
After the dough has had some time to sit, flour the counter and roll it out to about 1/2 inch thick. Take a cookie cutter ( I used a 3 inch at the widest part heart cookie cutter) and cut out the hearts (or whatever shape you want) Make sure you have 2 cutouts for each hand pie. After you have cut out as many as you can, gather dough into a ball and roll out again. Repeat until dough it gone.%u00a0
To assemble.
Place a tablespoon of jam into the middle of half of the cut out hearts . Gently place the remaining heart cut outs on top of those.%u00a0. Take a fork and press the edges together and then with the fork or a knife, pierce of cut a small slit into the tops to allow the steam to escape while baking. I did this directly on the baking sheet but found out after it was easier to do on the counter and then move it to the baking sheet. Do what ever it easier for you. Once they are all assembled and on the baking sheet,%u00a0refrigerate for 15 minutes.%u00a0
Preheat oven to 350
After the time in the fridge, remove and place directly into the hot oven. Bake for 20-25 minutes or until the bottoms are a nice %u00a0%u00a0golden brown. The tops will be slightly pale so check the bottoms.%u00a0
Remove and let cool on the baking sheet.%u00a0
While they are cooing, make the glaze. Zest the lime and juice the lime and combine with the sugar. If it is too runny, add a little more sugar, too dry, add in a splash of water. Once the pies are cooled,%u00a0drizzle each one with icing.
Now you have a bunch of cute little heart shaped hand pies and you should probably eat one (or a few)
The house next door to us is for sale and in the backyard of the house is a whole lot of blackberry bushes. The mr and I have been hopping the fence over there like ninjas and filling large bowls of berries and sneaking back home to eat our weight in those blackberries. (Ok, not entirely true. We are not good enough ninjas to jump the fence so we have been walking through the fence gate. Plus we checked with the current owner, she told us to pick all we wanted to. We are not asshole ninjas stealing fruit)
So many berries. I check every few days and they just keep on coming and I am not one to let perfectly good berries (or any food) go to waste, so I just keep picking. I froze some , ate so so many, and then I was going to make a straight up pie but decided to do pie bars instead because one, I couldn’t find my pie plate (I think Shannon has it) and two, these are just a bit less formal, like pie can sometime be. Plus easier to share because they are cut into little squares and hold there shape really well. And lets be honest, I didn’t want to have to roll out pie dough if I didn’t have to.
Such a good way to use up and share an excess of berries. Now off you go to make some pie crumble bars while I go play with the kittens (I’ll tell you all about the kittens tomorrow….)
The stuff. Flour, sugar, baking powder, and salt. A little soy milk and coconut oil, a lemon, and arrowroot powder. And of course lots of blackberries.
The flour, salt, baking soda, and sugar get mixed in a big bowl then the coconut oil get mixed in into a crumble.%u00a0 Now in goes the soy milk to get it all a little wet.
A little more then half the mixture gets patted down into a greases and lined pan
Berries, sugar, arrowroot powder, lemon juice and lemon zest go into a bowl. Give it a mix.
Dump and distribute all over recently patted down dough..
And crumble the rest of the crumble all over the top.
Now into the oven it go.
All cooked and cooling while you put away the clean dishes (or anything that will distract you for at least a half hour while they cool.)
And when they have cooled enough to cut, it’s time for you to eat.
And yes, these are totally perfect for dessert and breakfast.
-C
makes 16 squares
For the crust
2 1/2 cups flour
1 teaspoon baking powder
1/2 teaspoon salt
2/3 cup coconut oil melted then cooled to soft
2/3 cup cane sugar
4 tablespoons soy milk
For the berry filling
3 cups fresh blackberries
3 tablespoons arrowroot powder
1/3 cup cane sugar
zest and juice of a lemon
Preheat oven to 375
Mix the flour, sugar, salt, and baking powder together in a large bowl. Add in coconut oil and incorporate with a fork or pastry cutter until the dough looks crumbly, add in soy milk and mix in with for again just til until incorporated. (think pie dough-like)%u00a0 Don’t worry if some of the dough seems dry, it’s fine.
Grease and line a 9×9 pan. Dump a little more then half of the dough mixture in and pat down to cover bottom of pan. Try to make sure it’s all an even thickness.
In a separate bowl, toss together the berries, sugar, arrowroot powder, lemon zest and juice of that lemon. Dump the mixture into pan and evenly distribute over dough. Take the remaining dough and crumble all over the top then just stick it into the hot oven.
Bake for about 50 minutes or until the crumble on top is a nice golden brown.
Remove and let cool completely before cutting.
Cut then eat.
Store squares in fridge, some even say they taste better cold.
Let%u2019s talk about how soup is the perfect food. It can be light and fresh, hearty and deep, chunky or smooth. You can eat it with a spoon, or somtime a fork if warranted, or just drink it from a mug. It%u2019s usually a one pot meal, a small pot for one, a big pot for many. Make a pot of soup and eat some now and save some for later. It freezes amazingly well. Got a few extra sad carrots and wilted greens? Toss them into a pot with whatever you have on hand, maybe those veggies scraps and you got yourself a meal. Want something more filling, just add in some grains. Feeling sick, warm soup will make it all better. Feeling fresh and springy, well soup is there for you too. Seriously soup, you can do anything. If I could, I would marry you. %u2665%ufe0f
This soup is one of this velvety smooth, light but rich, delicious beyond delicious soups. A fresh spring time soup. Not to hearty or heavily spiced. Super rich and creamy and flavorful. Bright ass green which makes it amazing in itself, but then with a nice tangy sumac tahini swirl on top, well it is just about the most perfect soup. I made to share, which I did, (and everyone licked their bowls clean) but then hoarded the little bit left over and ate it cold for a late afternoon snack. That is another thing about soup, you can eat is cold and it is still amazing.
Tasty and delicious, and nutritious. This soup does it all.
To the soup!
The stuff. Peas, chopped broccoli, and chopped cauliflower which are all frozen and slightly thawed. You can totally use fresh here too, but I just so happen to have it frozen so you might as well save the fresh stuff for fresh eating. Also have a big yellow onion, a few cloves garlic, some tahini, a lemon, sumac, and salt and pepper. You need water which I did not picture here.
A pot, some water and a roughly chopped onion and the garlic start off this soup. Bring the pot to a boil, then turn to medium and let the onion and garlic cook until very tender. I have been making a lot of soups starting with this step lately. Boiling the onion and garlic until tender and fragrant really make for a super flavorful and clean soup base. Or soup in itself.
Now add in the broccoli and cauliflower to the pot and cook until tender.
Mid soup cooking time is a good time to make the sumac tahini sauce for the swirl. Basics here, just mix the tahini, the sumac, a pinch of salt and pepper, the juice of the lemon and a tablespoon of warm water together until smooth.
Last but not least, the peas. Add them in and they just need a few minutes to cook through.
And then it all gets blended to become this green creamy goodness.
Ladle into bowls, grab the sumac tahini sauce and swirl it on in. A tablespoon or so is good. And don%u2019t forget a little more pepper and another pinch of sumac for good measure.
Just appreciate for a moment. That is one good looking bowl of soup. And it taste even better then it looks.
-C
Makes about 4 serving
1 1/2 cups fresh or frozen peas
1 1/2 cup chopped fresh or frozen cauliflower
1 1/2 cup chopped fresh or frozen broccoli
1 large onion
3-4 cloves garlic
4-5 cups water
Salt and pepper
1 teaspoon sumac
2 tablespoons tahini
2-4 tablespoons warm water
Start by removing the papery skin from the onion and chop into a few big chunks. Remove the skin from garlic too. Place into pot with 4 cups water. Turn heat on high and bring to a boil then turn heat to medium and let onion are garlic cook until tender which should take about 15-20 minutes
Once the onion is cooked, add in the broccoli and cauliflower. Turn heat back to high and bring to a boil again then turn back down to medium heat. Keep cooking until tender (another 15 minutes or so) then add in the peas. Keep on heat until peas are cooked through then remove the pot from heat and either transfer to a blender or use a immusrian blender to blend the soup until smooth. Add a little more water if needed to get to the right consistency to blend right. Or if you want a thinner soup.
For the tahini sumac swirl just mix the tahini and sumac together along with the juice of the lemon, two tablespoon warm water and a pinch of salt. Mix together until smooth. If the mixture is to thick, add another tablespoon of water.
To serve. Ladle or pour soup into bowls and drizzle and swirl the tahini sumac on top. Sprinkle with pepper and a pinch more sumac and you are good to go.
Nothing here but a mere craving, the fact that I had a fresh head of cauliflower, and I really wanted tahini. TA DA. I made exactly what I wanted and it was so so sooooo good. Maple Cumin is one of those super A+++ taste pairings and anything roasted cover in tahini is basically going to be a win so I had no fear when making this dish that it was going to be anything but fanatic.
And of course I was right. It was so freaking good, like now I am going to make it again and again because I don%u2019t want make cauliflower any other way ever or at least until I get sick of it or of roasted vegetables. But that probably won%u2019t happen for a while.
So if you like cauliflower and tahini and amazingness, here, make this.
To the cauliflower
The stuff. A head of cauliflower, tahini, maple syrup, cumin powder, red wine vinegar, salt and pepper, and olive oil.
Break or cu the head of cauliflower up into florets and toss with a little oil, the maple and cumin, and a little salt and pepper.
Scatter on a baking sheet and stuff it into a hot oven.
Meanwhile mix tahini with vinegar, salt and pepper, and enough warm water to thin out.
Roasted all nice and crisp and delightful.
And now you gather up all that cauliflower and cover with all the tahini you want. Grab a bowl, or just eat off baking sheet, and get to it.
And there is no shame in eating a whole head of cauliflower because hey, its cauliflower.
-C
Makes a meal for one or a side for a few
a head of cauliflower
3 teaspoons cumin
2 tablespoons maple syrup
olive oil
3 tablespoons tahini
2 tablespoons red wine vinegar
2-3 tablespoons warm water
salt and pepper
Preheat oven to 450
Break or cut the cauliflower into medium sized florets. Place in a bowl and drizzle with a teaspoon or so olive oil and toss around. Drizzle in maple, add in the cumin, and a pinch of salt and pepper. Toss until coated then dump the cauliflower onto a baking sheet. Place in hot oven for 25-30 minutes or until roasted to your liking.
While that%u2019s roasting, mix up the tahini, vinegar, and a pinch of salt and pepper. Add in warm water until the mixture is a drizzlable consistency.
Once cauliflower is out of oven, cover with tahini.
Now eat.
There will be no left overs so don%u2019t worry about it.
Finally, it’s safe to turn the oven back on. No more heatwave (PLEASE NO MORE!!!) Last week was such a bust of life, I still feel like I am recovering. But let’s not talk about anymore. Lets talk about this cauliflower situation that was a highlight of my week.
I have been meaning to do this for a while now. And I have attempted, I’ll have the intention, get the cauliflower and peppers,%u00a0%u00a0then somehow forget that I was going to cook it and just feed it to the mr raw, or he will just start eating at it and then the head is not intact anymore (He loves raw cauliflower). And sure, you don’t need to have a whole head of cauliflower to roast it and enjoy it, but come on, doesn’t it look super badass and pretty whole? And you can slices of it like you would a cake, a really yummy veggie cake. So yeah, it should be a whole head. Anyways, besides being pretty, this thing was freaking amazing. I love cauliflower,%u00a0roasted cauliflower even more. Add to it some slightly sweet and cheesy pepper sauce, holy ho%u2026I almost ate the entire thing myself. It was everything and more how I wanted it to turn out and am now forever going eat my cauliflower exactly like this (but probably not always). And the sauce%u2026. I am going to make giant jars of it and stick it on everything. So good.
Now lets get to it.
The stuff. A whole head of cauliflower, a couple colorful peppers, nutritional yeast, garlic, lemon, salt and pepper, and a little bit of olive oil.%u00a0
Start with the cauliflower, Trim away any big leaves from the bottom and stick the whole head into a oven safe pot big enough to hold it.. Add in a little water and stick on the stove top on medium heat to cook for a few minutes, just to give it a little head start.
And preheat the oven
Pre roasted, slightly streamed cauliflower goes into the oven until a nice golden brown and all pretty like.
While the cauliflower is roasting, roasted the peppers too.I place mine whole onto a lightly oiled cast iron pan* and stick into the oven.
Once the peppers are starting to char and have become soft and tender, remove from the oven and let cool for a few minutes or long enough for you to handle them. When cooled enough, remove the stem, seeds and any of the skin that is coming off.
*Last year I used the same cast iron pan over and over to rasot peppes and never cleaned it, or bothered to oil it. By the end of the summer, there was a 1/2 inch thick layer of hard as rock caramelized pepper juice that I had to chip it away with a chisel%u2026 so yeah. be careful of pepper juice.
Toss the roasted peppers into a food processor along with the garlic, lemon juice, nutritional yeast, a splsh of oil and s little salt and pepper. %u00a0
And taste.. and try not to eat it all right now (It is so f ing good)%u00a0
And take that sweet, so delocouis sauce and smother all over the roasted cauliflower.
If you want, stick it back into the oven for a few minutes to crust up a little bit, but not a necessary.You can call it here and go to town.
I stuck in back in the oven for a few minutes%u2026 But again, not necessary.
And now you have this giant, amazing, head of delicious cauliflower, waiting to be eaten.%u00a0I recommend removing the head and sticking it on a cutting board, you know, for easier cutting, and also it looks pretty badass.%u00a0
Cut into chunks and serve right away. %u00a0
Goodness gracious was this thing so freaking good!
Have a fantastic day!
-C
1 fresh head of cauliflower
2 red(yellow or orange work too) peppers
2 -3 tablespoons nutritional yeast (the more the cheesier)
4-5 cloves of garlic
juice of a lemon
salt and pepper
olive oil
Take whole head of cauliflower and trim any big leaves or stem off bottom. Stick into a big oven safe pot with about 1/2 inch of water. Place a lid on pot and stick on medium heat for about 8-10 minutes, or until water has evaporated. and cauliflower is slightly tender.
Preheat oven to 425.
After the brief cook on the stove top, remove lid, drizzle cauliflower with a tiny bit of oil and sprinkle with a little salt and pepper. Stick into oven without the lid.
Now that the oven is on, toss peppers into oven, either on a baking sheet,%u00a0pan, or on the rack if you have the space and cook until all roasted and soft (should take about 15 minutes). Remove when cooked and let cool off for a few minutes. Once cool enough to handle, remove seeds and stem and any of the skin that want to come off and stick into a food processor. Add in the garlic, nutritional yeast, lemon juice and a tiny drizzle of olive oil. Blend until smooth. Add salt and pepper to taste.
Once the head of cauliflower is cooked and browned, remove from oven and dump/ smear with the red pepper sauce. If you want, place back into oven for a few more minutes, or not. Good both ways.
Remove from pot and cut into big ass chunks. Garnish with something green and eat until you can’t eat anymore.
If by chance you have any left overs (which I highly doubt) try blending it up as soup. It is freaking fantastic!
%u00a0 %u00a0 %u00a0Spicy, crispy cauliflower%u2026 um yes please.%u00a0 I really like cauliflower. The mister loves it, or at least likes it better than any other vegetable. So when he asked for spicy cauliflower, well yea I am going to make it because I am so nice and really, could I say no to a veggie request? (I might have said no if it involved deep frying) Also, I found fresh cauliflower on sale! ($2.25) I don’t usually cook fresh cauliflower, but %u00a0I figured at that price, it wouldn’t be bad to cook a head. (If I am cooking cauliflower, which I do a lot, I just use frozen%u2026.casue it be waaaay cheaper)%u00a0
Fresh, cheap and requested veggies%u2026.those are must makes. And the mister was happy with I handed him the plate of oh so lovely looking crispy crunchy loveliness. (I kind of like to make him happy%u2026sometimes)
The stuff. Cauliflower, chopped and broken into pieces. Corn meal mixed with salt, pepper, onion and garlic powder, and because I made this for the mister, parmesan cheese. And in the green bowl, srirsachi and a little oil. The%u00a0cauliflower%u00a0gets a coat of the hot sauce and then tossed around in the corn meal mixture. Handling as little as possible, place coated pieces on a lightly oiled baking sheet and stick those suckers in the oven for%u00a0about a half hour, taking them out and%u00a0flipping half way.And take them out of the oven when pieces tuned golden brown, stik them on a plate, and serve immediately.
A bit of spice, a bit of crispy , a lot a yum. %u00a0Serve with some crunchy veggies, maybe a squeeze of lemon and definitely some type of avocado situation.
A beer would be lovely too!
Have a fantastic weekend!%u00a0
-C
Spicy Crispy baked Cauliflower
1 head cauliflower, chopped or broken into florets
1/2 cup corn meal
3-4 tablespoon sriracha or your favorite hot sauce
1 tablespoon olive or coconut oil
salt and pepper
Any seasonings you might like (garlic or onion powder,%u00a0parmesan cheese,%u00a0national yeast%u2026. whatever%u00a0floats your boat)
Preheat oven to 400 degrees%u00a0
In a bowl, mix together sriracha and oil. In a separate %u00a0bowl, mix salt, pepper, any seasonings you might like, and corn meal. %u00a0Take cauliflower and toss in sauce to coat. Remove from sauce and toss around in cornmeal mixture till fully coated, but try not to hand too much%u00a0so the coating doesn’t come off. Place pieces on a lightly oiled baking sheet and stick into oven. Bake for about 15 minutes, remove and flip pieces. Back into the oven for another 15-20 minutes (depending on you crispy preference) Remove when golden brown (or darker if you like) and%u00a0serve immediately.
Cucumber, celery, and carrots are great accompaniments.. also a little mashed avocado or guacamole is much appreciated.
I am such a sucker for the reduced price produce at the grocery store. I save at least half of the original price for stuff that might look a little weird or have a brown spot or something. Sometimes I can’t believe what ends up on in the bin, stuff that I wouldn’t consider reduced bin material, but hey, if they want to stick it in there, then I will be more than happy to buy it.A couple days ago I found some good looking roma tomatoes in that said reduced produce bin..the skins the tiniest bit wrinkled (like I could care less), least hen 50 cents a pound. Um, yea, I bought those and put them to good use.%u00a0
Tomatoes roasted until they fell apart with a few other chunks of stuff, then piled onto a base of spinach and couscous. %u00a0This meal cost me pennies and was stupid easy and fast to make. And pretty to boot. Perfect for a quick healthy meal on a busy day or maybe for those people looking for a tasty, not too completed dinner to make for %u00a0a special someone for Valentines day? Or make just for yourself%u2026its pretty much the perfectly dish. Anyone can get into it. And if you don’t happen to have a grocery store with a reduced produce bin full of tomatoes%u2026it’s cool, you’ll just have to pay full price for the perfect ones.
So simple. A little olive oil in pan. Chunk the tomatoes and throw in pan with the chopped onion, carrot, cauliflower, garlic and chick peas. Drizzle a bit more oil and top with salt and pepper. Give it all a toss and stick into oven. That’s that. Just leave it in there until everything is so nice and soft and falling apart.
One of the best things about couscous is that%u00a0you don’t even need to dirty a pot or a bowl to make it, %u00a0just add dried couscous to the bowl you are going to eat out of with a cup of boiling water and a pinch of salt. %u00a0(I added the spinach with the water too) After about 8 minutes, the couscous absorbs all the water and you just fluff it up with a fork. Easy, freaking Peasy!!!%u00a0Out of the oven and piled on%u2026..
I mean, if this isn’t one classy looking meal, then I don’t know what is.
Sprinkle with a little parmesan or nutritional yeast if you want and step back and admire. And now eat it to you face.
And barely any dishes to wash. No big mess to clean up. %u00a0I could get used to that.%u00a0
-C%u00a0
Serves 2
3/4 cup Couscous
1 cup boiling water
Handful of chopped spinach
4-5 roma tomatoes chopped
1 medium carrot diced
Half of an onion diced
Cup or so of cauliflower (fresh or frozen)
Cup of prepared chick peas
4 or 5 cloves garlic minced
Olive oil to drizzle
Salt and pepper
Preheat oven to 400
Place onion, carrot, cauliflower,tomatoes, chick peas and garlic into a large skillet. Drizzle with olive oil, sprinkle with salt and pepper, and give everything a light toss. Stick into oven for 35-40 minutes until tomatoes are falling apart and everything is nice and roasted.
In a medium bowl, (or serving bowl) add cup of boiling water to dry couscous and spinach. Sprinkle with salt and cover. Let sit for at about 8 minutes, or until the couscous had fully absorbed all the water. Fluff with a fork and top with roasted tomato stuff.
Top with parmesan or nutritional yeast if you are into it.
Enjoy!
There is a joke about Vermonters, that all we talk about is the weather. Well, it’s kind of true. But to our defense, we get a lot of weather, and it’s always changing and intense and both lovely and crazy and all over. So yeah, we talk. A lot, about the weather. And on that topic, I am trying so hard not to complain, but%u00a0honestly, I am getting a little sick, both physically and mentally from all of these %u00a0super, to freaking cold temperatures. Yesterday the high was 0 ( which was at like 2 in the morning) %u00a0and factor in the windchill, the temp stayed at like 25 below. It f**king sucks. I can’t %u00a0stay outside for too long or else I will probably die. The dog %u00a0is having a hard time making it around the block before he gets ice paws, and the mister, well he even started wearing gloves (he wears a sweater all winter and never gets cold%u2026..he is officially cold)
%u00a0And not only is the cold keeping us all indoors, but its making us all borderline sick. We both have been fighting something for the past few week. The headaches, stuffy nose, chest congestions. The puppy is getting super dry skin and gave himself a hot spot. BLAh!! Ok, enough! No more complaining
Because %u00a0I do really love the winter and all the pretty snow!!!!
But we are feeling kind of sick so to make us feel oh so much better, a fantastic, super tasty, healing, good for me, good for you, soup. Turmeric ginger carrot%u2026 oh man. Made with lots of ginger, turmeric and garlic and finished with a drizzle of raw honey. This soup is exactly what we need. All ingredients scream.. FEEL GOOD, BE WARM AND COZY! Almost everything in it has antibacterial and anti inflammatory properties. The veggies are hearty and heathy and just eating soup helps to keep hydrated. And the best part..it tastes so freaking amazing.%u00a0
So whether %u00a0you are feeling a little mah, or just a little hungry.%u2026this soup is where it’s at!
Lots of chopped up carrots, a small onion, a little bit of cauliflower I had left over and a small beet. If you don’t have the cauliflower and or a beet, just use %u00a0ares pepper or another 2 carrots.. no biggy.%u00a0
Then we have the fresh ginger ( you can use powdered) turmeric and garlic. %u00a0All the good healthy spicy and yummy stuff.%u00a0
I accidentally spilled the turmeric on the counter..but it kind of looks like I might have done it on purpose%u2026 yeah, let’s go with that. %u00a0Chop the garlic and he ginger into %u00a0 %u00a0chunksAnd toss into the pot to warm and activate. Just a little toasty toast.%u00a0
And the veggies are roasted and tender and smell so good. %u00a0It took a lot of will power to not eat the whole pan right there.
I added the roasted veggies and 3 cups water straight into my pot %u00a0with the spices because I used an emulsion blender. If you are using normal blender, add the veggies, the toasted spices and the water to the blender and blend until smooth. Then transfer to a pot.
Pretty much all blended together%u2026.(I left a few big chunks in there to snack on while I was waiting to eat serve%u2026I was really hungry) and let to simmer for a little longer…
And now ladle into a bowl and get ready for a fantastic finish%u2026 drizzle a spoonful of raw honey into soup%u2026%u2026.so so good. You could add the honey before serving, but heating it kills all the good antibacterial stuff so that’s why we wait.%u00a0Then %u00a0I sprinkle some chopped kale and chives. (do it if you want, but not necessary)
Now enjoy. Let the warmth wash over you and feel all those good spices helping to fight the good fight to keep you well and all the yummy to satisfy your hunger.
And lets hope for some warm (above 0!!) weather!
-C
Turmeric Ginger%u00a0Carrot Soup
Ingredients
5 large carrots
1 small onion
1 small beet*
quarter head cabbage ( or a cup of frozen)*
2-3 teaspoons %u00a0turmeric%u00a0
2-3 tablespoons fresh %u00a0ginger (1/2 teaspoon if using powdered)
4-6 cloves garlic
salt pepper
raw honey (omit if vegan)
* If you don’t have or want to use beet and or the cauliflower, you can use a red pepper, a small sweet potato, or just use a few more carrots.%u00a0
Chop all veggies into similar sized chunks and toss into a lightly oiled pan or on a baking sheet and sprinkle with salt. %u00a0Stick in oven at 425 for about 30 minutes or until all veggies are fork tender.%u00a0
In a large soup pot or dutch oven, toss chopped garlic, ginger and the turmeric and place on medium heat for a few minutes to activate the spices. Add the roasted veggies and 3 cups water to pot (if using emulsion blender) and blend until smooth. If using a blender, add the toasted spices, roasted veggie and 3 cups water and blend until smooth then transfer to a large pot or dutch oven. Add salt and pepper to taste. Turn heat down to%u00a0%u00a0simmer and let cook for an addition 10 minutes.%u00a0
When ready to serve, ladle soup into bowl and drizzle a spoonful of raw honey into soup. Garnish with fresh chopped kale, chives, cabbage or whatever you want. (or nothing is good too)
I was informed yesterday that if I was going to make tortilla chips, that I better make some sweet ass dips to go with them. %u00a0I kind of agree%u2026 tortilla chips need dip%u2026 or better yet, two dips. Queso and guacamole. It’s what needed to be done, and so I did it.
Guacamole is amazing%u2026 anything avocado is amazing%u2026this guacamole is amazing. White bean guacamole is amazing. And not that we really care, but this guac is half the fat then straight up guacamole. %u00a0Plus it’s packed full of protein making it a kind of super duper, must eat all of it, kind of dip. %u00a0And sweet potato anything will make me happy. %u00a0Making queso dip with sweet potato and cauliflower is probably one of my best food combos so far. (after eating a butt load, I felt like I was a genius and made an amazing discovery) Again, not that we need it to be, but this is also a fat-free, vegan, gluten-free, super healthy, packed full of B12,%u00a0%u00a0fiber and nutrients, dip for all kind of dip.%u2026. just another reason why you cannot feel bad when you finish off half a batch before you get a chance to stick it in a serving bowl. (I might have done that)
%u00a0Here is what you need for a good time:
%u2212These tortilla chips%u00a0%u2026.Check.
%u2212Some %u00a0Chopped Veggies (I want the veggies)%u2026..Check
%u2212Cauliflower Sweet Potato Queso.%u2026Check.
%u2212White Bean Guacamole%u2026Check.%u00a0
You are now ready for it. It being this party, that party, the Super Bowl, or a Wednesday afternoon. %u00a0
%u00a0%u00a0 %u00a0 %u00a0%u00a0
To the left we have the makings for the cauliflower sweet potato queso.. Steamed cauliflower, a baked sweet potato, nutritional yeast, garlic, and chopped up red onion, red bell pepper and jalape%u00f1o. To make all you need to do it take the chopped peppers, onion, and garlic and saut%u00e9 for a few minutes just to slightly soften and bring out flavors. While that’s going on, take the steamed cauliflower and sweet potato(skin off..but eat it, or save it for soup or feed it to the dog) and puree together with a blender or food processor. Add in nutritional yeast, about a tablespoon or two of hot water and, salt and pepper to taste. Blend for about 5 minutes until super creamy smooth. Add in saut%u00e9ed stuff and pulse just enough to incorporated the veggies but not complete blend in. %u00a0Stick in a bowl.
To the right we have white bean guacamole stuff. %u00a0Two cups (or one can) rinsed white beans, one ripe avocado, a lime, a few cloves of garlic,(I also added a bit of garlic powered%u2026I like my garlic) and some chopped up red onion and tomato. %u00a0Place beans, garlic, avocado and lime juice in a blender or food processor and blend until smooth. Add salt to taste and toss in the chopped tomato and onion. Blend for sec to mix that in%u2026Stick in a bowl%u00a0
Perfect…
To think that both of these dips took about 10 minutes total to make. (I had pre baked the cauliflower and sweet potato) %u00a0And for real, I would spend much more time if I had too because both of these dips are so freaking good, I%u00a0definitely will be making these on the regular.
So there , dips for those sweet ass chips or whatever you want to dip or them spread them on.%u00a0
And he guys%u2026It’s FRIDAY! Have a fantastic day!
-C
White Bean Guacamole%u00a0
2 cups white beans (or 1 can) rinsed and drained
1 ripe avocado
3 cloves garlic
1 lime
1/4 %u00a0small red onion
1 small tomato
1-2 teaspoons salt
Finley chop onion and tomato. Set aside. Place the beans, avocado, garlic, garlic powder, 1 teaspoon salt and the juice from one lime into a blender or food processor and blend until smooth. Add a splash of water if needed to help keep things moving. Taste and add more salt if needed. When smooth, add %u00a0the onion and tomato and pulse a few times to mix in. Scoop into a serving dish and finish with a squeeze of lime and a bit of chopped onion and tomato.%u00a0
Cauliflower Sweet Potato Queso
1 1/2 cups pre cooked steamed or roasted cauliflower
1 medium pre baked sweet potato
1/2 cup nutritional yeast
1-2 tablespoons hot water
1/2 a small red pepper
1/4 small red onion
1 jalape%u00f1o
3 cloves garlic
salt and pepper
Finely dice the red pepper, jalape%u00f1o, onion and garlic and saut%u00e9 in a skillet for a few minutes until slightly soften and fragrant. Take the pre-cooked cauliflower, sweet potato (skin removed), and nutritional yeast and place in a blender or food processor. Blend for about 5 minutes until creamy and smooth. Add in a tablespoon %u00a0of water %u00a0to keep things moving. When completely smooth, add in saut%u00e9ed veggies and pulse a few times to combine. Scoop into a serving dish. If your feeling it, %u00a0top with scallions and cracked pepper.
Serve dips with chips, veggies or anything you want. Also make great spreads for sandwiches and crackers too!
CHILI MONDAY!Well it is, but I am talking about making some super duper, yes I’ll have seconds, tummy filling, bone warming, pumpkin chili.. And heathy oh so healthy to boot. Reals, it’s the best.
This pumpkin chili recipe had evolved over the years. The first time I made pumpkin chili was for my very first dinner party that I %u00a0threw back in college. %u00a0Instead of cutting the pumpkin and adding it into the chili, I chopped the little pumpkins in half, roasted them, and used the halves as bowls..A good idea except no one at the pumpkin and I was left with a bunch of slobbered on roasted pumpkin halves. ( I probably should have said something, but being a few drinks in, I didn’t think to say anything about the edible bowls and I don’t think I noticed the abandoned pumpkins until the next morning). After that somewhat failed attempt, I started adding the pumpkin to the chili and left the drinking tip after the food is served. ( I learned so much in college)
But yeah, this recipe has traveled a few years with me and every time I make it, I always think, jeez, why don’t I make this every weekend. %u00a0Well maybe now I will.
Don’t let this spread scare you.. it’s just veggies from the fridge, a chopped up pie pumpkin and pre soaked beans. Oh and some canned tomato and spices. It took about 10 minutes of hands on time and one big pot. No big mess to clean up and you can get rid of those veggies in the fridge that are on the way out. WIN WIN WIN!
All the chopped veggies, the chopped pumpkin go into the pot with salt. pepper , and spices.( I added a fresh jalapeno and about 5 cloves of garlic to this mixture) Let the mixture sweat for about 5 minutes, giving it a %u00a0quick stir or two.
Now toss in the beans and the tomatoes%u2026 Add a cans worth of water as well. Bring to a boil, then turn to low heat and cover.
A last minute addition.. I added a few chopped up kale leaves. I wanted a little more bright color and adding kale to anything is a good idea.
I added a little sliced avocado to one of the bowls (I only had enough for one) and cut up some lime wedges to squeeze on top. (I did, Nick didn’t)%u00a0
Best chili I have made in a long time%u2026and yes, there is a bunch of left over which is fantastic because now I have lunch for the next couple days%u2026%u00a0
HOORAY FOR FOOD!!!
Have a good Monday!
-C
%u00a0small sugar pie pumpkin
2 cups dried beans..I used a 1 1/2 cups black and 1/2 cup kidney or 2 cans of beans
28 oz can of crushed or diced tomatoes
1 small onion
1 small
1 carrot
1 /4 head of cabbage
a small broccoli crown
1/4 head of cauliflower
a few kale leaves
1 jalape%u00f1o%u00a0
5 cloves garlic
2 tablespoons chili powder
2 tablespoons cumin
1 tablespoon coriander
salt and pepper
Either the night before or morning of, presoak dried beans..(beans in pot with about 4 cups water and a sprinkle of salt)
Take pumpkin and slice in half, de-seed and chop flesh into little chunks. (You can peel it if you want, but really, there is no reason to) Rough chop all the veggies (minus the kale) and stick into a large pot with the pumpkin. Pot on medium heat.. let the veggies sweat for about five minutes. %u00a0Now add the garlic and the spices and let cook for a few more minutes.
When the mixture starts to become fragrant%u2026 drain, rinse and add presoaked (or canned) beans. Then the tomatoes, and 1 1/2 cans worth of water.%u00a0
Bring chili to a boil then cover and reduce heat to low. Let cook for about an hour, giving it a stir every now and then%u2026%u2026…
Add in chopped kale a few minutes before serving
Serve in a bowl and top with sliced lime, avocado, a sprinkle of cheese%u2026.Whatever you want.%u00a0
I can%u2019t remember the last time I have gone a day without eating lentils. Seriously, even when we travel I buy or bring along a bag of lentils. Or when we are camping, its basically all we eat. So it is safe to say that I know my way around a lentil or two. They are probably my favorite food (I say that about all my favorites)
Other then lentils being amazing delicious, the are so versatile. I am sure I say it all the time, but there is nothing you cannot make with lentils, sweet or savory. And nutritional as all heck. So much iron and a super amount of protein. Lentils are basically the perfect food in tiny little coin shaped form. Take it from this vegan lady here. Lentils help keep me alive. HA.
But enough about how many lentils I eat, what we need to address is this chili. It doesn%u2019t matter if you are a lentil feen or not, you will very much enjoy yourself a big bowl of this hearty, slightly spicy, warming goodness. Especially now, when it%u2019s cold outside and the days are short and you just want to eat something filling and healthy and that is not left over holiday cookies. And big bonus, this is a chili that you could come home to start at 5 and basically have it ready to eat by 6. That is just one bit of the magic of lentils, they so cook so fast.
And it%u2019s chili and chili is the best so you really should just get it made. It%u2019s what you need, I can tell.
To all the lentil goodness!
The stuff. Green lentils, crushed tomatoes, a cubanelle pepper, an onion, a couple carrots, and some cauliflower. Also a few cloves or garlic, cumin, chili powder, ground ginger, a red jalape%u00f1o, and salt and pepper.
Get started by small choping the carrot, onion, and pepper. Mince up the garlic too.
Grab that jalape%u00f1o and remove steam (and seeds if you want heat) and dice into very very small piece.
Into a big old pot it all goes, along with the cauliflower and all the spices. Add a splash of water and a sprinkle of salt and pepper and stick it on the stove for a few minutes to warm up the veggies and spices.
Looking good.. So good I wanted to eat it all, but don%u2019t, it%u2019s for the chili.
Now add all the tomatoes and water and place back on stove on high heat until it starts to boil, then reduce heat to a medium and cook until lentils are tender.
Well look at that, chili.
And why not top with a little avocado while you are at it. It is a very good addition, to the spiciness.
Very little amount of works for such great rewards. Probably going to be your new favorite chili recipe just so you know.
Lentil chili. Grab a bowl, kick up your feet, and dig on it.
-C
makes a lot of chili, like 10-12 servings
1 pound green lentils
1 large onion
5-6 cloves or garlic
1 cubanelle pepper (or any green or sweet pepper)
2 large carrots
3 cups chopped cauliflower (fresh or frozen)
6 cups (two 28 oz cans) crushed tomatoes
2 hefty tablespoons cumin
1 hefty tablespoon chili powder
1 teaspoon ground ginger
1 jalape%u00f1o pepper
6-8 cups water
salt and pepper
diced avocado for serving (optional)
Remove steam and seeds from cubanelle pepper and small dice it along with the carrots and onion then place int all nto a large heavy bottom pot. Mince the garlic add into pot. Remove steam and seeds from jalape%u00f1o pepper and finely dice it and add to pot. Last but not least, add the spices to the mix. Add a splash of water and place on high heat and cook the veggies and spices until for 5 or so minutes, just to give them a little heads start and to activate the spices.
Once the veggies have had a few minutes of heat, dump in the dried lentils, the tomatoes, and 6 cups of water. Stir around and keep on high heat until it starts to boil then turn down to medium and continue to cook, stirring once in a while, until the lentils are tender and the chili has thickened, which should take about 35-40 minutes. If at any time you the lentils are not submerged in liquid but are not cooke through, add more water. And once the lentils are cooked you can thicken bu continuing to cooke does or thin it out by adding more water. Taste soup and season with salt and pepper as you see fit.
To serves, ladle into bowls and tope with diced avocado.
Left overs are fantastic hot or cold and will last in the fridge for about a week. Or if you want, you can freeze a few servings.
I am cold. And I know I shouldn’t be complaining, that it is still winter and those fluke days of 60’s and 70’s where not suppose to happen, but still. I am freaking cold. I just wan to ditch the jacket and mittens and to live in sweaters all day long. Is that too much to ask? #sweaterlady
Last weekend the mr and I went down and over to PA to visit Dad and family. It was a blast. We got to see my grandmother and aunt and uncle on the farm and just get out of town for a few days. When we got home we clonked out then decided to rip up the porch. The plan was to wait until spring to do it, but the weekend was so warm and springy that we were like screw it, let’s just do this and ripped it up. Then we spent half of the week tip toeing over thin wooden beams to get into and out of the house while hunting for decking and fixing the structure. Good thing the mr thought to stick a note on the door because leaving the house at 530 am when I am not exactly at my sharpest and it’s dark outside… more then once that little sign saved me from disaster. After a long long day of 6 hardware stores hunting for decking, we finally found what we needed. (no one had enough in stock or what they did have was shit) And then the weather turned on us to a brutal blast of freaking cold. I was all, “Lets just wait until next week to finish”, but not the mr. He was out there cutting and screwing and being an all around bad ass and laid down the new porch. I stayed inside, made hot soup and started collecting all the papers for taxes. Neither of us were having fun. But we do have a new porch, well kinda. The floor is down and now we just need to build the rest. That will come next week. And I do have a large stsck of papers. We get stuff done.
The past few days with also involved some littles, having my house trashed, and just the anxious feeling like there is much to do now and only so much more to come, I really need a down day and so does the mr.(his plan is to replace a toilet in one of the apartments today. He never stops) I am gonna rest my aching bones for a bit, buy a new toothbrush, make some bread (oven heat!) and try not to dread the gigantic pile of tax papers awaiting me for tomorrow (who a I kidding, it’s going to take all week)
Internet sightings
-This made me happy. SHOT OF HAPPINESS FOR YOU
-Of course plants make life better. Want to Live Longer? This Study Suggests It’s Time to Turn Over a New Leaf
–Burmese Tofu (a.k.a. Chickpea Flour Tofu) On my list of things to make this week
-I have always really liked the visual of cracked roads. This is even better. Street Kintsugi: Artist Rachel Sussman Repairs the Roads with Gold
-This is pretty freaking sweet. Architect Turns Old Cement Factory Into His Home,
–Do Showers Make Oranges Taste Better? I don’t know about you, but I am good with keeping it a mystery.
-This lady is amazing. She wasn’t even trying, just doing life.%u00a0 What Makes Mira Rai Run?
–How To Clean and Season an Old, Rusty Cast Iron Skillet I have a few in need of some love.
-We are looking ot start the downstairs bathroom soon and I would really like a pattern tiled floor..
-I remember thinking about who the heck thought to shape sugar into cubes and that that person was a genius. HOW THE VICTORIAN OBSESSION FOR ORDER CREATED THE HUMBLE SUGAR CUBE
Salad season is here. Green salads, fruit salads, potato salads, and grain salads. All the salads and we are not mad about it.
This is a good grain salad using millet, which I am sightly surprised to hear that a lot of people have never had. Millet is kind of like quinoa, but not. I cooks fluffy and looks kind of the same, and is gluten free like quinoa. I think the biggest difference is that millet is slightly softer and tastes a bit more nutty. It also is really good at absorbing liquid flavors.
But who are we to compare. The main thing is that it is nutritious and delicious so we will eat it.
Back to the salad. This is one of those grain salads that is good cooked and served warm but only gets better with a little age (like an hour or a day) in the fridge. Served hot or cold or room tempature, and is hearty enough to be meal like but is also a fantastic addition as a side to any of you meal plans. Like maybe a BBQ? Whatever the occasion, or non occasion, this is just a really good grain salad situation and I think you will be pleased, smiling all smiles while eating it.
To the millet salad.
The stuff. Millet, a couple handful of greens, a few mushrooms, an onion, dijon mustard, a little maple syrup, red wine vinegar, a lemon, a couple cloves or garlic, some toasted sunflower seeds, and salt and pepper.
Start by giving the millet a little toast, just enough to really up the nutty flavor and make it that much more yummy. It only takes a few minutes in a skillet on medium heat. Not an entirely necessary step, but you should do it.
Toasted millet goes into pot with water. Bring pot to a boil and then turn to the lowest simmer and cover.
While millet is cooking, get to the mushrooms and onions. Chop the onion thin and small and the mushrooms thin and small as well. Place them into the skillet with a drizzle of oil and place on medium heat. Mix around every now and then and cook until the mushrooms and onions are soft and a nice golden brown.
And make the vinaigrette. Minced garlic, mustard, vinegar, the juice of the lemon, and maple syrup get put into one place.
Mixed and now all is one.
Millet. Cooked and fluffed and ready to go.
Cooked mushrooms and onions go into the pot, along with the greens, the sunflower seed, and the vinaigrette. This step can be right away or you can wait a little while for things to cool as to not wilt the greens. Up tp you.
Mixed with love and hunger.
Even if you are making it ahead of time, just do yourself a favor. Grab a bowl, grab a fork, and get down on it.
-C
Seves 4-6
3/4 cup uncooked millet
2 cups water
1 sweet onion
3-4 big button mushrooms
Large handful or two of bitter greens like arugula, spinach or a mixture.
2 tablespoon brown or dijon mustard
2 tablespoon red wine vinegar
1 teaspoon maple syrup
2 cloves garlic
salt and pepper
handful toasted sunflower seeds
To start, toast millet. Dump the uncooked millet into a pan and place on a medium heat tt for about 5 minutes or until you start hearing the millet crackle.This gives the millet a slightly more nutty flavor but you can skip this step if you don%u2019t care.
Dump millet and water into medium pot. Place on high heat until water starts to boil then tun heat down to simmer and over. After about 15 or 20 minutes, when most of the water is gone, turn pot completely off. Let sit, covered for another 10ish minutes then take a fork and fluff it.
While the millet is cooking, cook the veggies. Grab the onion and slice it up into thin pieces. Clean off the mushrooms and chop them into small thin pieces too. Place the chopped stuff into the skillet with a drizzle of olive oil and a pinch of salt and place on a medium heat. Stir occasionally and cook for about 15 minutes or until the onion and mushroom are a nice dark, golden brown.
And make the mustard vinaigrette. Mince garlic and place into a jar or bowl with the vinegar, the mustard, the maple, and the juice of the lemon. Mix and set aside.
Once the millet is cooked, the mushrooms and onions are cooked, and the vinaigrette is made, all you have left to do is mix everything together. You can do this while things are slightly warm which will wilt the greens a bit, o let them cool so the greens stay fresh. Up to you. (I like the greens fresh)
Finally, dump cooked mushrooms and onions into pot with cooked millet. Add in the greens and sunflower seeds and drizzle the vinegertte all over. Toss around until fully mixed. Sprinkle with lots of fresh cracked pepper.
Then eat. Or place in a container to bring to the BBQ.
I love pomegranates but barely ever buy them because they are usually really expensive. A few weeks ago I was pleasantly surprised to find that that the grocery store was selling them at a reasonable price so I bought one. Duh. Anyway, that was a few weeks ago and I have had the pomegranate chillin in the fridge, just waiting for the perfect time to bust open and retrieve all the bright pink jewel like seeds. But I also kind of forgot about it. It was hiding behind a giant rutabaga. When I finally grabbed the rutabaga for some soup, the pomegranate reviled itself again. It was time, it needed to be eaten. And me being me, I can%u2019t not share right? So I asked the mr what he wanted me to bake. He said muffins, and that is how I came to pomegranate orange and poppyseed muffins. Look at me, poster child for sharing good things. I should get a gold star!.
Anyway, these muffins came out awesome. First, they smell so good because anything baked smells good but the orange really shines and the smell is still lingering in my hair. Secondly, people really were into them. The mr said they were amazing when I finally let him eat one (two actually because I made them mini) and when I brought them over to Megans house for dinner, my Dad at one, then two, then three.. ..He stopped at 5, and this was after dinner. When a guy eats 5 muffins and is not a muffin man, you take it as a good sign.
Do yourself a solid this cold ass weekend and bake something. These muffins are a good place to start.
To the muffins!
The stuff. Flour, baking soda and powder, and salt in a bowl. Poppy seeds, an orange, a pomegranate, sugar, oil, vanilla extract, and a little apple cider vinegar.
First, remove arils from the pomegranate. Cut the fruit in half, hold the cut side face down in your hand and place over a large bowl. Take a wooden spoon and wack the outside of the fruit and the seeds will just fall out. And yes , the juice stains so watch out.
Next, whisk together all the dry ingredients and add in the sugar, poppyseeds and the zest of the orange. Whisk again to combine.
And then add in the oil, milk, vanilla, and the juice of the orange.
Mix until just combined. Don%u2019t over mix or the muffins will get gummy.
Last but not least, fold in the pomegranate arils.
Such a pretty muffin batter.
Scoop batter into well greased muffin tins and pop into a preheated oven.
Orange and crimson and golden brown goodness.
Out of tins and onto a rack to cool
And now you eat.
Stay warm this weekend and bake some muffins.
-C
makes 24 mini muffins or 12 regular muffins
2 cups all purpose flour
2 teaspoon baking powder
1 teaspoon baking soda
1 teaspoon salt
1/2 cup white sugar
1/3 cup canola oil
1 teaspoon vanilla
1 tablespoon apple cider vinegar
1 cup soy or plant based milk
1 orange
1/4 cup poppyseeds
1 cup pomegranate arils
Note. To easily remove arils (the seeds) from a pomegranate, cut it in half, hold the cut side down in the palm of your hand over a large bowl and wack the outside of the fruit with a wooden spoon. The arils will fall right out into the bowl.
Preheat oven to 350
In a large bowl, whisk together the flour, baking soda, baking powder, salt, and sugar. Zest the orange into the bowl and add in the poppyseed and whisk. Next add in the oil, juice of the orange (about 1/4 cup) the milk, and the vanilla. Mix until just combined. Fold in pomegranate seeds.
Scoop batter into well greased muffin pans and place in oven to bake until golden brown and a tester stuck into the muffins comes out clean, which should take about 15 minutes (22 fish if normal sized)
Once baked, pull form oven and pop from pans. Place on a wire rack to cool.
Eat at your leisure.
Roasted veggies of any kind can get this girl in trouble. Place a sheet pan meant for many full of roasted veggies and watch out, I will probably eat them all. I can%u2019t stop, won%u2019t stop and you know what, I am not sorry, especially if its roasted brussel sprouts and squash.l I am grabbing at every last bit, especially all the really crispy, almost burnt pieces. Burnt food is one of my favorite flavors.
This dish is pretty basic, but also not. A slightly overlooked grain, spelt, makes for a hearty backdrop to the magic of roasted sprouts and squash, covered with a sunflower butter sauce which is a nice spin on a traditional peanut sauce. It%u2019s pretty easy to make and pretty to look at as well. A nice hearty and warming meal for all of those cold winter nights. And it%u2019s not going to make you feel heavy or gross, like if you sat and ate an entire lasagna. No, you will feel full and fantastic and ready for a cookie (it is the holidays after all).
The ingredients in this dish are mainly inspired by the half eaten jar of sunflower butter a friend of mine gave me at the gym, plus the fact that I have been getting a few stocks of brussel sprouts each week at farm share so we are eating them at ever meal, (plus I LOVE brussel sprouts) and me trying to use up all of the grains and such in the pantry before restocking anything more or new. A dish of convenience sure, but also a damn delicious one at that. With this being said, if you had a different grain you wanted to use, or an abundance of some other veggies that you have or prefer, well go ahead and use them. You do you my friend.
And really, I was thinking of you when I made this dish. Sometimes at this time of year people tend to forget to eat, or tend to eat on the not so healthy side. This grain bowl situation is just what your body is in need of. Simple delicious nourishment.
The stuff. Spelt that has been soaking in water for a while, half a butternut squash, brussel sprouts, a red onion. Also sunflower butter, a few cloves garlic, a lime, soy sauce, a touch of maple, salt and pepper, and olive oil.
The spelt will probably take the longest so get it on the stove. Strain away the soaking water and place into with fresh water. Bring to boil then reduce heat to a simmer. Place a lid on pot ans let it go.
Next, get to the veggies. Halve the big sprouts (small ones can stay whole) chop onion into chunks and cube the squash.
A drizzle of oil, a sprinkle of salt and pepper, and a good toss around and it ready for the oven.
Meanwhile, make the sunflower butter sauce. Its pretty basic. The sunflower butter, minced garlic, soy, maple, and juice of the lime all into a vessel that can hold it. Add a couple tablespoons of warm water to thin it out and done. Sunflower butter sauce. Easy Peasy.
After about an hour, your slept should be cooked (that sounds aggressive to me) Tender and chewy and just right.
The veggies should be roasted and done too. Crisp as you like ( I actually like mine even darker, but the mr does not so I went a light roast this time)
And it%u2019s all ready for you to eat.
Roasted butternut squash and brussel sprouts on a warm bed of spelt covered in sunflower butter sauce. Living the good life here.
Take care of yourself this week, and always for that matter. Eat some good food. Your body will be happy for it.
Bye.
-C
Serves 2-3
1 cup spelt berries (soaked in water overnight if you remember)
3 cups water
about 1/2 of a butternut squash
about a pound of Brussel sprouts
a medium red onion
1/4 cup sunflower seed butter (unsalted and unsweetened)
2 tablespoons liquid amionos or soy
1 teaspoon maple or honey
1 lime
2 cloves garlic
salt and pepper
olive oil
Preheat oven to 425
Place soaked spelt berries in a pot with water and a pinch of salt. Bring a boil then reduce heat, place a lid on pot and simmer for 45 minutes to an hour or until spelt berries are tender and all the water has been absorbed.
While spelt is cooking, cut sprouts in half (unless they are very small), cube the butternut into pieces about an inch big, and chop the onion up into chunks. Place all that you just chopped onto a baking sheet, drizzle with a teaspoon or two of olive oil and toss around. Sprinkle the veggies with a pinch or so of salt and pepper and pop into the hot oven. Roast for 40-45 minutes or until roasted to your desired doneness. (I like things a lot darker then the mr so I would leave my veggies in for closer to an hour)
For the sunflower butter sauce. Mince garlic and place into bowl or cup with the sunflower butter. Add in the maple, soy, and the juice of the lime. Mix together and add in a 2 tablespoons of warm water to thin out. Add more water if needed to get to a thick but pourable consistency.
Once the spelt is cooked, the veggies are roasted and the sauce is made, well you can assemble and eat. Spelt in a bowl, toss on some roasted veggies, and cover in the sauce. And then you eat it.
I love making cookies. There something about having to keep a close eye on the oven, the anticipation of the perfect time to pull them from the oven. Not too early, but never to late. You have to pay close attention. A cookie is not very forgiving if left in for a minutes or two too long. Those minutes can make or break a great cookie. OS baking them is , to me anyway, like a form of meditation. You can%u2019t be distracted, thinking about things like %u201cwho came up with the name Banana Republic and then used it for a clothing store?%u201d, or looking up %u201c large metal rolling balls%u201d. No, you need to pay attention to cookies, or else your cookies might burn. But don%u2019t let that scare you, and really, you can totally think of all the random, but important, things you want while baking, just use a timer or think those thoughts while watching the oven.
These cookies are the cookies that you want to make. A cookie yes, but almost like little soft cakes, full of chocolate chips and pumpkin seeds and warm spices to elevate the pumpkiness of the pumpkin. A perfect cookie to bake when you are freezing and want nothing else then to sit in front of a warm oven, spacing out, and revealing in the smell of a fall kitchen.
Fall pro tip. Place outwear in the kitchen while baking. I had my jacket on a stool close by while the cookies were baking and even now, a few days later, it still smell like cookies.
To the cookies!
The stuff. Brown and granulated sugar, flour with salt, cinnamon, allspice ,nutmeg, and baking soda and baking powder. Pumpkin puree vanilla extract, canola oil, chocolate chips, and toasted pumpkin seeds.
Mix the sugars, oil, vanilla, and pumpkin puree together until completely incorporated.
Whisk together all the dry
Add dry to wet. Mix gently, until just incorporated.
A now you have cookie batter. But wait, can%u2019t forget the chocolate and seeds.
I like to give the chocolate chips a rough chop to make the chips a bit smaller. You can skip this step or just use small chips if you want.
Chocolate chips and toasted pumpkin seeds go into batter.
After a gentle mix, it%u2019s time bake.
Scoop the dough onto a parchment lined baking sheet (important to line or use a splat mat, or else they will stick)
Into the oven and out of the oven. Bakes to a plump golden brown perfection.
All the cookies cooling on a wire rack like all cookies should.
And then thats it.
Cookies for you and cookie to share, if you are nice like that.
Happy weekend!
-C
make 2 dozen or so cookies
2 1/2 cups all-purpose flour
1/2 teaspoon salt
1 teaspoons baking powder
1 teaspoon baking soda
2 teaspoon cinnamon
1/2 allspice
1/2 teaspoon nutmeg
3/4 cup cane sugar
1/2 cup packed brown sugar
1 1/2 cups pumpkin puree
1/2 cup vegetable oil
1 teaspoon vanilla extract
1/2 cup toasted pumpkin seeds
2/3 cup chocolate chunks or chips
Preheat oven to 350
In a large bowl, mix together the sugars, purlin puree, oil, and vanilla until completely incorporated. In a smaller bowl, whisk together the flour, baking soda and baking powder, salt, all spice, cinnamon, and nutmeg. Once whisk, dump into the bowl with the wet gas gently mix together until just incorporated. Do not over mix.
Dump your chocolate ships onto cutting board and give them a rough chop just to break some of the chips apart. (or use small chips) Add the chop chocolate and the toasted pumpkin seeds to the batter and gently fold them, just to even distribute them.
Line being sheets with either parchment or use a splat mat and scoop equal size ball of dough onto the baking sheets. Leave enough room for the cookie to rise and spread. Place baking sheets into oven and bake fir 12-14 minutes or until the cookies have risen, are golden brown, and a tester stuck into the middle of a cookie comes out clean. Remove from oven and place the cookies on a wire rack to cool.
Then you eat them.
Any not eaten cookies should be store in an air tight container and can be left out at room temperature for a day or two but should be refrigerated or frozen for longer storage. The mr likes to eat them straight out of the freezer.
If you come around my house in the cold months, you will more times then not find yourself faced with fresh bread. Why? Well because I like to bake bread. But mostly, if I am honest, when I am cold, I bake. (We keep the house heat off until at least November 1. After that we keep the heat at a low 60 when it%u2019s on.) I like the house to be kept on the colder side, but sometime, it%u2019s a little brisk so if I am home and cold, I am probably just going to bake something, to stay warm of course. This focaccia was my first foray baking to stay warm of the cold season. It was 40 degrees out and the heat still wasn%u2019t on, and I just so happen to be going through my spice drawer and found a batch of everything bagel seasoning that I had mixed up a couple months ago that needed to be used. Hence the bread.
Cold weather+found seasoning+I should make something for dinner=everything bagel focaccia. Or you can just make it because it is super easy and every time I make focaccia it gets gobbled right up. Especially this time. Barb and the mr ate half of it at dinner. And I think the other half was gone by the next day. To quote the mr. %u201cThis focaccia is professional%u201d. He said it with a mouth full of bread. No shit dude. I am professional. Ha
The stuff. Flour, yeast, warm water, everything bagel seasoning, sea salt, pepper, and olive oil.
Start with getting the yeast and warm water mixed together. Let it sit for a minute or 5, just to make sure it is active (this is more important to do if you are not using fresh yeast)
Once you are sure your yeast is alive, add in the flour and mix together until you are having a hard time mixing anymore.
Dump dough onto a floured surface and start to knead. Probably for 5 minutes, until you dough looks like%u2026.
This. Kneaded until smooth and beautiful .
Place dough into a deep bowl and drizzle with olive oil. Make sure the whole ball is coated. Then cover with a damp cloth and stick in a warm place to rise for about an hour, or until the dough has doubled in size.
Once dough has doubled, grab your baking sheet (can use a pan) and coat the pan with about 2 tablespoons olive oil.
Place the dough into pan and spread it out using your fingertips. Flip the dough over if you need to and keep dimpling the dough until it hits all the sides. Drizzle on another tablespoon of oil on top.
And don%u2019t forget the seasoning. Sprinkle on all the everything seasoning along with the sea salt and some cracked pepper. Make sure to be somewhat liberal with the seasonings too because you know that%u2019s what you want.
Into the oven for 30ish minutes then out of the oven
Look at all the everything.
Drizzle the top of the bread with a little more olive oil, pop it out of the pan, stick it on a cutting board, and that%u2019s it. Now watch your slab of bread disappear.
Happy bread baking. Stay warm.
-C
make a 9×13 slab of bread
4 cups all purpose flour (plus a little more for kneading)
2 cups warm water
2 teaspoon yeast (or one packet)
3 tablespoons everything bagel seasoning*
1 tablespoon sea salt
cracked pepper
about 1/3 cup very good olive oil
*Note To make your own everything bagel seasoning mix up equal parts dried minced garlic, dried onion flakes, sesame seeds, and poppy seeds. Or I think you can buy it now at the store with all the other spices. But it%u2019s probably cheaper to make it yourself.
To start, place yeast and warm water in a big bowl. Mix until incorporated and let sit for a minute or two or until you see little bubble form, just to make sure the yeast is active. When your sure it%u2019s good, add in 4 cups of flour. Mix with a wooden spoon or dough mixer until it becomes hard to mix anymore. Dump the dough onto a flour surface and start to knead, adding a little bit of flour as you go if it became to sticky, until the dough is smooth and uniform. Should take about 5 minutes. Place the kneaded dough back into bowl (scrap any of the extra bits out first) and drizzle with olive oil. Make sure the whole dough is coated. Cover the bowl with a damp towel and place in a warm spot. Let dough rise for an hour, or until it has doubled in size.
Preheat oven to 375.
Once dough has doubled, grab a 9×13 baking sheet or pan and coat with 2 tablespoons of olive oil. Really make sure the pan is well greased. Place dough into pan and with the tips of your fingers, smoosh and spread dough until it has filled up the pan. Drizzle with another tablespoon of oil then take your seasoning and evenly spread it all over the top. Sprinkle with salt and add a little cracked pepper. Now pop it into the preheated oven. Bake for 30 -35 minutes or until the bread has turned a nice golden brown.
Remove from oven and right away drizzle on another tablespoon or so of olive oil. Let sit for a few minutes to absorb then pop the bread out of the pan and place on a rack or cutting board and either let cool, or not. Warm focaccia is loved by all.
Whatever you do, do not turn on your oven this weekend! But I guess if you have air conditioning and don’t mind cranking it… well then go for it. And can I come stay with you?
But for the rest of us doing this weekend without the old A.C., we need to feed ourselves, feed ourselves without any fire because 100 degrees is no joke and any added heat from anything will likey tip us over the edge. I am already so close to that edge and it’s a long way down..(Just ask the mr, he could tell you a thing or two about heat and me.. not good)
Enter hummus and veggies.
You can’t really go wrong with a good hummus and veggies meal situation and sometimes it’s all that can be right. I for one could eat bowls and bowls of hummus, and sometime do, so this is not a stretch for me. Especially this hummus. I knew I would like it, but man, was (was because I ate it all) it freaking delicious. The sunflower seeds really did it for me, gave it a little something extra, like a freshness that is still creamy and earthy, but is not quite, I don’t know, dark as tahini? %u00a0It’s kind of hard to explain without having you taste it (so make it and you tell me)%u00a0%u00a0Don’t get me wrong, I love tahini, but sometimes you just %u00a0got to mix it up. (Plus sunflowers seeds are dirt cheap. Tahini is not nearly as cheap so bonus there too.)%u00a0%u00a0Maybe its because the sunflower seeds bring the sunshine to your mouth. A sun filled mouth of pureed seeds and beans.%u00a0 Yup, that’s what it is.
So here ya go, a no heat meal (or snack or spread).%u00a0We got this.
The stuff. %u00a0Cooked chickpeas (no need to cook your own, canned is a okay), sunflower seeds, a lemon, a few cloves of garlic, salt, pepper, a little water, and some herby green like parsley or cilantro.%u00a0
Hummus is pretty basic, it’s just stuff blended up, but because we are starting with raw sunflower seeds, we need to really bend the shit out of them until they turn into a paste, so do that, which is going to a take about 8-10 minutes. Then once its pasty, add in the garlic and the juice of the lemon and blend until its all smooth.
Could almost stop here at this point. Sunflower seed goodness all emulsified. Taste it, it is so good.
Now add in the chickpeas and a pinch of salt and pepper.
Blended until smooth with a little drizzle of water to give just the right consistency. %u00a0And that’s it.
Pile a bowl full enough that you can call it dinner them top with a good amount of fresh herbs. Serve with chopped up fresh veggies or whatever you like and we are good to go.
Creamy, dreamy sunflower hummus, no heat required!%u00a0
Stay not melted!
-C
Makes about 2 3/4 cups
2 1/2 cups cooked chickpeas (or one can) drained
3/4 cup raw (can use toasted)unshelled sunflower seeds
l juicy lemon
2-3 cloves garlic
1-2 tablespoons ice water
salt and pepper
handful fresh herbs like parsley,cilantro and or dill (optional)%u00a0
Place the sunflower seeds in food processor and turn on until seeds turn into a paste, which will take about 8-10 minutes. After every few minutes, scrap the sides down to make sure it all gets blended. Once the seeds reach paste consistency,%u00a0add in the juice of the lemon and the garlic. Blend until smooth. Last off, add in the chickpeas and a pinch or salt and pepper and blend until smooth, adding %u00a0in a tablespoon or two of water to get the hummus to the consistency of your liking. Once blended taste and check for seasoning (add more salt and or pepper if needed)%u00a0
When the hummus is done, scrape into bowl(s), and top with lots of fresh herbs and a sprinkle more of sunflower seeds. Now eat it. Eat with veggies, with bread, with pretzels, or with a spoon (or finger). Do what you need to do.
%u00a0Any left over, if there is any, can be store in the fridge for 2-3 days.%u00a0
I am one of those people that hangs out for far to long in the grocery store, mostly in the bulk section, looking al all the types of rice, and grains, and beans, and seeds, admiring the variety and colors and also wishing I was one of those people that had an extra $25 to drop on a pound of pistachios.%u00a0%u00a0(Them were some pricey pistachios fo sho.) I take my time, peruse the bins, maybe take a little taste or two, %u00a0and go for what I need. And maybe if something is on sale, get a little of that too. Things that usually make the list are spices,%u00a0oats, beans, maybe rice or quinoa, flours, and seeds. Pumpkin seeds were on sale so those were the seeds of choice and I also got some barely because when I was starting at all the grains,%u00a0it dawned on me that I don’t know many people that eat barley, or even care about it, which is a shame because it is awesome. It might not be trendy like farro or freekeh, but it is just as good, and damn if it is not a hell of a lot cheaper.%u00a0
With the barley and pumpkins seed in hand, I had the start of a salad. So I grabbed some oats, a few spices, some beans and ran away from the builk section, past the nuts before things got bad and I either a) got kicked out for eating my weight in cashews and almonds,%u00a0pretending to just need a taste, or b) paid the $25 for a pound of pistachios that I might not eat because I would need to save them for something really special because they cost $25 a pound. Then I grabbed veggies, walked around the wellness section for good measure, did another lap around the store just in case I forgot something, then finally made my way out of the store only to realize when I got home that I forgot something. (I always forget something)%u00a0
But I had all I needed for a barley salad situation so things went well. This is a fantastic salad. It’s quick and easy and tasty and good. Barley, tahini, veggies and pumpkin seeds… It’s all you need for a just right dinner, or a fantastic side to any meal. Or as a snack at anytime. Bring it to a BBQ, a graduation party, or a pot luck. it will get eaten, and if by chance you end up with a little left over, bring it on home and eat it for breakfast. It will still be just as good.%u00a0%u00a0
The stuff. Pearled barley, tahini, pumpkin seeds and garlic. And some red wine vinegar, salt and pepper, kale, a carrot, some cauliflower, a lemon, a red onion, and a cucumber. (you are not going to need the full amount of all these veggies)%u00a0
First off, cook the barley. The barley and water go into a pot, brought to a boil, then left on low %u00a0to cook until tender. Once cooked, strain away excess water
While barley is cooking (or is cooked) chop up the veggies into mouth sized pieces. I used half the cucumber, half the onion, some of the cauliflower, all the kale, and all the carrot. It’s not an exact measurement, you just want a good amount to toss into the salad.%u00a0
Barley in bowl, topped with the veggies and pumpkin seeds…. The pretty before the mix. You don’t need to add it like this, I just did it cause it looks good.
And the tahini sauce. Mince garlic and add to a jar or bowl with the juice of the lemon, vinegar, a pinch of salt and pepper and give it a really good mix.
Creamy, zippy, oh so good.%u00a0
Drizzle and toss the dressing with the barley and veggies.
And that’s that. Now you are ready for eating.%u00a0
Enjoy wherever this salad takes you.%u00a0
-C
If eaten as a meal, serves 2-3. As a side dish, serves 6-8
1 cup pearl barley%u00a0
3 cups water
1/4 cup tahini%u00a0
1 large lemon%u00a0
3 tablespoons red wine vinegar
2 cloves garlic
salt and pepper
1/2 of a cucumber%u00a0
1 small carrot
2 large kale leaves
1/2 of a red onion
1 cup of cauliflower florets%u00a0
1/4 cup toasted pumpkin seeds
Note. The vegetable amount and type is more of a preference. You could use all cucumber and onion or add %u00a0broccoli and pepper, just make sure to have a least 3 good cups of some chopped up color.%u00a0
Place barley and water into a pot and bring to a boil. Turn heat down to low and continue to cook until barley is tender, but not mushy, which should take about 45 minutes. Once cooked, strain excess water.
While the barley is cooking, chop all the veggies into small mouth sized pieces.%u00a0%u00a0And make the tahini sauce. Mince garlic and place in a bowl or jar. Add in tahini, the juice of the lemon, and the vinegar. Mix well until smooth then season with salt and pepper to taste. %u00a0
When barley is cooked and drained, let cool for a few minutes then place in a big bowl. Add in all the veggies and the toasted pumpkin seeds, then drizzle with the tahini sauce and toss all around. Season with salt and pepper to taste..%u00a0
Now eat still warm, or later at room renature, or place in fridge for it to get cold. It can be a filling meal or a great side dish.%u00a0It’s good all ways, any way.
Another note. This salad is great for parties and BBQ’s and can be made a day or two ahead. If you do make ahead, hold off on mixing the pumpkin seeds and the tahini sauce with the rest of the salad until you are about to serve it.%u00a0
Banana bread never goes out of style. It is a clsasic, everyday, everybody type of food. Have a slice for dessert, maybe drizzled with some chocolate, definitely.%u00a0%u00a0How about for a grab and go breakfast, sure sure.. A chunk slathered in peanut butter for snack time or anytime, well %u00a0isn’t that’s why you make it?%u00a0 And who doesn’t always have a banana bowl in the kitchen? A banana bowl that is always full of bananas because the banana just always makes it’s way home. They seem to pile up, even when I don’t mean for them to. And I know I am not the only one. I see it all the time. A fruit bowl in the kitchen with a least a couple of really really ripe bananas, waiting for that moment when you know there is no freaking way anyone in their right mind would eat those banana because gross. That’s when you have it, the perfect banana for some banana bread, or in this case, banana muffins. %u00a0
Here I went muffin style because I had already made a loaf of banana bread earlier in the week and because I wanted to send half of the muffins to the boys at the front desk at the gym. (They give me coffee, I give them muffins) And also, muffins cook a lot faster then bread so if you are a little low on time, muffins are the way to go. But if you would rather bread, you can make it bread. Bananas are there for you and are not fussy.%u00a0
The stuff. Ripe bananas, poppy seeds, brown sugar, oil, and apple cider vinegar. Also have flour, cinnamon, baking soda, baking powder, and a little salt in the bowl.%u00a0
Mash the bananas in a bowl, like really mash them up until it turns to a sugar banana slop.%u00a0Then add in the oil and the vinegar and mix together.
Dump in the dry and the poppy seeds and mix it all up until combined but then stop. Don’t over mix the batter or else you will get tuff muffins.%u00a0
Scoop into well greased muffin pans and pop them into the preheated oven to bake.%u00a0
Done! And in only took like 20 minutes appose to an hour if I made banana bread.%u00a0
And here is when you grab a coffee, a muffin, and have yourself a moment.
Stay good.
-C
makes 12-14 muffins
2 cups flour
1 teaspoon baking soda
1 teaspoon baking powder%u00a0
1 teaspoon salt
1 tablespoon cinnamon%u00a0
1/4 cup poppy seeds
2/3 cups packed %u00a0brown sugar
1/2 cup neutral flavored oil
4 really ripe bananas (they need to be really ripe of the mixture will be to dry)
1 tablespoon apple cider vinegar%u00a0
Preheat oven to 350
In a large bowl,%u00a0mash the bananas with the sugar until the mixture turns wet and sloppy, but there are still a few little chunks of banana.%u00a0%u00a0Mix in the oil and vinegar. In a separate bowl mix the %u00a0flour, cinnamon , baking powder and soda, salt, and poppy seeds together. Dump the dry into the wet and mix until all is combined but then stop. Don’t over mix batter.%u00a0
Scoop mixture into well greased muffin tins and place into oven once it has preheated.%u00a0Bake the muffins for about 20- 22 minutes or until nicely browned and a tester stuck into the middle of one comes out clean.
Remove from oven and let sit in tin for a few minutes until it cools down. Remove the muffins from the tin and let completely cool on a wire rack.%u00a0
Eat whenever and how many you want, store the rest in an air tight container for a couple of days or wrap a few and %u00a0freeze.%u00a0
food — OLD — The Lovely Crazy
September 19, 2019 by maximios • Blog
My winter farm share is coming to an end this week. One more pick and then a three week stretch until the summer share starts… WHAT AM I GOING TO DO!!!
Stock up as much as I can is what.
I have been strategic about the roots and veggies that I have chosen to bring home the past few weeks.(My farm lets you pick what you want) I know what I can buy at the store, things like carrots and potatoes, so I have been passing those up, but the roots like beets and celeriac… I have been bringing home baskets of those and hoarding them in the fridge and basement in preparation for the laps in farm fresh food and knowing that if I want to by these at the store it s going to coast me a million dollars a pound. (a for real million dollars)
Yup, lots of roots around here, especially celeriac root which is fantastic. I am kind of obsessed with celeriac, with its fibrous, knobby exterior, soft but almost meaty texture inside, and a flavor that is close to celery but so much better. I don’t know why it has taken me so long to do a posting featuring this amazing root vegetable (I eat it almost every day)
So here, an amazingly tasty, hearty but not heavy, celeriac recipe. Perfect for spring and the change into summer…. Mustard roasted celeriac with an fanatic split peas gravy that will have you licking you bowl clean.
The stuff….For the split pea gravy we have a carrot, a parsnip and a large onion chopped into small chunks. Salt, thyme, a bay leaf and of course the split peas. Then there is the celeriac root* sliced into 1/2 inch thick rounds and some plain old yellow mustard .
*Note. I don’t peel my celeriac root. I really enjoy the fibrous exterior but realize that some don’t(The mister does not like it) so peel it if you want.
Toss the chopped parsnip, carrot, onion and the spices into a pot on medium heat and let veggies sweat a few minutes until tender. Add in the split peas and enough water to cover everything. Turn pot on high and bring to a boil, then cover and turn to low. Make sure to give the pot a good stir ever few minutes and add more water if needed
While the gravy is cooking, take the celeriac rounds and brush each side with yellow mustard, sprinkle with pepper, and place on a baking sheet. Stick into the oven to roast for about 25 minutes, flipping the rounds after about 10 minutes.
Once the peas have soften, remove the bay leaf and puree until smooth and oh so creamy. Taste and add more salt and pepper if needed. If you find that the gravy seems to thick, just add in more water until it’s the consistency that you want. The gravy is made, the celeriac is roasted… now we are ready to eat!! Stick the celeriac on a plate and dump good amount of that gravy right on top. Feel free to add a bed of spinach, or a grain or anything you want, because why not, and also some chopped tomatoes for a little acid and prettiness.
Serve with the fanciest knife and fork you can find. Extra yellow mustard and sriracha sauce are great condiments to have close by.
Happy Tuesday!
-C
Mustard Roasted Celeriac with Split Pea Gravy
Preheat oven to 400 degrees
Small dice the carrot, parsnip and onion and throw into a large pot. Spinkle with salt and pepper, add in the thyme and bay leaf and add a splash of water. Stick on stove on medium heat and stir. Let cook until the veggies become soft and fragrant. Now add in the split peas and 2 cups of water. Bring to a boil then cover and turn heat down to medium low. Let cook until the split peas become tender (about 25 minutes) string on occasion and adding more water if the peas are not completely summered while cooking.
Once the peas are tender, let cool for a few minutes, remove bay leaf, and either dump into a blender or blend with an immersion blender until nice and creamy. If gravy seems to thick, add in more water.
Scrub or peel celeriac roots and slice them into 1/2 inch think rounds. Place on a baking sheet and brush mustard on both sides and spindle with pepper. Stick into oven for about 10 minutes, flip, then back into the oven for another 15 or so minutes, or unit the celeriac is tender.
When the celeriac is done remove from oven and stick a few rounds on a bed of spinach (or not, or any kind of grain or green you like) Top with a hearty helping of the gravy and toss on some chopped up tomatoes.
Eat with at knife and fork like a fancy person.