
THE LOVELY CRAZY
 This week was good. Two days in a row the front door was open, the window was open and the heater was off, which pretty much made me that happiest person in the world. My spring cleaning brain has kicked in and I want to clean everything (even the walls). I even spent a good part of an afternoon moving and rearranging furniture. (The house ended up basically the same as when I started) And one of the best parts of the week….most of the snow melted! I am getting super hyped to start raking, cleaning, planting and weeding and and just getting really dirty! Oh how I love the spring!
Here are a few internet things from the week
– Ancient Grains are new again About time!
– This article about the chemistry of cookies is a good one….
– Oooohh pretty. String art
-How to Do Fishtail or Herringbone Braids Step by Step I need to start doing something with my hair besides a really sloppy pony tail that I don’t take out for days on end.
-I think I want to make this Honeycomb shelves.
And some real life happy  Oh Intervale Community Farm..I love you. I picked up my farm share and was especially pumped for another gigantic kohlrabi and some locally grown, locally milled wheat flour.
 The trees, they are a budding
 The perfect ripeness, destined for naner ice-cream!
 My sister and I took this little for a sled ride through the wood where there was snow (but it was 45 degrees!) The hike ended up with me pulling her through a field of mud. It was fantastic.
 One year ago today. Dinner with my favorite people.
Hope your weeks was awesome and warm..Spring is just about here to stay!
Have a great week!
-C
 We made it ! FRIDAY!!! Fridays always make me think about Steve Urkel, you know, the geeky guy from the show Family Matters who’s catch phrase was “Did I do that?. Weird, I know, but when I was a kid, Fridays meant TGIF on abc (the Tv show line up) It was something I looked forward to all week. Get out of school, go home, have dinner (usually pizza) and spend the night in front of the Tv. And honestly, not mush has changed. We still keep Fridays the same. Work, Pizza, and Tv.. Just now its not Family Matters and Urkel, but Netflix binge watching and me making the mister a fancy ass pizza. But if Family Matters makes it to Netflix… I will for sure be watching that!
So anyways, This particular pizza was inspired by a small batch of kohlrabi and red cabbage sauerkraut I made, plus a block of swiss cheese that I found hidden in the back if the fridge. I guess it was meant to be. The mister was much into this concoction… like I will be making this again and maybe again after that. Its kind of like a reuben, but without the corn beef, which you could totally add if you wanted, or the mayo and ketchup dressing, which you could swap in instead of the mustard sauce. You can even make it vegan if you use vegan cheese. Do what ever you need to do here cause hey, its your pizza to eat.
 The stuff. Pizza dough, stone ground mustard, shredded swiss cheese, kraut, and caraway seeds.
  The dough is rolled out and smeared with the mustard. (The mister said I could have added more)
 Top that with the kraut
 Cheese goes next and a good sprinkle of caraway seeds too. Now stick that lovely into the oven.
 And after 15minutes, this is what you get… Bubbly, cheesy, crusty pizza. And it’s for real one of the prettiest pizzas that I ever have made.
  Slice and serve…. and eat in front of the TV.
HAPPY WEEKEND!!!!
-C
Kind of a Reuben Sauerkraut and Swiss Pizza
This is the stuff you will need..adjust the amounts to you liking
- Pizza dough (this dough or store bought)
- 1/4 cup Stone Ground Mustard
- 1 cup Cabbage and Kohlrabi Sauerkraut ( or just regular sauerkraut)
- 1 cup Swiss Cheese (Use vegan cheese to make this pizza is vegan)
- 1 teaspoon caraway seeds
Preheat oven to 450
Roll out the pizza dough to desired thickness and place on skillet or baking sheet. Smear with mustard, then layer the sauerkraut then cheese, and sprinkle with caraway seeds. Place into oven to cook for about 15 minutes. Pizza is done when dough s cooked and cheese is all nice and bubbly.
Remove from oven, let cool for a minute, cut into slices, and eat.
 WOO WHOA!! MARDI GRAS! I wish I was down in New Orleans today celebrating… and soaking up some warmth and sunshine, catching beads, maybe even taking my shirt off(?!!?)
No, I keep my shirt on today because I am not like that, and also, I would die of hypothermia. Today I wear a shirt, underneath 5 other shirts ad sweaters. Because today is just another day of -20 below here in Vermont.
To keep me from going completely crazy, I am thinking of warm weather and I am thinking of New Orleans (love that place!) and the humongo celebration that’s been going on there for the past week. Everyone partying out in the streets. Big floats and beads all around. I might be feeling a little jealous, (more of the weather then the partying) but thats ok, I have TV to watch and a warm comforter to wrap myself up in. And maybe I should have done a post of fried donuts or of some type of alcohol party drink to celebrate the day, but I really just wanted to make something warm and spicy, so I went with some dank cajun beans. And also I wanted to sing…. “Beans Beans the musical fruit, the more you eat the more you toot!!” hehe
But for real, these beans are sooooo f-ing tasty and super versatile. You can serve the spicy beans with the rice or just eat just the beans. You could do the beans and add to a bed of kale (me) or add cheese, guacamole and a few corn tortillas to the mix (the mister). Simple to make, super tasty and full of flavor! And pretty freaking heathy to boot! This dish gets an A+!

This dish is so full of flavor but so simple to make. We start with presoaked black beans drained and rinsed. Cajun seasoning (which is basically 1 part onion powder, thyme, oregano, and 2 parts paprika, garlic powder, cayenne power, and salt and pepper) Sliced onion and jalapeno, and a few tablespoons of tomato paste. Oh, and the rice.

 Beans are in a pot filled with water unit beans are completely sumerged. Add in the onion, jalapeño, tomato paste and cajun seasoning. Bring to a boil then cover with a lid and simmer for about 45 minutes….. After about a half hour, start up the rice. Water in pot with rice, bring to a boil, cover and simmer for 15-20 minutes.
 The rice is done and fluffed with at fork. The beans are cooked with just the tiniest bit of bite, bathing in a thick spicy tomatoey sauce. The chunks of onion and jalapeño have broken down and are hiding in every bite…. Oh so good!
Now get ready for the bowl!!!  Bringing a little spice and nice to this crazy cold winter day or any fun festivities you may have planned.
Have a Fantastic Day.. Stay Warm or if you already are.. lucky you!
-C
Cajun Black Beans and Rice
Ingredients
- 1 1/2 cups dried black beans* soaked for at least 4 hours or overnight..Rinse and strained
- 2 tablespoons tomato paste
- 2 tablespoons Cajun seasoning
- salt and pepper
- 1 Jalapeño
- 1 small yellow onion
- 1 tomato (I used a large roma)
- 1 1/2 cup of dried rice plus 3 cups water
*If you want to use canned beans, go for it…Just sub in 2 cans rinsed and strained black beans and only add a cup of water to the beans. Pre sauté the onion and the jalapeño before adding to the beans and only simmer the beans for about 15 minutes.
Place you soaked beans into a pot and fill with water until the beans are completely summered. Slice the jalapeño and onion and add to the pot along with the tomato paste and the cajun seasoning. Bring to a boil then place a lid on it and turn heat down to low. Let simmer for about 45 minutes or until the beans are completely cooked.
When the beans are about half way done, add rice to water and bring to a boil. Once boiling, place a lid on pot and turn heat down to simmer and cook for about 15 minutes or until all water is absorbed and rice is tender. Fluff with a fork.
To sever. place a scoop of two of rice to a bowl and top with a scoop of two of beans.… Top with diced tomatoes and scallions… (The mister added shredded pepper jack to his and thought it was excellent)
Eat with a fork or spoon.
 There is a joke about Vermonters, that all we talk about is the weather. Well, it’s kind of true. But to our defense, we get a lot of weather, and it’s always changing and intense and both lovely and crazy and all over. So yeah, we talk. A lot, about the weather. And on that topic, I am trying so hard not to complain, but honestly, I am getting a little sick, both physically and mentally from all of these super, to freaking cold temperatures. Yesterday the high was 0 ( which was at like 2 in the morning) and factor in the windchill, the temp stayed at like 25 below. It f**king sucks. I can’t stay outside for too long or else I will probably die. The dog is having a hard time making it around the block before he gets ice paws, and the mister, well he even started wearing gloves (he wears a sweater all winter and never gets cold…..he is officially cold)
And not only is the cold keeping us all indoors, but its making us all borderline sick. We both have been fighting something for the past few week. The headaches, stuffy nose, chest congestions. The puppy is getting super dry skin and gave himself a hot spot. BLAh!! Ok, enough! No more complaining
Because I do really love the winter and all the pretty snow!!!!
But we are feeling kind of sick so to make us feel oh so much better, a fantastic, super tasty, healing, good for me, good for you, soup. Turmeric ginger carrot… oh man. Made with lots of ginger, turmeric and garlic and finished with a drizzle of raw honey. This soup is exactly what we need. All ingredients scream.. FEEL GOOD, BE WARM AND COZY! Almost everything in it has antibacterial and anti inflammatory properties. The veggies are hearty and heathy and just eating soup helps to keep hydrated. And the best part..it tastes so freaking amazing.
So whether you are feeling a little mah, or just a little hungry.…this soup is where it’s at!

Lots of chopped up carrots, a small onion, a little bit of cauliflower I had left over and a small beet. If you don’t have the cauliflower and or a beet, just use ares pepper or another 2 carrots.. no biggy.
Then we have the fresh ginger ( you can use powdered) turmeric and garlic. All the good healthy spicy and yummy stuff.
 I accidentally spilled the turmeric on the counter..but it kind of looks like I might have done it on purpose… yeah, let’s go with that. Chop the garlic and he ginger into chunks
 And toss into the pot to warm and activate. Just a little toasty toast.
 And the veggies are roasted and tender and smell so good. It took a lot of will power to not eat the whole pan right there.
 I added the roasted veggies and 3 cups water straight into my pot with the spices because I used an emulsion blender. If you are using normal blender, add the veggies, the toasted spices and the water to the blender and blend until smooth. Then transfer to a pot.
 Pretty much all blended together….(I left a few big chunks in there to snack on while I was waiting to eat serve…I was really hungry) and let to simmer for a little longer…

And now ladle into a bowl and get ready for a fantastic finish… drizzle a spoonful of raw honey into soup…….so so good. You could add the honey before serving, but heating it kills all the good antibacterial stuff so that’s why we wait. Then I sprinkle some chopped kale and chives. (do it if you want, but not necessary)
Now enjoy. Let the warmth wash over you and feel all those good spices helping to fight the good fight to keep you well and all the yummy to satisfy your hunger.
And lets hope for some warm (above 0!!) weather!
-C
Turmeric Ginger Carrot Soup
Ingredients
- 5 large carrots
- 1 small onion
- 1 small beet*
- quarter head cabbage ( or a cup of frozen)*
- 2-3 teaspoons turmeric
- 2-3 tablespoons fresh ginger (1/2 teaspoon if using powdered)
- 4-6 cloves garlic
- salt pepper
- raw honey (omit if vegan)
* If you don’t have or want to use beet and or the cauliflower, you can use a red pepper, a small sweet potato, or just use a few more carrots.
Chop all veggies into similar sized chunks and toss into a lightly oiled pan or on a baking sheet and sprinkle with salt. Stick in oven at 425 for about 30 minutes or until all veggies are fork tender.
In a large soup pot or dutch oven, toss chopped garlic, ginger and the turmeric and place on medium heat for a few minutes to activate the spices. Add the roasted veggies and 3 cups water to pot (if using emulsion blender) and blend until smooth. If using a blender, add the toasted spices, roasted veggie and 3 cups water and blend until smooth then transfer to a large pot or dutch oven. Add salt and pepper to taste. Turn heat down to simmer and let cook for an addition 10 minutes.
When ready to serve, ladle soup into bowl and drizzle a spoonful of raw honey into soup. Garnish with fresh chopped kale, chives, cabbage or whatever you want. (or nothing is good too)
 No matter what is going on in my day, seeing a blue sky like this puts a smile on my face….To bad that smile turned to ice and my face froze in place. Because for some reason, winter around here now means below zero all the time. I mean, I love winter, but I am not going to lie… I wouldn’t mind if the wind would stop blowing and we had a couple of days of above zero weather.. and maybe a good foot of snow. I guess I’ll just have to be patient, cause its bound to happen. I mean, we live in Vermont, and if nothing else, we get weather.
Anyways.. another week full of stuff that fills. I am a little taken aback that its already February… when was it January? Time just keeps going by fast and faster, (especially when I get cabin fever) and I think, “What have I done in the past year?” Well, I have done a lot. I was just looking through pictures from a year ago and found some of our tiny home in working progress. Not to many people can remodel a five unit house and a meat locker to live in, within a year.. by ourselves. (ourselves being Nick and I)..So yeah, that made me feel pretty freaking awesome and accomplished. (I needed to remember that because I haven’t been feeling it) But now I am feeling inspired and am looking forward to some new projects and fun things to come! (hopefully getting my pottery studio up and running, maybe another house remodel and lots of traveling!!…. take that winter blues!)
Anyway.. here are a few little bits from my week that made me happy.
 The mister called these snow mounds goosebumps… I think that is exactly what they are

The only warm day this week. (20..woo whoo!) Took the little out for a sled ride. She spent the entire time dragging her hands in the fresh snow.
 And oh how I cannot handle how freaking cute she is!! Plus, a shout out to my brother in law….MADLOVE!
 Fresh snow..Even though it was -15, I had to stop and take this picture. The colors were amazing
 Cabbage at the farm share pick up! Love ICF!!!
 89 cents a pound for fresh organic cranberries. Score!! Made these Oatmeal fresh cranberry coconut chocolate chip cookies with them. Big hit.
 This picture was taken exactly a year ago…..The mister and I were finally putting in the bathroom of our tiny little home…. And look at that awesome sink! (another amazing salvage yard find) If you ever need or want to remodel a bathroom, I suggest using a old cast iron utility sink. So practical, so functional, so pretty.….it makes me happy everyday!
Happy Sunday!
Happy February!
And if you are into it….
Happy Football Super bowl Game and or party! ( If you need any awesome fast party recipes, I have bunch, just check out the recipes page!)
-C
 How awesome will you be when you bring the most freaking amazing tortilla chips to the party this weekend? You will be like..”what, it ain’t no thang.. I am just good like that” Yes, yes you are.
And yes, I am assuming that you will be making these awesome chippers to share at a Super Bowl part this weekend. I say this because even as I sit here writing this (with the TV on) there has been nothing but football talk…deflated balls, hot wings, half time shows and commercials. It’s almost as big as Christmas. Got to get the decorations, the special game day food and your football jerseys. It’s crazy and all over the place. So that’s why I am assuming you are making these for the game. But if you not going to be participating in any football parties.. by all means, make these chips for yourself anyways. Celebrate you day! Have a non football watching party. Or just make these whenever. Jalapeño Lime chips for everyday!
Note: You can make these chips without the jalaeno and or the lime if you need or want to. You can also stop after the first step and have some dank corn totillas for tacos ands stuff..But definitely make the chips… worth it for sure!

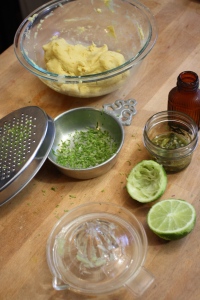
All the stuff.. Masa harina, hot water, salt, a lime and a jalapeño. Zest lime and place half the zest into a glass bowl with oil and either sit on warm oven or microwave for 30 seconds to infuse. Puree the jalapeño with a cup of hot water and add the puree and half the zest of a lime, plus salt, to the masa harina. Mix it all up with another 1/2 cup of water or enough to make the dough resemble play dough… You can add more water or masa if you dough is to wet or dry.
 Knead dough a few times just to make sure it’s completely uniformed and divide into 12-14 equal pieces. Place balls on a plate and cover with a wet paper towl to keep from drying out.
I do not own a tortilla press so I used what I had… wax paper, a wooded cutting board and brunt force. I took each ball and place it between the two pieces of the waxed paper, placed the cutting board on top, and with all my might and body weight, pressed down to smoosh. It works like a charm.
 My cast iron skillet is big enough to cook 2 -3 at a time, but doing one at a time is cool too. Preheat the skillet to medium heat. Cook each tortilla for about 2-3 minutes ( or until starting to brown) on each side.
  Half way there to chips!!!
With my fingers ( you can using a basting brush for sure), I rubbed a little of the lime oil all over both sides of each tortilla. Stacked a few high, then sliced those tortillas into triangle shapes. If you want to go crazy, you could cut them into strips or even use a cookie cutter and do some fun shapes… but triangle are easy, classic, and practical. A good shape for dipping!
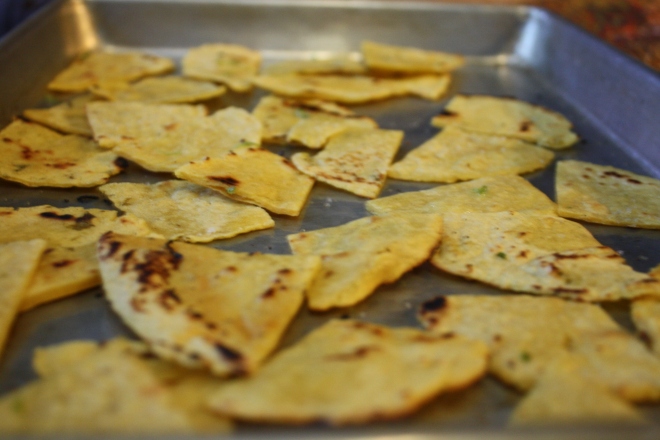 Placed all nice and cozy on a baking sheet. trying not to overlap. Into a 400 degree oven for about 20 minutes to complete the chip making process.. After about 15 minutes, check for doneness. When nice a crispy, remove from oven, squeeze lime juice all over and sprinkle with salt. I then stuck them back in the oven for a few more minutes just to dry the lime..
 After cooling down, take those chips and stick them in a bowl.
Eat a few, but wait and save them for the party. Or better yet, make a few batches. Bring a batch, eat a batch. (Its ok, you are allowed)
Eat with some salsa, maybe some of this guacamole, or just as they are…Anyway is the right way as long as you are eating!
Have fun making these and have fun getting read for the party this weekend (Super Bowl or not!)
-C
Jalapeño Lime Tortilla Chips
Makes 12-14 tortillas.. then made into a medium bowl of tortilla chips.
Ingredients
- 2 cups masa harina
- 1 1/2 to 1 3/4 cups hot water
- 1 teaspoon salt
- 1 lime (juice and zest)
- 1 large or 2 small jalapeños
- 2 tablespoons olive oil
- salt
To start, zest lime and add 1/2 of the zest to bowl with the oil. Place oil on warm spot on stove to let the oil infuse the limeness.
Take jalapeno and puree with 1 cup of hot water. In a large bowl, add puree and remaining lime zest to the masa harina and mix, adding an additional 1/2 to 1 cup of hot water until the dough resembles play dough, not to soft, but not to dry and completely incorporated
Divide dough into 12-14 balls and place on a plate under a wet paper towel to keep dough from drying out.
One at a time, take a dough ball and place between two pieces of wax or parchment paper. Place either a plate or cutting board on top and press down as hard as you can (you could even stand on it). Remove flatten tortilla from paper and place in medium hot skillet. Cook each tortilla for 2-3 minutes on each side.
When all tortillas have been made, lightly rub lime oil on all over both sides. Stack a few on top of each other and cut into triangles. Place pieces on a baking sheets (I used 2) and bake at 400 for 15- 20 minutes or until lightly browned and crunchy. When chips are done, remove from oven, squeeze or sprinkle lime juice on chips and sprinkle with salt. Stick back into oven for another 2 or so minutes to re-crisp from the lime juice.
Remove and let cool completely, then dump into a bowl
Enjoy!
What a week. It was my birthday, which if you know me, is not usually something I like to talk about. I’m not sure exactly why, but I am not really big on celebrating my own birthday. Or its more like I hide away from everyone around my birthday. ( I am not good with attention) But this year I tried. I had a couple little dinners with family, went on a few good hikes, gave the dog a bath (had to mention it because it was so needed and I was so happy to have a cleaner, less smelly dog..which lasted all of about 12 hours) and tried to relax and enjoy myself. The mister and I also did a bunch of little house repair projects that have been needed to be done (Birthday wish list). All and all, I had a good week. And now the birthday week is over and we can get back to normal, not bugging me, hectic, crazy, life. That makes me happy. Here are a few of my happy bits from the big week.
 A birthday bouquet of veggies. My lover knows me oh so well.
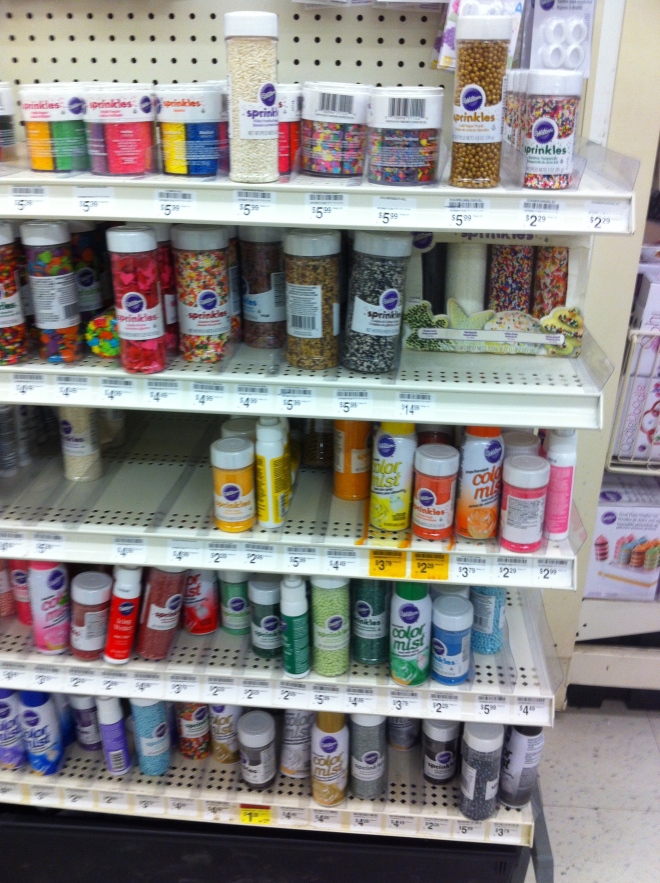
I went to get myself a new skien if yarn and stumbled upon this wall display of sprinkles.. It took a lot to not buy a bunch.
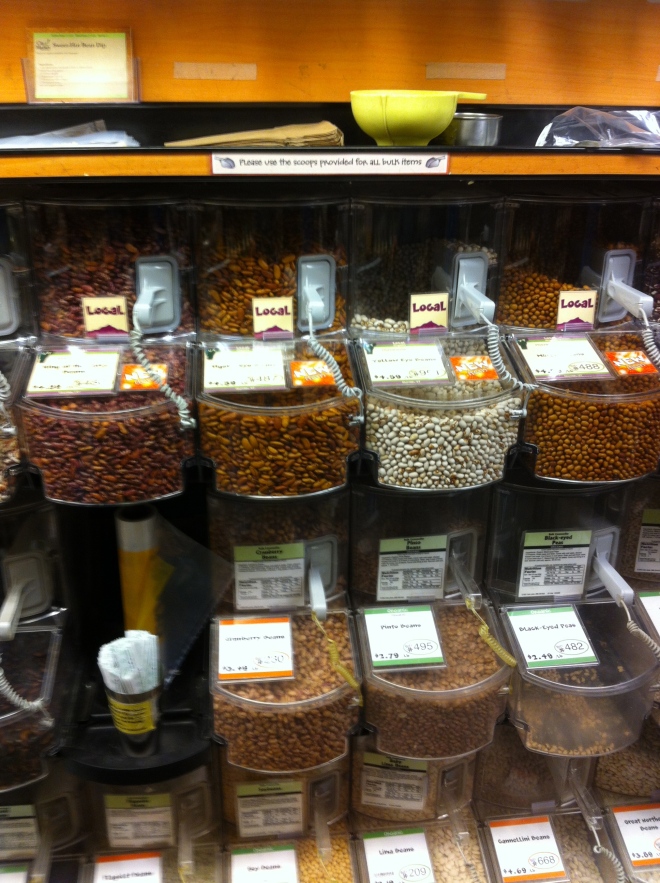 Every year I buy myself some special food for my birthday week. This is the bulk section at the local coop. They got in a bunch of new local dried beans!!!! Local birthday week beans. ( yes, beans make me happy)
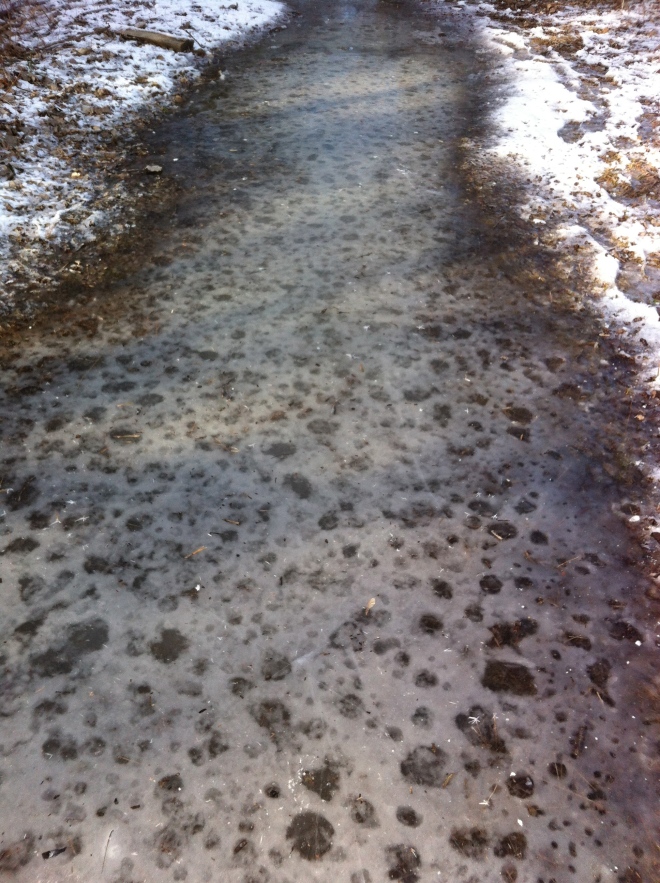 This hike was pretty treacherous, the whole trail was covered in this ice…. but look how cool it is.
 Huggable mountains

Birthday hike with big trees and a happy dog.
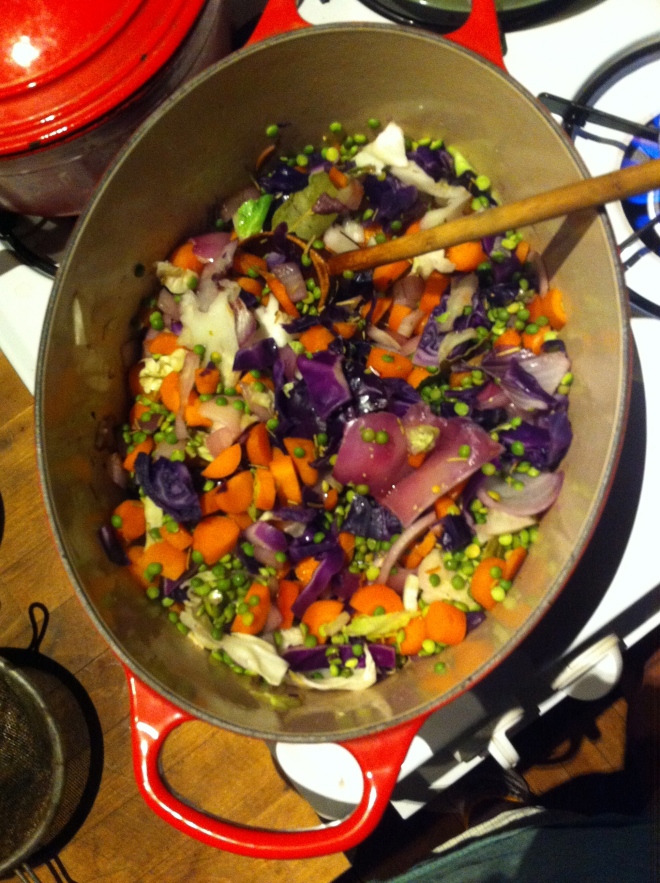 Split peas with tons of purple cabbage and purple onions plus chunks or bright orange carrots.. So freaking pretty and so freaking tasty!
 And last but not least..a throw back that made me smile…Moving day last summer. Our truck full of my house plants. I love my plants.
So now we go onto the last week of January! (holy crap, where has the time go?)
Have a great week!
-C
 Soft huggable mountains…..happy all over!
It started last month when I decided to make cool shaped pillows for all the little littles in family. (they all got fruit or veggies shapes…so cool. I wish I took some pictures) I needed to make a bunch so I went a bought this humongo box of stuffing thinking that I would end up using most of it and maybe have a little left over to make myself a pill or two. Oh man was I wrong. Those hug boxes could stuff a hundred pillows…the stuffers of stuffing really stuff those boxes stuffed! Now I had this giant box of stuffing and a bunch of extra fabric so I just figured that I’d make everyone in my family a pillow. I didn’t want to make the any more food shapes but still wanted to do something fun and pretty and huggable. …and then it came to me, A mountain! I mean, who wouldn’t want to hug a mountain?
So I made all the adults in my family a mountain for Christmas. (I am so nice). A couple of weeks went by, I had a little extra time and thought, “I should make a mountain pillow for me!”And if you are anything like me (super awesome), one mountain is just not enough and you will make an entire mountain range of pillows…… Mountains all over!
This pillow is so easy, no fuss, and can be made any size you like. I made mine on the smaller side, but if you have the fabric and the stuffing, why not go big? Do what feels right to you.
And I have to add, these pillows are really great gifts… I am thinking maybe a lovely Valentines day mountain? Doesn’t that sound fantastic?
What you will need:
- Sewing machine.(you can hand sew but machine is much much faster)
- Two pieces(or one piece folded in half) of fleece* for the mountain
- One small piece of fleece in another color for the mountain top
- Needle
- Thread
- Stuffing
Note: You can use other fabrics, but fleece is more forgiving because it had a little stretch, plus it soft and cuddly.
 To start, take you main color of fleece and cut into a mountainy triangle shape. You can go tall and skinny or short and fat….. any shape you want. If you feel like you need to make a paper template and use that to cut, go for it, but I don’t think you really need to.

Next, take the contrasting color fleece (the peak) and cut a large square. Line up with the top of the mountain peak underneath.
 Cut the piece for the peak in a jagged up and down pattern. Place right side up onto the base of the mountain and trim away excess fabric.
 Using the zig zag stitch on your machine, sew the jagged edges of the mountain peak right side up onto the right side of the mountain. Go slowly, but don’t worry about making it perfect, just make sure to sew over all the jagged edges.
 Now turn the two pieces right sides facing in on each other. Change the stitch on you machine to a straight stitch and sew around the perimeter of the mountain, leaving a small hole in the bottom.
And make sure to check your seams!
 Fold it right side out and stuff it. I started with little bits of the stuffing in each of the corners, then filled in the middle, it makes it easier to fill.
Once you are happy with your stuff job, thread a needle and hand sews the hole shut.
A soft, huggable, and oh so grand mountain.
I know, so fantastic…one is just not enough. And if you have gone to the trouble of pulling out the sewing machine, you might as well make a bunch. Just do it!
Have fun making a mountain range!
-C
 Chomp Chomp Chomp… The sound I make as I eat this freaking fantastic crunchy granola. You know it’s good when the person sitting next to you is annoyed by the sound of you face while eating. I eat a lot of crunchy stuff. And I am pretty sure I annoy the mister a lot.
  The simplest of stuff. 1 smashed banana, a cup of pureed butternut squash, Vietnamese cinnamon*, honey, and old fashion oats. (and a dash of salt, not shown)
 Toss the cinnamon and salt with the oats. Mix together the banana, squash and the sweetener and combine with the oats until full incorporated.
  Dump the mixture on a parchment lined baking sheet and give it a little pat, you know, to settle all the bit and pieces together, all cozy and evenly spread out. Now stick into a preheated oven and after about 20 minutes, take out of oven and give the granola a toss, breaking apart any super big chunks or overly wet pieces. Put back into oven for another 20 minutes. (I like my granola super crispy crunchy so I cook it a little longer, like 30 more minutes)
 And when you are happy with the crunchiness of you granola, remove from oven and let cool, trying not to eat all of it while it sit’s on the counter looking all pretty and smelling like happiness.
  I can’t stop eating these. They are like little balls of crack and I am an addict.
 The stuff you will need. Washed and drained fresh grapes (green or red. I usually use red but the green were half the price and the red ones didn’t taste very grapie*) Creamy peanut butter, skewers, and a little bit of cinnamon or cocoa powder (optional)
 When the grapes are frozen, melt peanut butter. Take a big glob and stick in a tall skinny cup or bowl and stick in the microwave or heat in a sauce pan and then transfer to a tall skinny vessel. Take frozen skewed grapes and, one skewer at a time, dip in the peanut butter. Cover with as much or as little of the peanut butter as you want and place on wax paper. If you are feeling feisty, add a sprinkle or cinnamon or even a dash of cocoa powder. Or, this may seem a little crazy, but garlic powder is so F*ing good.(it’s worth at least giving it a try) When all grapes are dipped, place back into freezer for another 10 minutes or so to let the peanut butter set up a bit.
 Whenever your ready… Eat. And be so happy. And always keep a back stock of frozen grapes in the freezer. They are the best.
 Because it is cold outside. Because I had an hour to kill before I needed to leave the house and because I wanted to make a sweet treat for the mister (who had been dealing with frozen pipes all day) and for the little littles that I was going to hang out with. My original idea was to just make regular old snickerdoodles, but as I was riffling around my tea drawer for a mid day tea (it’s usually coffee, but I am trying to cut back on drinking one thousand cups a day) I got hit with a little inspiration. Chai tea spiced snickerdoodles. Yes! a nice black chai, full of flavors or cinnamon, ginger, cardamon, allspice, and pepper. So many good time tastes. And while I am at it, why not add some chocolate to that mix, because, well just because.
 The stuff…Flour, salt, baking powder, cinnamon, and allspice. Cocoa powder, brown and white sugar. Veggie Oil (you can use butter, or vegan butter instead for a chewier cookie) vanilla, a little vinegar and a nice cup of chai tea… Also a little bowl of cinnamon and sugar to doodle the cookies.
 The sugars, oil, tea, vinegar, and vanilla go into a big bowl. Beat for a minute on medium, then add the rest of the stuff and beat some more until fully incorporated…. Simple simple.
  Aahhhh…….pulled from the oven and placed on a rack to cool. Fluffy, chewy, pillowy soft and spicy cookies. Oh the smell of so good!
 Made extra large to make extra little littles happy. The best part? I made each little sing me a song for a second cookie… I am the greatest!
 I need a good snack.. Something healthy, hardy, fast, and of course, something tasty.
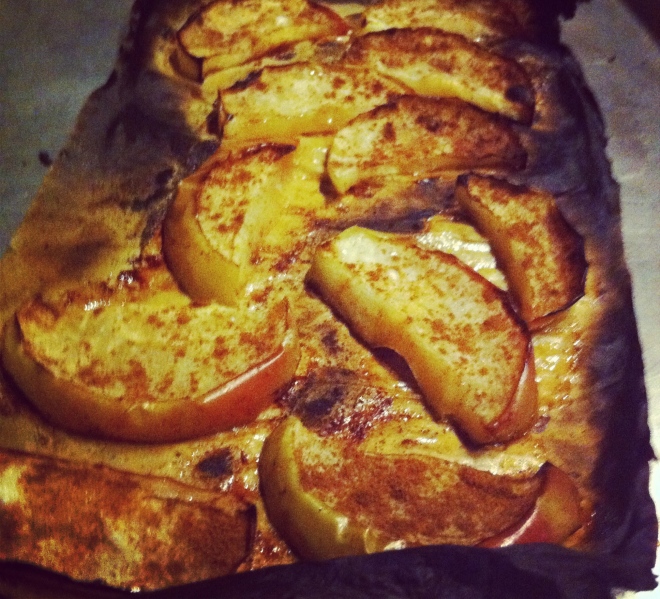 Nothing to fancy….. just a little warmth and spice to fancy up a quick snack. Word!
 FA LA LA LA LA….. LA LA LA LA….Happy eve of Christmas! What better way to celebrate the holidays than with the sweet and spicy flavor of ginger…in donut form! There is nothing better.
 I am really excited to finally share a donut recipe with you all. I haven’t made a batch yet that hasn’t won a round of applause or at least a super double thumbs up. If you haven’t made donuts yet, bookmark this recipe and make it priority for your next baking adventure
 The spiced mixed in to the dry….I used fresh and powered ginger but if you don’t have any fresh.. just add more powdered…but fresh adds that extra bit of gingery spiciness.
 The wet ingredients all mix together. Molasses first, then the butter, vanilla, and the brown sugar, mix that then add the egg and the milk last.(avoid adding egg and melted butter together so it doesnt scramble) Mix wet mixture with the dry until fully incorporated and smooth.
 Out of the oven and turned onto a cooling rack…This beauties smell so very nice.
 While the donuts are cooling, prepare the icing. Mix 1/4 cup of cream cheese with 1/2 cup of sifted powdered sugar. Half of a lemons worth of juice with a teaspoon of lemon zest and mix… add a splash or two of milk to get the desired consistency(this is a cream cheese glaze, it won’t harden like a sugar glaze)
 When the donuts are full cooled, dip into glaze….
 Just look at these. And for real, they really don’t take much time. You could totally whip these up in less than 30 minutes.. just make sure to have someone else do all the dishes!!!
 The perfect way to start your day. APPLES, PEARS, CARROTS, tossed in Cinnamon! Whats that you say? You don’t think carrot and fruit go together, that this couldn’t possible taste right… Well guess what, you are wrong. Yes, it may seem like a strange combination, but trust me, it works and it works so so good. This is what I eat almost every day for breakfast. And man oh man, with a cup of hot coffee and a good book, I welcome 5am. Note that this can be eaten throughout the day. Its even a fantastic night time snack!
 I eat a lot of winter squash. I go through 3-4 a week. And with all the squash comes the seeds. I know most people roast their pumpkin seeds but forget about the squash seeds. They are equally amazing and should not be forgotten. What I do is I scoop the seeds into a container that I keep in the fridge. When I have collected a few squashes worth, I boil them to help remove the fleshy parts, then give them a quick rinse. Toss in olive oil and salt and get on to roasting!


 As the weather gets warmer and the days get longer, my food brain turns to fresh colorful simple spring food. (which is totally a thing). Spring food is a combination of the last of the winters hardy root veggies combined with the springs bounty of fresh greens and early growers. Spring food is the best!
 Dressing stuff. A nice and ripe avocado, the juice of a juicy lemon, a bit of garlic powder (raw garlic is nice too, but grate it super fine) and salt. Simple simple and sometimes simple can be the best.
 All stuff get mashed super mashed until smooth and scooped into a jar with a lid. Add about 1/4- 1/2 cup water (depending on how thick you like it) and shake that jar all around.
 A roasted beet and carrot, all sliced up
 Tossed onto a bed of tender baby spinach
 And topped with creamy avocado dressing. Fantastic, so pretty, and makes the day super springy!
 Being that it was St. Patricks day this week and lots of folks buy up a good amount of cabbage, I figured that this is a good time to get people to try one of my most favorite of favorite meals…..Beet bean and cabbage steaks. I love to play around with food, how to pair textures and colors plus tastes while trying to make whatever I am making healthy and balanced. This is one of my fav creations. And sure, this may seem like a somewhat weird combo, maybe a little like a extremely hippy dippy vegan fake meat thing, and you might be kind of right, but screw if it doesn’t taste like A-mazing. First off, notice how freaking dang pretty this thing is. The roasted beets bring a earthy hearty flavor but also pack a huge punch of color, especially when blended together with the ever so sweet white bean, which brings a nice mellow taste and a great serving of protein. (Beets and beans are meant for each other). Spread that brightly colored, tasty mixture onto of a huge slab of one of my favorites, roasted cabbage with all its crunch and cabbagy flavor and you got yourself a hearty healthy meal of deliciousness.
  Cabbage, white beans, and beets. There is a lemon involved, but it didn’t make it into the picture.
 Cabbage is cut into inch thick slabs… I like to us the inter most part of a cabbage head cause I like the core. But use any cut that you want. 2 beets are chopped into chunkers and both the cabbage and the beets are placed on a lightly oiled baking sheets, seasoned with salt and pepper, and stuck into the oven for 20-25 minutes at 400 degrees.
 Once the beets are tender and the cabbage is cooked to a nice withered golden pretty, take out of the oven, but leave the oven on. Leave the cabbage on the pan but throw the beets into a blender or a big bowl if using a hand blender with the white beans
 Beans and beets get pureed together. Add the juice of 1/2 a lemon (or the whole lemon, depending on your taste) and a pinch of salt and pepper. With a big spoon or spatula, scoop equal amounts of the bean/beet mixture on top of the cabbage steaks and spread around. Sprinkle with cracked pepper and place back into oven for another 5-10 minutes. (You could totally skip the second bake, but I like my cabbage well done and crispy)
 Oh ho boy… And with a good squirt of mustard to finish off… I could eat this all day, everyday

 Wowzers…Is it for real Memorial day weekend? Where has all the time gone? Let’s talk about a week gone by fast. My brain is on complete overdrive and I am having a hard time keeping it from exploding…SO MUCH TO DO! (Not bad stuff, just a lot of stuff) But lo, that’s life right? There is always a lots of “stuff” to do, but today I am going to try and let that stuff chill and maybe give myself a few hours of coffee, (so much coffee) reading a book in the sunshine, gardening, and just some overall chillin.
  Goodbye fiddleheads…. Hello ferns
  On our way to a geo catch…. And note clothing options for 2 in the afternoon. I am much fond of that little guy wearing a rain jacket without a shirt in when its sunny and 80 degrees. And a pink poke dot bath robe.. I mean, it’s so the cool thing to do.
  We didn’t find the geo, but we found this gigantic mushroom. Just as cool, maybe even cooler.
 I love brick and there is one street in all of burlington (that I know of) that has brick sidewalks. I like to walk down it a lot.
  Nurse lady making food… I compare this to a big foot sighting. I have heard stories that she cooks,but have never actually witnessed it myself. (Just kidding….kinda)
THE LOVELY CRAZY
September 19, 2015 by maximios • Blog
CHILI MONDAY!Well it is, but I am talking about making some super duper, yes I’ll have seconds, tummy filling, bone warming, pumpkin chili.. And heathy oh so healthy to boot. Reals, it’s the best.
This pumpkin chili recipe had evolved over the years. The first time I made pumpkin chili was for my very first dinner party that I threw back in college. Instead of cutting the pumpkin and adding it into the chili, I chopped the little pumpkins in half, roasted them, and used the halves as bowls..A good idea except no one at the pumpkin and I was left with a bunch of slobbered on roasted pumpkin halves. ( I probably should have said something, but being a few drinks in, I didn’t think to say anything about the edible bowls and I don’t think I noticed the abandoned pumpkins until the next morning). After that somewhat failed attempt, I started adding the pumpkin to the chili and left the drinking tip after the food is served. ( I learned so much in college)
But yeah, this recipe has traveled a few years with me and every time I make it, I always think, jeez, why don’t I make this every weekend. Well maybe now I will.
Don’t let this spread scare you.. it’s just veggies from the fridge, a chopped up pie pumpkin and pre soaked beans. Oh and some canned tomato and spices. It took about 10 minutes of hands on time and one big pot. No big mess to clean up and you can get rid of those veggies in the fridge that are on the way out. WIN WIN WIN!
All the chopped veggies, the chopped pumpkin go into the pot with salt. pepper , and spices.( I added a fresh jalapeno and about 5 cloves of garlic to this mixture) Let the mixture sweat for about 5 minutes, giving it a quick stir or two.
Now toss in the beans and the tomatoes… Add a cans worth of water as well. Bring to a boil, then turn to low heat and cover.
A last minute addition.. I added a few chopped up kale leaves. I wanted a little more bright color and adding kale to anything is a good idea.
I added a little sliced avocado to one of the bowls (I only had enough for one) and cut up some lime wedges to squeeze on top. (I did, Nick didn’t)
Best chili I have made in a long time…and yes, there is a bunch of left over which is fantastic because now I have lunch for the next couple days…
HOORAY FOR FOOD!!!
Have a good Monday!
-C
Either the night before or morning of, presoak dried beans..(beans in pot with about 4 cups water and a sprinkle of salt)
Take pumpkin and slice in half, de-seed and chop flesh into little chunks. (You can peel it if you want, but really, there is no reason to) Rough chop all the veggies (minus the kale) and stick into a large pot with the pumpkin. Pot on medium heat.. let the veggies sweat for about five minutes. Now add the garlic and the spices and let cook for a few more minutes.
When the mixture starts to become fragrant… drain, rinse and add presoaked (or canned) beans. Then the tomatoes, and 1 1/2 cans worth of water.
Bring chili to a boil then cover and reduce heat to low. Let cook for about an hour, giving it a stir every now and then………
Add in chopped kale a few minutes before serving
Serve in a bowl and top with sliced lime, avocado, a sprinkle of cheese….Whatever you want.