
THE LOVELY CRAZY


Yesterday I spent the entire day (ok maybe not the entire day), but a the better part of the afternoon defrosting my freezer. Sure, I do the occasional chip chop here and there, just enough from around the freezer door so it will close, but ever few months I notice that everything in the fridge is not staying cold and that the freezer is not freezing stuff. Thats when I know its for real time to defrost. So a few days ago when I noticed my bananas were turing to liquid in the freezer, I knew it what I had to do….Completely empty the fridge and melt/hack away the 2-4 inches of ice build up that accumulated. It is such a freaking pain in the ass.So on this defrosting day, I took all the stuff from the freezer, stuck it in a cooler, and the rest of the stuff, which is basically all veggies, I just tossed on the table. As I am hacking away with a metal spatual, a wooden spoon, and a constant rotation of pots of boiling water, I was thinking about dinner. I figured I might as well just eat up as much of the veggies as I could, you know, so I didn’t have to put them back in the fridge. And also, I was getting pretty annoyed because this particular defrosting session was taking way longer the anticipated, which made making dinner seem like another pain in the ass. I figured I might as well just eat everything that is already out on the table, which pretty much narrowed down the “whats for dinner” conversations because it was already all over the place. And so dinner was a humongo salad for me, and for the mister, I made him a monster of a veggie sandwich. (my salad was exactly the same stuff as the sandwich, minus the bagel) Easy, fast, super duper yummy, pretty and piled so high with tons of veggies that the fridge is pretty much empty now.
Look at the is beast. I don’t call it a monster sandwich for nothing.

The stuff included in this monster veggie sandwich..

Romaine lettuce, tomato, avocado for there is not real sandwich without them. Thinly sliced radishes, cucumber,a and onion for nice crispy crunch. Shredded beets, carrots, and purple cabbage to give more crunch and a bit of sweetness. Then of course there needs to be something pickled, so I used banana peppers cause they are the SHIT!! And lastly some hummus for a nice creamy finish (plus a bit of protein) and yellow mustard because mustard on everything is just right. Heres to a mountain if goodness that is no longer in the fridge! Served with a another mountain of roasted parsnips and carrots (more stuff from the fridge) and a tall glass of iced tea.
Lucky that today is farm share pick up cause the fridge is pretty much on empty.
Yea it’s Thursday!!!!
-C
A Monster Veggie Sandwich
Note. This is just a guide.. Feel free to use whatever veggies you fancy.
- Either a bagel, 2 slices of bread, or a big chunk of baguette (use a gluten free bread if you want or need too)
- Hummus- Homemade or store bought
- Mustard
- Something pickled like pickles, banana peppers , jalapeños or all three
- Lettuce, spinach or some kind of leafy green
- Tomato
- Avocado
- Onion
- Radishes
- Cucumber
- Shredded Carrots
- Shredded Beets
- Shredded Cabbage
To assemble. Ready your bread.. Toast if you want, and stick it on a plate
On either side, smear the hummus and the mustard.
Pick a side, start to stack by evenly disrupting veggies on top of veggies. Place the second piece of bread on top and giving a little smooth to keep it together.
And go at it. Cut in half or don’t. Have a napkin or a long sleeve ready to wipe your face.
 The other day the mister and I started reminiscing about some of our earliest memories of what our parents fed us or what they used to eat when we were growing up. One of the dishes that we both remember eating was the classic creamed beef on toast, or as my mom use to call it, shit on a shingle. Yup, shit on a shingle. (who ever started calling creamed meat on toast is a freaking genius) I think that as a kid, I liked the dish just for the mer fact that I could say the word shit and get away with it. I think my mom liked it for few reasons; she could make a big butt load of it really fast, for a crap load of kids, on the super cheap. And I think that she just really like it.
Shit on a shingle is one of those foods that I like to call “trash food”, you know stuff like beefaroni or pork and beans. Stuff that we all loved as little kids but might think twice about feeding to anyone now. ( I’ll still feed nick a can of beefaroni.. he likes it) As a throwback to our earliest food memories, (also a lack of food in the house and wanted to make something fast, easy, and cheap.. thanks mom!) I made the mister my rendition of the classic. Creamy Lentils and Mushrooms on toast. Not quite as trashy as creamed beef (lentils, mushrooms and onions are not trashy) but you get the same reminiscing feeling. I guess I could call it something like “stuff on a shingle” or lumps on a shingle”, but what kid (or adult) would want to eat that. Let’s just stick with shit, it makes it more awesome to eat it.
 The shit….. A few mushrooms, a bit of onion, cooked lentils, flour, milk, oil, salt and pepper, and garlic powder. And the shingles.. 2 pieces of thick white country bread.
  Slice the mushrooms and the onion and toss into a skillet with a drizzle of oil. Cook on medium heat until browned and fragrant..Remove from pan.
 In the empty pan still on medium heat, add in the olive oil and the flour. Whisky constantly, slowly add in the milk. Keep whisking until sauce thickens. Remove from heat. Add in salt, pepper, and garlic powder.
 Add the mushrooms and the lentils into the sauce and give it a good mix. Oh, and don’t forget to toast up the bread.
  Now dump that shit all over those shingles! Oh the memories.
If you need to, make it classy by serving it with a cloth napkin and a nice fork and knife. But eat it however you need to. (As kids we like dirty hands and no fork, preferably with a big tall glass of overly sweetened red flavored kool-aid)
Enjoy this fantastic Spring weekend!
-C
Shit on s Shingle (Creamy Lentils and Mushrooms on Toast)
One serving
- 1 cup cooked lentils
- 2- 3 mushrooms
- 1/2 small onion
- 1 cup milk (cow, nut, plant… whatever you want)
- 1 tablespoon olive oil
- 1 tablespoon flour
- 1 teaspoon garlic powder
- salt and pepper
- 2 pieces of nice thick but soft white sandwich bread
Slice the mushroom and onion and toss into a pan or skillet with a drizzle of oil. Cook on medium heat until brown and fragrant than dump onto a plate. In same skillet, add the oil and the flour and mix with a whisk while slowly adding in the milk. Keep whisking until sauce starts to thicken. Turn heat to simmer and add in the cooked lentils and the sautéd mushrooms and onions. Push down the bread in the toaster.. and when it pops up, dump the shill over it.
 There is irish soda bread in your future. I can see it. A nice hardy hunk slathered in butter and honey, crumbs all over the place. So all you have to do know is make it.
I remember reading somewhere (I wish I could remember where) that irish soda bread is just four ingredients, flour, sea salt, baking soda and buttermilk and adding anything else would make it a cake. So when I decided to make irish soda bread, thats all I used. ( I made it with some wheat flour) What you end up with is a highly dense, super fragrant, soft, chewy bread with a crunchy crust. Definitely not a cake.
Note….You can for sure add in a bit of sweetener or even little fat to make it richer and softer, but then it wouldn’t be bread (or so that’s what I read) There are tons of other recipes out there that have other stuff in them. This is just a really simple basic recipe.
 White whole wheat flour and all purpose flour mixed together. Salt baking soda and buttermilk. That’s it.
 All the dry whisked together and in goes the buttermilk. Mix together until dough starts to form then dump onto a floured surface. Handling dough as little as possible, knead into ball.
 Place on a baking sheet and dust with flour. Take a sharp knife and cut an X through the top about 1/2 inch deep.
Stick in into the oven for 50 ish minutes, or unit la tester stuck into the middle comes out clean and there is kind of a hollow thunk when tapped on. 
And now you have a very pretty, dense hunk of irish soda bread.
Cut and serve with butter and honey (thats how the mister likes it) or whatever you want to eat it with.
-C
Irish Soda Bread
- 1 cup all purpose flour
- 1 cup white whole wheat flour (or you can use all purpose)
- 1 teaspoon baking soda
- 1 teaspoon salt
- 1 cup buttermilk (or your choice if milk plus a tablespoon lemon juice)
Preheat oven to 375
In a large bowl, whisk together flours, baking soda and salt. Mix in buttermilk until the dough starts to come together. If the dough seems to dry, add another splash or two of milk. Dump out dough onto a floured surface and shape into a ball. transfer onto a baking sheet, dust with flour and cut a x about 1/2 inch into the top. Stick into oven for 50 minutes until a toothpick comes out clean and the bread makes a hollow sound when tapped.
Let cool enough to handle.
Cut into and serve with a smear of whatever you want
Best eaten within a day or two
 One of the best things about winter is that I can have something in the oven at any time and not worry about how hot the house is going to get. I get to spend my free time (or my in between free minutes) baking up all the thing that I would not dare bake in the summer. (lots of bread and cakes) Yeah, I might complain a little about how cold it is outside (to my defense, -20 is kind of a bitch) but then I think of the super hot humid days that come during the summer and cringe. At least when its cold out I am able to get warm, (que oven) but when its super hot and humid, I just turn into something that border lines a wet towel and the rabbit animal… Not so pleasant. I much prefer cooler weather. So no big surprise….I made bread.. or focaccia to be exact. And now you should too because first off, you want to eat it, and secondly, you can probably whip this up faster then it would take to get all of you winter warmies on and leave the house. Don’t leave, just turn the oven on.
  The stuff, which isn’t a whole lot… Flour and salt. A mixture of honey, water, and yeast. And olive oil. Its pretty much my pizza dough recipe, tweaked with the addition of oil, less flour and no kneading.
  Mix together the wet and dry…I used my nifty dough whisk, but a wooden spoon or even your hand works. Mix mix mix. The dough should be really slack and sticky. And guess what.. no need to knead! Just make sure the dough is uniformly incorporated…hehe.. uniformly incorporated… sounds weird.
 Drizzle the dough (don’t worry about making it into a ball, a blob is good) with a little oil and place in a nice warm place topped with a towel to rise for about an hour or until dough has doubled in size. Once is has fully risen, drizzle 2 tablespoons oil in two 9 inch cake pans. Divide dough in half, and kind of smoosh dough into pans. Cover and let rise for another 20 minutes or so.
  When dough has finished its second rise, drizzle each with another tablespoon of oil and with your fingers, fill out the pan and indent the dough, kind of like playing a piano or tickling a puppy(?)….Then layer your toppings (if you want any) Start with any herbs, then the veggies. Then last, any cheese you got. I used thyme, cracked black pepper, tomato, onion, topped with parmesan cheese. And the other one is just plain old salt.
  Pulled from the oven when nice and golden brown..set on a wire rack to cool for a few minute and removed from the pans.
  The mister was practically salivating waiting for a slice… and he was so not disappointed. Crispy outside with soft airy insides… Everything a perfect focaccia should be. The one with the toppings was the favorite for the first night, but for a peanut butter and cheese panini for lunch the next day…plain is the way to go.. My suggestion, do what I did, jazz one up and leave one plain. And then make more if you need too because the forecast call for another week of below zero!!! Oh the things that I’ll get to make! (me being positive) Stay warm! -C
Focaccia with out without stuff
- 3 cups all-purpose flour
- 1 tablespoon salt plus 2 teaspoons for topping (can use more or less if you want)
- 2 teaspoons active yeast (or one package)
- 1 1/2 cups warm water
- 1 tablespoon honey (or sugar if vegan)
- 6 tablespoons olive oil
Optional toppings
- Fresh cracked pepper
- Thyme or any other spices
- Thinly sliced tomato
- Thinly sliced onion
- Parmesan Cheese
- Anything you want!
In a bowl or jar, mix honey (or sugar), yeast and warm water together and let sit for about 5 minutes or until yeast is activated and starts to foam In a large bowl, whisk together flour and 1 tablespoon of salt. With either a wooden spoon, dough whisk, or if you have one, a stand mixer with a dough hook, mix the yeast mixture with the flour. The dough is going to be really sticky so mixing might get a little gloppy, but keep at it until everything is full incorporated.. for about 3-5 minutes and don’t be afraid to use your hand… you can wash it off. Once mixed drizzle with oil and cover with a towel. Let rise for about an hour or until dough has dubbed in size. When dough has double, coat two 8 or 9 inch cake pans each with 2 tablespoons olive oil. Dump dough onto floured surface and cut in half. Take each half a place in pan. cover and let rise again for another 20ish minutes. preheat over to 400 degrees After second rise, lightly take your fingers and push down dough, making little indents all over the surface. Drizzle each with another tablespoon of olive oil and sprinkle each with a teaspoon of salt. If using spices or any other toppings, nows the time to layer them on. And do any cheese last! Place in oven and bake for about 30 minutes or until the tops are golden brown. When done, place on a wire rack and let cool a bit before removing from pans. Done!! To store, place in a paper bag.. best eaten within a few days!
 So the mister wants to know…”Why would anyone ever buy those crappy english muffins from the store when they could be eating these?”
Good question…And we will all answer….”Never again! Because I now make the sickest E.M.s around.!”(E.M.s is the cool short way to say english muffins and now that you are going to make your own….man, your so cool!)
These E.M.s are perfect. Easy to make, not overly fussy, and you end up with a super yummy, extremely versatile, individually portion super sweet little disk of bread. And the best part is..nooks and crannies! I think that is why I decided to make these E.M.s, so Nick and I can talk the about nooks and crannies…(Sometimes we need light conversation)

We start with flour and salt whisked together in a bowl. The honey, yeast and warm water are getting on proofing in a jar. An egg waiting to be cracked, some milk, and 2 tablespoons of butter. All this good stuff equals…nooks and crannies!
Oh you like my nifty dough whisk….me too, I use it all the time. Maybe I should have a dough whisk give away ……maybe…..
 Everything all mixed together, dumped onto a floured surface and kneaded for 10 minutes by hand…..If you have a stand mixer, you can use it if you want, but you are missing out on the fun of doing it by hand….
When the dough has been sufficiently kneaded, gather dough into a nice ball, coat with a little oil and place back into bowl. Cover with a towel and stick in a warm place to rise for about an hour or until it has doubled in size.
 When dough has doubled, punch down and plop out onto floured surface. Dust the bottom of a griddle or in my case, two cast iron pans, with corn meal. Divide dough into 8-10 equal balls and smash into 2 inch thick disks.
 Place on griddle or pans and sprinkle more corn meal on top of each E.M. Cover and let rise for another 15 minute.
 Now the E.M.s have rested, turn the griddle (or pans) on to low heat. Once your griddle (or pans) gets hot, continue to cook that side for another 7-10 minutes, or until golden brown. Flip and cook other side for 10-12 minutes or until golden brown. Once browned, check for doneness with a thermometer. The inside should reach 200 degrees.( if you don’t have a thermometer, fork split one open and check…. you are going to eat it anyway) If the outside cooked faster then the inside, no worries, just pop them into the oven at 350 for 8-10 minutes. I had to pop mine into the oven for to cook completely.

 Remove form griddle, let cool a bit, and ……Fresh, fluffy fat, fantastic….Everything and more that a real english muffin should be. Split open with a fork and……. the nooks and crannies! So spot on. Serve with anything your heart desires…I served these with whipped honey butter…. and eat the only kind of E.M. you will ever again eat. Grocery store english muffins be damned!
Enjoy and Happy Tuesday!
-C
English Muffins
Ingredients
- 2 1/2 cups unbleached all-purpose flour
- 2 teaspoons honey
- 1 teaspoon salt
- 2 tablespoon butter at room temperature
- 1 1/4 teaspoons active dry yeast
- 1/4 cup warm water
- 3/4 cup milk
- 1 egg
- cornmeal for pan
Combine warm water, honey and yeast in a bowl to active..about 5-10 minutes or until yeast is foamy.
In a separate bowl, whisk together flour and salt. Mix in butter(I use my fingers) When yeast mixture is done proofing, whisk together mixture with the egg and milk. Add wet to dry and mix until just incorporated Dump out onto floured surface and knead dough for 8 minutes, adding a bit of flour whenever dough starts to get too sticky. Roll into a ball, coat with oil and place back into bowl and cover with a towel. Let rise for 60 minutes or until sought has doubled in size.
Once the first rise is done, deflate dough and divide into 8 equal pieces(10 for a slightly smaller muffin). Smoosh each ball into a flat disk, about 2 inches thick) and place on a cold cornmeal dusted cast iron griddle. (I used 2 cast iron pans) Sprinkle tops of muffins with more corn meal and let dough rest for another 15 minted. Turn burners on low heat. Let griddle get hot and continue to cook the muffins for another 10 minutes or until golden brown. Flip and cook opposite side until gold brown and remove from griddle. To make sure the muffins are cooked completely, stick an instant read thermometer into the center…it should read 200 degrees. (if you don’t have a thermometer, split one open… the tester E.M.) If the E.M.s are not completely cook, just stick in the oven on 350 for 5-10 minutes or until cooked throughout.
Remove and let cool. To serve, split open with a fork and give a light toast. Spread with butter, jam, peanuts butter, anything you want…maybe make E.M pizzas!
 HORRAY, its Saturday!!! I don’t care that I have a bunch of laundry and house work to do, bills to pay, a mangy dog to groom… I get to do it all at home with the music blasting,(maybe some holiday tunes) a lot of coffee, in my comfy sweats and the oven on. Weekends are always a mixed bag of crazy for me but I can usually count on being at home for a chunk of the morning or afternoons and that’s when I jump at the chance to make me some yeasted bread. Give me a couple of hours, my list of chores and watch me go.. I can mix and knead,, set aside to rise and hit up cleaning that toilet. Go back and knead, divided and rise again, then go fold all the laundry. Stick the bread in the oven and watch out, I am mopping the floors. I am nothing if not a fantastic multitasked, much like these rolls. You can serve them as a side for dinner , use them as a sandwich roll, or eat them as the star with a dab of butter and a drizzle of honey. The possibilities are endless. This particular recipe is fantastic for may reasons…. Its pretty simple, not to many ingredients and is made with whole wheat flour. If you don’t want 16 rolls, you can make the dough, bake half and freeze the rest. You could even bake into loaves of bread instead.Yeah, sounds good right? Go ahead, you know you want to. Just do it!
 I always gather the ingredients.. I have learned over the years that if I have all my stuff out and measured in front of me, I will almost never forget something and that I make less of a mess. It also helps that I find it pretty. So, flours and salt are whisked together. The yeast and honey in a bowl waiting to be proofed. The butter in need of more melting and an egg.. Pretty.
 Honey and yeast mixed with a cup of warm water. BE CAREFUL with the temperature of the water.. If its to hot, the yeast will kill the yeast and you will have to start over again, but I trust you won’t do that.
 Now that the yeast is active, mix in melted butter and egg. (Make sure the butter is not hot, warm is ok) Add wet ingredients to the dry and mix.


I have a super awesome dough mixer , it helps to mix and not completely stick like it does to a wooden spoon. Dont have one? Use a wooden spoon, it works the same with a little more stickiness..You have a stand mixer? Well fancy you. No I am not jealous,(maybe a little). I like using my hands when making bread, but you? Go ahead, use your mixer, its cool with me. So mix you dough, you want the dough wet and sticky but still able to roll into a ball. If you need to, add a pinch more of flour, just enough to help form a ball. When ball is formed, drizzle oil and rub all over and place in bowl with a damp towel. Let sit somplace warm to rise for about an 45 minutes or unit dough has doubled in size. A good warm spot..Try the top of the fridge, thats my rising spot.

Once it has doubled, roll out onto a nicely floured surface and..my favorite part, punch it down and knead for a few minutes…. This dough doesn’t need a lot of kneading, just enough to reform ball and get some air out. Now divide and place into well buttered pans. I used two 9 inch cake pans, but a 13 X 9 pan or baking dish would work or loaf pans if you want loaves. Just make sure to really butter the pans.

 Little ball of dough turned into big balls of dough. (Yeast is so cool!).Into the oven they go. Right before I baked them I gave the tops a little milk wash, just for color. Do it if you want, you could even do an egg wash, but it’s really not necessary. Oh boy… Fresh from the oven…Take a bit of butter and melt over the top….
 So lovely! Who wouldn’t want to just tear these beauties apart?
Now eat.. Eat with jam, eat with cheese, eat with peanut butter or with a bit of honey. Or, eat as is…..Just eat it and enjoy you labor of love and the satisfaction that you just made those delicious rolls that you are eating.
Honey Wheat Pull-apart Rolls.
Ingredients
- 1 cup all-purpose flour
- 1 3/4 white whole wheat flour
- 2 tablespoons honey
- 4 tablespoons melted butter
- teaspoon salt
- 2 1/4 teaspoon yeast
- 1 egg
- 1 cup warm water
- 2 tablespoons butter(to rub over baked rolls)
Makes 16 good-sized rolls
In a large bowl whisk together both flours and salt.
In a smaller bowl add warm water, yeast and honey. Stir and let sit for 5 – 10 minutes or until the yeast has grown and is foamy. Meanwhile, melt butter and let sit for 5 minutes. When the yeast has proofed, whisk together with butter and egg. Add to dry ingredients.
With a dough spoon , wooden spoon, stand mixer or your fist, mix (or knead) until the dough comes together and begins to form into a ball. You want the dough to be wet and sticky but add a pinch or two of flour if its to wet and not forming a ball.
Coat dough with a little oil and place back into large bowl. Cover with a towel and place in a warm place(The top of the fridge is great) Let rise for 45 minutes or until the dough has doubled in size.
When dough has doubled, dump dough onto a well floured surface, flour up you hand and punch down the dough and knead for a few minutes. Divided dough 16 even balls. Now is a good time to preheat oven to 400 degrees.
Place in greased pans ( 8 in each) and cove with plastic and let rise for another 20-30 minutes or until dough has doubled and filling out the pans. When the second rise is done, place in oven and bake for 25 minutes or until a nice light brown. If you want a darker crust, right before baking, lightly brush the tops of rolls with butter. As soon as the rolls are removed from the oven take the remaining 2 tablespoons of butter( one tablespoon for each pan) and melt over top of rolls
Note..If you want to freeze any rolls, place in a pan after fist rise and stick in freezer until frozen Transfer to a airtight bag. When you want to use, simply pop out of freezer and let sit for about and hour. Bake as directed above.


 It’s been a long, packed, but very fantastic week. Everyday has been full of work, chores, family, and trying to get in a least one good bike ride or walk in. I made a list of a few important points to mention from the past week.
 The mister and the worlds biggest crayon, which is made of scraps of blue crayons from all over the world. I could totally use a big ass crayon like this.
 The coolest most badass 95 year old lady that I know (I know a few), Grammy Stem. And the little, getting a lift. (I could have used a lift too!)
 Brothers. The guy in the green is my Dad.
 Aftre dinner ice cream break.
 The sky has been on point all week long
 And made myself some veggie chips. The colors alone are delicious.
 My winter farm share is coming to an end this week. One more pick and then a three week stretch until the summer share starts… WHAT AM I GOING TO DO!!! Stock up as much as I can is what.
 The stuff….For the split pea gravy we have a carrot, a parsnip and a large onion chopped into small chunks. Salt, thyme, a bay leaf and of course the split peas. Then there is the celeriac root* sliced into 1/2 inch thick rounds and some plain old yellow mustard .
 Toss the chopped parsnip, carrot, onion and the spices into a pot on medium heat and let veggies sweat a few minutes until tender. Add in the split peas and enough water to cover everything. Turn pot on high and bring to a boil, then cover and turn to low. Make sure to give the pot a good stir ever few minutes and add more water if needed
  Once the peas have soften, remove the bay leaf and puree until smooth and oh so creamy. Taste and add more salt and pepper if needed. If you find that the gravy seems to thick, just add in more water until it’s the consistency that you want.
  The gravy is made, the celeriac is roasted… now we are ready to eat!!
  Stick the celeriac on a plate and dump good amount of that gravy right on top. Feel free to add a bed of spinach, or a grain or anything you want, because why not, and also some chopped tomatoes for a little acid and prettiness.
 And that’s how I know that this is a winner.
  As an awesome aunt, when I have any of my nieces or nephews, I feel the need to make something special for dinner, something that the kiddos might not get very often, but also keep it on he healthy side. I have 2 littles for the night which gives me the perfect opportunity for a trash food recipe. You know trash food, things like boxed mac and cheese, beefaroni in a can, or, in this case, sloppy joes.
 The stuff… We start with onion and green pepper, chopped into pieces. Black beans, bulgur, can crushed tomatoes. Chili powder, garlic powder, a bit o apple cider vinegar (which I forgot to picture) ,and some salt and pepper. Oh and cheese if you want… Plus a bun of some sort is necessary.
 Toss the chopped onion and peppers into a deep skillet or pot with a drizzle of oil. Cook on medium heat until tender and toss in the spices. Give a stir. Add in the beans, bulgur, and tomato, a splash of vinegar. Stir it all up, cover, and let simmer for about 15 minutes, or until the bulgur has absorbed the liquid and is nice and tender.
 And Then dump a good heaping pile right onto a bun. Add some cheese, or not..and eat with wild abandonment, making sure to get as much on your face as you get in you mouth.
  I don’t know if I have bitched enough about it, but I only have one window in my living space. And as much as I love love love our little tiny loft, I am a person who needs the sun. So when I am home I spend a lot of time siting in front of the window. Over the past few weeks I have been doing a lot of watercolor painting in front of that window and somehow between drawings of carrots and vintage fans, I ended up making these marbled window stained glass hoops. And I am glade I did because these little watercolor gems really do make a big impact on my one source of sunlight. Even when the day is kind of gray and gloomy, having these in the window make the light seem brighter and happy.
  So this project is really easy and fast. I recommend that if you are going to go to the trouble (it’s really no trouble) of making one, you might as well make 2 or 5. I actually made a bunch (think Mothers day or Easter presents) and ended up only keeping a s couple. I am going to have to make a few more soon.
 Take a piece(s) of paper a little bit bigger then the hoop you are working with and stick it into a pan or tray of water. Let it sit there for a few minutes until the paper is completely soaked.
 Take the wet paper and, oh so gently, crumple into a ball. This part can be a little tricky. You want to make as many creases as possible without ripping that paper. (I ripped a few pieces) I found that if I folded that paper a few time, then crumpled that it was less likely to rip.
 Uncrumple the paper and lay it gently onto the inner part of the hoop. Now the fun part. Go to town with the watercolors. I used 2 colors per piece, but you could do 1 or 3, or more. When applying the color, use big gentle strokes and let the colors kind of meld together. Watch as all the crumple veins soak up the paint. Try using different dilutions of color. I applied some color on thinly and some on the thicker side. But really, you can’t go wrong, just keep applying paint until you are happy. I stopped a few times and held it up to the window just to see what it looked like. When it looked good, I was done.
 When you are happy with the colors, let the paper dry for a while on the hoop until it is not longer super wet. I would say about an hour or so, but if you stick it near the heater, it might dry faster. (Just don’t stick it in the oven while you are making bread like I did with one.. It just ended up setting on fire. Oops)
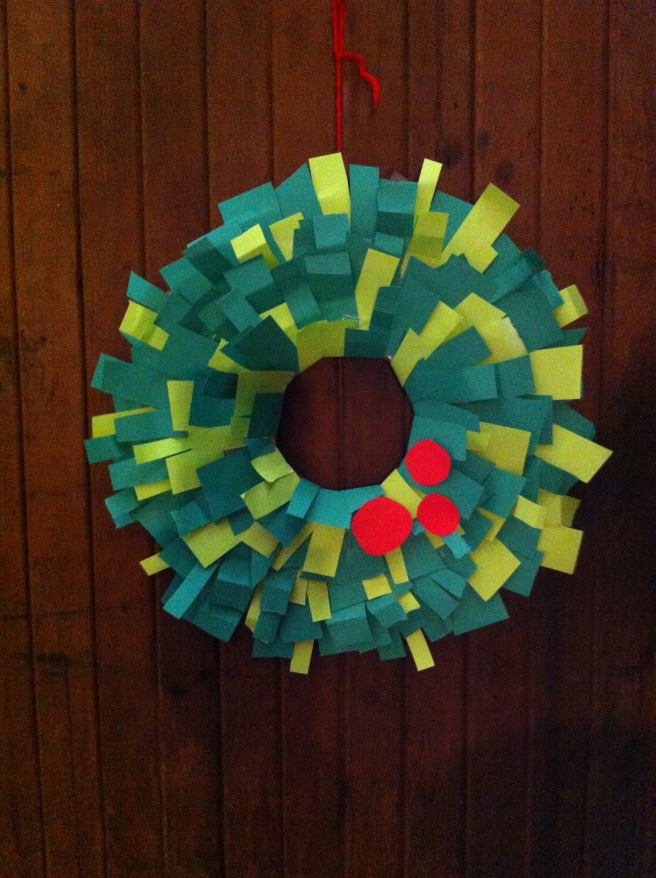 This one is good. How can a pile of scrap paper make me so happy? Tuning it into a lovely round wreath of pretty is how. I love me a good wreath. I usually make one every year out of the scraps from our Christmas tree. We don’t have out tree yet and I needed a little something to holiday up the room..Enter the coolest easiest paper wreath! Bonus, this is a very kid friendly project, a 2-year-old even made one.(Dont let that stop you as an adult from making one) And not just for Christmas.. Wreaths can be for any holiday or even a normal day. Pretty doesn’t discriminate. I’ll keep it short and sweet.
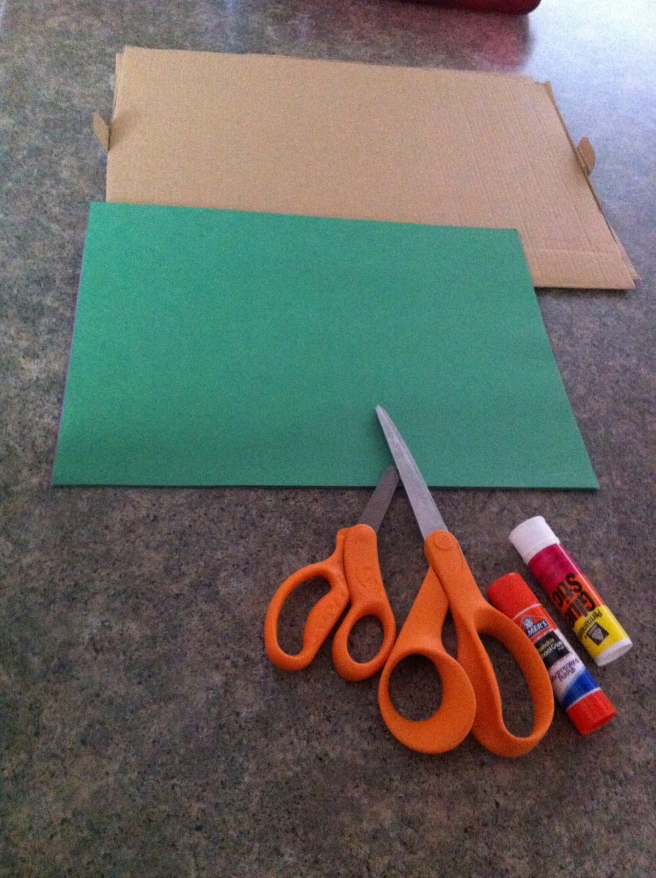 Get you stuff together.. I did most of the cutting for myself and the littlest little. Not that I didn’t trust the 2 year old with the scissors. We only had three pairs of scissors to work with.
 Step 1
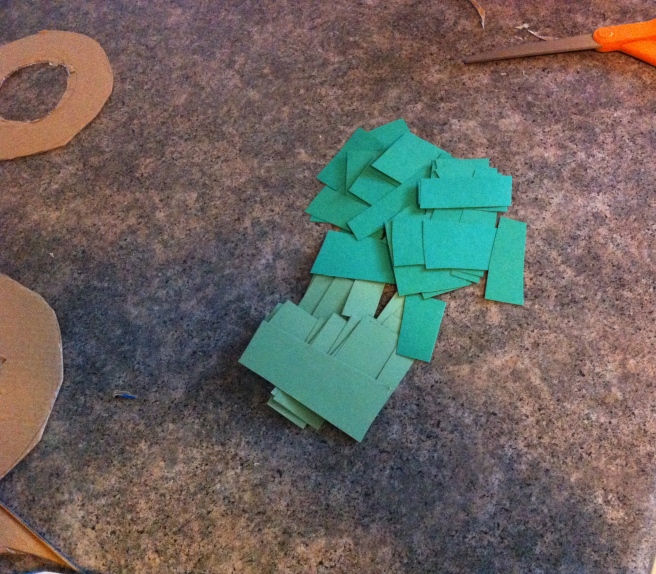 Step 2
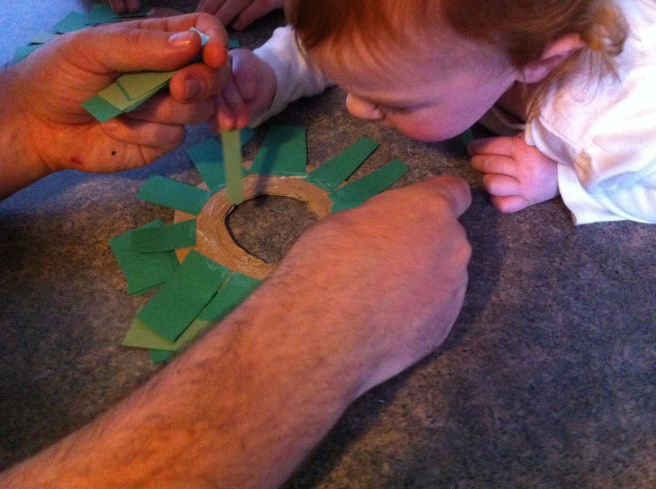
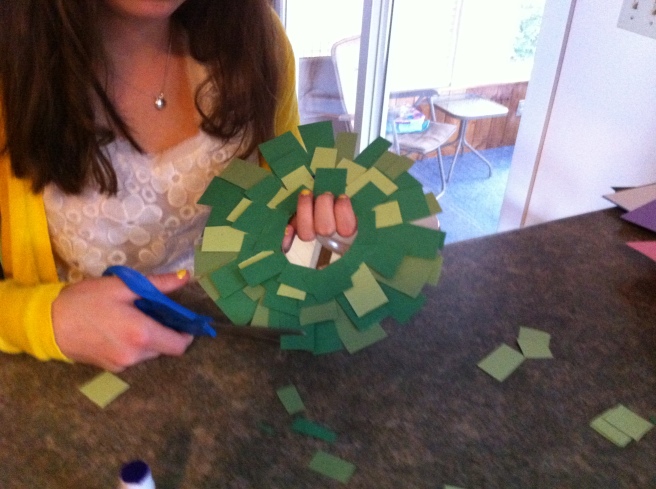 Continue to overlap paper in rings until you get to the inner circle. Once you get to the inner circle, either cut extra or fold over left over paper .
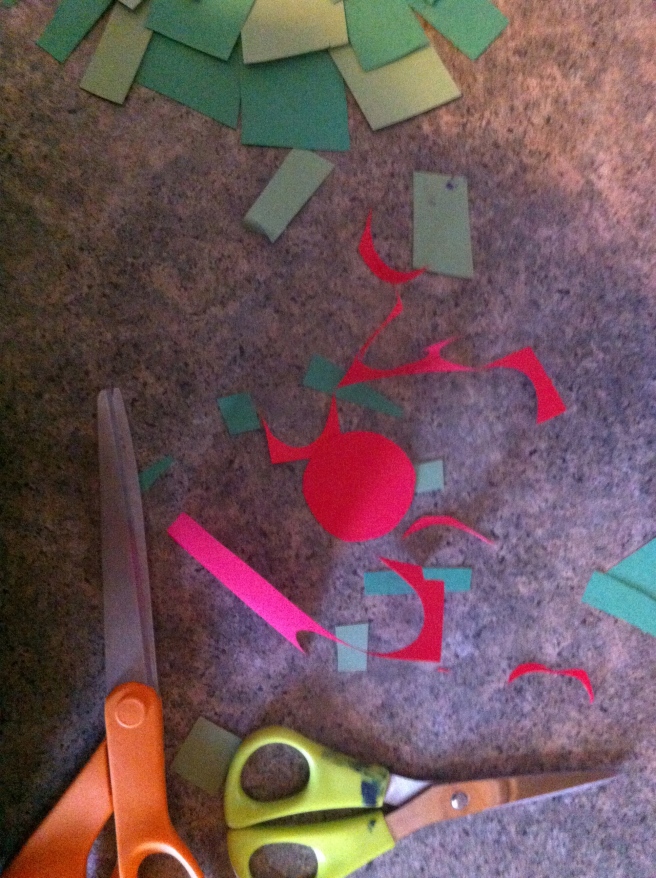 Step four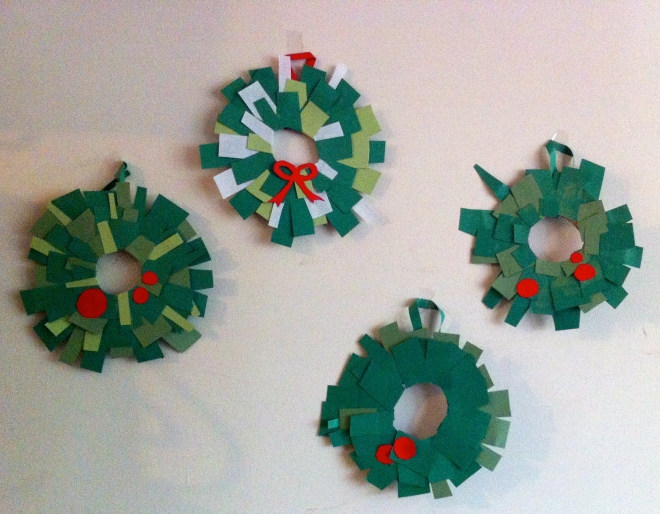
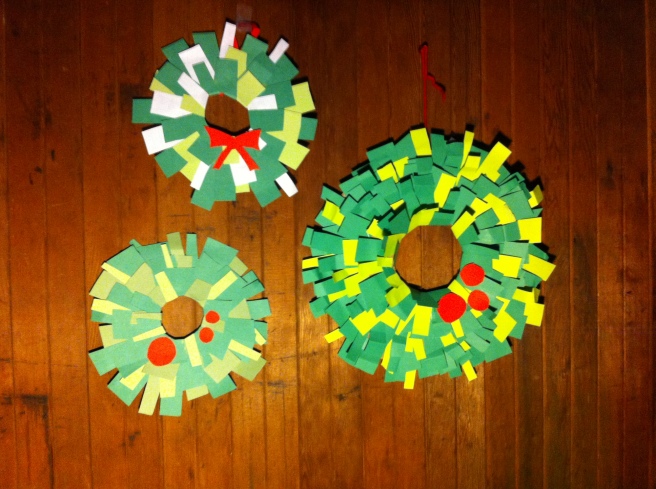 Aren’t these amazing! The most perfect paper wreaths. I had a blast doing this, I bet you will too.
 Wowzers…Is it for real Memorial day weekend? Where has all the time gone? Let’s talk about a week gone by fast. My brain is on complete overdrive and I am having a hard time keeping it from exploding…SO MUCH TO DO! (Not bad stuff, just a lot of stuff) But lo, that’s life right? There is always a lots of “stuff” to do, but today I am going to try and let that stuff chill and maybe give myself a few hours of coffee, (so much coffee) reading a book in the sunshine, gardening, and just some overall chillin.
  Goodbye fiddleheads…. Hello ferns
  On our way to a geo catch…. And note clothing options for 2 in the afternoon. I am much fond of that little guy wearing a rain jacket without a shirt in when its sunny and 80 degrees. And a pink poke dot bath robe.. I mean, it’s so the cool thing to do.
  We didn’t find the geo, but we found this gigantic mushroom. Just as cool, maybe even cooler.
 I love brick and there is one street in all of burlington (that I know of) that has brick sidewalks. I like to walk down it a lot.
  Nurse lady making food… I compare this to a big foot sighting. I have heard stories that she cooks,but have never actually witnessed it myself. (Just kidding….kinda)


 And I am home. The mister and I woke up at 2:15 am Friday morning to drive to Easton PA and spend the weekend with family, going to the Crayola crayon factory, wondering a grave yard, and hearing some fantastic stories about my family from the mouth of my 95 year old grandmother. (I’ll show some pictures and tell you some stuff later this week) Than we drove back late last night… I don’t know how I am even awake right now…I am sooooo much tired! But that’s how I work I guess. The coffee is almost ready, calling my name, telling me its totally cool to drink it all.
 My forsythia bush in from of one of my houses… Always the first one to bloom.
  This is how washer sleeps in the warmer months.. All feet in the air.
  I ate it all and it was good.
 Two pretty ladies
 Veggies Plants!!!!
  I don’t know about you guys, but I am JUMPING FOR JOY… cause its finally SPRING!!!!!!! I was really starting to doubt that it ever going to happen. So now that it is actually warm enough to be outside, what are your plans today? Are you going to spend it outside? Or at the very least, in a light filled house with all the windows an doors open? I hope so, cause I think everyone needs to take the day to finally de-thaw and get out of the winter funk that we, or at least me, having been living in for that past 2 months.
  Oh little little. I picked him up from school and all he wanted to do was cut out paper snowflakes. It then proceeded to snow 3 inches … I blamed him.
  Snow covered world. I admit, very pretty, but I am hopping that this was it, that I won’t see snow again unlit November.
 A day with blue skies and amazing clouds
 The most perfect little and the trash dog. These two spent a good hour fighting over sticks. It was fantastic.
  And this salad. I have been eating it all week long. Pineapple and dill… So freaking good.
  We had ourselves a very full past week. Dinners with the misters family, dinners with mine. Lots of running around for last minutes projects, papers and bills. Mailed in the taxes in (barf) and washed the Washer dog (now he smells like a wet dog with a faint lavender scent… not much better) Then it happened, the most amazing spring day. I spent half the day on Friday trying to remember what it’s like to function in warm weather. I was getting hot and forgot that I could take of my sweater. But it was back to the sweater, hat, and mittens the next day which made me kind of cranky. It actually worked out ok because I didn’t feel bad about hanging inside listening to music , drawing and painting. Oh, and can’t forget to mention the cleaning… lots and lots of cleaning.. and there is still more to be done. All in all, not a bad week.
 The collection of snow shovels has finally moved to the barn!!!
 Sure you can dye eggs, or like me, just melt a bunch of crayon.
 I have never seen it before, but all these leaves were melting into the ice. Very weird and very beautiful.
 Speaking of weird and beautiful…
  And yes.. I pulled out my sandals for the one day of spring we had this week. It was glorious and amazing. I had forgotten what warm weather felt like.
  Being that it was St. Patricks day this week and lots of folks buy up a good amount of cabbage, I figured that this is a good time to get people to try one of my most favorite of favorite meals…..Beet bean and cabbage steaks. I love to play around with food, how to pair textures and colors plus tastes while trying to make whatever I am making healthy and balanced. This is one of my fav creations. And sure, this may seem like a somewhat weird combo, maybe a little like a extremely hippy dippy vegan fake meat thing, and you might be kind of right, but screw if it doesn’t taste like A-mazing. First off, notice how freaking dang pretty this thing is. The roasted beets bring a earthy hearty flavor but also pack a huge punch of color, especially when blended together with the ever so sweet white bean, which brings a nice mellow taste and a great serving of protein. (Beets and beans are meant for each other). Spread that brightly colored, tasty mixture onto of a huge slab of one of my favorites, roasted cabbage with all its crunch and cabbagy flavor and you got yourself a hearty healthy meal of deliciousness.
  Cabbage, white beans, and beets. There is a lemon involved, but it didn’t make it into the picture.
 Cabbage is cut into inch thick slabs… I like to us the inter most part of a cabbage head cause I like the core. But use any cut that you want. 2 beets are chopped into chunkers and both the cabbage and the beets are placed on a lightly oiled baking sheets, seasoned with salt and pepper, and stuck into the oven for 20-25 minutes at 400 degrees.
 Once the beets are tender and the cabbage is cooked to a nice withered golden pretty, take out of the oven, but leave the oven on. Leave the cabbage on the pan but throw the beets into a blender or a big bowl if using a hand blender with the white beans
 Beans and beets get pureed together. Add the juice of 1/2 a lemon (or the whole lemon, depending on your taste) and a pinch of salt and pepper. With a big spoon or spatula, scoop equal amounts of the bean/beet mixture on top of the cabbage steaks and spread around. Sprinkle with cracked pepper and place back into oven for another 5-10 minutes. (You could totally skip the second bake, but I like my cabbage well done and crispy)
 Oh ho boy… And with a good squirt of mustard to finish off… I could eat this all day, everyday
THE LOVELY CRAZY
September 19, 2015 by maximios • Blog
Yesterday The mister and I went for a walk, a long walk. I was wearing a sweater, a light jacket and I left the mittens and hat at home. There was sunshine, huge puddles and mud. Birds were chirping. It was amazing.
After our nice long walk, we got home and I needed to start dinner. It was a little later than I usually so I wanted fast and easy I usually always have pesto in my fridge (I had to make some, but it only takes 5 minutes) because when it’s in there, I can whip up a big awesome meal in the time it takes to boil some pasta or quinoa or smear on toast or toss with potatoes. It really can be used on everything and can be made out of just about anything. Kale and walnuts are just one of so many fantastic combos. And frozen ravioli is always in the freezer too. I used just plain cheese, but use whatever kind you like.
Together, pesto and ravioli, well that’s a quick, easy, and tasty meal, perfect for a spring evening, And yea, there will be left over pesto from this recipe… just stick it in the fridge or freezer….you will be glad you have it.
A few little pre steps before the blending.. Toast the walnuts. Just toss onto a dry skillet and stick on medium heat for about 5 minutes or until they start to become née and fragrant. Remove from skillet and add in a bit of water. Add in chopped or ripped kale and cover to let the kale tenderize, but only for about 2 minutes. (you want the kale to still be crispy and fresh tasting) Drain water and add kale, garlic, toasted walnuts, cheese and the juice of the lemon into a food processor. Turn on and slowly add in olive oil until you get to a nice paste, adding more oil to get to your desired consistency. Oh and don’t forget to salt and pepper to taste!
When the ravioli is nice and brown and crispy, remove from oven and dump the ravioli and the mushrooms into a bowl. Add a big old scoop of the freshly made pesto and toss around.
I am the best lady, making the mister a pretty yummy dinner.
Have a great Tuesday!
-C
Kale Pesto and Baked Ravioli
Note..There will be plenty of left over pesto… Just fridge or freeze it
Place walnuts in a skillet and toast on medium heat for about 3-5 minutes or until the nuts become fragrant. In the same skillet, add enough water to cover bottom and add in all the kale. Place a lid on it and let kale wilt on medium heat for about a minutes or 2, Take off heat. Add walnuts. garlic, cheese, salt and pepper, and juice of lemon to a food processor. Blend. Now add in the kale and blend, slowly adding olive oil until a thick paste forms. You can add as much oil as you want to make it as thick or thin as you like.
Preheat oven to 400
Place frozen ravioli on an oiled baking sheet, making sure none are overlapping. Place into oven for about 15-18 minutes, removing after 8 minutes to flip. When you take the ravioli out to flip, slice up the mushrooms and grab a few more walnuts and toss onto baking sheet with the ravioli. When the ravioli’s are nicely browned and toasty, remove (mushrooms and walnuts too) and place into bowl. Add a big scoop of pesto and toss to mix.
Serve and eat.. fork is optional.
Note..Add a thin layer to the top of any left over pesto to keep it fresh and from turning black