What is better for a bake sale then Oreo cookies? Oreo cookies made from scratch!.
So when my sister called and asked me to make something for my nephews bake sale to raise money for his basketball team, I couldn’t say no. (or I didn’t want to say no cause any good excuse to bake right!) Plus I had just found this awesome recipe on one of my favorite blogs, my name is yeh, for home made Oreos that I have been super excited to try, so it kind of worked out. But before I committed to the Oreo, I wanted to just double check with my nephew and see what he might want me to make because it was his bake sale.
This is the conversation we had. And yes, it was through text.
Me- “Hey bud, what do you want me to make for your bake sale? Cupcakes, cookies, donuts, or brownies”
Jack- ” Yea!”
Me- “Yea what?”
Jack- “Make that.”
Me- “Make what?….Hello!! What do you want me to make? Should I make Oreos?”
Jack- I WANT OREOS!”
Ok.. So it took a little while, but we got there. And after the the basketball game and the super successful bake sale..
ME-“Did you see the Oreos?”
Jack- “What do you mean?”
Me- “The Oreos I made for the bake sale…the ones you wanted me to make”
Jack- “There was a bake sale? I want Oreos”
Yup, that’s the attention span of my 13 year old nephew. Little shit head. But for real, I had so much fun making these cookies and I am definitely going to be making them again. Plus they were a super hit at the sale.
I am the best aunt! (and sister!)
Cookie Time! Whats going on here is brown sugar and butter have be beaten together until nice and fluffy Then a good big splash of vanilla and another 2 big splashes of coffee are added to that.(I sacrificed my last few sips of my coffee for these cookies) The dry stuff, flour, salt and cocoa powder, are whisked together, waiting to be added to the wet. Mix the dry ingredients into the wet and mix. I ended up just using my hand and kind of squish mixing everything together until in tuned into a nice lovely uniformed dough. Form the dough into 2 balls and give each a few kneads to get any air bubbles out. Place dough back into bowl and stick in the fridge to sit for 10-15 minutes( it makes the dough a little easier to work with)
Once the dough has had a little time to rest and cool, remove from fridge, one ball at a time. Place on a lightly cocoa or powdered sugar dusted surface and roll out the dough. Grab any size circle (or other shape) cookie cutter and get to shaping the cookies. Notice the tin can in the bowl? I could’t find my biscuit cutters anywhere but the can was the perfect size, and it worked really well. Keep a little bowl of either powered sugar of cocoa to dip the cutter in in between making the cookies. It really helps the dough from sticking and breaking.
When you have cut out your cookies, use a spatial and place them on a baking sheet. You can try to transfer with you hands, but you end up messing up the shape and most of them will break anyway.
Stick the cookies in the oven for about 15 minutes a batch and continute to roll and cut out the cookies until you have no dough left.
While the cookies are getting their cool on, make the cream filling. All you need is a stick of butter, about 4 cups of powdered sugar, some vanilla and a few splashes of heavy cream. Beat that all up until nice and creamy thick and spoon it into a pastry bag (I used a big old ziplock bag) to be piped on the cookies. Filling the cookies is for sure the best part. Separate the cookies into pairs and pipe a big blob of filling onto one of the two cookies. Take the names cookie and place on top, giving it a little smooth to the disperse the cream. Keep doing that until the cookies are all filled.
Stacks of cookies… Sold to the highest bidder! I was told that they sold out within the first half hour at $1.50 a pop….Should have charged $5…. for a good cause right?
And yes, even though he was being a space head and didn’t even care that I just made him like 50 bucks for his team, I still saved the kid one.He just had to give me either a hug or 5 bucks for it.
I got a hug. (I really wanted the 5 dollars)
-C
From Scratch Oreo Cookies
Adapted by Molly Yeh from My Name is Yeh!
The cookie (makes about 18 3 inch Oreos)
2 cups all purpose flour
1 cup cocoa powder
3/4 cup brown sugar
1 cup or 2 sticks soften butter (use earth balance for vegan)
1 teaspoon salt
1 teaspoon vanilla extract
2 tablespoons brewed coffee
The filling
1 stick soft butter (us earth balance for vegan)
2 tablespoons heavy or whipping cream (use a nut or soy milk for vegan)
4 cups powdered sugar
2 teaspoons vanilla extract
Cookies- In a large bowl cream together sugar and butter until light and fluffy. Add in vanilla and coffee and mix together. In another bowl, whisk together the flour, salt and cocoa powder. Add dry to wet and mix together unit a uniform dough forms. Dump out onto a lightly cocoa or powdered sugared surface and knead dough a few times. Split ball into two balls, place in bowl, and stick in the fridge for 15 or so minutes.
Preheat oven t0 325 degrees
When dough is chilled, remove one ball at a time, and roll dough out on a cocoa or powdered sugar dusted counter until its about 1/4 inch thick. With a round (any shape would work) cookie cutter, cut out as many cookies as you can. In between sits, dip cutter in a sugar and cocoa to keep the cookie from sticking. Transfer cut out cookies onto a baking sheet with a spatula. Take scraps, roll into a ball, and roll out again. Keep doing that until you can’t cut out any more. (You can either bake a weird shape cookie or just eat the dough)
Bake cookies for about 15 minutes or until the cookie has risen a bit and the tops have lost their glossiness and look cooked. Remove from oven and let cookies dry on a wire rack.
Make the filling
Filling- Beat together butter, sugar, vanilla, and cream until completely mixed and is at your optimal consistency. Add a drizzle more cream if you want to thin out or add more sugar for a thicker cream.
Stick the filling into a piping bag or ziplock bag an snip the end. With cookies in pairs, pipe a big dollop of filling onto one of the two cookies. Place the naked cookie onto the filled cookie and give a smooth to distribute the filling.
lick your fingers and eat a cookie.
If selling at a bake sale, charge $3 a cookie…. If it’s for a good cause.
I probabaly have already told you, but August is for sure my favorite month of the year (well,one of my favorites)
There is bounties of bounties of fresh, sweet and colorful, oh so juicy, crispy crisp, just so f ing amazing, produce exploding all over the place. I have probably gained like 75 thousand pounds in the past month due to all of the fruits and veggies that I have been consuming. I am starting to consider it a full time job just to keep up with the eating.
Another reason why I love August so much is becauuse the days are still nice and warm, but the nights are starting to cool which means I get to make so much soup!!!!!.
This soup is the freshest freshy soup yet. Everything is from the farm and or the garden (except the salt pepper, vinegar and oil), some picked within hours of me making this.
. I am a lucky/spolied veggie brat.
Anyways. This soup. The fresh tomato base gives it a sweet, slightly acidic kick. So super creamy due to the lovely earthy stocks of the chard. Slightly spicy and earthy from the arugula* and chard green green. This soup… it just tastes so fresh and clean, yet hearty and satisfying. A perfect soup for a mid August night, eating outside, watching the sun slide behind the mountains and the temperature dropping just enough that you might want a light sweater. Or you can just eat it from the pot in the kitchen while watching TV. It’s good eating anyway you want.
*Here in America, it’s called arugula. Else where , it’s called rocket. I wish we all called it rocket, although I do like the name arugula, but for like my first born child or maybe a pet goldfish. Anyway, rocket is arugula, or vice versa.
Soup time!.
The stuff. Some big fresh tomatoes, a few stalks of chard, and a few handfuls of arugaula (aka rocket). A couple carrots, an onion, some garlic, salt and pepper and a bit of olive oil.. Oh, and I added some balsamic vinegar, which for some reason didn’t make it into the picture (sorry vinegar)
Start by removing the chard leaves from the stalks. Set aside leave with the arugula. Chop up the carrot, chard stems, onion and garlic and toss into a big pot with a drizzle of olive oil, a splash of water, and a sprinkle of salt and pepper. Stir around and stick o nthe stove on medium heat for about 10 minutes until the veggies start to soften up.
Now chop up the tomatoes into chunks and toss those right into the pot with the other stuff. Add in a few cups water and a few glugs of balazmic vinegar. Bring everything to a boil and then turn heat to medium low and place a lid on pot and let cook at medium heat for another 20 ish minutes, or until the tomatoes are falling apart.
Now that everything is all cooked up, blend it up.
And now take the chard leaves and the aruglula and chop into little pieces….into the pot they go.
Mix it all up.. and take the blender to the soup again….if you want a smaller sized bite.
Soup Into bowls..Then into mouth.
Happy August!!
And hey hey hey.. Have the best weekend!
-C
4-5 large fresh tomatoes
4 large stalks of rainbow chard
2-3 big handfuls of arugula
1 medium onion
1 large or 2 small carrots
4-5 garlic cloves
2-3glugs (about 2 tablespoons) balsamic vinegar
3 cups water
olive oil
salt and pepper
To start, remove stalks of chard from leaves and chop stalks, onion, carrot and garlic into chunks and place int a big pot with a drizzle of olive oil, a splash or water, and spinkle of salt and pepper. Place on stove on medium low heat sand cooke the veggies down until starting to soften and garlic is becoming fragrant. While that cooking, remove core from tomatoes and dice them up. Toss into pot with the cooked down veggies with the vinegar and water. Place a lid on the pot and let cook for about 20-25 minutes or until the tomatoes are falling apart.
When cooked, using with a hand blender or a normal blender, blend the soup until smooth. (if using blender, pour back into pot)
Now take the arugula and chard leaves and chop them into wee little picese and mix into soup. If you want to, blend the greens into the soup.. but not until smooth, unless thats what you want. Cook for another 5 minutes. Taste and season with more salt and pepper to taste.
Ladle into bowl and serve with lots of fresh cracked pepper, maybe a little balsamic drizzle or even some mustard (I at left overs with mustard and it rocked my world)
My contribution to last nights dinner at my sisters…. Freshy fresh veggies spring rolls.I had about 30 minutes between work and getting over to my sisters house to throw something together so it needed to be something fast, easy, and something I could make without going to the store. She was making the main course (some teriyaki situation and rice) so I was doing up the veggies.
I had just bought a package of spring roll wrappers…. Bingo! The perfect and logical choice. I grab the wrappers, a variety of veggies and after spending 12 of my 30 minutes trying to scrub the oil based paint off of my face and hands, I still managed to completely prepare, construct, and take pictures of these lovely tasty spring rolls. and get over to my sisters in time for dinner.
Impressed?
Damn right!
The stuff. Carrot, beet, asparagus, red cabbage, and kohlrabi, which all (except asparagus, which I just cut into thirds) got cut into matchstick sized pieces with my mandoiln. Then there are the rice spring roll wrappers that we need to make the veggies into rolls. Also a bit of red wine vinegar to drizzle onto the veggies for a little extra zing. And lastly, soy, fresh ginger, and a couple cloves of garlic for a spicy salty dipping sauce.Start by having everything set out and ready to assemble. Fill a large shallow dish or baking sheet with really warm water. Working with one at a time,place a rice wrapper into water and let sit for about 10 seconds or until the paper starts to soften. Remove from water and place on a damp surface (just splash a little water on the counter) Take a little bit of everything and and place on the lower middle part of the paper. Fold in the sides first, then tuck and roll the wrapper as tightly as you can without ripping the wrapper.
Repeat until you have used up all you veggies.For the dipping sauce. Finely grate ginger and garlic and add to soy sauce. Stir… and it’s done.Freshy, pretty and fantastically delicious. And for real, took about 8 minutes to make. (I even had enough time to wash the dishes before we left!)
I am so awesome!
Hump Day Pow!!!!!
-C
Fresh Veggies Spring Rolls
Makes 8-10 but can easily be increased or decreased to desired amount
8-1o rice spring roll papers
Splash of Red wine or rice vinegar
1/4 cup soy or tamari sauce
2 cloves of garlic
teaspoon freshly grated ginger
1 medium carrot
1 medium beet
1/4 head of purple cabbage
10 thin fresh asparagus
1 small kohlrabi
Note… I used the veggies that I had in the fridge at the moment. If you have a bunch of veggies but not these particular ones, use what you have. Pretty much all veggies taste good inside a spring roll!
Gather your veggies and prep by either using a mandolin, a grater, or some sick knife skills, and julienne, shred, or slice you veggies into thin match sticks. Once all the veggies are prepared, sprinkle a little vinegar over the top.
For the rolls…Grab a large shallow vessel (a rimmed baking sheet works great) and add in warm water. Working one at a time, place the wrapper into the water for about 10 seconds or until the wrapper starts to soften. Remove and spread onto a clean, damp work surface. Gather a bit of each veggie that you are adding and place towards the bottom middle of the wrapper. Now fold the sides in over the pile of veggies. Then with the side closest to you, tuck and roll wrapper away from you, trying to keep it tight, but not to tight that it rips.. (Hopefully that makes since.) Place finished rolls onto a damp surface to keep from sticking and if not serving right away, drape with a damp towel or paper towel to keep from drying out.
For the soy ginger dipping sauce. Add grated ginger, minced garlic, and soy into a bowl and mix together. Serve with spring rolls.
Eat one, two, or a plateful. It’s nice to share but not a necessity.
And that’s how I know that this is a winner. As an awesome aunt, when I have any of my nieces or nephews, I feel the need to make something special for dinner, something that the kiddos might not get very often, but also keep it on he healthy side. I have 2 littles for the night which gives me the perfect opportunity for a trash food recipe. You know trash food, things like boxed mac and cheese, beefaroni in a can, or, in this case, sloppy joes.
Sloppy yes, trashy, not so much. These are made with beans and bulgur. No meat.
And I figured it is nice enough out that I can make the kiddos some messy food and then just bring them out back and hose them off… I mean, why not right?
The stuff… We start with onion and green pepper, chopped into pieces. Black beans, bulgur, can crushed tomatoes. Chili powder, garlic powder, a bit o apple cider vinegar (which I forgot to picture) ,and some salt and pepper. Oh and cheese if you want… Plus a bun of some sort is necessary. Toss the chopped onion and peppers into a deep skillet or pot with a drizzle of oil. Cook on medium heat until tender and toss in the spices. Give a stir. Add in the beans, bulgur, and tomato, a splash of vinegar. Stir it all up, cover, and let simmer for about 15 minutes, or until the bulgur has absorbed the liquid and is nice and tender.
If you are a bun toaster… toast while waiting. If not, just get the buns ready And Then dump a good heaping pile right onto a bun. Add some cheese, or not..and eat with wild abandonment, making sure to get as much on your face as you get in you mouth.
Fantastic Friday!! Live it up.
-C
Black Bean and Bulgur Sloppy Joes
2 cups or 1 can cooked black beans
1 16 oz can crushed tomatoes
1/2 cup bulgur
1/2 cup water
1 small onion
1 green pepper
1 teaspoon garlic powder
1 teaspoon chili powder
salt and pepper
a splash of apple cider vinegar
olive oil
4-6 burger or bulky buns
cheese (optional)
Dice the onion and the pepper and toss with a drizzle of olive oil into a large skillet. Sauté on medium heat until veggies become tender. Add in the spices, stir in and let cook for a minutes, then add in the beans, the tomato,water and the bugler. Cover skillet and let simmer until bugler becomes soft.
When the slop is ready, either toasted or not, scoop a generous portions onto buns. If so inclined, add some cheese.
Eat with hands… Sloppy is good.
Spicy, crispy cauliflower… um yes please. I really like cauliflower. The mister loves it, or at least likes it better than any other vegetable. So when he asked for spicy cauliflower, well yea I am going to make it because I am so nice and really, could I say no to a veggie request? (I might have said no if it involved deep frying) Also, I found fresh cauliflower on sale! ($2.25) I don’t usually cook fresh cauliflower, but I figured at that price, it wouldn’t be bad to cook a head. (If I am cooking cauliflower, which I do a lot, I just use frozen….casue it be waaaay cheaper)
Fresh, cheap and requested veggies….those are must makes. And the mister was happy with I handed him the plate of oh so lovely looking crispy crunchy loveliness. (I kind of like to make him happy…sometimes)
The stuff. Cauliflower, chopped and broken into pieces. Corn meal mixed with salt, pepper, onion and garlic powder, and because I made this for the mister, parmesan cheese. And in the green bowl, srirsachi and a little oil. The cauliflower gets a coat of the hot sauce and then tossed around in the corn meal mixture. Handling as little as possible, place coated pieces on a lightly oiled baking sheet and stick those suckers in the oven for about a half hour, taking them out and flipping half way.And take them out of the oven when pieces tuned golden brown, stik them on a plate, and serve immediately.
A bit of spice, a bit of crispy , a lot a yum. Serve with some crunchy veggies, maybe a squeeze of lemon and definitely some type of avocado situation.
A beer would be lovely too!
Have a fantastic weekend!
-C
Spicy Crispy baked Cauliflower
1 head cauliflower, chopped or broken into florets
1/2 cup corn meal
3-4 tablespoon sriracha or your favorite hot sauce
1 tablespoon olive or coconut oil
salt and pepper
Any seasonings you might like (garlic or onion powder, parmesan cheese, national yeast…. whatever floats your boat)
Preheat oven to 400 degrees
In a bowl, mix together sriracha and oil. In a separate bowl, mix salt, pepper, any seasonings you might like, and corn meal. Take cauliflower and toss in sauce to coat. Remove from sauce and toss around in cornmeal mixture till fully coated, but try not to hand too much so the coating doesn’t come off. Place pieces on a lightly oiled baking sheet and stick into oven. Bake for about 15 minutes, remove and flip pieces. Back into the oven for another 15-20 minutes (depending on you crispy preference) Remove when golden brown (or darker if you like) and serve immediately.
Cucumber, celery, and carrots are great accompaniments.. also a little mashed avocado or guacamole is much appreciated.
I was informed yesterday that if I was going to make tortilla chips, that I better make some sweet ass dips to go with them. I kind of agree… tortilla chips need dip… or better yet, two dips. Queso and guacamole. It’s what needed to be done, and so I did it.
Guacamole is amazing… anything avocado is amazing…this guacamole is amazing. White bean guacamole is amazing. And not that we really care, but this guac is half the fat then straight up guacamole. Plus it’s packed full of protein making it a kind of super duper, must eat all of it, kind of dip. And sweet potato anything will make me happy. Making queso dip with sweet potato and cauliflower is probably one of my best food combos so far. (after eating a butt load, I felt like I was a genius and made an amazing discovery) Again, not that we need it to be, but this is also a fat-free, vegan, gluten-free, super healthy, packed full of B12, fiber and nutrients, dip for all kind of dip.…. just another reason why you cannot feel bad when you finish off half a batch before you get a chance to stick it in a serving bowl. (I might have done that)
Here is what you need for a good time:
−These tortilla chips ….Check.
−Some Chopped Veggies (I want the veggies)…..Check
−Cauliflower Sweet Potato Queso.…Check.
−White Bean Guacamole…Check.
You are now ready for it. It being this party, that party, the Super Bowl, or a Wednesday afternoon.
To the left we have the makings for the cauliflower sweet potato queso.. Steamed cauliflower, a baked sweet potato, nutritional yeast, garlic, and chopped up red onion, red bell pepper and jalapeño. To make all you need to do it take the chopped peppers, onion, and garlic and sauté for a few minutes just to slightly soften and bring out flavors. While that’s going on, take the steamed cauliflower and sweet potato(skin off..but eat it, or save it for soup or feed it to the dog) and puree together with a blender or food processor. Add in nutritional yeast, about a tablespoon or two of hot water and, salt and pepper to taste. Blend for about 5 minutes until super creamy smooth. Add in sautéed stuff and pulse just enough to incorporated the veggies but not complete blend in. Stick in a bowl.
To the right we have white bean guacamole stuff. Two cups (or one can) rinsed white beans, one ripe avocado, a lime, a few cloves of garlic,(I also added a bit of garlic powered…I like my garlic) and some chopped up red onion and tomato. Place beans, garlic, avocado and lime juice in a blender or food processor and blend until smooth. Add salt to taste and toss in the chopped tomato and onion. Blend for sec to mix that in…Stick in a bowl
Perfect…
To think that both of these dips took about 10 minutes total to make. (I had pre baked the cauliflower and sweet potato) And for real, I would spend much more time if I had too because both of these dips are so freaking good, I definitely will be making these on the regular.
So there , dips for those sweet ass chips or whatever you want to dip or them spread them on.
And he guys…It’s FRIDAY! Have a fantastic day!
-C
White Bean Guacamole
2 cups white beans (or 1 can) rinsed and drained
1 ripe avocado
3 cloves garlic
1 lime
1/4 small red onion
1 small tomato
1-2 teaspoons salt
Finley chop onion and tomato. Set aside. Place the beans, avocado, garlic, garlic powder, 1 teaspoon salt and the juice from one lime into a blender or food processor and blend until smooth. Add a splash of water if needed to help keep things moving. Taste and add more salt if needed. When smooth, add the onion and tomato and pulse a few times to mix in. Scoop into a serving dish and finish with a squeeze of lime and a bit of chopped onion and tomato.
Cauliflower Sweet Potato Queso
1 1/2 cups pre cooked steamed or roasted cauliflower
1 medium pre baked sweet potato
1/2 cup nutritional yeast
1-2 tablespoons hot water
1/2 a small red pepper
1/4 small red onion
1 jalapeño
3 cloves garlic
salt and pepper
Finely dice the red pepper, jalapeño, onion and garlic and sauté in a skillet for a few minutes until slightly soften and fragrant. Take the pre-cooked cauliflower, sweet potato (skin removed), and nutritional yeast and place in a blender or food processor. Blend for about 5 minutes until creamy and smooth. Add in a tablespoon of water to keep things moving. When completely smooth, add in sautéed veggies and pulse a few times to combine. Scoop into a serving dish. If your feeling it, top with scallions and cracked pepper.
Serve dips with chips, veggies or anything you want. Also make great spreads for sandwiches and crackers too!
I eat vegetables like I breath air… constantly and almost mindlessly. Some people are addicted to sugar or coffee, but me, I am addicted to veggies. ( I am also extremely addicted to coffee) This is my truth, but I am ok with it.
All week long I have been hearing about this big game going on this weekend, something to do with a ball and running up and down a field….not quite sure, but I think it might be a big deal to some people.(I know it’s the Super Bowl, and I have heard about some deflated balls, but that’s the extent of my knowledge) I have also have been hearing a lot of party planning around this game, food planning, which is something that I do understand. So I wanted to bring a party snack to the mix, and because of my addiction, my mind goes straight to vegetable. I know that there is traditionally a lot of meat, cheese and hot sauce at these said parties, and that’s totally cool, but I think everyone wants to have a least one awesome meatless cheese-less piece of food to snack on during half time. So I give the people what they want.
So simple, fast and easy to make. Tasty and healthy as can be. Grab and eat with you hands…. and nice to look at. We got the whole package here.
Pretty much a little bit of everything that I have in my fridge….Shredded red cabbage, carrots, beets. Some sliced of red onion, tomato and red pepper. Hummus and a little mashed avocado
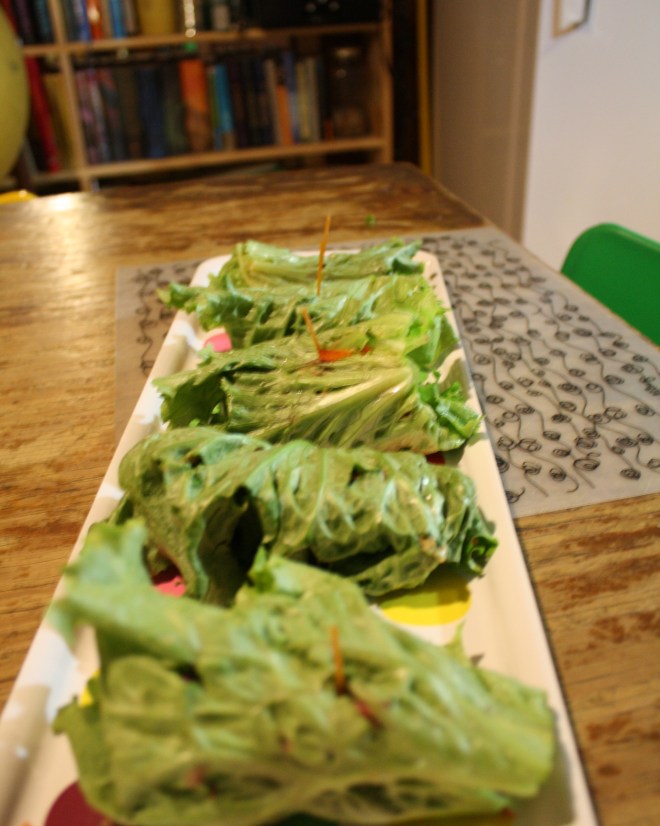
Yes, it may look like a mess, but that’s just me trying to make five different things at once. But really, making these wraps are simple simple. Just take rinsed and dried green or red leaf lettuce, smear on hummus and mashed avocado and pile on the veggies. Roll and stick with a toothpick to keep from unrolling. See…. simple.So many colors…… so much pretty. Wrapped and rolled…Sliced down the middle, just to see all the pretty inside.
These might be veggie wraps, but man, look at those sausage fingers…(hehehe)
Make for lunch, dinner, party, or snack. Eat them for breakfast, dessert or midnight nosh. Whenever, wherever…..YUMMY YUMMY YUM!
Happy hump day!
-C
Lettuce Wraps
Ingredients
Use whatever you want… but this is what I included in mine
Green leaf lettuce
Shredded red cabbage
shredded beets
shredded carrots
thinly sliced tomato
thinly sliced red pepper
thinly sliced red onion
hummus
avocado
With each wrap, take a large lettuce leaf and cut out the crunchy rib.(you can slice it up thinly and add to wrap. Smear leaf with hummus and smashed avocado, then layer on a bit of each of the veggies. Wrap or roll leaf in on the veggies and stick a toothpick in center to keep from unrolling.
Place on a plate and eat or share… Extras are fantastic to have in the fridge!
My contribution to last nights dinner at my sisters…. Freshy fresh veggies spring rolls.I had about 30 minutes between work and getting over to my sisters house to throw something together so it needed to be something fast, easy, and something I could make without going to the store. She was making the main course (some teriyaki situation and rice) so I was doing up the veggies.
I had just bought a package of spring roll wrappers…. Bingo! The perfect and logical choice. I grab the wrappers, a variety of veggies and after spending 12 of my 30 minutes trying to scrub the oil based paint off of my face and hands, I still managed to completely prepare, construct, and take pictures of these lovely tasty spring rolls. and get over to my sisters in time for dinner.
Impressed?
Damn right!
The stuff. Carrot, beet, asparagus, red cabbage, and kohlrabi, which all (except asparagus, which I just cut into thirds) got cut into matchstick sized pieces with my mandoiln. Then there are the rice spring roll wrappers that we need to make the veggies into rolls. Also a bit of red wine vinegar to drizzle onto the veggies for a little extra zing. And lastly, soy, fresh ginger, and a couple cloves of garlic for a spicy salty dipping sauce.Start by having everything set out and ready to assemble. Fill a large shallow dish or baking sheet with really warm water. Working with one at a time,place a rice wrapper into water and let sit for about 10 seconds or until the paper starts to soften. Remove from water and place on a damp surface (just splash a little water on the counter) Take a little bit of everything and and place on the lower middle part of the paper. Fold in the sides first, then tuck and roll the wrapper as tightly as you can without ripping the wrapper.
Repeat until you have used up all you veggies.For the dipping sauce. Finely grate ginger and garlic and add to soy sauce. Stir… and it’s done.Freshy, pretty and fantastically delicious. And for real, took about 8 minutes to make. (I even had enough time to wash the dishes before we left!)
I am so awesome!
Hump Day Pow!!!!!
-C
Fresh Veggies Spring Rolls
Makes 8-10 but can easily be increased or decreased to desired amount
8-1o rice spring roll papers
Splash of Red wine or rice vinegar
1/4 cup soy or tamari sauce
2 cloves of garlic
teaspoon freshly grated ginger
1 medium carrot
1 medium beet
1/4 head of purple cabbage
10 thin fresh asparagus
1 small kohlrabi
Note… I used the veggies that I had in the fridge at the moment. If you have a bunch of veggies but not these particular ones, use what you have. Pretty much all veggies taste good inside a spring roll!
Gather your veggies and prep by either using a mandolin, a grater, or some sick knife skills, and julienne, shred, or slice you veggies into thin match sticks. Once all the veggies are prepared, sprinkle a little vinegar over the top.
For the rolls…Grab a large shallow vessel (a rimmed baking sheet works great) and add in warm water. Working one at a time, place the wrapper into the water for about 10 seconds or until the wrapper starts to soften. Remove and spread onto a clean, damp work surface. Gather a bit of each veggie that you are adding and place towards the bottom middle of the wrapper. Now fold the sides in over the pile of veggies. Then with the side closest to you, tuck and roll wrapper away from you, trying to keep it tight, but not to tight that it rips.. (Hopefully that makes since.) Place finished rolls onto a damp surface to keep from sticking and if not serving right away, drape with a damp towel or paper towel to keep from drying out.
For the soy ginger dipping sauce. Add grated ginger, minced garlic, and soy into a bowl and mix together. Serve with spring rolls.
Eat one, two, or a plateful. It’s nice to share but not a necessity.
What a week. Was it summer where you are this week as well? I mean jeez, talk about one extreme to another. Oh well, at least the world has turned green, the winter stuff is completely out of sight and I found the box that contained all of my shorts and summery clothes (pants and long sleeves in 90 degrees is just gross) And honestly, it’s been great. In between work, chores and just plan old being busy, we have manage to get a few bike rides and long walks in. Plus all the veggie starts are doing great, the flowers are coming up everywhere and life just has a little bit more of a relaxed feeling. So what if my allergies are turning my face into big red puff or that the past few night have been so hot that the act of sitting has caused me to break a sweat. I’ll take it.
Oh and I can’t forget….
Happy Mother’s Day ladies!!!!
Here I give you a few thing from the internet this week …
– I didn’t believe they were paintings at first. Hyper-realistic Cactus Paintings that Bristle with Detail by Kwang-Ho Lee
-I’ll take any one of these The 5 Fanciest French Press Coffeemakers We Could Find
-Love love the floors in This house.
-Spending a bit of time making summer camping plans here…Vermont State Parks. I can’t wait to get the tent out!
-I think this should be happening everywhere. Recycled Drinking Water: Getting Past the Yuck Factor
– And there is this. ABC Brings Muppets Back To Prime Time As News Emerges About Fall Shows
And that, here are a few pictures from the week.
My boys. I long socks and sneakers… these guys know cool. Took the super cutie cuties out for an ice cream cone.Our first bike ride picnic down on the waterfront. I love bike ride picnics!So many succulents. I didn’t actually buy any because I need to stop being a plant whore.I have made a batch of this stuff evey day this week. I can’t stop eating it, it’s like eating summer. So good
Have a wonderful day and to all that it applies to…
Happy Moms Day!
-C
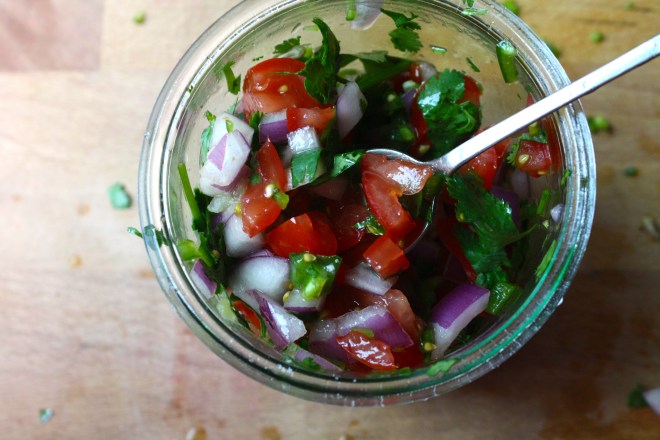
Happy Cinco de Mayo! And what better day to share my version of my oh so fantastic pico de gallo, or as I call it, super freshy salsa.
I love me some freshy salsa, It makes me oh so happy.
I make this stuff all the time, especially during the warmer months and tomato season. I usually make a batch right before a meal, just enough to eat right away, but sometimes I ‘ll make a big batched of it, thinking I’ll save some for the next day. It never makes it past the second day in the fridge because it’s just one of those things that when you see it, you want to eat it. Weird but true. And it’s totally ok to do so cause it’s basically eating a big bowl of healthy goodness, so eat on!
It takes no time to prepare, tastes super refreshing, goes on everything, and it’s just so freaking tasty. You can eat it with tacos and chips (the mister) or like me, I like to add it to everything; salads, popcorn, or directly in my mouth.
Make one batch, make 4, it doesn’t matter cause you will eat it all, and need to make more.
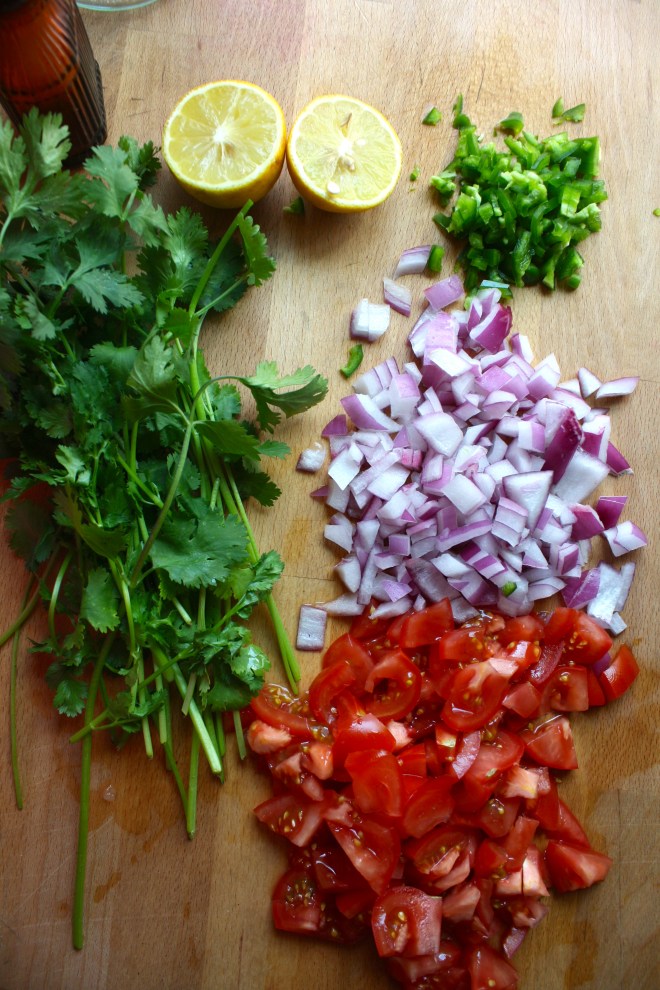
The stuff. Chopped Roma tomatoes, chopped red onion, a diced jalapeño, lemon, a bunch of cilantro, and salt.
Stick all the chopped stuff into a jar and add in the juice of the lemon. Roughly chop the cilantro and add that on in with a sprinkle of salt.
Mix it up….And thats it. Now eat… with something or without.
A spoon out of the jar is one of my favorite ways to go at it.
Happy Cinco de Mayo, Happy Tuesday!
-C
Pico de Gallo… Freshy Salsa
4-5 Roma Tomatoes
1 small red onion
1-2 jalapeños (Depending on heat preference)
1 lemon or lime
salt
1 bunch of cilantro (don’t use it if you don’t like it)
Chop tomatoes and onion and toss into a bowl or jar. Cut seeds from jalapeño(s) and dice up into little bitty pieces and add that to the tomato and onion. Roughly chop the cilantro and toss that in as well with the juice of the lemon or lime. Sprinkle with salt. Stir, let sit for a minutes, taste and then add more salt if needed.
Eat right away or make ahead and store in the fridge until ready to use.
Goes great with corn chips, tacos, toss onto salads or eat as is standing in front of the fridge. If someone is judging you, they are stupid.
Every year, the second weekend in August, the Stem family , siblings, cousins, even my 94 year old grandmother makes the trip from Easton PA, come together at, what we call, “the cabin.” (It’s more a house, but it started out as a cabin) . Its a little crazy, but such a good fun time.
This cabin, oh this place is magic. The air, the tree’s the streams, the mountains, and of course the people. It’s all the things that I love about life. Some of my earliest memories are from this place. Hanging out with my siblings, running around the meadow or through the woods. Playing in the swinging holes. My grandfather pulling taffy or making orange juice box houses with my grandmother. The giant rocking chair that my uncle made and all of us kids used to play on. So many camp fires and s mores. There are just so many memories because it’s been a part of my life, my whole life. It’s one of my favorite places in the world.
A little background on the place (what I can remember) Sometime in the late 70’s, my uncle and my grandparents bought a big chunk of land on the side of a mountain in the middle of nowhere Vt. After doing some clearing of trees, they went to building a cabin. (my aunt, grandmother, and dad helped a bit too). It was amazing, but quaint. A 2 story situation with a kitchen living area and one door to get in and out. At some point my grandparent ended up selling their share to my uncle and he took over the entry of the place. Over the years my uncle, (who is a carpenter, furniture designer,design professor, and all out crazy amazing person), continured to work on the place. He has added on a kitchen, a second floor bathroom, new this, and that, but never has it once felt like a patchworker pieced together place. And now the place is more like a amazing craftsman home, with just the right touches of cabin, but with two running toilets, a beautiful kitchen, electricity and running water ( There is even internet access, which sucks, but still).It is a little gem nestled on a side of a tiny mountain in one the most beautiful places.
So an awesome cabin in the woods with a bunch of crazy, but awesome people= Stem family reunion.
Ugh. It has been so nasty gross out. A four day heat wave, and no, not just hot hot days, but those gross, hot hot with all the humidity in the world, kind of days. My body has rebelled and turned into a slug and my hair… well let’s not talk about my hair.
Yup, it’s been way to freaking hot to do anything, especially cook. And eating food is’t even especially appealing either (living off raw kale and, yes, lots of tomatoes at the moment) . What we all want is to drink something nice and cold and refreshing (and boozy). And what do I do when I want this, and have a lot of that? I turn that into this. That being tomatoes, and this, being a cold drink. Did that confuse you?
What I am trying to say is that I have a butt load of cherry tomatoes to eat but what I really want is a cold drink. So I took the tomatoes and make them into a lemonade. And it is amazing. It hits all the end of summer, super gross heatwave, I don’t want to move, spots that needed to be hit. And just in time for the weekend sow e get to add a little splash or two of something hard, cause we all know that after this past week, we all deserve it.
Think that combination sounds weird? Well don’t cause lemons and tomatoes are perfectly paired together. Tart and tangy, but still with a bit of sweetness from the tomatoes ( especially if using a sweeter variety like the sun-gold). It really is a great, refreshing drink, with or without the booze. A perfect match!
Tomato lemonade here we go!
The stuff. Tomatoes ( I used sun-gold cherry cause I have a buttload, but you can sure use whatever tomato you have to many of), lemons, water, and if your into it vodka.
Note. The mr. and I are not big on sweet drinks, so I didn’t add any sweetener, the tomatoes being sweet enough. But feel free to add a little sugar or honey to yours.
Start by dumping tomatoes into a pot with water. Stick on high heat and bring to boil, then turn heat to medium low,stick a lid on pot, and let tomatoes simmer for a little while.
About 30 ish minutes later, the tomatoes have reduced to about 1/3 of what you started with and have turned into a a chunky like syrup.
Strain the juice from the solids into a big pitcher.
Tomato juice! and it’s so pretty bright gold. Now let it cool far a little bit.
And while juice is cooling, juice your lemons
When the tomato juice is cooled off, add the lemon juice to the tomato.
Add water and stir
Taste, and if you think it need sweetener, by all means, add a drizzle or two of some honey or spoonful of sugar.
A couple of glasses of ice, and if you shall,, a shot of vodka (add the shot to the glass, not the pitcher)
Me being so fancy added a garnish/snack. Basil leaf and cherry tomato skewer looks so nice.
And sit back, put your feet up. and take it all in.
Weekend here we come!
-C
2 cups cherry tomatoes (can use 2 cups of any tomato)
1 cup fresh lemon juice (4-5 lemons)
1 cup water plus 3 1/2 -4 cups water
a few basil leaves and extra tomatoes for garnish (optional)
Note. I did not add any sweetener to my lemonade but you could totally add in a few tablespoons honey or sugar. Do what floats your boat.
Dump tomatoes into a pot with 1 cup of water. Bring to boil then cover and turn heat to a medium low heat. Cook tomatoes down for about 30 minutes or until the tomatoes have reduced about 1/3 and is almost sauce like.
Using a fine mesh strainer, strain the tomato mixture into pitcher or jug that you can serve your drinks from. Use a wood spoon or spatula to scrap the tomato around strainer to really make sure you get all the juicy goodness. Let tomato juice cool.
While cooling, juice lemons until you get a cup of fresh lemon juice. Add lemon juice to cool tomato juice along with 3 1/2 cups water. Mix and taste. If you think it needs a little sweetener, add a little in. If you think it tastes to strong, add in more water.
Good stir, ice in cups, a 2-3oz shot of vodka per 8-12oz cup of lemonade (the ratio is up to you my friend)… and your sitting pretty. Feeling a little fancy, take a basil leaf and wrap around a cherry tomato. Stab it with a tooth pick and garnish your drink. It ames for anise snack too.
Sit back, sip and enjoy.
My flowers are coming up, I have packed away my winter jacket, and I haven’t worn anything but sandals for the past week. Plus yesterday I made the first batch of sun tea and saw my first hot air balloon of the season (which lead to a heated discussion with the mister about how hot air balloons take flight. We were both kinda right, but me more than him)So yeah, it’s for real… Winter is gone and spring has sprung, or more like spring sprung then bounced cause now it’s basically summer weather. Not complaining, but I hope we get a least a few more weeks of pleasant, not hot and humid weather.
Anyway. Sun tea, one of my favorite summer time drinks. Made by infusing regular old teas with water by using the almighty power of sun.
Why do we want to make iced tea this way instead of just using boiling water? Well you can still do that, but sun tea makes a more mellow, lovely, and I find, more sweeter tea. It brings out more complex flavors that you don’t get with the boiling water method. And it’s nice to know that it took zero effort on my part to make the drink (not that boiling water takes that much effort, but still)
It can be made with any variety of teas, infused with other fresh herbs, dried spices, or even chunks of fruit. You can also make the teas and add flavors after the infusing is over. Have fun and play with flavor combos.
A few of my favorite sun tea combinations
Any mellow black tea like orange pekoe or english breakfast with a few springs of mint
Chamomile and mint
Green with a fruity tea, like blueberry or pomegranate
Lemon Zinger with a few springs of Rosemary
These are just a few of the endless possible flavors. And you don’t have to get fancy with it either, you can totally use plain old lipton tea bags (I still do that too)
Now harness the sunshine and feel awesome and fancy by making some tea!
Woo Hoo Wednesday!
-C
SUN TEA
What you’ll need
Tea- Either bags or loose leaf
Water- Preferably Filtered
A glass jar with a lid
Sunshine
I use a ratio of 1 tea bag or 1 tablespoon loose leaf tea per 2 cups of water. And I usually make my teas in half gallon ball jars so I use 4-5 teabags or tablespoons of tea. (makes just enough tea for 4-6 tall glasses, depending on you glass size) If it’s a mint tea, I usually use a little less because I find that mint teas can become to strong and bitter so I use 3 teas bags or tablespoons of loose.
Directions
Place tea loose or bags into jar. Fill with water, leaving about an inch for tea expansion, place lid on tight, and stick in the sun for anywhere between 3-5 hours (depending on how strong you like your tea). When tea is infused to your liking, remove teabags or strain the loose tea and stick into the fridge to chill. Serve as is in a drinking vessel with a few ice cubes and add sweetener if that’s what you do.
Drink within a day or two, then rinse jar and make a new batch!
First off.. Happy Saturday and Happy Valantines Day!
Once again, it is so F-ing cold out and I don’t want to leave my house! And because of the cold we decided to forgoing the traditional V day hike(kinda sad) but instead are going to just hang at home and watch movies. (which is actually kind of nice because now I get to stay all frumpy and warm , hanging out in my baggy old sweats and oversized sweater (so sexy right?)
Anyways.. being all cozy usually entails something warm and yummy to drink. Neither of us are really big on hot chocolate, (plus we don’t have the stuff to make it) and sure we could crack open the fancy bottle of wine we bought for dinner (4.99 Trader Joes Special!!!!) or we can save that and I can whip up something a little spicy sweet.
Warm winter lemonade!! We are both big on lemon in everything and I just bought a bunch of sweet meyers lemons, so I think it’s meant to be.
Sweet, a little spicy, and warning….Perfect for a day of cuddling on the couch or for something to warm you after being outside. Great for anyone who wants a little something tasty that isn’t chocolate or booze, even good for those that might be feeling a little under the weather. Kids and adults alike…. this winter lemonade works for it all.
So whip some up and stay warm!
And have a fantastic day!!!
-C
Warm Winter Lemonade
Serves 2
1 Meyer lemon (can use regular lemon too)
3 cups water
2 tablespoon of honey (use sweetener of choice if vegan)
A few sprinkles of cinnamon(optional but recommended!)
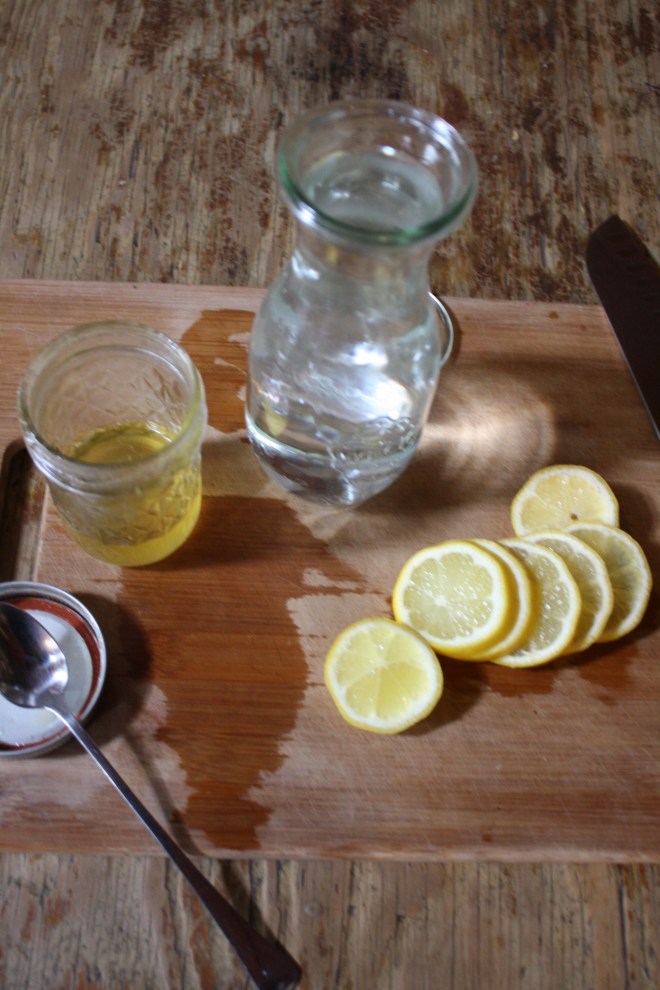
Slice lemon and place into a pot with water, cover, and bring to a boil. Once boiling, remove from heat and let sit for a minute or two. Transfer to a blender (or use a emulsifier) and blend until frothy. Place a tablespoon of the honey or whatever sweeter into each cup. (add more if you like) Strain lemon mixture in equal amounts into mugs. Stir and sprinkle with cinnamon.
If you don’t want to use the blender method, you can juice 1 lemon, split into two mugs , add sweetener and top with hot water.. Don’t forget the cinnamon!
I have been meaning do a post on seltzer and syrups for a while now and this one is perfect… Everyone around me has been getting sick and I am trying my hardest to not get anything.
Citrus and ginger…. Two of my favorite things, combined into one super refreshing, light and crisp, thirst quenching drink. Tasty and packed full of vitamin C from the citrus and blood warming, tummy healing ginger. Its kind of a feel better elixir, a good for you drink, a sparkler pop. A drink everyone can get into (the mister even liked it), And it has no added sugars or nasty coloring, it can’t get much better.
Feeling Happy, feeling crappy, or just plain feeling, this drink is a good for it all.
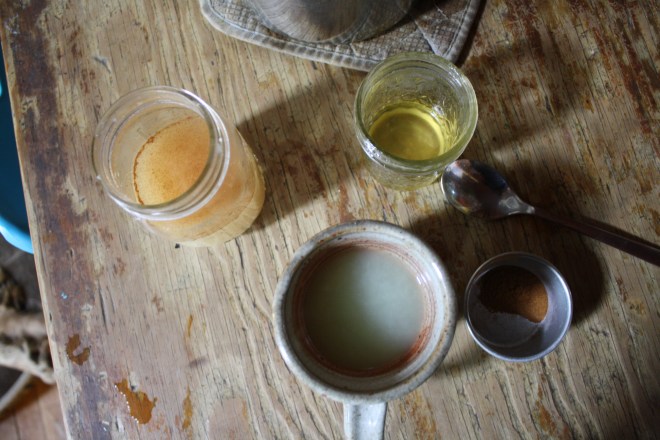
I made the ginger date simple syrup ahead of time.. All I did what chop 2 1/2 tablespoons fresh ginger and about 3 tablespoons pitted dates and added to a pot with a cup of water. Simmered the stuff until the dates were mostly dissolved, about 15 minutes, took off the heat and pureed it. I let it steep for another 5 minutes and strained….no biggy. This is a milder sweet simple syrup. If you like sweeter add more dates or even add a bit of honey… Do what tastes the best to you.
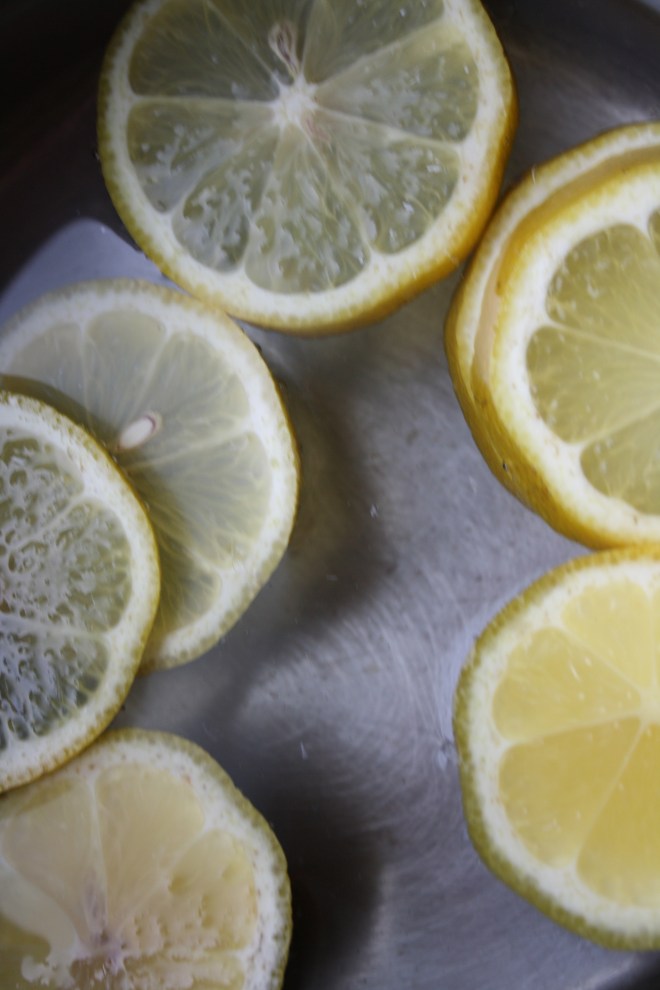
Juice the lime and blood orange…..so much pretty!
I ended up with about 12 tablespoons of juice from a the lime and the orange.. If you need or want to, juice an additional orange and lime.
Add 2-3 tablespoons of the fresh juice per 12oz glass and add about 2-3 tablespoons of the ginger date syrup…(adjust amounts to you taste) Top off with cold plain seltzer water and maybe an ice-cube or two. ( I would have if I had thought to make ice)
So lovely…. so nice. I really got into these flavors. This drink has the ability to make you feel warm and cozy while being cold and fresh. It makes me happy.
Double thumbs up here!
Stay un-sick!
-C
Blood Orange Ginger Lime Sparkler Pop
Ingredients
2 1/2 tablespoons fresh chopped ginger
3 tablespoons chopped dates (more if you want sweeter)
1 cup water
1 lime
1 blood orange
Plain Seltzer water
Ice (optional)
For the ginger date syrup
In a small pot on low heat, add chopped dates and ginger to a cup of water. Simmer until dates have mostly dissolved, about 15 minutes. remove from heat and puree with either a blender to a hand emulsifier. Let steep for another 5 minutes and strain, reserving the pulp (add it to soup or salad dressing). Let completely cool.
To assemble drink, juice blood orange, and lime. Add about 3 tablespoons of the ginger syrup and 2-3 tablespoons of the citrus juice per 12 0z cup. Top with plain seltzer water, give it a light swirl with a spoon or straw and add ice cube if you want. Now have at it!
My contribution to last nights dinner at my sisters…. Freshy fresh veggies spring rolls.I had about 30 minutes between work and getting over to my sisters house to throw something together so it needed to be something fast, easy, and something I could make without going to the store. She was making the main course (some teriyaki situation and rice) so I was doing up the veggies.
I had just bought a package of spring roll wrappers…. Bingo! The perfect and logical choice. I grab the wrappers, a variety of veggies and after spending 12 of my 30 minutes trying to scrub the oil based paint off of my face and hands, I still managed to completely prepare, construct, and take pictures of these lovely tasty spring rolls. and get over to my sisters in time for dinner.
Impressed?
Damn right!
The stuff. Carrot, beet, asparagus, red cabbage, and kohlrabi, which all (except asparagus, which I just cut into thirds) got cut into matchstick sized pieces with my mandoiln. Then there are the rice spring roll wrappers that we need to make the veggies into rolls. Also a bit of red wine vinegar to drizzle onto the veggies for a little extra zing. And lastly, soy, fresh ginger, and a couple cloves of garlic for a spicy salty dipping sauce.Start by having everything set out and ready to assemble. Fill a large shallow dish or baking sheet with really warm water. Working with one at a time,place a rice wrapper into water and let sit for about 10 seconds or until the paper starts to soften. Remove from water and place on a damp surface (just splash a little water on the counter) Take a little bit of everything and and place on the lower middle part of the paper. Fold in the sides first, then tuck and roll the wrapper as tightly as you can without ripping the wrapper.
Repeat until you have used up all you veggies.For the dipping sauce. Finely grate ginger and garlic and add to soy sauce. Stir… and it’s done.Freshy, pretty and fantastically delicious. And for real, took about 8 minutes to make. (I even had enough time to wash the dishes before we left!)
I am so awesome!
Hump Day Pow!!!!!
-C
Fresh Veggies Spring Rolls
Makes 8-10 but can easily be increased or decreased to desired amount
8-1o rice spring roll papers
Splash of Red wine or rice vinegar
1/4 cup soy or tamari sauce
2 cloves of garlic
teaspoon freshly grated ginger
1 medium carrot
1 medium beet
1/4 head of purple cabbage
10 thin fresh asparagus
1 small kohlrabi
Note… I used the veggies that I had in the fridge at the moment. If you have a bunch of veggies but not these particular ones, use what you have. Pretty much all veggies taste good inside a spring roll!
Gather your veggies and prep by either using a mandolin, a grater, or some sick knife skills, and julienne, shred, or slice you veggies into thin match sticks. Once all the veggies are prepared, sprinkle a little vinegar over the top.
For the rolls…Grab a large shallow vessel (a rimmed baking sheet works great) and add in warm water. Working one at a time, place the wrapper into the water for about 10 seconds or until the wrapper starts to soften. Remove and spread onto a clean, damp work surface. Gather a bit of each veggie that you are adding and place towards the bottom middle of the wrapper. Now fold the sides in over the pile of veggies. Then with the side closest to you, tuck and roll wrapper away from you, trying to keep it tight, but not to tight that it rips.. (Hopefully that makes since.) Place finished rolls onto a damp surface to keep from sticking and if not serving right away, drape with a damp towel or paper towel to keep from drying out.
For the soy ginger dipping sauce. Add grated ginger, minced garlic, and soy into a bowl and mix together. Serve with spring rolls.
Eat one, two, or a plateful. It’s nice to share but not a necessity.
I was informed yesterday that if I was going to make tortilla chips, that I better make some sweet ass dips to go with them. I kind of agree… tortilla chips need dip… or better yet, two dips. Queso and guacamole. It’s what needed to be done, and so I did it.
Guacamole is amazing… anything avocado is amazing…this guacamole is amazing. White bean guacamole is amazing. And not that we really care, but this guac is half the fat then straight up guacamole. Plus it’s packed full of protein making it a kind of super duper, must eat all of it, kind of dip. And sweet potato anything will make me happy. Making queso dip with sweet potato and cauliflower is probably one of my best food combos so far. (after eating a butt load, I felt like I was a genius and made an amazing discovery) Again, not that we need it to be, but this is also a fat-free, vegan, gluten-free, super healthy, packed full of B12, fiber and nutrients, dip for all kind of dip.…. just another reason why you cannot feel bad when you finish off half a batch before you get a chance to stick it in a serving bowl. (I might have done that)
Here is what you need for a good time:
−These tortilla chips ….Check.
−Some Chopped Veggies (I want the veggies)…..Check
−Cauliflower Sweet Potato Queso.…Check.
−White Bean Guacamole…Check.
You are now ready for it. It being this party, that party, the Super Bowl, or a Wednesday afternoon.
To the left we have the makings for the cauliflower sweet potato queso.. Steamed cauliflower, a baked sweet potato, nutritional yeast, garlic, and chopped up red onion, red bell pepper and jalapeño. To make all you need to do it take the chopped peppers, onion, and garlic and sauté for a few minutes just to slightly soften and bring out flavors. While that’s going on, take the steamed cauliflower and sweet potato(skin off..but eat it, or save it for soup or feed it to the dog) and puree together with a blender or food processor. Add in nutritional yeast, about a tablespoon or two of hot water and, salt and pepper to taste. Blend for about 5 minutes until super creamy smooth. Add in sautéed stuff and pulse just enough to incorporated the veggies but not complete blend in. Stick in a bowl.
To the right we have white bean guacamole stuff. Two cups (or one can) rinsed white beans, one ripe avocado, a lime, a few cloves of garlic,(I also added a bit of garlic powered…I like my garlic) and some chopped up red onion and tomato. Place beans, garlic, avocado and lime juice in a blender or food processor and blend until smooth. Add salt to taste and toss in the chopped tomato and onion. Blend for sec to mix that in…Stick in a bowl
Perfect…
To think that both of these dips took about 10 minutes total to make. (I had pre baked the cauliflower and sweet potato) And for real, I would spend much more time if I had too because both of these dips are so freaking good, I definitely will be making these on the regular.
So there , dips for those sweet ass chips or whatever you want to dip or them spread them on.
And he guys…It’s FRIDAY! Have a fantastic day!
-C
White Bean Guacamole
2 cups white beans (or 1 can) rinsed and drained
1 ripe avocado
3 cloves garlic
1 lime
1/4 small red onion
1 small tomato
1-2 teaspoons salt
Finley chop onion and tomato. Set aside. Place the beans, avocado, garlic, garlic powder, 1 teaspoon salt and the juice from one lime into a blender or food processor and blend until smooth. Add a splash of water if needed to help keep things moving. Taste and add more salt if needed. When smooth, add the onion and tomato and pulse a few times to mix in. Scoop into a serving dish and finish with a squeeze of lime and a bit of chopped onion and tomato.
Cauliflower Sweet Potato Queso
1 1/2 cups pre cooked steamed or roasted cauliflower
1 medium pre baked sweet potato
1/2 cup nutritional yeast
1-2 tablespoons hot water
1/2 a small red pepper
1/4 small red onion
1 jalapeño
3 cloves garlic
salt and pepper
Finely dice the red pepper, jalapeño, onion and garlic and sauté in a skillet for a few minutes until slightly soften and fragrant. Take the pre-cooked cauliflower, sweet potato (skin removed), and nutritional yeast and place in a blender or food processor. Blend for about 5 minutes until creamy and smooth. Add in a tablespoon of water to keep things moving. When completely smooth, add in sautéed veggies and pulse a few times to combine. Scoop into a serving dish. If your feeling it, top with scallions and cracked pepper.
Serve dips with chips, veggies or anything you want. Also make great spreads for sandwiches and crackers too!
When something goes on sale at the grocery store, I tend to buy it. Being that it is Valentines Day this week, all the stores are having specials on all sorts of sexy things… and strawberries are one of them. Now I am not a huge fan of buying produce that is terribly out of season, but I can’t help myself…a good deal is a good deal and the strawberries were a super good deal. I was just going to make some sweet ass strawberry jam or maybe a lovely strawberry cake with them (and I probably still will), but these strawberries are actually super juicy and full of flavor, and it’s always nice to eat some full flavor freshy strawberries… especially soaked in balsamic vinegar. And yeah, I think that this salad is pretty sexy, so it makes for a perfect Valentines day dish.
A handful of ingredients and 5 minutes will get you to a fantastic salad experience.
A bowl of baby spinach, a few chopped up strawberries*, half a sliced avocado and a small handful of toasted almonds.. Oh, and don’t forget the balsamic vinegar….
*Note.. Strawberries are kind of heart shaped already so if you want, reserve a few slices to fancy up you salad presentation, but chop up the rest into smaller pieces.
Pour the vinegar on the strawberries and let sit for at least 5 minutes. (the longer the strawberries can sit with the vinegar, the better)
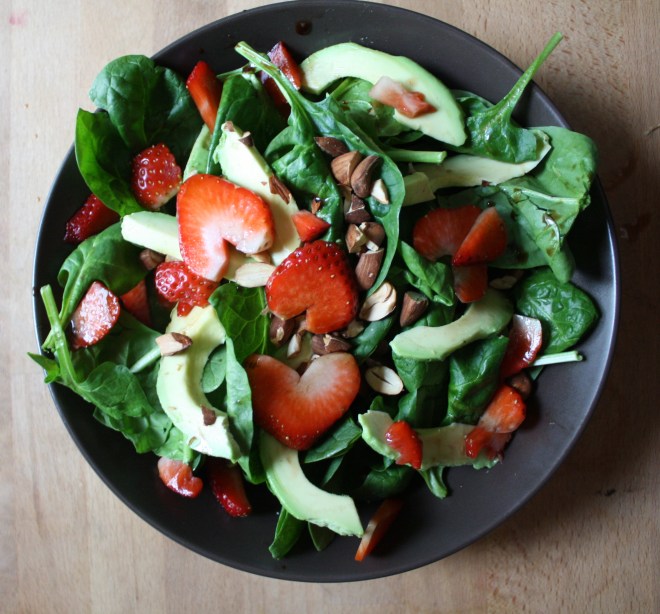
Pile it on.. thinly slice avocado.. rough chopped toasted almonds… It’s pretty much as easy as it can get.And last but not least, toss on the balsamic soaked strawberries and drizzle the remaining vinegar. (if you made hearts, place on top to make pretty) Sprinkle with a pitch of salt and pepper and pow! Fancy, sexy, delicious salad.
Not to shabby for 5 minutes and a handful of ingredients. Anyone (don’t feed to a person with nut allergies) would be so syked to be fed a salad like this… You yourself should be pretty excited to eat a salad like this. Heck, I am excited to eat a salad like this!
A love salad for everyone and everyday!
YAY for Thursday and Happy meal planning!!!!
-C
♥ Balsamic Strawberries on Spinach Almond Avocado Salad ♥
Ingredients for 1 large or 2 small salads
3-4 ripe strawberries
handful of roasted almonds (slivers or whole)
1/2 avocado
2 tablespoons Balsamic Vinegar
3 cups baby spinach
Pinch of salt and pepper
Dice strawberries into small pieces (reserve a few whole slices for heart shapes if you want) and toss in a small bowl with the balsamic vinegar. Let sit for at least 5 minutes. Rinse and dry spinach. Place in a bowl(s) and top with thinly sliced avocado, chopped almonds and balsamic soaked strawberries. Drizzle the residual vinegar on top and sprinkle with a pinch of salt and pepper.


 And that’s how I know that this is a winner.
  As an awesome aunt, when I have any of my nieces or nephews, I feel the need to make something special for dinner, something that the kiddos might not get very often, but also keep it on he healthy side. I have 2 littles for the night which gives me the perfect opportunity for a trash food recipe. You know trash food, things like boxed mac and cheese, beefaroni in a can, or, in this case, sloppy joes.
 The stuff… We start with onion and green pepper, chopped into pieces. Black beans, bulgur, can crushed tomatoes. Chili powder, garlic powder, a bit o apple cider vinegar (which I forgot to picture) ,and some salt and pepper. Oh and cheese if you want… Plus a bun of some sort is necessary.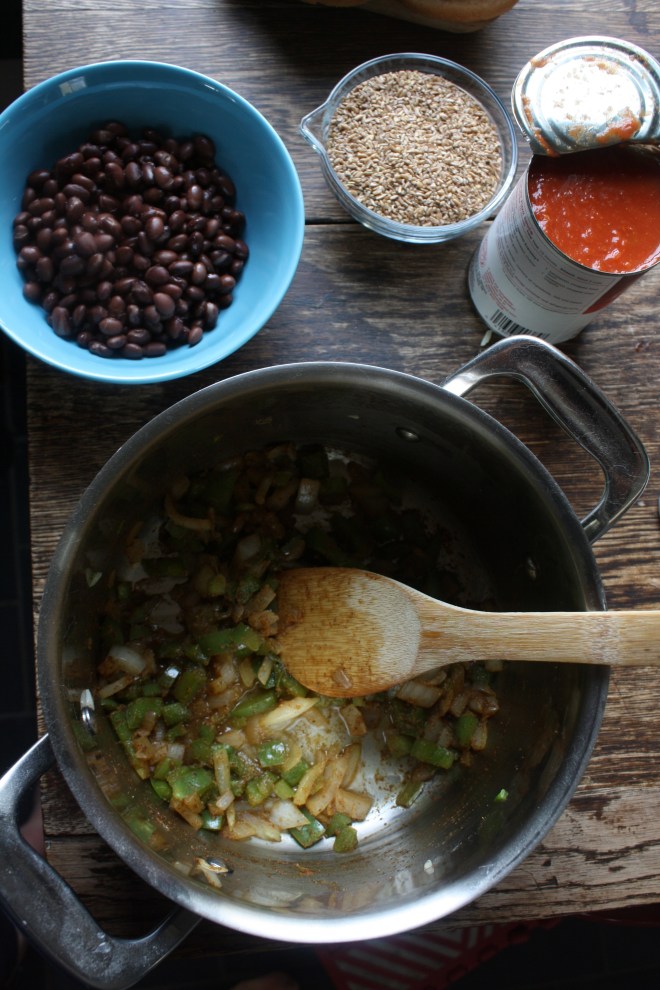
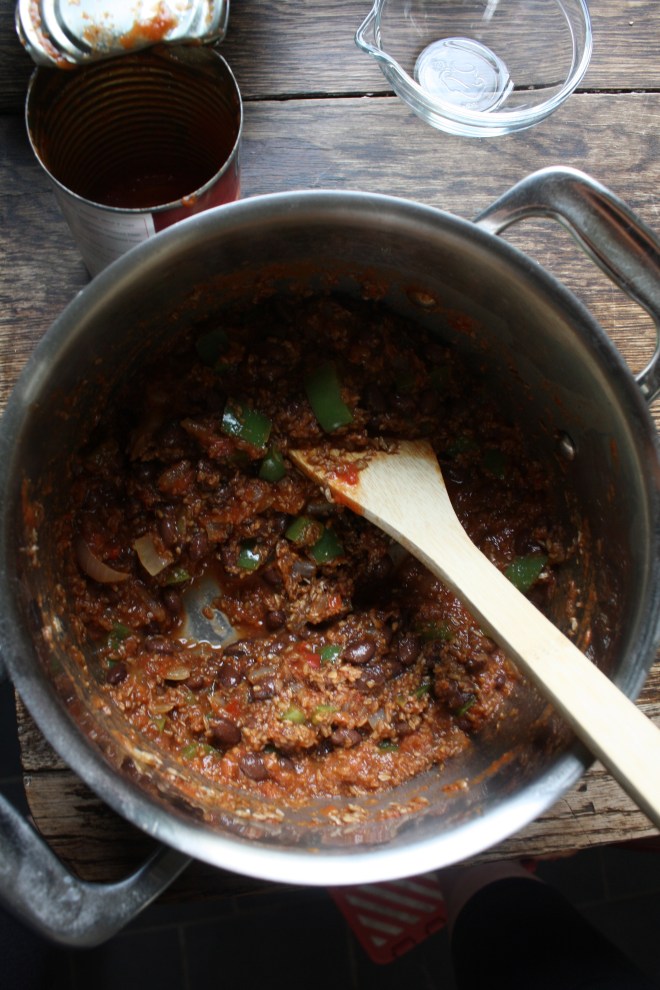 Toss the chopped onion and peppers into a deep skillet or pot with a drizzle of oil. Cook on medium heat until tender and toss in the spices. Give a stir. Add in the beans, bulgur, and tomato, a splash of vinegar. Stir it all up, cover, and let simmer for about 15 minutes, or until the bulgur has absorbed the liquid and is nice and tender.
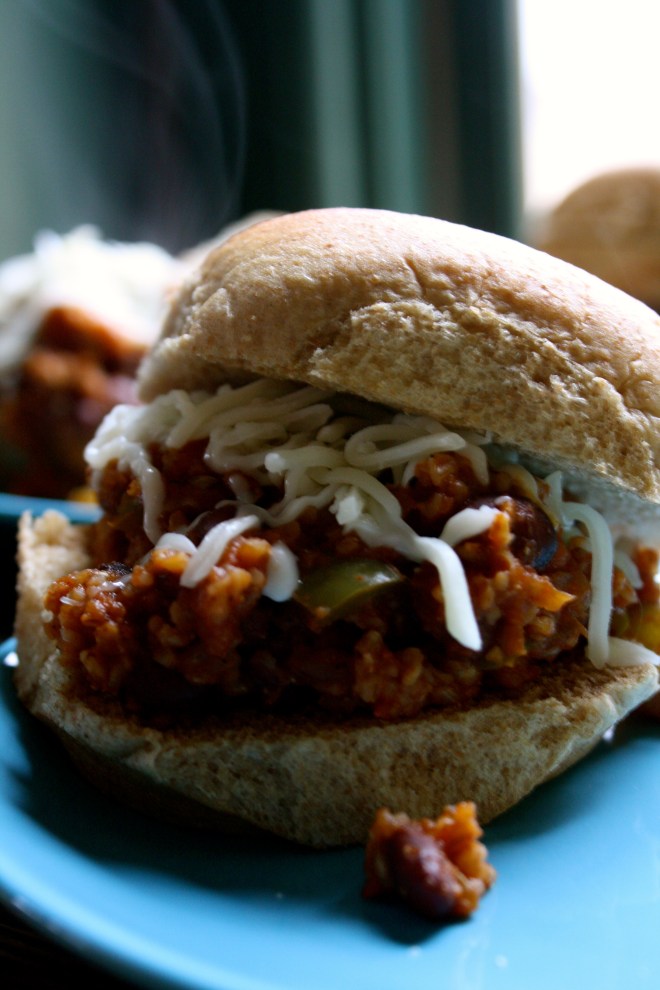 And Then dump a good heaping pile right onto a bun. Add some cheese, or not..and eat with wild abandonment, making sure to get as much on your face as you get in you mouth.
 Spicy, crispy cauliflower… um yes please. I really like cauliflower. The mister loves it, or at least likes it better than any other vegetable. So when he asked for spicy cauliflower, well yea I am going to make it because I am so nice and really, could I say no to a veggie request? (I might have said no if it involved deep frying) Also, I found fresh cauliflower on sale! ($2.25) I don’t usually cook fresh cauliflower, but I figured at that price, it wouldn’t be bad to cook a head. (If I am cooking cauliflower, which I do a lot, I just use frozen….casue it be waaaay cheaper)
  The stuff. Cauliflower, chopped and broken into pieces. Corn meal mixed with salt, pepper, onion and garlic powder, and because I made this for the mister, parmesan cheese. And in the green bowl, srirsachi and a little oil.
  The cauliflower gets a coat of the hot sauce and then tossed around in the corn meal mixture. Handling as little as possible, place coated pieces on a lightly oiled baking sheet and stick those suckers in the oven for about a half hour, taking them out and flipping half way.
 And take them out of the oven when pieces tuned golden brown, stik them on a plate, and serve immediately.
 I was informed yesterday that if I was going to make tortilla chips, that I better make some sweet ass dips to go with them. I kind of agree… tortilla chips need dip… or better yet, two dips. Queso and guacamole. It’s what needed to be done, and so I did it.

 Perfect…
 To think that both of these dips took about 10 minutes total to make. (I had pre baked the cauliflower and sweet potato) And for real, I would spend much more time if I had too because both of these dips are so freaking good, I definitely will be making these on the regular.
 I eat vegetables like I breath air… constantly and almost mindlessly. Some people are addicted to sugar or coffee, but me, I am addicted to veggies. ( I am also extremely addicted to coffee) This is my truth, but I am ok with it.
 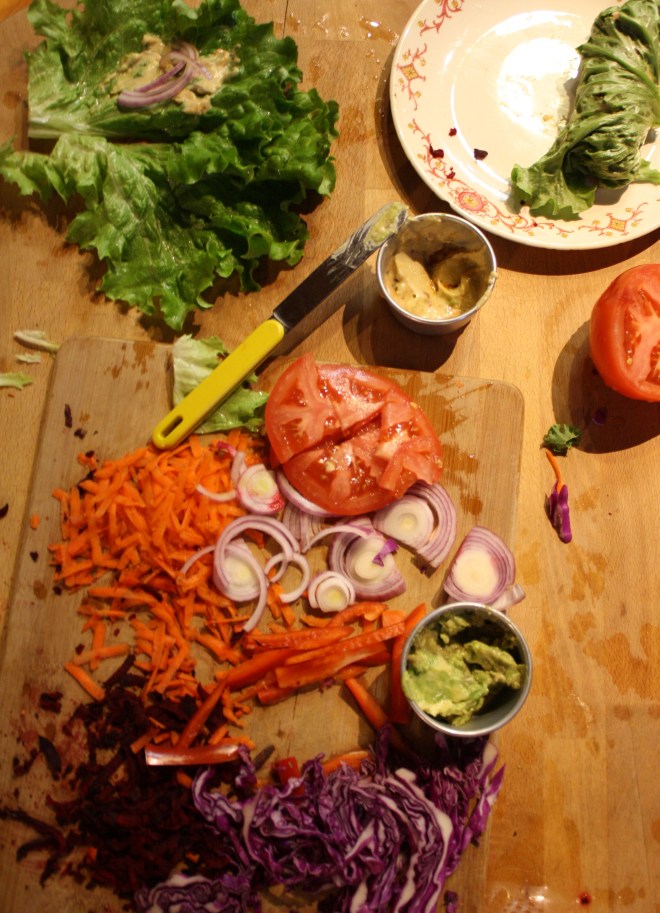 Pretty much a little bit of everything that I have in my fridge….Shredded red cabbage, carrots, beets. Some sliced of red onion, tomato and red pepper. Hummus and a little mashed avocado
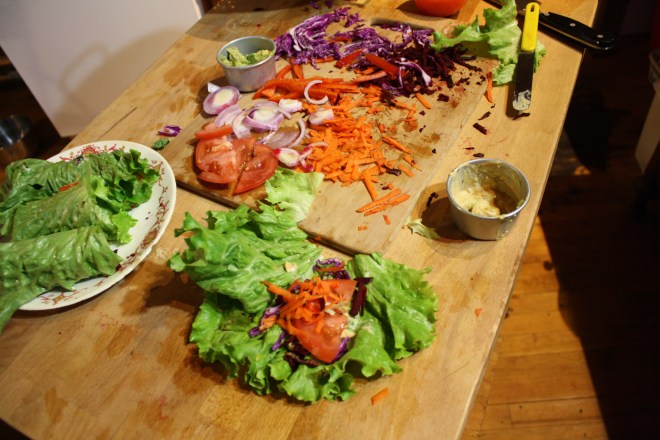 Yes, it may look like a mess, but that’s just me trying to make five different things at once. But really, making these wraps are simple simple. Just take rinsed and dried green or red leaf lettuce, smear on hummus and mashed avocado and pile on the veggies. Roll and stick with a toothpick to keep from unrolling. See…. simple.
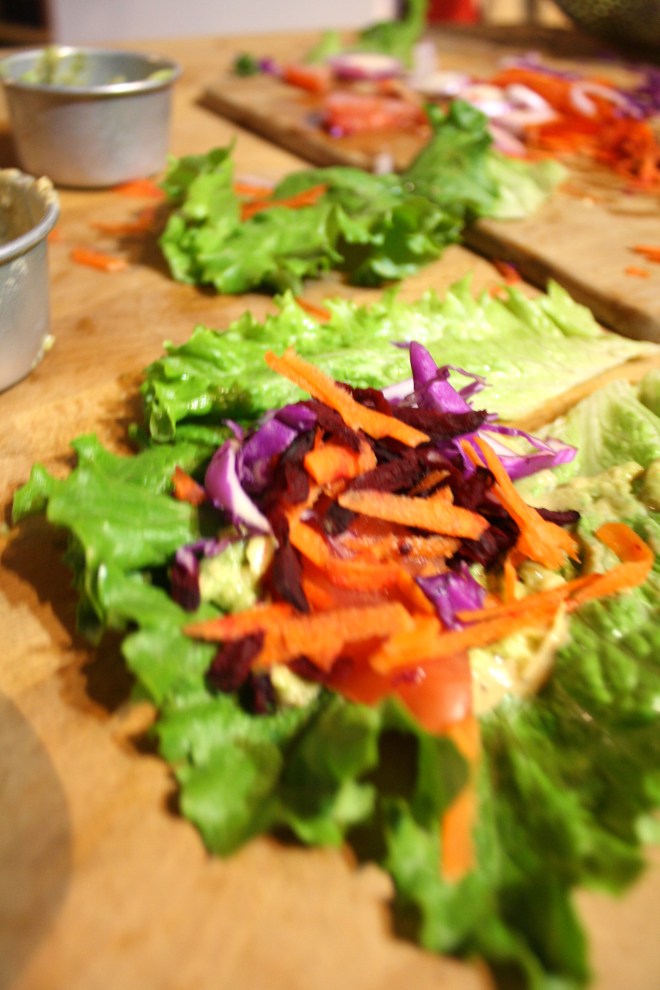 So many colors…… so much pretty.
 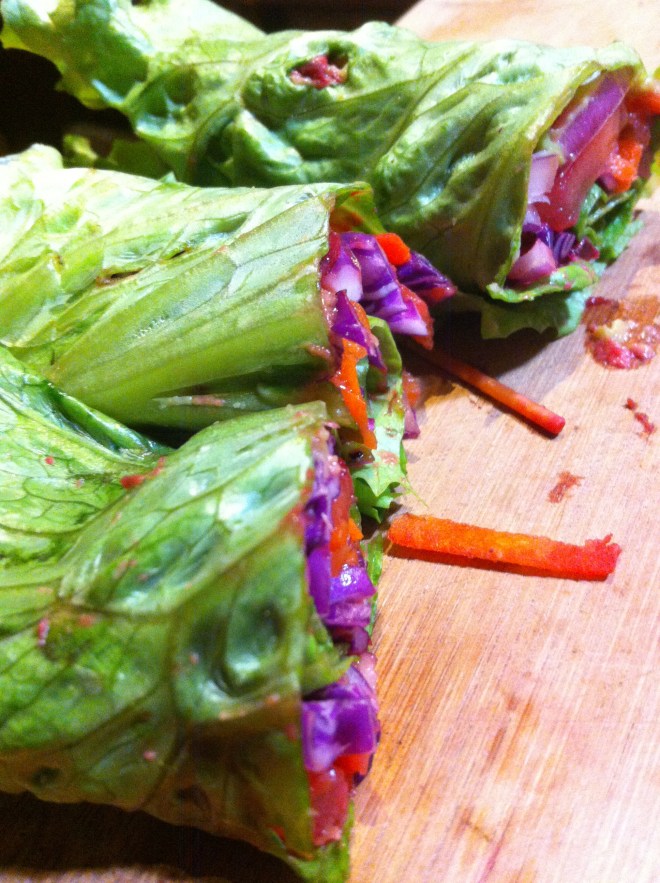 Wrapped and rolled…Sliced down the middle, just to see all the pretty inside.
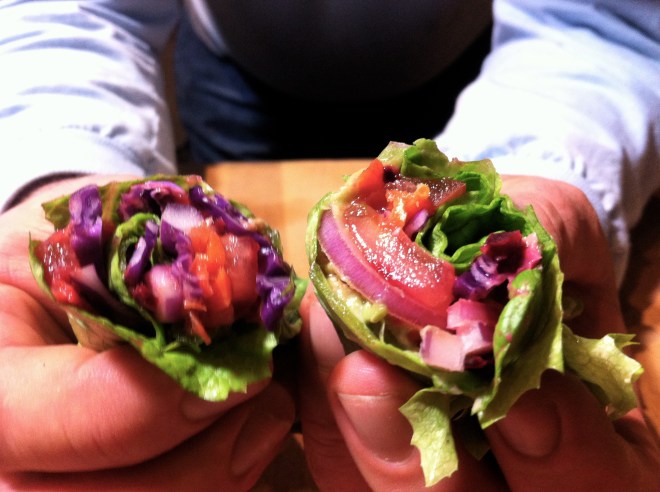 These might be veggie wraps, but man, look at those sausage fingers…(hehehe)
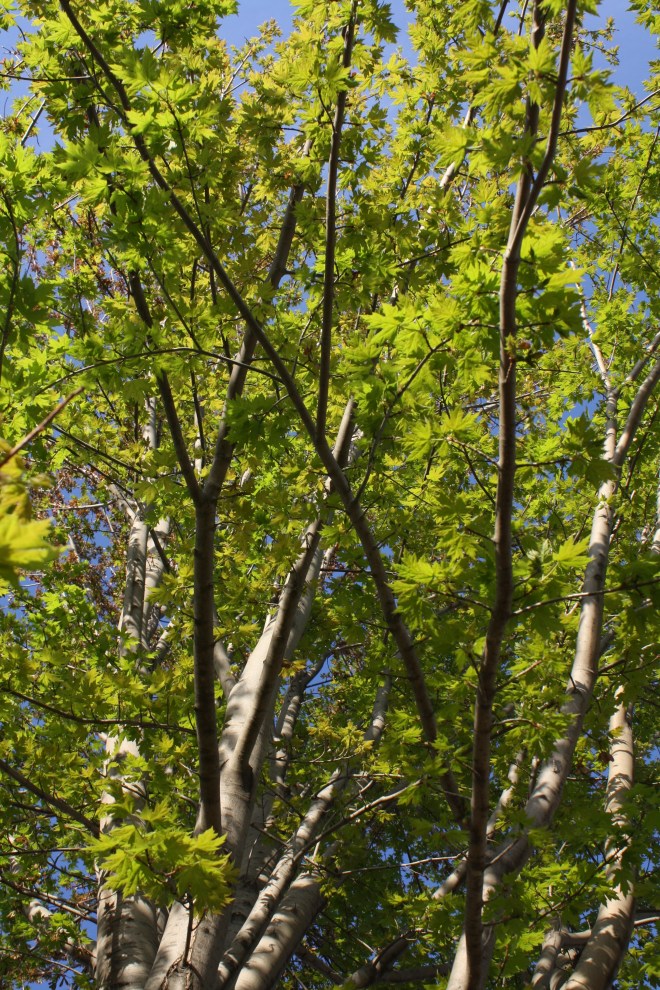 What a week. Was it summer where you are this week as well? I mean jeez, talk about one extreme to another. Oh well, at least the world has turned green, the winter stuff is completely out of sight and I found the box that contained all of my shorts and summery clothes (pants and long sleeves in 90 degrees is just gross) And honestly, it’s been great. In between work, chores and just plan old being busy, we have manage to get a few bike rides and long walks in. Plus all the veggie starts are doing great, the flowers are coming up everywhere and life just has a little bit more of a relaxed feeling. So what if my allergies are turning my face into big red puff or that the past few night have been so hot that the act of sitting has caused me to break a sweat. I’ll take it.
 My boys. I long socks and sneakers… these guys know cool.
  Took the super cutie cuties out for an ice cream cone.
 Our first bike ride picnic down on the waterfront. I love bike ride picnics!
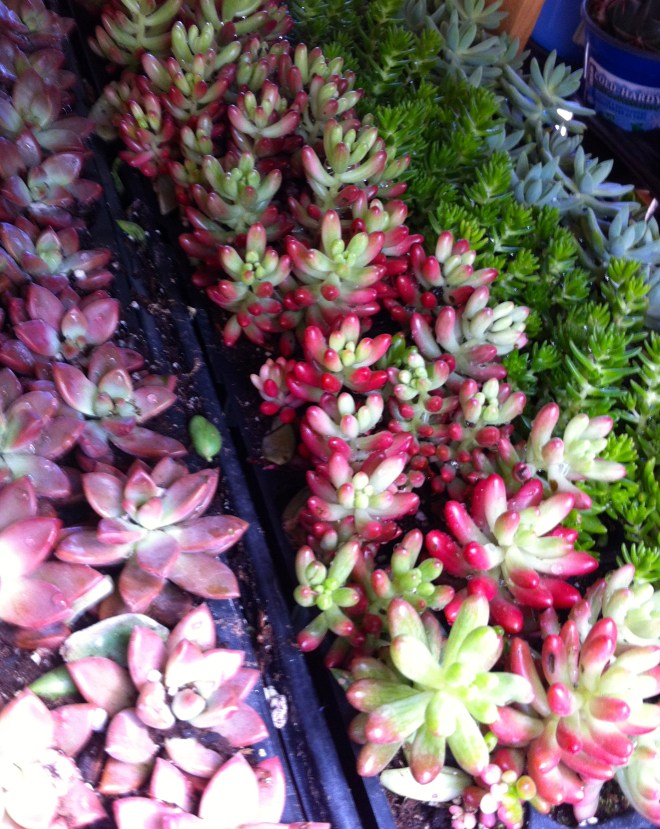 So many succulents. I didn’t actually buy any because I need to stop being a plant whore.
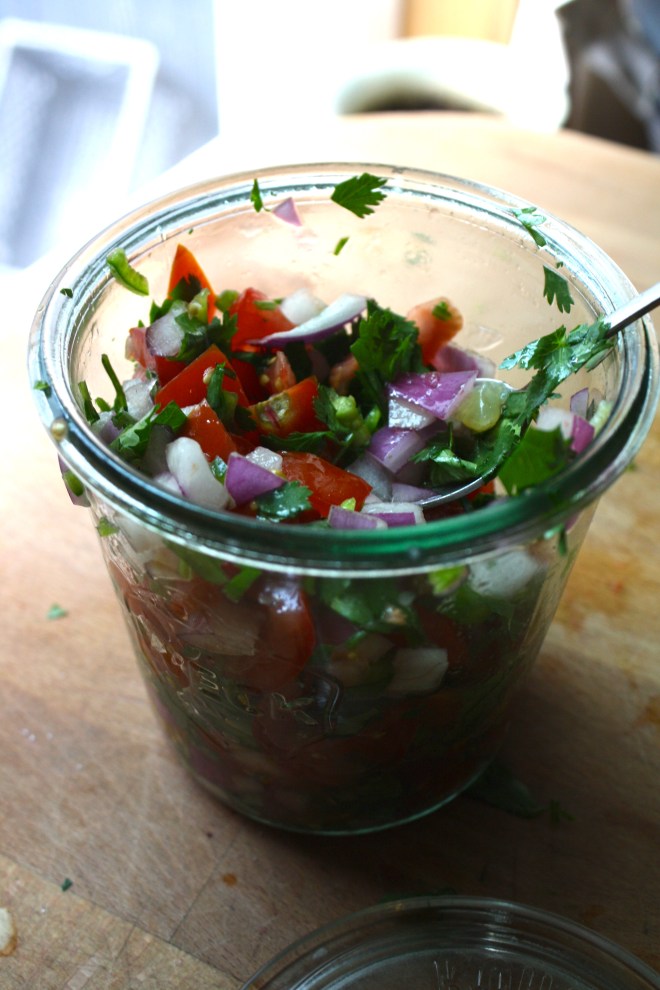 I have made a batch of this stuff evey day this week. I can’t stop eating it, it’s like eating summer. So good
 Happy Cinco de Mayo! And what better day to share my version of my oh so fantastic pico de gallo, or as I call it, super freshy salsa.
 The stuff. Chopped Roma tomatoes, chopped red onion, a diced jalapeño, lemon, a bunch of cilantro, and salt.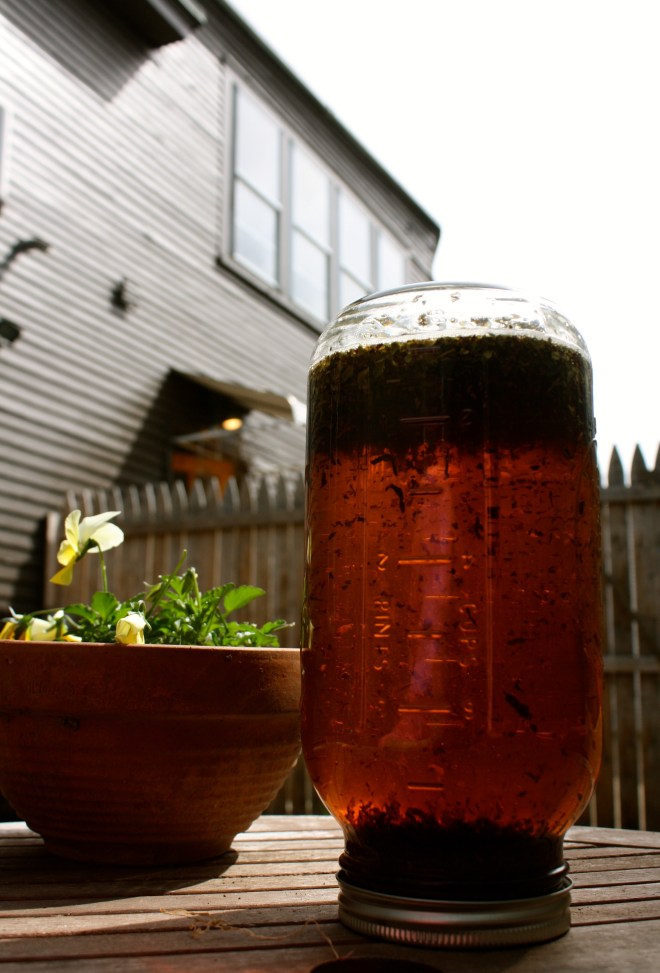


 I have been meaning do a post on seltzer and syrups for a while now and this one is perfect… Everyone around me has been getting sick and I am trying my hardest to not get anything.


 So lovely…. so nice. I really got into these flavors. This drink has the ability to make you feel warm and cozy while being cold and fresh. It makes me happy.
 When something goes on sale at the grocery store, I tend to buy it. Being that it is Valentines Day this week, all the stores are having specials on all sorts of sexy things… and strawberries are one of them. Now I am not a huge fan of buying produce that is terribly out of season, but I can’t help myself…a good deal is a good deal and the strawberries were a super good deal. I was just going to make some sweet ass strawberry jam or maybe a lovely strawberry cake with them (and I probably still will), but these strawberries are actually super juicy and full of flavor, and it’s always nice to eat some full flavor freshy strawberries… especially soaked in balsamic vinegar. And yeah, I think that this salad is pretty sexy, so it makes for a perfect Valentines day dish.
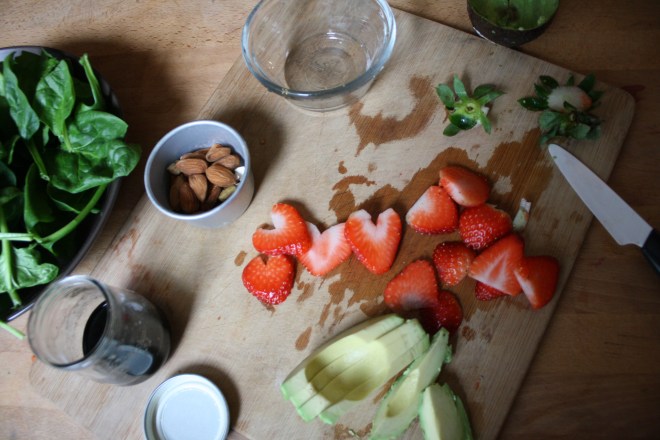 A handful of ingredients and 5 minutes will get you to a fantastic salad experience.
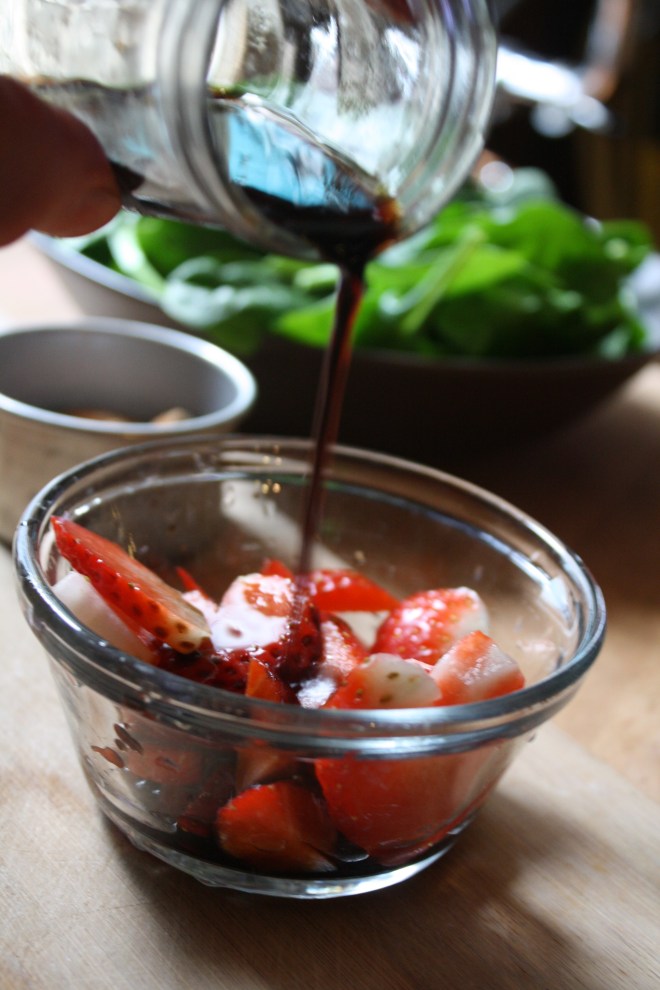 Pour the vinegar on the strawberries and let sit for at least 5 minutes. (the longer the strawberries can sit with the vinegar, the better)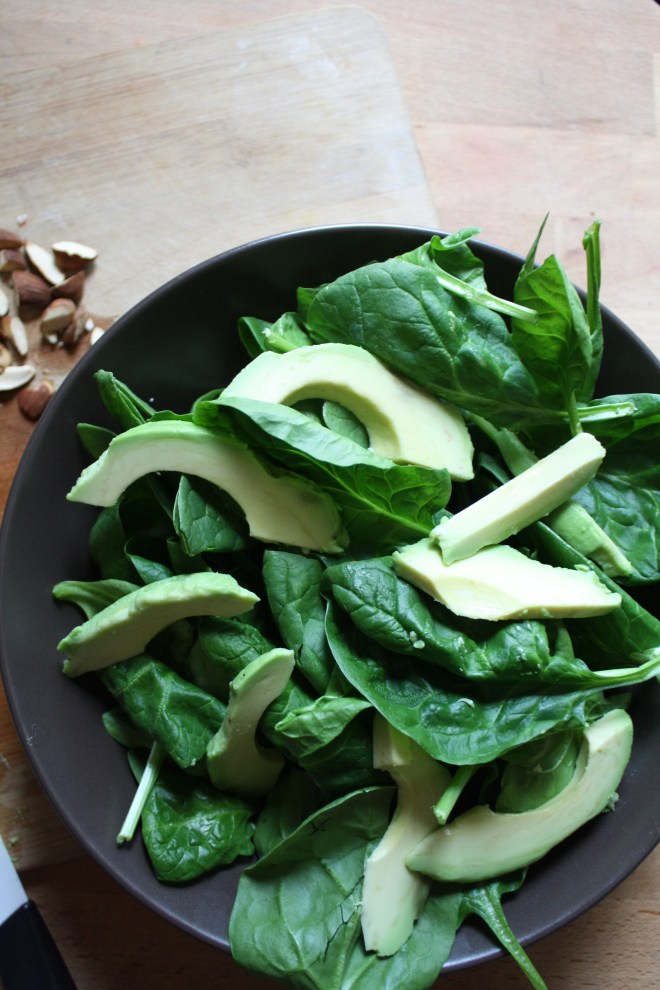
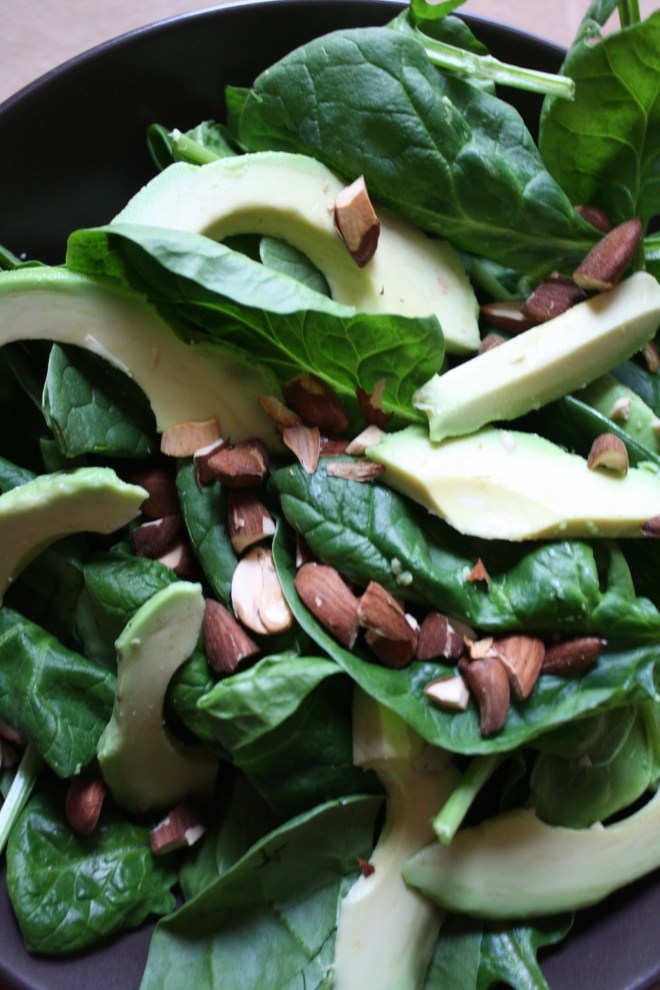 Pile it on.. thinly slice avocado.. rough chopped toasted almonds… It’s pretty much as easy as it can get.
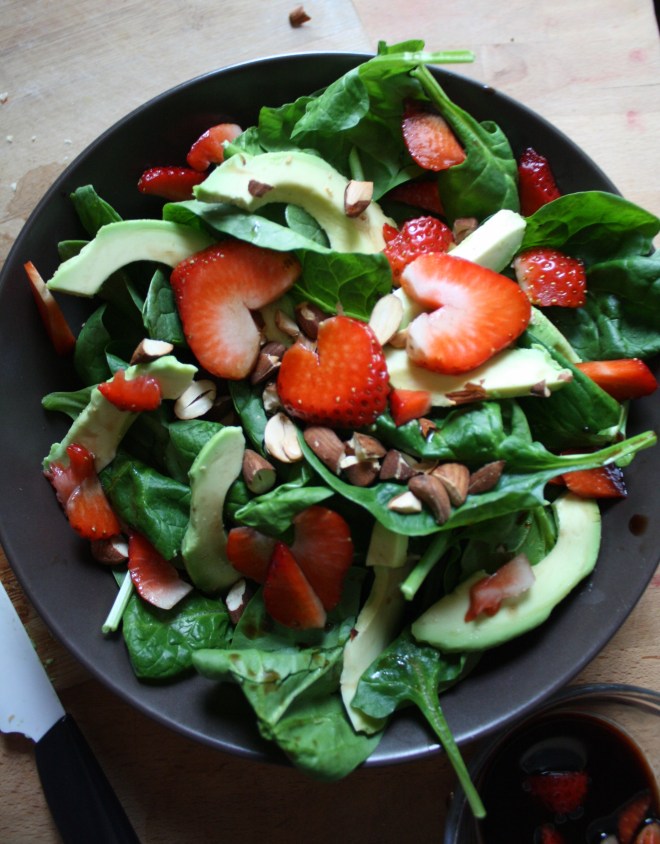 And last but not least, toss on the balsamic soaked strawberries and drizzle the remaining vinegar. (if you made hearts, place on top to make pretty) Sprinkle with a pitch of salt and pepper and pow! Fancy, sexy, delicious salad.
THE LOVELY CRAZY
September 19, 2015 by maximios • Blog
So when my sister called and asked me to make something for my nephews bake sale to raise money for his basketball team, I couldn’t say no. (or I didn’t want to say no cause any good excuse to bake right!) Plus I had just found this awesome recipe on one of my favorite blogs, my name is yeh, for home made Oreos that I have been super excited to try, so it kind of worked out. But before I committed to the Oreo, I wanted to just double check with my nephew and see what he might want me to make because it was his bake sale.
This is the conversation we had. And yes, it was through text.
Me- “Hey bud, what do you want me to make for your bake sale? Cupcakes, cookies, donuts, or brownies”
Jack- ” Yea!”
Me- “Yea what?”
Jack- “Make that.”
Me- “Make what?….Hello!! What do you want me to make? Should I make Oreos?”
Jack- I WANT OREOS!”
Ok.. So it took a little while, but we got there. And after the the basketball game and the super successful bake sale..
ME-“Did you see the Oreos?”
Jack- “What do you mean?”
Me- “The Oreos I made for the bake sale…the ones you wanted me to make”
Jack- “There was a bake sale? I want Oreos”
Yup, that’s the attention span of my 13 year old nephew. Little shit head. But for real, I had so much fun making these cookies and I am definitely going to be making them again. Plus they were a super hit at the sale.
I am the best aunt! (and sister!)
When you have cut out your cookies, use a spatial and place them on a baking sheet. You can try to transfer with you hands, but you end up messing up the shape and most of them will break anyway.
Stick the cookies in the oven for about 15 minutes a batch and continute to roll and cut out the cookies until you have no dough left.
Stacks of cookies… Sold to the highest bidder! I was told that they sold out within the first half hour at $1.50 a pop….Should have charged $5…. for a good cause right?
And yes, even though he was being a space head and didn’t even care that I just made him like 50 bucks for his team, I still saved the kid one.He just had to give me either a hug or 5 bucks for it.
I got a hug. (I really wanted the 5 dollars)
-C
From Scratch Oreo Cookies
Adapted by Molly Yeh from My Name is Yeh!
The cookie (makes about 18 3 inch Oreos)
The filling
Cookies- In a large bowl cream together sugar and butter until light and fluffy. Add in vanilla and coffee and mix together. In another bowl, whisk together the flour, salt and cocoa powder. Add dry to wet and mix together unit a uniform dough forms. Dump out onto a lightly cocoa or powdered sugared surface and knead dough a few times. Split ball into two balls, place in bowl, and stick in the fridge for 15 or so minutes.
Preheat oven t0 325 degrees
When dough is chilled, remove one ball at a time, and roll dough out on a cocoa or powdered sugar dusted counter until its about 1/4 inch thick. With a round (any shape would work) cookie cutter, cut out as many cookies as you can. In between sits, dip cutter in a sugar and cocoa to keep the cookie from sticking. Transfer cut out cookies onto a baking sheet with a spatula. Take scraps, roll into a ball, and roll out again. Keep doing that until you can’t cut out any more. (You can either bake a weird shape cookie or just eat the dough)
Bake cookies for about 15 minutes or until the cookie has risen a bit and the tops have lost their glossiness and look cooked. Remove from oven and let cookies dry on a wire rack.
Make the filling
Filling- Beat together butter, sugar, vanilla, and cream until completely mixed and is at your optimal consistency. Add a drizzle more cream if you want to thin out or add more sugar for a thicker cream.
Stick the filling into a piping bag or ziplock bag an snip the end. With cookies in pairs, pipe a big dollop of filling onto one of the two cookies. Place the naked cookie onto the filled cookie and give a smooth to distribute the filling.
lick your fingers and eat a cookie.
If selling at a bake sale, charge $3 a cookie…. If it’s for a good cause.