
THE LOVELY CRAZY
Whoa has It been a while since I have posted a recipe. Not that I haven%u2019t wanted to or that I haven%u2019t been making food, I just have been busy A.F. And truthfully I am as busy as ever but I happen to have my phone next to me when I was making this little casserole dish thing that I have made a few times now and I think it well worth a share.
What is it you ask? It is a creamy but dense chickpea base covered in tender roasted beets and onions with a lemon tahini drizzle. It is simple to make, super delicious, and can be tweaked in a million different ways to your liking.
Is it a fantastic dish to serve at say a Thanksgiving? Well yes, yes it is. You can serve it as a side or even make it bigger and have it as a sort of main dish. It%u2019s a good protein that is naturally gluten and grain free, vegan, and blah blah blah. What really matters here though is that it is damn tasty and also bonus, it is so siimple to make and can even be prepared a day in advance so no stress. We will take all the wins here.
-C
-
1 cup chickpea flour
-
2 cups boiling water
-
1 teaspoon salt plus more to taste
-
ground black pepper
-
2 teaspoons cumin (feel free to omit or use a different spice.Thyme or rosemary are equally delicious )
-
2 medium beets
-
1 large onion
-
a lemon
-
1-2 tablespoons tahini
-
teaspoon or so olive oil.
Note. This dish is excellent made and eaten right away but also gets even better (in my opinion) cooled and reheated. Also you can change up the veggie situation and use whatever ones you like.
Place chickpea flour in a bowl and slowly whisk in boil water with a fork so that there are no lumps. Mix in cumin and a teaspoon of salt and a pepper. Scoop batter into a lightly oiled 8X8 casserole dish (you can use a round cake tin or a cast iron skillet as well) and set aside to rest for a few.
Preheat oven to 400.
Grab beets and onion and slice in about 1/8 thick slices. Layer slices on top of chickpea mixture, making it look pretty if you feel like it. Once the veggies are layered, lightly drizzle the top with a teaspoon olive oil and sprinkle with a good pinch of salt and pepper.
When the oven is preheated, covered the baking dish and place in oven,. Bake covered for 1/2 hour then remove covering and bake for another 20-30 minutes or until the beets are nice and tender and a tester poked into the center of the dish comes out clean. Remove from oven,
Once it%u2019s out of the oven grab a little bowl and add the juice of the lemon to the tahini and mix. Season with salt to you liking.
Now serve. Drizzle the top with the tahini mixture and cut yourself a big old piece. Yes drizzle extra tahini on top. Sure squeeze on more lemon. You do you.
Store leftovers in fridge. Reheat in hot oven for 10 minutes..It gets crispy!
Black beans soup is eaten on the regular around here. Not always the same way but pretty much. Why screw with a good thing you know?
Now soup with dumplings. This is not (yet) a regular thing but I was making the usual blacken soup and planing on making corn bread to go with (in a pan) , when I had a moment of clarity and realized that I should just make the corn bread into dumplings and not have to deal with baking and another pan to clean. Duh. Why don%u2019t I do this more often?
And that is it. A black bean soup, nice and thick, with light fluffy cornbread dumplings cooked in one pot. Quick, easy and all sorts of delicious. Can%u2019t complain about that.
Now let%u2019s get to the soup and dumplings!

The stuff. For the soup there are bLackbeans, and onion, spices, a carrot, garlic, tomato paste, apple cider vinegar. For dumplings we have flour, baking powder, salt, oil, and plant milk. Salt and pepper too.

Start by dicing up the carrot and onion and mincing the garlic.
Dump all that you diced into a big pot, along with the spices, some salt and pepper, and about 1/2 cup of water. Place on stove and cook down on medium heat until the onion is becoming translucent and the whole pot is starting to smell fragrant.
Now add in beans and tomato paste and about 5 cups of water. Bring to a boil then turn down to medium an cook for about 20-30 minutes.

Soup. Cooked and all taste but one more little step.

Remove a third of the soup and blend until smooth and then add it back it.
Dumplings. Mix dry together then add in oil and milk. Mix together unit incorporated.

While soup is still on medium heat, scoop the dumping mixture right into the soup.
Place a loose side on top of pot ans let the dumplings cook util list and fluffy which will take about 15-20 minutes.

Cornbread dumplings looking all nice in the soup.

Then you eat it. Add some avocado on top of you want. Avocado is always a good idea.
-C
feeds 3-4
-
3 cups cooked black beans (or 2 16 oz cans)
-
1 large onion
-
1 good sized carrot
-
3-4 cloves garlic
-
1 teaspoon chill powder
-
1 tablespoon cumin
-
1/2 teaspoon red pepper flakes (or none if you don%u2019t like the spice)
-
1 tablespoon maple cider vineger
-
1/3 cup tomato paste
-
5 cups water
-
salt and pepper
Dumplings
-
3/4 cup all purpose flour
-
1/4 cup corn meal
-
3/4 cup plant milk
-
2 tablespoon neutral oil
-
1 teaspoon baking powder
-
1/2 teaspoon salt
Start by dicing up the carrot and onion into small pieces. Mince the garlic and then place the garlic, onion, and carrot into a large pot with the cumin, chili powder, and red pepper flakes, a good pinch of salt and pepper, and about 1/2 a cup of water. Place pot on stove on a medium low heat and sweat the mixture for about 10-15 minutes or until fragrant and the onions are slightly translucent.
Add in the tomato paste, beans , and 5 cups water. Bring to a boil then reduce to medium heat and let cook for about1/2 hour. Once soup has cooked down a bit and tastes delicious, remove form heat and carefully transfer 1/3 of the soup to a blender or jar (if using a hand blander) and blend until smooth. Add the blend soup back to the pot and turn the heat back on to medium low. Taste and add more salt and pepper if needed.
Now make dumpling mixture. Mix the dry ingredients together in a bowl then add in the oil and milk and mix until incorporated. Scoops the dumping mixture into the soup while the soup then place a lid loosely on the pot. Cook for another 15-20 minutes or unit the dumplings are nice a n fluffy.
And when they are done, remove lid, tun the heat off, and paddle soup and dumplings into bowl. Eat. Add sliced avocado for a little more yum.
I guess black eyed peas are good to eat on New Years because they bring you good luck or money or something. I have heard this and a lot of other food traditions but I don%u2019t really do New Years so I have never really actively thought about what I consume on the day. But when I went to ponder my bean selection ( I have so many varieties) I figured what the hell, why not make the stew I was about to make into a good luck black eyed pea stew. I mean I was already making it (I was leaning towards black beans) but If there is a chance that eating these delicious beans will give me a little extra luck (and or money) this year, well by all means I%u2019ll take it. And the stew because that is really what I was after.
This stew. It is thick and creamy from the sweet potato and beans, bright and light from the ginger and tangerines, and hearty because it is stew. It is a perfect stew situation to eat on any given day but especially nice on a cold winter evening. And I guess on New Years. Like today.
Now to the black eyed pea stew!

The stuff. Cooked black eyed peas. a sweet potato, some kale, a few tangerine, an onion, some garlic and ginger, tomato puree, and salt and pepper.
Start with chopping up the onion, mincing the garlic and ginger, and dicing up the sweet potato.
Toss the onion, garlic, and ginger into a big pot and add in a splash of water or oil and a pinch of salt. Place on medium heat ans cook until tranlucent and fragrant. Add in the sweet potatoes, tomato puree, and enough water to completely submerge it all. Keep on medium heat and cook until sweet potties are fork tender. Add more water if needed.

In he mean time chop up the kale.

And juice the tangerines.

Once potatoes are tender, add in the black eyed peas, the kale and the tangerine juice. Add more water to completely submerge again. And keep on medium high heat and cook for another 10-15 minutes or went everything is all melded and cooked together.

Like this. A pot of good goodness.

All that is left is to scoop the stew into blows and eat it. Squeeze more tangerine juice on top too, it makes it nice.
Good luck all year long!
-C
-
2 cups cooked and drained black eyed peas
-
1 medium sweet potato
-
2-3 tangerines
-
1/2 cup tomato puree
-
1 small onion
-
2 cloves garlic
-
1/2 inch fresh ginger root
-
a few leaves of kale, chard, or collard greens
-
4-6 cups water
Start by dicing up onion and peeling and mincing up the garlic and ginger. Place into a large pot with about 1/4 cup of water or a splash of oil and stick on stove on medium heat. Cook the mixture for 5-8 minutes or unit fragrant and translucent. While that is cooking dice up the sweet pot into small 1/2 inch cubes then add them into the pot once onion mixture has cooked, along with the tomato puree and enough water to completely submerge in all. Stir and and keep on medium heat and cook for another 20 or so minutes or until the sweet potatoes are fork tender.
Chop up kale and juice tangerines.
Once the sweet potato is tender add in the rinsed and drained black eyed peas, the chopped kale, and the tangerine juice. Add a sprinkle of salt and pepper and more water to submerge it all again and keep on medium heat. Cook for another 20 minutes so that all the flavors have time to meld and turn into a great pot of stew. Depending on your preference for thickness, cook down more for thicker stew, or add more water to keep it brothy.
Once cooked, scoop into bowls, season with more salt and pepper, and if you have an extra tangerine, squeeze a little more fresh juice on top.
First off, I am not sure if this is technically a stew, or chili, or just a soup, but I think a stew so I am sticking to it.
Secondly, I don%u2019t give a flying f%$# what it technically is because whatever it is is so freaking good!
Lets talk about this stew and whats in it. Me and tomatillos are having a thing right now and I can%u2019t seem to get enough if them. They are bright and slightly sour, but also sweet with a bit of acidity, kind of like a unripe tomato but just better and taste fantastic. Then I got the pumpkin which is hardy and creamy and I will eat all day, everyday forever if I could. White beans which are also creamy and delicious, all in a pot with a good amount or cumin, some of this and that, cooked down to a delicious pot of stewed goodness.
And isn%u2019t stew just he perfect food for a nice crisp fall day? 100% yes to that and yes to this stew. It will make you happy, smile, and full.
Now to the stew!

The stuff. Fresh Tomatillos, a pie pumpkin, cooked white beans, an onion, a jalape%u00f1o, a couple cloves or garlic, cumin, chili powder, red wine vinegar, salt and pepper, and fresh cilantro.
Start with dicing up the onion, garlic, and jalape%u00f1o. Remove the seeds fro meh jalape%u00f1o to make is less hot.

Toss that stuff into a pot along with the cumin and chili powder, a pinch of salt, ans about a 1/2 cup of water. Place on stove on medium heat and start to cooke.
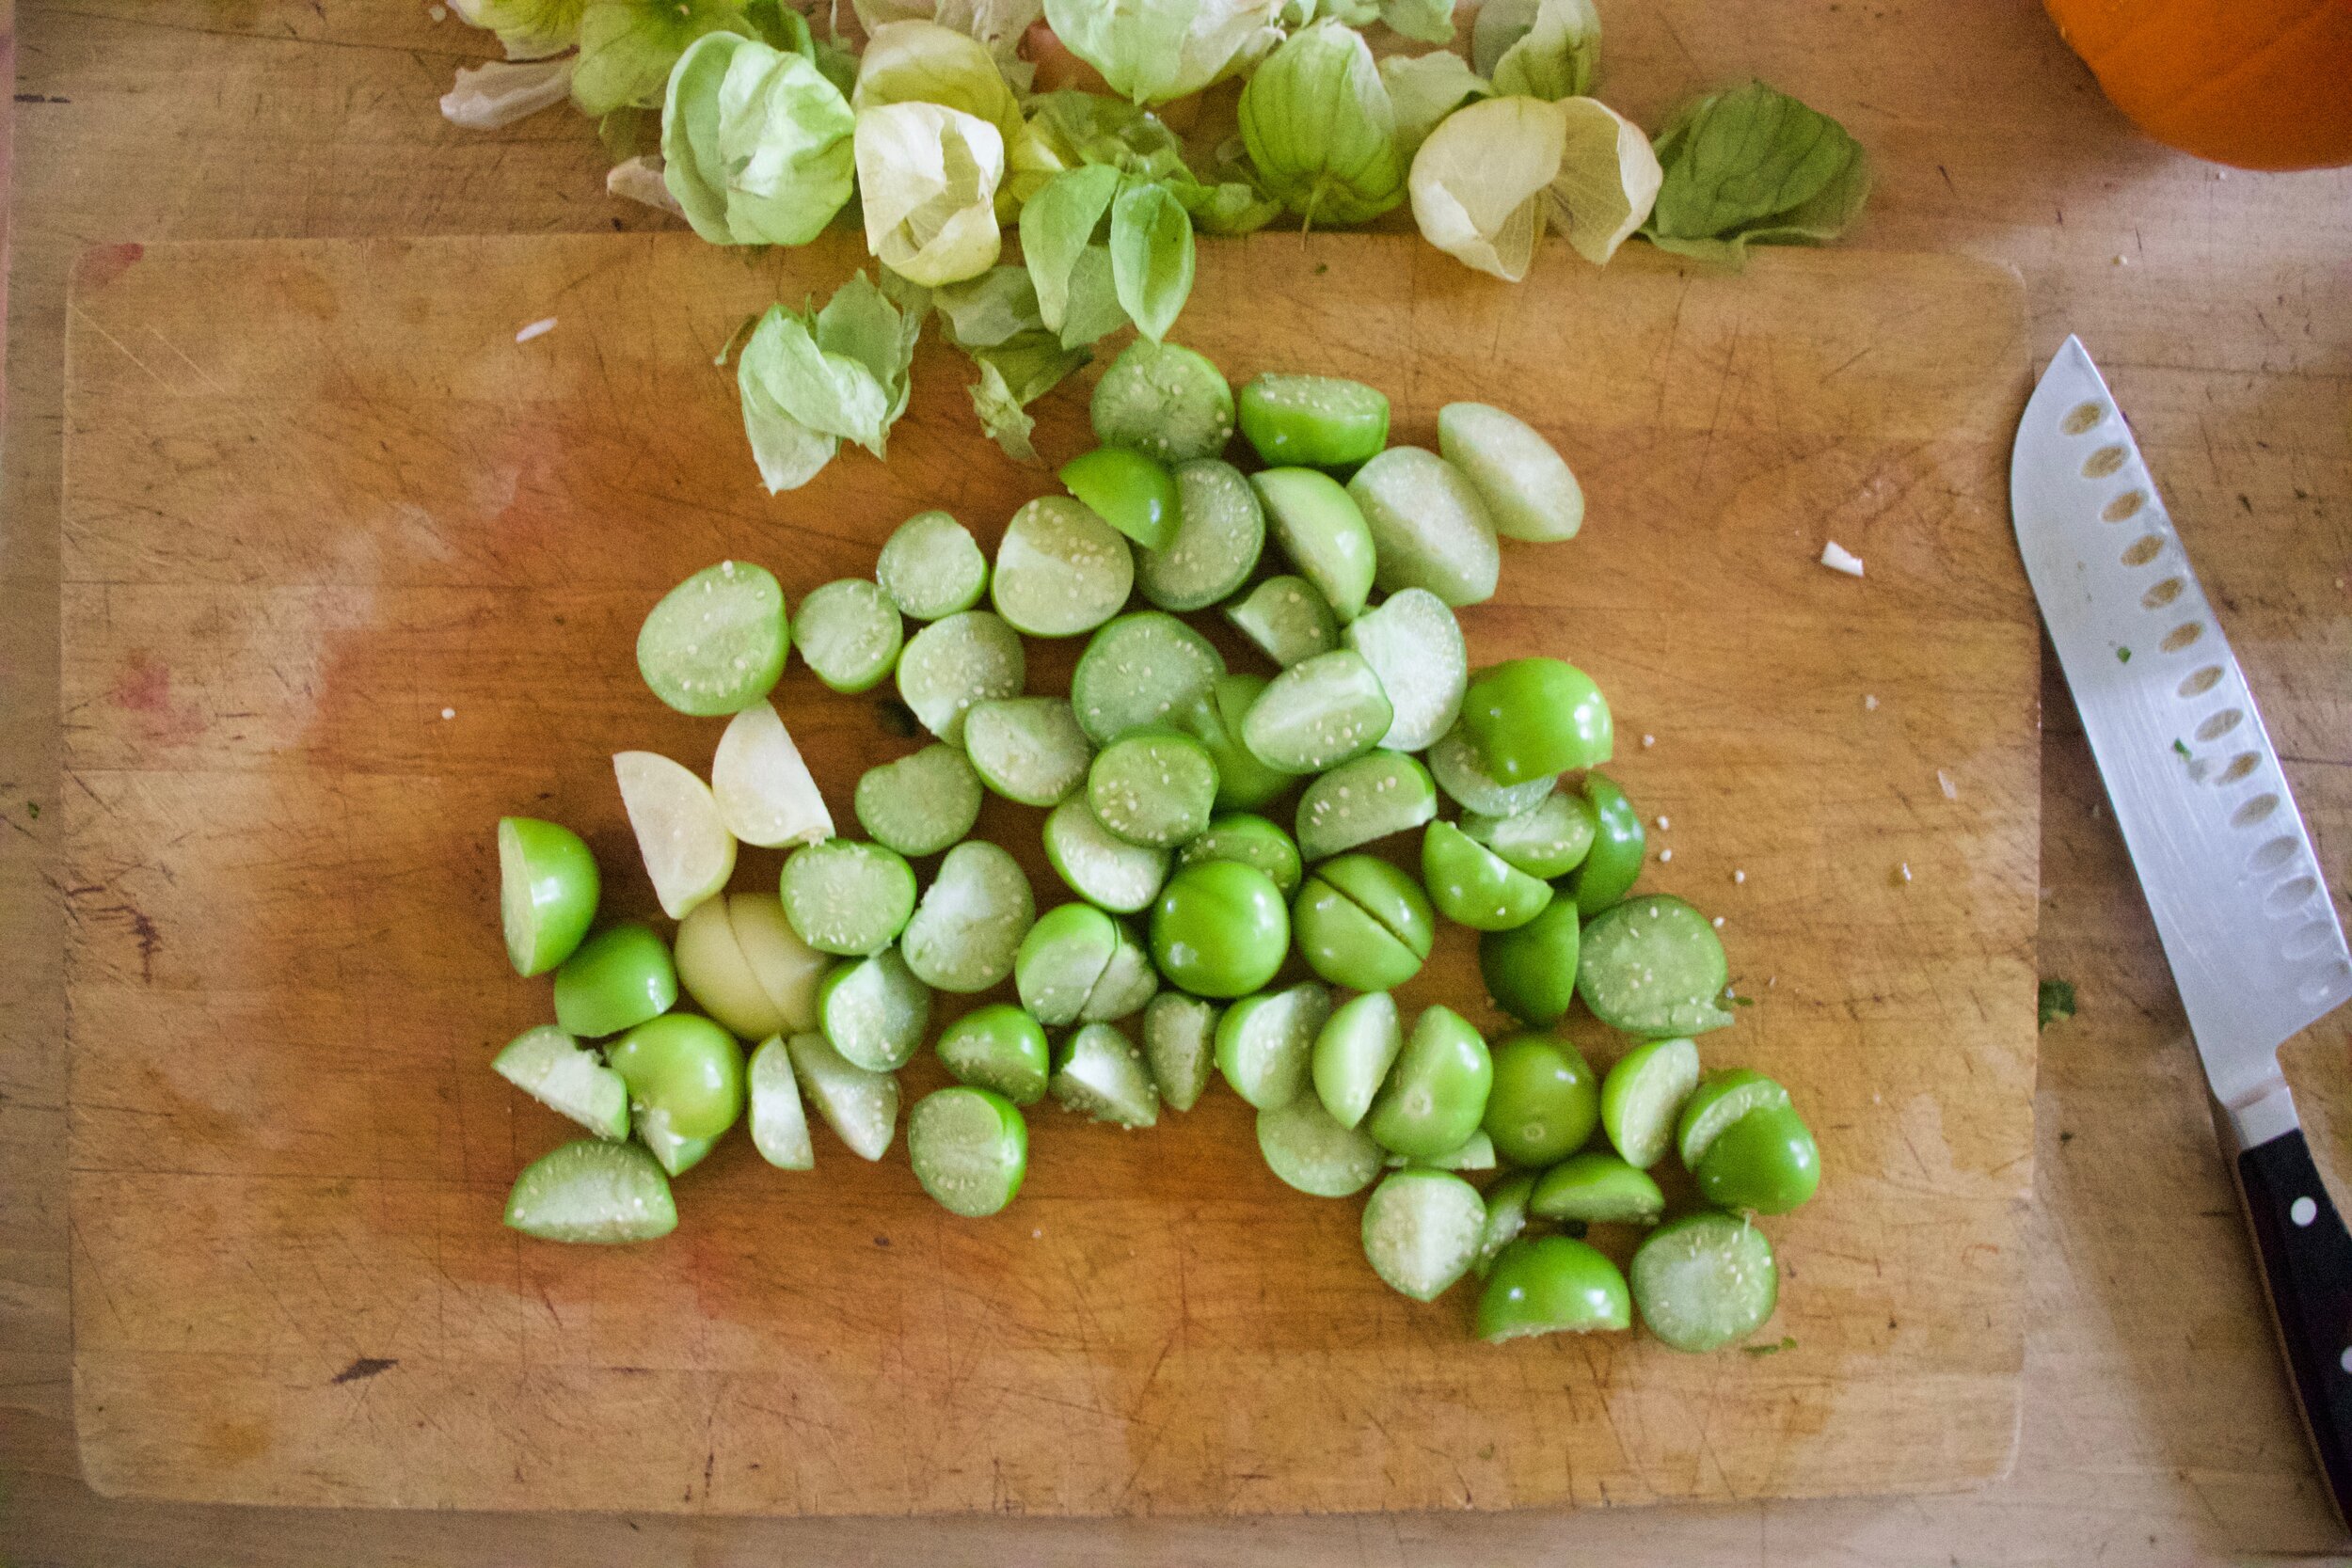
Husk, rinse, and halve tomatillos.

Once the onion and jalape%u00f1o mixture is cooked a bit like this%u2026
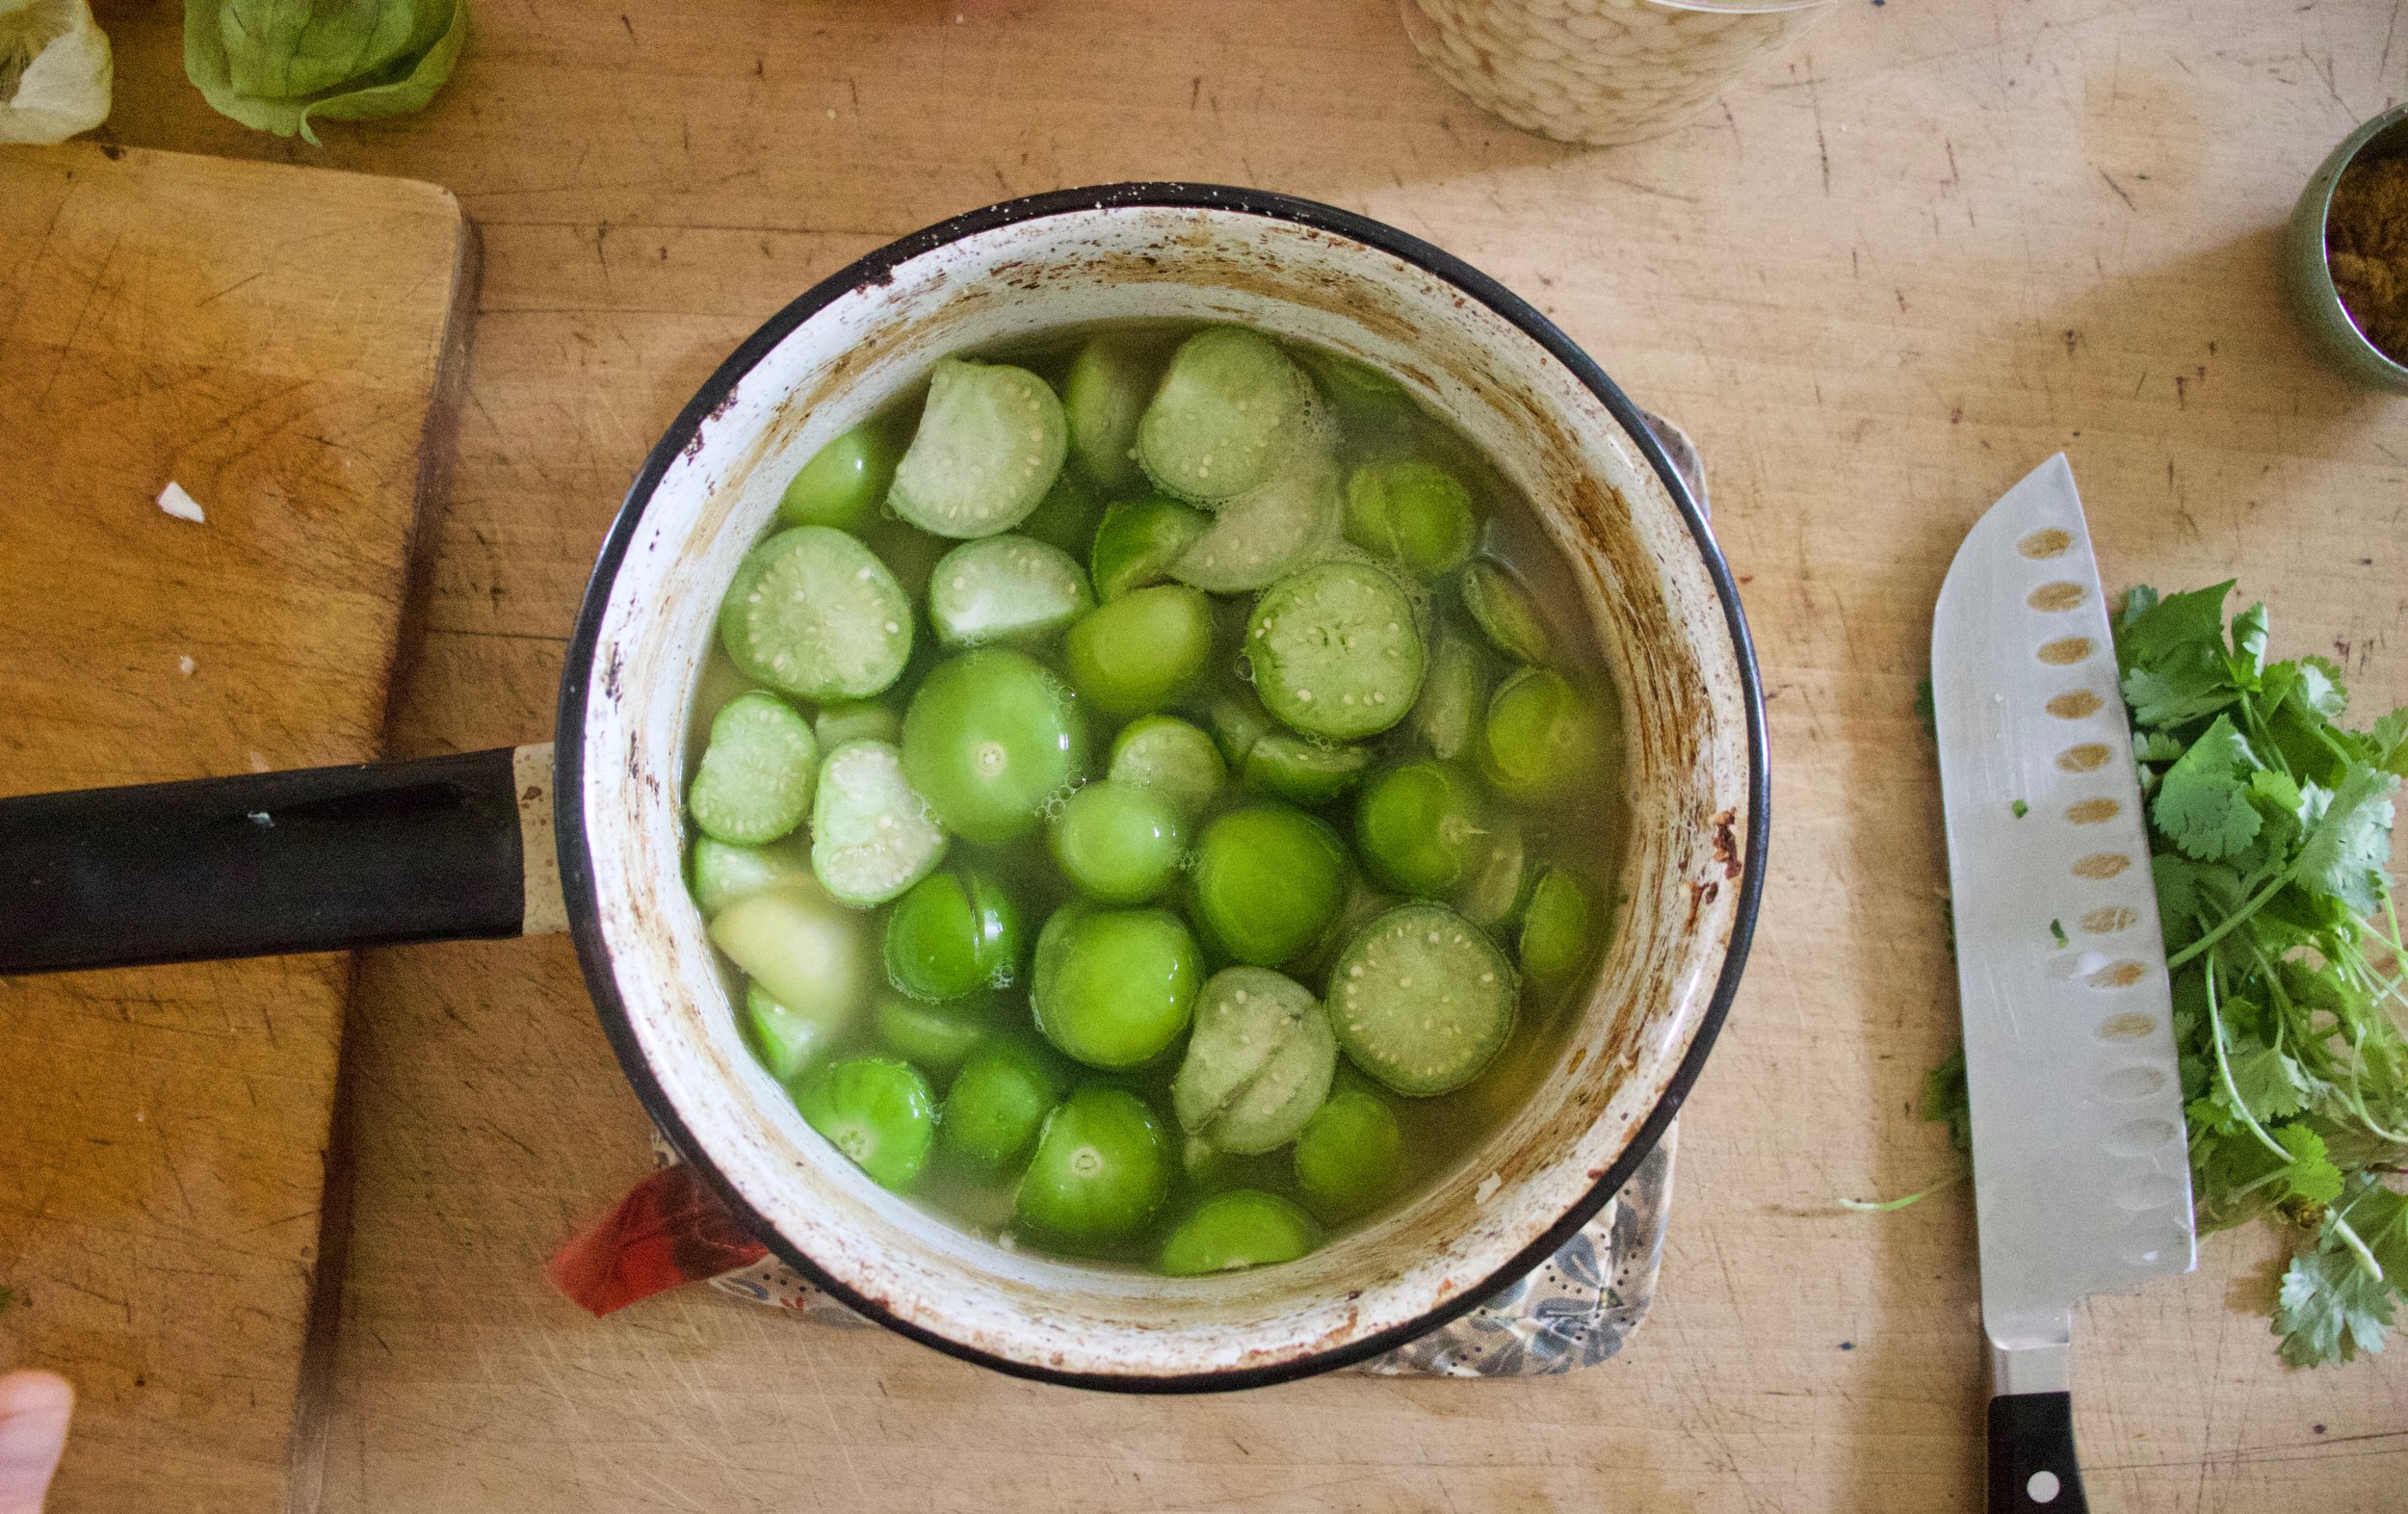
Add in the tomatillos and enough water to submerge the all. Place back on stove on high heat.

Now dice up pumpkin into inch sized cubed.

Now add the pumpkin and the white beans into the pot. Bring the whole thing to a boil once more, then turn the heat down to low. Cook for about an hour to hour and a half, string once in a while, until its cooked down nice and thick.


Grab a bowl, fill it up, top with fresh cilantro, and get down on it.
P.S. This is now my new favorite food
-C
2-3 good hardy servings
-
20-22 tomatillos (about 3 1/2 cups after husked and halved)
-
1 small pie pumpkin (3 1/2 cups cubed pumpkin)
-
2 cups (or 1 can) cooked and drained while beans
-
1 yellow onion
-
2 cloves garlic
-
2 tablespoons cumin
-
1 teaspoon chili powder
-
1 tablespoon red wine vinegar
-
6-7 cups water
-
salt and pepper
-
fresh cilantro
Start by dicing up the onion into really small pieces. Mince the garlic and cut the jalape%u00f1o up into small pieces (remove seeds) while you are at it. Place the onions, garlic, jalape%u00f1o,cumin, chili powder, and a pinch of salt into a pot. Add in about 1/2 a cup of water and place on stove on medium heat and start to cook.
While that is cooking a bit, husk, rinse, and halve the tomatillos. When the onion and garlic mixture has cooked down a bit, add the tomatillos to the pot along with a couple of cups of water (enough to submerge the tomatillos). Place back on stove on high heat and bring to a boil.
In the meantime, dice up 3 1/2 cups of pumpkin (remove seeds and save for later and don%u2019t peel pumpkin unless you really want to) into mouth sized cubes. Once diced up, add into the pot along with the with beans and vinegar. Add more water until everything is submerged (about 3-4 more cups) then bring pot back to a boil. Once boiling, reduce heat to low and let cook for about an hour to an hour and a half, stirring on occasion, until the tomatillos have cooked and thickened, the pumpkin is nice and tender, and the whole stew is nice and well, stew like.
And once it is cooked, taste for seasoning (add more salt and pepper if needed). Then ladle into a bowl, toss on some fresh cilantro then dig in.
Left overs store well in fridge for about a week. Its easy to heat up but really, cold stew is amazing!
Another heatwave. I tell you what, If I never live through another 90 + degree day, it will be too soon.
What to eat during a heat wave? Well maybe you don%u2019t care and have air conditioning in your kitchen so you cook whatever. I don%u2019t have air conditioning and after a few days of boiling temps, there is no freaking way I am turning on the oven. I can barely turn on the stove top to boil water, but I did, I boiled water, I just did it early in the morning before the temperatures starting rising again. (A pro tip for you.) That is one of the great things about pasta salad, you can make the pasta ahead of time. You can even make the whole salad in the morning and then you don%u2019t have to do a damn thing when it comes to dinner besides lifting a fork to your face, which I know can be a feat when all you want to do is melt, or slap at something, but still.
This pasta salad, well it is not you everyday pasta salad. It has beans, fresh basil, and a dressing that is made by blending up the most delicious seasonal tomatoes until rich and creamy and dumped all over the orzos. . It is probably going to be the best tasting pasta salad you will ever eat. The thing is, you really need to make it soon because sure you can get tomatoes all year round but don%u2019t do that. Do yourself a favor and make it now while the tomatoes are plentiful and at their peak of deliciousness. And also you don%u2019t have wait for a heatwave to make it. This is a good meal to have at the ready all throughout tomato season, and just in case, a heat wave.
Now to the pasta salad!

The stuff. Just picked tomatoes, some fresh basil, cooked navy beans, orzo pasta, olive oil, red wine vinegar, garlic, and salt and pepper.

Rough chop tomatoes into small pieces. Also peel and dice garlic into small pieces.
Place the tomatoes, garlic, and a good pinch of salt into a blender (I used a hand blender) and blend unit smooth. Add in the vinegar and oil and bend until the mixture starts to emulsify and becomes smooth and creamy.
Cook and strain pasta as instructed. Keep in on the al dente side.

Chop up basil into thin ribbons or whatever.
Then dump pasta into a large bowl. Add in cherry tomatoes ( I cut mine in half) and beans. Dump in half the sauce and mix around then mix in the chopped basil.
If you are eating it right away, add in the rest of the sauce. If you are keeping it for later, place pasta and sauce in fridge and a before you are planning on serving it mix in the remaining sauce.
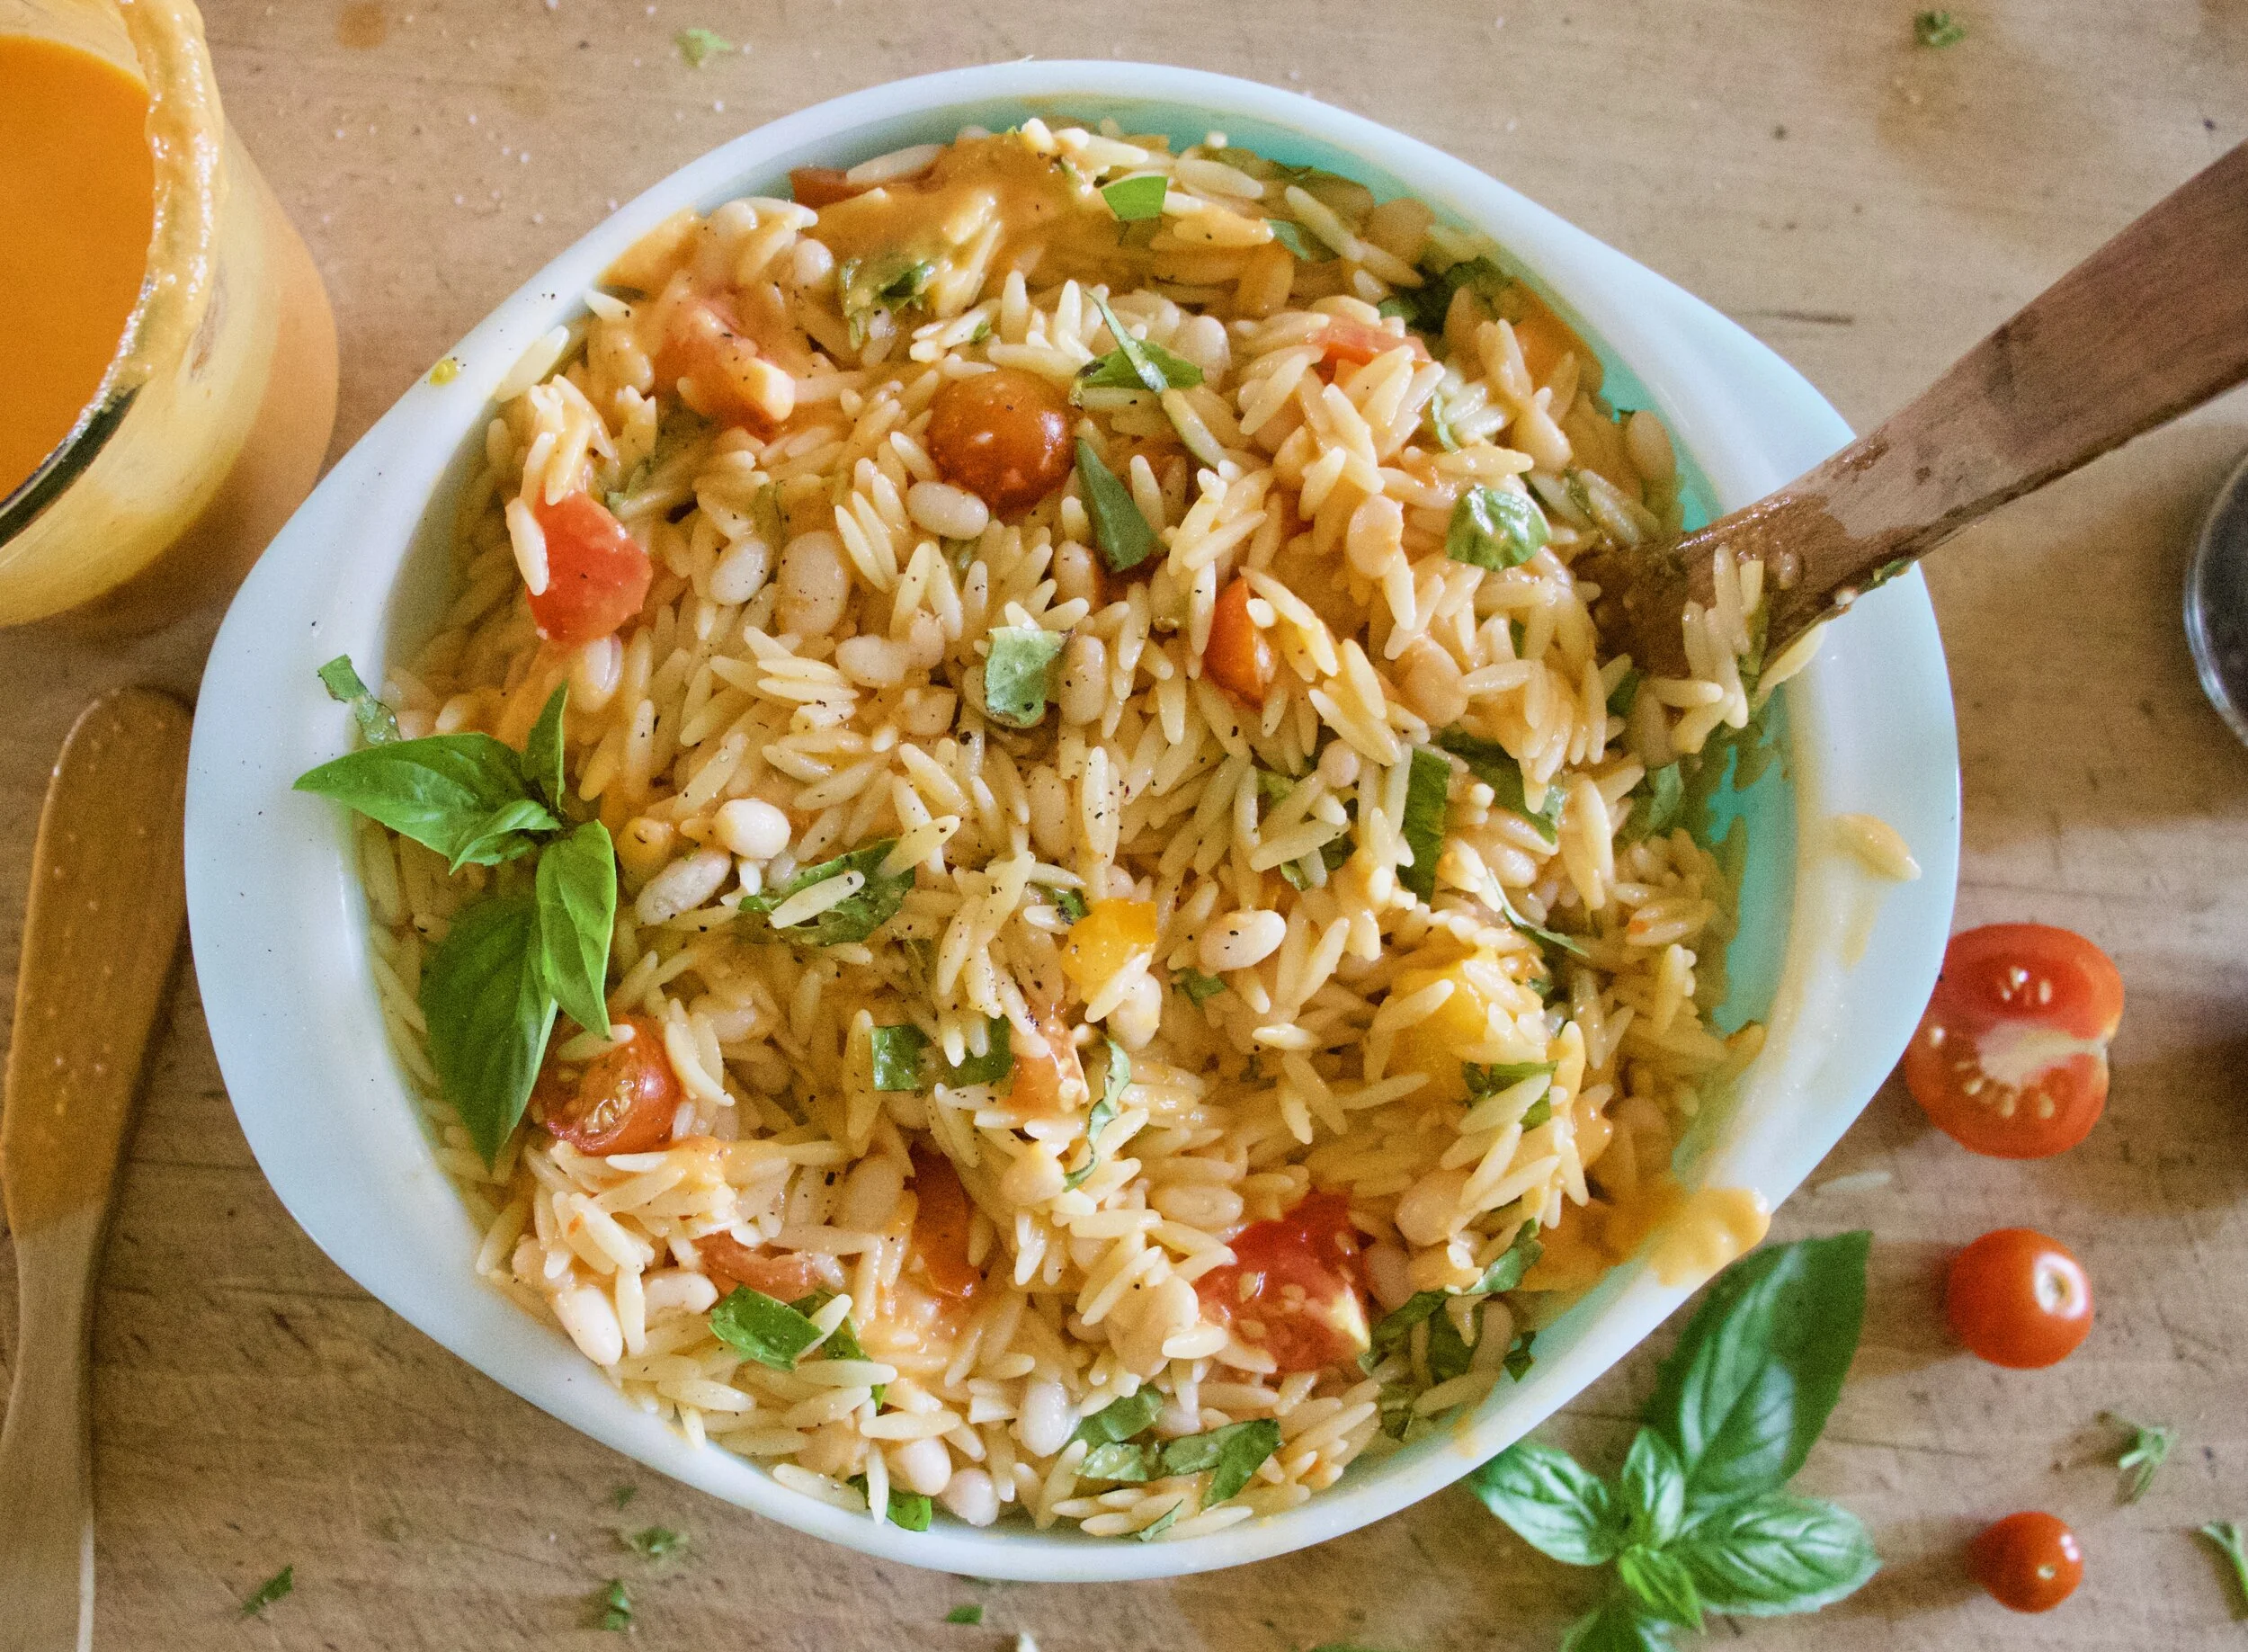
Looks so good right! Season with salt and pepper to taste and then you know%u2026

Grab a bowl and eat it. Probably should grab a from too, eating this with your hands might get messy.
Stay cool friends!
-C
serves 2-3 as a meal or more as a side
-
2 cups dried orzo pasta (12 oz)
-
2 large heirloom tomatoes (about 2 cups chopped)
-
1 1/2 cups cherry tomatoes (or chopped tomatoes)
-
1/3 cup olive oil
-
2 tablespoons red wine vinegar
-
1 1/2 cups cooked and drained white beans ( I used navy but any white bean will do)
-
1 cup packed basil leaves
-
2 cloves garlic
-
salt and pepper
Start with making the tomato dressing. Rough chop the 2 large tomatoes into smaller pieces and peel and chop garlic. Place the tomatoes in a blender (or a large jar if using a hand blender) with the garlic and a good pinch of salt and a little pepper. Blend until smooth. Add in the vinegar and oil and continue to blend until the mixture becomes thick and creamy. Taste and add more salt and pepper if needed .
Prepare orzo pasta as instructed on package (make it al dente)
Grab basil and chop into smaller pieces.
Once orzo is cooked and drained, dump it into a large bowl. Add in the beans and cherry tomatoes (slice in half if they are on the large size) and pour in half if the tomato sauce. Mix unit incorporated. Toss in the basil.
Now if you are going to eat right away mix in remaining sauce. If you plan on refrigerating and eating later, save the remaining half of the sauce and mix it in right before serving.
Store left overs in fridge for up to 5 days.










 Miraculous.
 Rutabaga. Sweet Potato. Beet. That’s what I was working with. I chose these roots for color as well as for taste. Separately the flavors are amazing. Together they are out of this world. If you wanted you could omit any of these and sub in, lets say, pureed cauliflower, or maybe parsnips. I would stay away from potato, it’s a little to starchy, but maybe acorn or butternut squash. Oh man, now I want to make celeriac, carrot and acorn squash marble. Pureed vegetables are trouble for me. I can’t stop eating when they are around. I know, but don’t judge, instead lets prepare.


 So you got a pile of roasted rutabaga, a pile of roasted beets and a baked sweet potato.
 I used my handy emulsion blender to puree everything but a food mill or a food processor is equally as good. Puree each root separately . Start with the rutabaga. Go to the sweet potato, then end with the beet. That way you don’t have to clean in between purees. Add little amounts of water when pureeing if it needs a little help to loosen up. Blend until smooth.
 I just took a spoon and threw piles in that bowl. I could have done more of a checkerboard pattern to make it a more uniform marble, but I just went for it. Do it any way you want. Don’t be afraid, you can’t screw this up!
 I took a fork and kind of rain it throw the top to start the effect. I then took a cake knife and just leaved it out. That’s what I did and then I was done. After all the oohing and aching, I stuck the dish into the oven for another 10 minutes just to keep hot, but you can serve this at room temp as well.
 Now tell me that isn’t a thing of beauty. I fell in love. I want to puree and marble everything. This could be my thing.
 Empty bowl…Ok, I’ll admit I ate half of it..I couldn’t help it. Next time I will have to make a bigger batch.
 I am the best sister. .
 All the right stuff nicely measured out and the oven preheating.. I really like baking in her kitchen. She has the best light and a bunch of kitchen gadgets, lots of bowls, plus a dish washer. I miss having a dish washer.
 Creaming the sugars with butter and adding the eggs…It took me like 20 minutes to find the beater which was in my face the whole time. I was looking for a white beater. Hers is black.I am oblivious.
 Here comes the pumpkin. I added the spices at this point. (This picture is awesome)
 Greased and flour dusted bundt pan. This pan is my new favorite, another one of my junk store scores! If you use a shaped pan like this, really make sure you get every line greased or else… Dusting the greased pan with flour makes it easier to see if you missed a spot. Pour in batter and stick on middle rack in oven.
 Pop it out of the oven when a tester come out clean and…TADA! What a beauty. I decided to forgo any frosting. The cake shape is too nice to cover. And bonus, since there is no frosting…didn’t have to wait for it to cool. Dug right into warm pumpkin goodness.
 Look at those flowers. Trader Joes has it going on. We looked all over her house for a vase and good thing I found this one. Nick had cut the top off of a 2 liter of mountain dew and stuck the flowers in that. I mean, it worked, but I think the vase was the better choice.
  And did I mention I am a genius? We couldn’t find any candles so I cut pieces of a striped straw and stuck matches in them. Best on the fly candle creation ever!
 Left with crumbs… Notice the finger marks in the powdered sugar? I bribed one of her littles with that sugar. I told her if she emptied the dish washer she could lick the plate clean. I am a fantastic sister!!!
 Oh boy we made it! Ate our way through another Thanksgiving. I hope yours was a good as mine, lot of family and friends…an abundance of pies, and lot of warm lovely goodness.

No knead Raisin Walnut Sourdough Bread — The Lovely Crazy
May 11, 2023 by maximios • Blog
I bake a lot of bread in my house . A LOT. Like at least 2-3 times a week and have been doing so for years now so I know a thing or two about bread. And when I bake bread, I almost always use starter unless I really really need dough fast. Then I will add yeast but honestly, I haven%u2019t used yeast in bread in probably 3+ years. I have developed such a rhythm with bread that I just have dough in the fridge at all times.
One reason I have never shared a sourdough recipe before on the blog is that I think a lot of people feel intimidated by baking bread and especially making bread with just a starter. Another reason is that up until the past year, I don%u2019t think having a starter was as common as it is now (but thanks to COVID it is more common then ever!). Anyway, now more people are on the home made bread band wagon (about stinkin time) and I am here for it.
A word of advice if you are new to the bread game%u2026. Don%u2019t take it to seriously! I remember back in my early days of bread baking I would freak out about if I was doing it right. About timing and wondering if it is exactly the right amount of rising or if the temperature of this or that was exactly, or if I handled the dough to rough. Now after all these years, I have gotten pretty intuitive with bread dough but also I don%u2019t worry to much. It will be good. It will be bread and you will love ever single bite.
This bread is a basic no knead bread with a little added goodness of walnuts and raisins. Easy, simple, and freaking delicious. A great bread to make if you are just getting into the sourdough bread game. Or if you want really dank ass bread!
To the bread!
The stuff. Ripe starter, flour, warm water, salt, raisins , walnuts, and a little cinnamon.
Start by dumping a little of the warm water onto the raisins to plump them up a bit and to make sure they are not all stuck together.
Make the dough. Stain the water from the raisins into a big bowl and add the rest of the water, along with the starter and a little flour. Mix until incorporated. Add in the salt, cinnamon, and rest of flour and mix until all the dry is mixed into wet you have a shaggy wet dough. Add in the raisins and walnuts and mix until incorporated.
All mixed and ready to rest. Scrap sides of bowl and cover. Place In a warm spot for a couple hours.
After about 2 hours, the dough hasn%u2019t done much rising but that is what is suppose to happen. Take a damp hand and fold dough over itself a few times then cover ( with plastic or a silicon bowl topper) and place dough into fridge. Leave it in there over night. (at least 10 hours or for up to a week)
Dough the next day. It hasn’t double, but that is fine.
Dump dough out onto a flour piece of parchment. Fold each side over onto the top and them flip top side down. Gently shape into a nice ball.
Place doughstill on parchment into a large dutch oven. Cover and let rest for 2ish hours.
Preheat oven!
After the two hours and once the oven is nice and hot, remove lid and take a lame of serrated knife and slash the top of the loaf. One or two slashes or a few fancy placed ones. Just don%u2019t press down to hard of cut it up to much. Now place lid back onto pot and place pot into hot oven. Bake for 30 minutes then carefully remove lid. Bake for another 20-25 minutes or until a deep golden brown.
What a beauty! Now take the bread out of pot and yes, you MUST wait to cut into it. Let cool for at least an hour. I know you want bread now but it will not end well if you try to cut into this loaf hot.
But once it is cooled and you slice into.. Worth every minutes of waiting.
-C
Makes one big road loaf but can also make 2 smaller round loafs
4 cups all purpose flour plus more for shaping
1 3/4 cup warm water
1/2 cup ripe sourdough starter
1 cup raisins
1 cup chopped walnuts
1 teaspoon salt
1 heapingtaspoon cinnamon
Start by dumping some of the warm water into a bowl with the raisins. Let sit for a few minutes until the y plump up a bit. Stain the water from raisins into a big bowl only with the starter and the rest of the warm water. Add in a cup or so of flour and mix until incorporated. Next add in the rest of the flour, the salt, and the cinnamon. Mix until all the dry flour is now wet and you have a shaggy wet dough. Dump in the walnuts and raisins and mix in. Scrape down sides of bowl, cover, and place in a warm spot for an hour to two. After sitting for a while, the dough should have risen a bit but to doubled in size. Grab the edge of dough and fold it over itself , cover back up (use plastic of a silicon top), and stick it in fridge overnight (at least 10 hours but up to a week)
The next day when you are ready to bake it off, remove the dough from fridge, dump out onto a floured covered piece of parchment, and fold side over to the top. Then roll the folded side over. Keep on parchment and gently shape into a round. Place shaped dough (pick up by the parchment paper) into a large dutch oven. Put the cover on and let rest. (You can also place on a baking sheet if you don%u2019t have a dutch oven and gently cover a plastic bag that is not touching he dough). After about and hour and a half start reheating the oven to 500 degrees.
After the oven has been preheated (give it a good 1/2 hour so oven temp is truly hot) remove lid (or bag) and sprinkle a little flour on top of dough. With a lame or a sharp serrated knife, score the stop of the bread. One or two slashed should be fine. Now place lid back onto pot and place pot into hot oven. Or if not using dutch oven, add a separate baking pan to the bottom of oven with a cup of water to create steam and just slide baking sheet into oven. i After a few minutes, turn heat down to 450. For dutch oven, bake for 1/2 hour then carefully remove lid from pot and continue to cook for another 20- 25 minutes or until the bread is a nice deep golden brown. If not using dutch oven, the bread will back a bit faster so check after 40 minutes for a nice deep golden brown loaf. (When in doubt of doneness check internal temperature . 200- 210 degrees)
Once baked through, remove pot from oven, pop bread out of pot and place on a cooling rack. Let cool for at least an hour before cutting into it.
Once cooled, slice and eat. Best eaten within 2-3 days and if you are not going to eat it that fast, just slice it up and stick in the freezer.