The heat is officially on in the house because well, it got kind of freezing out and also because we got some snow! So awesome and unexpected. Sure, it was only an inch and came at the exact wrong time making for a very sketchy driving situation, and also it froze all the chard in the garden I had left (I harvested it and just tossed it in the freezer for soups), but whatever. I was, and am just so happy to see it. I really do love this time of year, even if everyone else hates it.
The week started off slow. The extra hour was welcomed but also really kind of screwed with my body clock. I have been getting better throughout the week, but the first few days we changed the clock, I was waking up at like 3 am. Yes, I was going to bed at like 630, but when your tired, your tired. Anyway, besides being a little groggy, it was the usual as usual. Work stuff, getting ready for winter weather, dealing with the dealings. We had lunch with Megan, a spaghetti dinner with Judah, and I picked up the first winter farm share of the season. Lots of roots, greens, Brussels sprout, and peppers. All the best food a lady could ask for. I am also feeling like a queen with my new, permanent, gold crown in my mouth. And now I am officially sick of going to the dentist. Going to try really hard to not have to go back ever again, or at least 6 months when I am due for a clean.
Oh, and lets not forget how I busted out the new toilet brushes. Who doesn%u2019t love a fresh toilet brush? Highlight of the week. HA.
Today the mr and don%u2019t have much in the way of plans besides getting the winter tires thrown on the car and getting out of town for the afternoon for a hike. So I am going to the gym and dropping off the library books this morning, we will then deal with the car, and then off we will go, heading out to conquer a mountain. Or a small trail. I am fine with either. Just as long as we are outside.
Links from the internet for your reading and browsing enjoyment.
–Why You Should Find Time to Be Alone With Yourself. Alone time is the best. I cannot stress how important alone time for me is%u2026 I NEED IT!
-I didi%u2019t know how awesome and strong ginkgo trees were. Consider the ginkgo. These ancient trees survived the atomic bomb in Hiroshima.
-First, how is Emma Watson turning 30? Second, Yes lady. Did Emma Watson Just Coin the Next %u201cConscious Uncoupling%u201d?
-Why haven%u2019t I don%u2019t this yet? The Tangy-Sweet Pickled Fruit I Put on Absolutely%u00a0Everything
–Very Generous People Are Way Happier (and Have More Friend)
-Looking for new shoes is the worst. But I found some that are not exactly winter friendly, but maybe I can make them work? Teva%u00a0Voya Infinity Sandals.OR these appropriate footwear. I love them but jeez, I am not paying that much for a shoe.
-Give me roots, all the roots. Root, root, root for rutabaga, turnips and those other unappreciated vegetables
-This is me! %u2018It%u2019s cool to be cold%u2019: Confessions of frigid-weather fanatics
–The Cookie Sculptor. I think I need to spend more time sculpting cookies.
–Scrubbing Your House Of Bacteria Could Clear The Way For Fungus. I am a clean freak, but I don%u2019t use any chemicals whatsoever. Vinegar, water, vacuum. How that keeps the bad fungus away.
What%u2019s up with dinner rolls? Do people eat them all year round, like on a Tuesday in the middle of March or maybe a nice blue sky sunny day in July? Is that a weird question? But seriously, think about it. Dinner rolls, at least in my world of people, are pretty much only eaten in and around Thanksgiving and Christmas. Huh. Kind of strange seeing that dinner rolls are bread which everyone eats all the time and are basically made specifically for dinner (although can and should be eaten for breakfast and lunch as well) which most people eat. Every. Single. Day. Well, whatever the reason, it%u2019s weird. So yes, I am making these here dinner rolls now at the traditional holiday time but I think as of now, I am going to start making them all the time. It%u2019s going to be my new thing. Fourth of July dinner rolls. Yup.
And so yes, we need dinner rolls right now for the holiday food feasts and these dinner rolls are the perfect accompaniment to any and all dinners. They are nice and fluffy and all dinner roll like, just as any good roll should be, but also slightly more nutty and soft and healthy because oats and wheat flour and homemade which is always the best.
And if you are like, hell yes I am a dinner roll person and hell no I am sticking to store bought cause that is that and how it%u2019s done, well hey, no judgment here. I made these for my people for our family Thanksgiving, (which is happening today at my house. There are going be so many people) and I know that everyone will love and be happy to eat them, but I too also bought some of those super white, take and bake ones that I know if I don%u2019t have on the table next to these gorgeous and amazing rolls, that I will probably get punched in the face. So we will have both. And then at dinner I can bask in the glory of all the comments about how much better my rolls are then the store bought ones. (Secretly why I am having both. Fishing for compliments. HAHA!)
Now to those soft and fluffy dinner rolls!
The stuff. Old fashion oats, all purpose and white whole wheat flour, yeast, oil, water (hot and room temperature), maple syrup, and salt.
First, take the boiling water and pour it over the oats. Mix them and let them soak and cool for 10 or so minutes.
While oats are soaking, add the room temp water to a big bowl with the yeast. Once the oats are soft and cooled off a bit, add them to the yeast mixture along with the oil, and maple. Mix together. The add the flours and mix until combined.
Dump dough onto a floured surface and knead for about 3-5 minutes, adding a little more four as needed to keep from being to sticky, but don%u2019t over flour. The dough is and should be a little tacky.
Soft and supple. Kneaded and ready.
Place the dough back into the bowl and cover with a damp towel. Leave alone and let rise for about an hour or until it doubles in size.
Once the dough doubles, dump out onto a lightly floured surface and cut into 12-16 equal sized pieces .
Roll each roll into a roll shape and place them in a lightly greased baking dish. Cover for another 15-20 minutes to let rest and rise a little more.
Rolls risen again, just a little plumper. And now right before you place them in the oven, brush tops with a maple/water mixture and sprinkle with a few oats. To look pretty. And into the oven they go, 30ish minutes, until nice and golden brown.
Baked to golden dinner roll perfection.
And there you have it. Soft and fluffy dinner rolls. Warm out of the oven, looking and smelling like all the good things that you want and need.
And can, and should, be made now and all year round.
-C
makes 12-16 rolls
1 1/2 cups old fashion oats
2 cups all purpose flour plus more for kneading
1 1/2 cups white whole wheat flour
2 cups boiling water
1 cup room tempature water plus 2 tablespoons for brushing tops
2 teaspoons salt
2 tablespoons maple or honey
2 teaspoons yeast
1/4 cup neutral oil
In a bowl, mix oats with boil water and let sit and soak for about 10 minutes. In the meantime, in a large bowl, mix the room temp water with the yeast and 1 tablespoon of maple and mix. Once oats have soaked and cooled to a point that they are not super hot, but still just warm, mix them in with the yeast mixture. Add the salt and oil and mix then and both the white and white wheat flour. Mix until combined. The dough is going to be sticky, but that how is should be. Dump the dough onto a lightly floured surface and knead for 3-5 minutes, adding a little flour as needed to keep from sticking too much, until dough is nice and uniformed in texture. Place dough back into big bowl (after you clean it out and lily oil it) and cover with a damp towel. Place somewhere warm for about an hour until it doubles in size.
Once dough has doubled, dump out onto a lightly floured surface and with a knife of dough cutter, cut into 12- 16 equal sized pieces. Roll each piece into a ball, pinching any ends together and place them into a 9×13 inch baking pan. Once all pieces are in, over and let rest for another 15 minutes.
While dough is resting again, preheat oven to 350.
After the dough has rested, and right before you place them in the oven, mix 1tablespoon of maple with about 2 tablespoons warm water and brush the tops of the rolls. Sprinkle with a handful of oats and then place them into the oven to bake. 30-35 minutes, until they are a nice golden brown.
Once baked remove from oven and let cool to a reasonable temperature and serve.
These can certainly be made a few days ahead of time of eating. Just remove baked rolls from pan and let cool completely then place the into an airtight bag. To reheat, just place on a baking sheet and stick in a hot oven until warm.
What with all the holiday and family get togethers we have had over here at my house the past few week, we have had quite a few bags of chips and pretzels left over. Always almost empty%u2026 Always dumped into the compost because I mean, I am not so keen on seeing bags of little bits of chips and pretzels in the pantry that I know will never get eaten. Plus it is not like I am saving carrots or grapes or anything I would eat, it%u2019s junk food. But still. I hate the food waste. That is why I made these cookies. To not waste food. And because we had people coming over to the house for dinner and I cannot not have something for dessert. That would be just wrong. And lastly because I am pretty sure that chips and pretzel pieces only make a plain chocolate chunk cookie into an amazing sweet and salty cookie that will just blow your mind.
And I was right. I made the cookies, I feed them to the mr, the sister, friends and all the littles and they just couldn%u2019t get enough.
Current thought. I am sitting here typing and have come to the conclusion that I should start a bakery that makes cookies out of people almost empty bags of chips, like a Cheeto dust cookie, or a peanut butter Funyun cookie or chocolate chocolate chip Dorito cookie.
Yes. this is a good idea. Oh man, I am a genius.
But back to theeese cookies. Start with these. I%u2019ll let you know when I open the storefront to Garbage Cookies (that is what I’ll call the place) You can stand in line for the peanut butter Funyun cookies. I have a feeling about that flavor. Until then%u2026
To the cookies!
The stuff. The small bowl has flour, baking powder and baking soda. The big bowl has brown and white sugar. Then you need oil, almond milk, vanilla, chocolate chunks, some pretzels and some plain salted potatoes chips.
Start with the wet. Mix the oil, the milk, and the vanilla into the sugars until completely smooth
Whisk together the dry stuff.
And mix until its a cookie dough. Now here is the thing, you need to stick the dough in the fridge for a couple hours and if you mix in the chips and pretzels now, well I think that might make them extrealemy soggy, so hold off. For now, cover dough and refrigerate for 2-4 hours.
When the time comes for baking, grab the mix ins and with whatever method you chose, crush the chips and pretzels into small bits. (avoid turning into a dust, you want bits)
All salty and crumbly and ready to go
Grab the dough from fridge and dump in the stuff that needs to go in (crushed chips and pretzels and chocolate chunks).
Scoop dough into balls and place on a baking sheet.
Into the oven and out they come all golden brown and smelling like yes and mmmmmm.
Get those cookies on a wire rack to cool and to free up the baking sheet to keep baking.
Look at this proud cookie. Chips, pretzels, and chocolate chunks all on display.
Now is when you get yourself a plate, pile it up high, and eat.
Remember, sharing is caring so maybe share a cookie or two. (but like you don%u2019t HAVE to)
Stay happy this weekend.
-C
makes about 2 dozen cookies
2 cup all purpose flour
1 teaspoon baking soda
1/2 teaspoon baking powder
1/2 cup packed brown sugar
1/2 cup white sugar
1/2 cup canola oil
1 teaspoon vanilla
6 tablespoons plant milk
1/2 cup crushed potato chip
1/2 cup crushed pretzels pieces
3/4 cup chocolate chunks or chips
In a large bowl, mix together the sugars, oil, milk, and vanilla until completely combined. In a separate bowl, whisk together the flour, baking powder and soda. Dump the dry into the wet and mix until the dough comes together. Gather the dough together in the bowl and cover with plastic and stick in the fridge to rest for at least 2 hour and up to a day.
When ready to bake, preheat oven to 350
Right before you take the dough from fridge, get your chocolate chunks, pretzels, and chips out. If the chips and pretzels are not already in little bits, place them in a bag (just use the chip bag if you have it) and smash with a heavy object until you turn the chips and pretzels into bits. Be carful that you don%u2019t turn it all into a dust, look for small bits. Pull dough from fridge and mix the stuff in. Scoop out balls of dough and place on baking sheets. Bake cookies in oven for 11-12 minutes or until lightly browed. Remove from oven and immediately transfer cookies to a wire rack to cool.
And now you eat.
Store uneaten cookie in a airtight container for up to a week or freeze them but I doubt you will have too. The cookies went fast.
%u00a0%u00a0 %u00a0%u00a0%u00a0I figured now is a good time to get this recipe out there before we get to far into spring and summer recipes because there is going to be a lot of banana ice cream filled recipe coming and I figured its a good idea to have the basic banana ice cream recipe ready for people to refer too.%u00a0 And because I made so much fantastic naner ice cream, I also made a cookies and cream naner ice cream for my sisters and the mister.
Comments that I got from my sisters and the mister when I made them this ice cream
-Sister one.”I give this my sister seal of approval.. It’s so good. %u00a0The first dessert you have made that I liked! (not including all the other desserts that you have made that I liked)”
-Sister two- “Wow.. it looks like ice cream and feels like ice cream and tastes like ice cream.. You should make me this ice cream!” (I was confused too because I was pretty sure I just made her some)
-The mister- “I am so excited for my new fly fishing pole!”
Ok, so the naner ice cream isn’t new to the mister and he IS very much excited for his new fly fish pole. So excited that he forgot to tell me how amazing that I am and to thank me for making him a big bowl of yumminess. (It’s ok, I forgive him)
And yes, this is probably one of the easiest, most delicious, healthy and amazing frozen dessert that you will ever eat. You will probably find yourself buying mass amounts of bananas and stocking the freezer until things just start falling out. (which is also ok because it’s only bananas and you can’t have too many frozen bananas)
%u00a0 %u00a0The stuff you need for this ice cream%u2026. Nice and ripe bananas, peeled and then frozen* That’s it.
To make it, place frozen bananas into food processor and hit the on button. Process the crap out of the namers until nice and silky smooth.%u00a0
*Note, the smaller the frozen chunks are , the faster and maybe a little easier for the blender to blend the naners into ice cream. So if you think of it, chop bananas into pieces before freezing or even after.
After all blended and smooth, either eat right away or scoop ice cream into a freezer safe container and stick in freezer. That’s the banana ice cream%u2026 %u00a0And it is amazing and so so so so so addictive. I make a batch, think I am only going to eat a scoop, then find myself eating half of what I have made, but it’s ok cause it’s only bananas.%u00a0
Now for the cookies and cream banana ice cream..One%u00a0batch of banana ice cream, either freshly made, still in food processor or made ahead and placed in a food processor and given a good pulse to smooth it up.
Add cookies in, crushing a bit beforehand and pulse till combined.%u00a0Now you have cookies and cream naner ice cream%u2026. and everybody is happy.
Scoop into a cup, a bowl, a freezer safe container, or directly into your mouth.%u00a0Be careful%u2026. You can still get brain freeze from eating naner ice cream too fast!
Keep it real hump day drum bum!
-C
Basic Banana Ice Cream
Makes one batch. Good for 3-4 servings
4-5 %u00a0ripe bananas peeled and frozen
Peel %u00a0bananas and stick in a freezer bag or container and freeze. When bananas are completely frozen, break into pieces and stick into a food processor or blender and puree until silky smooth.%u00a0
Eat right away or scoop into a freezer safe container for later.
Cookies and Cream Banana Ice Cream
1 batch banana ice cream
5-10 (depending on your cookie need) cream filled cookies like oreos or Trader Joe’s Joe Joe’s (These are gluten free)
In a food processor, blend banana ice cream with cookies.
Eat right away, with a utensil of choice in a container of choice.
Bowl licking is acceptable.%u00a0
The conversation I had with my little brother on his birthday…
Me- “Happy Birthday!”
Bro- “Thanks”
Me- “What do you want to do.. want to come over, I’ll make you something, anything you want%u2026donuts, cake, pizza%u2026”
Bro- “Make me a shelf, I got like seven books for my birthday”
Me- “Um, ok%u2026 what are you thinking?”
Bro- “Something to hold like seven books”
Yup, he got “like seven” books and needed a shelf%u2026%u2026. I guess I didn’t realize that “like seven” was a unit of measurement. Man, I love my little brother, %u00a0but sometime I wonder about the kid. Anyway, Being that coolest big sister he’s got (and coolest big brother in law who did most of the work), we went along and made him a %u00a0shelf. Hopefully it holds those “like seven books”.
Here is the list of what you will need to make the exact shelf with the same measurements that we used%u2026but feel free to use and adjust the measurements to your want or need.
2 pieces of 1×8 common pine measuring 25 1/2 inches (sides)
2 pieces of 1×8 common pine measuring 17 1/2 (top and bottom)
1 %u00a0piece od 1×8 common pine measuring 16 inches (middle shelf)
2 pieces of 1×8 %u00a0common pine measuring 4 inches (legs)
Wood glue
About 20 (having a few extra never hurt) 2 1/4 inch finishing screws
Tools
Drill
Either a circular saw or a chop box to cut the legs
Measuring tape
Speed Square or something to make a perfect straight line
The legs are the hardest part to make and really, it’s so not hard. Take both 4″ pieces of pine and cut in half ( each piece will end up being 3 %u00a05/8″.. how is that you ask? Well here is some knowledge%u2026 1×8 %u00a0pine actually measures 7 %u00a01/2 “%u2026. nuts right?) With each piece, measure an inch in on the bottom and side%u2026Draw a vertical line to connect and %u00a0then cut the line. Repeat last step with the second piece you just cut, then repeat the whole processes with the second piece %u00a0of 4” pine. These words seem a little confusing, just look at the picture above, it has all the measurements on it too. In the end, you should end up with 4 legs.
Take one of the 17 1/2″ pieces and with a straight edge, draw two lines form opposite corners to find dead center. %u00a0Measure 8″ from center on each line, that is where the legs are going to be placed. Working with one leg at a time, add a smear of wood glue to each leg as you are about to screw it down. Place leg on mark and sink a screw about an inch up from the inside of the leg, screwing at a slight angle (see photo)..
Phew.. this is the most complicated part of the whole shelf so once you get the legs on%u2026 its all smooth sailing.
Flip bottom onto legs and sink a screw in (1 inch in on both sides) into each leg.
Now grab the top piece (17 1/2 “) piece and the two sides pieces (25 1/2”). Add a bit of wood glue to the side ends and line up top piece with the sides. %u00a0Sink 2 screws into each side. If you have another person helping, have them hold the pieces for you while you screw the top into the sides.. if not, use the bottom to rest a side against (like in picture).%u00a0
Now flip over and screw the bottom piece into the sides%u2026%u2026
Take a minutre%u2026. Look at what you have accomplished! You have a kick ass square with legs!
Now place the shelf. We went for just about center.. 12 1/2″ %u00a0from the bottom. Mark the measurements on both sides and use a square edge to draw a line.
Place shelf on the lines (The wood should fit in tight, you might even have to bang it a bit to get it into place%u2026.but you want it to fit nice and snug.)%u00a0Now screw the shelf%u2026two screws on each side.
Flip onto legs and %u2026%u2026%u2026.TA DA!!!! So Fancy!
%u00a0You now have a shelf to shelf things.. Simple as that. And I tested it out%u2026It holds more the “like seven” books. A success!%u00a0
Note%u2026…If you are feeling like you need to, use a little wood putty to fill in the screw holes. You can sand it if you want. You might even want to stain or paint it. Up to you. The shelf is made and is yours to do what you will. Me, I like it just the way it is.
If anyone out there takes this little shelf project up.. let me know how it goes, maybe even send a picture%u2026and feel free to ask any questions!
Just the other day I was at the gym talking to someone when all of a sudden, she coughed into my face, like full fledge hacking. This and then she continued to tell me that she has been sick for like weeks and blah blah blah. After that all I was thinking was, Oh Fuck, she just gave me her ick%u2026.GET AWAY FAST!!!!
So it%u2019s that time of year. Everyone all sick and shit. And that means getting my stash of stuff made, my feel better, don%u2019t get sick stuff. The tonics and elixirs and hocus pocus things that I use all year long, but mostly during the winter months when everyone starts getting sick.
One of the things I make is fire cider. First off, let me tell you I am no doctor, just in case you thought I might be. But I l am a strong believer in food as medicine. So the fire cider is a heath tonic of sorts, made with all sorts of yummy and highly potent things like fresh grated horseradish, hot peppers, garlic, and so forth. All things that are good for your health in many ways, but also taste really good. And let me tell you, if you are into the healing powers or not, a swing of this infused cider tonic will surely open up your sinus cavity like whoa.
And now before you get super excited about going and making yourself this fantastic health tonic/salad dressing/drink mixer, and thinking it will be ready and done as soon as you do a little grating, well hold up. You can throw it together super fast, but it does take a good 4-6 weeks of chilling and infusing before you really want to get into it. But don%u2019t let that stop you, it is 100% worth all the waiting. And wouldn%u2019t you know, the holidays are about 4-6 weeks away and I was just thinking after I made a batch for myself how I should make another big batch and give away in little jars for Christmas this year. Now there is a good idea. (Might not be a doctor, but I sure am a smarty pants%u2026HAHAHA)
Now to the Fire cider!
Garlic, onion and hot peppers, chopped into bits. Place it all into a clean 32oz jar.
Grated horseradish, turmeric, and ginger. Into jar it goes. And watch out, freshly grated horseradish can be a little intense.
Sliced lemon. Into said jar along with thyme, oregano, and peppercorns.
Packed and filled with raw apple cider vinegar.
Now a lid and some time in a cool dark place and you got yourself some liquid gold.
Remember, I am not a doctor so yeah, but this cider helps me feel better when I need it to and I think you will find it will help you too. And it tastes freaking awesome on food so theres that!
-C
makes 16-20 oz
1/3 cup fresh grated horseradish
1/4 cup fresh grated ginger root
1/4 cup fresh grated tumeric
1 chopped onion
3-5 heads of garlic chopped
2%u20144 hot peppers (depending on the type you use and the heat level you want) chopped
1 lemon sliced
1 teaspoon peppercorns
1 teaspoon oregano
1 teaspoon thyme
Raw apple Cider Vinegar
Honey or maple syrup (optional)
Note. Feel free to change the amounts of all of the ingredients. Want to use less horseradish, then do so. No hot peppers, then don%u2019t add them. Leave out the oregano and thyme and add dill or rosemary. You can be creative with your own flavors.
Now to make fire cider.
Place all ingredients besides vinegar into a 32 oz jar. Pack down with a wooden spoon then fill jar with apple cider vinegar.(Make sure all the stuff is submerged in the vinegar.) Place a lid on jar. If using a metal lid, line top with wax paper first or just use a plastic lid if you have one. Place jar in a cool dark place for 4-6 weeks, giving it a shake every day.
After at least 4 weeks, remove lid of the jar, strain the liquid from the solids through a fine mesh strainer or cheesecloth, squeezing out as much as the liquid as you can. You can discard the solids or make something tasty with them (saut%u00e9ed with potatoes?). Then taste the liquid. Add sweetener if you want, maybe a few tablespoons to start and go from there.
And thats it. Store the cider a lidded jar in a cool dark place. Or in the fridge if you want it cold.
To use, just take a swig when feeling crappy, stuffy, cold, or just want a tasty little pick me up. Or use as condiment on food, like in a salad or wherever.
Enjoy!
%u00a0I’ll let you know now, I am a make and eat soup all year long person. I can think of few things better then sitting outside, basking in the sun, hopefully with a light wind, a book in hand, enjoying a nice big cup of some good homemade soup. (Doesn’t that sound so freaking lovely?) This soup right here is perfect for just that. Parsnips are the best, kind of like a big white sweet, yet starchy carrots. And cooked together with a little bit of light and lemony thyme, rich earthy turmeric and a couple more chopped veggie%u2026.. you got yourself a%u00a0nice thick and fragrant bowl of happiness that fills you up without weighing you down. It’s food you can eat that fills you up, leaves you feeling cozy, yet still wanting to hop on a bike or lace up the running shoes. %u00a0Hearty without the feeling of all the heaviness.
A perfect soup for spring! (or summer, winter, or fall)
The stuff. Parsnips, carrots, onion and garlic. Thyme and turmeric, salt and pepper. the tinniest bit of oil and water (water not shown)Chop all the veggies and the garlic, drizzle a dutch oven or a pot with oil, toss in the veggies. Add the turmeric, the thyme, and 1/2 cup of water.%u00a0Sweet sweating the veggies. Turn pot on medium and cook until the water completely cooks out. When the veggies start to brown and stick to the pot, deglaze with water. Give a good stir and keep cooking. Repeat the deglazing process until the veggies are super soft and ready to blend. (I did this 4 times.. it only took 10 minutes)Add enough water to cover the cooked veggies.%u00a0And now blend the heck out of it.. Go as smooth or chunky as you want. I blended as smooth as I could get with this crappy immersion blender. (Blender on loan until I finally decide on, and buy a new one)And there you have it. Scoop into bowls, add lots of cracked black pepper, and go to town. I made enough to save a bowl for later%u2026 %u00a0it didn’t last for later.%u00a0
Soup so good.%u00a0
-C
Parsnip Thyme and Turmeric Soup%u00a0
4 large parsnips
2 carrots
1 whole onion
3-4 cloves garlic
2 teaspoons thyme
2 teaspoons turmeric%u00a0
salt and pepper
olive oil
water
Dice up the parsnips, carrots, garlic and onion and place into a large dutch oven or pot. Drizzle with a bit of olive oil, %u00a0sprinkle on the spices, salt and pepper and add about 1/2 cup of water. Turn heat on medium and start cooking down the veggies. Once the water evaporates and the veggies start to caramelize, deglaze pot with about a 1/2 cup of water. Give pot a stir, and continue to cook until water evaporates. %u00a0Repeat this 2-3 more times until the veggies are super soft and fragrant.%u00a0
When the %u00a0veggies are ready, add enough water to the pot to submerge the veggies. Bust out the immersion blender or dump into a blending device and blend until smooth (or the consistency that you want) Have a cup of water ready to thin out if needed. When blended, taste for salt and pepper, add more if you want, and cook on low heat until you are ready to serve.
Let us talk about how winter squash is like one of the best foods ever. Seriously. Hardy, creamy, rich, and full of the nutty, sweet flavors of all the good things. How anyone says they don%u2019t like winter squash is beyond me. I sometimes even feel like I put myself in danger of exploding when I am around enough cooked squash. I can eat and eat it until it%u2019s gone, which is fine if it%u2019s a serving or two, but when you roast up a 10 pound butternut, well, that is when the danger is real. I am getting better at holding back, but man, sometimes I just can’t (or don%u2019t want to?) help myself. ( You might also wonder why I cook 10 pounds of squash at a time. It%u2019s because I will eat it all in a few days and I might as well cook a bunch at once, for efficiency sake.)
Now the delicata squah. If you haven%u2019t had it before, stop what you are doing and go get one. You need to try it because it is amazing. Sweet, nutty, creamy. So good! And another good thing is that they are not giant, so you can buy one and eat the whole thing and not worry about overeating until you can%u2019t move, unless that is the goal. In that case, just buy a bunch. HA.
Anyway, it%u2019s getting to that time of year where salad is still great, it is just great warm. And with winter squash. Don%u2019t you agree? So we cook up the squash, grab the kale and make one heck of a salad to eat all to your face. Because that is what will happen. You will make it , taste it, and not want to share it. It is too good to share. (Yes salads can be too good to share, so if you are planning on feeding others, plan accordingly)
To the salad!
The stuff. Kale, a delicata squash, red onion, some balsamic vinegar, a touch of maple, spicy brown mustard, a handful of toasted seeds, and salt and pepper.
Start with the squash. Cut it in half and scoop seeds from booth sides (these seeds are great roasted). After deseeded, cut both pieces into 1/4-1/2 inch thick rounds. And NO!!!!, do not peel the skin.
Grab the onion and cut into 1/4 inch rounds too.
Place the squash on a very lightly oiled baking sheet so the pieces are not overlapping each other. Then toss on the onion which is fine if it overlaps. Sprinkle with a pinch of salt and lots of cracked pepper and pop into a hot oven.
In the meantime, mix the dressing situation together. Mustard, maple, and balsamic in a jar, mix and done.
Chop the kale too. Into mouth sized pieces.
Once squash is cooked all nice and tender, remove pan from oven. Take all the kale and toss on top then take the dressing and drizzle it all over the kale. Pop the pan back into the oven for a minutes or two, just until the kale starts to ever so slightly wilt.
Pull the pan back out and give it a good toss.
Dump it all into a big bowl, toss in the toasted seeds, and call it. Now grab a fork and start eating.
-C
Can be a main dish for 1 or a side for a few
1 delicata squash
1 bunch of kale (around 3/4 pound)
1 smallish red onion
3 tablespoons balsamic vinegar
1 -2 teaspoons maple syrup (more for a slightly sweeter, maple-y flavor)
2 tablespoons brown or dijon mustard
1/4 cup toasted seeds of choice (I used pumpkin and sunflower)
Preheat oven to 400
Cut delicata squash in half and scoop out all the seeds (you can save seeds to toast up later if you want), then slice the squash into 1/4 – 1/2 inch thick rounds. Grab onion and cut into thin slices. Take onion and squash and place them onto a very lightly oiled baking sheet and sprinkle with salt and pepper. Don%u2019t let the squash overlap, but it is fine for the onion to overlap the squash and itself. Pop the pan into the oven and bake until the squash starts to brown and is fork tender, which should take about 10-15 minutes.
In the meantime, chop kale into small mouth sized pieces and set aside. And mix the balsamic, mustard, and maple together to create the dressing.
Once the squash and onions are cooked, toss the kale onto the pan and drizzle the whole thing with the balsamic mixture. Toss it all around and pop pan back into oven for another minute or two, just to let kale get a touch wilted.
Remove pan from oven, dump everything from pan onto a plate, and toss in the toasted seeds.
Grab a fork. Eat.
Here’s one for the cabbage lovers our there, maybe even the haters as well. (I don’t understand those people, cabbage is king in my stomach).%u00a0I really believe that a good bit of cabbage can really change a persons perspective on the humble cruciferous vegetable, maybe even the world. To far? Maybe but what I always say is, “When in doubt try it out!” Either way, this bit of cabbage is vey very good good.%u00a0%u00a0
A quick little warm up in a skillet with some sesame soy flavor and crunch and you got yourself a A plus little salad. It hits all the right notes for when a) its winter and fresh greens are more sparse (which it currently is and they currently are) b)%u00a0its cold out (again currently because it’s winter) and c) when you only have a head of cabbage in the fridge (was the case but I have sense remedied that).%u00a0
Chop it, toss, it, eat it. Quick and easy good food. Get on it.
The stuff. Cabbage (I used savoy but you can use any cabbage you want) soy sauce, toasted sesame oil, olive oil, and a lemon. The lemon is optional, but a little acid is alway welcome in my mouth.%u00a0
Chop the cabbage. Unless %u00a0you are making this for more then 2 people, you probably only need half a head. However much you use, chop in up into 1-2 inch peices. You could %u00a0also shreds it if you want, but I like the bigger pieces.%u00a0
Toss the cabbage into a hot skillet that has been drizzled with a little olive oil and toss the soy sauce in with it too.%u00a0
Cook on medium high heat until the cabbage has slightly soften.%u00a0
While the skillet is still hot, drizzle in a touch of toasted sesame oil and a good amount of sesame seeds. Give it a toss. Taste and add more toasted sesame oil if you want.
Pile it Into a bowl and that’s that. Serve with a wedge of lemon or lime if you like the addition of the acid.%u00a0
-C
serves 1-2 people
1/2 of a head of cabbage (green savoy, or red work)
1 tablespoon soy or tamari%u00a0
1/2-1 teaspoon toasted sesame oil
1 tablespoon olive oil%u00a0
sesame seeds
lemon or lime (optional)
Preheat a large skillet to medium high with the olive oil. While its getting hot, chop the cabbage into 1- 2 inch pieces. When the skillet is hot, dump the cabbage in and toss around with the soy sauce. Let cook for 4-5 minutes, giving it a toss a few times, until the cabbage starts to soften. Depending on your preference you can stop cooking it now, or keep cooking until it reaches you preferred doneness. (I like it with a little crunch so I cook it for 5-6 minutes) Once it’s done but the skillet is still hot, drizzle in the toasted sesame oil and toss in the sesame seeds. Taste for flavor and add more toasted sesame oil if needed.%u00a0
Serve right away although cold left overs are also fantastic. A wedge of lemon or lime is a well received addition.%u00a0
I got my first few ears or corn from the farm share this week which is exciting because I wait until we get corn from the farm to eat it. I figure that we get so much from the farm that there is no freaking way I am going to buy it and plus I know that that corn was picked a few hours before I got it. If you are going to eat corn, it needs to be fresh (life lesson).
Have I told you that the mr hates corn? I am pretty sure I have. I also have a theory that he really doesn’t hate it so I just go ahead and make food with corn in it. Then he eats it, likes it, and I am all like” AHA, you like corn be-otch! I win!” (not sure what I win). But then the next time I mention we have fresh corn and how would he like it he is all like, I hate corn.%u00a0 It’s a game we keep on playing.%u00a0
So I got fresh corn, lots of tomatoes, and the kale is growing strong out back. I figured I would give the mr a break from all the zucchini for the night and make he a nice warm summer salad with the corn that he “hates”.
The mr ate it all and didn’t even mention corn so now I am thinking that he just hates the word corn and if I don’t say the word then there will be no problem. HA HA, I am a genius.
The stuff. A tomato, a ear of corn, some kale, a little balsamic vinegar, oil, and salt and pepper.
Chop the tomato and remove the corn from the cob.
Toss into an oven safe skillet with a drizzle of oil and a pinch of salt.
Now stick it into the oven
After about 10 minutes the tomato has fallen apart and the corn is all nice and tender.
While the skillet is still hot the vinegar goes in and the (chopped) kale goes in. Mix it all around until the kale wilts. And be careful, the pan is hot.
Dump it into a bowl, sprinkle with pepper, grab a fork, and you are on.
Happy eating.
-C
makes a salad for one or two small side salads
1 medium tasty tomato
1 ear of corn
like 4-5 good sized kale leaves
2-3 tablespoons balsamic vinegar
%u00a0oil of choice (i used avocado oil)
salt and pepper
You can cook this in or on the stove. I did it in the stove because I was baking anyway
Preheat oven to 425
Remove corn from cob and chop tomato into medium sized chunks. Toss into a oven safe skillet with a drizzle of oil and a little pinch of salt. Stick in oven and cook until the corn is tender and the tomatoes have fallen apart, about 10 minutes. Remove from oven and mix in vinegar. Chop kale into mouth sized pieces and toss into hot skillet. Mix around until kale starts to wilt. And it’s done. Serve with a pinch of pepper.
What%u2019s up with dinner rolls? Do people eat them all year round, like on a Tuesday in the middle of March or maybe a nice blue sky sunny day in July? Is that a weird question? But seriously, think about it. Dinner rolls, at least in my world of people, are pretty much only eaten in and around Thanksgiving and Christmas. Huh. Kind of strange seeing that dinner rolls are bread which everyone eats all the time and are basically made specifically for dinner (although can and should be eaten for breakfast and lunch as well) which most people eat. Every. Single. Day. Well, whatever the reason, it%u2019s weird. So yes, I am making these here dinner rolls now at the traditional holiday time but I think as of now, I am going to start making them all the time. It%u2019s going to be my new thing. Fourth of July dinner rolls. Yup.
And so yes, we need dinner rolls right now for the holiday food feasts and these dinner rolls are the perfect accompaniment to any and all dinners. They are nice and fluffy and all dinner roll like, just as any good roll should be, but also slightly more nutty and soft and healthy because oats and wheat flour and homemade which is always the best.
And if you are like, hell yes I am a dinner roll person and hell no I am sticking to store bought cause that is that and how it%u2019s done, well hey, no judgment here. I made these for my people for our family Thanksgiving, (which is happening today at my house. There are going be so many people) and I know that everyone will love and be happy to eat them, but I too also bought some of those super white, take and bake ones that I know if I don%u2019t have on the table next to these gorgeous and amazing rolls, that I will probably get punched in the face. So we will have both. And then at dinner I can bask in the glory of all the comments about how much better my rolls are then the store bought ones. (Secretly why I am having both. Fishing for compliments. HAHA!)
Now to those soft and fluffy dinner rolls!
The stuff. Old fashion oats, all purpose and white whole wheat flour, yeast, oil, water (hot and room temperature), maple syrup, and salt.
First, take the boiling water and pour it over the oats. Mix them and let them soak and cool for 10 or so minutes.
While oats are soaking, add the room temp water to a big bowl with the yeast. Once the oats are soft and cooled off a bit, add them to the yeast mixture along with the oil, and maple. Mix together. The add the flours and mix until combined.
Dump dough onto a floured surface and knead for about 3-5 minutes, adding a little more four as needed to keep from being to sticky, but don%u2019t over flour. The dough is and should be a little tacky.
Soft and supple. Kneaded and ready.
Place the dough back into the bowl and cover with a damp towel. Leave alone and let rise for about an hour or until it doubles in size.
Once the dough doubles, dump out onto a lightly floured surface and cut into 12-16 equal sized pieces .
Roll each roll into a roll shape and place them in a lightly greased baking dish. Cover for another 15-20 minutes to let rest and rise a little more.
Rolls risen again, just a little plumper. And now right before you place them in the oven, brush tops with a maple/water mixture and sprinkle with a few oats. To look pretty. And into the oven they go, 30ish minutes, until nice and golden brown.
Baked to golden dinner roll perfection.
And there you have it. Soft and fluffy dinner rolls. Warm out of the oven, looking and smelling like all the good things that you want and need.
And can, and should, be made now and all year round.
-C
makes 12-16 rolls
1 1/2 cups old fashion oats
2 cups all purpose flour plus more for kneading
1 1/2 cups white whole wheat flour
2 cups boiling water
1 cup room tempature water plus 2 tablespoons for brushing tops
2 teaspoons salt
2 tablespoons maple or honey
2 teaspoons yeast
1/4 cup neutral oil
In a bowl, mix oats with boil water and let sit and soak for about 10 minutes. In the meantime, in a large bowl, mix the room temp water with the yeast and 1 tablespoon of maple and mix. Once oats have soaked and cooled to a point that they are not super hot, but still just warm, mix them in with the yeast mixture. Add the salt and oil and mix then and both the white and white wheat flour. Mix until combined. The dough is going to be sticky, but that how is should be. Dump the dough onto a lightly floured surface and knead for 3-5 minutes, adding a little flour as needed to keep from sticking too much, until dough is nice and uniformed in texture. Place dough back into big bowl (after you clean it out and lily oil it) and cover with a damp towel. Place somewhere warm for about an hour until it doubles in size.
Once dough has doubled, dump out onto a lightly floured surface and with a knife of dough cutter, cut into 12- 16 equal sized pieces. Roll each piece into a ball, pinching any ends together and place them into a 9×13 inch baking pan. Once all pieces are in, over and let rest for another 15 minutes.
While dough is resting again, preheat oven to 350.
After the dough has rested, and right before you place them in the oven, mix 1tablespoon of maple with about 2 tablespoons warm water and brush the tops of the rolls. Sprinkle with a handful of oats and then place them into the oven to bake. 30-35 minutes, until they are a nice golden brown.
Once baked remove from oven and let cool to a reasonable temperature and serve.
These can certainly be made a few days ahead of time of eating. Just remove baked rolls from pan and let cool completely then place the into an airtight bag. To reheat, just place on a baking sheet and stick in a hot oven until warm.
This weekend was pretty fantastic. I got a lot of little things done around the house that needed to be done and spent half of that time hanging out in my pjs. (Pjs can be working loathes too) And all the while I was doing stuff, I was making these rolls. (I am nothing if not a great multi-tasker) That’s my favorite kind of weekend.. Baking, while doing house chores. and maybe watching tv or listening to music. (or NPR.. but saying that makes me sound so old).%u00a0I am like a little old house wife (I am close) and it makes me feel like I have achieved greatness!
And baking bread is the best. I love making bread. I %u00a0love the act of mixing and kneading the dough. The waiting and anticipation of the dough rising.The smells of good bread baking. It’s a very cathartic experience, and it also results in some very tasty bread that,%u00a0in my house, get’s eaten at an alarming speed (fresh bread doesn’t last long with the mr) But don’t let all that time waiting around scare you away from making bread, cause when you take out the time spent letting dough rise, bread really takes about 8 minutes to make. And people who make fresh bread are always the coolest people.%u00a0
So these rolls. These rolls are soft and fluffy and tender,, slight sweet, slightly spicy, and all over freaking fantastic.%u00a0I mean, it’s parsnip and pepper so what can go wrong with that?. The mr ate a good few pretty much as soon as I pulled them out of the oven(again..fresh bread doesn’t last long)%u00a0and when I brought the rest over to my sisters house, those were devoured as well. Even the littles were super into them. %u00a0And I now that it’s a few weeks away but%u2026. Thanksgiving is only a few weeks away!!! It’s creepy up oh so fast (as usual) and I am not going to let it get the best of me this year. And now that I got my roll game down for the big day (or 3.. there are 3 Thanksgivings that we are attending), I can move onto more pressing things.. like al the pies.(I’ll be sharing some pies with you soon)
The stuff. %u00a0We gots some flour, salt, cracked pepper and a really big parsnip. Also have water, yeast, sugar and some melting earth balance .%u00a0
To start, chop up the parsnip into small chunks and stick them into a pot with enough water to fully semerge the chunks. Place on stove and bring to a boil then turn heat to medium high and let the parsnips cook.
Once the parsnip are fork tender, strain the water (reserving 3/4 cup of that water)%u00a0and puree the parsnip until smooth.
Take %u00a0that parsnip water and (once cooled a bit) place in bowl with the sugar and the yeast and mix it all around. Let sit for a few minutes until the yeast is visibly active.
Now dump the parsnip puree and melted butter into with the yeast and mix it all up
Salt, pepper, and flour mixed into a bowl
The yeast and parsnip mixture goes into the flour.%u00a0
And mix until it looks kind like this. When it’s no longer mixable with the spoon, dump dough out onto lightly floured surface and knead, adding a little bit of flout to the work surface when needed to prevent it from sticking..
And keep kneading unitl dough is all nice and smooth and pretty.
Dough then goes into a lightly oiled bowl %u00a0and is covered with a towl and let to sit for about an hour until the dough doubles in size.%u00a0
When the dough has doubled, dump onto the counter and cut into 12 equalish sized balls. (my balls were not equal)
The balls then go into a %u00a0large, lightly oiled pan. Let those sit for some more time,covered with a towel,%u00a0unit the dough %u00a0doubles again and the balls are all touching each other. They are ready to bake.. but right before you place them in the oven, brush the tops with a little melted earth balance.
And into the oven they go!!!
And when the rolls are all golden brown and smelling so nice,%u00a0remove from oven. Brush tops with some more melted earth balance and sprinkle with salt and more pepper.
Serve up to people you like
Have a n awesome day!
-C
Makes 12-16 rolls (depending on the size you make them)
3 3-1/2 cups all purpose flour
2 big parsnips (need 3/4 cups mashed parsnip)
3/4 cups parsnip water (the water you boil the parsnips in)
2 teaspoons yeast
2 teaspoons cane sugar
2 teaspoon salt
1 tablespoon cracked pepper (more if you like pepper)
4 tablespoons melted earth balance or butter (2 for the dough- 2 to melt on top)
To start, chop parnsips into chunks and place into a pot full of water. Bring to boil and cook until the parsnips are fork tender. Remove parsnips from water and measure out 3/4 cups of the water and set aside Take cooked parnsips and stick in a blender and puree until smooth. Measure out 3/4 cups of the puree.(any left eat as a snack)
Let both the puree and water cool enough that %u00a0you can stick a finger in it and its not to hot (or a thermometer that says its below 110.. your call).
Once cooled, stick the water, sugar, and yeast into a bowl, mix around, and let yeast activate. When yeast is foamy and clearly noted that it is not dead, dump in the parsnip mash, 2 tablespoons melted earth balance,and mix together. And then for the flour. Mix in the salt and pepper to the flour mix in the parsnip yeast mixture until a dough forms. The dough should be a little sticky, but still workable. If the dough seems to wet, add in another 1/4 cup flour at a time, just till it is bot overly sticky.%u00a0
Dump dough onto a floured surface and knead for about 5 minutes, or until the dough starts to look glossy and ihas an elastic quality to it.%u00a0
Stick dough into a greased bowl, over with a towel, and place in a warm place for about an hour, or until the dough has doubled in size. Once doubles, dump dough out onto counter and using a dough cutter or serrated knife, cut the dough into 12 -16 equal pieces Take each piece and roll into a ball and place into a greased 9×12 baking pan. Once all balls are in, cover with towel and let the dough rise %u00a0until the balls are doubled in size and are toughing each other,for another 30 minutes or so. Preheat the oven to 350. Once the rolls are double again, right before you stick them into the oven, brush tops with melted earth balance
Place rolls into preheated oven and baked for about 25 minutes or until the tops are golden brown.%u00a0
Remove and right away, brush on any remaining earth balance to the tops and sprinkle with salt and pepper.
Serve right away!%u00a0
Best eaten the day the are made.. but will last a few days in an air tight container.%u00a0
HORRAY, its Saturday!!! I don’t care that I have a bunch of laundry and house work to do, bills to pay, a mangy dog to groom%u2026 I get to do it all at home with the music blasting,(maybe some %u00a0holiday tunes) a lot of coffee, in my comfy sweats and the oven on. Weekends are always a mixed bag of crazy for me but I can usually count on being at home for a chunk of the morning or afternoons and that’s when I jump at the chance to make me some yeasted bread. Give me a couple of hours, my list of chores and watch me go.. I can mix and knead,, set aside to rise and hit up cleaning that toilet. Go back and knead, divided and rise again, then go fold all the laundry. Stick the bread in the oven and watch out, I am mopping the floors. I am nothing if not a fantastic multitasked, much like these rolls. You can serve them as a side for dinner , use them as a sandwich roll, or eat them as the star with a dab of butter and a drizzle of honey. The possibilities are endless. This particular recipe is fantastic for may reasons%u2026. %u00a0Its pretty simple, not to many ingredients and is made with whole wheat flour. If you don’t want 16 rolls, you can make the dough, bake half and freeze %u00a0the rest. You could even bake into loaves of bread instead.Yeah, sounds good right? %u00a0Go ahead, you know you want to. Just do it!I always gather the ingredients.. I have learned over the years that if I have all my stuff out and measured in front of me, I will almost never forget something and that I make less of a mess. It also helps that I find it pretty. So, flours and salt are whisked together. The yeast and honey in a bowl waiting to be proofed. The butter in need of more melting and an egg.. Pretty.%u00a0Honey and yeast mixed with a cup of warm water. %u00a0BE CAREFUL with the temperature of the water.. If its to hot, the yeast will kill the yeast and you will have to start over again, but I trust you won’t do that.Now that the yeast is active, mix in melted butter and egg. (Make sure the butter is not hot, warm is ok) %u00a0Add wet ingredients to the dry and mix.
%u00a0 %u00a0
I have a super awesome dough mixer , it helps to mix and not completely stick like it does to a wooden spoon. Dont have one? Use a wooden spoon, it works the same with a little more stickiness..You have a stand mixer? Well fancy you. No I am not jealous,(maybe a little). I like using my hands when making bread, but you? Go ahead, use your mixer, its cool with me. So mix you dough, you want the dough %u00a0wet and %u00a0sticky but still able to roll into a ball. If you need to, add a pinch more of flour, just enough to help form a ball. %u00a0When ball is formed, drizzle oil and rub all over and place in bowl with a damp towel. Let sit somplace warm to rise for about an 45 minutes or unit dough has %u00a0doubled in size. A good warm spot..Try the top of the fridge, thats my rising spot.
Once it has doubled, roll out onto a nicely floured surface and..my favorite part, %u00a0punch it down and knead for a few minutes%u2026. This dough doesn’t need a lot of kneading, just enough to reform ball and get some air out. Now divide and place into well buttered%u00a0pans. I used two 9 inch cake pans, but a 13 X 9 pan or baking dish would work or loaf pans if you want loaves. Just make sure to really %u00a0butter the pans.
%u00a0 %u00a0 %u00a0 %u00a0 %u00a0 %u00a0 %u00a0 %u00a0%u00a0 %u00a0 %u00a0 %u00a0 %u00a0 %u00a0 %u00a0 %u00a0 %u00a0 %u00a0 %u00a0 %u00a0 %u00a0 %u00a0 %u00a0 %u00a0 %u00a0 %u00a0 %u00a0 %u00a0 %u00a0 %u00a0 Little ball of dough turned into big balls of dough. (Yeast is so cool!).Into the oven they go. %u00a0Right before I baked them I gave the tops a little milk wash, just for color. Do it if you want, you could even do an egg wash, but it’s really not necessary.%u00a0Oh boy%u2026 Fresh from the oven%u2026Take a bit of butter and melt over the top%u2026.So lovely! Who wouldn’t want to just tear these beauties apart?
Now eat.. Eat with jam, eat with cheese, eat with peanut butter or with a bit of honey. Or, eat as is%u2026..Just eat it and enjoy you labor of love and the satisfaction that you just made those delicious%u00a0rolls that you are eating.
Honey Wheat Pull-apart Rolls.
Ingredients
1 cup all-purpose flour
1 3/4 white whole wheat flour
2 tablespoons honey
4 tablespoons melted butter
teaspoon salt
2 1/4 teaspoon yeast
1 egg
1 cup warm water
2 tablespoons butter(to rub over baked rolls)
Makes 16 %u00a0good-sized rolls
In a large bowl whisk together both flours and salt.
In a smaller bowl add warm water, yeast and honey. Stir and %u00a0let sit for %u00a05 – 10 minutes or until the yeast has grown and is foamy. Meanwhile, melt butter and let sit for 5 minutes. When the yeast has proofed, whisk together with butter and egg. Add to dry ingredients.
With a dough spoon , wooden spoon, stand mixer %u00a0or your fist, mix (or knead) until the dough comes together and begins to form into a ball. You want the dough to be wet and sticky but add a pinch or two of flour if its to wet and not forming a ball.
Coat dough with a little oil and place back into large bowl. Cover with a towel and place in a warm place(The top of the fridge is great) Let rise for 45 minutes or until the dough has doubled in size.
When dough has doubled, dump dough onto a well floured surface, flour up you hand and punch down the dough and knead for a few minutes. Divided dough %u00a016 even balls. %u00a0Now is a good time to preheat oven to 400 degrees.
Place in greased pans ( 8 in each) and cove with plastic and let rise for another 20-30 minutes or until dough has doubled and filling out the pans. %u00a0When the second rise is done, place in oven and bake for 25 minutes or until a nice light brown. If you want a darker crust, right before baking, lightly brush the tops of rolls with butter. As soon as the rolls are removed from the oven take the remaining 2 tablespoons of butter( one tablespoon for each pan) and melt over top of %u00a0rolls
Note..If you want to freeze any rolls, place in a pan after fist rise and stick in freezer until frozen Transfer to a airtight bag. When you want to use, simply pop out of freezer and let sit for about and hour. Bake as directed above.
I think that I am going to make this a thing, every week do a post of a few things that make me happy. .Maybe it will make you happy too. The first Winter farm share pick up!!!!! I cannot say enough about how amazing my farm is..They are fantastic people with fantastic produce and simply just make the world a better place for me to live!
%u00a0Oh Washer%u2026…He looks so old%u2026He is so old
I get home late Thanksgiving night, tired, ready for bed, but in need of a shower. I open the shower curtain and almost jumped out of my skin, then started to laugh.(maybe you had to be there) I forgot that I left the ceramic whale in the shower to wash. What, you don’t have a ceramic whale? Well that’s weird.
I made this%u00a0paper wreath(I know, Its pretty fantastic). I am doing a holiday craft day with some littles soon and wanted something fairly easy and practical. We all need a wreath on our walls or door,. I’m doing a post for it%u2026you will love it and make hundreds. Your house will be filled with paper wreaths.
A gorgeous slice of cabbage. It looks like a willow tree.
%u00a0Hiking with my lover and the pup. We do a lot of winter hikes Washer is actually a snow fish. He swims through the snow like its his purpose in life.
I made these %u00a0dinner rolls for Thanksgiving. I love to make bread, its%u00a0a very hands on baking experience. I love kneading dough, watching it rise, punching it down and so on. And bonus, these came out sooooo good. .Everyone at dinner said that they were the best rolls ever%u2026 (I need to plug my skills in somewhere,) I’ll share the recipe soon.
Nick and I got this pot in our very first apartment 12 years ago%u2026Its a piece of crap but makes the best air popped popcorn. A few weeks ago, the handle finally melted off and I was sad. Nick being Nick, welded a new piece of metal and attached a driftwood handle. It’s pretty awesome and Nick is too.
And finally being all holidays and thanks., I am happy I got to see all my friends and family the week. I might be tired, I might be slightly annoyed, but I am always grateful for the people in my life.
HAPPY HAPPY %u00a0HAPPY!!!
I had a few recipes %u00a0that I was going to make with the last batch of pumpkin puree I made. I ended up eating just about all of it with no frills, just a dash cinnamon a spoon and maybe a finger or two. .But I did have enough to make the mr. a small batch of these pumpkin rolls. A small victory in sharing!
Nothing fancy, just a little pizza dough, a bit of %u00a0pumpkin puree, pumpkin pie spice, and some brown sugar.
Roll out dough%u2026 It is pizza dough so it will spring back a bit. %u00a0Mix the pumpkin and spice together with the brown sugar then smear over dough, leaving a bit of a bare boarder.. For real, you could stop here and just make a sweet pumpkin spice %u00a0pizza which would be oh so delightful. %u00a0For the rolls, starting at the top. roll dough down towards you. Dont roll to tight or all the pumpkin will squeeze out.
Now that you have a nice log.. cut it into equalish sized pieces and place on a piece or parchment paper. I would definitely use parchment because these will get gooey underneath,. You can space them out, but I like to bunch them together. Its prettier that way.
Once in the oven, whip up the glaze.
A %u00a0squeeze of orange, a pitch of orange zest and some powdered sugar should do it. If you want to make a plain glaze, go ahead. Just use milk and add a bit of vanilla.
Once you pull the rolls from the oven, let them cool for a few minutes but you want them to be warm when you drizzle glaze all over them..
TADA!
Pumpkin Spice Rolls with Orange Glaze
Ingredients
6 0z Pizza dough or half a store bough pizza dough
1/2 cup Pumpkin Puree
3 tablespoons Brown Sugar
teaspoon Pumpkin Pie Spice
1 Orange.. 1/2 teaspoon zest and the juice
1/4 cup Powdered Sugar
Preheat oven to 375
Roll out dough. Mix pumpkin, spice, and brown sugar together and evenly spread on dough. Roll dough towards you into a log. Cut into even sized pieces and place on a parchment lined cookie sheet. Bake for about 20 minutes.
While the rolls are baking, sift powderd sugar into a bowl and mix in orange zest. Mix in a few squeezes of orange juice until you have the consistencey that you want.
When rolls are slightly browned on top, remove from oven and let sit for %u00a0a few minute. Drizzle with the glaze while still warm.
Let us talk about how winter squash is like one of the best foods ever. Seriously. Hardy, creamy, rich, and full of the nutty, sweet flavors of all the good things. How anyone says they don%u2019t like winter squash is beyond me. I sometimes even feel like I put myself in danger of exploding when I am around enough cooked squash. I can eat and eat it until it%u2019s gone, which is fine if it%u2019s a serving or two, but when you roast up a 10 pound butternut, well, that is when the danger is real. I am getting better at holding back, but man, sometimes I just can’t (or don%u2019t want to?) help myself. ( You might also wonder why I cook 10 pounds of squash at a time. It%u2019s because I will eat it all in a few days and I might as well cook a bunch at once, for efficiency sake.)
Now the delicata squah. If you haven%u2019t had it before, stop what you are doing and go get one. You need to try it because it is amazing. Sweet, nutty, creamy. So good! And another good thing is that they are not giant, so you can buy one and eat the whole thing and not worry about overeating until you can%u2019t move, unless that is the goal. In that case, just buy a bunch. HA.
Anyway, it%u2019s getting to that time of year where salad is still great, it is just great warm. And with winter squash. Don%u2019t you agree? So we cook up the squash, grab the kale and make one heck of a salad to eat all to your face. Because that is what will happen. You will make it , taste it, and not want to share it. It is too good to share. (Yes salads can be too good to share, so if you are planning on feeding others, plan accordingly)
To the salad!
The stuff. Kale, a delicata squash, red onion, some balsamic vinegar, a touch of maple, spicy brown mustard, a handful of toasted seeds, and salt and pepper.
Start with the squash. Cut it in half and scoop seeds from booth sides (these seeds are great roasted). After deseeded, cut both pieces into 1/4-1/2 inch thick rounds. And NO!!!!, do not peel the skin.
Grab the onion and cut into 1/4 inch rounds too.
Place the squash on a very lightly oiled baking sheet so the pieces are not overlapping each other. Then toss on the onion which is fine if it overlaps. Sprinkle with a pinch of salt and lots of cracked pepper and pop into a hot oven.
In the meantime, mix the dressing situation together. Mustard, maple, and balsamic in a jar, mix and done.
Chop the kale too. Into mouth sized pieces.
Once squash is cooked all nice and tender, remove pan from oven. Take all the kale and toss on top then take the dressing and drizzle it all over the kale. Pop the pan back into the oven for a minutes or two, just until the kale starts to ever so slightly wilt.
Pull the pan back out and give it a good toss.
Dump it all into a big bowl, toss in the toasted seeds, and call it. Now grab a fork and start eating.
-C
Can be a main dish for 1 or a side for a few
1 delicata squash
1 bunch of kale (around 3/4 pound)
1 smallish red onion
3 tablespoons balsamic vinegar
1 -2 teaspoons maple syrup (more for a slightly sweeter, maple-y flavor)
2 tablespoons brown or dijon mustard
1/4 cup toasted seeds of choice (I used pumpkin and sunflower)
Preheat oven to 400
Cut delicata squash in half and scoop out all the seeds (you can save seeds to toast up later if you want), then slice the squash into 1/4 – 1/2 inch thick rounds. Grab onion and cut into thin slices. Take onion and squash and place them onto a very lightly oiled baking sheet and sprinkle with salt and pepper. Don%u2019t let the squash overlap, but it is fine for the onion to overlap the squash and itself. Pop the pan into the oven and bake until the squash starts to brown and is fork tender, which should take about 10-15 minutes.
In the meantime, chop kale into small mouth sized pieces and set aside. And mix the balsamic, mustard, and maple together to create the dressing.
Once the squash and onions are cooked, toss the kale onto the pan and drizzle the whole thing with the balsamic mixture. Toss it all around and pop pan back into oven for another minute or two, just to let kale get a touch wilted.
Remove pan from oven, dump everything from pan onto a plate, and toss in the toasted seeds.
If you are a falafel fan, as I am, then this one is for you. Carrot ginger falafel. Oh yes. Warm and spicy and carroty and all the things that are good, packed into a chickpea ball of mouth sized proportions. When I thought of it it sounded good, When I made it and ate it, it was everything and more I could have asked for in a freaking fantastic falafel. As for the tahini cabbage slaw, I might just be making it in my house every dang day. Super easy, super tasty, goes with the falafel like whoa but is just as good eaten on it%u2019s own. Eaten together the pair make every inch of mouth space happy. A happy mouth space, what more can you ask for?
To the falafel!
The stuff. Cooked chickpeas, carrots, a piece of fresh ginger, tahini, soy sauce, cabbage, an onion, a few cloves of garlic, red wine vinegar, some cumin and red pepper flakes, a lemon, chickpea flour, salt and pepper, and oil.
Start off by chopping the carrots into small pieces. Then cut half of the onion into small pieces. Rough chop the garlic and the ginger as well. No need to peel ginger unless you really want to.
Place it all into food processor and pulse until a small crumble.
Carrot onion garlic ginger mixture.
Dump mixture into a skillet with a splash of water. Add in the cumin, chili flakes, and a good pinch of salt and pepper and cook on the stove for 5-8 minutes until the crumble softens and becomes fragrant.
Dump carrot ginger mixture back into food processor along with the chickpeas, chickpea flour, and the juice of the lemon. Puree until smooth.
Carrot ginger falafel mixture. Now stick it in the fridge. For a little while to a day, just to let it set up a bit.
And in the mean time you can make the slaw. Shred cabbage and cut up onion all nice and thin.
Dump tahini, soy, vinegar, and a few tablespoons warm water into bowl and mix until creamy and good.
Toss in that cabbage and onion. Now you have tahini cabbage slaw.
Now to cook falafel. Grab the batter, scoop into balls then smoosh into disks. Place in a light oiled skillet and brown each side a nice golden brown.
After browning, place on a baking sheet. Once all the falafel has been browned, place the baking sheet into the oven to finish up cooking. 20 minutes or so and you got yourself falafel.
Then eat it. Falafel topped with tahini cabbage slaw. That is how it%u2019s done, with or without wraps or pitas or whatever your want. Just as it is. Falafel, cabbage slaw, into mouth.
Good things friend.
-C
serves 3-4 people or makes 14-16 falafel balls
For the falafel
2 cups cooked chickpeas drained
3-4 carrots (around 2 cups diced)
1/2 of a red onion
2 inches fresh ginger
2-3 cloves garlic
1 teaspoon cumin
1/2 teaspoon chili flakes
1/3 cup chickpea flour (can sub in oat flour if needed)
juice of a small lemon
salt and pepper
For Tahini Cabbage Slaw
1/2 head red or green cabbage (about 3 cups shredded)
1/2 of a red onion
3 tablespoon tahini
1 tablespoon soy or liquid aminos
2 tablespoon red wine vinegar
a few tablespoons warm water
Grab carrots and red onion. Chop carrots into small chunks and cut onion in half. Cut one half into chunks. Place in food processor. Take the ginger and cut into small chunks (you don%u2019t need to peel it) and peel and slice garlic and cut into small pieces. Add that to the food processor. Pulse the mixture into a very small crumble then dump the mixture into a skillet with a splash of water. Add in the cumin, chili flakes, and a good pinch of salt and lots of pepper, and place on medium heat and cook for 5-8 minutes until soft and fragrant. Once cooked, scoop back into food processor along with the chickpeas, chickpea flour, and the juice of the lemon. Turn on and and puree until smooth, stopping when needed to scrap down the side. Then either dump mixture into a bowl or leave in the container you processed it in and place in fridge for 1/2 hour to a day.
When ready to cook, preheat oven to 400.
After letting the dough sit for a bit, remove from fridge. Grab skillet and lightly oil it and place on medium heat. Take a cookie scoop or just a spoon and scoop balls of falafel into your hand and roll them around so they are packed together. Smoosh then balls a little into disks and place into hot skillet. Let cook until bottom is golden brown then gently flip and cook the other side until browned. Place cooked falafel on a baking sheet. Once you have browned all the falafel, place into oven to bake for about 20 minutes or until the falafel has firmed up to your liking.
To make the tahini cabbage slaw. Shred cabbage and cut the remaining half of red onion into thin pieces. Place tahini, soy, vinegar, and 2 tablespoons warm water into a big bowl. Mix together until light and creamy. If the mixture seems to thick, add another tablespoon of warm water. When happy with consistency, add in the cabbage and onion and toss around until everything is coated.
Now when the slaw is made, the falafel is cooked, you eat it. Serve with warm pita or wraps or a bed of greens or nothing. Just slaw on top of falafel. And FYI, this whole shebang can be eaten hot or cold or anywhere in between.
Salad season is here. Green salads, fruit salads, potato salads, and grain salads. All the salads and we are not mad about it.
This is a good grain salad using millet, which I am sightly surprised to hear that a lot of people have never had. Millet is kind of like quinoa, but not. I cooks fluffy and looks kind of the same, and is gluten free like quinoa. I think the biggest difference is that millet is slightly softer and tastes a bit more nutty. It also is really good at absorbing liquid flavors.
But who are we to compare. The main thing is that it is nutritious and delicious so we will eat it.
Back to the salad. This is one of those grain salads that is good cooked and served warm but only gets better with a little age (like an hour or a day) in the fridge. Served hot or cold or room tempature, and is hearty enough to be meal like but is also a fantastic addition as a side to any of you meal plans. Like maybe a BBQ? Whatever the occasion, or non occasion, this is just a really good grain salad situation and I think you will be pleased, smiling all smiles while eating it.
To the millet salad.
The stuff. Millet, a couple handful of greens, a few mushrooms, an onion, dijon mustard, a little maple syrup, red wine vinegar, a lemon, a couple cloves or garlic, some toasted sunflower seeds, and salt and pepper.
Start by giving the millet a little toast, just enough to really up the nutty flavor and make it that much more yummy. It only takes a few minutes in a skillet on medium heat. Not an entirely necessary step, but you should do it.
Toasted millet goes into pot with water. Bring pot to a boil and then turn to the lowest simmer and cover.
While millet is cooking, get to the mushrooms and onions. Chop the onion thin and small and the mushrooms thin and small as well. Place them into the skillet with a drizzle of oil and place on medium heat. Mix around every now and then and cook until the mushrooms and onions are soft and a nice golden brown.
And make the vinaigrette. Minced garlic, mustard, vinegar, the juice of the lemon, and maple syrup get put into one place.
Mixed and now all is one.
Millet. Cooked and fluffed and ready to go.
Cooked mushrooms and onions go into the pot, along with the greens, the sunflower seed, and the vinaigrette. This step can be right away or you can wait a little while for things to cool as to not wilt the greens. Up tp you.
Mixed with love and hunger.
Even if you are making it ahead of time, just do yourself a favor. Grab a bowl, grab a fork, and get down on it.
-C
Seves 4-6
3/4 cup uncooked millet
2 cups water
1 sweet onion
3-4 big button mushrooms
Large handful or two of bitter greens like arugula, spinach or a mixture.
2 tablespoon brown or dijon mustard
2 tablespoon red wine vinegar
1 teaspoon maple syrup
2 cloves garlic
salt and pepper
handful toasted sunflower seeds
To start, toast millet. Dump the uncooked millet into a pan and place on a medium heat tt for about 5 minutes or until you start hearing the millet crackle.This gives the millet a slightly more nutty flavor but you can skip this step if you don%u2019t care.
Dump millet and water into medium pot. Place on high heat until water starts to boil then tun heat down to simmer and over. After about 15 or 20 minutes, when most of the water is gone, turn pot completely off. Let sit, covered for another 10ish minutes then take a fork and fluff it.
While the millet is cooking, cook the veggies. Grab the onion and slice it up into thin pieces. Clean off the mushrooms and chop them into small thin pieces too. Place the chopped stuff into the skillet with a drizzle of olive oil and a pinch of salt and place on a medium heat. Stir occasionally and cook for about 15 minutes or until the onion and mushroom are a nice dark, golden brown.
And make the mustard vinaigrette. Mince garlic and place into a jar or bowl with the vinegar, the mustard, the maple, and the juice of the lemon. Mix and set aside.
Once the millet is cooked, the mushrooms and onions are cooked, and the vinaigrette is made, all you have left to do is mix everything together. You can do this while things are slightly warm which will wilt the greens a bit, o let them cool so the greens stay fresh. Up to you. (I like the greens fresh)
Finally, dump cooked mushrooms and onions into pot with cooked millet. Add in the greens and sunflower seeds and drizzle the vinegertte all over. Toss around until fully mixed. Sprinkle with lots of fresh cracked pepper.
Then eat. Or place in a container to bring to the BBQ.
Barb has been bugging me for a few months to make her pierogi and I keep telling her I will. But for some reason I just kept forgetting and ever time she came over for dinner I would just end up making her lentils . I make lentils for people when I care about them because lentils are perfect and I always figure she could use the nutrients. But finally, FINALLY, I remembered and figured it was about time. Time for Barb to get her pierogi. I got the ingredients, made up a plan, and went about making them thinking she was coming over for dinner. But guess what. She didn’t come over. After all that, she decided it was better for her to go to her classes and then go to her shift at work, that it was not a good idea to skip out on all that just because I decided to finally make her pierogi. Well whatever I guess.
And full disclouse, I don%u2019t think I made actual plans with her for the particular day that I made these pieorgi. I might have just assumed she was coming over%u2026. So maybe my bad. Good thing these things can be made ahead and cooked whenever. So I saved her half for whenever she does come over (today I think). I did make them for her after all.
Anyway. Pierogi. Pretty much a stuffed ravioli I filled these with the potato, chickpea, and onion mixture, tossed a little dill in for the hell of it, and there they were. The mr got the first half, covered in cashew cream. But I bet these would be equally fantastic with marinara sauce. Or ketchup? I could see that if you are into that sort of thing. Ha.
Also have to note. I keep wanting to write pierogies but I think that is wrong. Pierogi is the plural for pierog.. I think.
To the pierogi.
The stuff. Flour, oil, salt and pepper. Cooked chickpeas, a couple russet potatoes, a big onion, some dried dill (optional), warm water, soaked cashews, and a little red wine vinegar.
First make the dough. Flout, salt, water, and oil get mixed together until la shaggy dough is formed. Dump onto a floured surface ans give ut a good knead for a minute until lit comes together into a nice ball. Place dough back into the bowl (clean it out), cover it with a towel, and set aside to let the dough have little rest.
Meanwhile get the potatoes boiling. You are more then welcome to peel your potatoes but I don%u2019t. Chop the potatoes into small pieces, dump into a pot of cold water and cook them (boil until fork tender)
And cook the onions too. Chop the onion into small little bits and place in a skillet with a couple slashes of olive oil. Medium heat and a good stir until they are nice and golden brown.
Cooked onions and cooked ans drained potatoes.
Now to make the filling. Add the potatoes, onions, chickpeas, and ill to a bowl. Sprinkle in salt ans pepper
Mash it all together, small chunks are ok, but not big.
Taste and season with more salt and or pepper if needed. And stop eating all the filling, you need it.
Wen the filling is made, grab the dough, rolling pin, and a large biscuit cutter or a cup.
Roll out dough, then cut out circles.
And to make a pierogi, grab a dough disk, add a mound of filling, then fold in half and pinch closed. Simple. IF the dough doesn%u2019t want to seal, run a wet finger around the edge of the dough. That will do the trick.
All made, and not perfect by any means but perfect to me. Once you have made them, they need a little rest before cooking. Just a half hour or so. Enough time to clean up the mess that you just made and ge ta pot of water boiling on the stove. This is also a good time to prepare some to save for freezing. Any that you do not plan on eating in the next few days, place on a lightly floured baking sheet and stick in freezer. Once frozen, remove from sheet and place in an airtight container or freezer bag and stash away for another day. They can also go I the fridge for 3-4 days without being frozen, just make sure that you give each one a good dusting of flour so they don%u2019t stick to each other.
Oh, and before you finish cooking the pierogi, make a the cashew cream. Place soaked cashews into blender with the vinegar and a splash of hot water. Blend into creamy and smooth. Season with salt and pepper and that is that.
Now to cook those pierogies. Bring a pot of water to a rolling boil. Once boiling, drop (gently) the pierogies one by one into water. A few at a time as to not over crowed, boil until they start to float to the top, which should take 4-5 minutes. Once cooked, scoop them out and place them on a plate or pan while you boil more (if you are indeed cooking more)
After the pieogies had a boil, they then need a little crispness (you can skip this step if you don%u2019t want them crispy). Use the frying pan you cooked the onions in and add a splash more oil. Heat on medium and when pan is hot, add in the boiled (not sopping wet) pierogies. Cook each side for 3-5 minutes or until nice and and browned then flip and cook the other side.
And then all is left is eating. layered on a bed of cabbage carrot slaw and dolloped with a good dollop of the cashew cream. Done and done and ready to for the face.
I don%u2019t know. Maybe Barb should have skipped school and work for dinner.. Just saying
-C
makes about 25
For the dough
2 3/4 cups all purpose flour plus more for dusting
1 cup warm water
1 teaspoon salt
3 tablespoons olive oil
For the Filling
1 large sweet or vidilla onion
2 medium sized russet potatoes
1 cup cooked chick peas
2-3 teaspoons olive oil
1 teaspoon dill (optional)
salt and pepper
For the Cashew Cream (Optional for serving)
1/2 cup soaked cashews (soaked for at least 1/2 hour)
2 tablespoons red wine vinegar
3 tablespoons hot water
salt and pepper
First off, make the dough. Mix the flour with salt then add in oil and water. Mix together until a shaggy dough forms then dump out onto a lightly flour surface and knead a few times to form a uniform ball. Place dough back into (cleaned) bowl and cover. Set aside to rest.
Once dough is made, chop onion into small little pieces and place in a large skillet with 2-3 teaspoons of oil. Stick on medium heat and cook until tender and browned. Also cook the potatoes. Chop the potatoes into small pieces (peel if you want but you don%u2019t need to) and place into a pot of cold water. Bring potatoes to a boil and cook until they are fork tender, almost falling apart.
Once potatoes are cooked, strain from water and place in a big bowl. Add in the cooked onion and the chickpeas. Sprinkle in dill if you are using and season with salt and pepper. Grab a potato masher or a fork and mash the mixture together. It can be a little chunky, but you don%u2019t want really big chunks. Taste and season if it needs it.
Filling is done so now grab the rested dough. Place dough on a lightly floured surface, cut in half, place one half back in bowl and roll the other out about 1/8 inch thin. Take a large biscuit cutter or a large cup and cut out circles. Gather remaining dough and re roll out. Do this until you can%u2019t. Repeat with second half of dough.
Once the circles are cut out, place about a tablespoon of filling into the center of each. Fold the dough in half and pinch closed. If the dough has dried out to much, brush a little water on the edge of circle to help it seal. Place the pierogi on a floured surface (so they don%u2019t stick) And don%u2019t worry if you have a little extra filling.. Just eat it.
When all the pierogi are made, let them rest for about 1/2 an hour. There are a good amount of pierogi here so if you want, stick some in a container and in the fridge to have in the next few days. Just make sure to flour them so they don%u2019t stick together. Or if you prefer, place however many you to want to save on a lightly floured baking sheet and stick in the freezer until frozen. Once frozen, place into a freezer safe bag or container. They will keep for a few months.
Also, before you finish cooking, make the cashew cream (if you want it) Just add soaked cashews to a blender with vinegar and the water. Blend until smooth and creamy then season with salt and pepper to taste. If the mixture seems to thick, just add a splash more water until it is a desired thickness.
To cook the pierogi, bring a large pot of water to a boil. Place pierogi, one at a time, into pot. 5-7 at a time as to not crowd them, and cook until they start to float. Remove the cooked ones with a slotted spoon and stick on a plate. Boil as many as you are going to eat. Grab a skillet and add a few teaspoons of olive oil. Heat to a medium heat and place the pirogies into pan. Cook each side for 4-5 minutes or until browned and crispy. Flip and cook the other side.
Remove form pan, place on a plate, dollop with cashew cream (if desired) and eat.
My dad is in town. Hooray! Haven’t seen him in like 6 months cause a) he lives in Michigan, and b) he lives in Michigan. He comes back to Vt a few times a year to hang with the children he fathered then abandoned to the mid west. (haha just kidding, not kidding) So yeah, a family fun week. I am hopping for a good family hike, some father daughter house talking and of course any help he wants to hand out on the house… “Sure you can wire that!” But my real mission for the week is to a) feed him lots of good food (he looks to thin) and b) get him to move either back or very close to VT, or someplace like New Mexico (I would visit all the time) or even Florida (real estate is dirty cheap there)
%u00a0So mission one. Feed him lots of food, and food that is not bread and cheese. (he eats a lot of bread and cheese) So when the old many comes over this week fir dinner, I will bust out the good old falafel.
I used to make falafel all the time, it was my go to meal. Super fast and easy. The mr loves it, I love it, and yeah. But weirdly I haven’t made it in like over a year. So last week when my sister came over, I made it for us.%u00a0 And it was like the good old time where I would come home form class, grabbing the caned chick pea and all the spicy things(feeling so cool that I cooked my own food). I would make the dinner, we would light some candles, set the table and maybe even bust open the cheap, 3 dollar bottle or red wine and we would eat all the falafel. Oh those were the days. When I made it last week, there was no wine, (we drank seltzer)%u00a0 not candles (she needed light to do homework) and no smug feeling of being cool (I wasn’t going for cool) but there was a happy mr and sister ans some freaking tasty falafel.
So yeah, have to make it again for the old man, I know he will love it. And it’s cool if I make it again cause falafel is one of those things that should be eaten all the time, as long as it is not fried, which this is not, so eat it all the time.
The stuff. We have chickpeas (in their liquid) a bunch of parsley, a carrot and an onion. Spice wise we have garlic, turmeric, coriander, cumin, salt and pepper. Also have olive oil and a bit of oat flour. Then for the sauce we are going to need some sumac and tahini. A lemon and some garlic and some of that chick pea liquid.%u00a0
Start with chopping up the carrots and onion into smaller pieces and placing it all into the food processor along with the spices, the garlic and a little drizzle of olive oil. Pulse until mixture resembles a chunky crumb.
Now drain the chickpeas (reserve the liquid) and add them an the parsley in the processor. Also add in the oat flour. Continue to pulse.
Pretty, colored speckled goodness. Dump the mixture into a bowl and place in the fridge for at least an hour, but you could even go as far as making it a day ahead.%u00a0 And try not to eat it all right now. (I could eat it all right now)
And the sauce. Sumac is so lovely nice , bright and tangy which pairs so well with the earthy creamy tahini,. Add both those, along with the minced up garlic, and the lemon juice. And add in a bit of the chick pea liquid. May seem weird, but it gives the sauce a creamier consistency.
After the hangout in the fridge, take mixture and scoop out balls of like sized and place them on a lightly oiled baking sheet. I also brush the tops with a a tiny bit of oil as well. Pop them into the oven for about 35-40 minutes, flipping after about 25.
Baked to a nice dark brown on both sides while the inside stays a right tender green. These falafels are ready to go.
Along with some pitas, some greens and a simple onion and tomato slaw… Piled with falafel balls, smothered in sauce.
Dinner is served!
Cant wait to make it again!
So GOOD!
-C
makes about 12 good sized balls (serves 3)
Falafel things
2cups cooked chickpeas (or one can)
1 bunch parsley(about1 cup.. can sub cilantro or any type of green really)
2 hefty teaspoons ground cumin
1 teaspoon coriander
1 teaspoon turmeric
4-6 cloves garlic
a yellow onion
1 medium carrot
2- 4 tablespoon oat flour (or chickpea or regular flour.. just some type of flour)
salt and pepper
1 teaspoon olive oil plus more for baking sheet
For the sauce
2 tablespoons sumac
3-5 teaspoons chickpea water
2 tablespoons tahini
1-2 cloves garlic (optional)
juice of1/2 a lemon
Serving suggestions. Fresh pitas or flat breads are great. Lots of greens and chopped veggies topped with falafel is my favorite.%u00a0 I like to chop up a tomato and some onion sprinkled with salt to servealong with it. Also, if you don’tt want to make sumac sauce, hummus, salsa, hot sauce and mustard are all great topping.
In a food processor, add in garlic, the onion and carrot after you chop into smaller pieces) the spices and a splash of olive il pulse until it kind of chunky crumb.. Now add in parsley, the flour,(start with lesser amount ans ass more if mixture seems to loose)%u00a0 and the drained chickpeas.(RESERVE LIQUID) Pulse until combined and the mixture has all come together and is on it’s way to being smooth, but stop before it is. (don’t make hummus) Dump mixture into a bowl and place in fridge for at least an hour, if not longer.
While that in the fridge, make the sauce. Grab a cup or jar and all the stuff for the sauce. Mince up the garlic then add everything together in the jar and whisk with a fork, adding more chickpea liquid if you want to thin it out more. Set aside
Once the falafel had had time to chill, preheat oven to 375.
. Take the falafel and make 12-14 like sized balls and place onto a lightly oiled baking sheet. Press each ball down a bit and then very lightly brush (or spray)%u00a0 a tiny bit more oil on the tops. Place into oven to bake. for about 40 minutes, pulling them outand flipping them after about 25 minutes. They are ready when booth sided are a nice crisp deep brown, without being burnt.
Remove from oven, place on pitas or greens or what have you and smother with sauce. No need for forks here.
The bounty of spring is upon us. Asparagus is everywhere and I have been embracing it.. smelly pee and all.%u00a0 And along with all my spring veggies and smells, %u00a0I have grabbing for more springy spices. I go through seasonal spice kicks, like cinnamon and ginger in the fall, curries and chills in the winter. And for spring, I am big on sumac. If you haven’t heard of it or tasted it, it kind of taste like a tangy salty lemon..without actually having any salt. And its a really pretty, a bright red, almost purple color. I use it on a lot of things, especially veggies and bean dishes, sometimes as a lemon replacer, but mostly to add another level of tangy flavor.%u00a0It’s fantastic, really great for all those springy time dishes. Nice and bright!
%u00a0This dish is perfect made and eaten right away, but it’s one of those dishes that tastes even better the day after. Also it’s good and safe to serve room temperature. (think lunch box or a picnic!) And did I mention healthy? Protein packed quinoa and the lean green asparagus, I mean come on. You won’t feel an ounce of guilt for eating a hugmongo bowl of this stuff because you should, so it’s totally ok.
Eat away!%u00a0
The stuff of the stuff. Quinoa and asparagus for the base. Sumac, lemon, garlic, onion, salt and pepper and a little splash of oil for the dressing.%u00a0
Note. Sumac is not always the easiest spice to find. I know that its available online (what isn’t) and that some health food store or herbal apothecaries carry it, but i have ye tot see it at a conventional supermarket. And once you find it, buy a good amount cause you will also fall in love with it and use it on everything.%u00a0
%u00a0 %u00a0 %u00a0Start by making the dressing. You want to have it sit for at least 10 minutes. It will be perfect by the time the quinoa is done. Mince the garlic, dice the onion and juice the lemon. Stick it all into a jar with the sumac, a pinch of salt and pepper and about a teaspoons worth of olive oil. Stick a lid on the jar and shake shake shake. and let it sit.
Now you should make the quinoa.. Water and quinoa go into pot, high heat until boiling, %u00a0topped with a lid and set to simmer for about 15 minutes.%u00a0
When the quinoa is simmering, cook up the asparagus. Add a drizzle of oil, to a pan and a few splashes of water. Place trimmed and chopped asparagus to pan and sprinkle with salt. Cook on medium heat for about 8 minutes, or until cooked but still has a nice crunch to it. Take off heat and add the dressing to pan. %u00a0Let it sit and marinate for a few minutes.When the quinoa is tender, fluff with a fork and add to the skillet with the asparagus and dressing. Toss around to make sure all the quinoa gets dressed. Take a taste.. does it need a little salt and pepper? Add a pinch if it does.Pile into a bowl, add a bit of cracked pepper.. and eat.
Or%u2026 Idea! Make this dish and pack it into a jar. Maybe grab a baguette and some hummus os some other %u00a0tasty foods and take yourself and a friend out for a picnic.%u00a0
So much good .
Keep it real yo
-C
Quinoa and Asparagus with Sumac Dressing
serves 3-4 %u00a0as a side dish or 2 as a main meal.%u00a0
1 cup quinoa
2 cups water
8-10 asparagus%u00a0
olive oil
For the Dressing
1 tablespoon sumac
1/2 small red onion
2-3 cloves garlic
Juice of 1 jumbo lemon or 2 small lemons
2 teaspoons olive oil
salt and pepper
Start but making the dressing. Mince the garlic and finely dice the onion. Place in a %u00a0jar with the sumac, the juice of the lemon, a pinch of salt and pepper, and a little splash of oil. Top the jar and shake the crap out of it for a minute. Let sit and meld. (This dressing can be made ahead of time and is fantastic on all sorts of everything)
In a large pot, add water, quinoa and a spindle of salt. Bring to a boil, cover , and reduce heat to simmer. Let cook for about 15 minutes or until water has completely absorbed. %u00a0When the quinoa gets going, trim the woody parts of the asparagus and chop the remain asparagus into inch long pieces. Toss into a lightly oiled skillet with a few splashes of water, sprinkle with salt and put on medium heat for about 8 minutes, or until asparagus is cooked, but still crispy. Take off heat and add the sumac dressing. Once the quinoa is done, fluff it with a fork and toss it with the sumac dressed asparagus. Scoop into a bowl, add some cracked pepper. Bring food to face and eat.%u00a0
Any leftover? This dish is fantastic serves cold or at room temperature.
Whenever my little sister comes over for dinner, I always end up making lentils in some form or another because she, like me, is awesome and loves a good lentil. It makes me so happy that she has such great taste in food and wants to eat what I make. %u00a0It’s validation from a teenage girl which is the best kind of validation.%u00a0
So last night when she came over after school for dinner and trash talk (she likes to verbally abuse Nick) %u00a0we decided %u00a0to make both of our favorites %u2026 Lentils AND sweet potatoes. How can you go wrong with that combo? Well I am telling you that you can’t. The rich creamy soft and slightly sweet sweet potato mixed up with the hearty, earthy, oh so fantastically tasty lentil. Add in a bit of kale and cheese if you wish and serve with salsa and guac… Whoa, it’s the best!!!
Such a great evening, I get to the cooking, the sister gets to the verbal abuse and the mister, begin the champ that he is, takes it and dishes it right back.%u00a0
I am the greatest(coolest)%u00a0sister.%u00a0
Baked sweet potatoes, cooked lentils, chopped up kale and monetary jack cheese (Cheese is optional.. and make it vegan cheese if you want) And you don’t need then, but salsa and guacamole are the best toppings.. So you have them.%u00a0
Cut the cooked potato in half lengthwise and scoop the flesh out into a bowl. With a fork, smooth%u00a0the potato , sprinkle with salt and pepper and mix in lentils and kale.
Stuff the mixture back into the skins of the potato.
And add some cheese (The mister and the sister wanted lots of cheese, no cheese for me) and stick the potatoes into the oven and let bake for another 5 or so minutes or until the cheese is all melty or the top is nice and crispy.%u00a0
Remove and plate%u2026 Serve with salsa and guacamole and maybe some corn chips. %u00a0
I am the greatest sister
-C
Makes 2 serving
1 Large Sweet Potato
1 cup Prepared Lentils
1 cup Chopped Kale
1/2 cup Grated Monetary Jack Cheese (Vegan style or not)%u00a0
Salsa (optional)
Guacamole(optional)
Place potato in oven at 400 degrees for 30-40 minutes or until soft a baked throughout.
While potato is baking, prepare lentils. %u00a02 cups water to 1 cup lentils. Add water and lentil to pot, bring to a boil, add a sprinkle of salt, and reduce to simmer until lentils are tender.%u00a0
When potato is cooked, remove potato %u00a0and let cool for a few minutes.%u00a0Cut in half lengthwise and scoop out most of the flesh out of the skins and place into a big bowl. WIth a fork, mash the potato a bit %u00a0Add in the lentils and the kale, a sprinkle of salt and pepper, and mix to combine. Stuff the mixture back into the skins of the potatoes and top with cheese. (if using ) Place potatoes back into oven for 5-10 minutes until cheese is melty and bubbly or the top of the potato is a bit crispy. Remove from oven and serve on a plate with salsa and guacamole.
Eat and be happy.%u00a0
HOORAY FOR SPRING!!!!!!!
Yesterday The mister and I went for a walk, a long walk. I was wearing a sweater, a light jacket and I %u00a0left the mittens and hat at home. There was sunshine, huge puddles and mud. Birds were chirping. It was amazing.
After our nice long walk, we got home and I needed to start dinner. It was a little later than I usually so I wanted fast and easy %u00a0I usually always have pesto in my fridge (I had to make some, but it only takes 5 minutes)%u00a0because when it’s in there, I can whip up a big awesome meal in the time it takes to boil some pasta or quinoa or smear on toast or toss with potatoes. It really can be used on everything and can be made out of just about anything. Kale and walnuts are just one of so many fantastic combos. And frozen ravioli is always in the freezer too. I %u00a0used just plain cheese, but use whatever kind you like.
Together, pesto and ravioli, well that’s a quick, easy, and tasty meal, perfect for a spring evening, %u00a0And yea, there will be left over pesto from this recipe%u2026 just stick it in the fridge or freezer%u2026.you will be glad you have it.
%u00a0 %u00a0%u00a0%u00a0 %u00a0Pesto stuff. Kale, walnuts, parmesan cheese(nutritional yeast to keep it vegan), garlic, lemon, olive oil, and salt and pepper.
A few little pre steps before the blending.. Toast the walnuts. Just toss onto a dry skillet and stick on medium heat for about 5 minutes or until they start to become n%u00e9e and fragrant. Remove from skillet and add in a bit of water. Add in chopped or ripped kale and cover to let the kale tenderize, but only for about 2 minutes. (you want the kale to still be crispy and fresh tasting) %u00a0Drain water and add kale, garlic, toasted walnuts, cheese %u00a0and the juice of the lemon into a food processor. Turn on and slowly add in olive oil until you get to a nice paste, adding more oil to get to your desired consistency. Oh and don’t forget to salt and pepper to taste!
%u00a0Straight up frozen ravioli goes onto an oiled baking sheet.(make sure that non are overlapping) Place into an oven at 400 degrees for about 15-18 minutes, flipping after 10. If you want to add mushroom and a few more walnuts, just toss them onto the ravioli when you are flipping over the ravioli.%u00a0
When the ravioli is nice and brown and crispy, remove from oven and dump the ravioli and the mushrooms into a bowl. Add a big old scoop of the freshly made pesto and toss around.%u00a0
Look at this%u2026 fresh, crunchy, light and happy. Kinda like a spring day.
I am the best lady, making the mister a pretty yummy dinner.%u00a0
Have a great Tuesday!
-C
Kale Pesto and Baked Ravioli
4-5 cups chopped Kale
1/2 cup Parmesan Cheese ( Nutritional Yeast %u00a0to make it vegan)
1/2 cup Walnuts
1/4-1/2 cup Olive Oil
4-5 Cloves Garlic
1 Lemon
Salt and Pepper
1 bag of frozen ravioli(use vegan or gluten-free if you want)
3-4 mushrooms
Note..There will be plenty of left over pesto%u2026 Just fridge or freeze it
Place walnuts in a skillet and toast on medium heat for about 3-5 minutes or until the nuts become fragrant. In the same skillet, add enough water %u00a0to cover bottom and add in all the kale. Place a lid on it and let kale wilt on medium heat for about a minutes or 2, Take off heat. Add walnuts. garlic, cheese, salt and pepper, and juice of lemon to a food processor. Blend. Now add in the kale and blend, slowly adding olive oil until a thick paste forms. You can add as much oil as you want to make it as thick or thin as you like.
Preheat oven to 400
Place frozen ravioli on an oiled baking sheet, making sure none are overlapping. Place into oven for about 15-18 minutes, removing after 8 minutes to flip. When you take the ravioli out to flip, slice up the mushrooms and grab a few more walnuts and toss onto baking sheet with the ravioli. %u00a0When the ravioli’s%u00a0are nicely browned and toasty, remove (mushrooms and walnuts too) and place into bowl. Add a big scoop of pesto and toss to mix.
Serve and eat.. fork is optional.
Note..Add a thin layer to the top of any left over pesto to keep it fresh and from turning black%u00a0
%u00a0It’s Friday!!! And what does that mean? Pizza Pizza!!!!But not just Fridays%u2026pizza happens more times then not in our house%u2026It’s the misters favorite food and for real, he could eat it everyday, all day.%u2026He is kind of made of the stuff. As for me, well I don’t mind making it for him because it’s easy. And because I am making it, it doesn’t have 8 million calories, 9 million grams of fat and have 10 million milligrams of sodium like takeout of frozen. %u00a0My pizzas are for the most part pretty freaking heathy. It really depends on how its topped. Like take this one.. Homemade pesto, good quaility cheese, (you can use vegan or low fat)%u00a0chickpeas and tomatoes. Not to shabby. And really, it isn’t any more complicated then calling the take-out place or unwrapping the frozen plastic disk from the box. All you need is some good dough (I guess you could use store bought) and some good quality toppings%u2026 and you’re there%u2026Pizza in your face.
For this pizza I used the skillet cooking method. This crust is one of %u00a0the misters favorites. It is a basic pizza dough but cooked on the stove in a skillet. It’s almost like a pita bread, but not. And I like to make it this way because its really fast (once the dough is made) and I can even make up a few crusts to have on hand for later.
Fast, healthy, and tasty%u2026..Why not eat pizza every day?%u00a0
Not too many ingredients here. 3 cups of all purpose flour or 2 cups all purpose and 1 cup white whole wheat. A teaspoon salt, a teaspoon honey (use sugar if vegan), yeast and warm water%u2026%u00a0
Start with the dough. %u00a0Add honey or sugar to yeast and warm water and let sit to active, which should take about 5 minutes.
%u00a0Mix together the salt and flour(s) and add the foamy yeast mixture. Mix until it all comes together and dump out onto a floured surface. (if the dough seems to dry add a splash of water..if way to wet, add a little flour) Give the dough a good 2-3 minute knead session, adding flour as needed to keep the dough from sticking. Form a nice ball, place back into bowl and drizzle with oil. Cover bowl with a towel and stick in warm place to rise for about an hour or until it has doubled in size.
When dough has doubled, dump back onto a floured surface and divide into 4 equal sized balls (or as many balls at whatever size you want)
Now you have a few choices here. You can either cook up all the dough now if you need it, or freeze dough balls for future use. If you think you are going to make pizza again within the next few days, it can be refrigerated, or you could also blind bake the dough and freeze or fridragerate that and have pre baked crusts all ready to go. So many options%u2026 just do whatever works for you.%u00a0
To make the dough in a skillet, oil the bottom of a 15 inch skillet, turn burner on to high and let preheat until the oil is sizzling. Roll dough out to roughly the size of the skillet and when it has preheated, place dough on in there and let cook for about 3-5 minutes, or until the dough starts to bubble and the bottom has started to brown. Turn burner down to medium and flip. Cook this side for another 3-5 minutes.
If you want oven crust, just roll out and place on a baking sheet and bake with topping on at 475 degrees for about 20 minutes
Now the crust is ready for the toppings!!
Preheat the oven to 450 degrees.%u00a0
Smear the pesto (for this pie, I used the last of my homemade pesto from last summer%u2026sad face) Mince garlic and distribute evenly on top of that. Then do the cheese, followed by the tomato slices and chick peas. Sprinkle with a bit of salt, cracked pepper and some parmesan cheese.%u00a0
Stick into oven for 10 or so minutes or until the chesse is nice and bubbly and the crust os crispy and brown.
And that is pizza. A super duper, yummy, healthy, not too fatty or overly salty%u2026 %u00a0can be eaten breakfast lunch or dinner time, pretty, satisfying, pizza. %u00a0
Make it for yourself, for you lover, for a friend. Make it in the shape of a heart or an elephant. Give you kid(s) a ball of dough and have them make their own%u2026 I know%u2026 such a good idea.%u00a0
Everyday, all day.. Happy Friday and Happy Pizza
Stay warm!
-C
For the dough ..Makes about four 10 inch pizza doughs or three 12 -14 inch doughs. This is also the same recipe I use for all of my pizzas (skillet and oven)
3 cups of all purpose flour or %u00a02 cups all purpose and 1 cup white whole wheat
2 1/4 teaspoons of yeast or 1 packet
1 teaspoon of honey or sugar
1 teaspoon salt
1 1/2 cups warm water
The Pizza Toppings (for a 15 inch crust..adjust amounts to your need or liking)
1/4 cup of pesto
1 large %u00a0roma tomato thinly sliced
a few cloves of garlic minced
1/1 cup of prepare chick peas.. rinsed and drained
1/2- 3/4 cup of cheddar cheese (or any kind you like..use vegan cheese if you want too)
salt, pepper, and parmeasan (optional) to sprinkle on top
To start, place honey, yeast and water into a jar or bowl and let sit to active until mixture starts to foam. Mix together flour and salt into a large bowl and add in yeast mixture. Stir until combined and dump onto a well floured surface. Knead dough for a a few minutes and form into a ball. Place back into bowl, drizzle with oil and top with a towel. Place somewhere warm to rise for an hour, or until dough has doubled in size.
When dough is done rising, dump back onto floured surface and divide into 4-8 equal sized balls.( 4 balls make %u00a015 inch pizza%u2026 8 balls are good for individual size pizzas) Place whatever dough you are not going to use into a closable plastic bag and either stick in fridge(if using within a few days) or freeze for future use.
Place skillet on high heat on stove and drizzle with oil. Also, preheat oven to 450 degrees. Roll out you dough and when the skillet is has gotten really hot, place dough right on in. Let cook for about 3-5 minutes or unit the cough has started to form bubbles and the bottom has started to brown. Turn heat down to low and cook other side for another 3-5 minutes or until browned.%u00a0
Now pizzafy it.. Add on the toppings. Smear with pesto, add minced garlic, then evenly sprinkle cheese. Top with the chick peas and the sliced tomatoes. A sprinkle of salt and pepper and a dusting of grated parmesan%u2026%u2026Right into the oven for about 10 minutes to melt it all together%u2026..
I don’t know what the hell I was just reamng about, but I woke up with Celine Dion “Thats the way it is” stuck in my head. I am pretty sure I haven’t heard that song in like 10 years so it had to have made it’s way out of my deep, deep subconscious. What does it mean? And why won’t it stop replaying in my awake head!
What a ear worm to have on a Sunday morning. I need to plug my headphones in and listen to something, anything. It’s driving me nuts!
The past week involved our last camp of the year. We went to Little River State Park (the last place open) in the pouring rain and crazy wind and did our thing. Set up camp, hiked, made food. All drenched and loving every second of it, even the rm, who was fighting off a pretty crappy head cold. One thing that I did not love was that I was trying to dry out my soaking wet hiking boots a bit by the fire and ended up melting them. Yup, they actually melted, but lucky the mr brought extra shoes so those got me through the rest of the time. Anyway, so that was it, no more camping (due to the fact that it gets dark at 4 now and everything is closed for the season). And yes, I am sad about it. Until next year I guess, or until I convince the mr that winter camping is a good thing.
The rest of week involved me breaking and swallowing half of the second temporary crown. This time I did not bother going back for a third because my new permanent gold one goes in this week so I am just dealing for the time being. Then there was Halloween, which by hat time in the week, I was starting feel icky and sick, but still good enough for Barb to come over for dinner, watch me hand out a few handfuls of candy and walk the block in the rain. That storm was crazy with some freaky rain. The downpours were so intense at times that I though our house was going to wash away.
Not much else. I worked the studio and cut my hand open again. There was no farm share this week so I have had to go to the grocery store more then I would have liked. I cleaned the back porch off and backed away most of the summer stuff, and I found a few pairs of wool socks hiding in my closet. That was really nice. We didn’t see the littles cause they were all busy being cool with their fiends and between the mr and I both feeling under the weather, we choose to not infect the masses. We thought it better to lay a little low because we are good, caring people. Ha.
Yesterday was an Ikea day. Paul and Barb both wanted to go, so go we did. Left early morning, got stuck in dumb stupid traffic, then got to Ikea just in time for everyone else in Montreal to get there too. I peed, they got hot dogs. They shopped, I shouted. I peed again, they checked out and loaded up on more hot dogs. And then home we went. Me and Barb basically sitting on top of each other because Paul bought a shelf that took up half the car but you know what, traffic did not suck, the boarder was fine, and all and all not a bad trip. Minus the smell of the hotdogs, it made me want to barf.
And then I came home, the mr ran to rescue one of our tenants, I made dinner, we went for a walk, then I went to bed. Still feeling off and was more then happy just to get underneath all the covers and sleep.
Today the mr and I are not camping, but we are going hiking, so there is that. And we plan on making soup for dinner and maybe…maybe, turning the heat on tonight if we are feeling extra cold. But probably not. We might just wait til it snows.
Some links to look at from the internet.
–Is A Diet That’s Healthy For Us Also Better For The Planet? Most Of The Time, Yes. Get on board people.
-On the drive to Ikea, we got into the conversation of seltzer because it’s always about seltzer. Is Seltzer Bad for You?
–This map shows how food travels from farms to your home. Some things really travel so far, it’s kind of crazy. Let us all try to eat more local, yes?
–Why do people hate vegans? Why indeed.
-Keep your brain alive and healthy. 5 Daily Habits That Negatively Affect the Brain and Should Be Stopped Before the Damage Becomes Irreversible
–How Jane Fonda Convinces Her Famous Friends to Get Arrested. I would get arrested with Jane Fonda. Hell, I Would do just about anything with Jane Fonda.
-Bulk all the way, but done right. The Problem With America’s Bulk Food Bins
-Thank you Dutch science people for making the world embrace Brussel sprouts. From Culinary Dud To Stud: How Dutch Plant Breeders Built Our Brussels Sprouts Boom
-Yes please! MAKE MINE AN A-FRAME.
–I Tried the Wim Hof Method to Find Happiness Through Suffering . I don’t know, I could see this working for me. Huh.
The heat is officially on in the house because well, it got kind of freezing out and also because we got some snow! So awesome and unexpected. Sure, it was only an inch and came at the exact wrong time making for a very sketchy driving situation, and also it froze all the chard in the garden I had left (I harvested it and just tossed it in the freezer for soups), but whatever. I was, and am just so happy to see it. I really do love this time of year, even if everyone else hates it.
The week started off slow. The extra hour was welcomed but also really kind of screwed with my body clock. I have been getting better throughout the week, but the first few days we changed the clock, I was waking up at like 3 am. Yes, I was going to bed at like 630, but when your tired, your tired. Anyway, besides being a little groggy, it was the usual as usual. Work stuff, getting ready for winter weather, dealing with the dealings. We had lunch with Megan, a spaghetti dinner with Judah, and I picked up the first winter farm share of the season. Lots of roots, greens, Brussels sprout, and peppers. All the best food a lady could ask for. I am also feeling like a queen with my new, permanent, gold crown in my mouth. And now I am officially sick of going to the dentist. Going to try really hard to not have to go back ever again, or at least 6 months when I am due for a clean.
Oh, and lets not forget how I busted out the new toilet brushes. Who doesn%u2019t love a fresh toilet brush? Highlight of the week. HA.
Today the mr and don%u2019t have much in the way of plans besides getting the winter tires thrown on the car and getting out of town for the afternoon for a hike. So I am going to the gym and dropping off the library books this morning, we will then deal with the car, and then off we will go, heading out to conquer a mountain. Or a small trail. I am fine with either. Just as long as we are outside.
Links from the internet for your reading and browsing enjoyment.
–Why You Should Find Time to Be Alone With Yourself. Alone time is the best. I cannot stress how important alone time for me is%u2026 I NEED IT!
-I didi%u2019t know how awesome and strong ginkgo trees were. Consider the ginkgo. These ancient trees survived the atomic bomb in Hiroshima.
-First, how is Emma Watson turning 30? Second, Yes lady. Did Emma Watson Just Coin the Next %u201cConscious Uncoupling%u201d?
-Why haven%u2019t I don%u2019t this yet? The Tangy-Sweet Pickled Fruit I Put on Absolutely%u00a0Everything
–Very Generous People Are Way Happier (and Have More Friend)
-Looking for new shoes is the worst. But I found some that are not exactly winter friendly, but maybe I can make them work? Teva%u00a0Voya Infinity Sandals.OR these appropriate footwear. I love them but jeez, I am not paying that much for a shoe.
-Give me roots, all the roots. Root, root, root for rutabaga, turnips and those other unappreciated vegetables
-This is me! %u2018It%u2019s cool to be cold%u2019: Confessions of frigid-weather fanatics
–The Cookie Sculptor. I think I need to spend more time sculpting cookies.
–Scrubbing Your House Of Bacteria Could Clear The Way For Fungus. I am a clean freak, but I don%u2019t use any chemicals whatsoever. Vinegar, water, vacuum. How that keeps the bad fungus away.
And pictures from the week.
I am so happy for spring. It is my favorite season for sure. All the new, green things popping form the ground.. Warmer but not hot days, rain and sun then rain and more sun. No more winter jackets but sweaters are still good. People are in good moods. Flowers are coming out of the ground. The world is just a delight.
The week started off with a bang. I turned all of the garden beds over and did a great big yard rake and cleaning so things are looking pretty good back there right now. I repotted my tomatoes and peppers and started a bunch of greens and peas which makes me feel awesome. I think this might be the first year that I am actually on top of the planting season like I want to be. Yeh me. I also busted out the bike and went for the first ride of the year. Sure it was only a few blocks, but it was still fantastic. Now what I really need to do is give the old gal a tune up cause the chain was grinding and the tires need air and maybe new brakes? Not sure but I need to get to it, like asap because I plan on making the bike my means of transportation for the summer.
aside from all the that stuff, we also did some work, the mr did even more work (he is always working). I finished up a couple clay projects that have been lingering for a while. We went for lots of walks without jackets and I wore sandals all week. We managed a good stop by to see the littles and bring them carrot cookies. They ate all the cookies (2 dozen), beat the shit out of the mr, and managed to clean while they were doing it. We were impressed to say the least. The mr was sore from getting wacked a bunch.
Then Wednesday was Seans birthday. Would have been 30 years old%u2026Whoa. The family, friends, all of Seans friends went to the basketball court for a little pick up basketball game to celebrate and be together. It was fun, and sad, and good to see all the boys, but sad, but good. Never going get used to it. You know what I mean? Life.
Rest of the week came and went with the usual plus lots of rain and gray, but again, I was all about it because it is spring. worked at the studio on Friday where I moved all the clay in the world, got stabbed so hard by a stray pointy tool that was in slop bucket and got blood everywhere. I also managed to get so much clay in my hair and was overly praised for my height by all the studio ladies. They really appreciate my abilities at grabbing things on high shelves.
And the weekend. Yesterday we woke and basically ran out of the house to moms to borrow her truck (still haven%u2019t found a car to buy). We then drove the truck up to the greater north of Vermont and picked up all the cedar wood we need for the porch. Loaded up, drove back to the porch and unloaded all the wood. I came home for a few hours of power cleaning while the mr ran around all over some more and then back to moms for dinner. (Mom made ham, I brought my own dinner) We ate, Mom brushed my hair and then Barb breaded it which I love love and will never be able to do myself. I raided moms books (found nothing I haven%u2019t read already), searched for a missing bowl, made fun of the boys. Then I came home just in time to passed out.
Today, well today is Easter so after the gym and a few Sunday errands I need to do this morning, we are going to be doing a little easter lunch thing and an egg hunt for the littles at moms with the fam. After that I am coming home and continuing my quest for perfection in the yard, maybe tinker with the bike a bit, take a nap, read, drink all the coffee.. Looking at some sunshine and 70 degrees for the afternoon.. It%u2019s going to be a fine fine day.
And I still have not washed my hair so I need to do that. Most of the clay dried and fell out, but there still is some left%u2026.SO yeah, I need to do that today. I really hate washing my hair.
Internet links to check out.
–Fireflies Will Soon Light Up the Skies In Mesmerizing Harmony%u2014 Here’s How to See Them. I love me some fireflies, how cool would it be to see this.
– The Single Most Useful Snacking Rule I Give My Kid. I don%u2019t have my own kids, but when I have other peoples, I go by a rule like this too except my rule is you can eat veggies any time all the time.
-Want to grow your own avocado tree, here is how. Good luck.
–THE VINTAGE ROMANTIC BATH.. All the clawfoot tubs. Can%u2019t go wrong
-I am so ready. The first official %u201cStranger Things%u201d Season 3 trailer
–4 Natural Ways To Fertilize Houseplants. Now is a good time to fertilize!
-Hate the dentist? Read this and you will only hate it that much more. The Truth About Dentistry
-If ever I was to live on a house boat, this boat would be the one. And the floors in this place%u2026 swoon!
–How One Woman’s ‘Magically Delicious’ Pot Brownies Changed%u00a0History. Brownie Mary, what a lady.
-What the freaking f@ck? I am pretty sure I don%u2019t like where this could go. Neuroscientists just brought pig brain cells back to life.
Some pictures from the week
A simple little artsy craft project to get down with%u2026 apple printing. ALmost the same as potato print, except smells better and your apple comes with an interior fun shape to print with. And you have to use apple this time of year cause its apple season and there are apples everywhere!
I usually do things like this with a little or two, but at the time, I had no littles in my possession, so I went it did it all by my lonesome.%u00a0(which was actually a lot of fun)%u00a0I made myself big cup of hot coffee, put on some tunes, and zoned out and did a bunch of prints. It was a great little afternoon project that anyone, little or not so much, can do. And the best part about printing is%u2026 you can’t screw it up
And I know that this is going to be a cold dreary weekend%u2026 so this might just be the perfect indoor project to do!%u00a0
Things you are going to need..
apple(s).. And the apple that I use are fallen apples.. so I don’t feel bad about using them.
paper
a knife (or something sharp enough to cut the apple)
paint ( I used cheap-o acrylic paint, but any paint would work)
paint-brush
Cup of water (to rinse brush)
rag (to wipe hands)
Start by slicing your apple. If you cut in in half, you get the cool star shape in the middle, or just chop it into cool shaped pieces.%u00a0
Apply paint to the apple. I found that if I dipped the apple, then remove to much excess paint with a paint brush to work the best for me.. My suggestion is to play around with what works best for you.
Apple goes paint side down on paper%u2026 and that’s how it goes. Now repeat, either with the same shape, or use a new one. OR change up the color.. it’s all how you want to do it.%u00a0
If%u00a0
. I got a little excited with my fist print turned out a little chaotic(note print above)%u00a0but then I rained myself in.%u00a0
And did a few more simpler designs. %u00a0%u00a0
But do it anyway you want cause it’s going to look cool no matter what.
Have fun!
-C
The mr and I took off for NYC for the weekend to get us in some fun times, to hang with his brother, see some art, and basically just to get out of town.%u00a0
What we do when we go down is pretty much %u00a0always the same. We are big into art, and the mr is especially into street art (or “graffiti” as some may call it), and what better city is there to see amazing art? So when we are there, most of our time consists of walking around and taking in the sense. And walk we did. The second day were were there, we ended up walking from the east village, across to the west, all the way up to central park, and back down again. The little walking guy on google map said that our route (without all the side streets that we weaved through)%u00a0was 11.5 miles. So yeah, we walked our asses off. %u00a0But it felt good cause, well,%u00a0I like to walk and after the past few visits I feel like I am starting to get the hang of where I am and where I am going. (as a friend pointed out, the city is a grid.. but still)
We also got to spend a little quality time hanging with the mr’s little brother. He has been living in NYC for a few years now and has gradually turned unto a cool dude hipster that works like crazy running his own online business, but plays just as nuts. His friends came over for the “pre game” and left us for sleep at around 1 in the am%u2026 and his return home was a bit later.%u00a0%u00a0I mean, 5:30 am is a normal time to come home right? And of course when you get home, you must play some mid 90’s Seal %u00a0before drifting off to sleep. Mind you, he lives in a one room tiny apartment,%u00a0Oh Ev.. you are such a little shit, but I love you.%u00a0
To list a few of the highlights.%u00a0Osgemos street art (the mr has a hug boy crush on these guys) and all the other ssrteet art around the city. Seeing some live action taping of the new Ghost Busters movie which was cool las hell. Walking the high line (again, but I will do it every time I go)%u00a0Strands book store, Dick Blick art store and all the little shops and coffee shops we stopped in along the way. Oh, and shaving the ass of his brothers cat (it needed to be done, the knots were just out of control!)%u00a0
All in all, another successful trip to the city. Nothing was lost, no one was hurt, %u00a0we did what we wanted to do.
Love you New York!
Wowzers%u2026Is it for real Memorial day weekend? Where has all the time gone? Let’s talk about a week gone by fast.%u00a0My brain is on complete overdrive and I am having a hard time keeping it from exploding%u2026SO MUCH TO DO! (Not bad stuff, just a lot of stuff) But lo, that’s life right? There is always a lots of “stuff” to do, but today I am going to try and let that stuff chill and maybe give myself a few hours of coffee, (so much coffee) reading a book in the sunshine, gardening, and just some overall chillin.%u00a0
Hopefully.
And hopefully you party people out there will be able to do a little of the same, or at least the chillin part. It is a 3 day weekend after all (not for us, but whatever)
Some internet fun finds.
-Sleeping in a loft that I have to crawl to get to the bed%u2026 this%u00a0%u00a0Gallery of Gorgeous Attic Bedrooms%u00a0makes me so jealous..
-This new startup wants to sell you ugly fruit and veggies. I still don’t get it, it’s not ugly, its awesome.
-So cool and reminds me of my late brother in law.%u00a0Wet Fold Origami Technique Gives Wavy Personality to Paper Animals by Artist Hoang Tien Quyet
-Could this be my new home? And I love a good plant lady.%u00a0BURSTING WITH PLANTS, A 1910 PORTLAND FOURSQUARE FOR A FLORIST AND BARISTA
-Its so weird how try this is.%u00a0Going, Going, Gone: 30+ Items That Are Disappearing from Our Homes
-We are doing this is the humongus pot hole in front of our house(we want to anyway)%u00a0Treats in the Streets: Artist Jim Bachor Fills Potholes with Ice Cream Mosaics
-Holy shit is this the mister. 5 Conditions That Afflict the Reluctant Dishwasher. (1 and 2 %u00a0really hit the nail)
A few photos from the weekGoodbye fiddleheads%u2026. Hello ferns%u00a0
On our way to a geo catch%u2026. And note clothing options for 2 in the afternoon. I am much fond of that little guy wearing a rain jacket without a shirt in when its sunny and 80 degrees. And a pink poke dot bath robe.. I mean, it’s so the cool thing to do.%u00a0
We didn’t find the geo, but we found this gigantic mushroom. Just as cool, maybe even cooler.
I love brick and there is one street in all of burlington (that I know of) that has brick sidewalks. I like to walk down it a lot.%u00a0
Nurse lady making food%u2026 I compare this to a big foot sighting. I have heard stories that she cooks,but have never actually witnessed it myself. (Just kidding%u2026.kinda)
Happy long weekend! (if you are lucky to have one!)
-C
%u00a0%u00a0You ever make dish, completely on the fly, just to use something up (I have a lot of ripe tomatoes) with no real expectation, just because%u2026 Then have it be one of the best freaking things that you have ever made?%u00a0This salad is one of those things.. maybe not the best thing I have ever made, but definitely the best salad I have ever made%u2026. this week.
A salad compiled of all things amazing, taking just a few minutes to make and is the perfect balance of uber fresh with baby spinach, raw kale, and crunchy quick pickled onions. Then adding a touch of warmth with the sweet and juicy seared tomatoes and big chunks of creamy avocado.
I mean, for reals. %u2026…Best Salad Ever !!!! (this week)
Now let’s do this.
%u00a0The Stuff. A big bowl of baby spinach and chopped up kale, a few sliced up roma tomatoes, some super thinly sliced red onion, half an avocado, red wine vinegar and salt and pepper.%u00a0%u00a0Before you do anything, place the sliced onions into bowl, sprinkle with a pinch of salt and add a few glugs of the red wine vinegar. You want the onions to sit in the vinegar for at least 5 minutes on the counter cause the longer they sit the more crispy pickly they get. (after eating onions like this, you will never want to eat them any other way)%u00a0Lightly oil a skillet and preheat to a medium heat. Once the skillet is hot, sprinkle the tomato slices with salt and pepper and %u00a0place tomatoes right on in, snugly, but not overlapping. Let cook for about 3-4 minutes, or until the bottoms start to brown. Flip and cook other side for another few minutes.Once the tomatoes are seared on both sides, remove them gently from skillet and toss them on top of the bowl of greens.
Take the pickled onions and toss those right on top, with any of the residual vinegar, add dice and scoop the half of avocado and toss that on in as well.And now eat the best salad ever (this week).
Make the day good!
-C
Skillet Seared Tomato and Quick Pickled Onion Salad
Serves 2 as a side, 1 for a hungry eater
2 large or 3 smaller roma tomatoes
1/2 of a red onion
2-3 tablespoons red wine vinegar
1 1/2 cups baby spinach
1 1/2 cups chopped kale
salt pepper
1/2 a ripe avocado%u00a0
olive oil (to grease pan)
Thinly slice red onion and place in a bowl. %u00a0Add vinegar into a and sprinkle with salt. Let sit on counter for at least 5 minutes, if not longer,
Slice tomatoes into 1/2 inch thick rounds and sprinkle with a pitch or salt and pepper. %u00a0Lightly oil a skillet and preheat it on medium heat. Once the skillet is preheated, stick the tomatoes on it (watch out for splattering tomato juice) Cook first side for about 3 minutes or until the bottom has browned, then flip and do the same for other side.%u00a0
One tomatoes are seared, place directly onto the greens. Now dump the pickled onions and residual vinegar on top. And %u00a0dice up %u00a0avocado and add that on top too.%u00a0
Now eat your salad, fork or fingers%u2026 %u00a0
And I know, ba-daaaamn. So good.
What a week. Was it summer where you %u00a0are this week as well? I mean jeez, talk about one extreme to another. Oh well, at least the world has turned green, the winter stuff is completely out of sight and I found the box that contained all of my shorts and summery clothes (pants and long sleeves in 90 degrees is just gross)%u00a0 And honestly, it’s been great. In between work, chores and just plan old being busy, we have manage to get a few bike rides and long walks in. Plus all the veggie starts are doing great, the flowers are coming up everywhere and life just has a little bit more of a relaxed feeling. So what if my allergies are turning my face into big red puff or that the past few night have been so hot that the act of sitting has caused me to break a sweat. I’ll take it.
Oh and I can’t forget%u2026.%u00a0
Happy Mother’s Day ladies!!!!
Here I give you a few thing from the internet this week …
– I didn’t believe they were paintings at first. Hyper-realistic Cactus Paintings that Bristle with Detail by Kwang-Ho Lee
-I’ll take any one of these%u00a0The 5 Fanciest French Press Coffeemakers We Could Find
-Love love the floors in This house.
-Spending a bit of time making summer camping plans here…Vermont State Parks. I can’t wait to get the tent out!
%u00a0-I think this should be happening everywhere.%u00a0Recycled Drinking Water: Getting Past the Yuck Factor
– And there is this.%u00a0ABC Brings Muppets Back To Prime Time As News Emerges About Fall Shows
And that, here are a few pictures from the week.
%u00a0My boys. I long socks and sneakers%u2026 these guys know cool.%u00a0Took the super cutie cuties out for an ice cream cone.Our first bike ride picnic down on the waterfront. I love bike ride picnics!So many succulents. I didn’t actually buy any because I need to stop being a plant whore.I have made a batch of this stuff evey day this week. I can’t stop eating it, it’s like eating summer. So good
Have a wonderful day and to all that it applies to…
Happy Moms Day!
-C
It’s been a long, packed, but very fantastic week. Everyday has been full of work, chores, family, and trying to get in a least one good bike ride or walk in. %u00a0I made a%u00a0list of a few important points to mention from the past week.
Spring is real, not an imagined season in my head. (HOORAY!!!!).%u00a0
Banana ice cream is everyones favorite snack
Planting things from seed and watching them grow is magic
Riding a bike with kinda flat tires really sucks
The little people in my family are the best most fantastic humans
Don’t tell a 2 year that ants will bite her or you will end up caring that child around everywhere because she is afraid to walk outside (Anyone know %u00a0good therapist for a 2 year old?)
Anyways, I am hoping to take it easy today, catch up on my coffee consumption, do a bit of gardening, reading, bike riding, all without pressure or expectations. Everyone should have a day for no expectations.
Some fun internet stuff from the week.
-I need an RV or camper.%u00a0THE BRAVE // vintage rv renovation inspiration
-Who cares if not everyone is pleased, I would be if my lunch bags looked like this.%u00a0These Parents Make Lovely Lunch Bag Art. Not Everyone Is Pleased
-So lovely.%u00a0Urban Jewelry: New Lace Street Art by NeSpoon
-Alternative energy Woo Hoo!%u00a0%u00a0Tesla’s Powerwall Home Battery Wants to Make Fossil Fuels Obsolete
-I am really excited to make this%u2026 I have a feeling that I will be incorporating it into many of my recipes.%u00a0ChefSteps’ Genius Roasted Onion Cream
-Another house that I could get down with.%u00a0
And a few pictures%u2026.
The mister and the worlds biggest crayon, which is made of scraps of blue crayons from all over the world. I could totally use a big ass crayon like this.The coolest most badass 95 year old lady that I know (I know a few), Grammy Stem. And the little, getting a lift. (I could have used a lift too!)Brothers. The guy in the green is my Dad.Aftre dinner ice cream break.The sky has been on point all week longAnd made myself some veggie chips. The colors alone are delicious.
What%u2019s up with dinner rolls? Do people eat them all year round, like on a Tuesday in the middle of March or maybe a nice blue sky sunny day in July? Is that a weird question? But seriously, think about it. Dinner rolls, at least in my world of people, are pretty much only eaten in and around Thanksgiving and Christmas. Huh. Kind of strange seeing that dinner rolls are bread which everyone eats all the time and are basically made specifically for dinner (although can and should be eaten for breakfast and lunch as well) which most people eat. Every. Single. Day. Well, whatever the reason, it%u2019s weird. So yes, I am making these here dinner rolls now at the traditional holiday time but I think as of now, I am going to start making them all the time. It%u2019s going to be my new thing. Fourth of July dinner rolls. Yup.
And so yes, we need dinner rolls right now for the holiday food feasts and these dinner rolls are the perfect accompaniment to any and all dinners. They are nice and fluffy and all dinner roll like, just as any good roll should be, but also slightly more nutty and soft and healthy because oats and wheat flour and homemade which is always the best.
And if you are like, hell yes I am a dinner roll person and hell no I am sticking to store bought cause that is that and how it%u2019s done, well hey, no judgment here. I made these for my people for our family Thanksgiving, (which is happening today at my house. There are going be so many people) and I know that everyone will love and be happy to eat them, but I too also bought some of those super white, take and bake ones that I know if I don%u2019t have on the table next to these gorgeous and amazing rolls, that I will probably get punched in the face. So we will have both. And then at dinner I can bask in the glory of all the comments about how much better my rolls are then the store bought ones. (Secretly why I am having both. Fishing for compliments. HAHA!)
Now to those soft and fluffy dinner rolls!
The stuff. Old fashion oats, all purpose and white whole wheat flour, yeast, oil, water (hot and room temperature), maple syrup, and salt.
First, take the boiling water and pour it over the oats. Mix them and let them soak and cool for 10 or so minutes.
While oats are soaking, add the room temp water to a big bowl with the yeast. Once the oats are soft and cooled off a bit, add them to the yeast mixture along with the oil, and maple. Mix together. The add the flours and mix until combined.
Dump dough onto a floured surface and knead for about 3-5 minutes, adding a little more four as needed to keep from being to sticky, but don%u2019t over flour. The dough is and should be a little tacky.
Soft and supple. Kneaded and ready.
Place the dough back into the bowl and cover with a damp towel. Leave alone and let rise for about an hour or until it doubles in size.
Once the dough doubles, dump out onto a lightly floured surface and cut into 12-16 equal sized pieces .
Roll each roll into a roll shape and place them in a lightly greased baking dish. Cover for another 15-20 minutes to let rest and rise a little more.
Rolls risen again, just a little plumper. And now right before you place them in the oven, brush tops with a maple/water mixture and sprinkle with a few oats. To look pretty. And into the oven they go, 30ish minutes, until nice and golden brown.
Baked to golden dinner roll perfection.
And there you have it. Soft and fluffy dinner rolls. Warm out of the oven, looking and smelling like all the good things that you want and need.
And can, and should, be made now and all year round.
-C
makes 12-16 rolls
1 1/2 cups old fashion oats
2 cups all purpose flour plus more for kneading
1 1/2 cups white whole wheat flour
2 cups boiling water
1 cup room tempature water plus 2 tablespoons for brushing tops
2 teaspoons salt
2 tablespoons maple or honey
2 teaspoons yeast
1/4 cup neutral oil
In a bowl, mix oats with boil water and let sit and soak for about 10 minutes. In the meantime, in a large bowl, mix the room temp water with the yeast and 1 tablespoon of maple and mix. Once oats have soaked and cooled to a point that they are not super hot, but still just warm, mix them in with the yeast mixture. Add the salt and oil and mix then and both the white and white wheat flour. Mix until combined. The dough is going to be sticky, but that how is should be. Dump the dough onto a lightly floured surface and knead for 3-5 minutes, adding a little flour as needed to keep from sticking too much, until dough is nice and uniformed in texture. Place dough back into big bowl (after you clean it out and lily oil it) and cover with a damp towel. Place somewhere warm for about an hour until it doubles in size.
Once dough has doubled, dump out onto a lightly floured surface and with a knife of dough cutter, cut into 12- 16 equal sized pieces. Roll each piece into a ball, pinching any ends together and place them into a 9×13 inch baking pan. Once all pieces are in, over and let rest for another 15 minutes.
While dough is resting again, preheat oven to 350.
After the dough has rested, and right before you place them in the oven, mix 1tablespoon of maple with about 2 tablespoons warm water and brush the tops of the rolls. Sprinkle with a handful of oats and then place them into the oven to bake. 30-35 minutes, until they are a nice golden brown.
Once baked remove from oven and let cool to a reasonable temperature and serve.
These can certainly be made a few days ahead of time of eating. Just remove baked rolls from pan and let cool completely then place the into an airtight bag. To reheat, just place on a baking sheet and stick in a hot oven until warm.
Let us talk about how winter squash is like one of the best foods ever. Seriously. Hardy, creamy, rich, and full of the nutty, sweet flavors of all the good things. How anyone says they don%u2019t like winter squash is beyond me. I sometimes even feel like I put myself in danger of exploding when I am around enough cooked squash. I can eat and eat it until it%u2019s gone, which is fine if it%u2019s a serving or two, but when you roast up a 10 pound butternut, well, that is when the danger is real. I am getting better at holding back, but man, sometimes I just can’t (or don%u2019t want to?) help myself. ( You might also wonder why I cook 10 pounds of squash at a time. It%u2019s because I will eat it all in a few days and I might as well cook a bunch at once, for efficiency sake.)
Now the delicata squah. If you haven%u2019t had it before, stop what you are doing and go get one. You need to try it because it is amazing. Sweet, nutty, creamy. So good! And another good thing is that they are not giant, so you can buy one and eat the whole thing and not worry about overeating until you can%u2019t move, unless that is the goal. In that case, just buy a bunch. HA.
Anyway, it%u2019s getting to that time of year where salad is still great, it is just great warm. And with winter squash. Don%u2019t you agree? So we cook up the squash, grab the kale and make one heck of a salad to eat all to your face. Because that is what will happen. You will make it , taste it, and not want to share it. It is too good to share. (Yes salads can be too good to share, so if you are planning on feeding others, plan accordingly)
To the salad!
The stuff. Kale, a delicata squash, red onion, some balsamic vinegar, a touch of maple, spicy brown mustard, a handful of toasted seeds, and salt and pepper.
Start with the squash. Cut it in half and scoop seeds from booth sides (these seeds are great roasted). After deseeded, cut both pieces into 1/4-1/2 inch thick rounds. And NO!!!!, do not peel the skin.
Grab the onion and cut into 1/4 inch rounds too.
Place the squash on a very lightly oiled baking sheet so the pieces are not overlapping each other. Then toss on the onion which is fine if it overlaps. Sprinkle with a pinch of salt and lots of cracked pepper and pop into a hot oven.
In the meantime, mix the dressing situation together. Mustard, maple, and balsamic in a jar, mix and done.
Chop the kale too. Into mouth sized pieces.
Once squash is cooked all nice and tender, remove pan from oven. Take all the kale and toss on top then take the dressing and drizzle it all over the kale. Pop the pan back into the oven for a minutes or two, just until the kale starts to ever so slightly wilt.
Pull the pan back out and give it a good toss.
Dump it all into a big bowl, toss in the toasted seeds, and call it. Now grab a fork and start eating.
-C
Can be a main dish for 1 or a side for a few
1 delicata squash
1 bunch of kale (around 3/4 pound)
1 smallish red onion
3 tablespoons balsamic vinegar
1 -2 teaspoons maple syrup (more for a slightly sweeter, maple-y flavor)
2 tablespoons brown or dijon mustard
1/4 cup toasted seeds of choice (I used pumpkin and sunflower)
Preheat oven to 400
Cut delicata squash in half and scoop out all the seeds (you can save seeds to toast up later if you want), then slice the squash into 1/4 – 1/2 inch thick rounds. Grab onion and cut into thin slices. Take onion and squash and place them onto a very lightly oiled baking sheet and sprinkle with salt and pepper. Don%u2019t let the squash overlap, but it is fine for the onion to overlap the squash and itself. Pop the pan into the oven and bake until the squash starts to brown and is fork tender, which should take about 10-15 minutes.
In the meantime, chop kale into small mouth sized pieces and set aside. And mix the balsamic, mustard, and maple together to create the dressing.
Once the squash and onions are cooked, toss the kale onto the pan and drizzle the whole thing with the balsamic mixture. Toss it all around and pop pan back into oven for another minute or two, just to let kale get a touch wilted.
Remove pan from oven, dump everything from pan onto a plate, and toss in the toasted seeds.
Grab a fork. Eat.
I made baked beans last week for a side to dinner with the mr and Barb. They ate them all. I didn%u2019t get more then a spoonful. I was sad for me, but also was like %u201cShit, if I had known you guys were bean fiends, I would be making baked beans like all the time.%u201d
And maybe not all the time, but I made them again this week. And again, they ate a lot, but I got me some this time, and I will probably make them again next week too because they will be perfect for Thanksgiving. See, homemade baked beans are a thing of beauty. Sure you can buy them in a can and be just fine, but these baked beans, well these are waaaayyyy way better. These baked beans are soft (not canned bean soft) and tomatoey and a little spicy with a tang. Not sickly sweet, (not sugar added) and not too salty.. They are just about perfect. You can eat them on their own, toss them into salads or wraps, stick on some toast, serve as as side, or just eat them cold straight from a jar from the fridge right before bed. (your loved one will thank you for that). Plus they are baked in the oven and I love me a good warm oven on a cold day. And the obvious, but all the protein and all around goodness. A great dish to serve if ever you need to feed people like me who don%u2019t eat meat. It%u2019s a win win win win.
Baked beans in all their glory. No cans in sight.
The stuff. White beans that were soaked overnight, strained then added back to a pot with 6 cups of water. Also have crushed tomatoes. an onion, a few cloves of garlic, chili powder, mustard powder, apple cider vinegar, and some salt and pepper.
First step is to start boiling you beans. But while that is happening, mince garlic and chop the onion into really small pieces.
Toss the onion and garlic in a pan and cook on medium low until soften and fragrant.
Cooked beans. All you need to do to cook them is place the pot with soaked beans and water on high, bring to a boil, then turn heat to a medium. Let beans cook until tender. It should take about an hour and a half.
Beans are cooked and the garlic and onion are soften so now all you do is combine everything together. Don%u2019t drain the beans, just toss in the tomatoes, the vinegar, the spices, and a few pinches of pepper and a pinch of salt. Stir in all together,
Looks like soup right? This is right before you stick it into the oven.
Now look at that, oven baked beans. The best part%u2026 The crispy sides. ALL MINE!
Not much left to do but eat them. Straight up with a hunk of bread. That is a good way to start anyway.
Enjoy your beans!
-C
Makes a big pot of beans
1 pound (2 cups) white beans soaked in water for at least 8 hours (I used great northern but navy would be good too)
6 cups water or veggie stock
3 cups (or a 28 oz can) crushed tomatoes
1 onion
3 cloves garlic
1 1/2 tablespoons chili pepper
1 tablespoon mustard powder
1/3 cup apple cider vinegar
salt and pepper
Strain soaked beans and place them into large oven safe dutch oven almond with the water and stick on the stove. Bring the beans to a boil then reduce heat to medium and cook util the beans are tender. Should take about 1 1/2 hours.
Sometime while the beans are cooking, mince garlic and chop the onion into very small pieces. Place in a skillet and cook on medium until the onion and garlic are soften and fragrant. Remove from heat and set aside until beans are cooked
Preheat oven to 425
One beans are tender, dump in the cooked garlic and onion, the tomatoes, the spices, the vinegar, and a good pinch of salt and pepper. Stir it all together and place into the oven. Bake for about 2 hours, staring about ever 30 minutes, until the bean sauce is nice and thick. If at any point you think they have gotten to dry, just add more water. Pull the beans out of oven once you are happy with the sauce consistency. Taste and season with more salt and pepper if needed.
And then eat them. As a meal, as a side, or as a snack. Beans are good anytime.
Any leftovers should be stored in the fridge. Beans can be reheated very easily on the stove top. Just place the pot back on stove, stir in a little water and cook til hot.
Beans are also fantastic eaten cold from the fridge.
You know when you eat something that you haven%u2019t had or haven%u2019t had in a long time and it%u2019s all you want to eat?
I am having a moment with apples and onions. Roasted and raw, it%u2019s on my mind every time I am making food. Weird? I don%u2019t know, but it%u2019s sweet and savory and all fall like and comforting. It%u2019s a good moment.
So now I am passing on my moment in the form of cornbread. Why cornbread? Well I think cornbread is a fine fine vessel for things that could be perceived sweet of savory. This cornbread is in fact not sweet, but not not sweet. It is a little both and suits the the apple and onion moment quite well.
People ate it, at first somewhat suspect that it was not going to be good, but after a bite or two they too appreciated the apple onion combination. And the cornbread. Even got a lady that doesn’t even like cornbread to like this so that is something right?
Embrace the moments.. To the cornbread!
The stuff. A couple apples, an onion, cornmeal, flour, salt, and baking soda. Also soy milk, oil, apple cider vinegar, maple syrup, pepper, Sansa little earth balance.
Start by thinly slicing the onions. Toss them into a oven safe skillet with about a tablespoon of earth balance and place on a medium heat.
Once the onions are cooking, thinly slice the apples too.
Toss the apples in with the onions and stir around wait a few minutes and stir around some more until the stuff all looks like%u2026
This. The apples ans onions are super tender sans soft and amazing and do not eat them all, but maybe have bite or two.
Scoop the mixture out of the skillet ans melt another tablespoon of earth balance into the skillet, trying to evenly coat the bottom.
Now to the cornbread. Mix together all of the dry ingredients.
Then add in all the wet and gently mix until completely incorporated.
Pour the batter into the greased skillet
Top with the apple union mixture then pop into the oven for about 40-45 minutes to bake.
Golden crisp and amazing smelling. Check for donees with a tester stuck in the middle and when its done, its done.
Now the hard part. Let it cool. You can go right at it, but it will crumble and fall apart. This bread really needs a little time to chill.
Then it%u2019s time. Eat what you need. Careful, it might be all of it.
-C
Hey there friends. I hope you are all enjoying yourself a fantastic long weekend full of food, family, friends, or whatever you do that makes you happy. I know I am trying.%u00a0
We have had a busy week. It kicked off with my family Thanksgiving on Sunday. 24 people, a turkey gravy accident on my couch ( I almost flipped out but kept my cool), and a mess that took most of the next day to clean. But it was great, everyone was happy, Lillian brought me flowers,%u00a0%u00a0the food (I made it all beside the turkey my mom brought over already cooked and cut up)%u00a0was on point, and even though everyone forgot to bring drinks, we ended up with 4 pies and survived on a few beers and seltzer water.
After spending nearly all the next day cleaning (ok, maybe it was only a few hours) the mr and I decided we needed to get out of town so we took a drive to see the snow. All was great until the road froze and we almost skidded of the interstate. We ended up driving 5 mph for like a half hour just to get off. But that was ok,%u00a0what wasn’t ok was %u00a0after we got home, the mr had to run to fix a toliet. He jumped into the truck and I got a call 15 minutes later. While he was driving, the %u00a0truck died in the middle of the road. Long story short, we now have AAA and owe my brother in law a big ass thank you cake.%u00a0
We had the littles sleep over on Wednesday so that they could make birthday presents for their mother. Her (as in Erin)%u00a0Birthday landed on Thanksgiving this year so instead of doing dinner and cake, we had a moring cinnamon star birthday breakfast. The littles spent the night making paintings of a squirrel and and glittery octopus (I have glitter everywhere!!) and helping me bake. After the mess was contained, we curled up to popcorn and The Mighty Ducks 3. (then there was popcorn all over with the glitter) On Thanksgiving morning/Erin’s birthday, we listen to all the Christmas music, sang happy birthday, Paul ate half the star, Barb drank all the coffee, and we tried to make the baby walk for cookies. We know how to have us some good times.%u00a0
As usual went the the mr’s family for Thanksgiving dinner. Thanksgiving at their house is the big family holiday so everyone (usually) comes home for it. This year everyone did and it was great for all of us to be together.%u00a0I didn’t bring anything for the actual meal, but %u00a0I brought over a cinnamon star for breakfast the next day, which I am glad because there was so much food already.(Qui and Joanie went all out) so I was more helpful just washing all the dishes. We ate, we laughed, they drank. I left. I love that family so much, but alas I am an old lady and get very tired early.%u00a0We left before things got to crazy as I am sure that they did. All in all, another successful Thanksgiving.
Friday was spent with a social hangover and cleaning the house again (the glitter never stops).%u00a0We managed a good walk on the beach to get some air and nature then it was onto the Christmas decorations!! The mr spent a good chunk of the day being %u00a0amazing and wiring an outlet outside so we can hang up the Christmas lights. which brings me to the Christmas lights… It’s been rough and we (or I) still don’t know what to do. It’s because of the LED’s. I hate them, or very much dislike them. I much prefer the incandescent lights because they are prettier to me. But we need new lights and we really should buy LED, but they are ugly, or most of them are anyway. So The mr and I have bought 5 different colors and brands of LED’s and are currently trying out %u00a0sets on the house. We have some colored ones up now and %u00a0they are ok but I am not sure and might just go white but aaaahhh. I am driving the mr crazy, driving myself crazy, but I want to actually like the lights on my house. I guess I’ll figure it out.%u00a0
Besides getting the dang Christmas lights up, I am not sure whats gong down today. Probably going to listen to Sufjan, Hanson, and Charlie Brown Christmas albums all on repeat. Maybe make a few loaves of bread, start my knitting projects,%u00a0finish reading my book, and just enjoy not having to deal with a house full of people who spill turkey gravy on everything.%u00a0
Internet links from the past week.
–Adult Siblings Can Make Our Lives Healthier And Happier%u00a0This had better be true because I spend a lot of my time with my adult siblings. (love you guys)
–What your Christmas lights will do to your electricity bill. This is part of my problem with the lights. Because I really do like the incandescent so much more.. So annoying, Why can’t the led look better?%u00a0
-Sufjan Christmas has been on all week, but so has this album. So good.%u00a0%u00a0%u00a0First Listen: Sufjan Stevens, ‘The Greatest Gift’
–Don%u2019t Force Young Girls to Hug Their Relatives, the Girl Scouts Say%u00a0Finally!%u00a0It drives me crazy when parents make their kids hug people. If a kid doesn’t want to hug %u00a0you,%u00a0respect that.%u00a0
-Ah, Prince, so beautiful you were.%u00a0Dig, If You Will, Some Never-Before-Seen Pictures Of Prince In ‘A Private View’
-Idaho Dims The Lights For One Of The Best Night Skies Anywhere%u00a0I think camping in Idaho just made my list of things to do.%u00a0
-Terrifying is right, I am allergic to yellow jackets .%u00a0This ‘Granddaddy of Hornet’s Nests Is Terrifying, But Not All Bad
–Good Vegan, Bad Vegan.%u00a0This was a good article. I know a few vegetarians and vegans that eat shit and %u00a0they think they are healthy because they don’t eat meat and those people that think a meal isn’t a meal without meat.%u00a0
–The Sweet Rewards of Bitter Food
–Quirky Cartoon Toys and Vases Carved from Wood by Yen Jui-Lin. I love these and want them for myself
Pictures from the week.
Did you get any snow?%u00a0I was hopping for snow, but got none and am a little disappointed. Call me crazy, but I am just ready for a good dumping, maybe even snowed in for a day or two. Humm, probably not happening for a while, but a dusting would be nice, no?
This past week Shannon turned one year older. We had dinner and cake and Jackson wrote her a rap that made all of us cry.%u00a0Then the littles came over for a dinner/orchestra rehearsal and we got the baby to walk around the kitchen again. The only time he seems to walk is for Oreo cookies… He might be on to something here. I made what seems like a shit ton of bread products to feed the people who stop by for lunch. I found pine cones and turned them into a wall hanging, had a great time catching up with Joanie, and have continued my watching of Stranger Things 2 (taking my time with this season) I was very social this week and give myself 3 stars for not running away to a hole in the ground.%u00a0
Then the basement, The mr and I spent a very long day removing buckets and buckets of heavy ass dirt from down below. We were in respirators which sucked because they suck wearing and we both have this chest congestion so it was just sucky, but we needed them with the amount of dust and dirt we were dealing with. The truck was full by the end and we now have a shoveled out, swept, and vacuumed over and over, clean and empty (we got rid of allll the stuff and tools) basement.%u00a0That was one long day of shit shoveling. But it’s over and never again. And it was all in preparation for the washer and dryer that was to be delivered Thursday.%u00a0
We waited a full day for he washer and dryer to be delivered and it didn’t show. We were not happy put the mr dealt with it.%u00a0We waited another 1/2 day for the washer and dryer and it still didn’t show. And oh boy were we about to flip but the mr dealt with it and yesterday, right at 8ish in the morning, we finally got our washer and dryer!!!!!!!!!! And it is as amazing as I had remembered. Big metal tubs that will do all my washing and drying needs, right here in my house. I am so excited. %u00a0The mr spent the day running water and power and hooking it all up and ever since then, laundry on loop. Clean cloths whenever I want. I guess I have no excuses now.%u00a0%u00a0
The family is all coming over in just a few short hours for the annual Sunday before Thanksgiving, Family Thanksgiving I think we are up to 25 people.. Some are little so they take up less space, but it’s those half sized people that tend to make the biggest mess. %u00a0The house is going to be full by afternoon and I am not going to lie, I am a little stressed out. I think it’s because of the turkey. This is %u00a0a meat free house but Mom is bring a cooked turkey (no way in hell is a turkey being cooked in my oven) and I just have this anxiety that there is going to be meat everywhere, I know I am over reacting but I can’t help my feelings. But other then that it will be great. I am doing all the veggie sides, making some bread and maybe some cookies? I don’t know. My mom bought like 4 pies and I might just skip the cookies because we probably %u00a0don’t need them. So yeah, a full house of all the crazy people and a few extra to bare witness. I got the coloring supplies, grabbing the board games, and trying to set up a long as table to seat everyone at all at once. I hope people don’t mind sitting on mud buckets. %u00a0Wish me luck.
Internet findings from the week
–A Wrinkle in Time. Another one of my favorite books turned movie, but this one, I am so excited about.%u00a0. Mindy and Oprah…It has got to be great.
–Instagram Crowds May Be Ruining Nature%u00a0Be more aware people!
-Life goal (or next year goal) Find land and build and A frame cabin.%u00a0How to Build an A-Frame. Should be simple right?%u00a0
Sign me up, although I don’t make a lot os scrapes, I tend to eat it all.%u00a0This Kickstarter Converts Kitchen Scraps Into Cooking Fuel
–11 Stress Experts on Surviving the Constant Anxiety That Is 2017. Hoping the 2018 isn’t quite so nuts.
–The Bra Ladies of New York. Looking for that “Goldylocks” of bras would drive me crazy.%u00a0
-Potty humor, but seriously, don’t drop butt in toilet.%u00a0.%u00a0Toilet Signs Are Mysterious And Mirth-Inducing
-I think the week of Thanksgiving is the perfect time to start decorating.%u00a0Science Makes the Case For Putting Up Holiday Decorations Early
–Where Does That Rumbling in Your Tummy Really Come From?. I just thought it was my stomach yelling at me to eat (or nat eat)%u00a0
-A great way to use up some trash.%u00a0Giant Exhibition of Animal Assemblages Built with Trash
Pictures from the week.%u00a0
There is something about purple cabbage that makes me feel like I need to share it. It sounds weird , especially because I eat about a head of cabbage a day, but that is green cabbage. I barely buy purple cabbage because it cost twice as much and I really like green , but at farm share when you get to pick what color you want, I alway pick the purple. ( Side note. I used to call it red cabbage but have since stopped because it is very clearly purple and calling red just doesn’t make any sense)%u00a0
I also feel the need to do something a little more the chopping it up and eating it raw. So I make a little fancy. pretty, almond crunchy mustard type thing because that’s what I was feeling and I figure the mr would like it too. Note that I ended up using half a green and half %u00a0the purple because color is nice and also I ended up eating the other half of the purple before I could share it. But I caught myself before eating it all to may face and was proud of myself for thinking of others.%u00a0%u00a0
This dish is good, really really good.%u00a0. It has roasted cabbage which is alway great, but slathered with maple mustard and crunchy almonds.. it’s just freaking fantastic in all the ways. It also happens to be super easy to prepare and with minimal ingredients.%u00a0It makes for a great side dish, a main dish, and is great for sharing during the holidays that are just around the corner. Or if you are like me, not sharing and eating all afternoon long. (I did save some for the m for dinner because I am so nice)%u00a0
The stuff. Cabbage, red or green or a bit of both, stone ground mustard, maple syrup, almonds and pepper.
Easy peasy. Cut the cabbages about an 3/4 inch thick and lay them on a baking sheet. Pop it into the oven once it’s preheated.
While thats going on, mix some maple with the mustard and chop up the almonds.
After about 25 minutes, pull the cabbage out and flip them. Cover the top with maple mustard and sprinkle on the almonds. Stick the cabbage back into the oven and bake another 10-15 minutes, or until it’s roasted to your taste preference (I like it really roasted)%u00a0
Just look how pretty it is.%u00a0
Serves from a baking sheet but would look so lovely on a nice plater, you know, if you want to be extra classy.%u00a0
This cabbage situation is all of it.%u00a0
Have a great weekend and hope the Thanksgiving planning goes smoothly.%u00a0
-C
Makes about 6-8 slabs
1 head of cabbage (red or green or half of both)
1/4 cup stone ground mustard
2 tablespoon maple syrup%u00a0
1/3 cup raw almonds%u00a0
pepper to taste.%u00a0
Preheat oven to 425
Slice cabbage into thick slabs about 3/4 inch thick. Try to get them roughly the same thickness so they roast evenly. %u00a0Lay the cabbage on a baking sheet, not overlapping, and stick into the oven once it’s preheated. Bake for 25 minutes or until the bottoms of the cabbage are crispy.
While cabbage is roasting, mix mustard and maple %u00a0together and roughly chop the almonds. %u00a0
After %u00a0the 25 minutes, grab the cabbage from the oven and flip each piece. Cover the tops with the maple mustard and sprinkle on chopped almonds. Place back into the oven for another 10-15 minutes %u00a0and roast until the cabbage is as crispy as you like it.
Remove from oven, sprinkle with good pepper,%u00a0and serve. Extra maple muastd is welcomed to some. Any left over (but there won’t be any) is great eaten cold before bed %u00a0or tossed onto a salad for lunch the next day.%u00a0
I know it’s early an I know it’s Sunday, but other than that I am having a hard time concentrating on much of anything. All I can think about is paint color, well that and the kitchen stove. (I am getting closer to making that decision. I am secretly hoping Bluestar will just gift me one.) Oh, and how I want to hang some lights on the house because what is the point of having a house without hanging the holiday lights. So I guess I am thinking, just not very clearly.
How was your week? Good I hope. Ours was kind of quite. We spent most of our time at the house working and feeling sick. I might have convinced myself at the beginning of the week that I had listeria due to the fact that I ate a shit ton of some hummus that was recalled due to contamination. But I am alive so I think I am ok. We did get to see lots of family, spend a little time in some woods, and even got to take a afternoon nap .(mostly because I was sick) And it snowed!!!! There is no more snow now, but there was and it was so white and fluffy and great. I am looking forward to having an actual winter this year with some actual snow.
The mr and I are working our butts off, trying to maybe move in soon, like as soon as possible. Yesterday at the house, the mr was downstairs patching up the pantry walls and I was upstairs, painting. The plan was to touch up all the paint and to paint the closet doors. Sounds simple right? Well it wasn’t. Long story short, I spent the entire day painting, hating, remixing, then repainting the closet doors in the bedroom. I didn’t get to anything else. I almost tore my eyes out of my head. I seriously repainted those freaking doors5 times, each time thinking that I likes the color. Then an hour later, after painting front ans back of both doors (they are louved so they take longer) then I would hate the color and start all over again. I was going a little crazy. I blame it on the fumes.
Today I am going to bring over a scented candle (to mask he smell of urethane), put on some Christmas tunes, touch up all the paint in the bedrooms and bathroom upstairs and paint those stupid closet doors one last time, color be damned.%u00a0%u00a0 We are getting there. It’s going to be great
There might even be some time to bust out the Xmas lights!
Internet for the looking.
-My hometown. America%u2019s First All-Renewable-Energy City
–Your Brain Can Barely Handle Conversation and Eye Contact at the Same Time.
–Cool Ass Lamps. The peacock is the best.
-My siblings.. Best friends, worst enemies. Love them all to pieces even when I want to punch them in the face. Give Thanks For Siblings: They Can Make Us Healthier And Happier
-I could spend forever in one of these (Cornell is my favorite). THE 15 MOST BEAUTIFUL COLLEGE LIBRARIES IN AMERICA
-Maybe someday I will sit around and make bird houses, but they have to be this cool. These Modernist Houses Are Literally For the Birds
-Can’t wait to go crazy and cover my life with all the green, it makes me happy. Green and Peaceful
-So I for sure talk to myself, sometimes just saying lists out loud, but sometimes….The mr always thinks I am talking to him. I have to tell him to stop budding in on my conversation. The Running Conversation in Your Head
-The mr always get me purple carrots in my stocking and my birthday. WTF ARE PURPLE CARROTS AND WHERE DID THEY COME FROM?

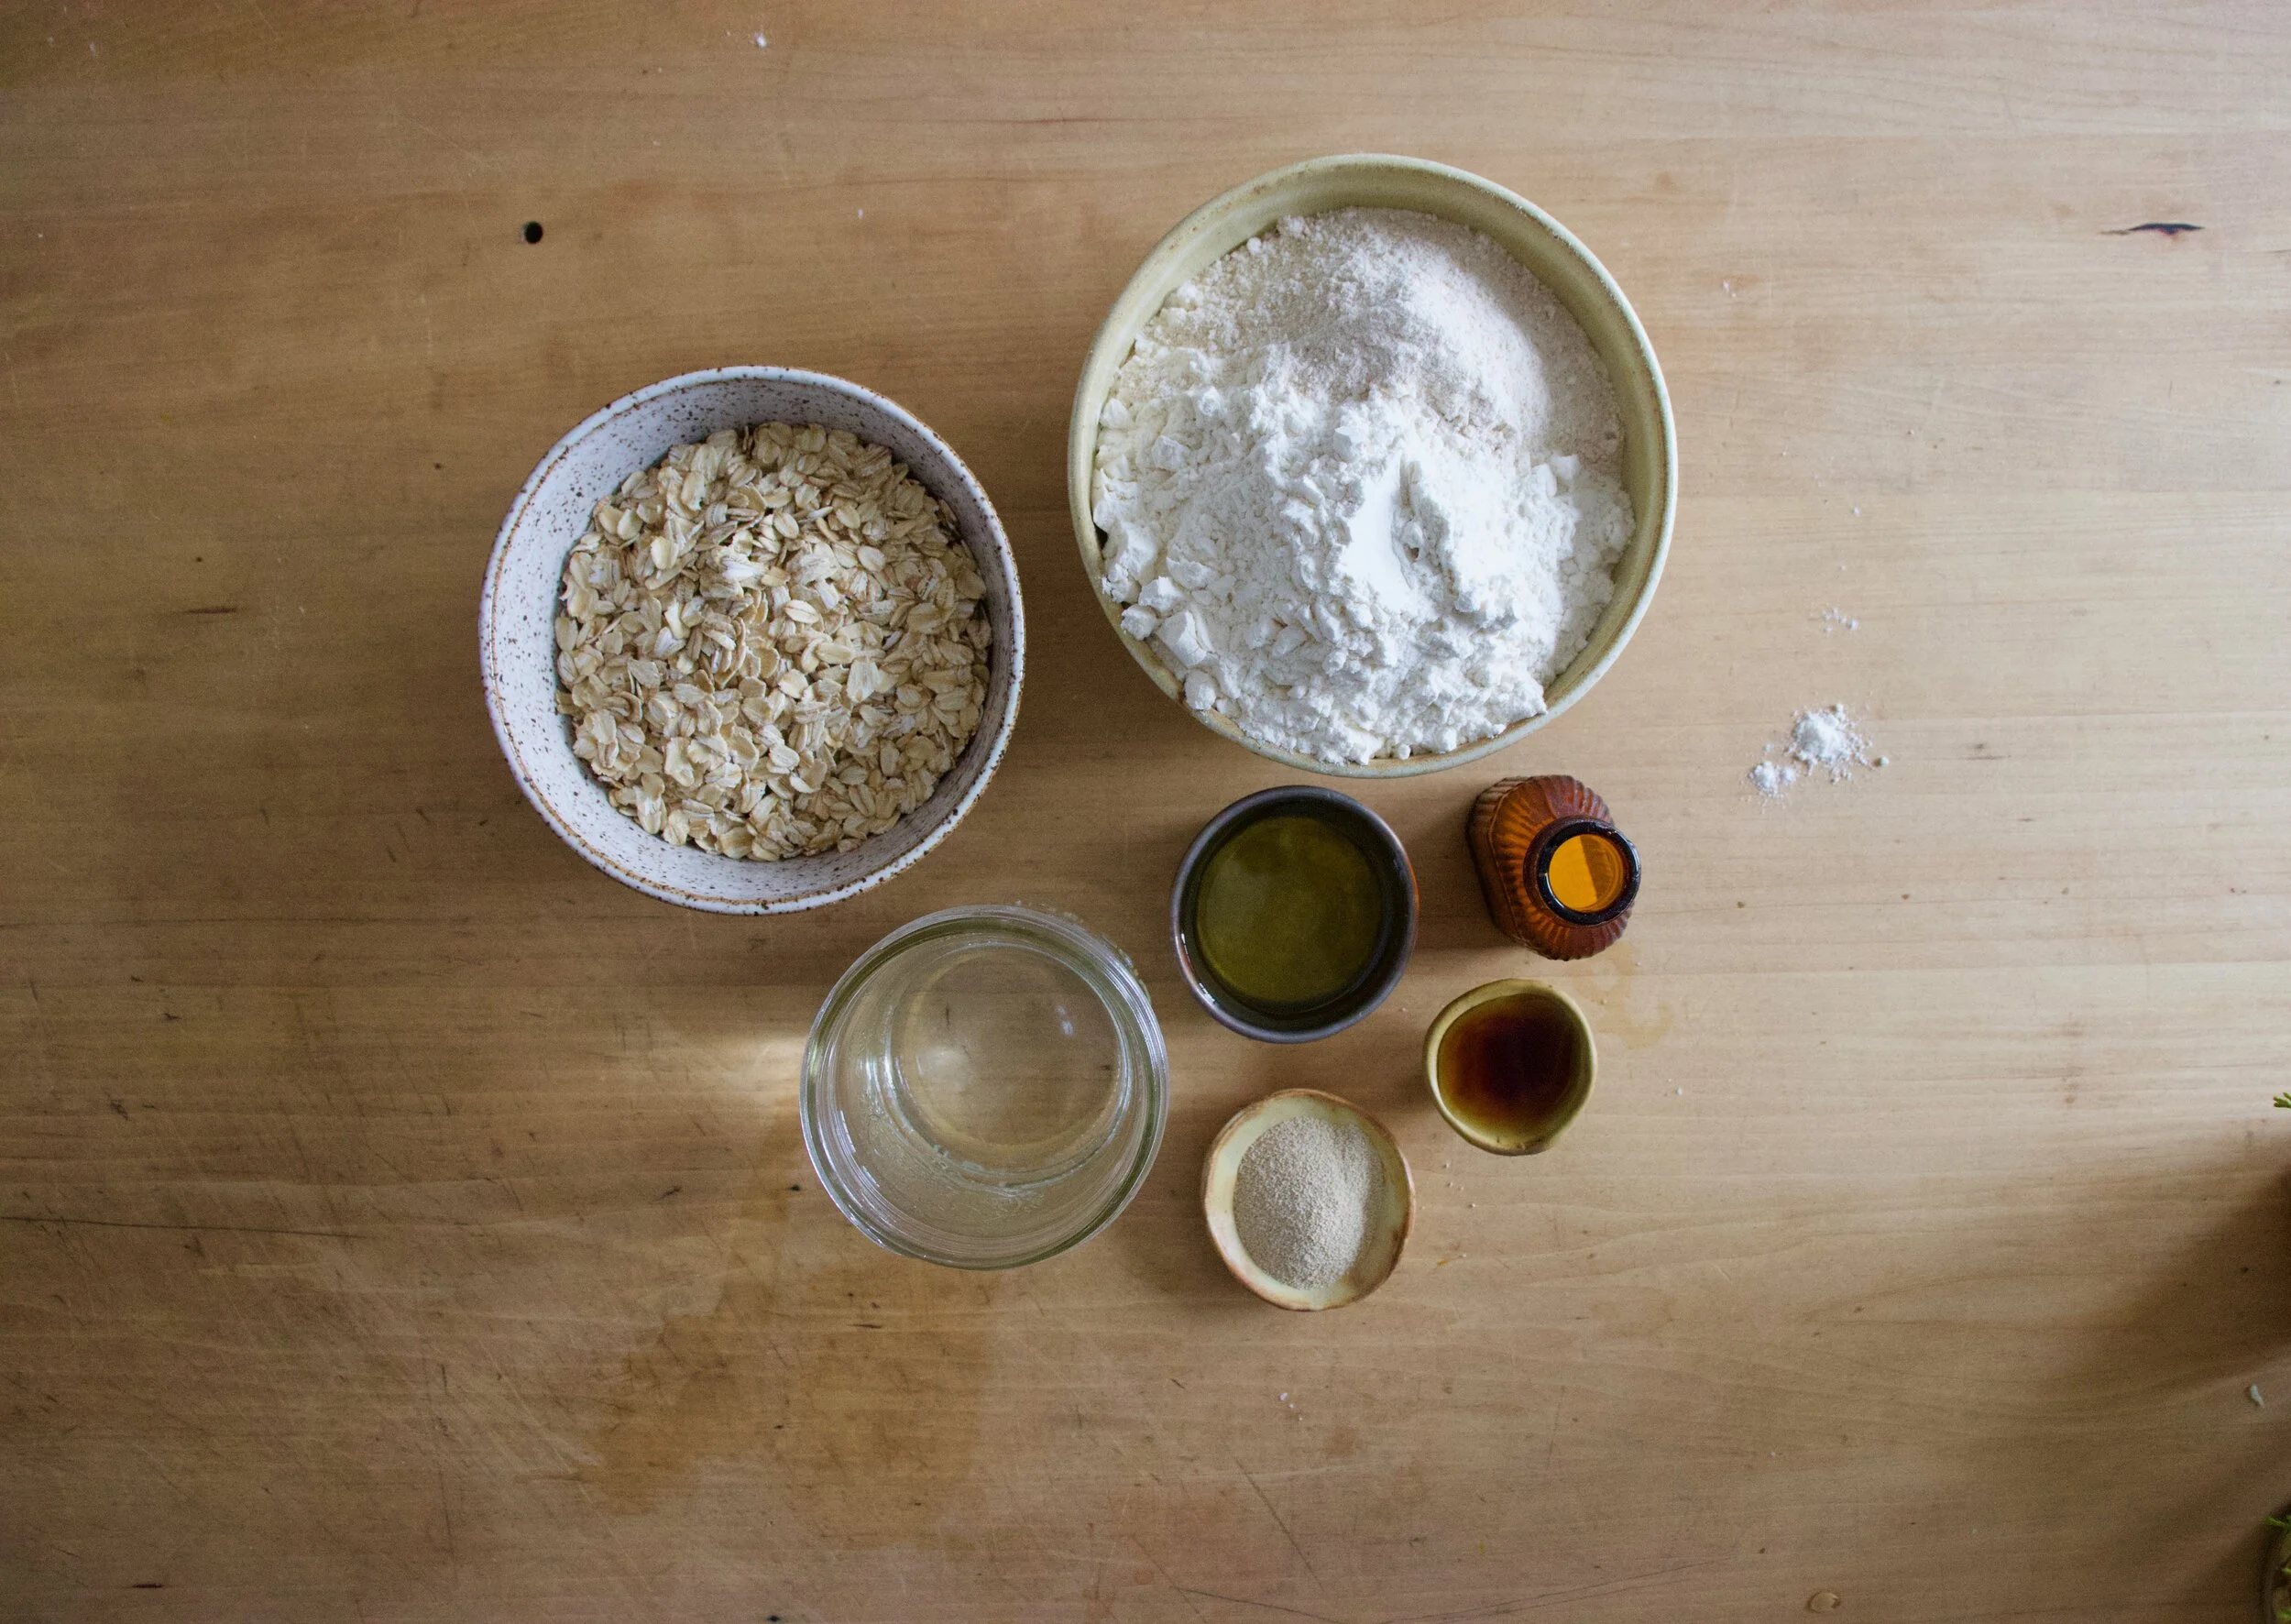
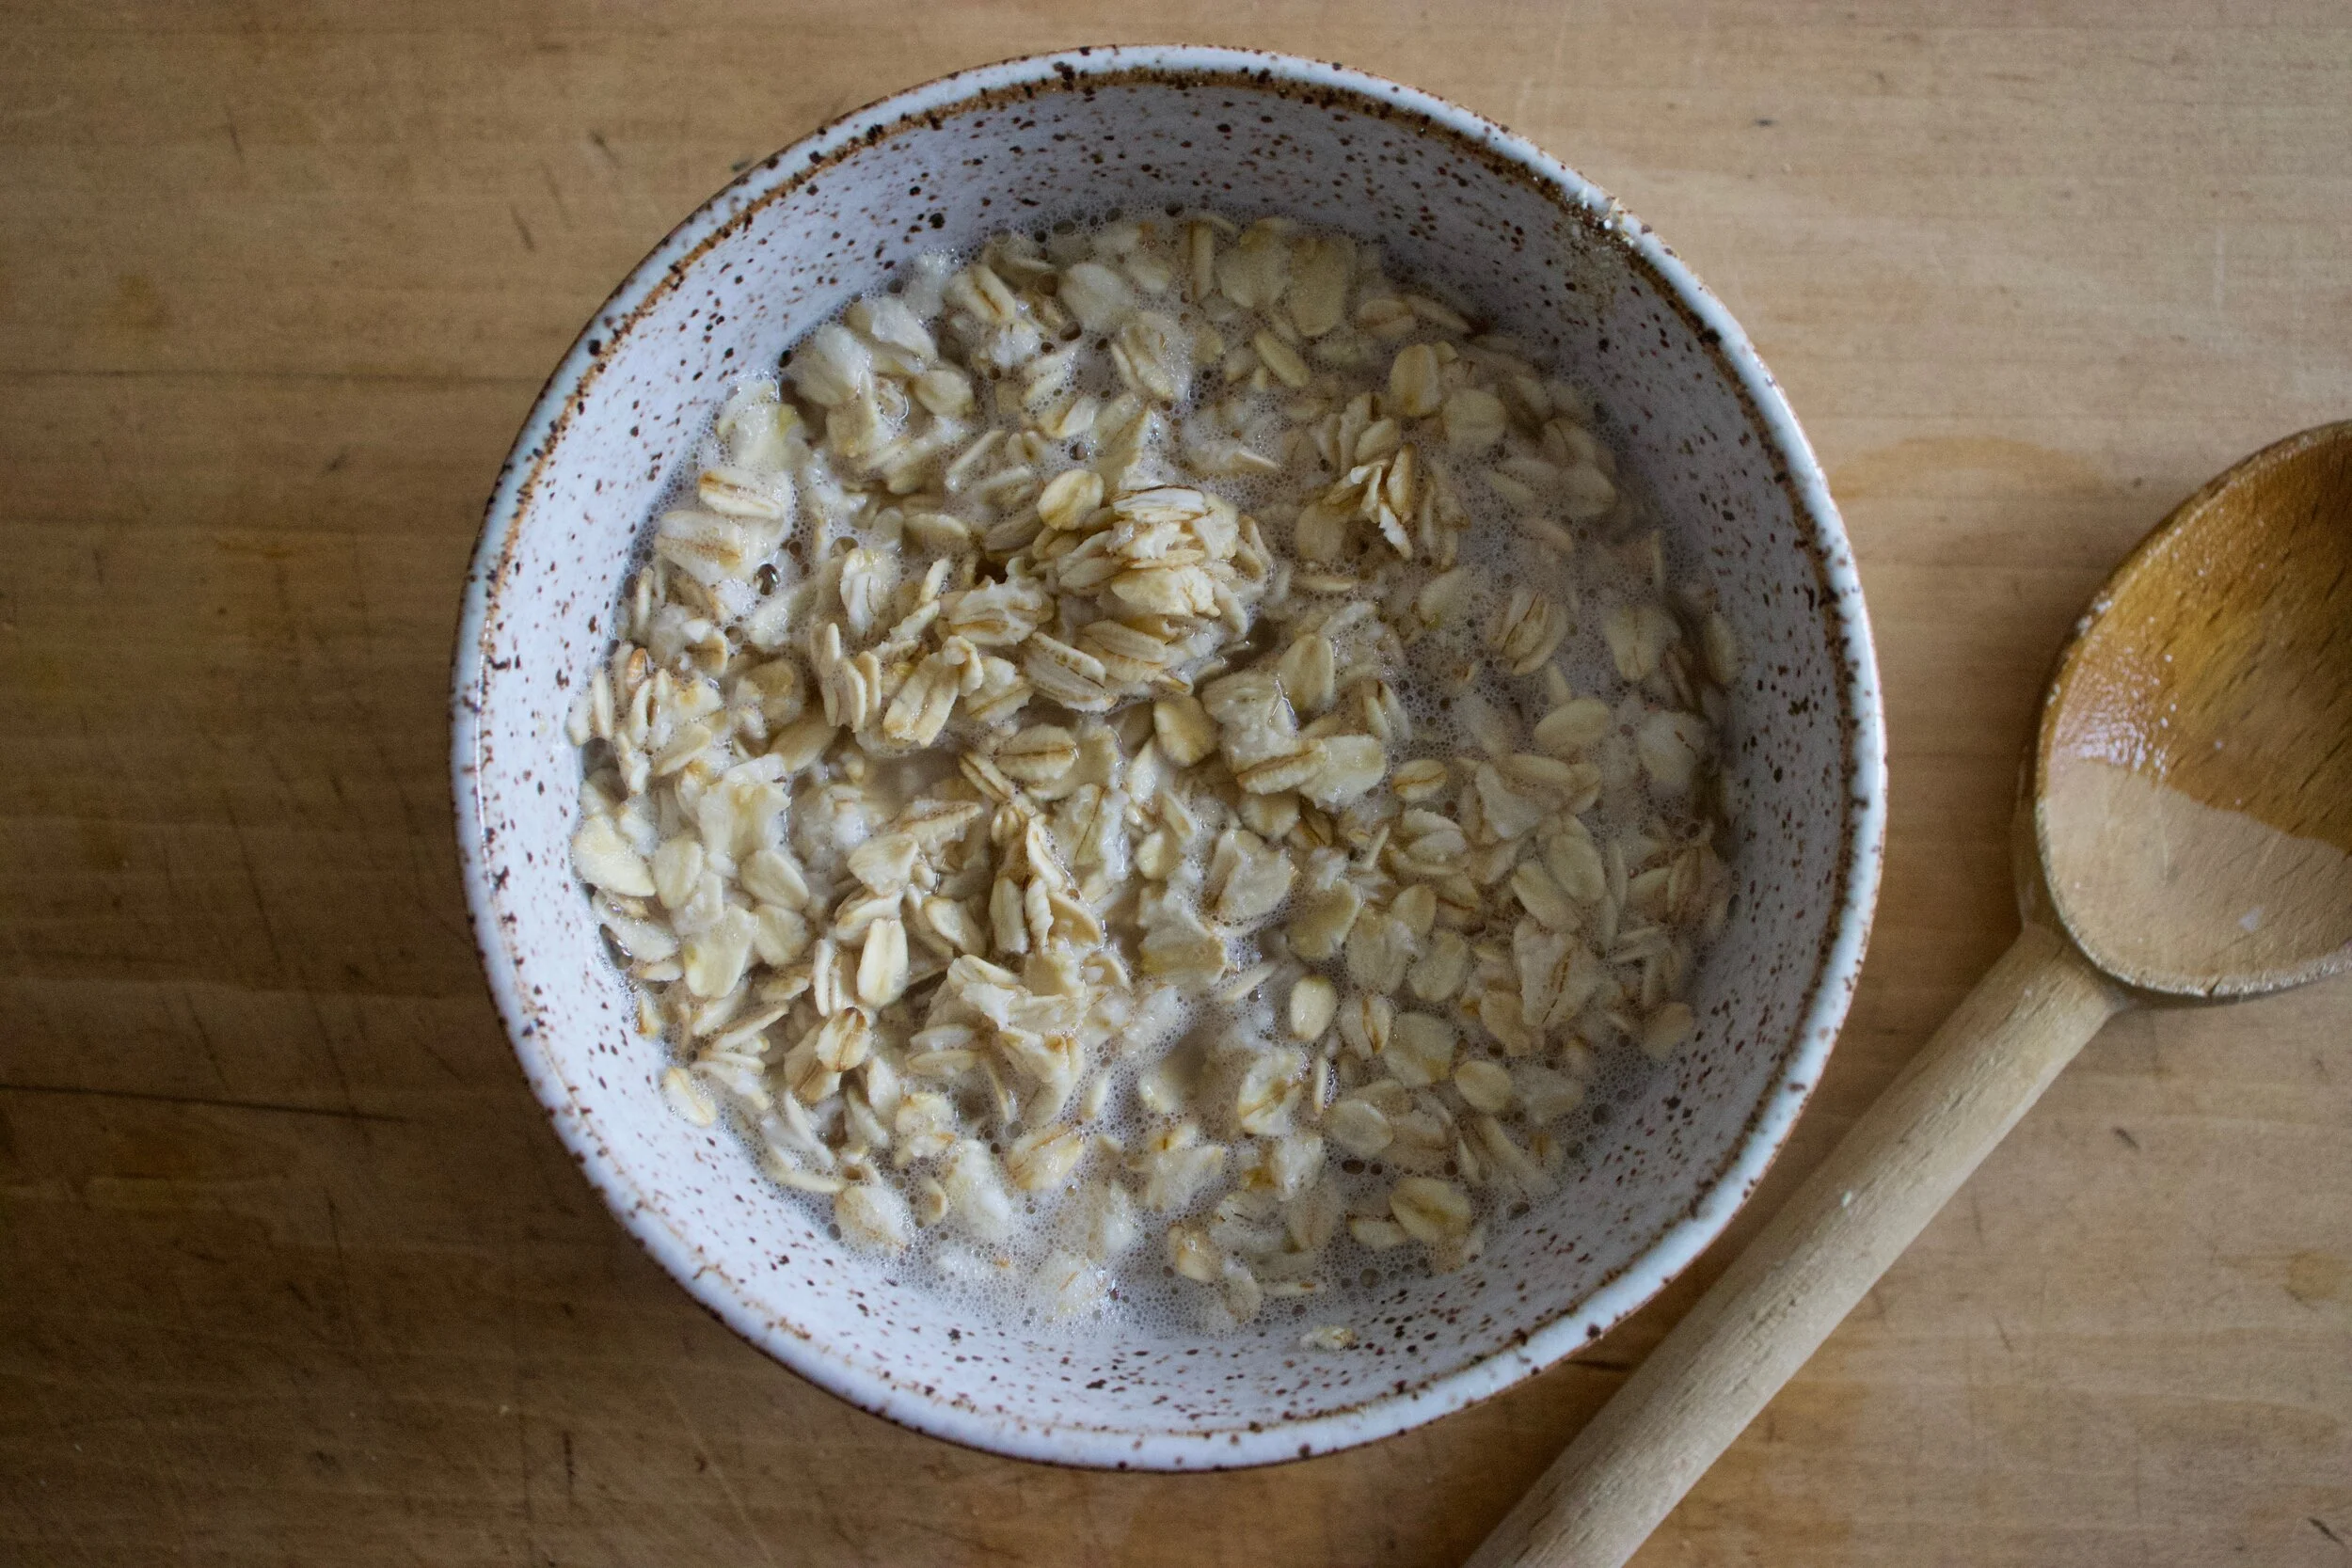

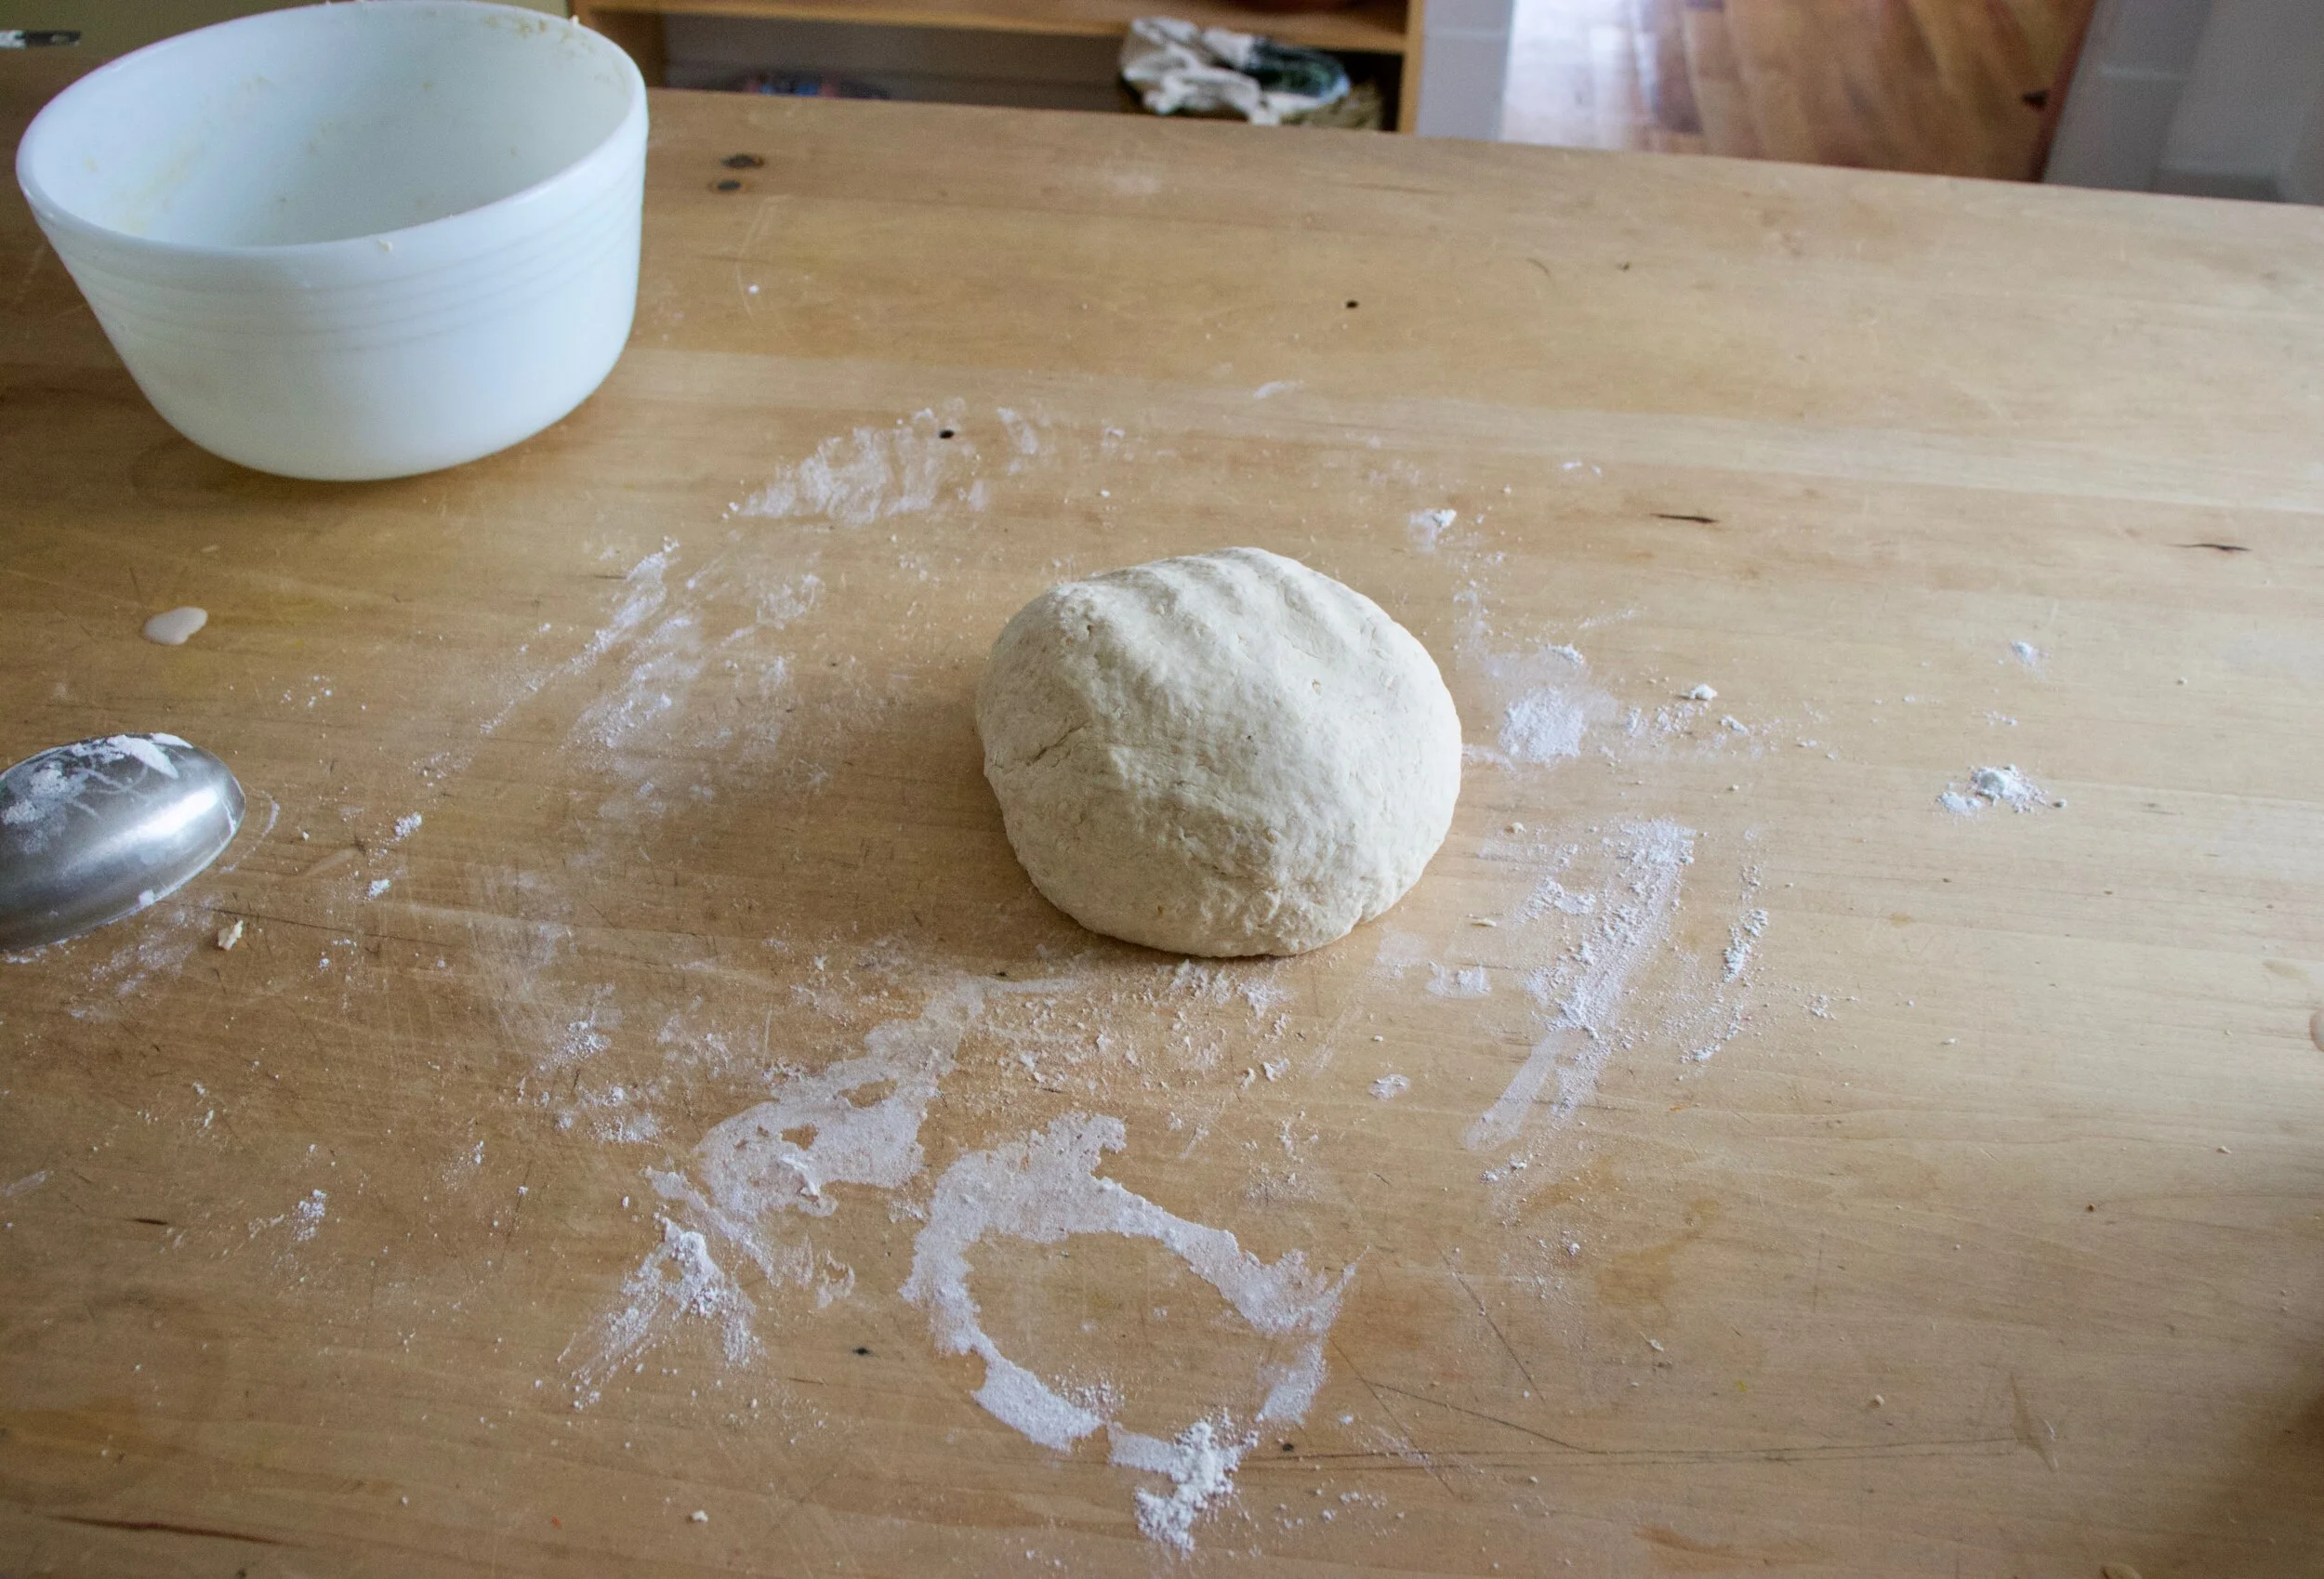
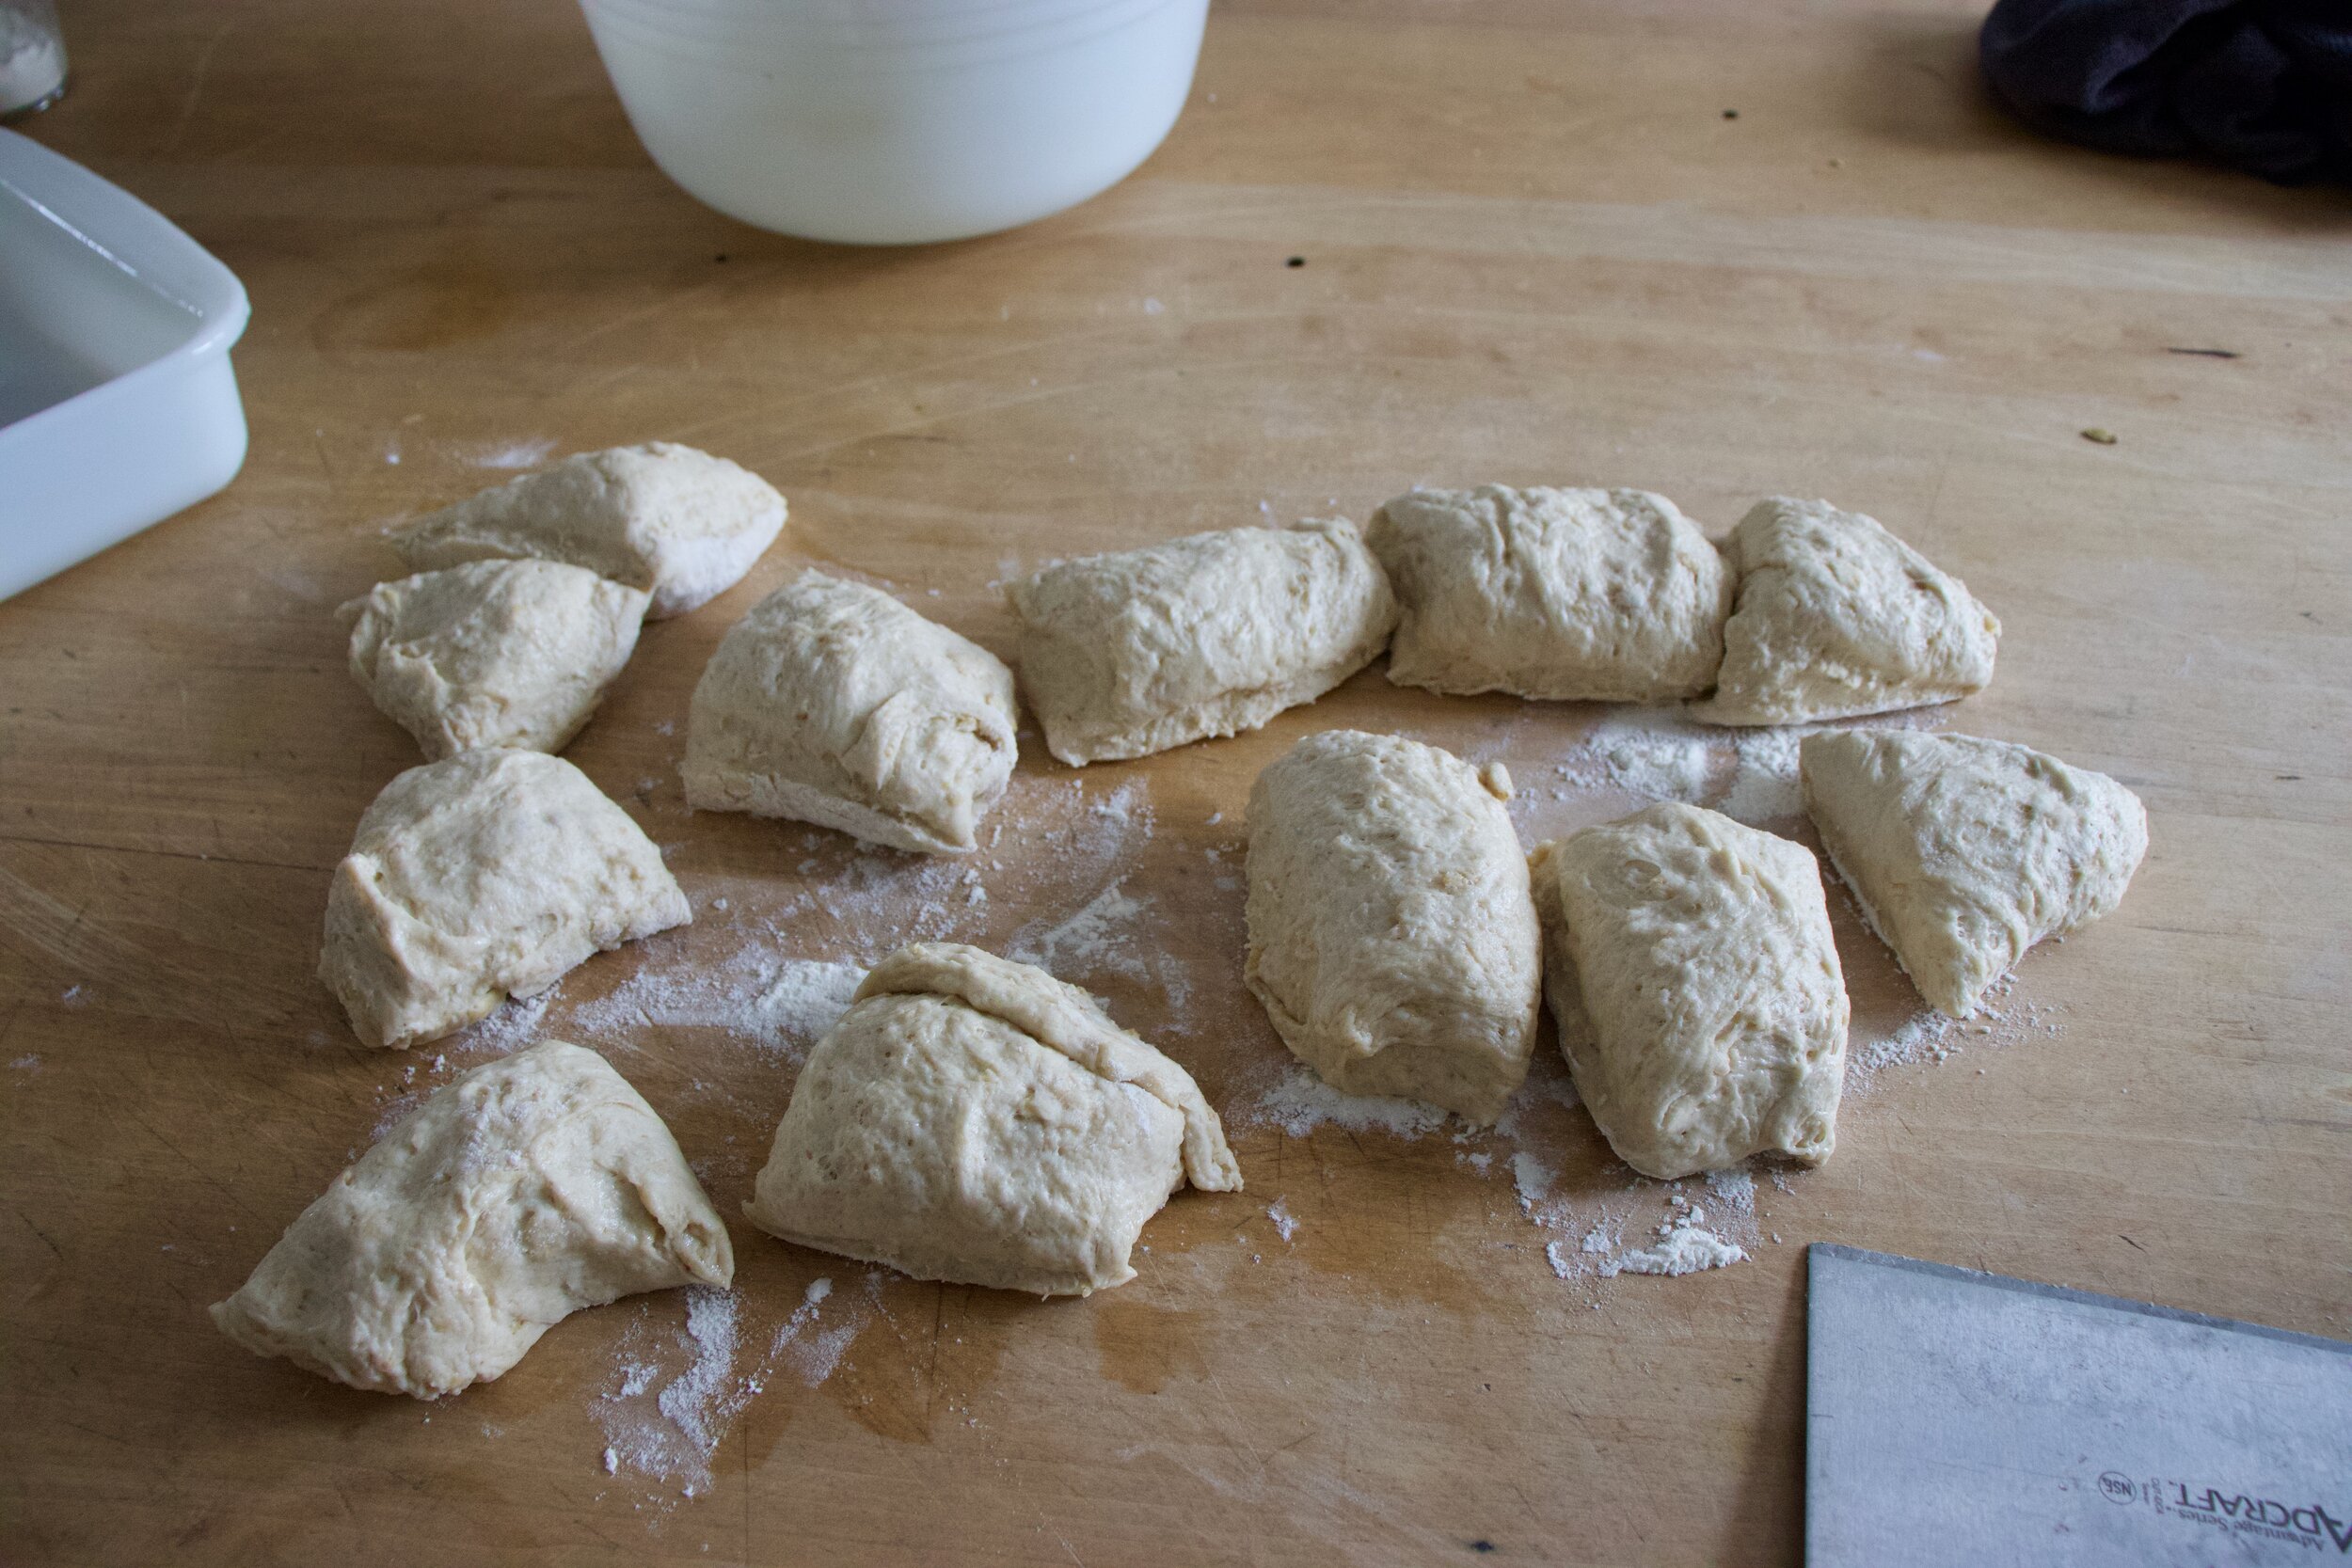

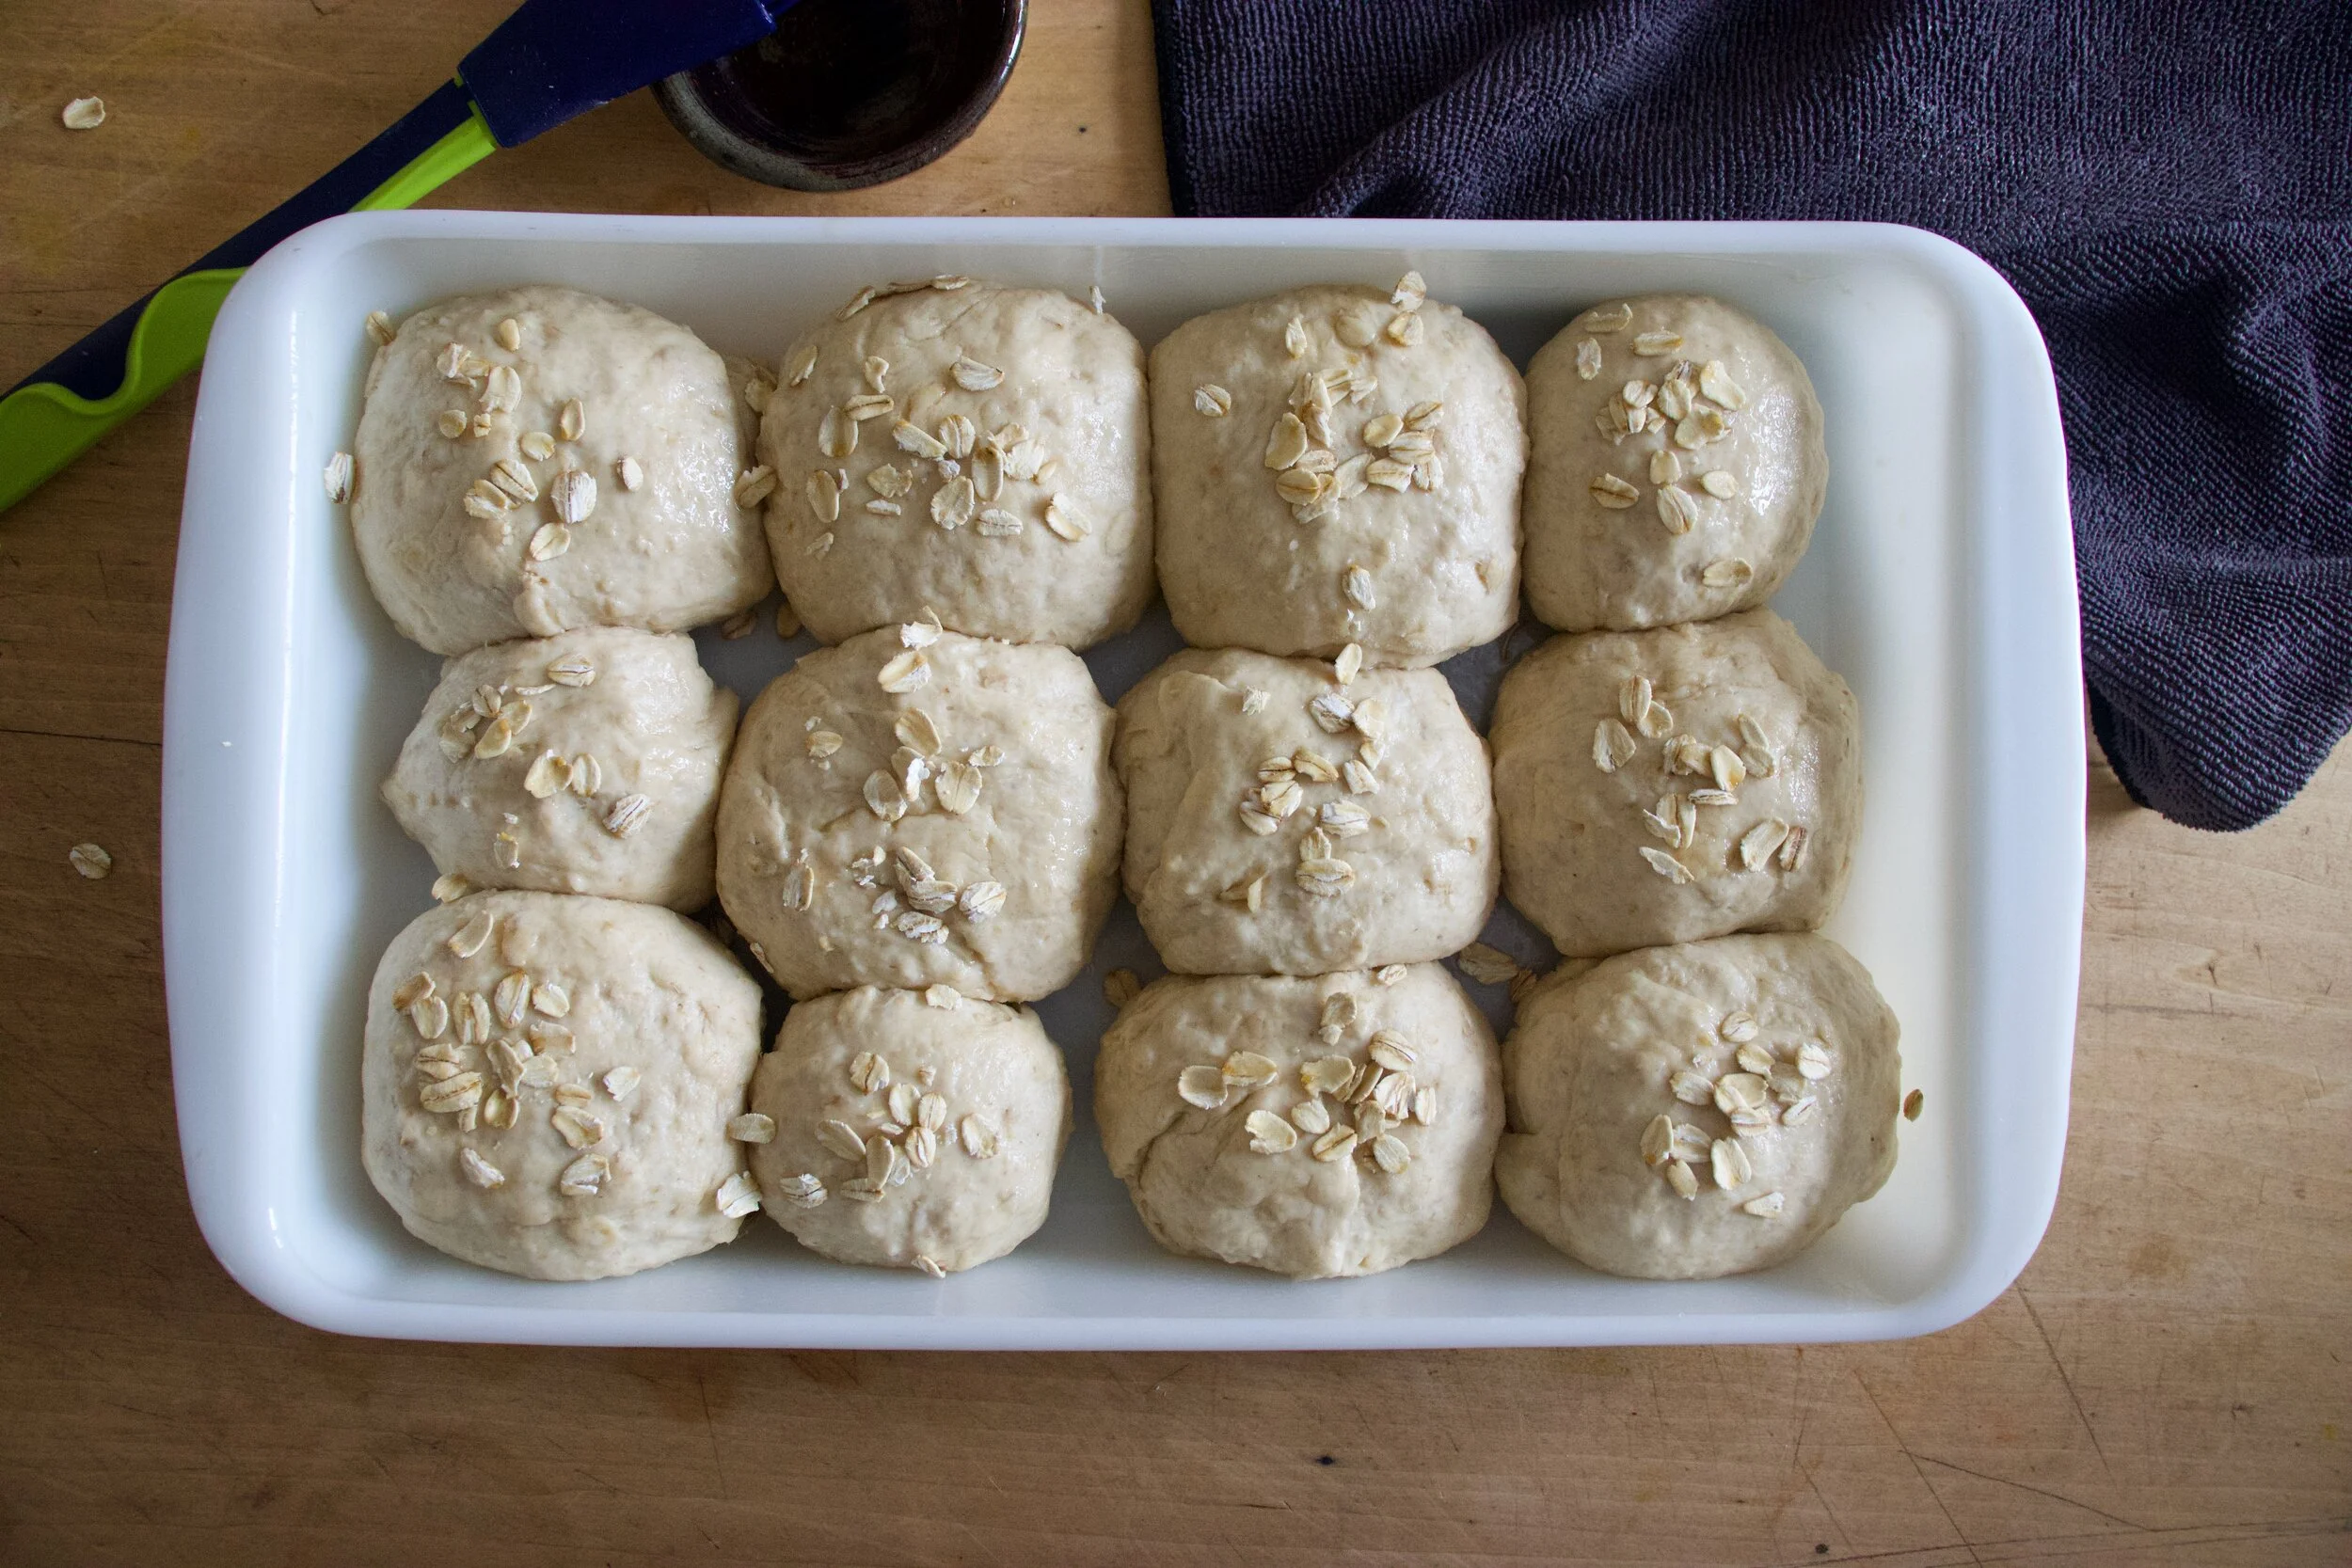


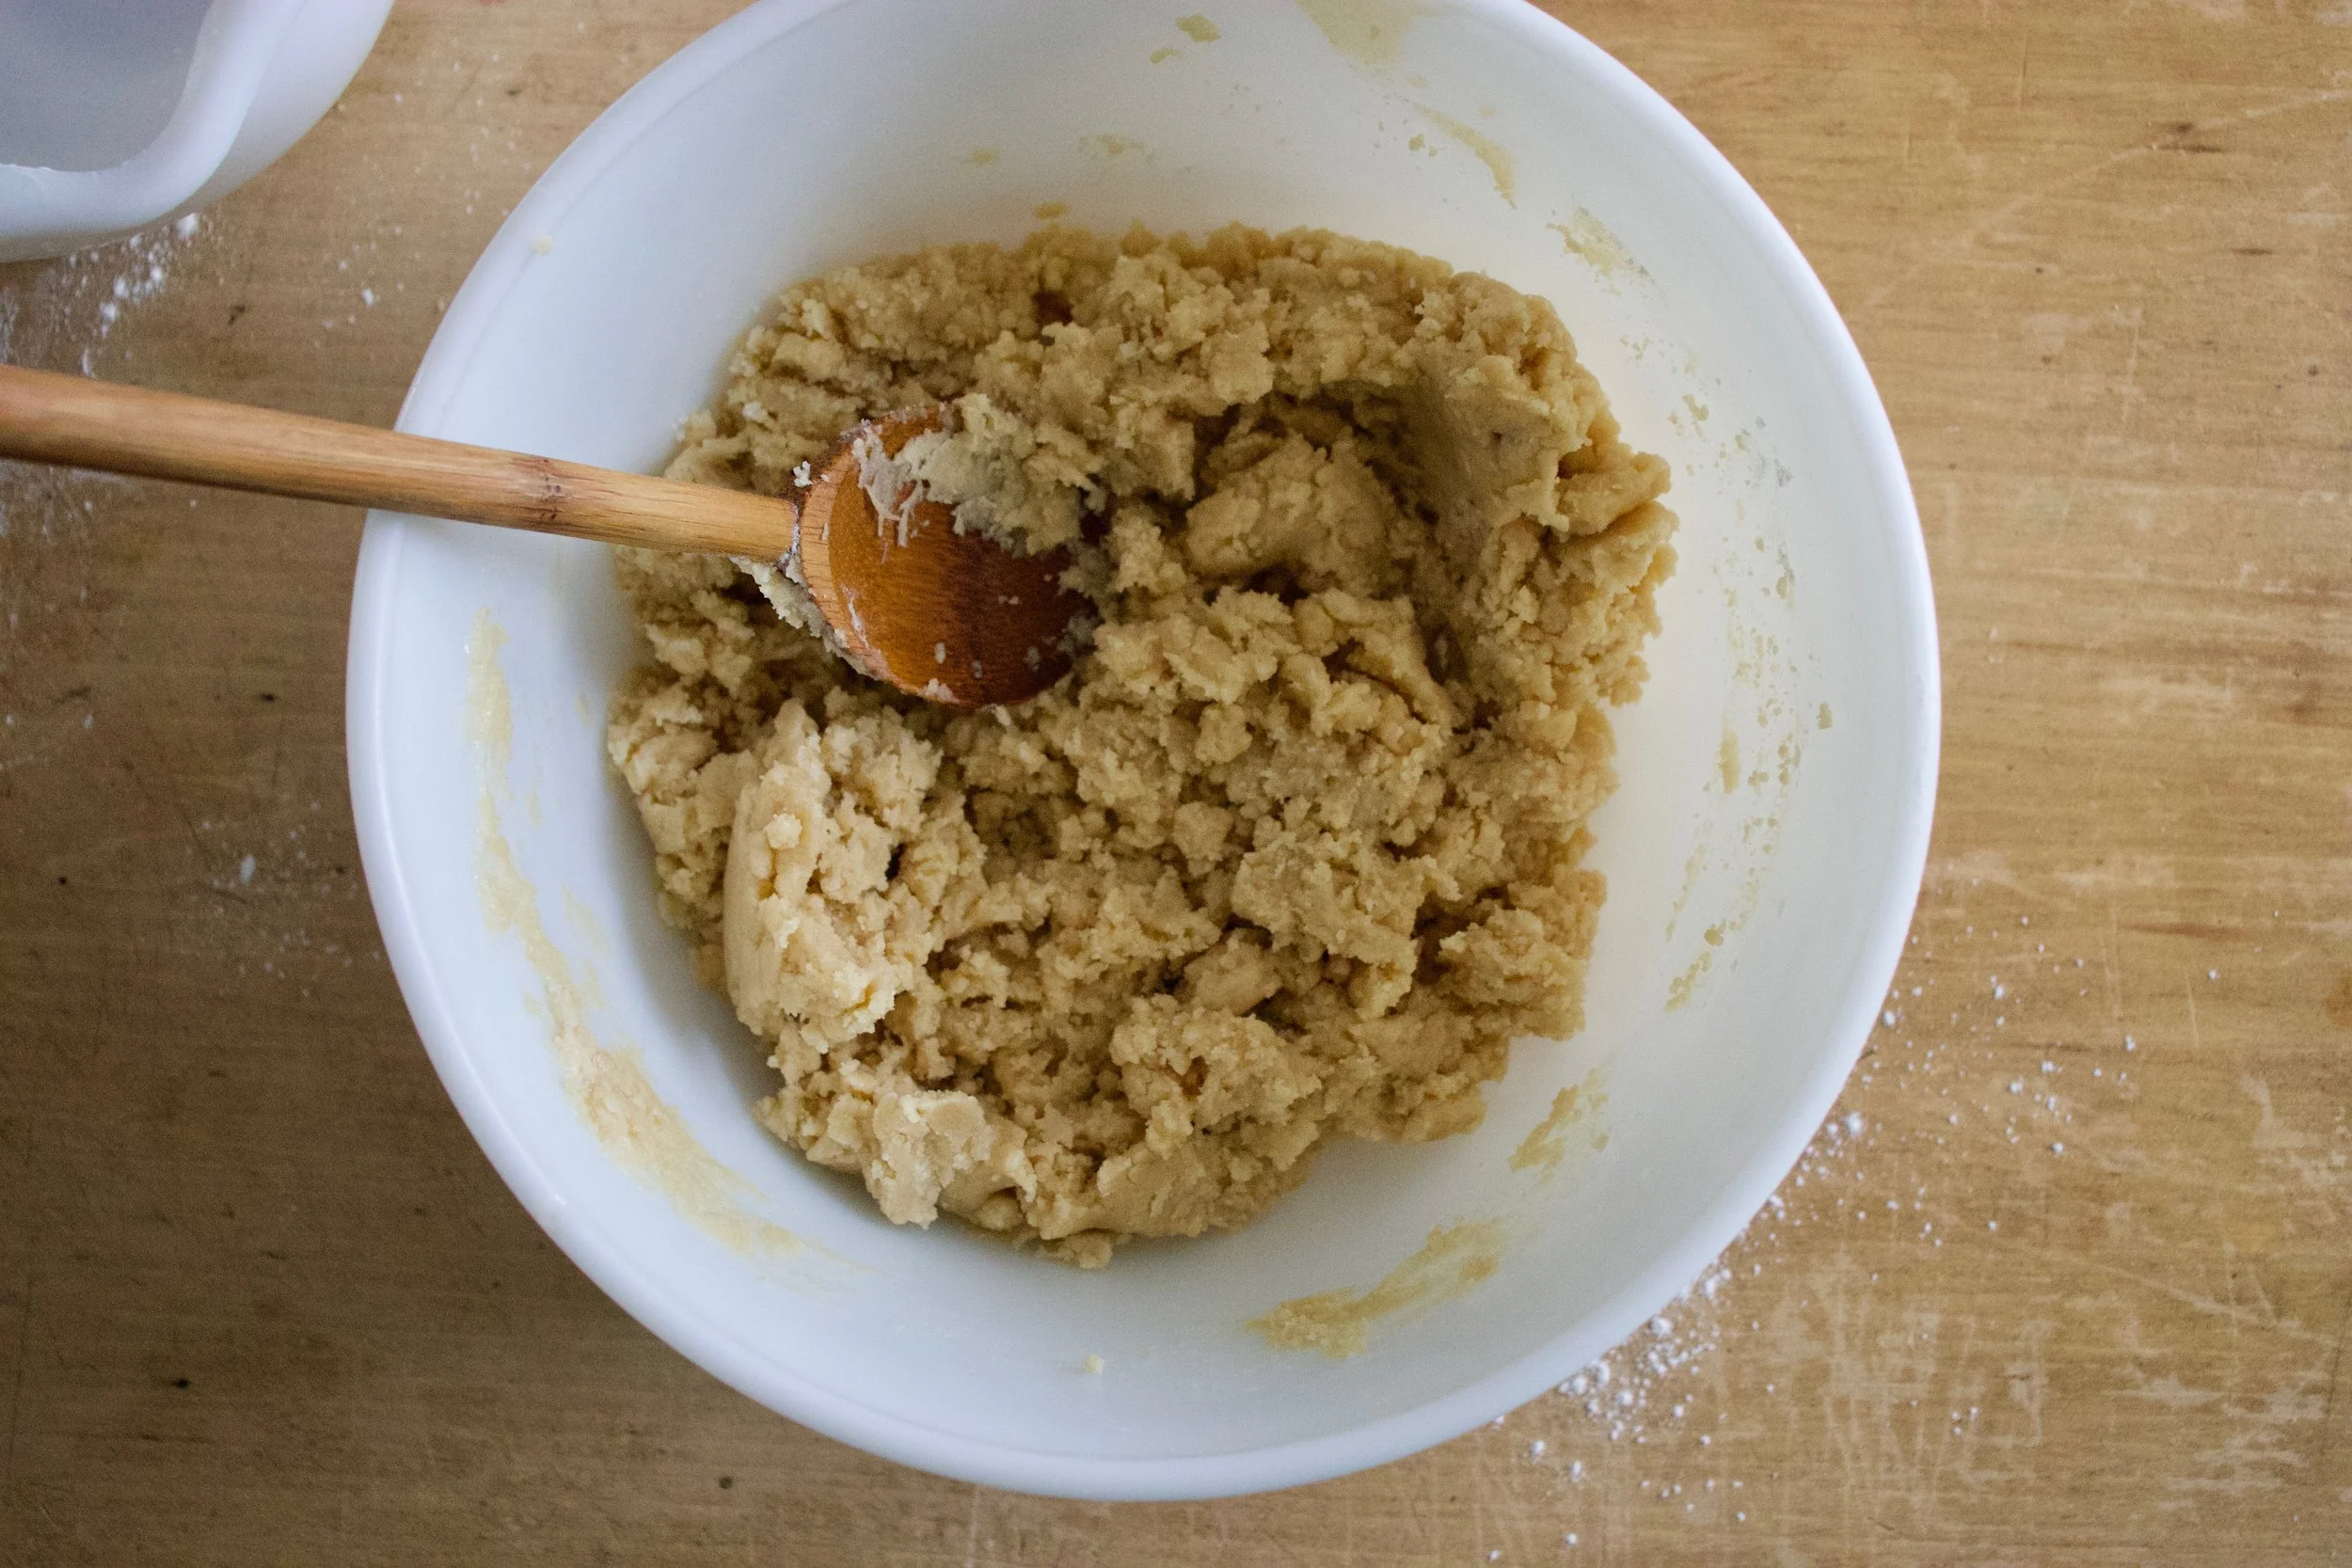
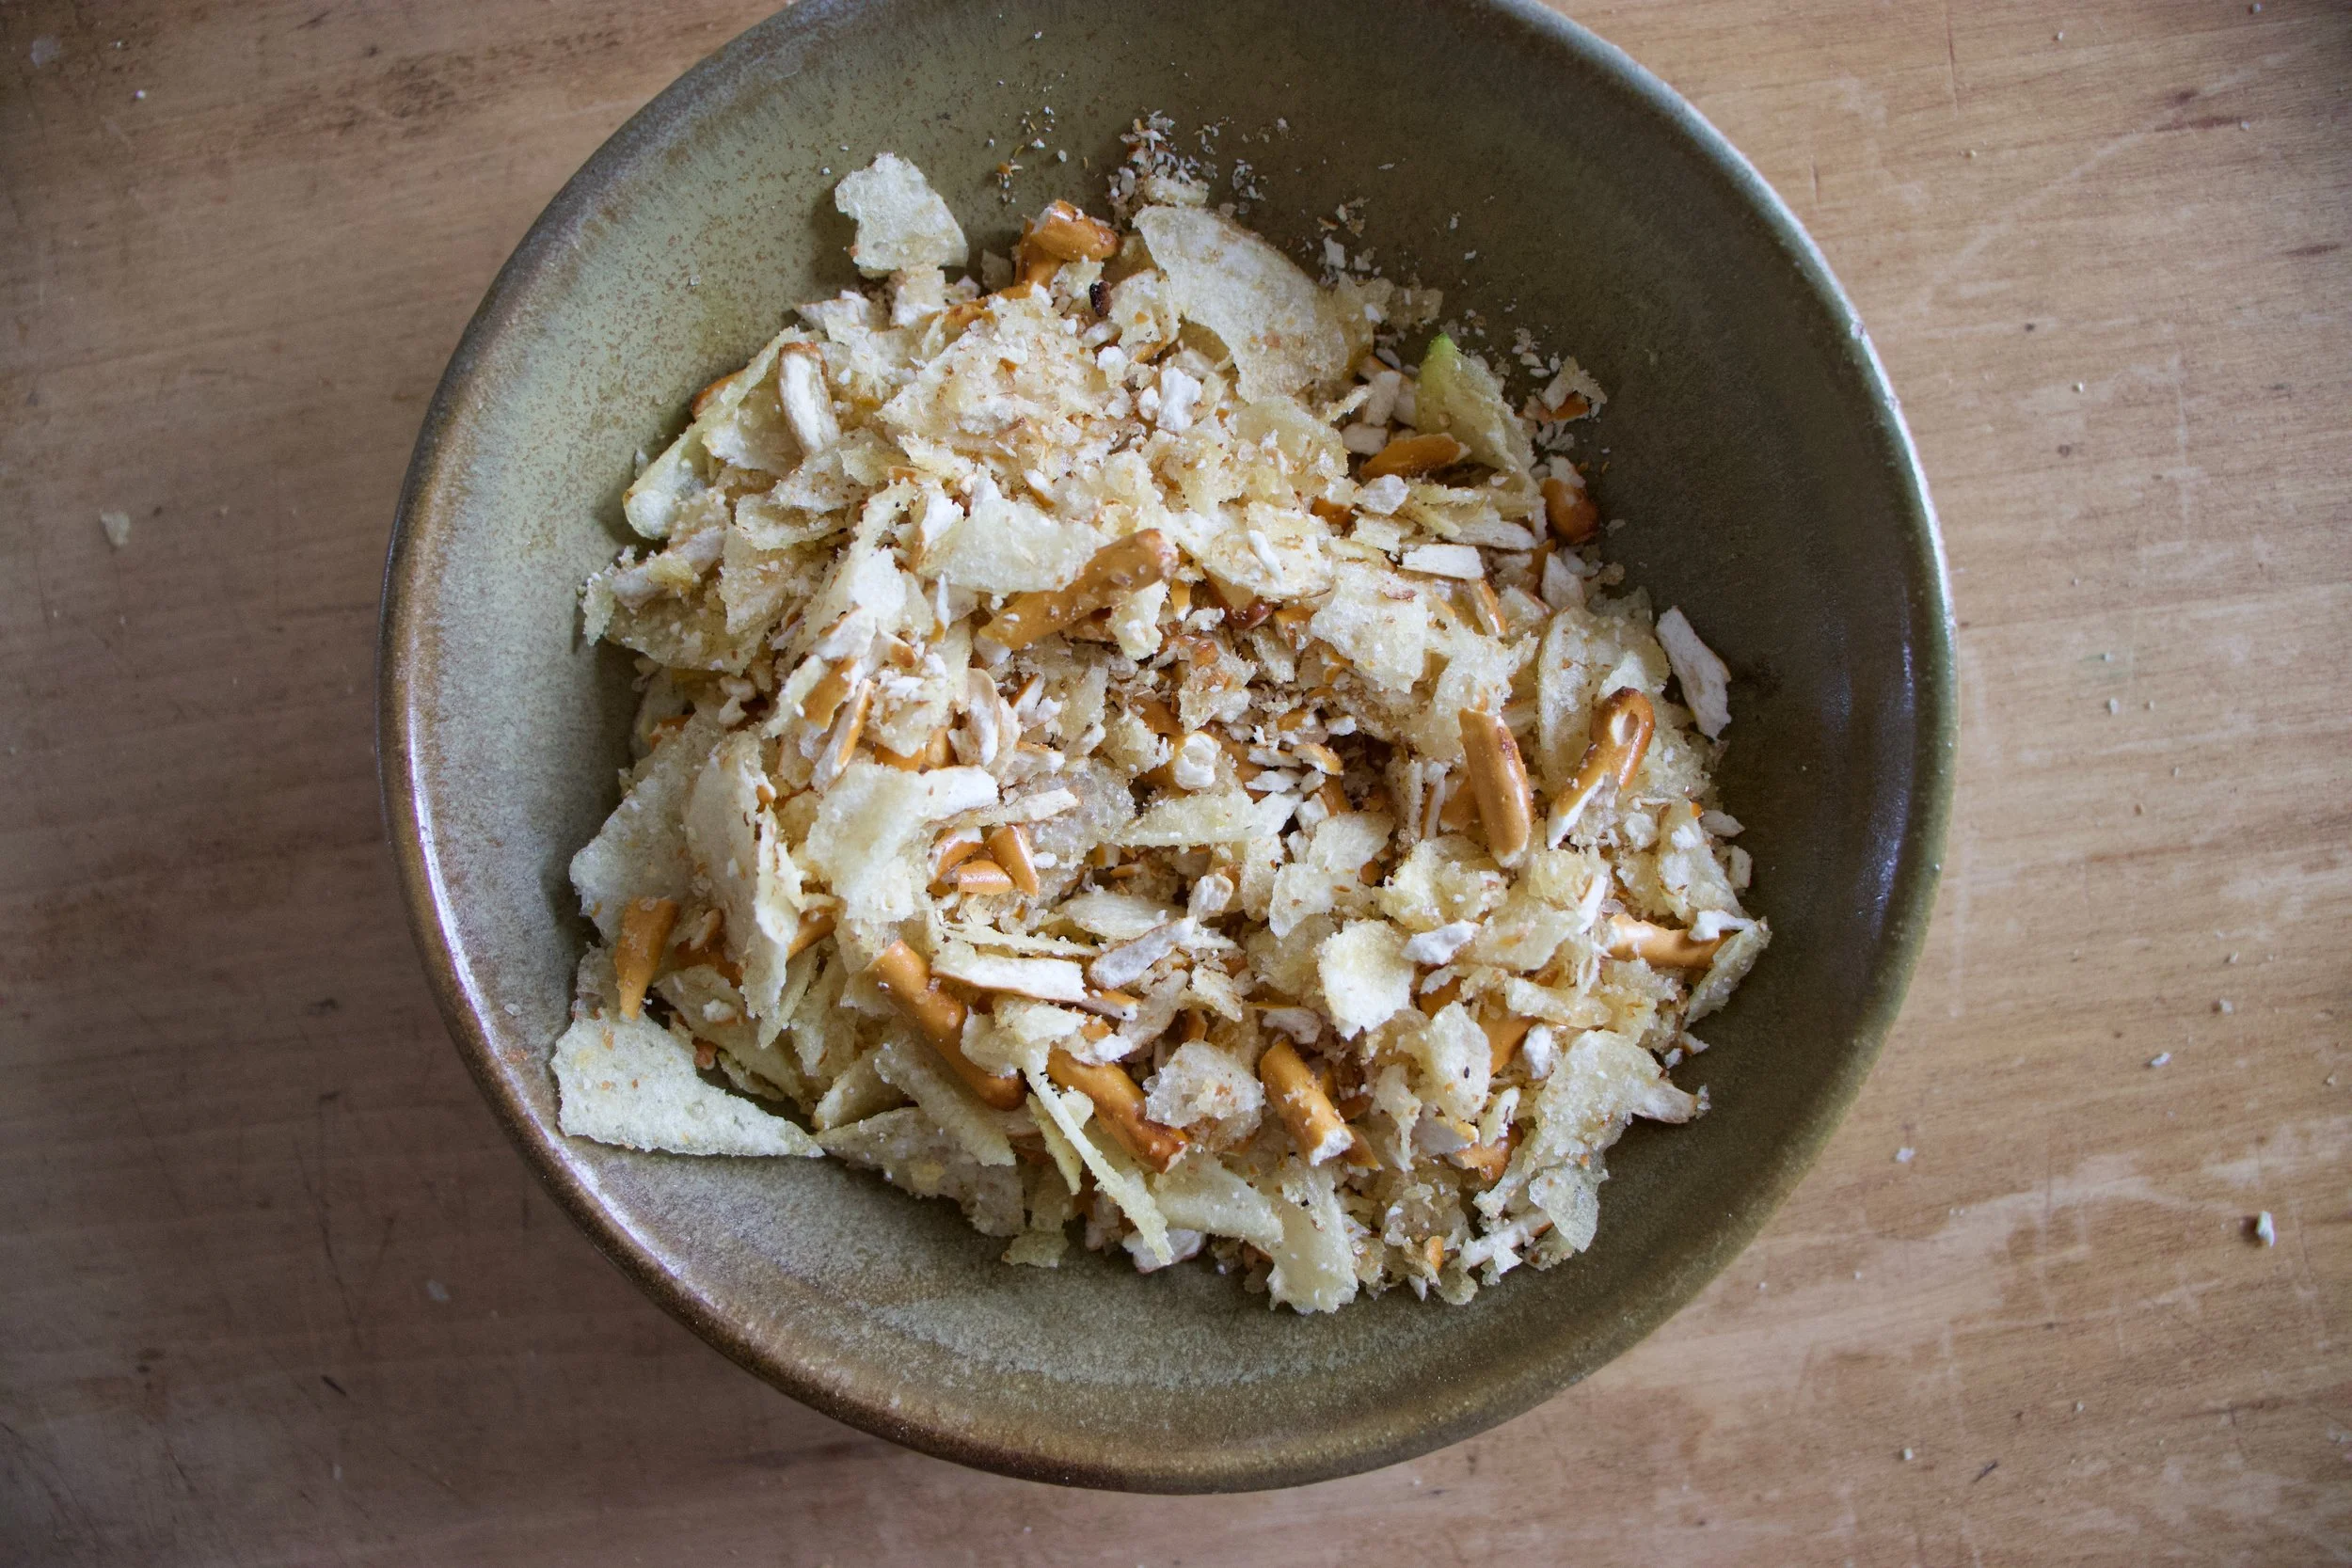

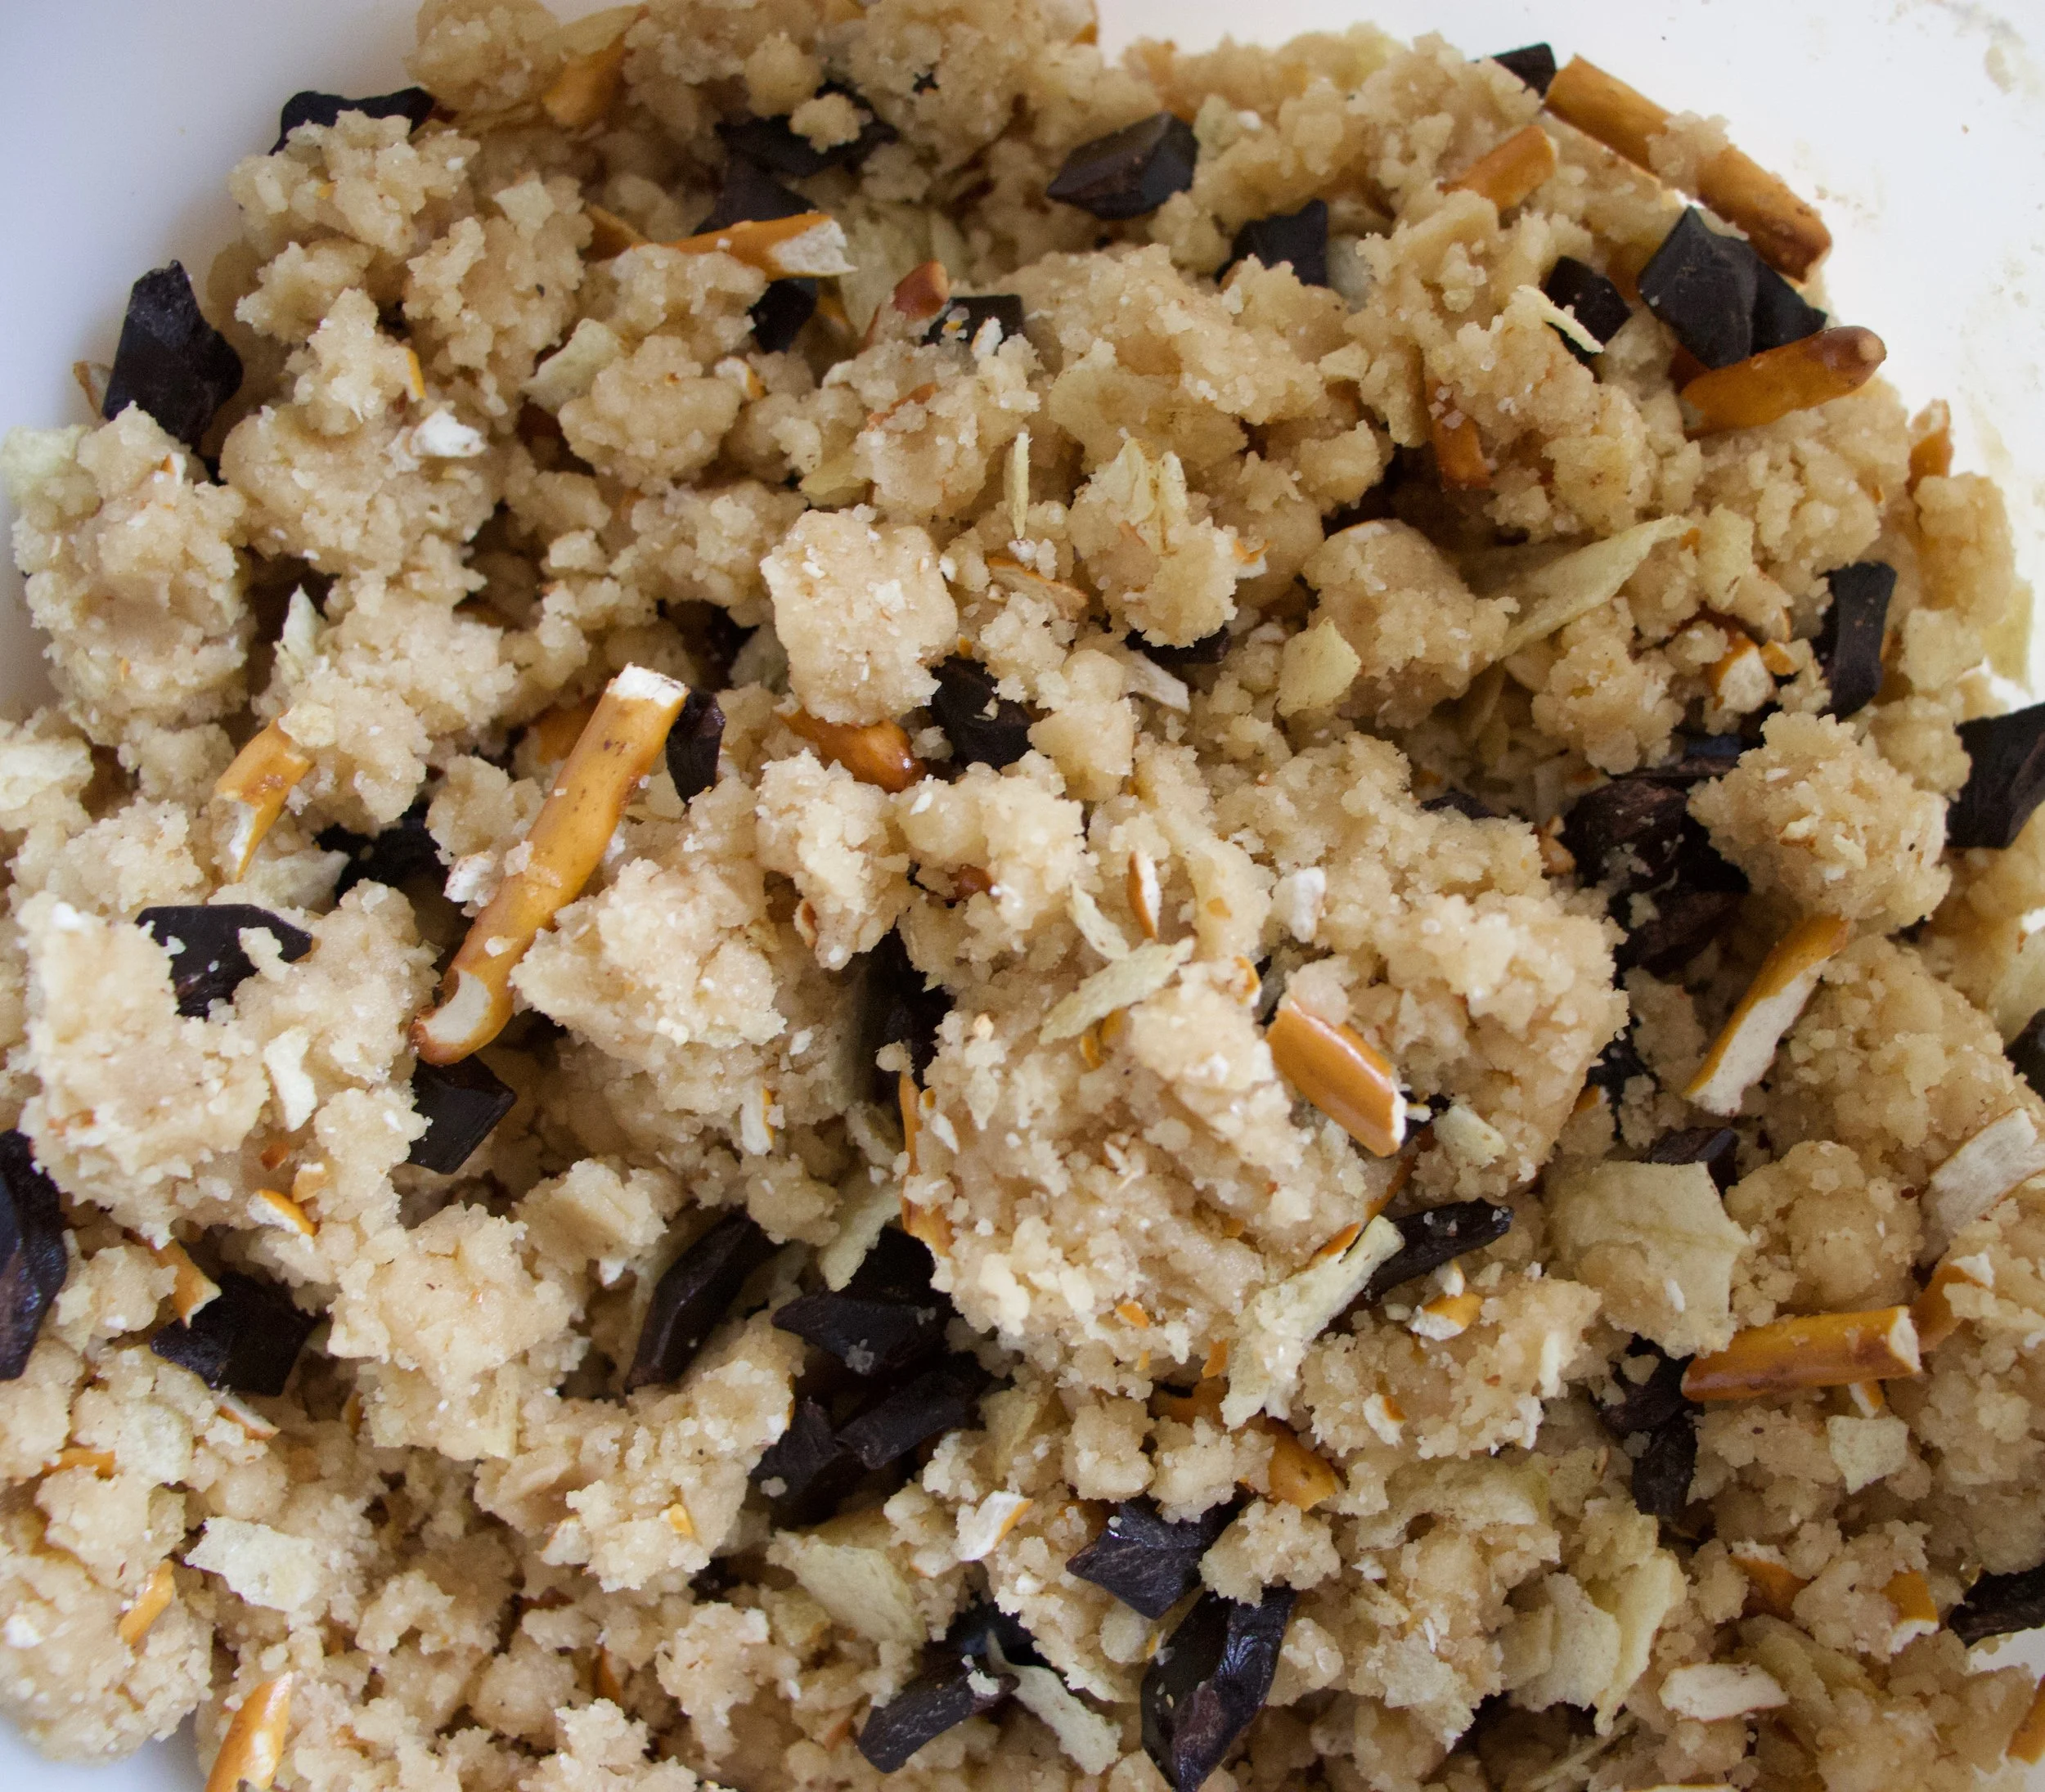
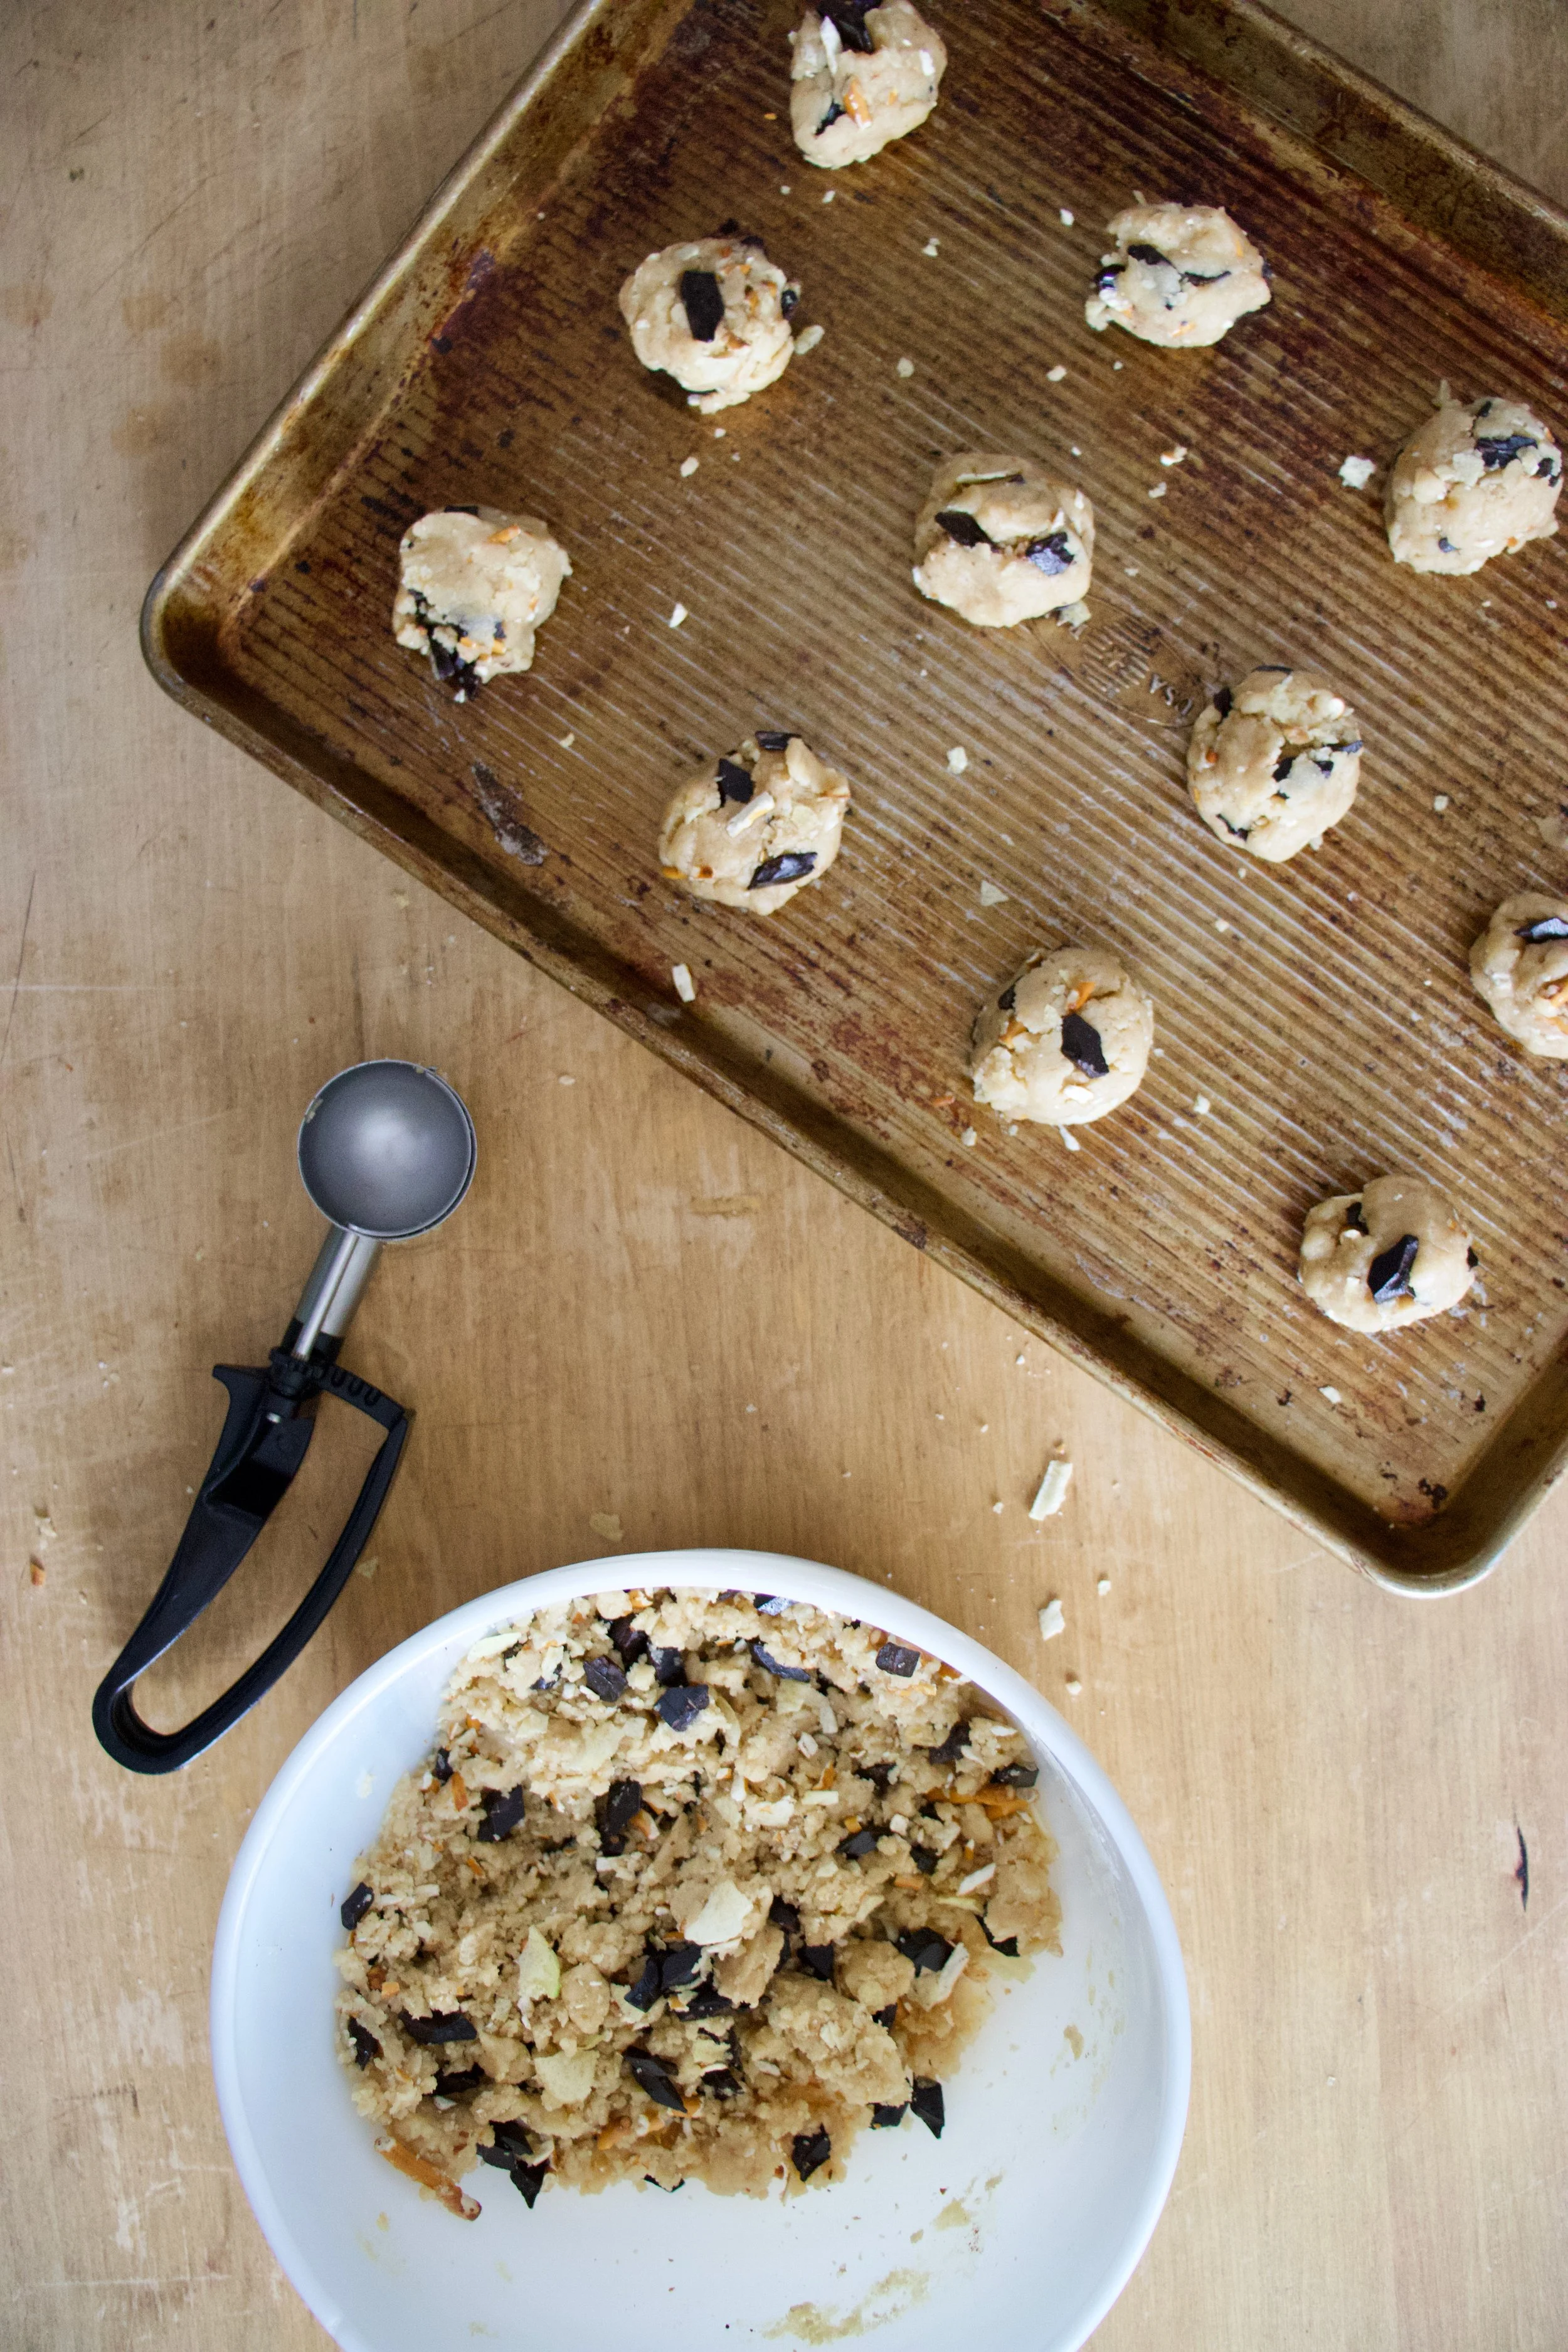
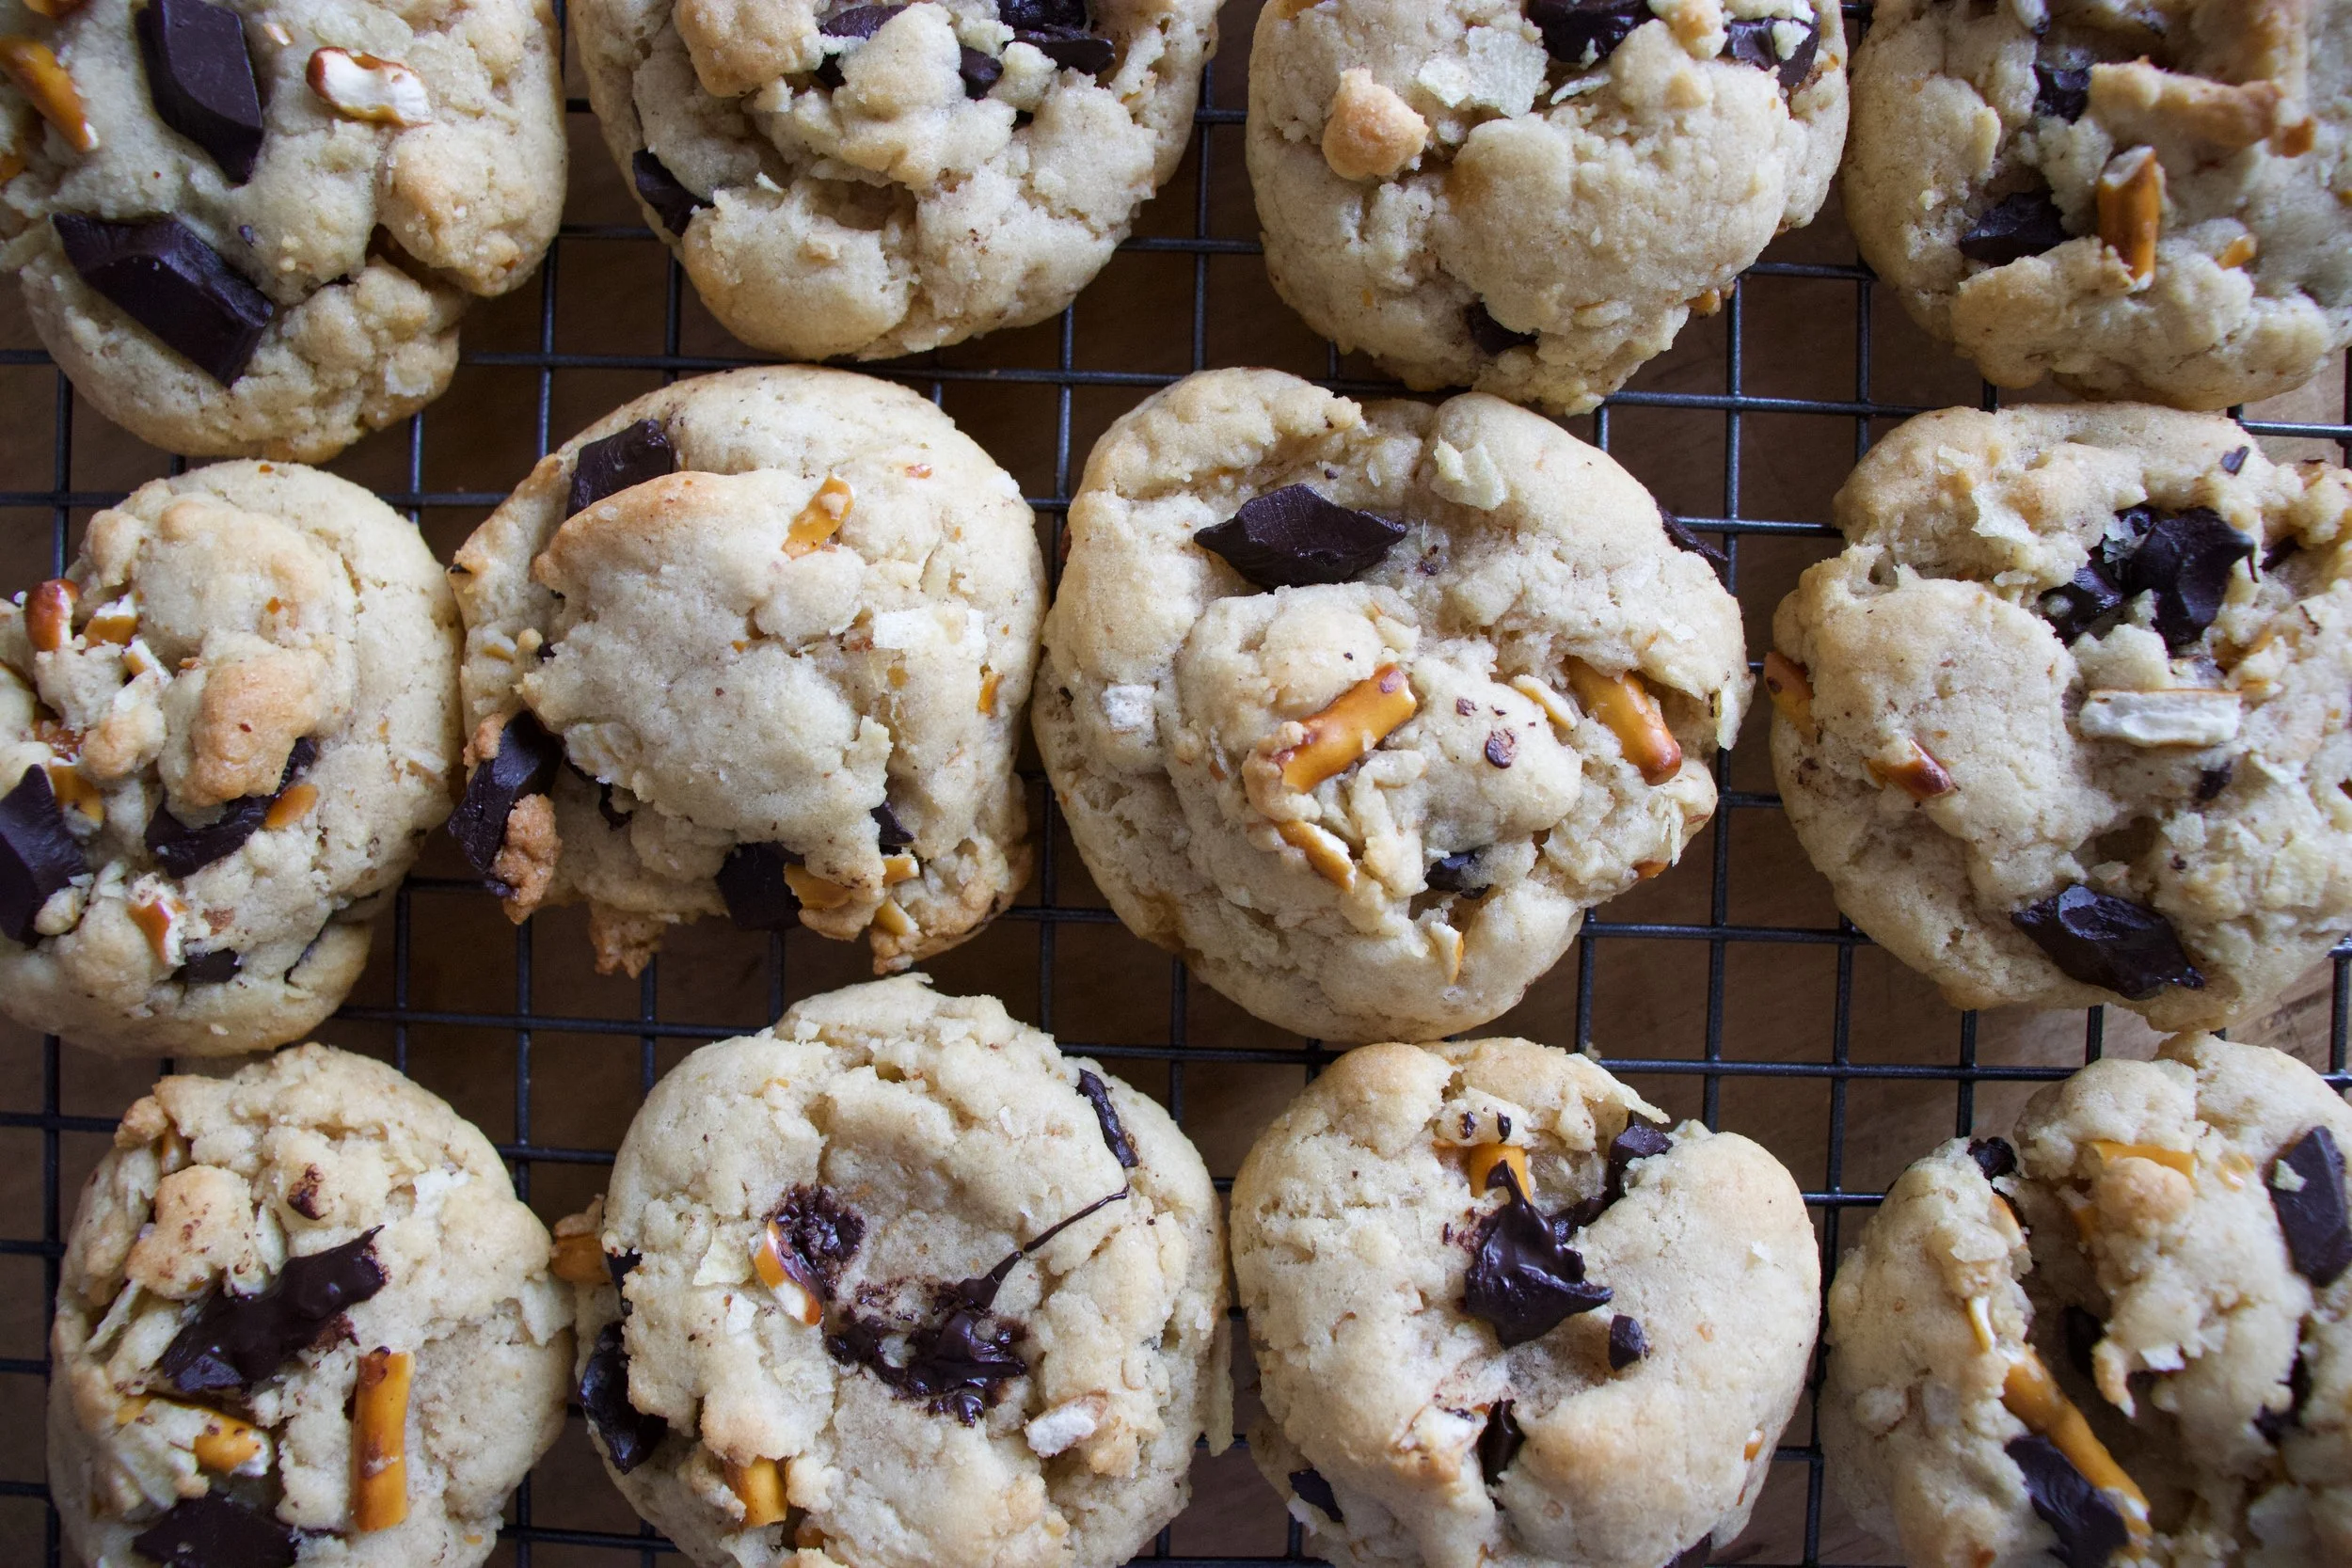
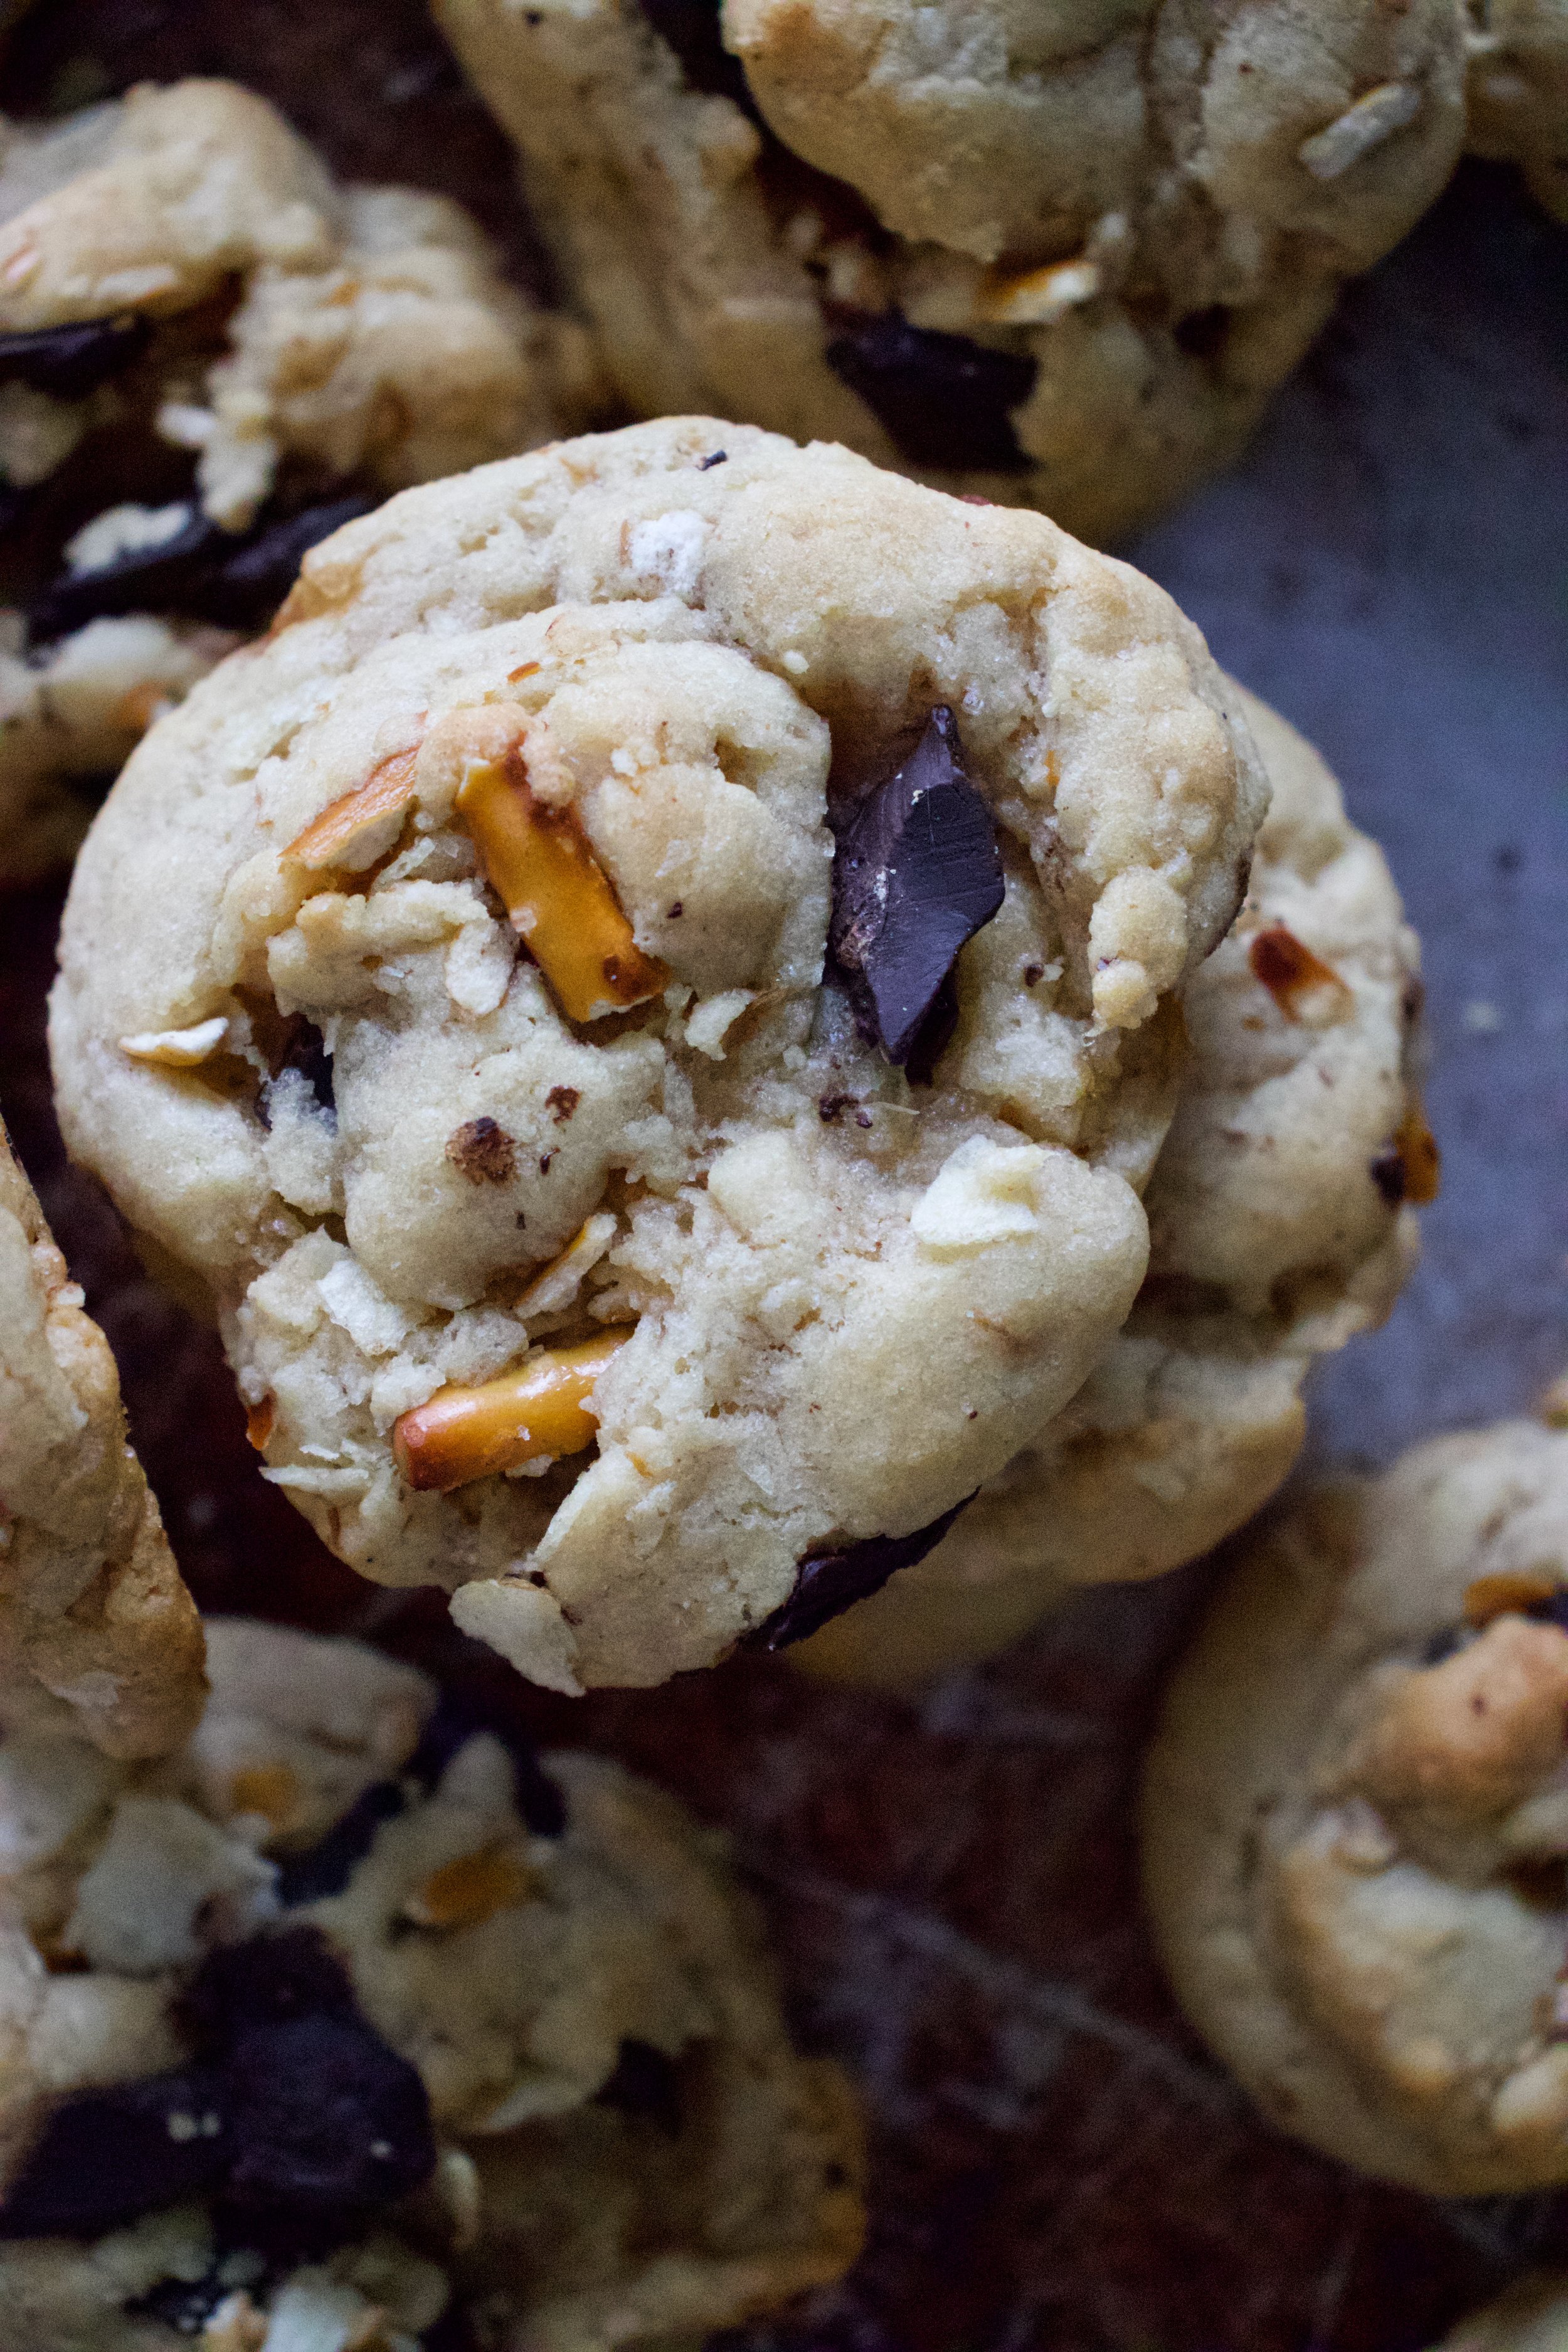

 %u00a0 %u00a0%u00a0
 %u00a0I figured now is a good time to get this recipe out there before we get to far into spring and summer recipes because there is going to be a lot of banana ice cream filled recipe coming and I figured its a good idea to have the basic banana ice cream recipe ready for people to refer too.%u00a0 And because I made so much fantastic naner ice cream, I also made a cookies and cream naner ice cream for my sisters and the mister.
 %u00a0 %u00a0
 The stuff you need for this ice cream%u2026. Nice and ripe bananas, peeled and then frozen* That’s it.
 After all blended and smooth, either eat right away or scoop ice cream into a freezer safe container and stick in freezer. That’s the banana ice cream%u2026 %u00a0And it is amazing and so so so so so addictive. I make a batch, think I am only going to eat a scoop, then find myself eating half of what I have made, but it’s ok cause it’s only bananas.%u00a0
 One%u00a0batch of banana ice cream, either freshly made, still in food processor or made ahead and placed in a food processor and given a good pulse to smooth it up.
 Now you have cookies and cream naner ice cream%u2026. and everybody is happy.
 The conversation I had with my little brother on his birthday…
 Here is the list of what you will need to make the exact shelf with the same measurements that we used%u2026but feel free to use and adjust the measurements to your want or need.
 Take one of the 17 1/2″ pieces and with a straight edge, draw two lines form opposite corners to find dead center. %u00a0Measure 8″ from center on each line, that is where the legs are going to be placed. Working with one leg at a time, add a smear of wood glue to each leg as you are about to screw it down. Place leg on mark and sink a screw about an inch up from the inside of the leg, screwing at a slight angle (see photo)..
 Now grab the top piece (17 1/2 “) piece and the two sides pieces (25 1/2”). Add a bit of wood glue to the side ends and line up top piece with the sides. %u00a0Sink 2 screws into each side. If you have another person helping, have them hold the pieces for you while you screw the top into the sides.. if not, use the bottom to rest a side against (like in picture).%u00a0
 Now flip over and screw the bottom piece into the sides%u2026%u2026
 Place shelf on the lines (The wood should fit in tight, you might even have to bang it a bit to get it into place%u2026.but you want it to fit nice and snug.)%u00a0Now screw the shelf%u2026two screws on each side.

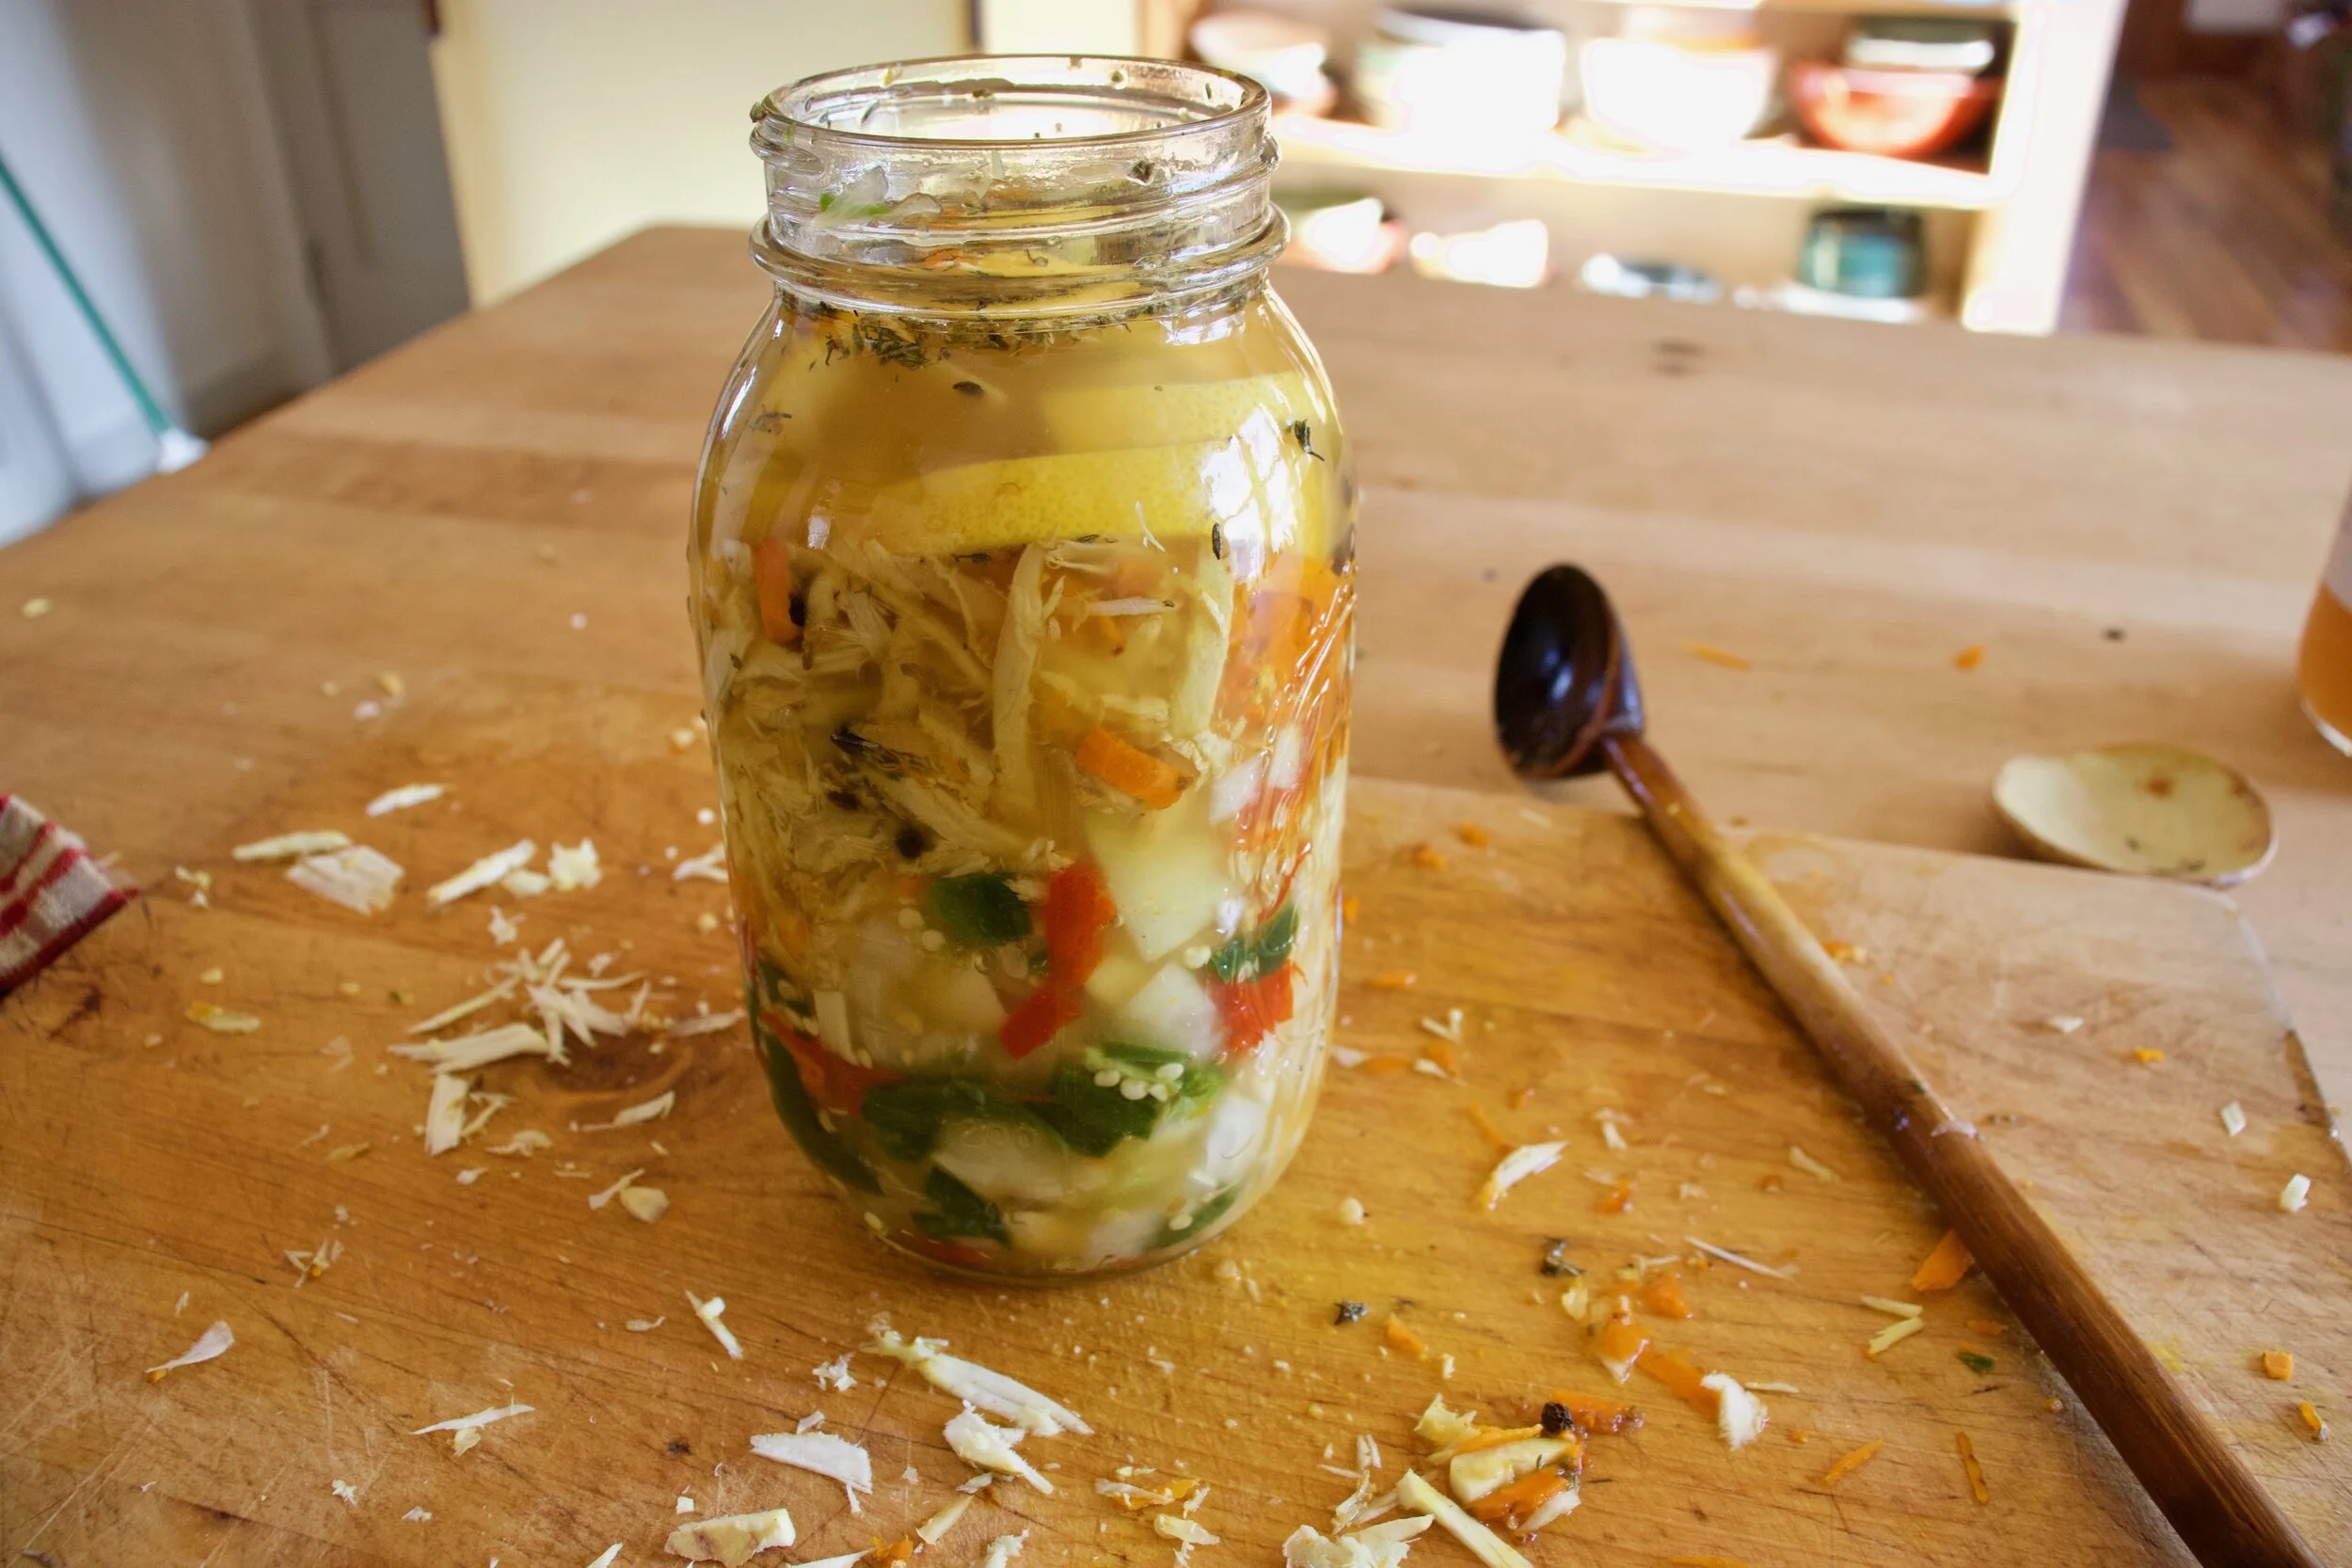

 %u00a0I’ll let you know now, I am a make and eat soup all year long person. I can think of few things better then sitting outside, basking in the sun, hopefully with a light wind, a book in hand, enjoying a nice big cup of some good homemade soup. (Doesn’t that sound so freaking lovely?) This soup right here is perfect for just that. Parsnips are the best, kind of like a big white sweet, yet starchy carrots. And cooked together with a little bit of light and lemony thyme, rich earthy turmeric and a couple more chopped veggie%u2026.. you got yourself a%u00a0nice thick and fragrant bowl of happiness that fills you up without weighing you down. It’s food you can eat that fills you up, leaves you feeling cozy, yet still wanting to hop on a bike or lace up the running shoes. %u00a0Hearty without the feeling of all the heaviness.
 The stuff. Parsnips, carrots, onion and garlic. Thyme and turmeric, salt and pepper. the tinniest bit of oil and water (water not shown)
 Chop all the veggies and the garlic, drizzle a dutch oven or a pot with oil, toss in the veggies. Add the turmeric, the thyme, and 1/2 cup of water.%u00a0
 Sweet sweating the veggies. Turn pot on medium and cook until the water completely cooks out. When the veggies start to brown and stick to the pot, deglaze with water. Give a good stir and keep cooking. Repeat the deglazing process until the veggies are super soft and ready to blend. (I did this 4 times.. it only took 10 minutes)
 Add enough water to cover the cooked veggies.%u00a0
 And now blend the heck out of it.. Go as smooth or chunky as you want. I blended as smooth as I could get with this crappy immersion blender. (Blender on loan until I finally decide on, and buy a new one)
 And there you have it. Scoop into bowls, add lots of cracked black pepper, and go to town. I made enough to save a bowl for later%u2026 %u00a0it didn’t last for later.%u00a0
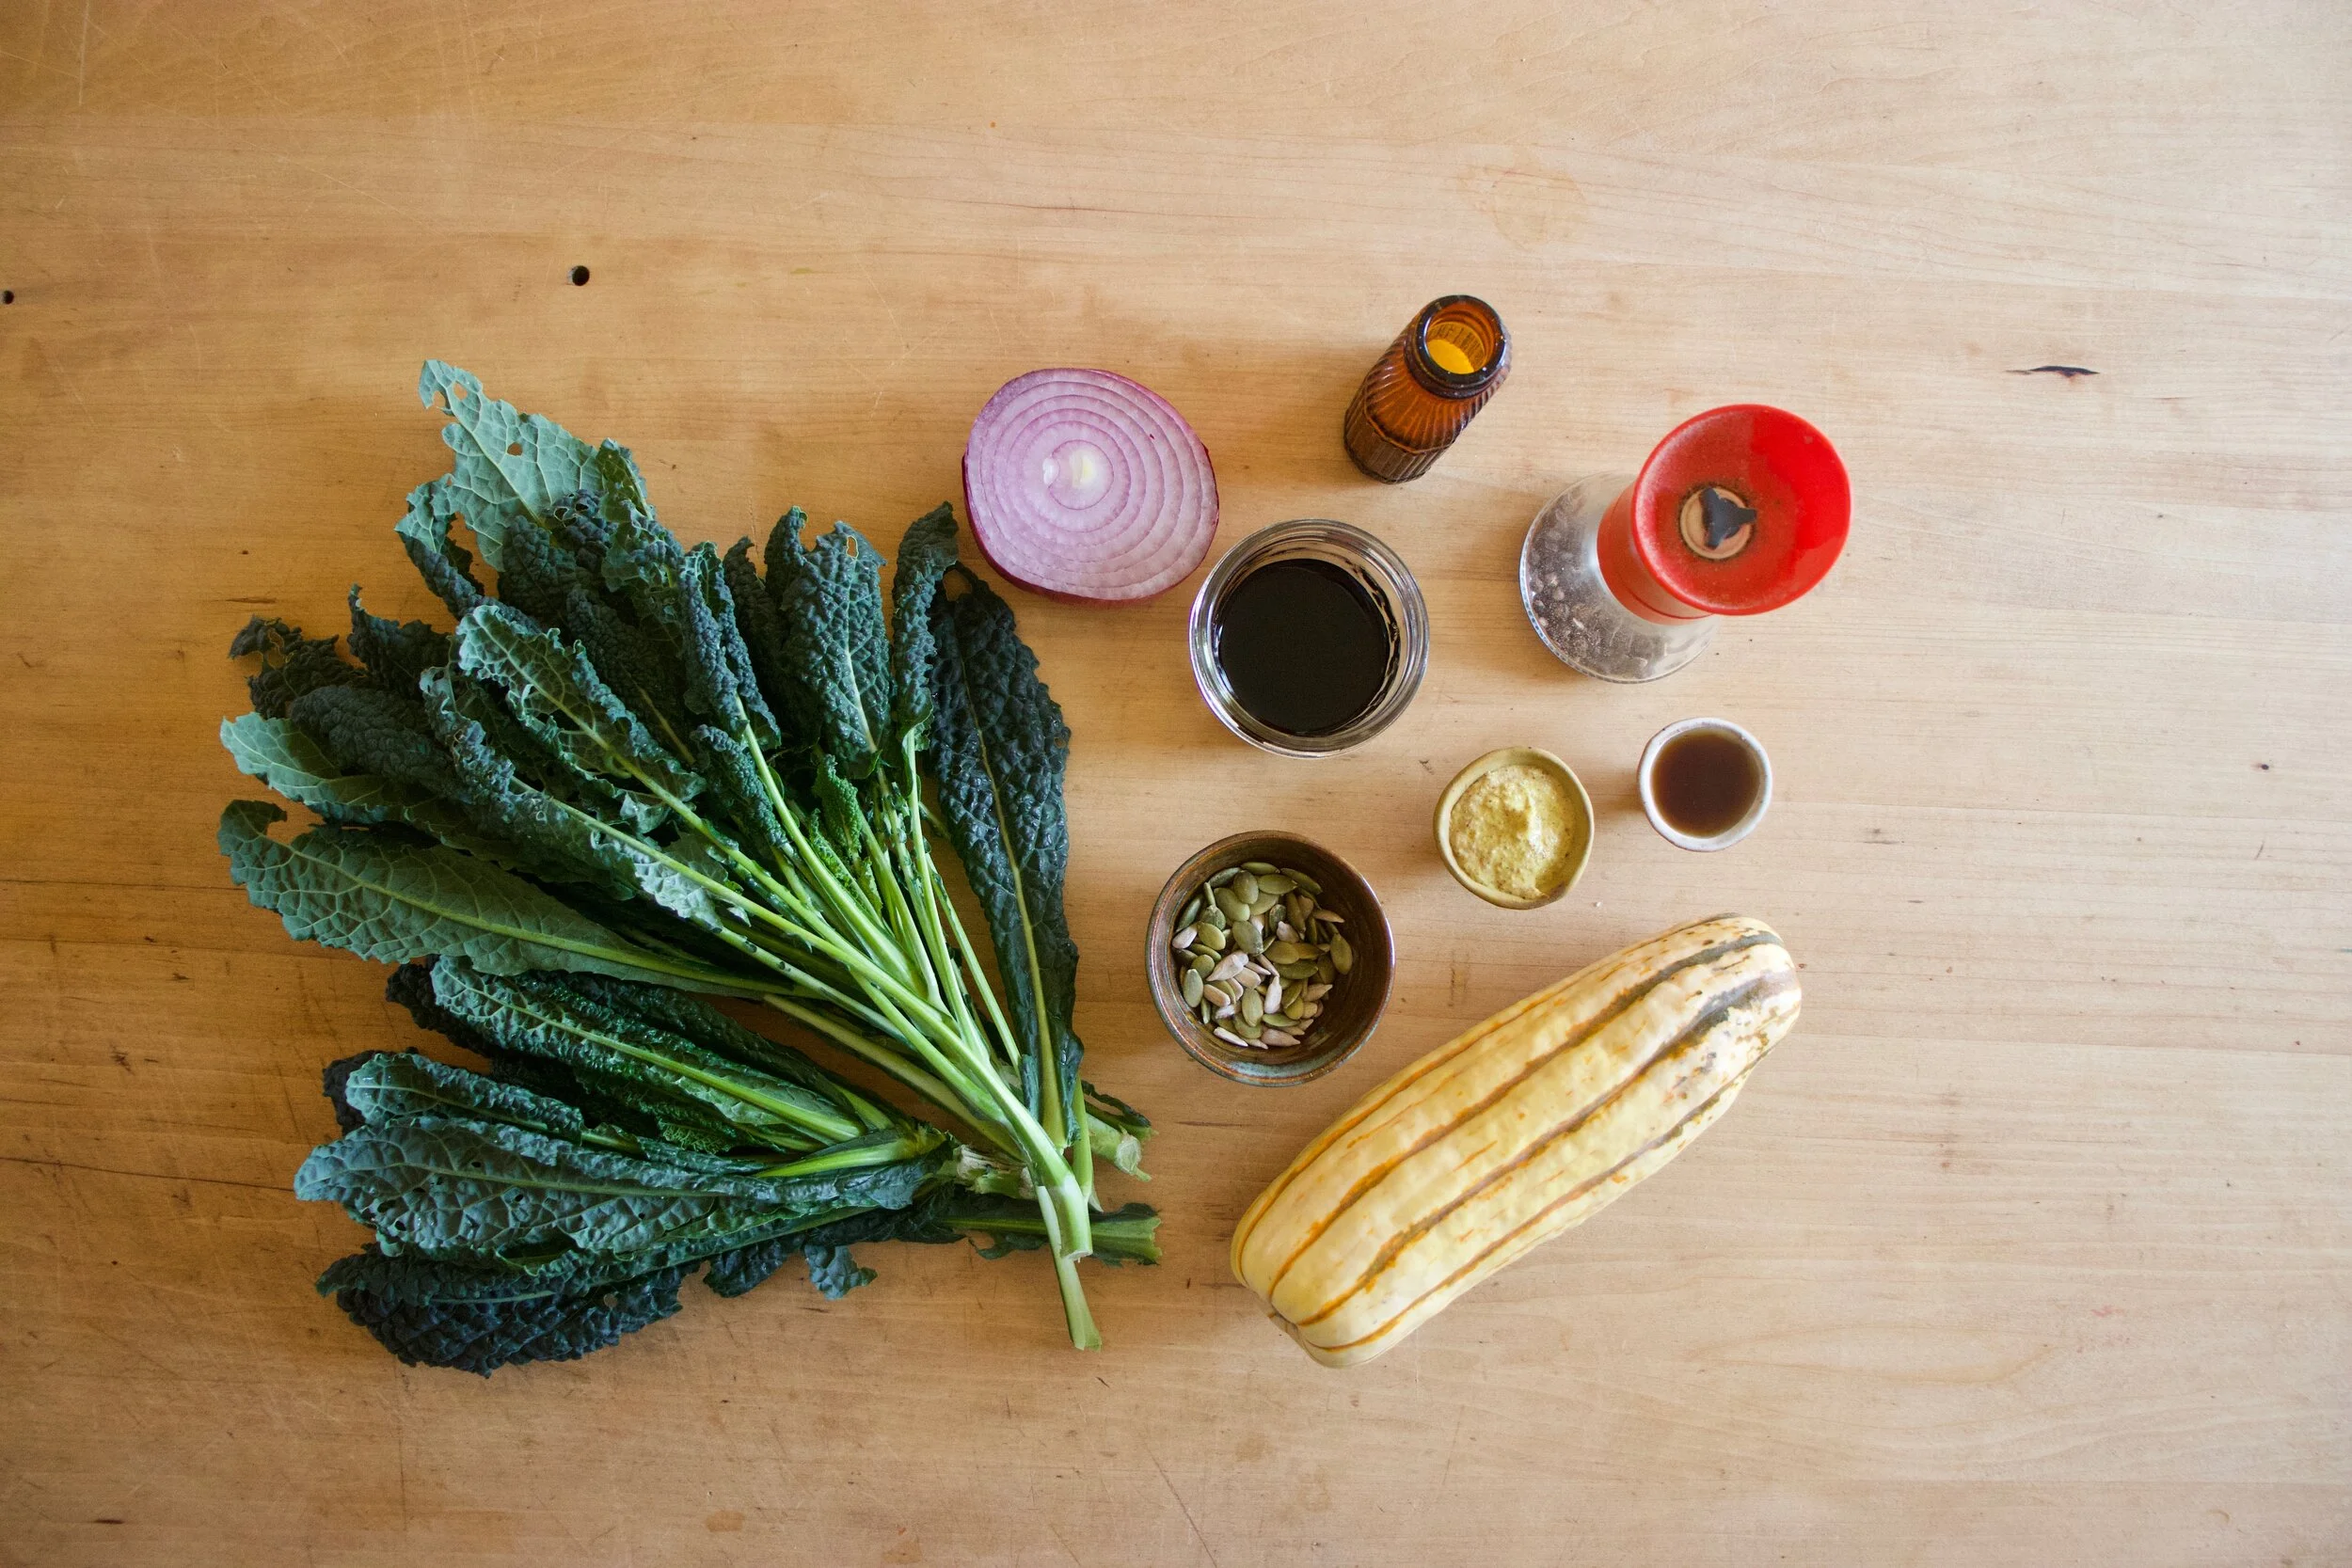
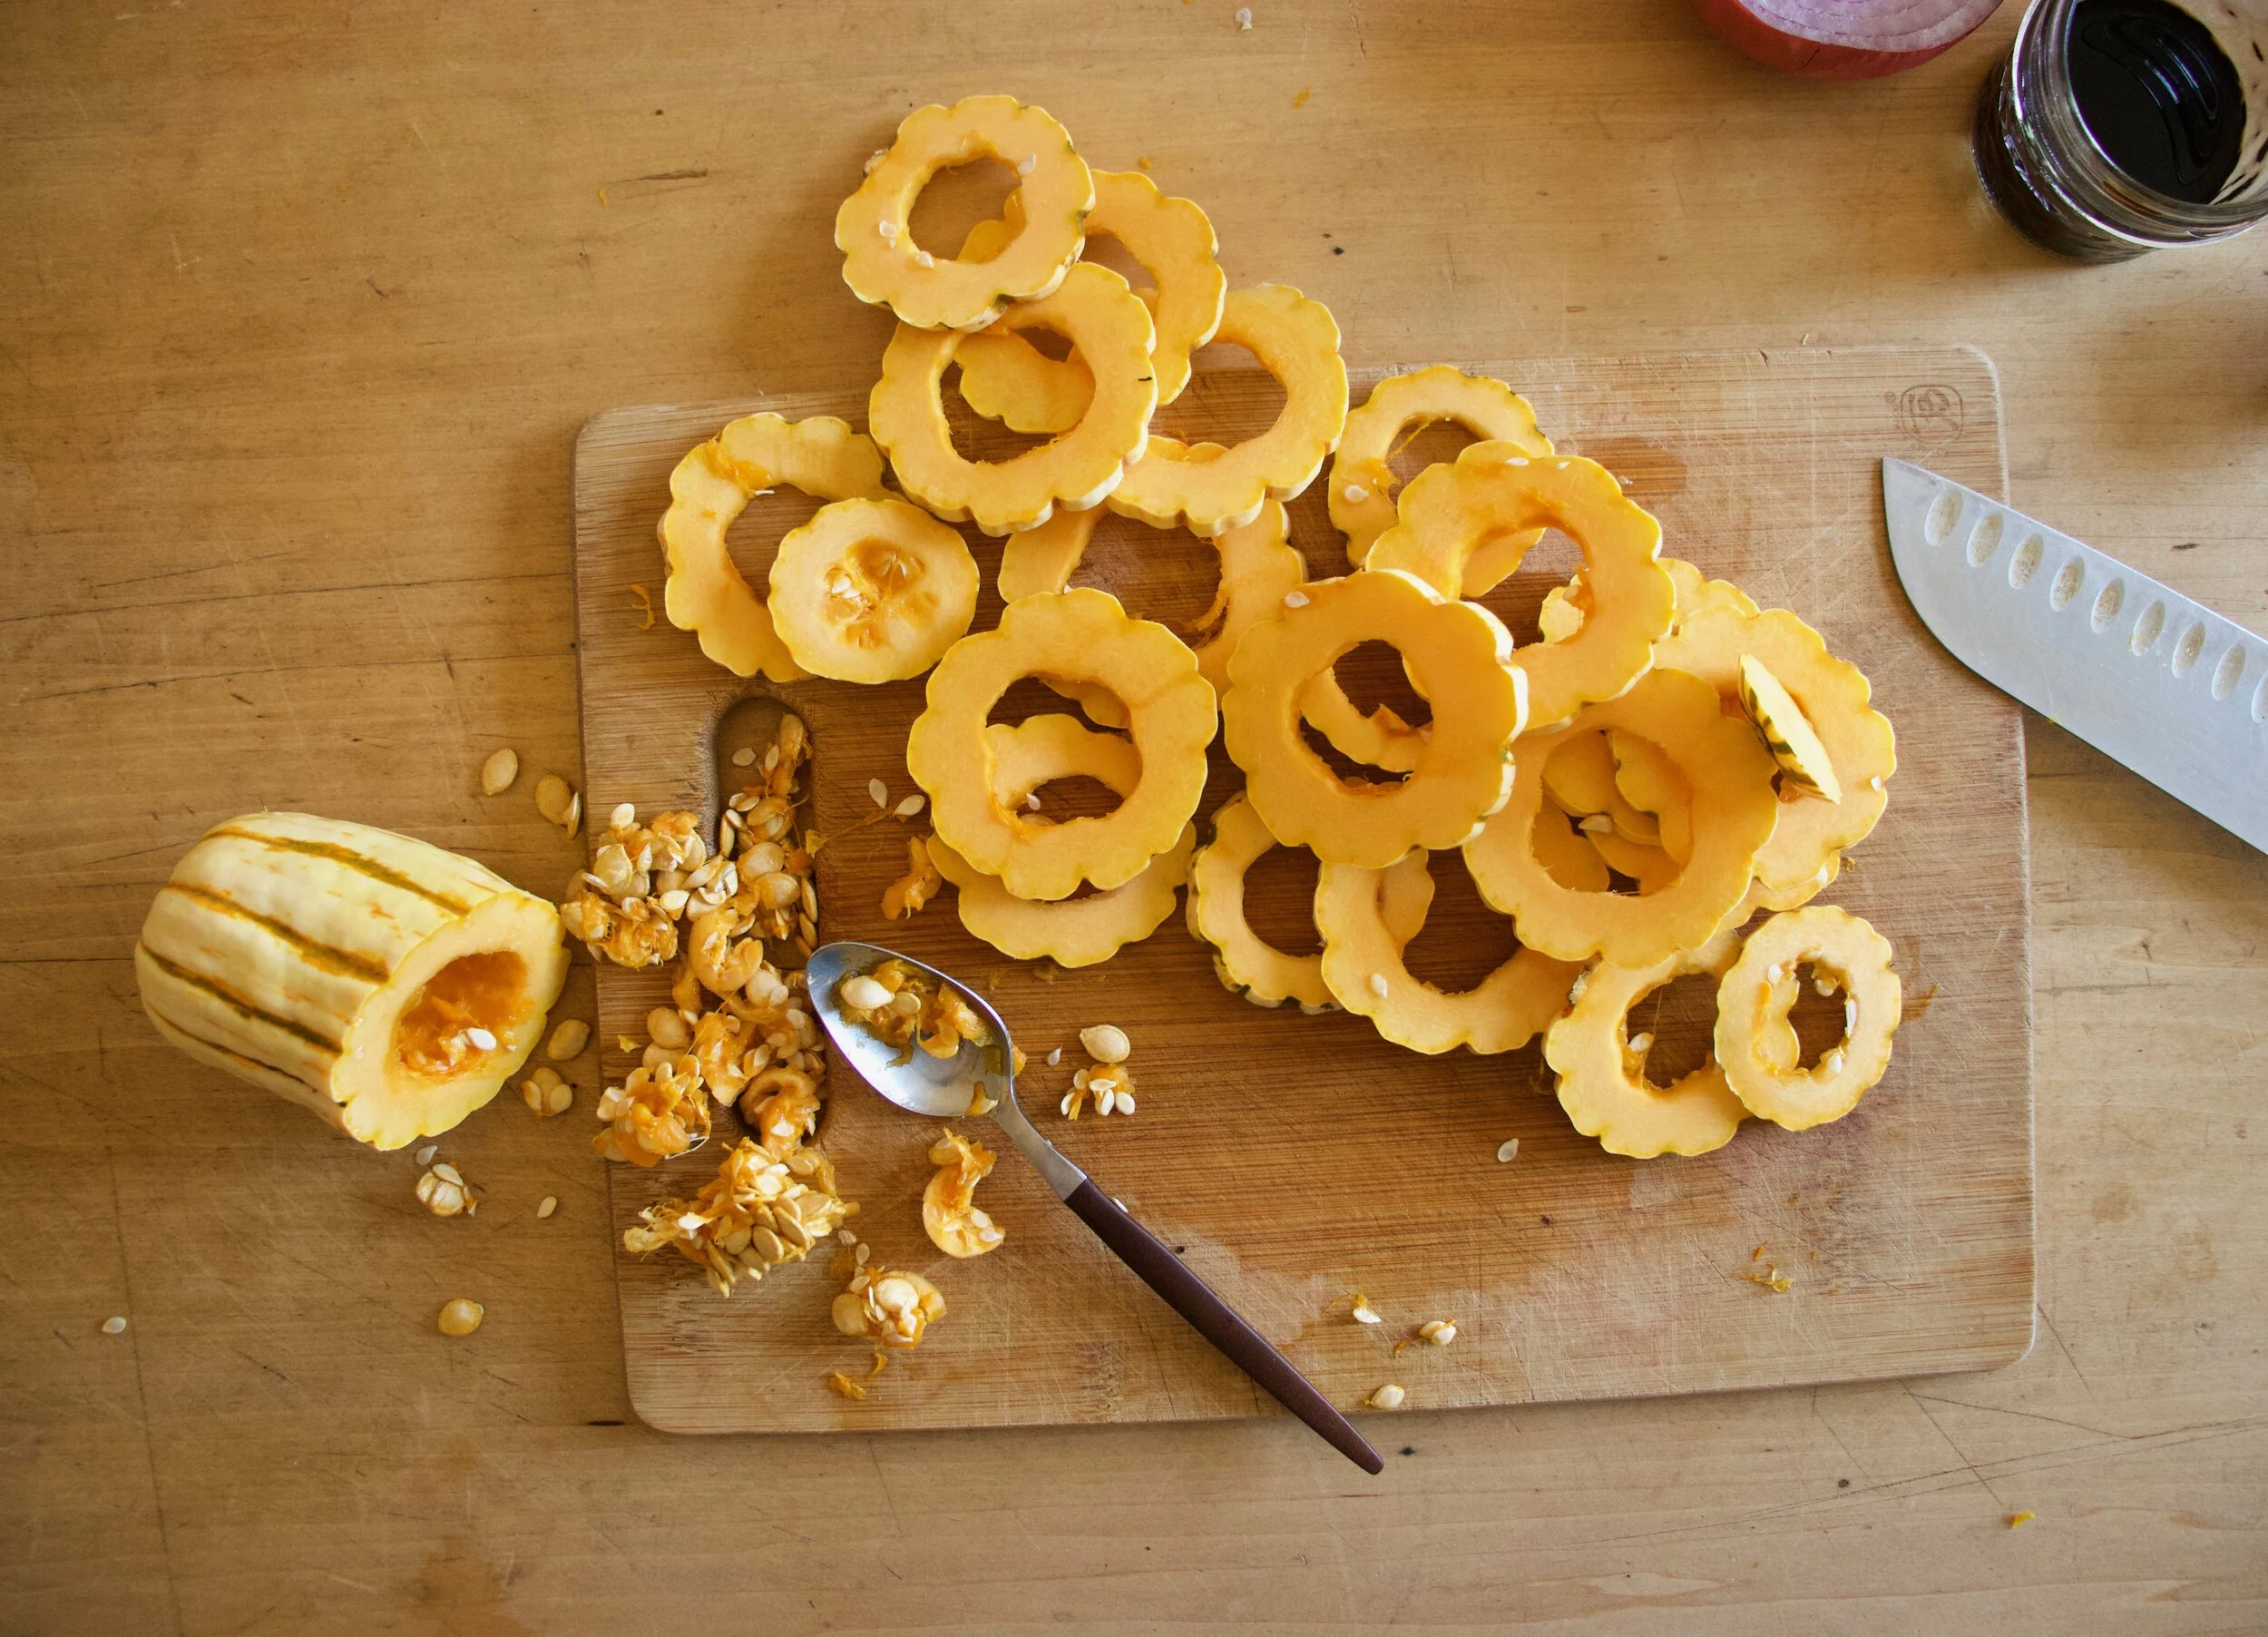
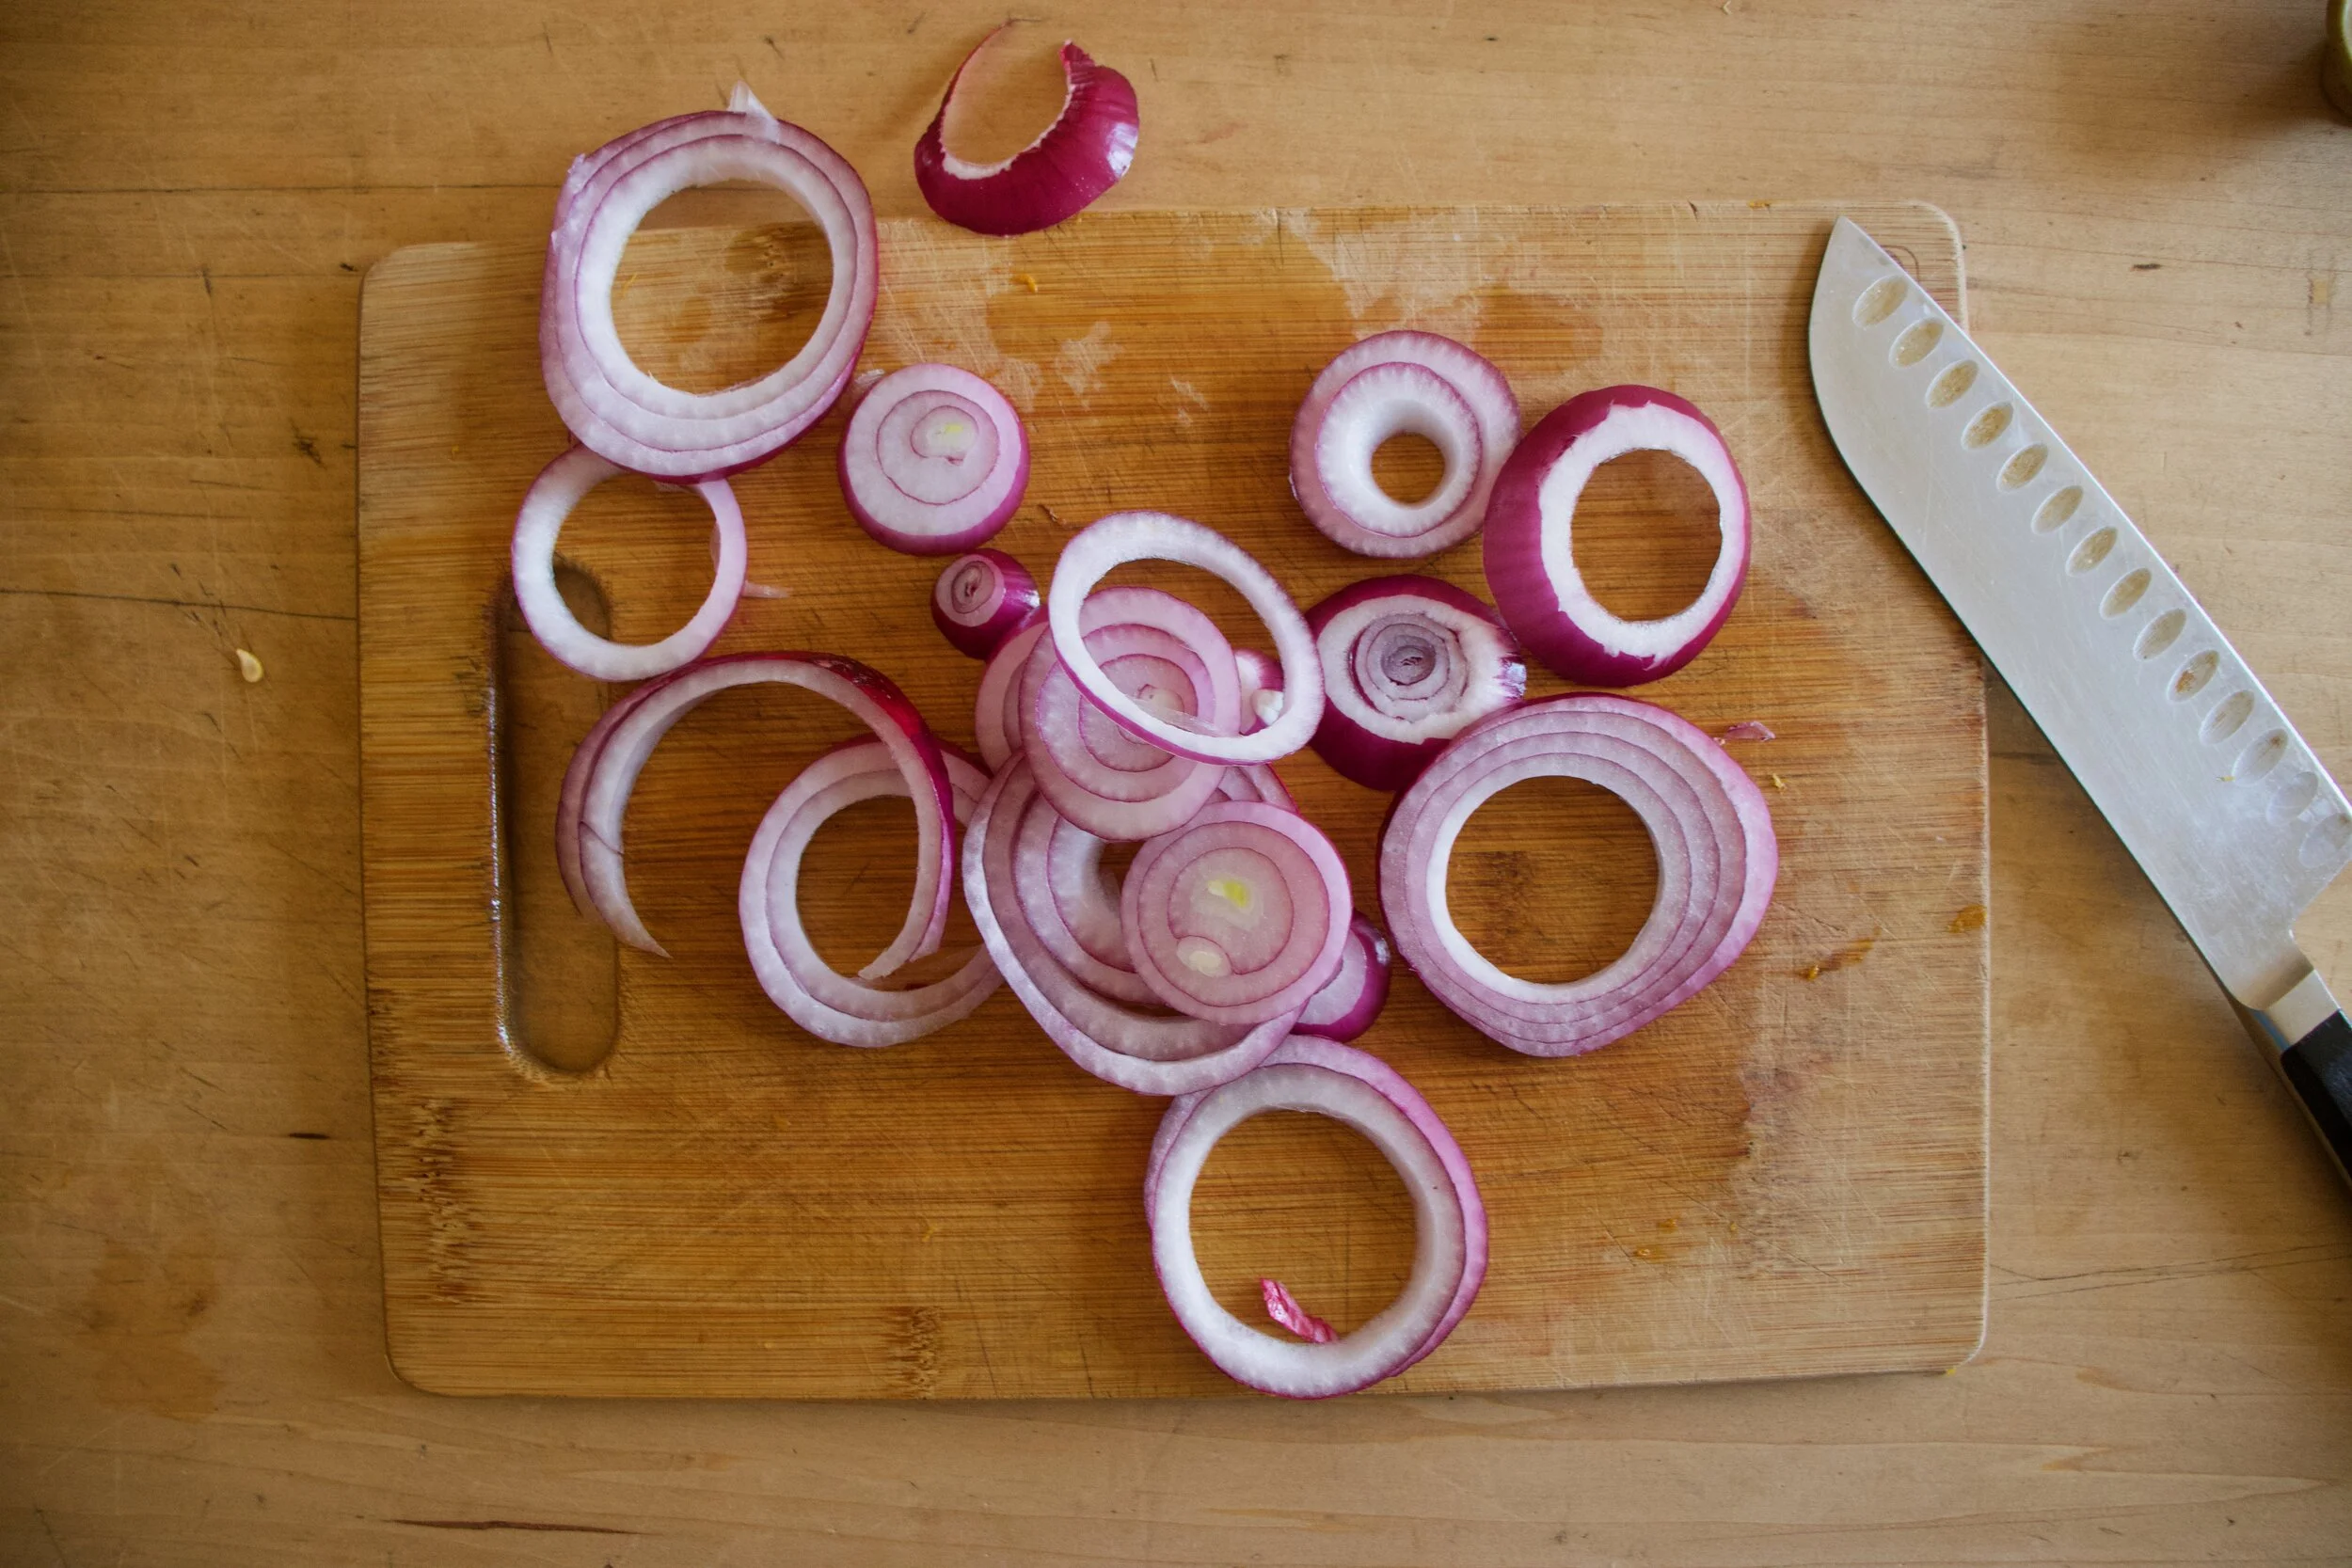
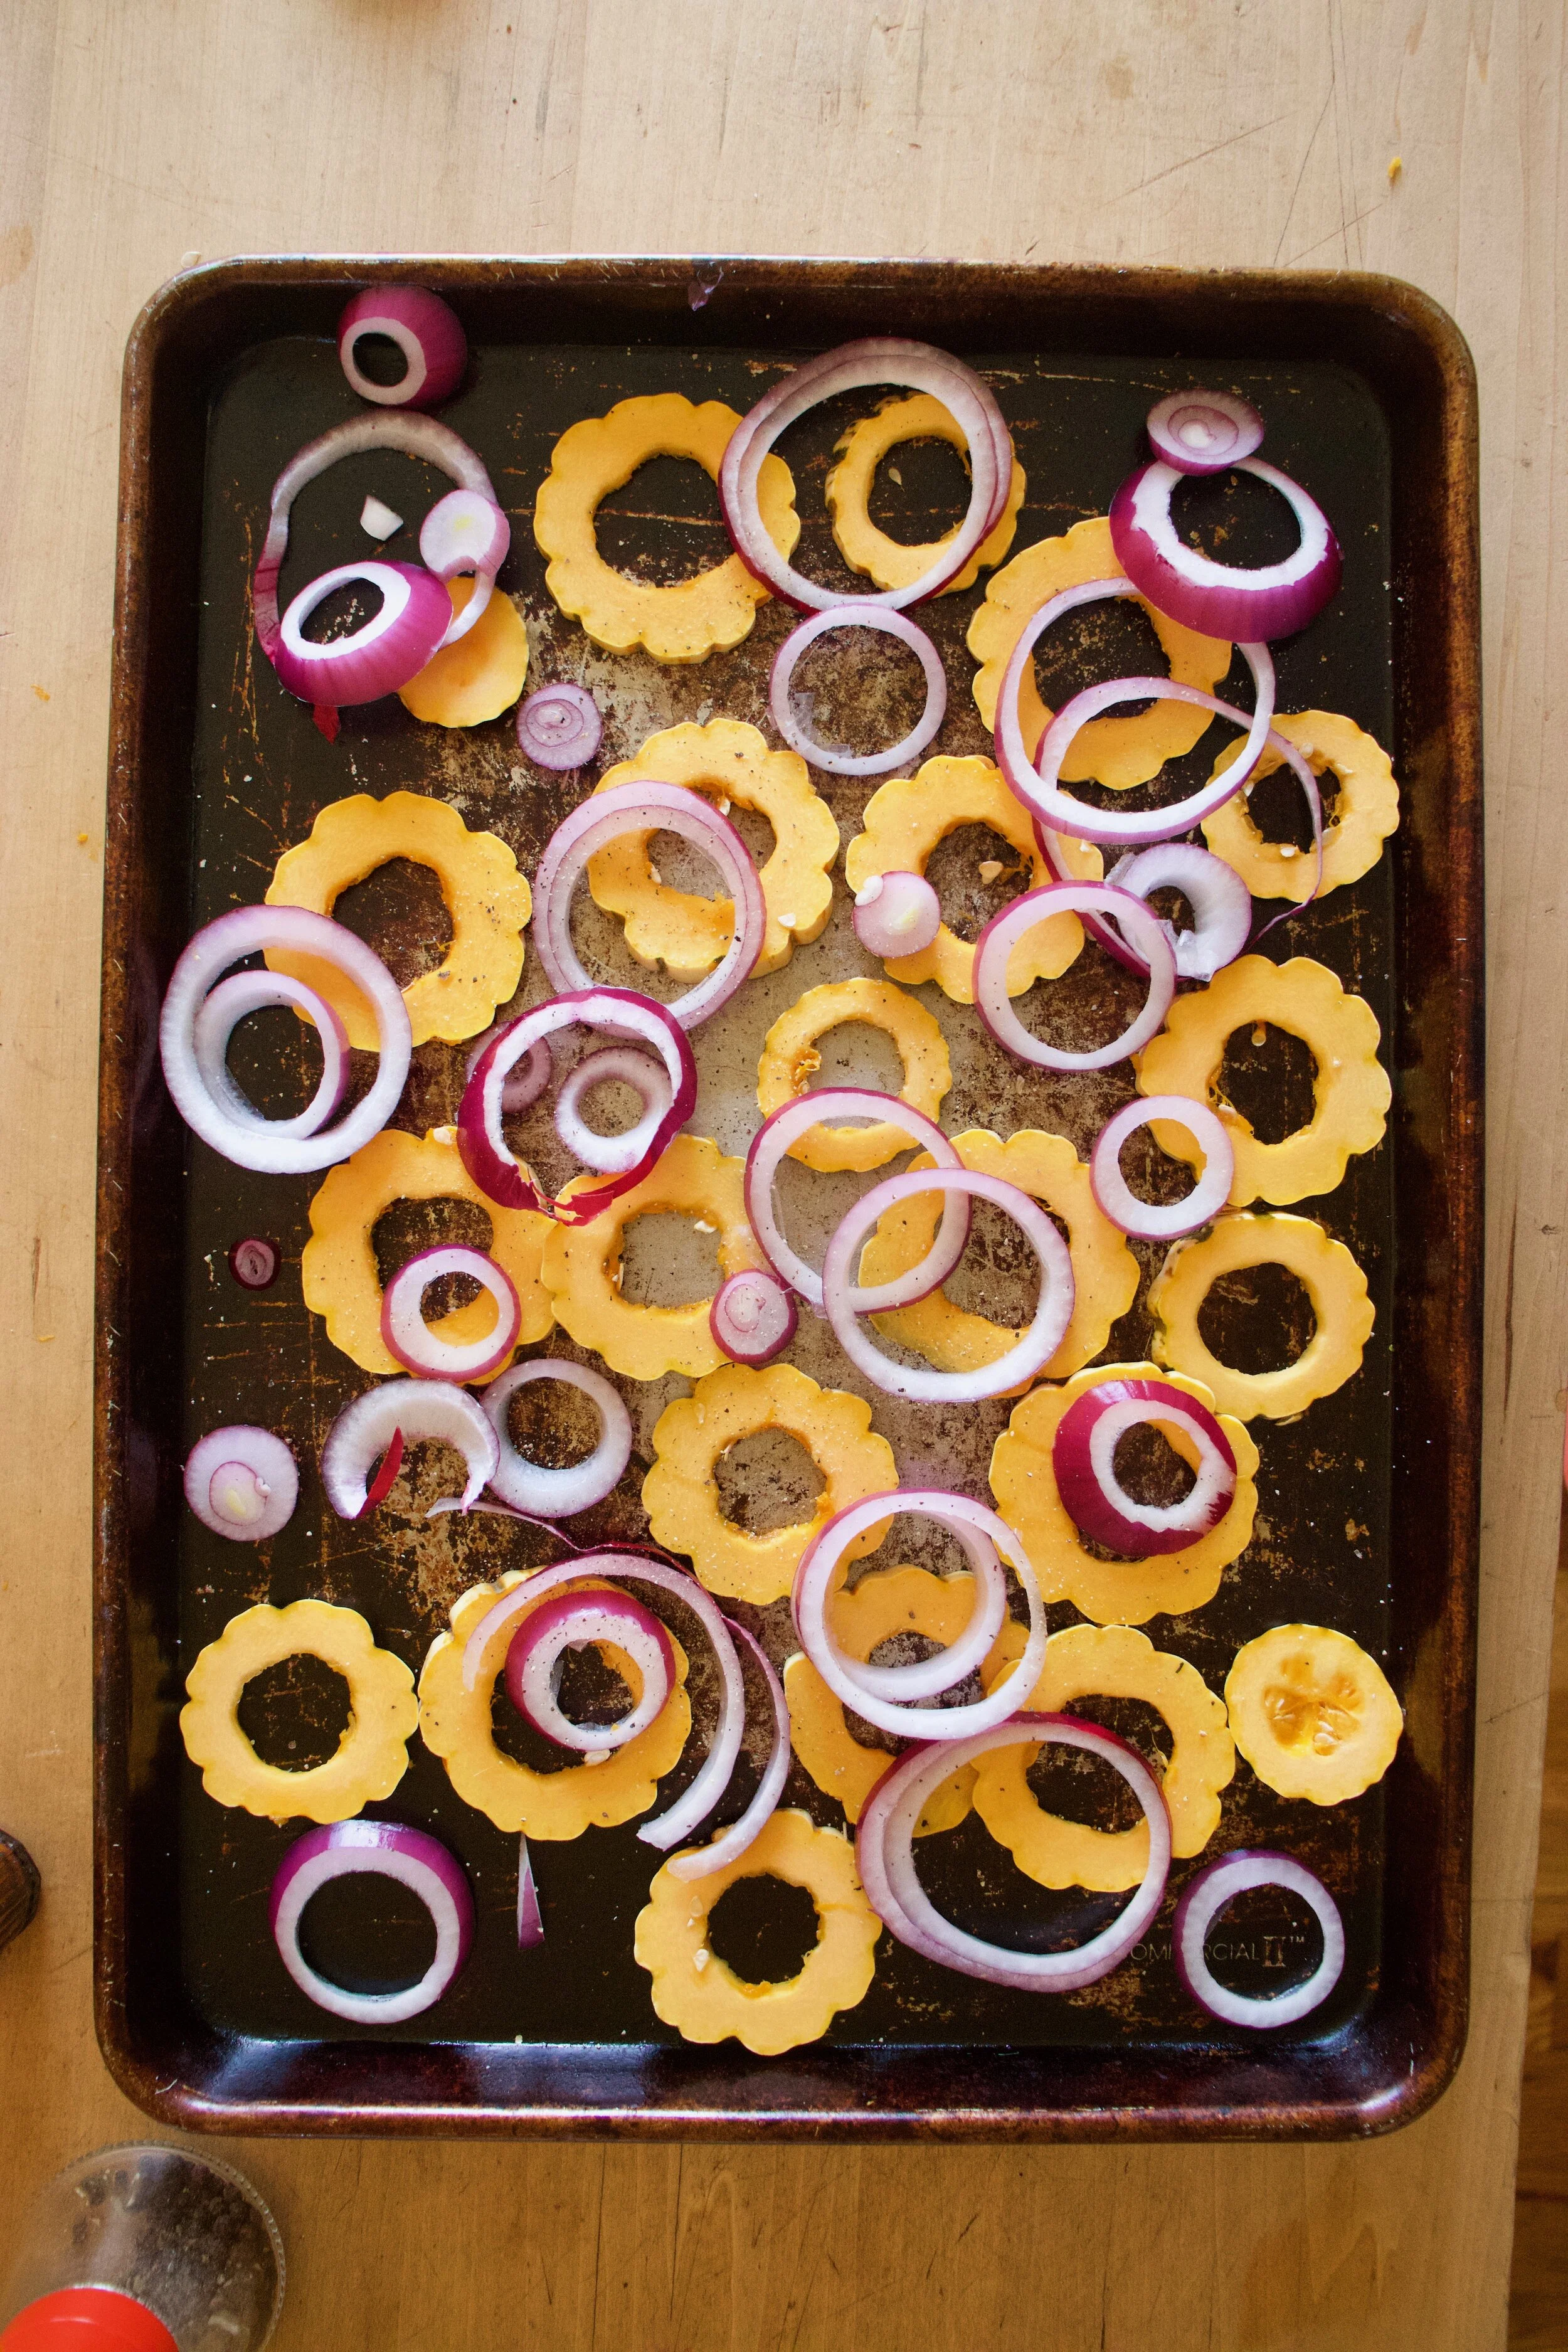

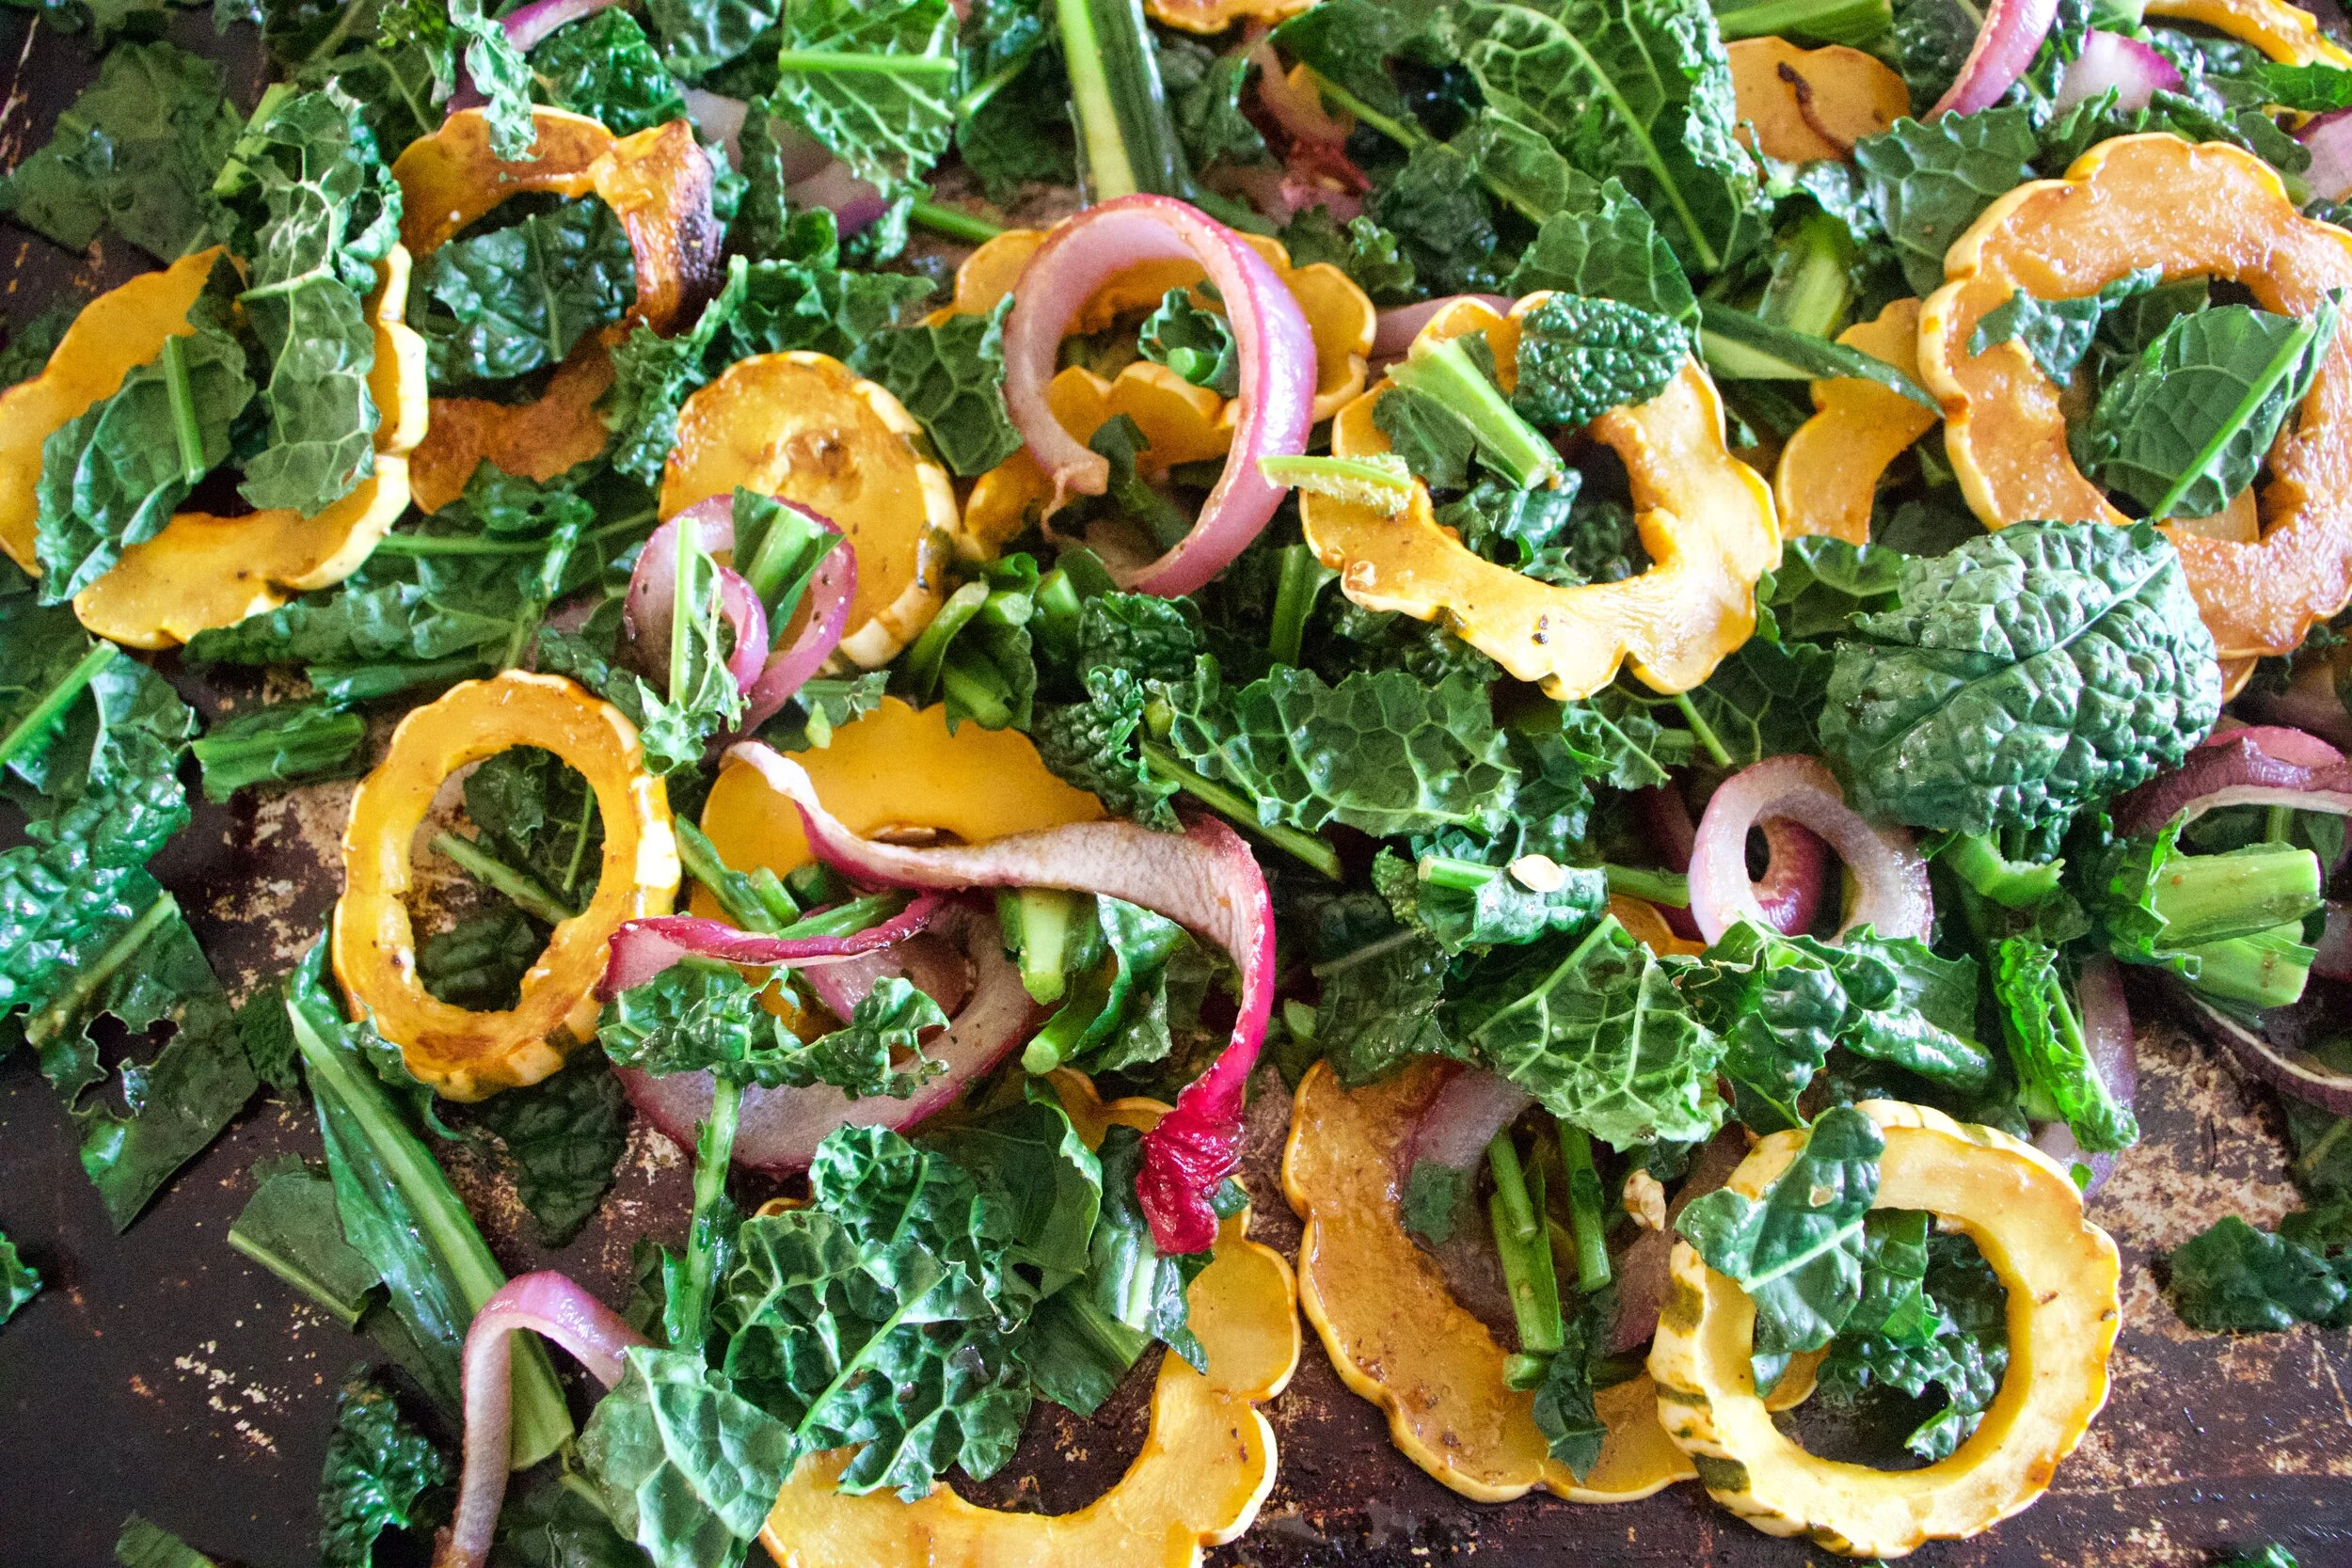
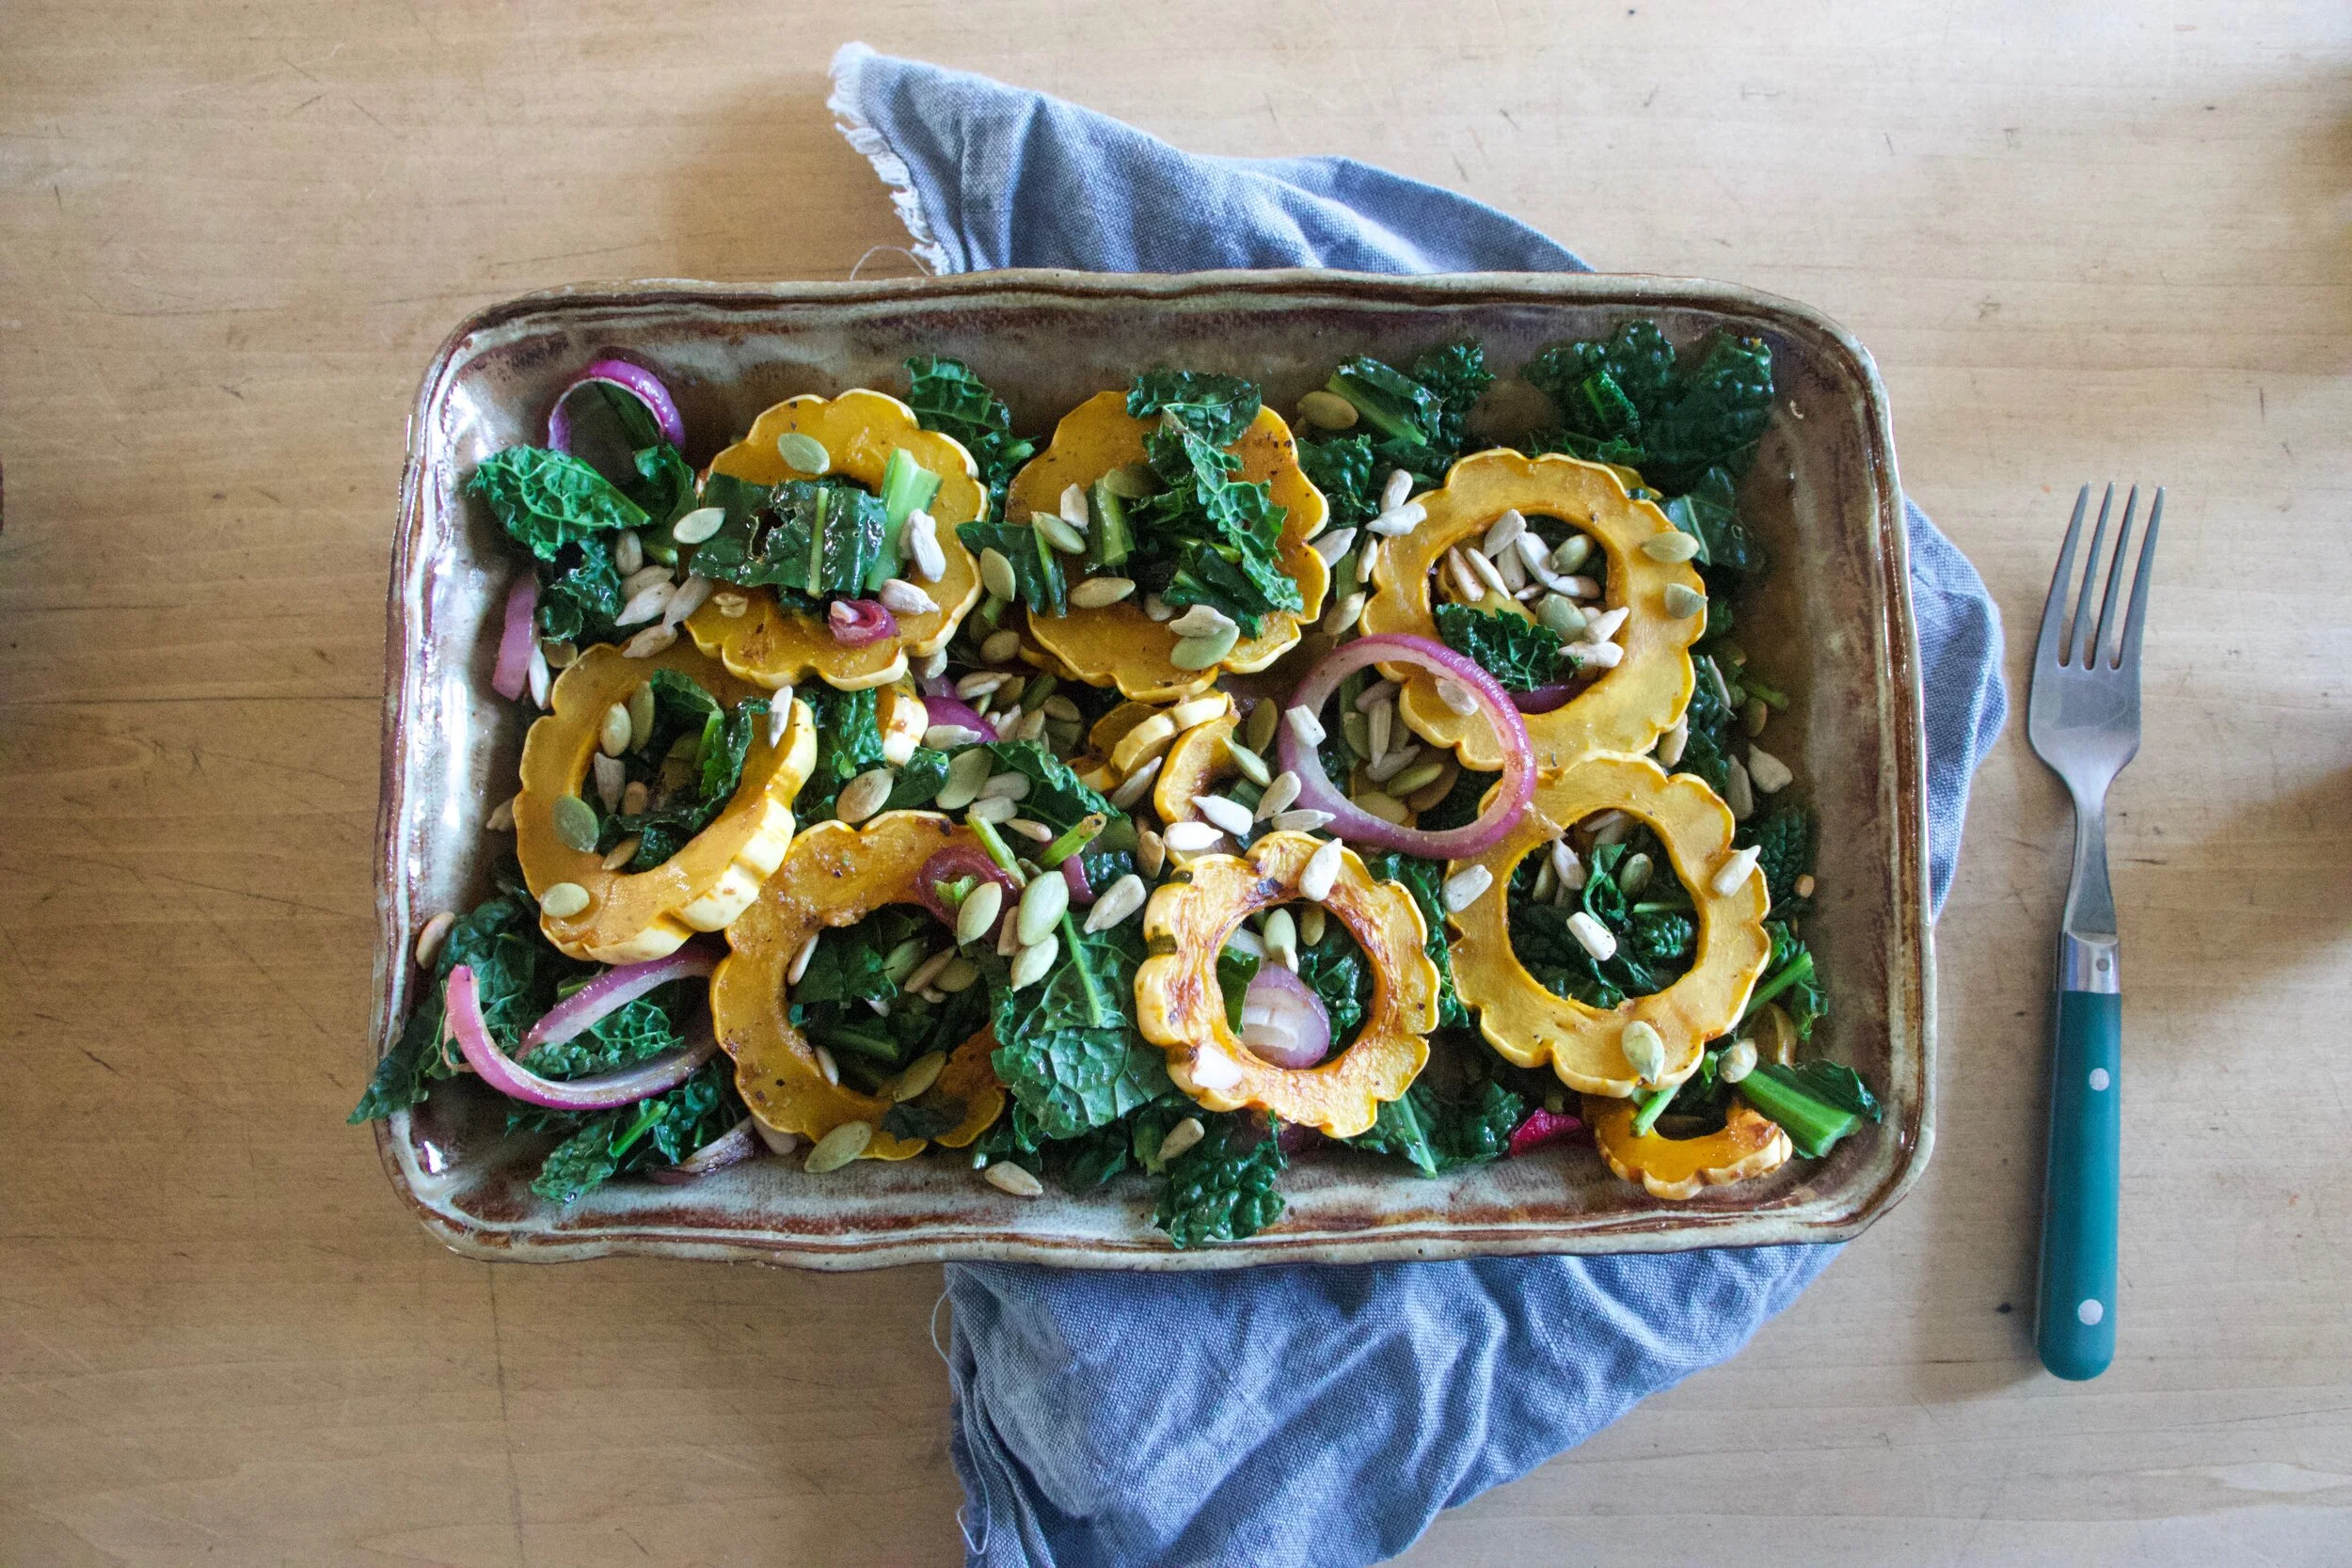


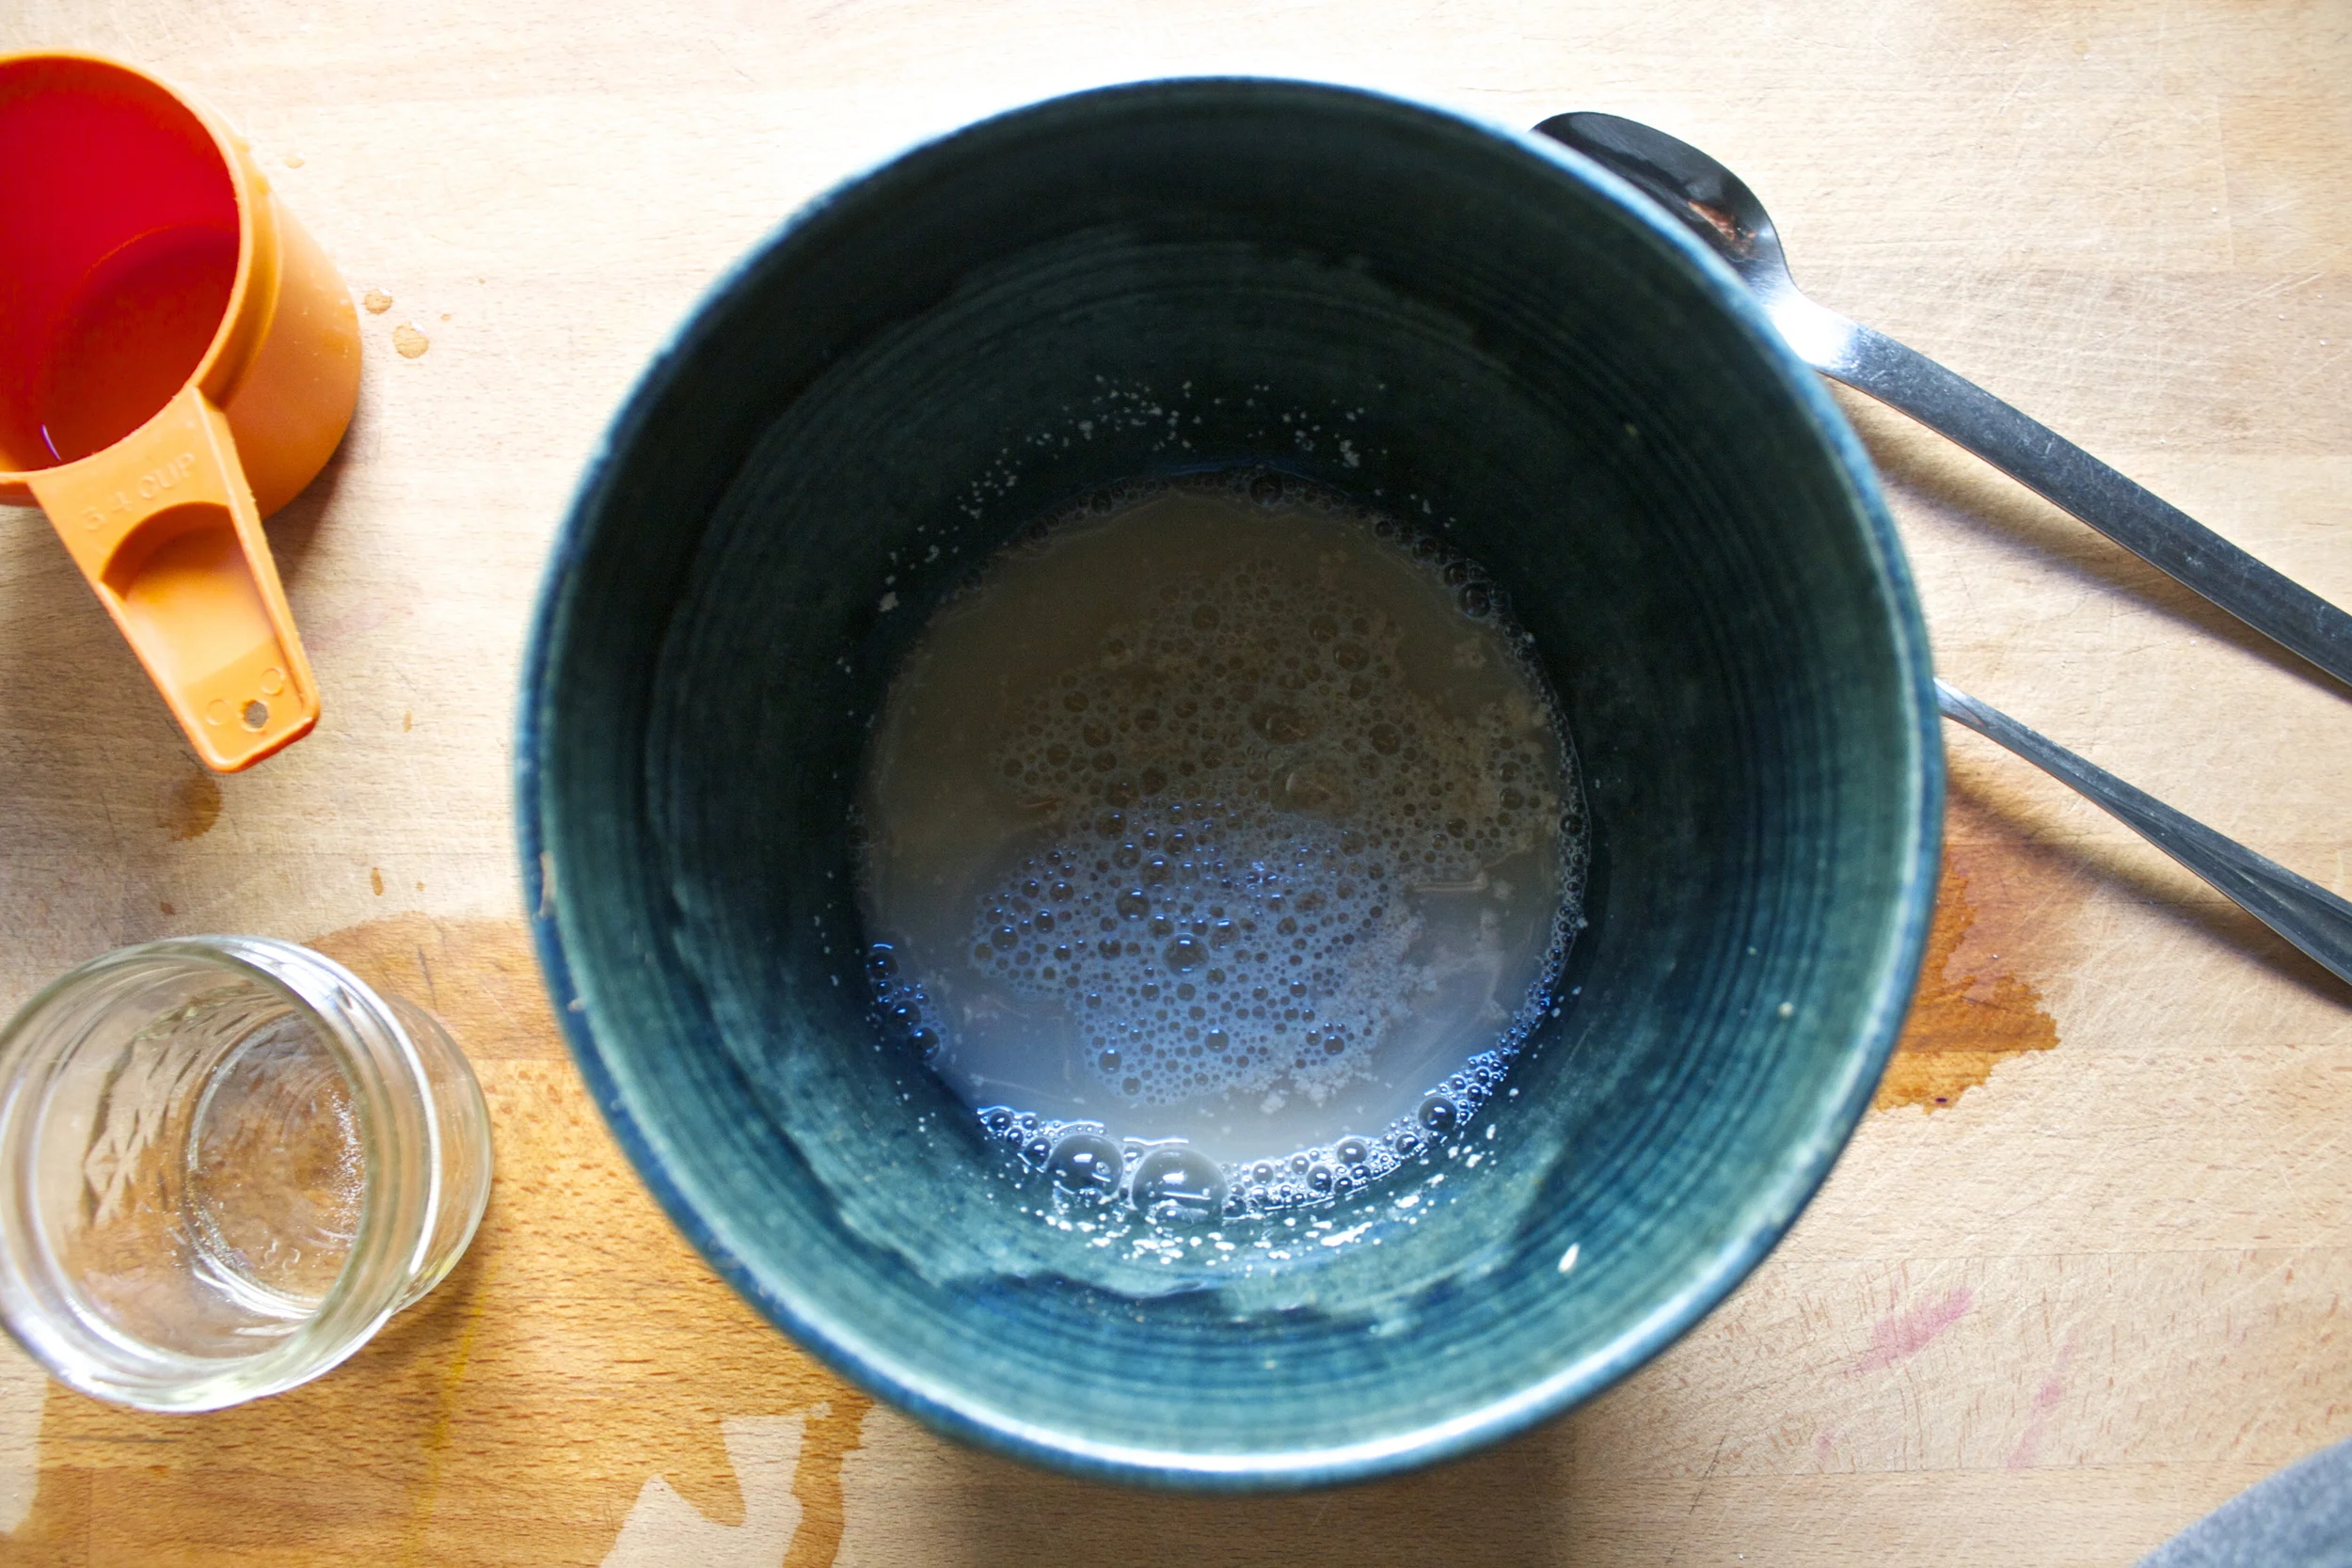
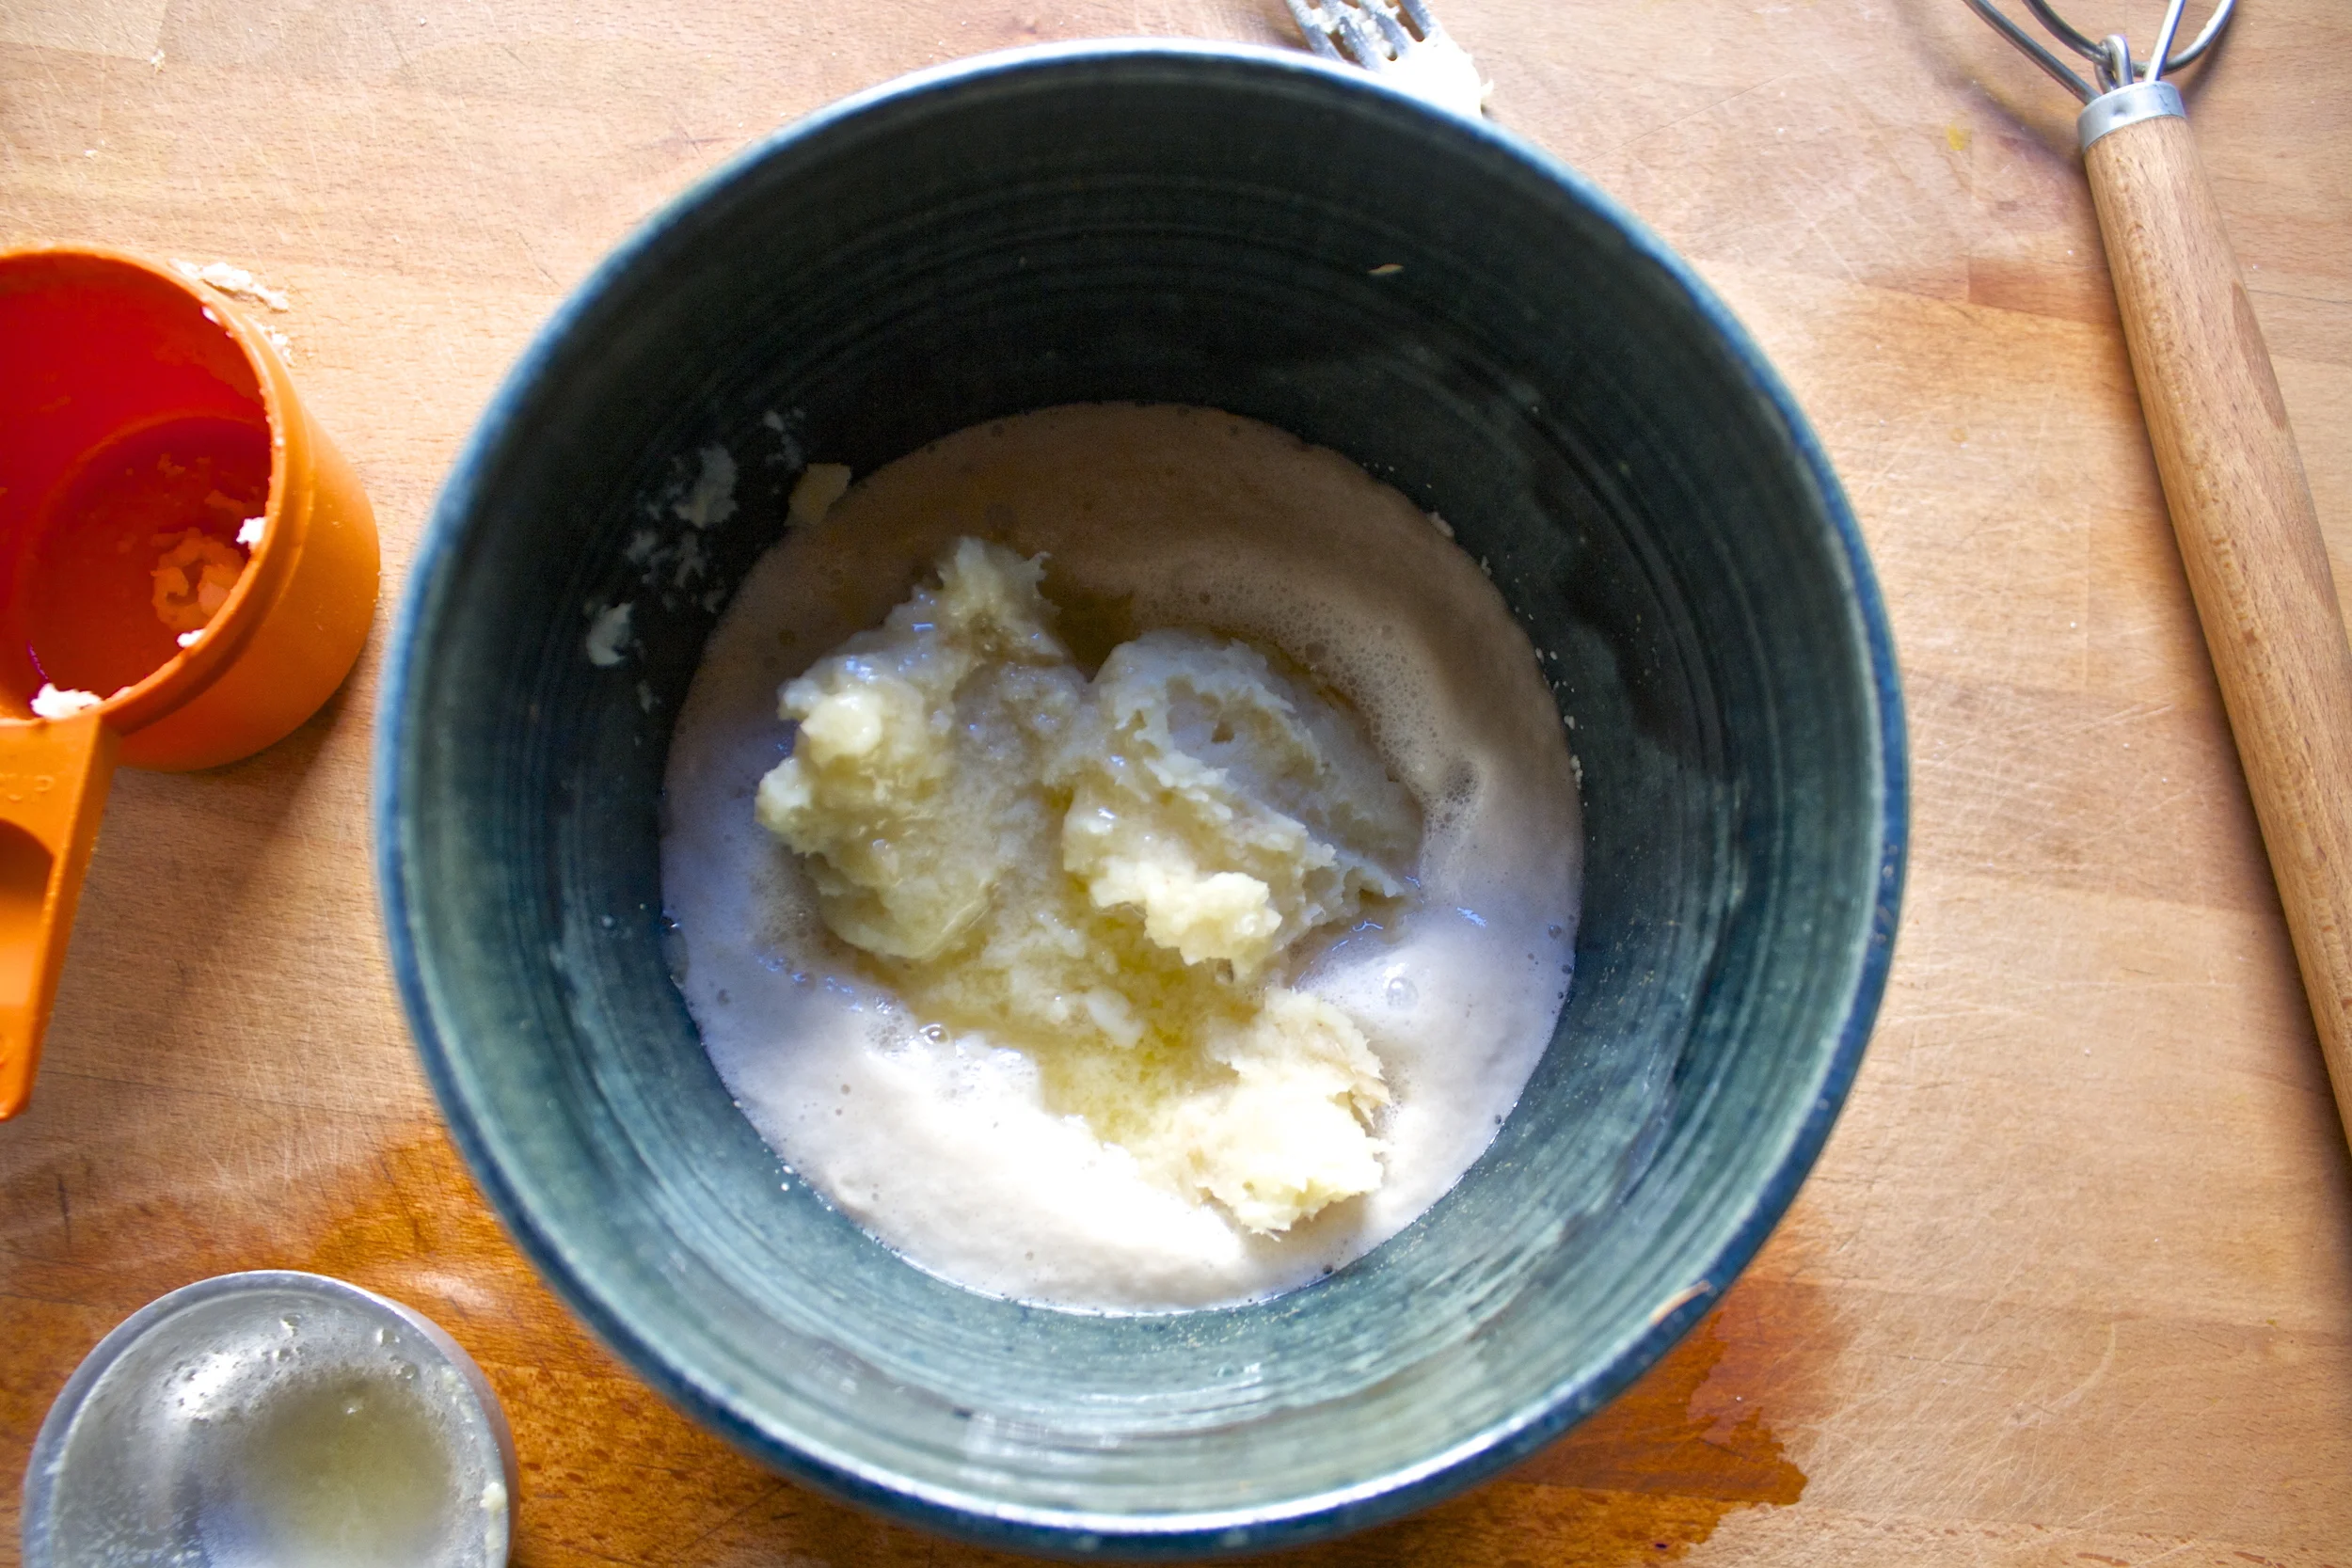
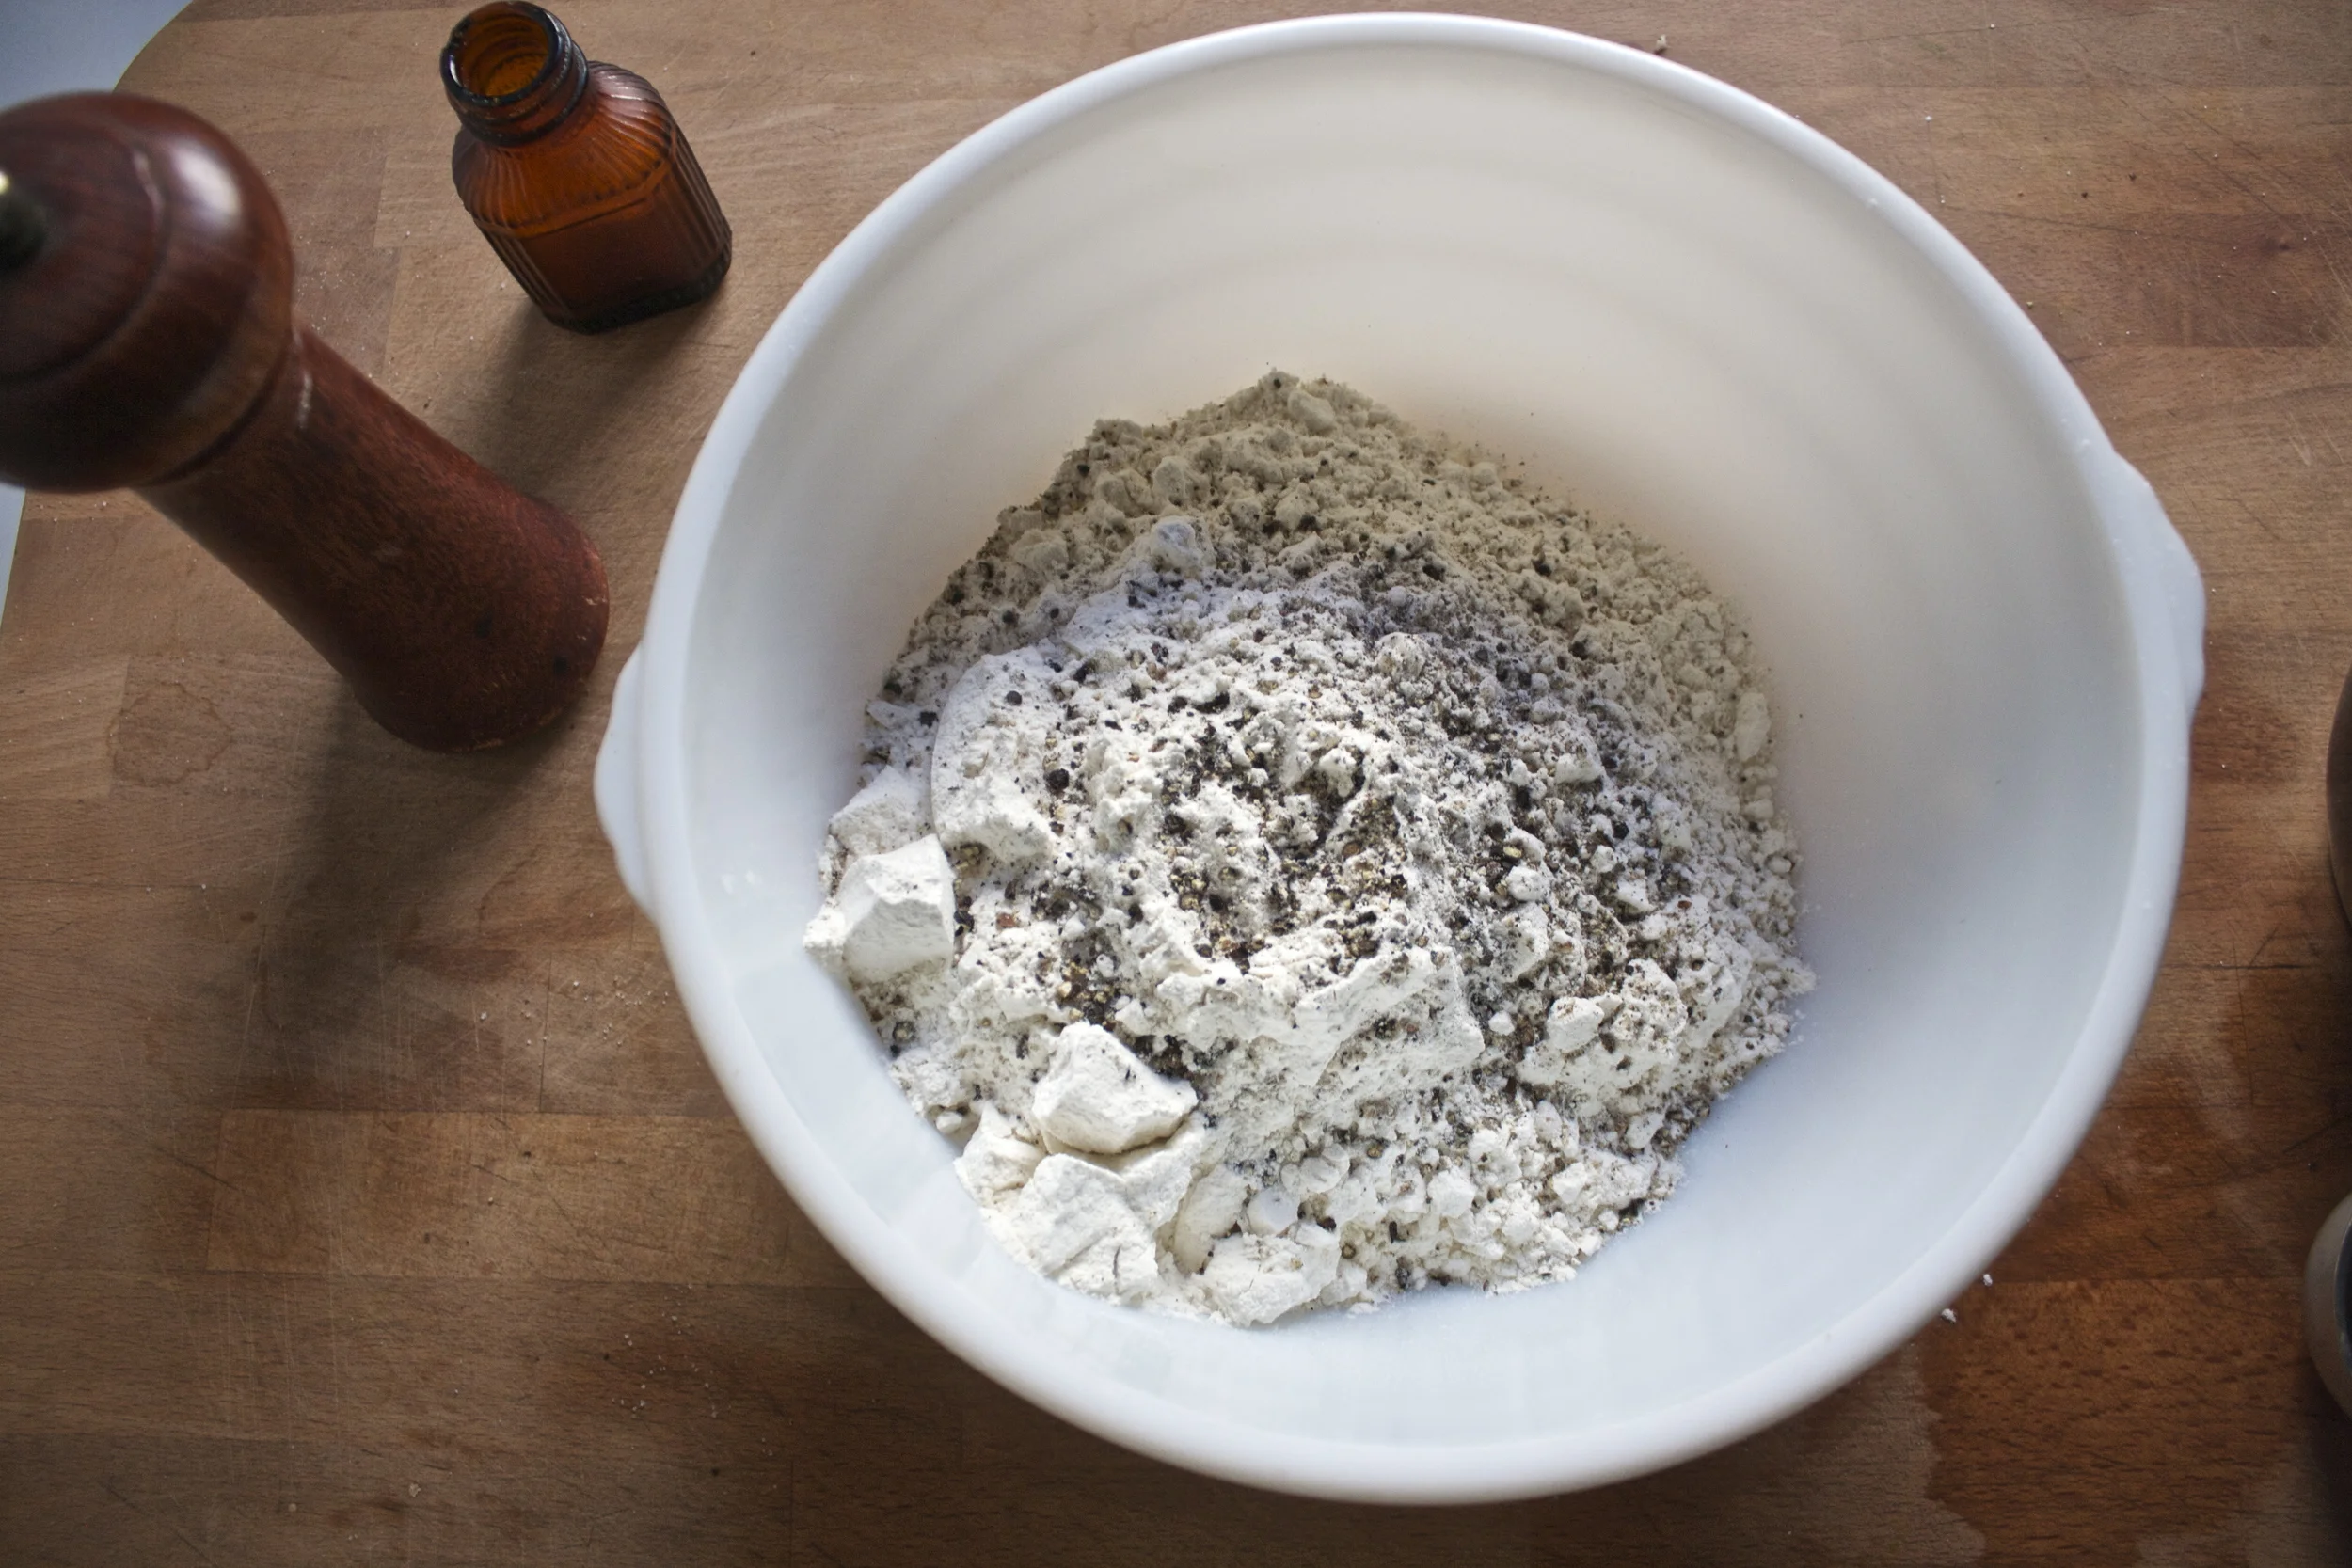


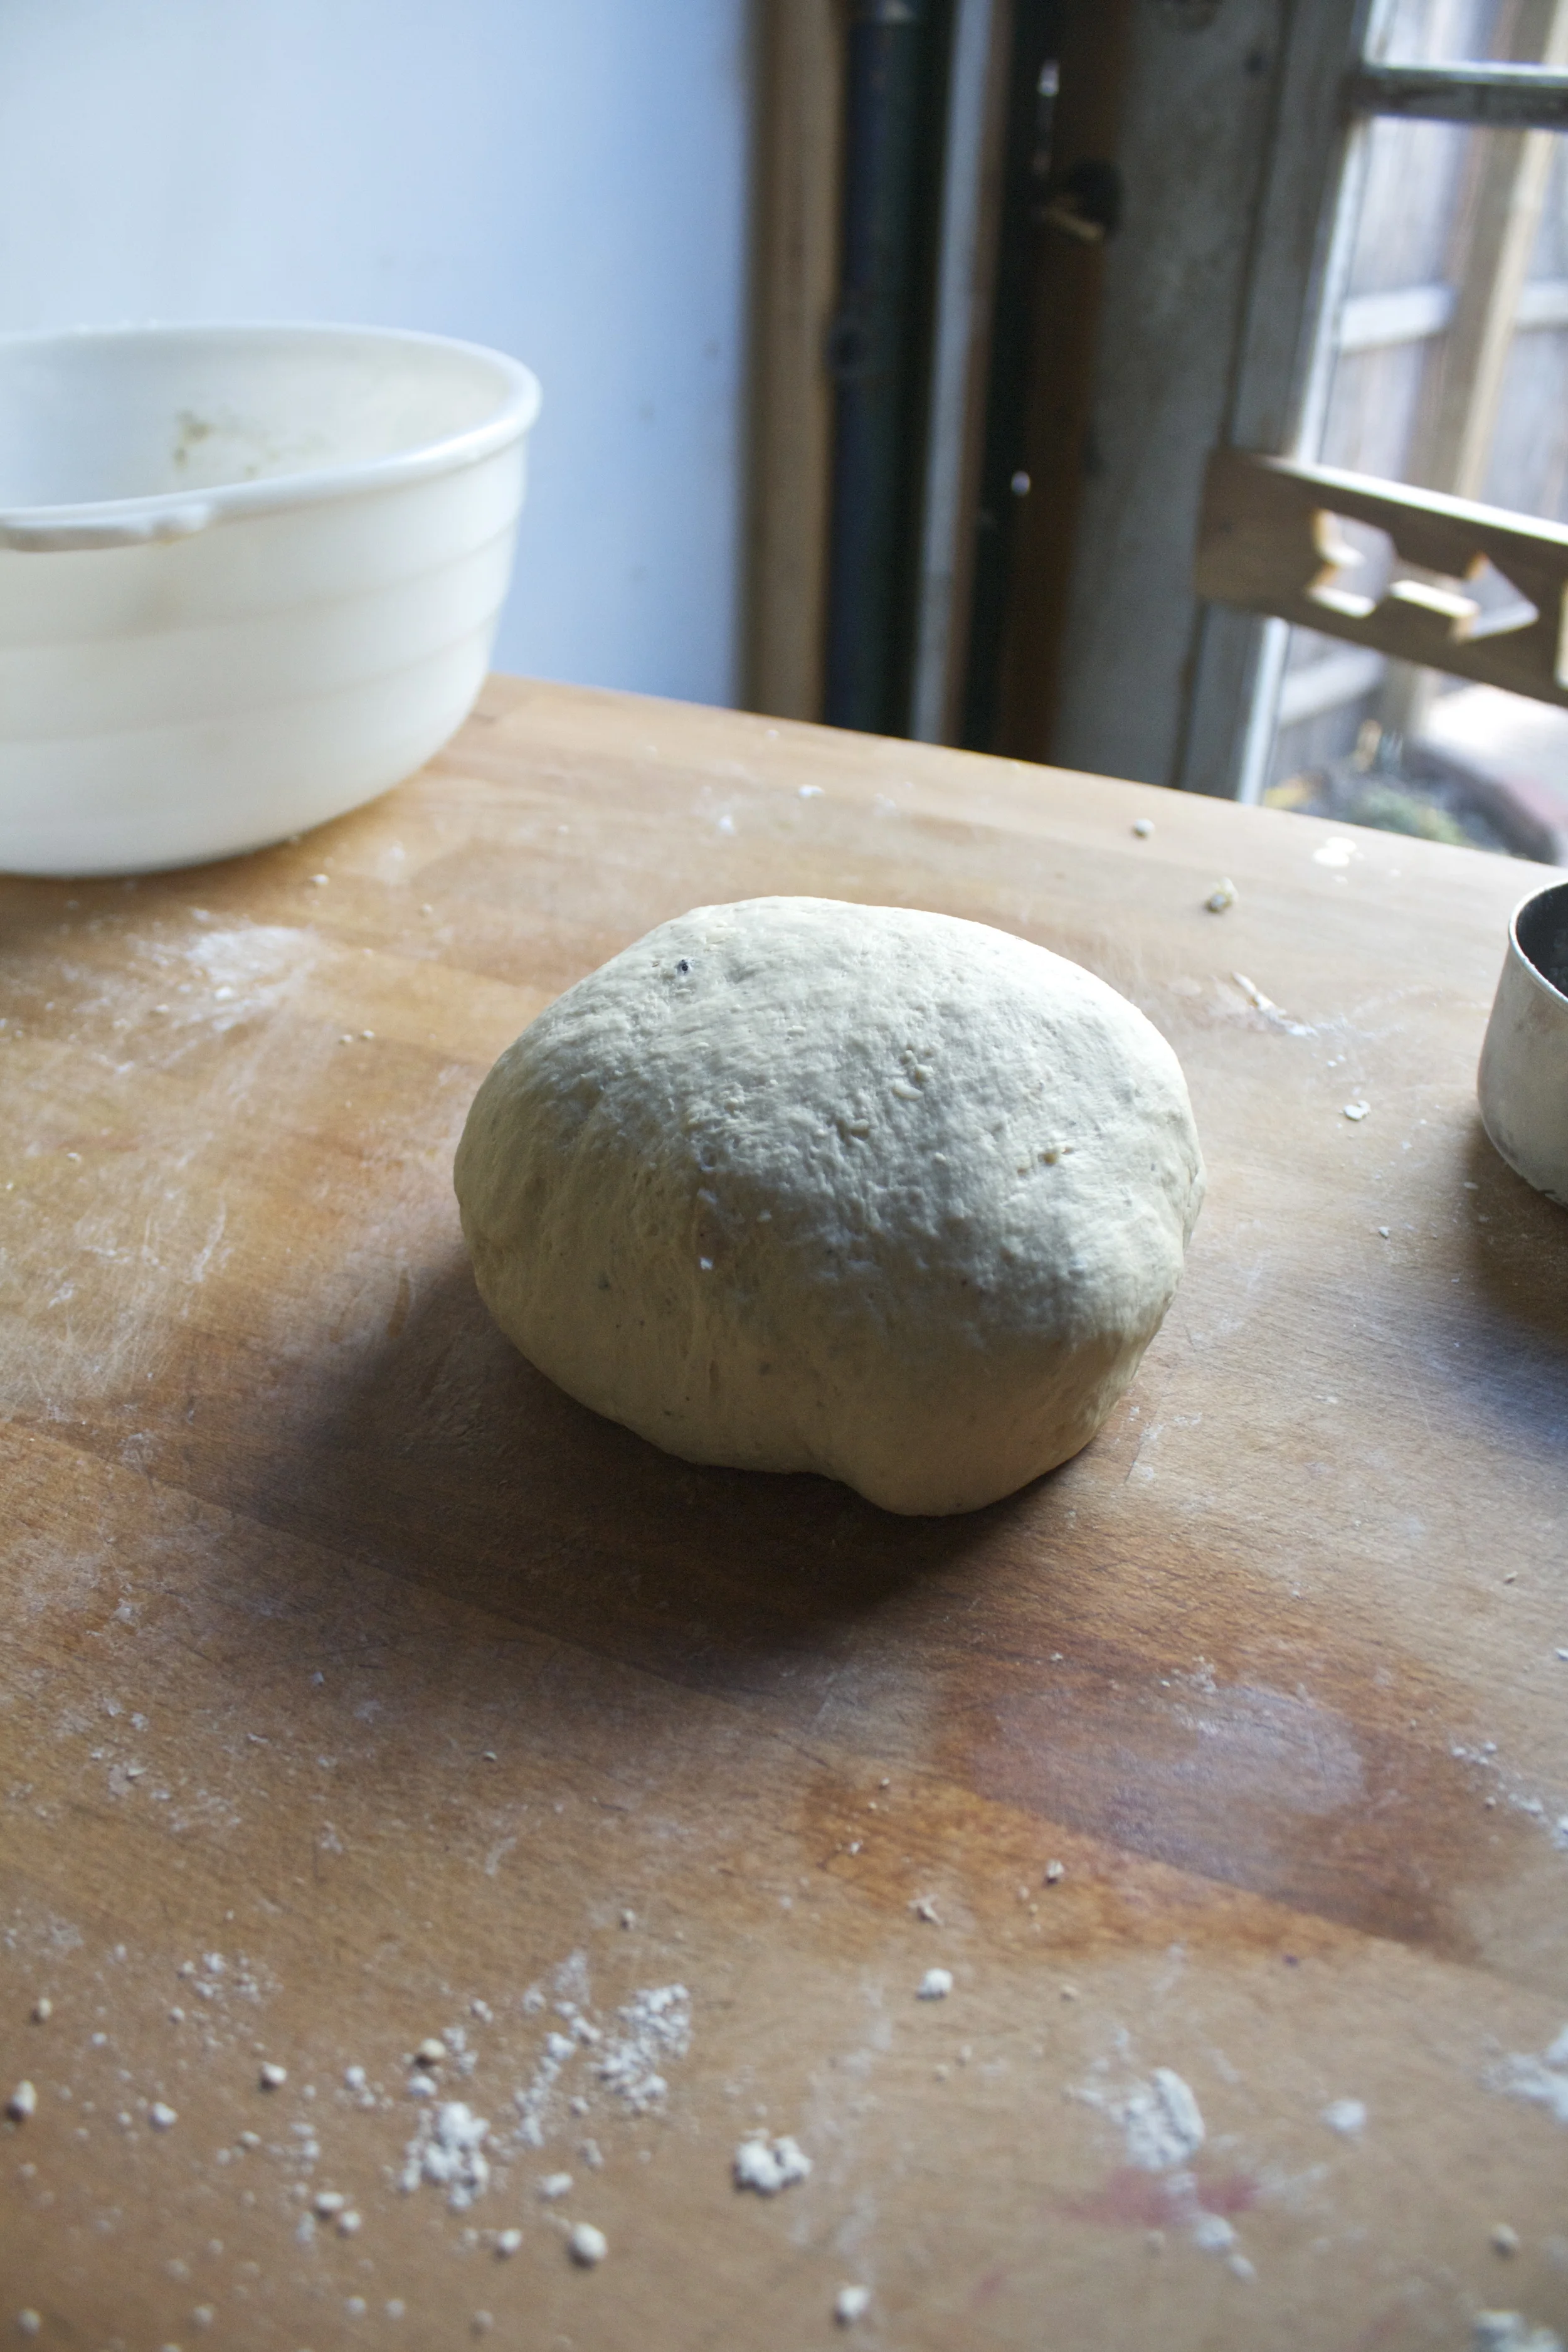

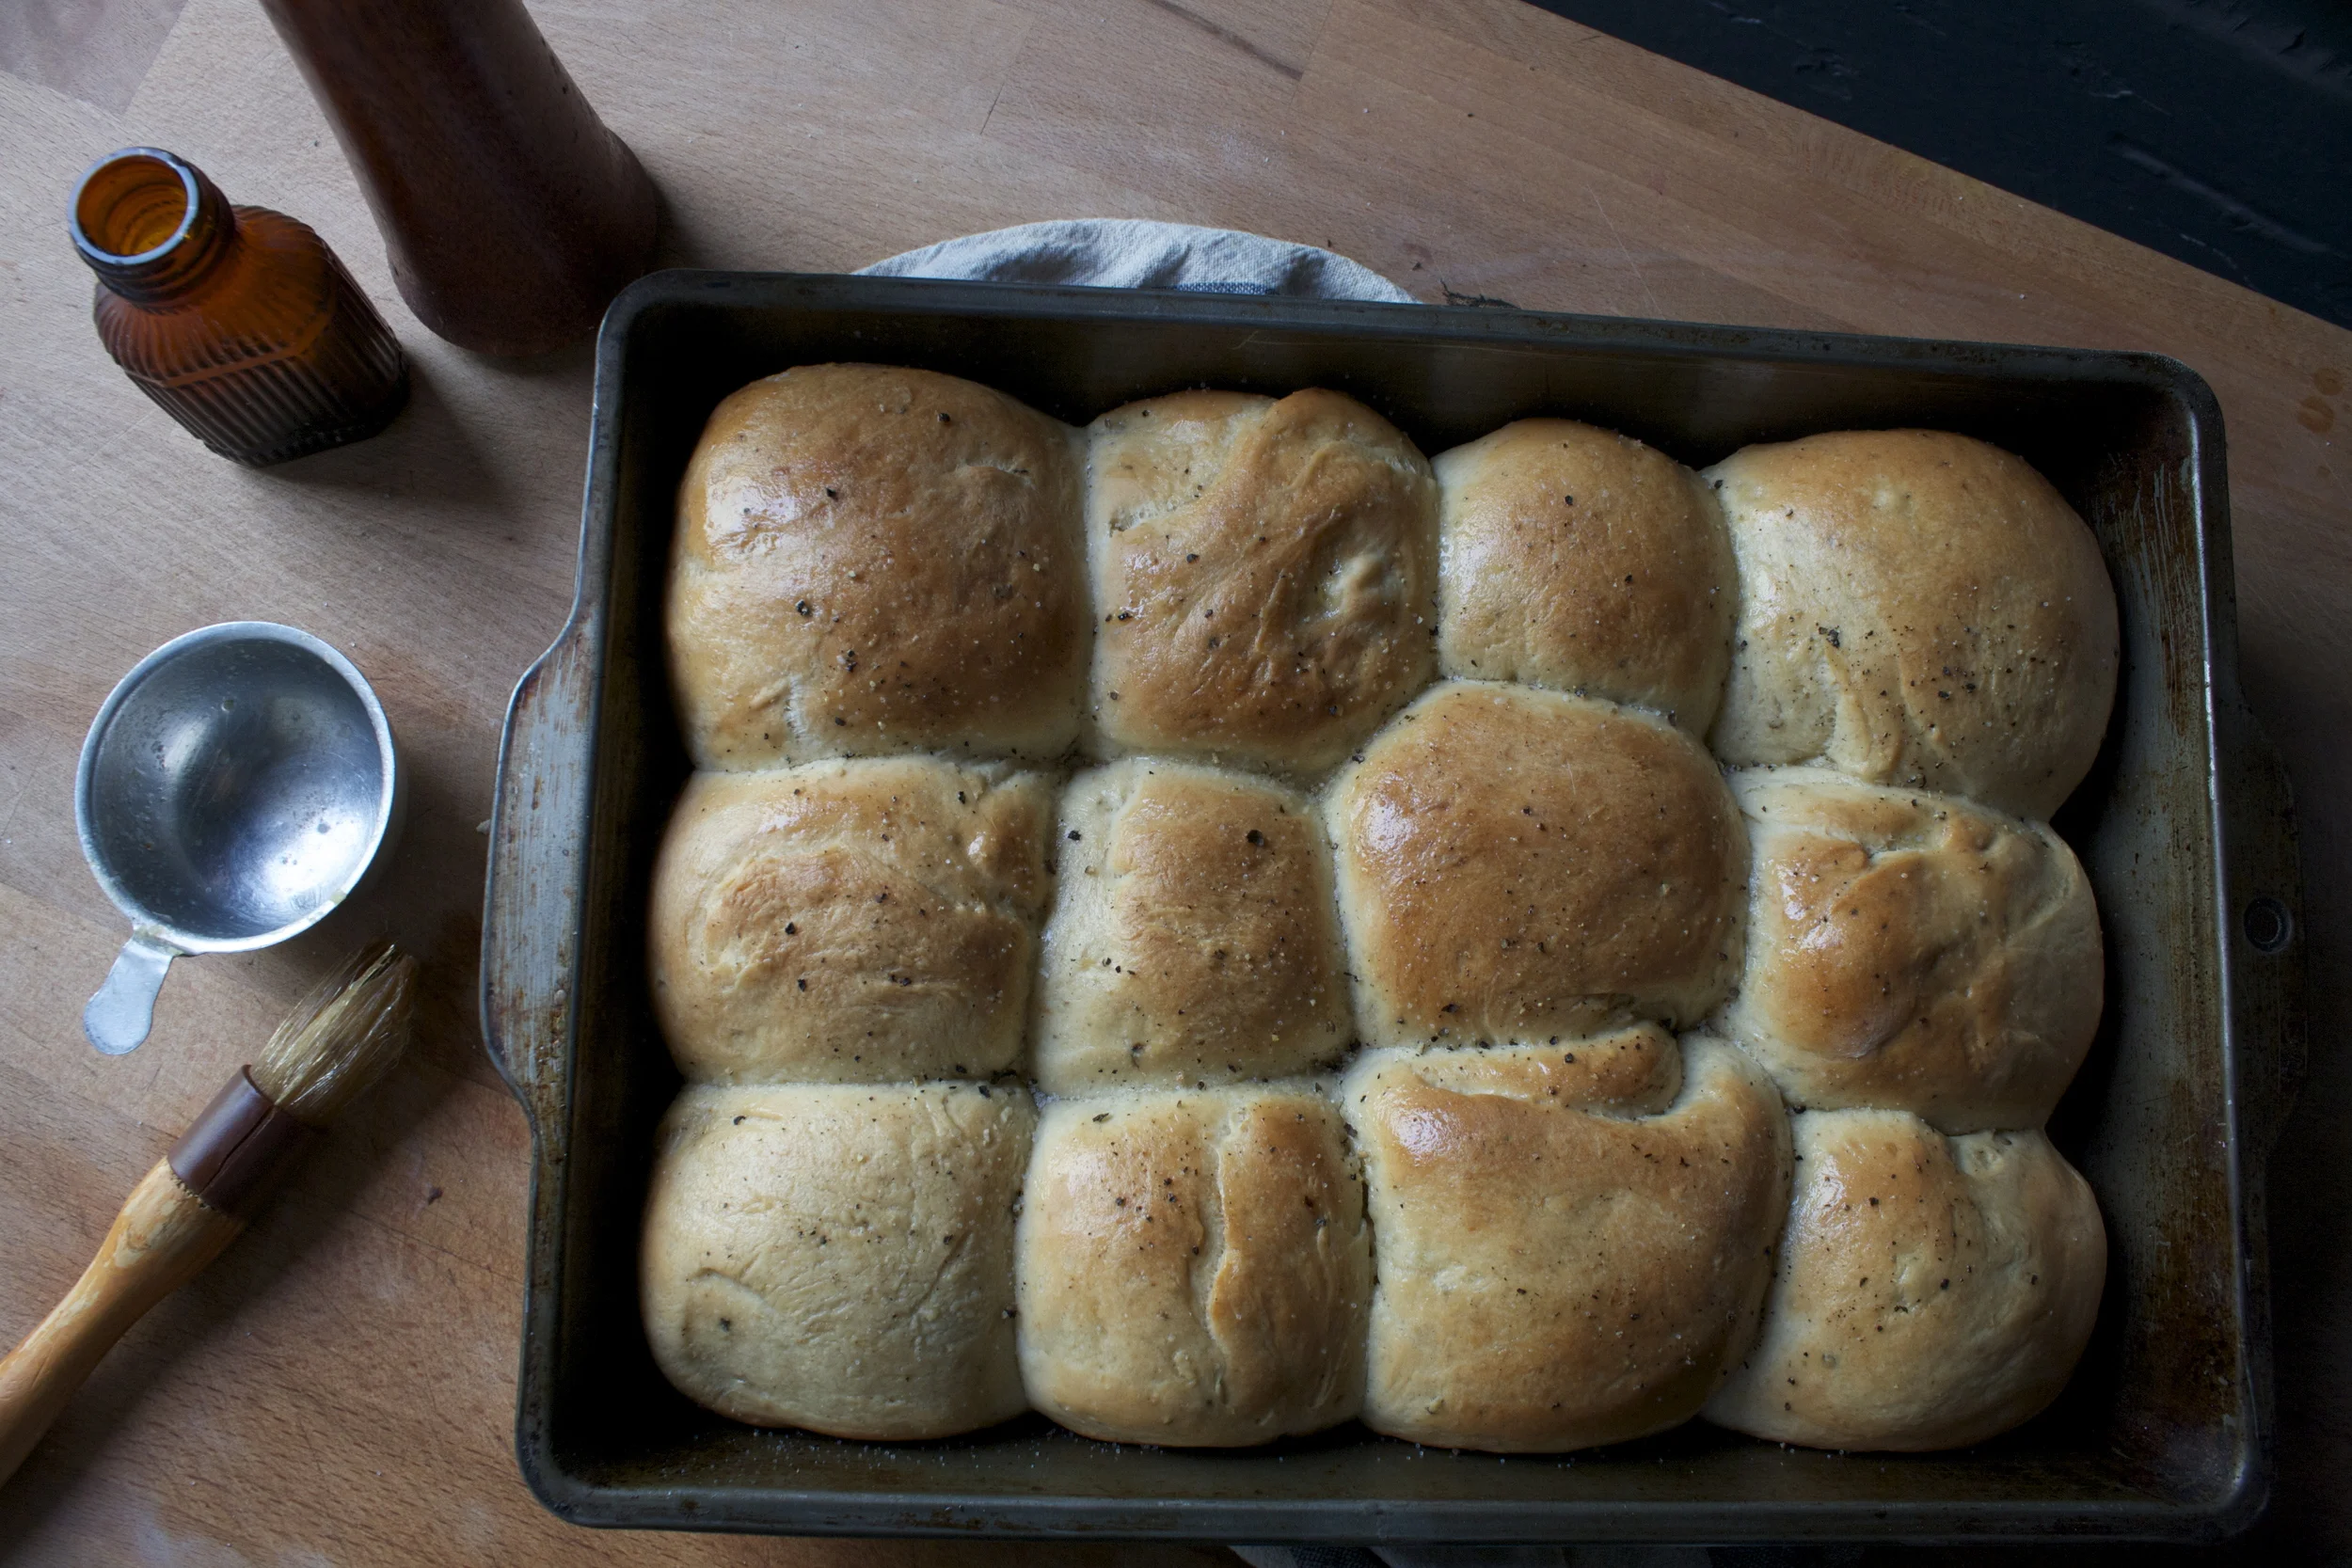

 HORRAY, its Saturday!!! I don’t care that I have a bunch of laundry and house work to do, bills to pay, a mangy dog to groom%u2026 I get to do it all at home with the music blasting,(maybe some %u00a0holiday tunes) a lot of coffee, in my comfy sweats and the oven on. Weekends are always a mixed bag of crazy for me but I can usually count on being at home for a chunk of the morning or afternoons and that’s when I jump at the chance to make me some yeasted bread. Give me a couple of hours, my list of chores and watch me go.. I can mix and knead,, set aside to rise and hit up cleaning that toilet. Go back and knead, divided and rise again, then go fold all the laundry. Stick the bread in the oven and watch out, I am mopping the floors. I am nothing if not a fantastic multitasked, much like these rolls. You can serve them as a side for dinner , use them as a sandwich roll, or eat them as the star with a dab of butter and a drizzle of honey. The possibilities are endless. This particular recipe is fantastic for may reasons%u2026. %u00a0Its pretty simple, not to many ingredients and is made with whole wheat flour. If you don’t want 16 rolls, you can make the dough, bake half and freeze %u00a0the rest. You could even bake into loaves of bread instead.Yeah, sounds good right? %u00a0Go ahead, you know you want to. Just do it!
 I always gather the ingredients.. I have learned over the years that if I have all my stuff out and measured in front of me, I will almost never forget something and that I make less of a mess. It also helps that I find it pretty. So, flours and salt are whisked together. The yeast and honey in a bowl waiting to be proofed. The butter in need of more melting and an egg.. Pretty.
 %u00a0Honey and yeast mixed with a cup of warm water. %u00a0BE CAREFUL with the temperature of the water.. If its to hot, the yeast will kill the yeast and you will have to start over again, but I trust you won’t do that.
 Now that the yeast is active, mix in melted butter and egg. (Make sure the butter is not hot, warm is ok) %u00a0Add wet ingredients to the dry and mix.
 %u00a0 %u00a0

 %u00a0 %u00a0 %u00a0 %u00a0 %u00a0 %u00a0 %u00a0 %u00a0
 %u00a0 %u00a0 %u00a0 %u00a0 %u00a0 %u00a0 %u00a0 %u00a0 %u00a0 %u00a0 %u00a0 %u00a0 %u00a0 %u00a0 %u00a0 %u00a0 %u00a0 %u00a0 %u00a0 %u00a0 %u00a0 %u00a0 Little ball of dough turned into big balls of dough. (Yeast is so cool!).Into the oven they go. %u00a0Right before I baked them I gave the tops a little milk wash, just for color. Do it if you want, you could even do an egg wash, but it’s really not necessary.
 So lovely! Who wouldn’t want to just tear these beauties apart?
 The first Winter farm share pick up!!!!! I cannot say enough about how amazing my farm is..They are fantastic people with fantastic produce and simply just make the world a better place for me to live!
 %u00a0Oh Washer%u2026…He looks so old%u2026He is so old
 I get home late Thanksgiving night, tired, ready for bed, but in need of a shower. I open the shower curtain and almost jumped out of my skin, then started to laugh.(maybe you had to be there) I forgot that I left the ceramic whale in the shower to wash. What, you don’t have a ceramic whale? Well that’s weird.
 I made this%u00a0paper wreath(I know, Its pretty fantastic). I am doing a holiday craft day with some littles soon and wanted something fairly easy and practical. We all need a wreath on our walls or door,. I’m doing a post for it%u2026you will love it and make hundreds. Your house will be filled with paper wreaths.
 A gorgeous slice of cabbage. It looks like a willow tree.
 %u00a0Hiking with my lover and the pup. We do a lot of winter hikes Washer is actually a snow fish. He swims through the snow like its his purpose in life.
 I made these %u00a0dinner rolls for Thanksgiving. I love to make bread, its%u00a0a very hands on baking experience. I love kneading dough, watching it rise, punching it down and so on. And bonus, these came out sooooo good. .Everyone at dinner said that they were the best rolls ever%u2026 (I need to plug my skills in somewhere,) I’ll share the recipe soon.
 Nick and I got this pot in our very first apartment 12 years ago%u2026Its a piece of crap but makes the best air popped popcorn. A few weeks ago, the handle finally melted off and I was sad. Nick being Nick, welded a new piece of metal and attached a driftwood handle. It’s pretty awesome and Nick is too.


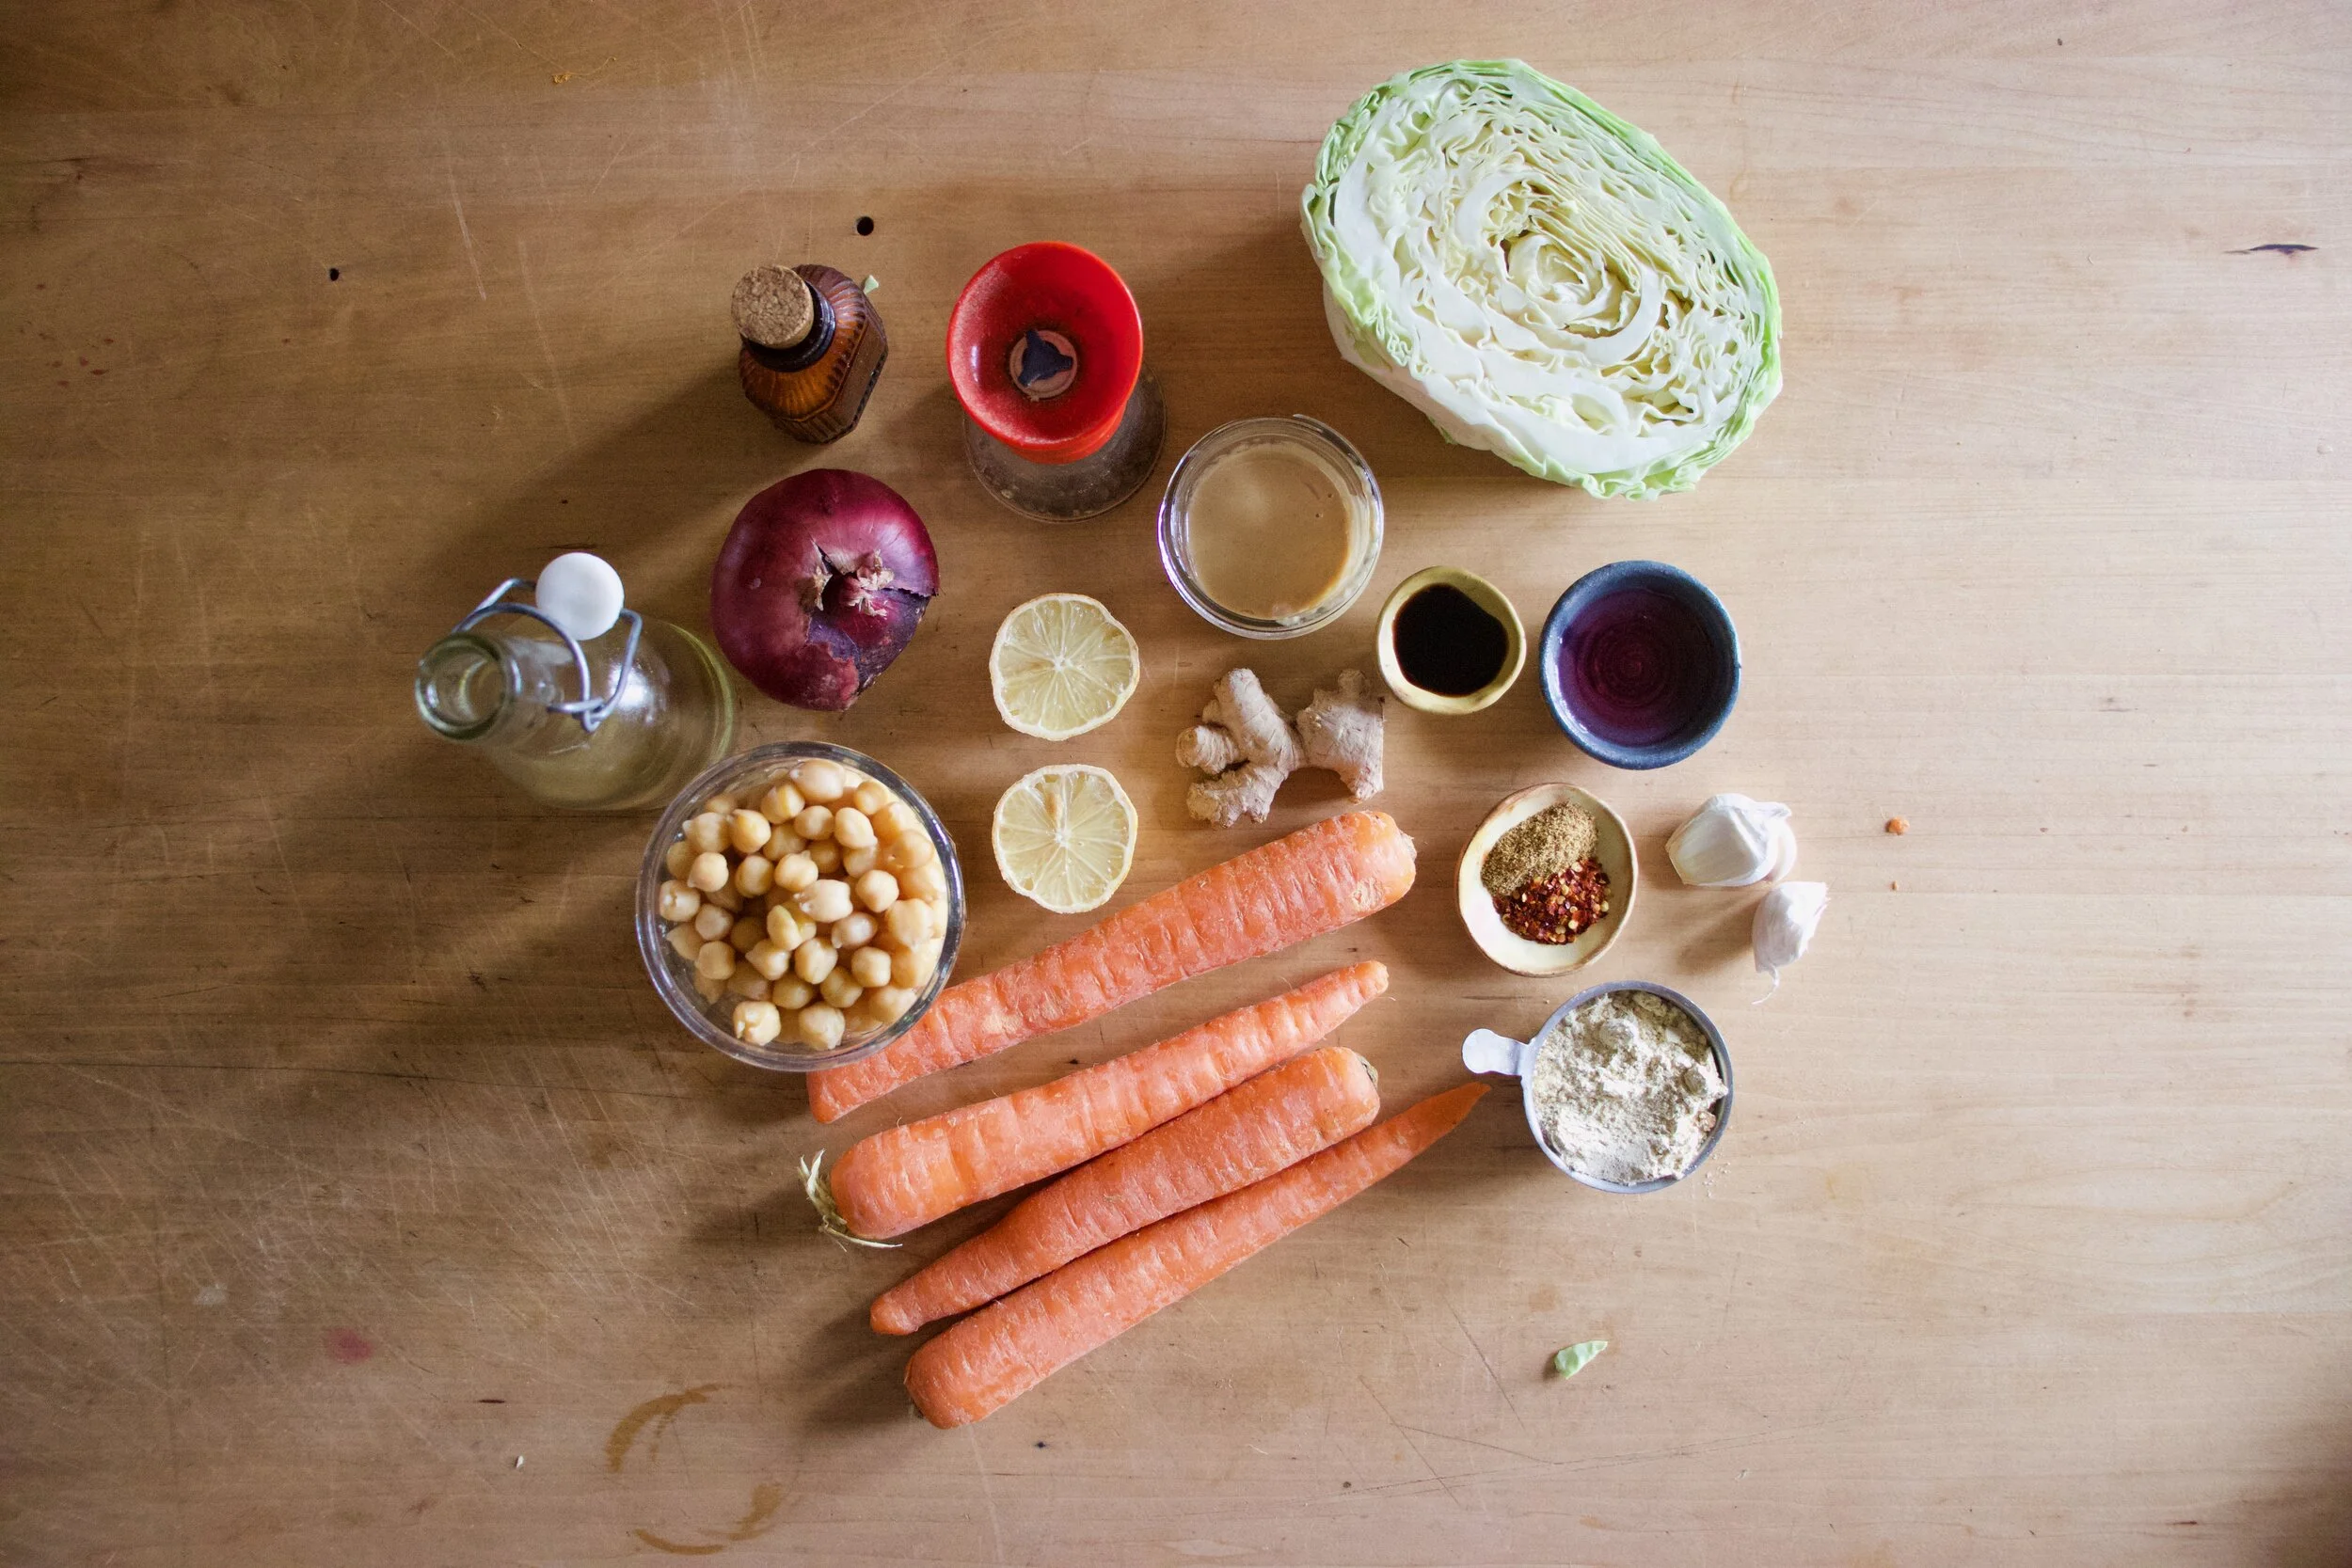

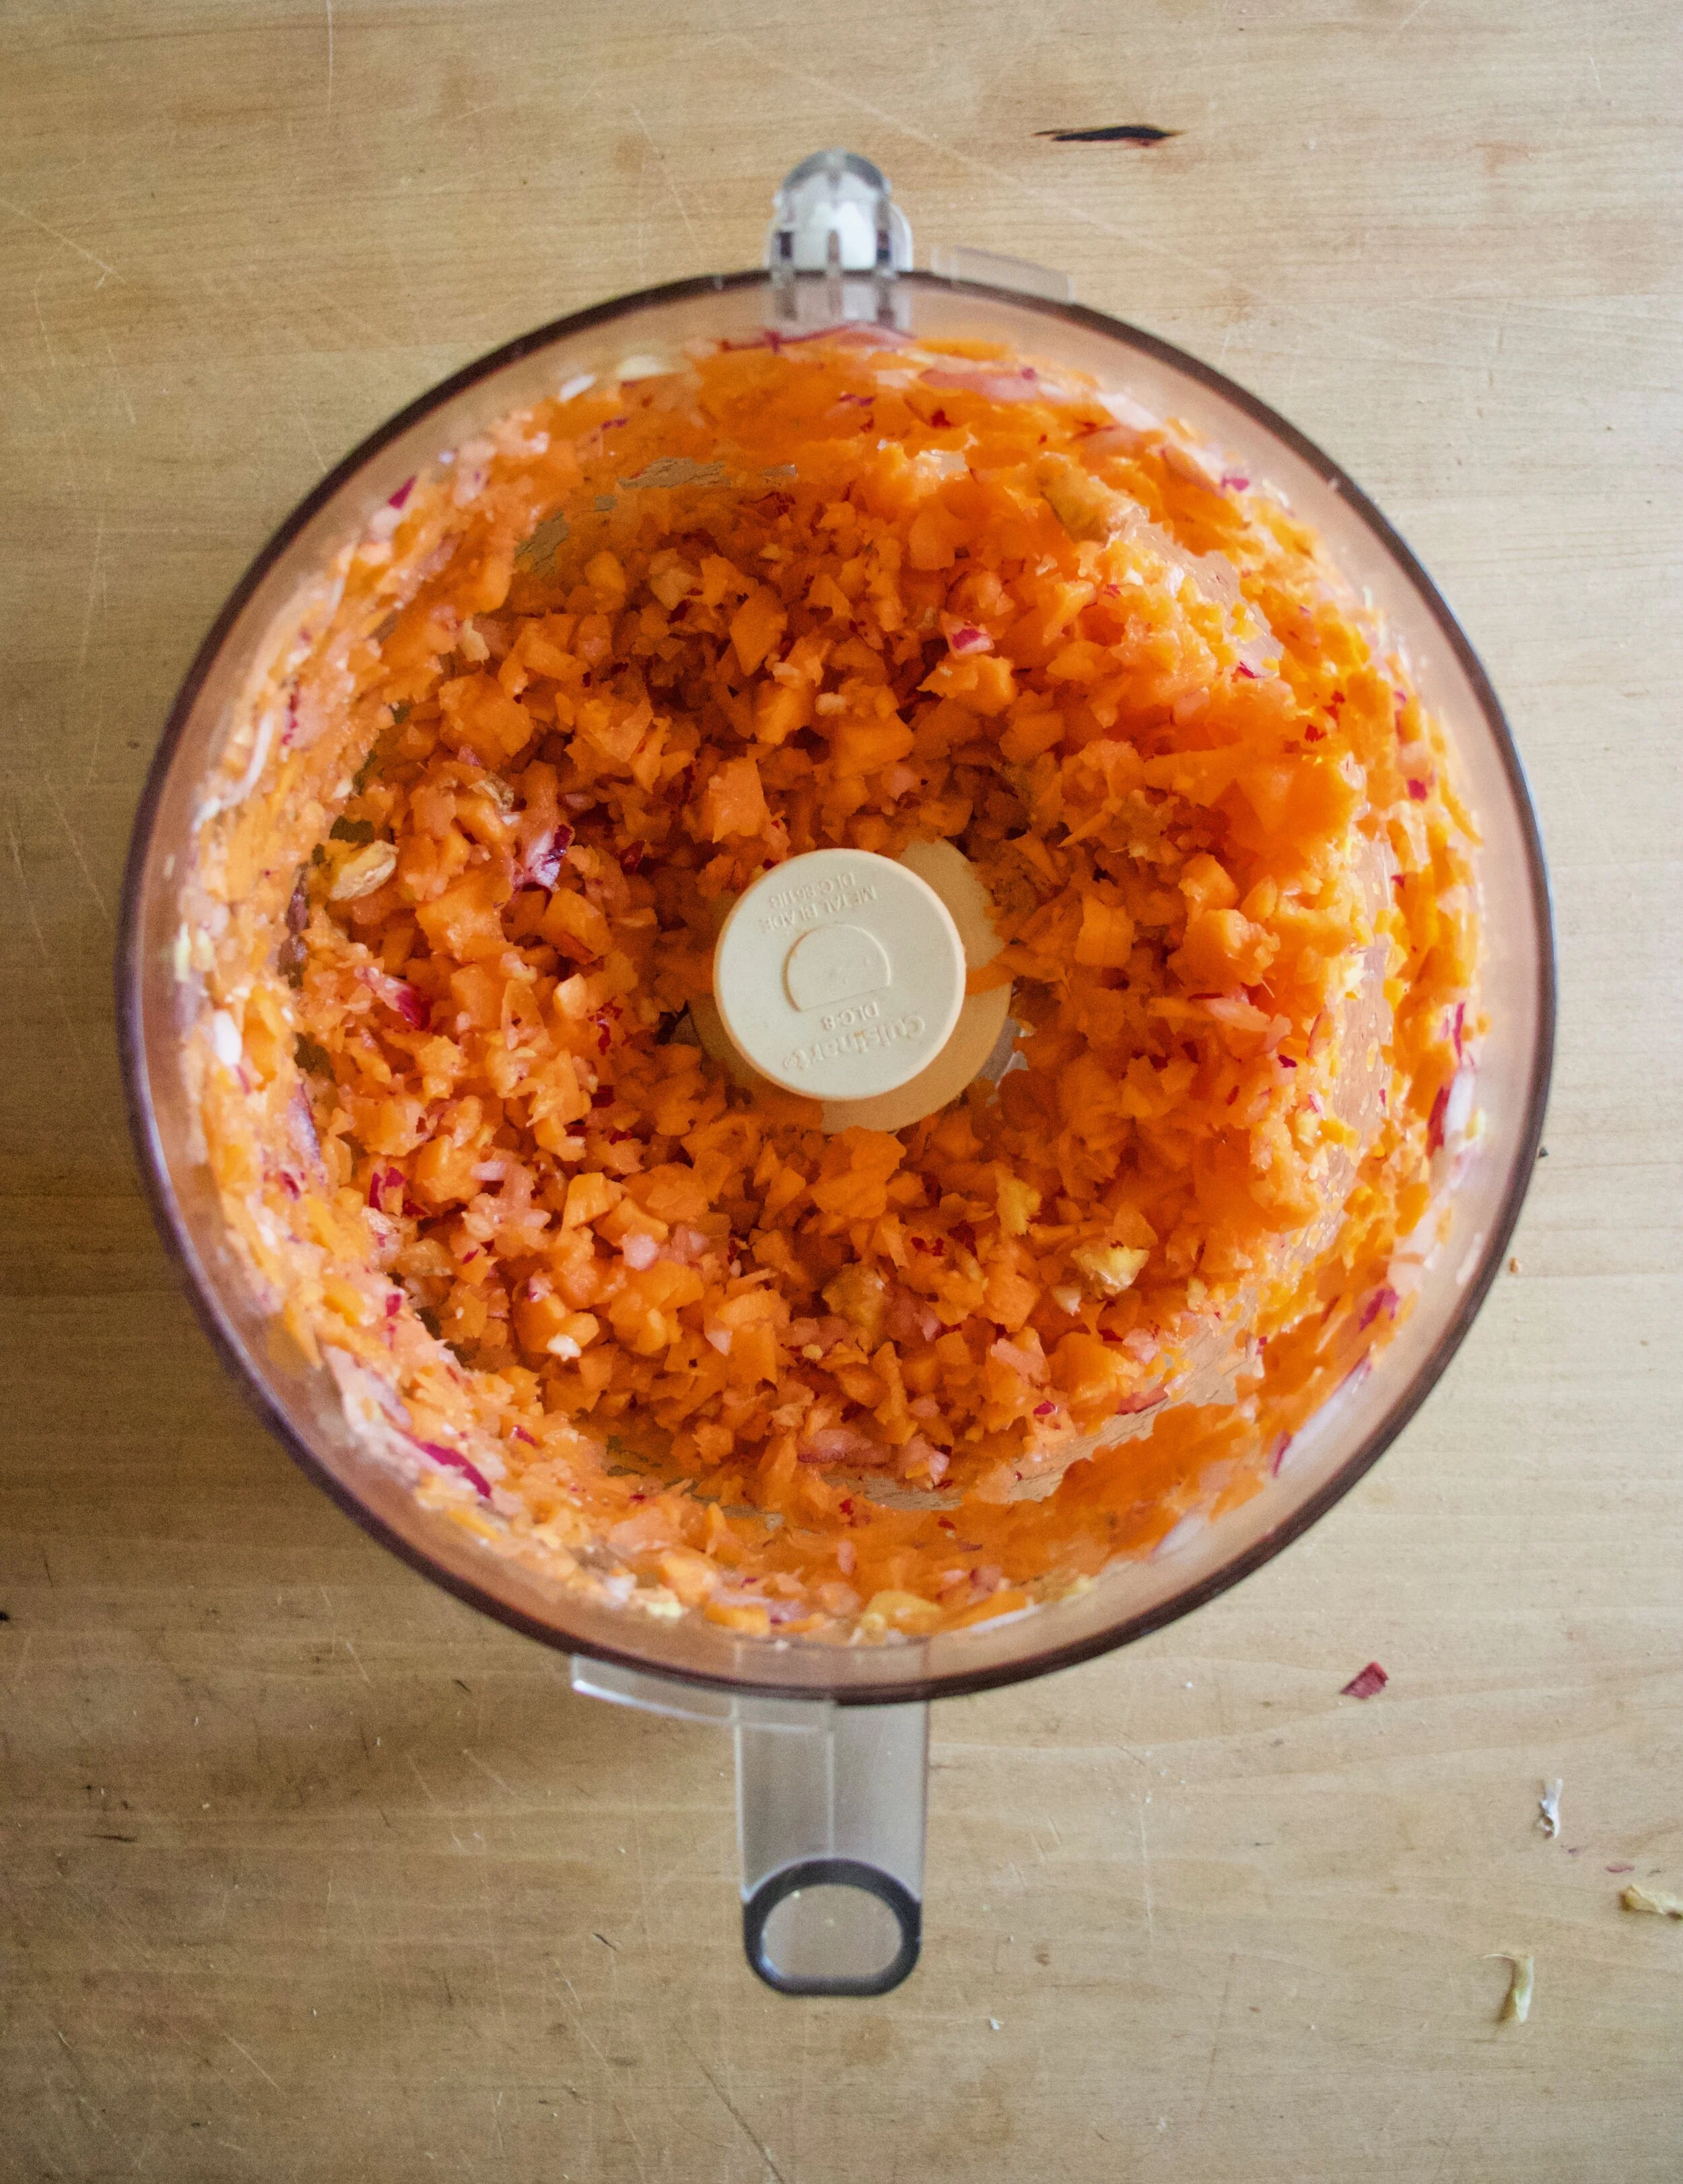
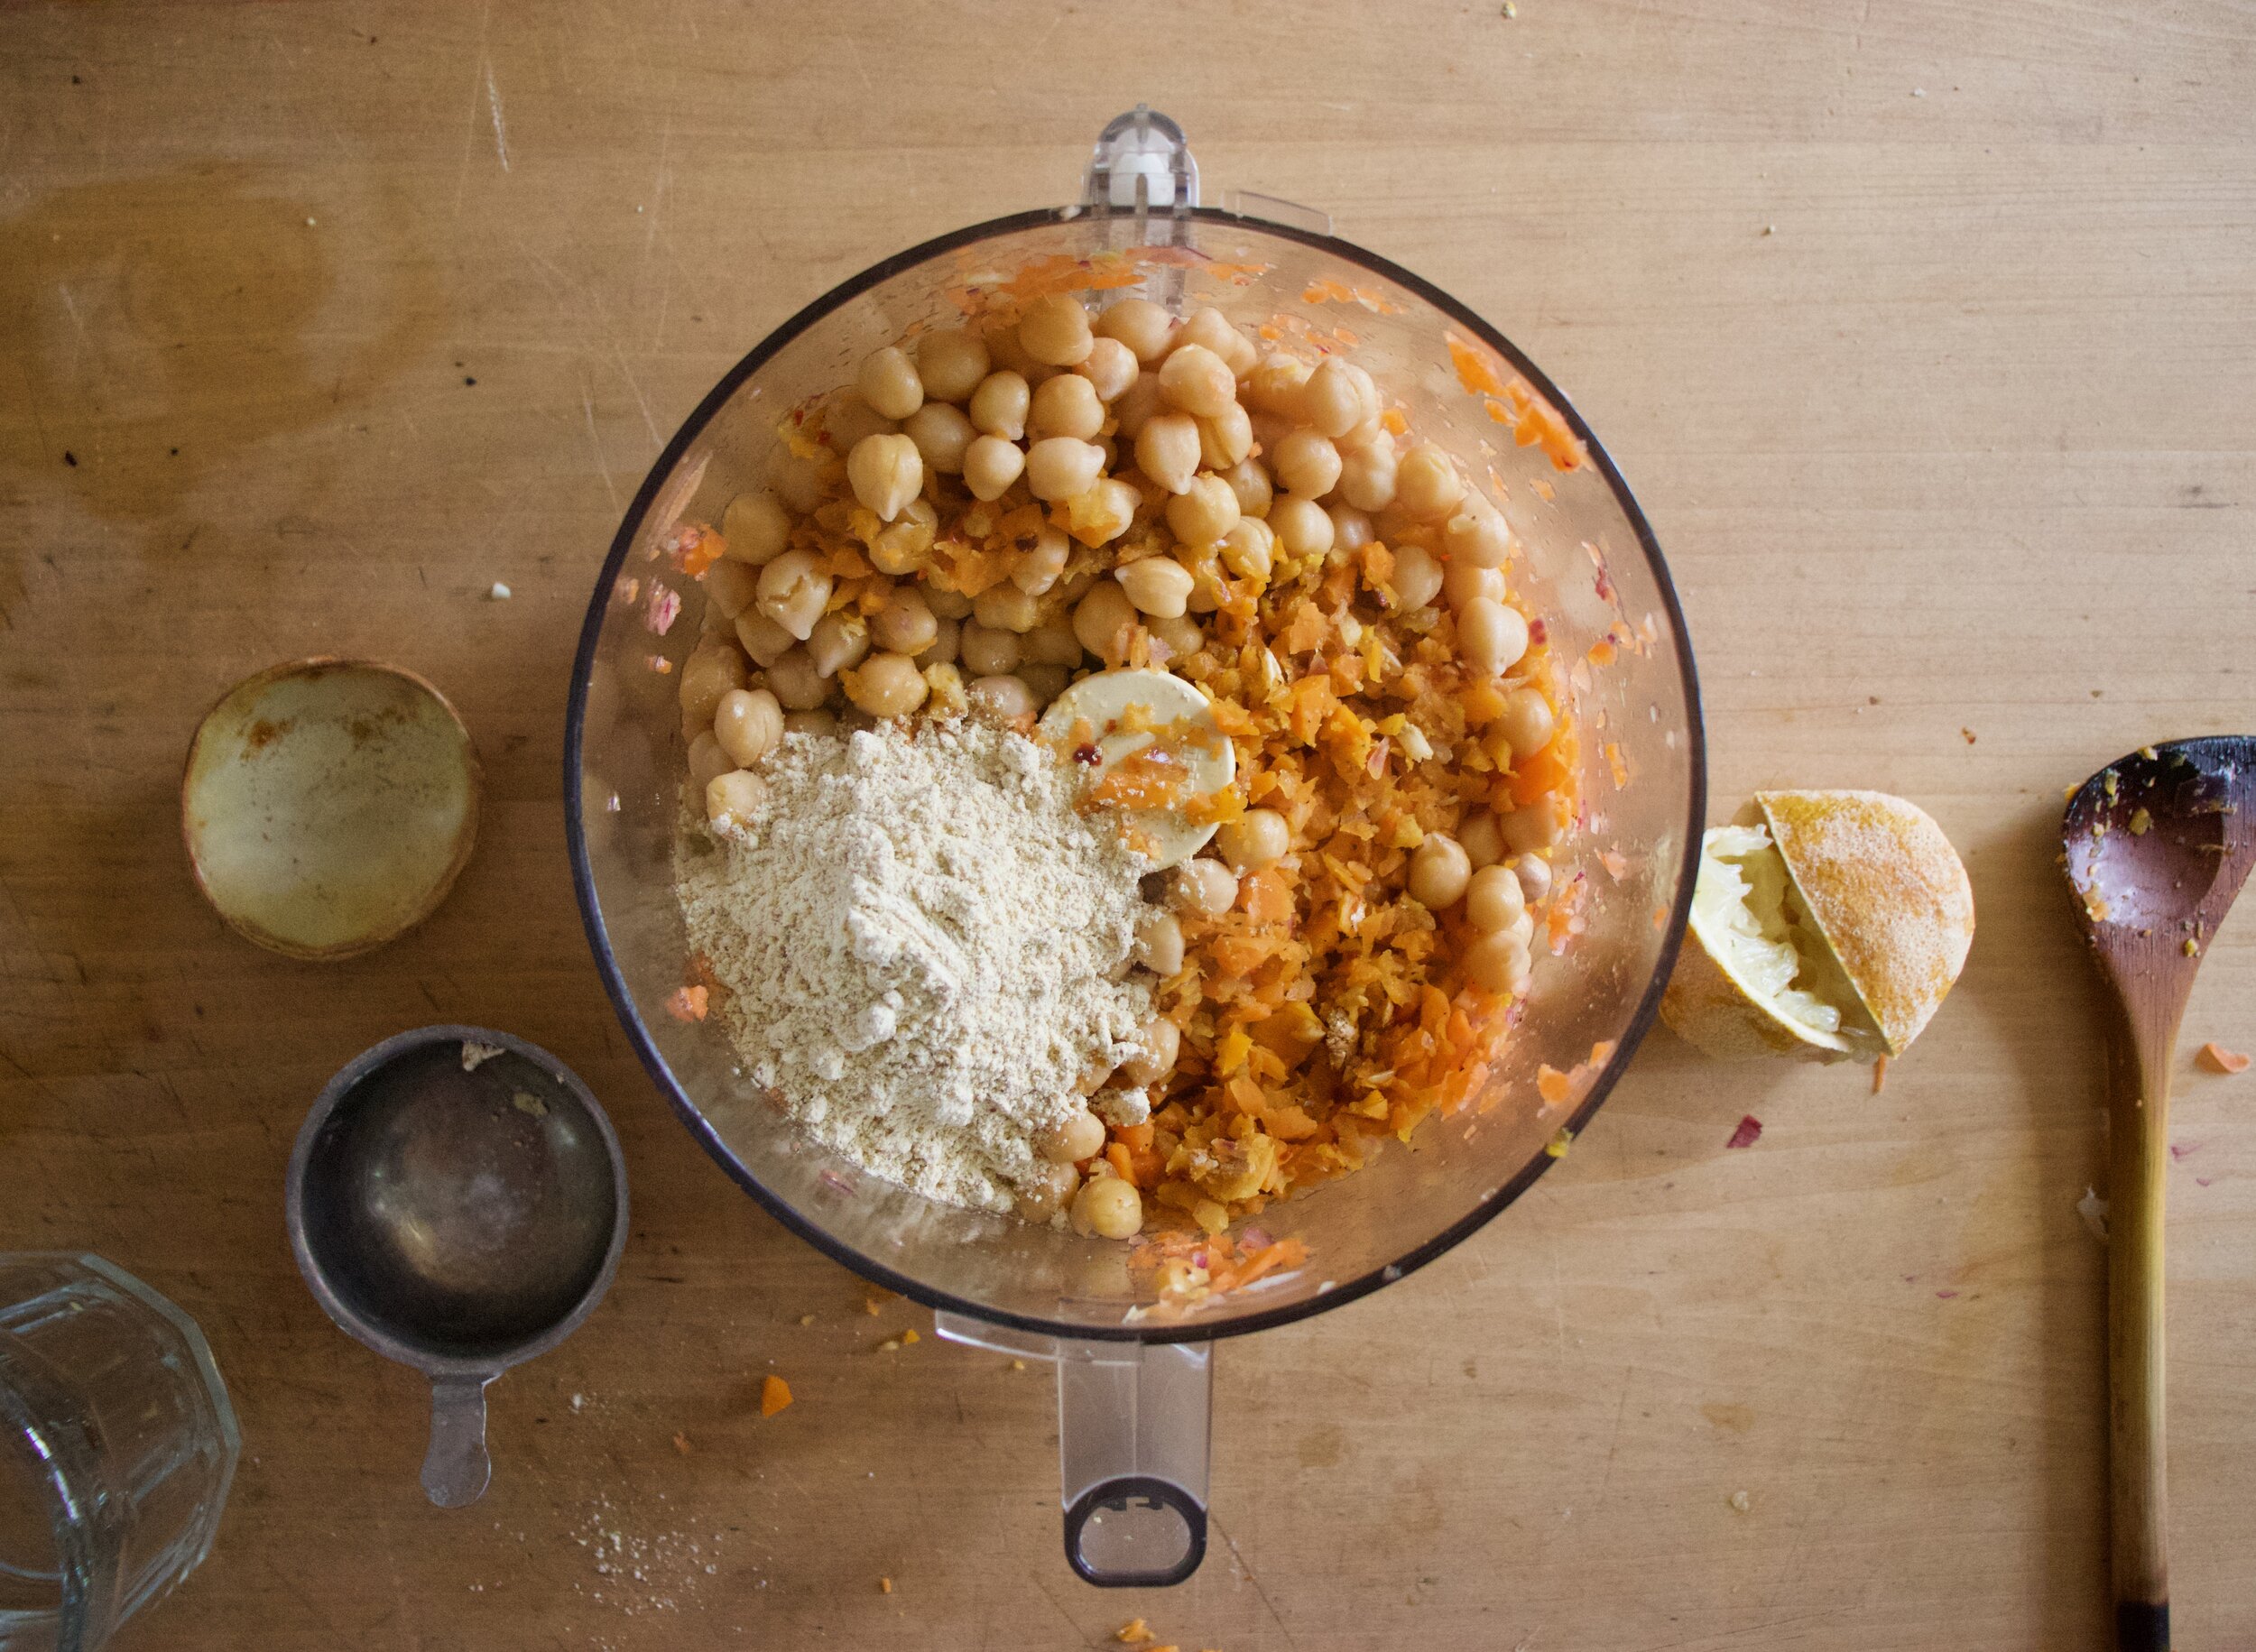
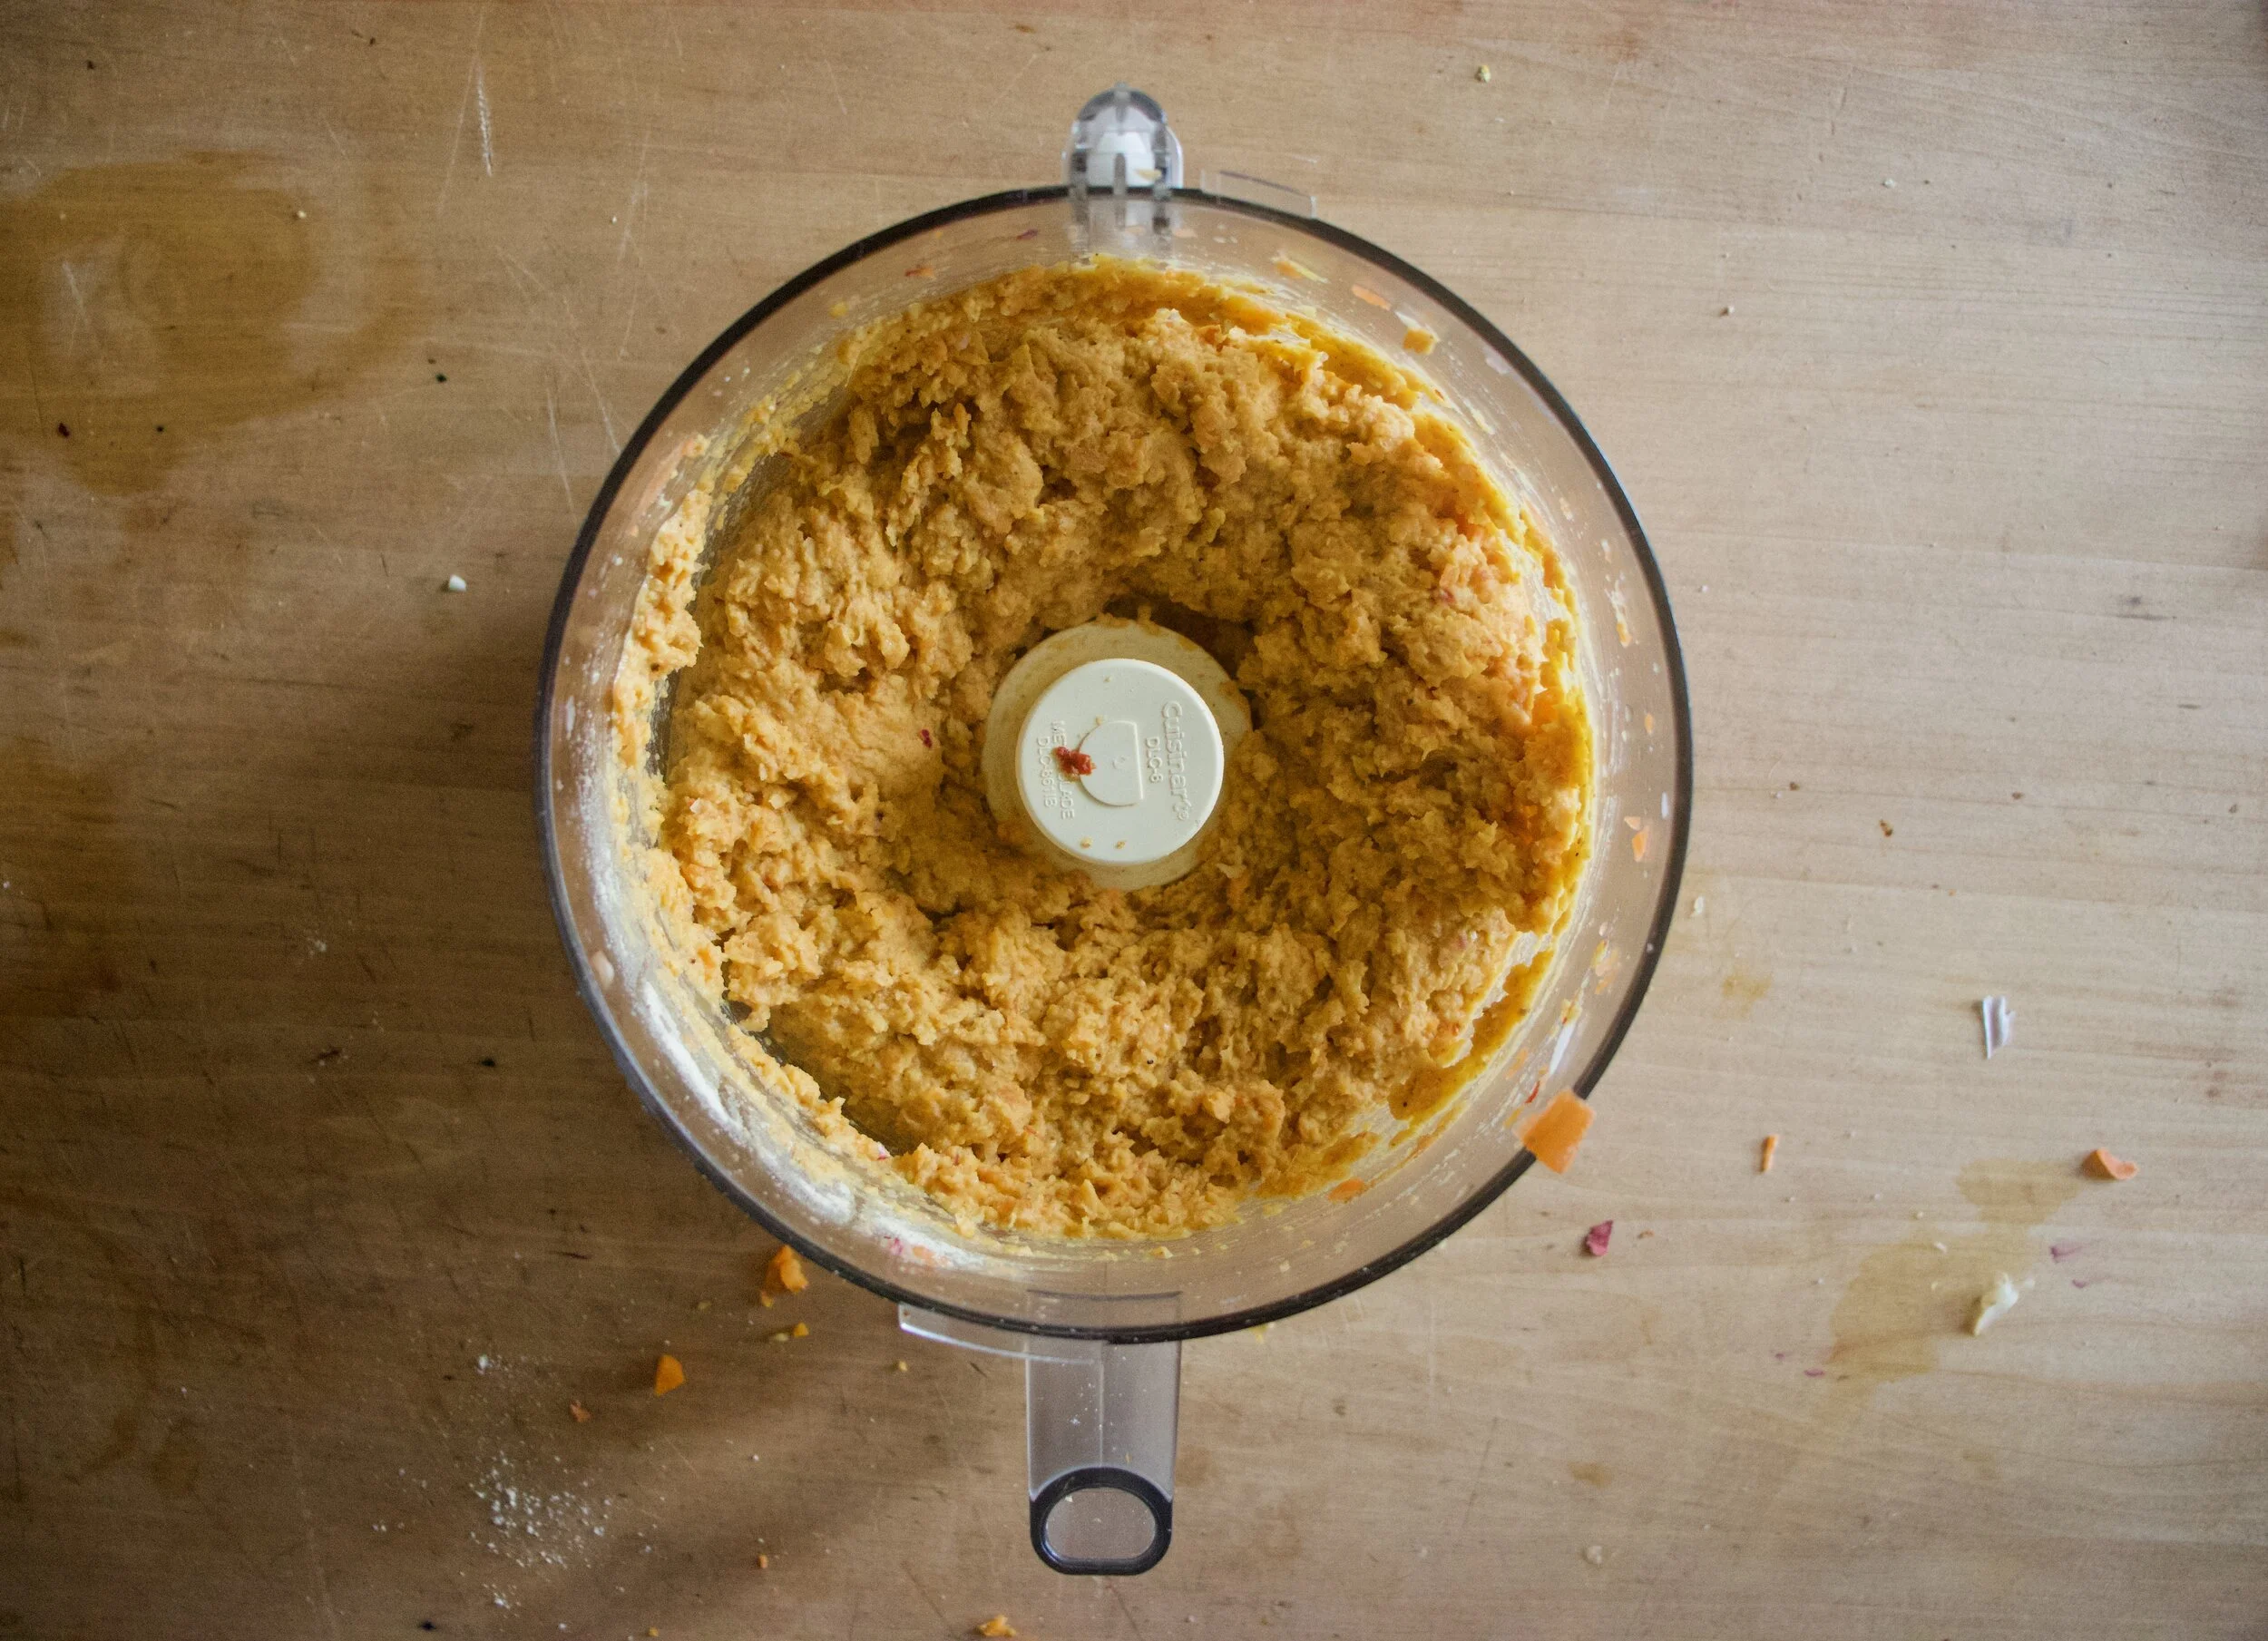
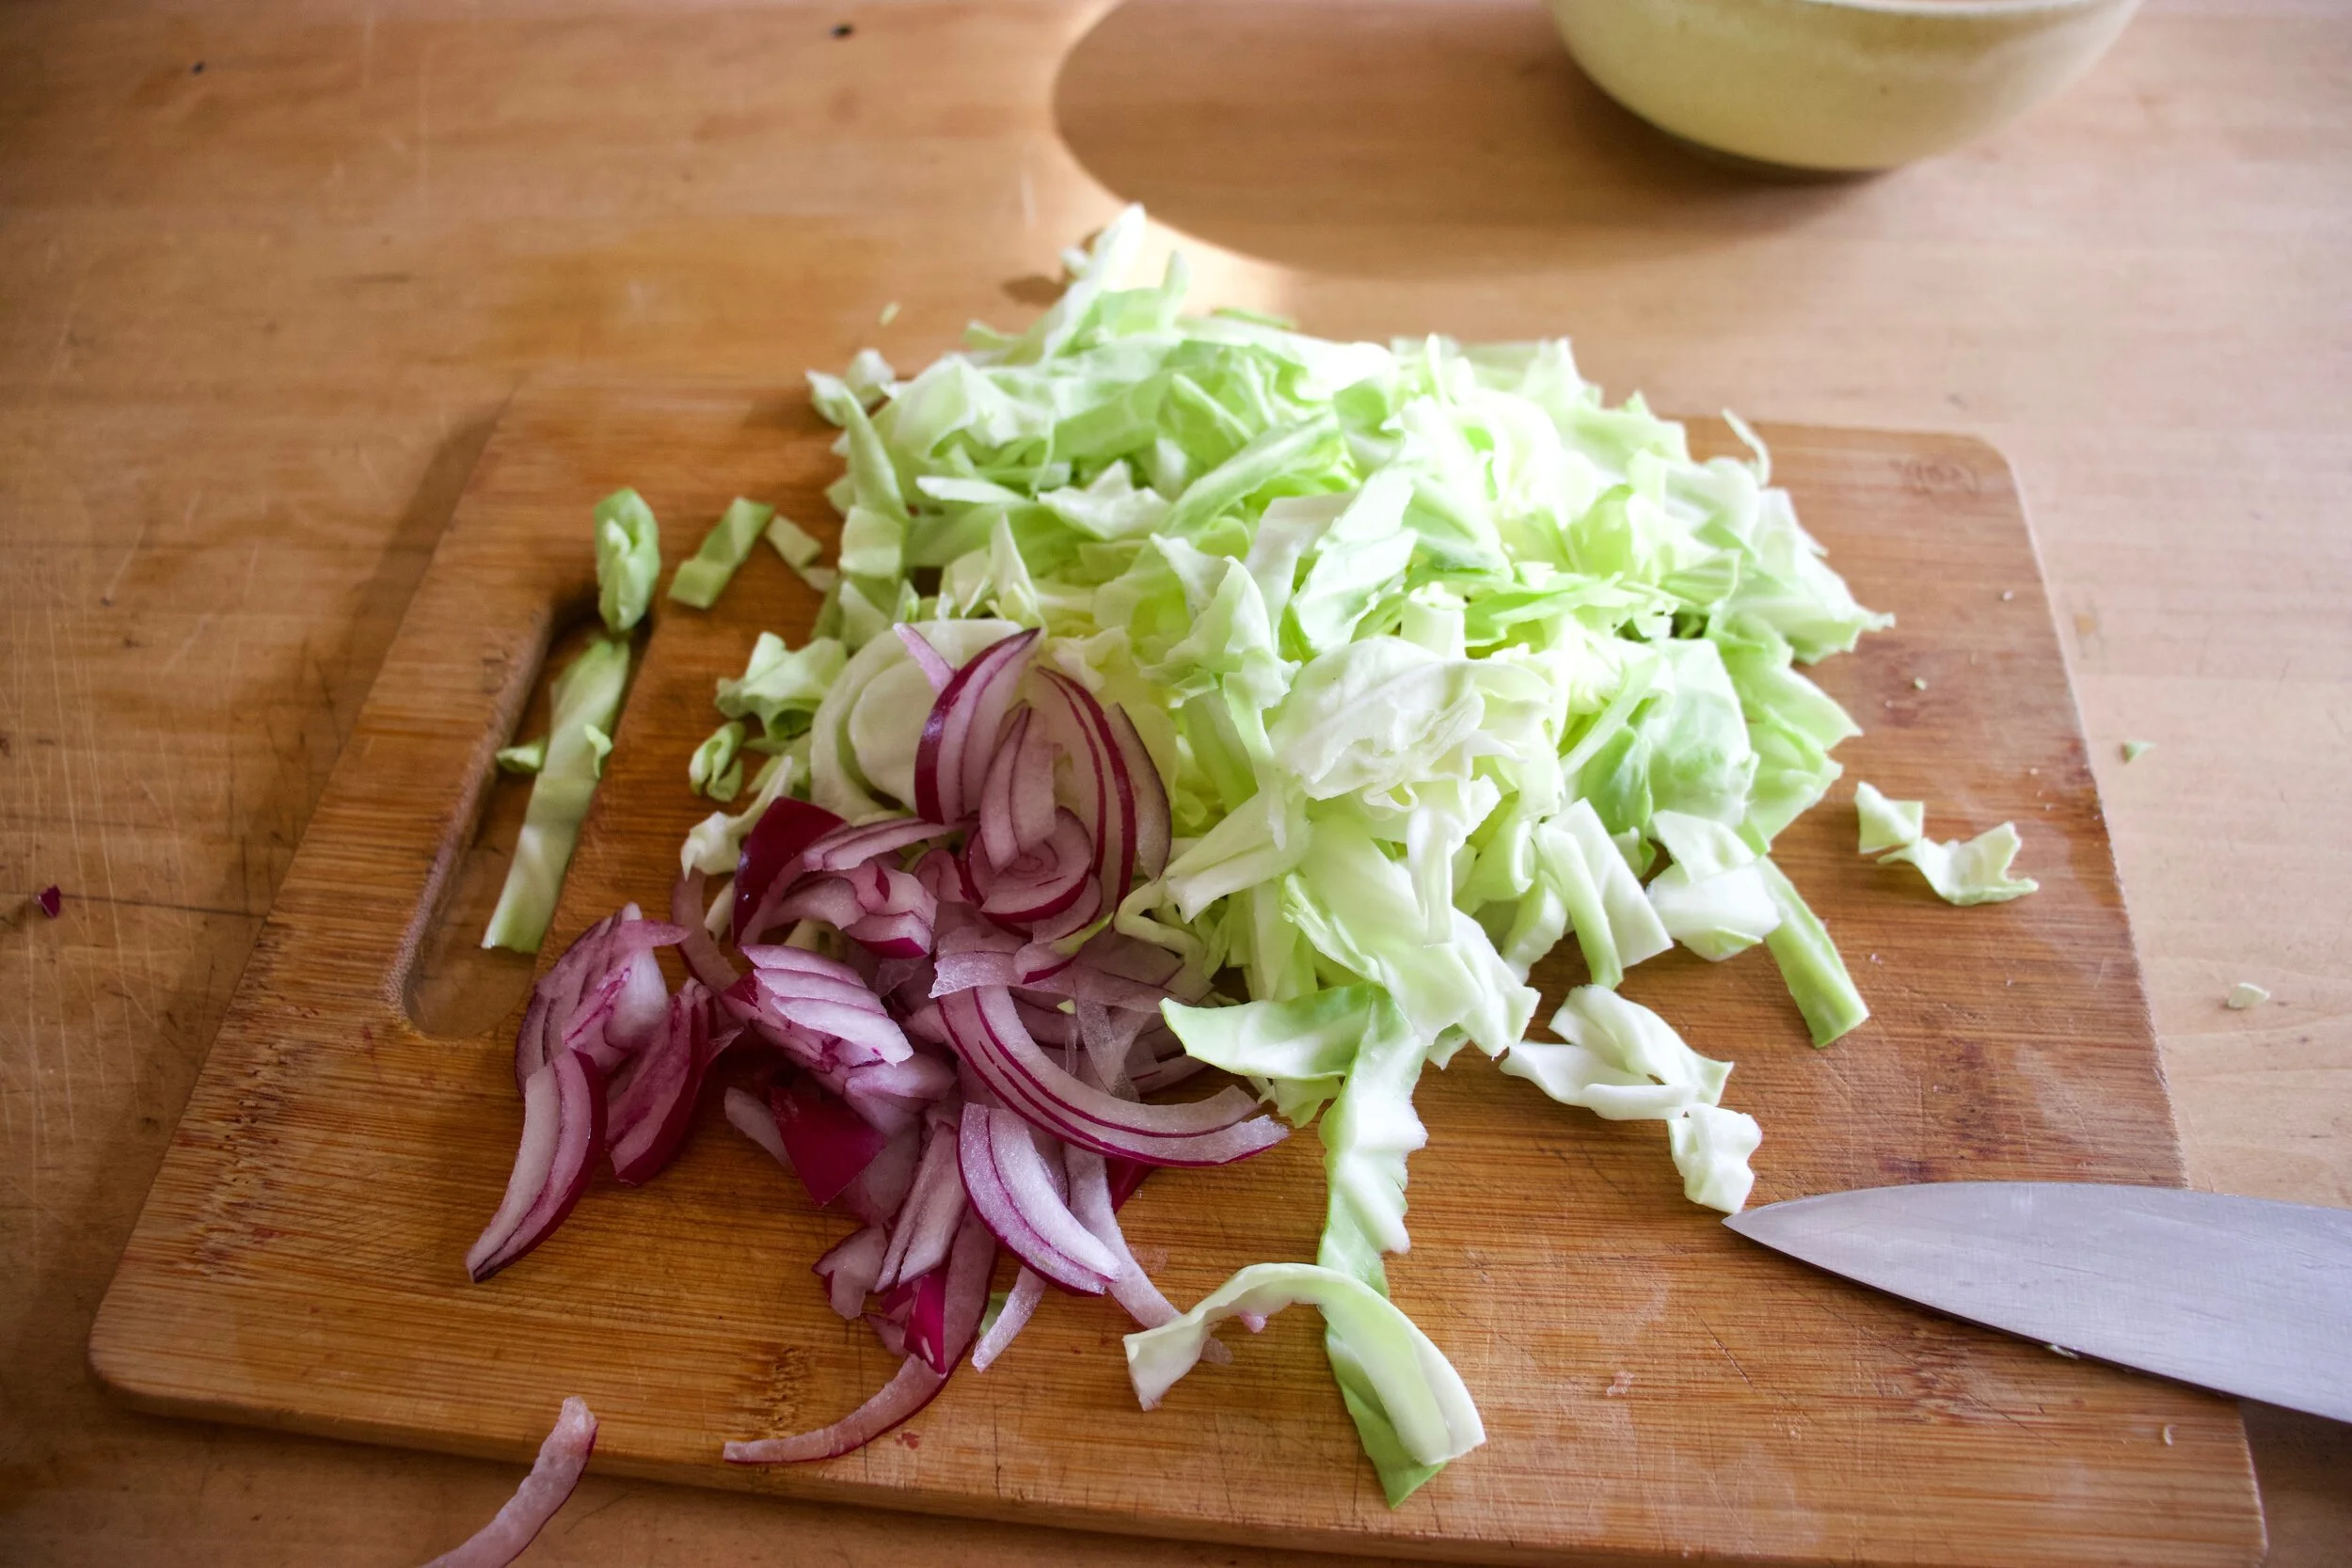
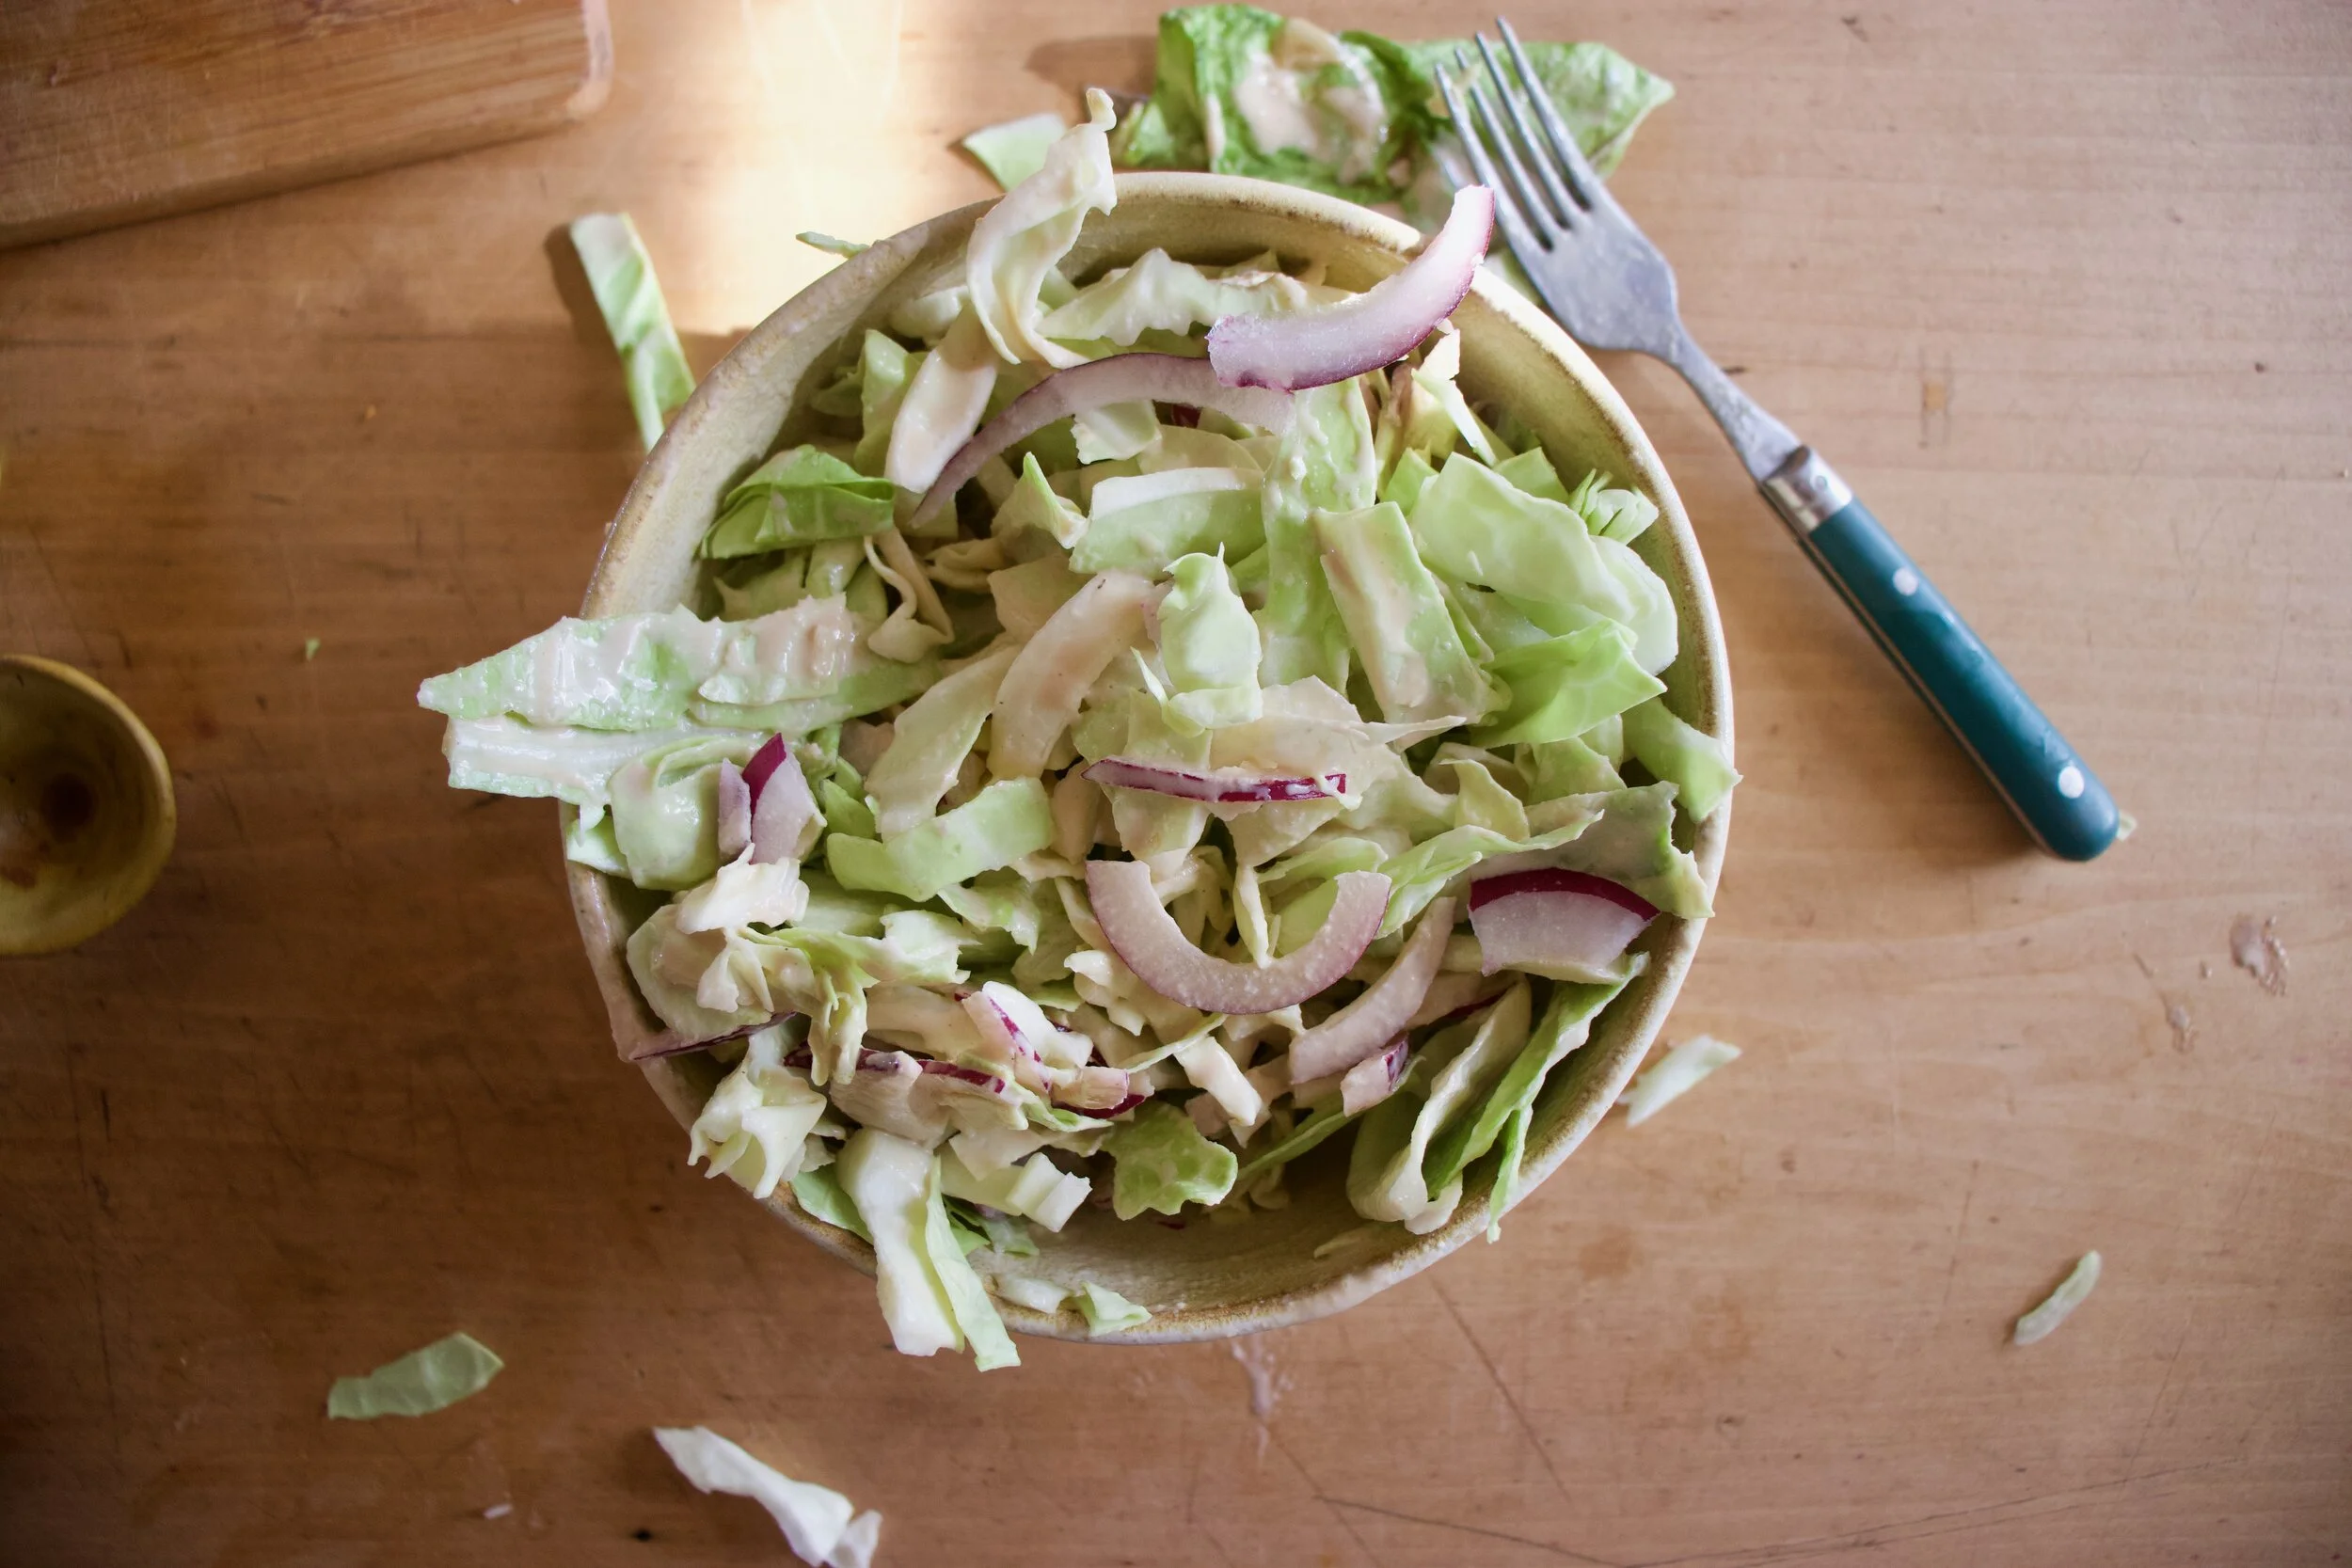


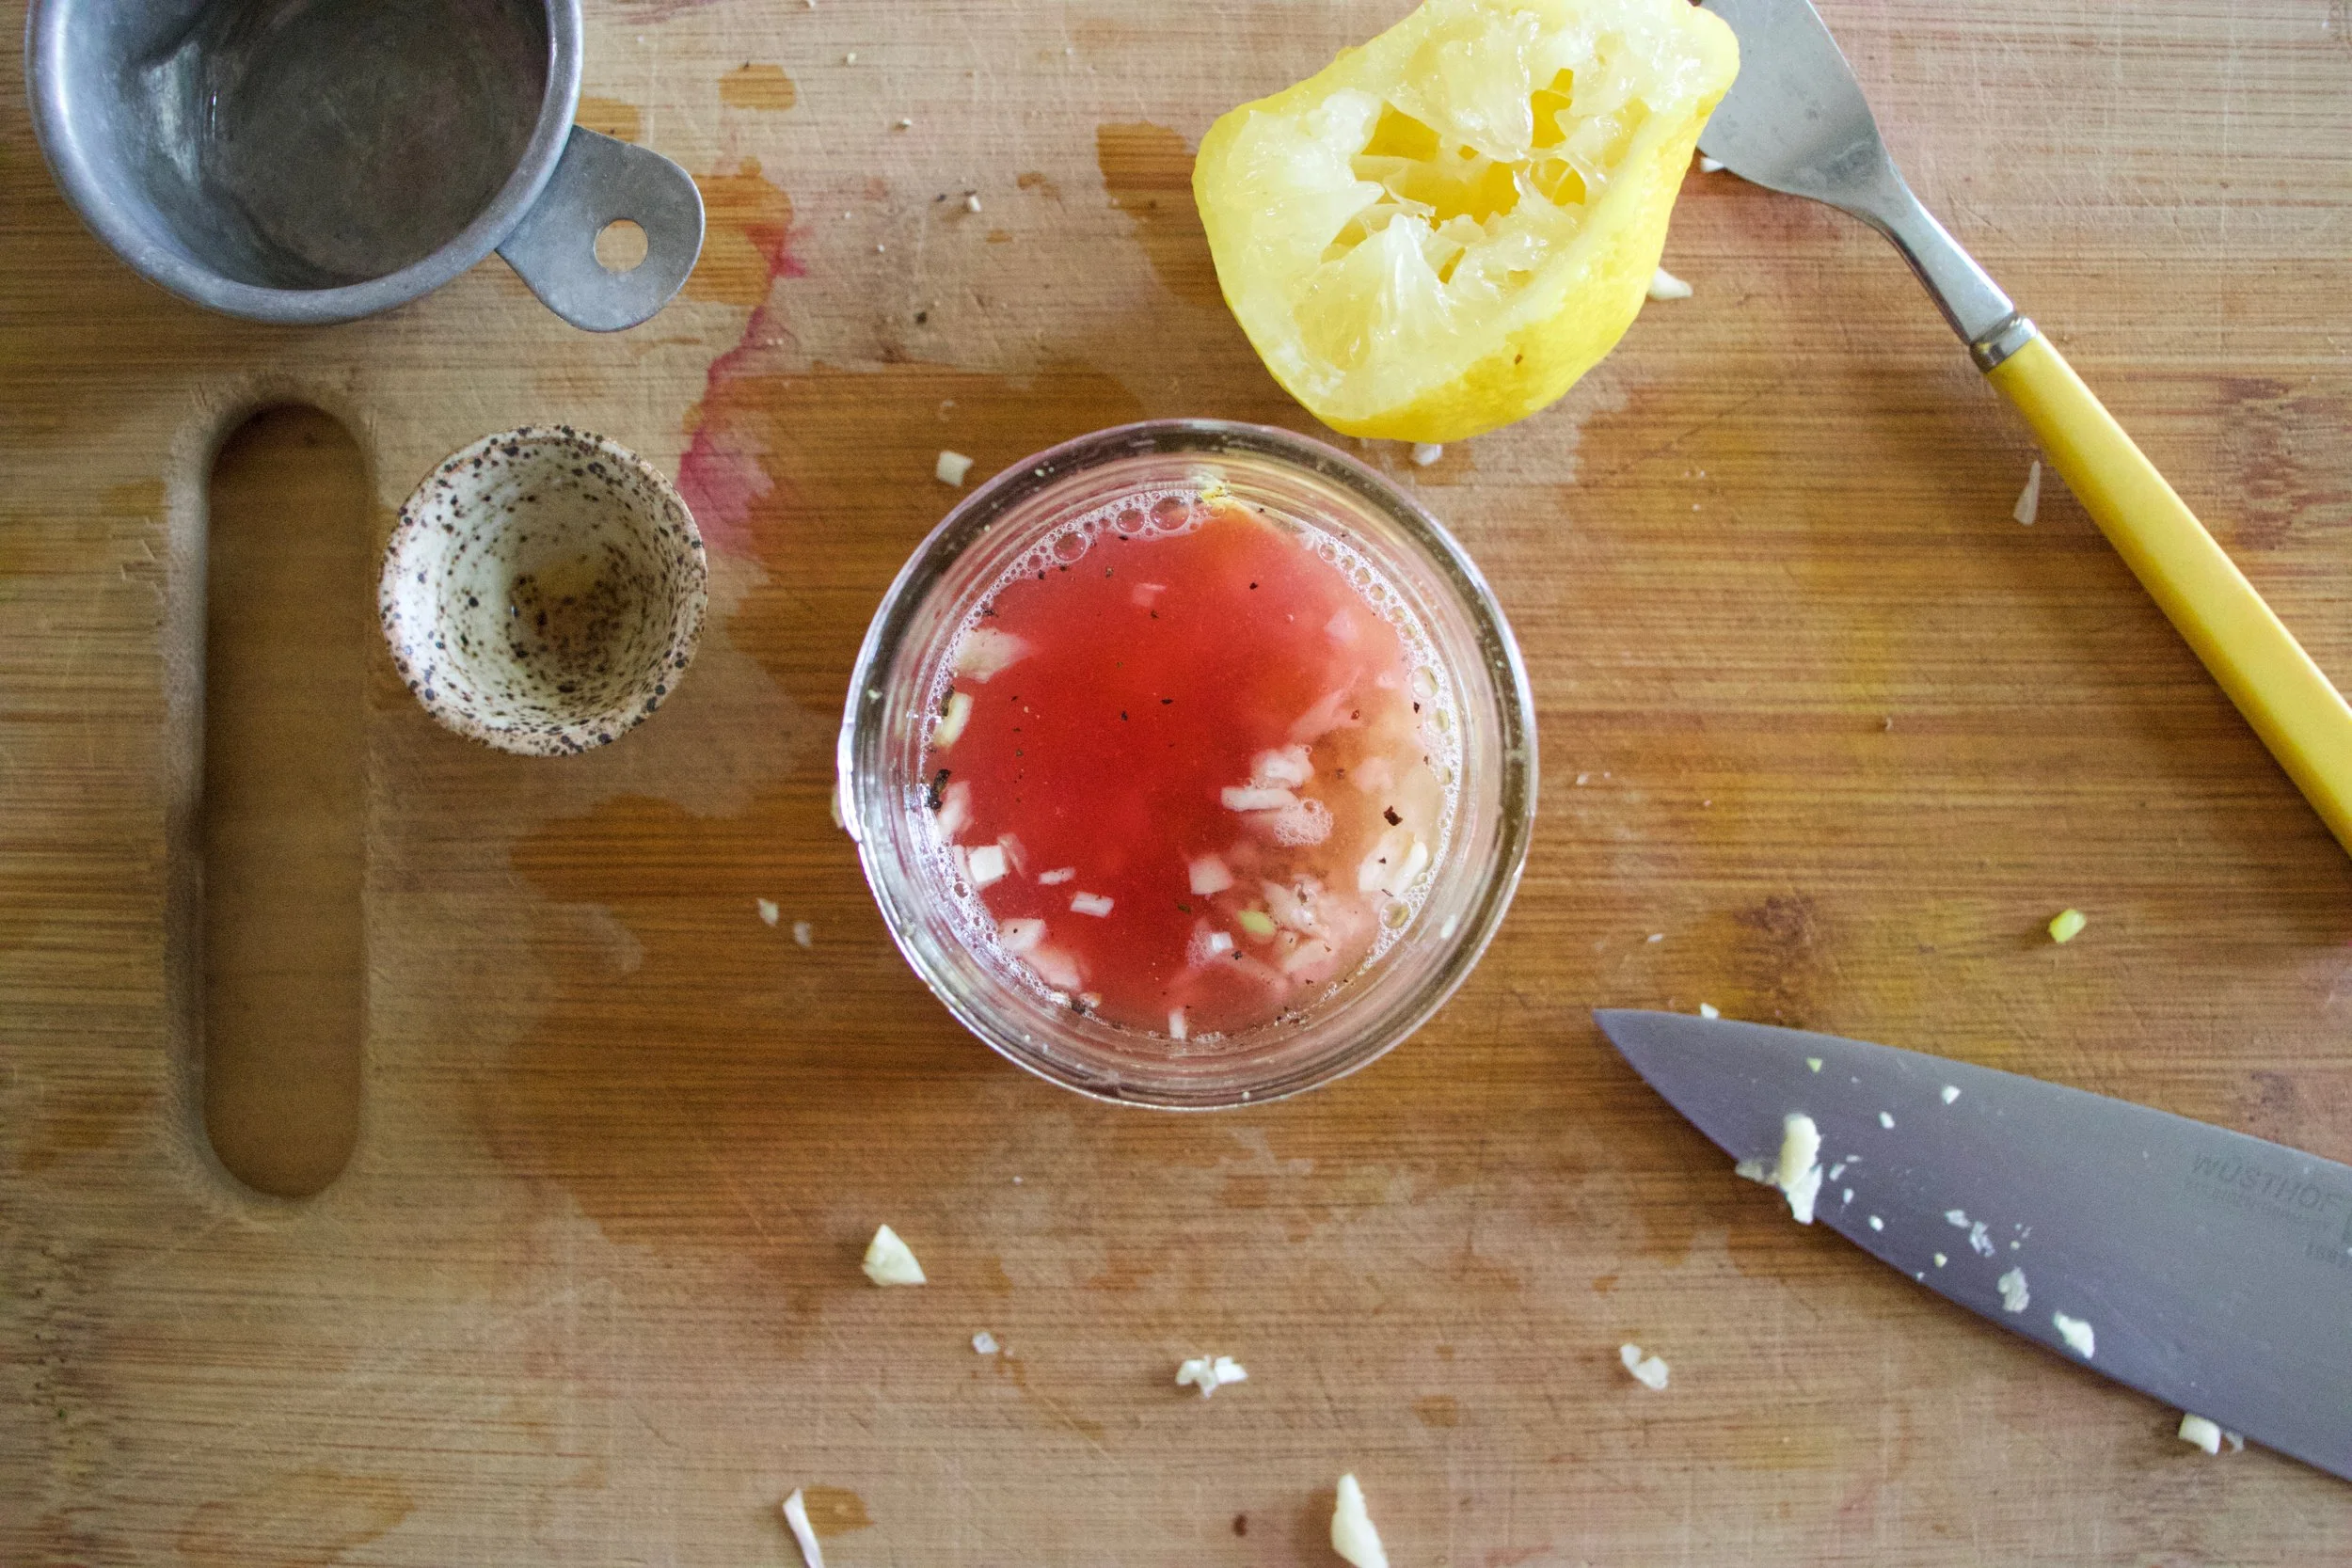
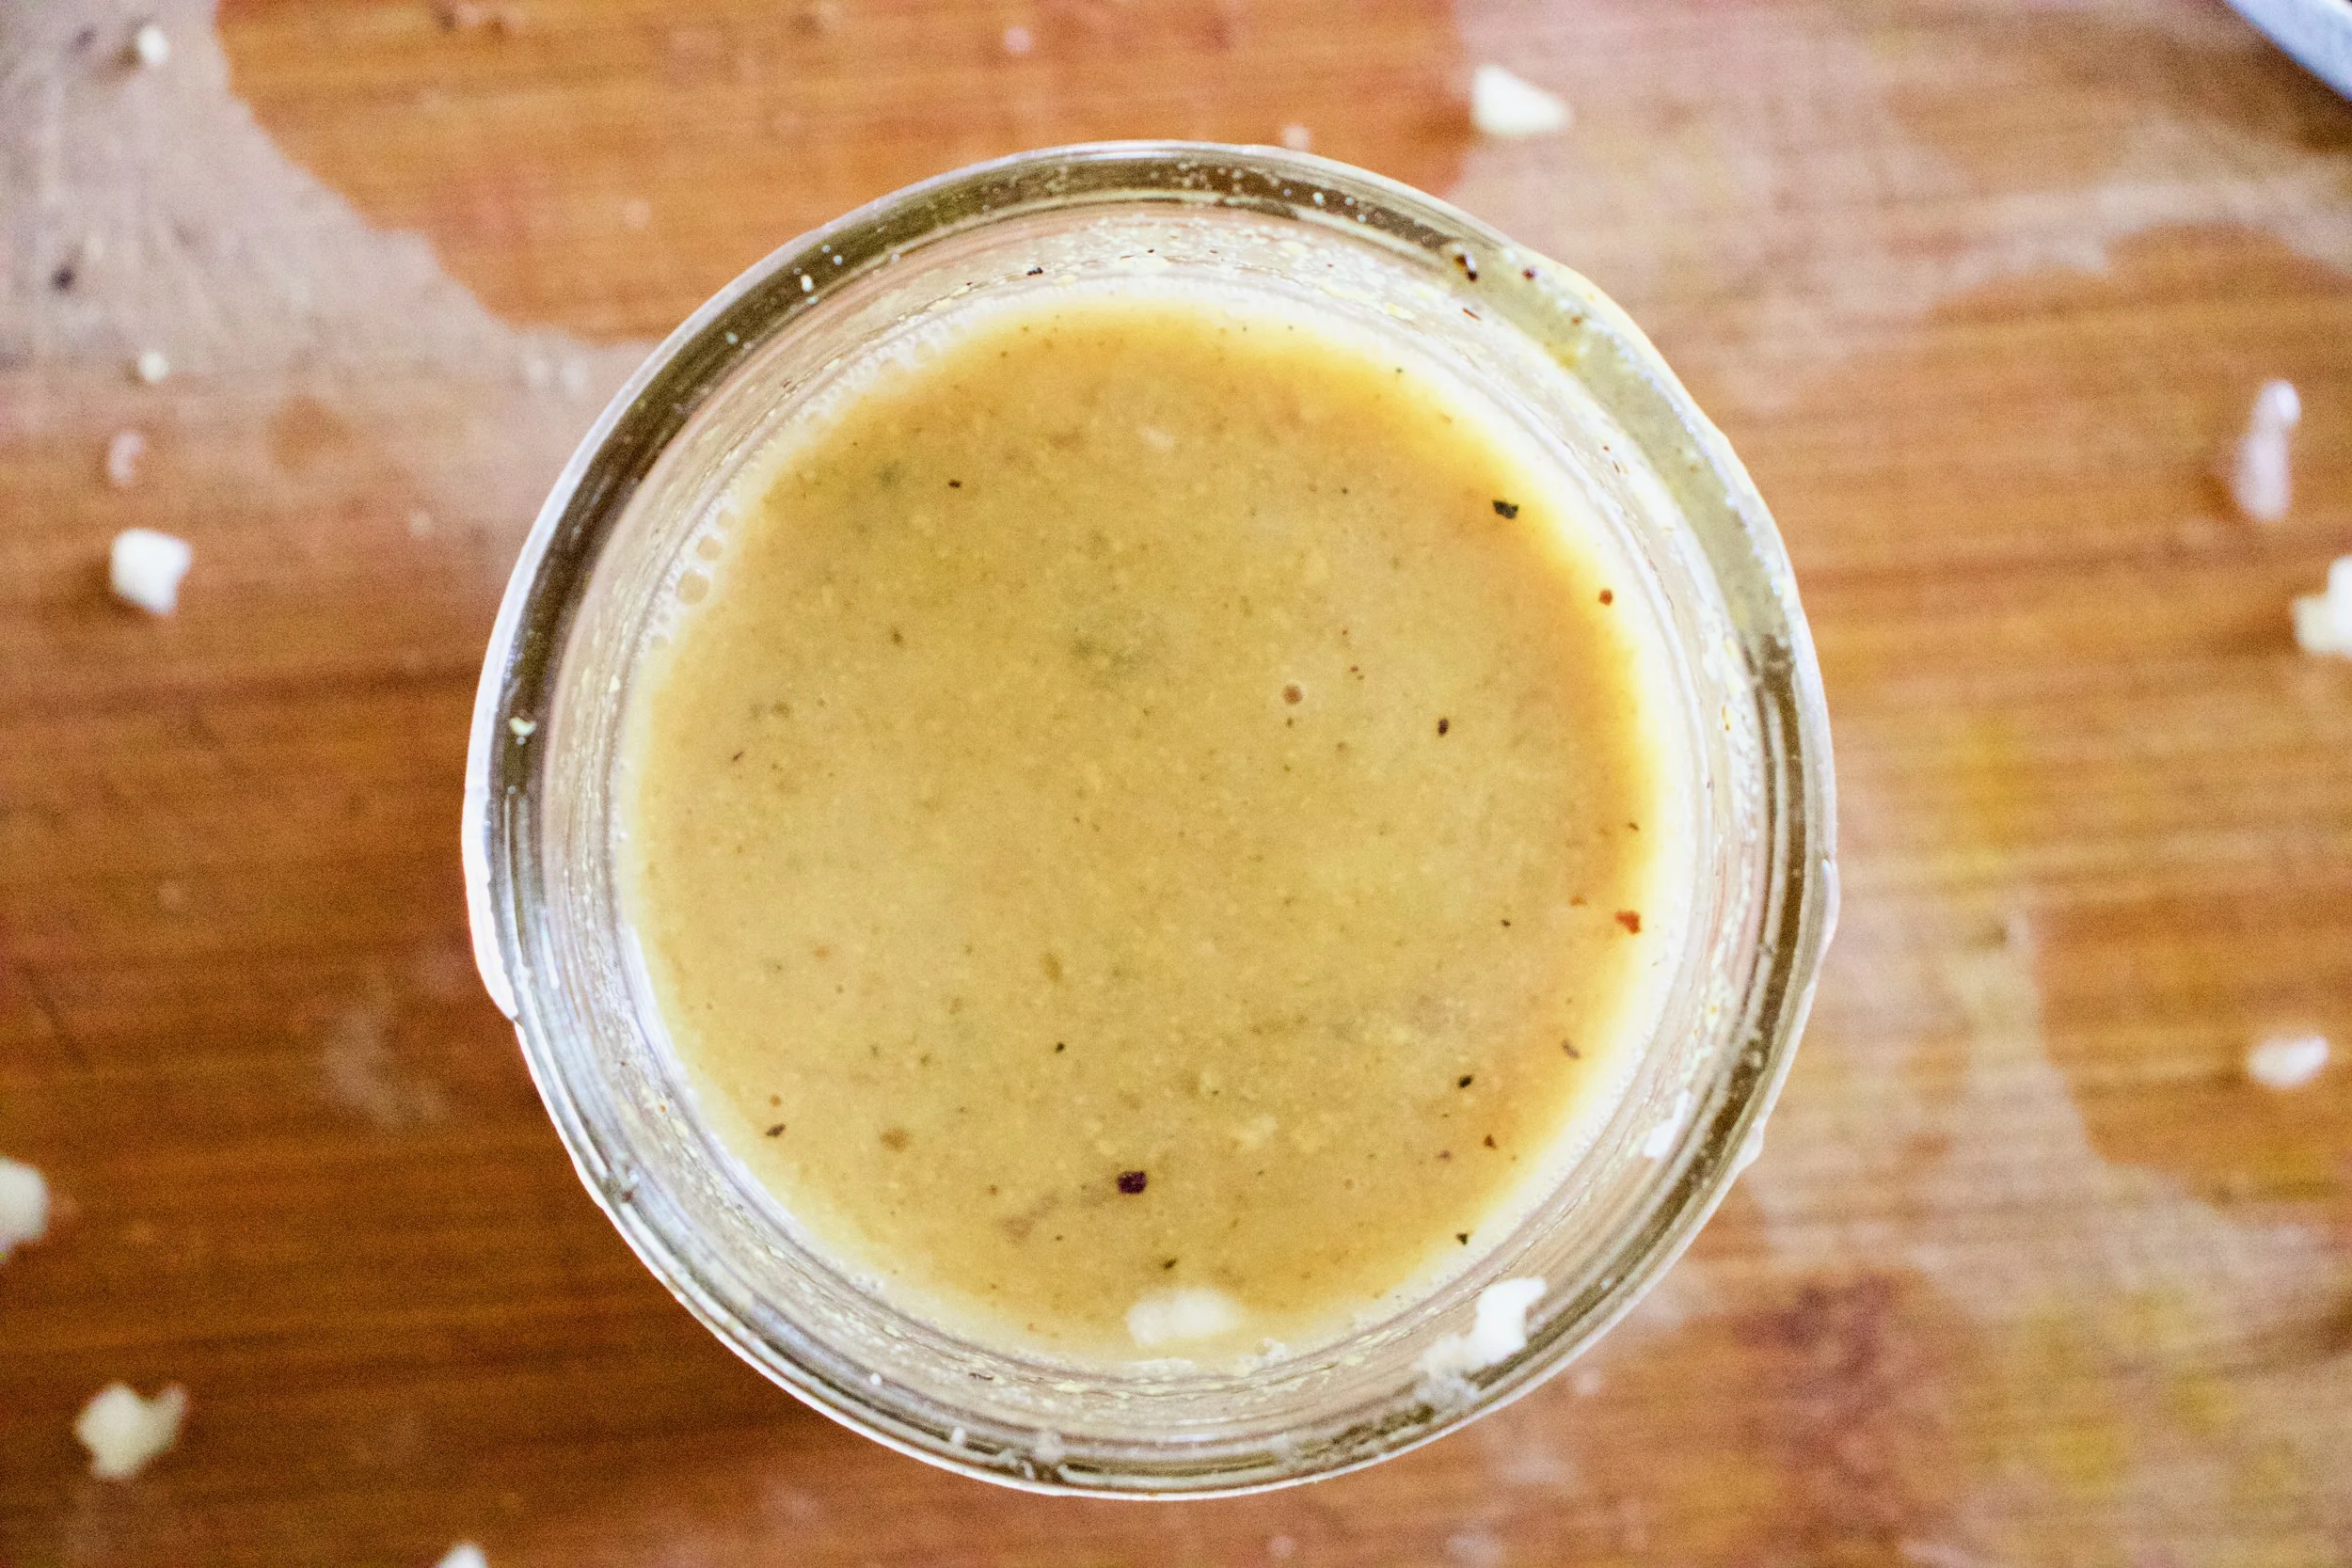


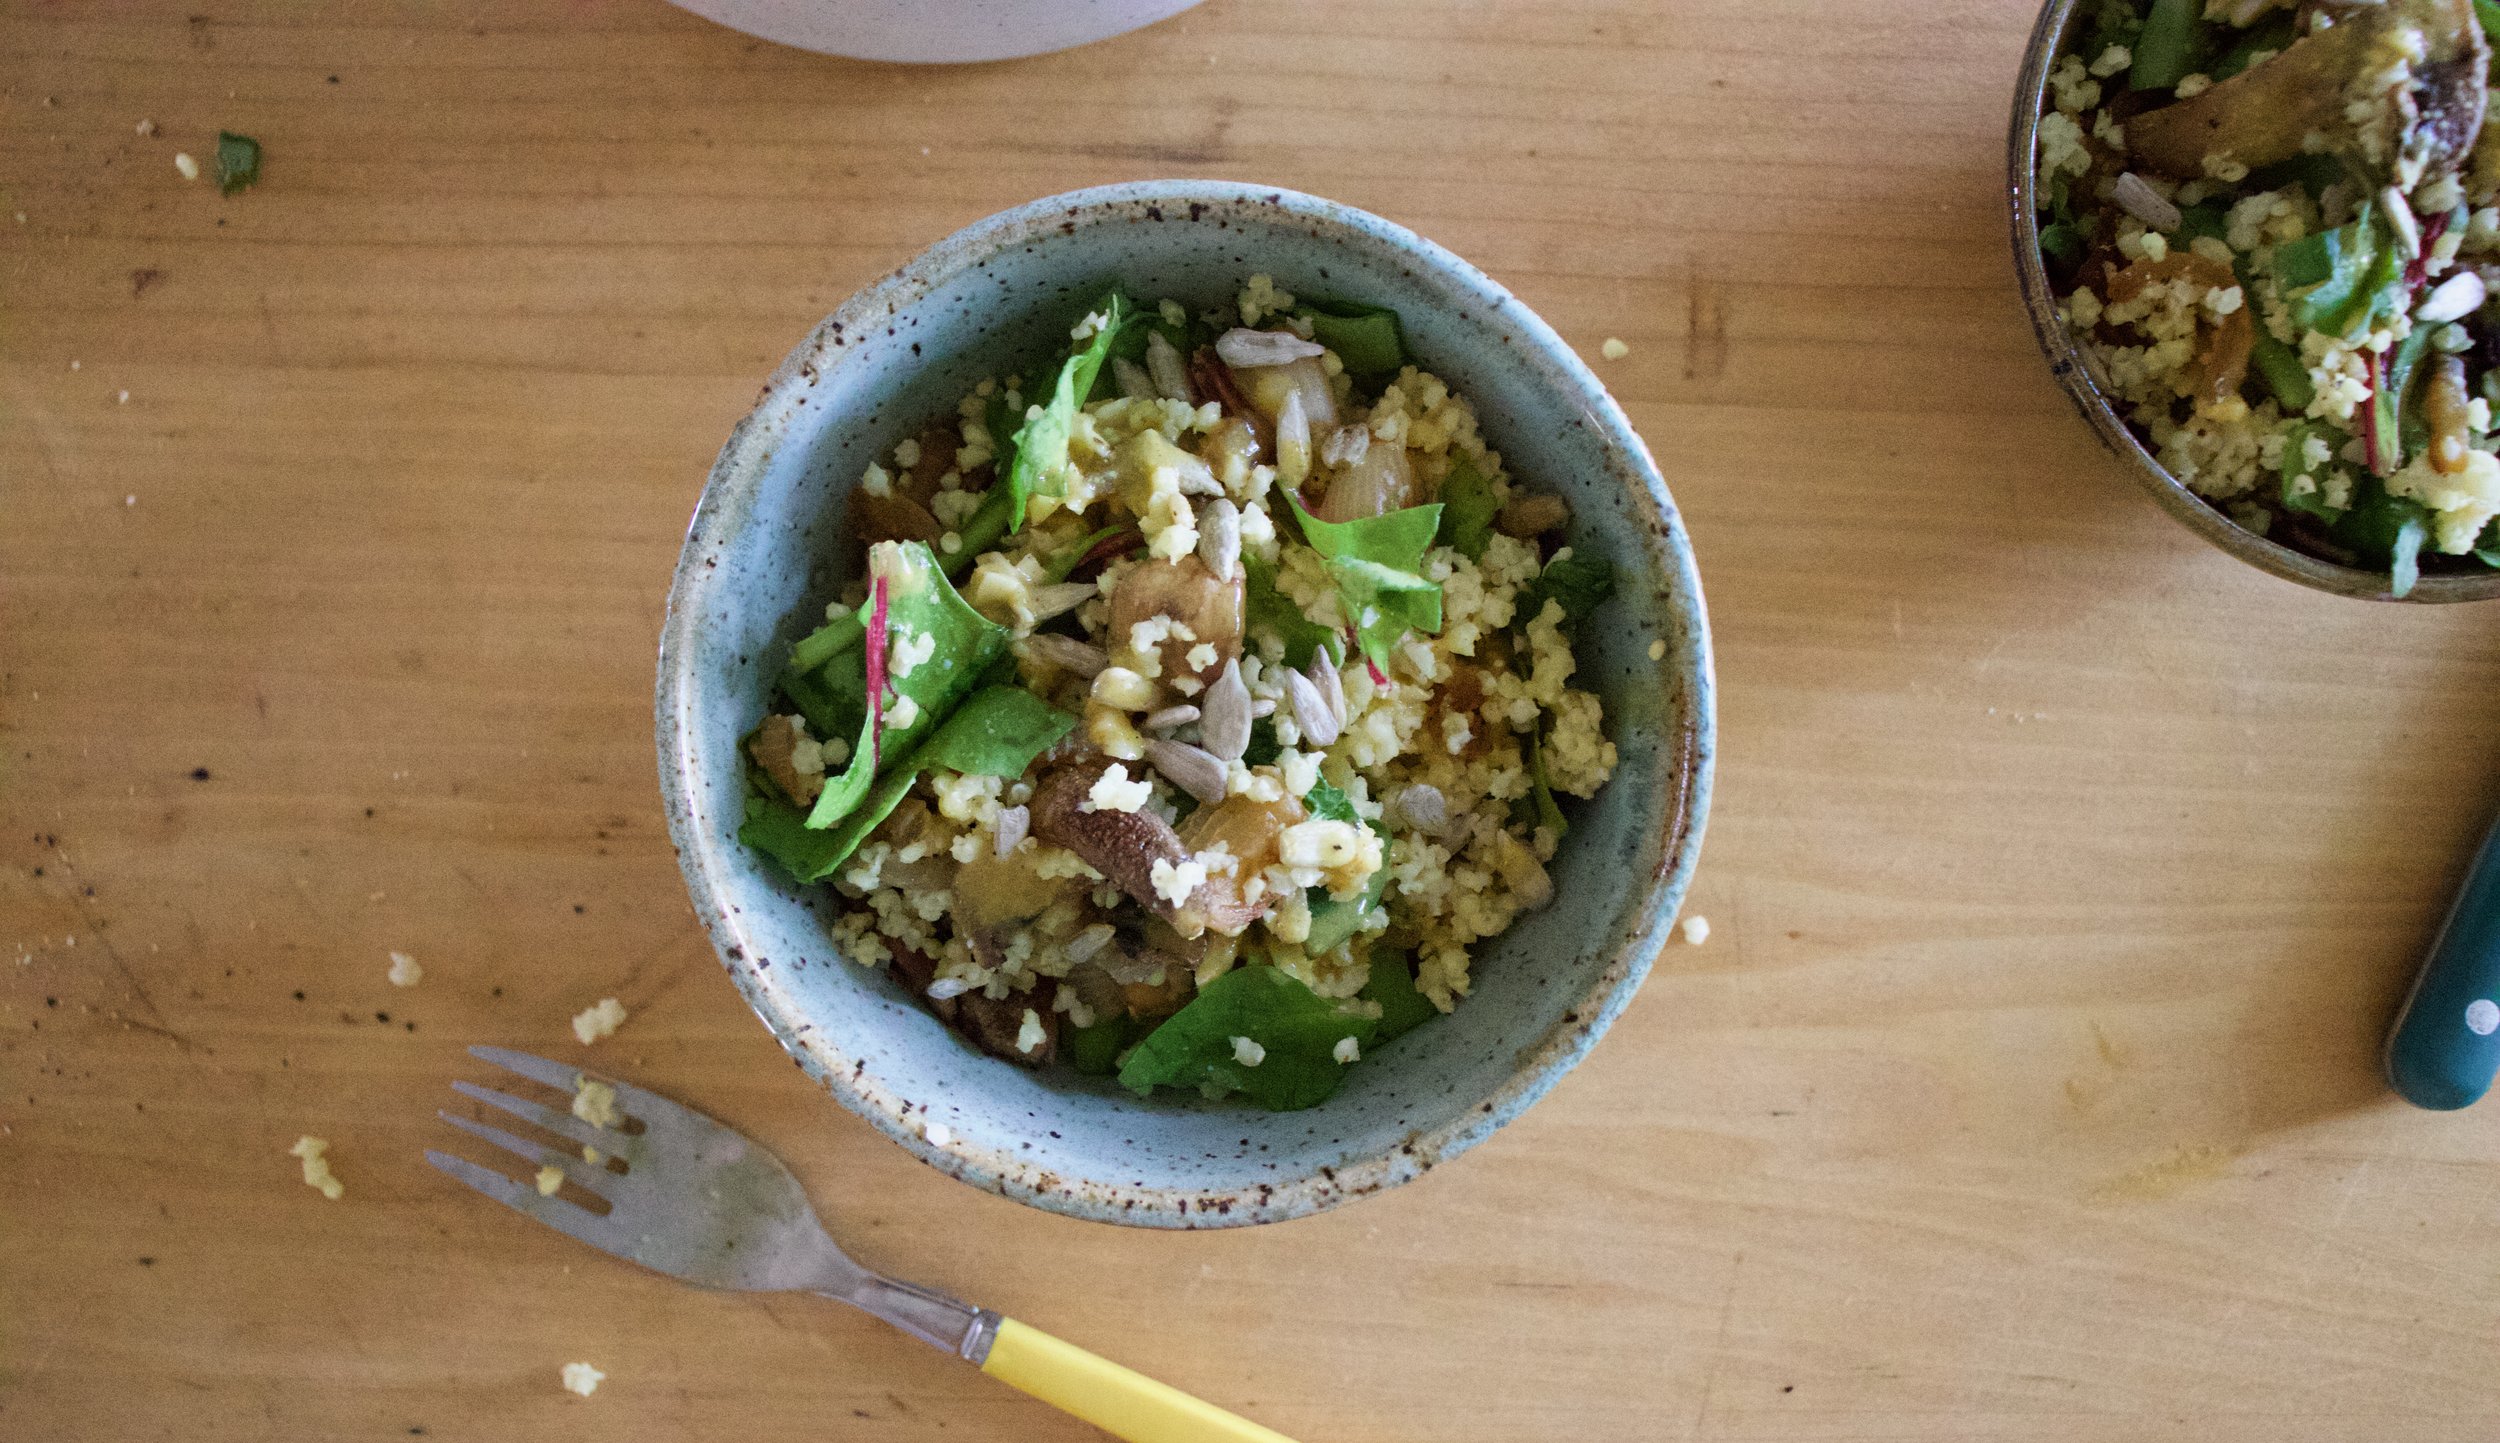
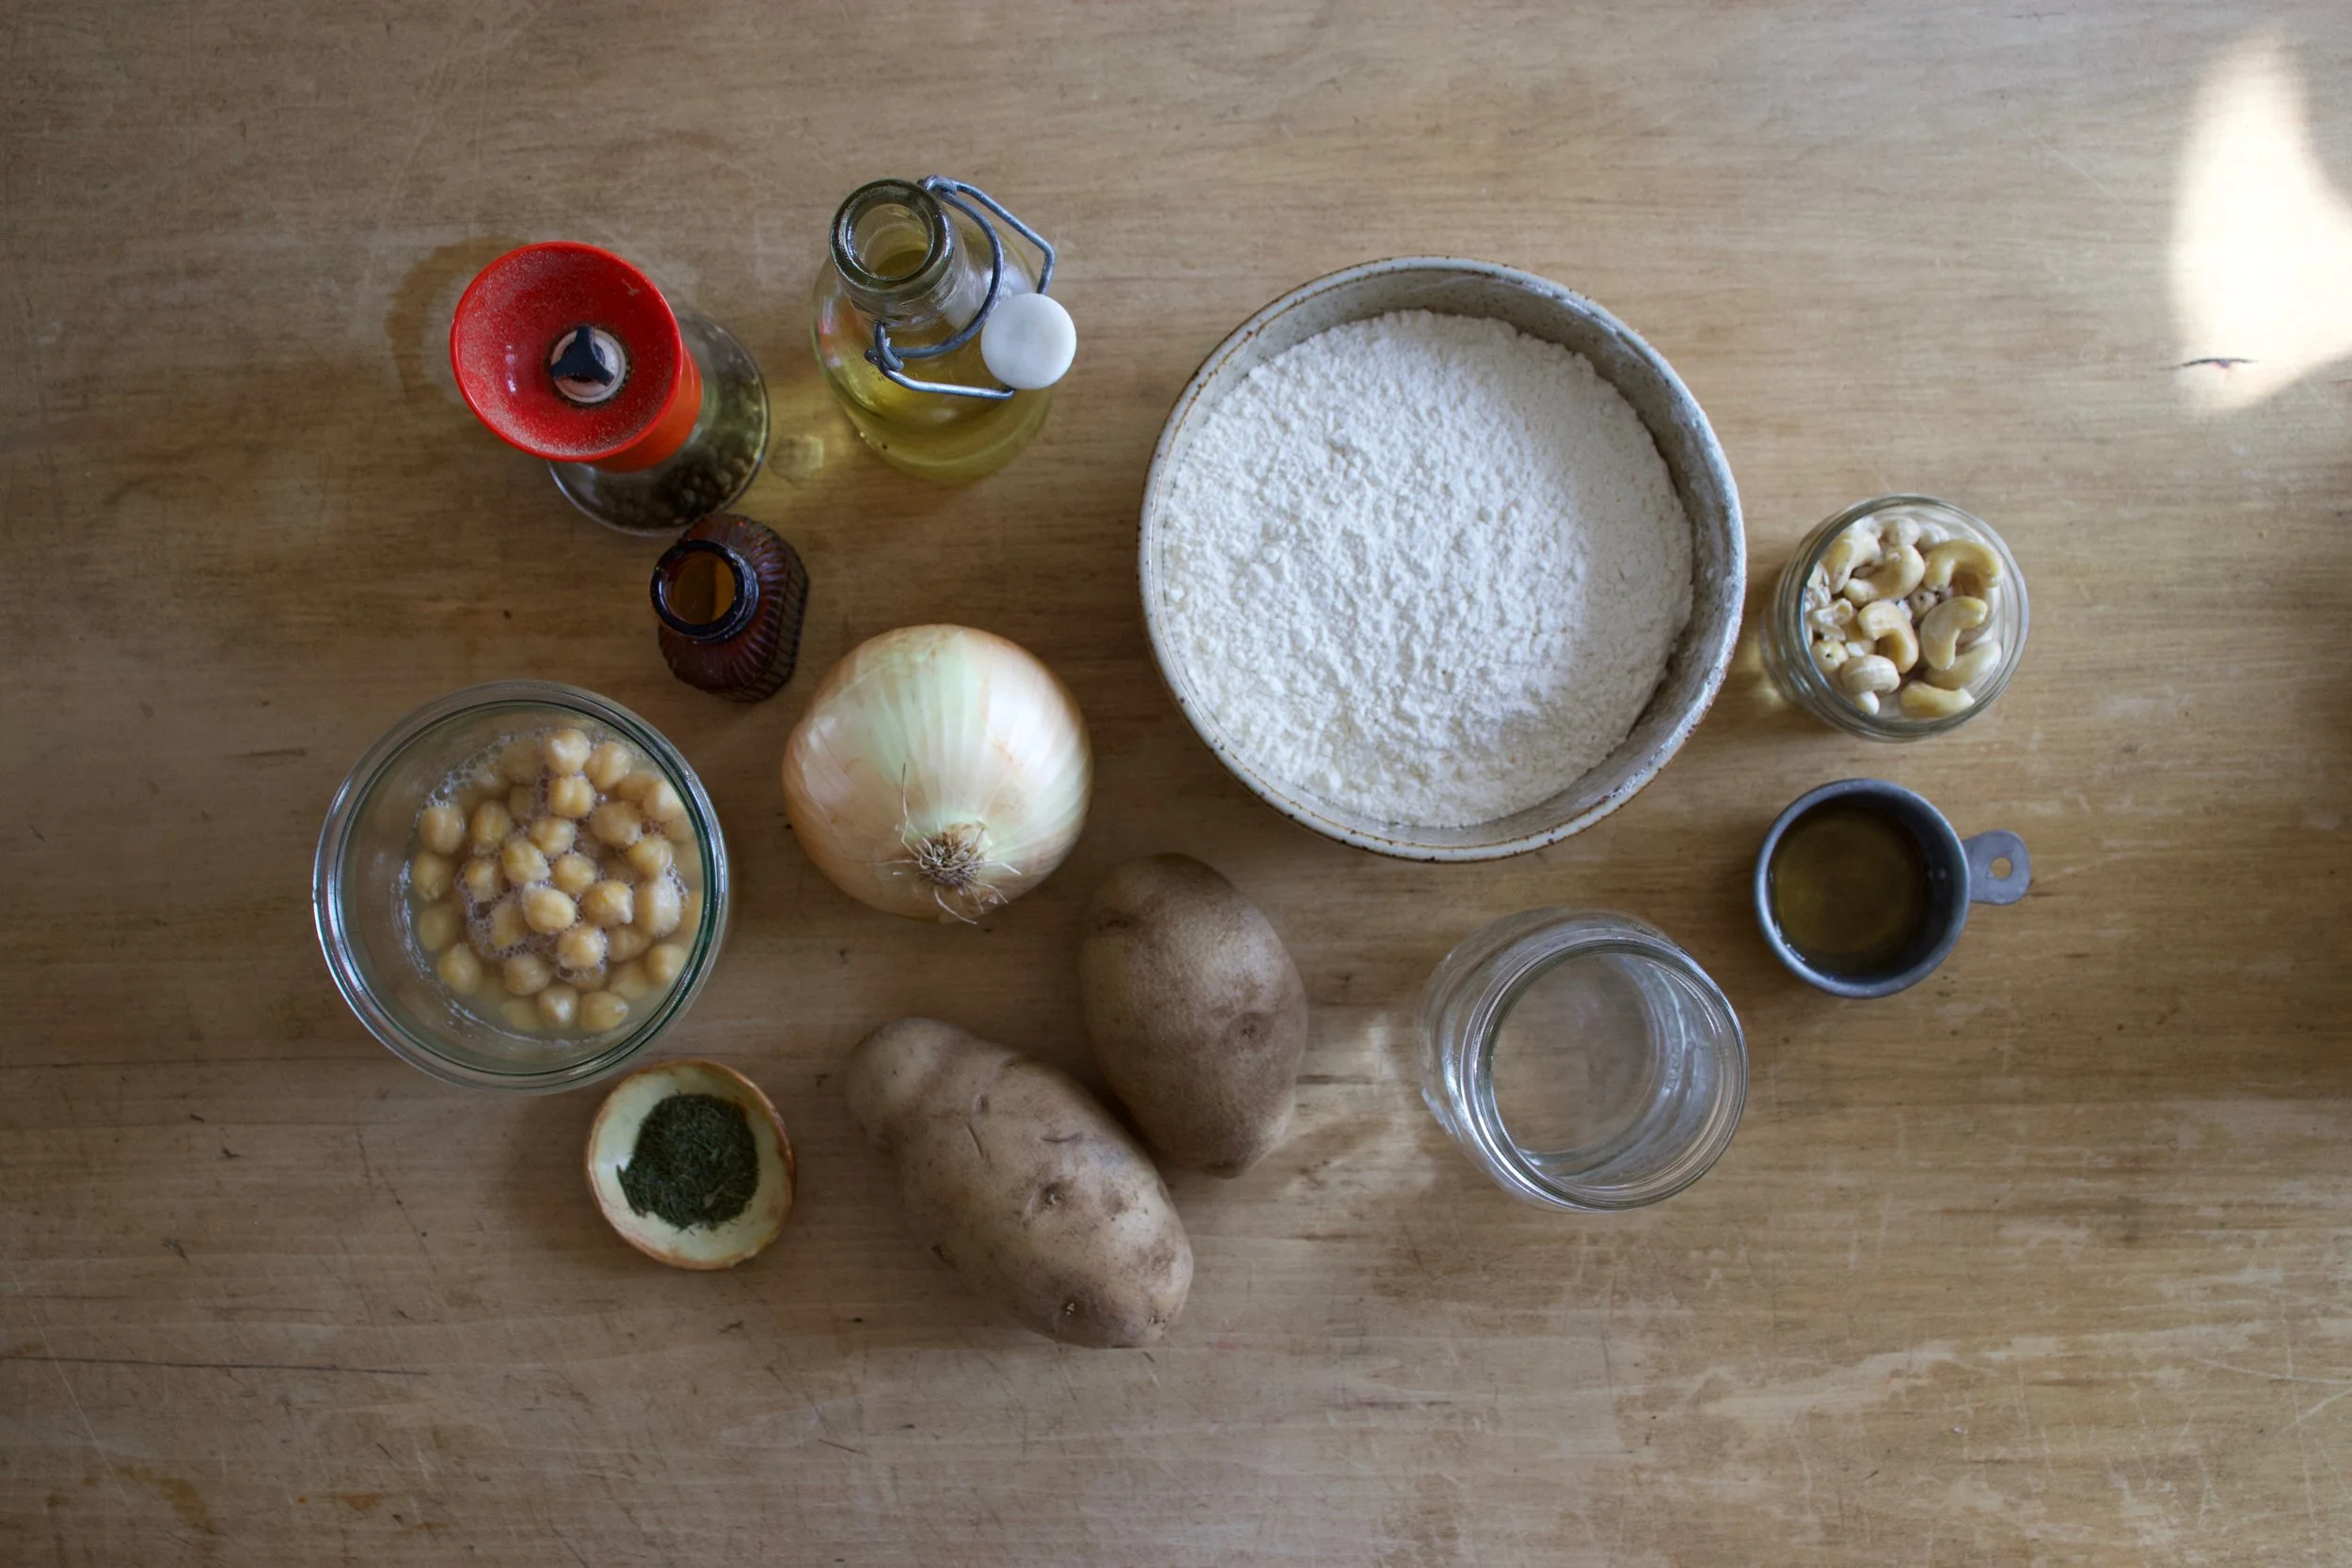
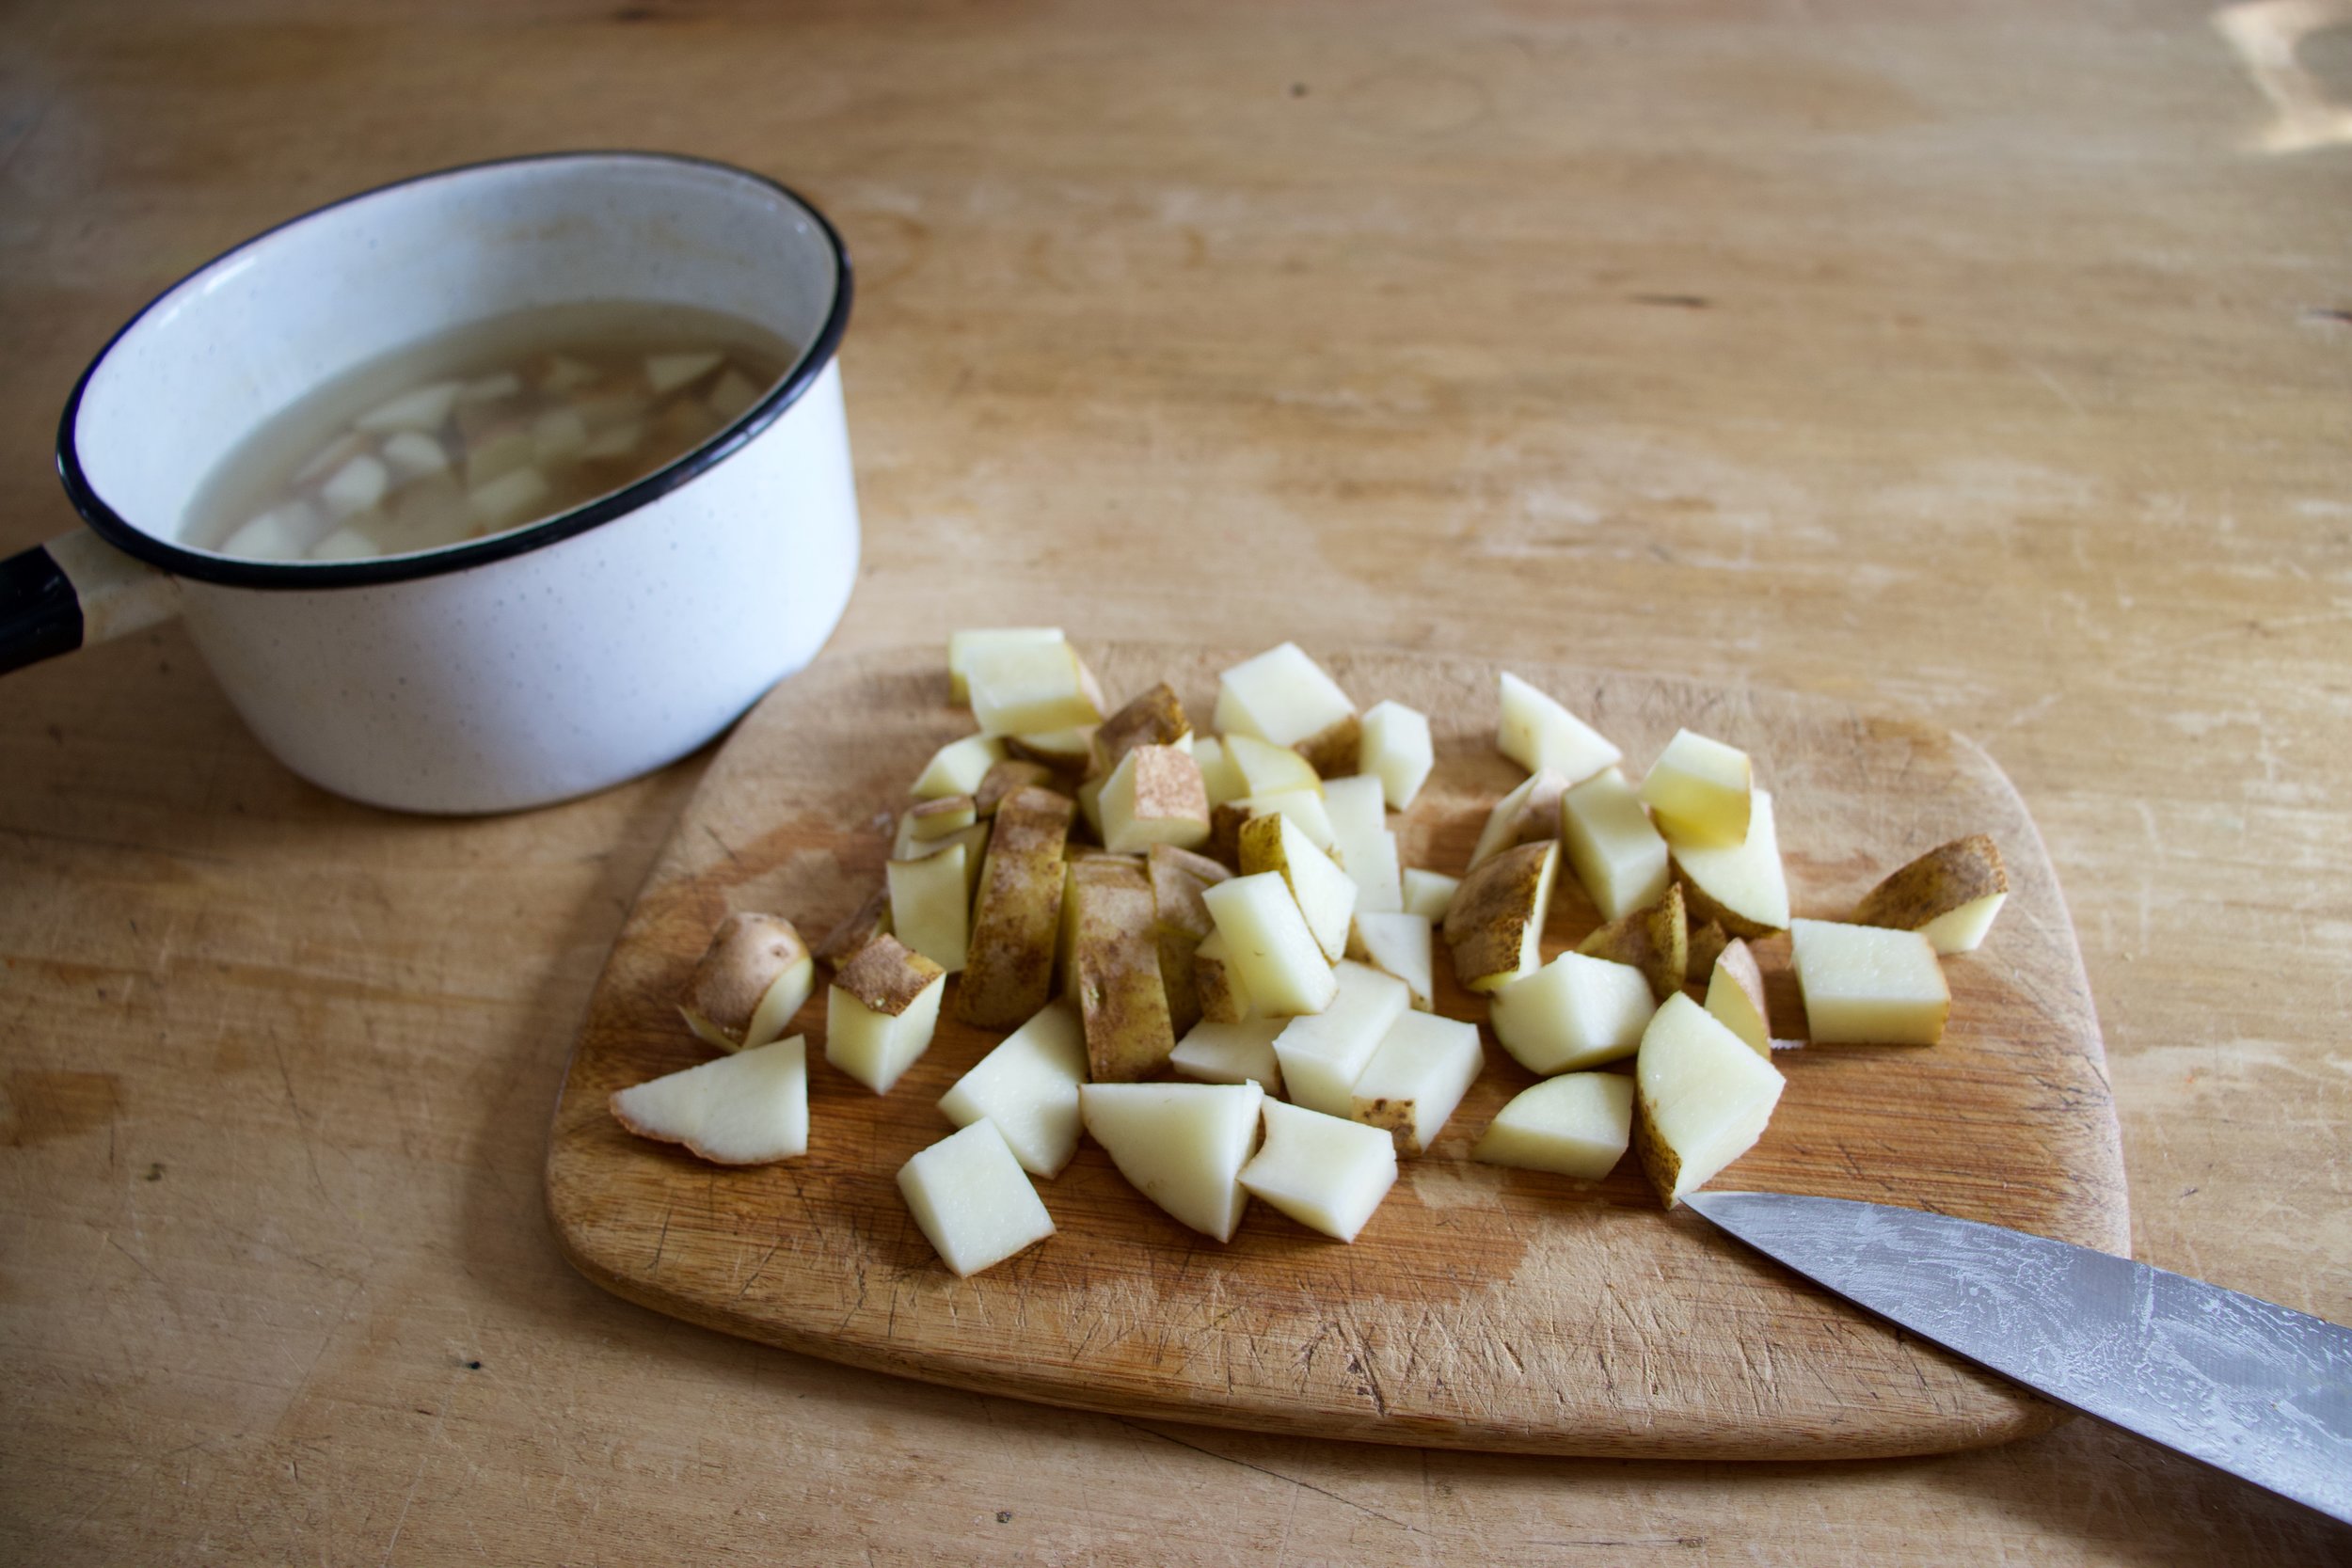
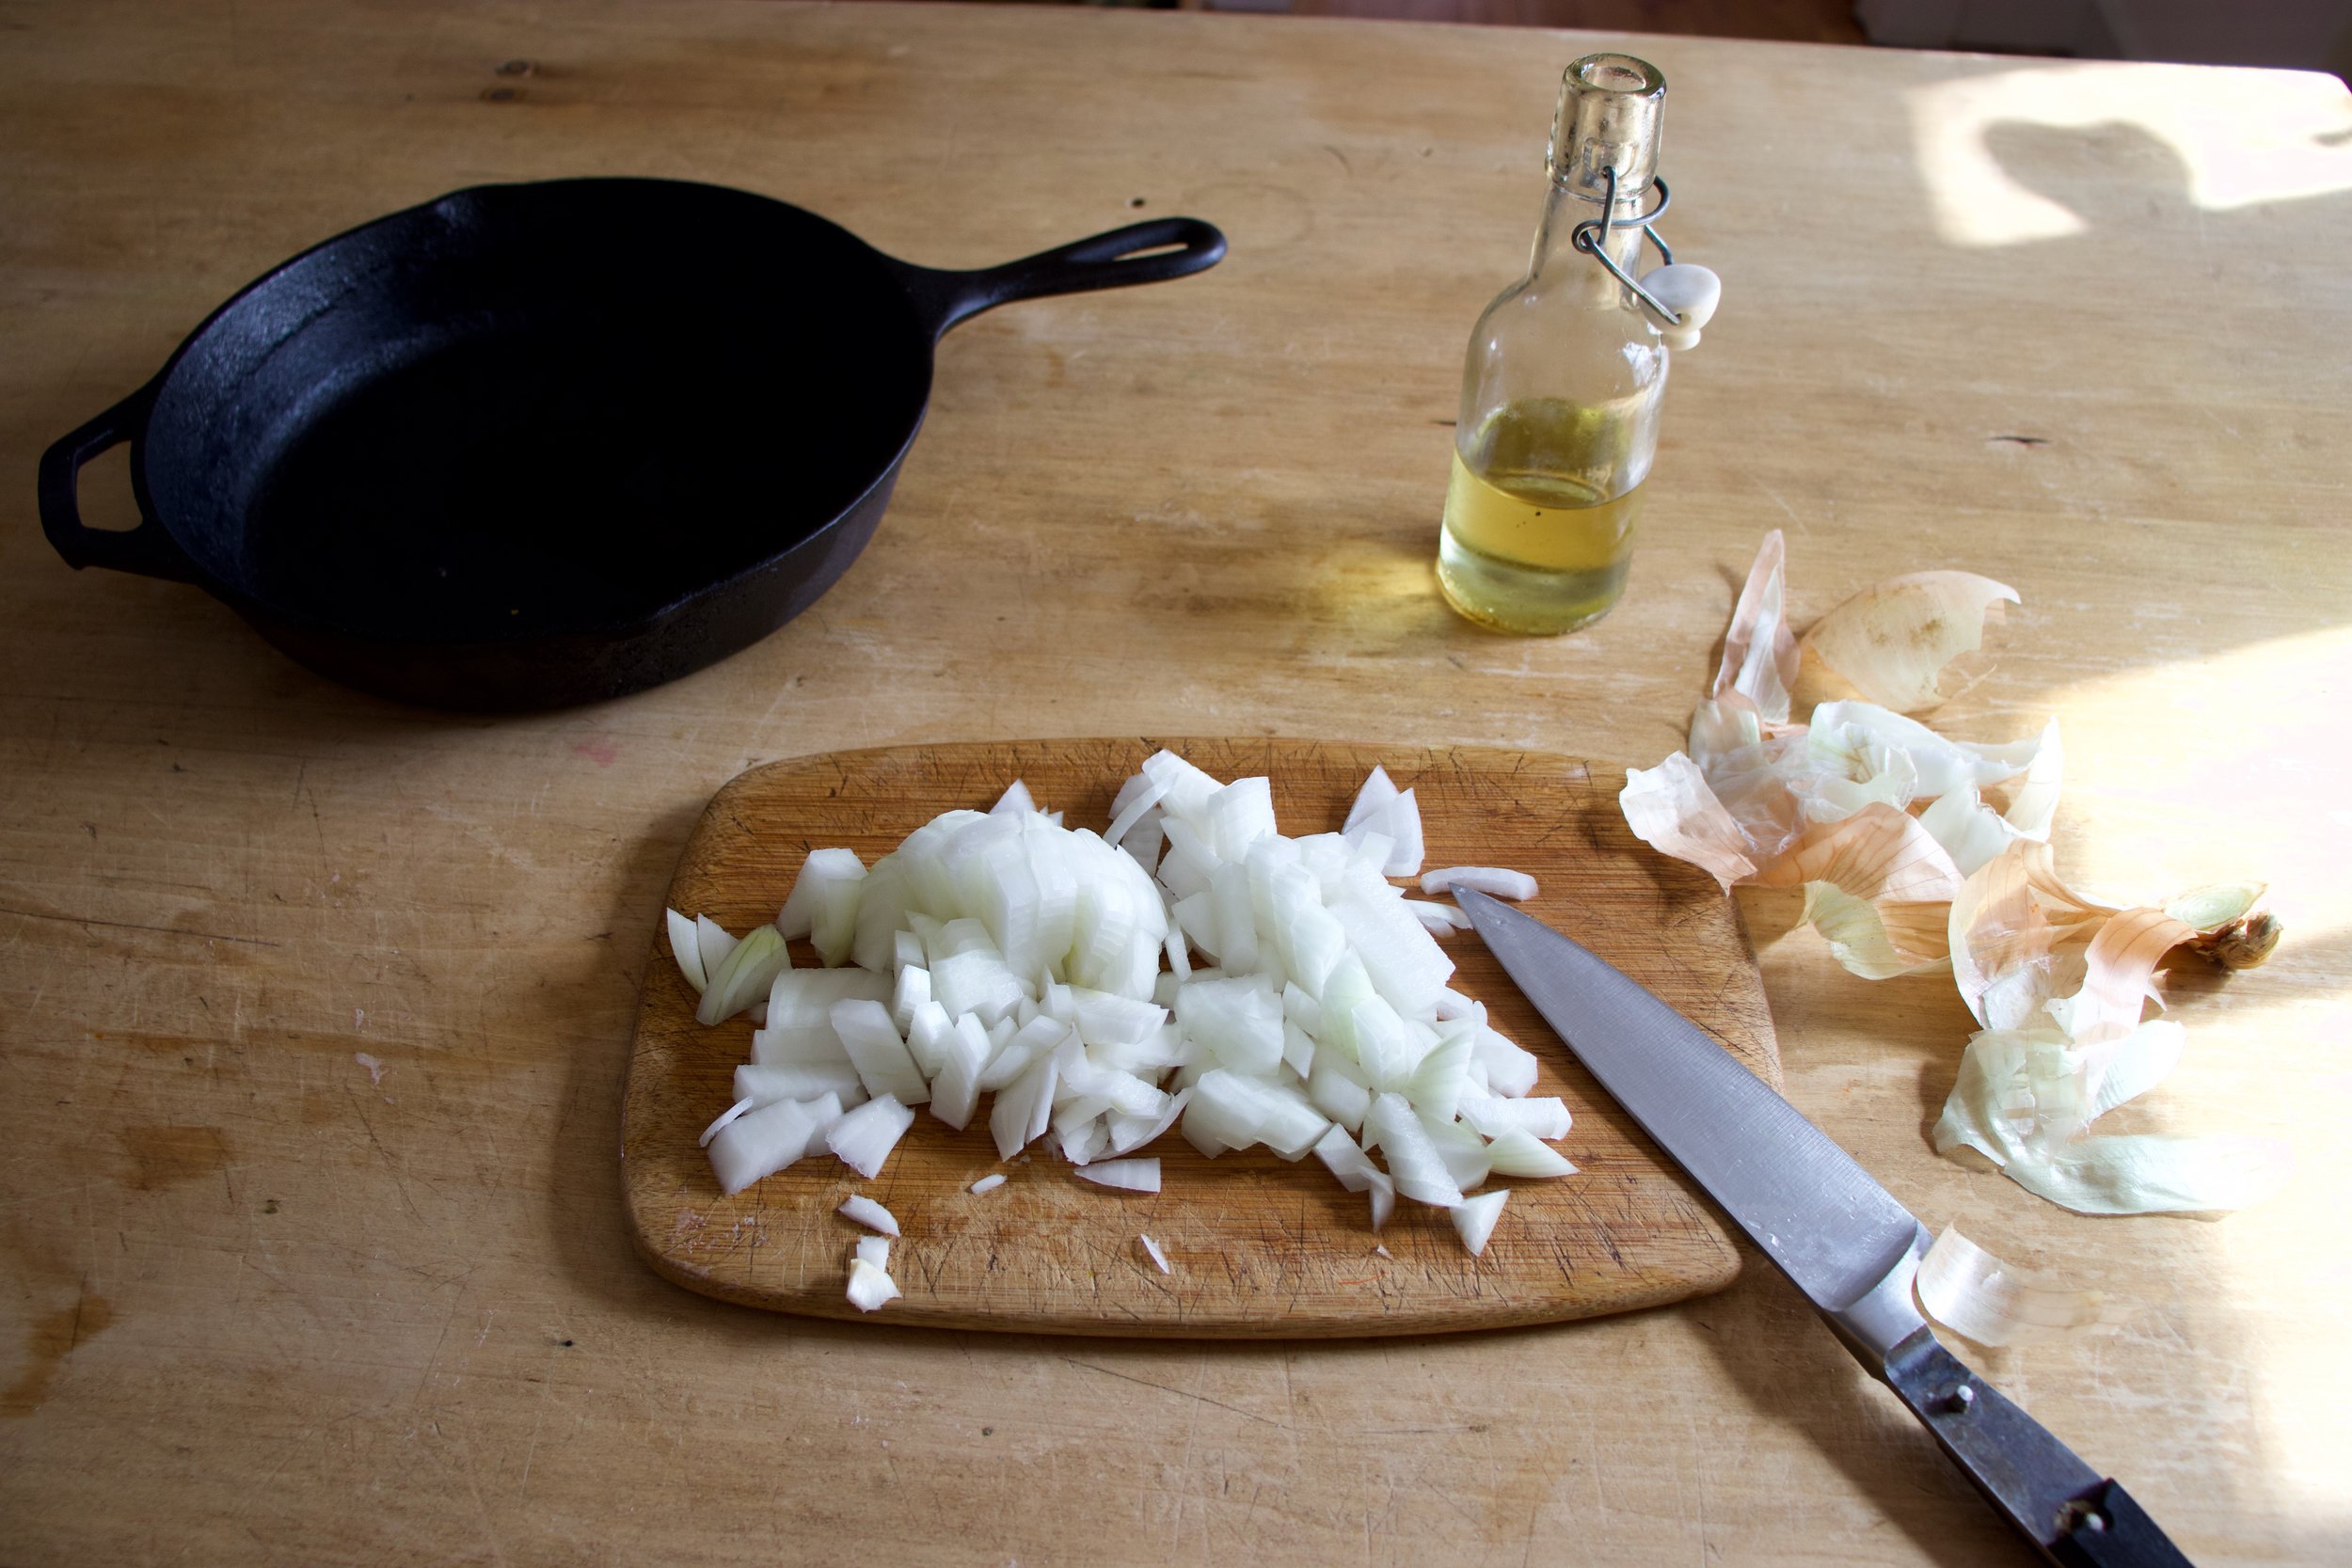
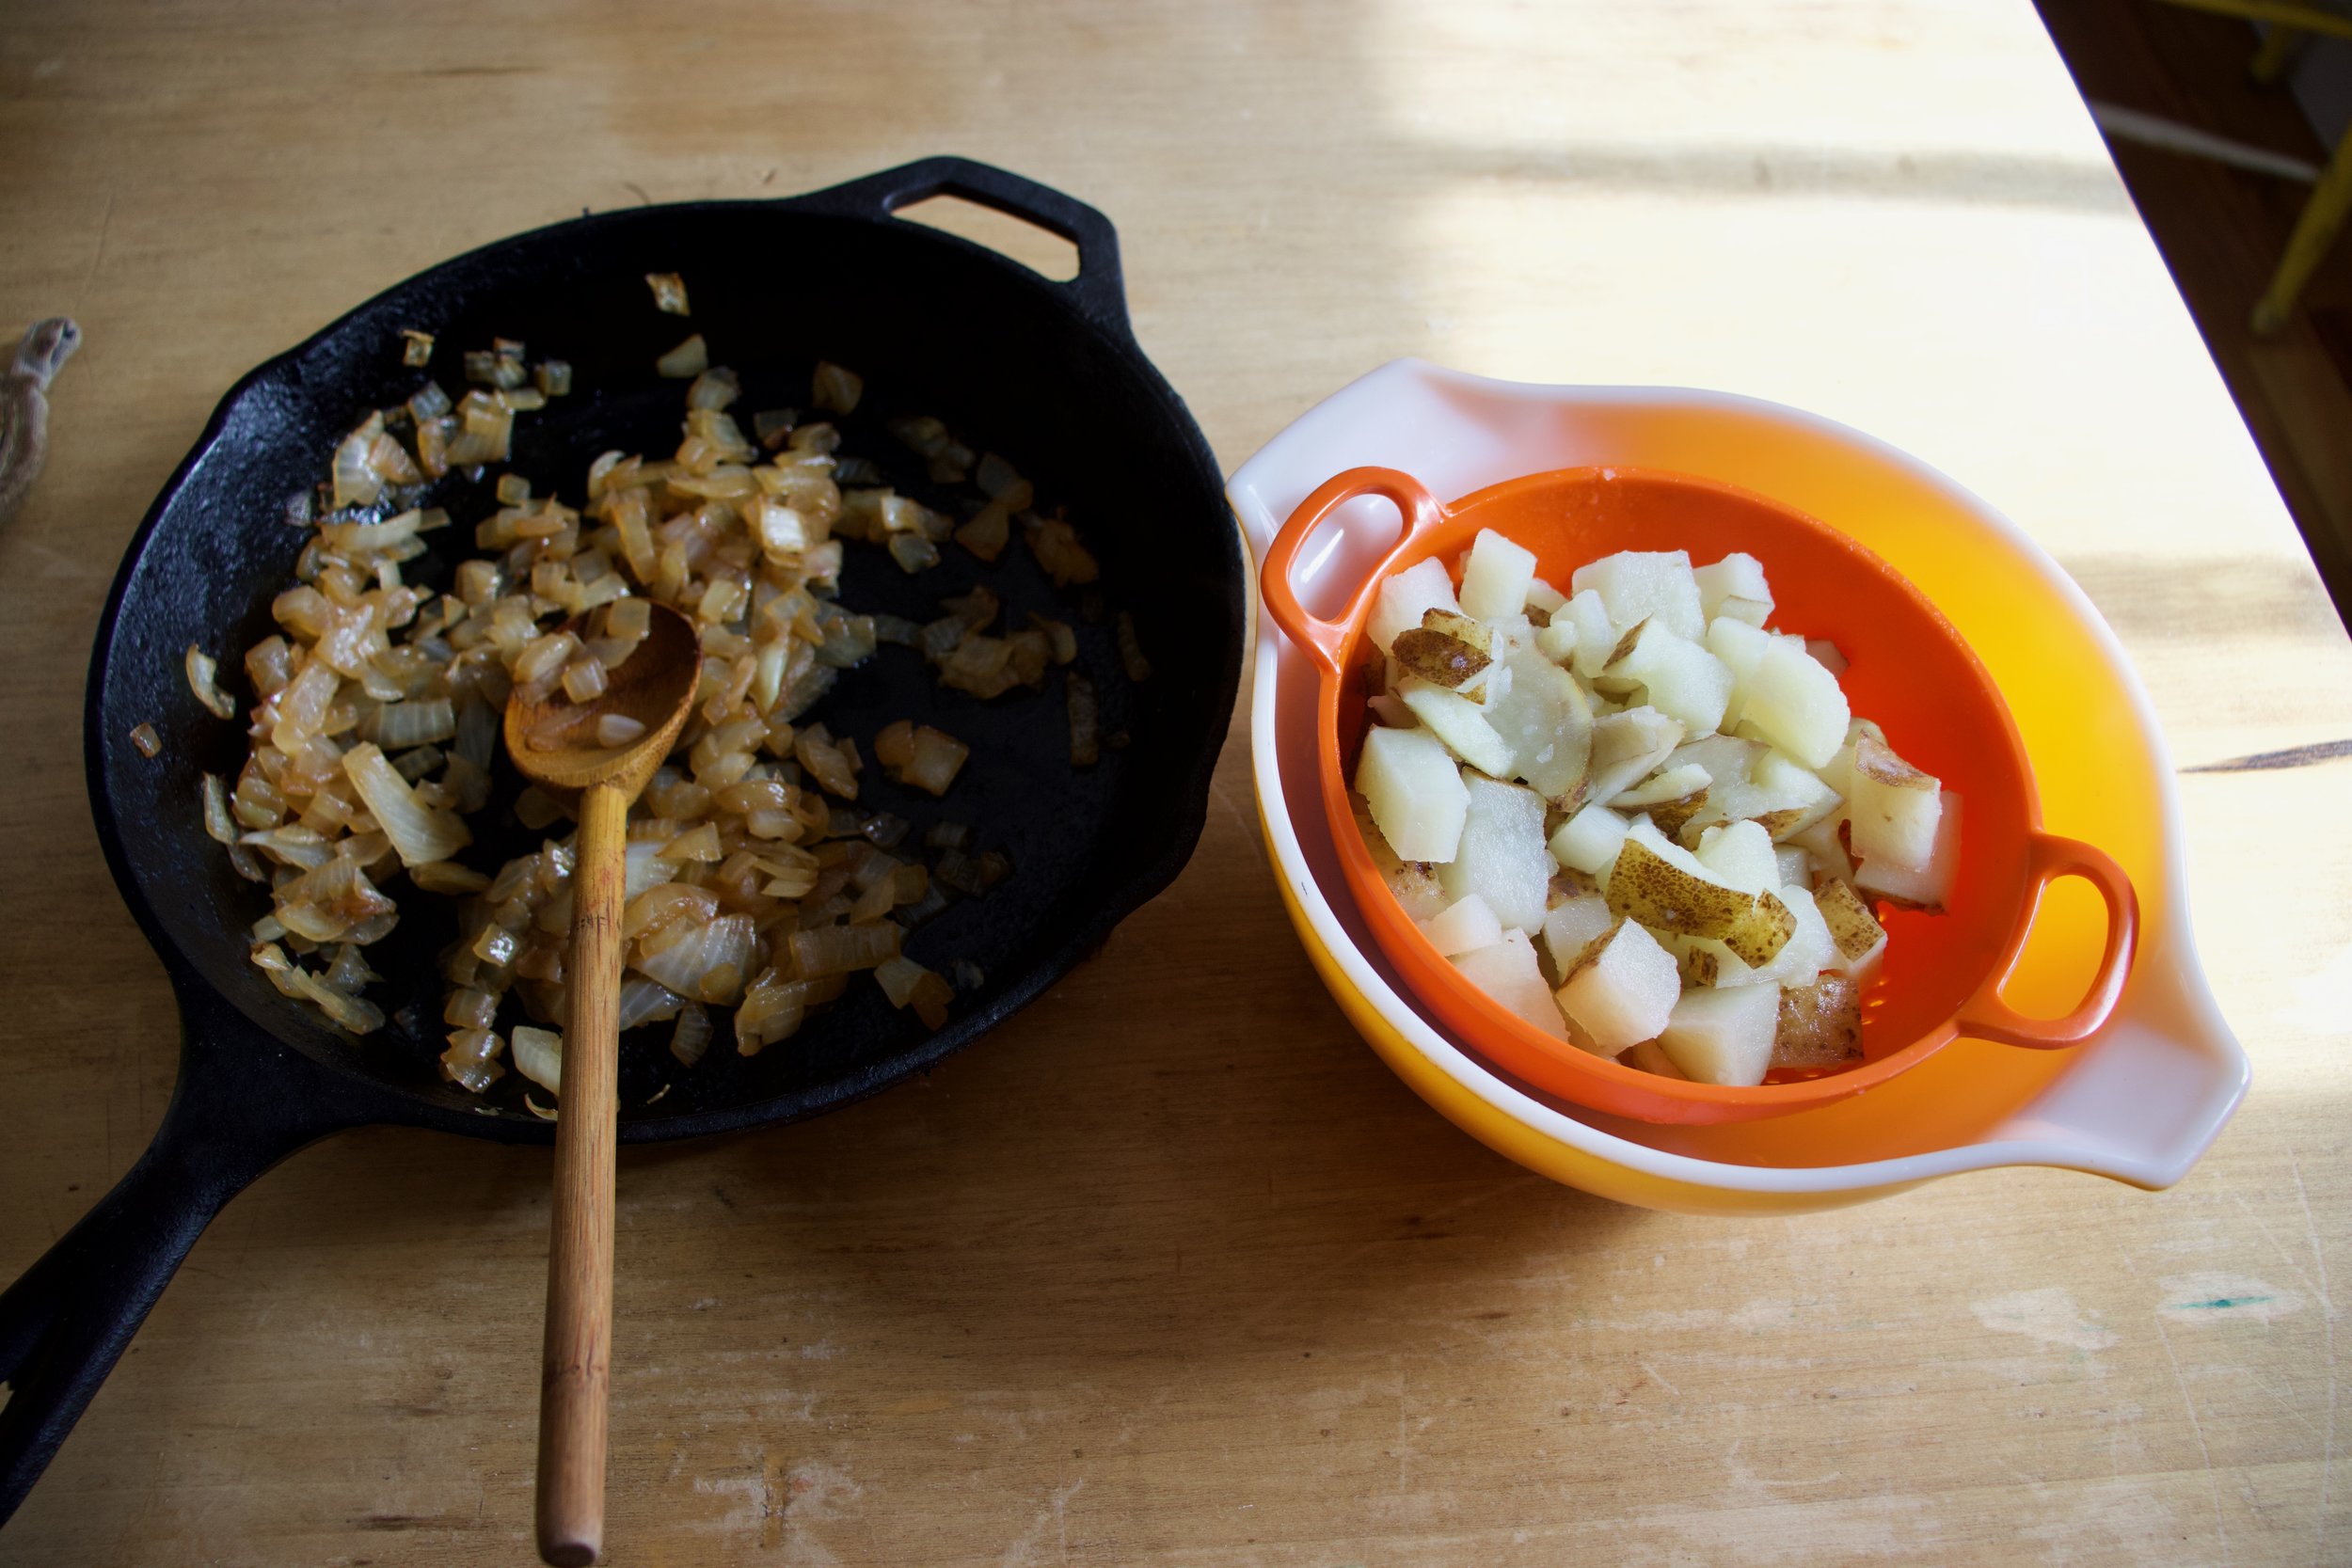
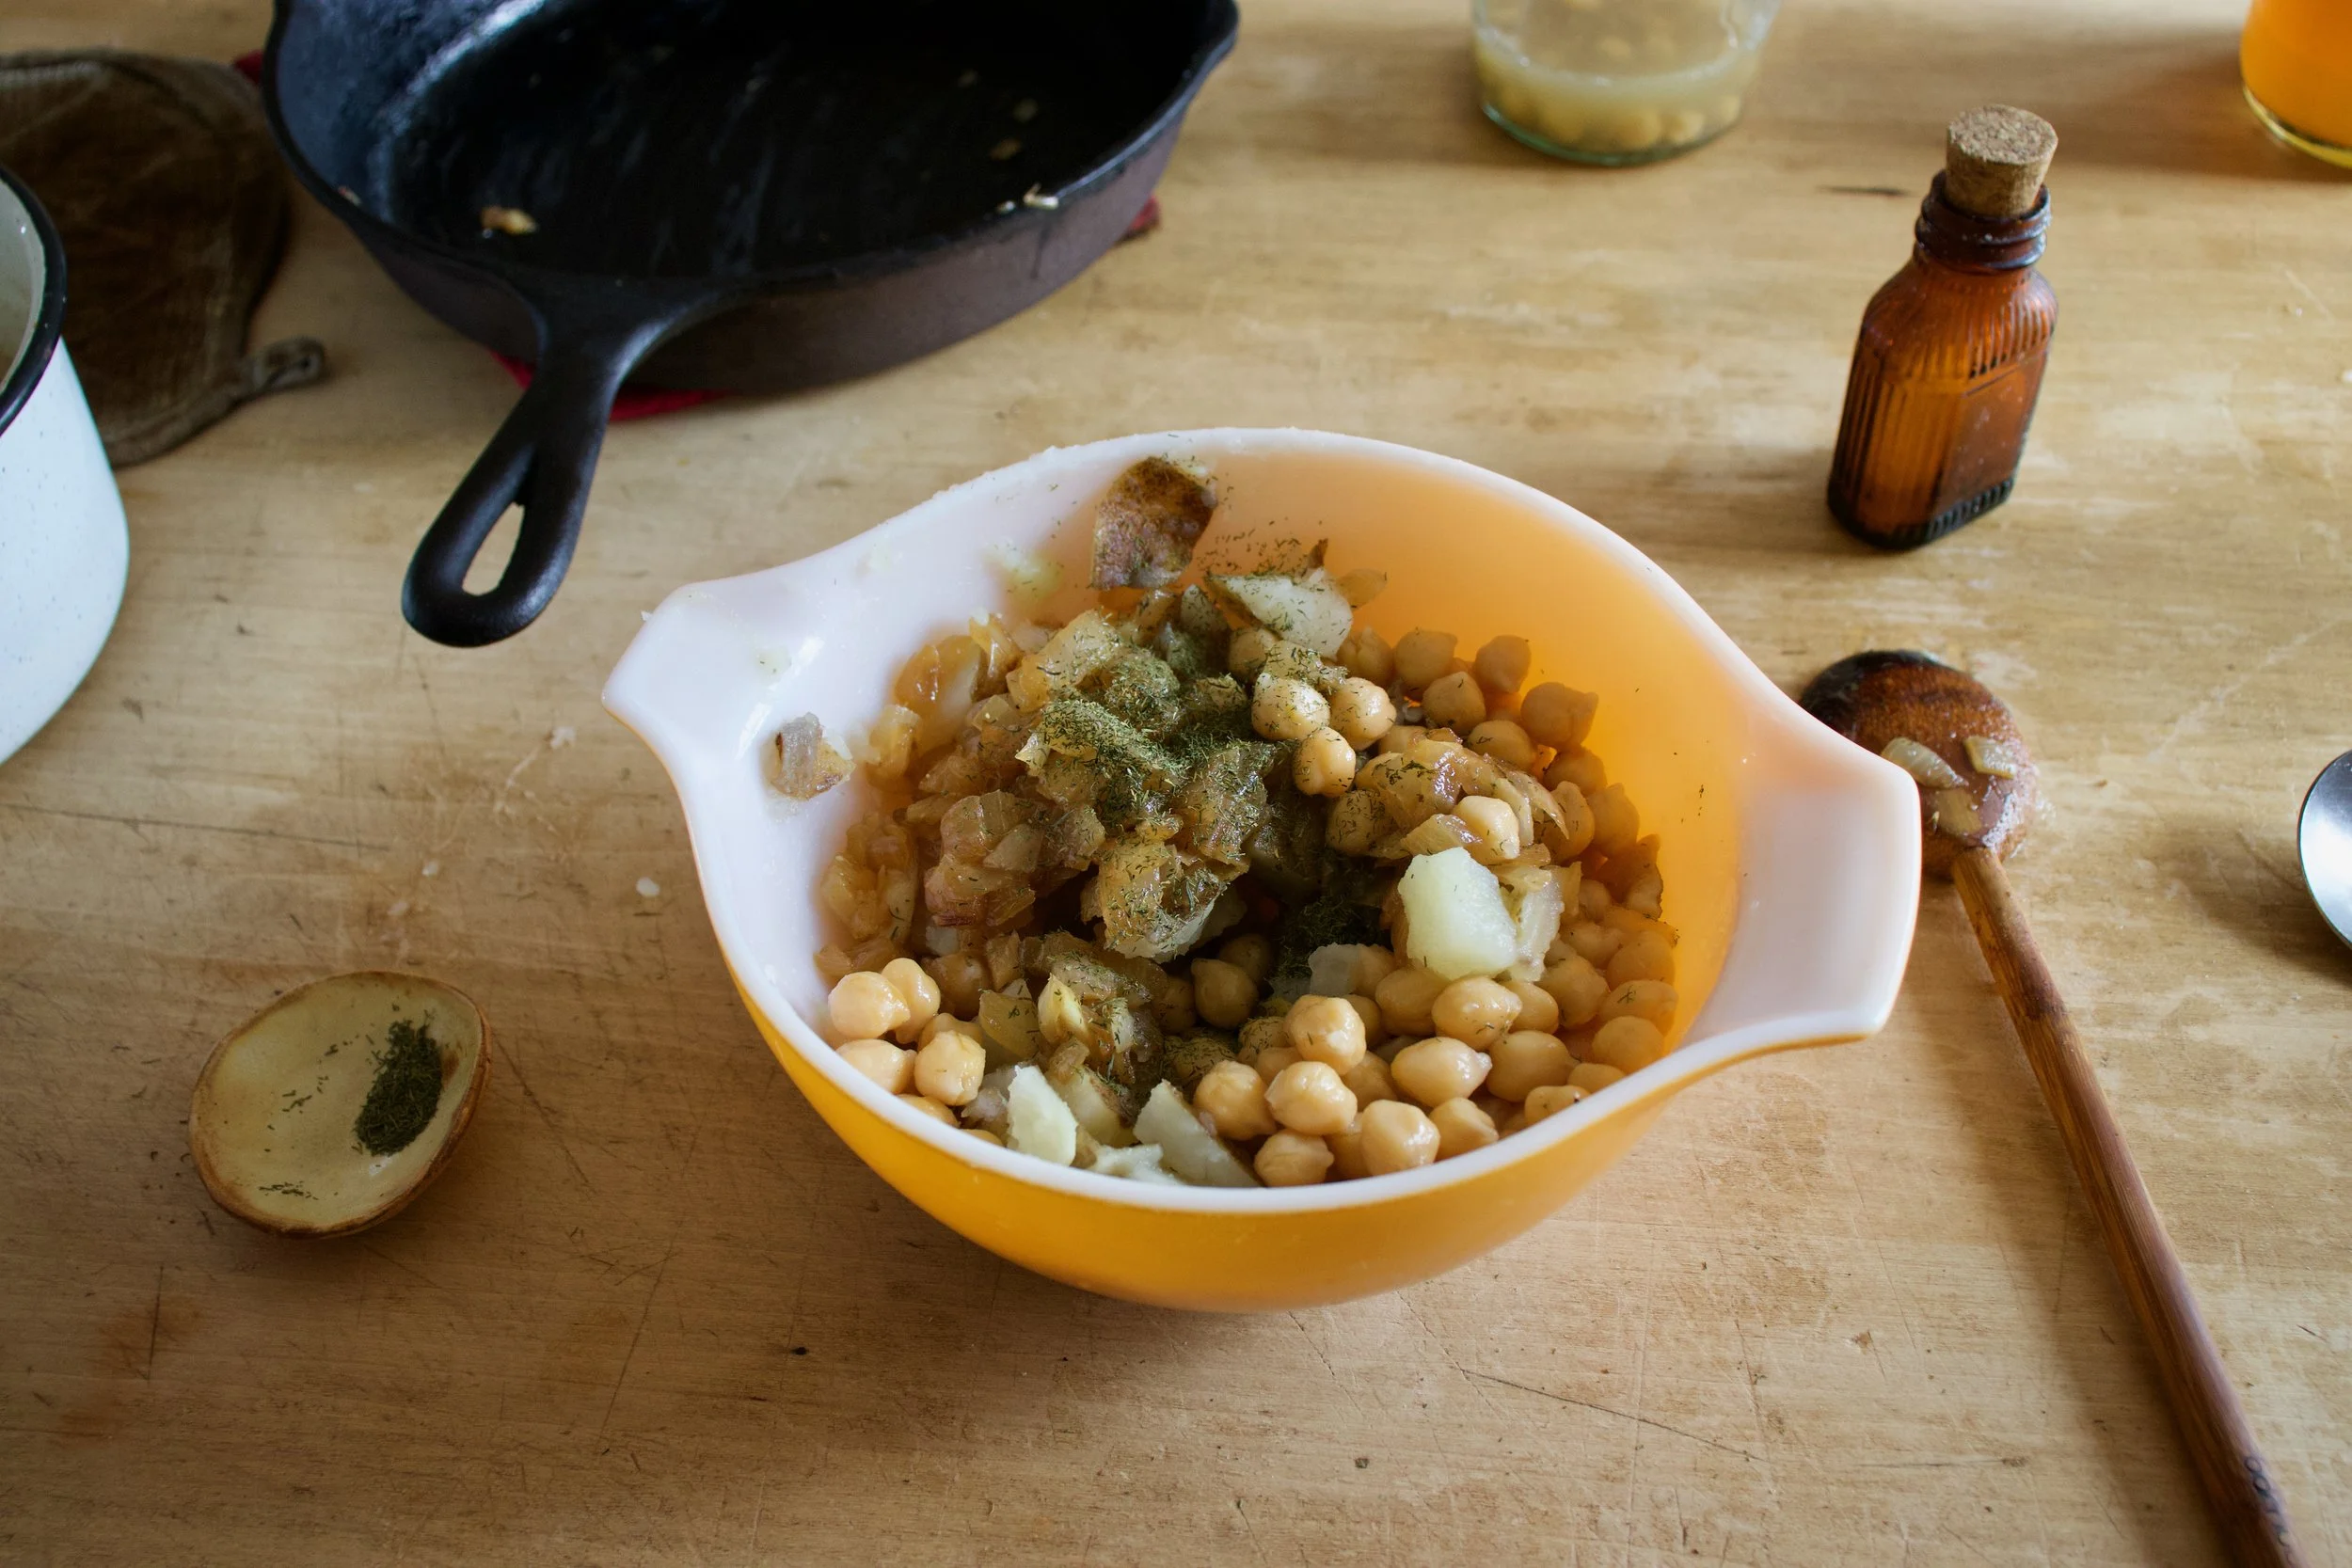


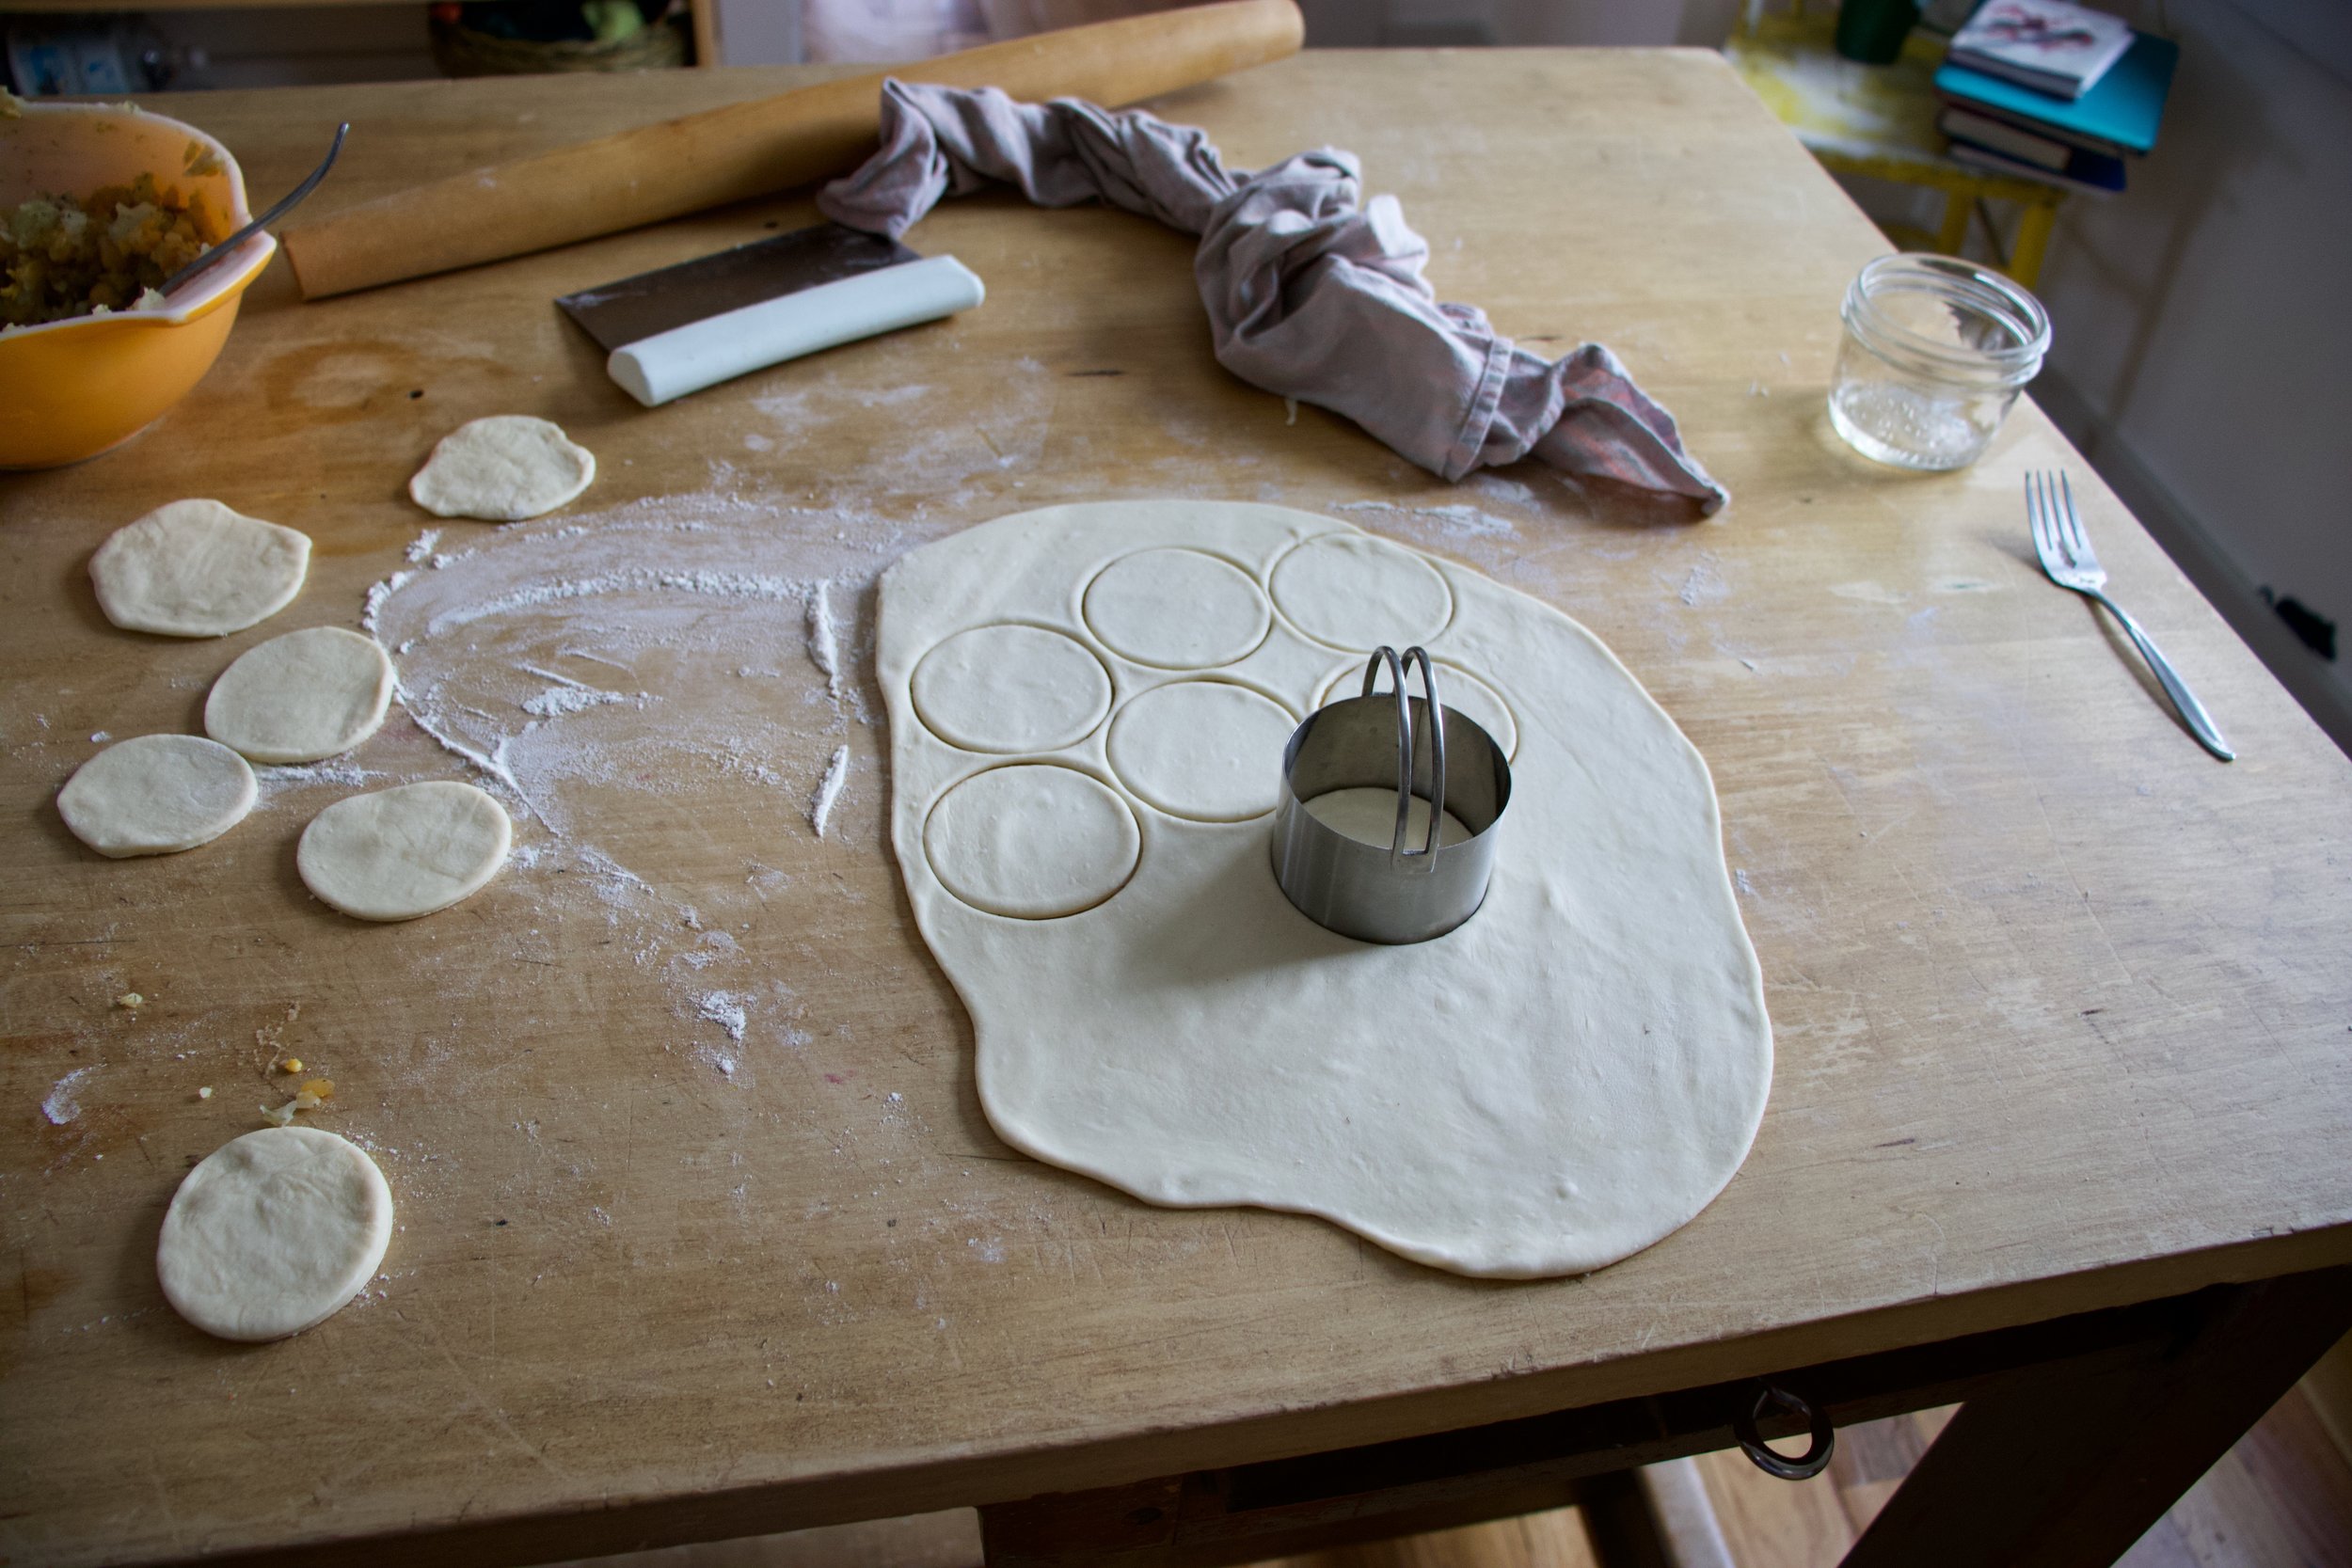
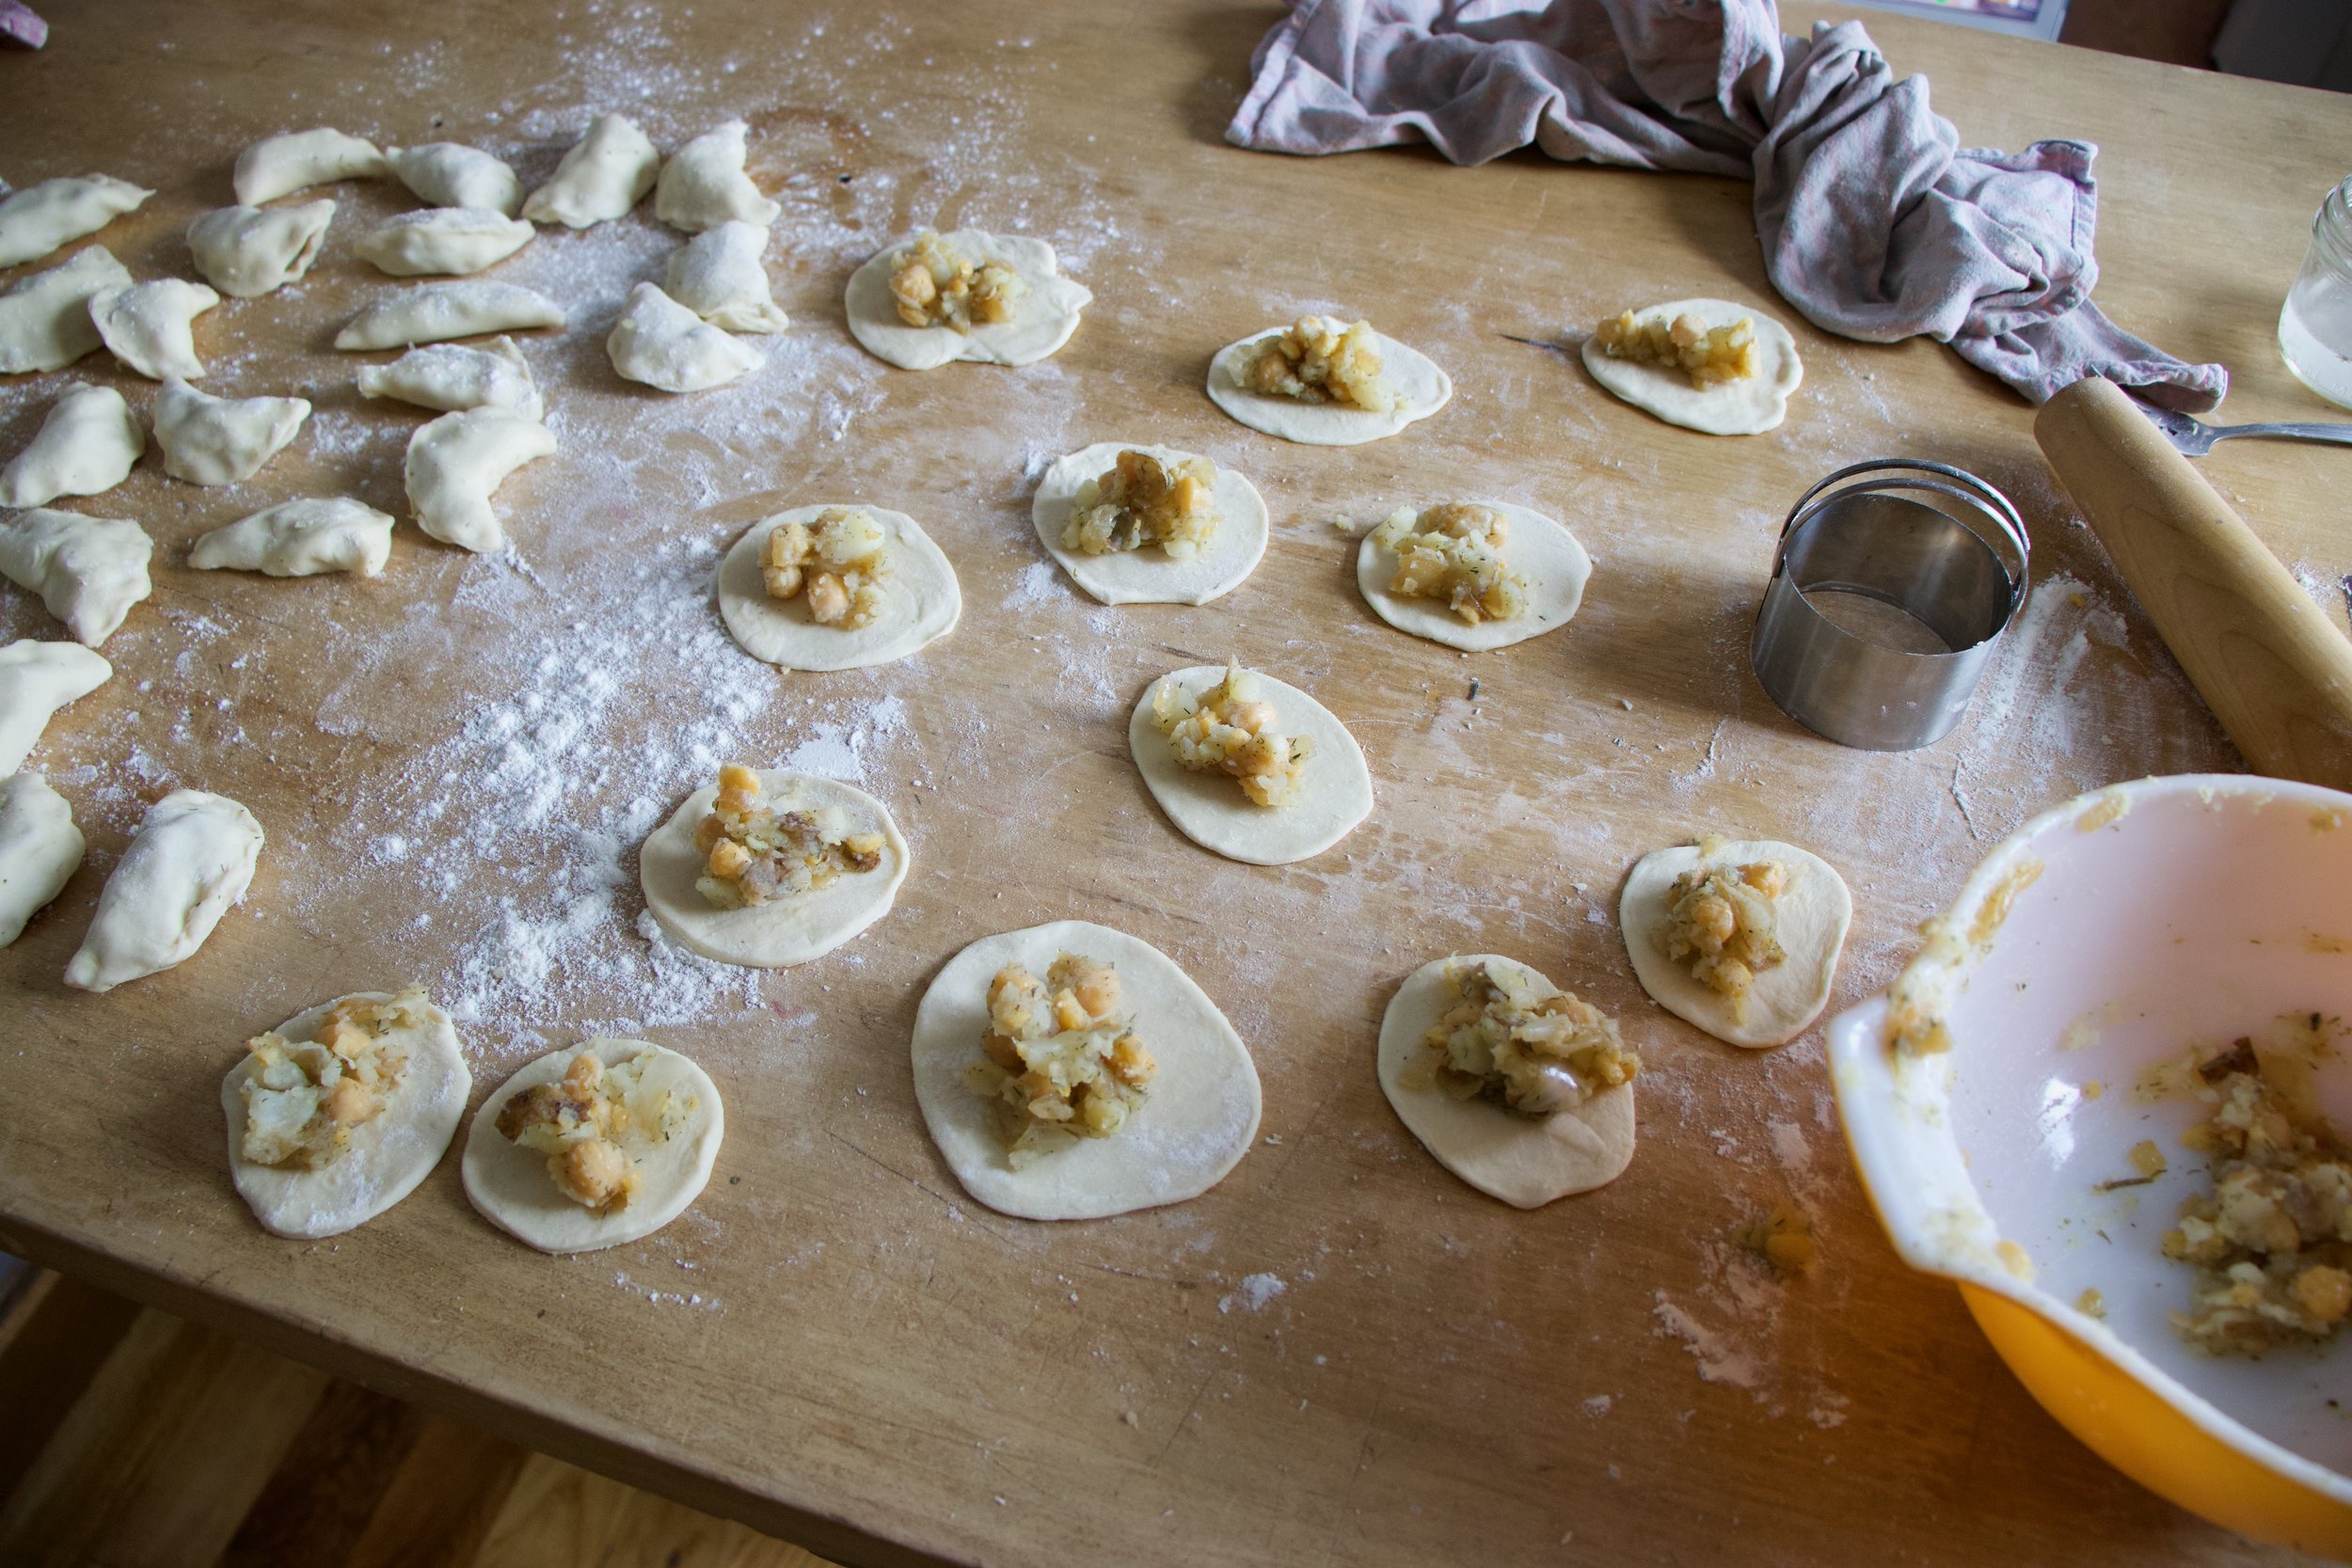
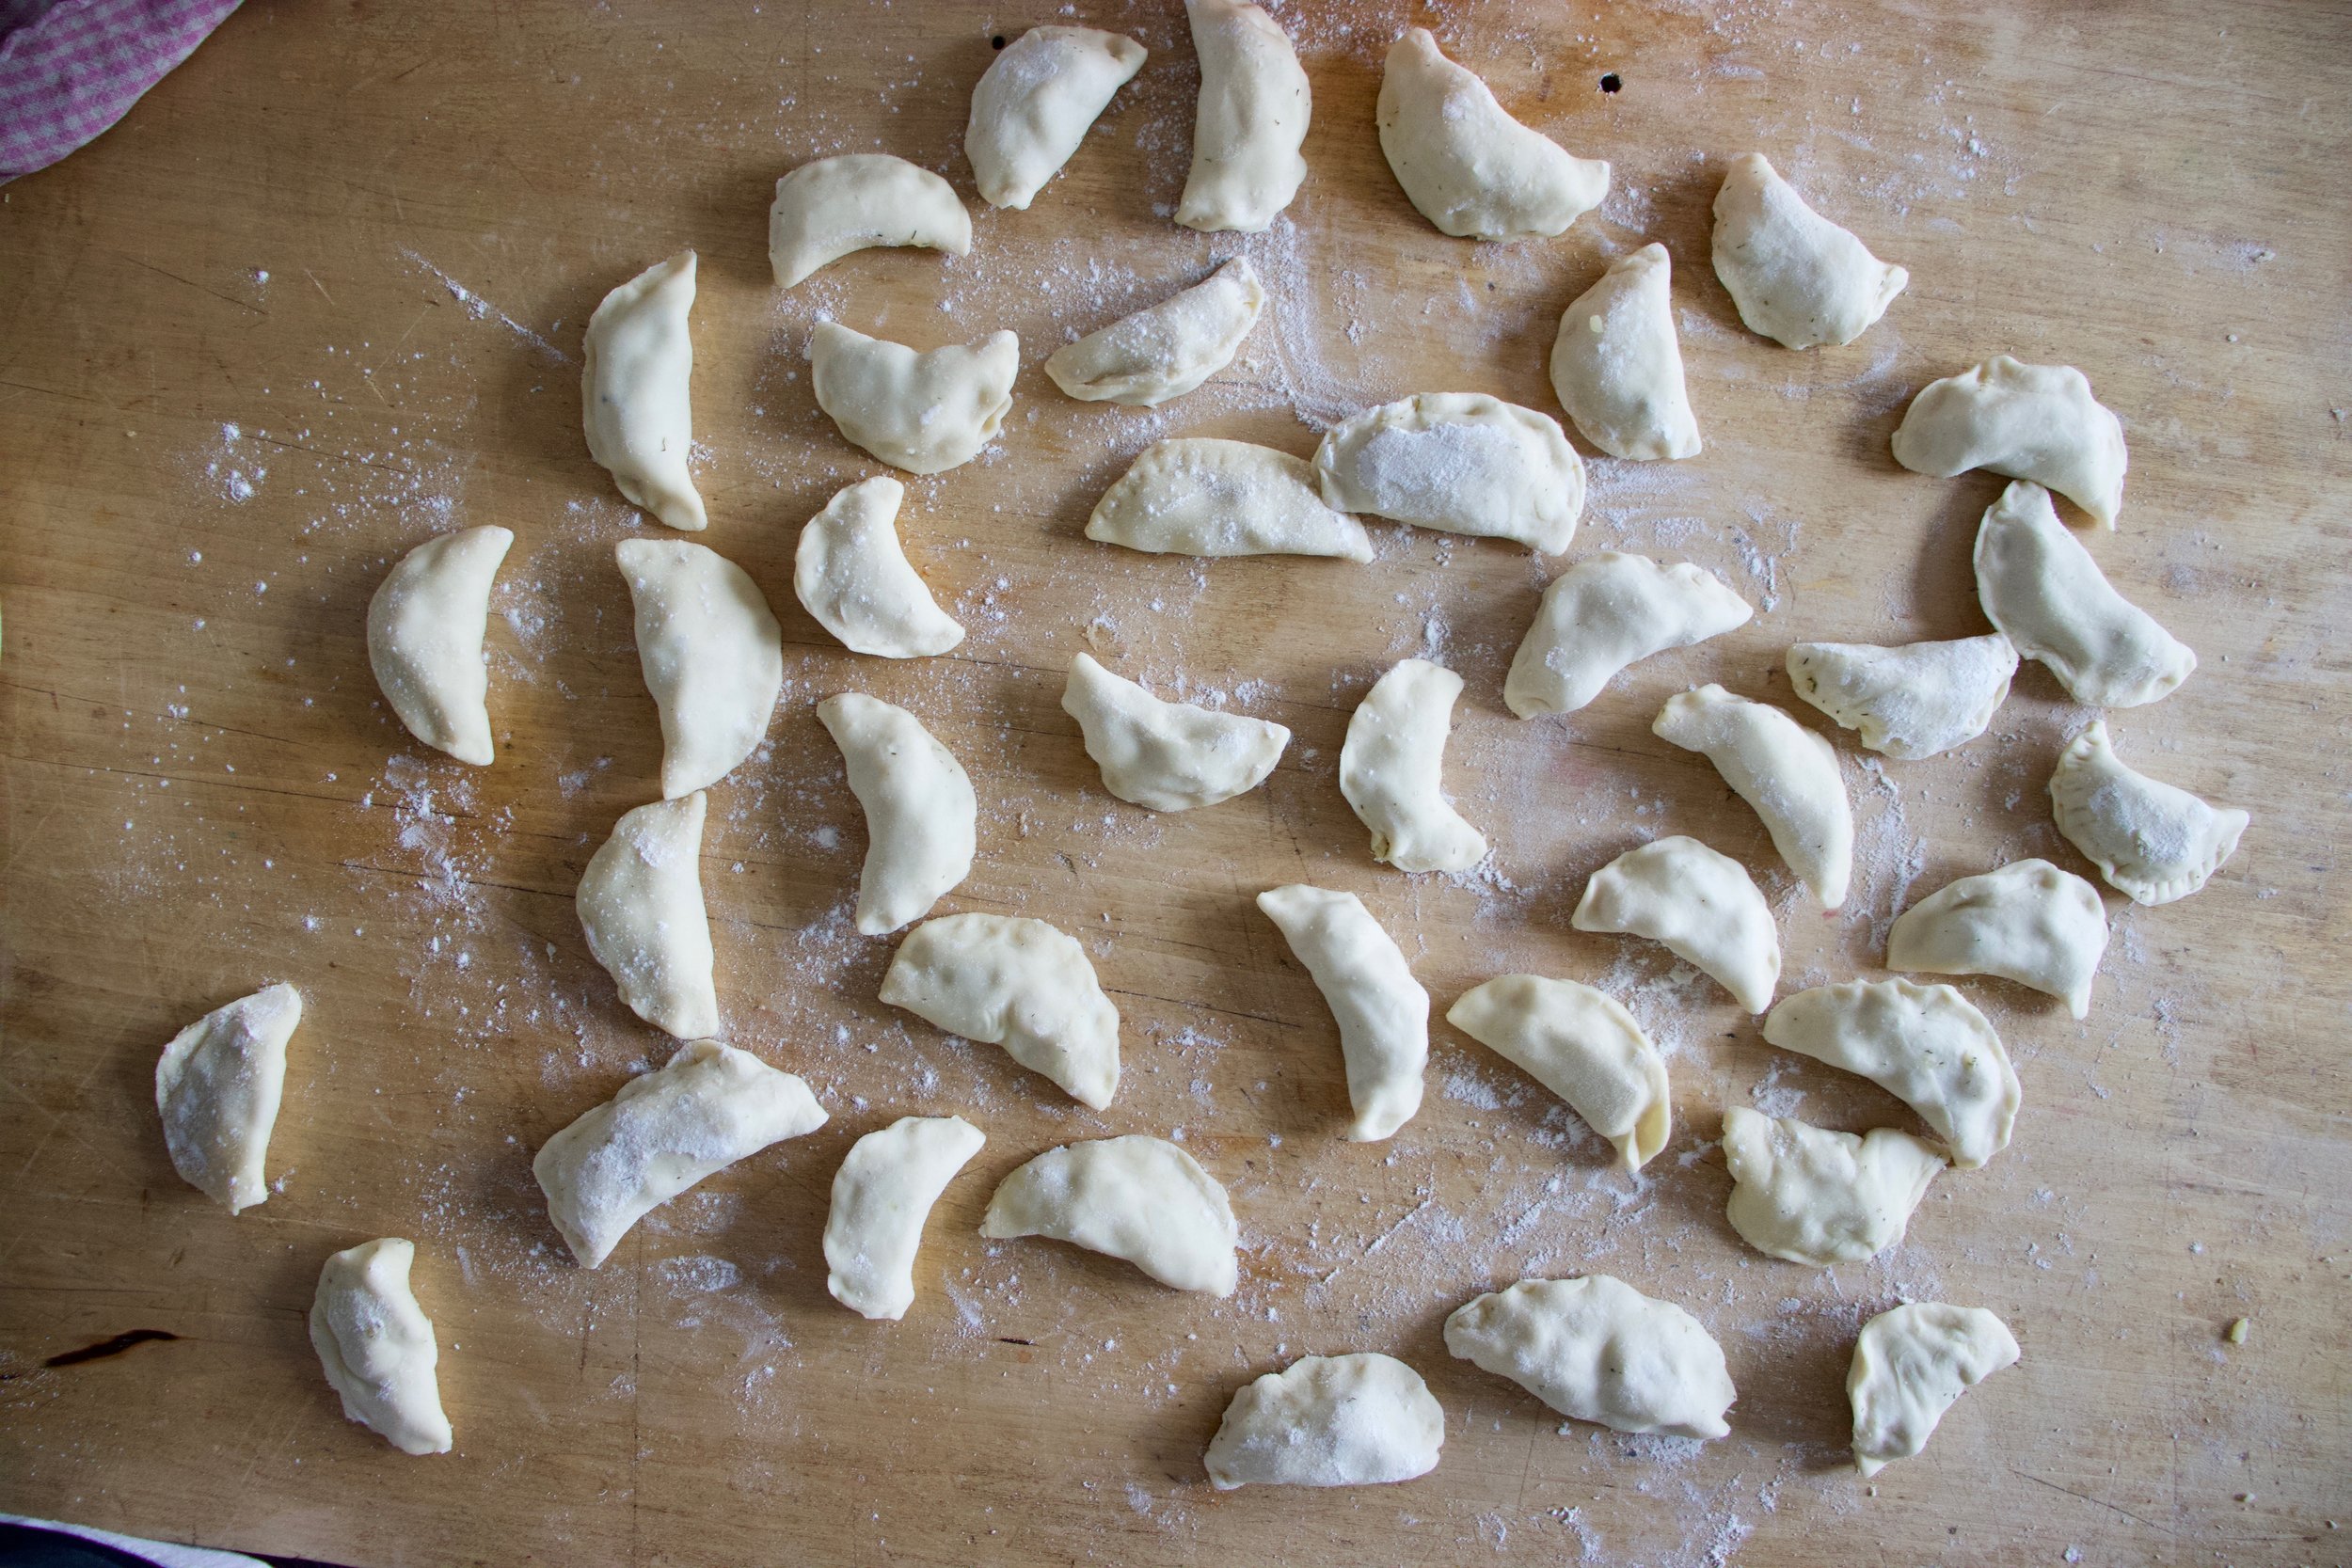
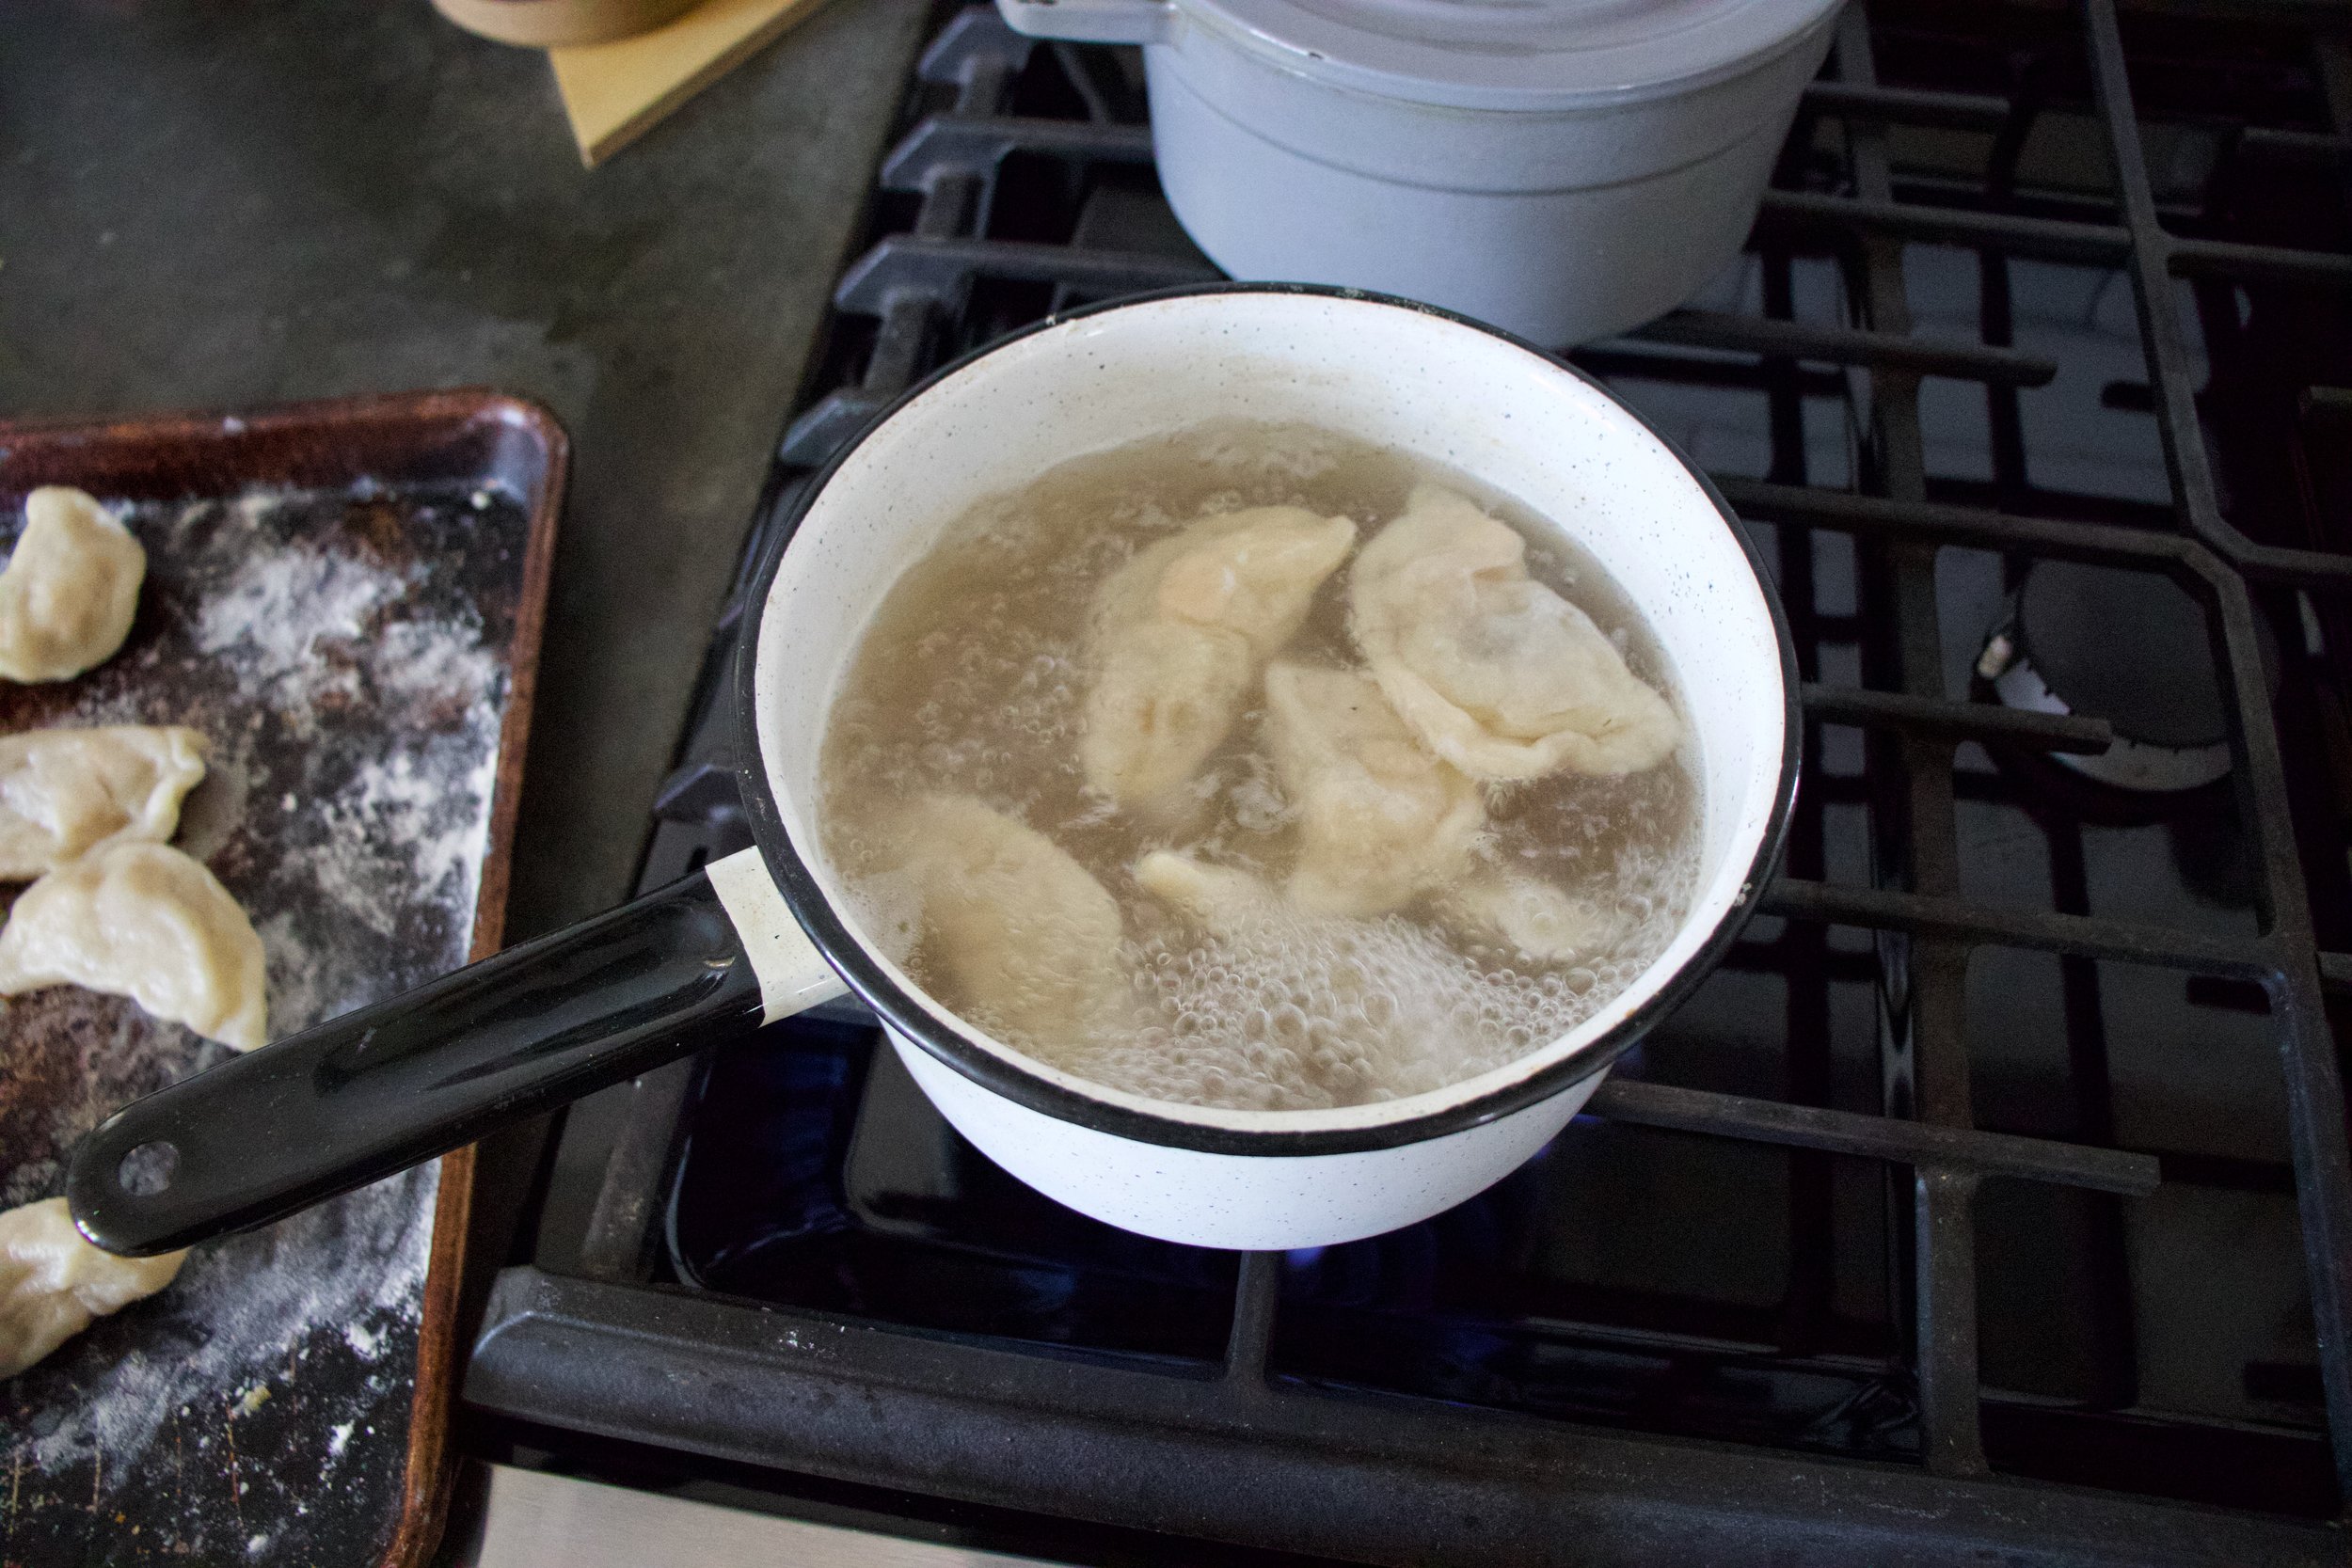
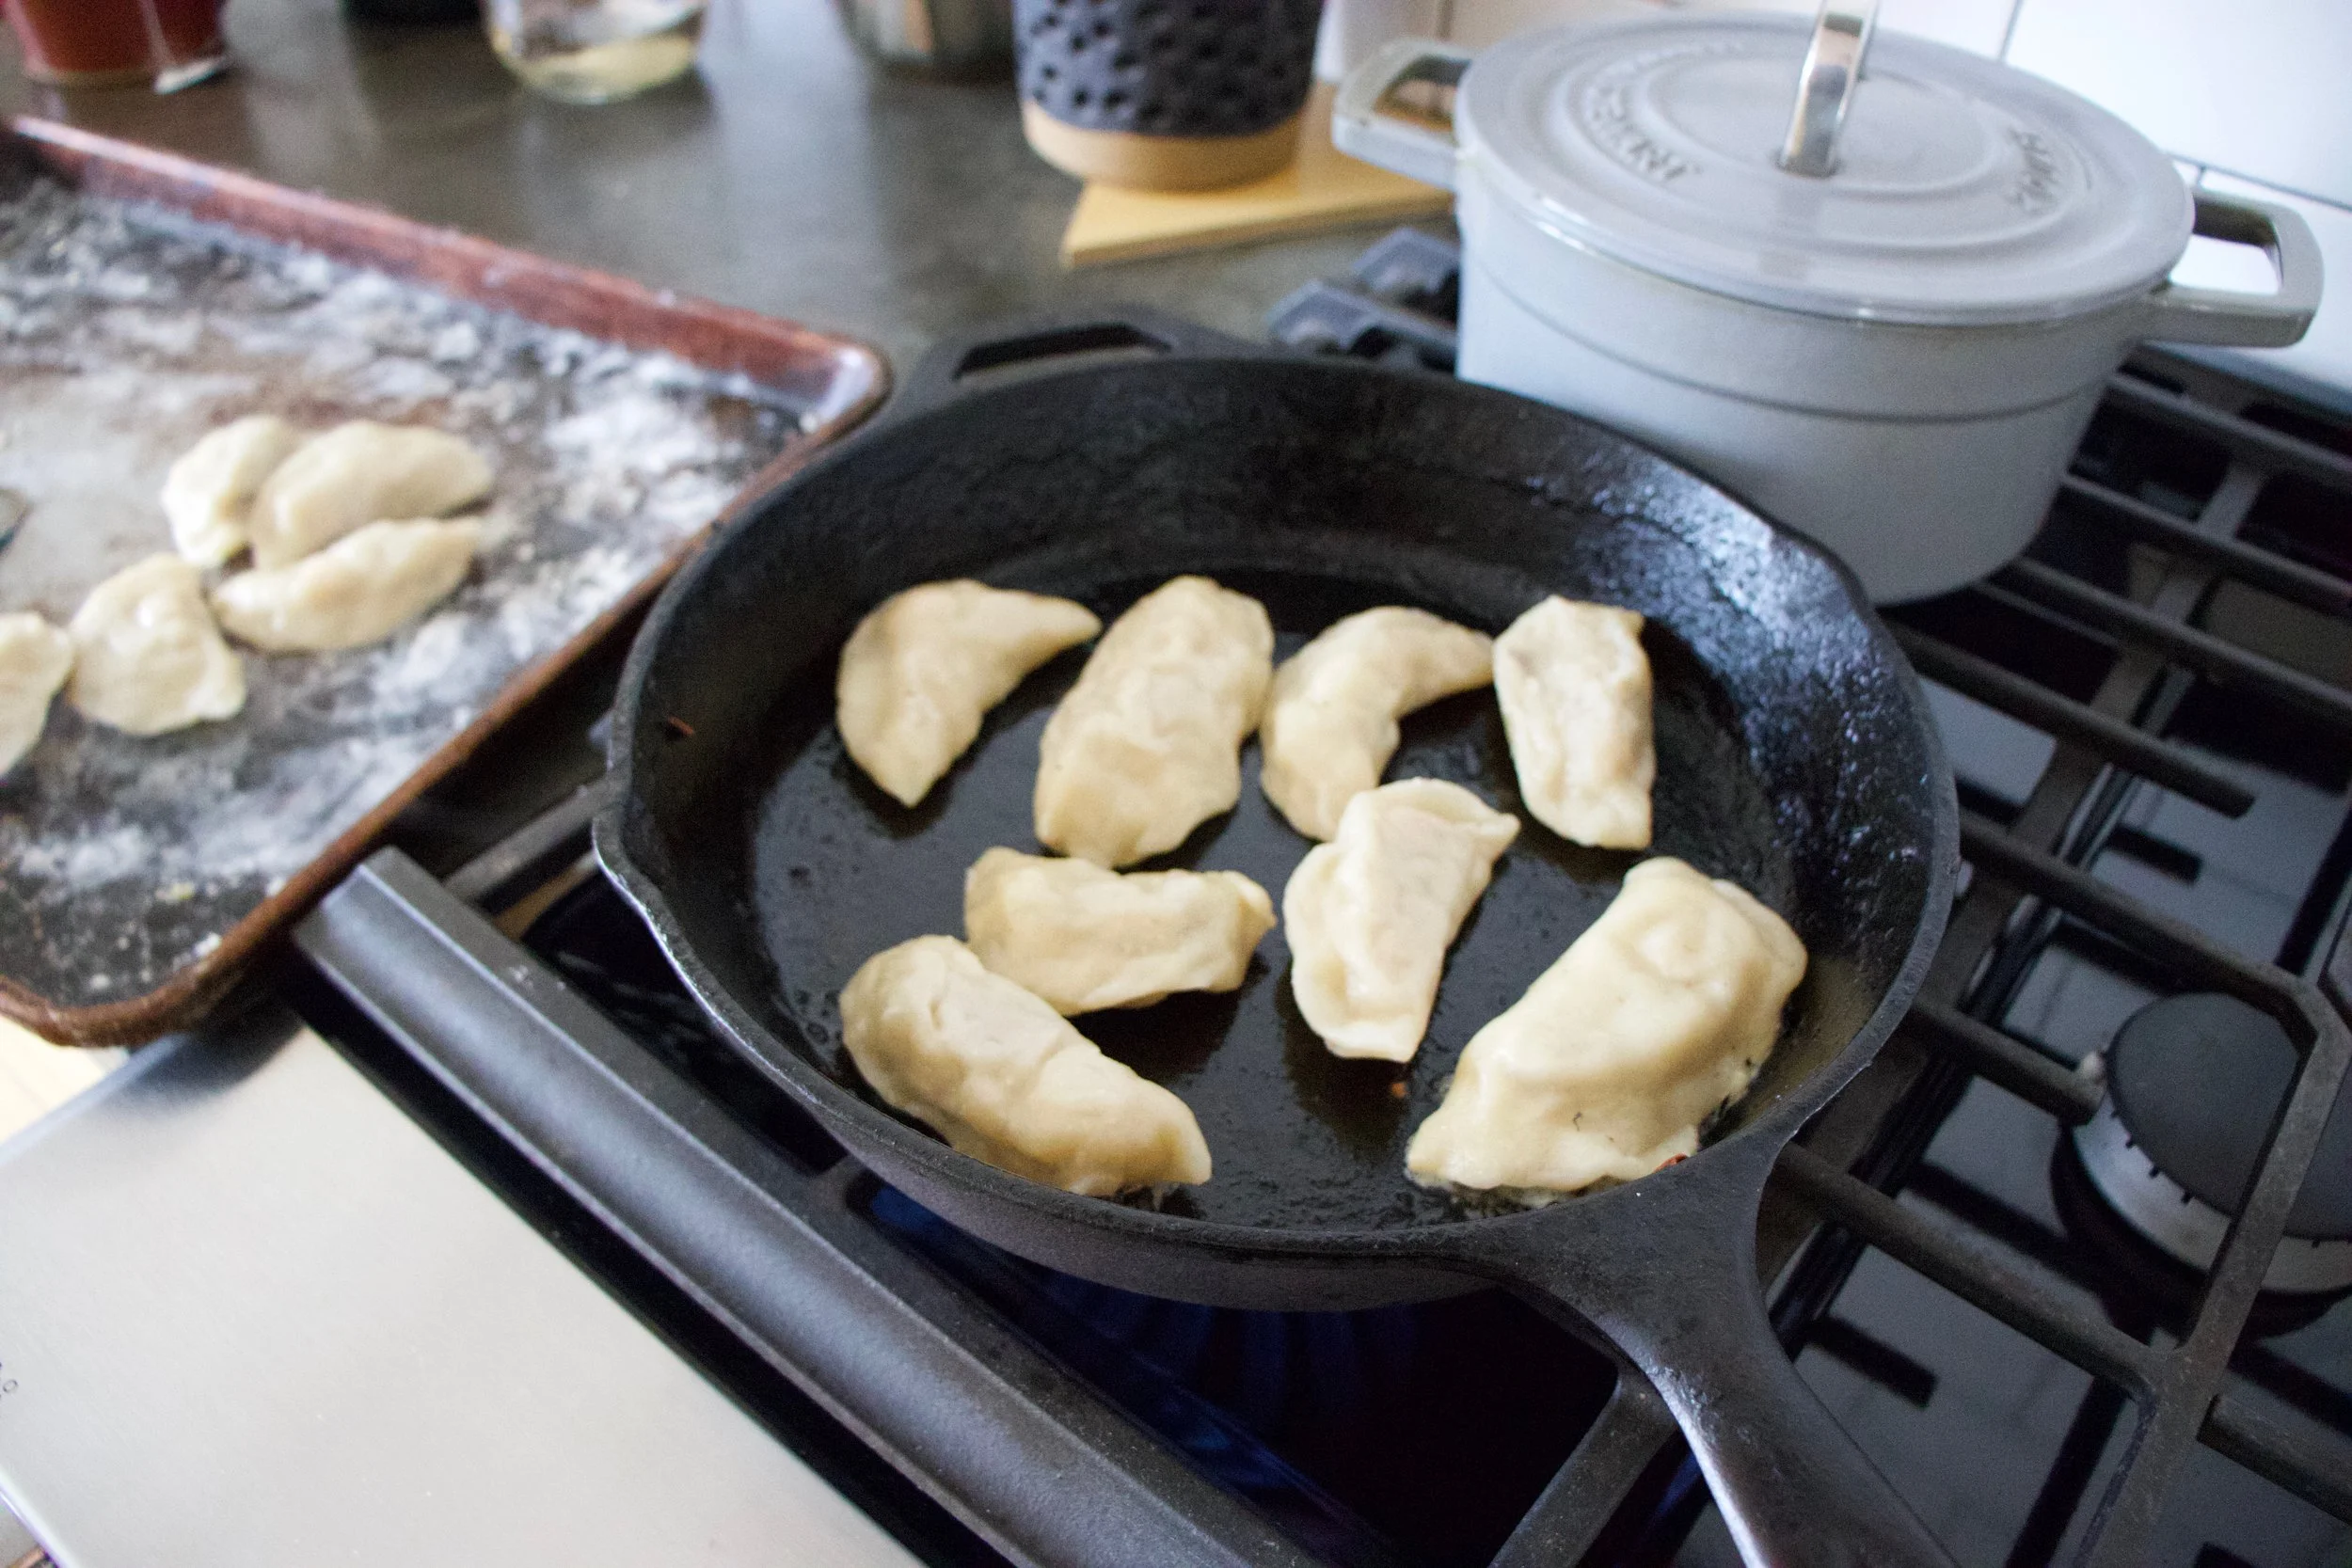
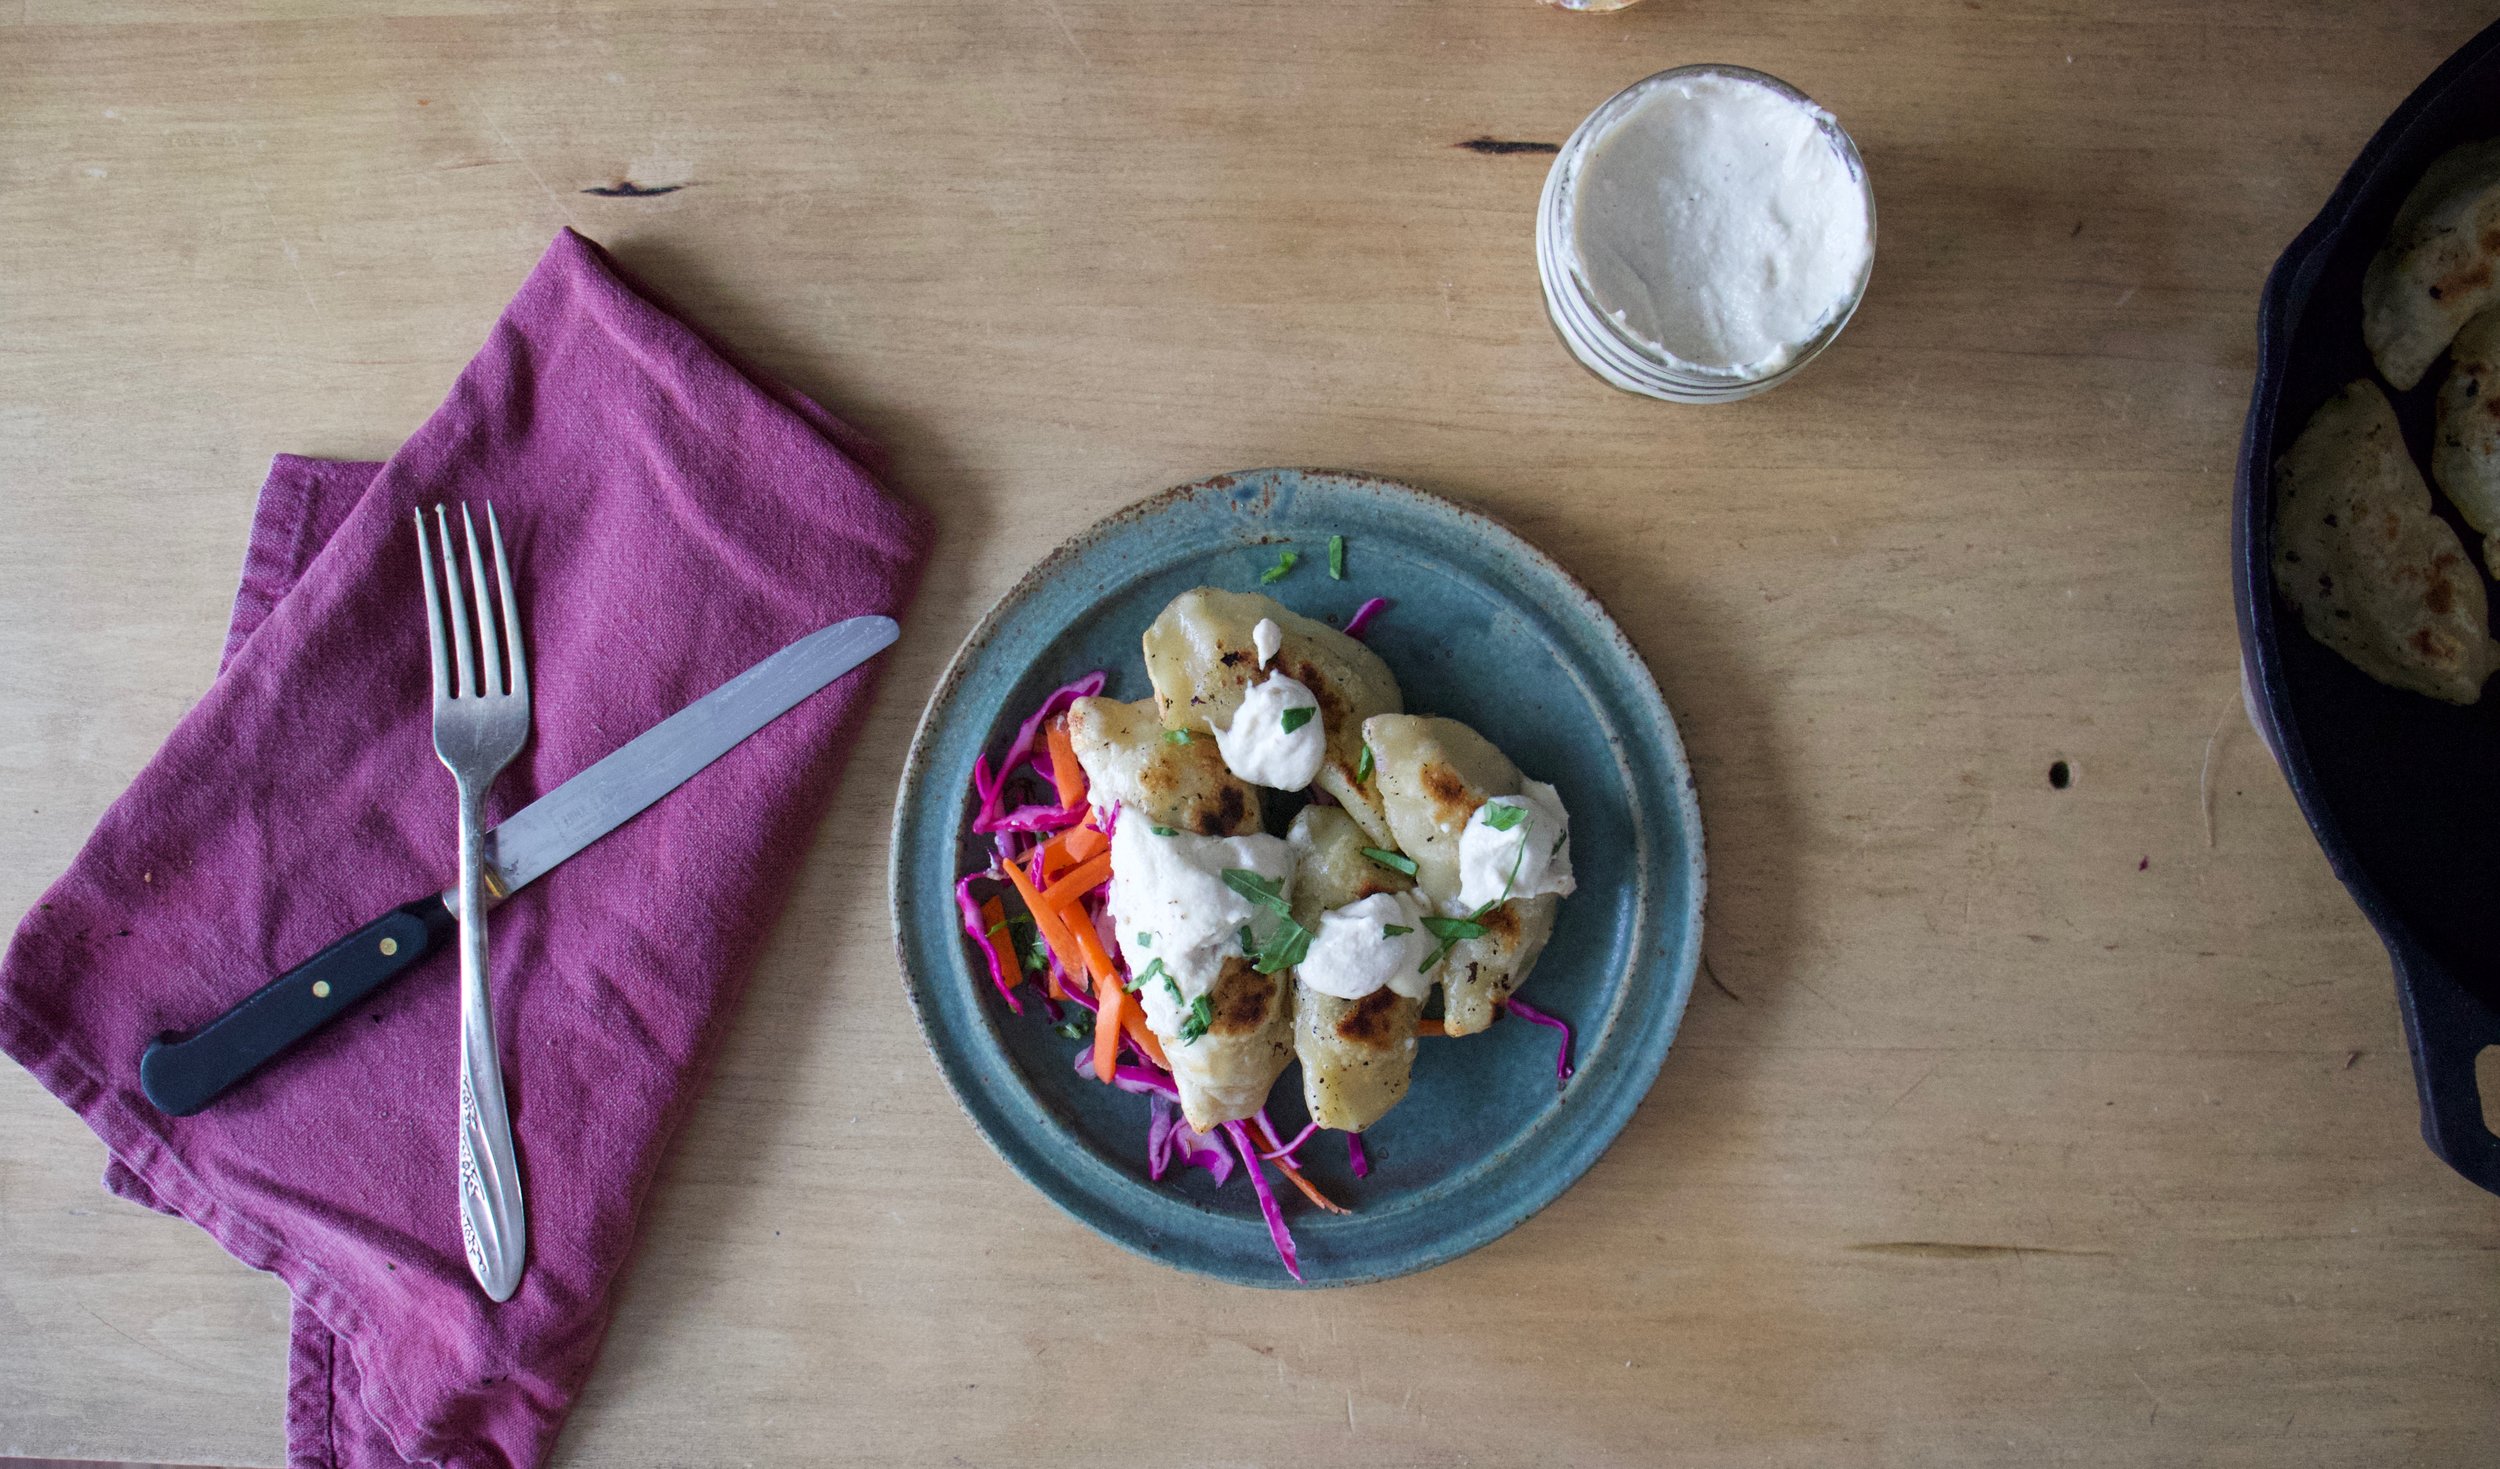

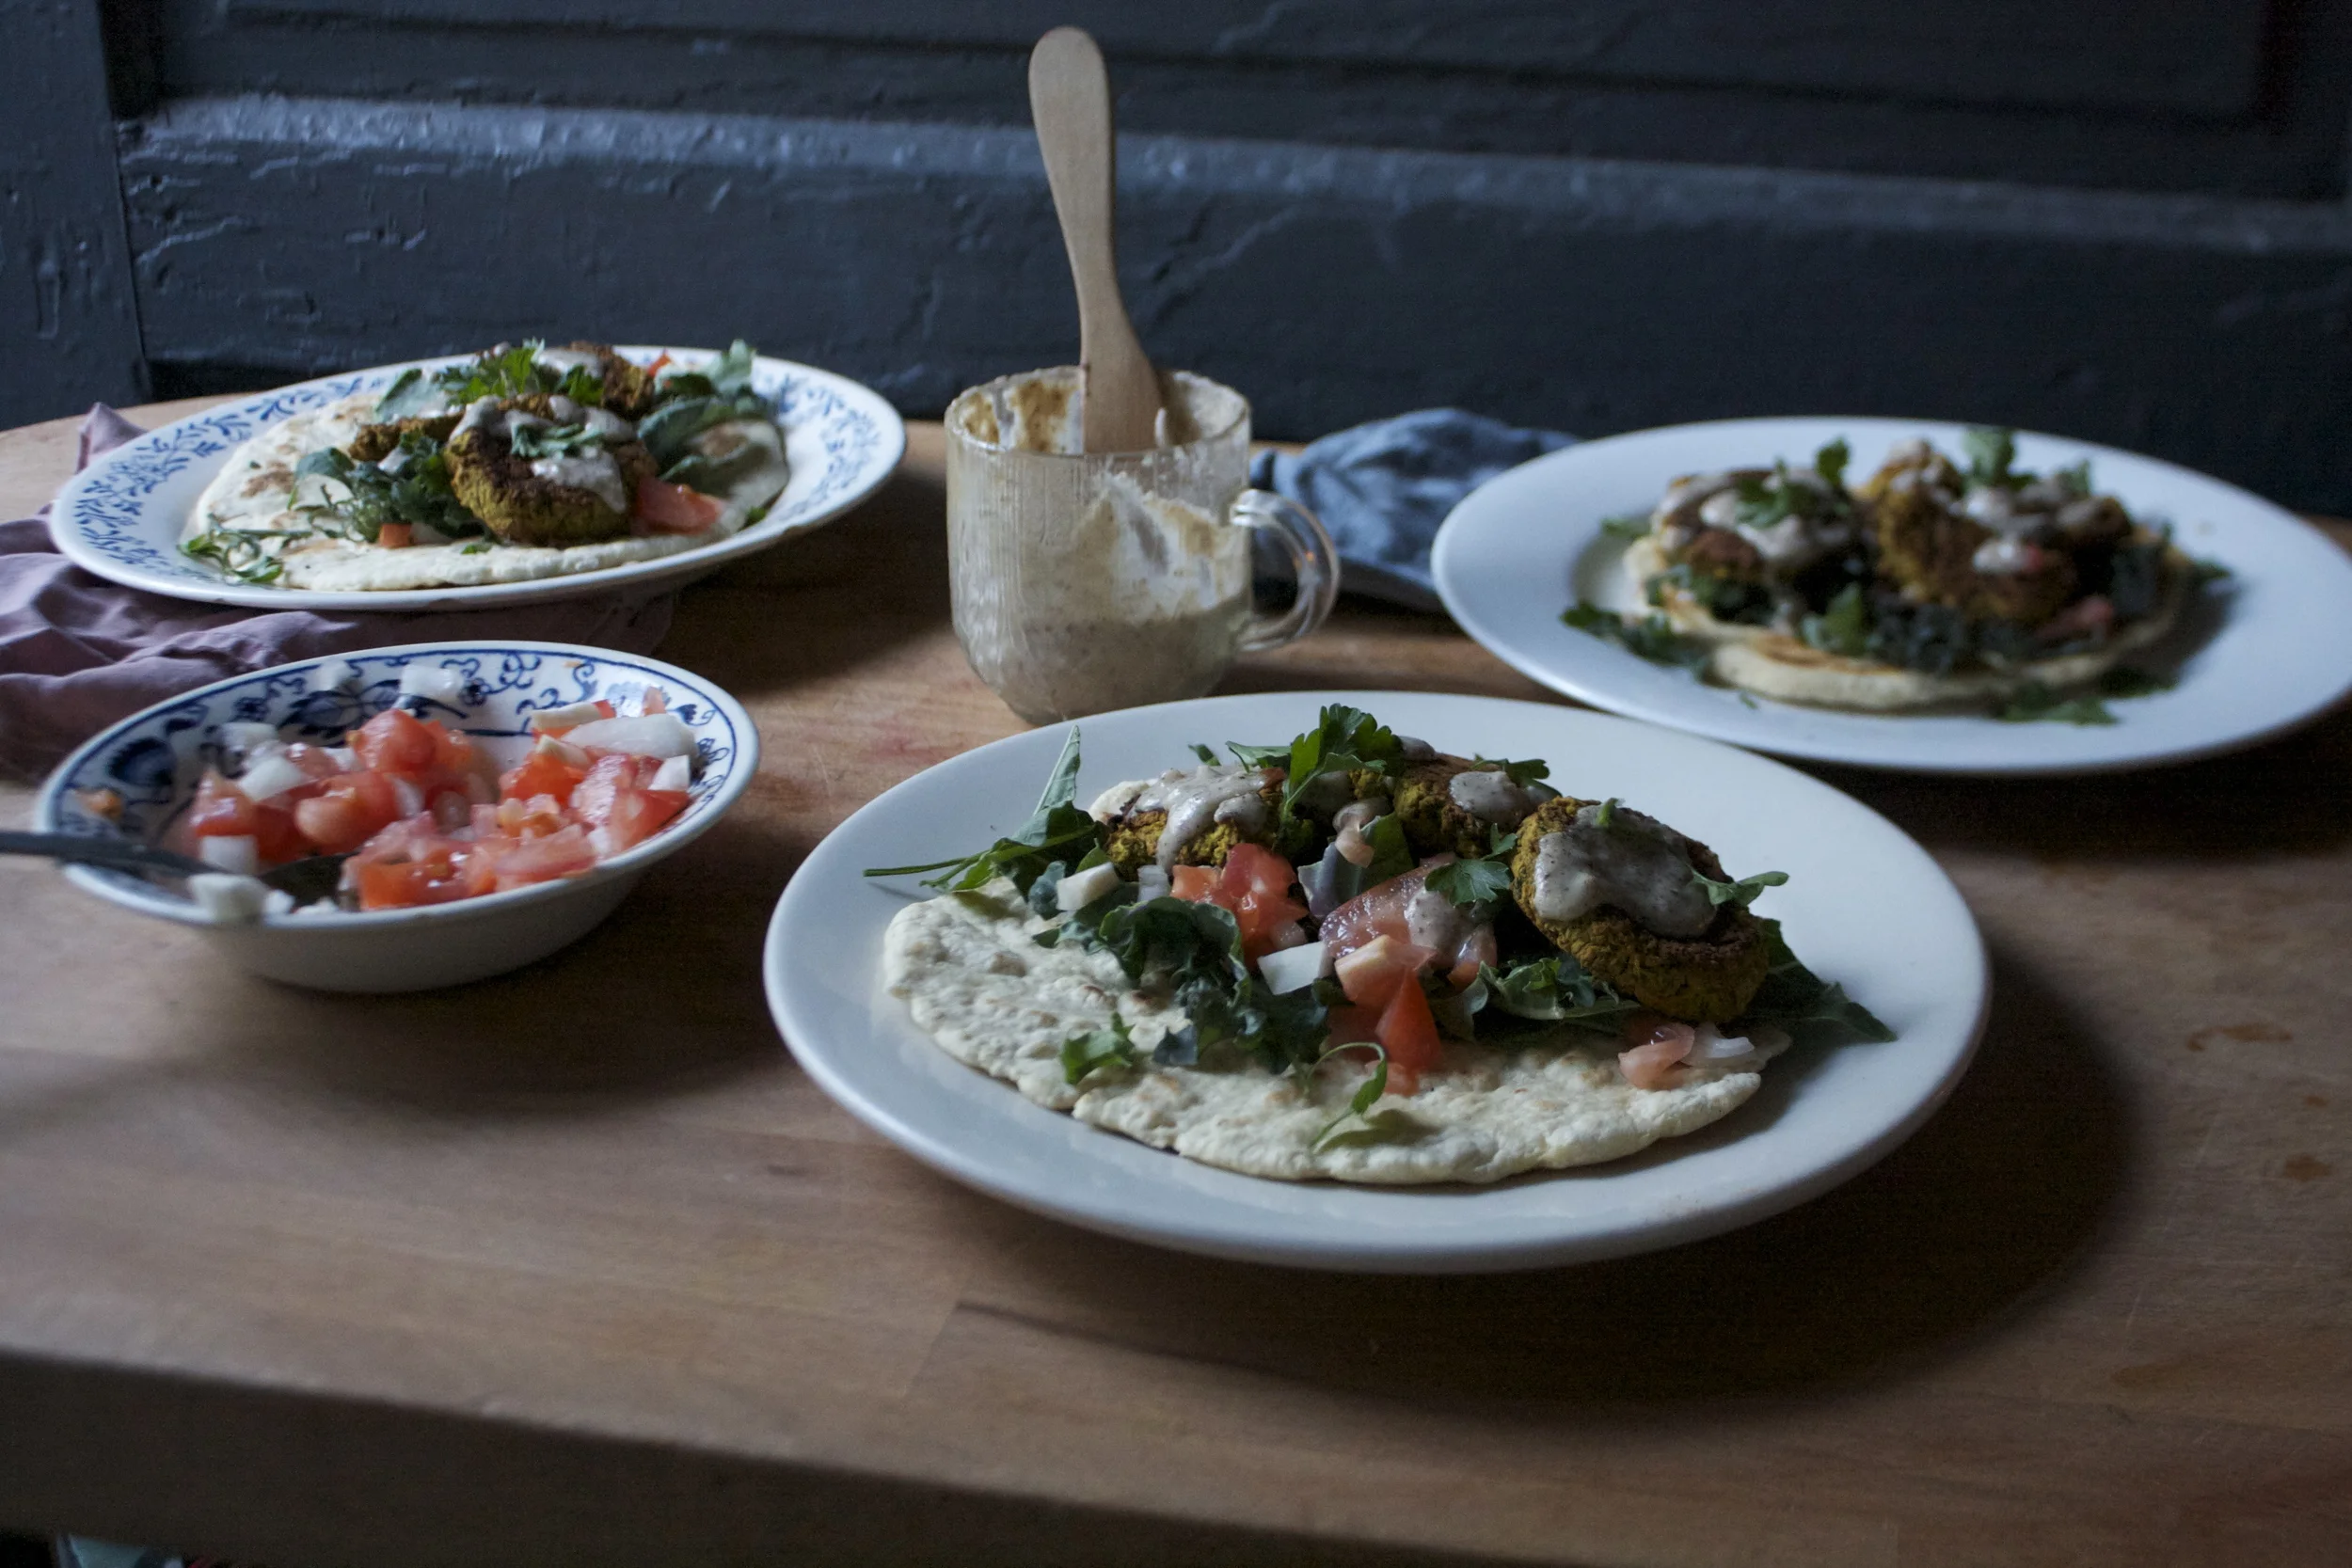


 The bounty of spring is upon us. Asparagus is everywhere and I have been embracing it.. smelly pee and all.%u00a0 And along with all my spring veggies and smells, %u00a0I have grabbing for more springy spices. I go through seasonal spice kicks, like cinnamon and ginger in the fall, curries and chills in the winter. And for spring, I am big on sumac. If you haven’t heard of it or tasted it, it kind of taste like a tangy salty lemon..without actually having any salt. And its a really pretty, a bright red, almost purple color. I use it on a lot of things, especially veggies and bean dishes, sometimes as a lemon replacer, but mostly to add another level of tangy flavor.%u00a0It’s fantastic, really great for all those springy time dishes. Nice and bright!
 The stuff of the stuff. Quinoa and asparagus for the base. Sumac, lemon, garlic, onion, salt and pepper and a little splash of oil for the dressing.%u00a0
 %u00a0 %u00a0 %u00a0
 Start by making the dressing. You want to have it sit for at least 10 minutes. It will be perfect by the time the quinoa is done. Mince the garlic, dice the onion and juice the lemon. Stick it all into a jar with the sumac, a pinch of salt and pepper and about a teaspoons worth of olive oil. Stick a lid on the jar and shake shake shake. and let it sit.
 When the quinoa is simmering, cook up the asparagus. Add a drizzle of oil, to a pan and a few splashes of water. Place trimmed and chopped asparagus to pan and sprinkle with salt. Cook on medium heat for about 8 minutes, or until cooked but still has a nice crunch to it. Take off heat and add the dressing to pan. %u00a0Let it sit and marinate for a few minutes.
 When the quinoa is tender, fluff with a fork and add to the skillet with the asparagus and dressing. Toss around to make sure all the quinoa gets dressed. Take a taste.. does it need a little salt and pepper? Add a pinch if it does.
 Pile into a bowl, add a bit of cracked pepper.. and eat.


 HOORAY FOR SPRING!!!!!!!
 %u00a0 %u00a0%u00a0
 %u00a0 %u00a0Pesto stuff. Kale, walnuts, parmesan cheese(nutritional yeast to keep it vegan), garlic, lemon, olive oil, and salt and pepper.
 %u00a0
 Straight up frozen ravioli goes onto an oiled baking sheet.(make sure that non are overlapping) Place into an oven at 400 degrees for about 15-18 minutes, flipping after 10. If you want to add mushroom and a few more walnuts, just toss them onto the ravioli when you are flipping over the ravioli.%u00a0
 Look at this%u2026 fresh, crunchy, light and happy. Kinda like a spring day.


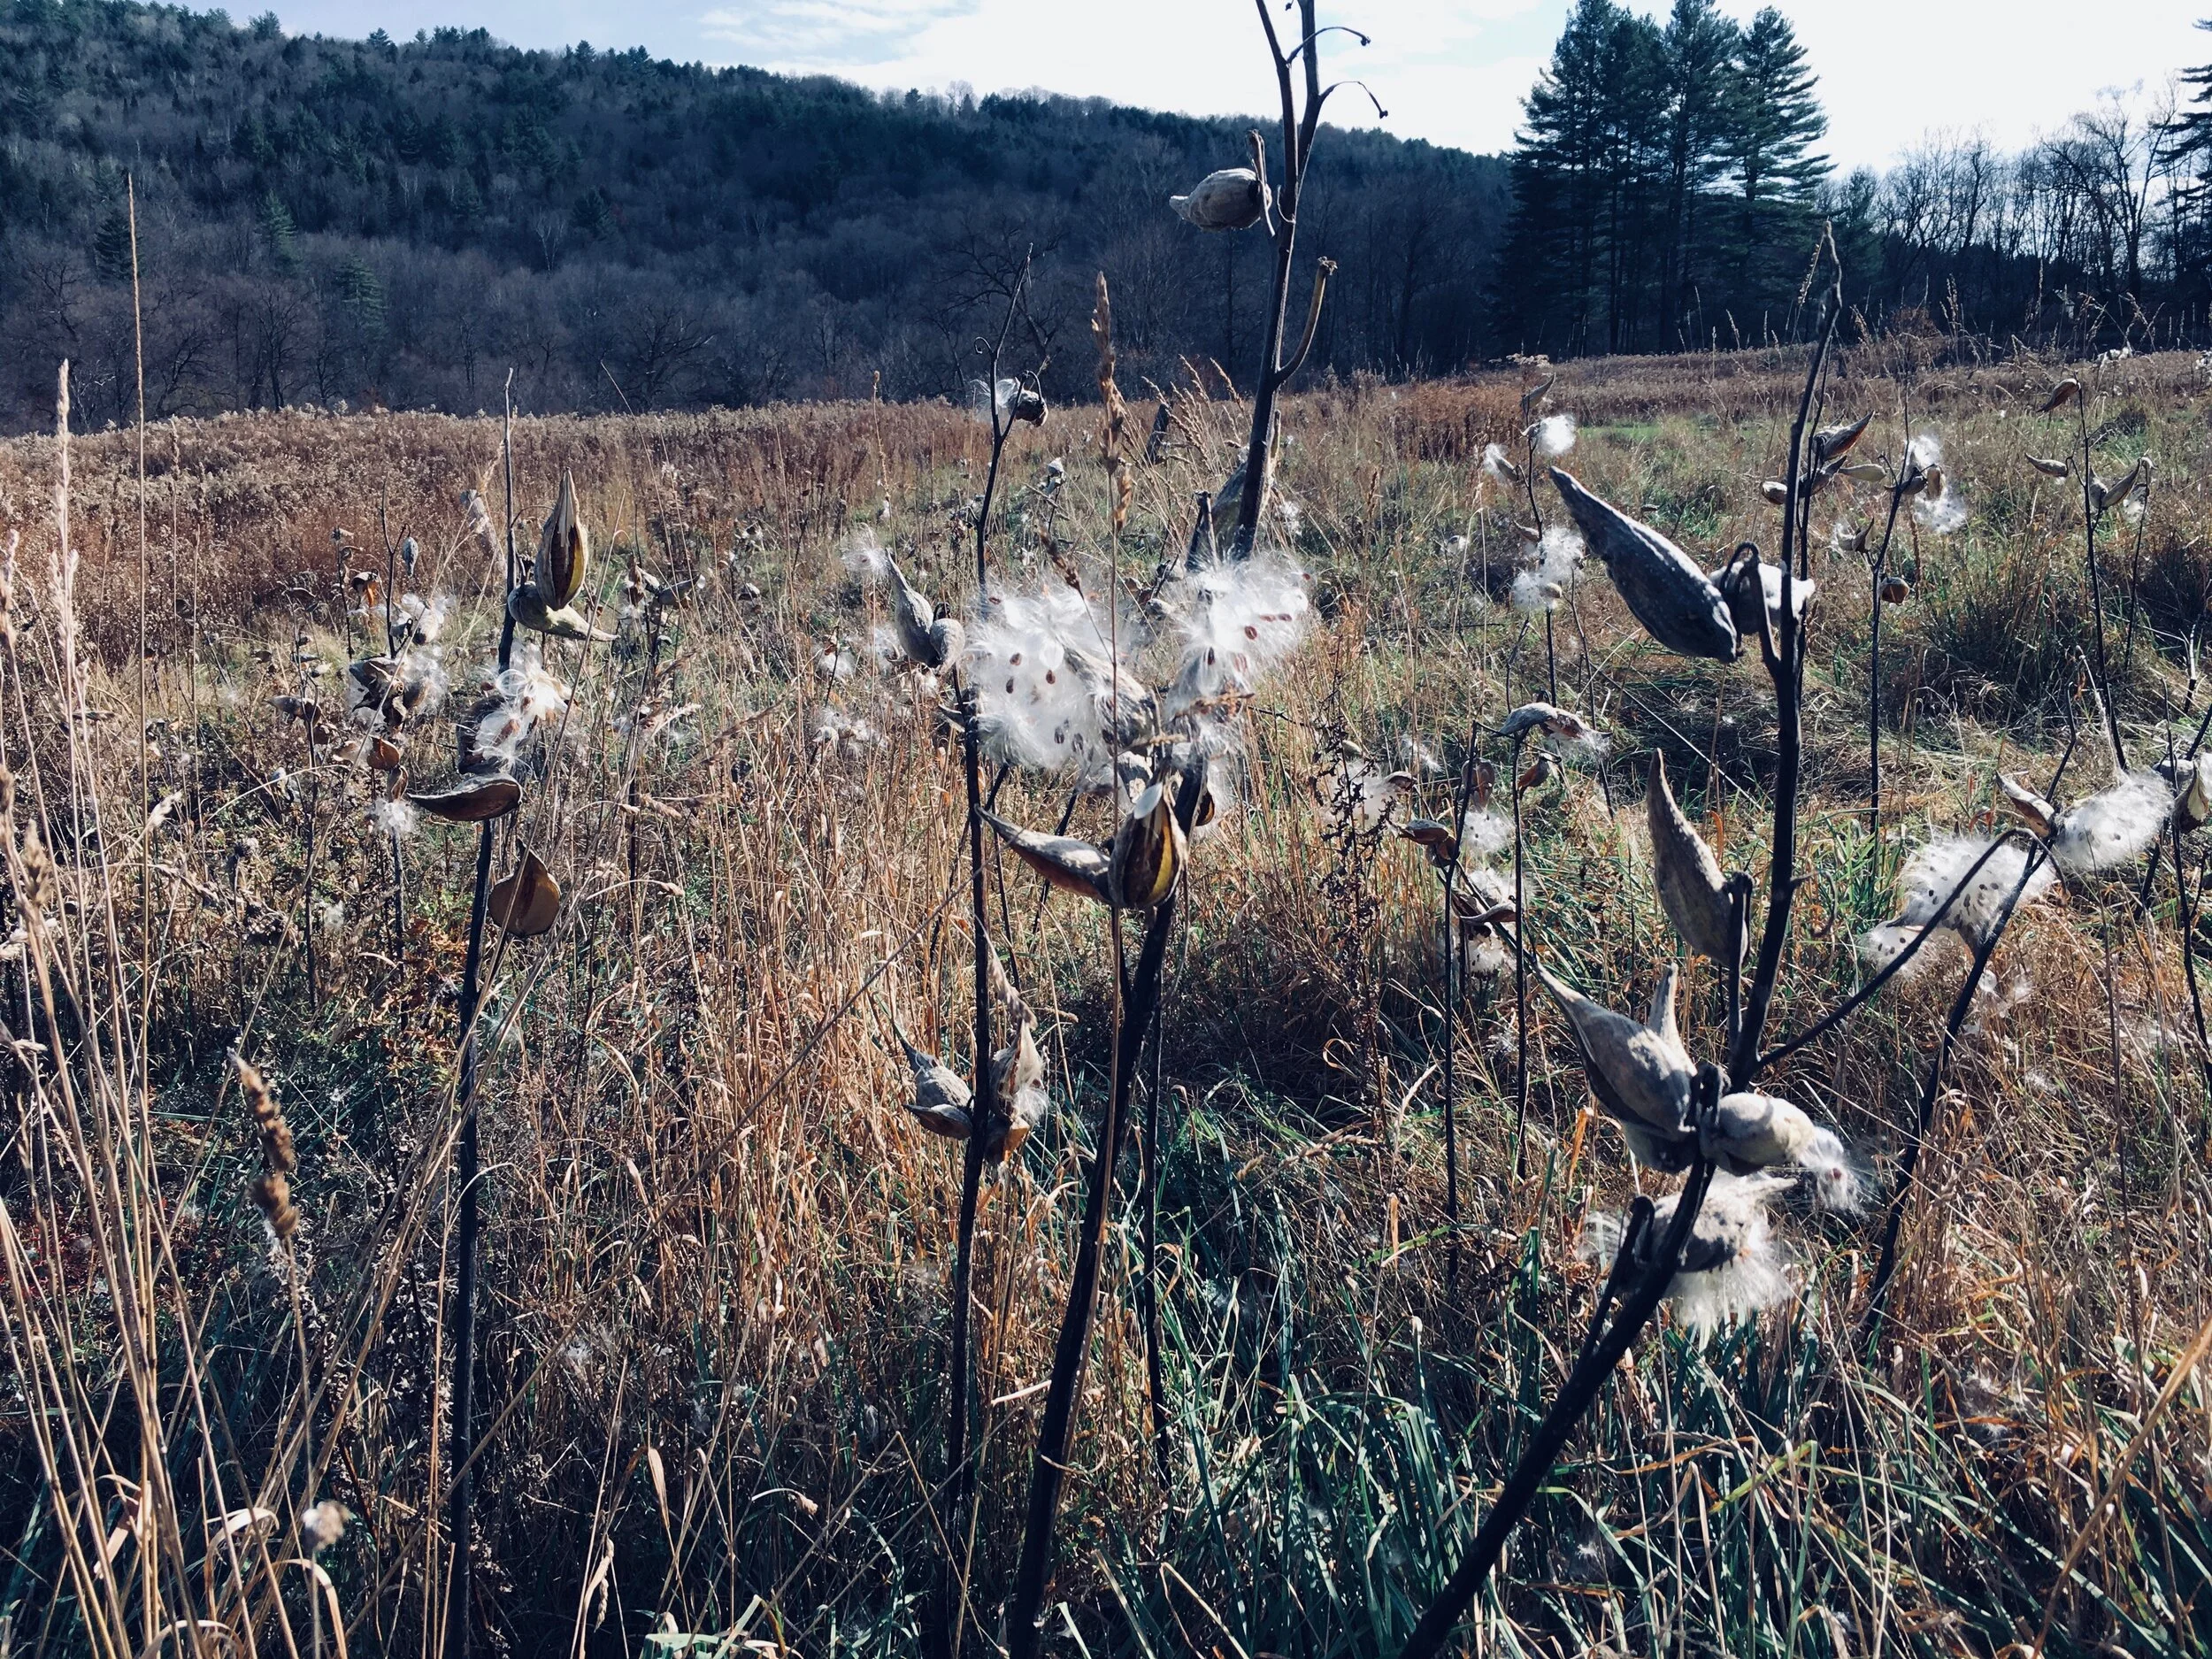


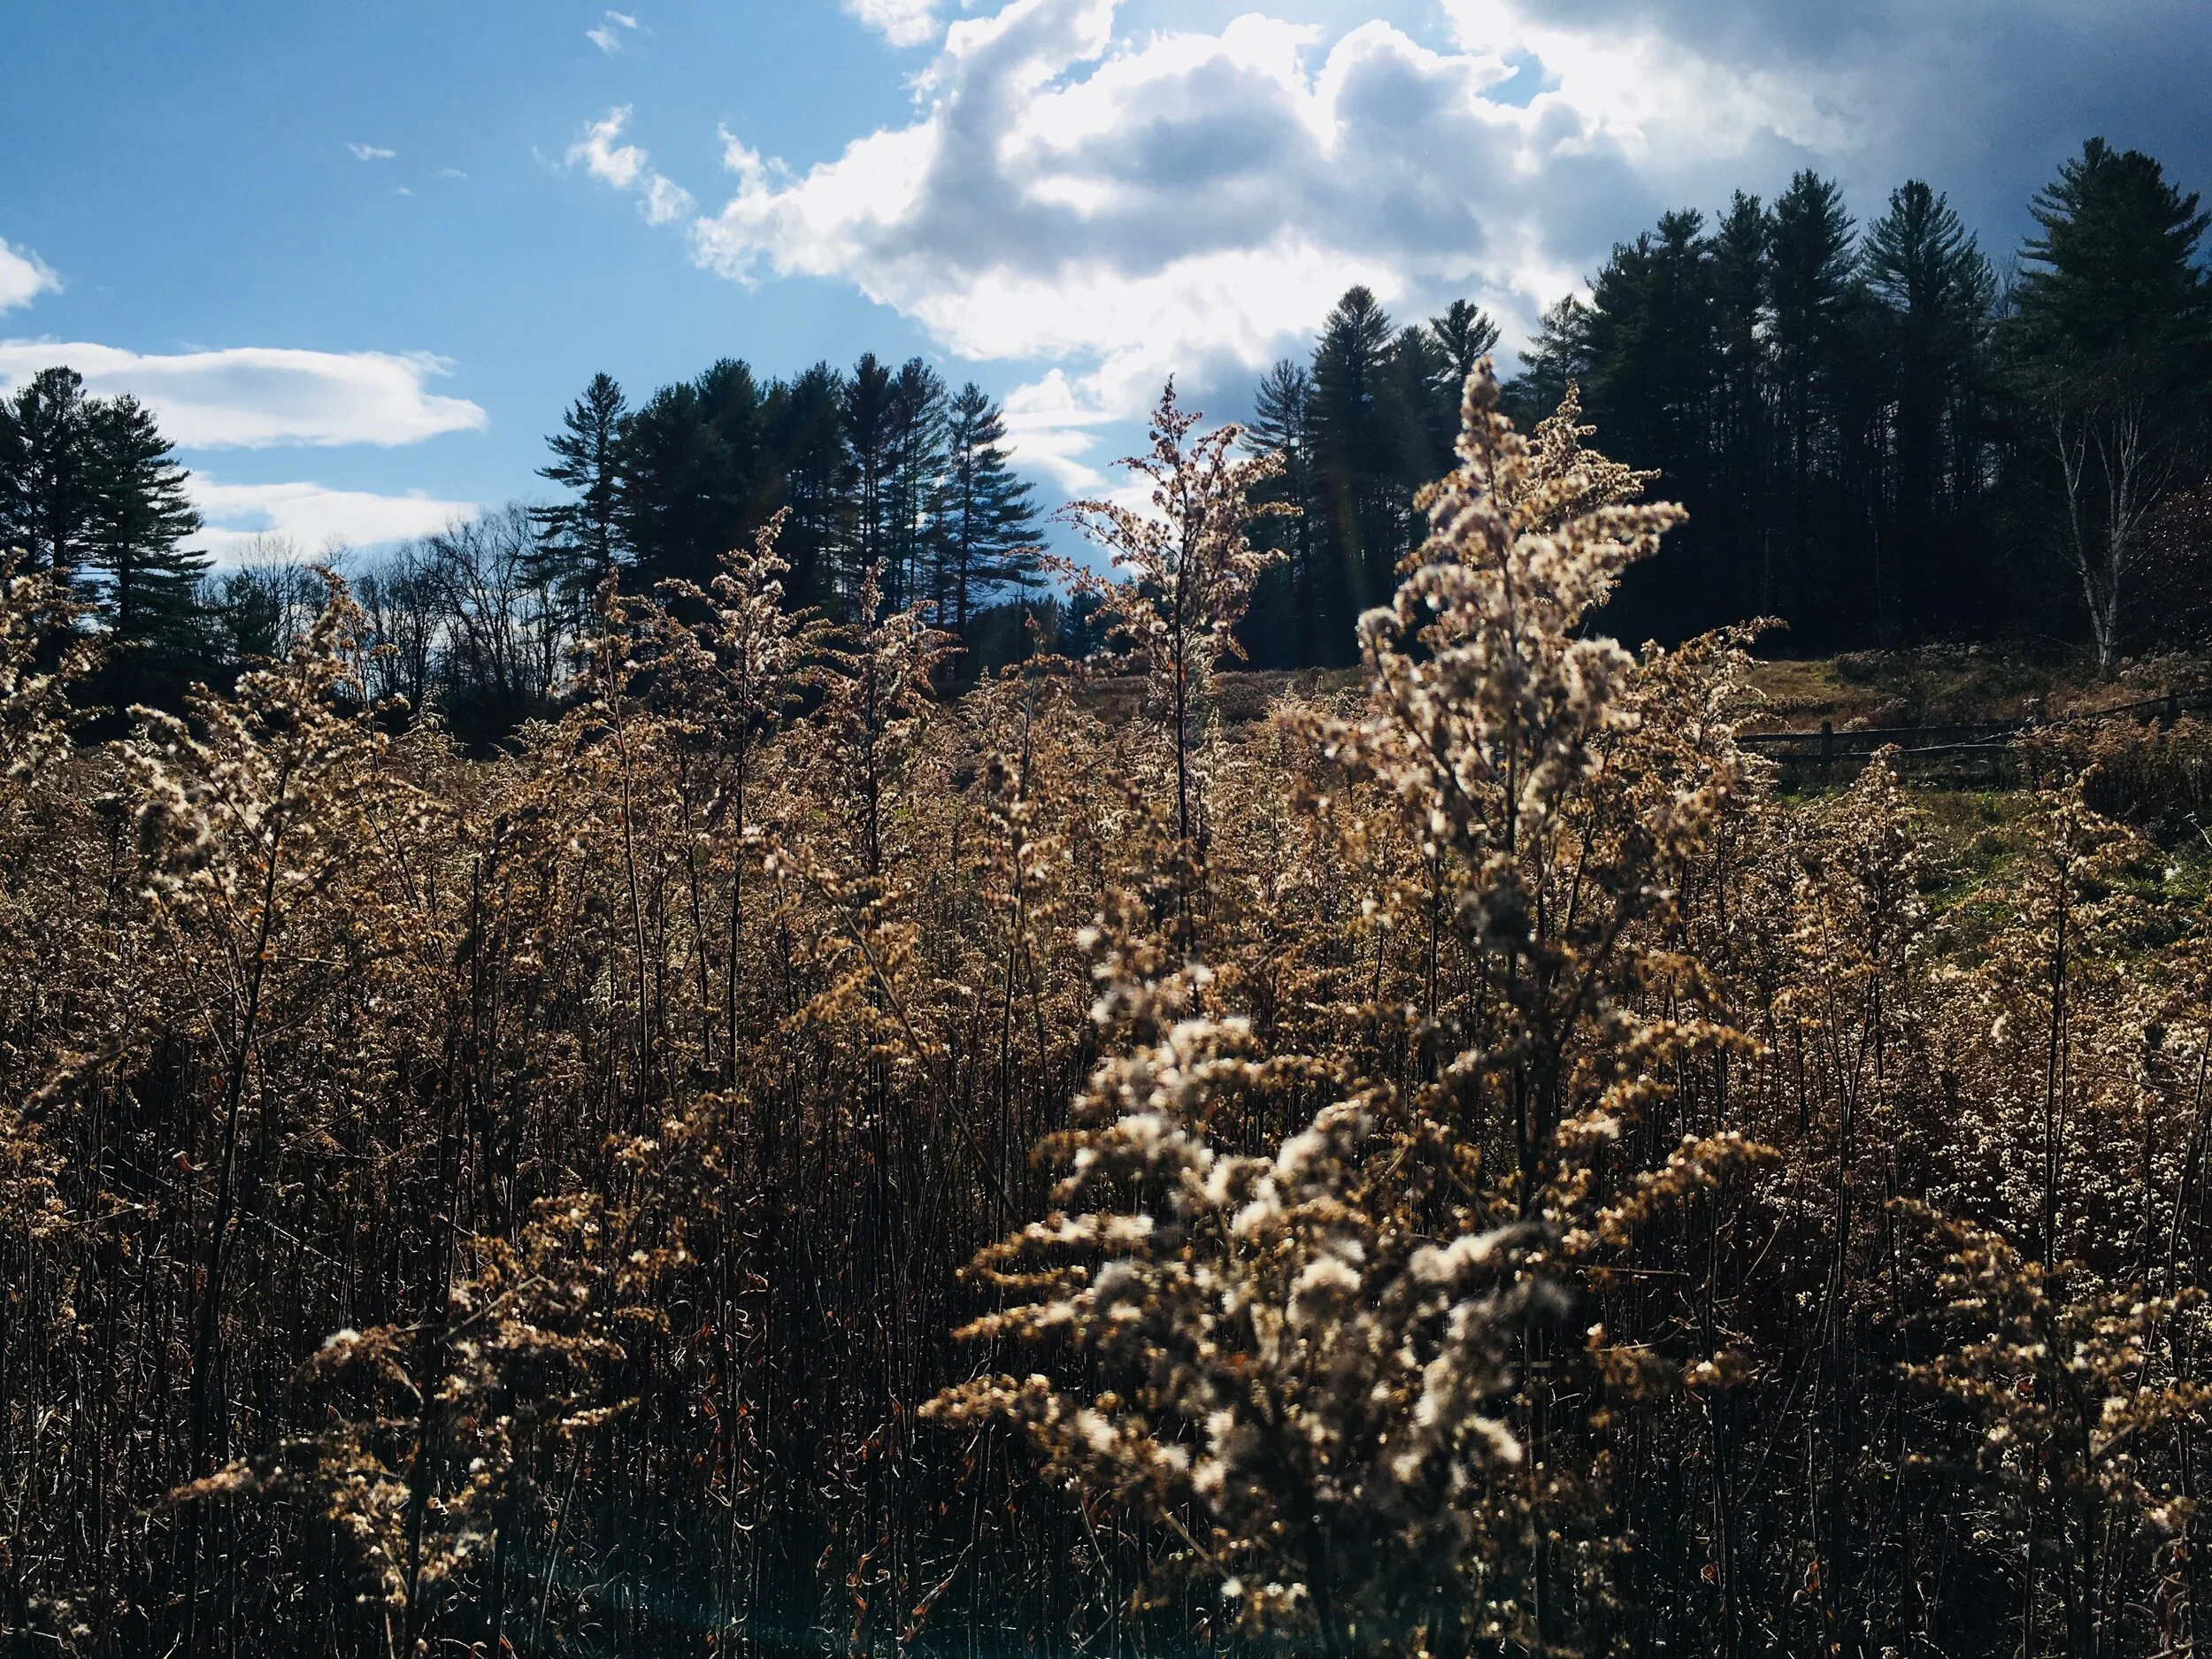


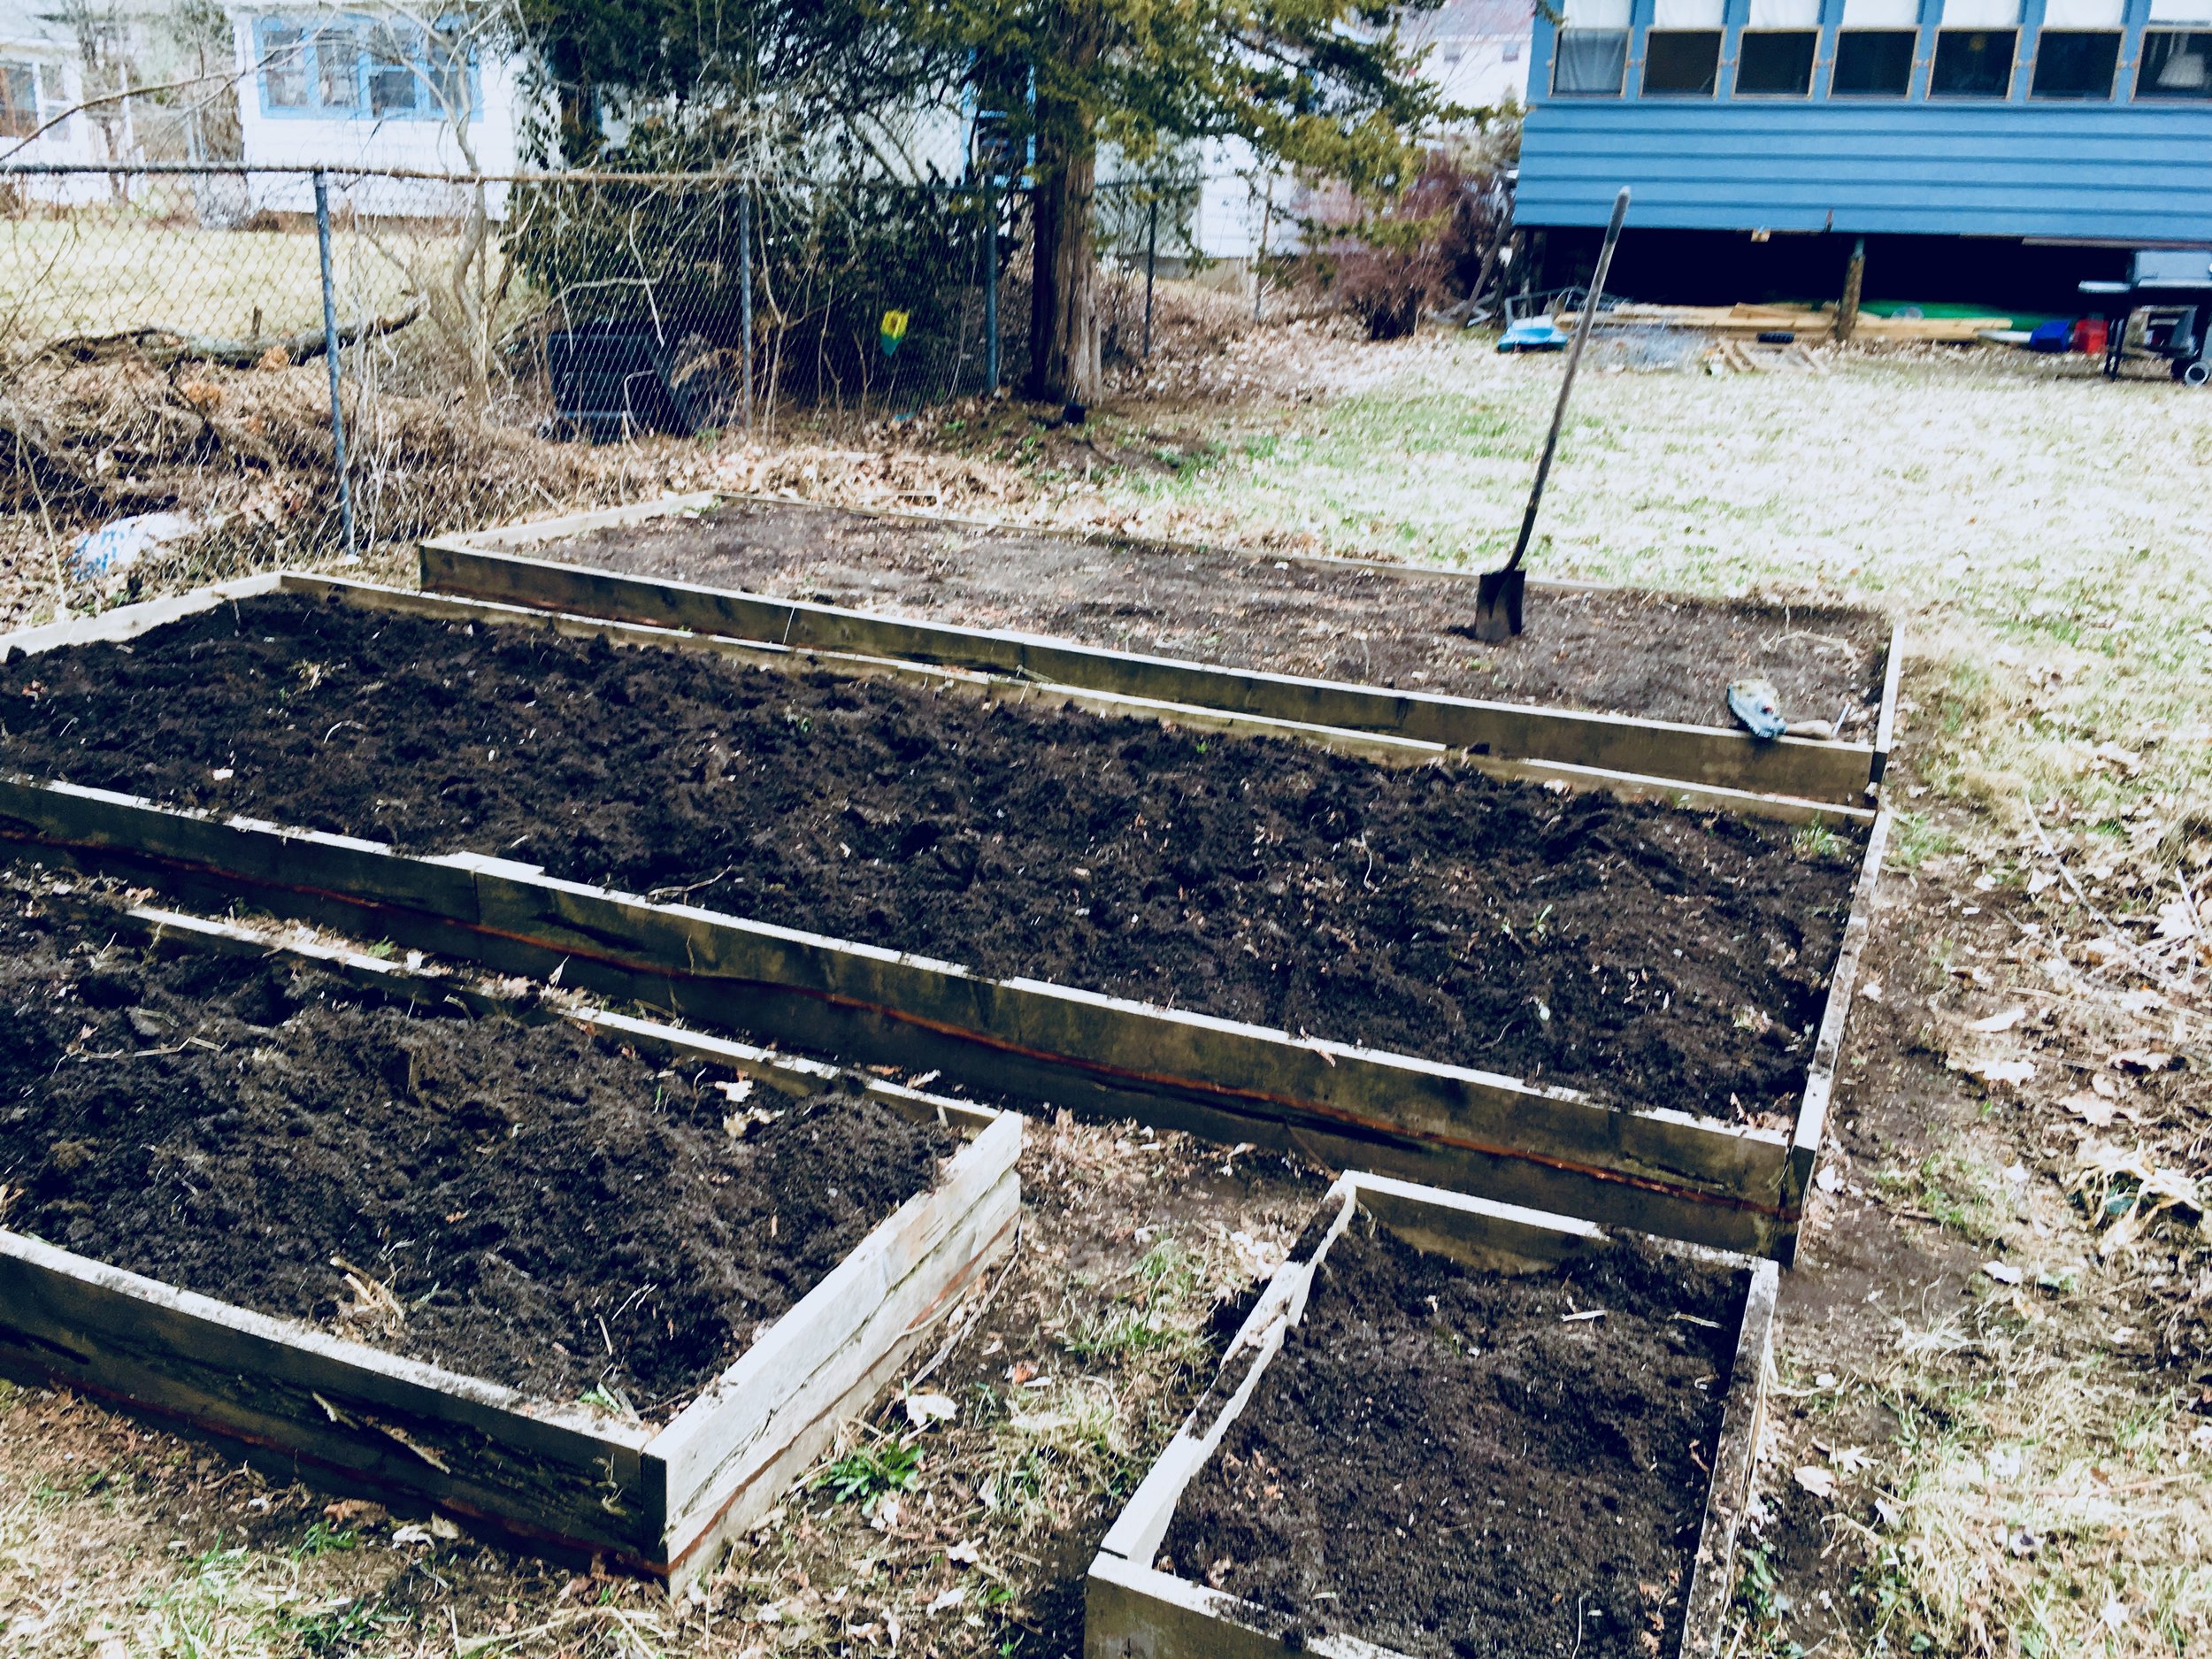


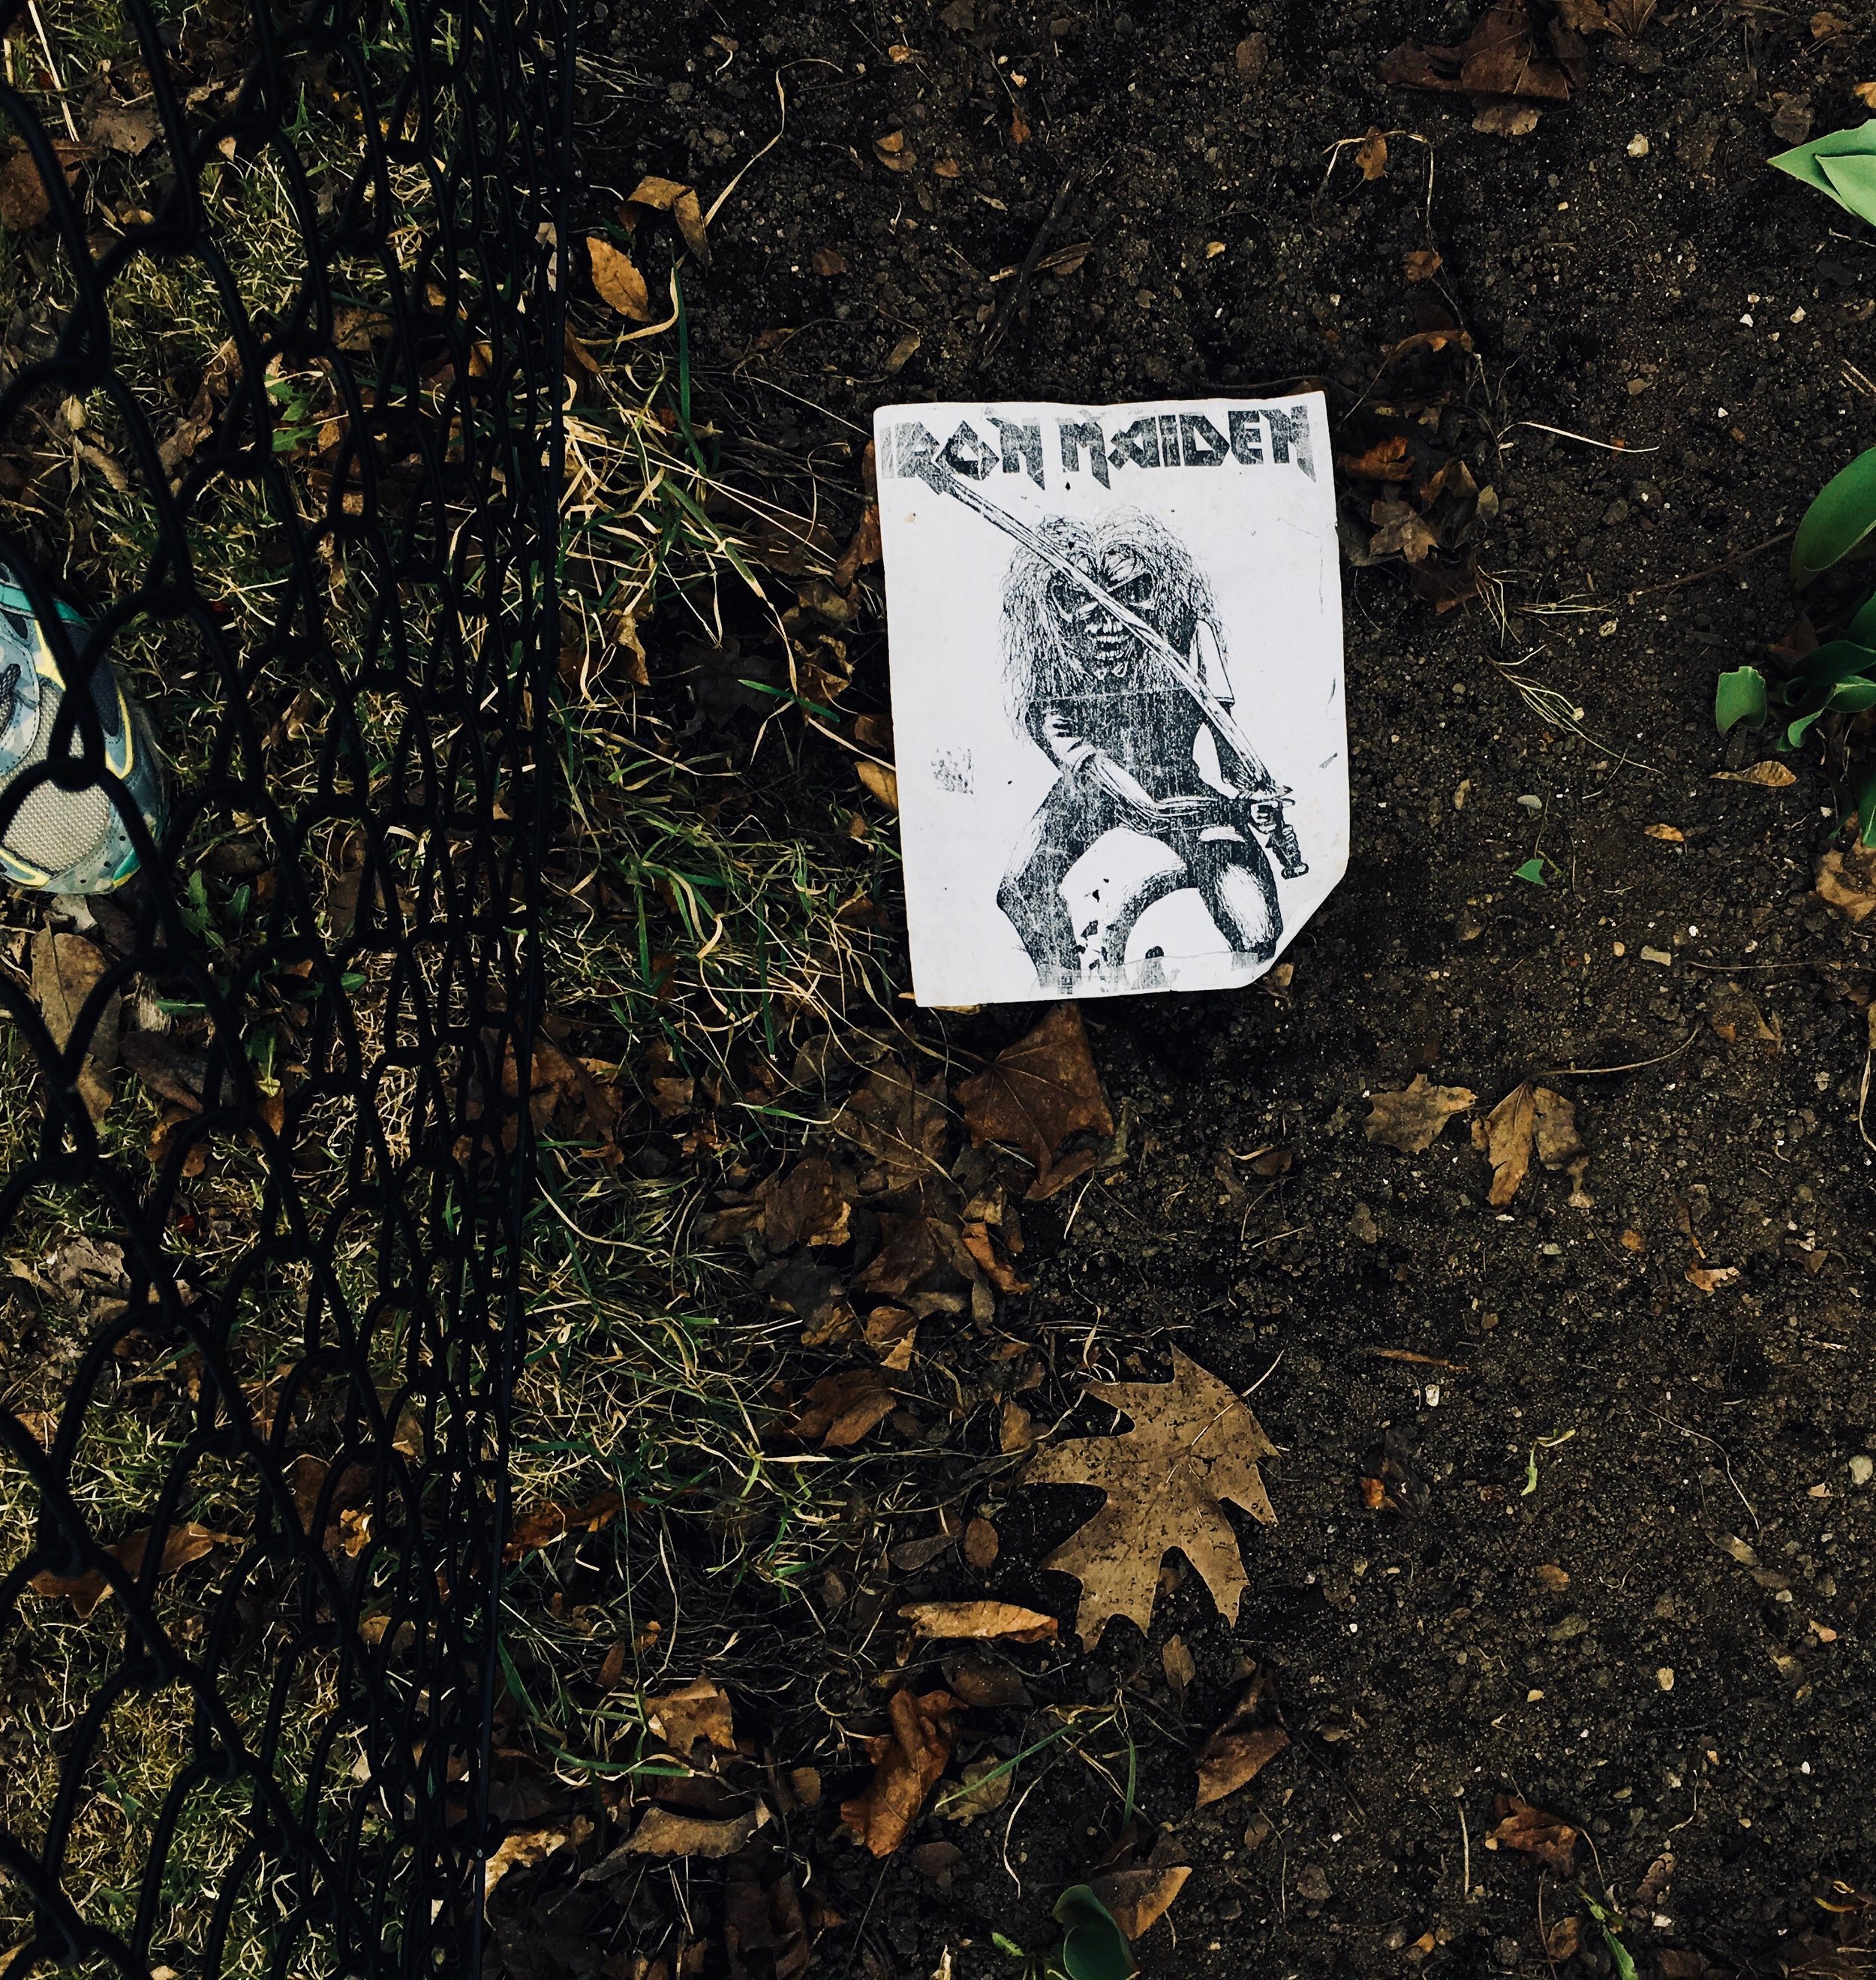


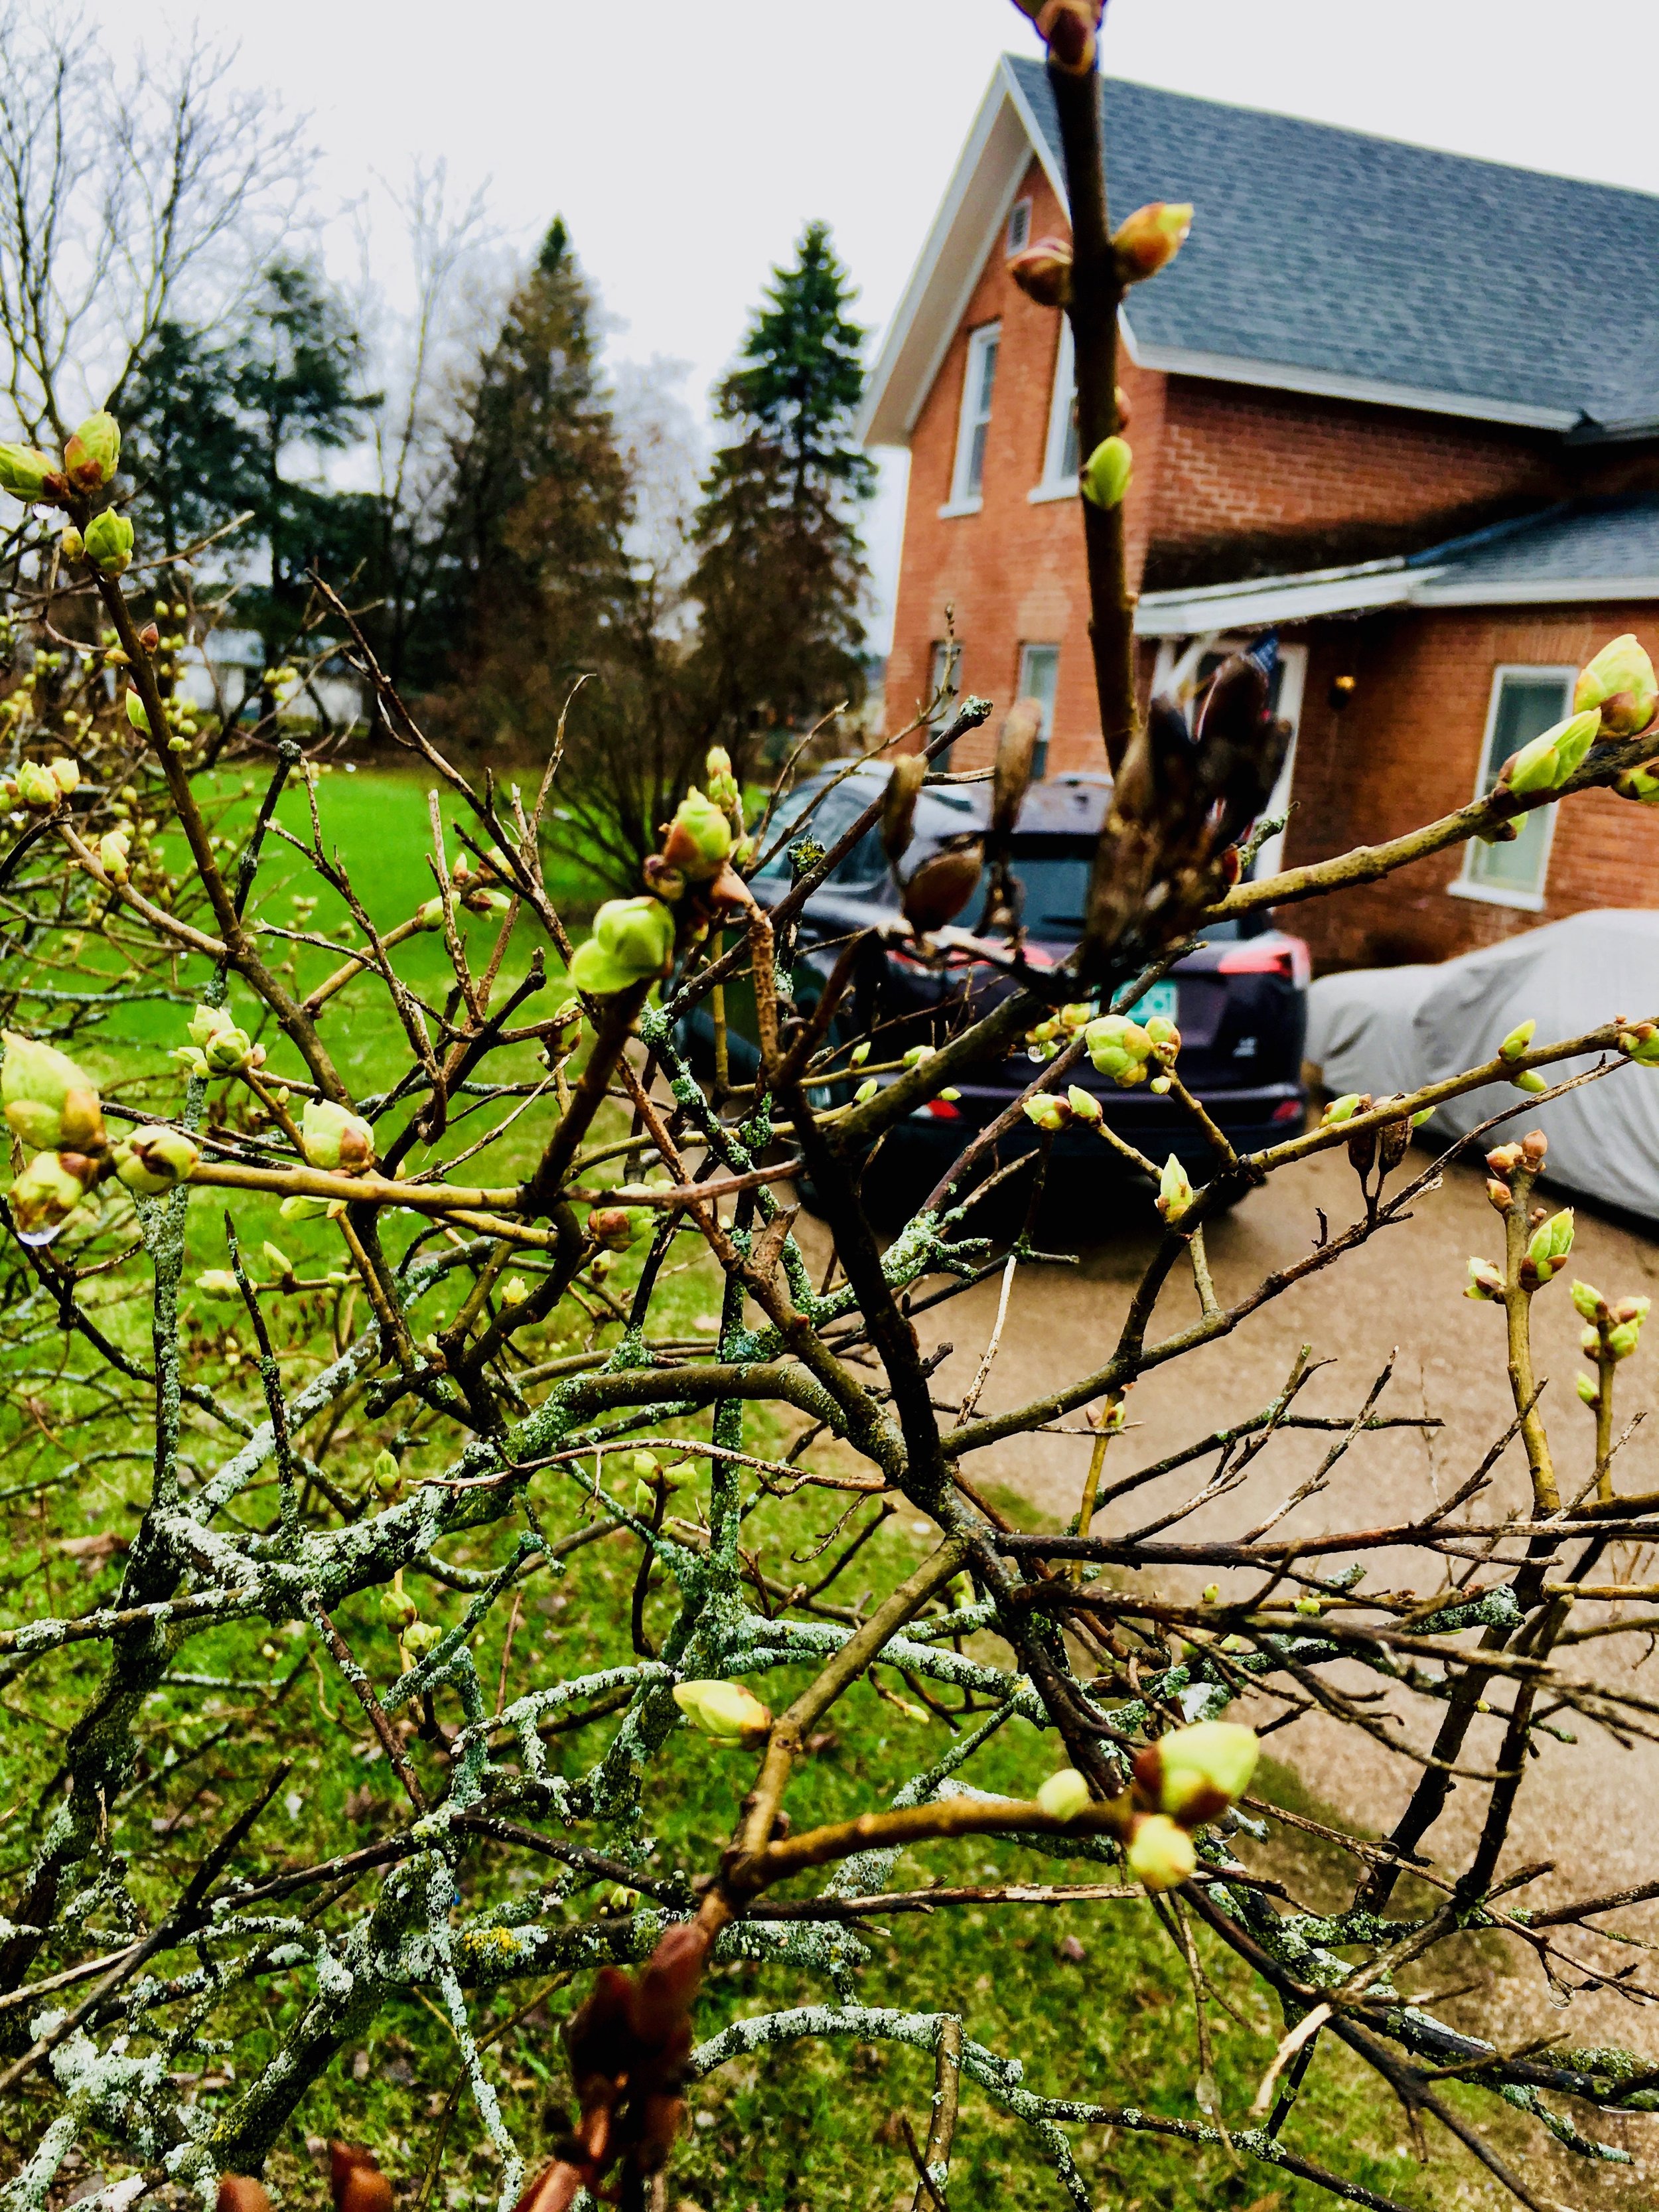
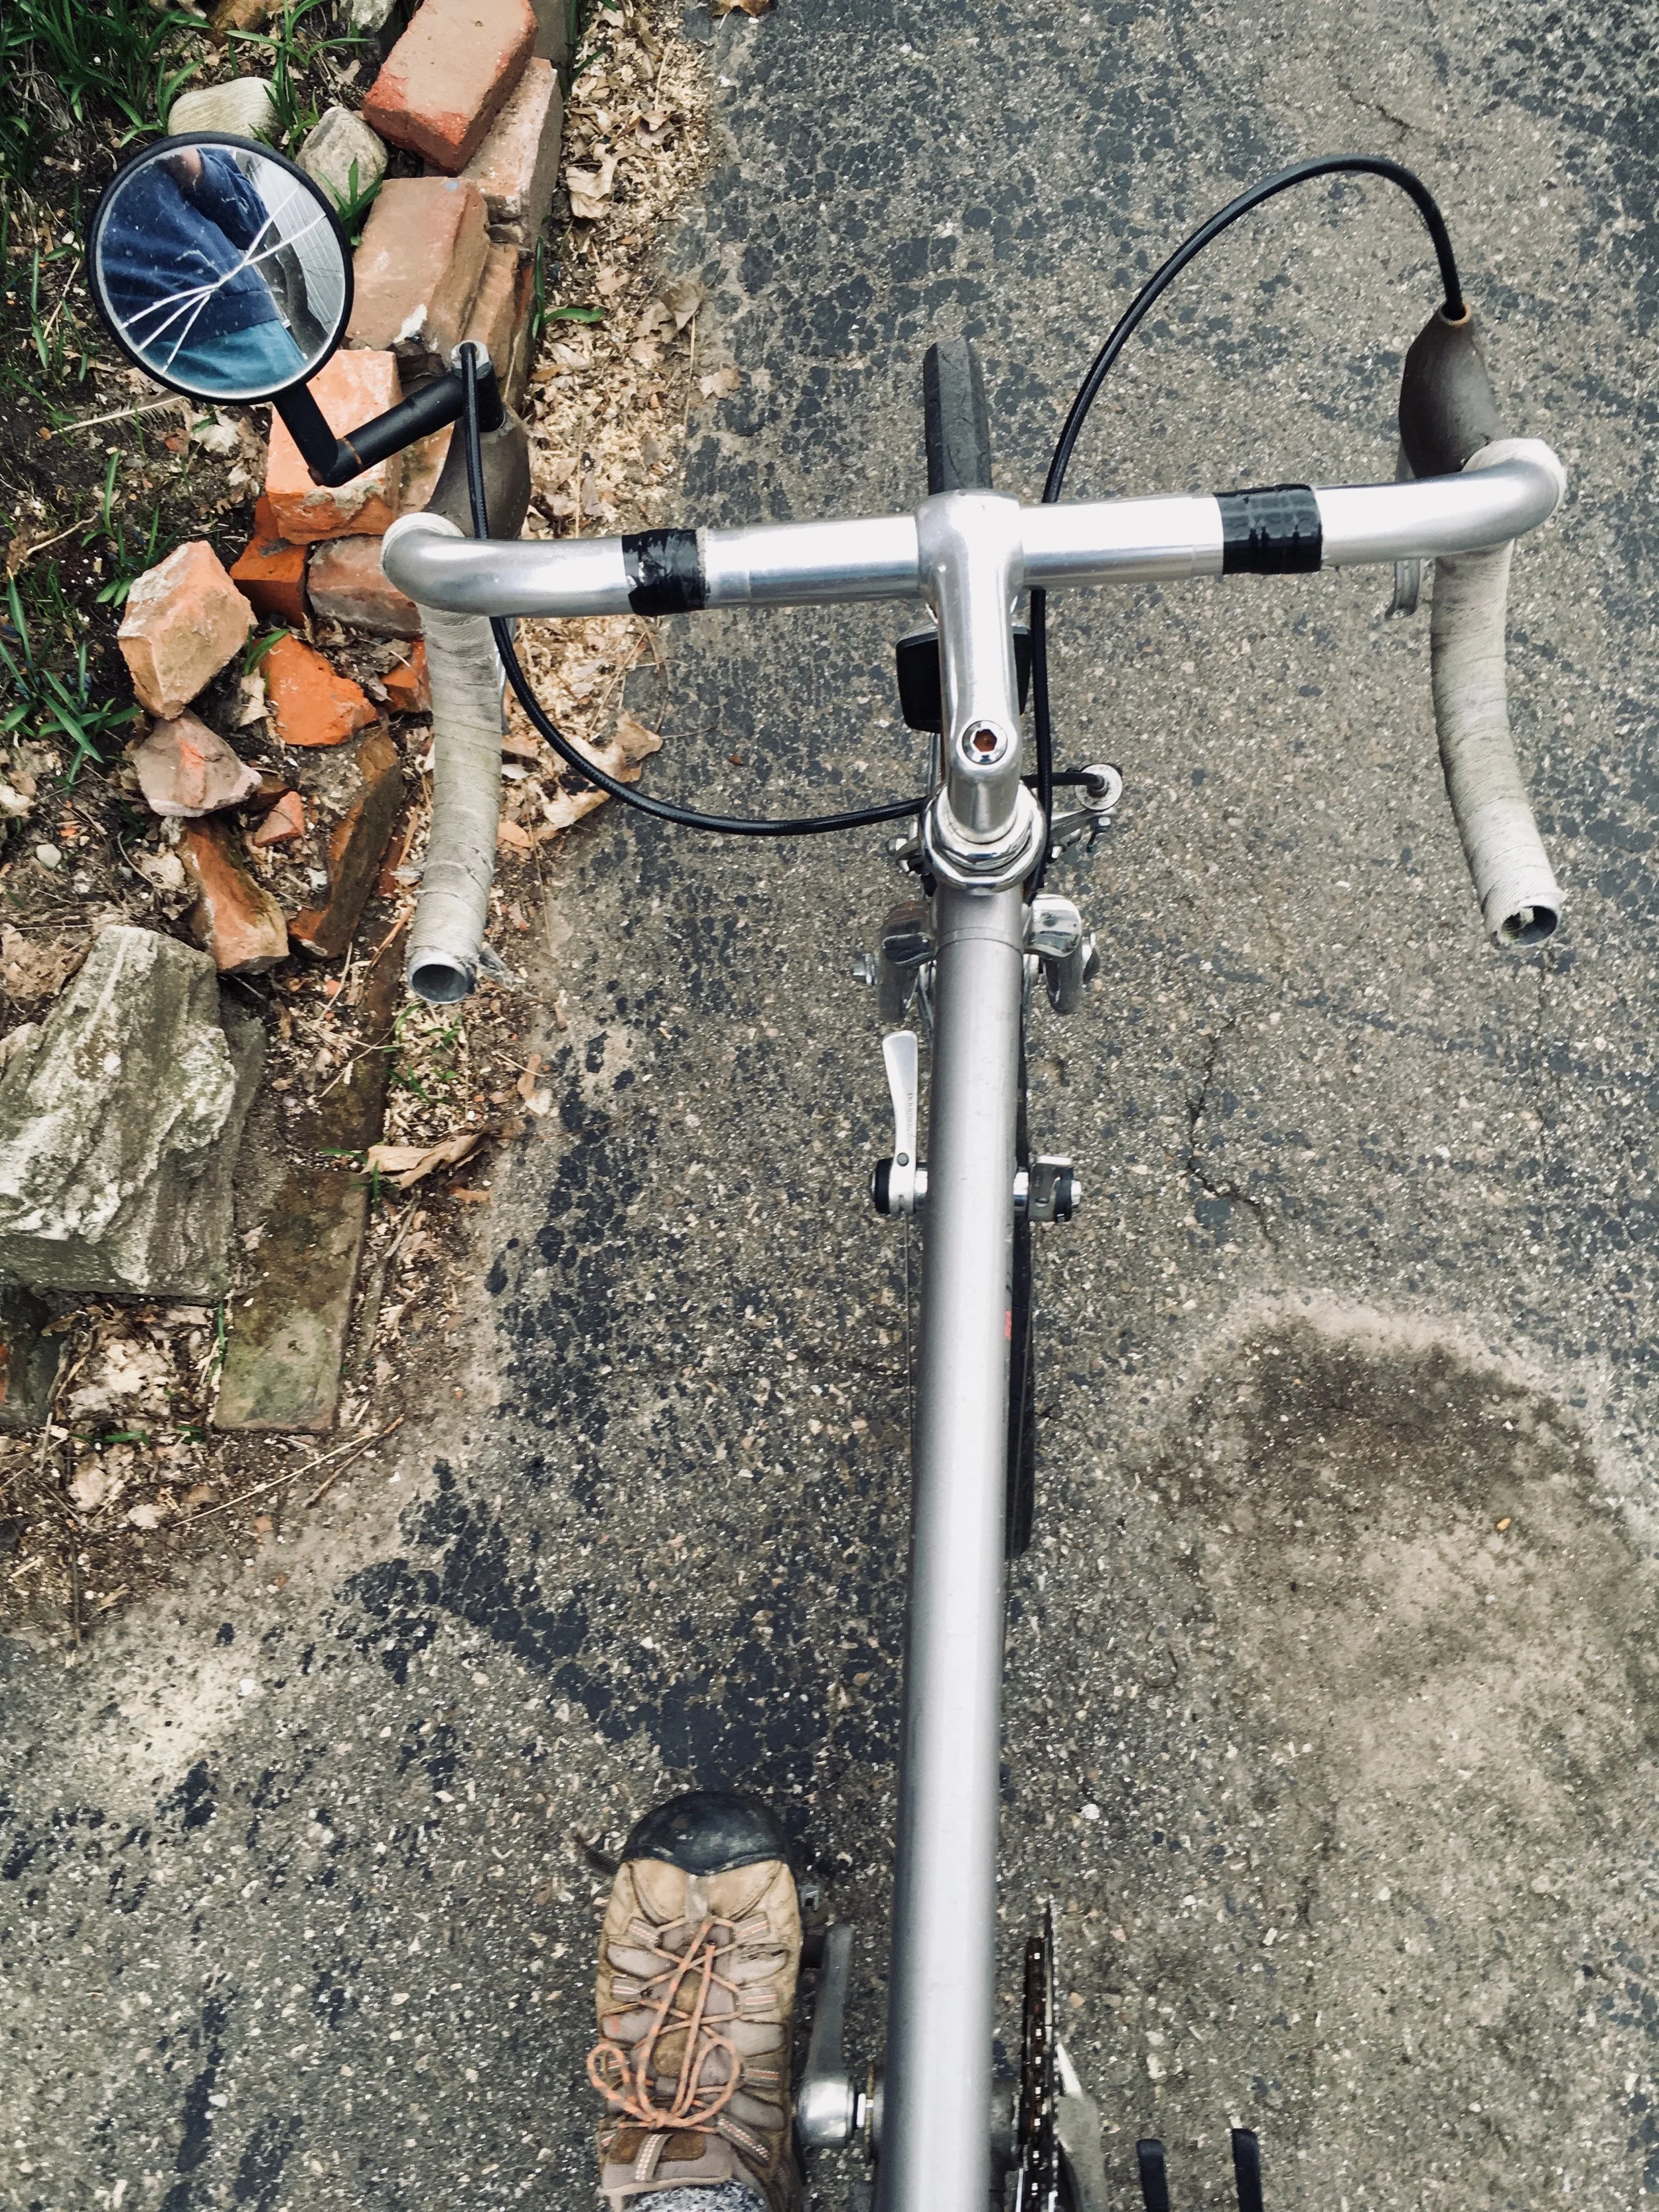
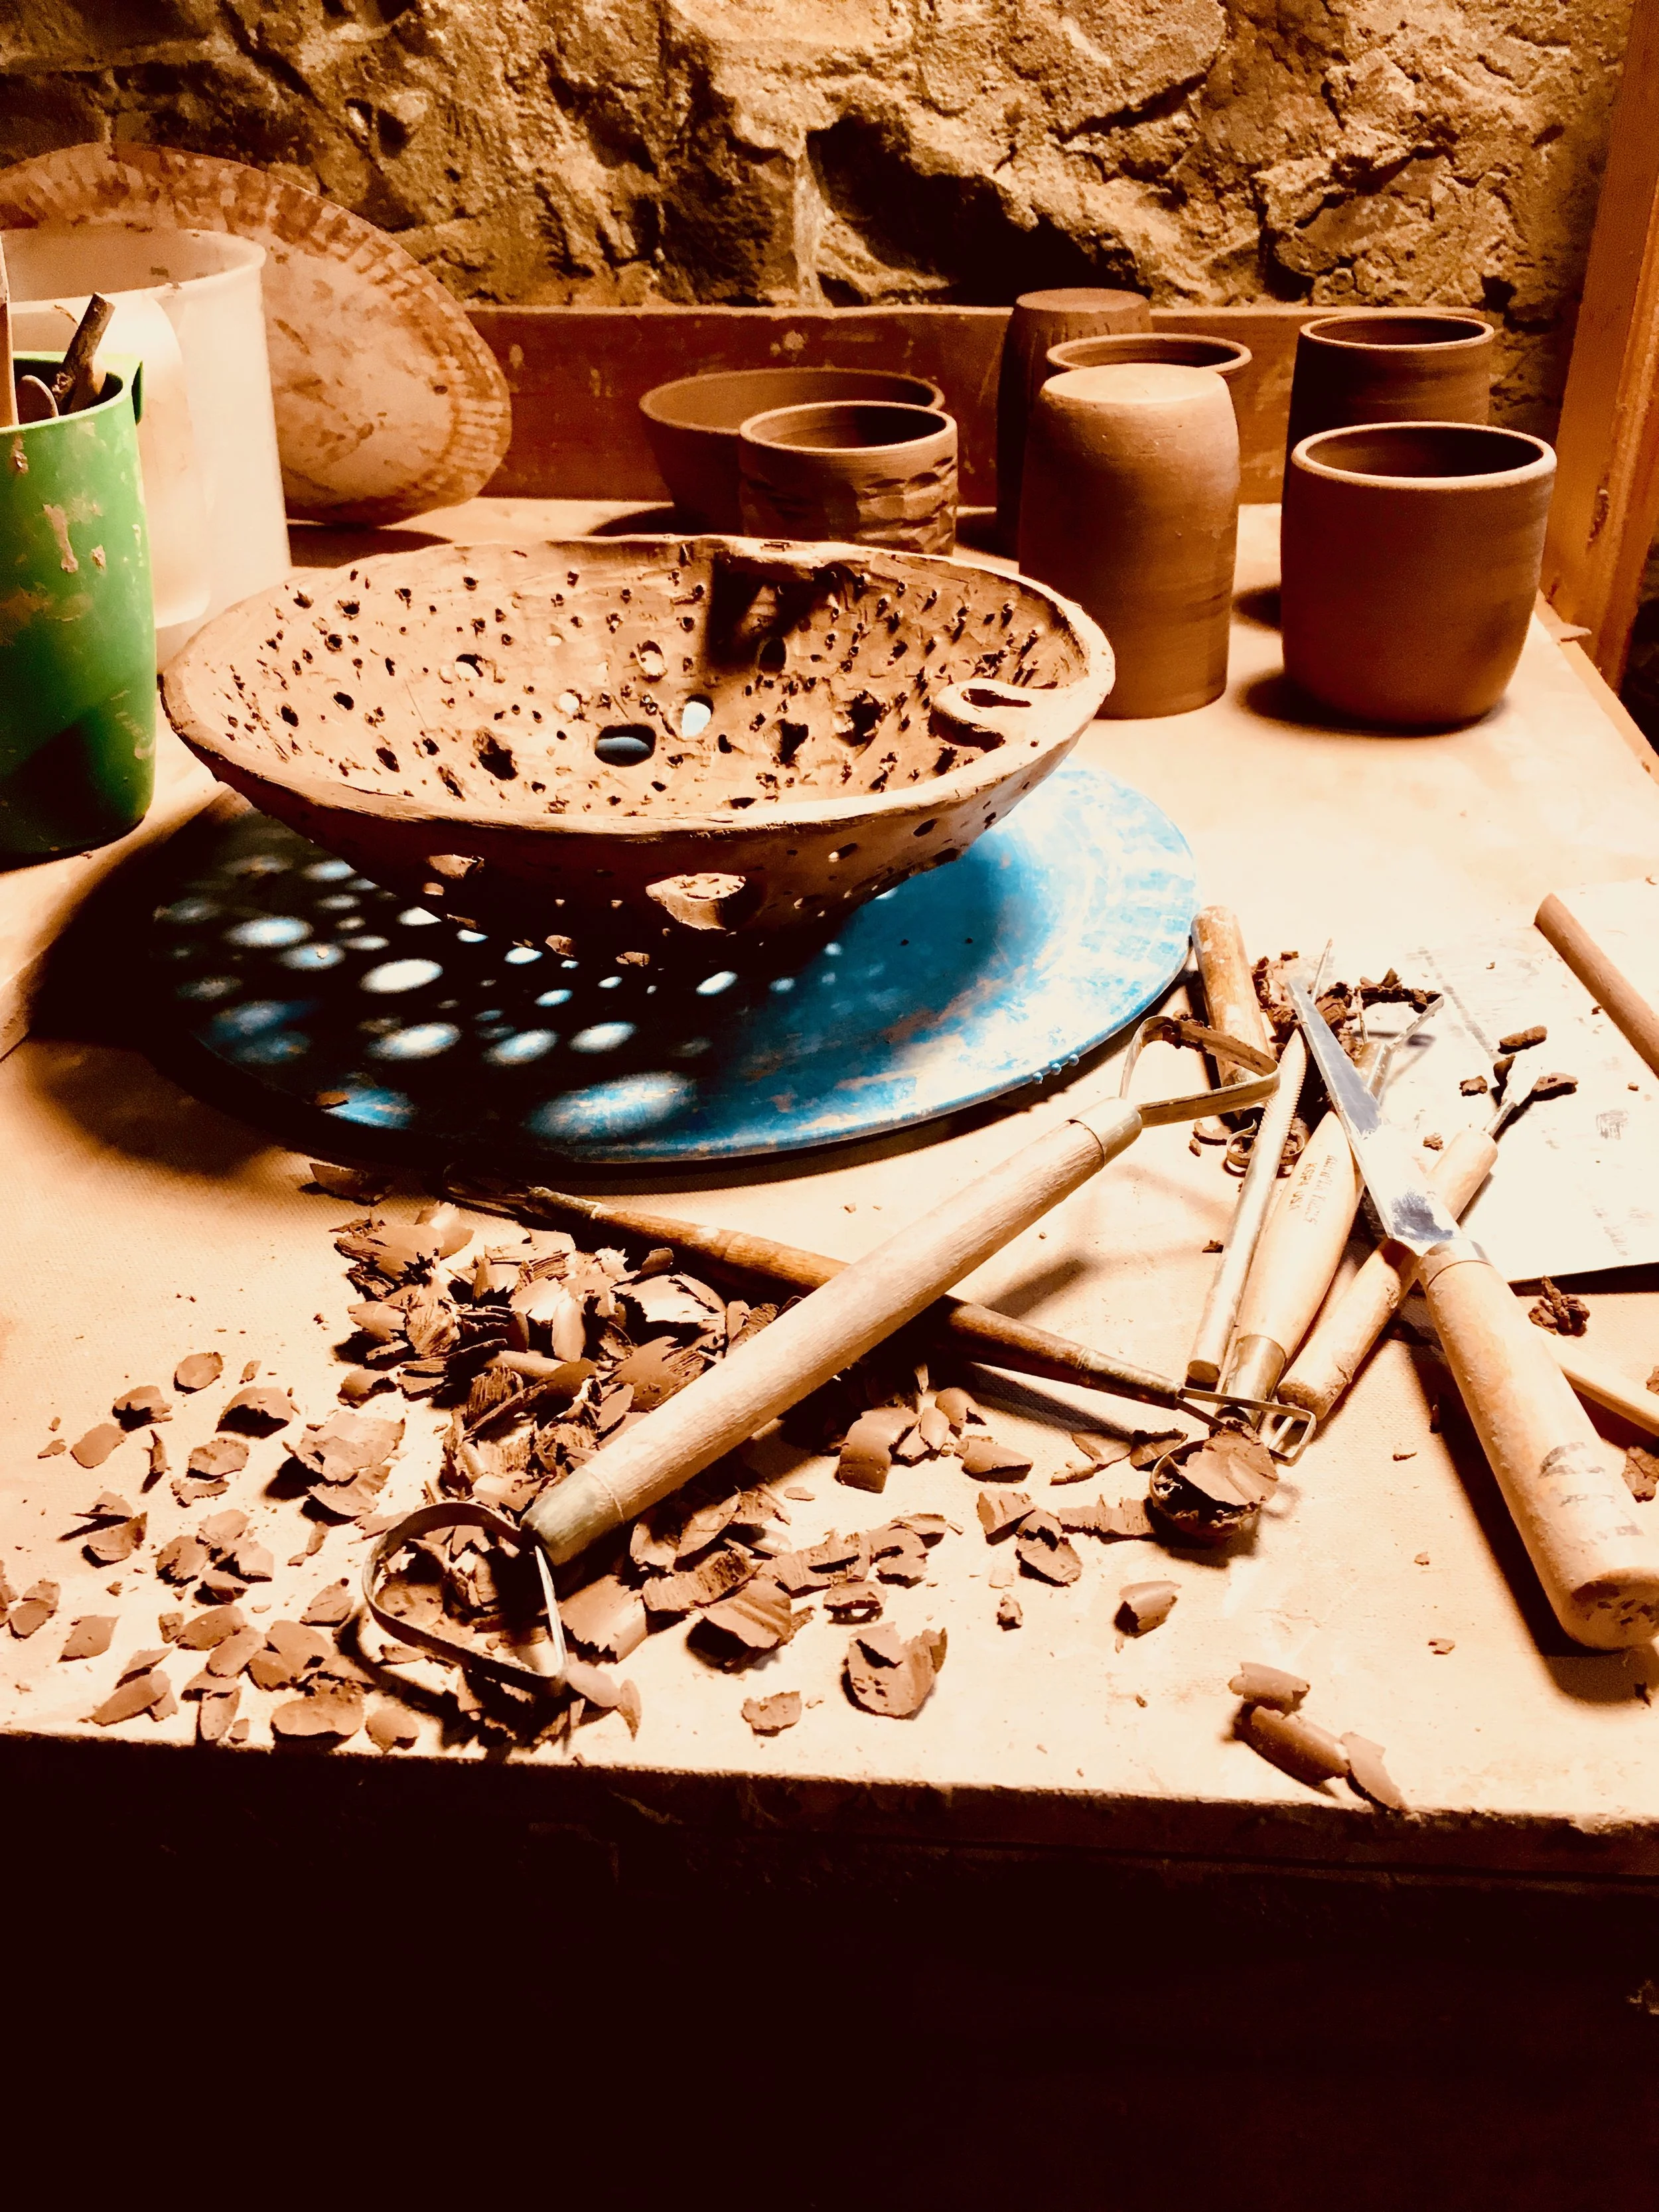


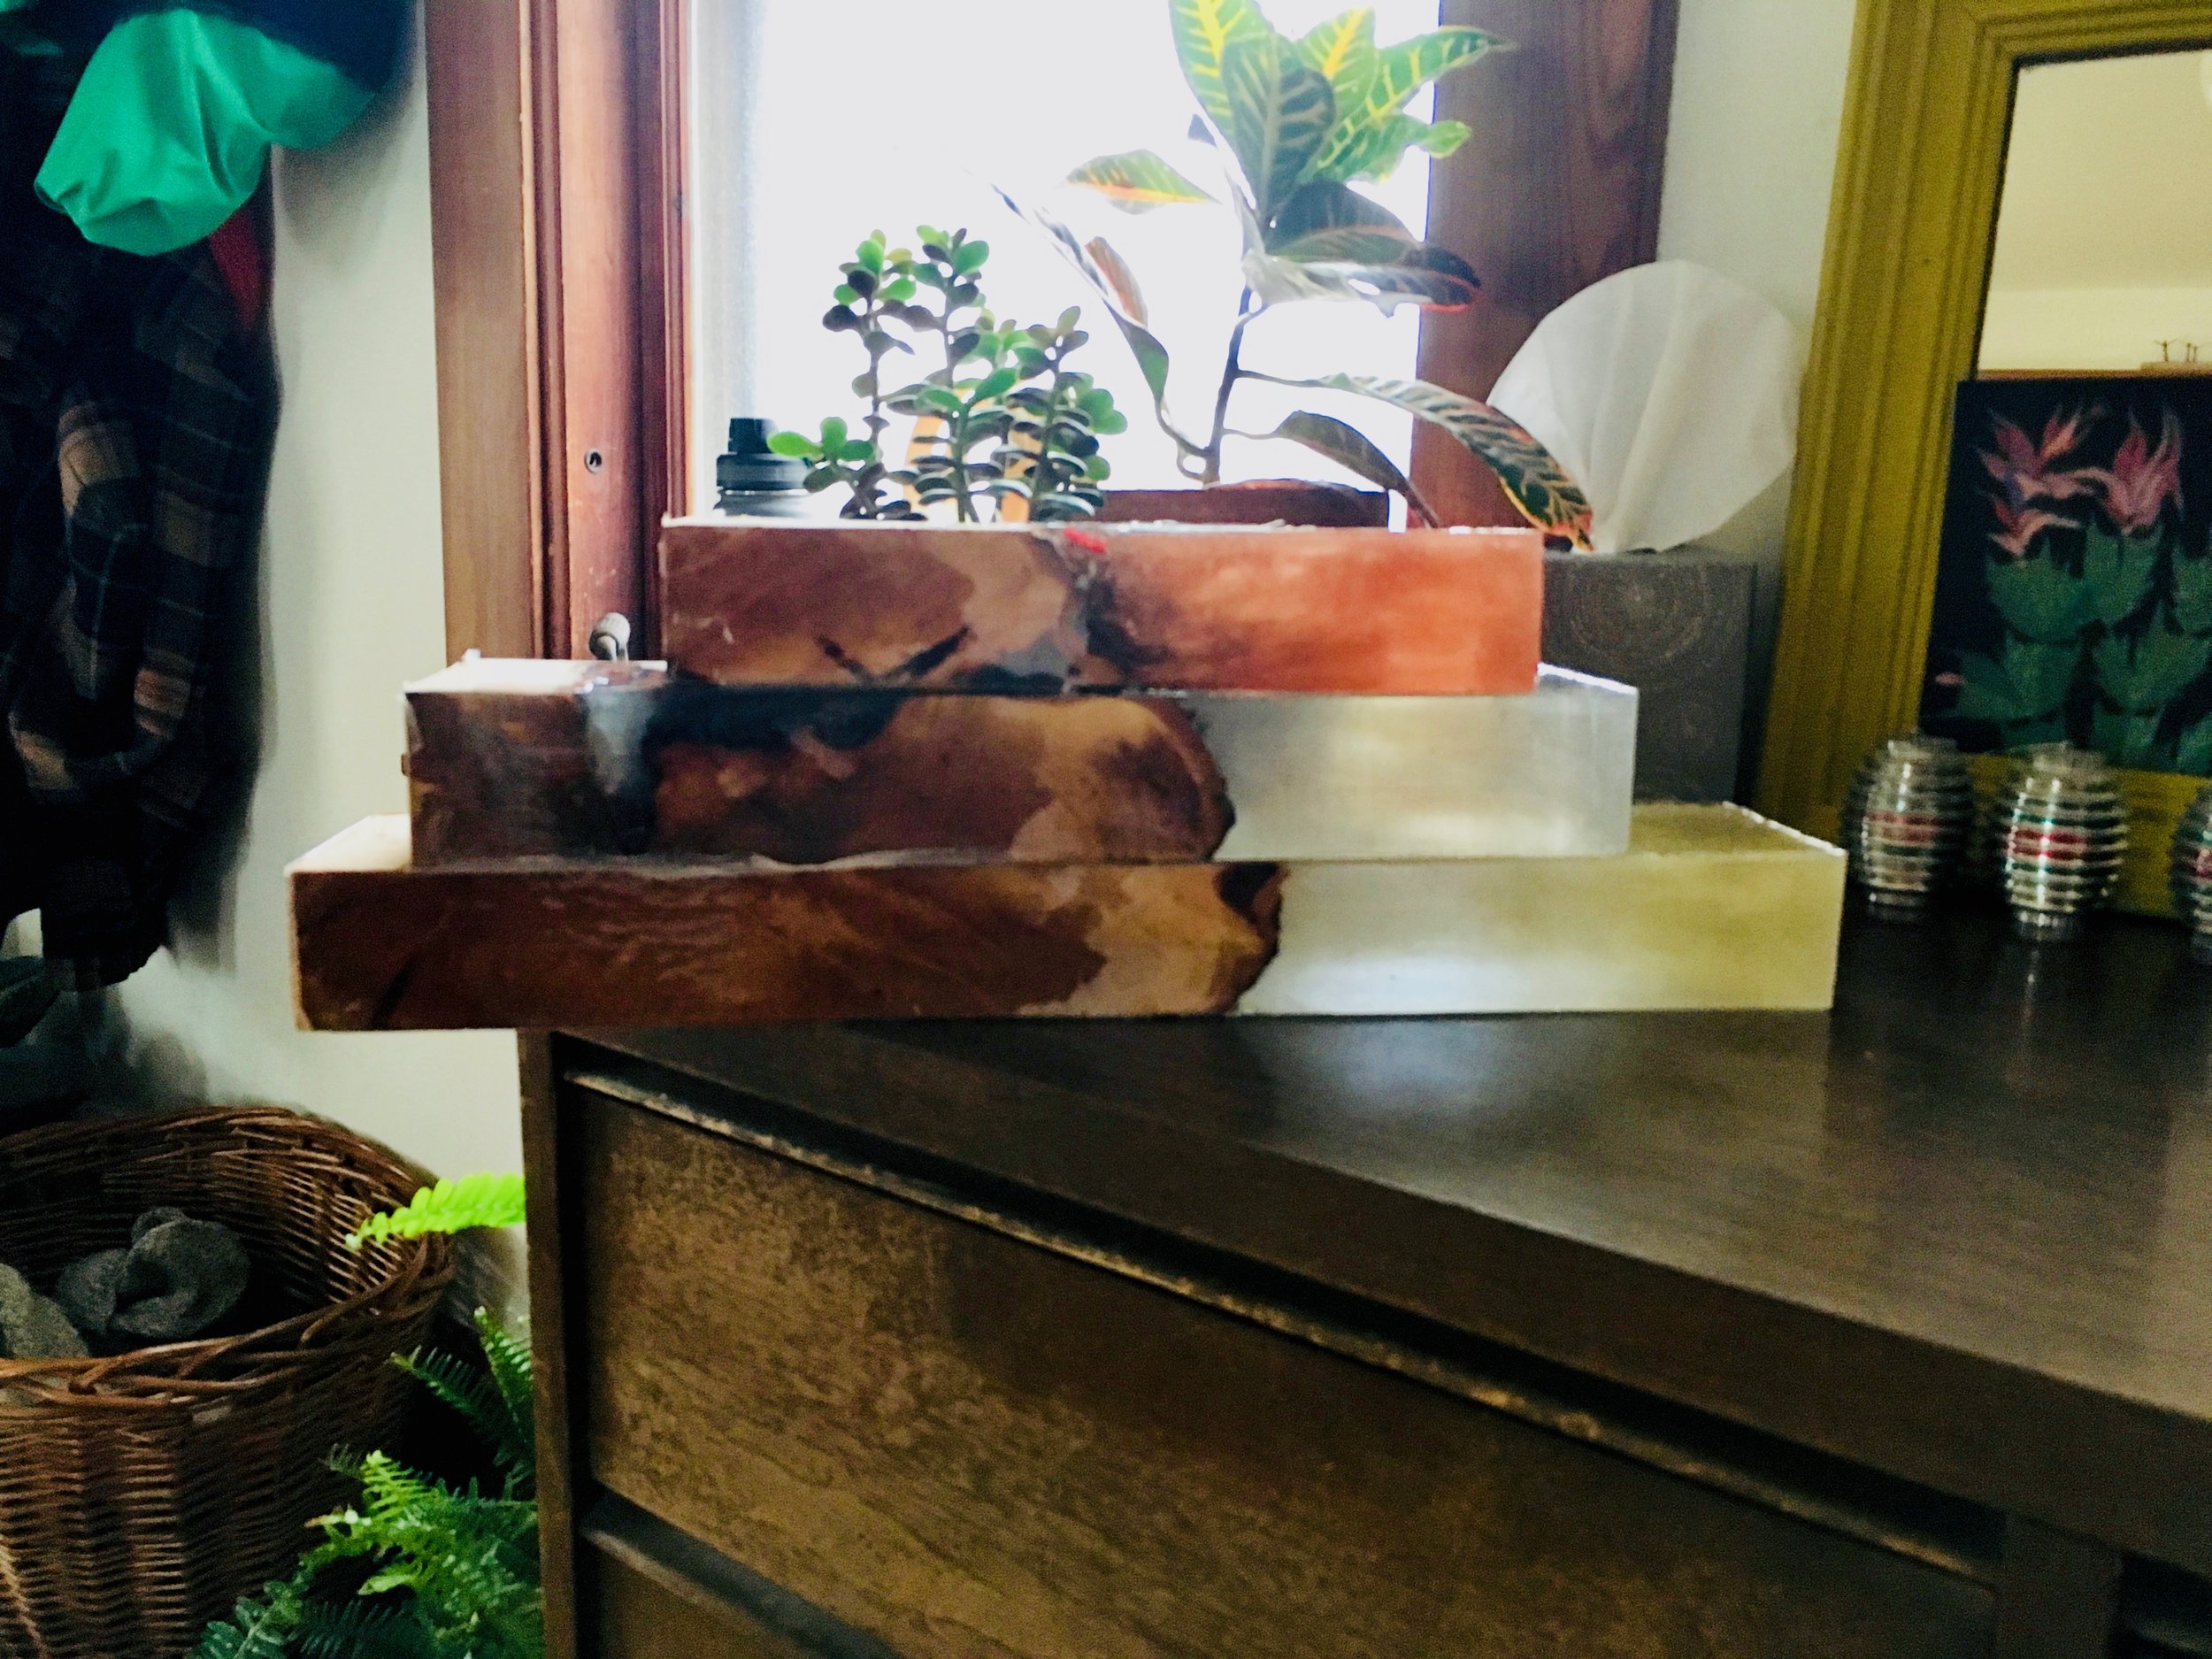
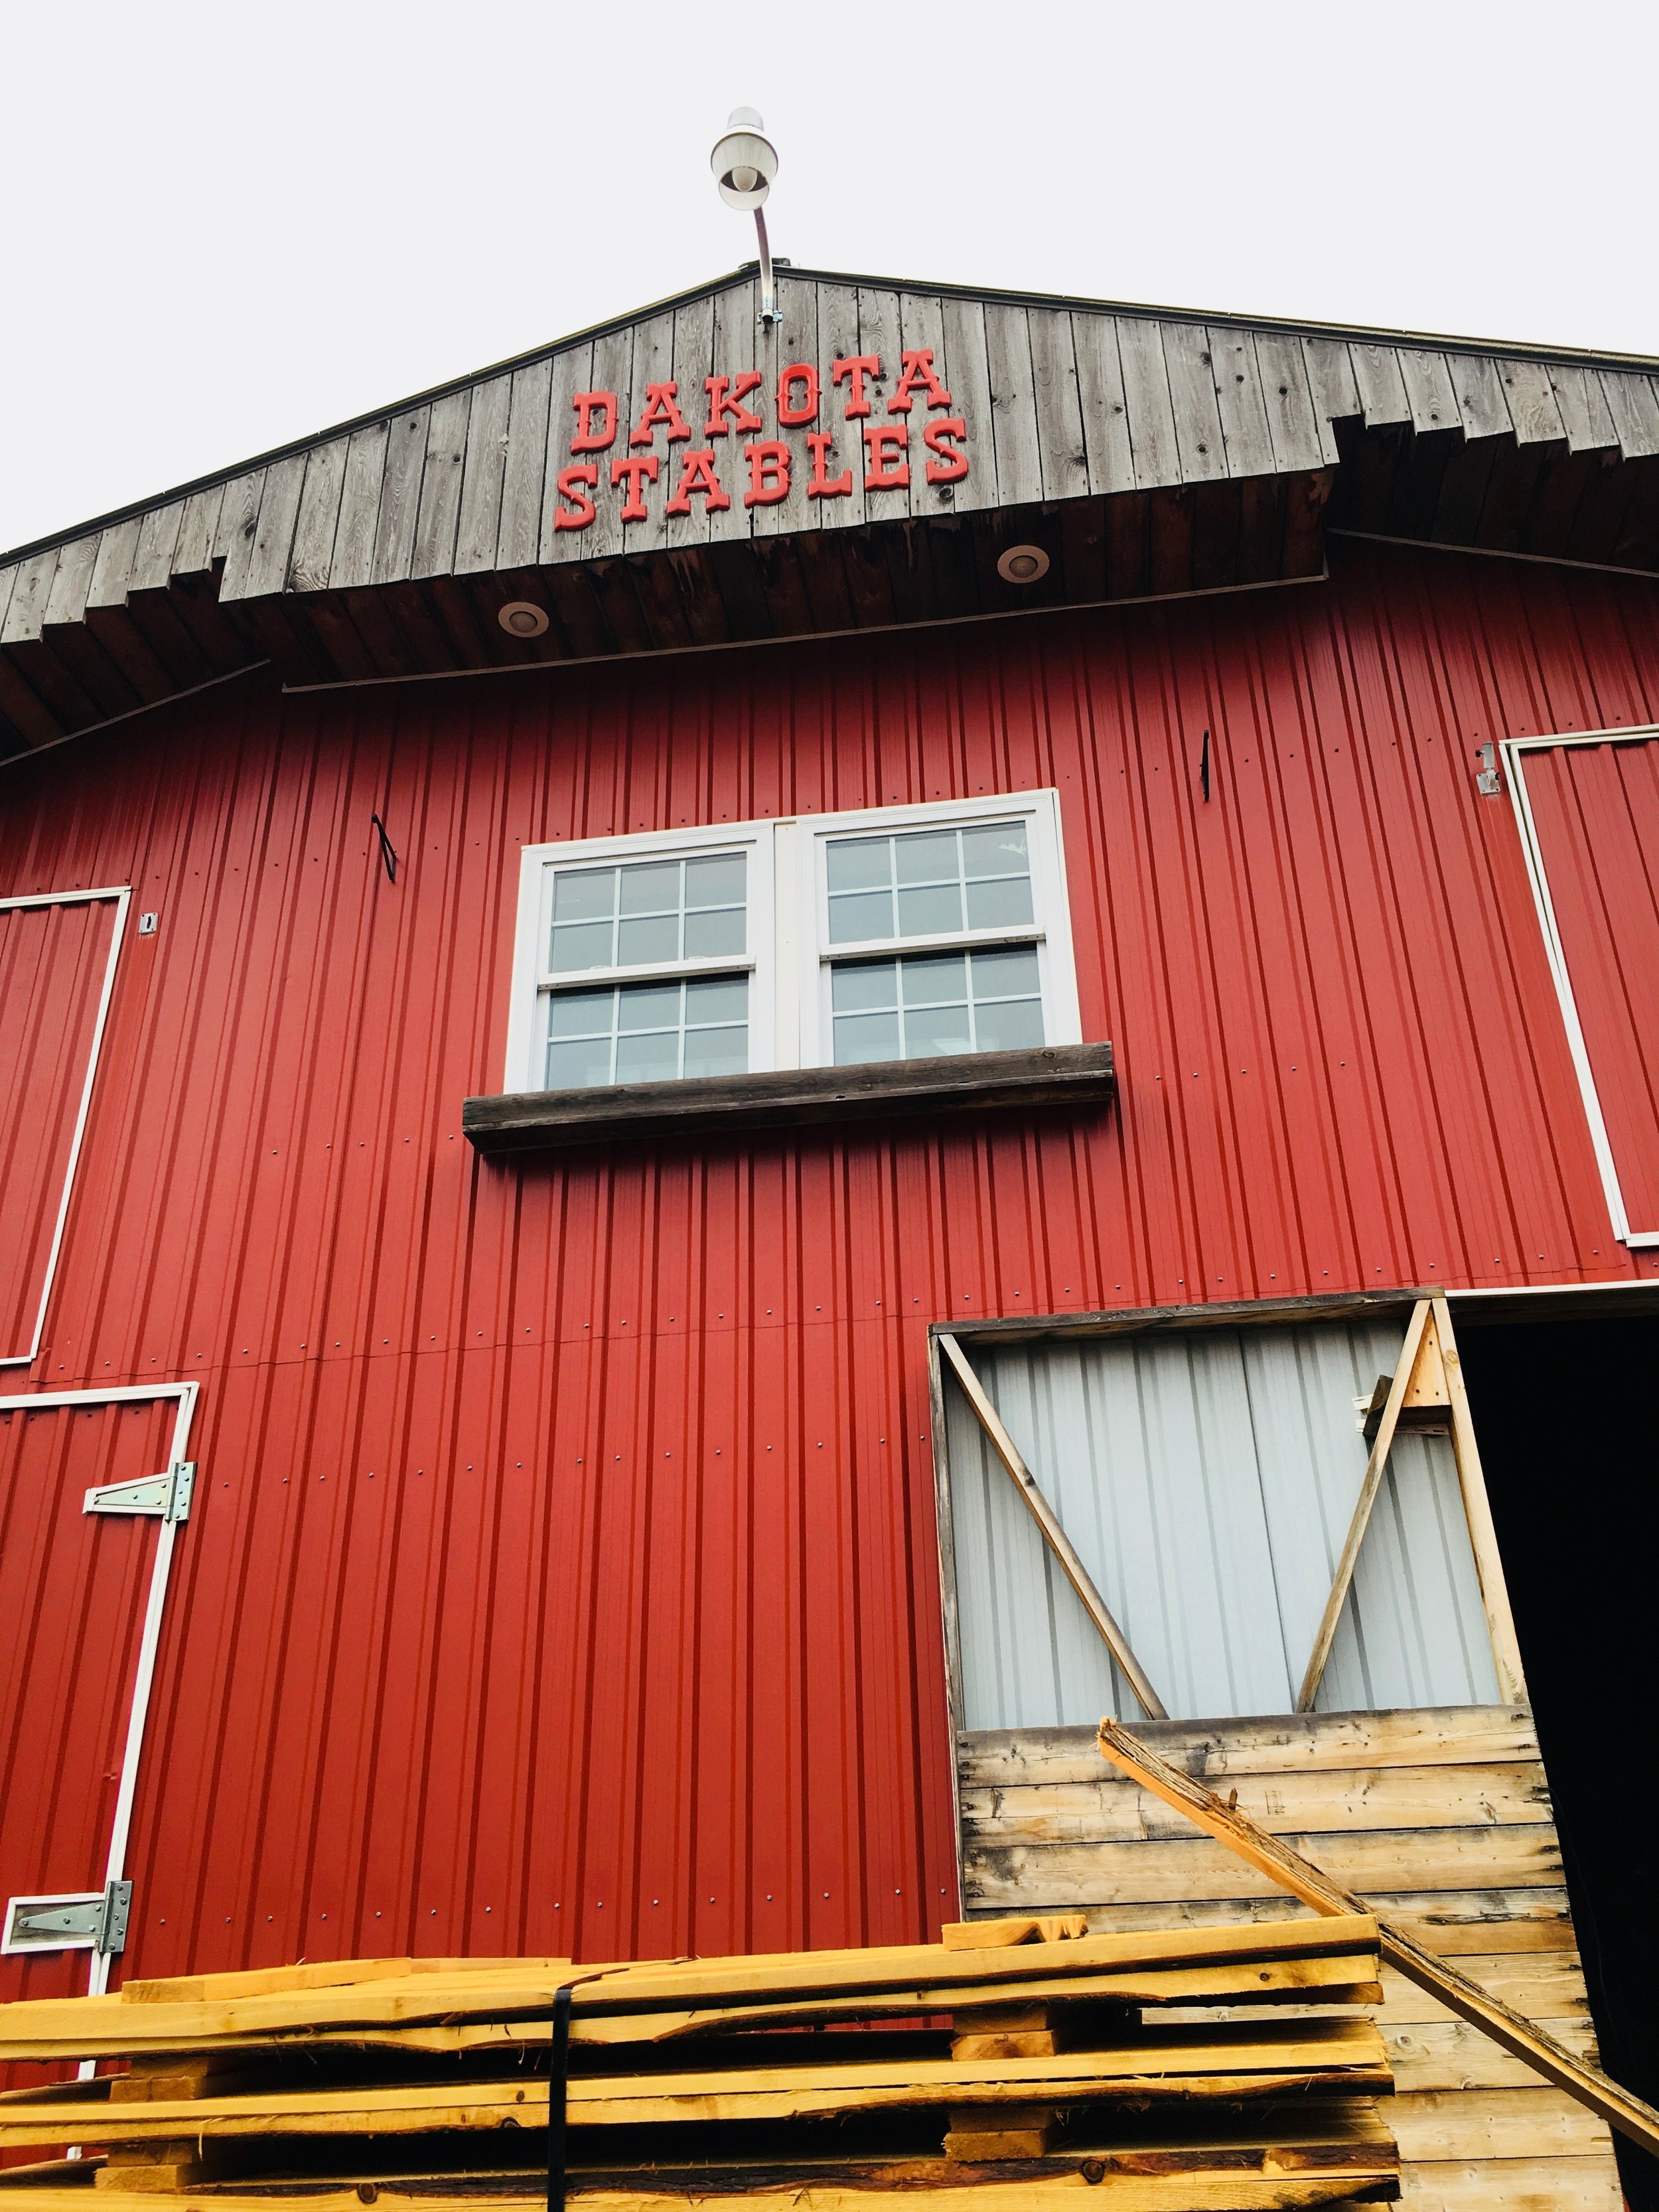


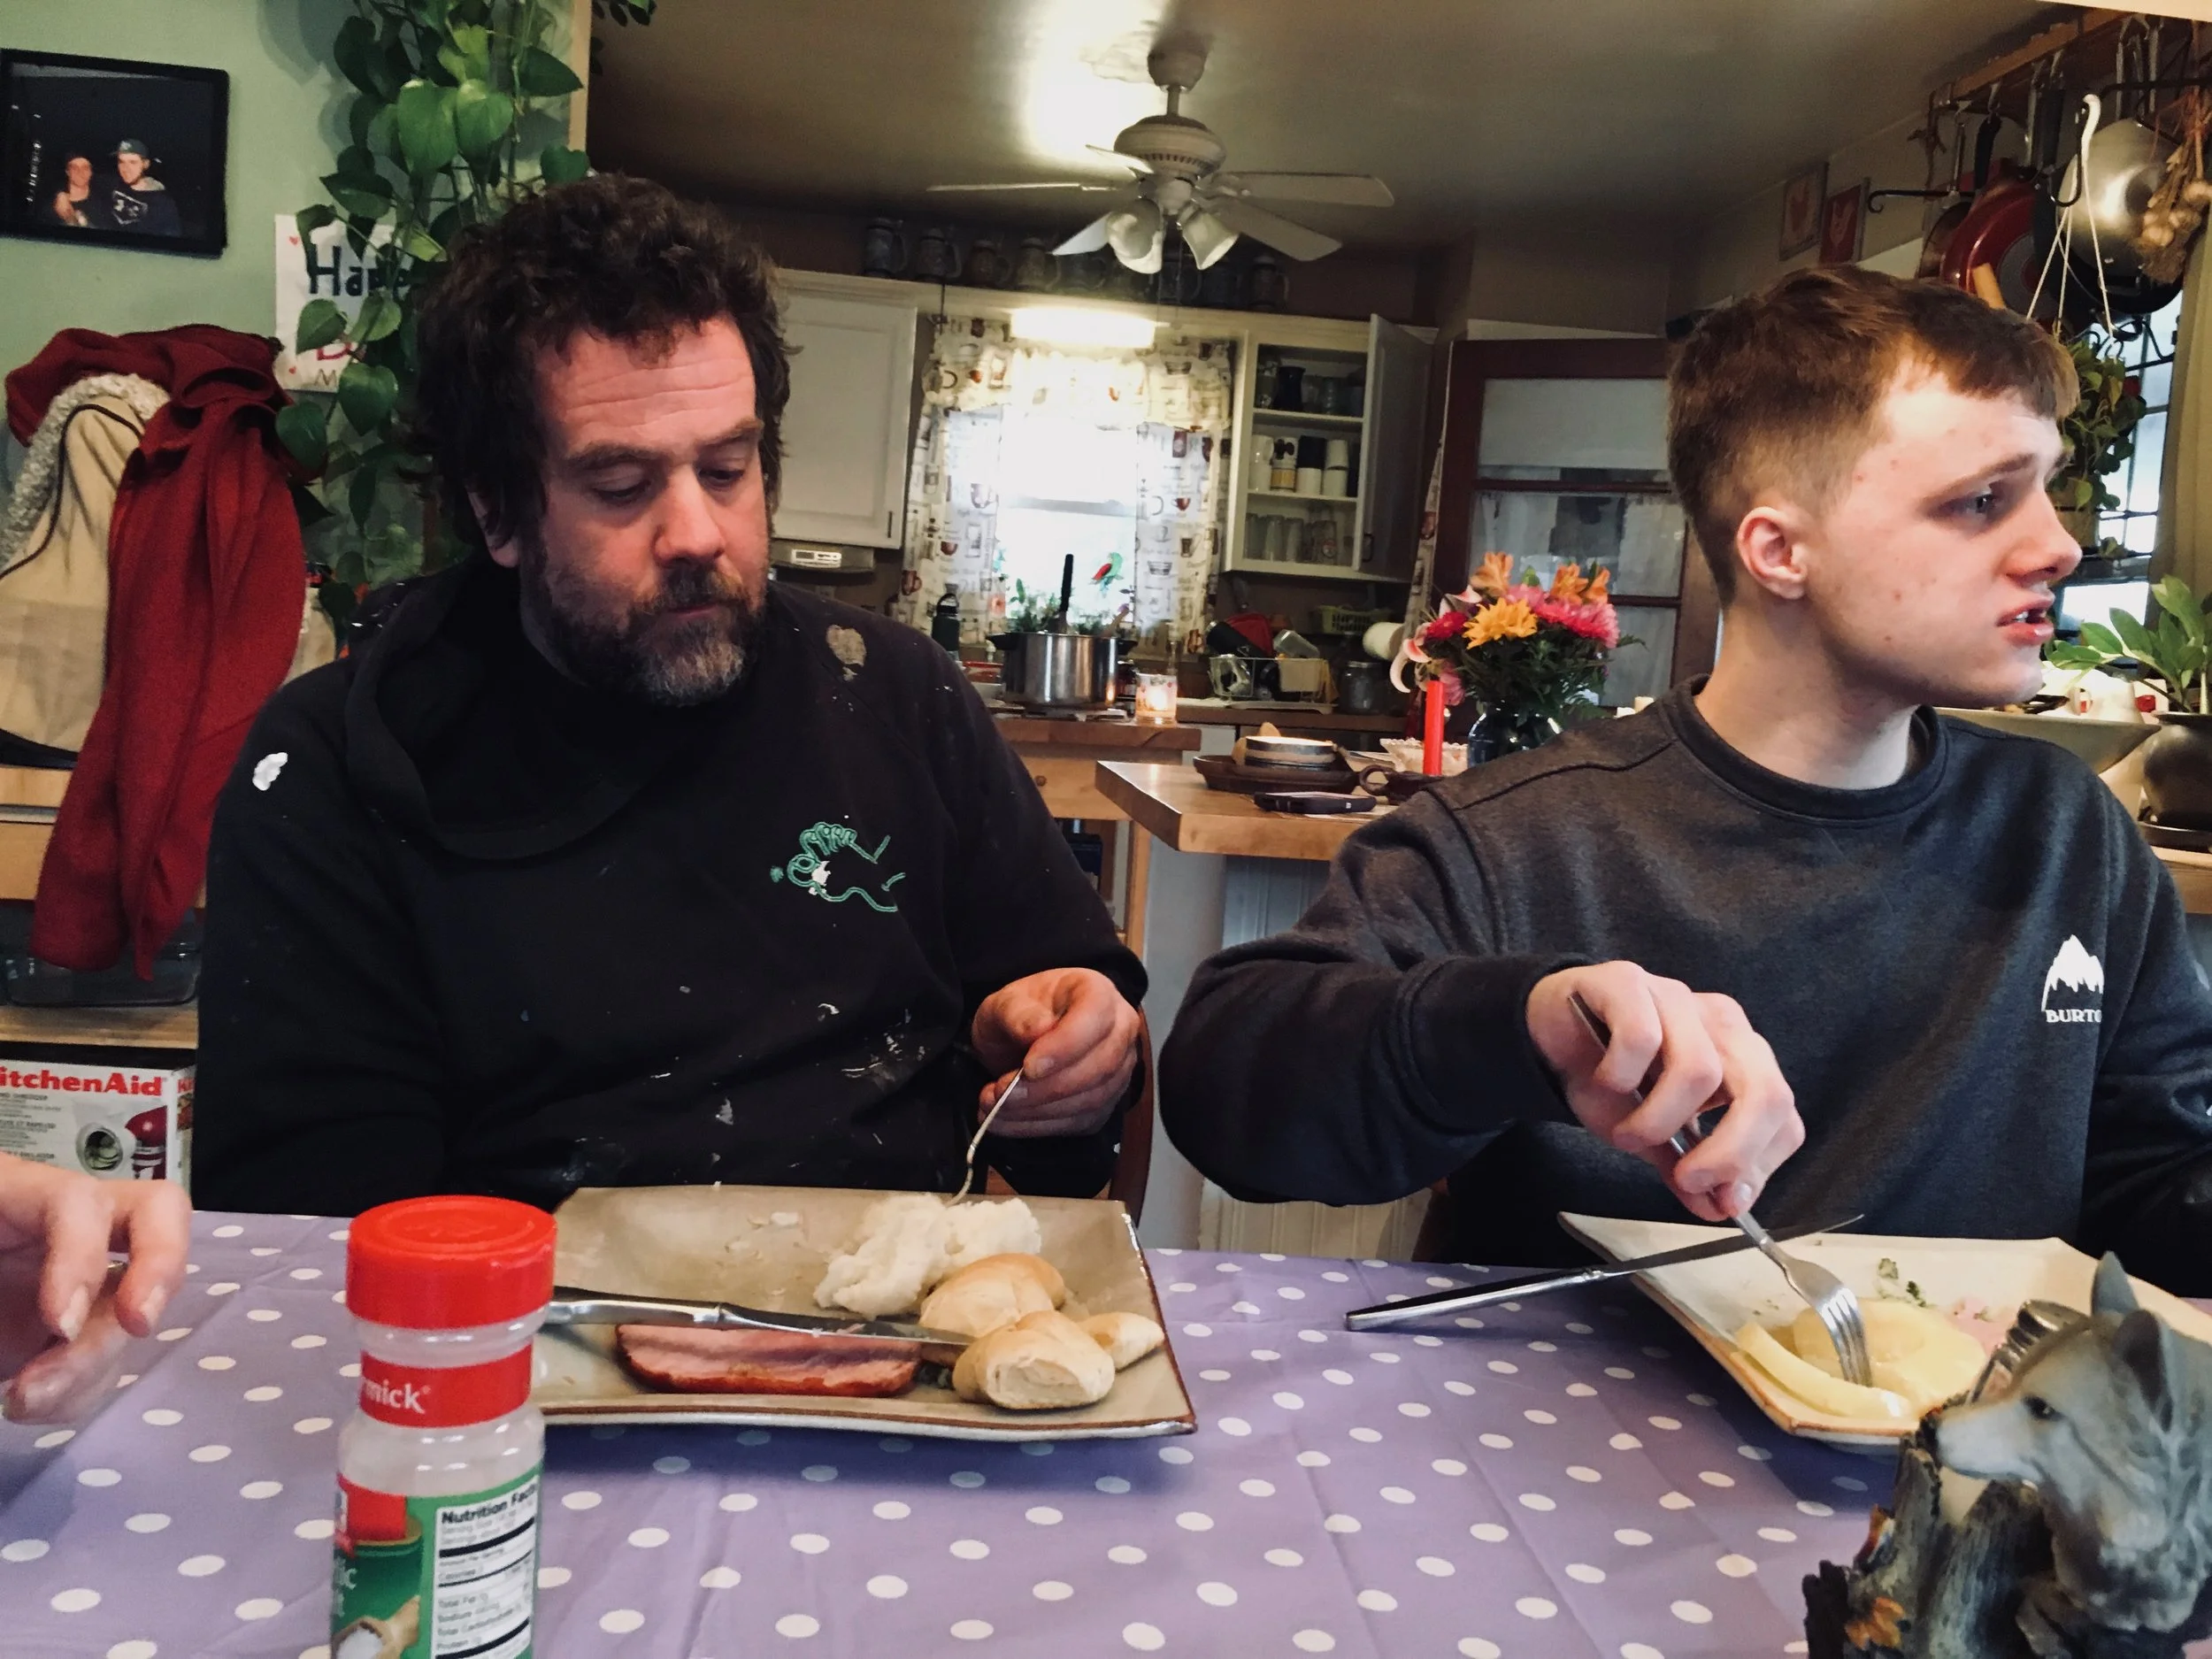


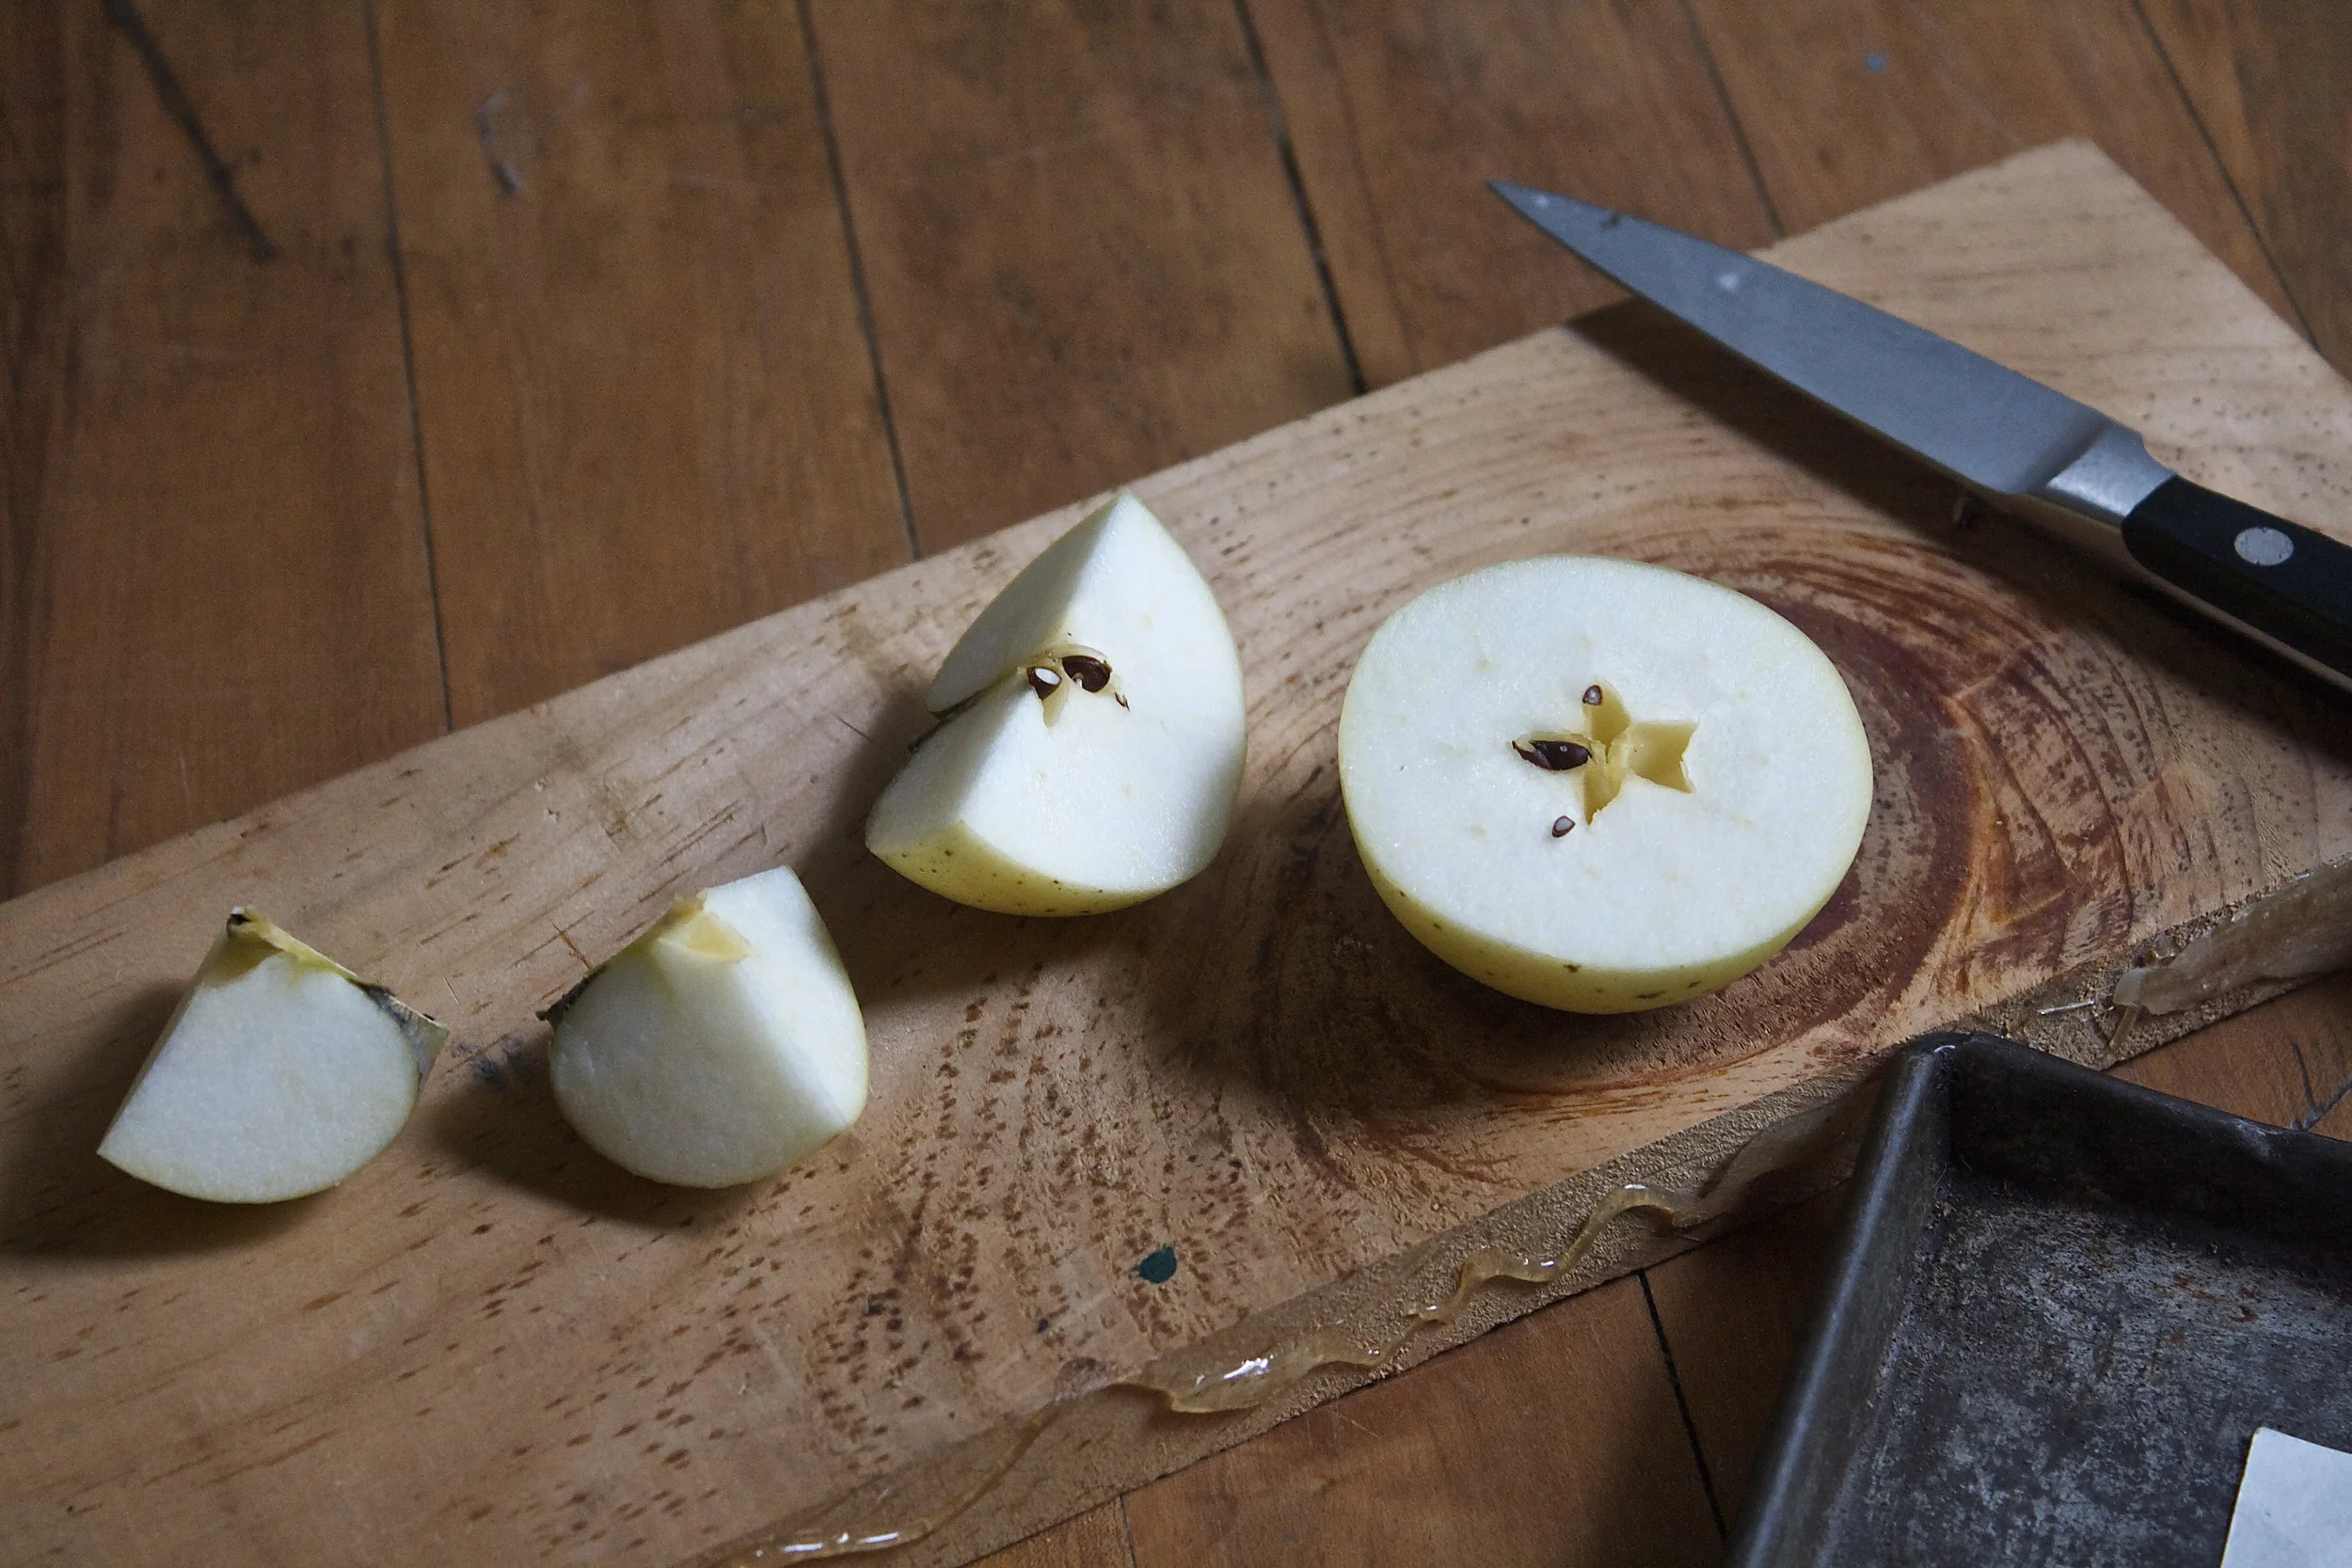
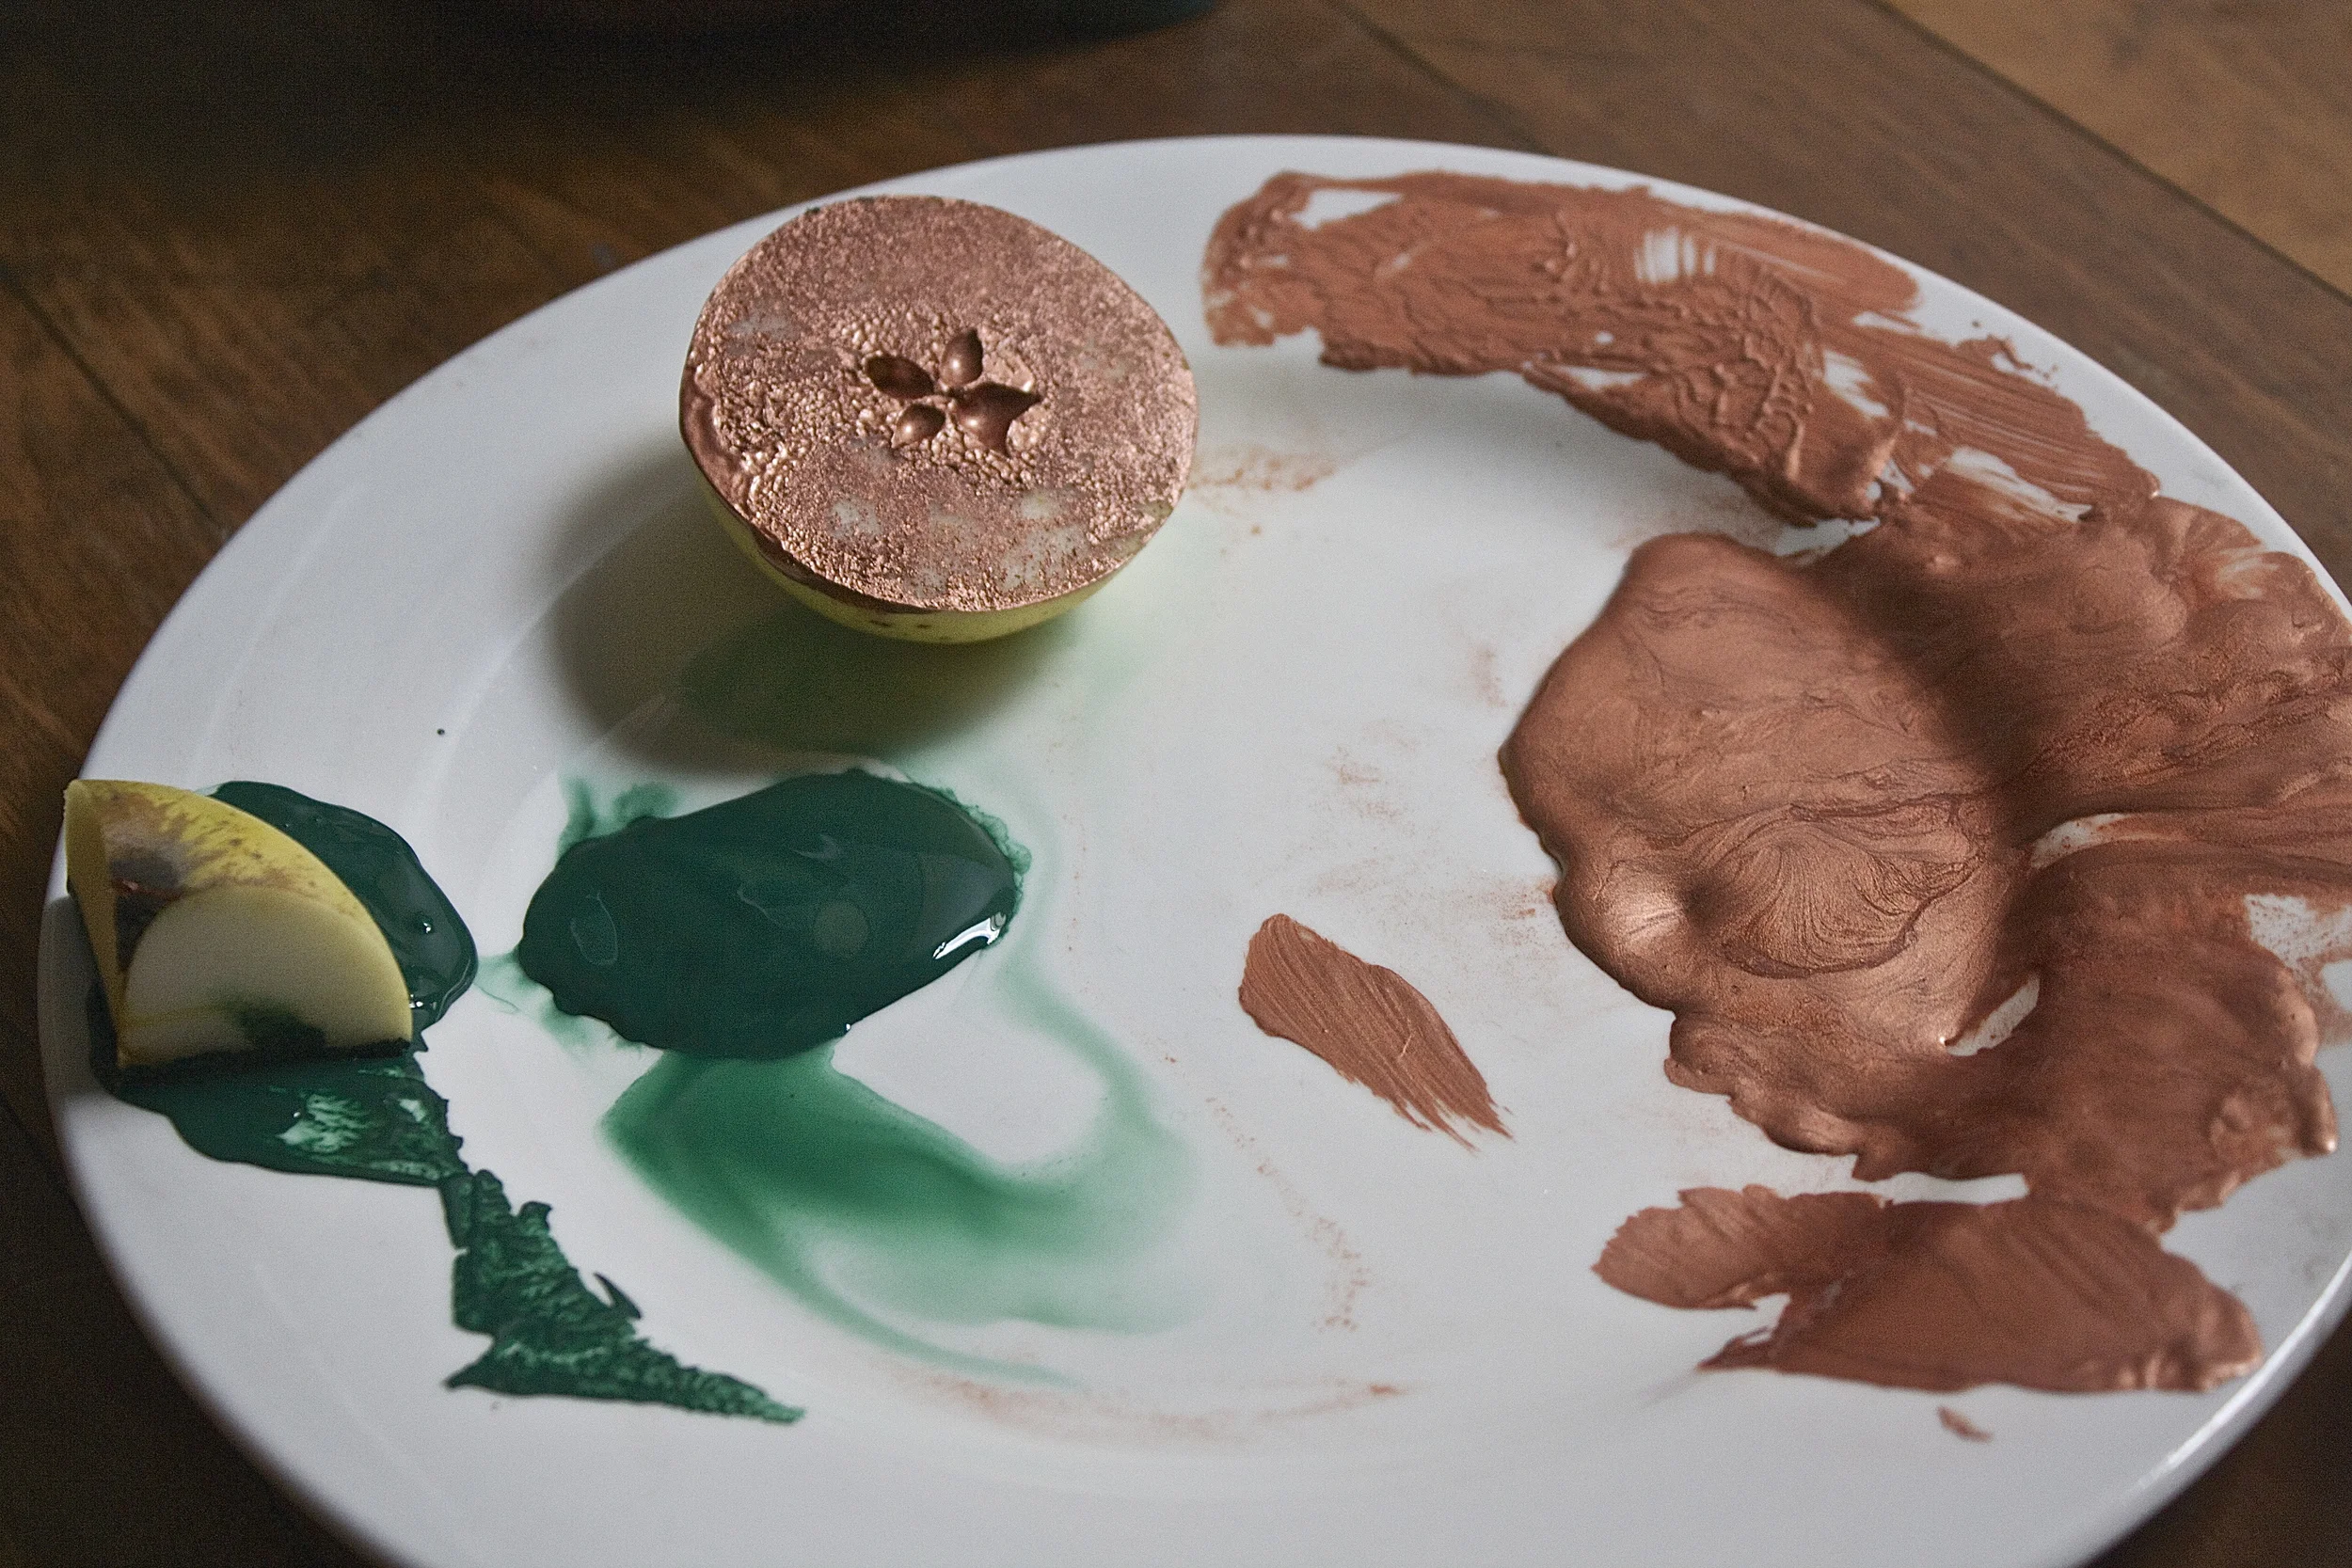
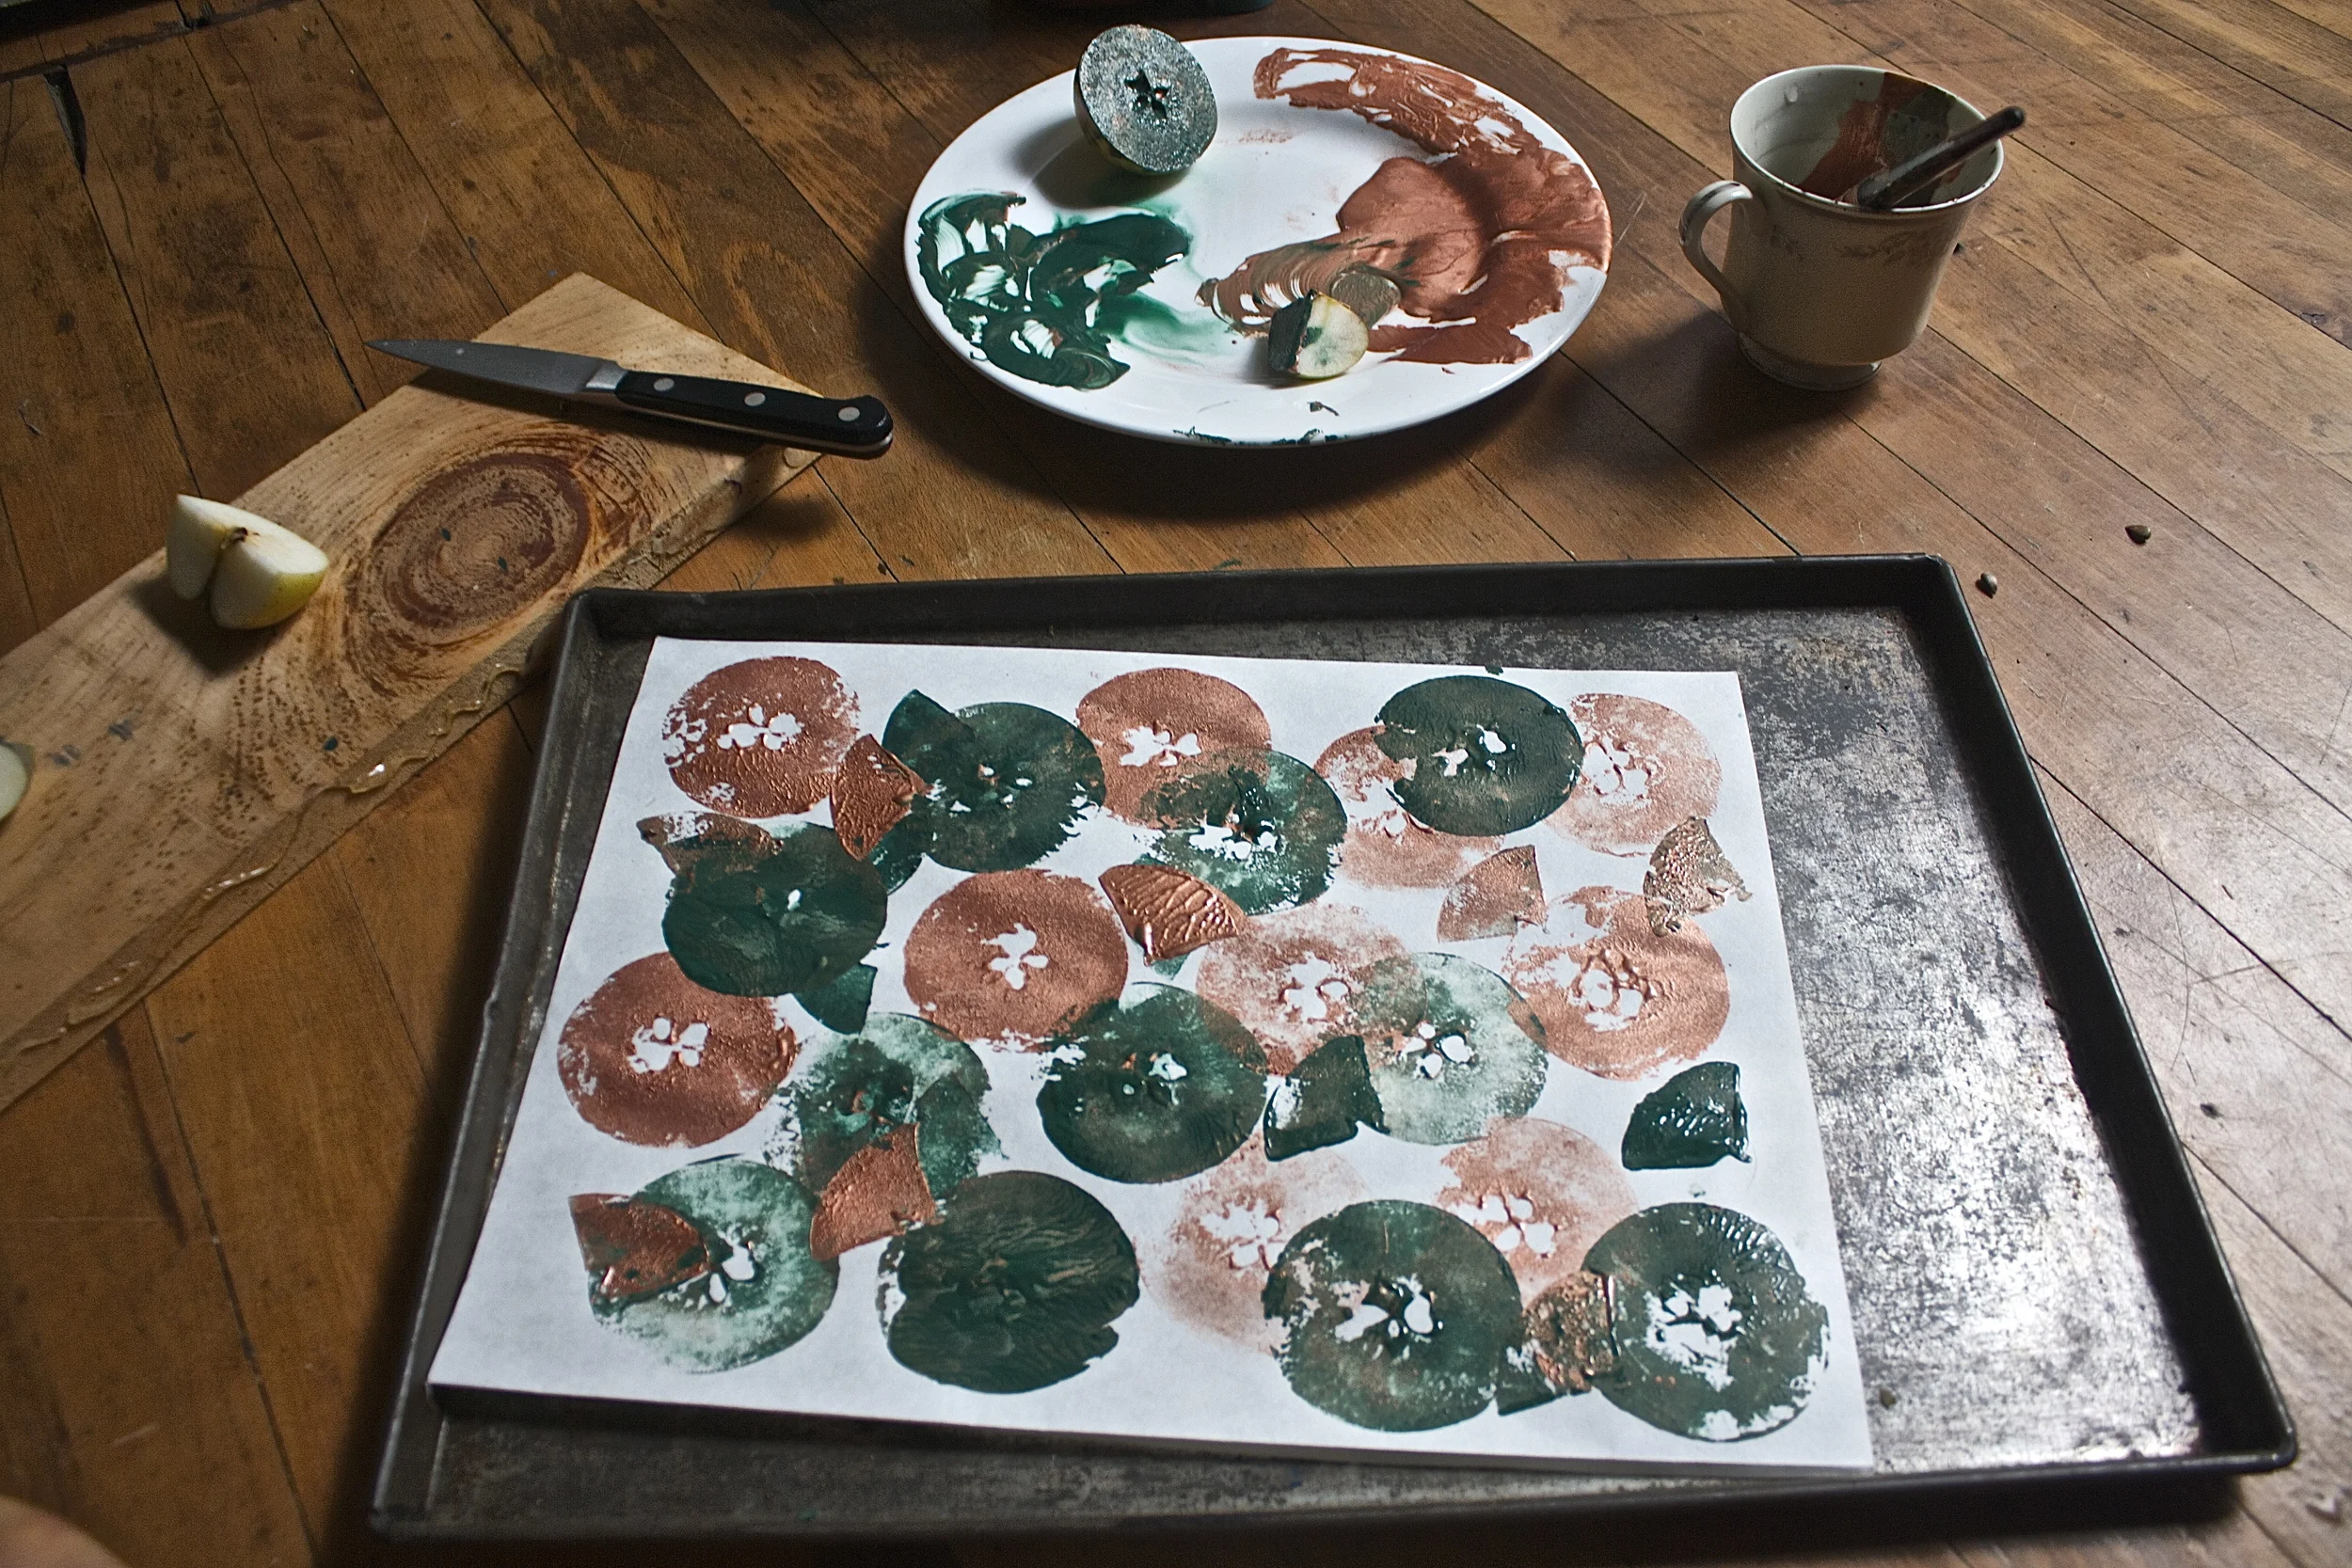
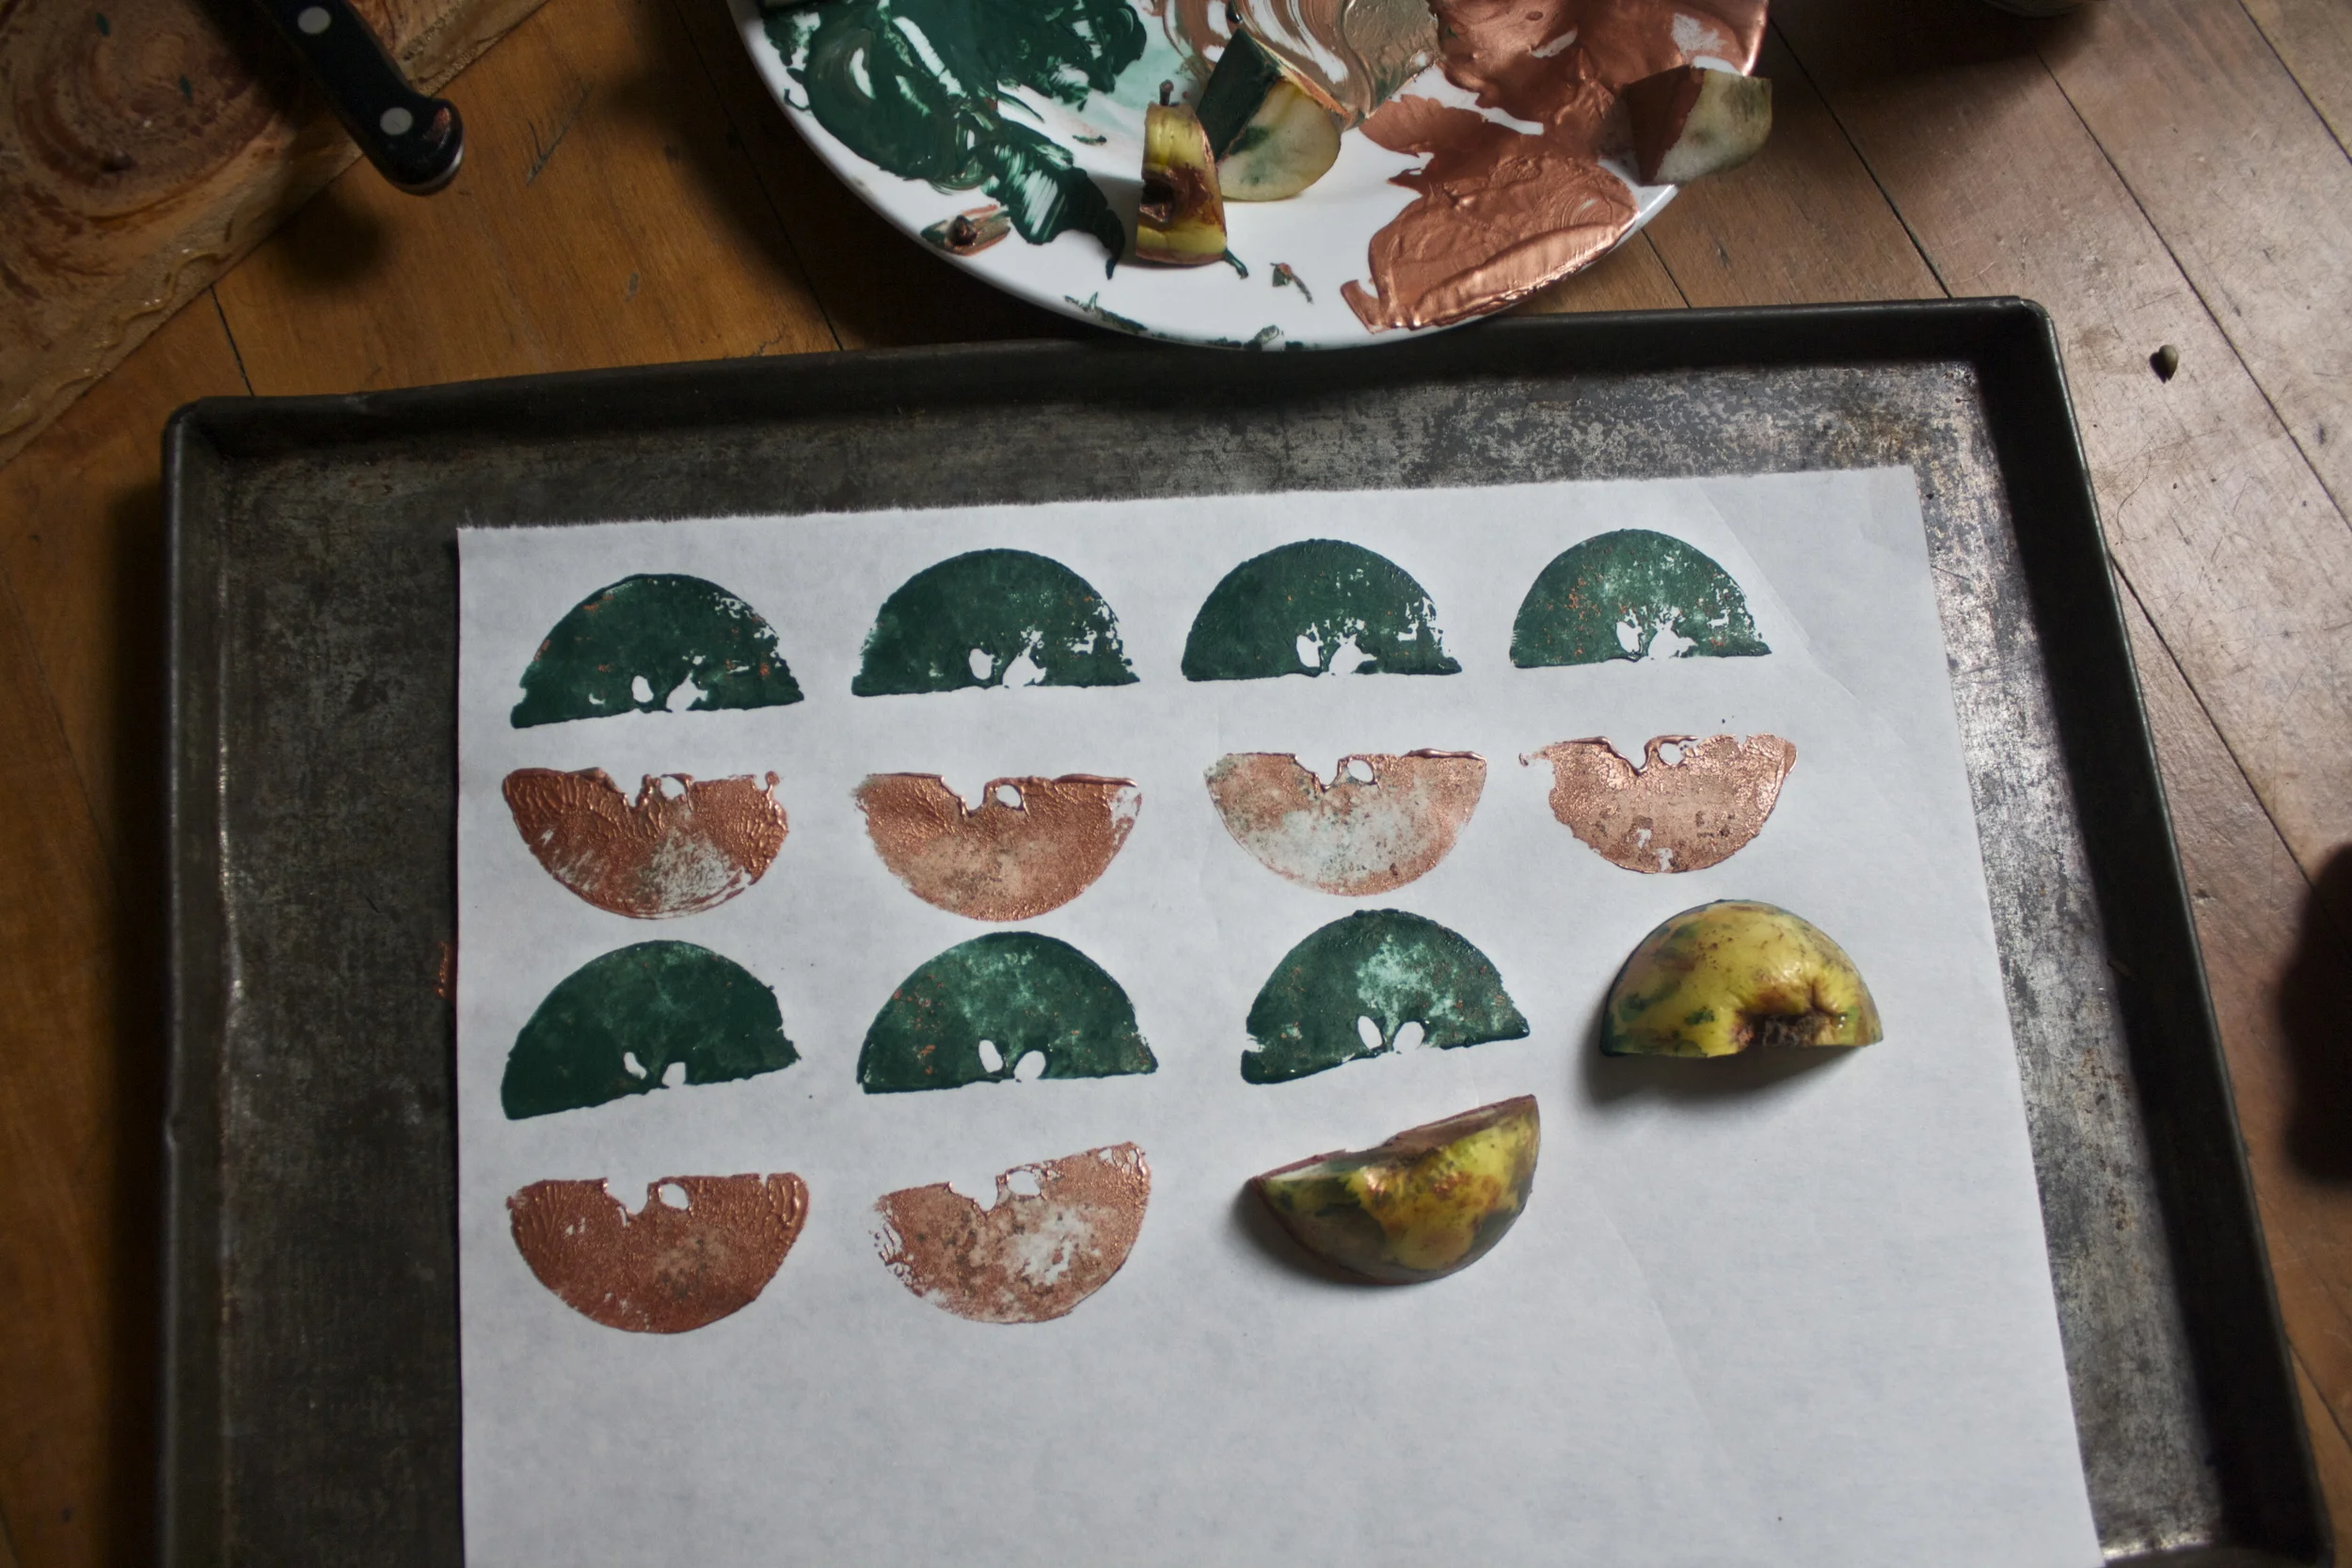
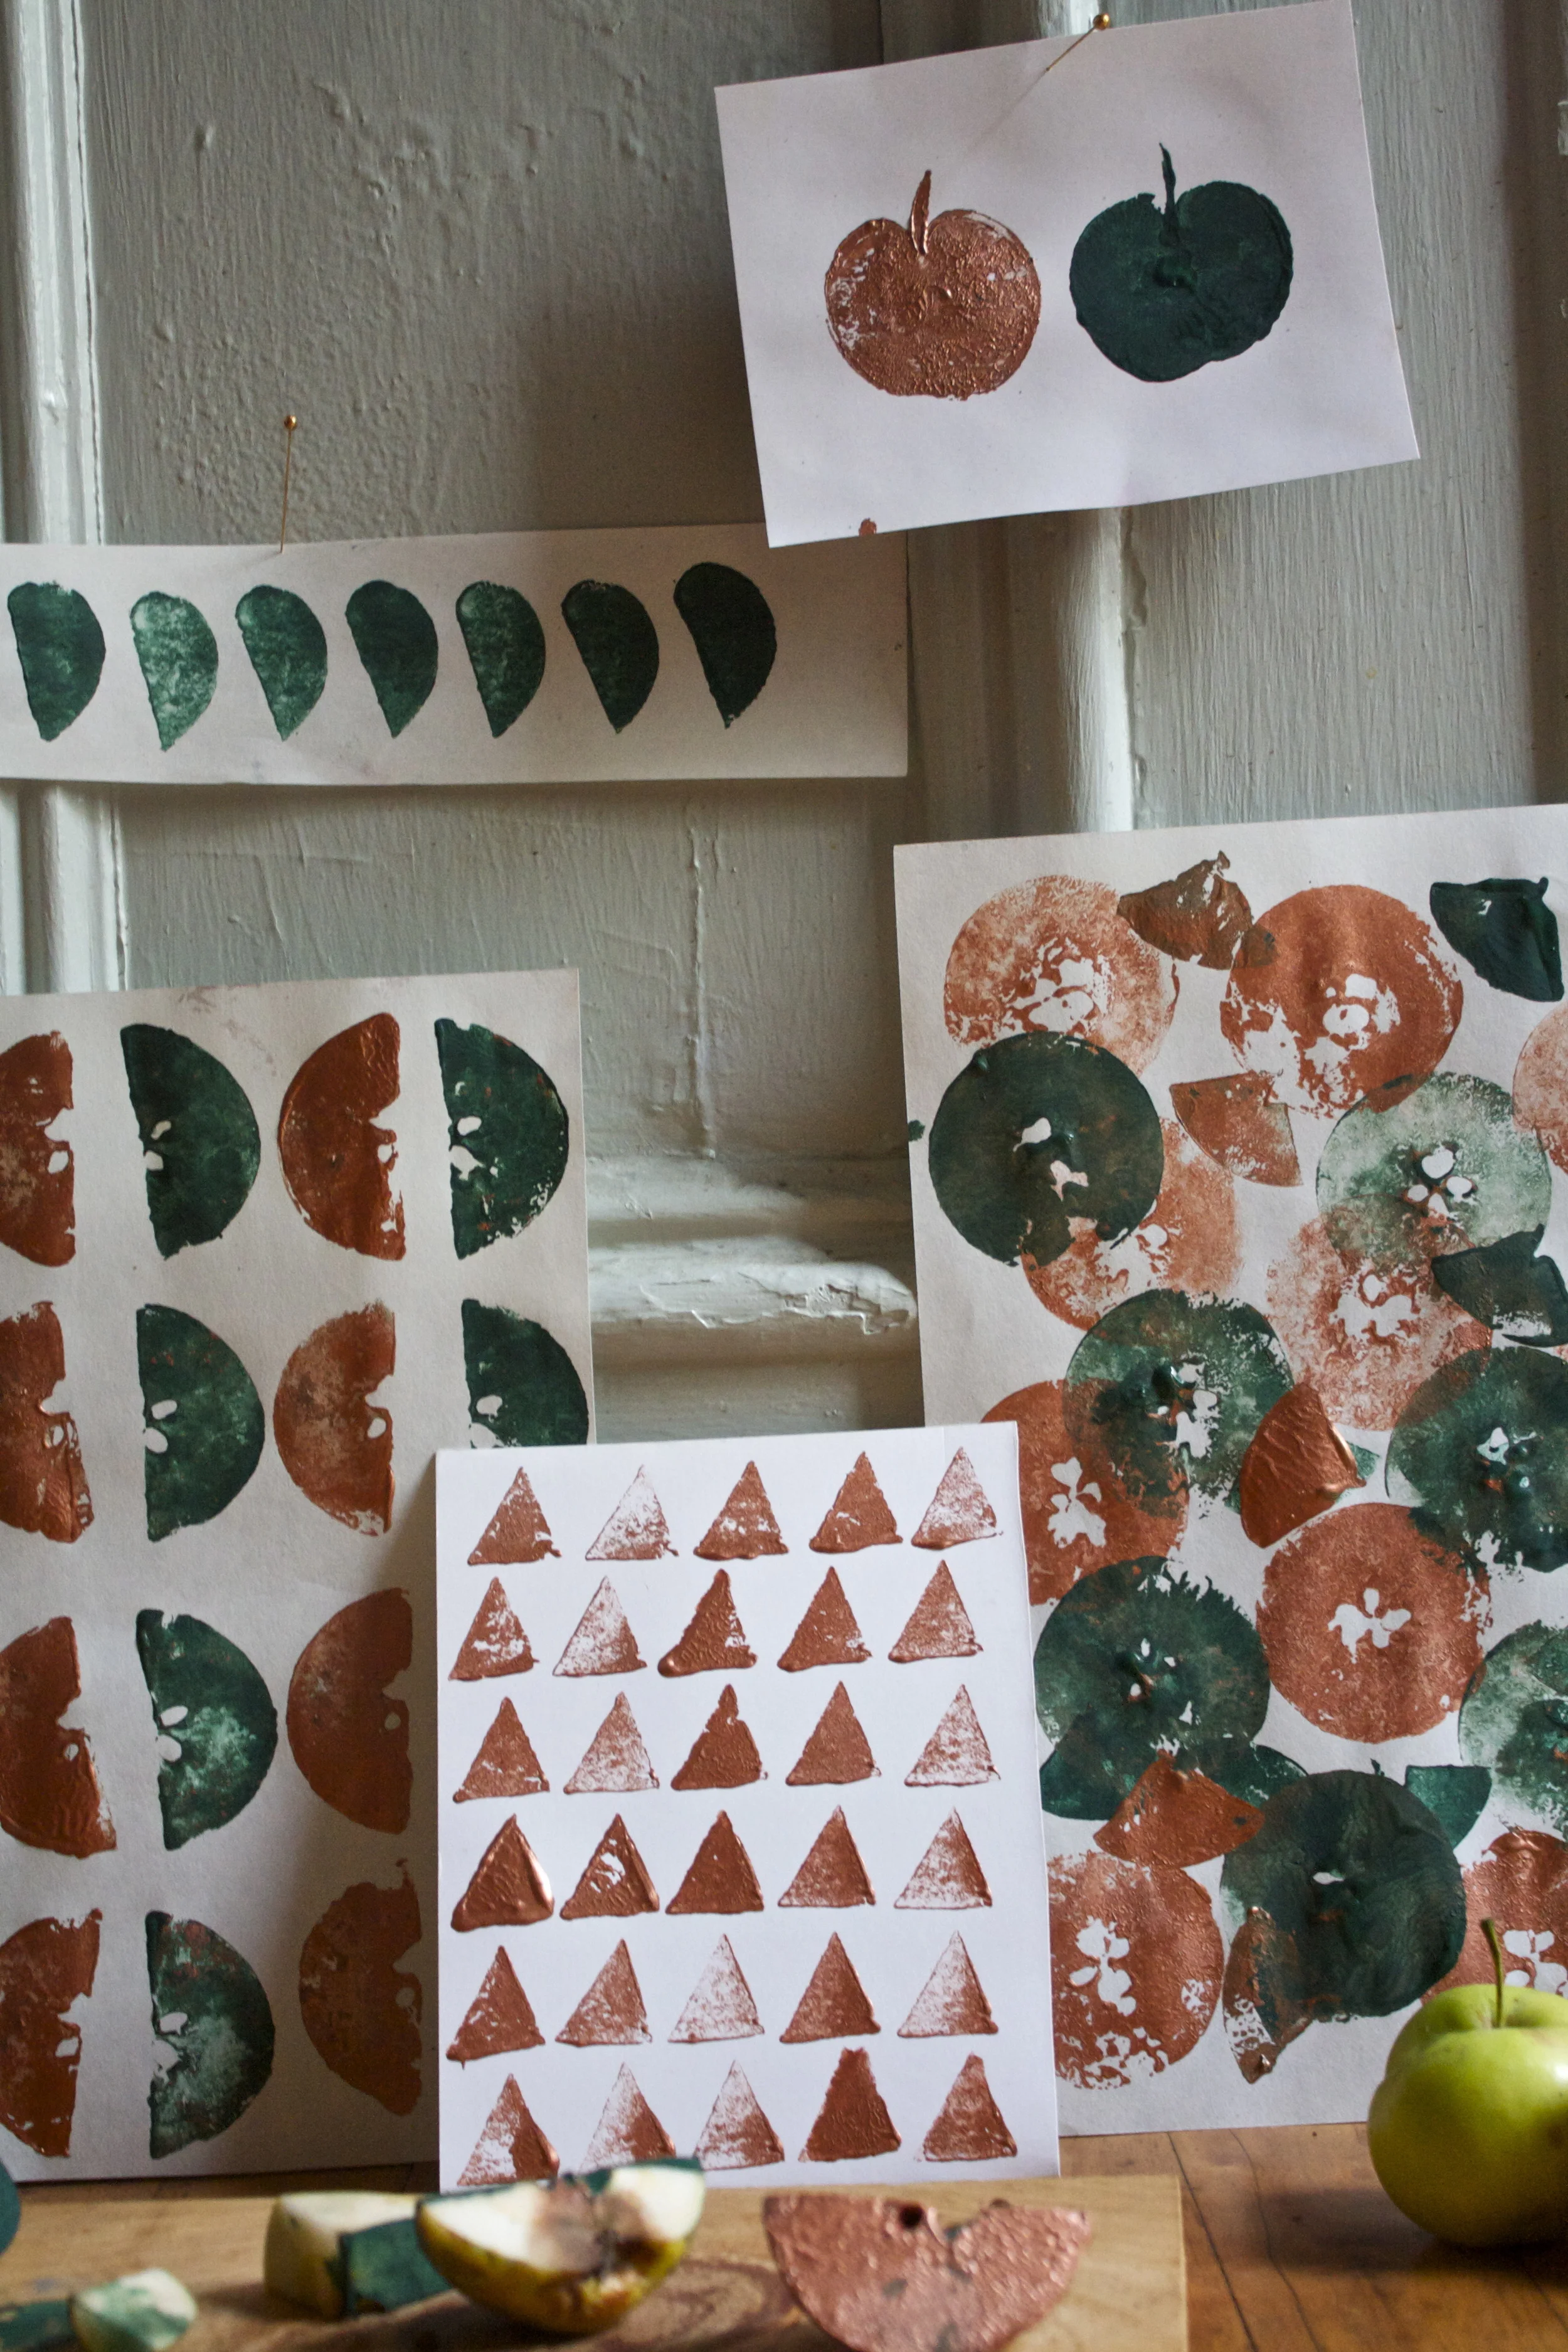


 Wowzers%u2026Is it for real Memorial day weekend? Where has all the time gone? Let’s talk about a week gone by fast.%u00a0My brain is on complete overdrive and I am having a hard time keeping it from exploding%u2026SO MUCH TO DO! (Not bad stuff, just a lot of stuff) But lo, that’s life right? There is always a lots of “stuff” to do, but today I am going to try and let that stuff chill and maybe give myself a few hours of coffee, (so much coffee) reading a book in the sunshine, gardening, and just some overall chillin.%u00a0
 Goodbye fiddleheads%u2026. Hello ferns%u00a0
 On our way to a geo catch%u2026. And note clothing options for 2 in the afternoon. I am much fond of that little guy wearing a rain jacket without a shirt in when its sunny and 80 degrees. And a pink poke dot bath robe.. I mean, it’s so the cool thing to do.%u00a0
 We didn’t find the geo, but we found this gigantic mushroom. Just as cool, maybe even cooler.
 I love brick and there is one street in all of burlington (that I know of) that has brick sidewalks. I like to walk down it a lot.%u00a0
 Nurse lady making food%u2026 I compare this to a big foot sighting. I have heard stories that she cooks,but have never actually witnessed it myself. (Just kidding%u2026.kinda)


 What a week. Was it summer where you %u00a0are this week as well? I mean jeez, talk about one extreme to another. Oh well, at least the world has turned green, the winter stuff is completely out of sight and I found the box that contained all of my shorts and summery clothes (pants and long sleeves in 90 degrees is just gross)%u00a0 And honestly, it’s been great. In between work, chores and just plan old being busy, we have manage to get a few bike rides and long walks in. Plus all the veggie starts are doing great, the flowers are coming up everywhere and life just has a little bit more of a relaxed feeling. So what if my allergies are turning my face into big red puff or that the past few night have been so hot that the act of sitting has caused me to break a sweat. I’ll take it.
 %u00a0My boys. I long socks and sneakers%u2026 these guys know cool.%u00a0
 Took the super cutie cuties out for an ice cream cone.
 Our first bike ride picnic down on the waterfront. I love bike ride picnics!
 So many succulents. I didn’t actually buy any because I need to stop being a plant whore.
 I have made a batch of this stuff evey day this week. I can’t stop eating it, it’s like eating summer. So good
 It’s been a long, packed, but very fantastic week. Everyday has been full of work, chores, family, and trying to get in a least one good bike ride or walk in. %u00a0I made a%u00a0list of a few important points to mention from the past week.
 The mister and the worlds biggest crayon, which is made of scraps of blue crayons from all over the world. I could totally use a big ass crayon like this.
 The coolest most badass 95 year old lady that I know (I know a few), Grammy Stem. And the little, getting a lift. (I could have used a lift too!)
 Brothers. The guy in the green is my Dad.
 Aftre dinner ice cream break.
 The sky has been on point all week long
 And made myself some veggie chips. The colors alone are delicious.
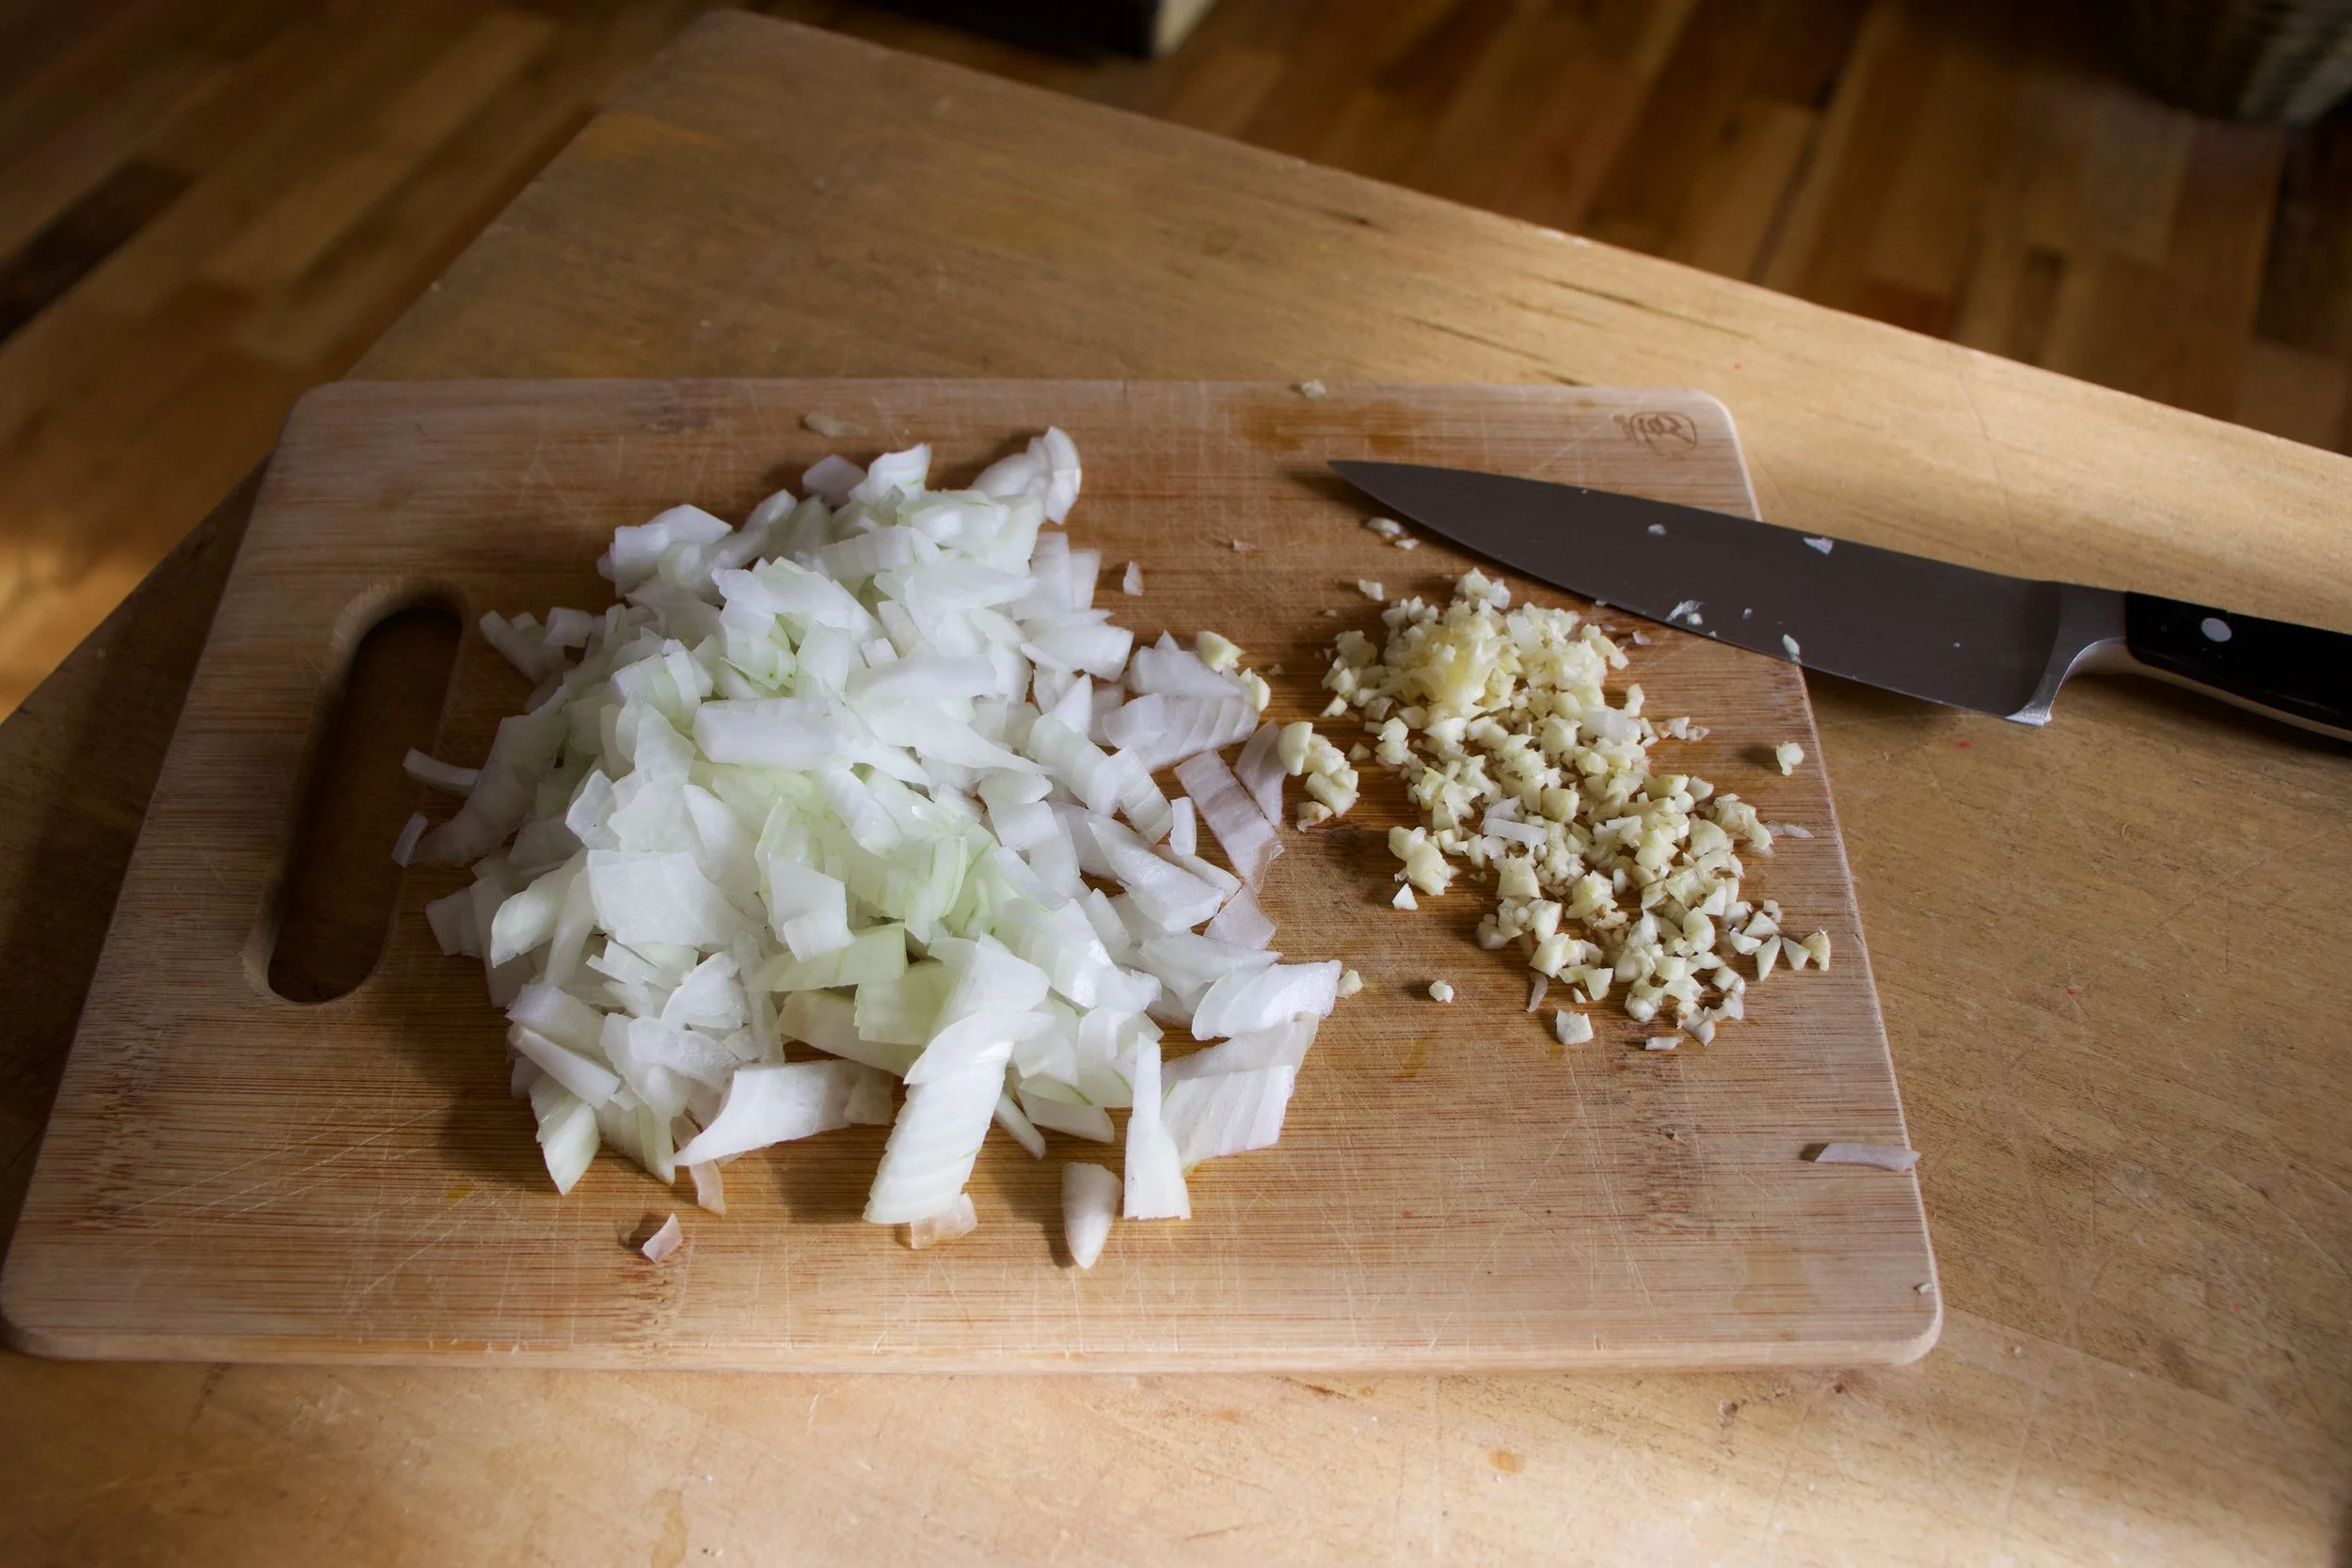

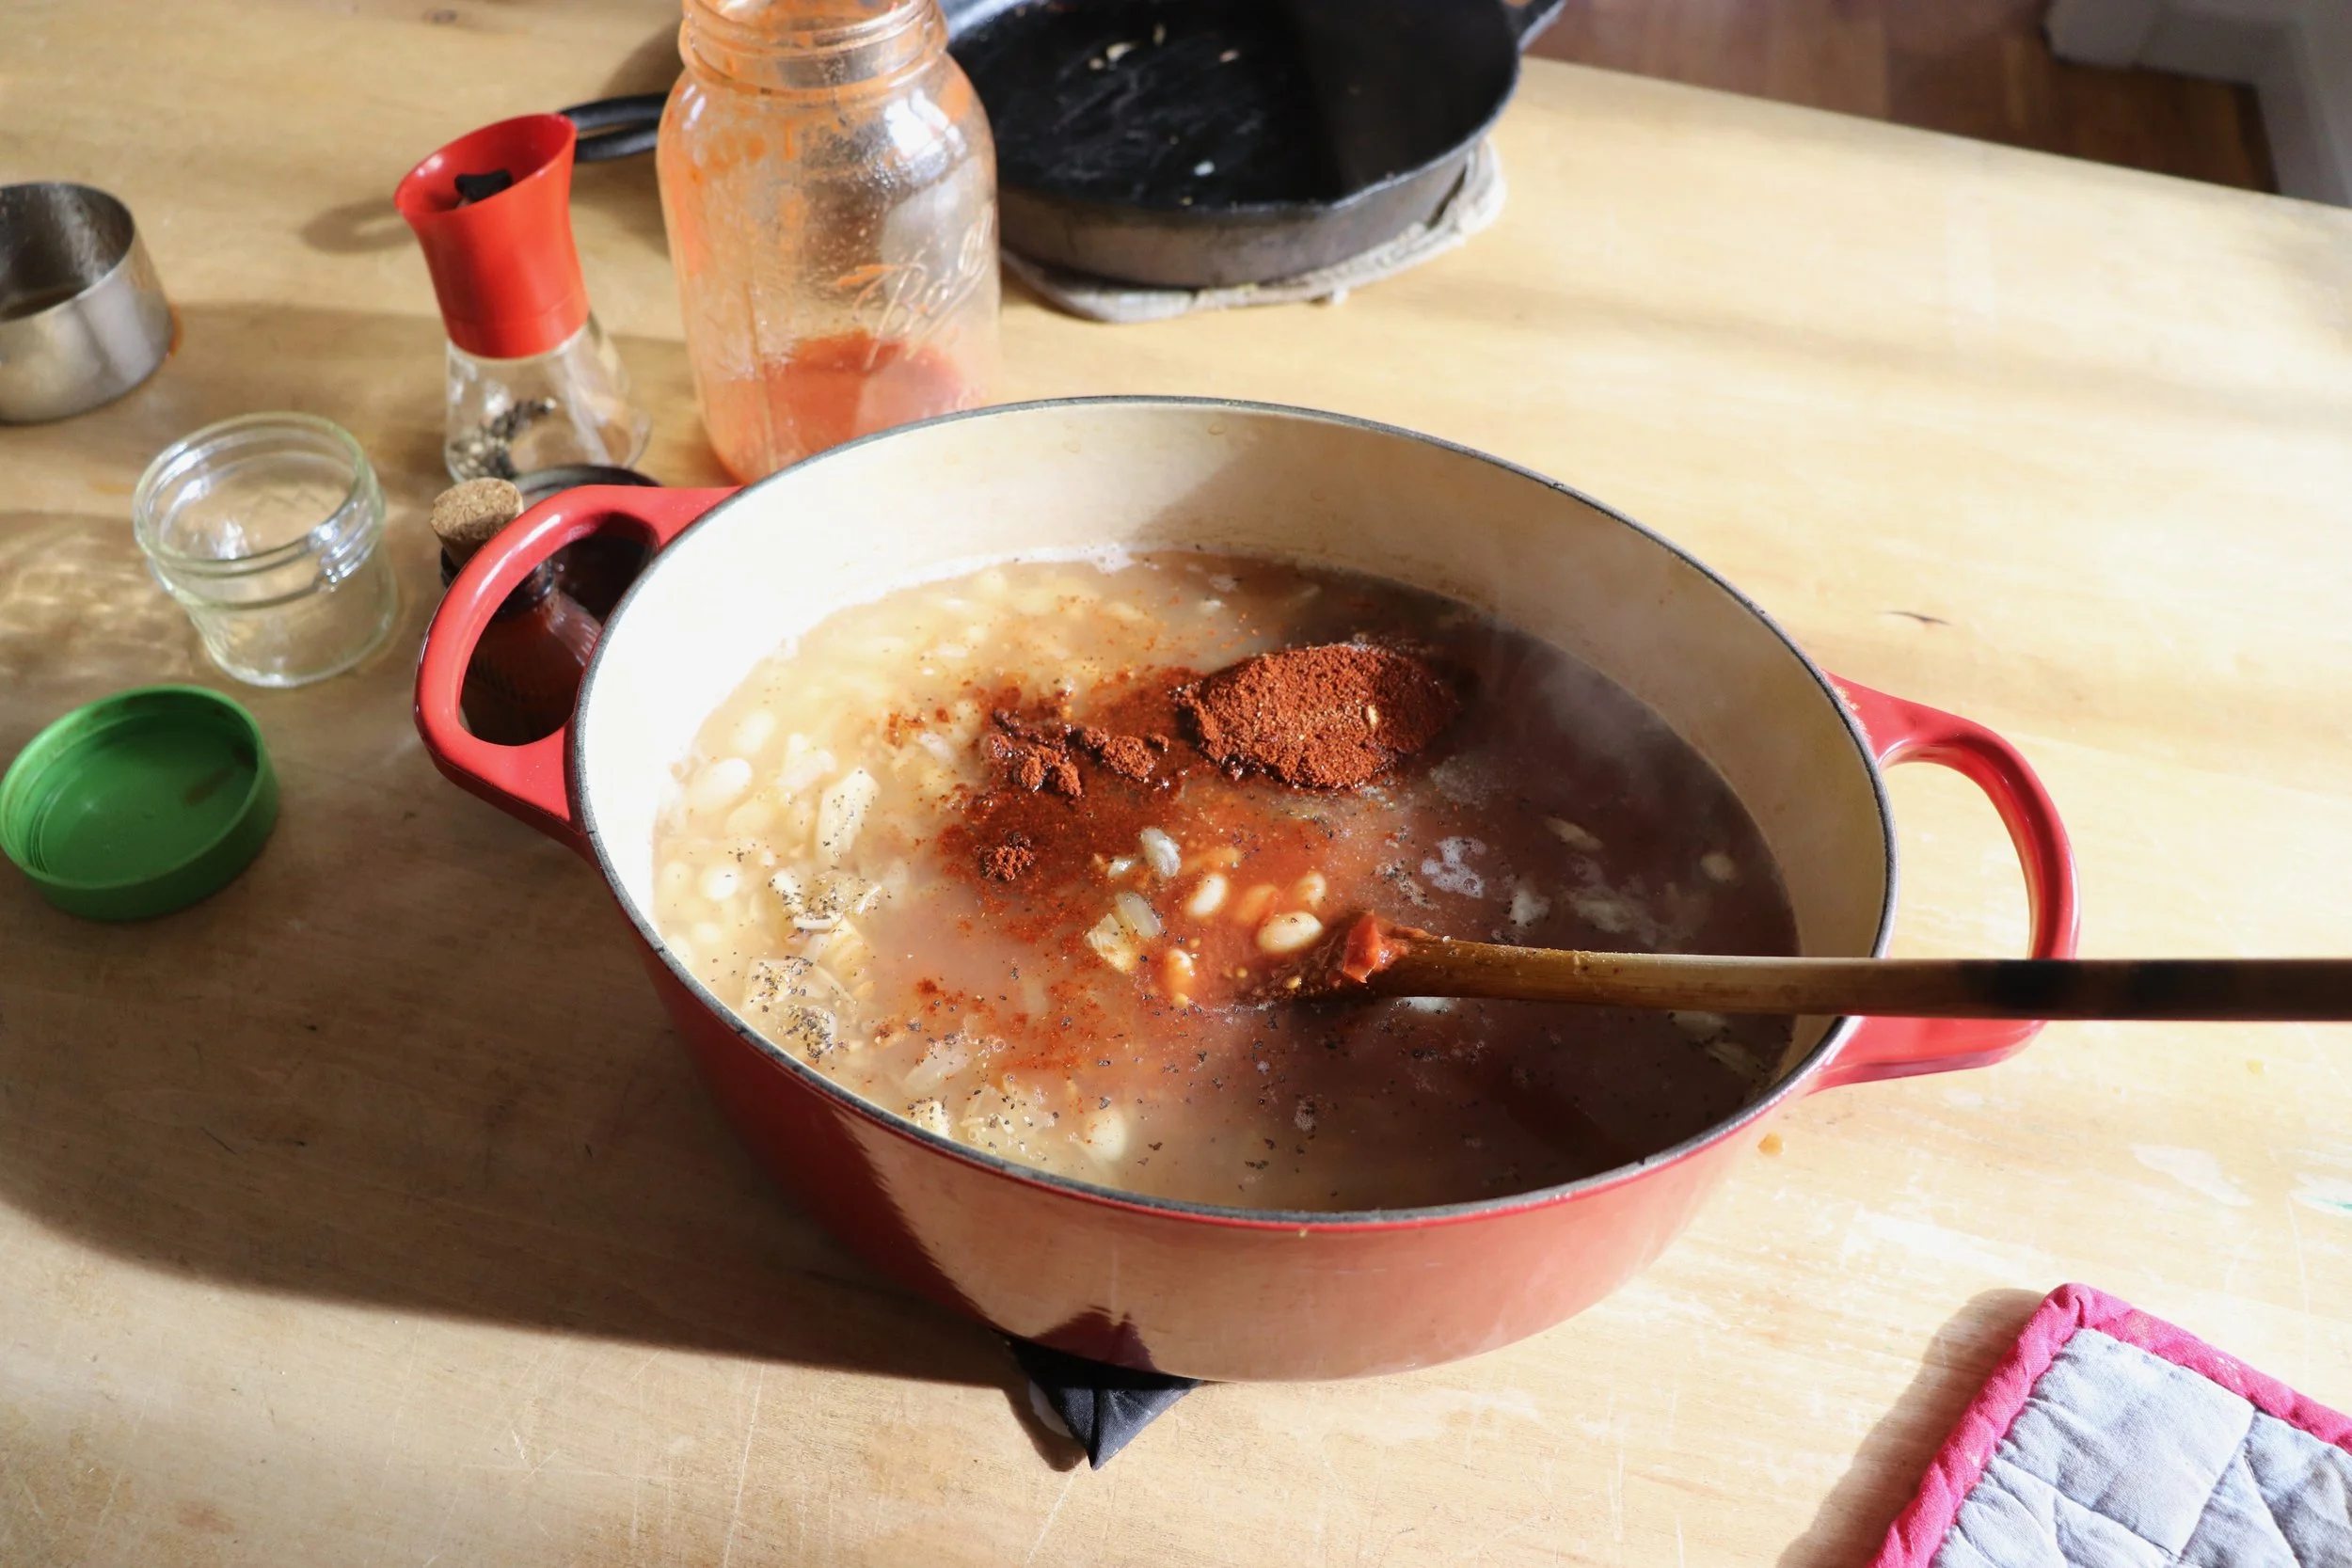


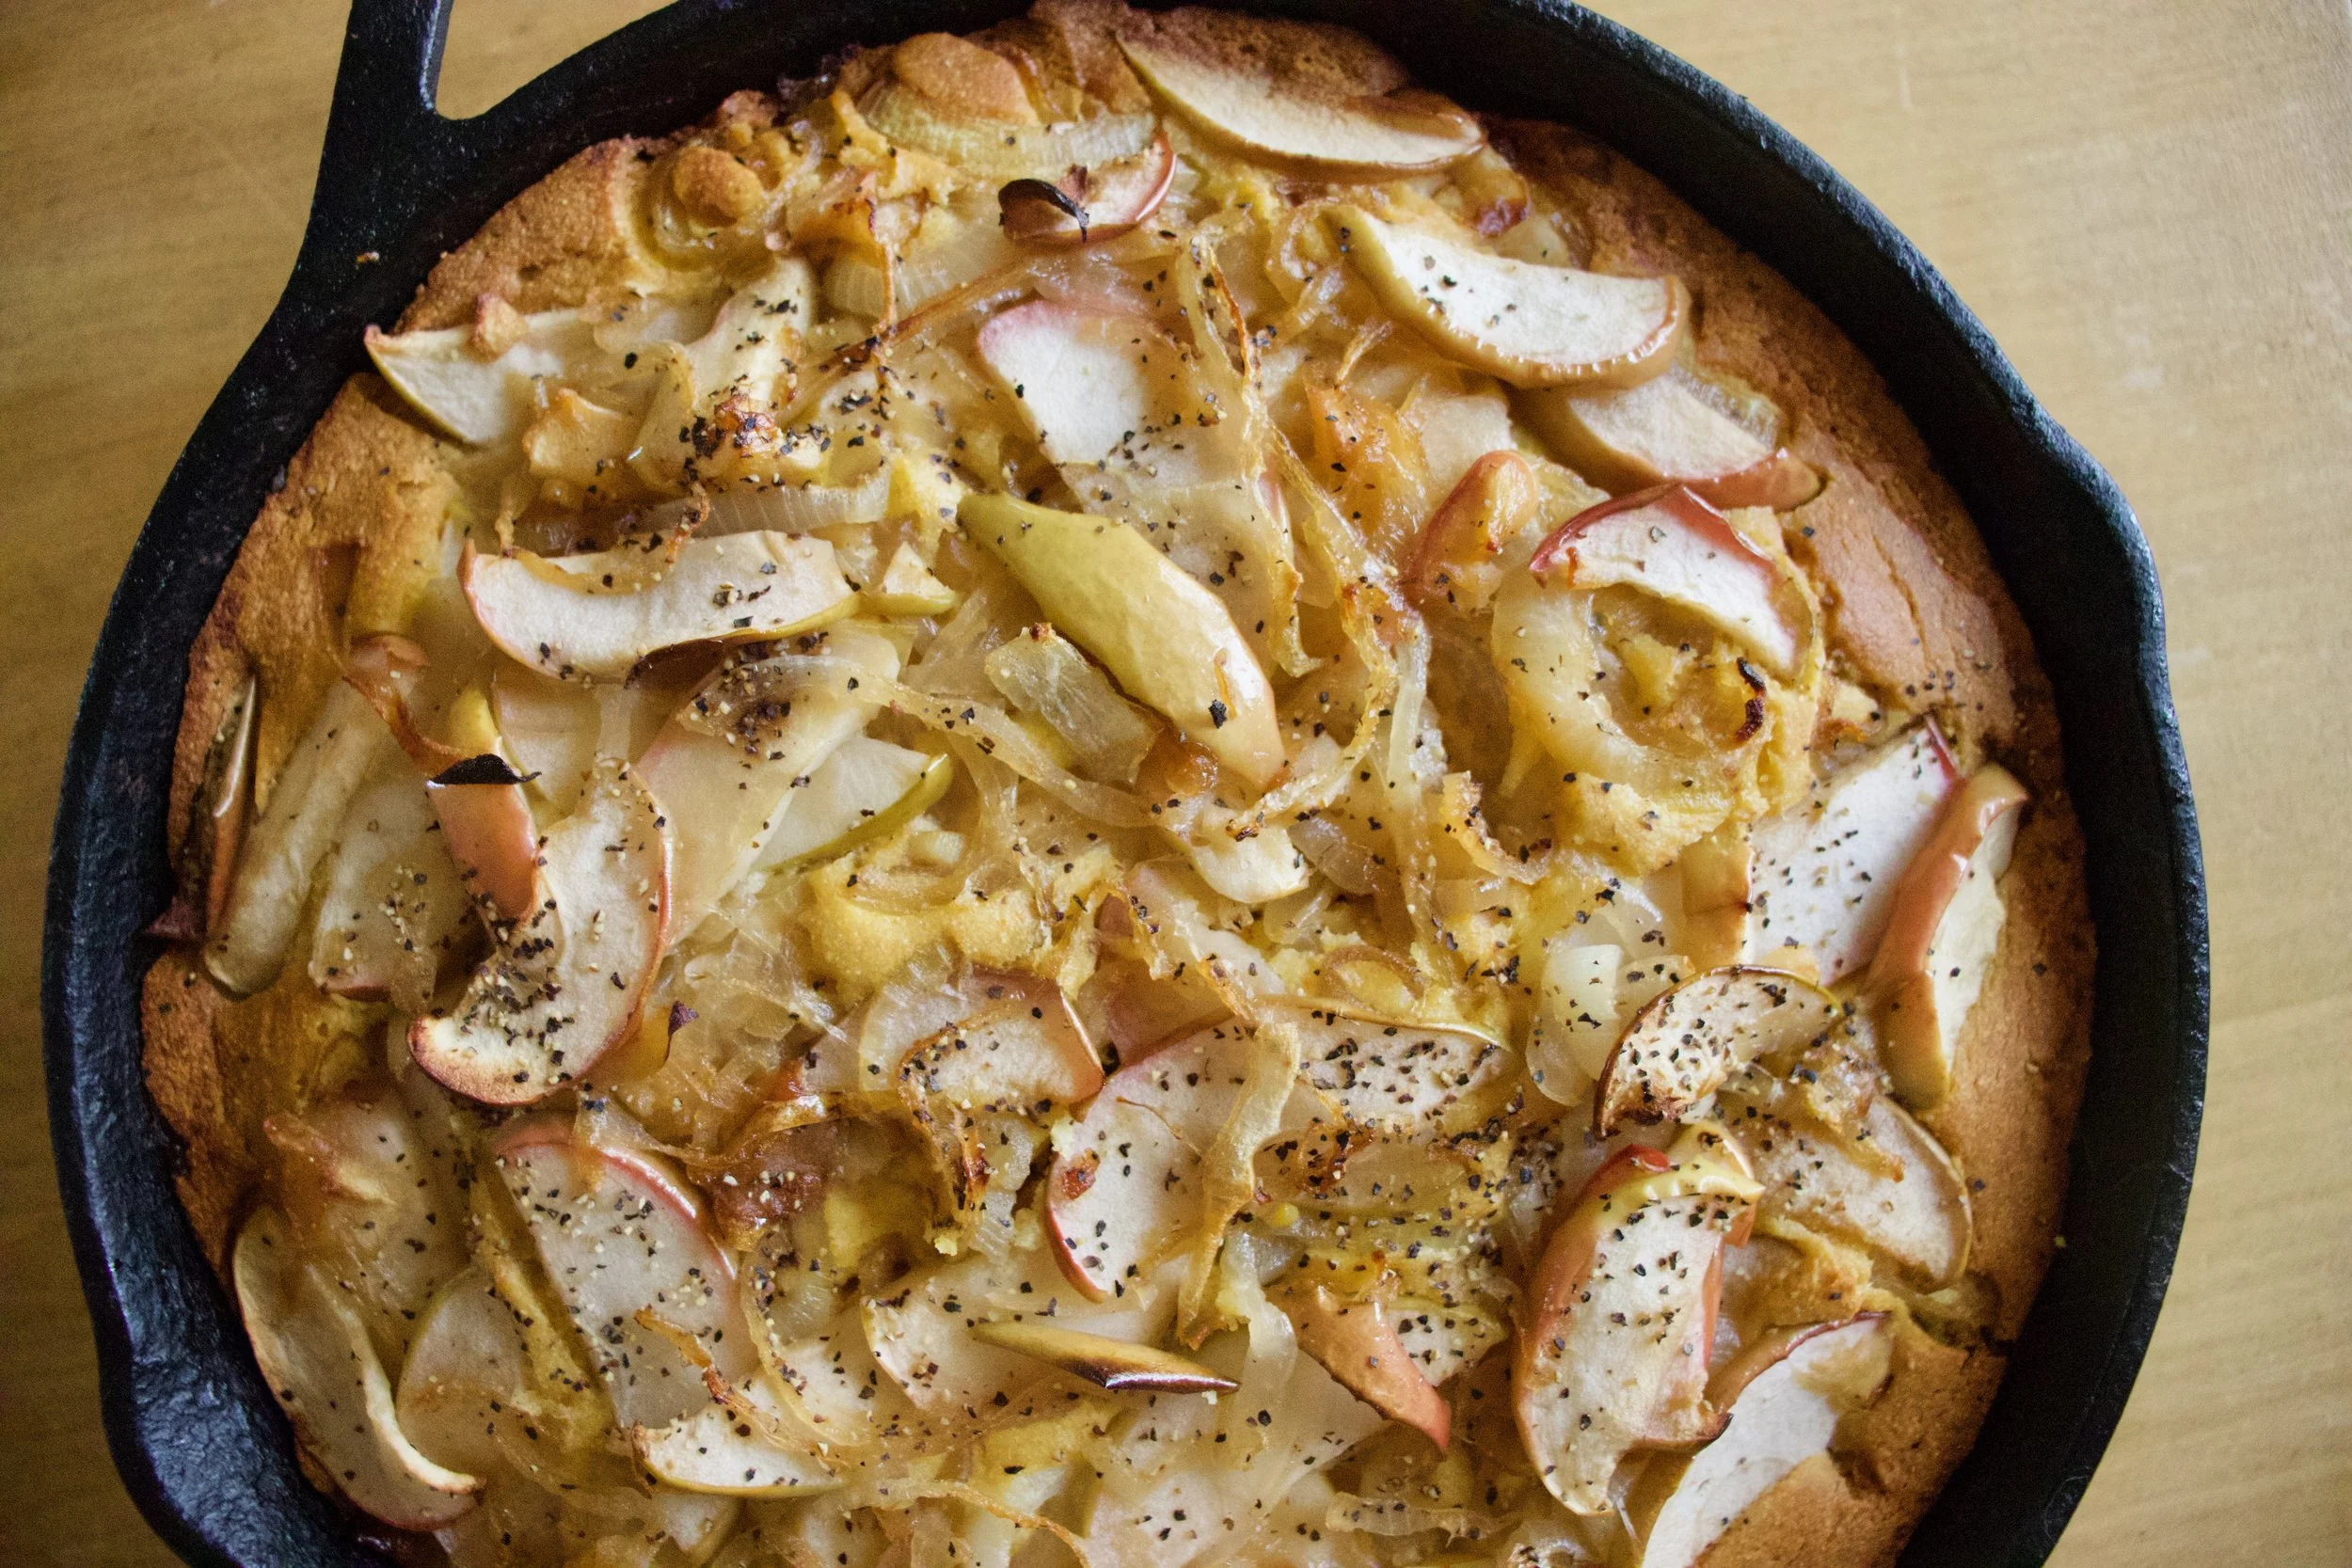
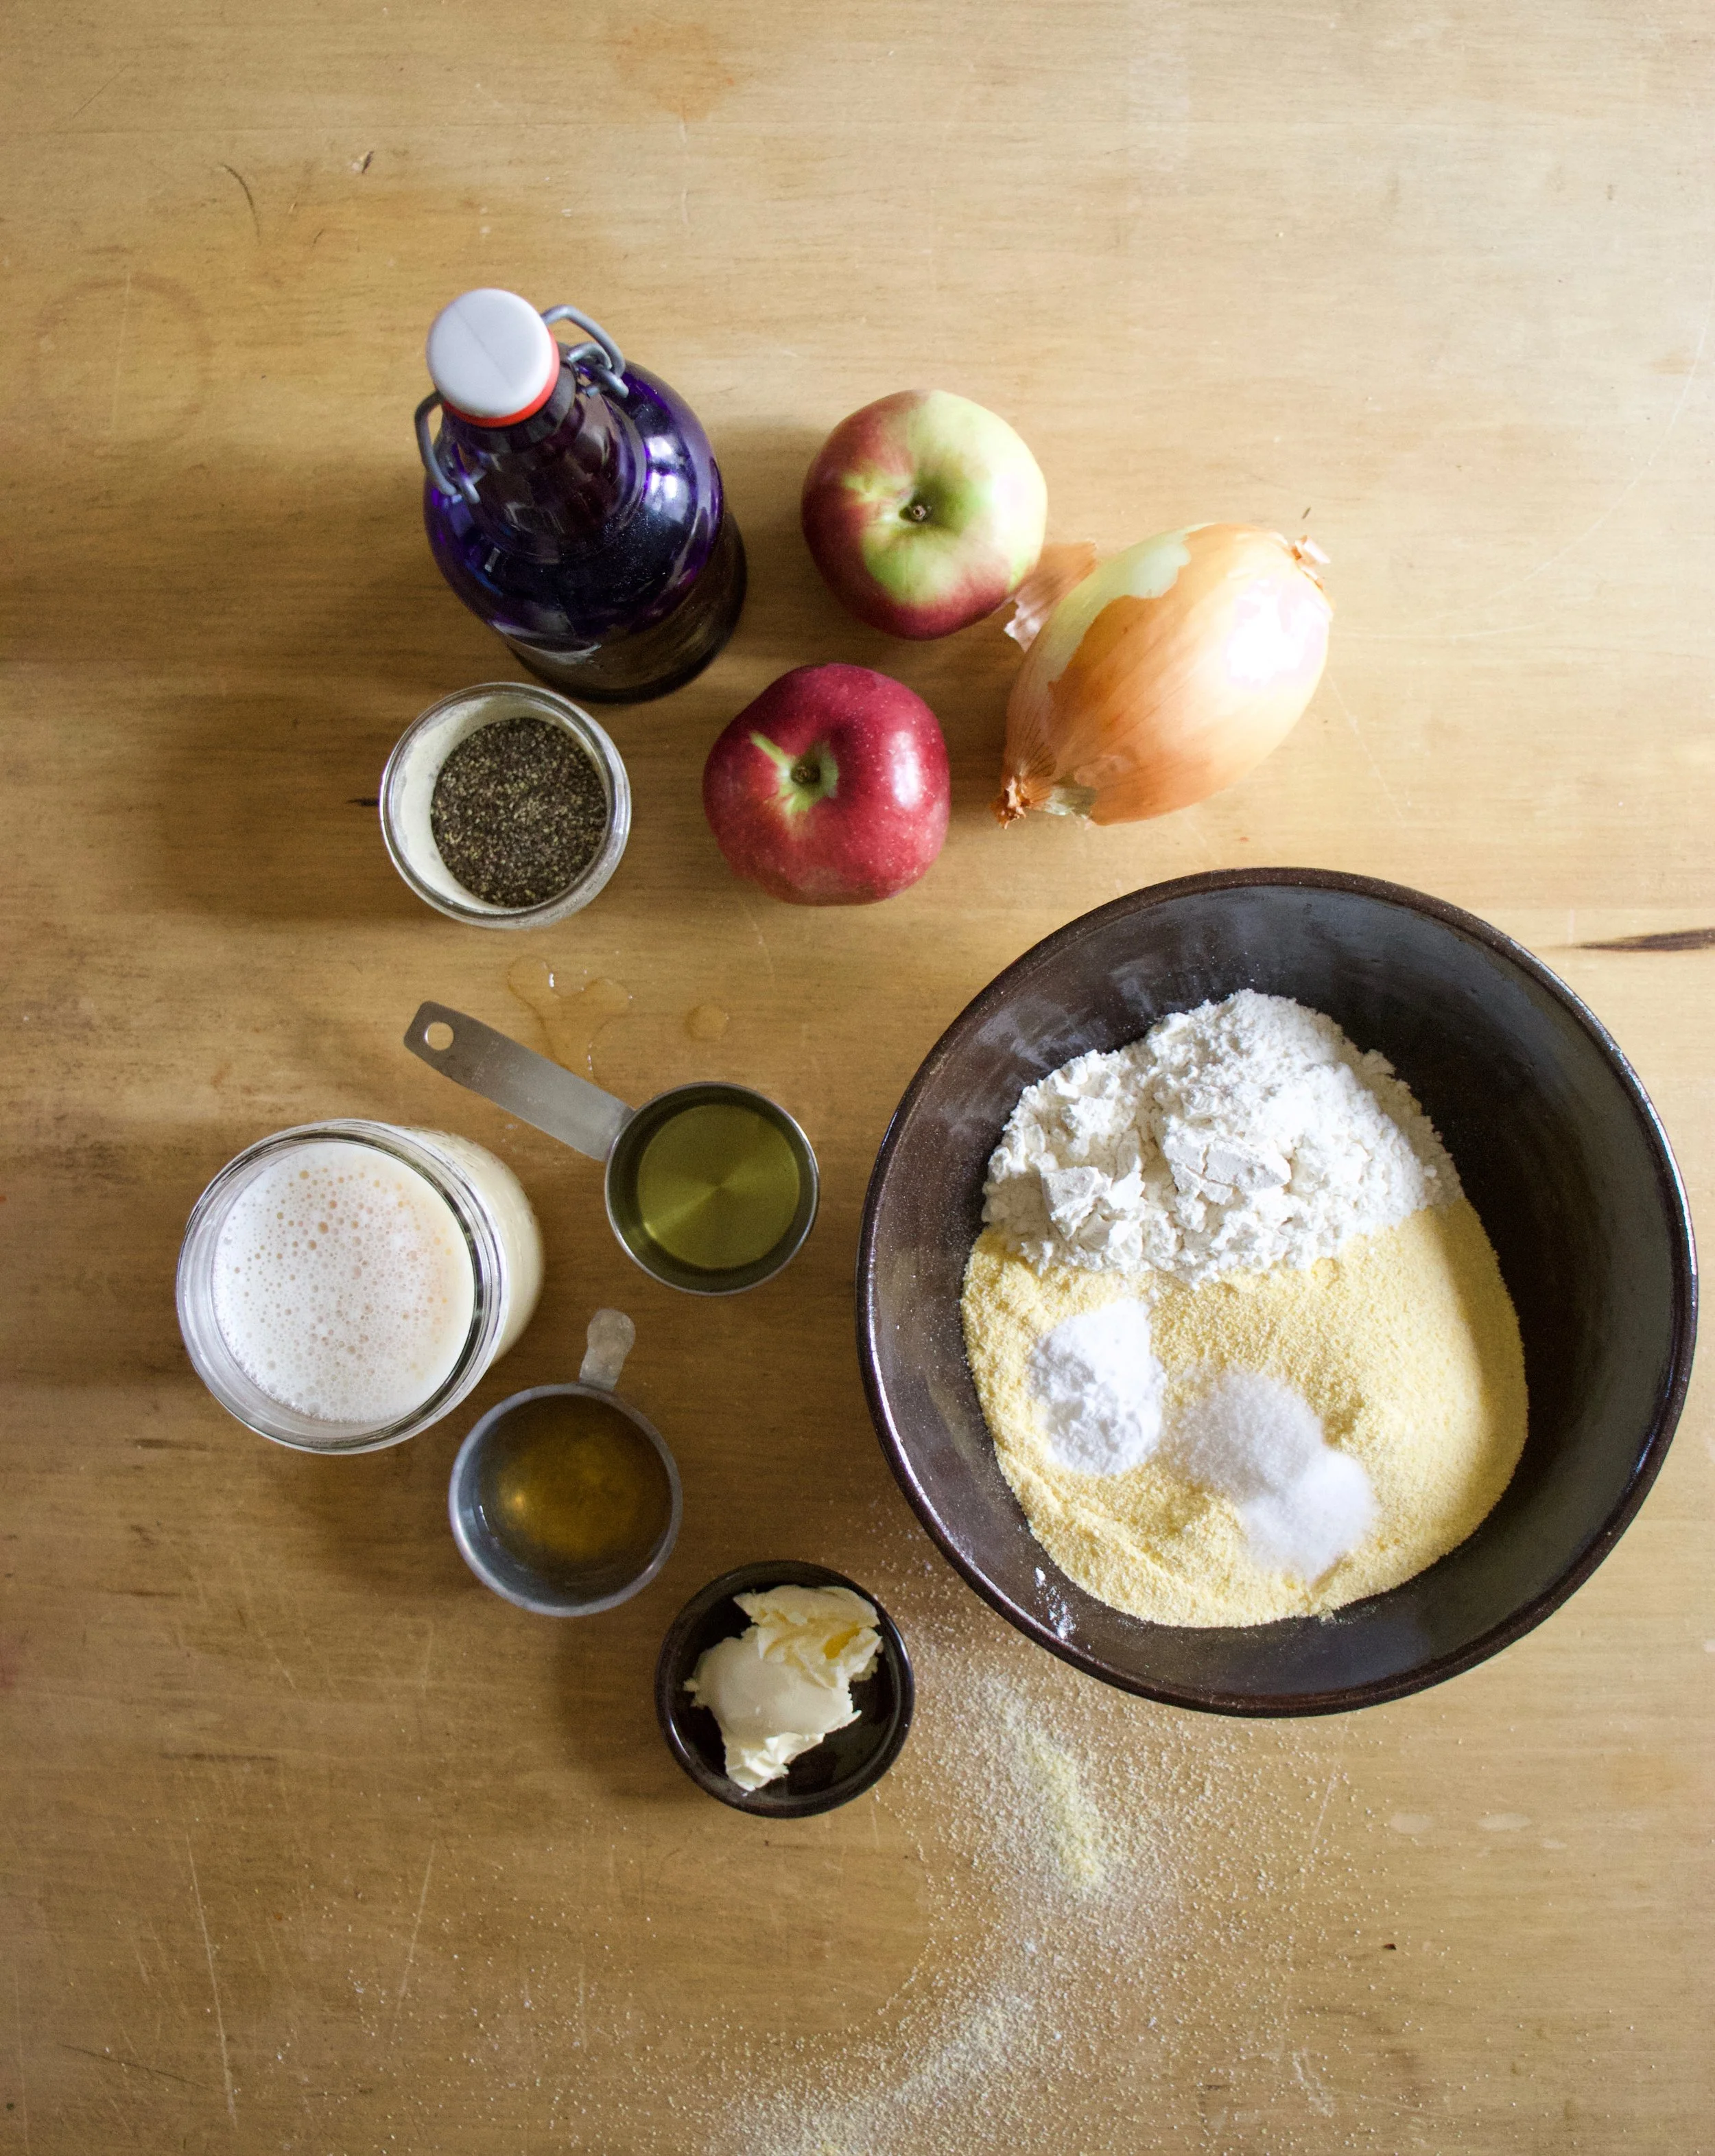


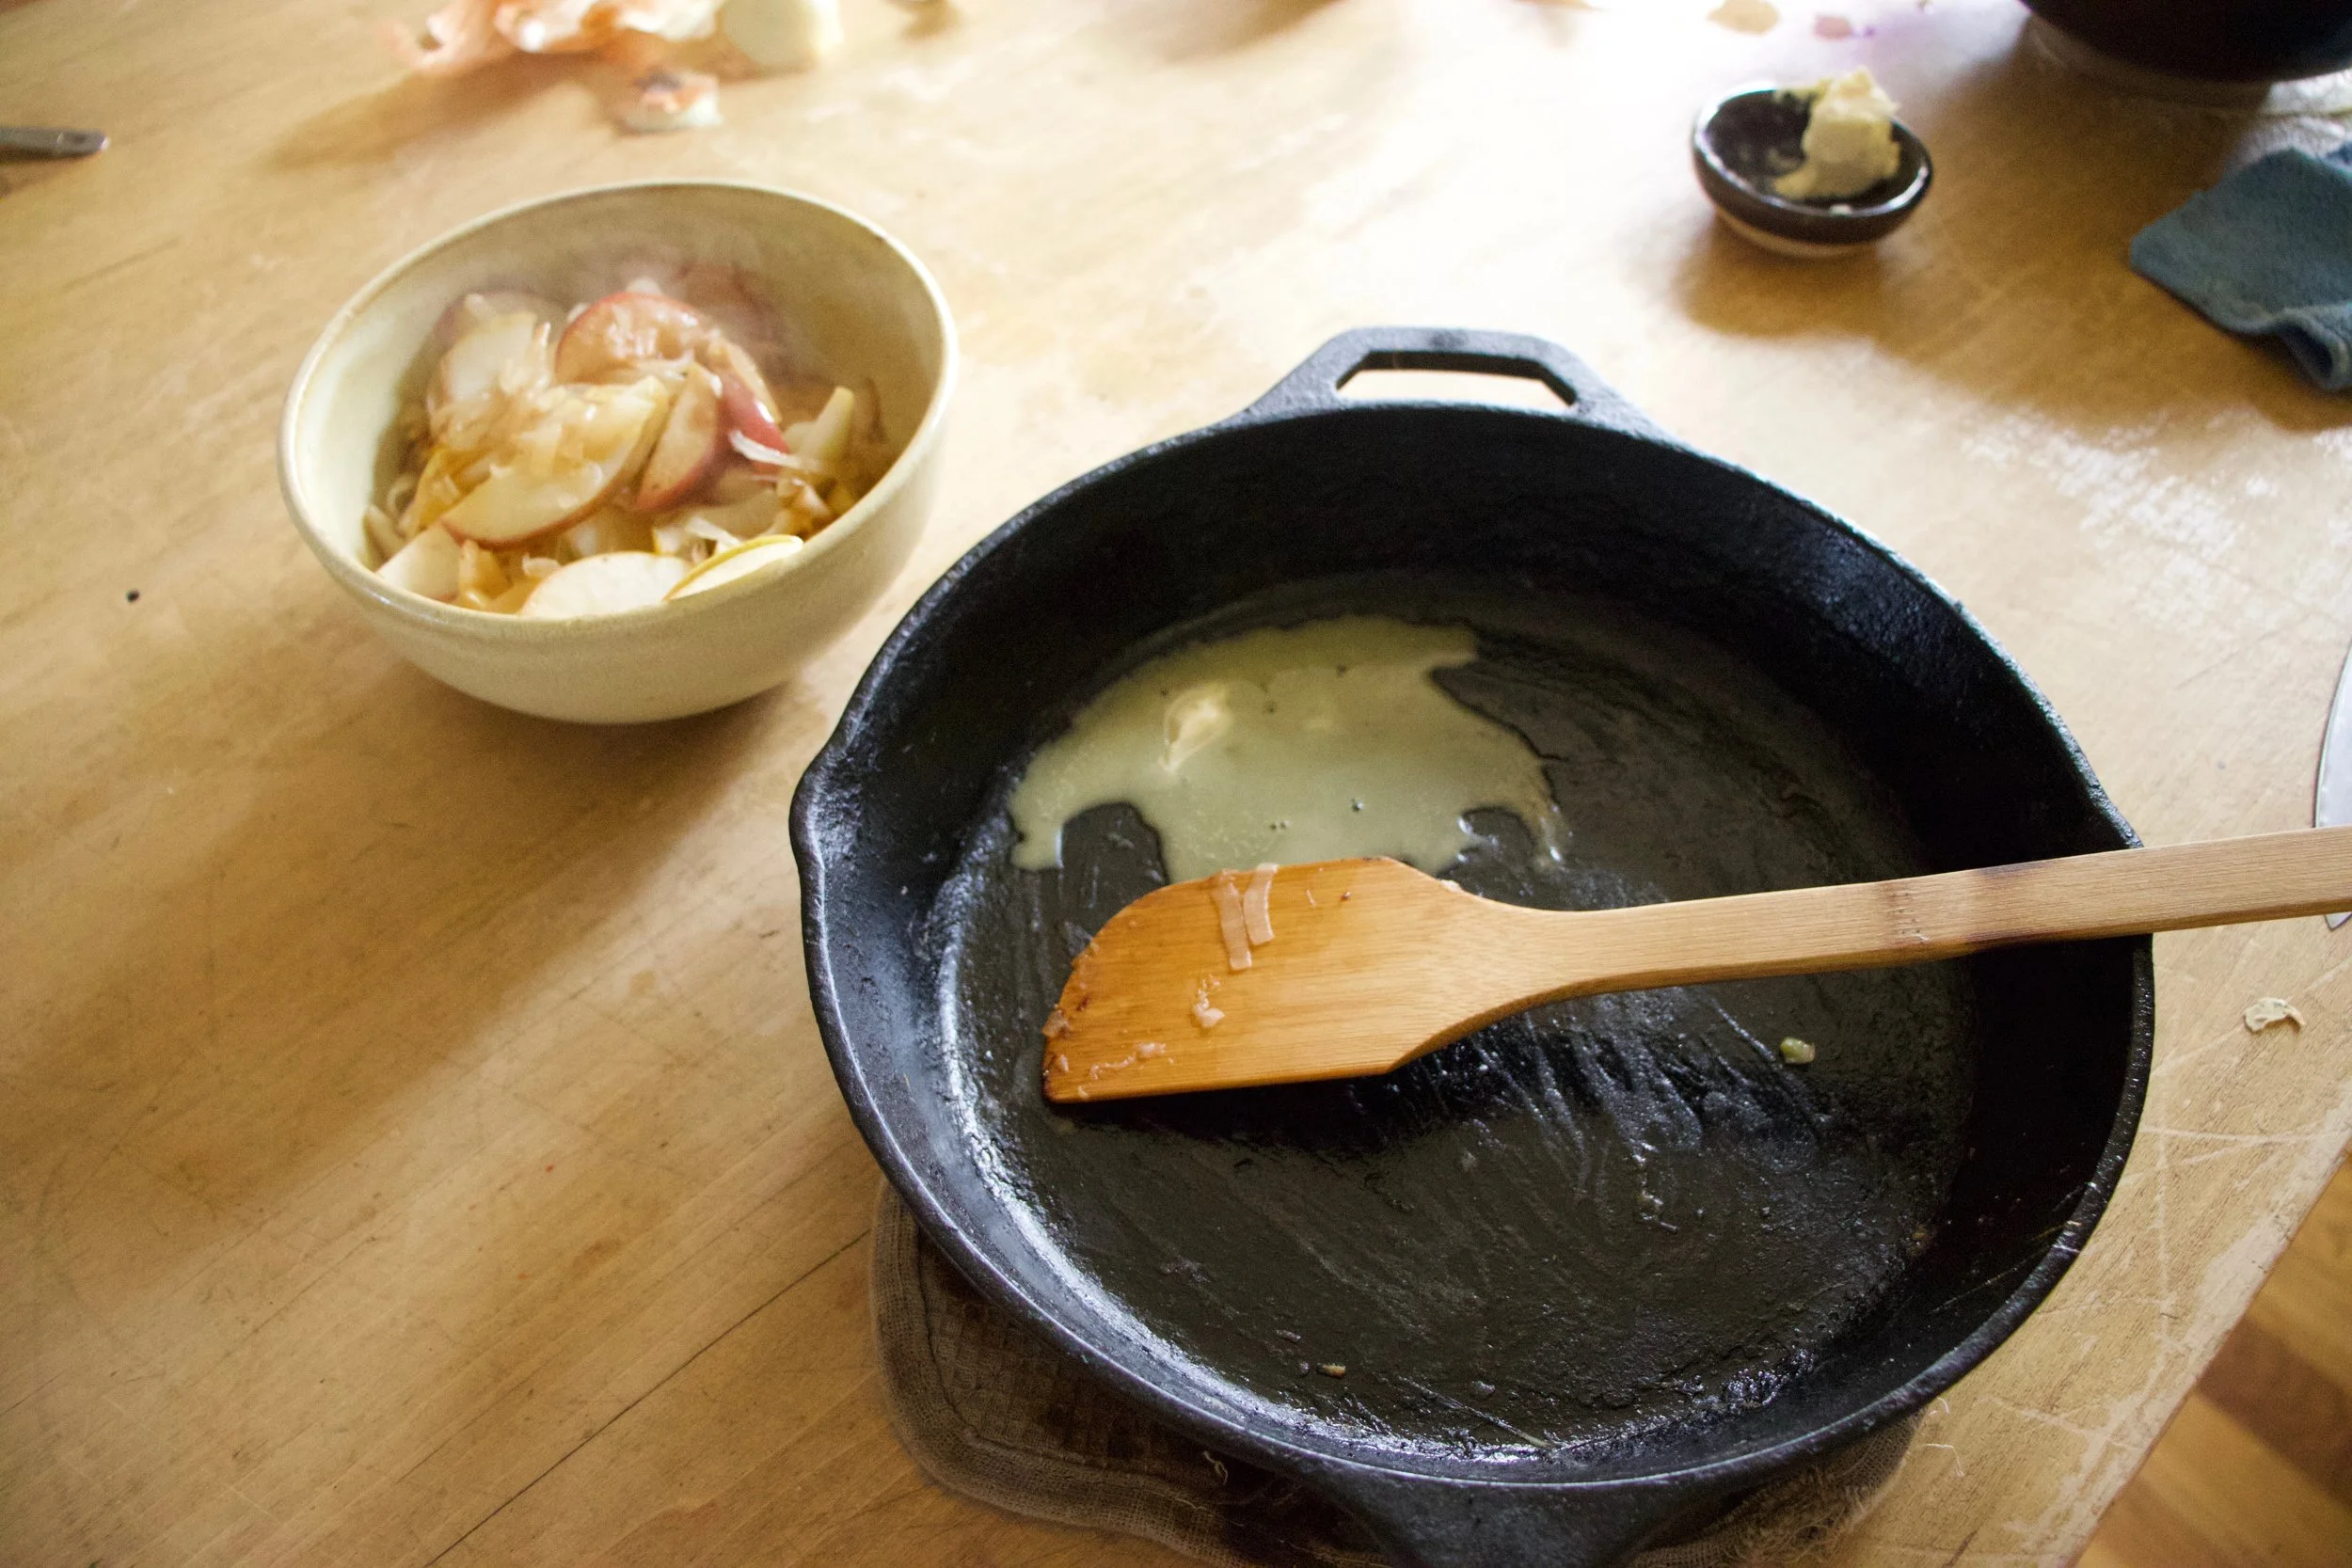

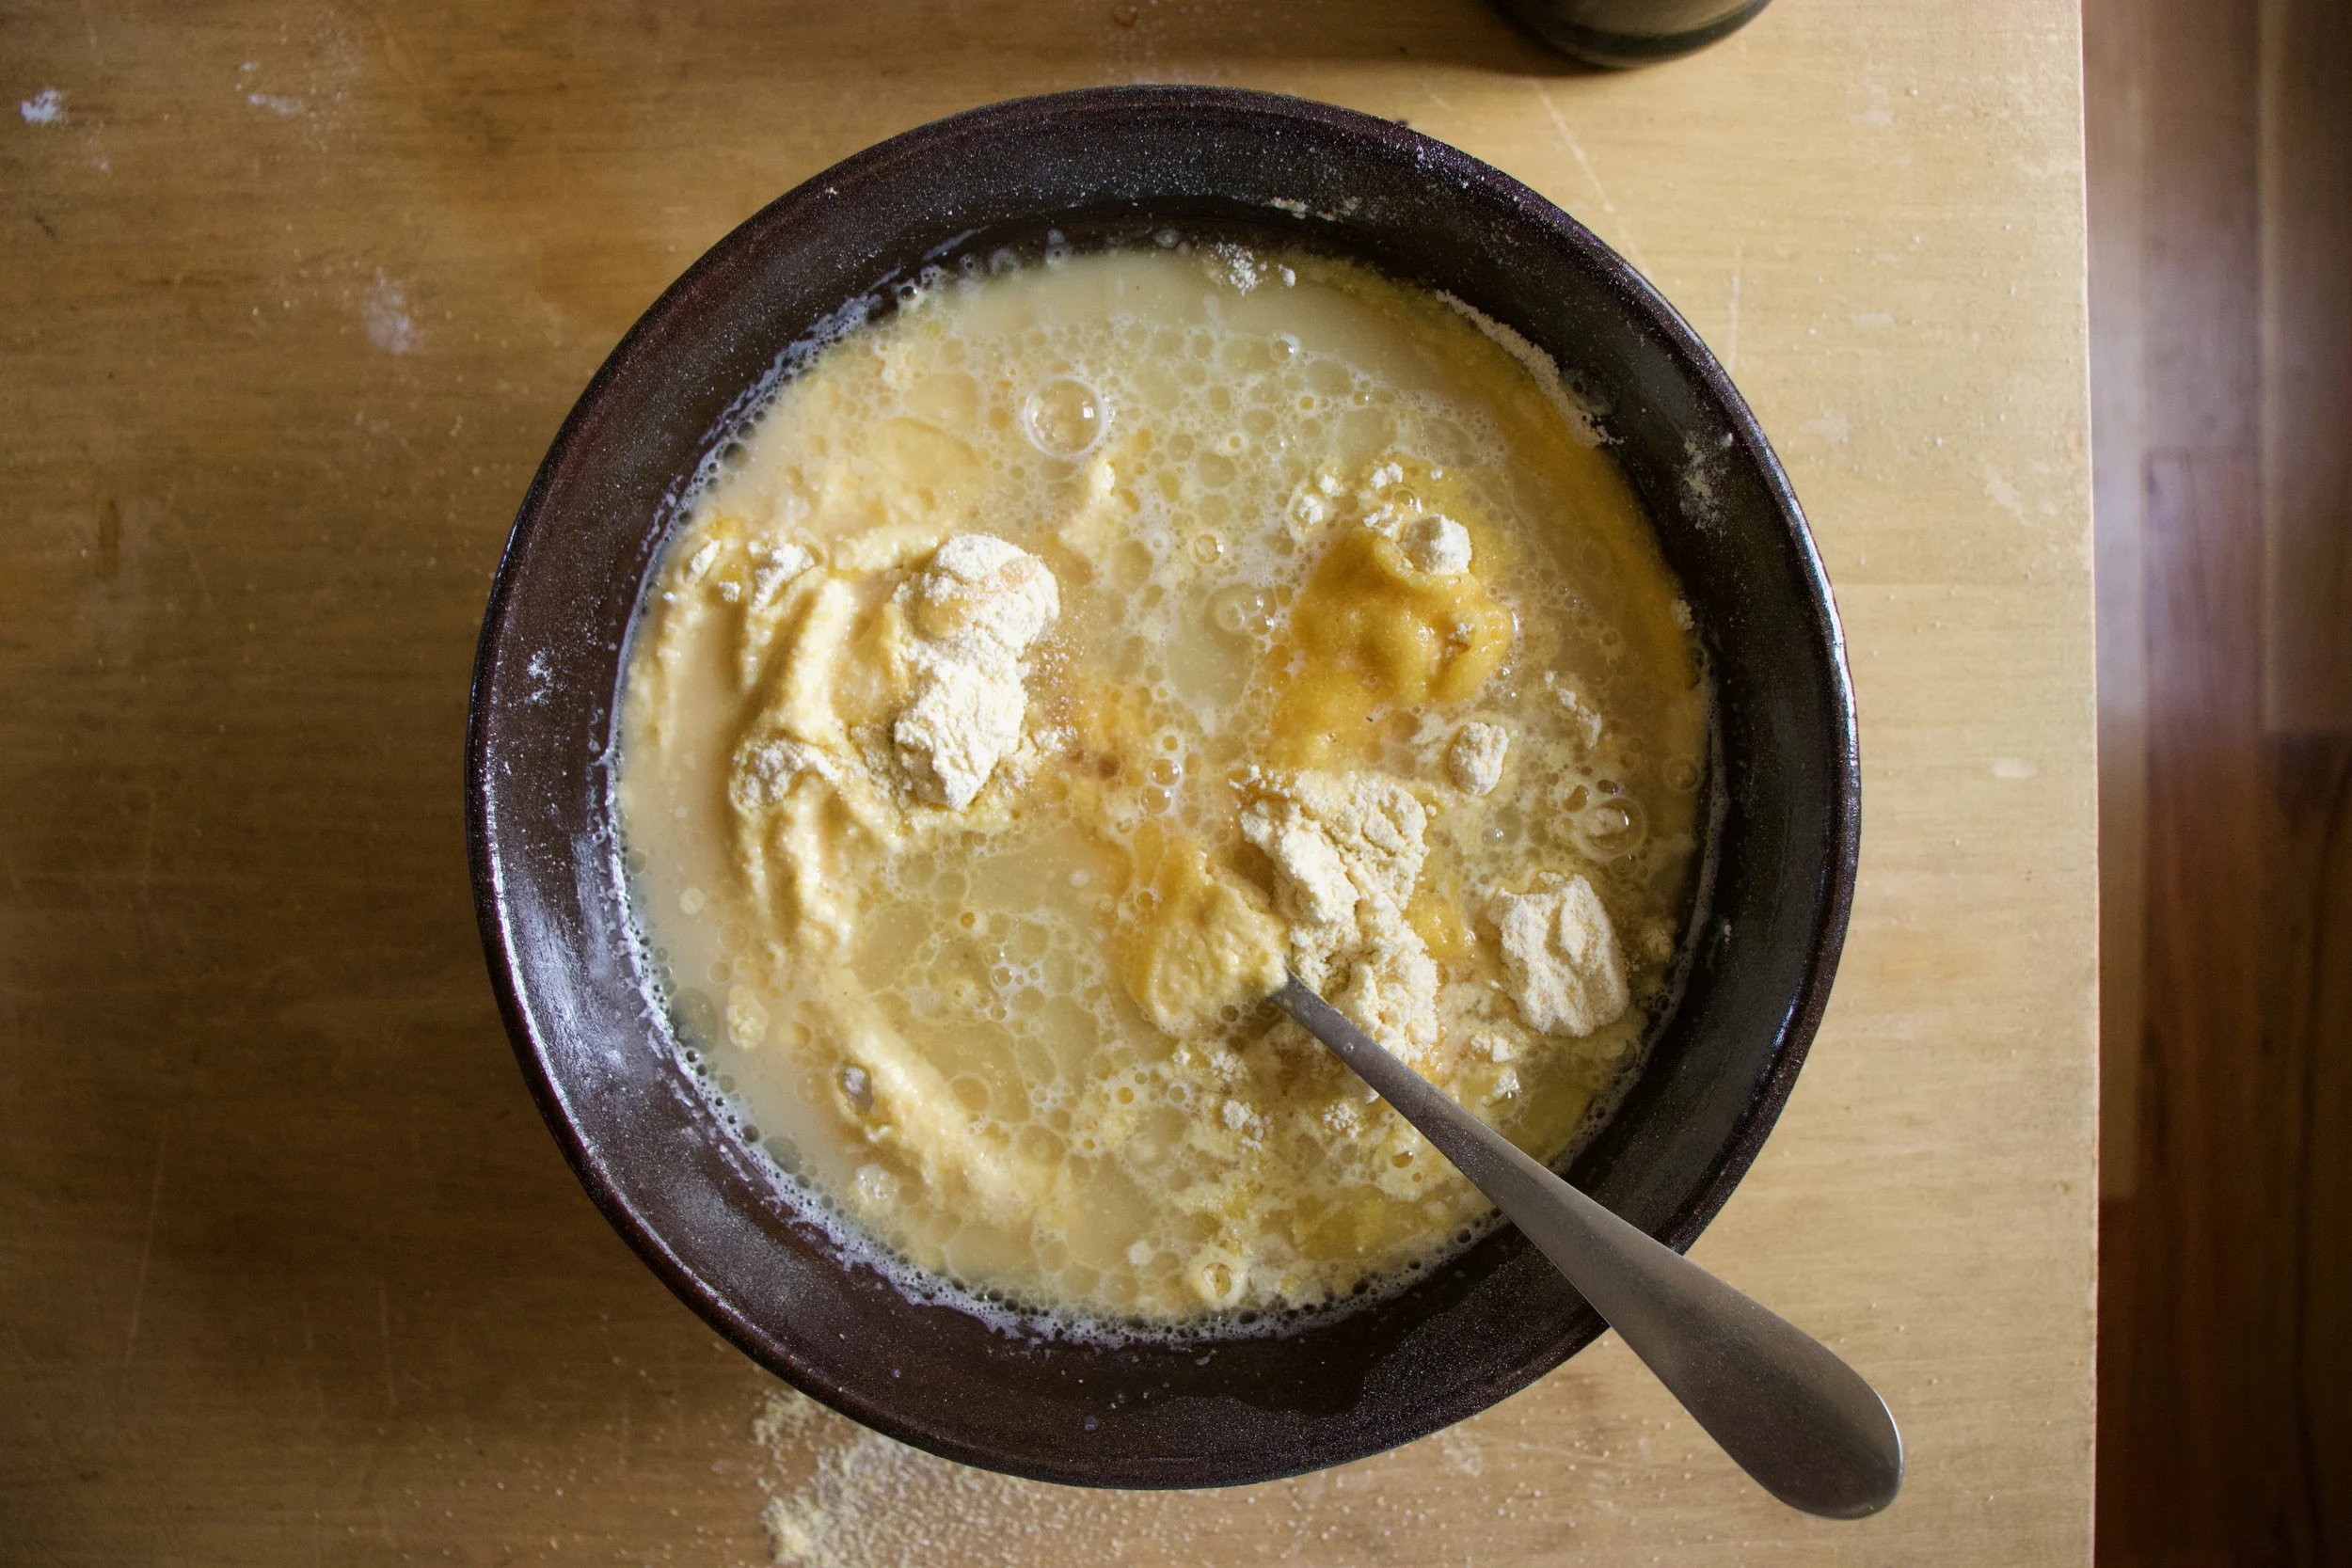


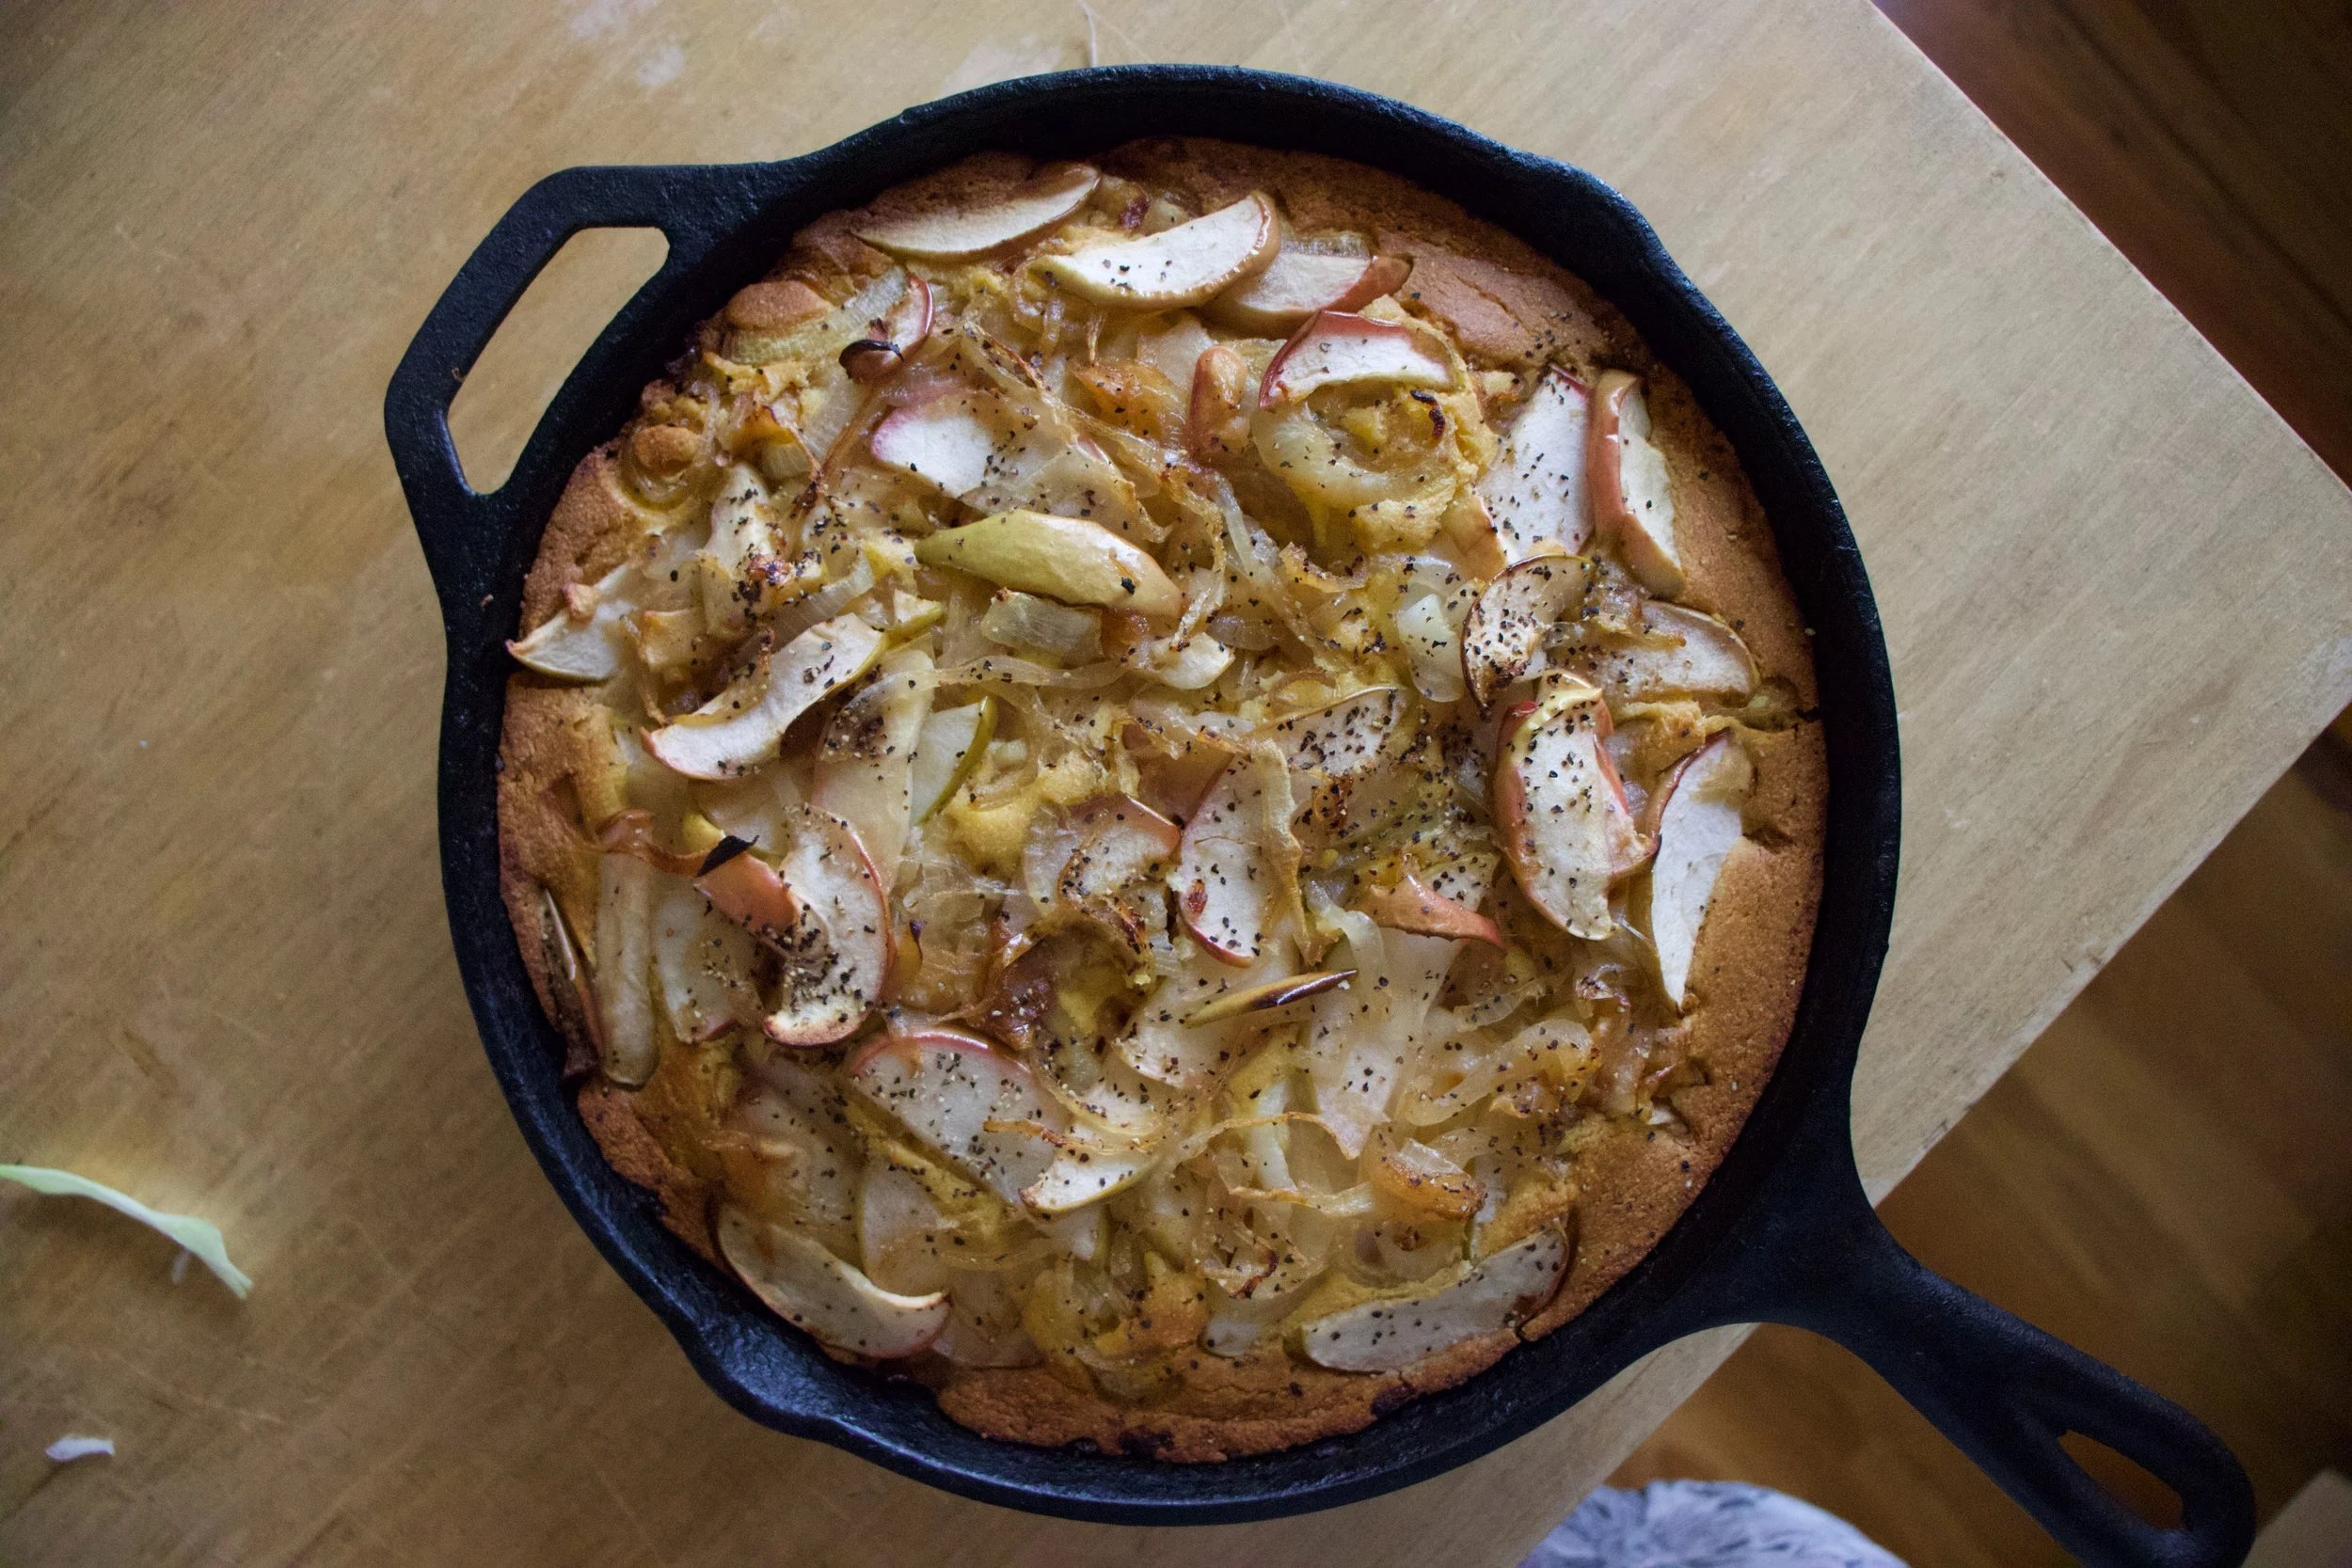

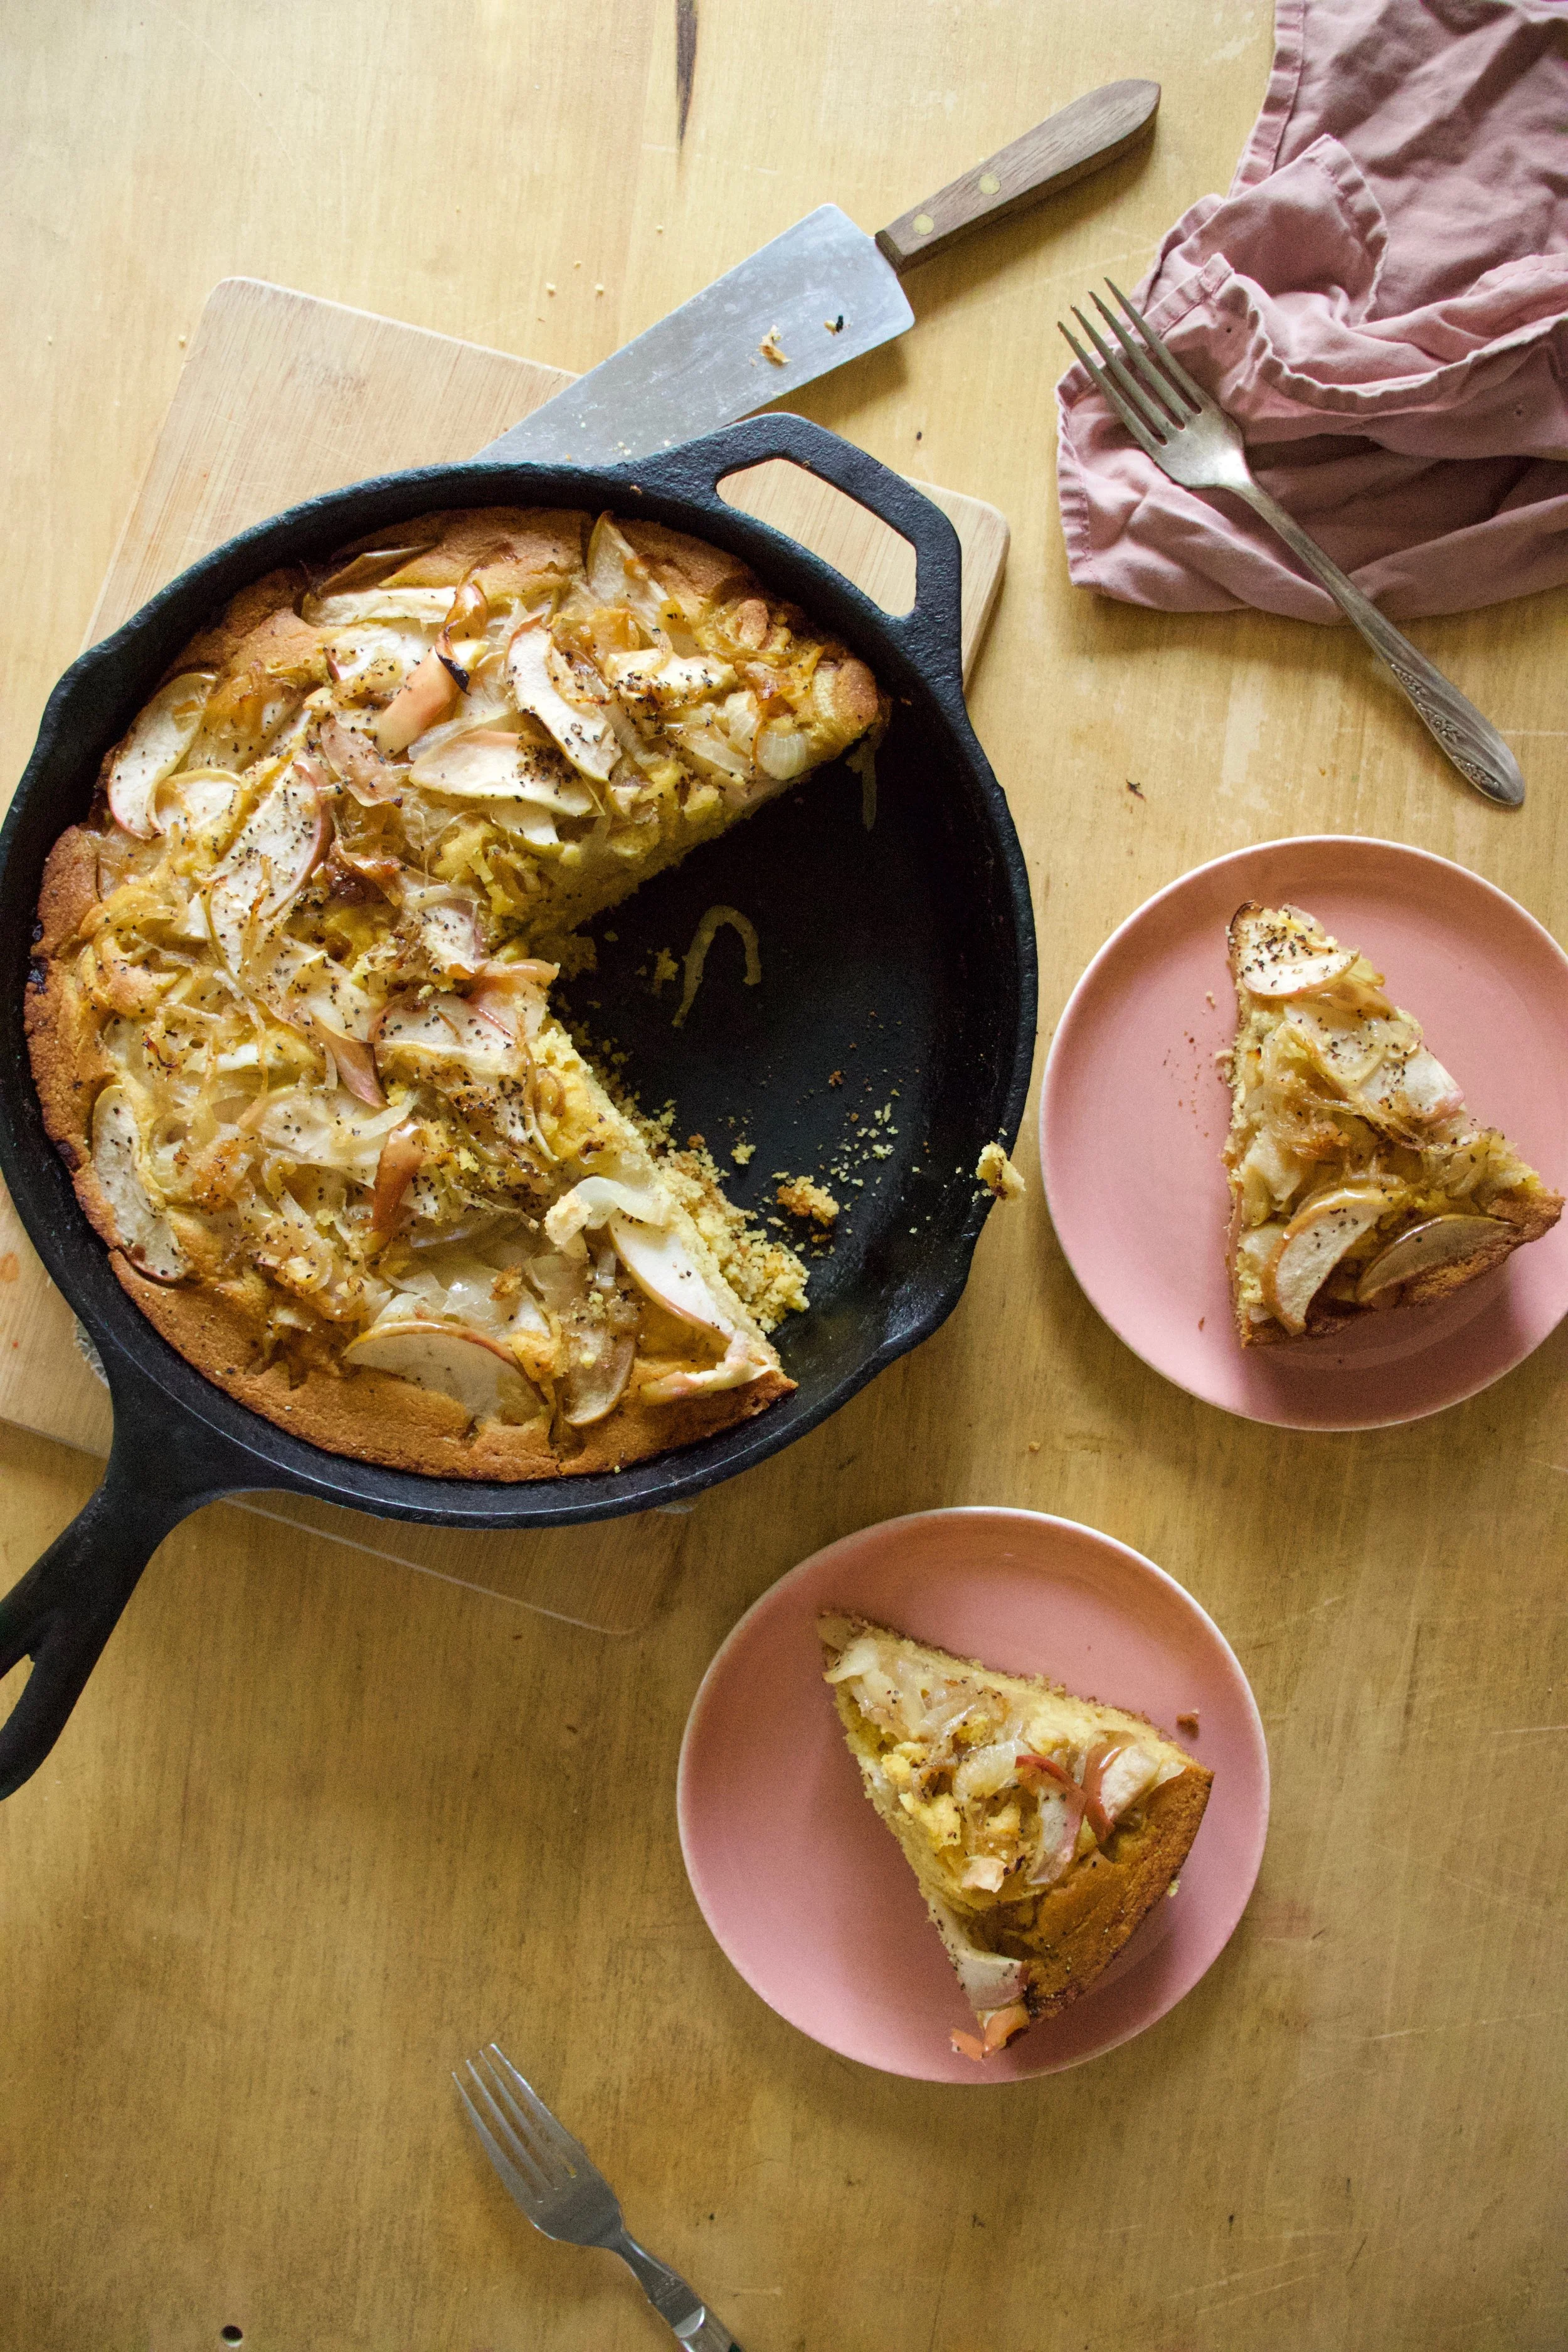


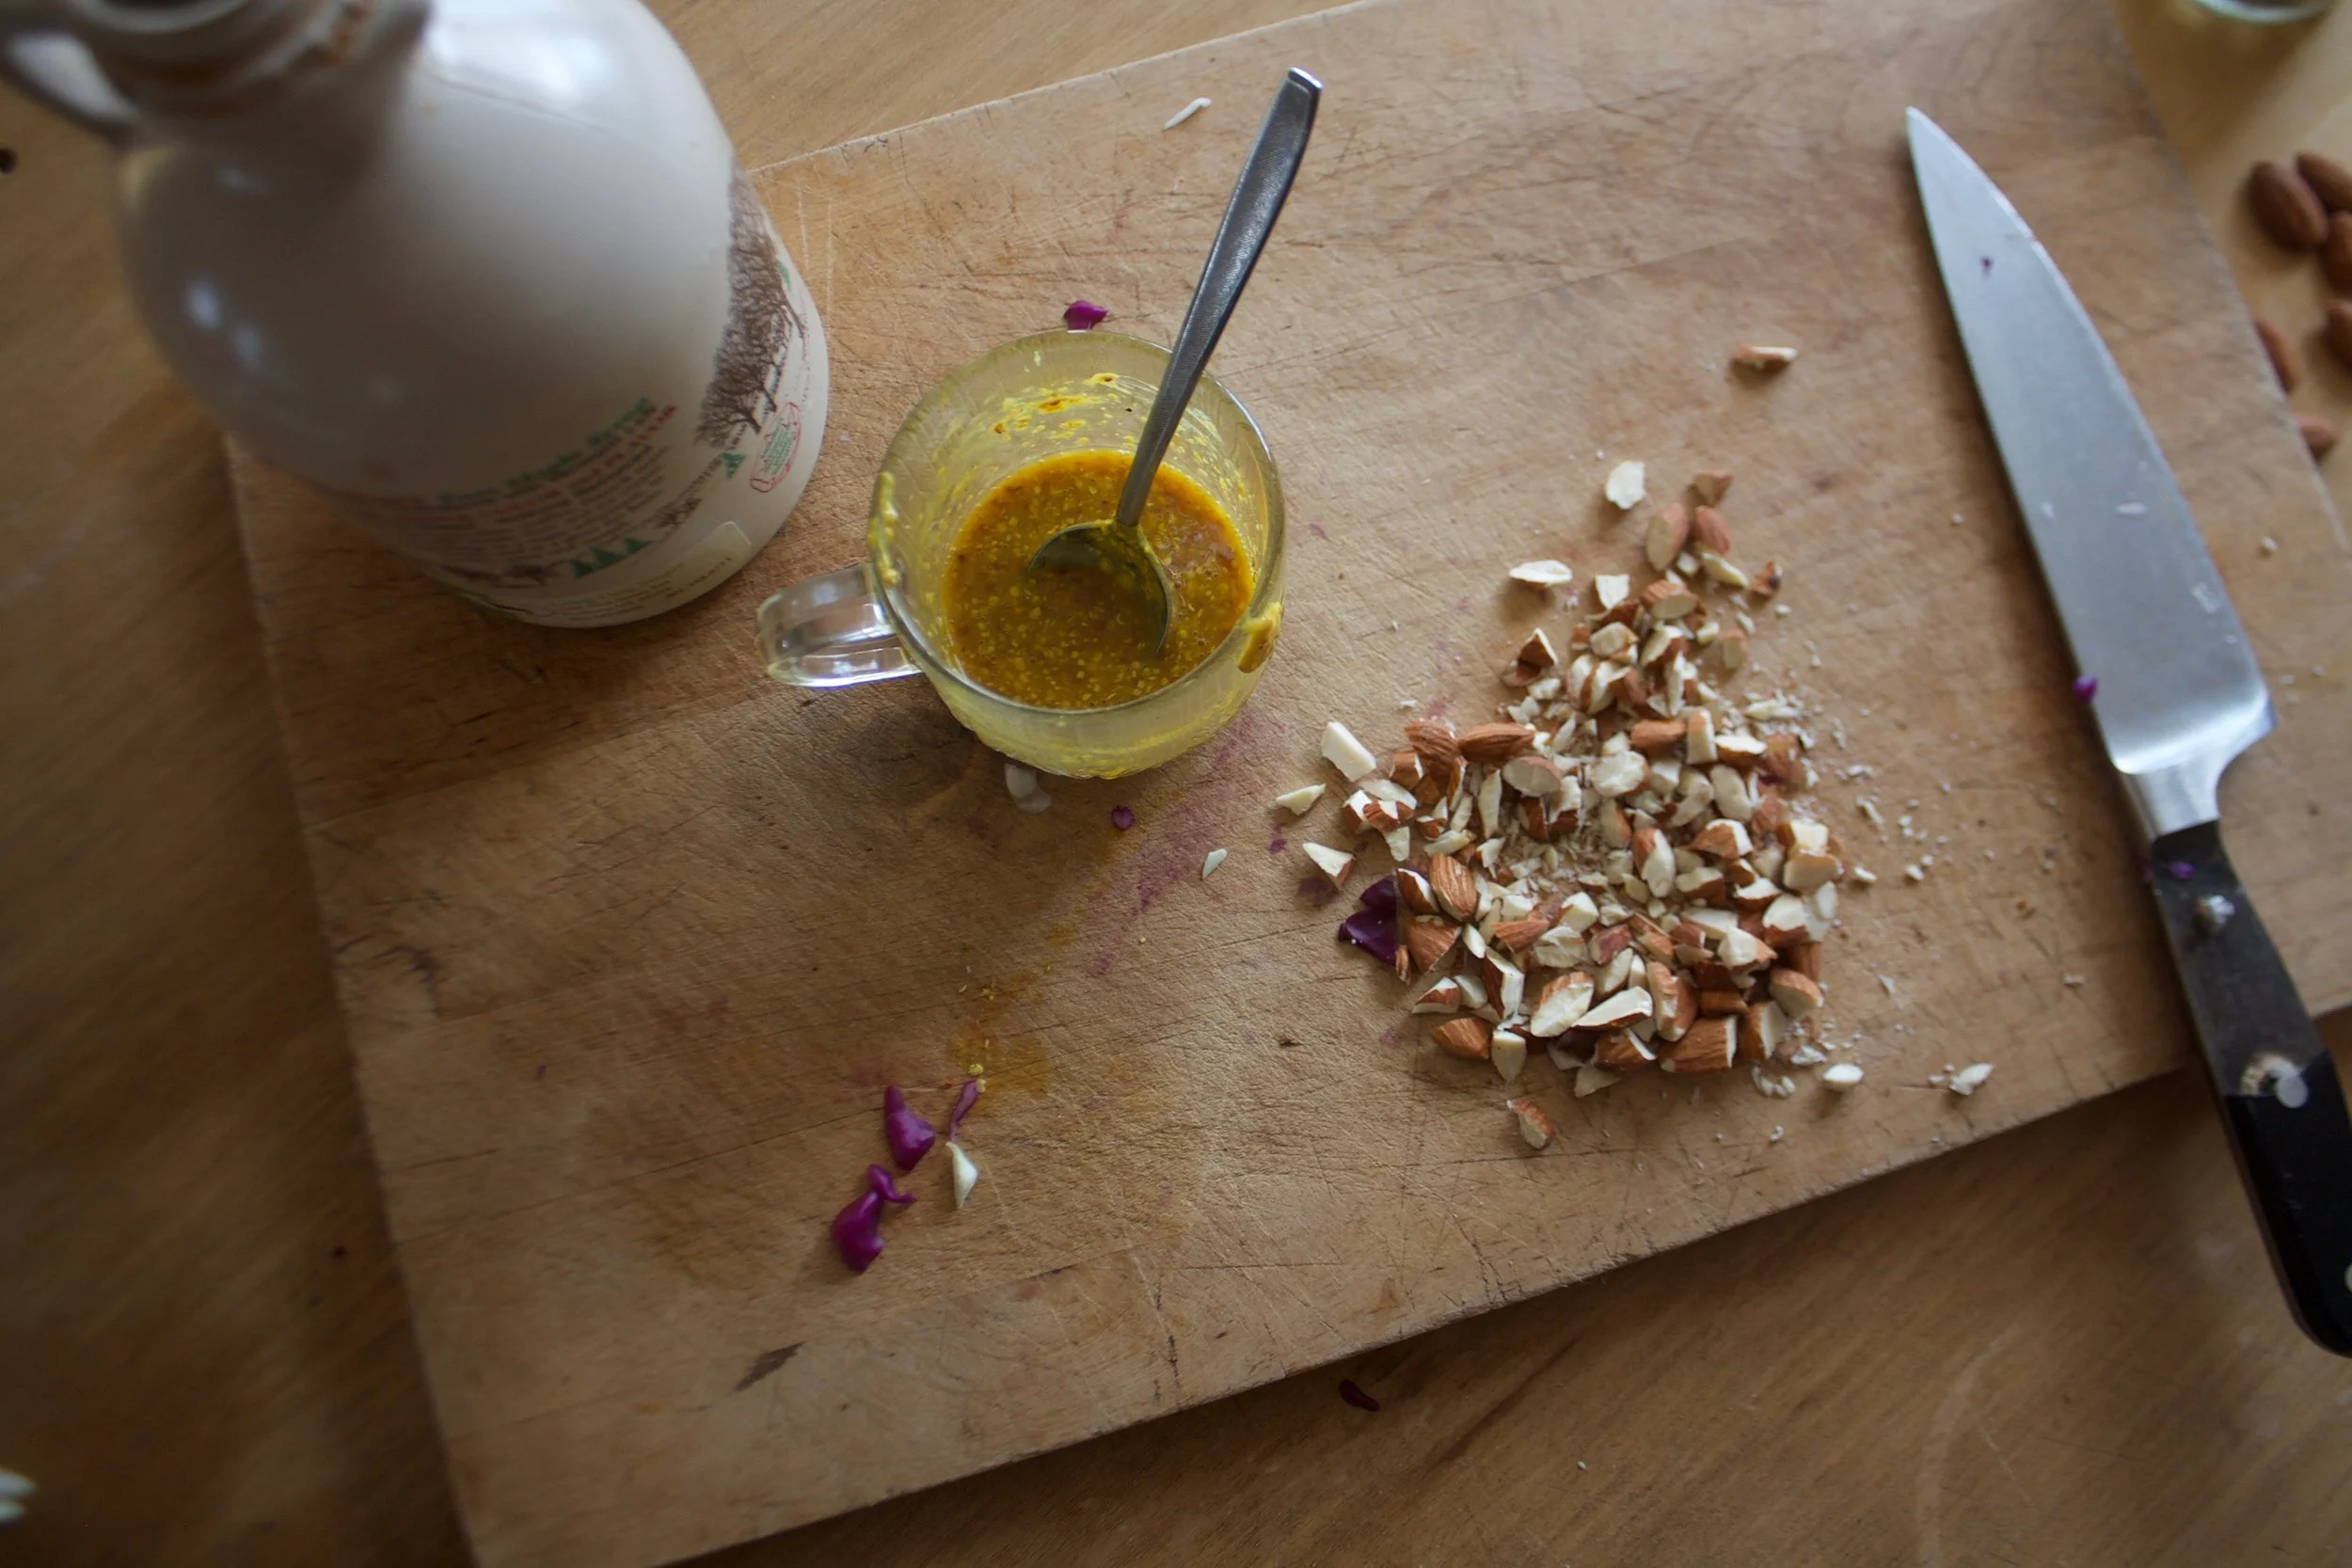

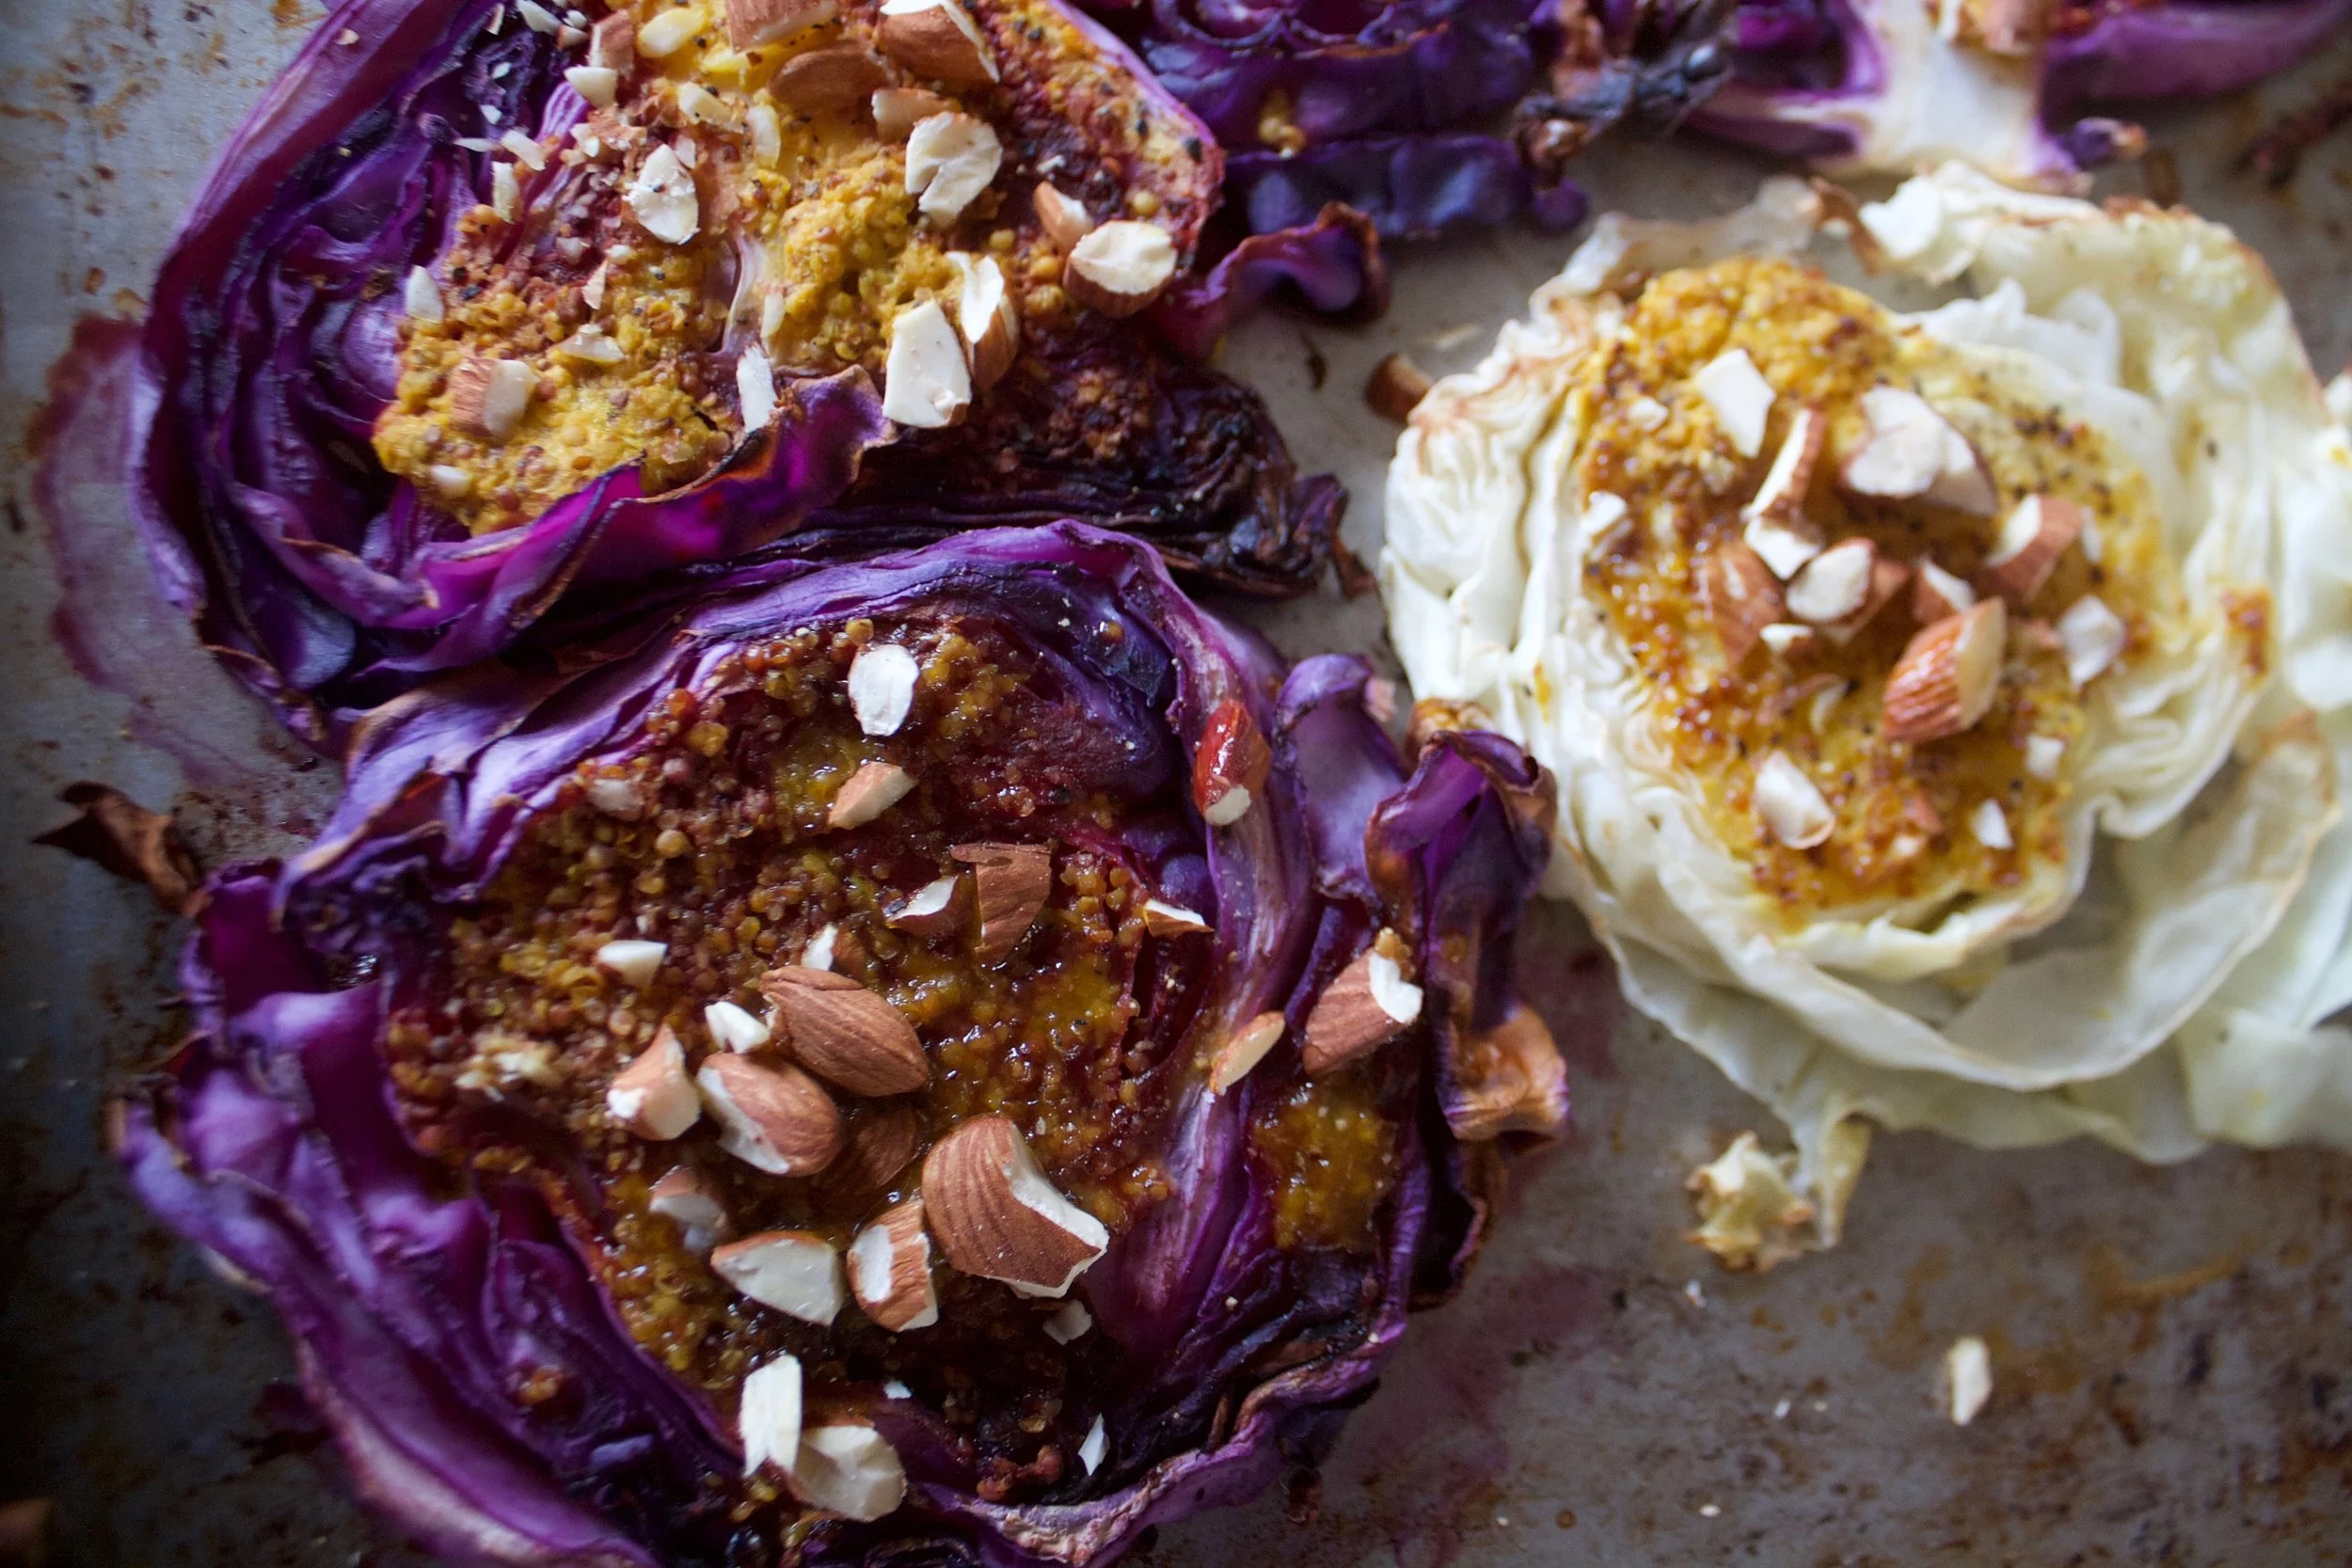


THE LOVELY CRAZY
November 29, 2019 by maximios • Blog
The heat is officially on in the house because well, it got kind of freezing out and also because we got some snow! So awesome and unexpected. Sure, it was only an inch and came at the exact wrong time making for a very sketchy driving situation, and also it froze all the chard in the garden I had left (I harvested it and just tossed it in the freezer for soups), but whatever. I was, and am just so happy to see it. I really do love this time of year, even if everyone else hates it.
The week started off slow. The extra hour was welcomed but also really kind of screwed with my body clock. I have been getting better throughout the week, but the first few days we changed the clock, I was waking up at like 3 am. Yes, I was going to bed at like 630, but when your tired, your tired. Anyway, besides being a little groggy, it was the usual as usual. Work stuff, getting ready for winter weather, dealing with the dealings. We had lunch with Megan, a spaghetti dinner with Judah, and I picked up the first winter farm share of the season. Lots of roots, greens, Brussels sprout, and peppers. All the best food a lady could ask for. I am also feeling like a queen with my new, permanent, gold crown in my mouth. And now I am officially sick of going to the dentist. Going to try really hard to not have to go back ever again, or at least 6 months when I am due for a clean.
Oh, and lets not forget how I busted out the new toilet brushes. Who doesn%u2019t love a fresh toilet brush? Highlight of the week. HA.
Today the mr and don%u2019t have much in the way of plans besides getting the winter tires thrown on the car and getting out of town for the afternoon for a hike. So I am going to the gym and dropping off the library books this morning, we will then deal with the car, and then off we will go, heading out to conquer a mountain. Or a small trail. I am fine with either. Just as long as we are outside.
Links from the internet for your reading and browsing enjoyment.
–Why You Should Find Time to Be Alone With Yourself. Alone time is the best. I cannot stress how important alone time for me is%u2026 I NEED IT!
-I didi%u2019t know how awesome and strong ginkgo trees were. Consider the ginkgo. These ancient trees survived the atomic bomb in Hiroshima.
-First, how is Emma Watson turning 30? Second, Yes lady. Did Emma Watson Just Coin the Next %u201cConscious Uncoupling%u201d?
-Why haven%u2019t I don%u2019t this yet? The Tangy-Sweet Pickled Fruit I Put on Absolutely%u00a0Everything
–Very Generous People Are Way Happier (and Have More Friend)
-Looking for new shoes is the worst. But I found some that are not exactly winter friendly, but maybe I can make them work? Teva%u00a0Voya Infinity Sandals. OR these appropriate footwear. I love them but jeez, I am not paying that much for a shoe.
-Give me roots, all the roots. Root, root, root for rutabaga, turnips and those other unappreciated vegetables
-This is me! %u2018It%u2019s cool to be cold%u2019: Confessions of frigid-weather fanatics
–The Cookie Sculptor. I think I need to spend more time sculpting cookies.
–Scrubbing Your House Of Bacteria Could Clear The Way For Fungus. I am a clean freak, but I don%u2019t use any chemicals whatsoever. Vinegar, water, vacuum. How that keeps the bad fungus away.
And pictures from the week.