Guess what guys ….I got myself a sick vintage waffle/ griddle iron. I couldn’t be more thrilled!!! I found this thing at the local recycled goods store the other day, along with a very beautiful old white pyrex mixing bowl. It was one of my best thrift store scores! (Checking out the inventory and the condition of all the old things that day, I would say an old lady had just died and all her perfectly keep, mint condition kitchen stuff had just been donated. But it’s cool, cause I get the feeling that she was at least 90, with a big loving family, and was happy until the day she died. And I am sure she would be pleased that I have taken over the waffle maker. Thanks old lady!)
And now I am pretty sure that everything I make for the next week will be cooked on said waffle/griddle. I am serious, I already have a list of things to try and cook on it; cookies, biscuits, granola bars, potatoes, fruit, some type of pasta situations…. the list of possibilities is endless and I bet that at least 1/2 of these things will be totally awesome and amazing.
But first thing first. I need to make dinner.
So waffles for dinner!!
Note. These waffles are completely 100% fantastic for any meal you want to make them for. They consist of nothing more then beans, a shit ton of veggies, and just a bit of cornmeal. But don’t let that fool you because they are super packed full of so much flavor, have a really soft tender inside, with a nice crispy outside and are so super pretty. They are wonderful! The stuff. First, we got a big old pile of shredded up veggies which include; carrot, beet, sweet potato, onion, parsnip, celeriac, and a little bit of kale. A we got a bowl of rinsed and strained white beans, a little bit of cornmeal and salt, pepper, and garlic powder.
The makings of something amazing!Before you do anything. get your waffle iron out and preheat it.
While thats going on, take you beans, add 3/4 cup water and puree until smooth with whatever blending device want to like to use. (I used my hand blender…less to clean)Now collect all the shredded veggies and dump into a big bowl with the bean puree, the spices and the cornmeal. Mix until combined. The batter should be thick, but not dry. If its seems to wet, add more corn meal, or too dry, add a little more water.
Note how my batter turned a magical pink… I love beets, they make everything pretty! And check out that bowl!When your waffle iron is preheated, oil it if needed (if your not sure, add a little oil just to really make sure your waffles don’t stick) and take appropriate size spoonfuls of the batter and stick on iron. Close it and wait…..My iron has a little light that turns on when the waffles are done cooking, so I waited patiently (ok iI did open it a few time) until light tuned on and removed the perfectly cooked waffles.
Did I mention how awesome my new/old vintage iron is?
SO AWESOME!!
I made a little gaucamole and gave the mister and little bowl of plain Greek yogurt with lemon juice, but feel free to top, drizzle, or dump whatever you want onto these beauties…
Happy waffle Wednesday!!!
-C
Veggie Bean Wonder Waffles
Makes 8-10 waffles (in my iron) feeds 2-3 peeps
1 small carrot shredded
1 small parsnip shredded
1/2 a small celeriac root
1 small beet shredded
2 kale leaves chopped into tiny bits
1/2 an onion, shredded
1/2 a small sweet potato shredded
1/2 cup cornmeal
2 cups(or 1 can) cooked, rinsed and strained white beans
2 teaspoons garlic powder
teaspoon each salt and pepper
oil for iron(if needed)
Note on veggies… I used what I had in the fridge and shredded, it came to about 3 cups. If you don’t have these specific veggies or only want to use a few.. go for it. Just make sure to have 3 cups of whatever veggies you use.
Take you beans and blend them up with whatever device you would like to use. Once creamy, add to a bowl with the rest of the ingredients. Stir until combined.
Once the waffle iron is preheated, oil it( if needed) and place the recommended amount of batter right on it there. Close and cook until golden brown and waffly.
Serve on a plate with topping of your choice, A few suggestions.. Guacamole, salsa, hummus, mustard, greek yogurt… anything that tastes good to you.
Eat as breakfast, lunch or dinner…
Fork into face
My contribution to last nights dinner at my sisters…. Freshy fresh veggies spring rolls.I had about 30 minutes between work and getting over to my sisters house to throw something together so it needed to be something fast, easy, and something I could make without going to the store. She was making the main course (some teriyaki situation and rice) so I was doing up the veggies.
I had just bought a package of spring roll wrappers…. Bingo! The perfect and logical choice. I grab the wrappers, a variety of veggies and after spending 12 of my 30 minutes trying to scrub the oil based paint off of my face and hands, I still managed to completely prepare, construct, and take pictures of these lovely tasty spring rolls. and get over to my sisters in time for dinner.
Impressed?
Damn right!
The stuff. Carrot, beet, asparagus, red cabbage, and kohlrabi, which all (except asparagus, which I just cut into thirds) got cut into matchstick sized pieces with my mandoiln. Then there are the rice spring roll wrappers that we need to make the veggies into rolls. Also a bit of red wine vinegar to drizzle onto the veggies for a little extra zing. And lastly, soy, fresh ginger, and a couple cloves of garlic for a spicy salty dipping sauce.Start by having everything set out and ready to assemble. Fill a large shallow dish or baking sheet with really warm water. Working with one at a time,place a rice wrapper into water and let sit for about 10 seconds or until the paper starts to soften. Remove from water and place on a damp surface (just splash a little water on the counter) Take a little bit of everything and and place on the lower middle part of the paper. Fold in the sides first, then tuck and roll the wrapper as tightly as you can without ripping the wrapper.
Repeat until you have used up all you veggies.For the dipping sauce. Finely grate ginger and garlic and add to soy sauce. Stir… and it’s done.Freshy, pretty and fantastically delicious. And for real, took about 8 minutes to make. (I even had enough time to wash the dishes before we left!)
I am so awesome!
Hump Day Pow!!!!!
-C
Fresh Veggies Spring Rolls
Makes 8-10 but can easily be increased or decreased to desired amount
8-1o rice spring roll papers
Splash of Red wine or rice vinegar
1/4 cup soy or tamari sauce
2 cloves of garlic
teaspoon freshly grated ginger
1 medium carrot
1 medium beet
1/4 head of purple cabbage
10 thin fresh asparagus
1 small kohlrabi
Note… I used the veggies that I had in the fridge at the moment. If you have a bunch of veggies but not these particular ones, use what you have. Pretty much all veggies taste good inside a spring roll!
Gather your veggies and prep by either using a mandolin, a grater, or some sick knife skills, and julienne, shred, or slice you veggies into thin match sticks. Once all the veggies are prepared, sprinkle a little vinegar over the top.
For the rolls…Grab a large shallow vessel (a rimmed baking sheet works great) and add in warm water. Working one at a time, place the wrapper into the water for about 10 seconds or until the wrapper starts to soften. Remove and spread onto a clean, damp work surface. Gather a bit of each veggie that you are adding and place towards the bottom middle of the wrapper. Now fold the sides in over the pile of veggies. Then with the side closest to you, tuck and roll wrapper away from you, trying to keep it tight, but not to tight that it rips.. (Hopefully that makes since.) Place finished rolls onto a damp surface to keep from sticking and if not serving right away, drape with a damp towel or paper towel to keep from drying out.
For the soy ginger dipping sauce. Add grated ginger, minced garlic, and soy into a bowl and mix together. Serve with spring rolls.
Eat one, two, or a plateful. It’s nice to share but not a necessity.
My winter farm share is coming to an end this week. One more pick and then a three week stretch until the summer share starts… WHAT AM I GOING TO DO!!! Stock up as much as I can is what.
I have been strategic about the roots and veggies that I have chosen to bring home the past few weeks.(My farm lets you pick what you want) I know what I can buy at the store, things like carrots and potatoes, so I have been passing those up, but the roots like beets and celeriac… I have been bringing home baskets of those and hoarding them in the fridge and basement in preparation for the laps in farm fresh food and knowing that if I want to by these at the store it s going to coast me a million dollars a pound. (a for real million dollars)
Yup, lots of roots around here, especially celeriac root which is fantastic. I am kind of obsessed with celeriac, with its fibrous, knobby exterior, soft but almost meaty texture inside, and a flavor that is close to celery but so much better. I don’t know why it has taken me so long to do a posting featuring this amazing root vegetable (I eat it almost every day)
So here, an amazingly tasty, hearty but not heavy, celeriac recipe. Perfect for spring and the change into summer…. Mustard roasted celeriac with an fanatic split peas gravy that will have you licking you bowl clean.
The stuff….For the split pea gravy we have a carrot, a parsnip and a large onion chopped into small chunks. Salt, thyme, a bay leaf and of course the split peas. Then there is the celeriac root* sliced into 1/2 inch thick rounds and some plain old yellow mustard .
*Note. I don’t peel my celeriac root. I really enjoy the fibrous exterior but realize that some don’t(The mister does not like it) so peel it if you want.
Toss the chopped parsnip, carrot, onion and the spices into a pot on medium heat and let veggies sweat a few minutes until tender. Add in the split peas and enough water to cover everything. Turn pot on high and bring to a boil, then cover and turn to low. Make sure to give the pot a good stir ever few minutes and add more water if needed
While the gravy is cooking, take the celeriac rounds and brush each side with yellow mustard, sprinkle with pepper, and place on a baking sheet. Stick into the oven to roast for about 25 minutes, flipping the rounds after about 10 minutes.
Once the peas have soften, remove the bay leaf and puree until smooth and oh so creamy. Taste and add more salt and pepper if needed. If you find that the gravy seems to thick, just add in more water until it’s the consistency that you want. The gravy is made, the celeriac is roasted… now we are ready to eat!! Stick the celeriac on a plate and dump good amount of that gravy right on top. Feel free to add a bed of spinach, or a grain or anything you want, because why not, and also some chopped tomatoes for a little acid and prettiness.
Serve with the fanciest knife and fork you can find. Extra yellow mustard and sriracha sauce are great condiments to have close by.
Happy Tuesday!
-C
Mustard Roasted Celeriac with Split Pea Gravy
2 medium celeriac roots
6 tablespoons mustard
1 large carrot
1 medium parsnip
1 large yellow onion
2/3 cup split peas
2-3 cups water
1 bay leaf
2 teaspoons thyme or italian spice mix
salt and pepper
spinach (optional)
diced tomatoes(optional)
Preheat oven to 400 degrees
Small dice the carrot, parsnip and onion and throw into a large pot. Spinkle with salt and pepper, add in the thyme and bay leaf and add a splash of water. Stick on stove on medium heat and stir. Let cook until the veggies become soft and fragrant. Now add in the split peas and 2 cups of water. Bring to a boil then cover and turn heat down to medium low. Let cook until the split peas become tender (about 25 minutes) string on occasion and adding more water if the peas are not completely summered while cooking.
Once the peas are tender, let cool for a few minutes, remove bay leaf, and either dump into a blender or blend with an immersion blender until nice and creamy. If gravy seems to thick, add in more water.
Scrub or peel celeriac roots and slice them into 1/2 inch think rounds. Place on a baking sheet and brush mustard on both sides and spindle with pepper. Stick into oven for about 10 minutes, flip, then back into the oven for another 15 or so minutes, or unit the celeriac is tender.
When the celeriac is done remove from oven and stick a few rounds on a bed of spinach (or not, or any kind of grain or green you like) Top with a hearty helping of the gravy and toss on some chopped up tomatoes.
Eat with at knife and fork like a fancy person.
Yesterday I spent the entire day (ok maybe not the entire day), but a the better part of the afternoon defrosting my freezer. Sure, I do the occasional chip chop here and there, just enough from around the freezer door so it will close, but ever few months I notice that everything in the fridge is not staying cold and that the freezer is not freezing stuff. Thats when I know its for real time to defrost. So a few days ago when I noticed my bananas were turing to liquid in the freezer, I knew it what I had to do….Completely empty the fridge and melt/hack away the 2-4 inches of ice build up that accumulated. It is such a freaking pain in the ass.So on this defrosting day, I took all the stuff from the freezer, stuck it in a cooler, and the rest of the stuff, which is basically all veggies, I just tossed on the table. As I am hacking away with a metal spatual, a wooden spoon, and a constant rotation of pots of boiling water, I was thinking about dinner. I figured I might as well just eat up as much of the veggies as I could, you know, so I didn’t have to put them back in the fridge. And also, I was getting pretty annoyed because this particular defrosting session was taking way longer the anticipated, which made making dinner seem like another pain in the ass. I figured I might as well just eat everything that is already out on the table, which pretty much narrowed down the “whats for dinner” conversations because it was already all over the place. And so dinner was a humongo salad for me, and for the mister, I made him a monster of a veggie sandwich. (my salad was exactly the same stuff as the sandwich, minus the bagel) Easy, fast, super duper yummy, pretty and piled so high with tons of veggies that the fridge is pretty much empty now.
Look at the is beast. I don’t call it a monster sandwich for nothing.
The stuff included in this monster veggie sandwich..
Romaine lettuce, tomato, avocado for there is not real sandwich without them. Thinly sliced radishes, cucumber,a and onion for nice crispy crunch. Shredded beets, carrots, and purple cabbage to give more crunch and a bit of sweetness. Then of course there needs to be something pickled, so I used banana peppers cause they are the SHIT!! And lastly some hummus for a nice creamy finish (plus a bit of protein) and yellow mustard because mustard on everything is just right. Heres to a mountain if goodness that is no longer in the fridge! Served with a another mountain of roasted parsnips and carrots (more stuff from the fridge) and a tall glass of iced tea.
Lucky that today is farm share pick up cause the fridge is pretty much on empty.
Yea it’s Thursday!!!!
-C
A Monster Veggie Sandwich
Note. This is just a guide.. Feel free to use whatever veggies you fancy.
Either a bagel, 2 slices of bread, or a big chunk of baguette (use a gluten free bread if you want or need too)
Hummus- Homemade or store bought
Mustard
Something pickled like pickles, banana peppers , jalapeños or all three
Lettuce, spinach or some kind of leafy green
Tomato
Avocado
Onion
Radishes
Cucumber
Shredded Carrots
Shredded Beets
Shredded Cabbage
To assemble. Ready your bread.. Toast if you want, and stick it on a plate
On either side, smear the hummus and the mustard.
Pick a side, start to stack by evenly disrupting veggies on top of veggies. Place the second piece of bread on top and giving a little smooth to keep it together.
And go at it. Cut in half or don’t. Have a napkin or a long sleeve ready to wipe your face.
Before we left for the weekend, I was was trying my hardest to empty the fridge out of all food with the intention of leaning it empty so I could leave it open to defrost while were were gone. Unfortunately I was not able to make it happen. What I did make happen was emptying it almost completely so that when we got home, we had pretty much no food in the house, except for a few things that probably should be eaten. Plus one of the last things that I want to do after sitting in a car for 6 hours is go to the grocery store, or anywhere for that matter, so I was determined to make with what wet had in the fridge:
Carrots
half of a gigantic kohlrabi
soy milk
iced tea
bananas that needed to be frozen
strawberries
Perfect! A few carrots and half of a gigantic kohlrabi.. plus at the hotel we were staying at, there were fruit bowls in he lobby full apples. Every time I went past the apples (which was a lot) I grab one or two, so I have a few apples (I actually have a lot of apples now). All the things I need for a super awesome salad slaw. Apples with their nice sweet crispiness and kohlrabi with its cabbagey, crunchy earthiness, tossed together with some vinegar, some toasted walnuts and some carrots, I mean, so freaking good. And to make it a bit more of a meal, I made some lentils to go with it. But the best part was there was no need to leave the house!!
The stuff… A huge hunk of a bigger then my head kohlrabi (or 2 normal bulbs). A carrot, an apple, toasted walnuts, red wine vinegar, and some salt.
Pretty simple stuff going on here. Just peel and julienne the kohlrabi, carrot and apple. (no need to peel the carrot or apple unless you want too) and stick it all into a bowl. I used my mandolin, which is one of my favorite kitchen tools ever, but if you don’t have one, a box grater works too.Sprinkle with salt and a good glug glug of red wine vinegar. Chop up the walnuts (some big chunks and some very small pieces makes for good eating), toss it all together and, well that’s it. But wait…. let it sit for a few minutes before serving to really let the flavors draw out.And there we have it. Super fast, full of flavors and crunchy texture. A salad slaw after my own heart.
Serve it as it or add to a bed of greens, rice, or lentils… and make sure to save at least as little… cause its an awesome little pre-bed snack.
Happy Week!!
-C
Kohlrabi Apple Walnut Slaw
2 medium sized Kohlrabis
1 medium apple
1 small carrot
1/2 cup toasted walnuts
red wine vinegar
salt
In a large bowl, julienne kohlrabi (after peeled) apple and carrot. Sprinkle with salt, add in vinegar. Rough chop walnuts and toss the whole bit together. Let sit for at least 10 minutes, if not longer before serving. (A great salad to make ahead of time)
Eat as is, or toss onto a bed of greens, plate of rice or a bowl of lentils.
Any left overs only end up tasting better the next day.
I’ll let you know now, I am a make and eat soup all year long person. I can think of few things better then sitting outside, basking in the sun, hopefully with a light wind, a book in hand, enjoying a nice big cup of some good homemade soup. (Doesn’t that sound so freaking lovely?) This soup right here is perfect for just that. Parsnips are the best, kind of like a big white sweet, yet starchy carrots. And cooked together with a little bit of light and lemony thyme, rich earthy turmeric and a couple more chopped veggie….. you got yourself a nice thick and fragrant bowl of happiness that fills you up without weighing you down. It’s food you can eat that fills you up, leaves you feeling cozy, yet still wanting to hop on a bike or lace up the running shoes. Hearty without the feeling of all the heaviness.
A perfect soup for spring! (or summer, winter, or fall)
The stuff. Parsnips, carrots, onion and garlic. Thyme and turmeric, salt and pepper. the tinniest bit of oil and water (water not shown)Chop all the veggies and the garlic, drizzle a dutch oven or a pot with oil, toss in the veggies. Add the turmeric, the thyme, and 1/2 cup of water. Sweet sweating the veggies. Turn pot on medium and cook until the water completely cooks out. When the veggies start to brown and stick to the pot, deglaze with water. Give a good stir and keep cooking. Repeat the deglazing process until the veggies are super soft and ready to blend. (I did this 4 times.. it only took 10 minutes)Add enough water to cover the cooked veggies. And now blend the heck out of it.. Go as smooth or chunky as you want. I blended as smooth as I could get with this crappy immersion blender. (Blender on loan until I finally decide on, and buy a new one)And there you have it. Scoop into bowls, add lots of cracked black pepper, and go to town. I made enough to save a bowl for later… it didn’t last for later.
Soup so good.
-C
Parsnip Thyme and Turmeric Soup
4 large parsnips
2 carrots
1 whole onion
3-4 cloves garlic
2 teaspoons thyme
2 teaspoons turmeric
salt and pepper
olive oil
water
Dice up the parsnips, carrots, garlic and onion and place into a large dutch oven or pot. Drizzle with a bit of olive oil, sprinkle on the spices, salt and pepper and add about 1/2 cup of water. Turn heat on medium and start cooking down the veggies. Once the water evaporates and the veggies start to caramelize, deglaze pot with about a 1/2 cup of water. Give pot a stir, and continue to cook until water evaporates. Repeat this 2-3 more times until the veggies are super soft and fragrant.
When the veggies are ready, add enough water to the pot to submerge the veggies. Bust out the immersion blender or dump into a blending device and blend until smooth (or the consistency that you want) Have a cup of water ready to thin out if needed. When blended, taste for salt and pepper, add more if you want, and cook on low heat until you are ready to serve.
Garnish with a lot of good cracked pepper
Eat from a vessel, use a spoon
Is it really for real April? Where has all the time gone and where the hell is the warm weather? It’s not funny anymore. I am officially OVER winter! Ok, so now that I got that off my chest…..
Last night the misters Dad came over for a long awaited dinner accompanied by talk of life goals and what her referred to as “narratives” or the story of our lives. Some deep shit to be talking about at dinner, especially with zero alcohol to be had.
Me, being so super awesome, was all up in taking charge in making the food. Except that last night I didn’t have a bunch of time and honestly, much energy to be doing anything. And sure, I could have just made a pot of spaghetti, but that just felt like cheeping out. So Polenta it was. And because I just made a hug pot of navy bean, those were going into the polenta too.
Beany polenta baked in the oven with a tomato sauce cooked on the stove. About 5 minutes of hands on time and an hour to cook it all. It’s the perfect meal to make when you have guests coming over. Fast prep, into the oven and on the stove, and then you have an hour to clean and make yourself presentable. See, I am a thinker. (I ended up skipping the making myself presentable part… I stayed in my gym clothes.. no need to impress family right?) Then after about and hour you end up with a hearty healthy pretty meal, all from scratch, that seems like you spent the afternoon cooking. When in fact you spent the past hour vacuuming and watching Gilmore Girls.
The Stuff. Cornmeal, water, navy beans and parmesan for the polenta. Crushed tomatoes, garlic, dried basil, onion, carrot, zucchini, and summer squash for the sauce. Salt, pepper, and olive oil all around.
Cornmeal and water go into a cast iron skillet (or any oven safe dish) with a pinch of salt and pepper. Give it a little mix and stick it into the oven at 400 degrees .
Once the polenta is in the oven, make the sauce. Chop up all the veggies and stick into a dutch oven or sauce pot with a pinch of salt, the basil and a good drizzle of olive oil. Stick on medium heat and let veggies cook down a bit. When the veggies are tender, add in minced garlic, crushed tomatoes and another drizzle or oil. Turn burner to lowest setting and simmer (giving it a stir every now and then) for about 45 minutes or until the polenta is done. After about 30 minutes when the water had pretty much all cooked down, take the polenta out of the oven and stir in the beans, the parmesan, a tablespoon or two of olive oil and salt and pepper. Smooth top out and sprinkle with more pepper, parmesan and drizzle with a bit more oil. Stick back into oven for another 1/2 or until polenta has formed a crust and no longer giggles when you wiggle the pan.
Pull polntna from the oven and let sit for at least 1o minutes.
Two big spoons and a pile of plates. Have the people serve themselves!
Have a Happy Day!
-C
Baked Navy Bean Polenta with Chunky Tomato Sauce
Serves 4 hungry people
For the Polenta
1 1/2 Cups Course Ground Corn Meal
4 Cups Water
3 Cups Prepared Navy Beans (Or just use to cans)
1/2 Cup Parmesan Cheese or Vegan Parmesan (Optional)
3 Tablespoons Olive Oil
Salt and Pepper
For the Sauce
One 28oz Can of Crushed Tomatoes
1 large Carrot
1 Small Onion
4 (or more ) Cloves Garlic
1 teaspoon Dried Basil
1 Small Zucchini
1 Small Summer Squash
Olive Oil
Salt and Pepper
Preheat oven to 400
In a large skillet, mix together the cornmeal and the water and add a good pinch of salt and pepper. Place into oven for about 30 minutes or until the polenta starts to congeal at the edge of the skillet nd most of the waster has cooked down.
Remove skillet from oven and with a whisk or wooden spoon, mix in the beans, the parmesan (if using) and 2-3 tablespoons of olive oil. Smooth out mixture, sprinkle with salt, pepper, parmesan and drizzle with olive oil. Stick back into oven for another 30 minutes or so. Polenta is done when it no longer wiggles when you giggle the skillet.
For the sauce
Small dice the carrot and the onion and stick into a medium dutch oven oor sauce pan with a drizzle of olive oil. Place on medium heat and cook until the veggies are tender. Add in tomato, minced up garlic and basil. stir and let simmer on stove top for about 45 minutes. When you place the polenta back into the oven for the second bake, dice up zucchini and squash and add to sauce. Stir and keep on simmer until ready to serve.
Once the polenta has completely cooked, remove from oven and let sit for at least 5 minutes…10 is better to solidify.
Spoon big piles of polenta on a plate or in a bowl, top with a big heap of tomato sauce. Sprinkle with a little more parm and maybe another dash of pepper .
Eat…..Spoon or fork is recommeded.
Happy Food!
I love mustard, and when I say love, I mean LOVE. I eat it on anything and everything. And not just small quaintites, I buy jumbo sized containers of the stuff because I go through it so fast. Over the past few years I even started taking down others with my mustard eating obsession. Sisters, brothers, even some of the littles are now mustard eating feens. One of my little nieces is now just as bad as me. I don’t think I have seen her eat a single meal without a side of mustard. Her favorite snack, clementines and mustard, although sometimes she skips the clementines and just goes in with her fingers. Oh so good. I think that child could possible be mine. And yes, it’s mostly the yellow grocery store variety of mustard being consumed, but yellow mustard is just the tip of the ice berg. There is a whole world of flavors, textures and colors when it comes to the humble mustard seed. Whole grain mustard, to me, is one of the best and easiest to adapt to any persons specific taste. You can make it plan or add in just about any spice, vinegar, even a little sweetness that you might like. One of my favorite variations of this mustard is to skip the vinegar and use picked jalapeño juice. Aah, my mouth is watering just thinking about it.
So if you are anything of a mustard connoisseur, you really must, at least once, make your own batch.(It’s so easy!) And you will love it and share it with all your friends and they will think you are a bad ass for making your own mustard and your life will just be so great. All because you are now a mustard maker. Yes.
Yellow mustard seeds, brown mustard seeds, apple cider vinegar and salt. The most basic ingredients.
Note- If you want, add in a pinch of any spice that you want.. Chili flakes, granulated garlic, turmeric…. And you can use the vinegar of your choice. I like apple cider because its mellow with a slight sweetness but white or sherry or any vinegar would be great. Even left over picked juice is fantastic too.
In a large jar, combine the mustard seed , twice as much vinegar and a pinch of salt. Cover and let sit for on the counter overnight until the seeds have soften and look almost like caviar.
Now blend those seeds. You might want to add another splash or two of vinegar to help blend and to thin out a bit. Chose how creamy or seeded you like you mustard. I like to make it creamy but seedy so I blend it half way to creamy.
Taste and add another pinch of salt if its needed and……..
You have got mustard! Make sure you have a good snack ready to eat with it.. My go to is carrots. I could eat this all day long.
Enjoy and have a great Tuesday full of mustard and stuff!
-C
Whole Grain Mustard
1/4 Cup Brown Mustard Seeds
1/4 Cup Brown Mustard Seeds
1 Cup Apple Cider Vinegar
1 Teaspoon Salt
Optional..A pinch of Garlic Graduals, Red Pepper Flakes, Curry Powder (Anything you want)
Combine all ingredients into a large jar that has at least a few extras inches for the seed to expand. Leave on counter for 8-12 hours.
Once seeds are nice and soft and have expanded, either eat as is (Mustard seed caviar) or blend the seeds to desired consistency (I like it half smooth, half seedy) Add a pinch more or salt and another splash or two of vinegar to help blend.
What are you going to be doing this weekend? Are you dressing up all crazy, taking a little or two door to door for bite sized pieces of candy, or are you maybe giving out candy? Are you going to some spectacular Halloween party, or are you thinking more tricks then treats and are planning on TP-ing the neighbors or creating some mischief around town.%u00a0
Whatever you are doing, it’s sounds like it’s going to be a blast. Just note,%u00a0if you are being mischievous %u00a0don’t be an asshole about it. Stealing candy from kids is wrong,(steal your candy from adults) and TP is cool but spray paint and things that are permanent are not. And stay away from my houses!%u00a0
Anyway, the Halloween situation %u00a0is always the same with me and the mr. We say that we need to do something fun and different every year. Maybe a party, or even just some human intreat ion. But just like every year, we give in to our inner hermits. Our Halloween night will be as followed: Lock ourselves in the house, drawing the shades,(note that we would totally give out candy, but our door is down a very narrow and dark driveway, behind a fence, and pretty much inaccessible to people) watch a movie %u00a0(thinking Donnie Darko or maybe even old reruns of Halloween Rosanne.)%u00a0eat popcorn,and go to sleep at a very reasonable hour. %u00a0And now that I say it out loud, our evening sounds like the most perfect way to spend the night. Especially because of the popcorn.
Let’s just stop and think about this popcorn a minute%u2026%u2026…
Ok, so do you get it now?. This is an epic popcorn combo.%u00a0Mustard is for everything. A slightly sweet honey mustard all drizzled on %u00a0popcorn, well that’s just craziness. And if you are like the mr., the pretzel crumble just takes it over the top. If we had made plans, I would probably have to cancel just so I can stay in an eat this popcorn.
And I have a hunch that this flavor combination will pair very well with a handful or two of some halloween candies.%u00a0
POPCORN TIME!!!!!
The stuff. A big ass bowl of air popped popcorn. %u00a0Spicy brown mustard (can use any mustard) honey (can use maple) a little olive oil and a few pretzel sticks. (can use any pretzel shape you like)
Bag the pretzels, grap something heavy (rolling pin works great) and smash the pretzels into tiny little bits.
In a little pot ) mix mustard, oil and honey together. Place on medium %u00a0heat and mix continuously until the mixture is hot and a nice liquid pourable consistency.%u00a0
Now you can do this any way you want, but my way is probably the best. Dividie popcorn in two bowls and drizzle each bowl with equal amounts of mustard sauce.
Flip one of the bowls ontop of the other and shake the crap oiut of it.(or until the popcorn is evenly coated)
And the popcorn is all nice and evenly coasted.%u00a0Now dump in the crushed pretzel and repeat the double bowl shake.
Check it out%u2026 Some fantastical popcorn
Now don’t you want to turn the lights off and snuggle on the couch with this bowl?
Share if you want, but hey, it’s just popcorn so you can taotally eat it all yourself.%u00a0
Happy Friday.. And Happy Halloween
-C
makes 10 cups (enough to share between 2 people)
10 ish cups of air popped popcorn
3 tablespoon spicy brown mustard
2 tablespoons honey (sub maple or agave if vegan)
1 tablespoon olive oil
3-4 pretzel rods (or whatever shape) which makes about 1/2 a cup smashed (use gluten free if needed)
Take pretzels and place them in a bag of some sort and using something heavy (like a rolling pin)%u00a0smash the pretzels until they are a smallish crumb (some big shanks are good too)
In a small sauce pot, combine the mustard, honey, oil, and mix to combine. Stick pot on stove and heat on medium until sauce is hot and liquidy. (can get the same result by using a microwave safe bowl and sticking it in a microwave at 20 second intervals until %u00a0hot)
Evenly distribute popcorn into two big bowls. Take the warmed up sauce and drizzle all over popcorn in %u00a0each bowl the, for the fun part,%u00a0flip one bowl onto the other and shake the popcorn all around to evenly coat. Remove a bowl, toss in the pretzel crumbs and pieces and place the bowl back on. Shake again.
Feels like we are nearing the end of summer, no? I am all on board, feeling that feeling one gets when the season starts to change over. It’s that deep down in my bones feeling, the feeling my body gets because it knows whats coming and is getting ready. The shift is coming on fast. Grasp those last summer days as much as you can.
Another intense week. After a super duper good camp at Ricker State Park, it was full steam ahead. The mr has been super crazed, all out, sanding and assembling bowling alleys into gigantic countertops for a local restaurant. Most days he is gone as I get home, home when I am in bed. But not quite as bad as last week. We have managed a few meals together and an adventure or two, like when we went to a church in the islands,, had ourselves a picnic and picked their apples. The apples were not good yet. But the church was lovely.
Other then being busy busy, there was other stuff. Barb and her man child came over for dinner and brought along Coco. We ate, he cried. I gave him a cookie, he laughed and ran around like a lunatic. (Coco, not barbs boyfriend) The older littles have been away at summer camp all week so we saw none of them.(We miss them!) We had dinner at my moms with the boys and Barb and I was lucky enough to see the world greatest tan lines ever. I also worked the last day of art camp (YAY!), picked blackberries, gave the mr a haircut, and scrubbed the shit out of the bathtub. All the fun stuff. Not fun stuff was when the car battery died when I Was trying to leave the house, the underglaze I was bringing home to use dumped all over me and the inside of the car (I was so pissed!) or when I was at the grocery store, lost my credit card, freaked out and ran around the store, then drove home, and back to the store looking for it, only to find it underneath one of my canvas bags in the shopping cart. The whole freaking time. At least I found it though cause I was about to cancel it. Look at me seeing the bright side.
Then I picked up farm share and all the tomatoes. Coming off of last weeks tomato hall, and all the tomatoes that are starting to come in in my garden, I am up to my ears in so many tomatoes. I have been cooking down pots and pots, freezing and jarring and of course eating. Eating so many tomatoes that my belly is on fire. And of course I have no help from the mr. He says he is officially tomatoed out. I wonder how is that possible? I think he is just being a butt is all. But whatever, no more tomatoes for him. (that he will know of. HAHA) And I’l just have to keep on keeping on and eat them. The season only lasts so long.
Yesterday the mr and I took a few hours to get away. We packed lunch and went in search of land. Picked a few properties to look at (but only made it to one) and hiked around the property. It was really nice, had a lot of what we are after but probably not THE property. But close so we are getting there and hopefully we will get there sooner then later. Ready to build our cabin life. And then we went home, I started cleaning and the mr went back to work and didn’t get home until like 3 am this morning.
Not gonna lie, I am bumming. We are not going camping today because well, the mr is still working like a madman and installing those bowling alleys today and tomorrow and we just can’t make it happen. So today, well I am going to make good use of it. Probably going to weed out some dead shit from the garden, maybe do a little replanting. Grocery shopping, clean the car, do a few loads of laundry, return books to the library, process food like a boss. (More tomatoes, hot sauce, freeze chard and pickles!) That and probably do some porch reading. And coffee all day. All. Day. It’s no camping but it will do. Next weekend we are back at it.
Internet read by me, shared with you.
-Are you a camper? If you are, here is some things to consider to optimize a good time. 10 rules for picking the perfect campsite
-Eat all the plants. Gorgeous Portraits of America’s Wild (and Surprisingly Delicious) Edible Plants
–You Should Pour Vinegar into Your Washing Machine—Here’s Why. What can’t vinegar do?
-Always a good idea when you pack lunches or any food. HOW TO MAKE REUSABLE SANDWICH BAGS AND SNACK BAGS
-I don’t consider myself a cat person or a person who wants a book of cats, but this book looks, well, it freaking awesome. A New Book Compiling Hundreds of Timeless Feline Photos by Walter Chandoha is the Cat’s Meow
–Oatly and the quest for the perfect alt-milk. Have you had Oatly? I haven’t but I do really like me some oat milk.
–Is crying truly cathartic?I think it can be. Can also be annoying and exhausting.
-Why does anyone ever listen to anything that guys says, ever? Greenland is not for sale. Seriously, why?
–Don’t Burn Trees to Fight Climate Change—Let Them Grow. I just thought that was common sense but what do I know.
-I don’t know about you, but I start baking a lot more around this time of year. So this is good to know. The Best Substitute for Cake Flour and Self-Rising Flour in Baking
For a quite a while now (like at least a year)%u00a0%u00a0the mr and I have had a standing Tuesday night dinner date with my sister Shannon. It’s been great. We don’t get to see each other as much as we would like so having a day where we can catch up and hang out is really nice. Plus, I get to make her dinner and I love to make her food cause she really likes the stuff I make.
%u00a0Well over the course of the past month we have not had our Tuesday dinners (always her fault%u2026 sick kids or some shit)
But last week, I was determined. I miss my sister and was real pumped to make her some food. So I sent her a text a few days before, saying dinner for sure no excuses! Then texted her again that Tuesday morning%u2026 just to make absolutely sure%u2026. And she said yes Hooray! Sister time, I was excited.
But then sometime around lunch she sent me this %u00a0″I know I am really lame, but going to have to cancel tonight.”.
Thoughts that ran through my head.. “That BITCH!.. and What the FU*K!.. and can she be anymore of a butt hole?”
But it ok, I get it. She is constantly working and taking care of monsters (the kids) and things happen.%u00a0%u00a0I am really not mad, I just really miss my sister, So whatever, she canceled, but I still wanted to make what I planned on making and that’s %u00a0what I did. These enchiladas, so freaking good, ! And it’s really to bad that she ditched us cause I know that she would have been all up in these.
So it’s Tueday again. I talked to her last night. She says we are on for dinner tonight%u2026 My hopes are high, but I think I am going to have a back up dinner plan. And if she cancels tonight, I am going to spray paint boobs on her front door.
I’ll let you know how it goes.
Now to the enchiladas!
The stuff. Pumpkin of course!.plus the seeds in that pumpkin. We also need black beans, red onion, garlic and kale. Paprika, cumin, chili powder, salt pepper and olive oil %u00a0Thats for the filling. Now for the sauce we need tomatillos, another onion, jalaepnos, lemon, parsley (I wanted to use cilantro, but couldn’t find any so you can use either) We are going to use salt, pepper and oil in this too. And some tortillas to wrap it all in!
First off, turn the oven on to 400.
Now grab the tomatillos and remove the outer skins. Chop up the white onion and the jalape%u00f1os and toss everything into a lightly oiled skillet. Sprinkle l with a bit of salt and stick it into the oven to roast.
Now we need the seeds from the pumpkin so slice the pumpkin in half and remove all the seed and guts.%u00a0
Gather the seeds, rinse and dry them and toss them into a lightly oiled skillet (or baking sheet) and stick those into the oven too.
While the stuff is in the oven roasting, grab a chunk of pumpkin (with skin on, or if you want you can peel it, but it really is pointless) and shred.. and shred until you have about 2 1/2- 3 cups worth or pumpkin. Also , small dice the red onion and mince up the garlic while you are at it.
Place the onion and garlic in lightly oiled skillet and cook for a few minutes, then toss in the pumpkin with a few splashed %u00a0of water. Cook a bit longer until the pumpkin is starting to become tender. Now toss in the spices and the beans and mix it all around.
And lastely, chop up the kale and mix that into the skillet as well.%u00a0
After the filling is made, the stuff in the oven is most likely done. When the tomatillos and onions are all soft and roasted and the seed are golden brown and crunchy remove them from the oven.
Pour the roasted tomatillos noon and peppers, the juice of the lemon, a handful of roasted seeds, and the fresh herbs into a blender with a drizzle of olive oil and blend until smooth.
Now all the stuff is ready to go.
A big scoop of pumpkin bean mixute in a tortilla. Wrap it up and stick into pan seam down (I used the same skillet that I roast the tomatillos in)%u00a0.%u00a0Repeat until stuff is gone (make sure the enchiladas are all nice and snug)%u00a0then pour sauce all over.(you can use all the sauce or save a little for to serve with)
And into the oven goes!
After about 20 minute, the sauce is thick, the edges of the wraps are a little crispy, and it is all ready for eating
Garnish with more roasted seeds and some chopped up green stuff!
%u00a0And eat you heart out!
And this is why you don not want to cancel dinner plans with me!
Happy Tuesday People!
-C
1 small sugar pie pumpkin (only going to use about 3 cups shredded so you are going to have some left over,Maybe Pie?)
2 cups cooked black beans
1 small red onion
3-4 cloves garlic
few kale leaves
1-2 teaspoons Paprika*
1-2 teaspoons chili powder*
1-2 teaspoons cumin*
salt and pepper to taste
5-6 medium sized flour torilttas (or any kind you like)
For the Tomatillo Sauce
1 pint tomatillos %u00a0
1 medium yellow onion
1-2 jalape%u00f1os %u00a0(or none if you don’t want them)
1 lemon
handful of toasted pumpkin seeds%u00a0
A bunch of fresh cilantro or parsley%u00a0
salt and pepper to taste
olive oil%u00a0
*Use a teaspoon of each, taste, then add more if you want%u2026 I like a lot of spice so I used a lot.%u00a0
Preheat oven to 400
Chop your pumpkin in half and coop out the seeds. Rinse them, dry them and toss them onto a lightly oiled skillet or baking pan and stick into the oven to roast until golden brown and crispy, giving them a little stir after about 15 minutes %u00a0%u00a0Should take about 20-30 minutes.%u00a0
For the sauce …
Grab the tomatillos, the yellow onion, and the jalape%u00f1os. Remove papery skins from the tomatillos and toss into a lightly oiled skillet. Cut the jalape%u00f1os in half (remove seeds and ribs) and chop up the onion into a few chunks. Toss that into the skillet too. Sprinkle with salt and stick that into the oven . Cook until tomatillos are soft, (stab them with a fork, if they kind of pop, they are done)%u00a0and the onion iand pepper is tender.. about 25-30 minutes. %u00a0 When done, remove form oven, let cool for a few minutes, then transfer to a blender. Add in a handful of toasted pumpkin seeds, the juice of the lemon,, and the pare sly or cilantro. Blend until smooth.%u00a0
For the filling… (I do this while the stuff is in the oven)
%u00a0Grab the red onion dice it small, and grab the garlic and mince it and toss into a skillet.%u00a0%u00a0Drizzle with a tiny oil. and a pinch of salt and place on the stove on medium low heat to soften a bit.%u00a0%u00a0Take a chunk of pumpkin and shred it until you get about 2 1/2- 3 cups of pumpkin. Toss the shredded pumpkin into the skillet with the cooking onion and mix in the spices and a splash or two on water. Let cook on stove for about 8-10 minutes, or until pumpkin is slightly tender. Now mix in the beans and chop up the kale leaves into little pieces and toss that in too. Mix it all around and remove from heat.%u00a0.
To assemble.%u00a0
Take a big scoop of the filling and place in a flour tortilla. Roll up and place,seem down,%u00a0into a skillet or roasting pan (I used the skillet I roasted the tomatillos in) Repeat until you have used up all the filling. The enchiladas should be snug.
Now pour the sauce all over eht op, spreading it over the sides. You can use all the sauce you made, or save little for serving)
Place into oven and bake for about 20 minutes or until the sauce is starting to become a lithe golden brown. Remove, let cool for a few minutes, and finsih with a handful of toasted pumpkin seeds and some pretty green stuff.
Corn is the name of the game, and this game I won!
The mr doesn%u2019t much like to eat corn. But I do. And this time of year I get like 10 ears of corn every week from farm share, which is a lot of corn for one person to have to eat every week and sometimes I just can%u2019t do it. So every now and then I make something that I think the mr will tolerate, if not like, to get him to help me eat the stash of a hundred ears or corn that I have going on in the fridge.
These fritters helped me with that and I think with all the future corn that I will get from the farm. They are soooo good! The mr liked them! As for me, I couldn’t stop eating them and almost didn’t want to share because they we just so dang good. Sweet fresh corn, nutty and slightly chewy oats. Scallions. And that%u2019s pretty much it. So fresh and clean and yummy tasting. A summertime fritter situation that takes corn to a place where even the corn hater likes it.
Although who the hell hates corn? I know one person. One. And I live with him. Weirdo.
Anyway, to the fritters!
The stuff. Fresh sweet corn, old fashion rolled oats, and a few scallion. Also some ground flax seed, water, baking powder, salt and pepper, and a little oil.
Start with oats. Add most of what we need to a blender and blend until it becomes oat flour.
Then the corn. Remove the kernels from the cobs. Best way is to hold corn in a large bowl and cut downward. Don%u2019t want corn flying all over the place!
Add most of the corn you just cut off the cob to the blender with the oat flour, along with with flax and water. Blend until smooth.
Chop the scallions into thin and tiny pieces.
Now dump the contents of the blender into a bowl, add in the scallions, the baking powder, and the extra oats and corn. Mix it all up and then let the batter rest for a few minutes (like 10) so the oats have a chance to really absorb all the liquid.
And then to cook them. Heat a lightly oiled skillet to medium high heat. Once skillet is hot, drop scoops of batter into it. Cook for 3-4 minutes or until the bottom is a nice deep golden brown. Flip and cook the other side the same.
When fritters are done cooking, place them on a wire rack. So they don%u2019t get soggy.
And then serve them right away. I ate mine with fresh salsa. Definitely the way to go. So GOOD!
Now eat your corn.
-C
makes about 12 fritters
3 ears fresh corn ( about 1 1/2 cups of kernels)
1 1/2 cups rolled oats (gluten free if needed)
1/2 teaspoon baking powder
2-3 scallions
1 tablespoon flax meal
3 tablespoons water
salt and pepper
a little oil for skillet
Combine water and flax meal, mix and set aside.
Place 1 cup of oats into blender or food processor and blend for about a minutes or until the oats are a fine flour.
Grab corn and remove from cob. Best way to do this is to place corn vertically in a big bowl and cut downwards so the bowl catches all the kernels. Cut enough corn until you have about 1 1/2 cups of kernels. Also, garb scallions and chop into very small, thin pieces.
Add in a cup of the corn, the flax and water mixture, baking powder, and a pinch of salt and pepper. Pulse or blend until completely combined and the mixture is mostly smooth.. Dump mixture into a bowl and add in the remaining corn, chopped scallions, and oats and mix together. The mixture should not be runny, but also should not be dry enough to pack together. If the mixture seems too dry and tight, add in a tablespoon or two more or water. To wet, add in a small handful of oats.
Once batter is mixed, set aside for about 10 minutes to rest.
Grab skillet and place on medium high heat. Add a touch of oil to pan and make sure it evenly coats the bottom. Once pan is preheated, add scoops batter into pan (about 2 tablespoons each). Cook first side for about 3-4 minutes or until dark golden brown, then flip and cook the other sides for another 2-3 minutes until a dark golden brown. Remove from pan and either place on a wire rack or a plate. ( I recommend a wire rack just to keep them from getting soggy.)
Serve right away. Fresh salsa goes amazingly with them!
Any left overs can be stored in fridge and reheated in the oven.
Pineapples have been on sale all week long. I think it’s because Easter and I guess people need pineapples for Easter for some reason. Does Pineapple have anything to do with bunnies or Jesus? I think not. Pretty sure it has something to do with cake or ham or some shit, but I honestly don’t care because I just like the fact that I can buy a few (like 3)%u00a0pineapples without breaking the bank.%u00a0(I think I am going to buy 3 more for the dehydrator) Plus it is always good to have a pineapple or 3 on the counter at home. You never know when you are going to need one.%u00a0So lets give a shout out to the Easter bunny and %u00a0Jesus. Thanks for the cheap pineapples.%u00a0%u00a0HA!
So now you are have those pineapples, you are going want to eat them. And maybe you don’t want to eat them with cake or ham or some shit. You are going to want to eat it the best way…In a stir fry.%u00a0
This is by far one of my favorite stir fry combinations. Pineapple does amazing things when cooked a bit, especially with soy, broccoli,%u00a0and tofu. This dish definitely let’s pineapple reach it’s full pineapple potential. It is so good that tI think I might even prefer my pineapple cooked along with savory stuff. It is just so right and seriously so freaking good. The mr even get excited for it and he is not the excitable kind of guy.%u00a0Plus it’s fast (especially if you have already cut up your pineapple) and easy because stir fry and that’s what stir fries are. Fast and easy, just like……….(insert your favorite fast and easy person and then chuckle)
And don’t try to use canned pineapple because no.%u00a0%u00a0Just get the fresh one,even if it’s not on sale.%u00a0It’s a must.%u00a0
The stuff. A pineapple (you are only going to need 1/3 of this, but you can never have too much fresh pineapple on hand), a big head of broccoli, a little cabbage, and some firm tofu. %u00a0Also need some soy, a few cloves of garlic, a little fresh ginger, a bit of oil, and pepper.%u00a0
Dice up the tofu into cubes and place on a clean dish towel to absorb some moisture.%u00a0
Grab the fresh pineapple. Cut it up the way you do, but the easiest way %u00a0for me is to cut in half the cut that half into fourths then cut the skin away. You are going to have a lot of extra pineapple so snack as you need too. I always eat like half of what I am cutting up and end up with pineapple gut. SO maybe watch yourself.%u00a0%u00a0
Pour some soy into a cup and mince the garlic and ginger.%u00a0
Garlic, ginger, soy. Looking good.
Cut up about 2ish (or more if you want) pineapple into small mouth sized pieces. Break Broccoli head into small florets and shredded the cabbage.%u00a0
Tofu into a lightly oiled hot skillet with a splash of soy, cooked until a nice crisp brown on all sides.%u00a0%u00a0Once it is cooked, remove from pan and set aside.
It’s the broccolis turn. Add in the florets and a splash of water to start cooking down for a few minutes, it need the head start.%u00a0
Once the broccoli turns bright green and is slightly less raw, add in the pineapple and cook until the broccoli is slightly tender and the pineapple starts to caramalize which will take about 5-7 minutes.%u00a0
Add the tofu back in along with the shredded cabbage and dump the soy ginger garlic mixture all over.. Keep cooking and stirring around until everything is hot and the liquid has mostly been absorbed.%u00a0
That’s some stir fry ladies and gentlemen.%u00a0
You might want some rice to accompany your stir fry so think about it and have it ready. Other then that, it’s food to face time.%u00a0
Enjoy the best stir fry ever.%u00a0
Bye.
-C
serves 2
1/3 of a fresh pineapple (about 2 cups cubed)
1/2 %u00a0block firm tofu
a large head of broccoli (about 2 1/2-3 cups of florets)
1/4 head of red or green cabbage (about a cup shredded)
2-3 cloves garlic
3 tablespoons soy or tamari
1 tablespoon freshly grated ginger
pepper
Cooked rice to serve with (Optional)
Cube tofu into 1 inch pieces and either place on a dry towel to absorb the moisture or place the tofu into the microwave and heat for 2 minutes. When you take it out of the microwave there will be a lot of liquid…pour it off and pat the tofu dry.%u00a0
Cube fresh pineapple into similar sized pieces and break broccoli into small florets. Shred cabbage.%u00a0
Mince garlic and add to a bowl or jar with the grated ginger and soy sauce.%u00a0
Place a large skillet on the stove an medium heat. Drizzle in a little olive oil. Once oil is hot, place the tofu in with a splash of soy, cooking until all sides are a nice dark browned. Remove the tofu from pan and add the in the broccoli. Add a splash of water and cook for 5 minutes. Then add in the pineapple and cook for another 5-7 minutes or until the pineapple starts to caramelize and the broccoli os no longer raw.%u00a0%u00a0Add the tofu back in along with the shredded cabbage and pour the soy garlic ginger mixture all over. Sprinkle with pepper to taste.%u00a0Cook for another 5 minutes or until the liquid has cooked down.%u00a0
Serve with rice or quinoa and extra soy if needed.
Guess what guys %u2026.I got myself a sick vintage waffle/ griddle iron. I couldn’t be more thrilled!!!%u00a0I found this thing at the local recycled goods store the other day, along with a very beautiful old white pyrex mixing bowl. It was one of my best thrift store scores! (Checking out the inventory and the condition of all the old things that day, I would say an old lady had just died and all her perfectly keep, mint condition kitchen stuff had just been donated. %u00a0But it’s cool, cause I get the feeling that she was at least 90, with a big loving family, and was happy until the day she died. And I am sure she would be pleased that I have taken over the waffle maker. Thanks old lady!)
%u00a0And now I am pretty sure that %u00a0everything I make for the next week will be cooked on said waffle/griddle. I am serious, I already have a list of things to try and cook on it; cookies, biscuits, granola bars, potatoes, fruit, some type of pasta situations%u2026. the list of possibilities is endless and I bet that at least 1/2 of these things will be totally awesome and amazing.
But first thing first. I need to make dinner.
So waffles for dinner!!%u00a0
Note. These waffles are completely 100% fantastic for any meal you want to make them for. They consist of nothing more then beans, a shit ton of veggies, and just a bit of cornmeal. But don’t let that fool you because they are super packed full of so much flavor, have a really soft tender inside, with a nice crispy outside and are so super pretty. They are wonderful!%u00a0The stuff. First, we got a big old pile of shredded up veggies which include; carrot, beet, sweet potato, onion, parsnip, celeriac, and a little bit of kale. %u00a0A we got a bowl of rinsed and strained white beans, a little bit of cornmeal and salt, pepper, and garlic powder.%u00a0
The makings of something amazing!Before you do anything. get your waffle iron out and preheat it.%u00a0
While thats going on, take you beans, %u00a0add 3/4 cup water and puree until smooth with whatever blending device want to like to use. (I used my hand blender%u2026less to clean)Now collect all the shredded veggies and dump into a big bowl with the bean puree, the spices and the cornmeal. Mix until combined. The batter should be thick, but not dry. If its seems to wet, add more corn meal, or too dry, add a little more water.
Note how my batter turned a magical pink%u2026 I love beets, they make everything pretty! And check out that bowl!When your waffle iron is preheated, oil it if needed (if your not sure, add a little oil just to really make sure your waffles don’t stick) and take appropriate size spoonfuls of the batter and stick on iron. Close it and wait%u2026..My iron has a little light that turns on when the waffles are done cooking, so I waited patiently (ok iI did open it a few time) until light tuned on and removed the perfectly cooked waffles.
Did I mention how awesome my new/old vintage iron is?
SO AWESOME!!
I made a little gaucamole and gave the mister and little bowl of plain Greek yogurt with lemon juice, but feel free to top, drizzle, or dump whatever you want onto these beauties%u2026%u00a0
Happy waffle Wednesday!!!
-C
Veggie Bean Wonder Waffles
Makes 8-10 waffles (in my iron) feeds 2-3 peeps
1 small carrot shredded
1 small parsnip shredded
1/2 a small celeriac root
1 small beet shredded
2 kale leaves chopped into tiny bits
1/2 an onion, shredded
1/2 a small sweet potato shredded
1/2 cup cornmeal
2 cups(or 1 can) cooked, rinsed and strained white beans
2 teaspoons garlic powder
teaspoon each salt and pepper
oil for iron(if needed)
Note on veggies%u2026 I used what I had in the fridge and shredded, it came to about 3 cups. If you don’t have these specific veggies or only want to use a few.. go for it. Just make sure to have 3 cups of whatever veggies you use.
Take you beans and blend them up with whatever device you would like to use. Once creamy, add to a bowl with the rest of the ingredients. Stir until combined.
Once the waffle iron is preheated, oil it( if needed) and place the recommended amount of batter right on it there. Close and cook until golden brown and waffly.
Serve on a plate with topping of your choice, A few suggestions.. Guacamole, salsa, hummus, mustard, greek yogurt%u2026 anything that tastes good to you.
Eat as breakfast, lunch or dinner…
Fork into face
%u00a0%u00a0You ever make dish, completely on the fly, just to use something up (I have a lot of ripe tomatoes) with no real expectation, just because%u2026 Then have it be one of the best freaking things that you have ever made?%u00a0This salad is one of those things.. maybe not the best thing I have ever made, but definitely the best salad I have ever made%u2026. this week.
A salad compiled of all things amazing, taking just a few minutes to make and is the perfect balance of uber fresh with baby spinach, raw kale, and crunchy quick pickled onions. Then adding a touch of warmth with the sweet and juicy seared tomatoes and big chunks of creamy avocado.
I mean, for reals. %u2026…Best Salad Ever !!!! (this week)
Now let’s do this.
%u00a0The Stuff. A big bowl of baby spinach and chopped up kale, a few sliced up roma tomatoes, some super thinly sliced red onion, half an avocado, red wine vinegar and salt and pepper.%u00a0%u00a0Before you do anything, place the sliced onions into bowl, sprinkle with a pinch of salt and add a few glugs of the red wine vinegar. You want the onions to sit in the vinegar for at least 5 minutes on the counter cause the longer they sit the more crispy pickly they get. (after eating onions like this, you will never want to eat them any other way)%u00a0Lightly oil a skillet and preheat to a medium heat. Once the skillet is hot, sprinkle the tomato slices with salt and pepper and %u00a0place tomatoes right on in, snugly, but not overlapping. Let cook for about 3-4 minutes, or until the bottoms start to brown. Flip and cook other side for another few minutes.Once the tomatoes are seared on both sides, remove them gently from skillet and toss them on top of the bowl of greens.
Take the pickled onions and toss those right on top, with any of the residual vinegar, add dice and scoop the half of avocado and toss that on in as well.And now eat the best salad ever (this week).
Make the day good!
-C
Skillet Seared Tomato and Quick Pickled Onion Salad
Serves 2 as a side, 1 for a hungry eater
2 large or 3 smaller roma tomatoes
1/2 of a red onion
2-3 tablespoons red wine vinegar
1 1/2 cups baby spinach
1 1/2 cups chopped kale
salt pepper
1/2 a ripe avocado%u00a0
olive oil (to grease pan)
Thinly slice red onion and place in a bowl. %u00a0Add vinegar into a and sprinkle with salt. Let sit on counter for at least 5 minutes, if not longer,
Slice tomatoes into 1/2 inch thick rounds and sprinkle with a pitch or salt and pepper. %u00a0Lightly oil a skillet and preheat it on medium heat. Once the skillet is preheated, stick the tomatoes on it (watch out for splattering tomato juice) Cook first side for about 3 minutes or until the bottom has browned, then flip and do the same for other side.%u00a0
One tomatoes are seared, place directly onto the greens. Now dump the pickled onions and residual vinegar on top. And %u00a0dice up %u00a0avocado and add that on top too.%u00a0
Now eat your salad, fork or fingers%u2026 %u00a0
And I know, ba-daaaamn. So good.
My winter farm share is coming to an end this week. One more pick and then a three week stretch until the summer share starts%u2026 WHAT AM I GOING TO DO!!! Stock up as much as I can is what.
I have been strategic about the roots and veggies that I have chosen to bring home the past few weeks.(My farm lets you pick what you want) %u00a0I know what I can buy at the store, things like carrots and potatoes, so I have been passing those up, but the roots like beets and celeriac%u2026 I have been bringing home baskets of those and hoarding them in the fridge and basement in preparation for the laps in farm fresh food and knowing that if I want to by these at the store it s going to coast me a million dollars %u00a0a pound. (a for real million dollars)
Yup, lots of roots around here, especially celeriac root which is fantastic.%u00a0I am kind of obsessed with celeriac, with its fibrous, knobby exterior, soft but almost meaty texture inside, and a flavor that %u00a0is close to celery but so much better. %u00a0I don’t know why it has taken me so long to do a posting featuring this amazing root vegetable %u00a0(I eat it almost every day)
So here, an amazingly tasty, hearty but not heavy, celeriac recipe. %u00a0Perfect for spring and the change into summer%u2026. Mustard roasted celeriac with an fanatic split peas gravy that will have you licking you bowl clean.
%u00a0The stuff%u2026.For the split pea gravy we have a carrot, a parsnip and a large onion chopped into small chunks. %u00a0Salt, thyme, a bay leaf and of course the split peas. Then there is the celeriac root* sliced into 1/2 inch thick rounds and some plain old yellow mustard .
*Note. I don’t peel my celeriac root. I really enjoy the fibrous exterior but realize that some don’t(The mister does not like it) so peel it if you want.%u00a0
Toss the chopped parsnip, carrot, onion and the spices into a pot on medium heat and let veggies sweat a few minutes until tender. %u00a0Add in the split peas and enough water to cover everything. %u00a0Turn pot on high and bring to a boil, then cover and turn to low. Make sure to give the pot a good stir ever few minutes and add more water if needed%u00a0
While the gravy is cooking, %u00a0take the celeriac rounds and brush each side with yellow mustard, sprinkle with pepper, and place on a baking sheet. Stick into the oven to roast for about 25 minutes, flipping the rounds after about 10 minutes.
Once the peas have soften, remove the bay leaf and puree until smooth and oh so creamy. Taste and add more salt and pepper if needed. If you find that the gravy seems to thick, just add in more water until it’s the consistency that you want.%u00a0The gravy is made, the celeriac is roasted%u2026 now we are ready to eat!!%u00a0Stick the celeriac on a plate and dump good amount of that gravy right on top. Feel free to add a bed of spinach, or a grain or anything you want, because why not, and also some chopped tomatoes for a little acid and prettiness.
Serve with the fanciest knife and fork you can find. Extra yellow mustard and sriracha sauce are great condiments to have close by.
Happy Tuesday!
-C
Mustard Roasted Celeriac with Split Pea Gravy
2 medium celeriac roots
6 tablespoons mustard
1 large carrot
1 medium parsnip
1 large yellow onion
2/3 cup split peas
2-3 cups water%u00a0
1 bay leaf
2 teaspoons thyme or italian spice mix
salt and pepper
spinach (optional)
diced tomatoes(optional)
Preheat oven to 400 degrees
Small dice the carrot, parsnip and onion and throw into a large pot. Spinkle with salt and pepper, add in the thyme and bay leaf and add a splash of water. Stick on stove on medium heat and stir. Let cook until the veggies become soft and fragrant. Now add in the split peas and 2 cups of water. Bring to a boil then cover and turn heat down to medium low. Let cook until the split peas become tender (about 25 minutes) string on occasion and adding more water if the peas are not completely summered while cooking.
Once the peas are tender, let cool for a few minutes, remove bay leaf, and either dump into a blender or blend with an immersion blender until nice and creamy. If gravy seems to thick, add in more water.%u00a0
Scrub or peel celeriac roots and slice them into 1/2 inch think rounds. Place on a baking sheet and brush mustard on both sides and spindle with pepper. Stick into oven for about 10 minutes, flip, then back into the oven for another 15 or so minutes, or unit the celeriac is tender.
When the celeriac is done remove from oven and %u00a0stick a few rounds on a bed of spinach (or not, or any kind of grain or green you like) Top with a hearty helping of the gravy and toss on some chopped up tomatoes.
These are definitely my favorite shaped cutout cookies I have ever made. I mean seriously, carrot shaped carrot cookies, what could possibly ever be better? Nothing, and that%u2019s truth for you.
Not only are they carrot shaped, they are also carrot flavored. Yup, Carrot shaped, carrot flavored, awesomeness. A little cinnamon added to the cookie for little extra boost of flavor and an orange glaze because it works and orange is good and fresh and springing. All good stuff.
You might be thinking, huh, carrot puree in a cookie, well that doesn%u2019t sound right. But it is, it is right. And you know how I know that these cookies are awesome? Well I packed them up, (2 dozen of them) and took them over to the littles house for an after school treat. When I got there, the two older ones had friends over. I asked them if they wanted a carrot which earned me that look that said %u201care you serious%u201d but them showed them the cookies. Of course the wanted a carrot so I gave them each one. They ate their cookies then proceeded to beat the shit out of the mr. Then they asked for another cookies and beat the shit out of the mr some more. This when on and on for about a 1/2 hour until all the cookies were gone and the mr was crouched in the corner with a broom trying to defend himself against 4 rulely kids who where slashing at him with light sabers and spraying him in he face with kitchen cleaner. It%u2019s because they wanted more cookies. (and yes, the littles are getting crazy). So yeah, the cookies are good. Ass kicking good.
Anyway, a cookie with some goodness mix into it, shaped into a great shape, that will make everyone smile and happy. You could make them by yourself, make them with your friends, make them with some kids, with some old people. They are the perfect cookie to leave out for the easter bunny(do you leave carrots out for the easter bunny?) or to serve up at any easter party, spring party, or any garden party you might be attending. This cookie is pretty much perfect for any and every occasion that required a cookie. Or a carrot because carrots are always welcome.
To the carrots! I mean, the cookies!
The stuff. Flour, baking soda, salt, sugar, vegan butter, carrot puree, cinnamon, an orange, some powdered sugar, and food coloring.
Into a big bowl the sugar, vegan butter, and carrot puree go.
Beat for a minute or two until completely incorporated.
Add in all the rest of the dry stuff and mix by hand until it turns to dough.
This is the dough it turned into.
Gather the dough and wrap it or place in a plastic bag and stick it Into the fridge for a few hours or overnight. The dough NEEDS to chill.
After you let the dough be, remove from fridge, liberally dust counter, and roll out dough about 1/4 inch thick.
And then it%u2019s time to cut the cookies out. I unfortunately do not have a cookie cutter so I improvised and make 2 carrot cutouts from paper and hand cut each cookie. That worked but took forever so I got crafty and used a fat Christmas tree cookie cutter then just did a little trim and pinch to make it into a cookie. (I am a genius for that). Any way works, and you can also do other shapes too, the cookies don%u2019t change taste in different shapes. (but that would be so cool if they did)
Carefully place cut out cookies onto a baking sheet, giving them a little space because they do spread a tiny bit.
And into the oven to bake they go.
Out in 10 minutes looking all carrot like.
Carrots waiting to cool so they can be glazed.
The glaze. Pretty straight forward. Just zest orange into powdered sugar and juice the orange into the sugar and mix.
Divide glaze and dye one orange and one green
And glaze away. I recommend doing it over a rack and baking sheet to minimize mess because they do drip a bit.
Now just you look at that, carrot shaped carrot sugar cookies .What a sight!
And of course, carrots come in bunches. HA
Enjoy some carrots!
-C
makes about 2 and a half dozen (depending on size)
2 1/4 cups all purpose flour plus more for dusting
1 teaspoon baking soda
1/2 teaspoon salt
1 teaspoon cinnamon
1/2 cup vegan butter
3/4 cup granulated sugar
1/2 cup carrot puree ( see note about how to make puree)
For the glaze
2 to 3 cups powdered sugar
on orange
orange and green food coloring
Note. To make carrot puree, steam a couple carrots until completely soft them blend until smooth.
Place sugar, vegan butter, and carrot puree into a big bowl. Beat with a beater until light and fluffy. Add in the flour, baking soda, salt, and cinnamon and mix by hand until completely incorporated and mixture tunes into dough. Gather dough into a disk and wrap in plastic or place in a plastic bag and refrigerate for at least 2 hours or up to overnight.
Once dough has chilled enough and you are ready to go, preheat the oven to 350.
Place dough on a flour dusted counter and roll out about 1/4 inch thick. Cut out the cookies with a cutter or by hand and place on a baking sheet. Bake cookies for 10-11 minutes or until just starting to turn slightly brown around the edges. Remove from oven and place on a wire rack to cool.
Once cookies are all baked and cooling, make the glaze. Place powered sugar into a big bowl, zest in the orange then add in the juice od half the orange. Mix completely and check consistency. You want it to be slightly running but not liquid, but also not to stiff. Add more juice or more sugar to get it right. Once it is the right consistency, separate into 2 bowls. Dye one green and one orange. Now glaze you cookies. A knife or small spatula works best and yes, the glaze drips a little so do it over a baking sheet, but after about 10 minutes the glaze hardens.
And then you have carrot cookies and all is good. Now go eat a carrot cookie!
Store uneaten cookies in an airtight container for up to 5 days. They can be frozen too.
The mr has a thing for crackers, like if I were to name his top five foods, crackers would probably be in the top three. So I try to be a nice girly friend and make him some crackers ever now and then. (He says my crackers are the best) I usually make plain or dill pickle ones for him , but last time I asked if there was any other kind he wanted me to make. He named off a bunch of weird shit but also few good ideas and one was carrot. Sounds about right.
A couple of days ago I was feeling like the mr needed some crackers. I figured it was a good time as any to try out carrot crackers because Easter,bunnies, carrots.. You can see where I am going with this right?%u00a0 Plus I have like 20 pounds of carrots in the fridge so yeah.
Full disclosure. The mr, he really like the crackers so that’s good and what counts.%u00a0 Alex, my 12 year old nephew said they tasted like cat food. But he knows nothing.
The stuff. White whole wheat flour, carrots, salt, olive oil , and water.
Chop up carrots and place into a pot with water. Onto a medium heat to steam away and get all tender.
Once cooked the carrots get blended.
The carrot puree along with the oil get mixed into the flour and salt. The mixture then gets lightly kneaded into a uniform ball and .Let to rest in the bowl for about 5 minutes.
Roll the dough out to about 1/8 inch thick.
Cutting the shape is a personal choice. I went with triangle because they kind of look like carrots?.. But any shape will do. After you cut them up, take a fork and pierce each cracker a few times to avoid air pockets while they are cooking.
Onto a baking sheet. No need to leave as much space as I did, they don’t expand any.%u00a0 Once you sheet is full, give those crackers a nice sprinkle of salt and get them into the hot oven and cook to cook. 15-18 minutes should do the trick.
And then you pull them from the oven and let them cool.
Now you got yourself some cracker.
-C
1 cup chopped carrot (about 1 1/2 carrots)
1 1/2 cups white whole wheat flour
1 cup water
3 tablespoons olive oil
2 teaspoons salt plus more for sprinkling
Place chopped carrots and water into a pot with a lid and place on a medium heat. Cook until the carrots are tender. When they are, puree them with the blender of your choice. You should end up with a cup of puree but if you end up with a little less, add water to make a cup. Too much and you can just eat the extra.%u00a0 Add the oil to the puree and mix
In a medium bowl mix flour with the salt. Add in the wet and mix until a dough forms. Dump onto counter and knead into a uniform ball. Place dough back into bowl to rest for a few minutes.
Preheat oven to 350
Place dough on a lightly floured surface. Roll out to about 1/8 inch thick then cut into whatever shape you want to eat your crackers in. Take a fork and stab a few holes into each cracker if you want to avoid air pockets (the mr likes the air pockets)%u00a0 then sprinkle the crackers with salt. Place on a baking sheet. You don’t want them touching but can be packed closely.. Into the oven for 15-18 minutes or until the bottoms are golden brown and have a slight crisp when broken. Remove and let cool..
Now Eat. With peanut butter, jelly, cheese or chocolate. This crackers are good for anything you eat with crackers.
Left over crackers can be stored in a airtight bag or container and will last for a week or so. If they start to get a little stale, just pop them back into the oven for a few minutes.
I walk into the house,%u00a0 have about 45 minutes to wash up my paint covered body, make dinner, eat dinner, clean up, and get back out the door. That has been the way of things around here lately. Lots to do, very little time. I miss hanging out in my kitchen all day, making bread and cakes and dishes that take some time. But soon, so soon I will have a nice new big kitchen to hang in and make all the crap I want!. Until then, what I have been cooking (o not cooking) has been things that I can whip up fast and with what I always have in my house. (there is always carrots and always tahini, and always hot sauce)
This is my new go to for the really busy night. Crispy, crunchy carrots covered inspicy nuttiness of sriracha and tahini. For sure some pretty freaky tasty stuff.%u00a0 Easy as hell to make,%u00a0 keeps nicely (if you make a big batch and save some for later) and takes all of 2-4 minutes toss together Can be eaten as a side dish (goes really well with lentils and rice) or as a big salad all to your face.
What more can you ask for?
The stuff. A few (like 4 or five) big carrots, a hunk of cabbage, anda few scallions. Also need tahini, Braggs amnios or soy sauce red wine vinegar, sriracha, a couple cloves or garlic, and pepper. Not shown but I used sesame seeds (if you don’t have them, no biggy)
Mince garlic super fine and toss into a big bowl with tahini, sriracha, vinegar, and liquid aminos or soy. Mix it all up.
Half where there. Now is a good time to taste the sauce. You might find that you want a little more vinegar or more sriracha. Add more of whatever to please your mouth.
Julianne the carrots and finely slice the cabbage.
Into the bowl it all goes. And cut up those scallions and get those into the bowl two.
Toss it all around Then sprinkle with sesame seeds if you have them and lots of cracked pepper.
See, super easy.
Now eat it.
-C
makes enough for one to eat alone or 2 as a side
4-5 large carrots
chunk of cabbage
a few scallions (green and white part)
2 tablespoons tahini
1 tablespoon red wine vinegar
1 tablespoon soy or Braggs liquid aminos
2 tablespoons sriracha
1-2 cloves garlic
pepper
sesame seeds (optional)
Finely mince garlic and toss into a large bowl with the tahini, sriracha, vinegar, and braggs or say, Mix it all together. Taste and adjust any of the ingredients to you liking (add more sriracha or tahini if you want). Grab carrots ans julianne (you could also just shred) and finely slice up cabbage. Toss into bowl with sauce. Chop up scallions, the white and green part) and those go into bowl too. Toss it all around in sauce until everything is all coated then sprinkle with sesame seeds and top with lots or pepper.
Eat and enjoy.
As a kid, my favorite holiday was Easter. Every year my parents would fill up brightly colored plastic baskets with handfuls of neon colored plastic “grass” and top it with all sorts of candy, coloring books, bubble, and sidewalk chalk. They were beautiful and amazing.%u00a0 It was like getting a basket of fun and a bunch of sugary candy to keep you going to have all that fun all day long. And the egg hunts. Plastic eggs full of candy hidden all over the house ans yard. We would all have our emptied out baskets running around full of excitement, ready to take out any sibling in our path just to be the one to get the next egg. We were ruthless and I am pretty sure every year someone would end up crying. Now, as an adult, I am not allowed to participate in the egg hunt. (but I still try to make my sibling cry)%u00a0 Nope, now I get to hide the eggs and sit back and watch the new generation of littles tripping each other and stealing eggs from one another. The carnage!
And also at Easter there is cake. Is there a rule that says you have to make carrot cake for Easter? I think there must be because it is when everyone and their moms busts this cake out. And everyone’s carrot cake it the best because they made it the right way, like with raisins or pineapple or walnuts. There are so many things that can be added to this cake that it’s a little overwhelming. So I made a carrot cake that was mainly about the carrots. Nothing added, no nuts raisins or coconut (although you could add i if you wanted) and it’s made into a pretty bundt cake, which in turn makes mine the best.
This here cake was destined for tomorrows Easter table. I made it with no nut produces cause the nephew has the deadly nut allergy. But when I went and made the date sauce, I kinda let that slip and used almond milk. Oops. So now I have a whole big carrot cake sitting on the counter with it’s destiny shattered. So sad, but I think its will survive cause the mris really into it and has already eaten a few pieces. I figure that because it’s a carrot cake, he can eat a few more. It’s almost like eating a vegetable….almost. And now I need to make a new cake to bring over or I might just stop at the store and buy some oreos on my way over tomorrow. The littles will like that.
The stuff. A bowl containing flour, salt, baking powder ans baking soda.%u00a0 Also need a few really big carrots, a bit of brown sugar, and ground up cinnamon and ginger. Coconut oil, soy milk, an orange (for it’s zest) and a little apple cider vinegar are going into this cake too.
Start by chopping up 2 of the biggest carrots and tossing the into a pot with about an inch of water. Stick the pot on the stove and cook until the carrots are nice and tender. Then blend those tender carrots up.
I had a hard time not eating all of the carrot puree, so maybe if you want, cook up a few extra carrots ans have yourself a pre-carrot cake carrot snack.
And while the carrot puree is still warm, add in the coconut oil and the sugar. Mix it until the oil is melted ans it’s one cohesive mixture.
And take that last carrot ans grate it up into the flour. Also add in the spices and the zest of the orange.
Note. I used a small holed grater so that the carrot shreds would be small and add texture to the cake but not make it too chunky. But use a normal grater..it’s all about your carrots chunk prefernce here.
Now dump the wet carrot mixture into the dry and start to mix
Adding in the soy and the vinegar to complete the batter.
And scooped that batter into a oiled bundt pan and get it into the (preheated) oven to bake.
After about an hour, the cake is ready, golden brown and smelling like any good carrot cake should. Remove from the oven and turn the cake out from the cake pan and stick on on a rack to cool. This cake is waiting for me to decide what, or if I want to frost, drizzle, or sauce it up….. I think it wants as little something.
Ok, I figured it out. Date sauce.
The stuff. Fresh medjool dates, almond milk and sea salt.
Date (pits removed) into the food processor along with the milk and a good pinch of sea salt.%u00a0 Blend until it turns into a nice smooth, fluffy sauce.
Take that sauce and spread it all over the cake. As much or as little as you want (you might have left over date sauce but its ok, you can just eat. It will last for about a week in the fridge and goes great with just about anything) Once fully sauced, sprinkle the cake with flaked sea salt.
Sliced, plated, and ready. It’s carrot cake time.
Have a great weekend, eat all your candy at once!
-C
Makes a bundt cake (but could be made into a 9×13 sheet cake)
2 1/2 cups flour
1 teaspoon baking soda
2 teaspoons baking powder
1 teaspoon salt
3/4 cup brown sugar
1/3 coconut cup oilany oil works)
1 tablespoon apple cider vinegar
3 large carrots (makes about 2 cups carrot puree and 1/2 cup of raw grated carrot)
1 heaping tablespoon cinnamon
1 teaspoon ginger
Salted Date Caramel
1 cup medjool dates (pitted)
1 cup almond milk (or any milk you want to use)
sea salt
Start by chopping up 2 of the biggest carrots and placing them into a pot with water about an inch of water. Stick on stove and bring to a boil then reduce to a simmer until the carrots are fork tender. When done, puree them with any means nessasary (hand blender, regular blender, food processor) Add the coconut oil and sugar to the warm carrot puree and mix until oil is melted.
Preheat oven to 350
In a large separate bowl, mix together the flour, baking soda and powder, salt, and the spices. Grate the smallest carrot in with the dry.
Take the wet carrot mixture and dump into the dry and mix, adding in the soy milk and the vinegar as you mix. Once everything is completely incorporated, pour mixture into a well oiled bundt pan and stick the cake into the preheated oven
While the cake is baking, make the date sauce. Just take the dates, remove pits if they have any and place in a food processor with a good pinch of sea salt and the almond milk. Pulse a few times, scrap down the sides, and keep blended, stopping to scrap sides if needed, until a nice thick smooth sauce is formed. If you want a thinner sauce, just add more milk til you get your desired consistency.
Now check cake. Once it’s golden brown and a tester comes out clean (between 50 minutes to an hour) remove from oven. Let cool for a few minutes in pan the then turn it over onto a wire rack to finish cooling off. Once the cake is cool, dump the date sauce all over it then sprinkle with another good few pinches of the sea salt.
And now eat it. This is a cake that needs no fork, but you can go ahead and use one if you must.
Last night I had my sister and her kiddos come over for dinner. Nothing fancy, nothing to complicated, %u00a0just something %u00a0fast and something that I knew the littles would eat. %u00a0Spaghetti and meatballs, except replace meatballs were bean balls So they came, we played, did a little drawing and had a bit of first grad gossip. Then came %u00a0dinner time %u00a0when I was told by one little that she was not going to eat.. She had pasta for lunch. Well I made her sit anyway and she mainly just ate carrots (I was ok with that) Then the other little was all into his pasta and bean balls, 1 down, 3 more to go, when the mister let slip that the meatballs were not really meat. He ate around the remaining balls, said he didn’t want them anymore. And my sister, well she doesn’t eat anything that is not pizza.
Good thing a neighbor stopped by while we were eating. He had a few of the balls and told me that they were amazing. I needed someone to tell me that. %u00a0
So yeah, the littles were not overly enthused with the ball, but the Mister the Neighbor, and I thought that they were awesome and delicious. Maybe next time I will make sure that %u00a0pasta was not lunch and tell Nick to keep his mouth shut and stop talking about balls at the dinner table.
I feel like I don’t need to tell you how to boil pasta or heat up the sauce, so I left that portion of the recipe out. I have faith that you are capable in doing that part without my instruction.
The bean ball stuff. Chickpeas (soaked and cooked or canned), sweet potato, carrot, onion, and some chick pea flour. Dried garlic, basil and oregano. Salt and pepper and a little bit of olive oil.%u00a0Small chop all the veggies and toss them and the dry spices into a skillet with a drizzle or two of olive oil. Stick on medium %u00a0heat and add about 1/4 cup of water to pan. Top with %u00a0slid and let veggies cook down until soft and fragrant.
Add the cooked veggies to a food processor or blender with %u00a0the rinsed and drained chickpeas. The mixture gets pulsed until combined, %u00a0keeping a little bit of chunkiness. %u00a0Now go warhead and taste %u00a0the mixture. Add another pinch or two of salt , pepper or any of the spices that you think it need. %u00a0Dump the mixture into a bowl and mix in the chickpea flour than stink the mixture into the fridge for a least a 1/2 hour. Cooling to off is really important to forming the balls. If you don’t, it’s much harder to keep mixture from falling apart and sticking to your hands.
After the mixture has had time to cool and set, start rolling the mixture into balls roughly the size of ping pong balls. In a shallow bowl, add a few tablespoons of the chickpea flour with a pinch of salt, pepper and garlic powder. Take each ball and roll in flour and place each ball on a well oiled baking sheet. When the balls are all rolled, stick into the oven and bake away for about 30-40 minutes, flipping balls after about 20. %u00a0After you flip the balls, get the pasta ready so its finished about the same time the balls are done.You pasta and sauce is cooked and the balls are all crispy and oh so nice.
Serve balls over pasta with sauce and eat with a fork.
Your day is now complete.. balls and all.
Happy Weekend!
-C
Spaghetti and Bean Balls
makes about 20 balls
4 Cups (or 2 cans) Cooked, Rinsed and Drained ChickPeas
1 Small Sweet Potato
1 Small Onion
1 Carrot
1/4 Cup Chickpea Flour plus extra to roll balls in
1 Heaping Teaspoon Basil
1 Heaping Teaspoon Oregano
1 Heaping Teaspoon Garlic Powder
Olive or Vegetable Oil
Salt and Pepper
Your choice of Spaghetti (Use Vegan and or Gluten Free if needed) %u00a0Prepared as package recommends
Marinara or Pasta Sauce of your choice
Preheat Oven to 425 degrees
Small dice the carrot, onion and sweet potato and toss into a skillet on medium high heat with a splash of oil. Add in the dry spices and add in about a quarter cup of water. stir and cover the skillet with a lid and let the veggies cook down until the water has evaporated and the veggies are tender.%u00a0
Add rinsed and drained chickpeas to a food processor with the cooked veggie mixture. Pulse together until the mixture is combined and slightly smooth, but still with a little bit of texture left.Place bean mixture in a bowl %u00a0and mix in the 1/4 cup of chickpea flour. and stick in the fridge for a least a 1/2 hour to cool. (Mixture can be made a day ahead if you want)
Once the mixture has time to cool and set up , remove from fridge and with a light head, roll mixture into ping-pong sized balls. In a separate shallow dish add a bit of chickpea flour with a pinch of salt and pepper. Roll each ball in the flour mixture and place balls on a well oiled baking sheet. Once balls ae made, stick into the oven and bake for about 30-40 minutes, flipping after about 20 minutes. The balls are done when the outsides are once and golden brown and crispy. After about 30 minutes, get to cooking your pasta and mariana sauce.
Once the pasta and sauce is done, plate it and toss on some of those awesome bean balls!
Bean balls also make fantastic bean ball sandwiches or bean balls on a toothpick.%u00a0
As the weather gets warmer and the days get longer, my food brain turns to fresh colorful simple spring food. (which is totally a thing). Spring food is a combination of the last of the winters hardy root veggies combined with the springs bounty of fresh greens and early growers. Spring food is the best!
This lovely. oh so gorgeous salad has been on repeat in my meal repertoire. It’s so yummy and so simple. Beets and carrots roasted and sliced, tossed onto a bed of tender spinach and topped with a creamy, lemony avocado dressing. Fresh, fast, light, and filling. Everything a perfect %u00a0spring salad needs. Not to mention it takes no time at all to make because with all this nice weather , we want to spend as much time basking in the warmth and glow of the sun. I might even take my spring salad outside today. Maybe.
Dressing stuff. A nice and ripe avocado, the juice of a juicy lemon, a bit of garlic powder (raw garlic is nice too, but grate it super fine) and salt. Simple simple and sometimes simple can be the best.All stuff get mashed super mashed until smooth and scooped into a jar with a lid. Add about 1/4- 1/2 cup water (depending on how thick you like it) and shake that jar all around.
That’s it. You now have super creamy avocado lemon dressing. Drizzle on anything and everything%u2026 especially this roasted carrot and beet salad..
A roasted beet and carrot, all sliced upTossed onto a bed of tender baby spinachAnd topped with creamy avocado dressing.%u00a0Fantastic, so pretty, and makes the day super springy!
A salad suggestion%u2026. %u00a0Add some roasted chickpeas toasted nuts, or sunflower seeds to this or any salad. Adds a little proteins and the crispy crunch is a nice addition.%u00a0
Enjoy the day..Smile lots%u00a0
-C
Roasted Carrot Beet Salad and Avocado Lemon Dressing
Salad
2-3 cups Baby Spinach
1 large carrot
1 medium beet
Toasted nuts, beans, or seeds (Optional)
You can roast the veggies a few ways.. Slice the carrot and beet, place on a baking sheet and %u00a0stick into the oven at 425 degrees until tender. Or you can just toss a the carrot and beet onto a baking sheet whole and roast.( What I usually do)
Once the veggies are roasted and cooled, thinly slice and toss onto the bed of baby spinach. Top with Avocado Lemon Dressing (recipe below) and some toasted crunchy thing.
Dressing
1 Ripe Avocado
1 lemon
1 teaspoon garlic powder
1 teaspoon salt
1/4- 1/2 %u00a0cup water
Scoop avocado fruit into a bowl and mash with a fork until a paste is formed. Scoop mashed avocado into a jar and add remaining ingredients. Stick lid on jar and shake tip combined. Use on anything.%u00a0
Dressing lasts a few days in the fridge. Should stay green, but add a layer of lemon juice to top to keep from browning.
You ever have one of those days where its %u00a09 am%u00a0and your ready to call it a day? . Yesterday was one of those day for me. Its spring vacation around here (more like an %u00a0arctic vacation) and I had volunteered my day to babysitting/ hanging out with 2 of my nephews, ages 11 and 13. (I know, I am the greatest sister). I had all of these great ideas and plans of things to do, but when it came down to it, they wanted to do nothing but play video games and not really listen to anything I said. I basically had to drag them outside to go for a walk we me and that’s all I could get them to do %u00a0My great little nephews, I love them so much, but yesterday they had their minds set on being little monsters.
I needed a drink. And I needed lunch. And so I was inspired to make this bloody mary tomato soup. Its got all the essentials to a great drink, the tomato, the spice, the zingy flavors, but warm and thick to eat as soup which was a perfect lift for a freezing cold dragging day. And no, I didn’t add the vodka to it because that would be irresponsible of me. %u00a0I am not about to serve up lunch soup to a couple %u00a0young boys with alcohol in it. I am not a dumb ass%u2026Save the vodka for when the kids go home!
%u00a0What we have going here%u2026… Chopped up onion, celery, and carrot in a pot. Stick that pot on the stove for a few minutes on medium heat to start the cooking process. %u00a0While that happening get the other stuff ready. %u00a0A big can of diced tomatoes, hot sauce, worcestershire sauce*, %u00a0prepared horseradish*, celery salt, garlic powder, salt and pepper And last but not least a good squirt of yellow mustard. Now add it all to the pot and bring to a boil. Turn down to low and stick a lid on it.
*I used %u00a0the horseradish that is made with only horseradish and vinegar%u2026..You can use the other stuff that contains sugars and milk, but I don’t know how tastes. And the worcestershire sauce I used did not contain fish but be aware that a lot of the popular brands do, so if you care, check labels!
After about 20 minutes the veggies should be soft and the flavors should all have melded together. Taste %u00a0soup as it is cooking and add any more spice that you want.
Now in goes the emulsifying stick of fun! (Or dump in a blender) Blend blend blend! %u00a0
I stopped when I got to a smooth consistency with the littlest bit of texture.
And now the soup is now%u00a0ready for the bowls!
And there it is%u2026served with a stock of celery and a wedge of lemon (I forgot to add them to the pictures!) %u00a0A bloody Mary to take the edge off%u00a0any drag of a cold weather day. And best part.. %u00a0 left over soup is great served chilled with a shot of vodka to loosen this Mary up!
Have a Happy Day!
-C
Bloody Mary Tomato Soup
The Stuff
Side note%u2026The spicier ingredients…hot sauce, horseradish, and worcestershire sauce are pretty flexible. My advice is to start with the lesser amounts of the ingredient and work your way up until you get to your happy soup place.
32 oz can of crushed or diced tomatoes
2 medium carrots
1 small onion
2 stalks or celery plus more for garnish
1-2 teaspoons horseradish
1-2 teaspoons worcestershire sauce
1-2 teaspoons hot sauce or %u00a0ground cayenne pepper
1 tablespoon yellow mustard%u00a0
A lemon cut into wedges (To squeeze on as a garnish)
2 teaspoons celery salt
1 teaspoon garlic powder
Salt and cracked pepper to taste
Dice up carrots, onion and celery and place in a large pot and cook on medium heat for about 5 minutes. Once the %u00a0veggies are slightly soft, add in the rest of the ingredients plus one tomato can %u00a0worth of water. Bring to boil, cover and turn heat down to low. Cook for another 15-20 minutes or until all the veggies are super soft and the flavor have all developed. %u00a0Add salt and pepper, taste and add any additional spicier spices that you want.
When happy with taste, either %u00a0in a blender or with a hand emulsifier, blend soup until smooth (or to your desired constancy)%u00a0Soup is now ready to serve.
Ladle or pour into bowls %u00a0and serve with a stalk of celery and maybe a wedge of lemon. Crackers or croutons are welcome too.
Eat with a Spoon
Soup left overs are great refrigerated and served cold.%u00a0Add a splash of vodka to make it fun.
%u00a0 %u00a0%u00a0 Before we get to the fries, I just want to mention that %u00a0yesterday was one of those fantastic winter days that reminds me why I love living in Vermont. %u00a0Pretty white snow everywhere, the sun was out, and 20 degrees without a gust of wind. The trash dog an I were even able to go for a little hike. %u00a0It was so nice and soooo sooo needed!%u00a0 Anyways, the other day as me, my sister and the mister where putting together %u00a0one more piece of Ikea furniture, (I am the master at Ikea assembling!) %u00a0a little runs into the room and presents the mister with a Dominos pizza. Yup, a whole pizza just for him. Why you might ask? Well I guess my sister was %u00a0delivered the wrong pizza and the place didn’t want it back and she didn’t want it, so she gave it to him.
A whole pizza to himself. I didn’t mind too much..he was just going to be eating it for lunch and dinner until it was%u00a0out of the fridge. But for dinner I did want him to eat something of the vegetable matter that didn’t come out of a box. I was going to make him a big salad, but then realized that would mean%u00a0sharing the last of the greens that I had for MY%u00a0dinner and I was not about to do that, so I made him parsnip and carrot fries instead. No biggy, just some slicing, a little tossing and a bit of time in the old oven. And I figured I might as well make a nice sauce for those fries because I be so very nice.
The biggest problem that I ran into when I made these fries was that I didn’t make enough, so you should probably make twice as many as you think you will eat. If you end up not eating them all (which you probably will), well then you now have a great start for a soup or a nice addition to a salad. Either way, you will eat them because they are amazing and addicting%u2026 and as healthy as can be!
The carrots and the parsnips are all sliced up into big matchsticks and ready to be baked to crispy browned perfection. %u00a0I added the oil to the pan to toss the fries in and then sprinkled with a fair amount of salt and pepper. %u00a0If you don’t have and or want to use a cast iron pan, a baking sheet works just the same.
%u00a0 %u00a0Oh saucy sauce stuff. Tomato puree, sriracha, and yellow mustard. Add a little bit of honey to lighten it up (can use brown sugar if keeping it vegan), a splash of apple cider vinegar and a couple minced cloves of garlic. Topped off with the smokey delightful spice of cumin. I cold eat this on everything%u2026and I kind of did.%u00a0
All mixed up in an oven safe dish, I stuck it into the oven for a about 8 minutes until it got a little bubbly, just to let all the flavors fuse together%u2026
Fries are done, Sauce is ready. Served in super cute tea cups.(from now on I want to serve everything in tea cups.) A perfect side dish, snack, or even a light meal. %u00a0It lead the mister to ask the question…What pizza?%u00a0
Happy Day!
-C
Parsnip and Carrot Fries with Smokey Sriracha Sauce
Wash%u00a0and trim%u00a0carrots and parsnips and cut into large matchsticks%u00a0(any shape is good, just make them all uniform) Toss with oil and sprinkle with salt and pepper. Place on cast iron pan or baking sheet and stick in oven for 30 or so minutes, and rotating after about 20. The fries are done when %u00a0crispy and brown.
For the sauce. Mince garlic and add to all the sauce ingredients in an oven safe bowl. stick into oven for about 8 minutes until slightly bubbly and hot.
This past weekend, the mr, the pup, and I grabbed our stuff, chucked it into the back of the car and took of to the wood.%u00a0
We ended up in Waterbury, at Little River State Park. Campsite 77 (the last one they had available!!) And from that we think, the best spot in the park.%u00a0
First things first,%u00a0set up camp. which involved the mr.%u00a0popping%u00a0up the tent and me making coffee and setting up the table.. Just cause we are in the woods doesn’t mean we can’t have a fruit bowl, right.
Then we spend the afternoon kicking%u00a0around.. Into the woods we went. This place had so many hiking%u00a0trails, we just let%u00a0the pup lead%u00a0the wayHe usually knows where he is going.
After a long afternoon of hiking and romping, we make our way back to our outdoor home for food. Dinner consisted of potato and%u00a0sweet potato, squash and onions, kale, salsa and beans.%u00a0%u00a0It couldn’t have been any better. We did forget plates, but no matter, we managed.
Of course we needed to take an after dinner hike to the river and swim the pup. (We think he might be part fish)
He spent about an hour fetching stick and making sure that he couldn’t possibly smell any worse.
Playing with my camera and sticks. Then off to the tent for the three of us.%u00a0(holy hell did the dog smell like shit)
Another morning hike and some time spent just hanging on the river. The mr fished, the pup swam and I collected rocks.
And then we went home, washed off the filth,%u00a0and assed out%u2026Then%u00a0Washer got sick, but%u00a0that’s a whole other story.
Camping is the best. I could live in a tent all year long. (not really%u00a0all year long.. I would surely freeze to death)
So if you are thinking of camping, I highly recommend going to Little River State Park.
My winter farm share is coming to an end this week. One more pick and then a three week stretch until the summer share starts… WHAT AM I GOING TO DO!!! Stock up as much as I can is what.
I have been strategic about the roots and veggies that I have chosen to bring home the past few weeks.(My farm lets you pick what you want) I know what I can buy at the store, things like carrots and potatoes, so I have been passing those up, but the roots like beets and celeriac… I have been bringing home baskets of those and hoarding them in the fridge and basement in preparation for the laps in farm fresh food and knowing that if I want to by these at the store it s going to coast me a million dollars a pound. (a for real million dollars)
Yup, lots of roots around here, especially celeriac root which is fantastic. I am kind of obsessed with celeriac, with its fibrous, knobby exterior, soft but almost meaty texture inside, and a flavor that is close to celery but so much better. I don’t know why it has taken me so long to do a posting featuring this amazing root vegetable (I eat it almost every day)
So here, an amazingly tasty, hearty but not heavy, celeriac recipe. Perfect for spring and the change into summer…. Mustard roasted celeriac with an fanatic split peas gravy that will have you licking you bowl clean.
The stuff….For the split pea gravy we have a carrot, a parsnip and a large onion chopped into small chunks. Salt, thyme, a bay leaf and of course the split peas. Then there is the celeriac root* sliced into 1/2 inch thick rounds and some plain old yellow mustard .
*Note. I don’t peel my celeriac root. I really enjoy the fibrous exterior but realize that some don’t(The mister does not like it) so peel it if you want.
Toss the chopped parsnip, carrot, onion and the spices into a pot on medium heat and let veggies sweat a few minutes until tender. Add in the split peas and enough water to cover everything. Turn pot on high and bring to a boil, then cover and turn to low. Make sure to give the pot a good stir ever few minutes and add more water if needed
While the gravy is cooking, take the celeriac rounds and brush each side with yellow mustard, sprinkle with pepper, and place on a baking sheet. Stick into the oven to roast for about 25 minutes, flipping the rounds after about 10 minutes.
Once the peas have soften, remove the bay leaf and puree until smooth and oh so creamy. Taste and add more salt and pepper if needed. If you find that the gravy seems to thick, just add in more water until it’s the consistency that you want. The gravy is made, the celeriac is roasted… now we are ready to eat!! Stick the celeriac on a plate and dump good amount of that gravy right on top. Feel free to add a bed of spinach, or a grain or anything you want, because why not, and also some chopped tomatoes for a little acid and prettiness.
Serve with the fanciest knife and fork you can find. Extra yellow mustard and sriracha sauce are great condiments to have close by.
Happy Tuesday!
-C
2 medium celeriac roots
6 tablespoons mustard
1 large carrot
1 medium parsnip
1 large yellow onion
2/3 cup split peas
2-3 cups water
1 bay leaf
2 teaspoons thyme or italian spice mix
salt and pepper
spinach (optional)
diced tomatoes(optional)
Preheat oven to 400 degrees
Small dice the carrot, parsnip and onion and throw into a large pot. Spinkle with salt and pepper, add in the thyme and bay leaf and add a splash of water. Stick on stove on medium heat and stir. Let cook until the veggies become soft and fragrant. Now add in the split peas and 2 cups of water. Bring to a boil then cover and turn heat down to medium low. Let cook until the split peas become tender (about 25 minutes) string on occasion and adding more water if the peas are not completely summered while cooking.
Once the peas are tender, let cool for a few minutes, remove bay leaf, and either dump into a blender or blend with an immersion blender until nice and creamy. If gravy seems to thick, add in more water.
Scrub or peel celeriac roots and slice them into 1/2 inch think rounds. Place on a baking sheet and brush mustard on both sides and spindle with pepper. Stick into oven for about 10 minutes, flip, then back into the oven for another 15 or so minutes, or unit the celeriac is tender.
When the celeriac is done remove from oven and stick a few rounds on a bed of spinach (or not, or any kind of grain or green you like) Top with a hearty helping of the gravy and toss on some chopped up tomatoes.
Feels like we are nearing the end of summer, no? I am all on board, feeling that feeling one gets when the season starts to change over. It’s that deep down in my bones feeling, the feeling my body gets because it knows whats coming and is getting ready. The shift is coming on fast. Grasp those last summer days as much as you can.
Another intense week. After a super duper good camp at Ricker State Park, it was full steam ahead. The mr has been super crazed, all out, sanding and assembling bowling alleys into gigantic countertops for a local restaurant. Most days he is gone as I get home, home when I am in bed. But not quite as bad as last week. We have managed a few meals together and an adventure or two, like when we went to a church in the islands,, had ourselves a picnic and picked their apples. The apples were not good yet. But the church was lovely.
Other then being busy busy, there was other stuff. Barb and her man child came over for dinner and brought along Coco. We ate, he cried. I gave him a cookie, he laughed and ran around like a lunatic. (Coco, not barbs boyfriend) The older littles have been away at summer camp all week so we saw none of them.(We miss them!) We had dinner at my moms with the boys and Barb and I was lucky enough to see the world greatest tan lines ever. I also worked the last day of art camp (YAY!), picked blackberries, gave the mr a haircut, and scrubbed the shit out of the bathtub. All the fun stuff. Not fun stuff was when the car battery died when I Was trying to leave the house, the underglaze I was bringing home to use dumped all over me and the inside of the car (I was so pissed!) or when I was at the grocery store, lost my credit card, freaked out and ran around the store, then drove home, and back to the store looking for it, only to find it underneath one of my canvas bags in the shopping cart. The whole freaking time. At least I found it though cause I was about to cancel it. Look at me seeing the bright side.
Then I picked up farm share and all the tomatoes. Coming off of last weeks tomato hall, and all the tomatoes that are starting to come in in my garden, I am up to my ears in so many tomatoes. I have been cooking down pots and pots, freezing and jarring and of course eating. Eating so many tomatoes that my belly is on fire. And of course I have no help from the mr. He says he is officially tomatoed out. I wonder how is that possible? I think he is just being a butt is all. But whatever, no more tomatoes for him. (that he will know of. HAHA) And I’l just have to keep on keeping on and eat them. The season only lasts so long.
Yesterday the mr and I took a few hours to get away. We packed lunch and went in search of land. Picked a few properties to look at (but only made it to one) and hiked around the property. It was really nice, had a lot of what we are after but probably not THE property. But close so we are getting there and hopefully we will get there sooner then later. Ready to build our cabin life. And then we went home, I started cleaning and the mr went back to work and didn’t get home until like 3 am this morning.
Not gonna lie, I am bumming. We are not going camping today because well, the mr is still working like a madman and installing those bowling alleys today and tomorrow and we just can’t make it happen. So today, well I am going to make good use of it. Probably going to weed out some dead shit from the garden, maybe do a little replanting. Grocery shopping, clean the car, do a few loads of laundry, return books to the library, process food like a boss. (More tomatoes, hot sauce, freeze chard and pickles!) That and probably do some porch reading. And coffee all day. All. Day. It’s no camping but it will do. Next weekend we are back at it.
Internet read by me, shared with you.
-Are you a camper? If you are, here is some things to consider to optimize a good time. 10 rules for picking the perfect campsite
-Eat all the plants. Gorgeous Portraits of America’s Wild (and Surprisingly Delicious) Edible Plants
–You Should Pour Vinegar into Your Washing Machine—Here’s Why. What can’t vinegar do?
-Always a good idea when you pack lunches or any food. HOW TO MAKE REUSABLE SANDWICH BAGS AND SNACK BAGS
-I don’t consider myself a cat person or a person who wants a book of cats, but this book looks, well, it freaking awesome. A New Book Compiling Hundreds of Timeless Feline Photos by Walter Chandoha is the Cat’s Meow
–Oatly and the quest for the perfect alt-milk. Have you had Oatly? I haven’t but I do really like me some oat milk.
–Is crying truly cathartic?I think it can be. Can also be annoying and exhausting.
-Why does anyone ever listen to anything that guys says, ever? Greenland is not for sale. Seriously, why?
–Don’t Burn Trees to Fight Climate Change—Let Them Grow. I just thought that was common sense but what do I know.
-I don’t know about you, but I start baking a lot more around this time of year. So this is good to know. The Best Substitute for Cake Flour and Self-Rising Flour in Baking


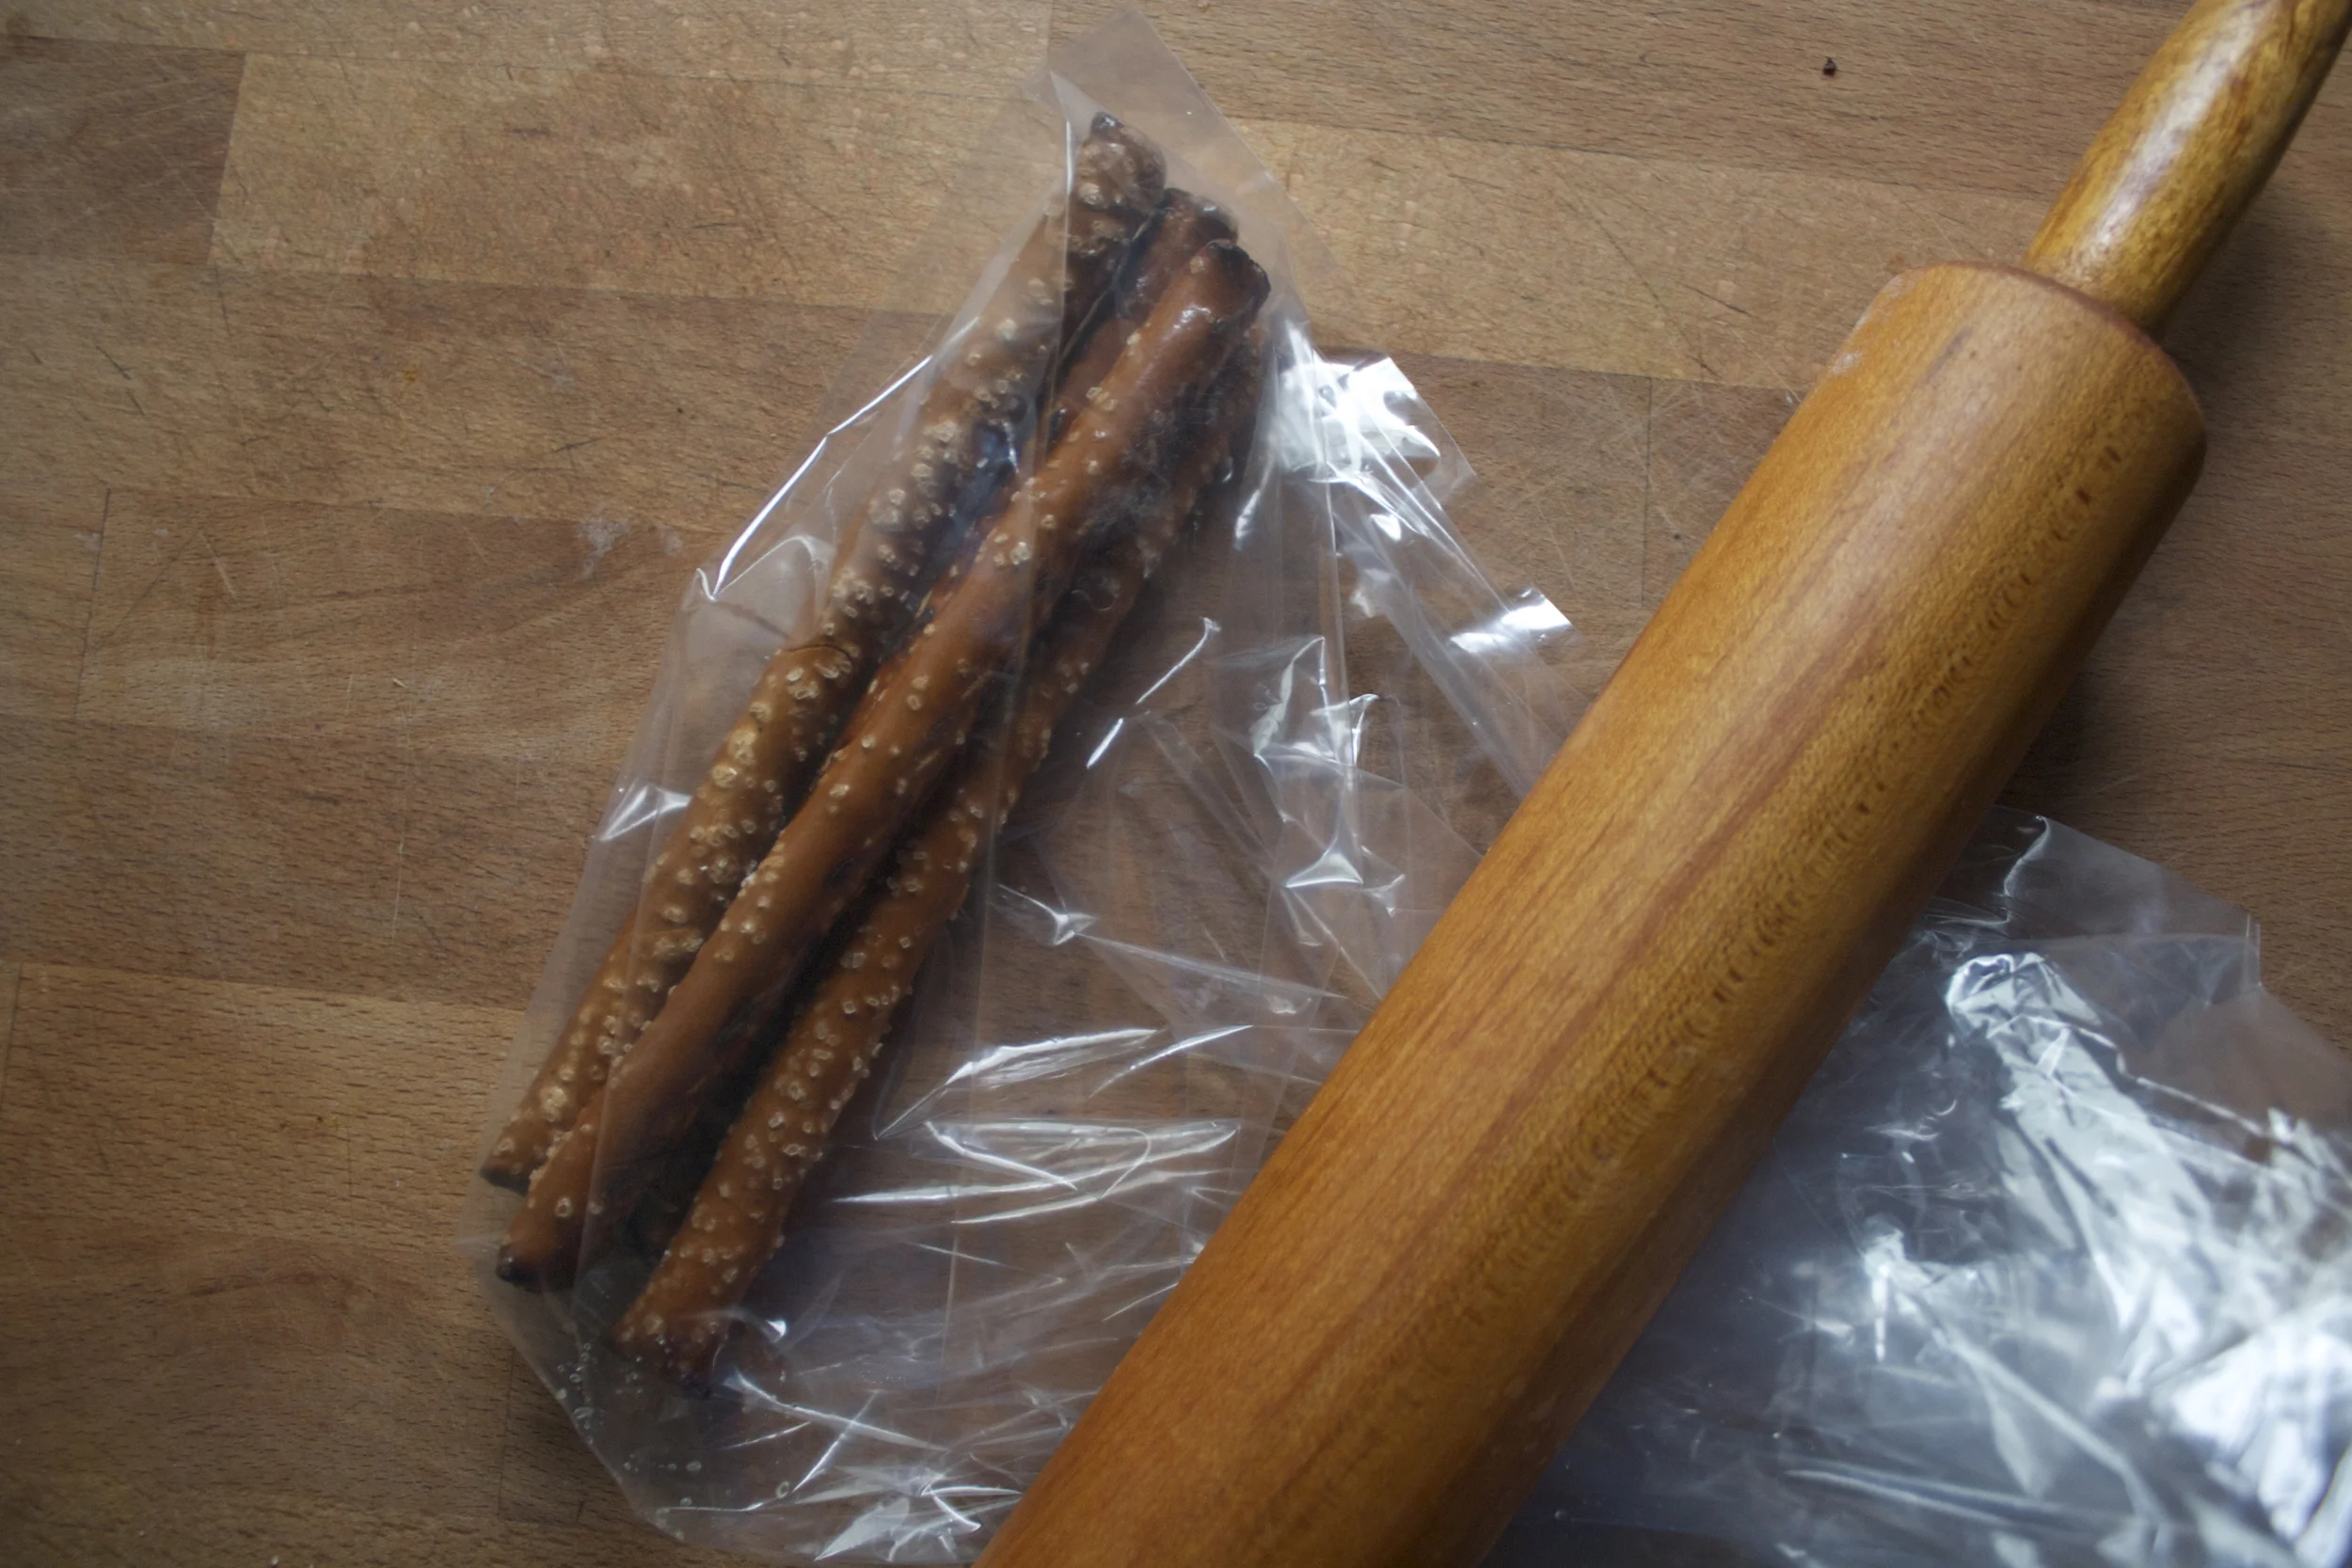
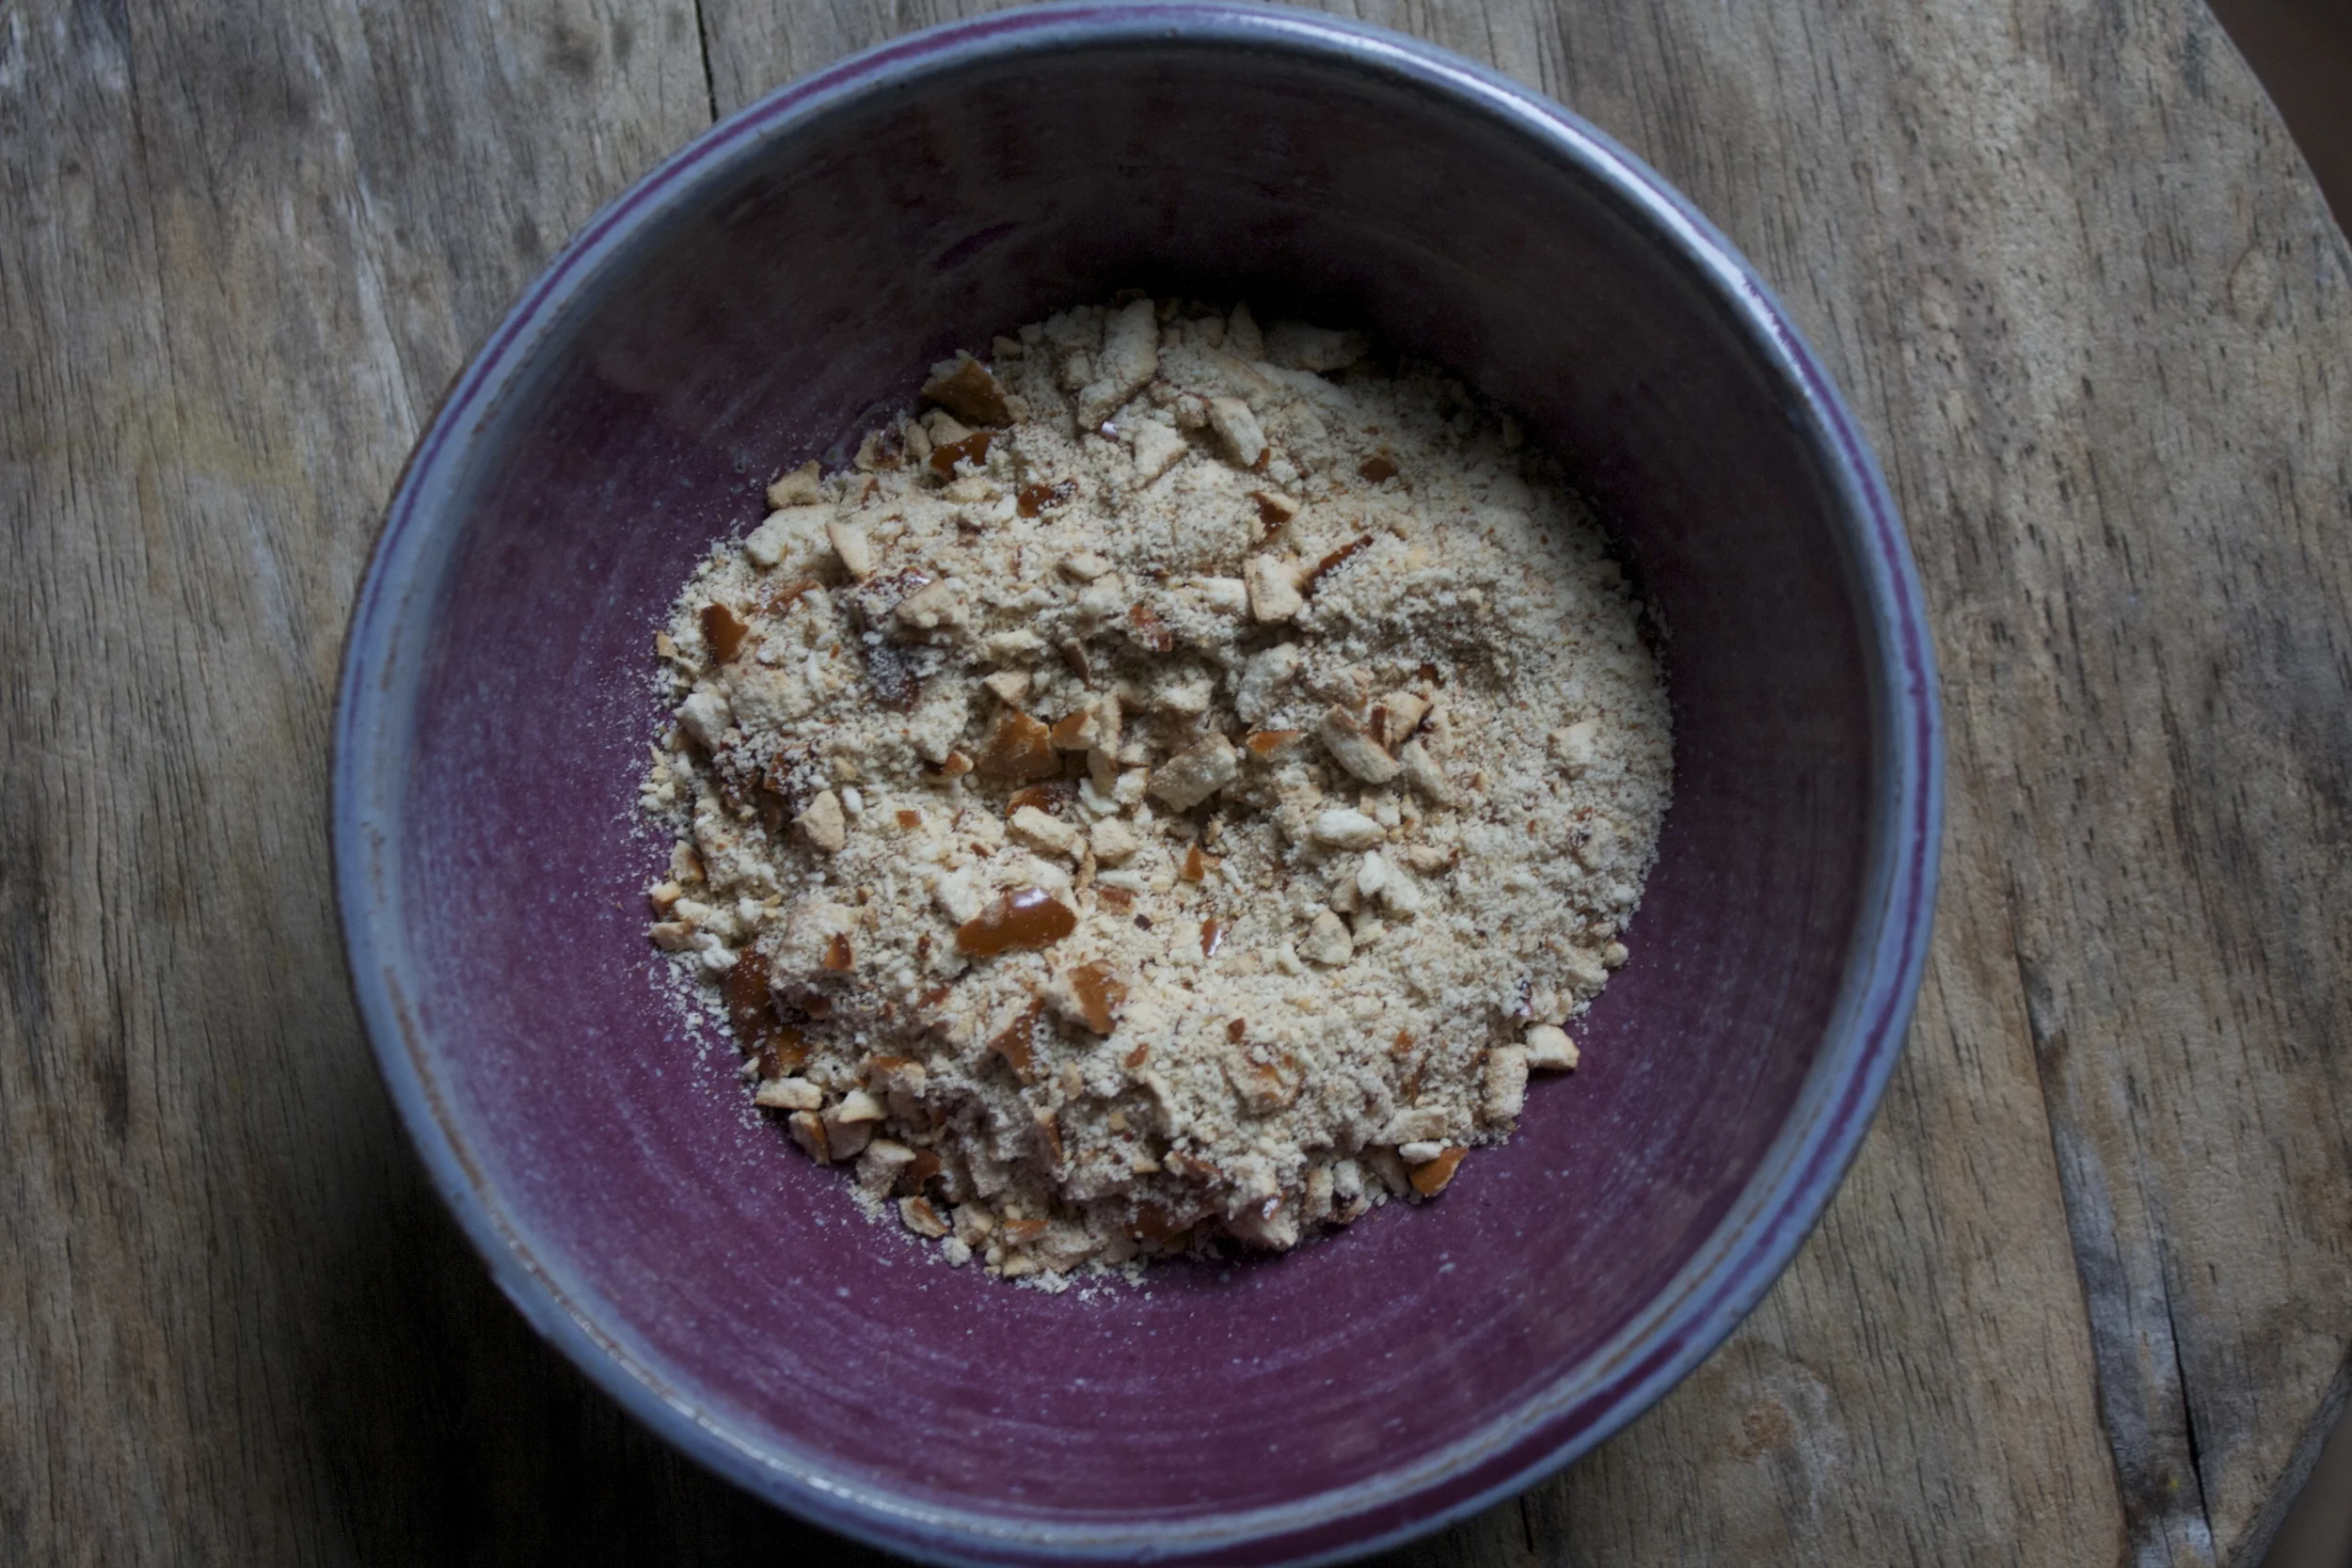


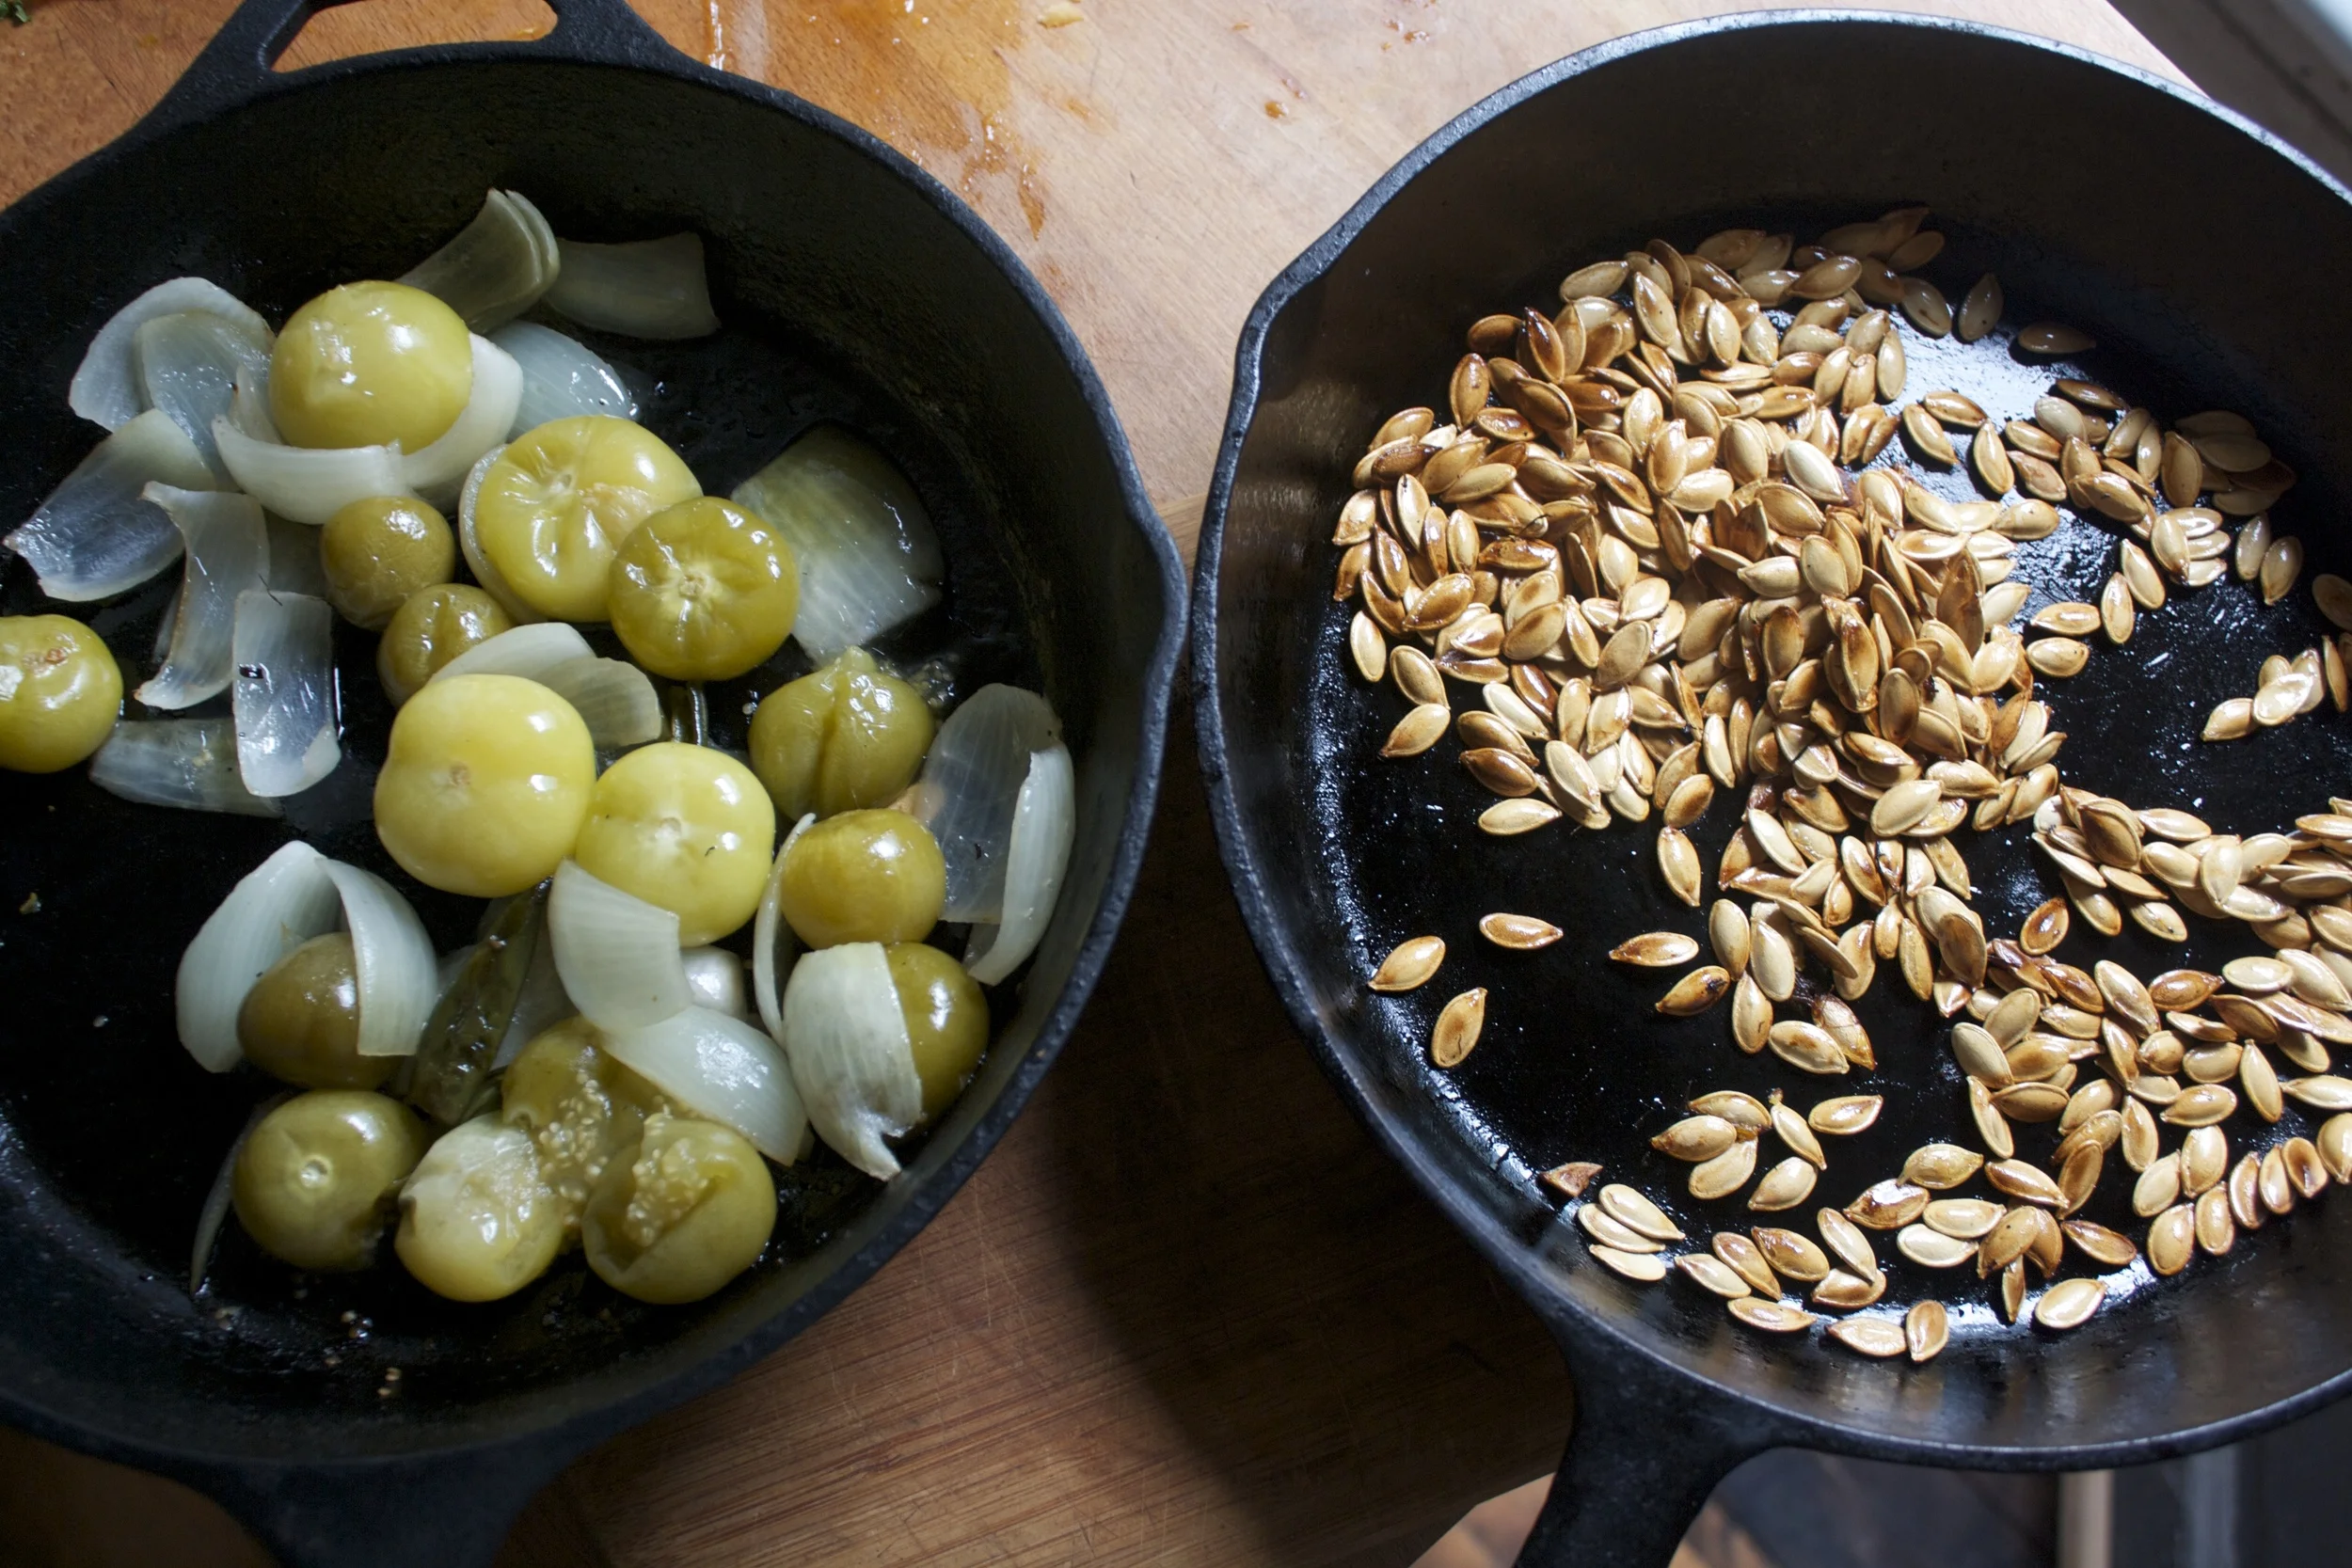

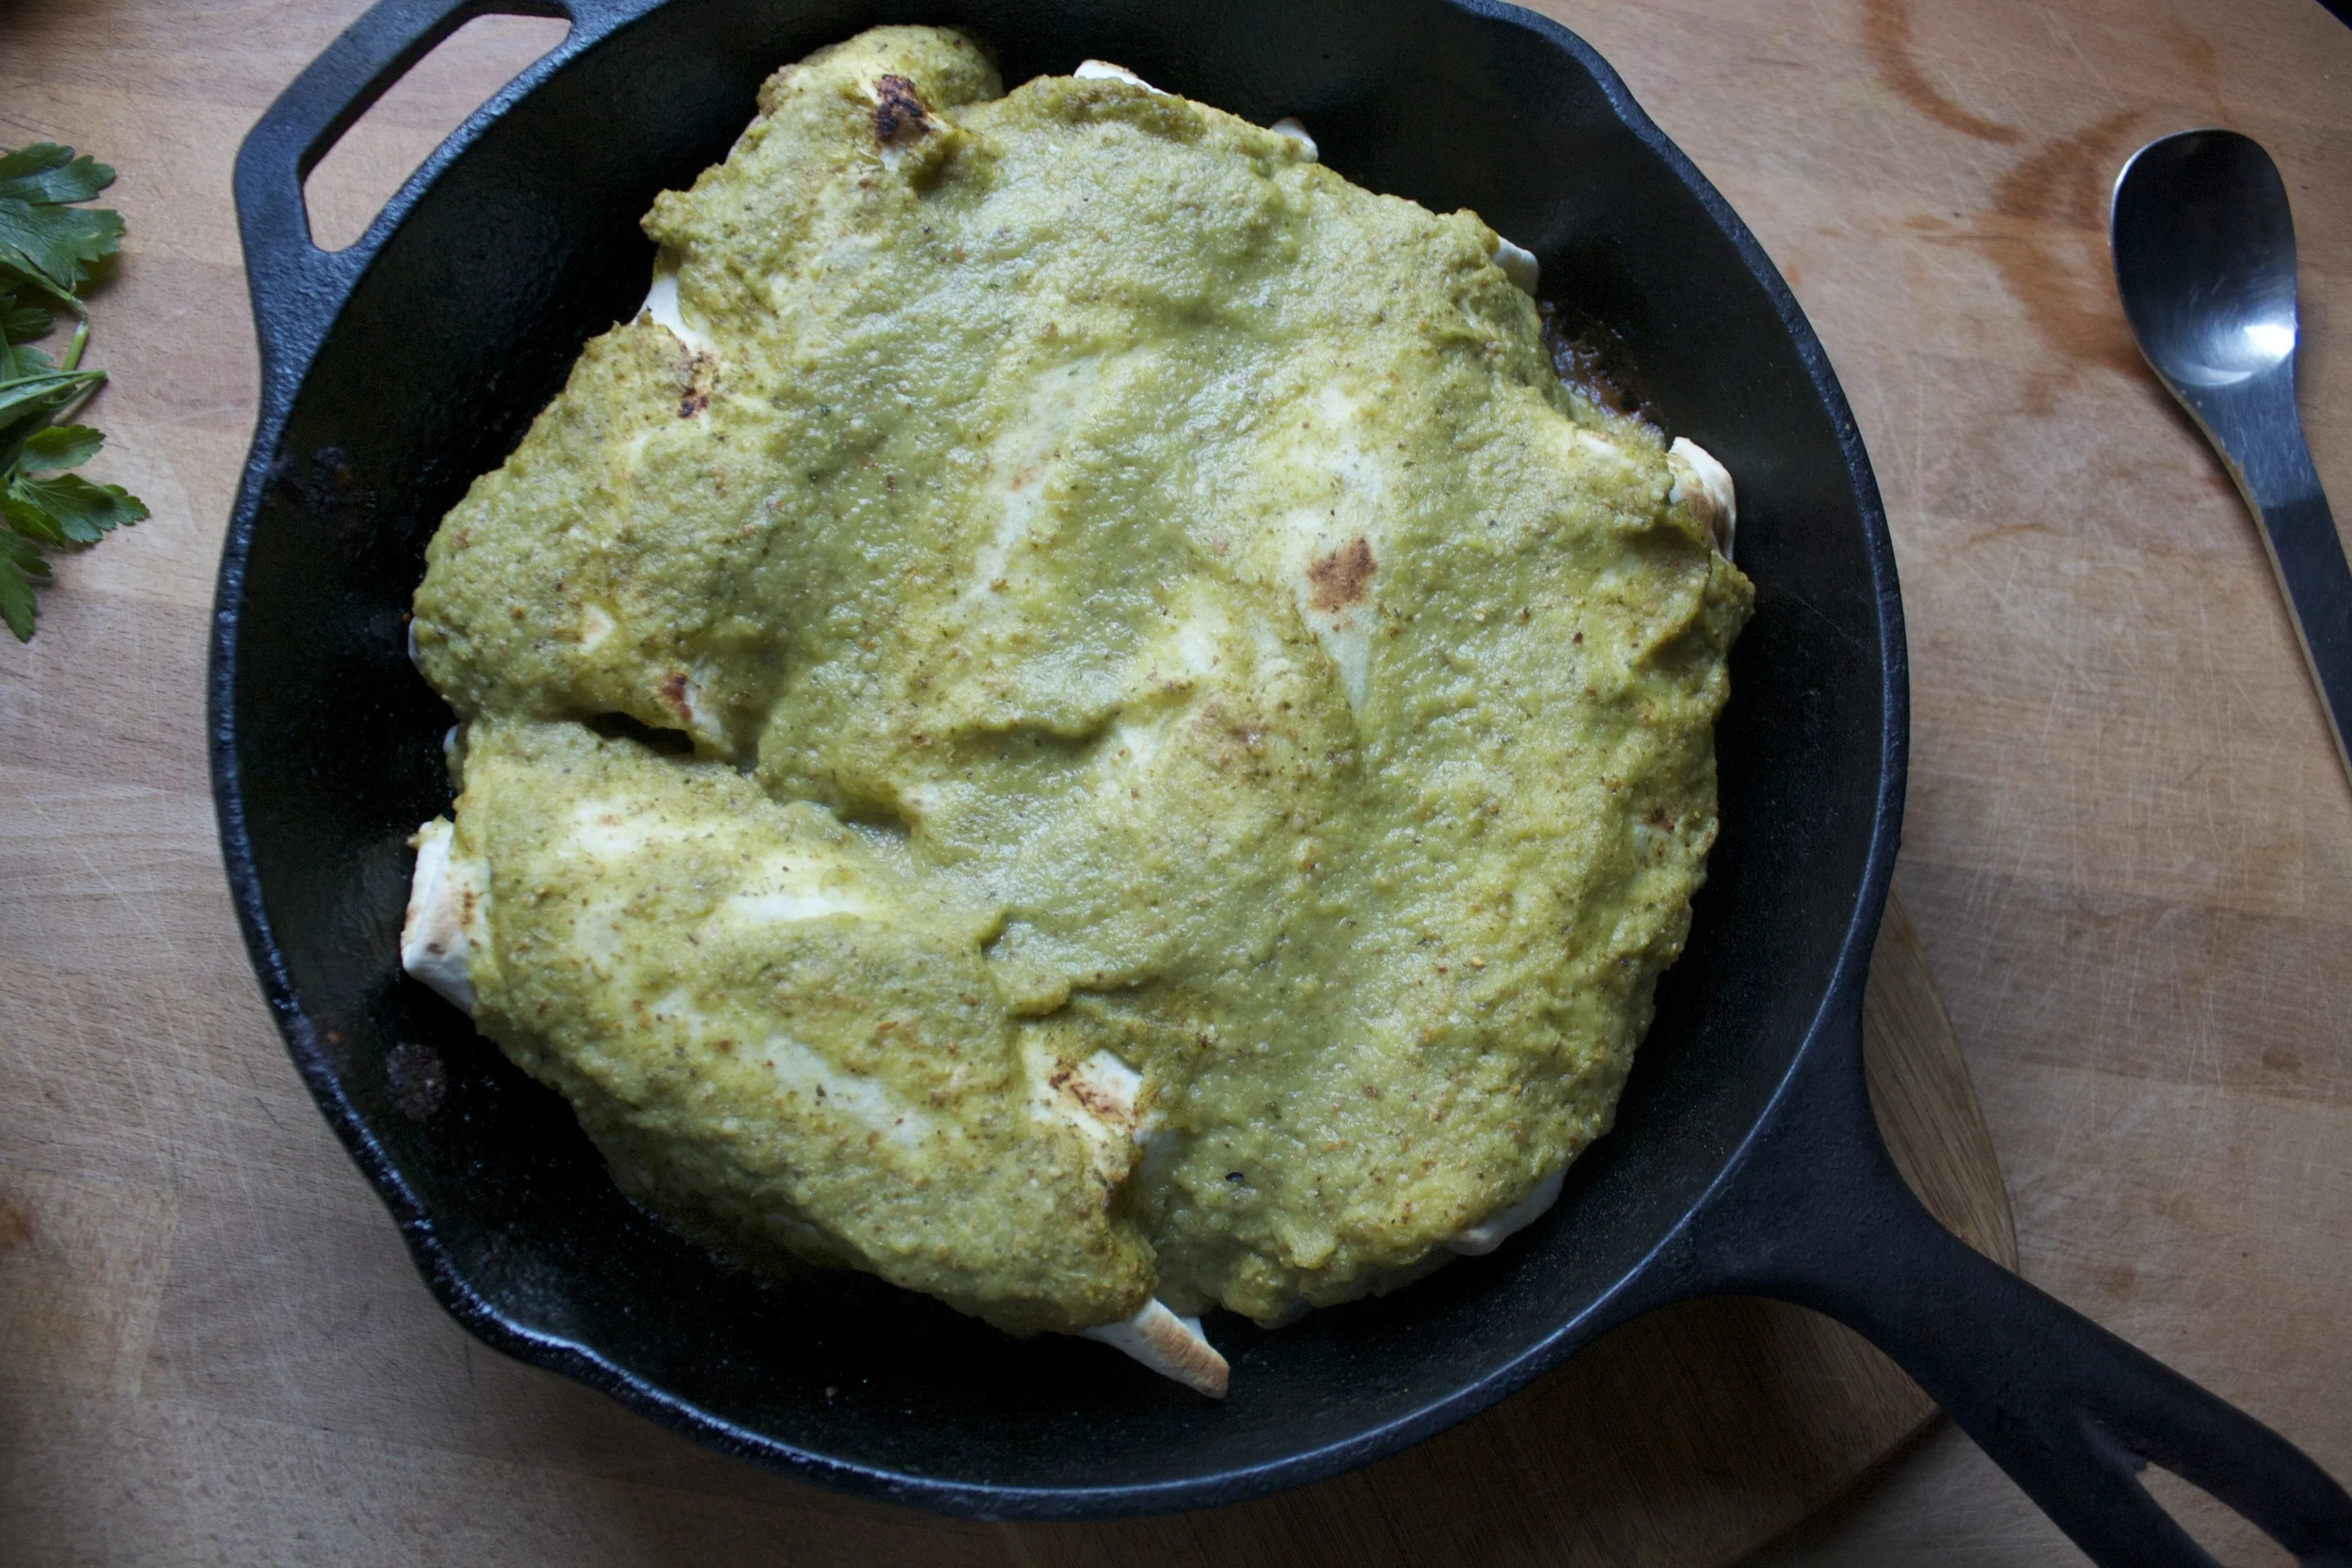

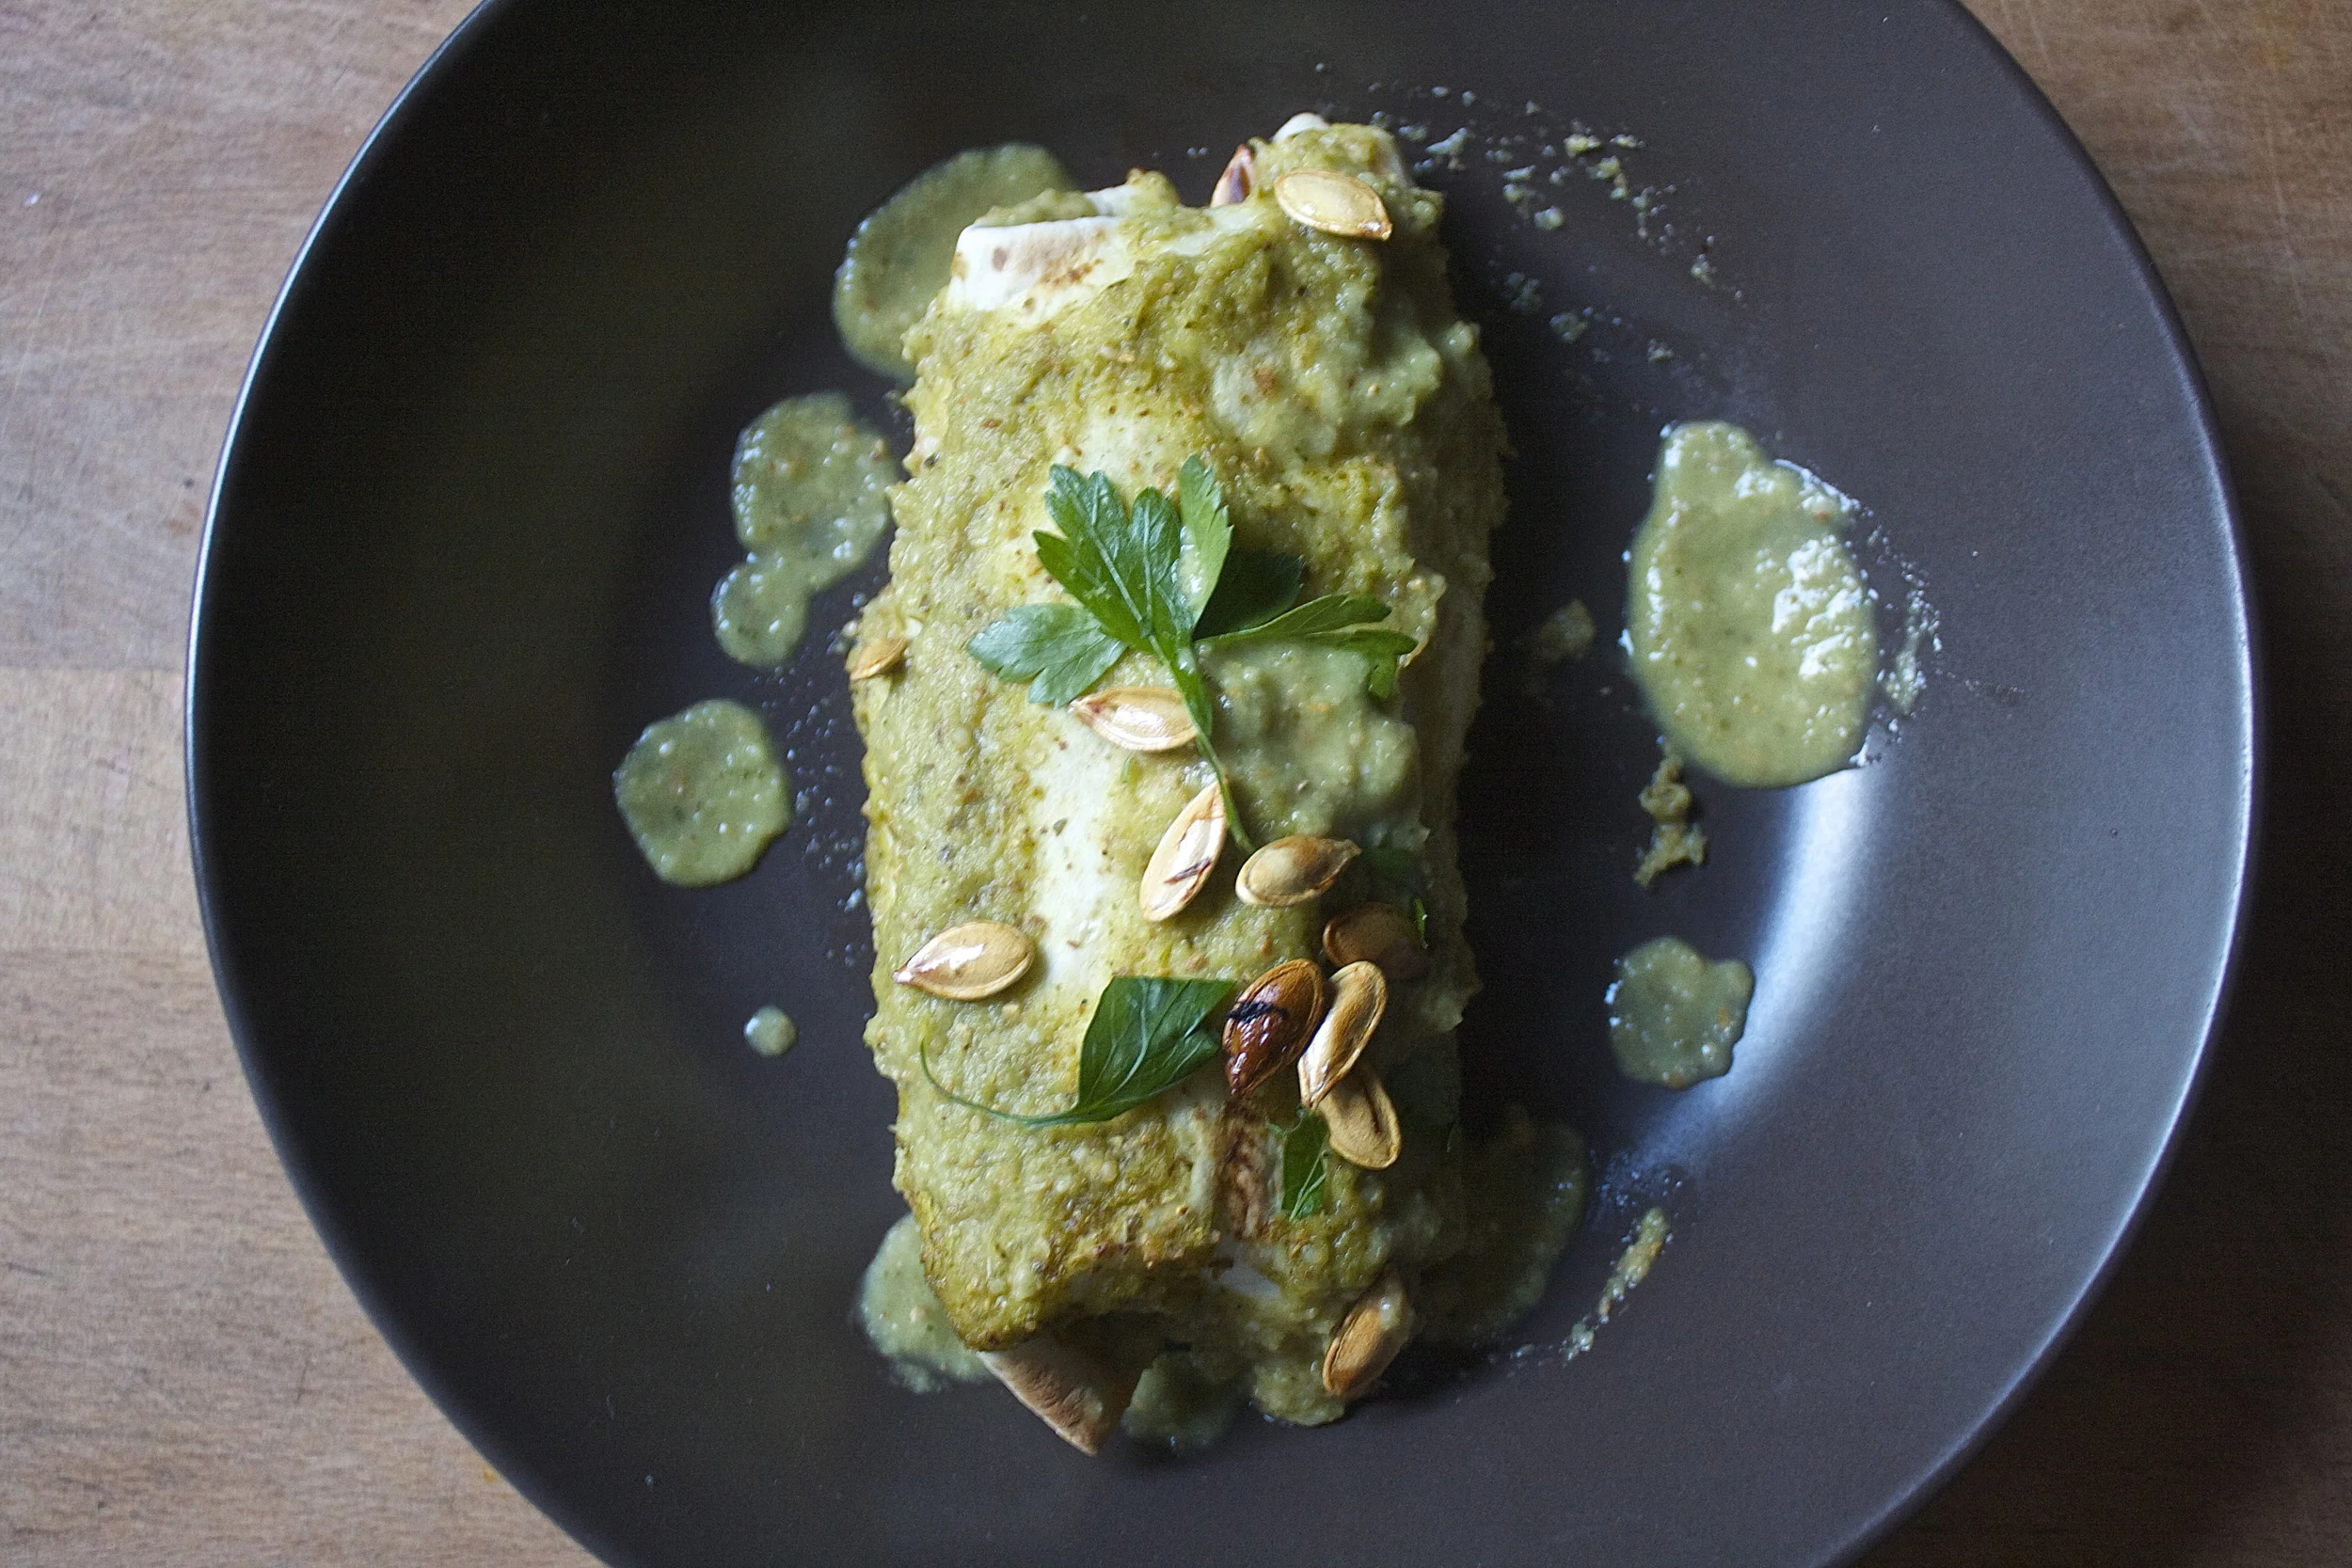

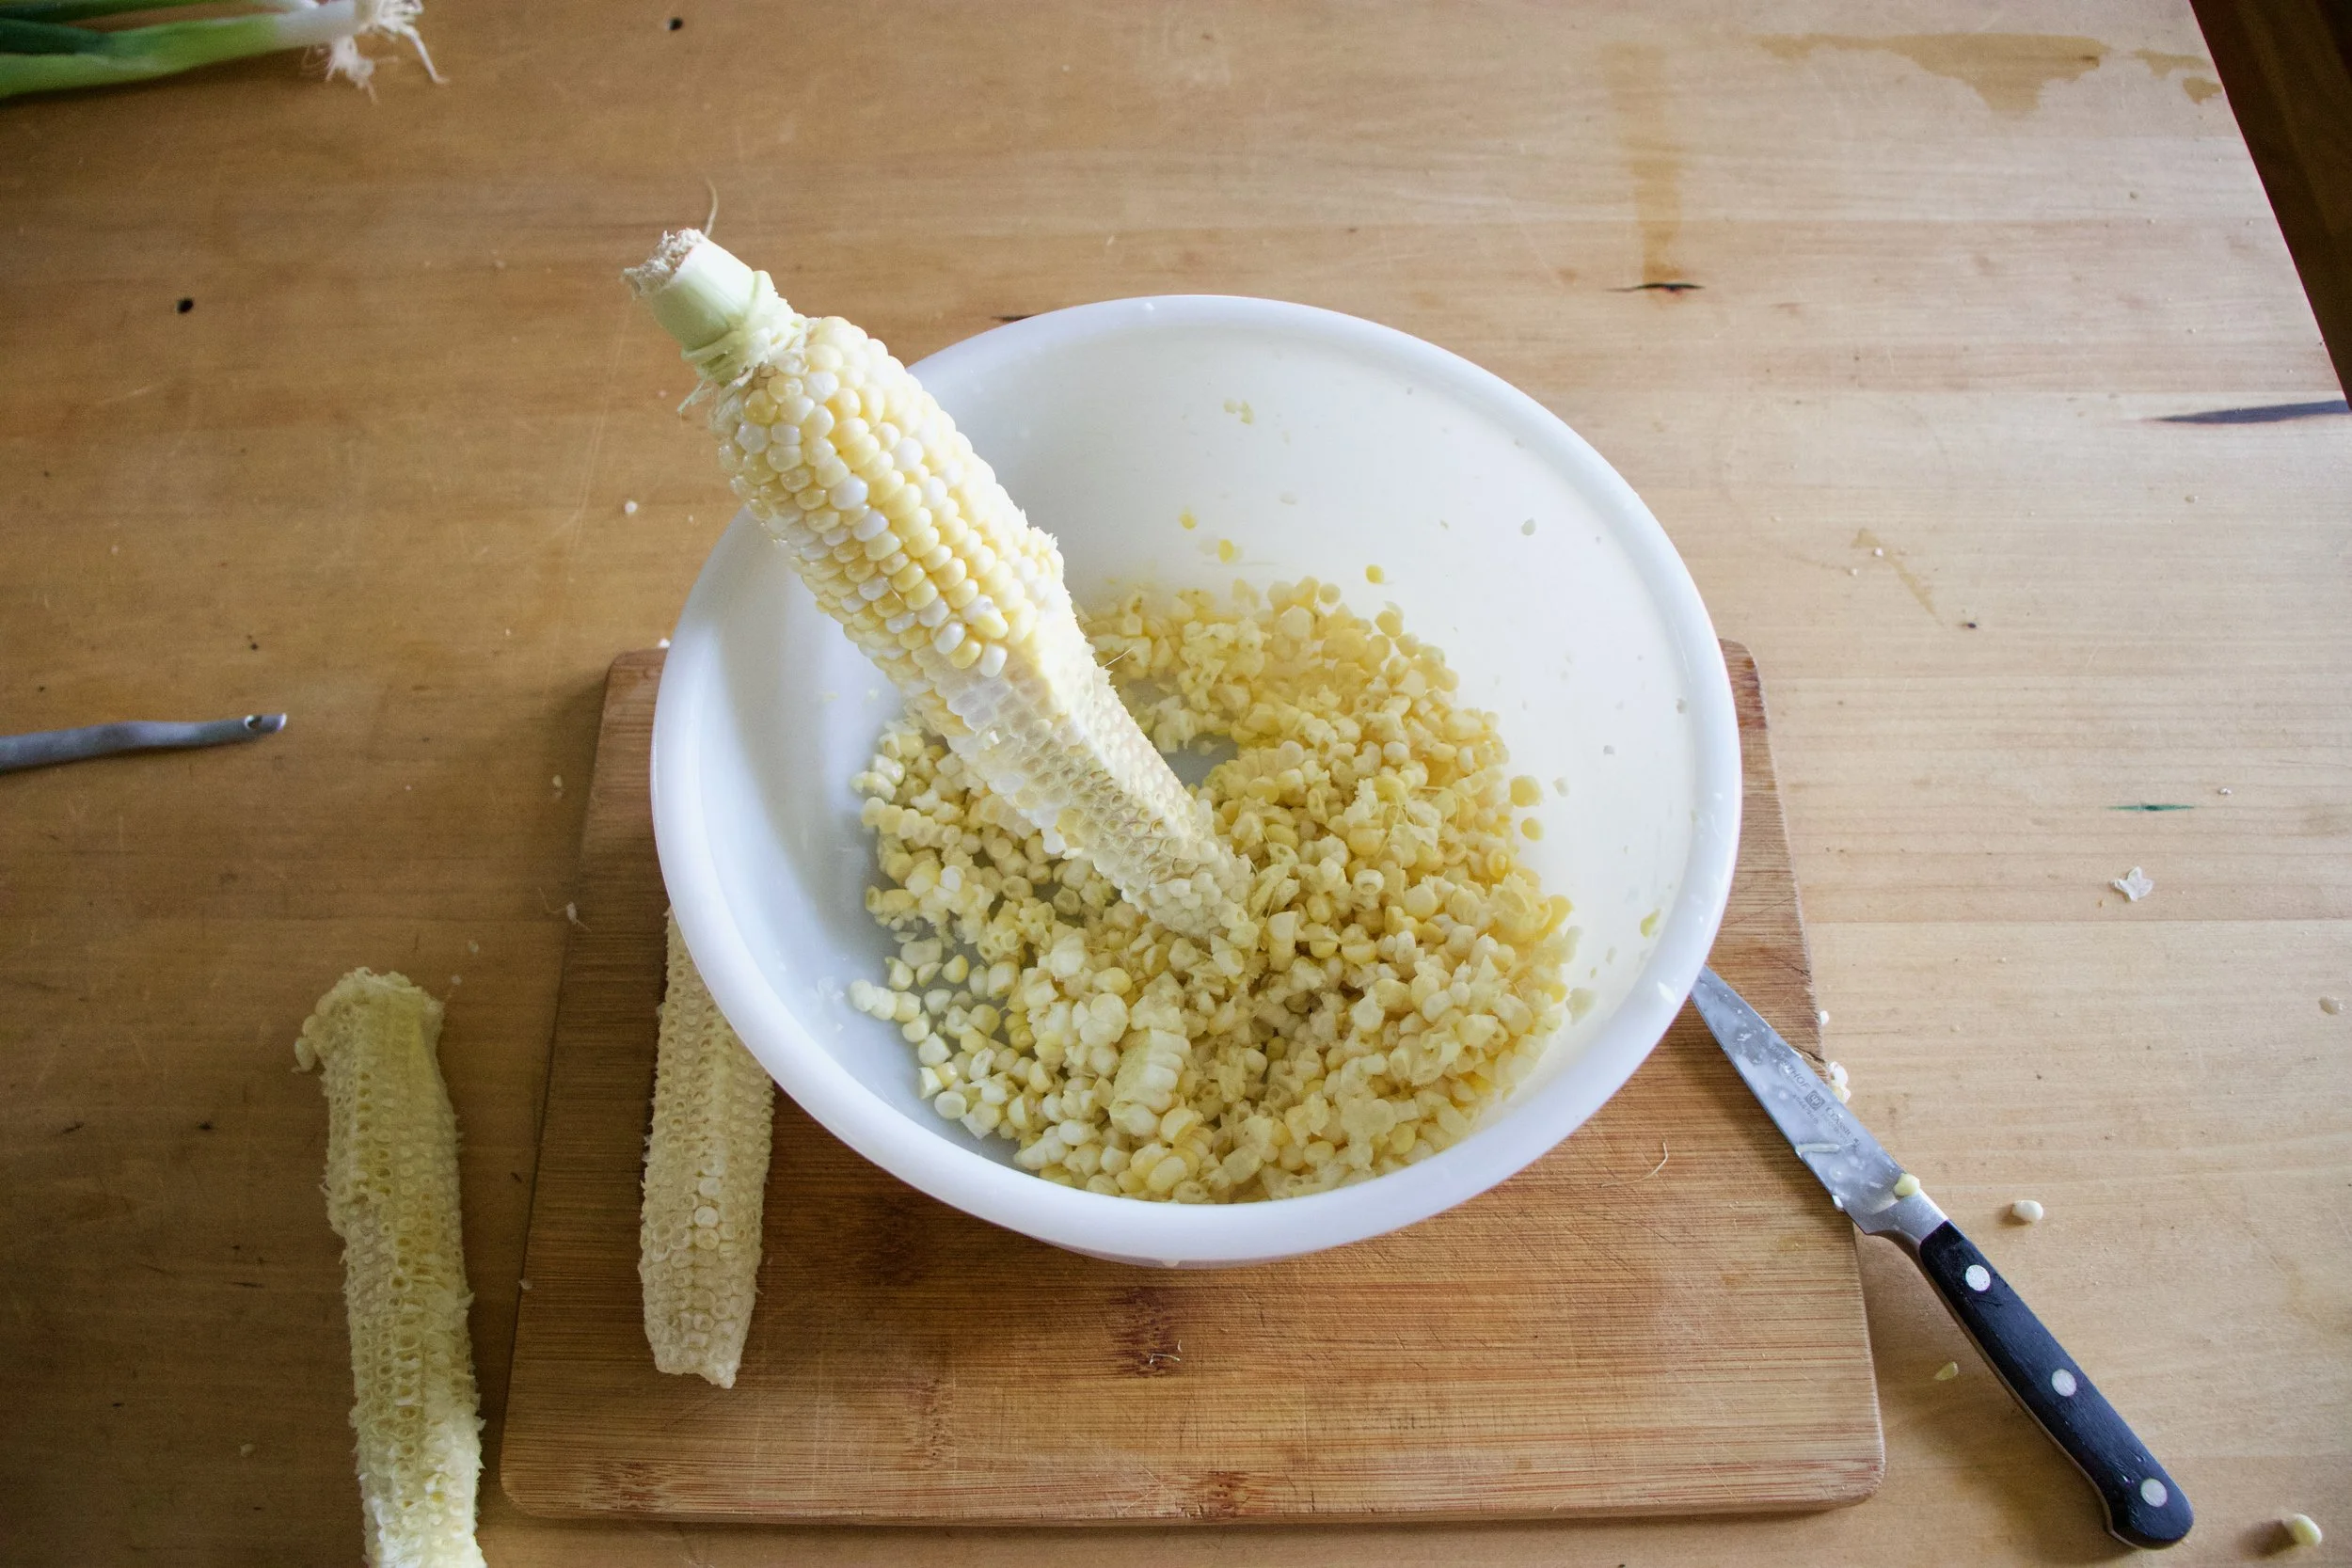
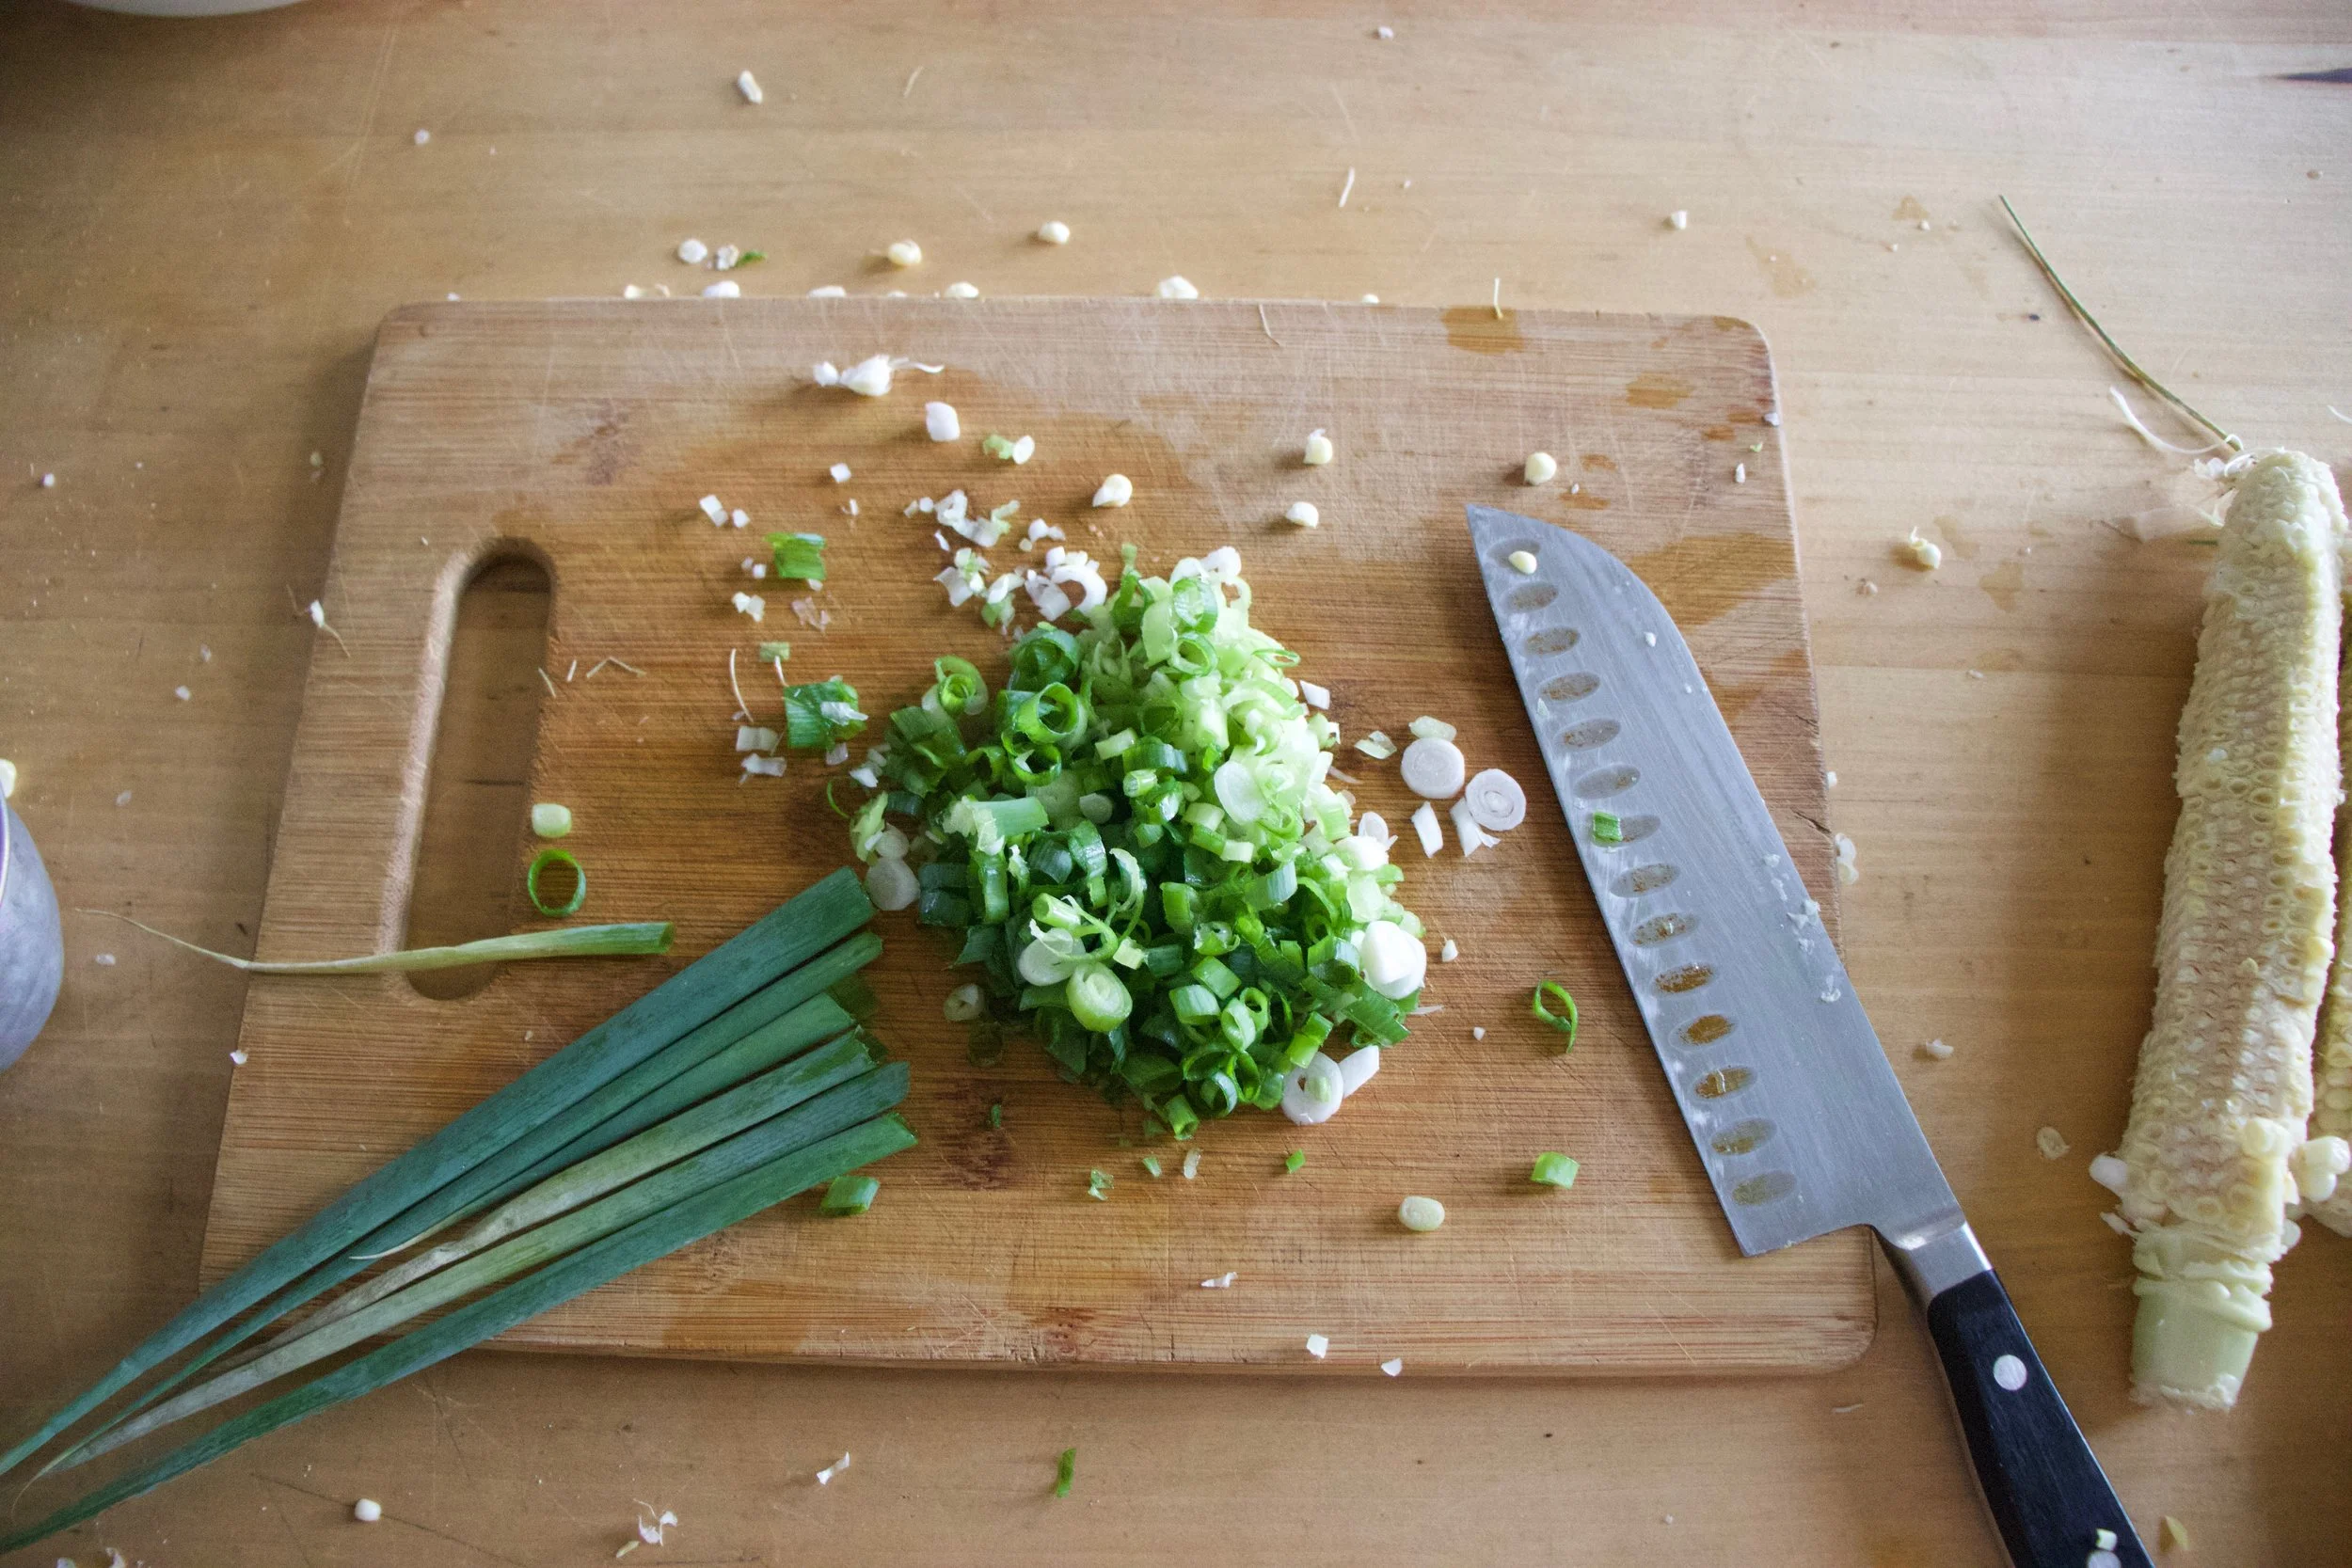


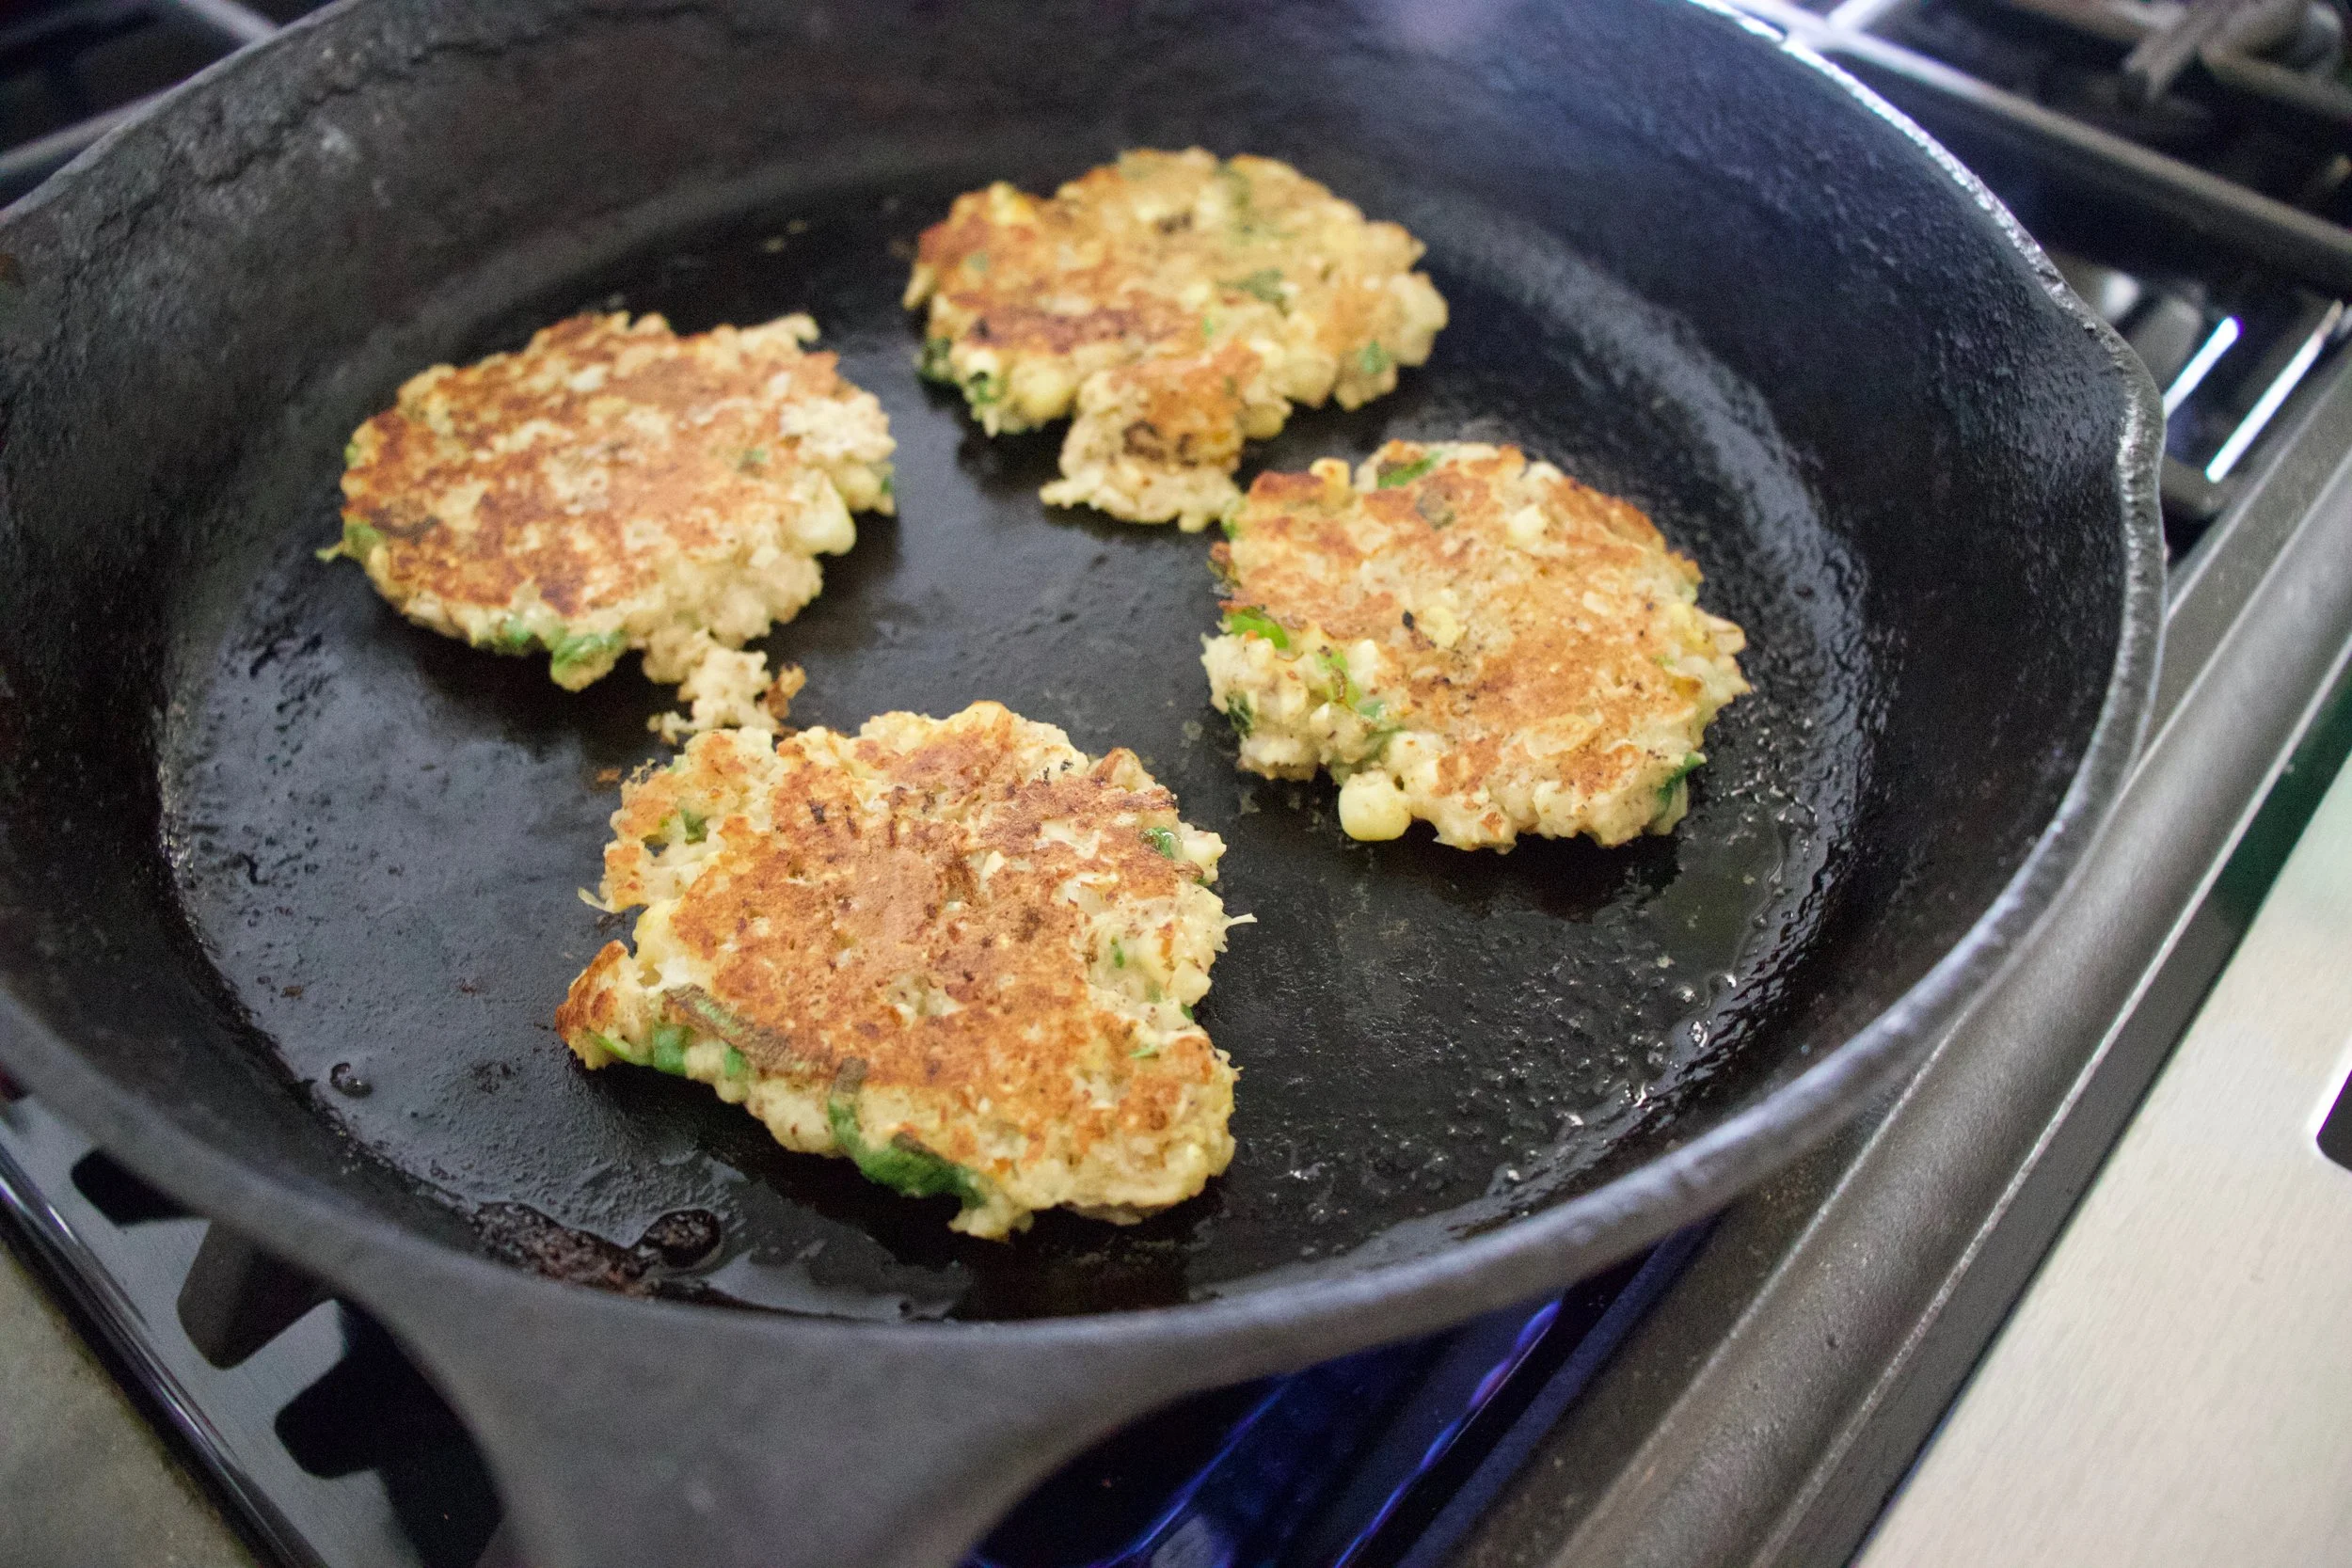
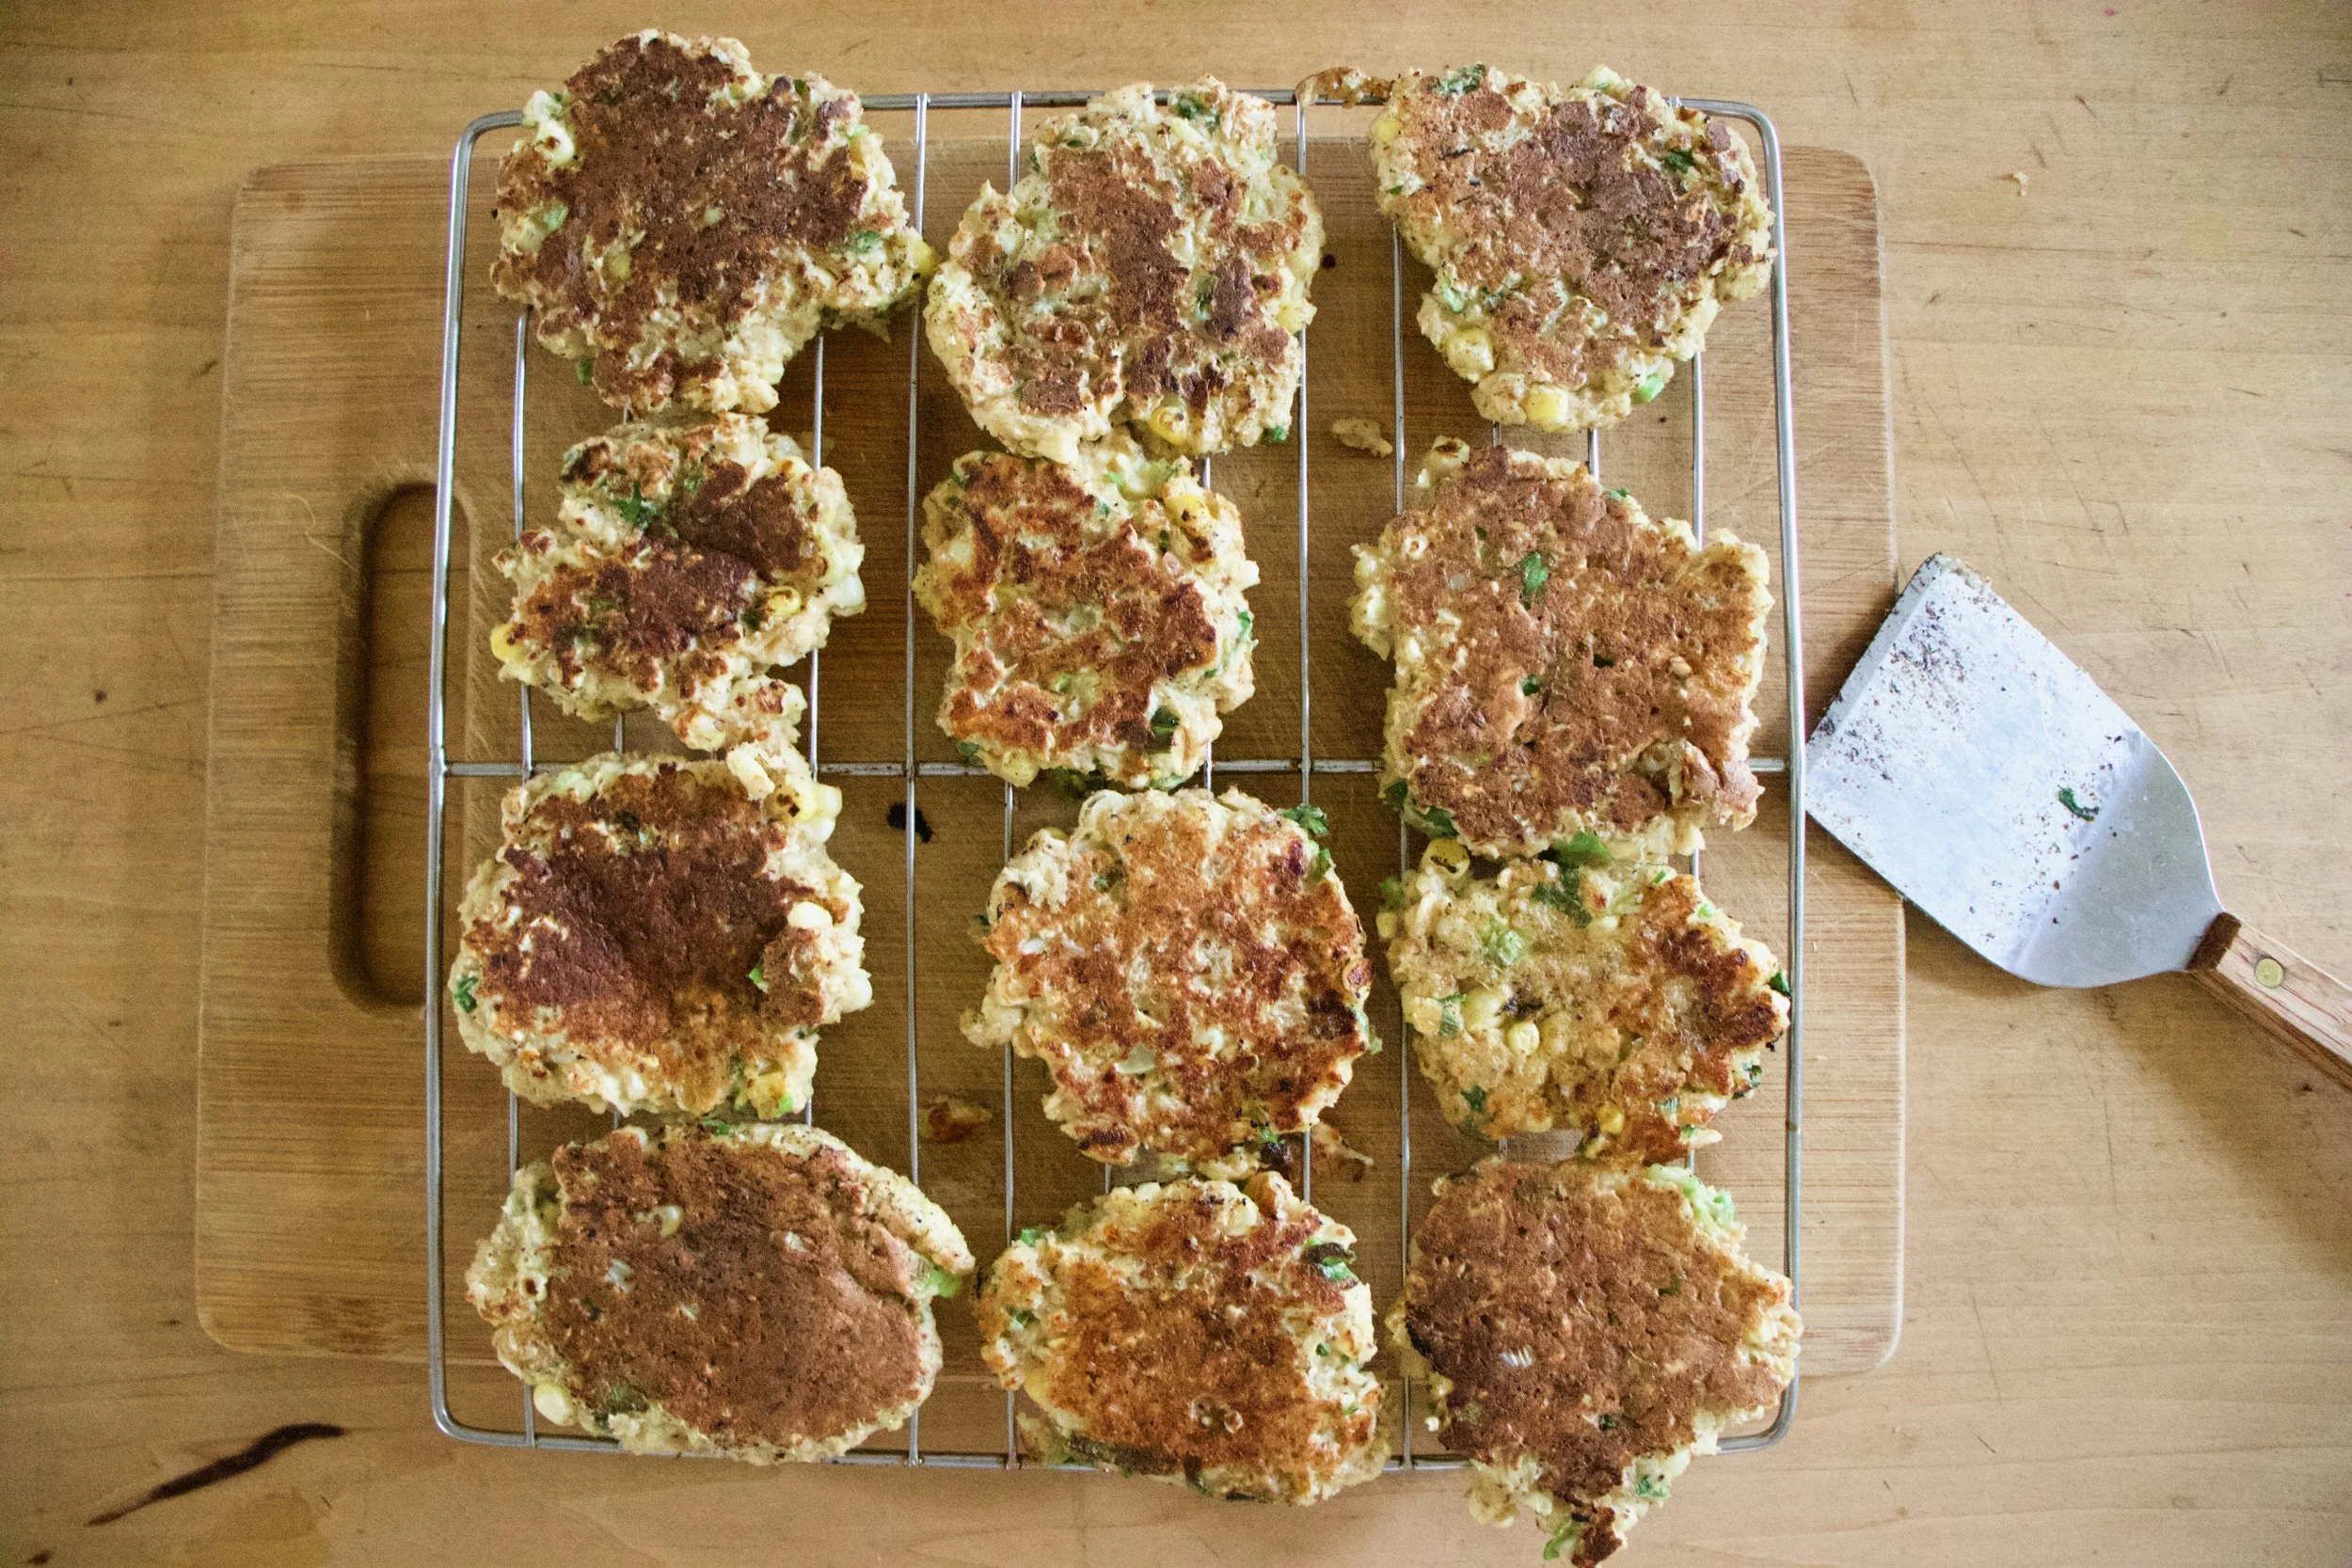


 My winter farm share is coming to an end this week. One more pick and then a three week stretch until the summer share starts%u2026 WHAT AM I GOING TO DO!!! Stock up as much as I can is what.
 %u00a0The stuff%u2026.For the split pea gravy we have a carrot, a parsnip and a large onion chopped into small chunks. %u00a0Salt, thyme, a bay leaf and of course the split peas. Then there is the celeriac root* sliced into 1/2 inch thick rounds and some plain old yellow mustard .
 Toss the chopped parsnip, carrot, onion and the spices into a pot on medium heat and let veggies sweat a few minutes until tender. %u00a0Add in the split peas and enough water to cover everything. %u00a0Turn pot on high and bring to a boil, then cover and turn to low. Make sure to give the pot a good stir ever few minutes and add more water if needed%u00a0
 Once the peas have soften, remove the bay leaf and puree until smooth and oh so creamy. Taste and add more salt and pepper if needed. If you find that the gravy seems to thick, just add in more water until it’s the consistency that you want.%u00a0
 The gravy is made, the celeriac is roasted%u2026 now we are ready to eat!!%u00a0
 Stick the celeriac on a plate and dump good amount of that gravy right on top. Feel free to add a bed of spinach, or a grain or anything you want, because why not, and also some chopped tomatoes for a little acid and prettiness.
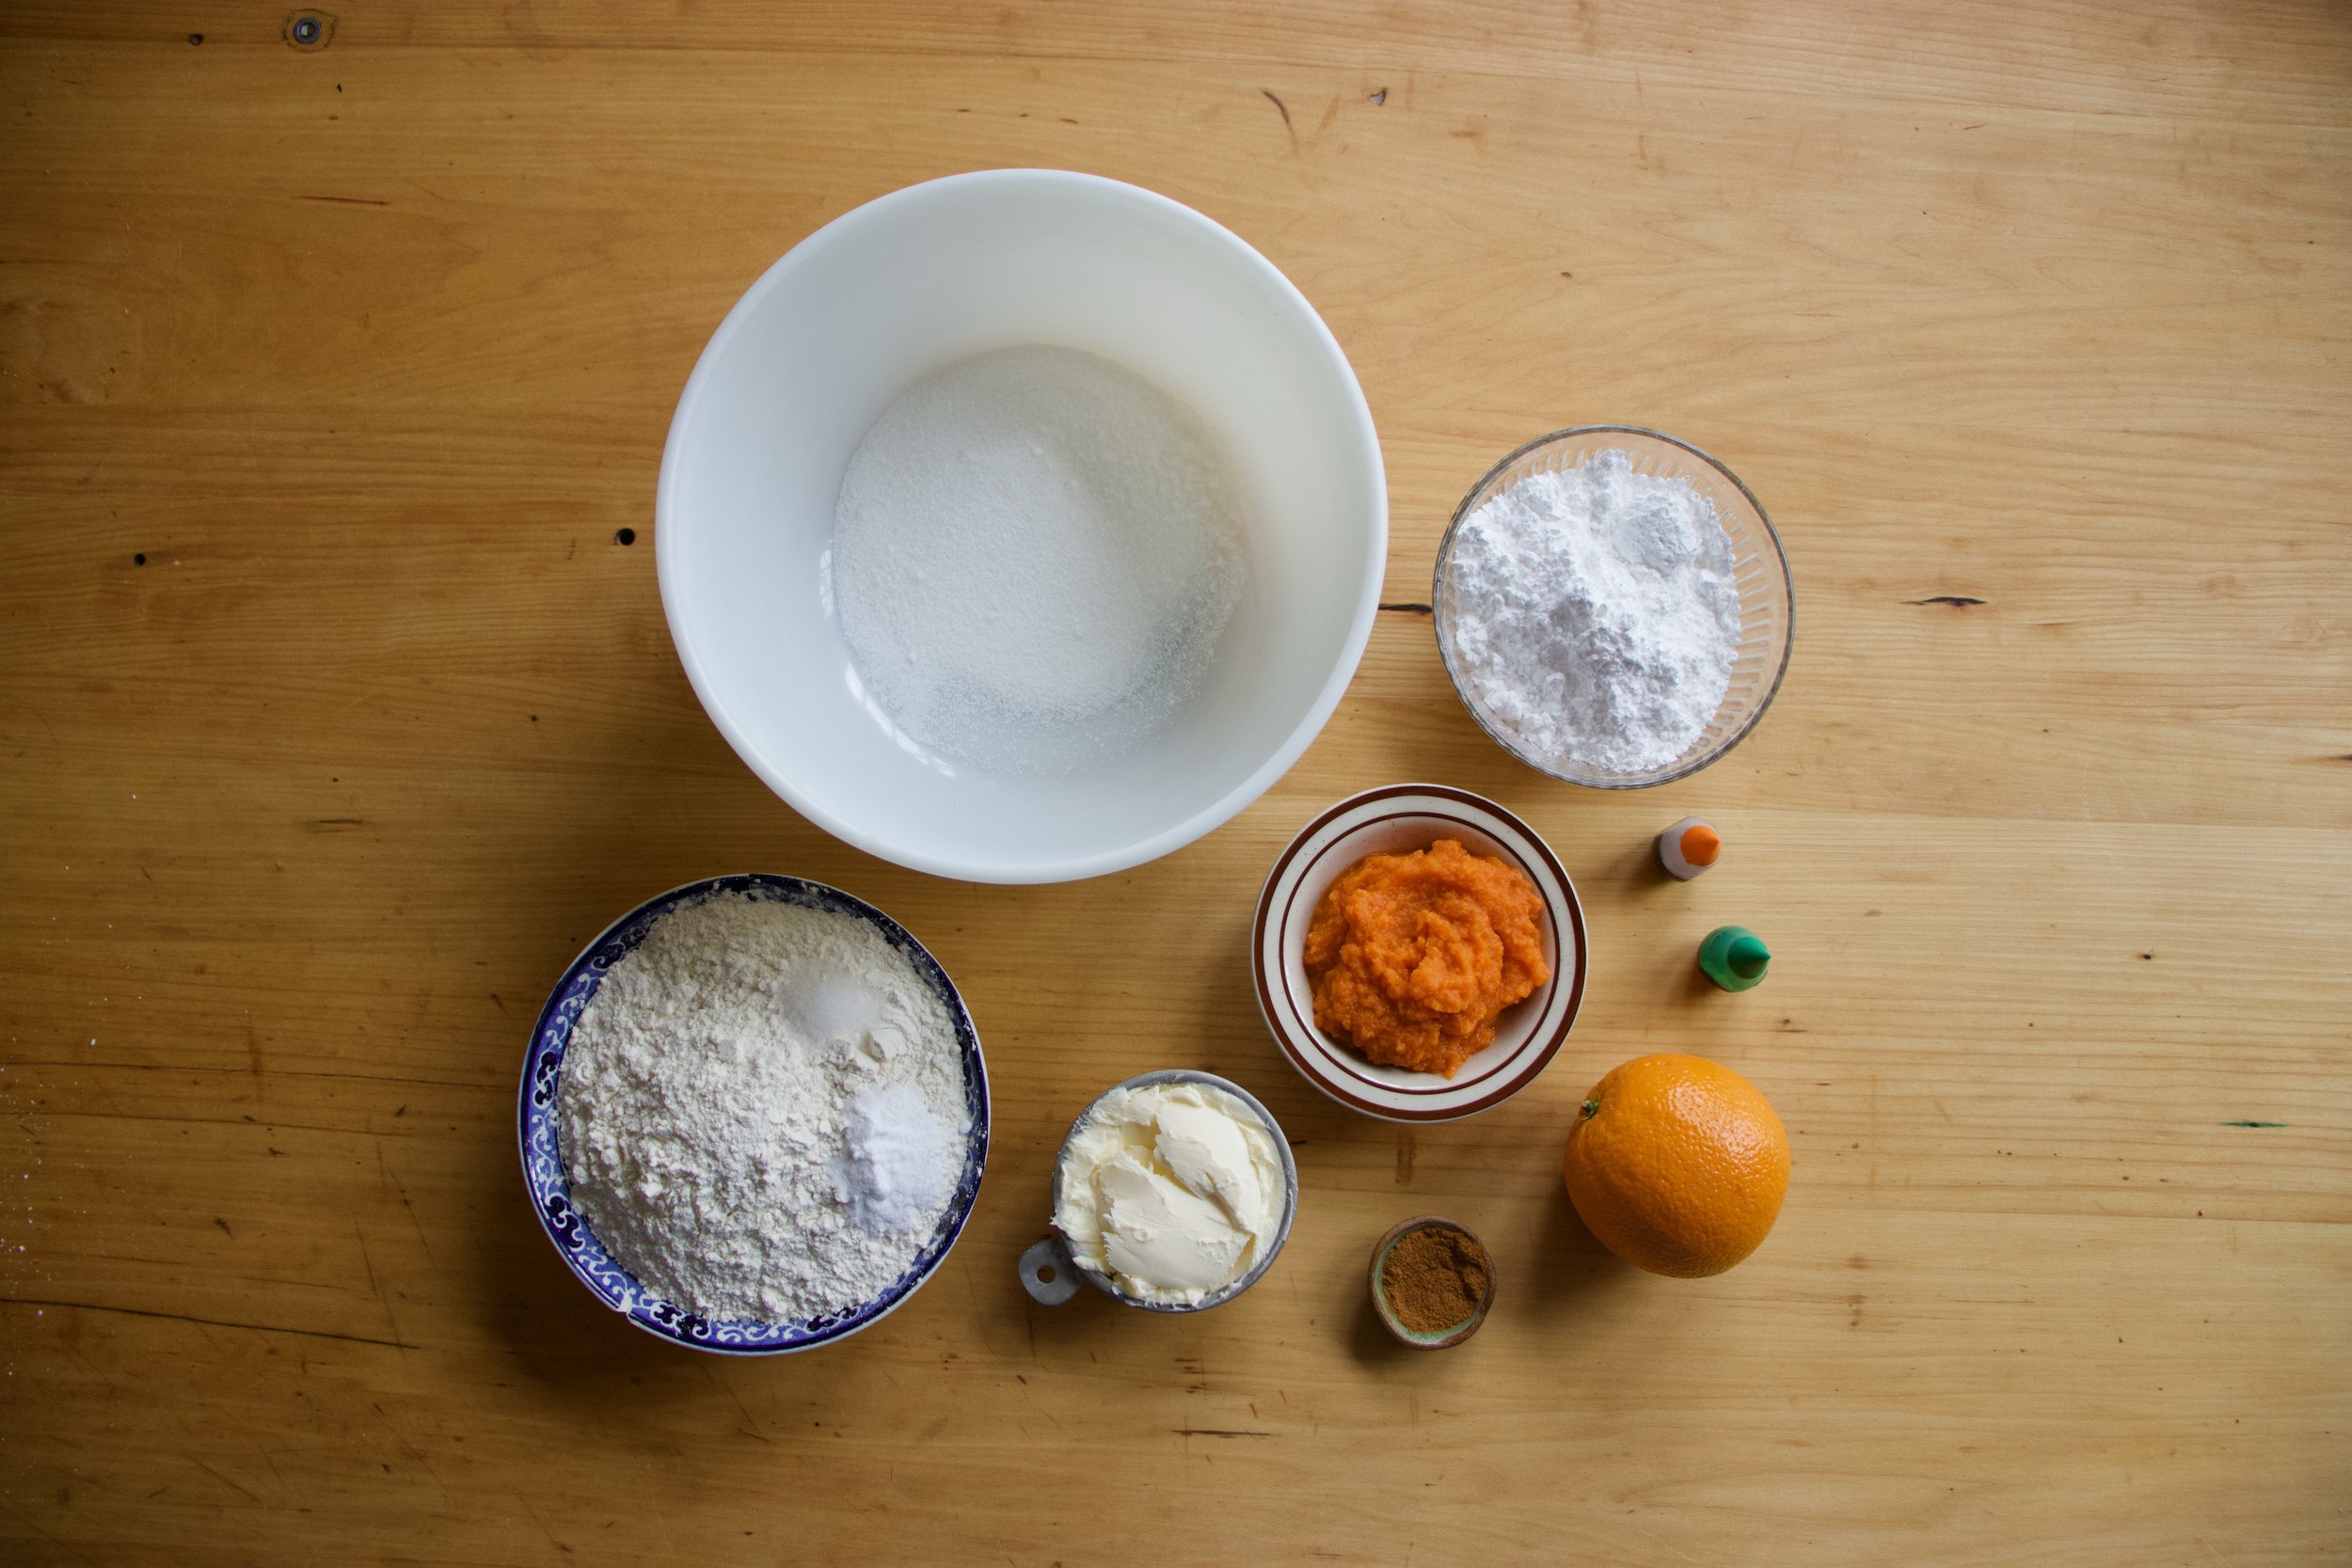

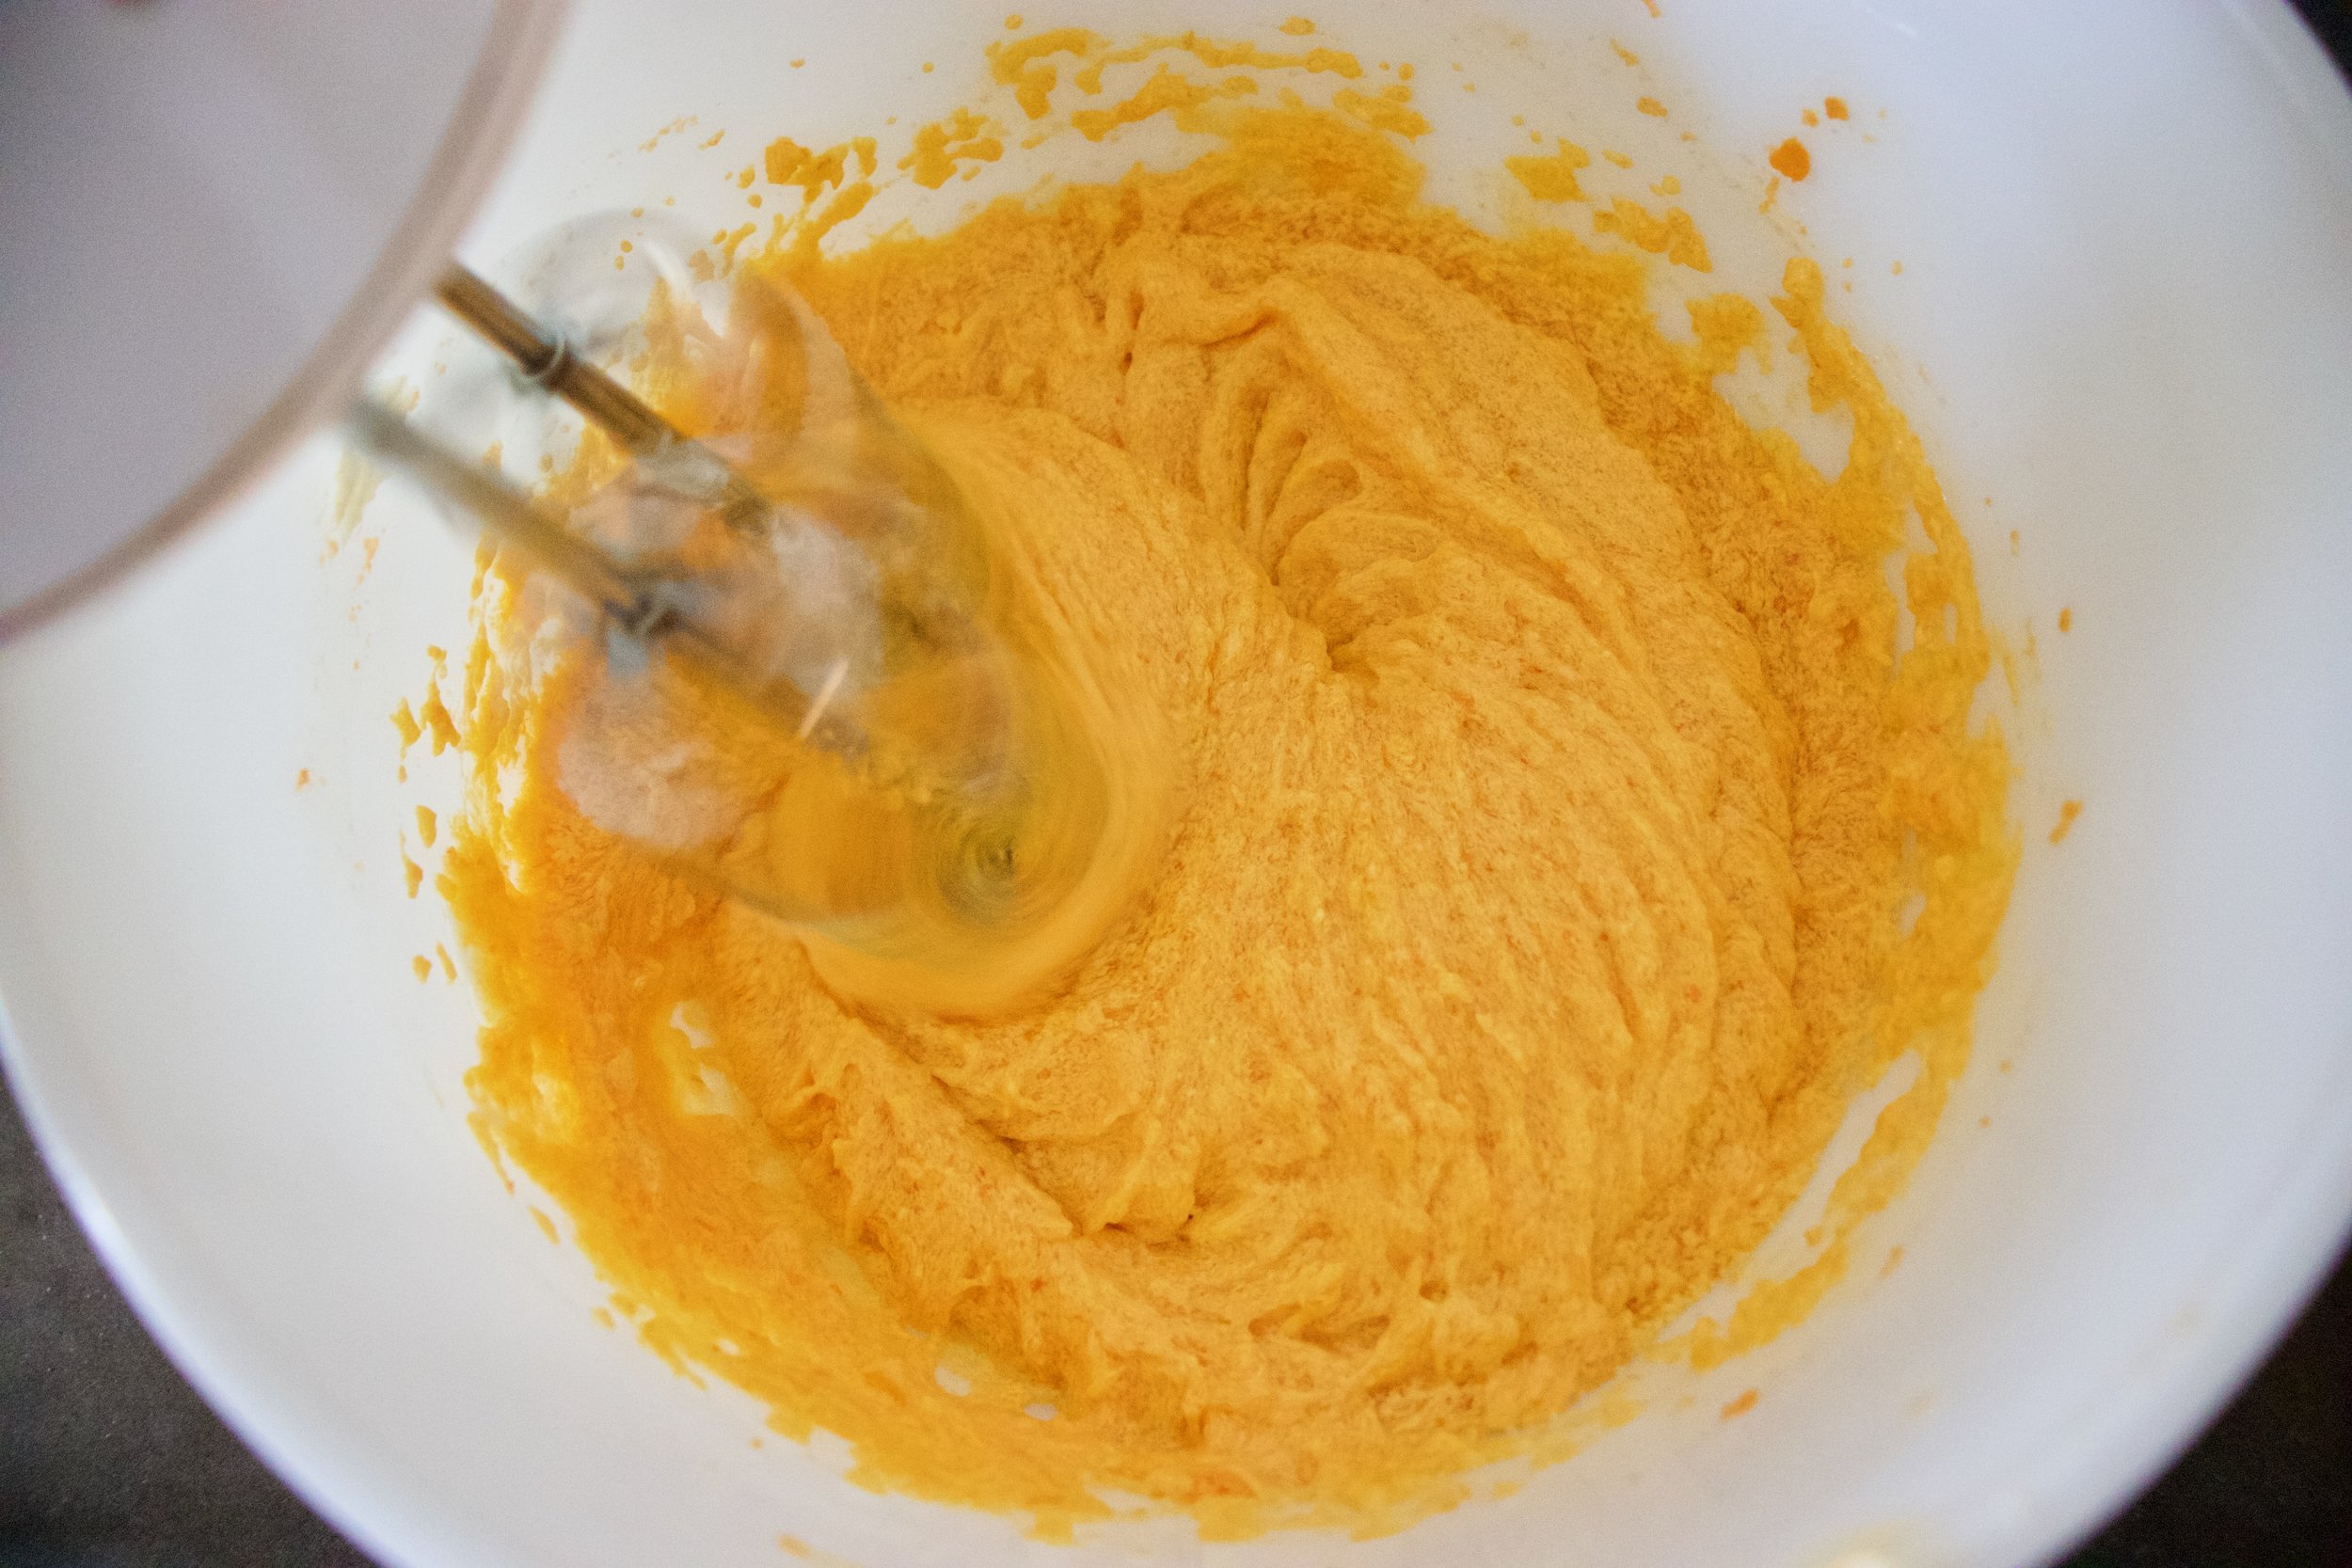


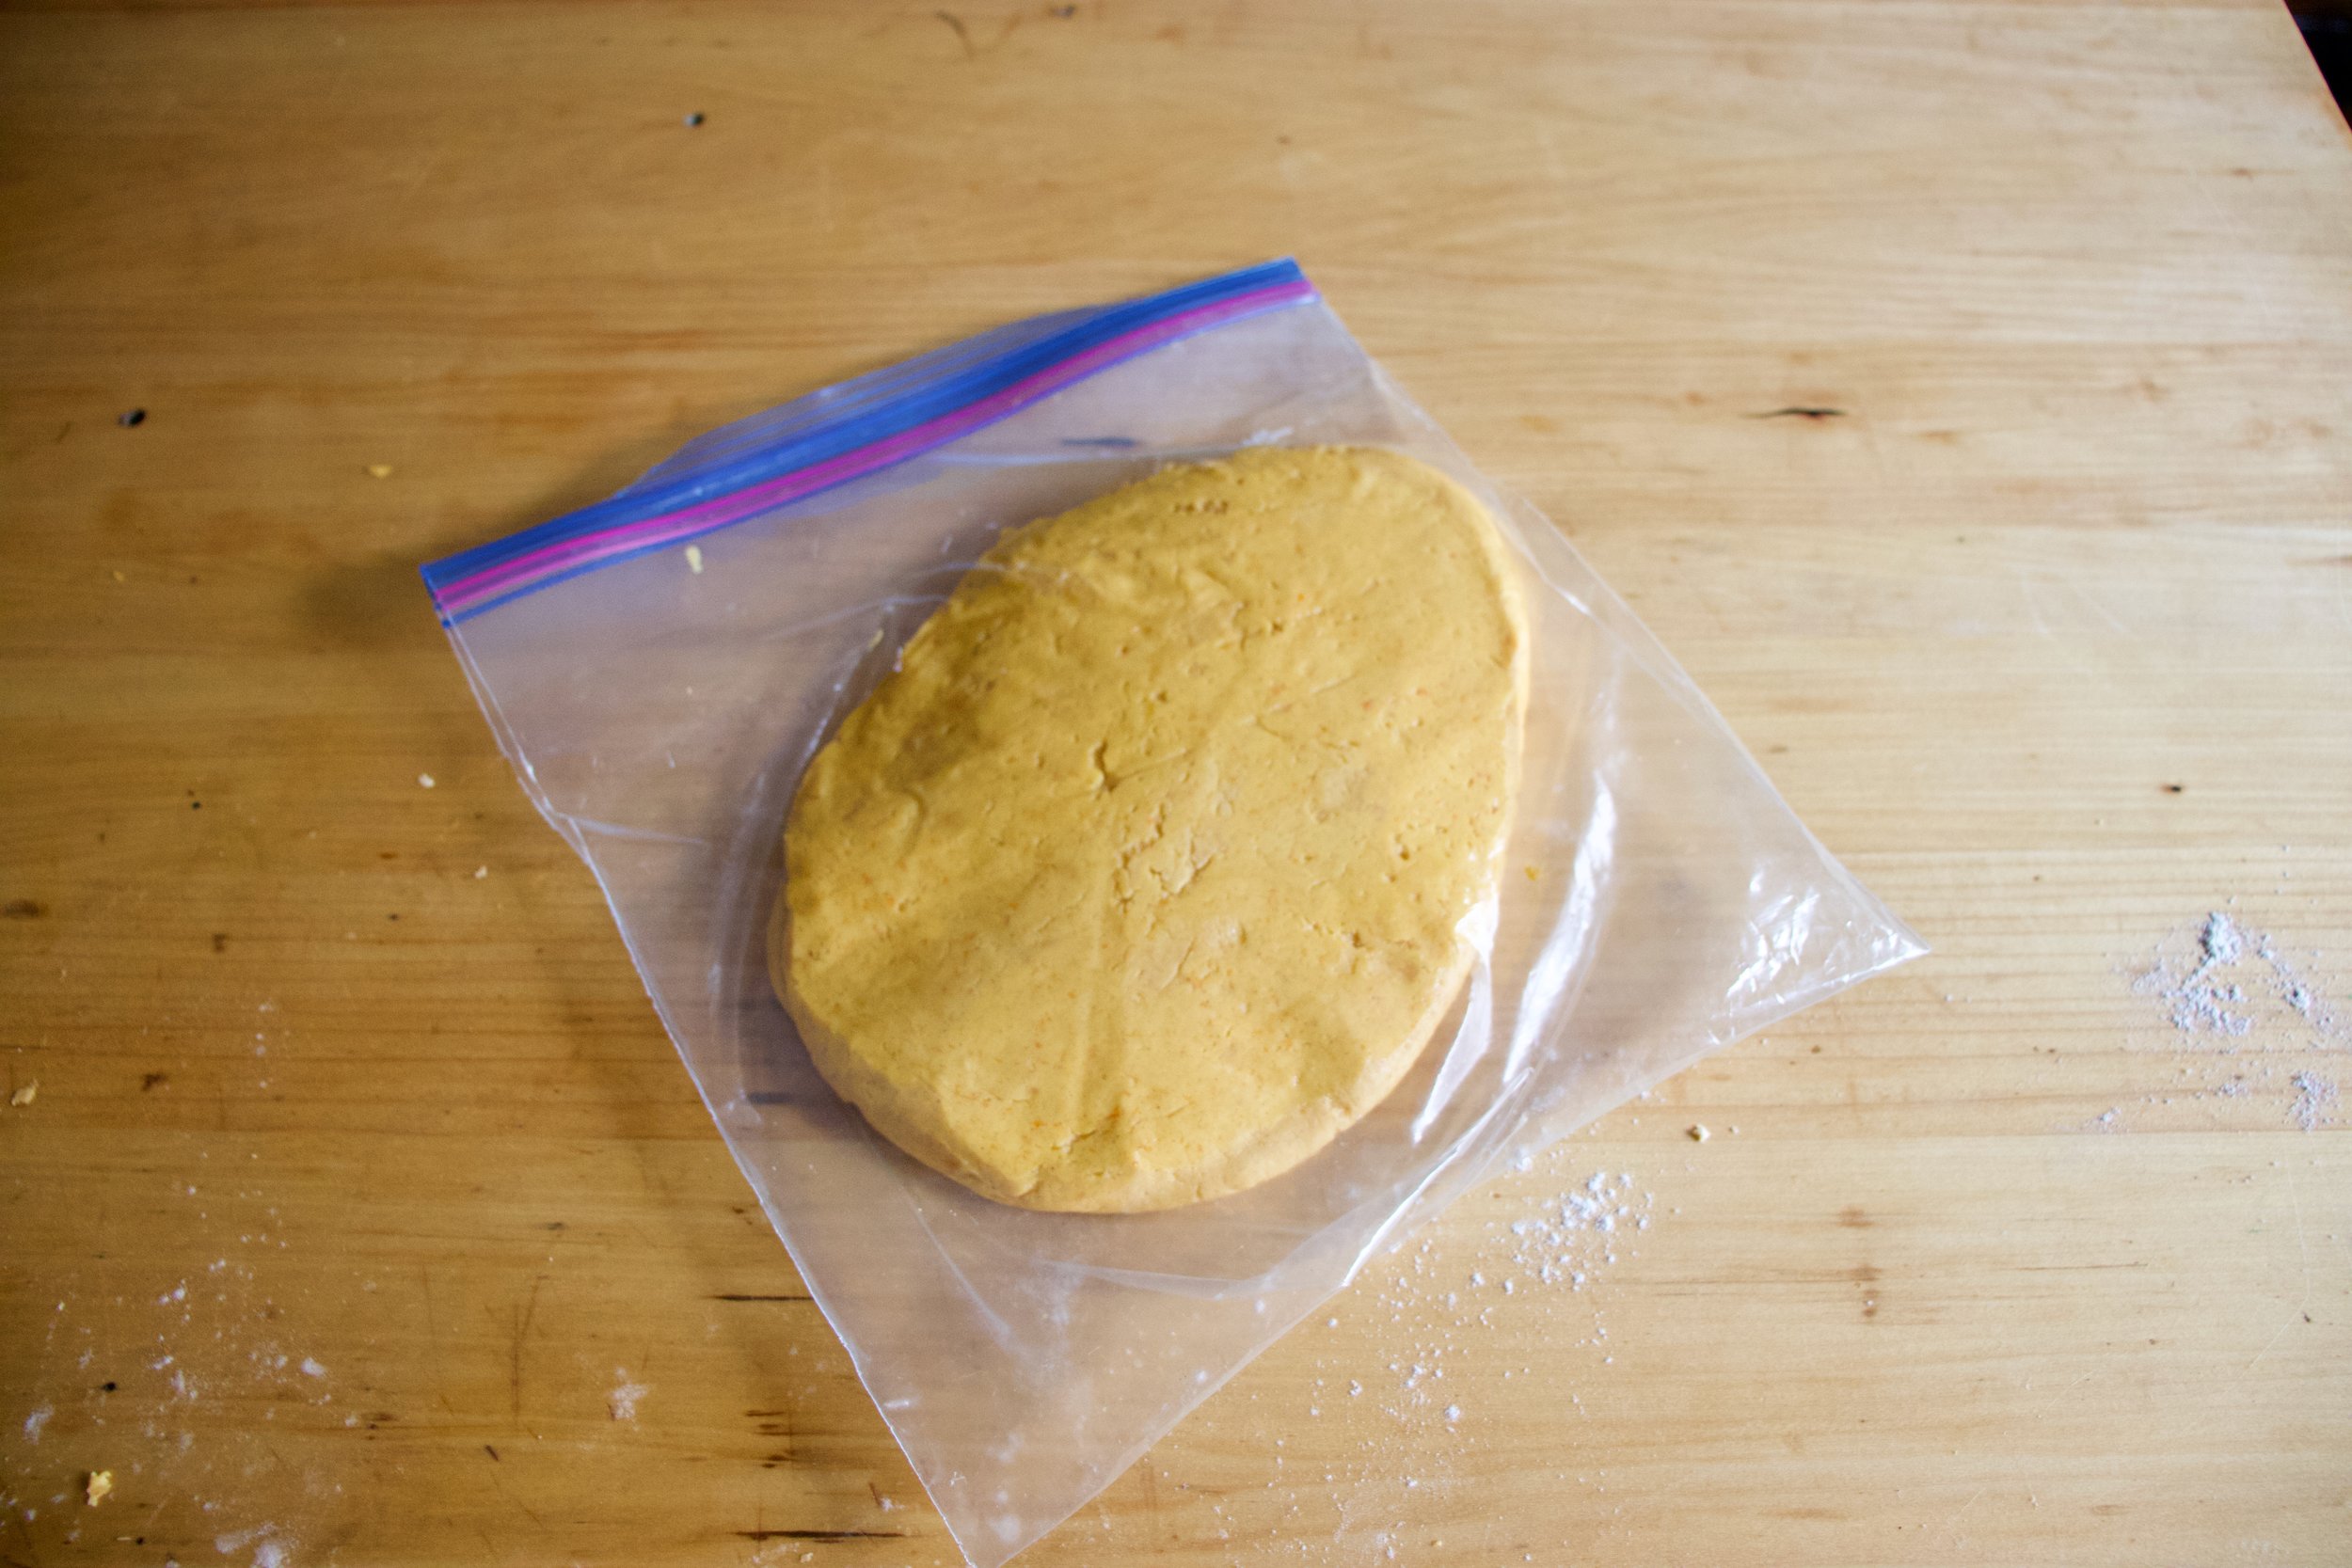


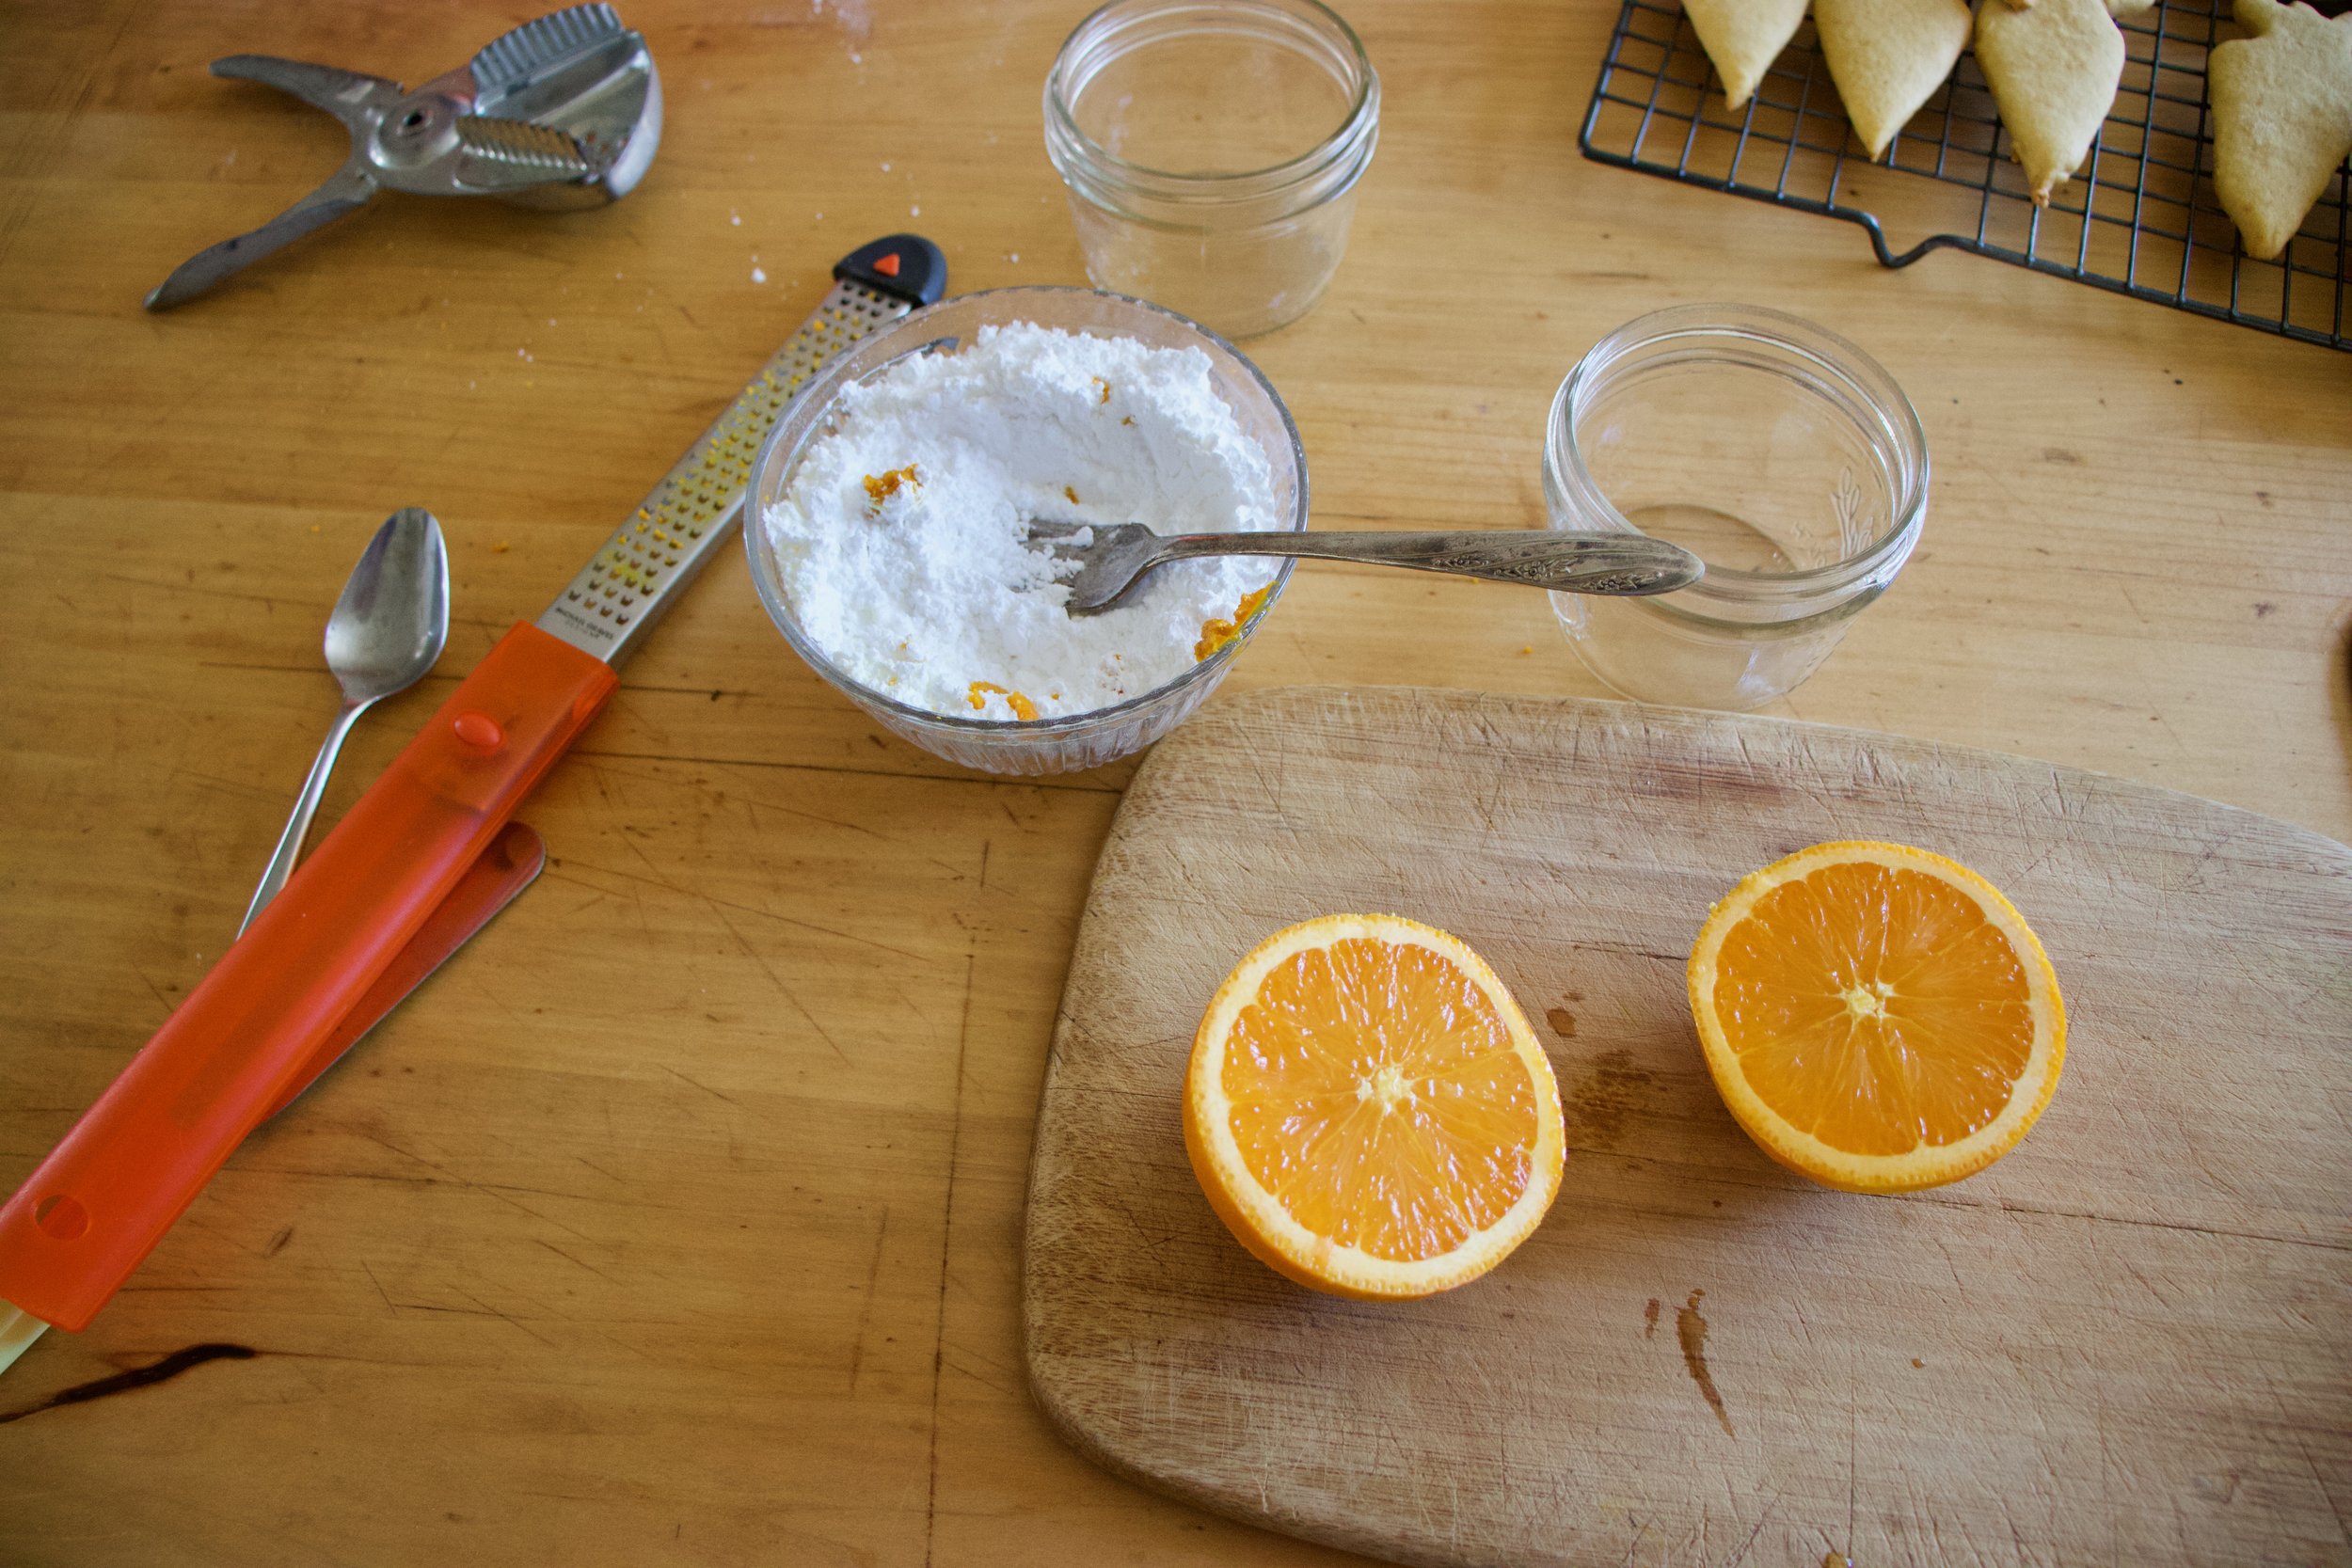
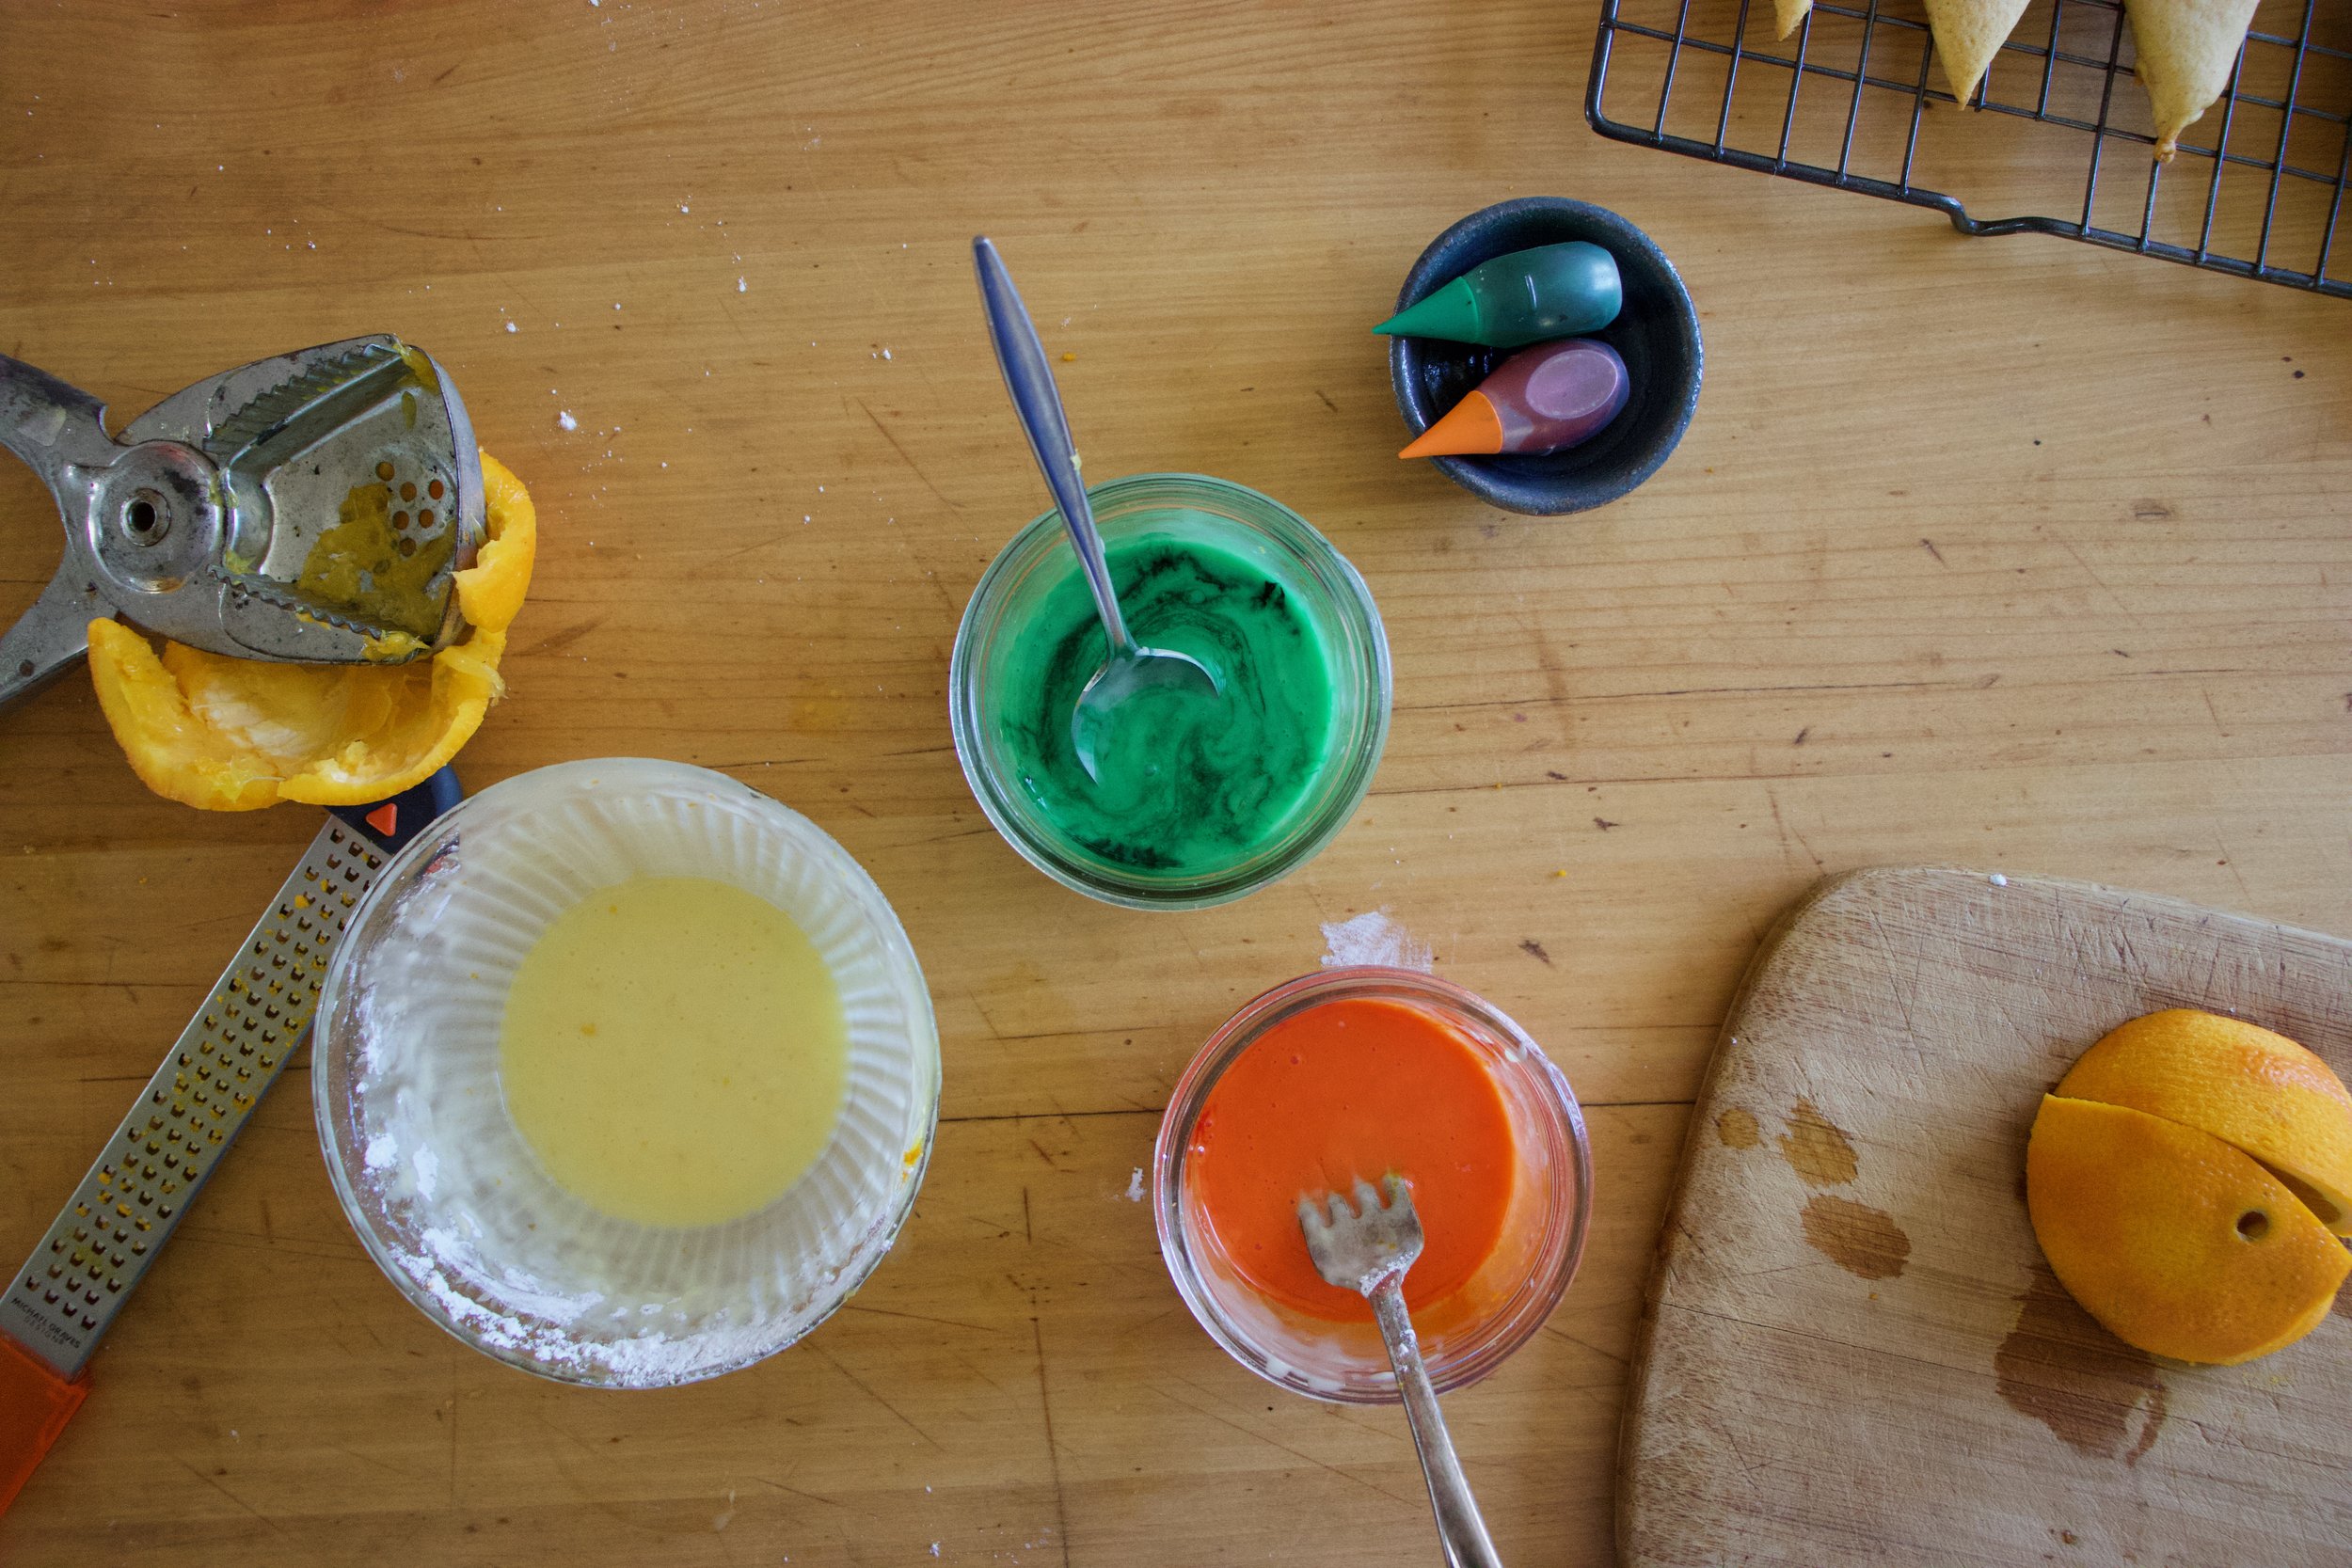


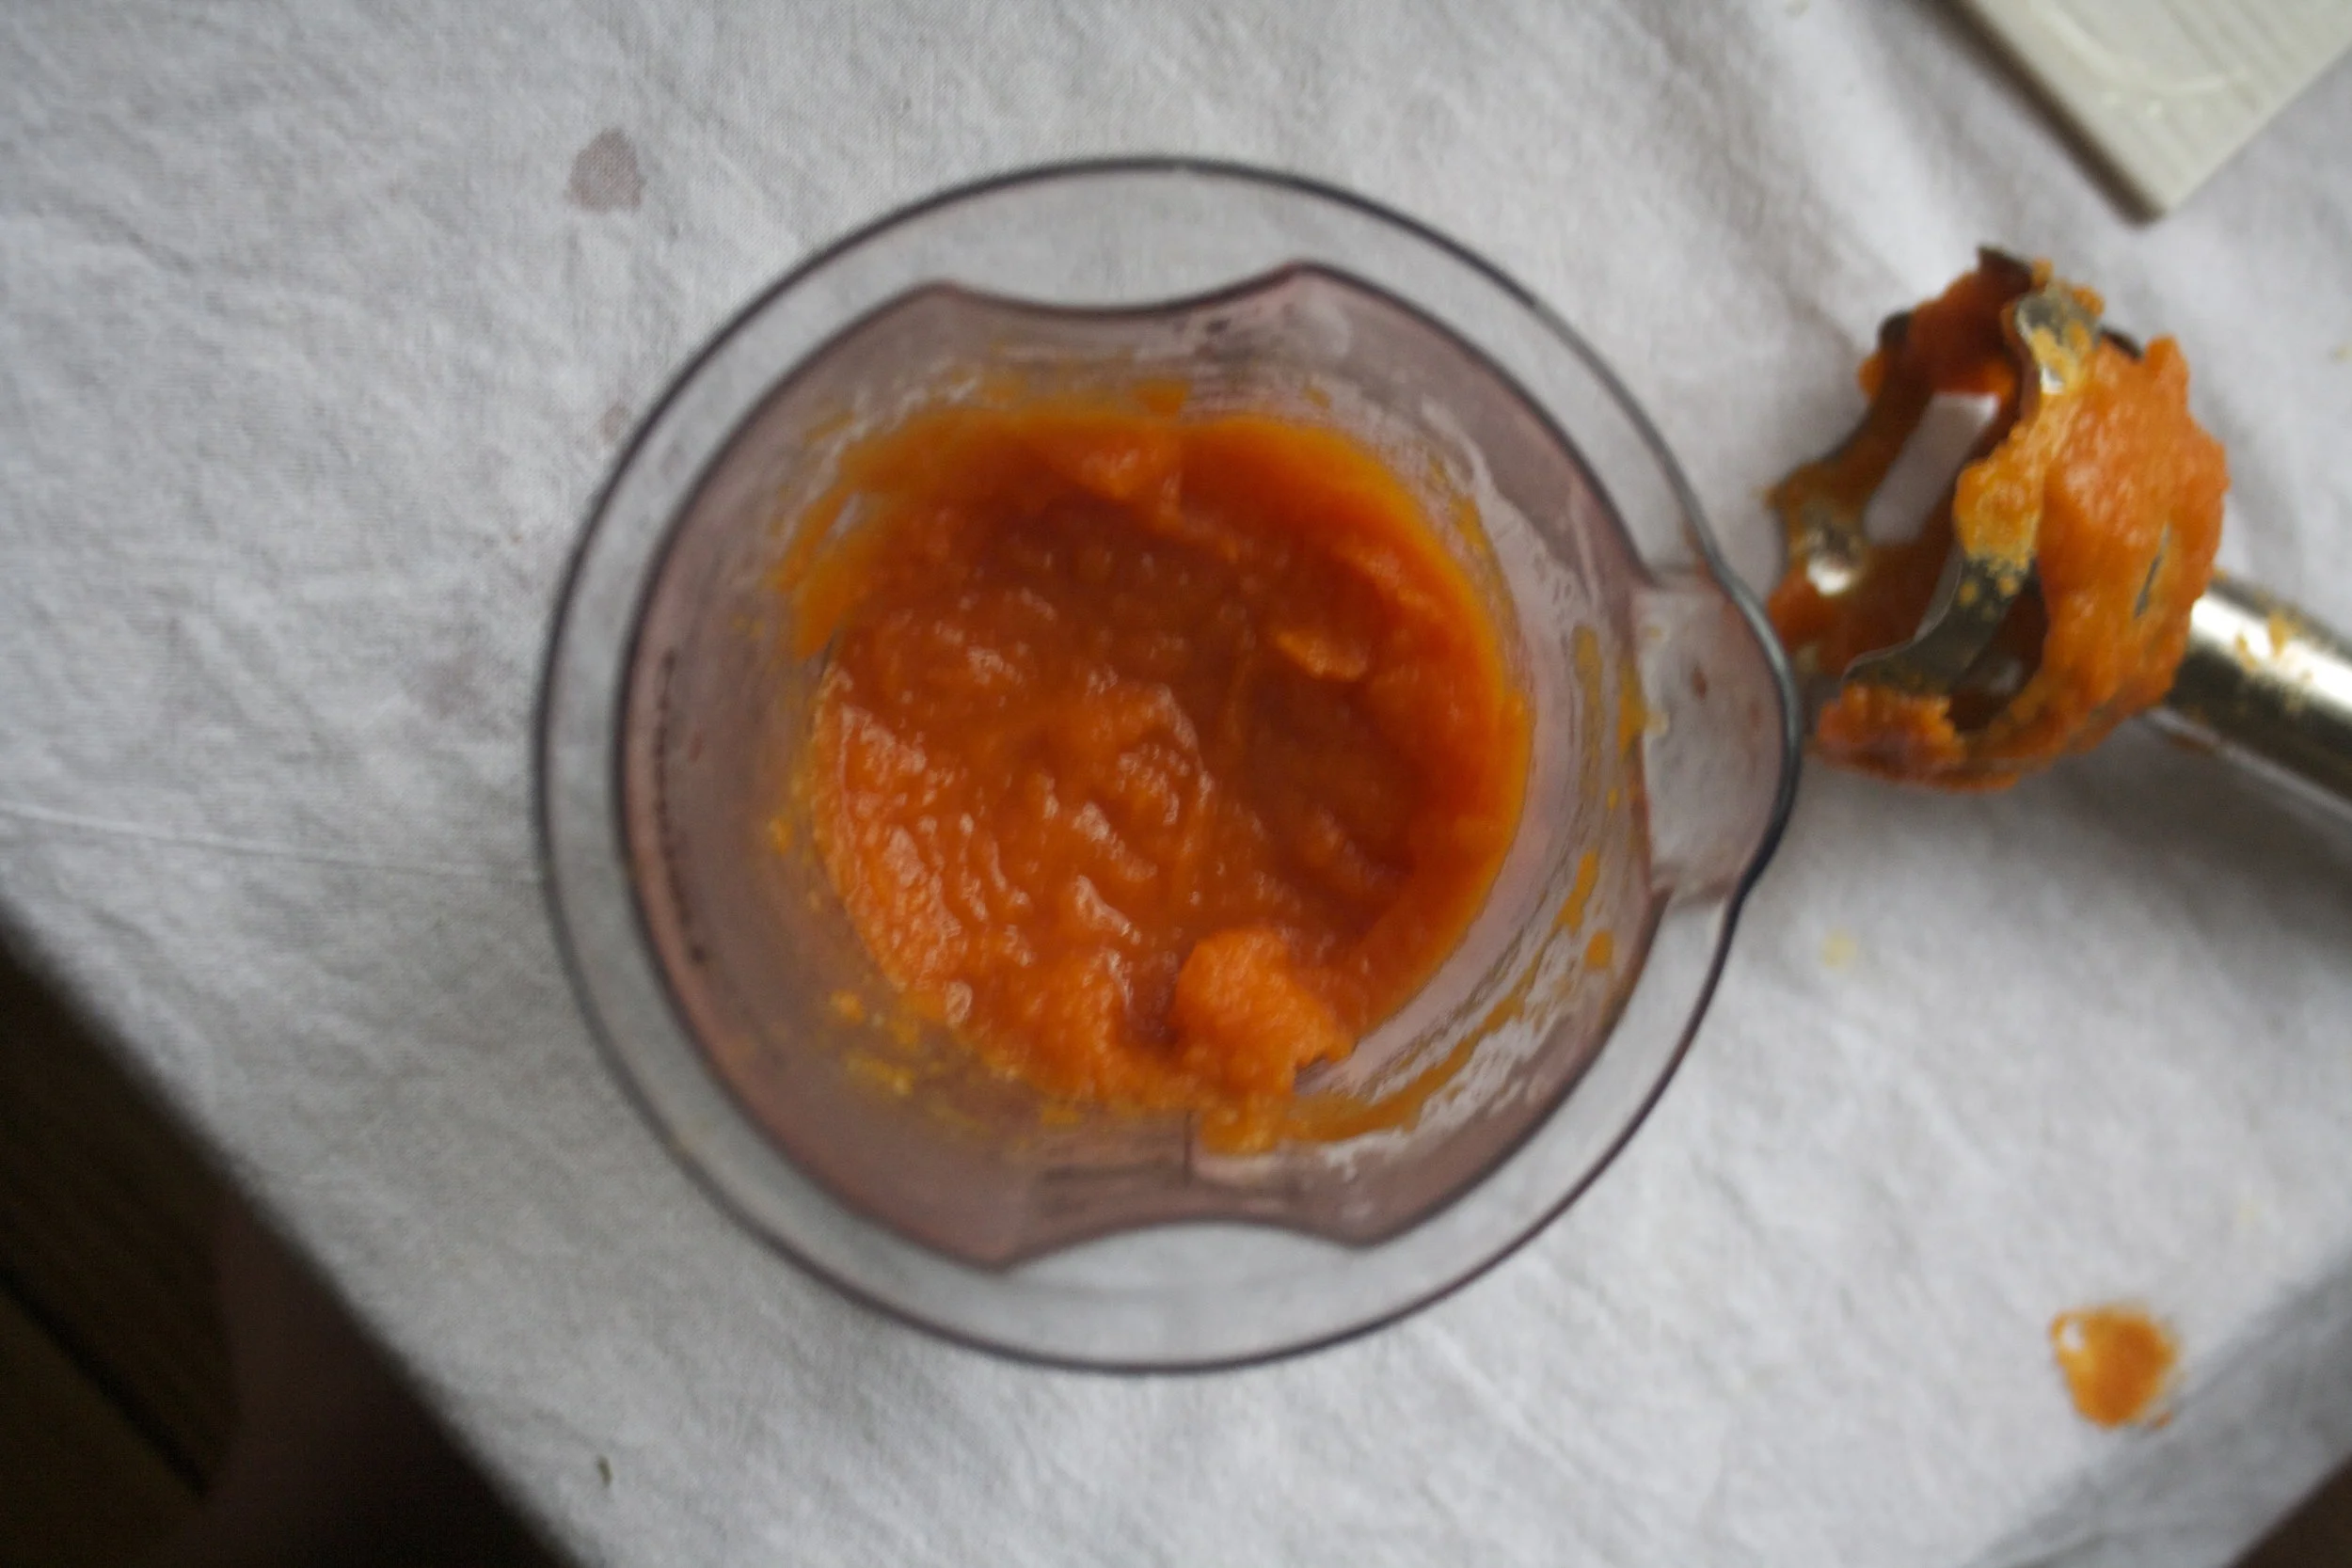
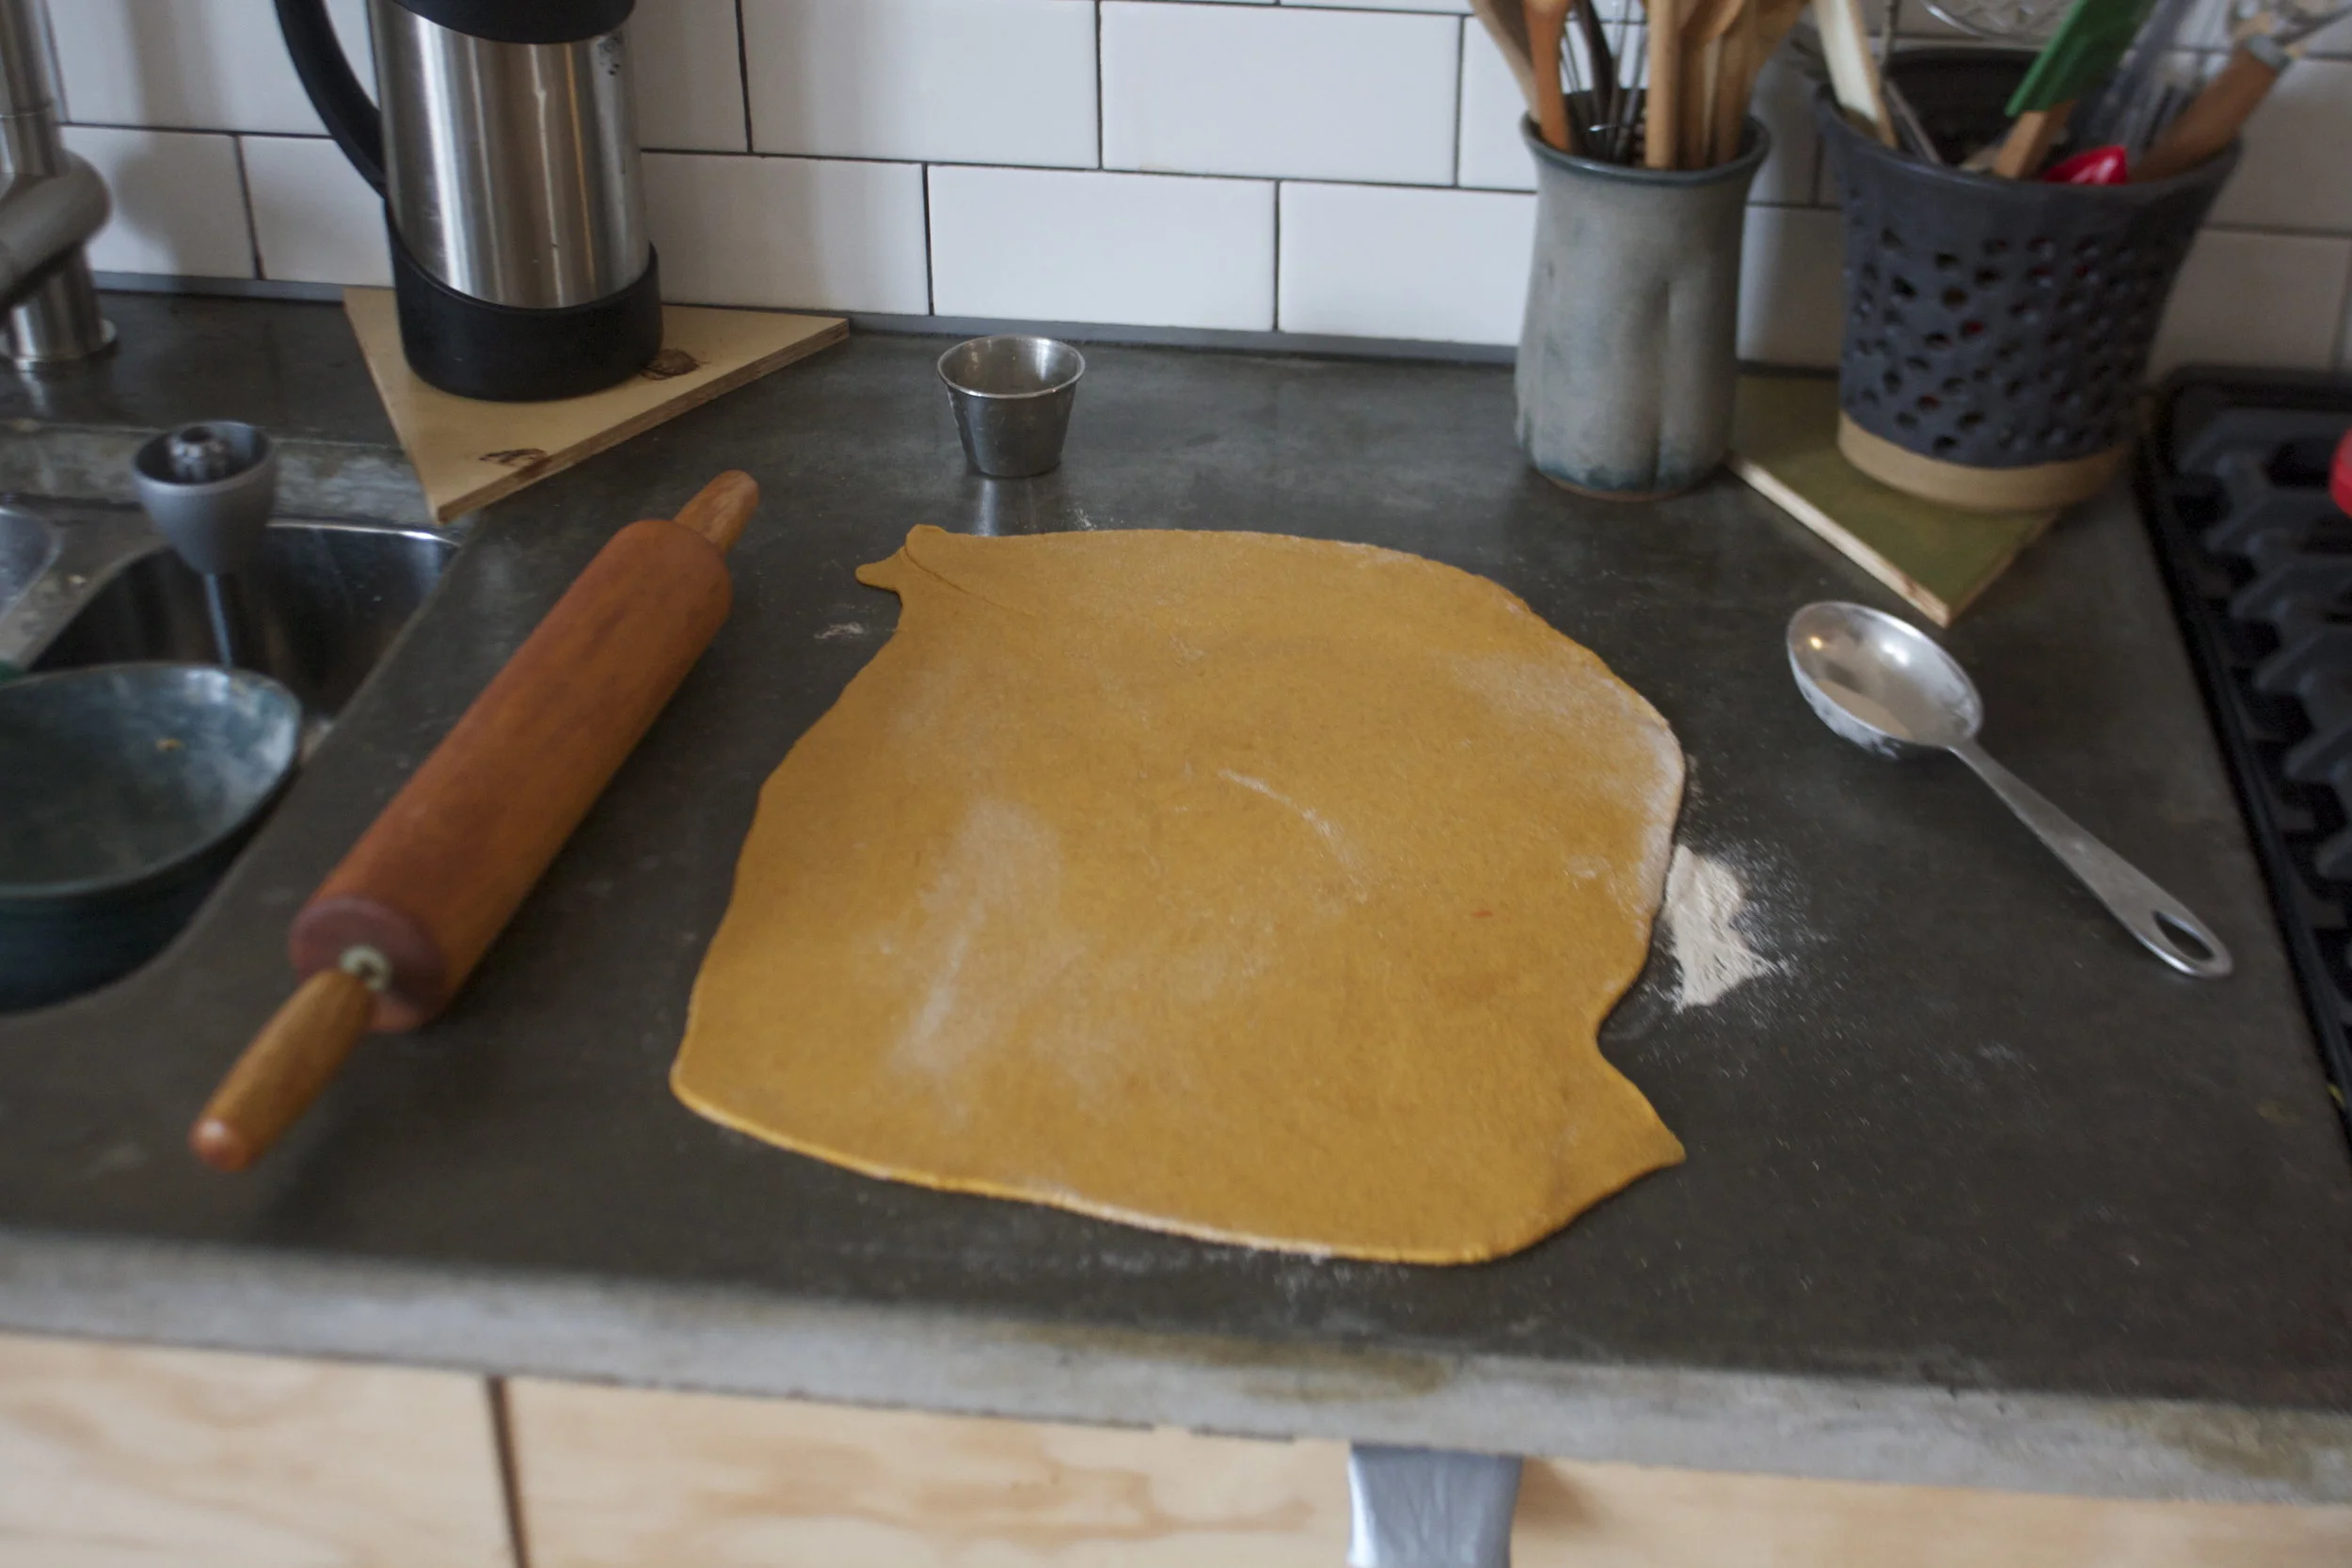
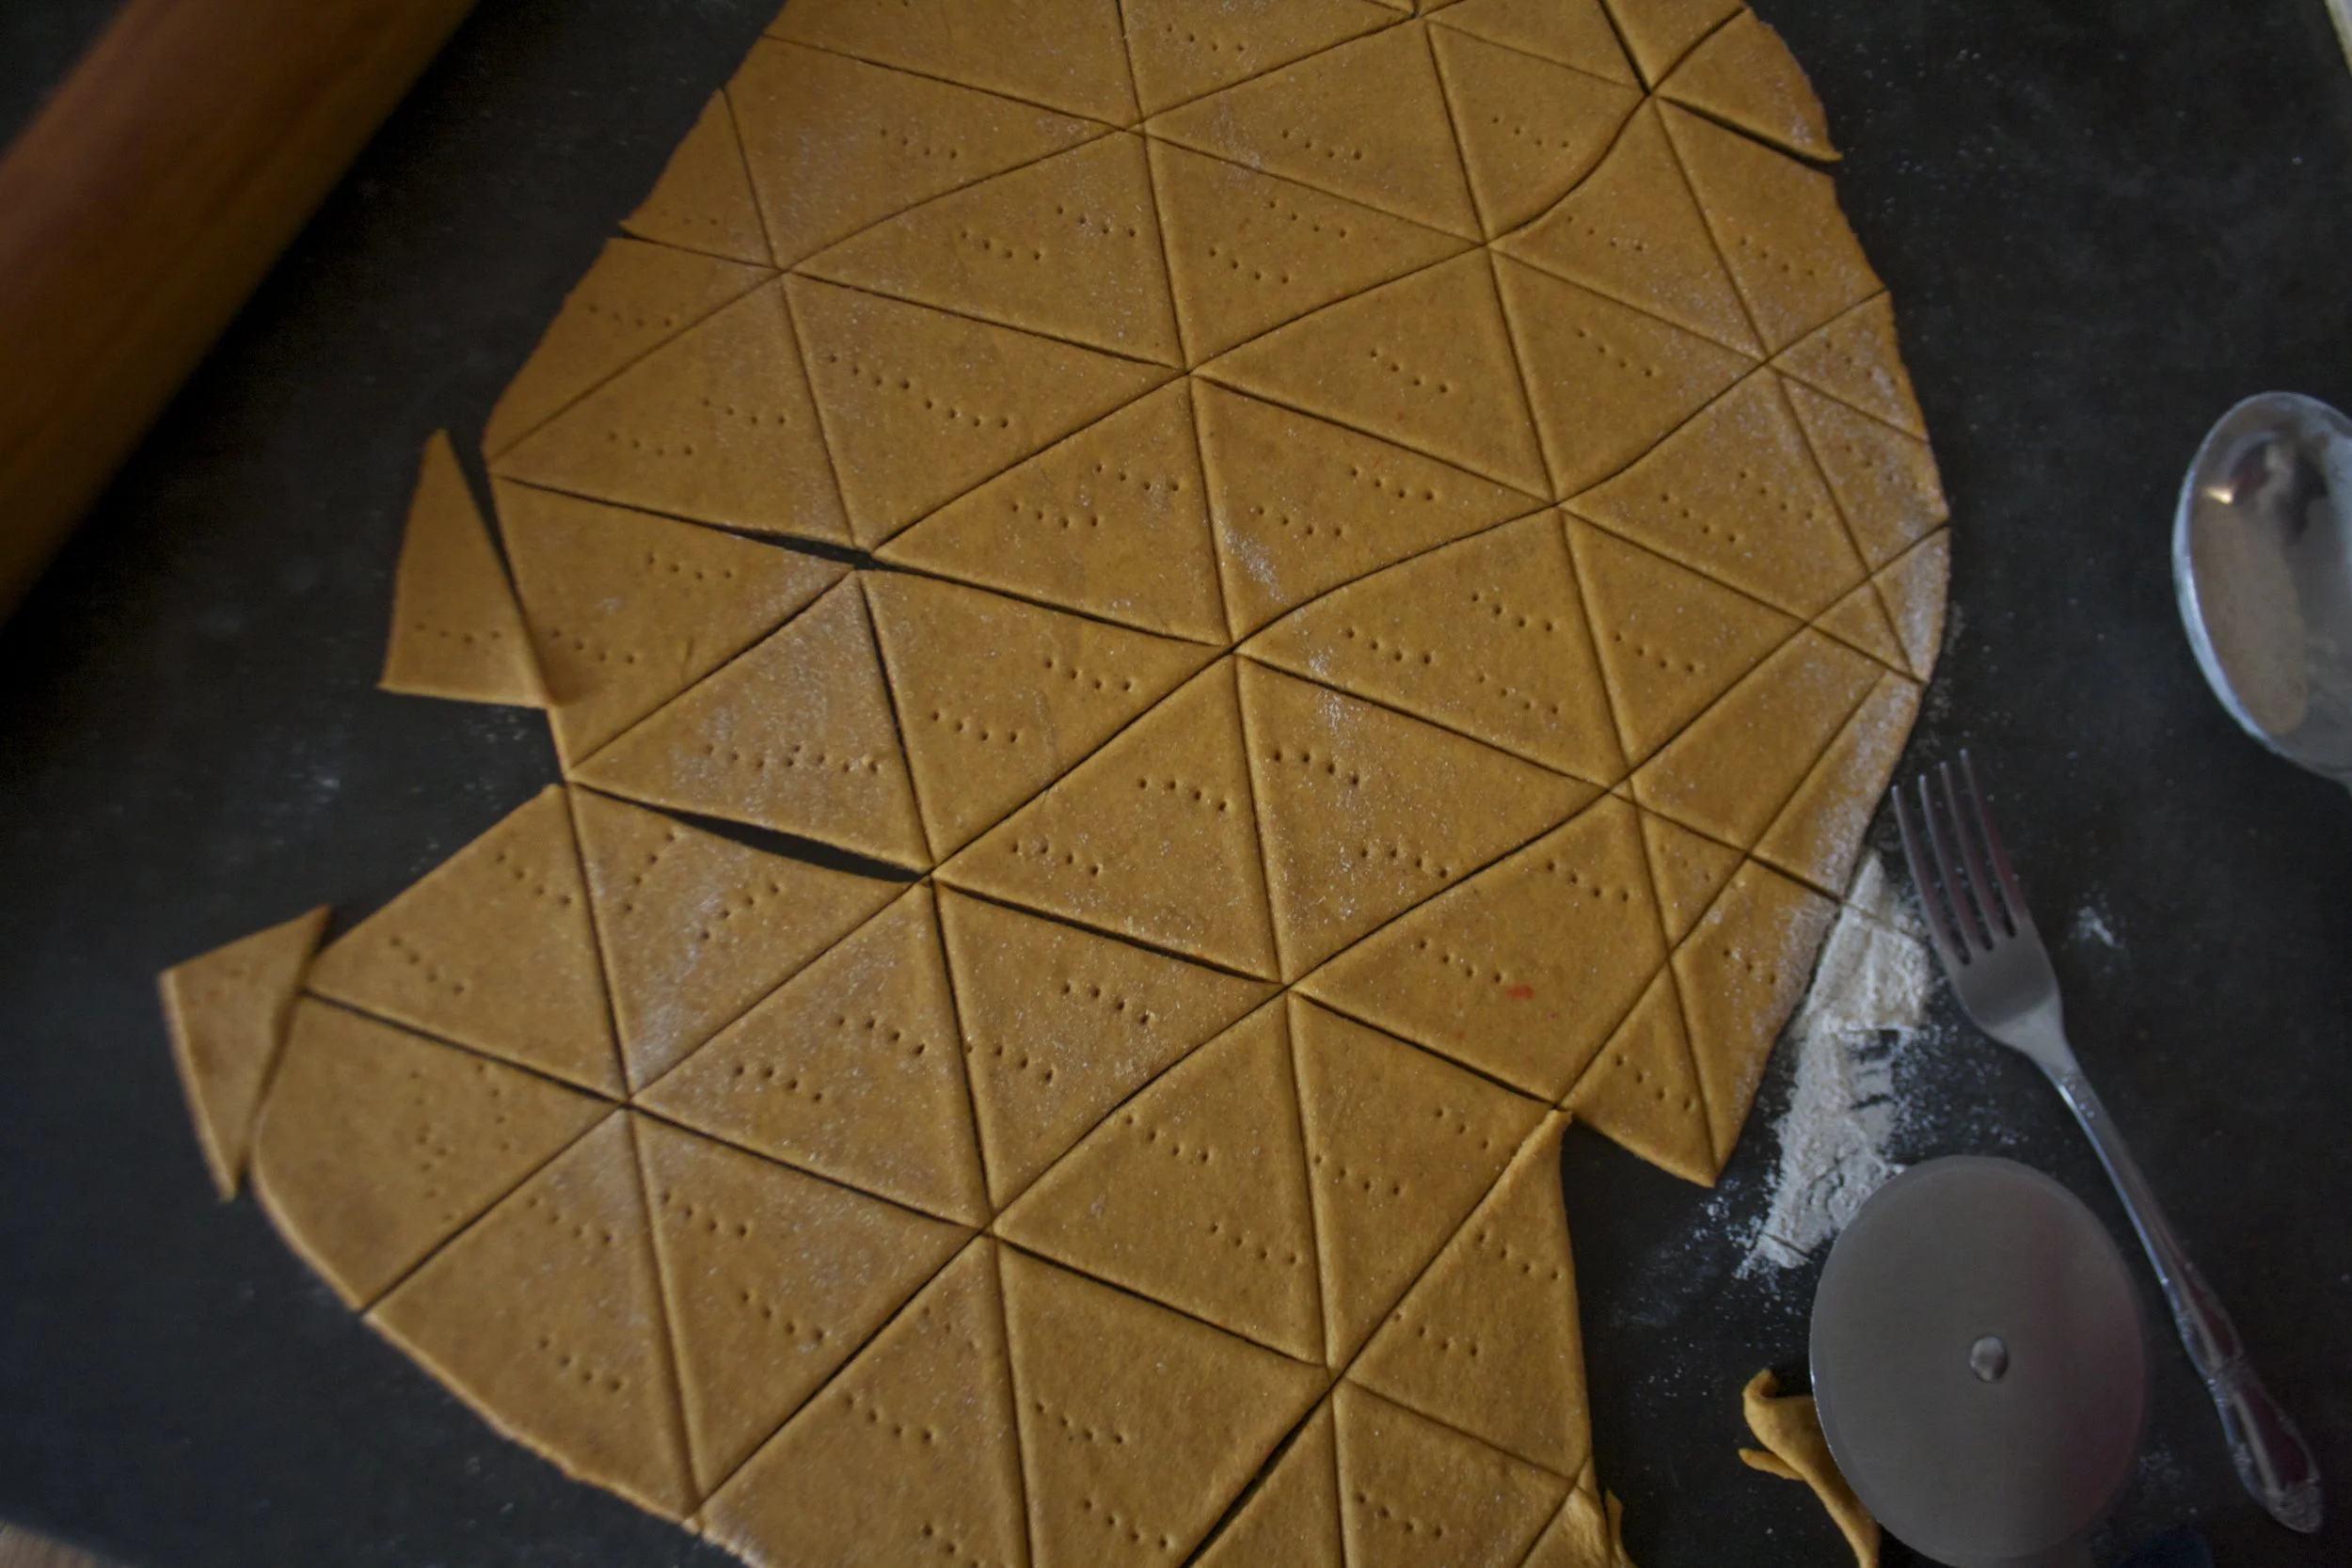
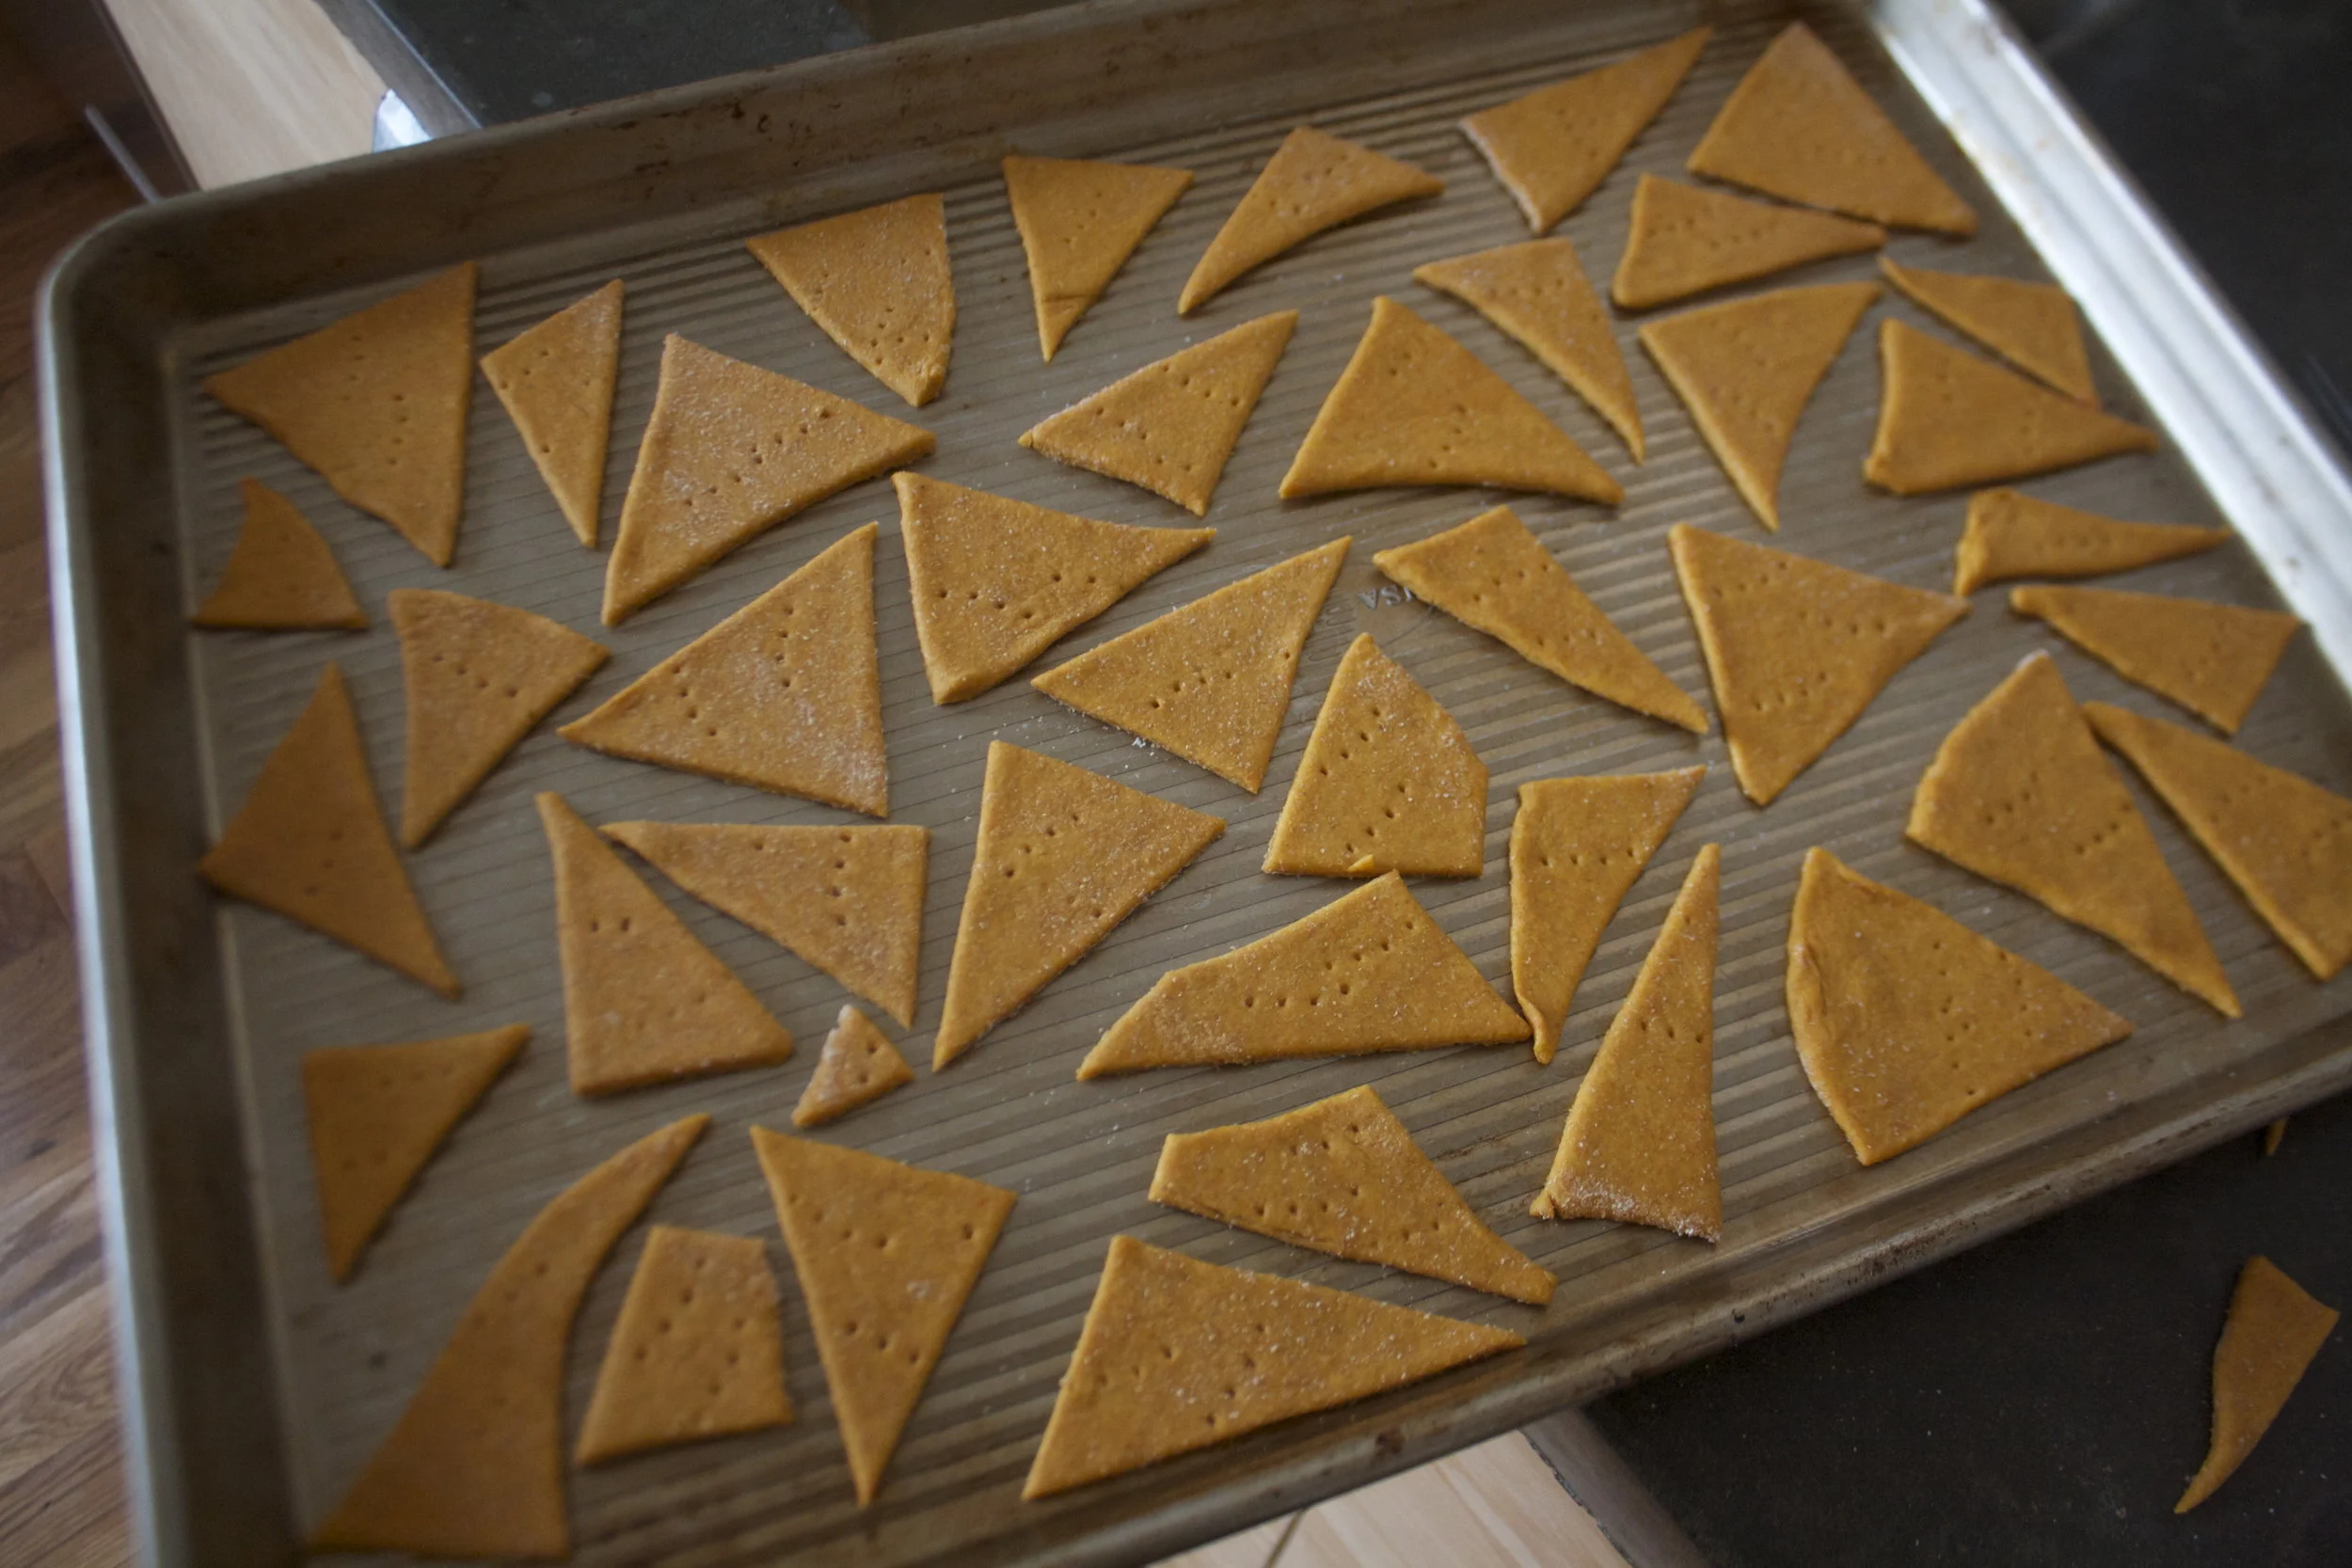


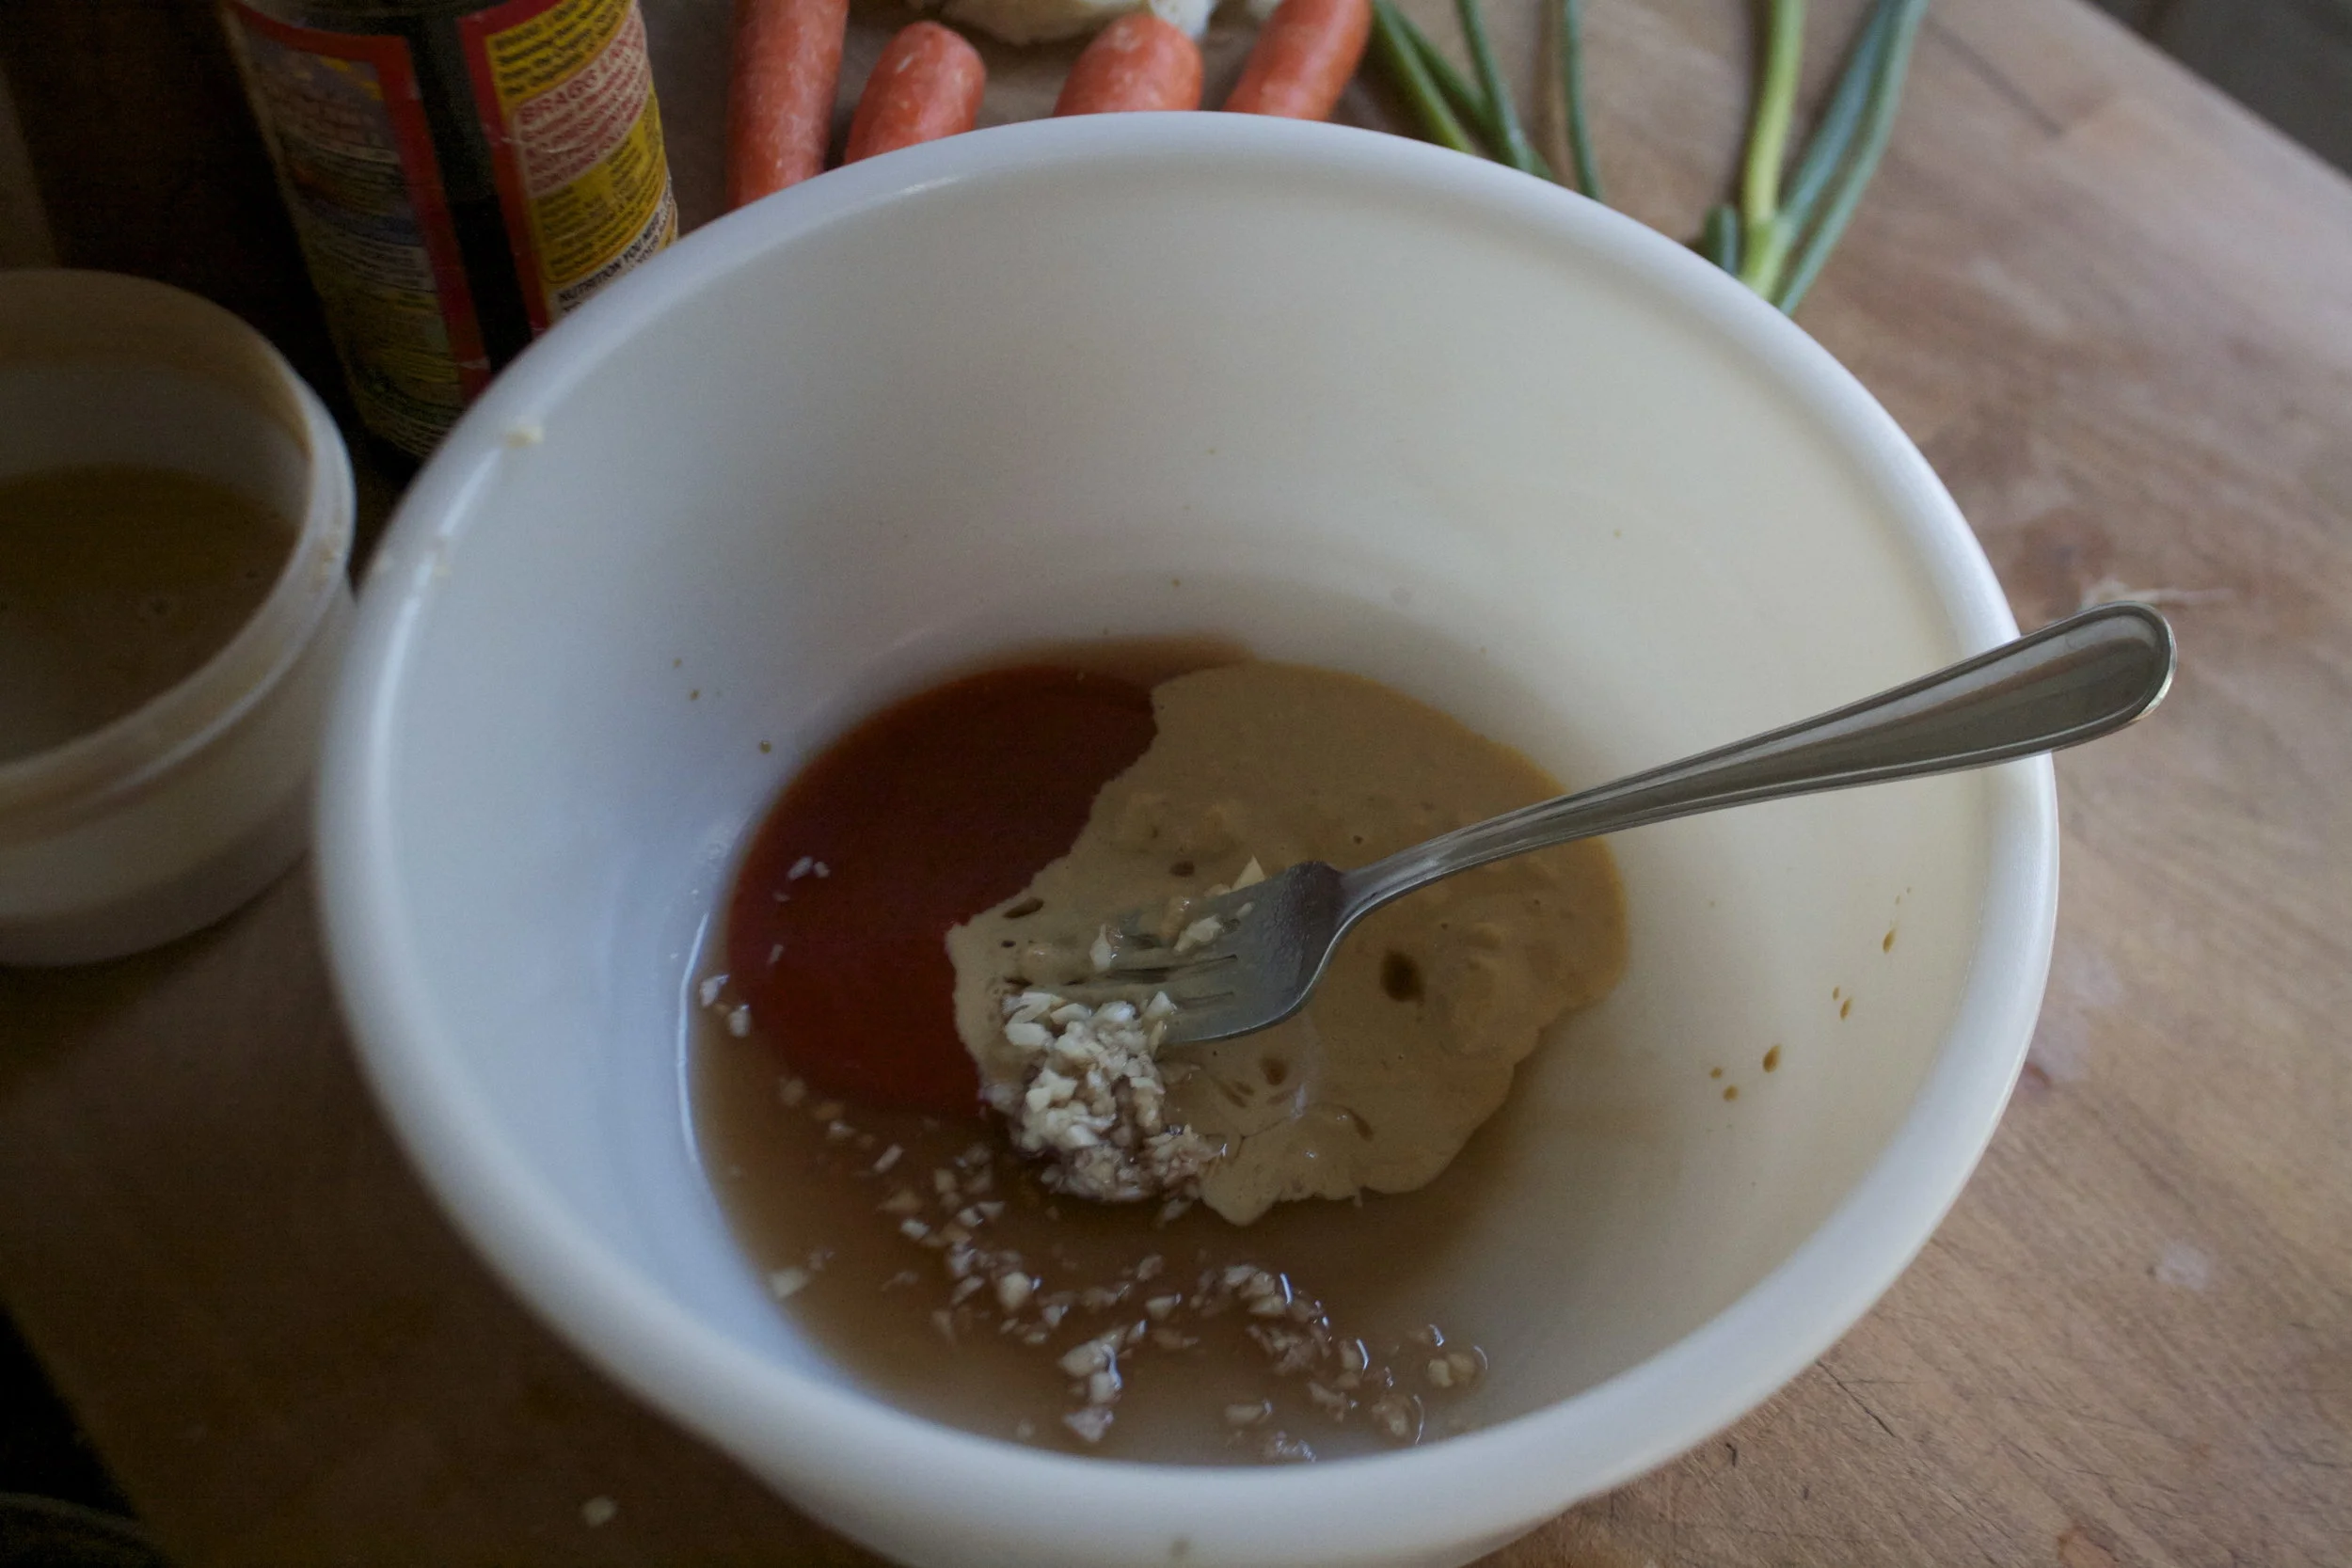
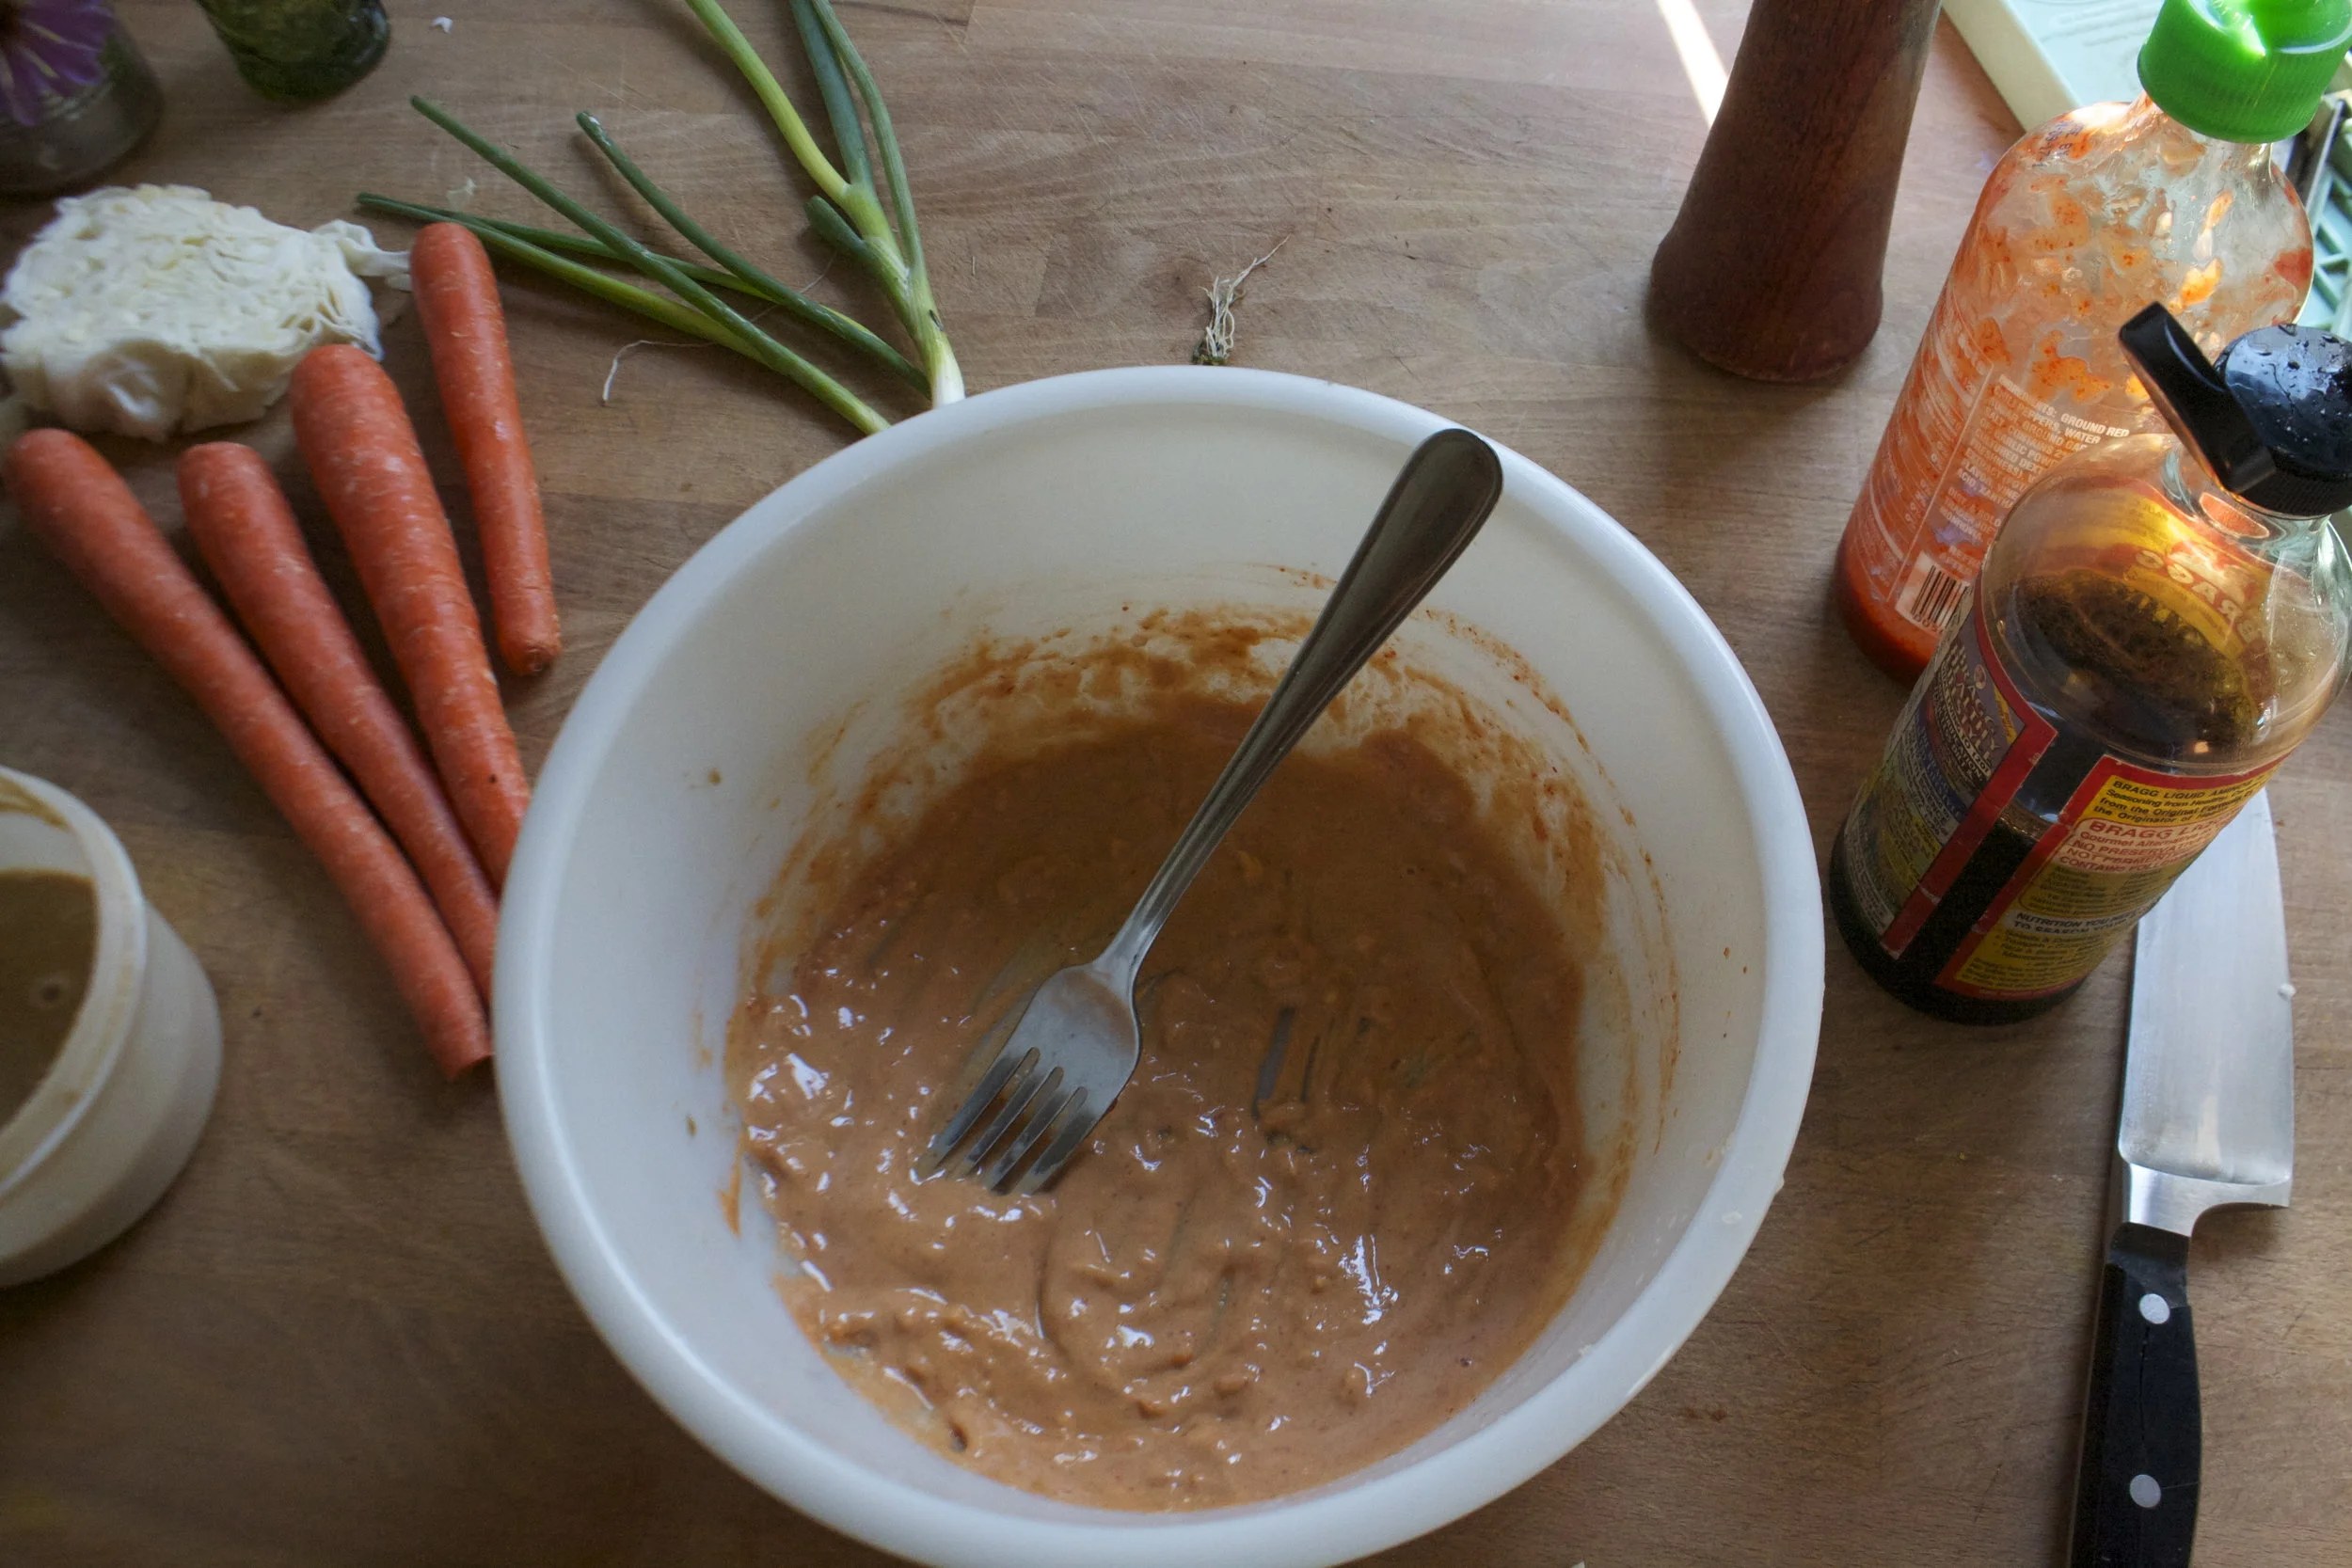


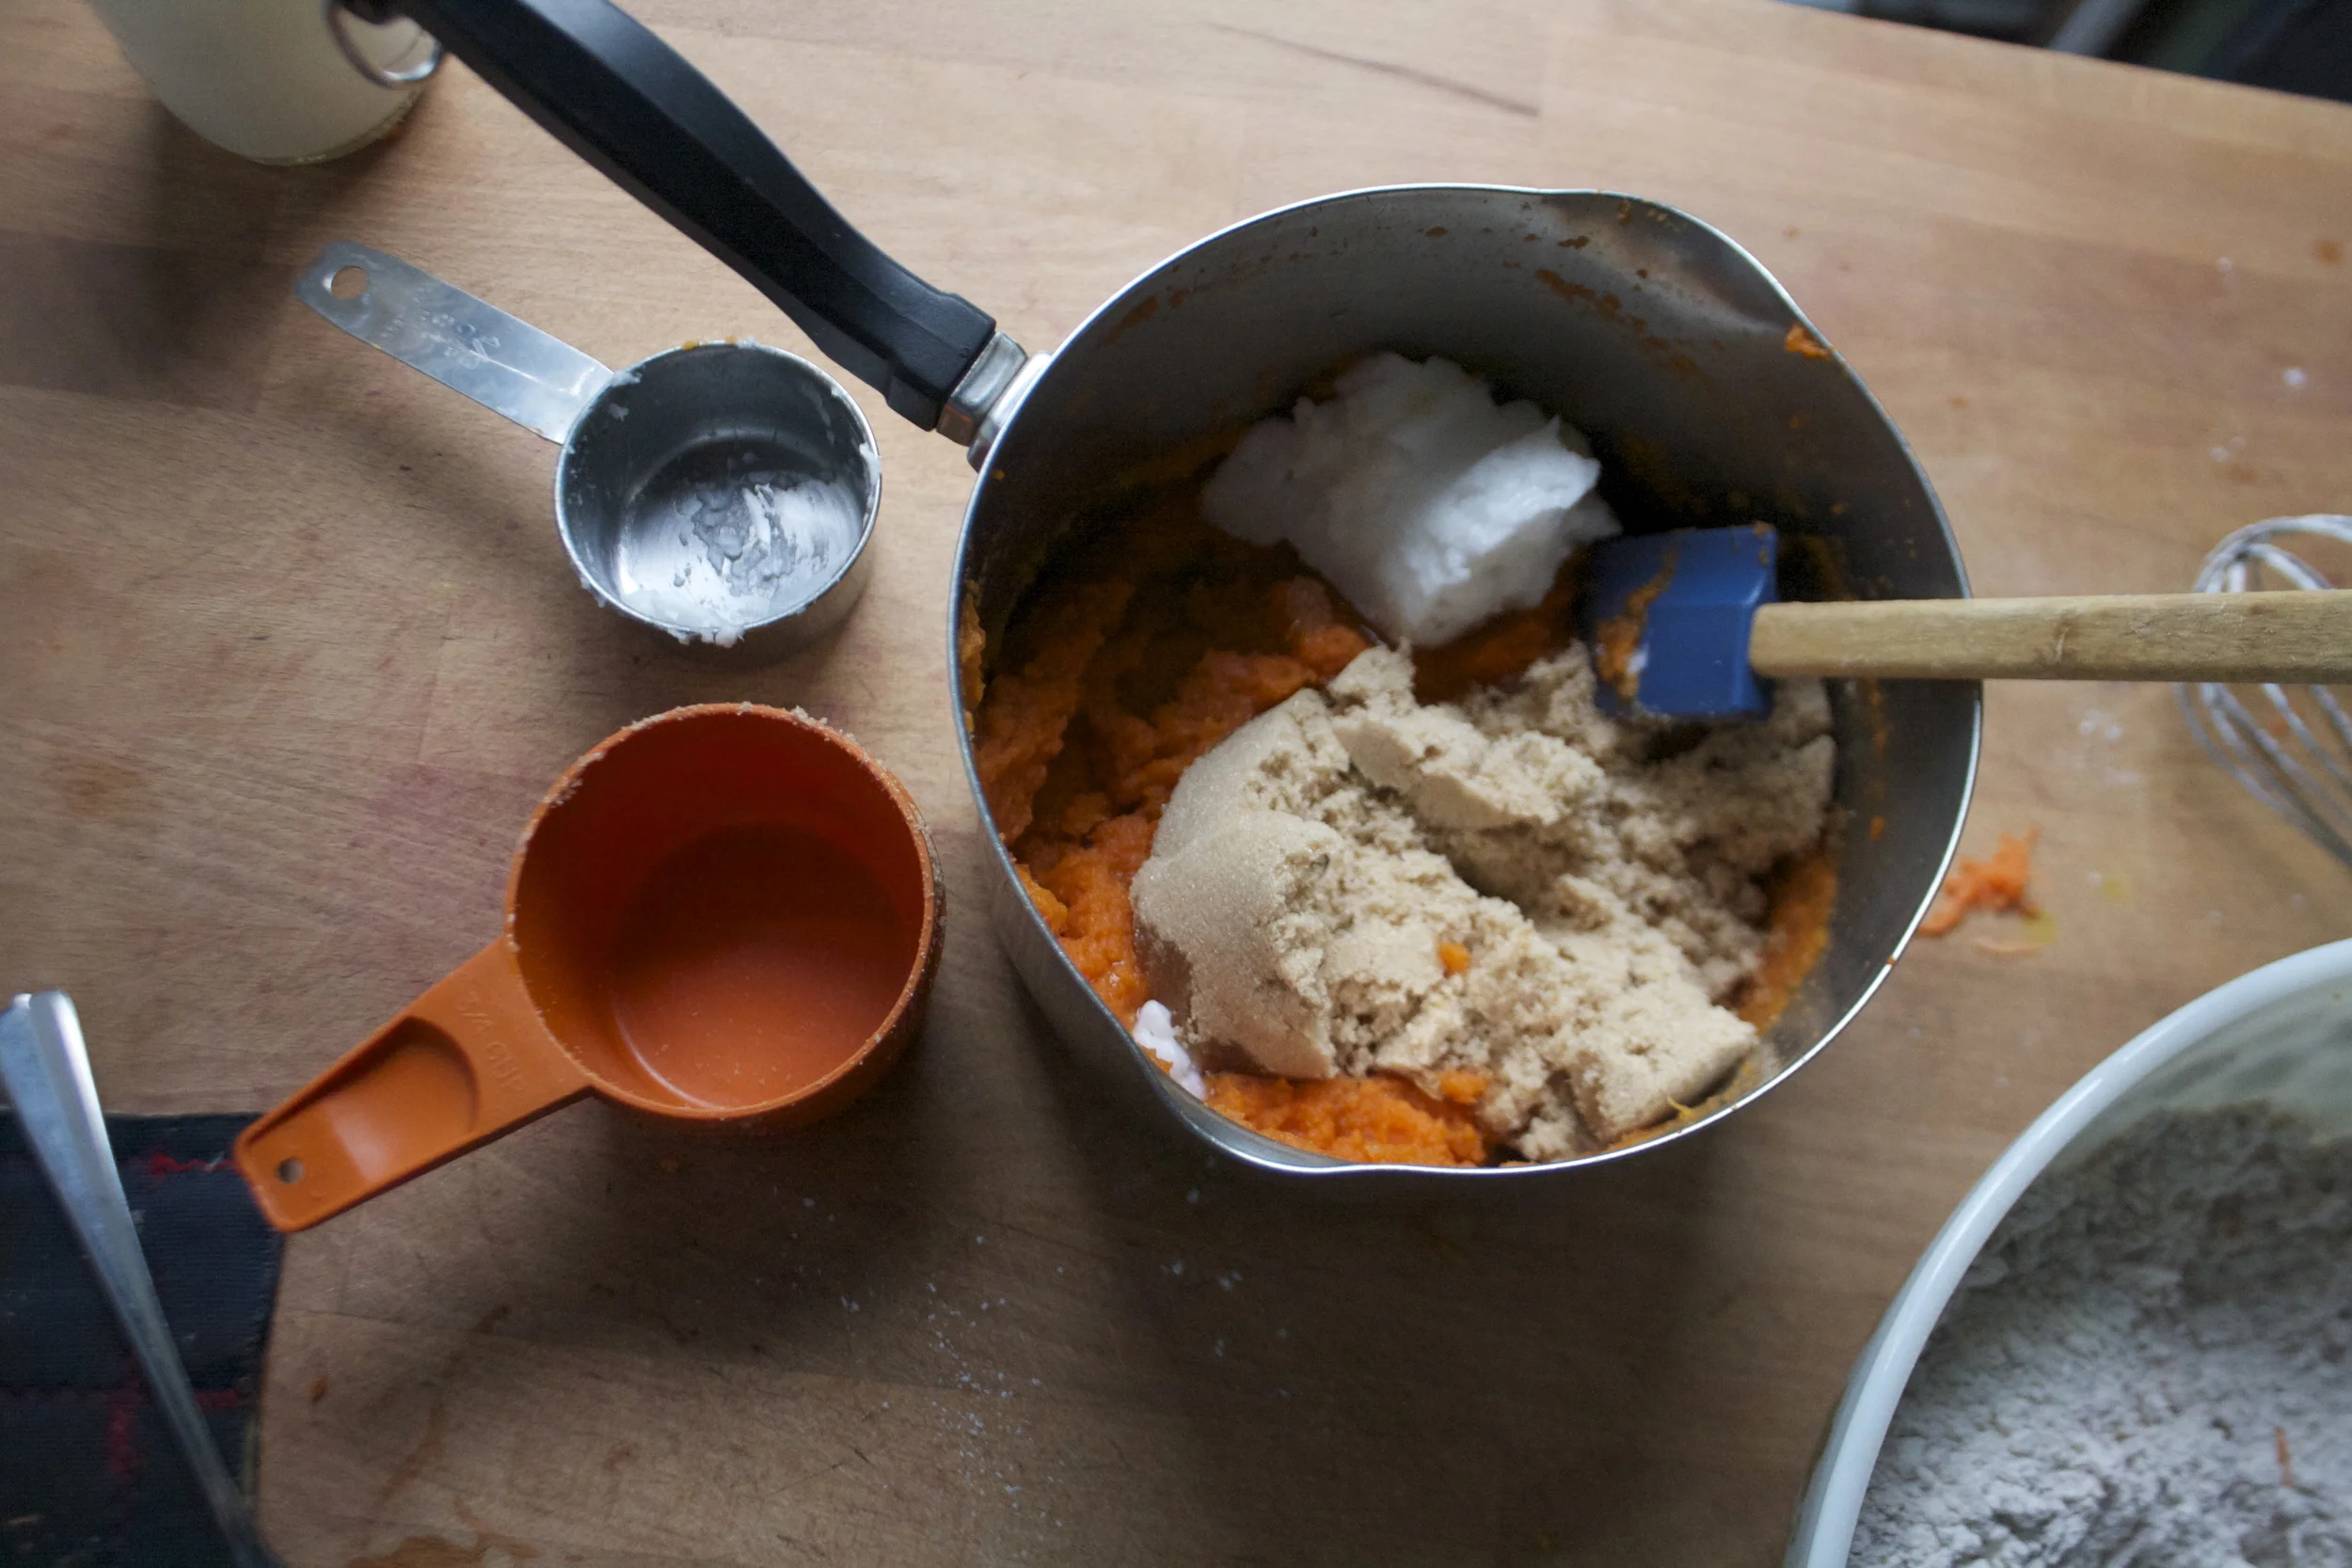
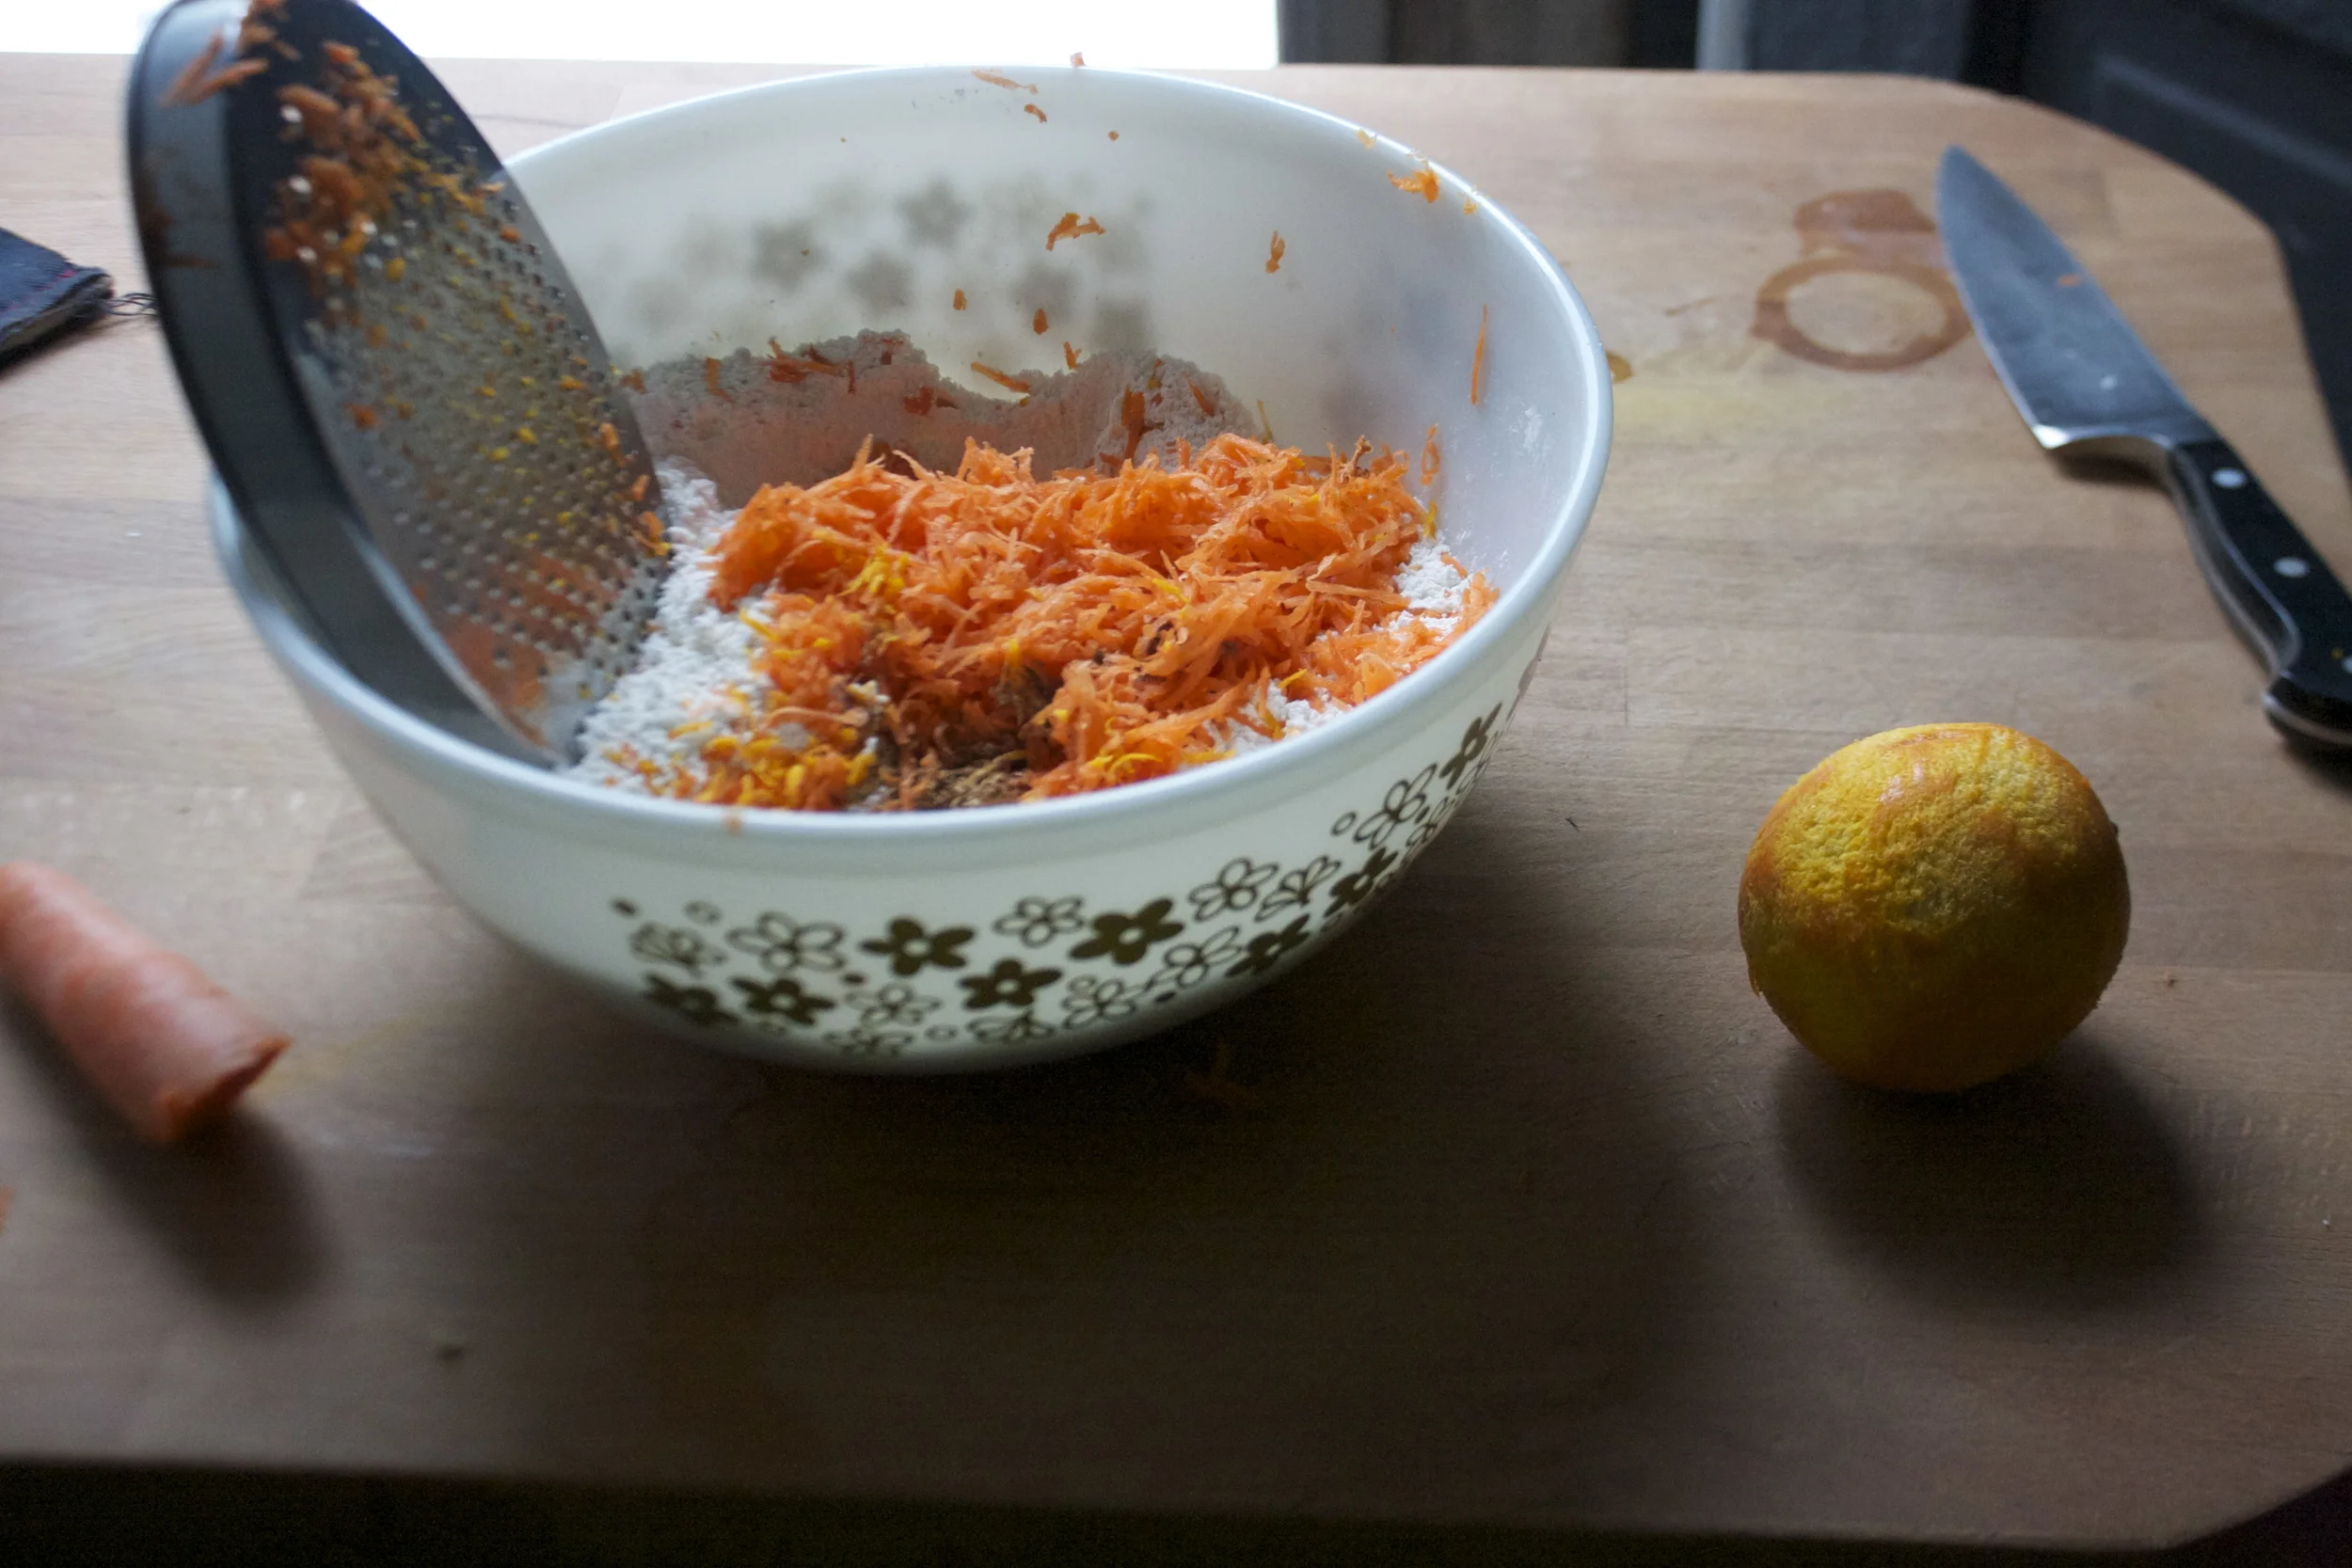
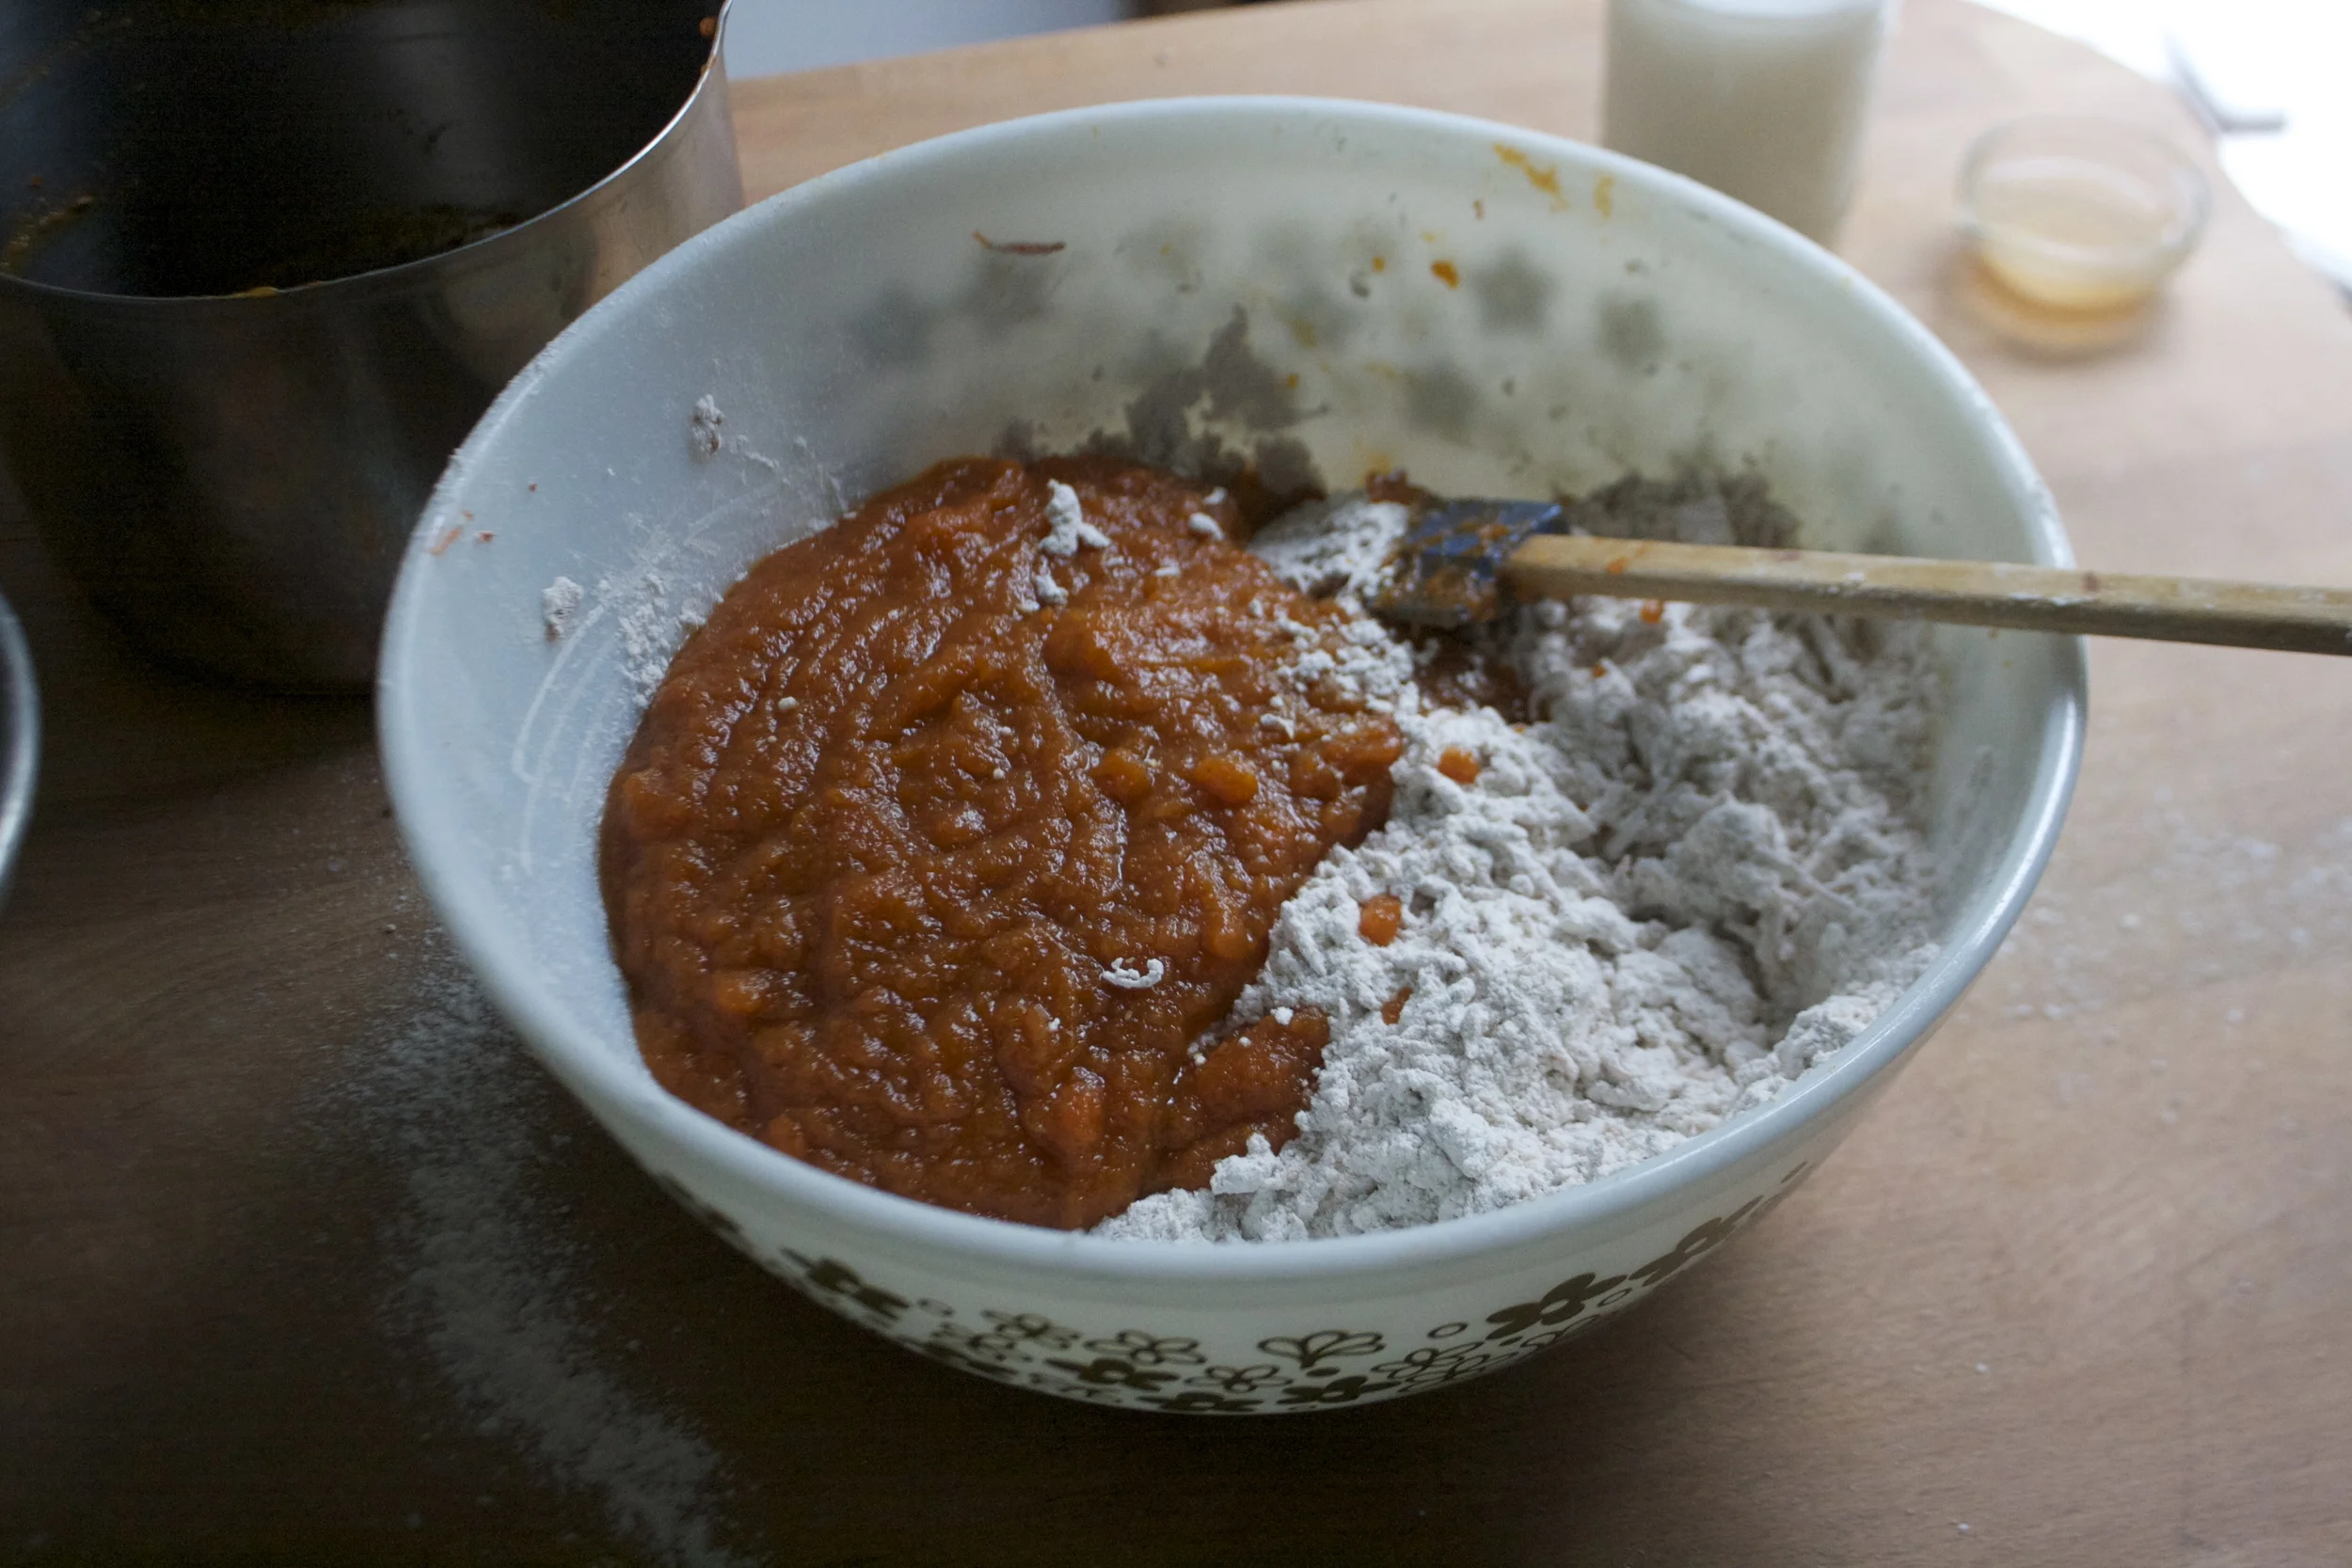

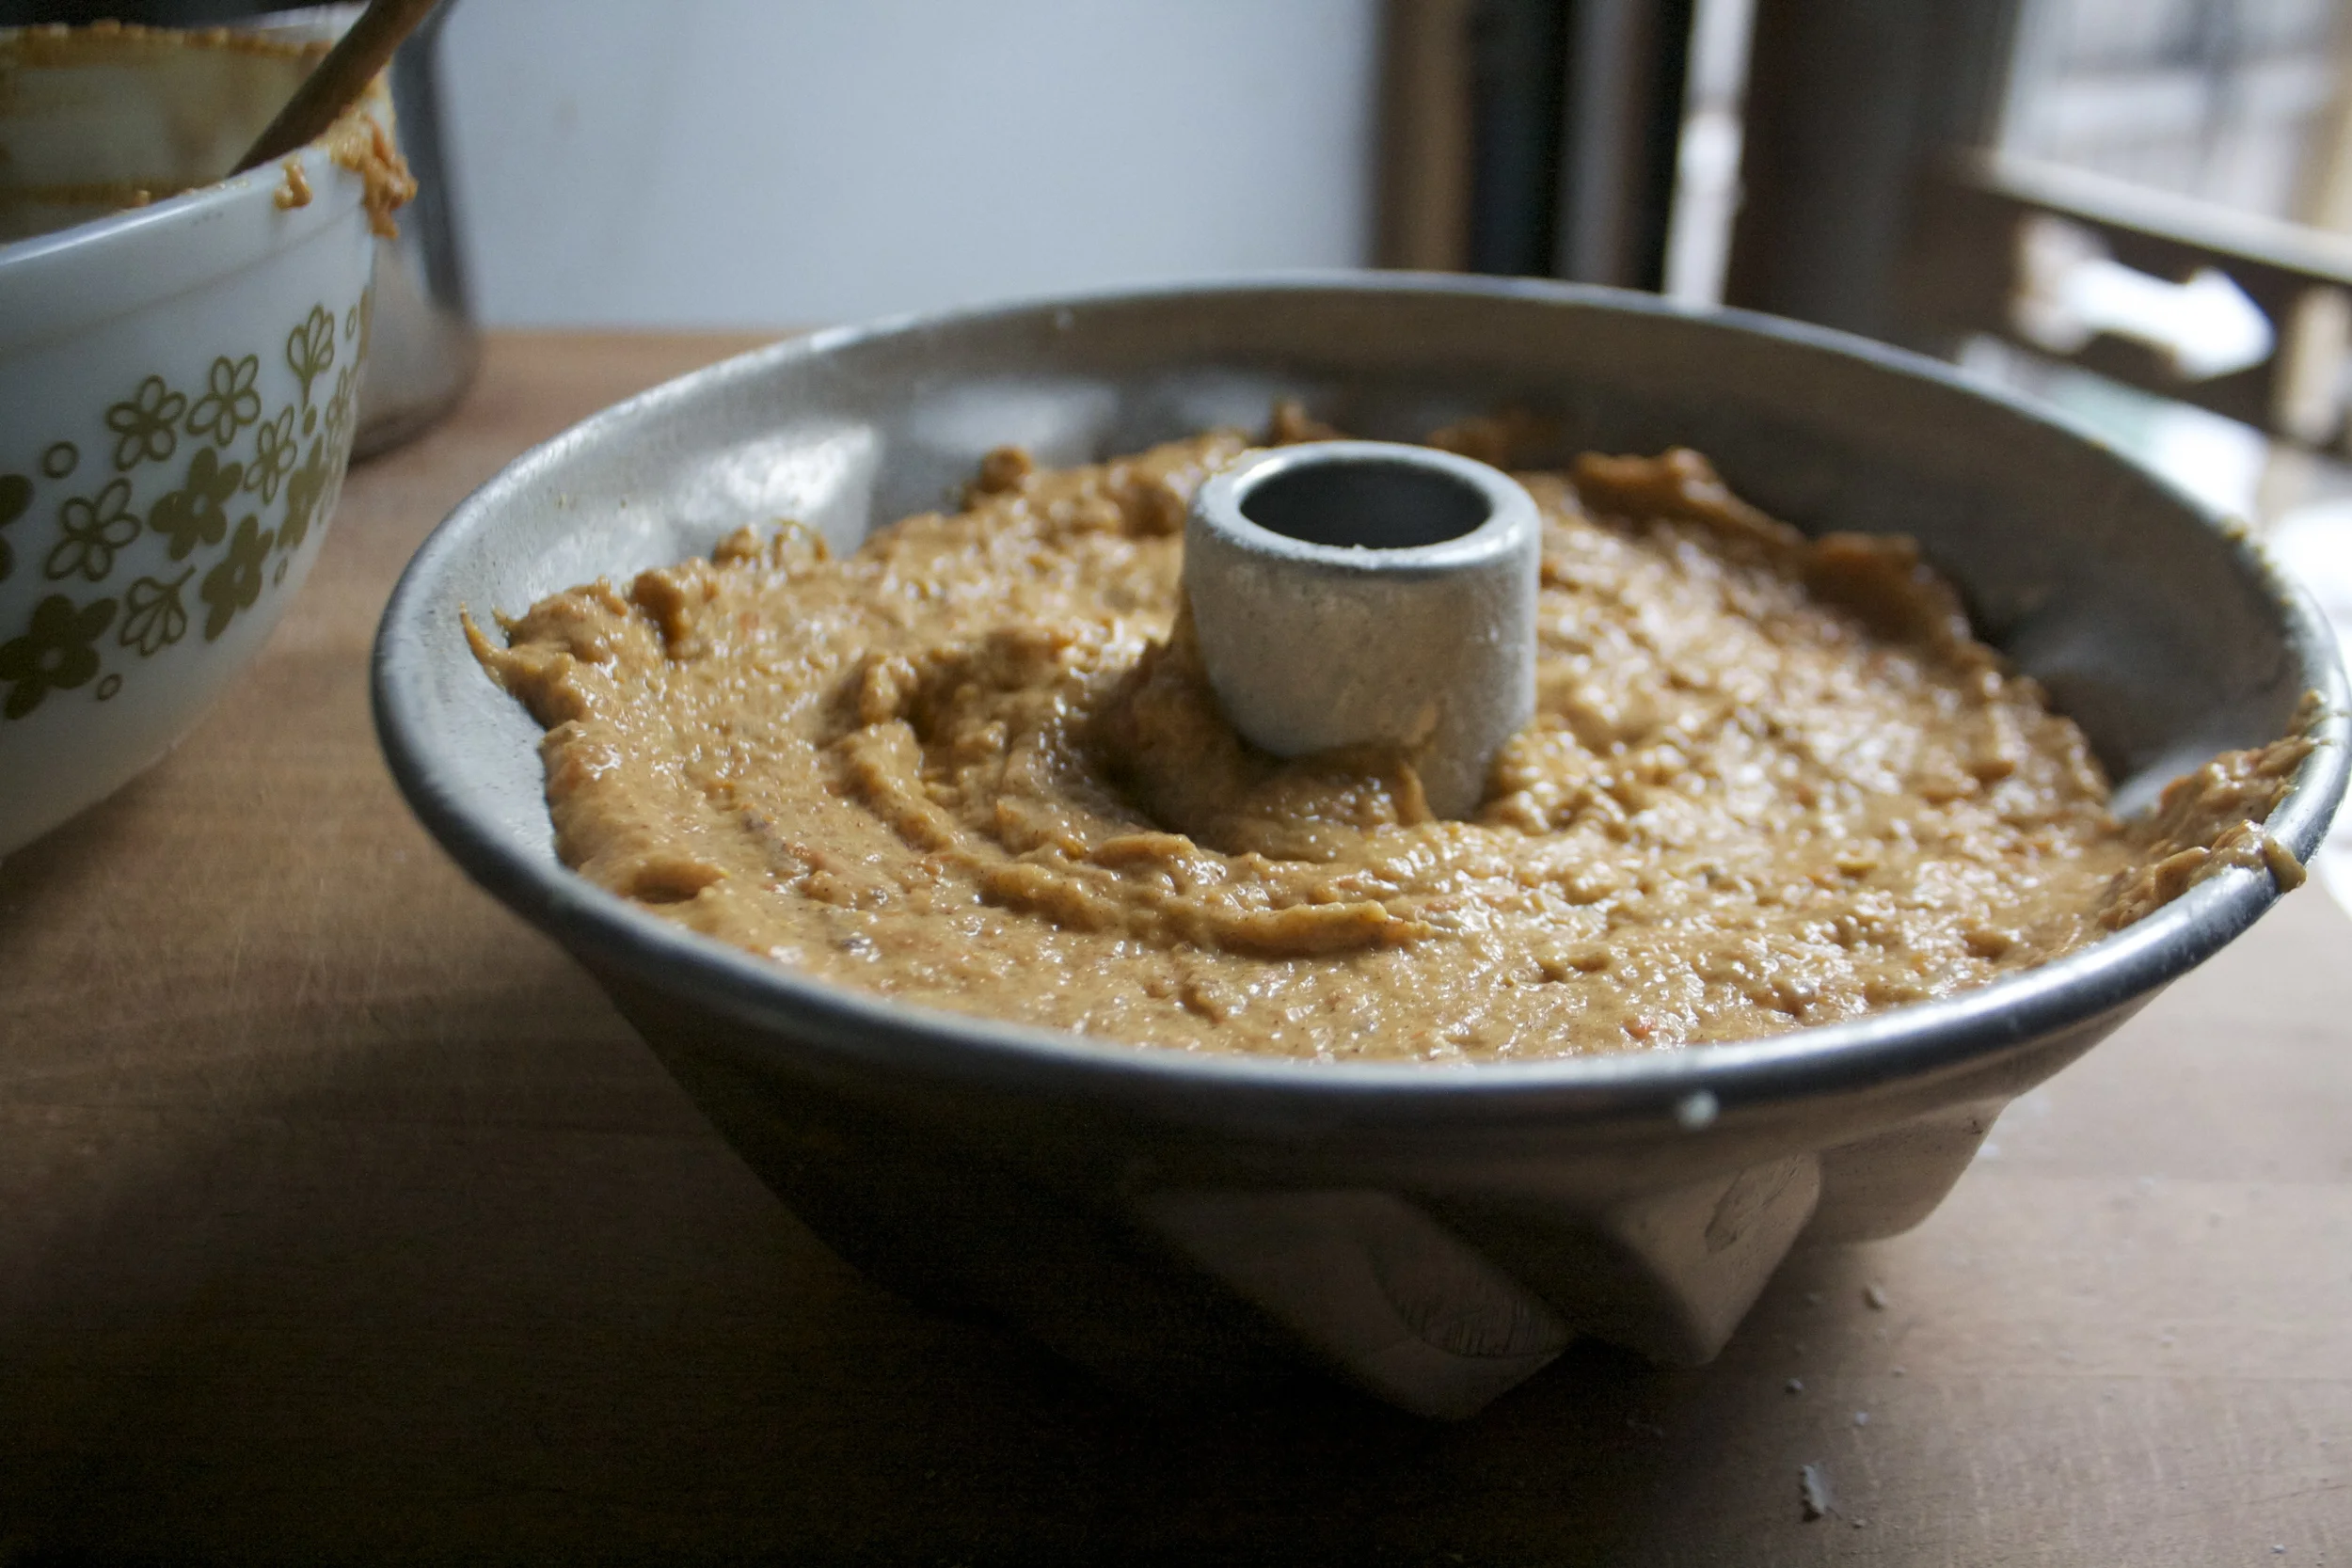


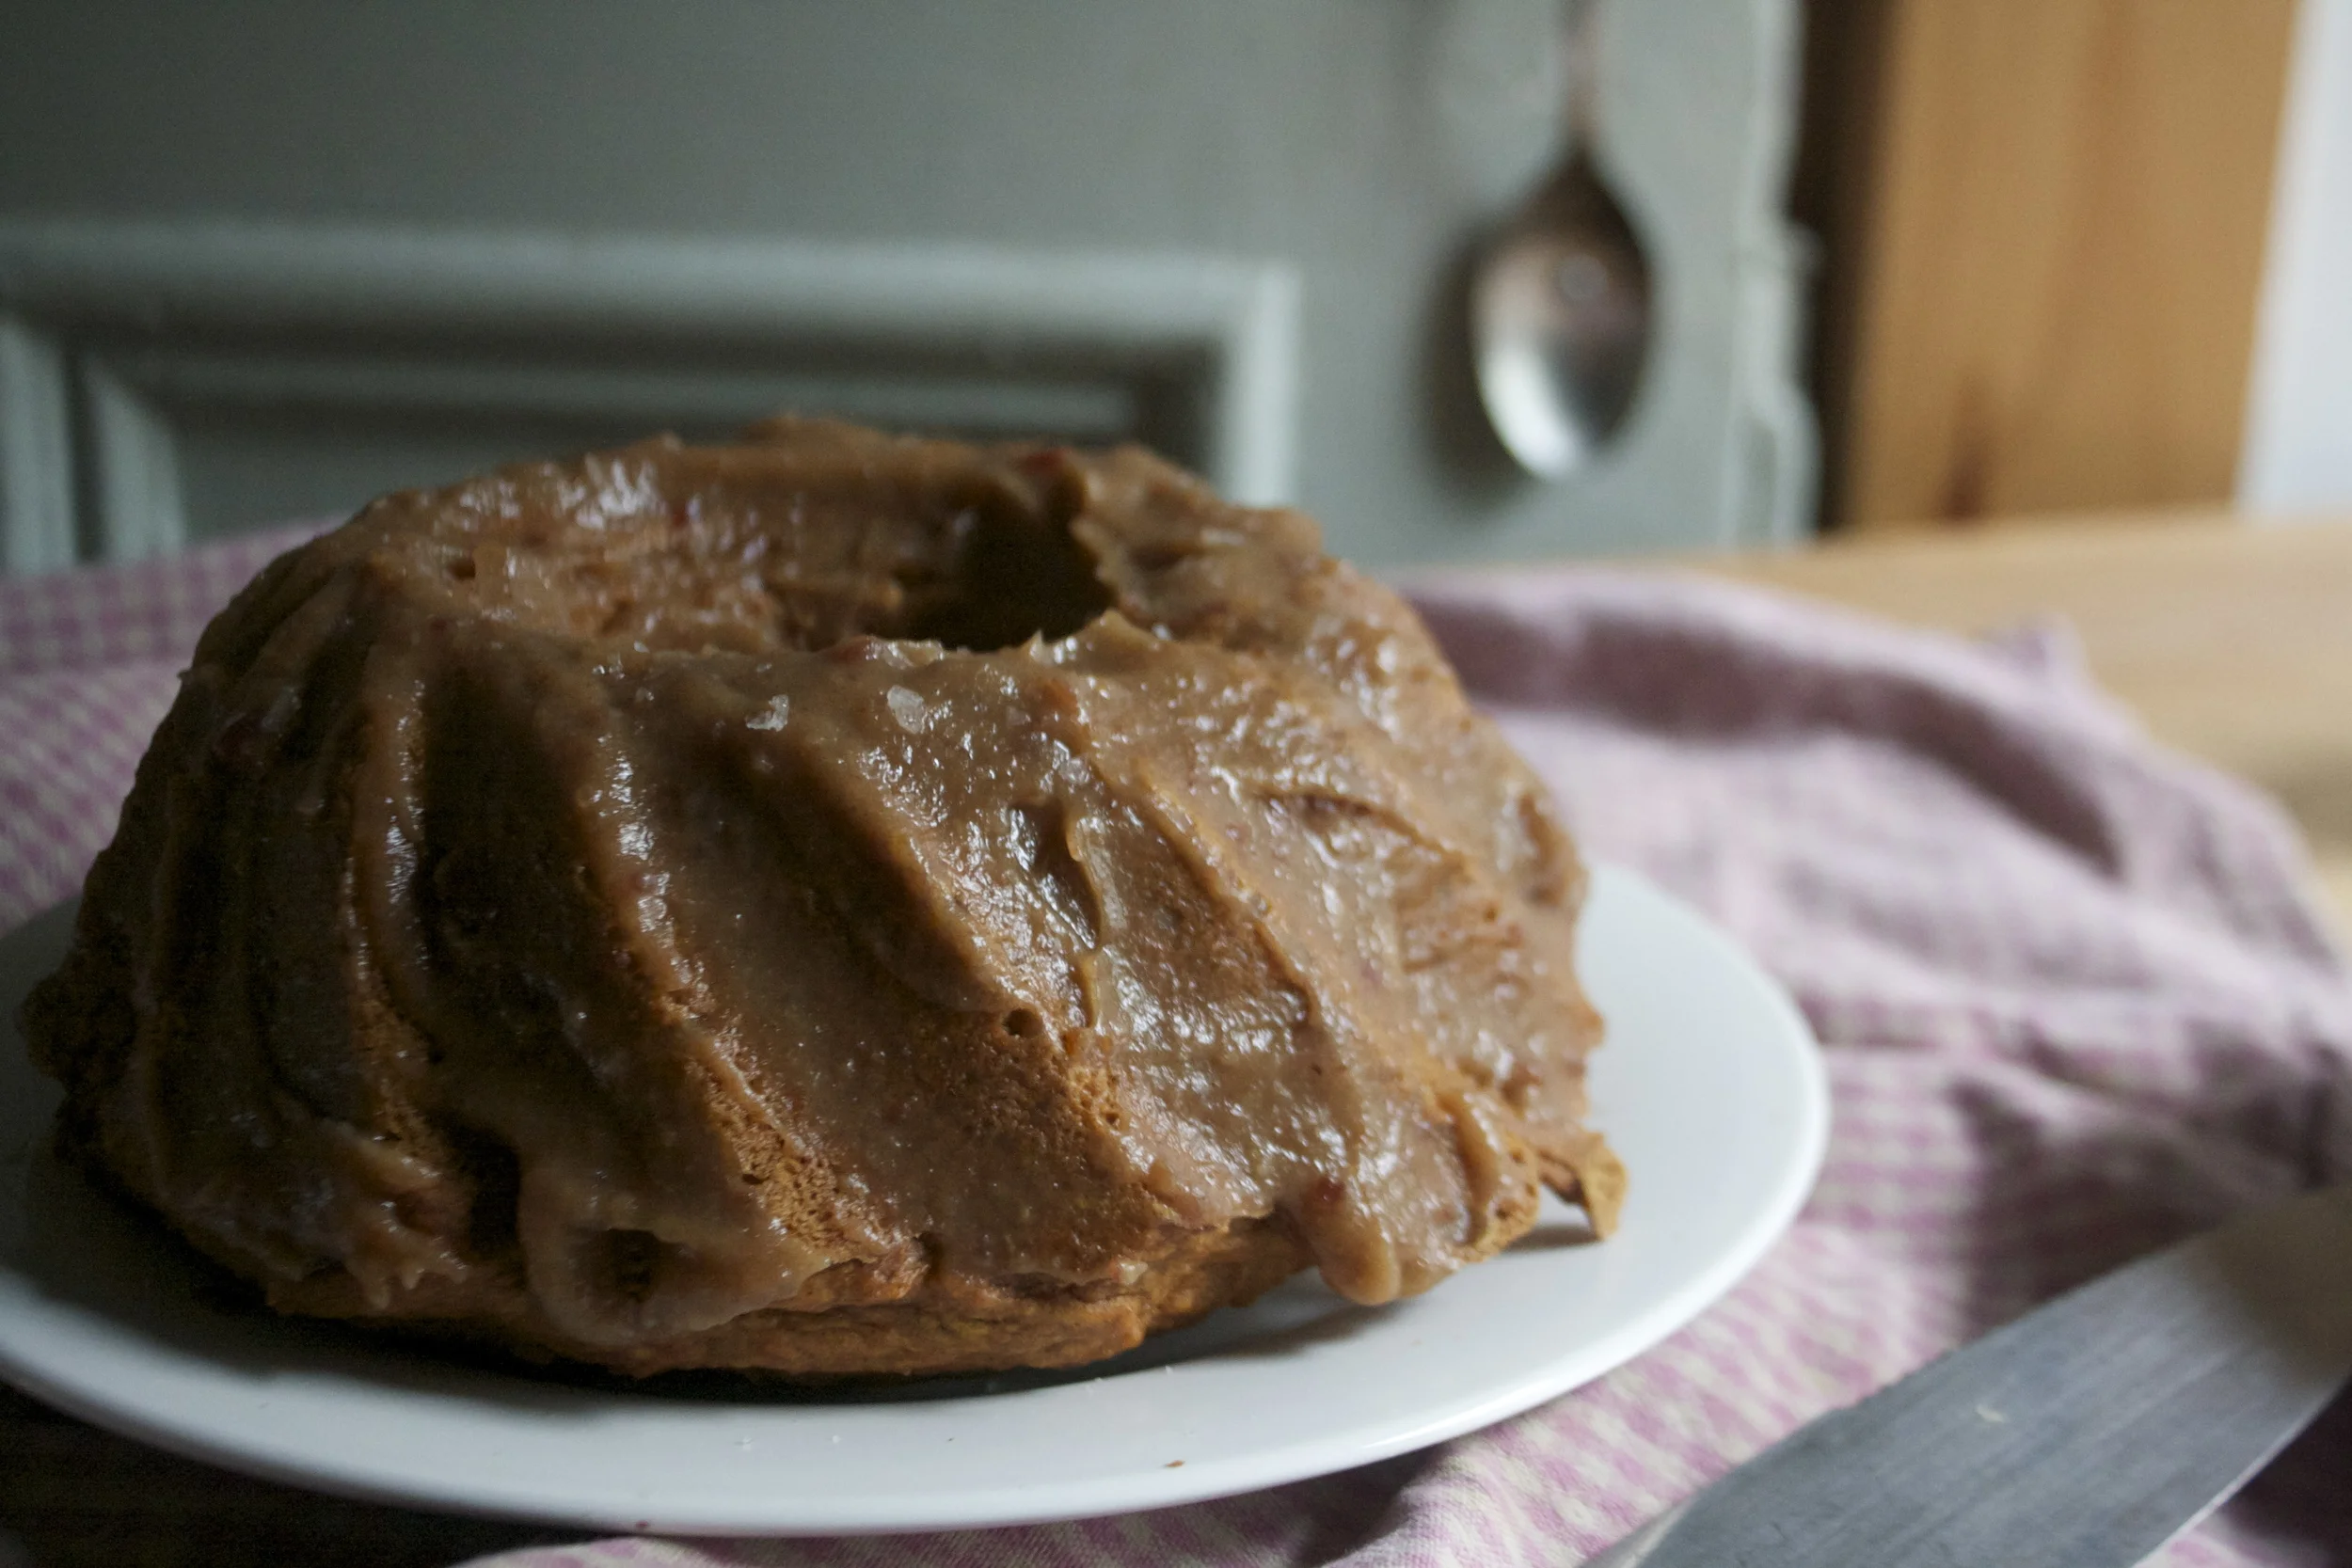
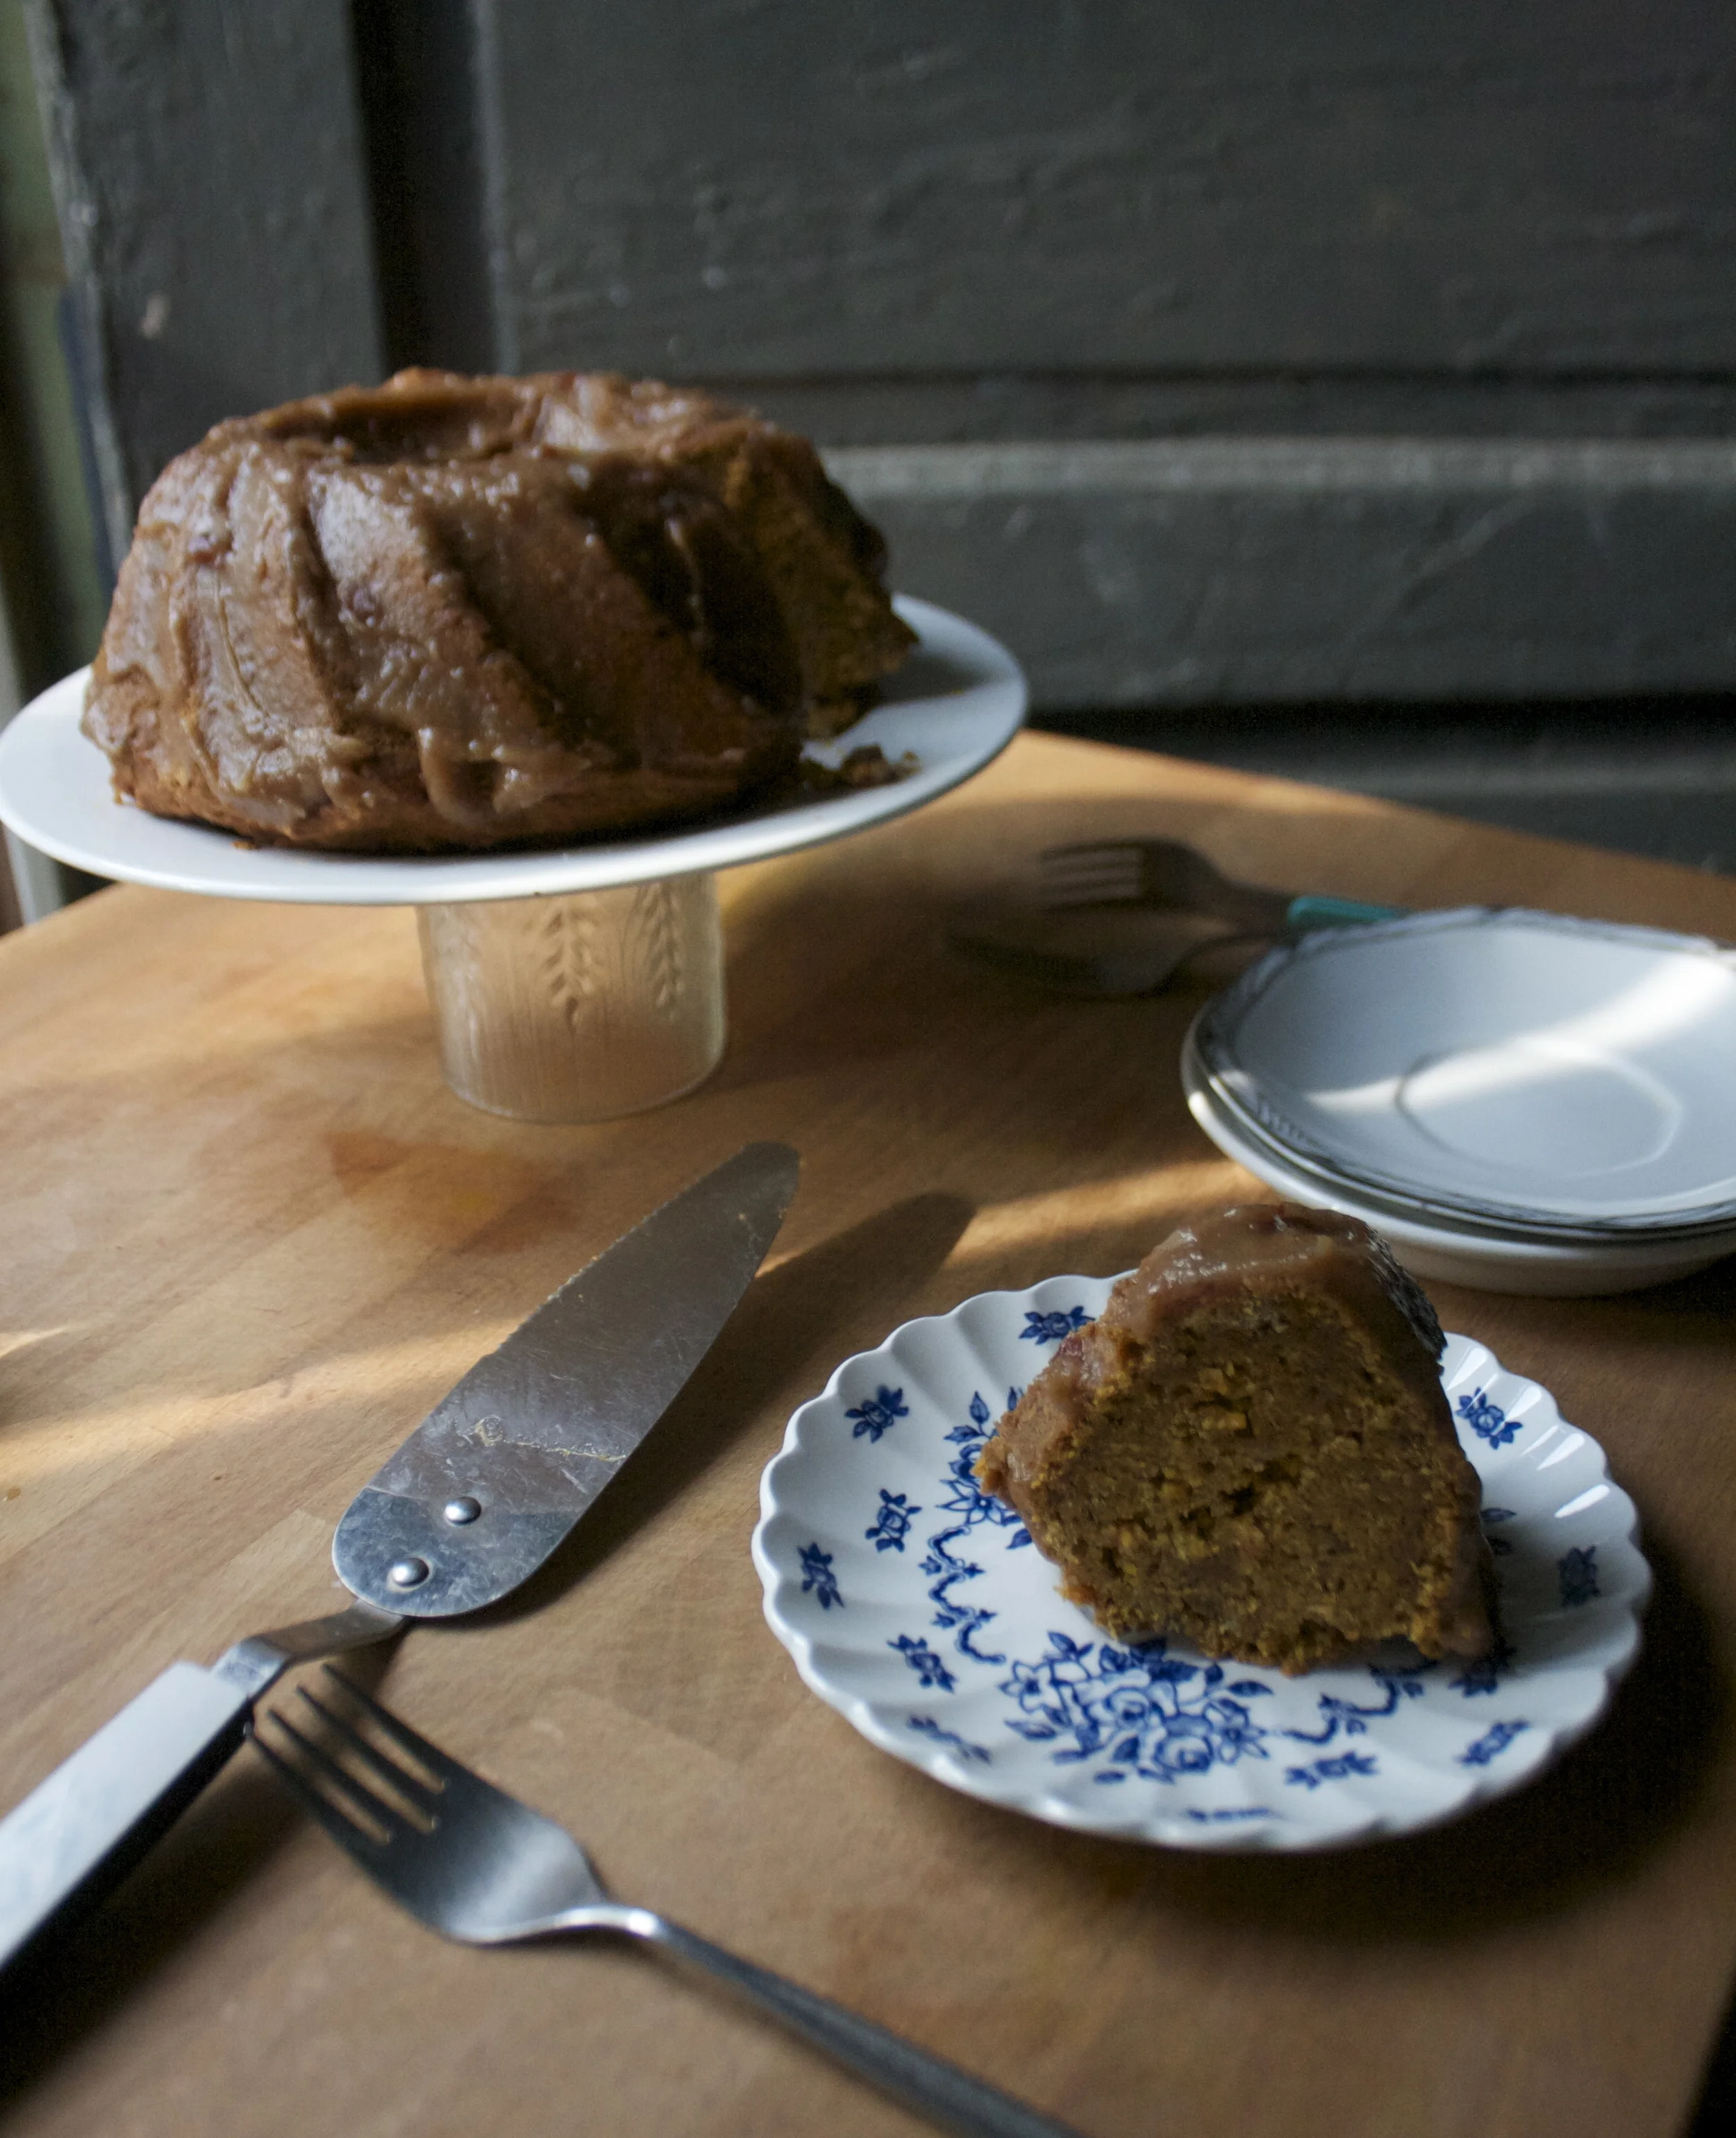
 Last night I had my sister and her kiddos come over for dinner. Nothing fancy, nothing to complicated, %u00a0just something %u00a0fast and something that I knew the littles would eat. %u00a0Spaghetti and meatballs, except replace meatballs were bean balls So they came, we played, did a little drawing and had a bit of first grad gossip. Then came %u00a0dinner time %u00a0when I was told by one little that she was not going to eat.. She had pasta for lunch. Well I made her sit anyway and she mainly just ate carrots (I was ok with that) Then the other little was all into his pasta and bean balls, 1 down, 3 more to go, when the mister let slip that the meatballs were not really meat. He ate around the remaining balls, said he didn’t want them anymore. And my sister, well she doesn’t eat anything that is not pizza.
 I feel like I don’t need to tell you how to boil pasta or heat up the sauce, so I left that portion of the recipe out. I have faith that you are capable in doing that part without my instruction.
 Small chop all the veggies and toss them and the dry spices into a skillet with a drizzle or two of olive oil. Stick on medium %u00a0heat and add about 1/4 cup of water to pan. Top with %u00a0slid and let veggies cook down until soft and fragrant.
 Add the cooked veggies to a food processor or blender with %u00a0the rinsed and drained chickpeas.
  The mixture gets pulsed until combined, %u00a0keeping a little bit of chunkiness. %u00a0Now go warhead and taste %u00a0the mixture. Add another pinch or two of salt , pepper or any of the spices that you think it need. %u00a0Dump the mixture into a bowl and mix in the chickpea flour than stink the mixture into the fridge for a least a 1/2 hour. Cooling to off is really important to forming the balls. If you don’t, it’s much harder to keep mixture from falling apart and sticking to your hands.
 After the mixture has had time to cool and set, start rolling the mixture into balls roughly the size of ping pong balls. In a shallow bowl, add a few tablespoons of the chickpea flour with a pinch of salt, pepper and garlic powder. Take each ball and roll in flour and place each ball on a well oiled baking sheet. When the balls are all rolled, stick into the oven and bake away for about 30-40 minutes, flipping balls after about 20. %u00a0After you flip the balls, get the pasta ready so its finished about the same time the balls are done.
 You pasta and sauce is cooked and the balls are all crispy and oh so nice.
 As the weather gets warmer and the days get longer, my food brain turns to fresh colorful simple spring food. (which is totally a thing). Spring food is a combination of the last of the winters hardy root veggies combined with the springs bounty of fresh greens and early growers. Spring food is the best!
 Dressing stuff. A nice and ripe avocado, the juice of a juicy lemon, a bit of garlic powder (raw garlic is nice too, but grate it super fine) and salt. Simple simple and sometimes simple can be the best.
 All stuff get mashed super mashed until smooth and scooped into a jar with a lid. Add about 1/4- 1/2 cup water (depending on how thick you like it) and shake that jar all around.
 A roasted beet and carrot, all sliced up
 Tossed onto a bed of tender baby spinach
 And topped with creamy avocado dressing.%u00a0Fantastic, so pretty, and makes the day super springy!
 You ever have one of those days where its %u00a09 am%u00a0and your ready to call it a day? . Yesterday was one of those day for me. Its spring vacation around here (more like an %u00a0arctic vacation) and I had volunteered my day to babysitting/ hanging out with 2 of my nephews, ages 11 and 13. (I know, I am the greatest sister). I had all of these great ideas and plans of things to do, but when it came down to it, they wanted to do nothing but play video games and not really listen to anything I said. I basically had to drag them outside to go for a walk we me and that’s all I could get them to do %u00a0My great little nephews, I love them so much, but yesterday they had their minds set on being little monsters.
 %u00a0What we have going here%u2026… Chopped up onion, celery, and carrot in a pot. Stick that pot on the stove for a few minutes on medium heat to start the cooking process. %u00a0While that happening get the other stuff ready. %u00a0A big can of diced tomatoes, hot sauce, worcestershire sauce*, %u00a0prepared horseradish*, celery salt, garlic powder, salt and pepper And last but not least a good squirt of yellow mustard. Now add it all to the pot and bring to a boil. Turn down to low and stick a lid on it.
 After about 20 minutes the veggies should be soft and the flavors should all have melded together. Taste %u00a0soup as it is cooking and add any more spice that you want.
 I stopped when I got to a smooth consistency with the littlest bit of texture.
 And there it is%u2026served with a stock of celery and a wedge of lemon (I forgot to add them to the pictures!) %u00a0A bloody Mary to take the edge off%u00a0any drag of a cold weather day. And best part.. %u00a0 left over soup is great served chilled with a shot of vodka to loosen this Mary up!
 %u00a0
  Before we get to the fries, I just want to mention that %u00a0yesterday was one of those fantastic winter days that reminds me why I love living in Vermont. %u00a0Pretty white snow everywhere, the sun was out, and 20 degrees without a gust of wind. The trash dog an I were even able to go for a little hike. %u00a0It was so nice and soooo sooo needed!%u00a0 Anyways, the other day as me, my sister and the mister where putting together %u00a0one more piece of Ikea furniture, (I am the master at Ikea assembling!) %u00a0a little runs into the room and presents the mister with a Dominos pizza. Yup, a whole pizza just for him. Why you might ask? Well I guess my sister was %u00a0delivered the wrong pizza and the place didn’t want it back and she didn’t want it, so she gave it to him.
 The carrots and the parsnips are all sliced up into big matchsticks and ready to be baked to crispy browned perfection. %u00a0I added the oil to the pan to toss the fries in and then sprinkled with a fair amount of salt and pepper. %u00a0If you don’t have and or want to use a cast iron pan, a baking sheet works just the same.
 %u00a0 %u00a0
 Oh saucy sauce stuff. Tomato puree, sriracha, and yellow mustard. Add a little bit of honey to lighten it up (can use brown sugar if keeping it vegan), a splash of apple cider vinegar and a couple minced cloves of garlic. Topped off with the smokey delightful spice of cumin. I cold eat this on everything%u2026and I kind of did.%u00a0
 Fries are done, Sauce is ready. Served in super cute tea cups.(from now on I want to serve everything in tea cups.) A perfect side dish, snack, or even a light meal. %u00a0It lead the mister to ask the question…What pizza?%u00a0


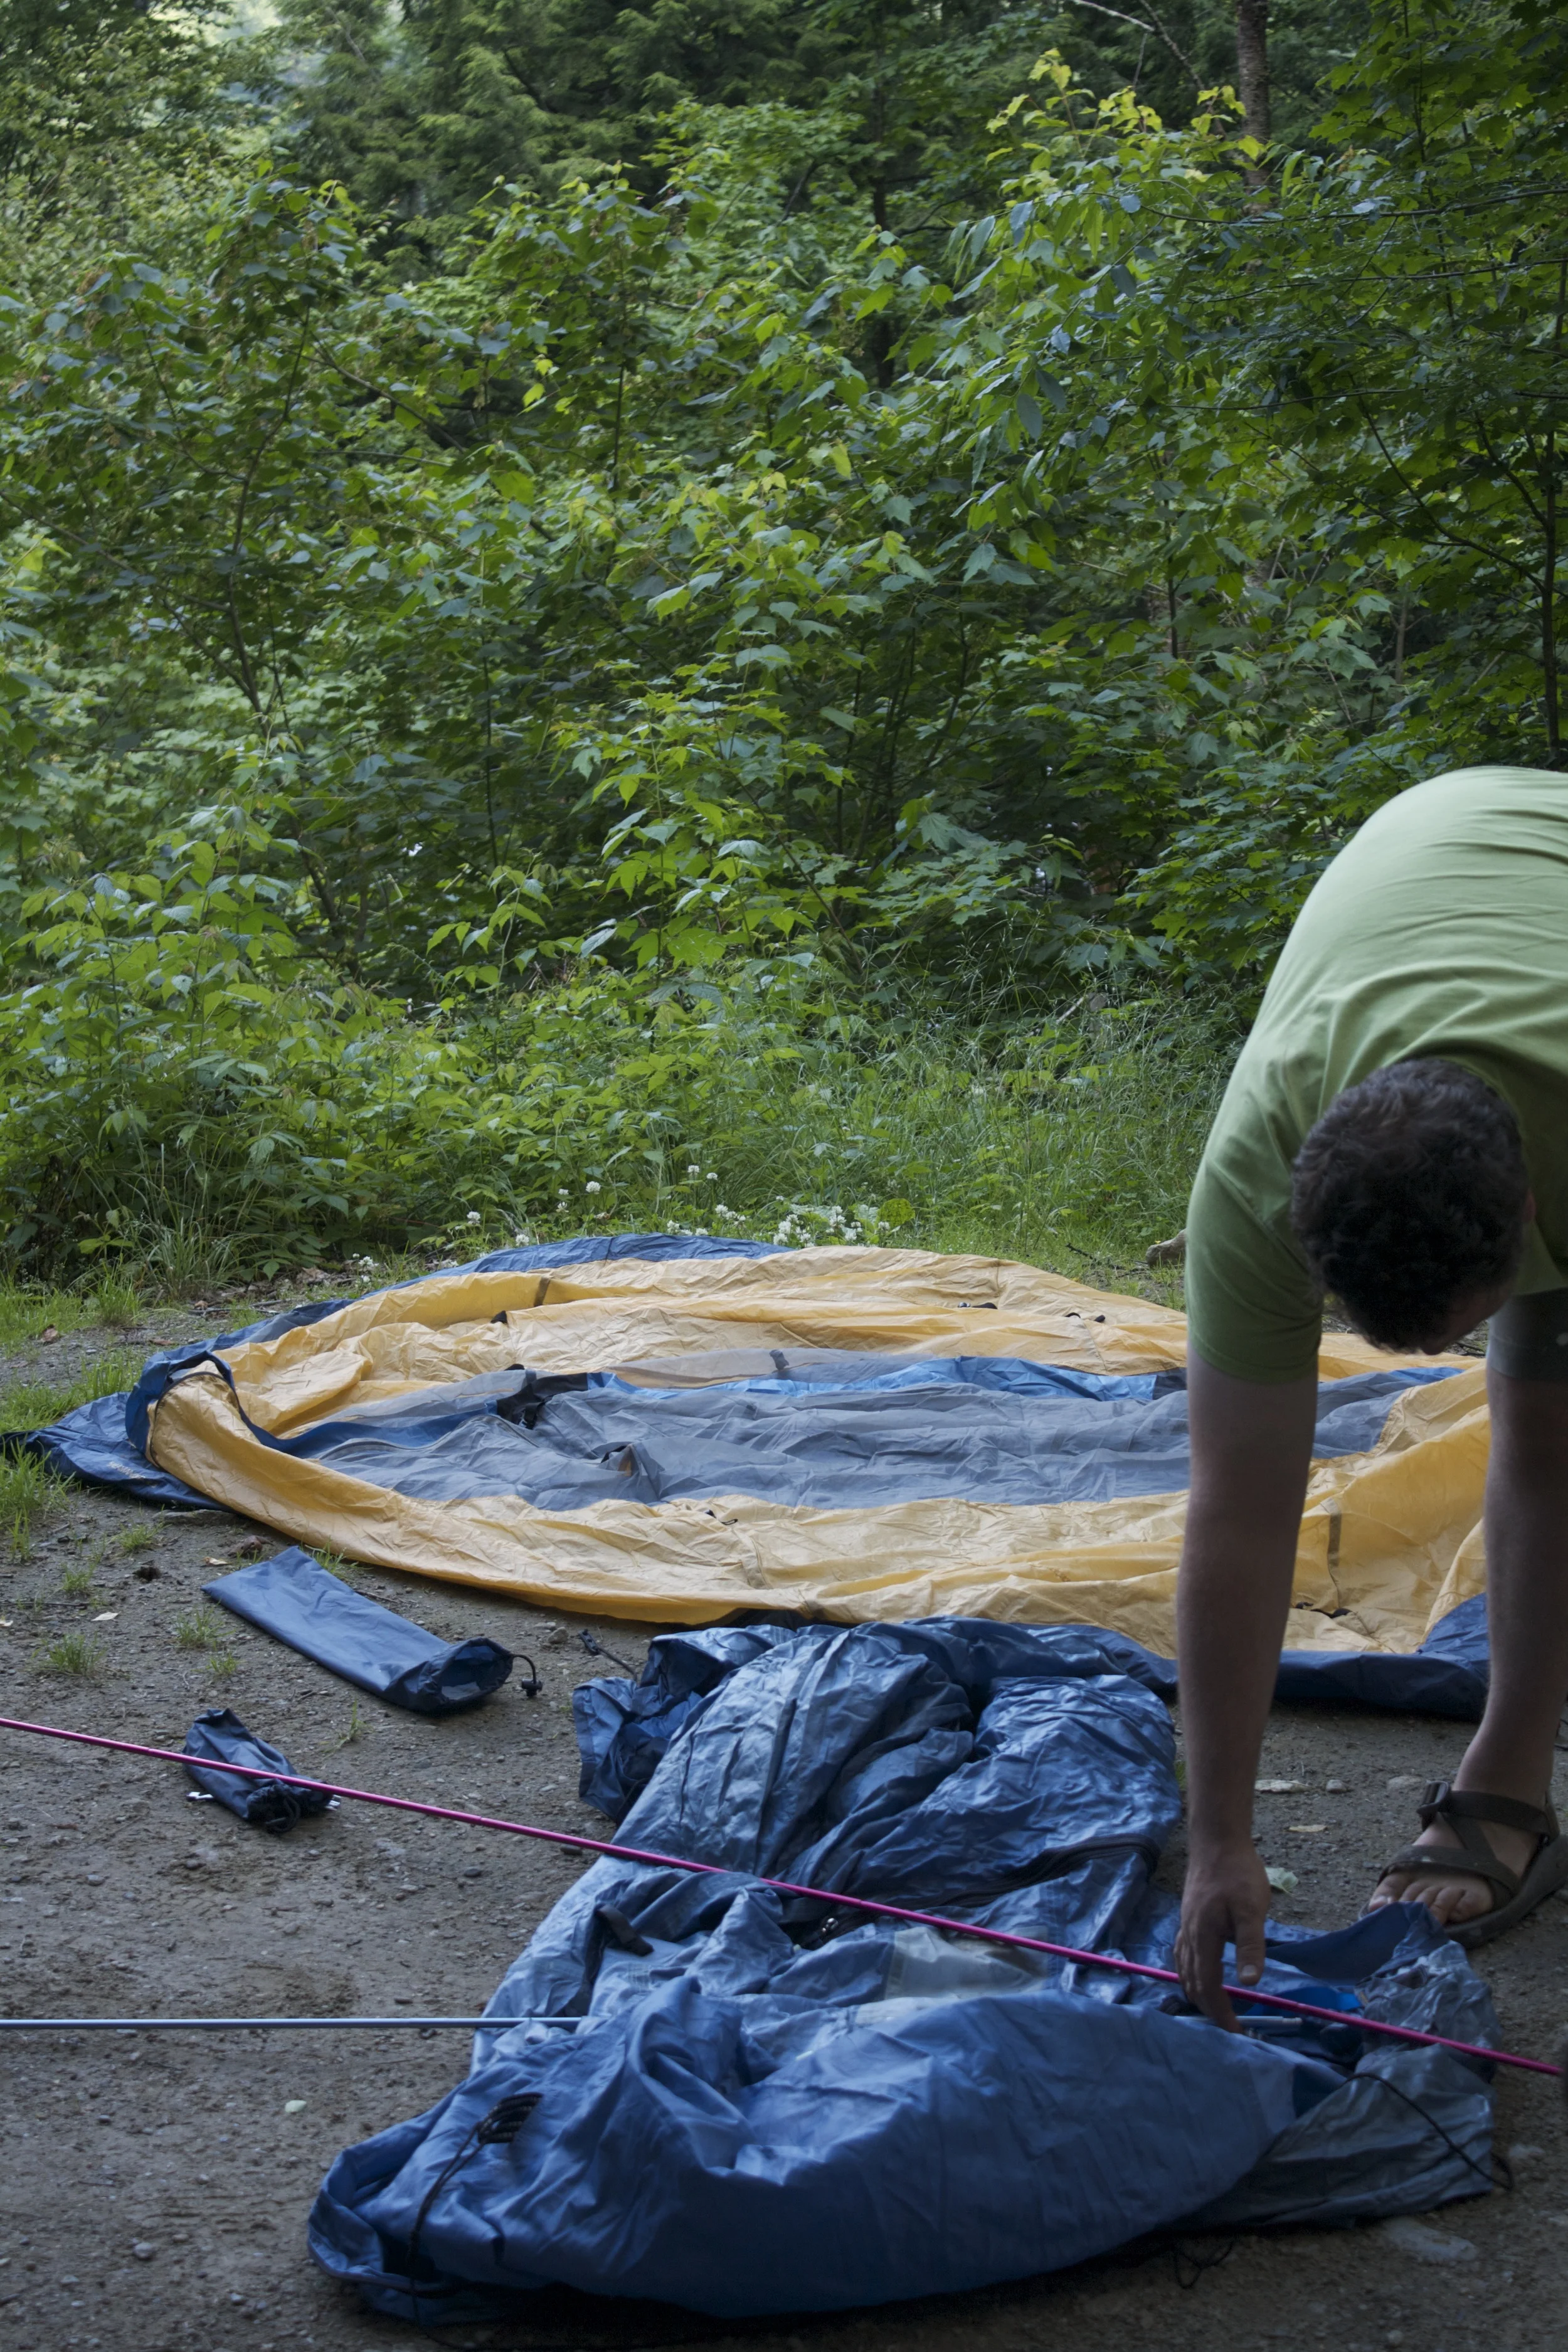


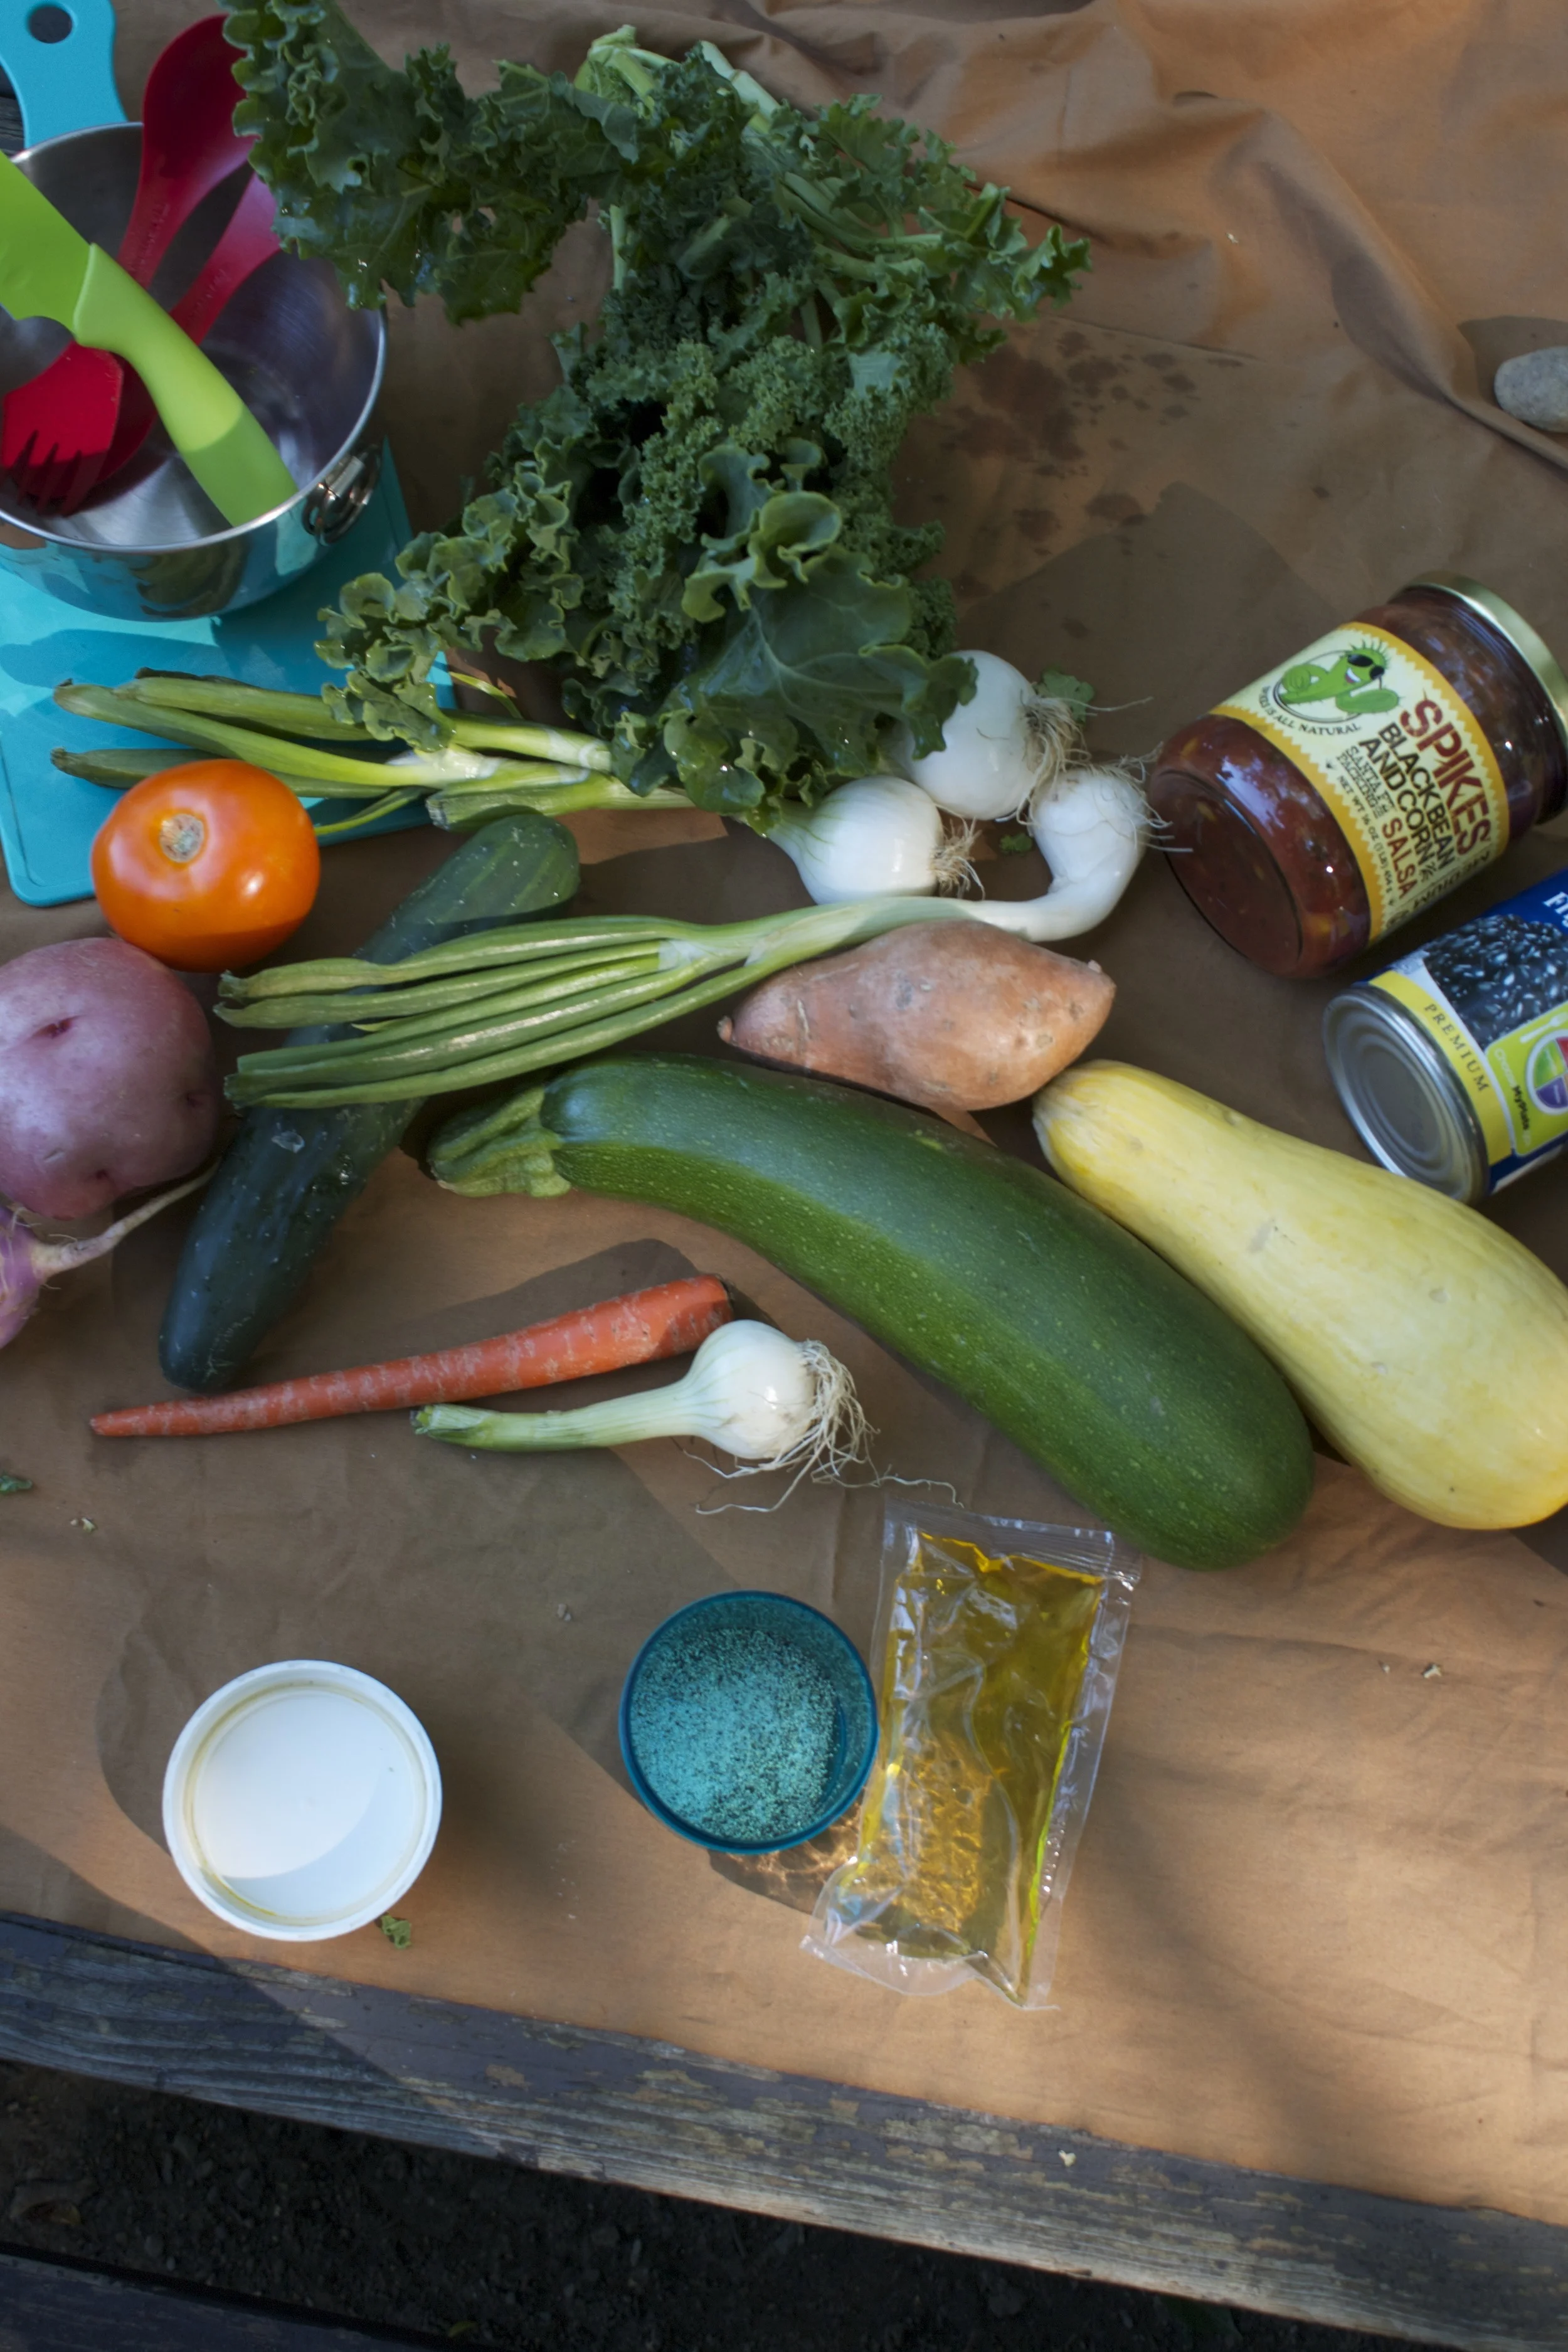


THE LOVELY CRAZY
September 18, 2019 by maximios • Blog
Guess what guys ….I got myself a sick vintage waffle/ griddle iron. I couldn’t be more thrilled!!! I found this thing at the local recycled goods store the other day, along with a very beautiful old white pyrex mixing bowl. It was one of my best thrift store scores! (Checking out the inventory and the condition of all the old things that day, I would say an old lady had just died and all her perfectly keep, mint condition kitchen stuff had just been donated. But it’s cool, cause I get the feeling that she was at least 90, with a big loving family, and was happy until the day she died. And I am sure she would be pleased that I have taken over the waffle maker. Thanks old lady!)
And now I am pretty sure that everything I make for the next week will be cooked on said waffle/griddle. I am serious, I already have a list of things to try and cook on it; cookies, biscuits, granola bars, potatoes, fruit, some type of pasta situations…. the list of possibilities is endless and I bet that at least 1/2 of these things will be totally awesome and amazing.
But first thing first. I need to make dinner.
So waffles for dinner!!
Note. These waffles are completely 100% fantastic for any meal you want to make them for. They consist of nothing more then beans, a shit ton of veggies, and just a bit of cornmeal. But don’t let that fool you because they are super packed full of so much flavor, have a really soft tender inside, with a nice crispy outside and are so super pretty. They are wonderful! The stuff. First, we got a big old pile of shredded up veggies which include; carrot, beet, sweet potato, onion, parsnip, celeriac, and a little bit of kale. A we got a bowl of rinsed and strained white beans, a little bit of cornmeal and salt, pepper, and garlic powder.
The makings of something amazing!Before you do anything. get your waffle iron out and preheat it.
While thats going on, take you beans, add 3/4 cup water and puree until smooth with whatever blending device want to like to use. (I used my hand blender…less to clean)Now collect all the shredded veggies and dump into a big bowl with the bean puree, the spices and the cornmeal. Mix until combined. The batter should be thick, but not dry. If its seems to wet, add more corn meal, or too dry, add a little more water.
Note how my batter turned a magical pink… I love beets, they make everything pretty! And check out that bowl!When your waffle iron is preheated, oil it if needed (if your not sure, add a little oil just to really make sure your waffles don’t stick) and take appropriate size spoonfuls of the batter and stick on iron. Close it and wait…..My iron has a little light that turns on when the waffles are done cooking, so I waited patiently (ok iI did open it a few time) until light tuned on and removed the perfectly cooked waffles.
Did I mention how awesome my new/old vintage iron is?
SO AWESOME!!
I made a little gaucamole and gave the mister and little bowl of plain Greek yogurt with lemon juice, but feel free to top, drizzle, or dump whatever you want onto these beauties…
Happy waffle Wednesday!!!
-C
Veggie Bean Wonder Waffles
Makes 8-10 waffles (in my iron) feeds 2-3 peeps
Note on veggies… I used what I had in the fridge and shredded, it came to about 3 cups. If you don’t have these specific veggies or only want to use a few.. go for it. Just make sure to have 3 cups of whatever veggies you use.
Take you beans and blend them up with whatever device you would like to use. Once creamy, add to a bowl with the rest of the ingredients. Stir until combined.
Once the waffle iron is preheated, oil it( if needed) and place the recommended amount of batter right on it there. Close and cook until golden brown and waffly.
Serve on a plate with topping of your choice, A few suggestions.. Guacamole, salsa, hummus, mustard, greek yogurt… anything that tastes good to you.
Eat as breakfast, lunch or dinner…
Fork into face
My contribution to last nights dinner at my sisters…. Freshy fresh veggies spring rolls.I had about 30 minutes between work and getting over to my sisters house to throw something together so it needed to be something fast, easy, and something I could make without going to the store. She was making the main course (some teriyaki situation and rice) so I was doing up the veggies.
I had just bought a package of spring roll wrappers…. Bingo! The perfect and logical choice. I grab the wrappers, a variety of veggies and after spending 12 of my 30 minutes trying to scrub the oil based paint off of my face and hands, I still managed to completely prepare, construct, and take pictures of these lovely tasty spring rolls. and get over to my sisters in time for dinner.
Impressed?
Damn right!
The stuff. Carrot, beet, asparagus, red cabbage, and kohlrabi, which all (except asparagus, which I just cut into thirds) got cut into matchstick sized pieces with my mandoiln. Then there are the rice spring roll wrappers that we need to make the veggies into rolls. Also a bit of red wine vinegar to drizzle onto the veggies for a little extra zing. And lastly, soy, fresh ginger, and a couple cloves of garlic for a spicy salty dipping sauce.Start by having everything set out and ready to assemble. Fill a large shallow dish or baking sheet with really warm water. Working with one at a time,place a rice wrapper into water and let sit for about 10 seconds or until the paper starts to soften. Remove from water and place on a damp surface (just splash a little water on the counter) Take a little bit of everything and and place on the lower middle part of the paper. Fold in the sides first, then tuck and roll the wrapper as tightly as you can without ripping the wrapper.
Repeat until you have used up all you veggies.For the dipping sauce. Finely grate ginger and garlic and add to soy sauce. Stir… and it’s done.Freshy, pretty and fantastically delicious. And for real, took about 8 minutes to make. (I even had enough time to wash the dishes before we left!)
I am so awesome!
Hump Day Pow!!!!!
-C
Fresh Veggies Spring Rolls
Makes 8-10 but can easily be increased or decreased to desired amount
Note… I used the veggies that I had in the fridge at the moment. If you have a bunch of veggies but not these particular ones, use what you have. Pretty much all veggies taste good inside a spring roll!
Gather your veggies and prep by either using a mandolin, a grater, or some sick knife skills, and julienne, shred, or slice you veggies into thin match sticks. Once all the veggies are prepared, sprinkle a little vinegar over the top.
For the rolls…Grab a large shallow vessel (a rimmed baking sheet works great) and add in warm water. Working one at a time, place the wrapper into the water for about 10 seconds or until the wrapper starts to soften. Remove and spread onto a clean, damp work surface. Gather a bit of each veggie that you are adding and place towards the bottom middle of the wrapper. Now fold the sides in over the pile of veggies. Then with the side closest to you, tuck and roll wrapper away from you, trying to keep it tight, but not to tight that it rips.. (Hopefully that makes since.) Place finished rolls onto a damp surface to keep from sticking and if not serving right away, drape with a damp towel or paper towel to keep from drying out.
For the soy ginger dipping sauce. Add grated ginger, minced garlic, and soy into a bowl and mix together. Serve with spring rolls.
Eat one, two, or a plateful. It’s nice to share but not a necessity.
I have been strategic about the roots and veggies that I have chosen to bring home the past few weeks.(My farm lets you pick what you want) I know what I can buy at the store, things like carrots and potatoes, so I have been passing those up, but the roots like beets and celeriac… I have been bringing home baskets of those and hoarding them in the fridge and basement in preparation for the laps in farm fresh food and knowing that if I want to by these at the store it s going to coast me a million dollars a pound. (a for real million dollars)
Yup, lots of roots around here, especially celeriac root which is fantastic. I am kind of obsessed with celeriac, with its fibrous, knobby exterior, soft but almost meaty texture inside, and a flavor that is close to celery but so much better. I don’t know why it has taken me so long to do a posting featuring this amazing root vegetable (I eat it almost every day)
So here, an amazingly tasty, hearty but not heavy, celeriac recipe. Perfect for spring and the change into summer…. Mustard roasted celeriac with an fanatic split peas gravy that will have you licking you bowl clean.
*Note. I don’t peel my celeriac root. I really enjoy the fibrous exterior but realize that some don’t(The mister does not like it) so peel it if you want.
While the gravy is cooking, take the celeriac rounds and brush each side with yellow mustard, sprinkle with pepper, and place on a baking sheet. Stick into the oven to roast for about 25 minutes, flipping the rounds after about 10 minutes.
Serve with the fanciest knife and fork you can find. Extra yellow mustard and sriracha sauce are great condiments to have close by.
Happy Tuesday!
-C
Mustard Roasted Celeriac with Split Pea Gravy
Preheat oven to 400 degrees
Small dice the carrot, parsnip and onion and throw into a large pot. Spinkle with salt and pepper, add in the thyme and bay leaf and add a splash of water. Stick on stove on medium heat and stir. Let cook until the veggies become soft and fragrant. Now add in the split peas and 2 cups of water. Bring to a boil then cover and turn heat down to medium low. Let cook until the split peas become tender (about 25 minutes) string on occasion and adding more water if the peas are not completely summered while cooking.
Once the peas are tender, let cool for a few minutes, remove bay leaf, and either dump into a blender or blend with an immersion blender until nice and creamy. If gravy seems to thick, add in more water.
Scrub or peel celeriac roots and slice them into 1/2 inch think rounds. Place on a baking sheet and brush mustard on both sides and spindle with pepper. Stick into oven for about 10 minutes, flip, then back into the oven for another 15 or so minutes, or unit the celeriac is tender.
When the celeriac is done remove from oven and stick a few rounds on a bed of spinach (or not, or any kind of grain or green you like) Top with a hearty helping of the gravy and toss on some chopped up tomatoes.
Eat with at knife and fork like a fancy person.
Yesterday I spent the entire day (ok maybe not the entire day), but a the better part of the afternoon defrosting my freezer. Sure, I do the occasional chip chop here and there, just enough from around the freezer door so it will close, but ever few months I notice that everything in the fridge is not staying cold and that the freezer is not freezing stuff. Thats when I know its for real time to defrost. So a few days ago when I noticed my bananas were turing to liquid in the freezer, I knew it what I had to do….Completely empty the fridge and melt/hack away the 2-4 inches of ice build up that accumulated. It is such a freaking pain in the ass.So on this defrosting day, I took all the stuff from the freezer, stuck it in a cooler, and the rest of the stuff, which is basically all veggies, I just tossed on the table. As I am hacking away with a metal spatual, a wooden spoon, and a constant rotation of pots of boiling water, I was thinking about dinner. I figured I might as well just eat up as much of the veggies as I could, you know, so I didn’t have to put them back in the fridge. And also, I was getting pretty annoyed because this particular defrosting session was taking way longer the anticipated, which made making dinner seem like another pain in the ass. I figured I might as well just eat everything that is already out on the table, which pretty much narrowed down the “whats for dinner” conversations because it was already all over the place. And so dinner was a humongo salad for me, and for the mister, I made him a monster of a veggie sandwich. (my salad was exactly the same stuff as the sandwich, minus the bagel) Easy, fast, super duper yummy, pretty and piled so high with tons of veggies that the fridge is pretty much empty now.
Look at the is beast. I don’t call it a monster sandwich for nothing.
The stuff included in this monster veggie sandwich..
Romaine lettuce, tomato, avocado for there is not real sandwich without them. Thinly sliced radishes, cucumber,a and onion for nice crispy crunch. Shredded beets, carrots, and purple cabbage to give more crunch and a bit of sweetness. Then of course there needs to be something pickled, so I used banana peppers cause they are the SHIT!! And lastly some hummus for a nice creamy finish (plus a bit of protein) and yellow mustard because mustard on everything is just right. Heres to a mountain if goodness that is no longer in the fridge! Served with a another mountain of roasted parsnips and carrots (more stuff from the fridge) and a tall glass of iced tea.
Lucky that today is farm share pick up cause the fridge is pretty much on empty.
Yea it’s Thursday!!!!
-C
A Monster Veggie Sandwich
Note. This is just a guide.. Feel free to use whatever veggies you fancy.
To assemble. Ready your bread.. Toast if you want, and stick it on a plate
On either side, smear the hummus and the mustard.
Pick a side, start to stack by evenly disrupting veggies on top of veggies. Place the second piece of bread on top and giving a little smooth to keep it together.
And go at it. Cut in half or don’t. Have a napkin or a long sleeve ready to wipe your face.
Perfect! A few carrots and half of a gigantic kohlrabi.. plus at the hotel we were staying at, there were fruit bowls in he lobby full apples. Every time I went past the apples (which was a lot) I grab one or two, so I have a few apples (I actually have a lot of apples now). All the things I need for a super awesome salad slaw. Apples with their nice sweet crispiness and kohlrabi with its cabbagey, crunchy earthiness, tossed together with some vinegar, some toasted walnuts and some carrots, I mean, so freaking good. And to make it a bit more of a meal, I made some lentils to go with it. But the best part was there was no need to leave the house!!
Pretty simple stuff going on here. Just peel and julienne the kohlrabi, carrot and apple. (no need to peel the carrot or apple unless you want too) and stick it all into a bowl. I used my mandolin, which is one of my favorite kitchen tools ever, but if you don’t have one, a box grater works too. Sprinkle with salt and a good glug glug of red wine vinegar. Chop up the walnuts (some big chunks and some very small pieces makes for good eating), toss it all together and, well that’s it. But wait…. let it sit for a few minutes before serving to really let the flavors draw out.
 And there we have it. Super fast, full of flavors and crunchy texture. A salad slaw after my own heart.
Serve it as it or add to a bed of greens, rice, or lentils… and make sure to save at least as little… cause its an awesome little pre-bed snack.
Happy Week!!
-C
Kohlrabi Apple Walnut Slaw
In a large bowl, julienne kohlrabi (after peeled) apple and carrot. Sprinkle with salt, add in vinegar. Rough chop walnuts and toss the whole bit together. Let sit for at least 10 minutes, if not longer before serving. (A great salad to make ahead of time)
Eat as is, or toss onto a bed of greens, plate of rice or a bowl of lentils.
Any left overs only end up tasting better the next day.
A perfect soup for spring! (or summer, winter, or fall)
Soup so good.
-C
Parsnip Thyme and Turmeric Soup
Dice up the parsnips, carrots, garlic and onion and place into a large dutch oven or pot. Drizzle with a bit of olive oil, sprinkle on the spices, salt and pepper and add about 1/2 cup of water. Turn heat on medium and start cooking down the veggies. Once the water evaporates and the veggies start to caramelize, deglaze pot with about a 1/2 cup of water. Give pot a stir, and continue to cook until water evaporates. Repeat this 2-3 more times until the veggies are super soft and fragrant.
When the veggies are ready, add enough water to the pot to submerge the veggies. Bust out the immersion blender or dump into a blending device and blend until smooth (or the consistency that you want) Have a cup of water ready to thin out if needed. When blended, taste for salt and pepper, add more if you want, and cook on low heat until you are ready to serve.
Garnish with a lot of good cracked pepper
Eat from a vessel, use a spoon
Last night the misters Dad came over for a long awaited dinner accompanied by talk of life goals and what her referred to as “narratives” or the story of our lives. Some deep shit to be talking about at dinner, especially with zero alcohol to be had.
Me, being so super awesome, was all up in taking charge in making the food. Except that last night I didn’t have a bunch of time and honestly, much energy to be doing anything. And sure, I could have just made a pot of spaghetti, but that just felt like cheeping out. So Polenta it was. And because I just made a hug pot of navy bean, those were going into the polenta too.
Beany polenta baked in the oven with a tomato sauce cooked on the stove. About 5 minutes of hands on time and an hour to cook it all. It’s the perfect meal to make when you have guests coming over. Fast prep, into the oven and on the stove, and then you have an hour to clean and make yourself presentable. See, I am a thinker. (I ended up skipping the making myself presentable part… I stayed in my gym clothes.. no need to impress family right?) Then after about and hour you end up with a hearty healthy pretty meal, all from scratch, that seems like you spent the afternoon cooking. When in fact you spent the past hour vacuuming and watching Gilmore Girls.
Two big spoons and a pile of plates. Have the people serve themselves!
Have a Happy Day!
-C
Baked Navy Bean Polenta with Chunky Tomato Sauce
Serves 4 hungry people
For the Polenta
For the Sauce
Preheat oven to 400
In a large skillet, mix together the cornmeal and the water and add a good pinch of salt and pepper. Place into oven for about 30 minutes or until the polenta starts to congeal at the edge of the skillet nd most of the waster has cooked down.
Remove skillet from oven and with a whisk or wooden spoon, mix in the beans, the parmesan (if using) and 2-3 tablespoons of olive oil. Smooth out mixture, sprinkle with salt, pepper, parmesan and drizzle with olive oil. Stick back into oven for another 30 minutes or so. Polenta is done when it no longer wiggles when you giggle the skillet.
For the sauce
Small dice the carrot and the onion and stick into a medium dutch oven oor sauce pan with a drizzle of olive oil. Place on medium heat and cook until the veggies are tender. Add in tomato, minced up garlic and basil. stir and let simmer on stove top for about 45 minutes. When you place the polenta back into the oven for the second bake, dice up zucchini and squash and add to sauce. Stir and keep on simmer until ready to serve.
Once the polenta has completely cooked, remove from oven and let sit for at least 5 minutes…10 is better to solidify.
Spoon big piles of polenta on a plate or in a bowl, top with a big heap of tomato sauce. Sprinkle with a little more parm and maybe another dash of pepper .
Eat…..Spoon or fork is recommeded.
Happy Food!
So if you are anything of a mustard connoisseur, you really must, at least once, make your own batch.(It’s so easy!) And you will love it and share it with all your friends and they will think you are a bad ass for making your own mustard and your life will just be so great. All because you are now a mustard maker. Yes.
Note- If you want, add in a pinch of any spice that you want.. Chili flakes, granulated garlic, turmeric…. And you can use the vinegar of your choice. I like apple cider because its mellow with a slight sweetness but white or sherry or any vinegar would be great. Even left over picked juice is fantastic too.
Taste and add another pinch of salt if its needed and……..
Enjoy and have a great Tuesday full of mustard and stuff!
-C
Whole Grain Mustard
Combine all ingredients into a large jar that has at least a few extras inches for the seed to expand. Leave on counter for 8-12 hours.
Once seeds are nice and soft and have expanded, either eat as is (Mustard seed caviar) or blend the seeds to desired consistency (I like it half smooth, half seedy) Add a pinch more or salt and another splash or two of vinegar to help blend.
Refrigerate and use on anything and everytihng.