Holy shit is it hot out. My brain is all fizzy, my hair is all frizzy, and my over all being is just blah. I am not a fan of super hot weather (as some of you may know) and am getting more pissy as the days go by and I continue to be a sweaty mess. I don’t want to feel like a big wet slob, I want to feel fresh and clean and wear clothes that are not drenched in sweat. I know, bitch, bitch, bitch, but seriously. Even the world around me is wilting, and in the nice, colorful fall foliage kind of way. It’s all crispy and brown. The garden is barely holding on, the flowers are shriveling in the ground, and a few plants are just plan dead. It’s just too hot.
I think that only plus side of this past week of hot crap weather are these popsicles that I made. They were actually suppose to be a treat for the littles, but guess what, me and the mr ate them and didn’t share, and no, I feel zero bad about it. They were so good, so refreshing, so cold(if only for a minute) and just so needed. A few minute reprieve from being miserably hot. And bonus, a great use of all the watermelon and tomatoes that I have taking over the countertops (I have so much watermelon and tomatoes)
And really, these probably (better freaking be) the last batch of popsicles for the summer so I think I am going to make another batch today, eat them, savor the flavors of summer, and move on from there.
. Maybe I’ll even share them this time.
The stuff. Some watermelon*, a tomato, a handful of basil, and a lime.
*My watermelon had seeds, but you can use seedless. I also removed the green skin, but kept on as much rind as I could, although this particulate melon had very little white rind.
Dump the melon, tomato (cut in a few pieces, the juice of the lime and the basil into a blender. If your melon has seed, don’t worry about removing them.
The stuff all blended up.
. This step is more necessary if you melon is seeded, straining the mixture pretty much caught most of the seed chunks. You can skip this if your melon is seedless.
Now pour the juice into your molds and stick into freezer to freeze.
After about 2 ish hours, remove and stick the sticks into the semi harder pops.
And a few more hours later……Frozen goodness.
And pop one of those suckers out of the mold and savor every frozen delicious bite.
Happy Tuesday… DON’T MELT!
-C
Make six 3.5 oz popsicles
1 ish cup watermelon (green skin removed.. rind is good)
1 large ripe tomato (about a cups worth)
a few sprigs of basil
Juice of 1 lime
Place all ingredients into blender and blend until smooth. Strain mixture through a fine strainer into a bowl or jar and pour into popsicle molds.
Place in freezer for a few hours. About 2-3 hours in the freezer, take them out and stick in sticks (or fallow you popsicle molds instructions) Place back into freezer
Once completely frozen, remove from molds and eat with your mouth.
FRIDAY YEAH YEAH!!!!
And for your Friday, I made these awesome little raw/ vegan/ gluten free cookies.
Now wait a minute. Don’t let all the labels of what is not in these cookies scare you away. Just focus on all the stuff that these cookies are made of. Almonds, Cashews, Coconut, Cocoa, Oatmeal. They are cookies made with lots of good yummy stuff that just happened to be enjoyed by those with specific food diets as well as those who eat anything. A cookie for all! See, don’t they sound excellent? Yes, yes they do. And they are good. So, so, good. Even the mr. is into them. And he is far from being raw/vegan/ gluten free.
And because these cookies are made with all sorts of good for you stuff (lots of proteins, good healthy fats, and complex carbs) you can pretty much feel zero percent guilt eating them. They a are a no joke, healthy, energy packed cookies of goodness. A fantastic way to start the morning, eat with lunch, as dessert, post work out, or eat as a late night snack. (Just don’t eat them all at once)
Now go for it!
The raw stuff. A cup of old fashion rolled oat that have been soaking in water for about an hour. Almonds(which I spent 20 minutes deshelling) cashews, dehydrated coconut flakes, some cocoa powder and a few medjool date. If your nuts are unsalted, add a pinch of salt too.
Dump everything into a food processor. BUT WAIT! Make sure to remove the pits from the dates)I have broken a blade in the past form a date pit)
Blend unit combined and a kind of rough dough is formed. It will be a little sticky. If it;s to sticky to handle, place into the fridge for a few minutes to set up.
Now take blobs of mixture and roll into balls
And you could totally leave them as balls… you can even play with your balls….
But I think they look nicer squished flat and topped with pieces of nuts and coconut. They look almost fancy, if I do say so myself.
Now have yourself a cookie, and place the rest in the fridge (they get harder and, if you can imagine, taste even better after a few hours of cold)
Freak Yeah FRIDAY! Do fu stuff!
-C
Makes 15 normal sized cookies (you can make more or less, depending on the ball size)
1 cups oat fashion oats soaked in 1 cup water for at least an hour (use gluten free oats if needed)
1/2 cup raw almonds
1/2 cup raw cashews
5-6 medjool dates
1/2 cup dehydrated flaked coconut
1/4 cup cocoa powder
a pinch of salt (if your nuts are unsalted)
Add all the ingredients into a food processer and blend until the mixer forms a cohesive dough. It;s going to be a tad sticky, but if it seems to sticky to handle, refrigerate for a little bit so it’s easier to handle. (I have no problem handling right away)
Scoop and roll into balls and either leave them as is or squish them flat. Sprinkle with chopped nuts and coconut
Eat one or two right away, then stick the rest in fridge.
A ok to eat as breakfast, with lunch, at dinner, as as snack, a post workout protein, or when sitting on the couch and watching TV.
I am a mint lover, even when it grows at such a ferocious speed that it threatens the lives of all the plants near it. That just means that I have to be vilagent and harvest and use as much as I can.
This drink is a fantastic way to use up some of that mint. I have been making and drinking fresh, hot, mint tea almost ever night for the past few weeks, but this weekend was way to freaking hot to be doing hot tea. So using my little noggin, I figured I should just chill it and added some lime because mint and lime are oh so nice together. Now my favorite, and one of the most refreshing drinks after a long hot day.
And limes just happen to be on sale this week….
The stuff. A few stems of fresh mint, a couple juicy limes, and water. And if you want, a little sweetener of your choice. (I used a tiny bit of honey..not shown)
Start by placing the mint, leaves and stem, into a big pot. Take a wooden spoon and gently muddle the mint. Add in the water, making sure that all the mint is fully sumerged (stuff it down in the pot)
Now place pot on the stove and bring water to a boil. Once boiling, remove from heat and let sit for a few minutes.
After steeping for a few, pout tea into a big jug, straining out the mint leaves. Add any sweetener that you might like (just a little.. you can always add more later if you need it) and stick into fridge to cool, or just leave it on the counter if your want.
While you are waiting for the tea to cool, you might as well juice the limes (cause we need the lime juice)
After the tea is cool, add in the juice of the limes and mix/shake/stir around.
And thats it..
Serve in a cup with a few chunks of ice and a mint leaf garnish (not necessary but nice)
A nice tall glass of cold yumminess… Keeps one from melting completely in this crazy hot weather and keeps mint from killing everything around it.
Stay cool!
-C
4 full stems of fresh mint
6 cups water
2-3 limes (I used 2 1/2 which was almost a full cup of juice)
sweetener to taste (a tablespoon of honey is nice)
Place mint, stems and all, into a large pot large pot. With a wooden spoon or sme type of blunt object, lightly muddle the plant. Pour water over mint and place pot on the stove. Bring water to a boil, then remove and let cool for a few minutes. Pour the mint tea into a big jar, straining out the mint leaves..(A half gallon ball jar works perfectly) If using a sweetener, add it to the tea while it is still warm.( little goes a long way… you can alway add a little more later!) Place mint tea into the fridge to cool. When the tea is cool, juice you limes and dump the juice into the tea and mix or shake.
It is now done and ready to serve. Pour over ice (thats in a cup) and serve with a fresh mint leaf (if your fancy)
Maybe you, like me, went a did a little strawberry picking this past weekend. And maybe you, like me, pick so so many that now you have an overload of the most perfect, if not slightly too ripe strawberries staring at you, waiting to be eaten or, at the very least, cooked into some magical cake, pie, cookie, or whatever. But lets face it, its Monday and maybe we do not exactly feel the need (or have the time) to make a cake, pie, cookie or whatever tonight. So that leaves us with a crap load of strawberries that need to be dealt with.
And sure, we can freeze them, but maybe you, like me, already have a freezer full of other stuff. And just because we don’t want to bake a cake, pie, cookies, or whatever tonight, doesn’t mean we don’t want something amazingly tasty and fantastic.
So that brings us to this super easy, oh so pretty, and ever so tasty way to move those strawberries….. Stick them in the oven and roast them. So simple and really truly amazing. When strawberries are roasted, they turn so tender and fall apart and release all of their juices that turn into a sweet syrup. They become almost jam like, but the flavors are way better, more complex. And there is no need for added sugar or any other stuff because the flavors and natural sweetness of the roasted strawberries stand on their own.
A few ways to which you might want to use roasted strawberries that will make your life better: Dump onto ice cream, yogurt, or make a strawberry shortcake or a strawberry fool. Scoop onto a green salad, mix into a bowl of quinoa, marinate some tofu, or add to roasted veggies. You can mix into muffin batter, into oatmeal, or add to a layer cake. They make a fantastic PB and J and the syrup in seltzer is a tasty drink. You can pretty much use them for anything. But MY favorite way to consume these…a bowl, a little spoon, and my mouth. Nothing else needed.
And if you didn’t happen to go strawberry picking this weekend. It’s cool, just pick some up from the closest farm stand near you. You can tell all your anyone thats asks that you picked them yourself. (not a lie, just a stretch cause you did, in fact, pick them up yourself)
Yea for Monday and for roasted strawberries! (Or at least yea for strawberries.)
All you need…A big (or small) bowl of strawberries.
Rinse those pretties and place them on a parchment lines baking sheet. (don’t skip parchment… these suckers get super thick and juicy.)
Here is the thing. These strawberries are picked from the lovely farm I get my CSA from.(How badass is it that we have a PYO part of the share). They are not like super market berries that are extra firm with dirty unappealing green tops. These little organic lovelys have tender little green tops…. I eat them. If you do not wish to eat the greens, just top the berry off before roasting.
So the berries, stick them in the oven at 450 degrees and roast them for about 35-45 minutes (depending on the size of your berries)
Pull them out when they start to get dark and slightly charred and the juice is thick and bubbly.
And scrap the berries, juice and all, right into a jar.
Eat with anything, everything and with nothing at all.
Happy Monday
-C
strawberries of any quantity
Place strawberries, with or without tops (your preference) on a parchment lined baking sheet. Place in a 450 degree oven and roasted foe about 45 minutes or until the berries are soft, mushy, starting to charr and have lots of bubbly juice, . When done, remove from oven and let cooll for for about 5 minutes. Transfer berries, juice and all, into jar.
Eat right away or stick in fridge. Juices thicken up when cooled.
Keeps about a week in fridge, but I highly doubt it will last the night.
My contribution to last nights dinner at my sisters…. Freshy fresh veggies spring rolls.I had about 30 minutes between work and getting over to my sisters house to throw something together so it needed to be something fast, easy, and something I could make without going to the store. She was making the main course (some teriyaki situation and rice) so I was doing up the veggies.
I had just bought a package of spring roll wrappers…. Bingo! The perfect and logical choice. I grab the wrappers, a variety of veggies and after spending 12 of my 30 minutes trying to scrub the oil based paint off of my face and hands, I still managed to completely prepare, construct, and take pictures of these lovely tasty spring rolls. and get over to my sisters in time for dinner.
Impressed?
Damn right!
The stuff. Carrot, beet, asparagus, red cabbage, and kohlrabi, which all (except asparagus, which I just cut into thirds) got cut into matchstick sized pieces with my mandoiln. Then there are the rice spring roll wrappers that we need to make the veggies into rolls. Also a bit of red wine vinegar to drizzle onto the veggies for a little extra zing. And lastly, soy, fresh ginger, and a couple cloves of garlic for a spicy salty dipping sauce.Start by having everything set out and ready to assemble. Fill a large shallow dish or baking sheet with really warm water. Working with one at a time,place a rice wrapper into water and let sit for about 10 seconds or until the paper starts to soften. Remove from water and place on a damp surface (just splash a little water on the counter) Take a little bit of everything and and place on the lower middle part of the paper. Fold in the sides first, then tuck and roll the wrapper as tightly as you can without ripping the wrapper.
Repeat until you have used up all you veggies.For the dipping sauce. Finely grate ginger and garlic and add to soy sauce. Stir… and it’s done.Freshy, pretty and fantastically delicious. And for real, took about 8 minutes to make. (I even had enough time to wash the dishes before we left!)
I am so awesome!
Hump Day Pow!!!!!
-C
Fresh Veggies Spring Rolls
Makes 8-10 but can easily be increased or decreased to desired amount
8-1o rice spring roll papers
Splash of Red wine or rice vinegar
1/4 cup soy or tamari sauce
2 cloves of garlic
teaspoon freshly grated ginger
1 medium carrot
1 medium beet
1/4 head of purple cabbage
10 thin fresh asparagus
1 small kohlrabi
Note… I used the veggies that I had in the fridge at the moment. If you have a bunch of veggies but not these particular ones, use what you have. Pretty much all veggies taste good inside a spring roll!
Gather your veggies and prep by either using a mandolin, a grater, or some sick knife skills, and julienne, shred, or slice you veggies into thin match sticks. Once all the veggies are prepared, sprinkle a little vinegar over the top.
For the rolls…Grab a large shallow vessel (a rimmed baking sheet works great) and add in warm water. Working one at a time, place the wrapper into the water for about 10 seconds or until the wrapper starts to soften. Remove and spread onto a clean, damp work surface. Gather a bit of each veggie that you are adding and place towards the bottom middle of the wrapper. Now fold the sides in over the pile of veggies. Then with the side closest to you, tuck and roll wrapper away from you, trying to keep it tight, but not to tight that it rips.. (Hopefully that makes since.) Place finished rolls onto a damp surface to keep from sticking and if not serving right away, drape with a damp towel or paper towel to keep from drying out.
For the soy ginger dipping sauce. Add grated ginger, minced garlic, and soy into a bowl and mix together. Serve with spring rolls.
Eat one, two, or a plateful. It’s nice to share but not a necessity.
Happy Cinco de Mayo! And what better day to share my version of my oh so fantastic pico de gallo, or as I call it, super freshy salsa.
I love me some freshy salsa, It makes me oh so happy.
I make this stuff all the time, especially during the warmer months and tomato season. I usually make a batch right before a meal, just enough to eat right away, but sometimes I ‘ll make a big batched of it, thinking I’ll save some for the next day. It never makes it past the second day in the fridge because it’s just one of those things that when you see it, you want to eat it. Weird but true. And it’s totally ok to do so cause it’s basically eating a big bowl of healthy goodness, so eat on!
It takes no time to prepare, tastes super refreshing, goes on everything, and it’s just so freaking tasty. You can eat it with tacos and chips (the mister) or like me, I like to add it to everything; salads, popcorn, or directly in my mouth.
Make one batch, make 4, it doesn’t matter cause you will eat it all, and need to make more.
The stuff. Chopped Roma tomatoes, chopped red onion, a diced jalapeño, lemon, a bunch of cilantro, and salt.
Stick all the chopped stuff into a jar and add in the juice of the lemon. Roughly chop the cilantro and add that on in with a sprinkle of salt.
Mix it up….And thats it. Now eat… with something or without.
A spoon out of the jar is one of my favorite ways to go at it.
Happy Cinco de Mayo, Happy Tuesday!
-C
Pico de Gallo… Freshy Salsa
4-5 Roma Tomatoes
1 small red onion
1-2 jalapeños (Depending on heat preference)
1 lemon or lime
salt
1 bunch of cilantro (don’t use it if you don’t like it)
Chop tomatoes and onion and toss into a bowl or jar. Cut seeds from jalapeño(s) and dice up into little bitty pieces and add that to the tomato and onion. Roughly chop the cilantro and toss that in as well with the juice of the lemon or lime. Sprinkle with salt. Stir, let sit for a minutes, taste and then add more salt if needed.
Eat right away or make ahead and store in the fridge until ready to use.
Goes great with corn chips, tacos, toss onto salads or eat as is standing in front of the fridge. If someone is judging you, they are stupid.
Chomp Chomp Chomp… The sound I make as I eat this freaking fantastic crunchy granola. You know it’s good when the person sitting next to you is annoyed by the sound of you face while eating. I eat a lot of crunchy stuff. And I am pretty sure I annoy the mister a lot.
Oh well, he will live, and he eats his fair share of annoying stuff too so we can just call it even.
So granola. I love it. I make a batch every few weeks or so, and I usually make it just for me. (I almost never make things just for me) I like to keep it simple but flavorful. A tad sweet, but not really, and crunchy, without the oily fried taste. I also like a variety of sizes, some big clusters and some small pieces.
This granola fits the bill perfectly. Made with 5 ingredients, no oil, and the perfect sweetness level. It’s one of my favorite flavors yet. And I know I said I made it just for me, but the mister really liked it too. (I can’t help sharing)
The simplest of stuff. 1 smashed banana, a cup of pureed butternut squash, Vietnamese cinnamon*, honey, and old fashion oats. (and a dash of salt, not shown)
*Note. I only ever use Vietnamese cinnamon because once I start using it, regular old cinnamon just won’t cut it anymore. It is a bit sweeter and a lot more spicy. If you don’t have it or don’t want to use it, use regular cinnamon and add in 1/2 a teaspoon of all spice.Toss the cinnamon and salt with the oats. Mix together the banana, squash and the sweetener and combine with the oats until full incorporated.
Another note. Because I made this granola for me and no body else, I actually omitted the honey (I think that banana abs squash make it sweet enough) But if I was making this for lets say, the mister, or a friend, I would use add a bit. The sweetness level and sweetener of choice is up to you, but 2-3 teaspoons of honey or maple syrup is usually sweet enough for people.
Dump the mixture on a parchment lined baking sheet and give it a little pat, you know, to settle all the bit and pieces together, all cozy and evenly spread out. Now stick into a preheated oven and after about 20 minutes, take out of oven and give the granola a toss, breaking apart any super big chunks or overly wet pieces. Put back into oven for another 20 minutes. (I like my granola super crispy crunchy so I cook it a little longer, like 30 more minutes)And when you are happy with the crunchiness of you granola, remove from oven and let cool, trying not to eat all of it while it sit’s on the counter looking all pretty and smelling like happiness.
Grab a bowl, stick the rest into a jar with a lid, hide it from others, and chomp chomp chomp away!
-C
Banana Butternut Granola
3 cups old fashion oats (use gluten free oats if needed)
1 ripe banana, mashed
1 cup butternut squash puree (can use canned)
2 tablespoons Vietnamese cinnamon (or 2 tablespoons regular cinnamon and 1/2 teaspoon of allspice)
1-3 tablespoon honey or sweetener of choice (use greater amount for sweeter)
dash of salt
Preheat oven to 375
In a large bowl, mix together oats, cinnamon and salt. Mix the mashed banana, squash, and sweetener of choice together and combine with the oats. If the mixture seems really dry, add in a very small splash of water to loosen just enough to mix.
Dump mixture onto a parchment lined baking sheet and evenly disperse the mixture. Give it a kind of smoosh to compact the oats and to make sure all its all the same thickness on the pan.
Stick into oven for 20 minutes. Remove and give granola a little toss, maybe breaking apart any really big chunks (unless you like really big chunks) and put back into oven for another 20 minutes. (30 for a crunchier granola) Remove from oven and let cool on baking sheet before storing in an air tight container. If you find that it is not as crunchy as you would like or is a few days old and lost some of its crunchiness, just stick it back into the oven for a few minutes to re crunch.
Eat as is, as a cold cereal, dip in peanut butter, add to popcorn or whatever way you want to eat it. No utensil required.
I swear I didn’t plan this, but today is officially Pi Day! Pi being the mathematical constant of the ratio of the circumference of a circle to its dimeter (did I say that right?) 3.1415…… And today’s date is 3.14.15. Whoa…I guess that means that this pie was meant to be.
But the real reason I made this pie was for a surprise treat for the mister. He left for a couple of days and me being the super assume lady love of his, thought it would be nice for him to come home to his favorite dessert.. plain old rhubarb pie.( I know, I be the best) And it didn’t hurt that when I went to the grocery store, there was a big old pile of fresh, gorgeous rhubarb staring me right in the face, and on sale to boot.
The funniest thing. Me and the mister have been together for a very long time (12+ years….we started dating in high school, so I am not that old!) and I have known that his favorite dessert is plain rhubarb pie for ever. Every time we have one of our food discussions about our favorite foods, (which happens more than it should and usually consists of me running my mouth and him grunting or nodding once in a while) rhubarb pie always comes up. He even talks about the old lady who used to make him rhubarb pie for mowing her lawn. And guess what… I have never once made him a plain rhubarb pie. Why? Honestly, I have no idea. Maybe I secretly think I was going to screw up his one favorite dessert, or maybe I never quit had enough rhubarb for a pie, or maybe I am really just an awful lady. But for whatever reason, it doesn’t matter anymore because I finally made him a plain rhubarb pie.
The stuff for the makings of pie… One single pie crust, flour, sugar and rhubarb. I mean, come on, this might be one of the simplest pies ever.
Note…The first thing the mister said to me when he saw the pie was. “Where is the top crust? My response what “Screw you ass face” but then chuckled. This pie would be great with a top crust, but I was thinking how pretty it would be without it. And honestly, I only made a single crust. What I am saying is.. make a double crust if you want a top.
The chilled pie crust gets rolled out, placed into a pie plate, trimmed and made all pretty. The bottom is sprinkled with a 1/4 cup of sugar and stuck back into the fridge while the oven preheats to 350. Now is a good time to dice the rhubarb into inchish chunks. Once the oven is preheated, remove crust from fridge and add in the diced rhubarb.
The remaining sugar and flour get mixed together in a bowl and dump on top of the rhubarb. Give it a tiny toss with you fingers just to get some of the mixture to sink down a little. (Don’t worry, the filling will be perfect when you do it like this) I also cut up the pie crust trimmings and placed on top… not necessary, but looks pretty and is a good use of the scraps.
Now cover the entire pie with tinfoil. Cut and x through the middle and fold foil back to expose the filling but keep the crust covered. (so much easier than trying to squish strips of foil together..you know what I am talking about)
And then the pie is ready to be baked.
In the oven for 5o minutes with the foil, then 10 or so minutes without to finish.And then you take it from the oven and marvel at the beauty.
I am now truly the best super awesome lady love. I should get a freaking crown but would settle for a stand mixer or blender as a reward instead.
Important…..Let the pie cool completely (or just about) before cutting.The filling needs a bit of time to set.
Happy Saturday, Happy Weekend, Happy PI Pie Day!!!
-C
Rhubarb Pie
Single Pie Crust.. Recipe here
4-5 large Rhubarb Stocks (4 cups chopped)
1 1/4 cups white sugar
a hefty 1/3 cup flour
Make you pie crust.. and make sure it’s chilled!
Roll our pie crust and place in pie plate. Trim and make edge all nice and pretty. Add 1/4 cup of sugar to the bottom and stick back in the fridge to relax while you get the other stuff together.
Preheat oven to 350
Wash and dice rhubarb into inchish chunks. In a bowl, mix together 1 cup of sugar and the flour. Once the oven is preheated, remove crust from fridge and fill crust with the chopped up rhubarb. Now dump the sugar, flour mixture on top, slightly tossing it around with your fingers. Cover entire pie with tin foil and with a knife, cut an x through the middle of the foil. Fold foil back to expose the center of the pie, but keep the crust covered. Stick into oven. Bake for about an hour, removing the tin foil after about 50 minutes. Pie is done when the crust is golden brown and a fork or knife stuck into the middle of pie comes out with a thick jam like sauciness.
Let pie cool and set for a bit.
Slice. Serve on a plate with an eating utensil and maybe a scoop of vanilla bean ice cream. Lick plate clean.

THE LOVELY CRAZY
September 19, 2015 by maximios • Blog
Holy shit is it hot out. My brain is all fizzy, my hair is all frizzy, and my over all being is just blah. I am not a fan of super hot weather (as some of you may know) and am getting more pissy as the days go by and I continue to be a sweaty mess. I don’t want to feel like a big wet slob, I want to feel fresh and clean and wear clothes that are not drenched in sweat. I know, bitch, bitch, bitch, but seriously. Even the world around me is wilting, and in the nice, colorful fall foliage kind of way. It’s all crispy and brown. The garden is barely holding on, the flowers are shriveling in the ground, and a few plants are just plan dead. It’s just too hot.
I think that only plus side of this past week of hot crap weather are these popsicles that I made. They were actually suppose to be a treat for the littles, but guess what, me and the mr ate them and didn’t share, and no, I feel zero bad about it. They were so good, so refreshing, so cold(if only for a minute) and just so needed. A few minute reprieve from being miserably hot. And bonus, a great use of all the watermelon and tomatoes that I have taking over the countertops (I have so much watermelon and tomatoes)
And really, these probably (better freaking be) the last batch of popsicles for the summer so I think I am going to make another batch today, eat them, savor the flavors of summer, and move on from there.
. Maybe I’ll even share them this time.
The stuff. Some watermelon*, a tomato, a handful of basil, and a lime.
*My watermelon had seeds, but you can use seedless. I also removed the green skin, but kept on as much rind as I could, although this particulate melon had very little white rind.
Dump the melon, tomato (cut in a few pieces, the juice of the lime and the basil into a blender. If your melon has seed, don’t worry about removing them.
The stuff all blended up.
. This step is more necessary if you melon is seeded, straining the mixture pretty much caught most of the seed chunks. You can skip this if your melon is seedless.
Now pour the juice into your molds and stick into freezer to freeze.
After about 2 ish hours, remove and stick the sticks into the semi harder pops.
And a few more hours later……Frozen goodness.
And pop one of those suckers out of the mold and savor every frozen delicious bite.
Happy Tuesday… DON’T MELT!
-C
Make six 3.5 oz popsicles
Place all ingredients into blender and blend until smooth. Strain mixture through a fine strainer into a bowl or jar and pour into popsicle molds.
Place in freezer for a few hours. About 2-3 hours in the freezer, take them out and stick in sticks (or fallow you popsicle molds instructions) Place back into freezer
Once completely frozen, remove from molds and eat with your mouth.
FRIDAY YEAH YEAH!!!!
And for your Friday, I made these awesome little raw/ vegan/ gluten free cookies.
Now wait a minute. Don’t let all the labels of what is not in these cookies scare you away. Just focus on all the stuff that these cookies are made of. Almonds, Cashews, Coconut, Cocoa, Oatmeal. They are cookies made with lots of good yummy stuff that just happened to be enjoyed by those with specific food diets as well as those who eat anything. A cookie for all! See, don’t they sound excellent? Yes, yes they do. And they are good. So, so, good. Even the mr. is into them. And he is far from being raw/vegan/ gluten free.
And because these cookies are made with all sorts of good for you stuff (lots of proteins, good healthy fats, and complex carbs) you can pretty much feel zero percent guilt eating them. They a are a no joke, healthy, energy packed cookies of goodness. A fantastic way to start the morning, eat with lunch, as dessert, post work out, or eat as a late night snack. (Just don’t eat them all at once)
Now go for it!
The raw stuff. A cup of old fashion rolled oat that have been soaking in water for about an hour. Almonds(which I spent 20 minutes deshelling) cashews, dehydrated coconut flakes, some cocoa powder and a few medjool date. If your nuts are unsalted, add a pinch of salt too.
Dump everything into a food processor. BUT WAIT! Make sure to remove the pits from the dates)I have broken a blade in the past form a date pit)
Blend unit combined and a kind of rough dough is formed. It will be a little sticky. If it;s to sticky to handle, place into the fridge for a few minutes to set up.
Now take blobs of mixture and roll into balls
And you could totally leave them as balls… you can even play with your balls….
But I think they look nicer squished flat and topped with pieces of nuts and coconut. They look almost fancy, if I do say so myself.
Now have yourself a cookie, and place the rest in the fridge (they get harder and, if you can imagine, taste even better after a few hours of cold)
Freak Yeah FRIDAY! Do fu stuff!
-C
Makes 15 normal sized cookies (you can make more or less, depending on the ball size)
Add all the ingredients into a food processer and blend until the mixer forms a cohesive dough. It;s going to be a tad sticky, but if it seems to sticky to handle, refrigerate for a little bit so it’s easier to handle. (I have no problem handling right away)
Scoop and roll into balls and either leave them as is or squish them flat. Sprinkle with chopped nuts and coconut
Eat one or two right away, then stick the rest in fridge.
A ok to eat as breakfast, with lunch, at dinner, as as snack, a post workout protein, or when sitting on the couch and watching TV.
I am a mint lover, even when it grows at such a ferocious speed that it threatens the lives of all the plants near it. That just means that I have to be vilagent and harvest and use as much as I can.
This drink is a fantastic way to use up some of that mint. I have been making and drinking fresh, hot, mint tea almost ever night for the past few weeks, but this weekend was way to freaking hot to be doing hot tea. So using my little noggin, I figured I should just chill it and added some lime because mint and lime are oh so nice together. Now my favorite, and one of the most refreshing drinks after a long hot day.
And limes just happen to be on sale this week….
The stuff. A few stems of fresh mint, a couple juicy limes, and water. And if you want, a little sweetener of your choice. (I used a tiny bit of honey..not shown)
Start by placing the mint, leaves and stem, into a big pot. Take a wooden spoon and gently muddle the mint. Add in the water, making sure that all the mint is fully sumerged (stuff it down in the pot)
Now place pot on the stove and bring water to a boil. Once boiling, remove from heat and let sit for a few minutes.
After steeping for a few, pout tea into a big jug, straining out the mint leaves. Add any sweetener that you might like (just a little.. you can always add more later if you need it) and stick into fridge to cool, or just leave it on the counter if your want.
While you are waiting for the tea to cool, you might as well juice the limes (cause we need the lime juice)
After the tea is cool, add in the juice of the limes and mix/shake/stir around.
And thats it..
Serve in a cup with a few chunks of ice and a mint leaf garnish (not necessary but nice)
A nice tall glass of cold yumminess… Keeps one from melting completely in this crazy hot weather and keeps mint from killing everything around it.
Stay cool!
-C
Place mint, stems and all, into a large pot large pot. With a wooden spoon or sme type of blunt object, lightly muddle the plant. Pour water over mint and place pot on the stove. Bring water to a boil, then remove and let cool for a few minutes. Pour the mint tea into a big jar, straining out the mint leaves..(A half gallon ball jar works perfectly) If using a sweetener, add it to the tea while it is still warm.( little goes a long way… you can alway add a little more later!) Place mint tea into the fridge to cool. When the tea is cool, juice you limes and dump the juice into the tea and mix or shake.
It is now done and ready to serve. Pour over ice (thats in a cup) and serve with a fresh mint leaf (if your fancy)
Maybe you, like me, went a did a little strawberry picking this past weekend. And maybe you, like me, pick so so many that now you have an overload of the most perfect, if not slightly too ripe strawberries staring at you, waiting to be eaten or, at the very least, cooked into some magical cake, pie, cookie, or whatever. But lets face it, its Monday and maybe we do not exactly feel the need (or have the time) to make a cake, pie, cookie or whatever tonight. So that leaves us with a crap load of strawberries that need to be dealt with.
And sure, we can freeze them, but maybe you, like me, already have a freezer full of other stuff. And just because we don’t want to bake a cake, pie, cookies, or whatever tonight, doesn’t mean we don’t want something amazingly tasty and fantastic.
So that brings us to this super easy, oh so pretty, and ever so tasty way to move those strawberries….. Stick them in the oven and roast them. So simple and really truly amazing. When strawberries are roasted, they turn so tender and fall apart and release all of their juices that turn into a sweet syrup. They become almost jam like, but the flavors are way better, more complex. And there is no need for added sugar or any other stuff because the flavors and natural sweetness of the roasted strawberries stand on their own.
A few ways to which you might want to use roasted strawberries that will make your life better: Dump onto ice cream, yogurt, or make a strawberry shortcake or a strawberry fool. Scoop onto a green salad, mix into a bowl of quinoa, marinate some tofu, or add to roasted veggies. You can mix into muffin batter, into oatmeal, or add to a layer cake. They make a fantastic PB and J and the syrup in seltzer is a tasty drink. You can pretty much use them for anything. But MY favorite way to consume these…a bowl, a little spoon, and my mouth. Nothing else needed.
And if you didn’t happen to go strawberry picking this weekend. It’s cool, just pick some up from the closest farm stand near you. You can tell all your anyone thats asks that you picked them yourself. (not a lie, just a stretch cause you did, in fact, pick them up yourself)
Yea for Monday and for roasted strawberries! (Or at least yea for strawberries.)
All you need…A big (or small) bowl of strawberries.
Rinse those pretties and place them on a parchment lines baking sheet. (don’t skip parchment… these suckers get super thick and juicy.)
Here is the thing. These strawberries are picked from the lovely farm I get my CSA from.(How badass is it that we have a PYO part of the share). They are not like super market berries that are extra firm with dirty unappealing green tops. These little organic lovelys have tender little green tops…. I eat them. If you do not wish to eat the greens, just top the berry off before roasting.
So the berries, stick them in the oven at 450 degrees and roast them for about 35-45 minutes (depending on the size of your berries)
Pull them out when they start to get dark and slightly charred and the juice is thick and bubbly.
And scrap the berries, juice and all, right into a jar.
Eat with anything, everything and with nothing at all.
Happy Monday
-C
Place strawberries, with or without tops (your preference) on a parchment lined baking sheet. Place in a 450 degree oven and roasted foe about 45 minutes or until the berries are soft, mushy, starting to charr and have lots of bubbly juice, . When done, remove from oven and let cooll for for about 5 minutes. Transfer berries, juice and all, into jar.
Eat right away or stick in fridge. Juices thicken up when cooled.
Keeps about a week in fridge, but I highly doubt it will last the night.
My contribution to last nights dinner at my sisters…. Freshy fresh veggies spring rolls.I had about 30 minutes between work and getting over to my sisters house to throw something together so it needed to be something fast, easy, and something I could make without going to the store. She was making the main course (some teriyaki situation and rice) so I was doing up the veggies.
I had just bought a package of spring roll wrappers…. Bingo! The perfect and logical choice. I grab the wrappers, a variety of veggies and after spending 12 of my 30 minutes trying to scrub the oil based paint off of my face and hands, I still managed to completely prepare, construct, and take pictures of these lovely tasty spring rolls. and get over to my sisters in time for dinner.
Impressed?
Damn right!
The stuff. Carrot, beet, asparagus, red cabbage, and kohlrabi, which all (except asparagus, which I just cut into thirds) got cut into matchstick sized pieces with my mandoiln. Then there are the rice spring roll wrappers that we need to make the veggies into rolls. Also a bit of red wine vinegar to drizzle onto the veggies for a little extra zing. And lastly, soy, fresh ginger, and a couple cloves of garlic for a spicy salty dipping sauce.Start by having everything set out and ready to assemble. Fill a large shallow dish or baking sheet with really warm water. Working with one at a time,place a rice wrapper into water and let sit for about 10 seconds or until the paper starts to soften. Remove from water and place on a damp surface (just splash a little water on the counter) Take a little bit of everything and and place on the lower middle part of the paper. Fold in the sides first, then tuck and roll the wrapper as tightly as you can without ripping the wrapper.
Repeat until you have used up all you veggies.For the dipping sauce. Finely grate ginger and garlic and add to soy sauce. Stir… and it’s done.Freshy, pretty and fantastically delicious. And for real, took about 8 minutes to make. (I even had enough time to wash the dishes before we left!)
I am so awesome!
Hump Day Pow!!!!!
-C
Fresh Veggies Spring Rolls
Makes 8-10 but can easily be increased or decreased to desired amount
Note… I used the veggies that I had in the fridge at the moment. If you have a bunch of veggies but not these particular ones, use what you have. Pretty much all veggies taste good inside a spring roll!
Gather your veggies and prep by either using a mandolin, a grater, or some sick knife skills, and julienne, shred, or slice you veggies into thin match sticks. Once all the veggies are prepared, sprinkle a little vinegar over the top.
For the rolls…Grab a large shallow vessel (a rimmed baking sheet works great) and add in warm water. Working one at a time, place the wrapper into the water for about 10 seconds or until the wrapper starts to soften. Remove and spread onto a clean, damp work surface. Gather a bit of each veggie that you are adding and place towards the bottom middle of the wrapper. Now fold the sides in over the pile of veggies. Then with the side closest to you, tuck and roll wrapper away from you, trying to keep it tight, but not to tight that it rips.. (Hopefully that makes since.) Place finished rolls onto a damp surface to keep from sticking and if not serving right away, drape with a damp towel or paper towel to keep from drying out.
For the soy ginger dipping sauce. Add grated ginger, minced garlic, and soy into a bowl and mix together. Serve with spring rolls.
Eat one, two, or a plateful. It’s nice to share but not a necessity.
I love me some freshy salsa, It makes me oh so happy.
I make this stuff all the time, especially during the warmer months and tomato season. I usually make a batch right before a meal, just enough to eat right away, but sometimes I ‘ll make a big batched of it, thinking I’ll save some for the next day. It never makes it past the second day in the fridge because it’s just one of those things that when you see it, you want to eat it. Weird but true. And it’s totally ok to do so cause it’s basically eating a big bowl of healthy goodness, so eat on!
It takes no time to prepare, tastes super refreshing, goes on everything, and it’s just so freaking tasty. You can eat it with tacos and chips (the mister) or like me, I like to add it to everything; salads, popcorn, or directly in my mouth.
Make one batch, make 4, it doesn’t matter cause you will eat it all, and need to make more.
Stick all the chopped stuff into a jar and add in the juice of the lemon. Roughly chop the cilantro and add that on in with a sprinkle of salt.
Mix it up….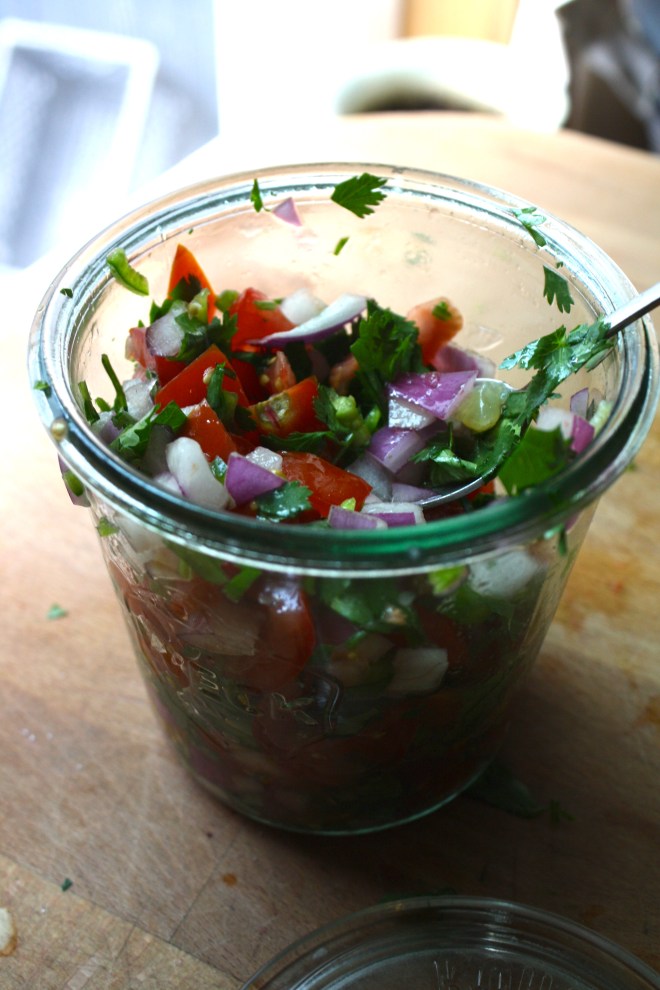 And thats it. Now eat… with something or without.
A spoon out of the jar is one of my favorite ways to go at it.
Happy Cinco de Mayo, Happy Tuesday!
-C
Pico de Gallo… Freshy Salsa
Chop tomatoes and onion and toss into a bowl or jar. Cut seeds from jalapeño(s) and dice up into little bitty pieces and add that to the tomato and onion. Roughly chop the cilantro and toss that in as well with the juice of the lemon or lime. Sprinkle with salt. Stir, let sit for a minutes, taste and then add more salt if needed.
Eat right away or make ahead and store in the fridge until ready to use.
Goes great with corn chips, tacos, toss onto salads or eat as is standing in front of the fridge. If someone is judging you, they are stupid.
Oh well, he will live, and he eats his fair share of annoying stuff too so we can just call it even.
So granola. I love it. I make a batch every few weeks or so, and I usually make it just for me. (I almost never make things just for me) I like to keep it simple but flavorful. A tad sweet, but not really, and crunchy, without the oily fried taste. I also like a variety of sizes, some big clusters and some small pieces.
This granola fits the bill perfectly. Made with 5 ingredients, no oil, and the perfect sweetness level. It’s one of my favorite flavors yet. And I know I said I made it just for me, but the mister really liked it too. (I can’t help sharing)
*Note. I only ever use Vietnamese cinnamon because once I start using it, regular old cinnamon just won’t cut it anymore. It is a bit sweeter and a lot more spicy. If you don’t have it or don’t want to use it, use regular cinnamon and add in 1/2 a teaspoon of all spice.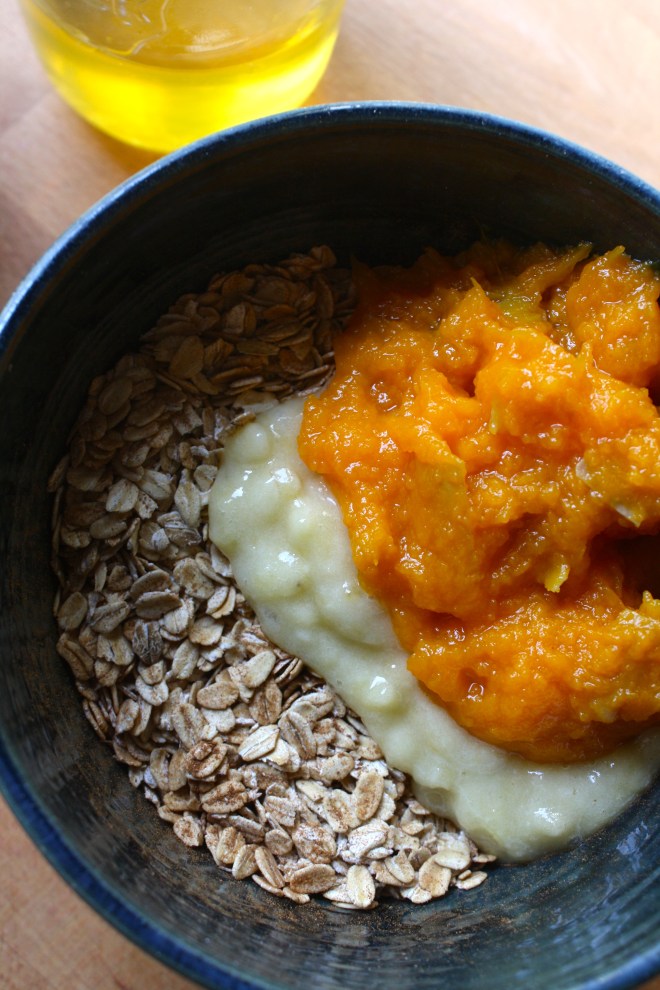 Toss the cinnamon and salt with the oats. Mix together the banana, squash and the sweetener and combine with the oats until full incorporated.
Another note. Because I made this granola for me and no body else, I actually omitted the honey (I think that banana abs squash make it sweet enough) But if I was making this for lets say, the mister, or a friend, I would use add a bit. The sweetness level and sweetener of choice is up to you, but 2-3 teaspoons of honey or maple syrup is usually sweet enough for people.
Grab a bowl, stick the rest into a jar with a lid, hide it from others, and chomp chomp chomp away!
-C
Banana Butternut Granola
Preheat oven to 375
In a large bowl, mix together oats, cinnamon and salt. Mix the mashed banana, squash, and sweetener of choice together and combine with the oats. If the mixture seems really dry, add in a very small splash of water to loosen just enough to mix.
Dump mixture onto a parchment lined baking sheet and evenly disperse the mixture. Give it a kind of smoosh to compact the oats and to make sure all its all the same thickness on the pan.
Stick into oven for 20 minutes. Remove and give granola a little toss, maybe breaking apart any really big chunks (unless you like really big chunks) and put back into oven for another 20 minutes. (30 for a crunchier granola) Remove from oven and let cool on baking sheet before storing in an air tight container. If you find that it is not as crunchy as you would like or is a few days old and lost some of its crunchiness, just stick it back into the oven for a few minutes to re crunch.
Eat as is, as a cold cereal, dip in peanut butter, add to popcorn or whatever way you want to eat it. No utensil required.
But the real reason I made this pie was for a surprise treat for the mister. He left for a couple of days and me being the super assume lady love of his, thought it would be nice for him to come home to his favorite dessert.. plain old rhubarb pie.( I know, I be the best) And it didn’t hurt that when I went to the grocery store, there was a big old pile of fresh, gorgeous rhubarb staring me right in the face, and on sale to boot.
The funniest thing. Me and the mister have been together for a very long time (12+ years….we started dating in high school, so I am not that old!) and I have known that his favorite dessert is plain rhubarb pie for ever. Every time we have one of our food discussions about our favorite foods, (which happens more than it should and usually consists of me running my mouth and him grunting or nodding once in a while) rhubarb pie always comes up. He even talks about the old lady who used to make him rhubarb pie for mowing her lawn. And guess what… I have never once made him a plain rhubarb pie. Why? Honestly, I have no idea. Maybe I secretly think I was going to screw up his one favorite dessert, or maybe I never quit had enough rhubarb for a pie, or maybe I am really just an awful lady. But for whatever reason, it doesn’t matter anymore because I finally made him a plain rhubarb pie.
Note…The first thing the mister said to me when he saw the pie was. “Where is the top crust? My response what “Screw you ass face” but then chuckled. This pie would be great with a top crust, but I was thinking how pretty it would be without it. And honestly, I only made a single crust. What I am saying is.. make a double crust if you want a top.
Now cover the entire pie with tinfoil. Cut and x through the middle and fold foil back to expose the filling but keep the crust covered. (so much easier than trying to squish strips of foil together..you know what I am talking about)
And then the pie is ready to be baked.
In the oven for 5o minutes with the foil, then 10 or so minutes without to finish.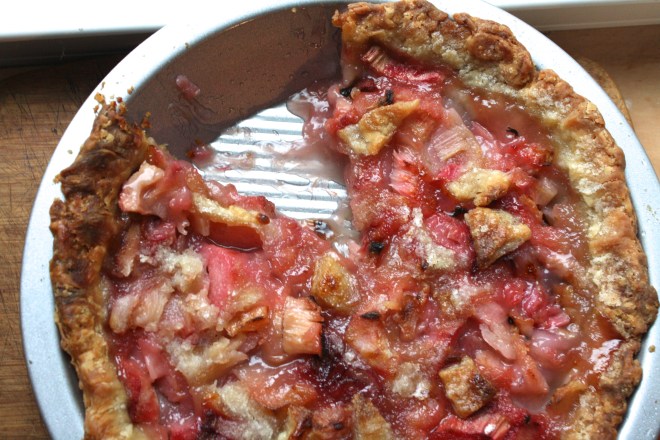 And then you take it from the oven and marvel at the beauty.
I am now truly the best super awesome lady love. I should get a freaking crown but would settle for a stand mixer or blender as a reward instead.
Important…..Let the pie cool completely (or just about) before cutting.The filling needs a bit of time to set.
Happy Saturday, Happy Weekend, Happy PI Pie Day!!!
-C
Rhubarb Pie
Make you pie crust.. and make sure it’s chilled!
Roll our pie crust and place in pie plate. Trim and make edge all nice and pretty. Add 1/4 cup of sugar to the bottom and stick back in the fridge to relax while you get the other stuff together.
Preheat oven to 350
Wash and dice rhubarb into inchish chunks. In a bowl, mix together 1 cup of sugar and the flour. Once the oven is preheated, remove crust from fridge and fill crust with the chopped up rhubarb. Now dump the sugar, flour mixture on top, slightly tossing it around with your fingers. Cover entire pie with tin foil and with a knife, cut an x through the middle of the foil. Fold foil back to expose the center of the pie, but keep the crust covered. Stick into oven. Bake for about an hour, removing the tin foil after about 50 minutes. Pie is done when the crust is golden brown and a fork or knife stuck into the middle of pie comes out with a thick jam like sauciness.
Let pie cool and set for a bit.
Slice. Serve on a plate with an eating utensil and maybe a scoop of vanilla bean ice cream. Lick plate clean.