Are you sizzling? Is that pool of water next to you , in fact, your own sweat?
Yeah, I feel you…..stupid heat wave.
During these long extended periods of heat and humidity, my body starts to revolt. I get bitchy, by skin get itchy, my head goes foggy, my stomach starts to refuse food. and I generally just feel like crap. I love the summer, but I am not, by any means, a hot, high humidity person.
So during this nasty bout of heat, I do what I can to find comfort. And one of my comforts is watermelon. I am pretty sure that watermelon is a magical fruit. A giant green oblong ball that when cracked open is the brightest, sweetest bright pink fruit.. I mean, thats pretty f ing magical. It can make anything better, and is one of the few things that I want to eat when its a million degrees outside without barfing.
Watermelon is my official heatwave food. Watermelon all day long (Is it bad that I could literally eat an entire watermelon all to my face, in one sitting? ) And because I am me, I like to spice it up a bit and slather a big glob of basil pesto to the melon…. and that makes me happy. Plus it makes the fact that I am eating nothing but melon seem a little more substantial.
Do you have a heatwave food? If not, try this….It will be your food.
The stuff. A big hunk of watermelon, basil, a lemon, olive oil and salt.
Stick the basil, the juice of the lemon, and a pinch of salt into a blender. Turn on and blend, adding just a tad bit of olive oil until a nice green pesto is made.
Prepare your melon. Remove rinds if you want and save for later.. (seriously, we can make gazpacho with it) and cut into inch thick chunks.
And now if your feeling it, stick a skillet on the stove and preheat on medium high. Once heated, place watermelon chunks on hot skillet and sear each side for about 3-5 minutes per side.
If you want to go fresh, just skip searing it. Me, I do a bowl of both.
And now slather the melon with the pesto
And go to town
Stay cool my friends!
-C
Watermelon
a bunch of basil
a lemon
salt
olive oil
Place basil, a pinch of salt and the juice of the lemon into a blender. Turn on and blend, adding in a drizzle of olive oil until pesto forms.
Preheat a lightly oiled skillet (or a grill) on medium high heat. Take your watermelon and remove rinds (save for later) and cut into inch chunks.* When heated, add the watermelon. LEt each side sear for 3-5 minutes, or until caramelized. Tarnsfrer to a bowl.
*Note. The seared melon is fantastic cooked then cooled. Also, I know some people blot out the juice before grilling, but I think that is a waste and I find unnecessary, but if you don’t want a juicy piece of cooke melon, by all means, blot out the juice..
Or if you don’t want to cook it, don’t
And lastly, toss in a big giant scoop of pesto
Now eat… eat eat eat.
I have been meaning to make this jam for a while now. I’ll buy a bunch of jalapeños, then slowly, before I get to cooking them down, end up eating them all. But not today, and the rewards are great, Fresh jalapeño jam. So much potential for the greatest of things (I am thinking mango jalapeño sorbet… no, I am making jalapeño mango sorbet) And if you, like me are a jalapeño fan, this is going to make your life amazing. You will find yourself jamming up everything, or maybe just eating it with a spoon.
Whatever you want to do with it, just make it.
Honey and jalapeños.. All you need, well a little salt and water too, but that’s it.
What you need to do is remove the stems,, most of the ribs and half of the seeds removed. (You could remove all or none of the seeds depending on you heat preference) Chop the peppers into small chunks, toss into a pot, sprinkle with a bit of salt, add in a splash of water. Place the pot on medium heat. Top it with a lid, and give the peppers a good stir every few minutes. While the peppers are cooking, you want to make sure the bottom isn’t sticking and buringin. If that starts to happen, just turn the heat down a bit and add in a little splash more of water.
After about 20 minutes, the peppers are fully cooked and falling apart. The liquid is cooked down and the peppers are starting to caramelize on the bottom of the pan. When that happened, remove the pot from heat.
Now you can either blend the peppers, mash the peppers with a fork, or leave it chunky. Thats a choice Ill leave to you. ( I like to blend, but keep some chunks)
And drizzle in a bit o honey. As little or as much as you like.
And scoop into a jar. Eat the jam on anything you want. (I found myself eating it with a spoon)
Keep it Real!
-C
Makes about 1 1/2 cups of jam
10 large jalapeño peppers
a pinch of salt
About 1 tablespoon of honey, but add more if you like (And if you want to keep it vegan, use agave or sugar)
Wash, remove ribs and most seeds (the more seeds you leave the hotter it will be) and dice jalapenos into small chunks. Place in a pot with a few splashes of water and a sprinkle of salt. Turn on medium heat and cover, stirring every few minutes. If the peppers seem to be sticking o the pot and burning, turn heat down and add another splash of water. After about 20 minutes, the peppers should be really tender and falling apart. The liquid should be completely cooked out and the peppers will start to caramelized at the bottom of the pot. When that starts to happen, remove from heat. Now either mash with a fork, blend with a hand blender, or leave superr chunky. Drizzle in honey (or sweetener) and stir.
Eat right away or stick in a jar and store in the fridge for up to a week (It won’t last that long)
I am a year round maker and consumer of soup.
With that being said, the nature of my soups change seasonally. My summertime soups are usually on the lighter side, made with the fresh bounty of the season, and spiced more on the light and floral side, opposed to the really deep and warm spices that I use all winter long,
This corn chowder is made just right. It had the perfect balance of hearty and creamy from the potatoes and use of pureed onion cream, but still light and refreshing from the sweet fresh corn and the lemony fresh thyme. It is for sure a great summertime soup (chowder) Even the Mr. was even really into it, and he claims he doesn’t like corn. (I say bullshit to that.. he eats corn all the time)
Now to chowder!
The Stuff. Some super fresh corn on the cob, a couple onions, a few chopped up potatoes and a chopped up carrot. Then we have a little oil, a lemon, dried thyme and salt and pepper.
To start, take an onion, chop it up, and toss into a large heavy pot with a little olive oil and a sprinkle of salt. Stick pot on stove on medium heat and cook until onions are soft and traslutcent. When the onions are done, remove and add to a blender or bowl. (if using a hand blender) Add in the juice of the lemon and blend it all up until nice a smooth.
You have now made a nice creamy cream that will help make the final product more, well more creamy without the use of cream (lets say cream on more time !) .Set aside.
When the pot is empty again, add in the rest of the stuff, including the cobs of the corn, (they hold a butt load of flavor) the dried thyme, and salt and pepper. Place on stove and add enough water to completely submerge the veggies. Keep pot on a medium heat, add a lid, and stir ever once in a while. Cook until the potatoes are nice and tender. (when the potatoes are done, so is everything else)
Now that everything is all cooked up, remove the cobs and stir in the onion puree.
Now with a hand blender, blend up until the chowder is thick and smooth, but still nice and chunky. (If you are working with a blender, just remove about half of the soup and blend up, then dump back in) The optimal chunkiness is up to you , so blend, check the chunk, then blend a little more if needed. If you feel that the soup is to thick, add in a little more water, or to thin, just cook down o little longer.
Once you like the constituency,season to taste with salt and pepper and place pot back on a simmer until you are ready to serve.
And thats how we make corn chowder
It tastes best serves in the daintiest of the cups, sprinkled heavily with cracked pepper, and with a side of some cracker situation (Saltines would be best, but sometime there are only triscits in the house)
Summertime is for chowder!
HAPPY Humpday Wednesday!!!
-C
Makes a pot big enough for 4-6 nice decent sized servings
2 fresh ears of corn
3 medium (tennis ball sized) red or white potatoes
2 white or yellow onions
1 carrot
Juice of a lemon
1 tablespoon olive oil
1 1/2 tablespoons dried thyme
salt and pepper
To start, peel and dice one whole onion and toss into pot with olive oil and stick on medium heat. Cook onions until translucent and fragrant. Remove from pot and add cooked onions and the lemon juice to a blender and puree until smooth and set aside.
While you are cooking down the onions, dice up the carrot and onion, remove the corn kernels from the cob, and chop up the potatoes. Once you have removed the first batch of onions, toss in corn, onions, carrot, potatoes, and the dried thyme. Stir around in the pot on medium heat for a few minutes just to warm up the spices. Add the cobs into the pot and fill with enough water to cover the stuff in the pot. Place back on medium heat with a lid and cook for another 20ish minutes, or until potatoes are super tender and almost falling apart.
Remove cobs from pot and add in the onion puree. Now either remove about half the soup and place in the bender and blend up til smooth, or use a hand blender and blend up chowder until you get your desired chunkiness. If you think the chowder seems to thick, add in more water, or to thin, just cook down a little longer on the stove.
When ready to eat, ladle chowder into a cup or bowl and add lots of fresh cracked pepper.
Serve with a cracker and a spoon to eat it with.
This little guy asked me to make him some popsicles, and of course I said yes because, well look at him.
So we made a date. A popsicle and playground date to be exact.
For these particular pops, I decided to use watermelon, mainly because I had just broken into one and once I open a melon, I have a race with myself as to how fast I can consume the in entire thing. ( It’s a sick form of watermelon gluttony) But also because the little was really really excited to hear that I could in fact make watermelon popsicles. And the other stuff I added because I had it and it all tastes really good together.
I made the popsicles the day before so they would be ready for our date. He came over, we ate lunch,(peanut butter sandwich and carrot sticks) wondered around the neighborhood with the pup, and made a quick stop at the playground. (we only managed a couple runs on the slide before it was too hot and our sweat had us sticking to the slide and it was more of a painful scoot then a glide) We then made our way home and rewarded ourselves for a walk well done with these amazing, super refreshing, and healthy frozen treats that I made just for us. While we were eating the popsicles, our conversation turned to food. We talked about all the different varieties of popsicle that we could make, and how we could eat them for breakfast, lunch or dinner because they are made of only good things and are really healthy (he is really trying to eat healthy) It was the perfect ending to a fantastic afternoon with a five year old, or any human for that matter…
I would have a popsicle date with this kid every day
The Stuff. Fresh seedless watermelon (make sure to have lots on hand cause you are going to be eating it as you make these), a fresh lime, a handful of blueberries and a sprig of fresh mint. And don’t forget a mold of some kind that form the liquid into a popsicle (if you don’t have a mold, little paper cups work too)
Remove watermelon from rind and cut into small chunks. Juice the lime and add that, the watermelon chunks, the mint and the blueberries to a blender or vessel if using a hand blender) and blend everything until smooth.
Look at how pretty that is. And so tasty…. I am not going to lie and say that I didn’t make a little extra to drink, cause I did.
Now pour the puree into your molds to the fill line (follow the instructions that your molds give you) and place into the freezer.
And yes Shannon, these are in fact, your popsicle molds. Don’t worry, I’ll bring them back soon. (I am thinking some type of booze infused situation)
Once the freezer has done its job freezing… pop those suckers out.. (I let the mold sit on the counter for a few minutes so the popsicle pops out clean)
And heres to the best popsicle date ever!
Happy Summer! Happy Tuesday!
-C
A big chunk of seedless Watermelon (aboutt 11/2 cups)
1/2 ish cup of blueberries (fresh or frozen)
Juice of 1 lime
a few fresh mint leaves
note. The popsicle mold that I used only needed 2 cups of popsicle juice. If you have a larger mold, just use more of everything to get the amount you need
Remove rind from watermelon and add to a blender with the lime juice, mint and blueberries. Blend until eveytthing is pureed and mixed all together. Pour liquid into popsicle molds and stick in freezer for at least 4 hours.
When ready to eat…, pop those suckers out of there molds and EAT!
It seems that everywhere I turn this week, there corn. So much so that its coming out of my ears…..get it.. ears! (yes I am that lame)
Yup, its now officially (but unofficially) summer and that means 2 things, well 3 things. First, we eat corn. Secondly, It’s hot out, and get so hot in our little tiny loft that having the oven on is like torture so I avoid it at all costs. And lastly, I seem to always have less time(or forget) to make dinner cause, you know, I am outside running around with my head cut off.
The solution to the last two…..Quesadillas.
I probably make the mister quesadillas at least 5 time a week. They are just so easy to make (takes about 8 minutes) are full of some kind of veggie situation and lots of cheese (which is the misters favorite food group). You can make one, for a quick lunch, or very easily make 10 to feed a few people for a easy dinner. (everyone likes a quesadilla!). And even though I cooked these particular ones inside, quesadillas are great made outside on the grill. They just make so much sense.
And so it goes.
Summertime + corn = Charred corn and kale quesadillas.
The Stuff. Freshy freshy corn on the cob. A few flour tortillas, a bunch of chopped kale and some shredded cheese. (I used pepper jack)
With a sharp knife, cut the corn off the cob. I find using a deep bowl works best to catch corn, and you could even invert another little bowl inside to rest the cob for easier cutting (I skipped extra bowl.. once less dish to wash)
While you are cutting the corn, preheat a large pan on medium high heat.
Once the pan is hot, toss the corn kernels right on into it and sprinkle with salt and pepper Let cook for a minutes or two, then give it a stir and cook for another minute.
After about 4 minutes the corn turns bright yellow and starts to char. Remove pan from heat and toss in the chopped up kale.
And compile the quesadilla. Tortilla, grated cheese, corn and kale, more cheese if you please, and top with anther tortilla. Place assembled quesadilla into the pan and place on medium heat. Cook both sides until brown and cheese is ooey gooey.
Remove from pan and cut into triangles (or any shape you want)
Serve right away. Can be eaten on a napkin, plate, or directly off the counter.
Not needed, but it would be nice of you to serve with a little avocado, salsa, or sour cream.
Happy Tuesday!
-C
Makes two 8 inch quesadillas
Four 8 inch flour tortillas (use gluten free if needed)
2 ears of fresh corn
3-4 larges kale leaves
1 cup* shredded pepper jack cheese (use vegan cheese if needed)
*Note. Use more cheese if you want
Preheat a large pan on medium high. While the pan is heating up, cut the corn from the cob. Once pan is hot, toss corn kernels into hot skillet and sprinkle with a pinch of salt and pepper. Give corn a stir after a few minutes. Once the kernels start to turn bright yellow and get a little charred, remove pan from heat. Chop up kale into little pieces and toss into pan with the corn while the pan is still hot. Mix around and let the kale wilt a bit from the residual heat.
Ready your tortilla. Place half the cheese onto totilla, add on half of the corn and kale mixture, sprinkle with a bit more cheese and top with another tortilla. Place onto now empty pan and heat up quesadilla until brown on both sides and chesse is melty. Remove from skillet and cut into triangle. Repeat for the second quesadilla.
Serve right away with or without some guacamole, salsa, or sour cream.
plates are not required.
Wowzers…Is it for real Memorial day weekend? Where has all the time gone? Let’s talk about a week gone by fast. My brain is on complete overdrive and I am having a hard time keeping it from exploding…SO MUCH TO DO! (Not bad stuff, just a lot of stuff) But lo, that’s life right? There is always a lots of “stuff” to do, but today I am going to try and let that stuff chill and maybe give myself a few hours of coffee, (so much coffee) reading a book in the sunshine, gardening, and just some overall chillin.
Hopefully.
And hopefully you party people out there will be able to do a little of the same, or at least the chillin part. It is a 3 day weekend after all (not for us, but whatever)
Some internet fun finds.
-Sleeping in a loft that I have to crawl to get to the bed… this Gallery of Gorgeous Attic Bedrooms makes me so jealous..
-This new startup wants to sell you ugly fruit and veggies. I still don’t get it, it’s not ugly, its awesome.
-So cool and reminds me of my late brother in law. Wet Fold Origami Technique Gives Wavy Personality to Paper Animals by Artist Hoang Tien Quyet
-Could this be my new home? And I love a good plant lady. BURSTING WITH PLANTS, A 1910 PORTLAND FOURSQUARE FOR A FLORIST AND BARISTA
-Its so weird how try this is. Going, Going, Gone: 30+ Items That Are Disappearing from Our Homes
-We are doing this is the humongus pot hole in front of our house(we want to anyway) Treats in the Streets: Artist Jim Bachor Fills Potholes with Ice Cream Mosaics
-Holy shit is this the mister. 5 Conditions That Afflict the Reluctant Dishwasher. (1 and 2 really hit the nail)
A few photos from the weekGoodbye fiddleheads…. Hello ferns
On our way to a geo catch…. And note clothing options for 2 in the afternoon. I am much fond of that little guy wearing a rain jacket without a shirt in when its sunny and 80 degrees. And a pink poke dot bath robe.. I mean, it’s so the cool thing to do.
We didn’t find the geo, but we found this gigantic mushroom. Just as cool, maybe even cooler.
I love brick and there is one street in all of burlington (that I know of) that has brick sidewalks. I like to walk down it a lot.
Nurse lady making food… I compare this to a big foot sighting. I have heard stories that she cooks,but have never actually witnessed it myself. (Just kidding….kinda)
Happy long weekend! (if you are lucky to have one!)
-C
My oldest sister graduated from nursing school this past weekend (wahoo!) and the friends and family had a party for her. I made these cupcakes for the party.But really, I made them just for her.
See, she is not a lady big on sweets. When I asked her what kind of dessert she wanted me to make her, she said if I could make a cake out of french fries, well that would be great. (I was close to making a french fry cake) But instead, I went a slightly different route and made cakes out of thing that I know she loves and can eat. Jalapeños because she is obsessed. Strawberries cause she likes her some fruit and are in season and I think, go with everything. Avocado frosting because she loves avocado and cornmeal because it makes the cakes a tad less sweet and a little more hearty. I also used GF flour cause she is GF.
Wow, I am the best sister. And here are a few more reasons why..
I went to the party (I am not a big party person.. But I did have fun and her friends were cool)
I changed into a clean outfit for her party (I really didn’t want to)
I stayed out past my 6 (I made it until 7.. what!!!)
I make her food
I am awesome (I think so anyway)
So yeah. The cupcakes. The Nurse lady totally got down with these. I am pretty sure that I heard the words, amazing and oh my good, while they were being noshed on. The day after, the nurse lady told me that they were the talk of the party (bullshit, but thanks)
Whatever, I was just glad she liked them.
The stuff. For the cupcakes; cornmeal and some pre blended gluten free flour. Sugar, salt, baking powder and baking soda. Soy milk (use whatever milk you want) oil, apple cider vinegar, strawberries and a couple jalapeños . For the icing; an avocado, a lemon, and some powdered sugar.
This is not a hard batter to work, no need for a mixer or to cream anything, it can all be done with a wooden spoon.
First, preheat the oven.
Then trim and tiny dice the strawberries, remove seeds and tiny dice the jalapeños and toss it all into a bowl. Sprinkle with a bit of sugar.
In a large mixing bowl, whisk together the flour, cornmeal, baking soda and powder, salt and sugar. Then add in the rest of the stuff. Stir together until combined.Now fold in the chopped berries and jalapeños and scoop batter into a well greased (or lined) cupcake tin.
Stick into oven to bake…
Check cakes after 20 minutes and remove from oven when they are golden brown and a tester comes out clean when poked.
Remove from pan and place on a wire rake to cool.
While the cakes are a coolin, add avocado to a blender with the zest of half a lemon and the juice of that half of lemon and blend smooth. Add in the sugar and blend.
The icing should be thick, but spreadable. Using your judgement and you taste buds, add more sugar if the icing seems to thin or lemon juice if it seems to dry.
And once the cakes are cooled, spread with icing and top with sliced strawberries.
Your welcome Nurse Shannon!
Happy Friday!!!
-C
Jalapeño Strawberry Cornmeal Cupcakes with Avocado Frosting
makes 24 cupcakes
1 1/2 cup gluten-free flour blend (if you don’t need or want it gluten-free, just use all-purpose flour)
1 1/2 cups cornmeal
3/4 cup white sugar
1 teaspoon salt
2 teaspoons baking soda
2 teaspoons baking powder
1 tablespoon apple cider vinegar
2 cups nut or plant milk
1/2 cup oil
1 1/2 cups diced fresh strawberries
2 jalapeños
For the frosting
1 whole avocado
1/2 lemon (zest and juice)
2-2 1/2 cups powdered sugar
Pre heat oven to 350
Wash, trim and dice strawberries into little pieces and toss into a bowl. Remove stem and seeds from jalepenos and dice into small pieces.. add to bowl. Sprinkle with a little sugar.
In a large bowl, combine flour, cornmeal, baking soda, powder, salt, and sugar and whisk together. Now add in the oil, milk, and vinegar and mix together with a wood spoon until combined. Lastly, fold in the strawberries and jalapeños.
Scoop mixture into well greased (or lined) cupcake tin and stick into oven. Bake for about 20-25 minutes, or until cakes are gold brown and a tester comes out clean. Remove from oven, remove form tin, and sick on a wire rack to cool.
While the cakes are cooling, take the avocado, sugar, and the zest and juice of half a lemon and blend with your choice of blending drive until smooth. The icing should be thick enough to If the icing is to runny, add more sugar, or to thick, a little more lemon juice.
Now Ice cupcakes and top with sliced strawberries.
Eat for breakfast, lunch, dinner or dessert.
No utensils required, just some teeth.
Guess what guys ….I got myself a sick vintage waffle/ griddle iron. I couldn’t be more thrilled!!! I found this thing at the local recycled goods store the other day, along with a very beautiful old white pyrex mixing bowl. It was one of my best thrift store scores! (Checking out the inventory and the condition of all the old things that day, I would say an old lady had just died and all her perfectly keep, mint condition kitchen stuff had just been donated. But it’s cool, cause I get the feeling that she was at least 90, with a big loving family, and was happy until the day she died. And I am sure she would be pleased that I have taken over the waffle maker. Thanks old lady!)
And now I am pretty sure that everything I make for the next week will be cooked on said waffle/griddle. I am serious, I already have a list of things to try and cook on it; cookies, biscuits, granola bars, potatoes, fruit, some type of pasta situations…. the list of possibilities is endless and I bet that at least 1/2 of these things will be totally awesome and amazing.
But first thing first. I need to make dinner.
So waffles for dinner!!
Note. These waffles are completely 100% fantastic for any meal you want to make them for. They consist of nothing more then beans, a shit ton of veggies, and just a bit of cornmeal. But don’t let that fool you because they are super packed full of so much flavor, have a really soft tender inside, with a nice crispy outside and are so super pretty. They are wonderful! The stuff. First, we got a big old pile of shredded up veggies which include; carrot, beet, sweet potato, onion, parsnip, celeriac, and a little bit of kale. A we got a bowl of rinsed and strained white beans, a little bit of cornmeal and salt, pepper, and garlic powder.
The makings of something amazing!Before you do anything. get your waffle iron out and preheat it.
While thats going on, take you beans, add 3/4 cup water and puree until smooth with whatever blending device want to like to use. (I used my hand blender…less to clean)Now collect all the shredded veggies and dump into a big bowl with the bean puree, the spices and the cornmeal. Mix until combined. The batter should be thick, but not dry. If its seems to wet, add more corn meal, or too dry, add a little more water.
Note how my batter turned a magical pink… I love beets, they make everything pretty! And check out that bowl!When your waffle iron is preheated, oil it if needed (if your not sure, add a little oil just to really make sure your waffles don’t stick) and take appropriate size spoonfuls of the batter and stick on iron. Close it and wait…..My iron has a little light that turns on when the waffles are done cooking, so I waited patiently (ok iI did open it a few time) until light tuned on and removed the perfectly cooked waffles.
Did I mention how awesome my new/old vintage iron is?
SO AWESOME!!
I made a little gaucamole and gave the mister and little bowl of plain Greek yogurt with lemon juice, but feel free to top, drizzle, or dump whatever you want onto these beauties…
Happy waffle Wednesday!!!
-C
Veggie Bean Wonder Waffles
Makes 8-10 waffles (in my iron) feeds 2-3 peeps
1 small carrot shredded
1 small parsnip shredded
1/2 a small celeriac root
1 small beet shredded
2 kale leaves chopped into tiny bits
1/2 an onion, shredded
1/2 a small sweet potato shredded
1/2 cup cornmeal
2 cups(or 1 can) cooked, rinsed and strained white beans
2 teaspoons garlic powder
teaspoon each salt and pepper
oil for iron(if needed)
Note on veggies… I used what I had in the fridge and shredded, it came to about 3 cups. If you don’t have these specific veggies or only want to use a few.. go for it. Just make sure to have 3 cups of whatever veggies you use.
Take you beans and blend them up with whatever device you would like to use. Once creamy, add to a bowl with the rest of the ingredients. Stir until combined.
Once the waffle iron is preheated, oil it( if needed) and place the recommended amount of batter right on it there. Close and cook until golden brown and waffly.
Serve on a plate with topping of your choice, A few suggestions.. Guacamole, salsa, hummus, mustard, greek yogurt… anything that tastes good to you.

THE LOVELY CRAZY
September 19, 2015 by maximios • Blog
Are you sizzling? Is that pool of water next to you , in fact, your own sweat?
Yeah, I feel you…..stupid heat wave.
During these long extended periods of heat and humidity, my body starts to revolt. I get bitchy, by skin get itchy, my head goes foggy, my stomach starts to refuse food. and I generally just feel like crap. I love the summer, but I am not, by any means, a hot, high humidity person.
So during this nasty bout of heat, I do what I can to find comfort. And one of my comforts is watermelon. I am pretty sure that watermelon is a magical fruit. A giant green oblong ball that when cracked open is the brightest, sweetest bright pink fruit.. I mean, thats pretty f ing magical. It can make anything better, and is one of the few things that I want to eat when its a million degrees outside without barfing.
Watermelon is my official heatwave food. Watermelon all day long (Is it bad that I could literally eat an entire watermelon all to my face, in one sitting? ) And because I am me, I like to spice it up a bit and slather a big glob of basil pesto to the melon…. and that makes me happy. Plus it makes the fact that I am eating nothing but melon seem a little more substantial.
Do you have a heatwave food? If not, try this….It will be your food.
The stuff. A big hunk of watermelon, basil, a lemon, olive oil and salt.
Stick the basil, the juice of the lemon, and a pinch of salt into a blender. Turn on and blend, adding just a tad bit of olive oil until a nice green pesto is made.
Prepare your melon. Remove rinds if you want and save for later.. (seriously, we can make gazpacho with it) and cut into inch thick chunks.
And now if your feeling it, stick a skillet on the stove and preheat on medium high. Once heated, place watermelon chunks on hot skillet and sear each side for about 3-5 minutes per side.
If you want to go fresh, just skip searing it. Me, I do a bowl of both.
And now slather the melon with the pesto
And go to town
Stay cool my friends!
-C
Place basil, a pinch of salt and the juice of the lemon into a blender. Turn on and blend, adding in a drizzle of olive oil until pesto forms.
Preheat a lightly oiled skillet (or a grill) on medium high heat. Take your watermelon and remove rinds (save for later) and cut into inch chunks.* When heated, add the watermelon. LEt each side sear for 3-5 minutes, or until caramelized. Tarnsfrer to a bowl.
*Note. The seared melon is fantastic cooked then cooled. Also, I know some people blot out the juice before grilling, but I think that is a waste and I find unnecessary, but if you don’t want a juicy piece of cooke melon, by all means, blot out the juice..
Or if you don’t want to cook it, don’t
And lastly, toss in a big giant scoop of pesto
Now eat… eat eat eat.
I have been meaning to make this jam for a while now. I’ll buy a bunch of jalapeños, then slowly, before I get to cooking them down, end up eating them all. But not today, and the rewards are great, Fresh jalapeño jam. So much potential for the greatest of things (I am thinking mango jalapeño sorbet… no, I am making jalapeño mango sorbet) And if you, like me are a jalapeño fan, this is going to make your life amazing. You will find yourself jamming up everything, or maybe just eating it with a spoon.
Whatever you want to do with it, just make it.
Honey and jalapeños.. All you need, well a little salt and water too, but that’s it.
What you need to do is remove the stems,, most of the ribs and half of the seeds removed. (You could remove all or none of the seeds depending on you heat preference) Chop the peppers into small chunks, toss into a pot, sprinkle with a bit of salt, add in a splash of water. Place the pot on medium heat. Top it with a lid, and give the peppers a good stir every few minutes. While the peppers are cooking, you want to make sure the bottom isn’t sticking and buringin. If that starts to happen, just turn the heat down a bit and add in a little splash more of water.
After about 20 minutes, the peppers are fully cooked and falling apart. The liquid is cooked down and the peppers are starting to caramelize on the bottom of the pan. When that happened, remove the pot from heat.
Now you can either blend the peppers, mash the peppers with a fork, or leave it chunky. Thats a choice Ill leave to you. ( I like to blend, but keep some chunks)
And drizzle in a bit o honey. As little or as much as you like.
And scoop into a jar. Eat the jam on anything you want. (I found myself eating it with a spoon)
Keep it Real!
-C
Makes about 1 1/2 cups of jam
Wash, remove ribs and most seeds (the more seeds you leave the hotter it will be) and dice jalapenos into small chunks. Place in a pot with a few splashes of water and a sprinkle of salt. Turn on medium heat and cover, stirring every few minutes. If the peppers seem to be sticking o the pot and burning, turn heat down and add another splash of water. After about 20 minutes, the peppers should be really tender and falling apart. The liquid should be completely cooked out and the peppers will start to caramelized at the bottom of the pot. When that starts to happen, remove from heat. Now either mash with a fork, blend with a hand blender, or leave superr chunky. Drizzle in honey (or sweetener) and stir.
Eat right away or stick in a jar and store in the fridge for up to a week (It won’t last that long)
I am a year round maker and consumer of soup.
With that being said, the nature of my soups change seasonally. My summertime soups are usually on the lighter side, made with the fresh bounty of the season, and spiced more on the light and floral side, opposed to the really deep and warm spices that I use all winter long,
This corn chowder is made just right. It had the perfect balance of hearty and creamy from the potatoes and use of pureed onion cream, but still light and refreshing from the sweet fresh corn and the lemony fresh thyme. It is for sure a great summertime soup (chowder) Even the Mr. was even really into it, and he claims he doesn’t like corn. (I say bullshit to that.. he eats corn all the time)
Now to chowder!
The Stuff. Some super fresh corn on the cob, a couple onions, a few chopped up potatoes and a chopped up carrot. Then we have a little oil, a lemon, dried thyme and salt and pepper.
To start, take an onion, chop it up, and toss into a large heavy pot with a little olive oil and a sprinkle of salt. Stick pot on stove on medium heat and cook until onions are soft and traslutcent. When the onions are done, remove and add to a blender or bowl. (if using a hand blender) Add in the juice of the lemon and blend it all up until nice a smooth.
You have now made a nice creamy cream that will help make the final product more, well more creamy without the use of cream (lets say cream on more time !) .Set aside.
When the pot is empty again, add in the rest of the stuff, including the cobs of the corn, (they hold a butt load of flavor) the dried thyme, and salt and pepper. Place on stove and add enough water to completely submerge the veggies. Keep pot on a medium heat, add a lid, and stir ever once in a while. Cook until the potatoes are nice and tender. (when the potatoes are done, so is everything else)
Now that everything is all cooked up, remove the cobs and stir in the onion puree.
Now with a hand blender, blend up until the chowder is thick and smooth, but still nice and chunky. (If you are working with a blender, just remove about half of the soup and blend up, then dump back in) The optimal chunkiness is up to you , so blend, check the chunk, then blend a little more if needed. If you feel that the soup is to thick, add in a little more water, or to thin, just cook down o little longer.
Once you like the constituency,season to taste with salt and pepper and place pot back on a simmer until you are ready to serve.
And thats how we make corn chowder
It tastes best serves in the daintiest of the cups, sprinkled heavily with cracked pepper, and with a side of some cracker situation (Saltines would be best, but sometime there are only triscits in the house)
Summertime is for chowder!
HAPPY Humpday Wednesday!!!
-C
Makes a pot big enough for 4-6 nice decent sized servings
To start, peel and dice one whole onion and toss into pot with olive oil and stick on medium heat. Cook onions until translucent and fragrant. Remove from pot and add cooked onions and the lemon juice to a blender and puree until smooth and set aside.
While you are cooking down the onions, dice up the carrot and onion, remove the corn kernels from the cob, and chop up the potatoes. Once you have removed the first batch of onions, toss in corn, onions, carrot, potatoes, and the dried thyme. Stir around in the pot on medium heat for a few minutes just to warm up the spices. Add the cobs into the pot and fill with enough water to cover the stuff in the pot. Place back on medium heat with a lid and cook for another 20ish minutes, or until potatoes are super tender and almost falling apart.
Remove cobs from pot and add in the onion puree. Now either remove about half the soup and place in the bender and blend up til smooth, or use a hand blender and blend up chowder until you get your desired chunkiness. If you think the chowder seems to thick, add in more water, or to thin, just cook down a little longer on the stove.
When ready to eat, ladle chowder into a cup or bowl and add lots of fresh cracked pepper.
Serve with a cracker and a spoon to eat it with.
This little guy asked me to make him some popsicles, and of course I said yes because, well look at him.
So we made a date. A popsicle and playground date to be exact.
For these particular pops, I decided to use watermelon, mainly because I had just broken into one and once I open a melon, I have a race with myself as to how fast I can consume the in entire thing. ( It’s a sick form of watermelon gluttony) But also because the little was really really excited to hear that I could in fact make watermelon popsicles. And the other stuff I added because I had it and it all tastes really good together.
I made the popsicles the day before so they would be ready for our date. He came over, we ate lunch,(peanut butter sandwich and carrot sticks) wondered around the neighborhood with the pup, and made a quick stop at the playground. (we only managed a couple runs on the slide before it was too hot and our sweat had us sticking to the slide and it was more of a painful scoot then a glide) We then made our way home and rewarded ourselves for a walk well done with these amazing, super refreshing, and healthy frozen treats that I made just for us. While we were eating the popsicles, our conversation turned to food. We talked about all the different varieties of popsicle that we could make, and how we could eat them for breakfast, lunch or dinner because they are made of only good things and are really healthy (he is really trying to eat healthy) It was the perfect ending to a fantastic afternoon with a five year old, or any human for that matter…
I would have a popsicle date with this kid every day
The Stuff. Fresh seedless watermelon (make sure to have lots on hand cause you are going to be eating it as you make these), a fresh lime, a handful of blueberries and a sprig of fresh mint. And don’t forget a mold of some kind that form the liquid into a popsicle (if you don’t have a mold, little paper cups work too)
Remove watermelon from rind and cut into small chunks. Juice the lime and add that, the watermelon chunks, the mint and the blueberries to a blender or vessel if using a hand blender) and blend everything until smooth.
Look at how pretty that is. And so tasty…. I am not going to lie and say that I didn’t make a little extra to drink, cause I did.
Now pour the puree into your molds to the fill line (follow the instructions that your molds give you) and place into the freezer.
And yes Shannon, these are in fact, your popsicle molds. Don’t worry, I’ll bring them back soon. (I am thinking some type of booze infused situation)
Once the freezer has done its job freezing… pop those suckers out.. (I let the mold sit on the counter for a few minutes so the popsicle pops out clean)
And heres to the best popsicle date ever!
Happy Summer! Happy Tuesday!
-C
note. The popsicle mold that I used only needed 2 cups of popsicle juice. If you have a larger mold, just use more of everything to get the amount you need
Remove rind from watermelon and add to a blender with the lime juice, mint and blueberries. Blend until eveytthing is pureed and mixed all together. Pour liquid into popsicle molds and stick in freezer for at least 4 hours.
When ready to eat…, pop those suckers out of there molds and EAT!
It seems that everywhere I turn this week, there corn. So much so that its coming out of my ears…..get it.. ears! (yes I am that lame)
Yup, its now officially (but unofficially) summer and that means 2 things, well 3 things. First, we eat corn. Secondly, It’s hot out, and get so hot in our little tiny loft that having the oven on is like torture so I avoid it at all costs. And lastly, I seem to always have less time(or forget) to make dinner cause, you know, I am outside running around with my head cut off.
The solution to the last two…..Quesadillas.
I probably make the mister quesadillas at least 5 time a week. They are just so easy to make (takes about 8 minutes) are full of some kind of veggie situation and lots of cheese (which is the misters favorite food group). You can make one, for a quick lunch, or very easily make 10 to feed a few people for a easy dinner. (everyone likes a quesadilla!). And even though I cooked these particular ones inside, quesadillas are great made outside on the grill. They just make so much sense.
And so it goes.
Summertime + corn = Charred corn and kale quesadillas.
The Stuff. Freshy freshy corn on the cob. A few flour tortillas, a bunch of chopped kale and some shredded cheese. (I used pepper jack)
With a sharp knife, cut the corn off the cob. I find using a deep bowl works best to catch corn, and you could even invert another little bowl inside to rest the cob for easier cutting (I skipped extra bowl.. once less dish to wash)
While you are cutting the corn, preheat a large pan on medium high heat.
Once the pan is hot, toss the corn kernels right on into it and sprinkle with salt and pepper Let cook for a minutes or two, then give it a stir and cook for another minute.
After about 4 minutes the corn turns bright yellow and starts to char. Remove pan from heat and toss in the chopped up kale.
And compile the quesadilla. Tortilla, grated cheese, corn and kale, more cheese if you please, and top with anther tortilla. Place assembled quesadilla into the pan and place on medium heat. Cook both sides until brown and cheese is ooey gooey.
Remove from pan and cut into triangles (or any shape you want)
Serve right away. Can be eaten on a napkin, plate, or directly off the counter.
Not needed, but it would be nice of you to serve with a little avocado, salsa, or sour cream.
Happy Tuesday!
-C
Makes two 8 inch quesadillas
*Note. Use more cheese if you want
Preheat a large pan on medium high. While the pan is heating up, cut the corn from the cob. Once pan is hot, toss corn kernels into hot skillet and sprinkle with a pinch of salt and pepper. Give corn a stir after a few minutes. Once the kernels start to turn bright yellow and get a little charred, remove pan from heat. Chop up kale into little pieces and toss into pan with the corn while the pan is still hot. Mix around and let the kale wilt a bit from the residual heat.
Ready your tortilla. Place half the cheese onto totilla, add on half of the corn and kale mixture, sprinkle with a bit more cheese and top with another tortilla. Place onto now empty pan and heat up quesadilla until brown on both sides and chesse is melty. Remove from skillet and cut into triangle. Repeat for the second quesadilla.
Serve right away with or without some guacamole, salsa, or sour cream.
plates are not required.
Hopefully.
And hopefully you party people out there will be able to do a little of the same, or at least the chillin part. It is a 3 day weekend after all (not for us, but whatever)
Some internet fun finds.
-Sleeping in a loft that I have to crawl to get to the bed… this Gallery of Gorgeous Attic Bedrooms makes me so jealous..
-This new startup wants to sell you ugly fruit and veggies. I still don’t get it, it’s not ugly, its awesome.
-So cool and reminds me of my late brother in law. Wet Fold Origami Technique Gives Wavy Personality to Paper Animals by Artist Hoang Tien Quyet
-Could this be my new home? And I love a good plant lady. BURSTING WITH PLANTS, A 1910 PORTLAND FOURSQUARE FOR A FLORIST AND BARISTA
-Its so weird how try this is. Going, Going, Gone: 30+ Items That Are Disappearing from Our Homes
-We are doing this is the humongus pot hole in front of our house(we want to anyway) Treats in the Streets: Artist Jim Bachor Fills Potholes with Ice Cream Mosaics
-Holy shit is this the mister. 5 Conditions That Afflict the Reluctant Dishwasher. (1 and 2 really hit the nail)
A few photos from the week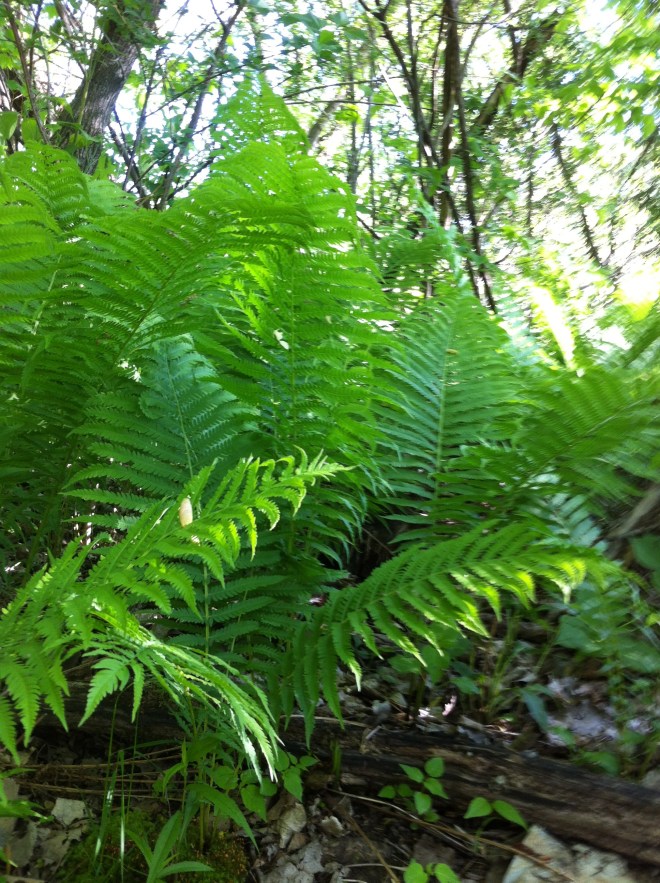 Goodbye fiddleheads…. Hello ferns
Happy long weekend! (if you are lucky to have one!)
-C
My oldest sister graduated from nursing school this past weekend (wahoo!) and the friends and family had a party for her. I made these cupcakes for the party.But really, I made them just for her.
See, she is not a lady big on sweets. When I asked her what kind of dessert she wanted me to make her, she said if I could make a cake out of french fries, well that would be great. (I was close to making a french fry cake) But instead, I went a slightly different route and made cakes out of thing that I know she loves and can eat. Jalapeños because she is obsessed. Strawberries cause she likes her some fruit and are in season and I think, go with everything. Avocado frosting because she loves avocado and cornmeal because it makes the cakes a tad less sweet and a little more hearty. I also used GF flour cause she is GF.
Wow, I am the best sister. And here are a few more reasons why..
So yeah. The cupcakes. The Nurse lady totally got down with these. I am pretty sure that I heard the words, amazing and oh my good, while they were being noshed on. The day after, the nurse lady told me that they were the talk of the party (bullshit, but thanks)
Whatever, I was just glad she liked them.
The stuff. For the cupcakes; cornmeal and some pre blended gluten free flour. Sugar, salt, baking powder and baking soda. Soy milk (use whatever milk you want) oil, apple cider vinegar, strawberries and a couple jalapeños . For the icing; an avocado, a lemon, and some powdered sugar.
This is not a hard batter to work, no need for a mixer or to cream anything, it can all be done with a wooden spoon.
First, preheat the oven.
Then trim and tiny dice the strawberries, remove seeds and tiny dice the jalapeños and toss it all into a bowl. Sprinkle with a bit of sugar.
In a large mixing bowl, whisk together the flour, cornmeal, baking soda and powder, salt and sugar. Then add in the rest of the stuff. Stir together until combined.Now fold in the chopped berries and jalapeños and scoop batter into a well greased (or lined) cupcake tin.
Stick into oven to bake…
Check cakes after 20 minutes and remove from oven when they are golden brown and a tester comes out clean when poked.
Remove from pan and place on a wire rake to cool.
While the cakes are a coolin, add avocado to a blender with the zest of half a lemon and the juice of that half of lemon and blend smooth. Add in the sugar and blend.
The icing should be thick, but spreadable. Using your judgement and you taste buds, add more sugar if the icing seems to thin or lemon juice if it seems to dry.
And once the cakes are cooled, spread with icing and top with sliced strawberries.
Your welcome Nurse Shannon!
Happy Friday!!!
-C
Jalapeño Strawberry Cornmeal Cupcakes with Avocado Frosting
makes 24 cupcakes
For the frosting
Pre heat oven to 350
Wash, trim and dice strawberries into little pieces and toss into a bowl. Remove stem and seeds from jalepenos and dice into small pieces.. add to bowl. Sprinkle with a little sugar.
In a large bowl, combine flour, cornmeal, baking soda, powder, salt, and sugar and whisk together. Now add in the oil, milk, and vinegar and mix together with a wood spoon until combined. Lastly, fold in the strawberries and jalapeños.
Scoop mixture into well greased (or lined) cupcake tin and stick into oven. Bake for about 20-25 minutes, or until cakes are gold brown and a tester comes out clean. Remove from oven, remove form tin, and sick on a wire rack to cool.
While the cakes are cooling, take the avocado, sugar, and the zest and juice of half a lemon and blend with your choice of blending drive until smooth. The icing should be thick enough to If the icing is to runny, add more sugar, or to thick, a little more lemon juice.
Now Ice cupcakes and top with sliced strawberries.
Eat for breakfast, lunch, dinner or dessert.
No utensils required, just some teeth.
Guess what guys ….I got myself a sick vintage waffle/ griddle iron. I couldn’t be more thrilled!!! I found this thing at the local recycled goods store the other day, along with a very beautiful old white pyrex mixing bowl. It was one of my best thrift store scores! (Checking out the inventory and the condition of all the old things that day, I would say an old lady had just died and all her perfectly keep, mint condition kitchen stuff had just been donated. But it’s cool, cause I get the feeling that she was at least 90, with a big loving family, and was happy until the day she died. And I am sure she would be pleased that I have taken over the waffle maker. Thanks old lady!)
And now I am pretty sure that everything I make for the next week will be cooked on said waffle/griddle. I am serious, I already have a list of things to try and cook on it; cookies, biscuits, granola bars, potatoes, fruit, some type of pasta situations…. the list of possibilities is endless and I bet that at least 1/2 of these things will be totally awesome and amazing.
But first thing first. I need to make dinner.
So waffles for dinner!!
Note. These waffles are completely 100% fantastic for any meal you want to make them for. They consist of nothing more then beans, a shit ton of veggies, and just a bit of cornmeal. But don’t let that fool you because they are super packed full of so much flavor, have a really soft tender inside, with a nice crispy outside and are so super pretty. They are wonderful! The stuff. First, we got a big old pile of shredded up veggies which include; carrot, beet, sweet potato, onion, parsnip, celeriac, and a little bit of kale. A we got a bowl of rinsed and strained white beans, a little bit of cornmeal and salt, pepper, and garlic powder.
The makings of something amazing!Before you do anything. get your waffle iron out and preheat it.
While thats going on, take you beans, add 3/4 cup water and puree until smooth with whatever blending device want to like to use. (I used my hand blender…less to clean)Now collect all the shredded veggies and dump into a big bowl with the bean puree, the spices and the cornmeal. Mix until combined. The batter should be thick, but not dry. If its seems to wet, add more corn meal, or too dry, add a little more water.
Note how my batter turned a magical pink… I love beets, they make everything pretty! And check out that bowl!When your waffle iron is preheated, oil it if needed (if your not sure, add a little oil just to really make sure your waffles don’t stick) and take appropriate size spoonfuls of the batter and stick on iron. Close it and wait…..My iron has a little light that turns on when the waffles are done cooking, so I waited patiently (ok iI did open it a few time) until light tuned on and removed the perfectly cooked waffles.
Did I mention how awesome my new/old vintage iron is?
SO AWESOME!!
I made a little gaucamole and gave the mister and little bowl of plain Greek yogurt with lemon juice, but feel free to top, drizzle, or dump whatever you want onto these beauties…
Happy waffle Wednesday!!!
-C
Veggie Bean Wonder Waffles
Makes 8-10 waffles (in my iron) feeds 2-3 peeps
Note on veggies… I used what I had in the fridge and shredded, it came to about 3 cups. If you don’t have these specific veggies or only want to use a few.. go for it. Just make sure to have 3 cups of whatever veggies you use.
Take you beans and blend them up with whatever device you would like to use. Once creamy, add to a bowl with the rest of the ingredients. Stir until combined.
Once the waffle iron is preheated, oil it( if needed) and place the recommended amount of batter right on it there. Close and cook until golden brown and waffly.
Serve on a plate with topping of your choice, A few suggestions.. Guacamole, salsa, hummus, mustard, greek yogurt… anything that tastes good to you.
Eat as breakfast, lunch or dinner…
Fork into face