My oldest sister graduated from nursing school this past weekend (wahoo!) and the friends and family had a party for her. I made these cupcakes for the party.But really, I made them just for her.
See, she is not a lady big on sweets. When I asked her what kind of dessert she wanted me to make her, she said if I could make a cake out of french fries, well that would be great. (I was close to making a french fry cake) But instead, I went a slightly different route and made cakes out of thing that I know she loves and can eat. Jalapeños because she is obsessed. Strawberries cause she likes her some fruit and are in season and I think, go with everything. Avocado frosting because she loves avocado and cornmeal because it makes the cakes a tad less sweet and a little more hearty. I also used GF flour cause she is GF.
Wow, I am the best sister. And here are a few more reasons why..
I went to the party (I am not a big party person.. But I did have fun and her friends were cool)
I changed into a clean outfit for her party (I really didn’t want to)
I stayed out past my 6 (I made it until 7.. what!!!)
I make her food
I am awesome (I think so anyway)
So yeah. The cupcakes. The Nurse lady totally got down with these. I am pretty sure that I heard the words, amazing and oh my good, while they were being noshed on. The day after, the nurse lady told me that they were the talk of the party (bullshit, but thanks)
Whatever, I was just glad she liked them.
The stuff. For the cupcakes; cornmeal and some pre blended gluten free flour. Sugar, salt, baking powder and baking soda. Soy milk (use whatever milk you want) oil, apple cider vinegar, strawberries and a couple jalapeños . For the icing; an avocado, a lemon, and some powdered sugar.
This is not a hard batter to work, no need for a mixer or to cream anything, it can all be done with a wooden spoon.
First, preheat the oven.
Then trim and tiny dice the strawberries, remove seeds and tiny dice the jalapeños and toss it all into a bowl. Sprinkle with a bit of sugar.
In a large mixing bowl, whisk together the flour, cornmeal, baking soda and powder, salt and sugar. Then add in the rest of the stuff. Stir together until combined.Now fold in the chopped berries and jalapeños and scoop batter into a well greased (or lined) cupcake tin.
Stick into oven to bake…
Check cakes after 20 minutes and remove from oven when they are golden brown and a tester comes out clean when poked.
Remove from pan and place on a wire rake to cool.
While the cakes are a coolin, add avocado to a blender with the zest of half a lemon and the juice of that half of lemon and blend smooth. Add in the sugar and blend.
The icing should be thick, but spreadable. Using your judgement and you taste buds, add more sugar if the icing seems to thin or lemon juice if it seems to dry.
And once the cakes are cooled, spread with icing and top with sliced strawberries.
Your welcome Nurse Shannon!
Happy Friday!!!
-C
Jalapeño Strawberry Cornmeal Cupcakes with Avocado Frosting
makes 24 cupcakes
1 1/2 cup gluten-free flour blend (if you don’t need or want it gluten-free, just use all-purpose flour)
1 1/2 cups cornmeal
3/4 cup white sugar
1 teaspoon salt
2 teaspoons baking soda
2 teaspoons baking powder
1 tablespoon apple cider vinegar
2 cups nut or plant milk
1/2 cup oil
1 1/2 cups diced fresh strawberries
2 jalapeños
For the frosting
1 whole avocado
1/2 lemon (zest and juice)
2-2 1/2 cups powdered sugar
Pre heat oven to 350
Wash, trim and dice strawberries into little pieces and toss into a bowl. Remove stem and seeds from jalepenos and dice into small pieces.. add to bowl. Sprinkle with a little sugar.
In a large bowl, combine flour, cornmeal, baking soda, powder, salt, and sugar and whisk together. Now add in the oil, milk, and vinegar and mix together with a wood spoon until combined. Lastly, fold in the strawberries and jalapeños.
Scoop mixture into well greased (or lined) cupcake tin and stick into oven. Bake for about 20-25 minutes, or until cakes are gold brown and a tester comes out clean. Remove from oven, remove form tin, and sick on a wire rack to cool.
While the cakes are cooling, take the avocado, sugar, and the zest and juice of half a lemon and blend with your choice of blending drive until smooth. The icing should be thick enough to If the icing is to runny, add more sugar, or to thick, a little more lemon juice.
Now Ice cupcakes and top with sliced strawberries.
Eat for breakfast, lunch, dinner or dessert.
No utensils required, just some teeth.
My flowers are coming up, I have packed away my winter jacket, and I haven’t worn anything but sandals for the past week. Plus yesterday I made the first batch of sun tea and saw my first hot air balloon of the season (which lead to a heated discussion with the mister about how hot air balloons take flight. We were both kinda right, but me more than him)So yeah, it’s for real… Winter is gone and spring has sprung, or more like spring sprung then bounced cause now it’s basically summer weather. Not complaining, but I hope we get a least a few more weeks of pleasant, not hot and humid weather.
Anyway. Sun tea, one of my favorite summer time drinks. Made by infusing regular old teas with water by using the almighty power of sun.
Why do we want to make iced tea this way instead of just using boiling water? Well you can still do that, but sun tea makes a more mellow, lovely, and I find, more sweeter tea. It brings out more complex flavors that you don’t get with the boiling water method. And it’s nice to know that it took zero effort on my part to make the drink (not that boiling water takes that much effort, but still)
It can be made with any variety of teas, infused with other fresh herbs, dried spices, or even chunks of fruit. You can also make the teas and add flavors after the infusing is over. Have fun and play with flavor combos.
A few of my favorite sun tea combinations
Any mellow black tea like orange pekoe or english breakfast with a few springs of mint
Chamomile and mint
Green with a fruity tea, like blueberry or pomegranate
Lemon Zinger with a few springs of Rosemary
These are just a few of the endless possible flavors. And you don’t have to get fancy with it either, you can totally use plain old lipton tea bags (I still do that too)
Now harness the sunshine and feel awesome and fancy by making some tea!
Woo Hoo Wednesday!
-C
SUN TEA
What you’ll need
Tea- Either bags or loose leaf
Water- Preferably Filtered
A glass jar with a lid
Sunshine
I use a ratio of 1 tea bag or 1 tablespoon loose leaf tea per 2 cups of water. And I usually make my teas in half gallon ball jars so I use 4-5 teabags or tablespoons of tea. (makes just enough tea for 4-6 tall glasses, depending on you glass size) If it’s a mint tea, I usually use a little less because I find that mint teas can become to strong and bitter so I use 3 teas bags or tablespoons of loose.
Directions
Place tea loose or bags into jar. Fill with water, leaving about an inch for tea expansion, place lid on tight, and stick in the sun for anywhere between 3-5 hours (depending on how strong you like your tea). When tea is infused to your liking, remove teabags or strain the loose tea and stick into the fridge to chill. Serve as is in a drinking vessel with a few ice cubes and add sweetener if that’s what you do.
Drink within a day or two, then rinse jar and make a new batch!
Happy Cinco de Mayo! And what better day to share my version of my oh so fantastic pico de gallo, or as I call it, super freshy salsa.
I love me some freshy salsa, It makes me oh so happy.
I make this stuff all the time, especially during the warmer months and tomato season. I usually make a batch right before a meal, just enough to eat right away, but sometimes I ‘ll make a big batched of it, thinking I’ll save some for the next day. It never makes it past the second day in the fridge because it’s just one of those things that when you see it, you want to eat it. Weird but true. And it’s totally ok to do so cause it’s basically eating a big bowl of healthy goodness, so eat on!
It takes no time to prepare, tastes super refreshing, goes on everything, and it’s just so freaking tasty. You can eat it with tacos and chips (the mister) or like me, I like to add it to everything; salads, popcorn, or directly in my mouth.
Make one batch, make 4, it doesn’t matter cause you will eat it all, and need to make more.
The stuff. Chopped Roma tomatoes, chopped red onion, a diced jalapeño, lemon, a bunch of cilantro, and salt.
Stick all the chopped stuff into a jar and add in the juice of the lemon. Roughly chop the cilantro and add that on in with a sprinkle of salt.
Mix it up….And thats it. Now eat… with something or without.
A spoon out of the jar is one of my favorite ways to go at it.
Happy Cinco de Mayo, Happy Tuesday!
-C
Pico de Gallo… Freshy Salsa
4-5 Roma Tomatoes
1 small red onion
1-2 jalapeños (Depending on heat preference)
1 lemon or lime
salt
1 bunch of cilantro (don’t use it if you don’t like it)
Chop tomatoes and onion and toss into a bowl or jar. Cut seeds from jalapeño(s) and dice up into little bitty pieces and add that to the tomato and onion. Roughly chop the cilantro and toss that in as well with the juice of the lemon or lime. Sprinkle with salt. Stir, let sit for a minutes, taste and then add more salt if needed.
Eat right away or make ahead and store in the fridge until ready to use.
Goes great with corn chips, tacos, toss onto salads or eat as is standing in front of the fridge. If someone is judging you, they are stupid.
The bounty of spring is upon us. Asparagus is everywhere and I have been embracing it.. smelly pee and all. And along with all my spring veggies and smells, I have grabbing for more springy spices. I go through seasonal spice kicks, like cinnamon and ginger in the fall, curries and chills in the winter. And for spring, I am big on sumac. If you haven’t heard of it or tasted it, it kind of taste like a tangy salty lemon..without actually having any salt. And its a really pretty, a bright red, almost purple color. I use it on a lot of things, especially veggies and bean dishes, sometimes as a lemon replacer, but mostly to add another level of tangy flavor. It’s fantastic, really great for all those springy time dishes. Nice and bright!
This dish is perfect made and eaten right away, but it’s one of those dishes that tastes even better the day after. Also it’s good and safe to serve room temperature. (think lunch box or a picnic!) And did I mention healthy? Protein packed quinoa and the lean green asparagus, I mean come on. You won’t feel an ounce of guilt for eating a hugmongo bowl of this stuff because you should, so it’s totally ok.
Eat away!
The stuff of the stuff. Quinoa and asparagus for the base. Sumac, lemon, garlic, onion, salt and pepper and a little splash of oil for the dressing.
Note. Sumac is not always the easiest spice to find. I know that its available online (what isn’t) and that some health food store or herbal apothecaries carry it, but i have ye tot see it at a conventional supermarket. And once you find it, buy a good amount cause you will also fall in love with it and use it on everything.
Start by making the dressing. You want to have it sit for at least 10 minutes. It will be perfect by the time the quinoa is done. Mince the garlic, dice the onion and juice the lemon. Stick it all into a jar with the sumac, a pinch of salt and pepper and about a teaspoons worth of olive oil. Stick a lid on the jar and shake shake shake. and let it sit.
Now you should make the quinoa.. Water and quinoa go into pot, high heat until boiling, topped with a lid and set to simmer for about 15 minutes.
When the quinoa is simmering, cook up the asparagus. Add a drizzle of oil, to a pan and a few splashes of water. Place trimmed and chopped asparagus to pan and sprinkle with salt. Cook on medium heat for about 8 minutes, or until cooked but still has a nice crunch to it. Take off heat and add the dressing to pan. Let it sit and marinate for a few minutes.When the quinoa is tender, fluff with a fork and add to the skillet with the asparagus and dressing. Toss around to make sure all the quinoa gets dressed. Take a taste.. does it need a little salt and pepper? Add a pinch if it does.Pile into a bowl, add a bit of cracked pepper.. and eat.
Or… Idea! Make this dish and pack it into a jar. Maybe grab a baguette and some hummus os some other tasty foods and take yourself and a friend out for a picnic.
So much good .
Keep it real yo
-C
Quinoa and Asparagus with Sumac Dressing
serves 3-4 as a side dish or 2 as a main meal.
1 cup quinoa
2 cups water
8-10 asparagus
olive oil
For the Dressing
1 tablespoon sumac
1/2 small red onion
2-3 cloves garlic
Juice of 1 jumbo lemon or 2 small lemons
2 teaspoons olive oil
salt and pepper
Start but making the dressing. Mince the garlic and finely dice the onion. Place in a jar with the sumac, the juice of the lemon, a pinch of salt and pepper, and a little splash of oil. Top the jar and shake the crap out of it for a minute. Let sit and meld. (This dressing can be made ahead of time and is fantastic on all sorts of everything)
In a large pot, add water, quinoa and a spindle of salt. Bring to a boil, cover , and reduce heat to simmer. Let cook for about 15 minutes or until water has completely absorbed. When the quinoa gets going, trim the woody parts of the asparagus and chop the remain asparagus into inch long pieces. Toss into a lightly oiled skillet with a few splashes of water, sprinkle with salt and put on medium heat for about 8 minutes, or until asparagus is cooked, but still crispy. Take off heat and add the sumac dressing. Once the quinoa is done, fluff it with a fork and toss it with the sumac dressed asparagus. Scoop into a bowl, add some cracked pepper. Bring food to face and eat.
Any leftover? This dish is fantastic serves cold or at room temperature.
Peas scream spring to me. The bright green color with that nice bright fresh taste….. kind of like a fresh spring day. Ah spring, so lovely, so nice, so hasn’t made its way here yet. So I guess I am left to eat my spring. And what better way to highlight those lovely spring tastes? A fantastic pesto my friends, and it can be made lickidy split.
Pesto is one of those things that I am constantly making, and not just the kind most people think of with basil and nuts, I pesto everything..peppers, greens, carrots, squash. And yea, I used this post to make a pesto pasta dish, but pesto has so many other fantastic uses. Like as a sandwich or wrap spread or a dip for veggies and crackers. I have used it as a soup base, a pizza sauce, on roasted potatoes and marinated tofu with pestos. It can also be thinned down and used as a salad dressing. See, so many uses.
And this pea pesto is no exception. It has such a great light, almost fruity, super bright taste. I mean, it’s peas so it taste just like peas but somehow even better. It really works in my mouth. I could eat a bowl of this stuff and be happy.
Whatever you plan on using it for, make the pesto. You will be thanking me later.
Pesto Stuff. We got the peas, garlic, lemon, oil, cheese if you please, and salt. Take a handful of peas and set aside for later. Juice the lemon and take that and the rest of the stuff and stick in a food processor and puree until smooth.
Oh my, so green, so good. I first made it without cheese and scooped a little out for me. It was perfect. Like the most brilliant bright pea flavor ever. It made me happy. After I added in the cheese, the mister said it tasted even better…. so cheese or not, it’s going to be good!The pesto is made, and it only took about 2 seconds, now boil up the pasta. If you were a thinker, you could start the pasta and make the pesto while its boiling. (I wasn’t being a thinker) I used bow ties cause they are super cute, but use whatever pasta you’re feeling. Shells or the ones that look like little brains would be good options.
Once the pasta is cooked, strain, reserving about 1/4 cup of the water. Add that bit of water back to the pot, add in the pesto, give a stir and dump pasta back into the pot. Toss in a handful of peas, maybe sprinkle some cheese and give it a good crack of some pepper.
Into a bowl and served with a fork to eat it with. A super green fresh springy meal of happiness. And all under 15 minutes in the kitchen.
Oh you want to thank me for this…
Hey, not a problem….not a problem at all.
-C
Spring Pea Pesto and Bow Ties
Makes enough pesto to coat a pound of cooked pasta and have some left over for sandwiches or to spread on crackers.
1 lb. fresh or frozen peas (thawed if frozen)
1 lemon
4-5 cloves garlic
2 ish tablespoons of olive oil
1/4 cup parmesan, really or vegan (optional)
salt
1 lb (an average box) of bow tie pasta (use any whole wheat, vegan, gluten free variety)
Place peas, (remove a handful and set aside to toss into the pasta) garlic, the juice of the lemon, olive oil and the parmesan (if you are using) into a food processor. Blend until smooth. Taste and salt as needed.
Pasta… Boil per instructions on box. Strain pastas but save about a 1/4 cup of starchy water. Toss pasta, starchy water and pesto together, adding in the handful or more of the whole peas. Sprinkle with more parmesan and or cracked pepper ,if wanted, and serve in big bowls.
Use a fork. Eat, smile and be happy.
My Moms birthday was this past week, and naturally, I made the cake for our big family birthday gathering. (and I bought and made dinner and cleaned everything up, although the mister did do all the dinner dishes) Word to my sisters… You guys suck! (but I still love you)
Every year my mom asks for the same cake. Strawberry with Lemon frosting. Then a few years ago, other people in the family started asking for the same one. Now there is a weird strawberry cake thing going on between some of my family members. They have taken claim of the strawberry cake and don’t want me to make it for anyone else but them. They think that because I make them this awesome cake that they are somehow special. Well guess what people.. Your only special for one day, then you go back to being normal.
I have a family full of a bunch of weirdoes.
Anyways, My mom said she wanted the usual strawberry cake, but as cup cakes, or actually she asked me to make the little square cakes. I was kind of confused when she said square cakes because well, what the hell was she talking about? But then I remembered that a long time ago I use to have a square cupcake pan. (I lost in somehow) So no, I couldn’t make the cakes square, but I sure could make them cute. And cute as hell is what I did.
Cake Stuff. Flour, baking soda, baking powder, and salt whisked together in a bowl. Butter, a little oil, vanilla, eggs and buttermilk. Then of course we have strawberries cause it wouldn’t be a strawberry cake with out them.First things first. Wash, trim and dice up the strawberries. Stick them into a pot and sprinkle with a few tablespoons of sugar. Heat on low and let the strawberries cook for about 10 minutes, stirring frequently, until they turn into a thick syrup. The sugar and the butter get beaten together until light and fluffy. Then goes in the oil, eggs, and vanilla. The milk is then added to the strawberry mixture. Add half the dry mixture to the wet, mix, then mix in half the strawberry mixture to that. Mix the rest of the dry in and finish off with the strawberry mixture.
Pour batter into well greased and parchment lined baking sheet (or pans). Stick cake into preheated oven for about 35 minutes, rotating cakes after 15 minutes. Cake is done when it starts turning a light gold brown and a cake tester stuck in the middle comes out clean. Cake gets pulled from the oven and set on a rack to cool.
I actually wrapped the cake when it was cool enough and stuck outside for a few hours. It didn’t completely freeze, but it was close. Frozen cake is easier to cut then soft non frozen cake. No necessary, but if you have the time….
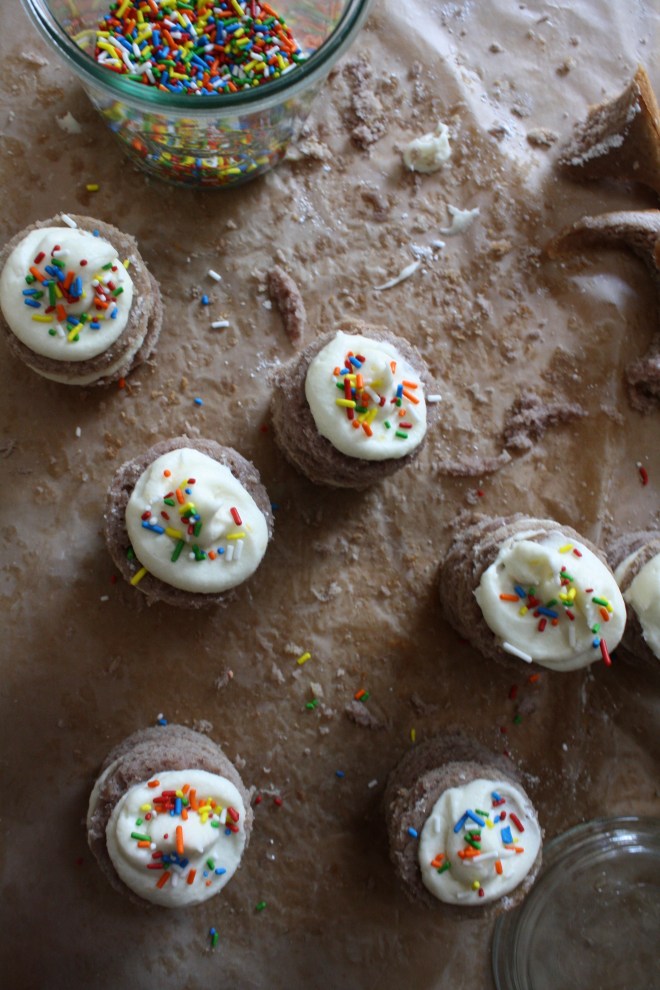
While the cake is cooling, make the frosting. Powdered Sugar, a stick of butter, cream cheese, lemon zest, lemon juice, and vanilla get mixed together until it turns into a big bowl of thick lemony frosting. Tomato can cutout. (I couldn’t find my biscuit cutters) A biscuit or cookie cutter would probably work a little better.. The cakes kept getting stuck in the can. Frost the cake!! Place frosting into a piping bag or a big plastic zip lock with the tip cut off. 2 rounds to a cake. A squeeze of frosting goes on one, topped with another and given a little smoosh. A nice big dollop of frosting on top then…. Sprinkles!!!! Or sliced strawberries (my mom doesn’t like sprinkles..I know)
So freaking cute. I don’t know if I can make a normal cake again.
Mom gets the bigger 3 tiered cake.. and a few more of the little ones.
HAPPY BIRTHDAY MOM!
-C
Strawberry Cake with Lemon Cream Cheese Frosting
makes 16 two tiers cupcakes or can be made in three 8 inch cake pans
The Cake
3 Cups All Purpose Flour
1 Teaspoon Salt
1 Teaspoon Baking Soda
1 Teaspoon Baking Powder
1/2 Cup or one Stick Soften Butter
1/3 Cup Vegetable Oil
3 Eggs
1 teaspoon Vanilla
1 Cup milk
1 Cup Sugar plus 2 Tablespoons
1 lb Fresh Strawberries (Can use Frozen, just let them thaw )
The Frosting
4 1/2 Cups Powdered Sugar
1 Stick Soften Butter
4 oz Cream Cheese (Half a block)
Zest of a Lemon
1-2 Tablespoons Lemon Juice
1 teaspoon Vanilla
pinch of salt
Preheat oven to 375
Grease a parchment lined 13×18 high rimmed baking sheet and dust with flour. If you baking sheet isn’t as big as mine, use whatever size you have and make a few cupcakes on the side. Or make one , 3 tiered cake with 8 inch cake pans. I trust that you can find a way to bake all this cake batter.
Wash, trim and dice strawberries. Toss them in a medium sauce pan and sprinkle with 2 tablespoons of sugar. Place on low heat and cook for about 10 minutes until strawberries break down and turn into a thick syrup. Take of heat and let cool.
Combine flour, salt, baking powder and soda in a bowl and whisk together, In another large bowl, add butter and sugar together and beat on medium until light and fluffy. Add in oil, vanilla and eggs. Beat together. Now add the milk to the strawberries and mix together. Beat in half the dry into the wet, add in half the strawberry mixture, then the rest of the dry, and finish off with the rest of the strawberry mixture.
Pour batter into prepare baking sheet (or pans) and place in oven. Check cake after about 15 minutes and rotate to help insure an even bake. Bake for another 15- 20 minutes, or until cake starts to turn golden brown and a tester (toothpick) comes out clean.
Remove from oven and let completely cool. (Not necessary, but once cake is cooled , wrap with plastic wrap and stick cake into the freezer of a little while before cutting the circles.. its makes it a little easier)
While cake is cooling, make the frosting. Place all ingredients in a big bowl and beat together until a nice soft but sturdy frosting forms. If. you frosting seems to thick add in a splash of milk. To thin.. add a little more sugar.
When the cake is cooled, get to it. With you cookie or biscuit cuter dipped in powdered sugar, cut as many circles as you can.
Fun Time!! Frost the cakes. Place frosting into a pastry bag, or like me, a large zip lock bag with the tip cut off. Partner up all the cake rounds and go through and give one of each of the pairs a good dollop of frosting. Top with the remaining cake, give it a lithe smooshto make sure they stick, and squeeze a nice dollop of frosting on top. Finish off with sliced strawberries and lots of sprinkles.
Sing Happy Birthday and eat!
Being that it was St. Patricks day this week and lots of folks buy up a good amount of cabbage, I figured that this is a good time to get people to try one of my most favorite of favorite meals…..Beet bean and cabbage steaks. I love to play around with food, how to pair textures and colors plus tastes while trying to make whatever I am making healthy and balanced. This is one of my fav creations. And sure, this may seem like a somewhat weird combo, maybe a little like a extremely hippy dippy vegan fake meat thing, and you might be kind of right, but screw if it doesn’t taste like A-mazing. First off, notice how freaking dang pretty this thing is. The roasted beets bring a earthy hearty flavor but also pack a huge punch of color, especially when blended together with the ever so sweet white bean, which brings a nice mellow taste and a great serving of protein. (Beets and beans are meant for each other). Spread that brightly colored, tasty mixture onto of a huge slab of one of my favorites, roasted cabbage with all its crunch and cabbagy flavor and you got yourself a hearty healthy meal of deliciousness.
So maybe this might seem a little out of your normal food routine, but why not try it? Trust me….you will love it and everyone you make it for will think you are a number 1 badass too.
Cabbage, white beans, and beets. There is a lemon involved, but it didn’t make it into the picture.
Notes…. I used white beans, but I have also done this with chick peas and lentils. All are fantastic. Also, I did not peel my beets because I never do.(I do not peel anything the skin is full of goodness and I love the taste) If you don’t want to eat the skin, then peel them. Cabbage is cut into inch thick slabs… I like to us the inter most part of a cabbage head cause I like the core. But use any cut that you want. 2 beets are chopped into chunkers and both the cabbage and the beets are placed on a lightly oiled baking sheets, seasoned with salt and pepper, and stuck into the oven for 20-25 minutes at 400 degrees.
Once the beets are tender and the cabbage is cooked to a nice withered golden pretty, take out of the oven, but leave the oven on. Leave the cabbage on the pan but throw the beets into a blender or a big bowl if using a hand blender with the white beans
Beans and beets get pureed together. Add the juice of 1/2 a lemon (or the whole lemon, depending on your taste) and a pinch of salt and pepper. With a big spoon or spatula, scoop equal amounts of the bean/beet mixture on top of the cabbage steaks and spread around. Sprinkle with cracked pepper and place back into oven for another 5-10 minutes. (You could totally skip the second bake, but I like my cabbage well done and crispy)
Oh ho boy… And with a good squirt of mustard to finish off… I could eat this all day, everyday
And now I am #1
Happy Wednesday… Keep it good!
-C
Beet and Bean Cabbage Steaks
Makes 2 Thick Cut Steaks
1/2 head of cabbage (green or red)
2 cups or 1 can of cooked white beans
2 medium beets
1 lemon
salt and pepper
Mustard (Optional)
Preheat Oven to 4oo degrees
Cut two 1 ish inch thick rounds of cabbage from the widest part of the head. Place on a lightly oiled baking sheet. Chop beets into chunks and toss on same baking sheet.(Peel if you want) Sprinkle everything with salt and pepper. Stick into oven for 20-25 minutes or until the beets and cabbage are tender. Remove veggies from oven and place roasted beets into a blender (or bowl if using a hand blender) but leave the cabbage on the baking sheet. Add the white beans, the juice of half a lemon, and salt and pepper to the beets and puree until smooth. Scoop equal amounts of the mixture to each cabbage steak, sprinkle with pepper and place back into oven for another 5-10 minutes to give the beans and beets a nice crunchy crust (You can skip this step if you don’t want to be crusty)
Remove from oven, stick on a plate and drizzle with mustard….Fork and knife are good ways to eat it, but eating it with you fingers makes less dirty dishes.
As the weather gets warmer and the days get longer, my food brain turns to fresh colorful simple spring food. (which is totally a thing). Spring food is a combination of the last of the winters hardy root veggies combined with the springs bounty of fresh greens and early growers. Spring food is the best!
This lovely. oh so gorgeous salad has been on repeat in my meal repertoire. It’s so yummy and so simple. Beets and carrots roasted and sliced, tossed onto a bed of tender spinach and topped with a creamy, lemony avocado dressing. Fresh, fast, light, and filling. Everything a perfect spring salad needs. Not to mention it takes no time at all to make because with all this nice weather , we want to spend as much time basking in the warmth and glow of the sun. I might even take my spring salad outside today. Maybe.
Dressing stuff. A nice and ripe avocado, the juice of a juicy lemon, a bit of garlic powder (raw garlic is nice too, but grate it super fine) and salt. Simple simple and sometimes simple can be the best.All stuff get mashed super mashed until smooth and scooped into a jar with a lid. Add about 1/4- 1/2 cup water (depending on how thick you like it) and shake that jar all around.
That’s it. You now have super creamy avocado lemon dressing. Drizzle on anything and everything… especially this roasted carrot and beet salad..
A roasted beet and carrot, all sliced upTossed onto a bed of tender baby spinachAnd topped with creamy avocado dressing. Fantastic, so pretty, and makes the day super springy!
A salad suggestion…. Add some roasted chickpeas toasted nuts, or sunflower seeds to this or any salad. Adds a little proteins and the crispy crunch is a nice addition.
Enjoy the day..Smile lots
-C
Roasted Carrot Beet Salad and Avocado Lemon Dressing
Salad
2-3 cups Baby Spinach
1 large carrot
1 medium beet
Toasted nuts, beans, or seeds (Optional)
You can roast the veggies a few ways.. Slice the carrot and beet, place on a baking sheet and stick into the oven at 425 degrees until tender. Or you can just toss a the carrot and beet onto a baking sheet whole and roast.( What I usually do)
Once the veggies are roasted and cooled, thinly slice and toss onto the bed of baby spinach. Top with Avocado Lemon Dressing (recipe below) and some toasted crunchy thing.
Dressing
1 Ripe Avocado
1 lemon
1 teaspoon garlic powder
1 teaspoon salt
1/4- 1/2 cup water
Scoop avocado fruit into a bowl and mash with a fork until a paste is formed. Scoop mashed avocado into a jar and add remaining ingredients. Stick lid on jar and shake tip combined. Use on anything.
Dressing lasts a few days in the fridge. Should stay green, but add a layer of lemon juice to top to keep from browning.

THE LOVELY CRAZY
September 19, 2015 by maximios • Blog
My oldest sister graduated from nursing school this past weekend (wahoo!) and the friends and family had a party for her. I made these cupcakes for the party.But really, I made them just for her.
See, she is not a lady big on sweets. When I asked her what kind of dessert she wanted me to make her, she said if I could make a cake out of french fries, well that would be great. (I was close to making a french fry cake) But instead, I went a slightly different route and made cakes out of thing that I know she loves and can eat. Jalapeños because she is obsessed. Strawberries cause she likes her some fruit and are in season and I think, go with everything. Avocado frosting because she loves avocado and cornmeal because it makes the cakes a tad less sweet and a little more hearty. I also used GF flour cause she is GF.
Wow, I am the best sister. And here are a few more reasons why..
So yeah. The cupcakes. The Nurse lady totally got down with these. I am pretty sure that I heard the words, amazing and oh my good, while they were being noshed on. The day after, the nurse lady told me that they were the talk of the party (bullshit, but thanks)
Whatever, I was just glad she liked them.
The stuff. For the cupcakes; cornmeal and some pre blended gluten free flour. Sugar, salt, baking powder and baking soda. Soy milk (use whatever milk you want) oil, apple cider vinegar, strawberries and a couple jalapeños . For the icing; an avocado, a lemon, and some powdered sugar.
This is not a hard batter to work, no need for a mixer or to cream anything, it can all be done with a wooden spoon.
First, preheat the oven.
Then trim and tiny dice the strawberries, remove seeds and tiny dice the jalapeños and toss it all into a bowl. Sprinkle with a bit of sugar.
In a large mixing bowl, whisk together the flour, cornmeal, baking soda and powder, salt and sugar. Then add in the rest of the stuff. Stir together until combined.Now fold in the chopped berries and jalapeños and scoop batter into a well greased (or lined) cupcake tin.
Stick into oven to bake…
Check cakes after 20 minutes and remove from oven when they are golden brown and a tester comes out clean when poked.
Remove from pan and place on a wire rake to cool.
While the cakes are a coolin, add avocado to a blender with the zest of half a lemon and the juice of that half of lemon and blend smooth. Add in the sugar and blend.
The icing should be thick, but spreadable. Using your judgement and you taste buds, add more sugar if the icing seems to thin or lemon juice if it seems to dry.
And once the cakes are cooled, spread with icing and top with sliced strawberries.
Your welcome Nurse Shannon!
Happy Friday!!!
-C
Jalapeño Strawberry Cornmeal Cupcakes with Avocado Frosting
makes 24 cupcakes
For the frosting
Pre heat oven to 350
Wash, trim and dice strawberries into little pieces and toss into a bowl. Remove stem and seeds from jalepenos and dice into small pieces.. add to bowl. Sprinkle with a little sugar.
In a large bowl, combine flour, cornmeal, baking soda, powder, salt, and sugar and whisk together. Now add in the oil, milk, and vinegar and mix together with a wood spoon until combined. Lastly, fold in the strawberries and jalapeños.
Scoop mixture into well greased (or lined) cupcake tin and stick into oven. Bake for about 20-25 minutes, or until cakes are gold brown and a tester comes out clean. Remove from oven, remove form tin, and sick on a wire rack to cool.
While the cakes are cooling, take the avocado, sugar, and the zest and juice of half a lemon and blend with your choice of blending drive until smooth. The icing should be thick enough to If the icing is to runny, add more sugar, or to thick, a little more lemon juice.
Now Ice cupcakes and top with sliced strawberries.
Eat for breakfast, lunch, dinner or dessert.
No utensils required, just some teeth.
My flowers are coming up, I have packed away my winter jacket, and I haven’t worn anything but sandals for the past week. Plus yesterday I made the first batch of sun tea and saw my first hot air balloon of the season (which lead to a heated discussion with the mister about how hot air balloons take flight. We were both kinda right, but me more than him)So yeah, it’s for real… Winter is gone and spring has sprung, or more like spring sprung then bounced cause now it’s basically summer weather. Not complaining, but I hope we get a least a few more weeks of pleasant, not hot and humid weather.
Anyway. Sun tea, one of my favorite summer time drinks. Made by infusing regular old teas with water by using the almighty power of sun.
Why do we want to make iced tea this way instead of just using boiling water? Well you can still do that, but sun tea makes a more mellow, lovely, and I find, more sweeter tea. It brings out more complex flavors that you don’t get with the boiling water method. And it’s nice to know that it took zero effort on my part to make the drink (not that boiling water takes that much effort, but still)
It can be made with any variety of teas, infused with other fresh herbs, dried spices, or even chunks of fruit. You can also make the teas and add flavors after the infusing is over. Have fun and play with flavor combos.
A few of my favorite sun tea combinations
These are just a few of the endless possible flavors. And you don’t have to get fancy with it either, you can totally use plain old lipton tea bags (I still do that too)
Now harness the sunshine and feel awesome and fancy by making some tea!
Woo Hoo Wednesday!
-C
SUN TEA
What you’ll need
I use a ratio of 1 tea bag or 1 tablespoon loose leaf tea per 2 cups of water. And I usually make my teas in half gallon ball jars so I use 4-5 teabags or tablespoons of tea. (makes just enough tea for 4-6 tall glasses, depending on you glass size) If it’s a mint tea, I usually use a little less because I find that mint teas can become to strong and bitter so I use 3 teas bags or tablespoons of loose.
Directions
Place tea loose or bags into jar. Fill with water, leaving about an inch for tea expansion, place lid on tight, and stick in the sun for anywhere between 3-5 hours (depending on how strong you like your tea). When tea is infused to your liking, remove teabags or strain the loose tea and stick into the fridge to chill. Serve as is in a drinking vessel with a few ice cubes and add sweetener if that’s what you do.
Drink within a day or two, then rinse jar and make a new batch!
I love me some freshy salsa, It makes me oh so happy.
I make this stuff all the time, especially during the warmer months and tomato season. I usually make a batch right before a meal, just enough to eat right away, but sometimes I ‘ll make a big batched of it, thinking I’ll save some for the next day. It never makes it past the second day in the fridge because it’s just one of those things that when you see it, you want to eat it. Weird but true. And it’s totally ok to do so cause it’s basically eating a big bowl of healthy goodness, so eat on!
It takes no time to prepare, tastes super refreshing, goes on everything, and it’s just so freaking tasty. You can eat it with tacos and chips (the mister) or like me, I like to add it to everything; salads, popcorn, or directly in my mouth.
Make one batch, make 4, it doesn’t matter cause you will eat it all, and need to make more.
Stick all the chopped stuff into a jar and add in the juice of the lemon. Roughly chop the cilantro and add that on in with a sprinkle of salt.
Mix it up….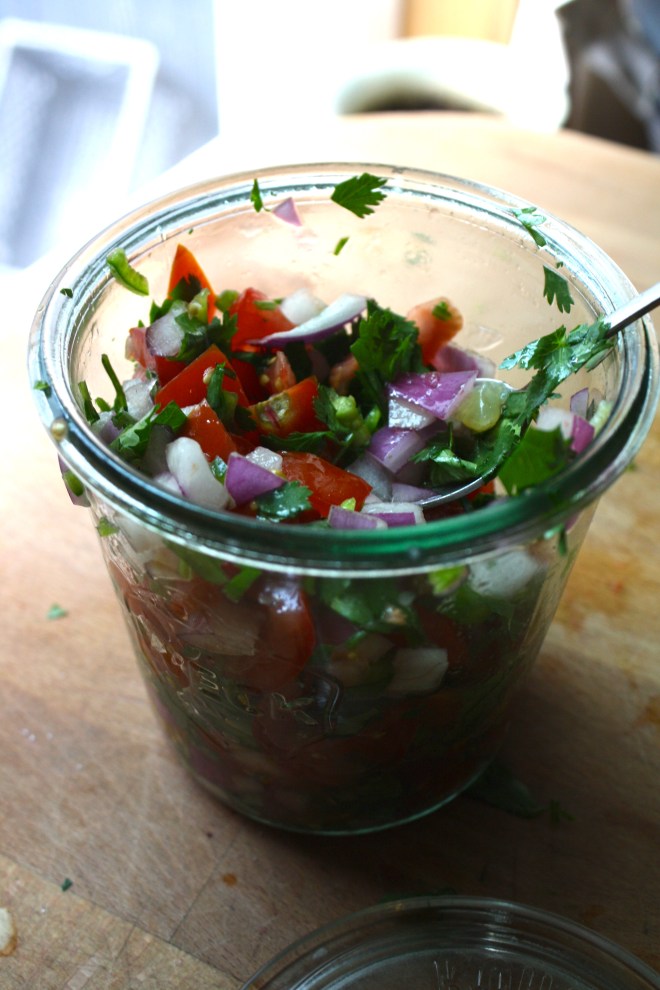 And thats it. Now eat… with something or without.
A spoon out of the jar is one of my favorite ways to go at it.
Happy Cinco de Mayo, Happy Tuesday!
-C
Pico de Gallo… Freshy Salsa
Chop tomatoes and onion and toss into a bowl or jar. Cut seeds from jalapeño(s) and dice up into little bitty pieces and add that to the tomato and onion. Roughly chop the cilantro and toss that in as well with the juice of the lemon or lime. Sprinkle with salt. Stir, let sit for a minutes, taste and then add more salt if needed.
Eat right away or make ahead and store in the fridge until ready to use.
Goes great with corn chips, tacos, toss onto salads or eat as is standing in front of the fridge. If someone is judging you, they are stupid.
This dish is perfect made and eaten right away, but it’s one of those dishes that tastes even better the day after. Also it’s good and safe to serve room temperature. (think lunch box or a picnic!) And did I mention healthy? Protein packed quinoa and the lean green asparagus, I mean come on. You won’t feel an ounce of guilt for eating a hugmongo bowl of this stuff because you should, so it’s totally ok.
Eat away!
Note. Sumac is not always the easiest spice to find. I know that its available online (what isn’t) and that some health food store or herbal apothecaries carry it, but i have ye tot see it at a conventional supermarket. And once you find it, buy a good amount cause you will also fall in love with it and use it on everything.
Now you should make the quinoa.. Water and quinoa go into pot, high heat until boiling, topped with a lid and set to simmer for about 15 minutes.
Or… Idea! Make this dish and pack it into a jar. Maybe grab a baguette and some hummus os some other tasty foods and take yourself and a friend out for a picnic.
So much good .
Keep it real yo
-C
Quinoa and Asparagus with Sumac Dressing
serves 3-4 as a side dish or 2 as a main meal.
For the Dressing
Start but making the dressing. Mince the garlic and finely dice the onion. Place in a jar with the sumac, the juice of the lemon, a pinch of salt and pepper, and a little splash of oil. Top the jar and shake the crap out of it for a minute. Let sit and meld. (This dressing can be made ahead of time and is fantastic on all sorts of everything)
In a large pot, add water, quinoa and a spindle of salt. Bring to a boil, cover , and reduce heat to simmer. Let cook for about 15 minutes or until water has completely absorbed. When the quinoa gets going, trim the woody parts of the asparagus and chop the remain asparagus into inch long pieces. Toss into a lightly oiled skillet with a few splashes of water, sprinkle with salt and put on medium heat for about 8 minutes, or until asparagus is cooked, but still crispy. Take off heat and add the sumac dressing. Once the quinoa is done, fluff it with a fork and toss it with the sumac dressed asparagus. Scoop into a bowl, add some cracked pepper. Bring food to face and eat.
Any leftover? This dish is fantastic serves cold or at room temperature.
Pesto is one of those things that I am constantly making, and not just the kind most people think of with basil and nuts, I pesto everything..peppers, greens, carrots, squash. And yea, I used this post to make a pesto pasta dish, but pesto has so many other fantastic uses. Like as a sandwich or wrap spread or a dip for veggies and crackers. I have used it as a soup base, a pizza sauce, on roasted potatoes and marinated tofu with pestos. It can also be thinned down and used as a salad dressing. See, so many uses.
And this pea pesto is no exception. It has such a great light, almost fruity, super bright taste. I mean, it’s peas so it taste just like peas but somehow even better. It really works in my mouth. I could eat a bowl of this stuff and be happy.
Whatever you plan on using it for, make the pesto. You will be thanking me later.
Oh my, so green, so good. I first made it without cheese and scooped a little out for me. It was perfect. Like the most brilliant bright pea flavor ever. It made me happy. After I added in the cheese, the mister said it tasted even better…. so cheese or not, it’s going to be good! The pesto is made, and it only took about 2 seconds, now boil up the pasta. If you were a thinker, you could start the pasta and make the pesto while its boiling. (I wasn’t being a thinker) I used bow ties cause they are super cute, but use whatever pasta you’re feeling. Shells or the ones that look like little brains would be good options.
Once the pasta is cooked, strain, reserving about 1/4 cup of the water. Add that bit of water back to the pot, add in the pesto, give a stir and dump pasta back into the pot. Toss in a handful of peas, maybe sprinkle some cheese and give it a good crack of some pepper.
Oh you want to thank me for this…
Hey, not a problem….not a problem at all.
-C
Spring Pea Pesto and Bow Ties
Makes enough pesto to coat a pound of cooked pasta and have some left over for sandwiches or to spread on crackers.
Place peas, (remove a handful and set aside to toss into the pasta) garlic, the juice of the lemon, olive oil and the parmesan (if you are using) into a food processor. Blend until smooth. Taste and salt as needed.
Pasta… Boil per instructions on box. Strain pastas but save about a 1/4 cup of starchy water. Toss pasta, starchy water and pesto together, adding in the handful or more of the whole peas. Sprinkle with more parmesan and or cracked pepper ,if wanted, and serve in big bowls.
Use a fork. Eat, smile and be happy.
Every year my mom asks for the same cake. Strawberry with Lemon frosting. Then a few years ago, other people in the family started asking for the same one. Now there is a weird strawberry cake thing going on between some of my family members. They have taken claim of the strawberry cake and don’t want me to make it for anyone else but them. They think that because I make them this awesome cake that they are somehow special. Well guess what people.. Your only special for one day, then you go back to being normal.
I have a family full of a bunch of weirdoes.
Anyways, My mom said she wanted the usual strawberry cake, but as cup cakes, or actually she asked me to make the little square cakes. I was kind of confused when she said square cakes because well, what the hell was she talking about? But then I remembered that a long time ago I use to have a square cupcake pan. (I lost in somehow) So no, I couldn’t make the cakes square, but I sure could make them cute. And cute as hell is what I did.
Pour batter into well greased and parchment lined baking sheet (or pans). Stick cake into preheated oven for about 35 minutes, rotating cakes after 15 minutes. Cake is done when it starts turning a light gold brown and a cake tester stuck in the middle comes out clean.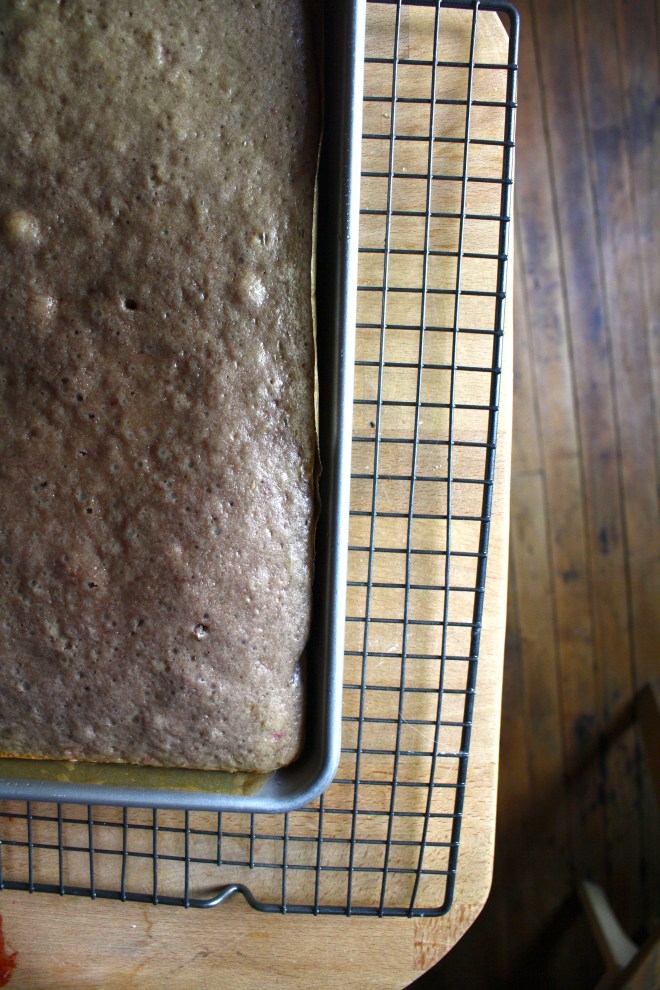 Cake gets pulled from the oven and set on a rack to cool.
I actually wrapped the cake when it was cool enough and stuck outside for a few hours. It didn’t completely freeze, but it was close. Frozen cake is easier to cut then soft non frozen cake. No necessary, but if you have the time….
While the cake is cooling, make the frosting. Powdered Sugar, a stick of butter, cream cheese, lemon zest, lemon juice, and vanilla get mixed together until it turns into a big bowl of thick lemony frosting. Tomato can cutout. (I couldn’t find my biscuit cutters) A biscuit or cookie cutter would probably work a little better.. The cakes kept getting stuck in the can.
  Frost the cake!! Place frosting into a piping bag or a big plastic zip lock with the tip cut off. 2 rounds to a cake. A squeeze of frosting goes on one, topped with another and given a little smoosh. A nice big dollop of frosting on top then….
 Sprinkles!!!! Or sliced strawberries (my mom doesn’t like sprinkles..I know)
So freaking cute. I don’t know if I can make a normal cake again.
Mom gets the bigger 3 tiered cake.. and a few more of the little ones.
HAPPY BIRTHDAY MOM!
-C
Strawberry Cake with Lemon Cream Cheese Frosting
makes 16 two tiers cupcakes or can be made in three 8 inch cake pans
The Cake
The Frosting
Preheat oven to 375
Grease a parchment lined 13×18 high rimmed baking sheet and dust with flour. If you baking sheet isn’t as big as mine, use whatever size you have and make a few cupcakes on the side. Or make one , 3 tiered cake with 8 inch cake pans. I trust that you can find a way to bake all this cake batter.
Wash, trim and dice strawberries. Toss them in a medium sauce pan and sprinkle with 2 tablespoons of sugar. Place on low heat and cook for about 10 minutes until strawberries break down and turn into a thick syrup. Take of heat and let cool.
Combine flour, salt, baking powder and soda in a bowl and whisk together, In another large bowl, add butter and sugar together and beat on medium until light and fluffy. Add in oil, vanilla and eggs. Beat together. Now add the milk to the strawberries and mix together. Beat in half the dry into the wet, add in half the strawberry mixture, then the rest of the dry, and finish off with the rest of the strawberry mixture.
Pour batter into prepare baking sheet (or pans) and place in oven. Check cake after about 15 minutes and rotate to help insure an even bake. Bake for another 15- 20 minutes, or until cake starts to turn golden brown and a tester (toothpick) comes out clean.
Remove from oven and let completely cool. (Not necessary, but once cake is cooled , wrap with plastic wrap and stick cake into the freezer of a little while before cutting the circles.. its makes it a little easier)
While cake is cooling, make the frosting. Place all ingredients in a big bowl and beat together until a nice soft but sturdy frosting forms. If. you frosting seems to thick add in a splash of milk. To thin.. add a little more sugar.
When the cake is cooled, get to it. With you cookie or biscuit cuter dipped in powdered sugar, cut as many circles as you can.
Fun Time!! Frost the cakes. Place frosting into a pastry bag, or like me, a large zip lock bag with the tip cut off. Partner up all the cake rounds and go through and give one of each of the pairs a good dollop of frosting. Top with the remaining cake, give it a lithe smooshto make sure they stick, and squeeze a nice dollop of frosting on top. Finish off with sliced strawberries and lots of sprinkles.
Sing Happy Birthday and eat!
So maybe this might seem a little out of your normal food routine, but why not try it? Trust me….you will love it and everyone you make it for will think you are a number 1 badass too.
Notes…. I used white beans, but I have also done this with chick peas and lentils. All are fantastic. Also, I did not peel my beets because I never do.(I do not peel anything the skin is full of goodness and I love the taste) If you don’t want to eat the skin, then peel them. Cabbage is cut into inch thick slabs… I like to us the inter most part of a cabbage head cause I like the core. But use any cut that you want. 2 beets are chopped into chunkers and both the cabbage and the beets are placed on a lightly oiled baking sheets, seasoned with salt and pepper, and stuck into the oven for 20-25 minutes at 400 degrees.
And now I am #1
Happy Wednesday… Keep it good!
-C
Beet and Bean Cabbage Steaks
Makes 2 Thick Cut Steaks
Preheat Oven to 4oo degrees
Cut two 1 ish inch thick rounds of cabbage from the widest part of the head. Place on a lightly oiled baking sheet. Chop beets into chunks and toss on same baking sheet.(Peel if you want) Sprinkle everything with salt and pepper. Stick into oven for 20-25 minutes or until the beets and cabbage are tender. Remove veggies from oven and place roasted beets into a blender (or bowl if using a hand blender) but leave the cabbage on the baking sheet. Add the white beans, the juice of half a lemon, and salt and pepper to the beets and puree until smooth. Scoop equal amounts of the mixture to each cabbage steak, sprinkle with pepper and place back into oven for another 5-10 minutes to give the beans and beets a nice crunchy crust (You can skip this step if you don’t want to be crusty)
Remove from oven, stick on a plate and drizzle with mustard….Fork and knife are good ways to eat it, but eating it with you fingers makes less dirty dishes.
This lovely. oh so gorgeous salad has been on repeat in my meal repertoire. It’s so yummy and so simple. Beets and carrots roasted and sliced, tossed onto a bed of tender spinach and topped with a creamy, lemony avocado dressing. Fresh, fast, light, and filling. Everything a perfect spring salad needs. Not to mention it takes no time at all to make because with all this nice weather , we want to spend as much time basking in the warmth and glow of the sun. I might even take my spring salad outside today. Maybe.
That’s it. You now have super creamy avocado lemon dressing. Drizzle on anything and everything… especially this roasted carrot and beet salad..
A salad suggestion…. Add some roasted chickpeas toasted nuts, or sunflower seeds to this or any salad. Adds a little proteins and the crispy crunch is a nice addition.
Enjoy the day..Smile lots
-C
Roasted Carrot Beet Salad and Avocado Lemon Dressing
Salad
You can roast the veggies a few ways.. Slice the carrot and beet, place on a baking sheet and stick into the oven at 425 degrees until tender. Or you can just toss a the carrot and beet onto a baking sheet whole and roast.( What I usually do)
Once the veggies are roasted and cooled, thinly slice and toss onto the bed of baby spinach. Top with Avocado Lemon Dressing (recipe below) and some toasted crunchy thing.
Dressing
Scoop avocado fruit into a bowl and mash with a fork until a paste is formed. Scoop mashed avocado into a jar and add remaining ingredients. Stick lid on jar and shake tip combined. Use on anything.
Dressing lasts a few days in the fridge. Should stay green, but add a layer of lemon juice to top to keep from browning.