
THE LOVELY CRAZY
 The other day the mister and I started reminiscing about some of our earliest memories of what our parents fed us or what they used to eat when we were growing up. One of the dishes that we both remember eating was the classic creamed beef on toast, or as my mom use to call it, shit on a shingle. Yup, shit on a shingle. (who ever started calling creamed meat on toast is a freaking genius) I think that as a kid, I liked the dish just for the mer fact that I could say the word shit and get away with it. I think my mom liked it for few reasons; she could make a big butt load of it really fast, for a crap load of kids, on the super cheap. And I think that she just really like it.
Shit on a shingle is one of those foods that I like to call “trash food”, you know stuff like beefaroni or pork and beans. Stuff that we all loved as little kids but might think twice about feeding to anyone now. ( I’ll still feed nick a can of beefaroni.. he likes it) As a throwback to our earliest food memories, (also a lack of food in the house and wanted to make something fast, easy, and cheap.. thanks mom!) I made the mister my rendition of the classic. Creamy Lentils and Mushrooms on toast. Not quite as trashy as creamed beef (lentils, mushrooms and onions are not trashy) but you get the same reminiscing feeling. I guess I could call it something like “stuff on a shingle” or lumps on a shingle”, but what kid (or adult) would want to eat that. Let’s just stick with shit, it makes it more awesome to eat it.
 The shit….. A few mushrooms, a bit of onion, cooked lentils, flour, milk, oil, salt and pepper, and garlic powder. And the shingles.. 2 pieces of thick white country bread.
 Slice the mushrooms and the onion and toss into a skillet with a drizzle of oil. Cook on medium heat until browned and fragrant..Remove from pan.
 In the empty pan still on medium heat, add in the olive oil and the flour. Whisky constantly, slowly add in the milk. Keep whisking until sauce thickens. Remove from heat. Add in salt, pepper, and garlic powder.
 Add the mushrooms and the lentils into the sauce and give it a good mix. Oh, and don’t forget to toast up the bread.
 Now dump that shit all over those shingles! Oh the memories.
If you need to, make it classy by serving it with a cloth napkin and a nice fork and knife. But eat it however you need to. (As kids we like dirty hands and no fork, preferably with a big tall glass of overly sweetened red flavored kool-aid)
Enjoy this fantastic Spring weekend!
-C
Shit on s Shingle (Creamy Lentils and Mushrooms on Toast)
One serving
- 1 cup cooked lentils
- 2- 3 mushrooms
- 1/2 small onion
- 1 cup milk (cow, nut, plant… whatever you want)
- 1 tablespoon olive oil
- 1 tablespoon flour
- 1 teaspoon garlic powder
- salt and pepper
- 2 pieces of nice thick but soft white sandwich bread
Slice the mushroom and onion and toss into a pan or skillet with a drizzle of oil. Cook on medium heat until brown and fragrant than dump onto a plate. In same skillet, add the oil and the flour and mix with a whisk while slowly adding in the milk. Keep whisking until sauce starts to thicken. Turn heat to simmer and add in the cooked lentils and the sautéd mushrooms and onions. Push down the bread in the toaster.. and when it pops up, dump the shill over it.
 I can’t stop eating these. They are like little balls of crack and I am an addict.
Frozen peanut butter grapes… I mean, I just can’t stop.
So you say you have never frozen your grapes? Well you should. It’s the only way I like to eat them anymore. I was never a huge grape fan, but one day long ago, I discovered the wonder that is the frozen grape and it is amazing, Now whenever grapes are on sale at the grocery store, I buy way to many and end up filling our tiny little freezer with jars and bowls of grapes. Then whenever the mister goes to grab the bag of frozen peas for his sore back or knees, there is almost always a frozen grape avalanche. Why I don’t put a lid on those containers is even a mystery to me. Oh, now I remember.. I want easy access.Oopen the freezer, grab a few grapes, and go on my way… not having a lid to take off makes the process a little easier.
Then one day, the frozen grape game turned into something else, something a little more decadent and even more addicting. Where it came from, I do not know. Maybe it’s some subconscious throwback to a childhood full of peanut butter and grape jelly sandwiches, or maybe it’s just that fact that I think peanut butter can pretty much go with anything. But no matter why, I started dipping those frozen grapes into peanut butter and never looked back. And now when I have grapes, it’s all I want to eat.
I am warning you now, once you start making these, watch out, because before you know it, you will develop a frozen grape addiction too. And littles.. they are as easily addicted to these as well. I have seen kids that hate grapes go totally bonkers for these. Just so you know.
 The stuff you will need. Washed and drained fresh grapes (green or red. I usually use red but the green were half the price and the red ones didn’t taste very grapie*) Creamy peanut butter, skewers, and a little bit of cinnamon or cocoa powder (optional)
*Note. When you are the store, try before you buy. You know what I mean, eat a few while shopping aground. I say this because not all grape are created equal. Some taste way better than others. I have bought grapes before that didn’t taste like anything or that have really tough skins, and those just piss me off, so eating a few will guarantee that your money is being well spent and that the grapes won’t disappoint you.
Ok, so now let’s make these bad boys.
Simple simple. Two grapes per skewer (or toothpick) Lay on a wax paper covered dish or pan and stick them in the freezer until frozen.  When the grapes are frozen, melt peanut butter. Take a big glob and stick in a tall skinny cup or bowl and stick in the microwave or heat in a sauce pan and then transfer to a tall skinny vessel. Take frozen skewed grapes and, one skewer at a time, dip in the peanut butter. Cover with as much or as little of the peanut butter as you want and place on wax paper. If you are feeling feisty, add a sprinkle or cinnamon or even a dash of cocoa powder. Or, this may seem a little crazy, but garlic powder is so F*ing good.(it’s worth at least giving it a try) When all grapes are dipped, place back into freezer for another 10 minutes or so to let the peanut butter set up a bit.
 Whenever your ready… Eat. And be so happy. And always keep a back stock of frozen grapes in the freezer. They are the best.
Keep it realz.
-C
Peanut Butter Freezer Grapes
the quantity is up to you, but I recommend making a shit ton!
- Creamy Peanut butter (I use organic creamy from Trader Joes, or natural skippy)
- Green or Red Grapes
- Cinnamon and or cocoa powder (Optional)
- Toothpicks or skewers
Wash grapes and skewer 2 grapes onto a stick. Place on a flat surface and stick into the freezer until frozen, which usually takes about an hour.
Once grapes are frozen, stick a big glob of peanut butter into a tall skinny vessel (Like a juice cup or a 4 oz ball jar) and warm to a liquid constancy in the microwave (about 30-45 seconds) or if you don’t have a microwave, stick in a sauce pan, warm on stove, and pour into a glass (what I do)
Remove frozen grapes from freezer and dip into melted peanut butter. Place on a wax paper line tray or pan and sprinkle with cinnamon and or cocoa powder, or not, or a few (whatever you want) and stick back into freezer for another 10 minutes.
Eat as many as you want… Make so many because you will become addicted!


First day of Spring!! Well kind of I guess. I think it actually starts at like 6:20 tonight, when the temperature is going to dip back done to 10.(Spring my ass) I don’t know about you people out there but here in Vermont, we are really hanging on to winter. I have to keep telling myself…” It will be warmer soon and you’ll be looking forward to this weather in a few months.. so stop bitching!” I give myself good pep talks.
Anyway, last week at the farm share pick up, there was a nice little surprise. We got a few pounds of some sweet locally grown and milled whole wheat flour. There was a little sign with the information about the wheat and where it came from, but in my haste of gathering all of my other veggies, I failed to take notes and forgot the name of the farm that it came from. But I do know that my farm traded some celeriac for the wheat. I was really excited because I am really into the idea of using locally grown grains and I don’t know, it just made me really happy, especially because it was a trade. Food framing and local sharing is stuff that makes me happy.
I wanted to make something to kind of showcase the hearty, nutty flavor of the wheat and I also wanted to make something that my mister would eat for breakfast. Well what better way to do that then with muffins! Banana coconut whole wheat (that just happen to be vegan) Hearty, fruity, and smells like the word lovely and the color yellow. A few to eat and a few to share. Hanging at home, running away or getting ready for a day of spring cleaning….This is a great weekend to make muffins!

The stuff… Light, nutty local whole wheat flour, ripe oh ripe bananas and coconut flakes are the stars in this muffin… But we need the other stuff too. Brown sugar, vanilla, coconut oil and a chia egg. Baking powder, baking soda, and last but not least, salt.


Yup, that sounds about right The salt, baking soda, and baking powder are whisked together. The banana and all the rest of the stuff are mixed up… Then mix the wet mixture into the dry. Stir until combined and then add in the coconut flakes,Scoop mixture into 12 lined muffin cups… A scoop like mine works very nicely. Don’t have one, well I recommend you get yourself one. Until then, use a spoon. Something I always do when baking any muffin is sprinkle the tops of each muffin with a bit of sugar or brown sugar. It melts and caramelizes and adds a sweet little crunch to the tops.


Now stick the muffins into the oven. Remove from oven when they look like this, nice and golden brown. Also good idea to check with a tester stuck into the middle. When it comes out clean, they are done.12 happy little muffins cooling on a rack, waiting to be eaten with you mouth.
Doesn’t the sight of pretty food make you happy, like sing a song happy? Muffins, whoa yah!! Friday yah yah!! Spring…What, Yah!! Yah…Yah Yah!!!
Terrible I know, but at least you were spared hearing my actual voice.
Have a great weekend. Do lots of springy stuff!
-C
- 2 Cups Whole Wheat Flour
- 4 Ripe bananas
- 1 Teaspoon Baking Soda
- 1/2 Teaspoon Baking Powder
- 1 teaspoon Salt
- 1 teaspoon Vanilla Extract
- 3/4 Cup Brown Sugar
- 1/3 cup melted Coconut Oil
- 1 Tablespoon Chia Seeds + 3 Tablespoons warm water
- 1/2 Cup Unsweetened Coconut Flakes
Preheat oven to 350
In a small bowl, mix 3 tablespoons warm water to the chia seeds and let sit for at least 5 minutes (10 is better) In a large bowl, peel and mash the bananas until they turn into a kind of chunky soupy puree. Add in brown sugar, chia seed mixture, vanilla extract, and the melted coconut oil (make sure it’s melted or it won’t incorporate into the mixture) Mix together. In another bowl, whisk together the flour, baking soda, baking powder and salt. Mix the wet mixture with the dry until combined then mix in the coconut flakes.
Line a 12 cup muffin tin and fill each cup about 3/4 the way up with batter. Sprinkle each muffin with brown sugar and place in oven on center rack. Bake for 25-30 minutes or until the tops 0f the muffins are golden brown and a tester inserted into the middle comes out clean.
Remove muffins from tin and let cool.
Serve as is or maybe with a smudge of coconut butter, or anything you want really.
No need for fork, just use you mouth.

 I swear I didn’t plan this, but today is officially Pi Day! Pi being the mathematical constant of the ratio of the circumference of a circle to its dimeter (did I say that right?) 3.1415…… And today’s date is 3.14.15. Whoa…I guess that means that this pie was meant to be.
But the real reason I made this pie was for a surprise treat for the mister. He left for a couple of days and me being the super assume lady love of his, thought it would be nice for him to come home to his favorite dessert.. plain old rhubarb pie.( I know, I be the best) And it didn’t hurt that when I went to the grocery store, there was a big old pile of fresh, gorgeous rhubarb staring me right in the face, and on sale to boot.
The funniest thing. Me and the mister have been together for a very long time (12+ years….we started dating in high school, so I am not that old!) and I have known that his favorite dessert is plain rhubarb pie for ever. Every time we have one of our food discussions about our favorite foods, (which happens more than it should and usually consists of me running my mouth and him grunting or nodding once in a while) rhubarb pie always comes up. He even talks about the old lady who used to make him rhubarb pie for mowing her lawn. And guess what… I have never once made him a plain rhubarb pie. Why? Honestly, I have no idea. Maybe I secretly think I was going to screw up his one favorite dessert, or maybe I never quit had enough rhubarb for a pie, or maybe I am really just an awful lady. But for whatever reason, it doesn’t matter anymore because I finally made him a plain rhubarb pie.
 The stuff for the makings of pie… One single pie crust, flour, sugar and rhubarb. I mean, come on, this might be one of the simplest pies ever.
Note…The first thing the mister said to me when he saw the pie was. “Where is the top crust? My response what “Screw you ass face” but then chuckled. This pie would be great with a top crust, but I was thinking how pretty it would be without it. And honestly, I only made a single crust. What I am saying is.. make a double crust if you want a top.

 The chilled pie crust gets rolled out, placed into a pie plate, trimmed and made all pretty. The bottom is sprinkled with a 1/4 cup of sugar and stuck back into the fridge while the oven preheats to 350. Now is a good time to dice the rhubarb into inchish chunks. Once the oven is preheated, remove crust from fridge and add in the diced rhubarb.

 The remaining sugar and flour get mixed together in a bowl and dump on top of the rhubarb. Give it a tiny toss with you fingers just to get some of the mixture to sink down a little. (Don’t worry, the filling will be perfect when you do it like this) I also cut up the pie crust trimmings and placed on top… not necessary, but looks pretty and is a good use of the scraps.
Now cover the entire pie with tinfoil. Cut and x through the middle and fold foil back to expose the filling but keep the crust covered. (so much easier than trying to squish strips of foil together..you know what I am talking about)
And then the pie is ready to be baked.
In the oven for 5o minutes with the foil, then 10 or so minutes without to finish. And then you take it from the oven and marvel at the beauty.
I am now truly the best super awesome lady love. I should get a freaking crown but would settle for a stand mixer or blender as a reward instead.
Important…..Let the pie cool completely (or just about) before cutting.The filling needs a bit of time to set.
Happy Saturday, Happy Weekend, Happy PI Pie Day!!!
-C
Rhubarb Pie
- Single Pie Crust.. Recipe here
- 4-5 large Rhubarb Stocks (4 cups chopped)
- 1 1/4 cups white sugar
- a hefty 1/3 cup flour
Make you pie crust.. and make sure it’s chilled!
Roll our pie crust and place in pie plate. Trim and make edge all nice and pretty. Add 1/4 cup of sugar to the bottom and stick back in the fridge to relax while you get the other stuff together.
Preheat oven to 350
Wash and dice rhubarb into inchish chunks. In a bowl, mix together 1 cup of sugar and the flour. Once the oven is preheated, remove crust from fridge and fill crust with the chopped up rhubarb. Now dump the sugar, flour mixture on top, slightly tossing it around with your fingers. Cover entire pie with tin foil and with a knife, cut an x through the middle of the foil. Fold foil back to expose the center of the pie, but keep the crust covered. Stick into oven. Bake for about an hour, removing the tin foil after about 50 minutes. Pie is done when the crust is golden brown and a fork or knife stuck into the middle of pie comes out with a thick jam like sauciness.
Let pie cool and set for a bit.
Slice. Serve on a plate with an eating utensil and maybe a scoop of vanilla bean ice cream. Lick plate clean.
 One of the best things about winter is that I can have something in the oven at any time and not worry about how hot the house is going to get. I get to spend my free time (or my in between free minutes) baking up all the thing that I would not dare bake in the summer. (lots of bread and cakes) Yeah, I might complain a little about how cold it is outside (to my defense, -20 is kind of a bitch) but then I think of the super hot humid days that come during the summer and cringe. At least when its cold out I am able to get warm, (que oven) but when its super hot and humid, I just turn into something that border lines a wet towel and the rabbit animal… Not so pleasant. I much prefer cooler weather. So no big surprise….I made bread.. or focaccia to be exact. And now you should too because first off, you want to eat it, and secondly, you can probably whip this up faster then it would take to get all of you winter warmies on and leave the house. Don’t leave, just turn the oven on.
 The stuff, which isn’t a whole lot… Flour and salt. A mixture of honey, water, and yeast. And olive oil. Its pretty much my pizza dough recipe, tweaked with the addition of oil, less flour and no kneading.
 Mix together the wet and dry…I used my nifty dough whisk, but a wooden spoon or even your hand works. Mix mix mix. The dough should be really slack and sticky. And guess what.. no need to knead! Just make sure the dough is uniformly incorporated…hehe.. uniformly incorporated… sounds weird.

 Drizzle the dough (don’t worry about making it into a ball, a blob is good) with a little oil and place in a nice warm place topped with a towel to rise for about an hour or until dough has doubled in size. Once is has fully risen, drizzle 2 tablespoons oil in two 9 inch cake pans. Divide dough in half, and kind of smoosh dough into pans. Cover and let rise for another 20 minutes or so.
 When dough has finished its second rise, drizzle each with another tablespoon of oil and with your fingers, fill out the pan and indent the dough, kind of like playing a piano or tickling a puppy(?)….Then layer your toppings (if you want any) Start with any herbs, then the veggies. Then last, any cheese you got. I used thyme, cracked black pepper, tomato, onion, topped with parmesan cheese. And the other one is just plain old salt.
 Pulled from the oven when nice and golden brown..set on a wire rack to cool for a few minute and removed from the pans.
 The mister was practically salivating waiting for a slice… and he was so not disappointed. Crispy outside with soft airy insides… Everything a perfect focaccia should be. The one with the toppings was the favorite for the first night, but for a peanut butter and cheese panini for lunch the next day…plain is the way to go.. My suggestion, do what I did, jazz one up and leave one plain. And then make more if you need too because the forecast call for another week of below zero!!! Oh the things that I’ll get to make! (me being positive) Stay warm! -C
Focaccia with out without stuff
- 3 cups all-purpose flour
- 1 tablespoon salt plus 2 teaspoons for topping (can use more or less if you want)
- 2 teaspoons active yeast (or one package)
- 1 1/2 cups warm water
- 1 tablespoon honey (or sugar if vegan)
- 6 tablespoons olive oil
Optional toppings
- Fresh cracked pepper
- Thyme or any other spices
- Thinly sliced tomato
- Thinly sliced onion
- Parmesan Cheese
- Anything you want!
In a bowl or jar, mix honey (or sugar), yeast and warm water together and let sit for about 5 minutes or until yeast is activated and starts to foam In a large bowl, whisk together flour and 1 tablespoon of salt. With either a wooden spoon, dough whisk, or if you have one, a stand mixer with a dough hook, mix the yeast mixture with the flour. The dough is going to be really sticky so mixing might get a little gloppy, but keep at it until everything is full incorporated.. for about 3-5 minutes and don’t be afraid to use your hand… you can wash it off. Once mixed drizzle with oil and cover with a towel. Let rise for about an hour or until dough has dubbed in size. When dough has double, coat two 8 or 9 inch cake pans each with 2 tablespoons olive oil. Dump dough onto floured surface and cut in half. Take each half a place in pan. cover and let rise again for another 20ish minutes. preheat over to 400 degrees After second rise, lightly take your fingers and push down dough, making little indents all over the surface. Drizzle each with another tablespoon of olive oil and sprinkle each with a teaspoon of salt. If using spices or any other toppings, nows the time to layer them on. And do any cheese last! Place in oven and bake for about 30 minutes or until the tops are golden brown. When done, place on a wire rack and let cool a bit before removing from pans. Done!! To store, place in a paper bag.. best eaten within a few days!
 So the mister wants to know…”Why would anyone ever buy those crappy english muffins from the store when they could be eating these?”
Good question…And we will all answer….”Never again! Because I now make the sickest E.M.s around.!”(E.M.s is the cool short way to say english muffins and now that you are going to make your own….man, your so cool!)
These E.M.s are perfect. Easy to make, not overly fussy, and you end up with a super yummy, extremely versatile, individually portion super sweet little disk of bread. And the best part is..nooks and crannies! I think that is why I decided to make these E.M.s, so Nick and I can talk the about nooks and crannies…(Sometimes we need light conversation)

We start with flour and salt whisked together in a bowl. The honey, yeast and warm water are getting on proofing in a jar. An egg waiting to be cracked, some milk, and 2 tablespoons of butter. All this good stuff equals…nooks and crannies!
Oh you like my nifty dough whisk….me too, I use it all the time. Maybe I should have a dough whisk give away ……maybe…..
 Everything all mixed together, dumped onto a floured surface and kneaded for 10 minutes by hand…..If you have a stand mixer, you can use it if you want, but you are missing out on the fun of doing it by hand….
When the dough has been sufficiently kneaded, gather dough into a nice ball, coat with a little oil and place back into bowl. Cover with a towel and stick in a warm place to rise for about an hour or until it has doubled in size.
 When dough has doubled, punch down and plop out onto floured surface. Dust the bottom of a griddle or in my case, two cast iron pans, with corn meal. Divide dough into 8-10 equal balls and smash into 2 inch thick disks.
 Place on griddle or pans and sprinkle more corn meal on top of each E.M. Cover and let rise for another 15 minute.
 Now the E.M.s have rested, turn the griddle (or pans) on to low heat. Once your griddle (or pans) gets hot, continue to cook that side for another 7-10 minutes, or until golden brown. Flip and cook other side for 10-12 minutes or until golden brown. Once browned, check for doneness with a thermometer. The inside should reach 200 degrees.( if you don’t have a thermometer, fork split one open and check…. you are going to eat it anyway) If the outside cooked faster then the inside, no worries, just pop them into the oven at 350 for 8-10 minutes. I had to pop mine into the oven for to cook completely.

 Remove form griddle, let cool a bit, and ……Fresh, fluffy fat, fantastic….Everything and more that a real english muffin should be. Split open with a fork and……. the nooks and crannies! So spot on. Serve with anything your heart desires…I served these with whipped honey butter…. and eat the only kind of E.M. you will ever again eat. Grocery store english muffins be damned!
Enjoy and Happy Tuesday!
-C
English Muffins
Ingredients
- 2 1/2 cups unbleached all-purpose flour
- 2 teaspoons honey
- 1 teaspoon salt
- 2 tablespoon butter at room temperature
- 1 1/4 teaspoons active dry yeast
- 1/4 cup warm water
- 3/4 cup milk
- 1 egg
- cornmeal for pan
Combine warm water, honey and yeast in a bowl to active..about 5-10 minutes or until yeast is foamy.
In a separate bowl, whisk together flour and salt. Mix in butter(I use my fingers) When yeast mixture is done proofing, whisk together mixture with the egg and milk. Add wet to dry and mix until just incorporated Dump out onto floured surface and knead dough for 8 minutes, adding a bit of flour whenever dough starts to get too sticky. Roll into a ball, coat with oil and place back into bowl and cover with a towel. Let rise for 60 minutes or until sought has doubled in size.
Once the first rise is done, deflate dough and divide into 8 equal pieces(10 for a slightly smaller muffin). Smoosh each ball into a flat disk, about 2 inches thick) and place on a cold cornmeal dusted cast iron griddle. (I used 2 cast iron pans) Sprinkle tops of muffins with more corn meal and let dough rest for another 15 minted. Turn burners on low heat. Let griddle get hot and continue to cook the muffins for another 10 minutes or until golden brown. Flip and cook opposite side until gold brown and remove from griddle. To make sure the muffins are cooked completely, stick an instant read thermometer into the center…it should read 200 degrees. (if you don’t have a thermometer, split one open… the tester E.M.) If the E.M.s are not completely cook, just stick in the oven on 350 for 5-10 minutes or until cooked throughout.
Remove and let cool. To serve, split open with a fork and give a light toast. Spread with butter, jam, peanuts butter, anything you want…maybe make E.M pizzas!
 The perfect way to start your day. APPLES, PEARS, CARROTS, tossed in Cinnamon! Whats that you say? You don’t think carrot and fruit go together, that this couldn’t possible taste right… Well guess what, you are wrong. Yes, it may seem like a strange combination, but trust me, it works and it works so so good. This is what I eat almost every day for breakfast. And man oh man, with a cup of hot coffee and a good book, I welcome 5am. Note that this can be eaten throughout the day. Its even a fantastic night time snack!

To compile this bowl of yum, all you have to do is chop up an apple, a pear, and a carrot and toss in a bowl with cinnamon to taste. I use Vietnamese cinnamon which has a spicier flavor to it, but plan old cinnamon works too. You could even try adding a pinch of ginger or nutmeg. Heck, drizzle a bit of honey if your feeling it. I also suggest using your favorite bowl, fork, and if your drinking something, your favorite mug. When your dishes and utensils are right, it just makes your food that much better.
Monday Monday!!!! Try to enjoy it!
 I am kind of obsessed with pickled jalapeños… like I want to eat a whole jar with a fork and then drink the juice. So much hot and spicy love. One of my sisters is the same way, pickled hot pepper obsessed. We used to buy the humongo gallon sized jars of jalapeños at Costco and go through them in like a month. But sadly, Costco stopped selling those humongous jars and we have been left buying the itty bitty jars that actually fit in a normal fridge. (I know, so sad). And maybe because the jars were normal sized and I was more aware that I shouldn’t eat a of cup of jalapeños at one sitting, or just the mire fact that a tiny jar cost the same as a gallon, but the store bought little jars weren’t doing it for me anymore. And then fate happened. The grocery store was having a super sale on fresh jalapeños and I figured it was time to make make my own. Now I don’t think I can ever go back to those store bought jars of blah because the ones I made are the best freaking pickled jalapeños this girl has ever eaten. I might even start making my own gallon sized jars!!!!
 Mustard and carrots. It’s that simple.


 What we got here is an easy one pan meal for the beginning of a hectic(but fun) holiday week . But I am sure that you have your wits about you, that you are not feeling like a stretch Armstrong doll. No, you are all calm and collected… Well that’s nice because I feel like my head going to explode. So what I need this week is easy, fast food with lots of healthy good stuff and maybe to get rid of the meatballs that are in the freezer….. Mission accomplished with this dish. It’s basically a hug pan of veggies with a few left over meatballs from Nicks bday dinner and a little cottage cheese. Nothing fancy… hearty and warm..Nick likes it so it’s a winner.
 The spaghetti squash is the main component in this dish so if you want to use other veggies, go for it. You can make this vegan and leave out the cheese and use fake balls or no balls at all (hehe) You can even toss in some beans, lentils, or tofu. I make variations of this dish often… and lentils are a really good addition..
 Pulled straight from the oven….Served nice and hot, placed right onto my wooded counter. I need to stop placing hot pans on the wood, I am leaving burn marks. There is actually a lot of thing that I need to stop doing in the kitchen, like setting towels on fire, burning myself at least once a day, slicing my fingers,.breaking dishes…….So maybe place skillet on a trivet of some kind and serve it up!

 Sometimes, no matter whats going on with the week, Monday seems like, well, like a Monday. I drag a little on Mondays. I think it stems from the Monday through Friday school week that was beaten into me for 16 plus years. Hate Mondays, Love Fridays.. Yup, I blame the public educational system(I have to blame someone) I want my day back. I don’t want to feel the drag today. I am going to have a fantastic day. I’m getting excited, pumped up and ready for the week. I am turning my Mondays into fun days. Funday Monday…Yes, yes I did just say that. . See, don’t we all feel better already?
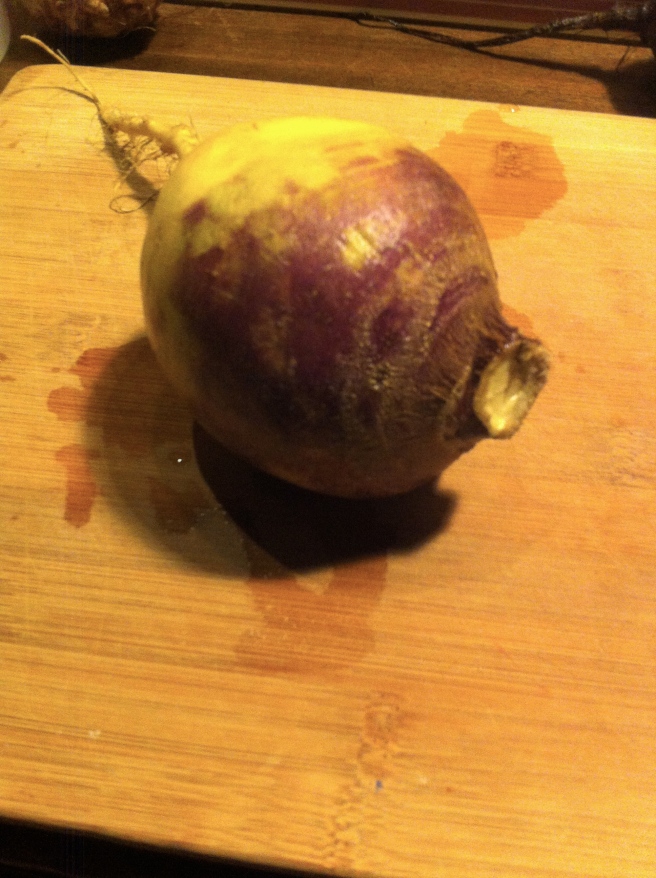 One large rutabaga… This one fed 2 as a side… but if your eating just the fries, eat a whole one to your face. It’s totally cool.
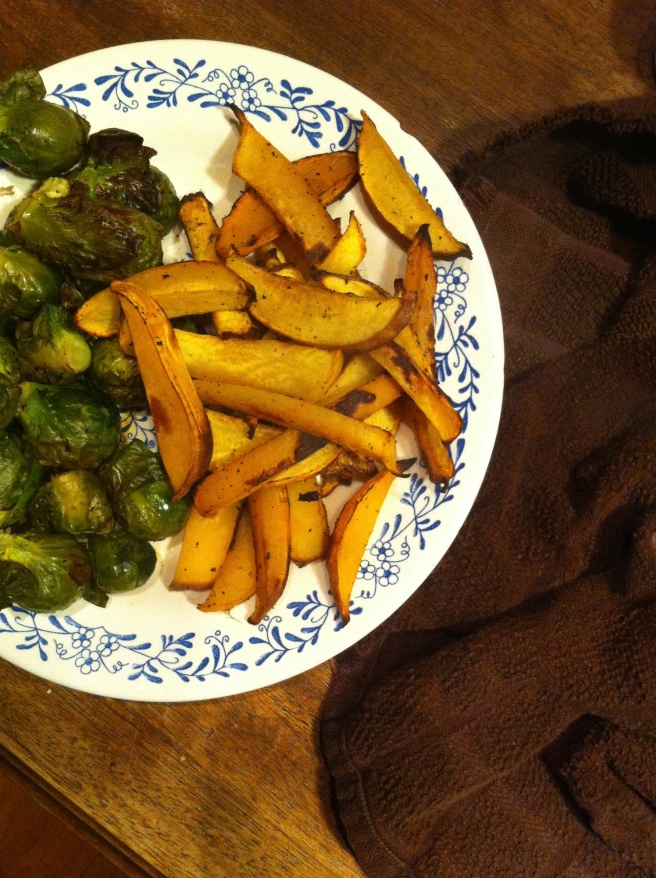
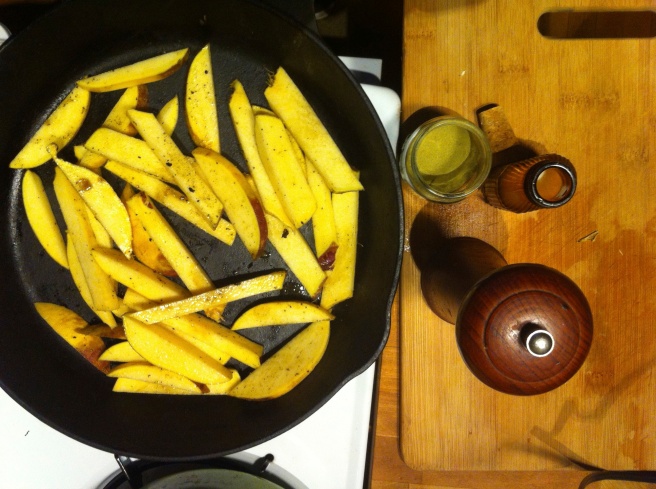 Chop the rutabaga into fries and toss with a smidge of oil, salt, pepper and ground up rosemary. Don’t like the rosemary… don’t use it. Maybe try something else like sage or garlic and onion powder or curry powder. Just use whatever you like. Throw into a 425 degree oven for 20 minutes, give them a flip and back in for another 15, Simple. Easy.
 Last week pineapples were on sale everywhere……So I bought 5. Don’t judge
 Stuff for the goodness. We got the kale, some avocado because all salads should have avocado and some cooked lentils because, well, all salads should have lentils (or beans or nuts.. so you could totally something else) Then a few sprigs of fresh dill, a clove of garlic, red wine vinegar, salt and a bowl of chunked up pineapple.
 The pineapple, dill, garlic, red wine vinegar, a splash of water and a pinch of salt get blended in a blender or whatever blending device you use. Go as smooth or chunky as you like, I recommend going smooth, but leaving a little chunk, like half blended.
 So good……So so good.
 Look at that old man face…. how can anyone stay mad at him? (there was a recent incident involving bananas, you can read about it in the last post.)
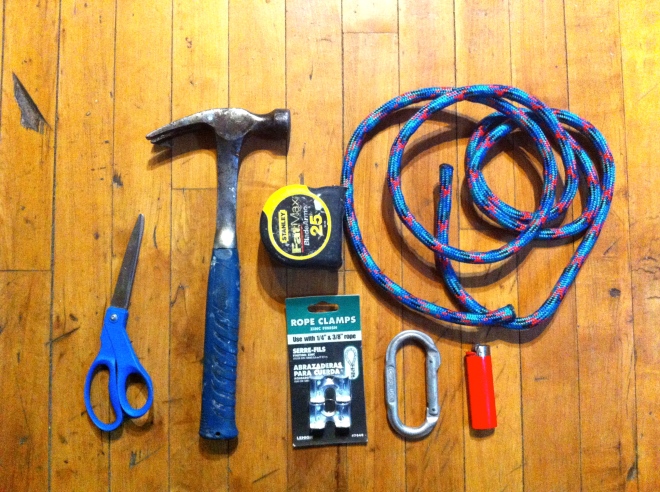
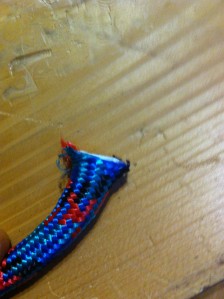
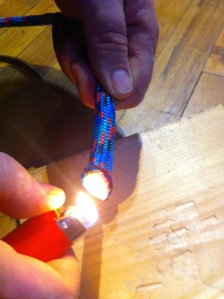

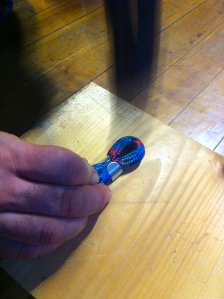

 For the handle, make a large loop, whatever size that works for you, and do the same hammer clamp situation on the ends here.

 New and old. Hopefully he won’t pee on this one for a while.
 A birthday bouquet of veggies. My lover knows me oh so well.
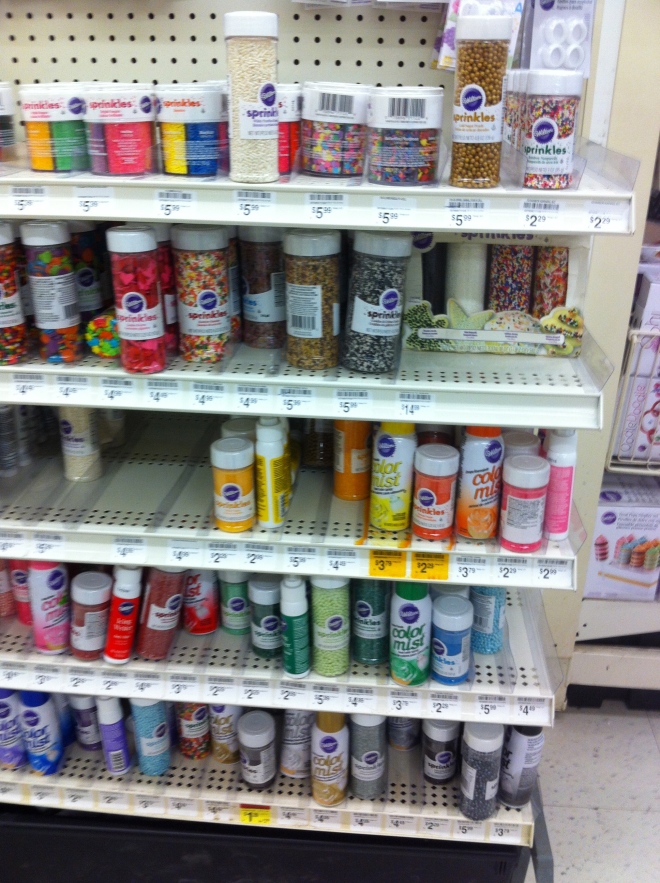
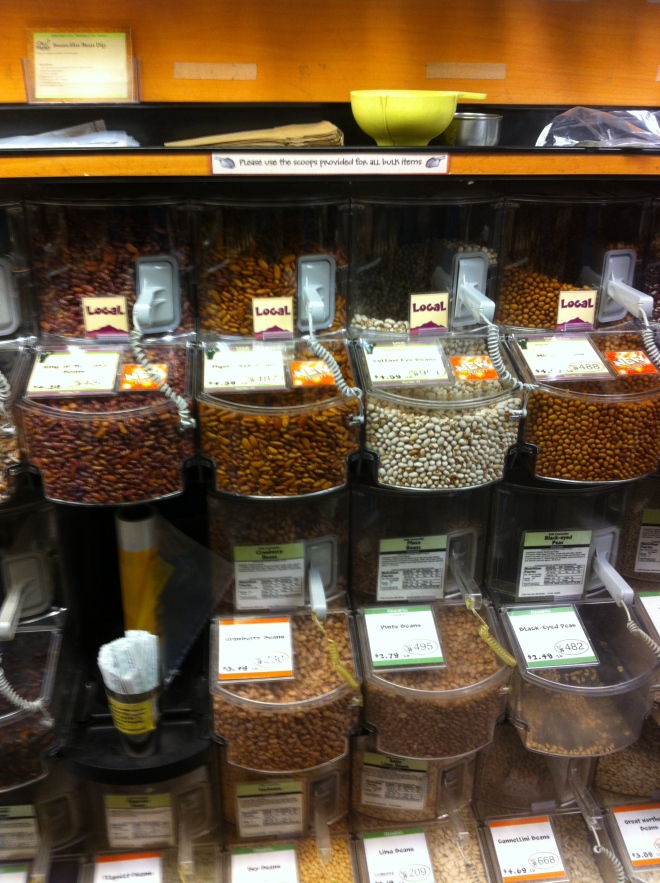 Every year I buy myself some special food for my birthday week. This is the bulk section at the local coop. They got in a bunch of new local dried beans!!!! Local birthday week beans. ( yes, beans make me happy)
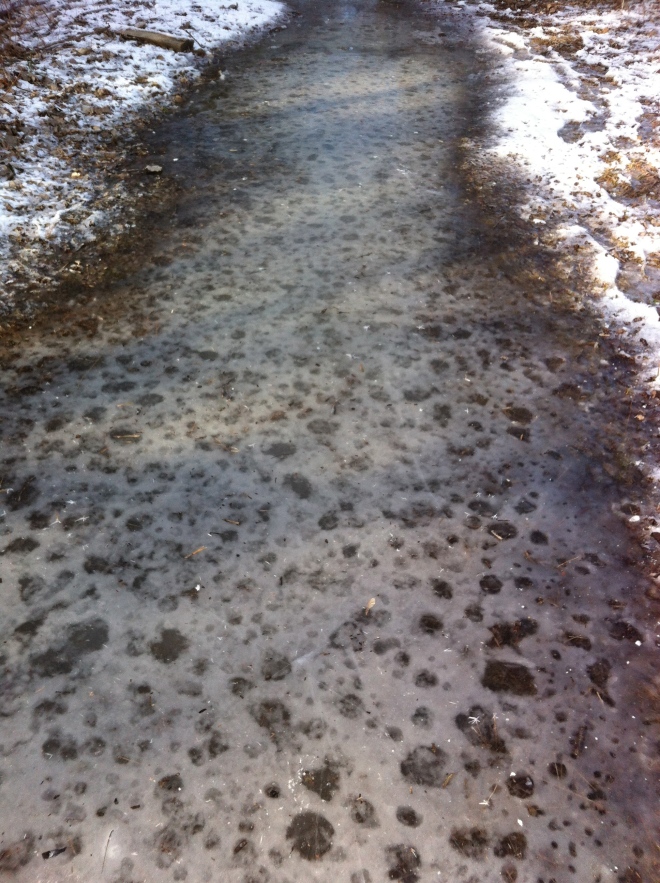 This hike was pretty treacherous, the whole trail was covered in this ice…. but look how cool it is.
 Huggable mountains

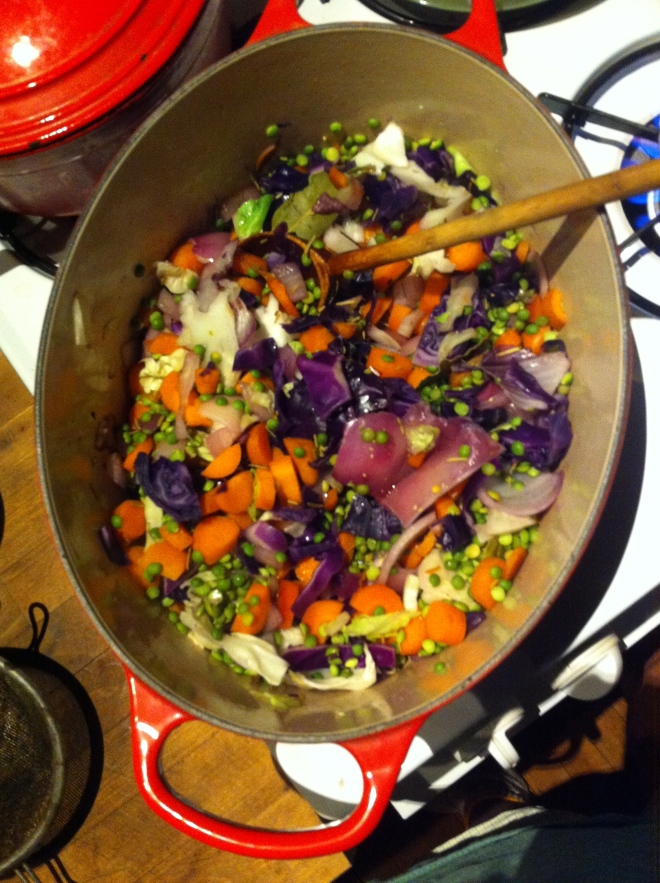 Split peas with tons of purple cabbage and purple onions plus chunks or bright orange carrots.. So freaking pretty and so freaking tasty!
 And last but not least..a throw back that made me smile…Moving day last summer. Our truck full of my house plants. I love my plants.


 Chomp Chomp Chomp… The sound I make as I eat this freaking fantastic crunchy granola. You know it’s good when the person sitting next to you is annoyed by the sound of you face while eating. I eat a lot of crunchy stuff. And I am pretty sure I annoy the mister a lot.
 The simplest of stuff. 1 smashed banana, a cup of pureed butternut squash, Vietnamese cinnamon*, honey, and old fashion oats. (and a dash of salt, not shown)
 Toss the cinnamon and salt with the oats. Mix together the banana, squash and the sweetener and combine with the oats until full incorporated.
 Dump the mixture on a parchment lined baking sheet and give it a little pat, you know, to settle all the bit and pieces together, all cozy and evenly spread out. Now stick into a preheated oven and after about 20 minutes, take out of oven and give the granola a toss, breaking apart any super big chunks or overly wet pieces. Put back into oven for another 20 minutes. (I like my granola super crispy crunchy so I cook it a little longer, like 30 more minutes)
 And when you are happy with the crunchiness of you granola, remove from oven and let cool, trying not to eat all of it while it sit’s on the counter looking all pretty and smelling like happiness.

 And I am home. The mister and I woke up at 2:15 am Friday morning to drive to Easton PA and spend the weekend with family, going to the Crayola crayon factory, wondering a grave yard, and hearing some fantastic stories about my family from the mouth of my 95 year old grandmother. (I’ll show some pictures and tell you some stuff later this week) Than we drove back late last night… I don’t know how I am even awake right now…I am sooooo much tired! But that’s how I work I guess. The coffee is almost ready, calling my name, telling me its totally cool to drink it all.
 My forsythia bush in from of one of my houses… Always the first one to bloom.
 This is how washer sleeps in the warmer months.. All feet in the air.
 I ate it all and it was good.
 Two pretty ladies
 Veggies Plants!!!!
 The kitchen, living room, dinning room, office…all over great room., covered in piles of clothes. Sometimes listening to music and folding laundry can be so, I don’t know, peaceful. I just felt happy at this moment. (might be the fact that I know have some clean clothes and dish cloths)

 Standing in line at the grocery store, saw this magazine and started to laugh. I love Oprah…but now…I really love Oprah. Best magazine cover ever!
 Another picture of the pup. Letting his rino toy have the bed. A little pathetic…A lot cute
 I am doing little recipe testing and this situation in this pot is so freaking good! Just trying to work out a few technical kinks.


 Persimmons.,,,,,,,,,,,. Do I need to say more?
 This new tea… I wasn’t sure I was going to like it but oh do I. It’s so freaking good, I have been drinking it every day. I must stock up before its gone!
 Look at how happy this guy is. Its hunting season and we forgot his bright colors so we improvised. Yellow trash bag ribbons. His new nickname is now Trash dog. It fits him.
 Watching this little. She is an amazing human being and I love love love her.. I think she might be mine. She really likes soup..
 My elf candle holders I got from CB2. I wanted them so bad for years and finally the last year they sold them I bought myself these guys. I heart them
 Oh you like my new milk crate show bench? Its awesome,, one of the best uses of scrap wood and milk crate that I have ever done(Yes there has been other scape wood milk crate projects) Well you are in luck..I will show you how to made it.. watch for it next week!
 I love old strainers. I kind of have a thing for them. This big guy is now in my collection. Bonus, green AND purple kale….
 Hanging out with my sister. I haven’t seen her for what seems like the past 4 months(she is in nursing school). This was her last day of classes so we cleaned her house, folded laundry while listening to music and I made her dinner.We wrapped up the night by mass texting our other sisters inappropriate pictures of the elf on the shelf. It got pretty crazy. It was such a great night. I love my sisters.
THE LOVELY CRAZY
September 19, 2015 by maximios • Blog
FRIDAY YEAH YEAH!!!!
And for your Friday, I made these awesome little raw/ vegan/ gluten free cookies.
Now wait a minute. Don’t let all the labels of what is not in these cookies scare you away. Just focus on all the stuff that these cookies are made of. Almonds, Cashews, Coconut, Cocoa, Oatmeal. They are cookies made with lots of good yummy stuff that just happened to be enjoyed by those with specific food diets as well as those who eat anything. A cookie for all! See, don’t they sound excellent? Yes, yes they do. And they are good. So, so, good. Even the mr. is into them. And he is far from being raw/vegan/ gluten free.
And because these cookies are made with all sorts of good for you stuff (lots of proteins, good healthy fats, and complex carbs) you can pretty much feel zero percent guilt eating them. They a are a no joke, healthy, energy packed cookies of goodness. A fantastic way to start the morning, eat with lunch, as dessert, post work out, or eat as a late night snack. (Just don’t eat them all at once)
Now go for it!
The raw stuff. A cup of old fashion rolled oat that have been soaking in water for about an hour. Almonds(which I spent 20 minutes deshelling) cashews, dehydrated coconut flakes, some cocoa powder and a few medjool date. If your nuts are unsalted, add a pinch of salt too.
Dump everything into a food processor. BUT WAIT! Make sure to remove the pits from the dates)I have broken a blade in the past form a date pit)
Blend unit combined and a kind of rough dough is formed. It will be a little sticky. If it;s to sticky to handle, place into the fridge for a few minutes to set up.
Now take blobs of mixture and roll into balls
And you could totally leave them as balls… you can even play with your balls….
But I think they look nicer squished flat and topped with pieces of nuts and coconut. They look almost fancy, if I do say so myself.
Now have yourself a cookie, and place the rest in the fridge (they get harder and, if you can imagine, taste even better after a few hours of cold)
Freak Yeah FRIDAY! Do fu stuff!
-C
Makes 15 normal sized cookies (you can make more or less, depending on the ball size)
Add all the ingredients into a food processer and blend until the mixer forms a cohesive dough. It;s going to be a tad sticky, but if it seems to sticky to handle, refrigerate for a little bit so it’s easier to handle. (I have no problem handling right away)
Scoop and roll into balls and either leave them as is or squish them flat. Sprinkle with chopped nuts and coconut
Eat one or two right away, then stick the rest in fridge.
A ok to eat as breakfast, with lunch, at dinner, as as snack, a post workout protein, or when sitting on the couch and watching TV.
And now the cucumbers are growing shit crazy.
Every time I open the fridge, at least one (if not a few) come falling out from all the places that I have managed to squeeze them in. (the egg tray in the door is not a safe place for cucumbers) This is a slight problem, but a problem that I kind of like having.
This past weekend I had planned on doing a bunch of pickling and canning. Like a whole day of music blasting, dancing around the kitchen in a cute little apron with wooden spoon in hand, (pretending its a microphone) canning all sorts of fruits and veggies that a piling up in massive amounts for the winter months.
That didn’t happen, and I still have a million cucumbers and not a whole heck of a lot of time this week to inact my canning day day dream.
My simple solution. Cut um up, stick in a bowl with a some fresh dill, a lithe vinegar and leave them on the counter….. And watch as they disappear. It’s crazy. I find if you leave a bowl of cut up anything on the counter, anyone that walks by will stop and eat a few pieces (if not the whole bowl) It’s a scientific fact (no not really, but maybe)
As for my blissful canning day. It will be happening soon. But until then, this is the way to go with those all those cucks. (this works fantastic will zucchinis too!)
The stuff. Cucumbers, onion, fresh dill, salt, pepper, and red wine vinegar.
Slice up the cucumber and onion and toss into a bowl. Spinkle with salt, pepper, and lots of fresh chopped up dill. Splash in the vinegar and toss it all around.
Let it sit on the counter for at least 2 minutes, but the longer they sit, the more pickley they taste.
And eat. Leave on the counter until they are all gone..which won’t take too long.
Enjoy the Tuesday!
-C
Slice cucumber and onion into thin slices. and stick in a big bowl. Sprinkle with salt. pepper, chopped up dill. Pour on a few glugs of vinegar. Toss around, taste and adjust seasoning if needed and let sit on the counter for a few minute… or as long as you want*.
Eat all day long or until they are gone.
IF there are still cucumbers left over after 2 hours and you are worried about leaving food out all day (I don’t worry, but that’s me), stick in the fridge until you ar ready to eat them.
Are you sizzling? Is that pool of water next to you , in fact, your own sweat?
Yeah, I feel you…..stupid heat wave.
During these long extended periods of heat and humidity, my body starts to revolt. I get bitchy, by skin get itchy, my head goes foggy, my stomach starts to refuse food. and I generally just feel like crap. I love the summer, but I am not, by any means, a hot, high humidity person.
So during this nasty bout of heat, I do what I can to find comfort. And one of my comforts is watermelon. I am pretty sure that watermelon is a magical fruit. A giant green oblong ball that when cracked open is the brightest, sweetest bright pink fruit.. I mean, thats pretty f ing magical. It can make anything better, and is one of the few things that I want to eat when its a million degrees outside without barfing.
Watermelon is my official heatwave food. Watermelon all day long (Is it bad that I could literally eat an entire watermelon all to my face, in one sitting? ) And because I am me, I like to spice it up a bit and slather a big glob of basil pesto to the melon…. and that makes me happy. Plus it makes the fact that I am eating nothing but melon seem a little more substantial.
Do you have a heatwave food? If not, try this….It will be your food.
The stuff. A big hunk of watermelon, basil, a lemon, olive oil and salt.
Stick the basil, the juice of the lemon, and a pinch of salt into a blender. Turn on and blend, adding just a tad bit of olive oil until a nice green pesto is made.
Prepare your melon. Remove rinds if you want and save for later.. (seriously, we can make gazpacho with it) and cut into inch thick chunks.
And now if your feeling it, stick a skillet on the stove and preheat on medium high. Once heated, place watermelon chunks on hot skillet and sear each side for about 3-5 minutes per side.
If you want to go fresh, just skip searing it. Me, I do a bowl of both.
And now slather the melon with the pesto
And go to town
Stay cool my friends!
-C
Place basil, a pinch of salt and the juice of the lemon into a blender. Turn on and blend, adding in a drizzle of olive oil until pesto forms.
Preheat a lightly oiled skillet (or a grill) on medium high heat. Take your watermelon and remove rinds (save for later) and cut into inch chunks.* When heated, add the watermelon. LEt each side sear for 3-5 minutes, or until caramelized. Tarnsfrer to a bowl.
*Note. The seared melon is fantastic cooked then cooled. Also, I know some people blot out the juice before grilling, but I think that is a waste and I find unnecessary, but if you don’t want a juicy piece of cooke melon, by all means, blot out the juice..
Or if you don’t want to cook it, don’t
And lastly, toss in a big giant scoop of pesto
Now eat… eat eat eat.
This time of year, there are so many reasons for popsicles, but I think that main reason is that I don’t want to willingly turn on the oven for any amount of time. It’s just to f-ing hot.
Lately, it’s been hot. And humid. And gross. Just way too hot to make anything in the oven. So when I grabbed the rhubarb out of the fridge, knowing that if I didn’t use it soon it would go bad, I immediately thought to make pie. Then I was like,” hell no, not going to happen. I need to freeze this shit”. And freeze it I did..into the greatest, slightly sweet, slightly tart, bright pink popsicles of happiness. They are really the perfect little frozen treat. Not overly sweet and sticky, have a lot a fresh clean flavor, and takes the edge off of the super summer heat and humidity, even if only for a few minutes.
I love popsicles.
But sadly this is probably the last rhubarb for the season (Or maybe the second to last..I think I saw some for sale at the coop a few days ago)
So get it while you can and make these popsicles!
The stuff. Rhubarb, a lime and a little bit of honey (or any sweetener you like). Plus you are going to need some water, but I bet you have some of that on hand.
Chop the rhubarb into inch chunks and toss into a big pot with the water. Stick on the stove and bring to a boil then turn heat to low and let simmer.
Once the rhubarb is so soft that it falls apart, remove from heat and let cool for a few minutes.
With a fine mesh stainer, strain juice into a large jar or bowl.
Now you have the juice for the popsicles and the left over rhubarb stuff is the rhubarb butter.
Place the rhubarb butter into a jar, adding a little honey(or whatever) if you want and eat with anything and everything ( I’ve been adding it to the mr’s yogurt and just eating it with a spoon)
And now add the juice of the lime to the rhubarb juice and add a little honey or whatever sweetness to taste.
And add the rhubarb juice to your popsicle molds and stick in the freezer with sticks tops or wait two hours and add wooden sticks.
When frozen, run the mold under a little hot water and pop those suckers out.
A two for one deal here. And timed perfectly. You have the rhubarb butter to eat while you wait for the popsicles to freeze. So smart
Happy Tuesday.. Keep it cool!
-C
makes 6 4oz popsicles and about a cup of jam
Chop the rhubarb into inch ish chunks and stick into a big pot with water. Turn on high heat and bring to a boil. Once boiling, turn heat to low and simmer until the rhubarb is so soft its falling apart. Remove from heat and let cool for a few minutes. Take a big jug or bowl with a fine mesh strainer,strain the liquid from the solids. You can use a wooden spoon to stir around to help get the juice flowing. Place remaining solids into a jar and add as little or as much or as little honey (any sweetener you like) and give it a stir. Thats your jam
Now for the popsicles. Add the juice of the lime and a tablespoon or two of honey (or whatever sweeteners you like) and mix around. Pour into popsicle molds and stick into freezer.Know your mold.. if you need to insert a stick, do so after about 2 hours.
When pops are frozen, remove from mold and eat your heart out.
I love summer!
All day, everyday, there is something new and delicious to pick and eat. I have my CSA with the Interval Community Farm, which is in full swing, so I am picking up thousands of pounds of fresh produce every week. (maybe not quite that much, but so so much) Plus our lovely garden is starting to reward up with the prettiest veggies as well. I have so much fresh produce that I find myself mindless eating just to make more room in the fridge.(not to mention that my counters are also covered and I have a laundry basket full of yellow squash and zucchini on the table). I guess its getting about time to do a little canning and pickling… but until then, I will just have to solider on and keep on eating!
So this salad is completely inspired by the ever exploding contents of my fridge (and table, and counters). Fresh zucchini, corn,and peaches roasted and tossed together with fresh tomato, creamy avocado, and herbs into one big bowl.. It’s like eating summer… And it fantastic.
The stuff. Zucchini, corn, tomato, peach, and avocado. A lemon (not shown..it rolled under the couch and I couldn’t find it for a little while) and salt and pepper. Also not shown is the bunch of fresh cilantro that I added at the last minute
I initially wanted to grill this stuff, but I didn’t feel like starting the charcoal and getting that all situated, so I just used the oven. So if you want, use the grill.
Cut zucchini into long wedges and cut the peaches into a few large slices. Place on a lightly oiled pan or baking sheet, sprinkle with a little salt and pepper and stick into the oven at 425 degrees. Toss you corn into the oven too.. but I just stuck that on the oven rack.
While the stuff is roasting in the oven, chop the tomato into mouth sized chunks, and mash the avocado with the juice of the lemon( I finally found it) and a pitch or more of salt. Add enough water to make it slightly runny.
Afer about 15 minutes, the stuff in the oven should be done. You want the corn slightly charred and the peach and zucchini to be soft, but not mushy. Remove from oven and stick everything on a plate or baking sheet and let cool for a few minutes, or until cool enough to handle it.
And now cut the corn from the cob and dice the zucchini and peaches into chunks.
Toss it all into a bowl, give it a mix and smother with the avocado dressing.
And lastly, dice up and add a big ass handful of some freshly chopped herb.. (Cilantro is great, but basil is also just as nice) and toss that on top too!
So much color, so much tasty. This is all summer!
Happy Friday
BYE!
-C
Makes a meal for 1 or a side for 2
Note..If i had the time to light up the charcoal to grill, I would have. So Feel free to cook the corn, zucchini and peach on the grill if you so do please.
Slice peach into 4 equal chunks and zucchini into 4-5 wedges. Place in a lightly oiled skillet and sprinkle with salt and pepper. Stick the pan and the corn, husk removed, into oven at 425 degrees for about 10-15 minutes, or until the corn is charred and the zucchini and peach is browning and slightly tender. While this is going on, dice up the tomato into chunks and smash the avocadoin a jar until smoothish with the juice of the lemon, salt and pepper, and enough water to thin it out so that its kind of pasty. (make it any consistency you like)
When veggies are done cooking, remove from oven and place on the counter or a plate and let sit until its cool enough to handle. When cooled off, dice the peach and zucchini into chunks and remove corn from the cob. Toss together with the tomato, sprinkle with a little salt and pepper, dump the mixed lemony avocado all over and top wit a heavy handful of some freshly chopped herb.
Serve warm or cold. Can be eaten with a fork or spoon.
I am a mint lover, even when it grows at such a ferocious speed that it threatens the lives of all the plants near it. That just means that I have to be vilagent and harvest and use as much as I can.
This drink is a fantastic way to use up some of that mint. I have been making and drinking fresh, hot, mint tea almost ever night for the past few weeks, but this weekend was way to freaking hot to be doing hot tea. So using my little noggin, I figured I should just chill it and added some lime because mint and lime are oh so nice together. Now my favorite, and one of the most refreshing drinks after a long hot day.
And limes just happen to be on sale this week….
The stuff. A few stems of fresh mint, a couple juicy limes, and water. And if you want, a little sweetener of your choice. (I used a tiny bit of honey..not shown)
Start by placing the mint, leaves and stem, into a big pot. Take a wooden spoon and gently muddle the mint. Add in the water, making sure that all the mint is fully sumerged (stuff it down in the pot)
Now place pot on the stove and bring water to a boil. Once boiling, remove from heat and let sit for a few minutes.
After steeping for a few, pout tea into a big jug, straining out the mint leaves. Add any sweetener that you might like (just a little.. you can always add more later if you need it) and stick into fridge to cool, or just leave it on the counter if your want.
While you are waiting for the tea to cool, you might as well juice the limes (cause we need the lime juice)
After the tea is cool, add in the juice of the limes and mix/shake/stir around.
And thats it..
Serve in a cup with a few chunks of ice and a mint leaf garnish (not necessary but nice)
A nice tall glass of cold yumminess… Keeps one from melting completely in this crazy hot weather and keeps mint from killing everything around it.
Stay cool!
-C
Place mint, stems and all, into a large pot large pot. With a wooden spoon or sme type of blunt object, lightly muddle the plant. Pour water over mint and place pot on the stove. Bring water to a boil, then remove and let cool for a few minutes. Pour the mint tea into a big jar, straining out the mint leaves..(A half gallon ball jar works perfectly) If using a sweetener, add it to the tea while it is still warm.( little goes a long way… you can alway add a little more later!) Place mint tea into the fridge to cool. When the tea is cool, juice you limes and dump the juice into the tea and mix or shake.
It is now done and ready to serve. Pour over ice (thats in a cup) and serve with a fresh mint leaf (if your fancy)
Last night had we had a couple littles (and my little sister who is not so little anymore) over for a cookout and watercolor evening.
It was fantastic. We set them up outside with paint, paper, and brushes and let them have at it. And while they were painting the mr took charge of the grill: cooking up potatoes, corn, and the tofu dogs.
I was cutting up fruit and making a special snack treat of popcorn (who doesn’t love popcorn?) consisting of almond butter, coconut, and chocolate….Almond Joy popcorn.
Addictive like crack. But still safe for children
The littles were more or less indifferent to it ( they are not big coconut fans..I know, but i am making it a mission to make them like it), but the sister and the mr… Lets just say I had to pull out my outdoor voice on them a few times (STOP EATING IT ALL!!!!!)
I think we have a winner here!
The stuff. A large quantity of air popped popcorn, almond butter, chocolate chip, coconut flakes and coconut oil. We also have some extra chocolate chips and a big handful of roasted almonds.
Licking your lips yet?
Start by dumpling your popcorn into the larges baking sheet to pan that you have.. the more surface area the better. Now heat up the almond butter. You can do this on the stove or in the microwave. The trick here is to heat it slowly so you don’t burn it. If doing on the stove, put in a sauce pot and with a fork, constantly stir until a drizzable consistency. If in microwave, stick it in there for 10 second intervals.
Note. I know from experience that there are many different types and consistency of almond butters out there. If your butter seems really stiff and thick, add a teaspoon of coconut oil.
As soon as your almond butter is melted, drizzle all over the popcorn.
With the same pot (no need to clean) place teaspoon of coconut oil in it. Heat oil until hot. Remove from heat and stir in the chocolate chips. Kepp string until the chips are melted.
And drizzle that all over
Then toss on the coconut chips, chopped almond bits, and the chocolate chip.
With your (clean) hands, give the popcorn a good toss, mixing everything all around.
And now place either in a big bowl or individual cups (great for littles) I happened to have some pink(beet juice stained) shredded coconut on hand, which made for a nice touch of pretty (totally not necessary,but it kinda was). Next time maybe some sprinkles would look nice……
Anyway, be ready to lick you fingers!
And I am giving you ample amount of time to get the ingredients needed for this. Makes the perfect snack for a cookout, a party, or movie night(or Netflix binge)
Happy Day!!!
-C
Feel free to play with proportion. You can adjust the amount and ratios of all the ingredients to your taste preference.
Take popcorn and dump on the biggest baking sheet or pan that you have and level it out. Either on the stove or in the microwave, heat almond butter until a melty a runny consistency. If doing so on the stove, make sure to consantly stir while heating* If in microwave, check ever 10 seconds. (burnt almond butter tastes like crap )
*Note. I find that all almond butters are not the same. IF you feel that yours is not melty and drizzable enough, add in a teaspoon of coconut oil.With a spoon or spatula, drizzle all over popcorn. .
Now take the coconut oil and melt on stove or in microwave until hot. Remove from heat, add in chocolate chips and mix around until fully melted. Drizzle all over popcorn .
And last but not least, take the coconut flakes, almond pieces, and the extra handful of chocolate chips and toss those in too. With clean hands, give everything a good mix Dump into a big bowl or individual container.
Eat with hands..lick your fingers clean..
Word of caution…Once you start, you will not be able to stop eating this.
IF you like potatoes and guacamole (probably even if you think you don’t like potatoes or guacamole) then oh boy, do I have a treat for you.
Guacamole Potato Salad.. Only the best potatoes salad you will ever put in your mouth.
I tried to make this a few weeks back and ended up not getting to my potatoes in time to use, so I had to put the salad on hold. But this weekend I was ready. The grill was prepped, the corn was husked, and the poatoes were boiled. Then it happened, I made the best potato salad ever. It changed the way I feel about potato salad. (I have never really been a huge fan) Sure, I love potatoes, but in the past I have experiences to many overly dressed, really heavy, and overall, some pretty crappy paotao salads. This salad, well it is the exact opposite. This salad is all summer. Bright and light, so full of flavor, but not overly heavy and gross. I mean, its potatoes covered in guacamole… How can that not be amazing. I am now a potato salad fan (for life!).
So my suggestion for you. Have a cook out, invite your friends, grill up some veggies or whatever and make a humongous batch (you will need a humongous batch) of this potato salad. Sit back and watch (while you are eating) and see peoples faces light up with joy and happiness. You will be number one. The hostess with thte mostest. People will fall at your feet…
or not. (But probably)
So here, take a look, and make.. Your day, week, life will be better for this.
The stuff; Potatoes, avocados, mini onions, and tomatoes. Pickled Jalapeños (with juice) garlic, and the juice from a lemon And lastly,a big bunch of cilantro, and salt.
First things first, boil the potatoes. Stick in a pot of cold water with a palmful of salt. Bring to a boil then turn down to a medium heat and stick a lid on the pot. Cook until fork pierces easily through then strain from water and let cool. When cooled, but still slightly warm, dice them up into mouth sized pieced. Place potatoes back into pot and drizzle a few glugs of the pickled jalapeño juice over them. Place in fridge to complete cool.
While the potatoes are cooling down, mix up the quad dressing. In a large bowl, take the avoado fruit and mash and smoosh until relatively smooth and mix in minced garlic , lemon juice, and a sprinkle of salt.
Dice up the onion, jalapeños, tomatoes and add to the mashed avocado and mix that all up…and try not to eat it all before the potatoes get in.
add in lots of chopped up cilantro
Nothing compares..
Have a great day and get to planning you next cookout!
Later!
-C
Wash potatoes and stick in a big pot with cold water and a good palmful of salt. Bring to a boil then turn heat downy to a a medium heat, stick a lid on it and cook potatoes until a fork can pierce through. Strain from water and let cool enough to handle. Once cooled, cut potatoes into mouth sized pieces, place back into bowl, and drizzle with a few teaspoons of pickled jalapeño juice. Stick the potatoes in the fridge and let completely cool.
While those are getting cold, make the guacamole dressing. In a big bowl, place the avocados (pits and rind removed of course) and smash and smoosh until a smooth constancy. Add in a pinch of salt, mince the garlic and toss that in, and add the juice of the lemon. Now dice up the garlic, onion, tomatoes and jalapenos and gentile fold it all in to the avocado mash.
Once the potatoes are cool, roughly chop the cilantro and add that and the potatoes into the guacamole and mix around until everthig is all coated. Top with some more cilantro.
Eat as a side, a meal, a snack, or dessert
a fork pierced nicely but a large wooden spoon works too.
Lasts for 3-4 days in the fridge.