
THE LOVELY CRAZY
I have been meaning to make this jam for a while now. I’ll buy a bunch of jalapeños, then slowly, before I get to cooking them down, end up eating them all. But not today, and the rewards are great, Fresh jalapeño jam. So much potential for the greatest of things (I am thinking mango jalapeño sorbet… no, I am making jalapeño mango sorbet) And if you, like me are a jalapeño fan, this is going to make your life amazing. You will find yourself jamming up everything, or maybe just eating it with a spoon.
Whatever you want to do with it, just make it.
Honey and jalapeños.. All you need, well a little salt and water too, but that’s it.
What you need to do is remove the stems,, most of the ribs and half of the seeds removed. (You could remove all or none of the seeds depending on you heat preference) Chop the peppers into small chunks, toss into a pot, sprinkle with a bit of salt, add in a splash of water. Place the pot on medium heat. Top it with a lid, and give the peppers a good stir every few minutes. While the peppers are cooking, you want to make sure the bottom isn’t sticking and buringin. If that starts to happen, just turn the heat down a bit and add in a little splash more of water.
After about 20 minutes, the peppers are fully cooked and falling apart. The liquid is cooked down and the peppers are starting to caramelize on the bottom of the pan. When that happened, remove the pot from heat.
Now you can either blend the peppers, mash the peppers with a fork, or leave it chunky. Thats a choice Ill leave to you. ( I like to blend, but keep some chunks)
And drizzle in a bit o honey. As little or as much as you like.
And scoop into a jar. Eat the jam on anything you want. (I found myself eating it with a spoon)
Keep it Real!
-C
Makes about 1 1/2 cups of jam
- 10 large jalapeño peppers
- a pinch of salt
- About 1 tablespoon of honey, but add more if you like (And if you want to keep it vegan, use agave or sugar)
Wash, remove ribs and most seeds (the more seeds you leave the hotter it will be) and dice jalapenos into small chunks. Place in a pot with a few splashes of water and a sprinkle of salt. Turn on medium heat and cover, stirring every few minutes. If the peppers seem to be sticking o the pot and burning, turn heat down and add another splash of water. After about 20 minutes, the peppers should be really tender and falling apart. The liquid should be completely cooked out and the peppers will start to caramelized at the bottom of the pot. When that starts to happen, remove from heat. Now either mash with a fork, blend with a hand blender, or leave superr chunky. Drizzle in honey (or sweetener) and stir.
Eat right away or stick in a jar and store in the fridge for up to a week (It won’t last that long)
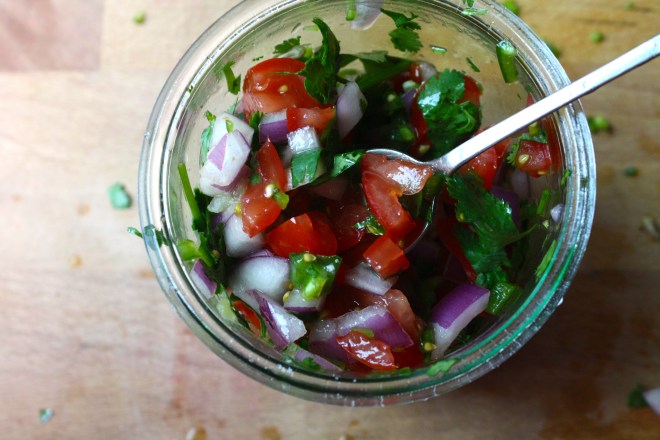 Happy Cinco de Mayo! And what better day to share my version of my oh so fantastic pico de gallo, or as I call it, super freshy salsa.
I love me some freshy salsa, It makes me oh so happy.
I make this stuff all the time, especially during the warmer months and tomato season. I usually make a batch right before a meal, just enough to eat right away, but sometimes I ‘ll make a big batched of it, thinking I’ll save some for the next day. It never makes it past the second day in the fridge because it’s just one of those things that when you see it, you want to eat it. Weird but true. And it’s totally ok to do so cause it’s basically eating a big bowl of healthy goodness, so eat on!
It takes no time to prepare, tastes super refreshing, goes on everything, and it’s just so freaking tasty. You can eat it with tacos and chips (the mister) or like me, I like to add it to everything; salads, popcorn, or directly in my mouth.
Make one batch, make 4, it doesn’t matter cause you will eat it all, and need to make more.
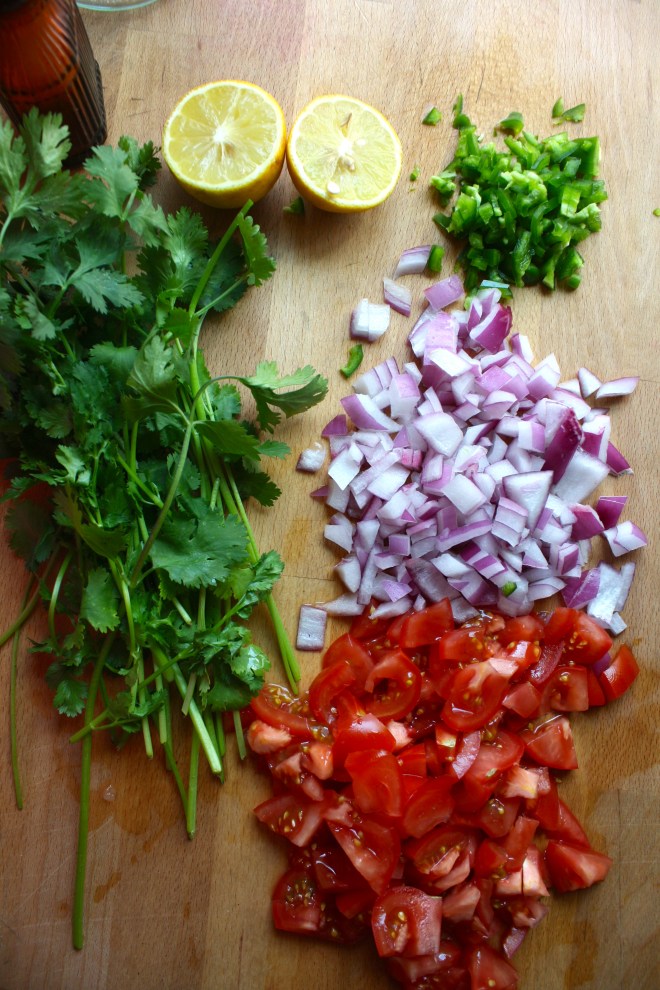 The stuff. Chopped Roma tomatoes, chopped red onion, a diced jalapeño, lemon, a bunch of cilantro, and salt.
Stick all the chopped stuff into a jar and add in the juice of the lemon. Roughly chop the cilantro and add that on in with a sprinkle of salt.
Mix it up….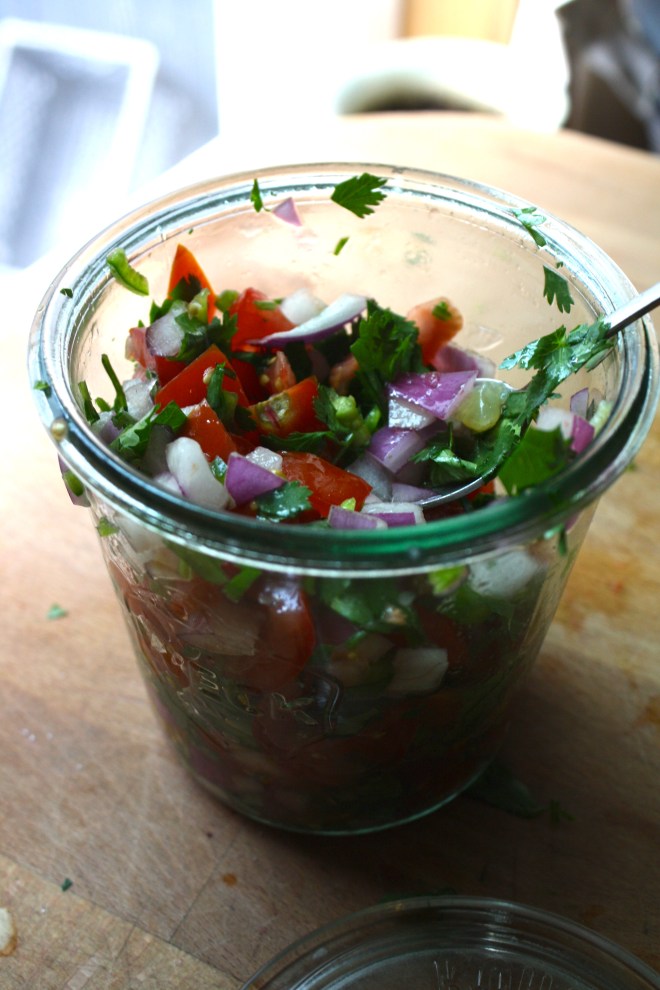 And thats it. Now eat… with something or without.
A spoon out of the jar is one of my favorite ways to go at it.
Happy Cinco de Mayo, Happy Tuesday!
-C
Pico de Gallo… Freshy Salsa
- 4-5 Roma Tomatoes
- 1 small red onion
- 1-2 jalapeños (Depending on heat preference)
- 1 lemon or lime
- salt
- 1 bunch of cilantro (don’t use it if you don’t like it)
Chop tomatoes and onion and toss into a bowl or jar. Cut seeds from jalapeño(s) and dice up into little bitty pieces and add that to the tomato and onion. Roughly chop the cilantro and toss that in as well with the juice of the lemon or lime. Sprinkle with salt. Stir, let sit for a minutes, taste and then add more salt if needed.
Eat right away or make ahead and store in the fridge until ready to use.
Goes great with corn chips, tacos, toss onto salads or eat as is standing in front of the fridge. If someone is judging you, they are stupid.
 WOO WHOA!! MARDI GRAS! I wish I was down in New Orleans today celebrating… and soaking up some warmth and sunshine, catching beads, maybe even taking my shirt off(?!!?)
No, I keep my shirt on today because I am not like that, and also, I would die of hypothermia. Today I wear a shirt, underneath 5 other shirts ad sweaters. Because today is just another day of -20 below here in Vermont.
To keep me from going completely crazy, I am thinking of warm weather and I am thinking of New Orleans (love that place!) and the humongo celebration that’s been going on there for the past week. Everyone partying out in the streets. Big floats and beads all around. I might be feeling a little jealous, (more of the weather then the partying) but thats ok, I have TV to watch and a warm comforter to wrap myself up in. And maybe I should have done a post of fried donuts or of some type of alcohol party drink to celebrate the day, but I really just wanted to make something warm and spicy, so I went with some dank cajun beans. And also I wanted to sing…. “Beans Beans the musical fruit, the more you eat the more you toot!!” hehe
But for real, these beans are sooooo f-ing tasty and super versatile. You can serve the spicy beans with the rice or just eat just the beans. You could do the beans and add to a bed of kale (me) or add cheese, guacamole and a few corn tortillas to the mix (the mister). Simple to make, super tasty and full of flavor! And pretty freaking heathy to boot! This dish gets an A+!
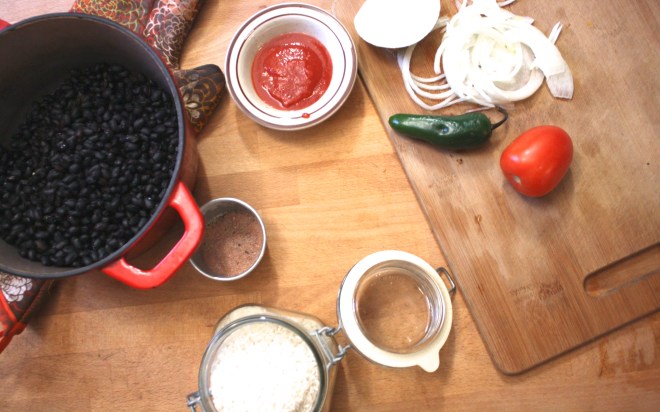
This dish is so full of flavor but so simple to make. We start with presoaked black beans drained and rinsed. Cajun seasoning (which is basically 1 part onion powder, thyme, oregano, and 2 parts paprika, garlic powder, cayenne power, and salt and pepper) Sliced onion and jalapeno, and a few tablespoons of tomato paste. Oh, and the rice.
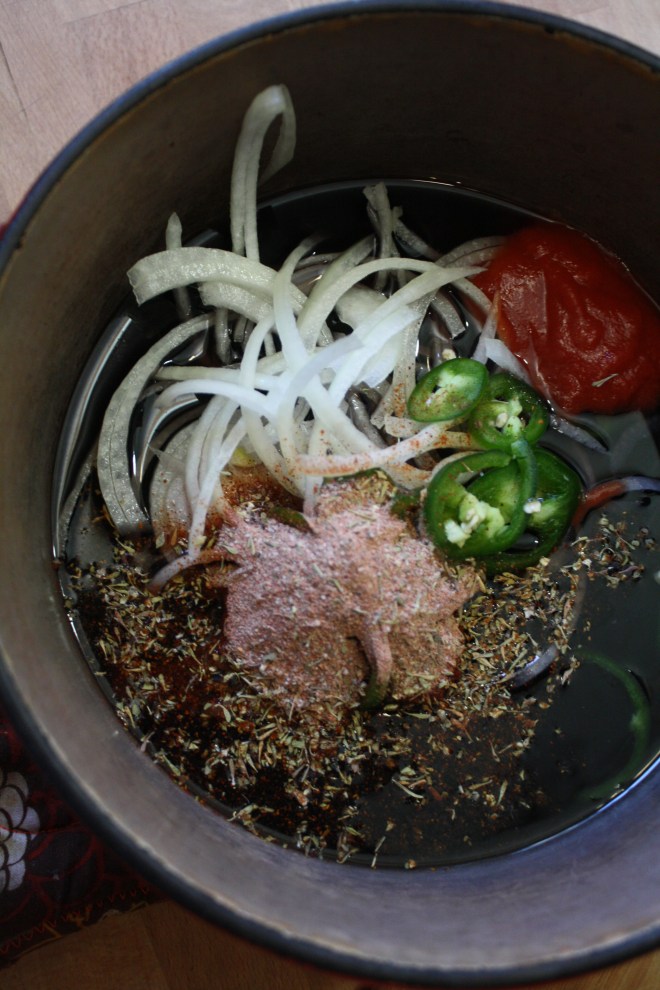
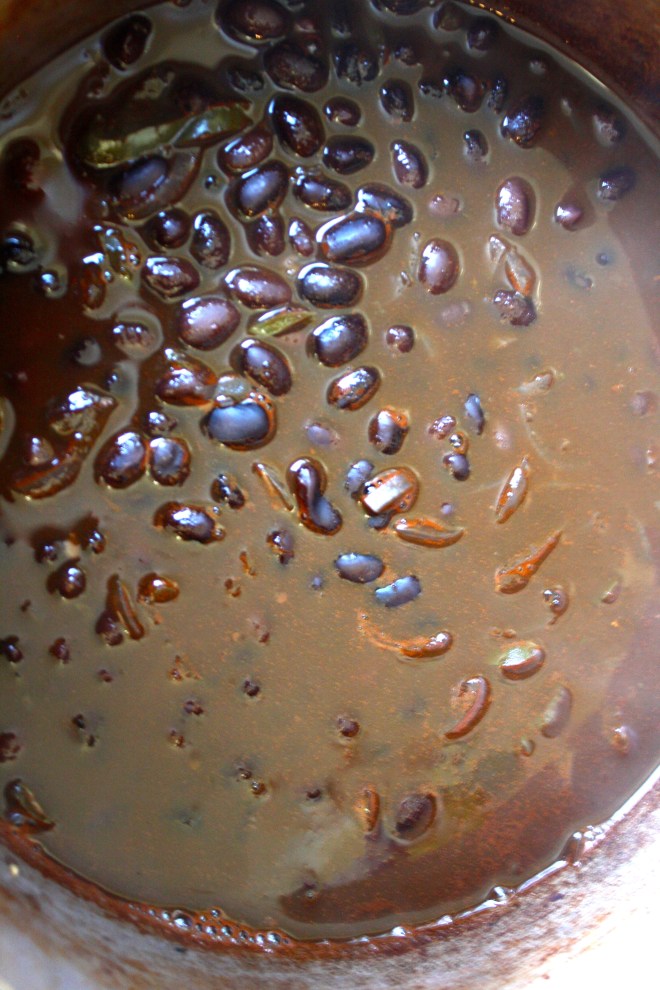 Beans are in a pot filled with water unit beans are completely sumerged. Add in the onion, jalapeño, tomato paste and cajun seasoning. Bring to a boil then cover with a lid and simmer for about 45 minutes….. After about a half hour, start up the rice. Water in pot with rice, bring to a boil, cover and simmer for 15-20 minutes.
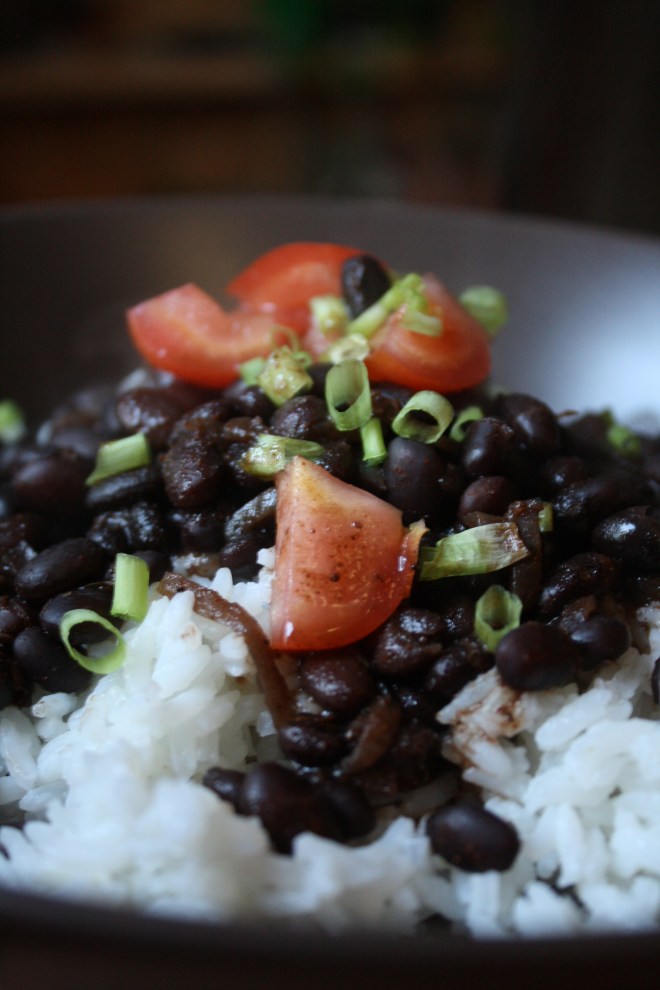
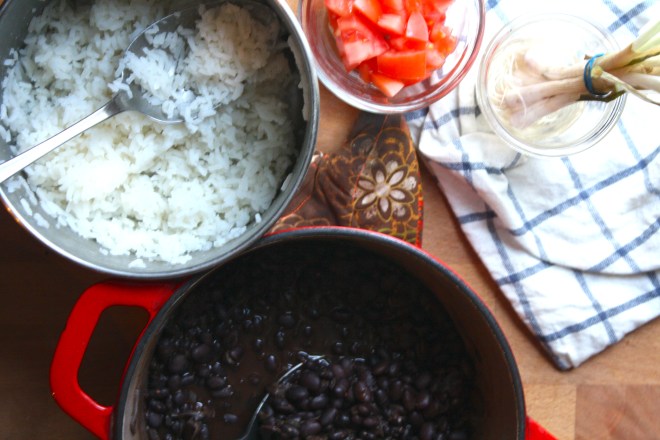 The rice is done and fluffed with at fork. The beans are cooked with just the tiniest bit of bite, bathing in a thick spicy tomatoey sauce. The chunks of onion and jalapeño have broken down and are hiding in every bite…. Oh so good!
Now get ready for the bowl!!! 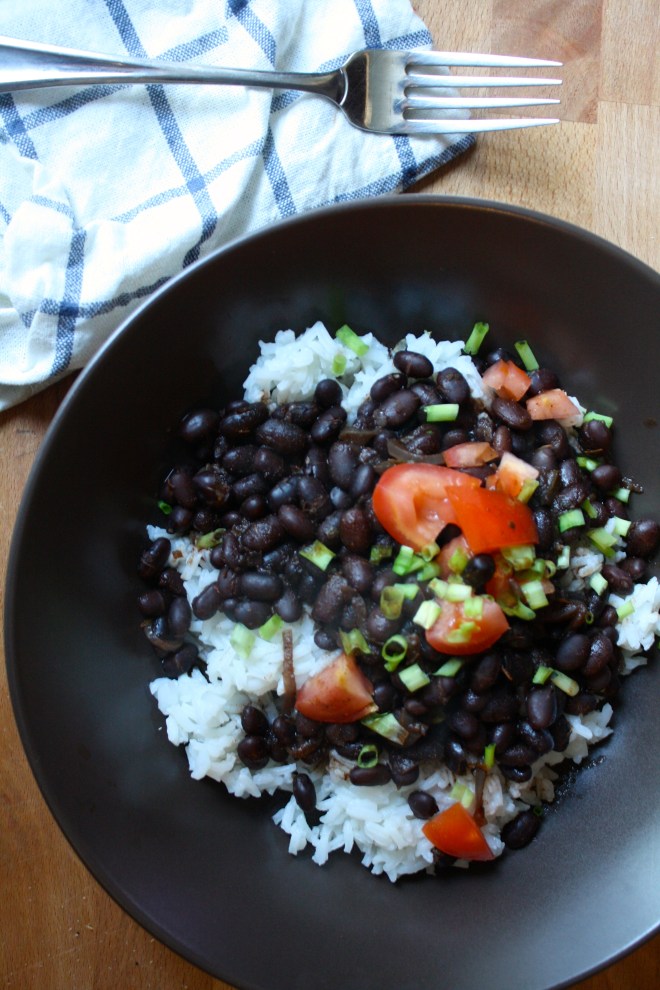 Bringing a little spice and nice to this crazy cold winter day or any fun festivities you may have planned.
Have a Fantastic Day.. Stay Warm or if you already are.. lucky you!
-C
Cajun Black Beans and Rice
Ingredients
- 1 1/2 cups dried black beans* soaked for at least 4 hours or overnight..Rinse and strained
- 2 tablespoons tomato paste
- 2 tablespoons Cajun seasoning
- salt and pepper
- 1 Jalapeño
- 1 small yellow onion
- 1 tomato (I used a large roma)
- 1 1/2 cup of dried rice plus 3 cups water
*If you want to use canned beans, go for it…Just sub in 2 cans rinsed and strained black beans and only add a cup of water to the beans. Pre sauté the onion and the jalapeño before adding to the beans and only simmer the beans for about 15 minutes.
Place you soaked beans into a pot and fill with water until the beans are completely summered. Slice the jalapeño and onion and add to the pot along with the tomato paste and the cajun seasoning. Bring to a boil then place a lid on it and turn heat down to low. Let simmer for about 45 minutes or until the beans are completely cooked.
When the beans are about half way done, add rice to water and bring to a boil. Once boiling, place a lid on pot and turn heat down to simmer and cook for about 15 minutes or until all water is absorbed and rice is tender. Fluff with a fork.
To sever. place a scoop of two of rice to a bowl and top with a scoop of two of beans.… Top with diced tomatoes and scallions… (The mister added shredded pepper jack to his and thought it was excellent)
Eat with a fork or spoon.
 I was informed yesterday that if I was going to make tortilla chips, that I better make some sweet ass dips to go with them. I kind of agree… tortilla chips need dip… or better yet, two dips. Queso and guacamole. It’s what needed to be done, and so I did it.
Guacamole is amazing… anything avocado is amazing…this guacamole is amazing. White bean guacamole is amazing. And not that we really care, but this guac is half the fat then straight up guacamole. Plus it’s packed full of protein making it a kind of super duper, must eat all of it, kind of dip. And sweet potato anything will make me happy. Making queso dip with sweet potato and cauliflower is probably one of my best food combos so far. (after eating a butt load, I felt like I was a genius and made an amazing discovery) Again, not that we need it to be, but this is also a fat-free, vegan, gluten-free, super healthy, packed full of B12, fiber and nutrients, dip for all kind of dip.…. just another reason why you cannot feel bad when you finish off half a batch before you get a chance to stick it in a serving bowl. (I might have done that)
Here is what you need for a good time:
−These tortilla chips ….Check.
−Some Chopped Veggies (I want the veggies)…..Check
−Cauliflower Sweet Potato Queso.…Check.
−White Bean Guacamole…Check.
You are now ready for it. It being this party, that party, the Super Bowl, or a Wednesday afternoon.


To the left we have the makings for the cauliflower sweet potato queso.. Steamed cauliflower, a baked sweet potato, nutritional yeast, garlic, and chopped up red onion, red bell pepper and jalapeño. To make all you need to do it take the chopped peppers, onion, and garlic and sauté for a few minutes just to slightly soften and bring out flavors. While that’s going on, take the steamed cauliflower and sweet potato(skin off..but eat it, or save it for soup or feed it to the dog) and puree together with a blender or food processor. Add in nutritional yeast, about a tablespoon or two of hot water and, salt and pepper to taste. Blend for about 5 minutes until super creamy smooth. Add in sautéed stuff and pulse just enough to incorporated the veggies but not complete blend in. Stick in a bowl.
To the right we have white bean guacamole stuff. Two cups (or one can) rinsed white beans, one ripe avocado, a lime, a few cloves of garlic,(I also added a bit of garlic powered…I like my garlic) and some chopped up red onion and tomato. Place beans, garlic, avocado and lime juice in a blender or food processor and blend until smooth. Add salt to taste and toss in the chopped tomato and onion. Blend for sec to mix that in…Stick in a bowl
 Perfect…
 To think that both of these dips took about 10 minutes total to make. (I had pre baked the cauliflower and sweet potato) And for real, I would spend much more time if I had too because both of these dips are so freaking good, I definitely will be making these on the regular.
So there , dips for those sweet ass chips or whatever you want to dip or them spread them on.
And he guys…It’s FRIDAY! Have a fantastic day!
-C
White Bean Guacamole
- 2 cups white beans (or 1 can) rinsed and drained
- 1 ripe avocado
- 3 cloves garlic
- 1 lime
- 1/4 small red onion
- 1 small tomato
- 1-2 teaspoons salt
Finley chop onion and tomato. Set aside. Place the beans, avocado, garlic, garlic powder, 1 teaspoon salt and the juice from one lime into a blender or food processor and blend until smooth. Add a splash of water if needed to help keep things moving. Taste and add more salt if needed. When smooth, add the onion and tomato and pulse a few times to mix in. Scoop into a serving dish and finish with a squeeze of lime and a bit of chopped onion and tomato.
Cauliflower Sweet Potato Queso
- 1 1/2 cups pre cooked steamed or roasted cauliflower
- 1 medium pre baked sweet potato
- 1/2 cup nutritional yeast
- 1-2 tablespoons hot water
- 1/2 a small red pepper
- 1/4 small red onion
- 1 jalapeño
- 3 cloves garlic
- salt and pepper
Finely dice the red pepper, jalapeño, onion and garlic and sauté in a skillet for a few minutes until slightly soften and fragrant. Take the pre-cooked cauliflower, sweet potato (skin removed), and nutritional yeast and place in a blender or food processor. Blend for about 5 minutes until creamy and smooth. Add in a tablespoon of water to keep things moving. When completely smooth, add in sautéed veggies and pulse a few times to combine. Scoop into a serving dish. If your feeling it, top with scallions and cracked pepper.
Serve dips with chips, veggies or anything you want. Also make great spreads for sandwiches and crackers too!
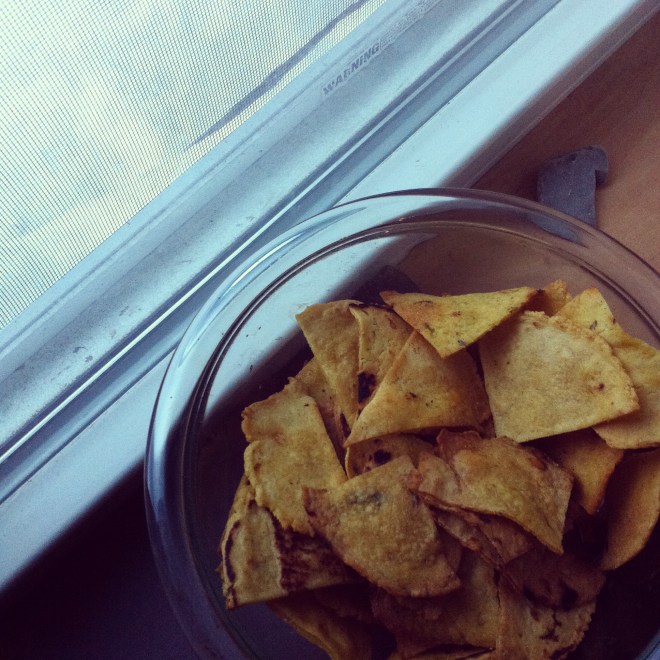 How awesome will you be when you bring the most freaking amazing tortilla chips to the party this weekend? You will be like..”what, it ain’t no thang.. I am just good like that” Yes, yes you are.
And yes, I am assuming that you will be making these awesome chippers to share at a Super Bowl part this weekend. I say this because even as I sit here writing this (with the TV on) there has been nothing but football talk…deflated balls, hot wings, half time shows and commercials. It’s almost as big as Christmas. Got to get the decorations, the special game day food and your football jerseys. It’s crazy and all over the place. So that’s why I am assuming you are making these for the game. But if you not going to be participating in any football parties.. by all means, make these chips for yourself anyways. Celebrate you day! Have a non football watching party. Or just make these whenever. Jalapeño Lime chips for everyday!
Note: You can make these chips without the jalaeno and or the lime if you need or want to. You can also stop after the first step and have some dank corn totillas for tacos ands stuff..But definitely make the chips… worth it for sure!
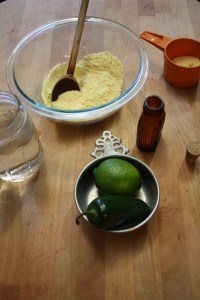
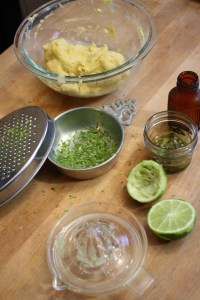
All the stuff.. Masa harina, hot water, salt, a lime and a jalapeño. Zest lime and place half the zest into a glass bowl with oil and either sit on warm oven or microwave for 30 seconds to infuse. Puree the jalapeño with a cup of hot water and add the puree and half the zest of a lime, plus salt, to the masa harina. Mix it all up with another 1/2 cup of water or enough to make the dough resemble play dough… You can add more water or masa if you dough is to wet or dry.
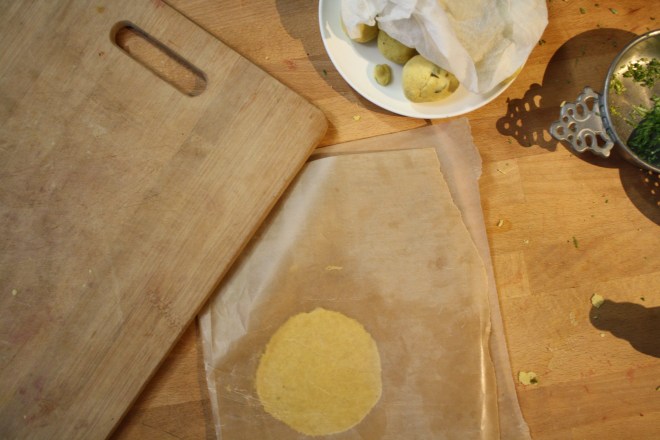 Knead dough a few times just to make sure it’s completely uniformed and divide into 12-14 equal pieces. Place balls on a plate and cover with a wet paper towl to keep from drying out.
I do not own a tortilla press so I used what I had… wax paper, a wooded cutting board and brunt force. I took each ball and place it between the two pieces of the waxed paper, placed the cutting board on top, and with all my might and body weight, pressed down to smoosh. It works like a charm.
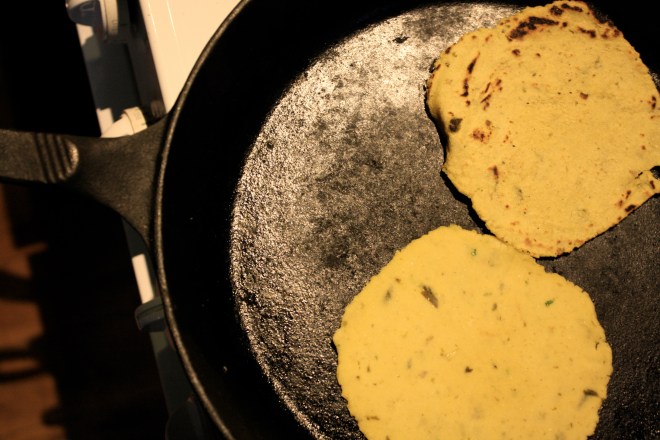 My cast iron skillet is big enough to cook 2 -3 at a time, but doing one at a time is cool too. Preheat the skillet to medium heat. Cook each tortilla for about 2-3 minutes ( or until starting to brown) on each side.
 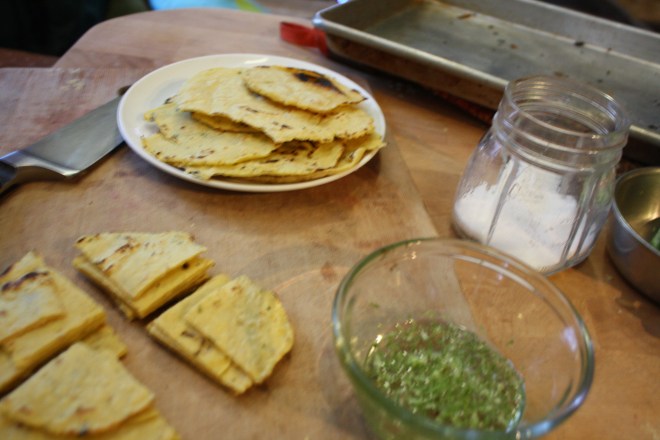 Half way there to chips!!!
With my fingers ( you can using a basting brush for sure), I rubbed a little of the lime oil all over both sides of each tortilla. Stacked a few high, then sliced those tortillas into triangle shapes. If you want to go crazy, you could cut them into strips or even use a cookie cutter and do some fun shapes… but triangle are easy, classic, and practical. A good shape for dipping!
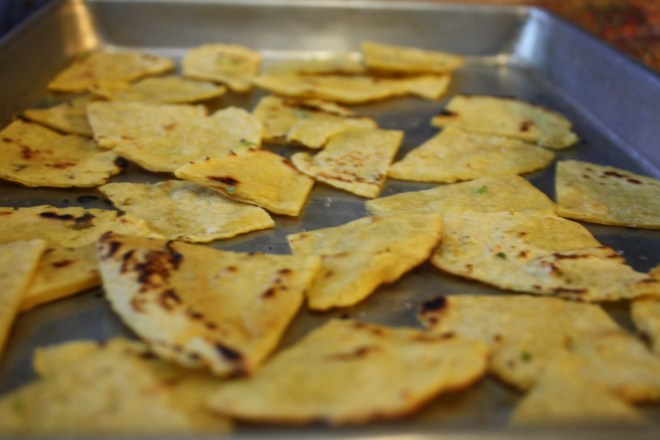 Placed all nice and cozy on a baking sheet. trying not to overlap. Into a 400 degree oven for about 20 minutes to complete the chip making process.. After about 15 minutes, check for doneness. When nice a crispy, remove from oven, squeeze lime juice all over and sprinkle with salt. I then stuck them back in the oven for a few more minutes just to dry the lime..
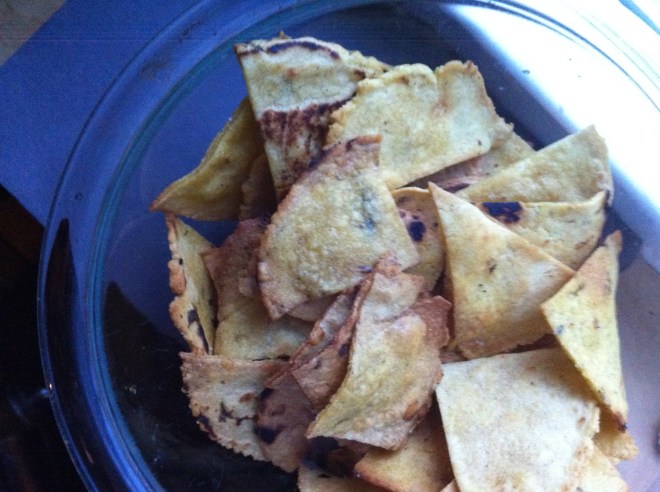 After cooling down, take those chips and stick them in a bowl.
Eat a few, but wait and save them for the party. Or better yet, make a few batches. Bring a batch, eat a batch. (Its ok, you are allowed)
Eat with some salsa, maybe some of this guacamole, or just as they are…Anyway is the right way as long as you are eating!
Have fun making these and have fun getting read for the party this weekend (Super Bowl or not!)
-C
Jalapeño Lime Tortilla Chips
Makes 12-14 tortillas.. then made into a medium bowl of tortilla chips.
Ingredients
- 2 cups masa harina
- 1 1/2 to 1 3/4 cups hot water
- 1 teaspoon salt
- 1 lime (juice and zest)
- 1 large or 2 small jalapeños
- 2 tablespoons olive oil
- salt
To start, zest lime and add 1/2 of the zest to bowl with the oil. Place oil on warm spot on stove to let the oil infuse the limeness.
Take jalapeno and puree with 1 cup of hot water. In a large bowl, add puree and remaining lime zest to the masa harina and mix, adding an additional 1/2 to 1 cup of hot water until the dough resembles play dough, not to soft, but not to dry and completely incorporated
Divide dough into 12-14 balls and place on a plate under a wet paper towel to keep dough from drying out.
One at a time, take a dough ball and place between two pieces of wax or parchment paper. Place either a plate or cutting board on top and press down as hard as you can (you could even stand on it). Remove flatten tortilla from paper and place in medium hot skillet. Cook each tortilla for 2-3 minutes on each side.
When all tortillas have been made, lightly rub lime oil on all over both sides. Stack a few on top of each other and cut into triangles. Place pieces on a baking sheets (I used 2) and bake at 400 for 15- 20 minutes or until lightly browned and crunchy. When chips are done, remove from oven, squeeze or sprinkle lime juice on chips and sprinkle with salt. Stick back into oven for another 2 or so minutes to re-crisp from the lime juice.
Remove and let cool completely, then dump into a bowl
Enjoy!
 It’s Mother’s Day weekend which means that you and I and everyone out there should feel the slightest bit obligated to at least do a little something nice for your mom for the mere fact that you were borned. And really what better way to celebrate mom than with food… It really is the least that you can do. (I think mom’s also like flowers and cards and handmade pasta necklaces) My mom is defiantly about the food. (she has had her fair share or pasta necklaces) A many years back on Mother’s day, this sweet little girl (me) made her mother a special breakfast treat…blueberry scones. And ever since that day, for every freaking holiday, birthday, whatever day, my mother requests (demands) a batch of those scones. She is always saying that these are her favorite treat and that no one has ever made them as good as I do. (I guess that just reiterates that I am her number 1 child)
 The stuff. Flour, baking soda, baking powder and salt. A bit of sugar, vanilla, buttermilk, and butter (use vegan butter and nut milk if you want to make them vegan) And of course we need the blueberries which can be fresh or frozen. I usually use fresh, but the store I stopped at only had really big containers of fresh that were like $1000 dollars a piece and the organic frozen happen to be on super sale. So you know, the cheap in me won that battle.
  So into the bowl goes all the dry stuff; flour, baking powder and soda, salt, and the sugar. Give it a good whisk.
 Now dump the blueberries into the flour mixture. Toss them around to give them a coat of flour. Add in the buttermilk and vanilla and give a little mix until liquid is absorbed. We are trying to handle the dough as little as possible.
 Turn mixture onto counter. It’s very loose, but thats what it should look like.
  Very gently and with as little handling as possible, gather dough up, knead a few times till everything just comes together. Press dough into a disk that is roughly an inch thick…. and it doesn’t need to be perfect.
  Cut the disk into even sized pieces. Do 6 big, 8 normal, maybe even 10 smaller. Whatever size you like. (I did 8) Place the scones onto a baking sheet, using a spatula to transfer, and sprinkle the tops with a little bit of sugar. Into a preheated oven for about 20 minutes.
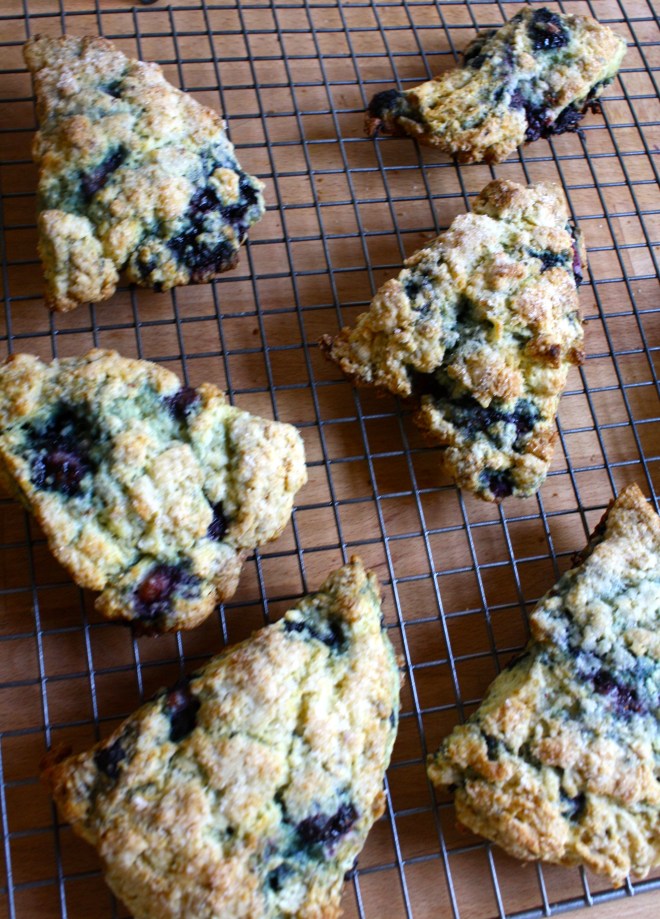 And when the scones look all nice and browned and a tester comes out clean. remove and either serve right away warm, preferably with huge cup of coffee or tea, or stick on a rack to cool before storing in air tight container.

 TGIF!!!! For reals, because Monday-Thurday were monster days. And now that its friday, I can dig a hole and hide in it until it’s at least 30 degrees with some sunshine. (I might never get to come out.)
 Simple lemon cake stuff. Flour, baking powder and salt whisked together, Sugar and soft butter in a bowl. An egg, some vanilla, milk, and of course, the lemon.
  Frozen bites ready for the chocolate coating… Bittersweet chocolate chips and a little bit of coconut oil. Melted together all nice and shiny smooth.
 Now dip and slather those bites in the melted chocolate.
  Fully coated and placed on a rack for the chocolate to harden. I ended up sticking the rack in the freezer for 10 minutes…They harder really fast in there.
 Because it is cold outside. Because I had an hour to kill before I needed to leave the house and because I wanted to make a sweet treat for the mister (who had been dealing with frozen pipes all day) and for the little littles that I was going to hang out with. My original idea was to just make regular old snickerdoodles, but as I was riffling around my tea drawer for a mid day tea (it’s usually coffee, but I am trying to cut back on drinking one thousand cups a day) I got hit with a little inspiration. Chai tea spiced snickerdoodles. Yes! a nice black chai, full of flavors or cinnamon, ginger, cardamon, allspice, and pepper. So many good time tastes. And while I am at it, why not add some chocolate to that mix, because, well just because.
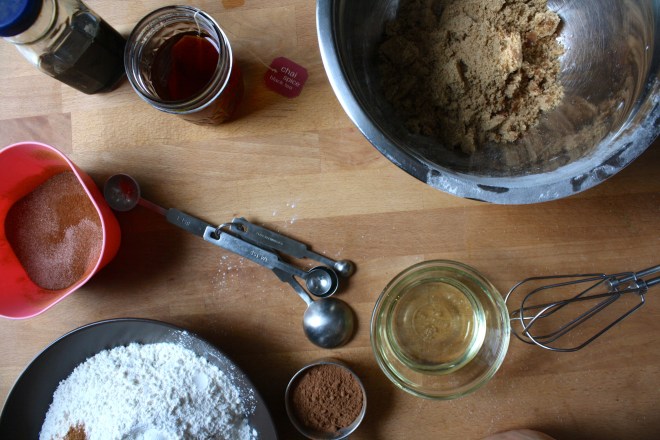 The stuff…Flour, salt, baking powder, cinnamon, and allspice. Cocoa powder, brown and white sugar. Veggie Oil (you can use butter, or vegan butter instead for a chewier cookie) vanilla, a little vinegar and a nice cup of chai tea… Also a little bowl of cinnamon and sugar to doodle the cookies.
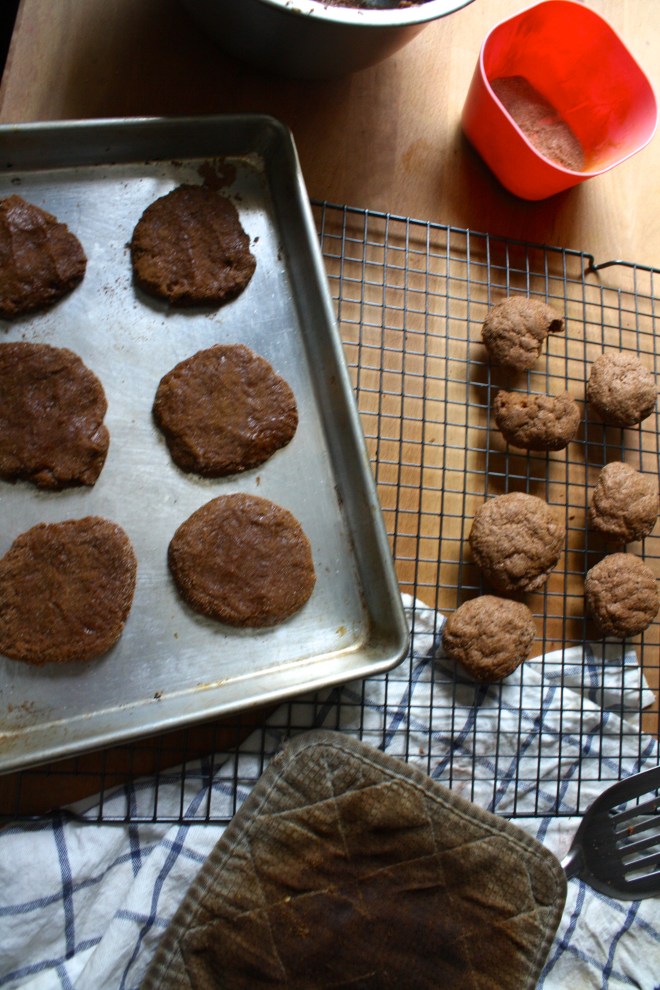 The sugars, oil, tea, vinegar, and vanilla go into a big bowl. Beat for a minute on medium, then add the rest of the stuff and beat some more until fully incorporated…. Simple simple.
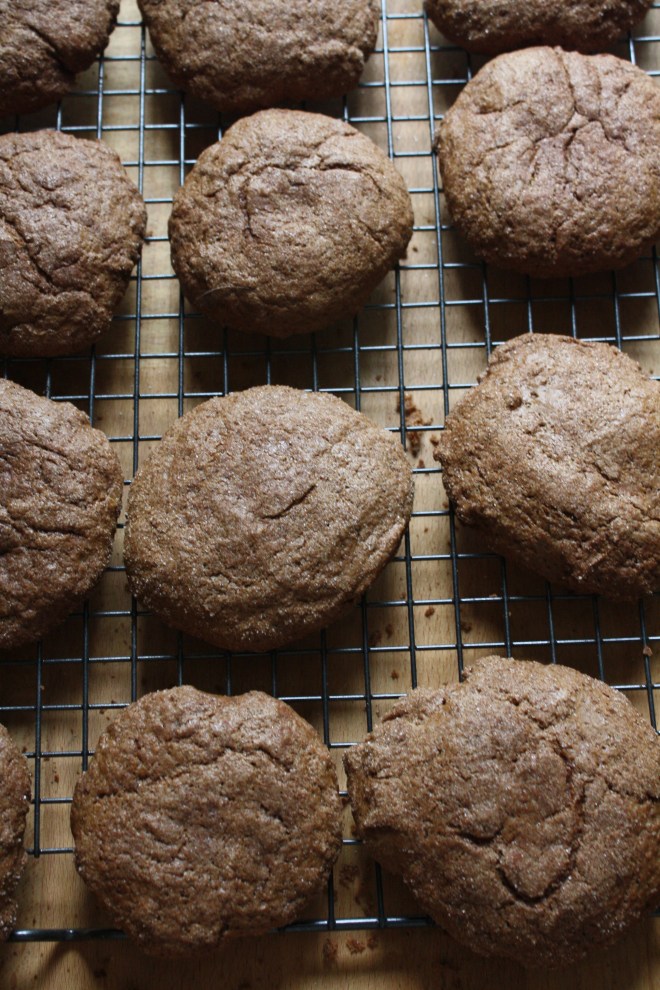
 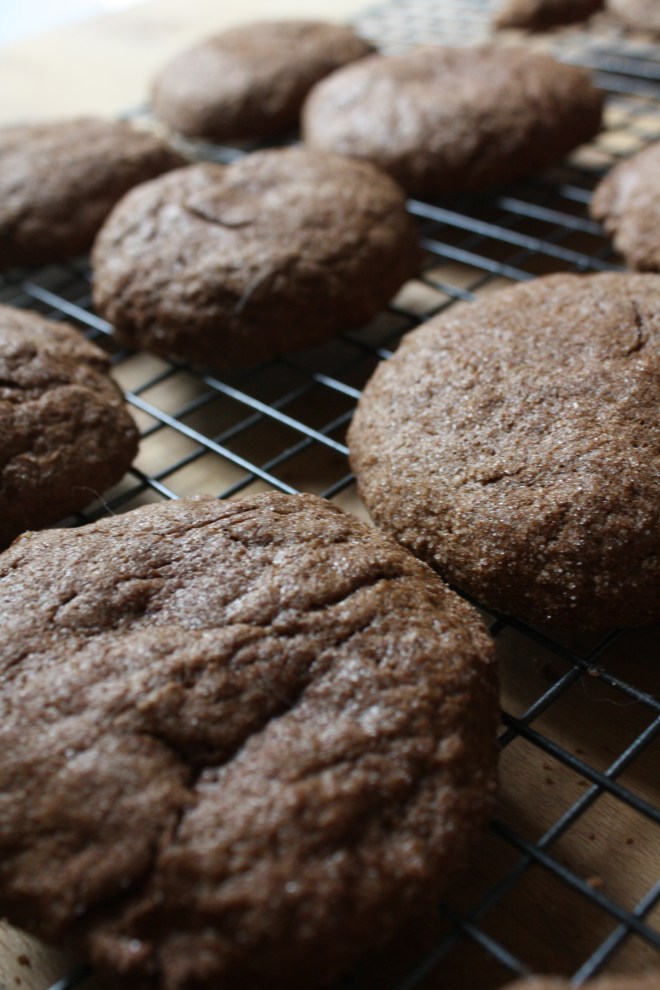 Aahhhh…….pulled from the oven and placed on a rack to cool. Fluffy, chewy, pillowy soft and spicy cookies. Oh the smell of so good!
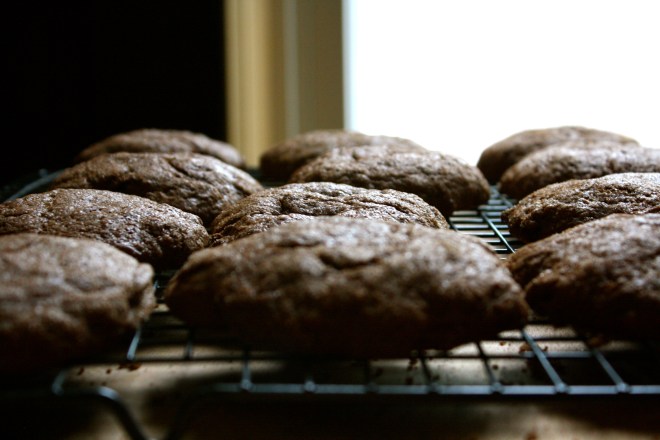 Made extra large to make extra little littles happy. The best part? I made each little sing me a song for a second cookie… I am the greatest!
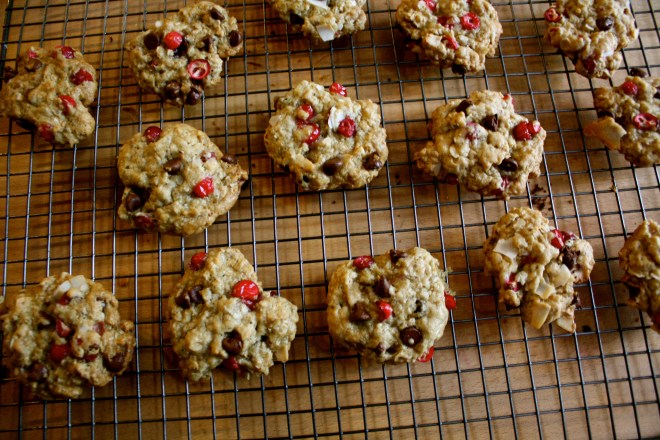 It hasn’t stopped snowing, the temperature is dropping fast (it’s getting to the point the dog doesn’t even want to be outside) and the mister is busy hand shoveling three long driveways. So I figured that in between all the laundry folding, plant watering , and all around sitting on my butt that I am doing INSIDE, that I would be so super nice and crank the stove up and make my love some cookies. I love making cookies, especially when I have chores to do. I think part of it is that cookies are baked in batches which breaks up the chores and gives a sort of rhythm to things. Plus everything is nice when the house smells like cookies. I was going to make chocolate chocolate chocolate cookies, but realized that I didn’t have cocoa powder, so I went with fresh cranberries (I just scored a pound of organic cranberries for 89 cents!) coconut flakes and chocolate chips. Plus I wanted to make them oatmeal because the mister likes oatmeal and oatmeal makes the cookies a little more hardy. (We need hardy when the temperature dips below zero) The verdict….. chewy, soft, slightly sweet oatmeal, bittersweet chocolate, nutty floral coconut, and the zing and pop of the fresh cranberries. He told me to hide them… hide so he will stop eating them….. because they be amazing!
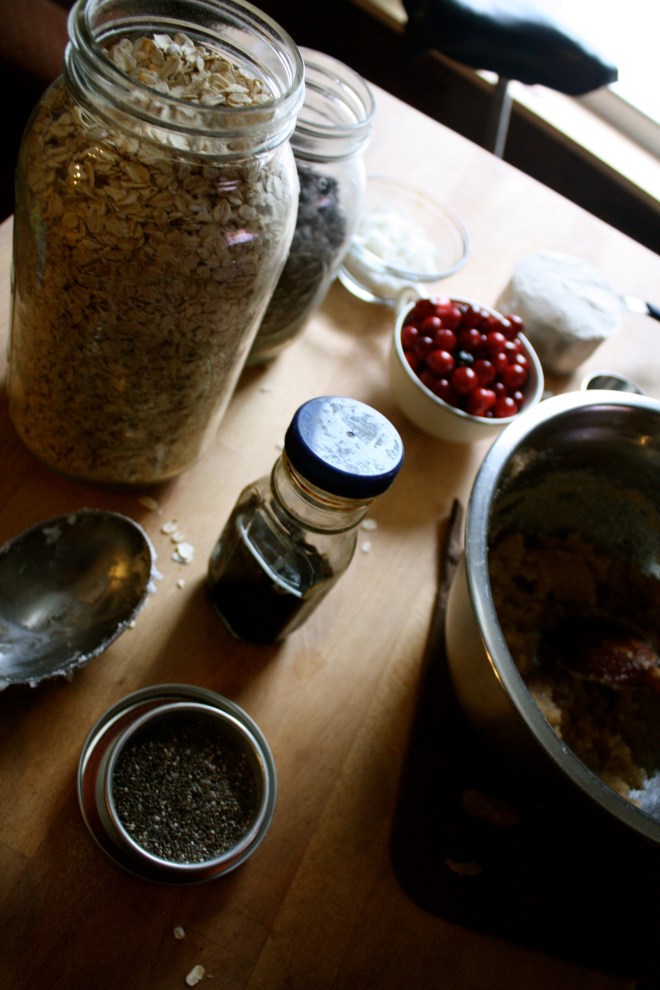 The base of this cookie….We are using regular old fashion oats and flour. Salt, baking soda and baking powder. Vanilla, chia seeds in hot water, coconut oil white and brown sugar…. You know, all the cookie stuff. Then all the goodness.. Chocolate chips, coconut flakes, and fresh cranberries. Goodness. Oh yeah, and they are vegan…if that matters to you.
 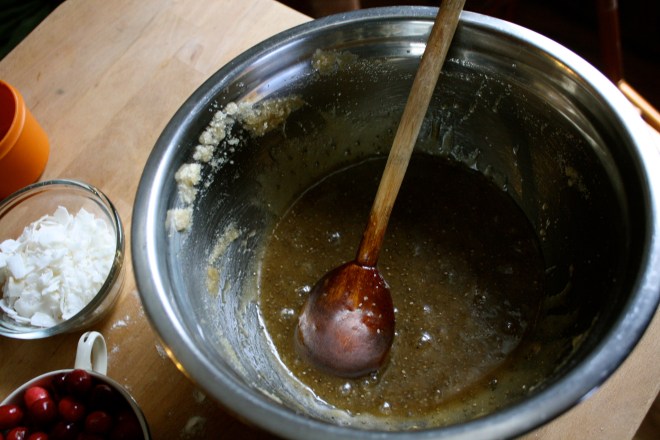 Warm the coconut oil and mix with the white and brown sugars. Then add the chia seeds soaked in hot water. Stir until nice and silky smooth.
 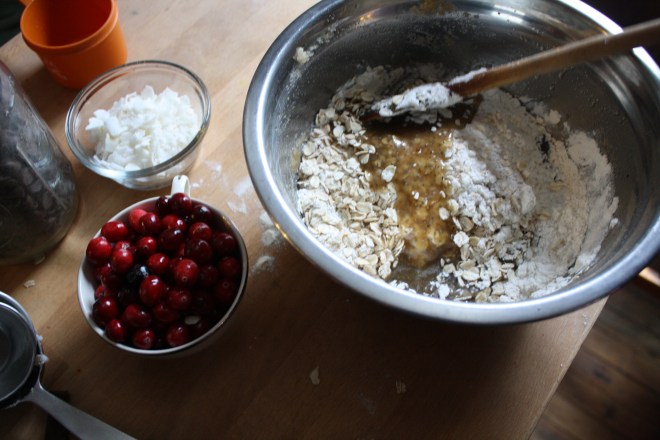 In goes some more stuff. I just dumped all the dry right on in that bowl and mixed it up nice and nice.
 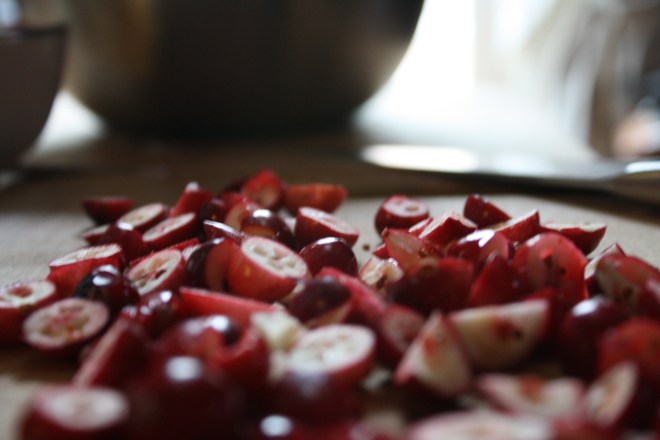 Chopped the fresh cranberries into chunks… One at a time…… Just kidding, I actually laid a cutting board on top of the cranberries, applied a little pressure and sliced through the cranberries.. Does that make sense? I hope so, because its is much easier and faster and the cranberries don’t all roll away.
 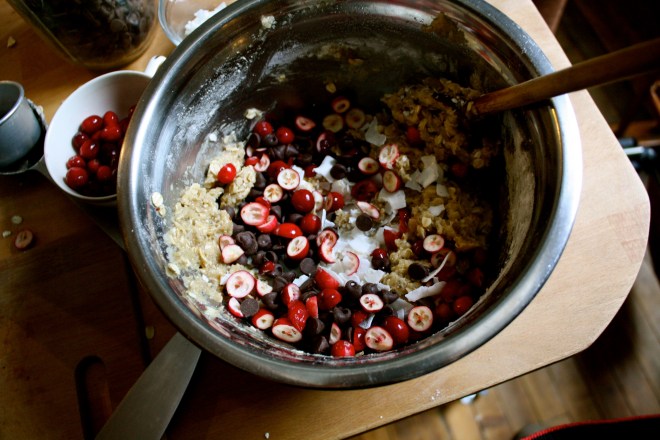 The chopped cranberries, coconut flakes and the chocolate chips go in to be mix all up.
 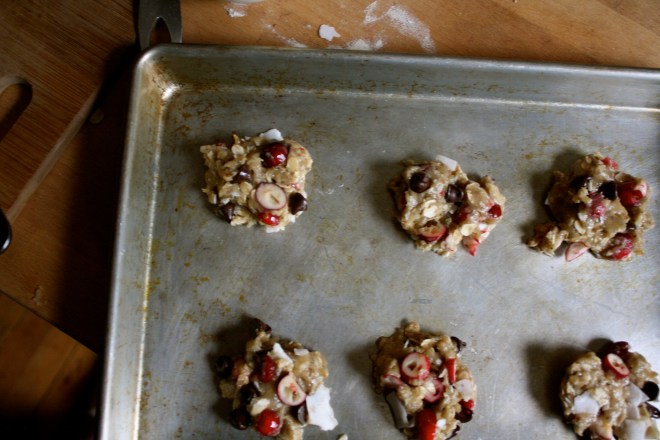 I used my hands to form the balls and gave each mound a little smoosh, but not completely flat. Then into a preheated 375 degree oven for about 13-15 minutes or until a nice golden brown.
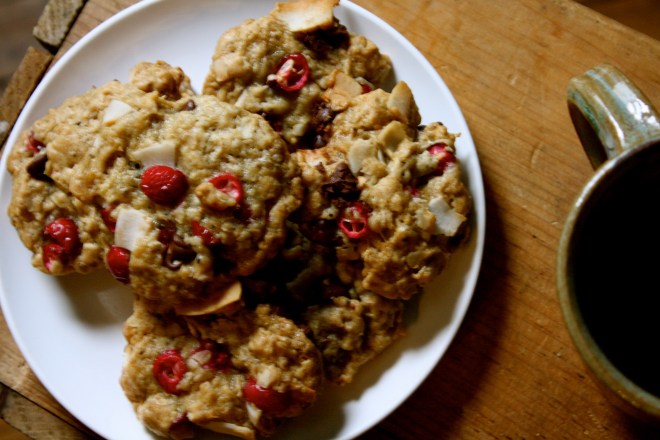 A cup of hot coffee and a plate of warm cookies… I am the nicest, right! (After his nice cookie rest I proceeded to do a little nagging, so the day evened out) So today is probably a great day for everyone to make cookies. It’s freezing out, its saturday and well, just cause. You might even be looking for a great recipe to make for that big party your going to. You should make these cookies. Have a Fantastic Weekend!!! -C
 All I want to do is make everything into hearts and turn everything pink…Is that a problem?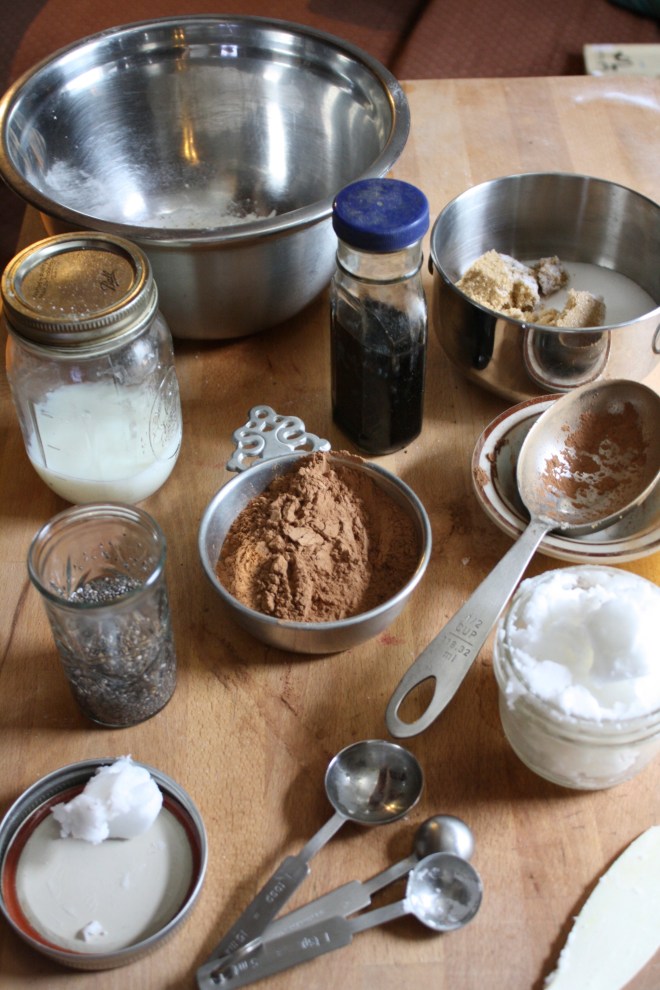
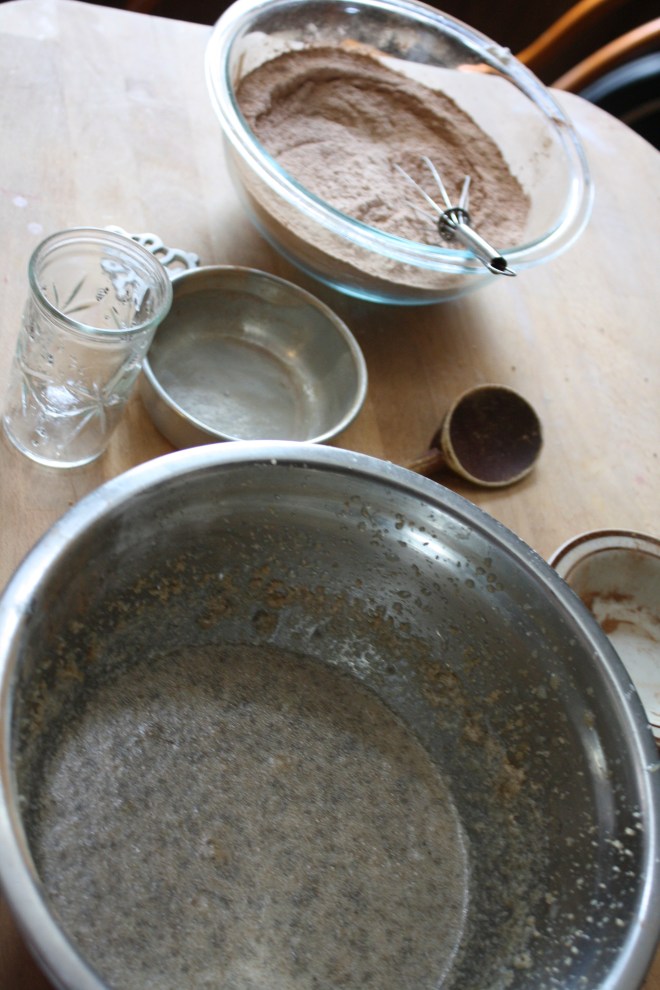
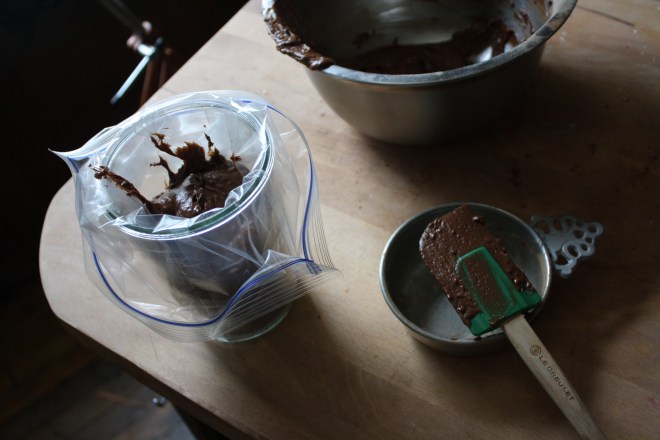
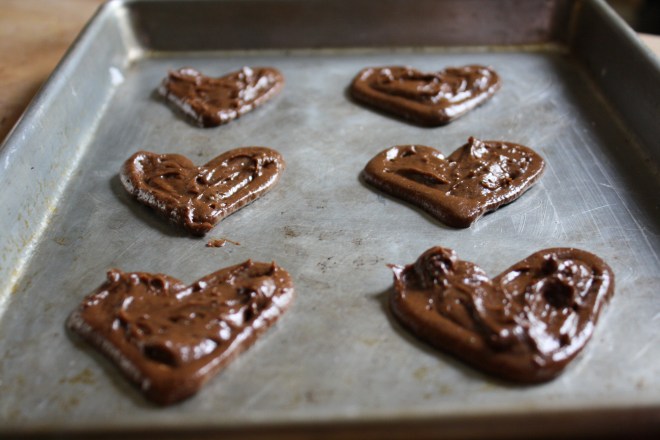
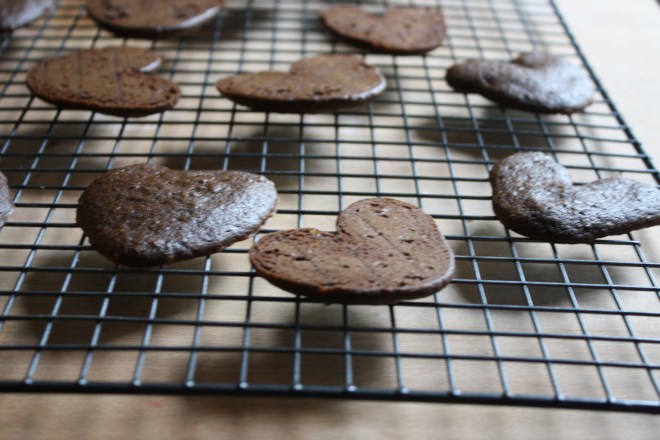 So lovely. Shadow hearts while the whoopie hearts cool.
 Whoopies all paired up
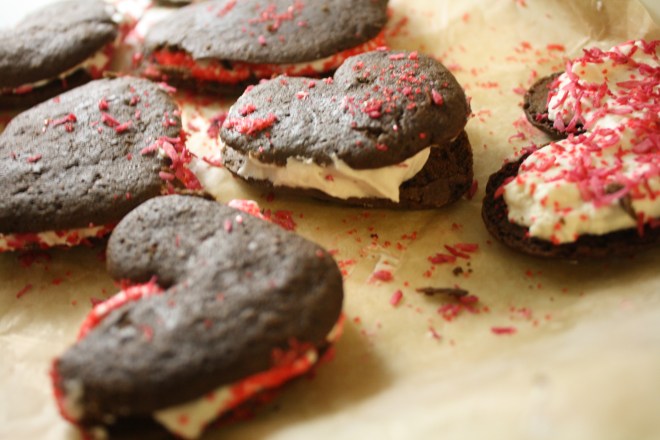 Stuffed with a generous dollop of whipped coconut cream ( a cold can of coconut cream whipped with a splash of vanilla and a tad bit of sweetener) and sprinkled with my home-made beet dyed coconut sprinkles…..

 Me and this little made some donuts, but screw the donuts(sweet potato with chocolate frosting).. look at the overalls! I decided a long time ago that when I have kids, they will be wearing nothing but overalls. Osh Gosh FOREVER!
  FARM SHARE PICK UP!!! I was starting to go through veggie withdrawals.
 Shadow hearts for Valentines Day! I love Valentines Day..… or maybe I just love hearts and pink. Either way, I am getting ready for some V-day recipes! This one is a definite go….
 And beet dyed coconut sprinkles…I mean, talk about happy.
  A late Christmas gift from Nicks mom. Every year she gives us s few of her hand thrown pieces….. love!!
 And I gave the mister a haircut!!! He has been asking me for about 2 months now to cut it, but for some reason we just haven’t gotten around to it. So finally this week it happened, and I can see his lovely face again!
 How can you not be happy when your piece of ginger looks like a little man. (right after I took this picture I cut his legs off)
 Flowers from our garden last summer….. Sunflowers are my favorite (these are teddy bear sunflowers)…. I love looking back at old picture, especially ones from opposite seasons, like flowers in winter or pictures of snow in summer. There like little glimpses of whats to come. I can not say it enough, I am so lucky to live in VT..we have excellent seasons so there is always something to look forward too!
 My motive for this drink…get rid of a few candy cane….. And maybe make a little kid happy, but that was just a bonus… I would have made him drink this even if he didn’t like it. (I am awful like that)
 All you need is a cup of milk(cow, soy, rice..whatever) a tablespoon of cocoa powder, a tiny pinch of salt and a candy cane. We don’t need to add any extra sugar because the candy cane is sugar.
  Stick all ingredients into a pot on medium heat and whisk until the candy cane is melted and the milk is as hot as you like it.
 It you want(we did) top with a dollop of whipped cream(or whipped coconut cream) and sprinkle with a little more crushed candy cane…..Best served after a long afternoon of playing in the snow!
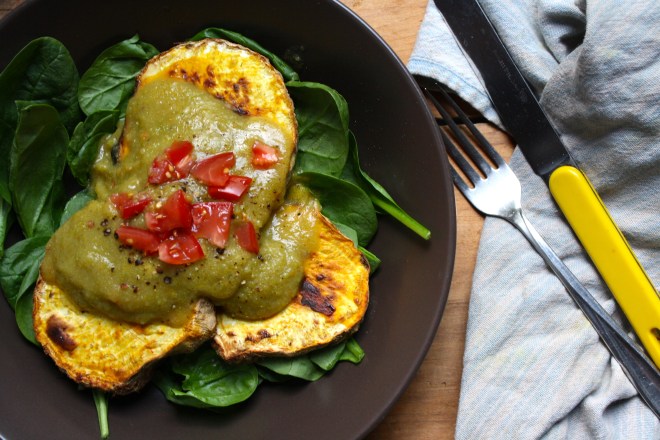 My winter farm share is coming to an end this week. One more pick and then a three week stretch until the summer share starts… WHAT AM I GOING TO DO!!! Stock up as much as I can is what.
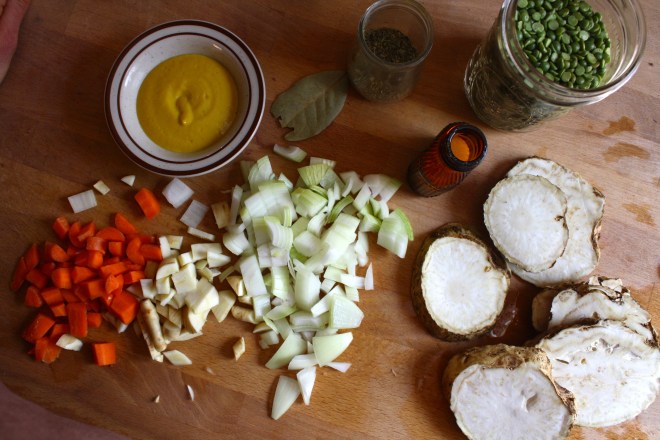 The stuff….For the split pea gravy we have a carrot, a parsnip and a large onion chopped into small chunks. Salt, thyme, a bay leaf and of course the split peas. Then there is the celeriac root* sliced into 1/2 inch thick rounds and some plain old yellow mustard .
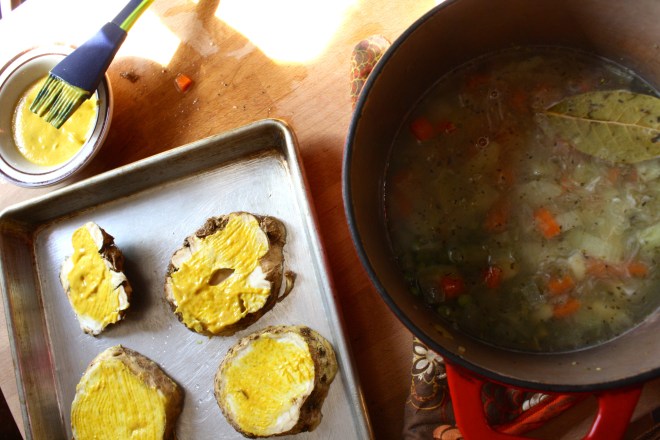 Toss the chopped parsnip, carrot, onion and the spices into a pot on medium heat and let veggies sweat a few minutes until tender. Add in the split peas and enough water to cover everything. Turn pot on high and bring to a boil, then cover and turn to low. Make sure to give the pot a good stir ever few minutes and add more water if needed
 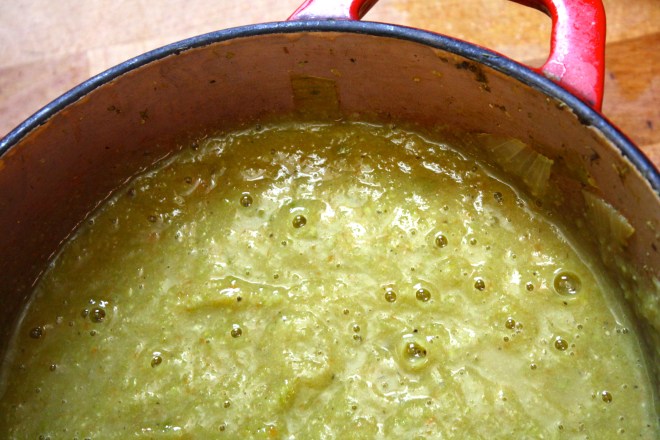 Once the peas have soften, remove the bay leaf and puree until smooth and oh so creamy. Taste and add more salt and pepper if needed. If you find that the gravy seems to thick, just add in more water until it’s the consistency that you want.
 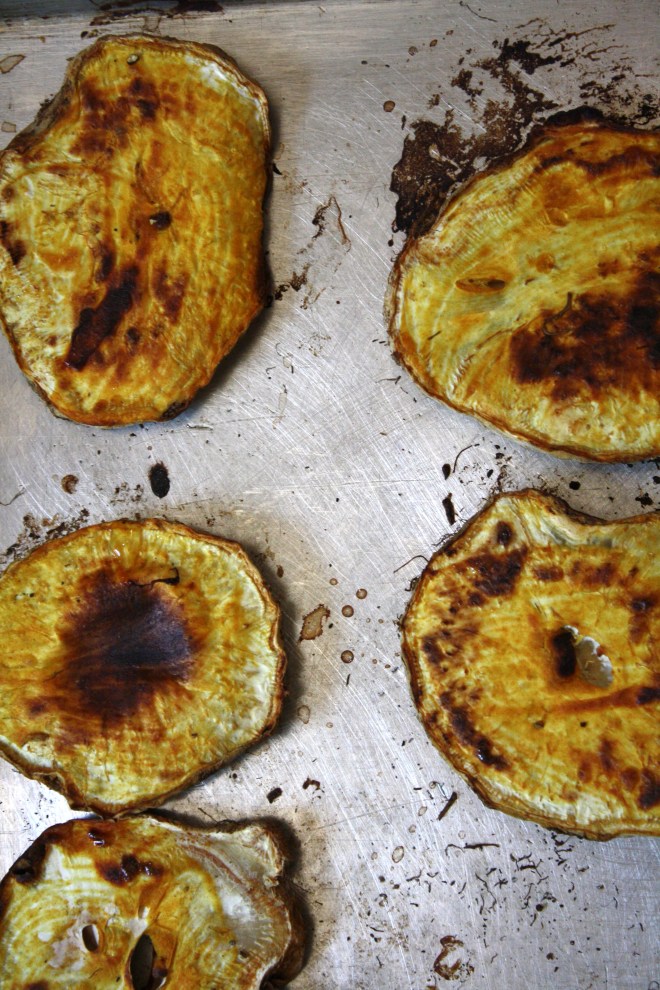 The gravy is made, the celeriac is roasted… now we are ready to eat!!
 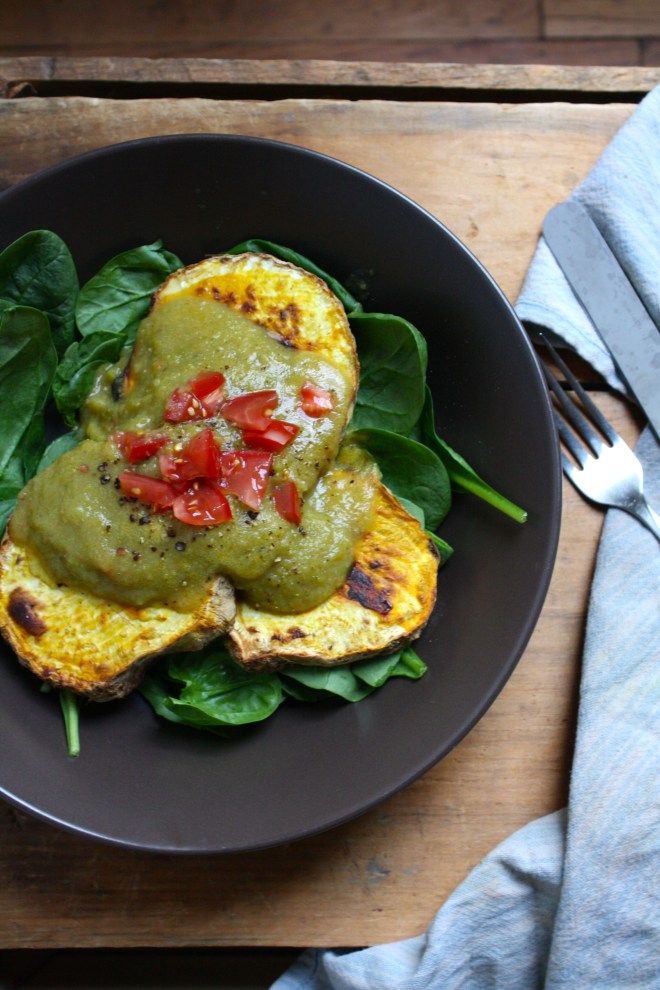 Stick the celeriac on a plate and dump good amount of that gravy right on top. Feel free to add a bed of spinach, or a grain or anything you want, because why not, and also some chopped tomatoes for a little acid and prettiness.


THE LOVELY CRAZY
September 19, 2015 by maximios • Blog
I made a pie dough a little while ago with the intention of making a cherry pie…but I ate all the cherries . (I do that a lot… eat all of something that I was intending to use for something else)
And then I think about that saying.. The road to hell is paved in good intentions.
.Well I guess I am going to hell.
So no cherries, but I have a crap load of summer squash (and it’s only the beginning) and a few peaches that are in need of some eating. And what’s that, a container of ricotta in the fridge from lasagna a couple weeks back…. Meant to be and not in hell yet!
Sure, I could have made one single crust galette, sweet or savory, and thrown it to the masses for consumption, but I figured that I might as well just hit two birds with one stone. A dinner and a dessert, all at once, and call it a victory in time management and putting a dent in the pile of squash on the table. (don’t be fooled, I love excess amounts of squash.. It’s like the printer paper of the veggie world.. can be used for everything!) And bonus, only one set of dishes! I mean come on, this is so good, easy and just really pretty. I know, I know….. so smart.
Anyway, here, take a look, get inspired and make some pretty dinsert (dinner and dessert) galettes.
The stuff. For the base, we need one single crust pie dough (that’s going to be for two smaller galettes) and some ricotta cheese. The savory galette has summer squash, salt, pepper, lemon ( the zest) and a couple tomatoes. The sweet needs honey, a peach, and a few strawberries.
And if you want, change up your toppings. Pretty much any fruit or veggie combo would work. And spice up the ricotta if you wan. Garlic, fresh thyme, cinnamon… whatever will make you happy.
First things first. Roll ourt dough. You could cut the dough in half and roll two separate disks, but I just rolled out one big rectangle shape.
And onto the baking sheet and into the fridge to rest.
While the dough is chillin, take half of the ricotta and whip it up with some honey and thinly slice up your fruit.
Take the other half of the ricotta and add a bit os lemon zest, a sprinkle of salt and pepper, and mix that up. And thinly slice up the squashes and dice up the tomatoes.
Two crusts(or one cut in half. Smear the honey ricotta on one side, savory on the other, leaving a boarder so you can fold the dough over.
Now pile the fruits on the honey ricotta, veggies on the savory, and fold the uncheesed part of the crust over. just enough to keep everything from falling out. Sprinkle salt and pepper on the veggies.
Stick into a preheated oven and bake until the crust is cooked all nice and golden brown and crispy.
While the galettes are baking, toss the chunks of tomatoes into a skillet with a splash of oil, salt and pepper and stick it into the oven too. Just bake until the tomatoes are nice and soft. You can stick in the oven right away and let the tomatoes cool, or towards the end of the bake time so that you can eat them warm… these tomatoes are good hot or cold.
all baked up, removed from the oven, looking oh so pretty.
Pile the roasted tomatoes onto the savory tart. And if you got it, a bit of chopped freshy fresh basil
And drizzle a little bit more honey on the sweet.
And serve… Is it savory first or do you go sweet?
How about a pice of both. Dnner and dessert.. all on one plate!
Happy Tuesday!
Ba Bye!
-C
-Makes 2 small or one large galettes
For the savory
For the Sweet
*Note. Feeling like blueberry apricot or maybe potatoes and peas? Swap out any fruit and veggie (and spice) combination you want. The possibilities are endless! And if you want to do just one big galette, go for it.
Roll out pie dough in either 2 separate disks or one large rectange cut in half and.place on baking sheet and stick in fridge. While dough is resting, divide the ricotta into separate bowls. Add the salt, pepper and lemon zest to one, and the honey to the other. Using a fork, whip them up.
Preheat oven to 400 degrees
When the oven is preheated, grab the crust from fridge and smear the ricotta fillings evenly on the middle of each crust, leaving about an inch and a half boarder. Layer on the toppings, (sweet on honey, savory on lemon pepper.. or whatever floats your boat) and fold border over the edges of the filling. Place in oven and bake for about 35-40 minutes or until the crusts are nice and crispy and golden brown.
While those are baking, dice up the tomatoes and toss into a oven safe skillet with a little drizzle of oil and sprinkle of salt. Stick that into the oven for about 10 minutes or until the tomatoes are nice and soft. You can do this right away, or towards the end of the bake time of the galettes… roasted tomatoes are great warm or cold.
When the galettes are done baking, remove from oven and let sit for at least 5 minutes before serving. Top the savory galette with the roasted tomatoes and chopped fresh basil. Drizzle a little more honey on the one with the fruit .
Serve one, then the other, or both at the same time!
Eats good hot, warm, or cold. Utensils not required