Besides begin a coffee addict, I am also a super big tea drinker. At least 1, if not like 3 cups a day. And when I say cups, I mean a 32oz ball jar of steaming hot water with a tea bag of some sort in it. And sure, I will use the same bag twice or leave in an old bag and add a new bag. Or with loose leaf, I%u2019ll end up just eventually swallowing it all. What can I tell ya. That%u2019s my truth. %ud83e%udd37%ud83c%udffb%u200d%u2640%ufe0f
Anyway, tea. I have a shit ton. Bags and loose leaf, but sometimes what I would call “conventional tea flavors%u201d do not sing my fancy. That is when I will dig around in my spice jars and pull stuff out to make or add to a tea.
Fenugreek. A seed. A great tasting seed. I usually use it in my chilis and curry dishes, but lately, I have also been brewing it up with (and without) fresh ginger to drink because it is fantastic. Ginger of course is spicy and earthy, but fenugreek, while also being really earthy, also has a sweetness to it and tastes kind of like real maple syrup. Now doesn%u2019t that sound great? That%u2019s because it is great.
So if you are feeling a little something different and tasty and maybe just so happened to have some fenugreek in the old spice cabinet, give this tea a try. A perfect for and cosy drink for cold winter afternoon.
To the tea!
The stuff. Water, fenugreek, fresh ginger, and an orange.
Dump water into a pot and add in fenugreek seeds. Place on the stove and bring to a boil, then turn the heat to low and simmer.
Cut up the fresh ginger into small chunks and take a few ribbons of peel from the orange.
After the fenugreek has had a 5 minute head start in the water, add in the ginger and orange and keep simmering for another 5 to 10 minutes. (longer time for stronger tea)
Strain the tea into cups, squeeze in a little fresh orange juice, and go curl up o the couch.
It%u2019s tea time.
-C
makes 2 cups of tea
2 teaspoons fenugreek seeds
1 inch chunk of fresh ginger
an orange (optional)
4 cups water
Place water and fenugreek seeds in a pot and place on stove. Bring to a boil then turn heat down to simmer for about 5 minutes. Cut up ginger into small chunks and peel a few ribbons of orange zest and place into pot. Continue to simmer for another 5-10 minutes (longer for stronger tea). When you are ready to drink, strain into cups, squeeze in a little fresh orange juice, and drink.
It%u2019s a smoothie. And no, we have never really been smoothie people in this house, but what can I say, sometimes smoothies happen, especially when you have about 20 ripe bananas in the fruit bowl with no room in the freezer and no need for 7 loafs of banana bread.
So I smoothied. And I like it (a lot).
This is a smoothie of simplicity. Nothing fancy. Simplest of simple. Straight to the point. And all sorts of good.
You might think, does this simple smoothie you speak of taste very good? Yes, yes indeed it does. It is all sorts of fantastic. Basically if you like creamy, nutty, oaty, bananery things, you will like this. And it%u2019s a perfect breakfast, snack, dessert, or just wanting a little treat like thing that is not garbage food. A smoothie of all smoothies with the most basic ingredients. And takes about 15 seconds to whip up. Can%u2019t complain about that.
To the smoothie goodness!
The stuff. A ripe banana, some old fashion rolled oats, a pinch of salt, water, and a smidge of maple syrup if you want it.
Everything goes into blender.
And blended until smooth. Hence the word smoothie.
Pour it into a cup (or if you are feeling primal, drink it straight from the blender%u2026 it%u2019s totally cool)
And done.
A banana oat smoothie.
Let the good time roll!
-C
makes 1 smoothie
1 very ripe banana
1/3 cup raw old fashion oats
1 1/2 cups water
pinch of salt
a tablespoon or two of any sweetener you like (optional)
a pinch of cinnamon (optional)
Place everything into a blender and blend until smooth. Pour into a cup, sprinkle with cinnamon if you wish, and drink right away.
Have you heard of switchel? A lot of people haven’t so don’t feel bad if you don’t know what the hell I am talking about (like my computer. It keeps auto correcting switchel to switched). So switchel. It’s basically a drink made from water and apple cider vinegar. But wait, don’t grimace and click away, it’s also has fresh ginger, lime, and maple syrup mixed in and is really really really freaking refreshing and tasty and just really good. I guess it was even used back I the day as a sort of sports drink, like Gatorade because it has all sorts of electrolytes and anti-inflammatory properties from the ginger.%u00a0%u00a0Plus apple cider vinegar has got all sorted or health benefits,%u00a0so it’s a tasty treat with benefits. Who doesn’t love the benefits?%u00a0
You can drink the switchel %u00a0straight up hot or cold, add it to seltzer for a bubbly soda like drink or even %u00a0mix some cocktails with it. I enjoy a nice cold glass when I am feeling thirsty but what I usually do it fill up half a %u00a0jar with boiling water, then fill the rest of the jar up with the cold switchel. It’s a nice tangy, spicy,%u00a0refreshing and warming drink that I look forward to every day. I even got the littles to try it.%u00a0%u00a0One thought it to be nasty (can’t win them all), but the other one really liked it too, so you know it’s not just me that thinks it good.%u00a0
The stuff. Apple cider vinegar (the good stuff that is raw and has the mother), fresh ginger, limes, maple syrup, and water.%u00a0
Fresh ginger is the best. Give it a little peel with a spoon, just to maximize gingerness exposure then chop into small pieces.%u00a0
Ginger and water goes into big pot. Bring it to a boil then turn down to a high simmer for 10-15 minutes to really get the ginger infused into that water.%u00a0
After it’s cooled a bit, strain the now ginger water into a pitcher or a big jar.
Add in the vinegar, the juice of the limes and a bit maple syrup. Start off with a little maple, you can alway add more later if needed.%u00a0
After the switchel has some time in the fridge to cool (at least 2 hours, but I like it best when it’s sat overnight) grab a glass ,some ice cubes, and a slice of lime. It’s go time.%u00a0
A drink to you my friends
-C
Makes bout 6%u00a0 cups%u00a0
1/2 cup raw apple cider vinegar (with the mother. Braggs is a popular option)%u00a0
5-6 inch piece of fresh ginger%u00a0
2 limes
5 1/2 cups water
1-4 tablespoons maple syrup%u00a0
With a spoon, gently peel ginger . Not perfectly, just get some of the skin off. Chop it into small pieces and place it into a large pot with the water. Bring to a boil then let simmer for 10-15 minutes. Strain ginger water int a large pitcher or jar.
Add in the apple cider vieager, the juice of the limes, and a tablespoon or two of maple syrup. Give it a good stir then place in the fridge until cold (about two hours but overnight is best)%u00a0
When it’s cold, give it a good stir again, taste, and if it needs more maple, add it in. And then it’s ready.
You can drink it on ice, maybe add some seltzer to it, or mix it into some fancy cocktail. It can also be reheated for a nice spicy warming treat.%u00a0
I love watermelon, I mean, who doesn’t, but i don’t often buy them for myself for one main reason. They are so freaking big and once you cut open a melon, the rest of what is not eaten needs to be refrigerated which would be fine but I have a very tiny fridge and sticking a watermelon in there takes up about half the space. And sure, I could maybe eat a whole melon all to may face in one sitting, but then I would explode. And yes, I know you can buy smaller wedges of melon at the store, but I refuse. Those wedges just seem gross and expensive and wrong to me.%u00a0 When I buy watermelon I take my chances and buy the whole thing and just eat the crap out of it until I make room for other food in the fridge.
It has been so hot out (too hot) and I really just needed a watermelon, so I bought a watermelon (the biggest one I could find because of course). I waited for a day until the fridge was near empty and cut the beast up. Half went into the fridge right away (I had just eaten the last of the greens to make room) and the other half, well only a 1/4 was eaten. I could have kept going and eaten the rest or I figured I would just make a nice tea drink with the rest. And that what I did and that’s this drink I show you here. Smooth, bright, and earthy iced green tea with fresh sweet watermelon, it’s all summertime up in you mouth. And pureeing up watermelon into a liquid definitely takes up way less space in the fridge. I am a genius.
The stuff. Some watermelon, a few green tea bags, a lime( or a lemon), a spring or two of mint, and some water.
Start off with making the tea. Hot water to tea bags, steep for 5 or so minutes then remove bags. Stick tea in fridge to cool.
Now for the watermelon. Remove the rind from the fruit , and cut it up into chunks. Toss in a few mint leaves and…..
So you have cooled tea, pureed watermelon and the juice of a lime.
Pour it all together and mix it all up.
And there you have it. Fresh watermelon green ice tea, ready for your drinking.
All you need now are glasses full of ice and little wedges of melon.
All the summertime, all the watermelon.
Hope you are all staying cool.
-C
make 6 1/2 cups
4 green tea bags
4 cups water
1/4 of a watermelon (about 2 1/2 cups liquid watermelon)
1 lime (lemon works too)
a few sprigs of mint (optional)
Bring water to an almost boil (I let my tea pot whistle, turn it off and sit for a minute or two) and pour hot water over tea bags. Let steep for about 5 minutes, then remove bags and refrigerate tea until cold.
When the tea has cooled, take you melon, remove the rind, and puree the fruit along with the mint, with a blending device of you choice. Squeeze in the juice of the lime and give it all a good stir.
Pour tea over ice, garnish with a sprig of mint and a slice of watermelon if you want some fancy.
I am channeling all my summer time feels here in hopes for warmer weather. As of yesterday there was still a pile of snow outside of my house and I am still leaving every morning in a hat, mittens, and a winter jacket.
I want t-shirts and shorts, I want sandals, and I want to set my winter jacket on fire (not really, but kinda).
This cold weather has crept back into my soul and I needed something to remind me that there will be warmer days to come and I will soon be bitching about how hot I am and blah blah blah.. you know how it goes.
So I make lemonade. This lemonade as inspired by my favorite tea as of late, raspberry zinger. It’s a nice and tangy tart and really tasty. I make great big jar of it at night and add a little squeeze or two of lemon to it for that little extra zing. I figured if it tastes good hot, it will taste great cold, which in fact, it does. It taste really freaking good. And it just occurred to me that there is probably a little subliminal inspiration from Beyonce in wanting lemonade, so thanks for the B.
Anyway, it’s suppose to me nice and seasonably warm this weekend. Maybe bust out your lemonade game and try a batch of this one.
The stuff. Lemons, a raspberry zinger tea bag, honey (or any sweetener you like to use) water and ice.
Bring some of that water to aalmost boil and pour it over the tea bag (make sure you stick the bag into a jar or pitcher)
While the tea is steeping, juice the lemons. And a personal preference, you can strain out the pulp or not. I use the strainer to catch the seeds but then stick the pulp back in cause I like pulp. All up to you.
While the tea is steeping and still hot, add in any sweetener that you want to use. ( I used a little honey) Stir until that sweetness is all dissolved.
And after the tea has had a good steep, dump the brewed tea into the pitcher with the lemon juice then add in the really cold water. Stir it all around.
Add acouple thin slices of lemon to make it all fancy anda few big chunks of ice to make it super cold
Refreshing, crispy, tangy with a touch of sweet….Perfect for all those warm summer days to come (hopefully)
Have a great weekend people.
-C
Makes 5 cups
1 raspberry zinger tea bag( I used Celestial Seasonings)
3/4 cup fresh lemon juice (3-5 lemons, depending on size)
Anywhere between no to 1/2 cup of sweeter (can use sugar, honey or maple, I like a touch of honey)
4 cups water (2 hot, 2 cold)
ice
Place tea bag in 2 cups of hot water (can be done directly in a pitcher) Add in the sweetener while its still hot and mix until completely dissolved. Let steep for about 10 minutes.
Remove tea bag and add in the lemon juice, 2 more cups of cold water and mix, Top with ice and garnish with a few more lemon slices if your feeling fanciful.
Serve in a glass full of ice with a wedge of lemon and a smile on you face.
A few month ago I read an article about NYC seltzer water (which I have still yet to have) and fell in love with those super cool glass seltzer bottles. (I really want to get my hands on a few). In the article, there was the mention of egg creams. Now at first I was kind of disgusted because who the hell drinks eggs, but then after doing super duper internet research (google) I found that egg creams are not actual egg.. It’s pretty much just bubbly chocolate milk.
Yesterday I was thinking of a non alcoholic beverage that people that are opting out of the alcohol can drink, something maybe a bit different and fun and I had that brain spark.. Egg creams! And I just so happen to be babysitting a gaggle of littles for the day and who better to serve a fun non alcohol drink too! (after that, save all he alcohol for me!) It was perfect cause these littles are down for anything with chocolate and it just so happened to be one of those littles birthday (HAPPY BIRTHDAY JUDAH BUG!) .so special party drinks were in order.
Here is how the egg creams when down. I made the chocolate syrup. The kids all loved it and where sticking there fingers in it. Then I assembled the egg creams. All the kids took a glass, drank some, and took off. I found 1/2empty cups of drinks around the house. But here is the thing. When I asked if they liked it, two said yes.,one said it was weird but good, and one little ran away from me with the bag of chocolate quinoa bark ! brought. (I didn’t run after her) The mr came by a few hours later and tried some of the dregs of one and he wasn’t into it at all , but then again he hates chocolate milk and it was sitting around for a while. So the verdict …. not sure.%u00a0 Kids like it if they like chocolate milk but treat it like they would treat any drink (drink half and abandon the rest). Adults could totally get into it if there is some nostalgia behind it or maybe a shot of vodka added.%u00a0 So yeah. I think anyone that is interested should definitely try it. And if you do, let me know. I am very curious what people think.
Oh, and to make the afternoon that much more interesting, I am currently still suffering from laryngitis (hahaha) So yesterday was some fun stuff.%u00a0
The stuff for the chocolate syrup. Cocoa powder, sugar, water, a pinch of salt and a little splash of vanilla. And for the actual egg cream.. milk (a plain plant, nut, or animal) and strawberry flavored seltzer water. (if you don’t like strawberry use any flavor or plain)
To make the syrup, combine the cocoa, sugar, water, vanilla and salt into a sauce pan and bring to a boil while whisking continuously. Keep whisking until sauce starts to thicken then remove from heat and pour into a jar and let cool.
Now for the egg cream assembly
Syrup goes into glass.
Milk into syrup and mix it all around.
Give it another little whirl with a spoon or straw and if you want a more bubbly head, blow into the straw(works the best!)
and get down to business.
HAPPY NEW YEARS!
-C
For the chocolate syrup (makes enough for a few egg creams but the syrup is good for anything calling for chocolate)
1/2 cup cocoa powder
1/2 cup sugar
1/2 cup water
pinch of salt
splash of vanilla extract
Stuff for one egg cream
1 cup cold strawberry flavored seltzer (can use plain or any flavor that you like)
1/2 cup cold, plan flavored milk (plant, nut or animal)
4-5 tablespoons chocolate syrup
To make the syrup, combine the cocoa, sugar, water, vanilla and salt into a sauce pan and bring to a boil while whisking continuously. turn heat down a little and keep whisking for another 2-3 minutes until sauce starts to thicken. Remove from heat and pour into a jar and let cool.
In a glass that holds are least 16 oz, add in the milk and the chocolate syrup. Mix together (can be shaken or stirred) then pour in about 1 cup of the seltzer water. Give the drink a good mix with a spoon and serve it on up. A straw is recommended to blow bubbles into drink!
Note.. I am aware that there are a few different ways to prepare an egg cream so if you know of a way that is better (milk in last. seltzer mixed with chocolate syrup..). then do it your way!
Ugh. It has been so nasty gross out. A four day heat wave, and no, not just hot hot days,%u00a0but those gross, hot hot with all the humidity in the world, kind of days. My body has rebelled and turned into a slug and my hair%u2026 well let’s not talk about my hair.
Yup, it’s been way to freaking hot to do anything, especially cook. And eating food is’t even especially appealing either (living off raw kale and, yes, lots of tomatoes at the moment)%u00a0. What we all want is to drink something nice and cold and refreshing (and boozy). And what do I do when I want this, and have a lot of that?%u00a0I turn that into this. That being tomatoes, and this, being a cold drink. Did that confuse you?
What I am trying to say is that I have a butt load of cherry tomatoes to eat but what I really want is a cold %u00a0drink. So I took the tomatoes and make them into a lemonade. And it is amazing. It hits all %u00a0the end of summer, super gross heatwave, I don’t want to move,%u00a0spots that needed to be hit. And just in time for the weekend sow e get to add a little splash or two of something hard, cause we all know that after this past week, we all deserve it.
Think that combination sounds weird? Well don’t cause lemons and tomatoes are perfectly paired together. Tart and tangy, but still with a bit of sweetness from the tomatoes (%u00a0especially if using a sweeter variety like the sun-gold). It really is a great, refreshing drink, with or without the booze.%u00a0A perfect match!
Tomato lemonade here we go!
The stuff. Tomatoes (%u00a0I used sun-gold cherry cause I have a buttload,%u00a0but you can sure use whatever tomato you have to many of), lemons, water, and if your into it vodka.
Note. The mr. and I are not big on sweet drinks, so I didn’t add any sweetener, the tomatoes being sweet enough. But feel free to add a little sugar or honey to yours.
Start by dumping tomatoes into a pot with water. Stick on high heat and bring to boil, then turn heat to medium low,stick a lid on pot,%u00a0and let tomatoes simmer for a little while.%u00a0
About 30 ish minutes later, the tomatoes have reduced to about 1/3 of what you started with and have turned into a a chunky like syrup.%u00a0
Strain the juice from the solids into a big pitcher.
Tomato juice! and it’s so pretty bright gold. Now let it cool far a little bit.
And while juice is cooling, juice your lemons
When the tomato juice is cooled off, add the lemon juice to the tomato.%u00a0
Add water and stir
Taste, and if you think it need sweetener, by all means, add a drizzle or two of some honey or spoonful of sugar.
A couple of glasses of ice, and if you shall,, a shot of vodka (add the shot to the glass, not the pitcher)
Me being so fancy added a garnish/snack.%u00a0Basil leaf and cherry tomato skewer looks so nice.
And sit back, put your feet up. and take it all in.%u00a0
Weekend here we come!%u00a0
-C
2 cups cherry tomatoes (can use 2 cups of any tomato)%u00a0
1 cup fresh lemon juice (4-5 lemons)
1 cup water plus 3 1/2 -4 cups water
a few basil leaves and extra tomatoes for garnish (optional)
Note. I did not add any sweetener to my lemonade but you could totally add in a few tablespoons honey or sugar. Do what floats your boat.
Dump tomatoes into a pot with 1 cup of water. Bring to boil then cover and turn heat to a medium low heat. Cook tomatoes down for about 30 %u00a0minutes or until the tomatoes have reduced about 1/3 and is almost sauce like.
Using a fine mesh strainer, strain the tomato mixture into pitcher or jug that you can serve your drinks %u00a0from. Use a wood spoon or spatula to scrap the tomato around strainer to really make sure you get all the juicy goodness. Let tomato juice cool.
While cooling, juice lemons until you get a cup of fresh lemon juice. Add lemon juice to cool tomato juice along with 3 1/2 cups water. Mix and taste. If you think it needs a little sweetener, add a little in. If you think it tastes to strong,%u00a0add in more water.
Good stir, ice in cups, a 2-3oz shot of vodka per 8-12oz cup of lemonade (the ratio is up to you my friend)%u2026 and your sitting pretty. Feeling a little fancy, take a basil leaf and wrap around a cherry tomato. Stab it with a tooth pick and garnish your drink. It ames for %u00a0anise snack too.
Sit back, sip and enjoy.%u00a0
My flowers are coming up, I have packed away my winter jacket, and I haven’t worn anything but sandals for the past week. Plus yesterday I made the first batch of sun tea and saw my first hot air balloon of the season (which lead to a heated discussion with the mister about how hot air balloons take flight. We were both kinda right, but me more than him)So yeah, %u00a0it’s for real%u2026 Winter is gone and spring has sprung, or more like spring sprung then bounced cause now it’s basically summer weather. Not complaining, but I hope we get a least a few more weeks of pleasant, not hot and humid weather.%u00a0
Anyway. Sun tea, one of my favorite summer time drinks. Made by infusing regular old teas with water by using the almighty power of sun.
Why do we want to make iced tea this way instead of just using boiling water? Well you can still do that, but sun tea makes a more mellow, lovely, and I find, more sweeter tea. It brings out more complex flavors that you don’t get with the boiling water method. %u00a0And it’s nice to know that it took zero effort on my part to make the drink (not that boiling water takes that much effort, but still)
It can be made with any variety %u00a0of teas, infused with other fresh herbs, dried spices, or even chunks of fruit. You can also make the teas and add flavors after the infusing is over. Have fun and play with flavor combos.
A few of my%u00a0favorite sun tea%u00a0combinations
Any mellow black tea like orange pekoe or english breakfast with a few springs of mint
Chamomile and mint%u00a0
Green with a fruity tea, like blueberry or pomegranate
Lemon Zinger with a few springs of Rosemary
These are just a few of the endless possible flavors. And you don’t have to get fancy with it either, you can totally use plain old lipton tea bags (I still do that too)
Now harness the sunshine and feel awesome and fancy by making some tea!
Woo Hoo Wednesday!
-C
SUN TEA
%u00a0What you’ll need
Tea- Either bags or loose leaf
Water- Preferably Filtered
A glass jar with a lid
Sunshine
I %u00a0use a ratio of 1 tea bag or 1 tablespoon loose leaf tea per 2 cups of water. And I usually make my teas in half gallon ball jars so I use 4-5 teabags or tablespoons of tea. (makes just enough tea for 4-6 tall glasses, depending on you glass size) %u00a0If it’s a mint tea, I usually use a little less because I find that mint teas can become to strong and bitter so I %u00a0use 3 teas bags or tablespoons of loose.
Directions
Place tea loose or bags into jar. Fill with water, leaving about an inch for tea expansion, place lid on tight, and stick in the sun for anywhere between 3-5 hours %u00a0(depending on how strong you like your tea). When tea is infused to your liking, remove teabags or strain the loose tea and stick into the fridge to chill. Serve as is %u00a0in a drinking vessel with a few ice cubes and add sweetener if that’s what you do.
Drink within a day or two, then rinse jar and make a new batch!
It%u2019s been 14 days since my last farm share pick up with 7 more days to go. (The farmers take a long break at the end of the year, which they all deserve but makes me sad. Or more like hungry.) It is a pretty long stretch for me to have to go without getting me some farm fresh goods. I have been making due, rationing out my roots (the greens were gone within days) and supplementing with lots and lots of frozen zucchini, Swiss chard, and broccoli, so it hasn%u2019t been bad. But now I am worried because with al the supplementing, the chest freezer is looking a little more on the empty side then I would like. And it%u2019s only January. I guess that is what happens when you eat your weight in vegetables everyday. %ud83e%udd37%u200d%u2640%ufe0f
Anyway, I am pretty much out of roots. The turnips were the last of what I had left besides the lone beet that I found stuffed in with the apples. And because they were the last roots and knowing I am not going to have any roots until next week, I wanted to do something a little special with them. That is why I hassledbacked them, which basically means I sliced them up without cutting completely through so they are cut but still stuck together. Does that make since? If not, just look at the pictures.
These turnips, oh these turnips. First off, roasted turnips are amazingly delicious and if you have never roasted one, well you need to get on it and do so. Secondly, the turnips I used are gIlfeather, which if you did not already know, are the Vermont state vegetable. But don%u2019t worry, if you can%u2019t find the gilfeather, regular old purple top turnips work and taste just as fantastic because all roasted turnips are so fantatic. When roasted I might describe them as the cooler, hipper, cousin of the baked potato. Add the avocado cream and seeds, which are the cooler friends of the cooler cousin, and you got yourself a cool dude party! Or basically just a way tastier baked potato situation with fixing.
Now don%u2019t you want a tasty cool hassledback turnip? And yes, I keep wanting to call them David hasselbacks turnips too. Because they are so cool. Am I right? Haha!
To the turnips!
The stuff. Turnip. Either a couple smaller ones or a giant one, up to you. Also need an avocado, a little red wine vinegar and water, salt and pepper, garlic powder, olive oil, and some toasted seeds (if you want).
If using a giant turnip, cut in half. If using small ones, you can cut those in half too or leave them whole. Up to you.
Now to hasselback. Using two guides that are the same thickness (chopsticks or chip clips.. whatever you have lying around that you don%u2019t mind nicking with a knife) slice into the turnip about ever 1/4 inch, right down to the guide, but not all the way through.
Lightly oil a skillet or baking sheet and also rub a little oil all over the turnips and lay them hasselbacked side up. Sprinkle with salt, pepper, and a pinch of garlic powder. Then into a hot ass oven they go.
While the turnips are roasting , make up the avocado cream. Basic, just scoop avocado into bowl (if you have a stick blender) or blender, add in a pinch of salt, the water and vinegar, and blend until smooth.
And back to the turnips. Baked for a little longer then an hour and flipped once, now they are all roasted and crispy and all sorts of ready.
A freshly roasted hasseldbacked turnip smothered in avocado cream and sprinkle with toasted seeds.. Good things here friends. Good things.
-C
serves 2-4
1 large or 2 small turnips
salt and pepper
olive oil
pinch or garlic powder
an avocado
1 tablespoon red wine vinegar
1 tablespoon water
handful of toasted mixed seeds (I used pumpkin and sunflower seeds)
Preheat oven to 450
Grab turnip(s) and wash thoughtful. If you buy the turnip from the store and it has a wax coating, peel the outer skin, otherwise, you don%u2019t have to. Now to haseslback. Cut the large turnip in half or if using to small ones, you can just leave it whole. Take two, either chopsticks or something that is about 1/4 – 1/2 inch thick, and place on either side of turnip to use as a cutting guid. Slice the turnip about ever 1/4 inch , right down to the guide, but not all the way through. After cutting, place on a lightly oiled skillet or baking sheet and drizzle a little oil in our hand and rub all over. Sprinkle with salt, pepper, and a pinch or garlic powder. Place the turnips in hot oven. Roasts for about an hour, or until the slices of the turnip start to brown and come apart. Also, if you want a little more crispy edge, half way through, drizzle on a little more oil. You can also flip (which I did) the turnip cut side down to finish roasting.
While turnips are roasting, make avocado puree. Scoop avocado into bowl or blender. Add in the water, vinegar, and a pinch or salt. Blend in blender or with stick blender until smooth. If to thick, drizzle in a little more water until desired consistency.
Once cooked and all crispy like, remove turnips from oven, place on a plate and slather on the avocado cream. Sprinkle on toasted seeds and eat to your face hole.
It%u2019s been 14 days since my last farm share pick up with 7 more days to go. (The farmers take a long break at the end of the year, which they all deserve but makes me sad. Or more like hungry.) It is a pretty long stretch for me to have to go without getting me some farm fresh goods. I have been making due, rationing out my roots (the greens were gone within days) and supplementing with lots and lots of frozen zucchini, Swiss chard, and broccoli, so it hasn%u2019t been bad. But now I am worried because with al the supplementing, the chest freezer is looking a little more on the empty side then I would like. And it%u2019s only January. I guess that is what happens when you eat your weight in vegetables everyday. %ud83e%udd37%u200d%u2640%ufe0f
Anyway, I am pretty much out of roots. The turnips were the last of what I had left besides the lone beet that I found stuffed in with the apples. And because they were the last roots and knowing I am not going to have any roots until next week, I wanted to do something a little special with them. That is why I hassledbacked them, which basically means I sliced them up without cutting completely through so they are cut but still stuck together. Does that make since? If not, just look at the pictures.
These turnips, oh these turnips. First off, roasted turnips are amazingly delicious and if you have never roasted one, well you need to get on it and do so. Secondly, the turnips I used are gIlfeather, which if you did not already know, are the Vermont state vegetable. But don%u2019t worry, if you can%u2019t find the gilfeather, regular old purple top turnips work and taste just as fantastic because all roasted turnips are so fantatic. When roasted I might describe them as the cooler, hipper, cousin of the baked potato. Add the avocado cream and seeds, which are the cooler friends of the cooler cousin, and you got yourself a cool dude party! Or basically just a way tastier baked potato situation with fixing.
Now don%u2019t you want a tasty cool hassledback turnip? And yes, I keep wanting to call them David hasselbacks turnips too. Because they are so cool. Am I right? Haha!
To the turnips!
The stuff. Turnip. Either a couple smaller ones or a giant one, up to you. Also need an avocado, a little red wine vinegar and water, salt and pepper, garlic powder, olive oil, and some toasted seeds (if you want).
If using a giant turnip, cut in half. If using small ones, you can cut those in half too or leave them whole. Up to you.
Now to hasselback. Using two guides that are the same thickness (chopsticks or chip clips.. whatever you have lying around that you don%u2019t mind nicking with a knife) slice into the turnip about ever 1/4 inch, right down to the guide, but not all the way through.
Lightly oil a skillet or baking sheet and also rub a little oil all over the turnips and lay them hasselbacked side up. Sprinkle with salt, pepper, and a pinch of garlic powder. Then into a hot ass oven they go.
While the turnips are roasting , make up the avocado cream. Basic, just scoop avocado into bowl (if you have a stick blender) or blender, add in a pinch of salt, the water and vinegar, and blend until smooth.
And back to the turnips. Baked for a little longer then an hour and flipped once, now they are all roasted and crispy and all sorts of ready.
A freshly roasted hasseldbacked turnip smothered in avocado cream and sprinkle with toasted seeds.. Good things here friends. Good things.
-C
serves 2-4
1 large or 2 small turnips
salt and pepper
olive oil
pinch or garlic powder
an avocado
1 tablespoon red wine vinegar
1 tablespoon water
handful of toasted mixed seeds (I used pumpkin and sunflower seeds)
Preheat oven to 450
Grab turnip(s) and wash thoughtful. If you buy the turnip from the store and it has a wax coating, peel the outer skin, otherwise, you don%u2019t have to. Now to haseslback. Cut the large turnip in half or if using to small ones, you can just leave it whole. Take two, either chopsticks or something that is about 1/4 – 1/2 inch thick, and place on either side of turnip to use as a cutting guid. Slice the turnip about ever 1/4 inch , right down to the guide, but not all the way through. After cutting, place on a lightly oiled skillet or baking sheet and drizzle a little oil in our hand and rub all over. Sprinkle with salt, pepper, and a pinch or garlic powder. Place the turnips in hot oven. Roasts for about an hour, or until the slices of the turnip start to brown and come apart. Also, if you want a little more crispy edge, half way through, drizzle on a little more oil. You can also flip (which I did) the turnip cut side down to finish roasting.
While turnips are roasting, make avocado puree. Scoop avocado into bowl or blender. Add in the water, vinegar, and a pinch or salt. Blend in blender or with stick blender until smooth. If to thick, drizzle in a little more water until desired consistency.
Once cooked and all crispy like, remove turnips from oven, place on a plate and slather on the avocado cream. Sprinkle on toasted seeds and eat to your face hole.
I have been on a severe citrus kick lately. Oranges, limes, lemons, kumquats. I want it all and have been eating it all. A lot of it all. Espeically the oranges which are just so good right now. We have been going through bags of them faster then ever and I am not mad about it.
Which then brings us to chili. Chili is one of the things that I make on a very regular bases. It%u2019s beans, veggies, tomatoes, and a ton of spices. Easy as can be, most people like it, and I never get sick of it. I mean, how could you get sick of it, it is so good! Anyway. Chili, its great but have you ever added orange to it? Oh man is it amazing. Bright and acidic and sweet. The whole pot of chili just radiates more goodness, more intensity, more, moreness. (I know that doesn%u2019t make sense but you get it.) It%u2019s a whole new level of chili and I don%u2019t if there will ever be a time when I don%u2019t add orange to my chili again. Well at least during citrus season.
But enough about all that, what you really want is to just start making this orange black bean chili so you can eat it. I hear you, so I%u2019ll let you at it.
To the chili!
The stuff. Oranges, black beans, crushed tomatoes, an onion, a couple carrots, a pepper, and jalape%u00f1os. Also lots of cumin, chili powder, ground ginger, garlic powder, and salt and pepper.
Small dice up the pepper, onion, carrots, and jalape%u00f1os. Don%u2019t want it super spicy, don%u2019t add the jalape%u00f1os.
All that stuff gets tossed into a big pot along with all the spices, some salt and pepper, and a little water too. Place on stove to start cooking down the veggies.
Slightly tender and smells amazing.
Now add in the beans, the tomatoes, and the zest and juice of an orange. Mix it all up, set it back on stove and keep on cooking,
Now eat your chili, with extra orange slices to squeeze all over it of course. And maybe you want to serve it with some corn bread? That is entirely up to you, but who would be made about it?
-C
Serves 4-6 people
1 pound cooked black beans drained (about 5 cups or 3 cans)
5 cups crushed tomatoes (or 2 28oz cans)
2 oranges (navel or cara cara work)
2 carrots
1 large onion
1 bell pepper
2 jalapenos (optional)
2 heaping tablespoons cumin
2 tablespoon chili powder
2 teaspoons garlic powder
2 teaspoons ground ginger
salt and pepper
Start by chopping up the veggies. Small dice the carrot, the onion and the pepper. If using jalape%u00f1o, dice that into small little bits too. And remove seeds for less heat or leave them if you like it. Once that is all cut up, dump it all into a large heavy bottom pot along with the cumin, chili powder, garlic and ginger powder, and about a teaspoon or so each of salt and pepper. Add about 1/2 cup water, mix it all up, and place the pot on stove on medium heat and start to cook the veggies and spices until they begin to smell fragrant and are ever so slightly tender, which should take 5-10 minutes.
Now add in the beans, the tomatoes, and the zest and juice of one orange. Mix together and keep cooking on medium heat, partially lidded, for about 45 minutes to an hour, stirring once in a while, until the chili has thicken and tastes good to you.
Once done, season to taste with more salt and pepper and either stir the juice of the second orange into the whole pot or serve with slices of orange to squeeze on top.
Eat. Store any left overs in fridge. Tastes delicious cold too.
I made baked beans last week for a side to dinner with the mr and Barb. They ate them all. I didn%u2019t get more then a spoonful. I was sad for me, but also was like %u201cShit, if I had known you guys were bean fiends, I would be making baked beans like all the time.%u201d
And maybe not all the time, but I made them again this week. And again, they ate a lot, but I got me some this time, and I will probably make them again next week too because they will be perfect for Thanksgiving. See, homemade baked beans are a thing of beauty. Sure you can buy them in a can and be just fine, but these baked beans, well these are waaaayyyy way better. These baked beans are soft (not canned bean soft) and tomatoey and a little spicy with a tang. Not sickly sweet, (not sugar added) and not too salty.. They are just about perfect. You can eat them on their own, toss them into salads or wraps, stick on some toast, serve as as side, or just eat them cold straight from a jar from the fridge right before bed. (your loved one will thank you for that). Plus they are baked in the oven and I love me a good warm oven on a cold day. And the obvious, but all the protein and all around goodness. A great dish to serve if ever you need to feed people like me who don%u2019t eat meat. It%u2019s a win win win win.
Baked beans in all their glory. No cans in sight.
The stuff. White beans that were soaked overnight, strained then added back to a pot with 6 cups of water. Also have crushed tomatoes. an onion, a few cloves of garlic, chili powder, mustard powder, apple cider vinegar, and some salt and pepper.
First step is to start boiling you beans. But while that is happening, mince garlic and chop the onion into really small pieces.
Toss the onion and garlic in a pan and cook on medium low until soften and fragrant.
Cooked beans. All you need to do to cook them is place the pot with soaked beans and water on high, bring to a boil, then turn heat to a medium. Let beans cook until tender. It should take about an hour and a half.
Beans are cooked and the garlic and onion are soften so now all you do is combine everything together. Don%u2019t drain the beans, just toss in the tomatoes, the vinegar, the spices, and a few pinches of pepper and a pinch of salt. Stir in all together,
Looks like soup right? This is right before you stick it into the oven.
Now look at that, oven baked beans. The best part%u2026 The crispy sides. ALL MINE!
Not much left to do but eat them. Straight up with a hunk of bread. That is a good way to start anyway.
Enjoy your beans!
-C
Makes a big pot of beans
1 pound (2 cups) white beans soaked in water for at least 8 hours (I used great northern but navy would be good too)
6 cups water or veggie stock
3 cups (or a 28 oz can) crushed tomatoes
1 onion
3 cloves garlic
1 1/2 tablespoons chili pepper
1 tablespoon mustard powder
1/3 cup apple cider vinegar
salt and pepper
Strain soaked beans and place them into large oven safe dutch oven almond with the water and stick on the stove. Bring the beans to a boil then reduce heat to medium and cook util the beans are tender. Should take about 1 1/2 hours.
Sometime while the beans are cooking, mince garlic and chop the onion into very small pieces. Place in a skillet and cook on medium until the onion and garlic are soften and fragrant. Remove from heat and set aside until beans are cooked
Preheat oven to 425
One beans are tender, dump in the cooked garlic and onion, the tomatoes, the spices, the vinegar, and a good pinch of salt and pepper. Stir it all together and place into the oven. Bake for about 2 hours, staring about ever 30 minutes, until the bean sauce is nice and thick. If at any point you think they have gotten to dry, just add more water. Pull the beans out of oven once you are happy with the sauce consistency. Taste and season with more salt and pepper if needed.
And then eat them. As a meal, as a side, or as a snack. Beans are good anytime.
Any leftovers should be stored in the fridge. Beans can be reheated very easily on the stove top. Just place the pot back on stove, stir in a little water and cook til hot.
Beans are also fantastic eaten cold from the fridge.
Whether you are stuck at home because you have the flu or because you do not want to leave the house for fear of turning into a human popsicle, or maybe even you just don’t want to because this is the first weekend that you have no plans, no obligations, no parties, well then you are in good company.%u00a0
Unfortunately for me, I have to leave the house.%u00a0I have obligations, I am getting over the flu, and I am pretty sure I am going to turn into a popsicle because when -8 is the high for the day, well, it’s bound to happen.%u00a0
But lucky for me I already made the soup, in my fitful sicky, but able to think about and eat food again state. Yes I had the flu, or better yet, the stomach flu. And the stomach flu and food do not mix. Even the thought of food would send me reeling and it was just no good. I seriously thought I would never be able to think or better yet, eat food again without turning straight to the bucket.%u00a0But I will stop there because you don’t need to hear about my misery. Anyway, the death spiral subsided and food was no longer the enemy. I actually wanted (kinda of) to eat again. So food it was to be.
Because it was my first day back to food, I really wanted to take it super easy. (Before I made this soup I actually boiled a carrot until it was mush and ate that just to test my tummy)%u00a0%u00a0Nothing heavy, obviously hot and warming, not to spicy. %u00a0Just soothing and nourishing. And I didn’t really want think about it and worry about it and spend much time in the kitchen. Sure I could have bought a can of soup but actually no, canned soup is not for me. And I know the mr would have thrown something together for me but I was determined to be a slightly productive human and do something with my day even if it was minimal.%u00a0%u00a0I had to make the soup, I had to do it.%u00a0
This soup was exactly what I needed and could not have been any easier to make.%u00a0Chop up some shit, toss it into a pot, and walk away (or nap on the couch) for a little while. It can be done on the stove, in a slow cooker, or if you have a Instapot and want to do that, I should say go for it. And I am not saying this because I was starving, but %u00a0this was one dang fantastic tasting soup. Right in every way. It’s going on my semi permanent soup rotation for the next few months.%u00a0%u00a0%u00a0%u00a0
No bad after 48 hours of dying and no food. (stupid flu)
The stuff. Carrots, celery, a small rutabaga, and and onion. A red potato, a parsnip, some green been, garlic, canned tomatoes, navy beans, %u00a0thyme, rosemary, a bay leaf, and salt and pepper.
Note here that all this stuff was already in my house. Say you do not have a rutabaga or a parsnip, it’s totally fine. You can add%u00a0
Here is the hardest part. Chop it all up into little pieces. All of it all mixed together, just get it chopped.
And toss it all into a big pot with he green beans,%u00a0a handful of dried beans,%u00a0and the spices.
Add in the can of tomatoes
Then fill the pot with water.
Now stick the pot on the stove and bring to a boil then reduce heat to a little lower the medium and loosely cover with a lid.%u00a0
A couple hours later, once the beans are cooked and the veggies are tender, you got yourself a big ol’%u00a0pot of some fantastic home made, easy as can be, vegetable soup.%u00a0
Chunky, hearty, and easy as can be. And the best part is that I have left overs and we all know that left over soup is the best soup.%u00a0
Stay warm, don’t turn into a popsicle.
-C
Makes a big pot of soup
2 carrots
3 stalks of elery
1 onion
1 small rutabage
1 red onion
1 parsnip
2 cups frozen green beans%u00a0
1/2 cup navy beans
3-4 cloves garlic
1 28oz can %u00a0(no salt added)%u00a0crushed tomatoes
1 teaspoon roasemary
1 teaspoon thyme
1 bay leave
salt and pepper
water
Note. You might not want rutabaga in this or you might want to add some cauliflour or peppers, so go for it. It’s a pretty adaptable soup so use what you got and like.%u00a0
Grab all you raw veggies, give them a quick wash, then chop them all up into bite sized pieces. Mince up the garlic.%u00a0Dump it all into a large heavy bottom pot. Add in the frozen green beans, the dried beans, the spices and the can of tomatoes. Add a pinch of salt and pepper and %u00a0enough water to cover the everything 3-4 inches.%u00a0
Place pot on stove, bring to a boil, then reduce heart to medium low and loosely cover wit a lid. Cook, giving it a stir once in a while, %u00a0for a least 1.5 hours ( can cook all day on long on simmer if you like)%u00a0%u00a0or until the beans are coooked through and the veggies have soften.%u00a0Add more water if needed.
Serve when you are ready to eat. Refrigerate leftovers.
Besides begin a coffee addict, I am also a super big tea drinker. At least 1, if not like 3 cups a day. And when I say cups, I mean a 32oz ball jar of steaming hot water with a tea bag of some sort in it. And sure, I will use the same bag twice or leave in an old bag and add a new bag. Or with loose leaf, I%u2019ll end up just eventually swallowing it all. What can I tell ya. That%u2019s my truth. %ud83e%udd37%ud83c%udffb%u200d%u2640%ufe0f
Anyway, tea. I have a shit ton. Bags and loose leaf, but sometimes what I would call “conventional tea flavors%u201d do not sing my fancy. That is when I will dig around in my spice jars and pull stuff out to make or add to a tea.
Fenugreek. A seed. A great tasting seed. I usually use it in my chilis and curry dishes, but lately, I have also been brewing it up with (and without) fresh ginger to drink because it is fantastic. Ginger of course is spicy and earthy, but fenugreek, while also being really earthy, also has a sweetness to it and tastes kind of like real maple syrup. Now doesn%u2019t that sound great? That%u2019s because it is great.
So if you are feeling a little something different and tasty and maybe just so happened to have some fenugreek in the old spice cabinet, give this tea a try. A perfect for and cosy drink for cold winter afternoon.
To the tea!
The stuff. Water, fenugreek, fresh ginger, and an orange.
Dump water into a pot and add in fenugreek seeds. Place on the stove and bring to a boil, then turn the heat to low and simmer.
Cut up the fresh ginger into small chunks and take a few ribbons of peel from the orange.
After the fenugreek has had a 5 minute head start in the water, add in the ginger and orange and keep simmering for another 5 to 10 minutes. (longer time for stronger tea)
Strain the tea into cups, squeeze in a little fresh orange juice, and go curl up o the couch.
It%u2019s tea time.
-C
makes 2 cups of tea
2 teaspoons fenugreek seeds
1 inch chunk of fresh ginger
an orange (optional)
4 cups water
Place water and fenugreek seeds in a pot and place on stove. Bring to a boil then turn heat down to simmer for about 5 minutes. Cut up ginger into small chunks and peel a few ribbons of orange zest and place into pot. Continue to simmer for another 5-10 minutes (longer for stronger tea). When you are ready to drink, strain into cups, squeeze in a little fresh orange juice, and drink.
Can you believe it? 2020. Not only a new year but a new decade. I mean, wasn’t it just Y2K like a few years ago? Haha. Y2K. Do you even remember that?
The past week was good. Kicked it off by making a Pokemon ball cake for Judah%u2019s birthday (he is now 10 freaking years old) and going over to participate in birthday party stuff. Then it was New Years Eve and Day, which the mr and I just kind of spent chillin a bit, took an afternoon and ran out of town. Nothing special and no we didn’t stay up all night. I don%u2019t think I could even if I wanted to. HA. After New Years, the fog of the holiday season kind of rolled in. My brain shut down from over stimulation, my body is feeling tired and sore, and I just feel off. I think a big part is the weather. It has been way to warm, damp, no snow, and just not wintery enough. Dang it, I need me some winter!
Anyway, the rest of the week went by. Started packing up the loft so Barb can move in next week before she goes back to school. I have been going to the new gym everyday, trying to get used to that new fancy building (I love it, but still miss the old building). We spent time with Coco and Judah being awesome and eating popsicles. And we have been watching the heart balloon move around he house as it slowly sinks further and further to the floor.
Now we are at Sunday. Not sure exactly what%u2019s in store. I am going to the gym and then there are a few things that we need to get done this afternoon, but we were thinking we might grab a little or two and try to hike up a small mountain. Or maybe even just go for a long walk through some trees. It snowed yesterday and I am so excited and am very much in need of outdoors and trees and quiet.
Internet for your taking.
-I think keeping the thermostat at 55 is right. With a fan blowing too. Your Bedroom Is Too Hot. What is the ideal temperature for sleep?
–Why you shouldn%u2019t bother making a resolution in January. Right? Right!
-Looking for a good mustard? Mustard Manual: Your Guide to Mustard Varieties
–The best things to eat and drink to fight wintertime dread. Soup. Aways soup.
-I have been saying this all along! Never Cut a Squash Again.
-Did you know that scrabble pieces were made in VT? Three shifts at the Scrabble factory: The inventor
–5 Reasons Why a Homestead is an Excellent Place for a Child to Grow Up. I wish I grew on a a farmstead. Hopefully someday I will be living on one though.
–Make This the Year You Finally See the Aurora Borealis. I sure am hoping I will!
-I am all about CBD, but this? Seriously, a bodysuit infused with CBD? What the fuck. I Spent a Full Week Wearing a CBD-Infused Bodysuit
Pictures from the week.
Did you get out last week, see some trees, see some nature, take in the world? I hope so but if you didn%u2019t, take some time today and do it, it will make you happy Promise.
Last Sunday was camping at the Queeche Gorge State Park. Stopped at a cool flea market on the way, saw some cool old stuff, almost bought a painting (I kind of wish I did. Oh well) Then off to the camp ground which was pretty empty, but man, there were a shit ton of people bumping around the gorge trails. Not bad, I just was a little surprised, but I guess I shouldn%u2019t have been. I mean, foliage and nice weather and beauty. It brings the people out. Anyway, the hiking was good. Found a off shoot trail that no one else was on and found a tiny little brook with spawning trout. Got back to camp, made pumpkin lentils for dinner and then the sun started to set and the night got very cold. The fire was needed oh so much. I might have even melted my shoe a bit because I was a little to close to it. And when it hit that magical time (8) we jumped into the tent. I slept with a hat and hood and mittens on in my sleeping bag with a wool blanket and was just as happy as could be. Then we woke up, made coffee, packed up, and headed for the streams so the mr could fish in 35 degree weather. It was freezing but it makes him happy so it makes me happy.
After we got home the week went per usual. Work here and there, dinner with the littles, Barb up my butt about how excited and nervous she was about Italy, and could I please just hem this skirt for her? You know, the normal stuff.
I think it was Wednesday, the mr and I were out for the day so I had packed out lunches. I was eating a carrot and all of a sudden, CRACK! Spit out my carrot and there was the little stone (it happens some times) and also a big ass chunk of my tooth. Yup, the stone broke a piece of one of my molars off. Oh my was I freaking out. Called the dentist right away but my dentist doctor is out of town and can%u2019t get me in until next week! As of right now it is fine and doesn%u2019t hurt or anything, but I am terrified that it%u2019s going get worse or break more or I don%u2019t know. This and I just was there for a cleaning like 2 weeks ago. Said I had great teeth health and blah blah blah. After that happened, I have been a little on edge since. The underlying feeling of something wrong in my face, and it%u2019s driving me crazy. Stupid tooth.
Friday morning was running around, a few chores, and a quick frosting and dinosaur making to finish off the ice cream cake and off to the studio for the day. Loaded kilns, played in the slop bucket, pugged some clay. Then ran home to get the cake and make quick to Barb for her 19th birthday hurray! There was a family crowded dinner. I brought the cake and she%u2019s jumping up and down being crazy and awesome and was trying to keep her shit together because the next day she was getting on her first plane ever and flying to Italy! Whoop whoop.
So yesterday was basically set aside for Barb. I cleaned the house early, packed our lunches, then the mr and I picked her and her friend up and drove them over the border into Cananda and dropped their lucky tushies off at the airport. SO CUTE. I might have been a little jealous, but more then that, I was, and am, just so excited for them. Italy, haven%u2019t been yet, but I will get there. Barb said she would bring me back a picture of an Italian toilet so that will be good enough. I probalaby won%u2019t need to go after getting that. Ha. And so we dropped them off, headed back home and watched all the most amazing clouds in the sky. Got home, took a shower, and passed the f out.
Today is up in the air. Not exactly sure wha’t%u2019s going to happen. We have a very important thing this afternoon that is exciting to us, but other then that, not sure. Camping was talked about but none of the campground are open anymore. We were thinking of maybe sleeping in the car under a tree, but not 100% sold on that idea. It also might snow so you know, the mr is scared of the white stuff. Me, I am very excited and would love to wake up with some snow, but I get it. It is getting cold out. But if we sleep in the car, it would totally be fine, and fun. Just got to convince the mr.
Internet from the week.
-Isn%u2019t see always right? Grandma Was Right: Sunshine Helps Kill Germs Indoors
–You Can Buy ‘Golden Girls’-Themed Cereal at Target Now. What the.. Funko%u2019s. That is just kind of amazing.
-Who didn%u2019t read this book? I hope if it does become a movie they don%u2019t screw it up and that the young ones still read the book. ‘Are You There God? It’s Me, Margaret.’ By Judy Blume Could Finally Become A Movie
-Good, Evil. Sugar There is a lot to the history., Sugartime. How a taste for sweetness, developed for survival, became a stand-in for everything good %u2014 and evil %u2014 about our culture
–Are Siblings More Important Than Parents? I don%u2019t know, but there is something. Growing up as one of 9 is who I am. I con%u2019t even imagine not having them. And my sisters are my best friends so maybe, yeah, like not more important but kinda?
–5 Mistakes to Avoid When Baking with Yeast. But it%u2019s really not hard to use yeast. If you are intimidated, start by making focaccia.
-I would live in an old church, but only if the vibe was good and there was no history if weird shit.. Holy Homes: Inside Houses That Used to Be Churches
–Last week at the gym there was a special on the news about people called flat landers. They believe the earth is flat ans think all of evidence , things like gravity and even the moon is all a hoax. It was very strange.. 10 easy ways you can tell for yourself that the Earth is not flat
-I need a glass greenhouse. Majestic Conservatories and Cozy Private Potting Sheds Showcase the Universal Appeal of Glass Greenhouses
Pictures from the week
An Easter April Fools Day all in one. This probably doesn’t happen too often.%u00a0%u00a0I could imagine that things could get pretty crazy with the holiday combination.%u00a0I am picturing lots of little littles opening empty Easter eggs, or eggs with rocks, or (fake) bunny poop…%u00a0because April fools %u00a0Ha. That would so be pretty fun to watch and is totally something that I would (and might) do. Would that make me a jerk? Maybe a little but I think it might be worth it.%u00a0
The week has been and up and down kind of week. Officially 2 years since Sean passed so I have been a little quite, sad, and maybe a little bitchy. Doesn’t help that it was just an annoying week in general. Like I almost broke my leg with a 35 lb weight at the gym, but not really. (Word of advice, don’t drop heavy shit on your leg, it doesn’t feel good and hurts all week). Had to get the oil change and ended up waiting for 2 hours. And I guess I am starting to get spring allergies making me feel heady and tired and Oh, I had to go to the dentist. Still no camera so pictures are are still all off my phone which is driving me nuts and I still haven’t finished the taxes that promised myself that I would have done before April 1…Ok, I am done bitching.
But it definitely was not all bad. We had dinner with Shannon and got to harass Jackson for a little while.%u00a0I won a bag of literal shit (compost) from a library raffle. Then there was farm share pickup where we %u00a0talked spring greens with the %u00a0farmers because we are all getting a little tired of the roots and very excited for spring. I did some seed planting and cleaned up the yard a bit. The mr and I have been taking some pretty good walks and trying to embrace any nice weather that we can. I talked to Barb about talking to her plants to keep them alive and while Mark was home for the weekend I got to harass him about applying for jobs where he is expected to wear short shorts and be a prick….. I think got some joy in harassing people this week.%u00a0
Then it was Moms birthday. (HAPPY BIRTHDAY MOM) The whole family came over and I made a birthday dinner and cake and cupcakes. The cake was for mom (blueberry coffee cake), who I know well enough to know that she was going to want to take half of it home so I made cupcake too. Those were basically for the little so I made them very neon pink.%u00a0Shannon hid some candy filled eggs in the yard to keep the littles busy (for like a second) and we all just basically had one big dance party because that’s what we do.%u00a0After dinner we all headed down to the YMCA for the annual pick up basketball game in honor or Sean with all of Sean’s friends. A bunch of younger dudes all getting a little older, playing a pretty intense and sweaty game of ball while all the littles and maybe some of the adults (Erin) proceeded to eat their weight in candy. This after all the cake they had just consumed. (The sugar highs were getting intense.).%u00a0%u00a0There was a lot of emotions, but mostly it was a lot of fun and was really good to see everyone.
And then we went home to the trashed house with pasta and cake all over. Like for real everywhere. I don’t know how the littles managed to smear pink frosting BEHIND and UNDER the couch, but they did and I am never going to let them eat %u00a0in my house again. All food outside from now on. %u00a0I then spent half of my day yesterday cleaning up after it all. Pink frosting and pee because apparently there are some boys that have a hard time aiming into the toilet. Fun stuff.%u00a0
Now it is Easter and I am not quite sure whats going on. I know that I am needed to fill (or not fill, or fill with (fake) poop) eggs and then hide them at some point this morning,%u00a0but other then that….. There are things and people and Easter stuff, but I am not putting any pressure on myself to participate in anything. I am feeling a bit antisocial and could use quite day.%u00a0I might just stay home and plant more seeds and pretend that it is not going to get mother f-ing cold out again next week and so I can pack away the last remaining bits of winter. And maybe bunny proof the garden because the bunnies have been hopping around a little to close to my garden beds these days an I am not particularly fond of sharing my food with them.What better way to spend Easter then to keep the bunnies away. Ha. %u00a0Maybe when we get chickens back there they bunnies will just stay on the other side of the fence. I’ll figure it out one way or another.
Have a Happy Easter April fools.
Internet excursion from the week
–Here’s Why Easter Eggs Are a Thing. Oh.%u00a0
-Seriously no. Just no.%u00a0Peeps-Flavored Beer Is Reportedly Being Released For Easter%u00a0
-The Last Conversation You%u2019ll Ever Need to Have About Eating Right. It really is.%u00a0
-Well son of a bitch.%u00a0Does Coffee Really Need A Cancer Warning? California Judge Decides So
-I am in love with this serving %u00a0board. It’s on my have to do list of things I have to do.%u00a0DIY Celestial Wood and Brass Inlay Serving Board
-A Tiny Cabin is This Writer’s Off the Grid Getaway. That toilet…It’s a good one.%u00a0
–New Human ‘Organ’ Was Hiding in Plain Sight.%u00a0Whoa dude.%u00a0
-I am always trying to make sure that I have enough protein in my diet, but I would never drink that muscle milk shit.Whole foods my friends. %u00a0How Protein Conquered America
-My sister Erin lived in a place for a while that had carpets in the bathrooms.. It was freaking disgusting.%u00a0Why Did Anyone Think Carpet in the Bathroom Was a Good Idea?
–Oh, and watch the fuck out.%u00a0Falling Chinese Space Station to Crash This Weekend
Pictures from the week
It’s officially kinda official. WE MOVED IN!!!! And yeah sure, we might not have a kitchen or a 100% functional shower, but hey, who needs that when you got a real freakin bed to sleep in. (we are showering and preparing food at the loft) Going form sleeping on a futon on wooden slates in a crawl space to our real bed, with a real frame, all in a giant room with windows….. It’s hella crazy.
Other then the move in, the week has been pretty jammed packed. Still spending every minute plugging away at the house all while making sure all of our tenants are keeping warm with working heaters. (we have spent way to much time at the plumbing supply store this week) Barb, the mr and I ditched a day of work and school to travel to the north and hit up the land of Canadian Ikea. The mission was simple. Get a kitchen sink and maybe a cool rug or a shelving unit, and for barb and the mr, to eat as many hot dogs as they could. Success was had. We go the sink, I got a jar and a rug, towels were bought and an obscene amount of hot dogs were eaten (I think they each ate somewhere between3.5 and 5, plus a fro-yo. Me I was happy with my carrots) We we home before dark and spent the remainder of the day hanging up the Christmas lights. It was a grand day indeed.
As for the mr, well he went and turned himself one year older. And what did we do?%u00a0 We went and had a happy birthday party with family and friends at the newly unfinished house. It was all sorts of fantastic. We frantically ran around to pick up all the construction mess, tossed some plywood on the cabinet frames, ran all over to make paper lanterns for the light bulbs hanging from the ceiling and cleaned the toilet. I made huge vats of soup and kept the warm in slow cookers (I am now a new owner of a vintage 70’s crock pot so I guess I need to learn how to use it) and we borrowed an electric griddle, cut up some veggies and fruit and had a soup and grilled cheese party. (shout out to barb for helping me cut all the everything, oh and having the first official dance party with me) A classic homemade vanilla cake with some Duncan Hines frosting and ice cream topped off the night. I must also mention that even with a house full of people, including a bunch of littles, there was barely any food wasted. My brother even asked where he could find my compost bin to toss the orange peels. That might have been the highlight of the night.%u00a0 After the evening my ass was tired so off to bed we went.%u00a0 Then I woke up. Nothing beats waking up at 5am the day after a party to a plywood covered pile of soup crusted dirty dishes.%u00a0 2 hours later, a rag, some peppermint Dr. Bronners and the bathroom sink made things look good again.%u00a0And now the house is full of every chair we have ever owned, every piece of mismatched bowl, plate, cup,jar, and spoon we could find, and a freezer full of wheat bread and lots of carrot sticks.
Yup, things are moving along. Pretty soon I’ll be cooking up a storm in new kitchen and will be bring you all some food posts to boot.%u00a0 The appliances are set to arrive tomorrow and all we have left to do is build the cabinets, run a few water lines, pour a concrete counter………
Today the mr have to remove the 500 plates, cups, bowls and spoons out and the rest of the birthday cake out of the kitchen area and get back to work to makingt he real kitchen thing happen. But the coffee pot and all the coffee has found it’s permanent home. I’ll have coffee all day long. Whoa hoo!
Things I saw and read on the internet that you can now see and read too.
-Not really a “gingerbread house” but what ev, it pretty fantastical. How To Build An Indestructible Gingerbread House. Gummy bear epoxy seems so right.
-Speaking of gingerbread houses. Holiday gingerbread cookies have a dark and violent past
–Cute Animation Imagines How Day Turns into Night
-A hairy tail has be found.%u00a0 First Dinosaur Tail Found Preserved in Amber
-This is a good guide with lots of good recipes. The Search is Over: This Map Will Find Your Sugar Cookie Soulmate
–I want this.
-Now I know where I have seen you before. Scientists Think Your Face Evolved to Look Like an Ape%u2019s Butt
–Why Nutrition News Contradicts Itself All the Time. One day my diet is super healthy and the next, I am probably going to die cause of it. Damned if you do, damned if you don’t. (nah, I think I am good)
–A Brighter Outlook Could Translate To A Longer Life. Doing it
-I get excited every year when this list comes out (I know, I a dork). NPR%u2019s Book Concierge Our Guide To 2016%u2019s Great Reads
Mid week, I was doing a little pantry cleaning/ inventorying of what I had and needed when I came upon not one, not two, or even three. No, six. SIX, jars of jam. And there are 2 that are already opened in the fridge. I don%u2019t know why, but knowing that there was that much jam in the house made me a little uneasy. Six unopened jars is about 3 jars past my comfort zone. Sure there are so many things you can do with a jar of jam (jelly, preserves, and marmalade included) and now that I am thinking about it, is one of the reasons why I bought a few jars a while back. Then there was Christmas and I think we got at least two jars as gifts so it%u2019s not all my fault, but still, that is just too many jars of jam. Right there I needed to get rid of at least one jar. So muffins. Jam muffins, with poppyseed crust because it%u2019s pretty and nobody ever complains about poppy seeds, or at least they don%u2019t until after they eat them and have poppy seeds stuck in their teeth all day. But that is just our mouths way of saving a little for later, am I right? HA
Anyway, a quick and simple muffin recipe for all of you people out there that might have a jar or two too many of jam in the fridge or pantry%u00a0(I used apricot but any flavor(s) would work) and could use yourself a tasty little muffin situation. I mean who doesn%u2019t want a tasty muffin?
To the muffins.
The stuff. In the bowl is white and white whole wheat flour, baking powder and soda, and salt. Also have apricot jam, oil, almond milk, apple cider vinegar, and orange, and some poppy seeds.
Grab a zester and zest the orange into the bowl with all the dry stuff. Whisk to combine.
Jam, oil, milk, and vinegar. All on top of dry. Whisk that up until just combined. No over mixing. You will get tough (not in a good way) muffins.
Scoop into well greased muffins tins then cover the tops with poppy seeds.
And out of the oven, looking all pretty like.
Pop those muffins out of the tins and cool on a wire rack for a bit. And by all means, don%u2019t wait until they are completely cool.
Now eat you a warm muffin and if they are mini, grab a few. You can%u2019t just eat one mini muffin, that is just crazy.
-C
Make 12 normal size muffins or 24 mini muffins
1 cup all purpose flour
1 1/4 cups white whole wheat flour
2 teaspoon baking powder
1/2 teaspoon baking soda
1/2 teaspoon salt
1 cup plant milk
1/3 cup neutral oil
1 tablespoon apple cider vinegar
zest of an orange
1 heaping cup apricot jam or preserves (can sub in any flavor you like)
1/3 cup poppy seeds
Preheat oven to 350
In a large bowl whisk together the flours, salt, baking powder and soda, and the zest of the orange. Add in the oil, milk, jam, and vinegar and whisk until just incorporated. Scoop batter into well grease muffin pans (12 regular or 24 mini) then cover the tops with poppy seeds. Pop into hot oven and bake until risen and a tester comes out clean when one is poked. For mini muffins, check after 13 minutes, for normal muffins, after 16 minutes.
Once baked, remove from oven and pop out of pans when cool enough to handle. Place on a wire rack to cool completely or just start eating them warm.
Store left over muffins in an airtight container for 3-4 days at room temperature. They also freeze well.
Corn is the name of the game, and this game I won!
The mr doesn%u2019t much like to eat corn. But I do. And this time of year I get like 10 ears of corn every week from farm share, which is a lot of corn for one person to have to eat every week and sometimes I just can%u2019t do it. So every now and then I make something that I think the mr will tolerate, if not like, to get him to help me eat the stash of a hundred ears or corn that I have going on in the fridge.
These fritters helped me with that and I think with all the future corn that I will get from the farm. They are soooo good! The mr liked them! As for me, I couldn’t stop eating them and almost didn’t want to share because they we just so dang good. Sweet fresh corn, nutty and slightly chewy oats. Scallions. And that%u2019s pretty much it. So fresh and clean and yummy tasting. A summertime fritter situation that takes corn to a place where even the corn hater likes it.
Although who the hell hates corn? I know one person. One. And I live with him. Weirdo.
Anyway, to the fritters!
The stuff. Fresh sweet corn, old fashion rolled oats, and a few scallion. Also some ground flax seed, water, baking powder, salt and pepper, and a little oil.
Start with oats. Add most of what we need to a blender and blend until it becomes oat flour.
Then the corn. Remove the kernels from the cobs. Best way is to hold corn in a large bowl and cut downward. Don%u2019t want corn flying all over the place!
Add most of the corn you just cut off the cob to the blender with the oat flour, along with with flax and water. Blend until smooth.
Chop the scallions into thin and tiny pieces.
Now dump the contents of the blender into a bowl, add in the scallions, the baking powder, and the extra oats and corn. Mix it all up and then let the batter rest for a few minutes (like 10) so the oats have a chance to really absorb all the liquid.
And then to cook them. Heat a lightly oiled skillet to medium high heat. Once skillet is hot, drop scoops of batter into it. Cook for 3-4 minutes or until the bottom is a nice deep golden brown. Flip and cook the other side the same.
When fritters are done cooking, place them on a wire rack. So they don%u2019t get soggy.
And then serve them right away. I ate mine with fresh salsa. Definitely the way to go. So GOOD!
Now eat your corn.
-C
makes about 12 fritters
3 ears fresh corn ( about 1 1/2 cups of kernels)
1 1/2 cups rolled oats (gluten free if needed)
1/2 teaspoon baking powder
2-3 scallions
1 tablespoon flax meal
3 tablespoons water
salt and pepper
a little oil for skillet
Combine water and flax meal, mix and set aside.
Place 1 cup of oats into blender or food processor and blend for about a minutes or until the oats are a fine flour.
Grab corn and remove from cob. Best way to do this is to place corn vertically in a big bowl and cut downwards so the bowl catches all the kernels. Cut enough corn until you have about 1 1/2 cups of kernels. Also, garb scallions and chop into very small, thin pieces.
Add in a cup of the corn, the flax and water mixture, baking powder, and a pinch of salt and pepper. Pulse or blend until completely combined and the mixture is mostly smooth.. Dump mixture into a bowl and add in the remaining corn, chopped scallions, and oats and mix together. The mixture should not be runny, but also should not be dry enough to pack together. If the mixture seems too dry and tight, add in a tablespoon or two more or water. To wet, add in a small handful of oats.
Once batter is mixed, set aside for about 10 minutes to rest.
Grab skillet and place on medium high heat. Add a touch of oil to pan and make sure it evenly coats the bottom. Once pan is preheated, add scoops batter into pan (about 2 tablespoons each). Cook first side for about 3-4 minutes or until dark golden brown, then flip and cook the other sides for another 2-3 minutes until a dark golden brown. Remove from pan and either place on a wire rack or a plate. ( I recommend a wire rack just to keep them from getting soggy.)
Serve right away. Fresh salsa goes amazingly with them!
Any left overs can be stored in fridge and reheated in the oven.
When your sister drops off 50 lbs of beets, on top of the 50 lbs that you have to harvest that are growing in your garden, what do you do?
Well chips of course.
Yeah, chips. That%u2019s right. When I got home from camping on Monday and there was a humongous pile of beets sitting next to my front door, I am not going to lie, I was a little shocked. I mean there wasn’t just a few little ones. These beets were freaking huge, like the size of my arm, and so many. But pretty much right after my initial shock I knew what needed to be done. First, eat a few roasted, second, roast extra to freeze for later, and lastly, make a few bunches of chips.
Have you ever had beet chip? They are amazing. Crispy, crunchy, tasty as all heck. If you like beets, even in the slightest, you will love these. If you hate beets, well maybe don%u2019t? Either way, beet chips are the best chip. Wha’t%u2019s not to love? Pink, and chippy. Sweet, and salty. And then you add the fact that making beets into chips is a good way to get your veggies in and that you can eat a whole bowl full and feel zero guilt because you are just eating beets. Plus making beets into chips is a good way to use up any extra beets you might have laying around or that have been dropped off at your front door.
These chips, once they are made, will not last long. So when you do make them, know you will probably be making them again soon there after. Me, I have still have to harvest all my garden beets so beet chips are happening again soon. Real soon (like this afternoon!)
To the beets!
The stuff. Beets (these are Formanova beets but any variety works) salt and pepper ,and oil.
Ok so you need to cut these bad boys reallllllly thin. Like 1/15th a inch. So, what I am saying is, use a mandolin. If you don%u2019t have one, a knife will do, but you are going to have a hard time getting them as thin as you need to and all of them consistent so baking is going to be a little more tricky so maybe you should just go borrow or invest in a mandolin.
Grab baking sheets, oil, and salt and pepper. You can either dump the oil directly onto the pile of sliced beets and really toss to make sure each one has been coasted or do what I did which was I drizzled oil into my hands and rubbed each sliced beet between my oiled hands before placing on the sheet.
After you get them on there, single layered with no overlapping, sprinkle tops with a pinch of salt and pepper.
On the way into the oven.
After the oven. Baked for about 18 minutes. You really have to watch after the first 13 or so minutes to make sure you catch them at the perfect time. Crispy, but not burnt.
A side by side shot. Crazy shrinking will happen!
Oh man, so delicious. And so pretty!.
Let the chips cool before eating, you know, so you don%u2019t burn your tongue. Plus they crisp up a wee bit more.
Once cooled, pile them into bowl, and then eat them. And eat them all. They are only beets after all. And you won%u2019t be able to stop yourself anyway. Ha
-C
Makes enough for an evening of chip eating for 1-2 people
2 Large beets (think softball sized)
a tablespoon or two of oil (I used grape seed but really any would work)
salt and pepper
Note. Making these without cutting with a mandolin will be a pain in the ass. It can be done, but if you have a mandolin, use it.
Preheat oven to 350
With a mandolin, slice the beets about 1/15 inch thick. (No need to peel the beets unless you want to.) Once beets are all sliced, either drizzle them all with a tablespoon or so of oil and toss until all are coated. OR what I did and found worked really well was drizzled oil into my hands and rubbed each beet between my oiled hands as I was placing them on the baking sheets. Either way.
Now place oiled beets, single layered, without overlapping, on baking sheets. Sprinkle with a pinch of salt and pepper and place into oven. Bake for about 13 minutes without worrying then start to check every minute or so until the beets are a deep golden brown and crispy ,which will be between 15-20 minutes. Also, even though you cut them all the exact same thickness, some might crisp up faster so you should remove done chips as they happen. Once they are done, place on a rack to cool. And then do another batch. And not, they do crisp up a tiny bit more as they cool.
Once chips are cool and crisp, eat.
Store uneaten (how did you not eat them all?) chips in an air tight container. If you notice that they turned a bit chew, just place them back into oven while preheating oven to 300 then turn oven off and let sit in there for a few minutes.
It’s Mother’s Day weekend which means that you and I and everyone out there should feel the slightest bit obligated to at least do a little something nice for your mom for the mere fact that you were borned. And really what better way to celebrate mom than with food%u2026 It really is the least that you can do. (I think mom’s also like flowers and cards and handmade pasta necklaces) My mom is defiantly about the food. (she has had her fair share or pasta necklaces) %u00a0A many years back on Mother’s day, this sweet little girl (me) made her mother a special %u00a0breakfast treat%u2026blueberry scones. And ever since that day, for every freaking holiday, birthday, whatever day, my mother requests (demands) a batch of those scones. She is always saying that these are her favorite treat and that no one has ever made them as good as I do. (I guess that just reiterates that I am her number 1 child)
And for the last few months my mom has been up my butt, trying to get me to make her some. Not going to lie, I have been saying I’ll get her a batch, but for some reason, I haven’t gotten around to making them. So two birds here.. Make the scones and she gets off my back for a least a little while (a month.. maybe 2) and I give her a fantastic Mothers day gift that I know she will love.
So here they are , oh mother of mine. Blueberry scones!
The stuff. Flour, baking soda, baking powder and salt. A bit of sugar, vanilla, buttermilk, and butter (use vegan butter and nut milk if you want to make them vegan) And of course we need the blueberries which can be fresh or frozen. I usually use fresh, but the store I stopped at only had really big containers of fresh that were like $1000 dollars a piece and the organic frozen happen to be on super sale. So you know, the cheap in me won that battle.%u00a0So into the bowl goes all the dry stuff; flour, baking powder and soda, salt, and the sugar. Give it a good whisk.
Now for my special trick for a perfectly distributed cold butter in a pastry. Freeze your butter and grate it!
With a large wholed grater, grate the frozen butter directly into the bowl with the dry, stoping a few times to toss the butter chunks around so you don’t end up with a huge pile of grated butter. When it’s all grated, gently toss around so the butter is evenly distributed.%u00a0Now dump the blueberries into the flour mixture. Toss them around to give them a coat of flour. Add in the buttermilk and vanilla and give a little mix until liquid is absorbed. We are trying to handle the dough as little as possible.Turn mixture onto counter. It’s very loose, but thats what it should look like. Very gently and with as little handling as possible, gather dough up, knead a few times till everything %u00a0just comes together. Press dough into a disk that is roughly an inch thick%u2026. and it doesn’t need to be perfect.%u00a0Cut the disk into even sized pieces. Do 6 big, 8 normal, maybe even 10 smaller. Whatever size you like. (I did 8) Place the scones onto a baking sheet, using a spatula to transfer, and sprinkle the tops with a little bit of sugar. Into a preheated oven for about 20 minutes.And when the scones look all nice and browned and a tester comes out clean. remove and either serve right away warm, preferably with huge cup of coffee or tea, or stick on a rack to cool before storing in %u00a0air tight container.
Perfect to serve as a breakfast pastry, at brunch, or even as a dessert. A nice little treat for a special lady. (dudes can eat them too)%u00a0
Happy Mothers Day Mom! Thanks for having me!
And Happy Weekend!!!
-C
Blueberry Scones%u00a0
2 cups all purpose flour
1/3 cup sugar plus%u00a02 tablespoons %u00a0to sprinkle on top
1 %u00a0teaspoon baking powder
1 teaspoon baking soda
1/2 teaspoon salt
1/2 cup (1 stick) unsalted %u00a0butter frozen or really cold (use non dairy butter like Earth Balance for vegan)
1 cup blueberries (fresh or frozen)
1 teaspoon %u00a0vanilla%u00a0
%u00a03/4 cup buttermilk (use non dairy milk for vegan)
Preheat oven t0 400 degrees
In a large bowl, whisk together flour, baking soda, baking powder, sugar, and salt. Take the frozen butter and grate directly into flour mixture, tossing around to evenly disrupted. Add in blueberries and toss around till coated with flour, then lastly, add vanilla to buttermilk and mix into mixture until just barely coming together. Turn mixture out onto counter and with your hands, knead mixture a few times until it forms a solid dough. Shape into a disk and smoosh down until about an inch thick. Cut into 6-10 triangles %u00a0and place on a non greases baking sheet and sprinkle tops with remaining sugar. Stick into oven and bake for 20 minutes or until tops start turning a golden brown and a tester in the middle of a scone comes out clean.%u00a0
Remove from baking sheet and serve warm or let cool on a rack.
Mom gets first dibs, and if she is willing to share, eat one yourself with%u00a0your face.%u00a0
%u00a0%u00a0 %u00a0%u00a0%u00a0I figured now is a good time to get this recipe out there before we get to far into spring and summer recipes because there is going to be a lot of banana ice cream filled recipe coming and I figured its a good idea to have the basic banana ice cream recipe ready for people to refer too.%u00a0 And because I made so much fantastic naner ice cream, I also made a cookies and cream naner ice cream for my sisters and the mister.
Comments that I got from my sisters and the mister when I made them this ice cream
-Sister one.”I give this my sister seal of approval.. It’s so good. %u00a0The first dessert you have made that I liked! (not including all the other desserts that you have made that I liked)”
-Sister two- “Wow.. it looks like ice cream and feels like ice cream and tastes like ice cream.. You should make me this ice cream!” (I was confused too because I was pretty sure I just made her some)
-The mister- “I am so excited for my new fly fishing pole!”
Ok, so the naner ice cream isn’t new to the mister and he IS very much excited for his new fly fish pole. So excited that he forgot to tell me how amazing that I am and to thank me for making him a big bowl of yumminess. (It’s ok, I forgive him)
And yes, this is probably one of the easiest, most delicious, healthy and amazing frozen dessert that you will ever eat. You will probably find yourself buying mass amounts of bananas and stocking the freezer until things just start falling out. (which is also ok because it’s only bananas and you can’t have too many frozen bananas)
%u00a0 %u00a0The stuff you need for this ice cream%u2026. Nice and ripe bananas, peeled and then frozen* That’s it.
To make it, place frozen bananas into food processor and hit the on button. Process the crap out of the namers until nice and silky smooth.%u00a0
*Note, the smaller the frozen chunks are , the faster and maybe a little easier for the blender to blend the naners into ice cream. So if you think of it, chop bananas into pieces before freezing or even after.
After all blended and smooth, either eat right away or scoop ice cream into a freezer safe container and stick in freezer. That’s the banana ice cream%u2026 %u00a0And it is amazing and so so so so so addictive. I make a batch, think I am only going to eat a scoop, then find myself eating half of what I have made, but it’s ok cause it’s only bananas.%u00a0
Now for the cookies and cream banana ice cream..One%u00a0batch of banana ice cream, either freshly made, still in food processor or made ahead and placed in a food processor and given a good pulse to smooth it up.
Add cookies in, crushing a bit beforehand and pulse till combined.%u00a0Now you have cookies and cream naner ice cream%u2026. and everybody is happy.
Scoop into a cup, a bowl, a freezer safe container, or directly into your mouth.%u00a0Be careful%u2026. You can still get brain freeze from eating naner ice cream too fast!
Keep it real hump day drum bum!
-C
Basic Banana Ice Cream
Makes one batch. Good for 3-4 servings
4-5 %u00a0ripe bananas peeled and frozen
Peel %u00a0bananas and stick in a freezer bag or container and freeze. When bananas are completely frozen, break into pieces and stick into a food processor or blender and puree until silky smooth.%u00a0
Eat right away or scoop into a freezer safe container for later.
Cookies and Cream Banana Ice Cream
1 batch banana ice cream
5-10 (depending on your cookie need) cream filled cookies like oreos or Trader Joe’s Joe Joe’s (These are gluten free)
In a food processor, blend banana ice cream with cookies.
Eat right away, with a utensil of choice in a container of choice.
Can you believe it? 2020. Not only a new year but a new decade. I mean, wasn’t it just Y2K like a few years ago? Haha. Y2K. Do you even remember that?
The past week was good. Kicked it off by making a Pokemon ball cake for Judah%u2019s birthday (he is now 10 freaking years old) and going over to participate in birthday party stuff. Then it was New Years Eve and Day, which the mr and I just kind of spent chillin a bit, took an afternoon and ran out of town. Nothing special and no we didn’t stay up all night. I don%u2019t think I could even if I wanted to. HA. After New Years, the fog of the holiday season kind of rolled in. My brain shut down from over stimulation, my body is feeling tired and sore, and I just feel off. I think a big part is the weather. It has been way to warm, damp, no snow, and just not wintery enough. Dang it, I need me some winter!
Anyway, the rest of the week went by. Started packing up the loft so Barb can move in next week before she goes back to school. I have been going to the new gym everyday, trying to get used to that new fancy building (I love it, but still miss the old building). We spent time with Coco and Judah being awesome and eating popsicles. And we have been watching the heart balloon move around he house as it slowly sinks further and further to the floor.
Now we are at Sunday. Not sure exactly what%u2019s in store. I am going to the gym and then there are a few things that we need to get done this afternoon, but we were thinking we might grab a little or two and try to hike up a small mountain. Or maybe even just go for a long walk through some trees. It snowed yesterday and I am so excited and am very much in need of outdoors and trees and quiet.
Internet for your taking.
-I think keeping the thermostat at 55 is right. With a fan blowing too. Your Bedroom Is Too Hot. What is the ideal temperature for sleep?
–Why you shouldn%u2019t bother making a resolution in January. Right? Right!
-Looking for a good mustard? Mustard Manual: Your Guide to Mustard Varieties
–The best things to eat and drink to fight wintertime dread. Soup. Aways soup.
-I have been saying this all along! Never Cut a Squash Again.
-Did you know that scrabble pieces were made in VT? Three shifts at the Scrabble factory: The inventor
–5 Reasons Why a Homestead is an Excellent Place for a Child to Grow Up. I wish I grew on a a farmstead. Hopefully someday I will be living on one though.
–Make This the Year You Finally See the Aurora Borealis. I sure am hoping I will!
-I am all about CBD, but this? Seriously, a bodysuit infused with CBD? What the fuck. I Spent a Full Week Wearing a CBD-Infused Bodysuit
I have been on a severe citrus kick lately. Oranges, limes, lemons, kumquats. I want it all and have been eating it all. A lot of it all. Espeically the oranges which are just so good right now. We have been going through bags of them faster then ever and I am not mad about it.
Which then brings us to chili. Chili is one of the things that I make on a very regular bases. It%u2019s beans, veggies, tomatoes, and a ton of spices. Easy as can be, most people like it, and I never get sick of it. I mean, how could you get sick of it, it is so good! Anyway. Chili, its great but have you ever added orange to it? Oh man is it amazing. Bright and acidic and sweet. The whole pot of chili just radiates more goodness, more intensity, more, moreness. (I know that doesn%u2019t make sense but you get it.) It%u2019s a whole new level of chili and I don%u2019t if there will ever be a time when I don%u2019t add orange to my chili again. Well at least during citrus season.
But enough about all that, what you really want is to just start making this orange black bean chili so you can eat it. I hear you, so I%u2019ll let you at it.
To the chili!
The stuff. Oranges, black beans, crushed tomatoes, an onion, a couple carrots, a pepper, and jalape%u00f1os. Also lots of cumin, chili powder, ground ginger, garlic powder, and salt and pepper.
Small dice up the pepper, onion, carrots, and jalape%u00f1os. Don%u2019t want it super spicy, don%u2019t add the jalape%u00f1os.
All that stuff gets tossed into a big pot along with all the spices, some salt and pepper, and a little water too. Place on stove to start cooking down the veggies.
Slightly tender and smells amazing.
Now add in the beans, the tomatoes, and the zest and juice of an orange. Mix it all up, set it back on stove and keep on cooking,
Now eat your chili, with extra orange slices to squeeze all over it of course. And maybe you want to serve it with some corn bread? That is entirely up to you, but who would be made about it?
-C
Serves 4-6 people
1 pound cooked black beans drained (about 5 cups or 3 cans)
5 cups crushed tomatoes (or 2 28oz cans)
2 oranges (navel or cara cara work)
2 carrots
1 large onion
1 bell pepper
2 jalapenos (optional)
2 heaping tablespoons cumin
2 tablespoon chili powder
2 teaspoons garlic powder
2 teaspoons ground ginger
salt and pepper
Start by chopping up the veggies. Small dice the carrot, the onion and the pepper. If using jalape%u00f1o, dice that into small little bits too. And remove seeds for less heat or leave them if you like it. Once that is all cut up, dump it all into a large heavy bottom pot along with the cumin, chili powder, garlic and ginger powder, and about a teaspoon or so each of salt and pepper. Add about 1/2 cup water, mix it all up, and place the pot on stove on medium heat and start to cook the veggies and spices until they begin to smell fragrant and are ever so slightly tender, which should take 5-10 minutes.
Now add in the beans, the tomatoes, and the zest and juice of one orange. Mix together and keep cooking on medium heat, partially lidded, for about 45 minutes to an hour, stirring once in a while, until the chili has thicken and tastes good to you.
Once done, season to taste with more salt and pepper and either stir the juice of the second orange into the whole pot or serve with slices of orange to squeeze on top.
Eat. Store any left overs in fridge. Tastes delicious cold too.
What a way to start the day, with a mouth full of c words%u2026%u2026.Caraway, cauliflower, chick peas and cabbage%u2026What did you think I meant?
This week has been nippy, no, its been chilly%u2026..nah, it’s been freaking freezing! Yeah, freezing cold. When I woke up this morning to walk the pup, it was 5 degrees. So needless to say, when it gets this cold, I like to keep inside. Tying not to be a complete lazy bones, I went to town on my spices%u2026 refilling jars with all the little baggies scattering the kitchen, screwing on lids, and wiping down the shelves. Not a bad accomplishment for a day. While cleaning I came upon a little bag or caraway seeds, %u00a0Not enough to warrant a jar on the wall, but defiantly enough for one dish. %u00a0
When I think of the bright, somewhat sweet and peppery caraway, I think cabbage.(anything cabbage and I am sold) A big pan cabbage, added cauliflower for the mister,(his favorite) creamy chick peas because we need %u00a0protein and they be tasty, and of course mustard, because everything tastes better with mustard.(I’ll let you in on a little secret.I eat a lot of mustard, I am kind of obsessed. Mustards of all kind; grainy, homemade, dijon%u2026but usually just plan old yellow. And I eat it on everything.. but my go to is French’s yellow mustard and carrots%u2026don’t judge) A warm, bright and filling dish, perfect for a freezing cold evening stuck inside. You can eat it as main dish or add a pile of quinoa or wild rice, or even a big plate of greens. What ever say you eat it, you and your stomach will be happy.(If your worries about cabbage bloat..don’t be. Cooking cabbage helps breaks down the enzymes that create gas, plus caraway has anti bloating properties%u2026WIN!)%u00a0
Cabbage, cauliflower,(fresh of frozen%u2026.I used frozen in this recipe) pre-cooked or canned chick peas, caraway seeds, yellow mustard, and salt..(I added pepper too)
Chop the cabbage and toss into a lightly oiled pan with the rest of the stuff. Heat pan with everything but water %u00a0for a couple of minutes.. to warm the caraway and give everything a cooking head start, then add the water. Stick a lid on it and let simmer.%u00a0After about 15 minutes, give it a stir or two and do a taste test. At this point, it’s up to you%u2026how cooked you want the veggies? I kept mine cooking for another 10 minutes. I also added another 1/2 cup of water. Not enough water and the pan will burn, a little extra water is good, it creates a yummy broth.
When you are happy with the flavor and doneness, eat it. I made myself a %u00a0bowl with a heap of pickled beets(holy yes!). I am sorry if you don’t have any pickled beets, but the dish is still amazing without them. %u00a0Fresh ground pepper really does the trick too!
So there you go, make it tonight, it will make you warm,smart and happy
-C
serves 2-3
1/2 small head of green cabbage(about 2 cups chopped)
2 cups cauliflower(fresh or frozen)
1 cup cooked chick peas
1 1/2 -2 cups water
1 tablespoon caraway seed
2 tablespoons yellow mustard
salt and pepper to taste
Lightly oil a medium sized skillet and add all ingredients except water. Heat for a few minutes to warm up veggie and caraway seeds then add a 1 1/2 cups of water. Keep on medium heat with a lid and stir on occasion If water evaporates completely out, add another 1/2 cup. %u00a0Dish is done when veggies are tender.. about 20 minutes%u2026.but whenever tastes best to you!
Lets kick the weekend off right, with a nice warm and hardy salad. Not a frilly little salad, but a salad that fills you up and leaves you feeling warm and cozy. %u00a0 A salad with a lot of squash! So here’s the thing, I eat a lot of winter squash, maybe 4 plus a week. Because I eat so many, I store a good amount in a cold storage area outside of the little warm living space we call home. Last week we had a drastic temperature change and %u00a0a good few of the my butternut and spaghetti squash froze.. then started to de-thaw. Not good. That was the second bad food experience of the day%u2026.. Earlier that day I had bought about 2 dozen super ripe bananas that I had been planing on freezing and what not. There were four bunches and each bunch was wrapped in plastic and were in a bag that I left near the back door. The thought crossed my mind, but I hastily brushed it away. Washer won’t eat those%u2026.. Well guess what? The shit ate half of my freaking bananas%u2026plastic and all. Needless to say, I was kind of pissed already so finding my squash on the way out really set me off. I was not about to let more food go to waste.(or be eaten by the dog) I went into rescue mode..Chop chop and dice%u2026boil, roast and steam%u2026and eat eat eat%u2026. and eat. I have been eating butternut for breakfast, lunch and dinner for the past week and that’s ok with me cause man it does taste oh so tasty. But for some people in my life, eating mashed squash out of a jar all day long does not hold the same appeal so I have been sneaking it in where ere I can. %u00a0
So some of that diced squash tuned into this lovely warm salad. Even the mister liked it and he is not a fan of warm salads(he says he is not, but I think he actually is, as long as I don’t call them “salads”) Any who%u2026This salad hits all the marks%u2026. Fantastically filling, super delicious, fast and healthy. %u00a0Check, check, and check! I am so good.%u00a0
Easy peasy%u2026.
Diced butternut squash, half a vilalia onion, %u00a0prepared lentils and a bunch of kale%u2026 Nothin else.(salt and pepper, but they don’t count)
Diced butternut and a mediumly sliced onion..(mediumly is a new cooking term) Spritz a bit of oil in a pan and toss the squash and onion in there and sprinkle with salt and pepper. Shove into the hot oven and roast until squash and onion are tender and tasty.
Remove the pan from the oven and toss in finely chopped kale and a big scoop of lentil%u2026 Mix it up and let the sit in hot pan for a few minutes%u2026it will make the kale get soft and warm.
Plate it and eat eat%u2026 I drizzled a little balsamic vinegar on mine%u2026Nick like his straight up. Do what you will cause either way, it’s going to be awesome!!!!
Hooray for Friday and for winter squash!!!!
-C
Warm Winter Salad
Ingredients (This made one good sized salad%u2026and exact measurements were not used so feel free to add greater or lesser amounts of any of the ingredients)
1 1/2 cup Diced Butternut squash
1/2 Vidalia Onion(or any variety you like)
3-4 large Kale leaves
1/2 cup Precooked Lentils
salt and pepper to taste
Balsamic Vinegar%u00a0
drizzle of oil for pan
In a 425 degree oven, %u00a0place diced squash and sliced onions in a slightly oiled pan, sprinkle with salt and pepper, and roast for about 20 minutes until tender. Remove pan from oven and toss in chopped kale and lentils and let sit in hot pan for a few minutes%u2026 Plate and drizzle with balsamic vinegar.
What we got here is an%u00a0easy one pan meal for the beginning of a hectic(but fun) holiday week . But I am sure that you %u00a0have your wits about you, that you are not feeling like a stretch Armstrong doll. No, you are all calm and collected%u2026 Well that’s nice because I feel like my head going to explode.So what I need this week is easy, %u00a0fast food %u00a0with lots of healthy good stuff and maybe to get rid of the meatballs that are in the freezer%u2026.. Mission accomplished with this dish. It’s basically a hug pan of veggies with a few left over meatballs from Nicks bday dinner and a little cottage cheese. %u00a0Nothing fancy%u2026 hearty and warm..Nick likes it so it’s a winner.%u00a0
The spaghetti squash is the main component in this dish so if you want to use other veggies, go for it. You can make this vegan and leave out the cheese and use fake balls or no balls at all (hehe) %u00a0You can even toss in some beans, lentils, or tofu. I make variations of this dish often%u2026 and lentils are a really good addition..
Besides the squash and the meatballs, I used mushroom, onion, kale, tomato and garlic %u00a0plus about a half cup of cottage cheese, cause that was what I had in the fridge.%u00a0
First thing first, cook the squash. %u00a0Just stick it in the oven for half hour at 425.. Once you can stick a fork into it, pull it out and let it cool enough to handle.. While thats cooling off, cook down the veggies. Started with a little oil in a cast iron skillet on medium heat, toss the onion and mushrooms ands frozen meatballs*(or whatever you want to use) and heat %u00a0until meatballs are cook through and the onion and mushroom are browned. Now add the garlic, kale and tomato, Turn heat off. %u00a0When the squash is cooled enough to handle,. slice open, scoop out the seeds and scoop the flash out. Spaghetti squash and cottage cheese into the skillet and toss.. Sprinkled a bit of mozzarella or parmesan cheese on top. %u00a0Lots of crushed black pepper and into the oven for about 15 minutes. or until the cheese is nice and melty and you are hungry and want to eat.%u00a0
*Note. If you want to make meatballs fresh, my recommendation would be to make them in the skillet first and then just toss all the veggies into that pan to cook down%u2026 No need to make more dishes.%u00a0
Pulled straight from the oven%u2026.Served nice and hot, placed right onto my wooded counter. I need to stop placing hot pans on the wood, I am leaving burn marks. There is actually a lot of thing that I need to stop doing in the kitchen, like setting towels on fire, burning myself at least once a day, slicing my fingers,.breaking dishes%u2026%u2026.So maybe place skillet on a trivet of %u00a0some kind and serve it up!
So easy and fast.. Served with a piece of crusty bread%u2026 Man, I wish everything this week could be this fast sans easy%u2026.. but I am not complaining.%u00a0
Have a good Monday!
1 small Spaghetti Squash
5-7 pre cooked vegan meatballs
Small red onion
2 -3 big mushrooms
1 small tomato
a few kale leaves
3-5 cloves garlic(or as many as you like)
half a cup of cottage cheese *
a handful of shredded parmesan or mozzarella*
salt and pepper
oil (for pan)
*use vegan versions or dairy versions.. up to you.
Preheat oven to 425
Place spaghetti squash in oven. Let bake for about a half hour or until fork tender. Remove and let cool enough to handle.
While that’s happening, chop the veggies into any size you want.. Drizzle olive oil in medium skillet and place diced sliced mushrooms, onion, and pre made meatball to brown. Once meatballs are warmed through, add the kale, garlic, tomato, and cottage cheese. Take the cooked spaghetti squash and remove seeds and scoop flesh into the skillet. Toss everything together, sprinkle with salt pepper, top with shredded cheese and place in oven for 15 minutes
Take it out of the oven and let cool. for a minutes and%u2026…
Welp, we had a few days of winter. But all that nice pretty snow, well it%u2019s basically all gone again due to all the freaking RAIN. Honestly, what the real fuck. I am starting to think that we won%u2019t have any real winter this year and I am made as hell about it. And no I don%u2019t want to hear it, that you like the warmer days and all that. It is winter, in Vermont, so it it suppose to be snowy and cold. GRRRRRRRRR. (Rant over)
The week came and went with the usual and such. The mr and I went snow shoeing one afternoon, built new shelves on the wall in the living room, and started talking about a time we need to talk about tax stuff. Blah. I also turned a year older, spent a good amount of time working on my pottery that will be up for sale soon (heart mugs are looking good!), picked up farm share, worked at the studio, and did this and that and what have you.
Then the past few days have been kind of crap with me having some sort of head thing. My head feels like an overinflated ballon that is full of jelly and is wrapped in rubber bands. Not exactly sick but not exactly not sick either. And me being me, and as the mr pointed out, when I feel under the weather I tend to feel guilty and push myself to do stuff which is the exact opposite of what I tell everyone else to do when they feel like crap. Not really the best approach to getting better. So I think I really need to work on being ok with feeling like shit and doing nothing and not trying to clean out the basement. HA
Today the mr and I have a good amount of chores to do so that is the plan for the day. I still, as of now, am feeling like real shit so I am going take it easy while running around. And at least with chores comes coffee and no matter how crappy I feel, I won%u2019t complain about coffee.
Links into the world wide web.
-When I am tired for no reason it is most definitely stressed induced. What Kind of Tired Are You?
-I feraking love this. Use %u2018Roadside Wildflowers at Full Speed%u2019 to Identify Plants Without Leaving Your Car
Before You Buy a Persimmon, Remember This. I have yet to buy one this year. Maybe today I will seek one out
–THE SUBVERSIVE JOY OF COLD-WATER SWIMMING. I think if I swam, I would be really into this.
-A long read about worms and why they are not as great as people think they are. Cancel Earthworms.
–What Percentage of the Human Brain Is Used? I don%u2019t know about your brain, but I am pretty sure I use a lot more then 10%%u00a0If I had to guess, probably around 70%. 80% on a good day. Ha
-Super into this house. Look Inside: This Bright Red %u201870s Ski House Is on the Market %u00a0
-Winter actiivnites and all the places to camp this time of year. Vermont State Parks Winter Activities.
-Whwnever I hear about anything that ws said by anyone from %u201cGOOP%u201d, I instantly think %u201cbullshit%u201d especially when it comes to anything vagina related. ‘The Goop Lab’ Is Just ‘Jackass’ for Girls
–Secondhand screen time may be just as dangerous as secondhand smoking. No shit. I see it all the time.

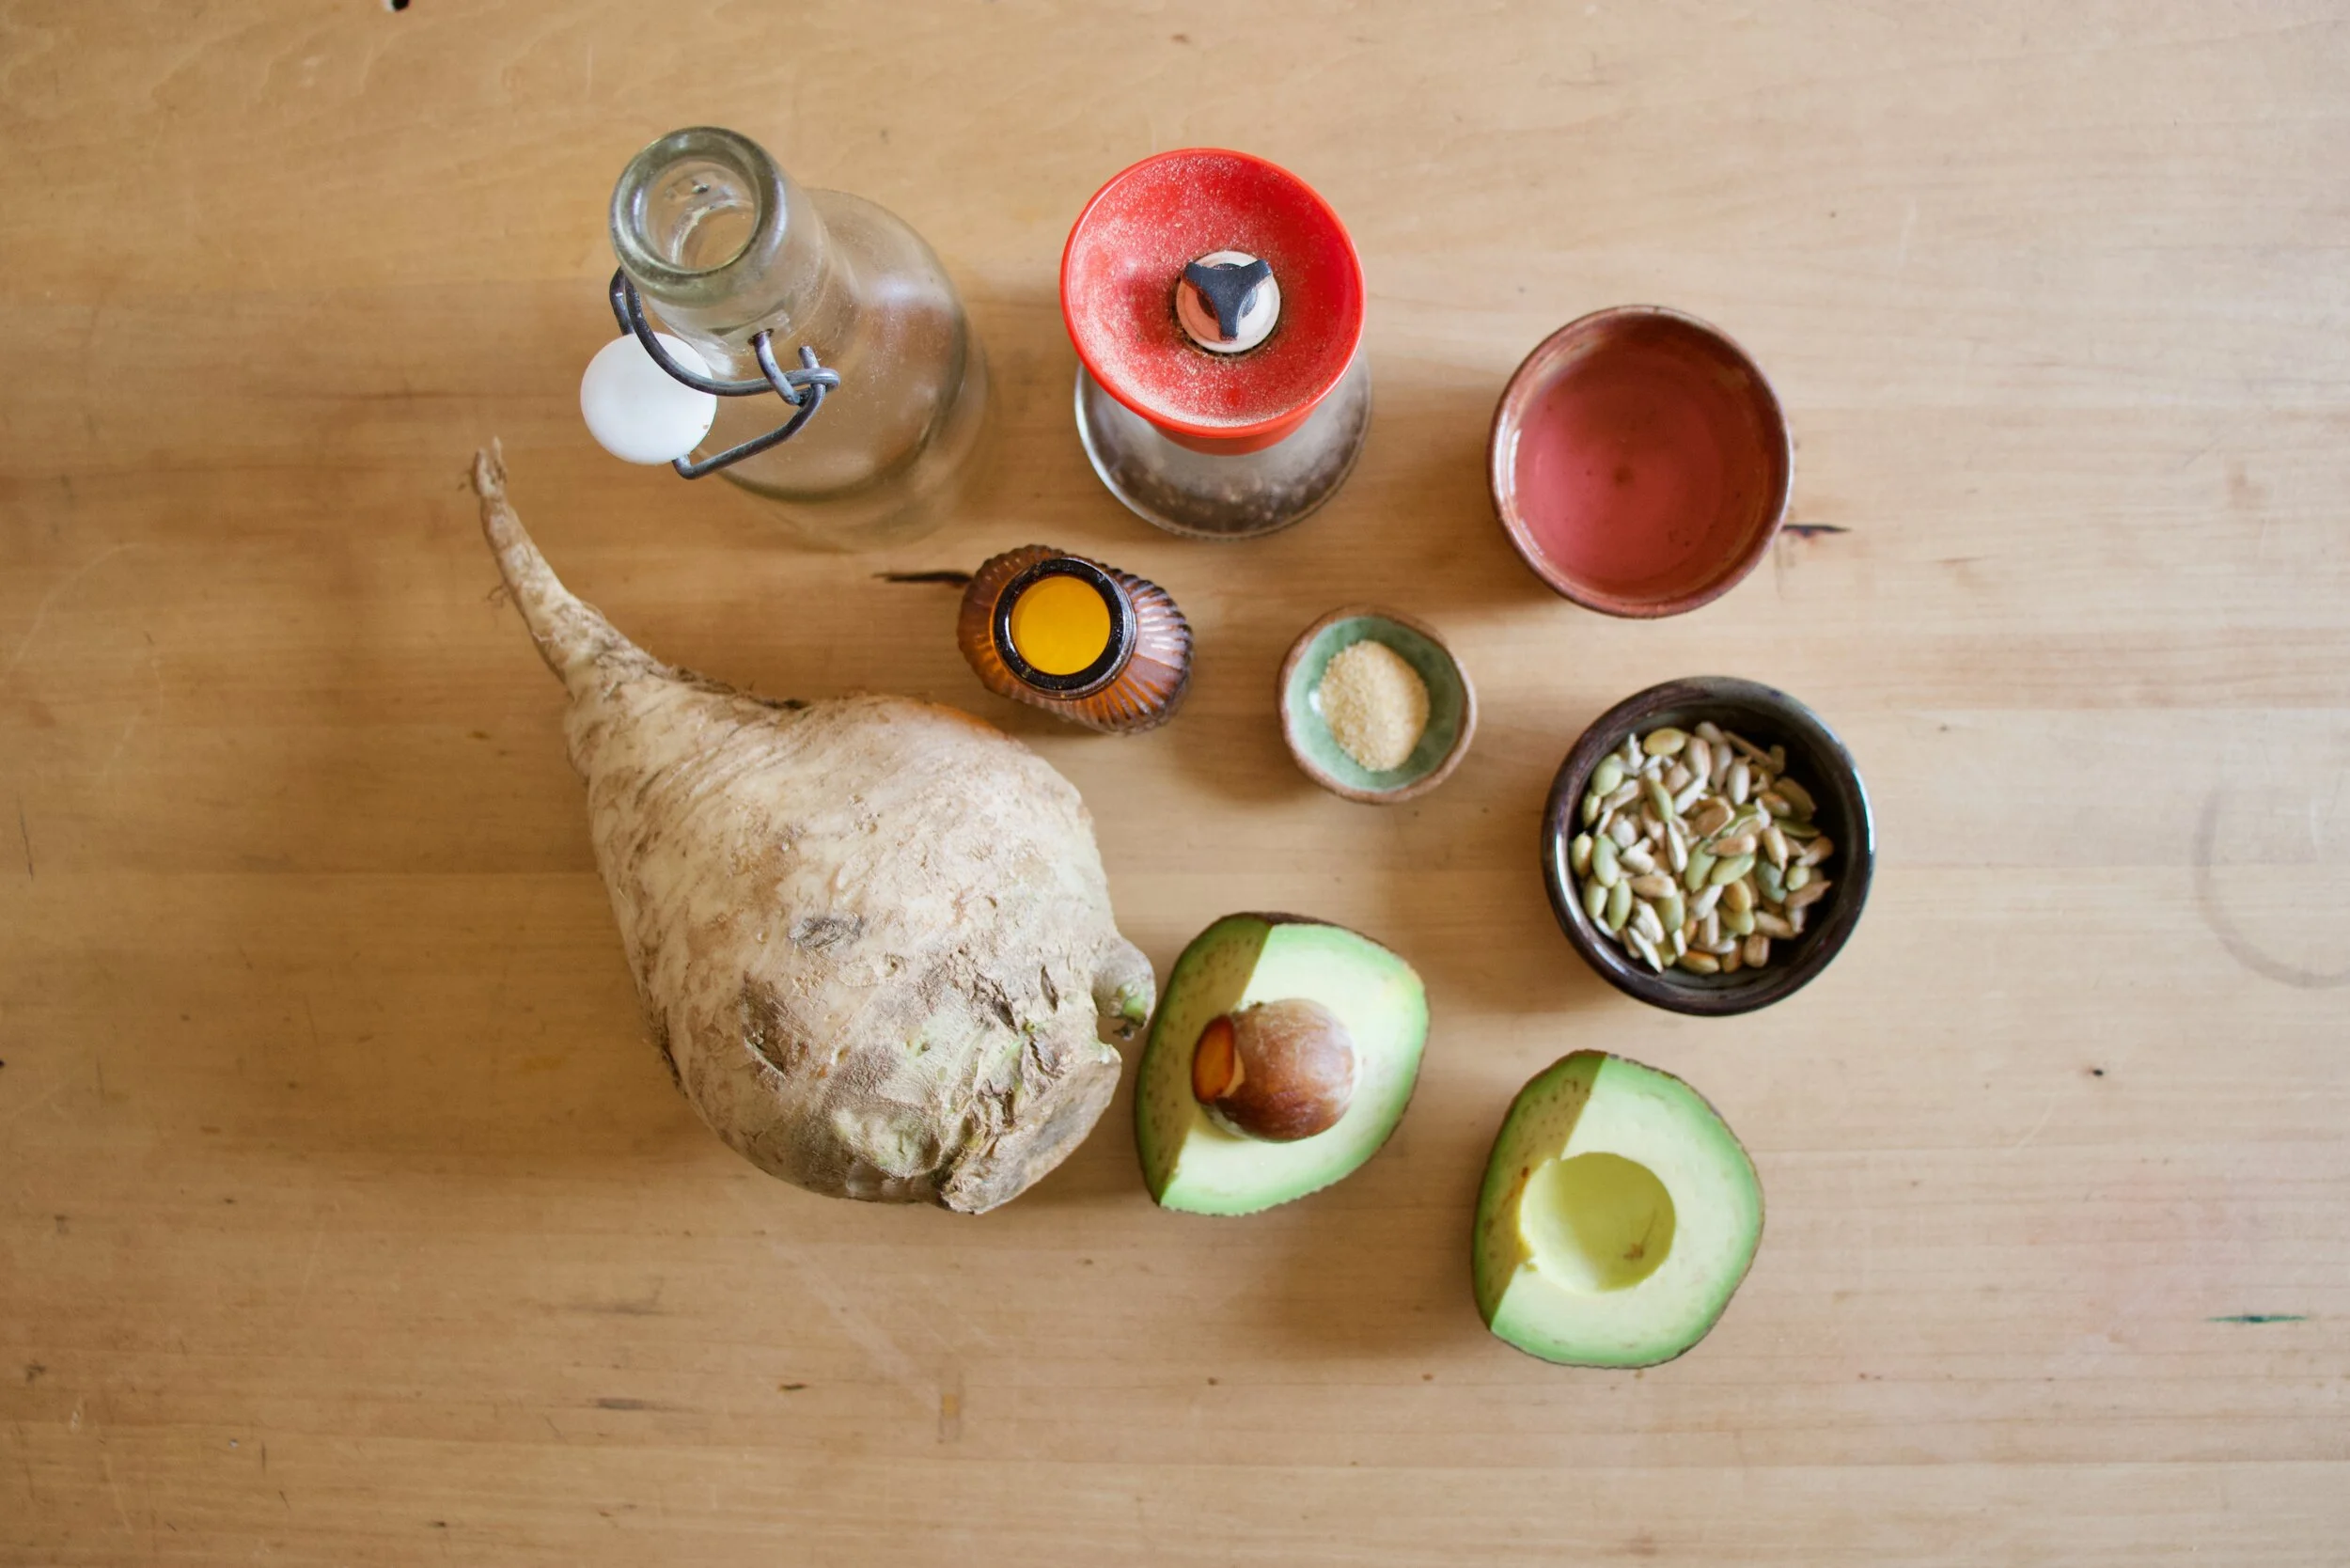
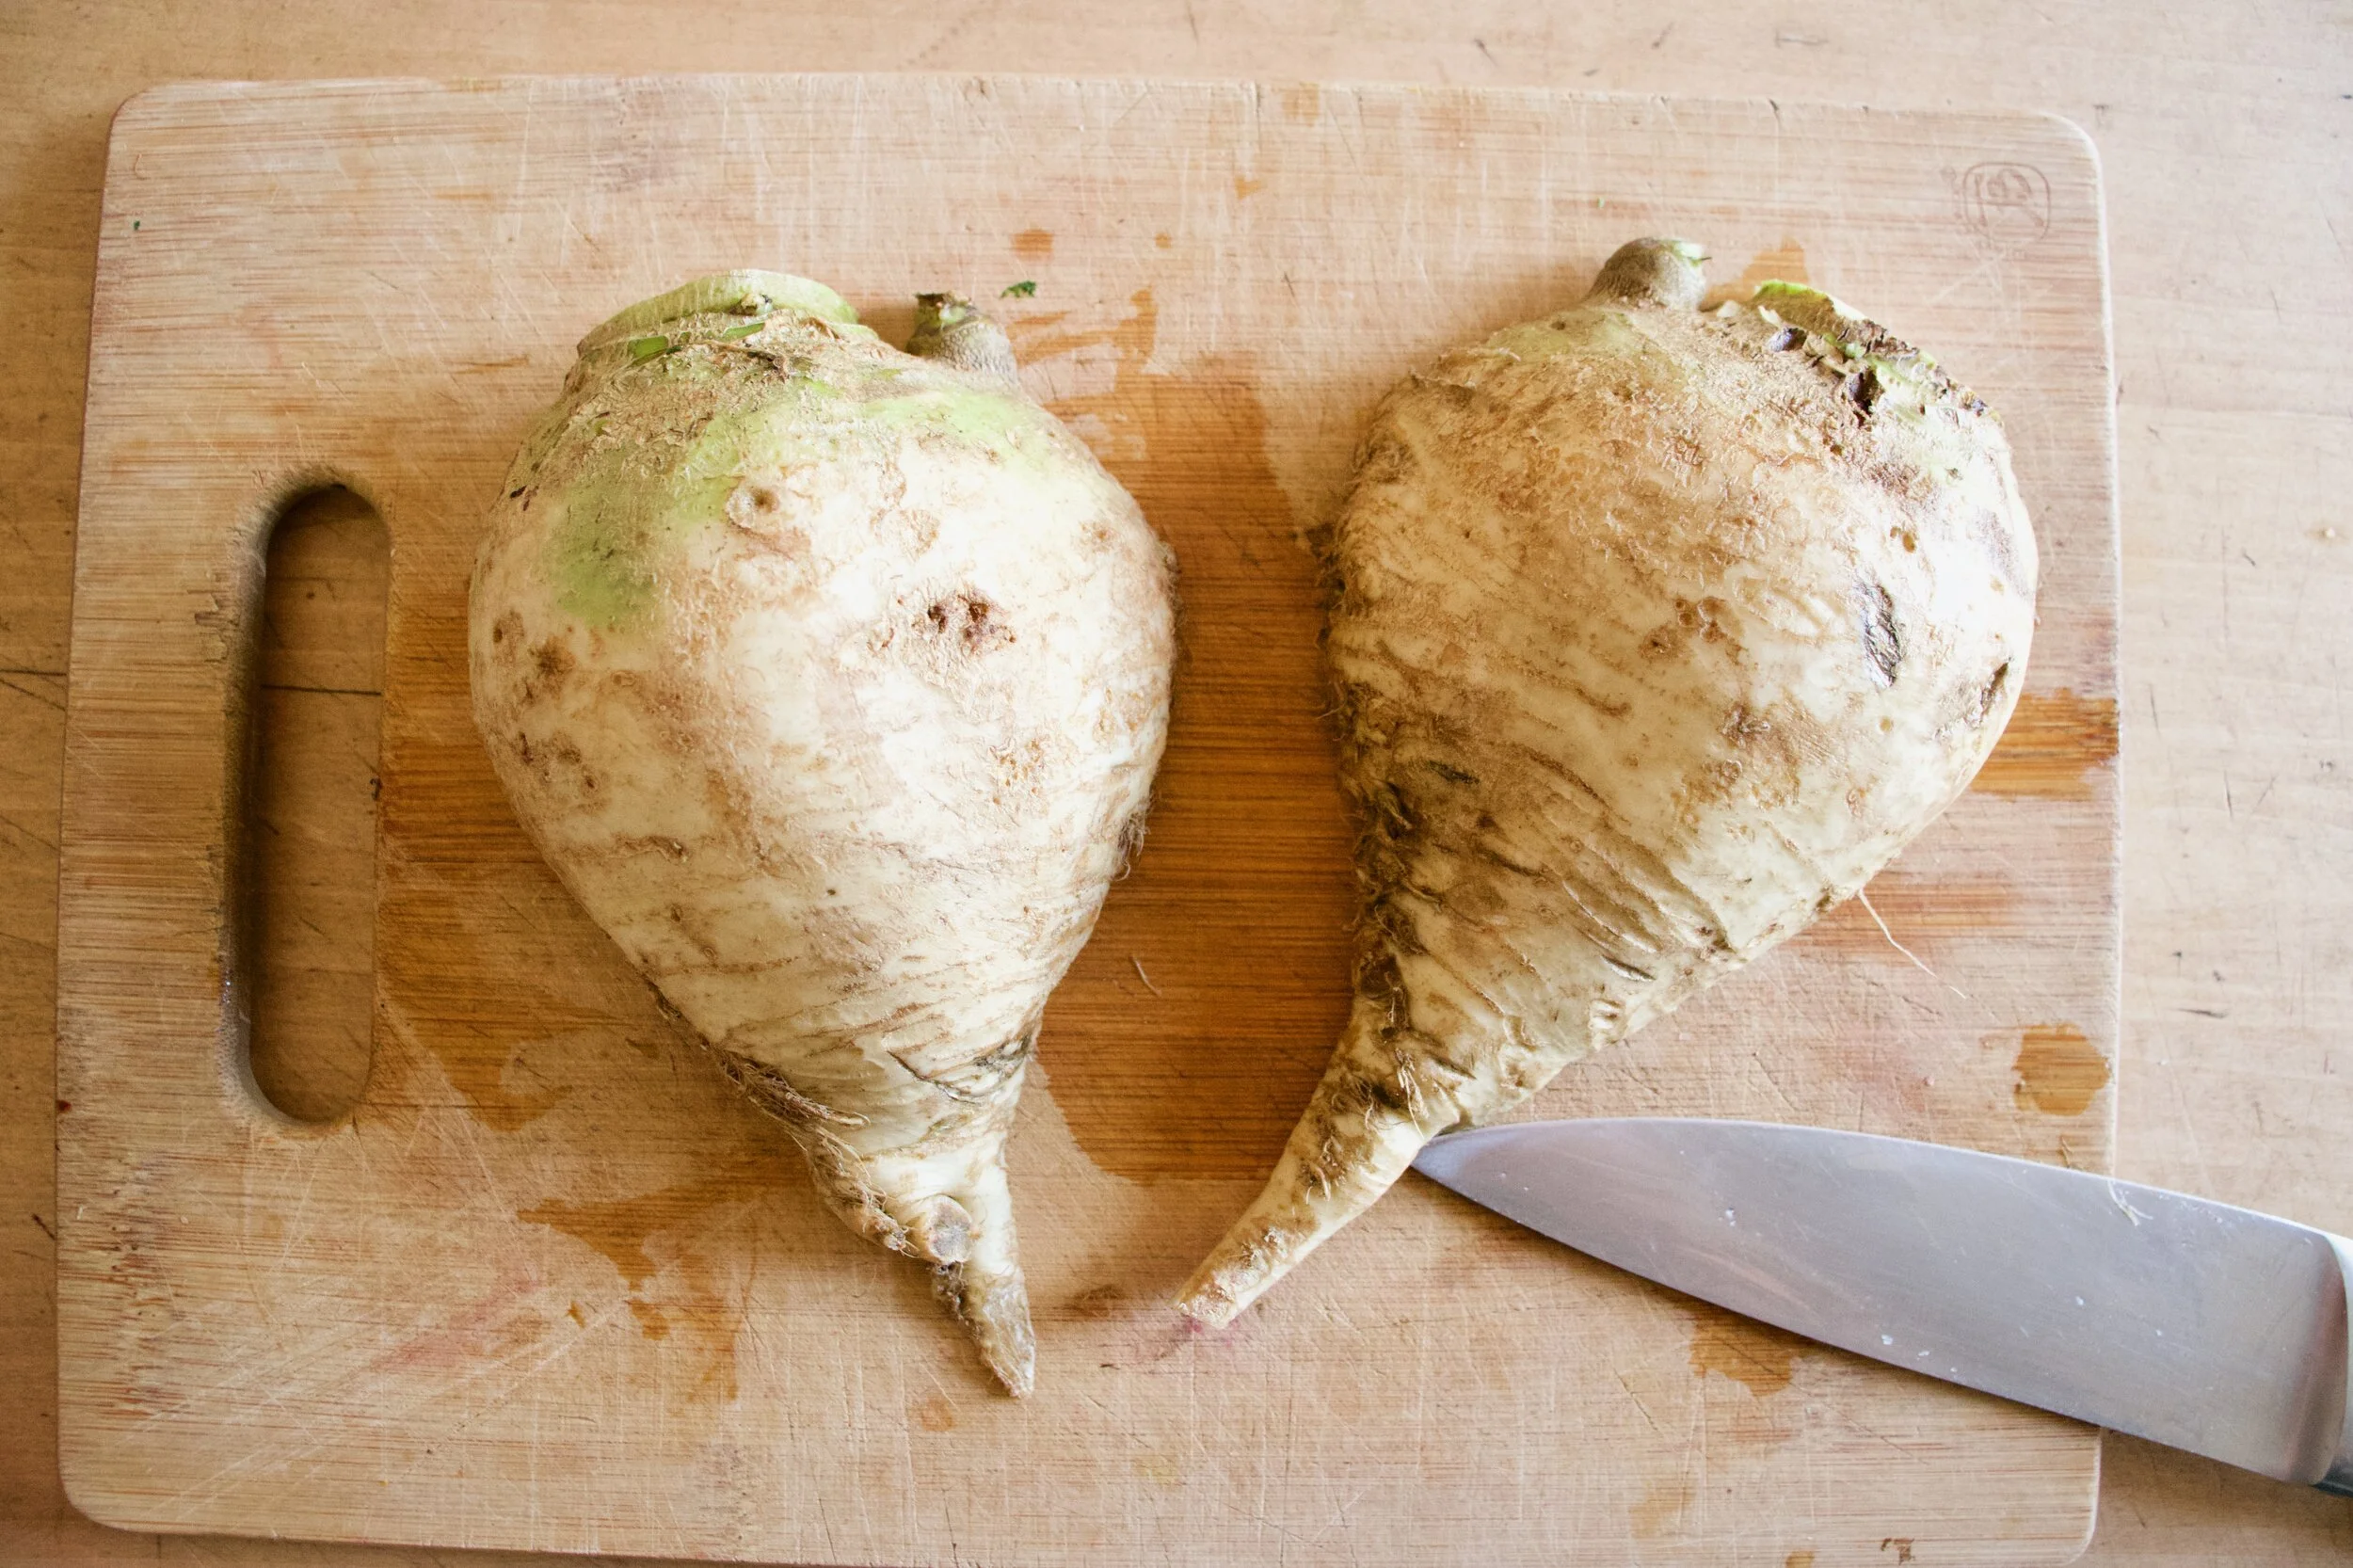
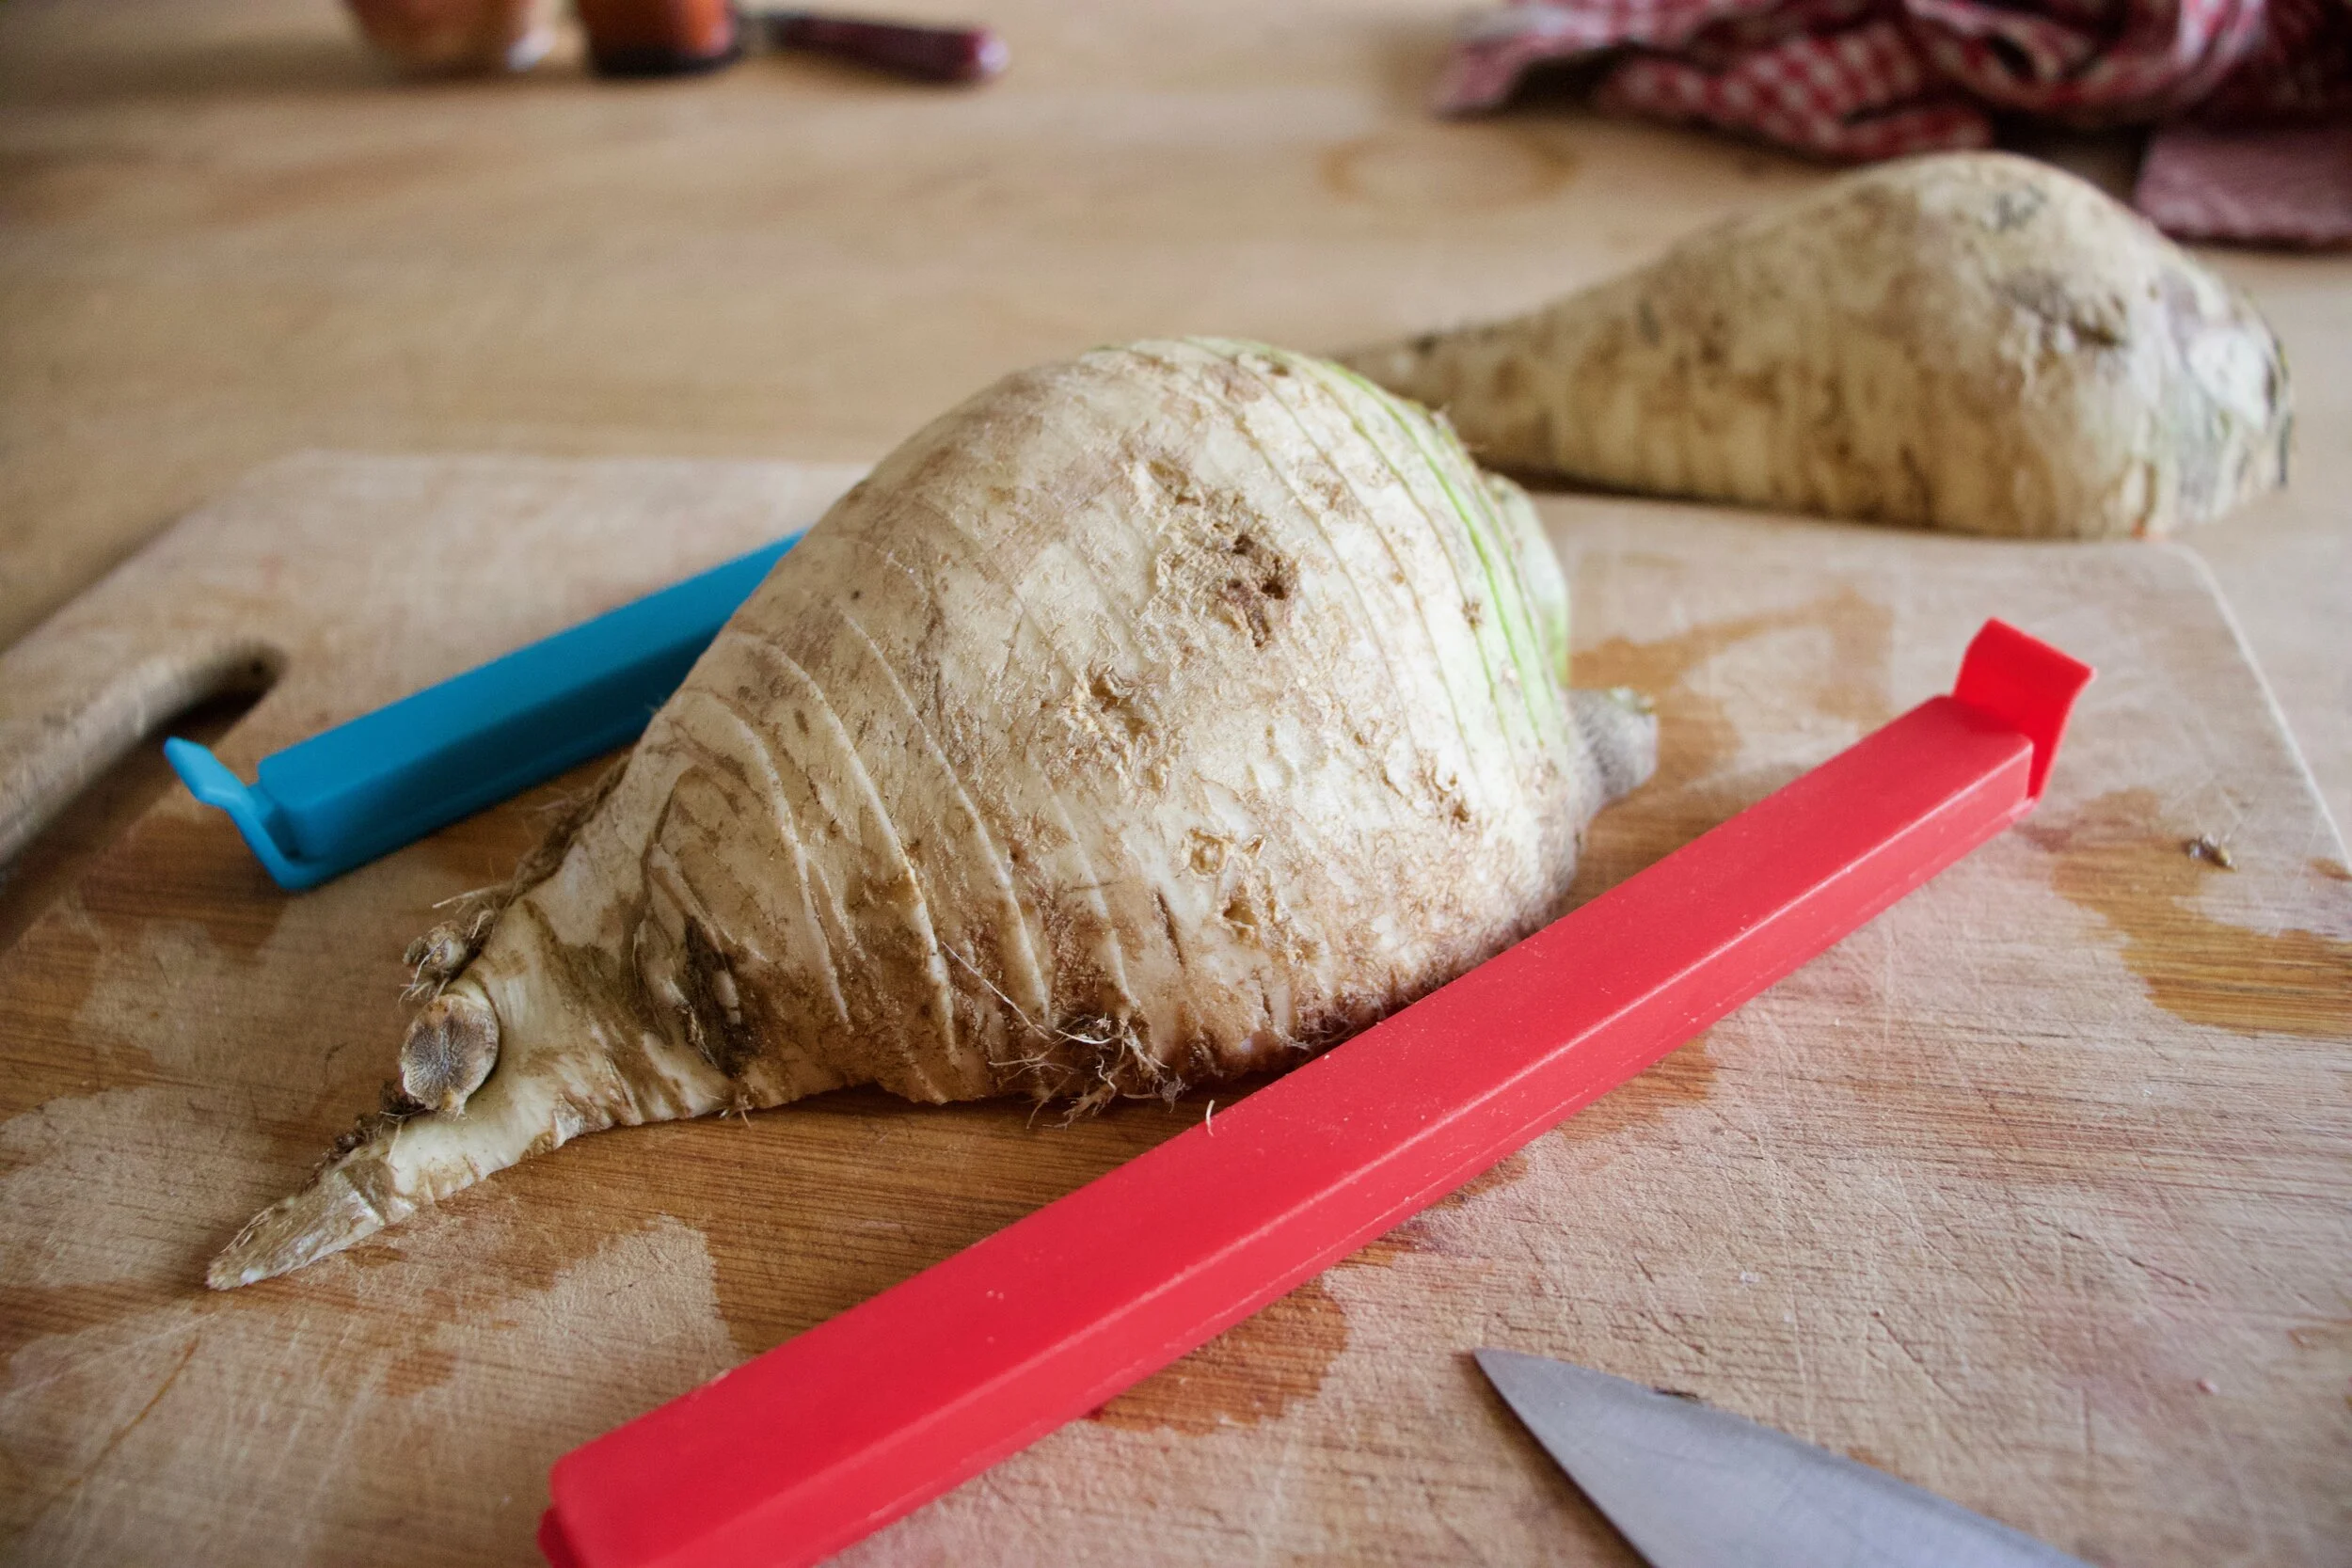
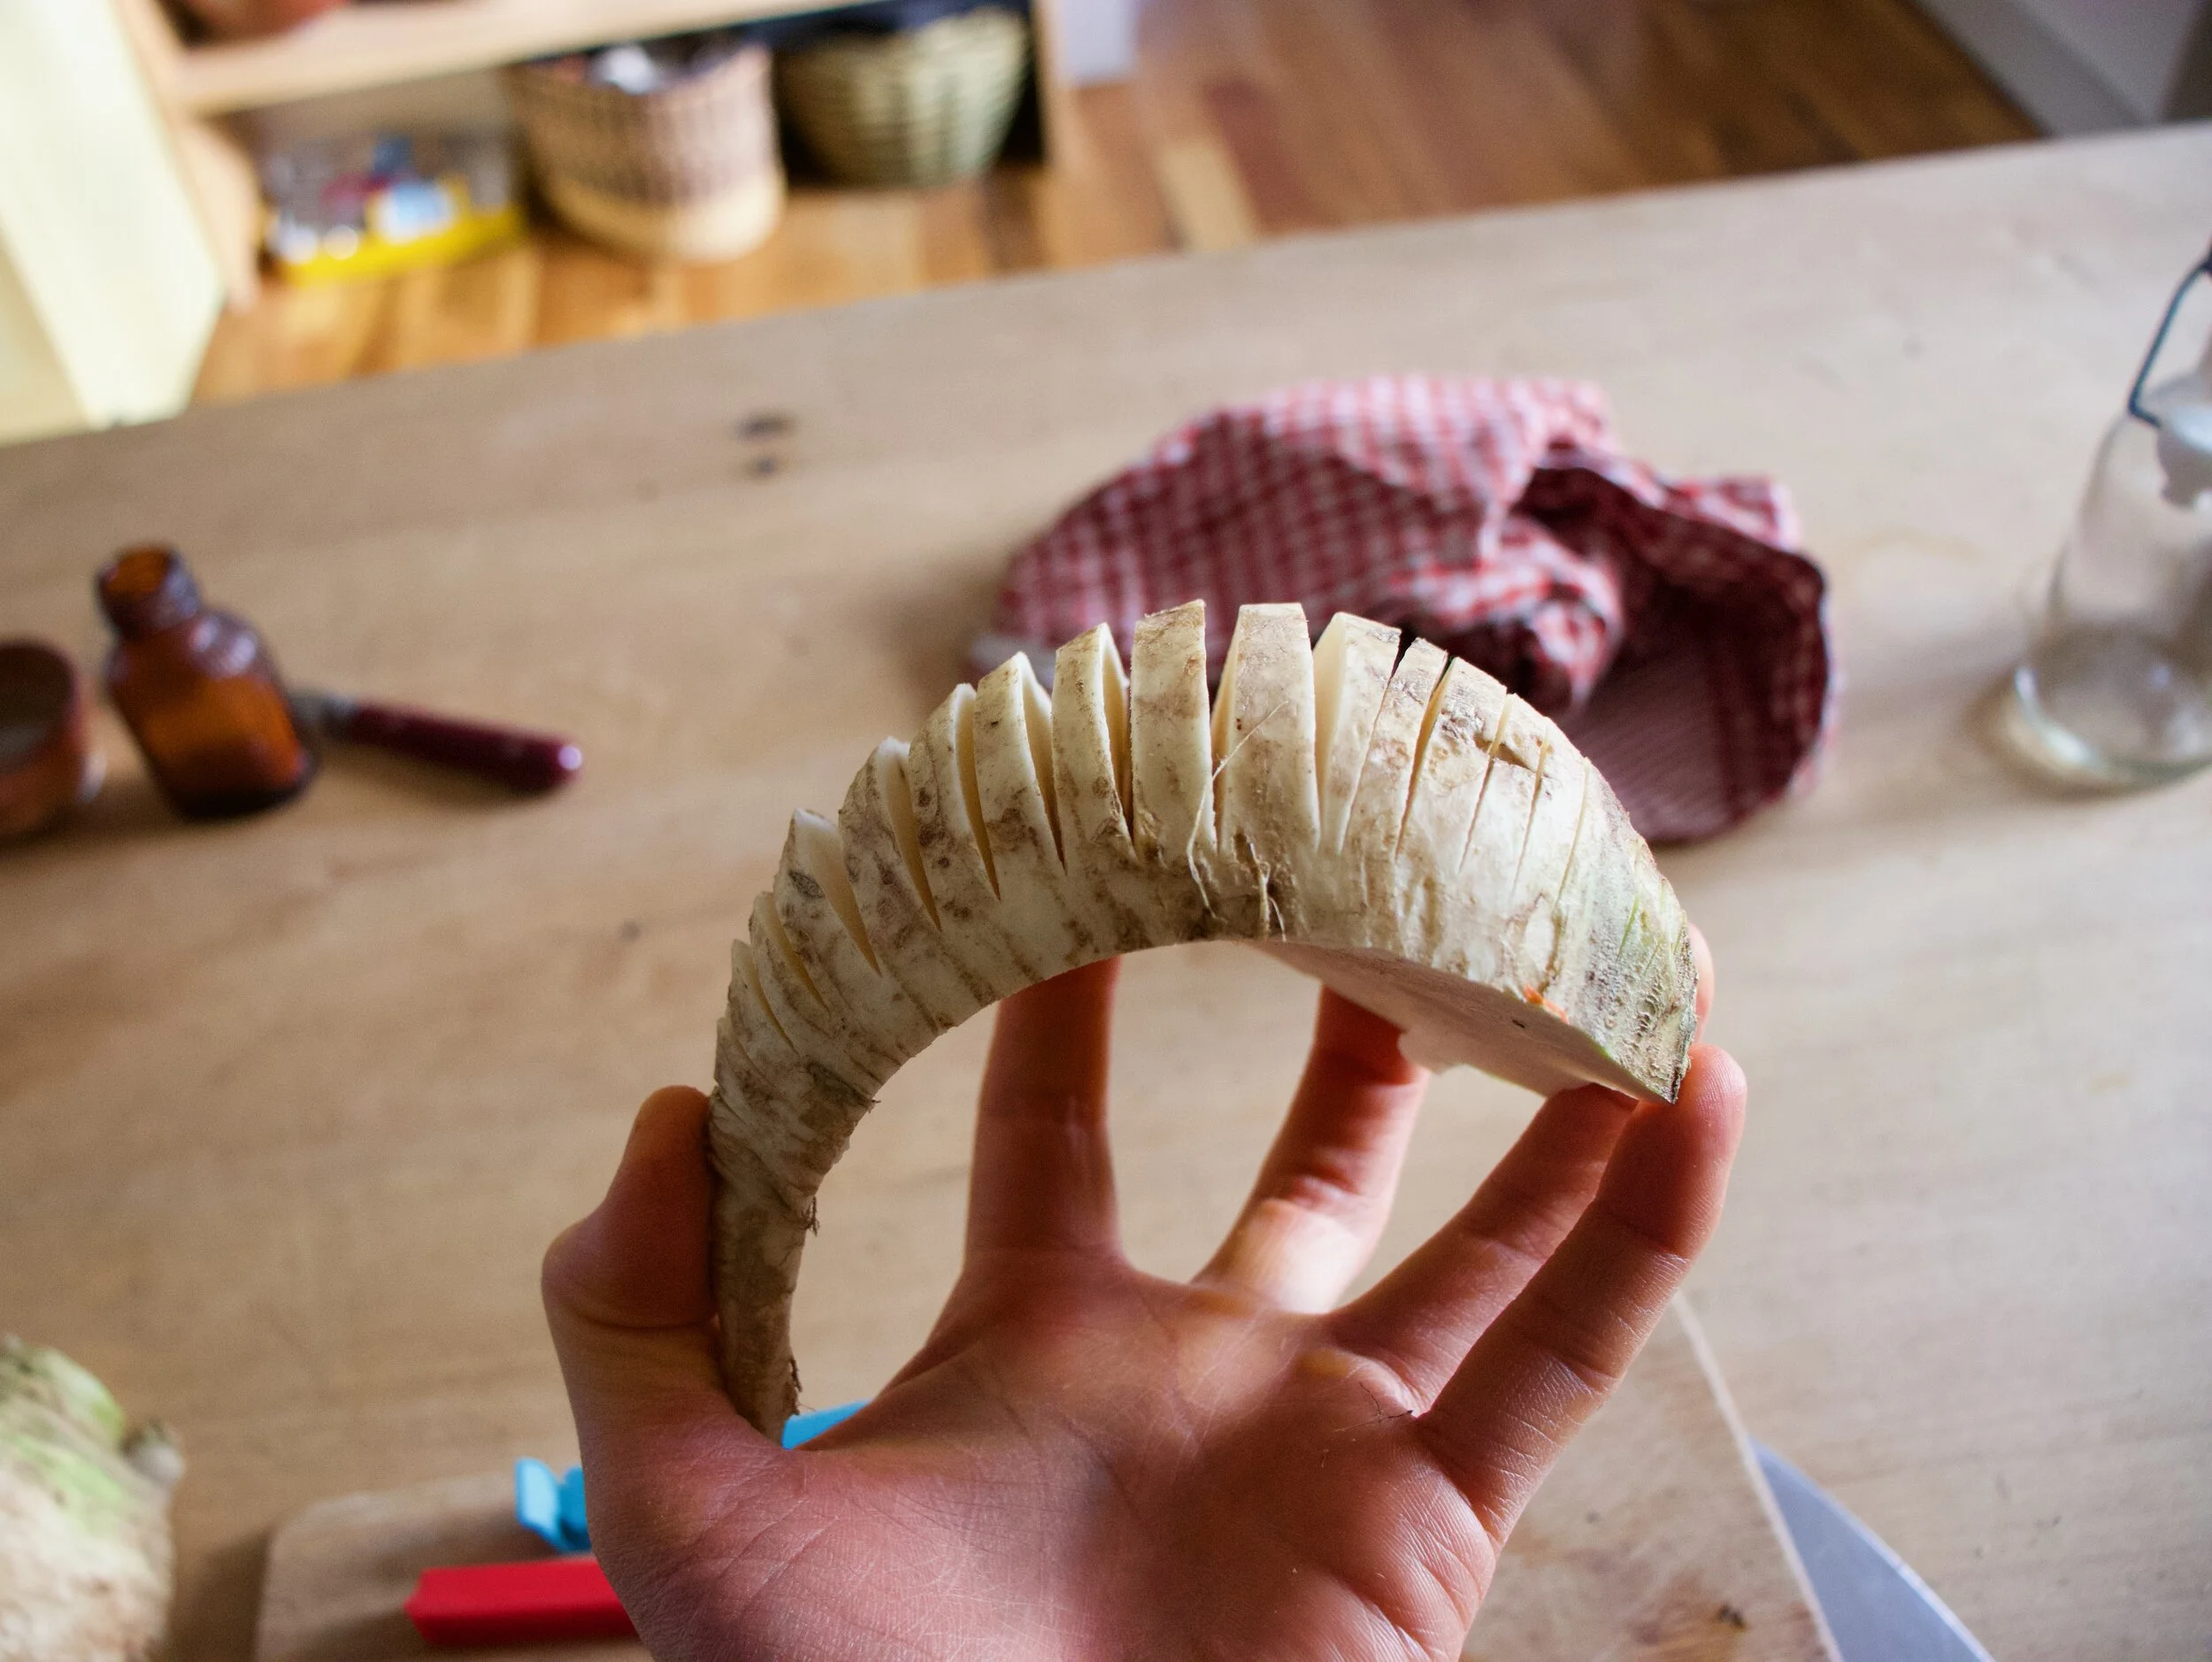
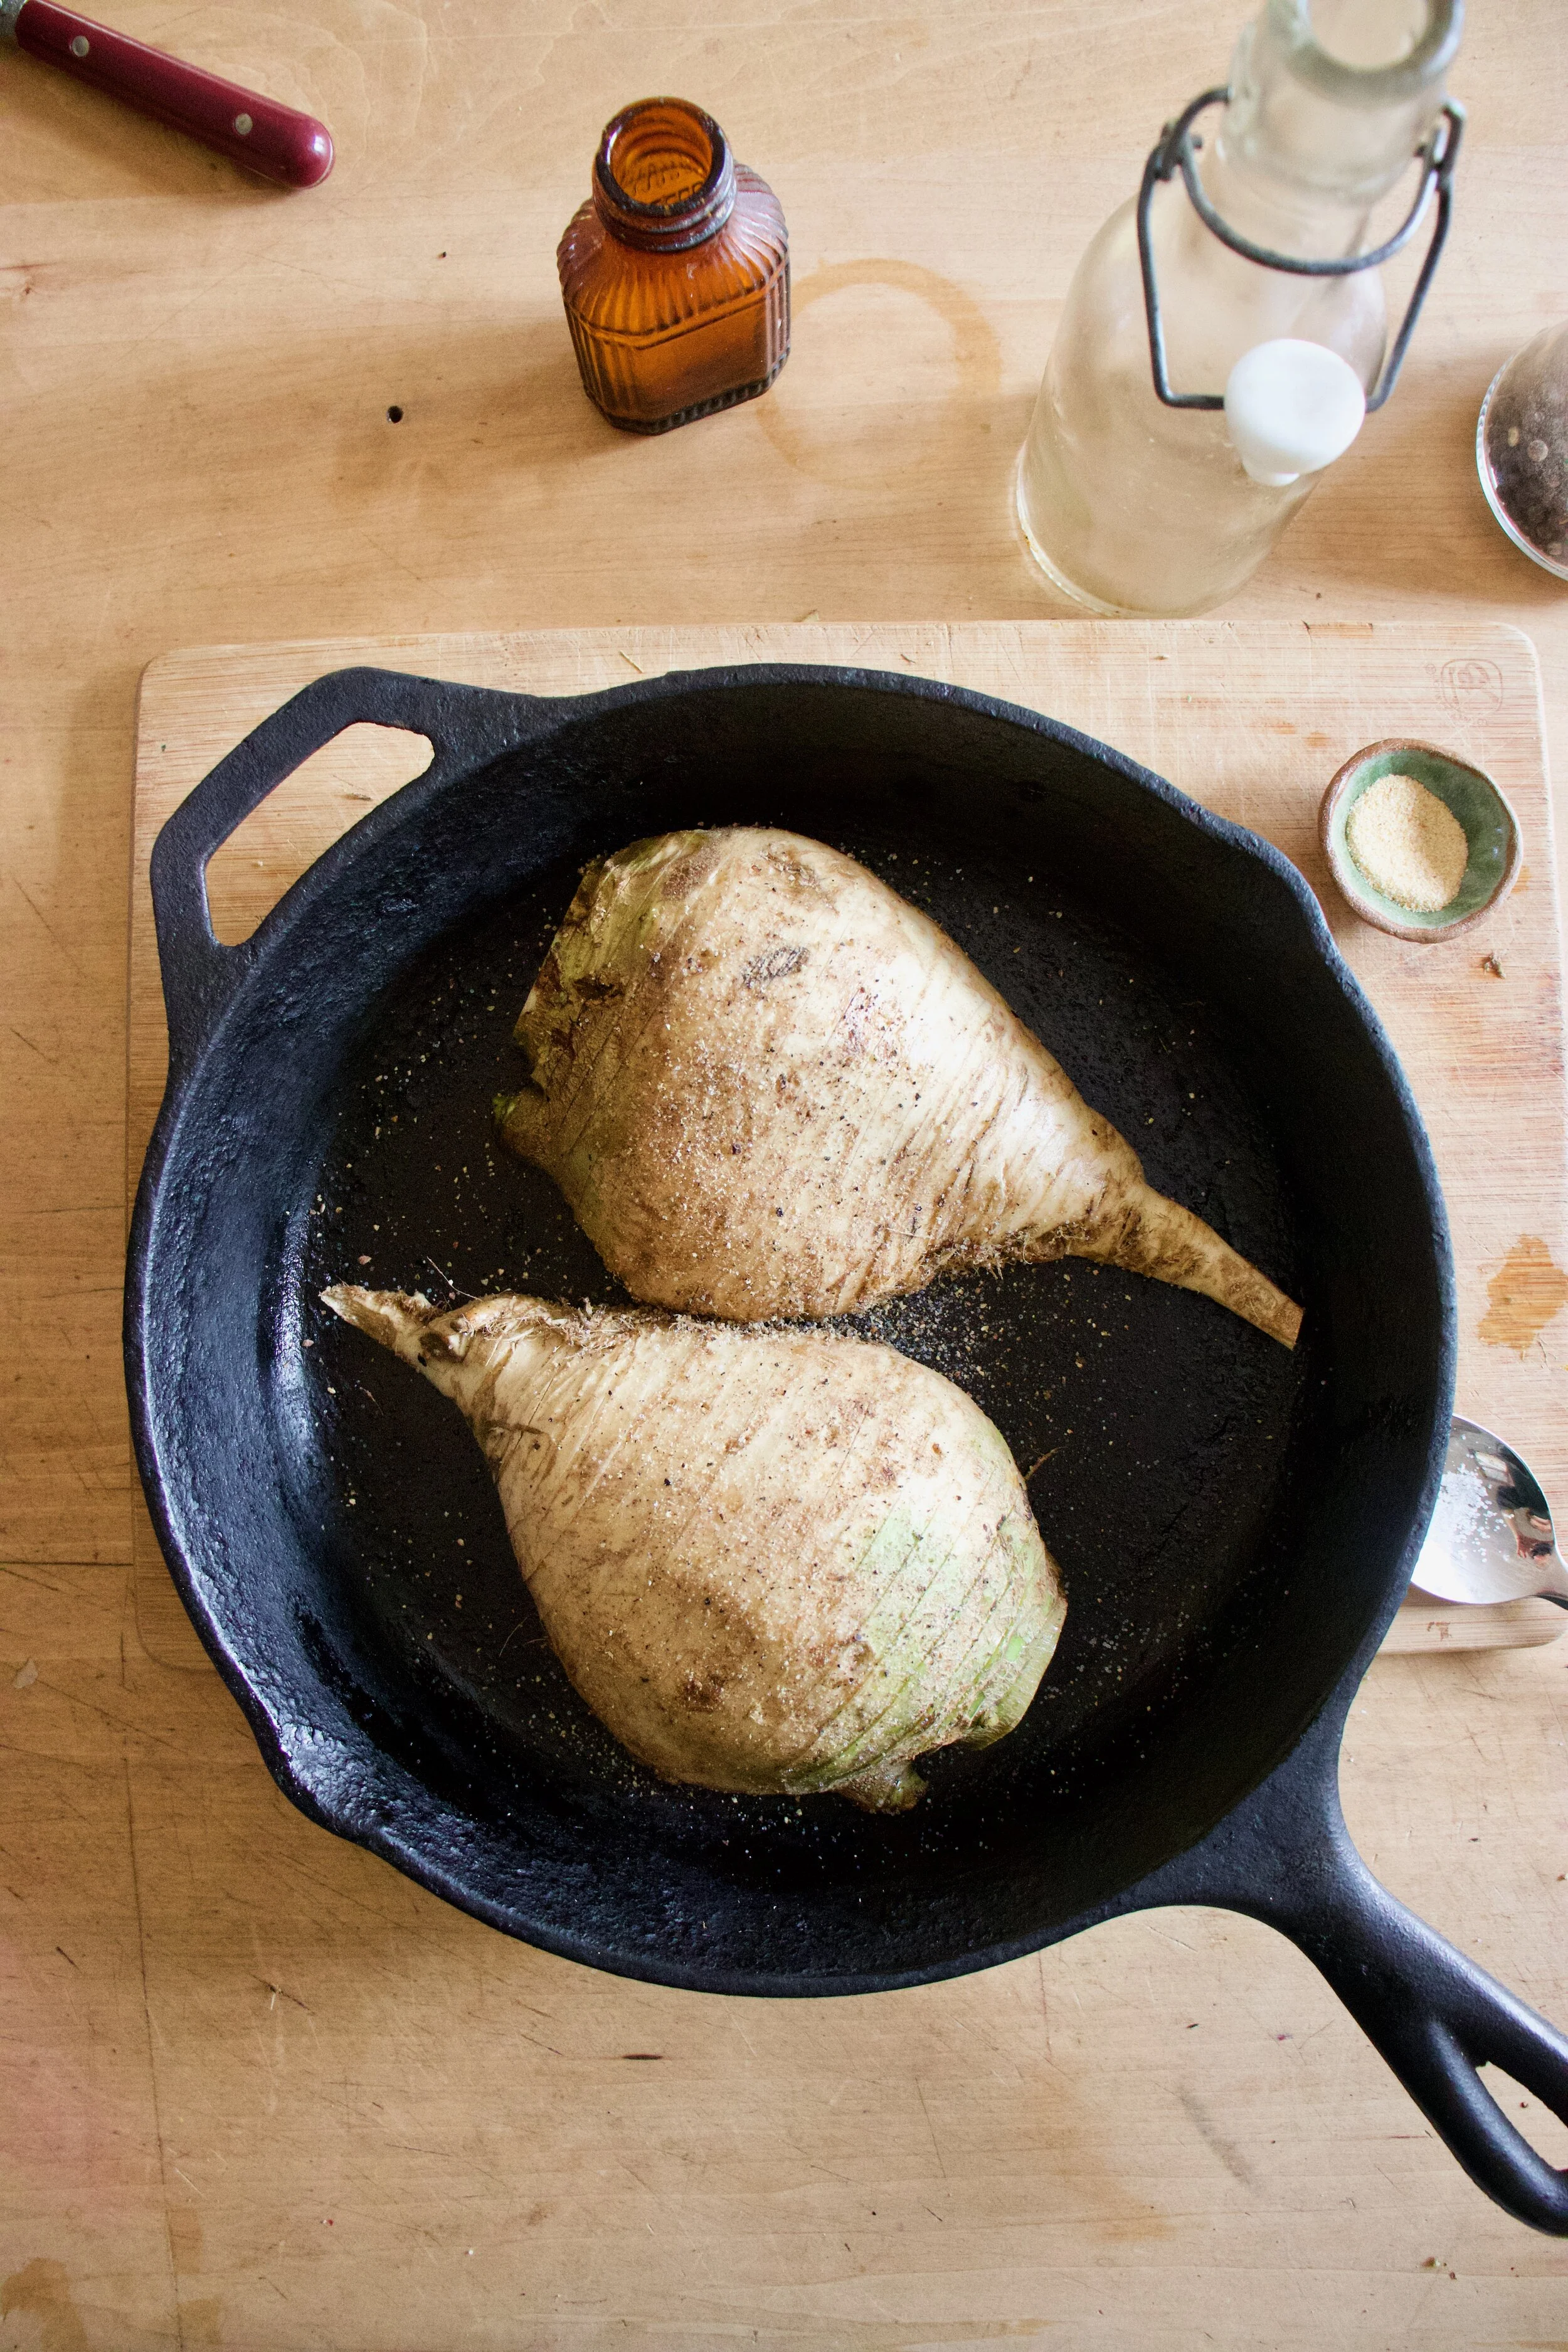
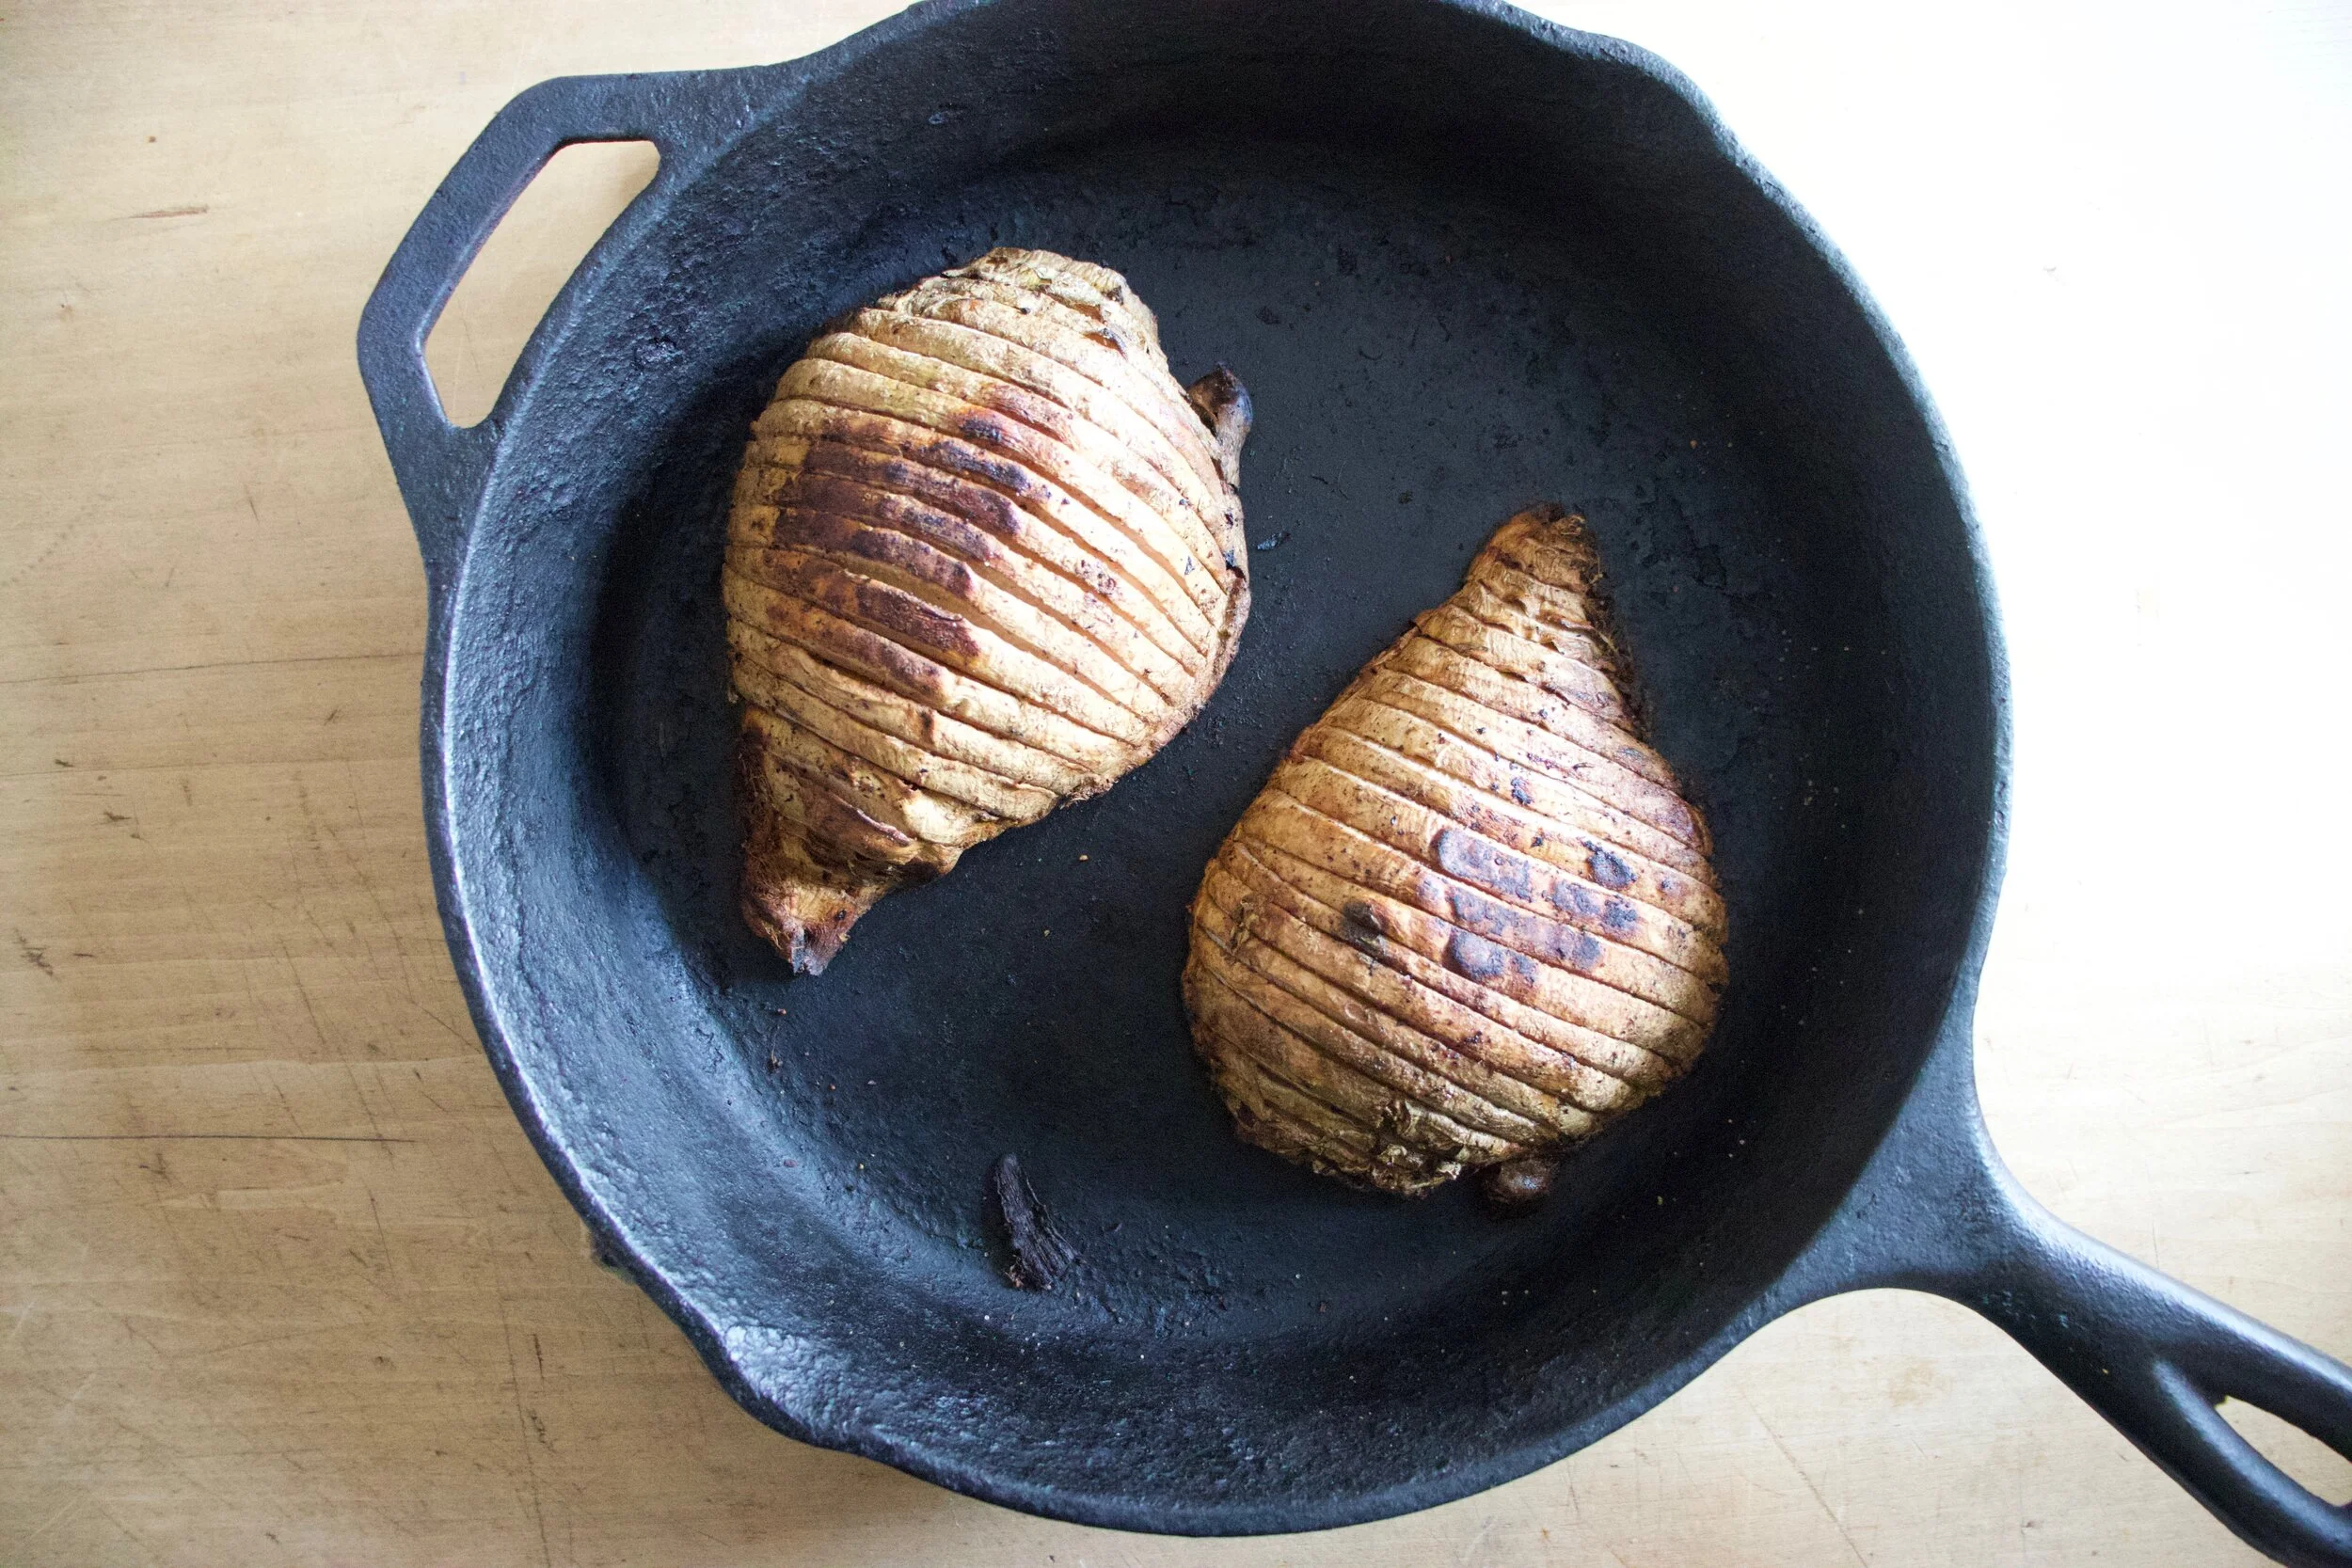
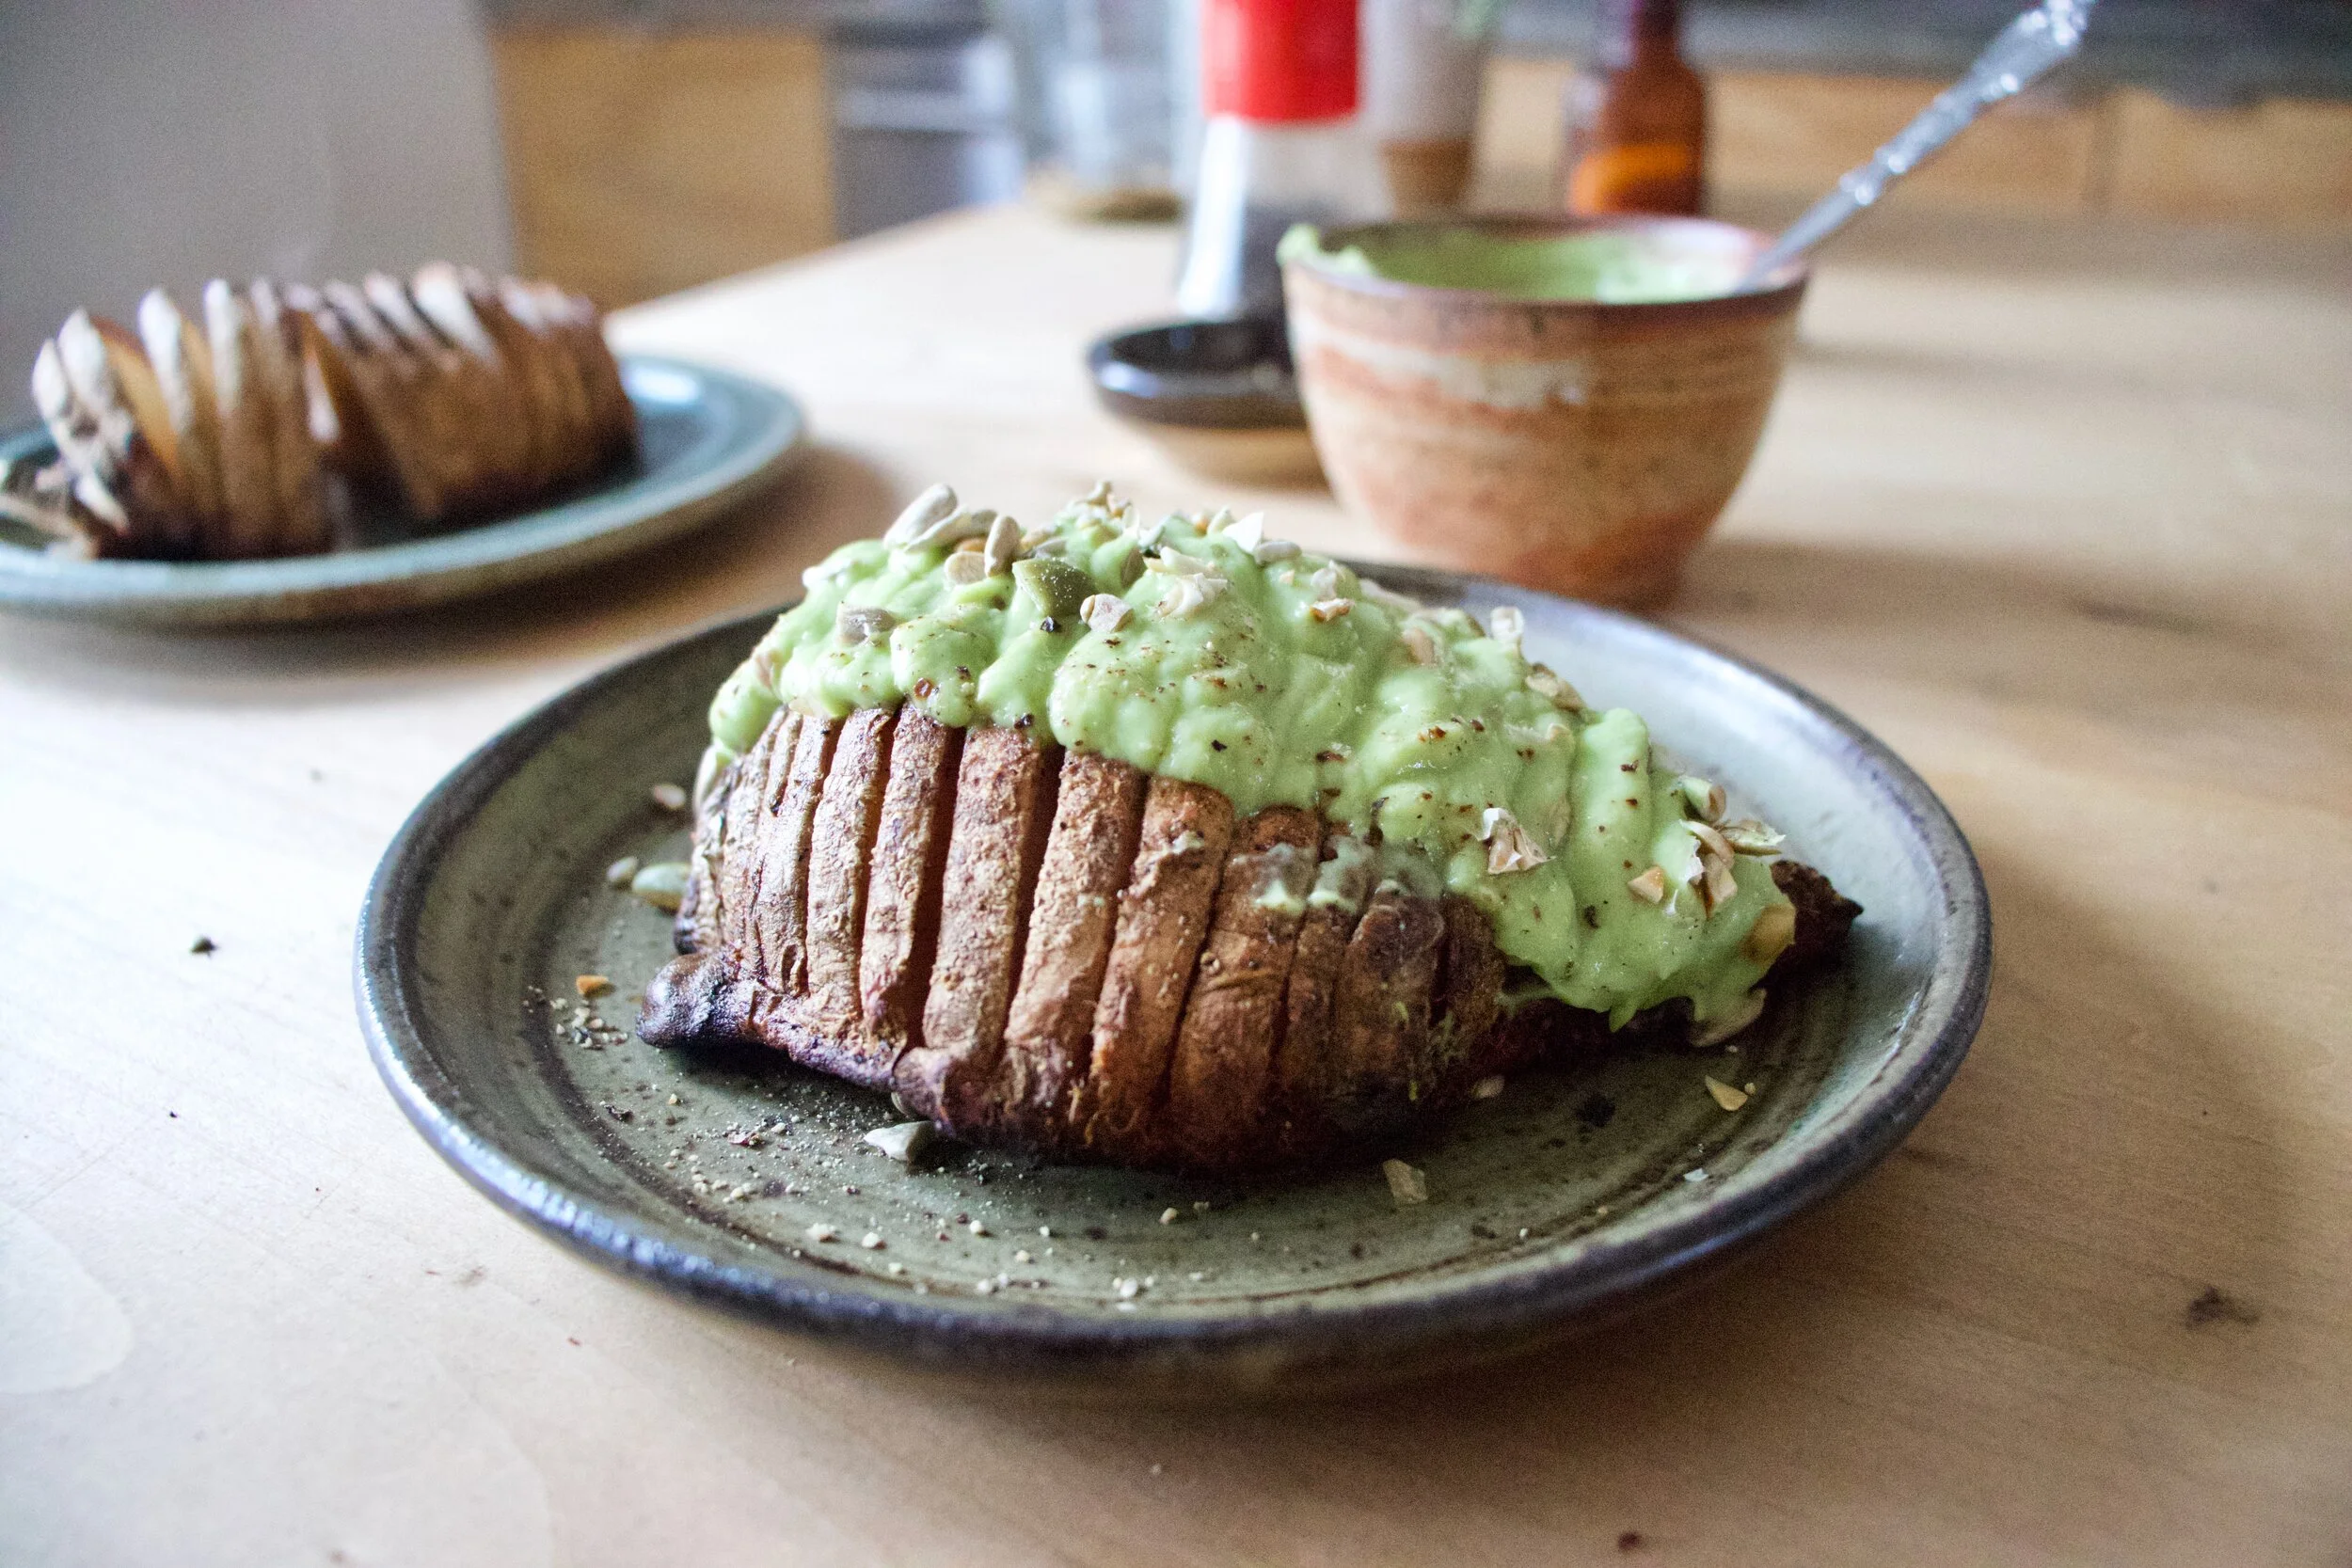


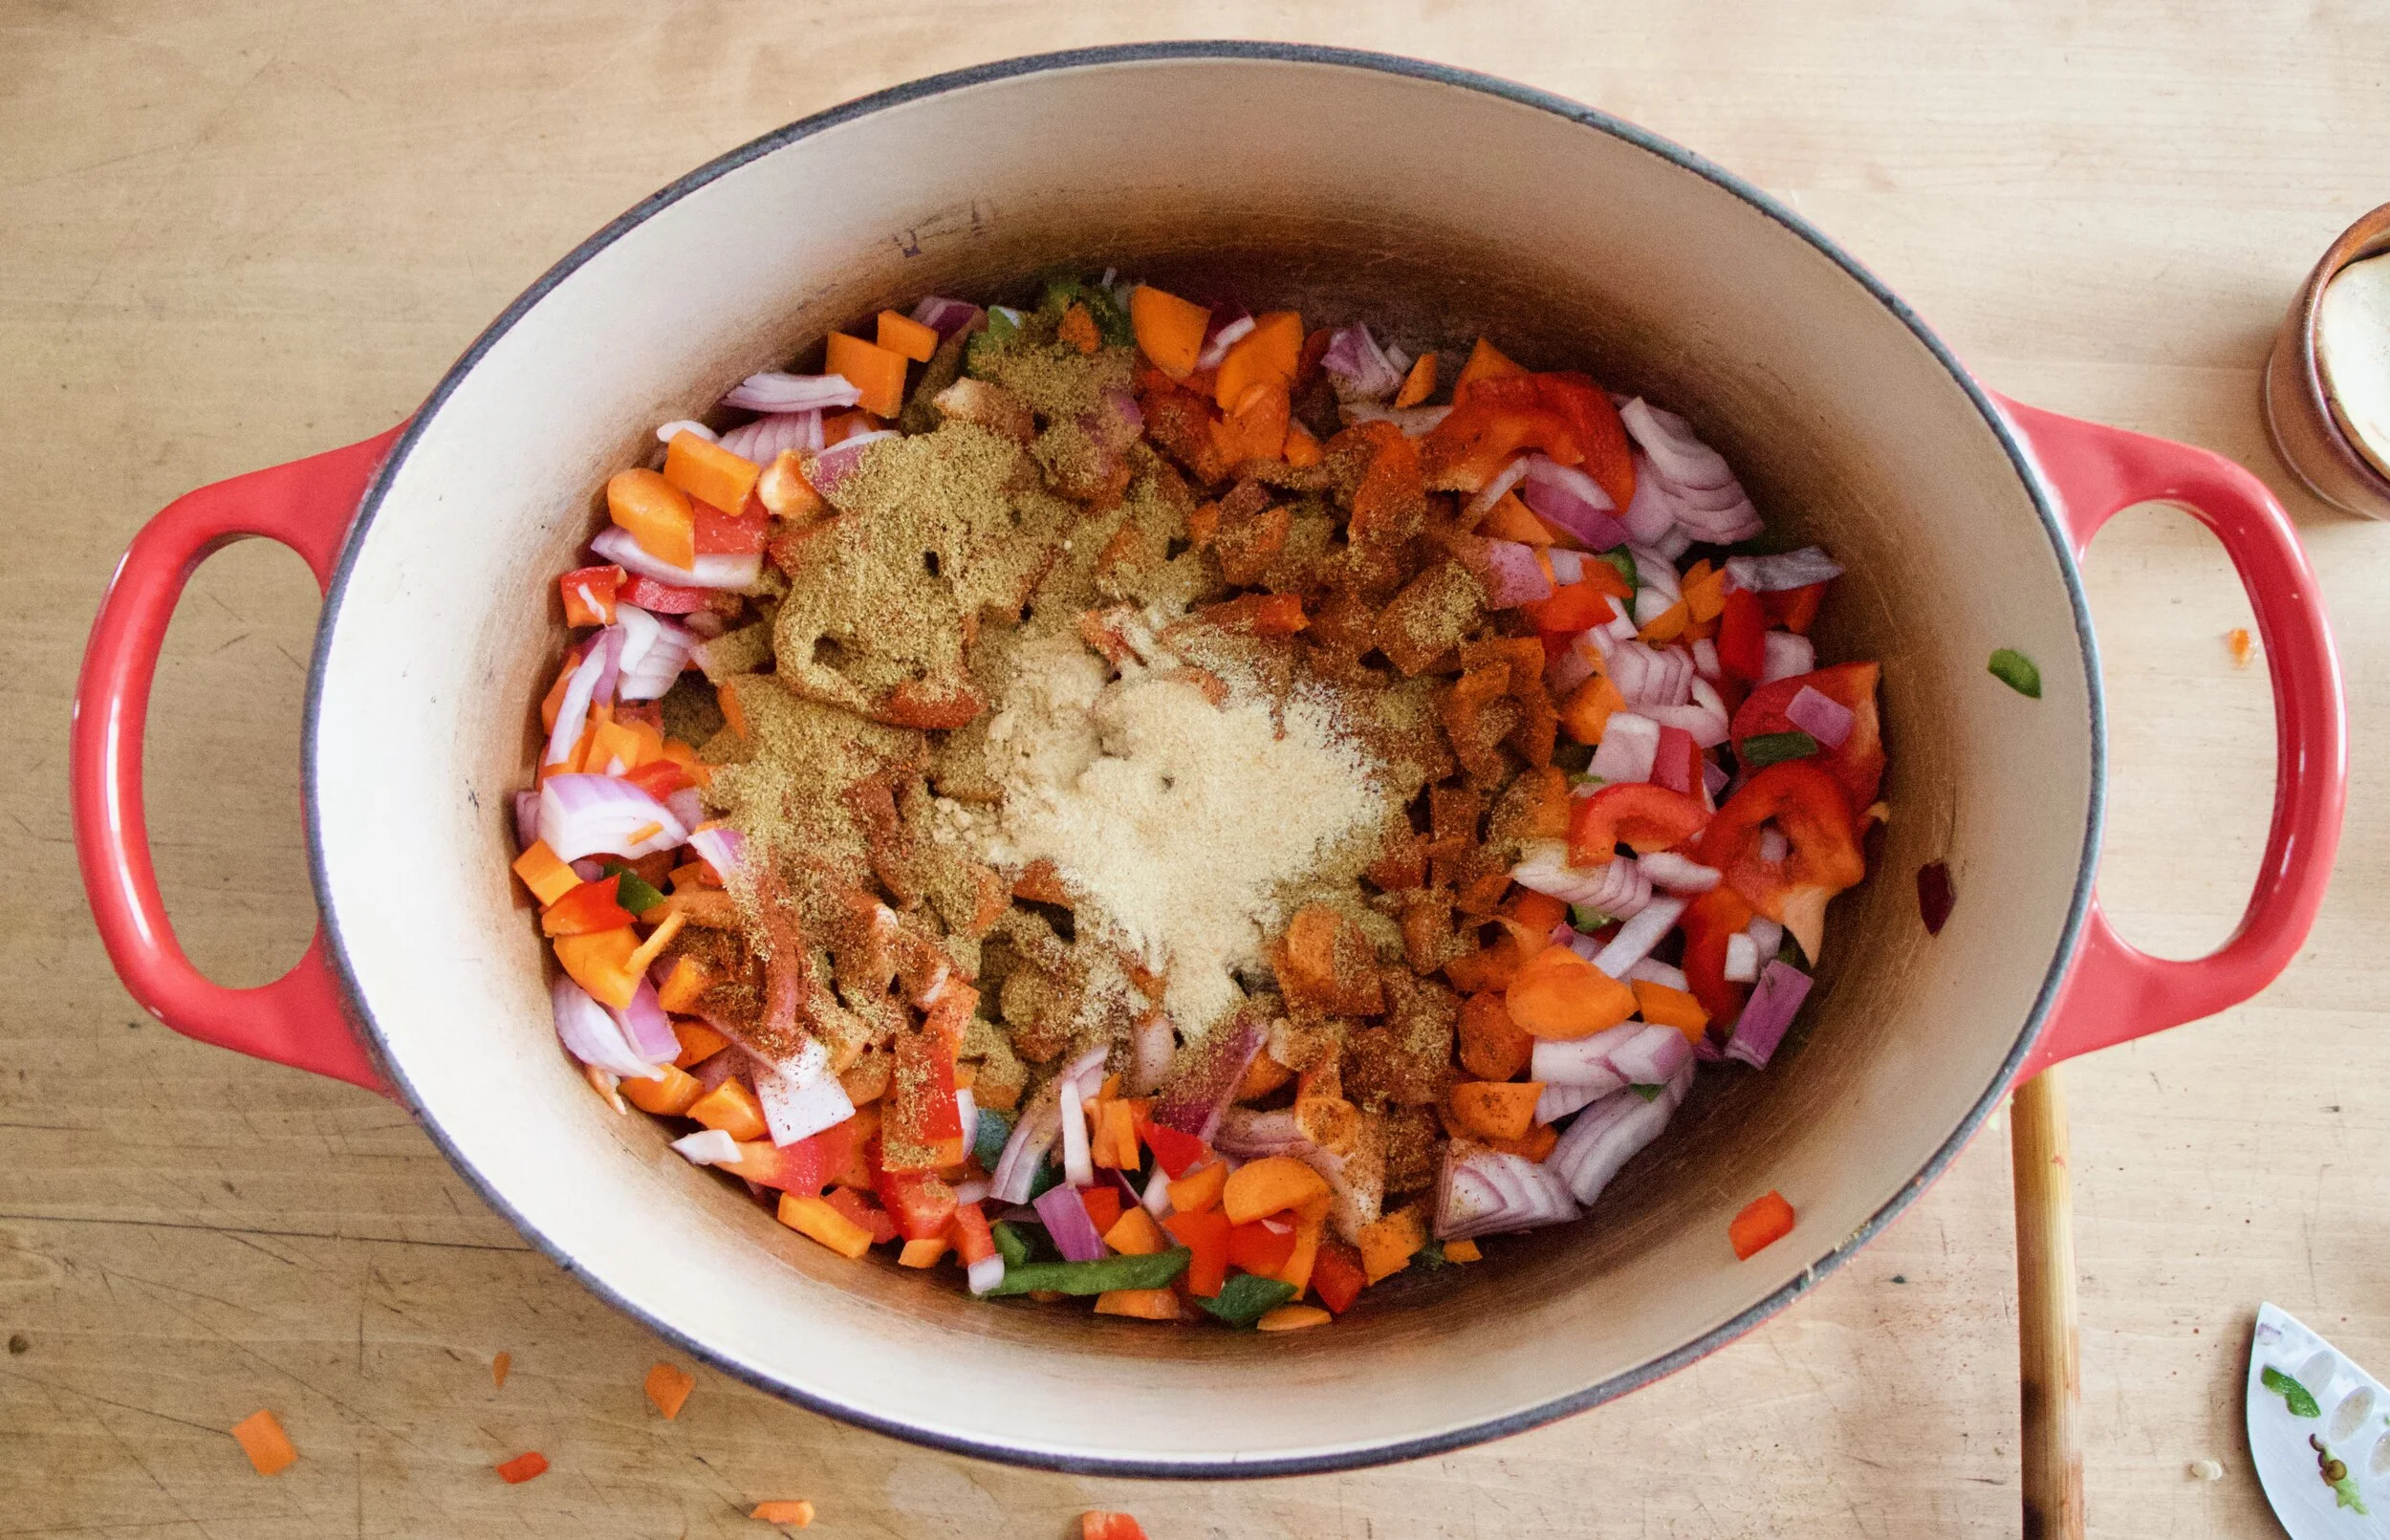
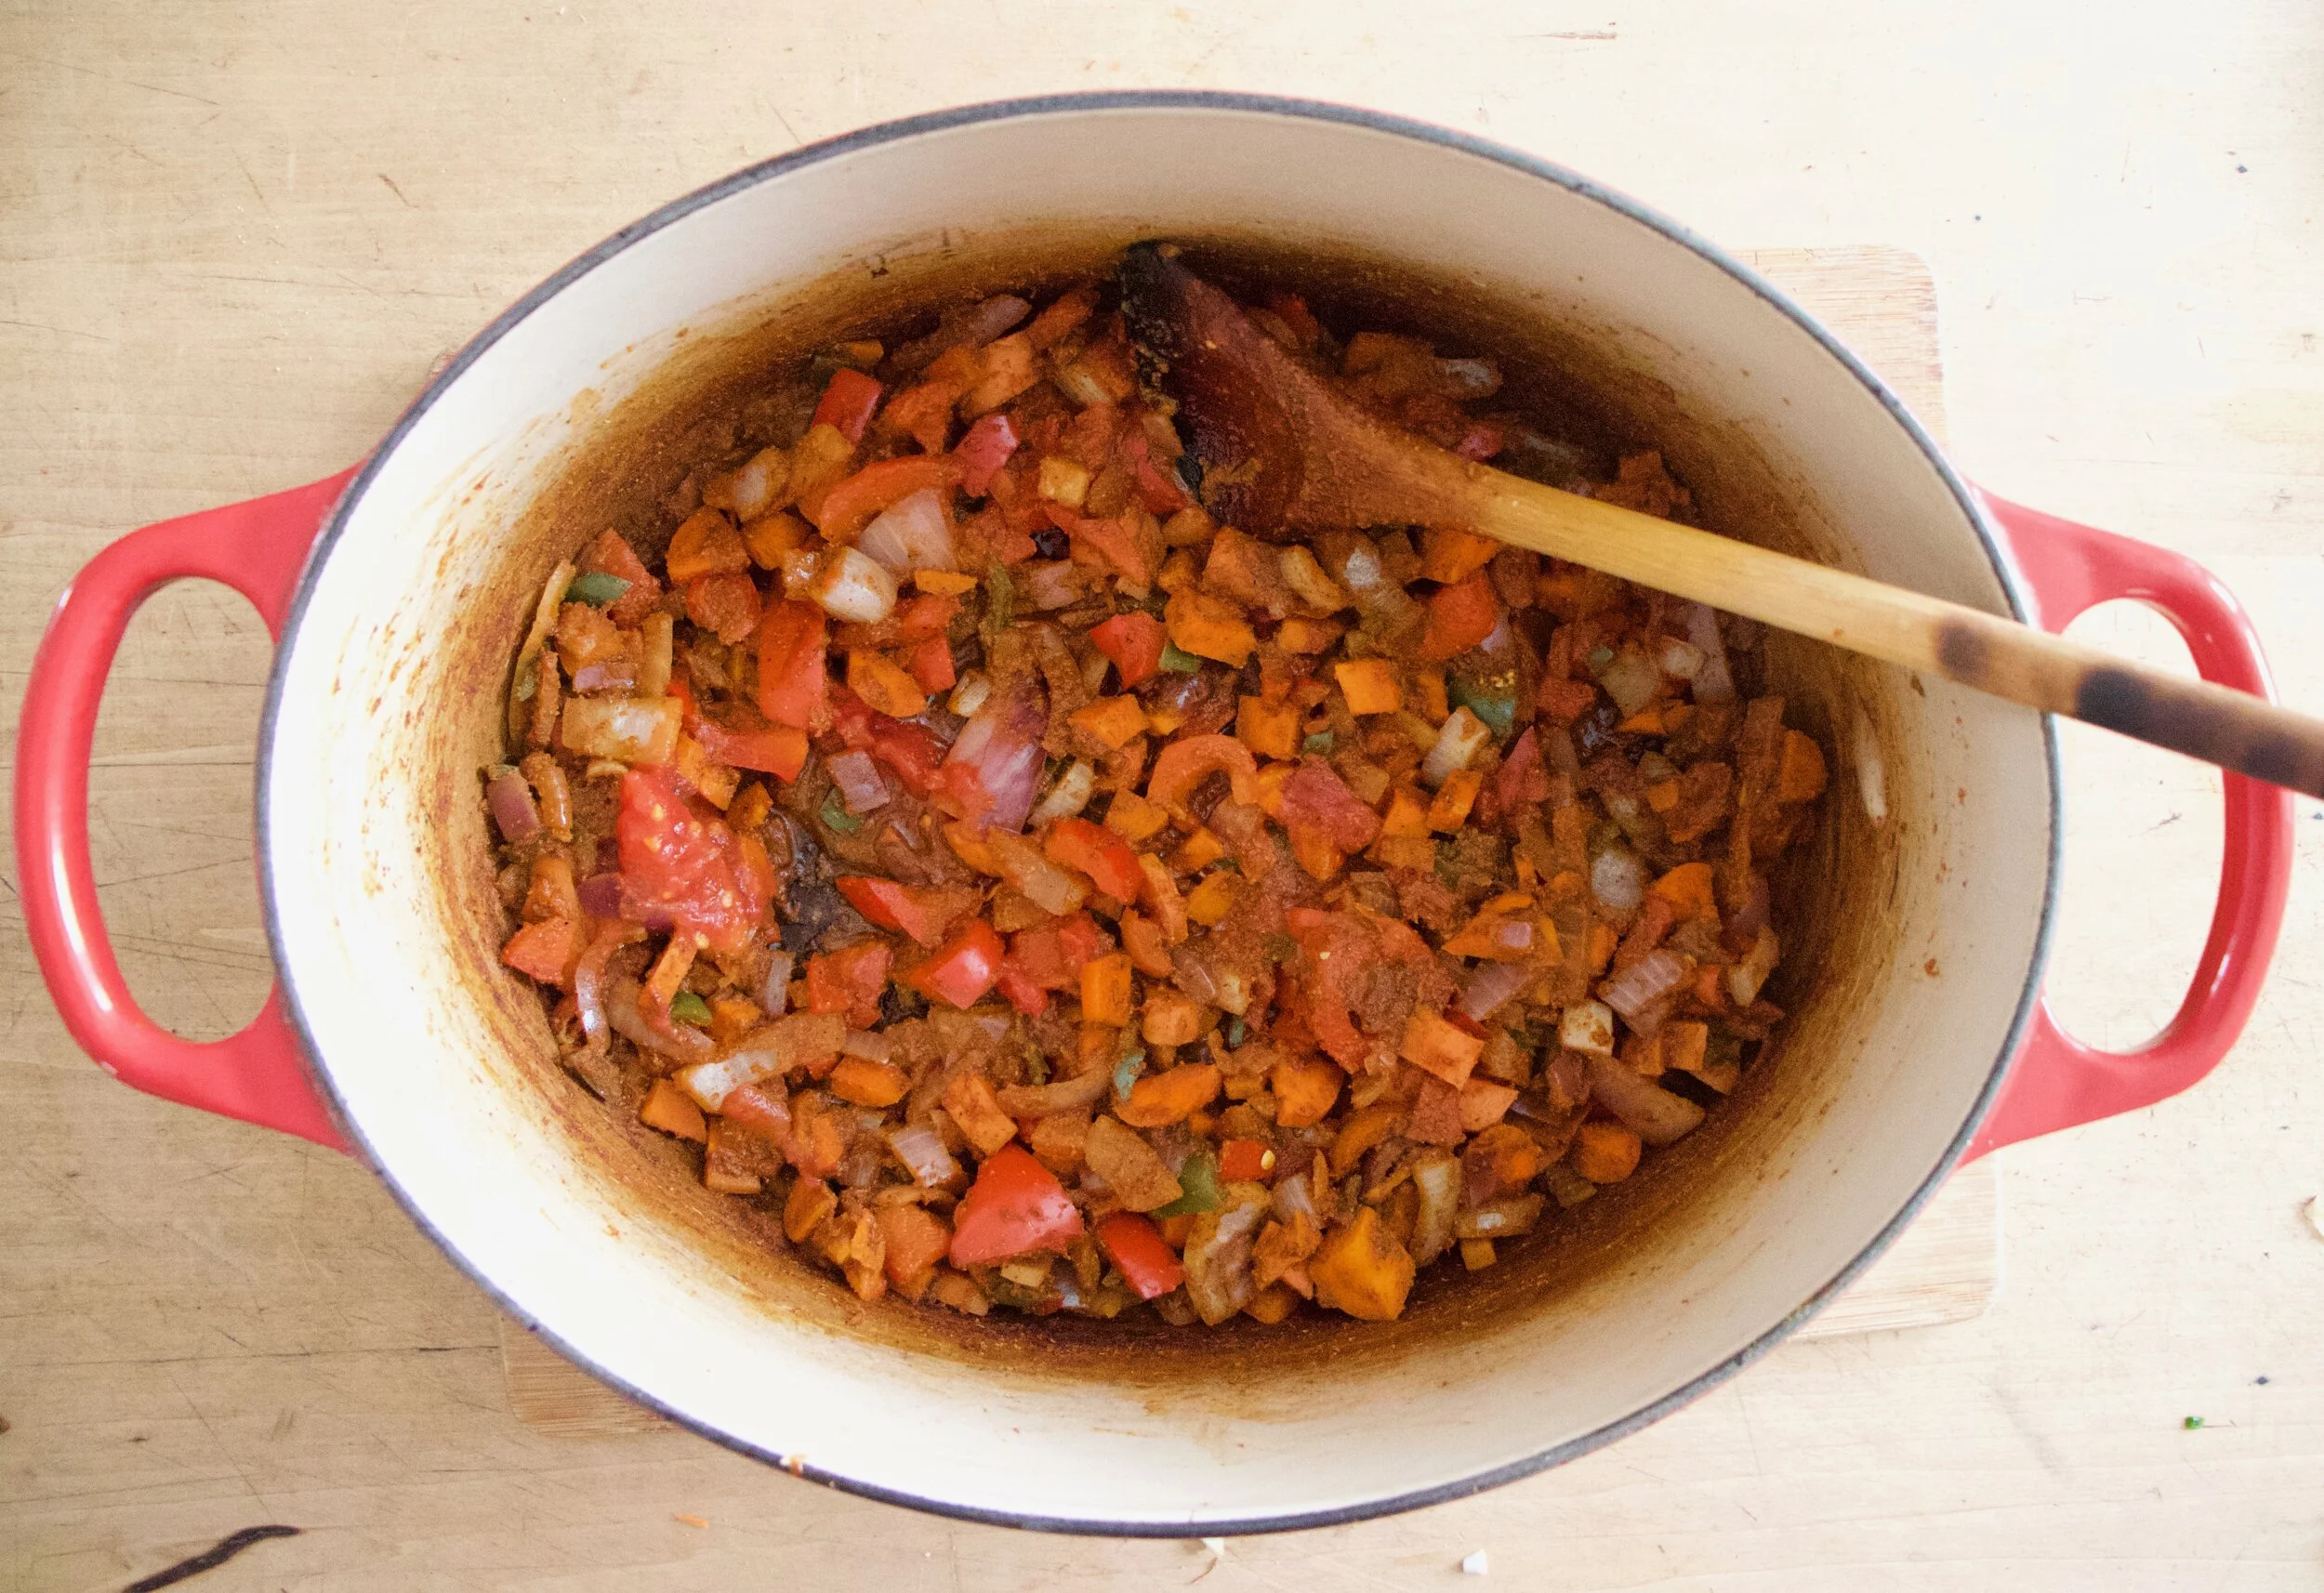
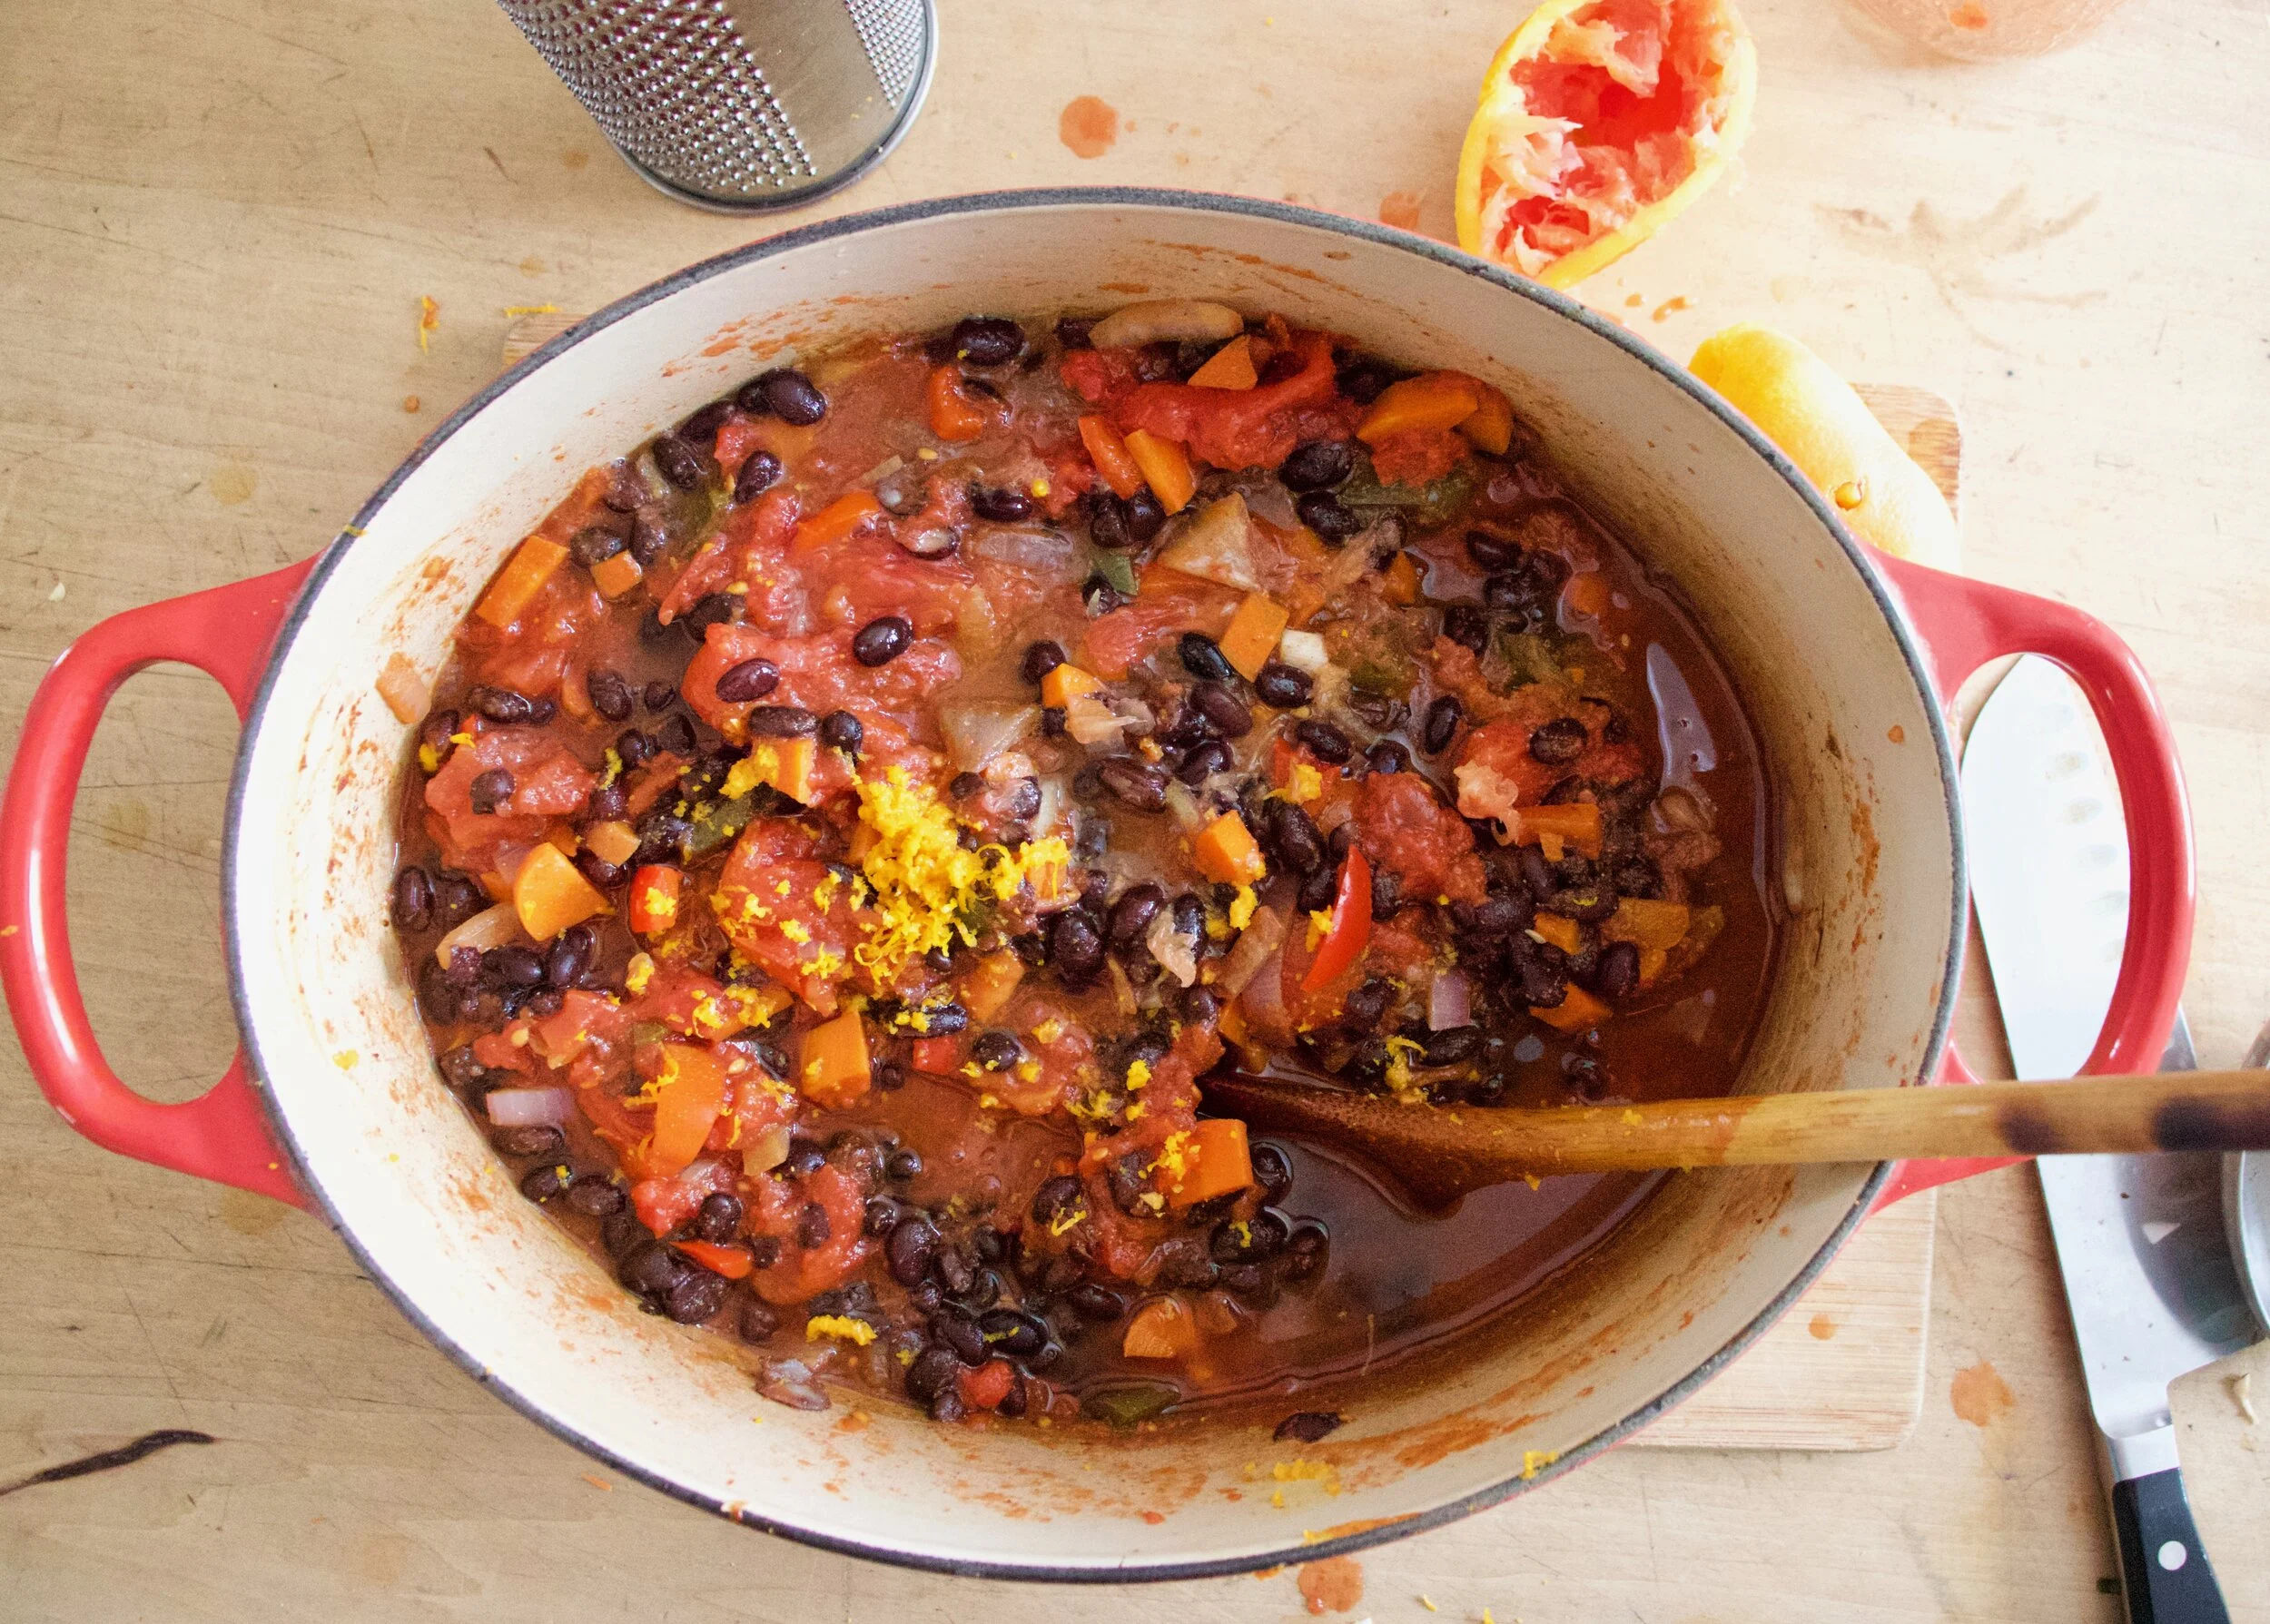
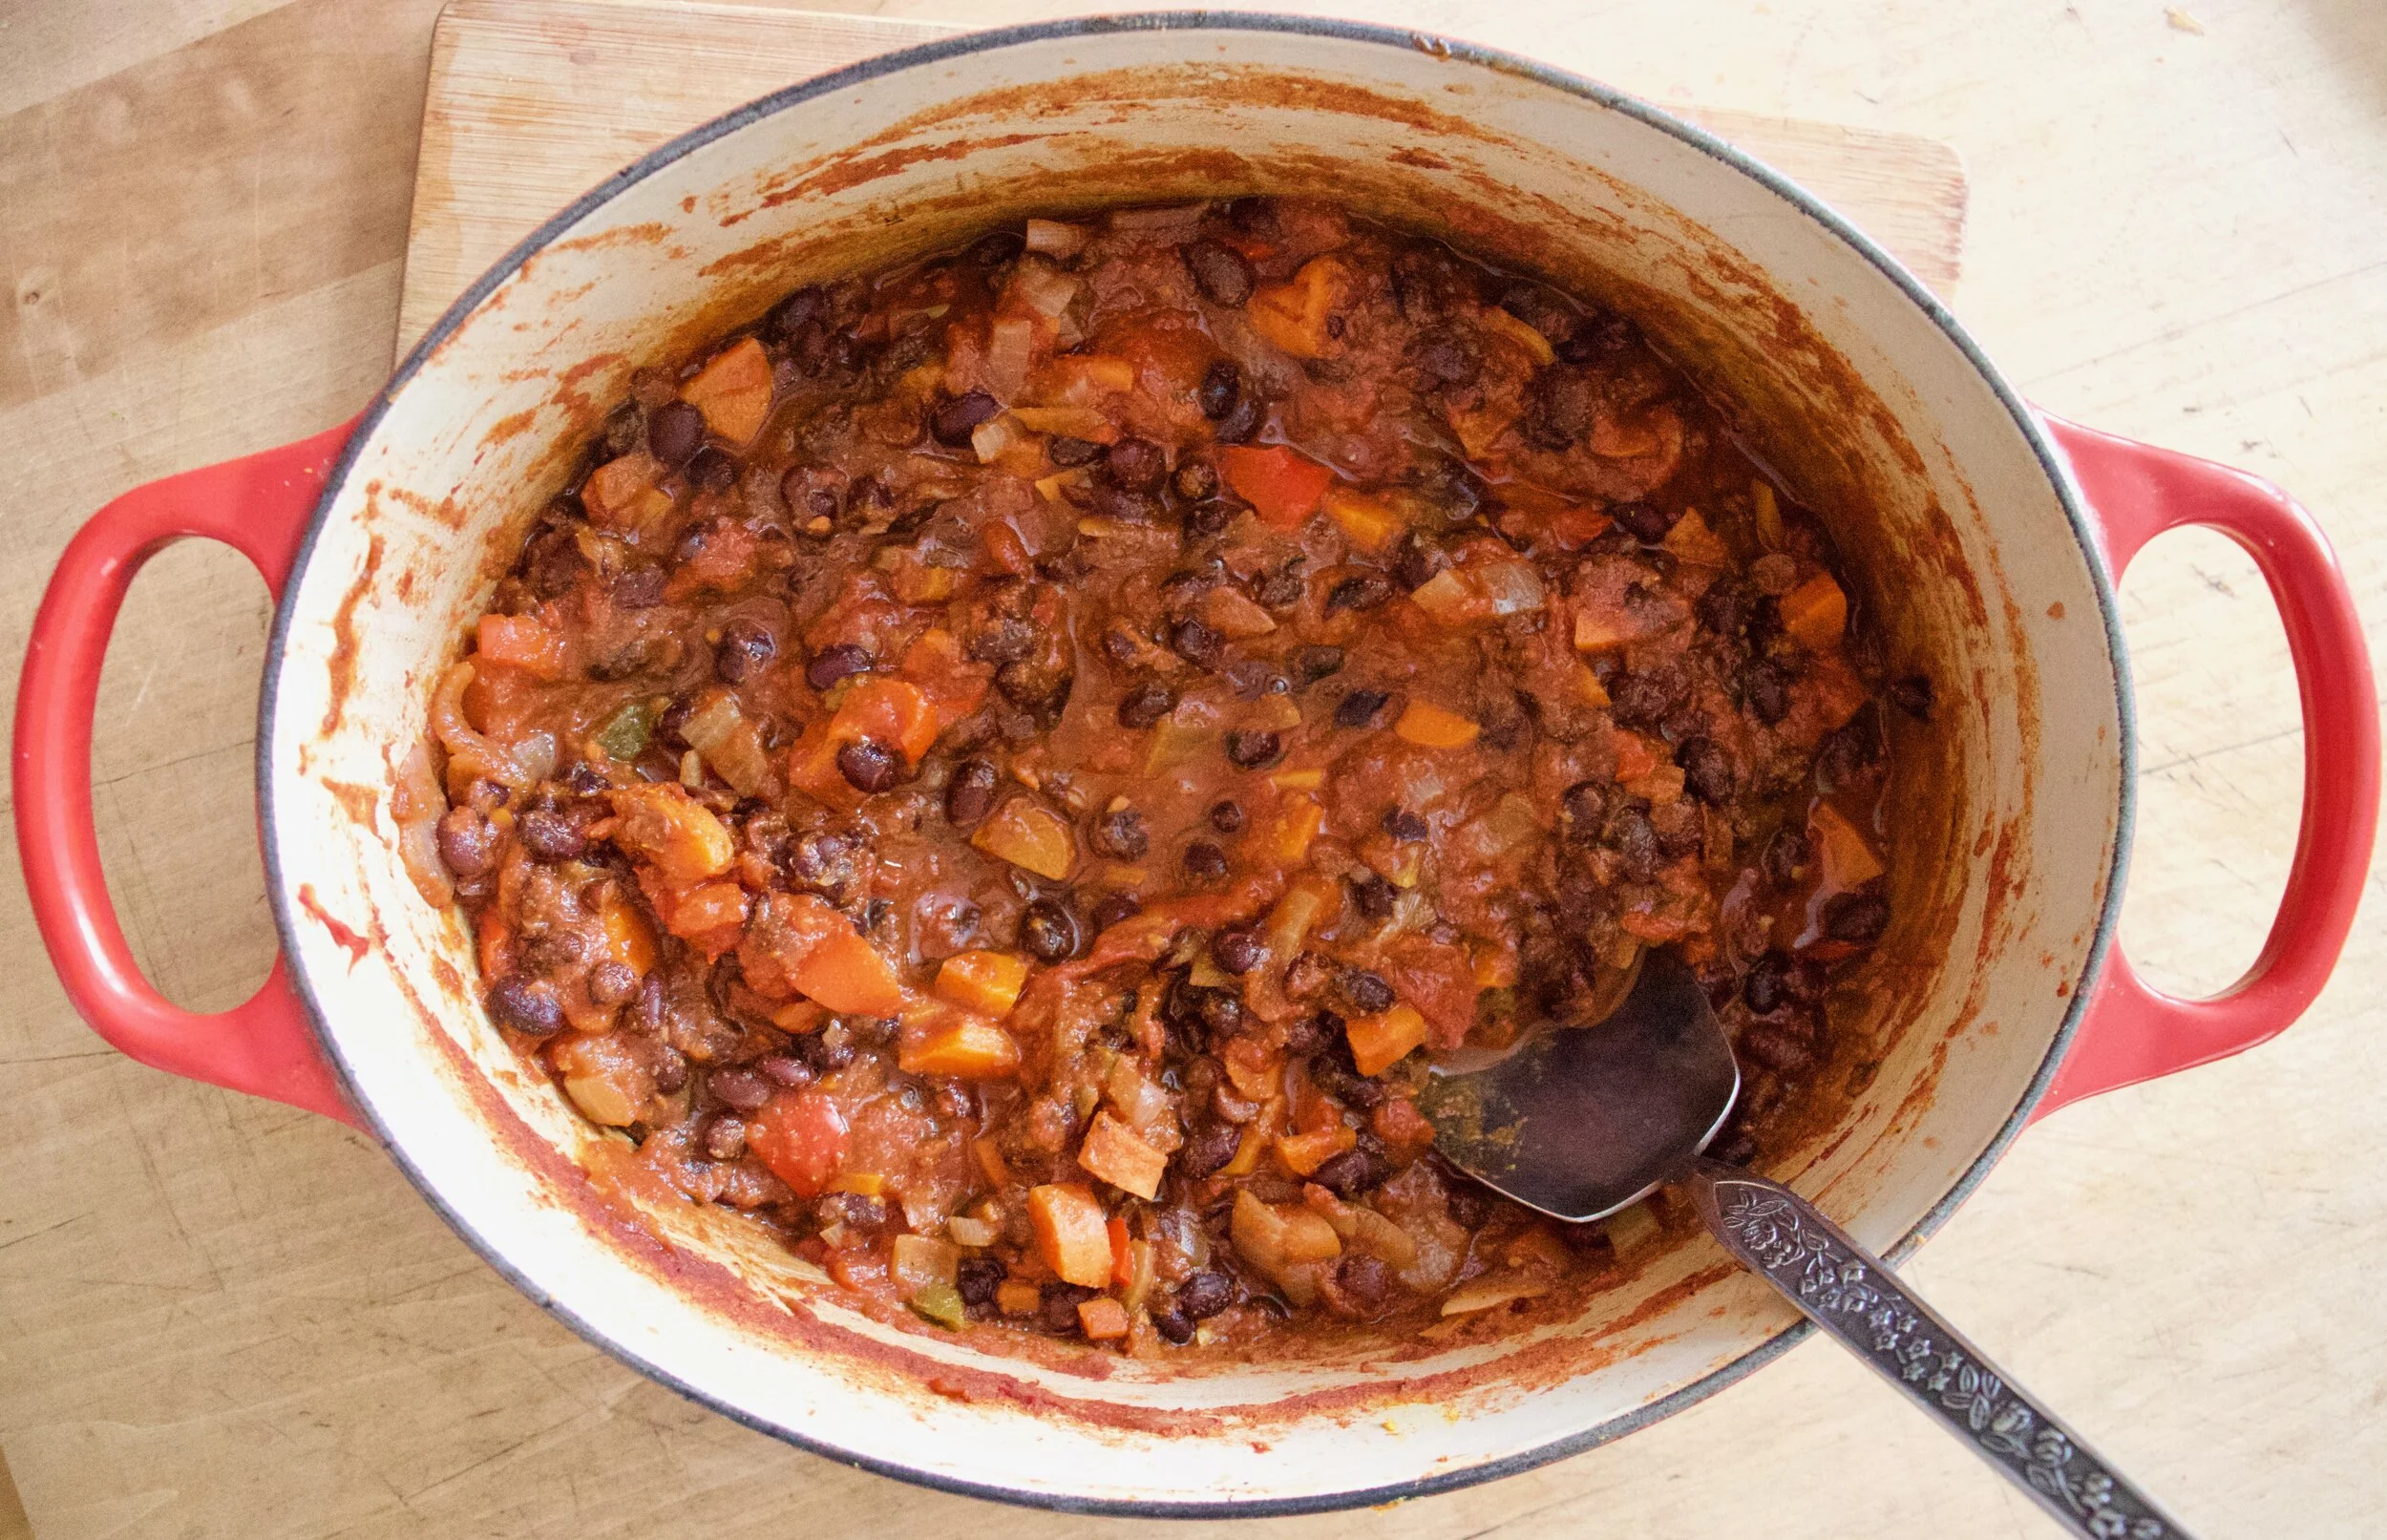
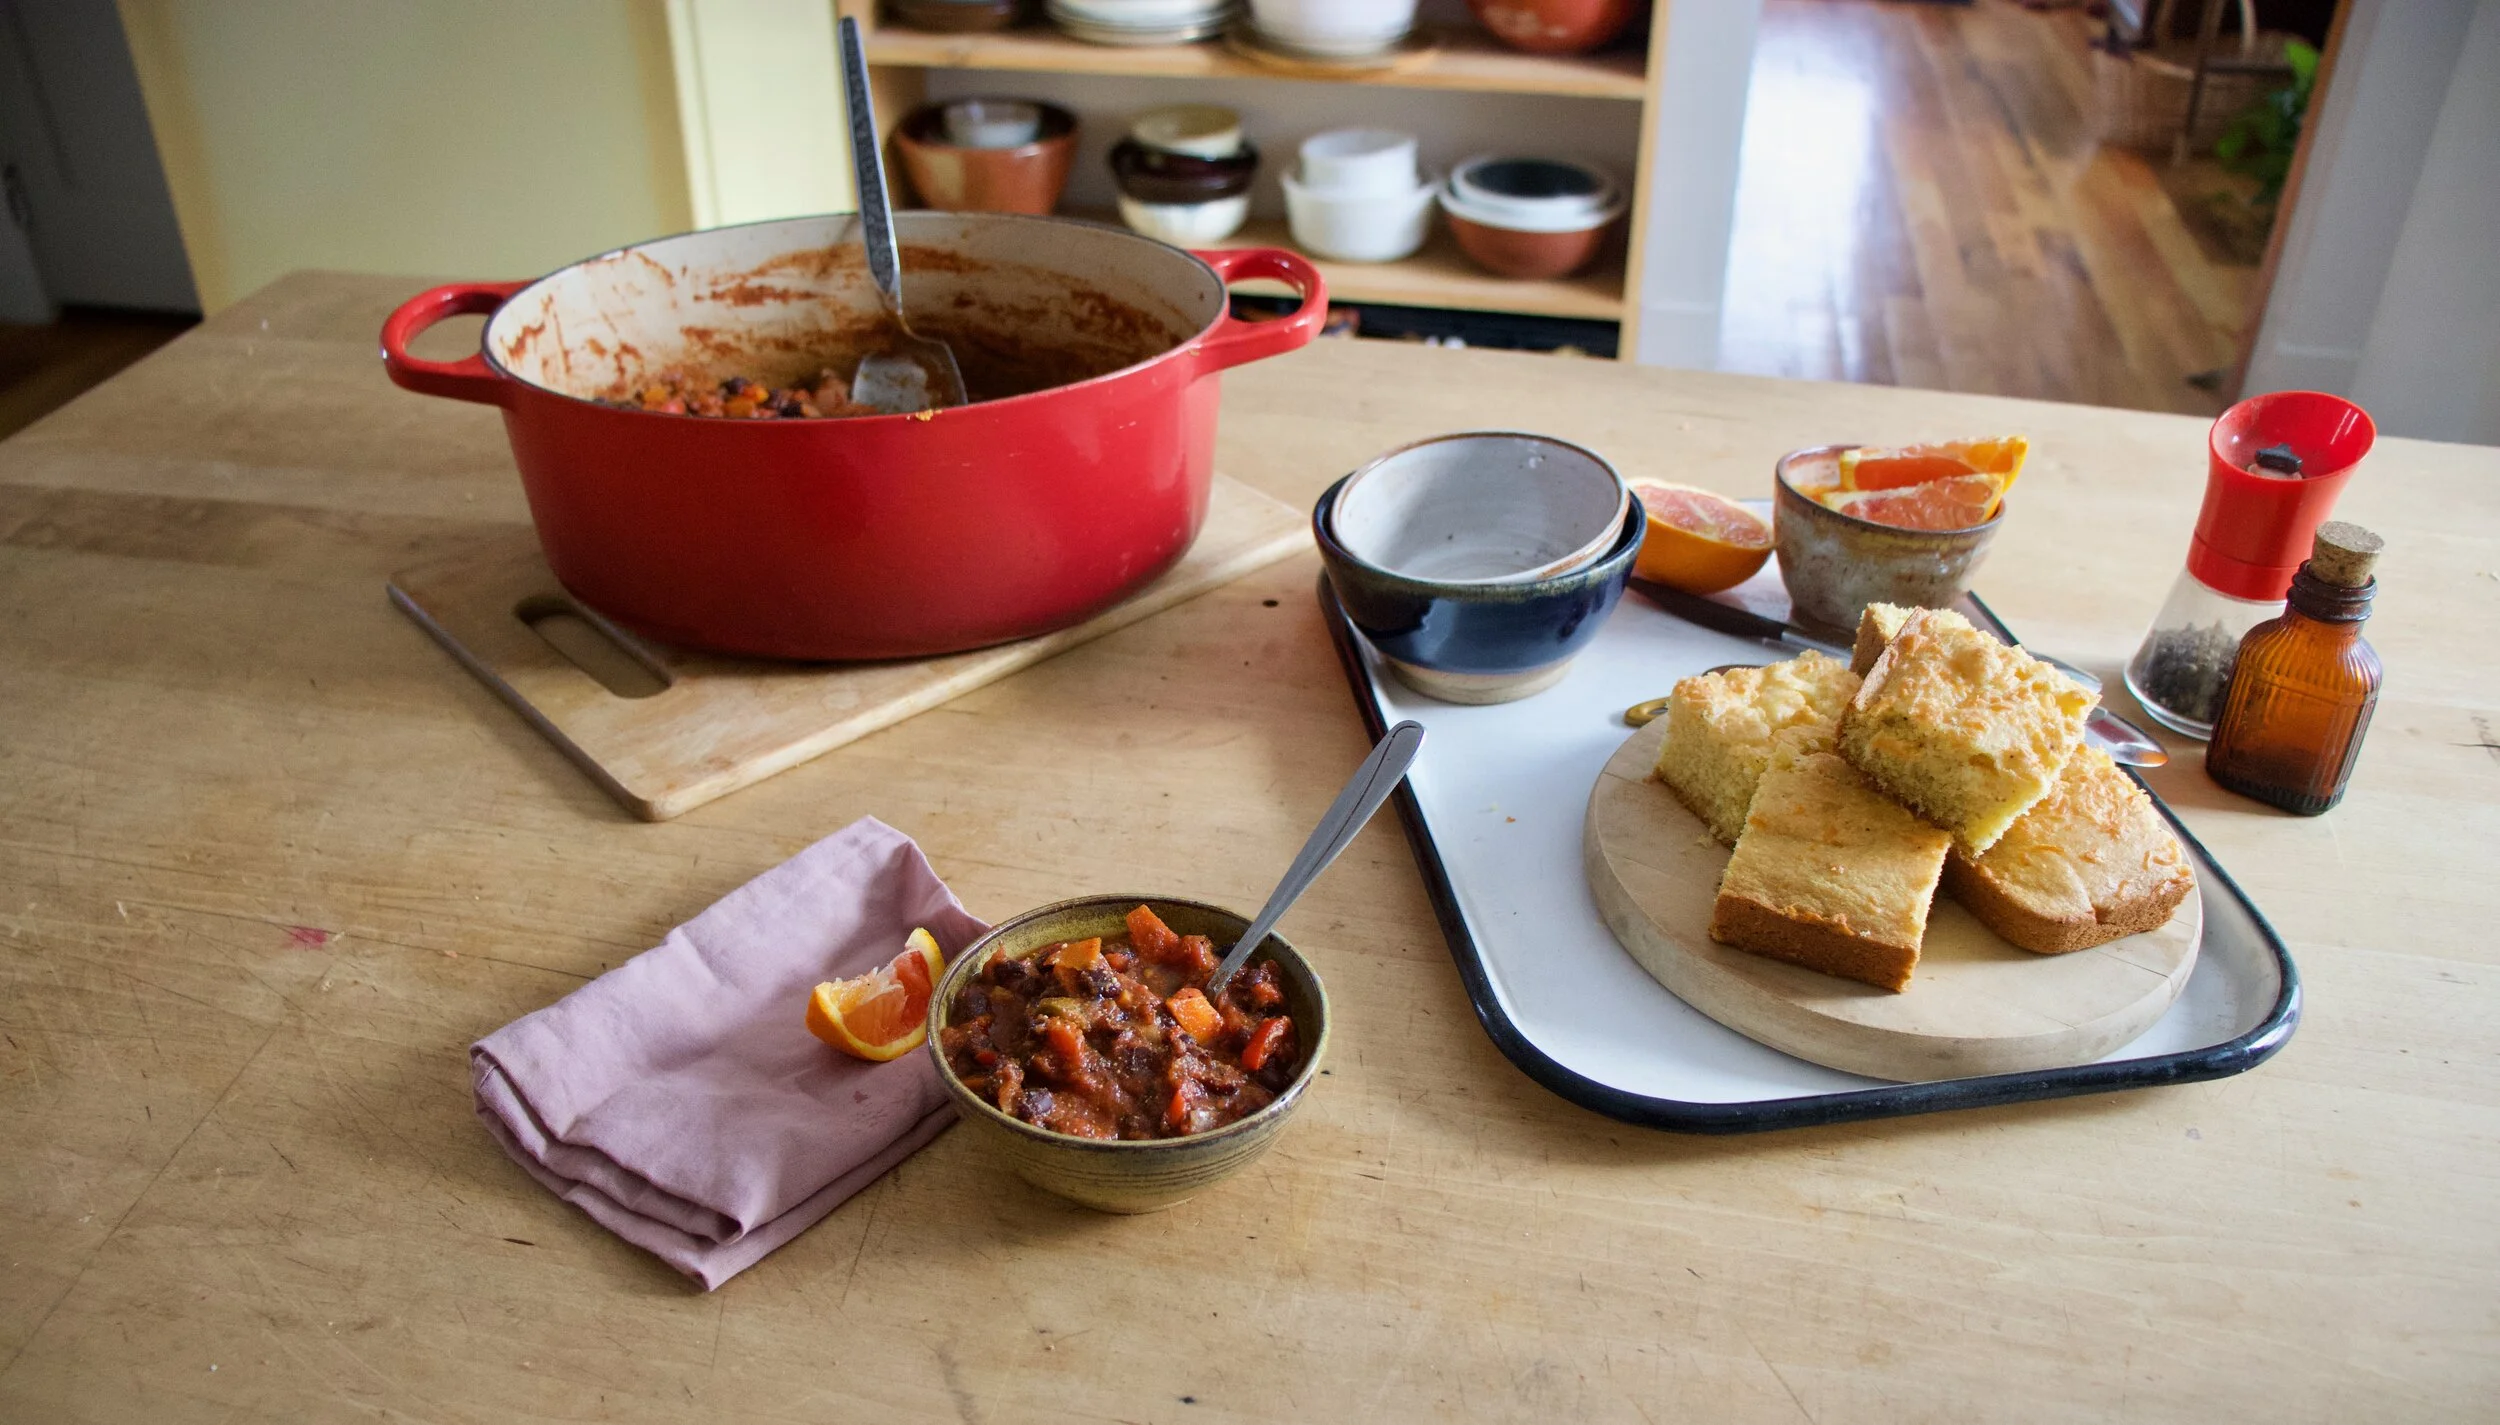

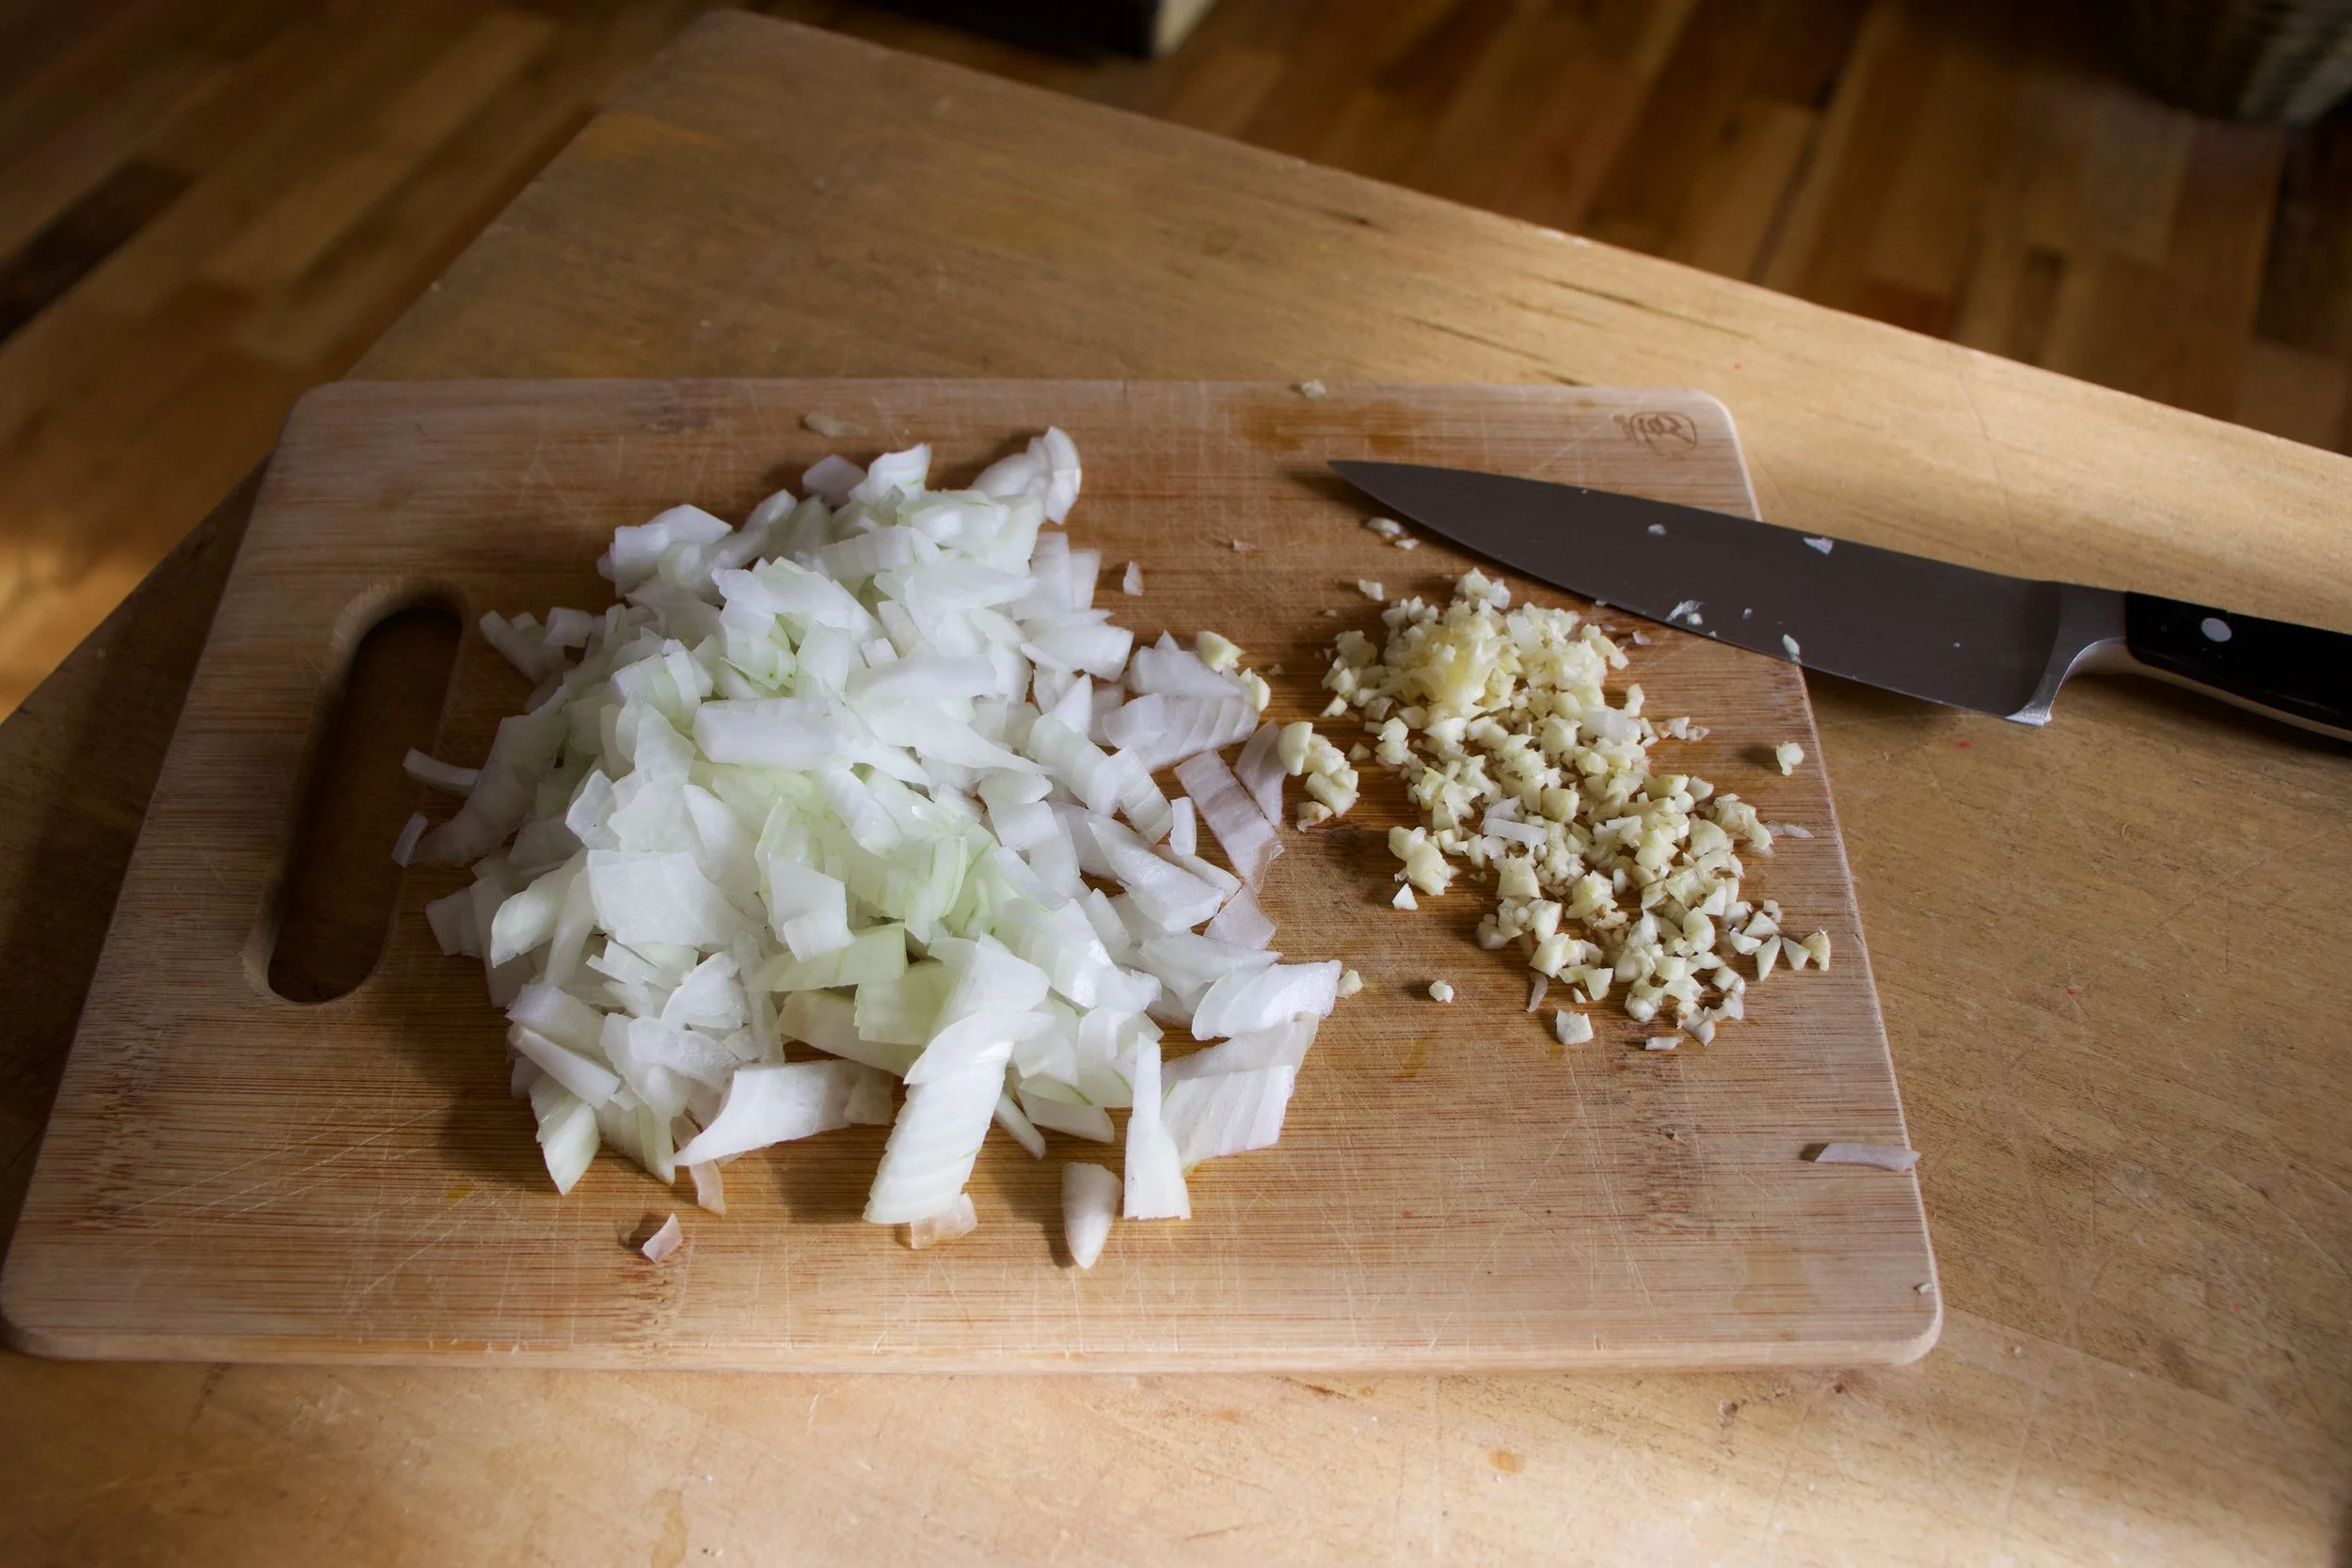

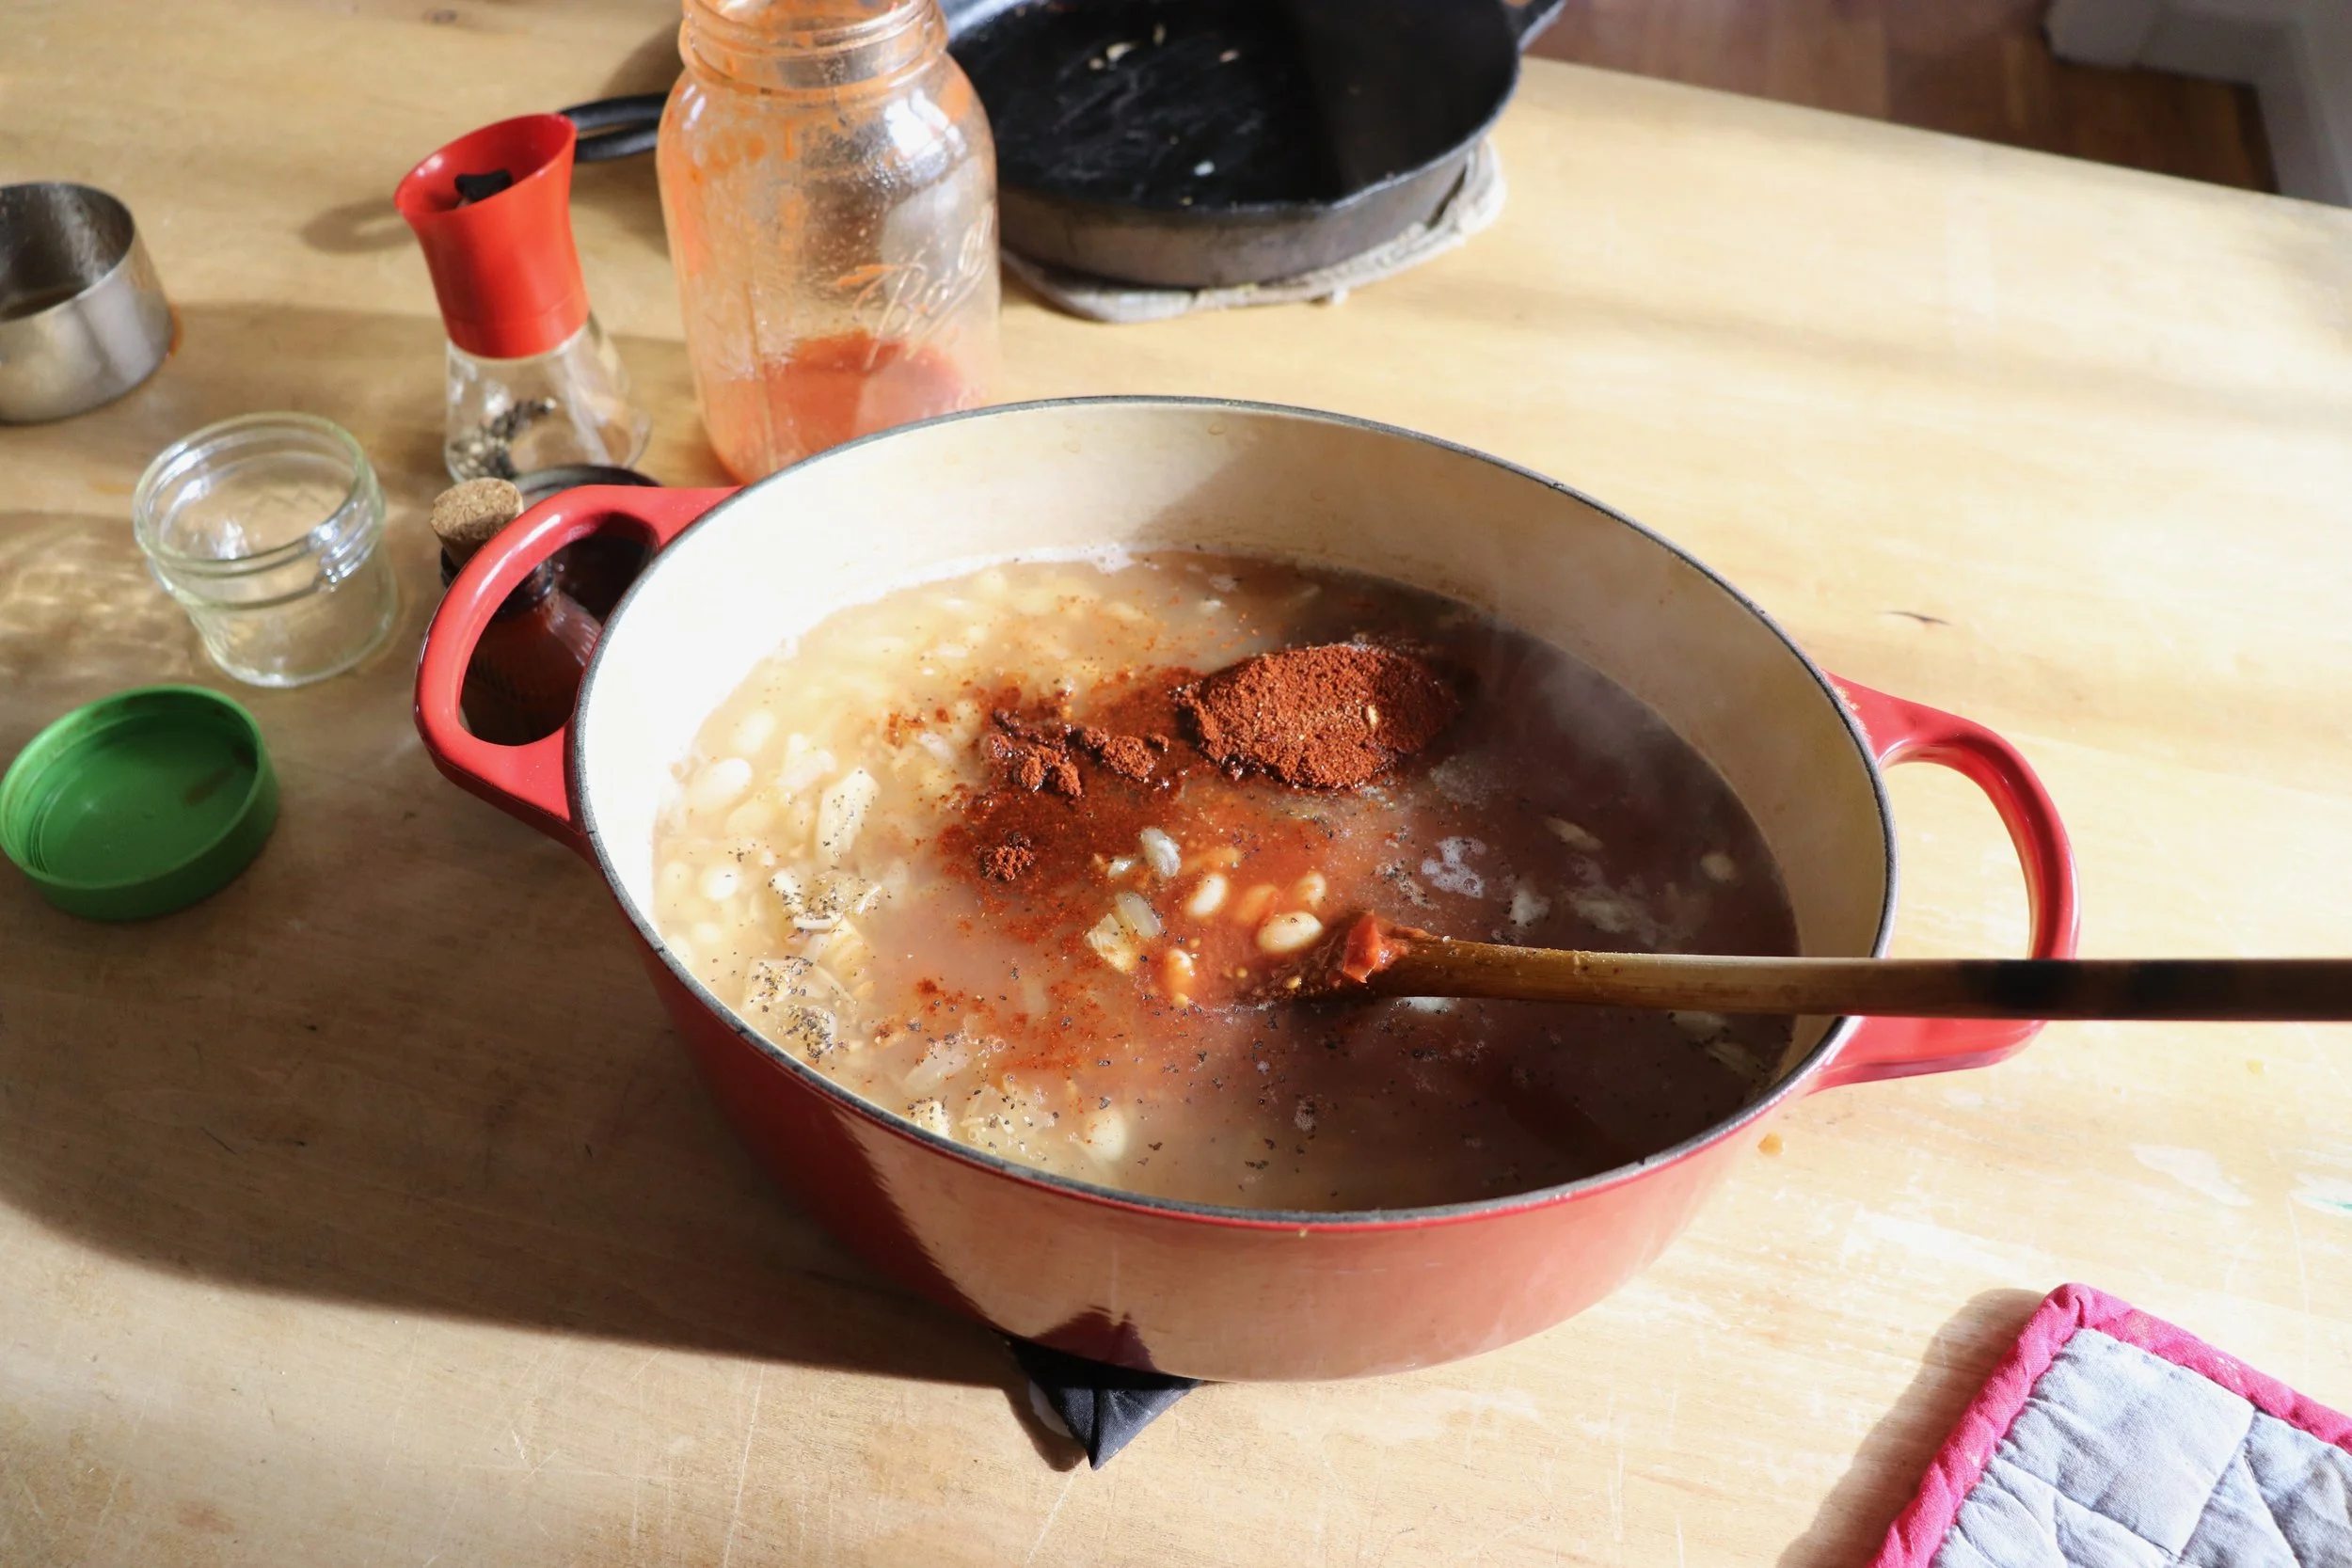


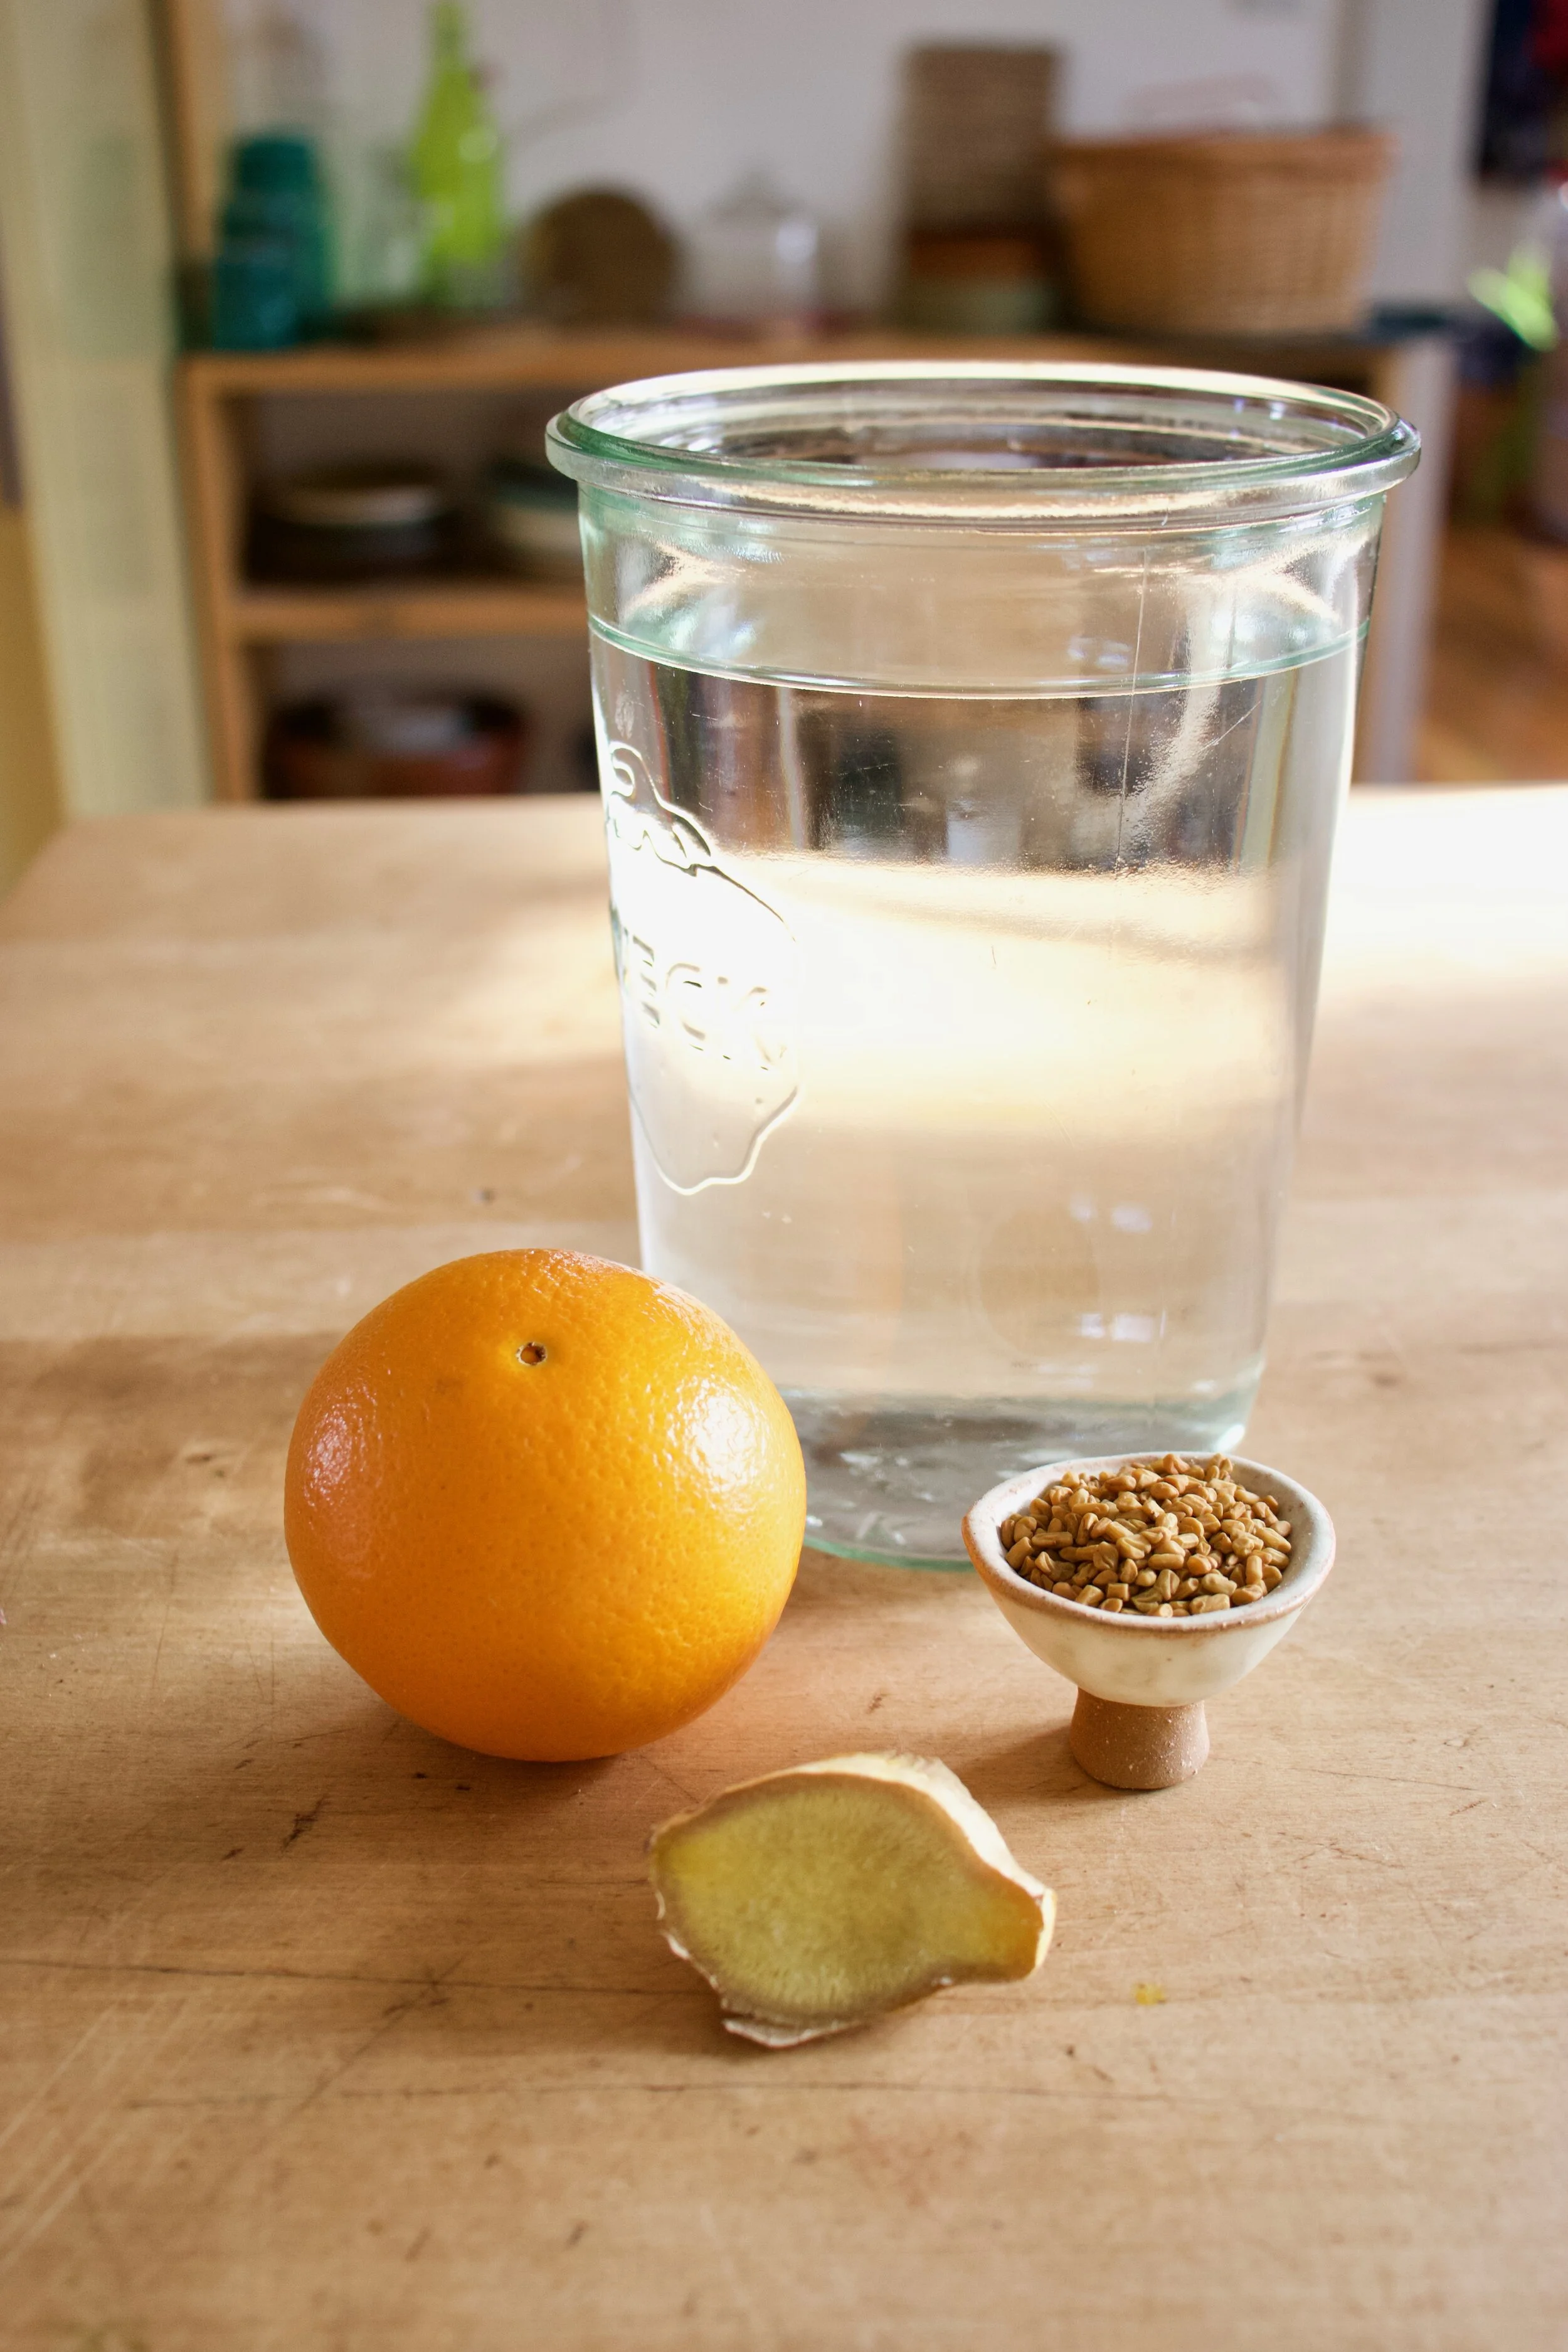
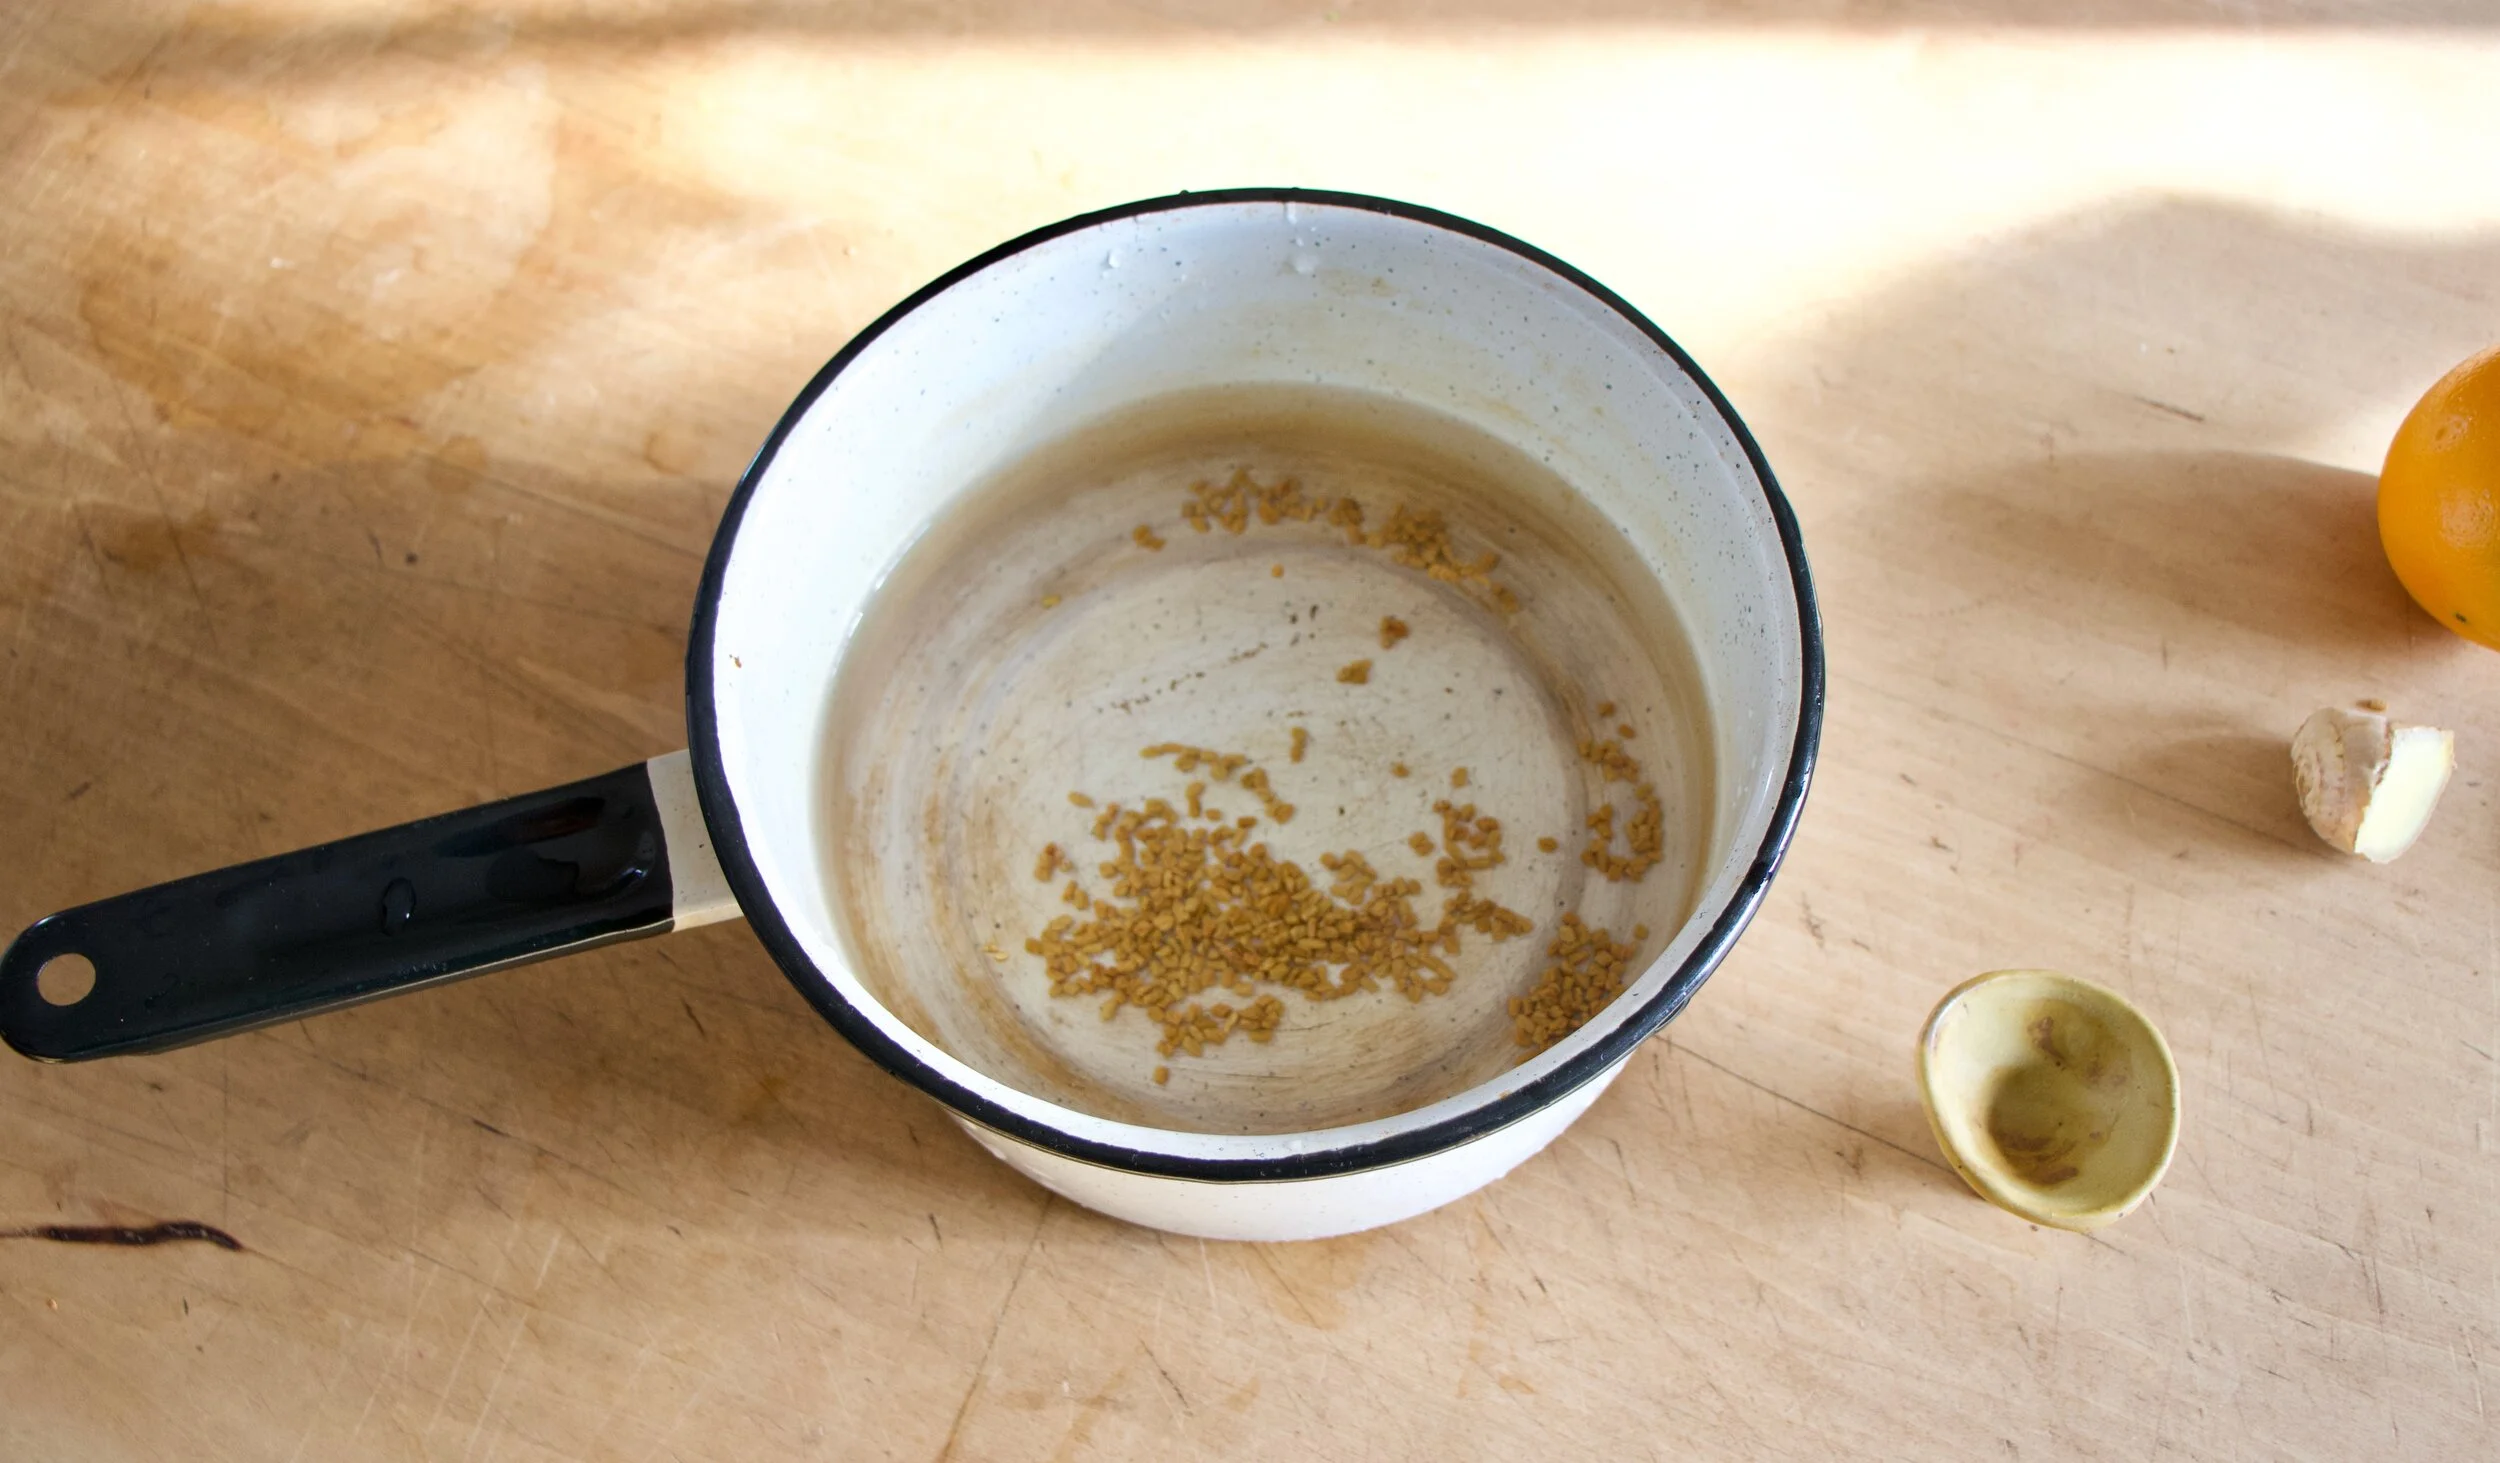


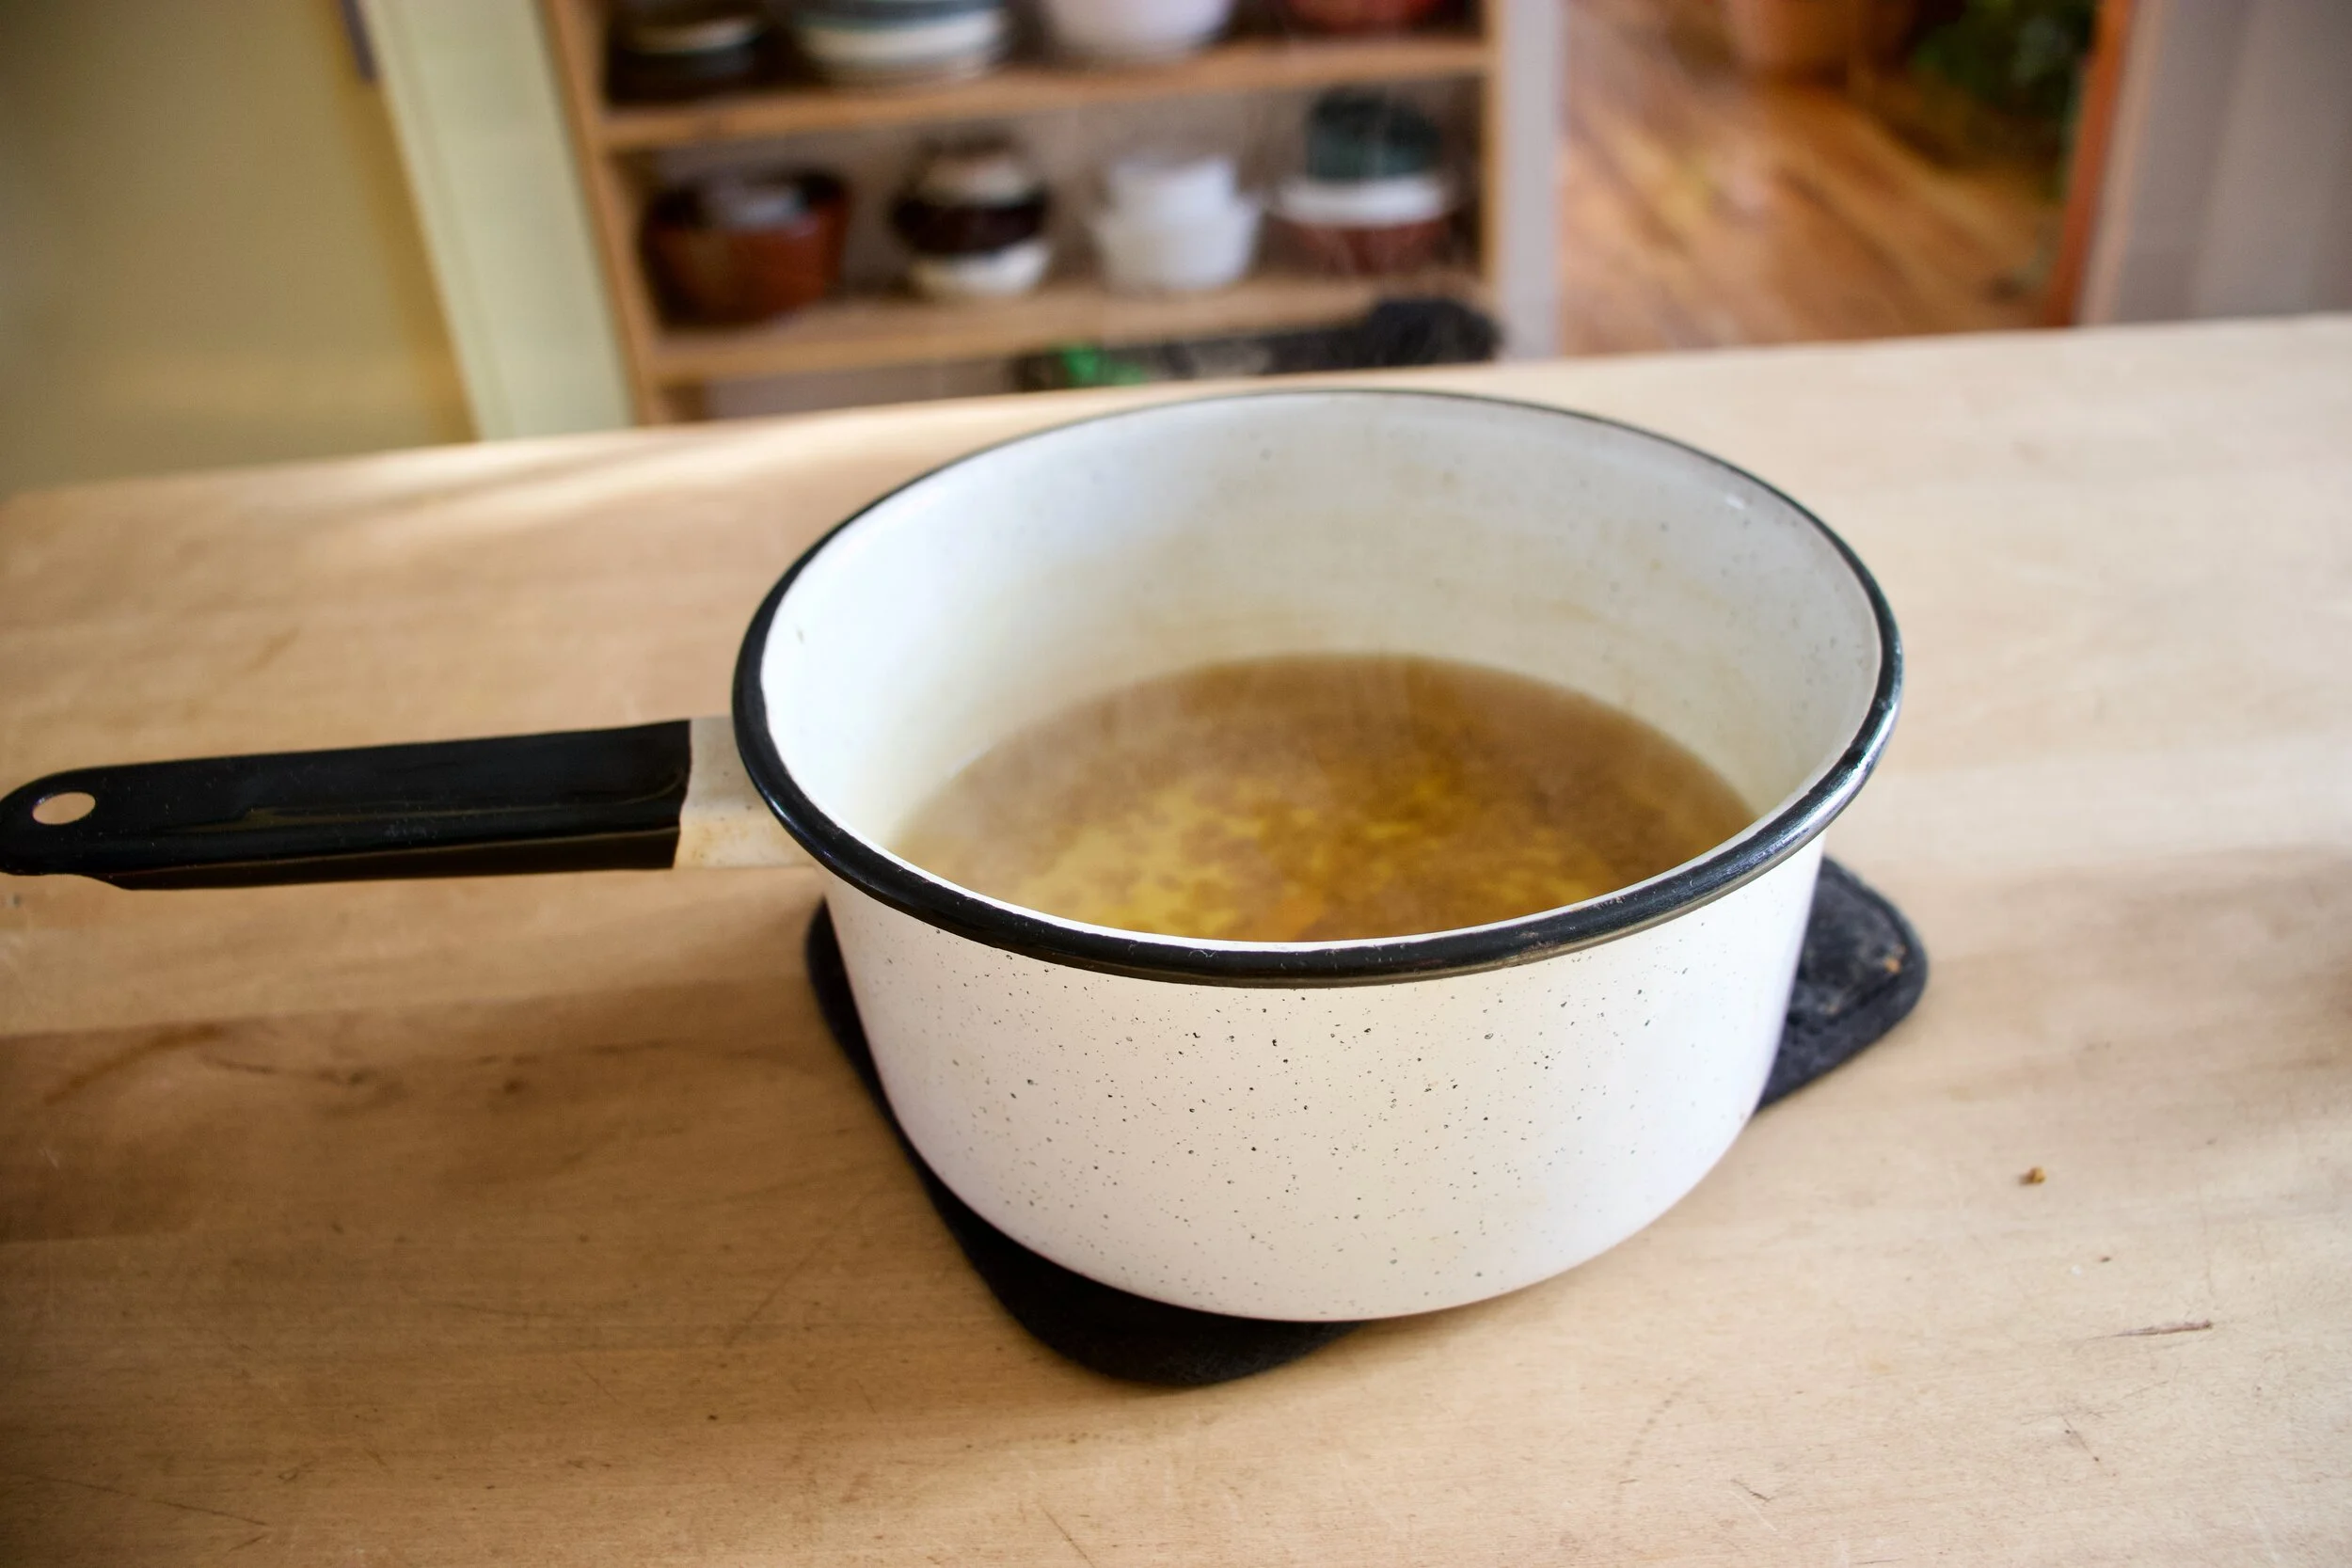
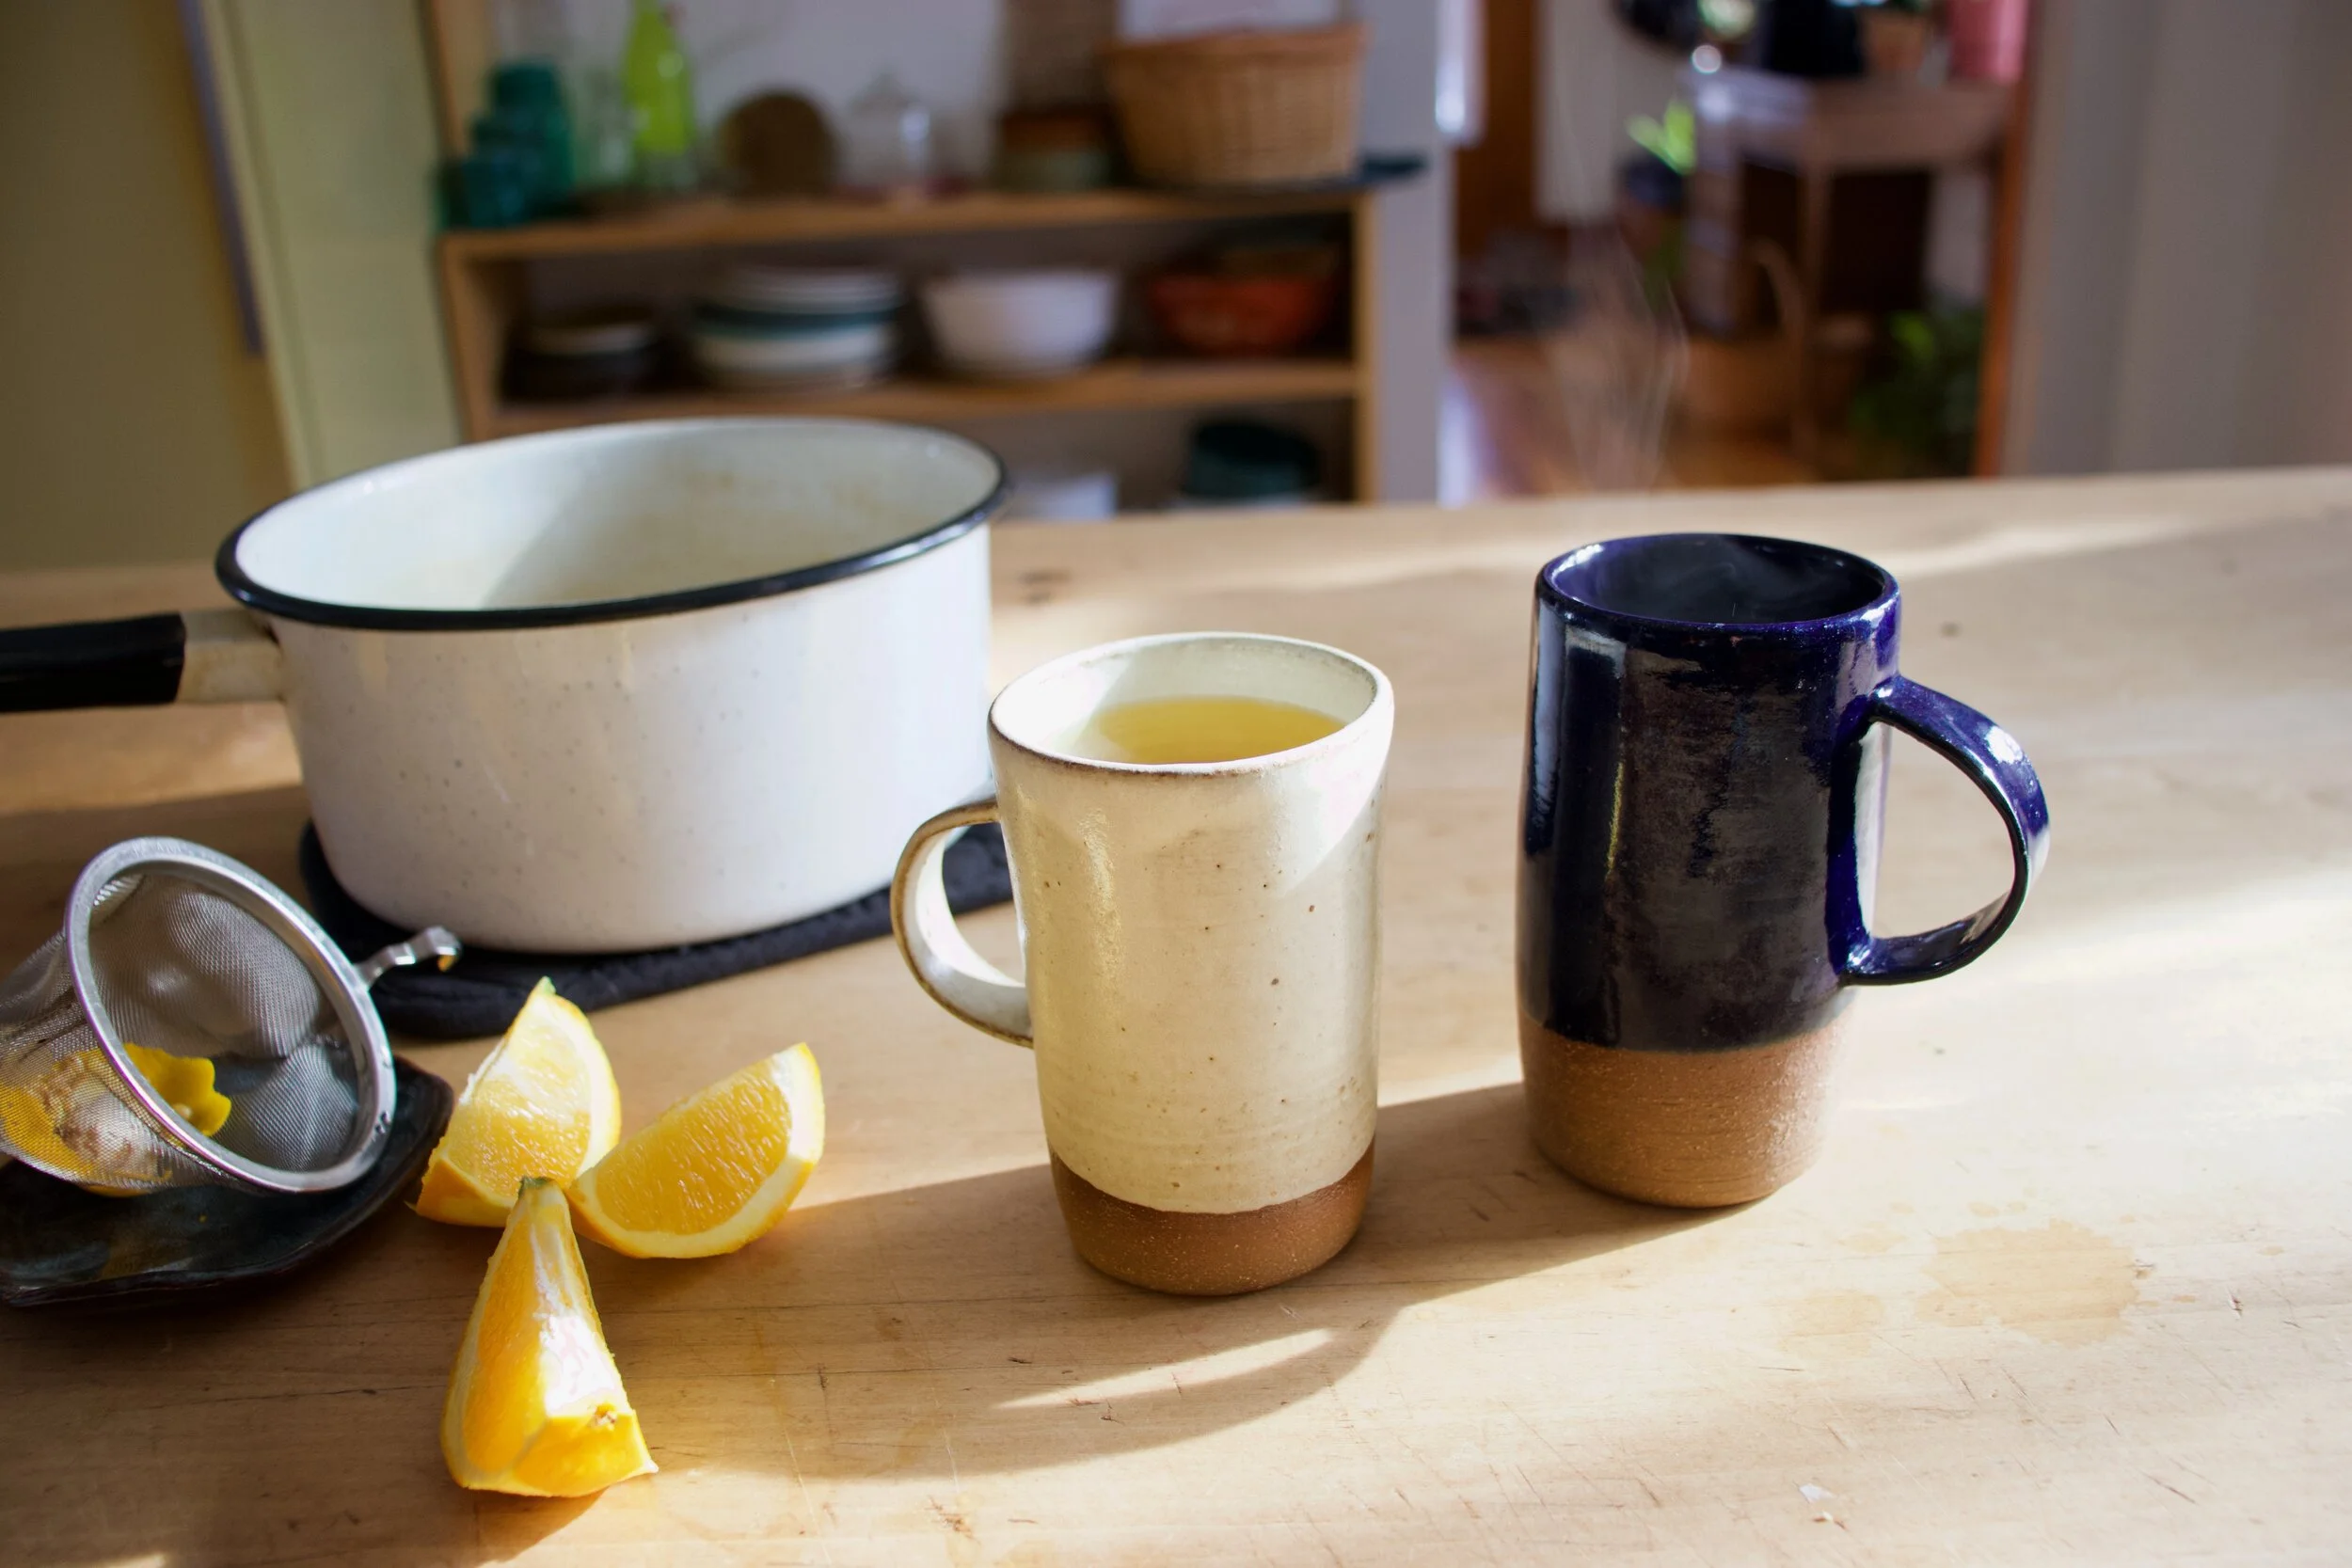























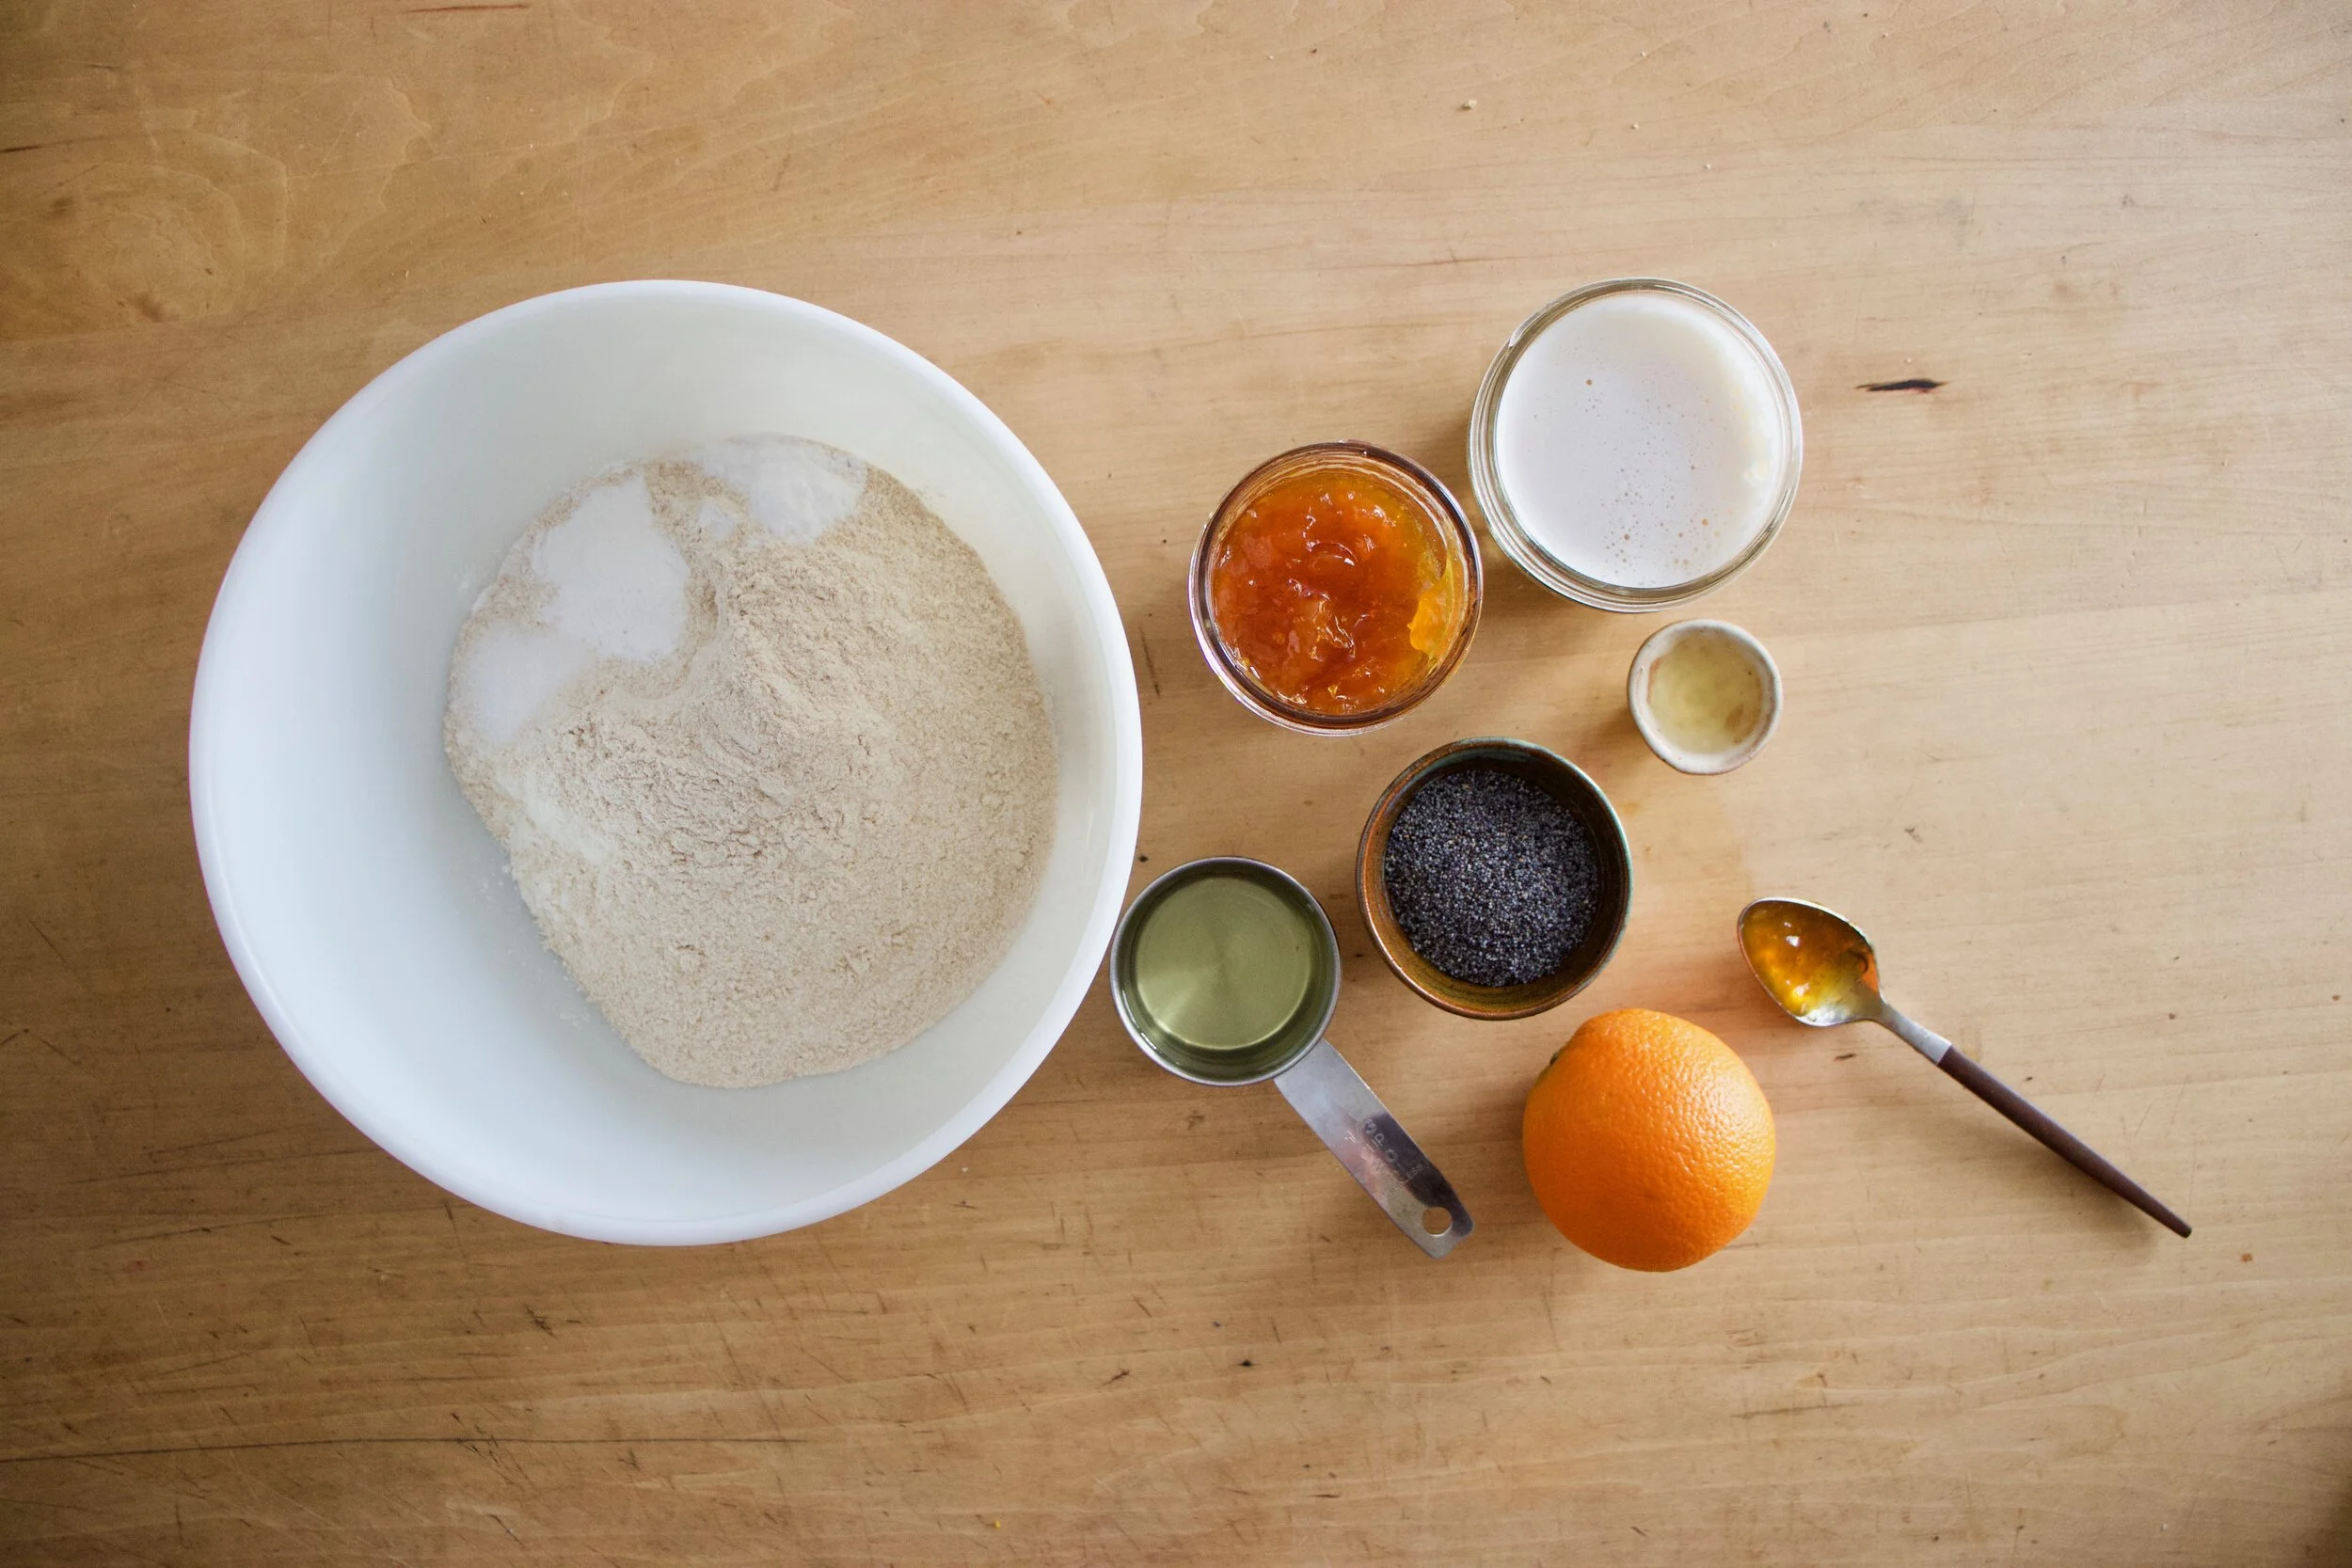
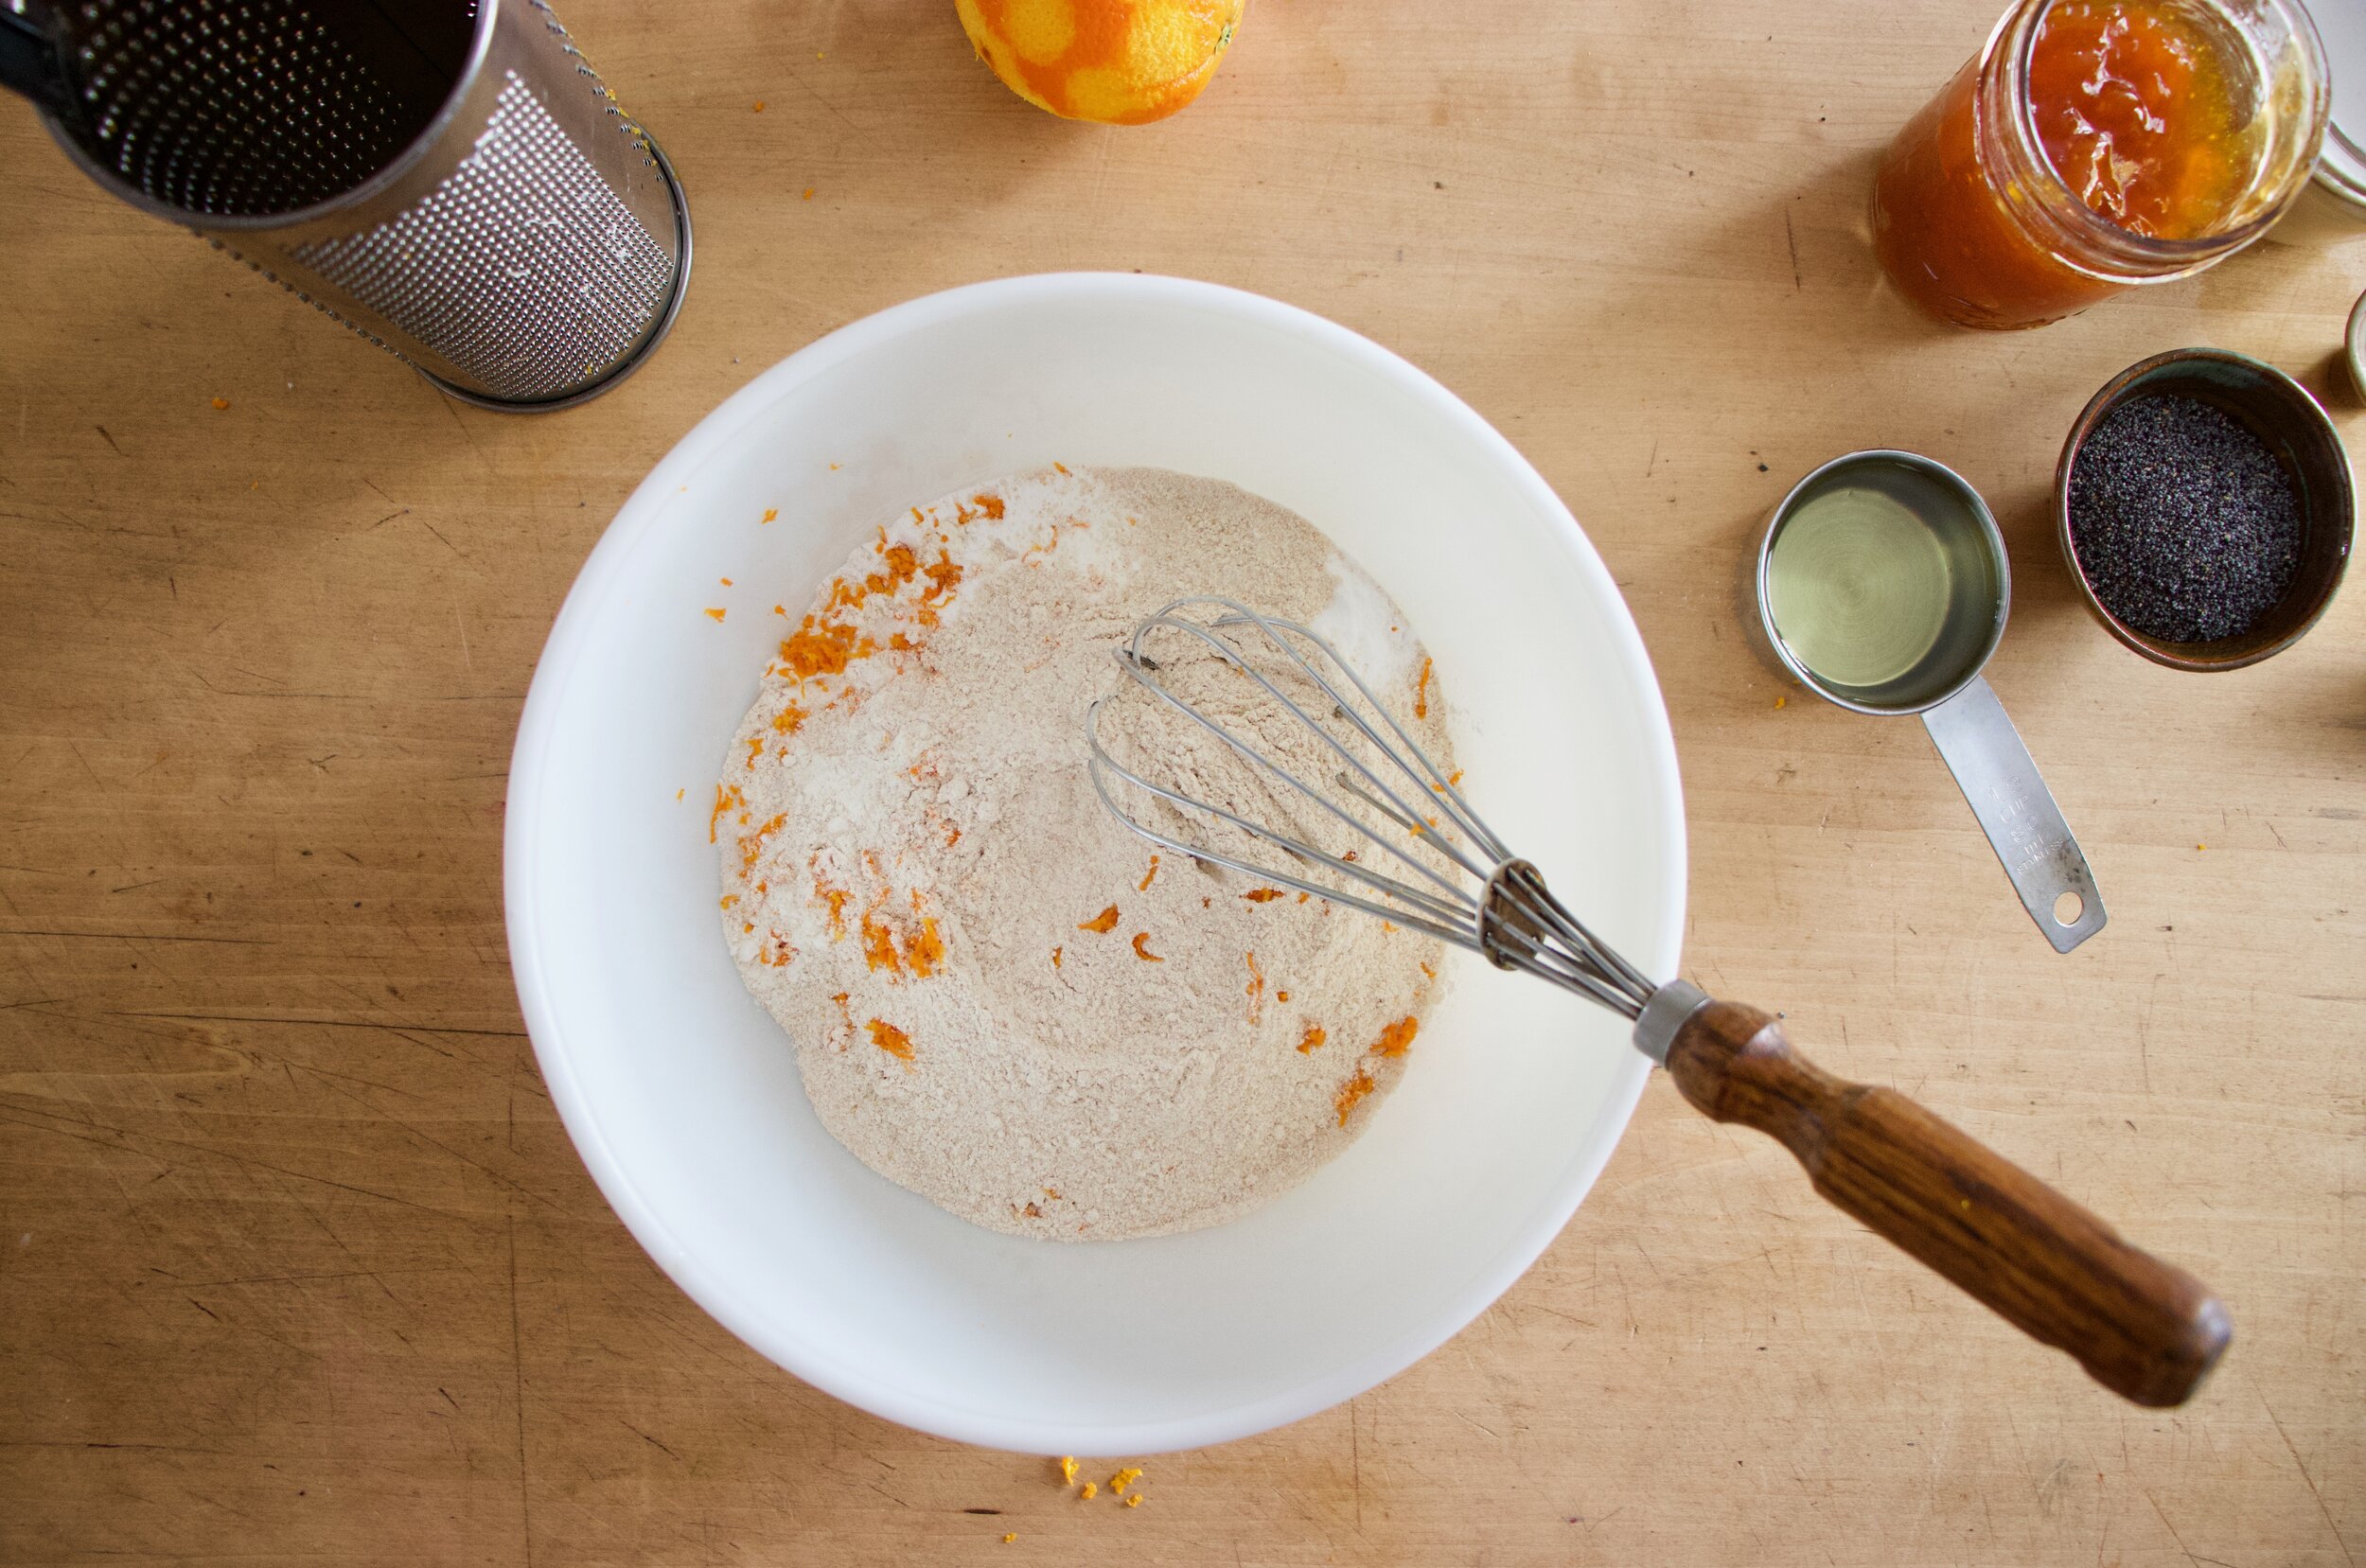

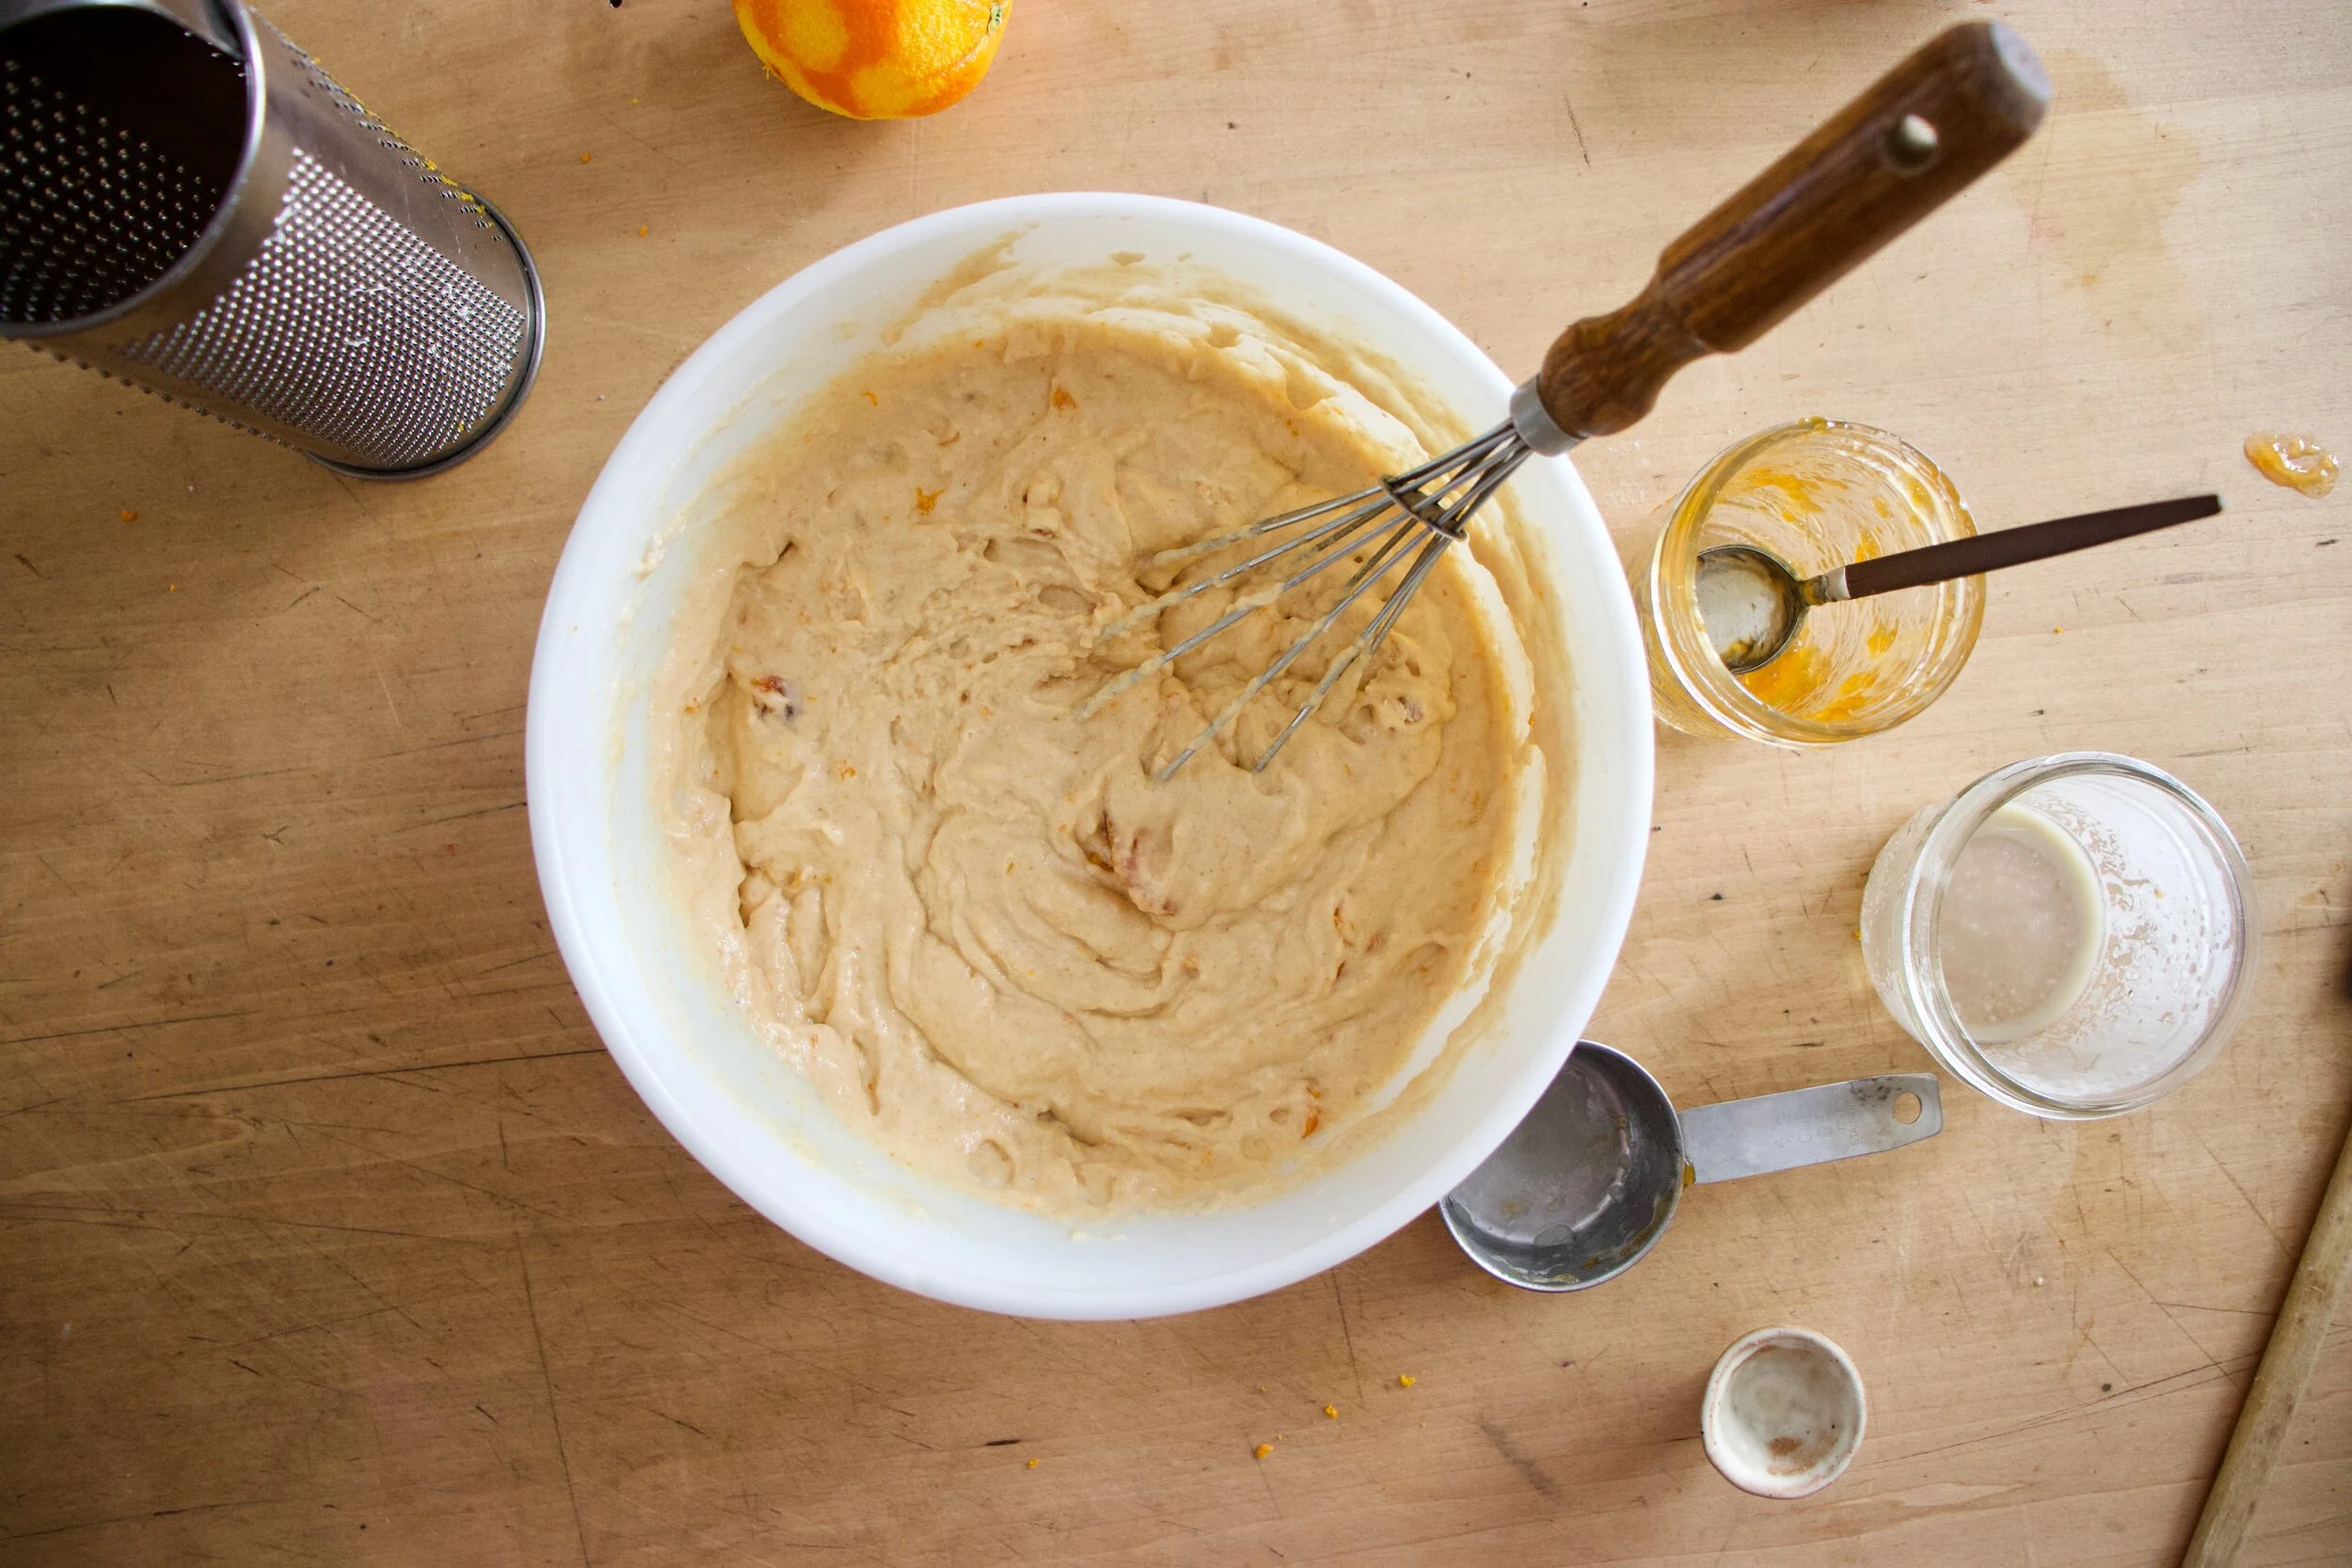
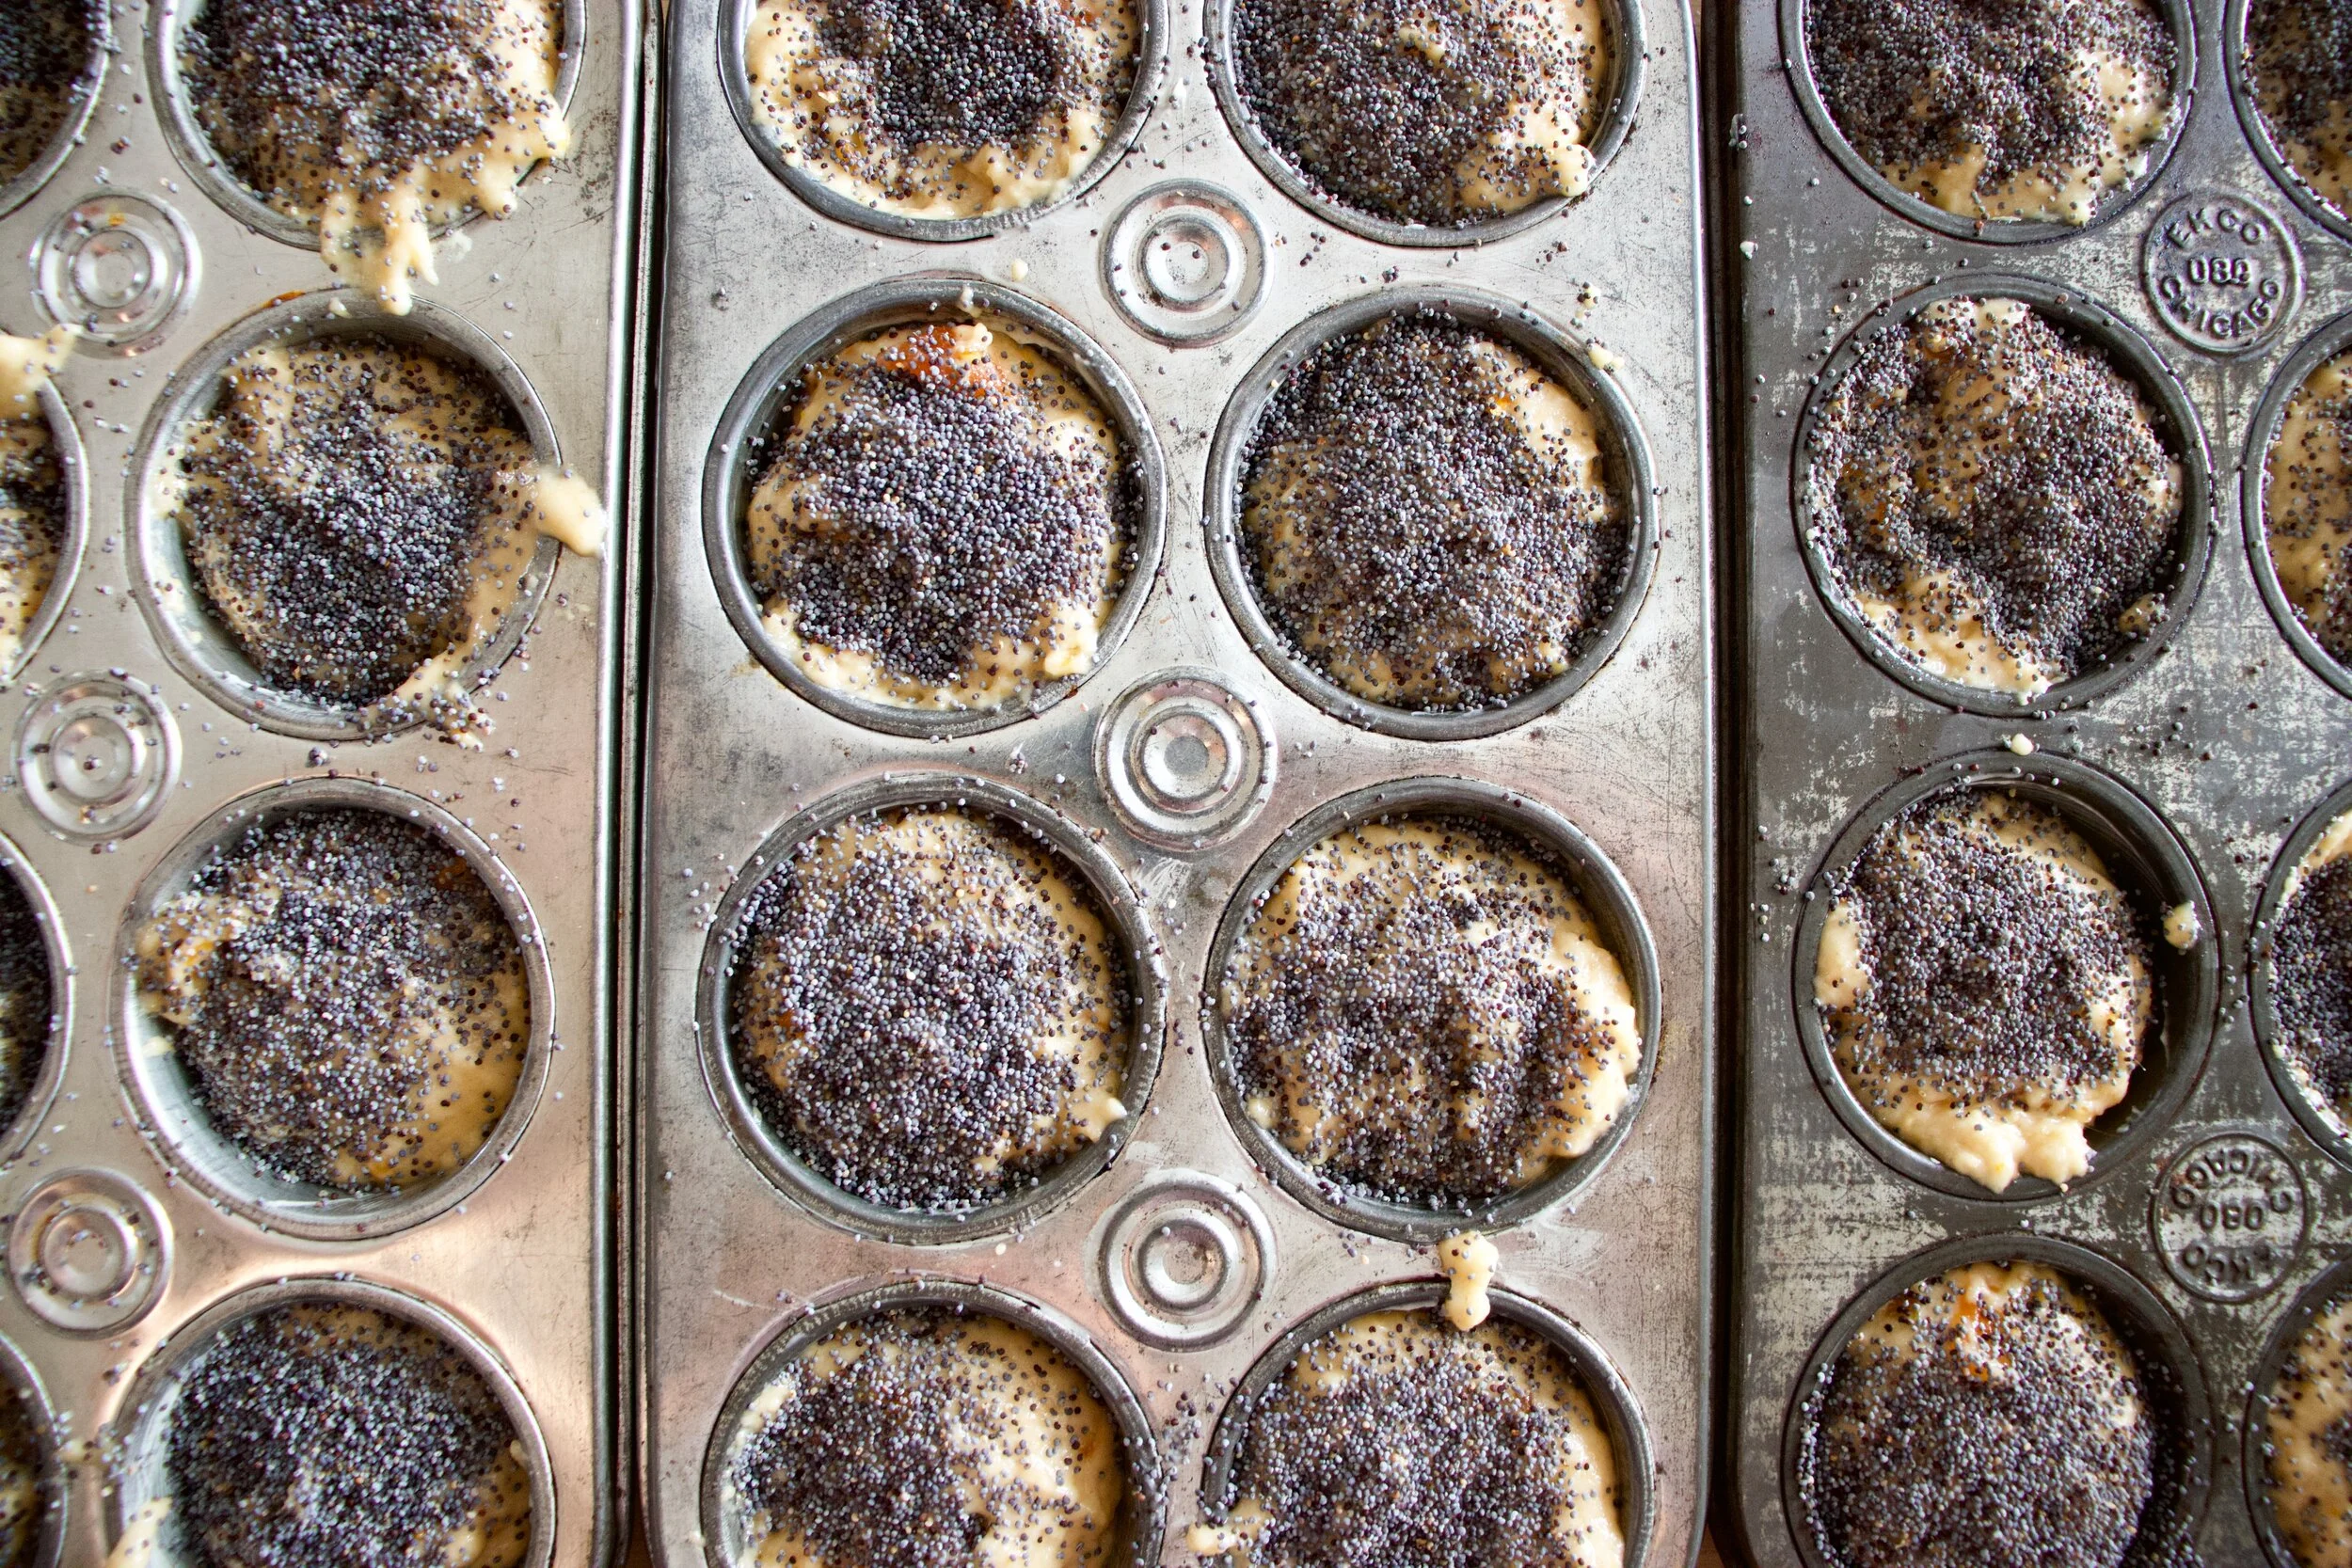
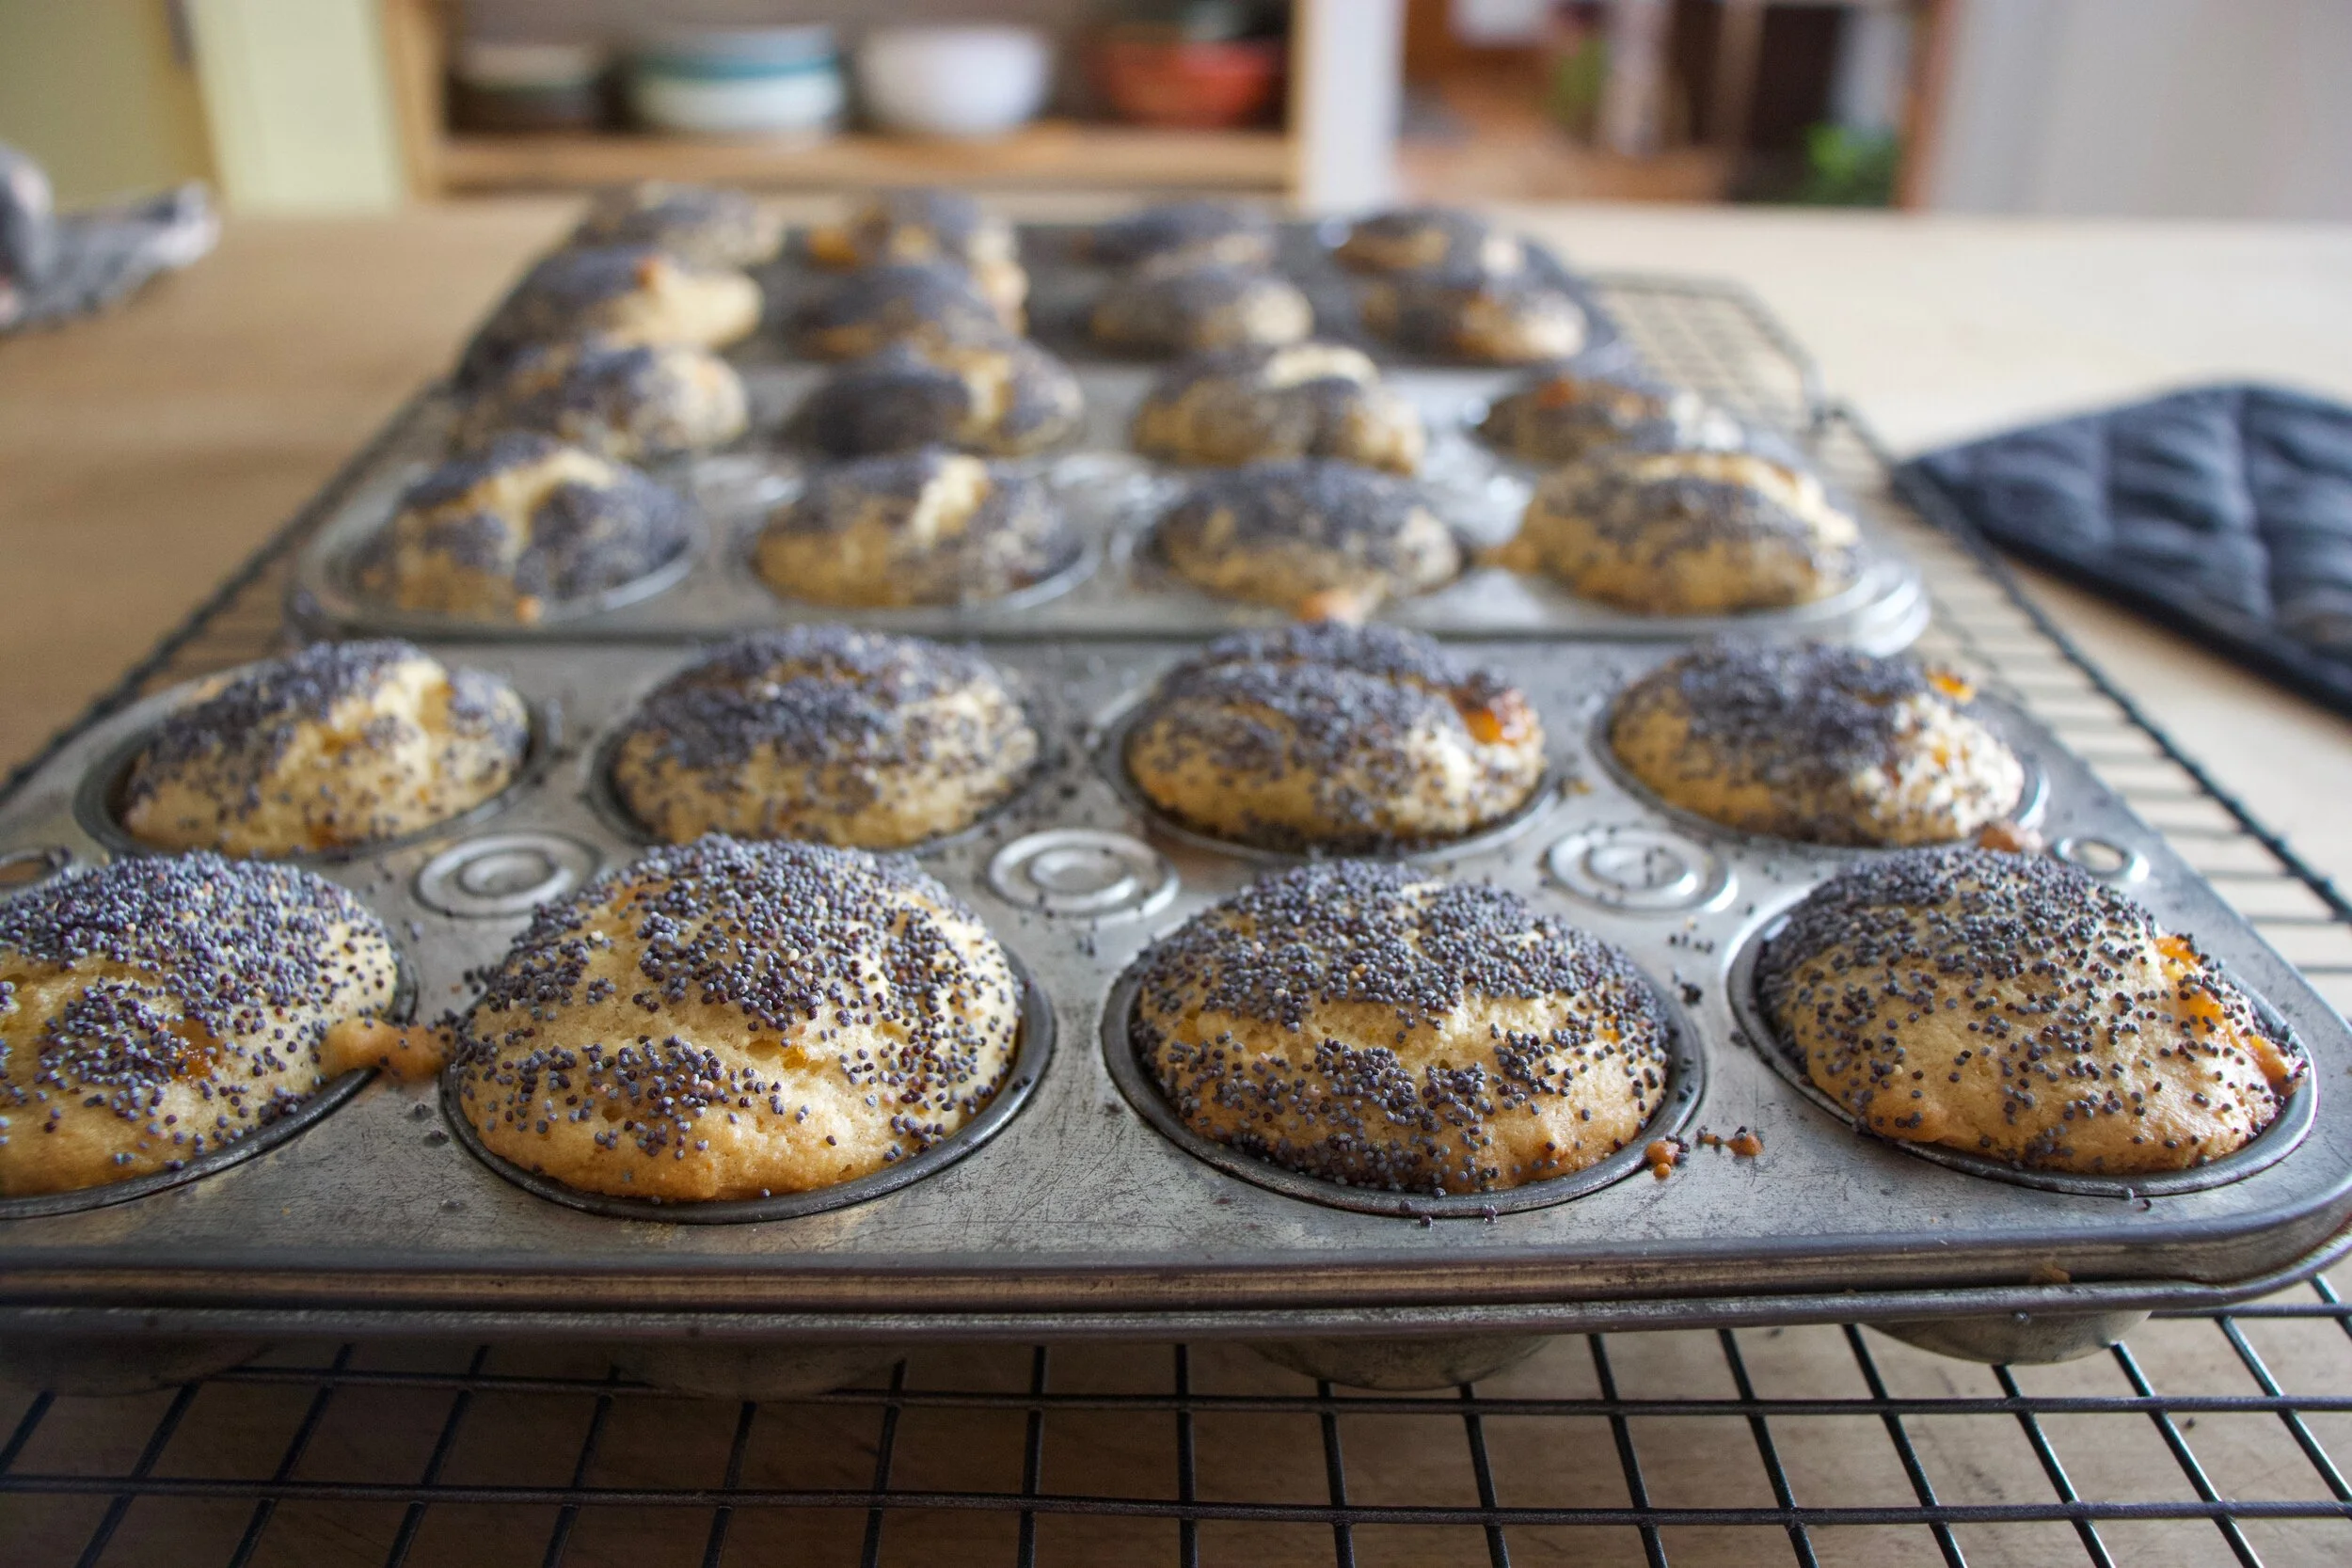
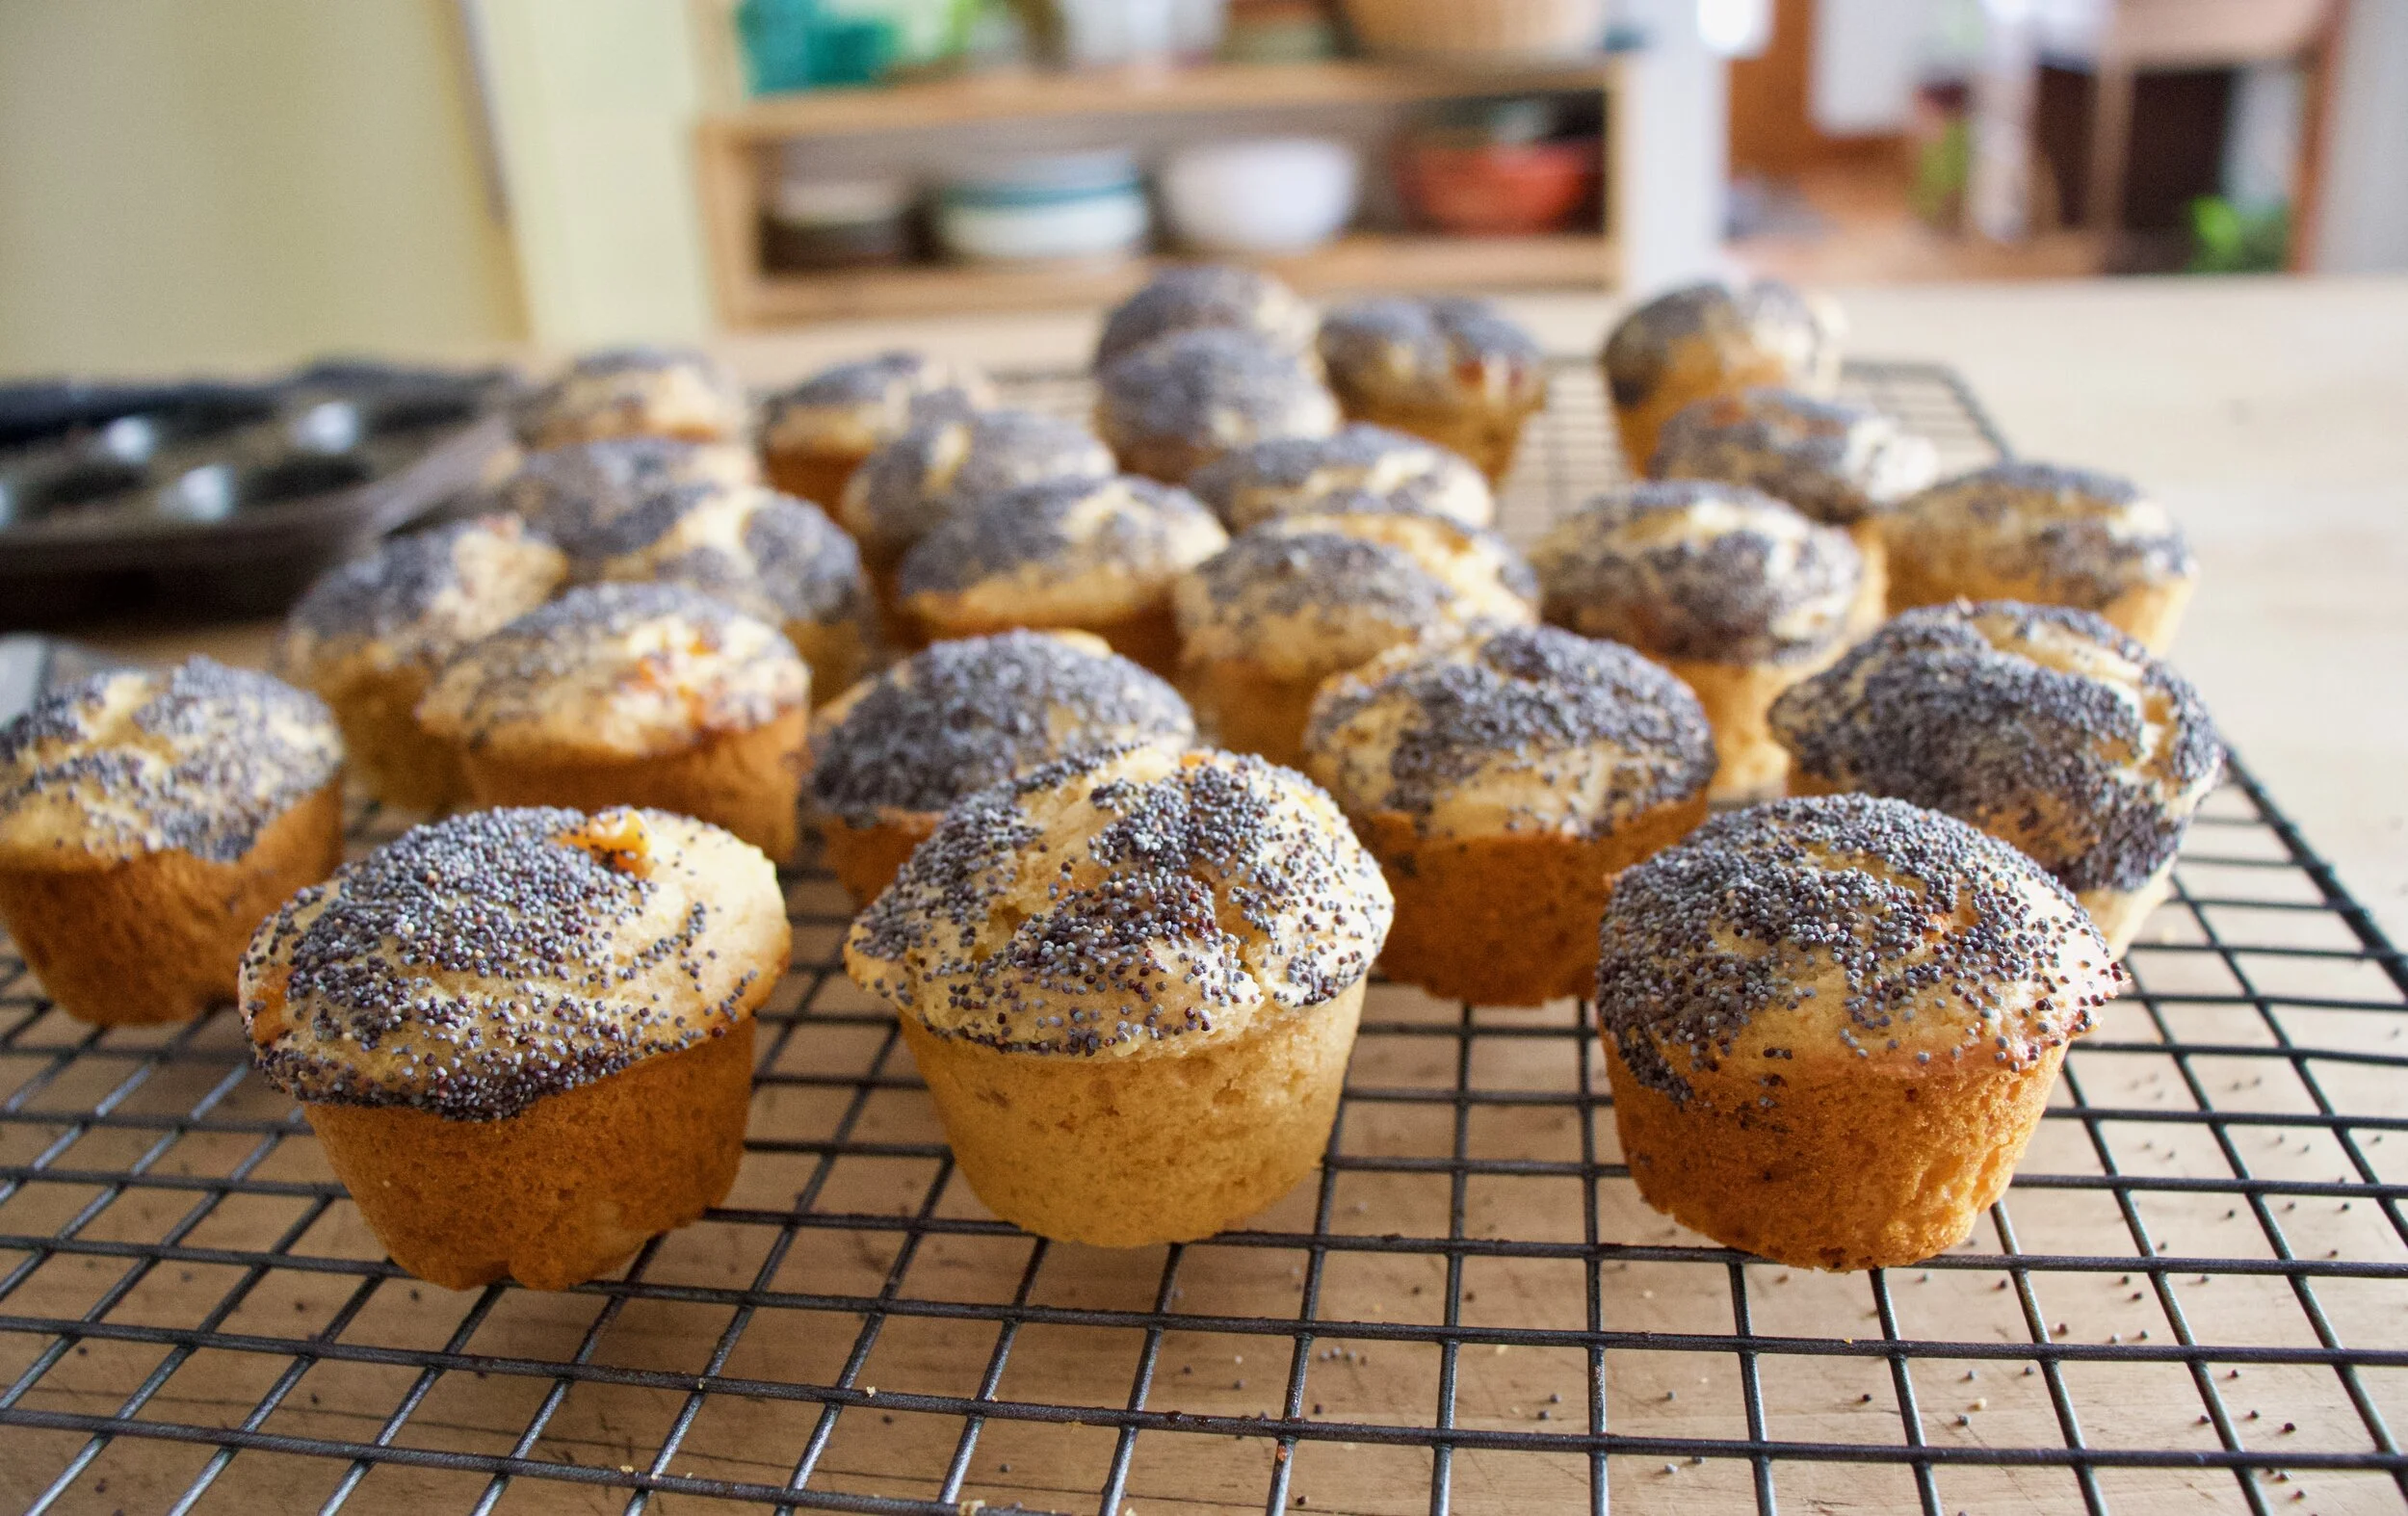


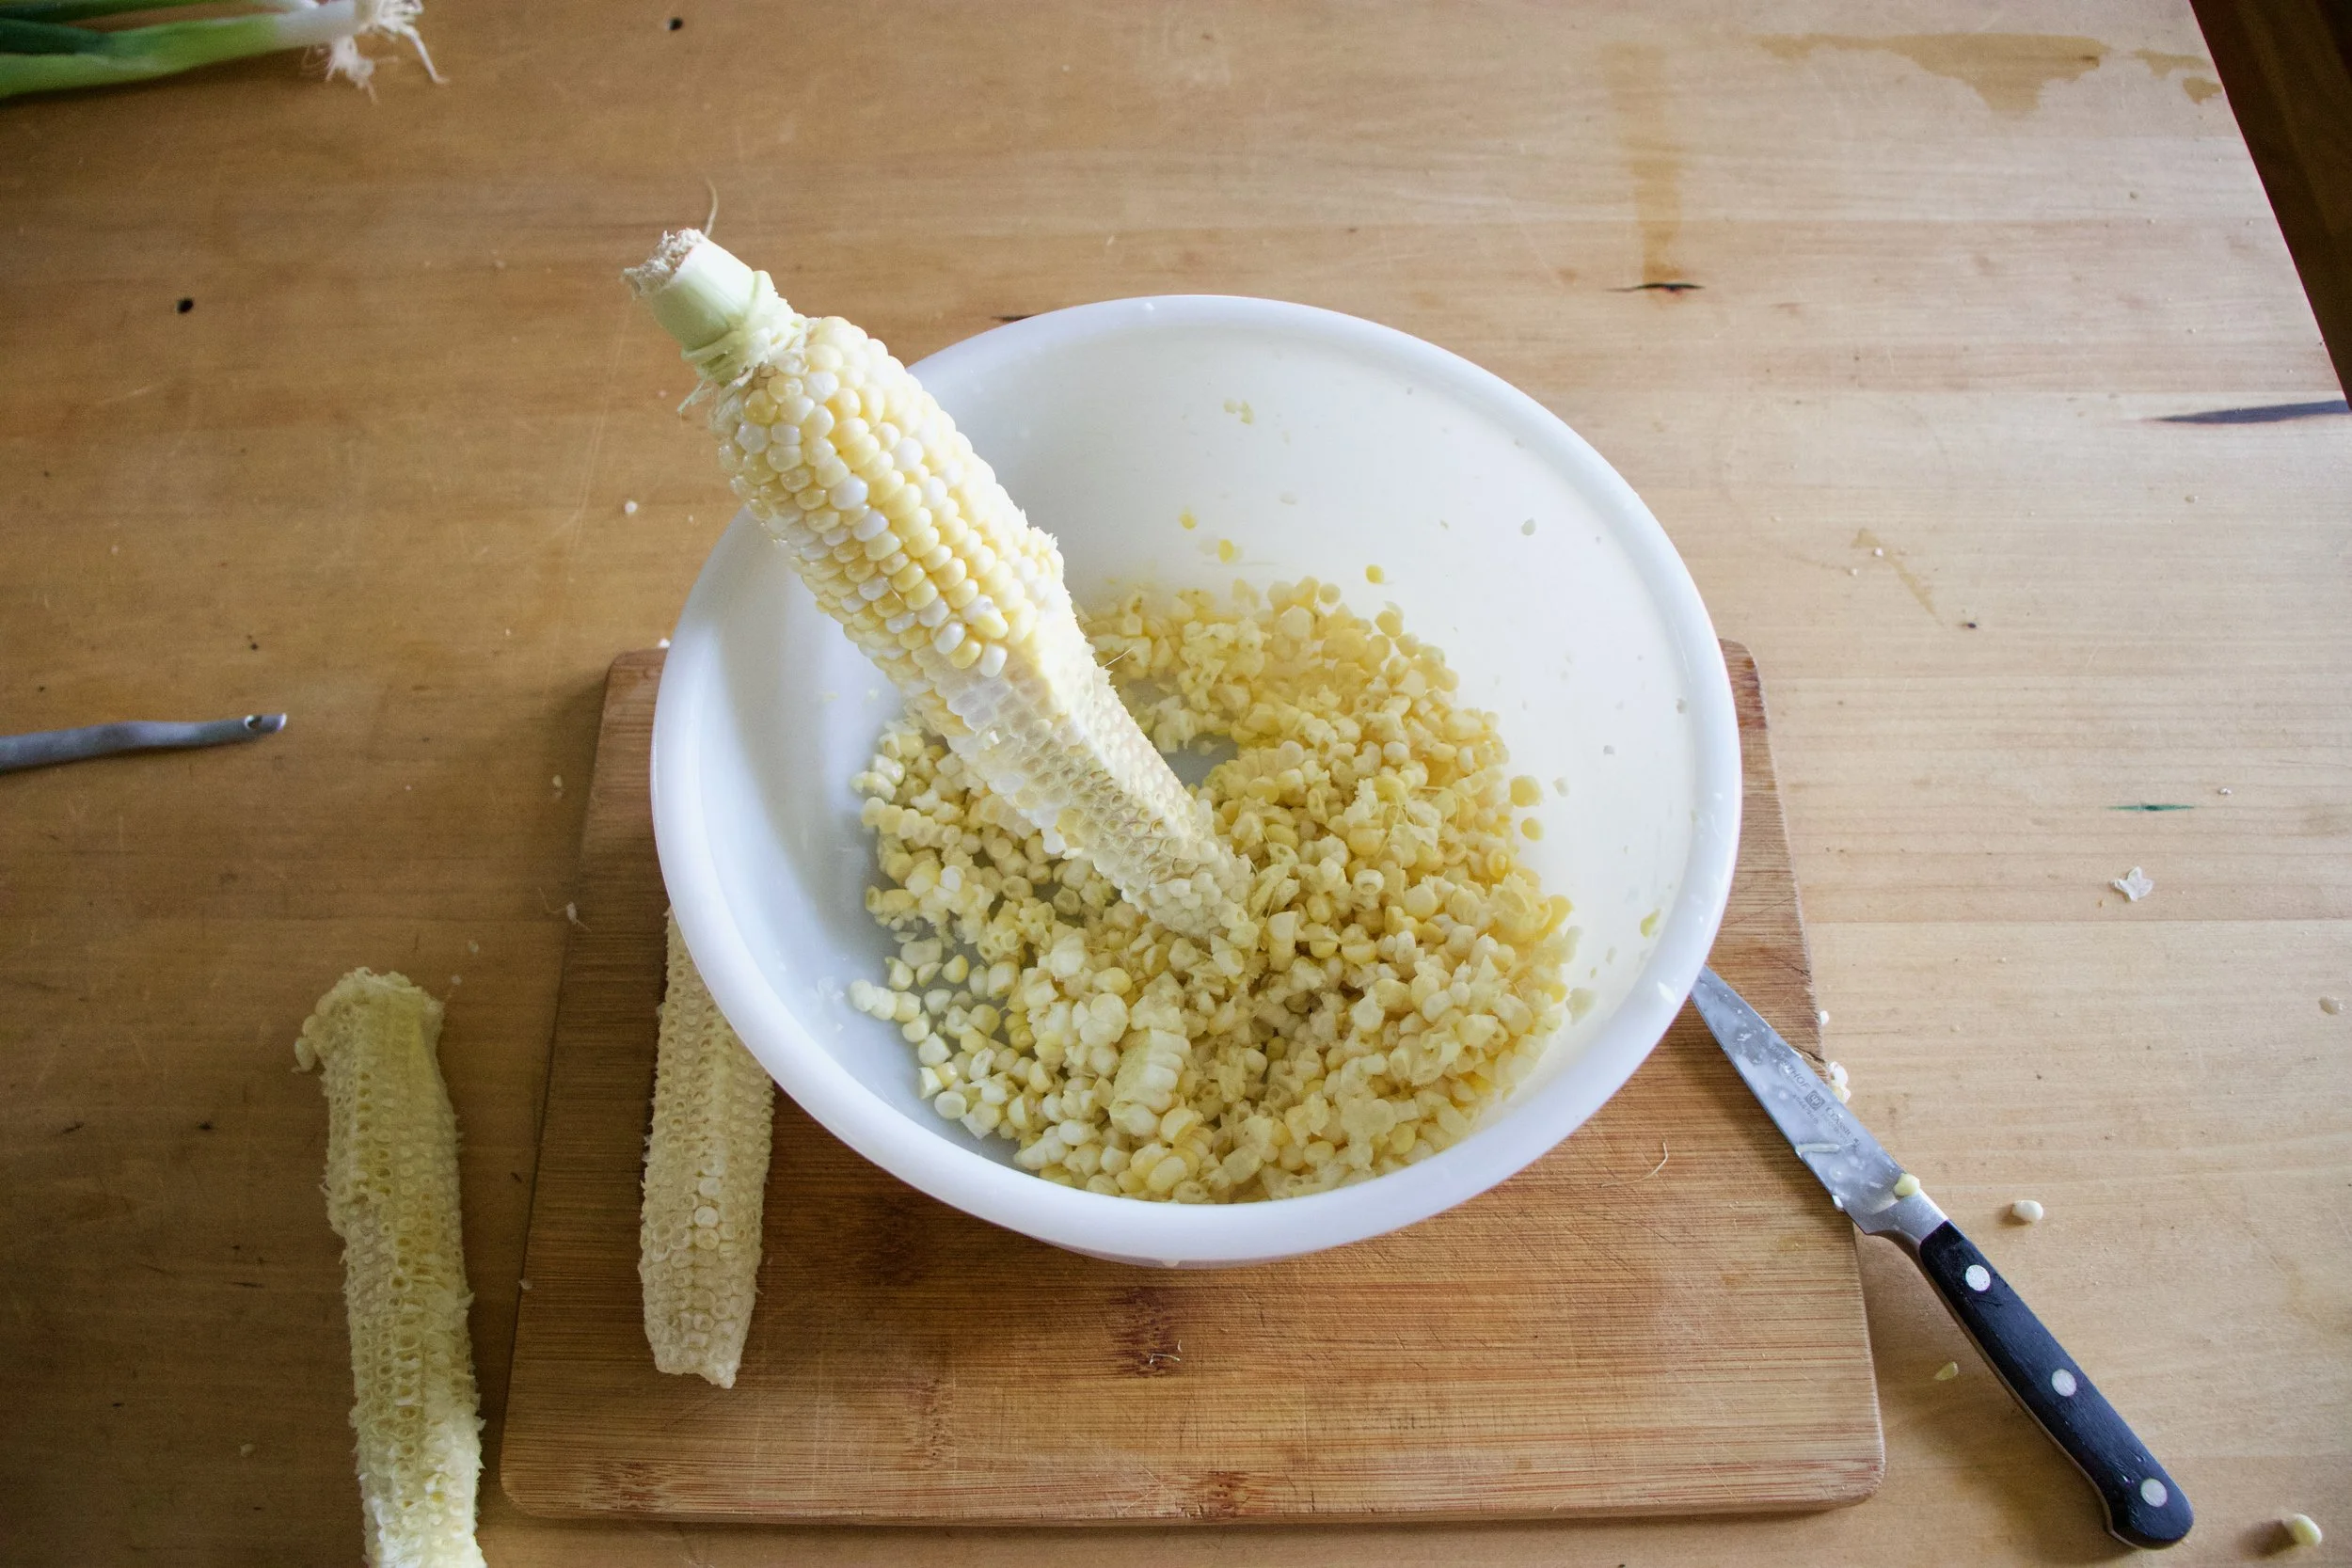
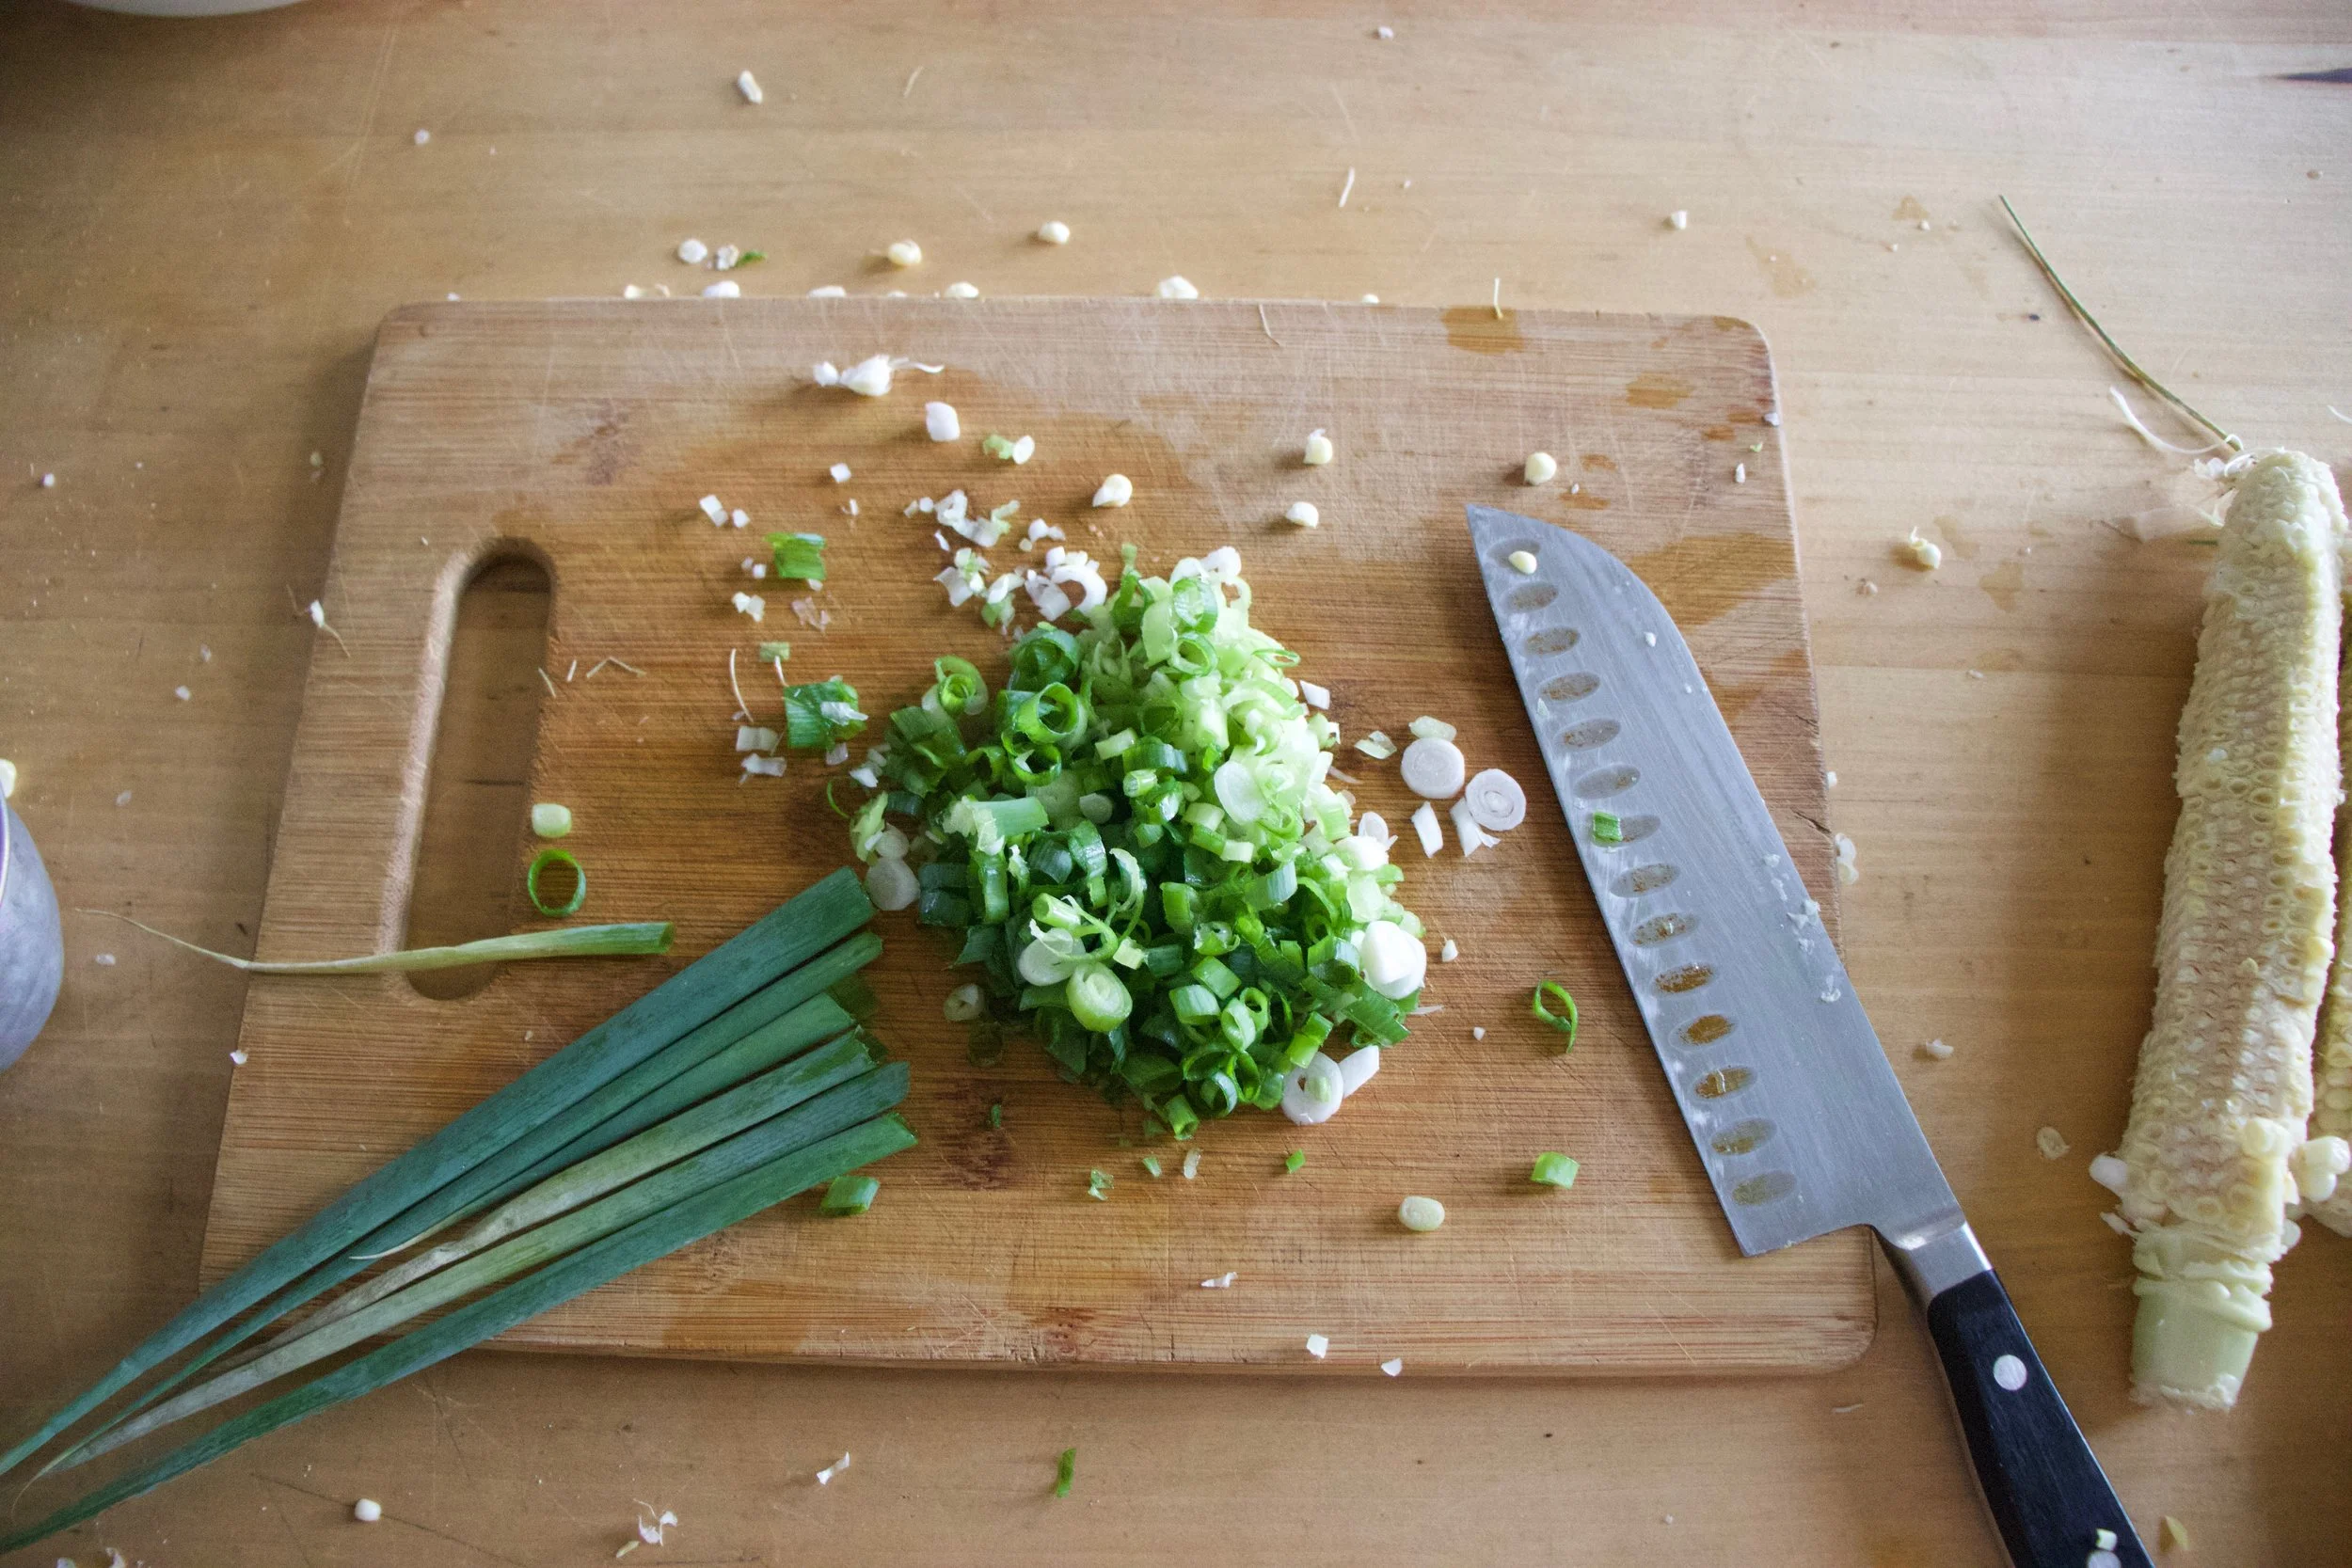


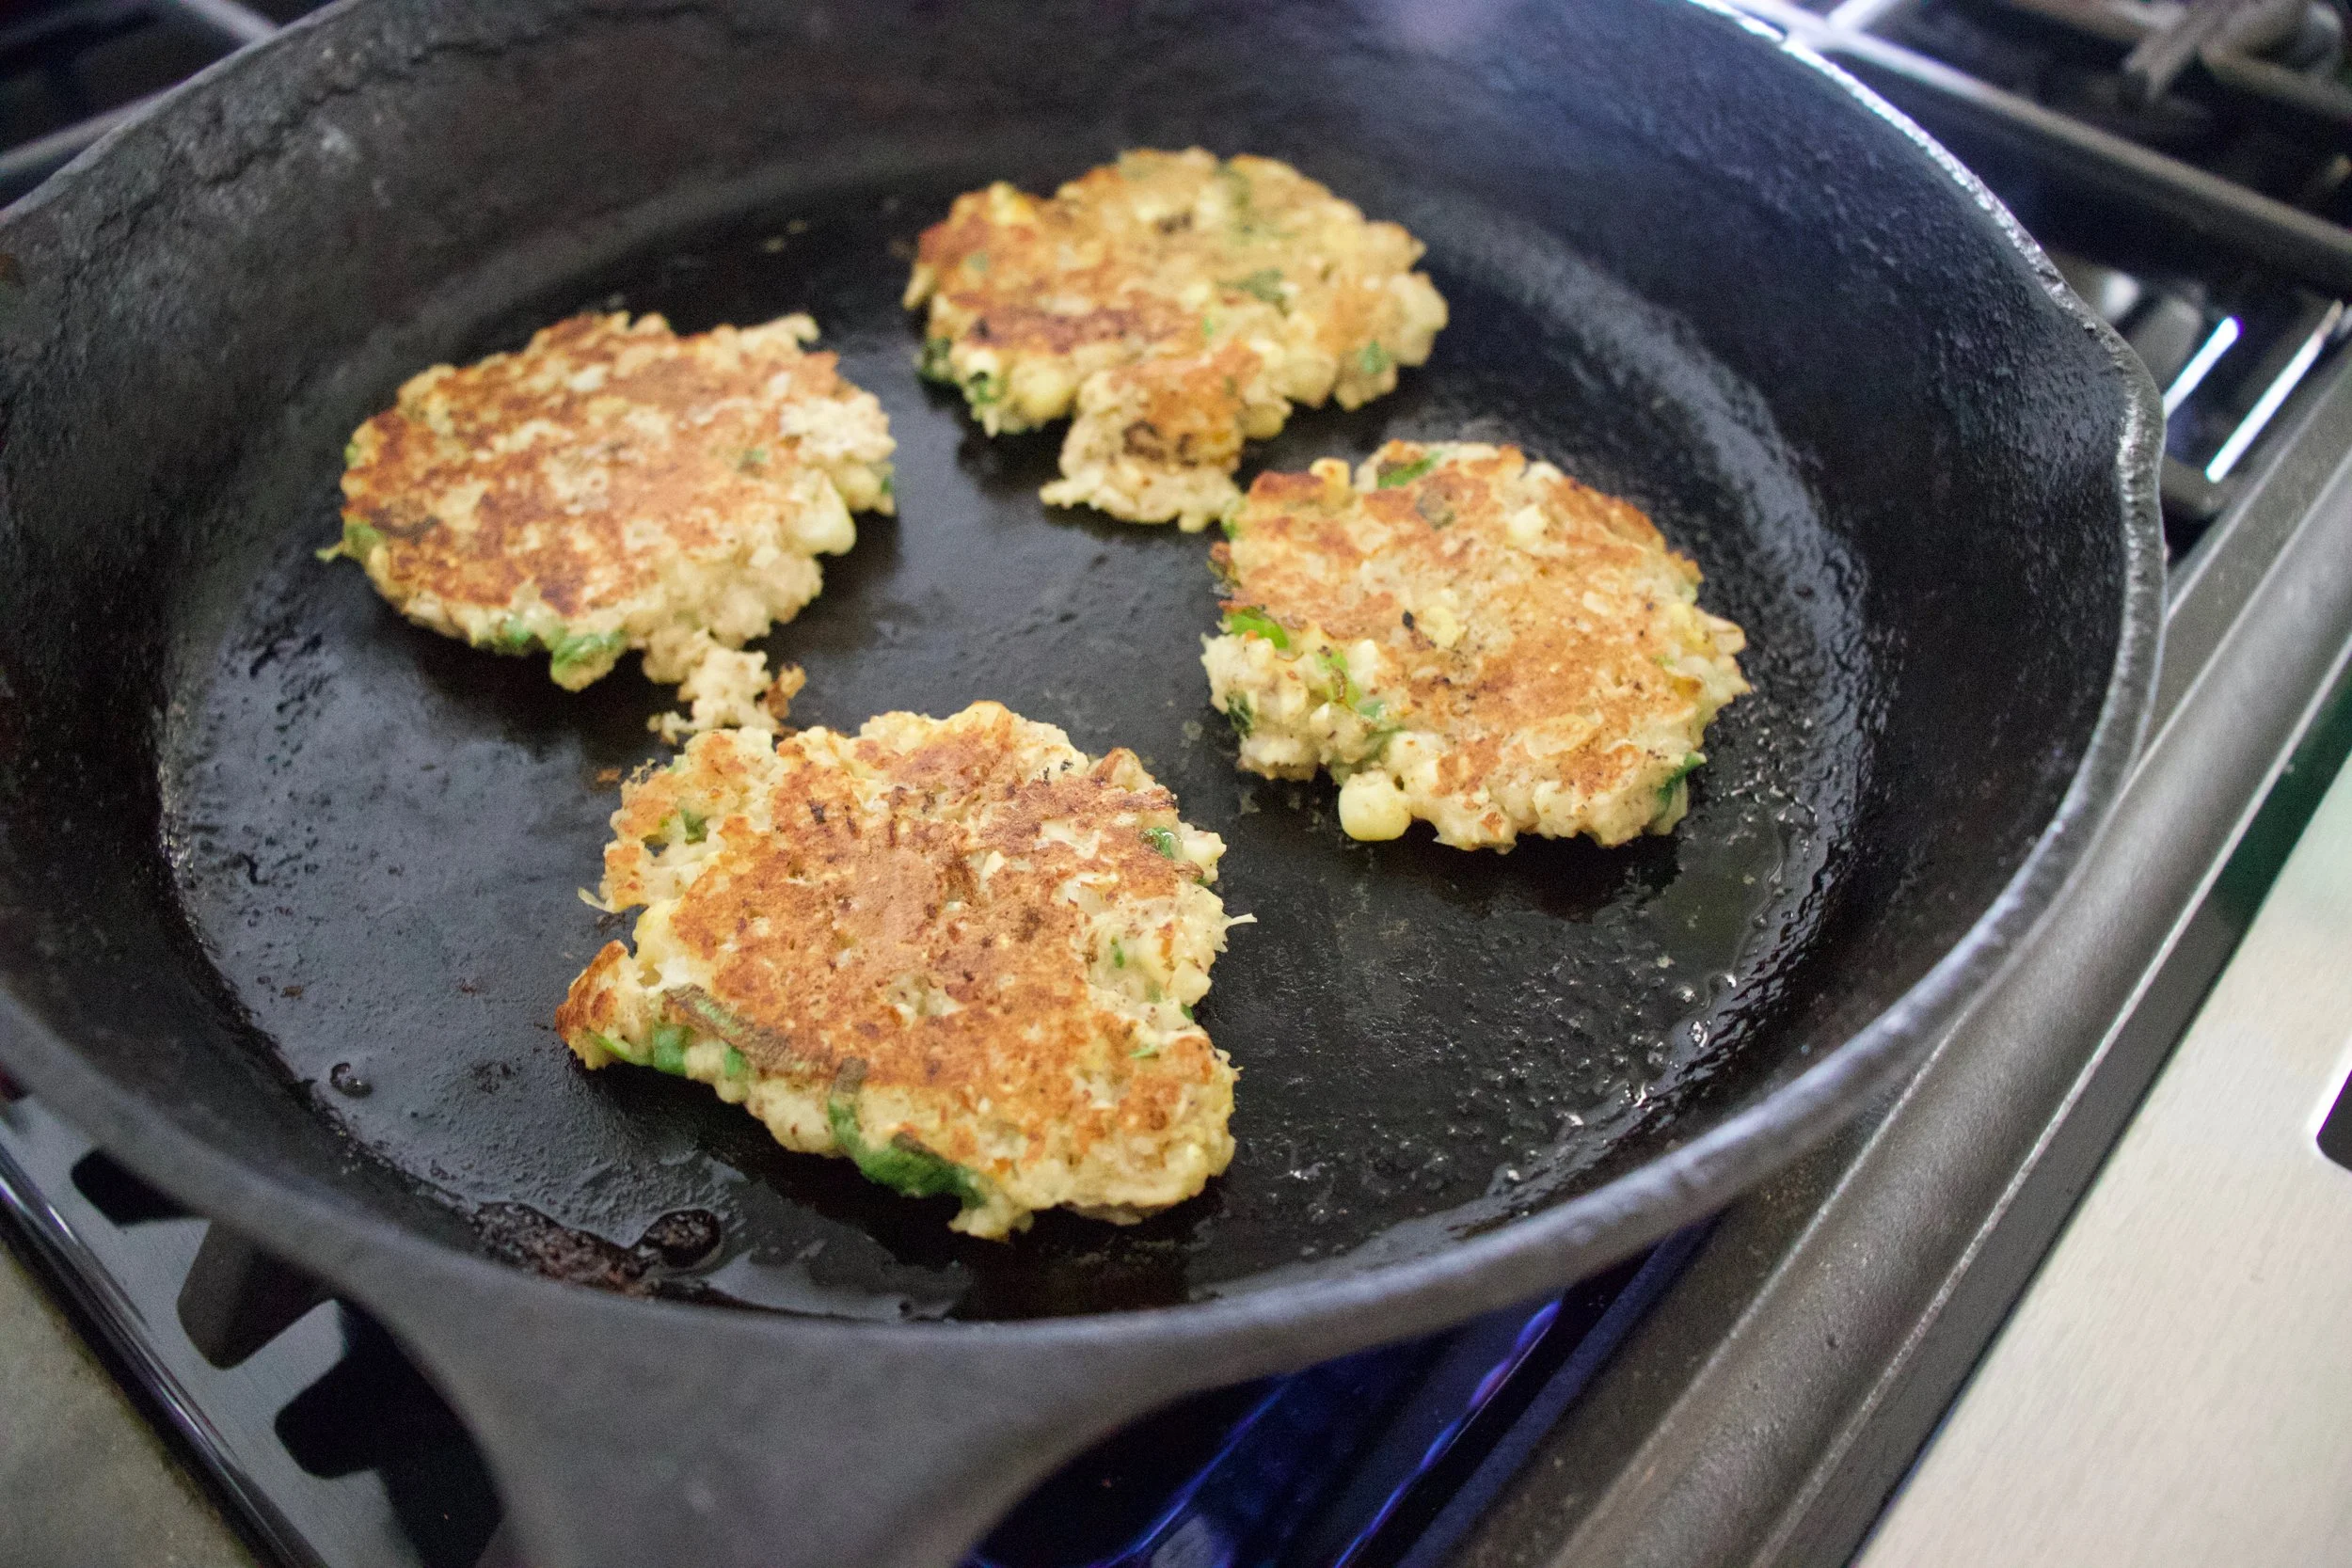
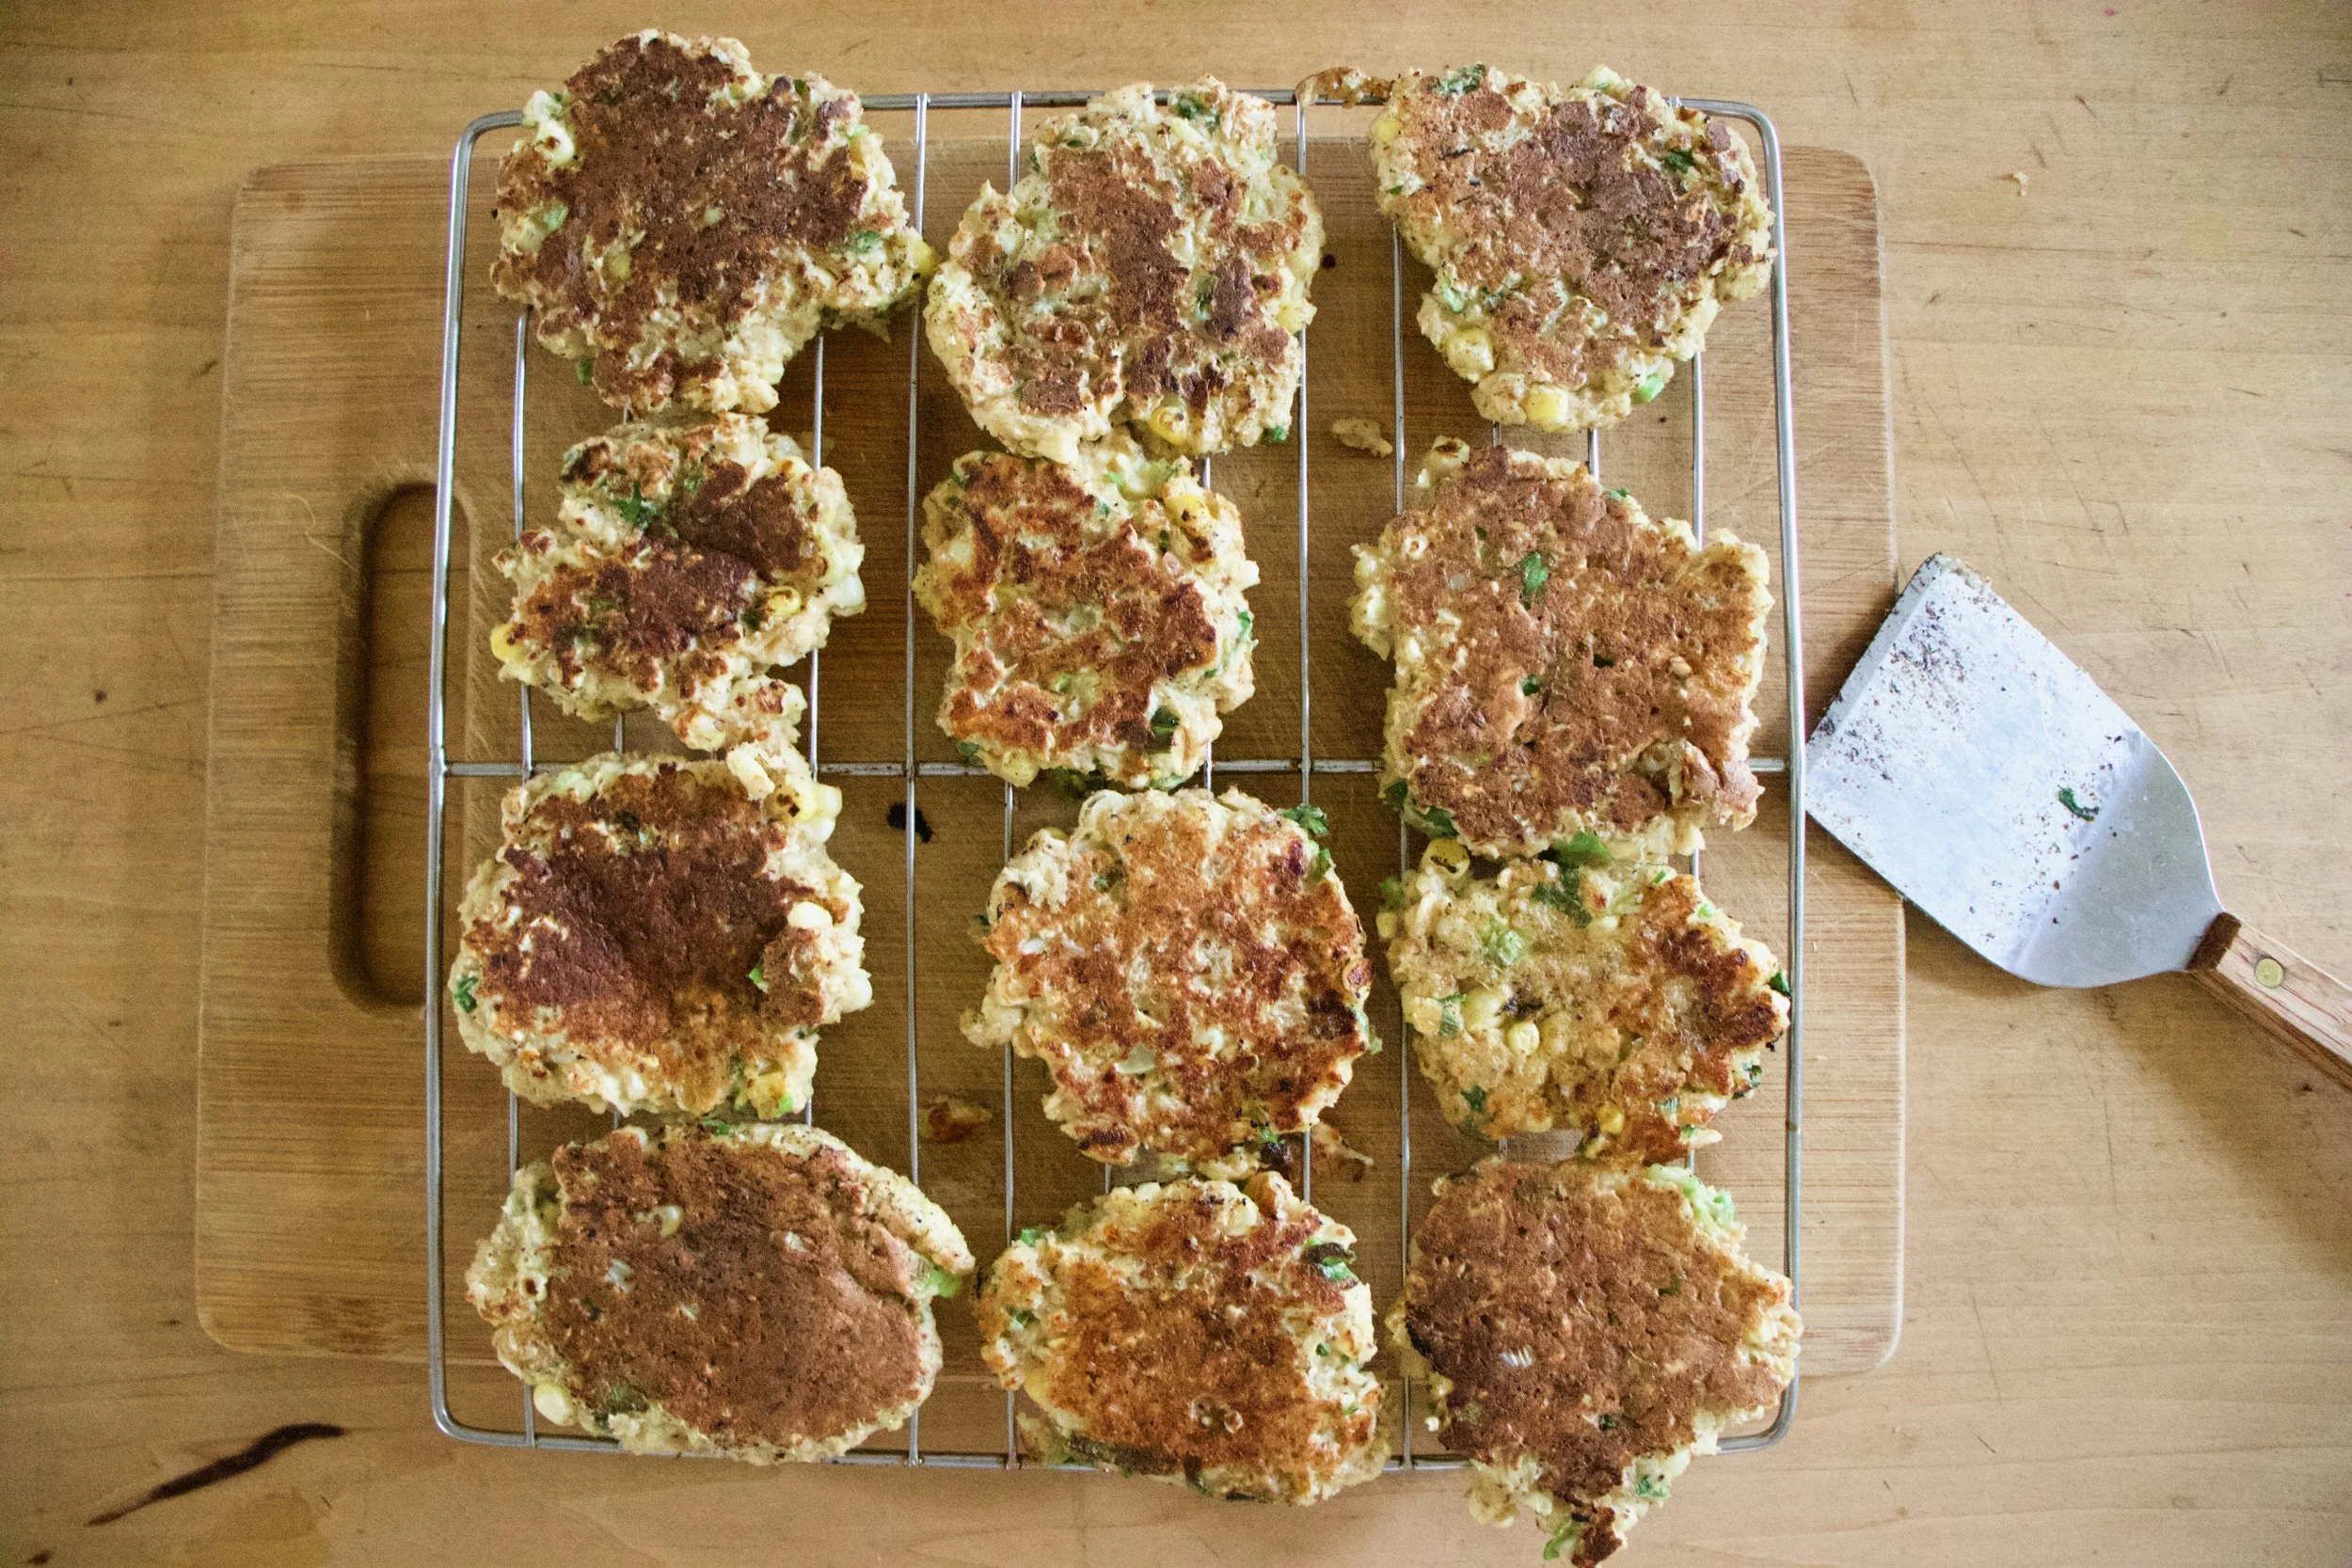

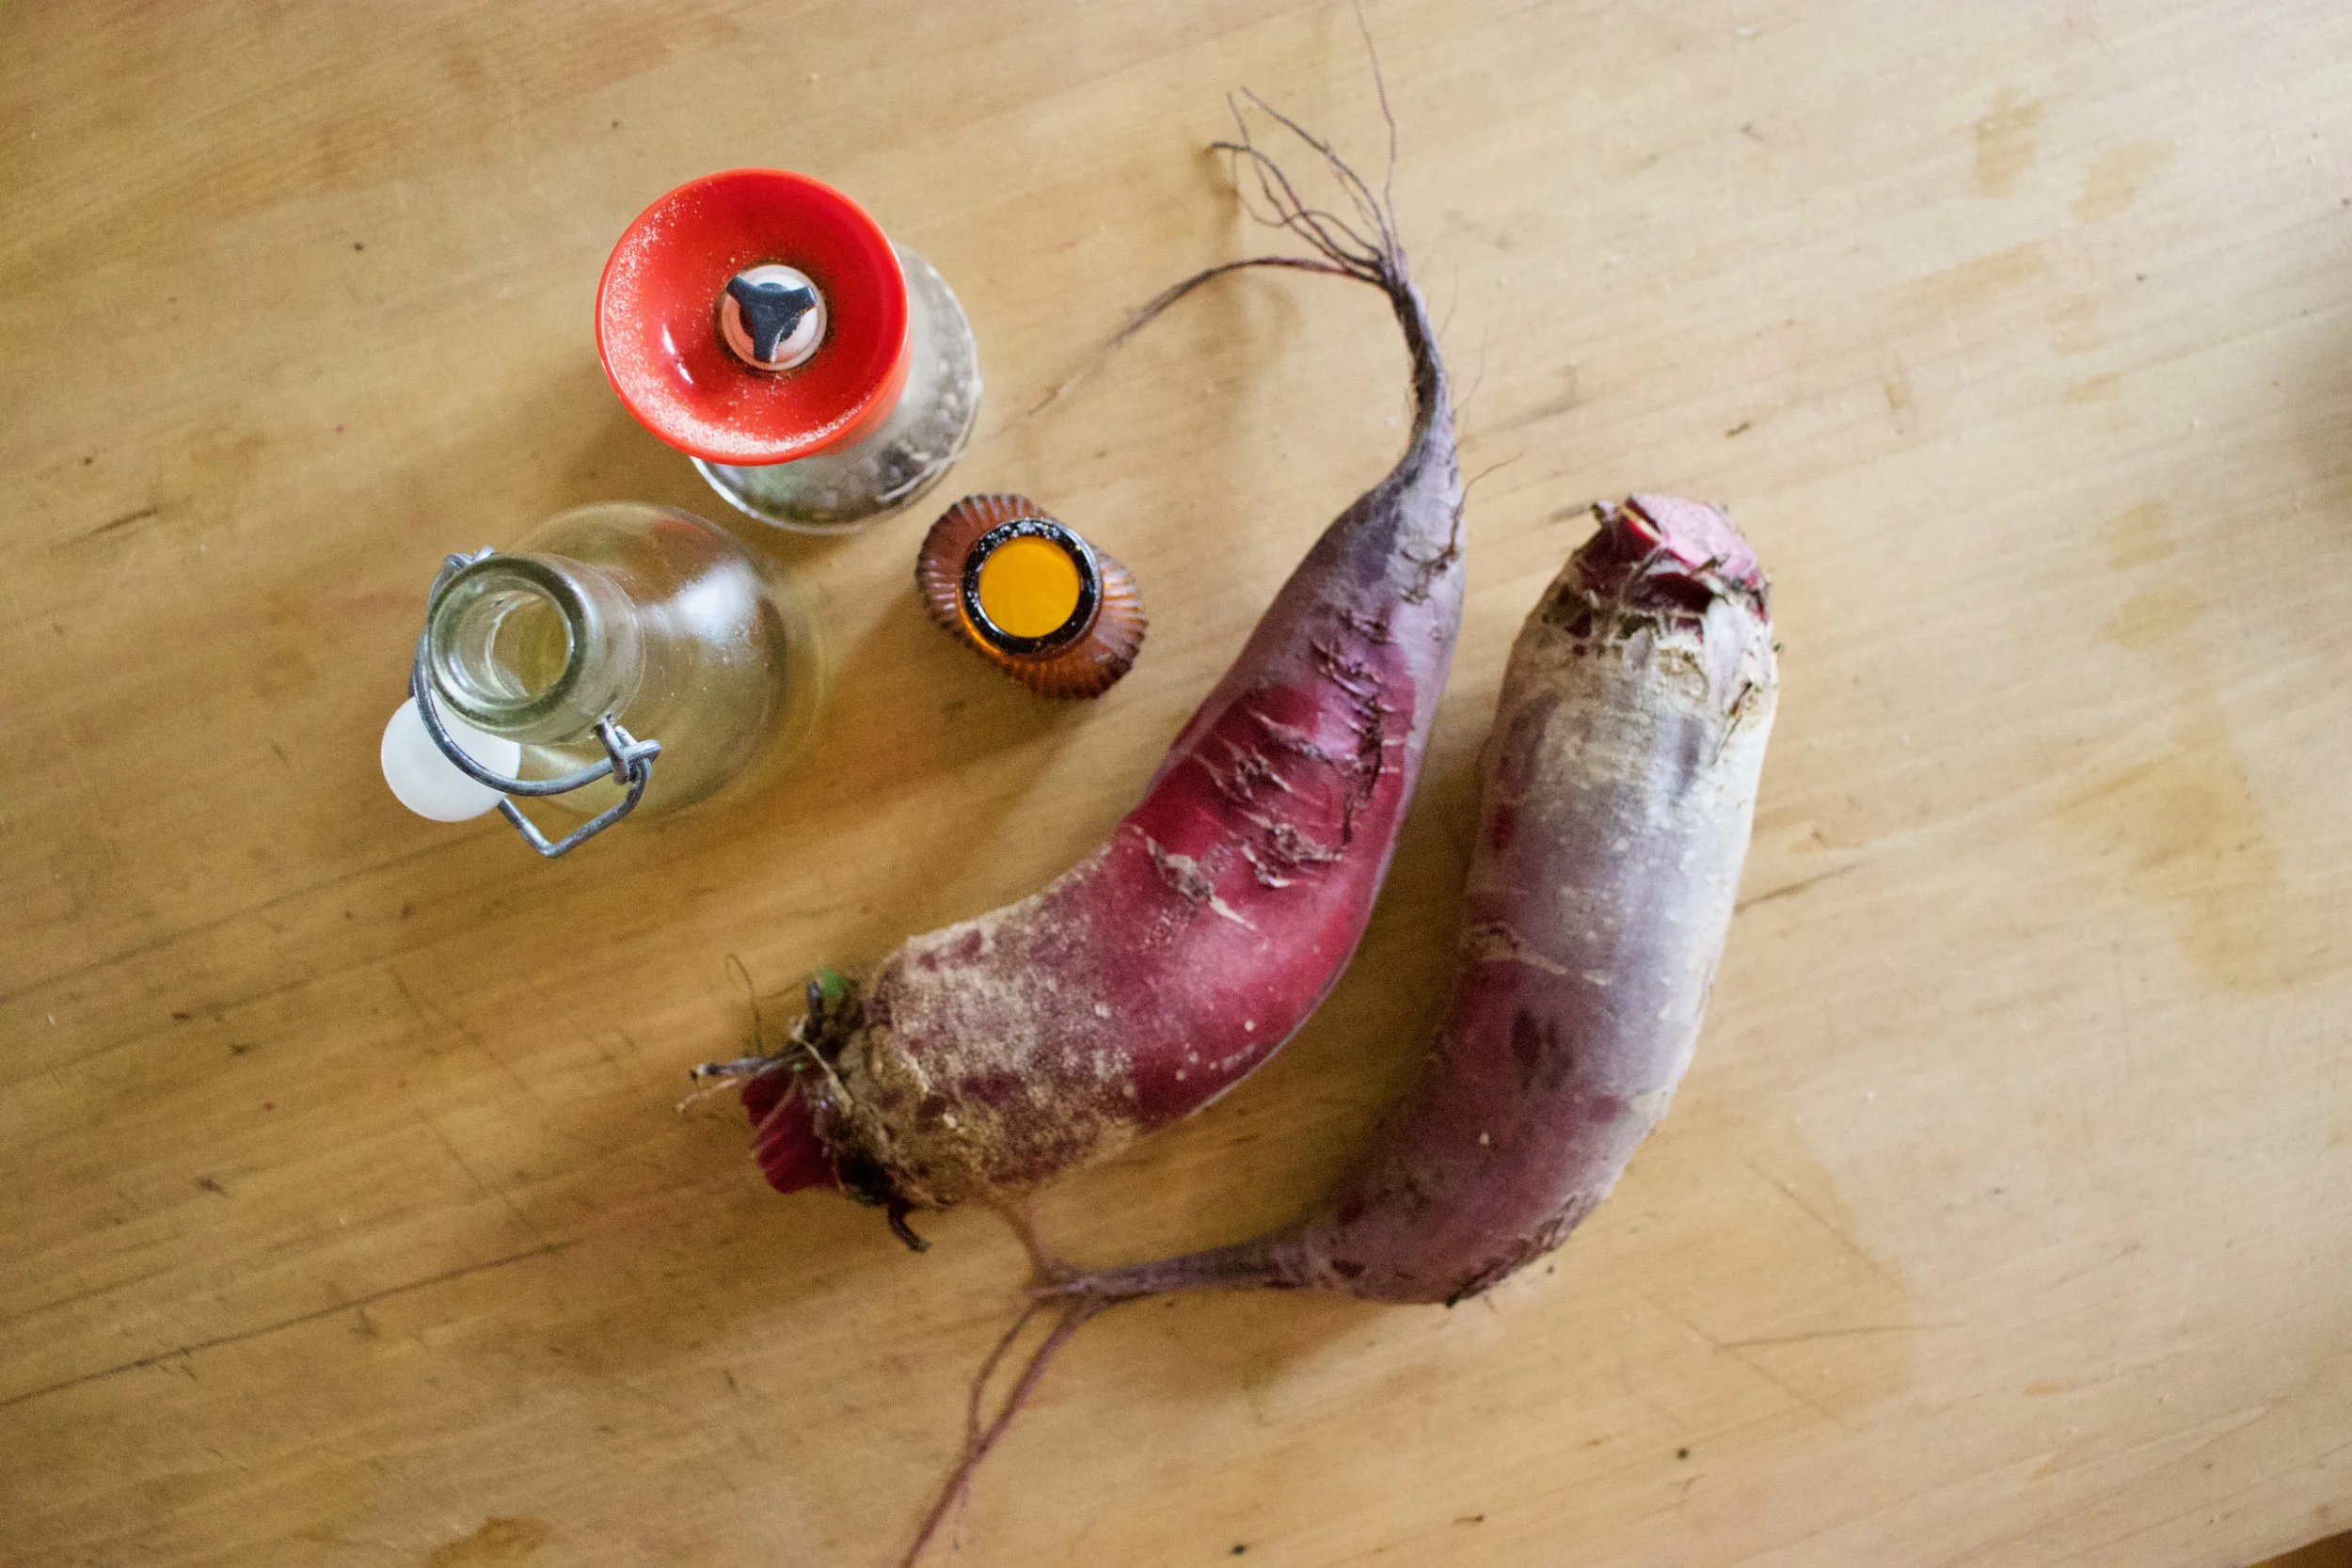
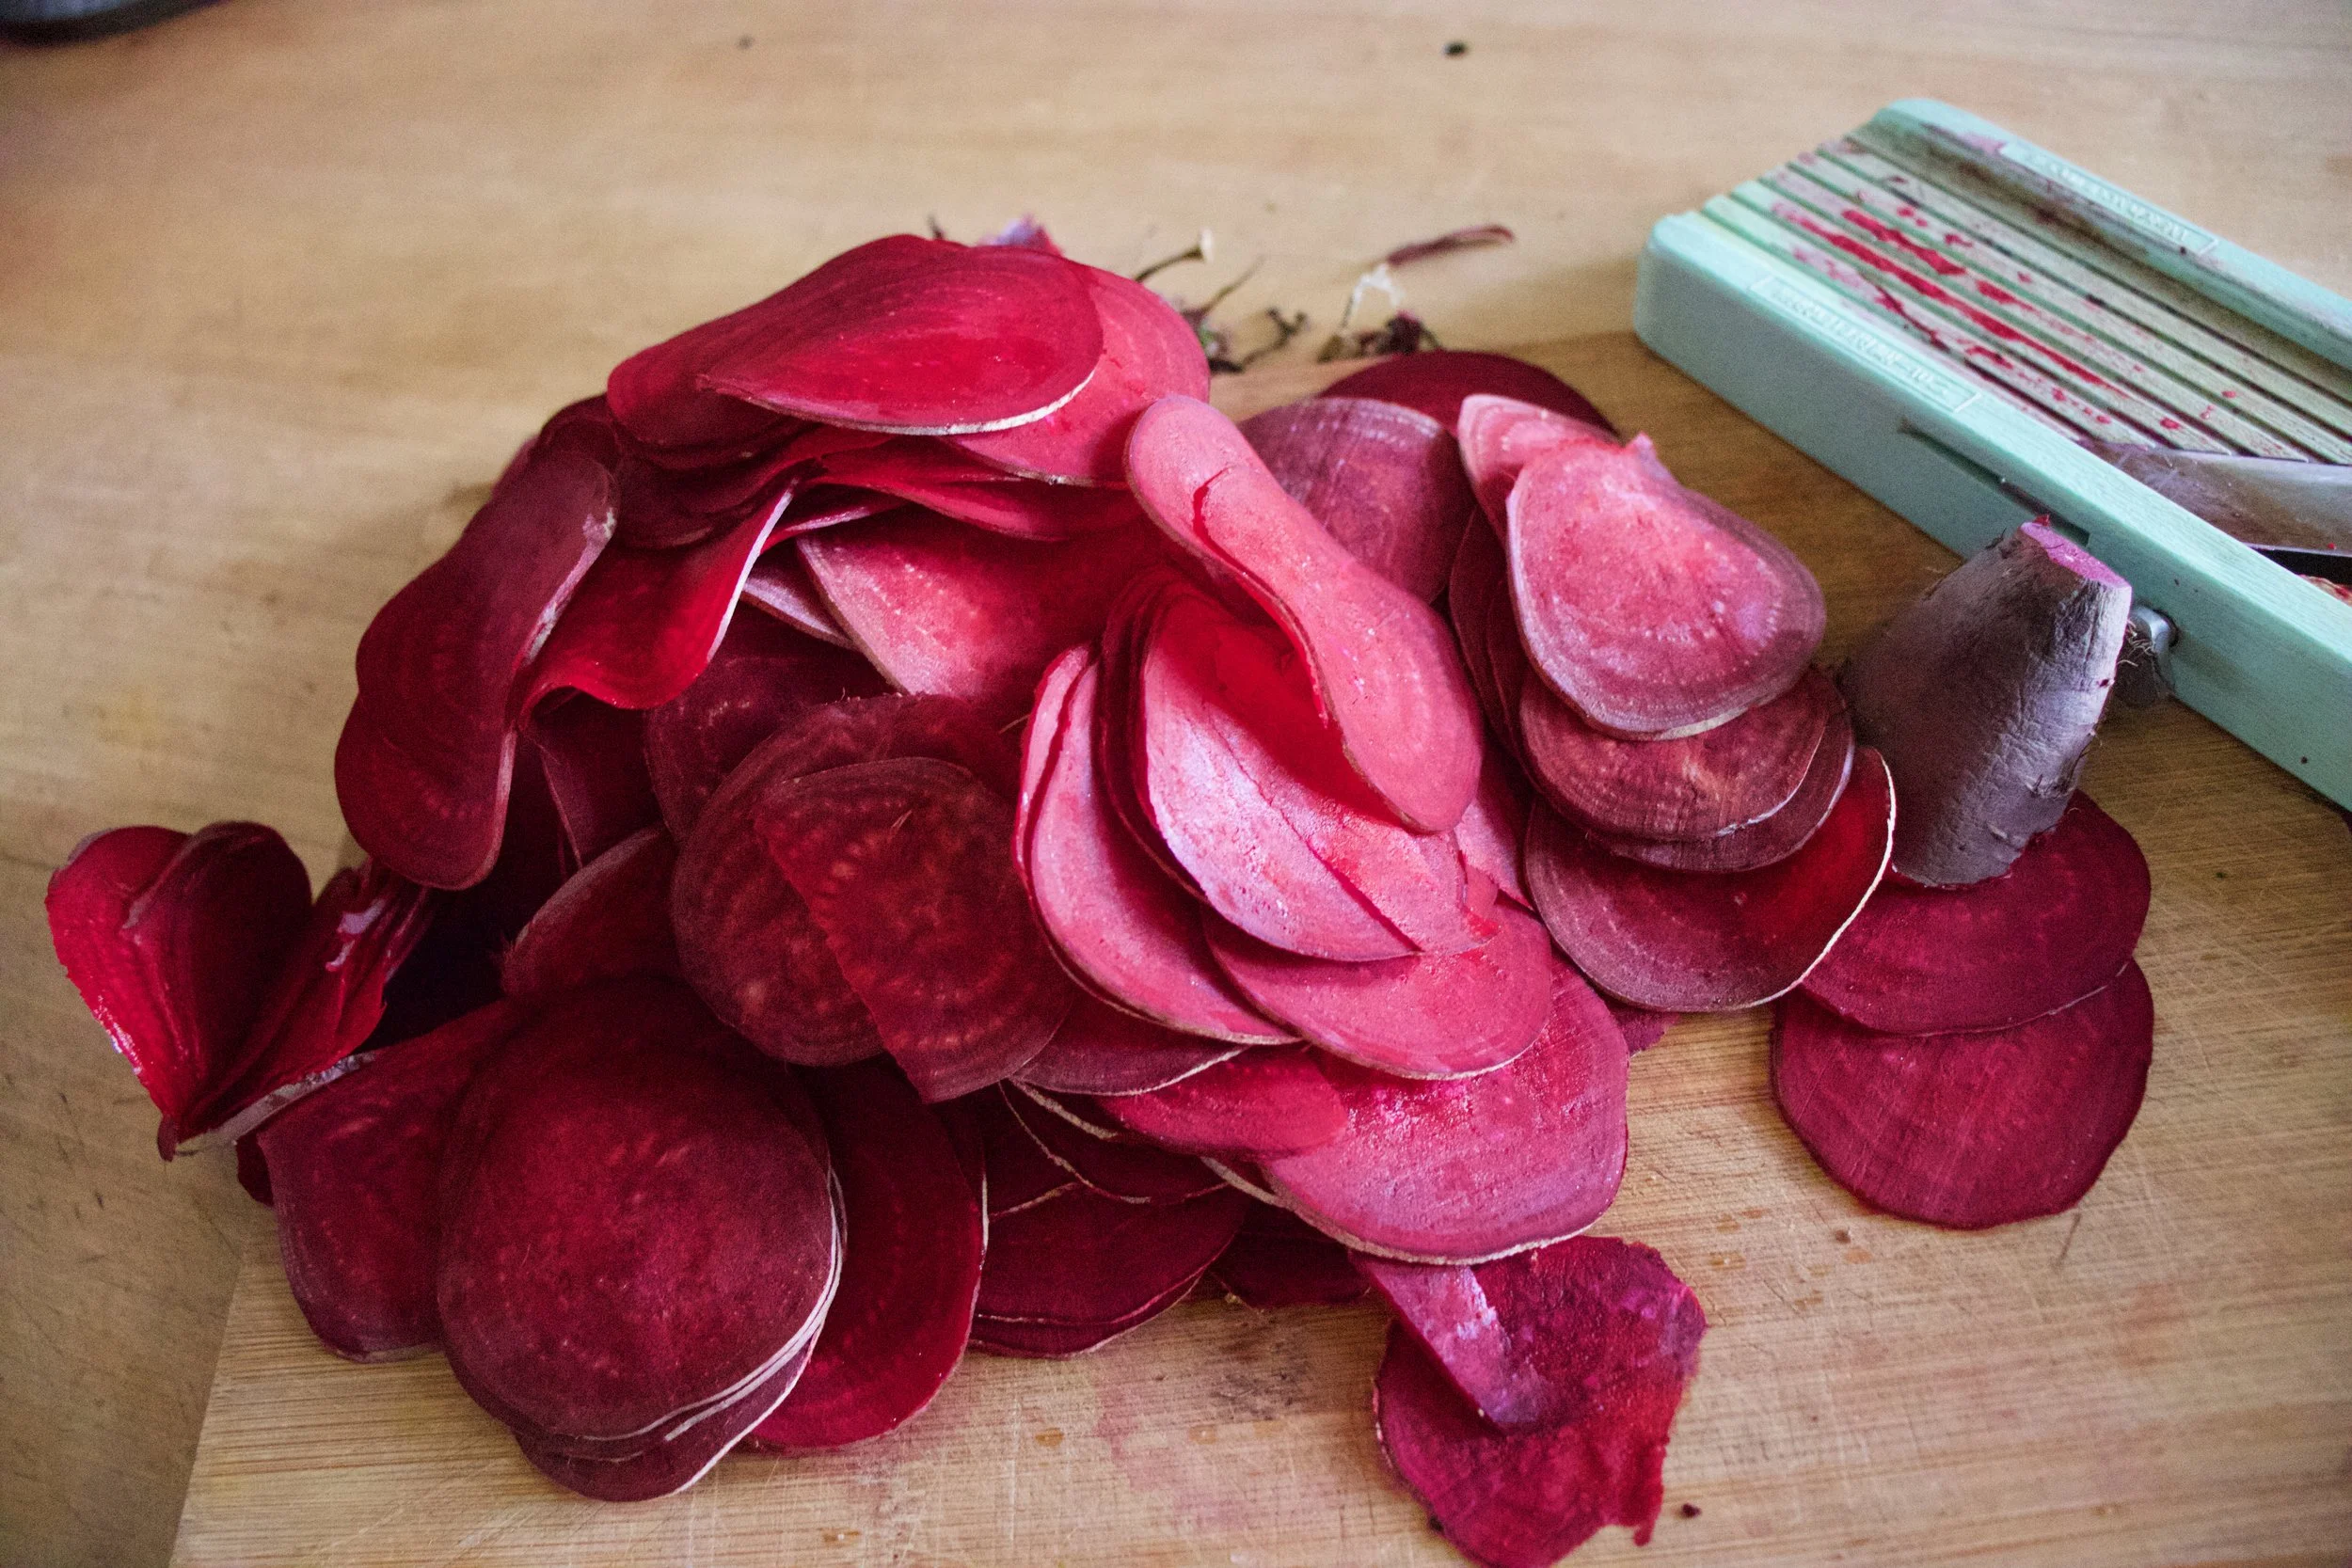
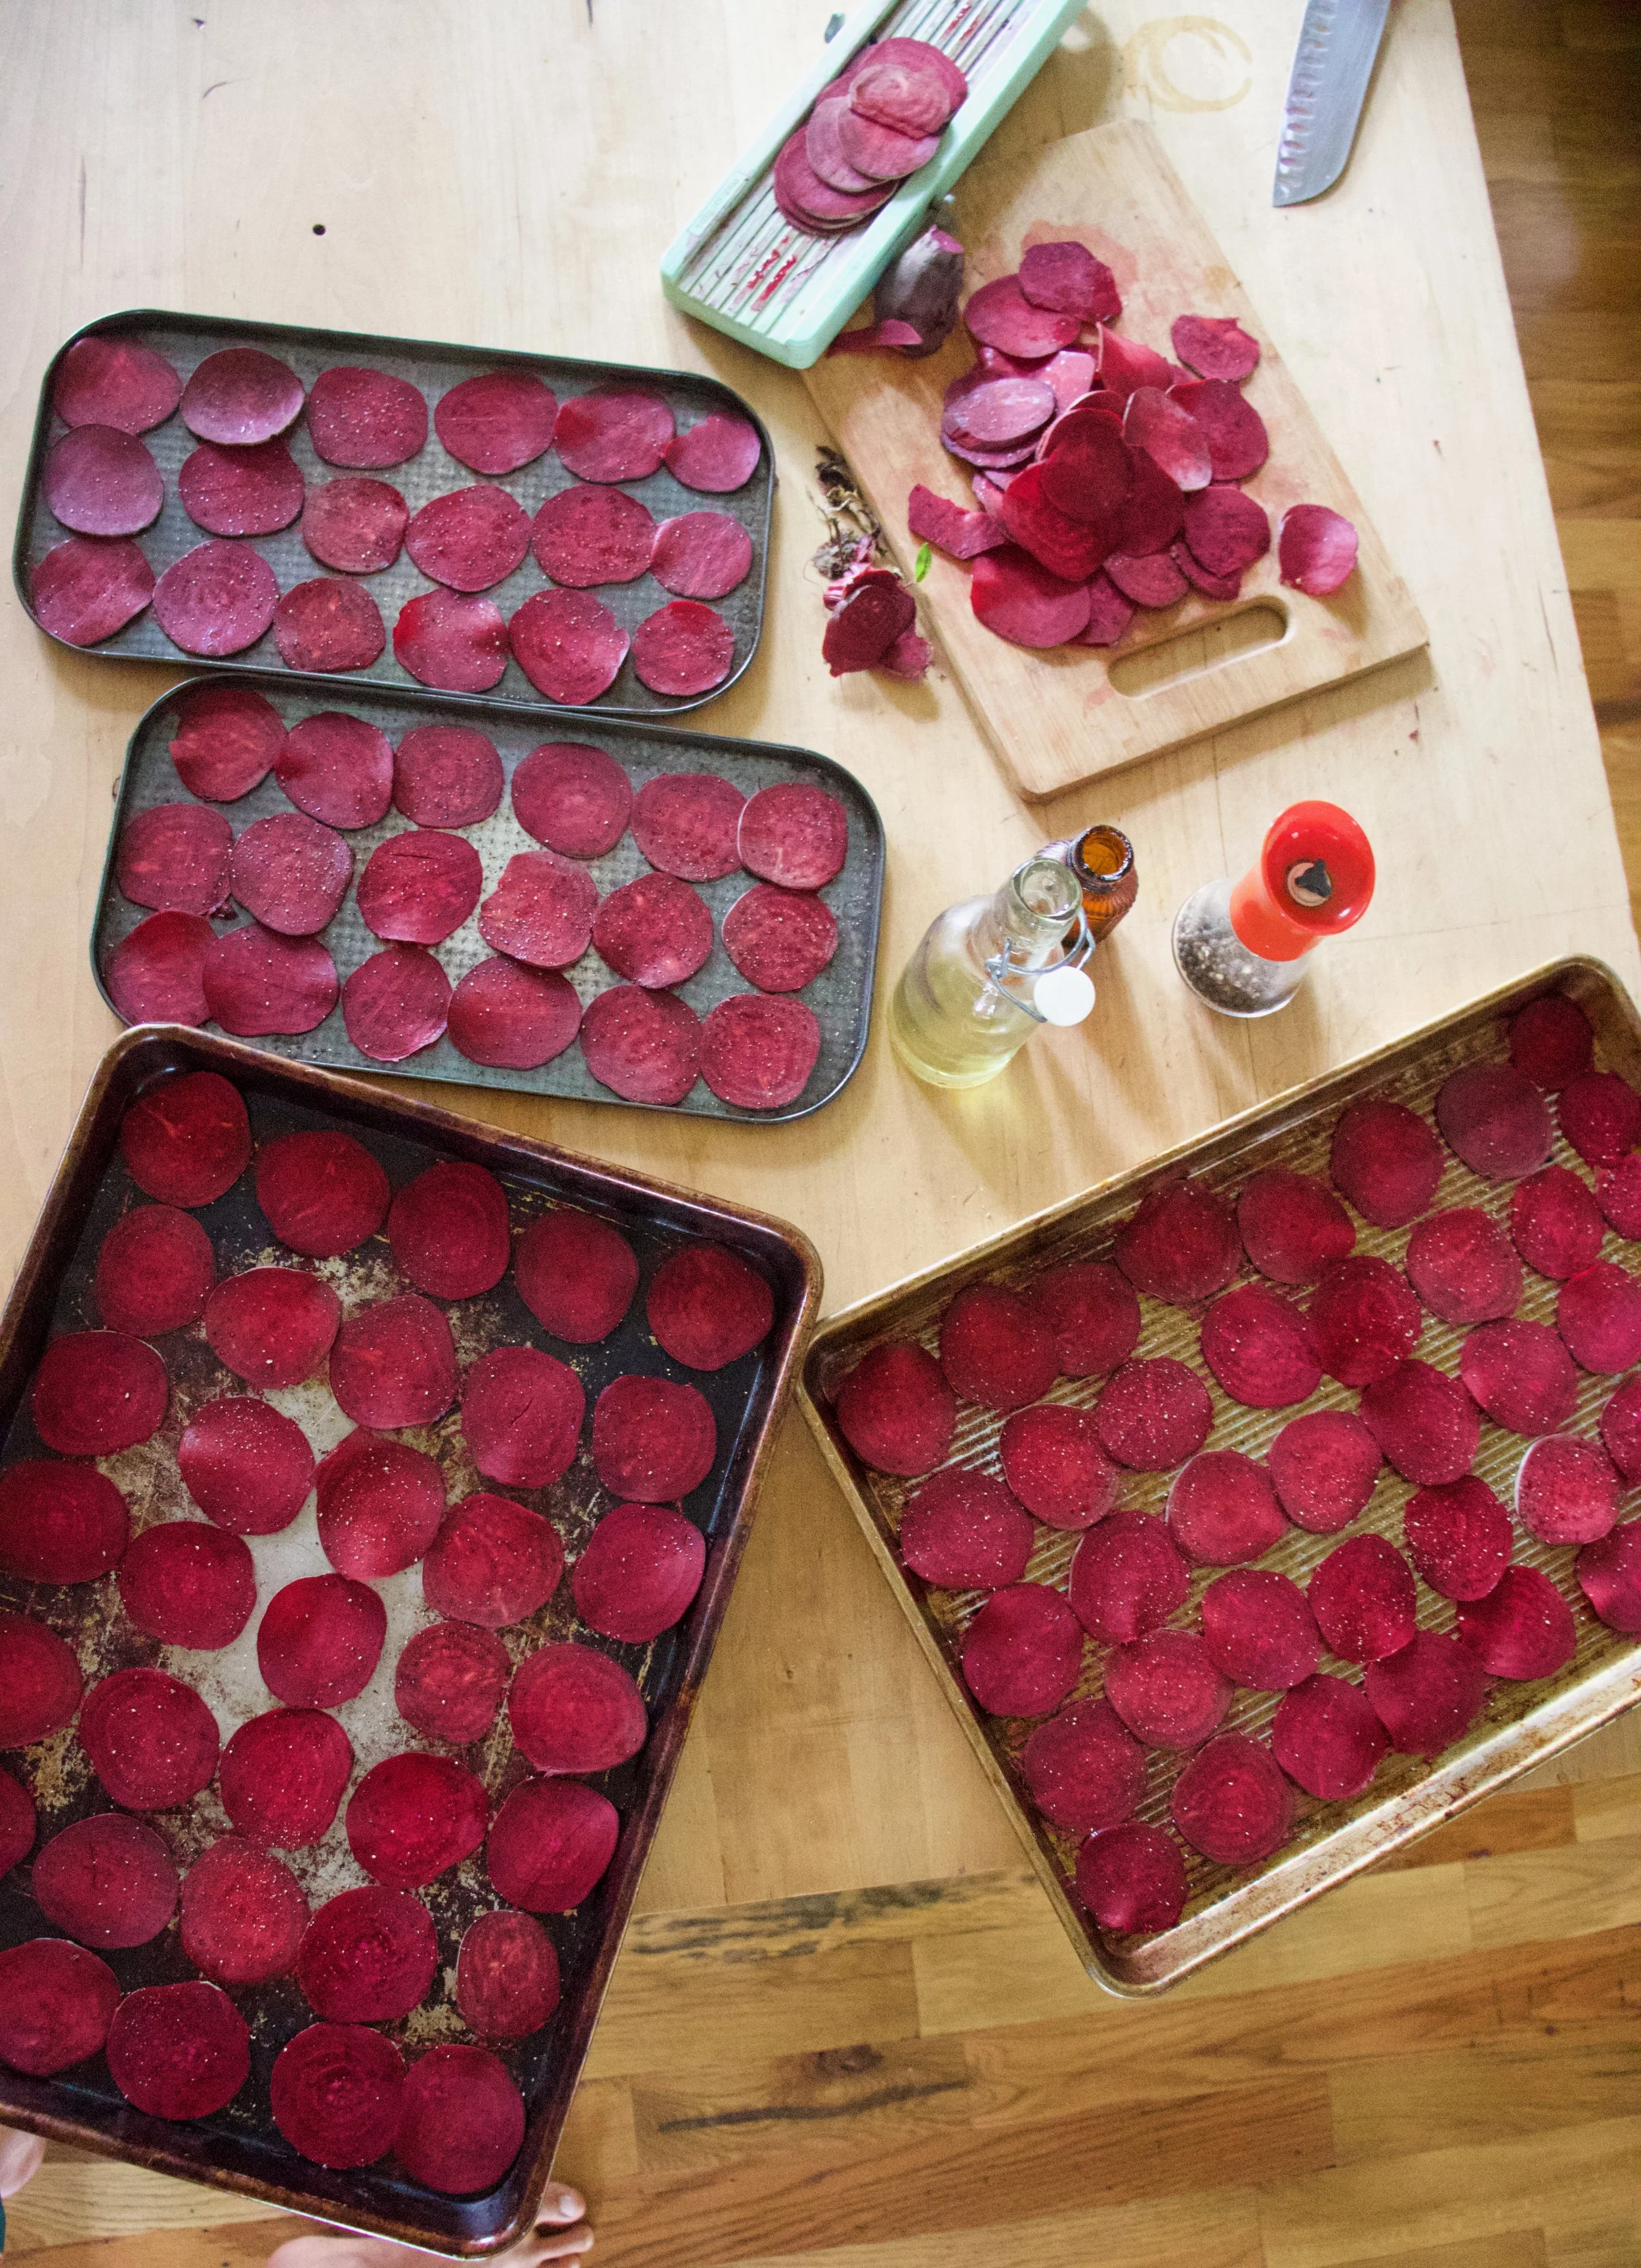
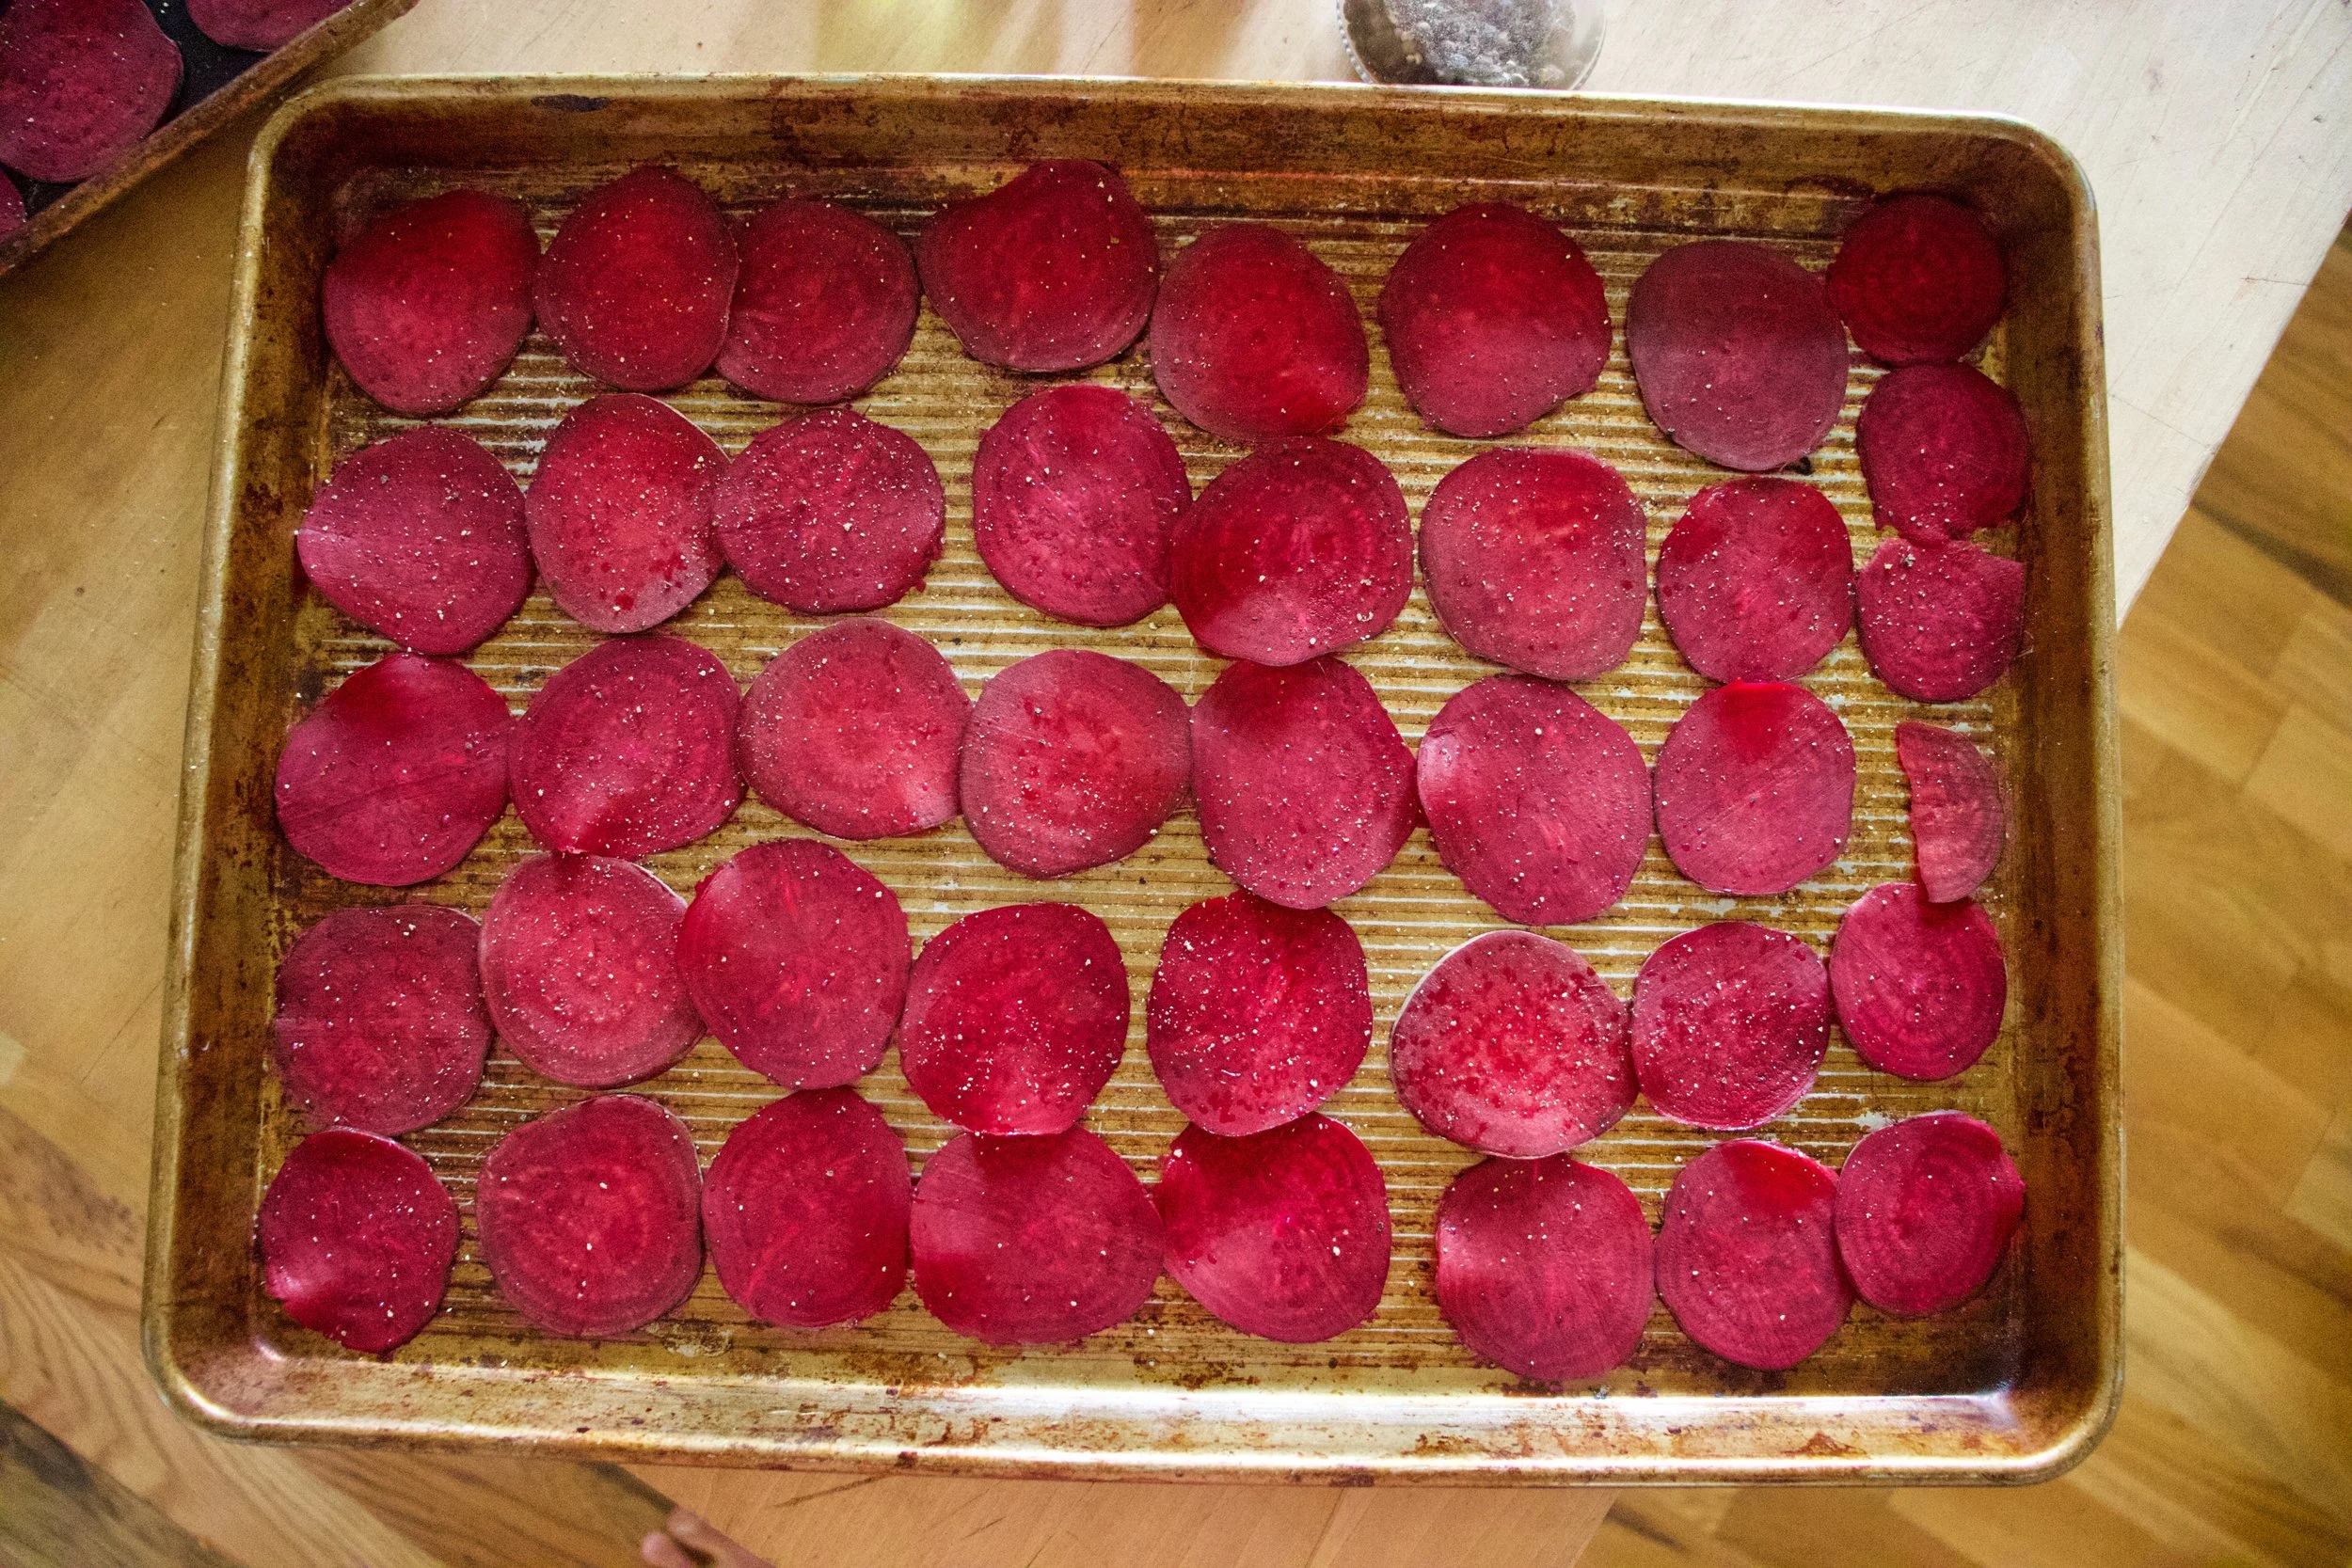
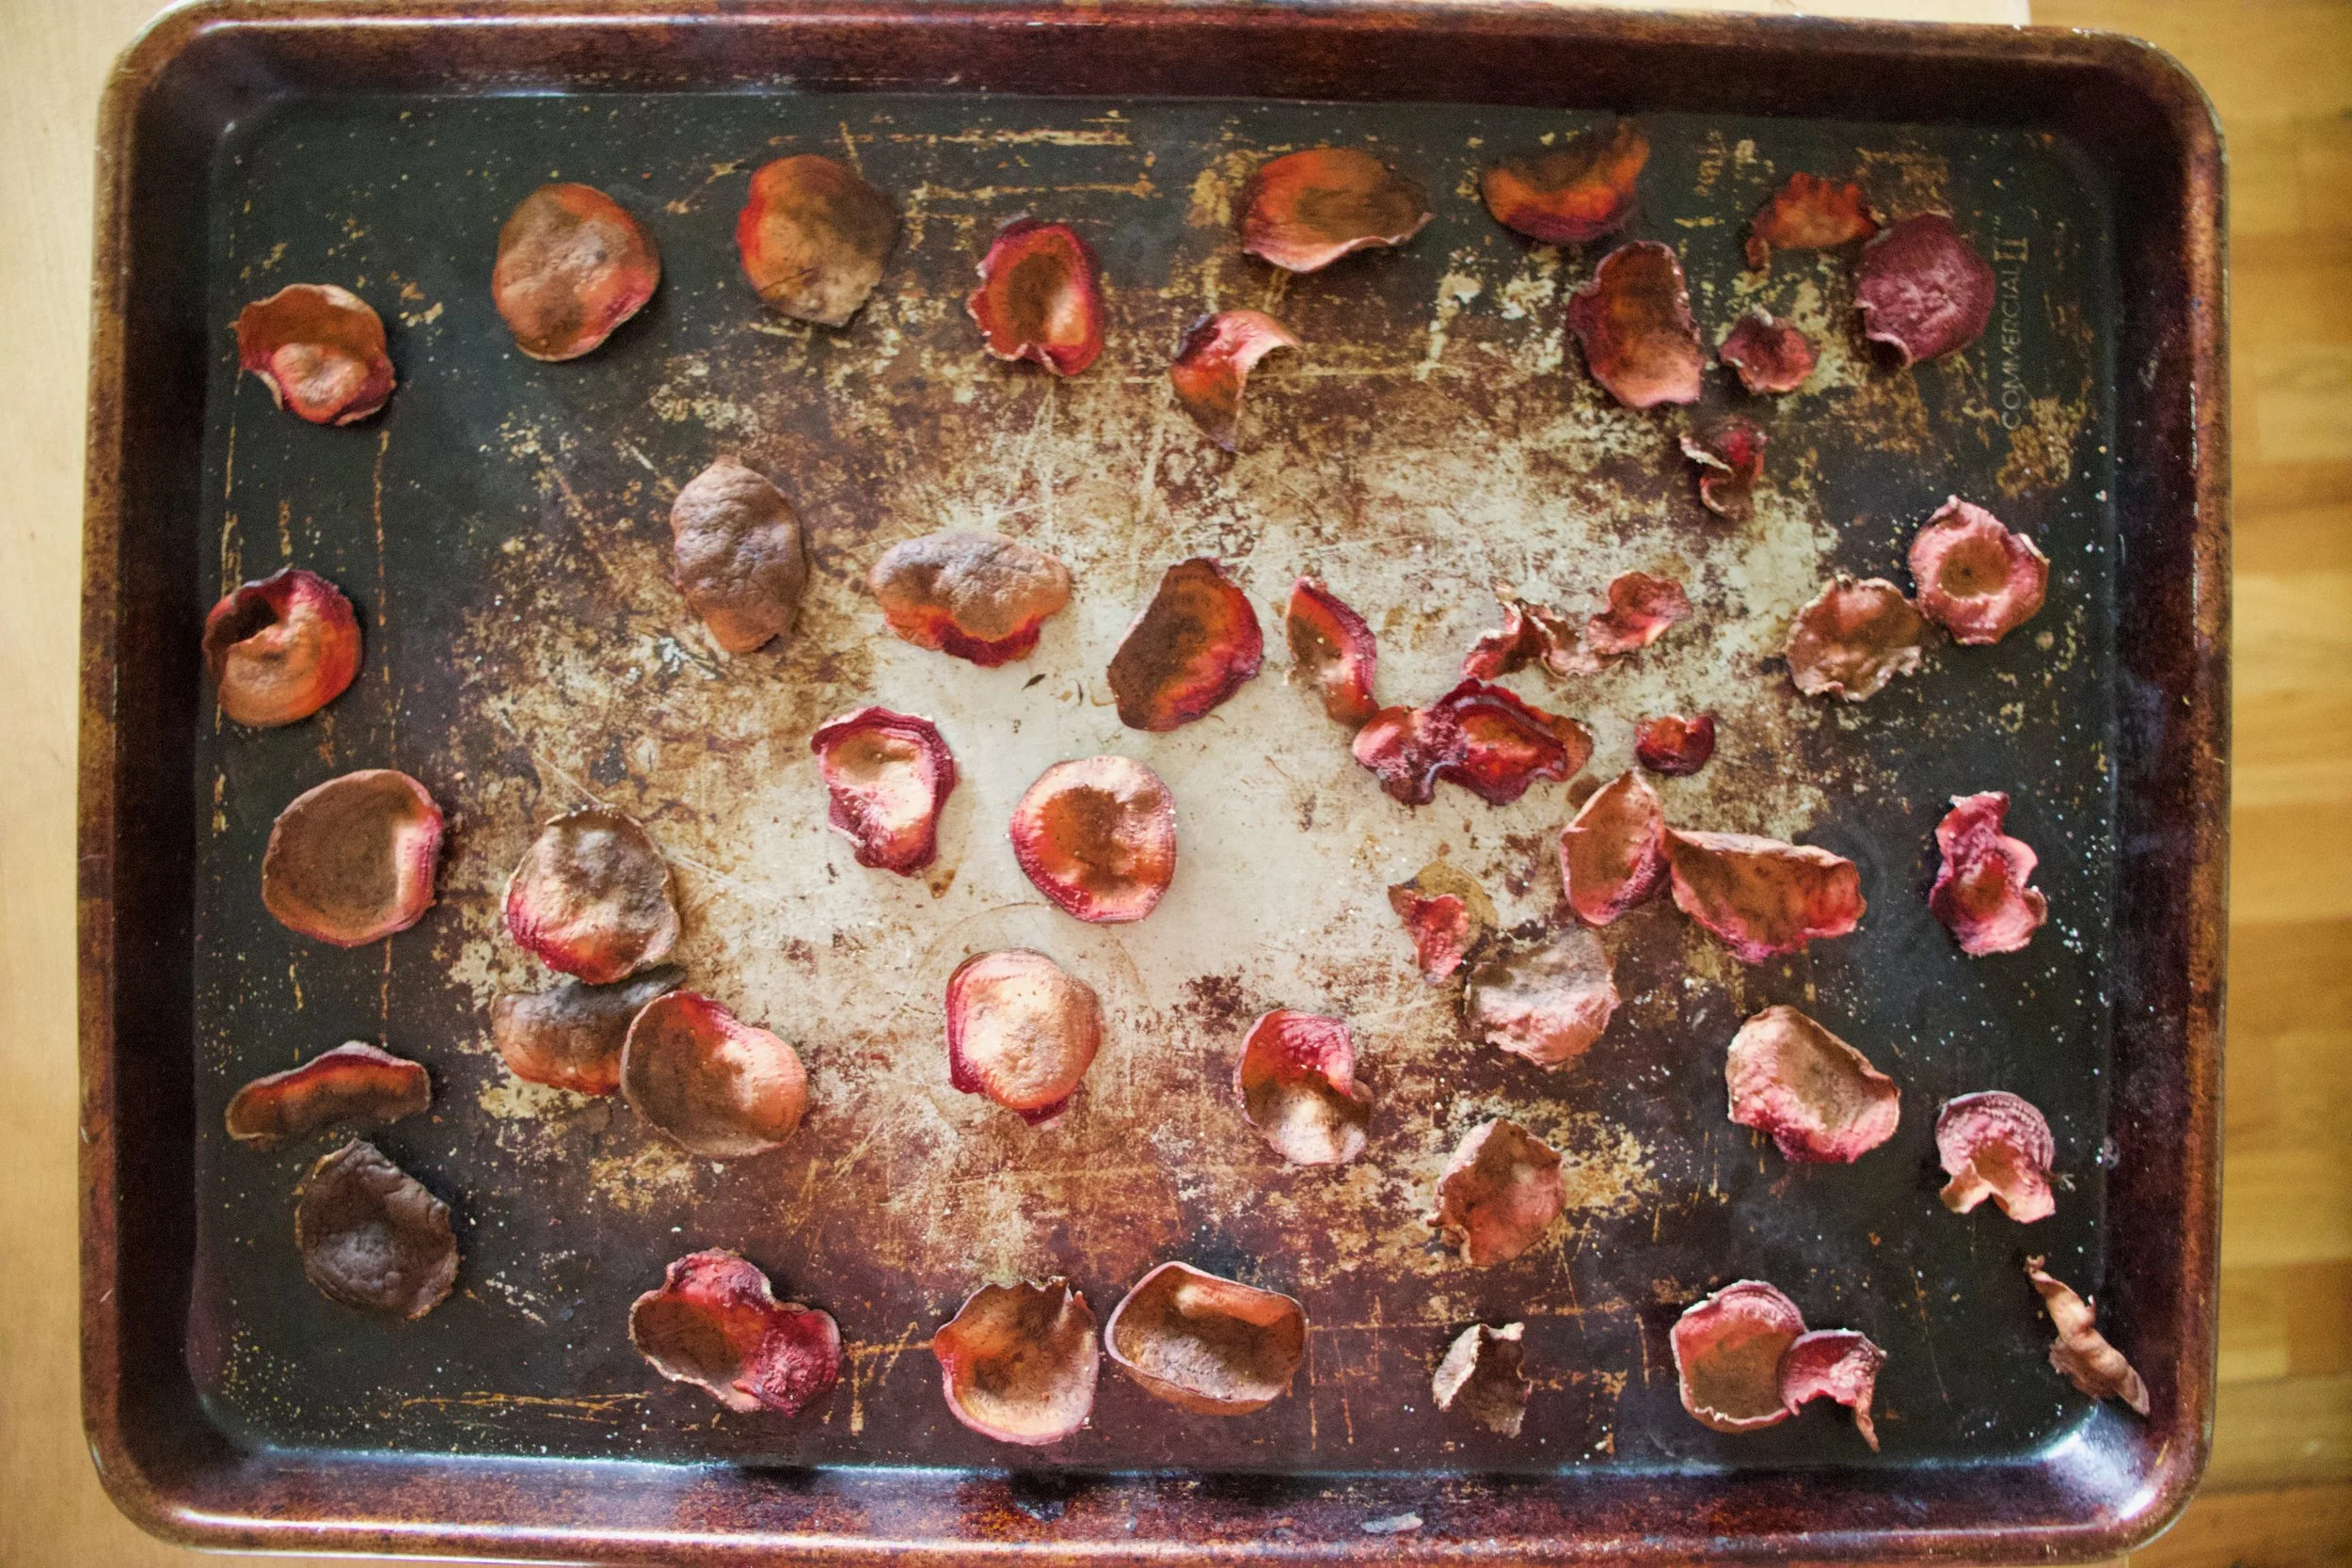

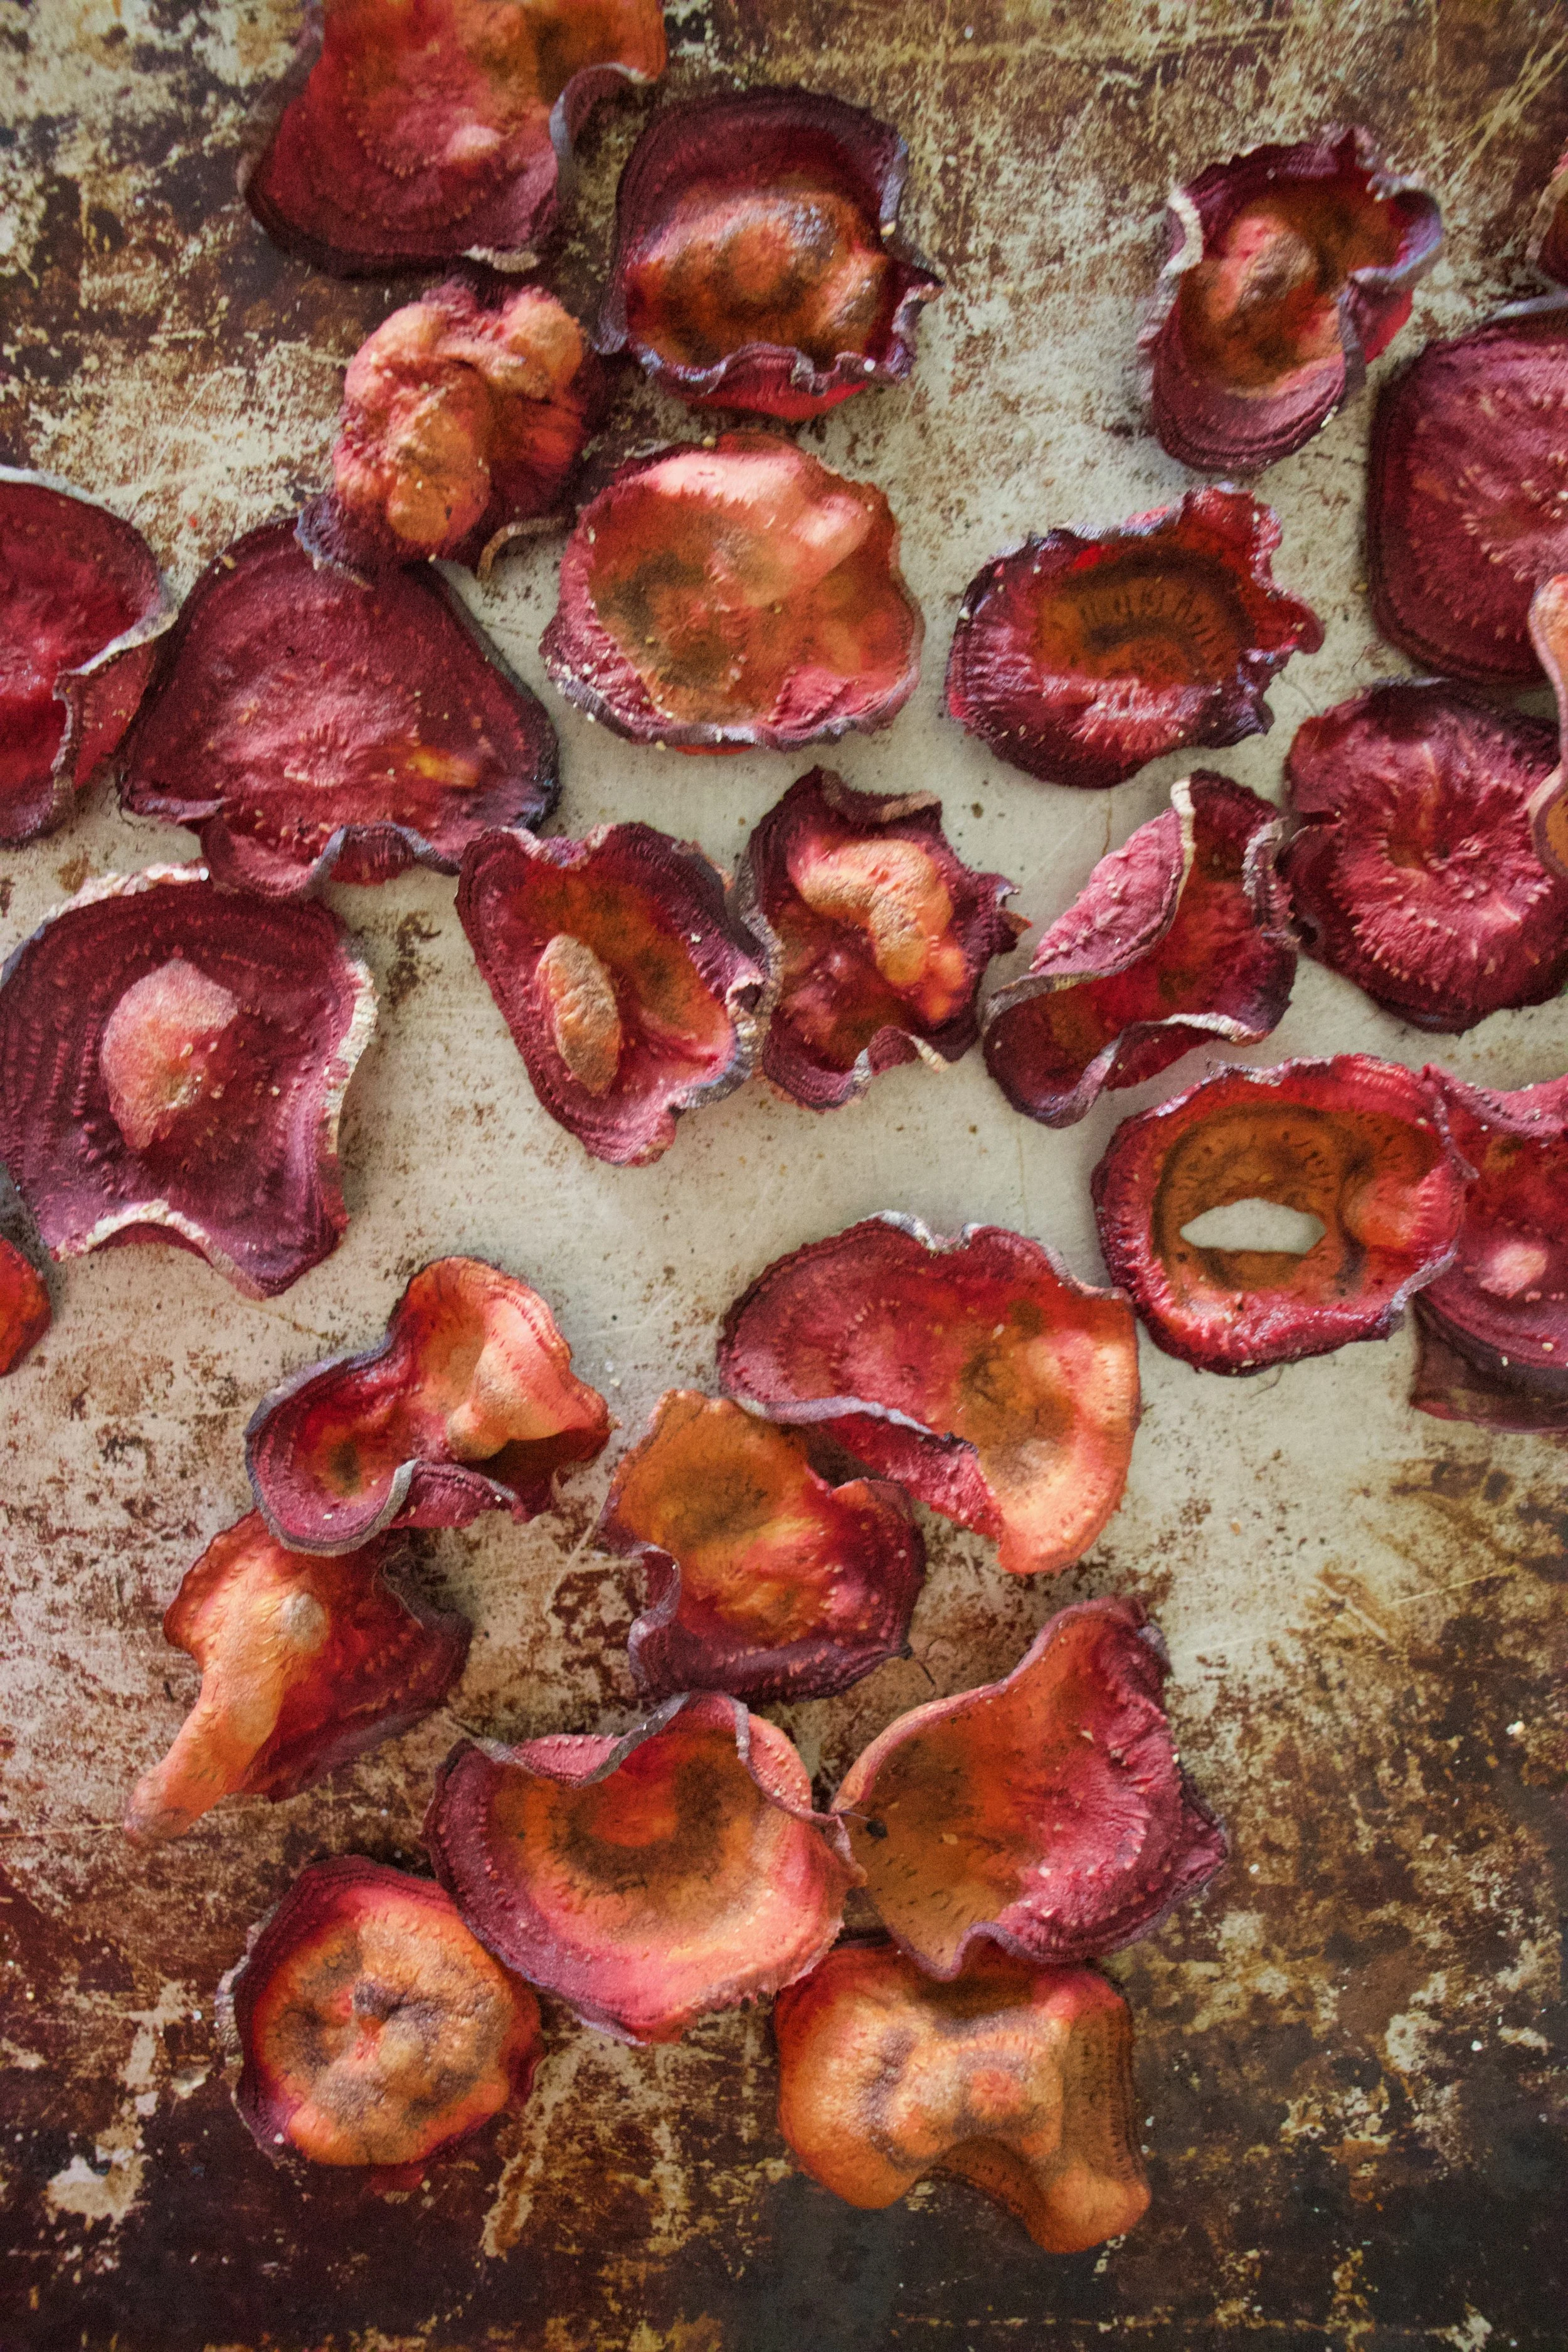
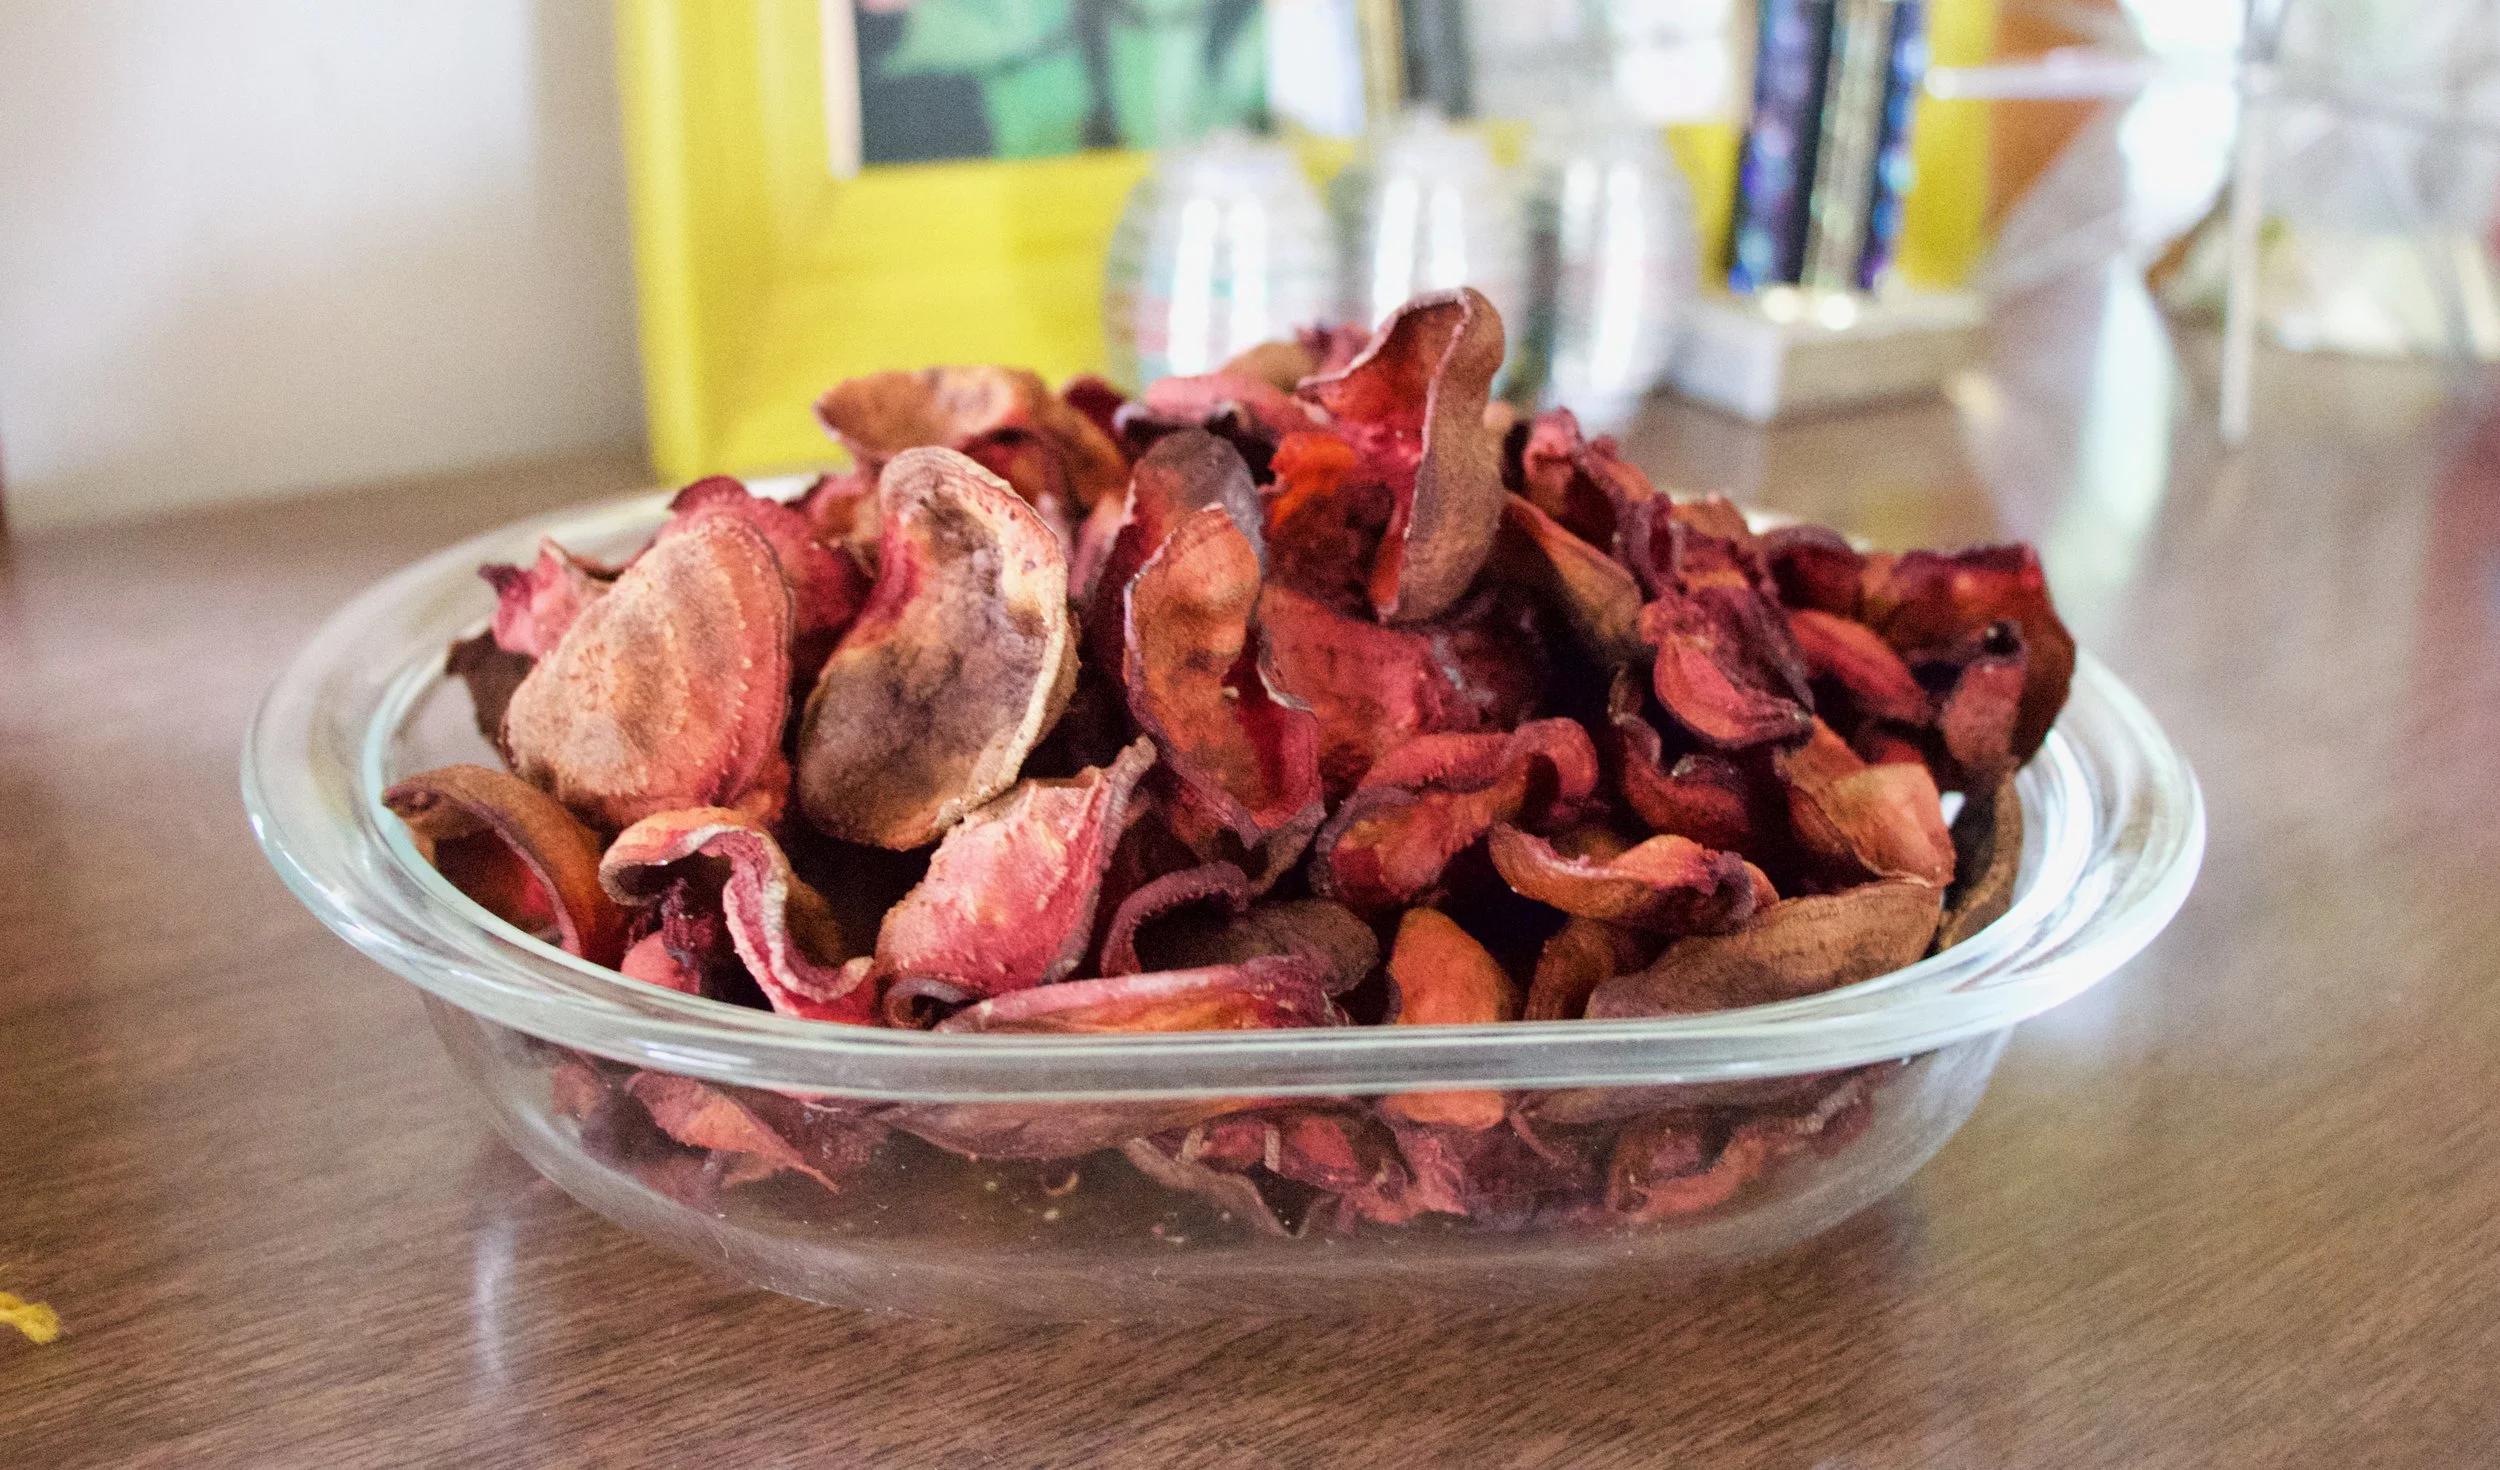
 It’s Mother’s Day weekend which means that you and I and everyone out there should feel the slightest bit obligated to at least do a little something nice for your mom for the mere fact that you were borned. And really what better way to celebrate mom than with food%u2026 It really is the least that you can do. (I think mom’s also like flowers and cards and handmade pasta necklaces) My mom is defiantly about the food. (she has had her fair share or pasta necklaces) %u00a0A many years back on Mother’s day, this sweet little girl (me) made her mother a special %u00a0breakfast treat%u2026blueberry scones. And ever since that day, for every freaking holiday, birthday, whatever day, my mother requests (demands) a batch of those scones. She is always saying that these are her favorite treat and that no one has ever made them as good as I do. (I guess that just reiterates that I am her number 1 child)
 The stuff. Flour, baking soda, baking powder and salt. A bit of sugar, vanilla, buttermilk, and butter (use vegan butter and nut milk if you want to make them vegan) And of course we need the blueberries which can be fresh or frozen. I usually use fresh, but the store I stopped at only had really big containers of fresh that were like $1000 dollars a piece and the organic frozen happen to be on super sale. So you know, the cheap in me won that battle.%u00a0
 So into the bowl goes all the dry stuff; flour, baking powder and soda, salt, and the sugar. Give it a good whisk.
 Now dump the blueberries into the flour mixture. Toss them around to give them a coat of flour. Add in the buttermilk and vanilla and give a little mix until liquid is absorbed. We are trying to handle the dough as little as possible.
 Turn mixture onto counter. It’s very loose, but thats what it should look like.
  Very gently and with as little handling as possible, gather dough up, knead a few times till everything %u00a0just comes together. Press dough into a disk that is roughly an inch thick%u2026. and it doesn’t need to be perfect.%u00a0
 Cut the disk into even sized pieces. Do 6 big, 8 normal, maybe even 10 smaller. Whatever size you like. (I did 8) Place the scones onto a baking sheet, using a spatula to transfer, and sprinkle the tops with a little bit of sugar. Into a preheated oven for about 20 minutes.
 And when the scones look all nice and browned and a tester comes out clean. remove and either serve right away warm, preferably with huge cup of coffee or tea, or stick on a rack to cool before storing in %u00a0air tight container.
 %u00a0 %u00a0%u00a0
 %u00a0I figured now is a good time to get this recipe out there before we get to far into spring and summer recipes because there is going to be a lot of banana ice cream filled recipe coming and I figured its a good idea to have the basic banana ice cream recipe ready for people to refer too.%u00a0 And because I made so much fantastic naner ice cream, I also made a cookies and cream naner ice cream for my sisters and the mister.
 %u00a0 %u00a0
 The stuff you need for this ice cream%u2026. Nice and ripe bananas, peeled and then frozen* That’s it.
 After all blended and smooth, either eat right away or scoop ice cream into a freezer safe container and stick in freezer. That’s the banana ice cream%u2026 %u00a0And it is amazing and so so so so so addictive. I make a batch, think I am only going to eat a scoop, then find myself eating half of what I have made, but it’s ok cause it’s only bananas.%u00a0
 One%u00a0batch of banana ice cream, either freshly made, still in food processor or made ahead and placed in a food processor and given a good pulse to smooth it up.
 Now you have cookies and cream naner ice cream%u2026. and everybody is happy.





 Lets kick the weekend off right, with a nice warm and hardy salad. Not a frilly little salad, but a salad that fills you up and leaves you feeling warm and cozy. %u00a0 A salad with a lot of squash! So here’s the thing, I eat a lot of winter squash, maybe 4 plus a week. Because I eat so many, I store a good amount in a cold storage area outside of the little warm living space we call home. Last week we had a drastic temperature change and %u00a0a good few of the my butternut and spaghetti squash froze.. then started to de-thaw. Not good. That was the second bad food experience of the day%u2026.. Earlier that day I had bought about 2 dozen super ripe bananas that I had been planing on freezing and what not. There were four bunches and each bunch was wrapped in plastic and were in a bag that I left near the back door. The thought crossed my mind, but I hastily brushed it away. Washer won’t eat those%u2026.. Well guess what? The shit ate half of my freaking bananas%u2026plastic and all. Needless to say, I was kind of pissed already so finding my squash on the way out really set me off. I was not about to let more food go to waste.(or be eaten by the dog) I went into rescue mode..Chop chop and dice%u2026boil, roast and steam%u2026and eat eat eat%u2026. and eat. I have been eating butternut for breakfast, lunch and dinner for the past week and that’s ok with me cause man it does taste oh so tasty. But for some people in my life, eating mashed squash out of a jar all day long does not hold the same appeal so I have been sneaking it in where ere I can. %u00a0
 Easy peasy%u2026.
 Diced butternut and a mediumly sliced onion..(mediumly is a new cooking term) Spritz a bit of oil in a pan and toss the squash and onion in there and sprinkle with salt and pepper. Shove into the hot oven and roast until squash and onion are tender and tasty.

 Plate it and eat eat%u2026 I drizzled a little balsamic vinegar on mine%u2026Nick like his straight up. Do what you will cause either way, it’s going to be awesome!!!!










THE LOVELY CRAZY
January 28, 2020 by maximios • Blog
Besides begin a coffee addict, I am also a super big tea drinker. At least 1, if not like 3 cups a day. And when I say cups, I mean a 32oz ball jar of steaming hot water with a tea bag of some sort in it. And sure, I will use the same bag twice or leave in an old bag and add a new bag. Or with loose leaf, I%u2019ll end up just eventually swallowing it all. What can I tell ya. That%u2019s my truth. %ud83e%udd37%ud83c%udffb%u200d%u2640%ufe0f
Anyway, tea. I have a shit ton. Bags and loose leaf, but sometimes what I would call “conventional tea flavors%u201d do not sing my fancy. That is when I will dig around in my spice jars and pull stuff out to make or add to a tea.
Fenugreek. A seed. A great tasting seed. I usually use it in my chilis and curry dishes, but lately, I have also been brewing it up with (and without) fresh ginger to drink because it is fantastic. Ginger of course is spicy and earthy, but fenugreek, while also being really earthy, also has a sweetness to it and tastes kind of like real maple syrup. Now doesn%u2019t that sound great? That%u2019s because it is great.
So if you are feeling a little something different and tasty and maybe just so happened to have some fenugreek in the old spice cabinet, give this tea a try. A perfect for and cosy drink for cold winter afternoon.
To the tea!
The stuff. Water, fenugreek, fresh ginger, and an orange.
Dump water into a pot and add in fenugreek seeds. Place on the stove and bring to a boil, then turn the heat to low and simmer.
Cut up the fresh ginger into small chunks and take a few ribbons of peel from the orange.
After the fenugreek has had a 5 minute head start in the water, add in the ginger and orange and keep simmering for another 5 to 10 minutes. (longer time for stronger tea)
Strain the tea into cups, squeeze in a little fresh orange juice, and go curl up o the couch.
It%u2019s tea time.
-C
makes 2 cups of tea
2 teaspoons fenugreek seeds
1 inch chunk of fresh ginger
an orange (optional)
4 cups water
Place water and fenugreek seeds in a pot and place on stove. Bring to a boil then turn heat down to simmer for about 5 minutes. Cut up ginger into small chunks and peel a few ribbons of orange zest and place into pot. Continue to simmer for another 5-10 minutes (longer for stronger tea). When you are ready to drink, strain into cups, squeeze in a little fresh orange juice, and drink.
It%u2019s a smoothie. And no, we have never really been smoothie people in this house, but what can I say, sometimes smoothies happen, especially when you have about 20 ripe bananas in the fruit bowl with no room in the freezer and no need for 7 loafs of banana bread.
So I smoothied. And I like it (a lot).
This is a smoothie of simplicity. Nothing fancy. Simplest of simple. Straight to the point. And all sorts of good.
You might think, does this simple smoothie you speak of taste very good? Yes, yes indeed it does. It is all sorts of fantastic. Basically if you like creamy, nutty, oaty, bananery things, you will like this. And it%u2019s a perfect breakfast, snack, dessert, or just wanting a little treat like thing that is not garbage food. A smoothie of all smoothies with the most basic ingredients. And takes about 15 seconds to whip up. Can%u2019t complain about that.
To the smoothie goodness!
The stuff. A ripe banana, some old fashion rolled oats, a pinch of salt, water, and a smidge of maple syrup if you want it.
Everything goes into blender.
And blended until smooth. Hence the word smoothie.
Pour it into a cup (or if you are feeling primal, drink it straight from the blender%u2026 it%u2019s totally cool)
And done.
A banana oat smoothie.
Let the good time roll!
-C
makes 1 smoothie
1 very ripe banana
1/3 cup raw old fashion oats
1 1/2 cups water
pinch of salt
a tablespoon or two of any sweetener you like (optional)
a pinch of cinnamon (optional)
Place everything into a blender and blend until smooth. Pour into a cup, sprinkle with cinnamon if you wish, and drink right away.
Have you heard of switchel? A lot of people haven’t so don’t feel bad if you don’t know what the hell I am talking about (like my computer. It keeps auto correcting switchel to switched). So switchel. It’s basically a drink made from water and apple cider vinegar. But wait, don’t grimace and click away, it’s also has fresh ginger, lime, and maple syrup mixed in and is really really really freaking refreshing and tasty and just really good. I guess it was even used back I the day as a sort of sports drink, like Gatorade because it has all sorts of electrolytes and anti-inflammatory properties from the ginger.%u00a0%u00a0Plus apple cider vinegar has got all sorted or health benefits,%u00a0so it’s a tasty treat with benefits. Who doesn’t love the benefits?%u00a0
You can drink the switchel %u00a0straight up hot or cold, add it to seltzer for a bubbly soda like drink or even %u00a0mix some cocktails with it. I enjoy a nice cold glass when I am feeling thirsty but what I usually do it fill up half a %u00a0jar with boiling water, then fill the rest of the jar up with the cold switchel. It’s a nice tangy, spicy,%u00a0refreshing and warming drink that I look forward to every day. I even got the littles to try it.%u00a0%u00a0One thought it to be nasty (can’t win them all), but the other one really liked it too, so you know it’s not just me that thinks it good.%u00a0
The stuff. Apple cider vinegar (the good stuff that is raw and has the mother), fresh ginger, limes, maple syrup, and water.%u00a0
Fresh ginger is the best. Give it a little peel with a spoon, just to maximize gingerness exposure then chop into small pieces.%u00a0
Ginger and water goes into big pot. Bring it to a boil then turn down to a high simmer for 10-15 minutes to really get the ginger infused into that water.%u00a0
After it’s cooled a bit, strain the now ginger water into a pitcher or a big jar.
Add in the vinegar, the juice of the limes and a bit maple syrup. Start off with a little maple, you can alway add more later if needed.%u00a0
After the switchel has some time in the fridge to cool (at least 2 hours, but I like it best when it’s sat overnight) grab a glass ,some ice cubes, and a slice of lime. It’s go time.%u00a0
A drink to you my friends
-C
Makes bout 6%u00a0 cups%u00a0
With a spoon, gently peel ginger . Not perfectly, just get some of the skin off. Chop it into small pieces and place it into a large pot with the water. Bring to a boil then let simmer for 10-15 minutes. Strain ginger water int a large pitcher or jar.
Add in the apple cider vieager, the juice of the limes, and a tablespoon or two of maple syrup. Give it a good stir then place in the fridge until cold (about two hours but overnight is best)%u00a0
When it’s cold, give it a good stir again, taste, and if it needs more maple, add it in. And then it’s ready.
You can drink it on ice, maybe add some seltzer to it, or mix it into some fancy cocktail. It can also be reheated for a nice spicy warming treat.%u00a0
I love watermelon, I mean, who doesn’t, but i don’t often buy them for myself for one main reason. They are so freaking big and once you cut open a melon, the rest of what is not eaten needs to be refrigerated which would be fine but I have a very tiny fridge and sticking a watermelon in there takes up about half the space. And sure, I could maybe eat a whole melon all to may face in one sitting, but then I would explode. And yes, I know you can buy smaller wedges of melon at the store, but I refuse. Those wedges just seem gross and expensive and wrong to me.%u00a0 When I buy watermelon I take my chances and buy the whole thing and just eat the crap out of it until I make room for other food in the fridge.
It has been so hot out (too hot) and I really just needed a watermelon, so I bought a watermelon (the biggest one I could find because of course). I waited for a day until the fridge was near empty and cut the beast up. Half went into the fridge right away (I had just eaten the last of the greens to make room) and the other half, well only a 1/4 was eaten. I could have kept going and eaten the rest or I figured I would just make a nice tea drink with the rest. And that what I did and that’s this drink I show you here. Smooth, bright, and earthy iced green tea with fresh sweet watermelon, it’s all summertime up in you mouth. And pureeing up watermelon into a liquid definitely takes up way less space in the fridge. I am a genius.
The stuff. Some watermelon, a few green tea bags, a lime( or a lemon), a spring or two of mint, and some water.
Start off with making the tea. Hot water to tea bags, steep for 5 or so minutes then remove bags. Stick tea in fridge to cool.
Now for the watermelon. Remove the rind from the fruit , and cut it up into chunks. Toss in a few mint leaves and…..
So you have cooled tea, pureed watermelon and the juice of a lime.
Pour it all together and mix it all up.
And there you have it. Fresh watermelon green ice tea, ready for your drinking.
All you need now are glasses full of ice and little wedges of melon.
All the summertime, all the watermelon.
Hope you are all staying cool.
-C
make 6 1/2 cups
Bring water to an almost boil (I let my tea pot whistle, turn it off and sit for a minute or two) and pour hot water over tea bags. Let steep for about 5 minutes, then remove bags and refrigerate tea until cold.
When the tea has cooled, take you melon, remove the rind, and puree the fruit along with the mint, with a blending device of you choice. Squeeze in the juice of the lime and give it all a good stir.
Pour tea over ice, garnish with a sprig of mint and a slice of watermelon if you want some fancy.
I am channeling all my summer time feels here in hopes for warmer weather. As of yesterday there was still a pile of snow outside of my house and I am still leaving every morning in a hat, mittens, and a winter jacket.
I want t-shirts and shorts, I want sandals, and I want to set my winter jacket on fire (not really, but kinda).
This cold weather has crept back into my soul and I needed something to remind me that there will be warmer days to come and I will soon be bitching about how hot I am and blah blah blah.. you know how it goes.
So I make lemonade. This lemonade as inspired by my favorite tea as of late, raspberry zinger. It’s a nice and tangy tart and really tasty. I make great big jar of it at night and add a little squeeze or two of lemon to it for that little extra zing. I figured if it tastes good hot, it will taste great cold, which in fact, it does. It taste really freaking good. And it just occurred to me that there is probably a little subliminal inspiration from Beyonce in wanting lemonade, so thanks for the B.
Anyway, it’s suppose to me nice and seasonably warm this weekend. Maybe bust out your lemonade game and try a batch of this one.
The stuff. Lemons, a raspberry zinger tea bag, honey (or any sweetener you like to use) water and ice.
Bring some of that water to aalmost boil and pour it over the tea bag (make sure you stick the bag into a jar or pitcher)
While the tea is steeping, juice the lemons. And a personal preference, you can strain out the pulp or not. I use the strainer to catch the seeds but then stick the pulp back in cause I like pulp. All up to you.
While the tea is steeping and still hot, add in any sweetener that you want to use. ( I used a little honey) Stir until that sweetness is all dissolved.
And after the tea has had a good steep, dump the brewed tea into the pitcher with the lemon juice then add in the really cold water. Stir it all around.
Add acouple thin slices of lemon to make it all fancy anda few big chunks of ice to make it super cold
Refreshing, crispy, tangy with a touch of sweet….Perfect for all those warm summer days to come (hopefully)
Have a great weekend people.
-C
Makes 5 cups
Place tea bag in 2 cups of hot water (can be done directly in a pitcher) Add in the sweetener while its still hot and mix until completely dissolved. Let steep for about 10 minutes.
Remove tea bag and add in the lemon juice, 2 more cups of cold water and mix, Top with ice and garnish with a few more lemon slices if your feeling fanciful.
Serve in a glass full of ice with a wedge of lemon and a smile on you face.
A few month ago I read an article about NYC seltzer water (which I have still yet to have) and fell in love with those super cool glass seltzer bottles. (I really want to get my hands on a few). In the article, there was the mention of egg creams. Now at first I was kind of disgusted because who the hell drinks eggs, but then after doing super duper internet research (google) I found that egg creams are not actual egg.. It’s pretty much just bubbly chocolate milk.
Yesterday I was thinking of a non alcoholic beverage that people that are opting out of the alcohol can drink, something maybe a bit different and fun and I had that brain spark.. Egg creams! And I just so happen to be babysitting a gaggle of littles for the day and who better to serve a fun non alcohol drink too! (after that, save all he alcohol for me!) It was perfect cause these littles are down for anything with chocolate and it just so happened to be one of those littles birthday (HAPPY BIRTHDAY JUDAH BUG!) .so special party drinks were in order.
Here is how the egg creams when down. I made the chocolate syrup. The kids all loved it and where sticking there fingers in it. Then I assembled the egg creams. All the kids took a glass, drank some, and took off. I found 1/2empty cups of drinks around the house. But here is the thing. When I asked if they liked it, two said yes.,one said it was weird but good, and one little ran away from me with the bag of chocolate quinoa bark ! brought. (I didn’t run after her) The mr came by a few hours later and tried some of the dregs of one and he wasn’t into it at all , but then again he hates chocolate milk and it was sitting around for a while. So the verdict …. not sure.%u00a0 Kids like it if they like chocolate milk but treat it like they would treat any drink (drink half and abandon the rest). Adults could totally get into it if there is some nostalgia behind it or maybe a shot of vodka added.%u00a0 So yeah. I think anyone that is interested should definitely try it. And if you do, let me know. I am very curious what people think.
Oh, and to make the afternoon that much more interesting, I am currently still suffering from laryngitis (hahaha) So yesterday was some fun stuff.%u00a0
The stuff for the chocolate syrup. Cocoa powder, sugar, water, a pinch of salt and a little splash of vanilla. And for the actual egg cream.. milk (a plain plant, nut, or animal) and strawberry flavored seltzer water. (if you don’t like strawberry use any flavor or plain)
To make the syrup, combine the cocoa, sugar, water, vanilla and salt into a sauce pan and bring to a boil while whisking continuously. Keep whisking until sauce starts to thicken then remove from heat and pour into a jar and let cool.
Now for the egg cream assembly
Syrup goes into glass.
Milk into syrup and mix it all around.
Give it another little whirl with a spoon or straw and if you want a more bubbly head, blow into the straw(works the best!)
and get down to business.
HAPPY NEW YEARS!
-C
For the chocolate syrup (makes enough for a few egg creams but the syrup is good for anything calling for chocolate)
Stuff for one egg cream
To make the syrup, combine the cocoa, sugar, water, vanilla and salt into a sauce pan and bring to a boil while whisking continuously. turn heat down a little and keep whisking for another 2-3 minutes until sauce starts to thicken. Remove from heat and pour into a jar and let cool.
In a glass that holds are least 16 oz, add in the milk and the chocolate syrup. Mix together (can be shaken or stirred) then pour in about 1 cup of the seltzer water. Give the drink a good mix with a spoon and serve it on up. A straw is recommended to blow bubbles into drink!
Note.. I am aware that there are a few different ways to prepare an egg cream so if you know of a way that is better (milk in last. seltzer mixed with chocolate syrup..). then do it your way!
Ugh. It has been so nasty gross out. A four day heat wave, and no, not just hot hot days,%u00a0but those gross, hot hot with all the humidity in the world, kind of days. My body has rebelled and turned into a slug and my hair%u2026 well let’s not talk about my hair.
Yup, it’s been way to freaking hot to do anything, especially cook. And eating food is’t even especially appealing either (living off raw kale and, yes, lots of tomatoes at the moment)%u00a0. What we all want is to drink something nice and cold and refreshing (and boozy). And what do I do when I want this, and have a lot of that?%u00a0I turn that into this. That being tomatoes, and this, being a cold drink. Did that confuse you?
What I am trying to say is that I have a butt load of cherry tomatoes to eat but what I really want is a cold %u00a0drink. So I took the tomatoes and make them into a lemonade. And it is amazing. It hits all %u00a0the end of summer, super gross heatwave, I don’t want to move,%u00a0spots that needed to be hit. And just in time for the weekend sow e get to add a little splash or two of something hard, cause we all know that after this past week, we all deserve it.
Think that combination sounds weird? Well don’t cause lemons and tomatoes are perfectly paired together. Tart and tangy, but still with a bit of sweetness from the tomatoes (%u00a0especially if using a sweeter variety like the sun-gold). It really is a great, refreshing drink, with or without the booze.%u00a0A perfect match!
Tomato lemonade here we go!
The stuff. Tomatoes (%u00a0I used sun-gold cherry cause I have a buttload,%u00a0but you can sure use whatever tomato you have to many of), lemons, water, and if your into it vodka.
Note. The mr. and I are not big on sweet drinks, so I didn’t add any sweetener, the tomatoes being sweet enough. But feel free to add a little sugar or honey to yours.
Start by dumping tomatoes into a pot with water. Stick on high heat and bring to boil, then turn heat to medium low,stick a lid on pot,%u00a0and let tomatoes simmer for a little while.%u00a0
About 30 ish minutes later, the tomatoes have reduced to about 1/3 of what you started with and have turned into a a chunky like syrup.%u00a0
Strain the juice from the solids into a big pitcher.
Tomato juice! and it’s so pretty bright gold. Now let it cool far a little bit.
And while juice is cooling, juice your lemons
When the tomato juice is cooled off, add the lemon juice to the tomato.%u00a0
Add water and stir
Taste, and if you think it need sweetener, by all means, add a drizzle or two of some honey or spoonful of sugar.
A couple of glasses of ice, and if you shall,, a shot of vodka (add the shot to the glass, not the pitcher)
Me being so fancy added a garnish/snack.%u00a0Basil leaf and cherry tomato skewer looks so nice.
And sit back, put your feet up. and take it all in.%u00a0
Weekend here we come!%u00a0
-C
Note. I did not add any sweetener to my lemonade but you could totally add in a few tablespoons honey or sugar. Do what floats your boat.
Dump tomatoes into a pot with 1 cup of water. Bring to boil then cover and turn heat to a medium low heat. Cook tomatoes down for about 30 %u00a0minutes or until the tomatoes have reduced about 1/3 and is almost sauce like.
Using a fine mesh strainer, strain the tomato mixture into pitcher or jug that you can serve your drinks %u00a0from. Use a wood spoon or spatula to scrap the tomato around strainer to really make sure you get all the juicy goodness. Let tomato juice cool.
While cooling, juice lemons until you get a cup of fresh lemon juice. Add lemon juice to cool tomato juice along with 3 1/2 cups water. Mix and taste. If you think it needs a little sweetener, add a little in. If you think it tastes to strong,%u00a0add in more water.
Good stir, ice in cups, a 2-3oz shot of vodka per 8-12oz cup of lemonade (the ratio is up to you my friend)%u2026 and your sitting pretty. Feeling a little fancy, take a basil leaf and wrap around a cherry tomato. Stab it with a tooth pick and garnish your drink. It ames for %u00a0anise snack too.
Sit back, sip and enjoy.%u00a0
My flowers are coming up, I have packed away my winter jacket, and I haven’t worn anything but sandals for the past week. Plus yesterday I made the first batch of sun tea and saw my first hot air balloon of the season (which lead to a heated discussion with the mister about how hot air balloons take flight. We were both kinda right, but me more than him)So yeah, %u00a0it’s for real%u2026 Winter is gone and spring has sprung, or more like spring sprung then bounced cause now it’s basically summer weather. Not complaining, but I hope we get a least a few more weeks of pleasant, not hot and humid weather.%u00a0
Anyway. Sun tea, one of my favorite summer time drinks. Made by infusing regular old teas with water by using the almighty power of sun.
Why do we want to make iced tea this way instead of just using boiling water? Well you can still do that, but sun tea makes a more mellow, lovely, and I find, more sweeter tea. It brings out more complex flavors that you don’t get with the boiling water method. %u00a0And it’s nice to know that it took zero effort on my part to make the drink (not that boiling water takes that much effort, but still)
It can be made with any variety %u00a0of teas, infused with other fresh herbs, dried spices, or even chunks of fruit. You can also make the teas and add flavors after the infusing is over. Have fun and play with flavor combos.
A few of my%u00a0favorite sun tea%u00a0combinations
These are just a few of the endless possible flavors. And you don’t have to get fancy with it either, you can totally use plain old lipton tea bags (I still do that too)
Now harness the sunshine and feel awesome and fancy by making some tea!
Woo Hoo Wednesday!
-C
SUN TEA
%u00a0What you’ll need
I %u00a0use a ratio of 1 tea bag or 1 tablespoon loose leaf tea per 2 cups of water. And I usually make my teas in half gallon ball jars so I use 4-5 teabags or tablespoons of tea. (makes just enough tea for 4-6 tall glasses, depending on you glass size) %u00a0If it’s a mint tea, I usually use a little less because I find that mint teas can become to strong and bitter so I %u00a0use 3 teas bags or tablespoons of loose.
Directions
Place tea loose or bags into jar. Fill with water, leaving about an inch for tea expansion, place lid on tight, and stick in the sun for anywhere between 3-5 hours %u00a0(depending on how strong you like your tea). When tea is infused to your liking, remove teabags or strain the loose tea and stick into the fridge to chill. Serve as is %u00a0in a drinking vessel with a few ice cubes and add sweetener if that’s what you do.
Drink within a day or two, then rinse jar and make a new batch!