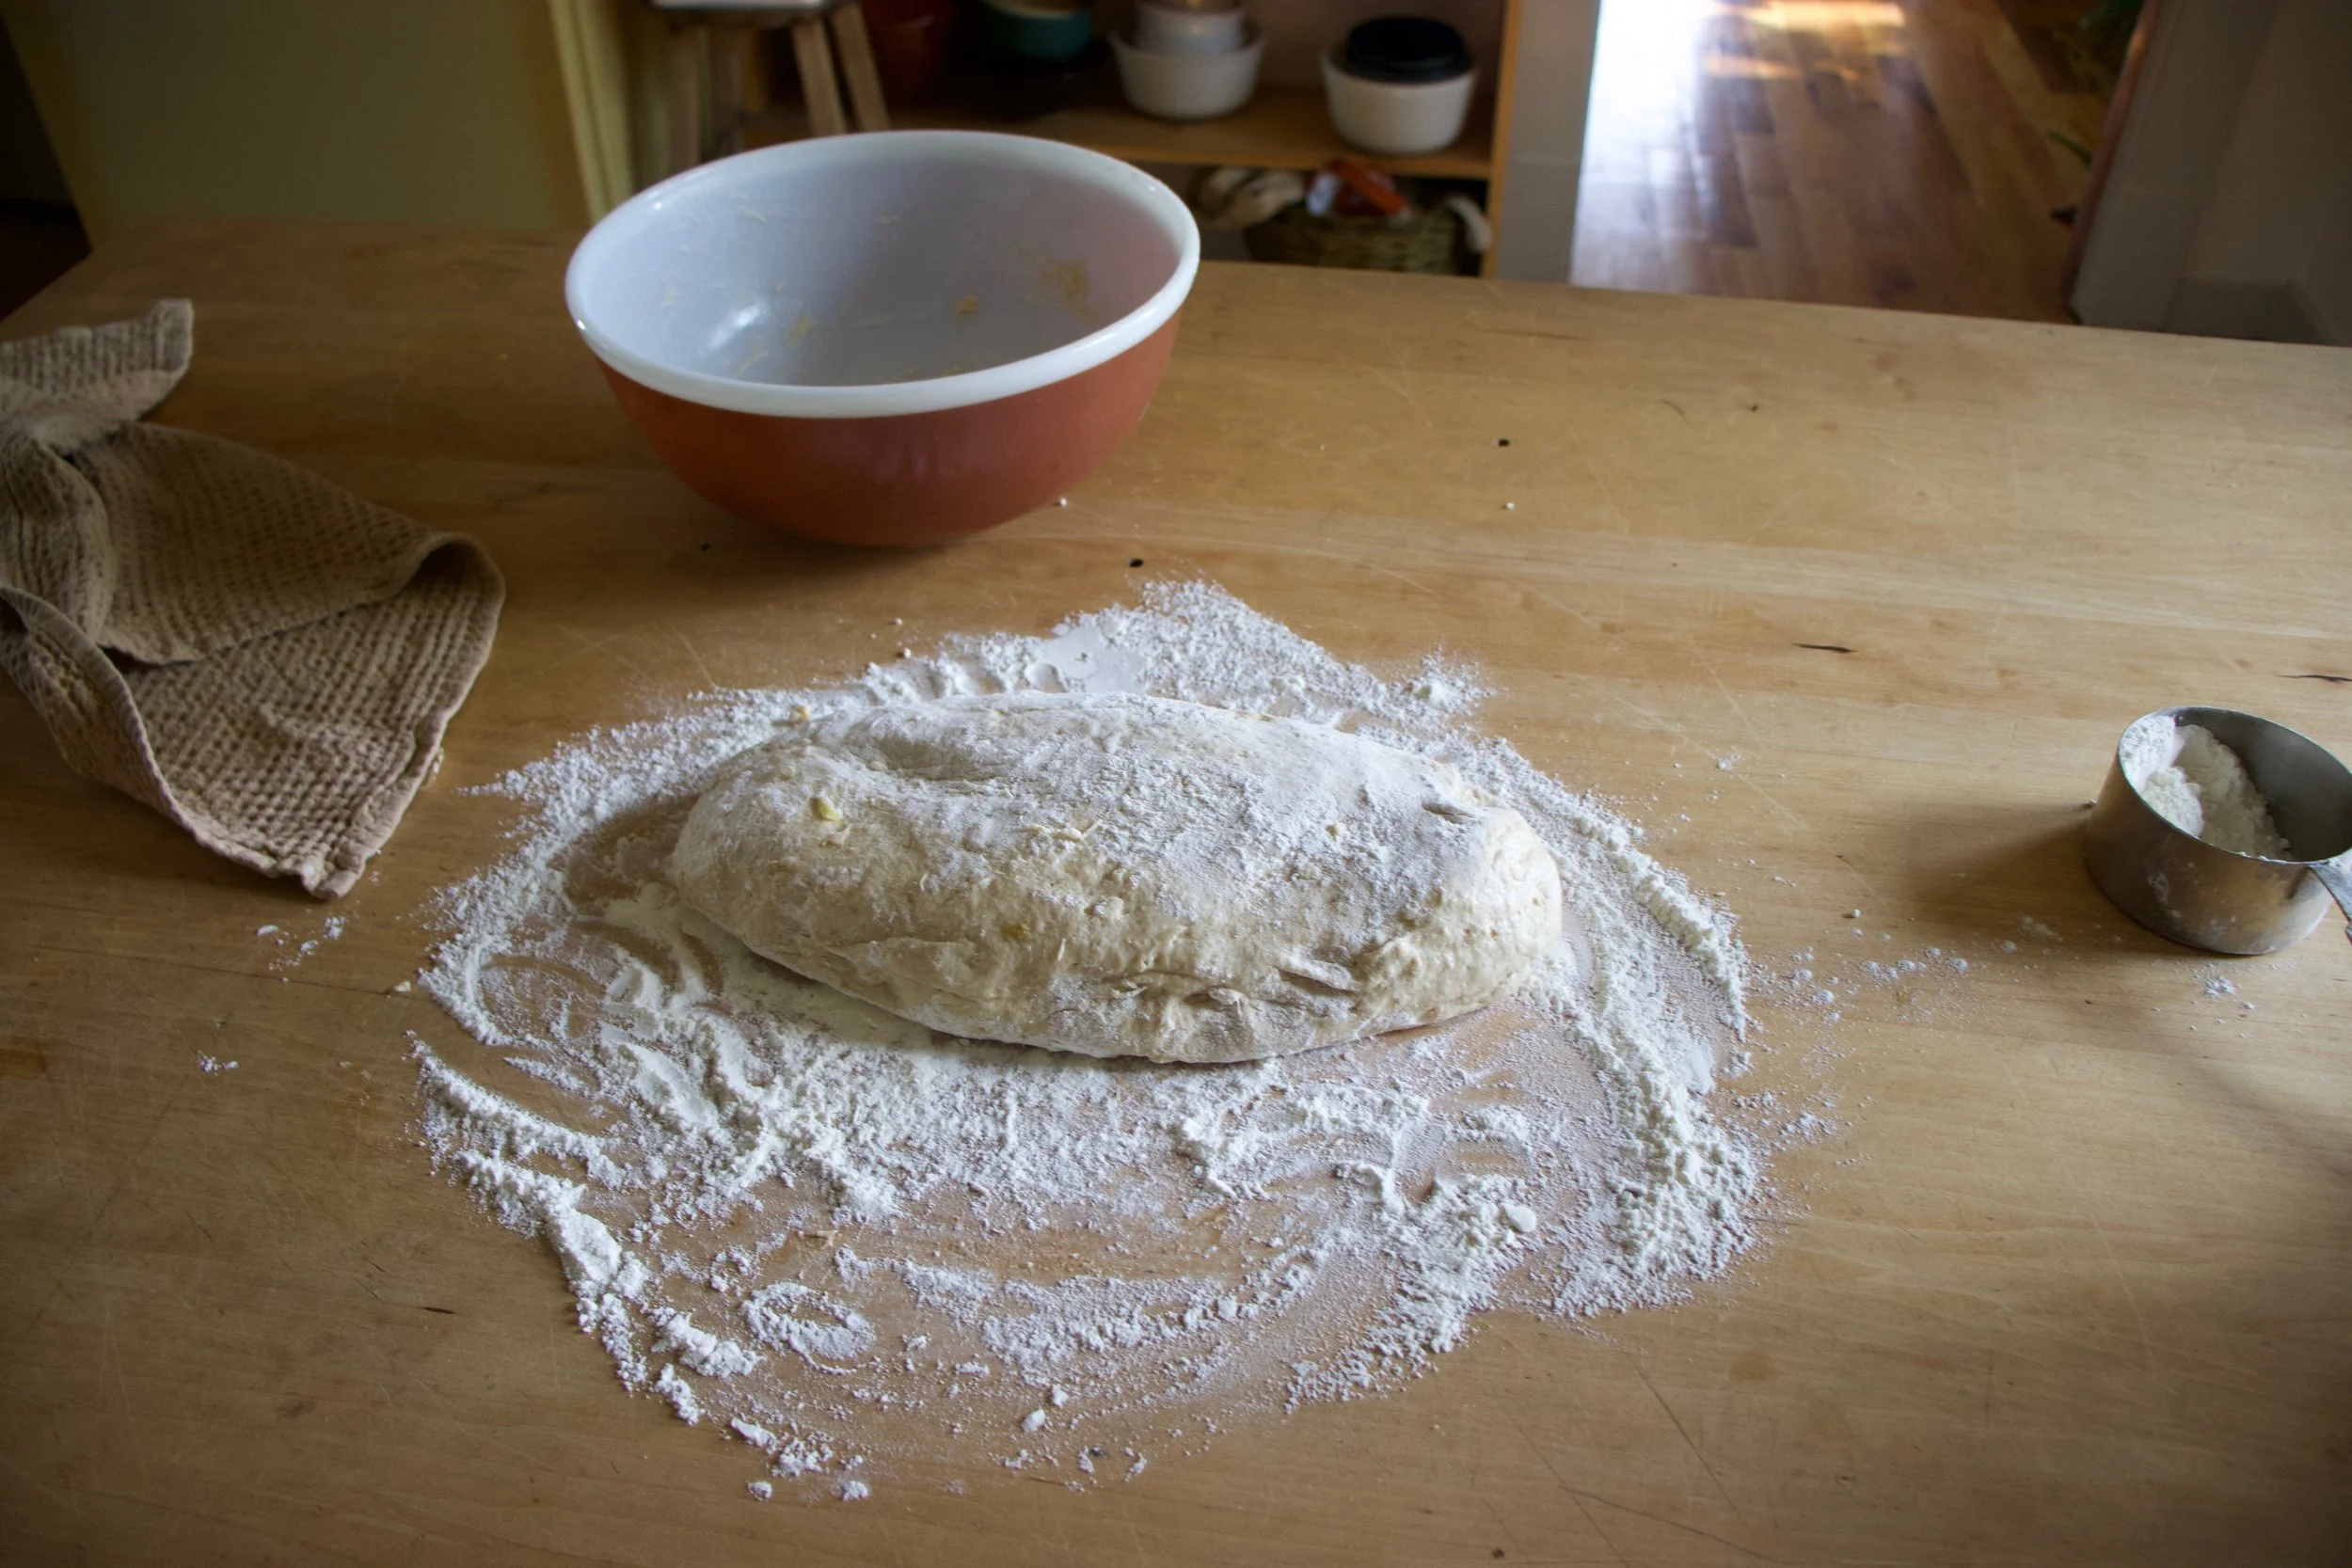
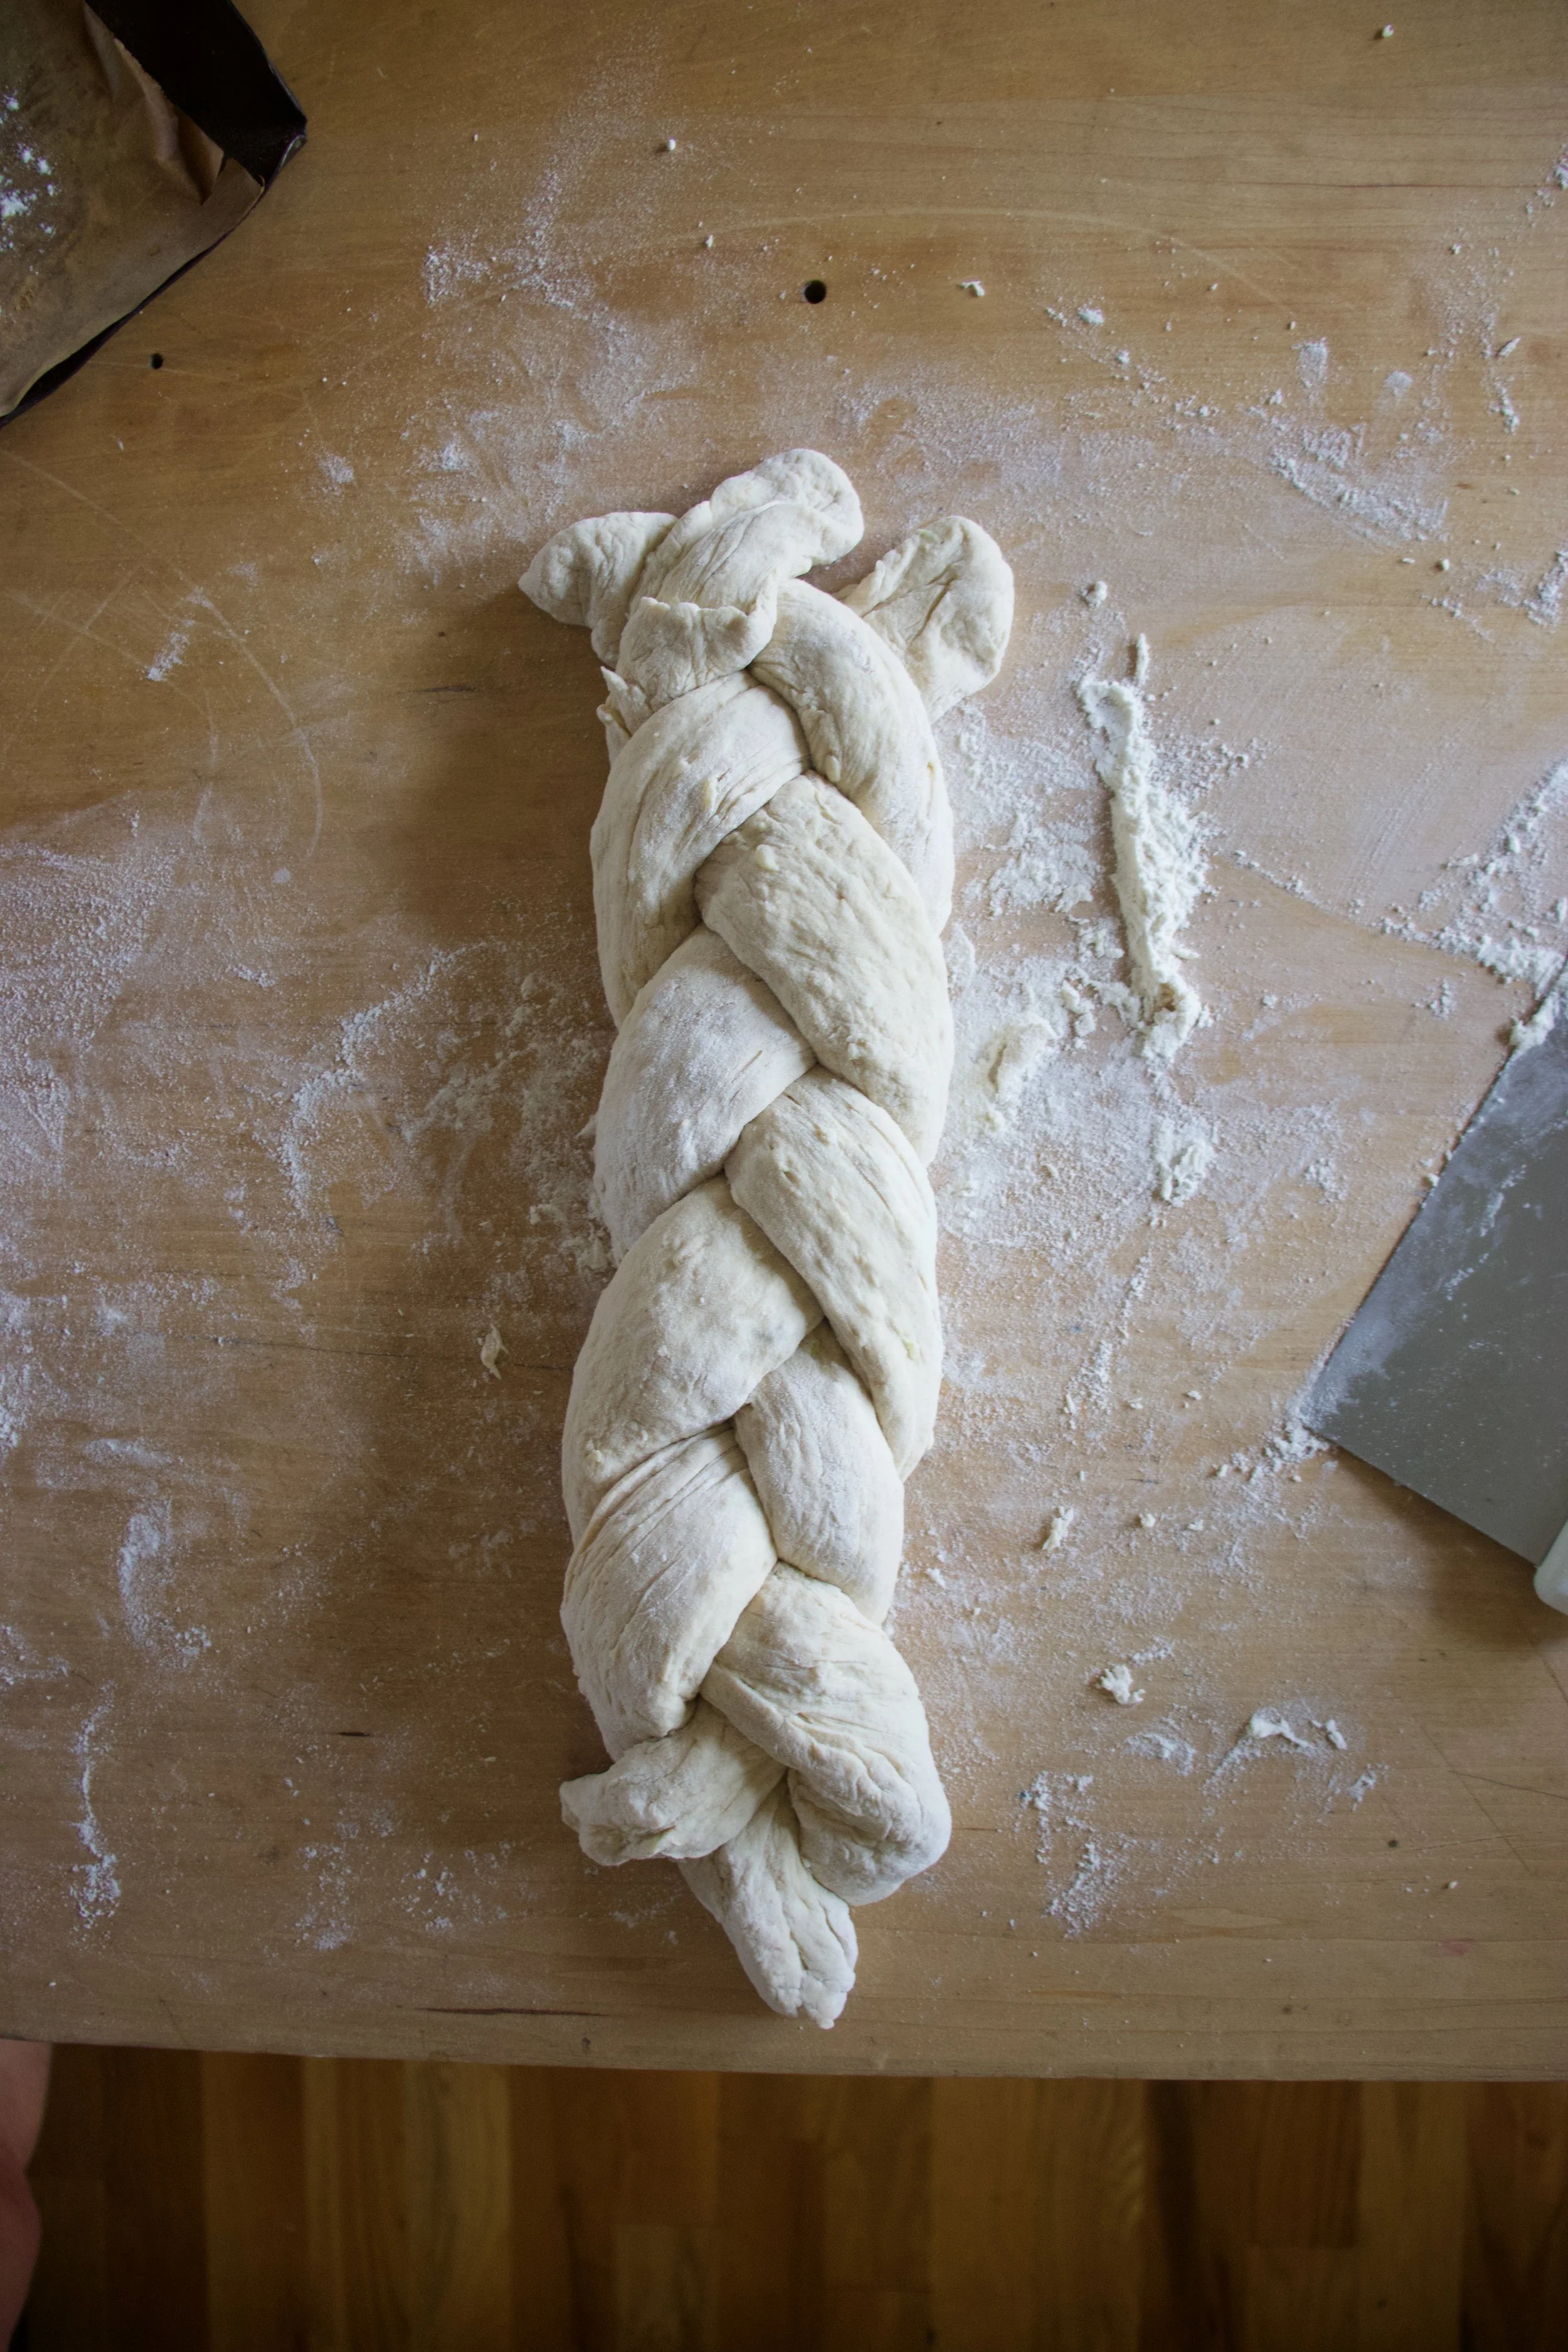
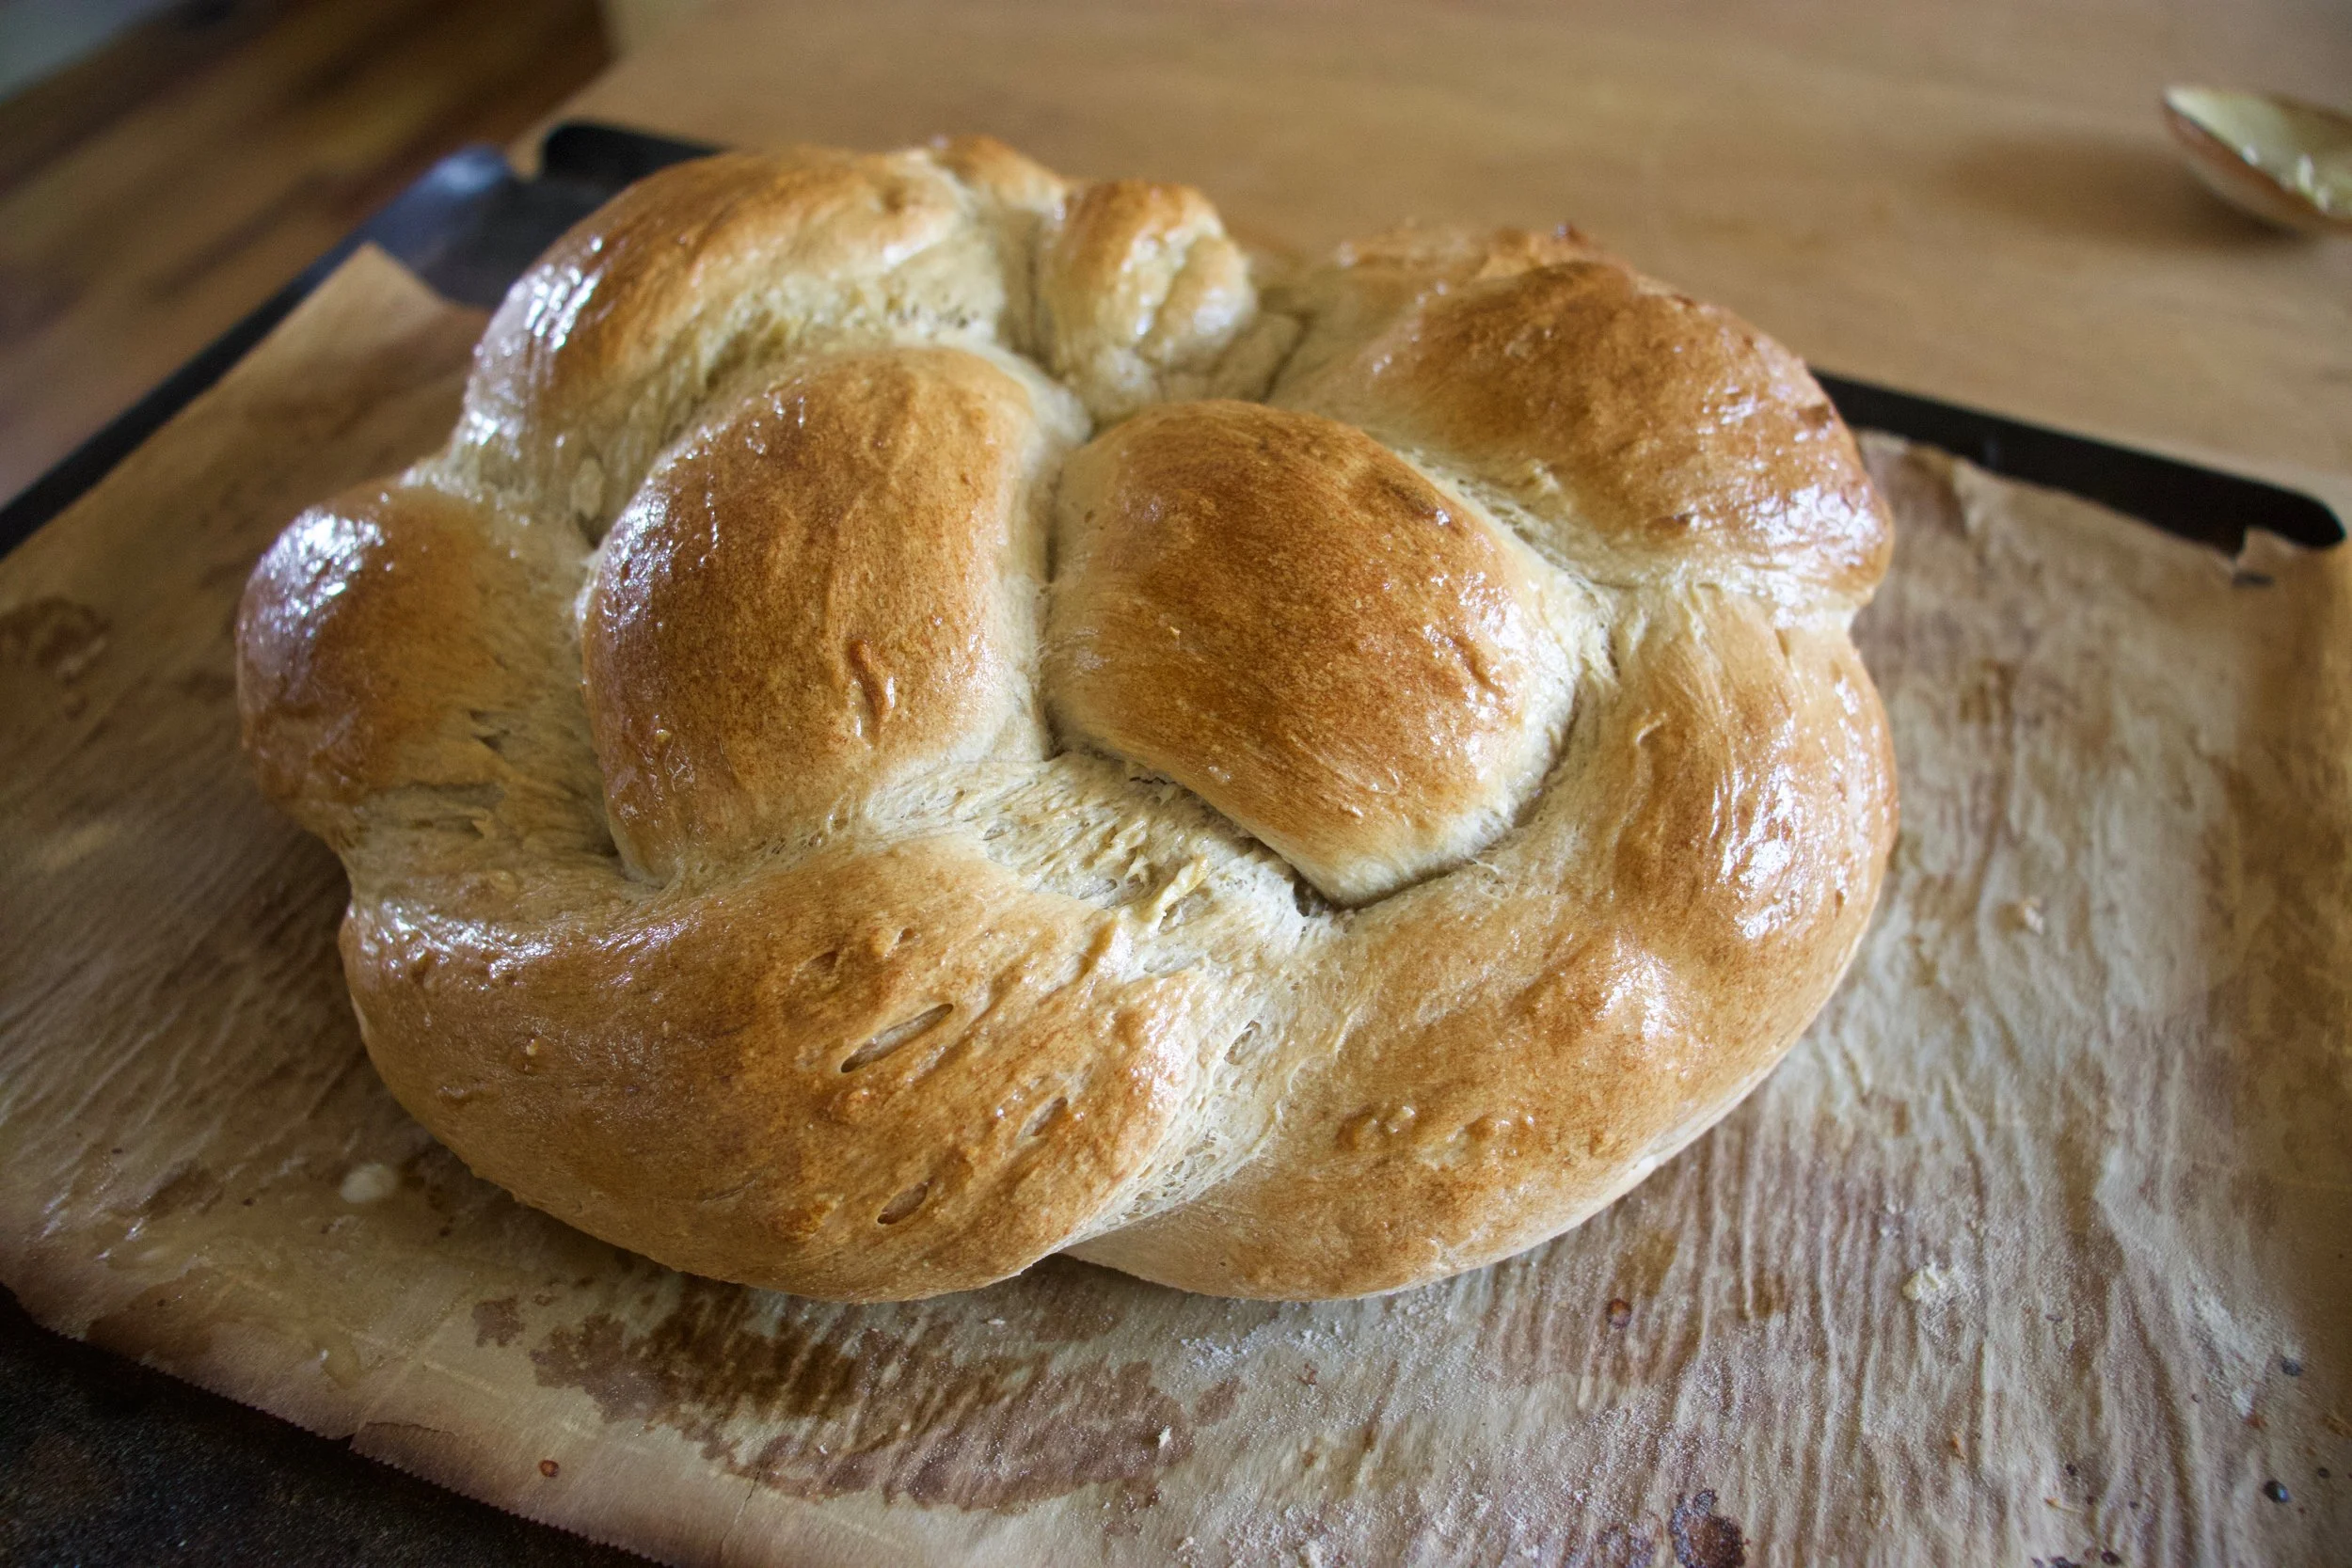
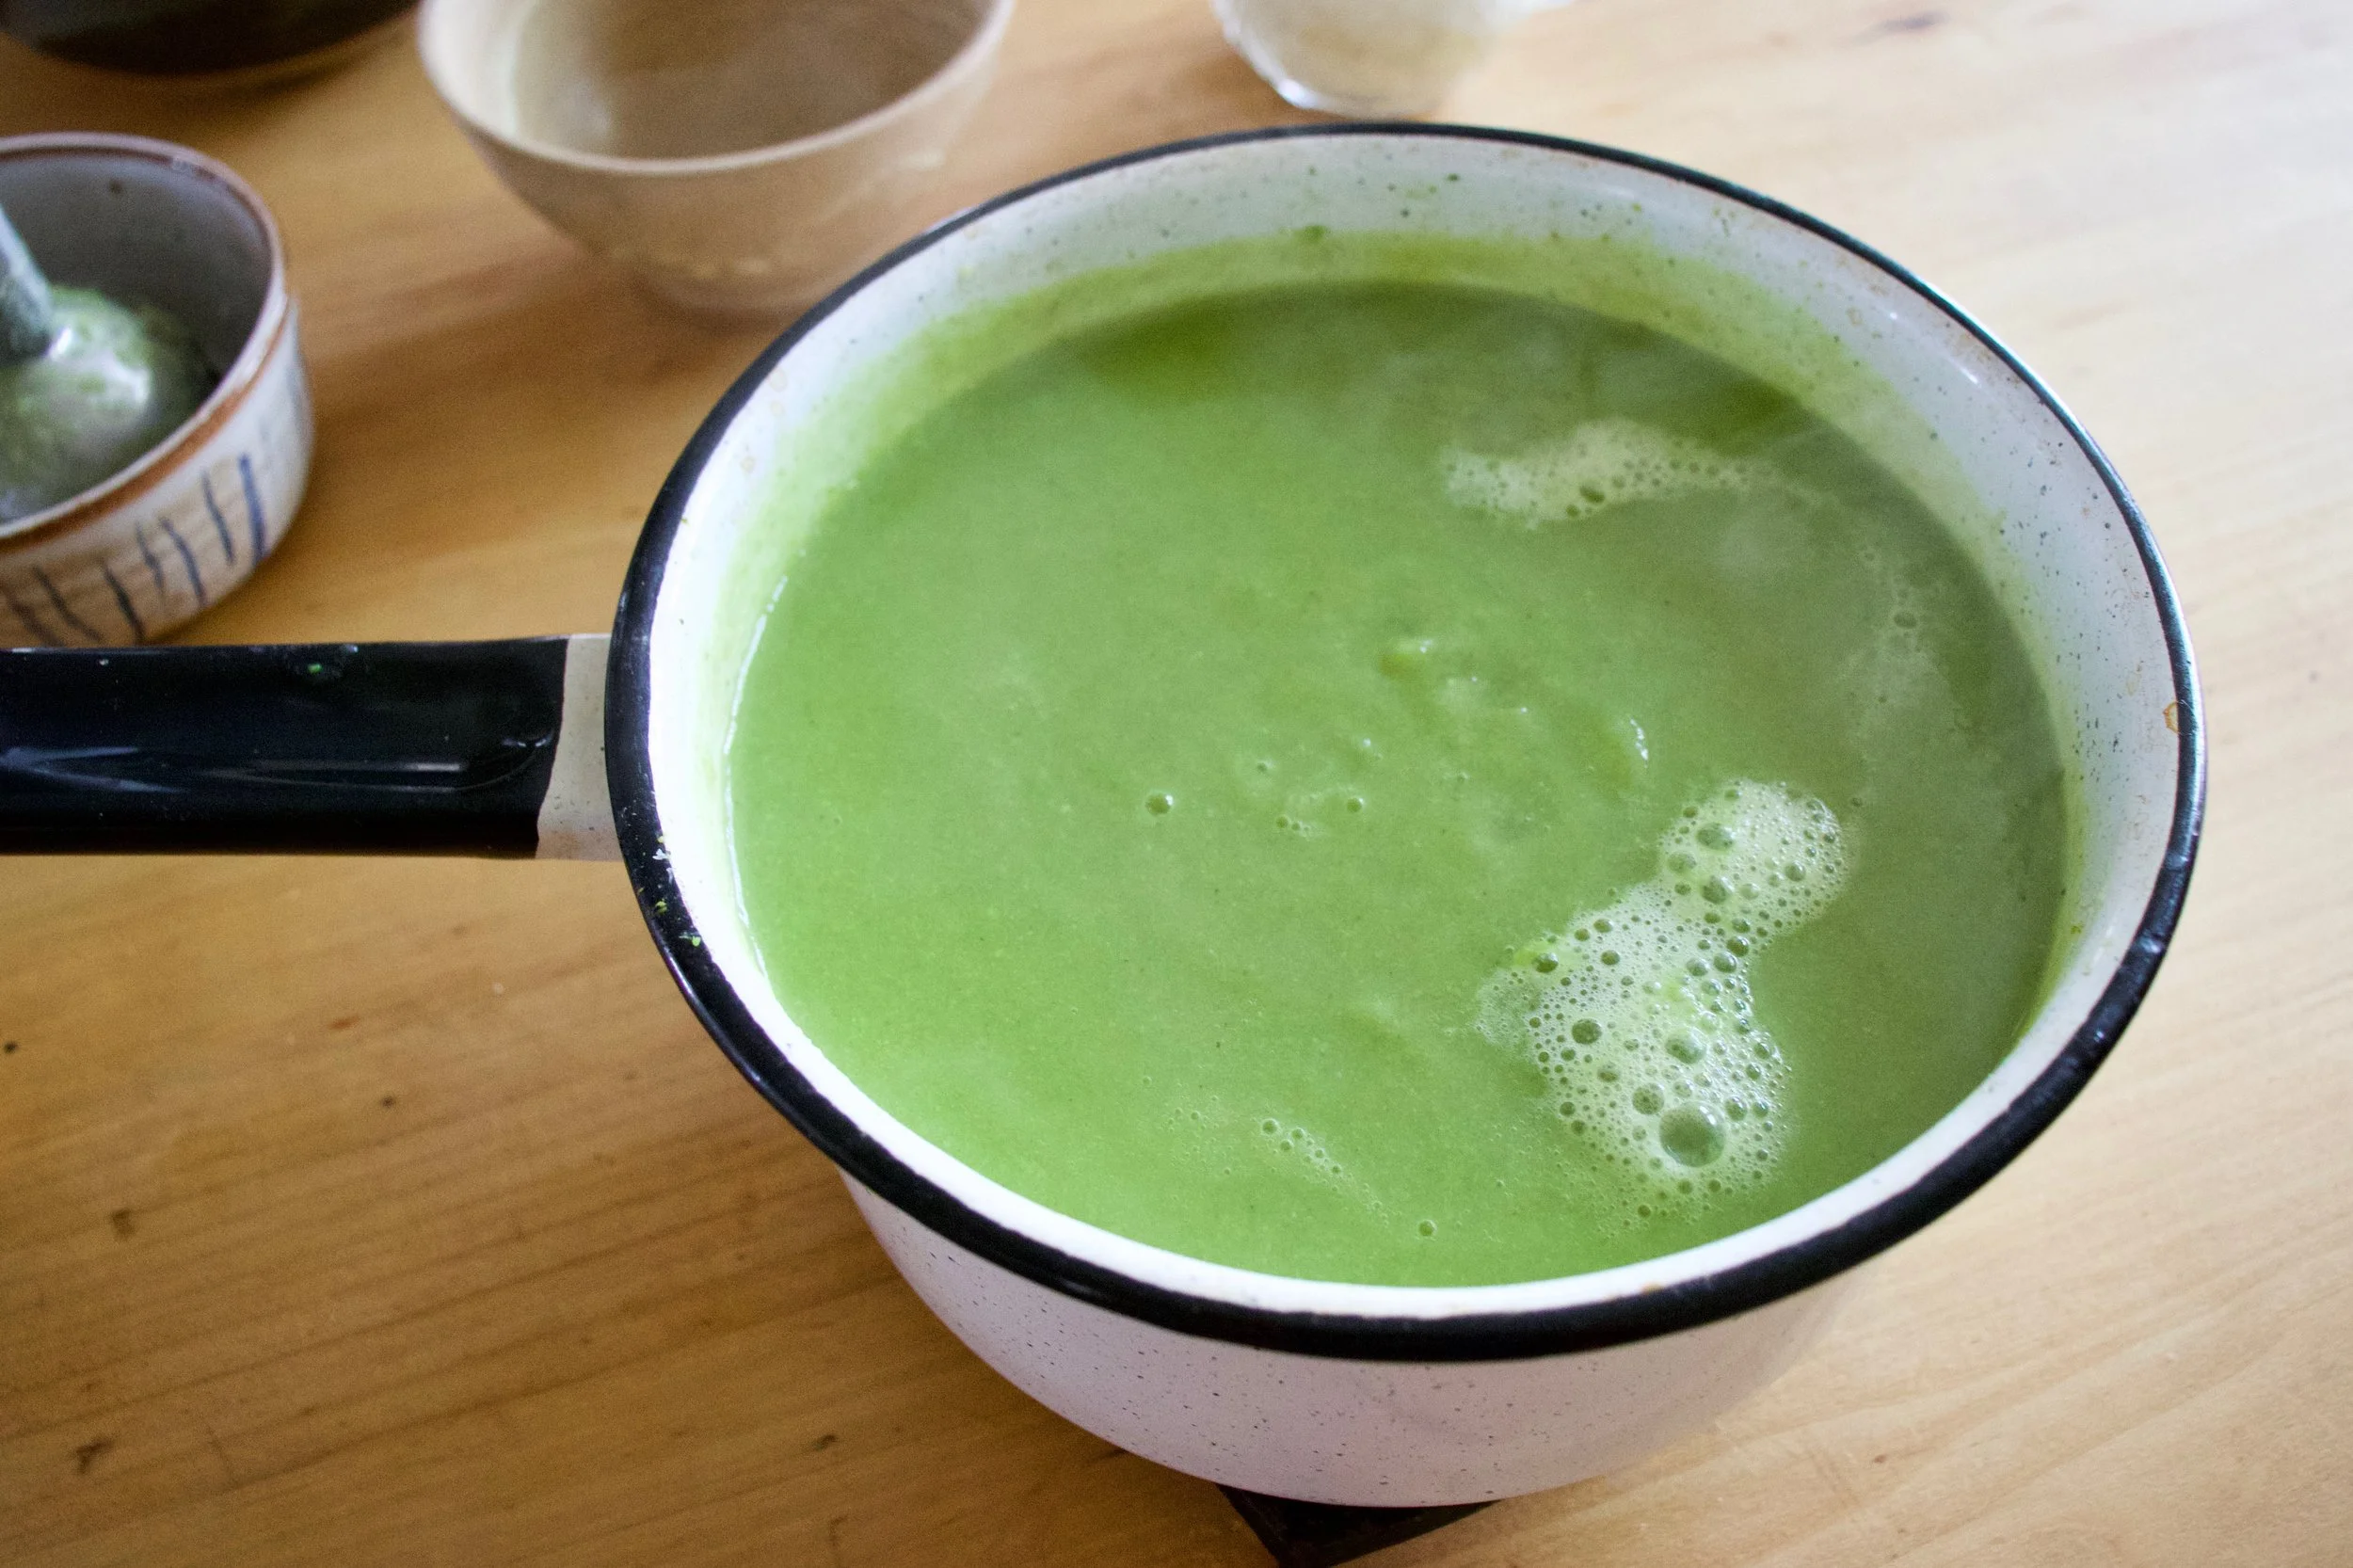
It%u2019s been 14 days since my last farm share pick up with 7 more days to go. (The farmers take a long break at the end of the year, which they all deserve but makes me sad. Or more like hungry.) It is a pretty long stretch for me to have to go without getting me some farm fresh goods. I have been making due, rationing out my roots (the greens were gone within days) and supplementing with lots and lots of frozen zucchini, Swiss chard, and broccoli, so it hasn%u2019t been bad. But now I am worried because with al the supplementing, the chest freezer is looking a little more on the empty side then I would like. And it%u2019s only January. I guess that is what happens when you eat your weight in vegetables everyday. %ud83e%udd37%u200d%u2640%ufe0f
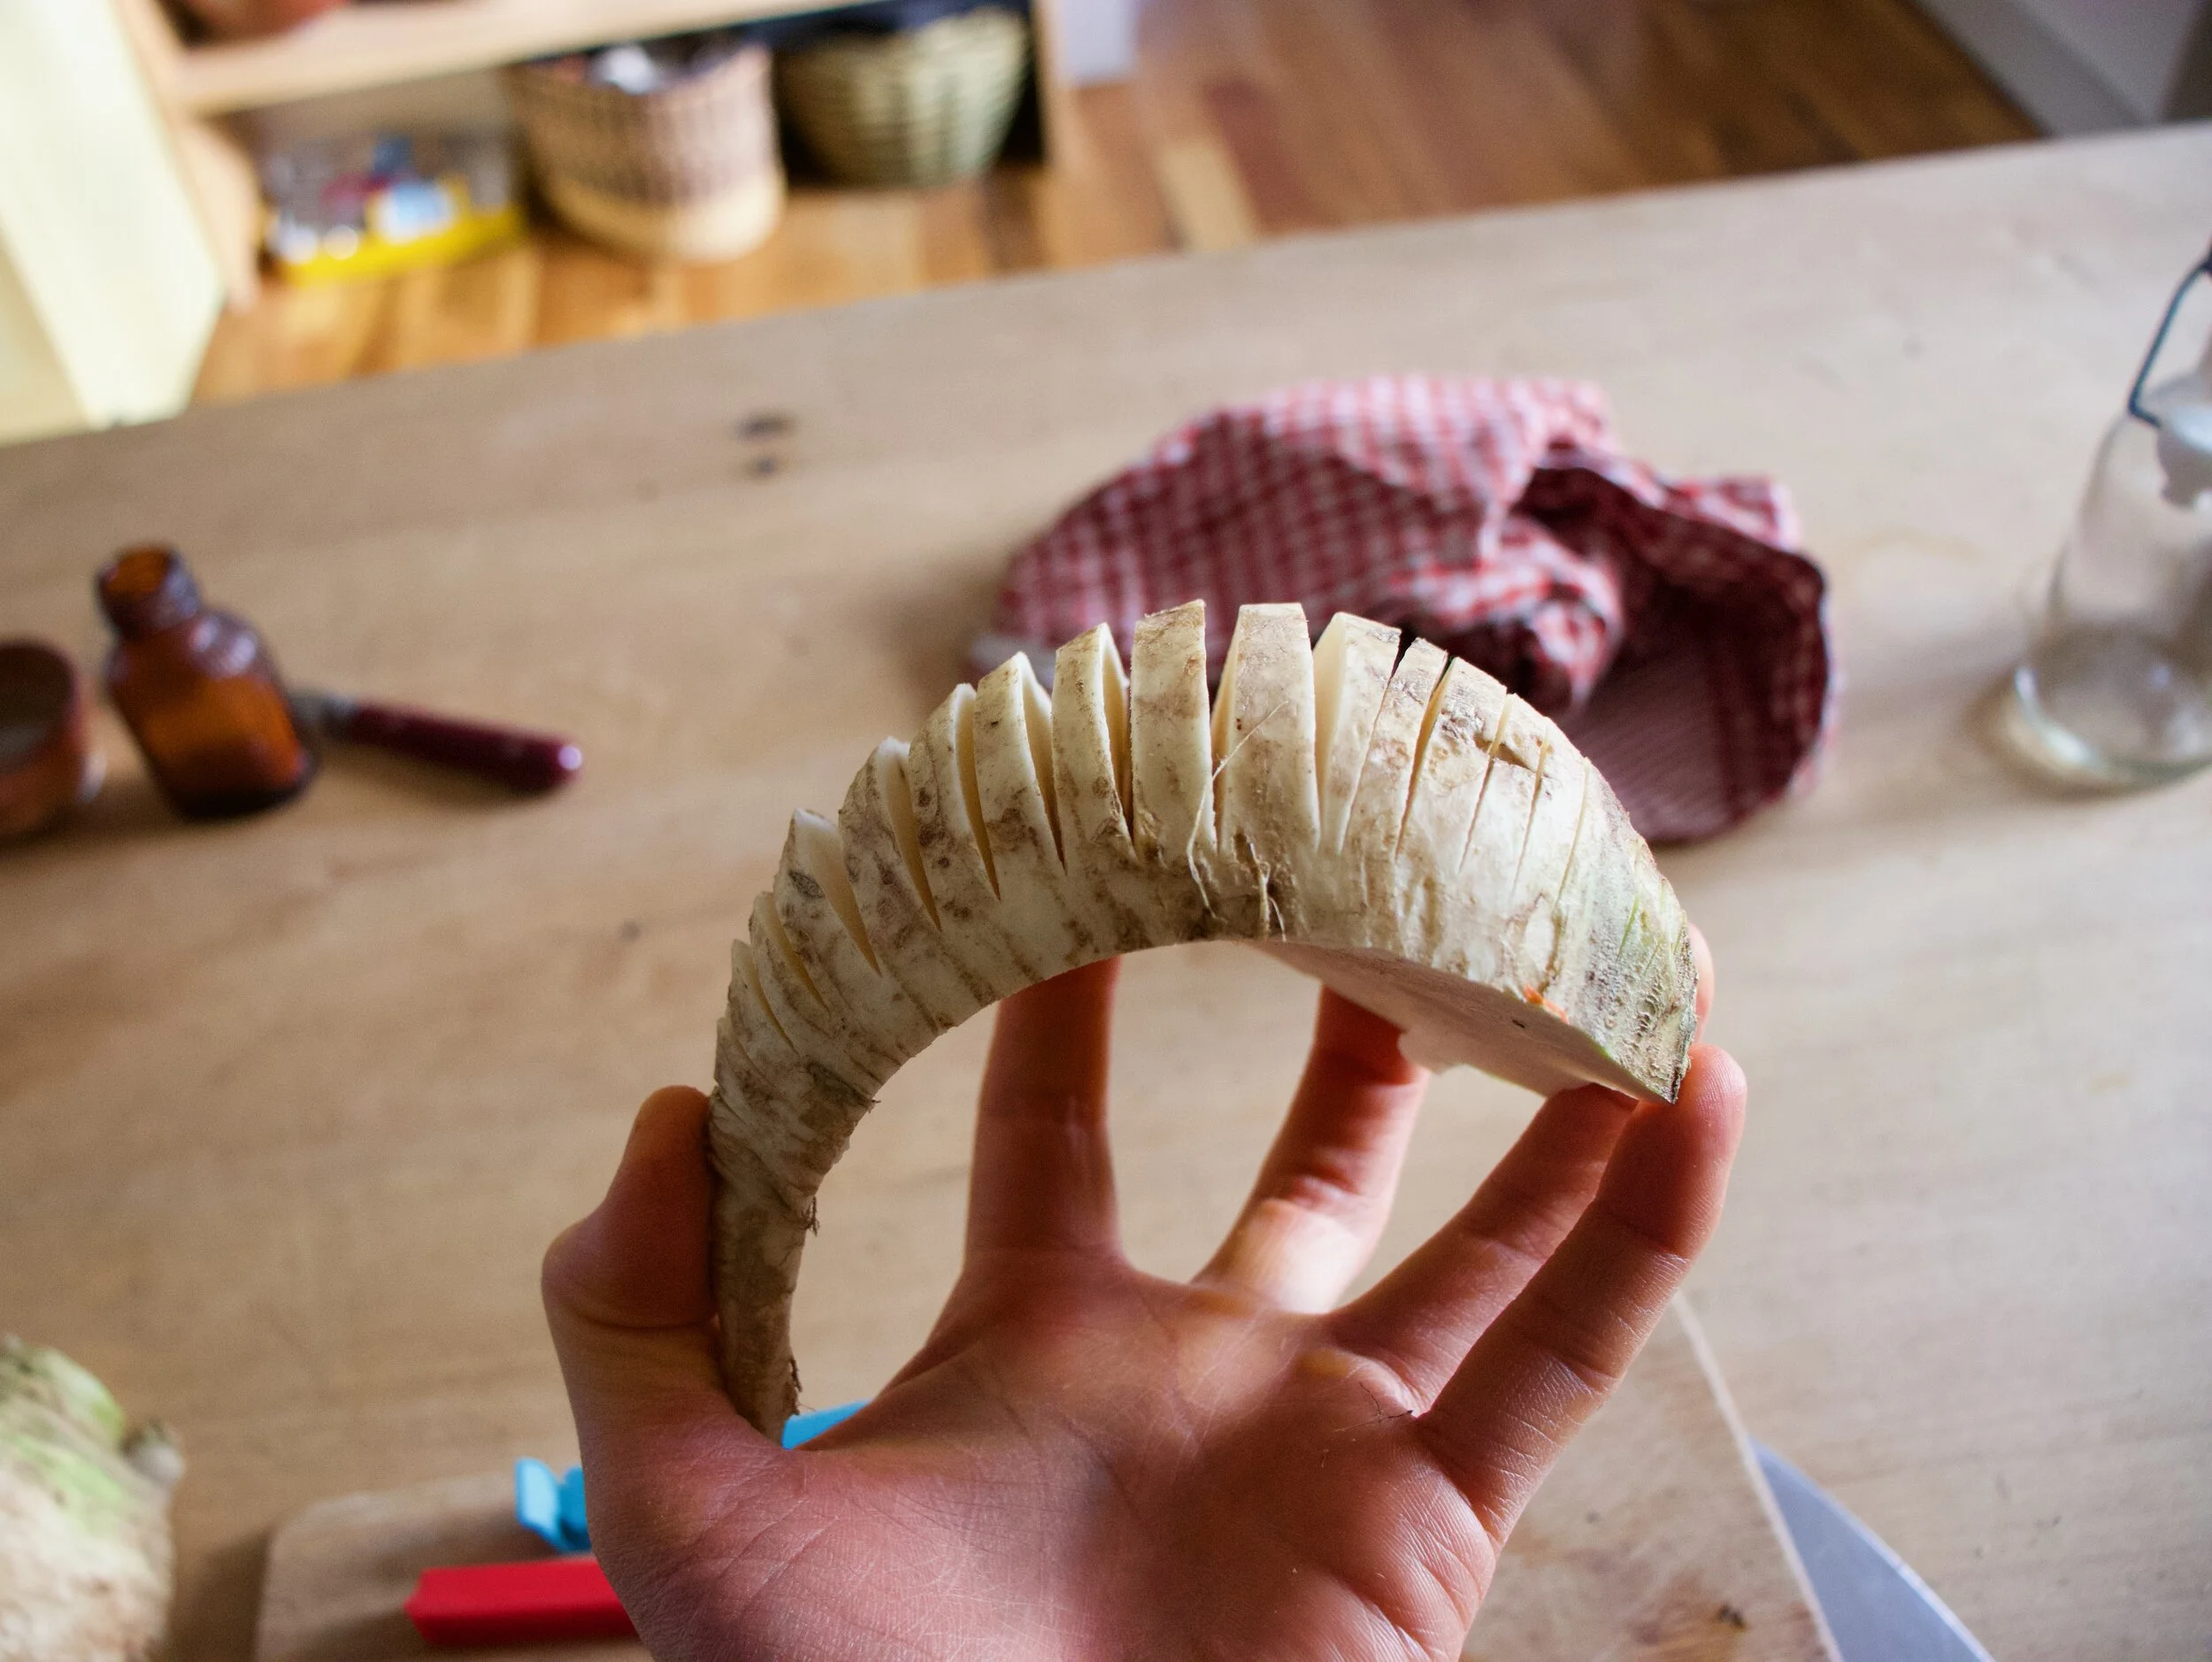
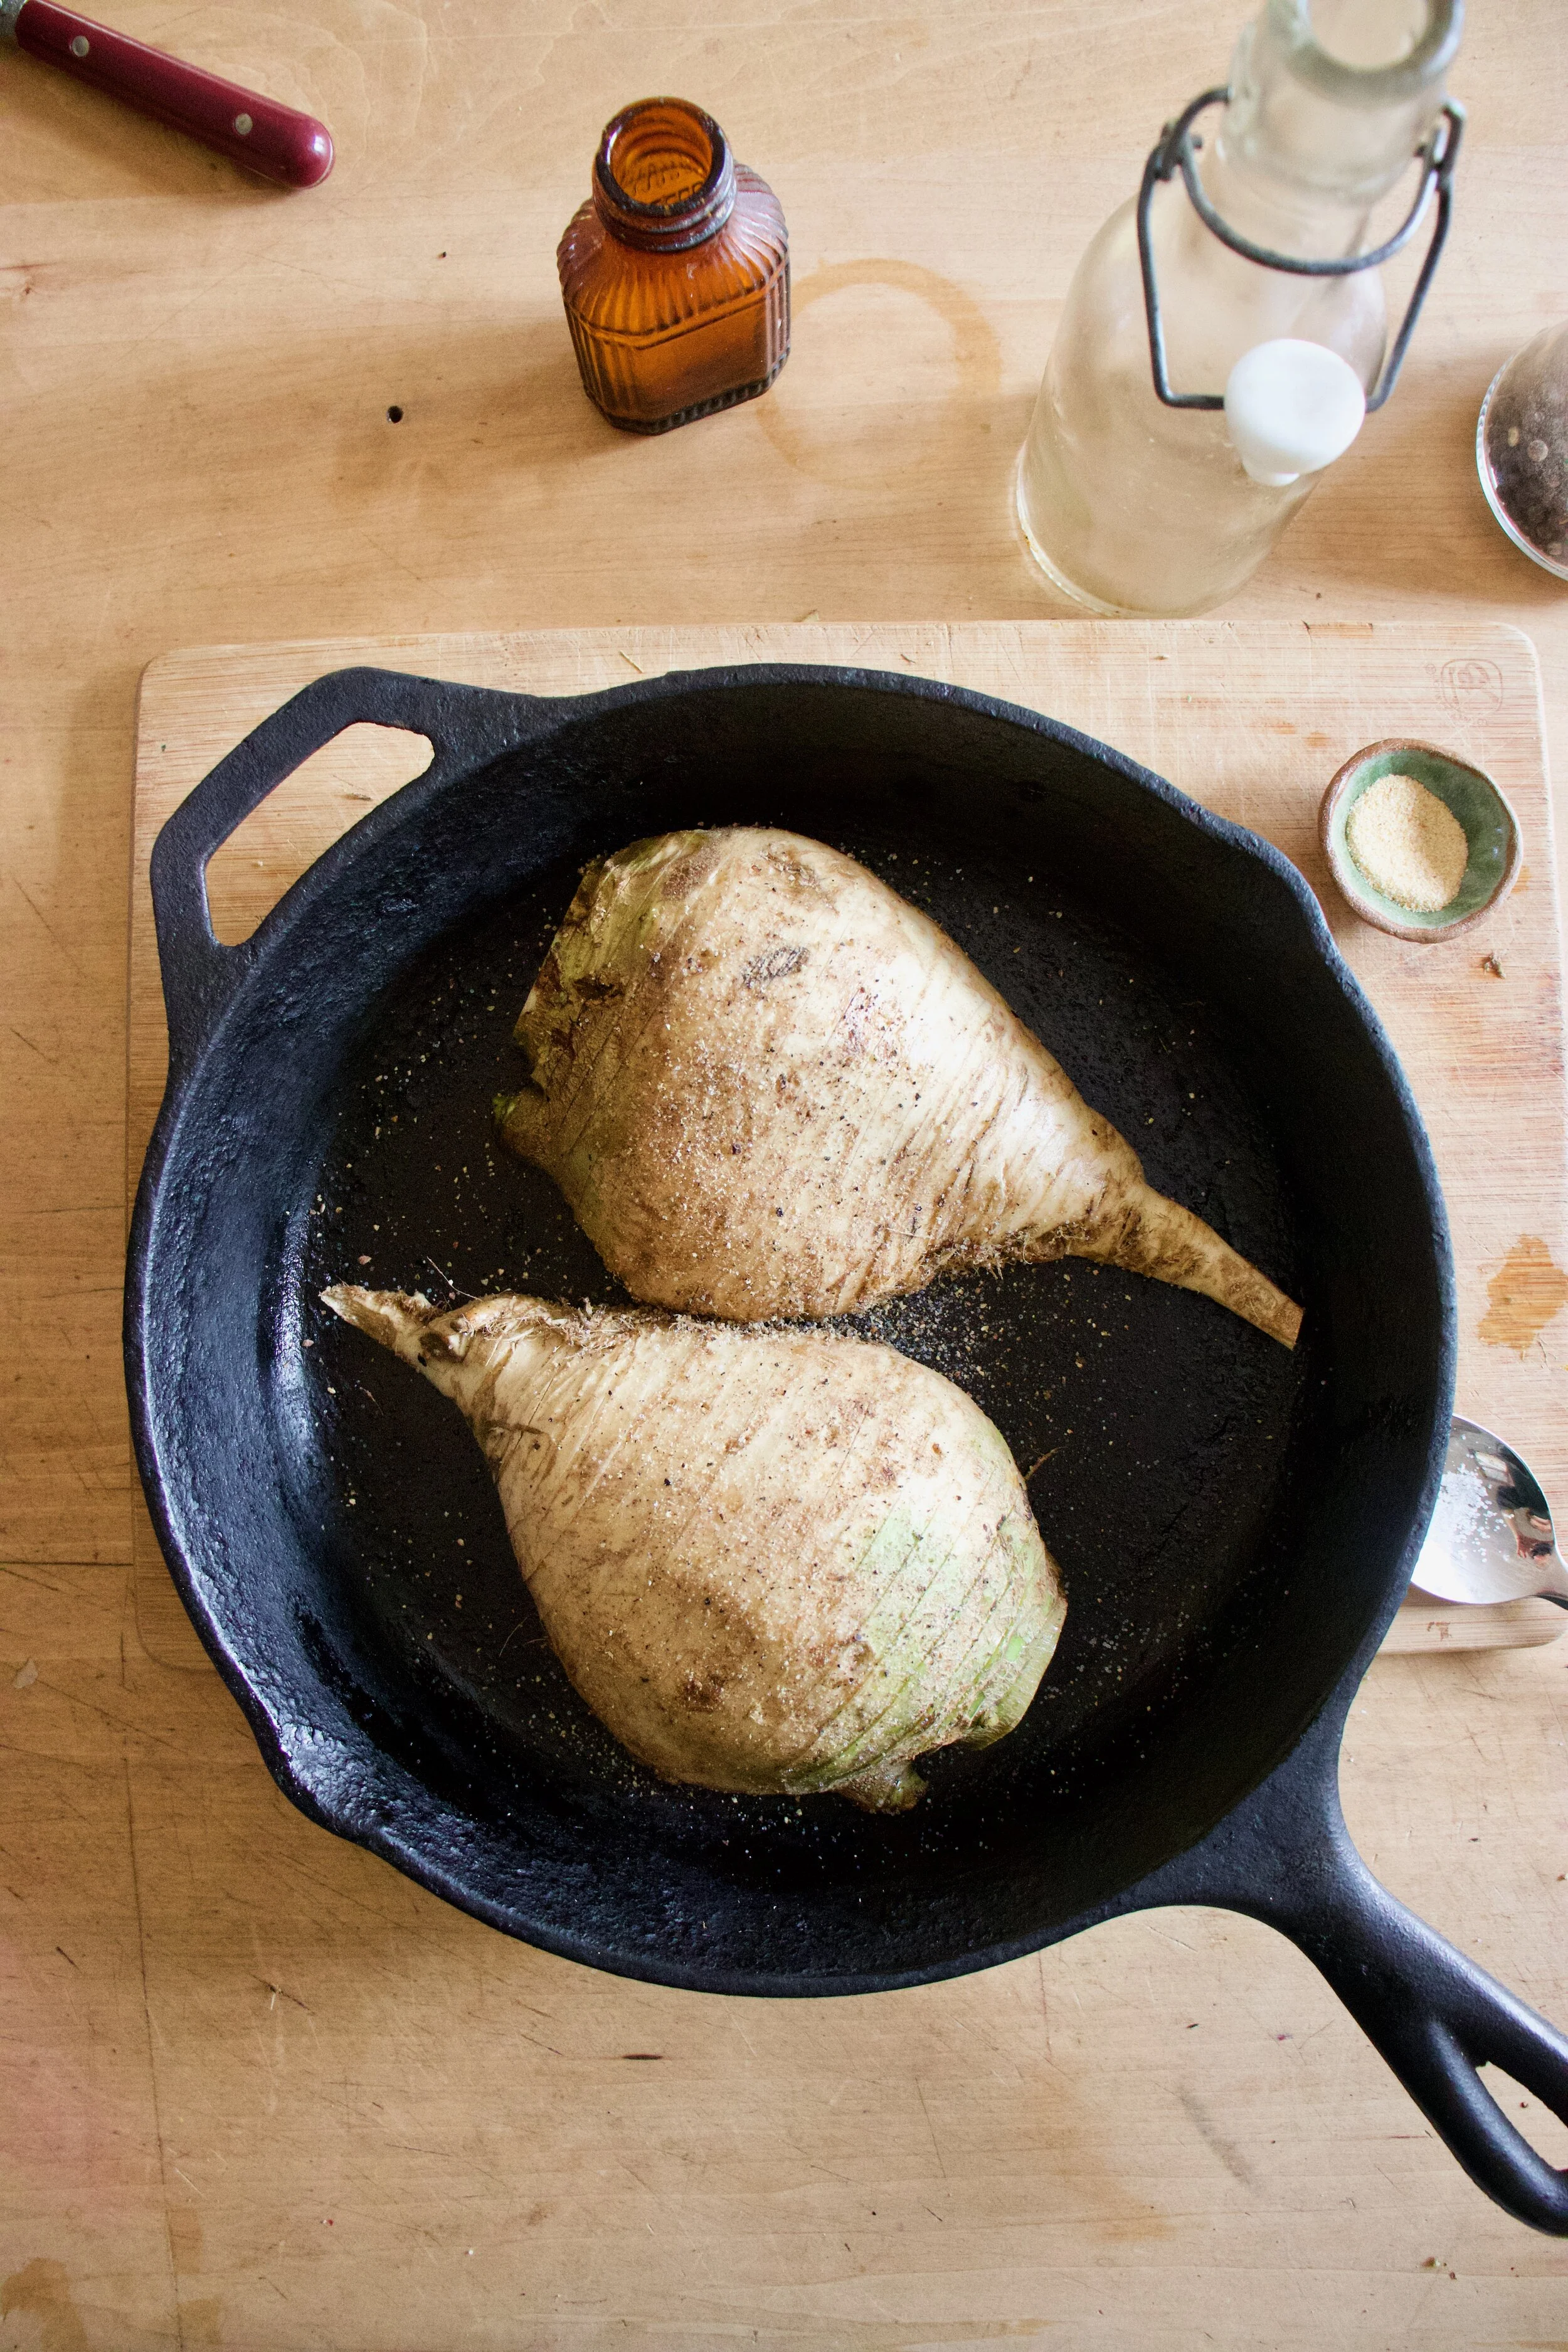
Anyway, I am pretty much out of roots. The turnips were the last of what I had left besides the lone beet that I found stuffed in with the apples. And because they were the last roots and knowing I am not going to have any roots until next week, I wanted to do something a little special with them. That is why I hassledbacked them, which basically means I sliced them up without cutting completely through so they are cut but still stuck together. Does that make since? If not, just look at the pictures.
These turnips, oh these turnips. First off, roasted turnips are amazingly delicious and if you have never roasted one, well you need to get on it and do so. Secondly, the turnips I used are gIlfeather, which if you did not already know, are the Vermont state vegetable. But don%u2019t worry, if you can%u2019t find the gilfeather, regular old purple top turnips work and taste just as fantastic because all roasted turnips are so fantatic. When roasted I might describe them as the cooler, hipper, cousin of the baked potato. Add the avocado cream and seeds, which are the cooler friends of the cooler cousin, and you got yourself a cool dude party! Or basically just a way tastier baked potato situation with fixing.
Now don%u2019t you want a tasty cool hassledback turnip? And yes, I keep wanting to call them David hasselbacks turnips too. Because they are so cool. Am I right? Haha!
To the turnips!
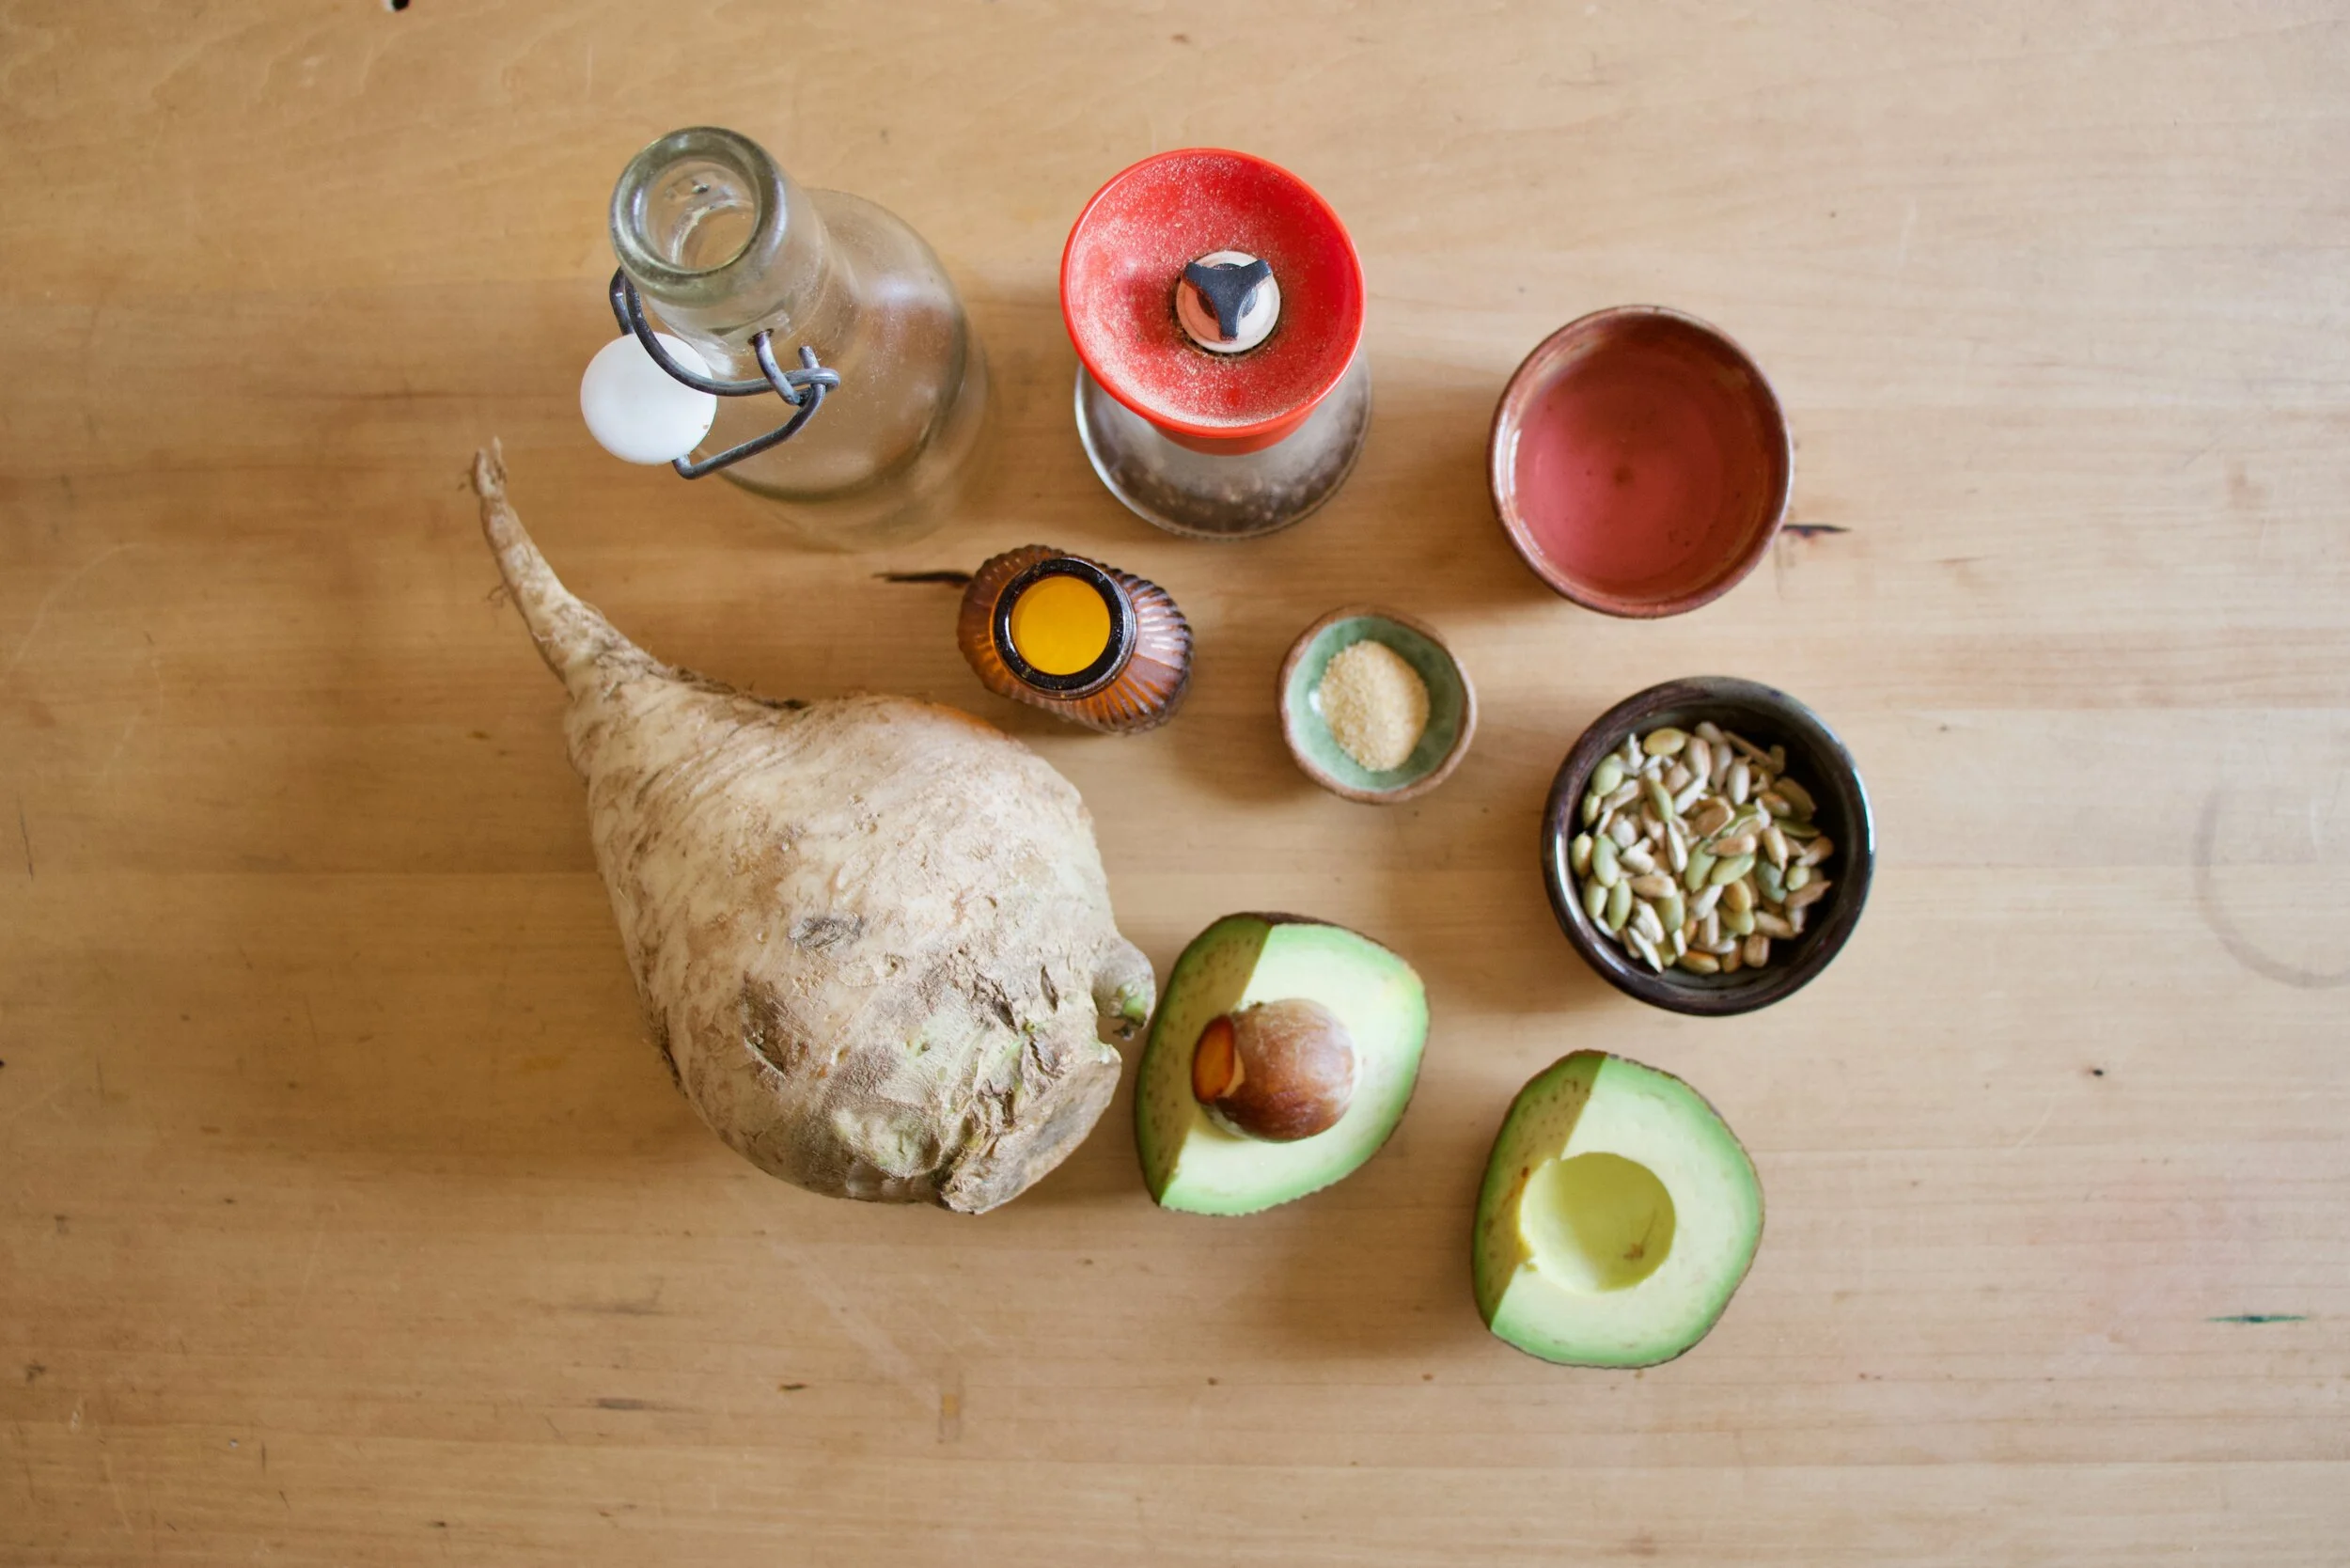
The stuff. Turnip. Either a couple smaller ones or a giant one, up to you. Also need an avocado, a little red wine vinegar and water, salt and pepper, garlic powder, olive oil, and some toasted seeds (if you want).
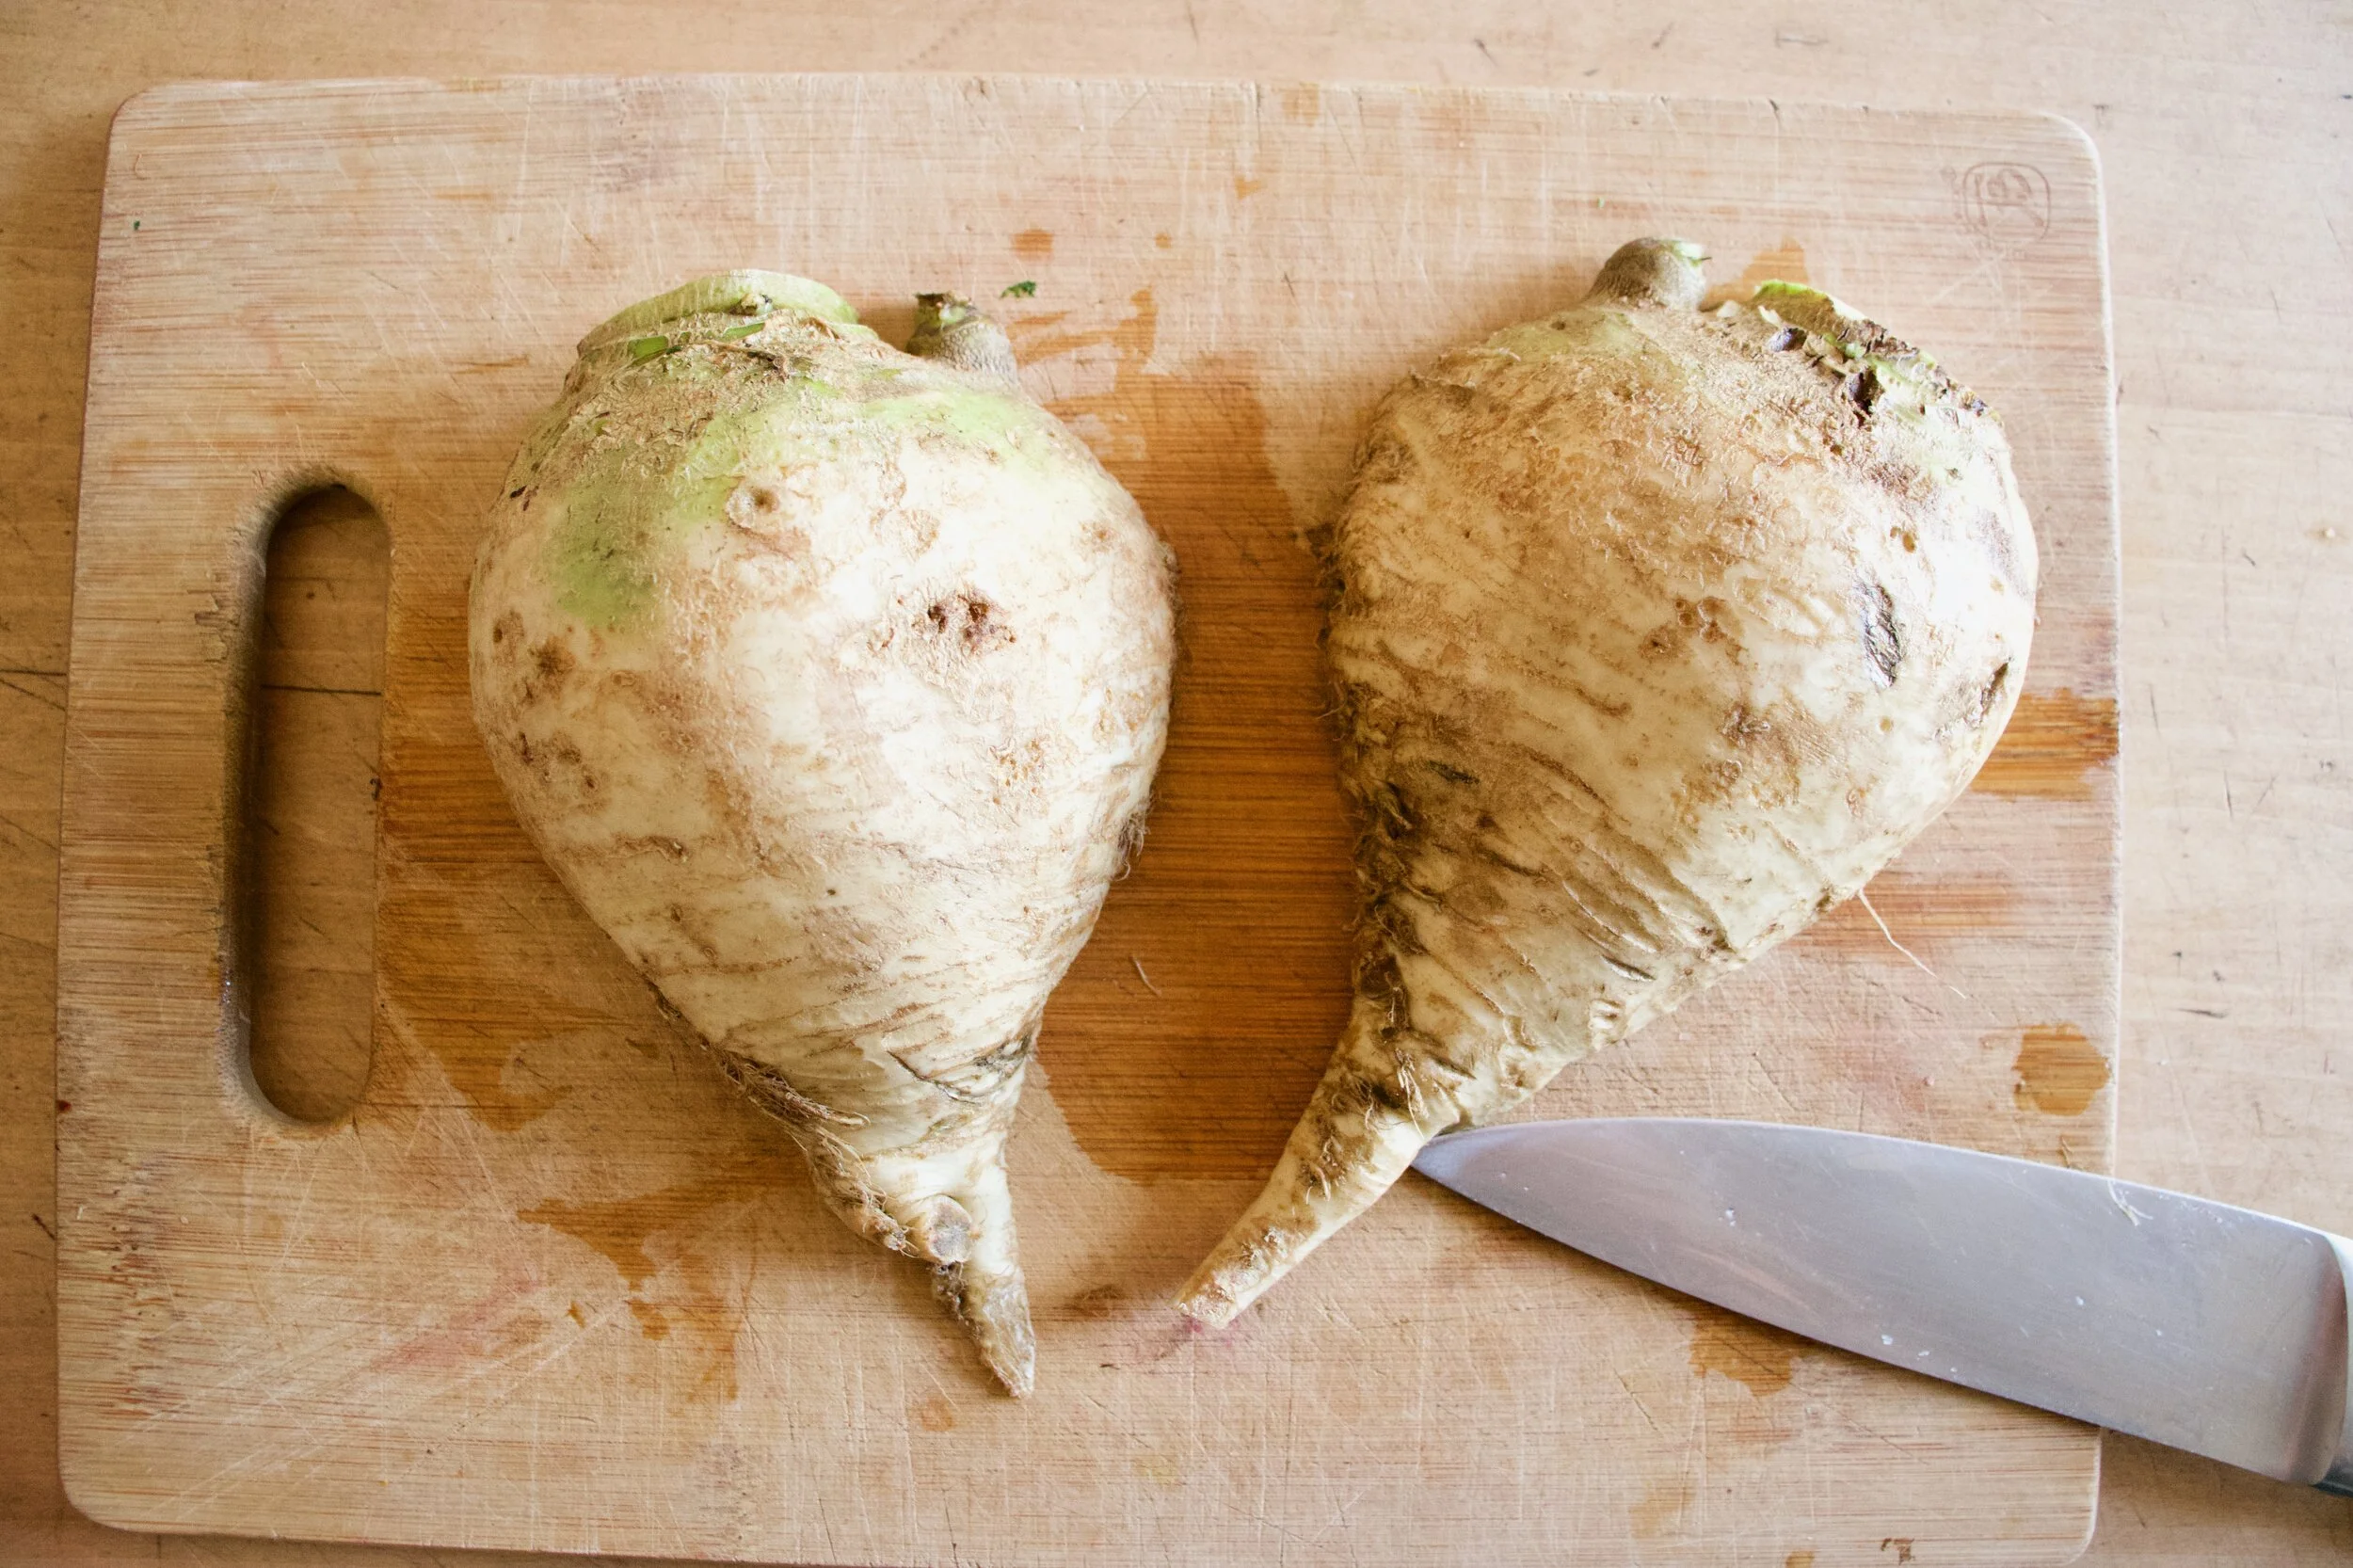
If using a giant turnip, cut in half. If using small ones, you can cut those in half too or leave them whole. Up to you.
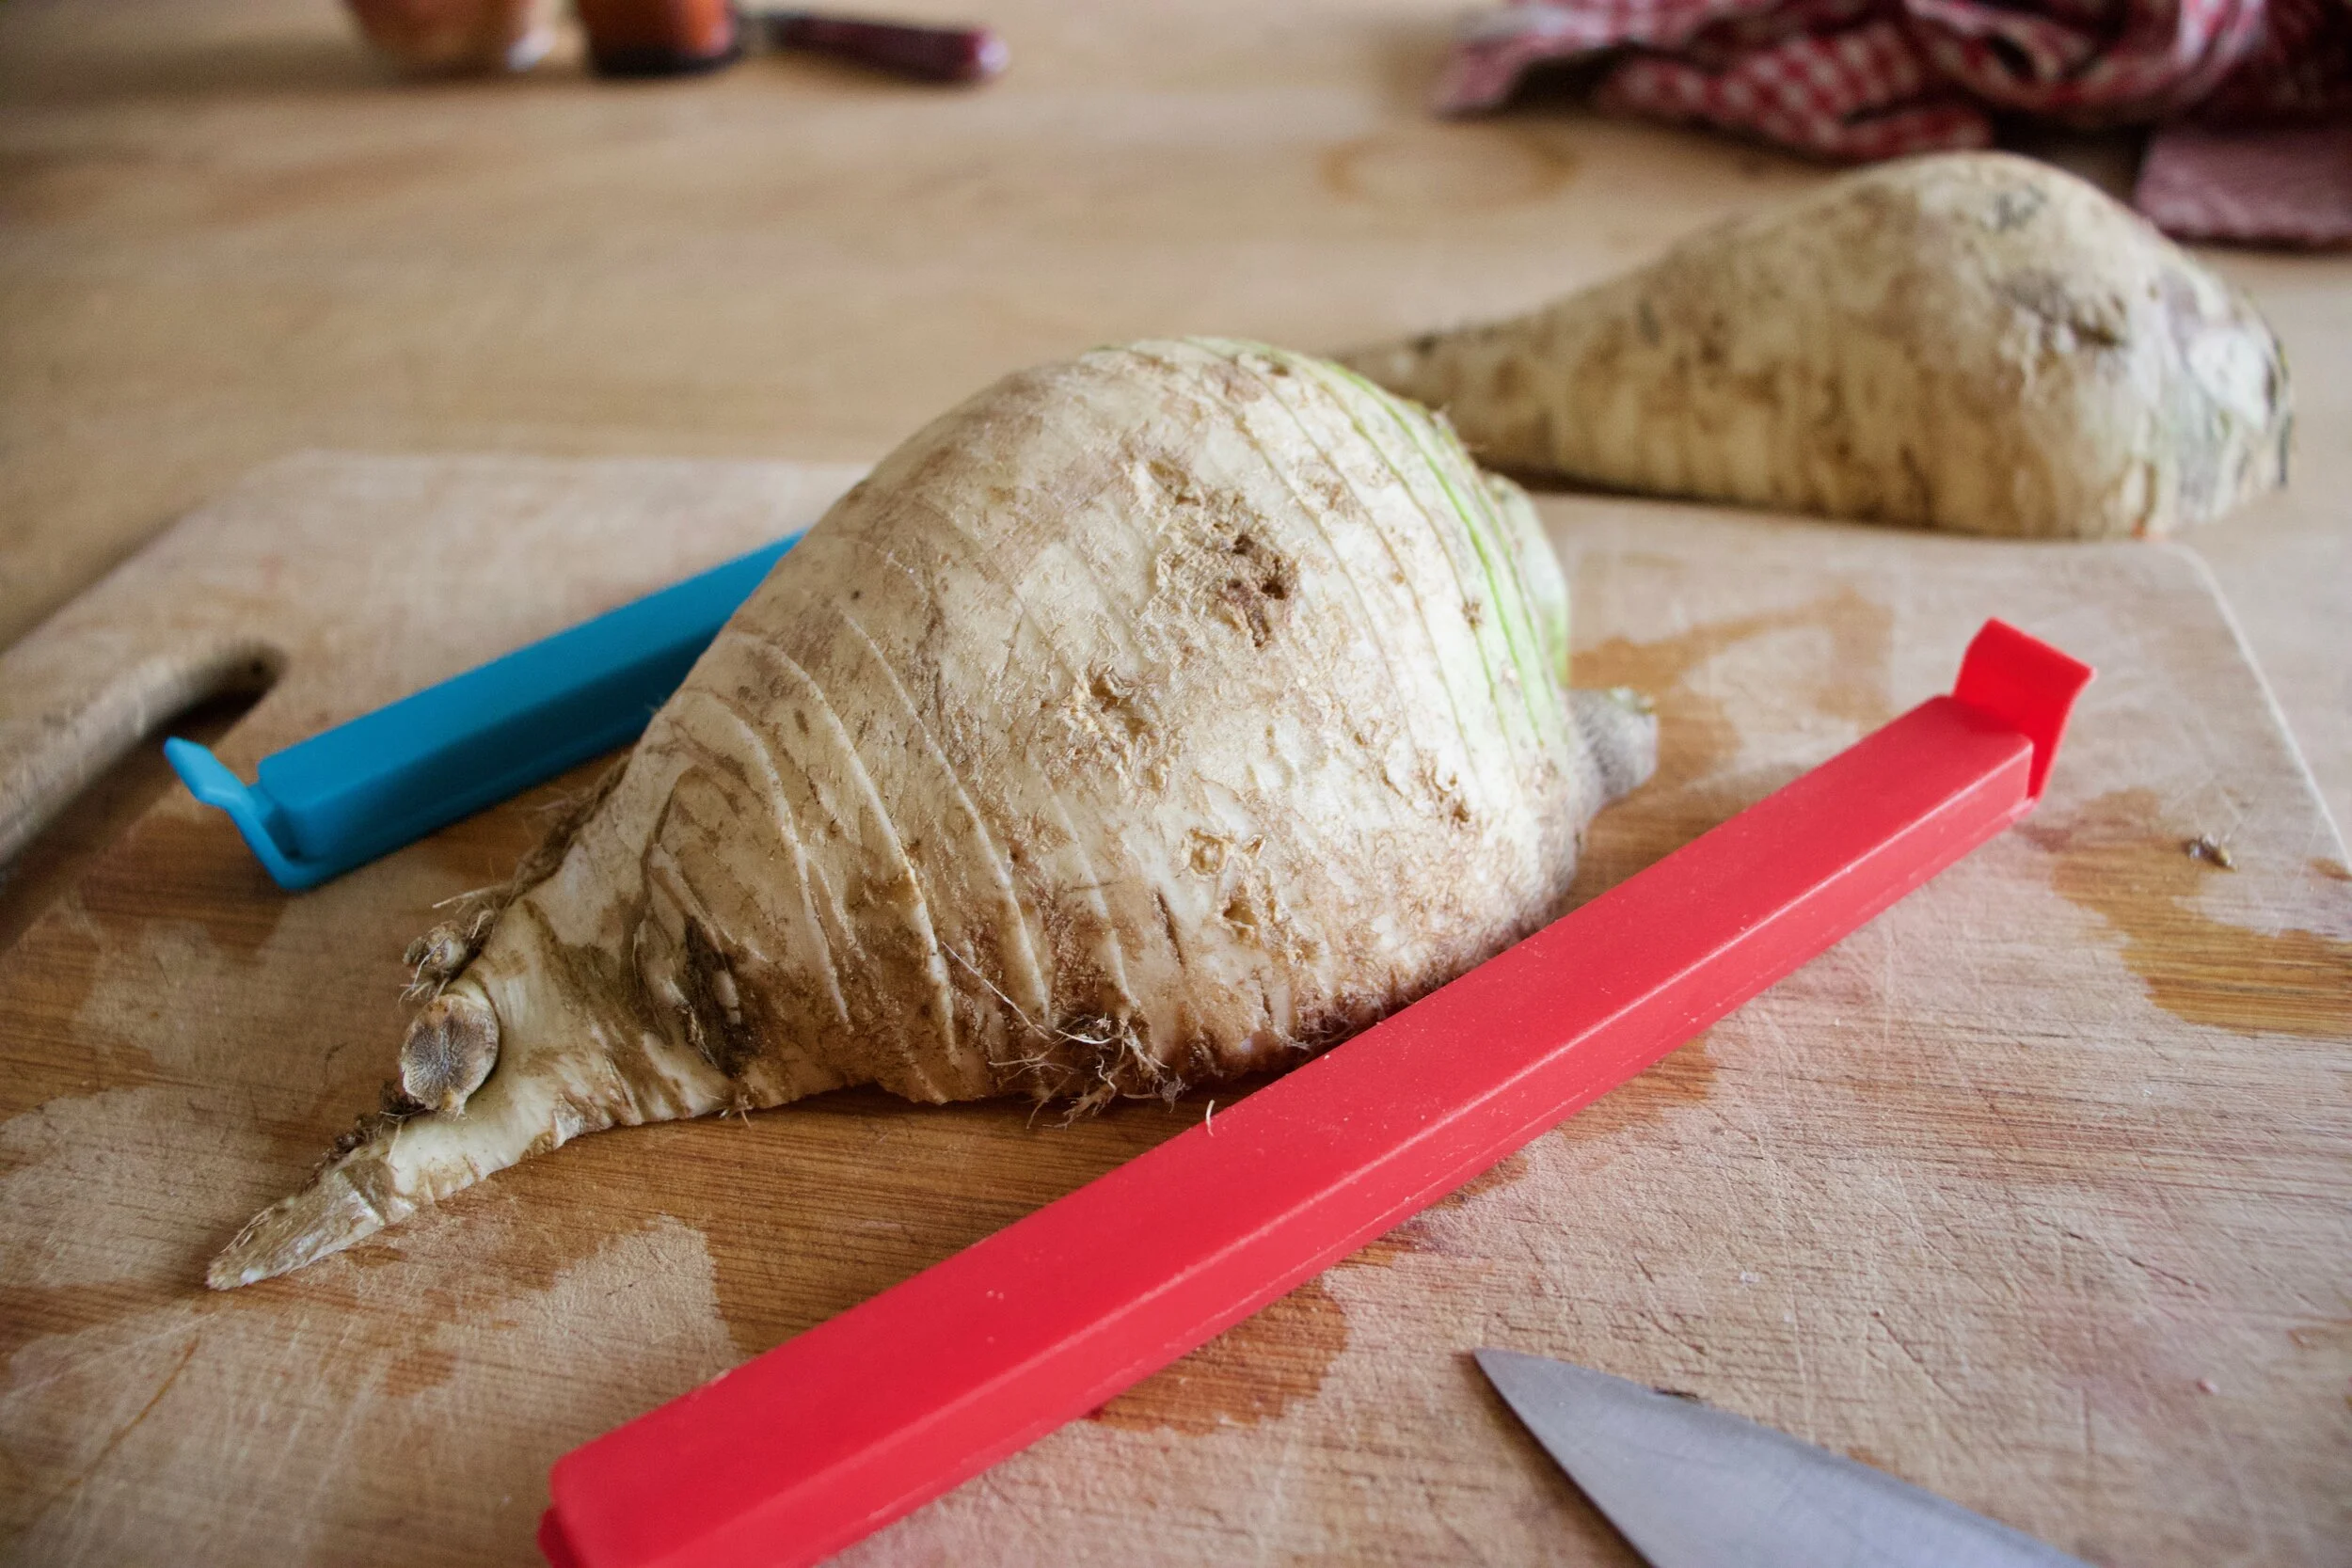
Now to hasselback. Using two guides that are the same thickness (chopsticks or chip clips.. whatever you have lying around that you don%u2019t mind nicking with a knife) slice into the turnip about ever 1/4 inch, right down to the guide, but not all the way through.
Lightly oil a skillet or baking sheet and also rub a little oil all over the turnips and lay them hasselbacked side up. Sprinkle with salt, pepper, and a pinch of garlic powder. Then into a hot ass oven they go.
While the turnips are roasting , make up the avocado cream. Basic, just scoop avocado into bowl (if you have a stick blender) or blender, add in a pinch of salt, the water and vinegar, and blend until smooth.
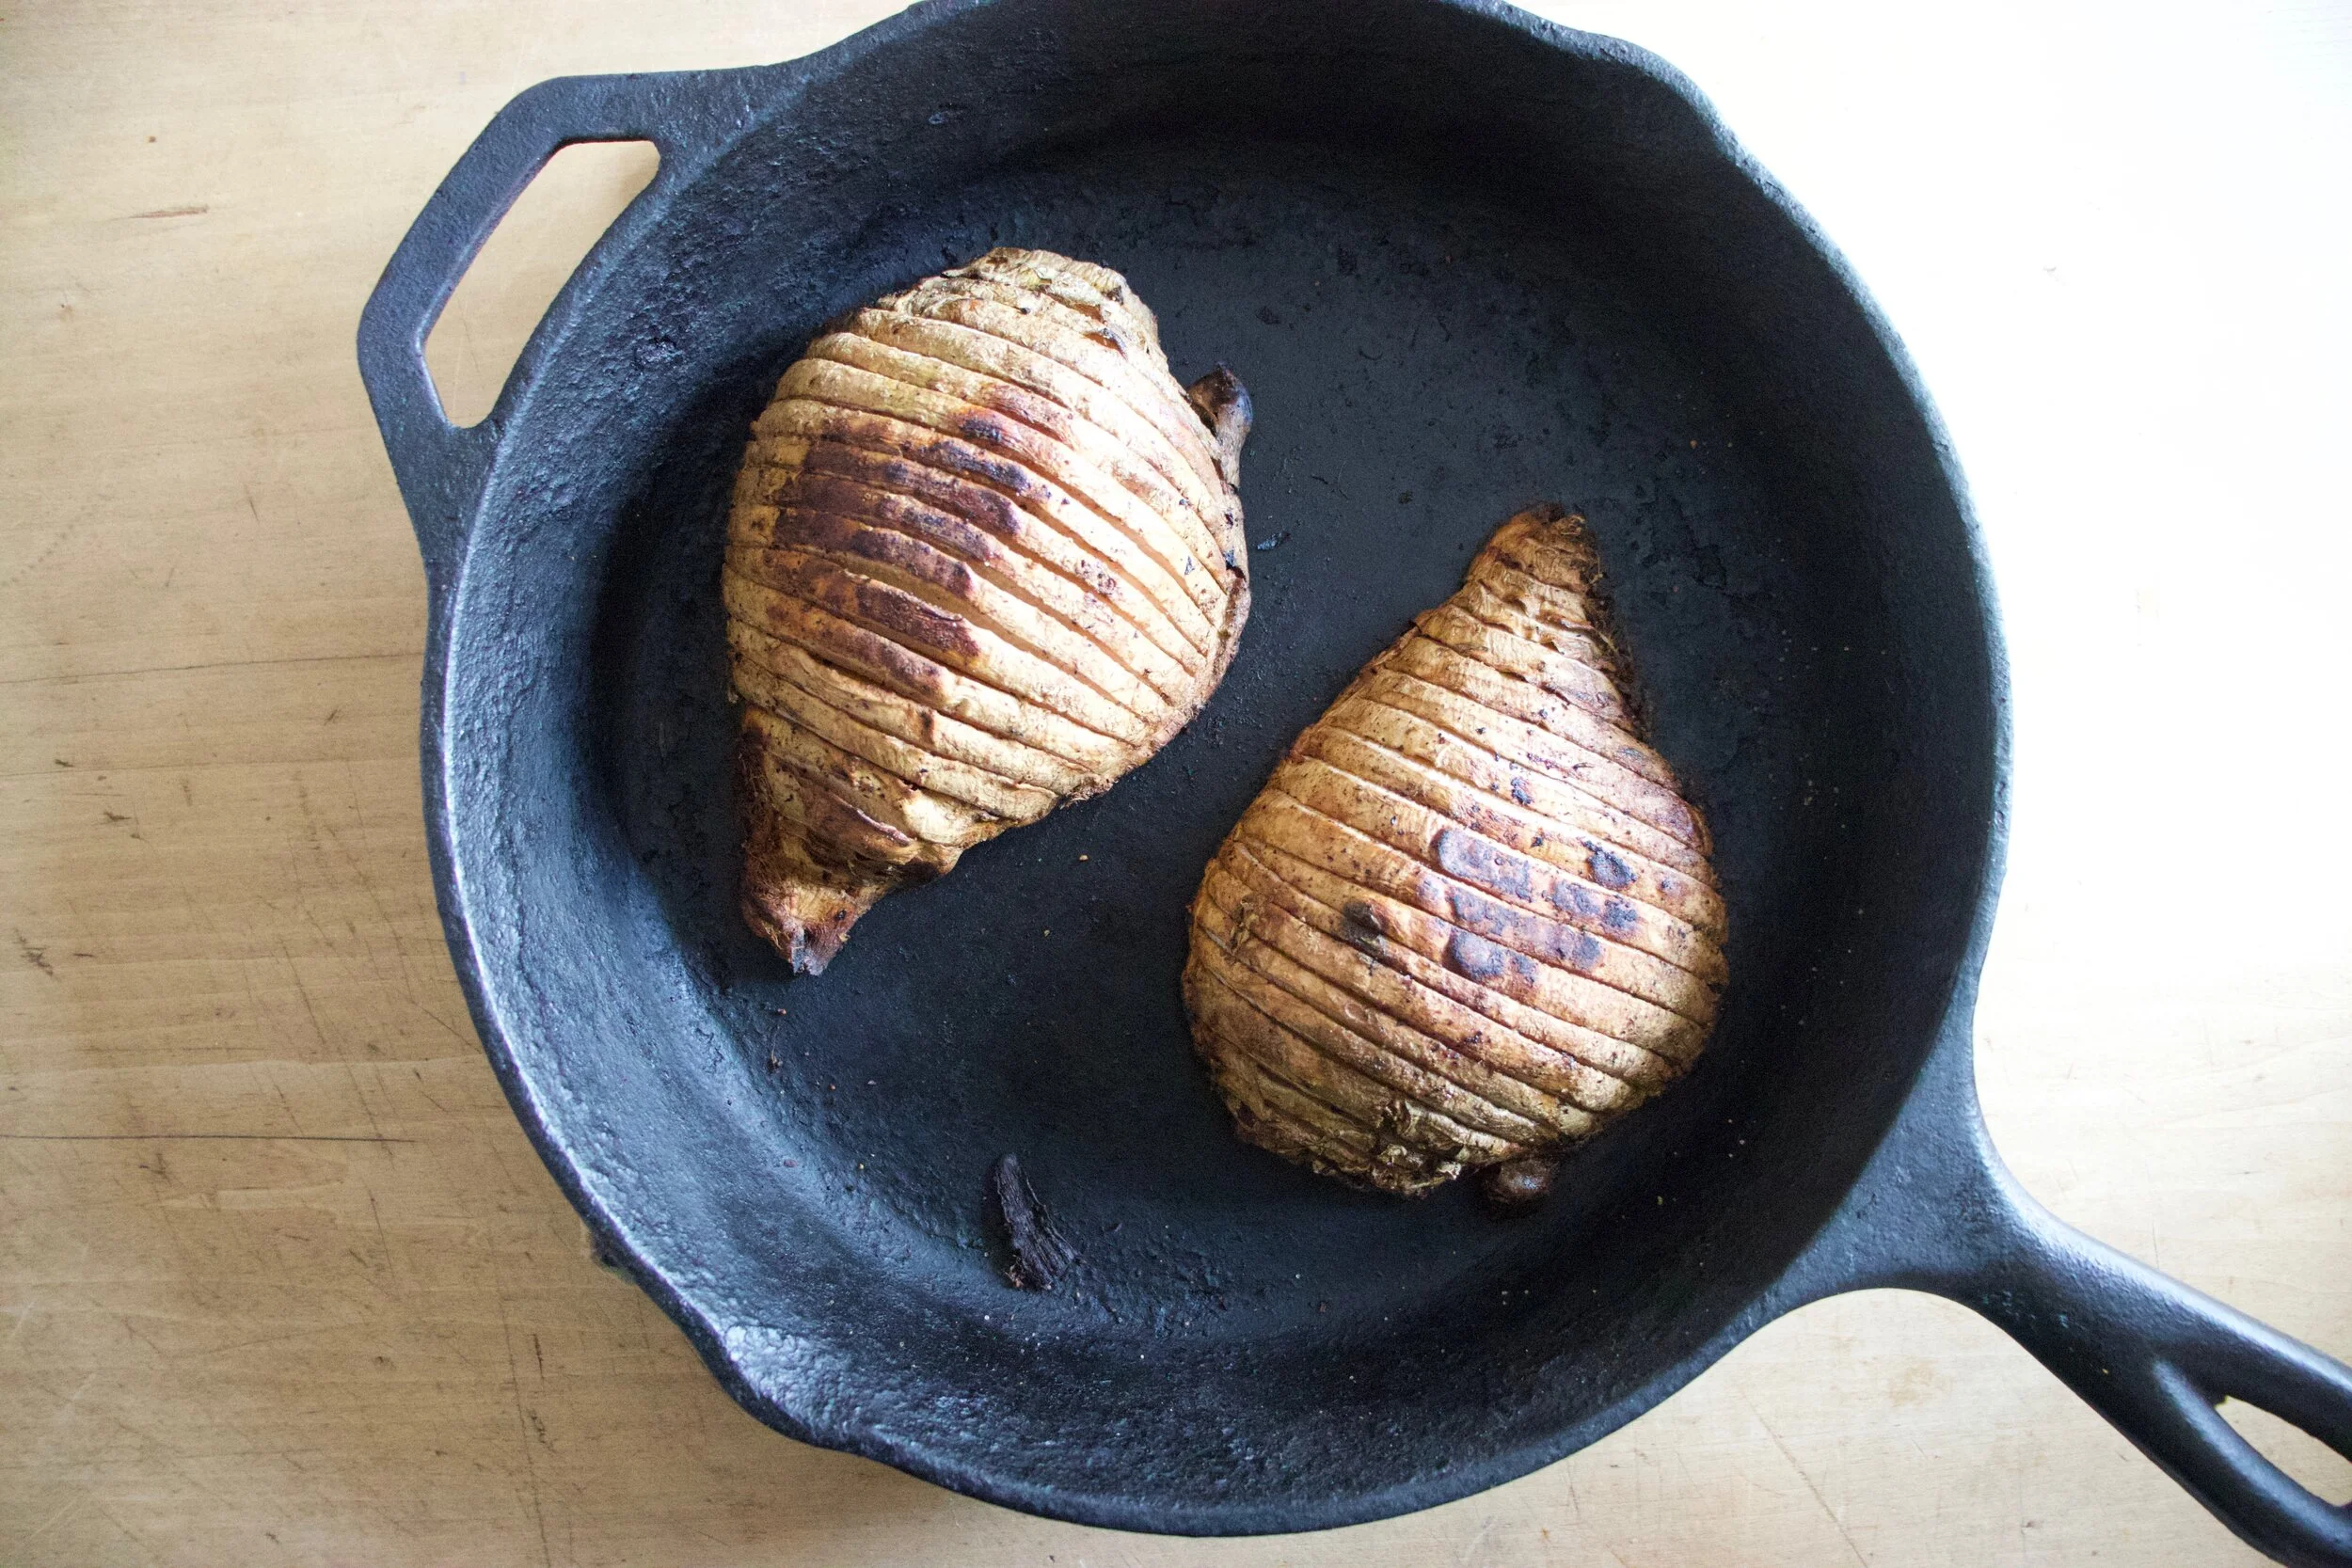
And back to the turnips. Baked for a little longer then an hour and flipped once, now they are all roasted and crispy and all sorts of ready.
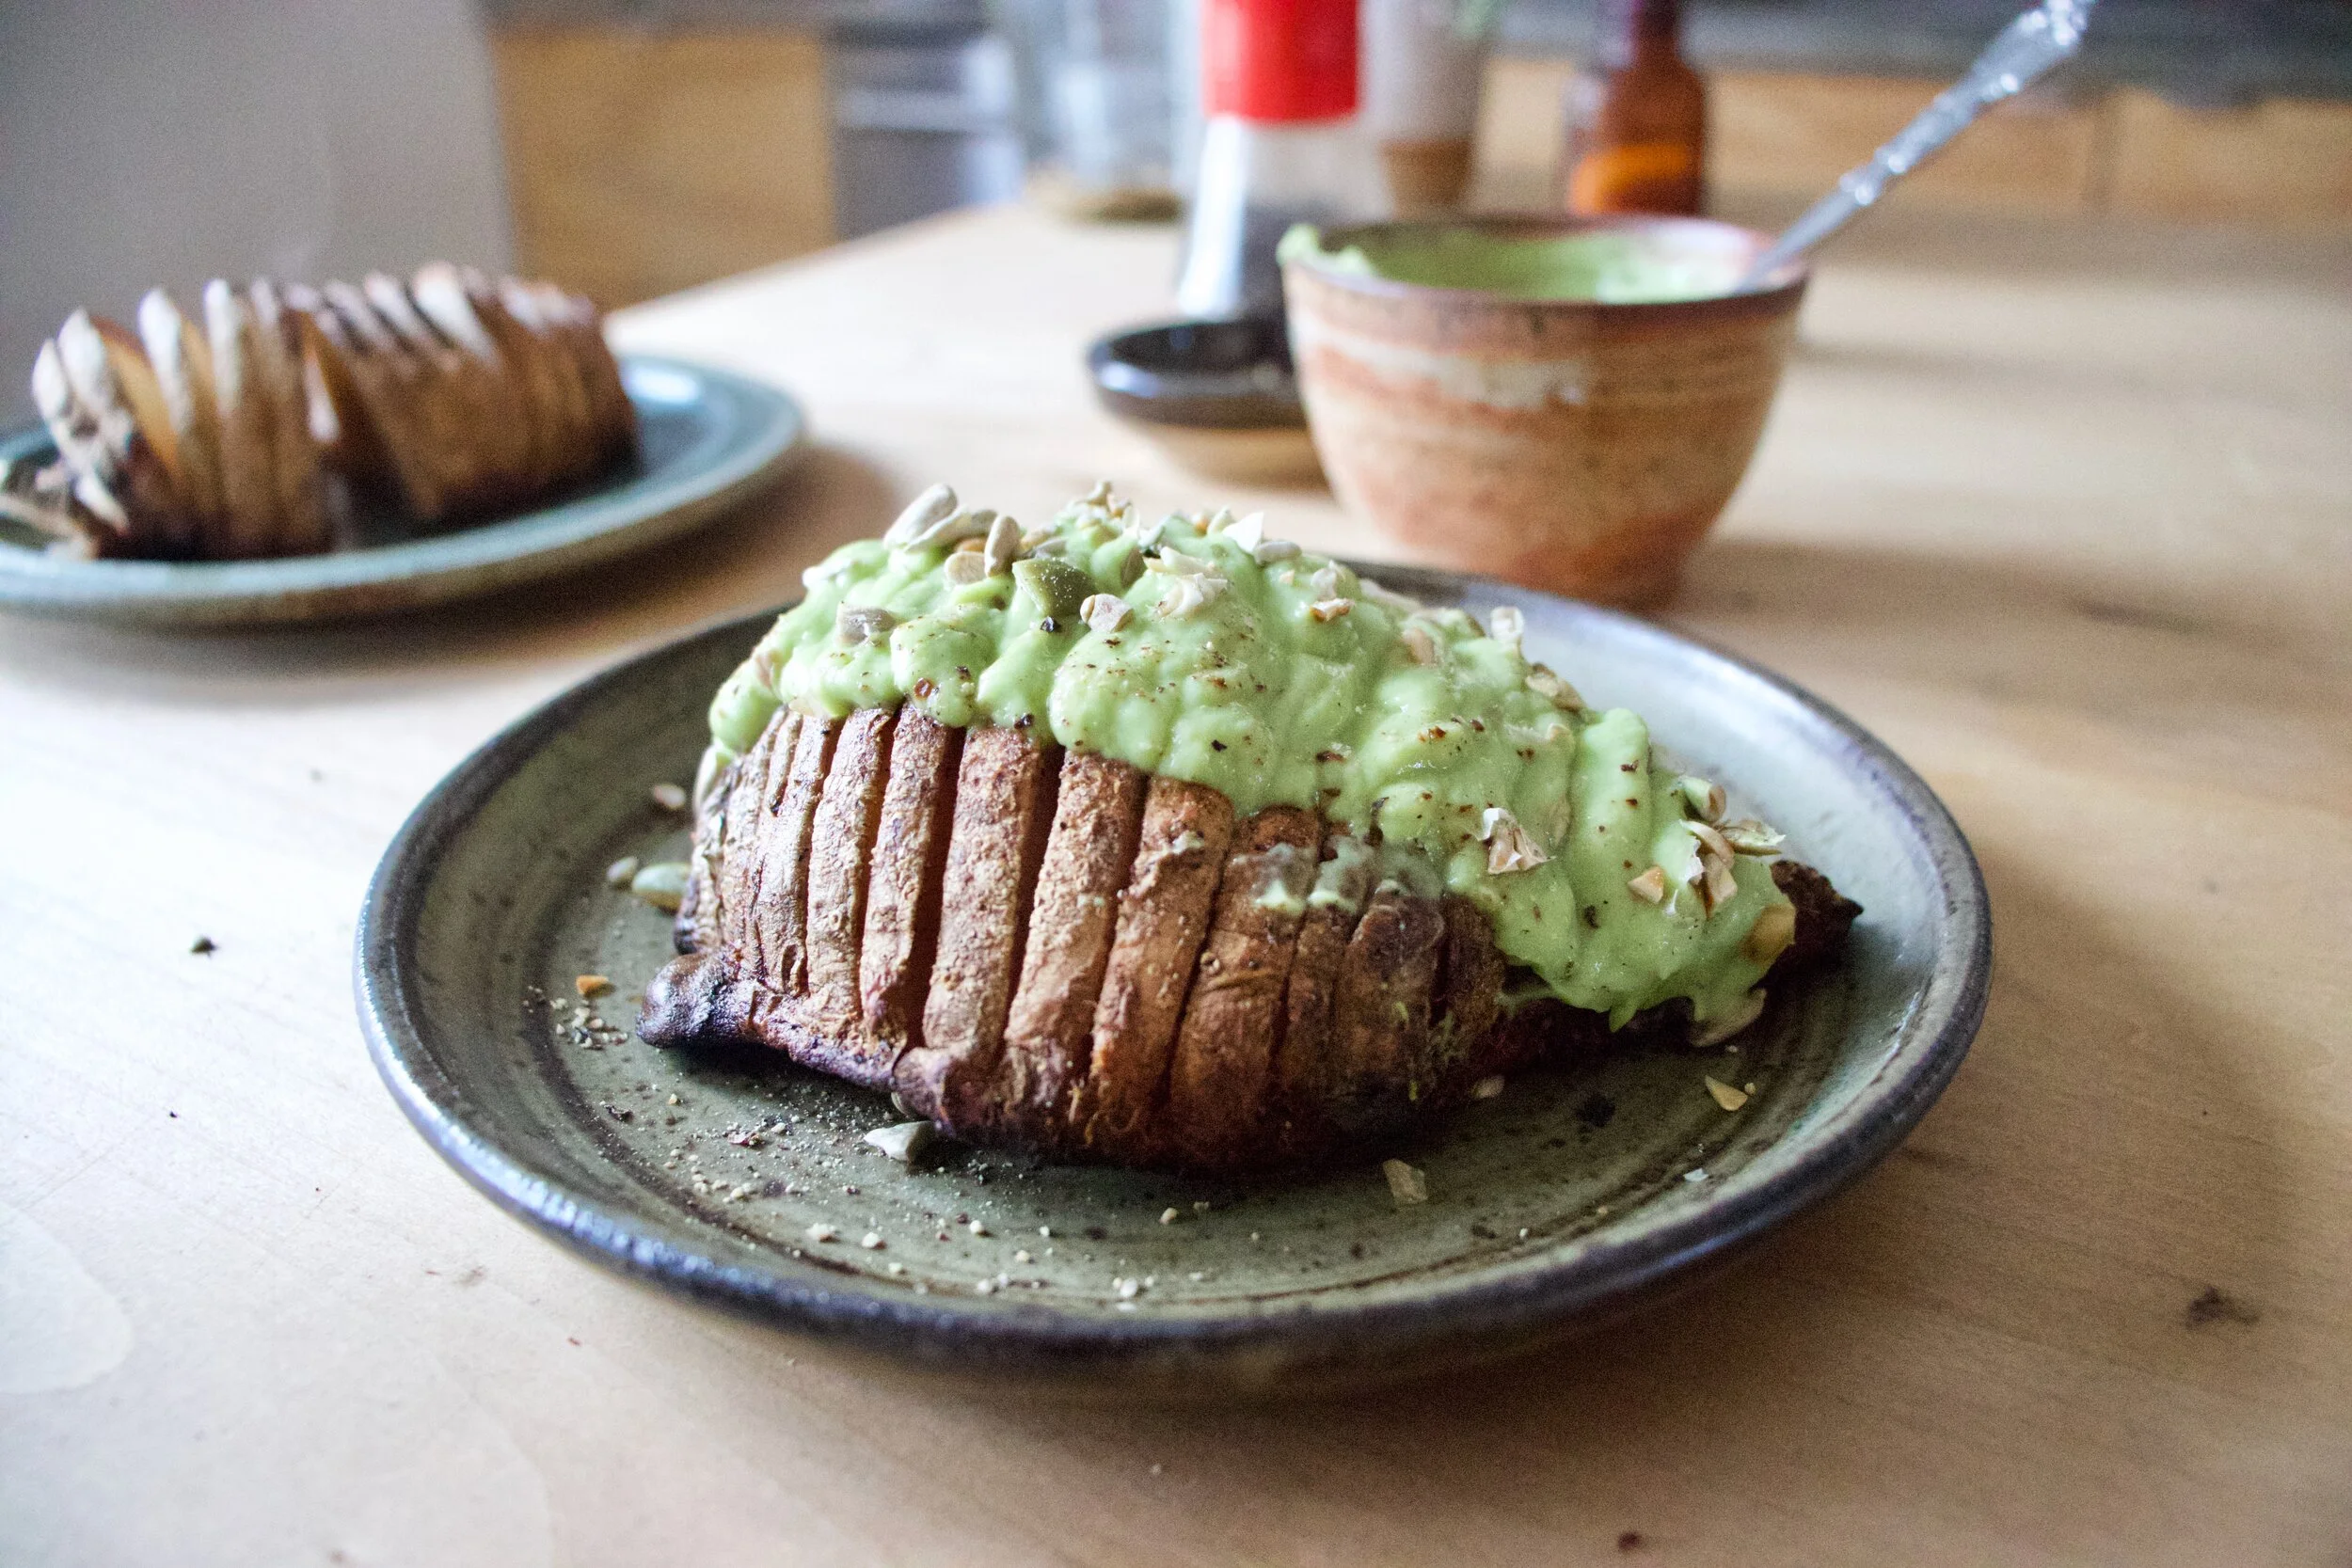
A freshly roasted hasseldbacked turnip smothered in avocado cream and sprinkle with toasted seeds.. Good things here friends. Good things.
-C
serves 2-4
1 large or 2 small turnips
salt and pepper
olive oil
pinch or garlic powder
an avocado
1 tablespoon red wine vinegar
1 tablespoon water
handful of toasted mixed seeds (I used pumpkin and sunflower seeds)
Preheat oven to 450
Grab turnip(s) and wash thoughtful. If you buy the turnip from the store and it has a wax coating, peel the outer skin, otherwise, you don%u2019t have to. Now to haseslback. Cut the large turnip in half or if using to small ones, you can just leave it whole. Take two, either chopsticks or something that is about 1/4 – 1/2 inch thick, and place on either side of turnip to use as a cutting guid. Slice the turnip about ever 1/4 inch , right down to the guide, but not all the way through. After cutting, place on a lightly oiled skillet or baking sheet and drizzle a little oil in our hand and rub all over. Sprinkle with salt, pepper, and a pinch or garlic powder. Place the turnips in hot oven. Roasts for about an hour, or until the slices of the turnip start to brown and come apart. Also, if you want a little more crispy edge, half way through, drizzle on a little more oil. You can also flip (which I did) the turnip cut side down to finish roasting.
While turnips are roasting, make avocado puree. Scoop avocado into bowl or blender. Add in the water, vinegar, and a pinch or salt. Blend in blender or with stick blender until smooth. If to thick, drizzle in a little more water until desired consistency.
Once cooked and all crispy like, remove turnips from oven, place on a plate and slather on the avocado cream. Sprinkle on toasted seeds and eat to your face hole.
Let us talk about how winter squash is like one of the best foods ever. Seriously. Hardy, creamy, rich, and full of the nutty, sweet flavors of all the good things. How anyone says they don%u2019t like winter squash is beyond me. I sometimes even feel like I put myself in danger of exploding when I am around enough cooked squash. I can eat and eat it until it%u2019s gone, which is fine if it%u2019s a serving or two, but when you roast up a 10 pound butternut, well, that is when the danger is real. I am getting better at holding back, but man, sometimes I just can’t (or don%u2019t want to?) help myself. ( You might also wonder why I cook 10 pounds of squash at a time. It%u2019s because I will eat it all in a few days and I might as well cook a bunch at once, for efficiency sake.)
Now the delicata squah. If you haven%u2019t had it before, stop what you are doing and go get one. You need to try it because it is amazing. Sweet, nutty, creamy. So good! And another good thing is that they are not giant, so you can buy one and eat the whole thing and not worry about overeating until you can%u2019t move, unless that is the goal. In that case, just buy a bunch. HA.
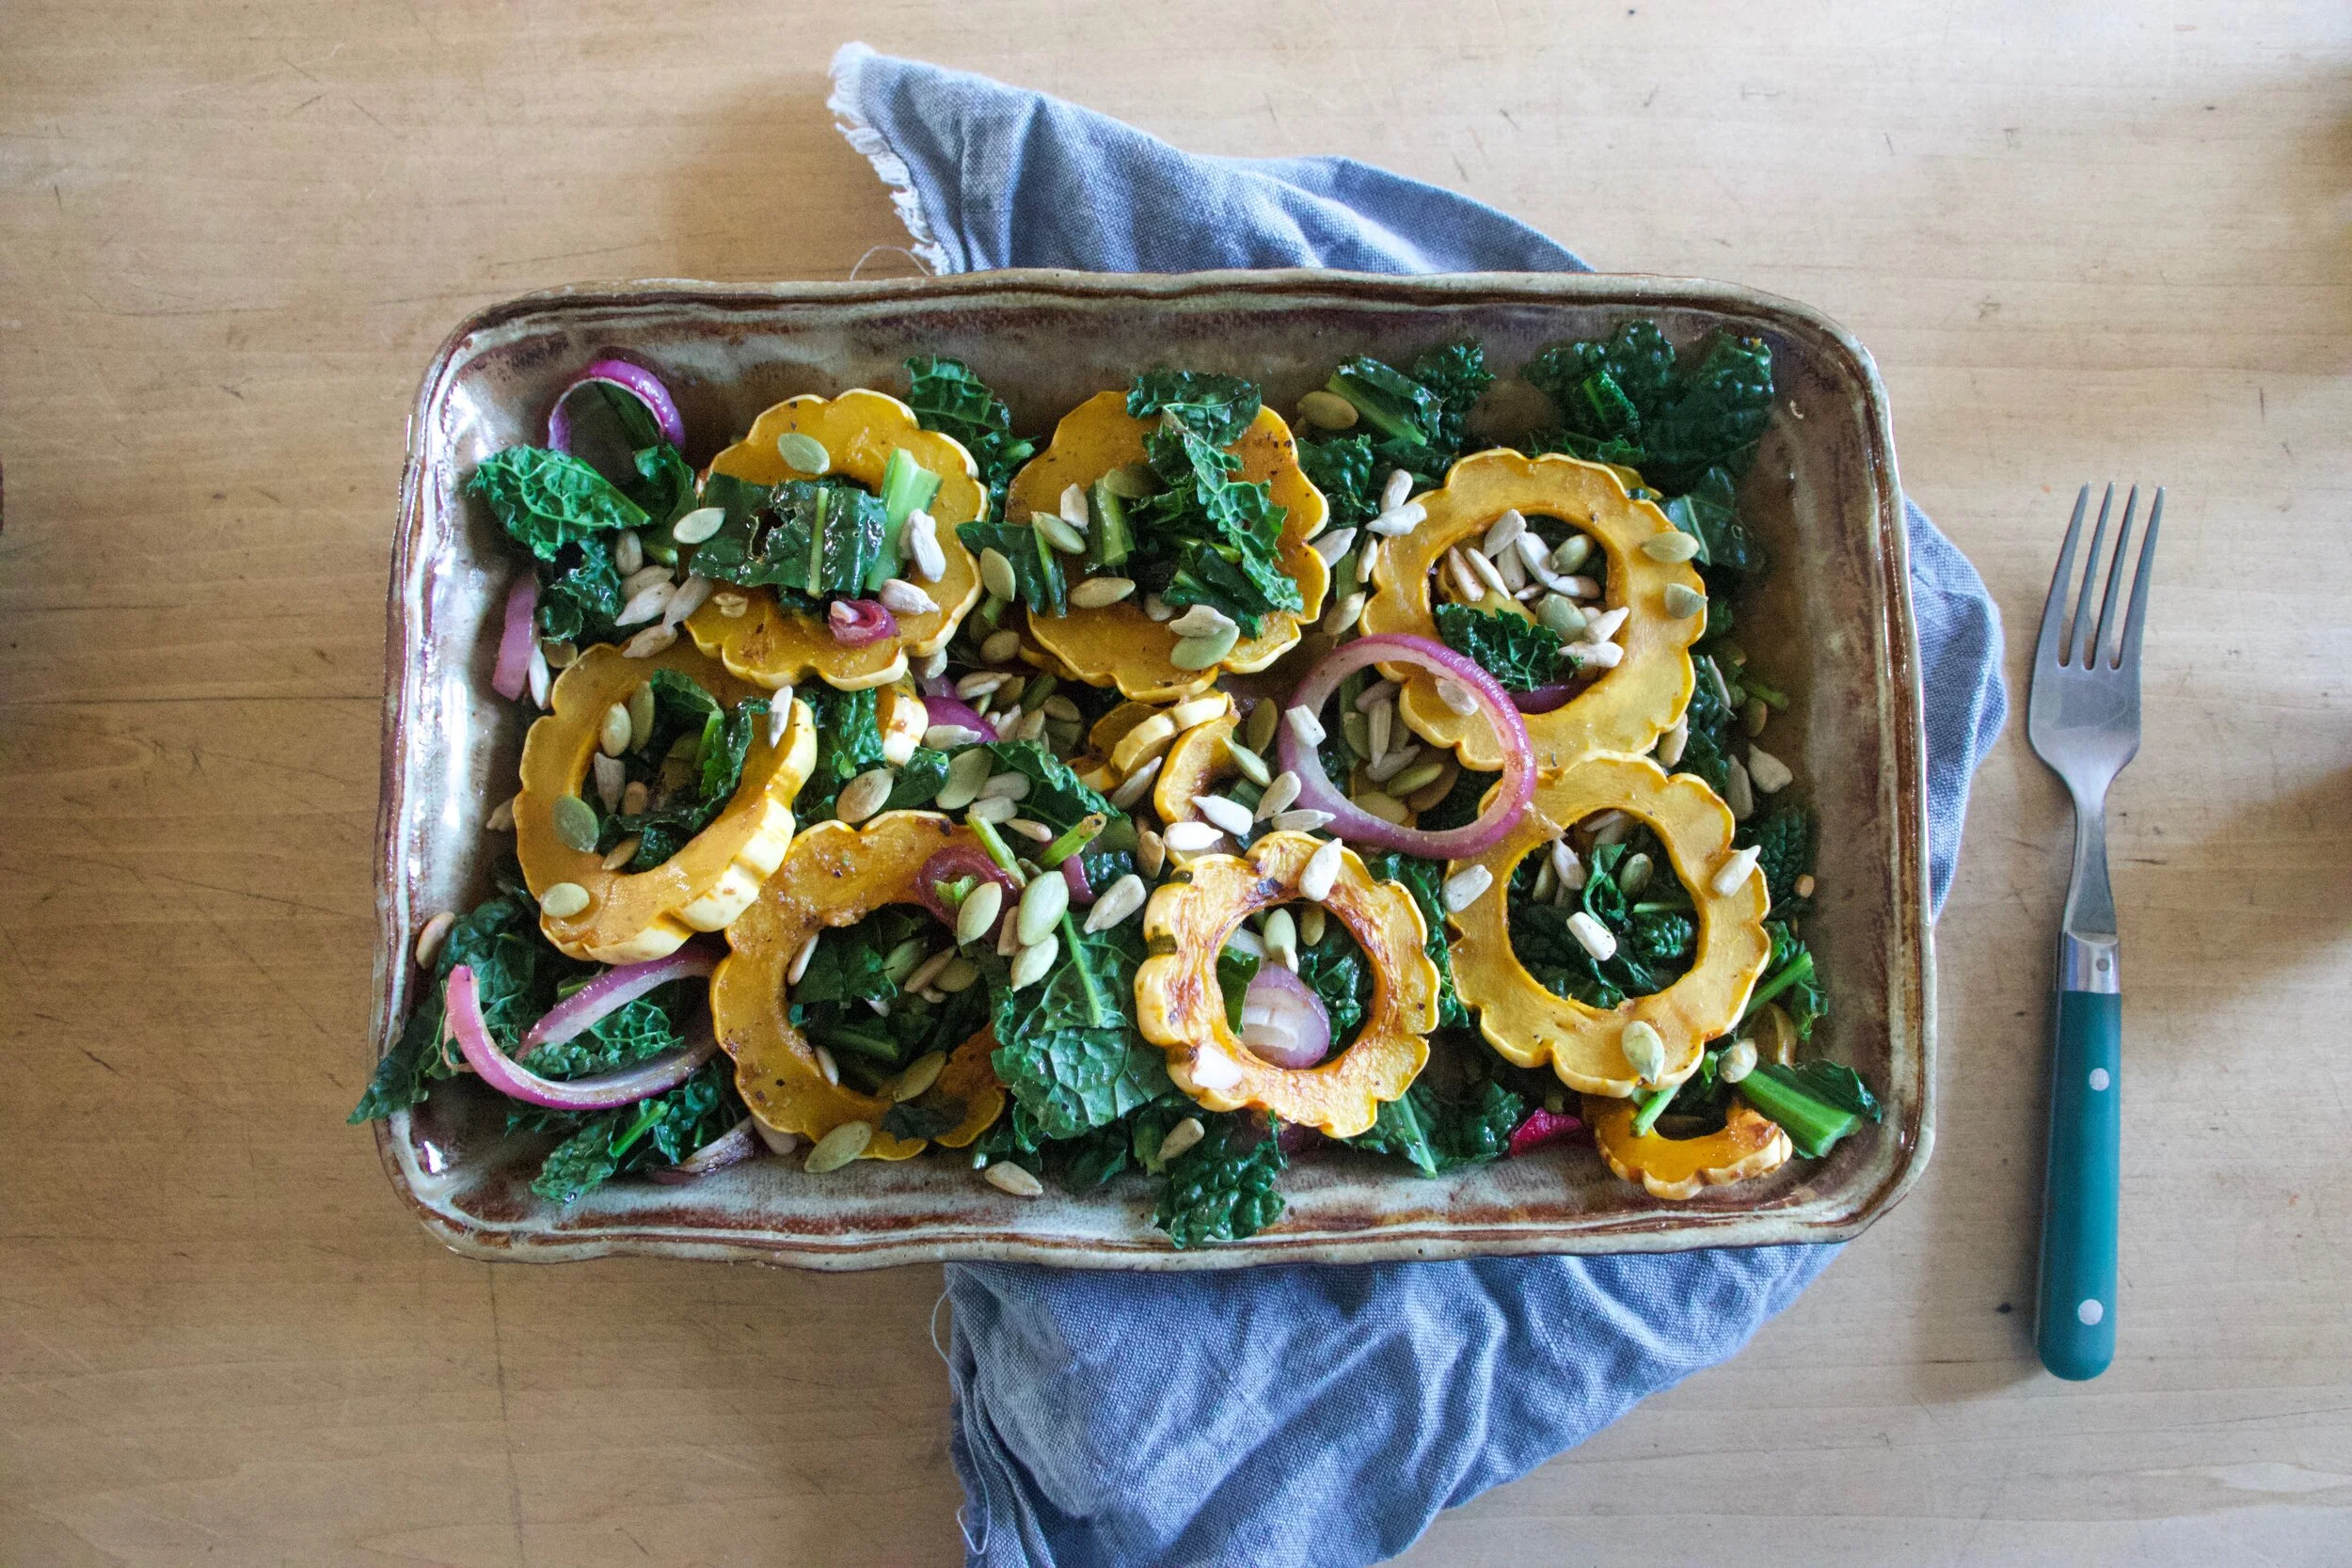
Anyway, it%u2019s getting to that time of year where salad is still great, it is just great warm. And with winter squash. Don%u2019t you agree? So we cook up the squash, grab the kale and make one heck of a salad to eat all to your face. Because that is what will happen. You will make it , taste it, and not want to share it. It is too good to share. (Yes salads can be too good to share, so if you are planning on feeding others, plan accordingly)
To the salad!
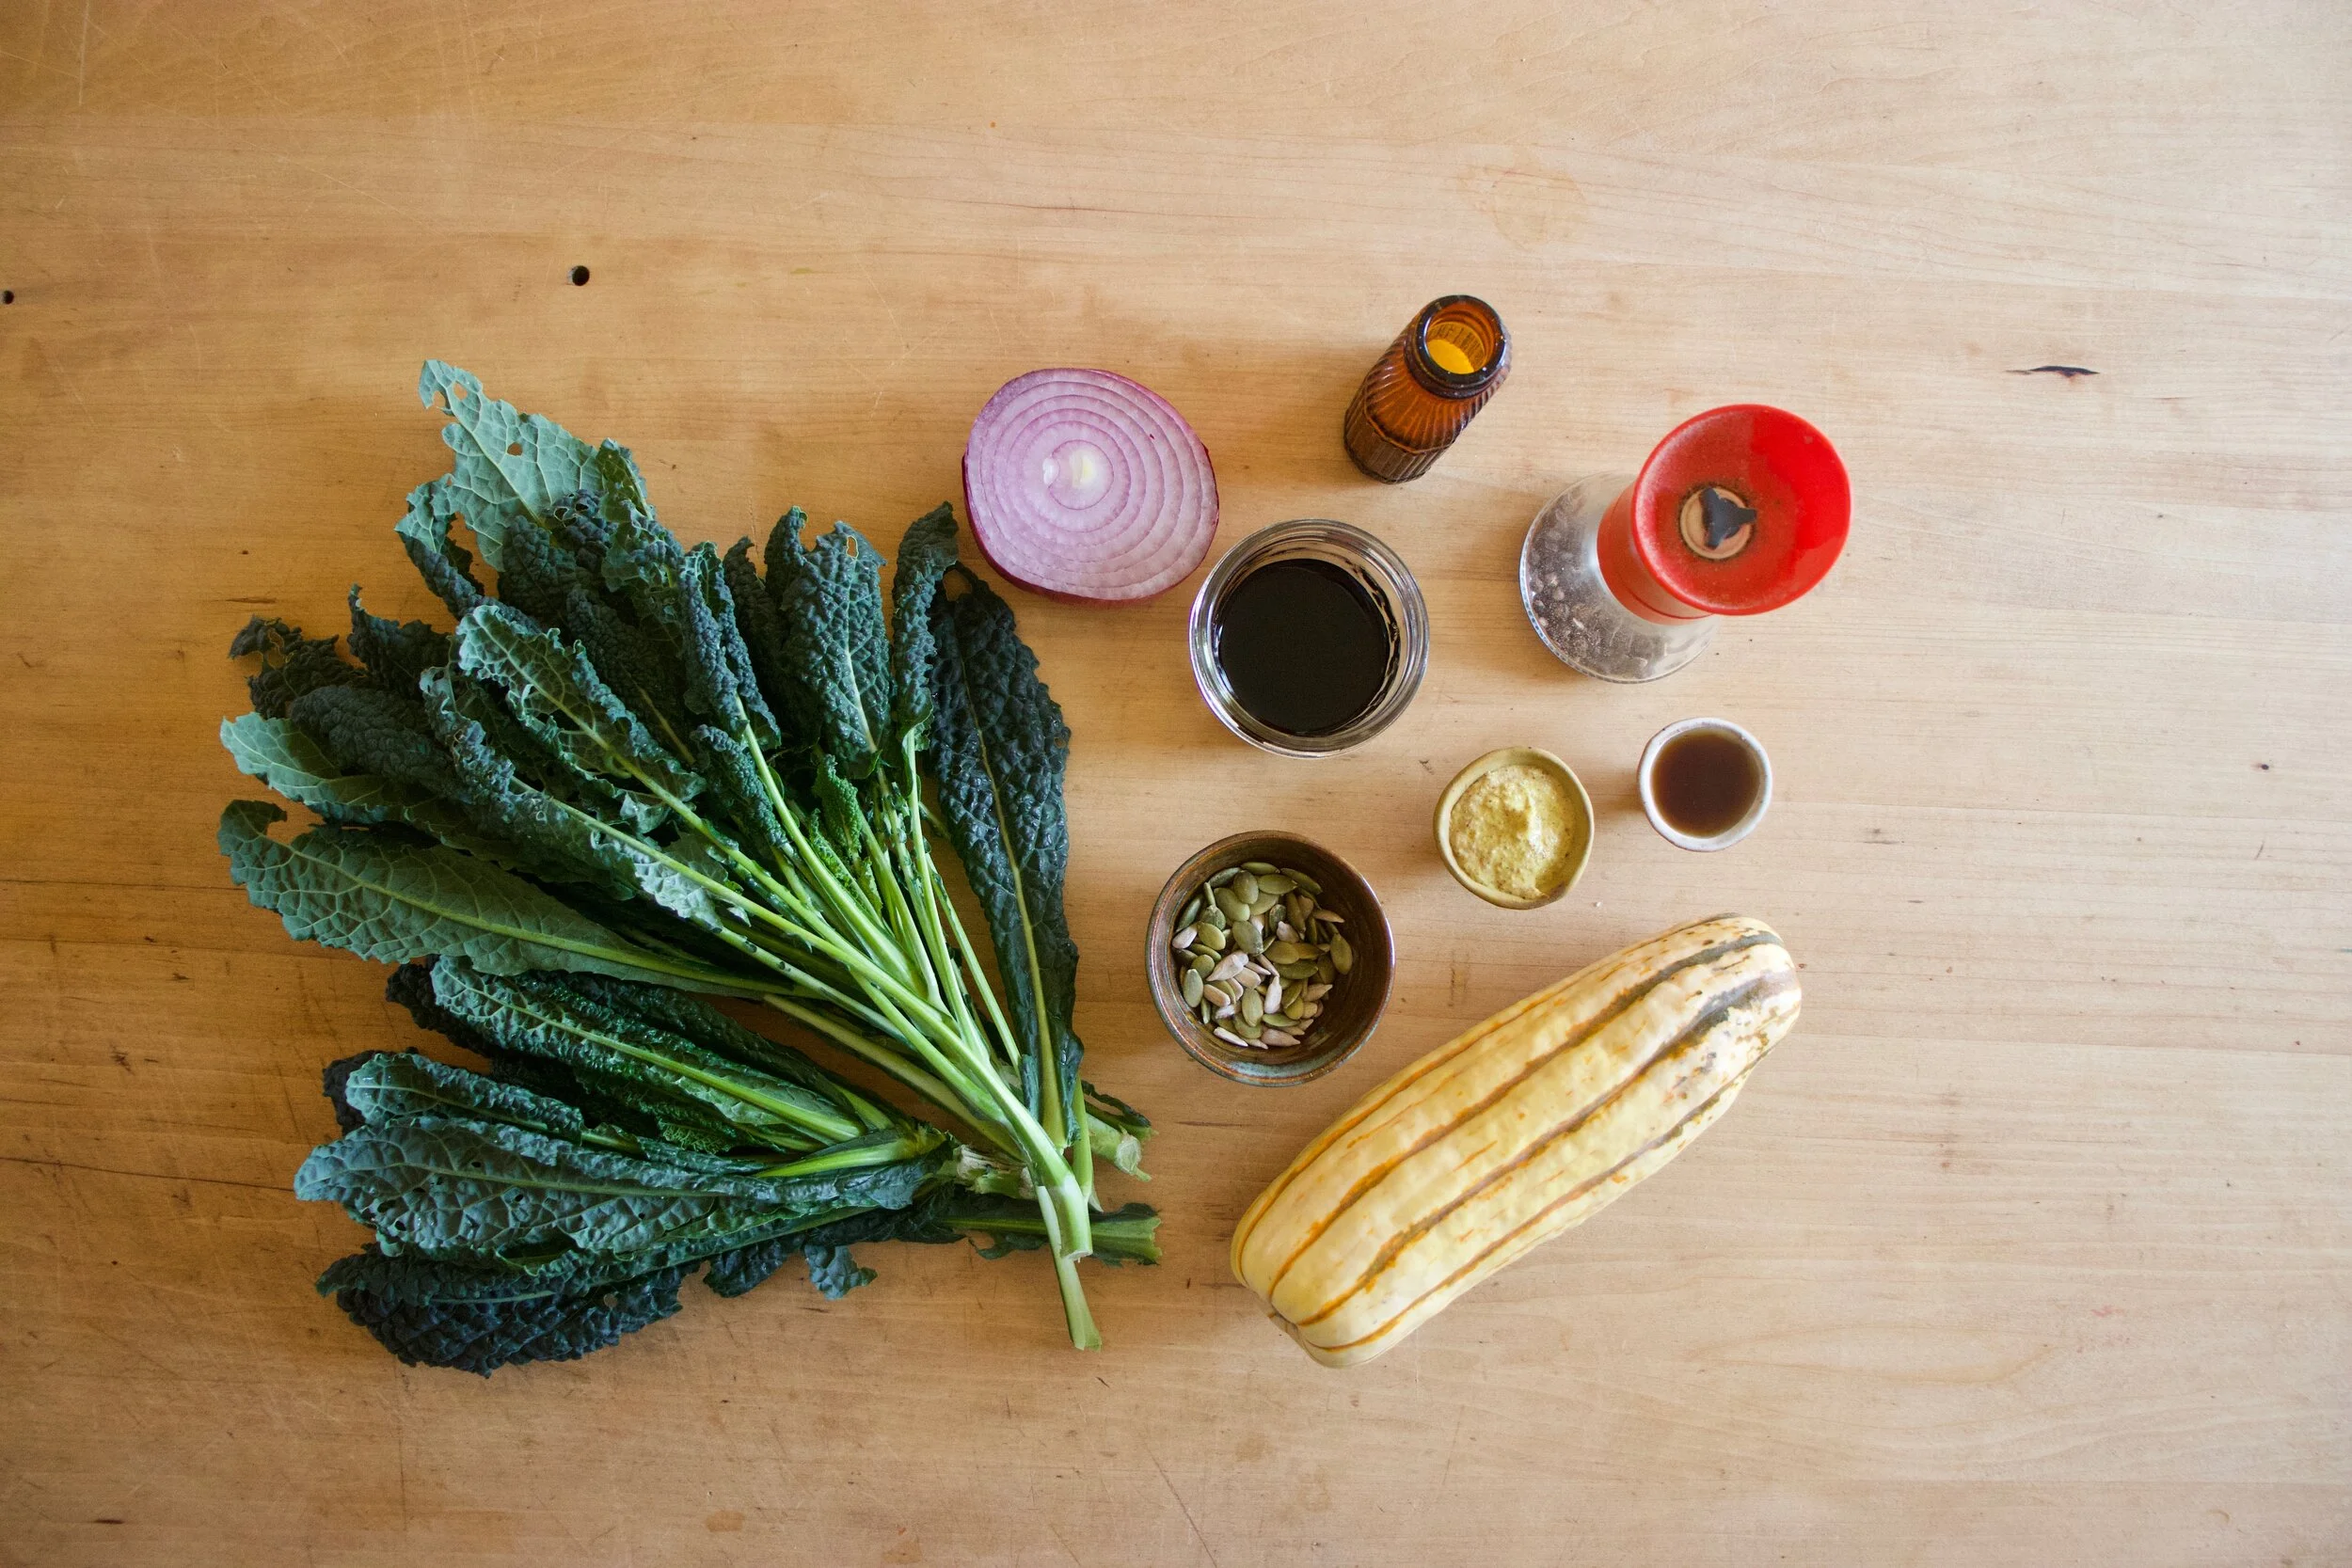
The stuff. Kale, a delicata squash, red onion, some balsamic vinegar, a touch of maple, spicy brown mustard, a handful of toasted seeds, and salt and pepper.
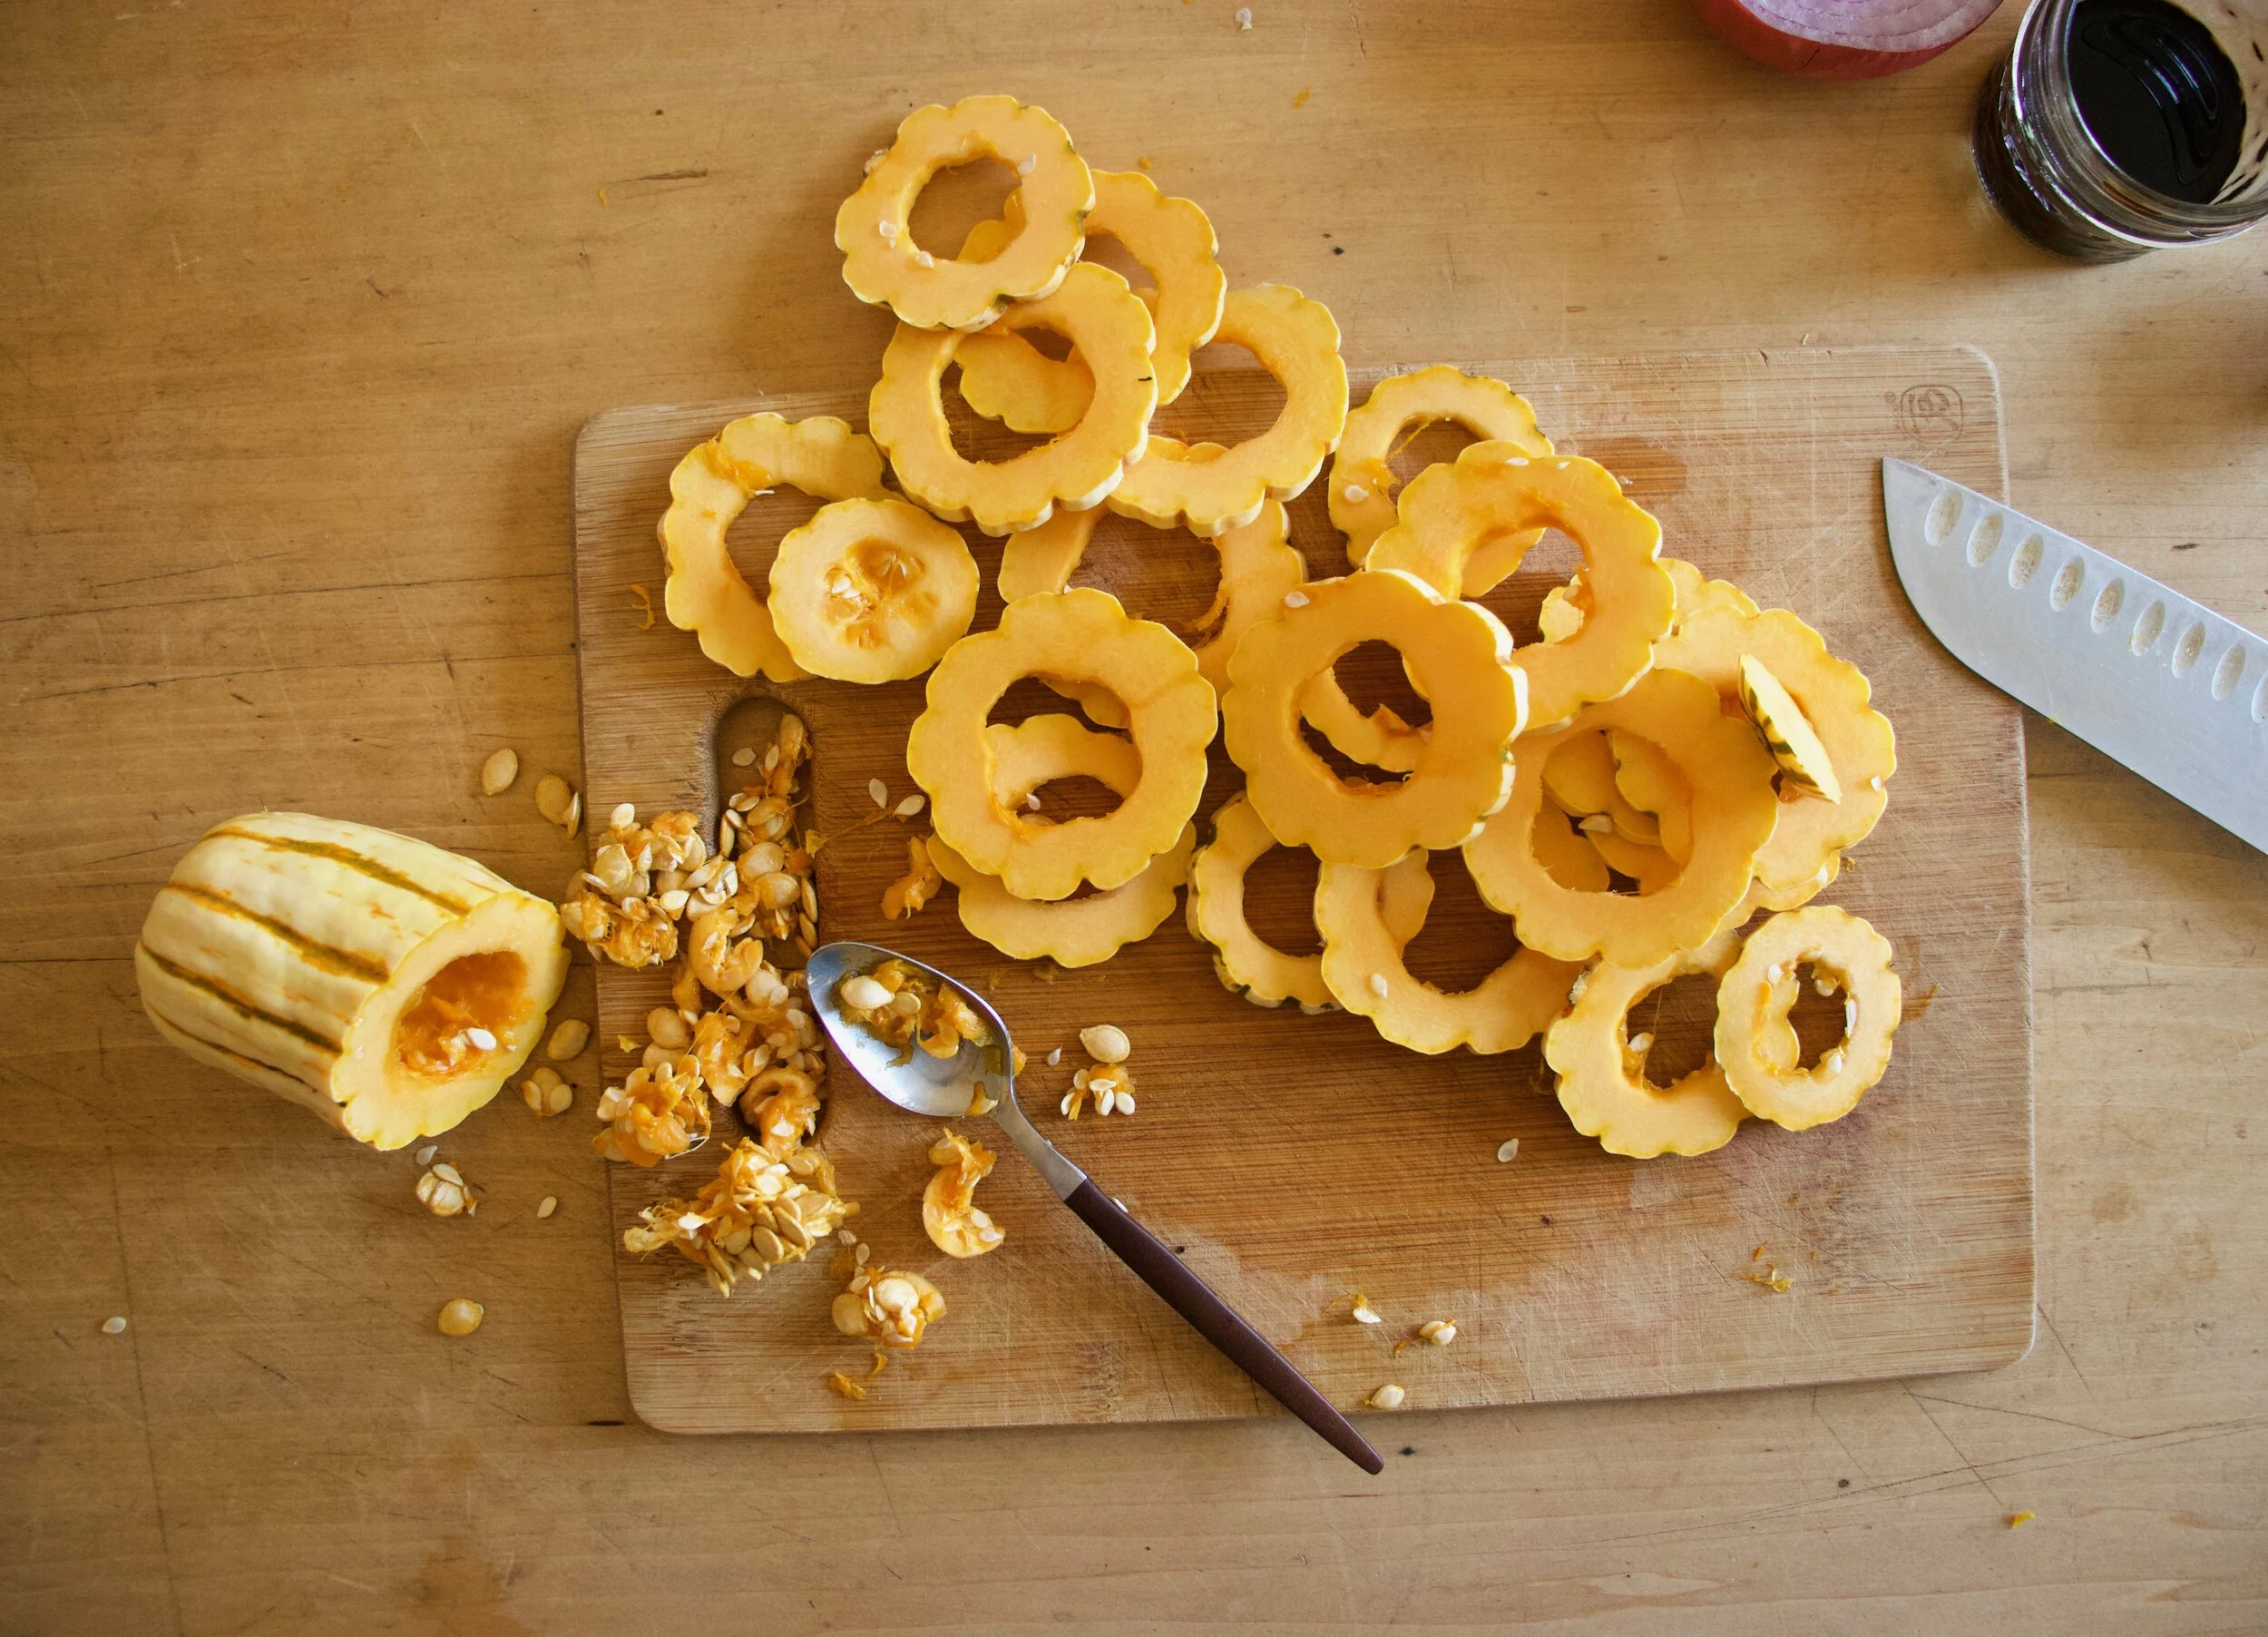
Start with the squash. Cut it in half and scoop seeds from booth sides (these seeds are great roasted). After deseeded, cut both pieces into 1/4-1/2 inch thick rounds. And NO!!!!, do not peel the skin.
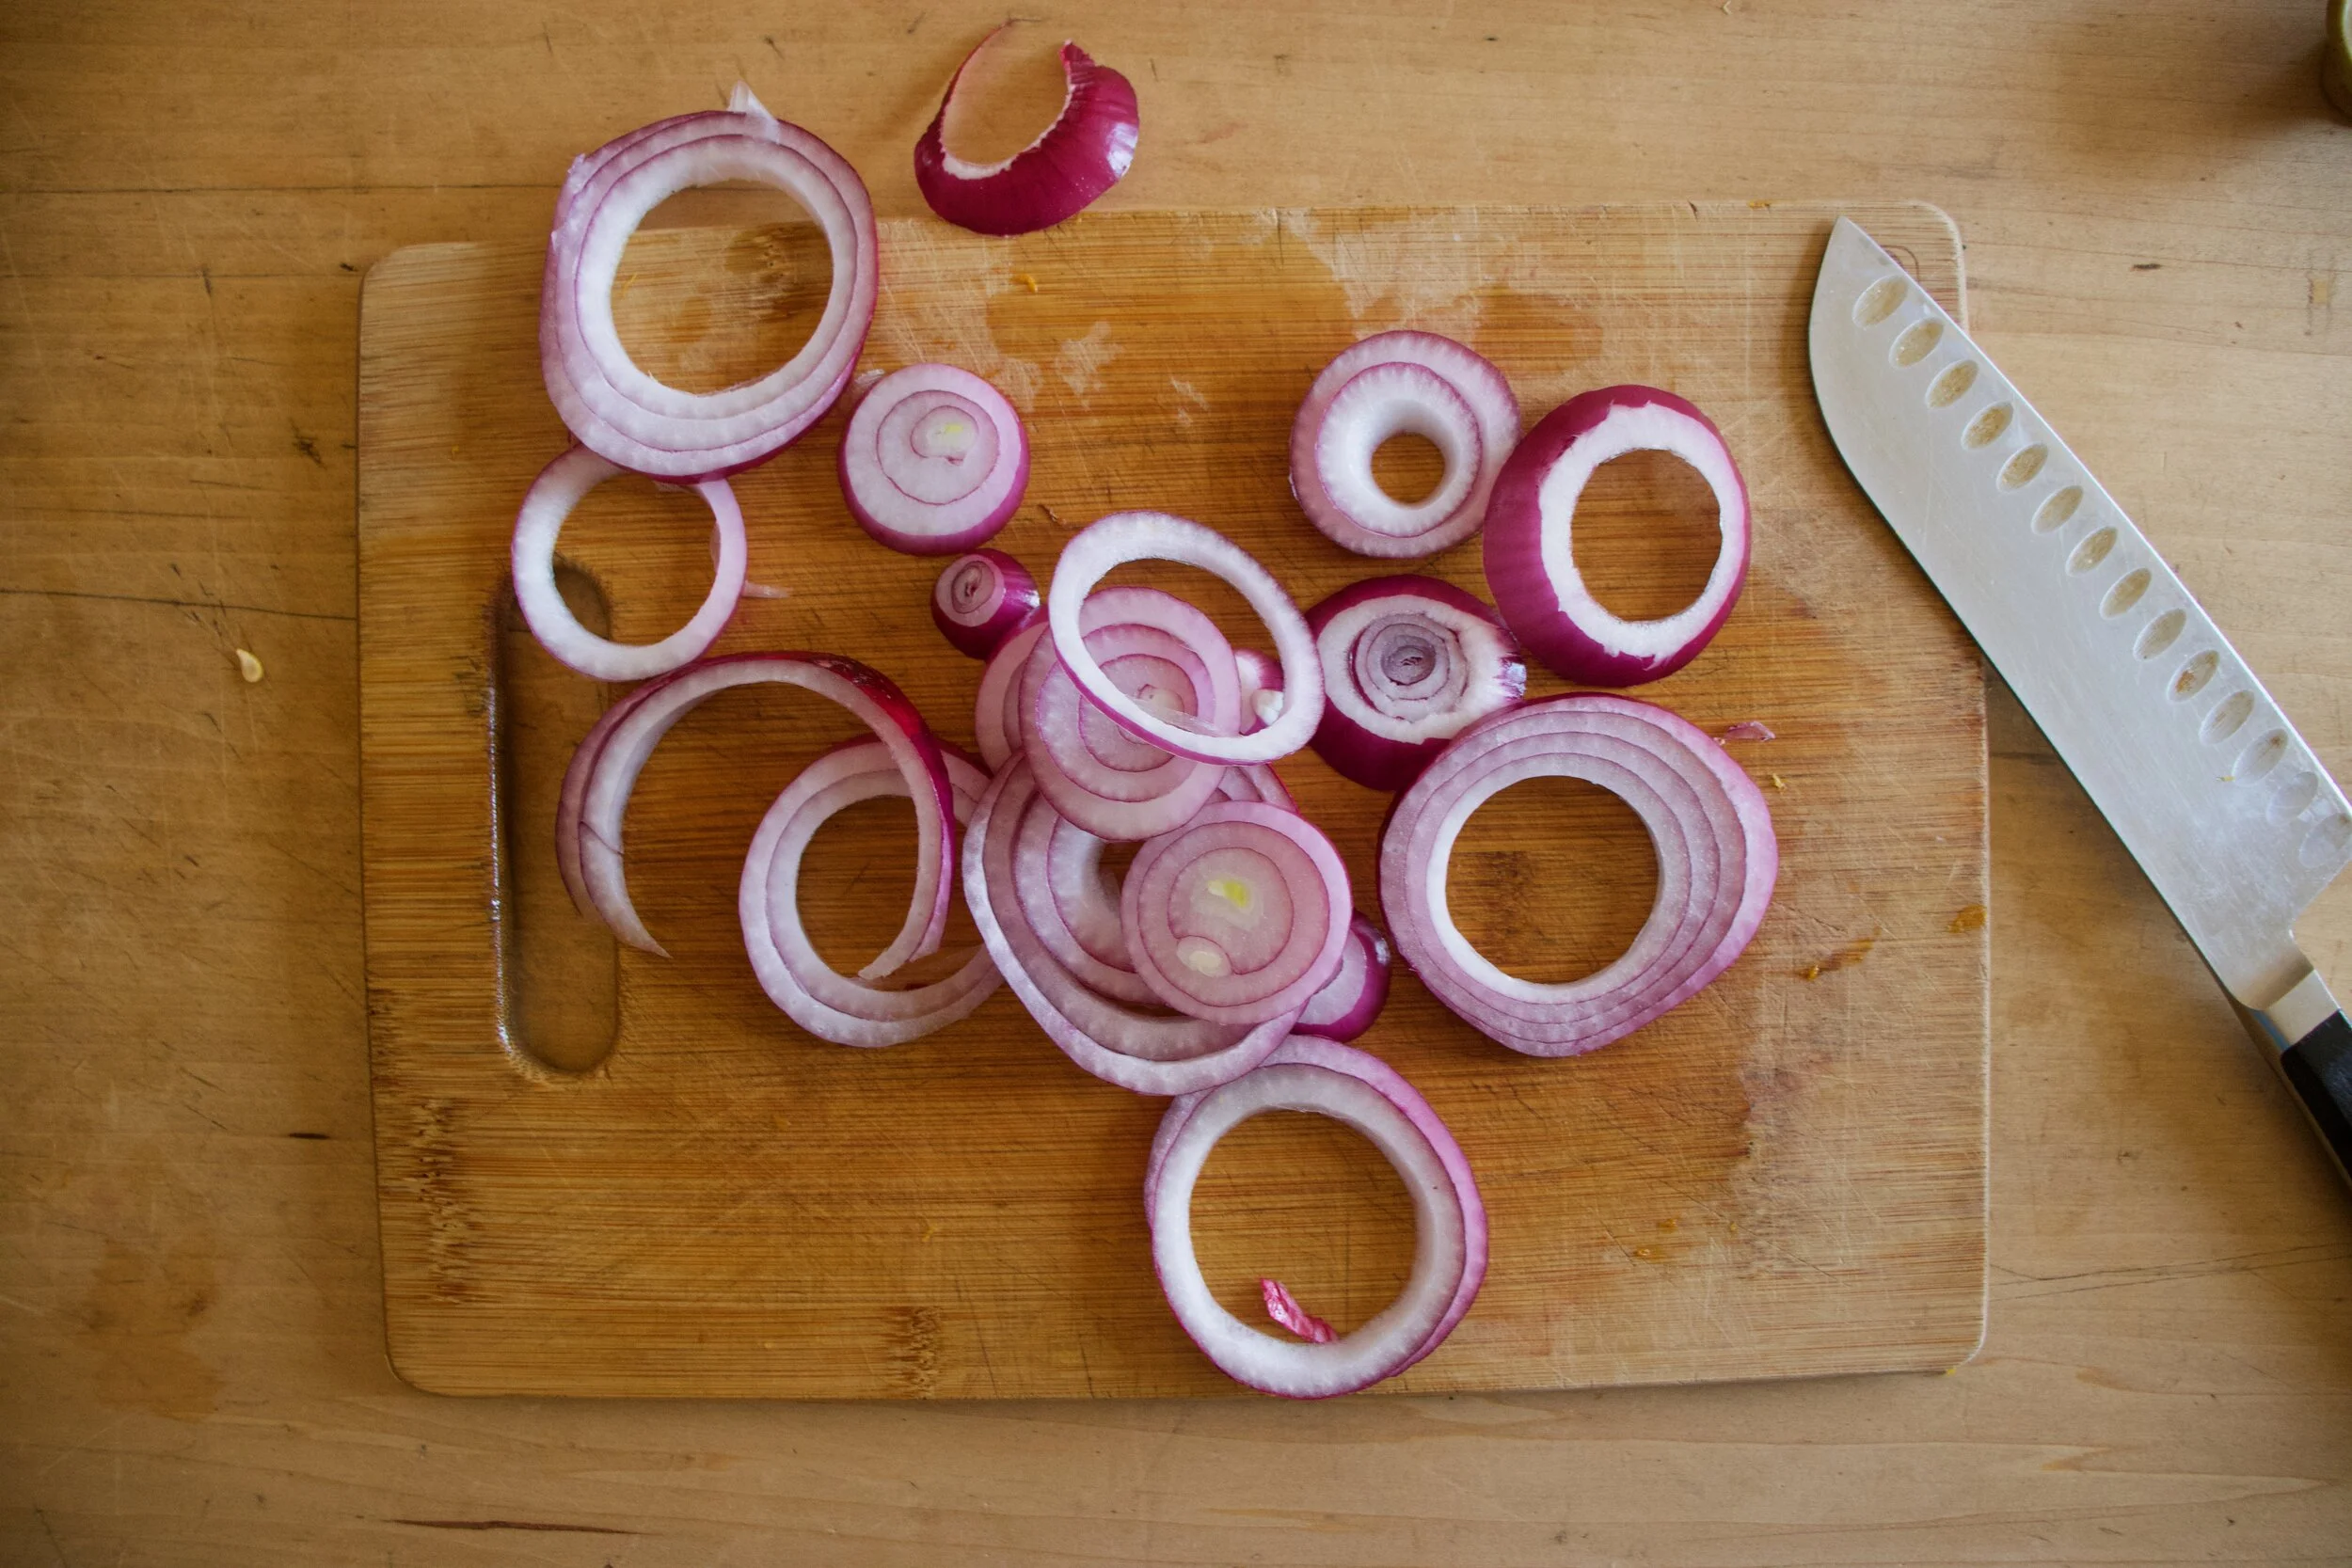
Grab the onion and cut into 1/4 inch rounds too.
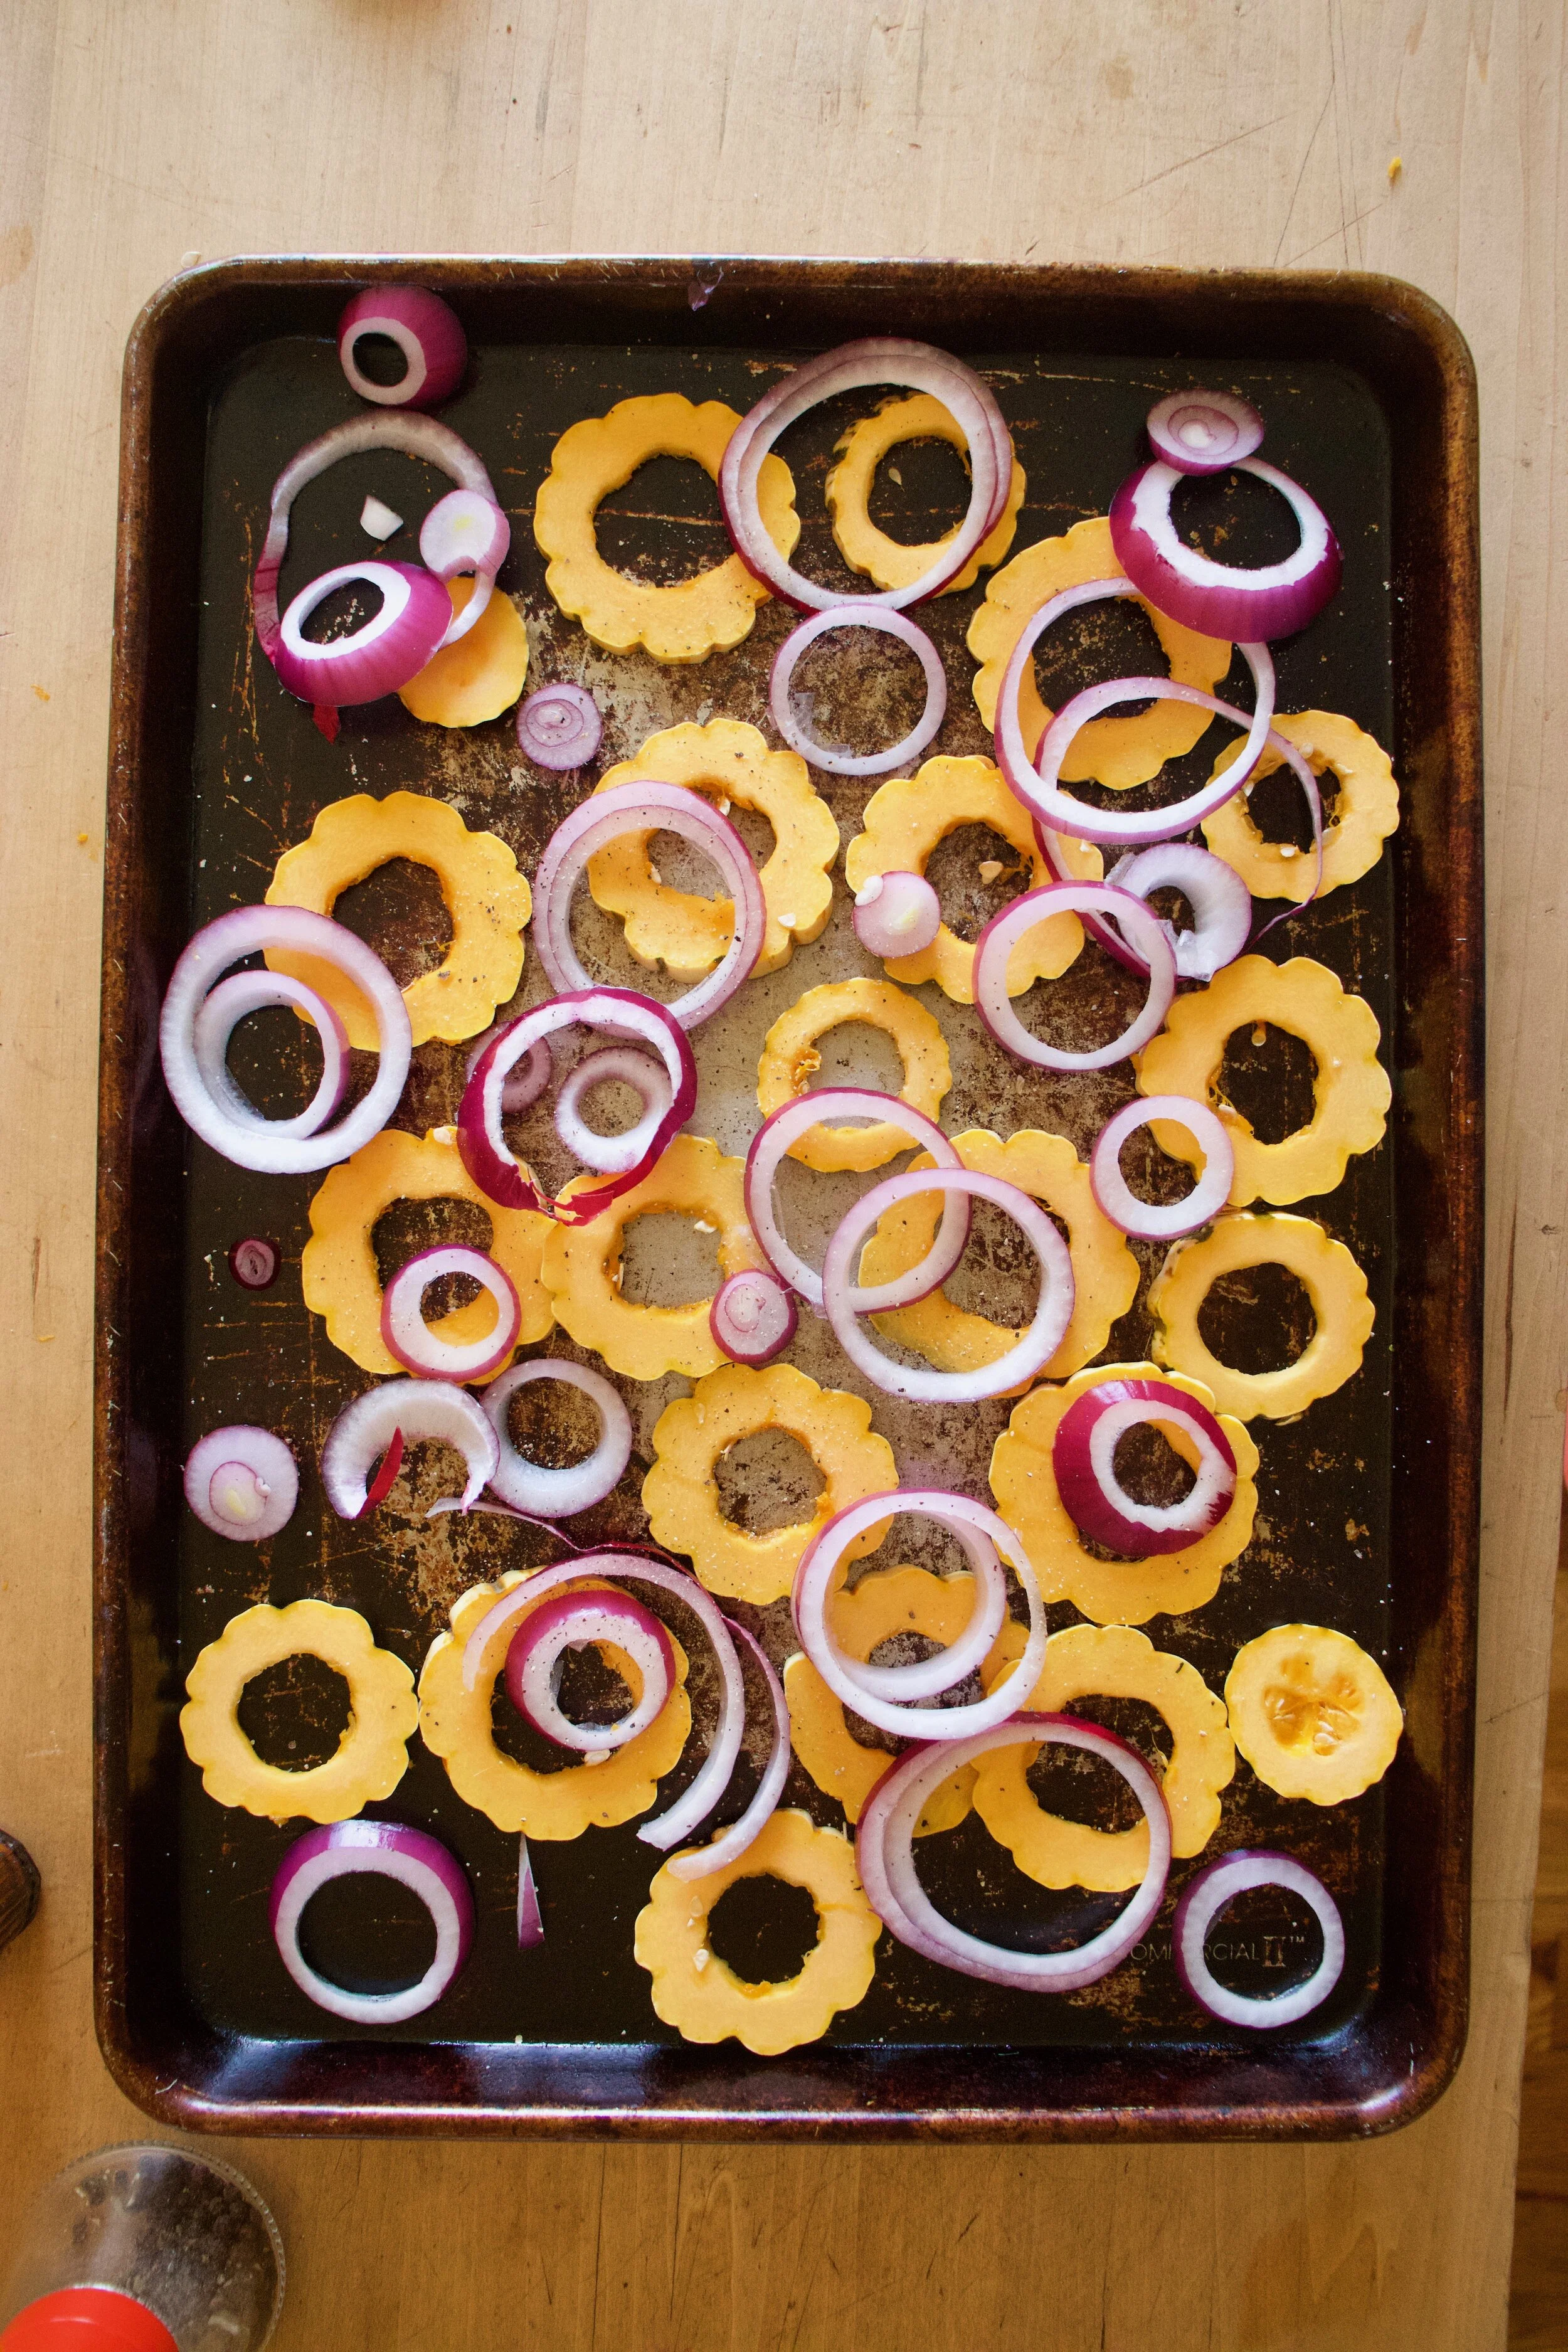
Place the squash on a very lightly oiled baking sheet so the pieces are not overlapping each other. Then toss on the onion which is fine if it overlaps. Sprinkle with a pinch of salt and lots of cracked pepper and pop into a hot oven.
In the meantime, mix the dressing situation together. Mustard, maple, and balsamic in a jar, mix and done.
Chop the kale too. Into mouth sized pieces.
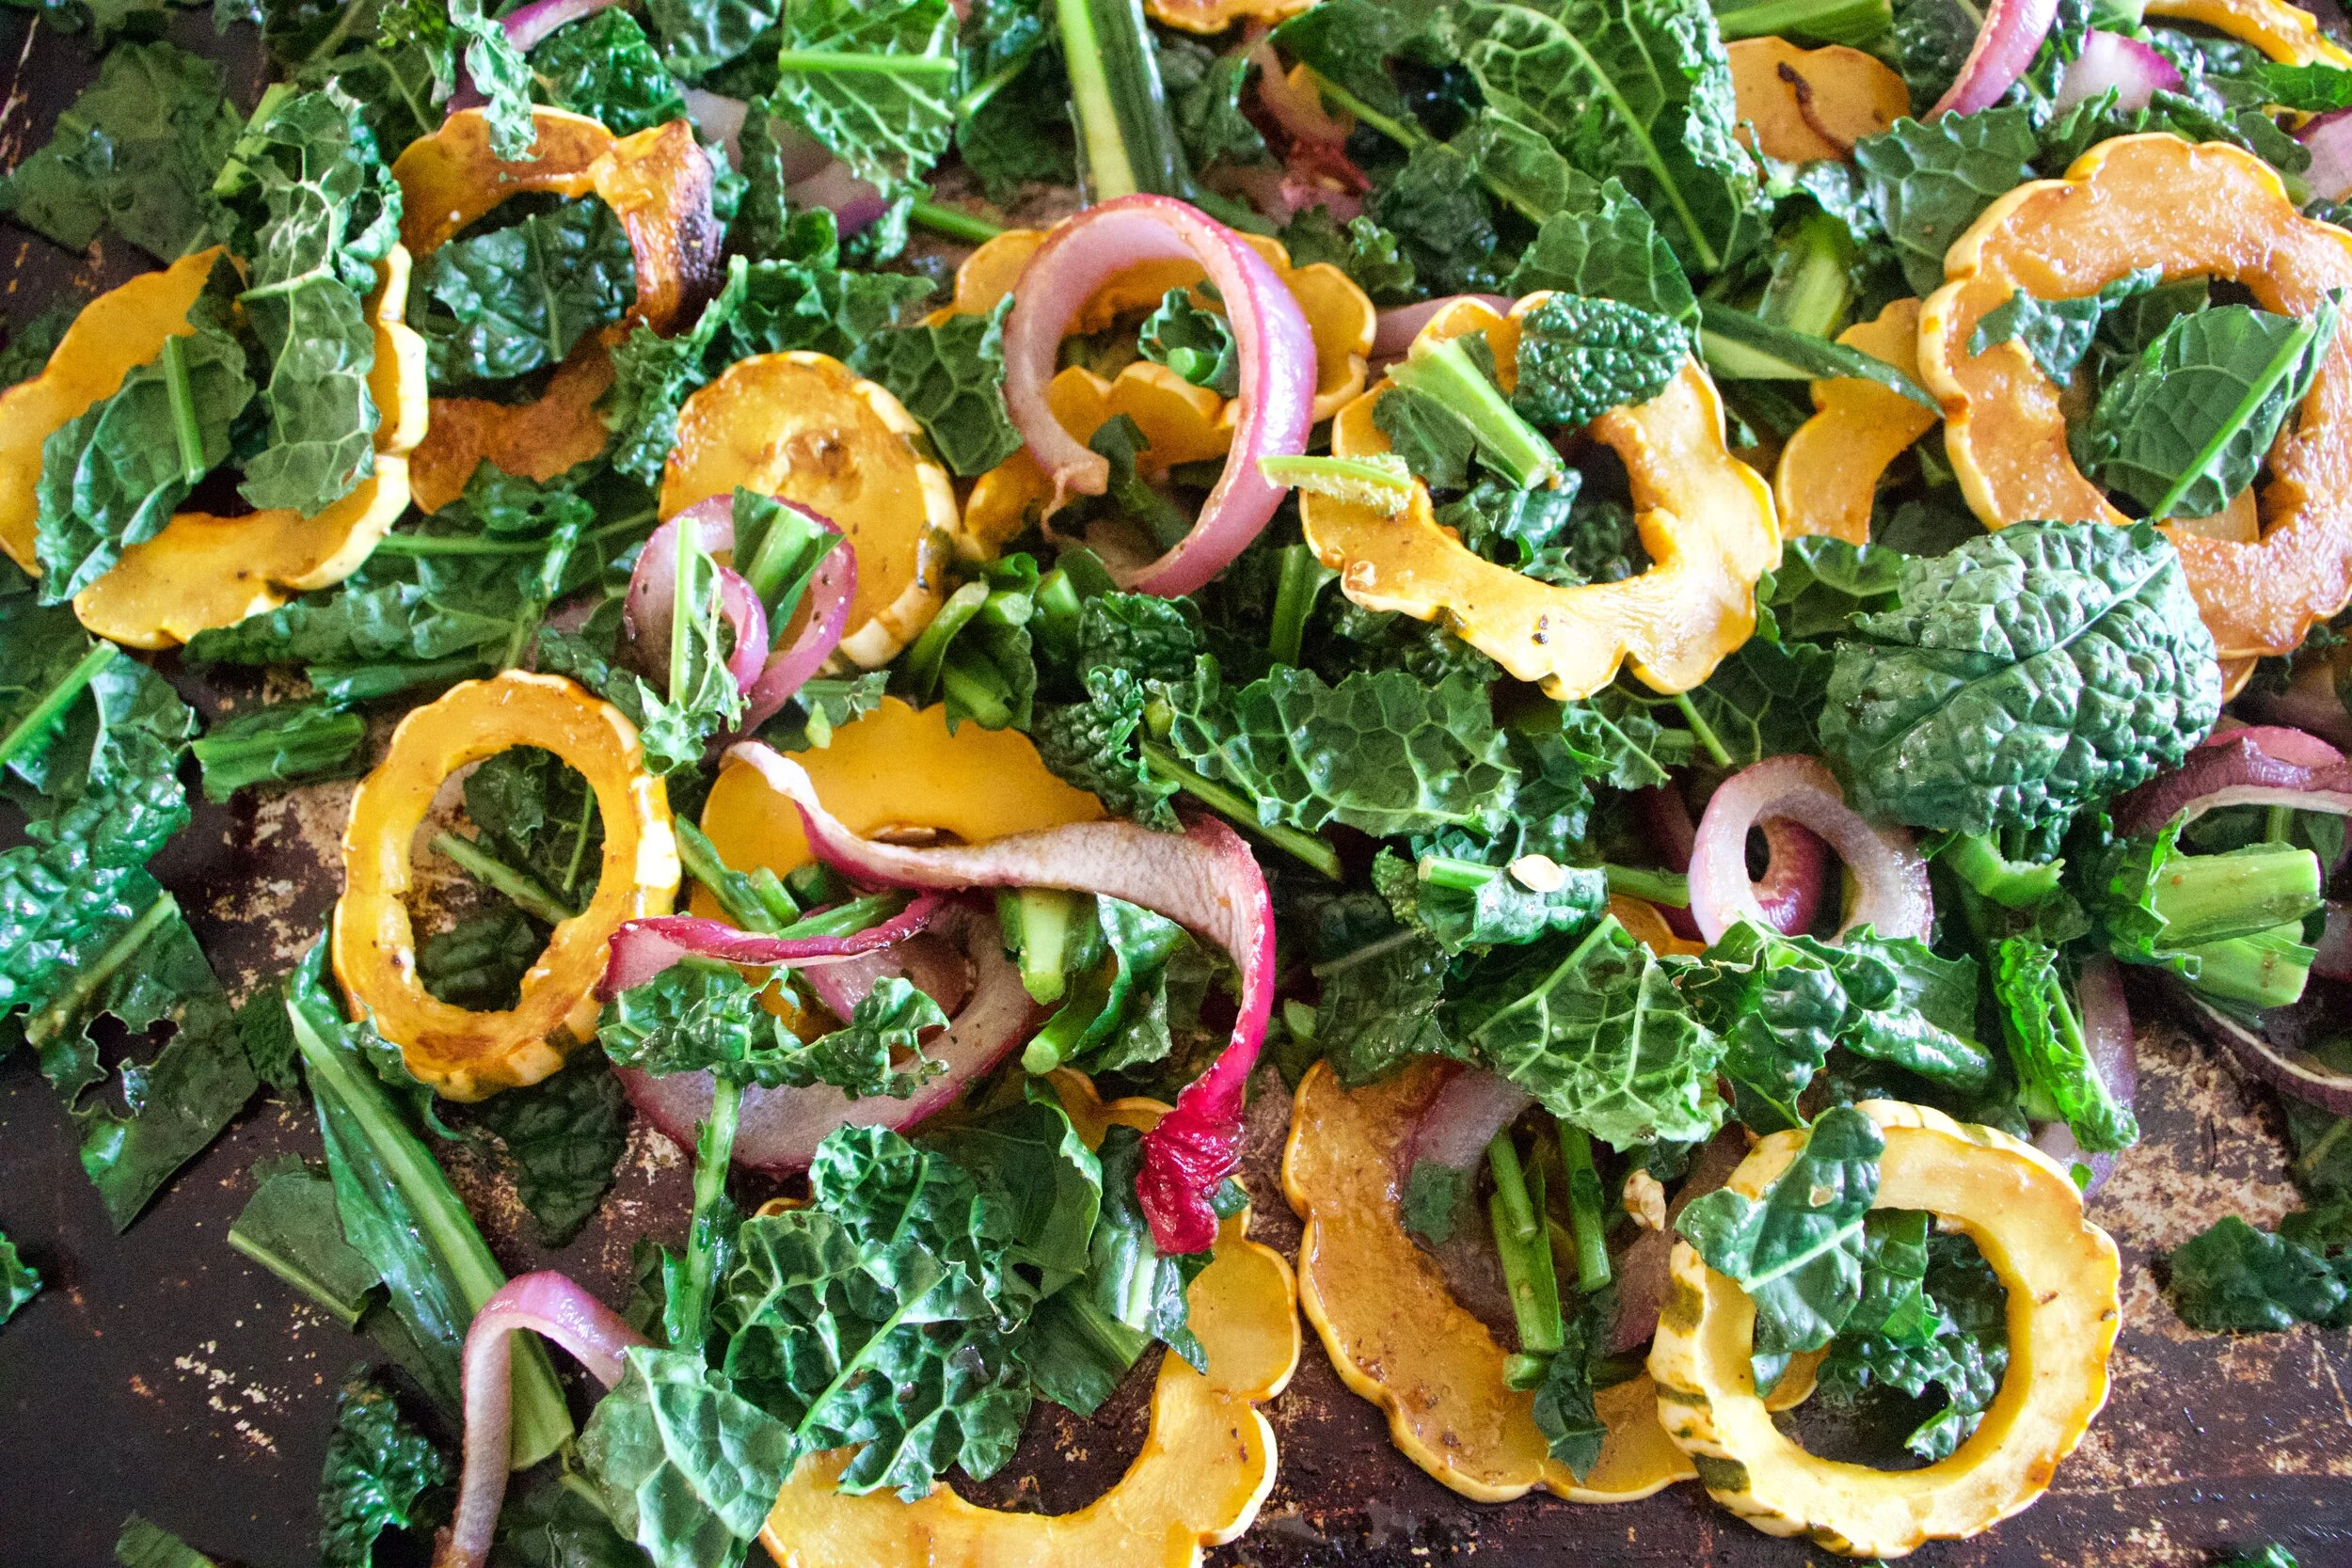
Once squash is cooked all nice and tender, remove pan from oven. Take all the kale and toss on top then take the dressing and drizzle it all over the kale. Pop the pan back into the oven for a minutes or two, just until the kale starts to ever so slightly wilt.
Pull the pan back out and give it a good toss.
Dump it all into a big bowl, toss in the toasted seeds, and call it. Now grab a fork and start eating.
-C
Can be a main dish for 1 or a side for a few
1 delicata squash
1 bunch of kale (around 3/4 pound)
1 smallish red onion
3 tablespoons balsamic vinegar
1 -2 teaspoons maple syrup (more for a slightly sweeter, maple-y flavor)
2 tablespoons brown or dijon mustard
1/4 cup toasted seeds of choice (I used pumpkin and sunflower)
Preheat oven to 400
Cut delicata squash in half and scoop out all the seeds (you can save seeds to toast up later if you want), then slice the squash into 1/4 – 1/2 inch thick rounds. Grab onion and cut into thin slices. Take onion and squash and place them onto a very lightly oiled baking sheet and sprinkle with salt and pepper. Don%u2019t let the squash overlap, but it is fine for the onion to overlap the squash and itself. Pop the pan into the oven and bake until the squash starts to brown and is fork tender, which should take about 10-15 minutes.
In the meantime, chop kale into small mouth sized pieces and set aside. And mix the balsamic, mustard, and maple together to create the dressing.
Once the squash and onions are cooked, toss the kale onto the pan and drizzle the whole thing with the balsamic mixture. Toss it all around and pop pan back into oven for another minute or two, just to let kale get a touch wilted.
Remove pan from oven, dump everything from pan onto a plate, and toss in the toasted seeds.
Grab a fork. Eat.
Whatever you do, do not turn on your oven this weekend! But I guess if you have air conditioning and don’t mind cranking it… well then go for it. And can I come stay with you?
But for the rest of us doing this weekend without the old A.C., we need to feed ourselves, feed ourselves without any fire because 100 degrees is no joke and any added heat from anything will likey tip us over the edge. I am already so close to that edge and it’s a long way down..(Just ask the mr, he could tell you a thing or two about heat and me.. not good)
Enter hummus and veggies.
You can’t really go wrong with a good hummus and veggies meal situation and sometimes it’s all that can be right. I for one could eat bowls and bowls of hummus, and sometime do, so this is not a stretch for me. Especially this hummus. I knew I would like it, but man, was (was because I ate it all) it freaking delicious. The sunflower seeds really did it for me, gave it a little something extra, like a freshness that is still creamy and earthy, but is not quite, I don’t know, dark as tahini? %u00a0It’s kind of hard to explain without having you taste it (so make it and you tell me)%u00a0%u00a0Don’t get me wrong, I love tahini, but sometimes you just %u00a0got to mix it up. (Plus sunflowers seeds are dirt cheap. Tahini is not nearly as cheap so bonus there too.)%u00a0%u00a0Maybe its because the sunflower seeds bring the sunshine to your mouth. A sun filled mouth of pureed seeds and beans.%u00a0 Yup, that’s what it is.
So here ya go, a no heat meal (or snack or spread).%u00a0We got this.
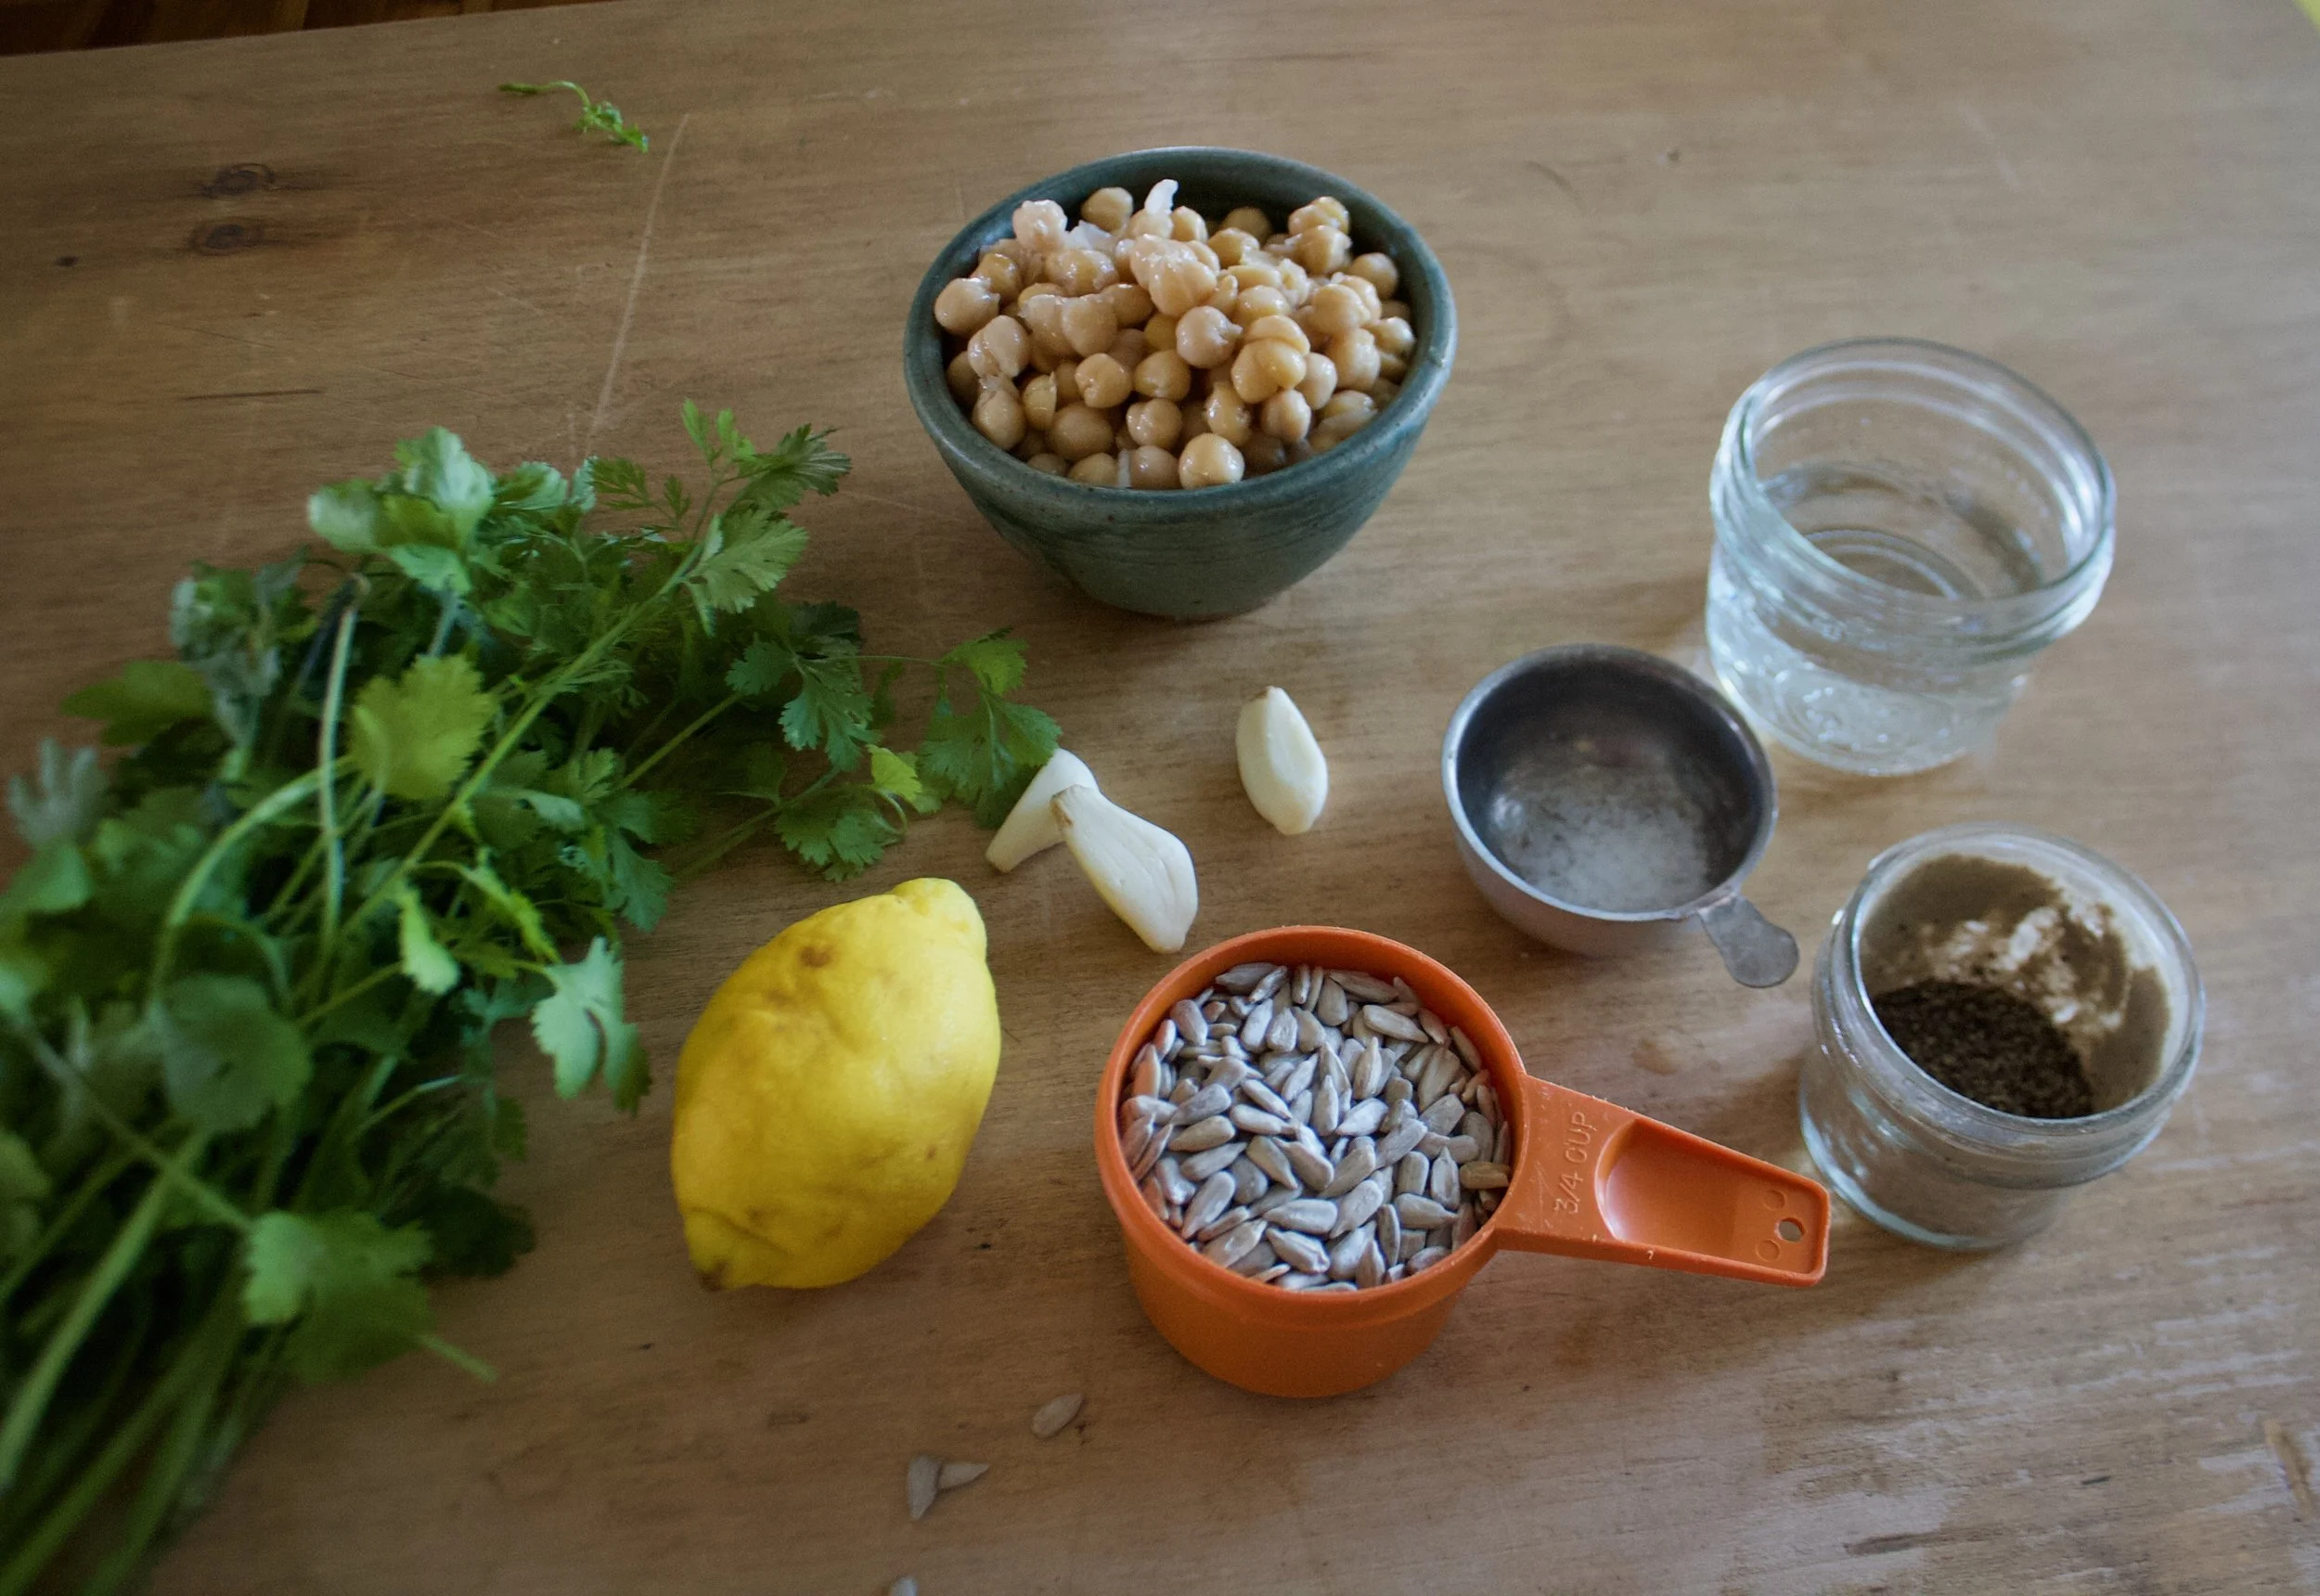
The stuff. %u00a0Cooked chickpeas (no need to cook your own, canned is a okay), sunflower seeds, a lemon, a few cloves of garlic, salt, pepper, a little water, and some herby green like parsley or cilantro.%u00a0
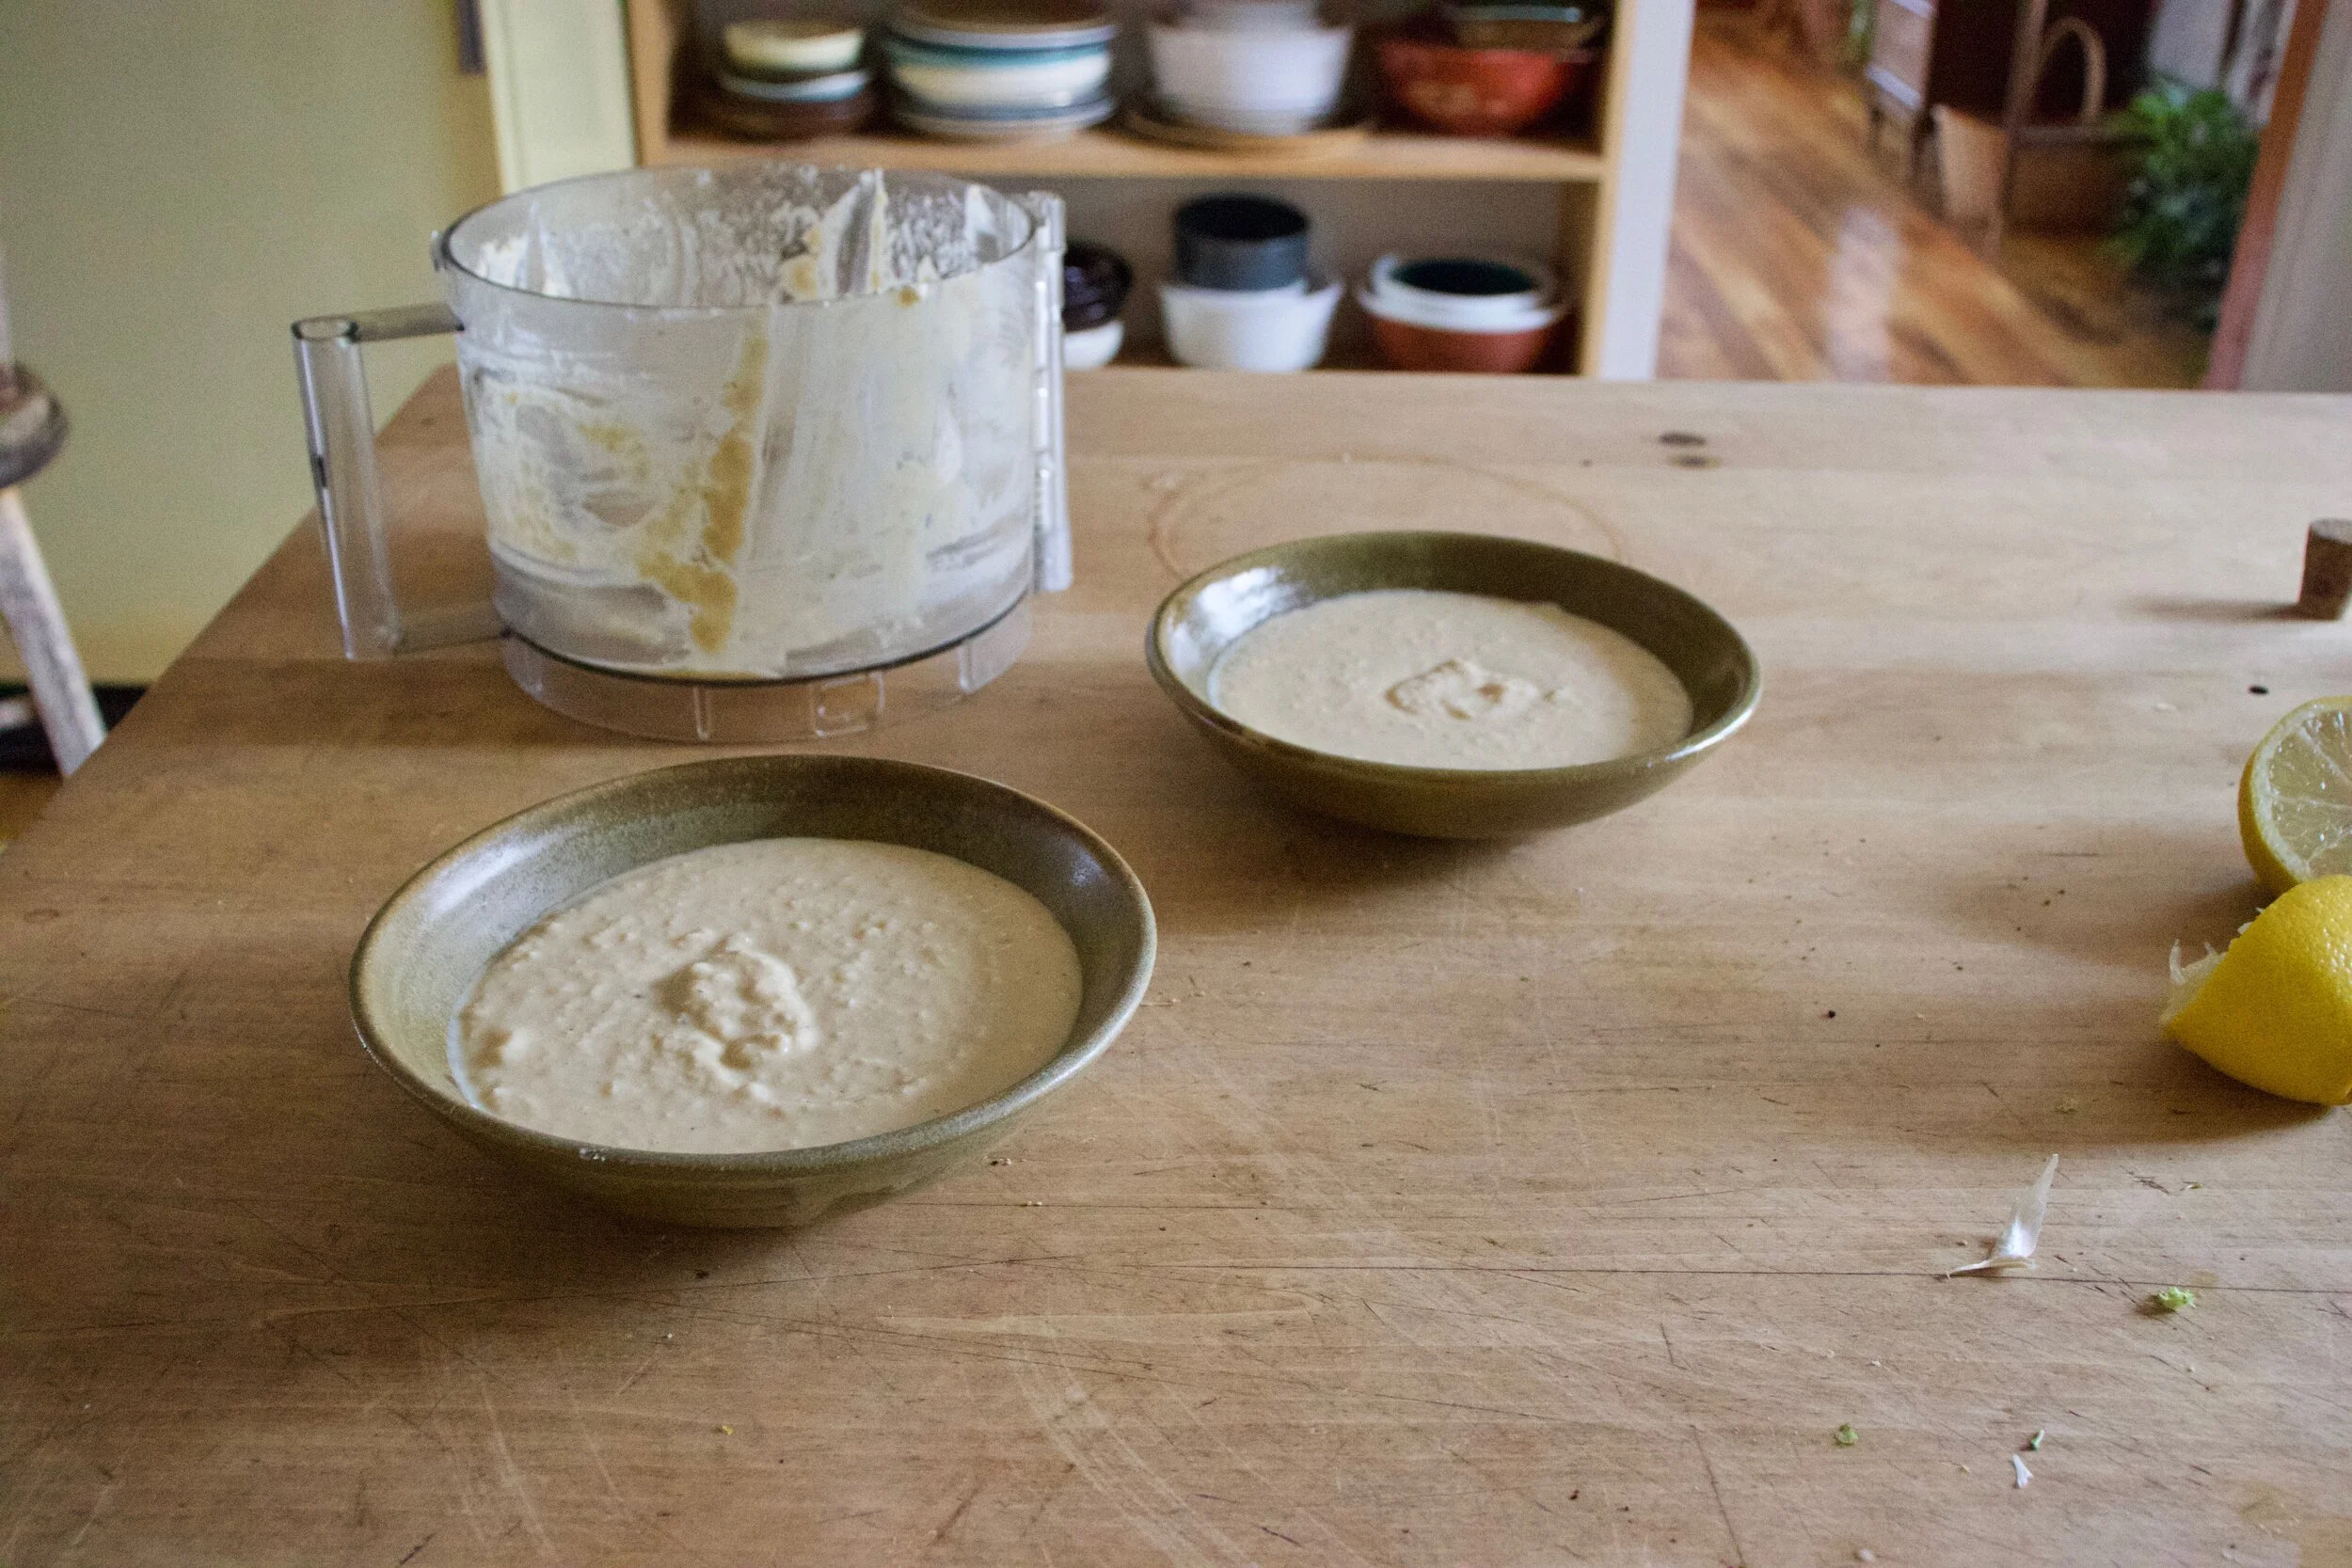
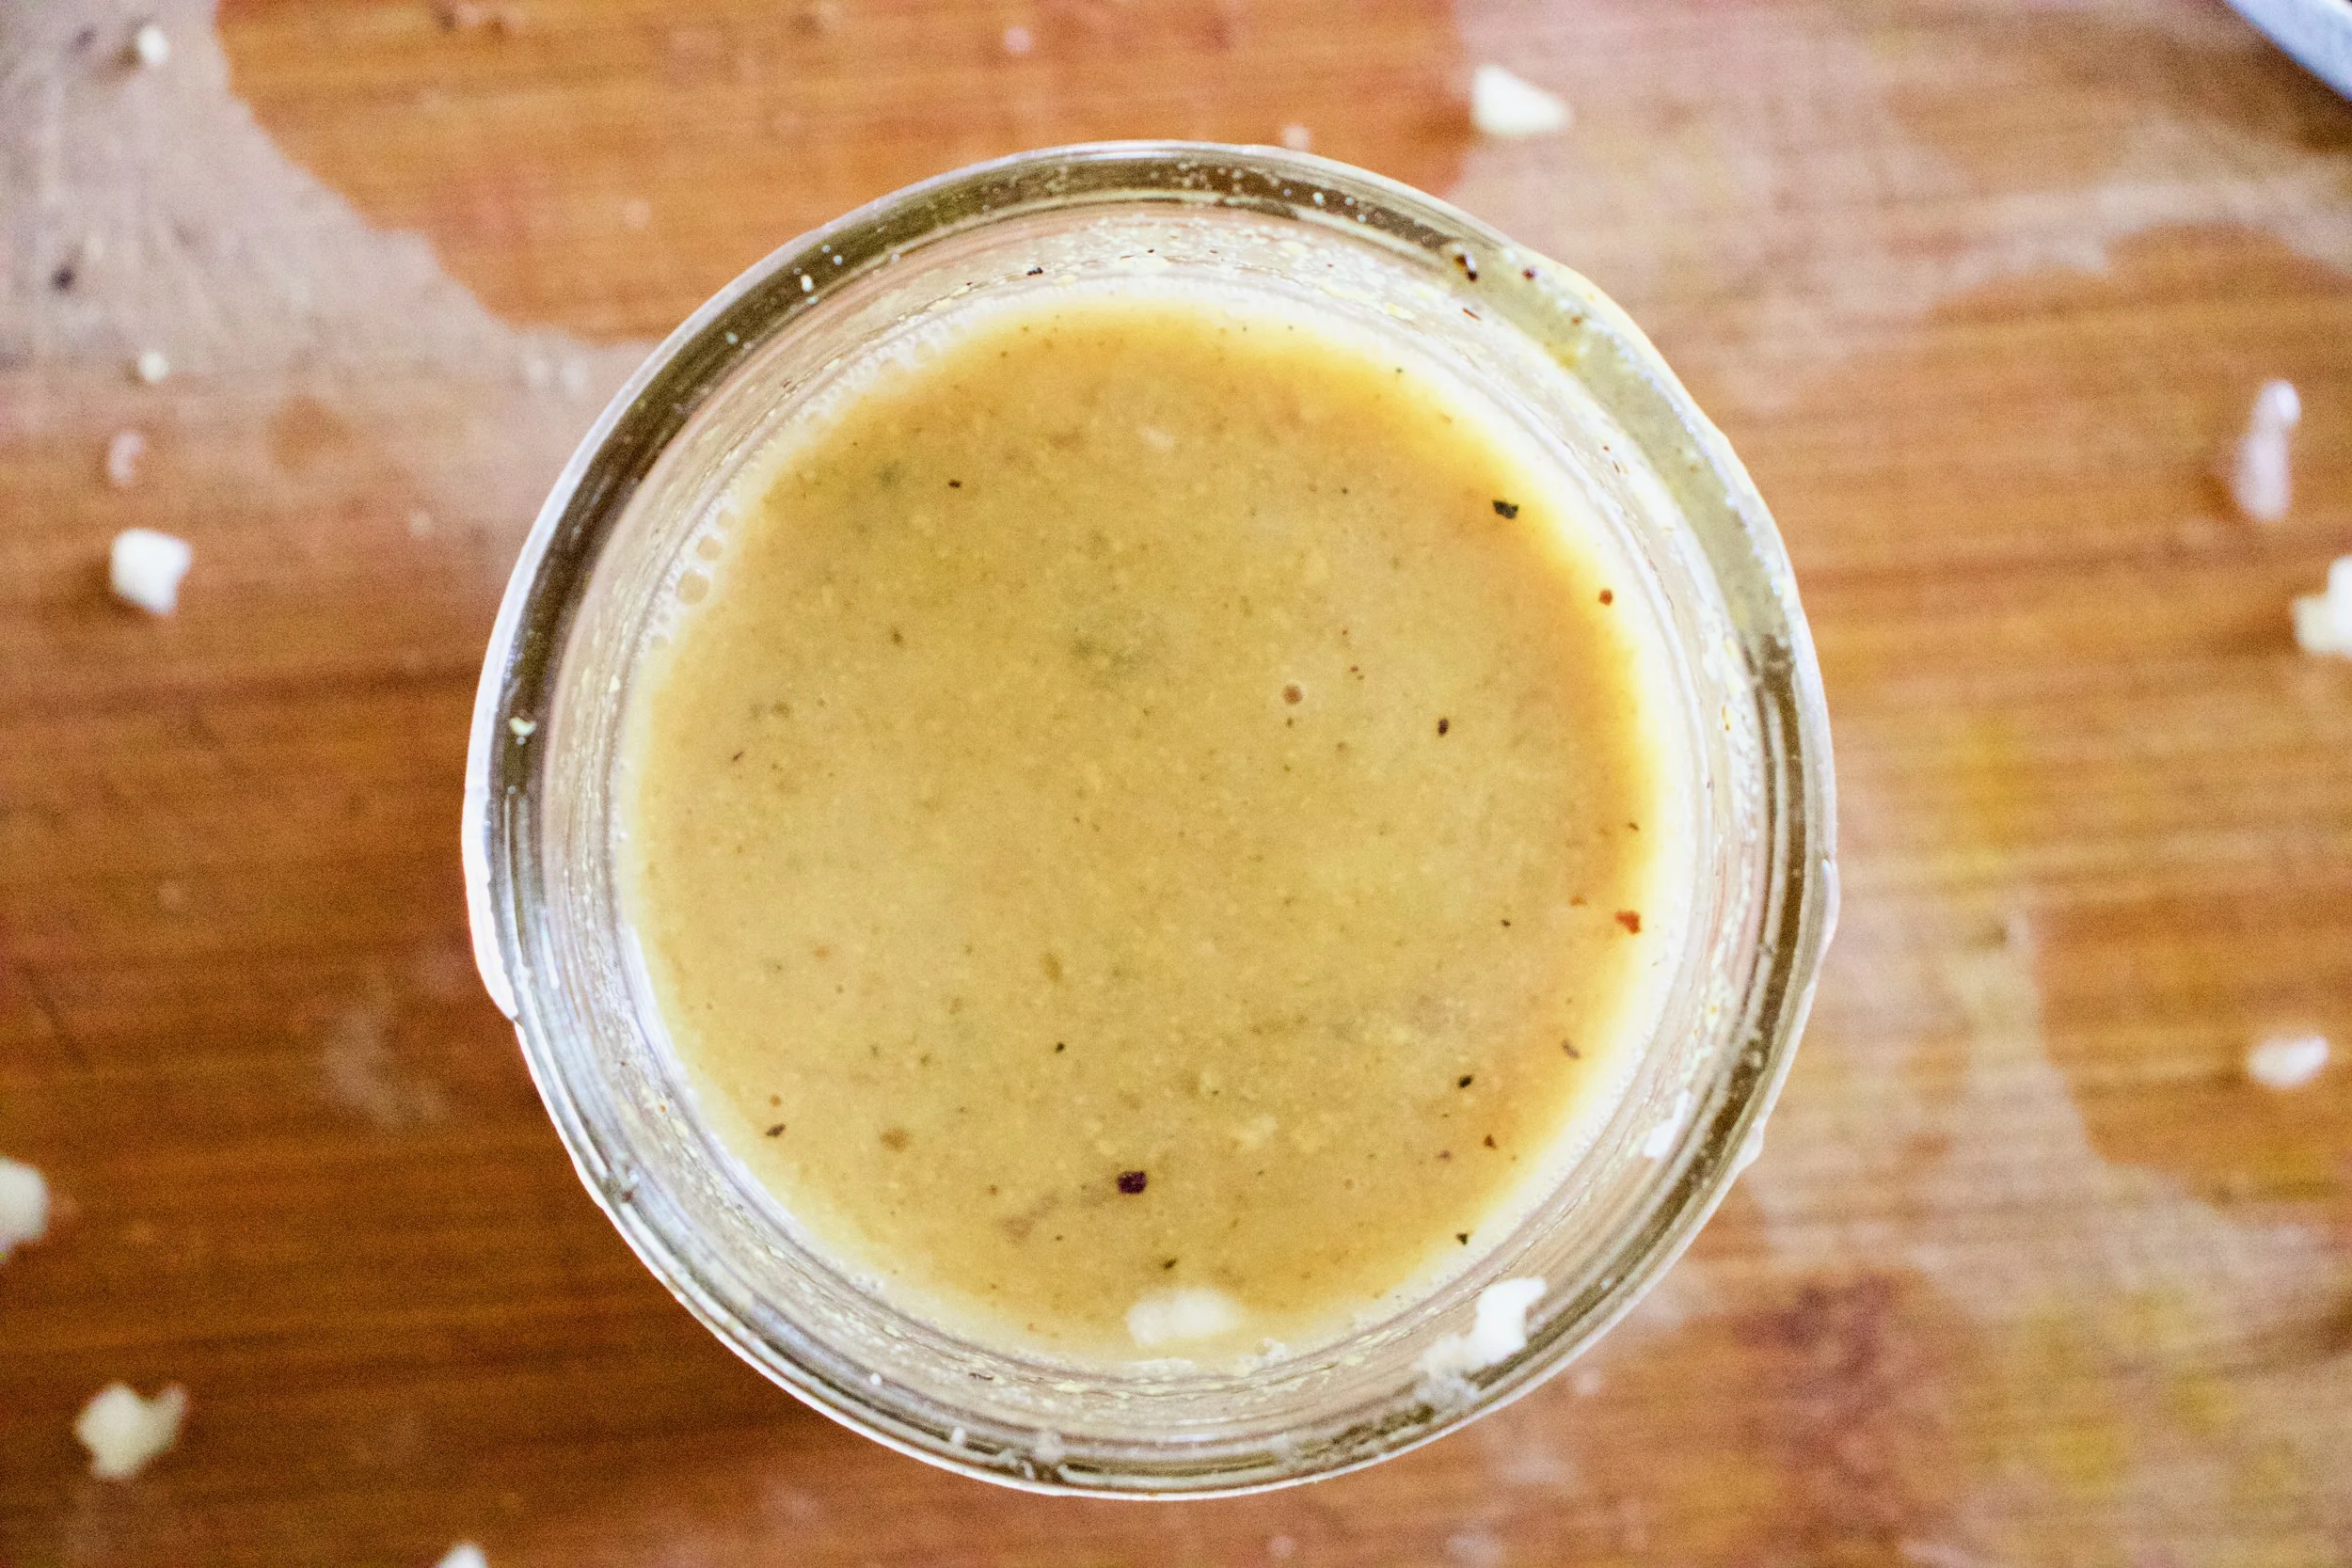
Hummus is pretty basic, it’s just stuff blended up, but because we are starting with raw sunflower seeds, we need to really bend the shit out of them until they turn into a paste, so do that, which is going to a take about 8-10 minutes. Then once its pasty, add in the garlic and the juice of the lemon and blend until its all smooth.
Could almost stop here at this point. Sunflower seed goodness all emulsified. Taste it, it is so good.
Now add in the chickpeas and a pinch of salt and pepper.
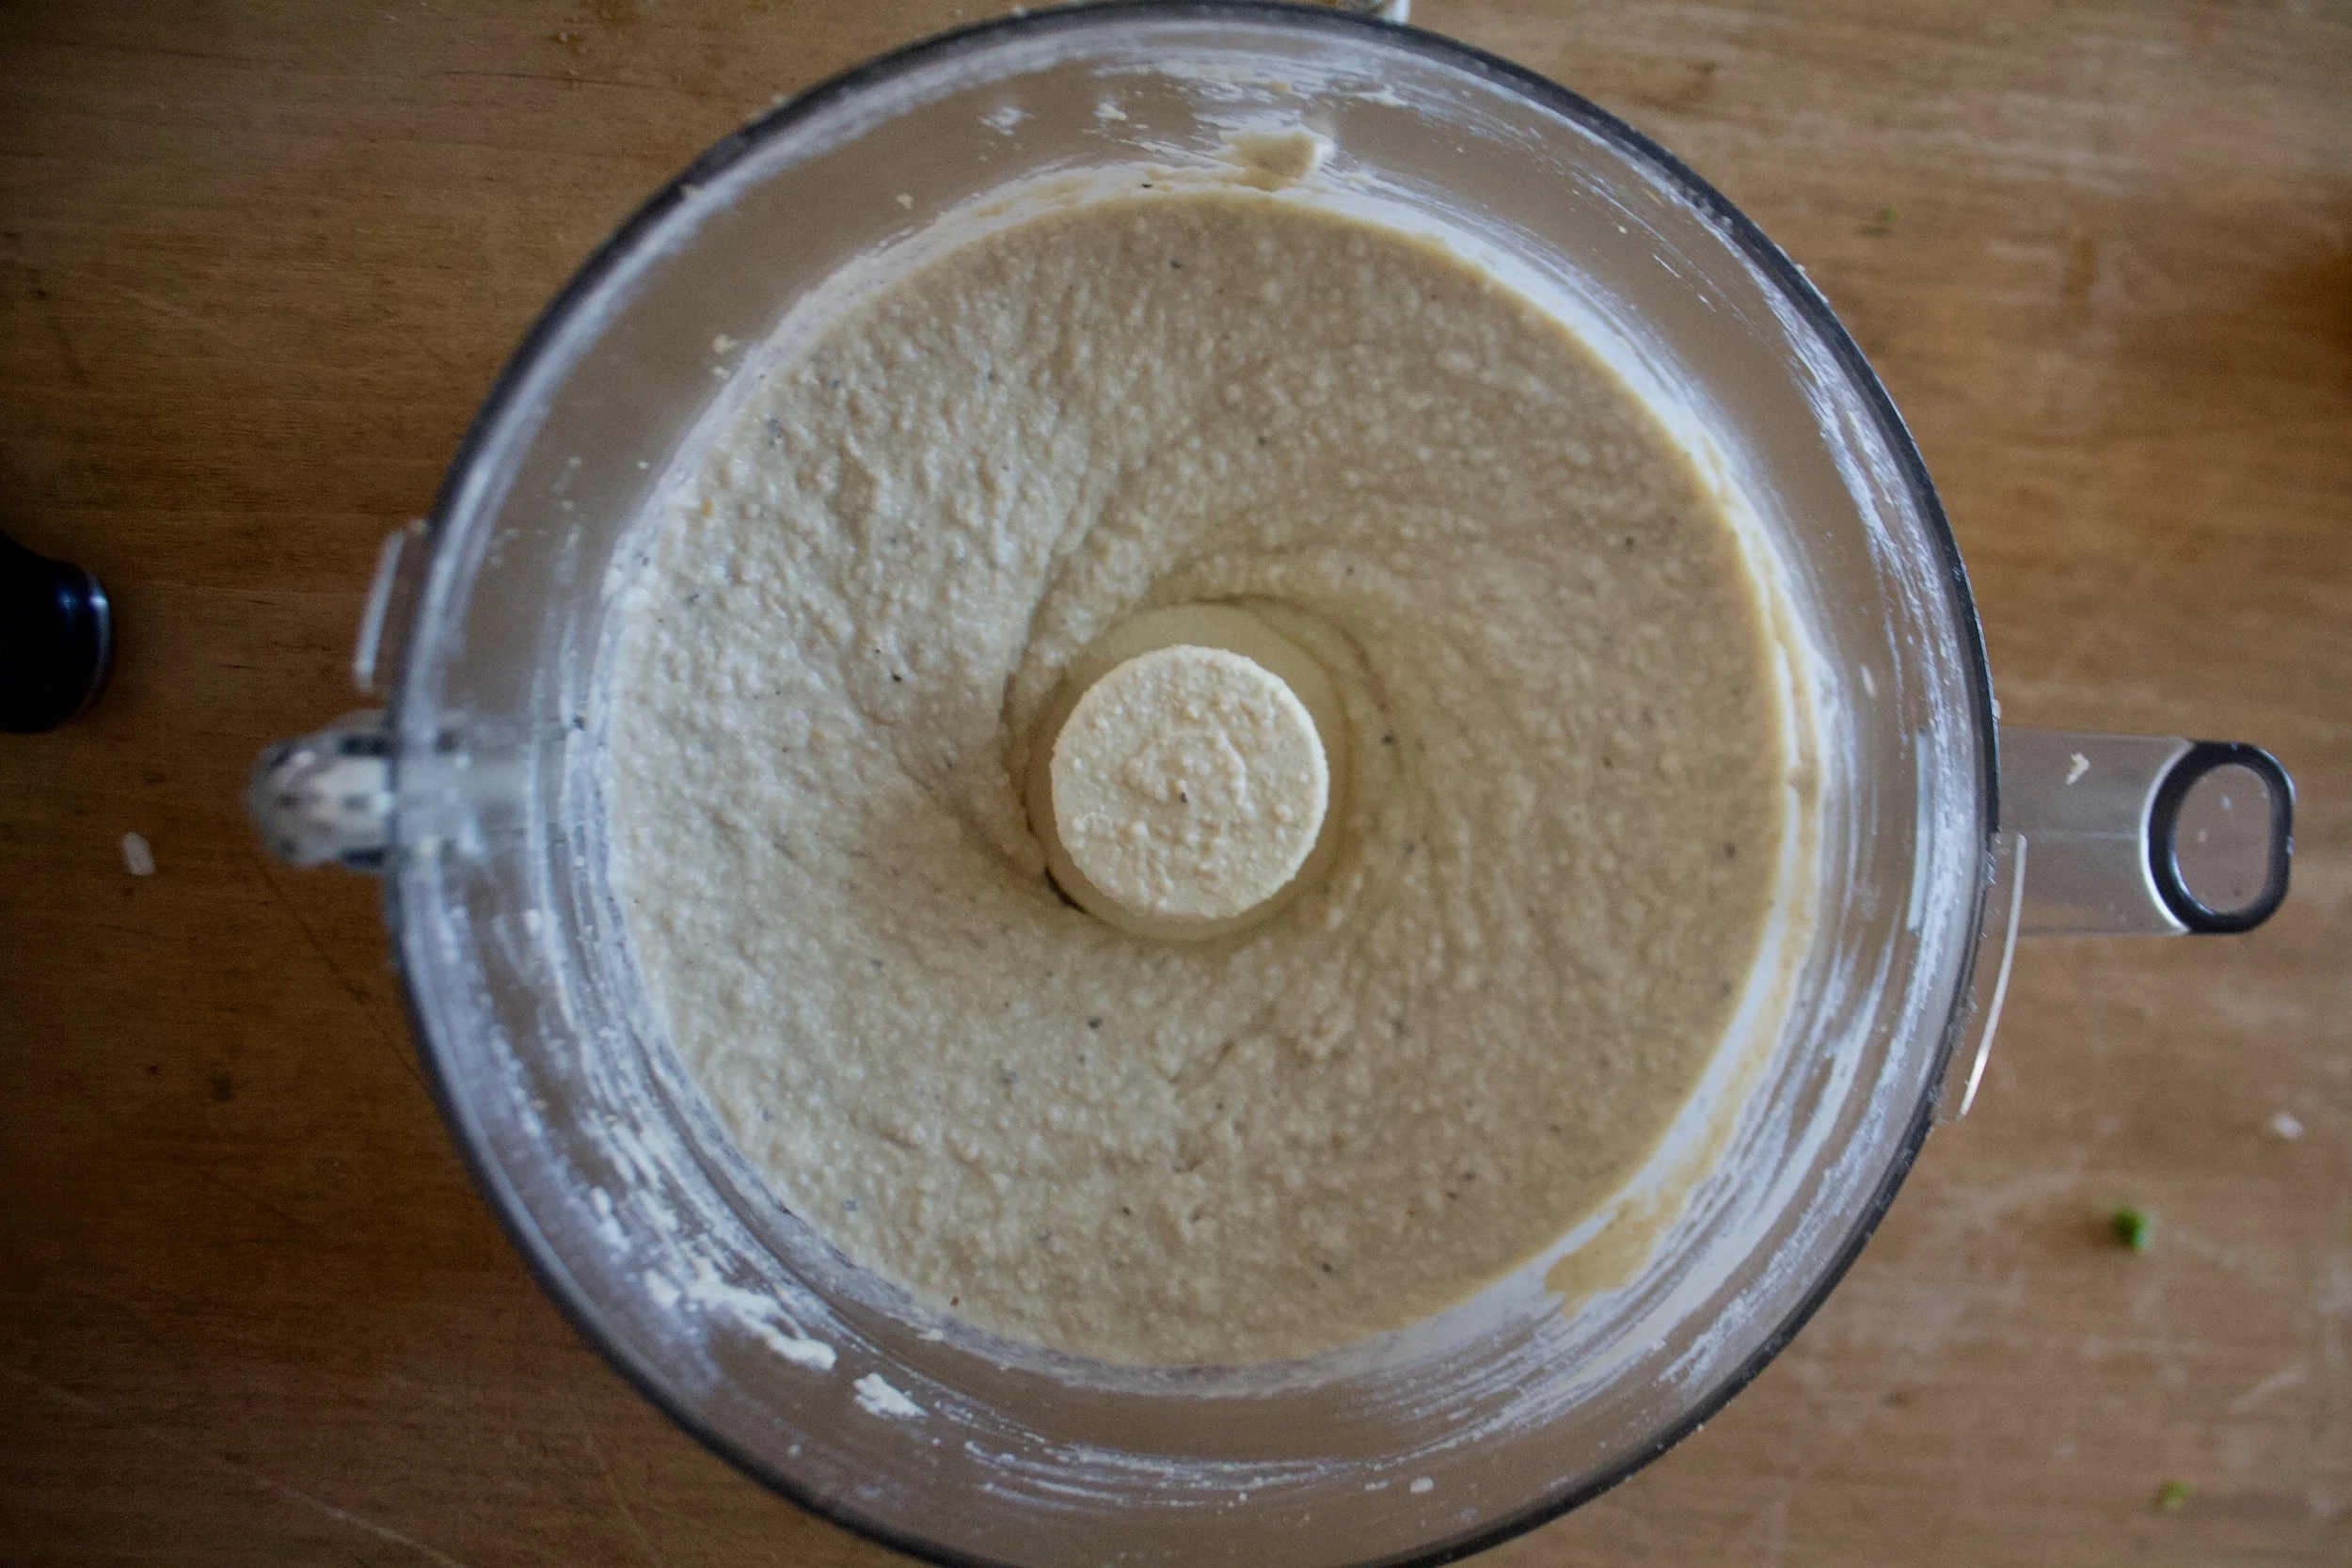
Blended until smooth with a little drizzle of water to give just the right consistency. %u00a0And that’s it.
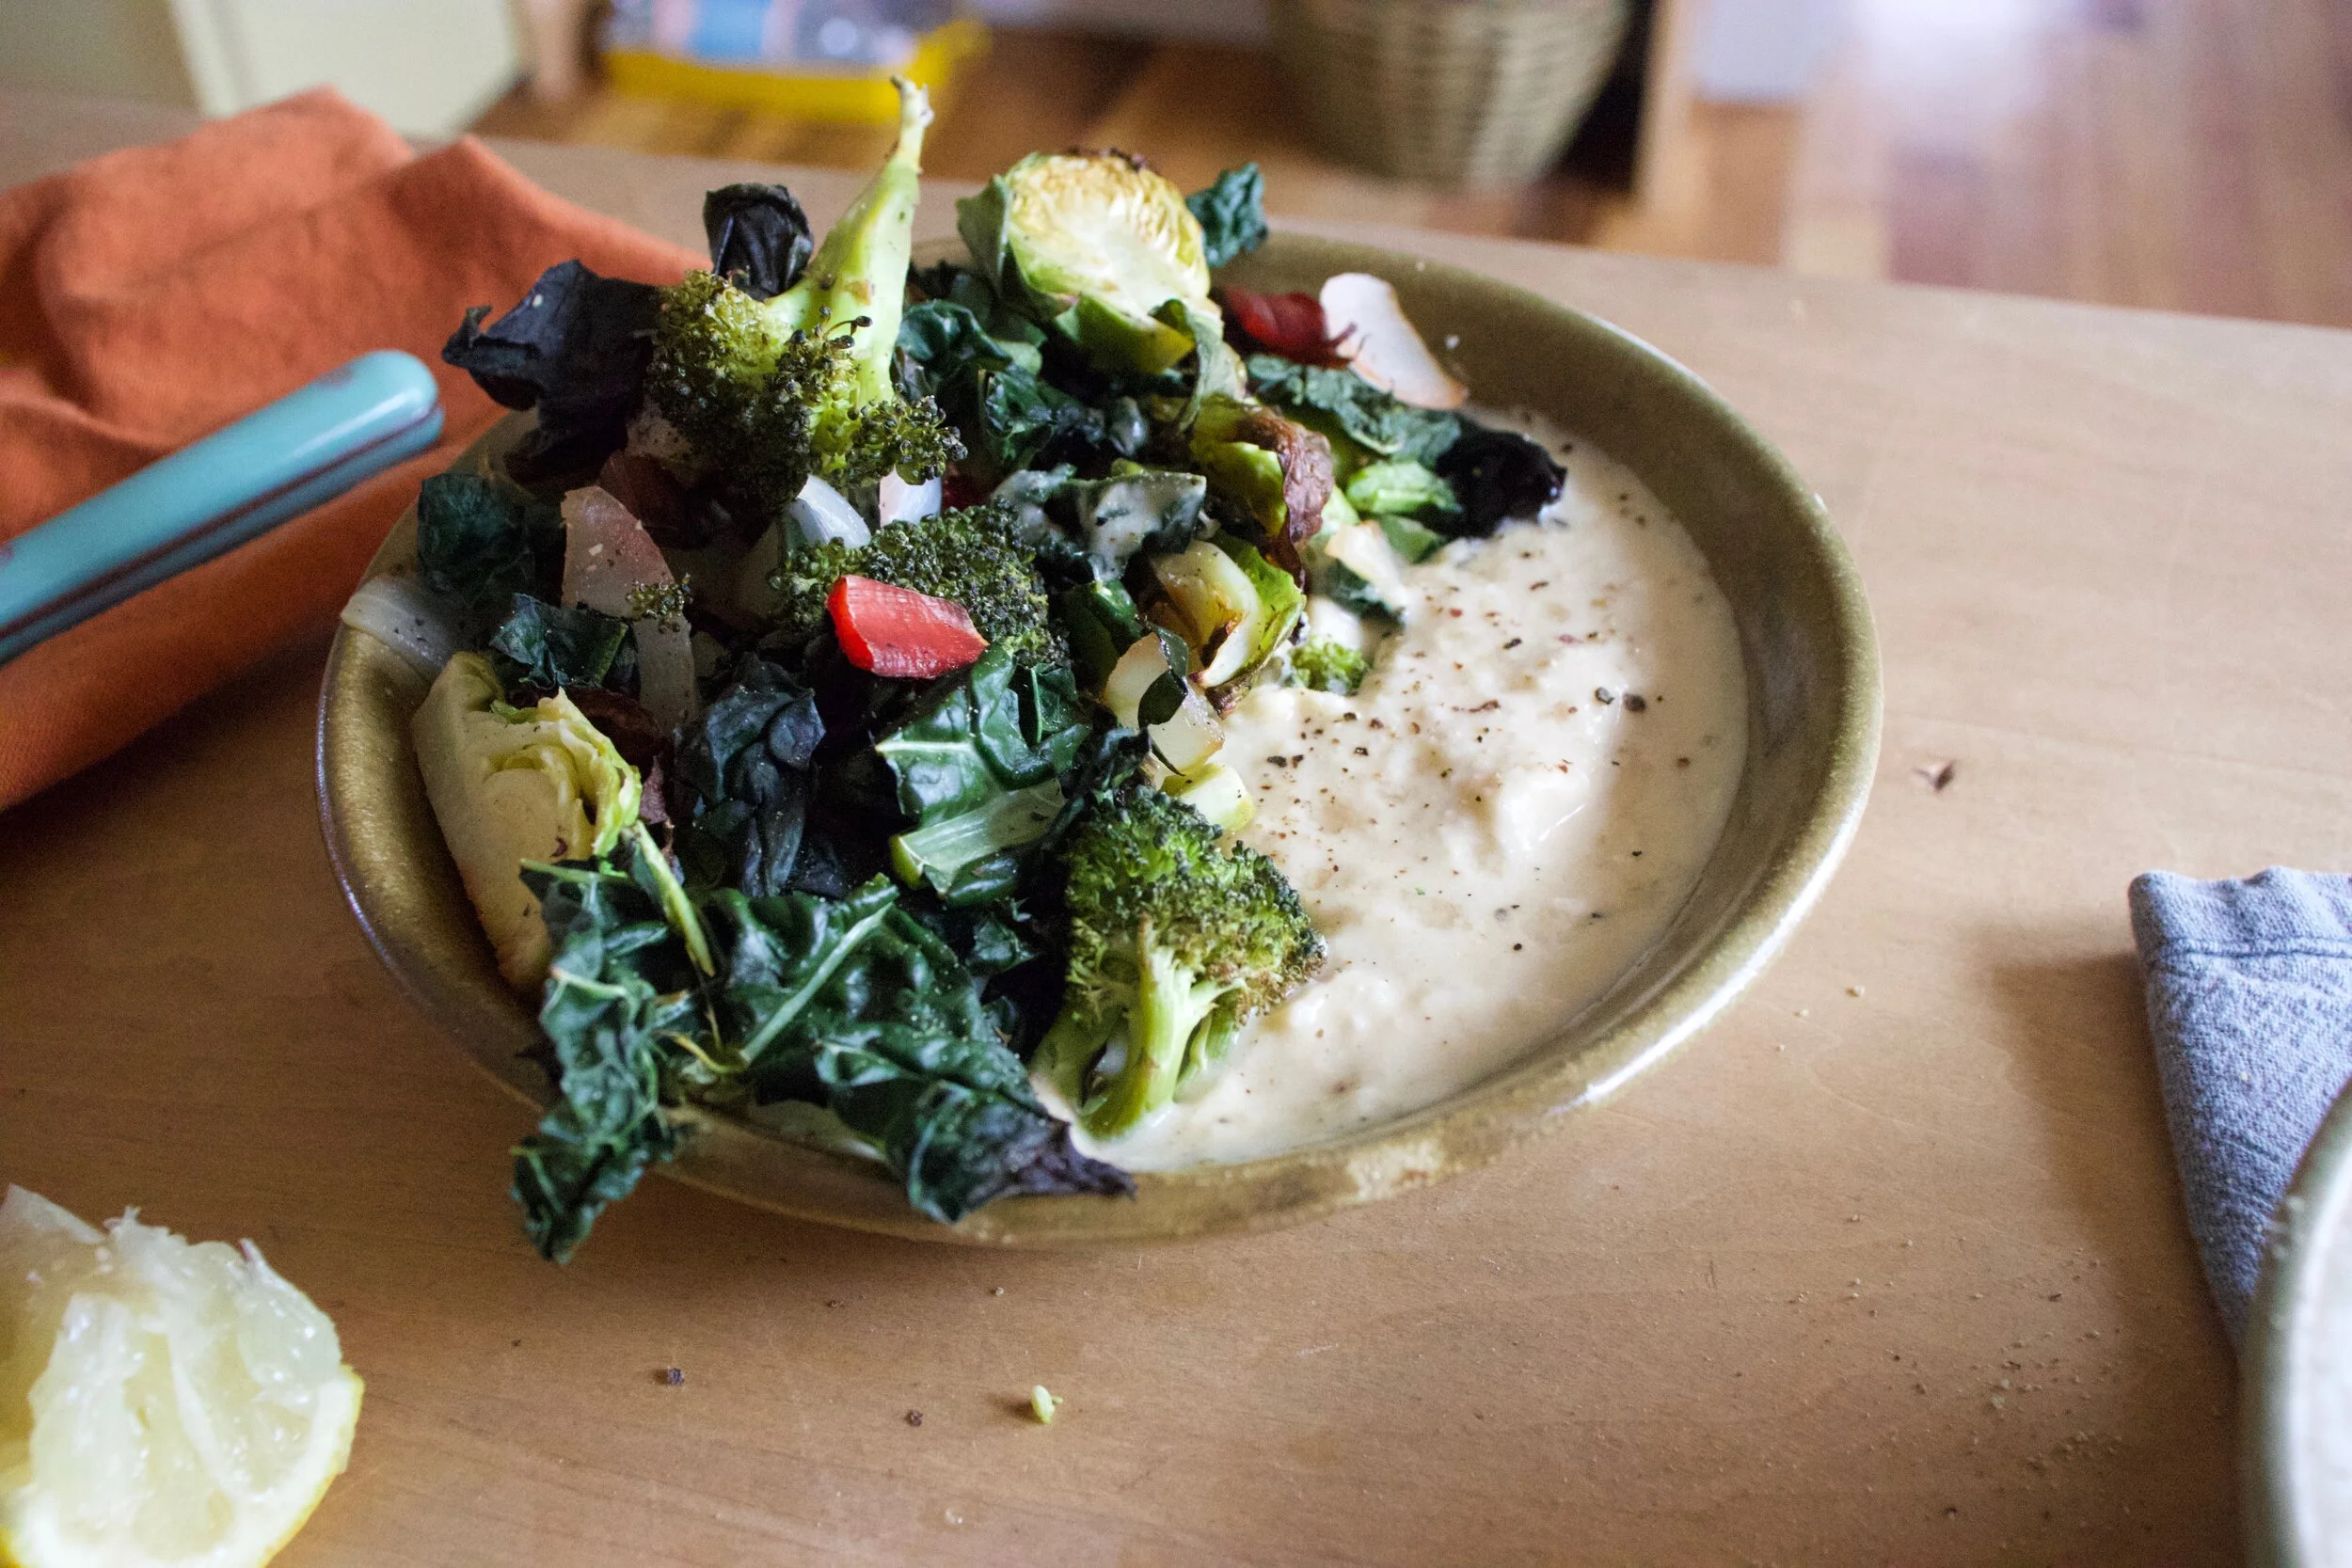
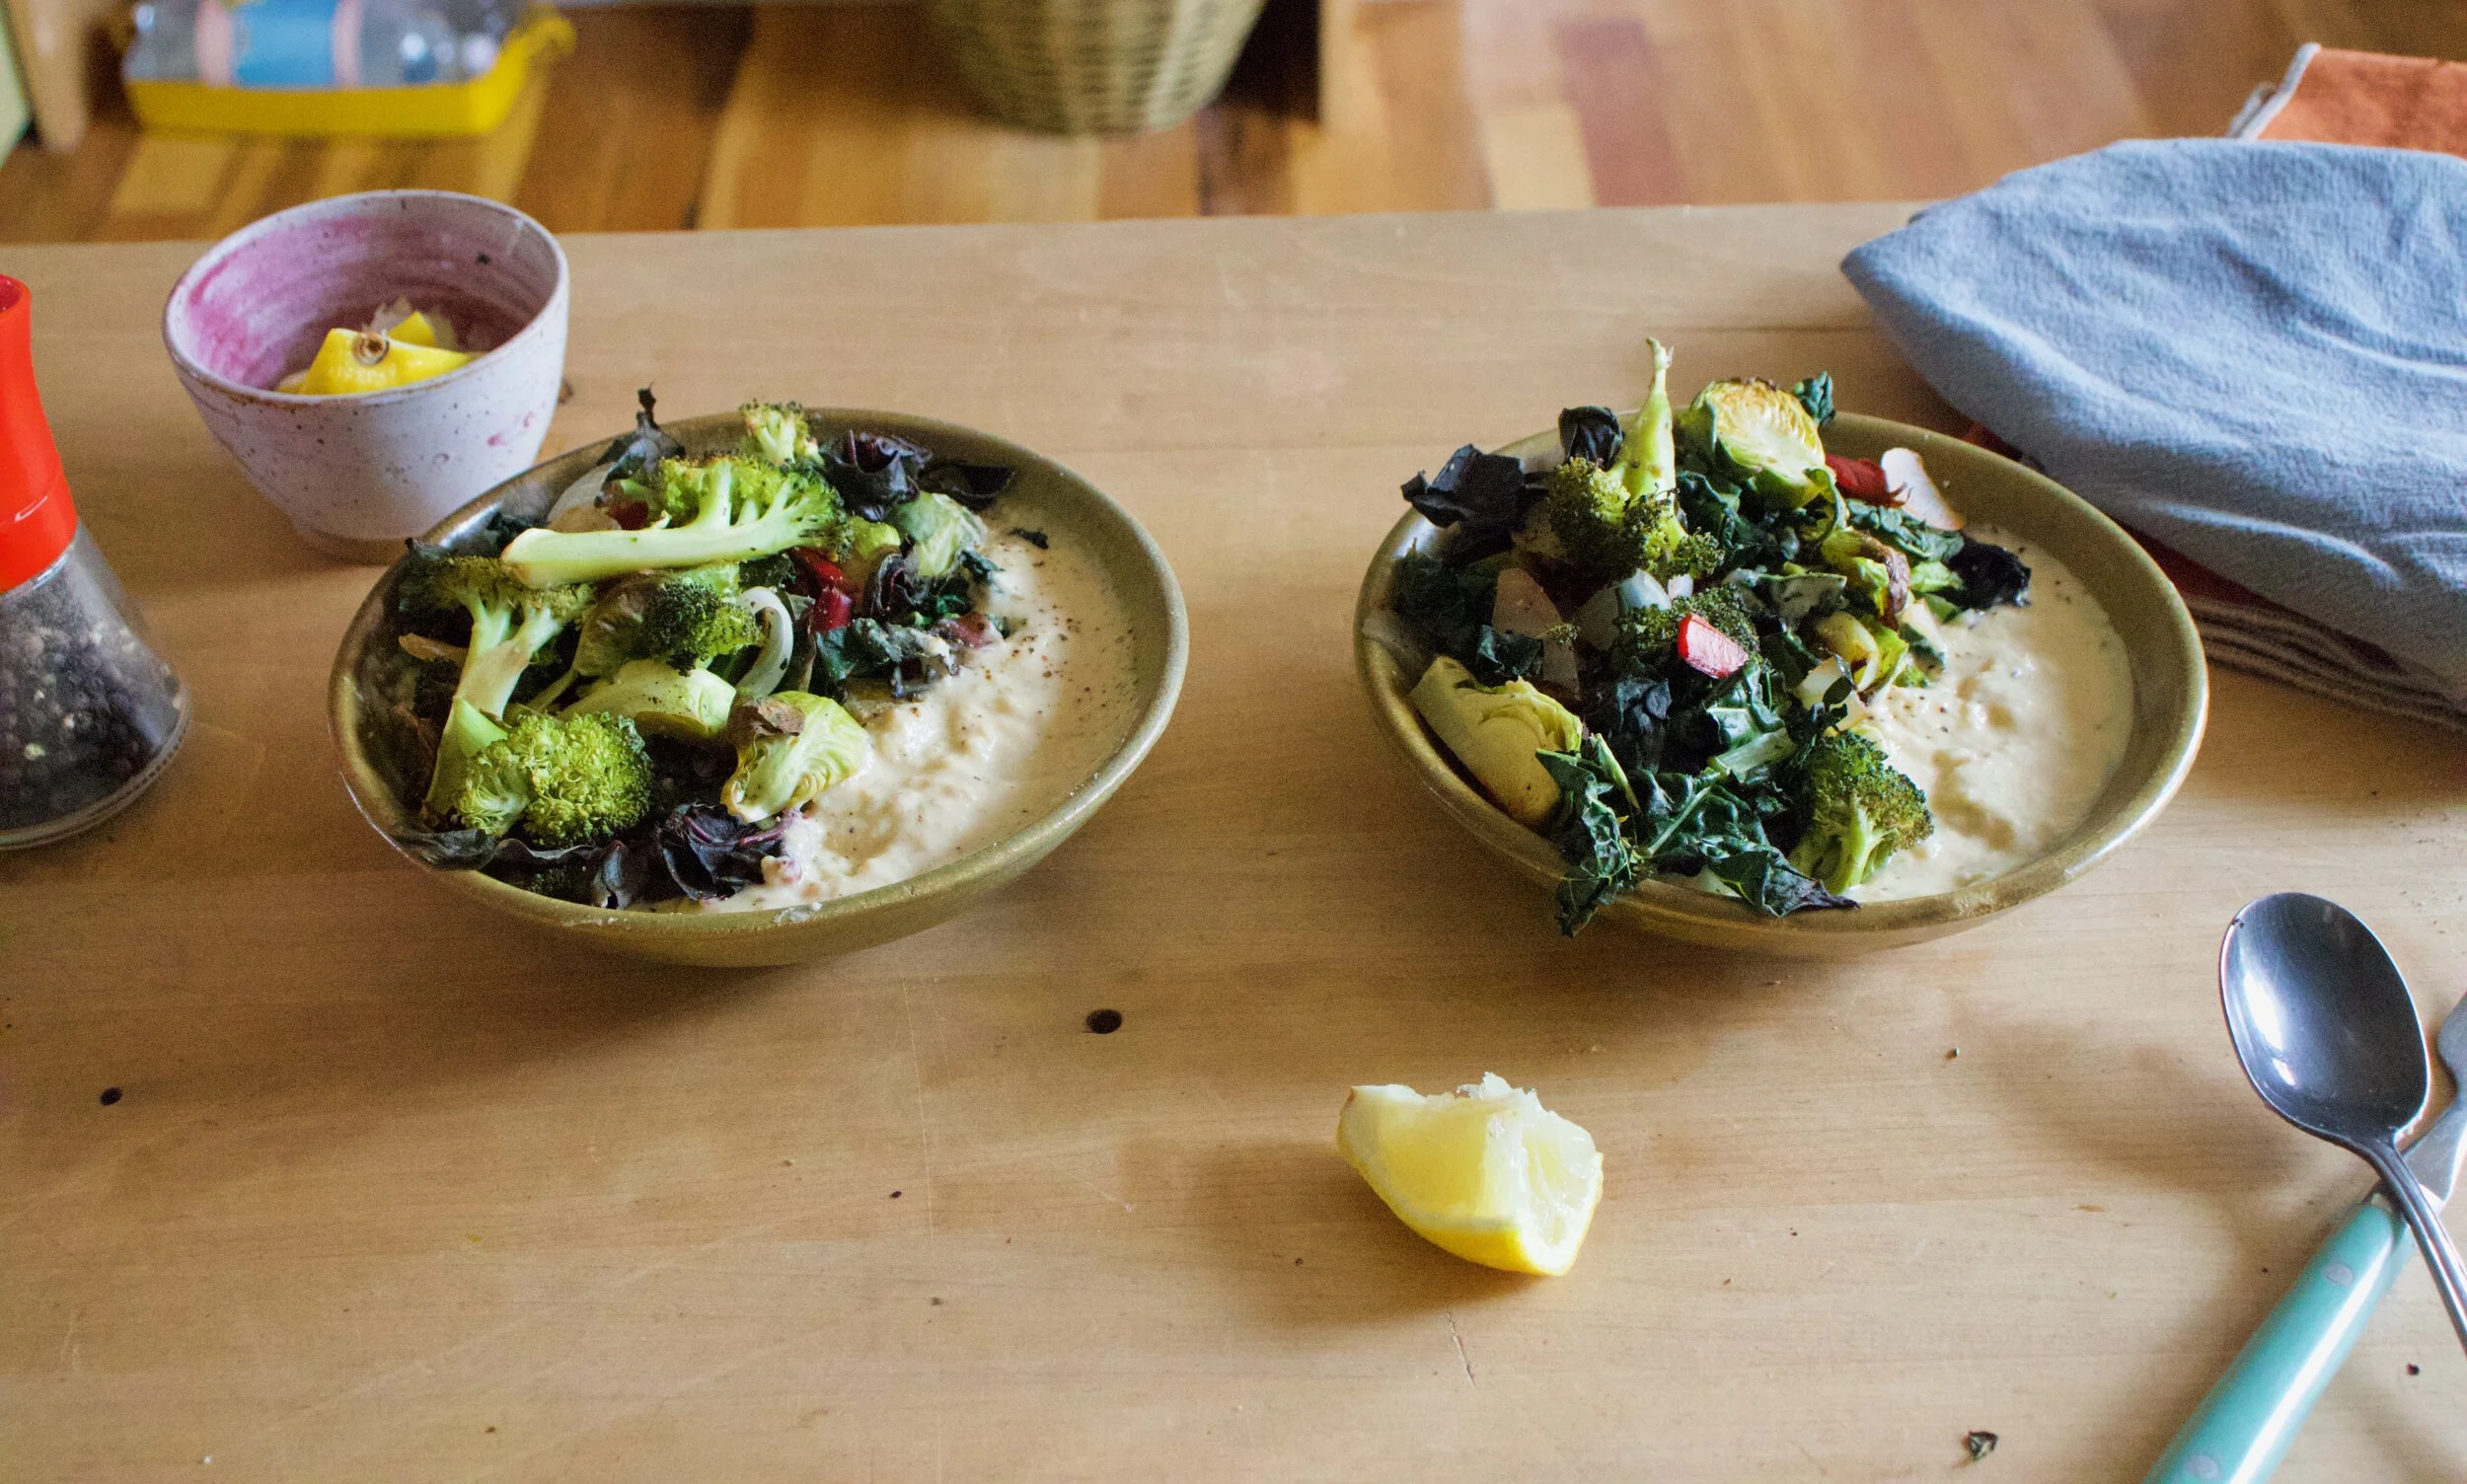
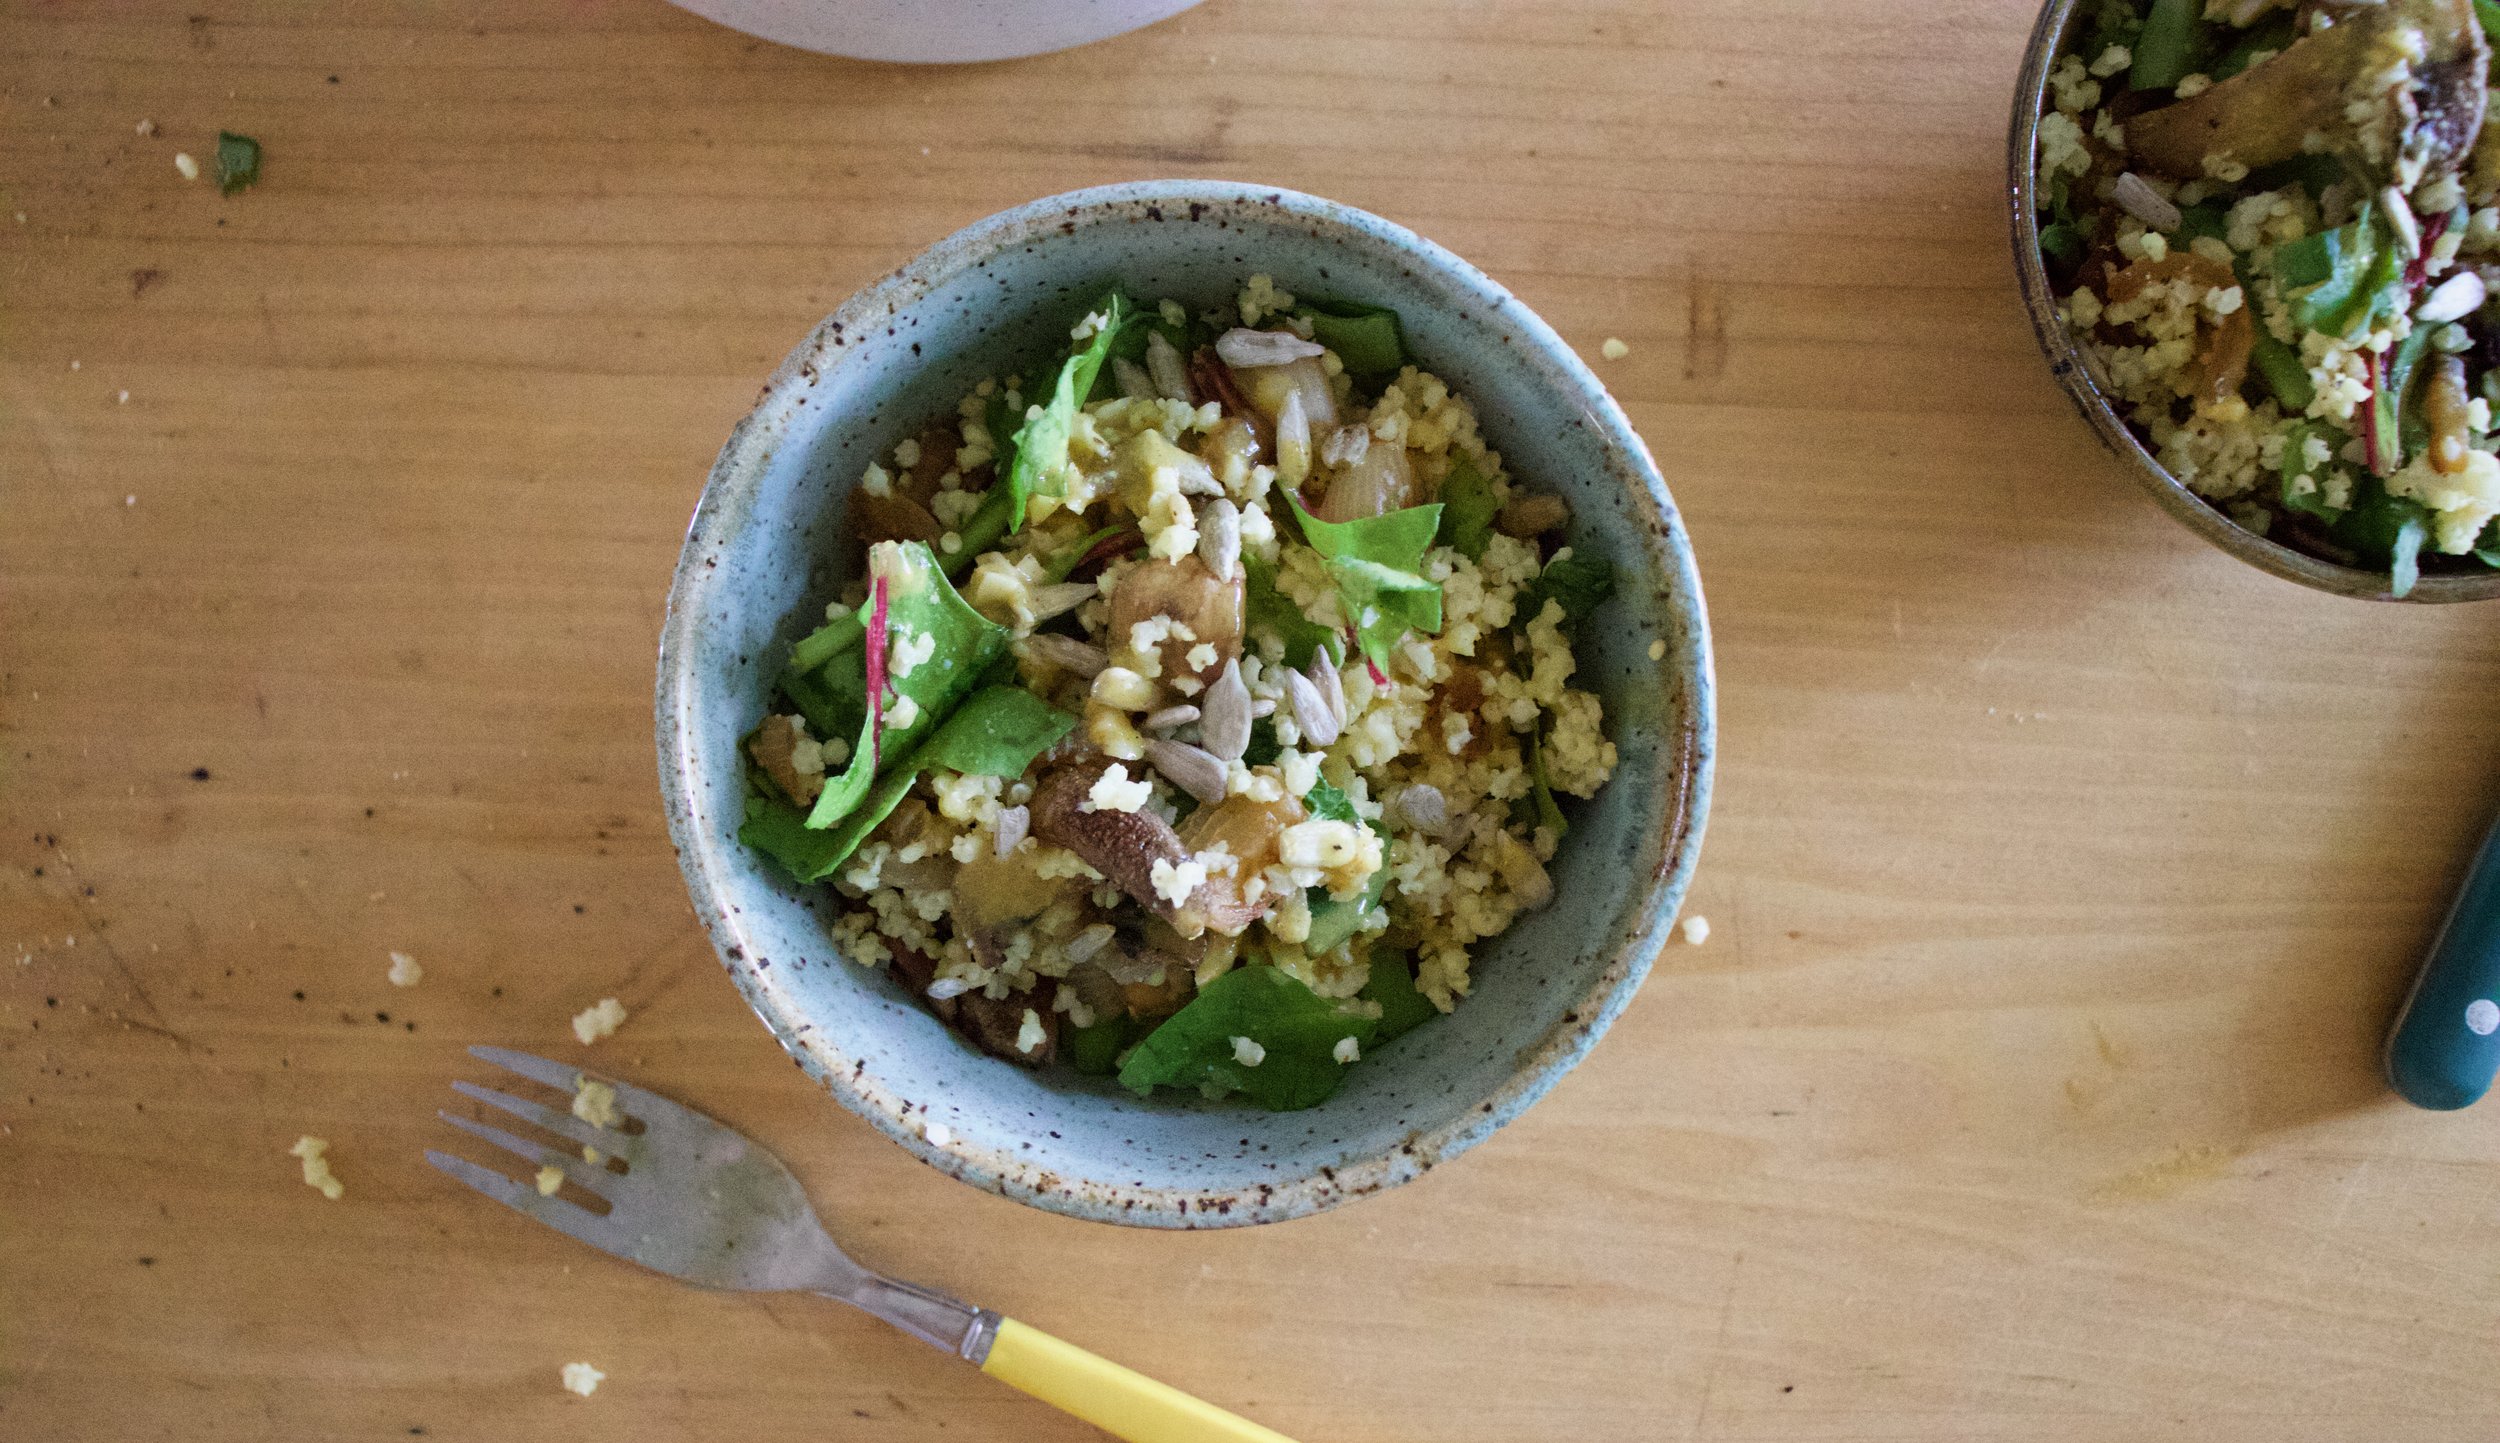
Pile a bowl full enough that you can call it dinner them top with a good amount of fresh herbs. Serve with chopped up fresh veggies or whatever you like and we are good to go.
Creamy, dreamy sunflower hummus, no heat required!%u00a0
Stay not melted!
-C
Makes about 2 3/4 cups
2 1/2 cups cooked chickpeas (or one can) drained
3/4 cup raw (can use toasted)unshelled sunflower seeds
l juicy lemon
2-3 cloves garlic
1-2 tablespoons ice water
salt and pepper
handful fresh herbs like parsley,cilantro and or dill (optional)%u00a0
Place the sunflower seeds in food processor and turn on until seeds turn into a paste, which will take about 8-10 minutes. After every few minutes, scrap the sides down to make sure it all gets blended. Once the seeds reach paste consistency,%u00a0add in the juice of the lemon and the garlic. Blend until smooth. Last off, add in the chickpeas and a pinch or salt and pepper and blend until smooth, adding %u00a0in a tablespoon or two of water to get the hummus to the consistency of your liking. Once blended taste and check for seasoning (add more salt and or pepper if needed)%u00a0
When the hummus is done, scrape into bowl(s), and top with lots of fresh herbs and a sprinkle more of sunflower seeds. Now eat it. Eat with veggies, with bread, with pretzels, or with a spoon (or finger). Do what you need to do.
%u00a0Any left over, if there is any, can be store in the fridge for 2-3 days.%u00a0
I feel like we are stuck in Narnia with the White Witch. Always winter, always snow. It will be worth it though if I get to meet some talking beavers, but until then, I’ll start looking for the lion. This cold snow shit needs to end.%u00a0
The week has been pretty shity and very very stressful so we are going to leave that alone and I’ll just tell you about good things, like watching all of my house plants that I repotted grow like gangbusters. Or seeing the veggie seedings start to emerge from the dirt.%u00a0Half of them need to be repotted but the other half need to go directly into the ground. Glad I didn’t get to it this week because the snow and the snow and the ice, oh, and the stupid snow. We were with the Miley, Judah, and Emerson every day this week. We helped them clean and organize their bedrooms,which was stressful, but also fun. I almost accidentally %u00a0broke Mileys toes off, Judah showed us magic tricks,%u00a0%u00a0and Emerson taught %u00a0us all the alphabet. (And the mr got to play with so many dolls). There was time for So to stop over so I could fix her dress and eat carrots and make me laugh with all the funny faces. And we even had a few days of some what nice weather where I was able to open the windows in the house (that did not last long). Oh and the fridge, I was able to clean the shit out of the fridge. The week didn’t completely suck.
%u00a0I think that highlight of the week is that we found and %u00a0awesome new couch (and skill saw).%u00a0While we were looking for replacement faucets for the bathroom sink (because it is leaking bad)%u00a0we stumbled upon a very nice, not to big, not to small, vintage, excellent condition, very comfortable, couch. And it was on sale, like super cheap and pretty much exactly what we have been looking for.(there is a picture bellow) %u00a0Our current couch, the little yellow one that we use %u00a0in our spare room, is way to small and very uncomfortable and after today, it’s going bye bye. We pick up the new couch tomorrow. And when we do we will continue or search for a new faucet because we did not find what we were looking for. Until we do we %u00a0will be brushing and washing our hands in the bathtub.%u00a0
Today is going to be the first day in more then a week that the mr and I do not have some crazy crazy happening. So what are we going to do? Well I think we both need to turn off our phone, lock the doors, draw the curtains (we don’t have curtain) and hide from the world. Will that really happen, no, but it’s nice to think about. But I do think we will spend the afternoon relaxing a bit. I’ll paint, or read, the mr will probably work on screens or his fly file (it’s officially fishing season) and then we will go to bed early. Next week is a busy, but hopefully a good busy and not like shitty busy. Wish us luck.
What I looked at when I was looking at the internet
-I probably wouldn’t use it as a headboard but as a sweet ass wall piece… maybe someday I will get to it.%u00a0How to Make a Woven Headboard
-Now this is a sweet little cabin in the woods.%u00a0
–Fact or Fiction: Can You Really Sweat Out Toxins?
-I used to listen to music at the gym but after sweating all over and then ruining my 2 different iPods, I stopped. But I still hear music in my head.%u00a0%u00a0How Your Body Reacts When You Exercise With Music, According to Science
-How to Keep Your Social Life When You Love Going to Bed Early%u00a0Be friends with other people who go to bed early too.%u00a0
-I really want to go see this movie, and after reading this, I want to see it that much more.%u00a0And I really hate scary movie ( I also might be kind of in love with John Krasinski).%u00a0A Quiet Place%u2019 Turns Eating Into a Suspenseful Act
-Watch out, those non organic strawberries are probably toxic.%u00a0Strawberries again top 2018’s ‘Dirty Dozen’ fruits and veggies
–Drug Use Is Detectable on Your Fingerprints.Say what?
–New 360-Degree Immersive Drawing Created With 120 Marker Pens by Oscar Oiwa%u00a0Pretty freaking crazy
-Really, who eats these things?%u00a0People Have Started Panic-Buying Necco Wafers
Pictures from the week
It’s the weekend before Halloween which is the perfect time for pumpkin carving. We got our pumpkins last week and I have been so excited but have been waiting to carve.%u00a0%u00a0Carving time to a pumpkin is crustal.%u00a0To early and the pumpkin starts to rot and the squirrels will probably eat it but wait too long and you don’t get to enjoy it long enough. 3-5 days before halloween, that’s the perfect time carve a pumpkin. (I am right, right?)
And what do you get when you carve a pumpkin? A free freaking snack my friends. Pumpkin seeds.%u00a0
Side story here. About ten years ago I set my mons brand new stove on fire roasting pumpkin seeds. Long story short, I wanted really crunchy seeds and though if I broiled them that they would be just perfect. Well not so much. I stuck them in, walked away for a few minutes and the whole kitchen filled up with smoke. Opened the oven to a big old fire going on.%u00a0Luckily once the flaming pan of seeds was removed, the fire in the oven was no longer but the stove did not make it through unharmed. The knobs and a little bit of the front of the stove melted a bit (Oops) and worst part, I charred the shit out of the seeds.%u00a0 So the leason here is do not stick oil covered seeds under the boiler and walk away and not expect them to catch fire.
Anyway. So we carved our pumpkins (well I started carving mine and ended up helping Judah an So carve theirs) and got a shit ton of pumpkin seeds. I pre scooped mine out and baked (not broiled) them up to a nice crunchy snack. These are coved in cinnamon sugar to entice the little who might or might not really like them, but all the adults that where here gobbled them right up.%u00a0
The stuff.%u00a0First you need to get the seeds. %u00a0You could buy them, but this is way more fun.%u00a0
Seeds full of goo, just stick them in water. The seeds float so you can scoop them out into a strainer.
Once most of the goo is gone, rinse the seeds and place them on a clean dry towel and spread them out.%u00a0Try to dry them off a bit.
The seeds are going to still be a little damp so dump them on a baking sheet and place them into the oven. Turn oven on to 350%u00a0
While the seeds are spending a little time drying off get the other stuff. Coconut oil, cinnamon, sugar,and salt.
Once the oven is preheated, remove the seeds. They should be dry by now. Dump warm seeds into a bowl with coconut oil and mix around until they are fully coated. %u00a0Now dump the salt cinnamon sugar mixture in and mix until coated.
Place back onto the bakings sheet and evenly spread them out.
Back into the oven to get crispy.
And a half hour-ish later, the house smells all nice and cinnamony good and you got yourself a sweet spicy little crunchy fun snack.
Makes about 2 cups which came fro one big jack-o-lantern pumpkin
2-ish cups of pumpkin seeds%u00a0
2 tablespoons coconut oil
2 hearty tablespoons sugar
2 tablespoons cinnamon
1/2 teaspoon salt
Grab yourself a pumpkin, cup the top open ,and scoop out all the seeds. Save for jack-o-lantern.Place seeds in sink or large bowl and scoop the seeds off the top that float up. You might need to squeeze the guts to loosen the seeds. Place seeds into a strainer and once you got what you can get, give them a quick rinse. Dump the seeds onto a clean dry towel and pat them dry as well as you can. Place the seeds evenly %u00a0onto a dry baking sheet and stick them into the oven. Turn oven on to 350 and leave them in there until the oven is preheated.
once oven is preheated, remove seeds and place into a a bowl. Add the coconut oil and mix around until completely melted and the seed save all coated. in a small bowl mix together the cinnamon, sugar, and salt. Dump the mixture onto the oiled seeds and mix until coated. Dump seeds back onto baking sheet and back into the oven. Bake for about 25 minutes, remove and mix around, and back into the oven for another 5-10. Check for crunchiness by either tasting of snapping one or two in half. Once the seeds are crunchy, remove from oven and let cool on baking sheet.%u00a0
Dump seeds into a bowl ad snack away. Store left over seeds in an air tight jar.%u00a0
First rhubarb of the season!!! The patch in my backyard is large and wild and I am about to be swimming in humongo pink stalks of the stuff within the week. There will be rhubarb in everything.
Last year we ended up eating so much rhubarb. I didn’t really have much of a game plan for it, I just ended up sticking it in everything and for the most part, it worked out great. Cakes, pies, salads, and soups. Rhubarb can find a place in anything. But for the first rhubarb of the season, I wanted to make something that was all about the rhubarb without too many other flavors to contend with.%u00a0 And I wanted to make something pretty. Rhubarb cake with poppyseeds Sweet and tangy with a little earthiness, great texture, and color. A spring celebration cake if you will and made me very happy.
The mr and my sister were very much pleased with how this cake came out. (It was gone pretty much gone the next day) A cake win for sure and a good start to rhubarb in everything season.
The stuff. Rhubarb and poppyseeds. for all the flavor. Then you need flour, baking soda, baking powder, salt, sugar, oil (I used coconut but I think any oil would be fine) soy milk, vanilla and a little apple cider vinegar.
Once you get the oven going, chop 2-3 stalks of rhubarb into small pieces about 1/4 inch thick until you have 1 1/2 cups. Take another stalk and cut lengthwise into thin strips for the top of the cake.
In a small bowl mix the oil, sugar, and vanilla together. Add the vinegar to the soy milk.
Whisk together all the dry, add in the poppyseeds then mix in the chopped up rhubarb to coat each piece.
The wet mixture goes into the dry along with the soy milk. Everything mixed until just combined.
Dump the mixture into a well greased pan, level off and sprinkle the top with poppyseeds . Take the thinly sliced rhubarb you reserves and lay on top any way that looks nice to you, giving in a little press into the batter so it stays put.
Now into the hot oven it goes.
And after a time in the oven you get yourself this gem of a cake.
Cooled a bit and ready for eating. A piece or two celebrate.
Rhubarb season has begun. Start it off right with cake!
-C
Makes a 9×9 square cake
1 1/2 cups all purpose flour
1 teaspoon baking soda
1 teaspoon baking powder
1 teaspoon salt
%u00a05 tablespoons poppyseeds
3-4 large stalks of rhubarb (1 1/2 cups chopped and a little extra for top)
1/2 cup coconut oil
3/4 cup brown sugar
1 teaspoon vanilla extract
1 tablespoon apple cider vinegar
3/4 cup soy milk
Preheat oven to 350
Chop rhubarb into 1/4 inch chunks until you have 1 1/2 cups. Extra stalk and slice lengthwise into 4 thin strips and set aside.
In a large bowl whisk flour, baking soda, baking powder, salt, and 3 tablespoons poppyseeds. In a smaller bowl mix together the sugar, oil, and vanilla extract until completely combined.%u00a0 Add vinegar to soy milk. Toss the chopped rhubarb into the dry mixture and coat the rhubarb pieces. Dump the wet mixture into the dry and add in the milk. Stir together until just combined.
Dump batter into a well greased 9×9 baking pan and level off. Sprinkle the top with remaining 2 tablespoons poppyseeds then lay the thinly cut rhubarb on top anyway you think looks good to you.
Stick the cake into the oven and bake for about 45-50 minutes or until the cake tester(or fork) stuck in the middle comes out clean.
A couple of days ago, during a grocery store porous, I stumbles upon a produce item that I have not seen sold in stores before, Broccoli leaf. And I was kind of surprised to see that they were selling bunches of the leaf, organic, at 2 bucks a bunch. I was very excited ! But wait.. You can eat broccoli leaves? Heck yes you can! Broccoli leaves are fantastic. They taste kind of like broccoli, have a hearty texture like a collard, and can be used raw or cooked just like any other green. Its just one more super yummy green to add to your repertoire. So when I bring home something that I find to be a good score, like a bunch of broccoli leaves, I feel like I have to share it with the mister. (I am so nice) And this dish was how I shared them…. Tossed into a bowl of garlic raging pasta. The stuff…. A bunch of broccoli leaves, lots of garlic, pasta, olive oil, salt and a lemon. Pretty simple right? Fist off, get your water boiling for the pasta. Once its ready, drop a pinch of salt into the water and stick pasta in for the amount of time recommend by pasta box people. While the pasta is boiling, mince up the garlic (I used my garlic press) into a skillet and add in the oil. Stick on a burner on medium for a few minutes, stirring around to make sure the garlic doesn’t stick and burn. Once you start to smell the garlic, turn heat onto low, chop up the broccoli leaves (stems and all) and stir around until wilted and add in the juice of half a the lemon.When the pasta is cooked, remove a few tablespoons of starchy water and strain the noodles. Add water and pasta right into the skillet with the other stuff. Toss around, taste, season with salt and pepper. Go ahead and add some chopped tomato and or parmesan cheese if you want. And serve your amazingly amazing pasta. And make sure that you are ok with really smelly garlic breath…Casue it’s going to happen. Keep it good! -C
2 servings of your favorite pasta (spaghetti, penne, vegan, gluten free…..)
8 or so fresh garlic cloves
1/4 cup olive oil
salt and pepper
lemon (optional)
parmesan cheese (optional)
Start by bringing a pot of water to a boil with a pinch of salt. Add in pasta and cook per instructions on box. While pasta is cooking, mined garlic and add to a skillet with the oil. Place on a burner on medium heat and cook and stir until the garlic becomes fragrant. Chop the broccoli leaves (stems and all) into bit sized pieces and add to the garlic oil and toss around to wilt the leaves. Squeeze in some lemon juice. Once the pasta is done cooking, remove a few tablespoons of the starchy water and strain the pasta. Add the water and the noodles to the skillet, toss to evenly coat the pasta and call it down. Serve in a bowl or on a plate, topped with freshly chopped tomatoes and parmesan cheese if you so shall please and another little squeeze of lemon juice if you like. Watch your mouth.. it will be breathing out garlic like whoa.
A couple of days ago, during a grocery store porous, I stumbles upon a produce item that I have not seen sold in stores before, Broccoli leaf. And I was kind of surprised to see that they were selling bunches of the leaf, organic, at 2 bucks a bunch. I was very excited ! But wait.. You can eat broccoli leaves? Heck yes you can! Broccoli leaves are fantastic. They taste kind of like broccoli, have a hearty texture like a collard, and can be used raw or cooked just like any other green. Its just one more super yummy green to add to your repertoire. So when I bring home something that I find to be a good score, like a bunch of broccoli leaves, I feel like I have to share it with the mister. (I am so nice) And this dish was how I shared them…. Tossed into a bowl of garlic raging pasta. The stuff…. A bunch of broccoli leaves, lots of garlic, pasta, olive oil, salt and a lemon. Pretty simple right? Fist off, get your water boiling for the pasta. Once its ready, drop a pinch of salt into the water and stick pasta in for the amount of time recommend by pasta box people. While the pasta is boiling, mince up the garlic (I used my garlic press) into a skillet and add in the oil. Stick on a burner on medium for a few minutes, stirring around to make sure the garlic doesn’t stick and burn. Once you start to smell the garlic, turn heat onto low, chop up the broccoli leaves (stems and all) and stir around until wilted and add in the juice of half a the lemon.When the pasta is cooked, remove a few tablespoons of starchy water and strain the noodles. Add water and pasta right into the skillet with the other stuff. Toss around, taste, season with salt and pepper. Go ahead and add some chopped tomato and or parmesan cheese if you want. And serve your amazingly amazing pasta. And make sure that you are ok with really smelly garlic breath…Casue it’s going to happen. Keep it good! -C
2 servings of your favorite pasta (spaghetti, penne, vegan, gluten free…..)
8 or so fresh garlic cloves
1/4 cup olive oil
salt and pepper
lemon (optional)
parmesan cheese (optional)
Start by bringing a pot of water to a boil with a pinch of salt. Add in pasta and cook per instructions on box. While pasta is cooking, mined garlic and add to a skillet with the oil. Place on a burner on medium heat and cook and stir until the garlic becomes fragrant. Chop the broccoli leaves (stems and all) into bit sized pieces and add to the garlic oil and toss around to wilt the leaves. Squeeze in some lemon juice. Once the pasta is done cooking, remove a few tablespoons of the starchy water and strain the pasta. Add the water and the noodles to the skillet, toss to evenly coat the pasta and call it down. Serve in a bowl or on a plate, topped with freshly chopped tomatoes and parmesan cheese if you so shall please and another little squeeze of lemon juice if you like. Watch your mouth.. it will be breathing out garlic like whoa.
Not just sweater weather, which it had been all week and I am LOVING IT, but it%u2019s lamp light weather too. I forgot that I had all these fantastic lights around my house and yesterday when it was dark out at 6 (it was raining so the sky was cloudy) I got to turn on a couple lamps that haven%u2019t had any action in months. It was soooo nice and cozy. This my friends, this is the best time of year!
Camping last week was great and not so great. The campground was pretty, but our fellows campers were very rawdy and loud and there was a party at the picnic pavilion that had a shitty classic rock cover band playing. The noisy people and shitty music echoed through the park for longer then anyone should have had to deal with it. But I guess that happens, especially on a long holiday weekend. And really, besides the buttheads, we had fun. We went for a nice hike through the woods and into giant fields of wildflowers and goldenrod then spent some great time in the kayaks on a nearby lake (away from all the people). Plus after eating dinner and then packing it in for the night, we didn%u2019t get soaking wet, which we could tell by the many car doors slamming and people screaming at 1am , a good few people did. Our tent stayed nice and dry inside and we even managed to stay dry when we got out of the tent and and realized it was sitting in a giant puddle. We even managed to stayed pretty dry packing up and getting on our way home, in the rain! It%u2019s because we are good at coming I guess.
Then the rest of the week came and went in a fast blur. Mostly some same. Had lunch with Barb, cleaned apartments for new tenants,, made cards for artwork, picked up farm share, and you know, other life stuff. I have been busy in the kitchen harvesting garden food and canning or freezing it as well. Trying to stock up on as much food as I can for the winter. Then the littles slept over Friday. We watched Dumb and Dumber and I fell asleep on the couch. Woke up made waffles (I was so excited to use my waffle iron. It%u2019s been too long) and sent them on their way home to be moody tweens because that is now happening.
Oh, and I can%u2019t forget about how some little shithead smashed in the back of our car. Yup, that happened too. But that is pretty much it. I think%u2026.
Now for today. Mt Auscunty State park if all goes to plan. Should be a fun one with lots of hiking and a big high tower and stuff. I know it is gonna get mighty cold tonight so I am packing my winter long underwear and a jacket, hat, and mittens. So excited!
Links to explore on the internet.
–Doctors are now prescribing houseplants to help treat anxiety and depression. Makes a whole heck of a lot of sense to me. And why not try this simple remedy before trying a bunch of drugs?
-I wasn’t;t surprised much when I read this. Junky processed food is so bad, especially if it is all you eat. .19-Year-Old Goes Blind Due to Diet of Pringles, Bread, Fries, and Processed Meats
–Lush Botanical Forms Translated Into Abstract Embroideries%u00a0. So very pretty.
-Another good reason to ditch that pessimistic attitude and to look at he bright side of things. It doesn%u2019t hurt to try. Optimists For The Win: Finding The Bright Side Might Help You Live Longer
–Why do clowns creep us out?%u00a0Because they are creepy, that is why.
-I want, no, I need this cabin. Totally Off-the-Grid Cabin in the New Hampshire Woods
–This Apple Might Be the Most Anticipated Piece of Produce in History. I heard about this apple few years ago. I wonder if it%u2019s gonna live up tp all the hype. We shall see.
-Why don%u2019t we have one of these? The Otter: The 1950s Amphibious Caravan That Time Forgot!
–Can Bullet Journaling Save You? I am a list maker in all the ways. I a ma doodler to no end. I love pretty things and I love hand writing and have a ton of sketch books but besides the occasional list of note in a sketch book, I have never really gotten into Buju. It%u2019s to time sensitive I think, for me anyway.
–Squeeze in a Quick Nap at Work with This Under-Desk Hammock. A new way to sleep on the job. HA.
Pictures from the week.
Corn is the name of the game, and this game I won!
The mr doesn%u2019t much like to eat corn. But I do. And this time of year I get like 10 ears of corn every week from farm share, which is a lot of corn for one person to have to eat every week and sometimes I just can%u2019t do it. So every now and then I make something that I think the mr will tolerate, if not like, to get him to help me eat the stash of a hundred ears or corn that I have going on in the fridge.
These fritters helped me with that and I think with all the future corn that I will get from the farm. They are soooo good! The mr liked them! As for me, I couldn’t stop eating them and almost didn’t want to share because they we just so dang good. Sweet fresh corn, nutty and slightly chewy oats. Scallions. And that%u2019s pretty much it. So fresh and clean and yummy tasting. A summertime fritter situation that takes corn to a place where even the corn hater likes it.
Although who the hell hates corn? I know one person. One. And I live with him. Weirdo.
Anyway, to the fritters!
The stuff. Fresh sweet corn, old fashion rolled oats, and a few scallion. Also some ground flax seed, water, baking powder, salt and pepper, and a little oil.
Start with oats. Add most of what we need to a blender and blend until it becomes oat flour.
Then the corn. Remove the kernels from the cobs. Best way is to hold corn in a large bowl and cut downward. Don%u2019t want corn flying all over the place!
Add most of the corn you just cut off the cob to the blender with the oat flour, along with with flax and water. Blend until smooth.
Chop the scallions into thin and tiny pieces.
Now dump the contents of the blender into a bowl, add in the scallions, the baking powder, and the extra oats and corn. Mix it all up and then let the batter rest for a few minutes (like 10) so the oats have a chance to really absorb all the liquid.
And then to cook them. Heat a lightly oiled skillet to medium high heat. Once skillet is hot, drop scoops of batter into it. Cook for 3-4 minutes or until the bottom is a nice deep golden brown. Flip and cook the other side the same.
When fritters are done cooking, place them on a wire rack. So they don%u2019t get soggy.
And then serve them right away. I ate mine with fresh salsa. Definitely the way to go. So GOOD!
Now eat your corn.
-C
makes about 12 fritters
3 ears fresh corn ( about 1 1/2 cups of kernels)
1 1/2 cups rolled oats (gluten free if needed)
1/2 teaspoon baking powder
2-3 scallions
1 tablespoon flax meal
3 tablespoons water
salt and pepper
a little oil for skillet
Combine water and flax meal, mix and set aside.
Place 1 cup of oats into blender or food processor and blend for about a minutes or until the oats are a fine flour.
Grab corn and remove from cob. Best way to do this is to place corn vertically in a big bowl and cut downwards so the bowl catches all the kernels. Cut enough corn until you have about 1 1/2 cups of kernels. Also, garb scallions and chop into very small, thin pieces.
Add in a cup of the corn, the flax and water mixture, baking powder, and a pinch of salt and pepper. Pulse or blend until completely combined and the mixture is mostly smooth.. Dump mixture into a bowl and add in the remaining corn, chopped scallions, and oats and mix together. The mixture should not be runny, but also should not be dry enough to pack together. If the mixture seems too dry and tight, add in a tablespoon or two more or water. To wet, add in a small handful of oats.
Once batter is mixed, set aside for about 10 minutes to rest.
Grab skillet and place on medium high heat. Add a touch of oil to pan and make sure it evenly coats the bottom. Once pan is preheated, add scoops batter into pan (about 2 tablespoons each). Cook first side for about 3-4 minutes or until dark golden brown, then flip and cook the other sides for another 2-3 minutes until a dark golden brown. Remove from pan and either place on a wire rack or a plate. ( I recommend a wire rack just to keep them from getting soggy.)
Serve right away. Fresh salsa goes amazingly with them!
Any left overs can be stored in fridge and reheated in the oven.
There are a million things you can, and should, do with tomatoes. Salsa is one of those things. Especially with the super fresh and ripe summertime tomatoes that may or may not be overflowing every empty surface of your kitchen (my current predicament). And peaches. Now is the time friends to eat your peaches. In season and oh so tasty. Do it now before it%u2019s too late and those oh so deliciously ripe and sweet peaches are gone and all that is left are mealy, gross, supermarket fakes. Only eat in season peaches. That is a life lesson everyone should know.
This salsa is perfect. Super fresh, sweet and slightly spicy, with a hint of tangy goodness and just, you, really freaking perfect. A salsa that hits all the right notes with out being overly anything and underly nothing if you know what I mean. All the tastes of summertime. A darn good salsa. Darn good.
This salsa also makes me a winner at the game I am playing with myself called %u201cGet the mr to eat tomatoes and like it”%u201c. The game started when he told me he was sick of tomatoes and he didn’t want to eat anymore. I made the salsa (which also made me a winner in the other game I play called %u201cGet the mr to eat fruit in his savory dishes%u201d, because he also tells me how much he hates fruit in savory), he tried the salsa, raved about the salsa, and then went and ate the rest of the salsa with his rice and beans. .
I win again! Haha
Anyway, super fast, super fresh, super super. A great way to use up a any of your shit load of tomatoes you might have laying around and to get in a few more of those summertime peaches before they are gone again for the year.
Now to the salsa.
The stuff. Cherry tomatoes, peaches, an onion, a jalape%u00f1o, a lime, a bunch of cilantro, salt and pepper, and a little vinegar.
Start by cutting up the tomatoes into quarters. Do this carefully or else you will have tomatoes rolling around everywhere. Place chopped tomatoes into a bowl.
Then dice up those peaches into small little pieces and toss into bowl with tomatoes.
Onion gets diced up too and placed into bowl.
Jalapeno, seeds removed, diced up nice and small. Get it into the bowl.
And cilantro. Give it a rough chop and into the bowl it goes.
A sprinkle of salt, lots of pepper (to taste of course), the juice of the lime, and a splash of vinegar. Mix it all up and there you have it.
Into a jar (or you can just keep it in the bowl if you want), and it%u2019s ready for eating. Chips, tacos, to top a salad%u2026 This salsa does it all. Heck, just eat it with a spoon. There is absolutely nothing wrong with that.
-C
Makes about 32 oz of the good stuff
1 overflowing pint cherry tomatoes (red, yellow, sun gold or a mix of any)
2 ripe but firm peaches
1 bunch cilantro
1-2 jalape%u00f1os (depending on how hot you want it)
1 small red or white onion
a lime
salt and pepper
splash red or white wine vinegar
Grab the tomatoes and carefully, so they don%u2019t roll away, cut each one into quarters. Place in a big bowl. Cut peaches in half, remove pit, and dice the flesh into very small little piece and toss into bowl. Now onion, dice that into small little pieces, along with the jalape%u00f1o and toss into bowl. Cilantro gets a rough chop then into the bowl it goes. Now sprinkle in a little salt and lots of black pepper. Add the juice of the lime and a splash of the vinegar and toss it all around. Let sit for a few minutes, taste, then season with more salt and pepper if needed. Can add more vinegar for more acid if needed too.
This salsa only gets better with a little age so you can definitely make it a day or two ahead of time.
Store in a bowl to serve or a jar for longer storage. Use within a 4-5 days of making it.
August. Then gem of the summer. Warm days, cool nights. The knowledge that yes, it is still summery now, but soon it will be crisp, and cool, and all fall with sweaters and apples and%u2026 I am getting ahead of myself. Still summer here, and I should just enjoy it will it lasts. So that is what I will do.
This past week was busy and a little on the stressful side at times. It started with camping on Sunday which was good, maybe not the best, but no camping is bad camping, unless it is bad. It just that is was terribibly hot and there was a lot of people around and poison ivy everywhere which made me anxious because I was also getting attacked by mosquitoes so I kept thinking I was starting to get it. (I am very allergic to poison ivy). Also I woke up in the middle if the night to the mr yelling because someone was looking into our tent. I didn%u2019t see said person because I was asleep until I wasn%u2019t and I did questioned whether or not he might have dreamed it, but needless to say, I didn’t not sleep much after that. So yeah, other then that, not bad. And then we got out of the tent early, made the coffee and went on our way home. To life. We had (and still have) a lot of stuff going on, all at once because that is how it goes. But we got stuff done, and then some. And we even managed to get in a couple kayak sessions! First of the year because we are butts and also we just finally got around to getting racks for the car.(No more truck to throw them into. Sad). We also made time to look at a big chunk of land that I was sooooo expecting to love but nope, wasn%u2019t for us. We test drove a newer van that was awesome, but again,wasn;t for us. We picked up farm share together and ate ten thousand tomatoes, and are now officially 100% filed and finished our taxes. Checks were wrote, I might have cried a little, but done they are.
So yeah, the week went, we did, I am tired, the mr is really tired, and we are ready to get out of here for the night. Our camping stuff is packed and ready to go. Now where are we going is the question%u2026..Somewhere without night creepers would be nice.
Links from the internet for you to take or leave.
-Plastics Or People? At Least 1 Of Them Has To Change To Clean Up Our Mess. A beach of flip flops. How depressing. People, let%u2019s all just stop buying plastic!
-I don%u2019t know what the heck is wrong with people but curly parsley is the shit! It%u2019s delicious and I can eat handfuls of it. For real. How Did Curly Parsley Get So Uncool?
-Reading this made me sad and angry. Greenland Is Melting Away Before Our Eyes
–This Must Be What It%u2019s Like to Live Inside a Rainbow. I can appreciate it and I would love to say there but I don%u2019t think I could actually live with that much color. Sensory overload!
-Now these rooms. I could live in. Cool Pics Show Hotel Rooms of the U.S in the 1950s and ’60s
-This reminded me so much of my sister Erin. She would do something like this (or already has) Three Cats in Japan Have a Closet Full of Custom-Made Hats Felted From Their Shedded Fur
–This Remote Corner Of Nevada Is One Of The Darkest Places In The World. I want to go. I will go. And I bet everyone else wants to to, so lets all not be assholes and trash the place like happens when cool places are discovered.
-I am a slut for bedding. Just pictures of pretty textiles make me happy. BOHO BEDDING.
–At Burger King, Your Meat-Free Burger Might Come With a Coating of Real Meat Juice. This is another reason why I don%u2019t ever go out to eat. And this 1 In 4 Food Delivery Drivers Admit To Eating Your Food. I trust no one!
–Japanese Way of Making Iced Coffee. Do you drink Iced coffee? I love it but rarely drink it because I have no will power when it comes to coffee and will basically chug it and then it is gone and I am sad. Hot coffee slows me down, if only a little bit.
And pictures from the week.
Summer at it%u2019s fullest and greatest. And not so great, at it%u2019s hottest. At least this past week was freaking amazing, especially compared to last weekend. That humid heat damn near killed me!
The week started off with a soggy hike and a heat soaked day of camping and fun times. Groton State forest, at the Stillwater campground. The mr and I were both a little drained and tired from being so so hot but we managed alright, went and did some hiking, the mr did a little fishing, I sat around and read. The normal, just a little slower then usually. But it all changed that night. We woke up and walked down to the water to watch the sunrise and take in the fresh, glorious, air. It was not hot and humid and we was alive again. HA
Then after camp, home we went, back to the week. Stuff happened, like stuff that needed to happen, like those taxes that I have not wanted to talk about%u2026 They are pretty much done. HOORAY!!! All the ups and downs. The few tears, the rage, the anxiety. Over. And now I can stop worring about them for a least a few more months, until next year that is. Because every year. Blah. Stupid taxes.
Besides taxes, there was a dentist appointment that I sat around and waited for but never got to be seen. (SO PISSED) Paul came over for resume help and food. The mr, Barb, Coco, and I spent an afternoon at the park. I weeded for hours in the garden. And lets talk about the garden. Whoa it is going and going. Right now it%u2019s all about the squash, chard, and greens and the tomatoes will be booming soon!!!!!!!!!! That on top of farm share, well I am just one happy, full to the brim, lady.
The rest of the week was and went.
Friday I worked the studio all day then the mr and the littles picked me up. We ran to the store to get supplies, then went home for our first backyard campout. The rule was, besides me, no one was allowed inside at all until just before bed time to use the bathroom and brush our teeth. (Or to go number two. They needed to use the toilet for that. Ha). And so I got dinner stuff ready (In the house but I needed to use the fridge and because I could), we ate dinner at the picnic table, set up the tents, made a fire, did so-mores, played with fire, and the kids ran around hopped up on sugar. We went to the park, walked around the neighborhood, and when it got dark, lit up some sparklers. It was the best! The kids were so happy, the mr and I were happy to be camping again, even if it was just the backyard, and really, it just was so great. Even when we were in our tent trying to fall asleep and all I could hear was Miley and Judah whispering and giggling and playing cards in their tent. Because that is what you do when you camp and it had me falling asleep smiling.
When we woke up (I woke up 3 hours earlier then everyone, made a pot of coffee and read on the porch) the breakfast stuff was ready outside. Eggs and toast on the camp stove. Hot chocolate, and freshly picked raspberries from the bushes in the yard. Then back to the park, and home they went. Probably some of the best camping yet. And now that we know they are awesome in a tent, we are taking them to a state park in the next few weeks. That%u2019s gonna be fun.
Today we are heading south to camp. Lake St. Katherine or maybe Half Moon. Not sure yet. The plan is to get close and see which one feels right. We were going to bring the kayaks but It might rain and thunderstorm during the afternoon and tonight so I figured we can just go hiking instead. I would rather be in the woods and not in the middle of the lake during a lightning storm. That would kind of suck. But watch, it probably won%u2019t rain, and even if it does, I am ok with that. We won%u2019t melt.
Endeavors into the world wide web.
–IKEA Upcycles Furniture Into Homes For Birds, Bees, and Bats. Some sweet ass, fun-tastic looking homes for those birds, bees, and bats.
-I am not a beach person, partially because of this. Sun, Sand And Sewage: Report Shows Many U.S. Beaches Unsafe For Swimming. Happens here in Burlington too.
–What are algae blooms and why are they bad?. Another reason I avoid the beach.
–Questions We All Ask Ourselves: Why Does the Beanbag Chair Even Exist? Because who doesn%u2019t love to sink into big ol%u2019 bean bag?
-I can%u2019t wait until the fennel starts flowing at the farm. It is the BEST! Fennel: The Best Ways to Pick It, Cook It, and Eat It
–Why Science Can Be So Indecisive About Nutrition. There is always something about something. Heck, even kale was bad for you at one point.
–This common plastic packaging is a recycling nightmare. When is the plastic craziness going to stop? And when are people going learn that just because it says it is recyclable, doesn%u2019t mean that it is actually going to be recycled. We should just stop worring about recycling and focus more on reducing freaking plastic all together.
-Not sure what I think about this. Petition to change date of Halloween gets more than 80,000 signatures
-Soemthing about these photgraphs that I really like. Murky waters: Karine Laval%u2019s dreamy photography takes you from the deep end to a surreal space
–A Needle Pulling Thread. Sashiko is the perfect simple, low-cost hobby to get you off your phone. Or just have another hobby. I have been meaning to Sashiko all the big holes in my couch cushions.. Maybe it will be my winter project?
Pictures from the week.
Holy shit. I am so hot. Like heated to the very depths of my soul and can%u2019t even think straight, hot. And It sucks, but what can we do about it? (Apparently I can bitch about it. Ha!)
We started the week off in the woods doing the camp thing. The park, Allis State Park, was just gorgeous. Nice and quite, lush and green, with a really cool fire tower with views for days. (I climbed it, the mr stayed on solid ground) The weather was amazing and it really was just what we needed. We went for a good hike, made lentils and zucchini for dinner, then just hung around and chilled by the fire. The perfect start to camping season even though I forgot my camp clothes. We were coming from a visit that required me to look decent and I forgot to pack a change of clothes and only grabbed my thin thermal underwear that I sleep in. But lucky me, the mr let me wear his extra shirt so I managed alright. That mr. Always looking out for me.
Back in town we did life as usual although with the heat and all we, especially me, have functioned at a much slower pace. We did manage to go for a bike ride lunch, another couple small hikes, and pick lots of flowers on top of feeding Megans cat everyday. And my garden is growing at a rapid pace and is now on the verge of being overcome by the onslaught of weeds. I just haven%u2019t wanted to spend to much time weeding this week because again, heat and all. Other then that, same old, same old.
Friday I was really excited to spend the afternoon working at the studio. But when I got there, all the kilns were on and reaching maximum temperature so the studio was a bit toasted warm and not the pleasant cool I was looking forward to. After work, the mr and littles picked me up, (they just went to the movies and were complaining how cold it was%u2026 brat faces) we went home and I made them pasta because I couldn%u2019t do much more. They played in the sprinkler then we tried to walk around the block but they just couldn%u2019t make it around because of the heat, then Miley felt sick and had to go home. So the mr and Judah brought her home and went to get supplies. Ice cream and chips. We ended up watching Kindergarten Cop which I haven%u2019t seen in like 20 years (it was terrible and Judah loved it) then made Judah a bed in our room so we could all crank the ac for the night and not melt.
Woke up, did the pancakes, went on a few errands, and dropped the boy off to his air conditioned family. Then the heat really just plowed me over. My brain tuned to mush, I cleaned a bit, picked blackberries from the yard, and basically just laid around on the floor and sweated. It was nasty and I was miserable. Meanwhile the mr was outside mowing the lawn because he is a glutton for punishment. And crazy. And that was the day. I was showered and locked away in the bedroom with the ac on by 7. And it was nice.
Currently sitting in the living room, with no ac, at 4am and the tempature is 87. It%u2019s just not right.
Going onwards with the day we are headed back into the woods again and I am optimistic. Camping by a lake in a forest so we should be semi cool?? Or less hot then right now I hope. At the very least we can jump into water. But I am pretty sure the heat, or at least the humidity is going to break today. It has to or else I am a goner.
Hope you al are holding up better then I am. HAHA!
Linkage from the net.
-I am in the Spice Girl Generation. And yes, I loved them and still do. The Rise of the Spice Girls Generation
-The mr and I have been going back and forth between new sleeping pads or an inflatable mattress or just using yoga mats for camping%u2026. Maybe the hammock is the way to go. Camping hammocks free you from tent tyranny
–How changes in barometric pressure affect the human body. I am so so so sensitive to it. I get head pressure and joint aches when it fluctuates. It%u2019s annoying.
–Why Do We Yawn? Reading about yawning makes people yawn. You are probably yawning right now. I totally yawned.
-It is so hot so you should know exactly what your options are. What%u2019s the Difference Between Ice Cream, Gelato, Sorbet, and Sherbet?
-There’s An Explanation For Why You Always Get Sick During Time Off. I don%u2019t get %u201csick%u201d per say, but I definitely crash after a long stint of work.
-What the holy fuck. Arby%u2019s mocks the fake meat trend with vegetables made out of meat (or %u201cmegetables%u201d) But pretty dang funny.
-I love a good tile floor. Who doesn’t? CHECKERED PAST.
–Hiiiiii! THIS is how texting has changed grammar & the way we communicate. I think by now we all know that a period at the end of a text is hostile. HA
-This could be my calling, or just a good way to get out of the country for a few years because, well you know. New vacancy for sheep dyke warden
Pictures from the week.
It%u2019s official. Summertime is here. Take it all in and enjoy it because that%u2019s what we need to do. Before it is gone again.
The week has been good. Besides the usual work and stuff, we have spent a lot of time with our people and trying to do things outside everyday. There was an afternoon of Barb and Coco where we went to the beach to find drift wood and throw rocks. Megan and So came over for lunch and teeth wiggling (her two from teeth a loose!! (Sophias, not Megans)) another afternoon. We stopped over to Erins to see the painting mess and Coco drawings all over the walls. The mr and I went for a little hike that took us out under bridges to a graffiti wonderland. That was unexpected and very cool.
Then there is thing that has been on my mind for the past few days. One night in the middle of the week, the mr and I both woke up to a terrifying screaming noice. Like something was dying, killing something, or some creature was about to suck out my soul. It definitely was not anything human. It freaked me out so much that I didn’t want to get out of bed to look out the window because I thought whatever was making the noice would see me awake and come kill me or some shit. So I laid in bed until it stopped then was worried it stopped because I didn%u2019t know where it went%u2026. CREEPY AS FUCK! And it happened again Friday night. So I am officially scared that the hell moth in opening up in my back yard. Or it could be a fox. Not sure. I%u2019ll let you know either way. But until I figure it out, I am going to freshen up my Buffy the Vampire Slayer knowledge. Just in case.
Other then that, the rest of the week was a success. The mr finished off the beautiful cedar outdoor table, I picked up farm share and cleaned out my home studio. At the BCA Studio, the kids summer camps started so working there was a bit different. Instead of loading kilns, I was doing clay things with kids. Just got to say, after working all Friday with others peoples kids, hanging out with just Judah that night was pretty much the best. Being around other peoples (not in my family) kids really makes me realize just how cool my littles are. I mean, how cool is it that while I was at work, Judah helped the mr fix a roof? All for a slushy and my home made pizza and just wanted to hang out and draw? That%u2019s a cool kid.
Yesteraday was just a gem. I woke up, did a few things before the sun even came up then sat on the front porch, drank my coffee and read. I even was able to go to the grocery store and cleaned out the pantry before Judah even woke up. (He ended up sleeping over Friday.). I then made pancakes for the boys, harvested greens, and played with the sprinkler. We then picked up Coco to go walk by the waterfront, throw rocks, and of course go down the slide a million times. All this before lunch. After we dropped the little back off, we came home and just hung out. Went for a bike ride, the mr secured the tree from the blowing winds and worked on the treehouse. I cleaned and puttered. The only crappy part was while I was putting away dishes I stabbed a fork under my finger nail. The prong went in deep and it bled like crazy. AGH. I would have rather cut my finger off. And now I have a swollen, still bleeding sometimes, very painful finger that has my heartbeat throbbing in it. But the rest of the day, and evening, besides the pain, was relaxing and lovely.
Today is suppose to be another wonderful day and we are hoping to enjoy it as much as the day will let us. I am going bike to the gym then come home and hop into car with the mr and drive away for the day. Where we are going, not exactly sure. Just out of town, into some of the world. Windows down, wind in my hair, tunes on the radio, coffee in my cup, and a lovely love by my side. Things are good.
Interesting internet. Take a look.
–How to lucid dream, and why you’d want to. I think I really started to think about controlling my dreams I might freak out go crazy.
–How important is seasonal eating? It is important to me for so many reasons. Biggest reason, I try to grow as much as I eat and the seasons depict that. Not a lot of fresh tomatoes coming Vermont in the winter.
-The terrifying screaming might be this? Red Fox Sounds.
–Whatever Happened to #Vanlife? Well, Things Are Changing. Van life is not just for the surfer dudes anymore.
–No Matter the Hack, Some Kitchen Tasks Will Always Be a Pain in the Ass. HERE HERE!! But here is a hack for garlic%u2026.just eat the freaking skin. No peeling. HA
-These are some kickass vinyl floors.
-Why wouldn%u2019t pants like good tunes. Good vibrations. It just makes sense. Music For Plants Is Real (Even If The Science Isn’t)
–What’s the Difference Between Sparkling Water and Seltzer? I needed to double check.
-Give me a good, healthy life, over a really long life. Human Lives Might Be Long Enough Already
Pictures from the week.
It is June. Already. That was fast.
The week started off great. We spent Sunday in Belvedere with family. The weather was perfect. There were barely any life sucking mosquitoes. Not to sunny, no rain. We just hung out, ate food, walked to the water falls, and basked in the glories of the world. Not to mention Judah invented a watch cookie, Shannon read my telepathically read my mind and picked me up the heart shaped baking tins that I was thinking about at a garage sale, and Sophia. She ate all my broccoli. All the littles played without fighting. All the adults talked without fighting. It was really nice.
And then we came home and by Monday afternoon, the shit starting to hit the fan. First off, it was the week before the June first rental turnovers. Always a hectic week. Always a lot of running around. It has been especially crazy for the mr this year because he was dealing with not only our tenant turn over, but a bunch of other apartments for other landlords. Painting, getting rid of garbage, fixing broken things. That in itself was not the issue. The issue was Monday afternoon, after the mr had been working all day, pulled into one of our driveways with the car to grab some paint, got back into the car, and the key wouldn’t turn. And the wheel wouldn’t turn. The car was stuck. Our newish (3 1/2 year old) car. The mr spent more then an hour trying to turn the key. I sent more then an hour on the internet trying to figure out what the heck was wrong. In the end, the car was just left for the night, the mr hitched a ride, and we ended up getting the car towed to the garage. (Note that this is the second tow in within a week.) After getting off the phone with the mechanic the next day, we were told it was going to be a few days before they can even look at it because they were so busy. We were feeling pretty screwed. Luckily for us, my mom is awesome and lent us her truck which if she didn’t , well we would be stuck with the rental car that I rented one afternoon, drove home, had a massive anxiety attack about crashing (we are having bad car juju right now), turned around and returned. I just had a bad feeling about it. So yeah, I rented a car, for about an hour. They laughed at me. I laughed at me too. Then cried a little. HAHA.
By Thursday the shop was able to look at the car. After the mechanic took a look at the car, he told us the master cylinder was stripped and needed to be replace. Or better yet needs to be. Almost a week later. The car is still there. They had to order the part and it won%u2019t be in until Tuesday. Yup. Just a week ago we were sitting pretty with a car and a sweet ass van and now, no cars. Oh, and the lawn mowers stopped working mid mowing. We think its the gas line or something.
Anyway. The week, hectic but not all bad. I found a bike on craigslist that I am going to fix up and call my new bike for a while (I am done bike shopping for the time being). Barb came over for a lunch and a walk one day. I made rainbows and popsicles another afternoon. Working at the studio was calm. That was nice. And the weather. I can%u2019t complain about that at the least bit.
Then yesterday. June first. Tenant moving day. It was cray cray. New tenants moving in and out usually isn%u2019t a big deal because most of the time our tenants are great and leave without issue. But yesterday the mr stopped over to check on all the apartments and found one in pretty awful condition. Long story short, we spent the day scrubbing filth and paint and hair (so fucking gross) off every surface then repainting the apartment while the new tenants were moving in. We did manage to have a little lunch picnic in th park with Miley and I took her on her first ever bike ride across town. That was good, but then it was back to the crazy apartment. Then we came home, ate dinner, cleaned our house, then passed the f out.
Today is going to be good. Why? I don%u2019t know yet, but we need it to be. I am not looking for anything spectacular, maybe just to find a few new good books at the library. Maybe go the day without getting 100 mosquito bites. Or maybe even just be able to take a nap. Just a mellow day. Wish us luck.
Stuff I looked at and read about on the internet this week.
–There Is Too Much Stuff. I couldn’t agree more and I hate it. Too much stuff makes me so anxious. And maybe a little angry. The piles of shit just keep getting bigger. AAGGHHH!!!!
-As a person who makes a lot of mugs with handles, this is very important. I have kept myself up all night on many occasions just thinking about mug handles. Shape, feel, visual ascetics. So much goes into a well made mug handle. But it is worth it and when you have a good one, you know.. Let%u2019s Talk About Mug Handles
–Why You Should Use a Wooden Spoon to Taste Your Food. What about a wooden fork, would that work too?
-Bad making bad worse. How pesticides can actually increase mosquito numbers
-Simple and clean%u2026 My kinda place. A HOLIDAY HOME IN PORTUGAL.
–Would you leave your life behind for a house you saw on Instagram? These people did. I love the instagram account CHEAP OLD HOUSE. And yes, I have definitely imagined buying half of them because some of them really are amazing. Maybe one of these day. Drafty windows and crumbling foundations don%u2019t scare me.
–Your Walls Need This Whimsical Magnetic Wallpaper. I don%u2019t need it, but oh boy would it be cool.
-If Ikea is doing it, then it%u2019s for real. Everyone is going vegan. HAHAHAHA. Ikea%u2019s Meatballs Will Officially Go Vegan This Fall
-As avid outdoors people, we really make evey effort to leave the outdoors exactly (if not better) as we found it. How to leave the great outdoors exactly how you found it. How pissed would you be if someone cam into your place and trashed it and moved things and picked at you?
-I eat beets eveyr single day and my pee has never turned pink but I know everyone I feed beets to pees pink. Hum? Why Do Beets Make Your Pee Turn Pink?
A couple of days ago, during a grocery store porous, I stumbles upon a produce item that I have not seen sold in stores before, Broccoli leaf. And I was kind of surprised to see that they were selling bunches of the leaf, organic, at 2 bucks a bunch. I was very excited ! But wait.. You can eat broccoli leaves? Heck yes you can! Broccoli leaves are fantastic. They taste kind of like broccoli, have a hearty texture like a collard, and can be used raw or cooked just like any other green. Its just one more super yummy green to add to your repertoire. So when I bring home something that I find to be a good score, like a bunch of broccoli leaves, I feel like I have to share it with the mister. (I am so nice) And this dish was how I shared them…. Tossed into a bowl of garlic raging pasta. The stuff…. A bunch of broccoli leaves, lots of garlic, pasta, olive oil, salt and a lemon. Pretty simple right? Fist off, get your water boiling for the pasta. Once its ready, drop a pinch of salt into the water and stick pasta in for the amount of time recommend by pasta box people. While the pasta is boiling, mince up the garlic (I used my garlic press) into a skillet and add in the oil. Stick on a burner on medium for a few minutes, stirring around to make sure the garlic doesn’t stick and burn. Once you start to smell the garlic, turn heat onto low, chop up the broccoli leaves (stems and all) and stir around until wilted and add in the juice of half a the lemon.When the pasta is cooked, remove a few tablespoons of starchy water and strain the noodles. Add water and pasta right into the skillet with the other stuff. Toss around, taste, season with salt and pepper. Go ahead and add some chopped tomato and or parmesan cheese if you want. And serve your amazingly amazing pasta. And make sure that you are ok with really smelly garlic breath…Casue it’s going to happen. Keep it good! -C
2 servings of your favorite pasta (spaghetti, penne, vegan, gluten free…..)
8 or so fresh garlic cloves
1/4 cup olive oil
salt and pepper
lemon (optional)
parmesan cheese (optional)
Start by bringing a pot of water to a boil with a pinch of salt. Add in pasta and cook per instructions on box. While pasta is cooking, mined garlic and add to a skillet with the oil. Place on a burner on medium heat and cook and stir until the garlic becomes fragrant. Chop the broccoli leaves (stems and all) into bit sized pieces and add to the garlic oil and toss around to wilt the leaves. Squeeze in some lemon juice. Once the pasta is done cooking, remove a few tablespoons of the starchy water and strain the pasta. Add the water and the noodles to the skillet, toss to evenly coat the pasta and call it down. Serve in a bowl or on a plate, topped with freshly chopped tomatoes and parmesan cheese if you so shall please and another little squeeze of lemon juice if you like. Watch your mouth.. it will be breathing out garlic like whoa.
It’s Mother’s Day weekend which means that you and I and everyone out there should feel the slightest bit obligated to at least do a little something nice for your mom for the mere fact that you were borned. And really what better way to celebrate mom than with food… It really is the least that you can do. (I think mom’s also like flowers and cards and handmade pasta necklaces) My mom is defiantly about the food. (she has had her fair share or pasta necklaces) A many years back on Mother’s day, this sweet little girl (me) made her mother a special breakfast treat…blueberry scones. And ever since that day, for every freaking holiday, birthday, whatever day, my mother requests (demands) a batch of those scones. She is always saying that these are her favorite treat and that no one has ever made them as good as I do. (I guess that just reiterates that I am her number 1 child)
And for the last few months my mom has been up my butt, trying to get me to make her some. Not going to lie, I have been saying I’ll get her a batch, but for some reason, I haven’t gotten around to making them. So two birds here.. Make the scones and she gets off my back for a least a little while (a month.. maybe 2) and I give her a fantastic Mothers day gift that I know she will love.
So here they are , oh mother of mine. Blueberry scones!
The stuff. Flour, baking soda, baking powder and salt. A bit of sugar, vanilla, buttermilk, and butter (use vegan butter and nut milk if you want to make them vegan) And of course we need the blueberries which can be fresh or frozen. I usually use fresh, but the store I stopped at only had really big containers of fresh that were like $1000 dollars a piece and the organic frozen happen to be on super sale. So you know, the cheap in me won that battle. So into the bowl goes all the dry stuff; flour, baking powder and soda, salt, and the sugar. Give it a good whisk.
Now for my special trick for a perfectly distributed cold butter in a pastry. Freeze your butter and grate it!
With a large wholed grater, grate the frozen butter directly into the bowl with the dry, stoping a few times to toss the butter chunks around so you don’t end up with a huge pile of grated butter. When it’s all grated, gently toss around so the butter is evenly distributed. Now dump the blueberries into the flour mixture. Toss them around to give them a coat of flour. Add in the buttermilk and vanilla and give a little mix until liquid is absorbed. We are trying to handle the dough as little as possible.Turn mixture onto counter. It’s very loose, but thats what it should look like. Very gently and with as little handling as possible, gather dough up, knead a few times till everything just comes together. Press dough into a disk that is roughly an inch thick…. and it doesn’t need to be perfect. Cut the disk into even sized pieces. Do 6 big, 8 normal, maybe even 10 smaller. Whatever size you like. (I did 8) Place the scones onto a baking sheet, using a spatula to transfer, and sprinkle the tops with a little bit of sugar. Into a preheated oven for about 20 minutes.And when the scones look all nice and browned and a tester comes out clean. remove and either serve right away warm, preferably with huge cup of coffee or tea, or stick on a rack to cool before storing in air tight container.
Perfect to serve as a breakfast pastry, at brunch, or even as a dessert. A nice little treat for a special lady. (dudes can eat them too)
Happy Mothers Day Mom! Thanks for having me!
And Happy Weekend!!!
-C
Blueberry Scones
2 cups all purpose flour
1/3 cup sugar plus 2 tablespoons to sprinkle on top
1 teaspoon baking powder
1 teaspoon baking soda
1/2 teaspoon salt
1/2 cup (1 stick) unsalted butter frozen or really cold (use non dairy butter like Earth Balance for vegan)
1 cup blueberries (fresh or frozen)
1 teaspoon vanilla
3/4 cup buttermilk (use non dairy milk for vegan)
Preheat oven t0 400 degrees
In a large bowl, whisk together flour, baking soda, baking powder, sugar, and salt. Take the frozen butter and grate directly into flour mixture, tossing around to evenly disrupted. Add in blueberries and toss around till coated with flour, then lastly, add vanilla to buttermilk and mix into mixture until just barely coming together. Turn mixture out onto counter and with your hands, knead mixture a few times until it forms a solid dough. Shape into a disk and smoosh down until about an inch thick. Cut into 6-10 triangles and place on a non greases baking sheet and sprinkle tops with remaining sugar. Stick into oven and bake for 20 minutes or until tops start turning a golden brown and a tester in the middle of a scone comes out clean.
Remove from baking sheet and serve warm or let cool on a rack.
Mom gets first dibs, and if she is willing to share, eat one yourself with your face.
My flowers are coming up, I have packed away my winter jacket, and I haven’t worn anything but sandals for the past week. Plus yesterday I made the first batch of sun tea and saw my first hot air balloon of the season (which lead to a heated discussion with the mister about how hot air balloons take flight. We were both kinda right, but me more than him)So yeah, it’s for real… Winter is gone and spring has sprung, or more like spring sprung then bounced cause now it’s basically summer weather. Not complaining, but I hope we get a least a few more weeks of pleasant, not hot and humid weather.
Anyway. Sun tea, one of my favorite summer time drinks. Made by infusing regular old teas with water by using the almighty power of sun.
Why do we want to make iced tea this way instead of just using boiling water? Well you can still do that, but sun tea makes a more mellow, lovely, and I find, more sweeter tea. It brings out more complex flavors that you don’t get with the boiling water method. And it’s nice to know that it took zero effort on my part to make the drink (not that boiling water takes that much effort, but still)
It can be made with any variety of teas, infused with other fresh herbs, dried spices, or even chunks of fruit. You can also make the teas and add flavors after the infusing is over. Have fun and play with flavor combos.
A few of my favorite sun tea combinations
Any mellow black tea like orange pekoe or english breakfast with a few springs of mint
Chamomile and mint
Green with a fruity tea, like blueberry or pomegranate
Lemon Zinger with a few springs of Rosemary
These are just a few of the endless possible flavors. And you don’t have to get fancy with it either, you can totally use plain old lipton tea bags (I still do that too)
Now harness the sunshine and feel awesome and fancy by making some tea!
Woo Hoo Wednesday!
-C
SUN TEA
What you’ll need
Tea- Either bags or loose leaf
Water- Preferably Filtered
A glass jar with a lid
Sunshine
I use a ratio of 1 tea bag or 1 tablespoon loose leaf tea per 2 cups of water. And I usually make my teas in half gallon ball jars so I use 4-5 teabags or tablespoons of tea. (makes just enough tea for 4-6 tall glasses, depending on you glass size) If it’s a mint tea, I usually use a little less because I find that mint teas can become to strong and bitter so I use 3 teas bags or tablespoons of loose.
Directions
Place tea loose or bags into jar. Fill with water, leaving about an inch for tea expansion, place lid on tight, and stick in the sun for anywhere between 3-5 hours (depending on how strong you like your tea). When tea is infused to your liking, remove teabags or strain the loose tea and stick into the fridge to chill. Serve as is in a drinking vessel with a few ice cubes and add sweetener if that’s what you do.
Drink within a day or two, then rinse jar and make a new batch!
Happy Cinco de Mayo! And what better day to share my version of my oh so fantastic pico de gallo, or as I call it, super freshy salsa.
I love me some freshy salsa, It makes me oh so happy.
I make this stuff all the time, especially during the warmer months and tomato season. I usually make a batch right before a meal, just enough to eat right away, but sometimes I ‘ll make a big batched of it, thinking I’ll save some for the next day. It never makes it past the second day in the fridge because it’s just one of those things that when you see it, you want to eat it. Weird but true. And it’s totally ok to do so cause it’s basically eating a big bowl of healthy goodness, so eat on!
It takes no time to prepare, tastes super refreshing, goes on everything, and it’s just so freaking tasty. You can eat it with tacos and chips (the mister) or like me, I like to add it to everything; salads, popcorn, or directly in my mouth.
Make one batch, make 4, it doesn’t matter cause you will eat it all, and need to make more.
The stuff. Chopped Roma tomatoes, chopped red onion, a diced jalapeño, lemon, a bunch of cilantro, and salt.
Stick all the chopped stuff into a jar and add in the juice of the lemon. Roughly chop the cilantro and add that on in with a sprinkle of salt.
Mix it up….And thats it. Now eat… with something or without.
A spoon out of the jar is one of my favorite ways to go at it.
Happy Cinco de Mayo, Happy Tuesday!
-C
Pico de Gallo… Freshy Salsa
4-5 Roma Tomatoes
1 small red onion
1-2 jalapeños (Depending on heat preference)
1 lemon or lime
salt
1 bunch of cilantro (don’t use it if you don’t like it)
Chop tomatoes and onion and toss into a bowl or jar. Cut seeds from jalapeño(s) and dice up into little bitty pieces and add that to the tomato and onion. Roughly chop the cilantro and toss that in as well with the juice of the lemon or lime. Sprinkle with salt. Stir, let sit for a minutes, taste and then add more salt if needed.
Eat right away or make ahead and store in the fridge until ready to use.
Goes great with corn chips, tacos, toss onto salads or eat as is standing in front of the fridge. If someone is judging you, they are stupid.
Peas scream spring to me. The bright green color with that nice bright fresh taste….. kind of like a fresh spring day. Ah spring, so lovely, so nice, so hasn’t made its way here yet. So I guess I am left to eat my spring. And what better way to highlight those lovely spring tastes? A fantastic pesto my friends, and it can be made lickidy split.
Pesto is one of those things that I am constantly making, and not just the kind most people think of with basil and nuts, I pesto everything..peppers, greens, carrots, squash. And yea, I used this post to make a pesto pasta dish, but pesto has so many other fantastic uses. Like as a sandwich or wrap spread or a dip for veggies and crackers. I have used it as a soup base, a pizza sauce, on roasted potatoes and marinated tofu with pestos. It can also be thinned down and used as a salad dressing. See, so many uses.
And this pea pesto is no exception. It has such a great light, almost fruity, super bright taste. I mean, it’s peas so it taste just like peas but somehow even better. It really works in my mouth. I could eat a bowl of this stuff and be happy.
Whatever you plan on using it for, make the pesto. You will be thanking me later.
Pesto Stuff. We got the peas, garlic, lemon, oil, cheese if you please, and salt. Take a handful of peas and set aside for later. Juice the lemon and take that and the rest of the stuff and stick in a food processor and puree until smooth.
Oh my, so green, so good. I first made it without cheese and scooped a little out for me. It was perfect. Like the most brilliant bright pea flavor ever. It made me happy. After I added in the cheese, the mister said it tasted even better…. so cheese or not, it’s going to be good!The pesto is made, and it only took about 2 seconds, now boil up the pasta. If you were a thinker, you could start the pasta and make the pesto while its boiling. (I wasn’t being a thinker) I used bow ties cause they are super cute, but use whatever pasta you’re feeling. Shells or the ones that look like little brains would be good options.
Once the pasta is cooked, strain, reserving about 1/4 cup of the water. Add that bit of water back to the pot, add in the pesto, give a stir and dump pasta back into the pot. Toss in a handful of peas, maybe sprinkle some cheese and give it a good crack of some pepper.
Into a bowl and served with a fork to eat it with. A super green fresh springy meal of happiness. And all under 15 minutes in the kitchen.
Oh you want to thank me for this…
Hey, not a problem….not a problem at all.
-C
Spring Pea Pesto and Bow Ties
Makes enough pesto to coat a pound of cooked pasta and have some left over for sandwiches or to spread on crackers.
1 lb. fresh or frozen peas (thawed if frozen)
1 lemon
4-5 cloves garlic
2 ish tablespoons of olive oil
1/4 cup parmesan, really or vegan (optional)
salt
1 lb (an average box) of bow tie pasta (use any whole wheat, vegan, gluten free variety)
Place peas, (remove a handful and set aside to toss into the pasta) garlic, the juice of the lemon, olive oil and the parmesan (if you are using) into a food processor. Blend until smooth. Taste and salt as needed.
Pasta… Boil per instructions on box. Strain pastas but save about a 1/4 cup of starchy water. Toss pasta, starchy water and pesto together, adding in the handful or more of the whole peas. Sprinkle with more parmesan and or cracked pepper ,if wanted, and serve in big bowls.
Use a fork. Eat, smile and be happy.
What is better for a bake sale then Oreo cookies? Oreo cookies made from scratch!.
So when my sister called and asked me to make something for my nephews bake sale to raise money for his basketball team, I couldn’t say no. (or I didn’t want to say no cause any good excuse to bake right!) Plus I had just found this awesome recipe on one of my favorite blogs, my name is yeh, for home made Oreos that I have been super excited to try, so it kind of worked out. But before I committed to the Oreo, I wanted to just double check with my nephew and see what he might want me to make because it was his bake sale.
This is the conversation we had. And yes, it was through text.
Me- “Hey bud, what do you want me to make for your bake sale? Cupcakes, cookies, donuts, or brownies”
Jack- ” Yea!”
Me- “Yea what?”
Jack- “Make that.”
Me- “Make what?….Hello!! What do you want me to make? Should I make Oreos?”
Jack- I WANT OREOS!”
Ok.. So it took a little while, but we got there. And after the the basketball game and the super successful bake sale..
ME-“Did you see the Oreos?”
Jack- “What do you mean?”
Me- “The Oreos I made for the bake sale…the ones you wanted me to make”
Jack- “There was a bake sale? I want Oreos”
Yup, that’s the attention span of my 13 year old nephew. Little shit head. But for real, I had so much fun making these cookies and I am definitely going to be making them again. Plus they were a super hit at the sale.
I am the best aunt! (and sister!)
Cookie Time! Whats going on here is brown sugar and butter have be beaten together until nice and fluffy Then a good big splash of vanilla and another 2 big splashes of coffee are added to that.(I sacrificed my last few sips of my coffee for these cookies) The dry stuff, flour, salt and cocoa powder, are whisked together, waiting to be added to the wet. Mix the dry ingredients into the wet and mix. I ended up just using my hand and kind of squish mixing everything together until in tuned into a nice lovely uniformed dough. Form the dough into 2 balls and give each a few kneads to get any air bubbles out. Place dough back into bowl and stick in the fridge to sit for 10-15 minutes( it makes the dough a little easier to work with)
Once the dough has had a little time to rest and cool, remove from fridge, one ball at a time. Place on a lightly cocoa or powdered sugar dusted surface and roll out the dough. Grab any size circle (or other shape) cookie cutter and get to shaping the cookies. Notice the tin can in the bowl? I could’t find my biscuit cutters anywhere but the can was the perfect size, and it worked really well. Keep a little bowl of either powered sugar of cocoa to dip the cutter in in between making the cookies. It really helps the dough from sticking and breaking.
When you have cut out your cookies, use a spatial and place them on a baking sheet. You can try to transfer with you hands, but you end up messing up the shape and most of them will break anyway.
Stick the cookies in the oven for about 15 minutes a batch and continute to roll and cut out the cookies until you have no dough left.
While the cookies are getting their cool on, make the cream filling. All you need is a stick of butter, about 4 cups of powdered sugar, some vanilla and a few splashes of heavy cream. Beat that all up until nice and creamy thick and spoon it into a pastry bag (I used a big old ziplock bag) to be piped on the cookies. Filling the cookies is for sure the best part. Separate the cookies into pairs and pipe a big blob of filling onto one of the two cookies. Take the names cookie and place on top, giving it a little smooth to the disperse the cream. Keep doing that until the cookies are all filled.
Stacks of cookies… Sold to the highest bidder! I was told that they sold out within the first half hour at $1.50 a pop….Should have charged $5…. for a good cause right?
And yes, even though he was being a space head and didn’t even care that I just made him like 50 bucks for his team, I still saved the kid one.He just had to give me either a hug or 5 bucks for it.
I got a hug. (I really wanted the 5 dollars)
-C
From Scratch Oreo Cookies
Adapted by Molly Yeh from My Name is Yeh!
The cookie (makes about 18 3 inch Oreos)
2 cups all purpose flour
1 cup cocoa powder
3/4 cup brown sugar
1 cup or 2 sticks soften butter (use earth balance for vegan)
1 teaspoon salt
1 teaspoon vanilla extract
2 tablespoons brewed coffee
The filling
1 stick soft butter (us earth balance for vegan)
2 tablespoons heavy or whipping cream (use a nut or soy milk for vegan)
4 cups powdered sugar
2 teaspoons vanilla extract
Cookies- In a large bowl cream together sugar and butter until light and fluffy. Add in vanilla and coffee and mix together. In another bowl, whisk together the flour, salt and cocoa powder. Add dry to wet and mix together unit a uniform dough forms. Dump out onto a lightly cocoa or powdered sugared surface and knead dough a few times. Split ball into two balls, place in bowl, and stick in the fridge for 15 or so minutes.
Preheat oven t0 325 degrees
When dough is chilled, remove one ball at a time, and roll dough out on a cocoa or powdered sugar dusted counter until its about 1/4 inch thick. With a round (any shape would work) cookie cutter, cut out as many cookies as you can. In between sits, dip cutter in a sugar and cocoa to keep the cookie from sticking. Transfer cut out cookies onto a baking sheet with a spatula. Take scraps, roll into a ball, and roll out again. Keep doing that until you can’t cut out any more. (You can either bake a weird shape cookie or just eat the dough)
Bake cookies for about 15 minutes or until the cookie has risen a bit and the tops have lost their glossiness and look cooked. Remove from oven and let cookies dry on a wire rack.
Make the filling
Filling- Beat together butter, sugar, vanilla, and cream until completely mixed and is at your optimal consistency. Add a drizzle more cream if you want to thin out or add more sugar for a thicker cream.
Stick the filling into a piping bag or ziplock bag an snip the end. With cookies in pairs, pipe a big dollop of filling onto one of the two cookies. Place the naked cookie onto the filled cookie and give a smooth to distribute the filling.
lick your fingers and eat a cookie.
If selling at a bake sale, charge $3 a cookie…. If it’s for a good cause.
I don’t know if I have bitched enough about it, but I only have one window in my living space. And as much as I love love love our little tiny loft, I am a person who needs the sun. So when I am home I spend a lot of time siting in front of the window. Over the past few weeks I have been doing a lot of watercolor painting in front of that window and somehow between drawings of carrots and vintage fans, I ended up making these marbled window stained glass hoops. And I am glade I did because these little watercolor gems really do make a big impact on my one source of sunlight. Even when the day is kind of gray and gloomy, having these in the window make the light seem brighter and happy.
We can all use a bright happy window.
So this project is really easy and fast. I recommend that if you are going to go to the trouble (it’s really no trouble) of making one, you might as well make 2 or 5. I actually made a bunch (think Mothers day or Easter presents) and ended up only keeping a s couple. I am going to have to make a few more soon.
You will need-
Watercolors
water
paintbrush
Sketch paper*
A pan or tray with a bit of water
Embroidery Circles * (As many as you want to make)
*Notes
-I tried to use a few different types of paper and found that the sketch works the best. Watercolor paper was a bit to thick and printer paper just kept ripping.
-You can buy embroidery circles at any craft store and they usually have a good variety of sizes. Use the sizes that you like.
Take a piece(s) of paper a little bit bigger then the hoop you are working with and stick it into a pan or tray of water. Let it sit there for a few minutes until the paper is completely soaked.Take the wet paper and, oh so gently, crumple into a ball. This part can be a little tricky. You want to make as many creases as possible without ripping that paper. (I ripped a few pieces) I found that if I folded that paper a few time, then crumpled that it was less likely to rip.
Uncrumple the paper and lay it gently onto the inner part of the hoop. Now the fun part. Go to town with the watercolors. I used 2 colors per piece, but you could do 1 or 3, or more. When applying the color, use big gentle strokes and let the colors kind of meld together. Watch as all the crumple veins soak up the paint. Try using different dilutions of color. I applied some color on thinly and some on the thicker side. But really, you can’t go wrong, just keep applying paint until you are happy. I stopped a few times and held it up to the window just to see what it looked like. When it looked good, I was done.
When you are happy with the colors, let the paper dry for a while on the hoop until it is not longer super wet. I would say about an hour or so, but if you stick it near the heater, it might dry faster. (Just don’t stick it in the oven while you are making bread like I did with one.. It just ended up setting on fire. Oops)
Once its pretty much dry, take the outer ring of the hoop and gently place around the inner hoop and tighten. Being super careful, trim the extra paper from the back of the hoop.
Place your pieces in a window and watch them glow. Yow now have a happy window.
-C
Happy St Patricks Day!!!! As a kid, St Patricks day always meant green milk, green eggs, and those nasty gold foil covered chocolate coins. (you know, from the pot of gold) Not to mention all the leprechaun hunting and pinching. In my family, if you were unlucky enough to forget to wear green, you ended up as a walking target. It all started out nice an innocent, a pinch here or there, but by the end of the day, someone would end up pinching a little to hard or maybe just one too many times and the game would go from pinches to punches.
Ahh, memories.
Now as an adult (kinda adult) St Patricks is celebrated a little differently. The little ones in the family still get their green milk (which they are told is leprechaun pee) and those nasty gold coins, but I think the pinching has stopped.( a great tradition lost) I myself don’t have any littles at home so no little leprechaun games or gross dyed food for me. Nope, in my house we celebrate with a few beers and a more traditional irish dish, Colcannon. Mashed up potatoes with cabbage and kale… I mean, can it get much better? It can when you use red potatoes and red cabbage. Not only is it so tasty tasty, but it is so pretty pretty. No need for green milk or nasty candy.
But I still make sure to wear green and you might find me doling out a pinch or two.
The stuff…. Super pretty red potatoes, red cabbage, shallots, kale, salt and pepper, and olive oil.
Note. If you do not have or want to use red potatoes, russet or white will work, it just won’t be as pretty.
Dice up the pretty potatoes and stick them into a pot and fill up with water and add in a good tablespoon of salt. Stick on high heat and bring to a boil, then turn the heat down to medium and cook those taters until super fork tender. (bring them to the edge of falling apart)
While the potatoes are boiling, chop up the cabbage, shallots, and the kale and stick into a big skillet with a good drizzle of olive oil. Sauté on medium heat until soft and tender.
Once the potatoes are super tender, drain the water and dump them into the pan with the sautéed veggies. With a potato masher or a fork, mash up the potatoes and mix in the veggies, adding a drizzle or more of olive oil as you go. (Start with a drizzle and work your way up until it tastes good to you) Salt and pepper to taste.
The most pretty pan of smashed up potatoes that I have ever seen. Eat as a side dish or even a light main dish. Fork is a good utensil to use, but I found that my fingers worked just as well.
Have a great happy day full of green, potatoes, and pinches. Maybe even a leprechaun or two!
-C
Red Potato Colcannon
5-10 Red potatoes Red Potatoes depending on the size (about 3 1/2 – 4 chops chopped)
1 Cup Chopped Red or Green Cabbage
1 Cup Chopped Kale
1-2 Shallots
Olive Oil
Salt and Pepper
Rinse and dice potatoes and place into big pot. Cover potatoes with water and add about a tablespoon of salt. Place on high high heat and bring to a boil. Turn heat to medium low and let potatoes cook until super fork tender. While potatoes are boiling, chop up cabbage, shallots and kale and sauté in a large cast iron skillet (or any skillet) with a good drizzle of olive oil. Once the potatoes are done, drain water and add potatoes to the skillet with the sautéed veggies. With a potato masher or fork, mash the potatoes and mix with the veggies, adding a drizzle or two (depending on your taste) of olive oil as you go. Salt and pepper to taste.
Serve from skillet or dump into a fancy dish with a big spoon.
Eat as a main dish or as a side….Good hot, warm and cold.
Whatever you do, do not turn on your oven this weekend! But I guess if you have air conditioning and don’t mind cranking it… well then go for it. And can I come stay with you?
But for the rest of us doing this weekend without the old A.C., we need to feed ourselves, feed ourselves without any fire because 100 degrees is no joke and any added heat from anything will likey tip us over the edge. I am already so close to that edge and it’s a long way down..(Just ask the mr, he could tell you a thing or two about heat and me.. not good)
Enter hummus and veggies.
You can’t really go wrong with a good hummus and veggies meal situation and sometimes it’s all that can be right. I for one could eat bowls and bowls of hummus, and sometime do, so this is not a stretch for me. Especially this hummus. I knew I would like it, but man, was (was because I ate it all) it freaking delicious. The sunflower seeds really did it for me, gave it a little something extra, like a freshness that is still creamy and earthy, but is not quite, I don’t know, dark as tahini? %u00a0It’s kind of hard to explain without having you taste it (so make it and you tell me)%u00a0%u00a0Don’t get me wrong, I love tahini, but sometimes you just %u00a0got to mix it up. (Plus sunflowers seeds are dirt cheap. Tahini is not nearly as cheap so bonus there too.)%u00a0%u00a0Maybe its because the sunflower seeds bring the sunshine to your mouth. A sun filled mouth of pureed seeds and beans.%u00a0 Yup, that’s what it is.
So here ya go, a no heat meal (or snack or spread).%u00a0We got this.
The stuff. %u00a0Cooked chickpeas (no need to cook your own, canned is a okay), sunflower seeds, a lemon, a few cloves of garlic, salt, pepper, a little water, and some herby green like parsley or cilantro.%u00a0
Hummus is pretty basic, it’s just stuff blended up, but because we are starting with raw sunflower seeds, we need to really bend the shit out of them until they turn into a paste, so do that, which is going to a take about 8-10 minutes. Then once its pasty, add in the garlic and the juice of the lemon and blend until its all smooth.
Could almost stop here at this point. Sunflower seed goodness all emulsified. Taste it, it is so good.
Now add in the chickpeas and a pinch of salt and pepper.
Blended until smooth with a little drizzle of water to give just the right consistency. %u00a0And that’s it.
Pile a bowl full enough that you can call it dinner them top with a good amount of fresh herbs. Serve with chopped up fresh veggies or whatever you like and we are good to go.
Creamy, dreamy sunflower hummus, no heat required!%u00a0
Stay not melted!
-C
Makes about 2 3/4 cups
2 1/2 cups cooked chickpeas (or one can) drained
3/4 cup raw (can use toasted)unshelled sunflower seeds
l juicy lemon
2-3 cloves garlic
1-2 tablespoons ice water
salt and pepper
handful fresh herbs like parsley,cilantro and or dill (optional)%u00a0
Place the sunflower seeds in food processor and turn on until seeds turn into a paste, which will take about 8-10 minutes. After every few minutes, scrap the sides down to make sure it all gets blended. Once the seeds reach paste consistency,%u00a0add in the juice of the lemon and the garlic. Blend until smooth. Last off, add in the chickpeas and a pinch or salt and pepper and blend until smooth, adding %u00a0in a tablespoon or two of water to get the hummus to the consistency of your liking. Once blended taste and check for seasoning (add more salt and or pepper if needed)%u00a0
When the hummus is done, scrape into bowl(s), and top with lots of fresh herbs and a sprinkle more of sunflower seeds. Now eat it. Eat with veggies, with bread, with pretzels, or with a spoon (or finger). Do what you need to do.
%u00a0Any left over, if there is any, can be store in the fridge for 2-3 days.%u00a0
I am on a major swiss chard kick. Like I am eating it all day, every day. And I don%u2019t know if it the heat or what, but the other night I was laying in bed, super hot mind%u00a0you, and couldn’t keep my mind from racing. All I could think about was swiss chard and how much I love it and all the ways I want to eat it. Yeah, I know, but that is my brain so what can I do? Anyway, I finally fell asleep, and when I did it was dreams of chard and rainbows and all sorts of colorful things that I cannot remember anymore. I do know I woke up hungry. And with a plan for lunch.
I will just tell you now, this chard situation is sooooo good! And besides me being on a major chard kick, I am also on a ginger and cumin kick and an onion kick as well so it just made sense to make something with them all together. Tender and gingery cumin-y chard with crispy pickled onions. Seriously, is your mouth watering yet? I have made it twice in the past few day and I plan on making it a whole bunch more. So freaking good!
If you like chard, or don%u2019t know if you do (you probably do), this is a great way to enjoy it. You will not be disappointed.
Now to the chard.
The stuff. A bunch of chard in a few different colors, a medium onion, a chunk of fresh ginger, cumin seeds, white wine vinegar, and salt and pepper.
First and the sooner the better, cut onion up into very thin pieces and place into a bowl with vinegar, a pinch of salt, and a splash of water. Toss onions around and let sit, for at least 20 minutes, or if you think of it and can make it happen, do it a few hours in advance. . The longer the onions sit in the vinegar the better.
Ginger. If you haven%u2019t grated it yet, do that.
Remove the stems from the greens of the chard then chop the stems into small pieces.
Now here we go. First, before anything, place the cumin seeds into the dry skillet and place on medium heat to toast for a couple minutes, Then add in the grated ginger, the chard stems, a pinch of salt, and about 1/2 a cup of water. Stir around. Keep on medium heat and let cook until the chard stems start to become tender. If all the water evaporates out before they are done cooking, add a little more.
Now chop up the chard greens.
Greens go into the skillet with the stems and a little more water. Cook the greens down until all wilted and lovey and delicious.
Dump the cooked chard into a bowl or on a place and mix in all the pickled onions. Drizzle with a little of the left over vinegar from the onions.
All there is left to do now is add a lot of cracked pepper and grab a fork.
My dreams come true%u2026..Ha.
-C
Serves 1 as a meal or 3-4 as a side
I bunch (around a pound) Swiss chard Any color or a mixture of colors))
1 mediam onion (red or white)
about an inch or so fresh ginger (1 tablespoon grated)
1 tablespoon cumin seeds
1/3 cup white or red wine vinegar
salt and pepper
around 1 cup water
Grab the onion and slice it very thinly into rings or half rings. Place in a bowl and add the vinegar plus a pinch of salt and about 1/4 cup of water. Toss around and set aside for at least 20 minutes. If you think of it, do this a few hours before saut%u00e9ing the chard. The longer the onions sit in the vinegar, the better.
When you are ready to cook it, grab the chard and remove the stems from the greens. Cut the stems into small little pieces. Grab a big skillet and place on medium heat. Add in the cumin seeds and let toast for a few minutes and while that is happening, grate the ginger. Once cumin is toasted, add in the chard stems, the ginger, and about 1/2 cup of water. Keep on medium heat and cook until the stems are slightly tender. Should take 8 or so minutes. If the water completely evaporates before cooked, add in a little more.
And the greens. roll them up together and slice them into thin pieces. Add all the greens to the skillet with tender stems. Add in a splash more water if needed and a pinch of salt. Mix around and cook for another 4-5 minutes or until the greens are completely wilted. Remove from heat and dump the chard into a bowl or on a plate. Take the onions, remove from the liquid and mix together with the chard. Drizzle a tiny bit of the left over vinegar from he onions on top. Cover with cracked pepper.
Eat. Hot, room temperature, or cold. It fantastic any way.
The radishes in my garden have gone from these tiny little wisps of green to a freaking jungle of greens with bright red bulbs bursting through the dirt. Ah, radishes., those little red balls of zesty crisp goodness that grow like crazy in the garden. They are no fuss, no joke, toss them seeds into the grown and bam, you get you some radishes. No matter how crappy of a gardener you might think you are, I bet you could grow you some radishes no problem.%u00a0
And with those radishes comes a butt load of greens, the greens that everyone seems to just toss away which is crazy because the greens are so good. They are tender and zippy and make for great eating. I usually just toss them into salads or whatever but I guess I went a little overboard with the planting of the radishes and I have so so so many radishes all ready to be pulled now with so so so many greens that need to be eaten. So pesto. Fresh early summer, tangy and bright green goodness. It is super tasty and great. Definitely anew favorite and a great way to use up your radish greens.%u00a0
The stuff. Lemon, olive oil, garlic, walnuts, salt and pepper and a bunch of radish greens.
Pretty freaking simple here. Stick garlic, and walnuts into the bottom of the blender and give that a pulse or two.%u00a0 (I would have used my food processor but the new blade has yet to arrive). Add in all the greens, the juice of lemons, sprinkle with salt and pepper. Turn on low and stream in a oil. You might need to push down greens to get them into the blenders vortex.
And once it’s all blended you have pesto.
Pour it into a jar and it’s ready to go.
Eat it any way you eat your pesto.
Enjoy
-C
Makes about 2 cups
4ish cups radish greens (I used the greens from about 10 radishes)
1-2 lemons
3/4 cup toasted walnuts
4 cloves garlic
about 1/2 cup olive oil
salt and pepper
Stick walnuts, garlic and the juice of the lemons into a food processor or blender. Give it a pulse or two. Add in a pinch of salt ans pepper then the greens. Turn on blender and stream in olive oil. You might need to stop a few times to push the greens down. Blend until combines. Taste and season with more salt and pepper to taste.
Pour finishes pesto into a jar. Eat with pasta, use as dip, smear on toast, dollop in soup. Eat it however you like.
Lasts for a week or two in fridge and freezes really well .
As I was sitting at the table making this simple little ode to spring salad, it started to snow outside. “Look away”, I told myself. “Pretend you didn’t see it.” Well, I saw it then, saw it before bed, and when I woke up this morning , there was (and still is)%u00a0 a few inches of fresh white covering up my hopes of a warm spring day. I have to admit that it is really very pretty, but what the hell.
This salad is all spring. Fresh spinach from the farm, asparagus in abundance every store I go to. Simple, crisp, refreshing. A nice change from a winter heavy with roasted roots and thick stews. I don’t know about you, but this is the time of year that all I want to eat are fist fulls of fresh green stuff. (I could insert a picture here of me sitting on the couch munching away from a bag of baby kale, but I won’t. You don’t need to see that)
Now if it would just stop snowing and be spring for real, that would be great.
The stuff. Fresh spinach. tender asparagus, a lemon, and salt and pepper..
Snap off the woody ends of the asparagus then dice up the rest.
Toss the chopped up asparagus in a bowl with spinach. Squeeze the juice of the lemon all up in that and sprinkle with salt and pepper. That is it.
Fresh, green, springtime goodness in a bowl.
-C
2 large handfuls of fresh spinach
10 ish spears of fresh asparagus
1 lemon
salt and pepper
Wash and dry spinach ans place in bowl. Snap off woody end of asparagus (I save this bits for soup) and chop up the rest into mouth sized pieces. Toss the chopped asparagus into bowl with spinach. Squeeze on the juice of the lemon and sprinkle with salt and pepper to taste.
Eat.
Farm share started this week (Hooray!!!) and always the first few pick ups of the season are loaded with a good amount of the freshest, most fantastic greens that there ever was. And I couldn’t be happier! (well maybe if I could just take home creates of the stuff)
While I was down at the farm filling and weighing my bags, I overhead a couple talking about how last year they never ate their greens fast enough and how they always went bad by the next week. What! Fresh greens bad in one week.. no way. A bag of greens can last weeks, just as long as you take the time to store them properly. It made me sad to think about the wasted greens and so now I am determined d to make sure that everyone knows the proper way to clean and store greens so no greens go to waste.
What you need
Your dirty greens
resealable gallon sized bags or large plastic containers (Bags are great for space saving if you have a tiny fridge like me and can be used over ans over again)
a big bowl or wash bin
A piece of clean muslin or other cotton fabric about the size of a paper towel per bag. (can use paper towels, but why not invest in reusable)
salad spinner
clean cold water
I know that some people might not have a salad spinner, but here is the thing. You need one!I am sure that there are people out there that have hacked a way to dry greens without one (like my aunt who is a farmer. She uses an old and very clean washing machine. so smart) but really, you should have one.
To clean. First off, the sooner you get them home and cleaned the better. Having damp greens in a bag is not ideal and will lead to yuk. If I bring greens home and don’t have time to clean and spin them right away, I at least stick a piece of muslin into the bag until I can get to them.
My method for cleaning. Fill a big ass bowl up with cold water and, in small batches,%u00a0 gently dunk and agitate the greens.%u00a0 There are two reason I do it like this. One is that I find running greens under running water doesn’t really get them as clean and sometime can even bruise fragile greens and two, I hate water waste and running water over greens wastes a lot(once I am done with the dirty water, I water my plants with it) If you find the water has gotten really dirty fast (which it will do sometimes) dump water and refresh with clean.
Once the greens have had a good bath, to the spinner they go.%u00a0 When adding greens, make sure to not over stuff the spinner and also spin once, dump water out from the bottom, then spin again. Maybe even three times to get the greens dry.
Line a bag (or container) with muslin cloth and fill it with your clean dried greens. The cloth is important for storing, it keeps the moister away from the greens so they don’t get slimmy and gross. And don’t over pack your greens either. If you have a lot, just grab another bag.
so fresh and so clean clean
And that’s it. Close up those bags and now you can store you greens in the fridge and they will last for a week or more, although honestly, with greens looking this good, how could you resist not eating them all right away (the nearly 2 lbs I brought home lasted about 2 days)
Yesterday we had a few pieces of really log ass metal roofing delivered to the new house so we can finish the little side parts of the roof off. The funny thing is we ended up with way more wood then metal. The roofing is super light and flexible so it has to be strapped to a super long wooden structure. And it was perfect. The mr and I have pretty much finished the fence except for the gate from the driveway which sucks because we still can’t bring Washer over to play without it ans we pretty much fenced the yard in for him. But the long ass wooded palette things.. IT was perfect. Well a perfect for now solution. A Already constructed tall and long (too long, we had to cut it down) wooded wall that is now our temporary gate.What a score! And now the pup can spend all day long laying around outside and not getting into any neighborhood fights with the other dogs. And look at us making use of all the scraps. We are so awesome.
Ok, so besides our awesomeness and the new temp gate, let talk about this greenest freaking soup that there ever was. It is probably the best green soup that I have ever tasted. (I know,%u00a0 I have habit of proclaiming all of my soups as the best soup ever, mostly because they are.) It’s one of those soups that is super fast and so simple to make and is perfect for all the spring and summer time eating that will be going on. Eaten hot or cold and out of a bowl or a drank out of a glass. A soup for any time, any place. The mr even liked it and he says he doesn’t like peas. (but he so does). Who doesn’t like the best soup ever?
Now here is how to make it.
The stuff. A big bowl of fresh spinach and a bowl of peas (fresh or frozen.. mine were frozen) Also need an onion, a carrot, a few cloves or garlic, water, olive oil, and salt and pepper.
First thing first. Get the onion and carrot all nice and chopped up and tossed into a big pot with a drizzle of olive oil, a little splash of water,and salt and pepper. Stick that pot on the stove on medium high heat and start to cook cook.
Soften and yummy carrots and onion. I am not exactly sure if my carrots turned the onion orange or if my pot because it is so stained with turmeric that it turns everything yellow. Keep the pot on low heat and mince and stir in the garlic.
And for magic. The pot is sill on low and you are going to pile all the fresh spinach right on in to the pot. Add a few splashes of water and a lid and let it cook for a few minutes. And when you go back and remove the lid..Ca bang ! All the spinach is gone (not really, it just wilted).
It’s time for the peas and water to be added.The blender comes out and the soup gets blended until super smooth.
So green, so good.. This soup is all ready to go. But here is the thing, you can eat it at any temperature and it will be amazing so if you want to heat it up a little more, go for it. Cold soup shooters, just stick it in the fridge for a while and wait until its chilled. Or both. I ate a bowl warm then had cold soup for dessert.
And to finish, you must serve with fresh lemon and if you have it, a pretty little mint plant. I love the flavor of a little fresh mint added, but not all do. So mint if you like( it really is so good) but lemon in a must!
Enjoy all the green things!
-C
serves 3-4
2 cup peas (fresh or frozen.. I used frozen)
3 packed cups fresh spinach
a few sprigs of fresh mint (optional)
3 cups water
1 small onion
a carrot
3 cloves garlic
1 lemon
olive oil
salt and pepper
Small chop onion and carrot and toss into a big heavy bottom pot with a drizzle of olive oil and salt and pepper. Stick on stove on medium heat and cook until it becomes soft and fragrant. Now mince garlic and add that it too. Stir and cook for another minute or two then add in all the spinach and a splash of water. Place o lid on pot and let until cook until spinach is all wilted. (give it a stir to get it all cooked down). Once wilted, add the peas and the water. Stir all together and let simmer for a few minutes then remove from heat. Now blend the crap out of it until silky smooth.(use your blending device of choice).
And it’s done. You can either serve right away as a hot soup or sick it in the fridge and serve cold! Just remember that you need to serve it with cracked pepper, a squeeze of fresh lemon and some chopped up fresh mint(mint it optional but so good)
Eat with a spoon or forget the spoon and slurp out a a cup like the cool kids.
%u00a0%u00a0You ever make dish, completely on the fly, just to use something up (I have a lot of ripe tomatoes) with no real expectation, just because%u2026 Then have it be one of the best freaking things that you have ever made?%u00a0This salad is one of those things.. maybe not the best thing I have ever made, but definitely the best salad I have ever made%u2026. this week.
A salad compiled of all things amazing, taking just a few minutes to make and is the perfect balance of uber fresh with baby spinach, raw kale, and crunchy quick pickled onions. Then adding a touch of warmth with the sweet and juicy seared tomatoes and big chunks of creamy avocado.
I mean, for reals. %u2026…Best Salad Ever !!!! (this week)
Now let’s do this.
%u00a0The Stuff. A big bowl of baby spinach and chopped up kale, a few sliced up roma tomatoes, some super thinly sliced red onion, half an avocado, red wine vinegar and salt and pepper.%u00a0%u00a0Before you do anything, place the sliced onions into bowl, sprinkle with a pinch of salt and add a few glugs of the red wine vinegar. You want the onions to sit in the vinegar for at least 5 minutes on the counter cause the longer they sit the more crispy pickly they get. (after eating onions like this, you will never want to eat them any other way)%u00a0Lightly oil a skillet and preheat to a medium heat. Once the skillet is hot, sprinkle the tomato slices with salt and pepper and %u00a0place tomatoes right on in, snugly, but not overlapping. Let cook for about 3-4 minutes, or until the bottoms start to brown. Flip and cook other side for another few minutes.Once the tomatoes are seared on both sides, remove them gently from skillet and toss them on top of the bowl of greens.
Take the pickled onions and toss those right on top, with any of the residual vinegar, add dice and scoop the half of avocado and toss that on in as well.And now eat the best salad ever (this week).
Make the day good!
-C
Skillet Seared Tomato and Quick Pickled Onion Salad
Serves 2 as a side, 1 for a hungry eater
2 large or 3 smaller roma tomatoes
1/2 of a red onion
2-3 tablespoons red wine vinegar
1 1/2 cups baby spinach
1 1/2 cups chopped kale
salt pepper
1/2 a ripe avocado%u00a0
olive oil (to grease pan)
Thinly slice red onion and place in a bowl. %u00a0Add vinegar into a and sprinkle with salt. Let sit on counter for at least 5 minutes, if not longer,
Slice tomatoes into 1/2 inch thick rounds and sprinkle with a pitch or salt and pepper. %u00a0Lightly oil a skillet and preheat it on medium heat. Once the skillet is preheated, stick the tomatoes on it (watch out for splattering tomato juice) Cook first side for about 3 minutes or until the bottom has browned, then flip and do the same for other side.%u00a0
One tomatoes are seared, place directly onto the greens. Now dump the pickled onions and residual vinegar on top. And %u00a0dice up %u00a0avocado and add that on top too.%u00a0
Now eat your salad, fork or fingers%u2026 %u00a0
And I know, ba-daaaamn. So good.
Hey there party people%u2026It’s Sunday! Hopefully you all have some good plans for the day. Me, well I %u00a0have a peanut butter and jelly lunch date at the park with some littles, a butt load of plants to stick into the ground, and hopefully%u00a0drinking much to much coffee while basking in the glow of the very lovely world. (which has been on point all week with%u00a0warm weather, sunny days, splashed with the perfect %u00a0moments of rain) Everything is so green and lush and freshy, it’s hard to not to be full of happy and the feeling that anything is possible. It’s fantastical!%u00a0Oh, and I got to give a shout out to my big sister for graduating from nursing school this week%u2026Whoa HOO!!!!! (Does she realize she is from a family of hypochondriacs? %u00a0Texting nurse Shannon%u2026…she is screwed.)
Summer here we come…It’s GO TIME!
Internet links from the week%u2026…
-Going to be making myself one of these this weekRail Road Totes.
-I could see doing somethinglike thiswith my family%u2026 If I didn’t kill them first.
-Interesting%u2026.What If Americans Ate Like South Africans And Vice Versa?%u00a0
-I have felt like popping a few balls in my time.The Good Listener: Can I Deflate The Beach Balls At Concerts?
-My next project/living arrangement? (Hey, if we can live in a tiny room now, we can live in a tiny room on wheels)%u2026 The Vintage Nugget
-I can’ t believe this show was canceled, but thank the tv gods for Hulu….Hulu Saves The Mindy Project
-I am into all of these interiors atFrenchyfancy%u2026..I wish I knew how to read french and wish I was that fancy.
A few pictures from the week%u2026.
The prettiest tree. LILACS!!!!!My yard these days..A wheel barrel full of strawberry plants.%u00a0Pretty in purple
The mister and I%u00a0%u00a0harvested a frame of honey%u2026So pretty
Have a great today!
-C
A couple of days ago, during a grocery store porous, I stumbles upon a produce item that I have not seen sold in stores before, Broccoli leaf. And I%u00a0was kind of surprised %u00a0to see that they were selling bunches of the leaf, %u00a0organic, %u00a0at 2 bucks a bunch.%u00a0I was very excited ! But wait.. You can eat broccoli leaves? Heck yes you can! Broccoli leaves %u00a0are fantastic. They taste kind of like broccoli, have a hearty texture like a collard, and can be used raw or cooked just like any other green. Its just one more super yummy green to add to your repertoire.%u00a0 So when I bring home something that I find to be a good score, like a bunch of broccoli leaves, I feel like I have to share it with the mister. (I am so nice) And this dish was how I shared them%u2026. Tossed into a bowl of garlic raging pasta. The stuff%u2026. A bunch of broccoli leaves, lots of garlic, pasta, olive oil, salt and a lemon. Pretty simple right? Fist off, get your water boiling for the pasta. Once its ready, drop a pinch of salt into the water and stick pasta in for the amount of time recommend by pasta box people. While the pasta is boiling, mince up the garlic (I used my garlic press) into a skillet and add in the oil. %u00a0Stick on a burner on medium for a few minutes, stirring around to make sure the garlic doesn’t stick and burn.%u00a0 %u00a0 %u00a0%u00a0Once you start to smell the garlic, turn heat onto low, chop up the broccoli leaves (stems and all) %u00a0and stir around until wilted and add in the juice of half a the lemon.When the pasta is cooked, remove a few tablespoons of starchy water and %u00a0strain the noodles. Add water and pasta right into the skillet with the other stuff. %u00a0Toss around, taste, season with salt and pepper.%u00a0 Go ahead and add some chopped tomato and or parmesan cheese if you want. %u00a0And serve your amazingly amazing pasta. %u00a0And make sure that you are ok with really smelly garlic breath%u2026Casue it’s going to happen. Keep it good! -C
2 servings of your favorite pasta (spaghetti, penne, vegan, gluten free%u2026..)
8 or so fresh garlic cloves
1/4 cup olive oil
salt and%u00a0pepper
lemon (optional)
parmesan cheese (optional)
Start by bringing a pot of water to a boil with a pinch of salt. Add in pasta and cook per instructions on box. While pasta is cooking, mined garlic and add to a skillet with the oil. Place on a burner on medium heat and cook and stir until the garlic becomes fragrant. Chop the broccoli leaves (stems and all) into bit sized pieces and add to the garlic oil and toss around to wilt the leaves. Squeeze in some lemon juice. Once the pasta is done cooking, remove a few tablespoons of the starchy water and strain the pasta. Add the water and the noodles to the skillet, toss to evenly coat the pasta and call it down. Serve in a bowl or on a plate, topped with freshly chopped tomatoes and parmesan cheese if you so shall please and another little squeeze of lemon juice if you like. Watch your mouth.. it will be breathing out garlic like whoa.%u00a0
Whatever you do, do not turn on your oven this weekend! But I guess if you have air conditioning and don’t mind cranking it… well then go for it. And can I come stay with you?
But for the rest of us doing this weekend without the old A.C., we need to feed ourselves, feed ourselves without any fire because 100 degrees is no joke and any added heat from anything will likey tip us over the edge. I am already so close to that edge and it’s a long way down..(Just ask the mr, he could tell you a thing or two about heat and me.. not good)
Enter hummus and veggies.
You can’t really go wrong with a good hummus and veggies meal situation and sometimes it’s all that can be right. I for one could eat bowls and bowls of hummus, and sometime do, so this is not a stretch for me. Especially this hummus. I knew I would like it, but man, was (was because I ate it all) it freaking delicious. The sunflower seeds really did it for me, gave it a little something extra, like a freshness that is still creamy and earthy, but is not quite, I don’t know, dark as tahini? %u00a0It’s kind of hard to explain without having you taste it (so make it and you tell me)%u00a0%u00a0Don’t get me wrong, I love tahini, but sometimes you just %u00a0got to mix it up. (Plus sunflowers seeds are dirt cheap. Tahini is not nearly as cheap so bonus there too.)%u00a0%u00a0Maybe its because the sunflower seeds bring the sunshine to your mouth. A sun filled mouth of pureed seeds and beans.%u00a0 Yup, that’s what it is.
So here ya go, a no heat meal (or snack or spread).%u00a0We got this.
The stuff. %u00a0Cooked chickpeas (no need to cook your own, canned is a okay), sunflower seeds, a lemon, a few cloves of garlic, salt, pepper, a little water, and some herby green like parsley or cilantro.%u00a0
Hummus is pretty basic, it’s just stuff blended up, but because we are starting with raw sunflower seeds, we need to really bend the shit out of them until they turn into a paste, so do that, which is going to a take about 8-10 minutes. Then once its pasty, add in the garlic and the juice of the lemon and blend until its all smooth.
Could almost stop here at this point. Sunflower seed goodness all emulsified. Taste it, it is so good.
Now add in the chickpeas and a pinch of salt and pepper.
Blended until smooth with a little drizzle of water to give just the right consistency. %u00a0And that’s it.
Pile a bowl full enough that you can call it dinner them top with a good amount of fresh herbs. Serve with chopped up fresh veggies or whatever you like and we are good to go.
Creamy, dreamy sunflower hummus, no heat required!%u00a0
Stay not melted!
-C
Makes about 2 3/4 cups
2 1/2 cups cooked chickpeas (or one can) drained
3/4 cup raw (can use toasted)unshelled sunflower seeds
l juicy lemon
2-3 cloves garlic
1-2 tablespoons ice water
salt and pepper
handful fresh herbs like parsley,cilantro and or dill (optional)%u00a0
Place the sunflower seeds in food processor and turn on until seeds turn into a paste, which will take about 8-10 minutes. After every few minutes, scrap the sides down to make sure it all gets blended. Once the seeds reach paste consistency,%u00a0add in the juice of the lemon and the garlic. Blend until smooth. Last off, add in the chickpeas and a pinch or salt and pepper and blend until smooth, adding %u00a0in a tablespoon or two of water to get the hummus to the consistency of your liking. Once blended taste and check for seasoning (add more salt and or pepper if needed)%u00a0
When the hummus is done, scrape into bowl(s), and top with lots of fresh herbs and a sprinkle more of sunflower seeds. Now eat it. Eat with veggies, with bread, with pretzels, or with a spoon (or finger). Do what you need to do.
%u00a0Any left over, if there is any, can be store in the fridge for 2-3 days.%u00a0
With that being said, the nature of my soups change seasonally. My summertime soups are usually on the lighter side, made with the%u00a0fresh bounty of the season, and spiced more on the light and floral side, opposed to the really deep and warm spices%u00a0that I use all winter long,
This corn chowder is made just right. It had the perfect balance of hearty and creamy from the potatoes and use of pureed%u00a0onion cream, but%u00a0%u00a0still light and refreshing from the sweet fresh corn and the lemony fresh thyme. It is for sure%u00a0a great summertime soup (chowder) Even the%u00a0Mr.%u00a0was even really into it, and he claims he doesn’t like corn. (I say bullshit to that.. he eats corn all the time)
Now to chowder!
The Stuff. Some super fresh corn on the cob, a couple onions, a few chopped up potatoes and a chopped up carrot. Then we have a little oil, a lemon,%u00a0dried thyme and salt and pepper.%u00a0
To start, take an%u00a0onion, chop it up, and toss into%u00a0a large heavy pot with a little olive%u00a0oil and%u00a0a sprinkle of salt. Stick pot on stove on medium heat and cook until %u00a0onions are soft and traslutcent. When the onions are done, remove and%u00a0add to a blender or%u00a0bowl. (if using a hand blender)%u00a0Add in the juice of the lemon%u00a0and blend it all up until nice a smooth.%u00a0
You have now made a nice creamy cream that will help make the final product more, well more creamy without the use of cream (lets say cream on more time !)%u00a0.Set aside.
When the pot is empty again, add in the rest of the stuff, including the cobs of the corn, (they hold a butt load of flavor)%u00a0the dried thyme, and salt and pepper.%u00a0Place%u00a0on stove and add enough%u00a0water to completely%u00a0submerge the veggies. Keep pot on a medium heat, add a lid, and stir ever once in a while. Cook until the potatoes are nice and tender.%u00a0(when the potatoes%u00a0are done, so is everything else)
Now that everything is all cooked up, remove the cobs and stir in the onion puree.
Now with a hand blender, blend up until the chowder is thick and smooth, but still nice and chunky. (If you are working with a blender, just remove about half of the soup and blend up, then dump back in) The optimal chunkiness %u00a0is up to you , so %u00a0blend, check the chunk,%u00a0%u00a0then blend a little more if needed. If you feel that the soup is to thick, add in a little more water, or to thin, just cook down o little longer.
%u00a0Once you like the constituency,season to taste with salt and pepper and%u00a0place pot back on a simmer until you are ready to serve.%u00a0
And thats how we make%u00a0corn chowder
It tastes best serves in the daintiest of the cups, sprinkled heavily with cracked pepper, and with a side of some cracker situation (Saltines would be best, but sometime there are only triscits in the house)
Summertime is for chowder!
HAPPY Humpday Wednesday!!!
-C
Makes a pot big enough for 4-6 nice decent sized servings
2 fresh ears of corn
3 medium (tennis ball sized)%u00a0red or white potatoes
2 white or yellow onions
1 carrot
Juice of a lemon
1 tablespoon olive oil
1 1/2 %u00a0tablespoons dried thyme
salt and pepper
To start, peel%u00a0and dice one whole onion and toss into pot with olive oil and stick on medium heat. Cook onions until translucent and fragrant. Remove from pot and add cooked onions and the lemon juice to a blender and puree until smooth and set aside.
While you are cooking down the onions, dice up the carrot and onion, remove the corn kernels from the cob, and chop up the potatoes. Once you have removed the first batch of onions, toss in corn, onions, carrot, potatoes, and the dried thyme.%u00a0Stir around in the pot on medium heat for a few minutes just to warm up the spices. Add the cobs into the pot and fill with enough water to cover the stuff in the pot. Place back on medium heat with a lid and cook for another 20ish minutes, or until potatoes are super tender and almost falling apart.
Remove cobs from pot and add in the onion puree. Now either remove about half the soup and place in the bender and blend up til smooth, or use a hand blender and blend up chowder until you get your%u00a0desired chunkiness. If you think the chowder seems to thick, add in more water, or to thin, just cook down a little longer on the stove.
When ready to eat, ladle chowder into a cup or bowl and add lots of fresh cracked pepper.%u00a0
Serve with a cracker and a spoon to eat it with.
My oldest sister graduated from nursing school this past weekend (wahoo!) and the friends and family had a party for her. I made these cupcakes for the party.But really, I made them just for her.
See, she is not a lady big on sweets. When I asked her what kind of dessert she wanted me to make her, she said if I could make a cake out of french fries, well that would be great. (I was close to making a french fry cake) But instead, I went a slightly different route and made cakes out of thing that I know she loves and can eat. Jalape%u00f1os because she is obsessed. Strawberries cause she likes her some fruit and are in season and I think, go with everything. Avocado frosting because she loves avocado and cornmeal because it makes the cakes a tad less sweet and a little more hearty. I also used GF flour cause she is GF.%u00a0
%u00a0Wow, I am the best sister. And here are a few more reasons why..
I went to the party (I am not a big party person.. But I did have fun and her friends were cool)
I changed into a clean outfit for her party (I really didn’t want to)
I stayed out past my 6 (I made it until 7.. what!!!)
I make her food
I am awesome (I think so anyway)
So yeah. The cupcakes. The Nurse lady totally got down with these. I am pretty sure that I heard the words, amazing and oh my good, %u00a0while they were being noshed on. The day after, %u00a0the nurse lady told me that they were the talk of the party (bullshit, but thanks)
Whatever, I was just glad she liked them.
The stuff. For the cupcakes; cornmeal and some pre blended gluten free flour. Sugar, salt, baking powder and baking soda. Soy milk (use whatever milk you want) oil, apple cider vinegar, strawberries and a couple jalape%u00f1os . For the icing; an avocado, a lemon, and some powdered sugar.
This is not a%u00a0hard batter to work, no need for a mixer or to cream anything, it can all be done with a wooden spoon.
%u00a0First, preheat the oven.
Then trim and tiny dice the strawberries, remove seeds and tiny dice the jalape%u00f1os and toss it all into a bowl. Sprinkle with a bit of sugar.
In a large mixing bowl, whisk together the flour, cornmeal, baking soda and powder, salt and sugar. Then add in the rest of the stuff. Stir together until combined.Now fold in the chopped berries and jalape%u00f1os and scoop batter into a well greased (or lined) cupcake tin.
Stick into oven to bake%u2026
Check cakes after 20 minutes and remove from oven when they are golden brown and a tester comes out clean when poked.
Remove from pan and place on a wire rake to cool.%u00a0
While the cakes are a coolin, add avocado to a blender with the zest of half a lemon and the juice of that half of lemon and blend smooth. %u00a0Add in the sugar and blend. %u00a0
The icing should be thick, but spreadable. Using your judgement and you taste buds, add more sugar %u00a0if the icing seems to thin or lemon juice if it seems to dry.
And once the cakes are cooled, spread with icing and top with sliced strawberries.
Your welcome Nurse Shannon!
Happy Friday!!!
-C
Jalape%u00f1o Strawberry Cornmeal Cupcakes with Avocado Frosting
makes 24 cupcakes
1 1/2 cup gluten-free flour blend (if you don’t need or want it gluten-free, just use all-purpose flour)
1 1/2 cups cornmeal
3/4 cup white sugar
1 teaspoon salt
2 teaspoons baking soda
2 teaspoons baking powder
1 tablespoon apple cider vinegar
2 cups nut or plant milk
1/2 cup oil
1 1/2 cups diced fresh strawberries
2 jalape%u00f1os
For the frosting
1 whole avocado
1/2 lemon (zest and juice)
2-2 1/2 cups powdered sugar
Pre heat oven to 350
Wash, trim and dice strawberries into little pieces and toss into a bowl. Remove stem and seeds from jalepenos and dice into small pieces.. add to bowl. Sprinkle with a little sugar.
In a large bowl, combine flour, cornmeal, baking soda, powder, salt, and sugar and whisk together. Now add in the oil, milk, and vinegar and mix together with a wood spoon until combined. Lastly, fold in the strawberries and jalape%u00f1os.
Scoop mixture into well greased (or lined) cupcake tin and stick into oven. Bake for about 20-25 minutes, or until cakes are gold brown and a tester comes out clean. Remove from oven, remove form tin, and sick on a wire rack to cool.%u00a0
While the cakes are cooling, take the avocado, sugar, and the zest and juice of half a lemon and blend with your choice of blending drive until smooth. %u00a0The icing should be thick enough to If the icing is to runny, add more sugar, or to thick, a little more lemon juice.
Now Ice cupcakes and top with sliced strawberries.
Eat for breakfast, lunch, dinner or dessert.
No utensils required, just some teeth.%u00a0
%u00a0%u00a0You ever make dish, completely on the fly, just to use something up (I have a lot of ripe tomatoes) with no real expectation, just because%u2026 Then have it be one of the best freaking things that you have ever made?%u00a0This salad is one of those things.. maybe not the best thing I have ever made, but definitely the best salad I have ever made%u2026. this week.
A salad compiled of all things amazing, taking just a few minutes to make and is the perfect balance of uber fresh with baby spinach, raw kale, and crunchy quick pickled onions. Then adding a touch of warmth with the sweet and juicy seared tomatoes and big chunks of creamy avocado.
I mean, for reals. %u2026…Best Salad Ever !!!! (this week)
Now let’s do this.
%u00a0The Stuff. A big bowl of baby spinach and chopped up kale, a few sliced up roma tomatoes, some super thinly sliced red onion, half an avocado, red wine vinegar and salt and pepper.%u00a0%u00a0Before you do anything, place the sliced onions into bowl, sprinkle with a pinch of salt and add a few glugs of the red wine vinegar. You want the onions to sit in the vinegar for at least 5 minutes on the counter cause the longer they sit the more crispy pickly they get. (after eating onions like this, you will never want to eat them any other way)%u00a0Lightly oil a skillet and preheat to a medium heat. Once the skillet is hot, sprinkle the tomato slices with salt and pepper and %u00a0place tomatoes right on in, snugly, but not overlapping. Let cook for about 3-4 minutes, or until the bottoms start to brown. Flip and cook other side for another few minutes.Once the tomatoes are seared on both sides, remove them gently from skillet and toss them on top of the bowl of greens.
Take the pickled onions and toss those right on top, with any of the residual vinegar, add dice and scoop the half of avocado and toss that on in as well.And now eat the best salad ever (this week).
Make the day good!
-C
Skillet Seared Tomato and Quick Pickled Onion Salad
Serves 2 as a side, 1 for a hungry eater
2 large or 3 smaller roma tomatoes
1/2 of a red onion
2-3 tablespoons red wine vinegar
1 1/2 cups baby spinach
1 1/2 cups chopped kale
salt pepper
1/2 a ripe avocado%u00a0
olive oil (to grease pan)
Thinly slice red onion and place in a bowl. %u00a0Add vinegar into a and sprinkle with salt. Let sit on counter for at least 5 minutes, if not longer,
Slice tomatoes into 1/2 inch thick rounds and sprinkle with a pitch or salt and pepper. %u00a0Lightly oil a skillet and preheat it on medium heat. Once the skillet is preheated, stick the tomatoes on it (watch out for splattering tomato juice) Cook first side for about 3 minutes or until the bottom has browned, then flip and do the same for other side.%u00a0
One tomatoes are seared, place directly onto the greens. Now dump the pickled onions and residual vinegar on top. And %u00a0dice up %u00a0avocado and add that on top too.%u00a0
Now eat your salad, fork or fingers%u2026 %u00a0
And I know, ba-daaaamn. So good.
Hey there party people%u2026It’s Sunday! Hopefully you all have some good plans for the day. Me, well I %u00a0have a peanut butter and jelly lunch date at the park with some littles, a butt load of plants to stick into the ground, and hopefully%u00a0drinking much to much coffee while basking in the glow of the very lovely world. (which has been on point all week with%u00a0warm weather, sunny days, splashed with the perfect %u00a0moments of rain) Everything is so green and lush and freshy, it’s hard to not to be full of happy and the feeling that anything is possible. It’s fantastical!%u00a0Oh, and I got to give a shout out to my big sister for graduating from nursing school this week%u2026Whoa HOO!!!!! (Does she realize she is from a family of hypochondriacs? %u00a0Texting nurse Shannon%u2026…she is screwed.)
Summer here we come…It’s GO TIME!
Internet links from the week%u2026…
-Going to be making myself one of these this weekRail Road Totes.
-I could see doing somethinglike thiswith my family%u2026 If I didn’t kill them first.
-Interesting%u2026.What If Americans Ate Like South Africans And Vice Versa?%u00a0
-I have felt like popping a few balls in my time.The Good Listener: Can I Deflate The Beach Balls At Concerts?
-My next project/living arrangement? (Hey, if we can live in a tiny room now, we can live in a tiny room on wheels)%u2026 The Vintage Nugget
-I can’ t believe this show was canceled, but thank the tv gods for Hulu….Hulu Saves The Mindy Project
-I am into all of these interiors atFrenchyfancy%u2026..I wish I knew how to read french and wish I was that fancy.
A few pictures from the week%u2026.
The prettiest tree. LILACS!!!!!My yard these days..A wheel barrel full of strawberry plants.%u00a0Pretty in purple
The mister and I%u00a0%u00a0harvested a frame of honey%u2026So pretty
Have a great today!
-C
A couple of days ago, during a grocery store porous, I stumbles upon a produce item that I have not seen sold in stores before, Broccoli leaf. And I%u00a0was kind of surprised %u00a0to see that they were selling bunches of the leaf, %u00a0organic, %u00a0at 2 bucks a bunch.%u00a0I was very excited ! But wait.. You can eat broccoli leaves? Heck yes you can! Broccoli leaves %u00a0are fantastic. They taste kind of like broccoli, have a hearty texture like a collard, and can be used raw or cooked just like any other green. Its just one more super yummy green to add to your repertoire.%u00a0 So when I bring home something that I find to be a good score, like a bunch of broccoli leaves, I feel like I have to share it with the mister. (I am so nice) And this dish was how I shared them%u2026. Tossed into a bowl of garlic raging pasta. The stuff%u2026. A bunch of broccoli leaves, lots of garlic, pasta, olive oil, salt and a lemon. Pretty simple right? Fist off, get your water boiling for the pasta. Once its ready, drop a pinch of salt into the water and stick pasta in for the amount of time recommend by pasta box people. While the pasta is boiling, mince up the garlic (I used my garlic press) into a skillet and add in the oil. %u00a0Stick on a burner on medium for a few minutes, stirring around to make sure the garlic doesn’t stick and burn.%u00a0 %u00a0 %u00a0%u00a0Once you start to smell the garlic, turn heat onto low, chop up the broccoli leaves (stems and all) %u00a0and stir around until wilted and add in the juice of half a the lemon.When the pasta is cooked, remove a few tablespoons of starchy water and %u00a0strain the noodles. Add water and pasta right into the skillet with the other stuff. %u00a0Toss around, taste, season with salt and pepper.%u00a0 Go ahead and add some chopped tomato and or parmesan cheese if you want. %u00a0And serve your amazingly amazing pasta. %u00a0And make sure that you are ok with really smelly garlic breath%u2026Casue it’s going to happen. Keep it good! -C
2 servings of your favorite pasta (spaghetti, penne, vegan, gluten free%u2026..)
8 or so fresh garlic cloves
1/4 cup olive oil
salt and%u00a0pepper
lemon (optional)
parmesan cheese (optional)
Start by bringing a pot of water to a boil with a pinch of salt. Add in pasta and cook per instructions on box. While pasta is cooking, mined garlic and add to a skillet with the oil. Place on a burner on medium heat and cook and stir until the garlic becomes fragrant. Chop the broccoli leaves (stems and all) into bit sized pieces and add to the garlic oil and toss around to wilt the leaves. Squeeze in some lemon juice. Once the pasta is done cooking, remove a few tablespoons of the starchy water and strain the pasta. Add the water and the noodles to the skillet, toss to evenly coat the pasta and call it down. Serve in a bowl or on a plate, topped with freshly chopped tomatoes and parmesan cheese if you so shall please and another little squeeze of lemon juice if you like. Watch your mouth.. it will be breathing out garlic like whoa.%u00a0
My contribution to last nights dinner at my sisters…. Freshy fresh veggies spring rolls.I had about 30 minutes between work and getting over to my sisters house to throw something together so it needed to be something fast, easy, and something I could make without going to the store. She was making the main course (some teriyaki situation and rice) so I was doing up the veggies.
I had just bought a package of spring roll wrappers%u2026. Bingo! The perfect and logical choice. I grab the wrappers, a variety of veggies and after spending 12 of my 30 minutes trying to scrub the oil based paint off of my face and hands, I still managed to completely prepare, construct, and take pictures of these lovely tasty spring rolls. and get over to my sisters in time for dinner.
Impressed? %u00a0
Damn right!
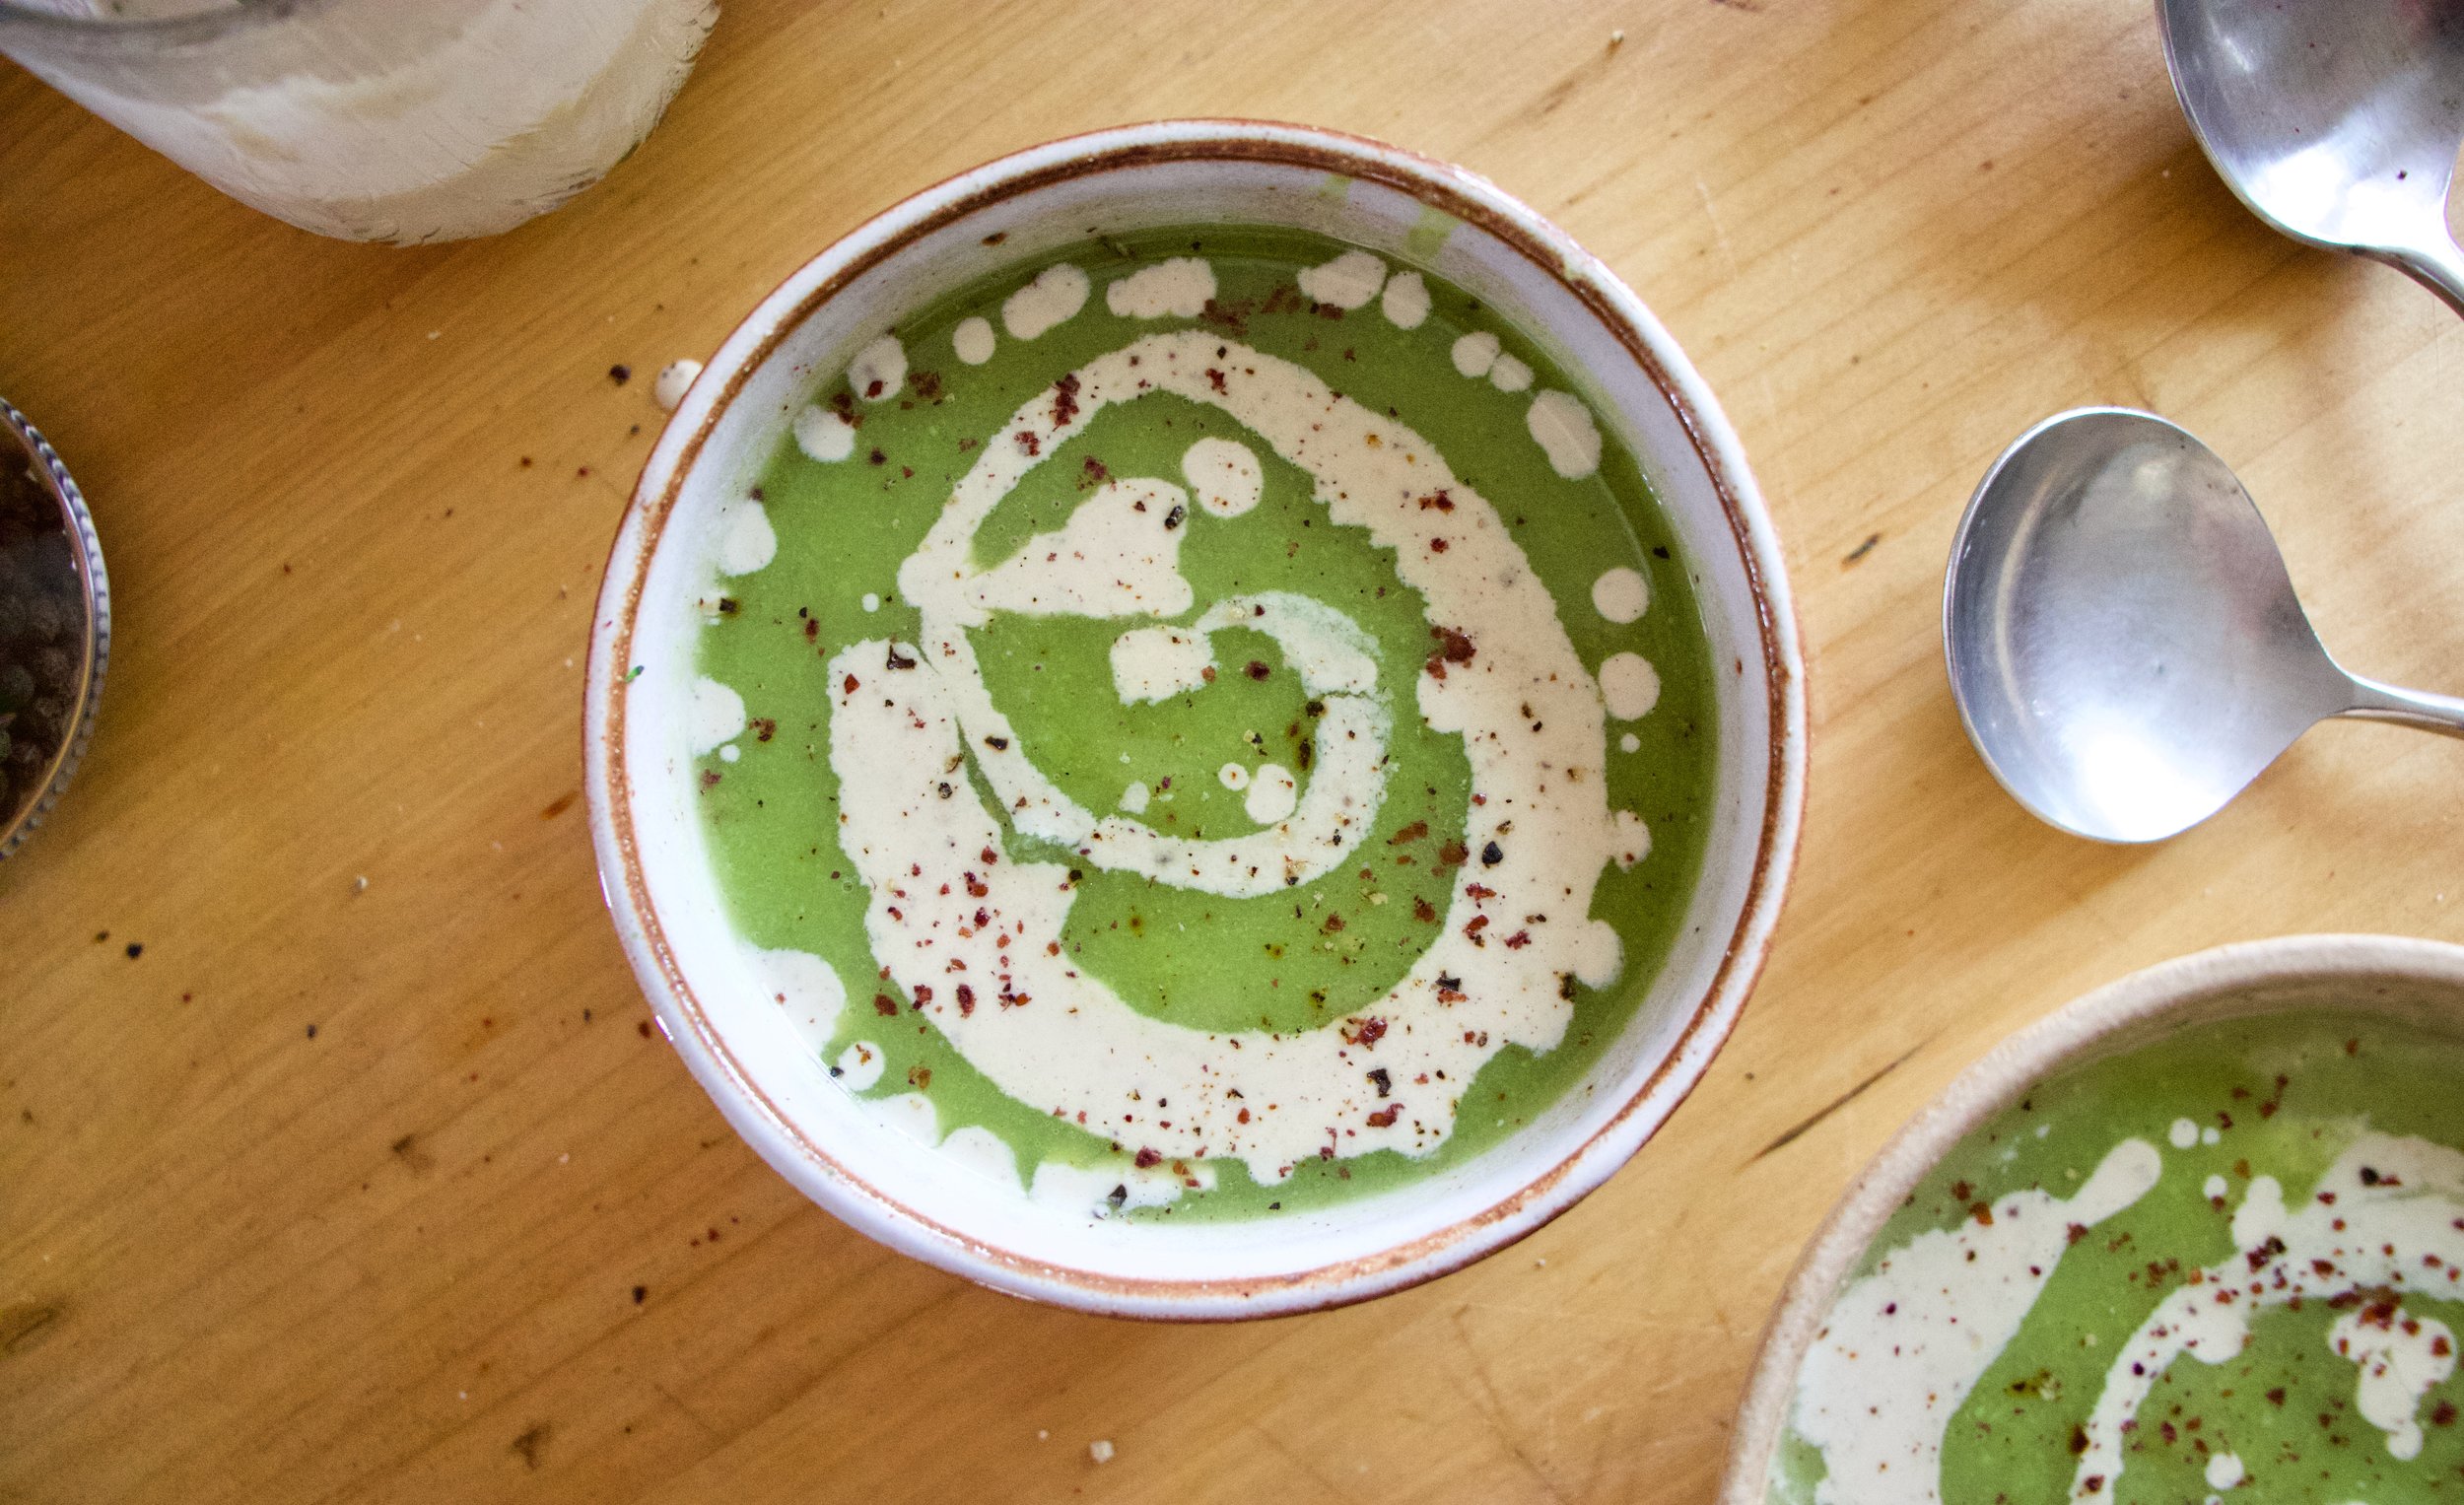
The stuff. Carrot, beet, asparagus, red cabbage, and kohlrabi, which all (except asparagus, which I just cut into thirds) got cut into matchstick sized pieces with my mandoiln. Then there are the rice spring roll wrappers that we need to make the veggies into rolls. Also a bit of red wine vinegar to drizzle onto the veggies for a little extra zing. And lastly, soy, fresh ginger, and a couple cloves of garlic for a spicy salty dipping sauce.Start by having everything set out and ready to assemble.%u00a0Fill a large shallow dish or baking sheet with really warm water. Working with one at a time,place a rice wrapper into water and let sit for about 10 seconds or until the paper starts to soften. Remove from water and place on a damp surface (just splash a little water on the counter) Take a little bit of everything and and place on the lower middle part of the paper. Fold in the sides first, then tuck and roll the wrapper as tightly as you can without ripping the wrapper.
Repeat until you have used up all you veggies.For the dipping sauce. Finely grate ginger and garlic and add to soy sauce. Stir%u2026 and it’s done.Freshy, pretty and fantastically delicious. And for real, took about 8 minutes to make. (I even had enough time to wash the dishes before we left!)
I am so awesome!
Hump Day Pow!!!!!
-C
Fresh Veggies Spring Rolls%u00a0
Makes 8-10 but can easily be increased or decreased to desired amount%u00a0
8-1o rice spring roll papers
Splash of Red wine or rice vinegar
1/4 cup soy or tamari sauce
2 cloves of garlic
teaspoon %u00a0freshly grated ginger
1 medium carrot
1 medium beet
1/4 head of purple cabbage
10 thin fresh asparagus
1 small kohlrabi
Note%u2026 I used the veggies that I had in the fridge at the moment. If you have a bunch of veggies but not these particular ones, use what you have. Pretty much all veggies taste good inside a spring roll!
Gather your veggies and prep by either using a mandolin, a grater, or some sick knife skills, and julienne, shred, or slice you veggies into thin match sticks. Once all the veggies are prepared, sprinkle a little vinegar over the top.
For the rolls…Grab a large shallow vessel %u00a0(a rimmed baking sheet works great) and add in warm water. Working %u00a0one at a time, place the wrapper into the water for about 10 seconds or until the wrapper starts to soften. Remove and spread onto a clean, damp work surface. Gather a bit of each veggie that you are adding and place towards the bottom %u00a0middle of the wrapper. Now fold the sides in over the pile of veggies. Then with the side closest to you, tuck and roll wrapper away from you, trying to keep it tight, but not to tight that it rips.. (Hopefully that makes since.) Place finished rolls onto a damp surface to keep from sticking and if not serving right away, drape with %u00a0a damp towel or paper towel to keep from drying out.
For the soy ginger dipping sauce. Add grated ginger, %u00a0minced garlic, and soy into a bowl and mix together. %u00a0Serve with spring rolls.%u00a0
Eat one, two, or a plateful. It’s nice to share but not a necessity.
My flowers are coming up, I have packed away my winter jacket, and I haven’t worn anything but sandals for the past week. Plus yesterday I made the first batch of sun tea and saw my first hot air balloon of the season (which lead to a heated discussion with the mister about how hot air balloons take flight. We were both kinda right, but me more than him)So yeah, %u00a0it’s for real%u2026 Winter is gone and spring has sprung, or more like spring sprung then bounced cause now it’s basically summer weather. Not complaining, but I hope we get a least a few more weeks of pleasant, not hot and humid weather.%u00a0
Anyway. Sun tea, one of my favorite summer time drinks. Made by infusing regular old teas with water by using the almighty power of sun.
Why do we want to make iced tea this way instead of just using boiling water? Well you can still do that, but sun tea makes a more mellow, lovely, and I find, more sweeter tea. It brings out more complex flavors that you don’t get with the boiling water method. %u00a0And it’s nice to know that it took zero effort on my part to make the drink (not that boiling water takes that much effort, but still)
It can be made with any variety %u00a0of teas, infused with other fresh herbs, dried spices, or even chunks of fruit. You can also make the teas and add flavors after the infusing is over. Have fun and play with flavor combos.
A few of my%u00a0favorite sun tea%u00a0combinations
Any mellow black tea like orange pekoe or english breakfast with a few springs of mint
Chamomile and mint%u00a0
Green with a fruity tea, like blueberry or pomegranate
Lemon Zinger with a few springs of Rosemary
These are just a few of the endless possible flavors. And you don’t have to get fancy with it either, you can totally use plain old lipton tea bags (I still do that too)
Now harness the sunshine and feel awesome and fancy by making some tea!
Woo Hoo Wednesday!
-C
SUN TEA
%u00a0What you’ll need
Tea- Either bags or loose leaf
Water- Preferably Filtered
A glass jar with a lid
Sunshine
I %u00a0use a ratio of 1 tea bag or 1 tablespoon loose leaf tea per 2 cups of water. And I usually make my teas in half gallon ball jars so I use 4-5 teabags or tablespoons of tea. (makes just enough tea for 4-6 tall glasses, depending on you glass size) %u00a0If it’s a mint tea, I usually use a little less because I find that mint teas can become to strong and bitter so I %u00a0use 3 teas bags or tablespoons of loose.
Directions
Place tea loose or bags into jar. Fill with water, leaving about an inch for tea expansion, place lid on tight, and stick in the sun for anywhere between 3-5 hours %u00a0(depending on how strong you like your tea). When tea is infused to your liking, remove teabags or strain the loose tea and stick into the fridge to chill. Serve as is %u00a0in a drinking vessel with a few ice cubes and add sweetener if that’s what you do.
Drink within a day or two, then rinse jar and make a new batch!
%u00a0Happy Cinco de Mayo! And what better day to share my version of %u00a0my oh so fantastic pico de gallo, or as I call it, super freshy salsa.
I love me some freshy salsa, It makes me oh so happy.%u00a0
%u00a0I make this stuff all the time, especially during the warmer months and tomato season. I usually make a batch right before a meal, just enough to eat right away, but sometimes I ‘ll make a big batched of it, thinking I’ll save some for the next day. %u00a0 It never makes it past the second day in the fridge because it’s just one of those things that when you see it, you want to eat it. Weird but true. And it’s totally ok to do so cause it’s basically eating a big bowl of healthy goodness, so eat on!
It takes no time to prepare, tastes super refreshing, goes on everything, and it’s just so freaking tasty. You can eat it with tacos and chips (the mister) or like me, I like to add it to everything; salads, popcorn, or directly in my mouth.%u00a0
Make one batch, make 4, it doesn’t matter cause you will eat it all, and need to make more.
The stuff. Chopped Roma tomatoes, chopped red onion, a diced jalape%u00f1o, lemon, a bunch of cilantro, and salt.
Stick all the chopped stuff into a jar and add in the juice of the lemon. Roughly chop the cilantro and add that on in with a sprinkle of salt.%u00a0
Mix it up%u2026.And thats it. Now eat%u2026 with something or without.
A spoon out of the jar is one of my favorite ways to go at it.
Happy Cinco de Mayo, Happy Tuesday!
-C
Pico de Gallo%u2026 Freshy Salsa
4-5 Roma Tomatoes
1 small red onion
1-2 jalape%u00f1os (Depending on heat preference)
1 lemon or lime
salt
1 bunch of cilantro (don’t use it if you don’t like it)
Chop tomatoes and onion and toss into a bowl or jar. %u00a0Cut seeds from jalape%u00f1o(s) and dice up into little bitty pieces and add that to the tomato and onion. Roughly chop the cilantro and toss that in as well with the juice of the lemon or lime. Sprinkle with salt. Stir, let sit for a minutes, taste and then add more salt if needed.%u00a0
Eat right away or make ahead and store in the fridge until ready to use.
Goes great with corn chips, tacos, toss onto salads or eat as is standing in front of the fridge. If someone is judging you, they are stupid.
I picked up out last winter farm share this week which makes me sad just thinking about it. Where am I going to get my food?%u00a0 Luckily it’s only like 3 weeks until the summer share starts so I think I will survive.
At the last pick up we got the usual roots, cabbage,and greens, but we got a bunch of spring greens. 3 lbs of them and I was just all smiles and glee. I legitimately get super excited when there is a large quantity of fresh spring greens in my fridge. Greens make me happy. And of course I share my green wealth with the mr. (I am so nice) He is not thae biggest fan of just handfuls of greens to the mouth for dinner so I figured a nice dressing to dress up those greens and any other veggies was something I could do. And I just so happen to have bought a giant bag of walnuts and walnuts go great with everything so yeah. And it’s really freaking good.
The stuff. Walnuts, oil(I used avocado but walnut or olive oil would be great) a lemon, a little honey, and salt and pepper. Also probably going to need a little water.
Stuff goes into blender and gets blended until creamy. This dressing starts off really thick and can be left thick or a little bit of water can be added to thin it out. Up to you.
Poured into a jar and that’s that.
Creamy walnut dressing.
Not just a salad dressing. You can eat it with anything and everything. I was dipping carrots and apple slices in it and the mr was dipping his pizza in it cause that’s how we roll.
-C
Makes about 1 1/2 cups
1 cup toasted walnuts
1/4 cup of oil. (I used avocado but olive or walnut would be good)
1 lemon
%u00a0Teaspoon or two of salt and pepper
1 teaspoon honey or agave
Water
Place walnuts, juice of lemon, honey or agave, and a pinch of salt and pepper into a blender or food processor. pulse to break up nuts then turn on and stream in oil. Blend until smooth, adding a few tablespoons of water to thin out as needed. This is a thick dressing so you can add as much water as you like to thin it out, just do it slowly. When blended, taste and season with more salt and pepper if needed. . Pour into a jar.%u00a0 Stick in the fridge when not in use. Will last a couple of weeks if you don’t eat it all.
THE LOVELY CRAZY
January 26, 2020 by maximios • Blog
It%u2019s been 14 days since my last farm share pick up with 7 more days to go. (The farmers take a long break at the end of the year, which they all deserve but makes me sad. Or more like hungry.) It is a pretty long stretch for me to have to go without getting me some farm fresh goods. I have been making due, rationing out my roots (the greens were gone within days) and supplementing with lots and lots of frozen zucchini, Swiss chard, and broccoli, so it hasn%u2019t been bad. But now I am worried because with al the supplementing, the chest freezer is looking a little more on the empty side then I would like. And it%u2019s only January. I guess that is what happens when you eat your weight in vegetables everyday. %ud83e%udd37%u200d%u2640%ufe0f
Anyway, I am pretty much out of roots. The turnips were the last of what I had left besides the lone beet that I found stuffed in with the apples. And because they were the last roots and knowing I am not going to have any roots until next week, I wanted to do something a little special with them. That is why I hassledbacked them, which basically means I sliced them up without cutting completely through so they are cut but still stuck together. Does that make since? If not, just look at the pictures.
These turnips, oh these turnips. First off, roasted turnips are amazingly delicious and if you have never roasted one, well you need to get on it and do so. Secondly, the turnips I used are gIlfeather, which if you did not already know, are the Vermont state vegetable. But don%u2019t worry, if you can%u2019t find the gilfeather, regular old purple top turnips work and taste just as fantastic because all roasted turnips are so fantatic. When roasted I might describe them as the cooler, hipper, cousin of the baked potato. Add the avocado cream and seeds, which are the cooler friends of the cooler cousin, and you got yourself a cool dude party! Or basically just a way tastier baked potato situation with fixing.
Now don%u2019t you want a tasty cool hassledback turnip? And yes, I keep wanting to call them David hasselbacks turnips too. Because they are so cool. Am I right? Haha!
To the turnips!
The stuff. Turnip. Either a couple smaller ones or a giant one, up to you. Also need an avocado, a little red wine vinegar and water, salt and pepper, garlic powder, olive oil, and some toasted seeds (if you want).
If using a giant turnip, cut in half. If using small ones, you can cut those in half too or leave them whole. Up to you.
Now to hasselback. Using two guides that are the same thickness (chopsticks or chip clips.. whatever you have lying around that you don%u2019t mind nicking with a knife) slice into the turnip about ever 1/4 inch, right down to the guide, but not all the way through.
Lightly oil a skillet or baking sheet and also rub a little oil all over the turnips and lay them hasselbacked side up. Sprinkle with salt, pepper, and a pinch of garlic powder. Then into a hot ass oven they go.
While the turnips are roasting , make up the avocado cream. Basic, just scoop avocado into bowl (if you have a stick blender) or blender, add in a pinch of salt, the water and vinegar, and blend until smooth.
And back to the turnips. Baked for a little longer then an hour and flipped once, now they are all roasted and crispy and all sorts of ready.
A freshly roasted hasseldbacked turnip smothered in avocado cream and sprinkle with toasted seeds.. Good things here friends. Good things.
-C
serves 2-4
1 large or 2 small turnips
salt and pepper
olive oil
pinch or garlic powder
an avocado
1 tablespoon red wine vinegar
1 tablespoon water
handful of toasted mixed seeds (I used pumpkin and sunflower seeds)
Preheat oven to 450
Grab turnip(s) and wash thoughtful. If you buy the turnip from the store and it has a wax coating, peel the outer skin, otherwise, you don%u2019t have to. Now to haseslback. Cut the large turnip in half or if using to small ones, you can just leave it whole. Take two, either chopsticks or something that is about 1/4 – 1/2 inch thick, and place on either side of turnip to use as a cutting guid. Slice the turnip about ever 1/4 inch , right down to the guide, but not all the way through. After cutting, place on a lightly oiled skillet or baking sheet and drizzle a little oil in our hand and rub all over. Sprinkle with salt, pepper, and a pinch or garlic powder. Place the turnips in hot oven. Roasts for about an hour, or until the slices of the turnip start to brown and come apart. Also, if you want a little more crispy edge, half way through, drizzle on a little more oil. You can also flip (which I did) the turnip cut side down to finish roasting.
While turnips are roasting, make avocado puree. Scoop avocado into bowl or blender. Add in the water, vinegar, and a pinch or salt. Blend in blender or with stick blender until smooth. If to thick, drizzle in a little more water until desired consistency.
Once cooked and all crispy like, remove turnips from oven, place on a plate and slather on the avocado cream. Sprinkle on toasted seeds and eat to your face hole.
Let us talk about how winter squash is like one of the best foods ever. Seriously. Hardy, creamy, rich, and full of the nutty, sweet flavors of all the good things. How anyone says they don%u2019t like winter squash is beyond me. I sometimes even feel like I put myself in danger of exploding when I am around enough cooked squash. I can eat and eat it until it%u2019s gone, which is fine if it%u2019s a serving or two, but when you roast up a 10 pound butternut, well, that is when the danger is real. I am getting better at holding back, but man, sometimes I just can’t (or don%u2019t want to?) help myself. ( You might also wonder why I cook 10 pounds of squash at a time. It%u2019s because I will eat it all in a few days and I might as well cook a bunch at once, for efficiency sake.)
Now the delicata squah. If you haven%u2019t had it before, stop what you are doing and go get one. You need to try it because it is amazing. Sweet, nutty, creamy. So good! And another good thing is that they are not giant, so you can buy one and eat the whole thing and not worry about overeating until you can%u2019t move, unless that is the goal. In that case, just buy a bunch. HA.
Anyway, it%u2019s getting to that time of year where salad is still great, it is just great warm. And with winter squash. Don%u2019t you agree? So we cook up the squash, grab the kale and make one heck of a salad to eat all to your face. Because that is what will happen. You will make it , taste it, and not want to share it. It is too good to share. (Yes salads can be too good to share, so if you are planning on feeding others, plan accordingly)
To the salad!
The stuff. Kale, a delicata squash, red onion, some balsamic vinegar, a touch of maple, spicy brown mustard, a handful of toasted seeds, and salt and pepper.
Start with the squash. Cut it in half and scoop seeds from booth sides (these seeds are great roasted). After deseeded, cut both pieces into 1/4-1/2 inch thick rounds. And NO!!!!, do not peel the skin.
Grab the onion and cut into 1/4 inch rounds too.
Place the squash on a very lightly oiled baking sheet so the pieces are not overlapping each other. Then toss on the onion which is fine if it overlaps. Sprinkle with a pinch of salt and lots of cracked pepper and pop into a hot oven.
In the meantime, mix the dressing situation together. Mustard, maple, and balsamic in a jar, mix and done.
Chop the kale too. Into mouth sized pieces.
Once squash is cooked all nice and tender, remove pan from oven. Take all the kale and toss on top then take the dressing and drizzle it all over the kale. Pop the pan back into the oven for a minutes or two, just until the kale starts to ever so slightly wilt.
Pull the pan back out and give it a good toss.
Dump it all into a big bowl, toss in the toasted seeds, and call it. Now grab a fork and start eating.
-C
Can be a main dish for 1 or a side for a few
1 delicata squash
1 bunch of kale (around 3/4 pound)
1 smallish red onion
3 tablespoons balsamic vinegar
1 -2 teaspoons maple syrup (more for a slightly sweeter, maple-y flavor)
2 tablespoons brown or dijon mustard
1/4 cup toasted seeds of choice (I used pumpkin and sunflower)
Preheat oven to 400
Cut delicata squash in half and scoop out all the seeds (you can save seeds to toast up later if you want), then slice the squash into 1/4 – 1/2 inch thick rounds. Grab onion and cut into thin slices. Take onion and squash and place them onto a very lightly oiled baking sheet and sprinkle with salt and pepper. Don%u2019t let the squash overlap, but it is fine for the onion to overlap the squash and itself. Pop the pan into the oven and bake until the squash starts to brown and is fork tender, which should take about 10-15 minutes.
In the meantime, chop kale into small mouth sized pieces and set aside. And mix the balsamic, mustard, and maple together to create the dressing.
Once the squash and onions are cooked, toss the kale onto the pan and drizzle the whole thing with the balsamic mixture. Toss it all around and pop pan back into oven for another minute or two, just to let kale get a touch wilted.
Remove pan from oven, dump everything from pan onto a plate, and toss in the toasted seeds.
Grab a fork. Eat.
Whatever you do, do not turn on your oven this weekend! But I guess if you have air conditioning and don’t mind cranking it… well then go for it. And can I come stay with you?
But for the rest of us doing this weekend without the old A.C., we need to feed ourselves, feed ourselves without any fire because 100 degrees is no joke and any added heat from anything will likey tip us over the edge. I am already so close to that edge and it’s a long way down..(Just ask the mr, he could tell you a thing or two about heat and me.. not good)
Enter hummus and veggies.
You can’t really go wrong with a good hummus and veggies meal situation and sometimes it’s all that can be right. I for one could eat bowls and bowls of hummus, and sometime do, so this is not a stretch for me. Especially this hummus. I knew I would like it, but man, was (was because I ate it all) it freaking delicious. The sunflower seeds really did it for me, gave it a little something extra, like a freshness that is still creamy and earthy, but is not quite, I don’t know, dark as tahini? %u00a0It’s kind of hard to explain without having you taste it (so make it and you tell me)%u00a0%u00a0Don’t get me wrong, I love tahini, but sometimes you just %u00a0got to mix it up. (Plus sunflowers seeds are dirt cheap. Tahini is not nearly as cheap so bonus there too.)%u00a0%u00a0Maybe its because the sunflower seeds bring the sunshine to your mouth. A sun filled mouth of pureed seeds and beans.%u00a0 Yup, that’s what it is.
So here ya go, a no heat meal (or snack or spread).%u00a0We got this.
The stuff. %u00a0Cooked chickpeas (no need to cook your own, canned is a okay), sunflower seeds, a lemon, a few cloves of garlic, salt, pepper, a little water, and some herby green like parsley or cilantro.%u00a0
Hummus is pretty basic, it’s just stuff blended up, but because we are starting with raw sunflower seeds, we need to really bend the shit out of them until they turn into a paste, so do that, which is going to a take about 8-10 minutes. Then once its pasty, add in the garlic and the juice of the lemon and blend until its all smooth.
Could almost stop here at this point. Sunflower seed goodness all emulsified. Taste it, it is so good.
Now add in the chickpeas and a pinch of salt and pepper.
Blended until smooth with a little drizzle of water to give just the right consistency. %u00a0And that’s it.
Pile a bowl full enough that you can call it dinner them top with a good amount of fresh herbs. Serve with chopped up fresh veggies or whatever you like and we are good to go.
Creamy, dreamy sunflower hummus, no heat required!%u00a0
Stay not melted!
-C
Makes about 2 3/4 cups
Place the sunflower seeds in food processor and turn on until seeds turn into a paste, which will take about 8-10 minutes. After every few minutes, scrap the sides down to make sure it all gets blended. Once the seeds reach paste consistency,%u00a0add in the juice of the lemon and the garlic. Blend until smooth. Last off, add in the chickpeas and a pinch or salt and pepper and blend until smooth, adding %u00a0in a tablespoon or two of water to get the hummus to the consistency of your liking. Once blended taste and check for seasoning (add more salt and or pepper if needed)%u00a0
When the hummus is done, scrape into bowl(s), and top with lots of fresh herbs and a sprinkle more of sunflower seeds. Now eat it. Eat with veggies, with bread, with pretzels, or with a spoon (or finger). Do what you need to do.
%u00a0Any left over, if there is any, can be store in the fridge for 2-3 days.%u00a0
I feel like we are stuck in Narnia with the White Witch. Always winter, always snow. It will be worth it though if I get to meet some talking beavers, but until then, I’ll start looking for the lion. This cold snow shit needs to end.%u00a0
The week has been pretty shity and very very stressful so we are going to leave that alone and I’ll just tell you about good things, like watching all of my house plants that I repotted grow like gangbusters. Or seeing the veggie seedings start to emerge from the dirt.%u00a0Half of them need to be repotted but the other half need to go directly into the ground. Glad I didn’t get to it this week because the snow and the snow and the ice, oh, and the stupid snow. We were with the Miley, Judah, and Emerson every day this week. We helped them clean and organize their bedrooms,which was stressful, but also fun. I almost accidentally %u00a0broke Mileys toes off, Judah showed us magic tricks,%u00a0%u00a0and Emerson taught %u00a0us all the alphabet. (And the mr got to play with so many dolls). There was time for So to stop over so I could fix her dress and eat carrots and make me laugh with all the funny faces. And we even had a few days of some what nice weather where I was able to open the windows in the house (that did not last long). Oh and the fridge, I was able to clean the shit out of the fridge. The week didn’t completely suck.
%u00a0I think that highlight of the week is that we found and %u00a0awesome new couch (and skill saw).%u00a0While we were looking for replacement faucets for the bathroom sink (because it is leaking bad)%u00a0we stumbled upon a very nice, not to big, not to small, vintage, excellent condition, very comfortable, couch. And it was on sale, like super cheap and pretty much exactly what we have been looking for.(there is a picture bellow) %u00a0Our current couch, the little yellow one that we use %u00a0in our spare room, is way to small and very uncomfortable and after today, it’s going bye bye. We pick up the new couch tomorrow. And when we do we will continue or search for a new faucet because we did not find what we were looking for. Until we do we %u00a0will be brushing and washing our hands in the bathtub.%u00a0
Today is going to be the first day in more then a week that the mr and I do not have some crazy crazy happening. So what are we going to do? Well I think we both need to turn off our phone, lock the doors, draw the curtains (we don’t have curtain) and hide from the world. Will that really happen, no, but it’s nice to think about. But I do think we will spend the afternoon relaxing a bit. I’ll paint, or read, the mr will probably work on screens or his fly file (it’s officially fishing season) and then we will go to bed early. Next week is a busy, but hopefully a good busy and not like shitty busy. Wish us luck.
What I looked at when I was looking at the internet
-I probably wouldn’t use it as a headboard but as a sweet ass wall piece… maybe someday I will get to it.%u00a0How to Make a Woven Headboard
-Now this is a sweet little cabin in the woods.%u00a0
–Fact or Fiction: Can You Really Sweat Out Toxins?
-I used to listen to music at the gym but after sweating all over and then ruining my 2 different iPods, I stopped. But I still hear music in my head.%u00a0%u00a0How Your Body Reacts When You Exercise With Music, According to Science
-How to Keep Your Social Life When You Love Going to Bed Early%u00a0Be friends with other people who go to bed early too.%u00a0
-I really want to go see this movie, and after reading this, I want to see it that much more.%u00a0And I really hate scary movie ( I also might be kind of in love with John Krasinski).%u00a0A Quiet Place%u2019 Turns Eating Into a Suspenseful Act
-Watch out, those non organic strawberries are probably toxic.%u00a0Strawberries again top 2018’s ‘Dirty Dozen’ fruits and veggies
–Drug Use Is Detectable on Your Fingerprints.Say what?
–New 360-Degree Immersive Drawing Created With 120 Marker Pens by Oscar Oiwa%u00a0Pretty freaking crazy
-Really, who eats these things?%u00a0People Have Started Panic-Buying Necco Wafers
Pictures from the week
It’s the weekend before Halloween which is the perfect time for pumpkin carving. We got our pumpkins last week and I have been so excited but have been waiting to carve.%u00a0%u00a0Carving time to a pumpkin is crustal.%u00a0To early and the pumpkin starts to rot and the squirrels will probably eat it but wait too long and you don’t get to enjoy it long enough. 3-5 days before halloween, that’s the perfect time carve a pumpkin. (I am right, right?)
And what do you get when you carve a pumpkin? A free freaking snack my friends. Pumpkin seeds.%u00a0
Side story here. About ten years ago I set my mons brand new stove on fire roasting pumpkin seeds. Long story short, I wanted really crunchy seeds and though if I broiled them that they would be just perfect. Well not so much. I stuck them in, walked away for a few minutes and the whole kitchen filled up with smoke. Opened the oven to a big old fire going on.%u00a0Luckily once the flaming pan of seeds was removed, the fire in the oven was no longer but the stove did not make it through unharmed. The knobs and a little bit of the front of the stove melted a bit (Oops) and worst part, I charred the shit out of the seeds.%u00a0 So the leason here is do not stick oil covered seeds under the boiler and walk away and not expect them to catch fire.
Anyway. So we carved our pumpkins (well I started carving mine and ended up helping Judah an So carve theirs) and got a shit ton of pumpkin seeds. I pre scooped mine out and baked (not broiled) them up to a nice crunchy snack. These are coved in cinnamon sugar to entice the little who might or might not really like them, but all the adults that where here gobbled them right up.%u00a0
The stuff.%u00a0First you need to get the seeds. %u00a0You could buy them, but this is way more fun.%u00a0
Seeds full of goo, just stick them in water. The seeds float so you can scoop them out into a strainer.
Once most of the goo is gone, rinse the seeds and place them on a clean dry towel and spread them out.%u00a0Try to dry them off a bit.
The seeds are going to still be a little damp so dump them on a baking sheet and place them into the oven. Turn oven on to 350%u00a0
While the seeds are spending a little time drying off get the other stuff. Coconut oil, cinnamon, sugar,and salt.
Once the oven is preheated, remove the seeds. They should be dry by now. Dump warm seeds into a bowl with coconut oil and mix around until they are fully coated. %u00a0Now dump the salt cinnamon sugar mixture in and mix until coated.
Place back onto the bakings sheet and evenly spread them out.
Back into the oven to get crispy.
And a half hour-ish later, the house smells all nice and cinnamony good and you got yourself a sweet spicy little crunchy fun snack.
Makes about 2 cups which came fro one big jack-o-lantern pumpkin
Grab yourself a pumpkin, cup the top open ,and scoop out all the seeds. Save for jack-o-lantern.Place seeds in sink or large bowl and scoop the seeds off the top that float up. You might need to squeeze the guts to loosen the seeds. Place seeds into a strainer and once you got what you can get, give them a quick rinse. Dump the seeds onto a clean dry towel and pat them dry as well as you can. Place the seeds evenly %u00a0onto a dry baking sheet and stick them into the oven. Turn oven on to 350 and leave them in there until the oven is preheated.
once oven is preheated, remove seeds and place into a a bowl. Add the coconut oil and mix around until completely melted and the seed save all coated. in a small bowl mix together the cinnamon, sugar, and salt. Dump the mixture onto the oiled seeds and mix until coated. Dump seeds back onto baking sheet and back into the oven. Bake for about 25 minutes, remove and mix around, and back into the oven for another 5-10. Check for crunchiness by either tasting of snapping one or two in half. Once the seeds are crunchy, remove from oven and let cool on baking sheet.%u00a0
Dump seeds into a bowl ad snack away. Store left over seeds in an air tight jar.%u00a0
First rhubarb of the season!!! The patch in my backyard is large and wild and I am about to be swimming in humongo pink stalks of the stuff within the week. There will be rhubarb in everything.
Last year we ended up eating so much rhubarb. I didn’t really have much of a game plan for it, I just ended up sticking it in everything and for the most part, it worked out great. Cakes, pies, salads, and soups. Rhubarb can find a place in anything. But for the first rhubarb of the season, I wanted to make something that was all about the rhubarb without too many other flavors to contend with.%u00a0 And I wanted to make something pretty. Rhubarb cake with poppyseeds Sweet and tangy with a little earthiness, great texture, and color. A spring celebration cake if you will and made me very happy.
The mr and my sister were very much pleased with how this cake came out. (It was gone pretty much gone the next day) A cake win for sure and a good start to rhubarb in everything season.
The stuff. Rhubarb and poppyseeds. for all the flavor. Then you need flour, baking soda, baking powder, salt, sugar, oil (I used coconut but I think any oil would be fine) soy milk, vanilla and a little apple cider vinegar.
Once you get the oven going, chop 2-3 stalks of rhubarb into small pieces about 1/4 inch thick until you have 1 1/2 cups. Take another stalk and cut lengthwise into thin strips for the top of the cake.
In a small bowl mix the oil, sugar, and vanilla together. Add the vinegar to the soy milk.
Whisk together all the dry, add in the poppyseeds then mix in the chopped up rhubarb to coat each piece.
The wet mixture goes into the dry along with the soy milk. Everything mixed until just combined.
Dump the mixture into a well greased pan, level off and sprinkle the top with poppyseeds . Take the thinly sliced rhubarb you reserves and lay on top any way that looks nice to you, giving in a little press into the batter so it stays put.
Now into the hot oven it goes.
And after a time in the oven you get yourself this gem of a cake.
Cooled a bit and ready for eating. A piece or two celebrate.
Rhubarb season has begun. Start it off right with cake!
-C
Makes a 9×9 square cake
Preheat oven to 350
Chop rhubarb into 1/4 inch chunks until you have 1 1/2 cups. Extra stalk and slice lengthwise into 4 thin strips and set aside.
In a large bowl whisk flour, baking soda, baking powder, salt, and 3 tablespoons poppyseeds. In a smaller bowl mix together the sugar, oil, and vanilla extract until completely combined.%u00a0 Add vinegar to soy milk. Toss the chopped rhubarb into the dry mixture and coat the rhubarb pieces. Dump the wet mixture into the dry and add in the milk. Stir together until just combined.
Dump batter into a well greased 9×9 baking pan and level off. Sprinkle the top with remaining 2 tablespoons poppyseeds then lay the thinly cut rhubarb on top anyway you think looks good to you.
Stick the cake into the oven and bake for about 45-50 minutes or until the cake tester(or fork) stuck in the middle comes out clean.
Remove, let cool, then eat at your own pace.