Spring is here for reals, I think. No, it is here, it has just been a bit raw and maybe a bit more rainy then it really needs to be, but whatever, it is spring and it is good. Things are greener by the day, the temperatures although not exactly warm are still inhabitable and without cause for winter jackets (although I have still been rocking the mittens) and spring veggies are popping up all over. Things are looking good.
So last week I made a pie crust with the intention to make a veggie pot pie and stuck it into the freezer. When the time came to make said pot pie, I forgot to take it out of the freezer so the crust was not meant to be for pot pie (it will probably end up as a rhubarb pie%u2026we shall see). Without pie crust, I wasn%u2019t exactly feeling like I should make a pot pie, but a tart, well yeah, sure. A crispy and chewy crackery crusted thing with almond ricotta a spring veggies because that is where the mind went and what the mr agreed sounded good. (When I make up recipes I just start taking about ingredient and preparations and wait til the mr says %u201cYea, that loud good. I%u2019ll eat that %u201c He usually will say it right away and for anything. Very easy to please or he just doesn%u2019t care%u2026hum? )
And so the tart was made and the tart was eaten in all entirety for dinner by the mr alone. Usually when he eats all of something it means it was one of the really good things. Or he is really really hungry. But he said it was a really good thing. I trust him because I agreed. I got in a few spoonfuls of the almond ricotta mixture and it is really freaking good if I do say so myself (I could eat bowls of almond ricotta all day long).
Anyway, heres to spring and all things that are green and good.
To the tart.
The stuff. Flours (white and white whole wheat), baking powder, and a little salt in the bowl. Water and olive oil, blanched almonds, a lemon, a clove of garlic, asparagus, peas, frozen and thawed spinach, a small red onion, and salt and pepper.
Start with making the crust. Mix the dry together then add in the oil and water to form a dough. Knead dough a minutes until the dough is uniform and place back in bowl and cover. Dough needs a few alone minutes to rest. I can relate to that.
While dough is resting, make the almond ricotta. Almonds, garlic, the juice of the lemon, and a bit of water go into blender. Add in a pinch of salt and pepper too.
Blend until creamy and smooth.
Dump in the spinach and blend, just until combined.
Scoop ricotta into a bowl and mix in the peas. And sure give it another taste but try not to eat it all.
Grab the onion and slice it all nice and thin.
And after the resting time, grab dough and roll it out. Try for a rectangular shape or as rectangular as you can get it, but nice and thin. Thiner is better.
Place rolled out dough onto a baking sheet and poke the bottom with lots of little hole. Take ricotta mixture and spread evenly all over crust, leaving a 1 1/2 border all the way around.
Then top with the asparagus and more onions.
Fold over the edges of the crust, sprinkle with a pinch of salt and pepper, and into the oven it goes to bake.
And then it is baked. And ready to eat (after a few minutes of cooling).
Nothing left but to cut it up and eat it.
Spring. Green. Food.
Things are good.
-C
Makes a 8×12(ish) tart
For the Crust
1/2 cup all purpose flour
1/2 cup white whole wheat (can sub for all purpose)
3 tablespoon oil
1/3 cup room temp water
1/4 teaspoon baking powder
1/2 teaspoon salt
For the Almond Ricotta and Veggies
1/2 cup blanched almonds
1/4- 1/3 cup warm water
1 lemon
1 clove garlic
1/2 teaspoon salt and pepper or more to taste
1/4 cup frozen and thawed spinach squeezed of liquid
9-10 spears of Asparagus
1/4 cup peas (fresh or frozen and thawed)
1 /2 red onion
First make the crust. Whisk together the flours, salt, and baking soda. Add in the oil and water and mix until a dough forms. Form dough into a ball and knead for minute or two on counter then place dough back into the bowl and cover. The dough needs to rest for 10-15 minutes.
While dough is resting, make the almond ricotta. Place almonds, garlic, and juice of lemon into a blender. Start blending and add in the lesser amount of water, adding a little more until the stuff all starts to blend. Blend on high for a minute or two until the mixture is nice and creamy. Season with salt and pepper, blend a second to mix then add in the squeezed out spinach. Blend until mix together then dump or scoop the mixture into a bowl and mix in the peas. Then thinly slice up the onion.
Preheat the oven to 450
After doughs little rest, lightly flour a counter and roll it out, thin as you can, in a rectangular shape. Try for at least 12in x 16in. The rectangle doesn%u2019t need to be perfect. Rough is good.
Place the rolled out crust onto a baking. Take a fork and dock the surface (poke holes into it to prevent air bubbles). Take the ricotta and pea mixture and spread evenly on crust, leaving about a 1 1/2 inch border all the way around. Add a layer of sliced red onion and then take asparagus (trim off woody ends) and either lay on whole or break in half and lay on. Add more onions on top. Fold the border of the crust over the top. Sprinkle the whole thing with pepper and place into the hot oven.
Bake for 22-25 minutes or until the crust becomes a nice golden brown. Remove and let cool a few minutes
And then cut up and eat. Right away or at room temperature. Or some now and some later. All up you you.
Store left over in fridge in air tight container for up to a few days. the crust will not be crispy but more chewy. Can stick it back in oven for a few minutes to crisp it up.
Fall is all up in here!. The air is so nice and crisp and the leaves are changing to the prettiest colors.%u00a0I gots my pumpkins, an abundance of apples and squashes (our table is forverver overflowing with some type of squash) and am wearing all of my favorite sweaters.%u00a0
I am a happy lady here!
And this happy lady just wants to sit on her butt and knit.
But first, dinner. And my thought are. “What to do that doesn’t include doing much of anything (especially dishes) and maybe even has the oven on for a little extra warmth?” See here, I am a thinker. I knew I %u00a0had a single pie dough in the freezer (you should always have a pie dough in the freezer), a table full of the loveliest produce. So this happened. And the mr ate it, and he was all like “Whoa”.%u00a0 And I was like,”yeah dude, I know.”
A Ssuper fall galette.. and I still had time for my knitting and my butt.%u00a0
Like Whoa!
The stuff. A single crust pie dough, a butternut squash, an onion, and a honey crisp apple.(there are 2 shown, but I only needed on1)%u00a0%u00a0Also going to need a tiny bit if olive oil and a pinch of salt
Preheat oven to 375.
Roll your chilled dough out %u00a0on a lightly floured surface and place onto a large baking sheet. Stick it in the fridge to rest for a few minutes.
And slice them up into 1/4 inch-ish thick srounds.
Time to compile%u2026 A layer of overlapping squash. (Make sure to leave inch-ish boarder)%u00a0%u00a0Then a layer of the apples, and lastly the onion, which I think looks so pretty as ringlets, but you could keep in rounds if you wanted.%u00a0
Fold the sides and pinching dough to keep it secure. Drizzle the top, and the crust, with a tiny bit of olive oil and sprinkle with a picnh of salt.
Now into the oven it goes!
And %u00a0after about 45 minutes when the dust is perfectly golden and the stuff inside is nice and tender. Remove (turn off the oven) and let cool
And there you have it.. A ode to fall in flavors and colors..
Have a great day%u2026 Eat lots of fall food!
-C
1 single pie dough (recipe here)
1 small butternut squash
1 medium sweet onion
1 large honey crisp apple
olive oil
salt
Preheat oven to 375.
Roll out chilled pie dough %u00a0on a lightly floured surface to about a 12-14 inch round (ish) and place on a large baking sheet and stick in the fridge.
Grab the squash and cut the neck off the bottom.%u00a0Save the bottom for later (maybe soup?)%u00a0and slice up the neck into 1/4 inch thick rounds. %u00a0Now take the onion and apple and slice those into 1/4 inch thick rounds too. (the seeds and the stem will just fall our.. but if they don’t, just poke them out with a knife)
Grab the dough from fridge and start to layer. First a layer of squash, leaving around an 1.5 inch boarder. You want the pieces to overlap,but don’t double layer. Next the apples go on top of the squash, again overlapping. Finally the onion. I liked the look of the individual ringlets%u2026 but you can do thick rounds if you want.%u00a0Fold over the sides of the dough, pinching it in wherever it needs to be pinch until all the stuff is snug. Drizzle with a tiny bit of olive oil %u00a0and rub a little oil on the outside crust as well. Sprinkle with a pinch of salt and stick into oven.
Bake for about 45 minutes or until crust is a nice light golden brown and the stuff inside is tender.
Remove, let cool for a few minutes and eat your heart out.
I made a pie dough a little while ago with the intention of making a cherry pie%u2026but I ate all the cherries . (I do that a lot%u2026 eat all of something that I was intending to use for%u00a0something else)
And then I think about%u00a0that saying.. The road to hell is paved in good intentions.
.Well I guess I am going to hell.
So no cherries,%u00a0but I have a crap load of summer squash (and it’s only the beginning) and a few peaches that are in need of some eating. And what’s that, a container of ricotta in the fridge from lasagna a couple weeks back%u2026. Meant to be and%u00a0not in hell yet!
Sure, I could have made one single crust galette,%u00a0sweet%u00a0or savory,%u00a0and thrown it to the masses for consumption, but I figured that I might as well just hit two birds with one stone. A dinner and a dessert, all at once,%u00a0and call it a victory in time management%u00a0and putting a dent in the%u00a0pile of squash on the table. (don’t be fooled, I love excess amounts of squash.. It’s like the printer paper of the veggie world.. can be used for everything!) And bonus, only one set of dishes! I mean come on, this is so good, easy%u00a0and just really pretty. I know, I know%u2026..%u00a0so smart.
Anyway, here, take a look, get inspired and make some pretty dinsert (dinner and dessert) galettes.%u00a0
The stuff. For the base,%u00a0we need one%u00a0single crust pie dough%u00a0(that’s going to be for two smaller galettes)%u00a0and some ricotta%u00a0cheese.%u00a0%u00a0The savory galette has%u00a0summer squash, salt, pepper, lemon (%u00a0the zest) and a couple tomatoes. %u00a0The sweet needs honey, a peach, and a few strawberries.%u00a0
And if you want, change up your toppings. Pretty much any fruit or veggie combo would work. And spice up the ricotta if you wan. Garlic, fresh thyme, cinnamon%u2026 whatever will make you happy.
First things first.%u00a0Roll ourt dough. You could cut the dough in half and roll two separate disks, but I just rolled out one big rectangle shape.
And onto the baking sheet and into the fridge to rest.
While the dough is chillin, take half of the ricotta and whip it up %u00a0with some honey and thinly slice up your fruit.
Take the other half of the ricotta and add a bit os lemon zest, a sprinkle%u00a0of salt and%u00a0pepper,%u00a0and mix that up. And%u00a0thinly%u00a0slice up the%u00a0squashes and dice up the tomatoes.
Two crusts(or one cut in half. Smear the honey%u00a0ricotta on one side, savory%u00a0on the other, leaving%u00a0a boarder so you%u00a0can fold the dough over.
Now%u00a0pile the fruits on the honey%u00a0ricotta, veggies on the savory, %u00a0and fold the uncheesed part of the crust over. just enough to keep everything from falling out. Sprinkle salt and pepper on the veggies.
Stick into %u00a0a preheated oven and%u00a0bake until the crust is cooked all nice and golden brown and crispy.%u00a0
While the galettes%u00a0are baking, toss the chunks of tomatoes into a skillet with a splash of oil, salt and pepper and stick it into the oven too. Just bake until the tomatoes are nice and soft. You can stick in the oven right away and let the tomatoes cool, or towards the end of the bake time so that you can eat them warm%u2026 these tomatoes are good hot or cold.
all baked up, removed from the oven, looking oh so pretty.
Pile the roasted tomatoes onto the savory tart. And if you got it, a bit of chopped freshy fresh basil
And drizzle a little bit more honey on the sweet.
And serve%u2026 Is it savory first or do you go sweet?
How about a pice of both. Dnner and dessert.. all on one plate!
Happy Tuesday!
Ba Bye!
-C
-Makes 2 small%u00a0or one large galettes%u00a0
a single pie crust (recipe here.. or use whatever dough you like)
1 cup of ricotta cheese
For the savory
2 cups thinly sliced green and yellow summer squash*
2 roma tomatoes
salt and pepper
teaspoon lemon zest
a few fresh basil leaves
olive oil
For the Sweet
2-3 tablesppons honey
1 peach thinly sliced*
3-4 strawberries thibky sliced*
*Note. Feeling like blueberry apricot or maybe potatoes and peas? Swap out any fruit and veggie (and spice)%u00a0combination you want. The possibilities are endless! And if you want to do just one big galette, go for it.%u00a0
Roll out%u00a0pie dough in either 2 separate disks or one large rectange cut in half and.place on baking sheet and stick in fridge. While dough is%u00a0resting, divide the ricotta into separate%u00a0bowls. Add the salt, pepper and lemon zest to one, and the honey to the other. Using a fork,%u00a0whip them%u00a0up.
Preheat oven to 400 degrees
When the oven is preheated, grab the crust from fridge and smear the ricotta fillings evenly on the middle of each crust,%u00a0leaving about an%u00a0inch and a half%u00a0boarder. Layer on the toppings, (sweet on honey, savory on lemon pepper.. or whatever floats your boat) and fold %u00a0border over the edges of the filling. Place in oven and bake for about 35-40 minutes or%u00a0until the crusts are nice and crispy and golden brown.
While those are%u00a0baking, dice up the tomatoes and toss into a oven safe skillet%u00a0with a little drizzle of oil and sprinkle of salt. Stick that into the oven for about 10 minutes or until the tomatoes are nice and soft. You can do this right away, or towards the end of the bake time of the galettes%u2026 roasted tomatoes are great warm or cold.
When the galettes%u00a0are done baking, remove from oven and let sit for at least 5 minutes before serving. Top the savory galette with the roasted tomatoes and chopped fresh basil. Drizzle a little more honey on the one with the fruit .
Serve one, then the other, or both at the same time!
Eats good hot, warm, or cold. Utensils not required
Peaches are here. YAY!!! Peaches are for sure one of those fleeting fruits, one that once in season, you need to eat as many fresh as you can because once they are out of season, they are not good. Not good at all. And me being me, I see peaches, I buy a shit load, and now I have a fridge drawer full. Not complaining in the slightest, but peaches cannot sit around all summer waiting to be eaten. So if you are going to buy a shit load, know what you are going to do with them all.
My peaches, well they haven%u2019t had to wait long. I have been eating at least a peach a day and%u2026 I made these bars with a few. Sharing my peaches, thats what I do. HA.
These almond peach shortbread bars. Fantastic A+ on all fronts. Easy to make, not a whole heck of a lot of ingredients, make the house smell amazing, and really kick off the peach, summer vibe thing that goes on around here.
‘%u201cMillions of peaches, peaches for me. Millions of Peaches, peaches for free%u201d %ud83c%udfb6 (Peaches by The Presidents of the United States of America. If you have%u2019t head the song, look it up. I don%u2019t think I can even look at a peach without hearing the song in my head.)
Now to the peach almond shortbread bars!
The stuff. Peaches, almonds, vegan butter, brown sugar, flour, cinnamon, salt, and baking powder.
Easy peasy. Almonds go in to food processor first. Blend and pulse for a minute or two until they turn into a medium fine almond meal. (Don%u2019t over blend or you will end up with almond butter.) When almonds are ground, add in the flour, baking powder, salt, cinnamon, and sugar. Pulse until combined. Then add in the butter in chunks and pulse until dough just starts to come together.
Half the dough goes into a 9×9 baking pan. Smooshed evenly all over the bottom poke it with a fork. Then it just needs to go into the oven to bake. 15-18 minutes or so, just until it starts to brown a bit.
Peaches need to be cut so cut them up. !/2 inch thick slices, after the pits be removed of course.
Blinded baked bottom. Looks good yeah? Let it cool for a few minutes and then it gets peaches. Three rows, all over lapping and nestled together.
The top gets the remaining half of dough and is now it%u2019s ready for the oven. Another 40-ish minutes or so to really seal the deal.
Taken from the oven when golden brown, cooled, cut up, and placed on a pretty plate because pretty is nice.
I am pretty sure you figured out what to do next%u2026. EAT IT!
-C
makes a 9×9 pan which can be cut Into the sizes of your choice
1 cup vegan butter
1 cup packed brown sugar
2 cup cup all purpose flour
1 cups raw almonds
1 teaspoon baking powder
1 teaspoon salt
3 large firm peaches
1 heaping teaspoon cinnamon
Preheat oven 350
Place almonds into a food processor and pulse and blend until a fine meal has formed. It should take only a minute or two and stop half way and scrape the edges and sides do the almonds don%u2019t start to form a paste. Add in the flour, salt, baking powder, cinnamon,and sugar and pulse until combined. Add in the vegan butter in a few chunks and pulse until the mixture turns into a crumbly dough. Stop pulsing and dump mixture into big bowl.
Take half of the mixture and place into a 9×9 baking pan. Evenly distribute and press the dough into the bottom. Take a fork and poke the dough all over then place the pan in the oven. Bake for 15-17 minutes or until the dough just starts to lighly brown. Remove from oven.
While the bottom crust is cooling off for a few minutes, slice peaches into 1/2 inch slices. Obviously make sure to remove pit.
Now take your half baked crust and layer peaches evenly on top. It is easies to start at the top, make three rows across and then layer the peaches down (like in the picture above). Once peaches are layered, grab the remaining half of dough and evenly distribute on top. Place back into oven and bake for another 40-45 minutes or until the crumble on top is a nice deep golden brown.
Remove from oven, let coo completely (or as completely as you can) cut into pieces, and then you eat it.
Left over pieces should be placed in an airtight container in the fridge for up to 5 days. They freeze well individually wrapped too.
blind back for about 15 minutes of until the crust is starting to brown around the edges
I know what you are thinking, you are thinking “It’s Memorial Day weekend. Unofficial start of summer. Lots of BBQ’s now I have to make a potato salad!” (it’s a law right?) and “I want a pickle, dill to be specific”. Ok, maybe you weren’t thinking that, but I was. (I often think about pickles…)
Pickles. And potato salad. It only made sense to make a pickled potato salad. So make it I did. And oh boy oh boy, there is nothing better then a rich and creamy salad consisting of potatoes other then a rich and creamy and pickle tart salad of potatoes. I hit the nail right on the head with this one. The mr and I ate the entire salad all to ourselves and way to fast. Now it is gone and I didn’t get a chance to share with anyone. But it’s ok, cause this is definitely going into the summertime potato salad rotation.
Now you are thinking “creamy dill pickle potato salad.. this girl is a genius!” and to that, I say yes. I would have to agree with you on that. (hehe)
And to all who may not be a pickle fan, or need to make 2 potato salads, (it is always good to have a variety of potato dishes at any BBQ ) try this guacamole potato salad, another favorite.
The stuff. Potatoes of course and half a sweet onion, a cup or so of navy beans in the aquafaba ( bean water), left over pickle juice, fresh dill, dried dill, garlic, olive oil ,salt and a pepper.%u00a0
Yes there is a lemon pictured, but I was actually using that to squeeze into my water so yeah, not needed in the potato salad but you should grab a lemon and a big tall glass of water and drink it. Keep yourself hydrated.
Get the potatoes going. Chop them up into small piece and place into a big pot. Cover with cold water and add in a good bit of salt. Stick the pot on the stove and boil those taters.
While potatoes are boiling, strain the aquafaba (bean water) from the beans.
And chop the onion into little pieces and stick into a big bowl along with the strained (and now rinsed) beans.%u00a0 Pour in half the pickle juice and give it a good toss then set aside and let the pickle juice do it’s thing.
Now it’s the sauce time. Blend up aquafaba, garlic,%u00a0 dried dill, a little pickle juice and pinch of salt. As your blending, pour in olive oil until the sauce becomes rich and creamy dill sauce (vegan mayo my friends)
The potatoes are boiled until fork tender and drained..
Toss the strained potatoes back into the pot and add in the bean/ onion mix and the rest of the pickle juice. Give it all a good toss and stick the pot into the fridge for about an hour until the potatoes are cool.
And now we assemble. The cooled off pickle juice infused potatoes, beans, and onions are stuck into a bowl (or just leave in the pot if you want) and slathered with the creamy dill sauce and mixed with as much fresh dill as you want and lots of freshly cracked pepper
And a pickle. If you have one, I highly, HIGHLY, recommend chopping one up and adding it… I mean it is a pickled potato salad after all.
So now you have a great,%u00a0 fantastic, knock your socks off, salad to make for any of your weekend BBQ needs.
Your welcome.
Now have a great, extra long weekend!
-C
Serve 4-6
5-6 red potatoes
1 cup pickle juice (use a good pickle juice that you like the taste of)
A small sweet yellow onion (or half a big one)
1 cup navy beans
3-4 tablespoons aquafaba (bean water)
1/2 cup olive oil
2-3 cloves garlic
1 tablespoon dried dill
a handful of fresh dill
salt and pepper
pickles (optional)
Chop up the potatoes into mouth little chunks ans place into a pot . Rinse them and them cover about with about an extra inch of cold water, Ad d in a a good sprnkle of salt (like a tablespoon) and stick on the stove. Bring the pot to a rapid boil then turn heat down a bit to a low boil and cook until the potatoes are fork tender.
While potatoes are boils, strain you beans away from the aquafaba, and keeping about 3-4 tablespoons of the liquid. Rinse the beans and place into a big bowl. Chop the onion into little pieces and add that in with the beans and about 1/2 of the pickle juice. Set aside
Now grab the strained bean juice, about a tablespoon of pickle juice, the garlic, and the dried dill,%u00a0 Either with a hand blender or regular blender, start blending all that together while slowly pouring in olive oil (about 1/2 a cup ) until the sauce is thick and creamy. Season with salt and pepper to taste and place in fridge to hang until you need it.
And once the potatoes are cooked, strain them then add them back to the pot along with the bean/onion mixture and the rest of the pickle juice. Toss around to coat evenly and place into the fridge to cool. After about a half hour its a good idea to give it a toss to make sure the juice is getting to all the potatoes.
Once potatoes are cooled, dump into a serving bowl. (or just keep in pot) It’s ok if there is a little remaining liquid.. it will get sucked up by the potatoes. Get the sauce from the fridge and pour it and toss it around to evenly coat all those yummy potatoes. Chop up fresh dill and toss that in too (as much fresh dill as you like.. more is better!) And lately, if you have a spare pickle or two, chop it up and add it on in (or place in a bowl on the side for people add in themselves)
I added the pickle. You should add the pickle. It is so good with the pickle
Like any potato salad, serve with your favorite foods and keep in the fridge when not being eaten.
Spring is here for reals, I think. No, it is here, it has just been a bit raw and maybe a bit more rainy then it really needs to be, but whatever, it is spring and it is good. Things are greener by the day, the temperatures although not exactly warm are still inhabitable and without cause for winter jackets (although I have still been rocking the mittens) and spring veggies are popping up all over. Things are looking good.
So last week I made a pie crust with the intention to make a veggie pot pie and stuck it into the freezer. When the time came to make said pot pie, I forgot to take it out of the freezer so the crust was not meant to be for pot pie (it will probably end up as a rhubarb pie%u2026we shall see). Without pie crust, I wasn%u2019t exactly feeling like I should make a pot pie, but a tart, well yeah, sure. A crispy and chewy crackery crusted thing with almond ricotta a spring veggies because that is where the mind went and what the mr agreed sounded good. (When I make up recipes I just start taking about ingredient and preparations and wait til the mr says %u201cYea, that loud good. I%u2019ll eat that %u201c He usually will say it right away and for anything. Very easy to please or he just doesn%u2019t care%u2026hum? )
And so the tart was made and the tart was eaten in all entirety for dinner by the mr alone. Usually when he eats all of something it means it was one of the really good things. Or he is really really hungry. But he said it was a really good thing. I trust him because I agreed. I got in a few spoonfuls of the almond ricotta mixture and it is really freaking good if I do say so myself (I could eat bowls of almond ricotta all day long).
Anyway, heres to spring and all things that are green and good.
To the tart.
The stuff. Flours (white and white whole wheat), baking powder, and a little salt in the bowl. Water and olive oil, blanched almonds, a lemon, a clove of garlic, asparagus, peas, frozen and thawed spinach, a small red onion, and salt and pepper.
Start with making the crust. Mix the dry together then add in the oil and water to form a dough. Knead dough a minutes until the dough is uniform and place back in bowl and cover. Dough needs a few alone minutes to rest. I can relate to that.
While dough is resting, make the almond ricotta. Almonds, garlic, the juice of the lemon, and a bit of water go into blender. Add in a pinch of salt and pepper too.
Blend until creamy and smooth.
Dump in the spinach and blend, just until combined.
Scoop ricotta into a bowl and mix in the peas. And sure give it another taste but try not to eat it all.
Grab the onion and slice it all nice and thin.
And after the resting time, grab dough and roll it out. Try for a rectangular shape or as rectangular as you can get it, but nice and thin. Thiner is better.
Place rolled out dough onto a baking sheet and poke the bottom with lots of little hole. Take ricotta mixture and spread evenly all over crust, leaving a 1 1/2 border all the way around.
Then top with the asparagus and more onions.
Fold over the edges of the crust, sprinkle with a pinch of salt and pepper, and into the oven it goes to bake.
And then it is baked. And ready to eat (after a few minutes of cooling).
Nothing left but to cut it up and eat it.
Spring. Green. Food.
Things are good.
-C
Makes a 8×12(ish) tart
For the Crust
1/2 cup all purpose flour
1/2 cup white whole wheat (can sub for all purpose)
3 tablespoon oil
1/3 cup room temp water
1/4 teaspoon baking powder
1/2 teaspoon salt
For the Almond Ricotta and Veggies
1/2 cup blanched almonds
1/4- 1/3 cup warm water
1 lemon
1 clove garlic
1/2 teaspoon salt and pepper or more to taste
1/4 cup frozen and thawed spinach squeezed of liquid
9-10 spears of Asparagus
1/4 cup peas (fresh or frozen and thawed)
1 /2 red onion
First make the crust. Whisk together the flours, salt, and baking soda. Add in the oil and water and mix until a dough forms. Form dough into a ball and knead for minute or two on counter then place dough back into the bowl and cover. The dough needs to rest for 10-15 minutes.
While dough is resting, make the almond ricotta. Place almonds, garlic, and juice of lemon into a blender. Start blending and add in the lesser amount of water, adding a little more until the stuff all starts to blend. Blend on high for a minute or two until the mixture is nice and creamy. Season with salt and pepper, blend a second to mix then add in the squeezed out spinach. Blend until mix together then dump or scoop the mixture into a bowl and mix in the peas. Then thinly slice up the onion.
Preheat the oven to 450
After doughs little rest, lightly flour a counter and roll it out, thin as you can, in a rectangular shape. Try for at least 12in x 16in. The rectangle doesn%u2019t need to be perfect. Rough is good.
Place the rolled out crust onto a baking. Take a fork and dock the surface (poke holes into it to prevent air bubbles). Take the ricotta and pea mixture and spread evenly on crust, leaving about a 1 1/2 inch border all the way around. Add a layer of sliced red onion and then take asparagus (trim off woody ends) and either lay on whole or break in half and lay on. Add more onions on top. Fold the border of the crust over the top. Sprinkle the whole thing with pepper and place into the hot oven.
Bake for 22-25 minutes or until the crust becomes a nice golden brown. Remove and let cool a few minutes
And then cut up and eat. Right away or at room temperature. Or some now and some later. All up you you.
Store left over in fridge in air tight container for up to a few days. the crust will not be crispy but more chewy. Can stick it back in oven for a few minutes to crisp it up.
I am not complaining at the least bit, but man, so,so,so %u00a0many tomatoes. Everyday more and more are ripe and ready for the picking,%u00a0some even starting to fall off %u00a0the plants.
If you were to come to my house, you will notice that I have bowls and baskets all over the place, just full of not just cherry tomatoes, but big baskets of the most beautiful heirloom tomatoes this girl has ever seen. It’s actually causing me a little anxiety. I cannot bare to think of one single tomato going bad. I and am on a mission to eat as many of the heirloom ones as I can ever day. But that still leaves all the sweet little cherry tomatoes, which I do still snack on, (and try and make the mr snack on too)%u00a0but am having a had time keeping up with eating all of those on top of the other kinds. But again, not a complaint, cause one can never really have too many tomatoes.
So instead of just continuing to make sauces and soups, (I have yet to do a tomato canning day, which is in need of happing asap)%u00a0I figured I would give the mr a %u00a0break and make him something a little different. A big tomato slab tart. And a tart needs some type of cream, so fresh corn and avocado cream happened as well.
Lovely looking, yummy, and pretty easy to make. Uses a good amount of tomatoes (I was fooled.. I used two pints for this tart,%u00a0%u00a0went to garden afterword,%u00a0got 4 more pints) and is perfect for a lunch situation or a light dinner. Add some greens, maybe some cheese (the mr and his cheese) and you are sitting pretty and ready to go.%u00a0
Lets get tarting!
The stuff%u2026 For the tart we have flour, slat, a little vinegar, icy cold water,%u00a0frozen olive oil* and a big bowl of cherry tomatoes. For the avocado and corn cream, well we gots an avocado, a cooked cob of corn,a few cloves of garlic (I forgot in the picture) and a lemon. Salt and pepper for everything.
*Note. I recently read on the food 52 website that freezing the olive oil for crust makes the oil distribute more like butter and %u00a0makes the dough super flaky and crispy, which it indeed did. I will forever freeze oil for oil crusts, Thanks food 52 for being so smart.%u00a0
Start by making the dough. Whisk together the flour and salt, then dump in the frozen olive oil. Using a fork or a pastry cutter and working as quick as you can, cut the oil into the dough.
When the mixture resembles a course crumb, add in vinegar and mix with fork, then add in water, one tablespoon at a time, until the dough starts to comes together. Dump mixture out onto a floured surface and form into ball. Wrap in plastic and stick in the fridge for at least an hour or even over night.%u00a0
Chilled dough placed on a lightly floured surface, ready to roll.
You know what to do here.. roll it out and stick it in a baking sheet or, if you don’t have a small baking sheet, use a large casserole dish. You could use a pie plate, but you might have a little extra dough (pie dough cookies?)
And dump in the tomatoes. Don’t forget to remove the little green tops if they have them. Drizzle with a little olive oil,%u00a0season with salt and pepper. and into the oven it goes.
While the tart is baking,%u00a0make the cream. Scoop fruit of avocado, the corn off the cob, a clove or two of garlic, juice of lemon, and %u00a0salt to taste, into a blender (or bowl if using a immersion blender)%u00a0and blend until smooth. Taste and ass more swooning if needed. and if you want the cream a little thinner, add in a slash of water.%u00a0
Cream oh creamy goodness. (So great on tart, but also makes a great dip, toast spread, salad topper, or eaten straight with a spoon.)
The tart has been baking and after about an 45 minutes, it should be done.%u00a0Remove from oven when the tomatoes have all bursted and are starting to caramelize and the crust is cooked through and golden brown,%u00a0
Let cool for a few minutes. I
You got you tart, the cream, and if you are in into it, a nice serving of some freshy greens to some extra heft and color%u2026SOmething on the more bitter side like kale or young chard pairs very well with the sweetness of the tomatoes.
A big slab on greens with cream on slab.
The mr added a little cheese to his%u2026 if your a cheese person.(he sure likes his cheese)
Pretty food.. Food so good!
Happy Humpty hump!
-C
For the Tart
2 pints of any variety cherry tomatoes. A variety look nice
1 3/4 %u00a0cups all purpose flour
1/2 cup olive oil (frozen ahead of time)
1 teaspoon salt for crust
1 tablespoon apple cider vinegar
3-4 tablespoons ice water
salt and pepper
9×11 baking pan*%u00a0
For the Corn Avocado Cream
1 cooked and cooled %u00a0cob of corn
1 avocado
1 lemon
salt%u00a0
2 cloves of garlic
*Note. I used a 9×11 baking sheet, but if you don’t have one, you can use a big glass casserole dish. Or you could even use a pie plate, but you will end up with a little extra dough and you might not need all the tomatoes.%u00a0
Start by making your dough. Whisk together the flour and salt. Cut in the frozen olive oil into flour with either a pastry cutter or a big fork until it has a crumbly texture. Add in the apple cider vinegar and a tablespoon of water at a time until dough starts to come together.(about 3-4)
Dump out onto a surface and fomr into a disk. Wrap with plastic and stick in the fridge for at least %u00a0an hour or overnight.
Preheat oven to 375
Get your chilled dough and, on a lightly floured surface,roll out into a rectangle roughly the size of your baking sheet. Place in sheet pan and make it look pretty. You can use your fingers to lightly press the dough into pan %u00a0Dump in your cherry tomatoes. If you want, once the tomatoes are in, slightly fold the edges towards the tomatoes and away form the side of the pan.%u00a0Sprinkle with salt and pepper and the finest drizzle of olive oil. %u00a0Stick into the oven for about 45-55 minutes. The Pie is done when the tomatoes %u00a0%u00a0have popped and starting to brown and caramelize and the crust is golden brown.
While the pie %u00a0is baking, remove corn from cob. Add to a blender with the avocado, garlic and %u00a0and the juice of the lemon. Puree until smooth. Season with salt and pepper to taste.
To serve, slice big slabs of tart and spoon on big globs of the avocado corn cream. If your into it, a bed of fresh greens is very much nice.
Summer is really just coming along nicely. I have heard many a people complaining that it is not warm enough yet, but I would like to completely disagree. It is plenty warm and I am loving this not to hot start of summer. Even the rain. The only downside I see to it is the late start planting for farmers. But talking to a few farmers made me feel better about my rain loving self. The are alright and getting things in the ground. They will good. So I can go back to be happy about it again.
Besides the wonderful weather, the week had been pretty good. The mr got to go fishing a couple of different time, I have been biking all over the world (within the surrounding 20 mile radius). We had dinner with Barb which always makes me happy. Miley also came over for her own dinner night. We talked about dealing with mean girls (so hard to not go track each one down and flip the F out on them) and her summer bucket list. Then she ate a gallon of ice cream because why not. I worked the studio, the mr worked the work, and being fully functional adults we did all the doings that needed to be done. We are good like that.
Then there is this thing that I have noticed this week with my brain that is driving me crazy. I think that I might have summer brain fog. I%u2019ll be thinking about something and all of a sudden I forget what I am thinking about. I don%u2019t know if it because I have so much I want to think, and so many little things I want to do, but it keeps happening and is driving me nuts. There is a rabbit hole of reasons for why this is happening that I am trying not to go down. I am not a hypochondriac per say, but I am definitely staying off any web based medical sites that will tell me I have all and any brain diseases possible. I don%u2019t need help visualizing my demise, thank you-very-much.
Today is a day for home stuff. After I bike into town to go to the gym and drop off a hundred library books, I am coming home, throwing on my overalls and spending a good amount of time weeding the garden, mowing the lawn, and lets be honest, sitting around drinking coffee and reading. The mr, I think he is going to finish making a picnic table for me to sit at. I am excited for that picnic table.
Oh, and call my dad cause it%u2019s Fathers Day. #1 Daughter here!
The stuff on the internet that I looked at and am now sharing with you.
-Labels can be tricky and misleading.Good to know what they all mean. Why Food Reformers Have Mixed Feelings About Eco-Labels
-I have been in Love with Keanu Reeves ever since I saw him jump off that bus. And knowing he is not an asshole, only makes me love him more. Keanu Reeves Is Too Good for This World
–The Invention of the %u201cBeach Read%u201d. Sometime a good, easy read is what we (I) need.
-I love the idea of the Prefab Treehouse, but it seems a little sketchy.. Who checks if the trees are safe? But still cool.
–Meet the Coolest Inflatable Pool Ever from Mylle. My kind of kiddie pool. I want one.
–What your grip says about your odds of surviving a health crisis. Now whenever I shake someones hand I am going to crush it. HA
-It is true. Behold, the Age of %u2018Salad Frosting%u2019 Is Upon%u00a0Us. And I kind of think it is brilliant and also wrong.
-I used to hate arches but now, well I am kind of obsessed with them. THE ART OF THE ARCH.
-In love with these Found Leaves with Delicate Crochet Embellishments by Susanna Bauer
–Scientists Are Figuring Out How To Change Blood Types. The things that science and smart people can do is crazy and mazing and scary.
It is getting oh so much nicer out yeah? Springing and such, well kind of. Still a wee bit chillier then it should be around here but still, it is spring and I am taking it.
And with the spring, I feel the itch, the itch to spend all of my free time outside. Out doing things that are not inside because I spent the last 7 long months inside way too much. I needed to be outside as much as possible and as it gets even nicer and warmer and garden temperature-able, I am basically going to be living outside.
Bring in sesame noodles. Super fast, super easy, super duper in every way. Make a big old batch and eat now, eat later, eat hot or eat cold. Everyone loves them, they love you, etc. etc%u2026 A perfect meal to have in rotation when you know that you are not going to have or want to spend much time cooking in the kitchen because you will be outside playing in the dirt and soaking up the sun. And think about all the picnics and BBQ%u2019s to come. These suckers are fantastic to have at any outdoor eating event. They are even peanut free so you can safely bring them to potlucks and such and don%u2019t have to worry about accidentally kill a peanut allergy person. And you can make them gluten free as well if you sub in your favorite gluten free pasta. These noodles, I am telling you. They are a winner in every way.
So with out further ado, the noodles!
The stuff. Spaghetti noodles, tahini, a few cloves of garlic, some toasted sesame oil, soy sauce, red wine vinegar, honey (used whatever sweetener you like), red pepper flakes, tasted sesame seeds some cabbage, half a red onion and a carrot.
Get pasta cooking. Boil water, drop noodles in, you know the drill. Cook as long as the the noodles need cooking, just make sure to not over cook them cause soggy noodles are nasty.
Chop, shred and julienne the cabage, onion and carrot. Nice and thin.
Mince the heck out of the garlic. Or use a garlic press if you want.
Now make the sauce. Add the minced garlic, along with the soy, sesame oil, vinegar, sweetener, and chili flakes to the bowl with the tahini. Mix, mix, mix until it is all incorporated and not lumpy. And that is that.
Noodles should be done by now so strain them out.
Add the prepared veggies to a big bowl.
Add in the cooked noodles
Cover with sauce and toss all around until all the noodles are coated and delicious. Sprinkle with sesame seeds and a pinch or so more of pepper flakes.
And then it is time. Eating time.
Happy spring!
-C
serves 3-6
3/4 lb (3/4 of a package) of your favorite spaghetti noodles (or linguine or similar noodle)
2 tablespoons toasted sesame oil
1/4 cup soy (low sodium if you have it and gluten free tamari if needed)
3 tablespoons red wine vinegar
3 tablespoons tahini
2-4 teaspoons red chili flakes
1-2 teaspoons sweetener of choice (maple, honey, or brown sugar)
4-5 cloves garlic
1-2 tablespoons toasted sesame seeds
about a 1/4 head of cabbage
a carrot
small red onion
Bring a pot of water to a boiling cook the noodles as directed on package. You want them al dente, cooked all the way, but barely. No soggy noodles. (unless you like them soggy)
In the mean time, shred the cabbage, julienne the carrot (or shred it) and slice the onion so very thinly. Place into a large bowl. Now mince garlic and place into a bowl along with the soy, sweetener, vinegar, tahini, sesame oil and a teaspoon or two (more for spicier) of chili flakes and whisk until completely incorporated. Taste and adjust if needed. Add more tahini for more body, more sweetener if needed or more hot pepper flakes for more spice.
Once noodles are cooked, drain and place into large bowl along with the shredded and julienned veggies. Pour in the sauce and toss it all around until all the noodles are covered. Sprinkle in the toasted sesame seeds and a small pinch more of the red pepper flakes.
Eat. Eat warm, room temp, or cold. They are delicious any way.
Any left overs just stick in fridge. Can be reheated or not. Also, you can make the sauce and the noodles a few day ahead of time of when you want to have the dish Just mix the sauce with the noodles when you are about to serve them%u2026 So simple!
Nothing here but a mere craving, the fact that I had a fresh head of cauliflower, and I really wanted tahini. TA DA. I made exactly what I wanted and it was so so sooooo good. Maple Cumin is one of those super A+++ taste pairings and anything roasted cover in tahini is basically going to be a win so I had no fear when making this dish that it was going to be anything but fanatic.
And of course I was right. It was so freaking good, like now I am going to make it again and again because I don%u2019t want make cauliflower any other way ever or at least until I get sick of it or of roasted vegetables. But that probably won%u2019t happen for a while.
So if you like cauliflower and tahini and amazingness, here, make this.
To the cauliflower
The stuff. A head of cauliflower, tahini, maple syrup, cumin powder, red wine vinegar, salt and pepper, and olive oil.
Break or cu the head of cauliflower up into florets and toss with a little oil, the maple and cumin, and a little salt and pepper.
Scatter on a baking sheet and stuff it into a hot oven.
Meanwhile mix tahini with vinegar, salt and pepper, and enough warm water to thin out.
Roasted all nice and crisp and delightful.
And now you gather up all that cauliflower and cover with all the tahini you want. Grab a bowl, or just eat off baking sheet, and get to it.
And there is no shame in eating a whole head of cauliflower because hey, its cauliflower.
-C
Makes a meal for one or a side for a few
a head of cauliflower
3 teaspoons cumin
2 tablespoons maple syrup
olive oil
3 tablespoons tahini
2 tablespoons red wine vinegar
2-3 tablespoons warm water
salt and pepper
Preheat oven to 450
Break or cut the cauliflower into medium sized florets. Place in a bowl and drizzle with a teaspoon or so olive oil and toss around. Drizzle in maple, add in the cumin, and a pinch of salt and pepper. Toss until coated then dump the cauliflower onto a baking sheet. Place in hot oven for 25-30 minutes or until roasted to your liking.
While that%u2019s roasting, mix up the tahini, vinegar, and a pinch of salt and pepper. Add in warm water until the mixture is a drizzlable consistency.
Once cauliflower is out of oven, cover with tahini.
Now eat.
There will be no left overs so don%u2019t worry about it.
I love watermelon, I mean, who doesn’t, but i don’t often buy them for myself for one main reason. They are so freaking big and once you cut open a melon, the rest of what is not eaten needs to be refrigerated which would be fine but I have a very tiny fridge and sticking a watermelon in there takes up about half the space. And sure, I could maybe eat a whole melon all to may face in one sitting, but then I would explode. And yes, I know you can buy smaller wedges of melon at the store, but I refuse. Those wedges just seem gross and expensive and wrong to me.%u00a0 When I buy watermelon I take my chances and buy the whole thing and just eat the crap out of it until I make room for other food in the fridge.
It has been so hot out (too hot) and I really just needed a watermelon, so I bought a watermelon (the biggest one I could find because of course). I waited for a day until the fridge was near empty and cut the beast up. Half went into the fridge right away (I had just eaten the last of the greens to make room) and the other half, well only a 1/4 was eaten. I could have kept going and eaten the rest or I figured I would just make a nice tea drink with the rest. And that what I did and that’s this drink I show you here. Smooth, bright, and earthy iced green tea with fresh sweet watermelon, it’s all summertime up in you mouth. And pureeing up watermelon into a liquid definitely takes up way less space in the fridge. I am a genius.
The stuff. Some watermelon, a few green tea bags, a lime( or a lemon), a spring or two of mint, and some water.
Start off with making the tea. Hot water to tea bags, steep for 5 or so minutes then remove bags. Stick tea in fridge to cool.
Now for the watermelon. Remove the rind from the fruit , and cut it up into chunks. Toss in a few mint leaves and…..
So you have cooled tea, pureed watermelon and the juice of a lime.
Pour it all together and mix it all up.
And there you have it. Fresh watermelon green ice tea, ready for your drinking.
All you need now are glasses full of ice and little wedges of melon.
All the summertime, all the watermelon.
Hope you are all staying cool.
-C
make 6 1/2 cups
4 green tea bags
4 cups water
1/4 of a watermelon (about 2 1/2 cups liquid watermelon)
1 lime (lemon works too)
a few sprigs of mint (optional)
Bring water to an almost boil (I let my tea pot whistle, turn it off and sit for a minute or two) and pour hot water over tea bags. Let steep for about 5 minutes, then remove bags and refrigerate tea until cold.
When the tea has cooled, take you melon, remove the rind, and puree the fruit along with the mint, with a blending device of you choice. Squeeze in the juice of the lime and give it all a good stir.
Pour tea over ice, garnish with a sprig of mint and a slice of watermelon if you want some fancy.
Not only is it the first week of summer, it’s also popsicle week! Billy over at the sweet ass blog Wit and Vinegar hosts a little (actually quite large) bloggers party that share all sorts of fun and fantastic popsicle recipes and presents that list to the world. There are popsicle flavors up the wazoo…Pretty stinkin cool right.
So my contribution to the world of popsicle eaters is one of my all time favorites (maybe the absolute best one yet).. Carrot Ginger Orange.
For those who know me, this flavor combination should come as no surprise. Carrots are my thing. I eat them all day, every day. Sure I eat a shit ton of other stuff, but always carrots. Carrots are in my breakfast,lunch, and dinner. If I need a snack, I grab a carrot. There is just something so satisfying not to mention so easy about carrots. Eaten alone, with mustard or hummus, or dipped in peanut butter of cinnamon..Carrots can do just about anything. I mean I eat so many carrots that no shit, my skin is a slight tint of orange (seriously for reals. Something about an abundance of carotene) Crazy I know, but what can I say. I really like carrots. %u00a0%u00a0%u00a0%u00a0%u00a0%u00a0%u00a0 (that’s what I say when people ask me why I am glowing orange)
So naturally the carrot made it’s way into my popscile mold. And now it’s for real. Carrots really can do anything.
Another win for carrots everywhere.
And popsicles.. Just in time for that hot as shit weekend we are about to have.
GO POPSICLES CO!
The stuff. Carrots, an orange, some fresh ginger, and some water. Simple simple and no, I didn’t forget the sweetener… these pops have no need (although if you want, go ahead and add a smidge or splash of something sweet)
Start by chopping up the carrots and sticking them into a pot with some water. Not a lot, just enough that it almost cover the carrots, and stick that pot onto the stove, cover and cook on medium heat until tender. Make sure to check that the water doesn’t completely evaporate or you will have burnt carrots which taste just fine, but not as a sweet popsicle
While the carrots are tenderizing, zest the orange then juice it and grate up some fresh ginger.
Once the carrots are fork tender, dump in the juice, the zest, and the ginger. Stick pot back on heat for just a few more minutes to meld the flavor together.
Dump the contents of the pot into the blender and blend blend blend until smooth.
Grab your mold and pour blended mixture into it.. Because the mixture is thick, you don’t have to wait to stick the sticks in so go ahead and do that now.
And into the freezer they go!
Serious popsicle goodness right there.
Happy Popsicle Week. Go ahead and make them all!
-C
Makes about four or five 3.5 oz popsicles
3 medium sized carrots
1 orange (zest and juice)
1-2 teaspoons fresh ginger
water
Note. I did not use and sweetener and did not miss it but if you really think you need it, add a little bit of honey or sugar. But really, they are sweet enough so maybe give them a chance without it.
Start by chopping the carrots up into coins and stick them into a pot with enough water to just about cover the carrots. Stick on stove on medium heat and place a lid on the pot. Cook carrots until tender.
While that’s happening, zest and juice orange and grate up the fresh ginger. (I used 1 teaspoon of ginger at first, but after I blended it, I decided that I wanted a little more so I added another teaspoon)%u00a0 Once the carrots are soft, dump in all the juice, zest and ginger. keep on heat for a few more minutes to let the flavors all meld together.
%u00a0And now dump the pot of carrot goods into the blender and blend the crap out of it until smooth. (add in a splash or two of water if needed. Taste your puree and if you want more ginger, add it it.( can also decide now if you want any sweetener..
Now pour the mixture into you popsicle molds and follow the mold directions on how to use it (add popsicle sticks and stick it in the freezer)
Freeze until frozen.
Remove from freezer and let sit until pops slip from mold.
Eat until gone.
Make more popsicle.
%u00a0I remember long ago, when I was just a little, my mom would take me to the health food store with her to get whatever new fancy snack that she was obsessed with or to stock up on way to expensive jams and her very specific boxes of teas that she could not find anywhere else. Those were the days (when mom was buying the groceries) And I loved going to the store with here because well, bulk bins! Oh the bulk section, it had all the best stuff like sesame sticks and granola chunks.%u00a0 It was a free for all,, grabbing a piece dried mango here or a handful of almonds there. (don’t judge, I as just a sweet little little, I don’t do that anymore…often) %u00a0 This store had a pretty impressive bulk section and includedtwo bins of carob covered rice cakes. One was plain, one was mint, both freaking delicious. Up until the first time I ate one of those rice cakes I had no clue what carob was or that those rice cakes were not chocolate. I just remember that they were super tasty and that my mom always got one for me.%u00a0 She wold buy a dozen and I might have gotten to eat another one of those too.%u00a0 I loved those rice cakes.
I haven’t seen a carob covered rice cake in years.%u00a0 I think that they stopped carrying them or maybe it’s because the store has changed a lot and I don’t often go there anymore, but either way, it’s been a while. So anyway, last week I spur of the moment bought a package of (unsalted plain) rice cakes, then realized that the mr wasn’t to into rice cakes anymore (there was a long period of time where I made him peanut butter banana rice cakes for lunch everyday). But I bought them and they need to be eaten, and that’s when it came to me.. Make the carob covered rice cakes from the old days. Something new and different for the mr and something super nostalgic for me.
And it helped that it has been way to freakin deakin hot and all the things that I have been wanting to bake (cherry pie, rhubarb cake, food in general) just wasn’t happening. . But these sweet treats take 2 minutes to make and require no heat whatsoever (my coconut was already melted.) Can you really ask for more?
The stuff. Carob powder, coconut oil and rice cakes. I should have stuck the sea salt in the picture, but it is kind of optional..
Simple as can be. Th oil and carob powder get combined in a bowl of some kind.
Mixed together until silky smooth and BLING BLING shiny.
Rice cakes all ready to get decked out ( doing this on wax paper to make life much easier)
Smothered with the carob all over. You can do one side at a time, sticking it into the freezer to set for a minute or just get a little messy and do it all at once. Up to you. But wither way, it need to go in the freezer for just a few minute to get hard.
And right before you stick them in the freezer, sprinkled with sea salt.
Uh huh.. Looking good. And taste ever better then I remembered. (it’s the salt. Salt makes everything better)
-C
Makes 2 (why make only 1)
2 tablespoons coconut oil
4 heaping tablespoons carob powder
2 plain rice cakes
Sea salt
In a bowl mix together melted coconut oil with the carob powder until a smooth and shinny consistency. With a spatula, smother the top and the sides of the rice cakes with the mixture. Place on wax wax paper, un-carobed bottom down, and stick in freezer for a few minutes until carob has harden. Remove, flip, and smother remaining side. (you can do both sided at once, but it’s a little messier) Sprinkle salt on now and back into freezer until hard. Remove and eat.
Note. If you make two and have one left over for late, keep it in an air tight container in the fridge or freezer. It will melt just like chocolate.
This treat is a long time coming, like almost a years time%u2026Let me explain.%u00a0
One of the littles had requested a dessert of some type of almond pear situation for his birthday%u2026..last year. Of course I said yes, no problem, for your birthday, you got it. But I never got it. I actually completely forgot. Then a few months later, I remebemered, felt like a big D-bag and told %u00a0myself I still had to make something for the guy%u2026 and I forgot again.%u00a0Next time I remembered, I had just bought a bunch of pears and that was it. Make the kid something you bitch (is what I told myself) but heres the thing, I figured he forgot too and those pears were mighty tasty.(I know I am horrible)%u00a0
So just last week I was at the store, meandering through the produce, and noticed that local pears were on sale. This was it.%u00a0I knew it had to be done. I bought a large quantity (enough to bake with and eat) and got to making that little his birthday treat request. I went with bars.. nothing to sweet, nothing to crazy, lot and lots of almond and pear flavors. Perfect for breakfast or an afternoon snack, and made even better by the fact that they were made for him, and it isn’t even his birthday.
So I made them, and brought them to his house, waited for him to get off the bus from school, and handed him his long awaited pear almond treat. He was so happy, it made me feel like shit.(I so should have made him something a year ago)%u00a0%u00a0But oh well,%u00a0%u00a0he got them right? And this way is much more a surprise then if I had actually made them when I said that I would. An unexpected, not your birthday, birthday treat!
Right here guys%u2026Still the Best Aunt EVER!
The stuff. Alond flour, oat flour, baking soda ,salt, earth balance and a little honey. We also need some rolled oaths almond butter and almonds. And of course we need pears, with a little corn starch and a smidge of cinnamon.
Nice ripe pears get thinly sliced, seeds and stems removed.
Tossed into a bowl with the starch and cinnamon and set aside.%u00a0
The oat and almond flour gets mixed together with the salt and the baking soda, then mix together with the earth balance and honey until it turns into a dough.( I used my hands to mix it together%u2026it worked better then a fork)
Break off about a 1/4 of the dough and stick back in bowl. Take the rest and evenly press into the bottom of a 9×9 baking pan.
Take the remaing dough and mix in the almonds, oats, and almond butter to form the crumble.
Dump the pears on the crust, making sure the are level and pretty evenly layered.
And crumble the crumble on top.
Give it a little press to compact the crumble and into the oven it goes!
When all browned and crispy and nice, remove from oven and let cool. Cut into squares and go for it.
Look at that, so much goodness.Go ME!%u00a0
Happy Wednesday people!
-C
For the crust and crumble
1 1/2 cup oat flour
1 1/2 cup almond %u00a0flour
1 teaspoon baking soda
1 teaspoon salt
1/4 cup honey
1/2 cup earth balance (can use butter)
1/4 cup almond butter
1/2 cup oats
1/4 cup almonds
For the pear filling
4-5 ripe pears
2 tablespoons corn or arrowroot starch
1 teaspoon cinnamon
Preheat oven to 350
In a large bowl, mix together the almond and oat flour, baking soda, and salt. Add in the earth balance and honey and mix together until a dough forms (I find using my hands to work swell). Roll dough into a blob and tear about 1/4 of the dough away and set back into bowl. Press the remaining dough into he bottom of a 9X9 inch baking pan. With the remaining dough, mix the rolled oats, the almond butter and the chopped almonds and set aside again.
Now slice up your pears %u00a0into 1/4 inch thick slices (remove seeds and stems)%u00a0and toss into a bowl with the cinnamon and starch. Take pears and layer ontop of the crust, trying to keep the pears evenly distributed. And dump and distribute the crumble topping all over the pears. Gie the whole thing a few pats to compress the crumble a bit.
Stick into the oven and bake for about 45 minutes, or until the crumble topping is all nice and brown and crispy.%u00a0
Remove from the oven, let cool and cut into squares.%u00a0
Great as breakfast lunch snack or dinner. Eat with you hands and lick crumbs off plate.%u00a0
Holy shit is it hot out. My brain is all fizzy, my hair is all frizzy, and my over all being is just blah. I am not a fan of super hot weather (as some of you may know) and am getting more pissy as the days go %u00a0by and I continue to be a sweaty mess. I don’t want to feel like a big wet slob, I want to feel fresh and clean and wear clothes that are not drenched in sweat. I know, bitch, bitch, bitch, but seriously. Even the world around me is wilting, and in the nice, colorful fall foliage kind of way. It’s all crispy and brown.%u00a0%u00a0The garden is barely holding on, the flowers are shriveling in the ground, and a few plants are just plan dead.%u00a0It’s just too hot.
I think that only plus side of this past week of hot crap weather are these popsicles that I made. They were actually suppose to be a treat for the littles, but guess what, me and the mr ate them and didn’t share, and no, I feel zero bad about it. They were so good, so refreshing,%u00a0so cold(if only for a minute) and just so needed. %u00a0A few minute reprieve from being miserably hot. And bonus, a great use of all the watermelon and tomatoes that I have taking over the countertops (I have so much watermelon and tomatoes)%u00a0
And really, these probably (better freaking be) the last batch of popsicles for the summer so I think I am going to make another batch today, eat them, savor the flavors of summer, and move on from there.
.%u00a0Maybe I’ll even share them this time.%u00a0
The stuff. Some watermelon*, a tomato, a handful of basil, and a lime.%u00a0
*My watermelon had seeds,%u00a0but you can use seedless. I also removed the green skin, but kept on as much rind as I could, although this particulate melon had very little white rind.
Dump the melon, tomato (cut in a few pieces, the juice of the lime and the basil into a blender. If your melon has seed, don’t worry about removing them.
The stuff all blended up.
. This step is more necessary %u00a0if you melon is seeded, straining the mixture pretty much caught most of the seed chunks. You can skip this if your melon is seedless.
Now pour the juice into your molds and stick into freezer to freeze.%u00a0
After about 2 ish hours, remove and stick the sticks into the semi harder pops.
And a few more hours later%u2026…Frozen goodness.
And pop one of those suckers out of the mold and savor every frozen delicious bite.%u00a0
Happy Tuesday…%u00a0DON’T MELT!
-C
Make six 3.5 oz popsicles
1 ish cup watermelon (green skin removed.. rind is good)
1 large ripe tomato (about a cups worth)
a few sprigs of basil
Juice of 1 lime
Place all ingredients into blender and blend until smooth. Strain mixture through a fine strainer into a bowl or jar and pour into popsicle molds.%u00a0
Place in freezer for a few hours. About 2-3 hours in the freezer, take them out and stick in sticks (or fallow you popsicle molds instructions) Place back into freezer
Once completely frozen, remove from molds and eat with your mouth.
FRIDAY%u00a0YEAH YEAH!!!!
And for your Friday, I made these awesome little raw/ vegan/ gluten free cookies.%u00a0
Now wait a minute. Don’t let all the labels of what is not in these cookies scare you away. Just focus on all the stuff that these cookies are made of. Almonds, Cashews, Coconut, Cocoa, Oatmeal. They are cookies made with lots of good yummy stuff that just happened to be enjoyed by those with%u00a0specific food diets as well as%u00a0those who eat anything. A cookie for all!%u00a0%u00a0See, don’t they sound excellent? Yes, yes they do. And they are good. So, so, good.%u00a0Even the mr. is into them. And he is far from being%u00a0raw/vegan/ gluten free.%u00a0
And because these cookies are made%u00a0with all sorts of good for you stuff (lots of proteins,%u00a0good healthy fats, and%u00a0complex carbs) you can pretty much feel zero percent guilt eating them.%u00a0They a%u00a0are a no joke, healthy, energy packed cookies of goodness. A fantastic way%u00a0to start the morning, eat with lunch, as dessert, post work out,%u00a0or eat as a late night snack. (Just don’t eat them all at once)%u00a0
Now go for it!
The raw stuff. A cup of old fashion rolled oat that have been soaking in water for about an hour.%u00a0%u00a0Almonds(which I spent 20 minutes deshelling) cashews, dehydrated coconut flakes, some cocoa powder and a few medjool%u00a0date. If your nuts are unsalted, add a pinch of salt too.%u00a0
Dump everything into %u00a0a food processor. BUT WAIT! Make sure to remove the pits from the dates)I have broken a blade in the past form a date pit)
Blend unit combined and a kind of rough dough is formed. It will be a little sticky. If it;s to sticky to handle, place into the fridge for a few minutes to set up.
Now take blobs of mixture and roll into balls
And you could totally leave them as balls%u2026 you can%u00a0even play with your balls%u2026.
But I think they look nicer squished flat and topped with pieces of nuts and coconut. They look almost fancy, if I do say so myself.
Now have yourself a cookie, and place the rest in the fridge (they get harder and, if you can imagine, taste even better after a few hours of%u00a0cold)
Freak Yeah FRIDAY!%u00a0Do fu stuff!
-C
Makes 15 normal sized cookies (you can make more or less, depending on the ball size)
1 cups oat fashion oats soaked in 1%u00a0cup%u00a0water for at least an hour (use gluten free oats if needed)
1/2 cup raw%u00a0almonds
1/2 cup raw%u00a0cashews
5-6 medjool%u00a0dates
1/2 cup dehydrated%u00a0flaked coconut
1/4 cup cocoa powder
a pinch of salt (if your nuts are unsalted)
Add all the ingredients into a food processer and blend until the mixer forms a %u00a0cohesive%u00a0dough. It;s going to be a tad sticky, but if it seems to sticky to handle, refrigerate for a little bit so it’s easier to handle. (I have no problem handling right away)
Scoop %u00a0and roll into balls and either%u00a0leave them as is or%u00a0squish them flat. Sprinkle with chopped nuts and%u00a0coconut
Eat one or two right away, then stick the rest in%u00a0fridge.
A ok to eat as breakfast, with lunch, at dinner, as as snack, a post workout protein, or when sitting on the couch and watching TV.
I am a mint lover, even when it grows at%u00a0such a ferocious%u00a0speed that it%u00a0threatens the lives of all the plants near it. That just means that I have to be vilagent%u00a0and harvest and use as much as I can.
This drink is a fantastic way to use up some of that mint. I have been making and drinking fresh, hot,%u00a0mint tea almost ever night for the past few weeks, but this weekend was way to freaking hot to be doing hot%u00a0tea. So using my little noggin, I figured I should just%u00a0chill%u00a0it and added some lime because mint and lime are oh so nice together.%u00a0%u00a0Now my favorite, and one of the most refreshing%u00a0drinks after a long hot day.
%u00a0And limes just happen to be on sale this week%u2026.%u00a0
The stuff. A few stems%u00a0of fresh mint, a couple juicy limes, and%u00a0water. And if you want, a little sweetener of your choice. (I used a tiny bit of honey..not shown)%u00a0
Start by placing %u00a0the mint, leaves and stem, into a big pot.%u00a0Take a wooden spoon and gently muddle the mint. Add in the water, making sure that all the mint is fully sumerged (stuff it down in the pot)
Now place pot on the stove and bring water to a boil. Once boiling, remove from heat and let sit for a few minutes.
After steeping %u00a0for a few, pout tea into a big jug, straining out the mint leaves. Add any sweetener that you might like (just a little.. you can always add more later if you need it)%u00a0and%u00a0stick into%u00a0fridge to cool, or just leave it on the counter if your want.
While you are waiting for the tea to cool, you might as well juice the limes (cause we need the lime juice)%u00a0
After the tea%u00a0%u00a0is cool, add in the juice of the limes and mix/shake/stir around.
And thats it..%u00a0
Serve in a cup with a few chunks of ice and a mint leaf garnish (not necessary but nice)
A nice tall glass of%u00a0cold yumminess%u2026 Keeps one from melting completely in this crazy hot weather and keeps mint from killing everything around it.
Stay cool!
-C
4 full stems%u00a0of fresh mint
6 cups water
2-3 limes (I used 2 1/2 which was almost a full cup of juice)
sweetener to taste (a tablespoon of honey is nice)
Place mint, stems and all,%u00a0into a large pot%u00a0large pot. With a wooden spoon or sme type of blunt object, lightly muddle the plant. Pour water over mint and place pot on the stove. Bring water to a boil, then remove and let cool for a few minutes. Pour%u00a0the%u00a0mint tea%u00a0into a big jar, straining out the mint leaves..(A half gallon ball jar works perfectly) If using a sweetener, add it to the tea while it is still warm.( little goes a long way%u2026 you can alway add a little more later!) Place mint tea into the fridge to cool. When the tea is cool, juice you limes and dump%u00a0the juice into the tea and mix or shake.
It is now done and ready to serve. Pour over ice (thats in%u00a0a cup)%u00a0and serve with a fresh mint leaf (if your fancy)
Maybe you, like me, went a did a little strawberry picking this past weekend. And maybe you, like me, pick so so many that%u00a0now you have an overload of the most perfect, if not slightly too ripe strawberries staring at you, waiting to be eaten or, at the very least,%u00a0cooked into some magical cake, pie, cookie, or whatever. But lets face it, its Monday and maybe we do not exactly feel the need (or have the time)%u00a0to make a cake, pie, cookie or whatever tonight. So%u00a0that leaves us with a crap load of strawberries that need to be dealt with.%u00a0
And sure, we can freeze them,%u00a0but maybe you, like me, already have a freezer full of other stuff. And just because we don’t want to bake a cake, pie, cookies, or whatever tonight, doesn’t mean we don’t want something amazingly tasty and fantastic.
So that brings us to this super easy, oh so pretty, and ever so tasty way to move those strawberries%u2026.. Stick them in the oven and roast them. So simple and really truly amazing. When strawberries are roasted, they turn so%u00a0tender and%u00a0fall apart%u00a0and release%u00a0all of their%u00a0juices that turn into a sweet syrup. They become%u00a0almost jam like,%u00a0but the flavors are way better, more complex. And there is no%u00a0need%u00a0for added sugar or any other%u00a0stuff because the flavors and natural sweetness of the roasted strawberries stand on their own.%u00a0%u00a0
A few ways to which you might want%u00a0to use roasted strawberries that will make your life better:%u00a0Dump%u00a0onto ice cream, yogurt, or make a strawberry shortcake or a strawberry fool.%u00a0Scoop%u00a0onto a green salad, mix into a bowl of quinoa, marinate some tofu, or add to roasted veggies. %u00a0You can mix into muffin%u00a0batter, into oatmeal, or%u00a0add to a layer cake. They make%u00a0a fantastic PB and J and%u00a0the syrup in seltzer is a tasty%u00a0drink. You can pretty much use them for anything. But MY favorite way to consume these%u2026a bowl, a little spoon, and my mouth. Nothing else needed.
And if you didn’t happen to go strawberry picking this weekend. It’s cool, just pick some up from the closest farm stand near you. You can tell all your anyone thats asks that you picked them yourself.%u00a0%u00a0(not a lie, just a stretch cause you did, in fact, pick them up yourself)
%u00a0Yea for Monday%u00a0and%u00a0for%u00a0roasted strawberries! (Or at least yea for strawberries.)%u00a0
All you need%u2026A big (or small)%u00a0bowl of strawberries.%u00a0
Rinse those pretties and place them on a parchment lines baking sheet. (don’t skip parchment%u2026 these suckers get super thick and juicy.)
Here is the thing. These strawberries are picked from the lovely farm I get my CSA from.(How badass is it that we%u00a0have a PYO part of the%u00a0share). They are not like super market berries that are extra firm with dirty unappealing green tops. These little organic lovelys have tender little green tops%u2026.%u00a0I eat them. If you do not wish to eat the greens,%u00a0just top the berry off before roasting.%u00a0
So the berries, stick them in the oven at 450 degrees and roast them for about 35-45 minutes (depending on the size of your berries)
Pull them out when they start to get dark and slightly charred and the juice is thick and bubbly.
And scrap the berries, juice and all, right into a jar.
Eat with anything, everything and with nothing at all.
Happy Monday
-C
%u00a0strawberries of any quantity
Place strawberries, with or without tops (your preference) on a parchment lined baking sheet. Place in a 450 degree oven and roasted %u00a0foe about 45 minutes or%u00a0until the berries are soft, mushy, starting to charr and have lots of bubbly juice, . When done, remove from oven and let cooll for for about 5 minutes.%u00a0Transfer berries, juice and all, into jar.%u00a0
Eat%u00a0right away or stick in fridge. Juices thicken up when cooled.
Keeps%u00a0%u00a0about a week in fridge, but I highly doubt it will last the night.
How awesome will you be when you bring the most freaking amazing tortilla chips to the party this weekend? You will be like..”what, it ain’t no thang.. I am just good like that” Yes, yes you are.
And yes, I am assuming that you will be making these awesome chippers to share at a Super Bowl part this weekend. I say this because even as I sit here writing this (with the TV on) there has been nothing but football talk…deflated balls, hot wings, half time shows and commercials. It’s almost as big as Christmas. Got to get the decorations, the special game day food and your football jerseys. It’s crazy and all over the place. So that’s why I am assuming you are making these for the game. But if you not going to be participating in any football parties.. by all means, make these chips for yourself anyways. Celebrate you day! Have a non football watching party. Or just make these whenever. Jalapeño Lime chips for everyday!
Note: You can make these chips without the jalaeno and or the lime if you need or want to. You can also stop after the first step and have some dank corn totillas for tacos ands stuff..But definitely make the chips… worth it for sure!
All the stuff.. Masa harina, hot water, salt, a lime and a jalapeño. Zest lime and place half the zest into a glass bowl with oil and either sit on warm oven or microwave for 30 seconds to infuse. Puree the jalapeño with a cup of hot water and add the puree and half the zest of a lime, plus salt, to the masa harina. Mix it all up with another 1/2 cup of water or enough to make the dough resemble play dough… You can add more water or masa if you dough is to wet or dry.
Knead dough a few times just to make sure it’s completely uniformed and divide into 12-14 equal pieces. Place balls on a plate and cover with a wet paper towl to keep from drying out.
I do not own a tortilla press so I used what I had… wax paper, a wooded cutting board and brunt force. I took each ball and place it between the two pieces of the waxed paper, placed the cutting board on top, and with all my might and body weight, pressed down to smoosh. It works like a charm.
My cast iron skillet is big enough to cook 2 -3 at a time, but doing one at a time is cool too. Preheat the skillet to medium heat. Cook each tortilla for about 2-3 minutes ( or until starting to brown) on each side. Half way there to chips!!!
With my fingers ( you can using a basting brush for sure), I rubbed a little of the lime oil all over both sides of each tortilla. Stacked a few high, then sliced those tortillas into triangle shapes. If you want to go crazy, you could cut them into strips or even use a cookie cutter and do some fun shapes… but triangle are easy, classic, and practical. A good shape for dipping!
Placed all nice and cozy on a baking sheet. trying not to overlap. Into a 400 degree oven for about 20 minutes to complete the chip making process.. After about 15 minutes, check for doneness. When nice a crispy, remove from oven, squeeze lime juice all over and sprinkle with salt. I then stuck them back in the oven for a few more minutes just to dry the lime..
After cooling down, take those chips and stick them in a bowl.
Eat a few, but wait and save them for the party. Or better yet, make a few batches. Bring a batch, eat a batch. (Its ok, you are allowed)
Eat with some salsa, maybe some of this guacamole, or just as they are…Anyway is the right way as long as you are eating!
Have fun making these and have fun getting read for the party this weekend (Super Bowl or not!)
-C
Jalapeño Lime Tortilla Chips
Makes 12-14 tortillas.. then made into a medium bowl of tortilla chips.
Ingredients
2 cups masa harina
1 1/2 to 1 3/4 cups hot water
1 teaspoon salt
1 lime (juice and zest)
1 large or 2 small jalapeños
2 tablespoons olive oil
salt
To start, zest lime and add 1/2 of the zest to bowl with the oil. Place oil on warm spot on stove to let the oil infuse the limeness.
Take jalapeno and puree with 1 cup of hot water. In a large bowl, add puree and remaining lime zest to the masa harina and mix, adding an additional 1/2 to 1 cup of hot water until the dough resembles play dough, not to soft, but not to dry and completely incorporated
Divide dough into 12-14 balls and place on a plate under a wet paper towel to keep dough from drying out.
One at a time, take a dough ball and place between two pieces of wax or parchment paper. Place either a plate or cutting board on top and press down as hard as you can (you could even stand on it). Remove flatten tortilla from paper and place in medium hot skillet. Cook each tortilla for 2-3 minutes on each side.
When all tortillas have been made, lightly rub lime oil on all over both sides. Stack a few on top of each other and cut into triangles. Place pieces on a baking sheets (I used 2) and bake at 400 for 15- 20 minutes or until lightly browned and crunchy. When chips are done, remove from oven, squeeze or sprinkle lime juice on chips and sprinkle with salt. Stick back into oven for another 2 or so minutes to re-crisp from the lime juice.
Remove and let cool completely, then dump into a bowl

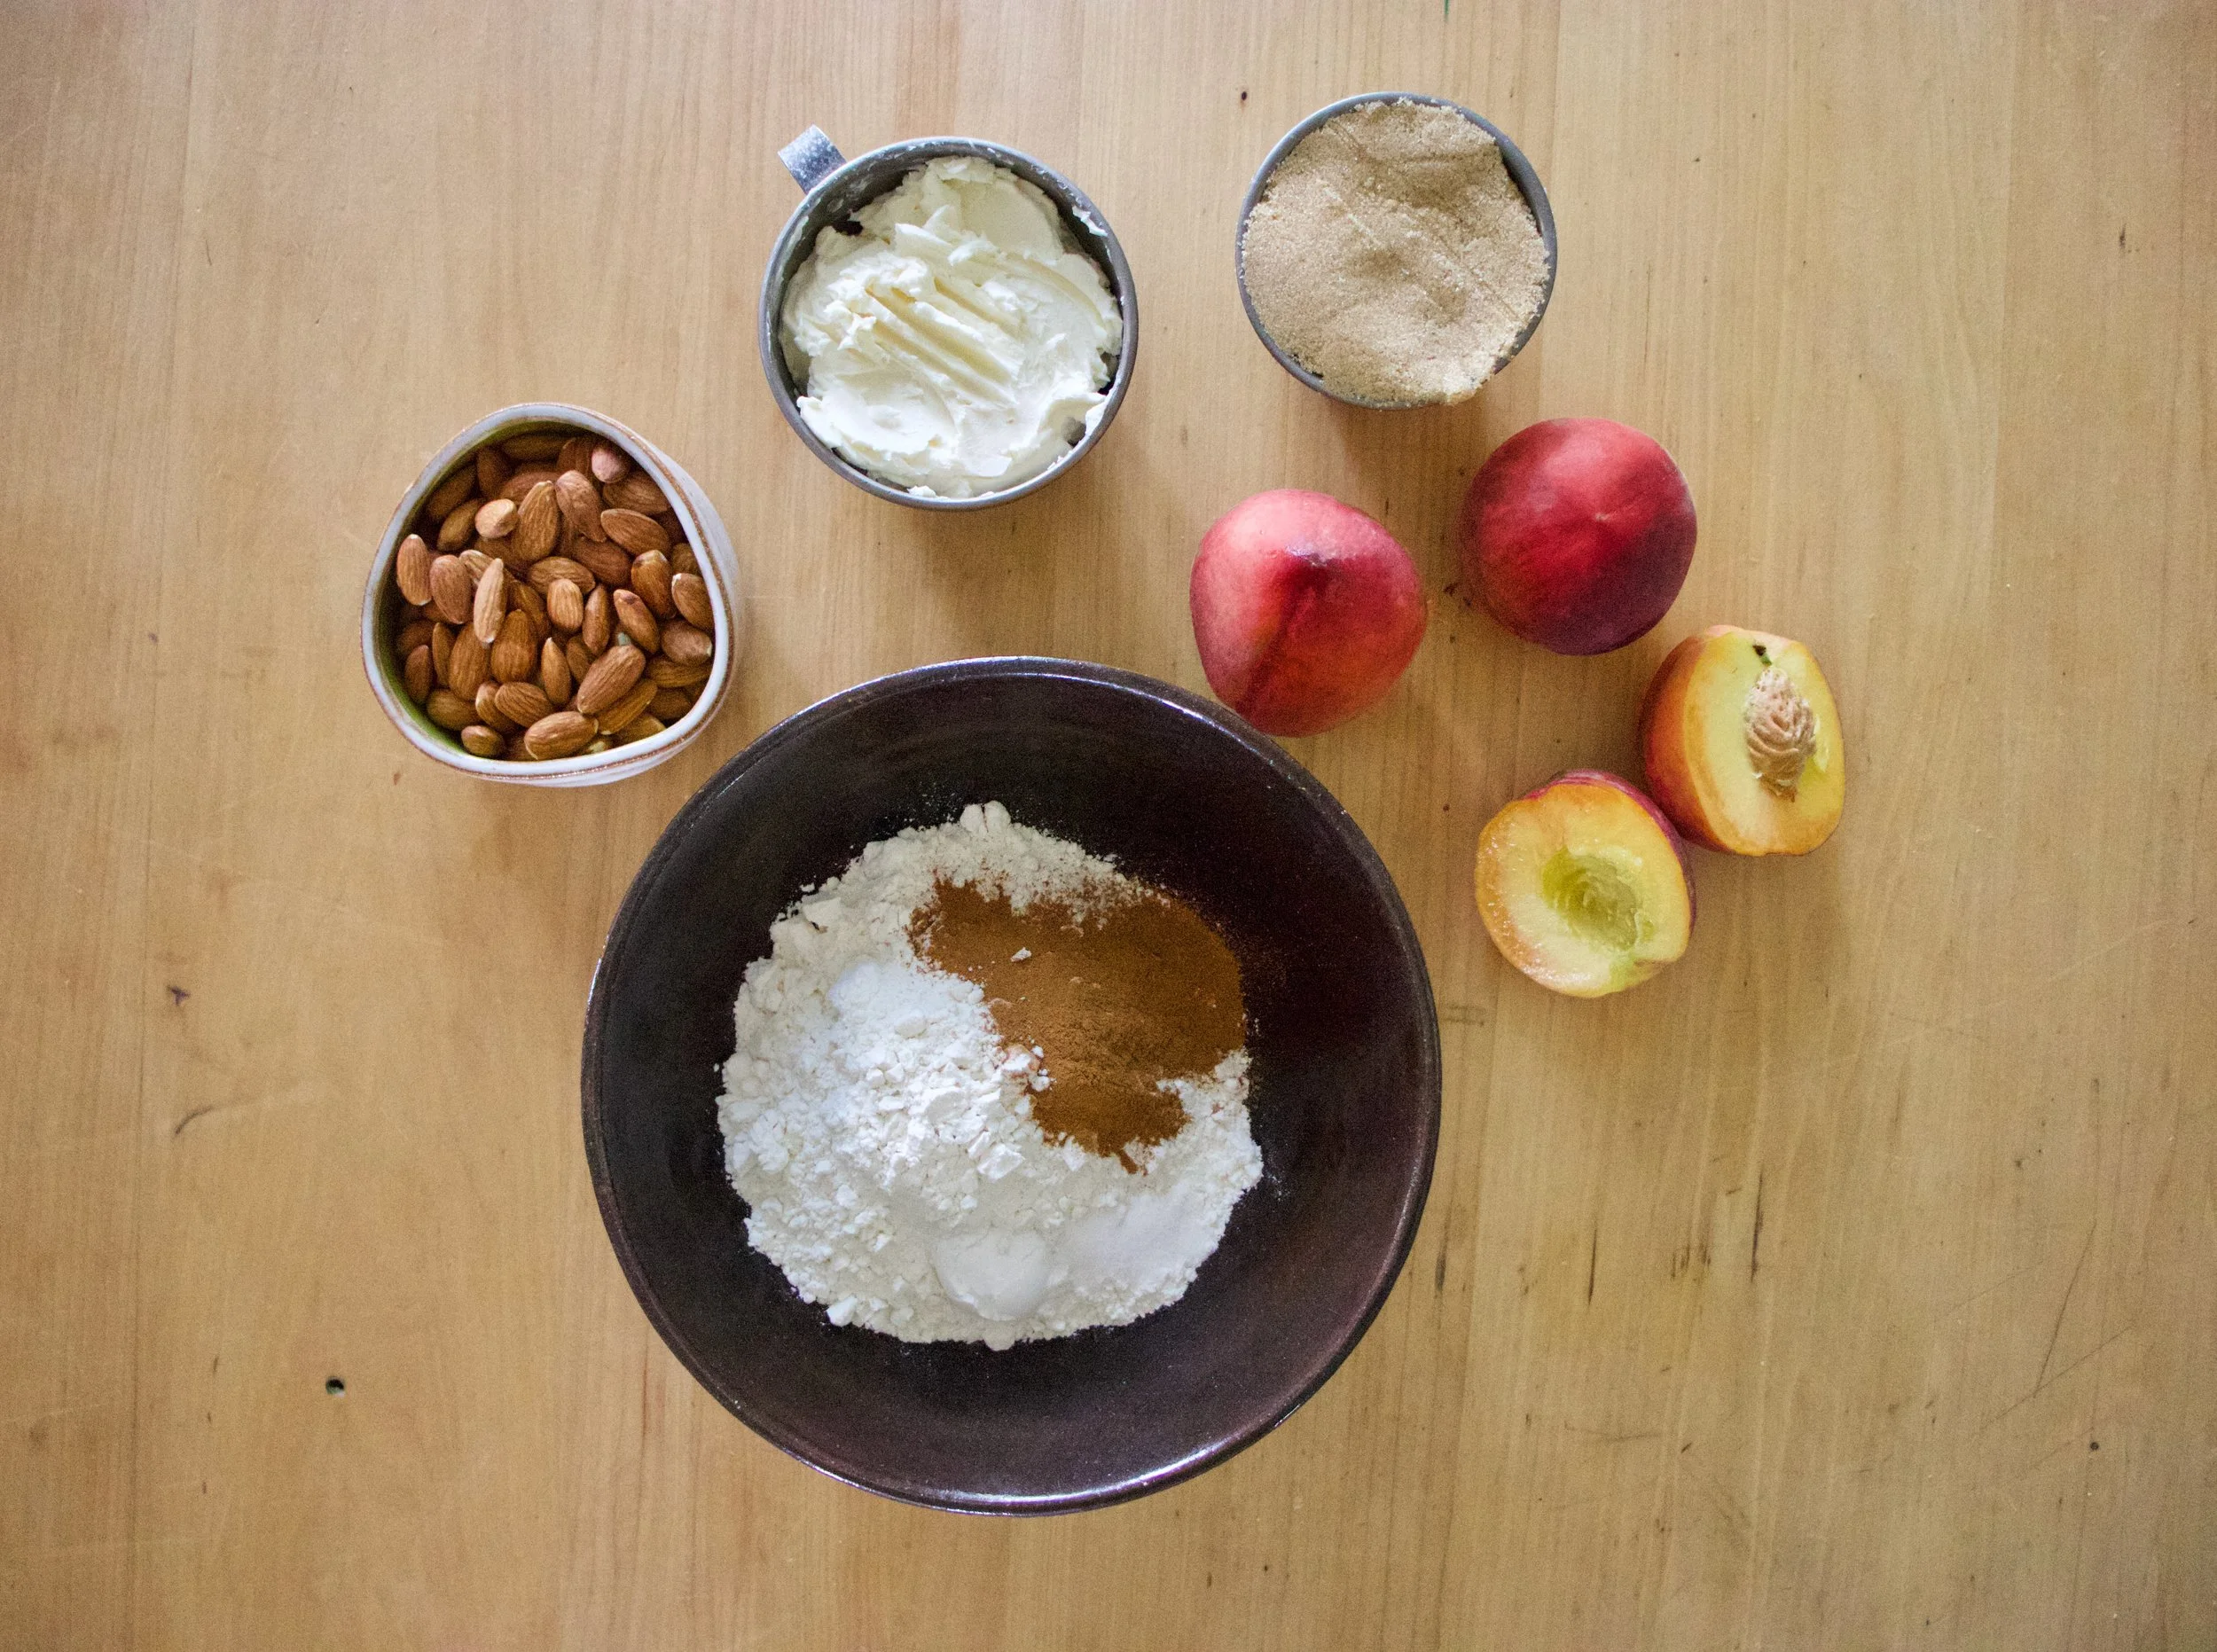


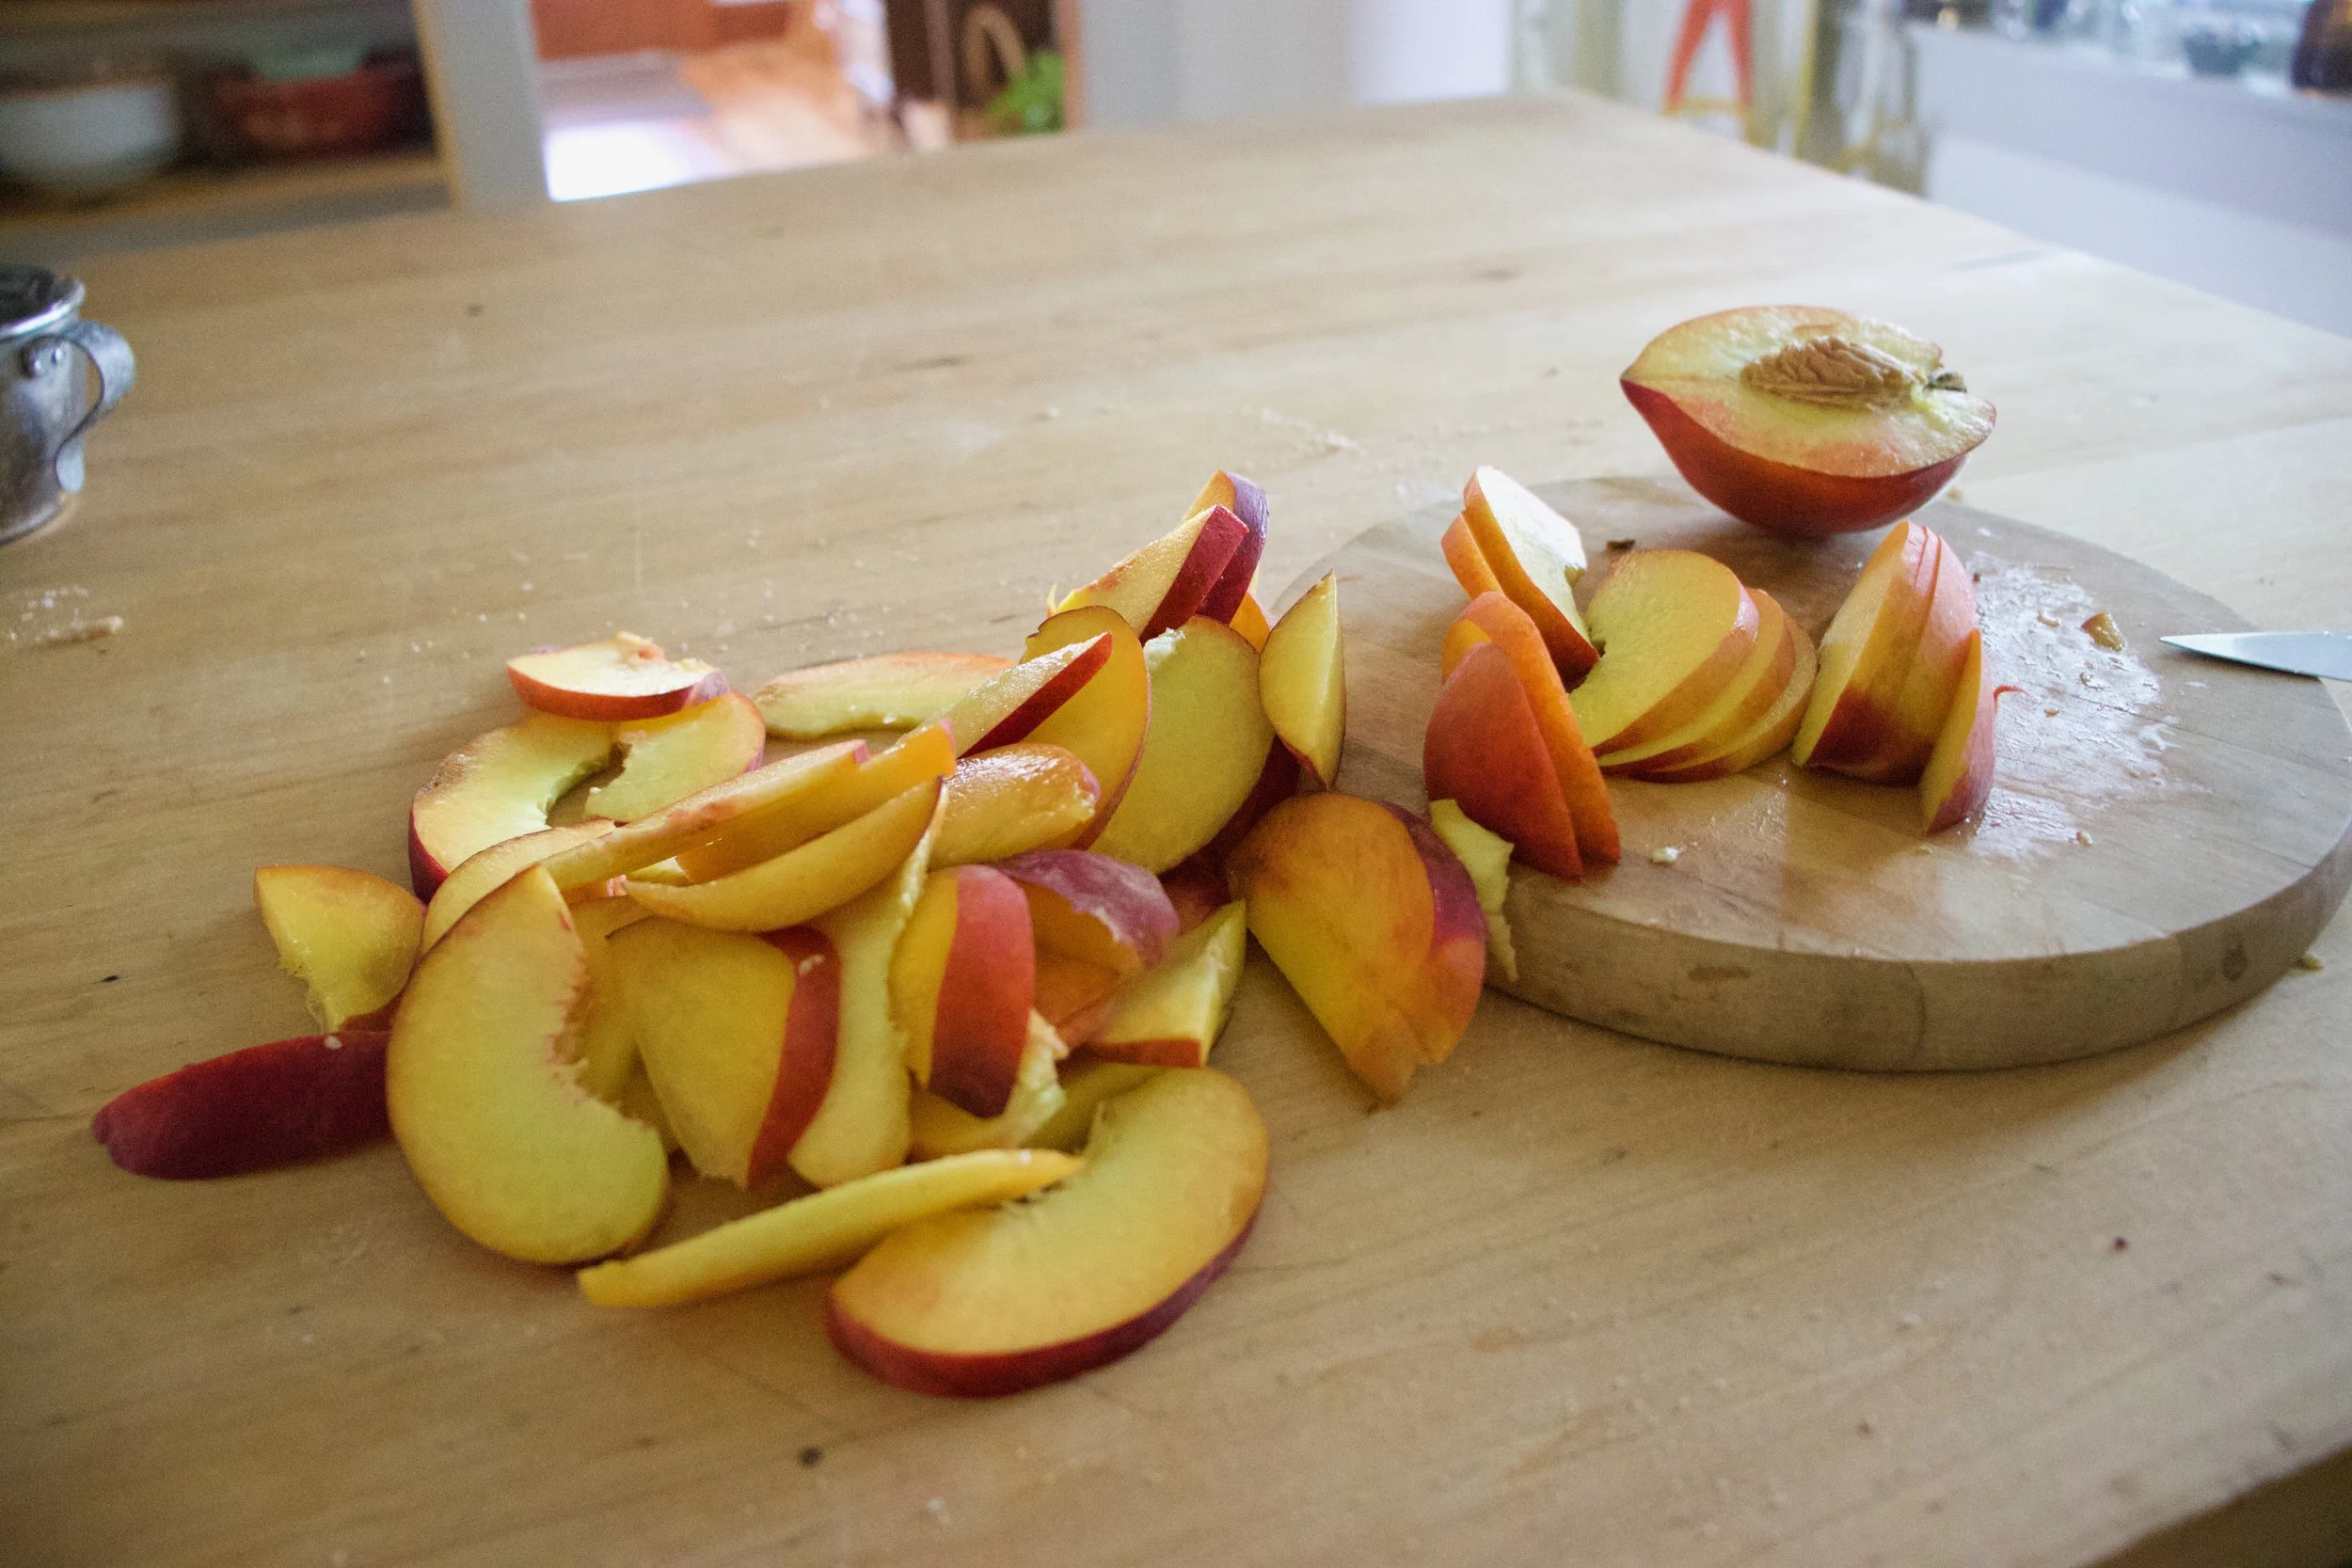


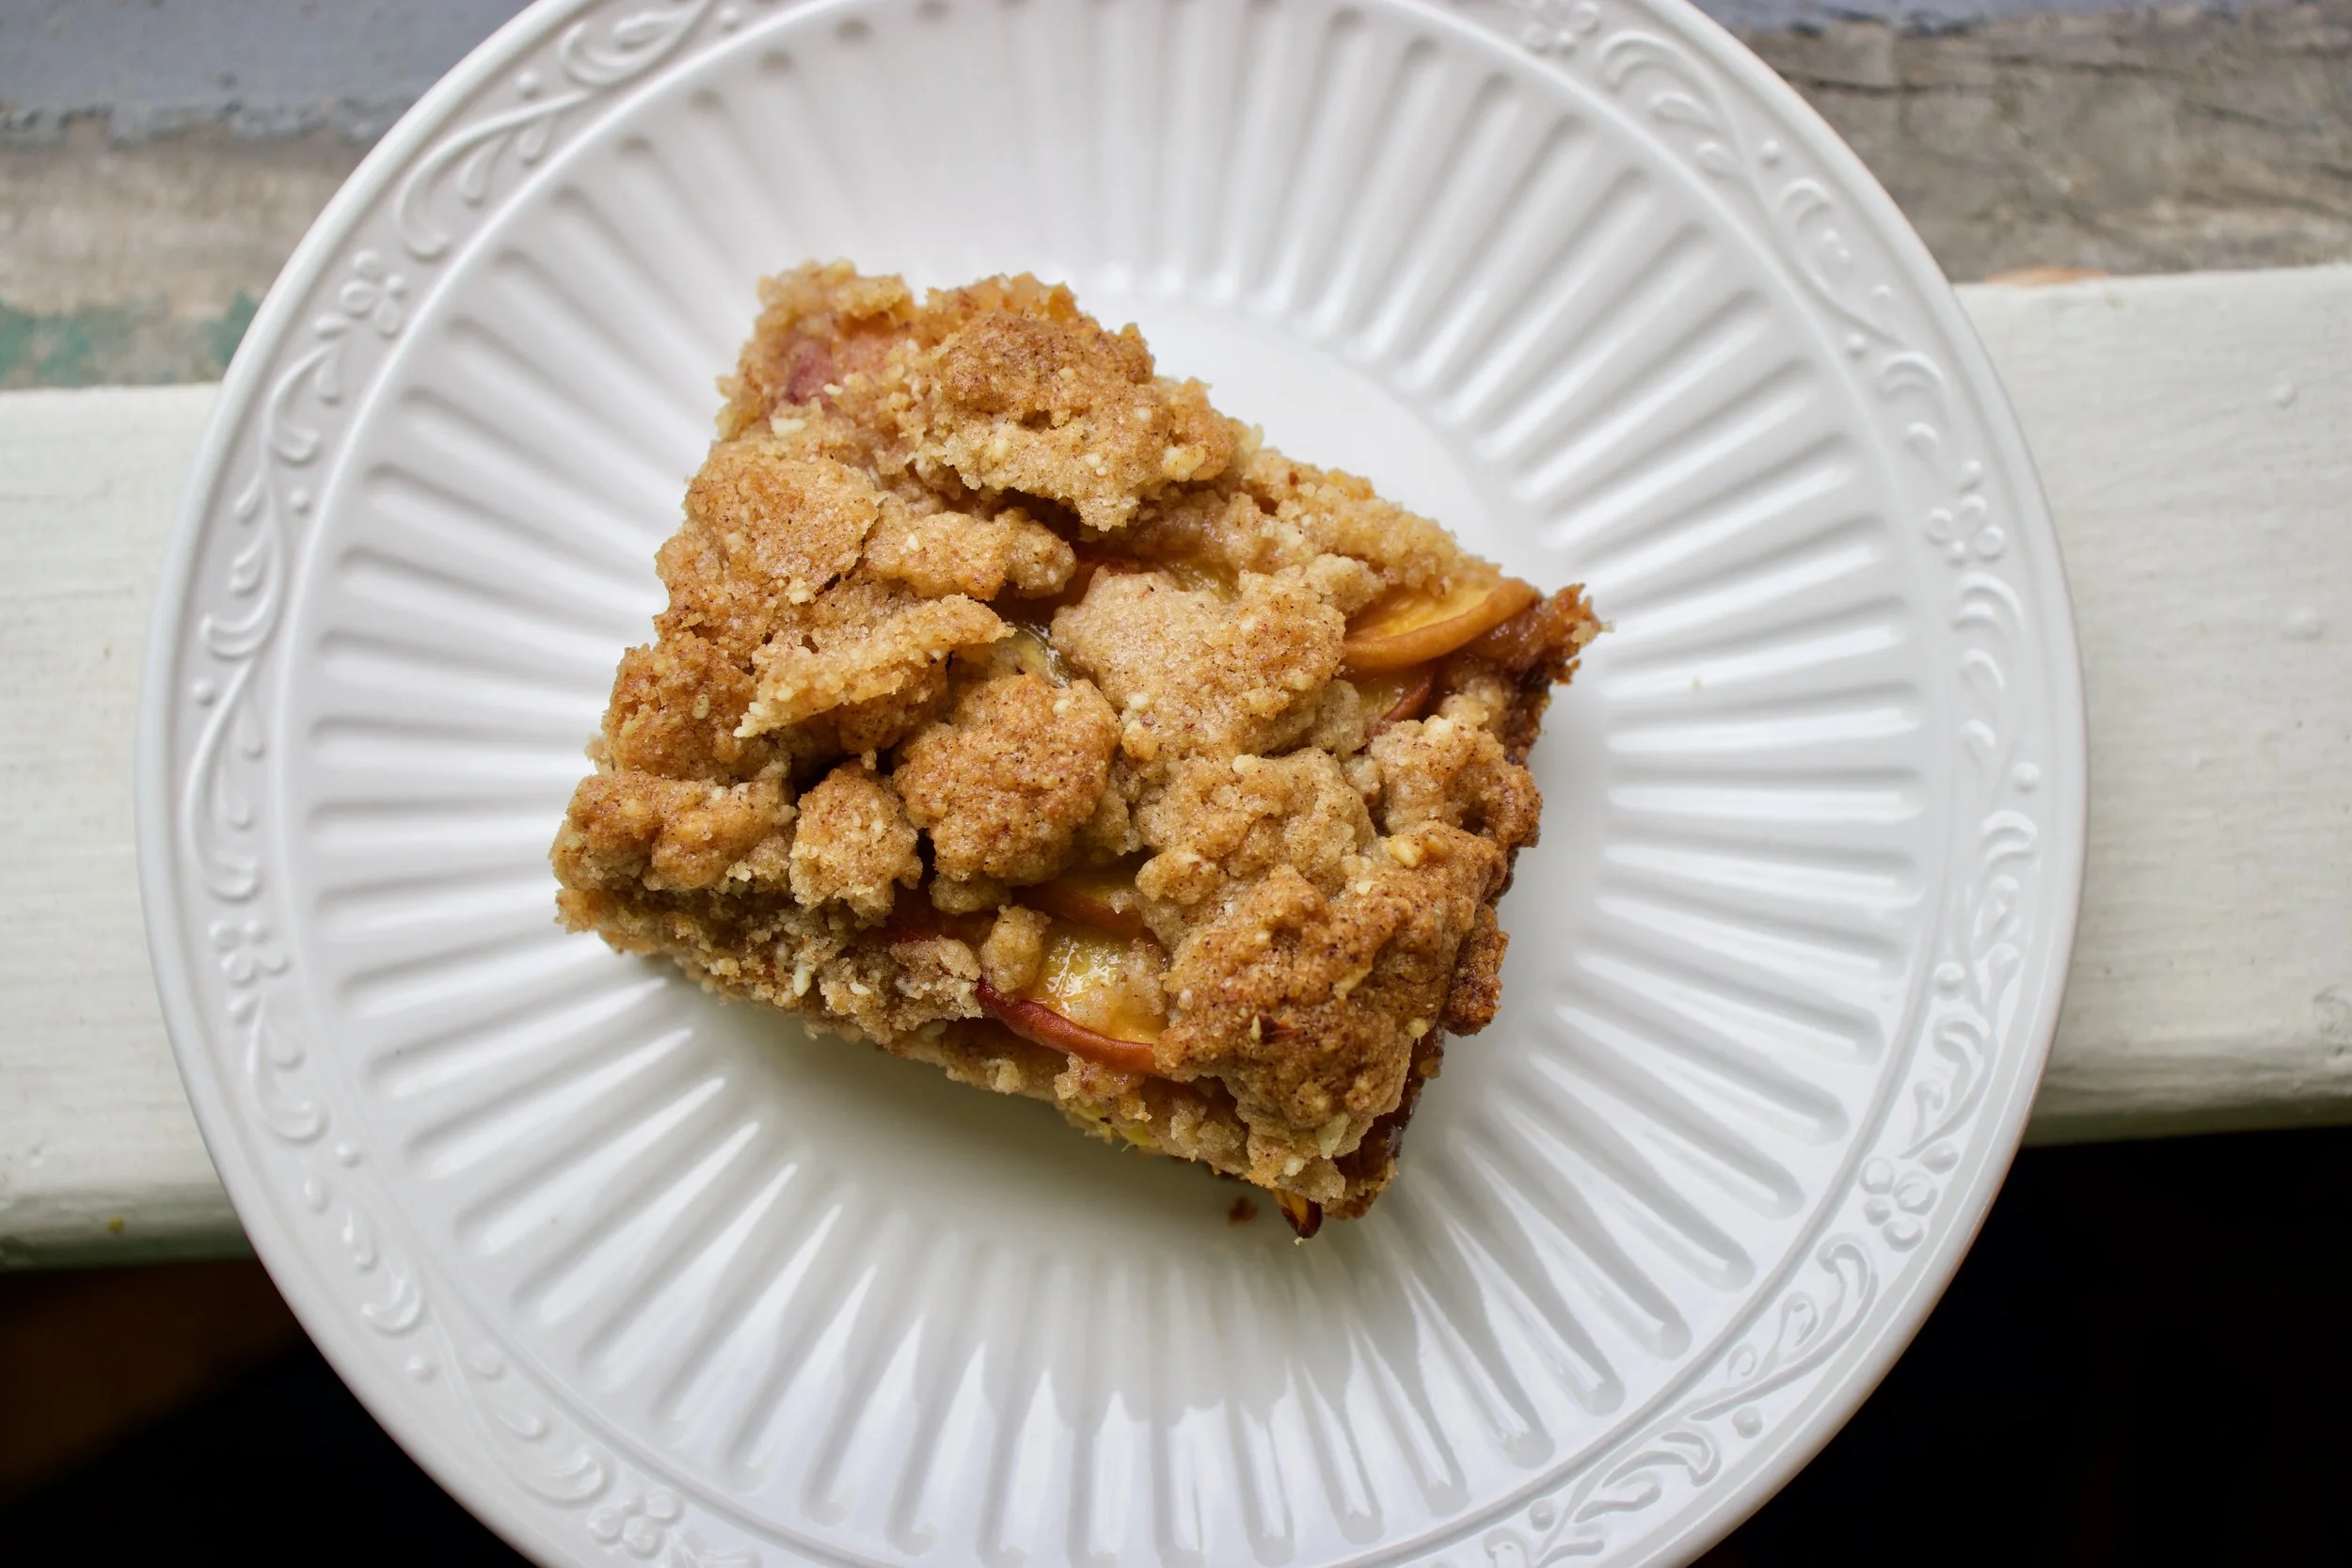


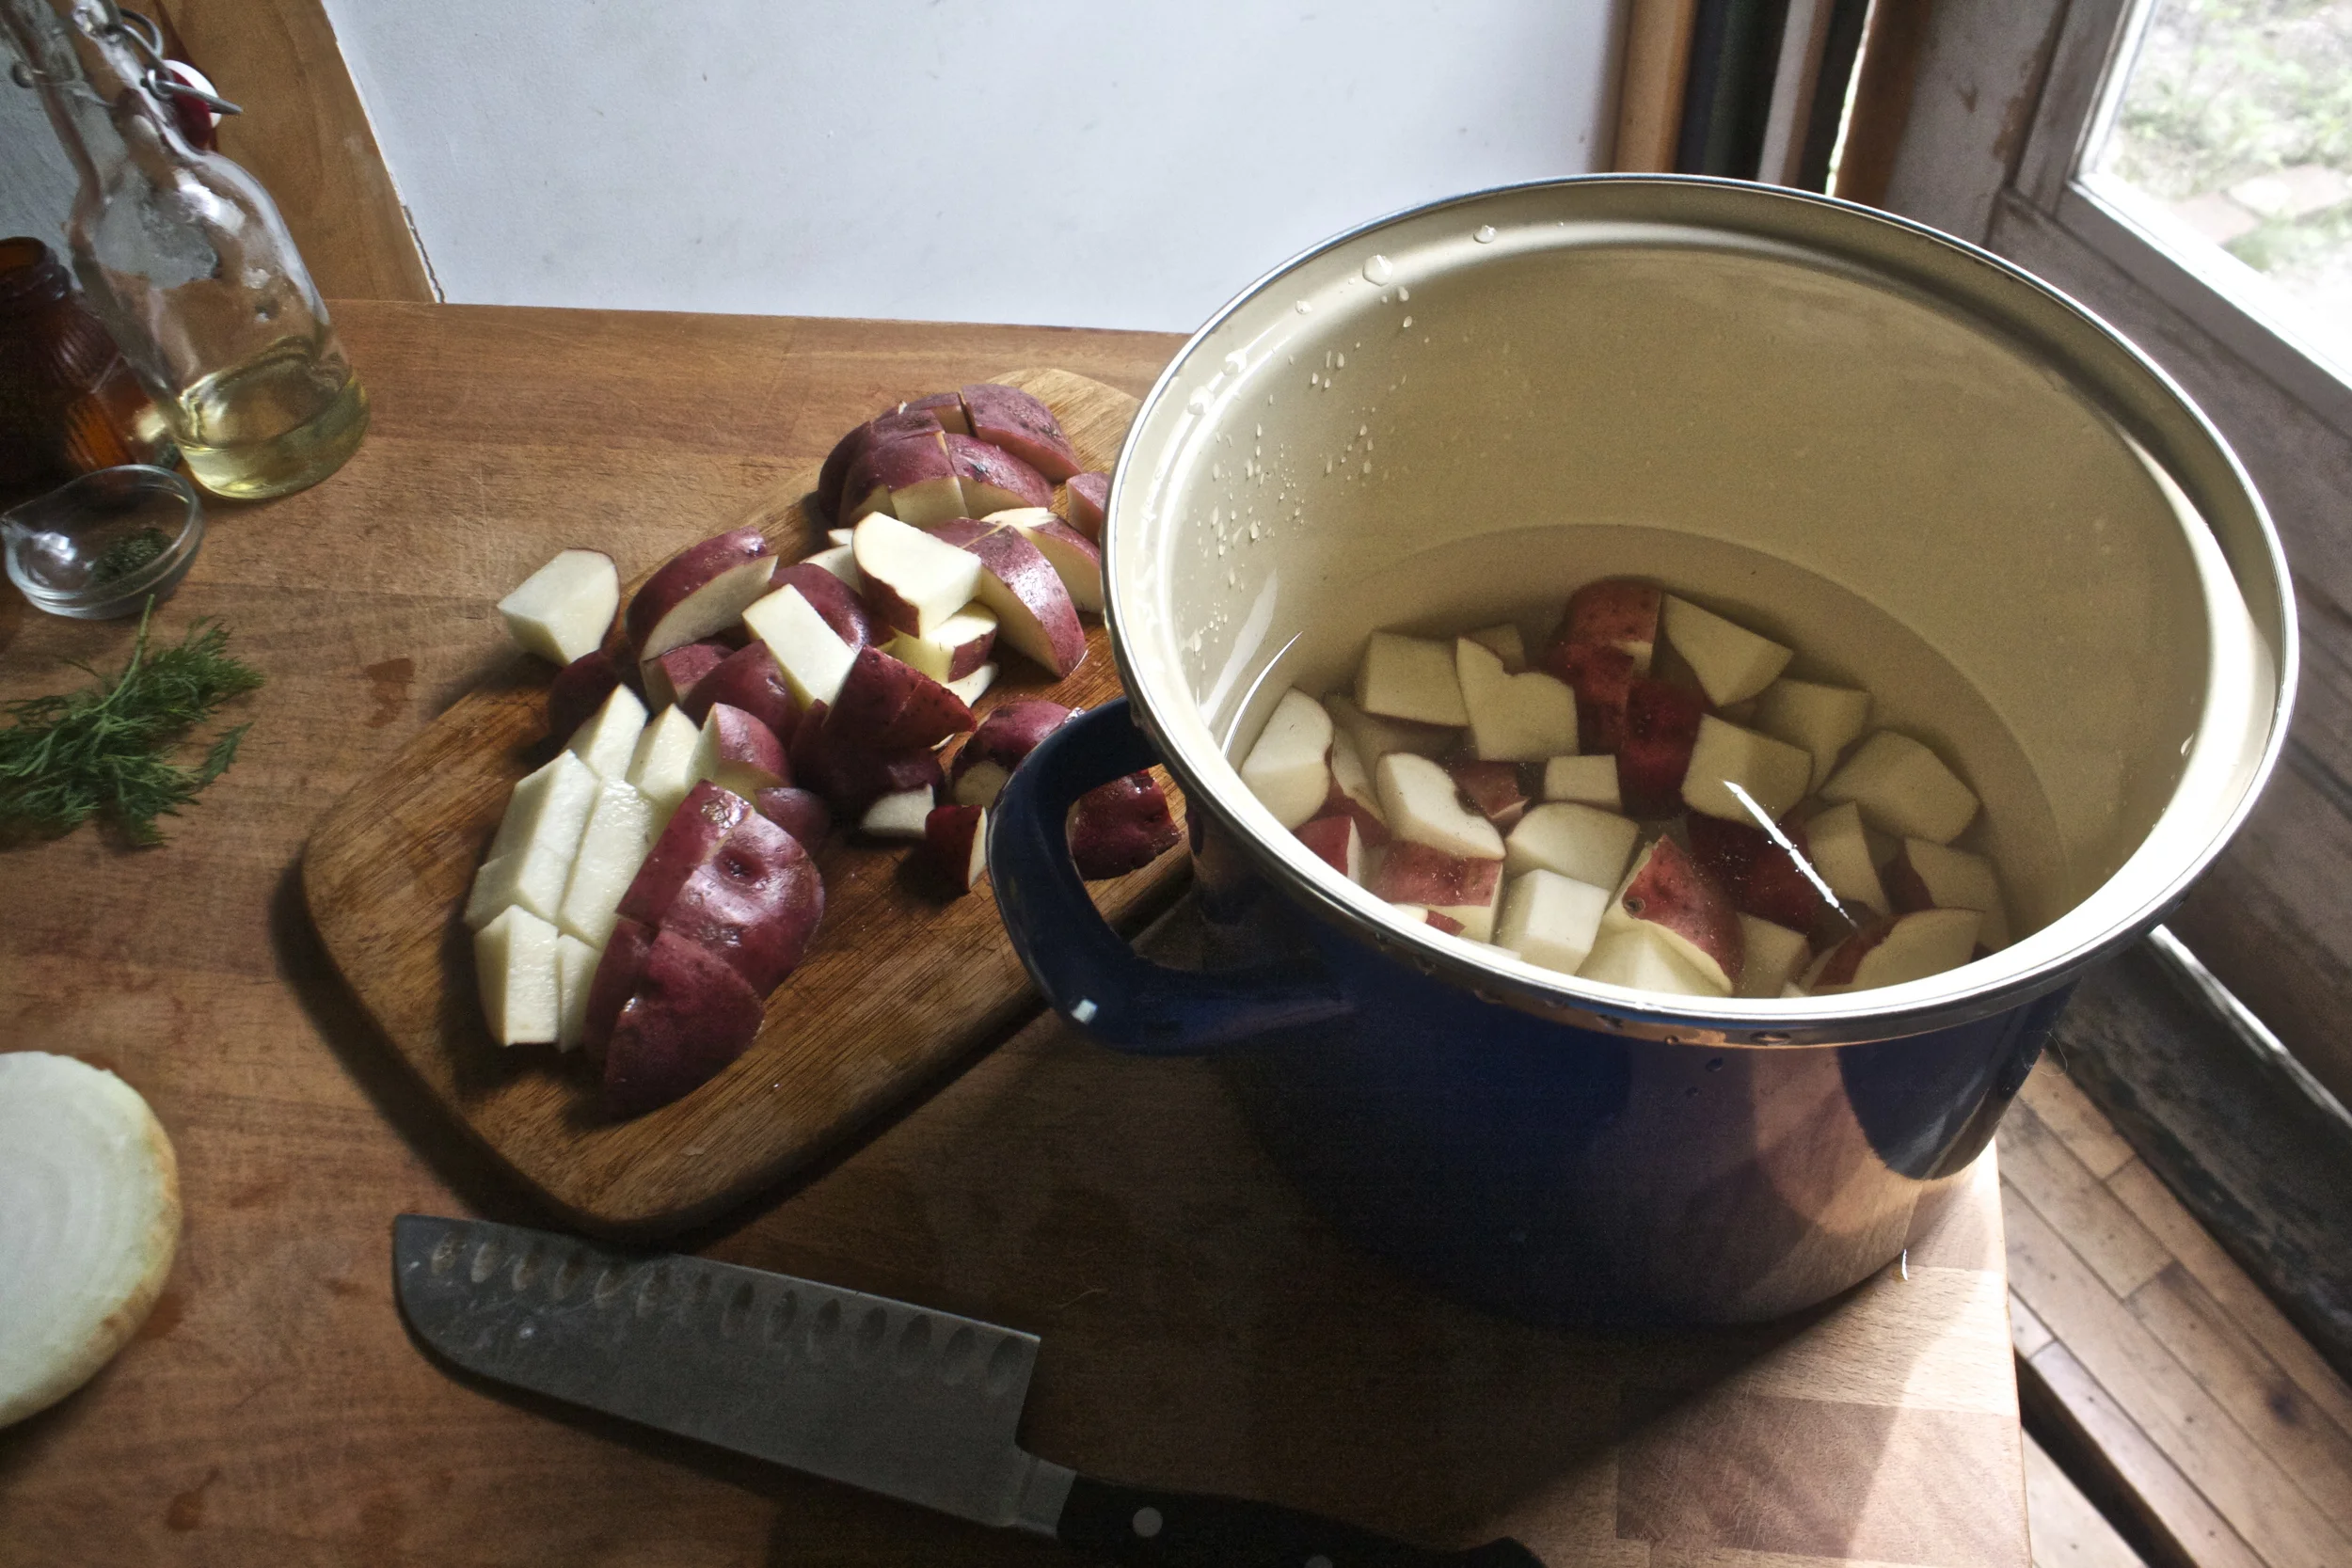
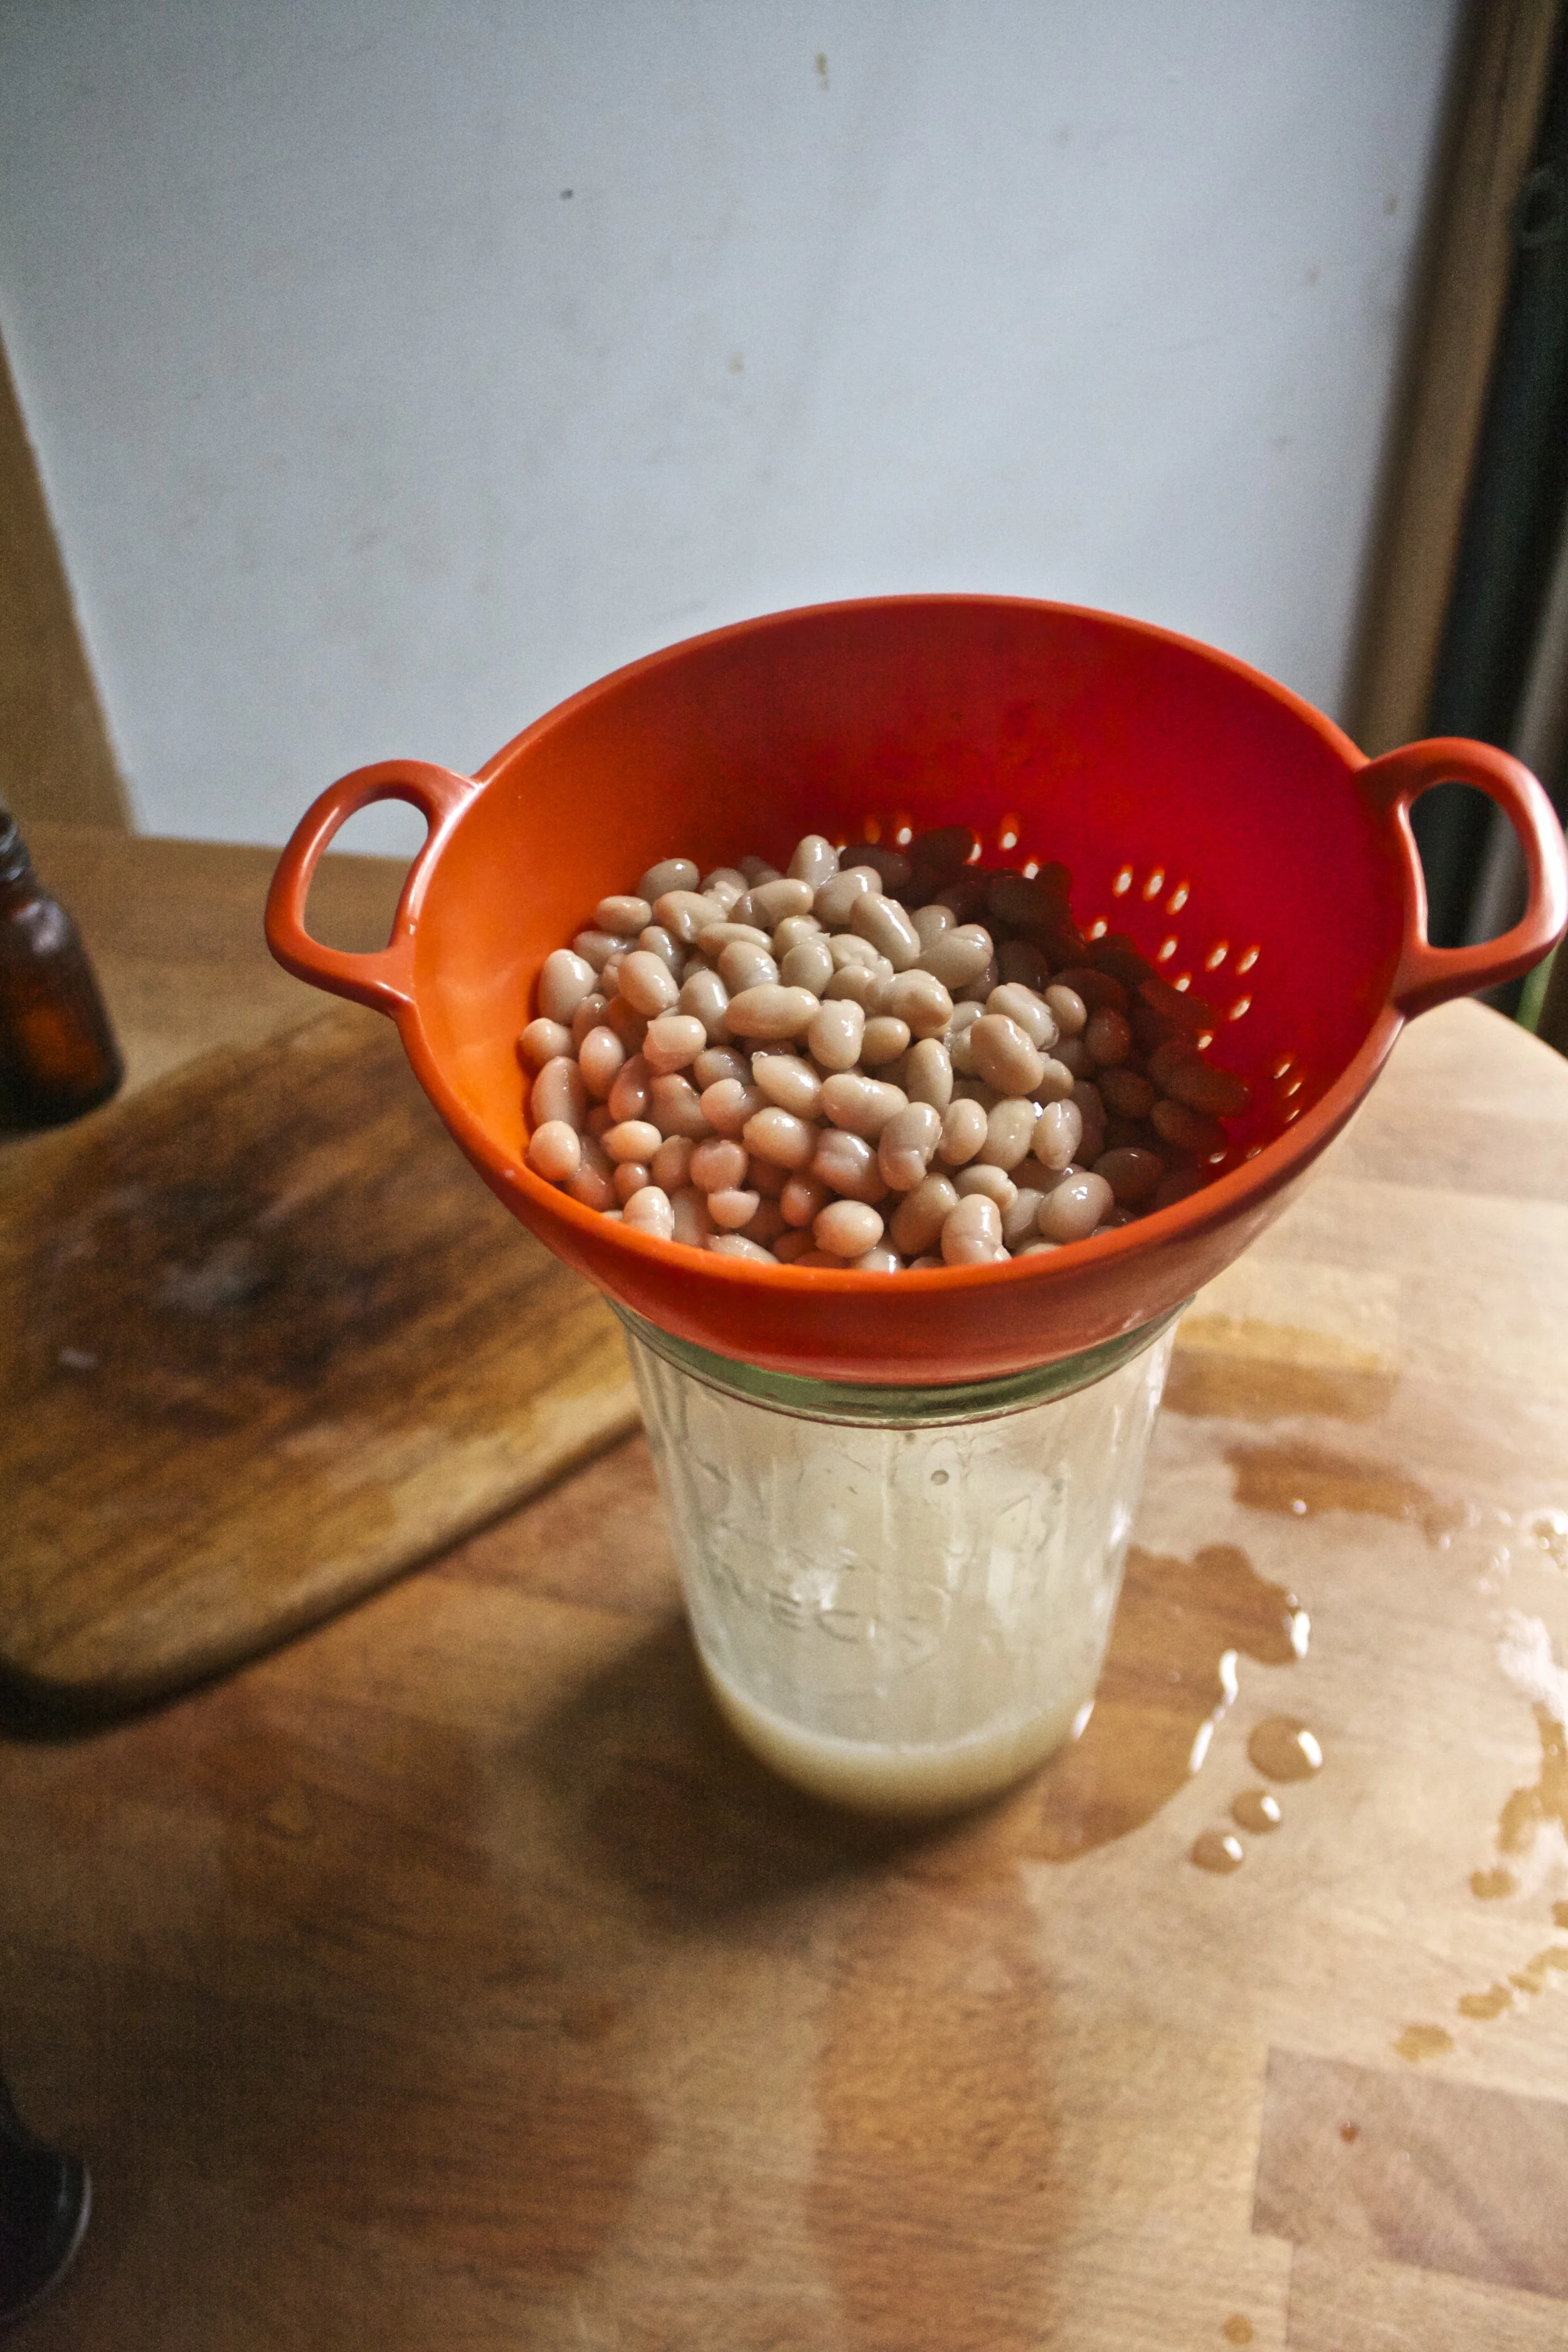

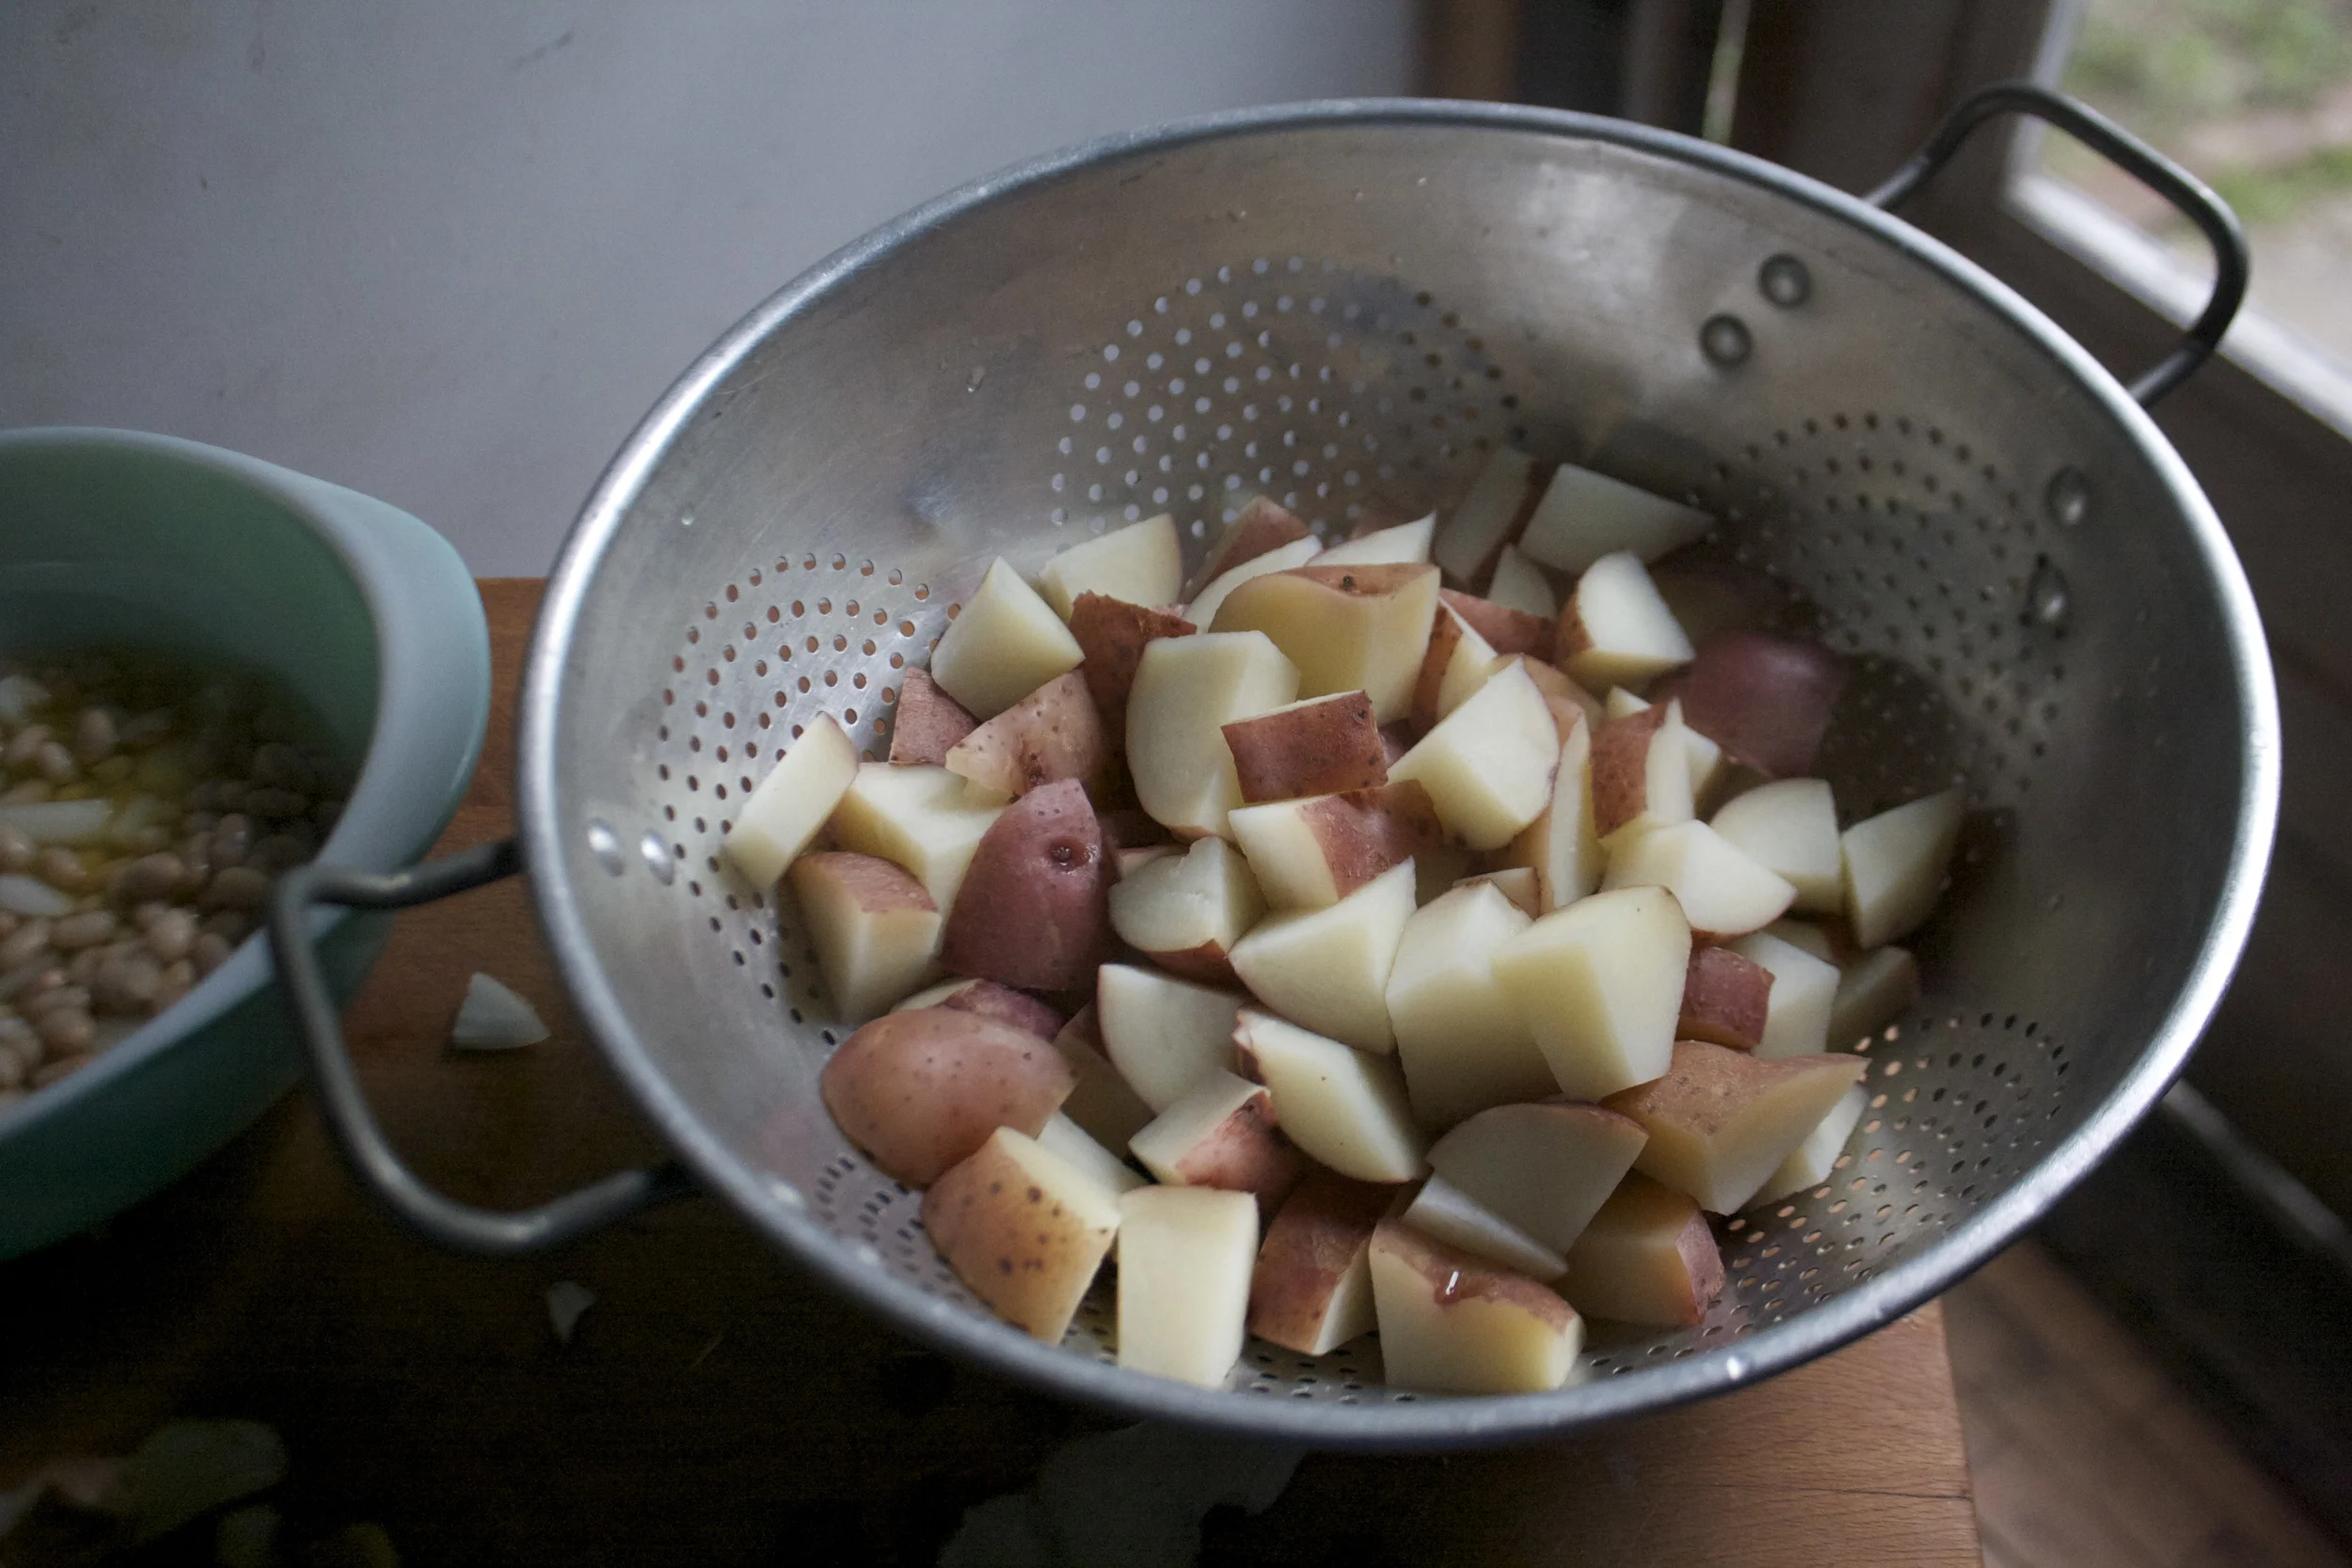


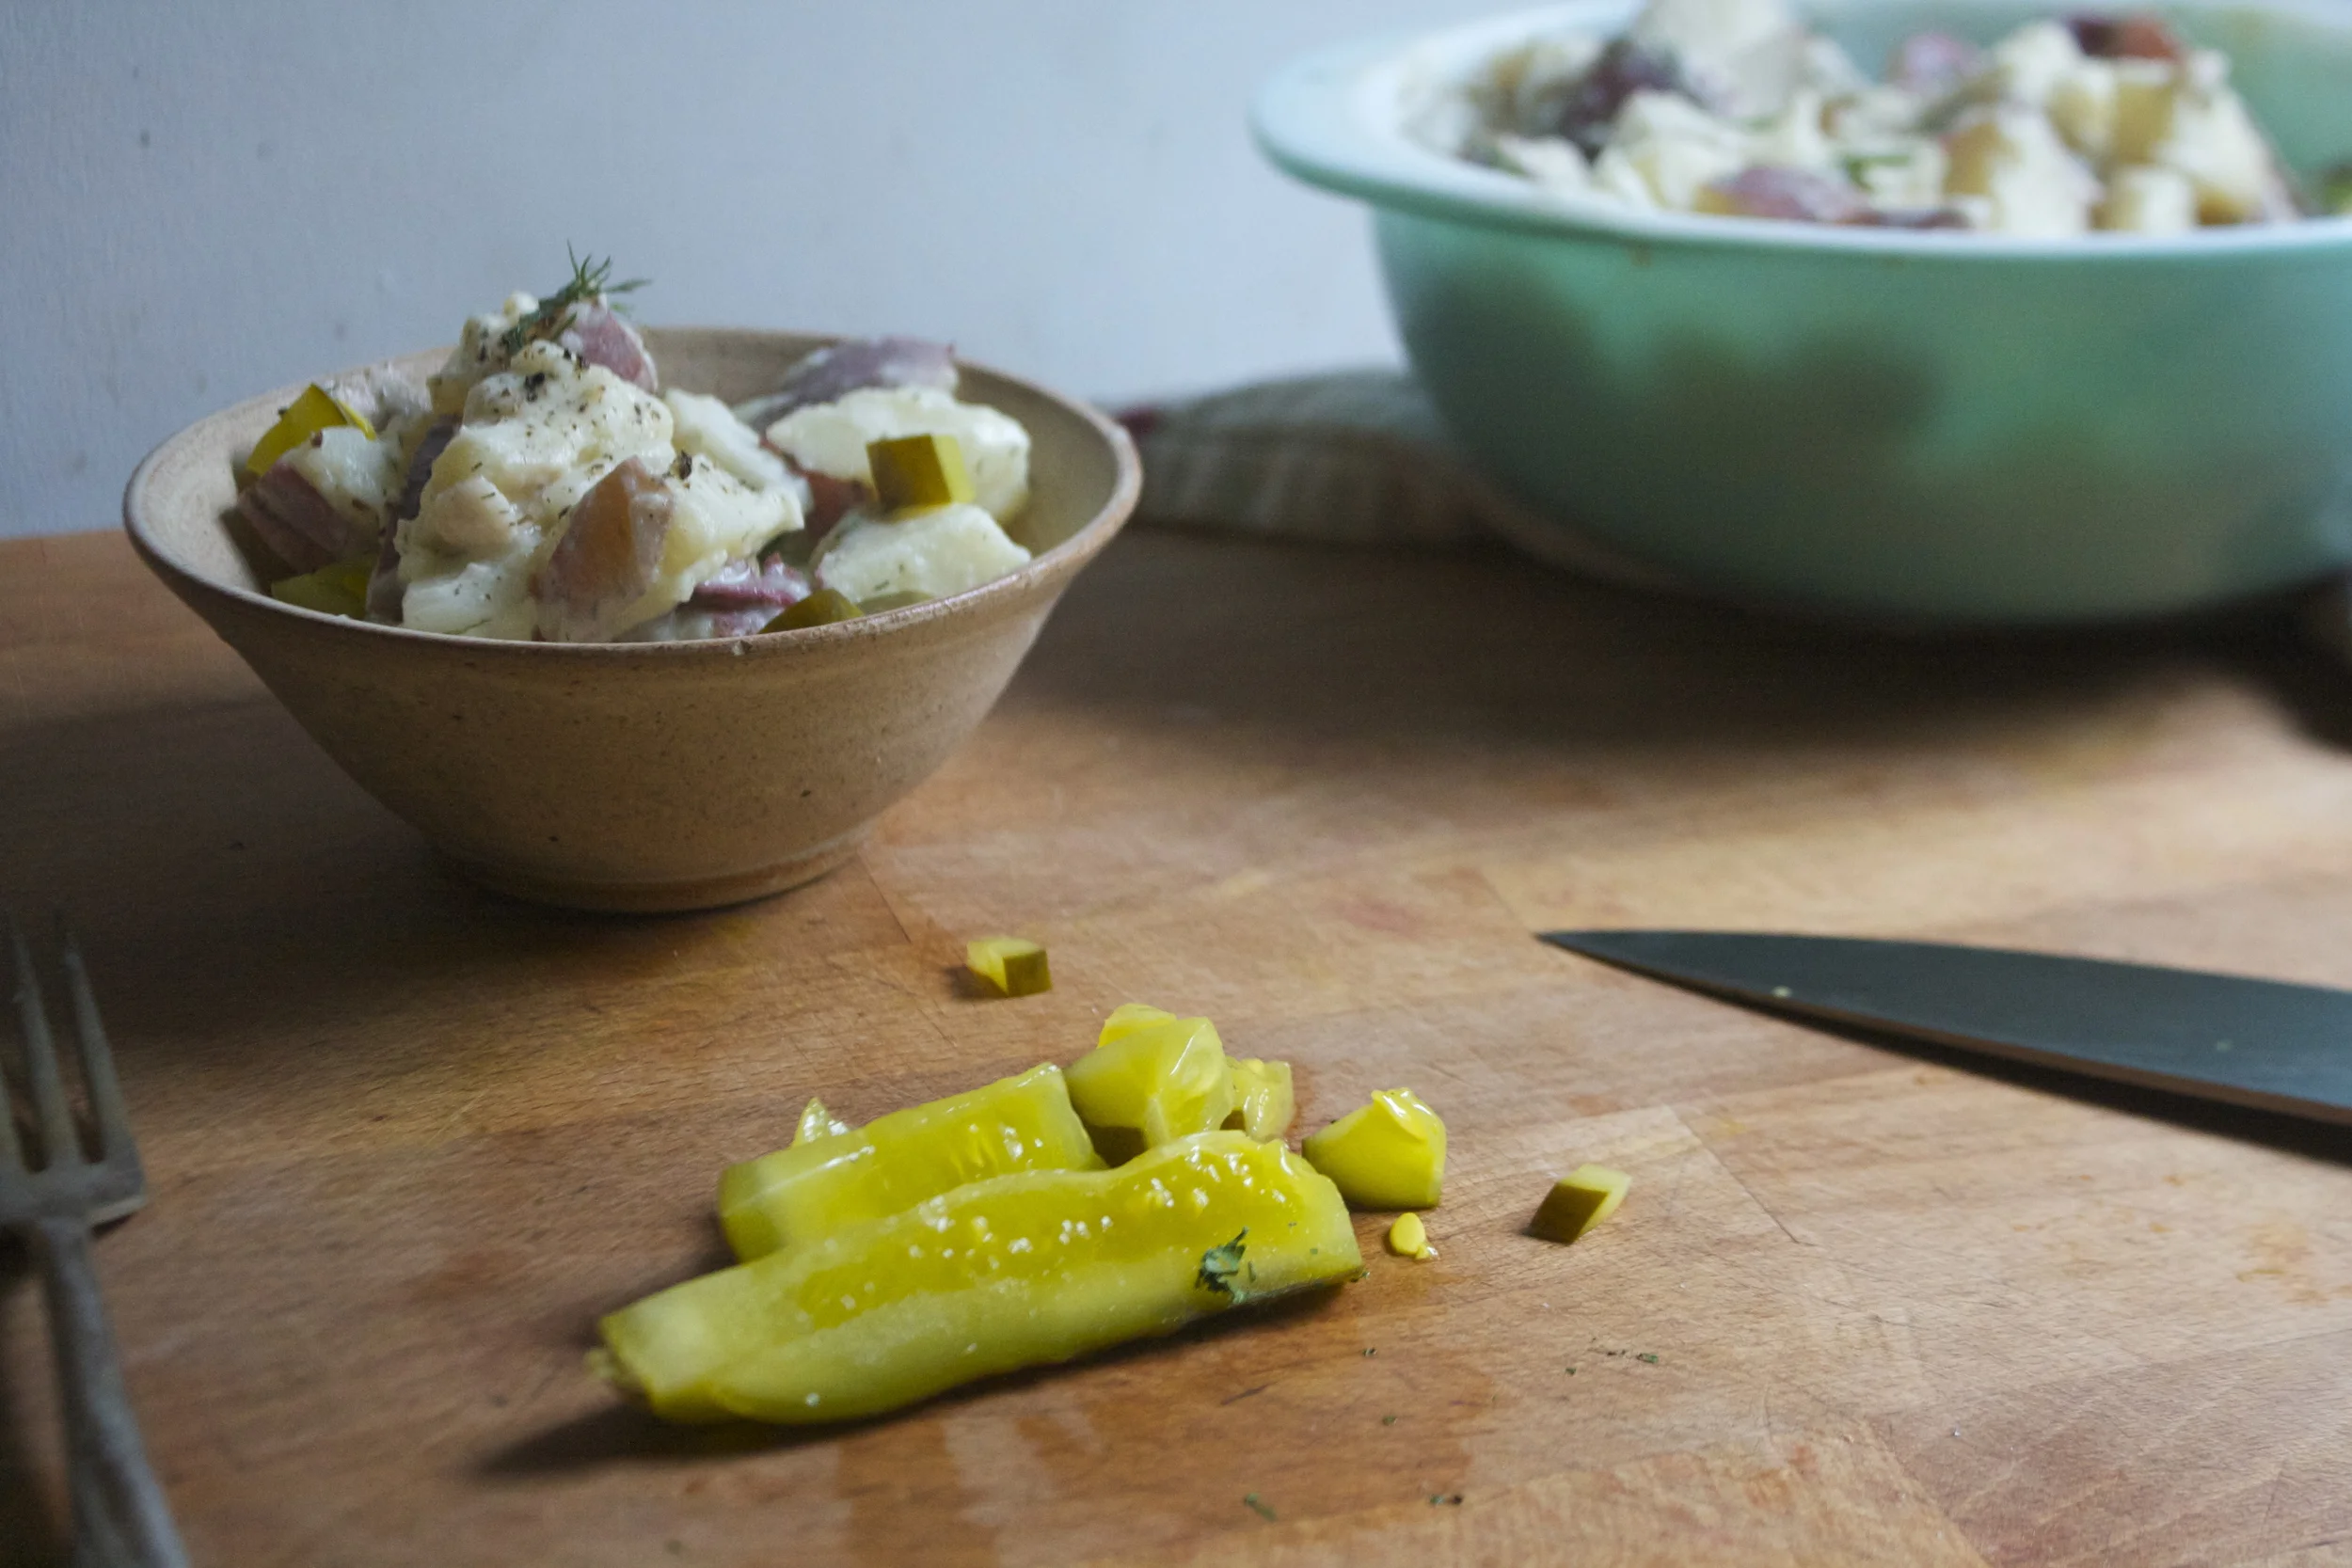


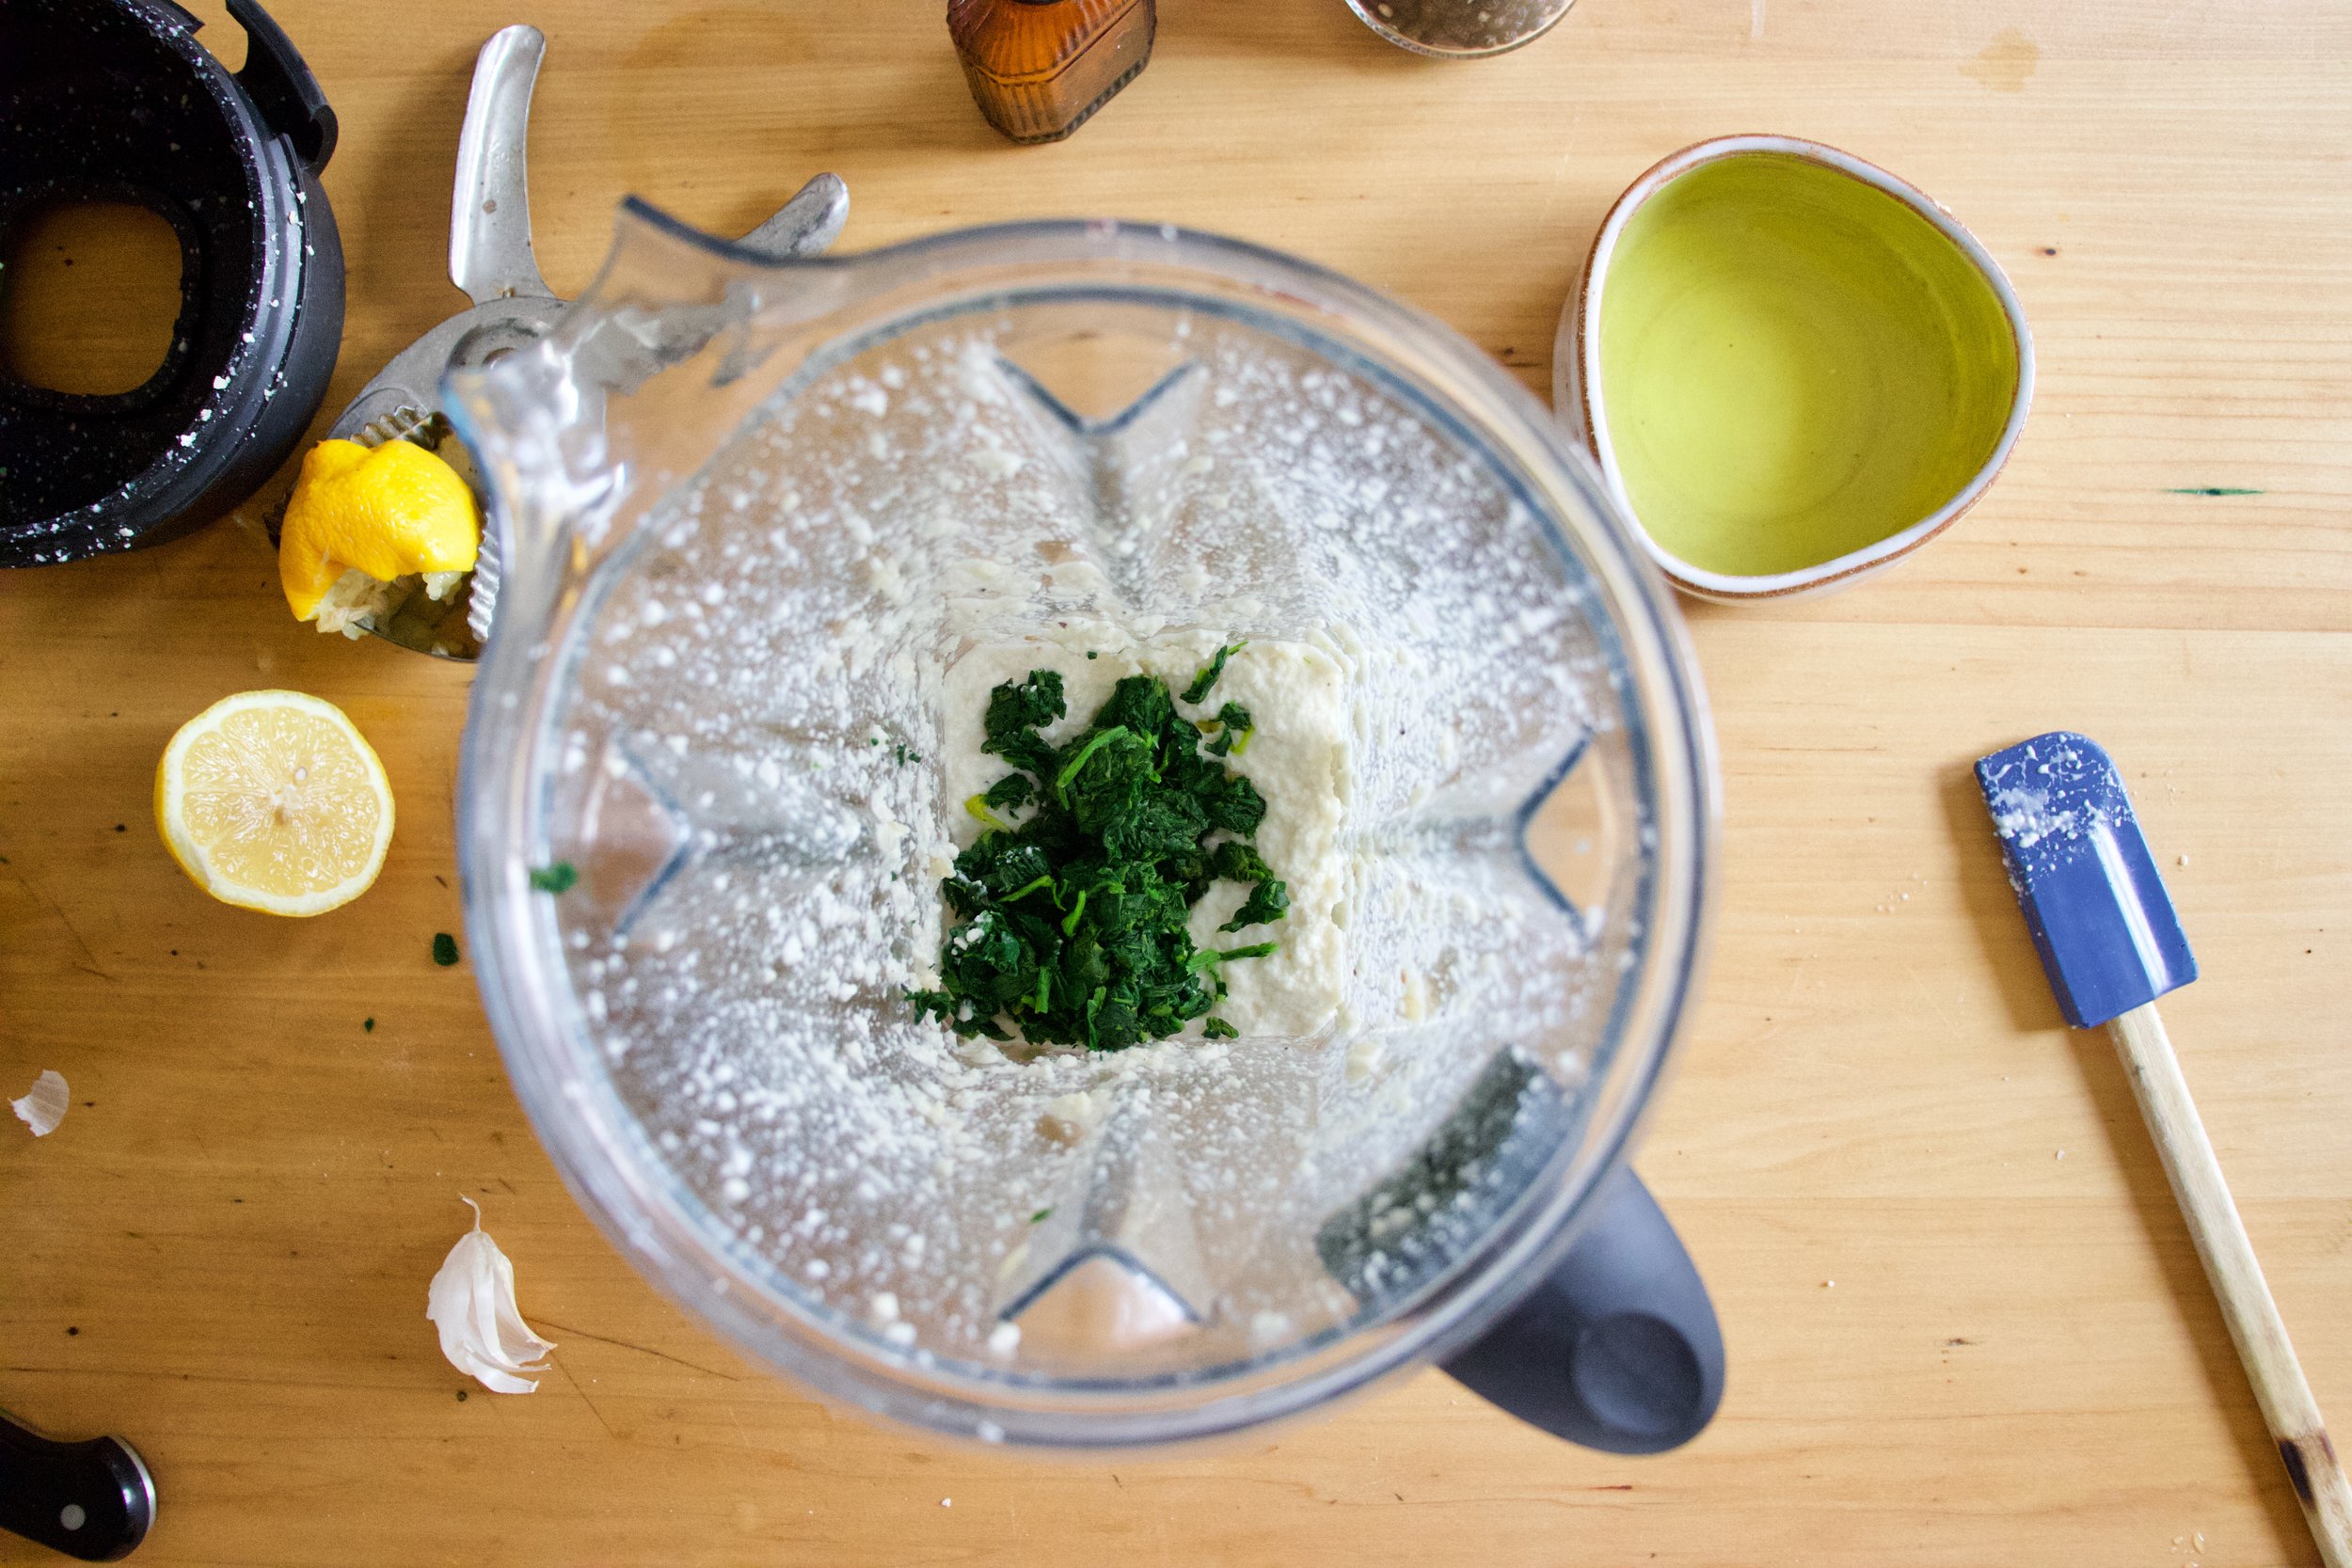
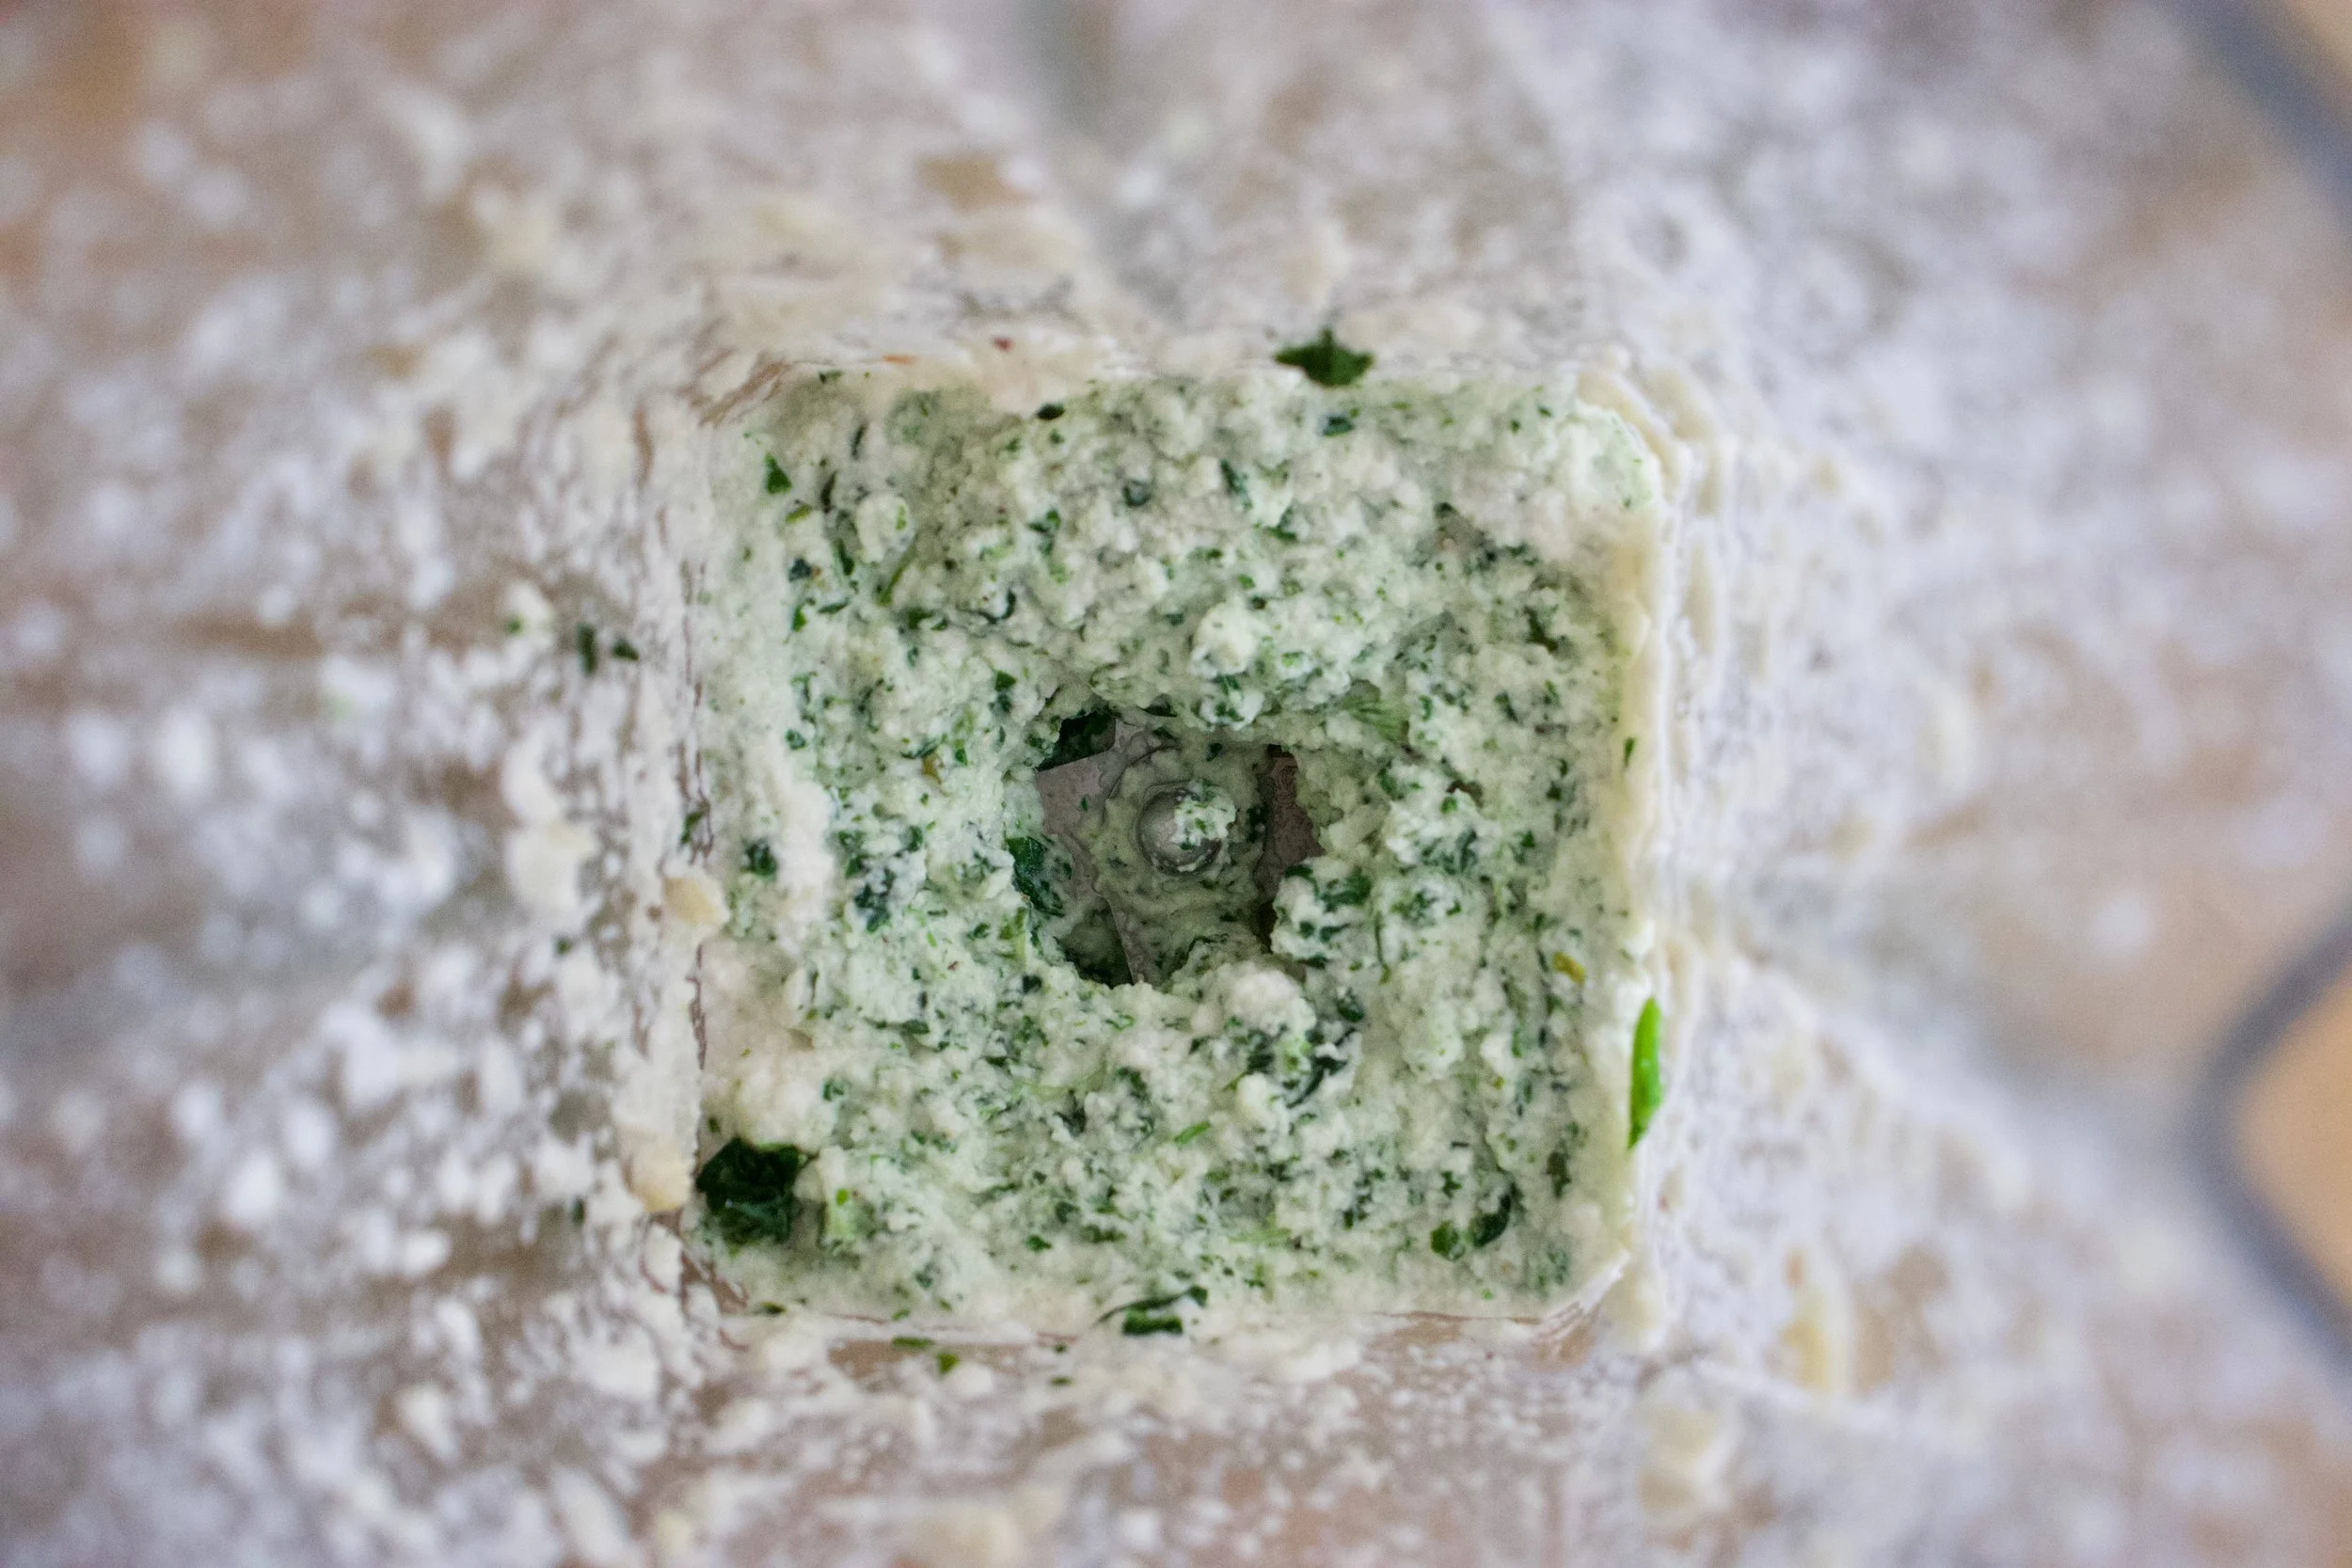
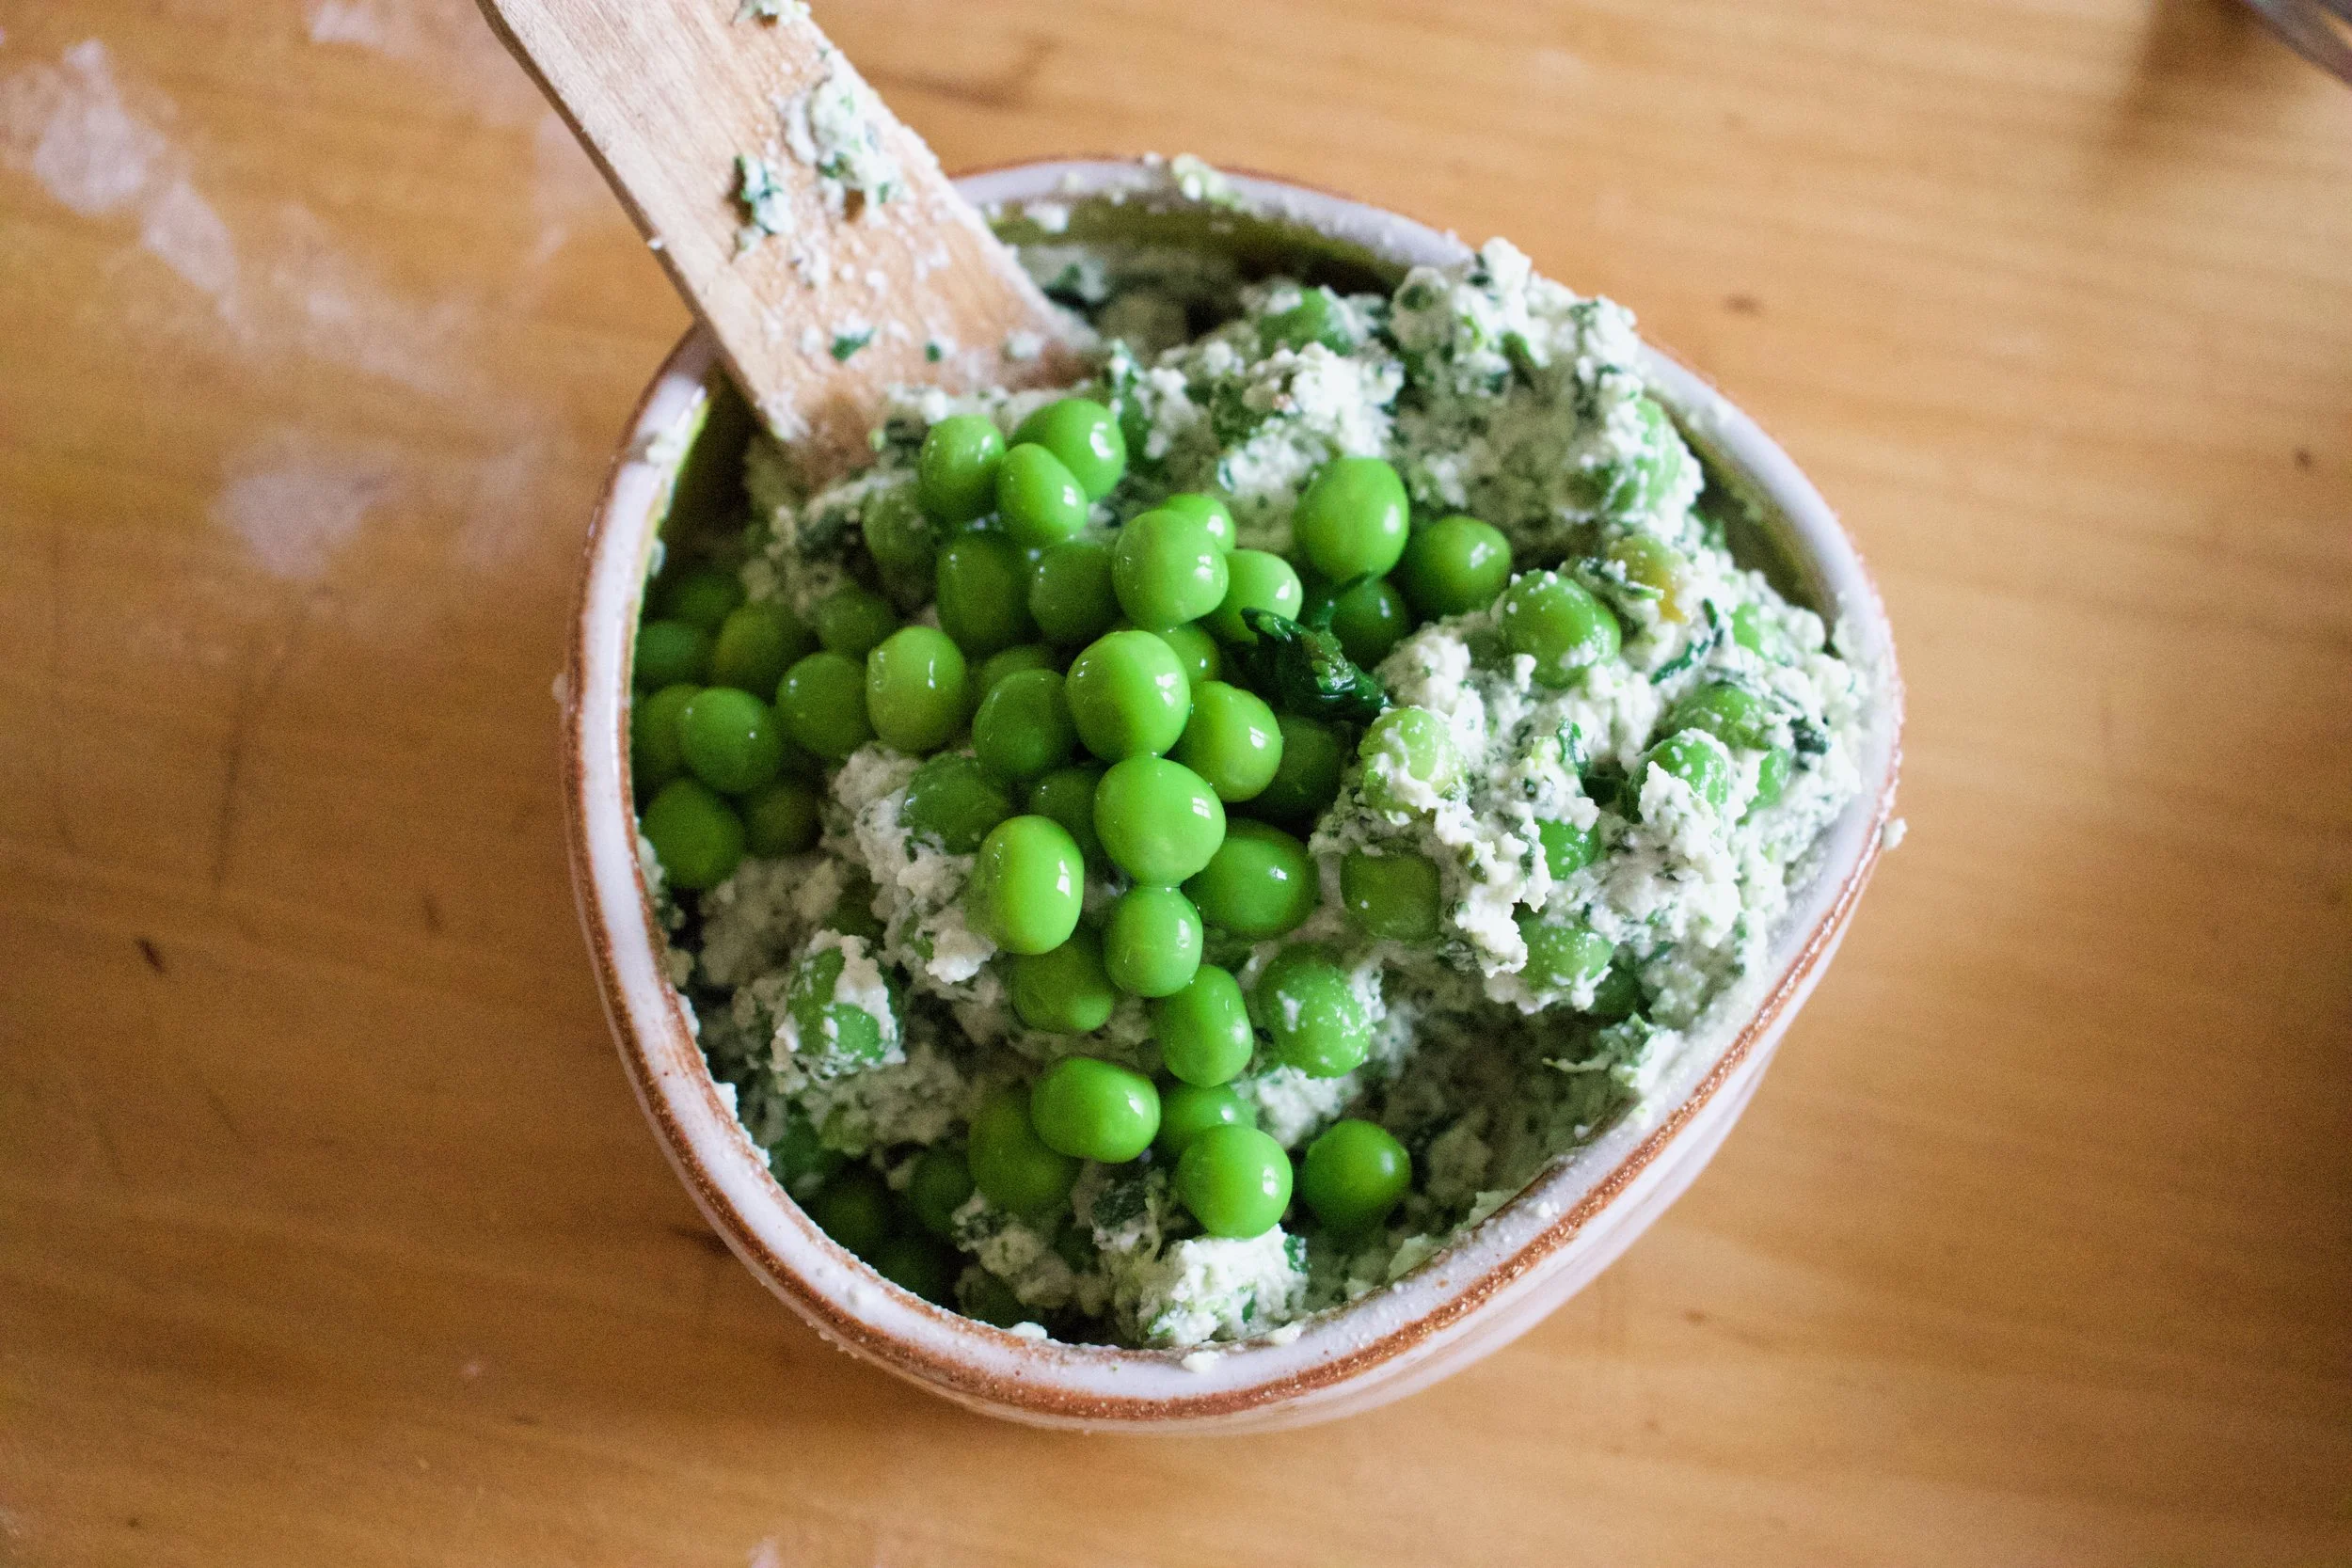


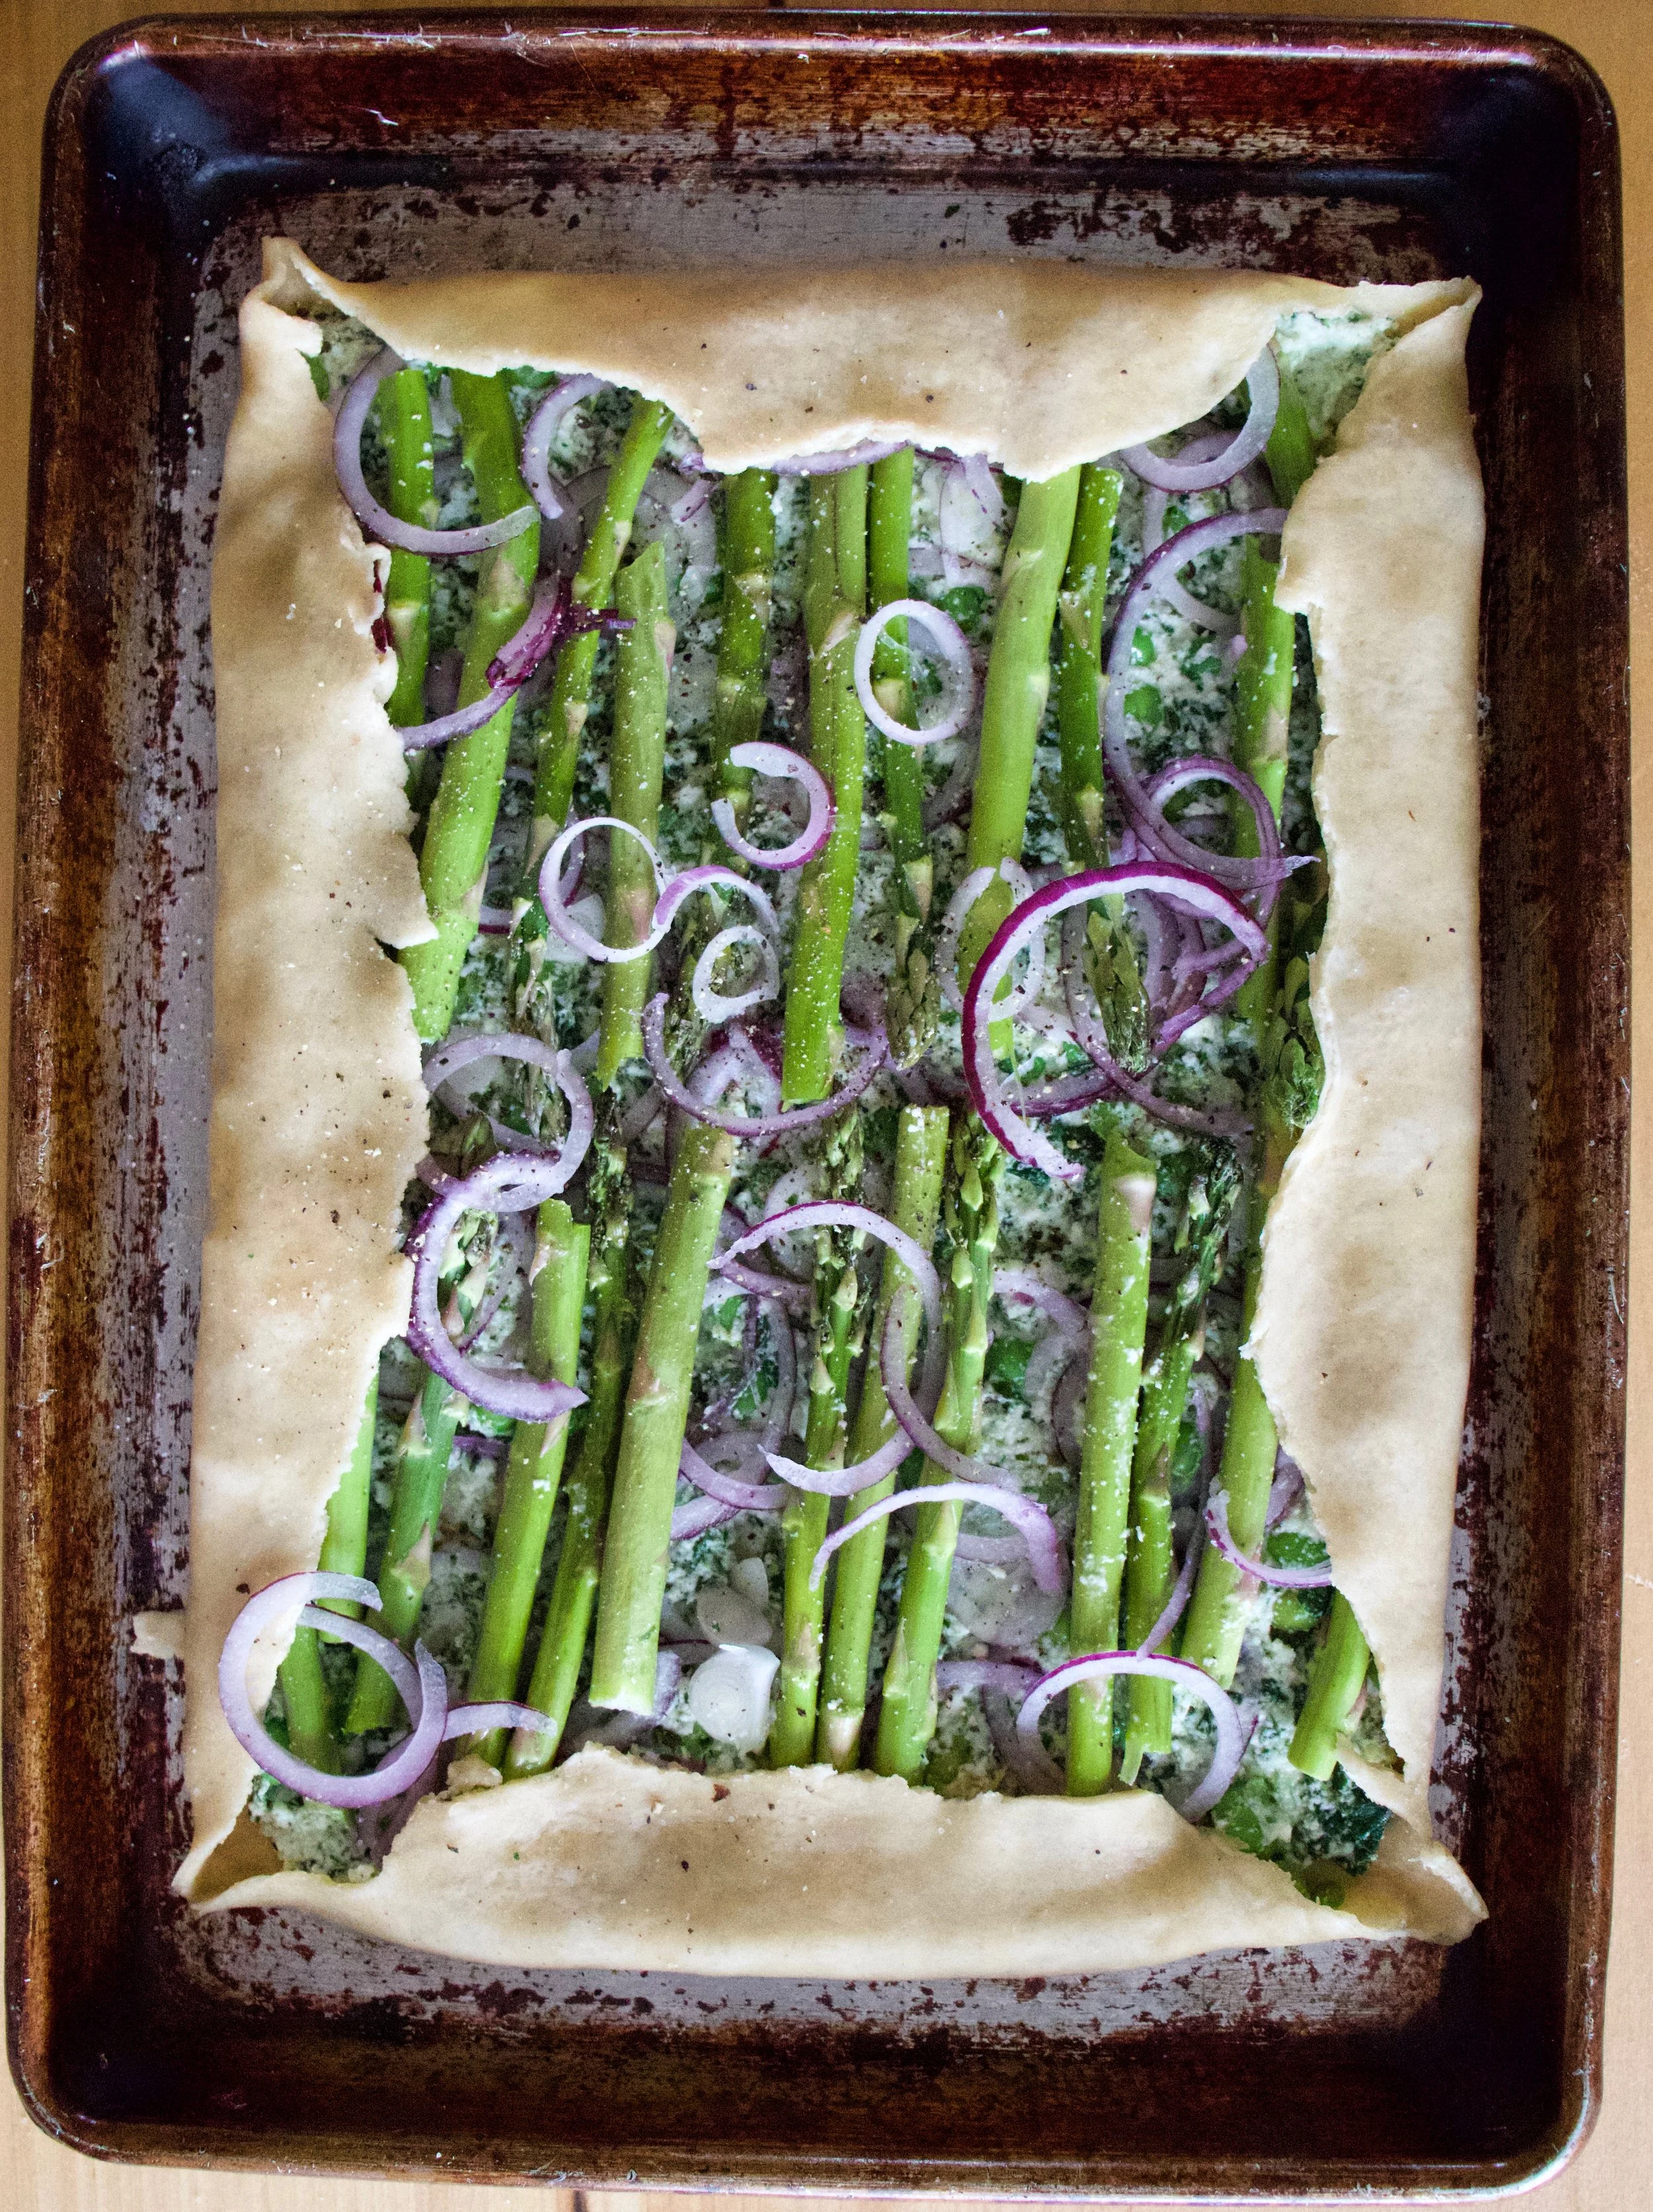
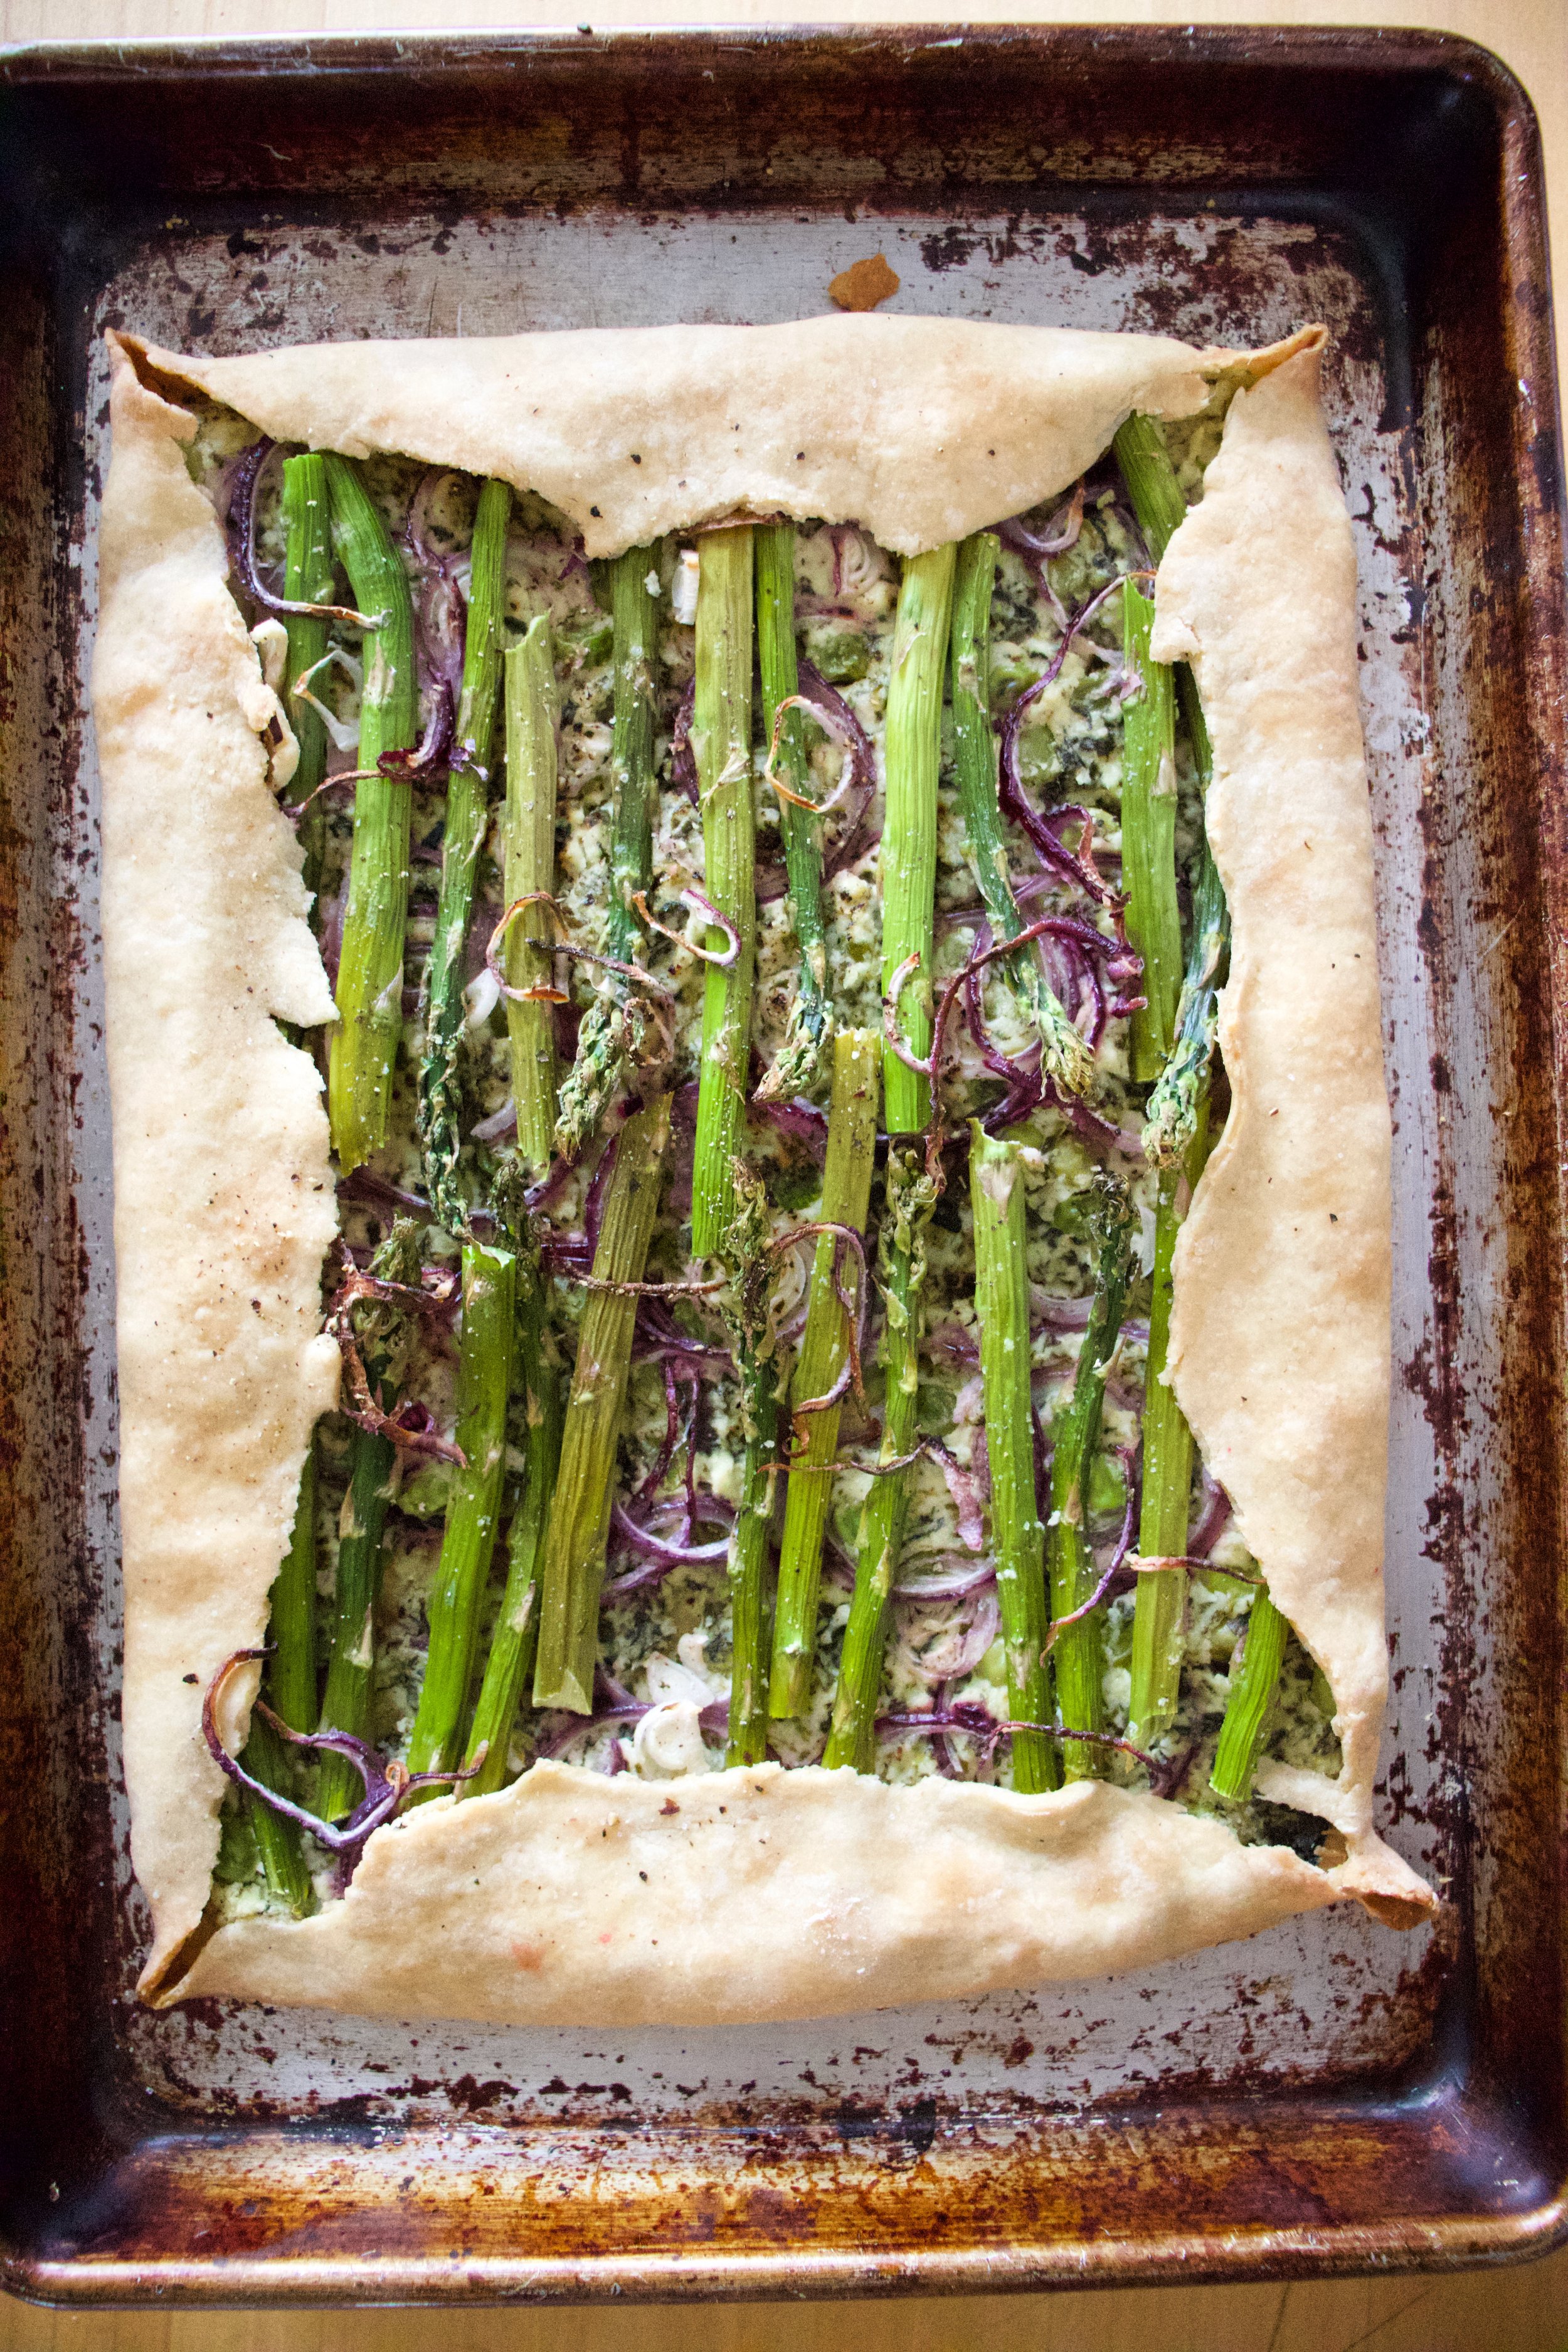
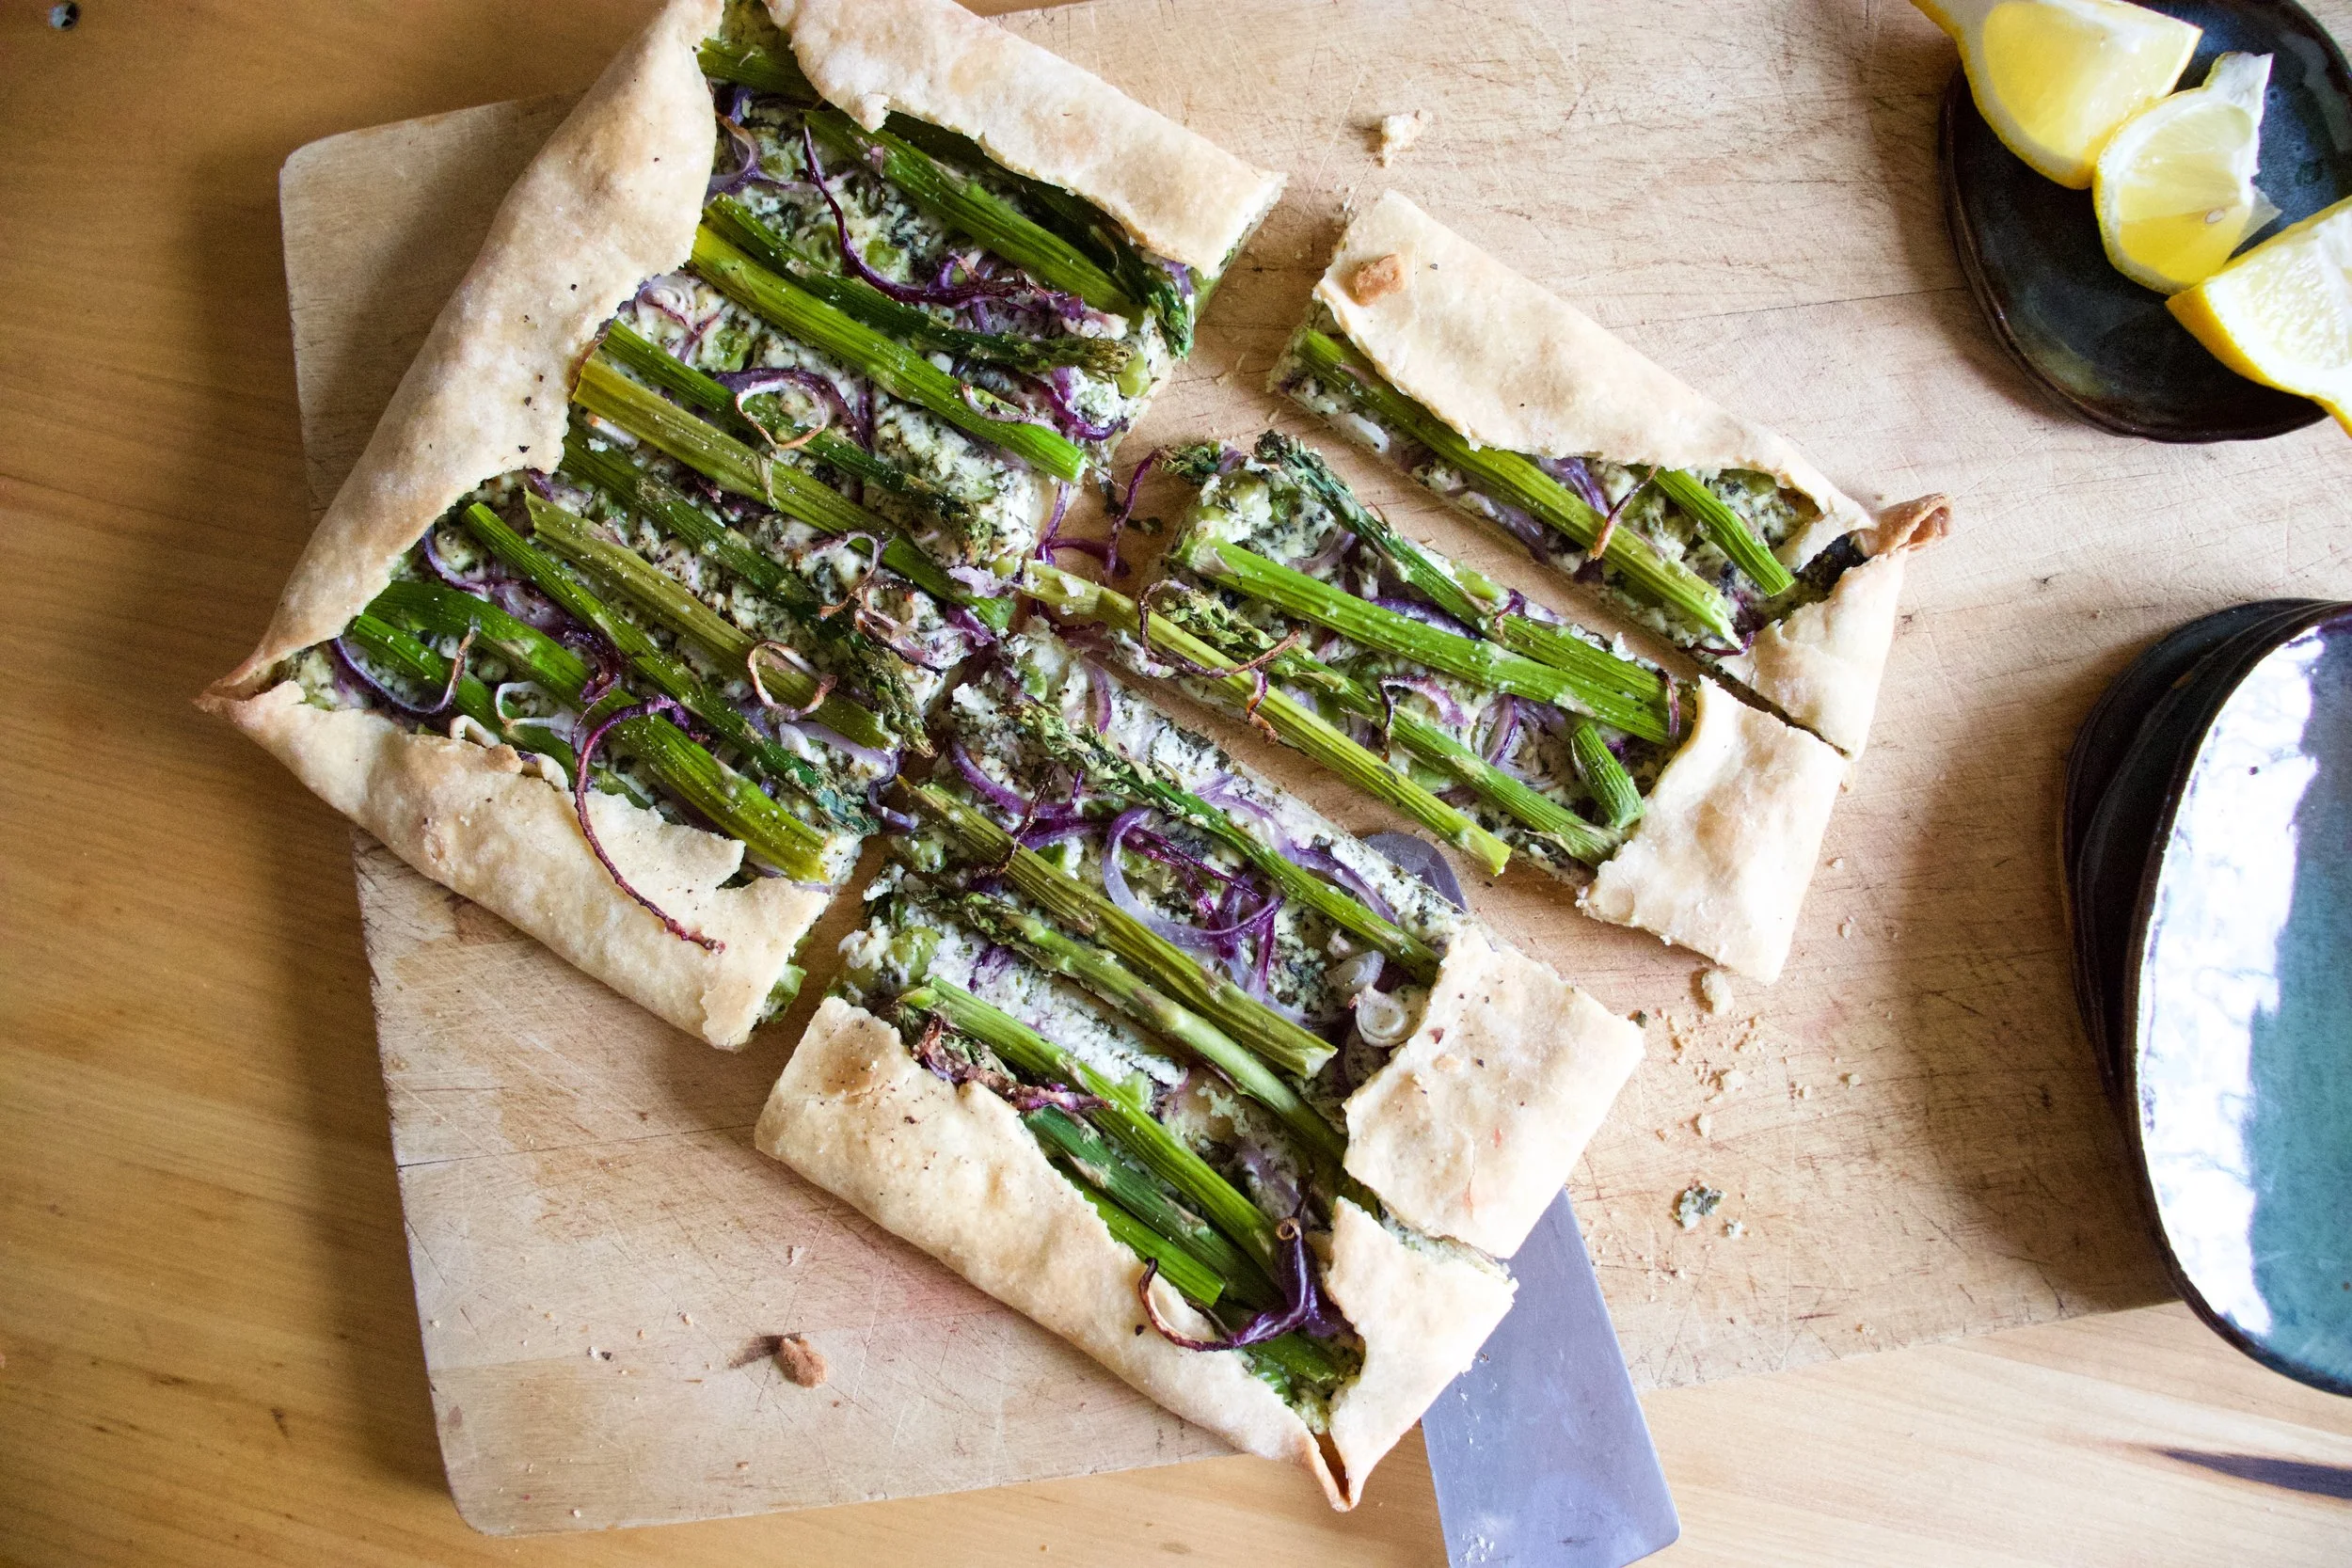


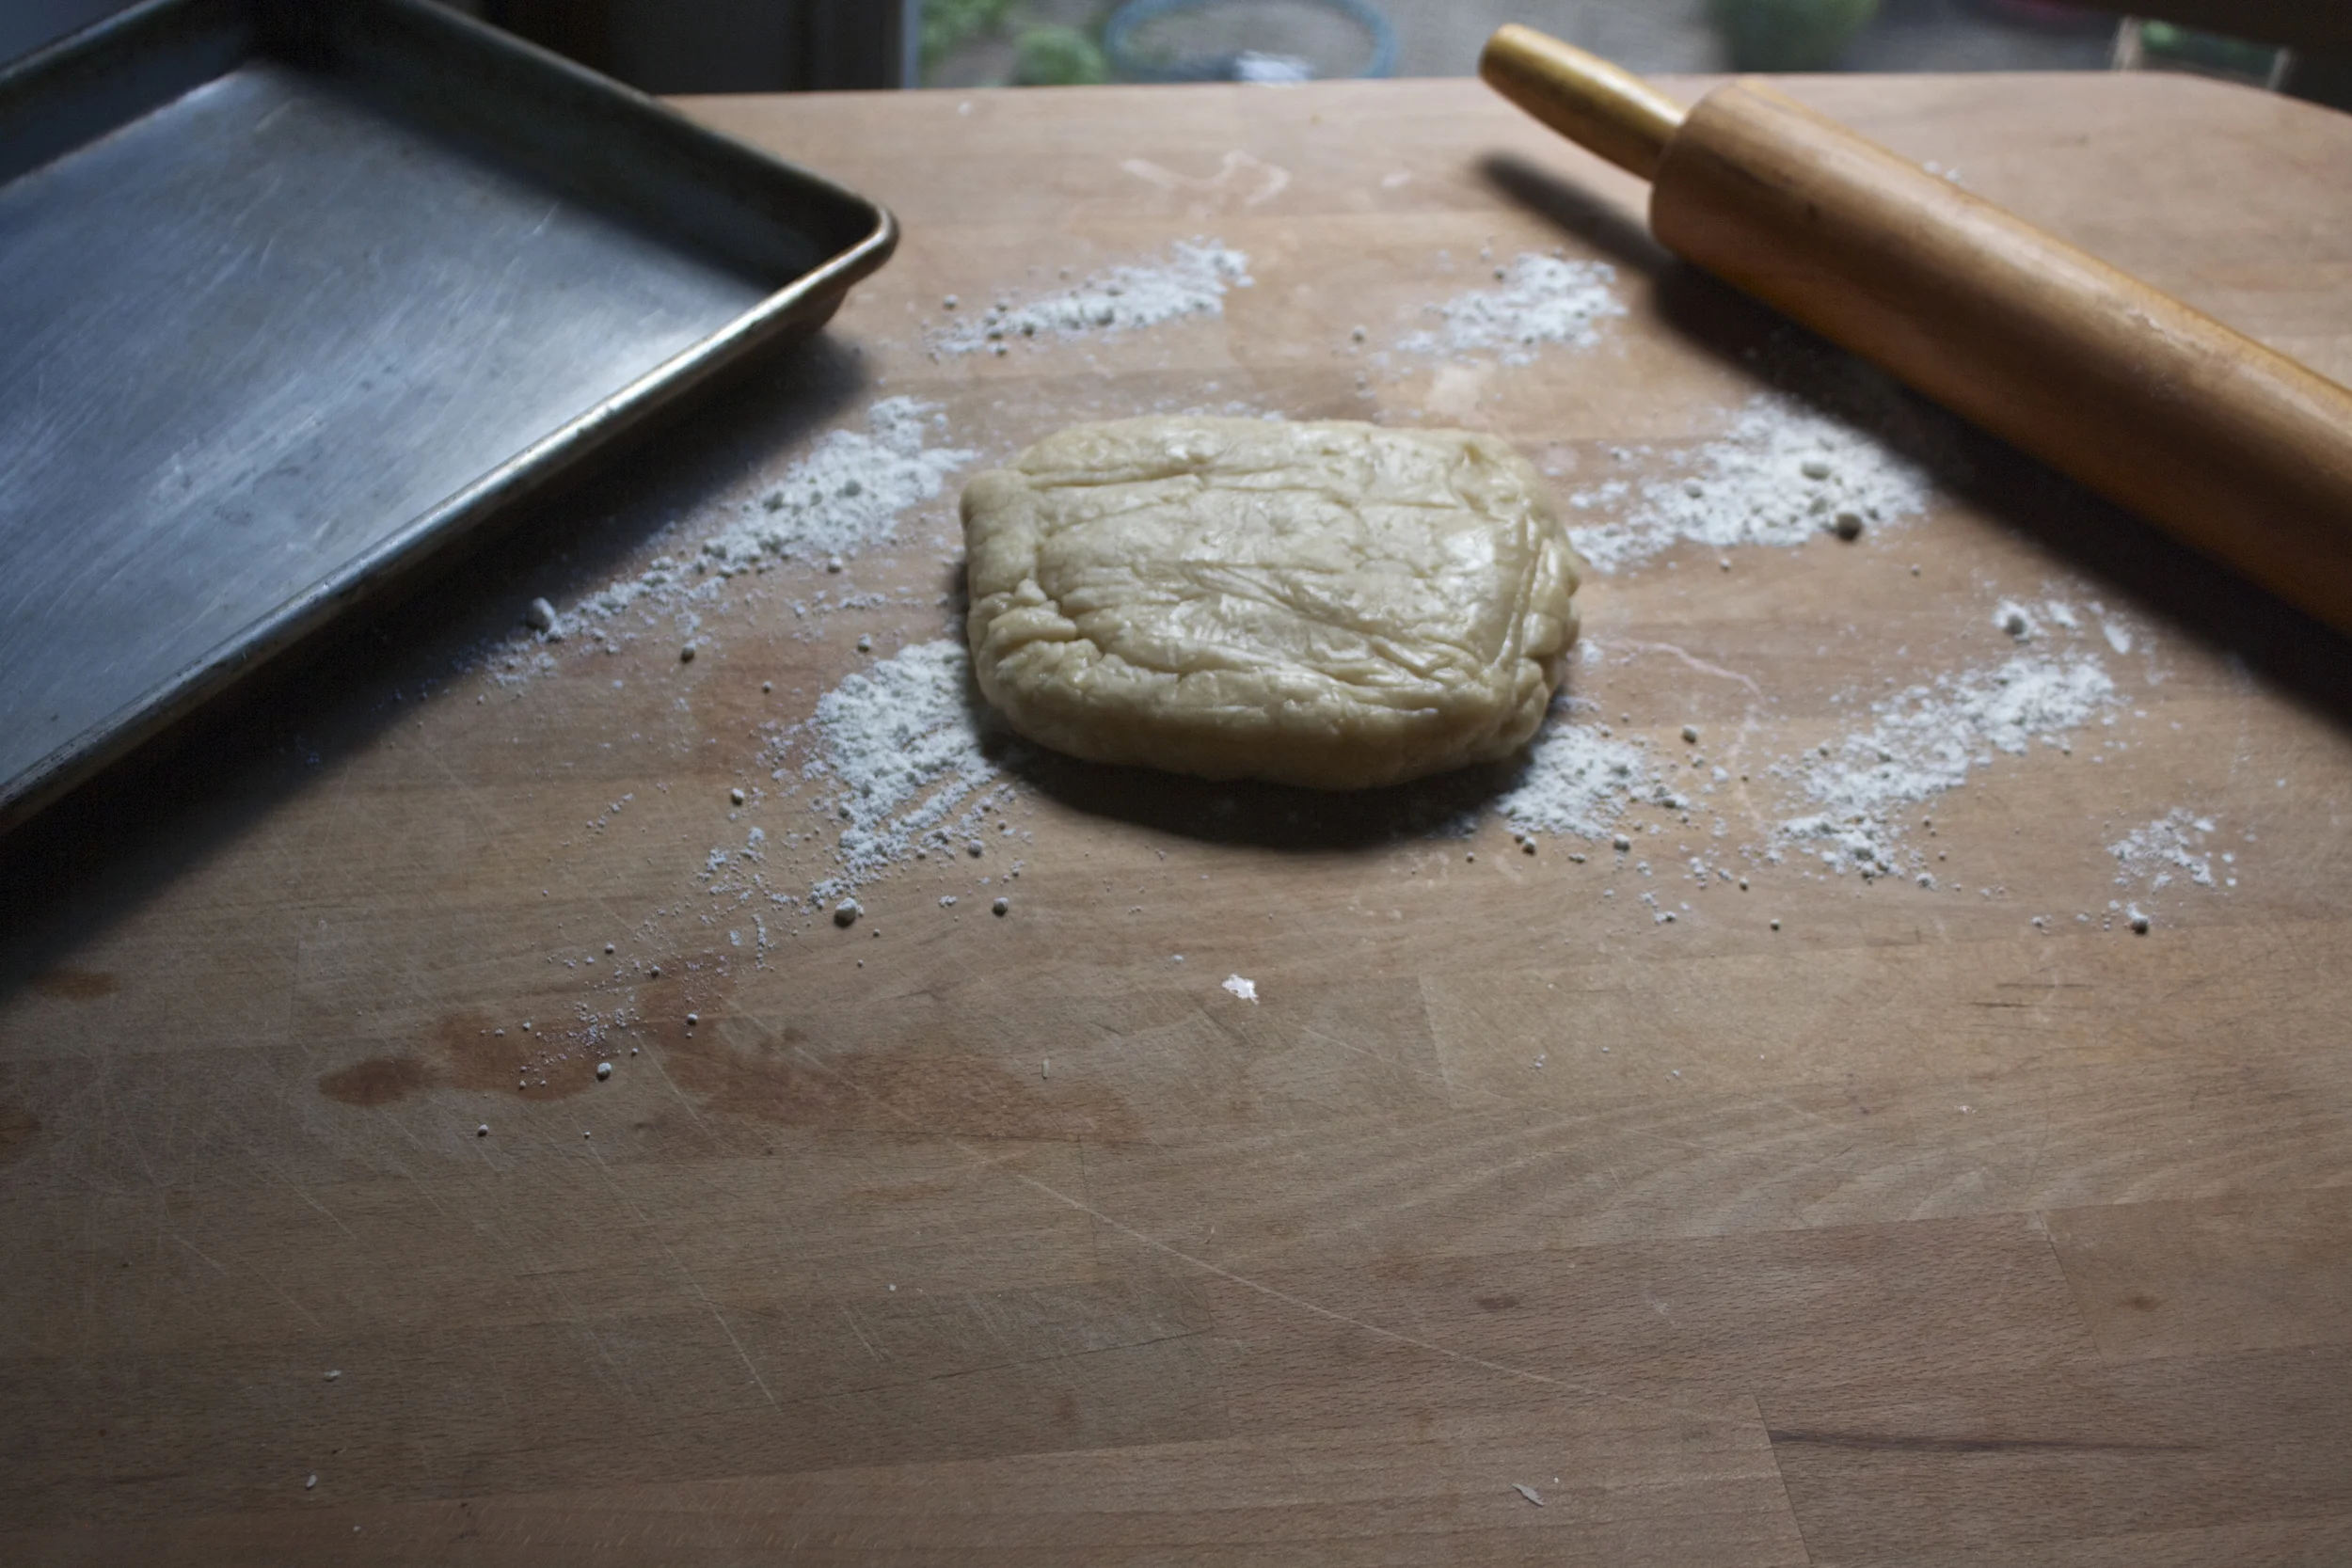

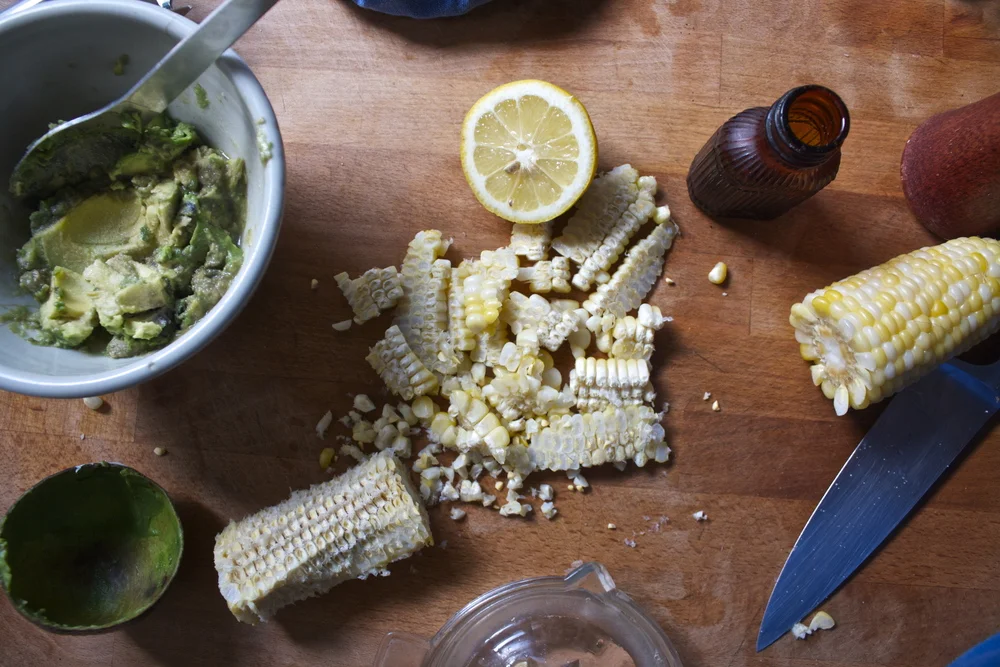


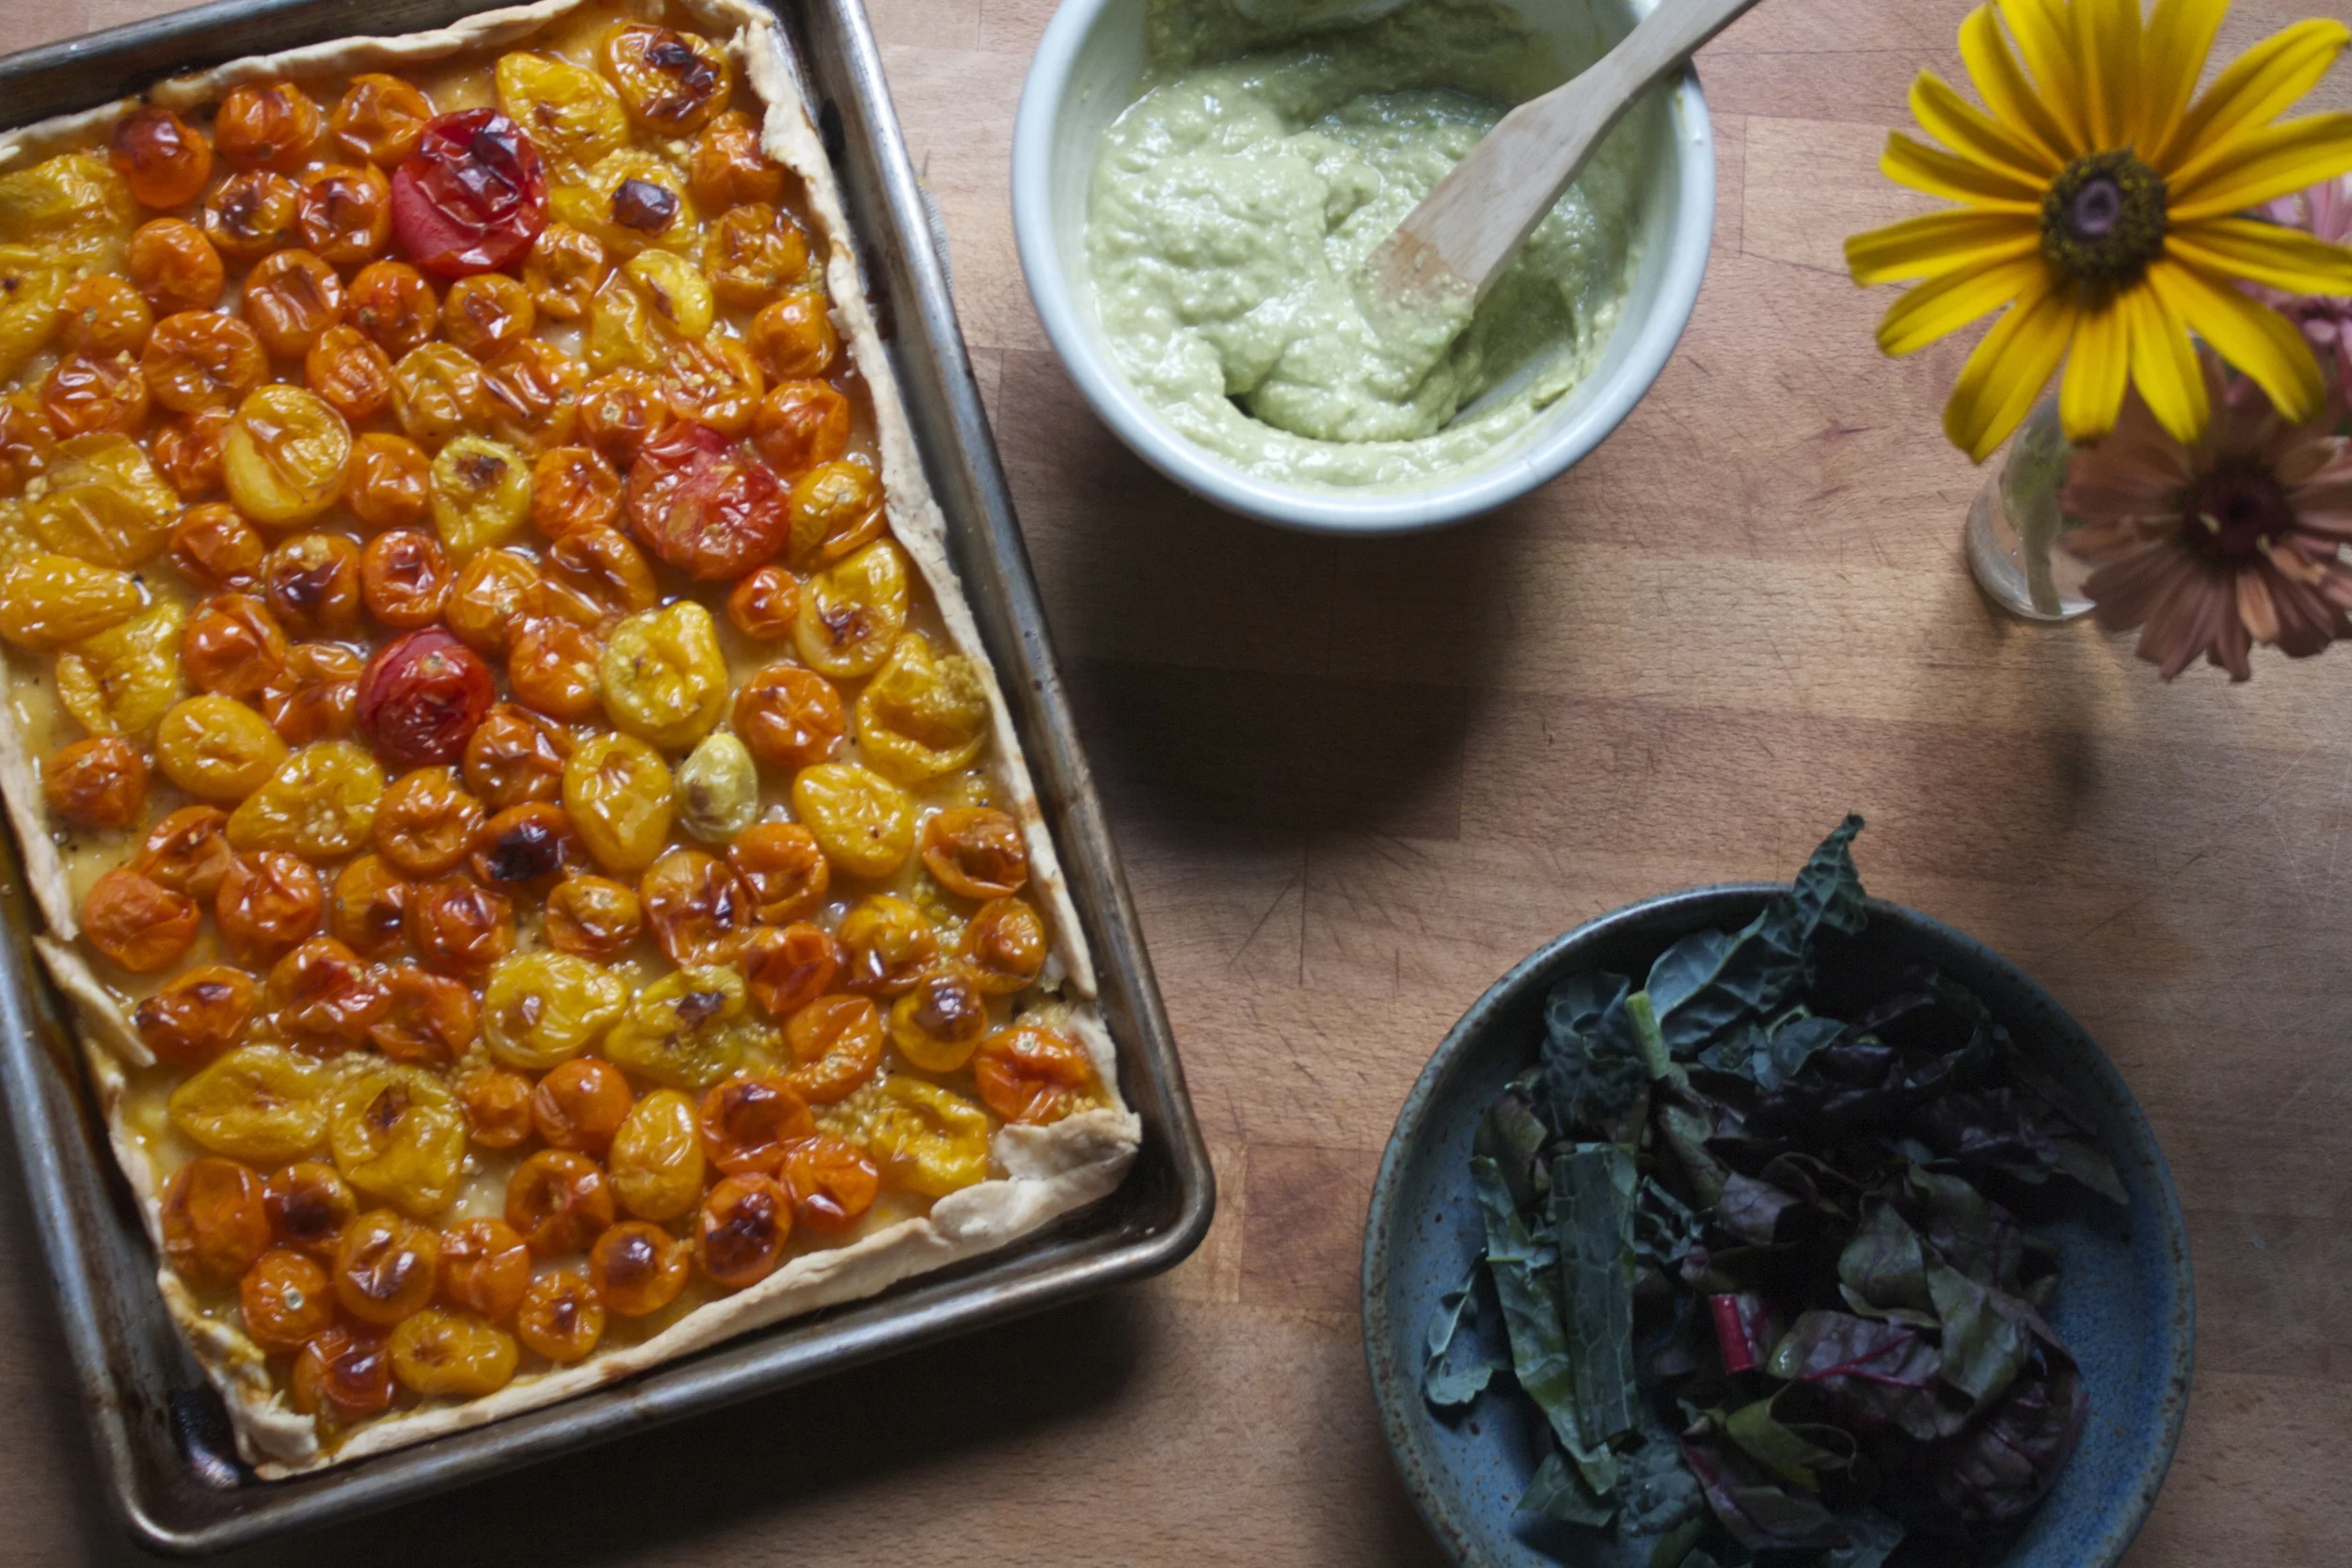
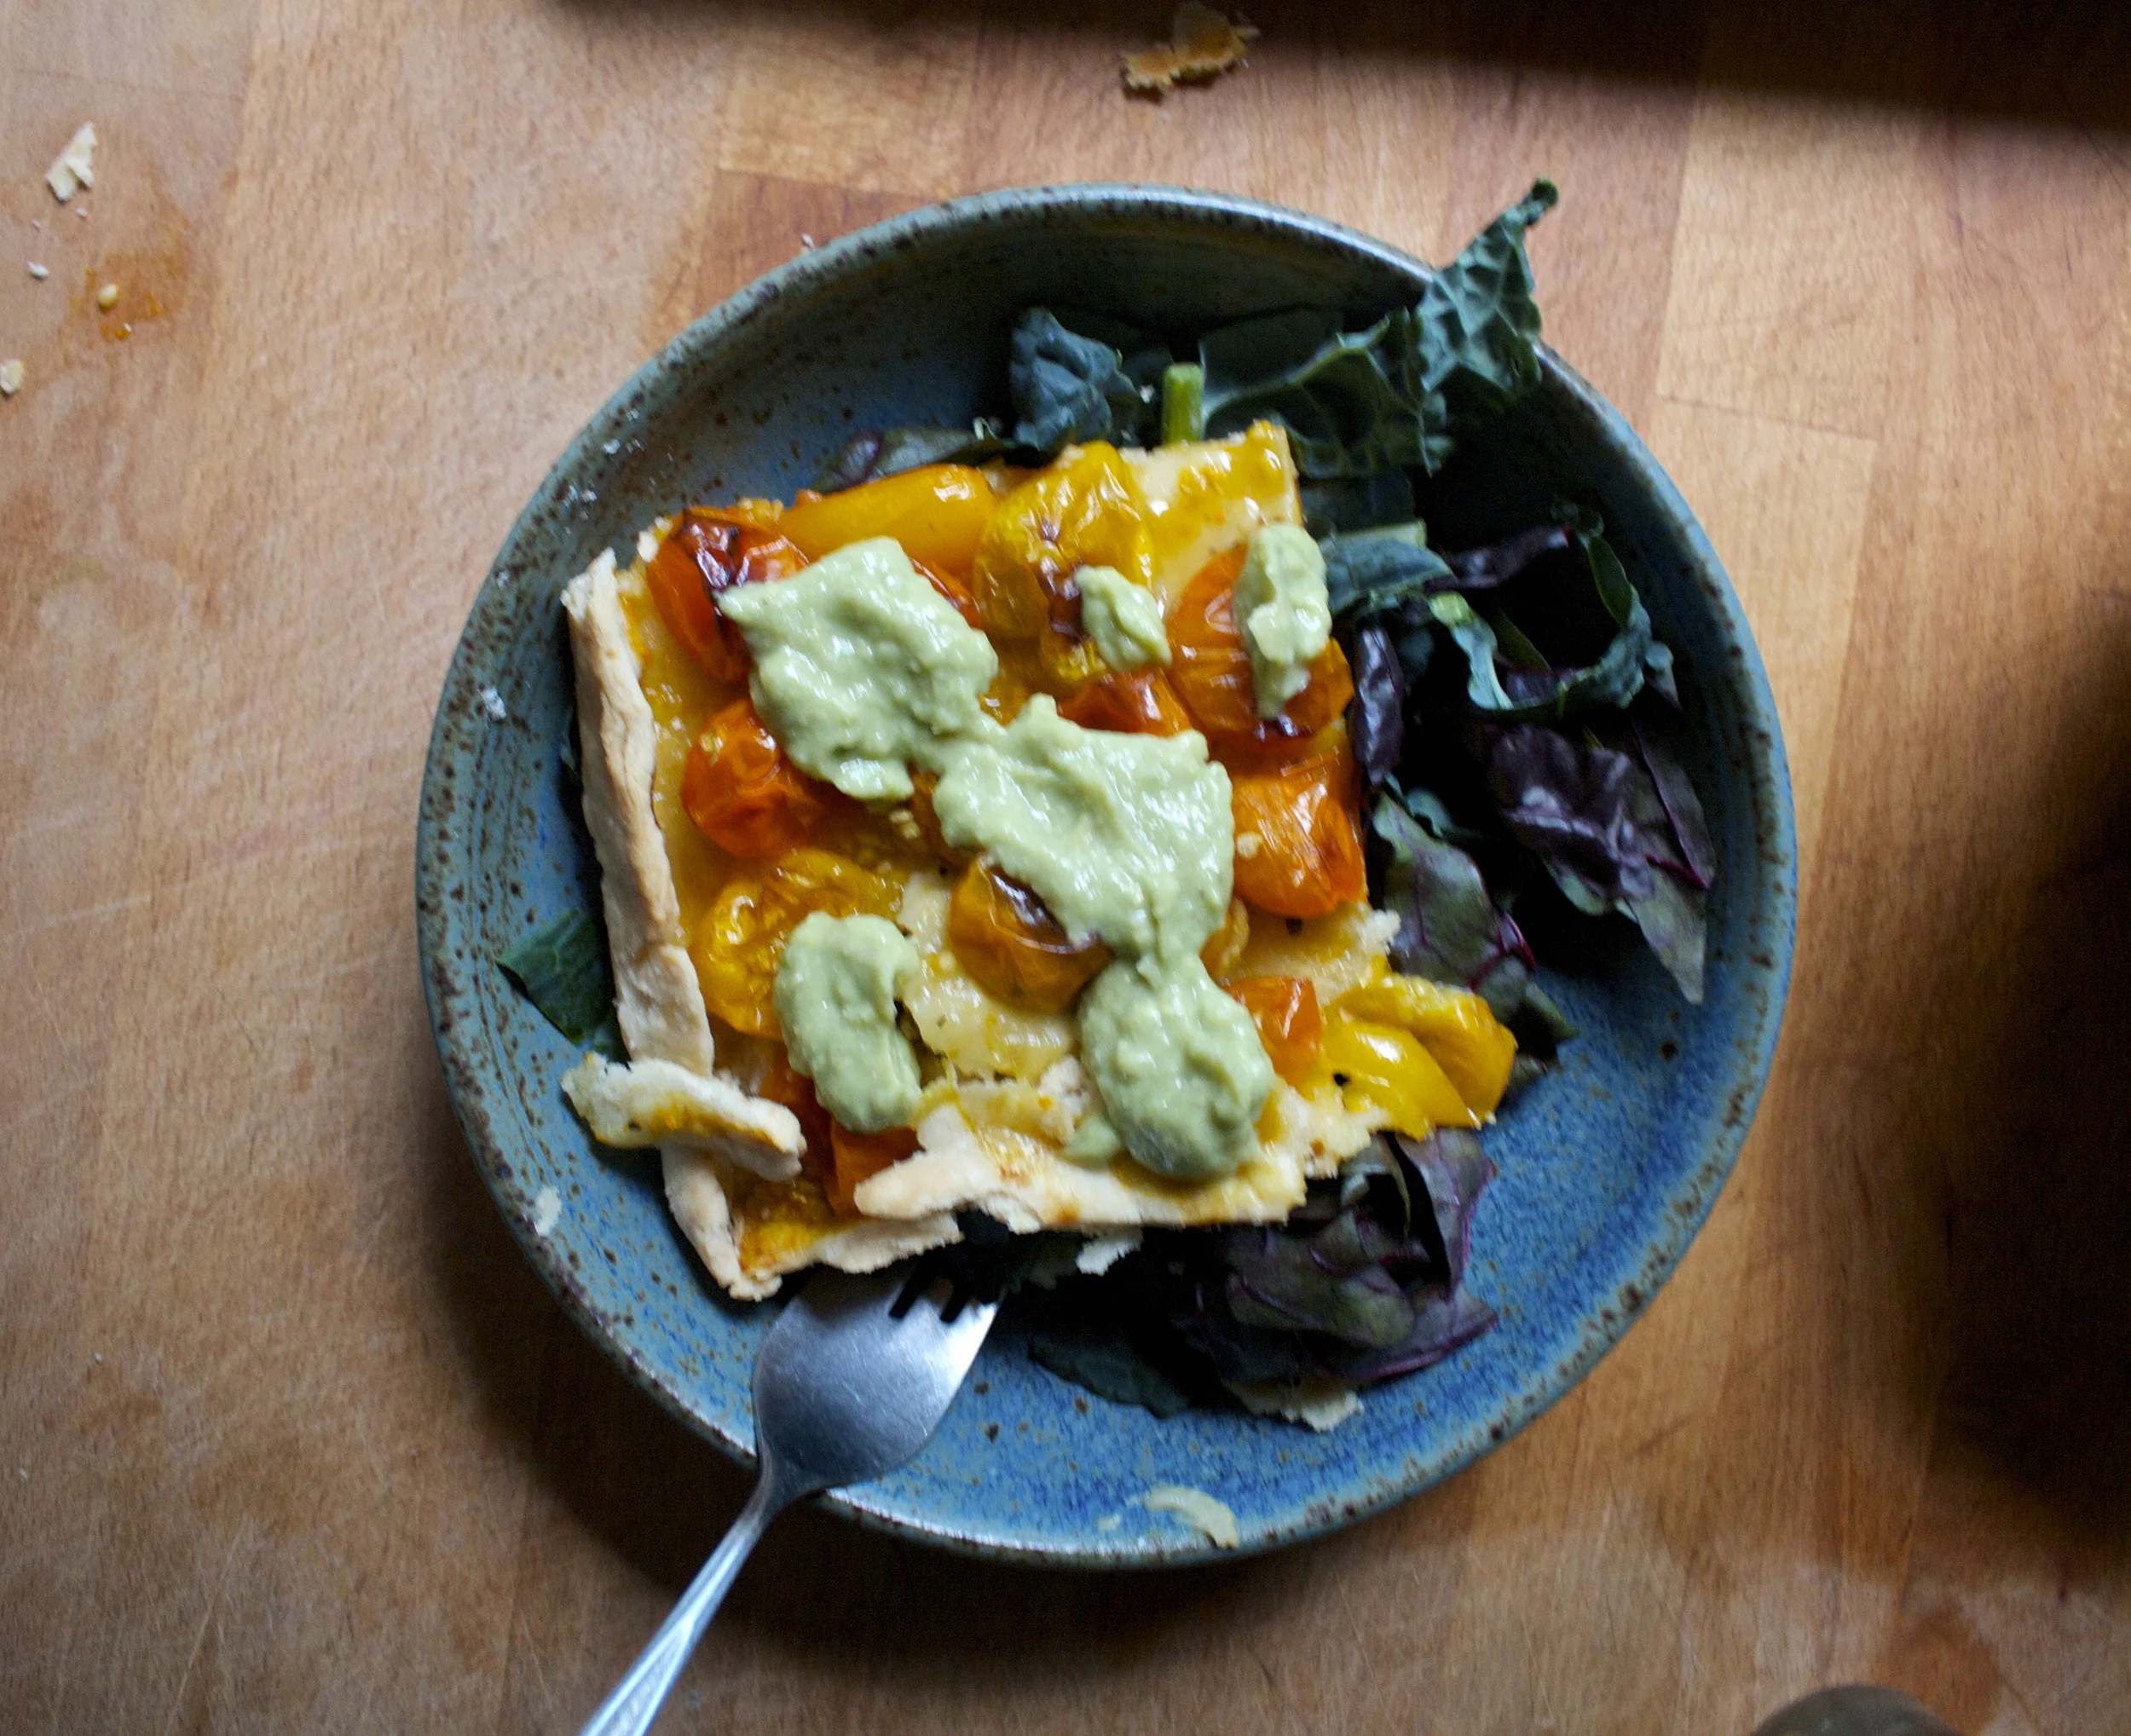


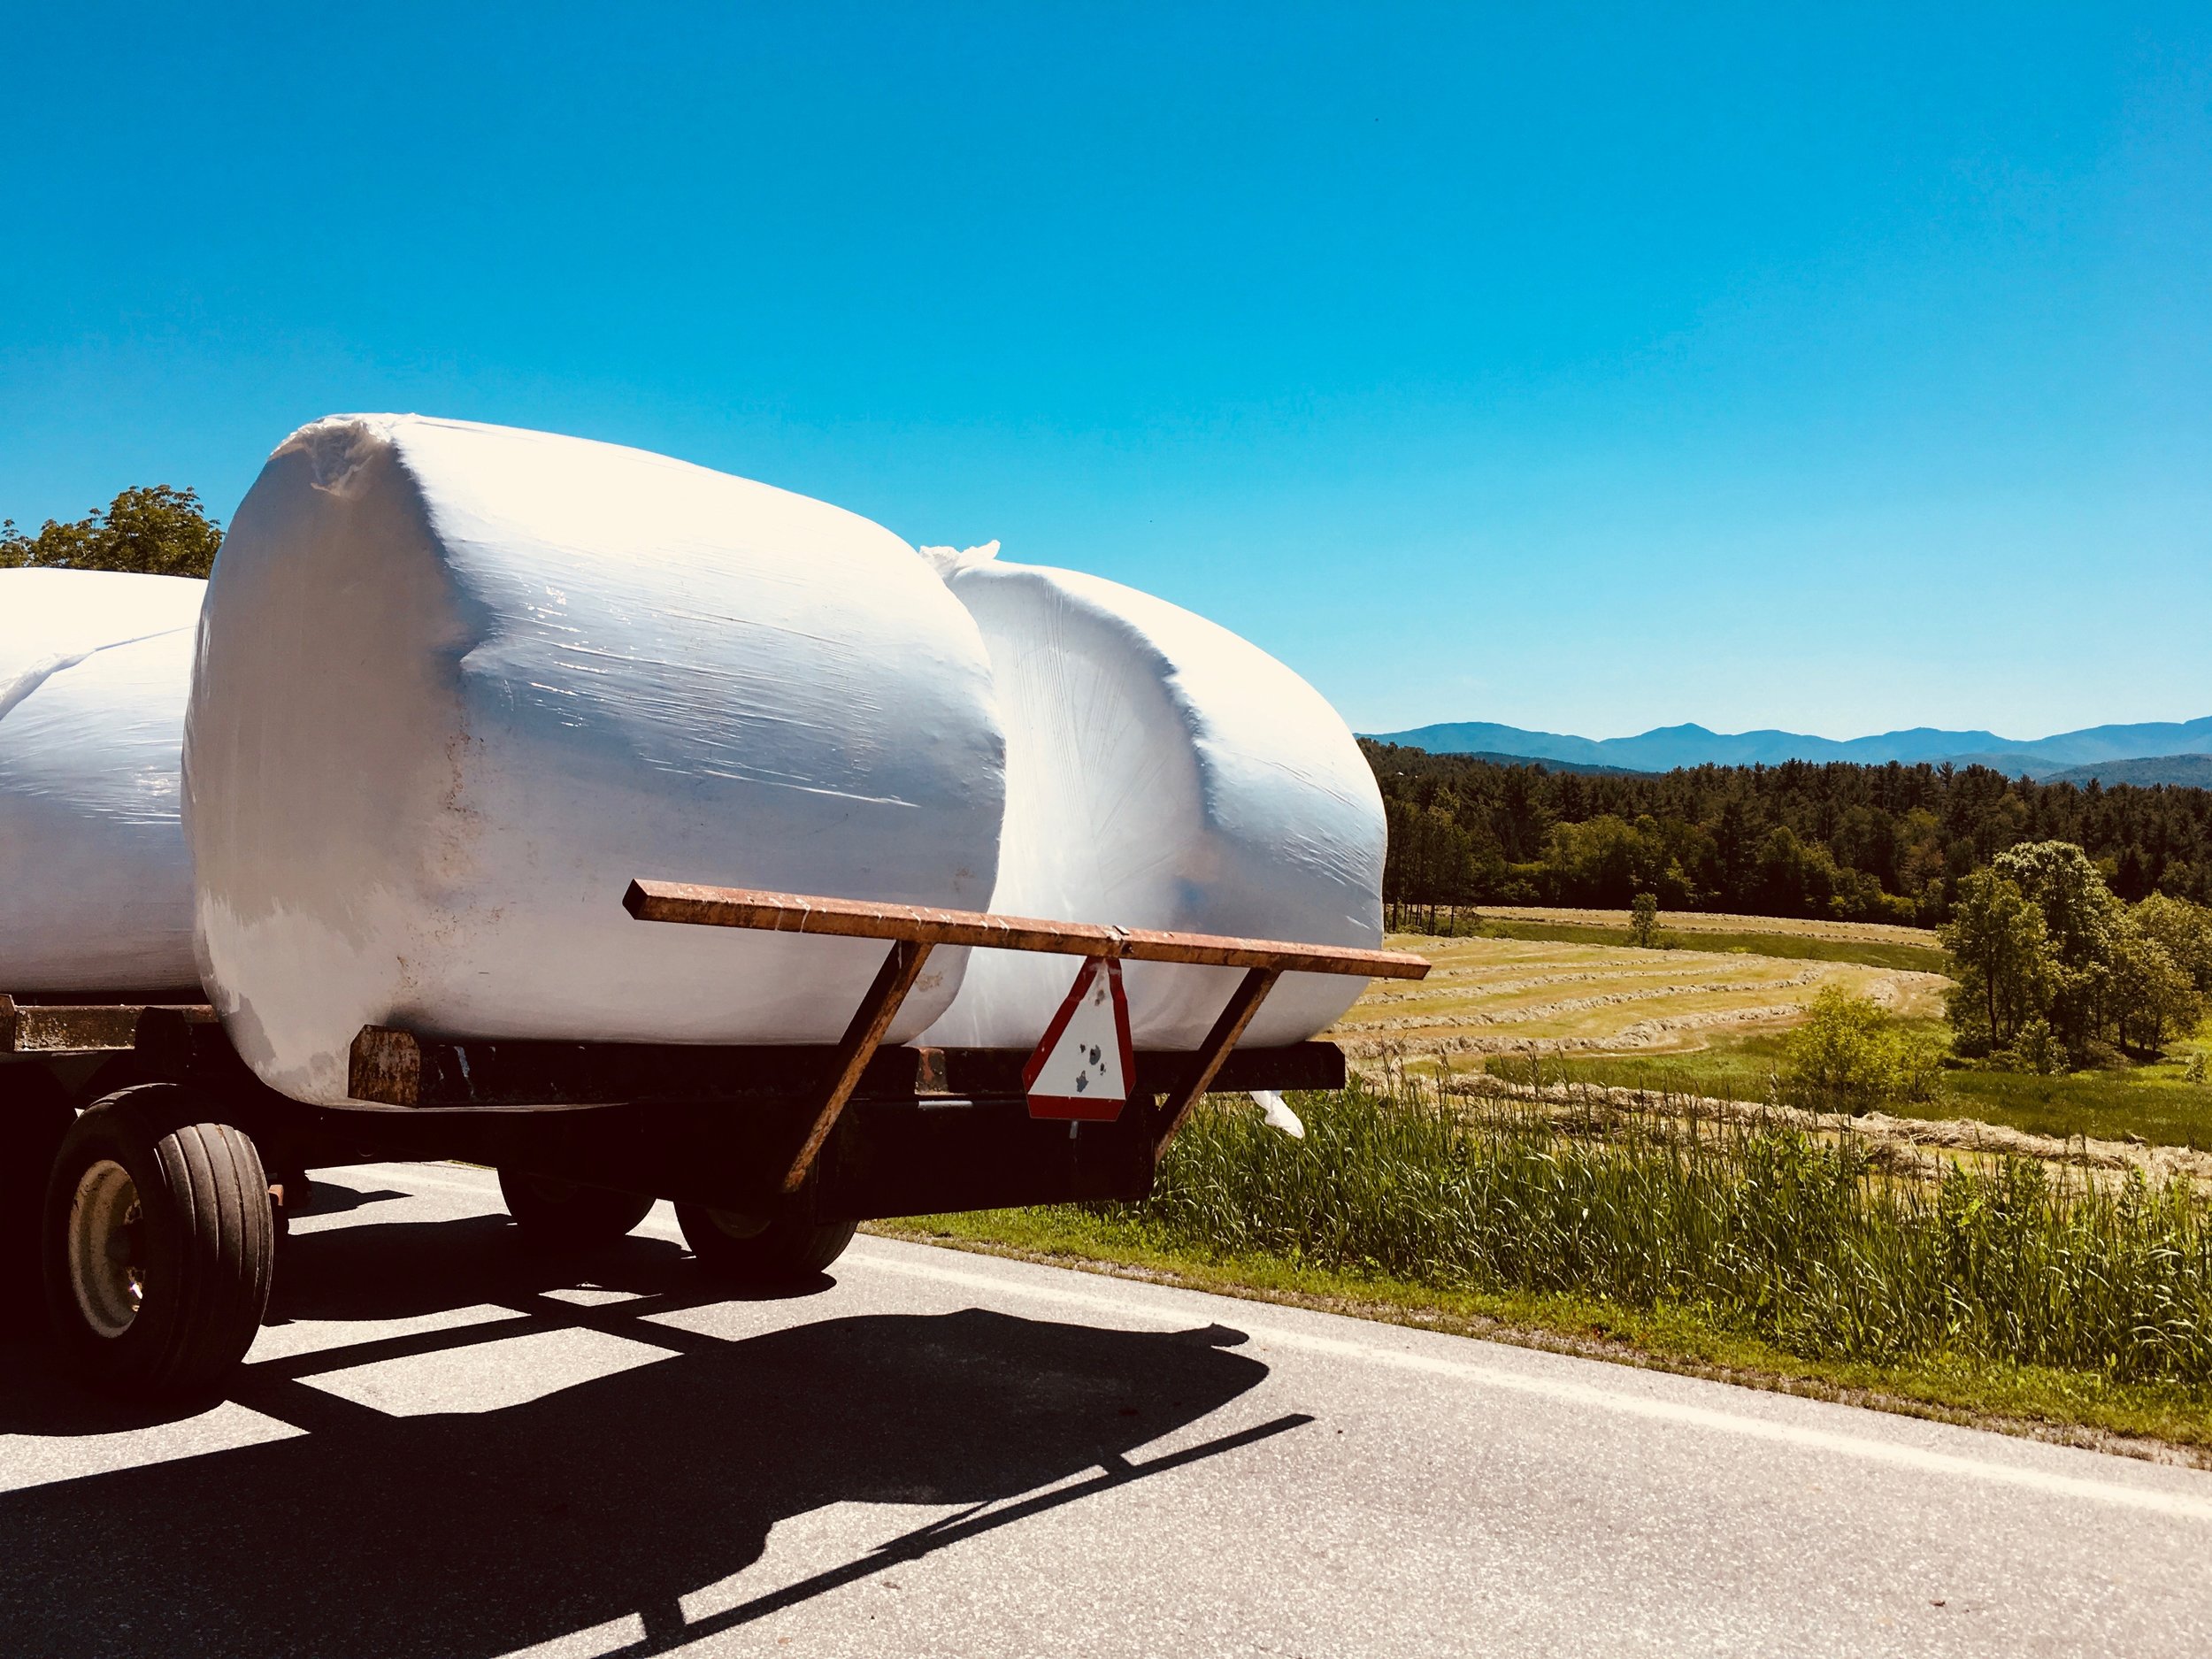
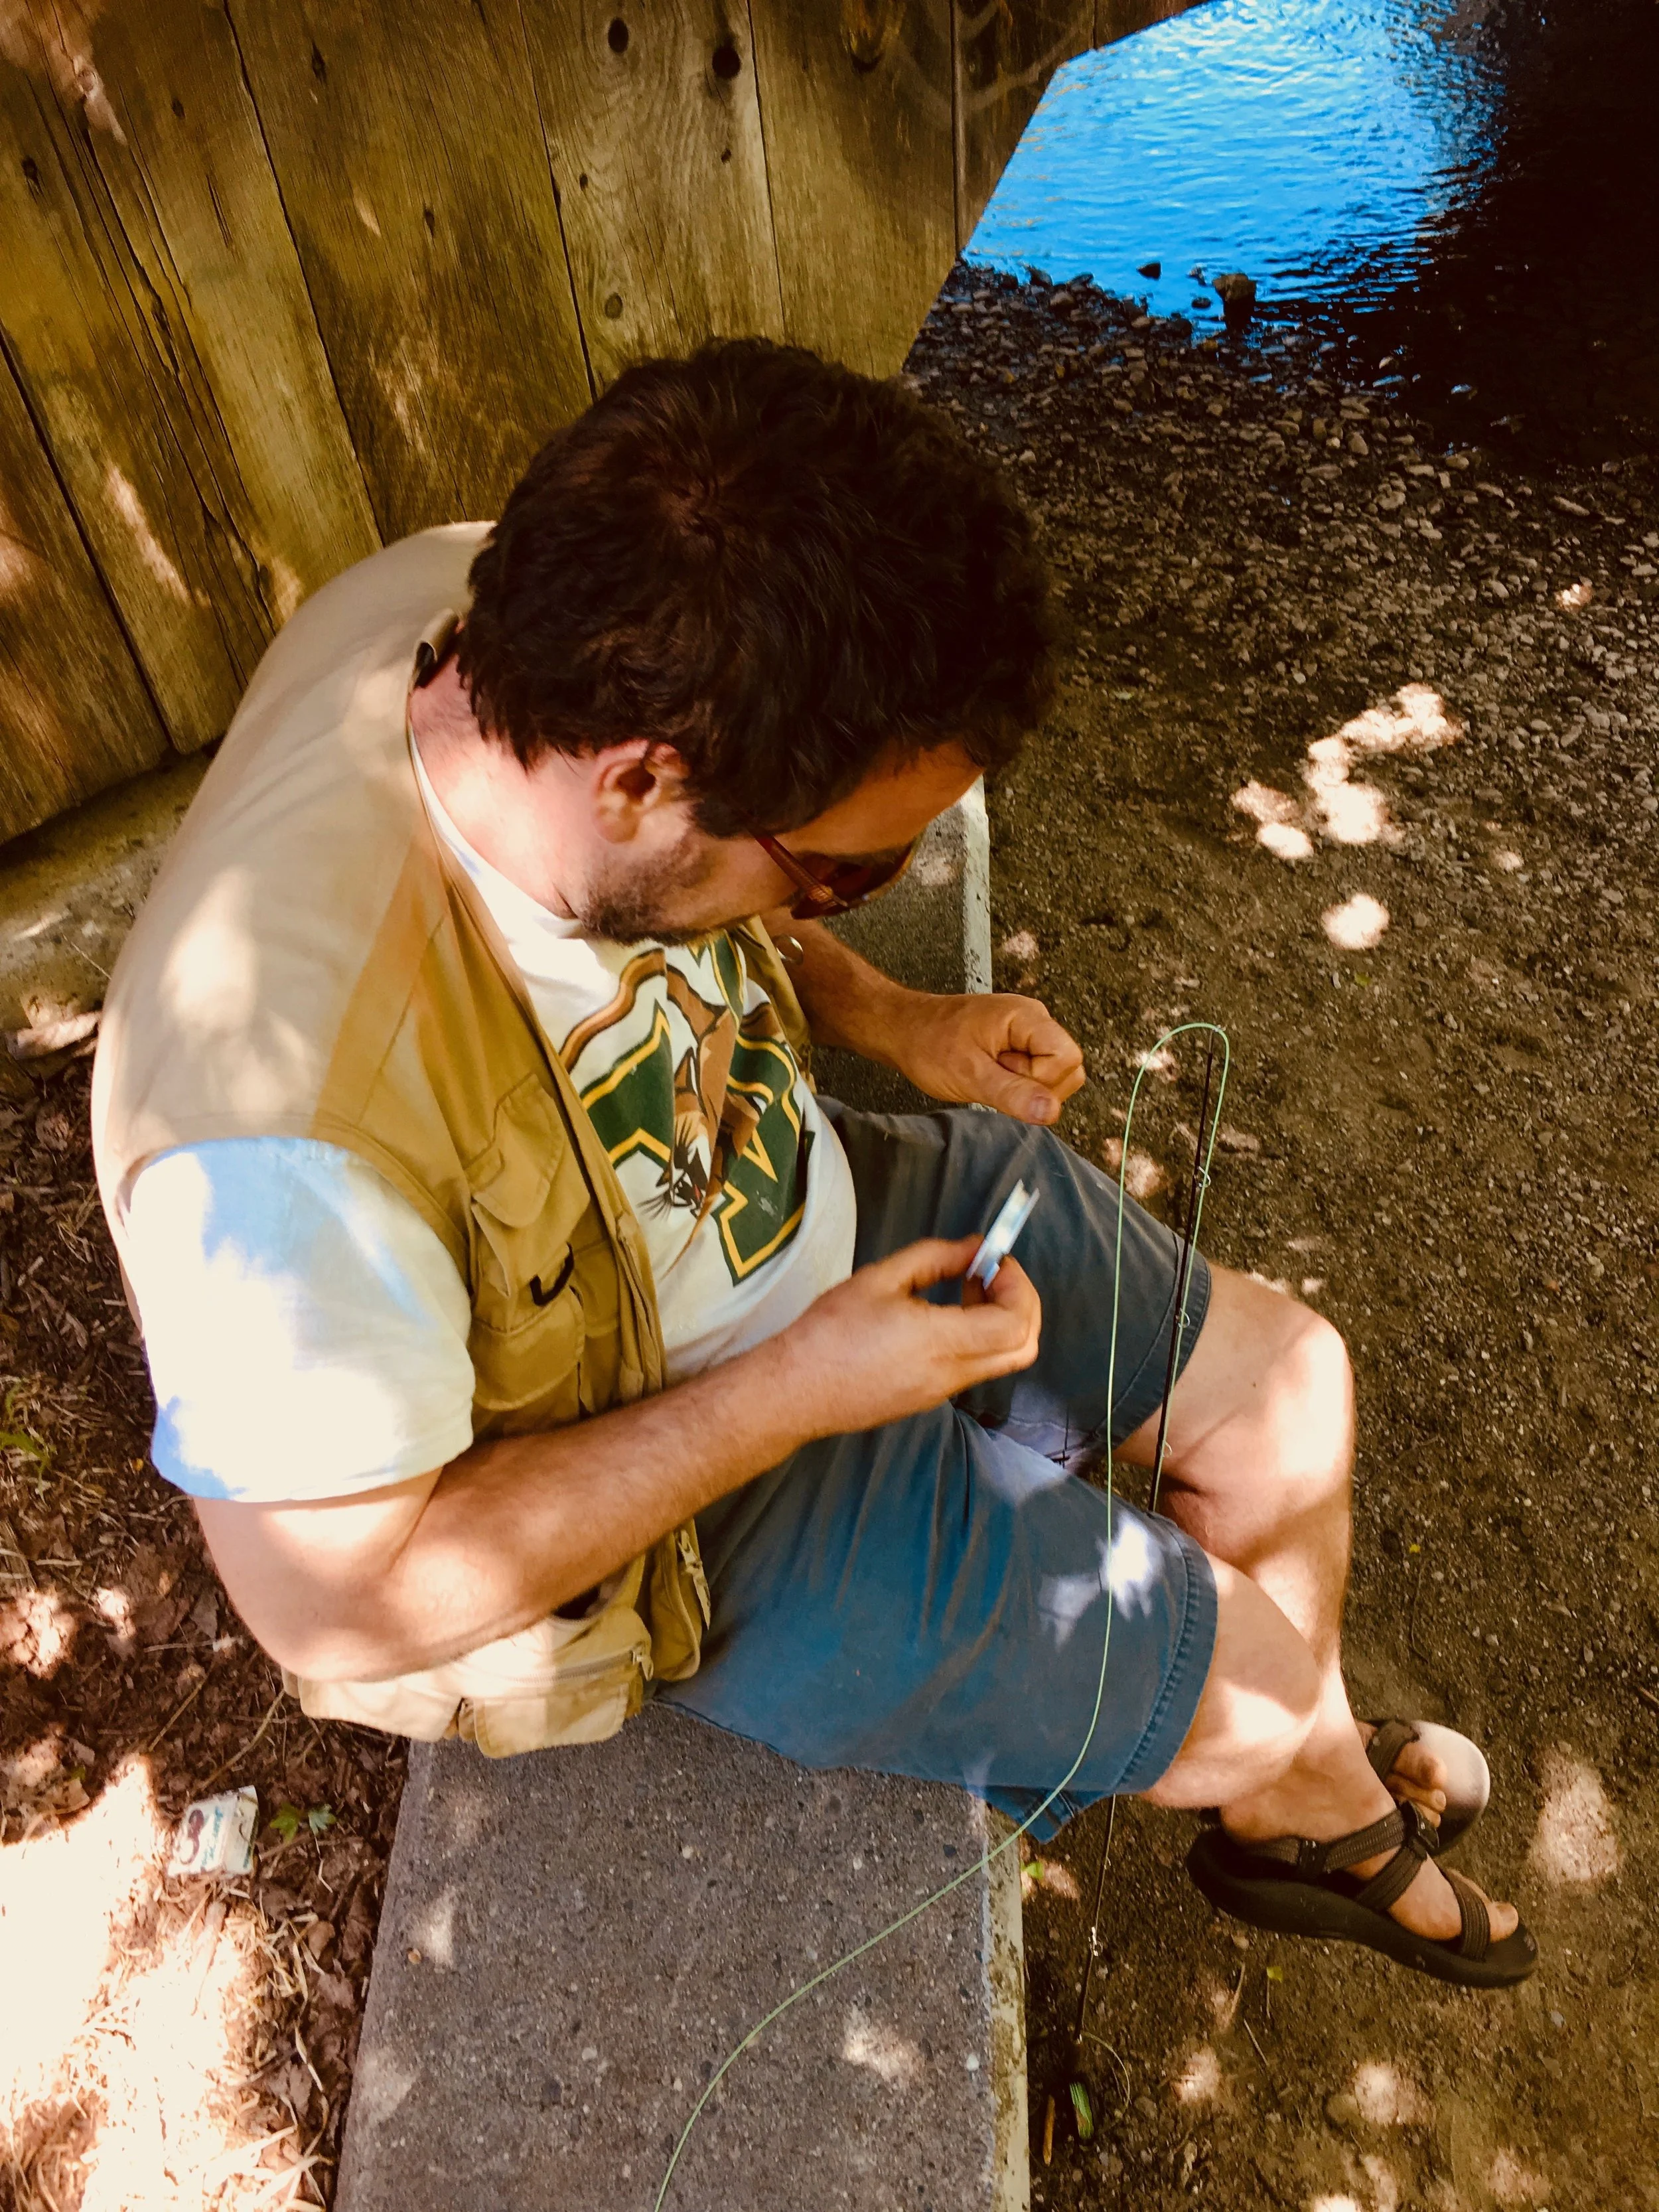

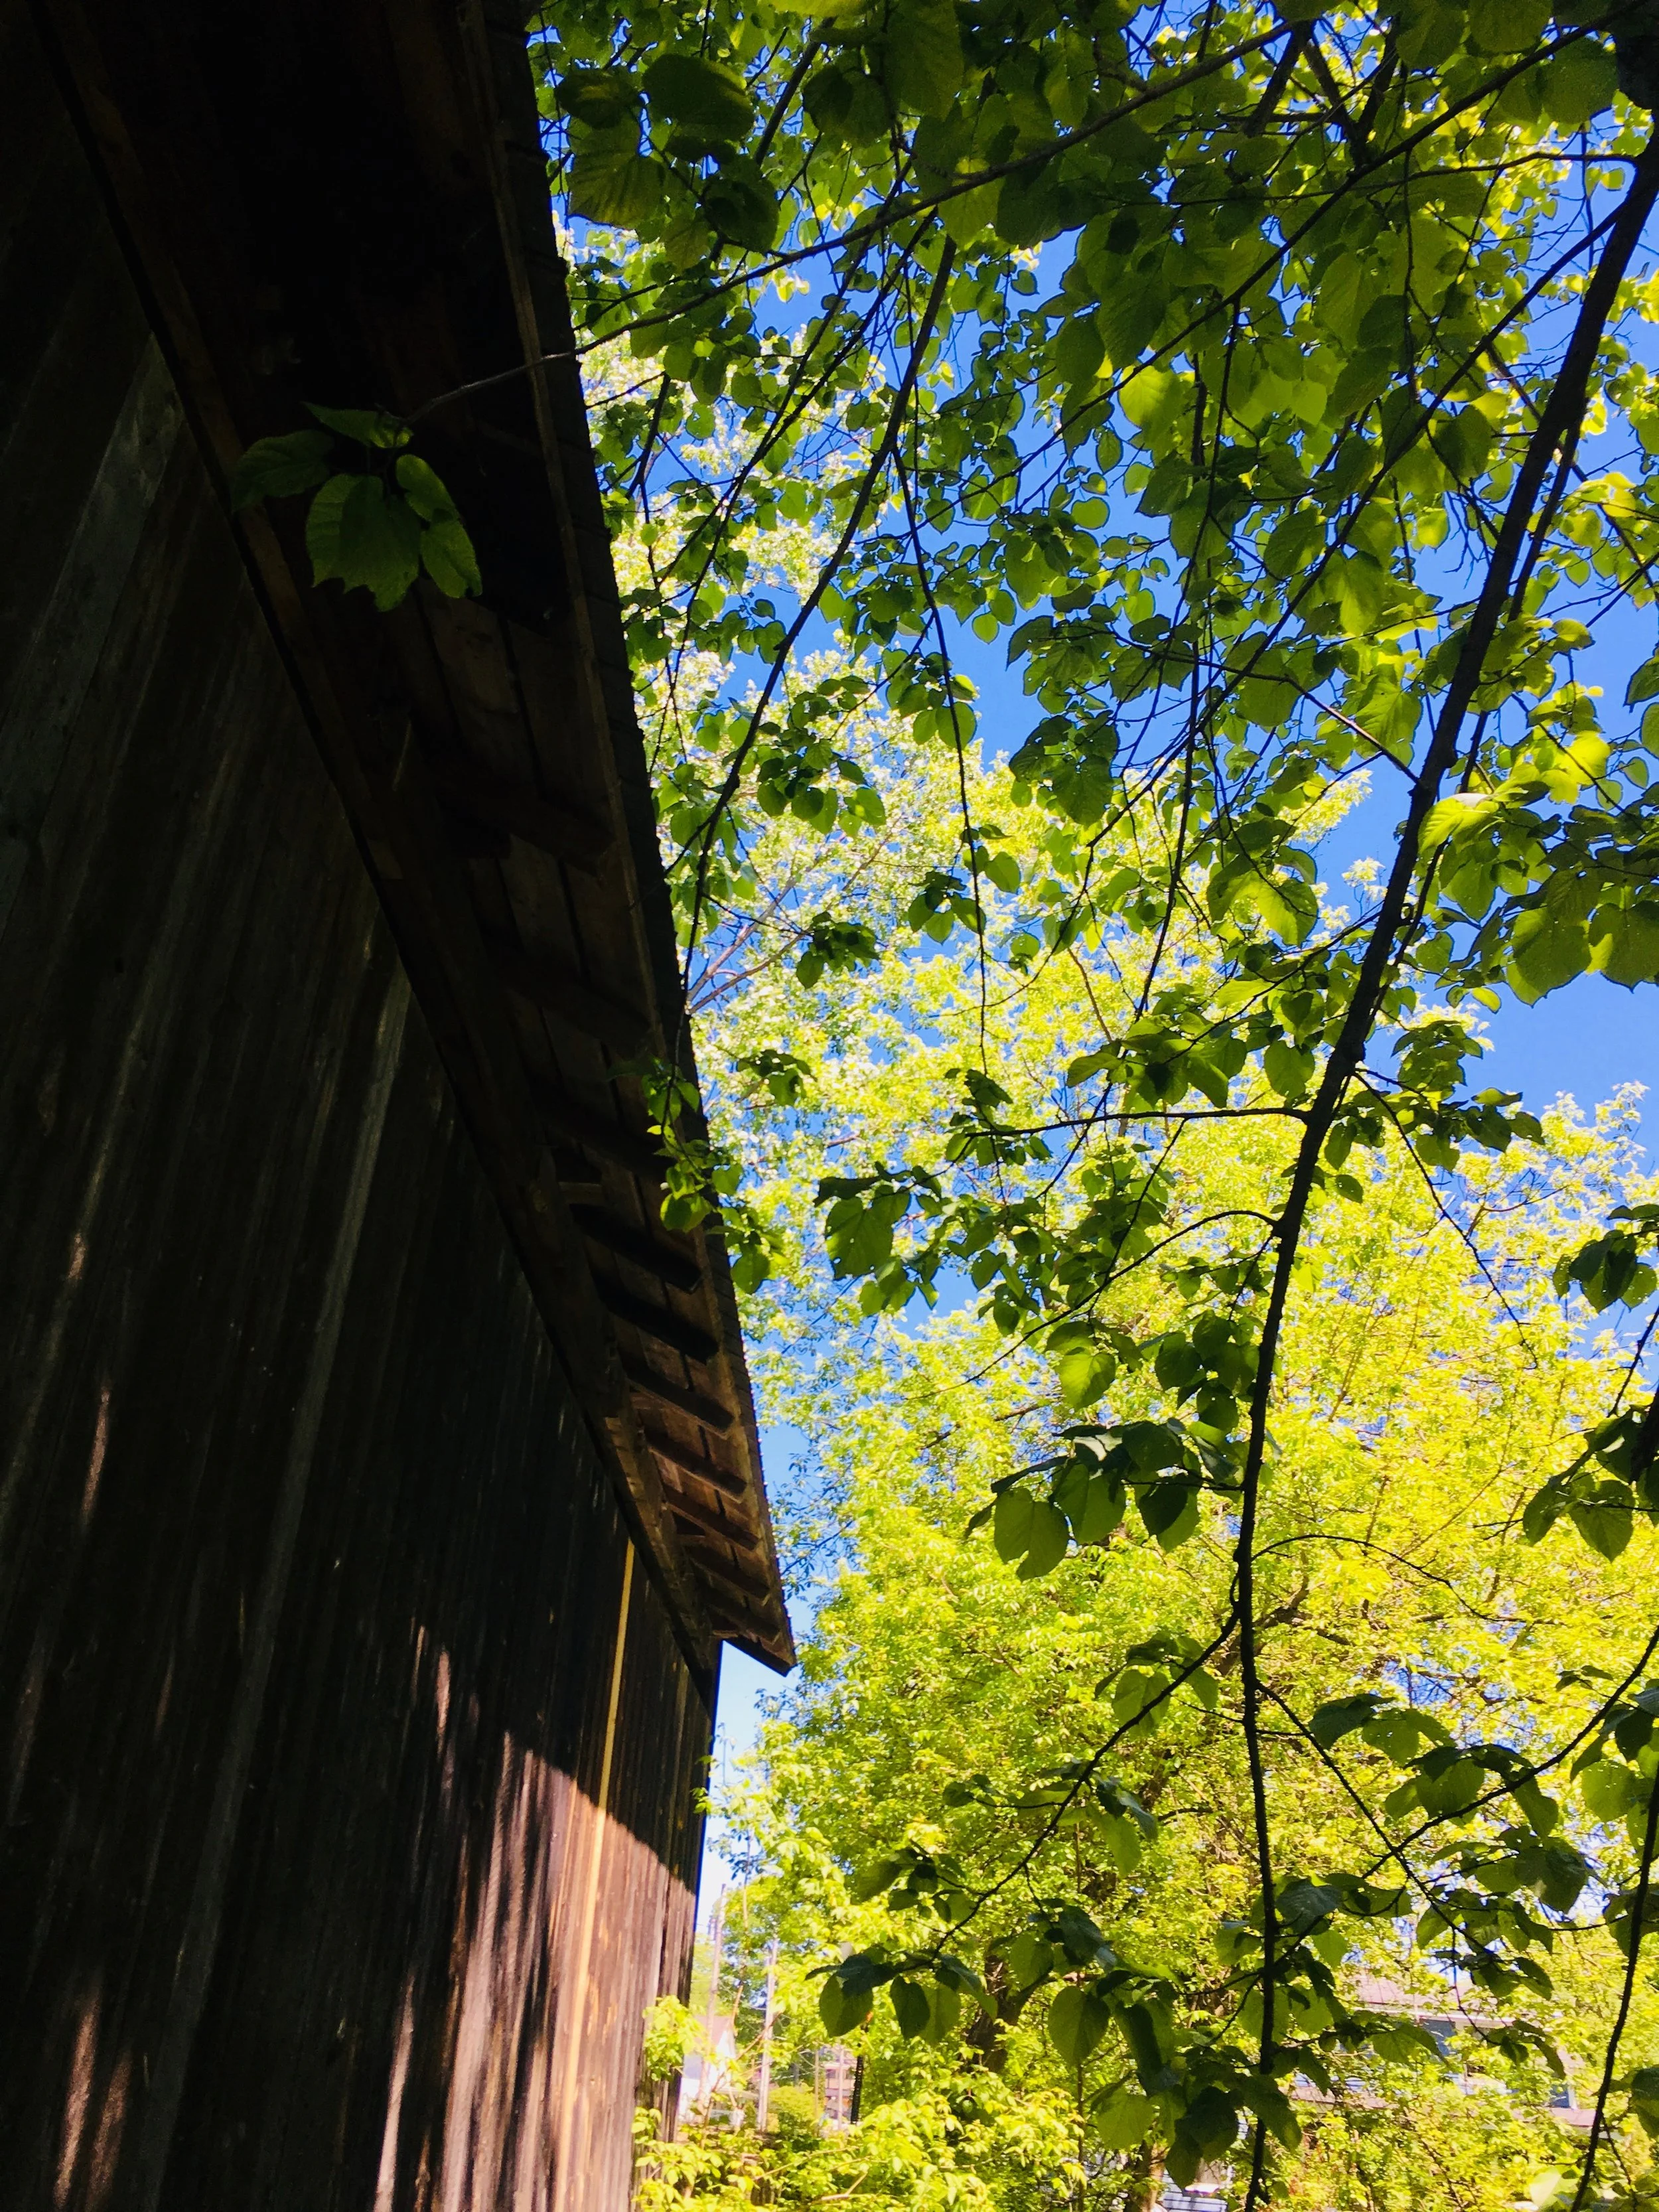


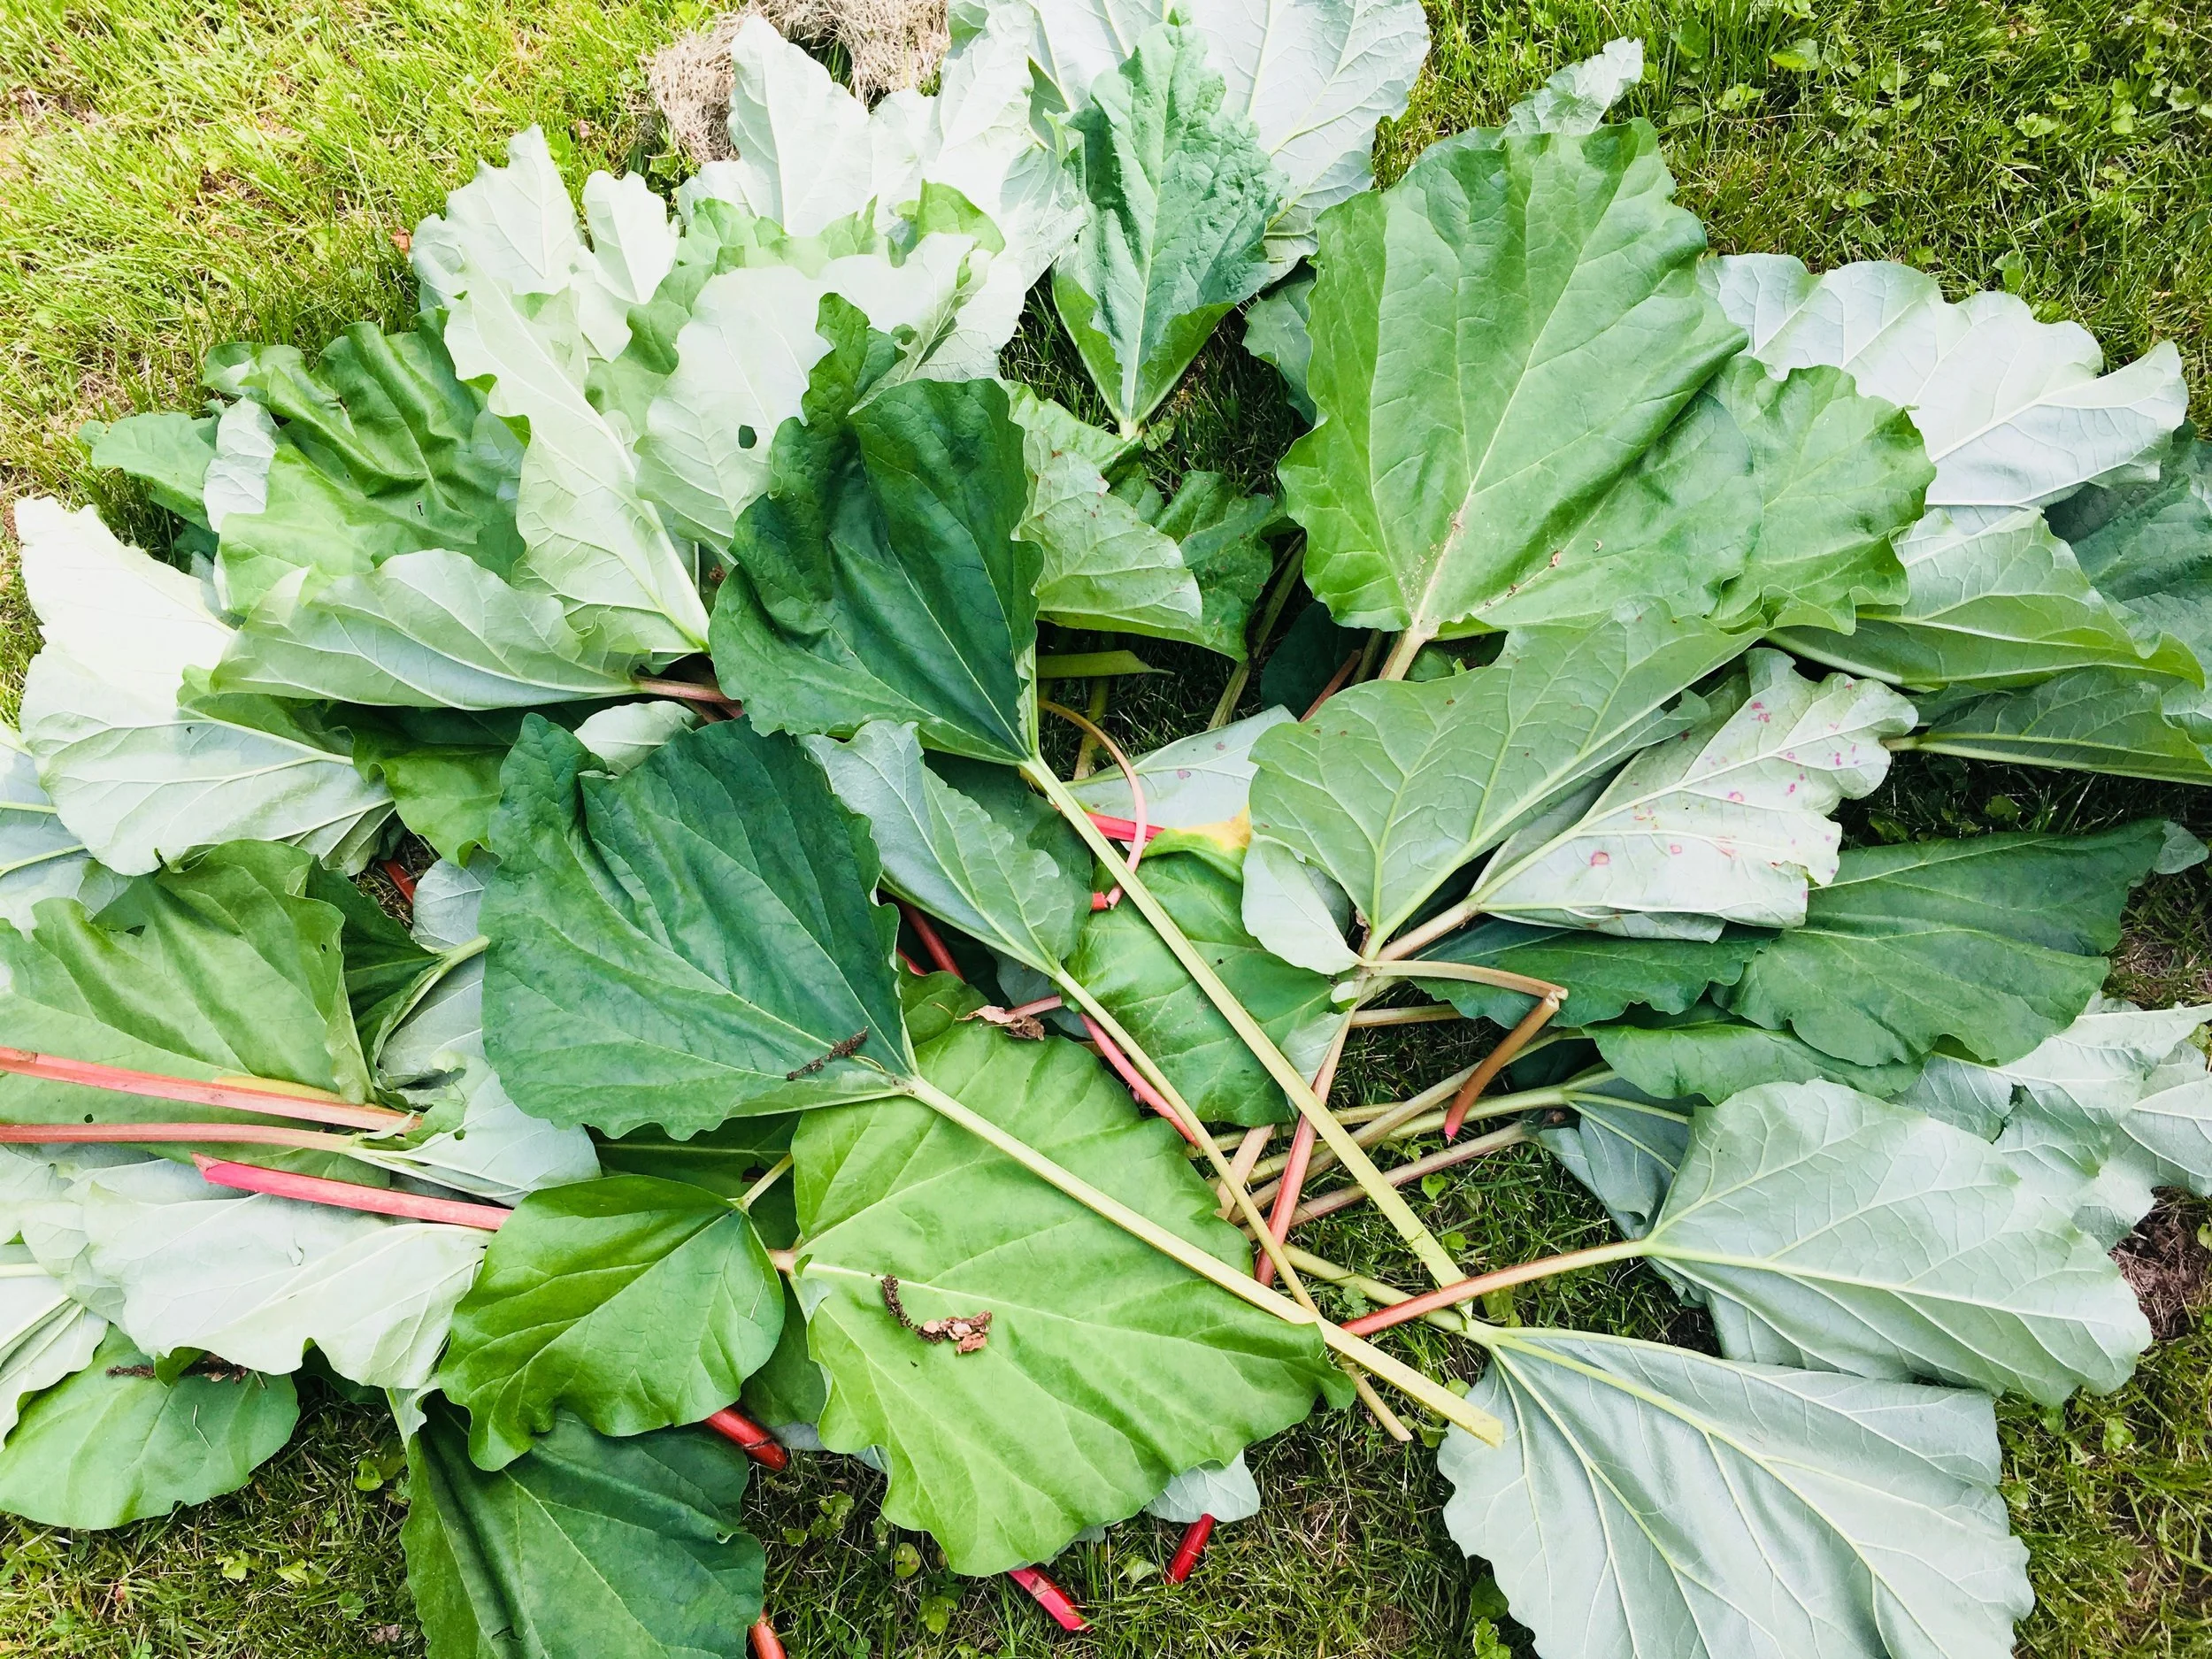
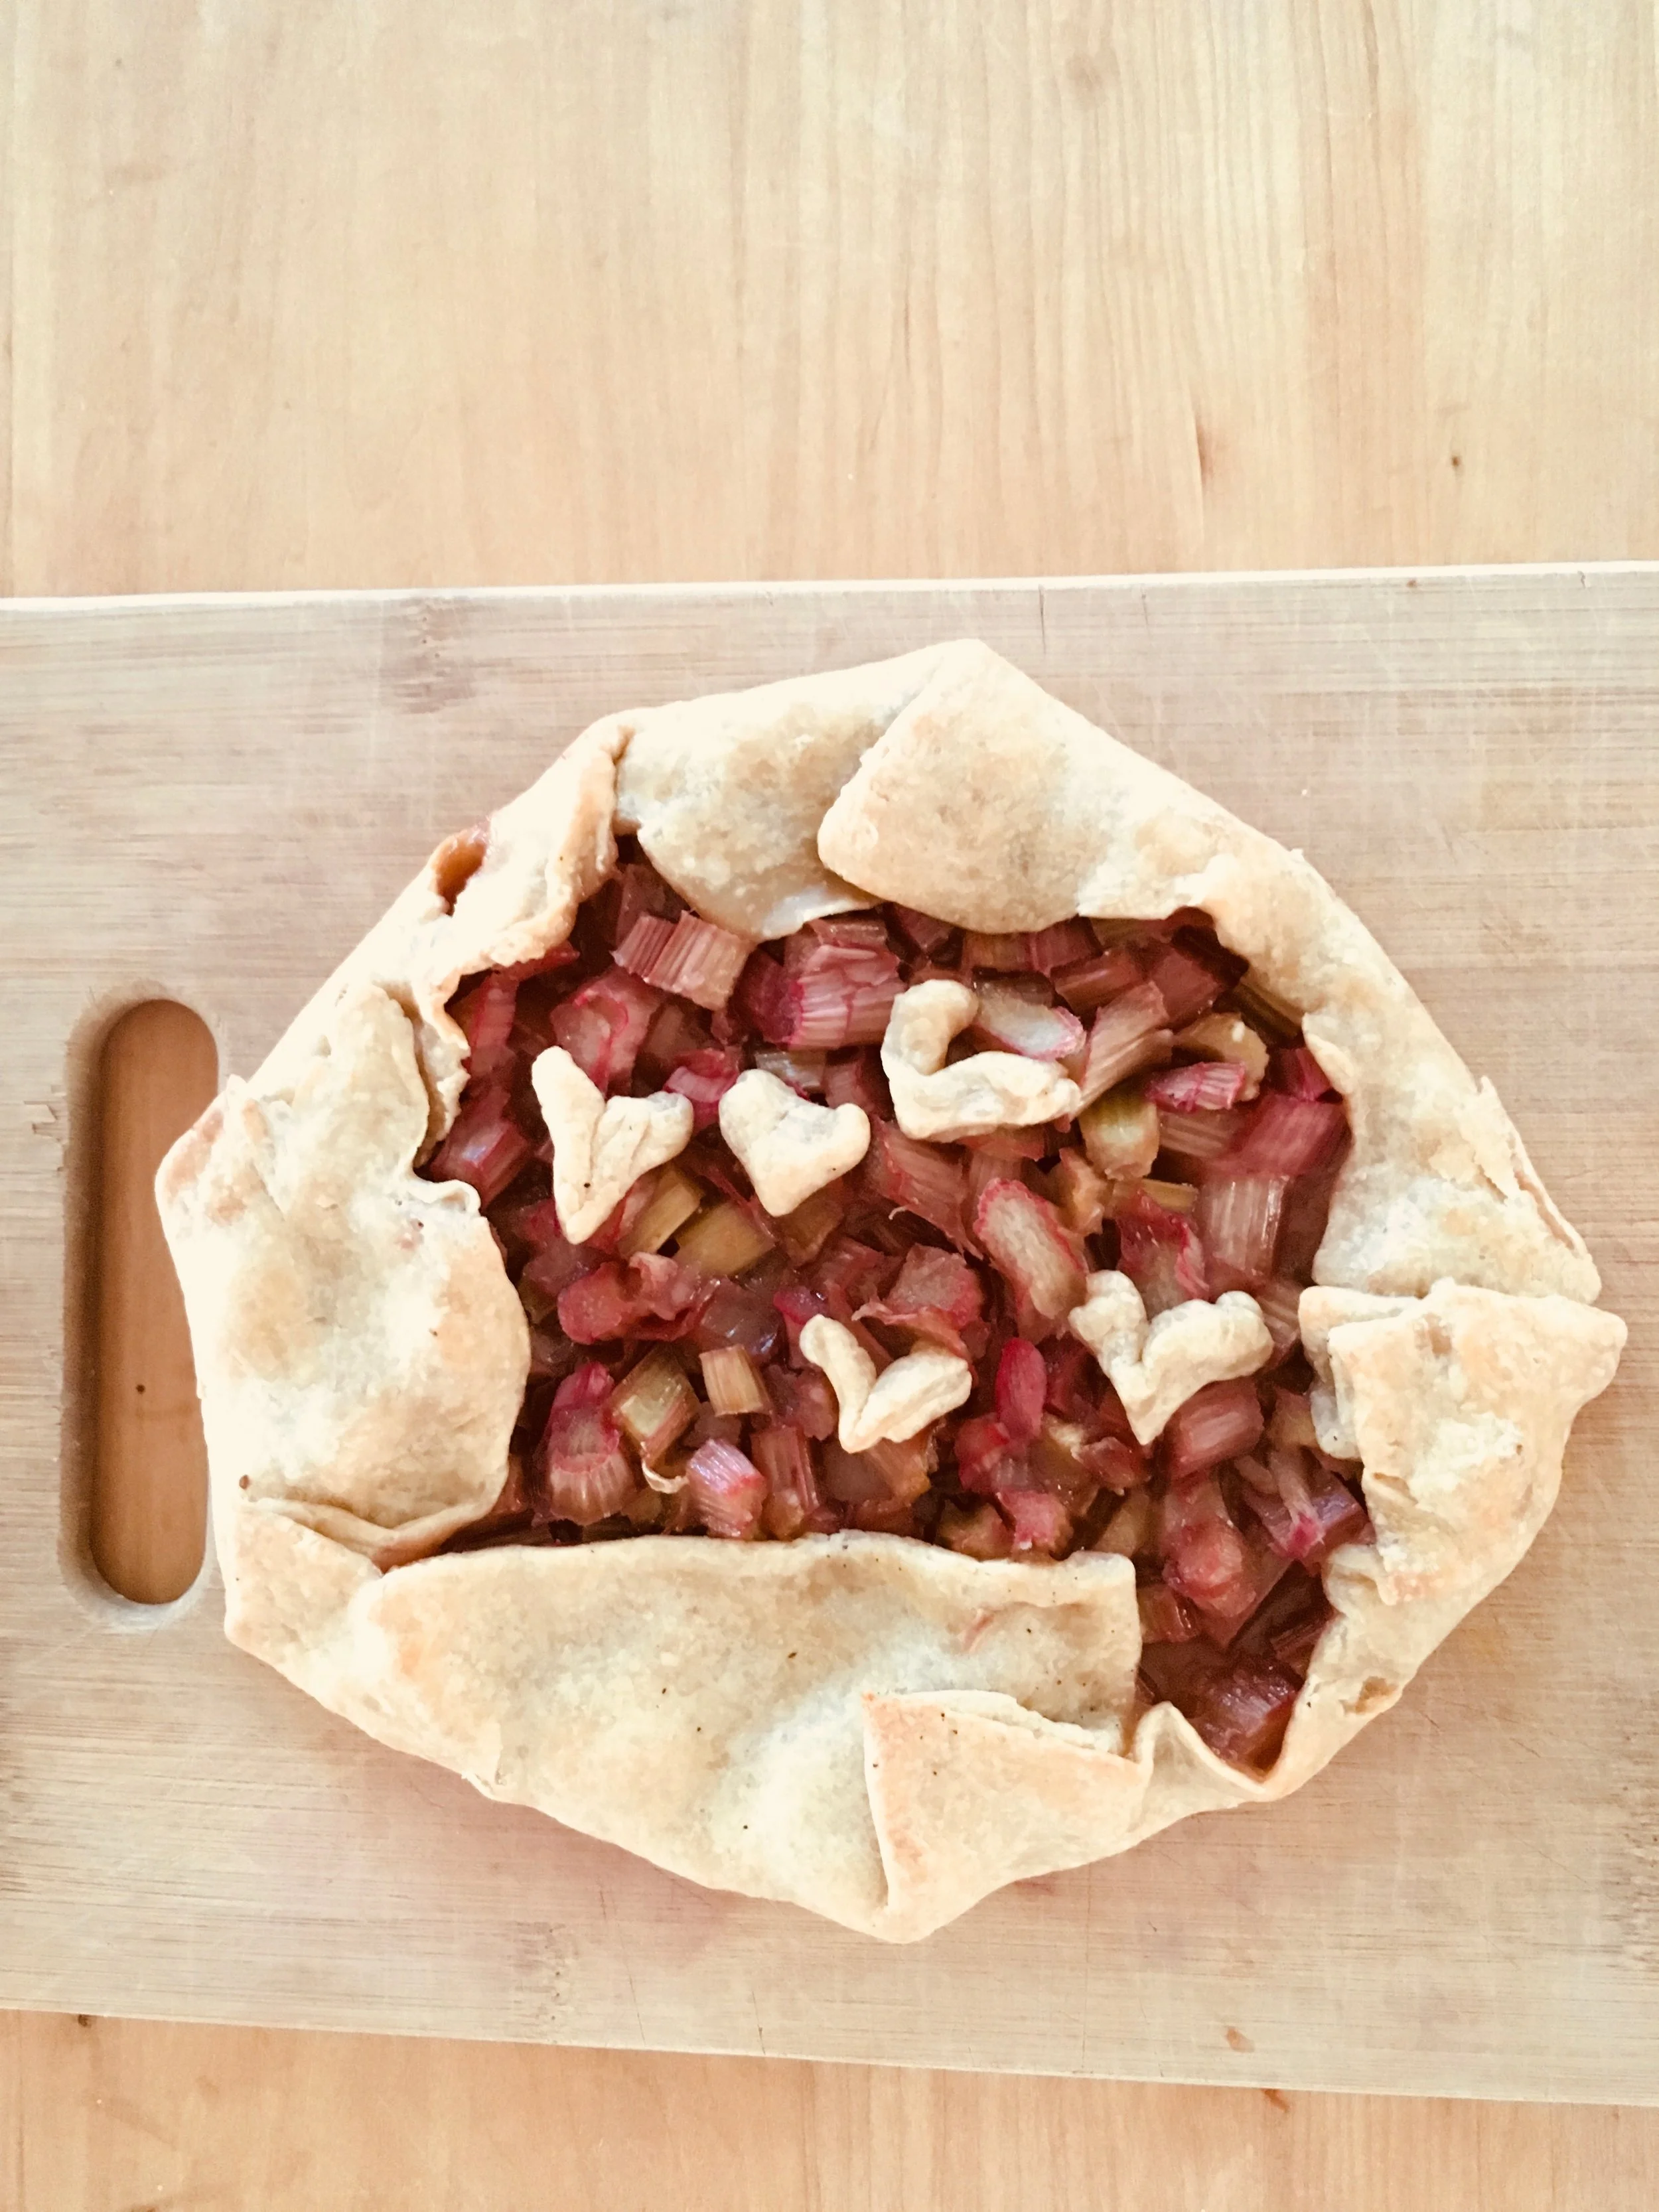


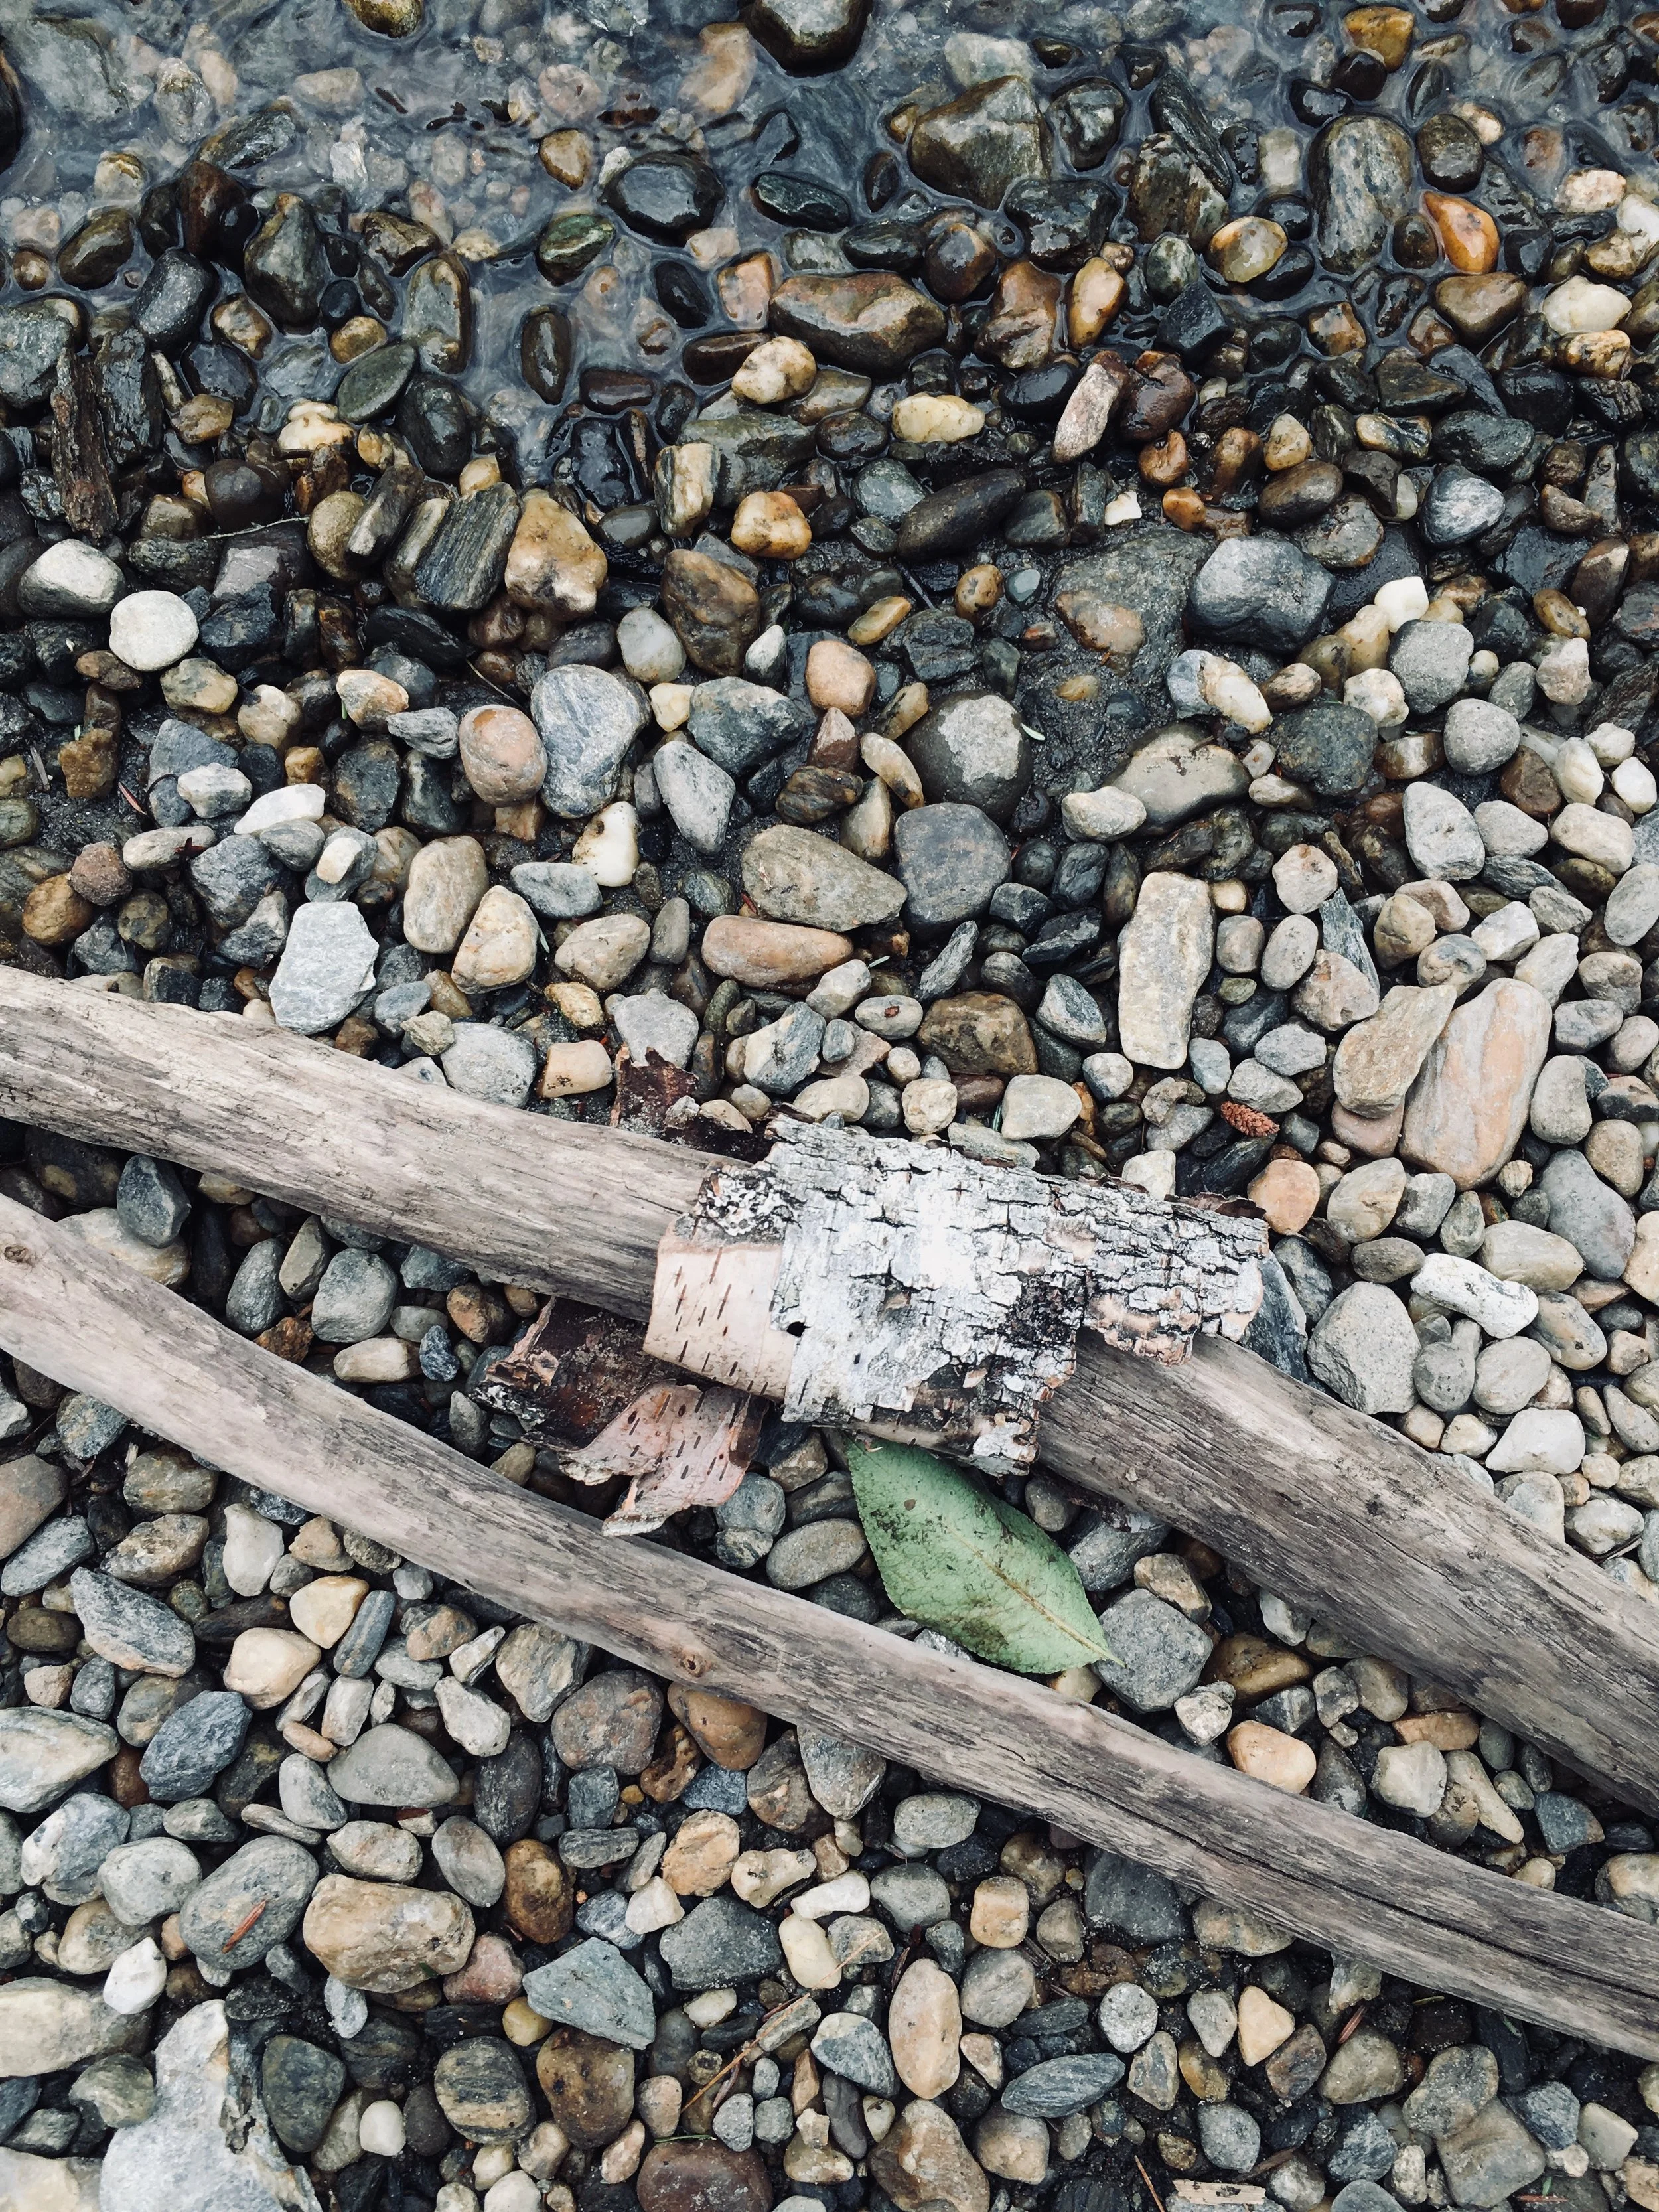


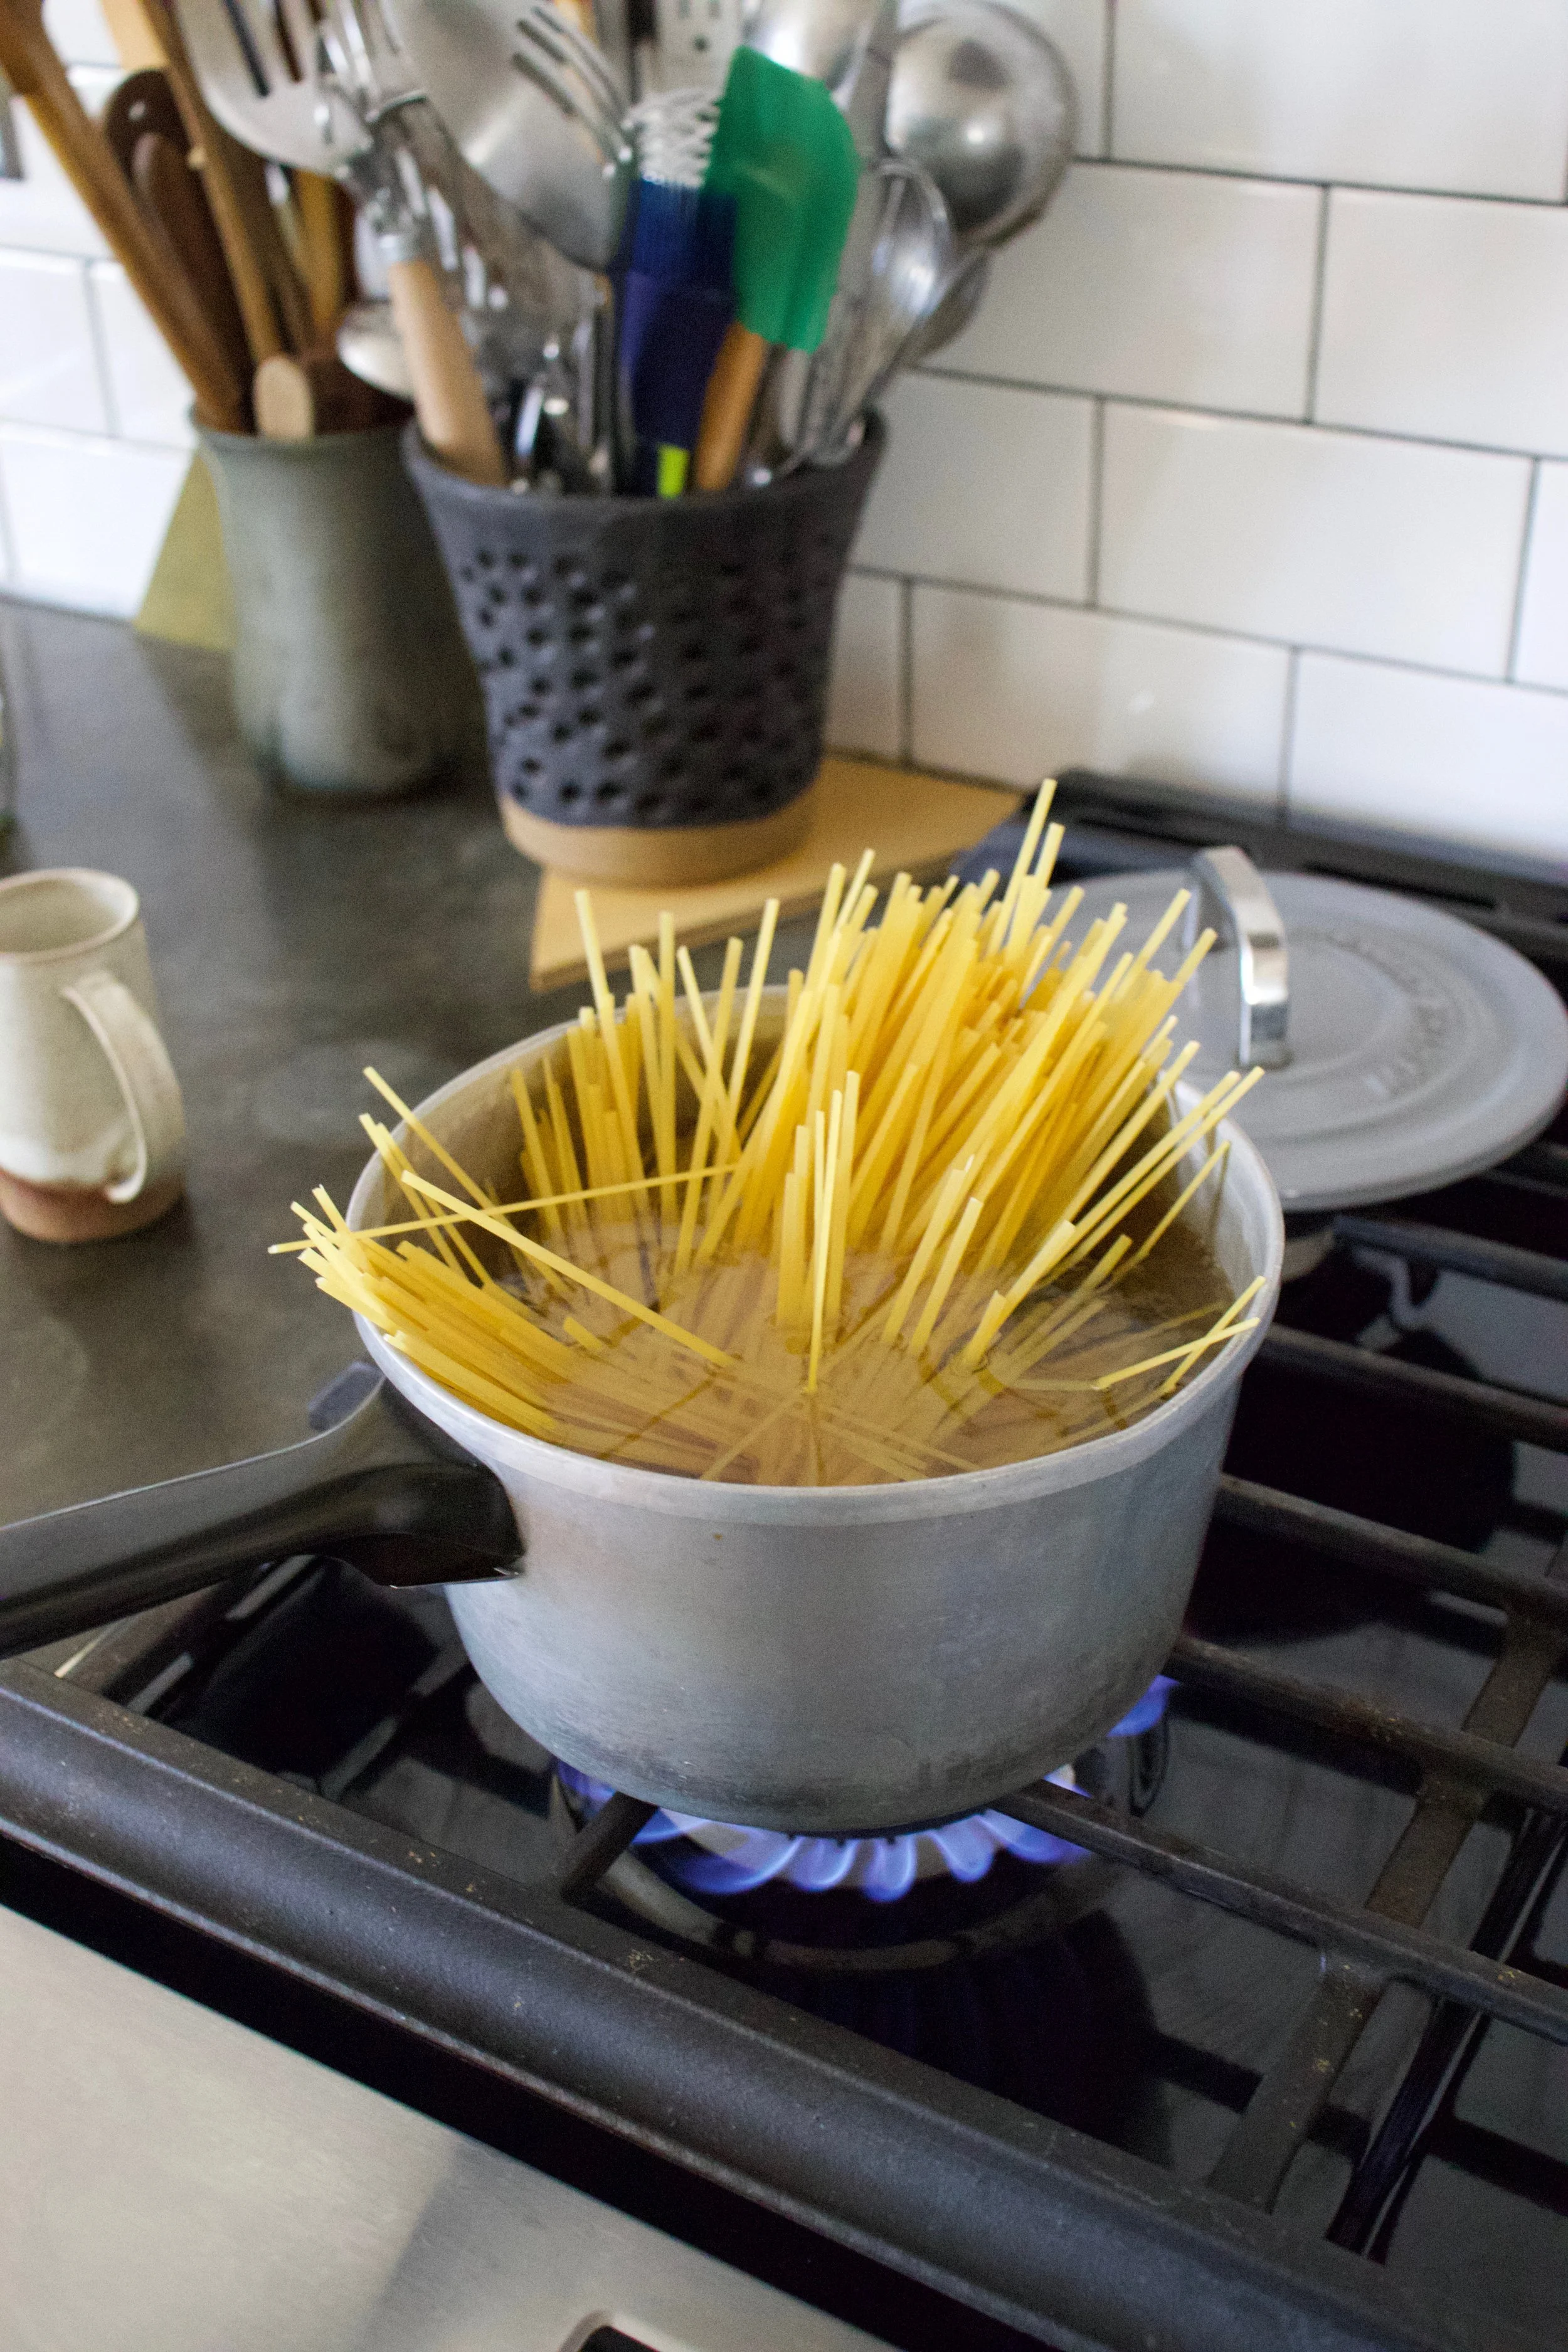
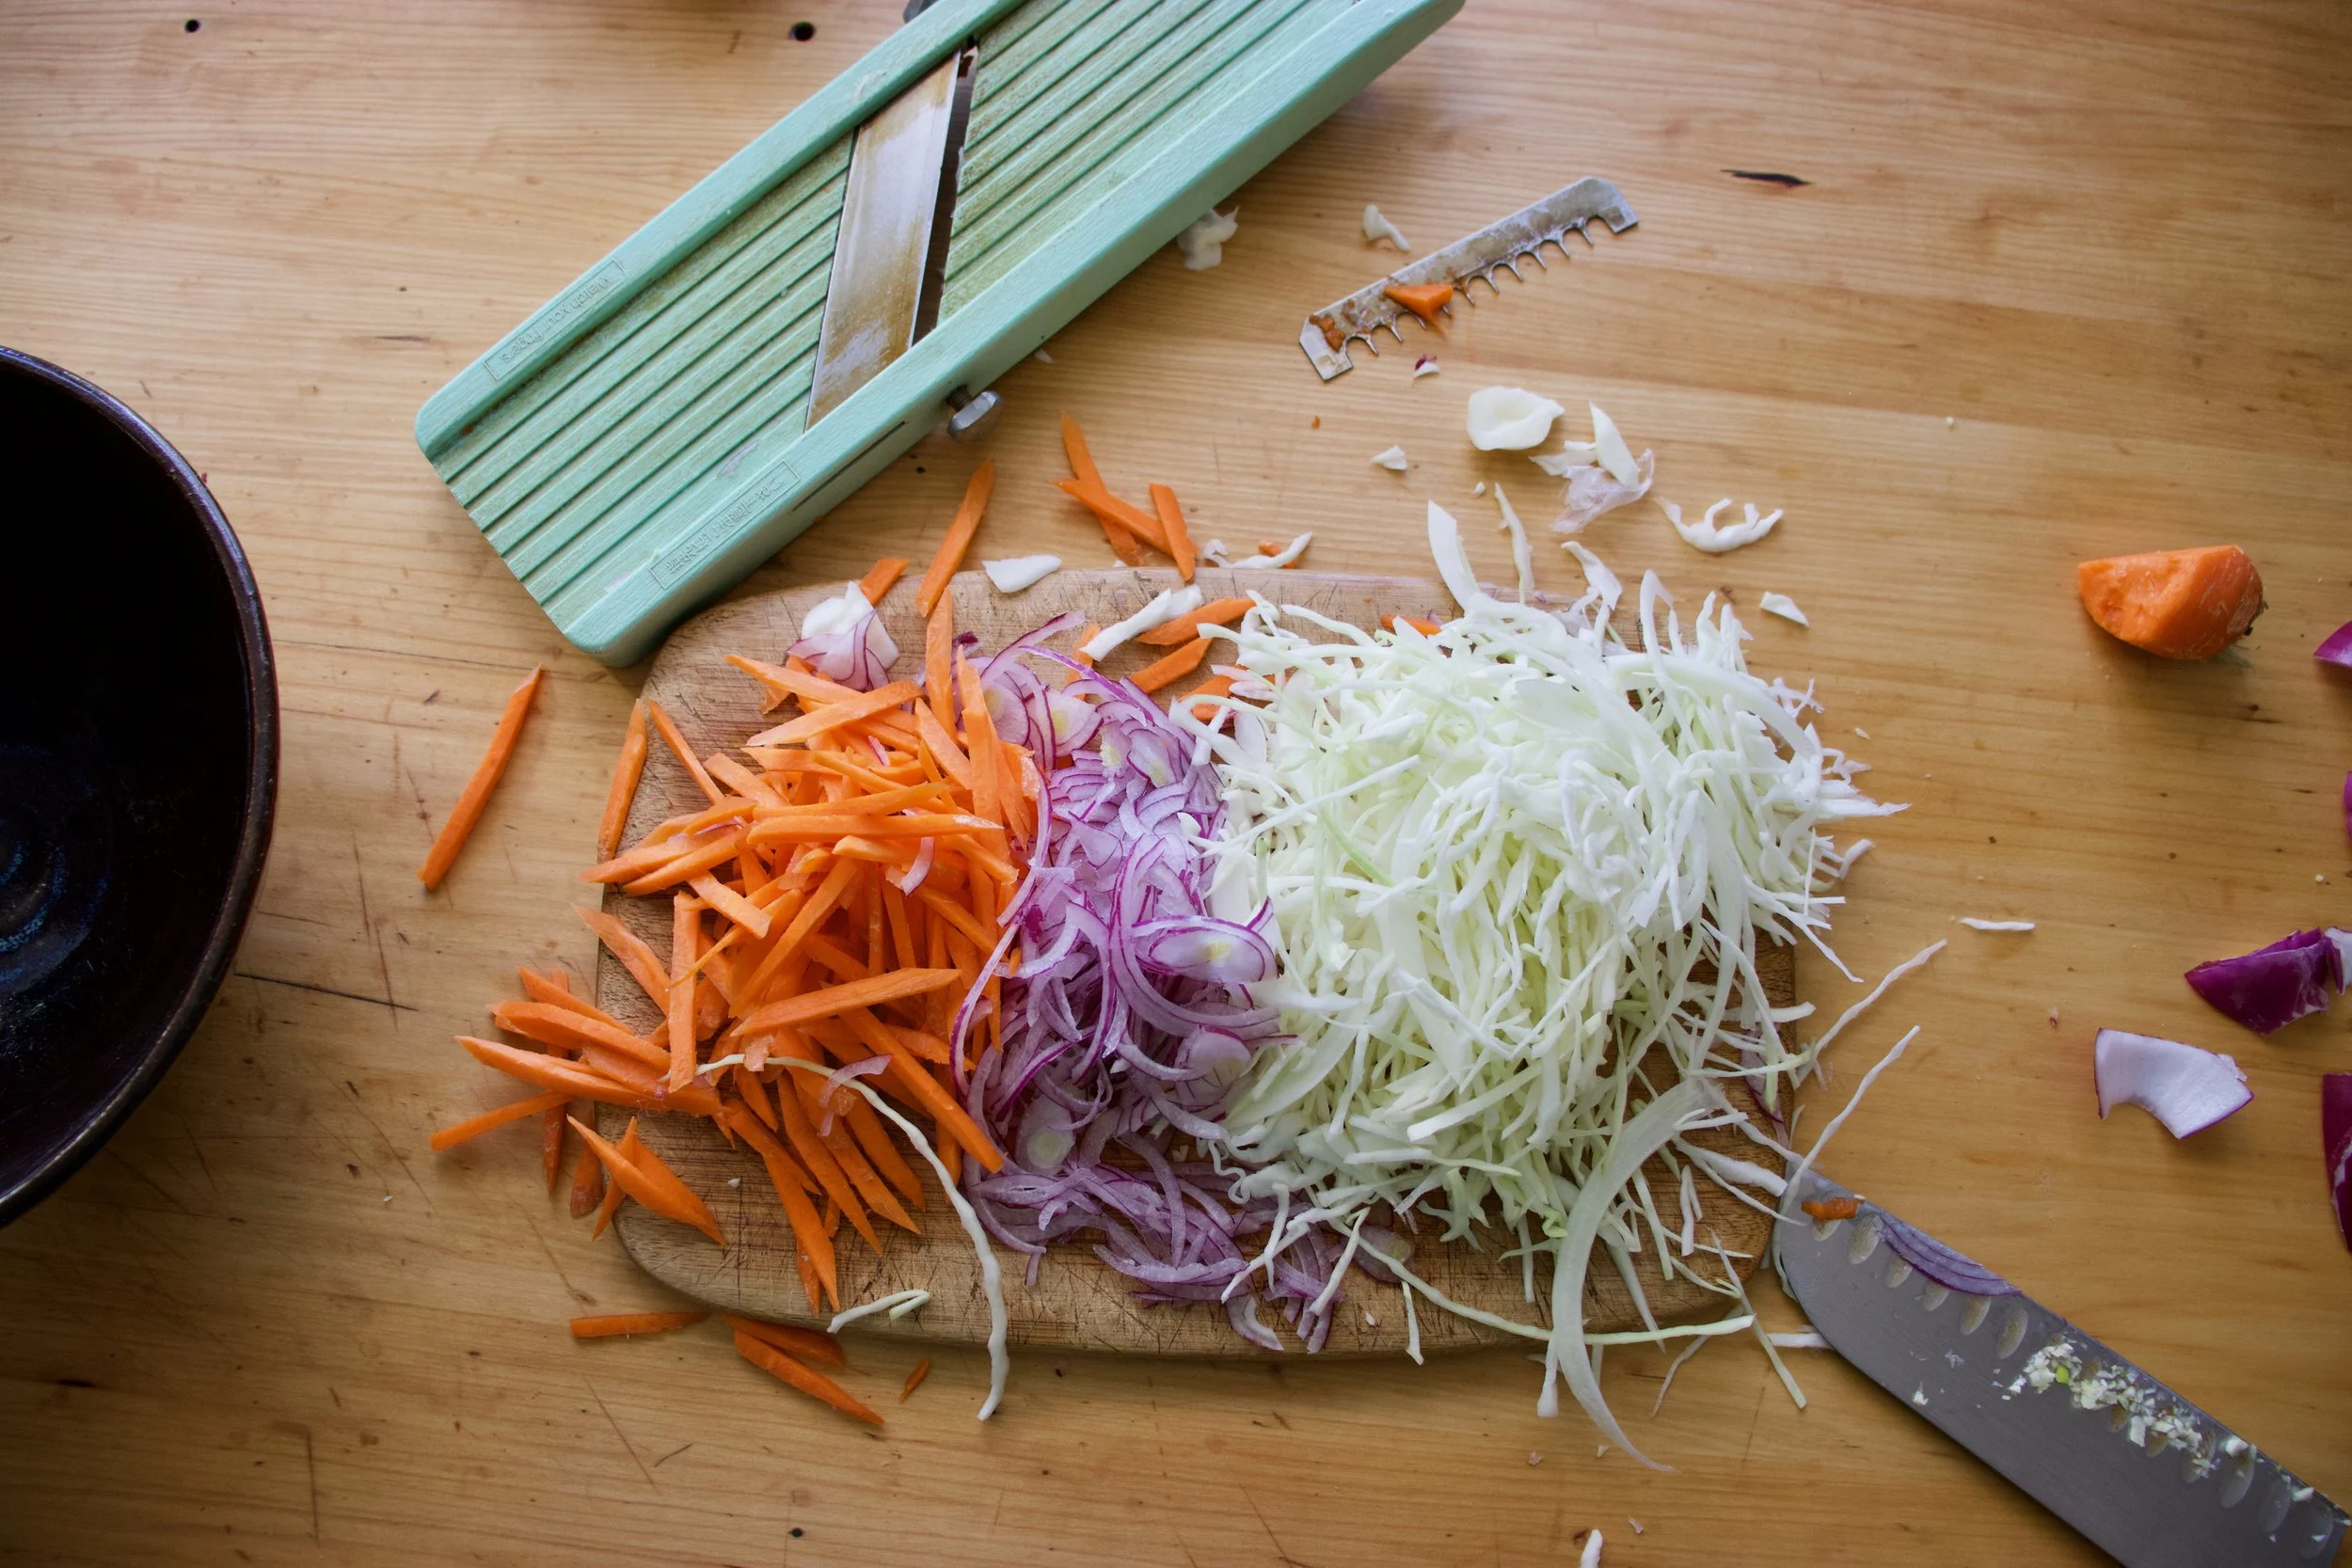


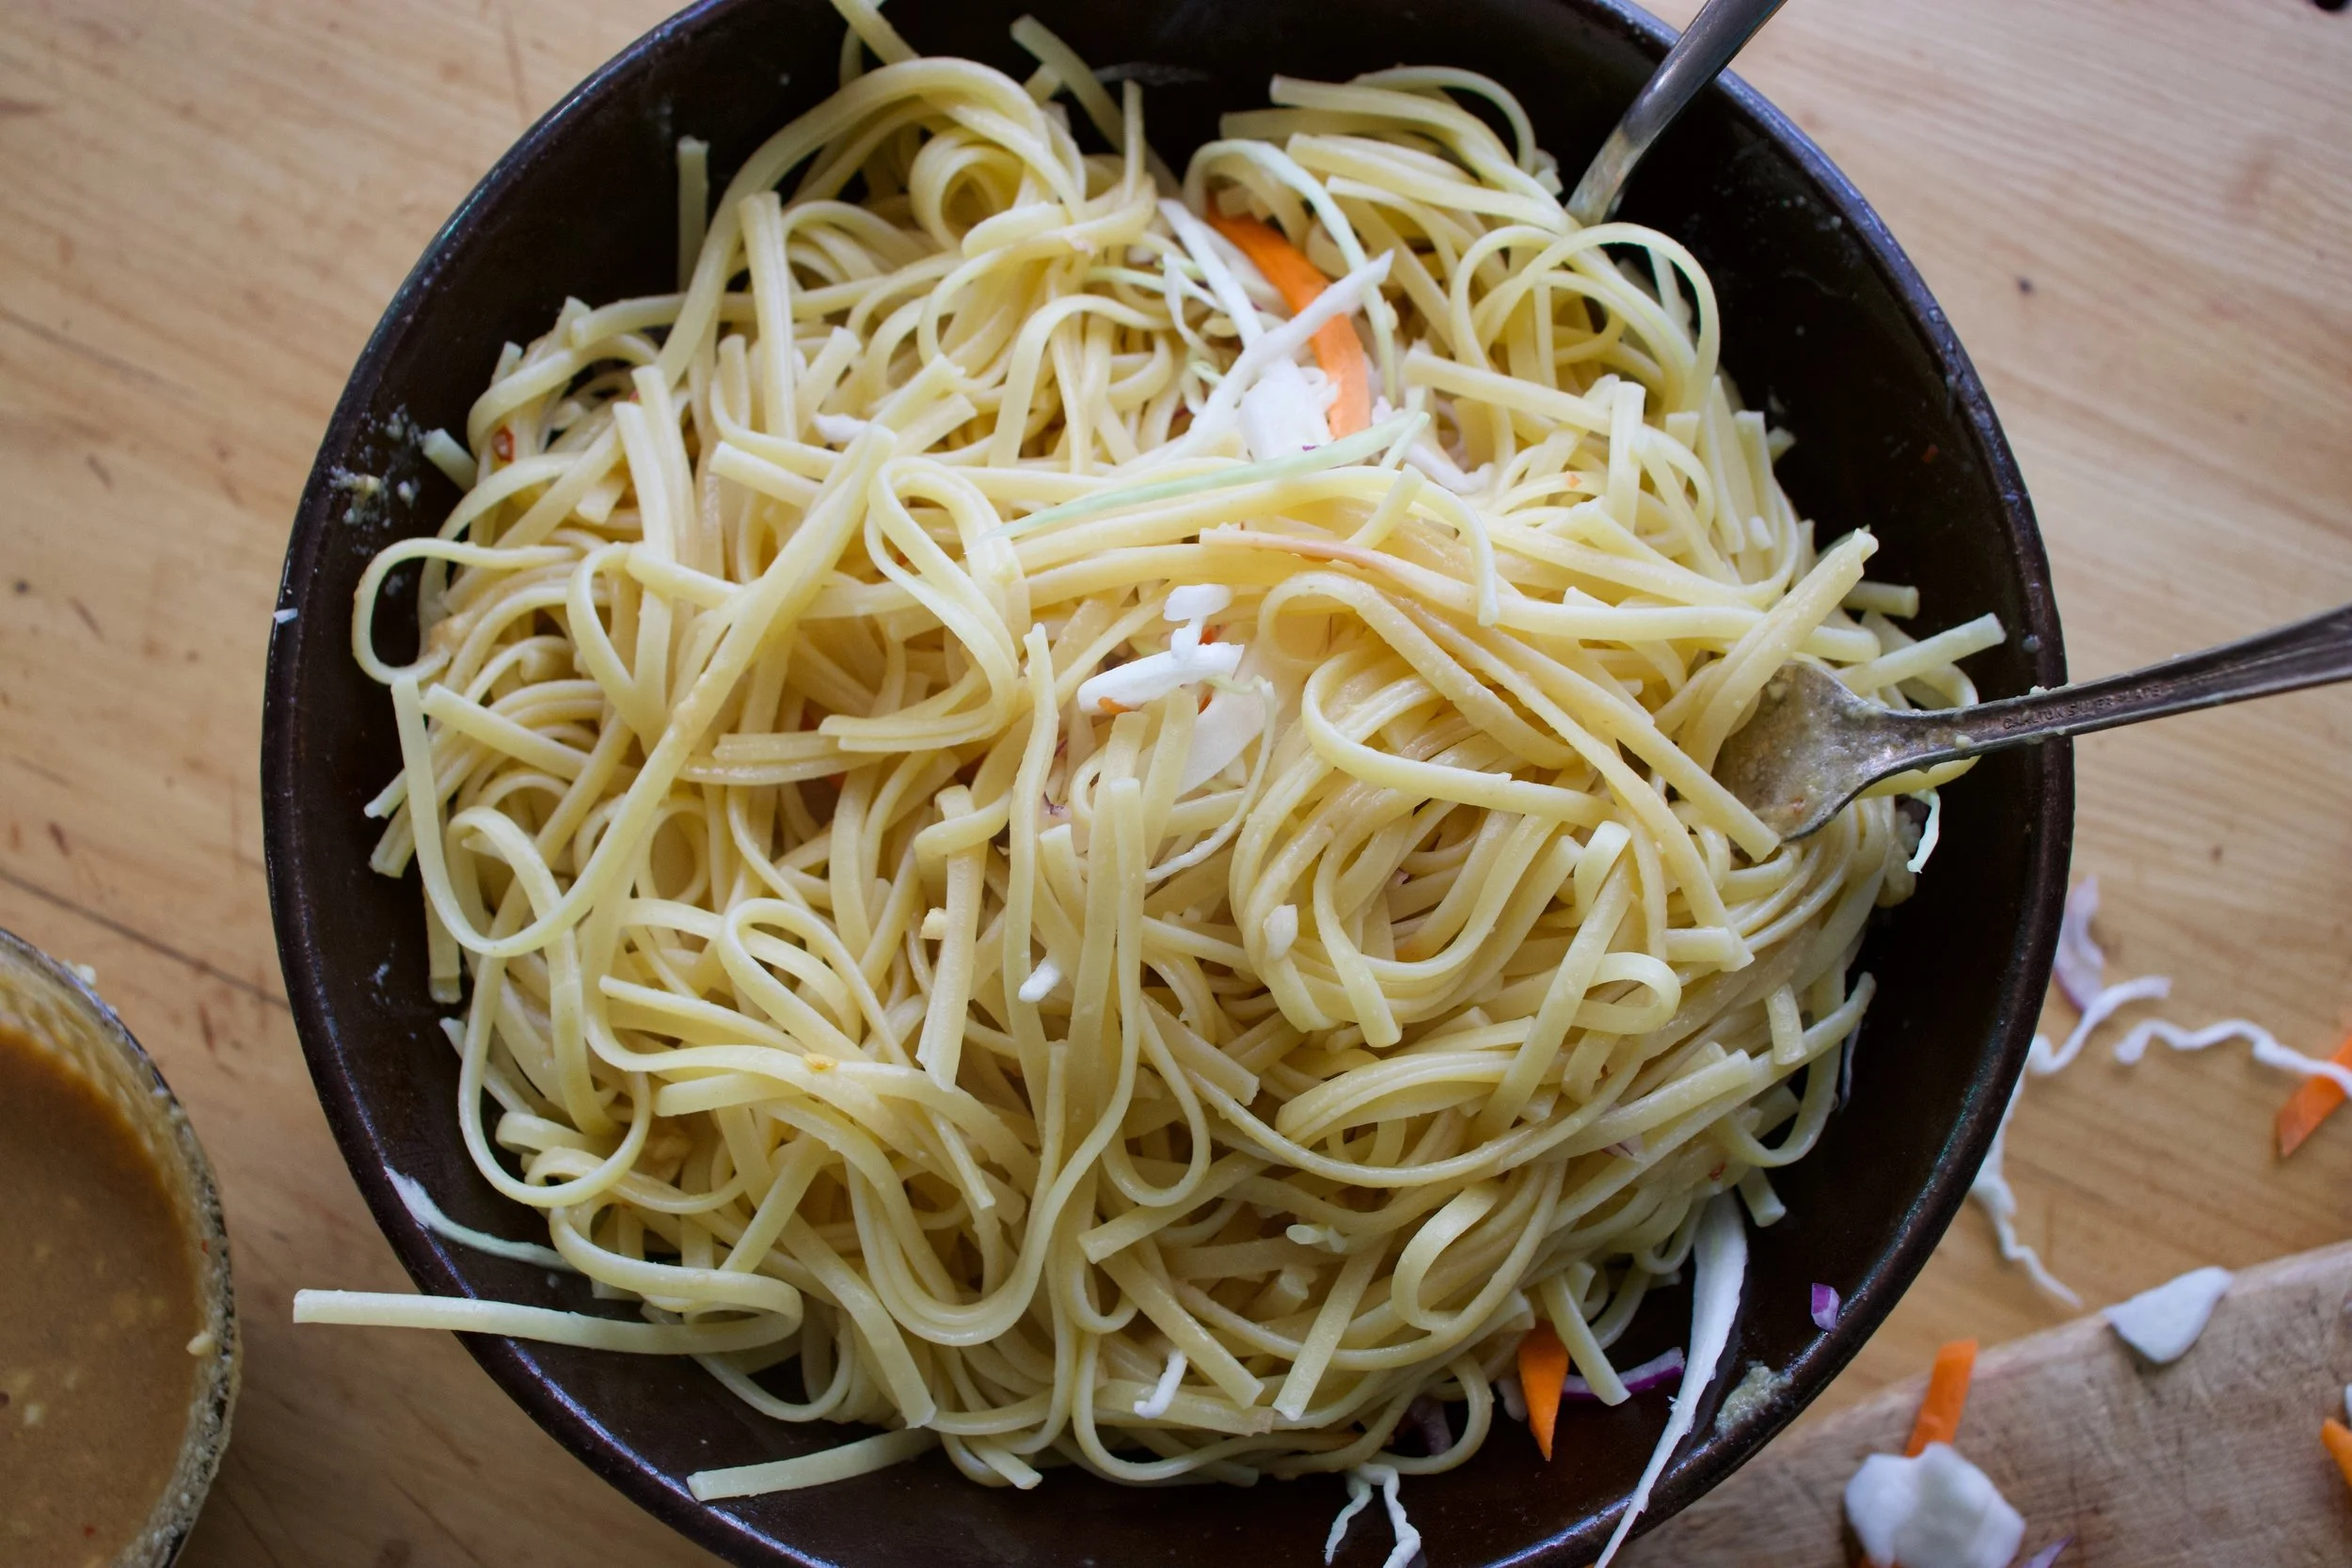
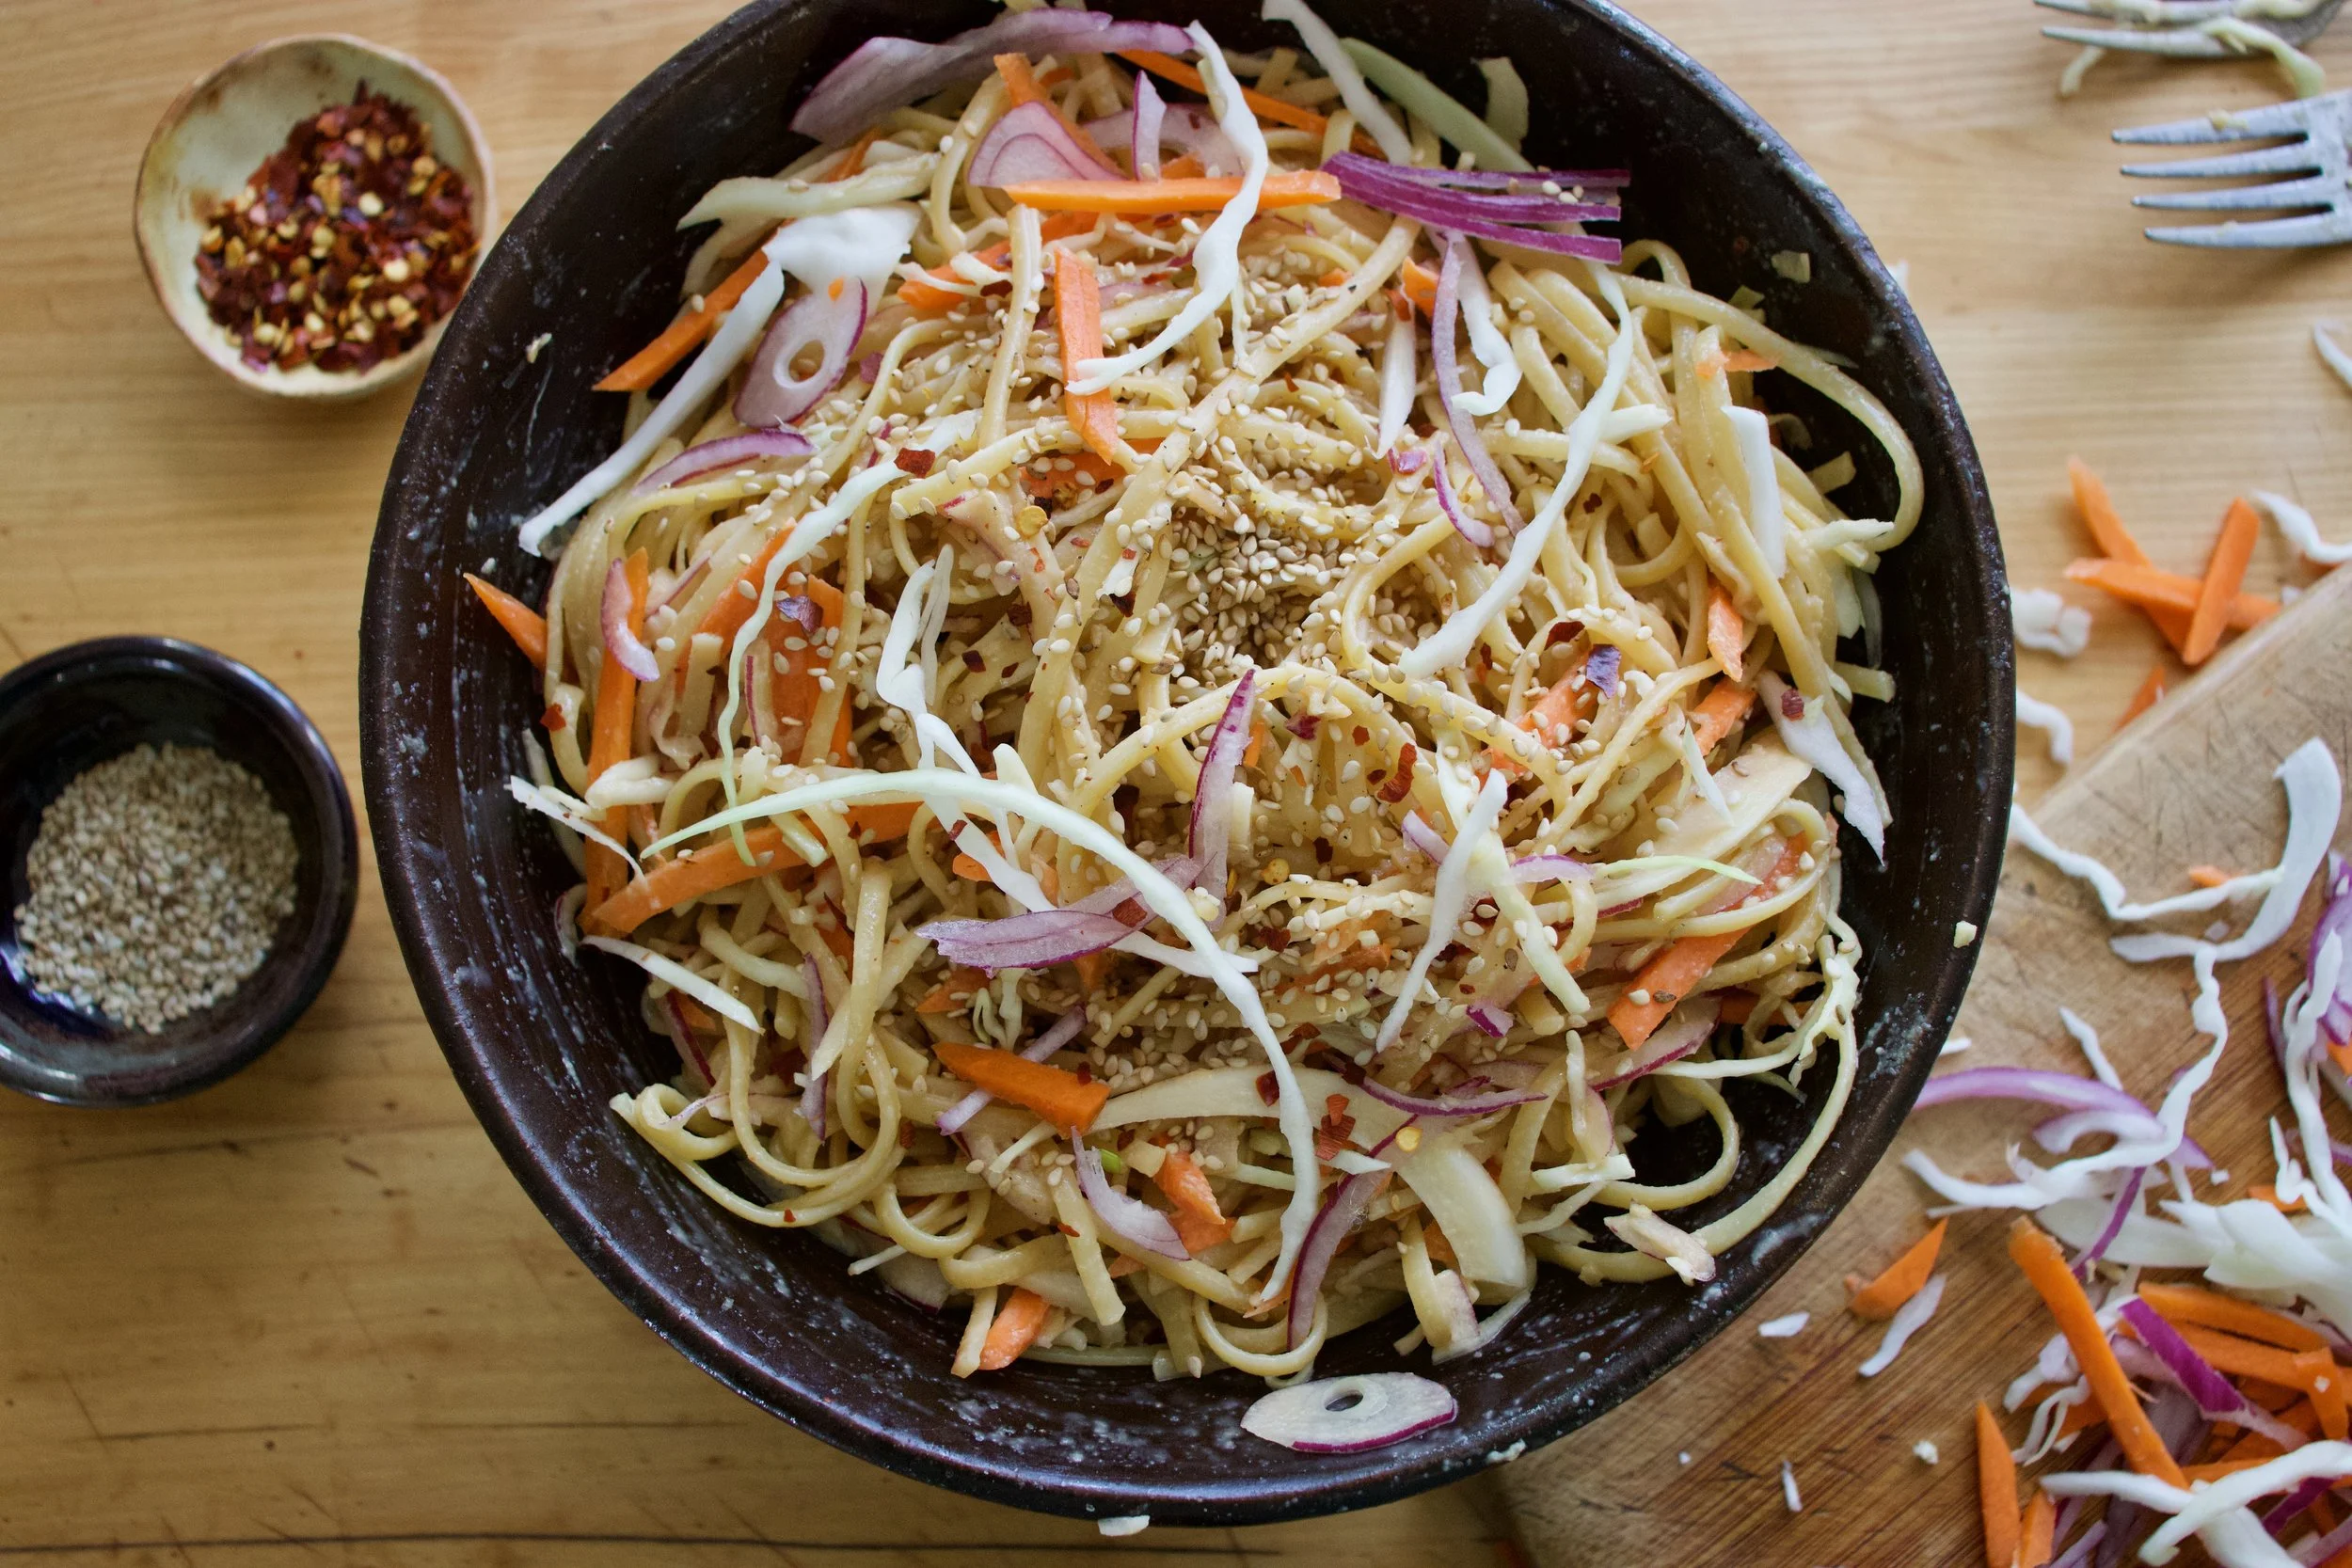

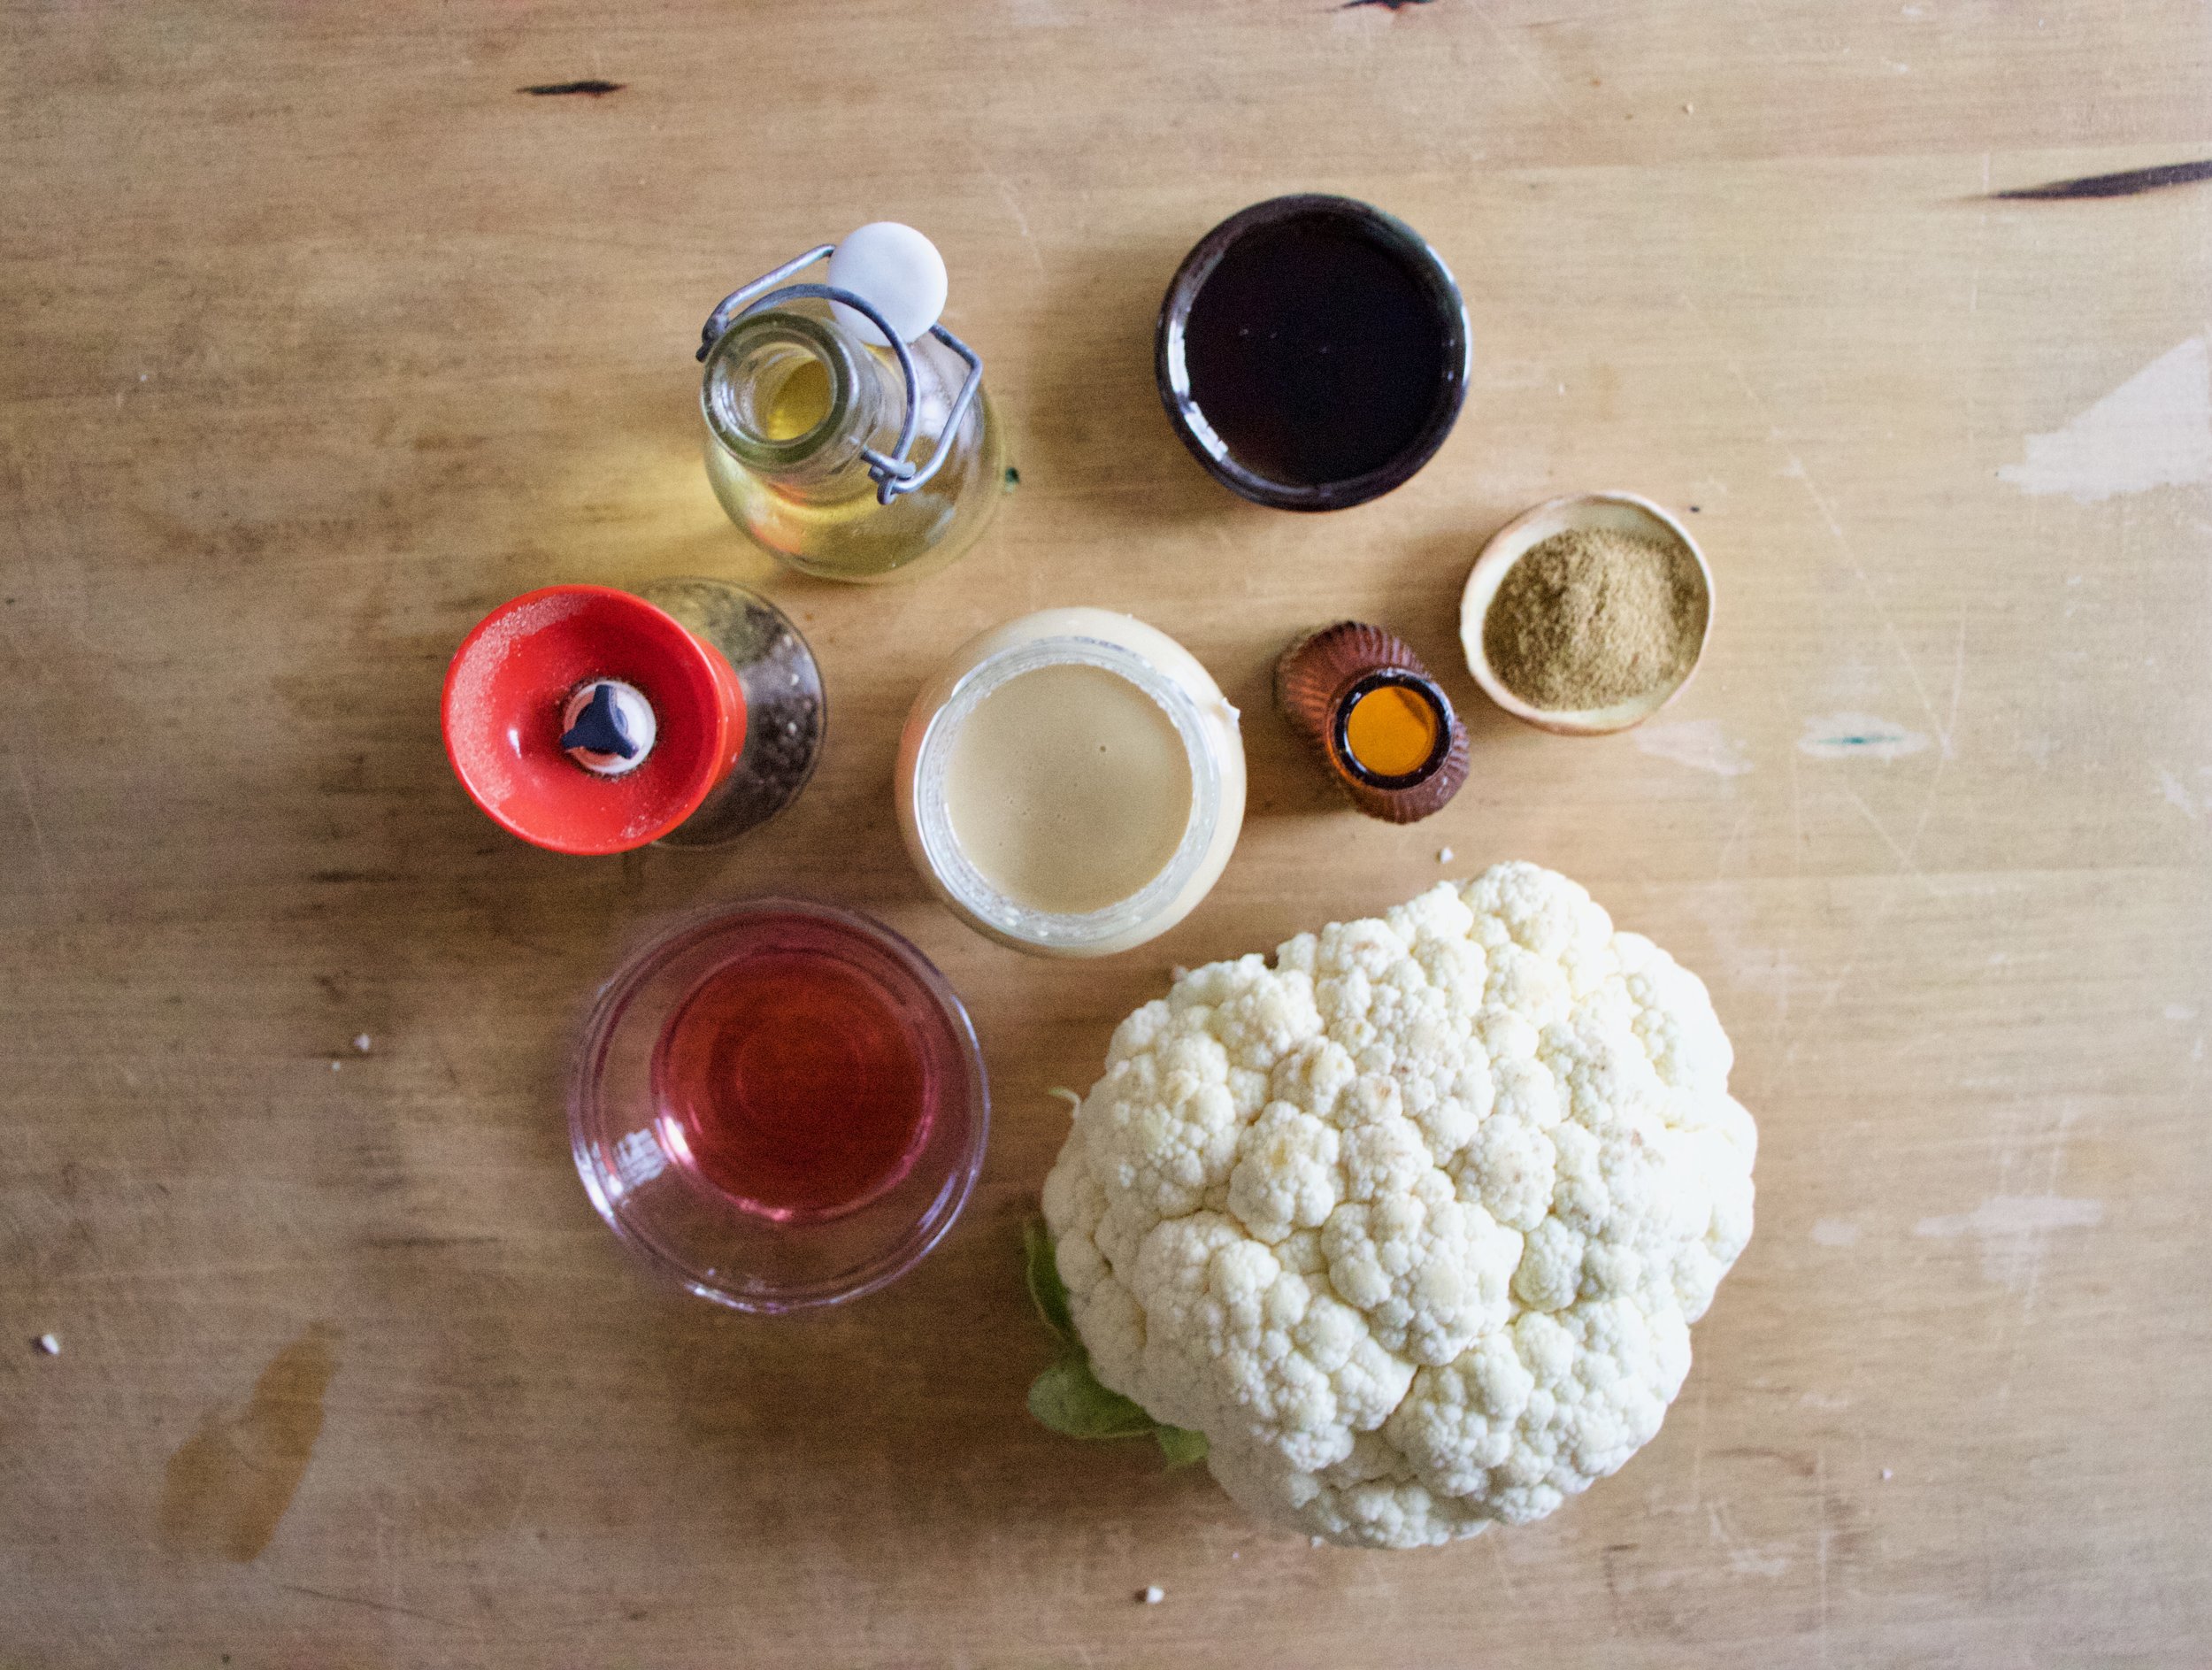


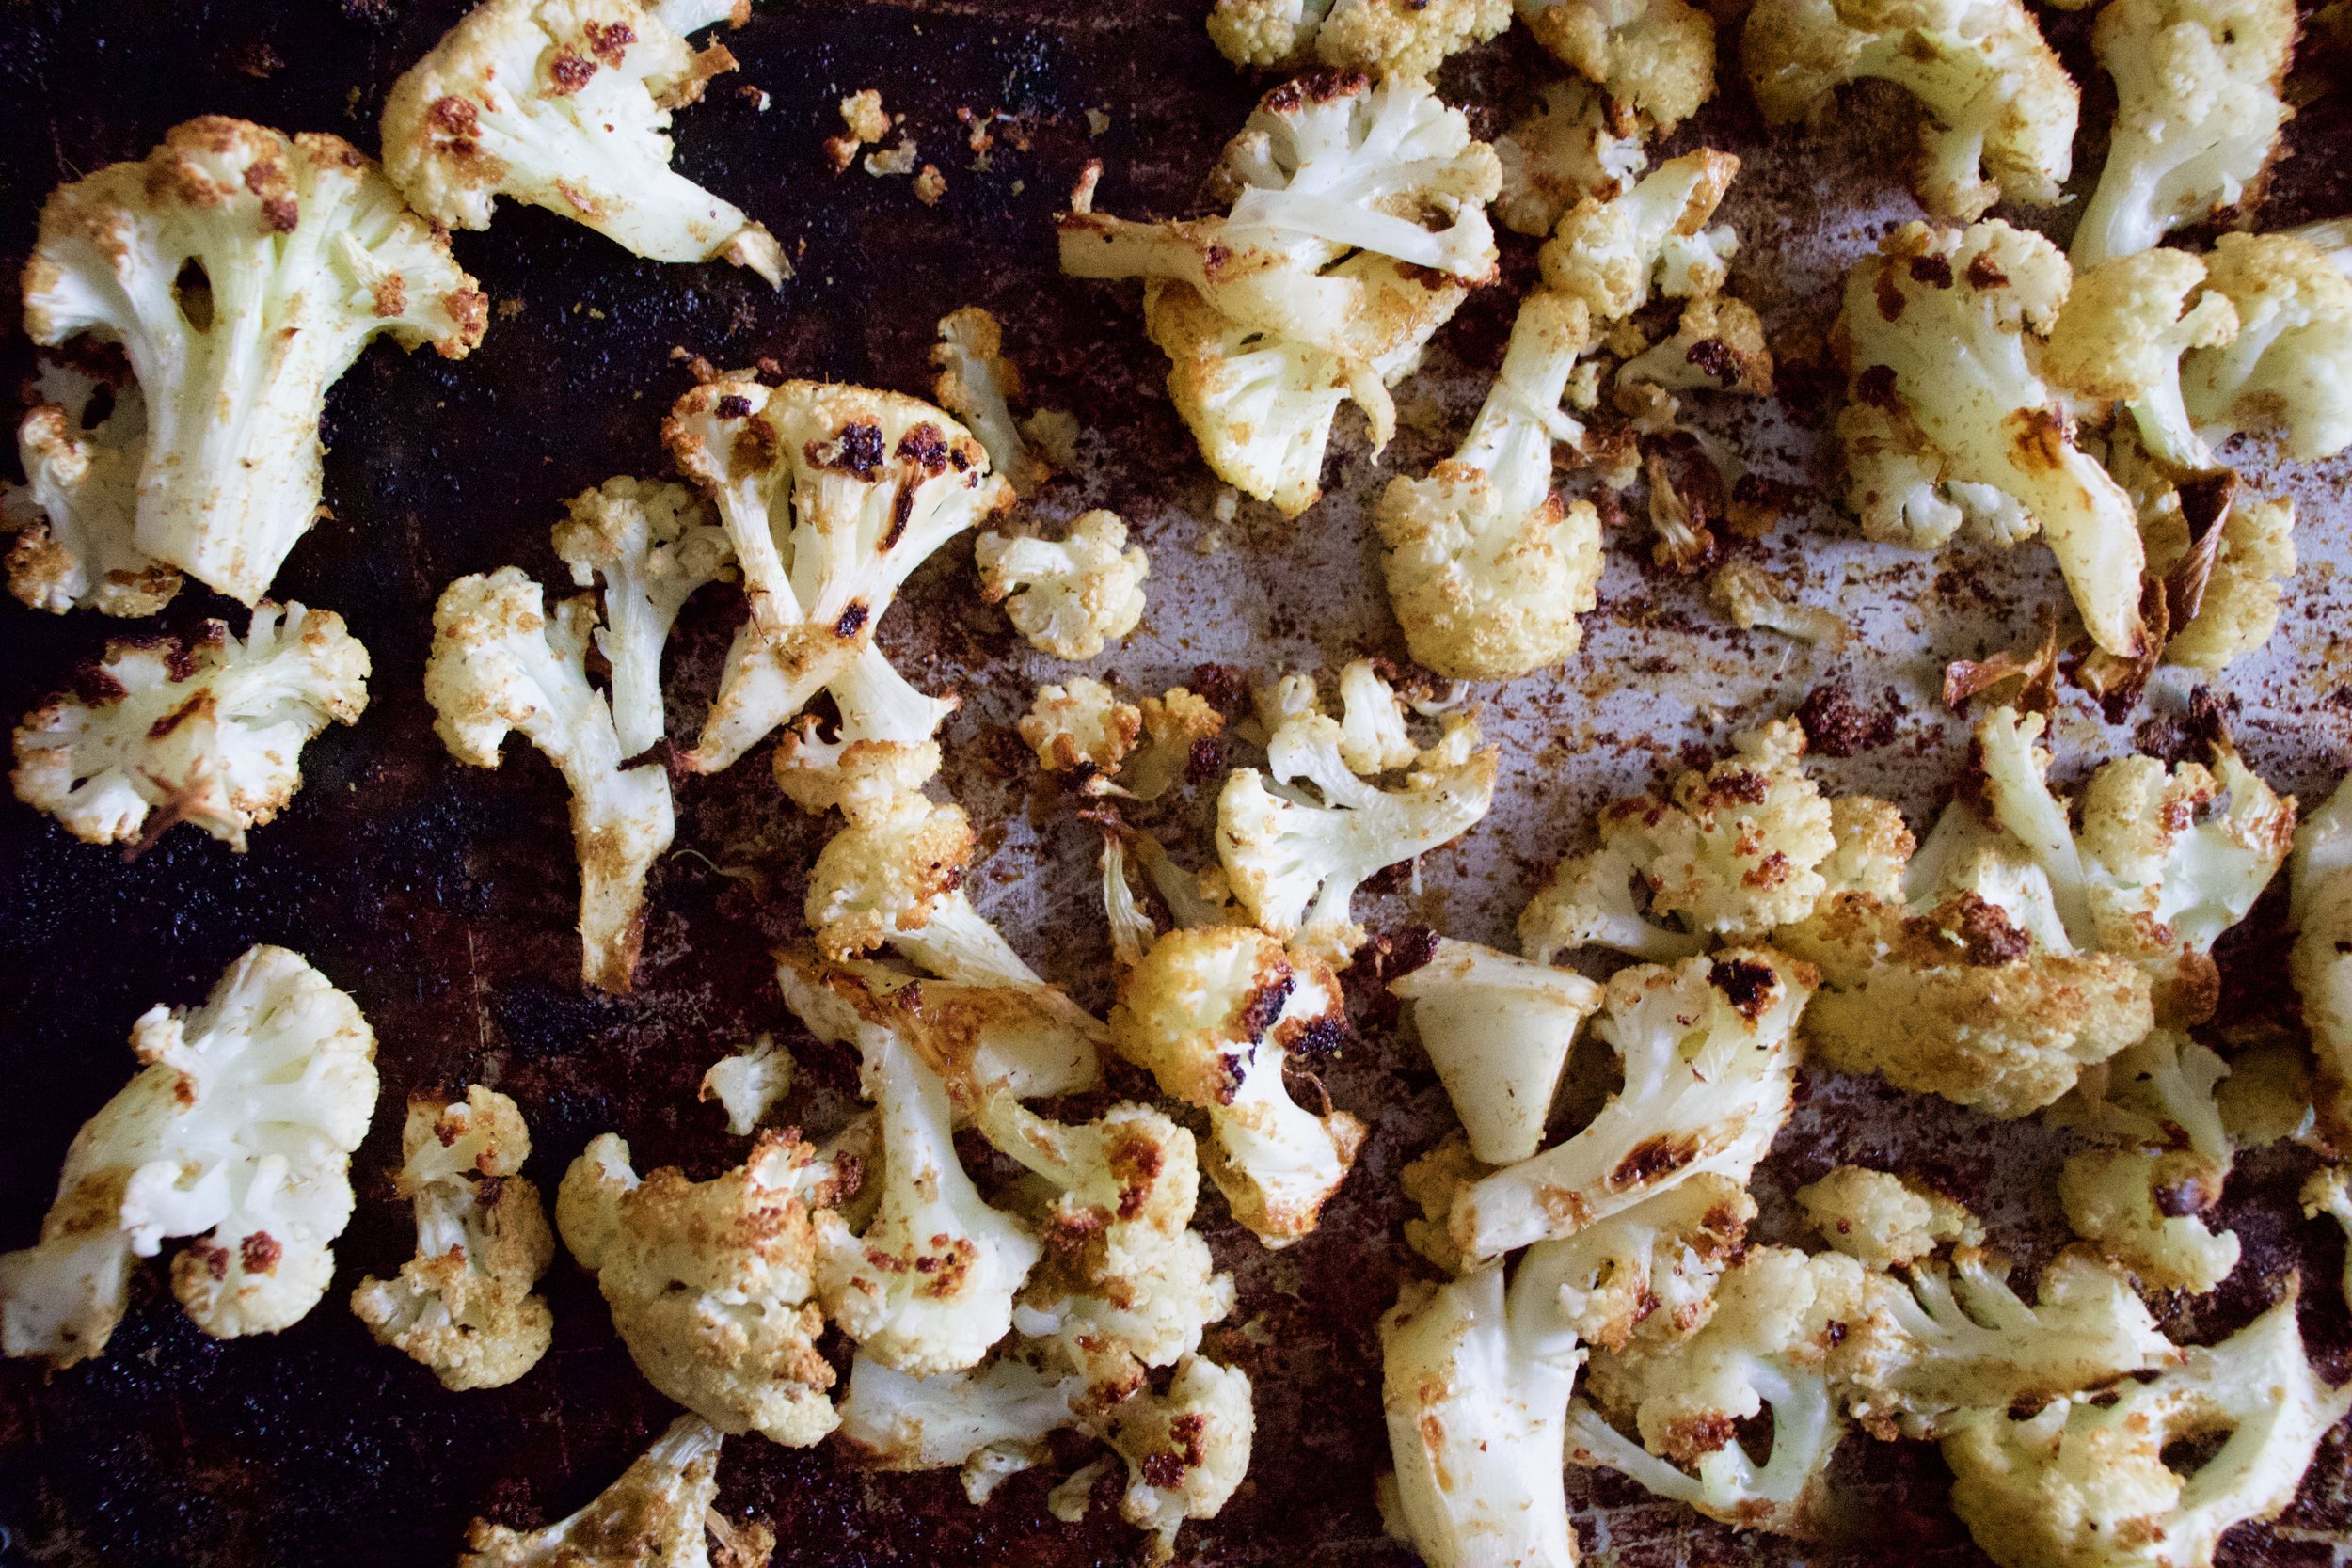

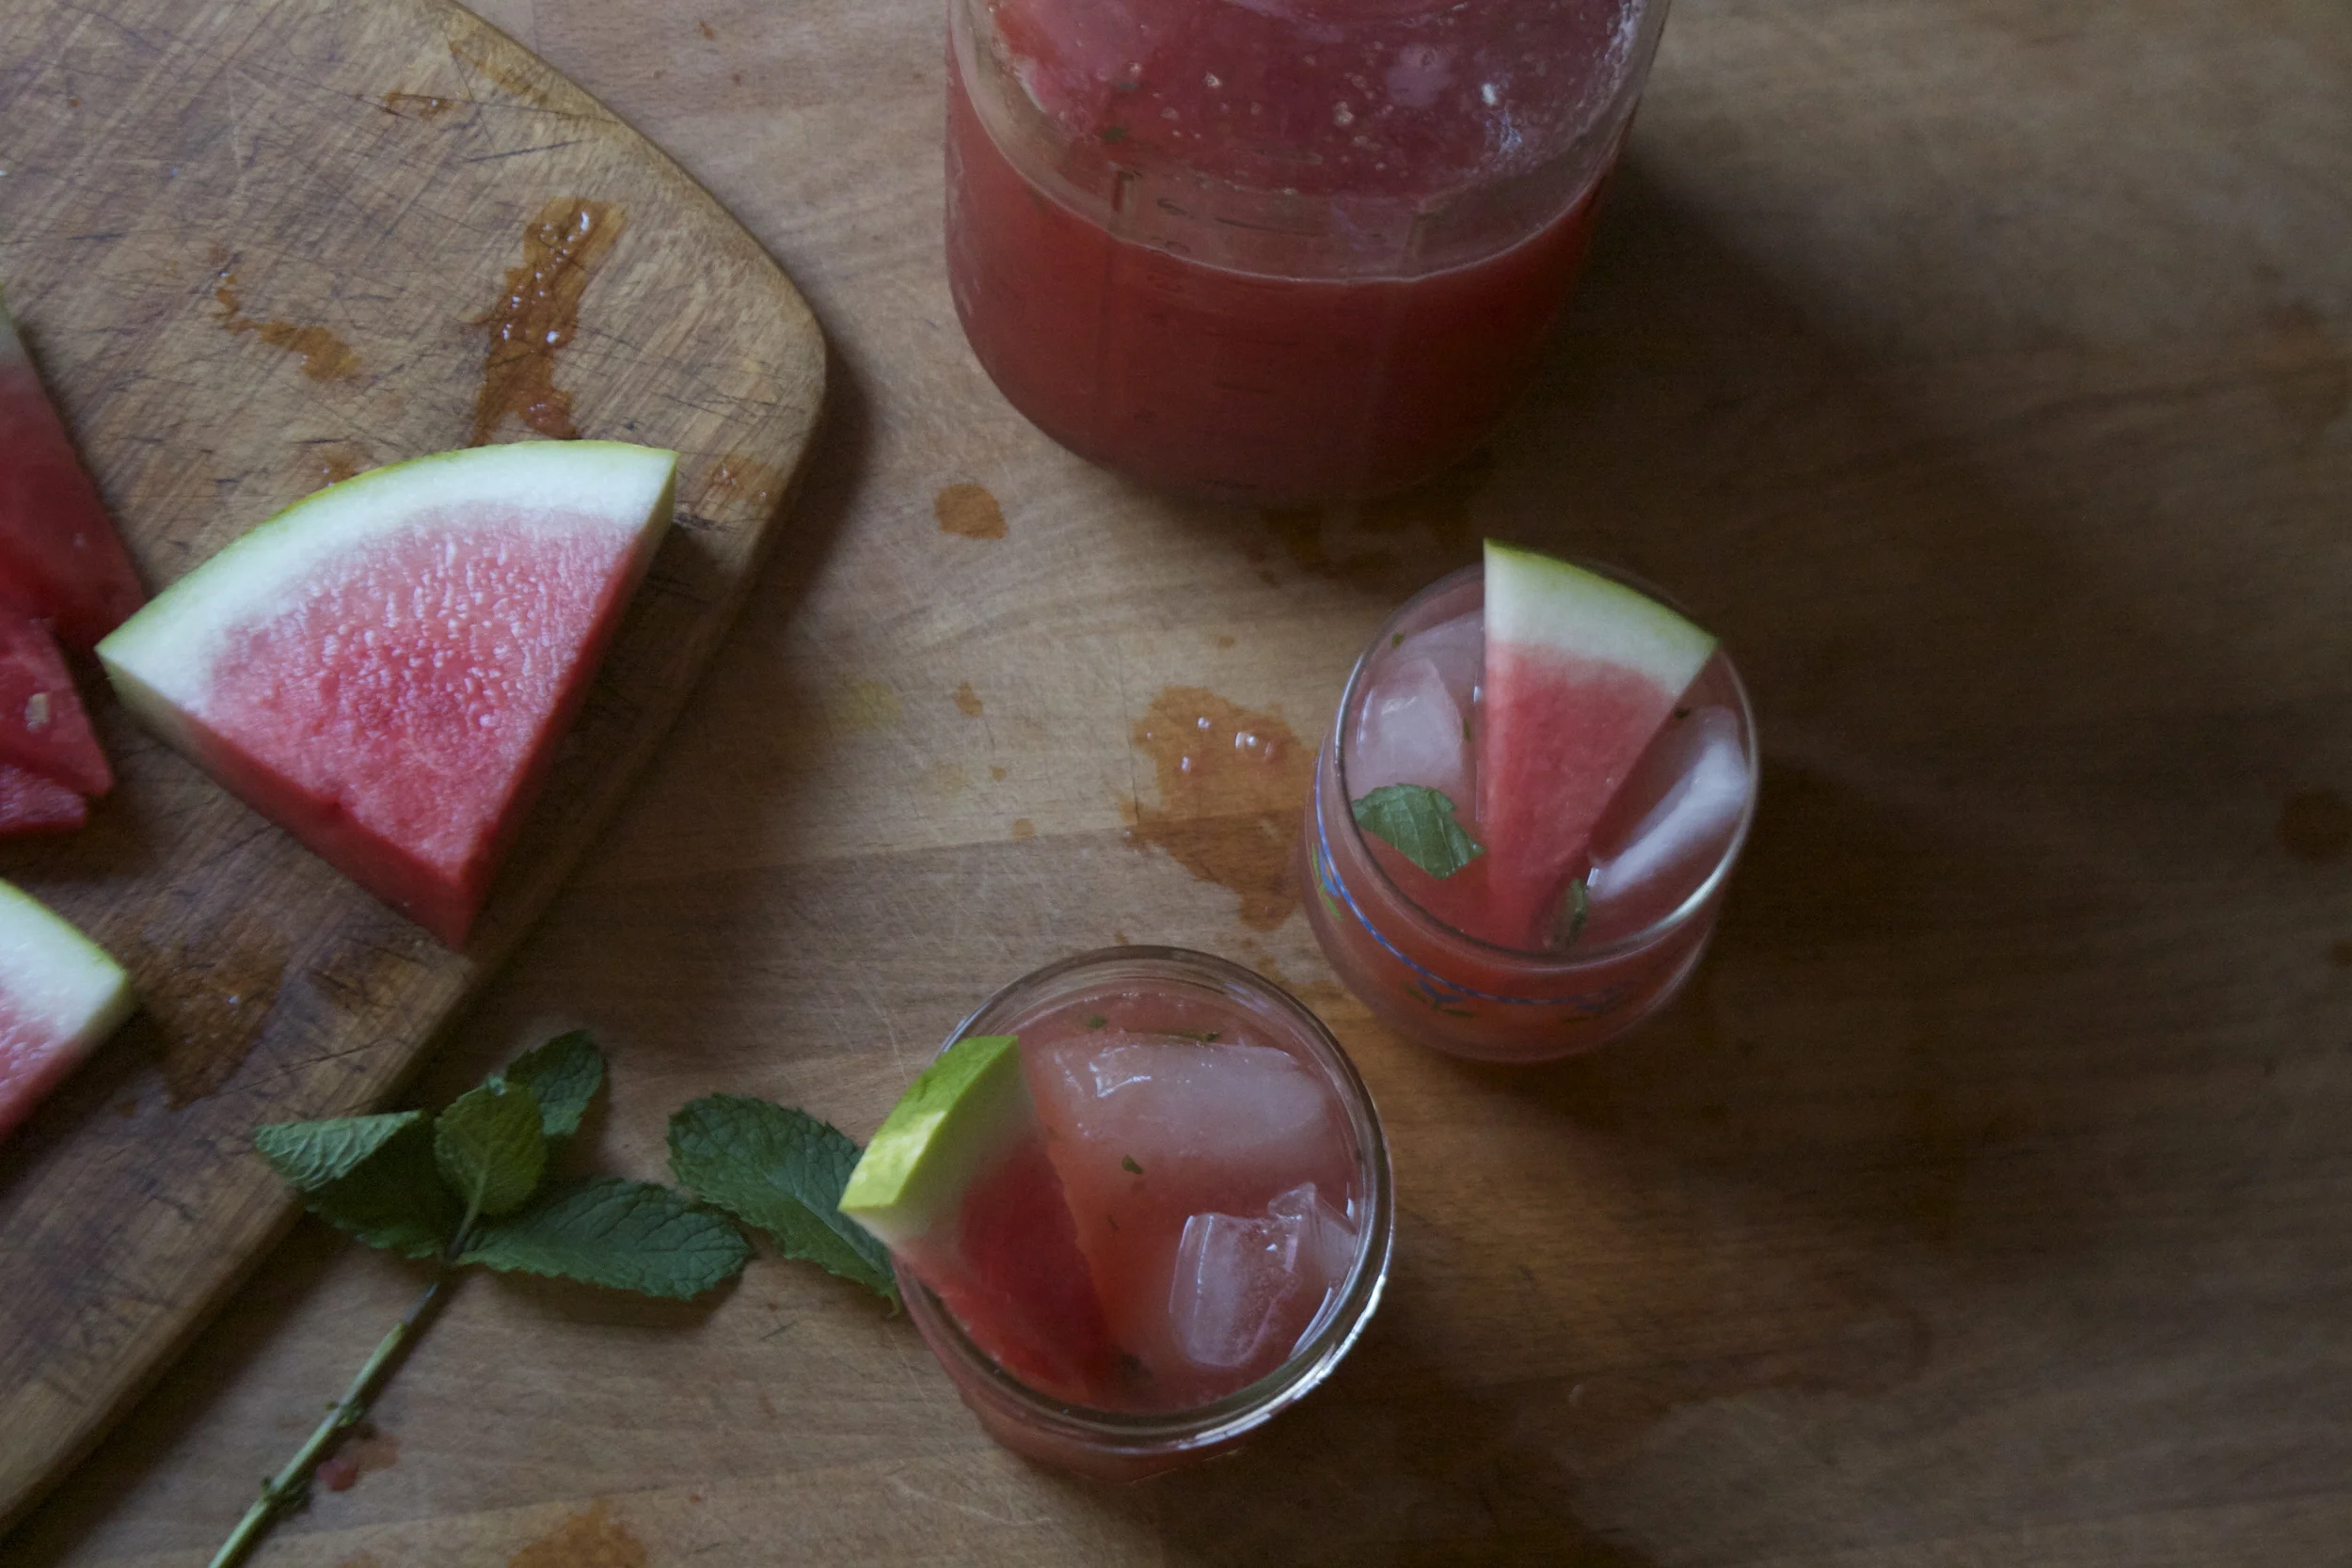
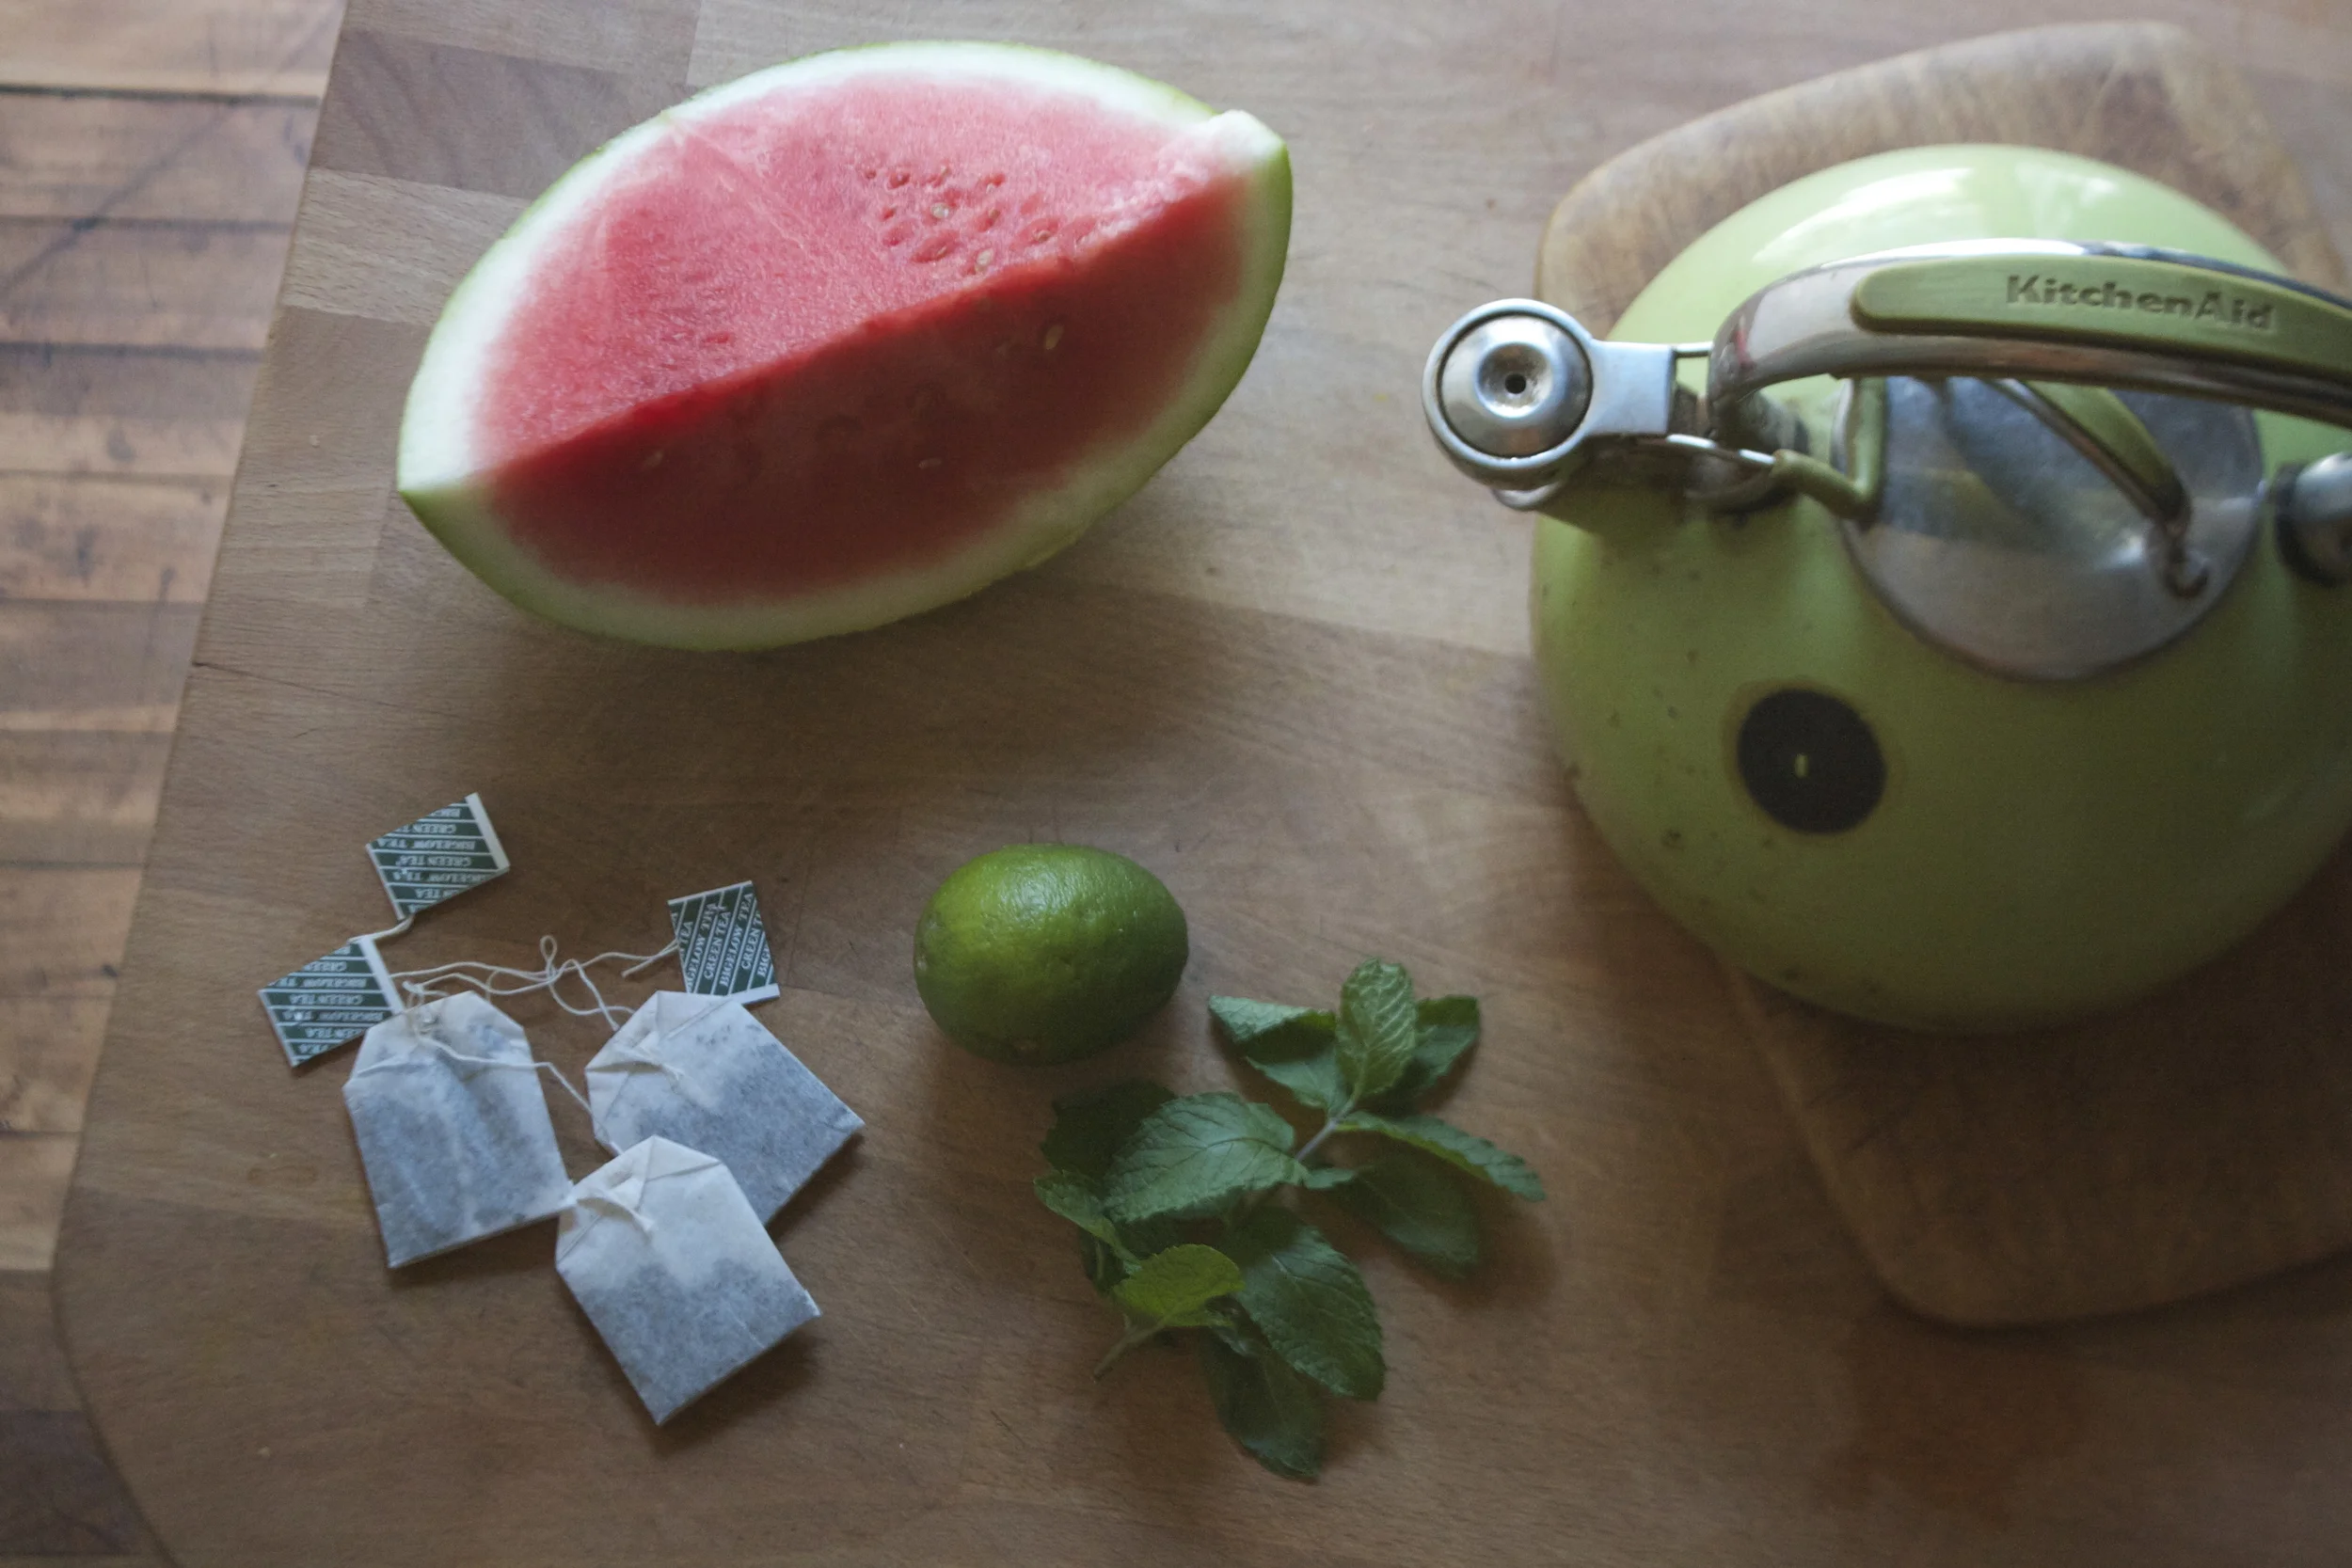
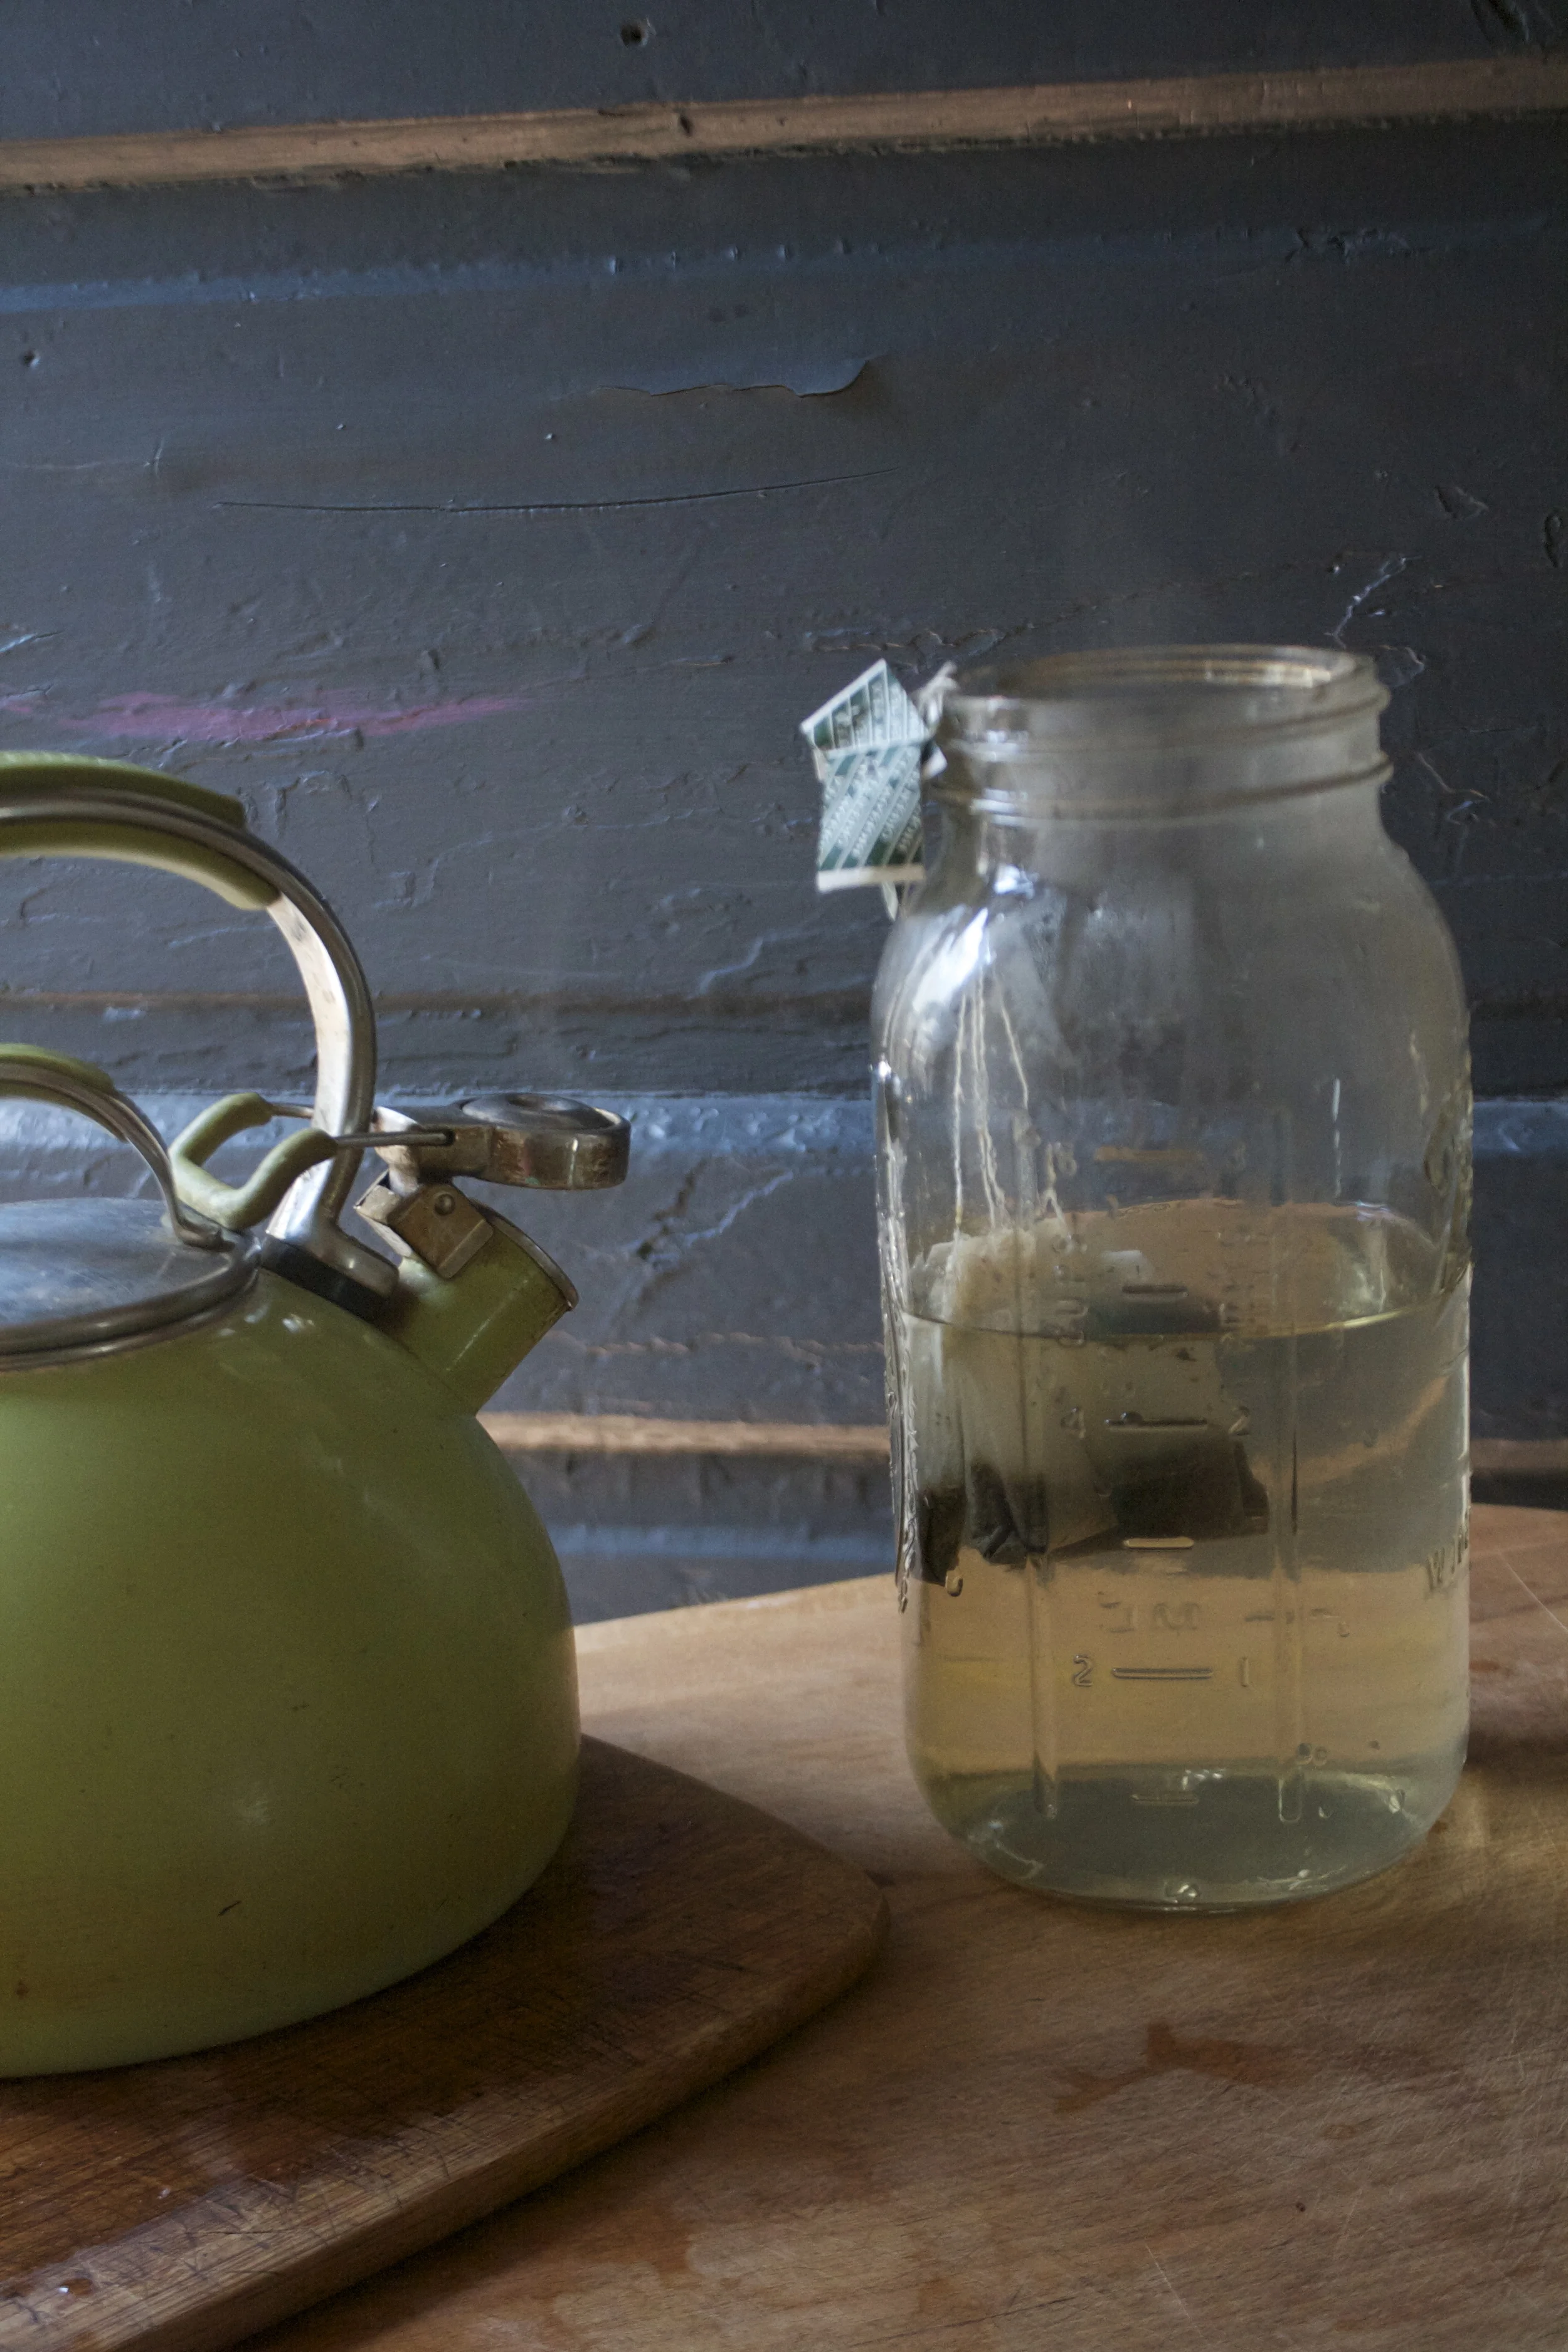
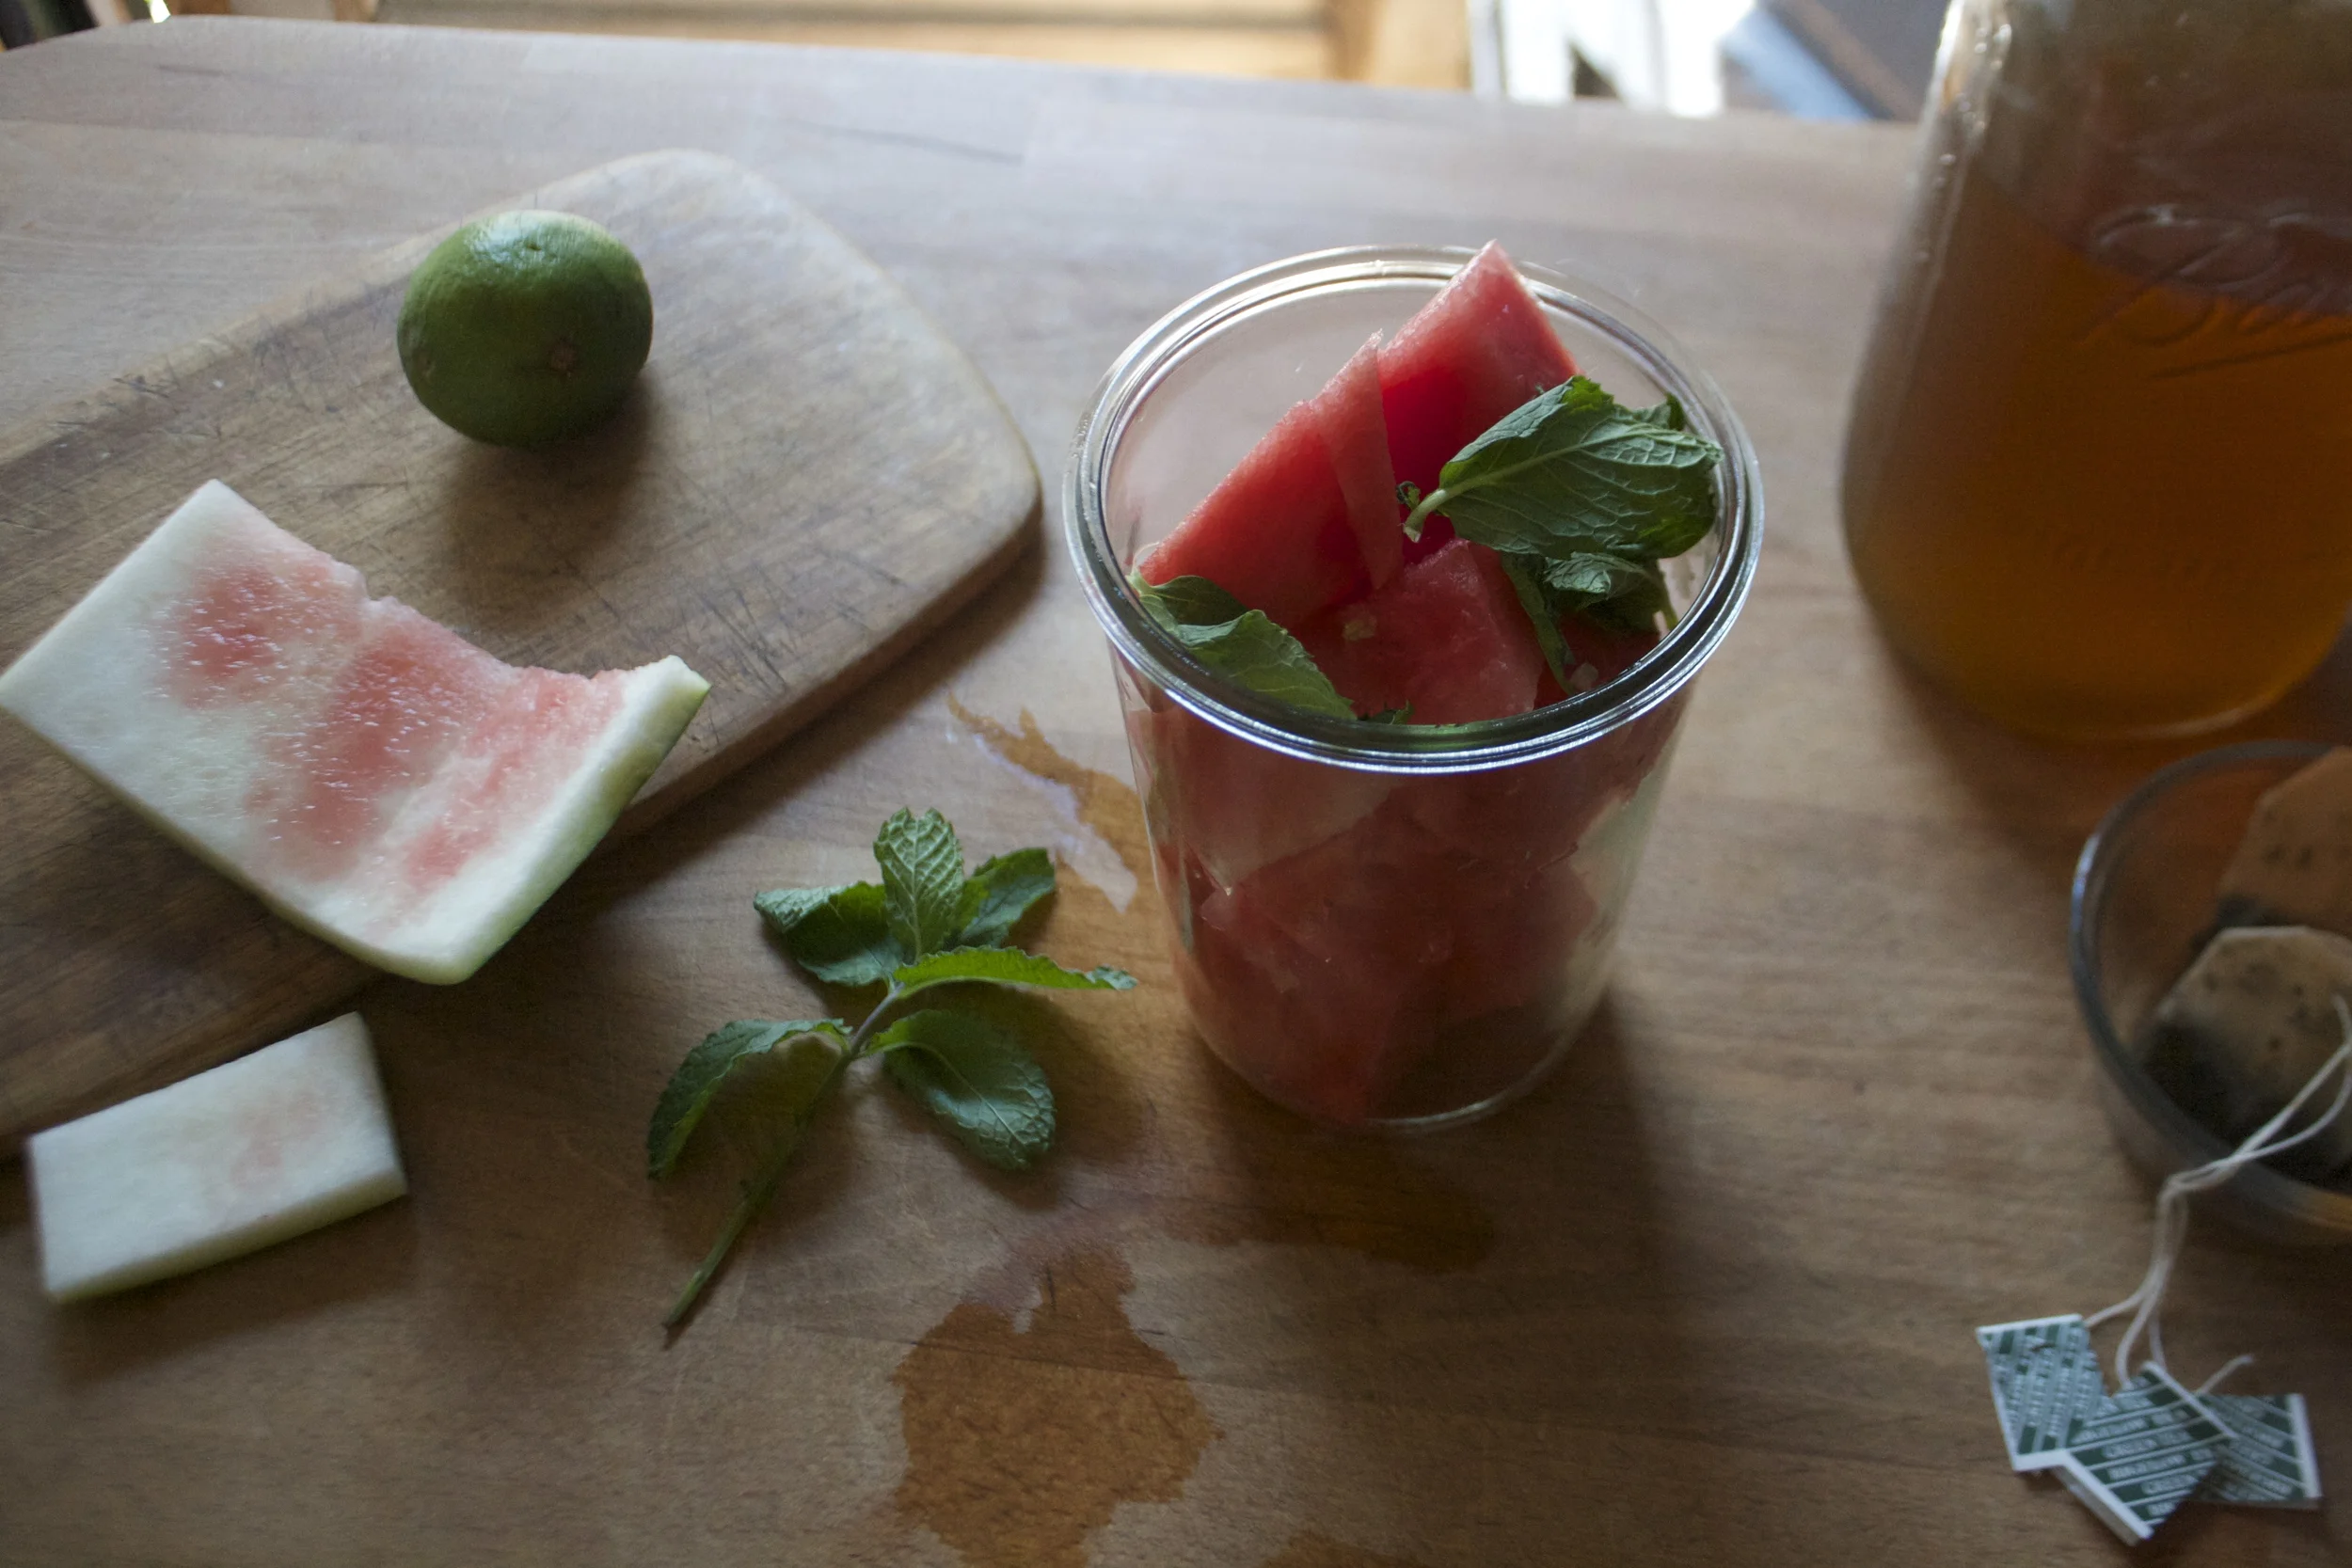
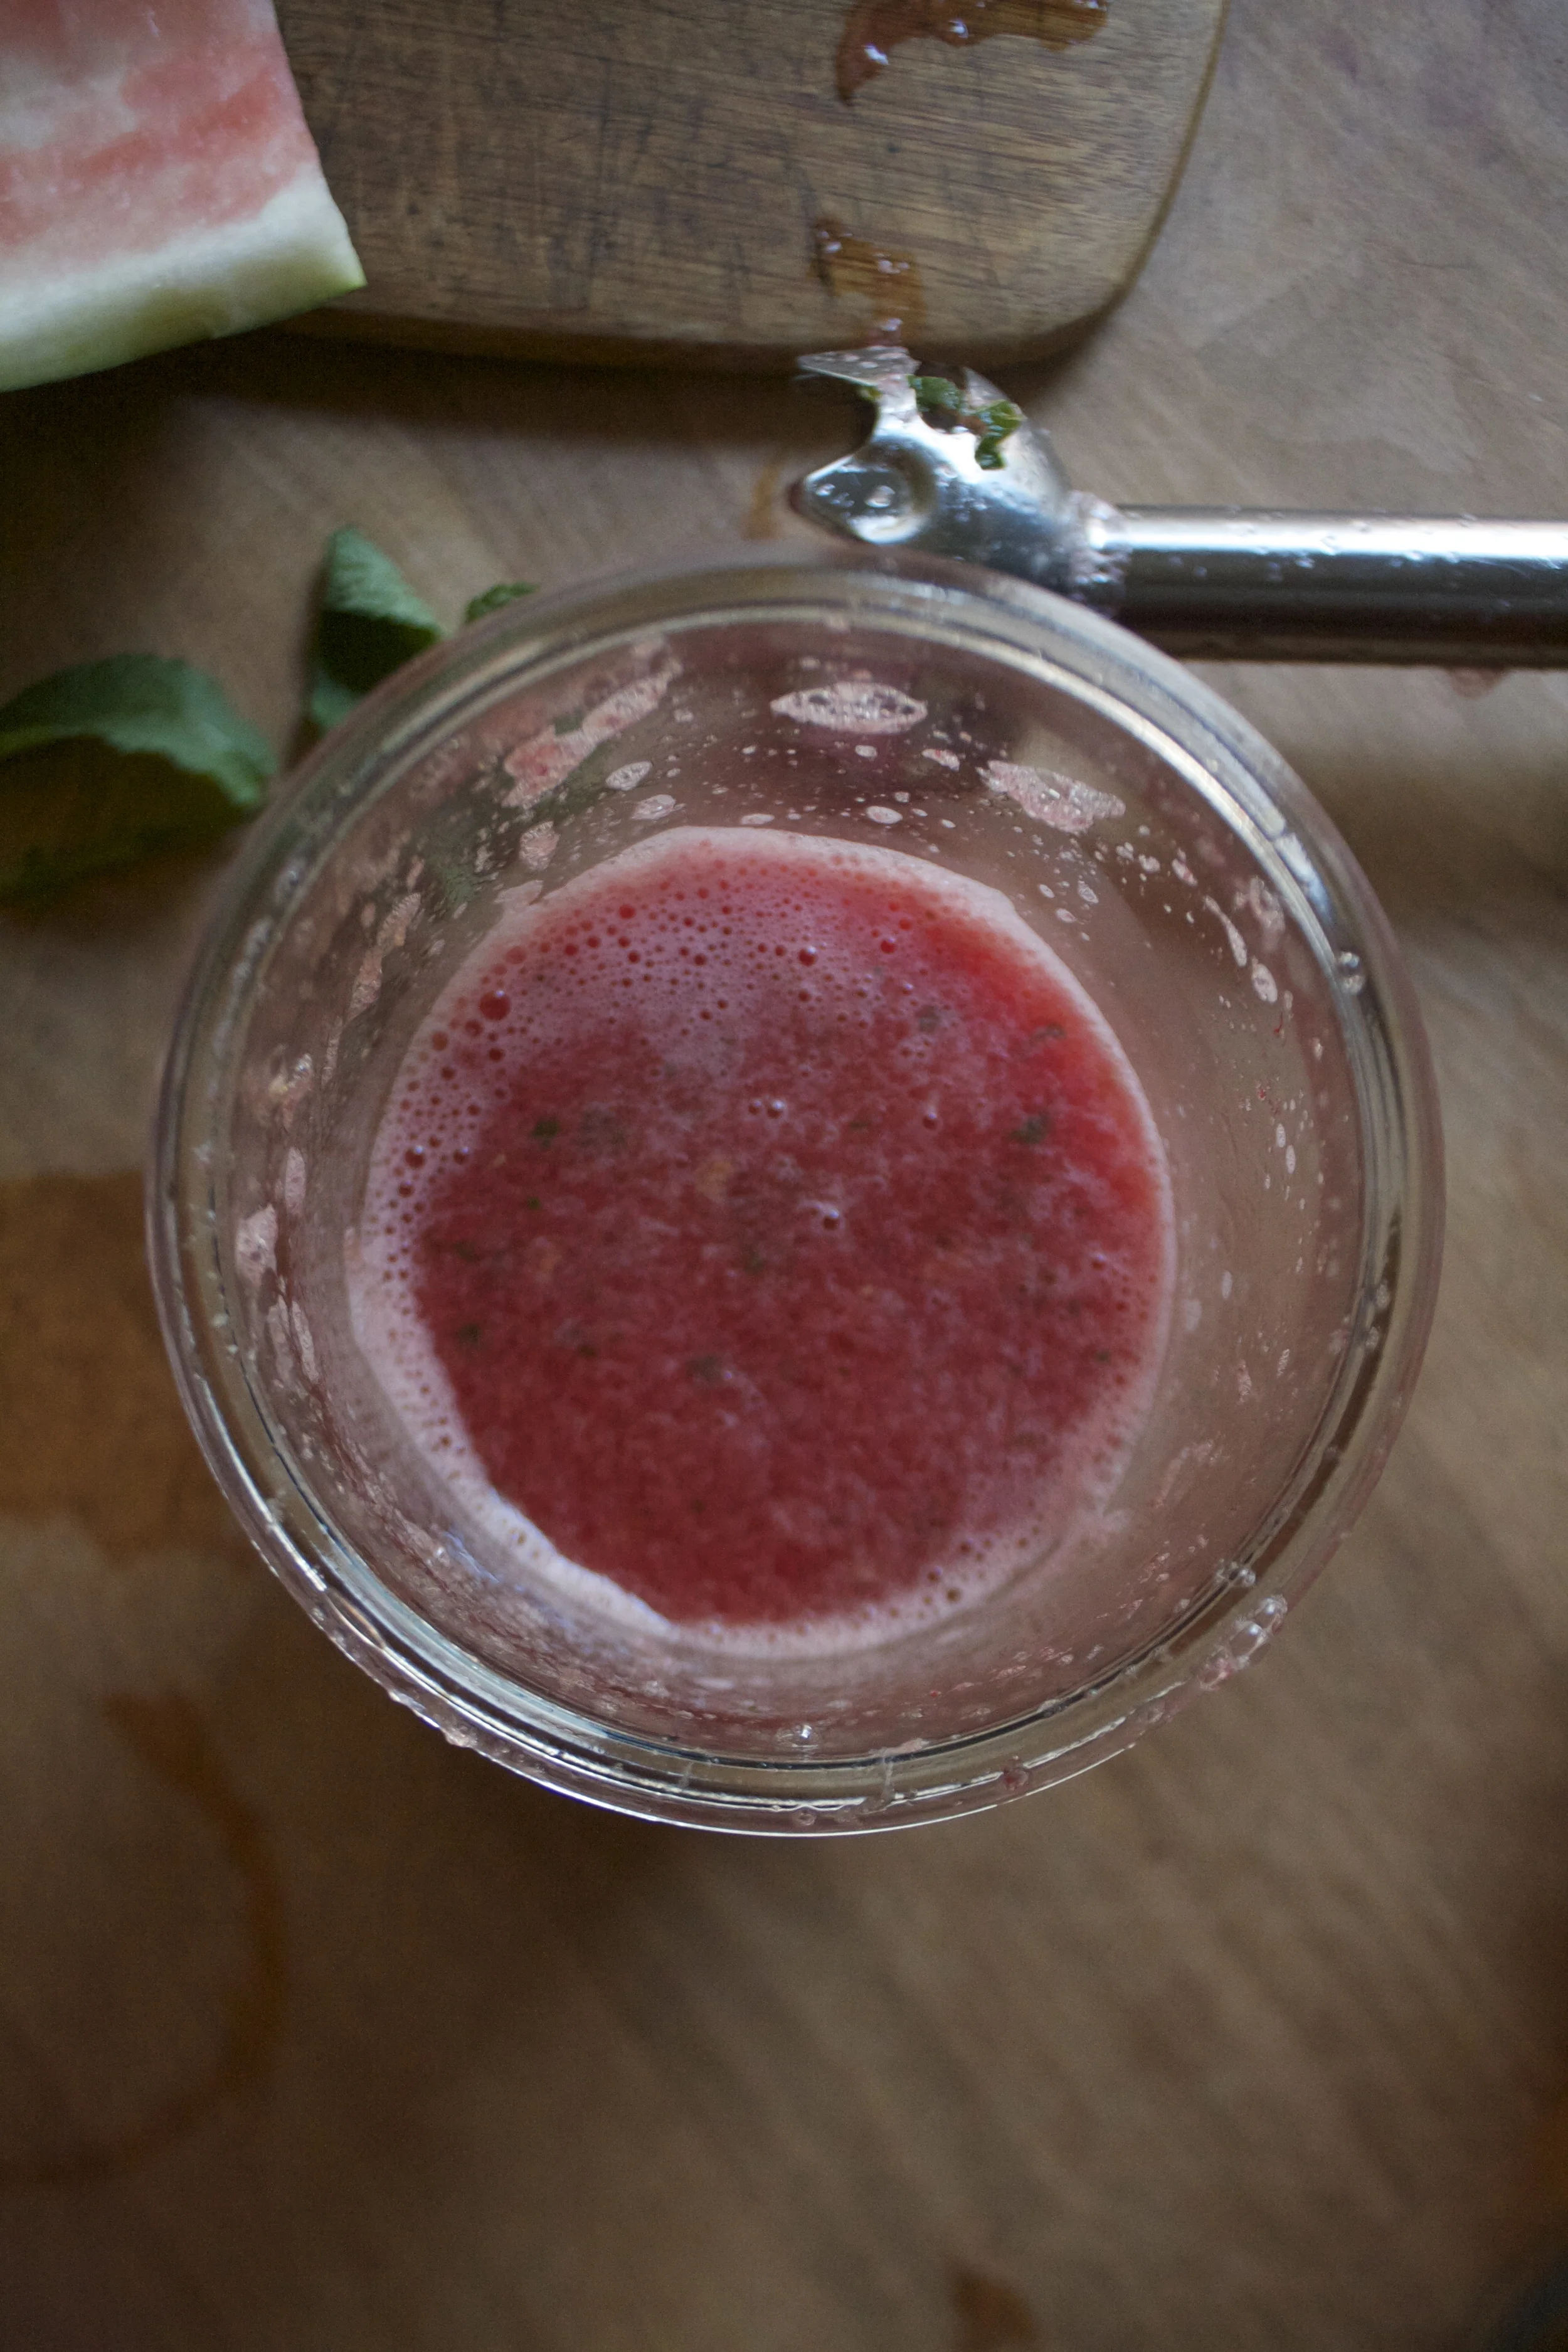

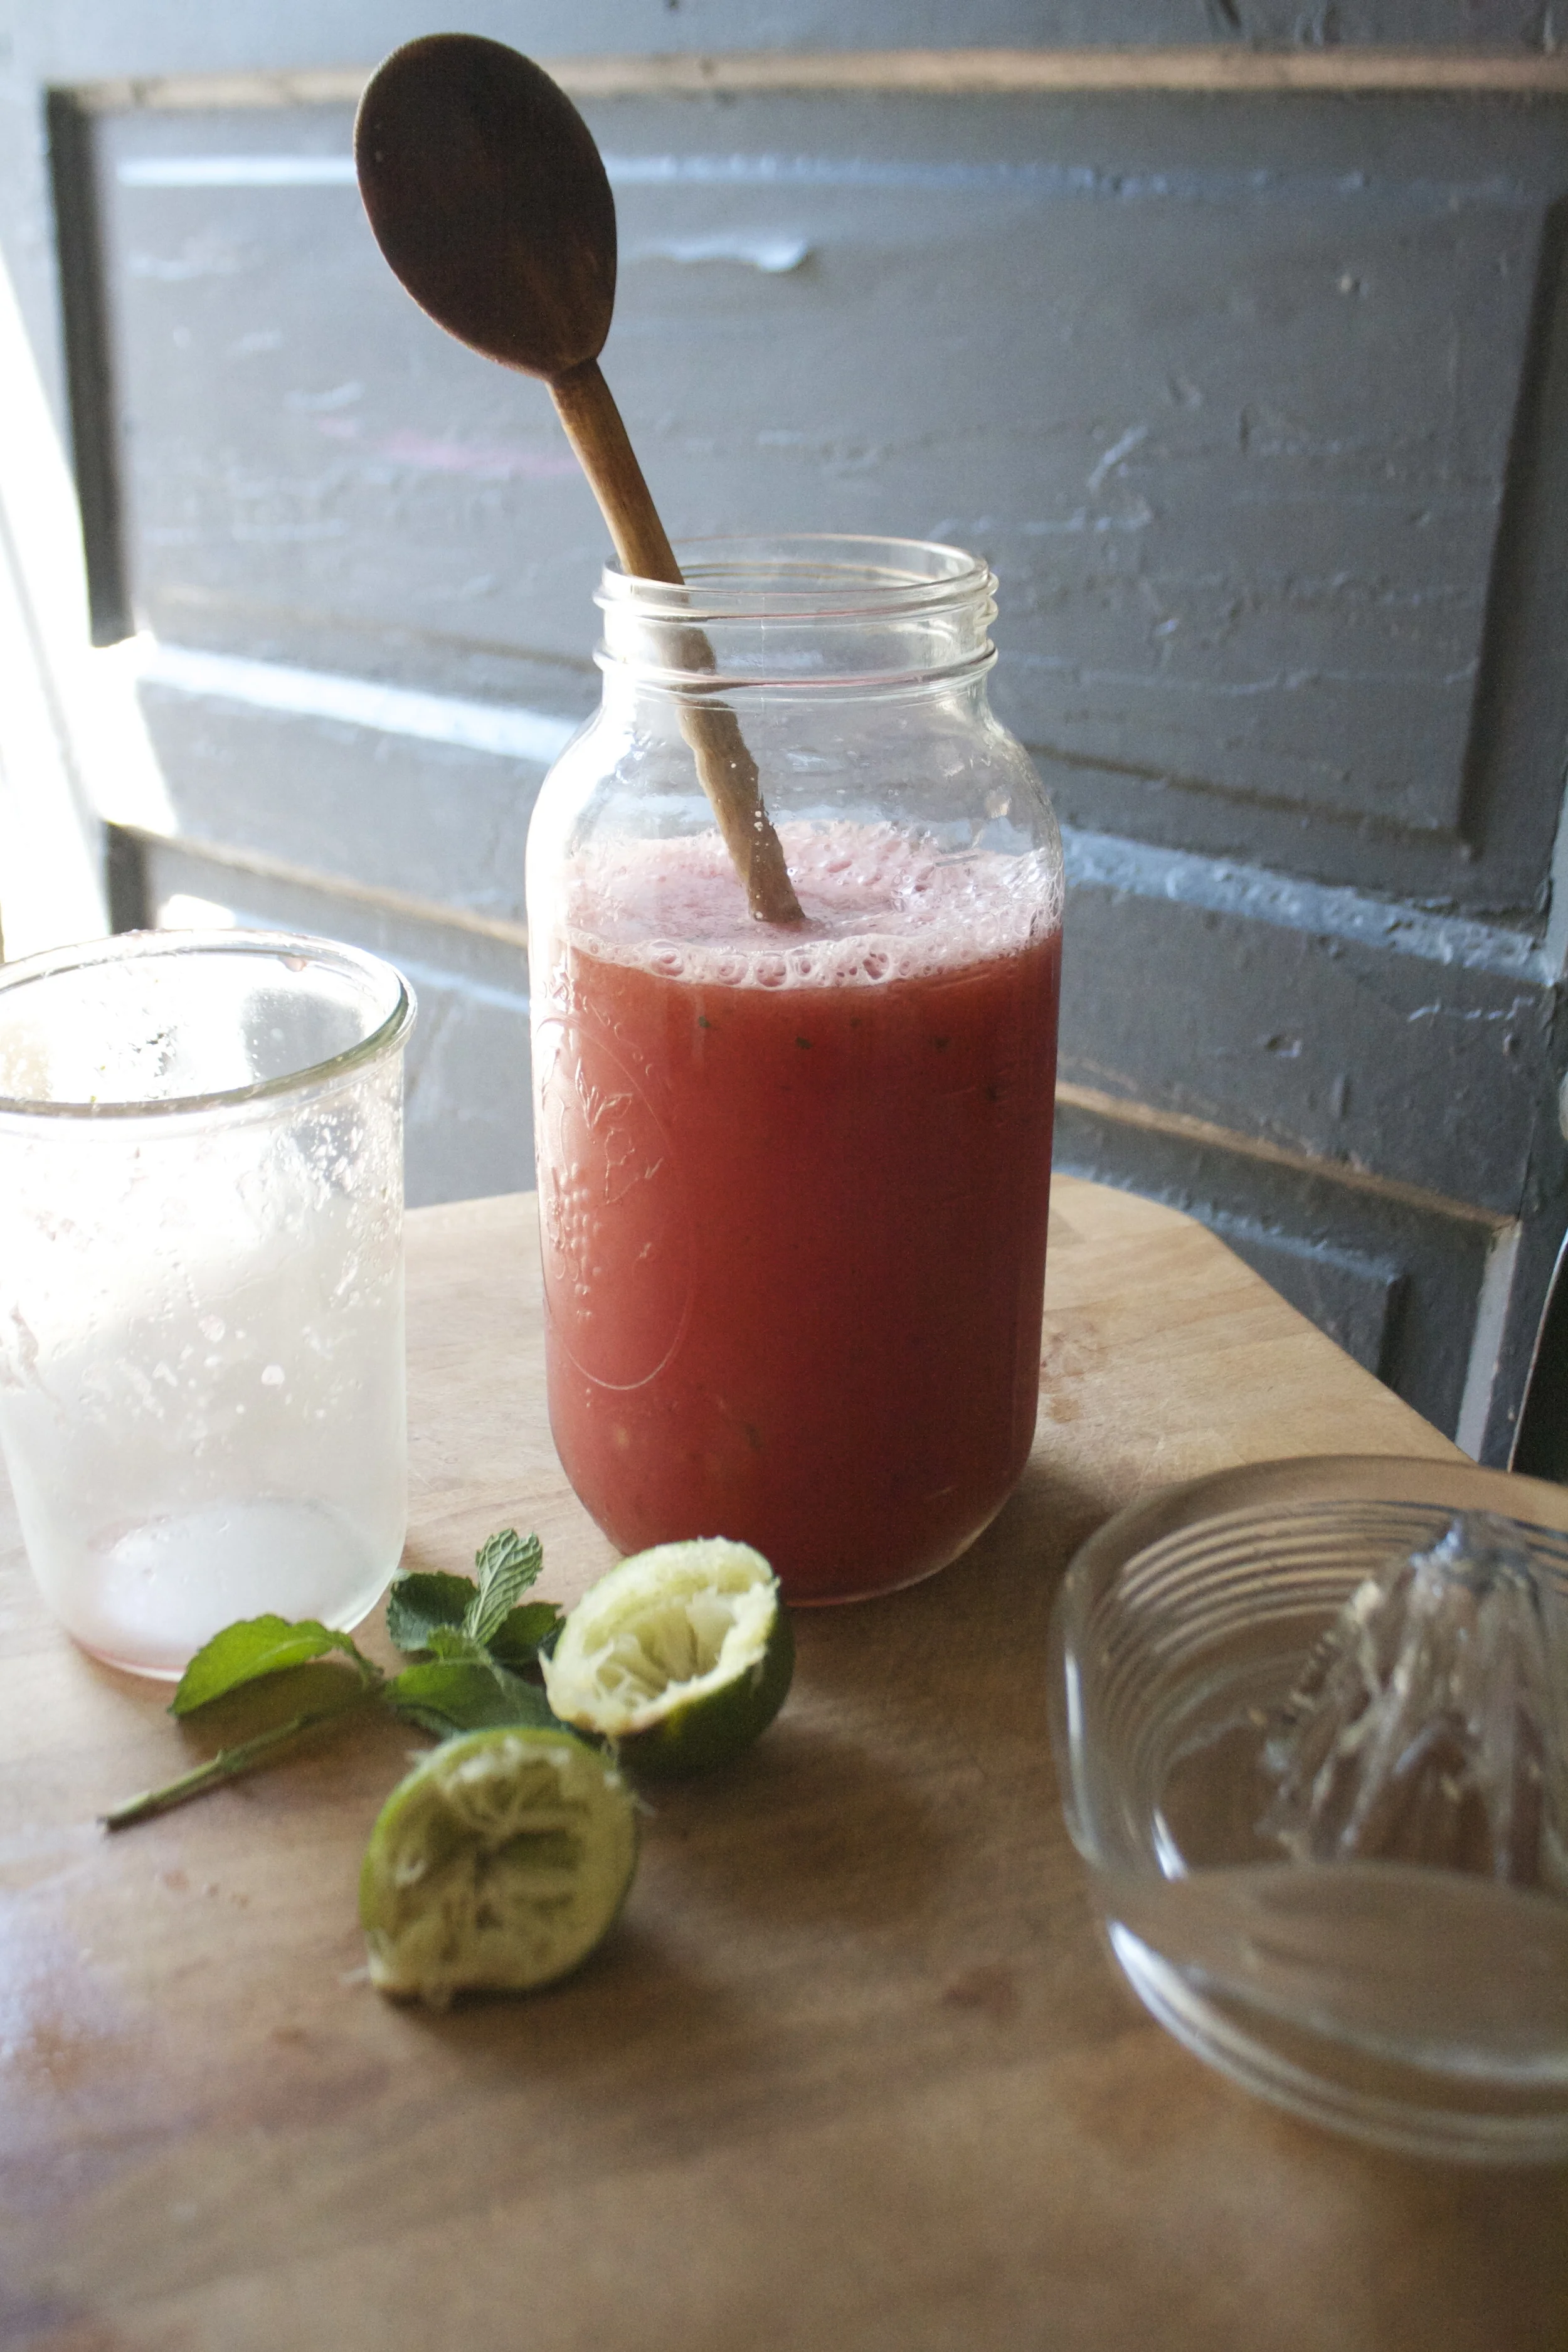
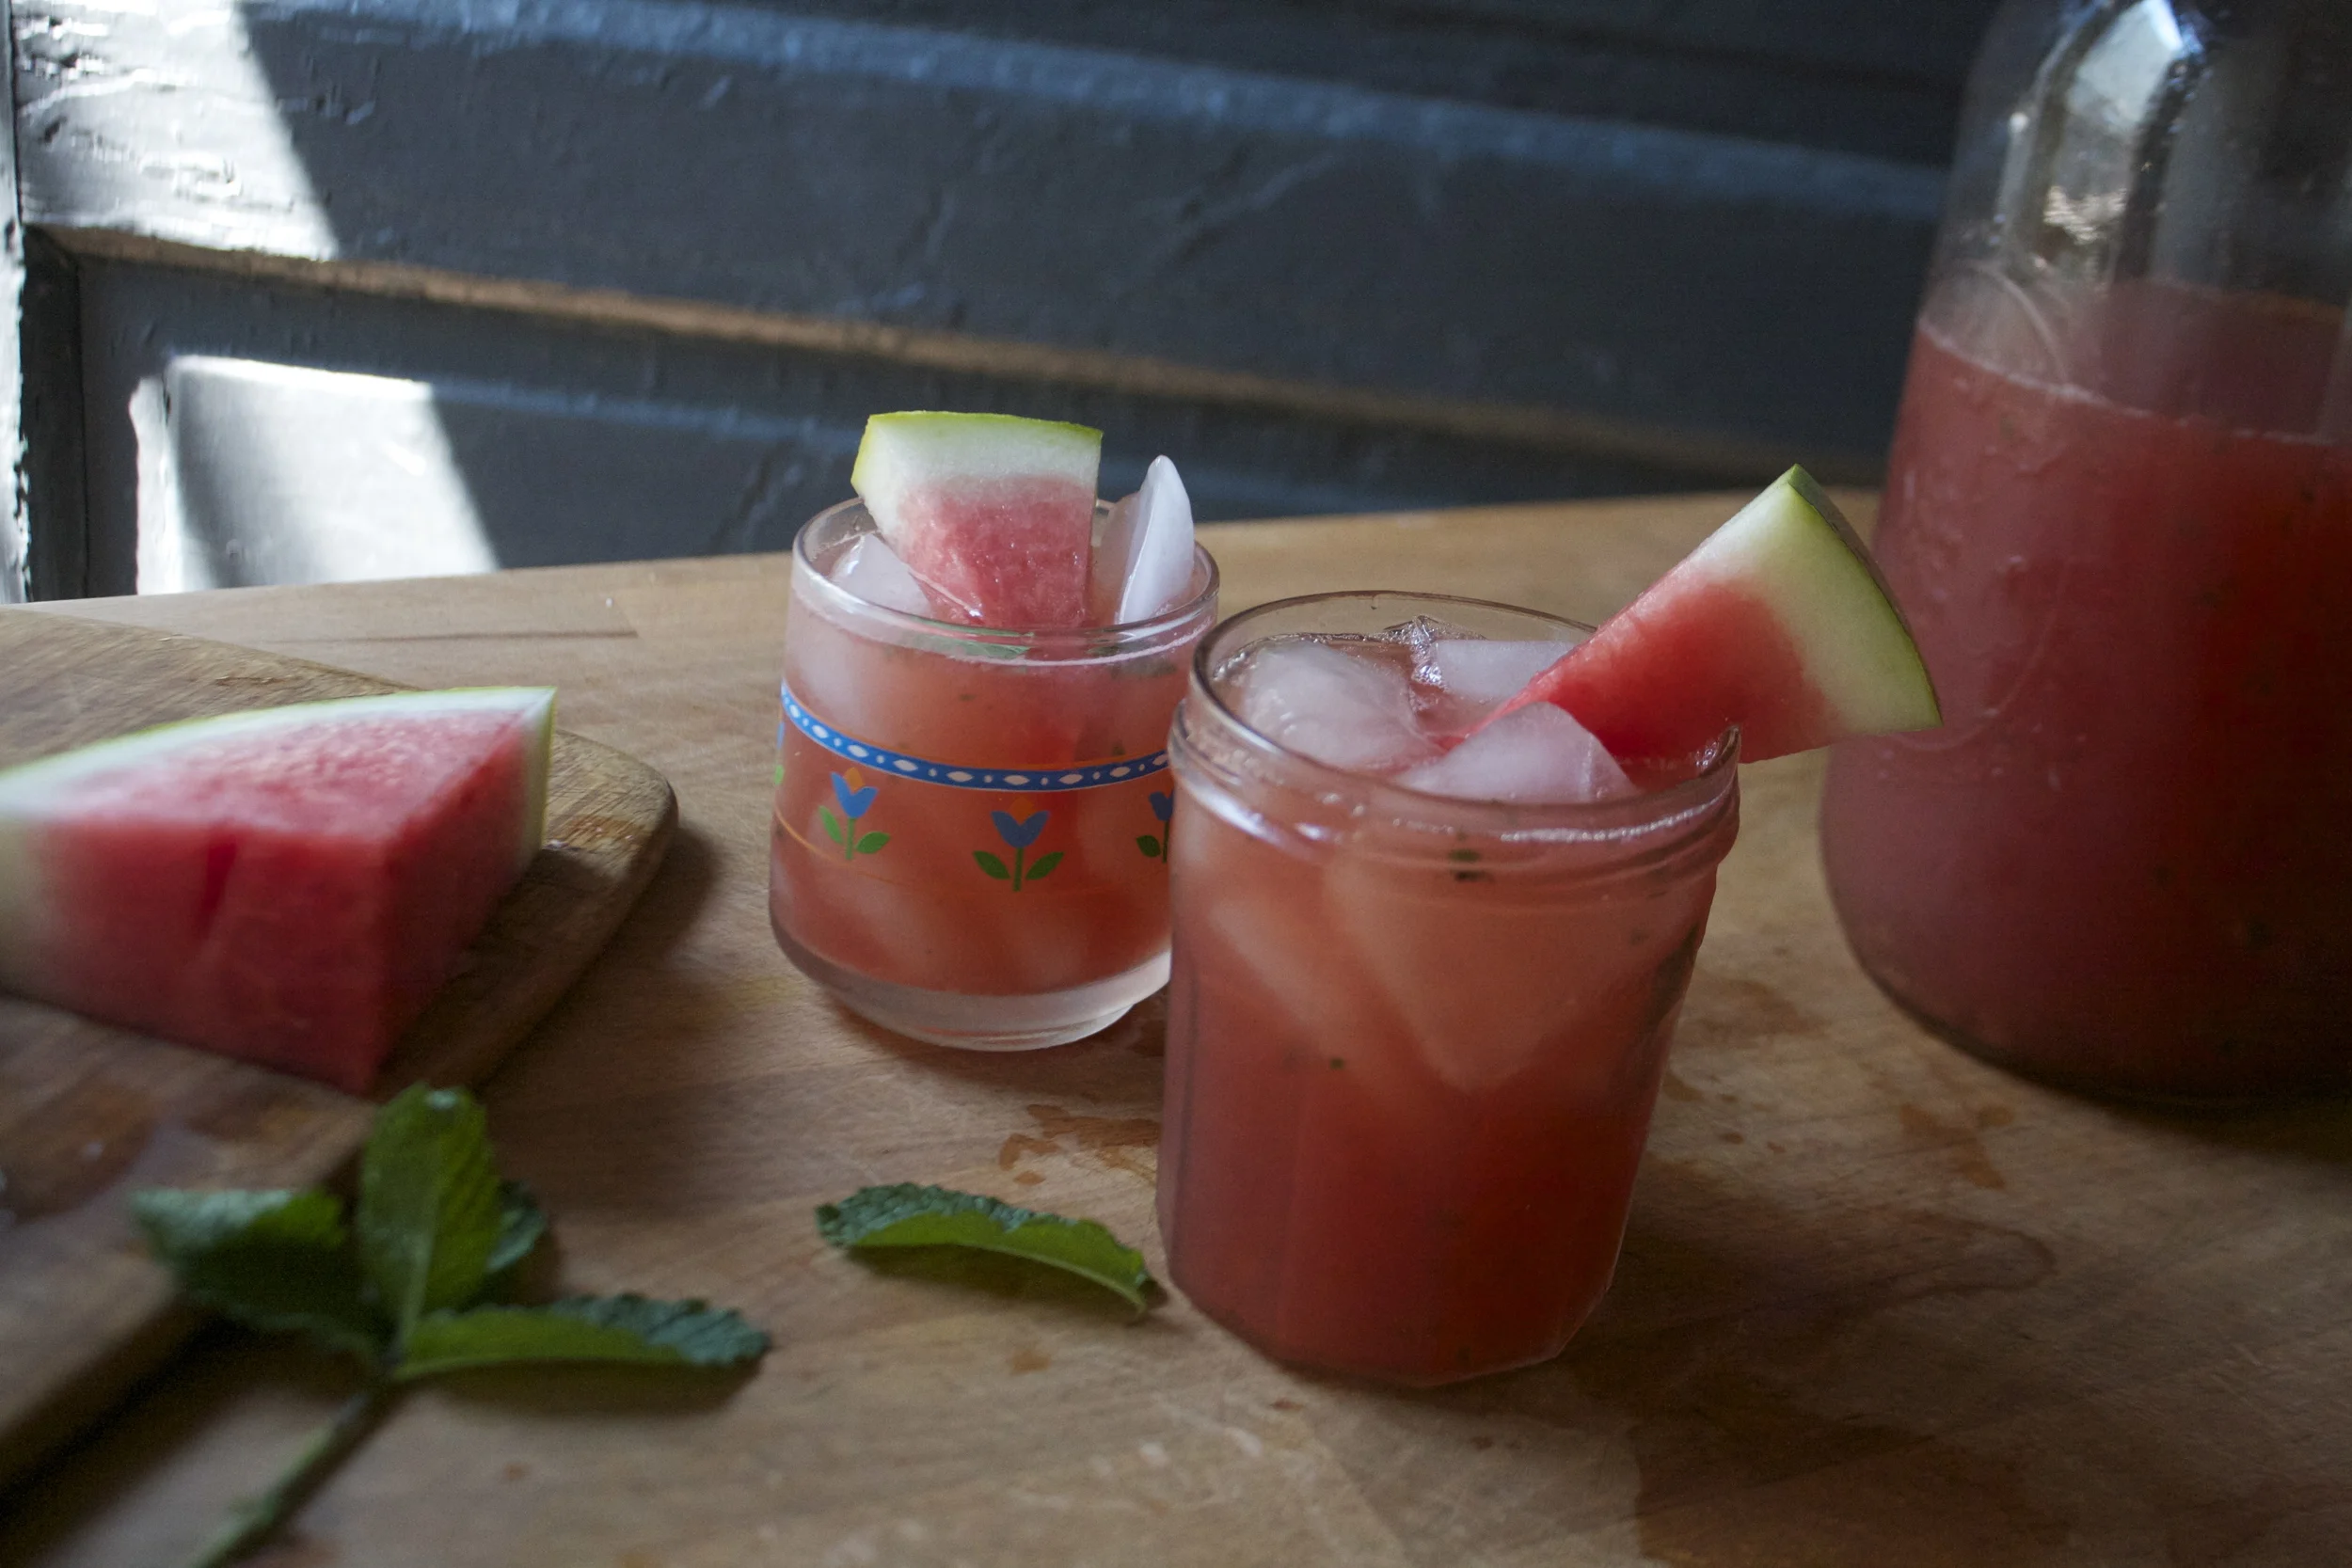
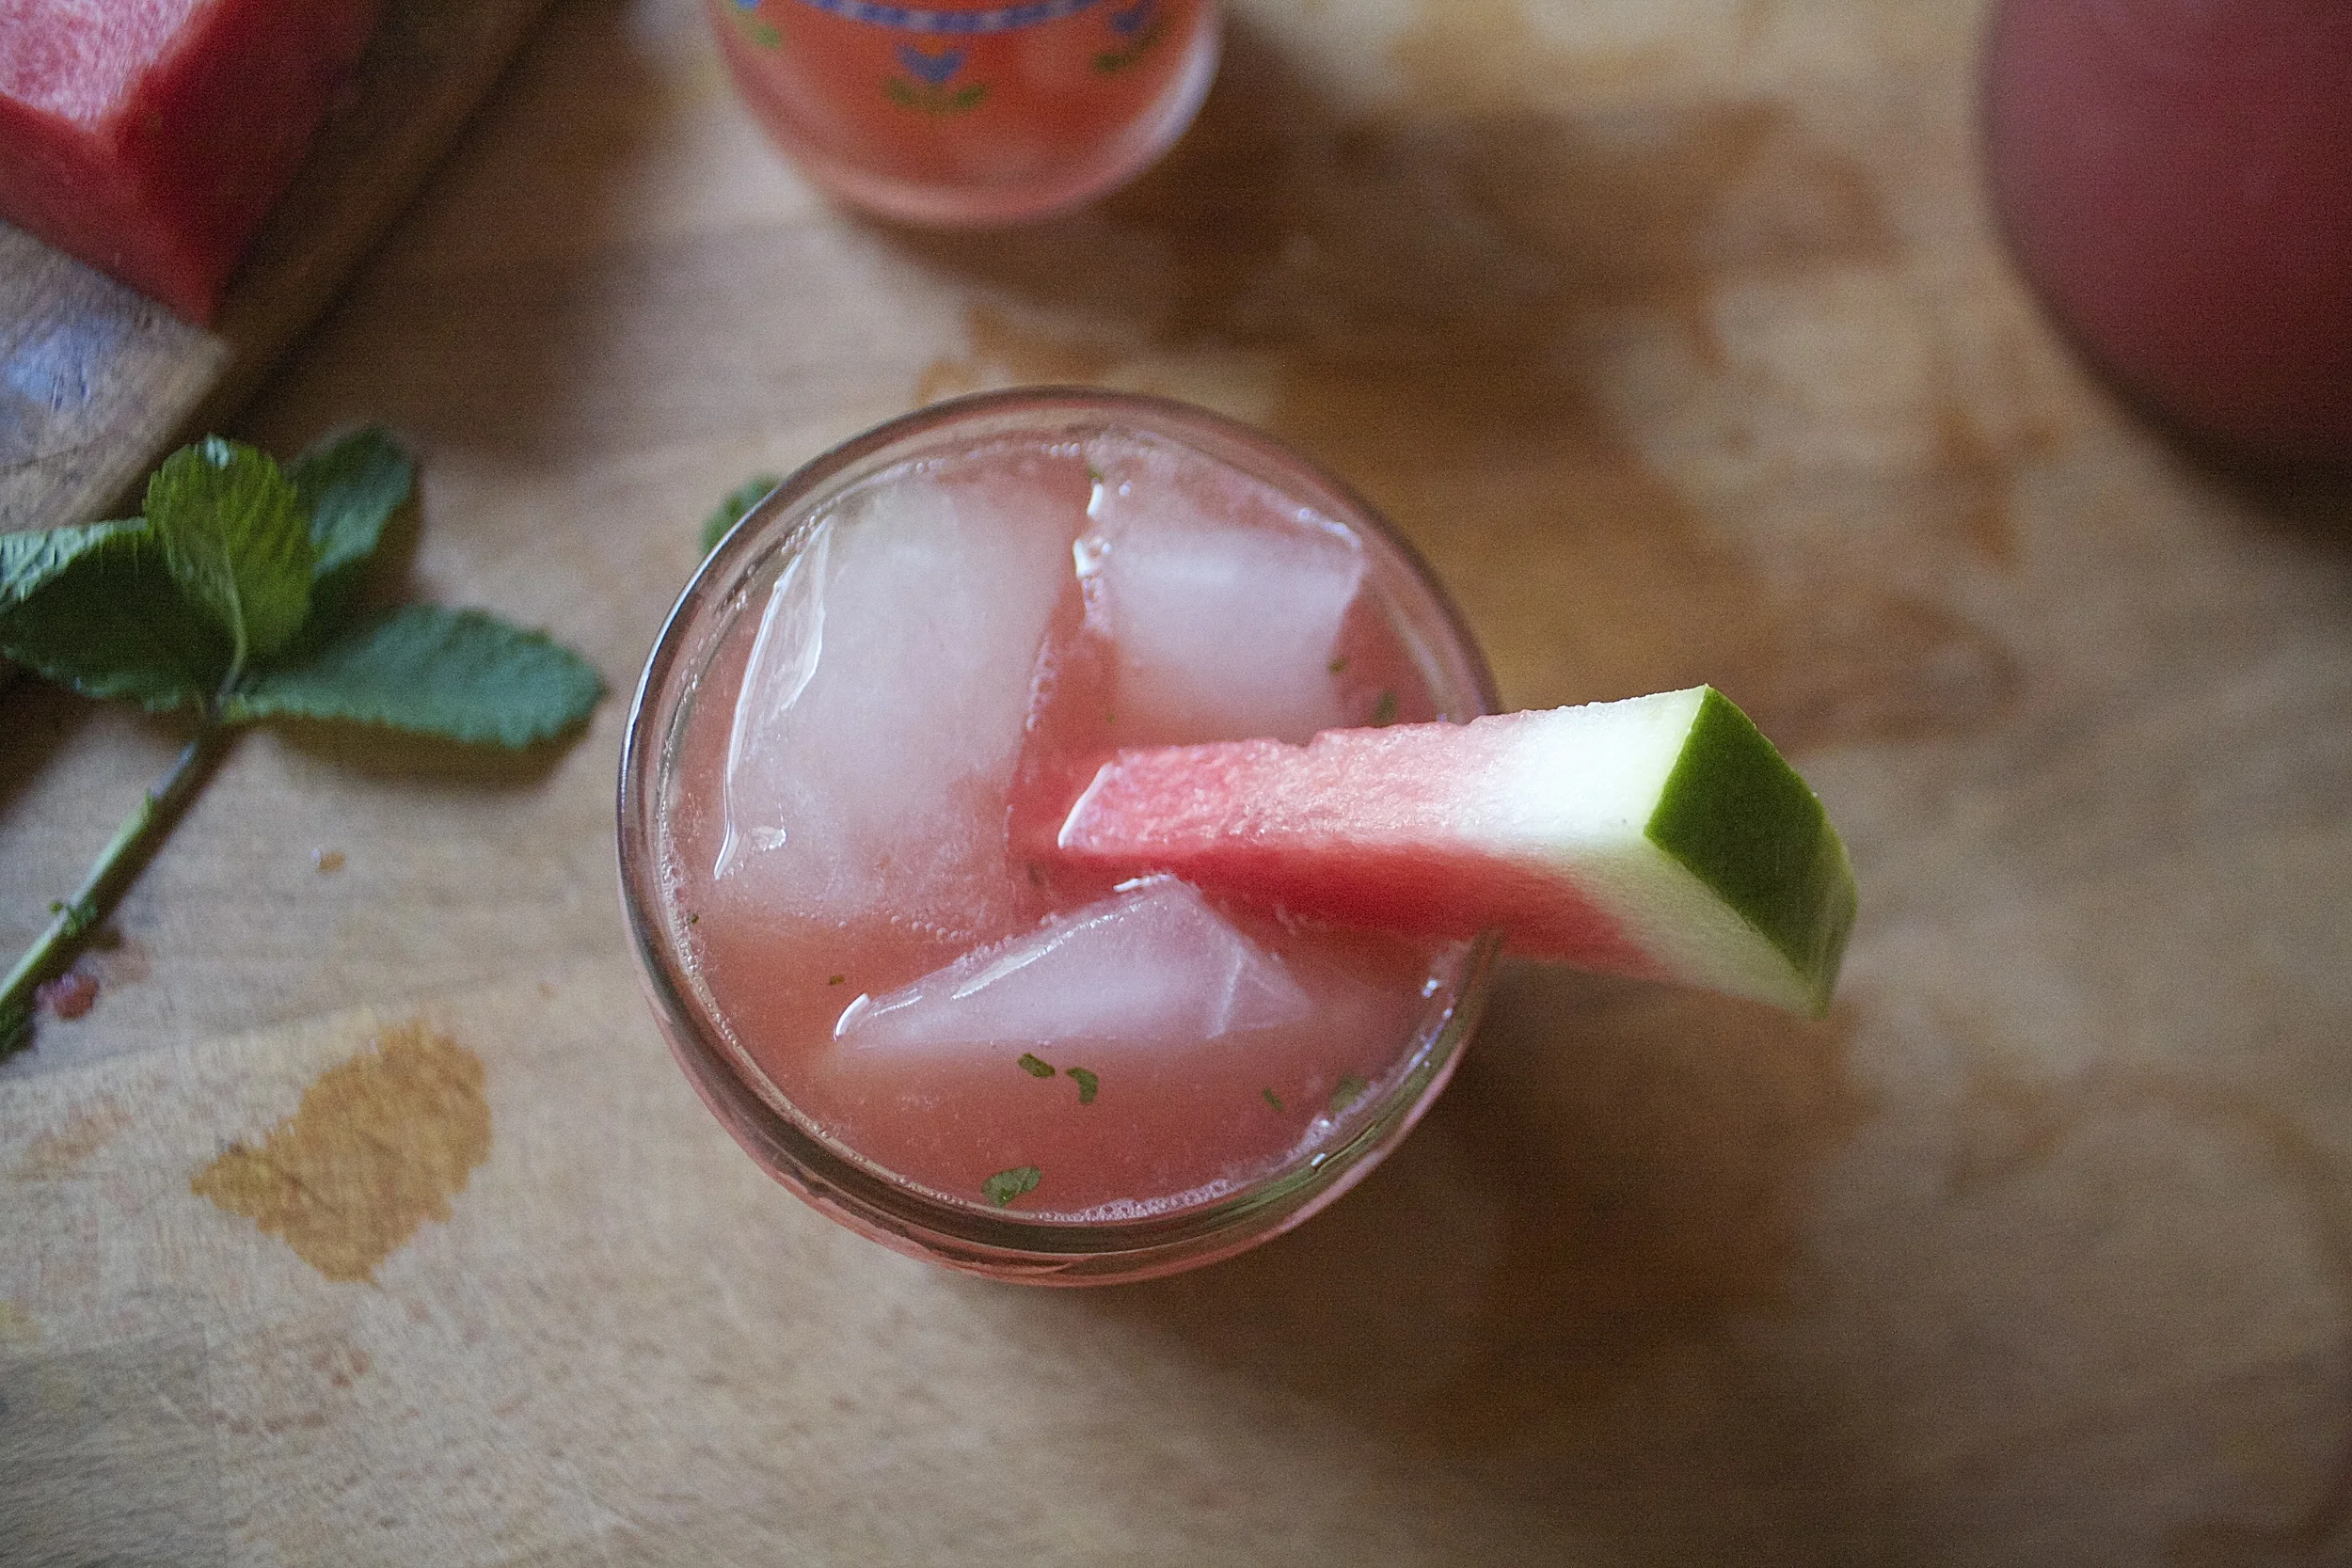

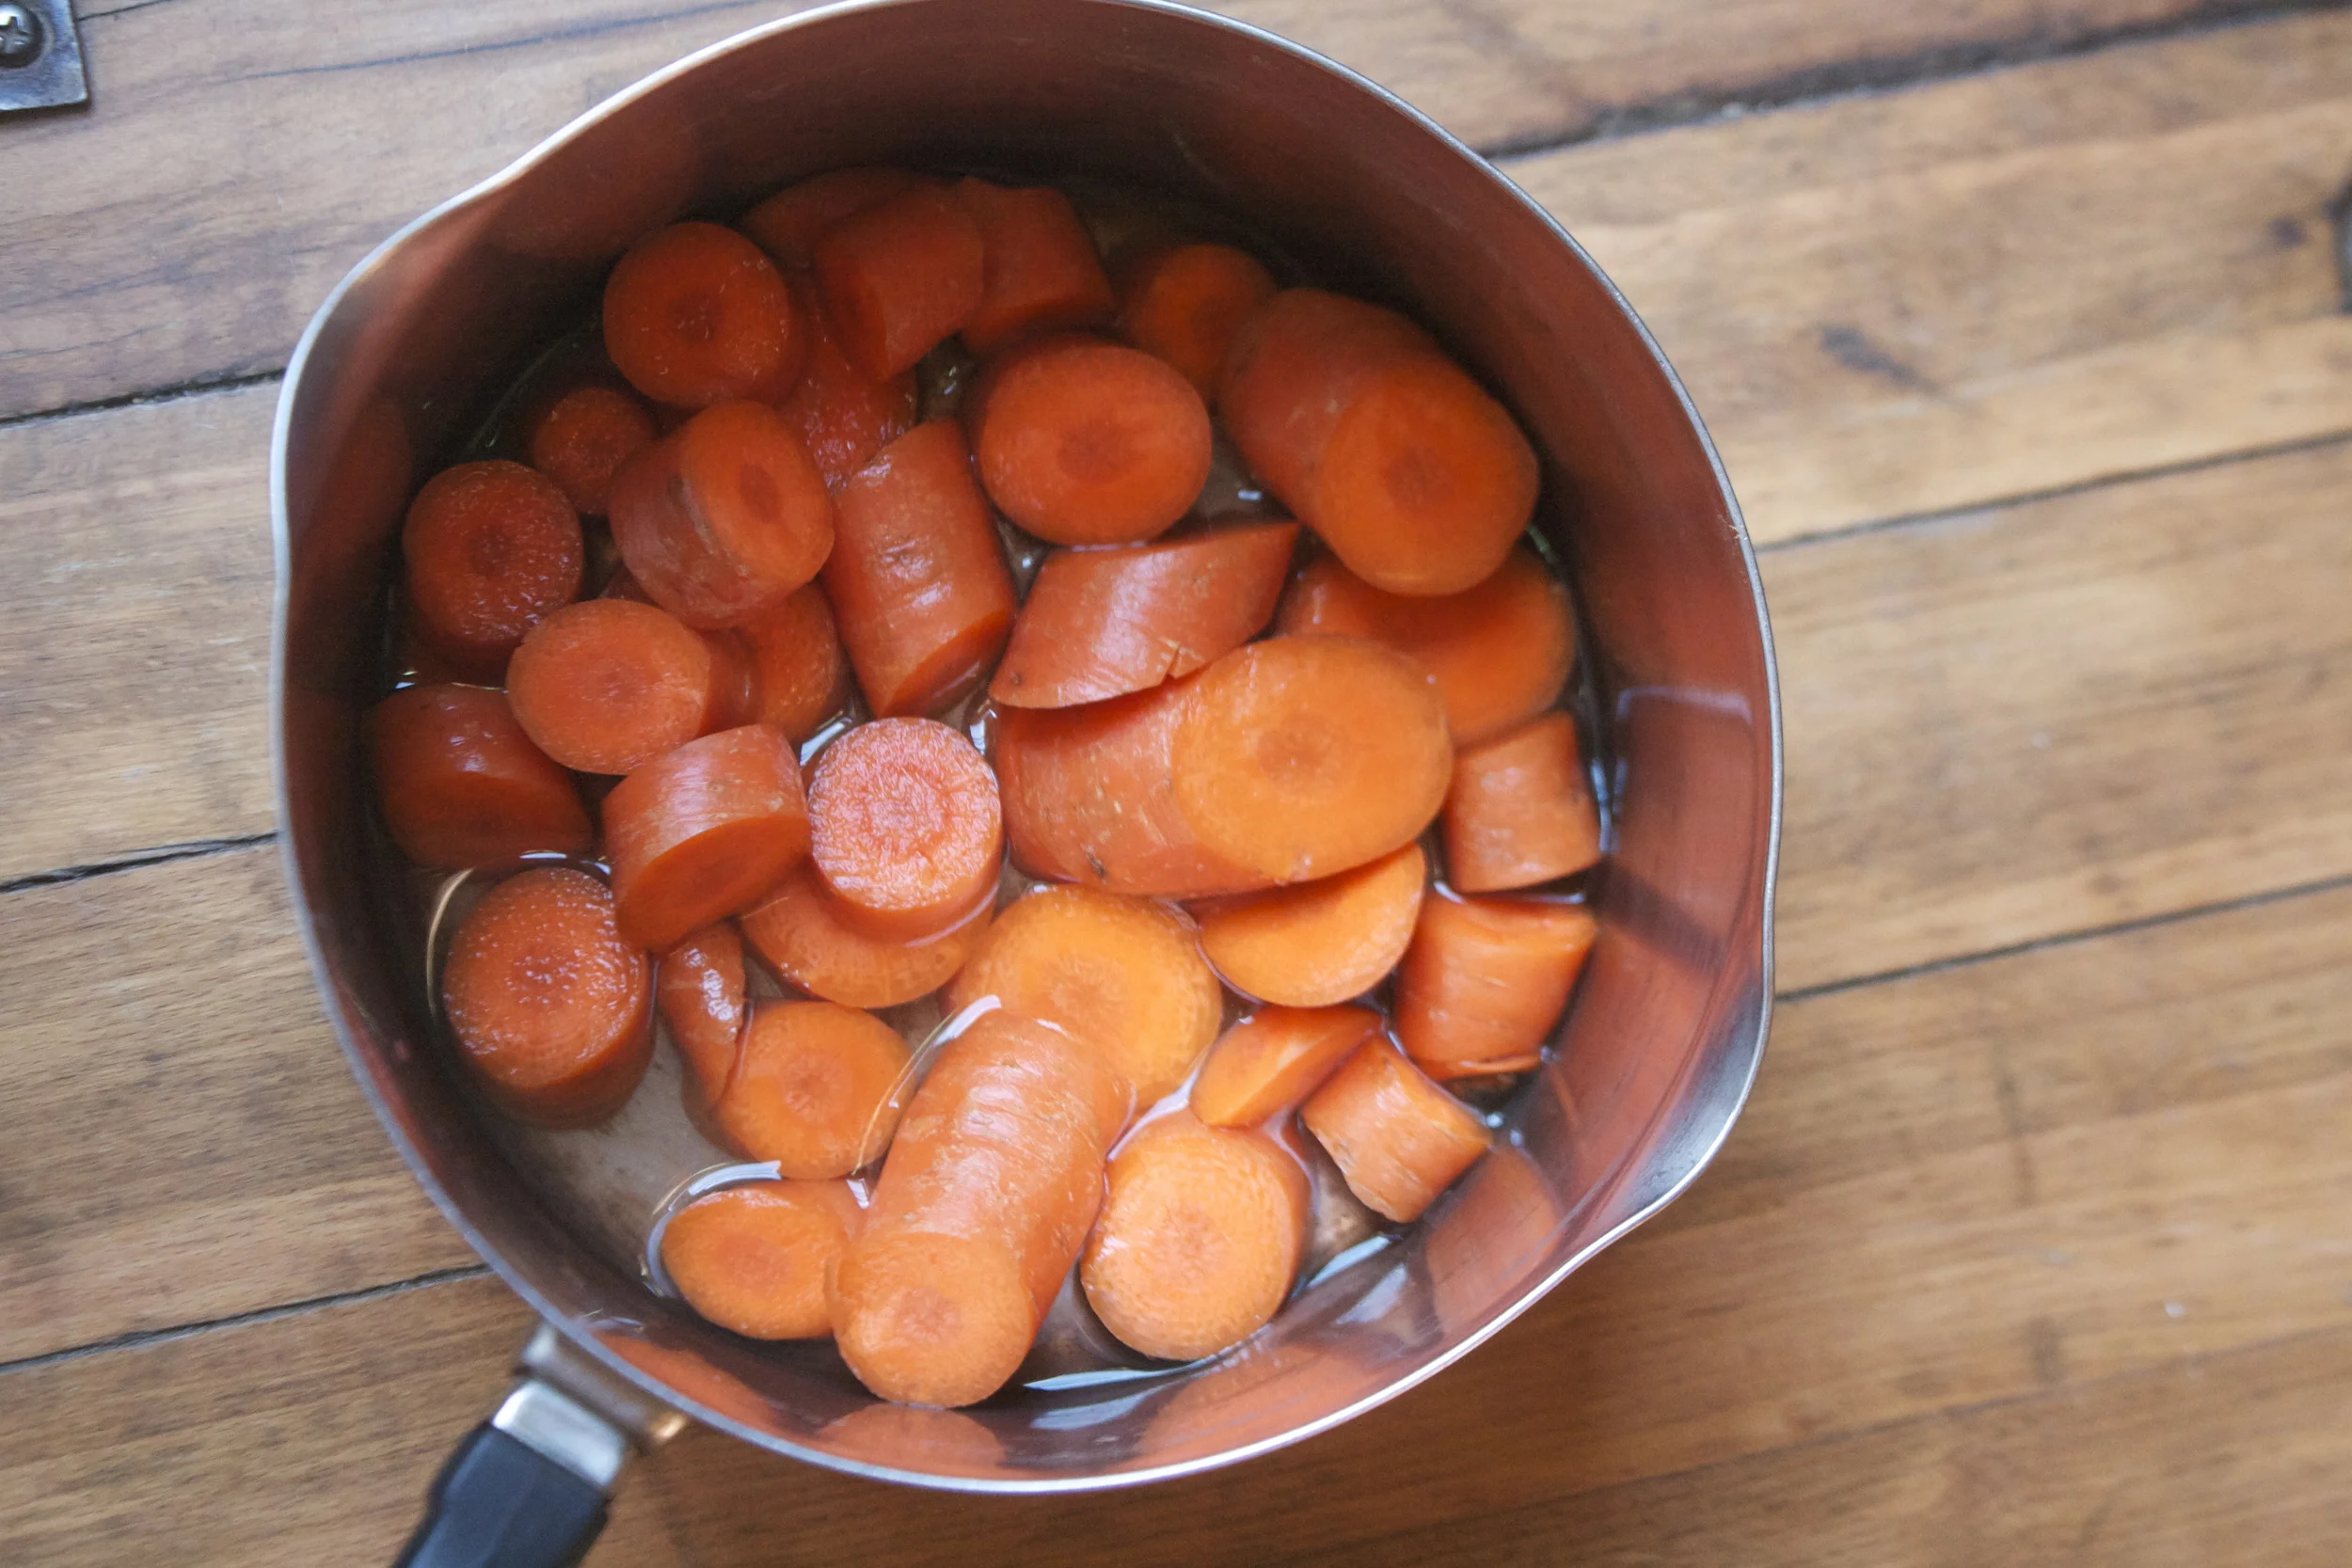

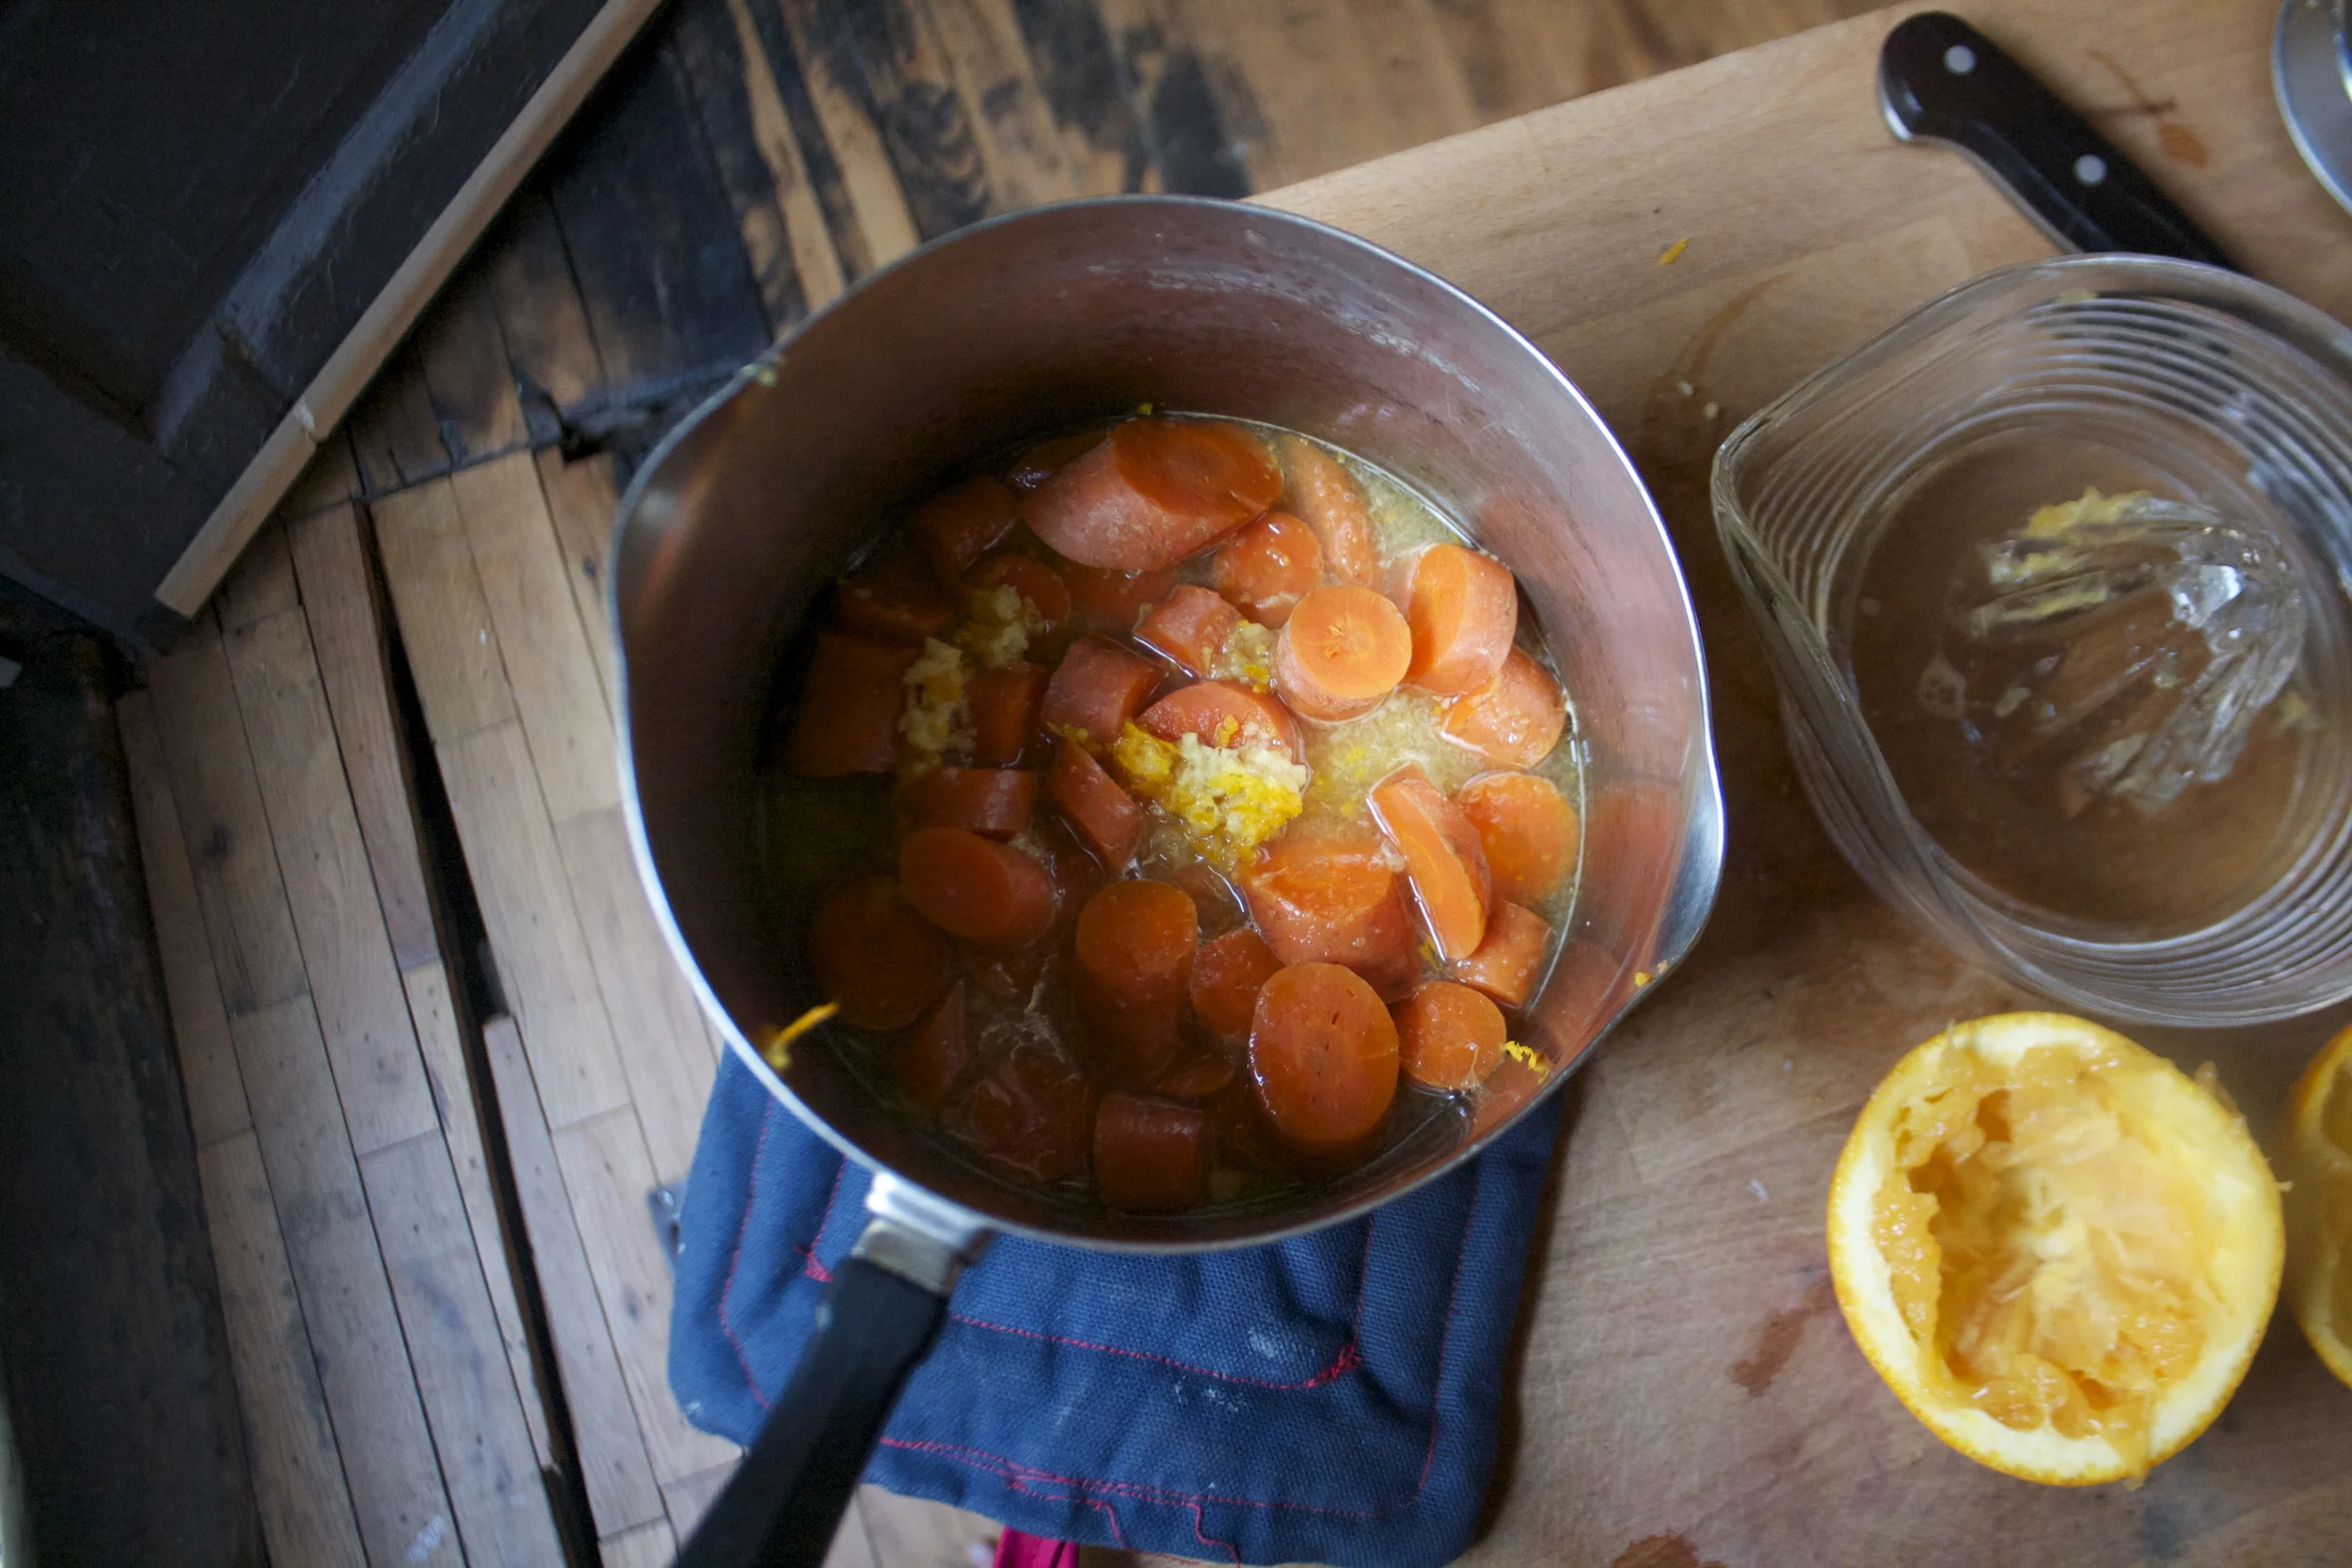

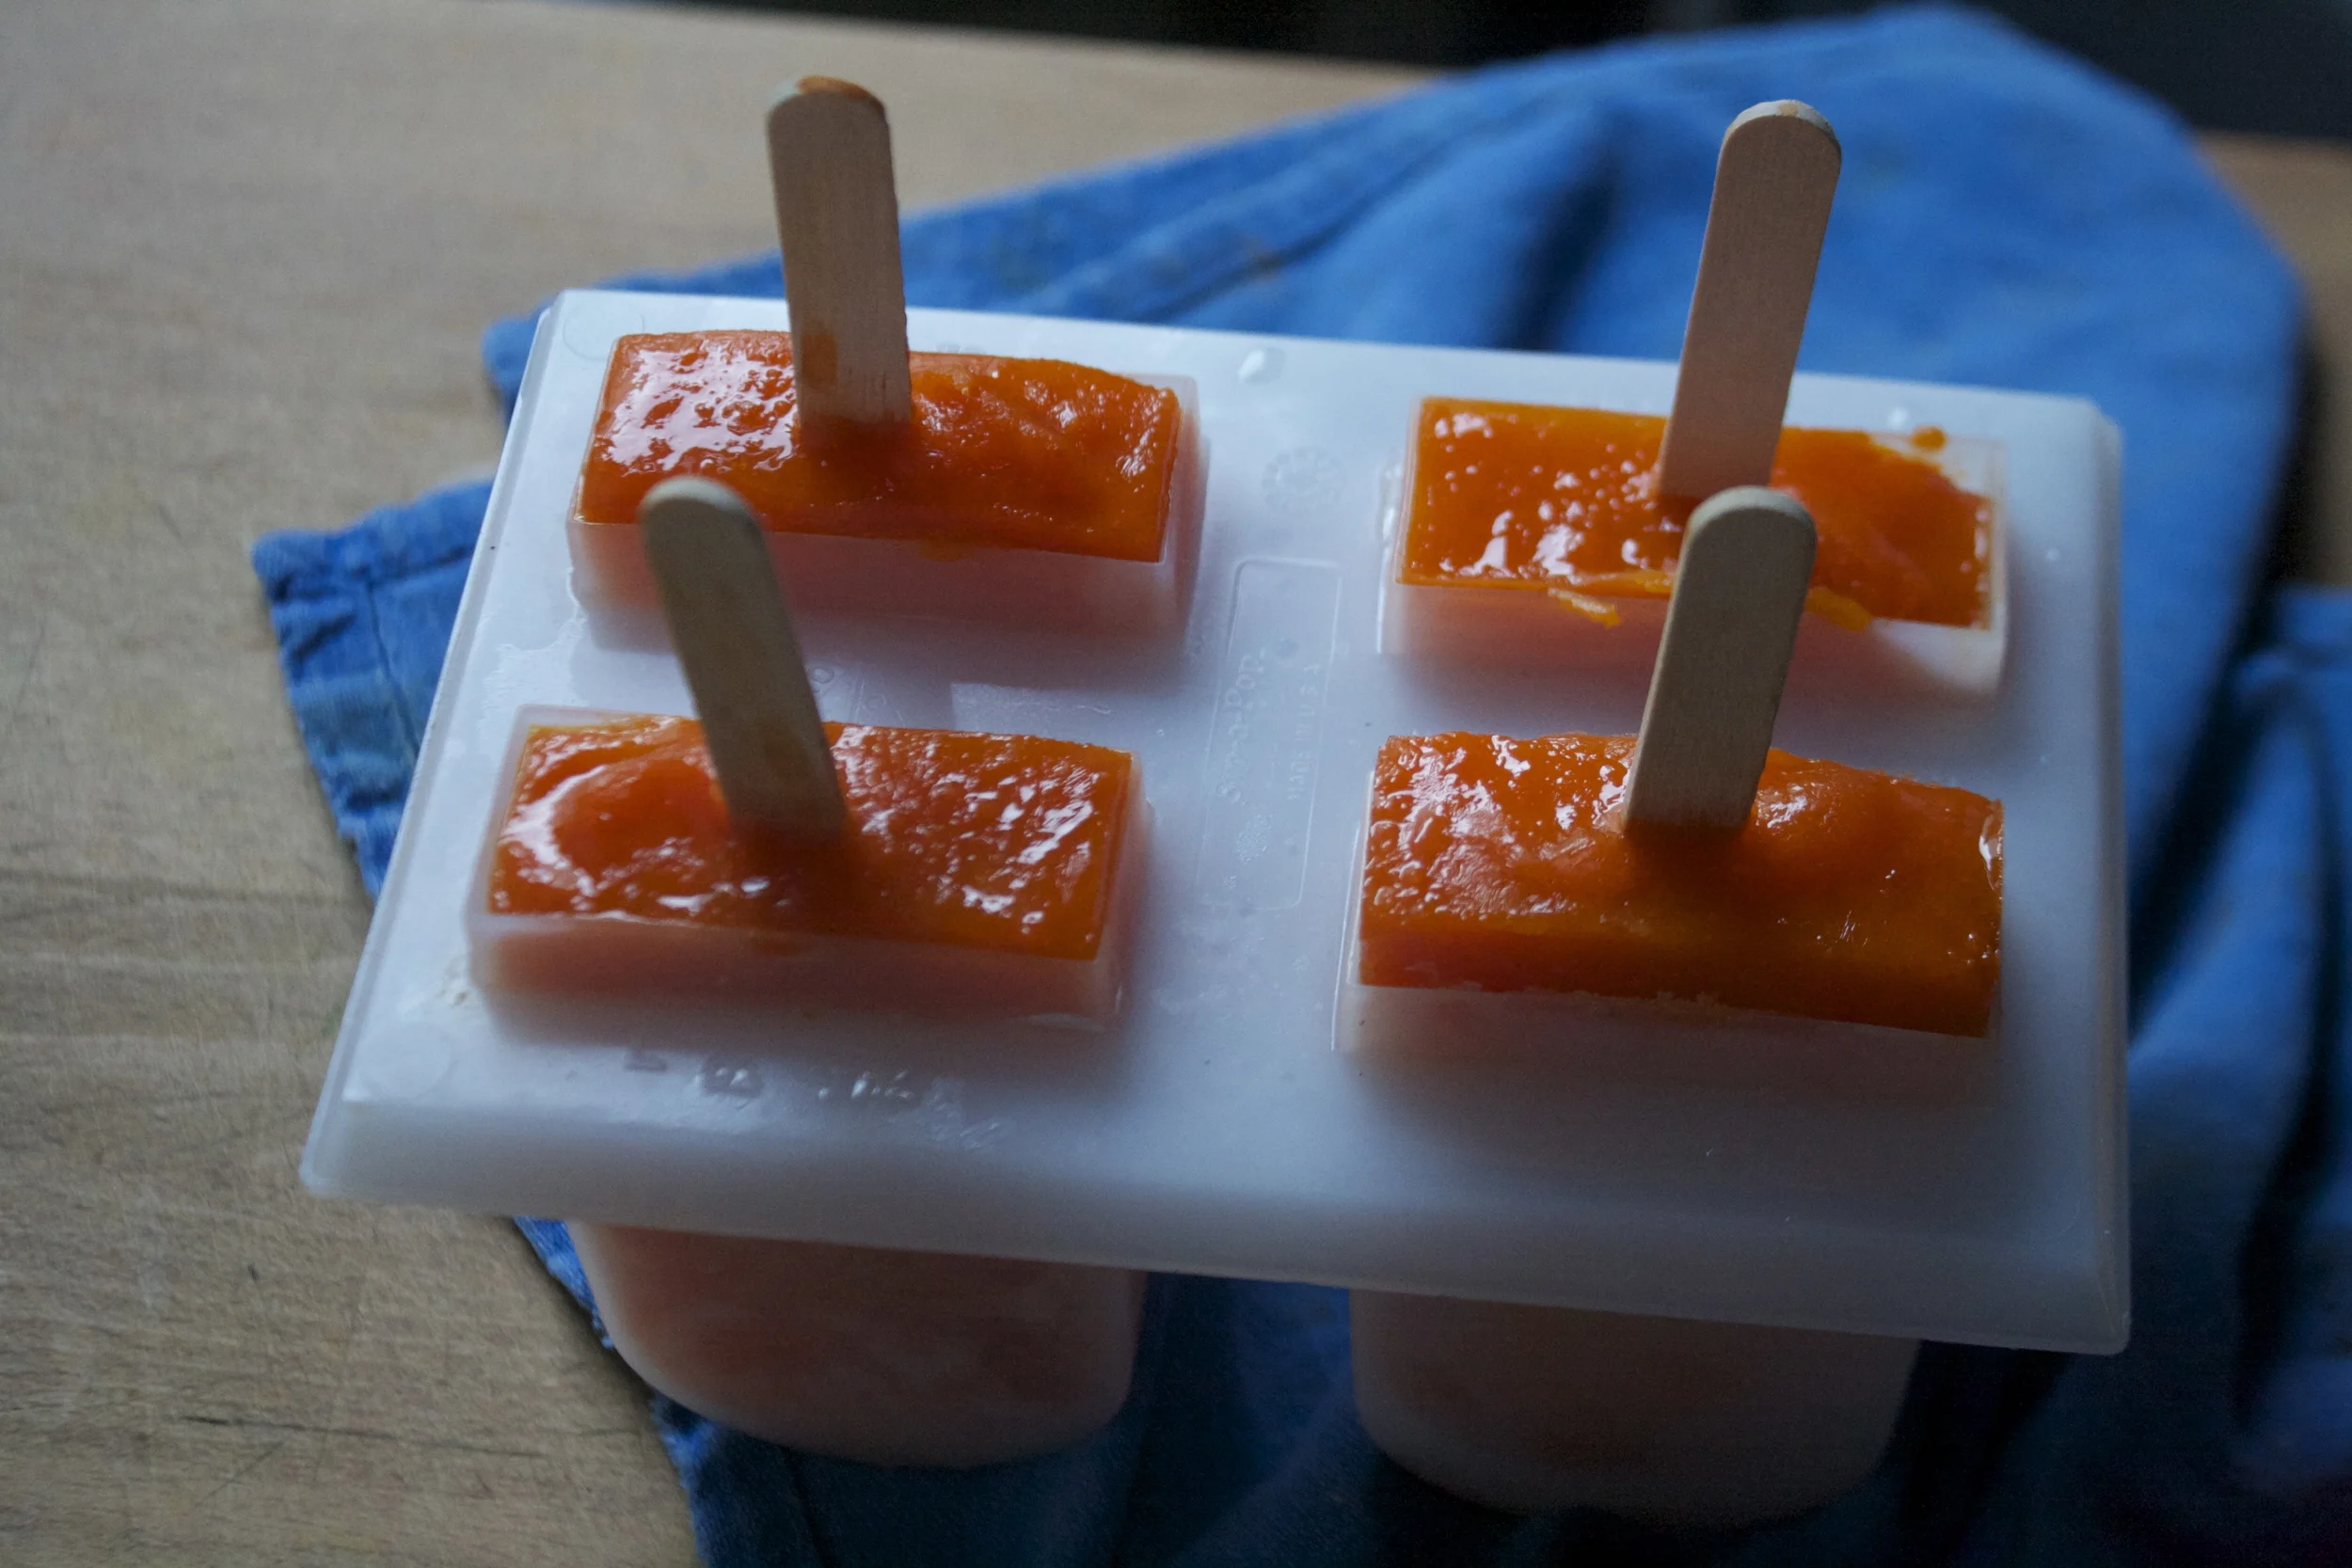
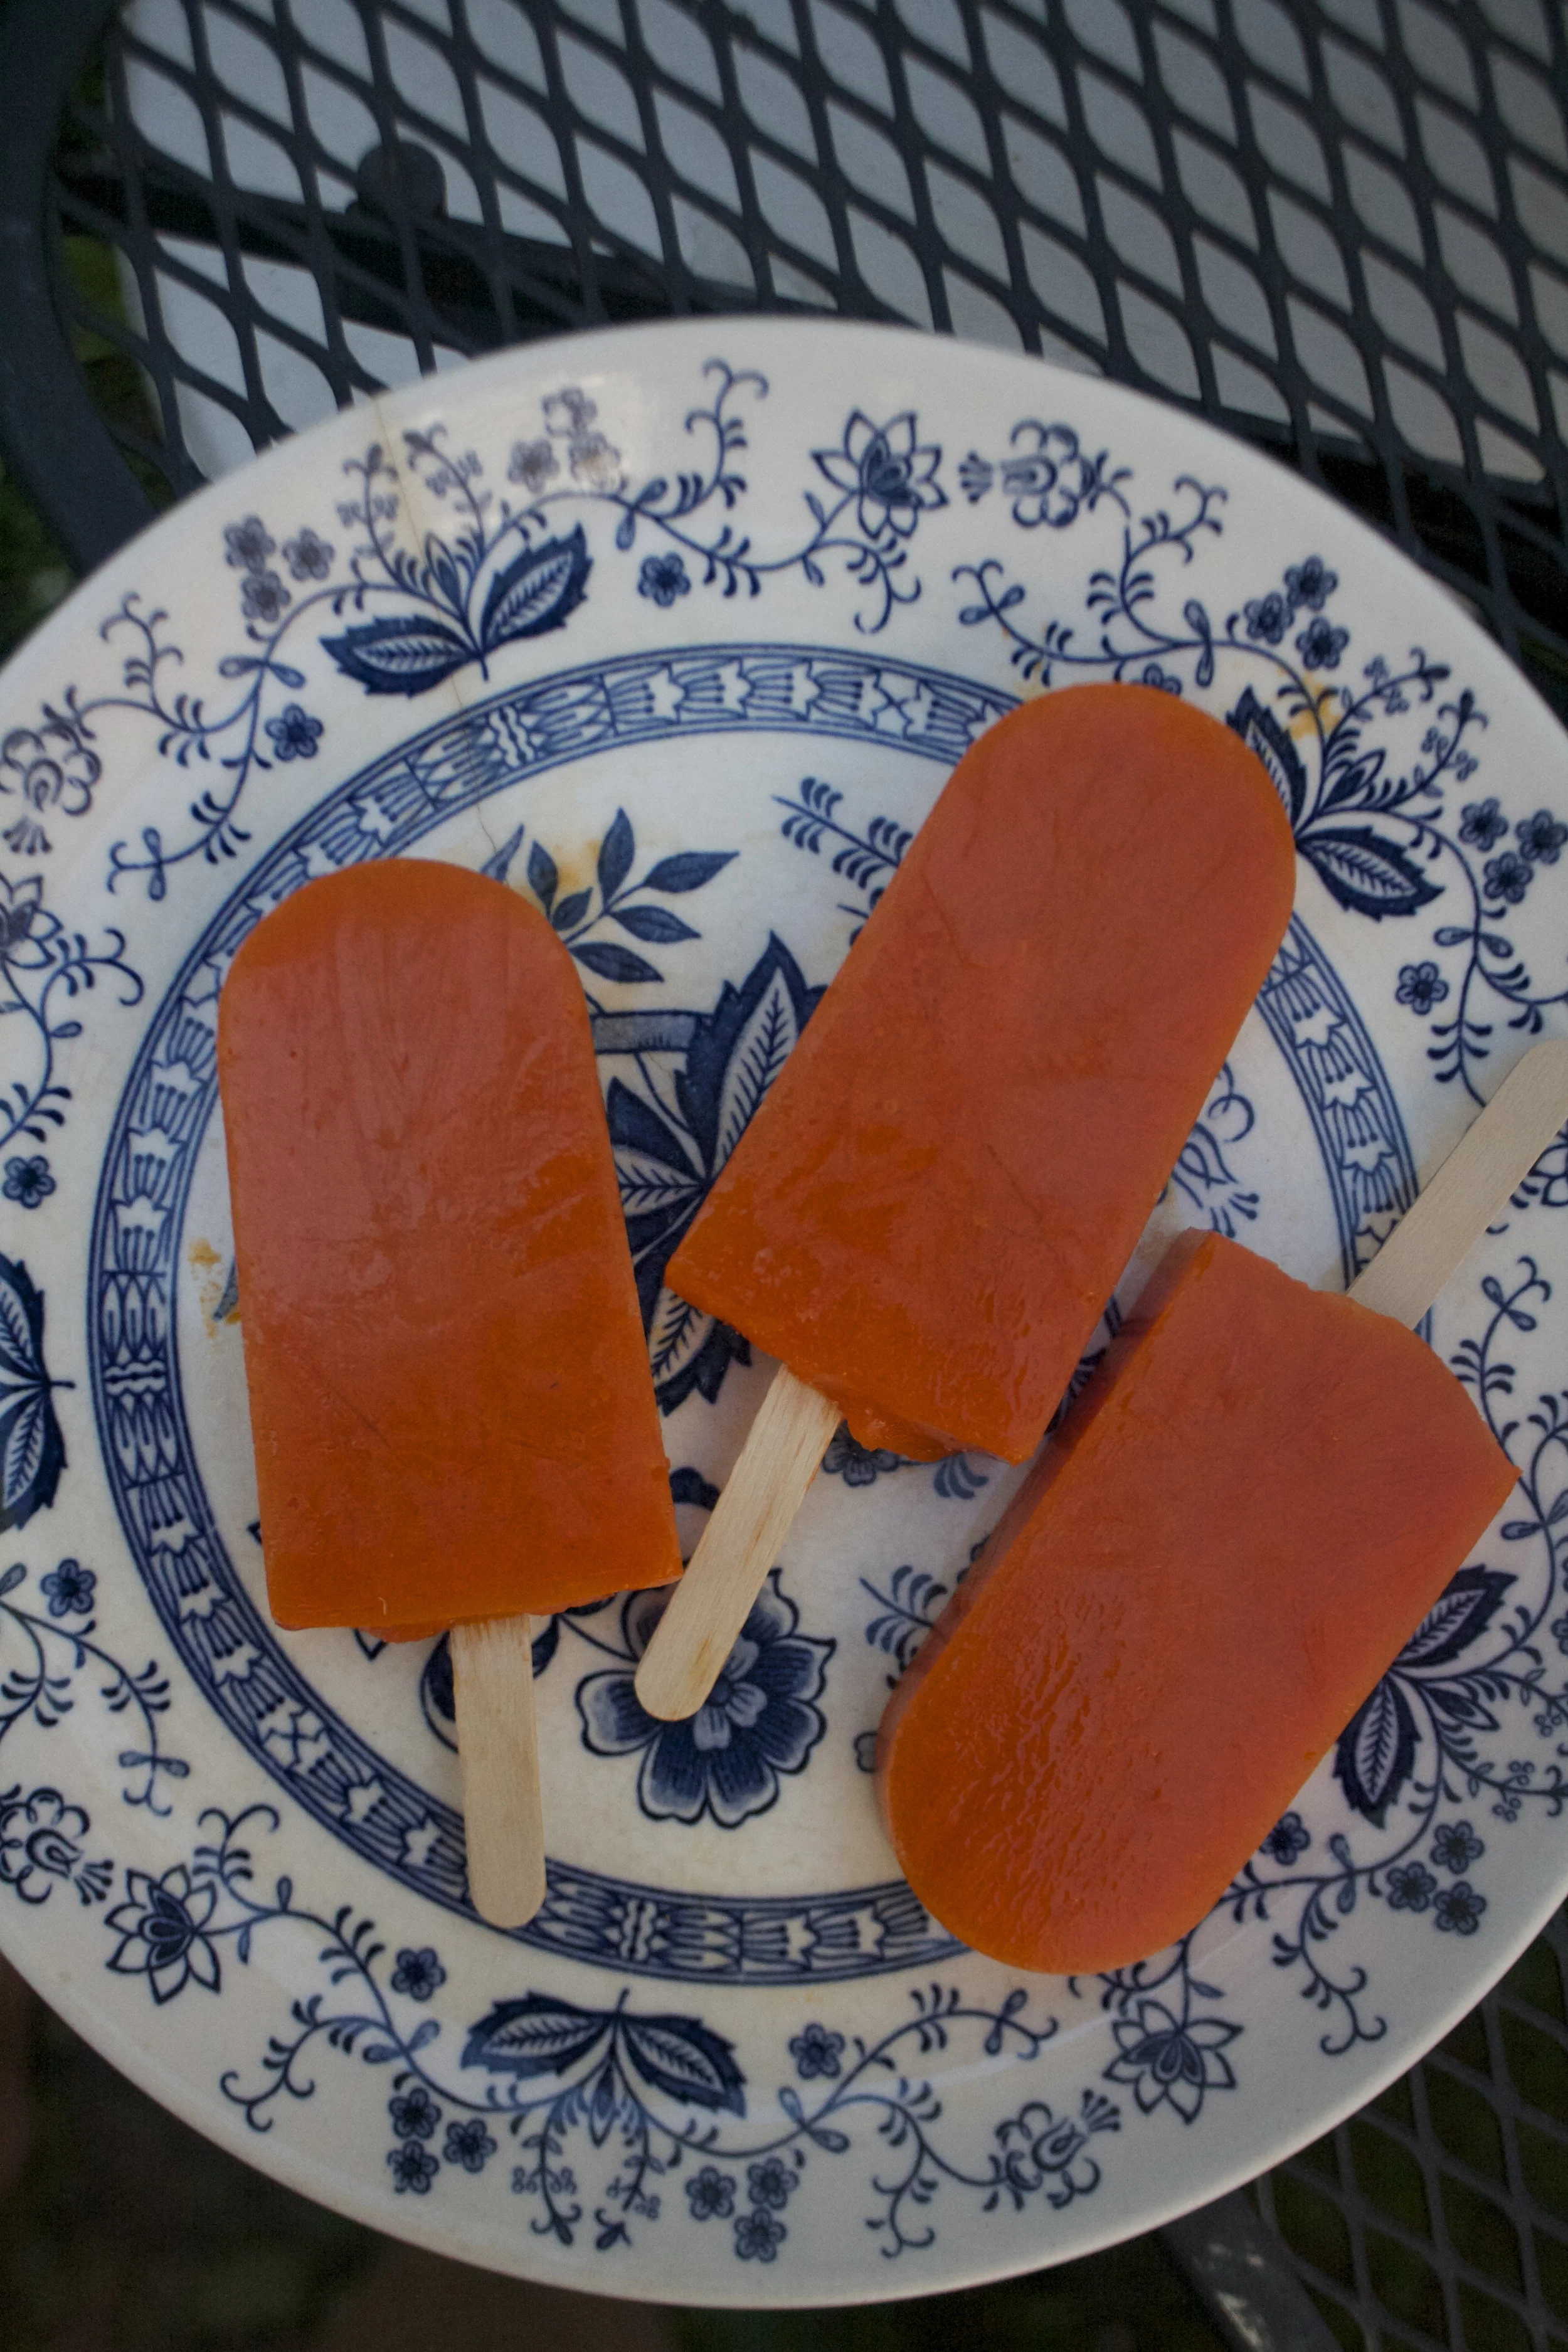

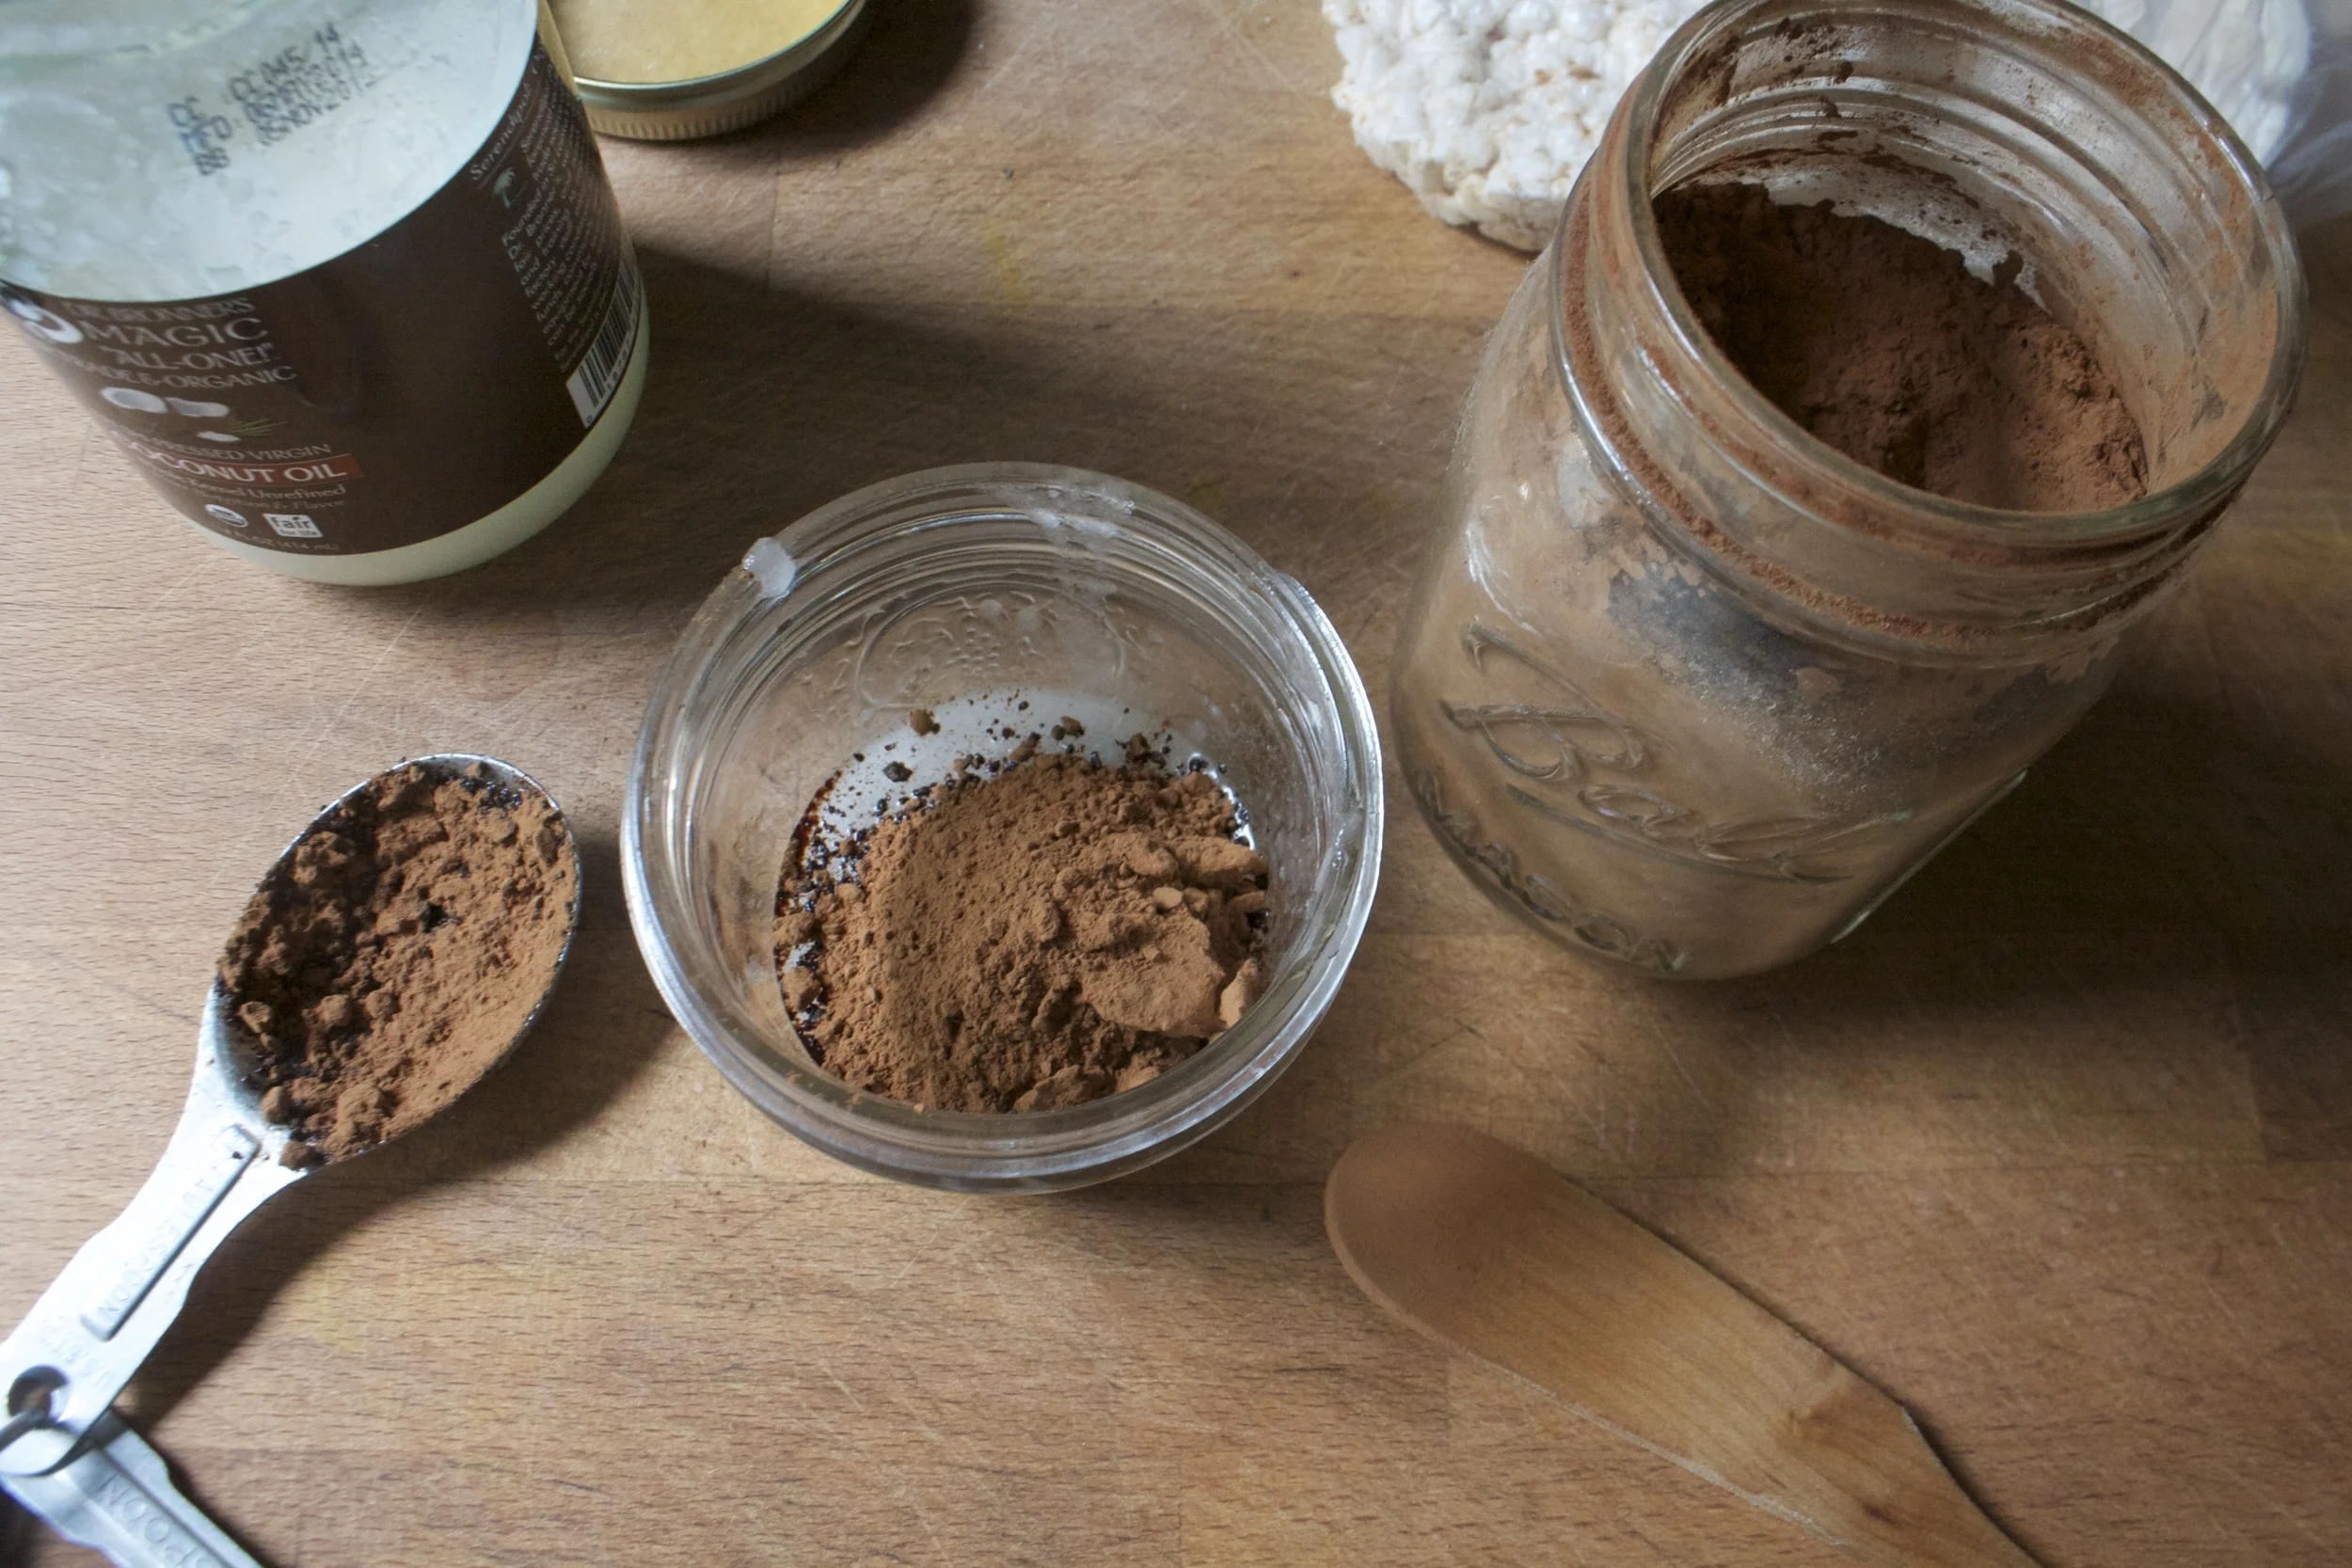

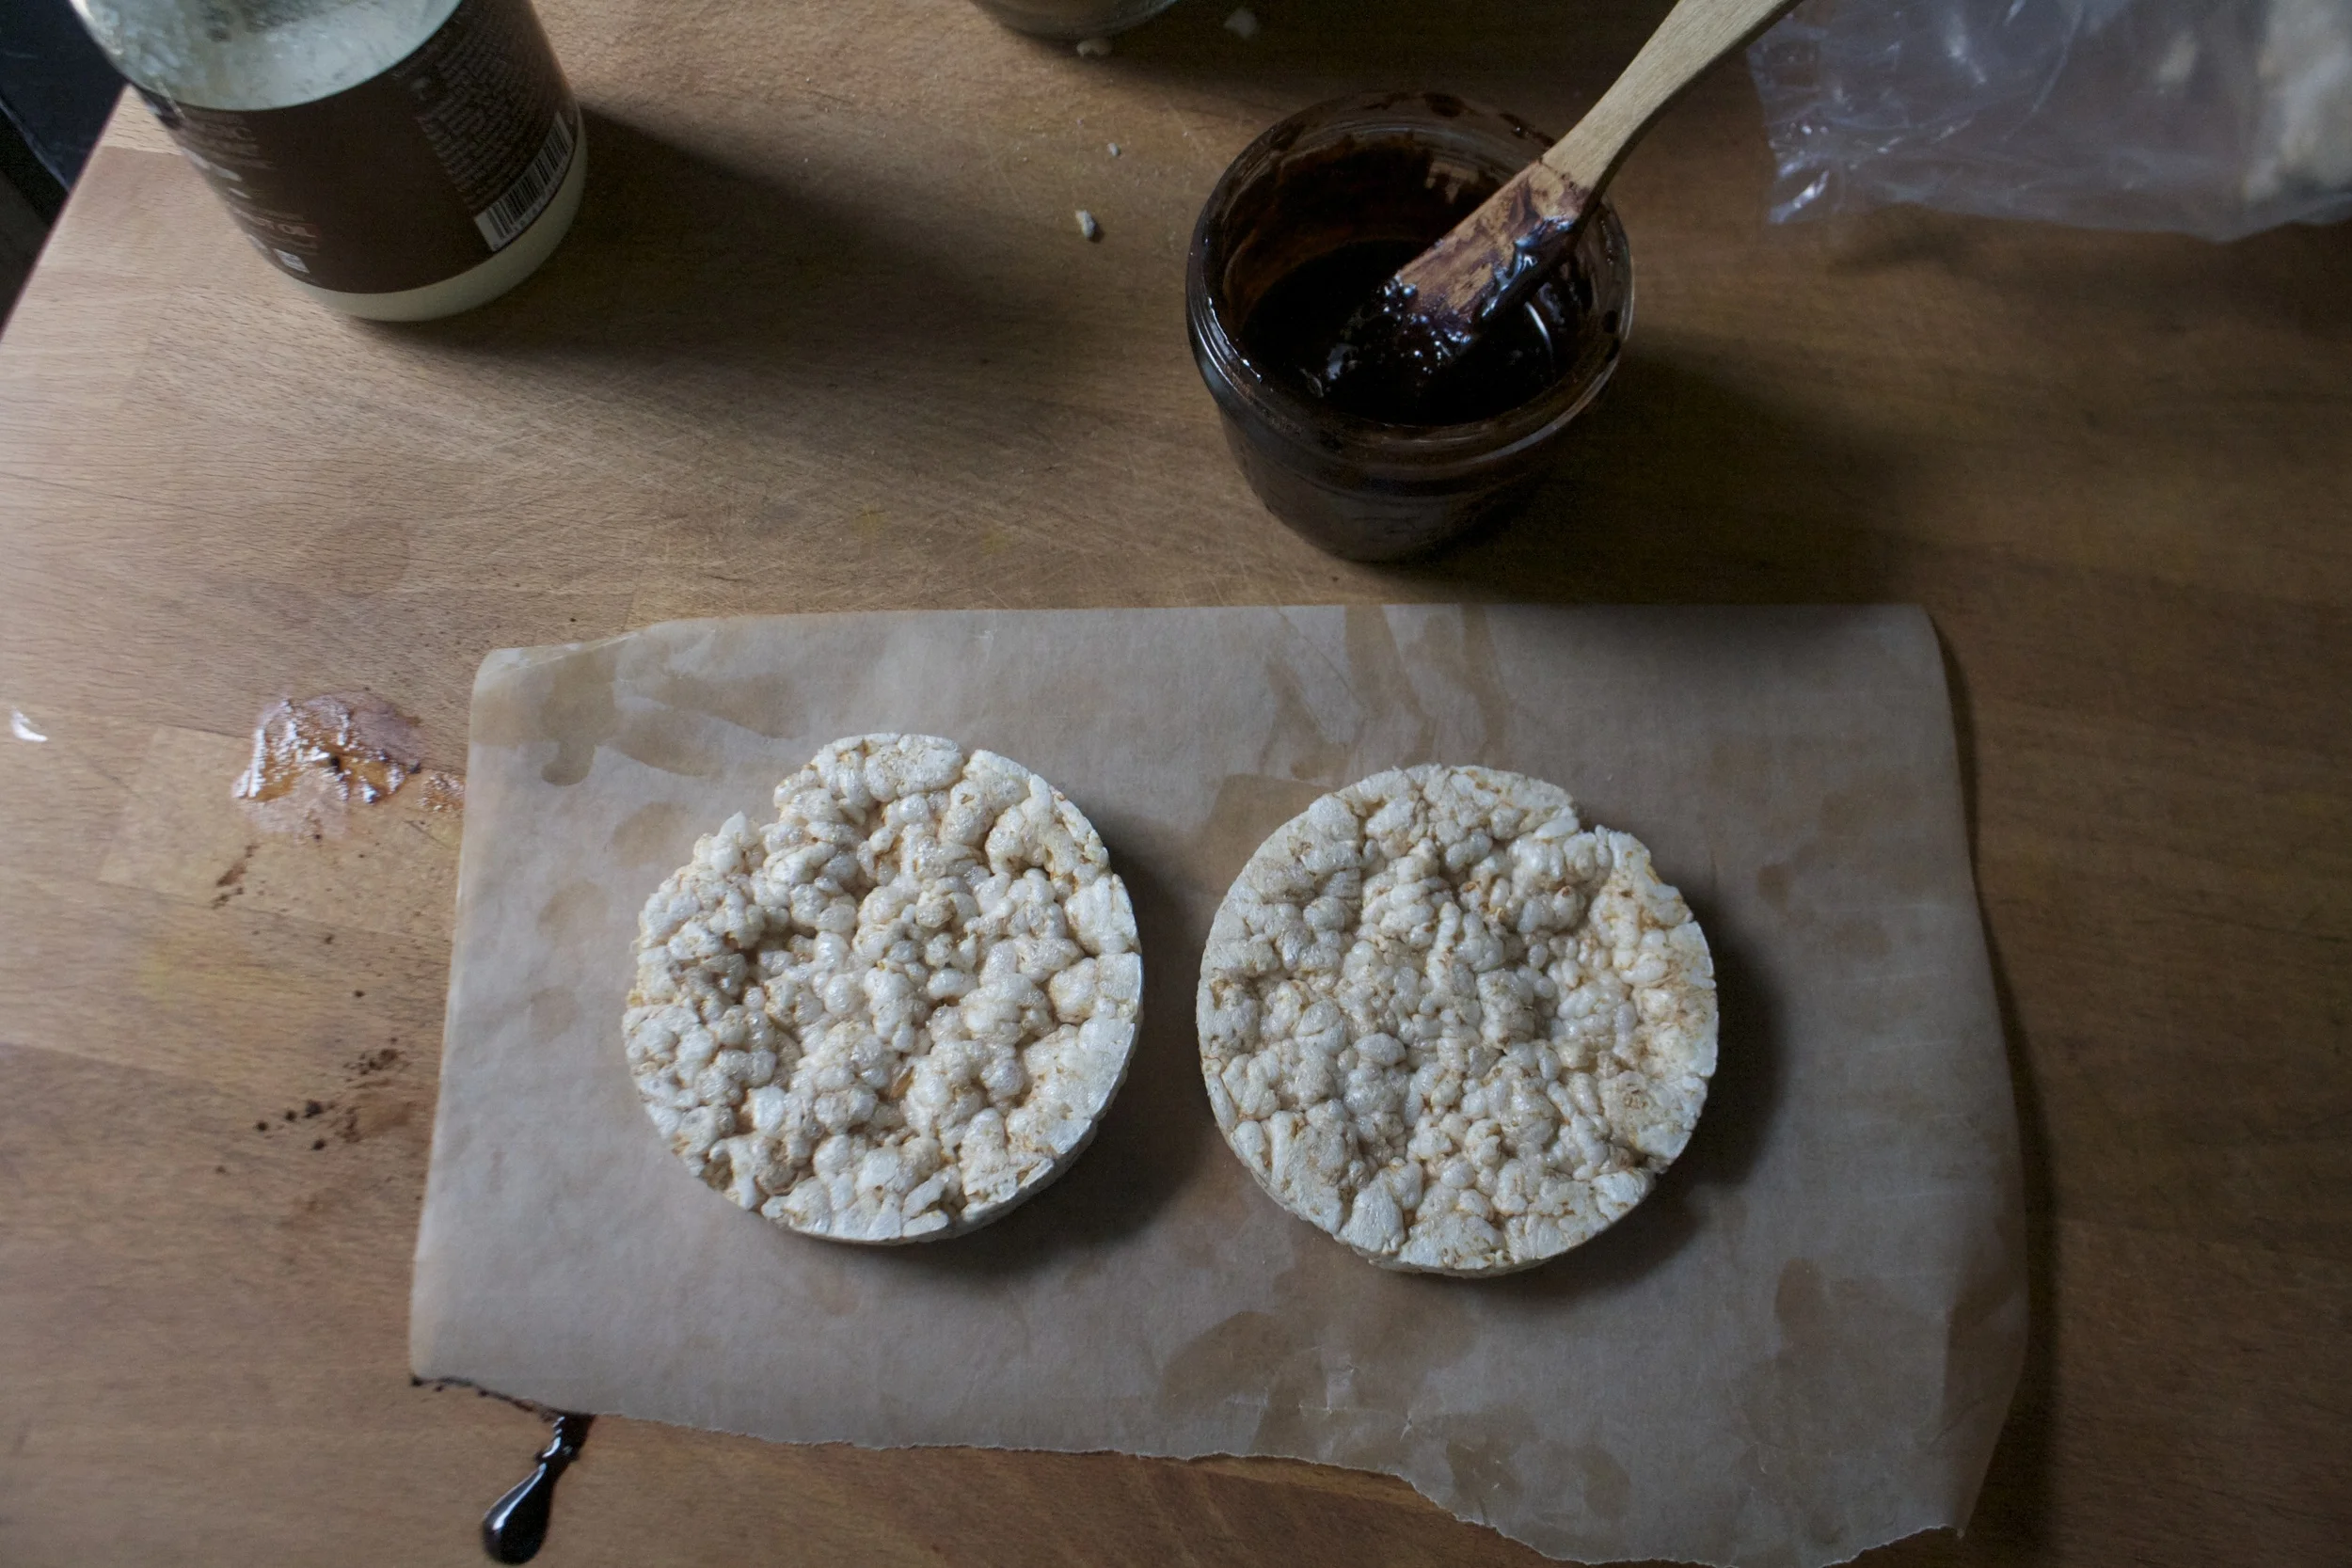
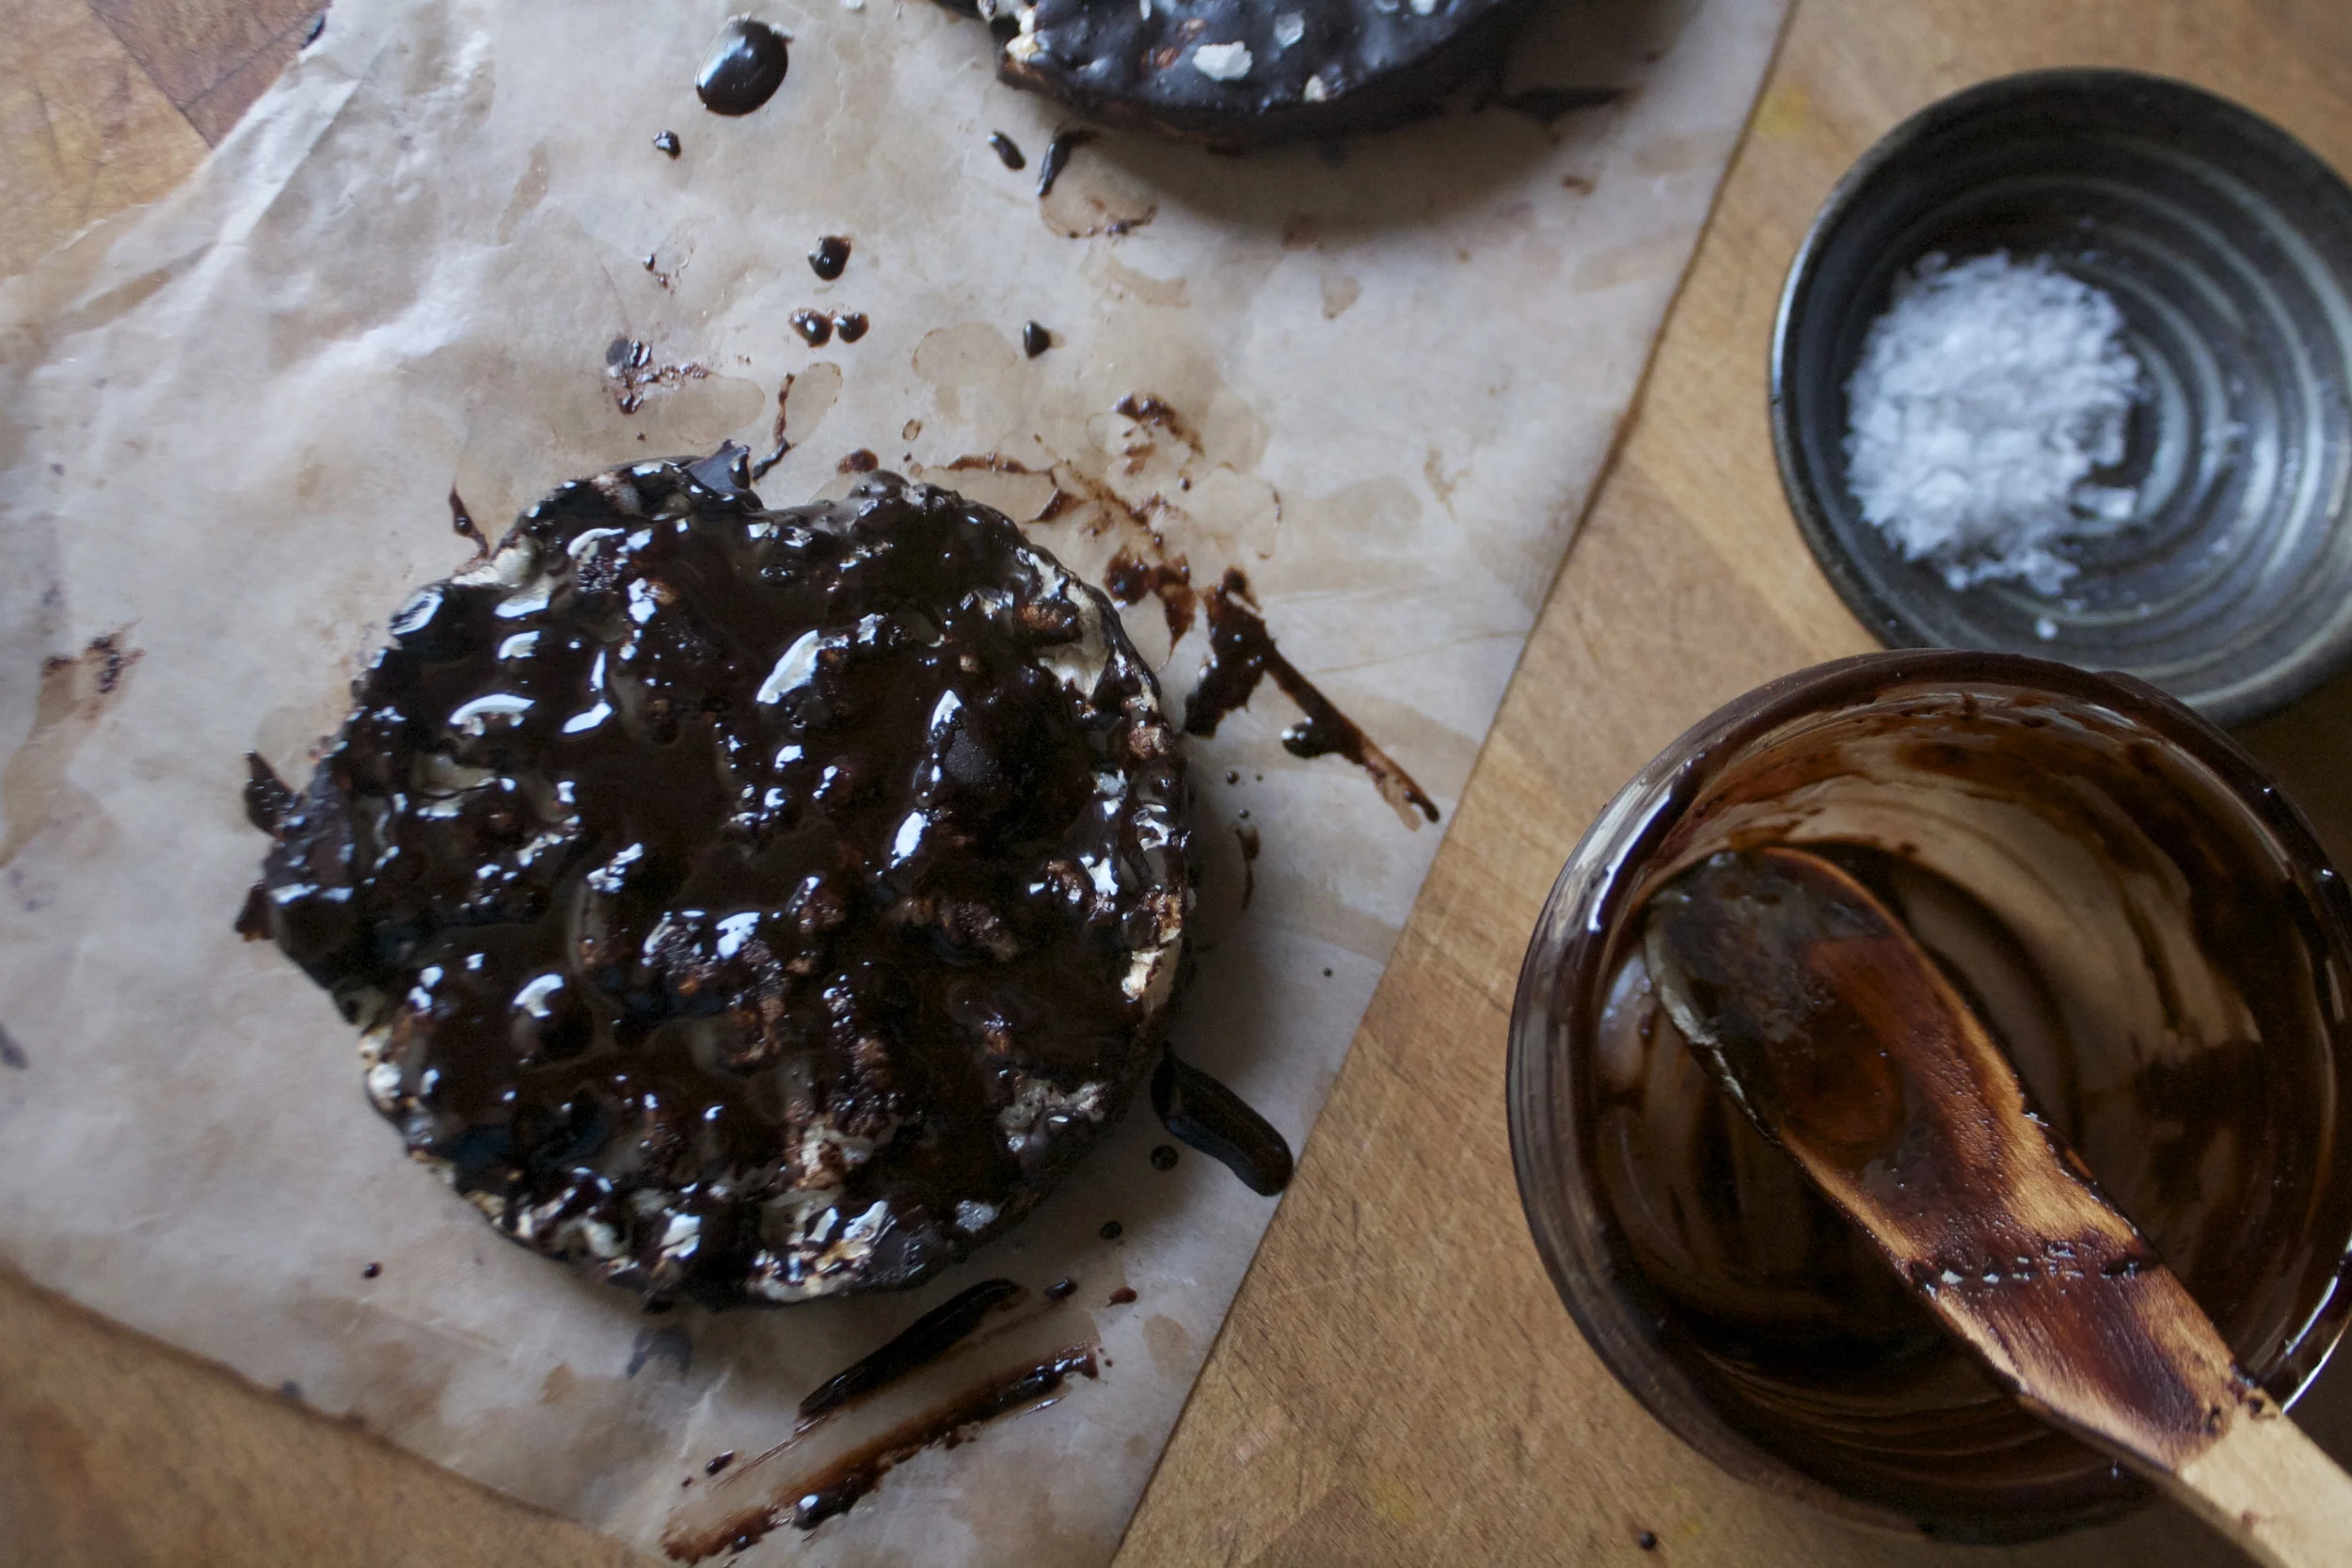
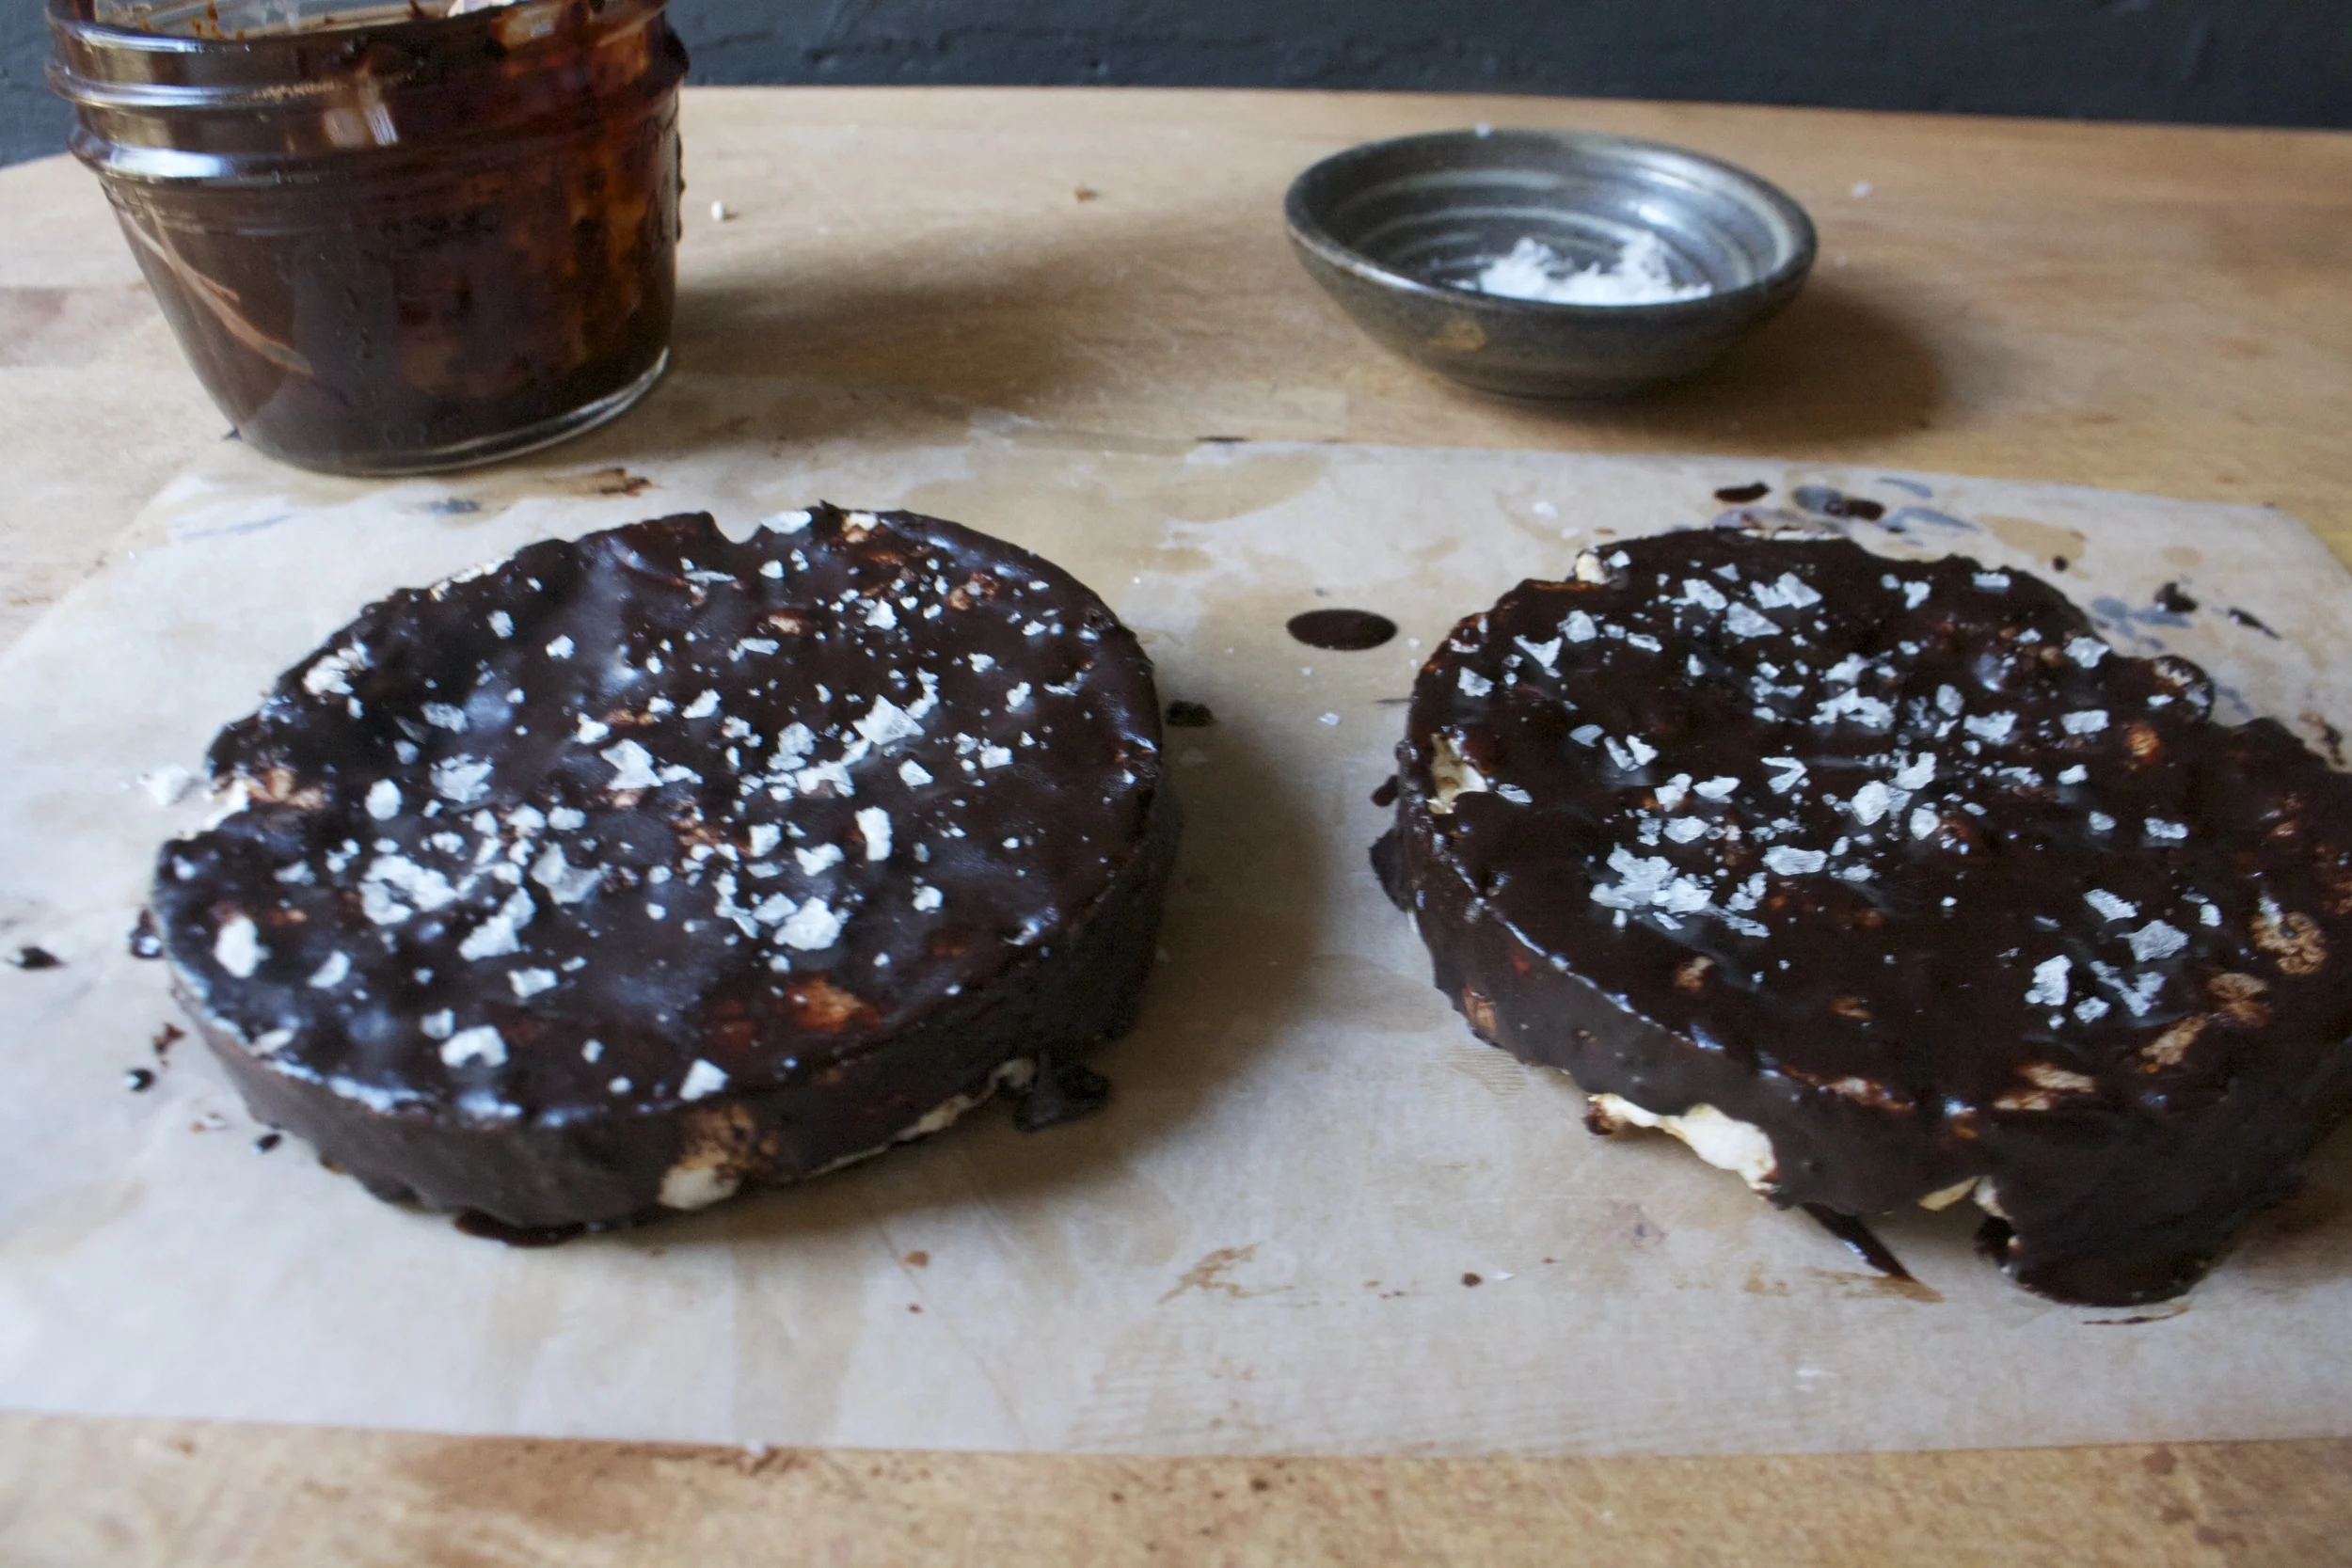
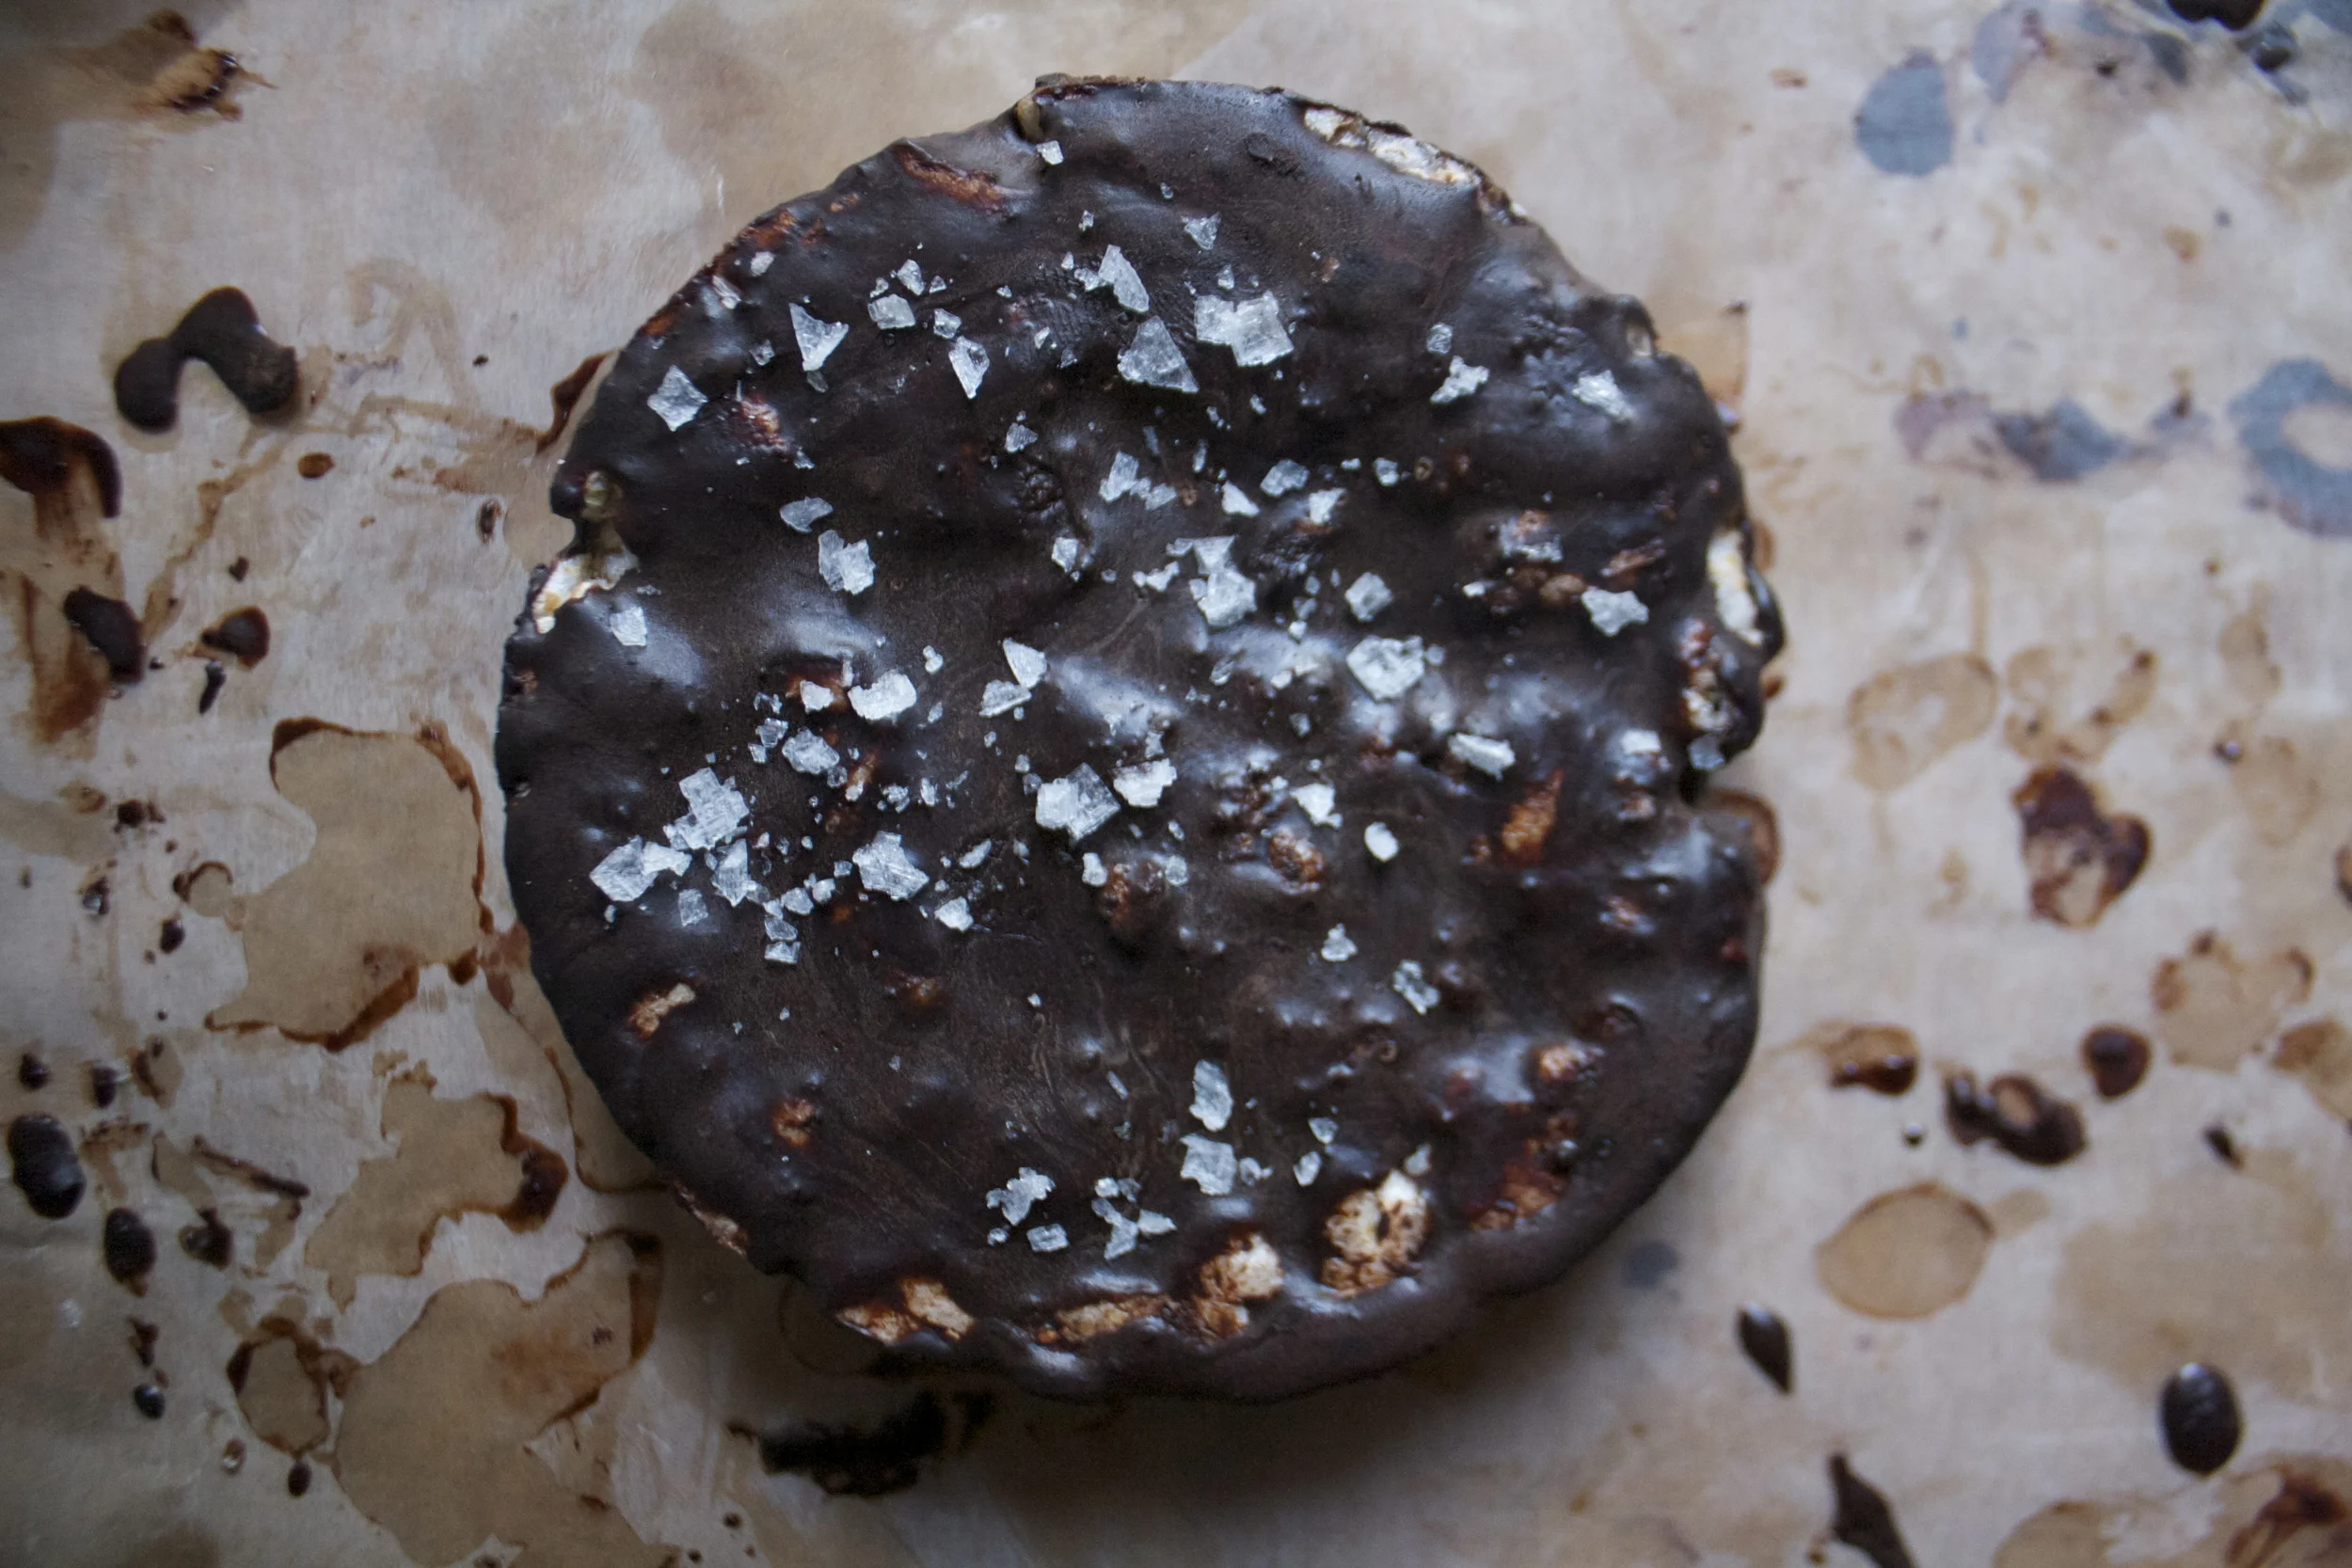
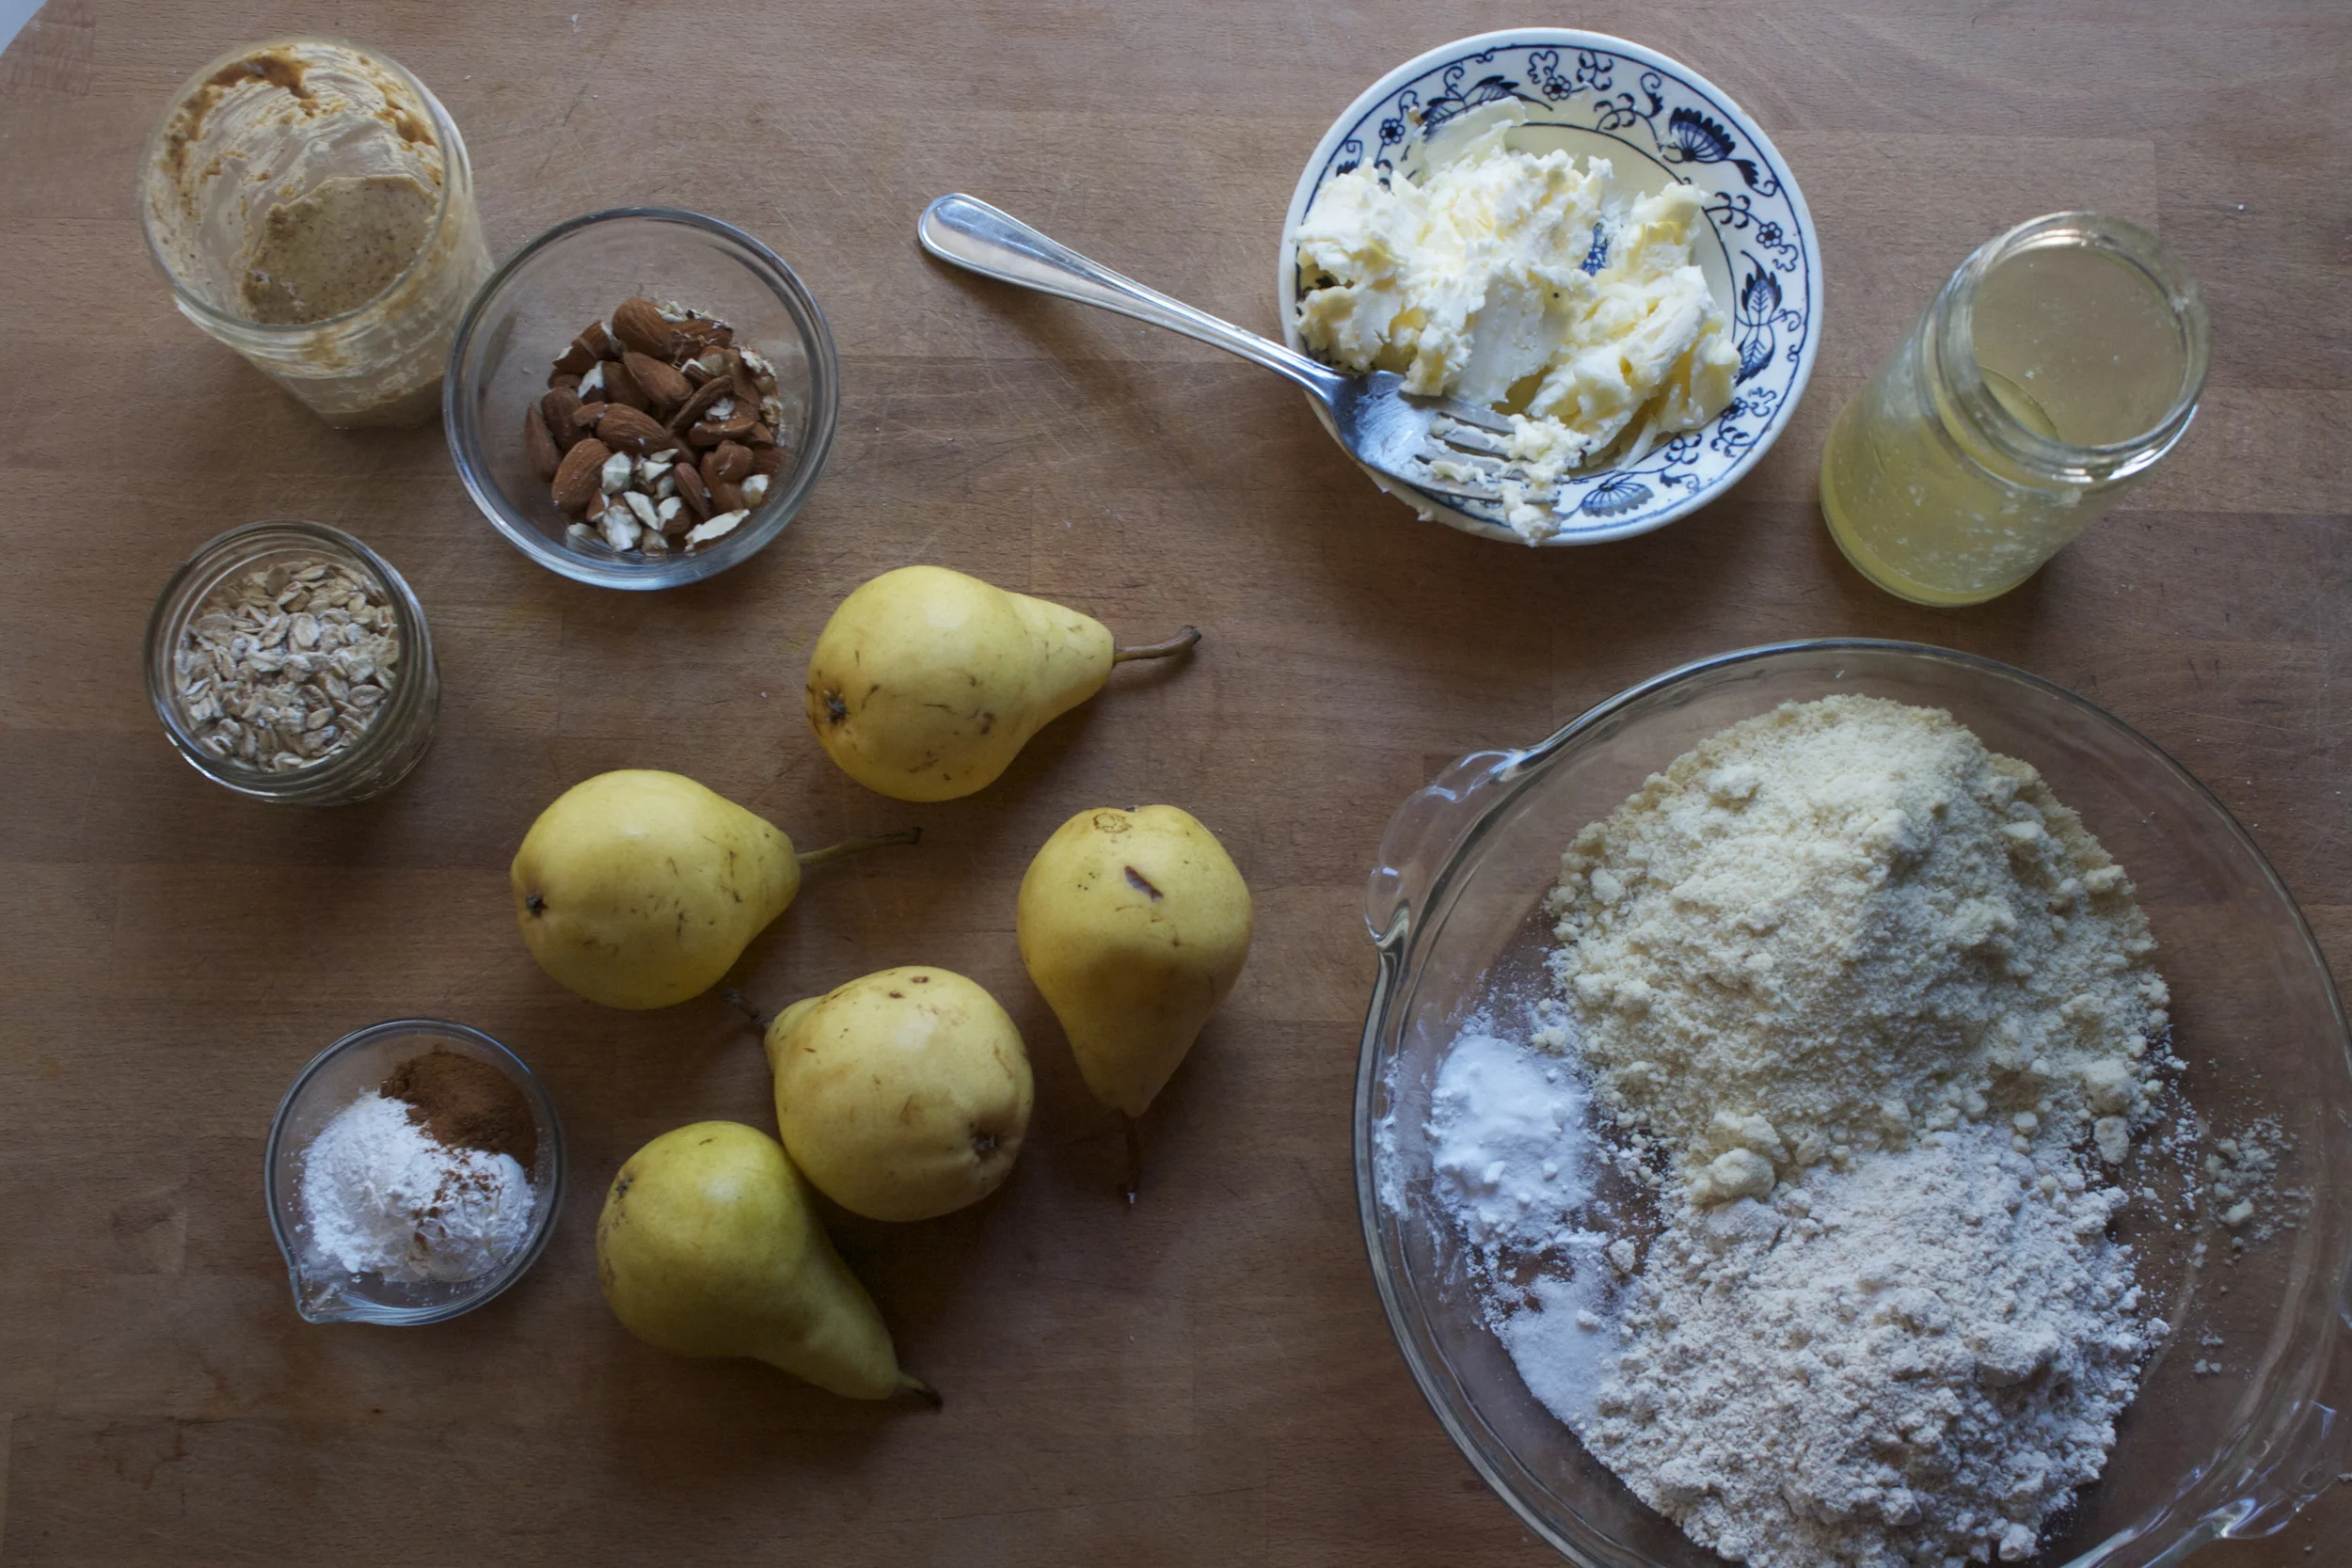


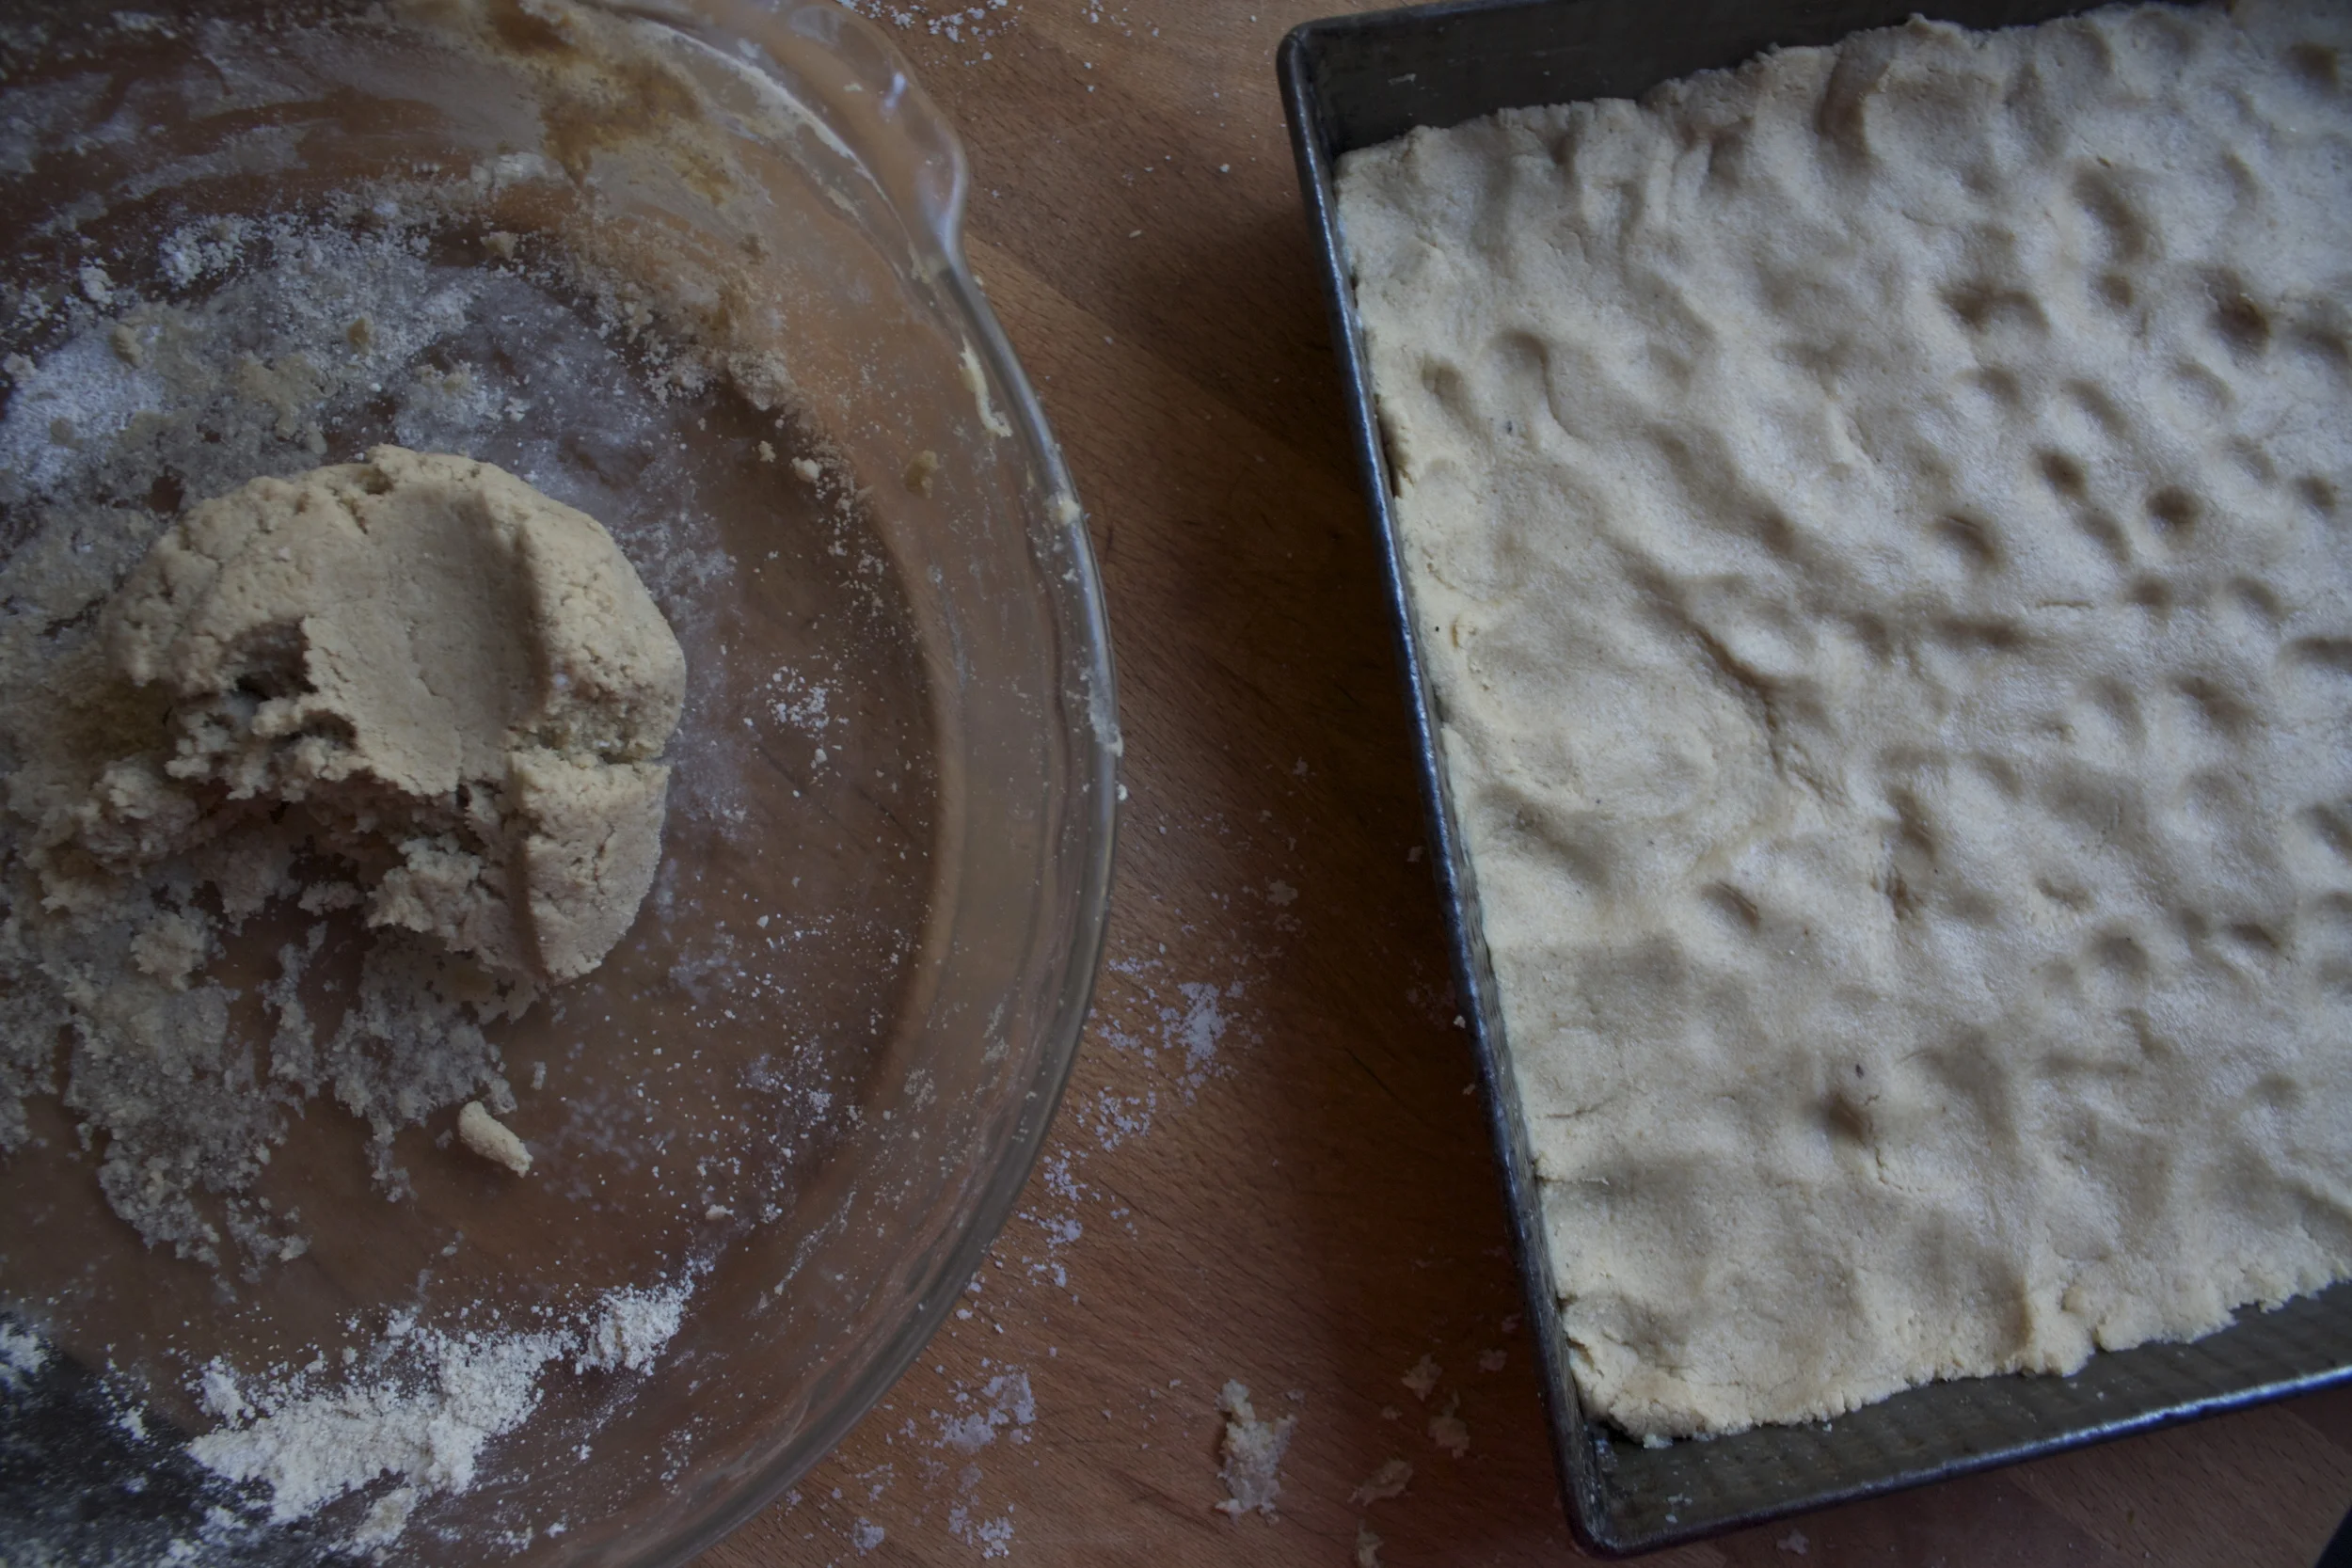
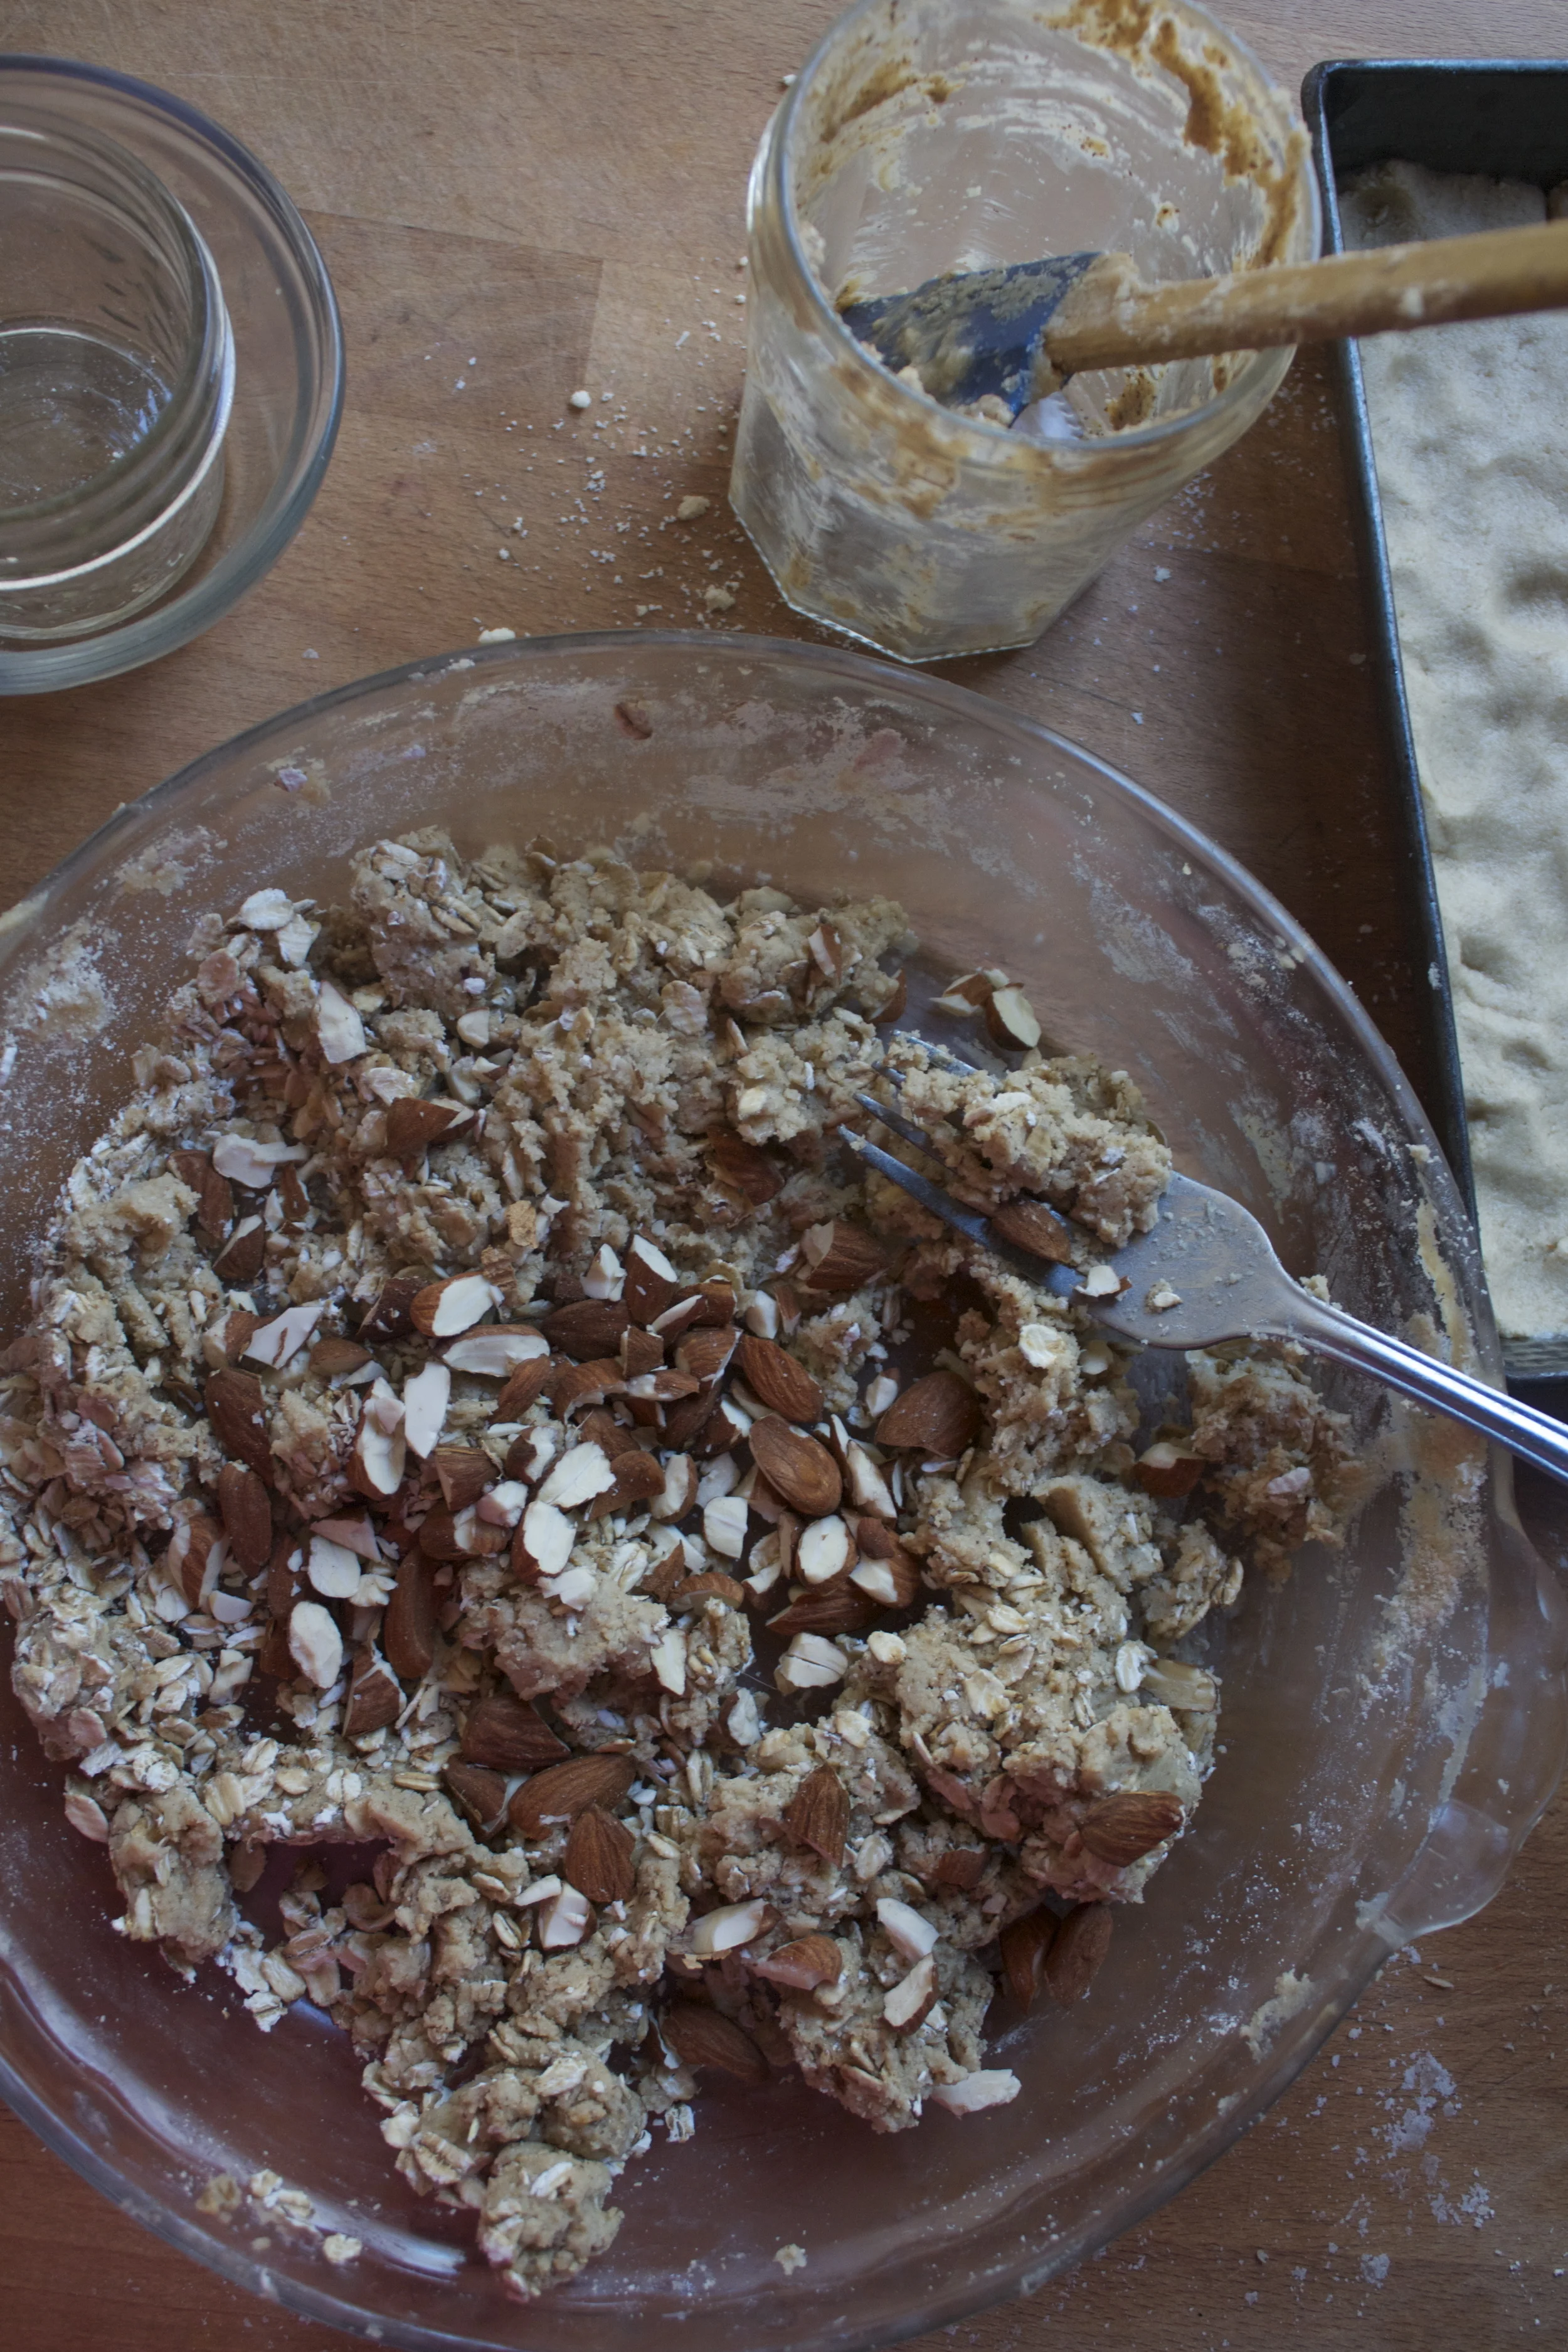

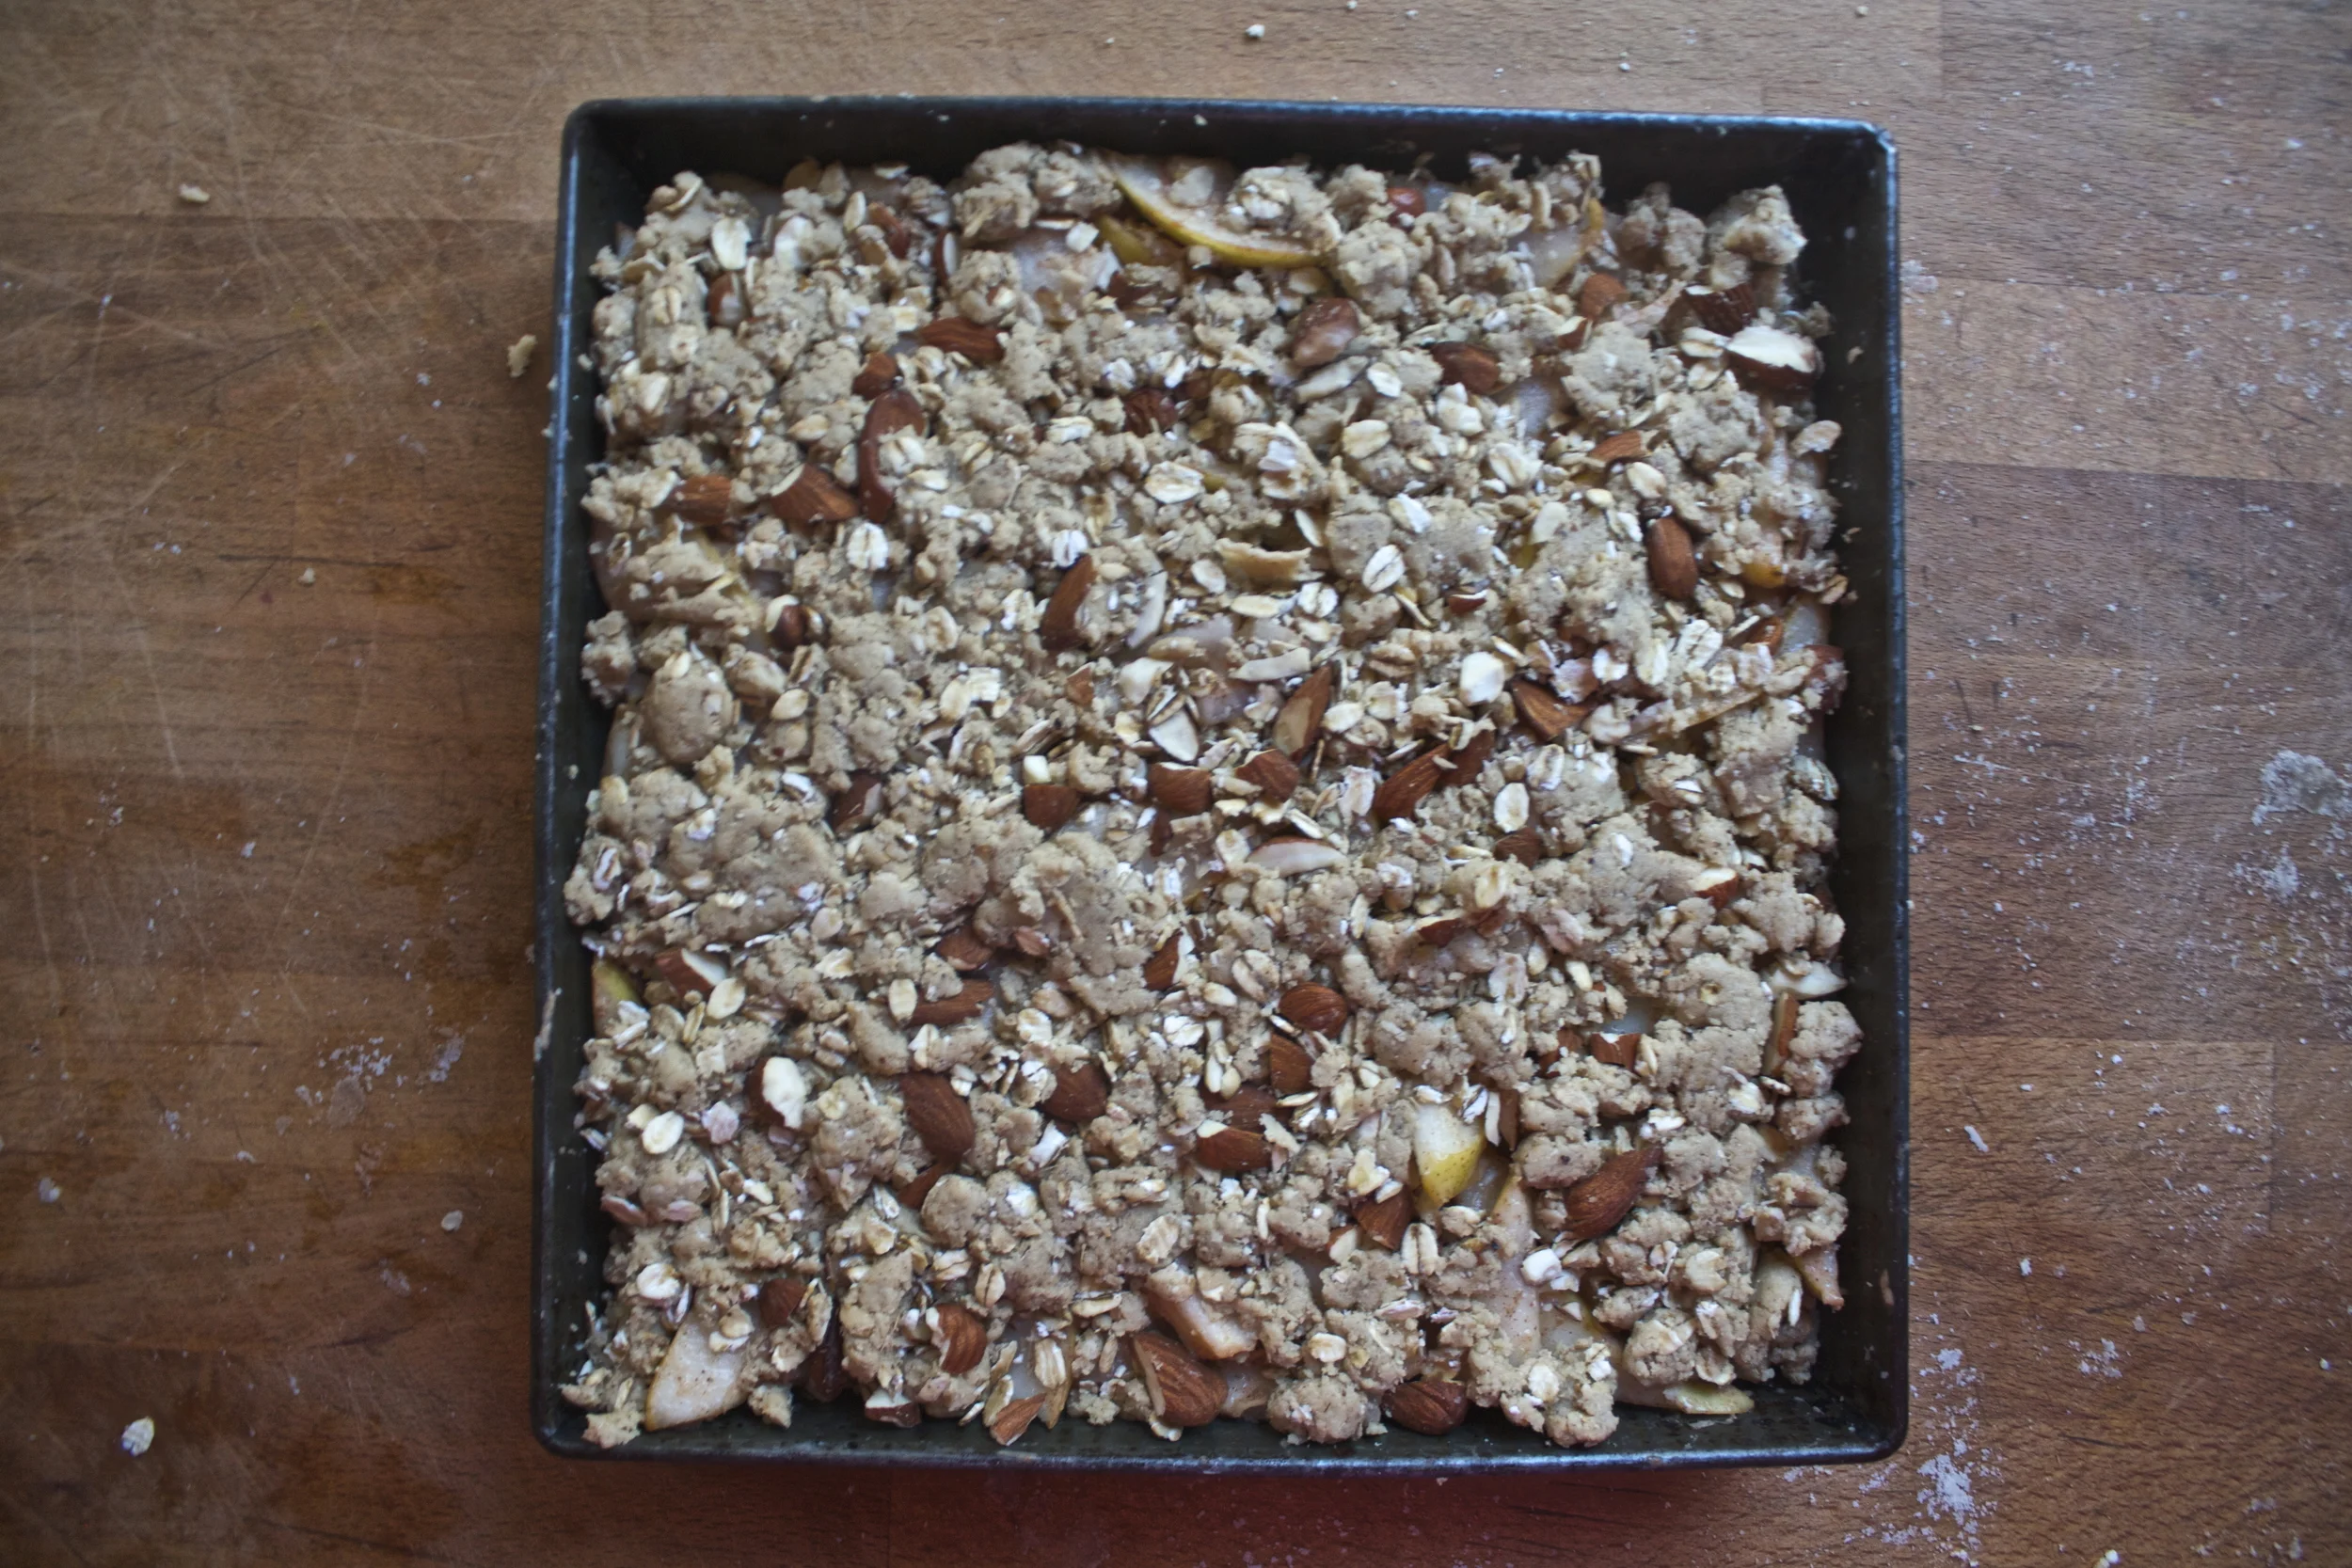

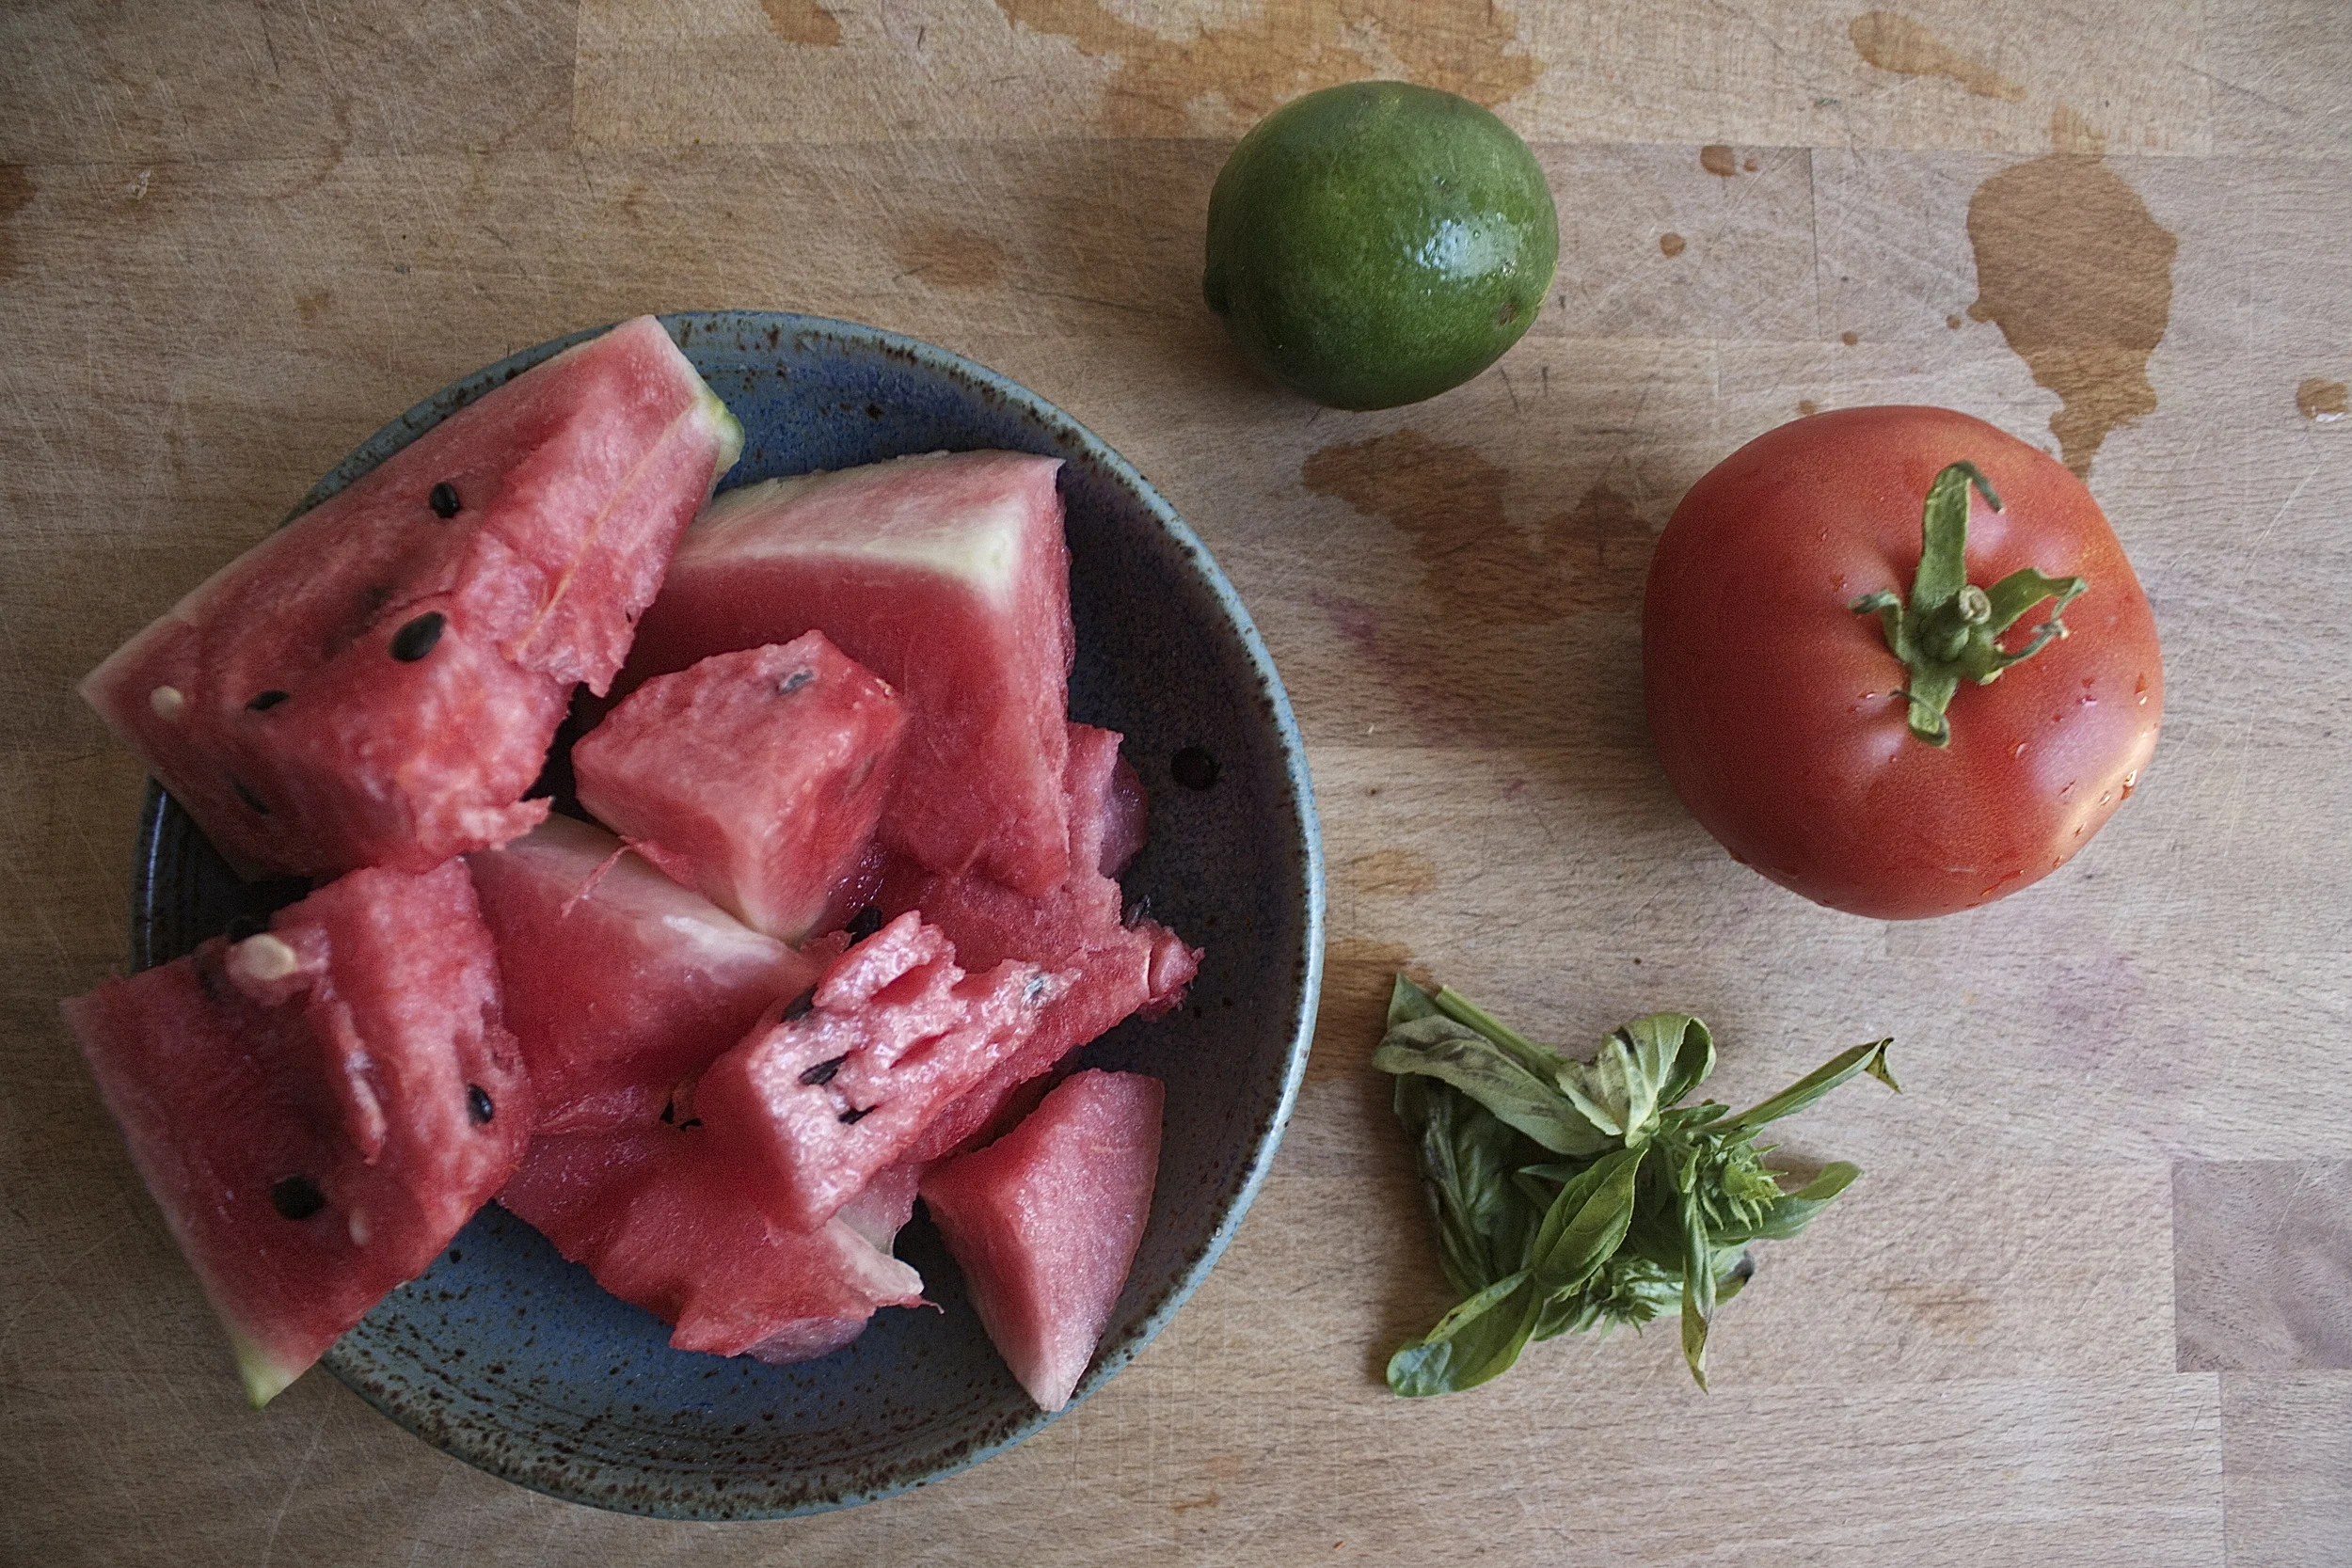
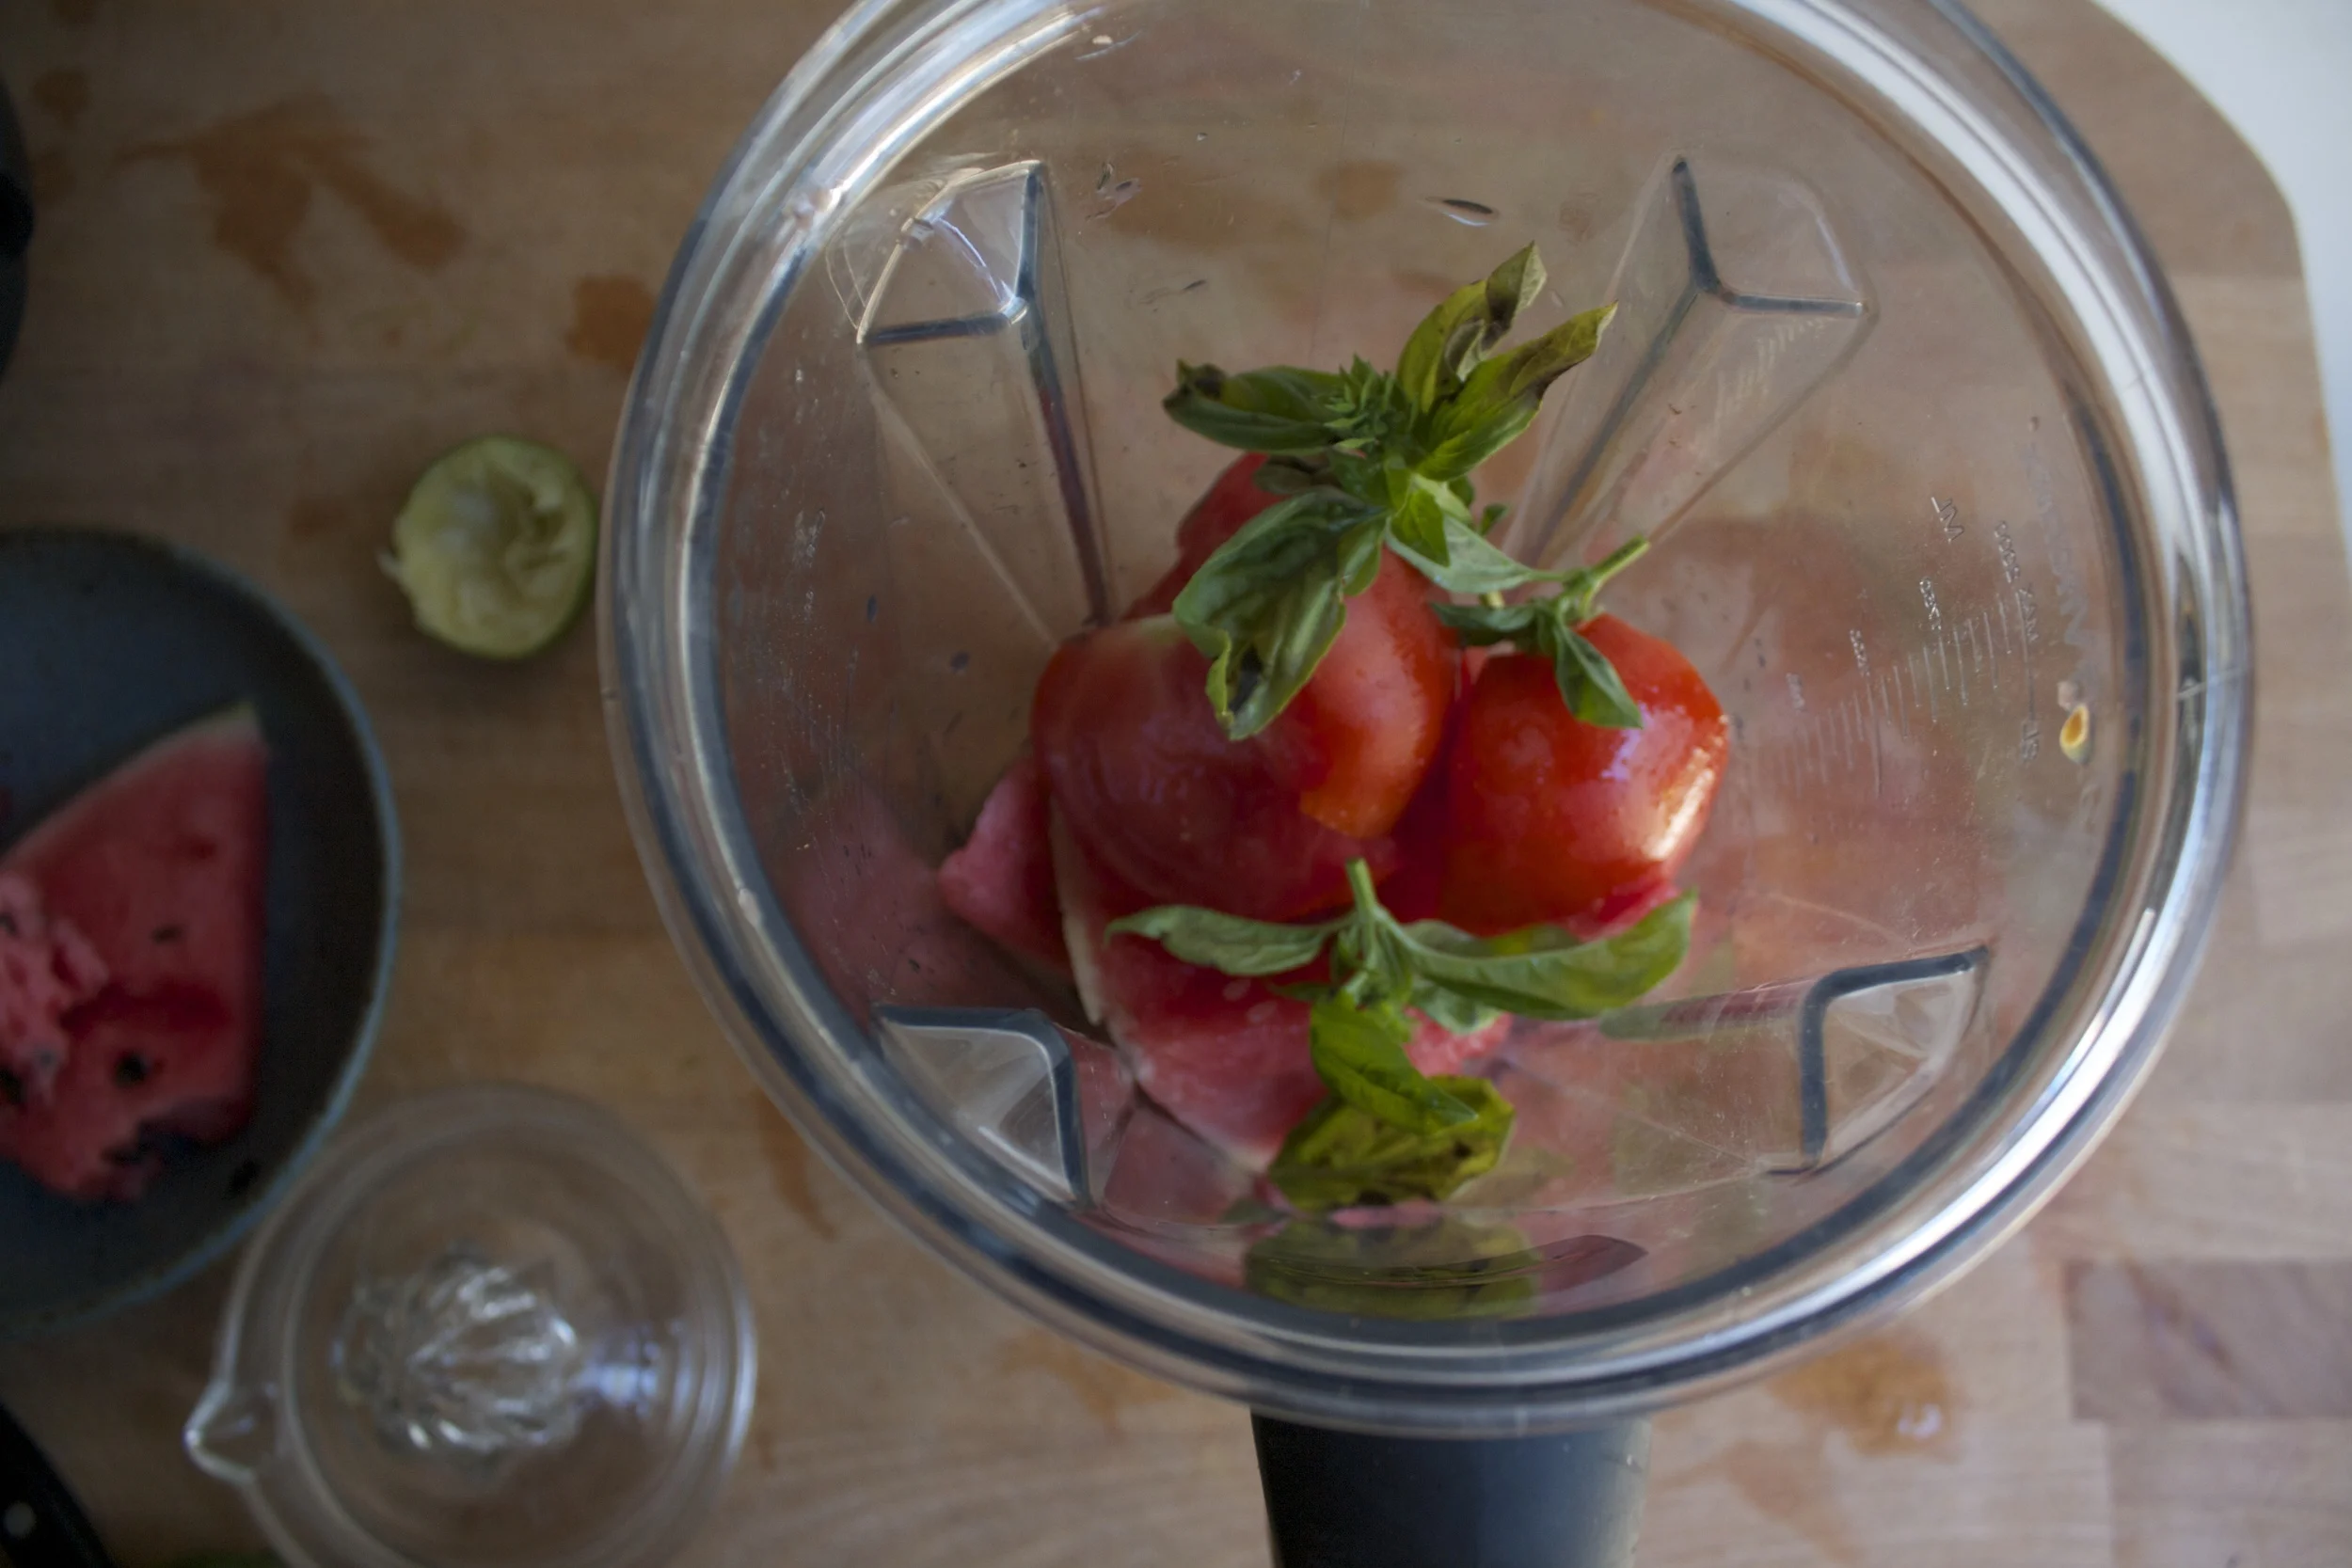
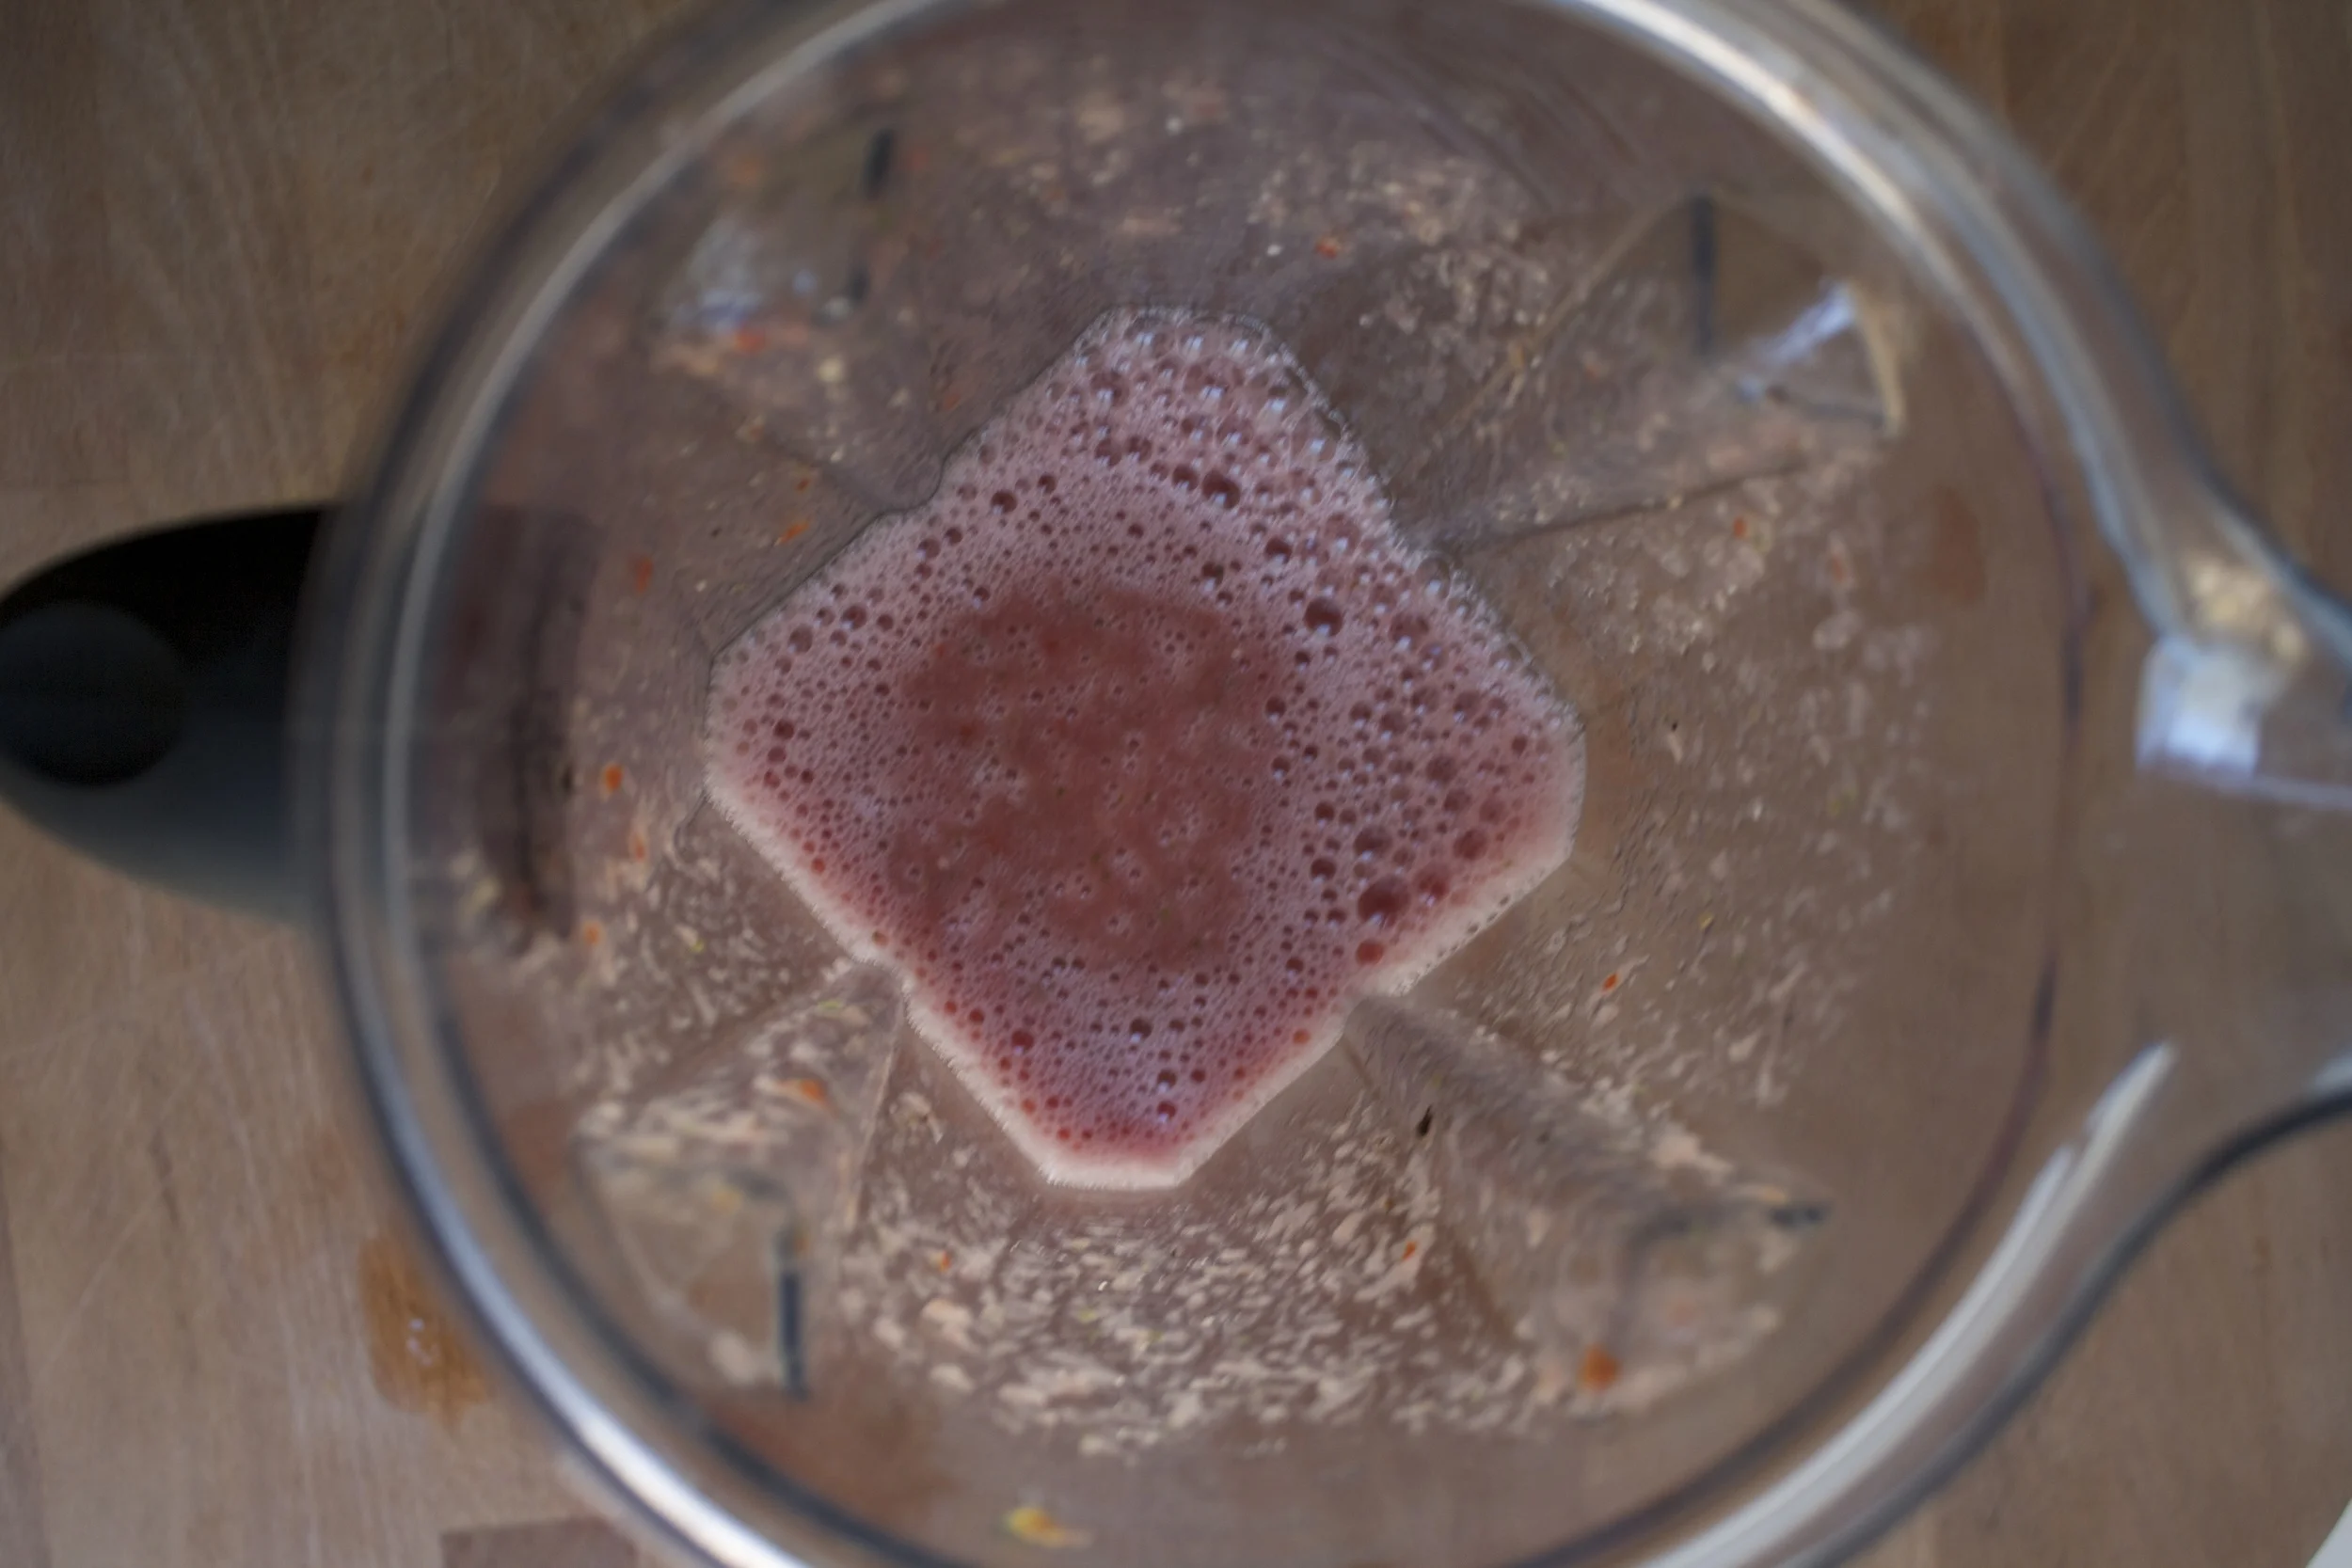
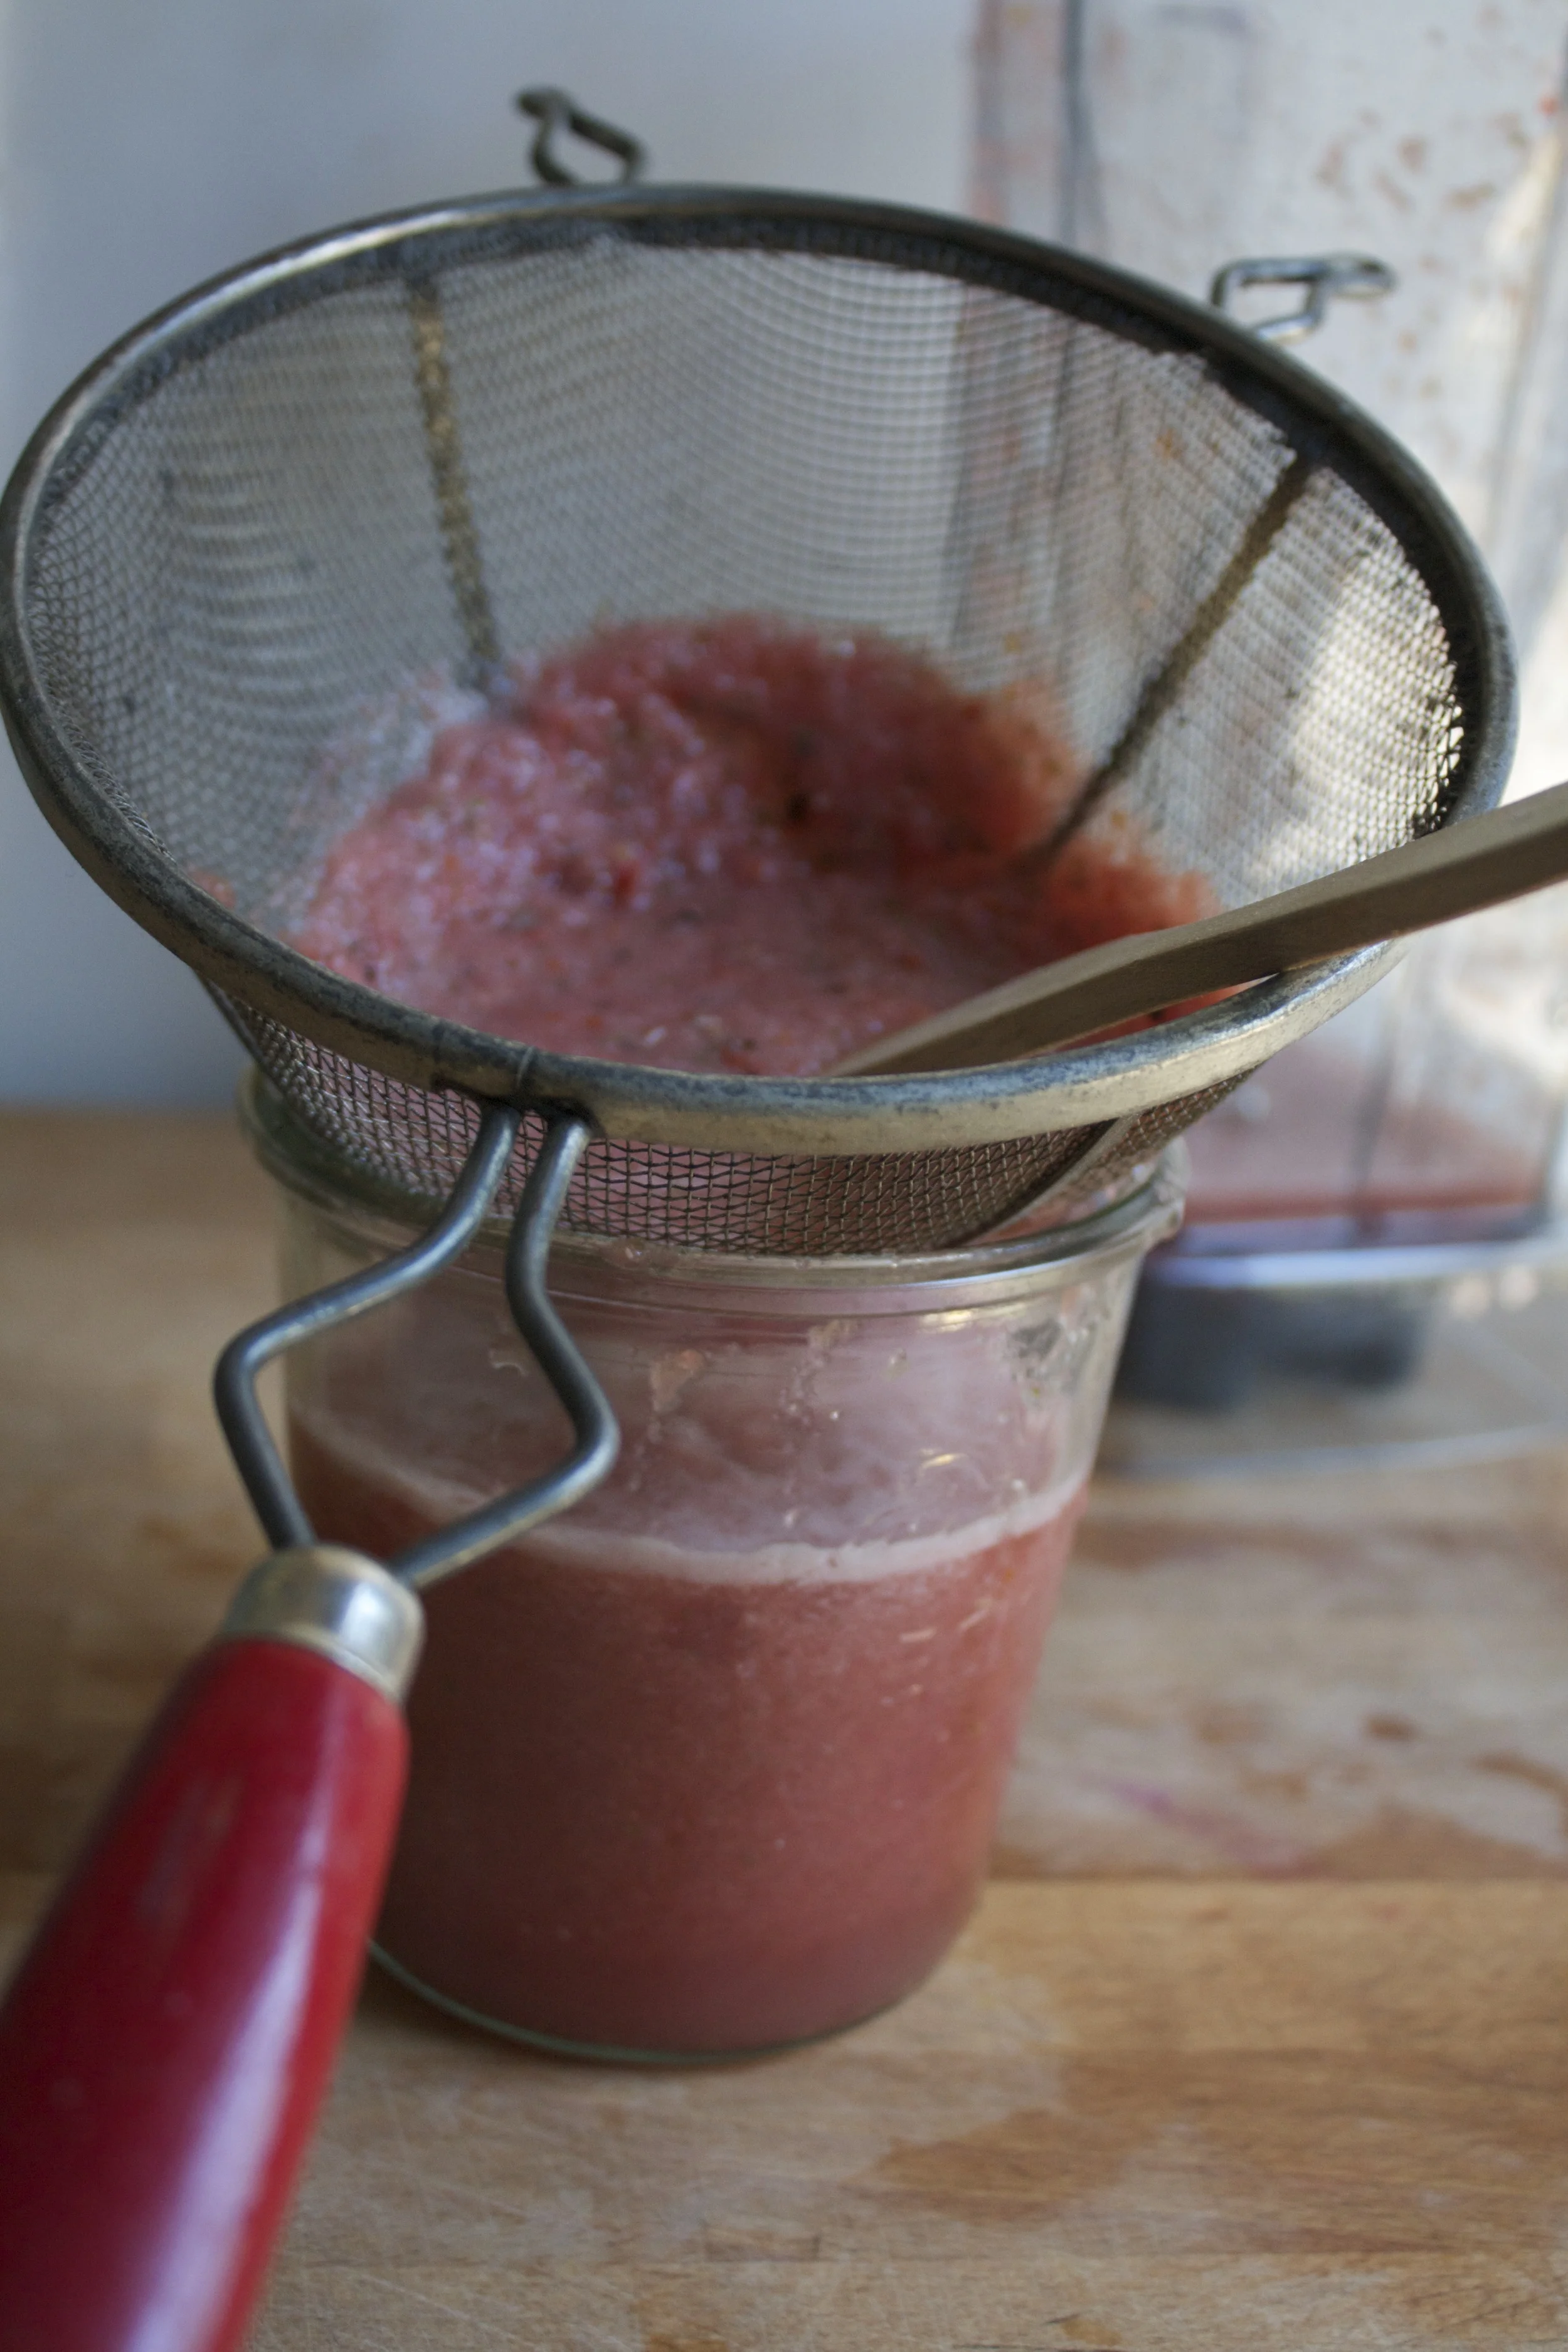


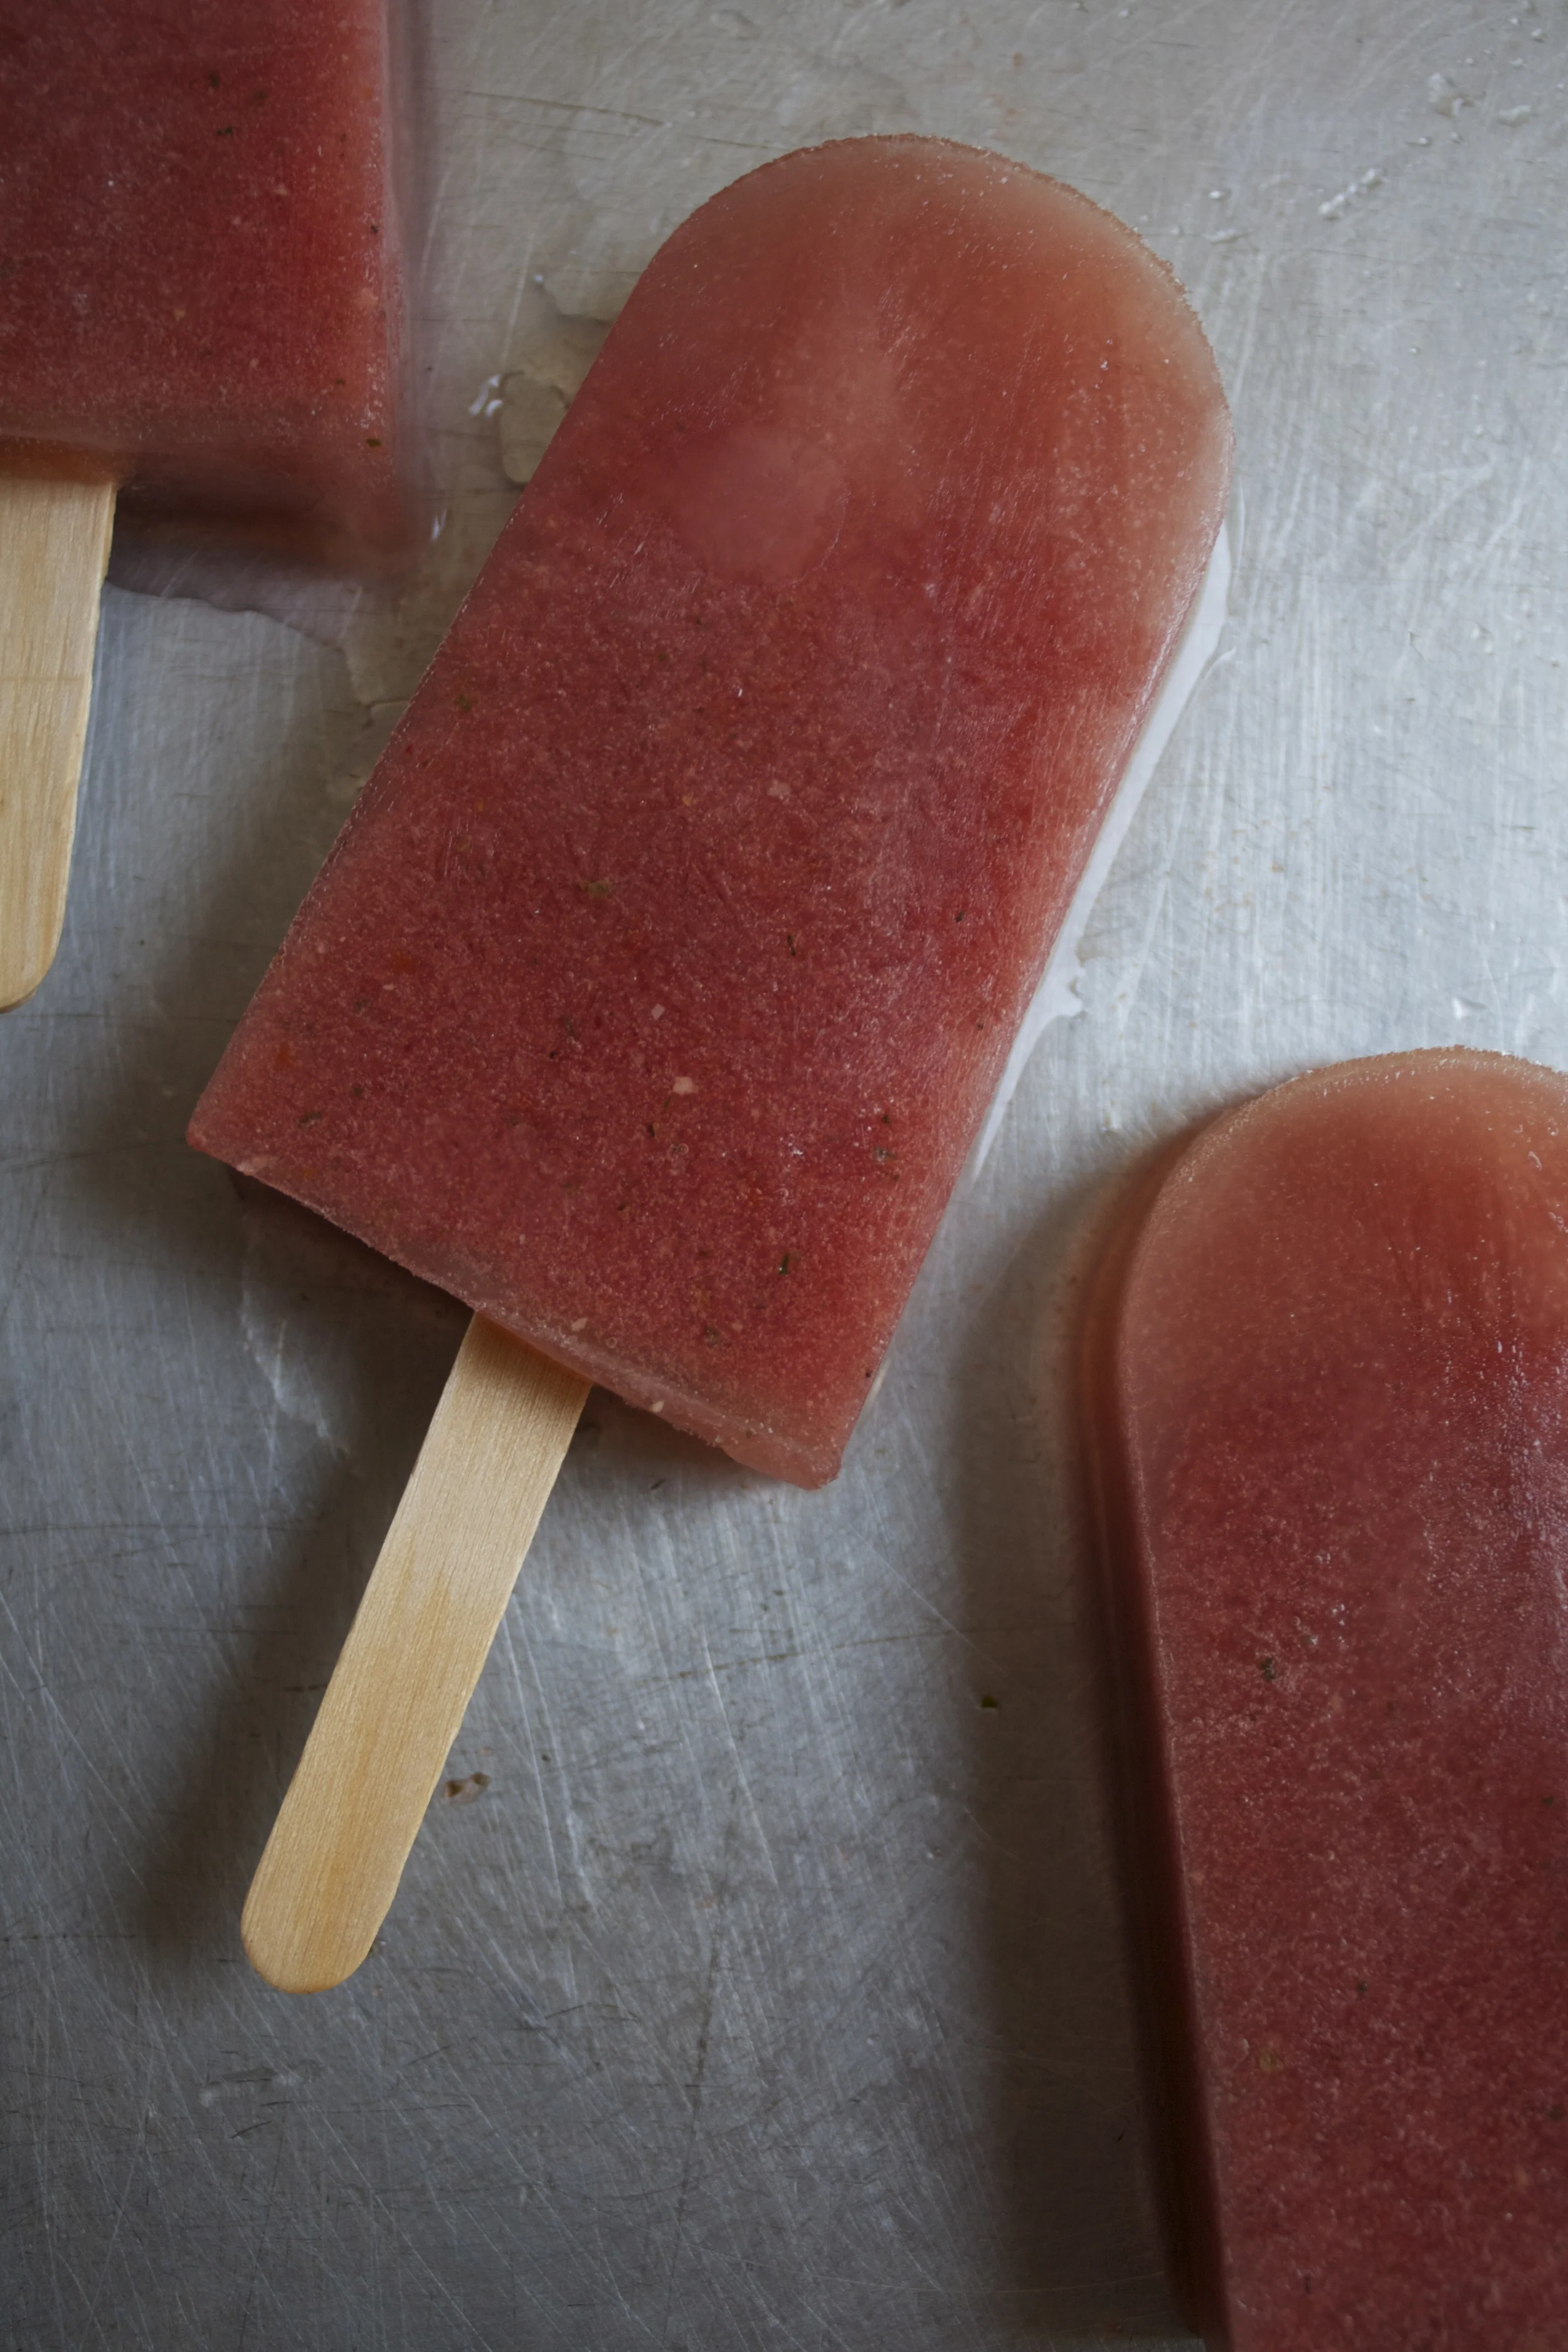


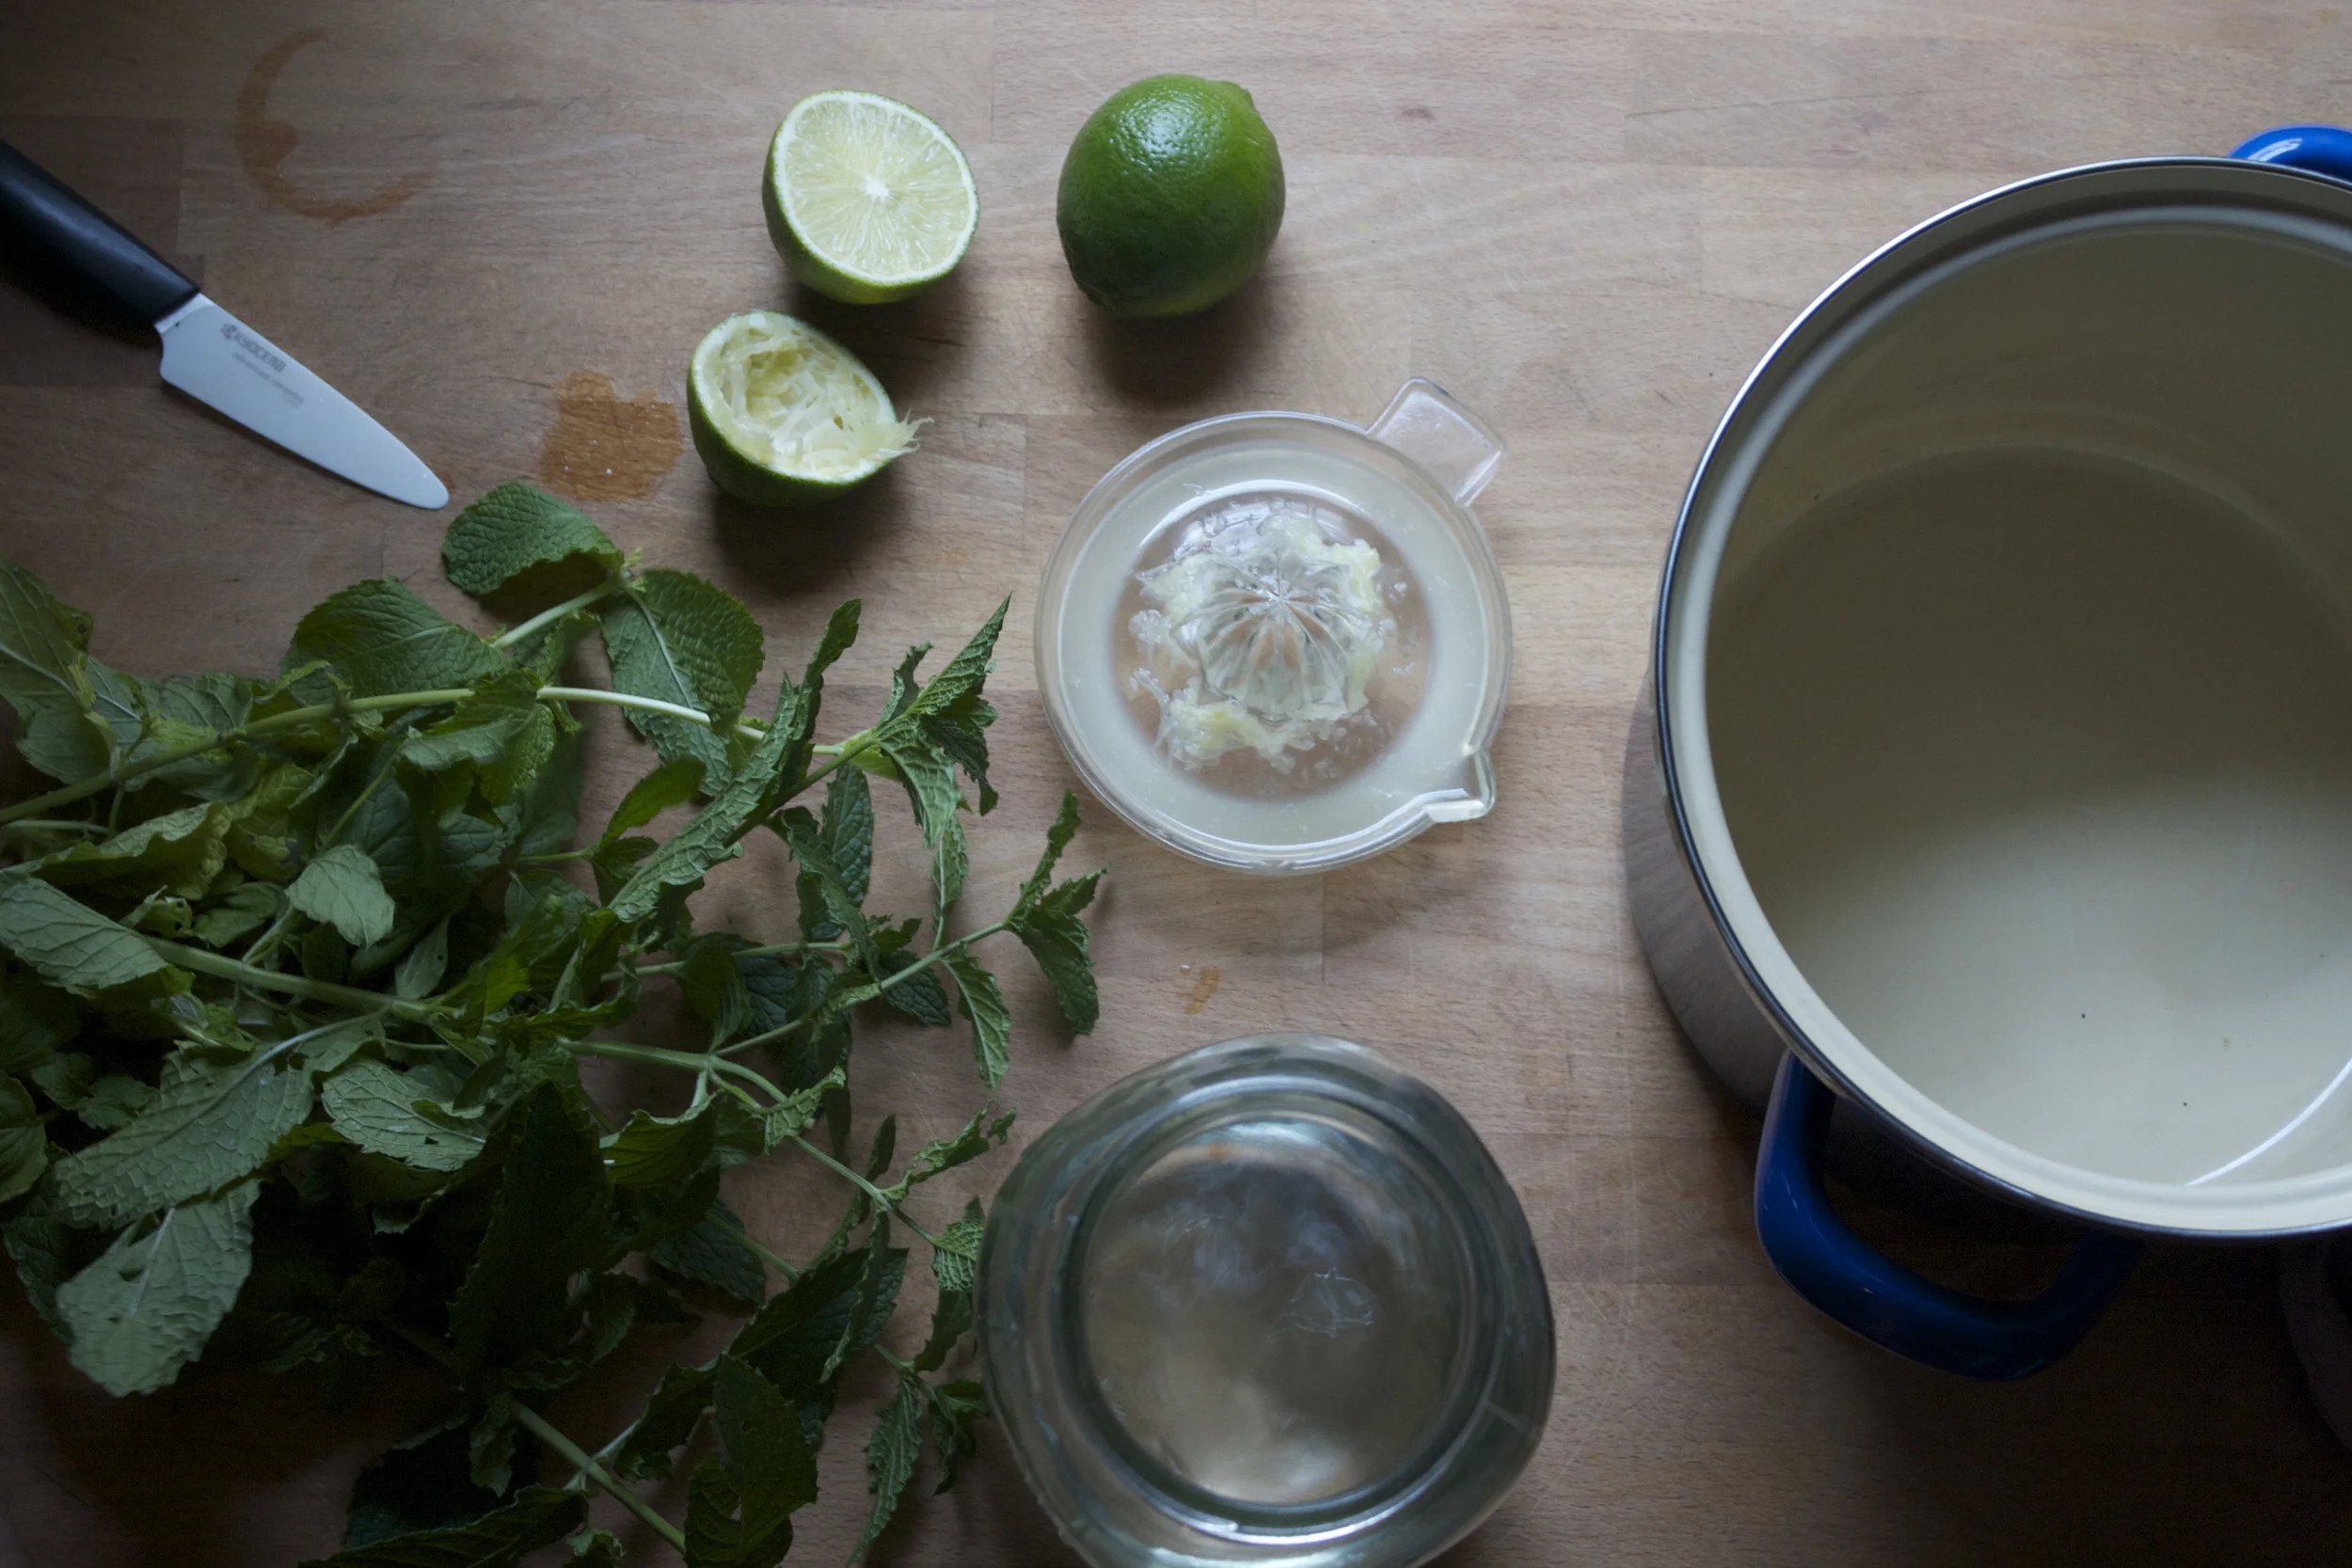
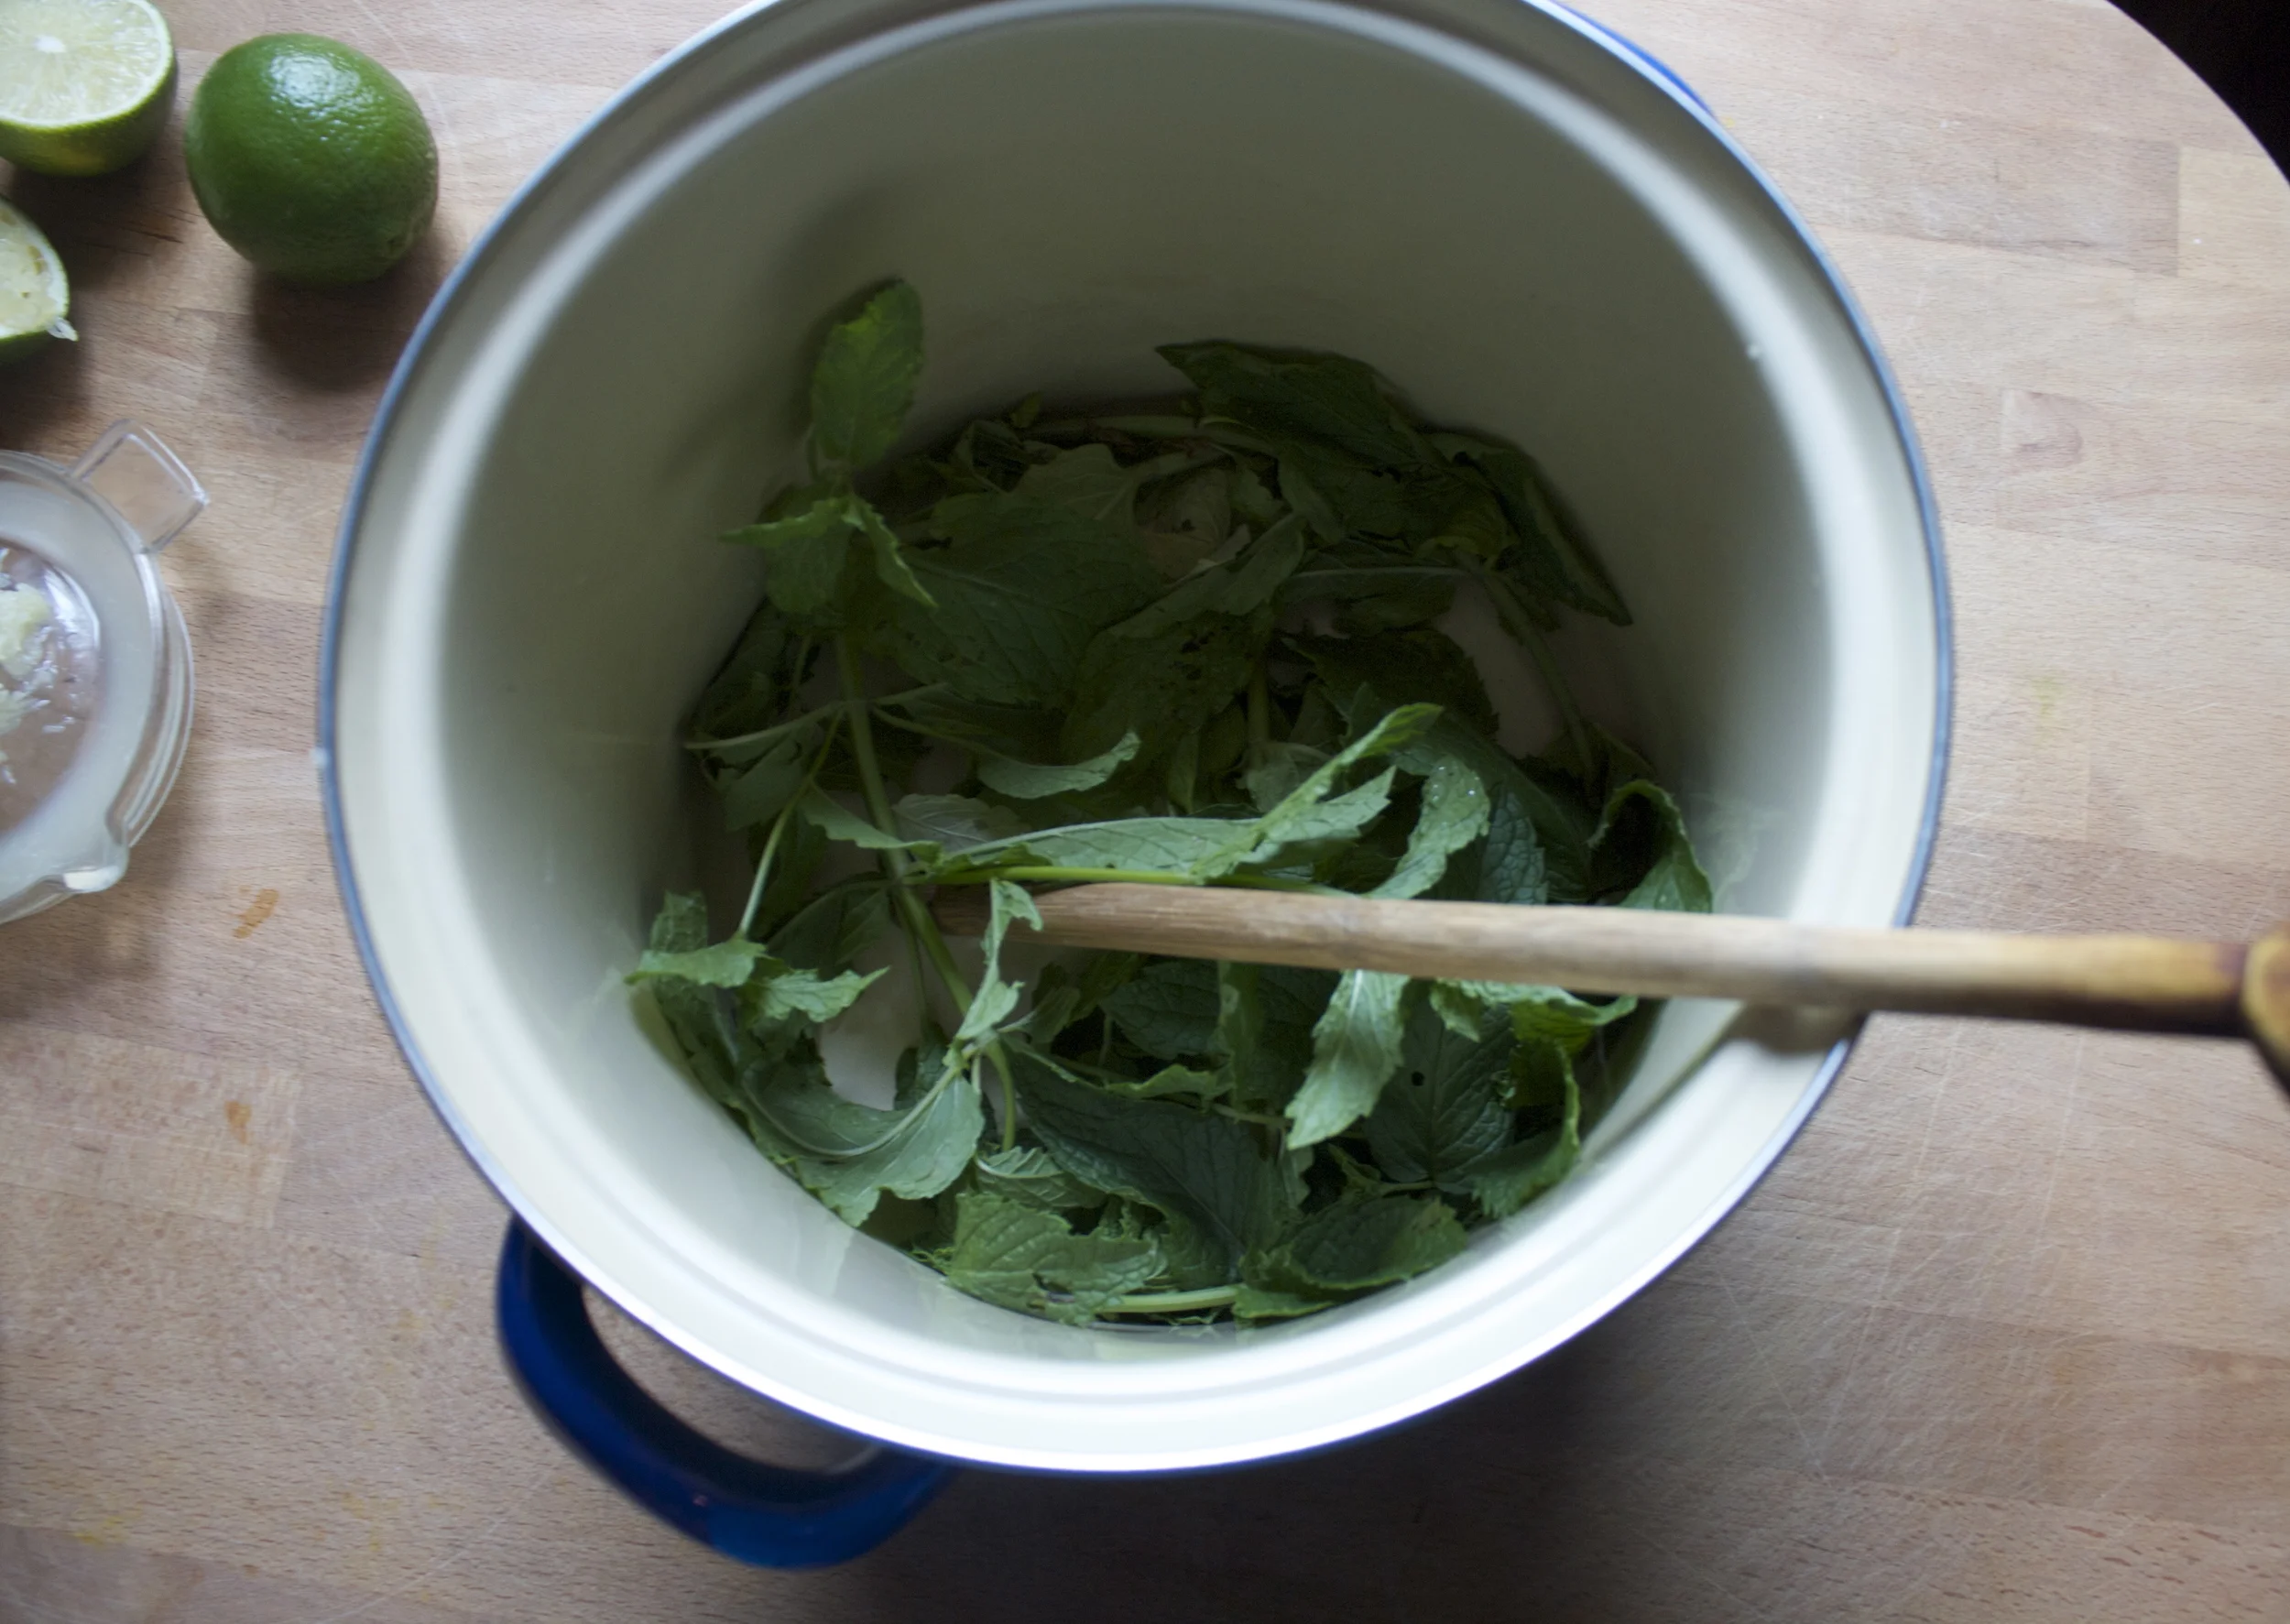


 How awesome will you be when you bring the most freaking amazing tortilla chips to the party this weekend? You will be like..”what, it ain’t no thang.. I am just good like that” Yes, yes you are.

 Knead dough a few times just to make sure it’s completely uniformed and divide into 12-14 equal pieces. Place balls on a plate and cover with a wet paper towl to keep from drying out.
 My cast iron skillet is big enough to cook 2 -3 at a time, but doing one at a time is cool too. Preheat the skillet to medium heat. Cook each tortilla for about 2-3 minutes ( or until starting to brown) on each side.
  Half way there to chips!!!
 Placed all nice and cozy on a baking sheet. trying not to overlap. Into a 400 degree oven for about 20 minutes to complete the chip making process.. After about 15 minutes, check for doneness. When nice a crispy, remove from oven, squeeze lime juice all over and sprinkle with salt. I then stuck them back in the oven for a few more minutes just to dry the lime..
 After cooling down, take those chips and stick them in a bowl.
THE LOVELY CRAZY
September 15, 2019 by maximios • Blog
Spring is here for reals, I think. No, it is here, it has just been a bit raw and maybe a bit more rainy then it really needs to be, but whatever, it is spring and it is good. Things are greener by the day, the temperatures although not exactly warm are still inhabitable and without cause for winter jackets (although I have still been rocking the mittens) and spring veggies are popping up all over. Things are looking good.
So last week I made a pie crust with the intention to make a veggie pot pie and stuck it into the freezer. When the time came to make said pot pie, I forgot to take it out of the freezer so the crust was not meant to be for pot pie (it will probably end up as a rhubarb pie%u2026we shall see). Without pie crust, I wasn%u2019t exactly feeling like I should make a pot pie, but a tart, well yeah, sure. A crispy and chewy crackery crusted thing with almond ricotta a spring veggies because that is where the mind went and what the mr agreed sounded good. (When I make up recipes I just start taking about ingredient and preparations and wait til the mr says %u201cYea, that loud good. I%u2019ll eat that %u201c He usually will say it right away and for anything. Very easy to please or he just doesn%u2019t care%u2026hum? )
And so the tart was made and the tart was eaten in all entirety for dinner by the mr alone. Usually when he eats all of something it means it was one of the really good things. Or he is really really hungry. But he said it was a really good thing. I trust him because I agreed. I got in a few spoonfuls of the almond ricotta mixture and it is really freaking good if I do say so myself (I could eat bowls of almond ricotta all day long).
Anyway, heres to spring and all things that are green and good.
To the tart.
The stuff. Flours (white and white whole wheat), baking powder, and a little salt in the bowl. Water and olive oil, blanched almonds, a lemon, a clove of garlic, asparagus, peas, frozen and thawed spinach, a small red onion, and salt and pepper.
Start with making the crust. Mix the dry together then add in the oil and water to form a dough. Knead dough a minutes until the dough is uniform and place back in bowl and cover. Dough needs a few alone minutes to rest. I can relate to that.
While dough is resting, make the almond ricotta. Almonds, garlic, the juice of the lemon, and a bit of water go into blender. Add in a pinch of salt and pepper too.
Blend until creamy and smooth.
Dump in the spinach and blend, just until combined.
Scoop ricotta into a bowl and mix in the peas. And sure give it another taste but try not to eat it all.
Grab the onion and slice it all nice and thin.
And after the resting time, grab dough and roll it out. Try for a rectangular shape or as rectangular as you can get it, but nice and thin. Thiner is better.
Place rolled out dough onto a baking sheet and poke the bottom with lots of little hole. Take ricotta mixture and spread evenly all over crust, leaving a 1 1/2 border all the way around.
Then top with the asparagus and more onions.
Fold over the edges of the crust, sprinkle with a pinch of salt and pepper, and into the oven it goes to bake.
And then it is baked. And ready to eat (after a few minutes of cooling).
Nothing left but to cut it up and eat it.
Spring. Green. Food.
Things are good.
-C
Makes a 8×12(ish) tart
For the Crust
1/2 cup all purpose flour
1/2 cup white whole wheat (can sub for all purpose)
3 tablespoon oil
1/3 cup room temp water
1/4 teaspoon baking powder
1/2 teaspoon salt
For the Almond Ricotta and Veggies
1/2 cup blanched almonds
1/4- 1/3 cup warm water
1 lemon
1 clove garlic
1/2 teaspoon salt and pepper or more to taste
1/4 cup frozen and thawed spinach squeezed of liquid
9-10 spears of Asparagus
1/4 cup peas (fresh or frozen and thawed)
1 /2 red onion
First make the crust. Whisk together the flours, salt, and baking soda. Add in the oil and water and mix until a dough forms. Form dough into a ball and knead for minute or two on counter then place dough back into the bowl and cover. The dough needs to rest for 10-15 minutes.
While dough is resting, make the almond ricotta. Place almonds, garlic, and juice of lemon into a blender. Start blending and add in the lesser amount of water, adding a little more until the stuff all starts to blend. Blend on high for a minute or two until the mixture is nice and creamy. Season with salt and pepper, blend a second to mix then add in the squeezed out spinach. Blend until mix together then dump or scoop the mixture into a bowl and mix in the peas. Then thinly slice up the onion.
Preheat the oven to 450
After doughs little rest, lightly flour a counter and roll it out, thin as you can, in a rectangular shape. Try for at least 12in x 16in. The rectangle doesn%u2019t need to be perfect. Rough is good.
Place the rolled out crust onto a baking. Take a fork and dock the surface (poke holes into it to prevent air bubbles). Take the ricotta and pea mixture and spread evenly on crust, leaving about a 1 1/2 inch border all the way around. Add a layer of sliced red onion and then take asparagus (trim off woody ends) and either lay on whole or break in half and lay on. Add more onions on top. Fold the border of the crust over the top. Sprinkle the whole thing with pepper and place into the hot oven.
Bake for 22-25 minutes or until the crust becomes a nice golden brown. Remove and let cool a few minutes
And then cut up and eat. Right away or at room temperature. Or some now and some later. All up you you.
Store left over in fridge in air tight container for up to a few days. the crust will not be crispy but more chewy. Can stick it back in oven for a few minutes to crisp it up.
Fall is all up in here!. The air is so nice and crisp and the leaves are changing to the prettiest colors.%u00a0I gots my pumpkins, an abundance of apples and squashes (our table is forverver overflowing with some type of squash) and am wearing all of my favorite sweaters.%u00a0
I am a happy lady here!
And this happy lady just wants to sit on her butt and knit.
But first, dinner. And my thought are. “What to do that doesn’t include doing much of anything (especially dishes) and maybe even has the oven on for a little extra warmth?” See here, I am a thinker. I knew I %u00a0had a single pie dough in the freezer (you should always have a pie dough in the freezer), a table full of the loveliest produce. So this happened. And the mr ate it, and he was all like “Whoa”.%u00a0 And I was like,”yeah dude, I know.”
A Ssuper fall galette.. and I still had time for my knitting and my butt.%u00a0
Like Whoa!
The stuff. A single crust pie dough, a butternut squash, an onion, and a honey crisp apple.(there are 2 shown, but I only needed on1)%u00a0%u00a0Also going to need a tiny bit if olive oil and a pinch of salt
Preheat oven to 375.
Roll your chilled dough out %u00a0on a lightly floured surface and place onto a large baking sheet. Stick it in the fridge to rest for a few minutes.
And slice them up into 1/4 inch-ish thick srounds.
Time to compile%u2026 A layer of overlapping squash. (Make sure to leave inch-ish boarder)%u00a0%u00a0Then a layer of the apples, and lastly the onion, which I think looks so pretty as ringlets, but you could keep in rounds if you wanted.%u00a0
Fold the sides and pinching dough to keep it secure. Drizzle the top, and the crust, with a tiny bit of olive oil and sprinkle with a picnh of salt.
Now into the oven it goes!
And %u00a0after about 45 minutes when the dust is perfectly golden and the stuff inside is nice and tender. Remove (turn off the oven) and let cool
And there you have it.. A ode to fall in flavors and colors..
Have a great day%u2026 Eat lots of fall food!
-C
Preheat oven to 375.
Roll out chilled pie dough %u00a0on a lightly floured surface to about a 12-14 inch round (ish) and place on a large baking sheet and stick in the fridge.
Grab the squash and cut the neck off the bottom.%u00a0Save the bottom for later (maybe soup?)%u00a0and slice up the neck into 1/4 inch thick rounds. %u00a0Now take the onion and apple and slice those into 1/4 inch thick rounds too. (the seeds and the stem will just fall our.. but if they don’t, just poke them out with a knife)
Grab the dough from fridge and start to layer. First a layer of squash, leaving around an 1.5 inch boarder. You want the pieces to overlap,but don’t double layer. Next the apples go on top of the squash, again overlapping. Finally the onion. I liked the look of the individual ringlets%u2026 but you can do thick rounds if you want.%u00a0Fold over the sides of the dough, pinching it in wherever it needs to be pinch until all the stuff is snug. Drizzle with a tiny bit of olive oil %u00a0and rub a little oil on the outside crust as well. Sprinkle with a pinch of salt and stick into oven.
Bake for about 45 minutes or until crust is a nice light golden brown and the stuff inside is tender.
Remove, let cool for a few minutes and eat your heart out.
I made a pie dough a little while ago with the intention of making a cherry pie%u2026but I ate all the cherries . (I do that a lot%u2026 eat all of something that I was intending to use for%u00a0something else)
And then I think about%u00a0that saying.. The road to hell is paved in good intentions.
.Well I guess I am going to hell.
So no cherries,%u00a0but I have a crap load of summer squash (and it’s only the beginning) and a few peaches that are in need of some eating. And what’s that, a container of ricotta in the fridge from lasagna a couple weeks back%u2026. Meant to be and%u00a0not in hell yet!
Sure, I could have made one single crust galette,%u00a0sweet%u00a0or savory,%u00a0and thrown it to the masses for consumption, but I figured that I might as well just hit two birds with one stone. A dinner and a dessert, all at once,%u00a0and call it a victory in time management%u00a0and putting a dent in the%u00a0pile of squash on the table. (don’t be fooled, I love excess amounts of squash.. It’s like the printer paper of the veggie world.. can be used for everything!) And bonus, only one set of dishes! I mean come on, this is so good, easy%u00a0and just really pretty. I know, I know%u2026..%u00a0so smart.
Anyway, here, take a look, get inspired and make some pretty dinsert (dinner and dessert) galettes.%u00a0
The stuff. For the base,%u00a0we need one%u00a0single crust pie dough%u00a0(that’s going to be for two smaller galettes)%u00a0and some ricotta%u00a0cheese.%u00a0%u00a0The savory galette has%u00a0summer squash, salt, pepper, lemon (%u00a0the zest) and a couple tomatoes. %u00a0The sweet needs honey, a peach, and a few strawberries.%u00a0
And if you want, change up your toppings. Pretty much any fruit or veggie combo would work. And spice up the ricotta if you wan. Garlic, fresh thyme, cinnamon%u2026 whatever will make you happy.
First things first.%u00a0Roll ourt dough. You could cut the dough in half and roll two separate disks, but I just rolled out one big rectangle shape.
And onto the baking sheet and into the fridge to rest.
While the dough is chillin, take half of the ricotta and whip it up %u00a0with some honey and thinly slice up your fruit.
Take the other half of the ricotta and add a bit os lemon zest, a sprinkle%u00a0of salt and%u00a0pepper,%u00a0and mix that up. And%u00a0thinly%u00a0slice up the%u00a0squashes and dice up the tomatoes.
Two crusts(or one cut in half. Smear the honey%u00a0ricotta on one side, savory%u00a0on the other, leaving%u00a0a boarder so you%u00a0can fold the dough over.
Now%u00a0pile the fruits on the honey%u00a0ricotta, veggies on the savory, %u00a0and fold the uncheesed part of the crust over. just enough to keep everything from falling out. Sprinkle salt and pepper on the veggies.
Stick into %u00a0a preheated oven and%u00a0bake until the crust is cooked all nice and golden brown and crispy.%u00a0
While the galettes%u00a0are baking, toss the chunks of tomatoes into a skillet with a splash of oil, salt and pepper and stick it into the oven too. Just bake until the tomatoes are nice and soft. You can stick in the oven right away and let the tomatoes cool, or towards the end of the bake time so that you can eat them warm%u2026 these tomatoes are good hot or cold.
all baked up, removed from the oven, looking oh so pretty.
Pile the roasted tomatoes onto the savory tart. And if you got it, a bit of chopped freshy fresh basil
And drizzle a little bit more honey on the sweet.
And serve%u2026 Is it savory first or do you go sweet?
How about a pice of both. Dnner and dessert.. all on one plate!
Happy Tuesday!
Ba Bye!
-C
-Makes 2 small%u00a0or one large galettes%u00a0
For the savory
For the Sweet
*Note. Feeling like blueberry apricot or maybe potatoes and peas? Swap out any fruit and veggie (and spice)%u00a0combination you want. The possibilities are endless! And if you want to do just one big galette, go for it.%u00a0
Roll out%u00a0pie dough in either 2 separate disks or one large rectange cut in half and.place on baking sheet and stick in fridge. While dough is%u00a0resting, divide the ricotta into separate%u00a0bowls. Add the salt, pepper and lemon zest to one, and the honey to the other. Using a fork,%u00a0whip them%u00a0up.
Preheat oven to 400 degrees
When the oven is preheated, grab the crust from fridge and smear the ricotta fillings evenly on the middle of each crust,%u00a0leaving about an%u00a0inch and a half%u00a0boarder. Layer on the toppings, (sweet on honey, savory on lemon pepper.. or whatever floats your boat) and fold %u00a0border over the edges of the filling. Place in oven and bake for about 35-40 minutes or%u00a0until the crusts are nice and crispy and golden brown.
While those are%u00a0baking, dice up the tomatoes and toss into a oven safe skillet%u00a0with a little drizzle of oil and sprinkle of salt. Stick that into the oven for about 10 minutes or until the tomatoes are nice and soft. You can do this right away, or towards the end of the bake time of the galettes%u2026 roasted tomatoes are great warm or cold.
When the galettes%u00a0are done baking, remove from oven and let sit for at least 5 minutes before serving. Top the savory galette with the roasted tomatoes and chopped fresh basil. Drizzle a little more honey on the one with the fruit .
Serve one, then the other, or both at the same time!
Eats good hot, warm, or cold. Utensils not required