I love mustard, and when I say love, I mean LOVE. I eat it on anything and everything. And not just small quaintites, I buy jumbo sized containers of the stuff because I go through it so fast. Over the past few years I even started taking down others with my mustard eating obsession. Sisters, brothers, even some of the littles are now mustard eating feens. One of my little nieces is now just as bad as me. I don’t think I have seen her eat a single meal without a side of mustard. Her favorite snack, clementines and mustard, although sometimes she skips the clementines and just goes in with her fingers. Oh so good. I think that child could possible be mine. And yes, it’s mostly the yellow grocery store variety of mustard being consumed, but yellow mustard is just the tip of the ice berg. There is a whole world of flavors, textures and colors when it comes to the humble mustard seed. Whole grain mustard, to me, is one of the best and easiest to adapt to any persons specific taste. You can make it plan or add in just about any spice, vinegar, even a little sweetness that you might like. One of my favorite variations of this mustard is to skip the vinegar and use picked jalapeño juice. Aah, my mouth is watering just thinking about it.
So if you are anything of a mustard connoisseur, you really must, at least once, make your own batch.(It’s so easy!) And you will love it and share it with all your friends and they will think you are a bad ass for making your own mustard and your life will just be so great. All because you are now a mustard maker. Yes.
Yellow mustard seeds, brown mustard seeds, apple cider vinegar and salt. The most basic ingredients.
Note- If you want, add in a pinch of any spice that you want.. Chili flakes, granulated garlic, turmeric…. And you can use the vinegar of your choice. I like apple cider because its mellow with a slight sweetness but white or sherry or any vinegar would be great. Even left over picked juice is fantastic too.
In a large jar, combine the mustard seed , twice as much vinegar and a pinch of salt. Cover and let sit for on the counter overnight until the seeds have soften and look almost like caviar.
Now blend those seeds. You might want to add another splash or two of vinegar to help blend and to thin out a bit. Chose how creamy or seeded you like you mustard. I like to make it creamy but seedy so I blend it half way to creamy.
Taste and add another pinch of salt if its needed and……..
You have got mustard! Make sure you have a good snack ready to eat with it.. My go to is carrots. I could eat this all day long.
Enjoy and have a great Tuesday full of mustard and stuff!
-C
1/4 Cup Brown Mustard Seeds
1/4 Cup Brown Mustard Seeds
1 Cup Apple Cider Vinegar
1 Teaspoon Salt
Optional..A pinch of Garlic Graduals, Red Pepper Flakes, Curry Powder (Anything you want)
Combine all ingredients into a large jar that has at least a few extras inches for the seed to expand. Leave on counter for 8-12 hours.
Once seeds are nice and soft and have expanded, either eat as is (Mustard seed caviar) or blend the seeds to desired consistency (I like it half smooth, half seedy) Add a pinch more or salt and another splash or two of vinegar to help blend.
And the best part, it’s as easy as eating way to many slices of pie! Roasted beets, rutabaga and sweet potato. A little salt…A food processor…no joke, so easy and it tastes so freaking good. A real show stopper. Everyone will whip out their phones to snap a pic.
Let me break this down for you. Rutabaga. Sweet Potato. Beet. That’s what I was working with. I chose these roots for color as well as for taste. Separately the flavors are amazing. Together they are out of this world. If you wanted you could omit any of these and sub in, lets say, pureed cauliflower, or maybe parsnips. I would stay away from potato, it’s a little to starchy, but maybe acorn or butternut squash. Oh man, now I want to make celeriac, carrot and acorn squash marble. Pureed vegetables are trouble for me. I can’t stop eating when they are around. I know, but don’t judge, instead lets prepare.
Peel the rutabaga..To be honest, I don’t peel, but this one that I got at the grocery store had a layer of wax on it…so yeah, I decided to peel that. You can also peel the beet if you want, but again, I don’t do that.
I diced up the baga and the beet, and tossed into separate pans to roast. I gave each pan a tiny splash of oil and a sprinkle of salt. The sweet potato, well that just got tossed into the oven as it was. I wouldn’t mix the beet with the rutabaga, the juice will turn it pink. Here the thing, If you want to boil or steam you veggies, go right ahead. I roast because I like the roasted flavor and its easier for me to throw things into the oven on a cast iron pan then to boil onto of my tiny stove. Bonus, I don’t wash my cast iron so less dishes! Just make sure with any method, your vegetables are cooked throughout and that they are tasty.
So you got a pile of roasted rutabaga, a pile of roasted beets and a baked sweet potato.
Remove the flesh from the skin of the sweet potato.. then eat it. Ok you don’t have to eat it but it is SOOOOOOO good. At least try it.I used my handy emulsion blender to puree everything but a food mill or a food processor is equally as good. Puree each root separately . Start with the rutabaga. Go to the sweet potato, then end with the beet. That way you don’t have to clean in between purees. Add little amounts of water when pureeing if it needs a little help to loosen up. Blend until smooth.
Three beautiful purees. My sister and I stood in the kitchen prior to preparing the plate and stuck our fingers in the puree. That right, and we licked then and went back in for seconds. In my family, as long as there is not disease being transmitted, a little bit of shared germs is ok. So now that you have tasted and tried not to eat to much of the purees, let’s get crazy….I just took a spoon and threw piles in that bowl. I could have done more of a checkerboard pattern to make it a more uniform marble, but I just went for it. Do it any way you want. Don’t be afraid, you can’t screw this up!I took a fork and kind of rain it throw the top to start the effect. I then took a cake knife and just leaved it out. That’s what I did and then I was done. After all the oohing and aching, I stuck the dish into the oven for another 10 minutes just to keep hot, but you can serve this at room temp as well. Now tell me that isn’t a thing of beauty. I fell in love. I want to puree and marble everything. This could be my thing.Empty bowl…Ok, I’ll admit I ate half of it..I couldn’t help it. Next time I will have to make a bigger batch.
P.S. You could totally make this dish today and serve it tomorrow. Just plastic wrap the top and refrigerate. When your getting ready for you meal, stick in oven for 20 minutes or until it’s the temperature you want it.
Happy Thanksgiving and Yeah!
Marbled Roots
Choose at least two, preferable three contrasting root vegetables. I;ll give you the version in the pictures.
1 large beet
1 medium rutabaga
1 large sweet potato
olive oil
salt
Preheat oven to 425
Dice rutabaga and beet. Toss with splash of oil and sprinkle of salt. Place on spereate baking sheets and move to oven. Place whole sweet potato in oven Cook until veggies are fork tender, usually about 40 minutes.
Remove veggies and place into separate containers and puree each veggie, starting with the lightest colored one. Add small amounts of water to help loosen if needed.
In a shallow casserole dish or pie plate, pile small amount of puree in dish, alternating the colors. With a knife, swirl the veggies around…Dont go to crazy or it will end up blended. You could stop here, I know, it looks amazing, but I finish it all off by taking a cake knife and smooth out the top.
Pop the roots back into the oven for another 10-15 minutes just to completely warm and meld the flavors together.
How cool are you now? People will be talking about you marbled roots for weeks.. maybe even until next thanksgiving.
Is it really for real April? Where has all the time gone and where the hell is the warm weather? It’s not funny anymore. I am officially OVER winter! Ok, so now that I got that off my chest…..
Last night the misters Dad came over for a long awaited dinner accompanied by talk of life goals and what her referred to as “narratives” or the story of our lives. Some deep shit to be talking about at dinner, especially with zero alcohol to be had.
Me, being so super awesome, was all up in taking charge in making the food. Except that last night I didn’t have a bunch of time and honestly, much energy to be doing anything. And sure, I could have just made a pot of spaghetti, but that just felt like cheeping out. So Polenta it was. And because I just made a hug pot of navy bean, those were going into the polenta too.
Beany polenta baked in the oven with a tomato sauce cooked on the stove. About 5 minutes of hands on time and an hour to cook it all. It’s the perfect meal to make when you have guests coming over. Fast prep, into the oven and on the stove, and then you have an hour to clean and make yourself presentable. See, I am a thinker. (I ended up skipping the making myself presentable part… I stayed in my gym clothes.. no need to impress family right?) Then after about and hour you end up with a hearty healthy pretty meal, all from scratch, that seems like you spent the afternoon cooking. When in fact you spent the past hour vacuuming and watching Gilmore Girls.
The Stuff. Cornmeal, water, navy beans and parmesan for the polenta. Crushed tomatoes, garlic, dried basil, onion, carrot, zucchini, and summer squash for the sauce. Salt, pepper, and olive oil all around.
Cornmeal and water go into a cast iron skillet (or any oven safe dish) with a pinch of salt and pepper. Give it a little mix and stick it into the oven at 400 degrees .
Once the polenta is in the oven, make the sauce. Chop up all the veggies and stick into a dutch oven or sauce pot with a pinch of salt, the basil and a good drizzle of olive oil. Stick on medium heat and let veggies cook down a bit. When the veggies are tender, add in minced garlic, crushed tomatoes and another drizzle or oil. Turn burner to lowest setting and simmer (giving it a stir every now and then) for about 45 minutes or until the polenta is done. After about 30 minutes when the water had pretty much all cooked down, take the polenta out of the oven and stir in the beans, the parmesan, a tablespoon or two of olive oil and salt and pepper. Smooth top out and sprinkle with more pepper, parmesan and drizzle with a bit more oil. Stick back into oven for another 1/2 or until polenta has formed a crust and no longer giggles when you wiggle the pan.
Pull polntna from the oven and let sit for at least 1o minutes.
Two big spoons and a pile of plates. Have the people serve themselves!
Have a Happy Day!
-C
Baked Navy Bean Polenta with Chunky Tomato Sauce
Serves 4 hungry people
For the Polenta
1 1/2 Cups Course Ground Corn Meal
4 Cups Water
3 Cups Prepared Navy Beans (Or just use to cans)
1/2 Cup Parmesan Cheese or Vegan Parmesan (Optional)
3 Tablespoons Olive Oil
Salt and Pepper
For the Sauce
One 28oz Can of Crushed Tomatoes
1 large Carrot
1 Small Onion
4 (or more ) Cloves Garlic
1 teaspoon Dried Basil
1 Small Zucchini
1 Small Summer Squash
Olive Oil
Salt and Pepper
Preheat oven to 400
In a large skillet, mix together the cornmeal and the water and add a good pinch of salt and pepper. Place into oven for about 30 minutes or until the polenta starts to congeal at the edge of the skillet nd most of the waster has cooked down.
Remove skillet from oven and with a whisk or wooden spoon, mix in the beans, the parmesan (if using) and 2-3 tablespoons of olive oil. Smooth out mixture, sprinkle with salt, pepper, parmesan and drizzle with olive oil. Stick back into oven for another 30 minutes or so. Polenta is done when it no longer wiggles when you giggle the skillet.
For the sauce
Small dice the carrot and the onion and stick into a medium dutch oven oor sauce pan with a drizzle of olive oil. Place on medium heat and cook until the veggies are tender. Add in tomato, minced up garlic and basil. stir and let simmer on stove top for about 45 minutes. When you place the polenta back into the oven for the second bake, dice up zucchini and squash and add to sauce. Stir and keep on simmer until ready to serve.
Once the polenta has completely cooked, remove from oven and let sit for at least 5 minutes…10 is better to solidify.
Spoon big piles of polenta on a plate or in a bowl, top with a big heap of tomato sauce. Sprinkle with a little more parm and maybe another dash of pepper .
Is it just me or can you also stuff an entire pound of fresh spring greens into your mouth by the fist full and be nothing but happy about it?
Spring greens are on point right now. So tender and sweet and just, agh, I just love greens. I picked up our last winter farm share a few days ago (3 weeks til summer share begins.. will I survive?) and I got a huge bag of baby kale which made me really freaking happy because I love me some kale but baby kale, I loooooovee it. Yay for me!
Then we have rhubarb. I get so excited every year when my patch starts to peek out from under all the rotten leave. The stalks I used for the salad were the first ones that I harvested from my patch! So I know that some people might think ruhabrb in any other form other then in a pie seems strange, but stop, don%u2019t think that. Rhubarb is everything. You can use it and love it in all sorts of ways, sweet and savory, and in all sorts of things, like this salad.
Fresh greens tossed with tart and gingery warm rhubarb and onions, topped with a creamy almond dressing. There is not much more you can ask for in a spring time salad. Sure, I guess you can ask for a fork, but really, I ate more of it with my fingers because well, that%u2019s just how I roll.
Now to the rhubarb and kale salad.
The stuff. Fresh rhubarb, baby kale, half an onion, a chunk of fresh ginger, a couple cloves garlic, almond butter, some roasted almonds, soy, vinegar, water, oil, and black pepper.
Start by mincing garlic and ginger and choping onion up into smallish pieces.
Add the stuff to a hot skillet with a little oil. Once it starts to sizzle, add in a couple splashes of water and let cook until soft.
While that%u2019s cooking make the almond dressing. Mix the almond butter, soy, vinegar, and a little warm water together until smooth and creamy. Taste and add more soy or vinegar if you feel it necessary. More water too if it%u2019s too thick.
Grab rhubarb ad cut into 1/2 inch pieces.
Toss it into skillet with the other stuff. Add in another splash or so of water and keep on cooking.
Once rhubarb starts to soften, turn the heat off of the skillet. Grab kale and toss it around in the skillet to mix around with the good stuff.
Immediately dump it all into a big bowl and top with almond dressing. Toss it around to evenly coat. Oh and throw in some chopped almonds. And black pepper. Add lots (as much as you like) of black pepper.
Now it%u2019s fork(or fingers) to bowl to face.
What a salad. What. A Salad.
Get at it!
-C
makes an entree salad for one or a side salad for a few
2-3 stalks fresh rhubarb (about 2 cups chopped)
3 large handfuls (about 6 oz) baby kale (you can really use any greens)
1/2 a yellow or sweet onion
1tablespoon freshly grated ginger
2 cloves garlic
olive oil
black pepper
2 tablespoons almond butter
1 tablespoon red wine vinegar
1 tablespoons soy sauce
1-2 tablespoons warm water
smal handful of chopped toasted almonds
Start by mincing the ginger and garlic and chop onion into small pieces. Place it all into a skillet with a drizzle of olive oil and place on medium heat. Once it starts to sizzle, add in a tablespoon or so of water to help soften and cook. Should take about 5 minutes.
In the meantime make the almond dressing. Mix almond butter, soy, vinegar, and a tablespoon of warm water together in a small bowl until completely incorporated. Taste. Add a little more soy if not salty enough, a splash more vinegar if not acidic enough, or bit more water if to thick.
Now chop up rhubarb into about 1/2 inch pieces and toss into skillet along with the other stuff. Cook for a few more minutes until the rhubarb becomes slightly soft. If the plan seems to get dry, add in another few splashed of water. Once rhubarb starts to get tender, take skillet off heat. Add in the baby kale and toss around then immediately transfer to a big bowl or plate. Drizzle almond dressing all over, toss, then top with chopped toasted almonds and lots of black pepper.
Eat.
I found another bag of frozen rhubarb in the chest freezer which is never a bad thing, but my rhubarb patch outside is growing strong and I will have all the fresh rhubarb I could possible eat within the next few weeks. So found rhubarb just means I need to eat it right fast before the fresh stuff comes in. (I haven%u2019t had a problem with that. it%u2019s almost gone already). Plus the other day while I was digging up and transplanting raspberry bushes to the back yard, my neighbor came over and gave me a gallon of frozen raspberries, harvested from said bushes that I was currently planting in my yard. Score for me! Free bushes and berries%u2026I have such nice neighbors.
So the logical thing to do with my new found and giving bounty was of course to hurry up and bake something. Cobbler. Why cobbler? Well, why not? I figured the mr would really like it and eat it and I also didn%u2019t want to make anything to fussy because I was just to dang busy spending all of my extra time outside doing outside things. And cobbler, it%u2019s not fussy because it is basically biscuits and jam baked up all together. Not a lot to think about and comes out looking all homey and sweet and smelling all nice and cozy. Doesn%u2019t that sound nice? And not a pain in the ass?
And best part. A made cobbler works as dessert or breakfasts or just a snack. Just asked the mr. He ate it for all the reasons. With a dollop of yogurt or cream of course because he is fancy like that.
And yeah the fruit I used was frozen, but fresh works just the same here too.
Now, lets get to that cobbler.
The stuff. Raspberries (frozen), rhubarb (frozen), sugar, flour, salt, baking power, cinnamon ,almond milk, apple cider vinegar, cornstarch, and oil.
Raspberries, rhubarb, sugar, cinnamon, cornstarch. Its all there in the bowl. Just needs to be mixed. So mix it.
Dump fruit mixture into well greased 8 inch pan and pop it into a hot oven to get a head start on baking.
While the fruits in the oven, make the biscuit dough. Mix the dry together then mix in the wet until just incorporated and a sticky dough forms.
Pulled from the oven, the fruit is starting to cook down and whoa, it just smells so good!
Drop on the biscuits dough on top of the fruit (careful of the hot pan). Evenly if possible, but don%u2019t work to hard to make it look perfect. Imperfection makes it look perfect, you know?
Once biscuits are on, lightly brush the tops with a little milk and sprinkle with more sugar then pop it back into the oven for another 25-30 minutes or until the biscuits are baked.
Pulled from the oven with a bubbly filling and a golden brown biscuity top. Things are looking good here.
And now it%u2019s time.
Dig on in my friend. Sever with something creamy like whipped coconut cream or some type of yogurt or ice cream situation of your choice. And again, this can be your breakfast.
Happy spring people!
-C
make a a 8 inch round which serves 5-6
For the Filling
2 cups raspberries (fresh or frozen)
2 cups rhubarb chopped into 1/2 inch to inch long pieces (fresh or frozen)
1 1/2 tablespoons corn starch
3/4 -1 cup sugar (lesser amount if you like a little more tartness. I used lesser amount)
1 teaspoon cinnamon
For the dough
1 cups all purpose flour
1 1/2 teaspoon baking powder
1/2 teaspoon salt
3 tablespoons sugar
3 tablespoons neutral flavored oil
1/2 cup plant based milk
1 teaspoon apple cider vinegar
Preheat oven to 350.
In a large bowl mix together the rhubarb and raspberries with the corn starch, sugar, and cinnamon. Grease a 8 inch round pan the is at least 2 inches deep (can use a slightly large pan or a square) and dump in fruit mixture. Place into oven to bake for about 15 minutes or the fruit starts to break down.
While fruit is baking, mix up biscuit dough. Flour, salt, 2 tablespoons sugar, and baking powder go in a large bowl and mixed until combined. Add in the oil, the milk, and the vinegar. Mix until just incorporated and a dough has formed.
Remove the fruit cooking from the oven. Turn heat up to 375.
Carefully drop spoonfuls of biscuit batter on top of fruit. Brush the top of the biscuits with a little milk and sprinkle with remaining tablespoon sugar. Place the pan back into the oven and bake for another 25-30 minutes or until the biscuits are all nice and golden brown on top.
Remove from oven and let cool for a few minutes before serving. Serve warm with a scoop or dollop of soothing creamy (coconut cream, yogurt, ice cream%u2026..whatever floats your boat.)
Left overs can be stored in pan, just cover it with something and place in fridge. Can be eaten cold to or reheated in microwave or oven.
I am sadly at my last few bags of frozen garden foods from last season. As of now I have a bag of tomatoes, a couple bags of shredded zucchini, and a bag of rhubarb. Well, had a bag of rhubarb. I think I have eaten almost all of it already. My rhubarb patch better get up and producing stalks soon. And as for the rest of the veggies that I will require. Guess I am going to be surviving mostly on roots from farm share (we are getting a lot more greens though!!!!) and probably doing a bit more grocery shopping then I care too. A few more months. I can do it.
Anyway, enough about my freezer and lack of fresh produce problems.
Here in Vermont maple season is well on it%u2019s way making it a perfect time for anything maple. And rhubarb. Yeah I am using my frozen rhubarb from last year, but any time now (after the snow melts) there will be plenty of stalks for the taking. There will be so much maple and so much fresh rhubarb which are the perfect taste combination. Exciting times! And when added to oatmeal, things just get more gooder. (I know gooder is not a word but I think it should be) Oatmeal, especially baked, is the stuff where all gooder things start.
Have you had baked oatmeal yet? It truly is fantastic. Not at all gummy and gloopy like stove topped cooked oatmeal (but I like it like that too). It still has a good bite to it while still being soft and creamy and boy oh boy is it just the bees knees. With the addition of some crunchy almond friends, well even better. Trust me. If you are a oatmeal eater, you must try it baked. Best part is that it can be eaten as breakfast but also I have been serving it to the mr for dessert with a healthy drizzle of more maple. It%u2019s that good friends. From breakfast to dessert. Everyone is happy.
To the baked oatmeal.
The stuff. Old fashion oats, cinnamon, salt, baking powder, rhubarb (fresh or frozen), REAL maple syrup, some plant milk, a few flax eggs, a bit of tahini, and some almonds.
To start. Oats, cinnamon. salt, baking powder and almonds get a quick toss together in a big bowl.
If you rhubarb is not already chopped up into inch long pieces, do that. I already did before freezing it so yea me. Once its chopped, layer almost all of it (reserve a few small needful to toss on top) into a lightly greased 9×9 inch baking dish then cover evenly with the oat mixture.
In now empty bowl mix together the milk, the flax eggs, the tahini, and the maple until evenly incorporated.
Pour the wet mixture all over the oats and let it absorb.
Once the liquid is all absorbed , top with any left over almonds and the left over rhubarb. For good looks.
Pop into a hot oven to bake.
Golden brown with crispy edges. Rhubarb and maple baked oatmeal for all your maple, oaty and rhubarbie needs.
Fresh from the oven scooped warm into bowls. Top with extra maple if thats what you should want do.
Enjoy and happy maple season!
-C
Make a 9×9 pan of oatmeal
2 1/2 cups old fashion oats (make sure gluten free if need be)
2 1/2 cups fresh or frozen rhubarb chopped into inch long pieces
1 1/2 cup plant milk (water works but it won%u2019t be as creamy)
1/2 cup chopped almonds (optional)
Preheat oven to 375
Lightly grease a 9×9 inch baking pan (I used metal because it makes for crisper edges but glass works too) and dump 2 cups of the rhubarb in and evenly distribute on the bottom. In a large bowl mis the oats, the baking powder, salt, and cinnamon together. Mix in chopped nuts if you are using. Evenly cover rhubarb with oat mixture. In now empty bowl mix together the milk, flax eggs, maple syrup, and tahini until evenly incorporated. Pour mixture over oats. Let the mixture sit for a few minutes until the oats have abosbed all the liquid. Toss the rest of the diced rhubarb and a few more chop nuts to the top and pop into the oven to bake.
Bake for 30-40 minutes (shorter time for a wetter oatmeal, longer for a denser crispier oatmeal)
Once baked to your likeness, remove from oven and let cool for a few minutes just so it is not super hot. Scoop into bowls and serve warm with extra maple and milk or whatever you might want to serve with it.
Left overs last great in fridge for 3-4 days or individual portions can be frozen for a month or two. Just pop into microwave for a couple minutes to warm up.
The day started off with rhubarb soup and ended in cinnamon walnut rhubarb bread. The bread was a star,%u00a0the soup, not so much, which sucked because I was so excited and so sure it was going be fantastic. Tomatoes, rhubarb, and fresh ginger.%u00a0Doesn’t that sound good? I still have hopes for the combination, but the batch I made was way way to acidic and thick and spicy because I added so much fresh ginger to it that it made the mr’s eye water and my nose run a little. So yeah, the soup needed work, but I was not going to end my day of rhubarb cooking with a fail. Also I felt like I owed it to the mr to make him something that he found edible. He really did not like the soup.
I knew the mr wanted (or at least he hinted at) pie but I had no time for pie. I already spent the morning making not so good soup and I had shit I needed to do. Pie would just take a little to long.%u00a0Quick bread was more in my time frame. A few minutes to chop and mix,%u00a0toss it into the oven for a while. and done.%u00a0%u00a0I had time to cleaned up, run to the post office and bank (I should probably tell you not to leave your oven on when you are not in the house, but I do, but only for short periods of time. And don’t tell the mr. He will kill me) and come back to the house not on fire and fresh cinnamon walnut rhubarb bread. I felt redemption,%u00a0even this it was not pie. The mr didn’t complain, not one bit.%u00a0
And by the way, the soup made it’s way into a different batch of soup that had other stuff in it and it WAS fantastic.%u00a0
The stuff. Rhubarb and walnuts and a bowl with flour, baking soda, baking powder, cinnamon, and salt. Also have coconut oil, brown sugar, soy milk, and a little dish or more brown sugar, cinnamon, and coconut oil for the topping.%u00a0
Chop rhubarb and walnuts into small pieces, not tiny pieces, but not big ones either.%u00a0
Mix the brown sugar and coconut oil into dry mixture, then add in the milk and vinegar and mix until just incorporated (don’t over mix).
Don’t forget to mix in the rhubarb and walnut pieces.%u00a0
Pour batter into a greased pan and then its %u00a0time for the cinnamon sugar topping. (cinnamon+sugar+coconut oil=rainbows?)
Cinnamon sugar topping %u00a0gets crumbled on and I found a few stray walnuts so I tossed those on top too. %u00a0
Now it’s time for the oven.
Look at that, fresh from the oven. So handsome.%u00a0%u00a0Pop it out of the tin and get it onto a wire rack to cool.%u00a0
And when it’s cooled a little and you are ready to take a seat, you slice and eat.
-C
makes one loaf
2 1/4 cup all purpose flour
3/4 cups brown sugar%u00a0
1 teaspoon baking soda
1 teaspoon baking powder
1 teaspoon salt
1 tablespoon cinnamon
1 cup soy or another plant milk
1/2 cup coconut oil (melted and cooled)
1 tablespoon apple cider vinegar
3 stalks rhubarb (2 cups chopped)
1/2 cup walnuts
Cinnamon Sugar Topping
1 tablespoon melted coconut oil
2 tablespoons brown sugar
1 hefty tablespoon cinnamon%u00a0
Preheat oven to 350
Chop rhubarb into small 1/2 inch pieces. If your walnuts are whole, chop those up into small pieces as well.
In a large bowl, combine the flour, salt, baking soda, baking powder, and cinnamon. Mix together then add in the brown sugar and %u00a0the melted coconut oil and mix. Then add in the say milk %u00a0and apple cider vinegar and mix until all is incorporated. %u00a0Stir in the chopped rhubarbd and walnuts.
Pour batter into a well greases bread pan. For the cinnamon topping, just add the cinnamon and brown sugar to the melted coconut oil and mix. %u00a0Crumble the mixture on top of the bread. if you have a few more walnuts, you can toss those on top too.%u00a0Pop bread into preheated oven.
Bake for 60 -70 minutes %u00a0or until a tester stuck into the middle comes out clean.
Remove from pan and let cool on wire rack. When ready, cut and eat.
Bread lasts 3 day in airtight container on counter, a few days longer in the fridge. %u00a0Freezes well.%u00a0
The rhubarb is ready and I am ready. There will be rhubarb in everything for weeks. But what to start with? I was debating if I should go classic and make a pie, or maybe savory and make a rhubarb tomato soup (going to make that soup later), or maybe just a big batch of jam to stick on and in everything.. Then I remembered %u00a0that I had a cookie dream last fall, a dream that I had made almond rhubarb cookie. (that is the extent of my dream memory) %u00a0And who am I to ignore a cookie dream? So I starting off rhubarb season with cookies.%u00a0
These cookies are all sorts of good. They have oats, almonds, flax, and a vegetable (because we all know that rhubarb is technically a veggies right?) so right there is a good enough excuse to make them. And to eat whenever, including breakfast, because remember, all the good stuff. But don’t let that good stuff fool you. These cookies are just as good, if not better then any other cookie. Soft and chewy. So nutty, sweet but not too, and rhubarb all tart and fantastic cutting in to say hey hey hey. These are springtime, any time, cookie time cookies. Dream cookies that are now reality cookies.
Let the rhubarb begin!
The stuff. Almonds, oats and rhubarb. Brown sugar, vegan butter, a flax egg, cinnamon, baking soda, vanilla and salt.
First we need to turn the oats into flour so blend them in a food processor until that happens%u00a0
Next up are the almonds. These you want to pulse for about 2-3 minutes they become %u00a0more of an almond meal the flour. Don’t over blend or else you might end up with almond butter.%u00a0
Next up. Sugar, vegan butter, cinnamon, vanilla, ans flax egg all go into a big bowl.
Mix well until all combined and incorporated.%u00a0
Now add in the oat flour, almond meal, cinnamon, salt, and baking powder.
Stir it up and there you go.. but the rhubarb!
Remove the leave from rhubarb if you haven’t already.%u00a0They will kill you!(or make you violently ill).%u00a0Chop the rhubarb stalks into small pieces that are roughly the same size as chocolate chip. Some chunks can be a little bit bigger, but you don’t want the piece too big or else you will end up with soggy cookies.
Rhubarb goes into cookie batter Mix it all in.%u00a0
Scoop out dough onto baking sheet and give them all a good pat to flatten them down a good bit. Place them into the oven for %u00a017-22 minutes to bake. until nice deep golden brown.
Golden brown and baked all nice. Look at those rhubarb chunks.%u00a0So pretty.
Cookies out on a wire rack to cool and firm up a bit.
So now you eat yourself a cookie. Or two.
-C
makes 18-22 cookies depending on size
1 1/2 cups raw almonds
1 1/2 cups old fashion oats (gluten free if needed)
1/3 cup vegan butter room temperature
1 flax or chia egg (1 tablespoon ground seed and 3 tablespoon water)
1 cup packed brown sugar
1 teaspoon baking soda
1 teaspoon salt
1 teaspoon vanilla extract
1 tablespoon cinnamon
2-3 stalks rhubarb (about 1 1/2 cups chopped)
Preheat oven to 350
Add oats to a food processor and blend until the oats turn into flour, which will take about 2 minutes. Dump the now flour into a bowl. Add almonds to the food processor and pulse for 2-3 minutes until the almonds turn into fine meal. Dump into the bowl with oats.
In a large bowl mix together the vegan butter, brown sugar, flax egg, and vanilla until fully incorporated. Add in the oat and almond flours, cinnamon, salt, and baking soda and mix until la dough forms.%u00a0
Grab rhubarb and chop into little pieces that are roughly the size of a chocolate chip. Measure out 1 1/2 cups and dump into batter. Mix until incorporated.%u00a0
Scoop out cookies onto a parchment lined baking sheet and flatten each cookie to aboutt 1/2 inch thick. Place into %u00a0preheated oven. and bake for 17-22 minutes (rotate after 12)%u00a0%u00a0or until a nice golden brown on top and bottom. (Depending on your baking sheet and stove, it could take a few minutes longer, just keep your eyes on the cookies!)%u00a0%u00a0Once bakes, place on a wire rack to cool.%u00a0These cookies are very fragile until they cool off so be careful handling them.%u00a0
Let cool and eat. And yes, these are 100% exceptable to eat as a breakfast cookie.%u00a0
Left over cookies should be stored in an airtight container at room tempature for 2-3 day, longer in the fridge, and can be frozen .
And eat yourself a cookie. Or two.
Cookie anecdote. %u00a0I placed a cookie sheet full of cookies back into a cold oven to store while I was cleaning up the kitchen. And left them there and kind of forgot about they, And then I cranked the oven on to make dinner and a few minutes later smelled something burning. OH fuck… the cookies! I pulled them out just in time to see that I had completely burnt the bottoms. SO PISSED ( I might have raged cried a little). But you know what I did? I cut all the bunt bottoms off and placed the crumbles up un-burnt bits onto a bowl. The mr came home and ate the bowl of crumble and was happy as a clam. And lucky had left out half of the cookies l on the counter so not all were lost. But lessons learned. Cookies crumbles are just as good as whole cookies and always check the oven before turning it on. There might be cookies in there!!!%u00a0
What a week, what a week. I have barely had time to think, let alone cook food.%u00a0
I had the rhubarb that was in need of cooking, the corn is all over the place all super fresh, and I had me a few minutes in between running around to make some food.
%u00a0I made this (what I now realize is succotash, which is such a fantastic word for food) a few weeks back, fell in love with it so I wanted to make it again. I also wanted to see if the mr would like it this time (he didn’t so much the last time) Says he is not a corn fan. But I don’t know, I still think he loves corn and just wants to be a pain in my ass and tell me he doesn’t. I figured that this time I made it, he would finally declare his love of corn, I mean, there is butt load of rhubarb in it too. And big creamy lima beans and nice sweet onion, and tomatoes. Yes it has a lot of corn, but it has so much more.
Well, he didn’t declare his love of corn.%u00a0 He did have a big scoop on his dinner plate, ate a bite or two then, picked out all the lima beans and chunks of rhubarb then told me that corn love wasn’t going to happen. He also aid that I should stop messing with the rhubarb and just make another pie.
What a butt face.
Whatever, more for me! And if you are awesome and you like sweet corn, tart rhubarb (corn and rhubarb together is the best) ,and are in need of a great summer side for any and all of your summertime food time needs, this is a winner.%u00a0 Super fast and easy to make, eaten warm or cold, and keeps well. It screams BBQ time. (Or 10 o’clock at night, standing in front of the fridge, eaten with a big spoon) It’s good whenever.
The stuff. Rhubarb, fresh corn, and some cooked lima beans. Also need a tomato, a sweet onion, red wine vinegar, salt ans pepper, a little olive oil and water (not pictured) and a few sprigs of fresh parsley.
The onion and rhubarb gets chopped up and tossed into a big skillet with a tiny bit of olive oil and a few splashes of water and place on the stove to cook a bit.
Corn needs to come off the cob. Do it the way you like, but I find holding corn vertical in a big bowl and cutting it down works best.
Slightly soft rhubarb and onions, ready for the other stuff.
Dump the corn, the tomato (chop it up first) the lima beans(drained) and a few splashes of vinegar into the skillet. Stir it all up and keep on heat for a few more minutes until the corn is just barely cooked and all the flavors have had a few minutes to meld.
Toss in some fresh chopped up parsley and season with salt and pepper…..
Into a pretty bowl for eating now or eating later.
This big ass bowl is all for me!!!!
Have the greatest weekend!
-C
2 ears of corn
4 fat stalks rhubarb (mine where about 10 inches long)
2 cups cooked lima beans
1/2 a sweet onion
1 tomato
fresh parsley
salt and pepper
few tablespoons red wine vinegar
olive oil
a few splashes of water
Chop the onion into small pieces then chop the rhubarb into smallish chunks. Toss the rhubarb and onion into a skillet with just a tiny bit of olive oil and a few splashes water. Place on the stove on medium heat and cook until the onion and rhubarb are slightly tender, but not to soft.%u00a0 If you need to, add a bit more water to the skillet to keep the stuff from browning or burning.
While the rhubarb is cooking, remove the corn from the cob and chop up the tomato into small chunks.%u00a0 Toss the corn, the tomato, the lima beans (drained) into the skillet with the rhubarb and onion. Pour in about 2-3 tablespoons of vinegar and season with salt and pepper. Mix and cook for another few minutes just until the corn get slightly cooked and all the flavors have had a few minutes to meld.
Remove from heat and dump into a bowl. Chop up a handful of fresh parsley and sprinkle all over
Serve right away warm or stick in the fridge and serve cold later.
My rhubarb patch has turned into a rhubarb jungle and I couldn’t be happier. At the beginning of the spring I moved like 10 of the plants to the new patch location and was wondering if I would even get a small crop this year. Guess my soil is premo cause those plants be ginormous.
And now I am harvesting the stalks from that jungle and I have rhubarb coming out of my ears. (I will be eating rhubarb all summer long) It’s not really a problem per say, but there is so much, so it’s time to get a little crafty with the tangy sour veggie stalk.(rhubarb sword fight anyone?)%u00a0 One of the first things I made with some of it was a salad that consisted of roasted and slightly charred zucchini, onions, corn and rhubarb. I made it for the mr thinking that he was going to love it because he loves rhubarb so much. Well he didn’t love it because of all the corn. (Such a weird egg that boy) But me,I loved it, like ate it all and then some. Corn and rhubarb are such a good combination and if the mr wasn’t being such a weirdo, he should have liked that salad too. But it gave me the inspiration for the cake . A cornbread cake ( he loves cornbread) sweetened just the right amount with maple. Not exactly a rhubarb corn salad, but you get the idea. And this cake is totally multi purpose. Made as dessert and would go extremely well with a scoop of your favorite vanilla ice cream but would work equally as well served with a bowl of baked beans. I mean, can cake for dinner get any better?
The stuff. A bowl with cornmeal, flour, baking soda, baking powder, along with a little salt. Also need some maple syrup, soy milk, earth balance and apple cider vinegar.And of course we have a few rhubarb stocks,
Start with melting the earth balance and maple syrup together on the stove and letting it thicken up a bit. While it’s thickening, think about the shape of you skillet and haw you want to layer you rhubarb, like the design of it.
Then when the maple is thickened and you know how you want to layer it, chop up your rhubarb and start placing in into the bottom of the skillet. Any way you do it, just make sure that the bottom is pretty much covered in rhubarb and that its only on stalk deep.
Now for the batter. Easy easy. Just whisk together the dry and combine all of the wet into a bowl.
Wet and dried mixed together.
Pour the batter gently onto the rhubarb and smooth the batter out.
And into the oven it goes.
Pulled from the oven when the cornbread is golden brown and a tester stuck into it comes out clean. Let it cool just as it is for about 10 minutes… (give the maple time to cool and set up so it doesn’t just get sucked into the cake) then flip in. I flipped mine onto a piece of parchment and a cutting board . You could try to go directly onto a cake stand or plate, but It might get a little messy. I like to play it safe when flipping things and just use a big cutting board. Now get ready to cross your fingers…..
Ta da!. Ain’t it a beaut? And don’t worry if a little piece or two get stuck in the pan. Either scrape it out and place it back on the cake or consider it a little snack.
There you have it. A cake good to go for all your meal eating needs.
Go rhubarb GO!
-C
1 1/4 cup flour
1 1/4 cup cornmeal
1 teaspoon baking soda
1 tablespoon baking powder
1 teaspoon salt
1/3 cup melted earth balance + 2 tablespoons
1/3 cup maple syrup + 2-3 tablespoons
1 1/2 cups soy milk (or any plant based milk)
1 tablespoon apple cider vinegar
2-3 stalks rhubarb (enough to cover bottom of skillet)
Note. I baked this in a 10 inch cast iron skillet. If you don’t have one, a 9 inch circle or square pan will do the trick, you are just going to have to simmer the maple in a pot ans pour in into the pan you are using…and maker sure to grease it!
Preheat oven to 350.
Place the 2 tablespoons of earth balance and the 1/3 cup of maple into a 10 inch skillet and place on medium heat. Stir around until earth balance is melted and the maple starts to thicken. Remove from heat. Now grab rhubarb cut into pieces and layer it any way you see fit, making sure to cover the bottom of the skillet but not layering it in to thick.
In a large bowl mix together the flour corn meal, salt, baking soda and powder. Then In a separate bowl, mix together the apple cider vinegar, soy, melted and cooled earth balance and the remaining maple. Pour wet into dry ans mix until even;y incorporated.
Pour batter gently on top of rhubarb, leveling out if need be, then slide it on into the oven to bake for 25-30 minutes or until the cake is golden brown and a tester stuck into the middle come out clean.
Remove cake ans let cool for for about 10 minutes. This is really important,because flipping to soon and all the rhubarb maple will just absorb and soggy up the cake and if you wait to long, all that goodness willl harden up and get stuck. SO 10 minutes.
Now when your ready yo flip, think about size. I used a big cutting board that , but a plate would work to, just make sure it;s slightly bigger then the skillet. Then just do it flip and lift the skillet away. Any pieces that might have gotten stuck can be scraped off and placed back where they belong.
Now your cake is ready and waiting for you to eat. Sweet enough for dessert, not to sweet that you couldn’t serve it with dinner. Multi purpose cake.. the best kind!
I found another bag of frozen rhubarb in the chest freezer which is never a bad thing, but my rhubarb patch outside is growing strong and I will have all the fresh rhubarb I could possible eat within the next few weeks. So found rhubarb just means I need to eat it right fast before the fresh stuff comes in. (I haven%u2019t had a problem with that. it%u2019s almost gone already). Plus the other day while I was digging up and transplanting raspberry bushes to the back yard, my neighbor came over and gave me a gallon of frozen raspberries, harvested from said bushes that I was currently planting in my yard. Score for me! Free bushes and berries%u2026I have such nice neighbors.
So the logical thing to do with my new found and giving bounty was of course to hurry up and bake something. Cobbler. Why cobbler? Well, why not? I figured the mr would really like it and eat it and I also didn%u2019t want to make anything to fussy because I was just to dang busy spending all of my extra time outside doing outside things. And cobbler, it%u2019s not fussy because it is basically biscuits and jam baked up all together. Not a lot to think about and comes out looking all homey and sweet and smelling all nice and cozy. Doesn%u2019t that sound nice? And not a pain in the ass?
And best part. A made cobbler works as dessert or breakfasts or just a snack. Just asked the mr. He ate it for all the reasons. With a dollop of yogurt or cream of course because he is fancy like that.
And yeah the fruit I used was frozen, but fresh works just the same here too.
Now, lets get to that cobbler.
The stuff. Raspberries (frozen), rhubarb (frozen), sugar, flour, salt, baking power, cinnamon ,almond milk, apple cider vinegar, cornstarch, and oil.
Raspberries, rhubarb, sugar, cinnamon, cornstarch. Its all there in the bowl. Just needs to be mixed. So mix it.
Dump fruit mixture into well greased 8 inch pan and pop it into a hot oven to get a head start on baking.
While the fruits in the oven, make the biscuit dough. Mix the dry together then mix in the wet until just incorporated and a sticky dough forms.
Pulled from the oven, the fruit is starting to cook down and whoa, it just smells so good!
Drop on the biscuits dough on top of the fruit (careful of the hot pan). Evenly if possible, but don%u2019t work to hard to make it look perfect. Imperfection makes it look perfect, you know?
Once biscuits are on, lightly brush the tops with a little milk and sprinkle with more sugar then pop it back into the oven for another 25-30 minutes or until the biscuits are baked.
Pulled from the oven with a bubbly filling and a golden brown biscuity top. Things are looking good here.
And now it%u2019s time.
Dig on in my friend. Sever with something creamy like whipped coconut cream or some type of yogurt or ice cream situation of your choice. And again, this can be your breakfast.
Happy spring people!
-C
make a a 8 inch round which serves 5-6
For the Filling
2 cups raspberries (fresh or frozen)
2 cups rhubarb chopped into 1/2 inch to inch long pieces (fresh or frozen)
1 1/2 tablespoons corn starch
3/4 -1 cup sugar (lesser amount if you like a little more tartness. I used lesser amount)
1 teaspoon cinnamon
For the dough
1 cups all purpose flour
1 1/2 teaspoon baking powder
1/2 teaspoon salt
3 tablespoons sugar
3 tablespoons neutral flavored oil
1/2 cup plant based milk
1 teaspoon apple cider vinegar
Preheat oven to 350.
In a large bowl mix together the rhubarb and raspberries with the corn starch, sugar, and cinnamon. Grease a 8 inch round pan the is at least 2 inches deep (can use a slightly large pan or a square) and dump in fruit mixture. Place into oven to bake for about 15 minutes or the fruit starts to break down.
While fruit is baking, mix up biscuit dough. Flour, salt, 2 tablespoons sugar, and baking powder go in a large bowl and mixed until combined. Add in the oil, the milk, and the vinegar. Mix until just incorporated and a dough has formed.
Remove the fruit cooking from the oven. Turn heat up to 375.
Carefully drop spoonfuls of biscuit batter on top of fruit. Brush the top of the biscuits with a little milk and sprinkle with remaining tablespoon sugar. Place the pan back into the oven and bake for another 25-30 minutes or until the biscuits are all nice and golden brown on top.
Remove from oven and let cool for a few minutes before serving. Serve warm with a scoop or dollop of soothing creamy (coconut cream, yogurt, ice cream%u2026..whatever floats your boat.)
Left overs can be stored in pan, just cover it with something and place in fridge. Can be eaten cold to or reheated in microwave or oven.
Granola is a weakness of mine, well good granola is. I don%u2019t really call most stuff of the stuff you can buy at the store really granola, it is more like sugary candy crap that is marketed to be good for you when it really is not. That shit is gross and that%u2019s my truth.
Real granola, or the kind I make, is the basic bitch of granola. All it is is oats, a spice or two, salt, and a pureed up fruit (or veggies). Sometimes I will add a seed or nut at the end, or maybe even a little coconut or some other dried fruit. There is no added sweetener added, no added oils, just straight up oats and fruit.. And it%u2019s clumpy and crunchy, and all sorts of frantastic. It really is what every granola should strive to be.
The last batch I made was peach because, if you didn%u2019t know, it is peach season. Plus peach granola is delicious. That is fact. (unless you don%u2019t like peaches).
Now to the granola!
The stuff. Old fashion oats, a couple of ripe peaches, cinnamon, salt, and a little water.
Cut peaches in half, remove pits, and cut into chunks.
Place peach chunks into blender and blend until smooth.
Mix the cinnamon and salt with the oats.
Pour the peach puree into the oats.
Mix until evenly incorporated and a little clumpy. If the oats are all moist but not creating any clumps, add a few tablespoons water until there is some clumping going on.
Dump mixture onto a baking sheet, You can line it, but I don%u2019t bother.
Pop into preheated oven to bake for about 25 minutes then remove from oven and toss around. Stick it back into oven for 25 more minutes or so. After 45-50 minutes of being in the oven, turn oven off and just let granola cool in oven. It%u2019s key to crispy granola.
Cooled off and all crispy and clumpy. Granola at it%u2019s finest.
Into a jar to save some for later to eat however you want.
Me, I like handfuls straight into my mouth, chased by a little oat milk. Hehe!
-C
makes 2 1/2 cups
2 peaches
2 1/2 cups old fashion oats
a few tablespoons of water (if needed)
1-2 tablespoons cinnamon
pinch of salt
Preheat oven to 375
Cut peaches in half, remove pits, and cut into a few chunks. Place chunks into a blender and blend until smooth.
Place oats into a big bowl and mix in the salt and cinnamon then dump in the peach puree. Mix until completely incorporated and a little clumpy. IF there are no clumps, add a few tablespoons water and mix. Dump mixture onto a baking sheet and evenly distribute. Place baking granola into oven to bake.
Bake for 25 minutes, remove the granola and toss around with a spatula, then place back into oven and bake for another 25-30 minutes. After being in the oven for a total of 45-50ish minutes, turn oven off but keep granola in oven to cool. This is key to a good crispy granola.
After cooling off in oven, remove and eat. Place what is not eaten in an airtight container. Eat within a week or so.
Ever since schools have been canceled and we have turned to homeschooling, the school systems around my parts have been dropping lunches off to all the littles. Both my sisters with littles have been getting food every day and it is great and amazing and makes me less worried about all the kids that really depend on school for food. Thank you school systems for being awesome!
The thing with the food is that you get what you get. Just about everyday, packed with the lunches,are either applesauce cups or strawberry puree cups.
The little shits, well none of them eat them. I don%u2019t know if they just don%u2019t like them or are sick of them but yeah, they are really starting to pile up. And so sisters have been sending apple and strawberry cups my way and now I have shit ton too.
I figured I would just bake with them and that is what I have been doing, but I still have so many and it is way to hot to be baking all the time. What to do with an excess of fruit puree cups? Freeze them. And make them into granitas. Whats a granita? A granita is flaked frozen fruit, kind of like a slushy you eat with a spoon. And wouldn%u2019t you know, once the applesauce and strawberry cups were frozen and called something else, the littles were all over them.%u00a0I am a genius.
It also helped that is was like a 95 degrees out and when it is that gross, no one wants to eat anything that isn%u2019t frozen. Blah. Too hot way too early!
So if you find yourself with an excess amount of fruit cups or just want to make a healthy and delicious cold treat for your littles or yourself, do this.
Now to the apple strawberry granitias!
The stuff. Applesauce cups and strawberry puree cups. If you don%u2019t have the actually cups, you can use applesauce from a jar or homemade and make your own strawberry puree by tossing fresh or frozen strawberries into a blender. Easy peasy.
The apple and strawberry purees into a bowl
Mix together. Have a taste, it is delicious.
Dump mixture into a baking sheet or pan, preferably a metal one, and place in freezer.
After about and hour, once it is slightly frozen, remove from freezer. Grab a fork and scrape the puree to kind of fluff it up. Place back into freezer for another hour and repeat one or two more time until the texture is nice and fluffy. Once you like texture, place in freezer for another 1/2 to really freeze up.
When you are ready to eat, scoop and serve.
Once scooped, eat. Right away because frozen things don%u2019t stay frozen for long!
-C
makes about 4 servings
2 applesauce cups (or 2 cups applesauce)
2 strawberry cups (or 2 cups strawberries pureed)
1 tablespoon sugar (optional)
Dump the applesauce and strawberry puree into a bowl. Mix together and taste. If you think it could use a little sugar, mix it in. Remember, once frozen, it won%u2019t taste quite as sweet.
Dump mixture into a baking pan or sheet, preferable a metal one, and place in freezer. After about an hour, or once it has frozen a bit, remove from freezer, grab a fork, and scrape the puree to losses it up. Place back in freezer for another hour. Repeat with the fork one or two more times until the texture is that of fluffy ice. After the last scrape, keep in freezer for another 1/2 hour or so to get it really frozen again then when you are ready, scoop out into bowl and eat.
Any that doesn%u2019t get eaten right away, keep in freezer. You can transfer to a smaller container with a lid.
I don%u2019t really understand the pineapple Easter correlation. I think it might have something to do with ham, but you know what, I really don%u2019t care that much to figure it out. (Okay, I googled it and it is ham related.)
So no ham here but I am all about the pineapple. Last week when I did my grocery shop there were a shit ton of pineapples on sale, so I grab a few figuring that me and the mr would eat them for next week or so. Up until last week, I was positive that the mr really liked pineapple. Until I cut one up. Turns out the mr , for some reason, now doesn’t like pineapple that much. What. the, HELL!? This was new news to me. I swear he just says these things to piss me off, but whatever, I guess he is not a fan anymore and it just means more pineapple for me.
But I also made a cake with some of the pineapple because I had so much and also I just wanted to bake a cake. And guess what, turns out the mr does like pineapple, just as long it is in cake form. I should have known.
To the upside down cake!
The stuff. A pineapple, flour, baking soda and power, salt, brown sugar, coconut oil, vanilla and apple cider vinegar.
Cut up pineapple. If you want to get fancy, garb a cookie cutter and cut out pineapple shapes for the upside down part. Or just cut up 1/2 inch slices or rings. however you want.
Get the pan ready. Grease a pan, add a parchment bottom. place about a tablespoon coconut oil into pan and coat bottom of pan then evenly sprinkle in about 1/2 cup brown sugar. Layer in your pineapple.
In a large bowl, whisk together the dry ingredients%u2026 (a bowl bigger then mine)
Place pineapple into blender (use scraps if you have them) and blend until smooth. Add in the brown sugar, coconut oil, vanilla, and vinegar and blend until combined.
Pour wet into dry and whisk until combined.
Pour batter over pineapple and into the oven it goes.
Oooooh. Cake. Are you just so excited! You should be, it is an exciting time.
Give it a few minute before flipping it.
Flipped and revealed. So pretty!
Now it%u2019s cake time so get down on it.
-C
makes a 12 round or 9×13 inch rectangle cake
2 1/4 cups all purpose flour
1 teaspoon baking soda
1 teaspoon baking powder
1/2 teaspoon salt
3/4 cup brown sugar plus 1/4 cup
1/2 cup warm coconut oil plus 1 tablespoon
1 1/2 cups pineapple pureed which Is about 1/2 a small pineapple
About 1/4 pineapple for bottom
1/4 cup water
I tablespoon apple cider vinegar
Preheat oven to 350 degrees.
First get the pineapple cut up any way you usually do it. If you want specific shapes for the pineapple bottom, keep that in mind and cut the pineapple accordingly. You are going to want the pieces (like the circles that I used) to be about 1/2 inch thick. And if you are using a cut out, my suggestion is to cut out all the pieces that you need to use and use the cut out scrapes to puree.
Grease and parchemnt line a 12 inch round or 9×13 inch rectangle cake pan. Evenly spread a tablespoon coconut oil on parchment then evenly coat with 1/4 cup of brown sugar. Place pineapple cut outs or pieces into pan. It is fine if pineapple pieced overlap a bit but make sure to not go much thicker then1/2 inch in places.
In a large bowl whisk together the flour, baking power and soda, and salt.
Place 1 1/2 cups of chopped pineapple into blender and blend until smooth. Make sure it equals 1 1/2 cup pureed. Add in 1/4 cup water, 3/4 cups brown sugar, 1/2 cup warm coconut oil, vanilla, and the vinegar and blend until completely smooth. Pour mixture into the bowl with the whisked dry ingredients and mix until combined. Pour cake batter gently over pineapple in pan.
Bake for 45-50 minutes or until the cake is a nice golden brown and a tester poke comes out clean.
Remove cake from oven and let cool for about 5 minutes, then invert pan onto a wire rack or plate and remove pan gently. The cake should pop out easily with the parchment attached. Peel parchment off and if any of the pineapple cokes loose, jus stick it back on.
And then cake. Eat it.
I found another bag of frozen rhubarb in the chest freezer which is never a bad thing, but my rhubarb patch outside is growing strong and I will have all the fresh rhubarb I could possible eat within the next few weeks. So found rhubarb just means I need to eat it right fast before the fresh stuff comes in. (I haven%u2019t had a problem with that. it%u2019s almost gone already). Plus the other day while I was digging up and transplanting raspberry bushes to the back yard, my neighbor came over and gave me a gallon of frozen raspberries, harvested from said bushes that I was currently planting in my yard. Score for me! Free bushes and berries%u2026I have such nice neighbors.
So the logical thing to do with my new found and giving bounty was of course to hurry up and bake something. Cobbler. Why cobbler? Well, why not? I figured the mr would really like it and eat it and I also didn%u2019t want to make anything to fussy because I was just to dang busy spending all of my extra time outside doing outside things. And cobbler, it%u2019s not fussy because it is basically biscuits and jam baked up all together. Not a lot to think about and comes out looking all homey and sweet and smelling all nice and cozy. Doesn%u2019t that sound nice? And not a pain in the ass?
And best part. A made cobbler works as dessert or breakfasts or just a snack. Just asked the mr. He ate it for all the reasons. With a dollop of yogurt or cream of course because he is fancy like that.
And yeah the fruit I used was frozen, but fresh works just the same here too.
Now, lets get to that cobbler.
The stuff. Raspberries (frozen), rhubarb (frozen), sugar, flour, salt, baking power, cinnamon ,almond milk, apple cider vinegar, cornstarch, and oil.
Raspberries, rhubarb, sugar, cinnamon, cornstarch. Its all there in the bowl. Just needs to be mixed. So mix it.
Dump fruit mixture into well greased 8 inch pan and pop it into a hot oven to get a head start on baking.
While the fruits in the oven, make the biscuit dough. Mix the dry together then mix in the wet until just incorporated and a sticky dough forms.
Pulled from the oven, the fruit is starting to cook down and whoa, it just smells so good!
Drop on the biscuits dough on top of the fruit (careful of the hot pan). Evenly if possible, but don%u2019t work to hard to make it look perfect. Imperfection makes it look perfect, you know?
Once biscuits are on, lightly brush the tops with a little milk and sprinkle with more sugar then pop it back into the oven for another 25-30 minutes or until the biscuits are baked.
Pulled from the oven with a bubbly filling and a golden brown biscuity top. Things are looking good here.
And now it%u2019s time.
Dig on in my friend. Sever with something creamy like whipped coconut cream or some type of yogurt or ice cream situation of your choice. And again, this can be your breakfast.
Happy spring people!
-C
make a a 8 inch round which serves 5-6
For the Filling
2 cups raspberries (fresh or frozen)
2 cups rhubarb chopped into 1/2 inch to inch long pieces (fresh or frozen)
1 1/2 tablespoons corn starch
3/4 -1 cup sugar (lesser amount if you like a little more tartness. I used lesser amount)
1 teaspoon cinnamon
For the dough
1 cups all purpose flour
1 1/2 teaspoon baking powder
1/2 teaspoon salt
3 tablespoons sugar
3 tablespoons neutral flavored oil
1/2 cup plant based milk
1 teaspoon apple cider vinegar
Preheat oven to 350.
In a large bowl mix together the rhubarb and raspberries with the corn starch, sugar, and cinnamon. Grease a 8 inch round pan the is at least 2 inches deep (can use a slightly large pan or a square) and dump in fruit mixture. Place into oven to bake for about 15 minutes or the fruit starts to break down.
While fruit is baking, mix up biscuit dough. Flour, salt, 2 tablespoons sugar, and baking powder go in a large bowl and mixed until combined. Add in the oil, the milk, and the vinegar. Mix until just incorporated and a dough has formed.
Remove the fruit cooking from the oven. Turn heat up to 375.
Carefully drop spoonfuls of biscuit batter on top of fruit. Brush the top of the biscuits with a little milk and sprinkle with remaining tablespoon sugar. Place the pan back into the oven and bake for another 25-30 minutes or until the biscuits are all nice and golden brown on top.
Remove from oven and let cool for a few minutes before serving. Serve warm with a scoop or dollop of soothing creamy (coconut cream, yogurt, ice cream%u2026..whatever floats your boat.)
Left overs can be stored in pan, just cover it with something and place in fridge. Can be eaten cold to or reheated in microwave or oven.
It%u2019s a smoothie. And no, we have never really been smoothie people in this house, but what can I say, sometimes smoothies happen, especially when you have about 20 ripe bananas in the fruit bowl with no room in the freezer and no need for 7 loafs of banana bread.
So I smoothied. And I like it (a lot).
This is a smoothie of simplicity. Nothing fancy. Simplest of simple. Straight to the point. And all sorts of good.
You might think, does this simple smoothie you speak of taste very good? Yes, yes indeed it does. It is all sorts of fantastic. Basically if you like creamy, nutty, oaty, bananery things, you will like this. And it%u2019s a perfect breakfast, snack, dessert, or just wanting a little treat like thing that is not garbage food. A smoothie of all smoothies with the most basic ingredients. And takes about 15 seconds to whip up. Can%u2019t complain about that.
To the smoothie goodness!
The stuff. A ripe banana, some old fashion rolled oats, a pinch of salt, water, and a smidge of maple syrup if you want it.
Everything goes into blender.
And blended until smooth. Hence the word smoothie.
Pour it into a cup (or if you are feeling primal, drink it straight from the blender%u2026 it%u2019s totally cool)
And done.
A banana oat smoothie.
Let the good time roll!
-C
makes 1 smoothie
1 very ripe banana
1/3 cup raw old fashion oats
1 1/2 cups water
pinch of salt
a tablespoon or two of any sweetener you like (optional)
a pinch of cinnamon (optional)
Place everything into a blender and blend until smooth. Pour into a cup, sprinkle with cinnamon if you wish, and drink right away.
It’s melon season!%u00a0The past few farm shares have included at least 2,, if not 4, watermelons and cantaloupes… Can you imagine. eating 4 watermelons a week? That’s a tall order, even for someone like me who could probably eat a whole watermelon in one sitting, it’s just doing it 4 times a week might be a problem. %u00a0It’s a whole lot of melon and not enough stomach, you know what I mean?%u00a0
So what do I do with so much melon? Well first off, whenever anyone comes over I try to get them to %u00a0eat as much of it as they can, which helps a great deal. Secondly, I cut it up and freeze some. But here is the thing, I love eating chunks of frozen cantaloupe, but frozen watermelon,%u00a0never been my favorite so I usually just pass on sticking in the freezer, until now.
There is something magical that happens when you stick the frozen watermelon and cantaloupe together into a blender and making it into a slushy. It’s like eating a ray of sunshine or maybe even a rainbow, just really satisfying and juicy, and sweet but not overly sweet, and just really freaking good. Especially with all the stupid hot and humid weather we have had lately, these slushies have really been hitting the spot. %u00a0Even the mr who says he dislikes watermelon was all into these melon slushies. (he likes things that he says he doesn’t like all the time. I am pretty sure he is taste confused) Like %u00a0he was really into them. Usually I have to prompt him to tell me how something tastes, but not the slushy, he told me right away how good it was. I was like, I know dude, I just drank 2 of them myself. And I could have drank 2 more but I was trying to not get tot far ahead of myself. Moderation is key, plus I didn’t;t have any more of the melons frozen. Time to restock the freezer.%u00a0
Go make yourself a slushy, it’s juicy deliciousness will make you happy.%u00a0
The stuff. Watermelon and cantaloupe. There should be a lime in there too but it must have rolled away….%u00a0
Chop some of each of the melon up, remove the rinds, and place on a big baking sheet and stick into the freezer until frozen. You can do as little as 2 cups %u00a0of each or as much as a whole melon, it’s up to you. (I suggest freezing extra)
Frozen melon. And now you can slushy.
Equal parts watermelon and cantaloupe go into blender, along with the juice of half (or more to taste)%u00a0a lime and you are probably going to need to add about 1/2 a cup of water, to help the blender blend it all together. %u00a0And that’s it. You blend until it’s all slushy.
Pour into cups, garnish with a lime and/or little chunks of melon and you are good as golden.%u00a0
From now on, or until summer is over and I run out of melon, I will be keeping the freezer stocked, especially because I know that the next few weeks are suppose to be stupid hot again.%u00a0
Waterloupe slushies. Summertime goodness.%u00a0
-C
about 2 cups %u00a0of a watermelon
about 2 cups of a cantaloupe%u00a0
1 lime
1/2- 1 cup water%u00a0
Note. The amounts above are for two%u00a0 2 cup slushies. You can, and should,%u00a0freeze a crap load more melon for future slushies. %u00a0Also, no one would fault you for maybe adding a little nip of some clear alcohol to this slushy situation to make it more of an adult drink……
Cut up a watermelon and a cantalopjue. Eat some and reserve at least 2 cups of each. Remove the rinds from the melons and cut into cubes. Place melon on a baking sheet and stick into the freezer until frozen.%u00a0
Once frozen,%u00a0place equal parts frozen watermelon and cantaloupe into the blender with the juice of a lime. Turn blender on. Slowly add in water until the blender can handle blending the frozen fruit. Blend until smooth. Pour into cups, garnish if you want with more melon and lime, then get to drinking.%u00a0
Banana bread never goes out of style. It is a clsasic, everyday, everybody type of food. Have a slice for dessert, maybe drizzled with some chocolate, definitely.%u00a0%u00a0How about for a grab and go breakfast, sure sure.. A chunk slathered in peanut butter for snack time or anytime, well %u00a0isn’t that’s why you make it?%u00a0 And who doesn’t always have a banana bowl in the kitchen? A banana bowl that is always full of bananas because the banana just always makes it’s way home. They seem to pile up, even when I don’t mean for them to. And I know I am not the only one. I see it all the time. A fruit bowl in the kitchen with a least a couple of really really ripe bananas, waiting for that moment when you know there is no freaking way anyone in their right mind would eat those banana because gross. That’s when you have it, the perfect banana for some banana bread, or in this case, banana muffins. %u00a0
Here I went muffin style because I had already made a loaf of banana bread earlier in the week and because I wanted to send half of the muffins to the boys at the front desk at the gym. (They give me coffee, I give them muffins) And also, muffins cook a lot faster then bread so if you are a little low on time, muffins are the way to go. But if you would rather bread, you can make it bread. Bananas are there for you and are not fussy.%u00a0
The stuff. Ripe bananas, poppy seeds, brown sugar, oil, and apple cider vinegar. Also have flour, cinnamon, baking soda, baking powder, and a little salt in the bowl.%u00a0
Mash the bananas in a bowl, like really mash them up until it turns to a sugar banana slop.%u00a0Then add in the oil and the vinegar and mix together.
Dump in the dry and the poppy seeds and mix it all up until combined but then stop. Don’t over mix the batter or else you will get tuff muffins.%u00a0
Scoop into well greased muffin pans and pop them into the preheated oven to bake.%u00a0
Done! And in only took like 20 minutes appose to an hour if I made banana bread.%u00a0
And here is when you grab a coffee, a muffin, and have yourself a moment.
Stay good.
-C
makes 12-14 muffins
2 cups flour
1 teaspoon baking soda
1 teaspoon baking powder%u00a0
1 teaspoon salt
1 tablespoon cinnamon%u00a0
1/4 cup poppy seeds
2/3 cups packed %u00a0brown sugar
1/2 cup neutral flavored oil
4 really ripe bananas (they need to be really ripe of the mixture will be to dry)
1 tablespoon apple cider vinegar%u00a0
Preheat oven to 350
In a large bowl,%u00a0mash the bananas with the sugar until the mixture turns wet and sloppy, but there are still a few little chunks of banana.%u00a0%u00a0Mix in the oil and vinegar. In a separate bowl mix the %u00a0flour, cinnamon , baking powder and soda, salt, and poppy seeds together. Dump the dry into the wet and mix until all is combined but then stop. Don’t over mix batter.%u00a0
Scoop mixture into well greased muffin tins and place into oven once it has preheated.%u00a0Bake the muffins for about 20- 22 minutes or until nicely browned and a tester stuck into the middle of one comes out clean.
Remove from oven and let sit in tin for a few minutes until it cools down. Remove the muffins from the tin and let completely cool on a wire rack.%u00a0
Eat whenever and how many you want, store the rest in an air tight container for a couple of days or wrap a few and %u00a0freeze.%u00a0
I made this salad about a week ago right before the mr and I left town for the weekend. I had just gotten 2 very large canary watermelons from the farm, and had a million cucumbers and a trillion tomatoes from the garden. If a trillion tomatoes seems like a lot it is. But that is how many I had, and still do (this years garden just won’t quit) And with counters of all the fruit and veggies that I could possible want at one given time, we needed to eat some up before we left. But I really wanted watermelon and felt guilty about cutting into one when I would be fine left for a while and there were a million ripe and ready tomatoes to eat that would not last the weekend fresh. But guess what, went for it anyway and cut up a watermelon because damn it, I really wanted watermelon.
So a bazillion tomatoes (notice how the number keeps getting bigger, that’s because it’s truth) a million cucumbers, and now a watermelon that needs to be eaten. Salad it will be. (I had the littles over to eat the rest of the watermelon, they will always help a lady out)
A big ass fruity, citrus-y, crispy, tangy salad. A party of all these fresh fantastic flavors all up in your mouth. The first time I made this, I thought there was a chance the mr might not like it, but as it turns out he like it very very much, enough to eat the whole entire big ass bowl of it. (I got a few measly little bits) I have since made this salad two other times and know well enough to save myself a bowl of my own. The mr forgets to share.
The stuff. Watermelon (I used a canary but a red watermelon works too) onion, cucumber and tomatoes. A jalapeno for a little heat, fresh basil and mint, a lemon and salt and pepper.
First the watermelon. You probably don’t want to eat the rind so remove that and chop up the fruit into mouth sized pieces. IF you have a really seedy melon, just remove what you can see and save them for roasting later (yes roast the seeds.. they are fantastic)
Now the cucumber, onion and jalapeno get their turn to be chopped up. Cucumber into smallish pieces. Onion thin and small pieces and jalapeno into very tiny little pieces. After those go into bowl, it’s tomato time. Just cut up into into mouth sided pieces and into the bowl too.
Red, yellow, and green tomatoes. The colors are so PRETTY!
Mint and bail minces up nice .
Topped with all the fresh herbs, salt and pepper, and lemon juice.
A thing of beauty and tastes better then it looks. A salad worth making over and over and lots of it too.
Make sure to save yourself a bowl if sharing, you might not get any otherwise.
Have a great weekend
-C
serves between 2-4 people
1/4 of a canary watermelon (around 3 cups cubed)
1 cucumber
2-3 tomatoes of any variety
1/2 of an onion (red or sweet white)
handful of fresh basil and mint
1 small jalapeno
1 lemon
salt and pepper
Take watermelon and remove rind then cut the melon into mouth sized chunks. If you melon has seeds, remove what you can (save for later to roast) and place into a large bowl. Grab cucumbers and cut into mouth sized chunks. Thinly slice onion into long thin ribbons then into smaller pieces and then cut up jalapeno.%u00a0 To cut the jalapeno, remove stem, cut in half length wise, then scrap the seeds and ribs from the inside out. Dice the pepper into very small pieces and toss everything you just cut up into the bowl with the melon.%u00a0 Tomatoes now get cut into chunks and those go into the bowl too. Sprinkle with a pinch of salt and pepper and the juice of the lemon. Cut or chop fresh basil and mint up and add on in. Mix it all up and that’s that.
Do you have a gazillion tomatoes, like so many that they are practically coming out of your ears? Me too…. Me too. This year the tomatoes have been gang busters, a explosion of the sweetest and most delicious fruit and now I have tomatoes littered everywhere, tucked into all the corners and baskets all over the house. It’s getting kinda tomato crazy over here.
%u00a0I can only eat so many tomatoes a day before all I have eaten are tomatoes and I start to feel slightly sick. Same with the mr, he has been a tomato eating champ as well but I think he was getting a little bored with all the tomato salads that I have been making. So I thought I would try something new and make a tomato cake. I figured why the heck not, tomatoes are technically a fruit and fruit and cake are great together and yeah. So tomato cake is going to be fantastic. I also wanted to make something that the mr would eat for breakfast. I have been doing this new thing in the mornings for the mr. I have coffee ready, some breakfast food (its been zucchini bread for a while), and a little vase of fresh flowers that I pick on my morning walk, all set out on the counter for when he wakes up. I know, I am so great right. Really I do it cause I want him to eat something before working all morning and plus if I am all sweet in the morning, he can’t be an old man cranky pants (at least he tries not to be).%u00a0 Now for the next few days the tomato cake is breakfast cake and all is good.
Anyway, the cake come out great. Bright reddish orange, dense but fluffy and most, and smells so good. The mr tells me it’s amazingand I shared a chunk with some of my family and everyone (minus a little) where fans. I am for sure going to be making this again soon, although I have been toying with the idea of eggplant sweet bread (too far??) but I’ll get to that later.
Now for the tomato cake!
The stuff. Flour, baking soda, baking powder and salt (all in the bowl). Brown sugar, oil, vanilla, apple cider vinegar and a few nice and juicy tomatoes.
First off, remove the core from tomatoes and cut into some chunks. Stick the chunks into a blender and blend.
Fresh and smooth tomato puree.
Now just dump the rest of the liquid stuff into the blender now and give it a whirl to mix it all up.
And pour the blended wet into the dry and mix until incorporated.
Pretty pink batter goes in a well greases bundt pan. I had got brown sugar everywhere while I was measuring it out and decided to just toss it on the cake as not to waste it…doesn’t hurt.
And now the batter goes into a preheated oven to bake .
A bit of time later you have yourself a cake.
The scary part. Flip the pan and hope all that grease does it’s job and the cake pops out. Lucky me this one popped out like a champ.
One de-panned, let the cake cool for a bit before cutting into it.
And now all you have left to do it eat it, so eat it.
Have a great weekend. Eat lots of tomatoes and make lots of cake.
-C
Makes one bundt cake
2 -1/3 cup all purpose flour
1 teaspoon baking soda
1 -1/2 teaspoon powder
1/2 teaspoon salt
2-3 large tomatoes (2 -1/2 cups after blended)
1/2 cup brown sugar (for a tad sweeter, add another 1/4 cup)
1/2 cup of any neutral flavored oil
1 teaspoon vanilla
1 tablespoon apple cider vinegar
Preheat oven to 350
Start by whisking together all the dry ingredients into a big bowl. Take tomatoes, remove core, chop into chunks, and place into a blender. Blend tomatoes until a smooth and frothy puree. Now add in the sugar, oil, vanilla, and apple cider vinegar and blend until incorporated. Pour wet mixture into dry and stir until combined.
Pour the cake batter into a greased (and floured if you want. I find it helps to make sure all the nooks are greases) and stick into preheated oven. Bake for 45-50 minutes until it’s a dark reddish golden brown and a tester (I use a fork) comes out clean when stabbed.
Remove from oven and let cool for a minute or two then invert cake, give the pan a few tap taps and hope that it comes out all nice and clean. (don’t worry if a piece gets stuck, you can just dust the top with some powdered sugar)
Let cake cool and when ready, cut a slice and eat it up. I was told no glaze, but I was going to make a simple lemon glaze (lemon juice and powdered sugar) for the top. The mr said it was perfect, but glaze would have been pretty.%u00a0 So glaze it up if you want.
I am channeling all my summer time feels here in hopes for warmer weather. As of yesterday there was still a pile of snow outside of my house and I am still leaving every morning in a hat, mittens, and a winter jacket.
I want t-shirts and shorts, I want sandals, and I want to set my winter jacket on fire (not really, but kinda).
This cold weather has crept back into my soul and I needed something to remind me that there will be warmer days to come and I will soon be bitching about how hot I am and blah blah blah.. you know how it goes.
So I make lemonade. This lemonade as inspired by my favorite tea as of late, raspberry zinger. It’s a nice and tangy tart and really tasty. I make great big jar of it at night and add a little squeeze or two of lemon to it for that little extra zing. I figured if it tastes good hot, it will taste great cold, which in fact, it does. It taste really freaking good. And it just occurred to me that there is probably a little subliminal inspiration from Beyonce in wanting lemonade, so thanks for the B.
Anyway, it’s suppose to me nice and seasonably warm this weekend. Maybe bust out your lemonade game and try a batch of this one.
The stuff. Lemons, a raspberry zinger tea bag, honey (or any sweetener you like to use) water and ice.
Bring some of that water to aalmost boil and pour it over the tea bag (make sure you stick the bag into a jar or pitcher)
While the tea is steeping, juice the lemons. And a personal preference, you can strain out the pulp or not. I use the strainer to catch the seeds but then stick the pulp back in cause I like pulp. All up to you.
While the tea is steeping and still hot, add in any sweetener that you want to use. ( I used a little honey) Stir until that sweetness is all dissolved.
And after the tea has had a good steep, dump the brewed tea into the pitcher with the lemon juice then add in the really cold water. Stir it all around.
Add acouple thin slices of lemon to make it all fancy anda few big chunks of ice to make it super cold
Refreshing, crispy, tangy with a touch of sweet….Perfect for all those warm summer days to come (hopefully)
Have a great weekend people.
-C
Makes 5 cups
1 raspberry zinger tea bag( I used Celestial Seasonings)
3/4 cup fresh lemon juice (3-5 lemons, depending on size)
Anywhere between no to 1/2 cup of sweeter (can use sugar, honey or maple, I like a touch of honey)
4 cups water (2 hot, 2 cold)
ice
Place tea bag in 2 cups of hot water (can be done directly in a pitcher) Add in the sweetener while its still hot and mix until completely dissolved. Let steep for about 10 minutes.
Remove tea bag and add in the lemon juice, 2 more cups of cold water and mix, Top with ice and garnish with a few more lemon slices if your feeling fanciful.
Serve in a glass full of ice with a wedge of lemon and a smile on you face.
This time next week the mr and I will be on our jolly (the word jolly is way underused) journey through the hill of the Irish countryside.%u00a0 I am getting a bit nervous. First off, we have yet to book a single b and b (we are air bnb-ing it the whole time.) We still haven’t reserved a car, have just starting looking at baggage requirements and have no clue how we are getting home from the airport. But we did print out the plane tickets last night, so that’s something!!%u00a0 I make it sound like we have been slacking, but it really isn’t our fault (most of it). We have most of the stuff we need to book ready to pay for, but our credit card we ordered for this trip was lost in the mail and we can’t book anything without it. Aagh!%u00a0 But hopefully the new one will be in the mailbox today and we can get on our way to planning the best trip ever
With the trip getting so close, my mind is doing this weird thing where it doesn’t want to research things anymore. It is sick of looking up attractions or prices of this, or how to translate that. I have done all the research that I can handle and am mentally tired. I just want to chill on the internet stuff and spend the rest of this week cleaning the house and baking things until we leave. You know, smash in as much domestic things as I can.
So clean I do and bake things I am. The other day I bought 4 beautiful vanilla persimmons (yeah persimmons!)%u00a0 and instead of hoarding them all to my face, I baked a little persimmon cornbread concoction for the mr(he doesn’t get excited about fresh persimmon like I do) This way he gets in on some of the persimmon action and I don’t feel as guilty about buying 4 persimmons.
Dense, moist on the inside, crispy on the outside. A nice sweet maple glazed layer of soft persimmon nicely layered on top to take it to the next level .This bread, it’s and all sorts of good. It hugs the boarder of a bread and cake. but still makes a great side to a big bowl of squash soup, black bean chili, or whatever.%u00a0 The mr, he ate a piece for a snack after I made it, then a chunk with his dinner, a little slice for late night snacking and then a piece for breakfast. I might just make him a lunch situation with the rest of it for him today. And then it will be gone.. whoa.%u00a0 I guess that means it perfect for anytime and it’s just that good.
I am that good. But we can talk about me later, for now, the cornbread.
The stuff. A persimmon, some white whole wheat flour, yellow cornmeal, baking soda and powder and salt. Maple syrup, melted earth balance, and some soy milk are going in too.
Start by preheating the oven and then thinly slicing the persimmon into the prettiest little rounds
And now whisk together all the dry stuff in a big bowl then dump in all the wet stuff.
Mix it all together until full just incorporated. (don’t over mix.)
Grease a 9 inch pan (can use a 9 inch square) and coat the grease with cornmeal.
Spread the mixture in the pan then layer the top with the sliced persimmon.
Lovely right.
Now stick it into the oven.
After about 25 minutes, the cake is just about done. Remove it from the oven and quickly brush the top with maple syrup then stick it back into the oven to finish baking.
And when the bread is completely baked, the persimmons nice and soft and glimmering,%u00a0 remove from the oven and sit on a rack to let cool.
And when you can’t wait any longer….. cut yourself a big piece
Along with a cup of coffee…..
Nothing to worry about here.
Have a great day.. Wish me luck!
-C
make a 9 inch round bread cake
1 cup white wheat flour
1 cup yellow or white corn meal
1/3 cup melted earth balance
1/4 cup maple syrup plus about 2 tablespoons more for brushing the top of bread
1 1/2 cups soy milk
2 teaspoons baking soda
1 teaspoon baking powder
2 tablespoon apple cider vinegar
pinch of salt
1 large ripe but firm vanilla or fuyu persimmon (If you have smaller ones, you might need 2)
Preheat oven to 375
First off, slice the persimmon into really thin slices.
Next, combine the flour, the cornmeal, baking soda powder, ans the salt into a large bowl and whisk together. Add in the maple syrup, the soy milk, the melted earth balance and the apple cider vinegar. Mix together until just combined.%u00a0 Dumb the batter into to a greased and cornflour coated 9 inch cake pan and layer persimmon slices on top, starting with the outer edge and layering inward (or whatever way you want to)
Place bread into oven and bake for about 25 minutes or until the cornbread has risen and is starting to brown, but could use a few more minutes. Take cake out and brush the persimmons with maple syrup. Place back into over to bake for another 8-10 minutes or until the cornbread is completely cooked.(tester comes out clean)
Remove from oven and let cool in pan on a wire rack
Slice, serve, and eat.
That right bitches .. %u00a0grape soda!!!!
uh-hum. Sorry. you are not bitches.%u00a0
But this grape soda is my bitch. It is SO GOOD! And that is coming from me, who is not a soda drinker. (Spoiler alert.. all it is is cooked down grapes and seltzer. (and a bit of lemon juice) But thats is)%u00a0So why soda? I guess it’s because I can’t make wine since %u00a0I don’t have the %u00a0knowledge and or the vineyard to make wine.%u00a0%u00a0But cooking down some grapes.. I can totally do that.%u00a0
Every once in a while I make something that I think is so freaking ingenious and fanatic that I am shocked that everyone and there mom doesn’t do it. This is one of those recipes. I mean, the mr was more at then thrilled when I handed him a glass, covered in condensation, with a cutie pink straw. %u00a0He took a long drink and gave a sweet little refreshing sigh. It was great and cute and make me happy cause I think it made his day.%u00a0%u00a0And I know that there are a %u00a0thousand and one other people out there that have been doing this for years and that there are probably a couple hundred recipes as well,%u00a0but I still consider myself a genius for making this. Great minds my friends.%u00a0
Anyway, this grape soda is super refreshing, perfectly sweet, and a great way to end the summer and greet the fall. Great for kids and parties,%u00a0%u00a0I think this is definially going to be making an appearance at a few of the littles birthday parties and maybe a few grown up people parties.(maybe %u00a0with a splash or two of booze..see you don’t need wine) over the next few weeks. Who needs wine when you got grape soda!
The stuff. Grapes, a lemon, and seltzer water.
Oh wants that?%u00a0%u00a0Is that drink jar suppose to be an empty? Nope. I forgot to fill it with the seltzer before I took the pictures.( I think I get a break cause yesterday was stupid hot and I was feeling a little woozy)%u00a0Let’s just pretend there is seltzer in there, ok. and also lets pretend there is water in this picute too, cause we need that as well.
Take your grapes, stems removed, and place in a pot with the lemon juice and water. Stick the pot on stove on medium heat and during to a boil. Then place a lid on it and turn heat down to low and simmer away, giving it a stir sand keeping you eye on it.
%u00a0Continue to cook until the grapes are pretty much all dissolved and the liquid has reduced about 1/2.
Let cool for a few minutes and strain the grapes through a fine mesh strainer, smooshing and scraping the grapes all around to extract as much liquid as you can.
The left over grape mush makes for a great little snack on some toast, in some yogurt, or with a spoon in your mouth.%u00a0
Oh so pretty grape juice concentrate. Stick it in the fridge to cool completely.%u00a0
After cooled, get it all ready for drinking. %u00a0Add a few tablespoons of the concentrate to a cup, add in some seltzer, maybe a few ice cubes and %u2026wa la!
Gape soda is the shits!
Happy Friday.. Enjoy the last weekend of summer!
-C
Makes about 5 drinks so feel free to double and or triple recipe if you are serving a lot of people
2 cups red grapes
2 cups water
Juice of 1 lemon
plain (or madiran orange, or any flavor really) seltzer water
Remove stems from grapes and place into a pot with water and the lemon juice. Briong to boil then cover and turn heat to low. Cook for about 20 minutes to a 1/2 hour or until the grapes are complete mush and the liquid has reduced to about 1/2.%u00a0
Let cool enough hot handle and strain grape glop through a very fine mesh strainer, smooshing it around to extract as much liquid as you can. Refidgerate the juice, eat the left over mush.
Once cooled, pour about 3-4 tablespoon of the concentrate into a cup and add in about 1 cup of seltzer. Mix and enjoy.%u00a0
Using a straw is optional, but either way, drink with your mouth.
Zucchini. One of the best summertime veggies. If you have been around here (as in my blog) for long enough, you all know how I am a zucchini feen. Once they start growing, I take them all. From my garden, from your garden, even my sisters mother in laws extra, plus the million I get with my farm share. At any given time I could have upwards of fifty zucchini spilling out all over the counter and shoved into any crevice I can find in the fridge. But the excess never lasts long because I eat them all. Mostly to myself, and I feel great about it. (Ok, I do end up freezing some of it for winter, but I am still eating it all!)
And every year when the first zucchinis start to hit the ground, all the people are up in my squash asking for zucchini bread, like they can%u2019t possibly make it themselves or anything. But I don%u2019t mind what so ever because sharing is caring and I guess I care. Plus I like to bake so it works, you know?
When I was recently asked to bake a loaf of zucchini bread, I made the decision to go the muffin route instead because aren%u2019t muffins just individual little breads that take half the time to cook them a loaf? Yup, and that is very nice when you want to minimize any hot oven time because summer is hot enough as it is.
And because they are muffins, they acceptable for breakfast, even with all the chocolate chips.
Win!
Now to the muffins!
The stuff. A good sized zucchini, flour, baking soda and powder, salt, brown sugar, oil, cinnamon, raw sugar, apple cider vinegar, and some chocolate chips.
In a large bowl, whisk together the flour, baking soda and powder, salt, cinnamon, and brown sugar until completely incorporated and there are no lumps of sugar.
Shred the zucchini. I used a smaller shredder so the pieced are very thin but a normal sized box grater shred works just as well
Add zucchini, oil, and vinegar to bowl and fold in until completely combined.
Then fold in chocolate chips. Duh.
Scoop batter into a greased muffin pan and sprinkle the tops with raw sugar. Pop into the hot oven to bake.
Pop out of tins to cool on a rack.
And eat. All to yourself or share, that is on you.
-C
makes 12 muffins
2 1/2 cups all purpose flour
1 1/2 teaspoon baking powder
1 teaspoon baking soda
1/2 teaspoon salt
1 tablespoon cinnamon
3/4 cup packed brown sugar
1/2 cup neutral flavored oil
2 tablespoons apple cider vinegar
1 medium zucchini (2 cups packed shredded zucchini)
2/3 cup chocolate chips
1/4 cup raw sugar (to sprinkle the tops) optional
Preheat oven to 350.
Grab a large bowl and add in the flour, baking powder and soda, cinnamon, and salt. Whisk together then add in the brown sugar and whisk in, making sure there are no big clumps.
Shred zucchini uniti you have 2 hefty cups. If you have a fine shredder, use that, if not, a normal sized shred will do.
Place shredded zucchini into the bowl along with the oil and the vinegar. Start folding with a spatula until everything is incorporated. Resist the urge to aggressively mix, it takes a minute for the liquid from the zucchini to absorb into the flour. (Over mixing it will make the muffins tough) Once the batter is uniform, fold in chocolate chips.
Scoop batter into a well greased or lined muffin tin. Sprinkle the tops with raw sugar and pop the pan into the preheated oven. Bake for about 30 minutes or until fluffily and domed and a tester stuck in one comes out clean.
When baked, remove from oven and pop out if tin. Let cool on a wire rack but feel free to eat one warm.
Store uneaten muffins in airtight container at room temp for a 2-3 days but if it is really hot out, just stick them in the fridge. Also can be frozen.
Ever since schools have been canceled and we have turned to homeschooling, the school systems around my parts have been dropping lunches off to all the littles. Both my sisters with littles have been getting food every day and it is great and amazing and makes me less worried about all the kids that really depend on school for food. Thank you school systems for being awesome!
The thing with the food is that you get what you get. Just about everyday, packed with the lunches,are either applesauce cups or strawberry puree cups.
The little shits, well none of them eat them. I don%u2019t know if they just don%u2019t like them or are sick of them but yeah, they are really starting to pile up. And so sisters have been sending apple and strawberry cups my way and now I have shit ton too.
I figured I would just bake with them and that is what I have been doing, but I still have so many and it is way to hot to be baking all the time. What to do with an excess of fruit puree cups? Freeze them. And make them into granitas. Whats a granita? A granita is flaked frozen fruit, kind of like a slushy you eat with a spoon. And wouldn%u2019t you know, once the applesauce and strawberry cups were frozen and called something else, the littles were all over them.%u00a0I am a genius.
It also helped that is was like a 95 degrees out and when it is that gross, no one wants to eat anything that isn%u2019t frozen. Blah. Too hot way too early!
So if you find yourself with an excess amount of fruit cups or just want to make a healthy and delicious cold treat for your littles or yourself, do this.
Now to the apple strawberry granitias!
The stuff. Applesauce cups and strawberry puree cups. If you don%u2019t have the actually cups, you can use applesauce from a jar or homemade and make your own strawberry puree by tossing fresh or frozen strawberries into a blender. Easy peasy.
The apple and strawberry purees into a bowl
Mix together. Have a taste, it is delicious.
Dump mixture into a baking sheet or pan, preferably a metal one, and place in freezer.
After about and hour, once it is slightly frozen, remove from freezer. Grab a fork and scrape the puree to kind of fluff it up. Place back into freezer for another hour and repeat one or two more time until the texture is nice and fluffy. Once you like texture, place in freezer for another 1/2 to really freeze up.
When you are ready to eat, scoop and serve.
Once scooped, eat. Right away because frozen things don%u2019t stay frozen for long!
-C
makes about 4 servings
2 applesauce cups (or 2 cups applesauce)
2 strawberry cups (or 2 cups strawberries pureed)
1 tablespoon sugar (optional)
Dump the applesauce and strawberry puree into a bowl. Mix together and taste. If you think it could use a little sugar, mix it in. Remember, once frozen, it won%u2019t taste quite as sweet.
Dump mixture into a baking pan or sheet, preferable a metal one, and place in freezer. After about an hour, or once it has frozen a bit, remove from freezer, grab a fork, and scrape the puree to losses it up. Place back in freezer for another hour. Repeat with the fork one or two more times until the texture is that of fluffy ice. After the last scrape, keep in freezer for another 1/2 hour or so to get it really frozen again then when you are ready, scoop out into bowl and eat.
Any that doesn%u2019t get eaten right away, keep in freezer. You can transfer to a smaller container with a lid.
It started a few nights ago when I was eating my after dinner dessert snack. A big bowl of fresh strawberries. But there was something missing. I wanted a little something else to add to my dessert so I opened the freezer to see if there was any frozen bananas. What caught my eye was the bag of peas. And it just seemed right so I poured some into a bowl, dumped hot water on them to thaw, and mixed them into the bowl with the strawberries. Now I got to tell you, it was one of the most satisfying delicious desserts I have had in a long time. Think about it. Peas are sweet and creamy and strawberries are sweet and tart. The combination might seem a little strange but haven%u2019t we learned by now that I am always right about flavors? HAHA. But really. It%u2019s one of my new favorite snacks.
Now how to share my newfound love of peas and strawberries? Well cake of course. I figured people are less hesitant to try new flavor combinations when in cake form because everyone wants cake. And I was right. Plus it is a real looker if I do say so myself. Bright green cake with bright red strawberry glaze. A spring time snack with the spring time feels. Everything about this cake is right on point with all the things. And it is super fast and easy to make to boot because it%u2019s all thrown together in a blender.
You really can%u2019t go wrong here friends. And if you happened to be needing a little something something to snack on with your mama this weekend, well I think you just found the perfect snack.
Now to the cake!
The stuff. Peas,strawberrie jam of perceives (I had just made it so it is still warm) Flour, sugar and powdered sugar, baking soda and powder, salt, oil, and vinegar.
Super easy here. Place peas into blender and blend until smooth. Add oil and sugar and blend until incorporated. Then add in all the dry. Before you blend, take a spoon or spatula and hand mix it a little. Add in a cup of water and vinegar then pulse until incorporated. Don%u2019t over blend it or else it will be tough.
Pour batter into a well greased pan and pop into a hot oven. Bake.
Afer about 25 minuts, check for doneness. When the fork or tester comes out clean, it is done!
Pop cake out and let cool on a wire rack.
And glaze. Warm up the jam in the microwave on on stove until loose then mix jam with powdered sugar.
When the cake has cooled, grab a fork and stab holes all over so when you pour glaze on it will kind of seep into said holes.
Pop cake back into pan (or don%u2019t if you dont want too) and pour glaze all over top.
A dusting of powdered sugar for looks and done and done. Cut into squares, pop a piece on a plate, and snack away.
-C
makes a 9×9 cake
2 cups all purpose flour
3/4 cup white sugar
1 1/3 cups sweet peas (fresh or frozen and thawed)
1 cup water
1/3 cup oil
1/2 teaspoon salt
1 teaspoon baking powder
1 teaspoon baking soda
1 tablespoon vinegar
1 cup powdered sugar
3 tablespoon strawberries jam or preserves
Preheat oven to 350
Place peas into blender ans blend until smooth. Add in oil and sugar and blend until incorporated. Next add in baking soda and powder and then flour on top. Grab a spoon or spatula and mix a little to give the batter a head start then add int he water and vinegar. Pulse in blender for a few seconds, scrap sides, then pulse again until it just become a cohesive batter. Don%u2019t oven blend it or that cake will be tough.
Pour batter into a well greased 9×9 baking tin and place into hot oven. Bake for about 25 minutes or until golden brown and a tester comes out clean. When it is done, pop out of oven and pop cake out of tin to cool on a wire rack.
Once cake is cooled, place back into baking pan. Mix together the powdered sugar and jam then either microwave it or heat on stove for 30ish seconds until warmed and pourable. Grab a fork and stab holes all over top of cake then pour glaze all over.
Sprinkle some more powdered sugar on top for looks, but other then that, it%u2019s now time to eat.
Cake that is not eaten is best keep at room temperature for 2-3 days. Can be frozen too.
I don%u2019t really understand the pineapple Easter correlation. I think it might have something to do with ham, but you know what, I really don%u2019t care that much to figure it out. (Okay, I googled it and it is ham related.)
So no ham here but I am all about the pineapple. Last week when I did my grocery shop there were a shit ton of pineapples on sale, so I grab a few figuring that me and the mr would eat them for next week or so. Up until last week, I was positive that the mr really liked pineapple. Until I cut one up. Turns out the mr , for some reason, now doesn’t like pineapple that much. What. the, HELL!? This was new news to me. I swear he just says these things to piss me off, but whatever, I guess he is not a fan anymore and it just means more pineapple for me.
But I also made a cake with some of the pineapple because I had so much and also I just wanted to bake a cake. And guess what, turns out the mr does like pineapple, just as long it is in cake form. I should have known.
To the upside down cake!
The stuff. A pineapple, flour, baking soda and power, salt, brown sugar, coconut oil, vanilla and apple cider vinegar.
Cut up pineapple. If you want to get fancy, garb a cookie cutter and cut out pineapple shapes for the upside down part. Or just cut up 1/2 inch slices or rings. however you want.
Get the pan ready. Grease a pan, add a parchment bottom. place about a tablespoon coconut oil into pan and coat bottom of pan then evenly sprinkle in about 1/2 cup brown sugar. Layer in your pineapple.
In a large bowl, whisk together the dry ingredients%u2026 (a bowl bigger then mine)
Place pineapple into blender (use scraps if you have them) and blend until smooth. Add in the brown sugar, coconut oil, vanilla, and vinegar and blend until combined.
Pour wet into dry and whisk until combined.
Pour batter over pineapple and into the oven it goes.
Oooooh. Cake. Are you just so excited! You should be, it is an exciting time.
Give it a few minute before flipping it.
Flipped and revealed. So pretty!
Now it%u2019s cake time so get down on it.
-C
makes a 12 round or 9×13 inch rectangle cake
2 1/4 cups all purpose flour
1 teaspoon baking soda
1 teaspoon baking powder
1/2 teaspoon salt
3/4 cup brown sugar plus 1/4 cup
1/2 cup warm coconut oil plus 1 tablespoon
1 1/2 cups pineapple pureed which Is about 1/2 a small pineapple
About 1/4 pineapple for bottom
1/4 cup water
I tablespoon apple cider vinegar
Preheat oven to 350 degrees.
First get the pineapple cut up any way you usually do it. If you want specific shapes for the pineapple bottom, keep that in mind and cut the pineapple accordingly. You are going to want the pieces (like the circles that I used) to be about 1/2 inch thick. And if you are using a cut out, my suggestion is to cut out all the pieces that you need to use and use the cut out scrapes to puree.
Grease and parchemnt line a 12 inch round or 9×13 inch rectangle cake pan. Evenly spread a tablespoon coconut oil on parchment then evenly coat with 1/4 cup of brown sugar. Place pineapple cut outs or pieces into pan. It is fine if pineapple pieced overlap a bit but make sure to not go much thicker then1/2 inch in places.
In a large bowl whisk together the flour, baking power and soda, and salt.
Place 1 1/2 cups of chopped pineapple into blender and blend until smooth. Make sure it equals 1 1/2 cup pureed. Add in 1/4 cup water, 3/4 cups brown sugar, 1/2 cup warm coconut oil, vanilla, and the vinegar and blend until completely smooth. Pour mixture into the bowl with the whisked dry ingredients and mix until combined. Pour cake batter gently over pineapple in pan.
Bake for 45-50 minutes or until the cake is a nice golden brown and a tester poke comes out clean.
Remove cake from oven and let cool for about 5 minutes, then invert pan onto a wire rack or plate and remove pan gently. The cake should pop out easily with the parchment attached. Peel parchment off and if any of the pineapple cokes loose, jus stick it back on.
And then cake. Eat it.
Pudding is comfort. Pudding is simple. Pudding is just that, nothing but pudding. And if you add some graham cracker crumble, well you got yourself a pudding parfait. And a pudding party of sorts, if you need one.
Now do you, like me, think about grade school when you see pudding? Or how about Billy Madison. Oh hell yeah, definitely watching Billy Madison, in grade school, with a snack pack. HA. Those were some days right there. And with all the littles being homeschooled these crazy days, I figured why not bring in a bit of the grade school feeling into the routine and make some pudding for an after lunch or after %u201cschool%u201d snack. For the routine purposes and also as a form of a bribe. Yes. You can bribe your children with pudding. Or your partner. The mr got his pudding too, just after he dealt with the recycling on the porch.
And plus. Oat milk. You got a stash? Yeah? Well use it in this pudding. It will make you glad you panicked bought 10 cartons and hid them under your mattress. Right next to all the canned beans of course.
Now to the pudding!
The stuff. Oat milk (use any milk you want or have), cocoa powder, brown sugar, corn starch, brewed coffee (optional), vanilla extract, graham crackers, coconut oil, and a little salt.
Start with a pot. Mix in the cocoa powder, brown sugar, and corn starch, and pinch of salt. Add in a little milk and coffee if using and mix around until its a thick paste and everything is incorporated.
Now add in the rest of the milk and place on medium heat on the stove. Heat up for about 3ish minutes and once it starts get hot and you see a bubble or two, start whiskingand don%u2019t stop. Whisk all around pot, all over the bottom, so no spot start to burn. Whisk whisk whisk, until it thickens to pudding consistency. Should take 3-5 minutes.
Once thick and pudding like turn heat off and add in the vanilla and chocolate chips. Whisk until completely melted and incorporated.
Silky and smooth. Hot pudding.
Pour the pudding into a jar or bowl and place into the fridge to set. 1- 2 hours.
In the meantime, graham cracker crumble. Smash up the crackers into a bowl, (big chunks are good) and add in the melted coconut oil and a tablespoon of brown sugar.
Mix around until evenly incorporated
Dump the crumbs onto a baking sheet and stick into the oven to toast up for about 10 minutes.
And now you assemble. Graham crumble on a vessel, topped with pudding, more crumble, and whatever whipped cream, yogurt, ice cream situation you might want to top it with.
Pudding. All for you to eat.
-C
make 4-6 serving
2 cups oat milk (can use any milk you have on hand)
1/3 packed cup brown sugar
2 tablespoon brewed coffee (optional but makes it a little more deep and chocolatey)
3 tablespoon cocoa powder
1/3 cup chocolate chips
2 tablespoons cornstarch
pinch of salt
1 teaspoon vanilla extract
For Graham Cracker Crumble
6 full sheets of package of graham crackers
2 tablespoon melted coconut oil or vegan butter
1 tablespoon brown sugar
In a medium size pot mix together the cocoa powder, brown sugar, corn starch, and a pinch of salt. Add in the coffee if using, and about 1/2 cup of milk. Mix until all the ingredients are evenly incorporated and the mixture is kind of pasty. Place pot on stove on medium heat and add in the rest of the milk . Let mixture heat up for a few minutes and once it starts to warm, start whisking. Whisk consistency until the mixture heats up and thickens to a pretty thick pudding consistency. Remove from heat, add in the chocolate chips and vanilla and keep whisking until the chocolate completely melts it.
Pour pudding into a jar or bowl and place into the fridge. 1-2 hours to cool and set.
In the meantime make the graham cracker crumble. Preheat oven to 350. Crush up crackers into a bowl (some big chunks are good) and mix in the brown sugar and melted coconut oil. Mix around until the crumbs are evenly moisten. Dump the crumble onto a baking sheet and place into oven for about 10 minutes or until the crumble is a nice deep golden brown. Remove from oven and let cool.
Once the pudding is set and the crumble is toasted, it is time to assemble. Scoop some crumble into a bowl or jar, add in some pudding, then top with more crumble. If you want, top with a dollop of something creamy like whipped cream, yogurt, or even ice cream.
Eat.
IF there is pudding and crumble left over, store the pudding I the fridge (will last a few days) and the crumble separately at room temperature in a airtight container.
I was having one of those weeks, a week when I just needed to make some cookies. You know those weeks right? And so cookies were made. White chocolate chip because thats all I had (Or thought I had. I forgot that I dumped all the regular chocolate chips into humongous jar in the pantry) and lemon because it just sounded right and also I had this giant lemon, which is the best part about these cookies. The giant lemon I used was the single lemon that I grew, in my own house, here in Vermont, on my little lemon tree. Crazy right? A $40 dollar lemon (because the plant cost that much), so these are some expansive ass cookies. HAHA.
So I know I make good cookies, but there was something about this flavor combination that had everyone drooling over them. A cookie that is chewy and crisp, but not hard and crunchy. They smell all sweet and citrusy and amazing. Probably the exact perfect cookie that anyone and everyone wants. The littles, they tried to eat them all. Barb, she ate one when she came over then texted me in the middle of the night to ask if I had anymore cookies left. Cameron, the boy (or gigantic man now) stopped over and raved about the cookies and that is saying a lot because that boy is picky. And the mr. of course, was skeptical of the flavor combination at first but that went out the window when he sat down and ate like 4 within minutes. So if you have any doubts, know that these are some good cookies. And also, you don%u2019t need to grow your own lemon for these cookies. A regulate grocery store lemon will be just fine.
To the cookies!
The stuff. White and brown sugar, coconut oil, a flax egg, a lemon, vanilla extract, flour, salt, baking soda, and white chocolate chips.
Simple and straight forward. Grab a big bowl and add in the sugars, coconut oil, flax egg, vanilla, lemon zest and lemon juice. Mix until completely combined. Add in the baking soda, salt, and flour. Mix again until combined.
And don%u2019t forget to to mix in the chocolate chips!
Up close for your pleasure.
Scoop dough onto baking sheets and give them a little tap to flatten the tops. Not too smooshed, just a bit, and toss that pan into the oven to bake.
And would you look at that, baked to perfection.
Place cookies on rack to cool.
And thats it.
Pile of cookies, cup of coffee%u2026 Do it. Do you.
1 Large lemon ( or 1 hefty tablespoon zest and 1 tablespoon lemon juice)
1 1/2 cups white chocolate chips (the vegan ones, if you care)
Preheat oven to 350
Place oil, sugars, vanilla, flax egg, the zest of the lemon, and a tablespoon of lemon juice into a big bowl, Mix together until completely incorporated. Add in a the flour, salt, and baking soda and mix until dough forms then add in the white chocolate chips and mix until combined.
Stoop out dough balls, about 2 tablespoons worth, onto a baking sheet. Make sure to give each ball a good amount of room because these cookies will spread a good bit. Give each dough ball a little press, not completely flat, just a little tap so the tops are not domed and then place cookies into oven to bake. Bake for 11-13 minutes or until the cookies are turning slightly golden brown on top and golden brown on the bottom.
Once out of the oven, place cookies on a cooling rack to cool. Be careful because they are really fragile until they cool.
And then eat your cookies.
Store cookies at room tempature in airtight counter for up to a week. OR freeze them for a few months. But they will be gone in days so yeah.
I have been on a good long kick here with eating oats at night for my after dinner snack. Just about every night after cleaning up the dinner dishes, sweeping the floors, going for a nice after dinner walk with the mr, I come home, put the hot water on, grab my oats, my peanut flour, and sometimes a banana. As soon as the water boils I mash up some banana (if using), add in some oats, pour in some boiling water, and let them sit. I also pour a huge jar of tea then plop my butt down at the counter to do any brain tasks that need doing like checking the email, left over billing things, maybe check the old phone for the first time in hours%u2026 After about 5 minutes of that, I stop brain tasks because I just can%u2019t, grab oats, and dump in a few big ass tablespoons of peanut flour and cinnamon and give it a good stir. Voila, snack time. A delicious, nutritious, tummy filling and easy dish that is full of all sorts of things that my body needs. I grab a spoon, my tea, and open my book. For sure one of my favorite times of day.
Now lets talk about peanut flour. I have been eating peanut flour for a few years now. Not to confuse with powered peanut butter which is basically peanut flour but usually with added sugar and salt. Peanut flour is just peanuts, with the oil pressed out and then ground up into a super fine flour. And not a flour is the typical sense. Like you can%u2019t make bread with it, but you could add it to bread. You can also use it to thicken things like soups or sauces up. Or add it to smoothies, make a cake frosting with it , or just mix it with a little water and eat it with a spoon. It is delicious and amazing and full of protein without all the added fat and high calorie content. I started to add it to foods because of the protein but now I just eat it all the time because I freaking love the stuff. (Another favorite way to eat it is cut up carrot sticks tossed in the flour%u2026 SO GOOD!) Anyway, truth be told, it is not the most widely available stuff. I have only seen it in a few store over the years, so I have been buying it online. But recently someone told me that Trader Joes is selling it now (I haven%u2019t checked yet) so I figured now is a good time to share the greatness of the flour and how you might want to use it.
Anyway, these oats here are my favorite way to eat oats. Warm and creamy, but not cooked and gruel like. They are like a cross between stove top oats and overnight oats except they take all of 5 minutes to make and you don%u2019t need to dirty a pot. Then mixed with banana for extra sweetness and flavor, the peanut flour for all the peanut butter taste and protein. These oats are unstoppable.%u00a0 Delicious and nutritious for breakfast, lunch, snack time, or dessert, these oats are all win win. Add another win just because. Win, Win, WIN!
Now to the oats!
The stuff. Old fashion oats, a small banana, peanut flour, cinnamon, and boiling hot water.
Mash up the banana until smoothish then add in half the hot water and mix. Dump in the oats and mix those too.
Top with the rest of the boiling water and let sit for about 5 minutes.
After the oats absorbed the hot banana water, dump on the cinnamon and the peanut butter flour and mix in.
Grab yourself a spoon friend.
Eat.
-C
Makes 1 serving. Can be halved for smaller portion
1 small banana
1/2 cup old fashion oats
2 (or more if you want) tablespoons peanut flour
1 teaspoon cinnamon (optional)
1 cup boiling water
Place peeled banana in a bowl and mash with a fork unit smooth. Add in half the boiling water and mix.. Dump in oats and mix until incorporated then add in the rest of the hot water. Let sit for 5 minutes until oats absorb all the water. Stir in peanut flour and cinnamon. Eat.
It%u2019s not too late to get in a little end of the year baking. It is actually the perfect time to bake. All the holiday hub bub is still going on so there is usually still people all around still willing and able to eat your offerings (if you were so inclined to share), the days just feel more slow and of need of warmth and lovely smells. Plus we need something to do while while waiting for New Years, because we are just all sitting around waiting for that ball to drop, right? HAHAHA. No.
Anyway, I have been wanting to make some version of a boiled clementine cake for a while now. I love that fact the the whole clementine goes into the cake, that there is no peeling or zesting or juicing. It is just boil the clems for a little while to get the bitterness out and you are good to go. And it doesn%u2019t hurt that right now is citrus season so I have a humngo bowl of clementines, plus a shit load of other oranges and other citrus to go through so the thought of tossing a good few clementines into a cake, well it was just what needed to be done.
And the family is coming over to eat and trash my house so I needed another dessert besides the half eaten ice cream cake left in the freezer from Camereon%u2019s birthday/Christmas. So I baked that they will eat. And there we go. Win win.
Now to the clementine cake.
The stuff. Flour, baking powder and soda, salt, sugar, oil, cinnamon, vinegar, clementines, and powdered sugar.
First you need to boil the clementines. Big pot, fill with water, place clems inside, bring to a boil, then simmer for 2 hours. Seems like a long time but just do it while you are making and drinking coffee or doing laundry or whatever. You don%u2019t need to keep an eye on them, other then to check that the water hasn%u2019t evaporated, and it smells so nice.
After the 2 hours are up, remove clementines from water and let cool enough to handle. Cut in half. If there are giant seeds, remove them.
Place the clementines into blender and blend until silky smooth.
Now the other stuff. Flour, sugar, salt, baking powder and soda, and cinnamon. All into big bowl.
Whisk together until incorporated then add in the clementine puree, the oil, and the vinegar. Whisk together until it becomes a uniform batter.
Scoop batter into a very well greased bundt cake pan and bake, 50-60 minutes, until tester comes out clean.
The big revel%u2026. And it went perfect! Now time to let this sucker cool a bit on a wire rack.
While the cake is cooling, make a simple glaze. Just powdered sugar and fresh (not boiled) clementine juice. Mixed unit glaze consistency.
Once the cake is pretty much cooled, pour on the glaze.
And now it is cake time.
-C
Makes one bundt cake
2 1/4 cups all pupose flour
1 cup white sugar
1/2 teaspoon salt
1 teaspoon baking powder
1 teaspoon baking soda
1 tablespoon vinegar
1/2 cup any neutral oil
1 teaspoon cinnamon
6 clementines (you need 2 cups pureed)
For the glaze
1 cup powdered sugar
1 clementine
To start, place 6 clementines into large pot and fill with water. Place on stove and bring water to a rapid boil then reduce heat and continue to simmer clementines for about 2 hours.
Once clementines are cooked, cut in half and check and discard any large seeds. Place the clementines into a blended and blend until smooth. Should have about 2 cups puree. If you are short on volume, add water to make up the difference.
Preheat oven to 350
Grab a large bowl. Dump the flour, baking powder and soda, salt, cinnamon, and sugar and whisk together until completely incorporated. Now add in the clementine puree along with the oil and the vinegar. Mix until completely incorporated. Scoop batter into a well greased burnt pan (at least 10 cup capacity) then place into oven on middle rack and bake for 50-60 minutes until a tester (or a fork) stuck in to the deepest part of the cake comes out clean.
Once baked, remove cake from oven and allow to cool for a few minutes in pan, then flip the cake out of pan, gently of course, and hope you greased it well enough for it to just pop out. Once removed from pan, allow to cool on a wire rack.
While cake is cooling, make the glaze. Powered sugar into a bowl along with the juice of a clementine. Mix together. If the glaze is to thick, add more juice (or water), to thin, a little more powdered sugar until you reach your desired consistency (pourable but not runny is good) and once cake is cooled, pour glaze all over.
And then eat cake.
Peaches are here. YAY!!! Peaches are for sure one of those fleeting fruits, one that once in season, you need to eat as many fresh as you can because once they are out of season, they are not good. Not good at all. And me being me, I see peaches, I buy a shit load, and now I have a fridge drawer full. Not complaining in the slightest, but peaches cannot sit around all summer waiting to be eaten. So if you are going to buy a shit load, know what you are going to do with them all.
My peaches, well they haven%u2019t had to wait long. I have been eating at least a peach a day and%u2026 I made these bars with a few. Sharing my peaches, thats what I do. HA.
These almond peach shortbread bars. Fantastic A+ on all fronts. Easy to make, not a whole heck of a lot of ingredients, make the house smell amazing, and really kick off the peach, summer vibe thing that goes on around here.
‘%u201cMillions of peaches, peaches for me. Millions of Peaches, peaches for free%u201d %ud83c%udfb6 (Peaches by The Presidents of the United States of America. If you have%u2019t head the song, look it up. I don%u2019t think I can even look at a peach without hearing the song in my head.)
Now to the peach almond shortbread bars!
The stuff. Peaches, almonds, vegan butter, brown sugar, flour, cinnamon, salt, and baking powder.
Easy peasy. Almonds go in to food processor first. Blend and pulse for a minute or two until they turn into a medium fine almond meal. (Don%u2019t over blend or you will end up with almond butter.) When almonds are ground, add in the flour, baking powder, salt, cinnamon, and sugar. Pulse until combined. Then add in the butter in chunks and pulse until dough just starts to come together.
Half the dough goes into a 9×9 baking pan. Smooshed evenly all over the bottom poke it with a fork. Then it just needs to go into the oven to bake. 15-18 minutes or so, just until it starts to brown a bit.
Peaches need to be cut so cut them up. !/2 inch thick slices, after the pits be removed of course.
Blinded baked bottom. Looks good yeah? Let it cool for a few minutes and then it gets peaches. Three rows, all over lapping and nestled together.
The top gets the remaining half of dough and is now it%u2019s ready for the oven. Another 40-ish minutes or so to really seal the deal.
Taken from the oven when golden brown, cooled, cut up, and placed on a pretty plate because pretty is nice.
I am pretty sure you figured out what to do next%u2026. EAT IT!
-C
makes a 9×9 pan which can be cut Into the sizes of your choice
1 cup vegan butter
1 cup packed brown sugar
2 cup cup all purpose flour
1 cups raw almonds
1 teaspoon baking powder
1 teaspoon salt
3 large firm peaches
1 heaping teaspoon cinnamon
Preheat oven 350
Place almonds into a food processor and pulse and blend until a fine meal has formed. It should take only a minute or two and stop half way and scrape the edges and sides do the almonds don%u2019t start to form a paste. Add in the flour, salt, baking powder, cinnamon,and sugar and pulse until combined. Add in the vegan butter in a few chunks and pulse until the mixture turns into a crumbly dough. Stop pulsing and dump mixture into big bowl.
Take half of the mixture and place into a 9×9 baking pan. Evenly distribute and press the dough into the bottom. Take a fork and poke the dough all over then place the pan in the oven. Bake for 15-17 minutes or until the dough just starts to lighly brown. Remove from oven.
While the bottom crust is cooling off for a few minutes, slice peaches into 1/2 inch slices. Obviously make sure to remove pit.
Now take your half baked crust and layer peaches evenly on top. It is easies to start at the top, make three rows across and then layer the peaches down (like in the picture above). Once peaches are layered, grab the remaining half of dough and evenly distribute on top. Place back into oven and bake for another 40-45 minutes or until the crumble on top is a nice deep golden brown.
Remove from oven, let coo completely (or as completely as you can) cut into pieces, and then you eat it.
Left over pieces should be placed in an airtight container in the fridge for up to 5 days. They freeze well individually wrapped too.
blind back for about 15 minutes of until the crust is starting to brown around the edges
bake for another 30 minutes
Yes you read that right. Corn. In a popsicle.
What?
No it is not weird or gross or anything. I wouldn’t do that to you. These popsicles are down right deeee-lightful. Rich and creamy and sweet. Both the creamy coconut and the toasted coconut pair perfectly with the sweet corn flavor. They truly are delicious and I think that if you give them a try, you will think so too. And really, now that it is like almost summer, who doesn’t have a little extra corn laying around. So you might as well just make a batch.
And then you will thank me for introducing you to the goodness that is a toasted coconut and corn popsicle. Heck, the mr even ate one and he (still, after I have proven him wrong on a many occasions) says he hates corn. So if a corn hater likes these, imagine what a corn lover will think. HAHA. Corn lover.
To the popsicles!
The stuff. Corn, full fat coconut milk, shredded coconut, and maple syrup.
First, remove corn from cob and place on a baking sheet. Bake in oven for 10-ish minutes until corn is cooked and all nice and sweet.
And don%u2019t forget to toast the coconut. A few minutes in the oven is all it needs.
Now to blend. Corn and coconut milk go in first to blend until nice and smooth. Then add in the maple and coconut and blend until just combined. That will leave a little coconut texture. If you want it smooth, well just blend until completely smooth. Do what feels right to you.
Thick, rich and creamy popsicle mixture.
Now pour it into the molds and stick into the freezer. You could probably stick the sticks in now or wait a little while for the mixture to set a bit, but just don%u2019t forget to get sticks in those popsicles before they completely freeze. That would suck.
Pop those lovelies out of the molds and there you go.
The anticipation is over. Eat a popsicle
-C
makes 4 average sized popsicles
2 ears corn (about a cup of corn kernels)
1 cup full fat coconut milk (the canned stuff)
1/4 cup shredded unsweetened coconut
2- 4 tablespoons maple syrup
Note. If you have left over cooked corn, just use that. You don%u2019t need to recook it so skip the cooking corn step.
Preheat oven to 400
Remove corn kernels from cob and place on a baking sheet pretty evenly. Pop into the oven for 10 minutes of so or until the corn is cooked through and nice and sweet.
Remove corn and dump it into blender and set aside to cool for a few minutes. Place the coconut onto the baking sheet and pop into the oven for 3-4 minutes to just lightly toast. When the coconut is toasted, remove from oven.
Grab the blender with the corn and pot in the coconut milk. Blend until smooth. Add in the maple (start with 2 tablespoons and work your way up to the sweetness you like) and the toasted coconut. Blend quickly just to combine for a slightly more textures popsicle or blend completely smooth if you would rather a smoother popsicle.
Pour mixture into popsicles molds and place into freezer. After the mixture sets up (about an hour) pop sticks into molds. Continue to freeze until completely frozen. Usually 4-6 hours.
And then when it is popsicle time, remove popsicles from molds and eat them.
Kind of a spur of the moment cake situation. I was in the middle of doing some paper work and remembered that I had made plans with the littles to go bike shopping and do dinner. Usually when they come over for dinner I don%u2019t make a point to have a dessert (they are happy with a handful of chocolate chips if I have nothing) but I felt the need to have something special. I mean, bike shopping, that%u2019s a big deal and they were so excited so I wanted to have a little celebration cake thing. A, YIPPIE YOU GOT BIKES! cake. It just seemed like the right thing to do.
So I made cake. I running a little short on time (yet I still had time to take pictures%u2026.) so I went with my trusty one bowl, super easy chocolate cake. (This is everyone in my families favorite cake). Peanut butter frosting because it was right in from of me and really, it was for Coco the fat baby. He basically eats nothing but peanut butter these days. And of course because peanut butter and chocolate together are never going out of style. I cooked the cake in a loaf pan because I was just feeling loafy I guess. But This cake could totally be cooked into a cake round or square if you wanted to.
And that was that. I made that cake, they got the bikes (YEA!!!!, although I told them both that they sucked because they walked into a store and picked out bikes in less then an hour. I on the other hand have been bike shopping for more then a month and still haven%u2019t made a decision.) We then came back here to my house, biked around for a while, then ate cake (after dinner of course.)
Anyways. This cake. Rich, dense, chocolatey peanut butter goodness. Has been described as the best cake ever and like a Reese peanut butter cup. If you are into any of that, well this is the cake for you.
To the cake.
The stuff for the cake.. Flour, baking soda, salt, cocoa powder, oil, coffee, vanilla. brown sugar, and apple cider vinegar. And the stuff for the frosting. Peanut butter, butter, powdered sugar, and almond milk.
In a big bowl, whisk together the dry stuff, pinching and breaking apart any big clumps of cocoa or sugar. Then just dump in the wet.
Whisked until glossy and smooth. A perfectly perfect chocolate cake batter.
Pour batter into a greased and lined loaf pan and into the oven it goes. 50-60 minutes or so or until a tester poked in the middle comes out clean. Then pop the cake right on out. Remove cake from tin and let cool on a wire rack.
While cake is cooling, make frosting. Beat together powdered sugar, peanut butter, butter, and milk.
Fully beaten. Ready to frost a cake.
Once cake is cooled, cut in half down the middle, length wise. Then frosting the middle. (Make sure it is cooled in the middle before frosting. If it is still warm, let it cool)
Pop the top back on and frost the rest.
And don%u2019t forget the sprinkles. Went with chocolate and gold because. But you do you and use whatever sprinkles you want.
And then you eat the cake.
I ended up stick it in the freezer to hide for a while%u2026 I guess this cake cold or slightly frozen is just about the best thing ever. The littles damn near ripped my arm off trying to get seconds.
-C
makes 1 loaf cake
For the Cake
1 3/4 cup all purpose flour
1 cup packed light brown sugar
1/3 cup cocoa powder
1 teaspoon baking soda
1/2 teaspoon salt
1/2 cup neutral oil
1 1/2 cups warm coffee
1 teaspoon vanilla
1 tablespoon apple cider vinegar
For frosting
3/4 cup minus 2 tablespoons peanut butter
2 tablespoons vegan butter
1/4 cup plant based milk
1 1/2 cups powdered sugar
Preheat oven to 350 and grease and line a loaf pan.
In a large bowl mix together the flour, baking soda, salt, cocoa powder, and brown sugar. Break apart any big clumps of sugar or cocoa with your fingers. When that%u2019s mixed, dump in the wet and whisk together until just fully incorporated. Pour batter into the greased pan and stick into oven.
Bake for 55- 60 minutes or until a tester poked into the middle comes out clean.
Once cooked, remove from oven and carefully remove from pan. Place on a wire rack to cool.
While cake is cooling, make the frosting. Just beat together the butter, peanut butter, and milk until nice and creamy. If you find your frosting be too thin, add in more powdered sugar, too thick, a splash more milk.
When it is cooled, cut the loaf in half length wise. Make sure the inside is complete cooled as well. I totally stuck my cake in the freezer for little bit to speed up the cooling process%u2026..
When the cake is cut and completely cooled, frost it. Spread a little less then half the frosting on the bottom layer, stick top back on, and finish the frosting. Cover with sprinkles (if you want) and then that is it.
Serve room temperature or what my people really like is served slightly frozen, which is great because I just cut the cake up and froze individual pieces making for a perfect quick dessert.
I found another bag of frozen rhubarb in the chest freezer which is never a bad thing, but my rhubarb patch outside is growing strong and I will have all the fresh rhubarb I could possible eat within the next few weeks. So found rhubarb just means I need to eat it right fast before the fresh stuff comes in. (I haven%u2019t had a problem with that. it%u2019s almost gone already). Plus the other day while I was digging up and transplanting raspberry bushes to the back yard, my neighbor came over and gave me a gallon of frozen raspberries, harvested from said bushes that I was currently planting in my yard. Score for me! Free bushes and berries%u2026I have such nice neighbors.
So the logical thing to do with my new found and giving bounty was of course to hurry up and bake something. Cobbler. Why cobbler? Well, why not? I figured the mr would really like it and eat it and I also didn%u2019t want to make anything to fussy because I was just to dang busy spending all of my extra time outside doing outside things. And cobbler, it%u2019s not fussy because it is basically biscuits and jam baked up all together. Not a lot to think about and comes out looking all homey and sweet and smelling all nice and cozy. Doesn%u2019t that sound nice? And not a pain in the ass?
And best part. A made cobbler works as dessert or breakfasts or just a snack. Just asked the mr. He ate it for all the reasons. With a dollop of yogurt or cream of course because he is fancy like that.
And yeah the fruit I used was frozen, but fresh works just the same here too.
Now, lets get to that cobbler.
The stuff. Raspberries (frozen), rhubarb (frozen), sugar, flour, salt, baking power, cinnamon ,almond milk, apple cider vinegar, cornstarch, and oil.
Raspberries, rhubarb, sugar, cinnamon, cornstarch. Its all there in the bowl. Just needs to be mixed. So mix it.
Dump fruit mixture into well greased 8 inch pan and pop it into a hot oven to get a head start on baking.
While the fruits in the oven, make the biscuit dough. Mix the dry together then mix in the wet until just incorporated and a sticky dough forms.
Pulled from the oven, the fruit is starting to cook down and whoa, it just smells so good!
Drop on the biscuits dough on top of the fruit (careful of the hot pan). Evenly if possible, but don%u2019t work to hard to make it look perfect. Imperfection makes it look perfect, you know?
Once biscuits are on, lightly brush the tops with a little milk and sprinkle with more sugar then pop it back into the oven for another 25-30 minutes or until the biscuits are baked.
Pulled from the oven with a bubbly filling and a golden brown biscuity top. Things are looking good here.
And now it%u2019s time.
Dig on in my friend. Sever with something creamy like whipped coconut cream or some type of yogurt or ice cream situation of your choice. And again, this can be your breakfast.
Happy spring people!
-C
make a a 8 inch round which serves 5-6
For the Filling
2 cups raspberries (fresh or frozen)
2 cups rhubarb chopped into 1/2 inch to inch long pieces (fresh or frozen)
1 1/2 tablespoons corn starch
3/4 -1 cup sugar (lesser amount if you like a little more tartness. I used lesser amount)
1 teaspoon cinnamon
For the dough
1 cups all purpose flour
1 1/2 teaspoon baking powder
1/2 teaspoon salt
3 tablespoons sugar
3 tablespoons neutral flavored oil
1/2 cup plant based milk
1 teaspoon apple cider vinegar
Preheat oven to 350.
In a large bowl mix together the rhubarb and raspberries with the corn starch, sugar, and cinnamon. Grease a 8 inch round pan the is at least 2 inches deep (can use a slightly large pan or a square) and dump in fruit mixture. Place into oven to bake for about 15 minutes or the fruit starts to break down.
While fruit is baking, mix up biscuit dough. Flour, salt, 2 tablespoons sugar, and baking powder go in a large bowl and mixed until combined. Add in the oil, the milk, and the vinegar. Mix until just incorporated and a dough has formed.
Remove the fruit cooking from the oven. Turn heat up to 375.
Carefully drop spoonfuls of biscuit batter on top of fruit. Brush the top of the biscuits with a little milk and sprinkle with remaining tablespoon sugar. Place the pan back into the oven and bake for another 25-30 minutes or until the biscuits are all nice and golden brown on top.
Remove from oven and let cool for a few minutes before serving. Serve warm with a scoop or dollop of soothing creamy (coconut cream, yogurt, ice cream%u2026..whatever floats your boat.)
Left overs can be stored in pan, just cover it with something and place in fridge. Can be eaten cold to or reheated in microwave or oven.
To know me is to know that I eat a shit load of lentils. And not just one kind, I eat them all, in all the ways, all day, everyday. Vegetables and lentils. That is my truth.
Lentil flour. One more way to consume the mighty legume. Blended while dry into a fine powder, it takes the lentil to a whole other level. You can use the flour in all sorts of things like bread, soup, even in baked goods. it really is a great flour to have on hand, especially if you are hungry and want to toss something quick and easy, heathy, and delicious together like these here pancakes.
These pancakes. All they are made of is lentil flour and pureed up zucchini and onion. Now that might sound a little on the dull side, but trust me here, they are far from dull. They are freaking delicious. And better for it that they take like 10 minutes from start to finish to make. And no oven which is necessary these days with all the stupid hot weather.
Anyway. lentil zucchini pancakes. Give them a try. They will probably become your favorite.
To the lentil flour and zucchini pancakes!
The stuff. Dry green lentils, a zucchini, and onion, salt and pepper, and a splash of oil.
Te make lentil flour. Place dried lentils into a high speed blender and blend until it turns into a fine flour.
Once you have the flour made, cut up the zucchini and onion into chunks.
Drop into the blender and blend until pretty smooth.
Dump puree into bowl and top with some lentil flour.
Mix until completely combined. The batter should be kind of thic but still spoonable. Also, season with salt was pepper here.
Heat up a skillet with a splash of oil. Once hot, scoop spoonfuls of batter into pan and spread it evenly about 1/4 inch thick. Cook first side fr 4-6 minutes or until nice and brown then flip and cook the other side until done. Repeat until batter is gone.
Now eat your amazing delicious lentil zucchini pancakes. I served with fresh salsa, and I have also made tahini dip and used hummus to smear on them which was also freaking amazing, but you can serve with whatever floats your boat.
-C
1 pound dry green lentils
1 large zucchini
1 onion
salt and pepper
splash of oil
Start with the by making the lentil flour. Place lentils into a high speed blender and blend until it has turned into a fine flour. You might need to stop the blender ever once in a while to move things around with a spoon (when it is turned off!). It should only take about a minute or so in a Vitamix, but maybe a few extra minutes if using a less powerful blender.
Once flour is achieved, dump into a jar with a lid. You probably won%u2019t be using it all right now.
Now grab the zucchini and onion and cut into chunks. Place the chunks into the blender and blend until smooth.
Dump puree into a bowl. Add about 1 cup of lentil flour and stir. IF the batter is really loss, add in another 1/4 cup or more to get the batter to a thick but spreadable consistency (kind of like hummus). Season with salt and pepper.
Grab a skillet and place on medium heat with a splash of oil. Once skillet is heated place spoonfuls of the batter in and spread around until between 1/2-1/4 inch thick. Cook fist side for 4-6 minutes or until a nice golden brown then flip and cook the other for a few minutes until browed. Repeat until batter is gone.
Place cooked pancakes on a plate, grab a fork and some savory type condiment (hummus, salsa, tahini, cashew cream) and eat.
Eggplant and I are having real moment right now. I honestly think I have been eating one, in some way or another, just about every day for the last week or so. And no, I am not sick of them at all. But yes, I have been lazy about doing much other roasting or braising the old plant and just eating it straight into my mouth hole. But I guess sometimes my lazy ass wants more substance and also, it is nice to feed the mr something good too. I figured I should maybe do something a little more classy, more meal like, and might actually require a fork to eat it with. (I have a real tendency to eat with my hands, even the things that most people would probably say could not be eaten with hands. You should see me eat soup! Ha!) And so I prepared for us a feat of greatness (not really a feat, but great for sure). Eggplant roll ups.
These rolls are way more tasty and delicious then the effort it takes to make them. Really, they are super simple to make. Just a thick herby bean filling rolled up in eggplant and roasted in tomatoes. Sounds so good right? Well then taste even better. And then you can top that whole shebang with some fresh basil and everyone is all good to go.
So ok, I feed some to the mr for dinner because the goal was to fee us both with one dish, but I sure did eat more then half (like 3/4 of it) to myself. Without a fork.
There is no shame in my game.
Now to the eggplant rolls!
The stuff. An eggplant, an onion, some white beans, crushed tomatoes, a lemon, some thyme, oregano,and garlic powder, salt and pepper, oil, and basil. (I just pureed all my fresh basil into a paste so yeah).
First up, slice the eggplant lengthwise into 1/2 inch thick pieces.
Place the pieces on a baking sheet and sprinkle with a pinch of salt. It is ok if they overlap a little, we are just trying to soften them a bit. Stick into a hot oven.
Into a skillet it goes to cook up until soft and fragrant.
Eggplant, comes out of the oven all nice a pliable.
Now make the bean filling. Beans, onions, spices, juice of lemon, and a good crank of pepper and a pinch of salt go into food processor. Blend until smooth.
Gently grab an eggplant cut and cover one side with the bean mixture. Don%u2019t skimp our but don%u2019t add ore then you can roll up. And then roll it up.
Add a cup or so of sauce to a skillet or casserole dish, then place the rolls on in. Once all the rolls are in, cover with the remaining crushed tomato or marinara sauce.
Pop into hot oven to bake.
And then when the eggplant is tender and the sauce is all bubbly, pop it out.
Add some fresh basil (or basil puree) and grab that fork.
Nothing left for you to do beside eat it.
-C
serves 3-5
a medium to large eggplant
1 yellow onion
2 1/2 cups white beans (or one can)
a lemon
teaspoon each of thyme, garlic powder and oregano
3 cups crushed tomato or a simple marinara sauce
salt and pepper
splash of oil
fresh basil (optional)
Preheat oven to 400 degrees
Grab the eggplant and cut the very top off then cut slices lengthwise about 1/2 inch thick. You should get about 10-12 slices. Place the slices onto a baking sheet, overlapping a little if necessary, sprinkle with a pinch of salt, and place into oven. Cook for about 10 minutes or until the eggplant is just barely starting to soften and becomes pliable. Remove from oven and let cool a bit.
Meanwhile chop up the onion and place into a lightly oiled skillet. Cook for 5-8 minutes or until the onion starts to become translucent and fragrant. Once cooked, place into a food processor along with the beans (drained but keep the liquid),the spices, and the juice of the lemon. Pulse until smooth and if needed, add a few tablespoons of the bean liquid to loosen it up enough to blend. Taste and season with salt and pepper.
Now to make the rolls. Grab cooled off piece of eggplant, lay it flat, and cover with the bean mixture. Not too much or too little, probably a bit less then 1/4 cup. Then roll the eggplant up. Either grab a skillet or baking dish and add about 1 cup of the crushed tomato or marinara sauce to the bottom. Place rolls as they are being made into the dish. Once you have filled the dish with the rolls, cover with the remaining sauce.
Place the rolls into the oven and bake for 30ish minutes or until eggplant is nice and fork tender.
Once baked, remove from oven, left cool for a few minute and then serve. Top with fresh basil (or basil puree) if you want.
Eat with a fork.
Granola is a weakness of mine, well good granola is. I don%u2019t really call most stuff of the stuff you can buy at the store really granola, it is more like sugary candy crap that is marketed to be good for you when it really is not. That shit is gross and that%u2019s my truth.
Real granola, or the kind I make, is the basic bitch of granola. All it is is oats, a spice or two, salt, and a pureed up fruit (or veggies). Sometimes I will add a seed or nut at the end, or maybe even a little coconut or some other dried fruit. There is no added sweetener added, no added oils, just straight up oats and fruit.. And it%u2019s clumpy and crunchy, and all sorts of frantastic. It really is what every granola should strive to be.
The last batch I made was peach because, if you didn%u2019t know, it is peach season. Plus peach granola is delicious. That is fact. (unless you don%u2019t like peaches).
Now to the granola!
The stuff. Old fashion oats, a couple of ripe peaches, cinnamon, salt, and a little water.
Cut peaches in half, remove pits, and cut into chunks.
Place peach chunks into blender and blend until smooth.
Mix the cinnamon and salt with the oats.
Pour the peach puree into the oats.
Mix until evenly incorporated and a little clumpy. If the oats are all moist but not creating any clumps, add a few tablespoons water until there is some clumping going on.
Dump mixture onto a baking sheet, You can line it, but I don%u2019t bother.
Pop into preheated oven to bake for about 25 minutes then remove from oven and toss around. Stick it back into oven for 25 more minutes or so. After 45-50 minutes of being in the oven, turn oven off and just let granola cool in oven. It%u2019s key to crispy granola.
Cooled off and all crispy and clumpy. Granola at it%u2019s finest.
Into a jar to save some for later to eat however you want.
Me, I like handfuls straight into my mouth, chased by a little oat milk. Hehe!
-C
makes 2 1/2 cups
2 peaches
2 1/2 cups old fashion oats
a few tablespoons of water (if needed)
1-2 tablespoons cinnamon
pinch of salt
Preheat oven to 375
Cut peaches in half, remove pits, and cut into a few chunks. Place chunks into a blender and blend until smooth.
Place oats into a big bowl and mix in the salt and cinnamon then dump in the peach puree. Mix until completely incorporated and a little clumpy. IF there are no clumps, add a few tablespoons water and mix. Dump mixture onto a baking sheet and evenly distribute. Place baking granola into oven to bake.
Bake for 25 minutes, remove the granola and toss around with a spatula, then place back into oven and bake for another 25-30 minutes. After being in the oven for a total of 45-50ish minutes, turn oven off but keep granola in oven to cool. This is key to a good crispy granola.
After cooling off in oven, remove and eat. Place what is not eaten in an airtight container. Eat within a week or so.
When your neighbor tells you to pick as many raspberries as you can, well you go pick as many raspberries as you can. Just a few houses down the street, she has a yard full of the heaviest fruited raspberry bushes that have seen. So I grabbed my biggest mixing bowl and went at it. So many raspberries, they were basically falling off into the bowl (and into my mouth). Fresh raspberries, there is not much better.
And she wants me to come back for anther round. We have good neighbors.
I had quite the raspberry loot. The mr and I ate some (maybe too many), froze some, and then I made danishes for no other reason then I wanted to. And that was a just decision because everyone loves a good danish.
And these were good, or sooo good, according to the mr. He ate half while the other half were demolished when I brought them to my moms for dessert which was the plan so it worked out. People and their danishes. It%u2019s a thing you know.(No, not really)
Now to the danishes!
The stuff. Fresh raspberries (You can use frozen or if you really want, raspberry jam) flour, sugar, salt, plant milk, oil, yeast, a lemon, powdered sugar, vanilla. and that is it.
Start with mixing the yeast with the oil, milk, and sugar in a large bowl. Add in the flour and slat ads mix mix mix until you can%u2019t mix no more.
Dump onto a floured surface aaaaaanf. Knead. 5-8 minutes until the dough is all soft and smooth and uniformly dough.
Place the dough into cleaned bowl and cover. Set somewhere warm to rise.
In the mean time, make raspberry jam. Place raspberries and sugar into a pot and cook down until mixture is thick and jam like. Once the mixture sticks to a spoon like warm jam, turn heat off and let cool.
Dump dough out and cut into 12 equal pieces. Roll each piece into ball then roll out into a dish about a 1/2 inch thick.
Place dough disks onto splat or parchment lined baking sheet then indent each dough disk with a spoon or your fingers. Dollop a good plop of raspberry jammy into said intents. Once they are all jammed, pop them into the oven to bake. 15-18 minute should do it.
Look at those. Get them out of the oven and on to a wire rack for cooling time.
Make glaze. Sugar, lemon zest, vanilla, and lemon juice Mix until combined and yeah, that it glaze.
Drizzle the glaze all over those lovelies.
And then you eat becucae that is why you made them.
Share with your people. Or just eat them all to yourself, you made them and they are yours.
-C
makes 12
4 cups of all purpose flour
1 teaspoon salt
2 teaspoons yeast
1 cup room temperature plant based milk
1/2 cup neutral oil
1/3 cup white sugar
For raspberry jam
1/4 cup white sugar
2 cups fresh raspberry
For glaze
1 lemon
1 1/2 cups powdered sugar
splash of vanilla
In a large bowl combine the yeast, sugar, oil and milk. Really mix well and let sit for a minute to just get yeast activated. Dump in flour and salt and mix with a wooden spoon or whisk until it becomes to hard to stir. Dump mixture onto a lightly floured surface and knead dough for about 5-8 minutes or until the dough is soft and smooth. Place dough in a clean bowl and cover and let rise for about an hour or so or until the dough doubles in size.
While dough is rising, make raspberry jam. Mix raspberries and sugar together into a pot and place on medium heat on stove. Let cook for a couple minutes and once the raspebrries start to break down, stir. Let mixture cook down for about 10 minutes, stirring often, until the mixture becomes thick and sticks to a spoon like warm jam should. Take off heat and let cool.
Preheat oven to 350
Once dough has doubled in size, dump onto it onto a floured surface and with a knife or dough scraper, cut into 12 equal sized pieces. Roll each piece into a ball then flatten out into a disk about 1/2 inch thick. Place dough disks on a parchment or splat mat lined baking sheets (you will need 2). With a spoon, lightly push a intent into the center of each disk then place a good plop or the cooled raspberry jam into the intent. Once all the dough has its berries, place the baking sheets into the oven to bake, for about 15-18 minutes, or until the danishes are a nice golden brown.
When they are done baking, remove from oven and place on wire rack to cool.
While cooling, make the glaze. Zest lemon and place in a bowl with the powdered sugar and vanilla. Add in half the juice of the lemon and stir until completely combined. If the mixture is too thick, add more juice, to thin, add a little more powdered sugar.
And once the danishes are cooled, drizzle on the glaze. And then thats it. You can eat them now.
Any left over why are there left overs?) should be stored in a airtight container for a few days at room temp or in the fridge . They also freeze well.
Zucchini. One of the best summertime veggies. If you have been around here (as in my blog) for long enough, you all know how I am a zucchini feen. Once they start growing, I take them all. From my garden, from your garden, even my sisters mother in laws extra, plus the million I get with my farm share. At any given time I could have upwards of fifty zucchini spilling out all over the counter and shoved into any crevice I can find in the fridge. But the excess never lasts long because I eat them all. Mostly to myself, and I feel great about it. (Ok, I do end up freezing some of it for winter, but I am still eating it all!)
And every year when the first zucchinis start to hit the ground, all the people are up in my squash asking for zucchini bread, like they can%u2019t possibly make it themselves or anything. But I don%u2019t mind what so ever because sharing is caring and I guess I care. Plus I like to bake so it works, you know?
When I was recently asked to bake a loaf of zucchini bread, I made the decision to go the muffin route instead because aren%u2019t muffins just individual little breads that take half the time to cook them a loaf? Yup, and that is very nice when you want to minimize any hot oven time because summer is hot enough as it is.
And because they are muffins, they acceptable for breakfast, even with all the chocolate chips.
Win!
Now to the muffins!
The stuff. A good sized zucchini, flour, baking soda and powder, salt, brown sugar, oil, cinnamon, raw sugar, apple cider vinegar, and some chocolate chips.
In a large bowl, whisk together the flour, baking soda and powder, salt, cinnamon, and brown sugar until completely incorporated and there are no lumps of sugar.
Shred the zucchini. I used a smaller shredder so the pieced are very thin but a normal sized box grater shred works just as well
Add zucchini, oil, and vinegar to bowl and fold in until completely combined.
Then fold in chocolate chips. Duh.
Scoop batter into a greased muffin pan and sprinkle the tops with raw sugar. Pop into the hot oven to bake.
Pop out of tins to cool on a rack.
And eat. All to yourself or share, that is on you.
-C
makes 12 muffins
2 1/2 cups all purpose flour
1 1/2 teaspoon baking powder
1 teaspoon baking soda
1/2 teaspoon salt
1 tablespoon cinnamon
3/4 cup packed brown sugar
1/2 cup neutral flavored oil
2 tablespoons apple cider vinegar
1 medium zucchini (2 cups packed shredded zucchini)
2/3 cup chocolate chips
1/4 cup raw sugar (to sprinkle the tops) optional
Preheat oven to 350.
Grab a large bowl and add in the flour, baking powder and soda, cinnamon, and salt. Whisk together then add in the brown sugar and whisk in, making sure there are no big clumps.
Shred zucchini uniti you have 2 hefty cups. If you have a fine shredder, use that, if not, a normal sized shred will do.
Place shredded zucchini into the bowl along with the oil and the vinegar. Start folding with a spatula until everything is incorporated. Resist the urge to aggressively mix, it takes a minute for the liquid from the zucchini to absorb into the flour. (Over mixing it will make the muffins tough) Once the batter is uniform, fold in chocolate chips.
Scoop batter into a well greased or lined muffin tin. Sprinkle the tops with raw sugar and pop the pan into the preheated oven. Bake for about 30 minutes or until fluffily and domed and a tester stuck in one comes out clean.
When baked, remove from oven and pop out if tin. Let cool on a wire rack but feel free to eat one warm.
Store uneaten muffins in airtight container at room temp for a 2-3 days but if it is really hot out, just stick them in the fridge. Also can be frozen.
I am freaking hot. We are currently in a heat wave right this very minute and I am not happy about it. This is my problem with summer, the heat. Or better yet, the heat with humidity. It turns me sour and I can%u2019t deal with anything, including myself. It is not a good look on me.
But a redeeming quality summer does have is all the fresh produce. The farm share is really starting to pick up and we are getting a good amount of fresh goody goods and that is something I can%u2019t not be happy about. But it is still to hot and when it%u2019s to hot, no one (I think) wants to cook. So don%u2019t cook, just compile. A big ass bowl of veggies, some lentil (or use beans if you want) , and creamy peanut sauce. Thrown together within minutes, hardy and satisfying without being heavy and hot, and tasted really freaking good. A meal on it%u2019s own or a fantastic side dish or snack dish or you know, anytime eating time food dish.
It is just a good dish to make and even better to eat. Heatwave or not.
Now to the cauliflower, kale, and lentil bowl with all the peanut sauce!
The stuff. Half a head of cauliflower, a few big kale leaves, half an onion, cooked lentils, peanut butter, apple cider vinegar, hot water, soy sauce, ginger, garlic powder, red pepper flakes, and black pepper.
Cut up cauliflower. Just go at it with a knife until it is a pile of small little pieces. Then dice up the onion into small pieces and cut up kale into small pieces as well.
Toss all of that into a bowl and top with the lentils.
Peanut sauce. Mix together the peanut butter, vinegar, soy, ginger, garlic, and red pepper flakes. Stir and add in enough hot water to make it creamy, smooth, and pourable.
Dump the peanut sauce into the bowl with everything else.
Toss until everything is evenly coated. And don%u2019t forget to add a good amount of black pepper.
And that is it. Now grab a bowl and a fork and eat. It is really really good.
-C
Serves 1-2 as a big salad or 3-4 as a side
1/2 head of cauliflower
1 1/2 cup cooked lentils
2-3 large kale leaves
1/2 a small onion
Peanut Sauce
1/4 heaping cup of peanut butter
2 tablespoons soy or liquid aminos
2 tablespoons apple cider vinegar
1 teaspoon garlic powder
1/2 teaspoon ground ginger
1/2 teaspoon chili flakes
4-5 tablespoons hot water
black pepper
Start by chopping up cauliflower into little pieces. Some pieces will be like crumble and that is good. Also dice up onion into small pieces and chop kale into small pieces. Place it all into a bowl and top with the cooked lentils.
Make peanut sauce. Place peanut butter, soy ,vinegar, the ginger, garlic and red pepper flakes, and 4 tablespoons hot water into a jar or bowl and mix until incorporated. It should be smooth and thick, but pourable. If to thick, add in another tablespoon or two of hot water.
Once sauce is made, dump into bowl with the rest of the stuff and toss until everything is coated and combined. Top with lots of black pepper and then, well, eat. Or set aside until meal time. Then eat.
Do you ever make cold potato salad when it is not summer? I can%u2019t remember a time when I have. Is that strange? Maybe a little, but it probably has more to do with never wanting to turn the oven on in the summer to cook anything or eating anything that is hot. And fall and winter is not time for anytime cold, I just want my potatoes hot.
I just reasoned myself my own question.
Anyway, cold potato salad. A classic summertime staple just in time for all the BBQ%u2019s, picnics, lazy days spent at home doing nothing , and basically eating anywhere, anytime. Yes,a great side dish but I have been known to have myself a little bowl here or there for a nice snack. Heck, it would make for a nice filling breakfast treat as well. It%u2019s your potato salad ad you can it it whenever you dang well please.
This potato salad is pretty classic in the since that is is boiled potatoes covered with creaminess except the creaminess comes form beans and not mayo. And let me tell you, the mayo is not missed in the slightest here. The bean cream is made from cannellini beans which when blended, are nice and smooth and not overly beany. Added to the cream is pickle juice and mustard for a slight tang. And it all gets mixed together with onions to complete the dish. Simple yes, but so good. And because it is mayo free, everyone can eat it, making it a perfect side dish to bring along or share at any eating event with people that might have a different style of eating. Because we all deserve some so good potato salad, don%u2019t ya think?
Now to the potato salad!
The stuff. Potatoes, caneillini beans, an onion, a few cloves garlic, brown mustard, ground flax seeds, pickle juice, and salt and pepper
Start by dicing up potatoes into inch-ish sized chunks.
Rinse then place the potatoes into a pot completely submerged in cold water. Sprinkle in a good pinch of salt and set on stove to boil.
In the mean time, dice up onions into small pieces. Also chop garlic into smaller pieces.
Place onions into a big bowl along with a pinch of salt and1/4 cup of pickle juice (or vinegar if you prefer)
Now make bean cream. Strain all the liquid from the beans then place 1/4 cup back in. Add the rest of the pickle juice, the mustard, the chipped garlic, and the ground flax seed. Blend until smooth.
Once the potatoes are nice and from tender, remove from heat and strain away the liquid.
Toss the warm potatoes into the bowl with the pickling onion. Let sit for about 10-15 minutes so potatoes have time to cool and absorb picking liquid.
When potatoes have slightly cooled, dump the bean puree an and toss until combined.
And there you have it, super delicious creamy cannellini bean potato salad. If you want to be a little fancy, dice up something green (I used broccoli) to sprinkle on top. It never hurts!
Happy Summertime eating!
-C
About 2 1/2 pounds potatoes ( I used Yukon gold)
a large onion
2 heaping tablespoons spicy brown mustard
1 heaping tablespoon ground flax seed
2 cups cooked cannellini beans with 1/4 cup bean liquid
2-3 cloves garlic
1/2 cup pickle juice (or any type of vinegar)
salt and pepper
Start by dicing up potatoes into cubes about and inch big. Place potatoes in a large pot, rinse in water, strain, then refill pot with cold water until all potatoes are submerged. Add a large pinch of salt to pot and then stick pot on high heat on stove until it starts to boil. Once water is boiling, lower heat but keep at a soft boil. Cook potatoes until fork tender which should take about 15 minutes.
While potatoes are cooking, dice up the onion into small pieces. Place in a large bowl along with a pinch of salt and 1/4 cup of pickle juice. Toss around and set aside.
The cannellini bean cream. Strain the beans but reserve 1/4 cup of liquid. Add liquid back to beans along with the other 1/4 cup pickle juice, the garlic, the mustard and flax seeds, and a small pinch of salt and lots of pepper. With either a hand blender or regular blender, blend until smooth. Taste and add more salt if needed. Also if the puree seems really thick, add in another splash of pickle juice. To thin, add in another tablespoon ground flax seeds.
Once potatoes are fully cooked, strain from water and toss the potatoes, still warm, into the bowl with the onions. Gently toss around and let sit for a few minutes to cool and absorb any pickle liquid. Once the potatoes cooled off a bit, dump the bean cream into the bowl and toss around until potatoes are all evenly coated.
And that is it. You can be fancy and spindle something green like some chopped dill or parsley or broccol on top for a little color and flavor%u2026If you want.
And then eat right away still slightly warm or stick in the fridge to completely chill and eat cold. Last for 3-4 day in the fridge covered.
Ever since schools have been canceled and we have turned to homeschooling, the school systems around my parts have been dropping lunches off to all the littles. Both my sisters with littles have been getting food every day and it is great and amazing and makes me less worried about all the kids that really depend on school for food. Thank you school systems for being awesome!
The thing with the food is that you get what you get. Just about everyday, packed with the lunches,are either applesauce cups or strawberry puree cups.
The little shits, well none of them eat them. I don%u2019t know if they just don%u2019t like them or are sick of them but yeah, they are really starting to pile up. And so sisters have been sending apple and strawberry cups my way and now I have shit ton too.
I figured I would just bake with them and that is what I have been doing, but I still have so many and it is way to hot to be baking all the time. What to do with an excess of fruit puree cups? Freeze them. And make them into granitas. Whats a granita? A granita is flaked frozen fruit, kind of like a slushy you eat with a spoon. And wouldn%u2019t you know, once the applesauce and strawberry cups were frozen and called something else, the littles were all over them.%u00a0I am a genius.
It also helped that is was like a 95 degrees out and when it is that gross, no one wants to eat anything that isn%u2019t frozen. Blah. Too hot way too early!
So if you find yourself with an excess amount of fruit cups or just want to make a healthy and delicious cold treat for your littles or yourself, do this.
Now to the apple strawberry granitias!
The stuff. Applesauce cups and strawberry puree cups. If you don%u2019t have the actually cups, you can use applesauce from a jar or homemade and make your own strawberry puree by tossing fresh or frozen strawberries into a blender. Easy peasy.
The apple and strawberry purees into a bowl
Mix together. Have a taste, it is delicious.
Dump mixture into a baking sheet or pan, preferably a metal one, and place in freezer.
After about and hour, once it is slightly frozen, remove from freezer. Grab a fork and scrape the puree to kind of fluff it up. Place back into freezer for another hour and repeat one or two more time until the texture is nice and fluffy. Once you like texture, place in freezer for another 1/2 to really freeze up.
When you are ready to eat, scoop and serve.
Once scooped, eat. Right away because frozen things don%u2019t stay frozen for long!
-C
makes about 4 servings
2 applesauce cups (or 2 cups applesauce)
2 strawberry cups (or 2 cups strawberries pureed)
1 tablespoon sugar (optional)
Dump the applesauce and strawberry puree into a bowl. Mix together and taste. If you think it could use a little sugar, mix it in. Remember, once frozen, it won%u2019t taste quite as sweet.
Dump mixture into a baking pan or sheet, preferable a metal one, and place in freezer. After about an hour, or once it has frozen a bit, remove from freezer, grab a fork, and scrape the puree to losses it up. Place back in freezer for another hour. Repeat with the fork one or two more times until the texture is that of fluffy ice. After the last scrape, keep in freezer for another 1/2 hour or so to get it really frozen again then when you are ready, scoop out into bowl and eat.
Any that doesn%u2019t get eaten right away, keep in freezer. You can transfer to a smaller container with a lid.
Is it just me or can you also stuff an entire pound of fresh spring greens into your mouth by the fist full and be nothing but happy about it?
Spring greens are on point right now. So tender and sweet and just, agh, I just love greens. I picked up our last winter farm share a few days ago (3 weeks til summer share begins.. will I survive?) and I got a huge bag of baby kale which made me really freaking happy because I love me some kale but baby kale, I loooooovee it. Yay for me!
Then we have rhubarb. I get so excited every year when my patch starts to peek out from under all the rotten leave. The stalks I used for the salad were the first ones that I harvested from my patch! So I know that some people might think ruhabrb in any other form other then in a pie seems strange, but stop, don%u2019t think that. Rhubarb is everything. You can use it and love it in all sorts of ways, sweet and savory, and in all sorts of things, like this salad.
Fresh greens tossed with tart and gingery warm rhubarb and onions, topped with a creamy almond dressing. There is not much more you can ask for in a spring time salad. Sure, I guess you can ask for a fork, but really, I ate more of it with my fingers because well, that%u2019s just how I roll.
Now to the rhubarb and kale salad.
The stuff. Fresh rhubarb, baby kale, half an onion, a chunk of fresh ginger, a couple cloves garlic, almond butter, some roasted almonds, soy, vinegar, water, oil, and black pepper.
Start by mincing garlic and ginger and choping onion up into smallish pieces.
Add the stuff to a hot skillet with a little oil. Once it starts to sizzle, add in a couple splashes of water and let cook until soft.
While that%u2019s cooking make the almond dressing. Mix the almond butter, soy, vinegar, and a little warm water together until smooth and creamy. Taste and add more soy or vinegar if you feel it necessary. More water too if it%u2019s too thick.
Grab rhubarb ad cut into 1/2 inch pieces.
Toss it into skillet with the other stuff. Add in another splash or so of water and keep on cooking.
Once rhubarb starts to soften, turn the heat off of the skillet. Grab kale and toss it around in the skillet to mix around with the good stuff.
Immediately dump it all into a big bowl and top with almond dressing. Toss it around to evenly coat. Oh and throw in some chopped almonds. And black pepper. Add lots (as much as you like) of black pepper.
Now it%u2019s fork(or fingers) to bowl to face.
What a salad. What. A Salad.
Get at it!
-C
makes an entree salad for one or a side salad for a few
2-3 stalks fresh rhubarb (about 2 cups chopped)
3 large handfuls (about 6 oz) baby kale (you can really use any greens)
1/2 a yellow or sweet onion
1tablespoon freshly grated ginger
2 cloves garlic
olive oil
black pepper
2 tablespoons almond butter
1 tablespoon red wine vinegar
1 tablespoons soy sauce
1-2 tablespoons warm water
smal handful of chopped toasted almonds
Start by mincing the ginger and garlic and chop onion into small pieces. Place it all into a skillet with a drizzle of olive oil and place on medium heat. Once it starts to sizzle, add in a tablespoon or so of water to help soften and cook. Should take about 5 minutes.
In the meantime make the almond dressing. Mix almond butter, soy, vinegar, and a tablespoon of warm water together in a small bowl until completely incorporated. Taste. Add a little more soy if not salty enough, a splash more vinegar if not acidic enough, or bit more water if to thick.
Now chop up rhubarb into about 1/2 inch pieces and toss into skillet along with the other stuff. Cook for a few more minutes until the rhubarb becomes slightly soft. If the plan seems to get dry, add in another few splashed of water. Once rhubarb starts to get tender, take skillet off heat. Add in the baby kale and toss around then immediately transfer to a big bowl or plate. Drizzle almond dressing all over, toss, then top with chopped toasted almonds and lots of black pepper.
Eat.
I love me some onions, I mean I eat one everyday so I asked myself why the heck haven%u2019t I made onion rings before? Probably because when I usually think onion rings, I think greasy and fried and that is not really my jam. But early in the week the lightbulb went off in my brain. I have been making a lot of stuff with bean flours lately and thought that chickpea flour would make an excellent batter for onions. And low and behold, I was right. Very very right.
These onion rings are so f-ing amazing. Sure they might not be the most traditional of onion ring but they are for sure just as good. A spicy crispy crunchy outer layer with a soft and creamy onion inside. Baked, not fried, and just really delightful. Easy to throw together and yeah, you got onion rings. I have made them twice this week already. Probably going to make them again tonight because why the hell not? They are simply a vegetable covered in bean. I should be eating them every day and you probably should be eating them everyday too.
Now to the onion rings!
The stuff. Onions (I used valida but any sweet variety will work) chickpea flour, spices (garlic, ginger, cumin, chili powder, paprika, and a pick or red pepper flakes), warm water, oil, and salt and pepper.
Mix up the batter. All the spices get mix together with the chickpea flour. Add in the water and then mix unit completely combined and all batter like.
Dip the onions into the batter and place on a oiled baking sheet. Try not to overlap too much and use the insides of large rings to place the small ones!
Into the oven and out of the oven. Crispy, dark, and delicious!
Get those rings onto a plate while they are hot, grab some dipping sauce of choice (tahini for me) and eat.
Get into this.
-C
3/4 cup checkpea flour
1 teaspoon each cumin and chili powder
1/2 teaspoon each garlic, paprika and ground ginger
pinch of red pepper flakes
2 medium sized valida onions (or whatever onions you have)
3/4 cup warm water
1/2 teaspoon salt
cracked pepper
tablespoon or so of oil to oil baking sheet
Preheat oven to 425.
In a wide bottomed bowl mix together the chickpea flour. salt. and all the spices. Add in the warm water and mix until completely incorporated and smooth. You want the batter to coat the onions when dipped but not be overly thick. If you think it needs to thicken up a bit, add a tablespoon more chickpea flour. To thin it, just add a splash more water.
Grab onions and peel off papery skin then slice into 1/4-1/2 inch rounds. Take onion rings and dip them into the batter then place rings on a large oiled baking sheet. Try not to overlap to much and definitely place smaller rings inside bigger rings. Also use a second baking sheet if you need to.
Once rings are all battered, place in preheated oven and bake for 40 minutes, giving them a flip atfter about 25-30 minutes.
Once dark brown and crispy, remove from the oven. Place rings on a plate and eat. Dipping sauce recommendation is tahini but anything or nothing at all is also right.
It started a few nights ago when I was eating my after dinner dessert snack. A big bowl of fresh strawberries. But there was something missing. I wanted a little something else to add to my dessert so I opened the freezer to see if there was any frozen bananas. What caught my eye was the bag of peas. And it just seemed right so I poured some into a bowl, dumped hot water on them to thaw, and mixed them into the bowl with the strawberries. Now I got to tell you, it was one of the most satisfying delicious desserts I have had in a long time. Think about it. Peas are sweet and creamy and strawberries are sweet and tart. The combination might seem a little strange but haven%u2019t we learned by now that I am always right about flavors? HAHA. But really. It%u2019s one of my new favorite snacks.
Now how to share my newfound love of peas and strawberries? Well cake of course. I figured people are less hesitant to try new flavor combinations when in cake form because everyone wants cake. And I was right. Plus it is a real looker if I do say so myself. Bright green cake with bright red strawberry glaze. A spring time snack with the spring time feels. Everything about this cake is right on point with all the things. And it is super fast and easy to make to boot because it%u2019s all thrown together in a blender.
You really can%u2019t go wrong here friends. And if you happened to be needing a little something something to snack on with your mama this weekend, well I think you just found the perfect snack.
Now to the cake!
The stuff. Peas,strawberrie jam of perceives (I had just made it so it is still warm) Flour, sugar and powdered sugar, baking soda and powder, salt, oil, and vinegar.
Super easy here. Place peas into blender and blend until smooth. Add oil and sugar and blend until incorporated. Then add in all the dry. Before you blend, take a spoon or spatula and hand mix it a little. Add in a cup of water and vinegar then pulse until incorporated. Don%u2019t over blend it or else it will be tough.
Pour batter into a well greased pan and pop into a hot oven. Bake.
Afer about 25 minuts, check for doneness. When the fork or tester comes out clean, it is done!
Pop cake out and let cool on a wire rack.
And glaze. Warm up the jam in the microwave on on stove until loose then mix jam with powdered sugar.
When the cake has cooled, grab a fork and stab holes all over so when you pour glaze on it will kind of seep into said holes.
Pop cake back into pan (or don%u2019t if you dont want too) and pour glaze all over top.
A dusting of powdered sugar for looks and done and done. Cut into squares, pop a piece on a plate, and snack away.
-C
makes a 9×9 cake
2 cups all purpose flour
3/4 cup white sugar
1 1/3 cups sweet peas (fresh or frozen and thawed)
1 cup water
1/3 cup oil
1/2 teaspoon salt
1 teaspoon baking powder
1 teaspoon baking soda
1 tablespoon vinegar
1 cup powdered sugar
3 tablespoon strawberries jam or preserves
Preheat oven to 350
Place peas into blender ans blend until smooth. Add in oil and sugar and blend until incorporated. Next add in baking soda and powder and then flour on top. Grab a spoon or spatula and mix a little to give the batter a head start then add int he water and vinegar. Pulse in blender for a few seconds, scrap sides, then pulse again until it just become a cohesive batter. Don%u2019t oven blend it or that cake will be tough.
Pour batter into a well greased 9×9 baking tin and place into hot oven. Bake for about 25 minutes or until golden brown and a tester comes out clean. When it is done, pop out of oven and pop cake out of tin to cool on a wire rack.
Once cake is cooled, place back into baking pan. Mix together the powdered sugar and jam then either microwave it or heat on stove for 30ish seconds until warmed and pourable. Grab a fork and stab holes all over top of cake then pour glaze all over.
Sprinkle some more powdered sugar on top for looks, but other then that, it%u2019s now time to eat.
Cake that is not eaten is best keep at room temperature for 2-3 days. Can be frozen too.
Why is it when I bring up anything that has to do with savory peanut butter, people get all wild and weird about it? There has been some misinformation that has seeped into peoples brains that told them that peanut butter cannot be savory, that it must be paired with something sweet and sugary.
Well I am here to tell you that that is bull shit and while peanut butter does go amazingly with all things sweet and or fruity, it is almost more fantastic with savory notes and veggies. Seriously, I eat peanut butter all the freaking time, and most of that time it is has garlic, vinegar, and some hot sauce mixed into it. To dip carrots and cabbage into of course.
This sandwich is basically that. Peanut butter mixed with a few spices and loaded with veggies. Sure ok, some of you might be a little skeptical, that is how you were raised. Peanut butter and jelly. Peanut butter and fluff. Peanut butter and banana. I get it, because that was me when I was a kid too. But then I grew up and my taste for great things grew up too, which lead me to this sandwich.
So trust me. It will probably be one of the best peanut butter sandwich situations that you will ever stick in your mouth. Plus what do you got to lose? It is a one sandwich, basically no time invested, easy as can be, adventure. One that will change your view of peanut butter and maybe even your life in all the good ways. For reals.
Now to the peanut butter and veggie sandwich!
The stuff. Peanut butter, soy, apple cider vinegar, garlic powder, black pepper, ginger, and red pepper flakes. Also bread and lots of sliced up or shredded veggies. I used red onion, shredded cabbage and carrot, cucumber, sliced fresh green beans, and spinach.
First you pile your veggies together and dump a little vinegar on to them. Also add a little pepper and toss a bit. I did it right on the cutting board. No need to dirty another bowl if you don%u2019t have to.
Now for the peanut butter spread. Mix the soy, rest of vinegar, the garlic, ginger, and red pepper flakes all together with the peanut butter. Add a tiny splash of water to loosen it up if needed. Mix until completely incorporated. And then dip your finger and taste it. Add more soy or spices if you want.
And then you spread the peanut butter all over the bread.
Top with the veggies that have been sitting a good couple minutes in the vinegar.
Close up the sandwich, cut in half%u2026
Eat.
I know, I know. Life is pretty swell, especially with a peanut butter and veggie sandwich.
You%u2019re welcome.
-C
makes 1 sandwich
2 heaping tablespoons peanut butter
1/2 teaspoon each ground ginger and red chili flakes
1/2 teaspoon garlic powder
2 tablespoon apple cider or red wine vinegar
1 tablespoon soy
splash of water
Veggies. You can use any or all of the following . Red onion, shredded cabbage, shedded carrot, sliced cucumber, green beans, spinach.
2 slices of some good ass bread
Start by placing all the veggies you are adding to the sandwich into a little pile and drizzle about a tablespoon of vinegar. Add ground black pepper and toss around a little. You can do this in a bowl, but just on a cutting board works too.
Next mix the peanut butter, tablespoon of vinegar, ginger, garlic, red chili flakes, and soy together until completely incorporated. Add a splash of water if needed to loosen a bit if it gets to thick to stir. Then taste. If you think it needs more heat, add more chili flakes, or more saltness, add a splash more soy.
And now spread the peanut butter all over the two slices of bread. Each side get equal amounts. Grab the veggies and pile them on, close sides together, and cut in half.
Spring is here for reals, I think. No, it is here, it has just been a bit raw and maybe a bit more rainy then it really needs to be, but whatever, it is spring and it is good. Things are greener by the day, the temperatures although not exactly warm are still inhabitable and without cause for winter jackets (although I have still been rocking the mittens) and spring veggies are popping up all over. Things are looking good.
So last week I made a pie crust with the intention to make a veggie pot pie and stuck it into the freezer. When the time came to make said pot pie, I forgot to take it out of the freezer so the crust was not meant to be for pot pie (it will probably end up as a rhubarb pie%u2026we shall see). Without pie crust, I wasn%u2019t exactly feeling like I should make a pot pie, but a tart, well yeah, sure. A crispy and chewy crackery crusted thing with almond ricotta a spring veggies because that is where the mind went and what the mr agreed sounded good. (When I make up recipes I just start taking about ingredient and preparations and wait til the mr says %u201cYea, that loud good. I%u2019ll eat that %u201c He usually will say it right away and for anything. Very easy to please or he just doesn%u2019t care%u2026hum? )
And so the tart was made and the tart was eaten in all entirety for dinner by the mr alone. Usually when he eats all of something it means it was one of the really good things. Or he is really really hungry. But he said it was a really good thing. I trust him because I agreed. I got in a few spoonfuls of the almond ricotta mixture and it is really freaking good if I do say so myself (I could eat bowls of almond ricotta all day long).
Anyway, heres to spring and all things that are green and good.
To the tart.
The stuff. Flours (white and white whole wheat), baking powder, and a little salt in the bowl. Water and olive oil, blanched almonds, a lemon, a clove of garlic, asparagus, peas, frozen and thawed spinach, a small red onion, and salt and pepper.
Start with making the crust. Mix the dry together then add in the oil and water to form a dough. Knead dough a minutes until the dough is uniform and place back in bowl and cover. Dough needs a few alone minutes to rest. I can relate to that.
While dough is resting, make the almond ricotta. Almonds, garlic, the juice of the lemon, and a bit of water go into blender. Add in a pinch of salt and pepper too.
Blend until creamy and smooth.
Dump in the spinach and blend, just until combined.
Scoop ricotta into a bowl and mix in the peas. And sure give it another taste but try not to eat it all.
Grab the onion and slice it all nice and thin.
And after the resting time, grab dough and roll it out. Try for a rectangular shape or as rectangular as you can get it, but nice and thin. Thiner is better.
Place rolled out dough onto a baking sheet and poke the bottom with lots of little hole. Take ricotta mixture and spread evenly all over crust, leaving a 1 1/2 border all the way around.
Then top with the asparagus and more onions.
Fold over the edges of the crust, sprinkle with a pinch of salt and pepper, and into the oven it goes to bake.
And then it is baked. And ready to eat (after a few minutes of cooling).
Nothing left but to cut it up and eat it.
Spring. Green. Food.
Things are good.
-C
Makes a 8×12(ish) tart
For the Crust
1/2 cup all purpose flour
1/2 cup white whole wheat (can sub for all purpose)
3 tablespoon oil
1/3 cup room temp water
1/4 teaspoon baking powder
1/2 teaspoon salt
For the Almond Ricotta and Veggies
1/2 cup blanched almonds
1/4- 1/3 cup warm water
1 lemon
1 clove garlic
1/2 teaspoon salt and pepper or more to taste
1/4 cup frozen and thawed spinach squeezed of liquid
9-10 spears of Asparagus
1/4 cup peas (fresh or frozen and thawed)
1 /2 red onion
First make the crust. Whisk together the flours, salt, and baking soda. Add in the oil and water and mix until a dough forms. Form dough into a ball and knead for minute or two on counter then place dough back into the bowl and cover. The dough needs to rest for 10-15 minutes.
While dough is resting, make the almond ricotta. Place almonds, garlic, and juice of lemon into a blender. Start blending and add in the lesser amount of water, adding a little more until the stuff all starts to blend. Blend on high for a minute or two until the mixture is nice and creamy. Season with salt and pepper, blend a second to mix then add in the squeezed out spinach. Blend until mix together then dump or scoop the mixture into a bowl and mix in the peas. Then thinly slice up the onion.
Preheat the oven to 450
After doughs little rest, lightly flour a counter and roll it out, thin as you can, in a rectangular shape. Try for at least 12in x 16in. The rectangle doesn%u2019t need to be perfect. Rough is good.
Place the rolled out crust onto a baking. Take a fork and dock the surface (poke holes into it to prevent air bubbles). Take the ricotta and pea mixture and spread evenly on crust, leaving about a 1 1/2 inch border all the way around. Add a layer of sliced red onion and then take asparagus (trim off woody ends) and either lay on whole or break in half and lay on. Add more onions on top. Fold the border of the crust over the top. Sprinkle the whole thing with pepper and place into the hot oven.
Bake for 22-25 minutes or until the crust becomes a nice golden brown. Remove and let cool a few minutes
And then cut up and eat. Right away or at room temperature. Or some now and some later. All up you you.
Store left over in fridge in air tight container for up to a few days. the crust will not be crispy but more chewy. Can stick it back in oven for a few minutes to crisp it up.
I found another bag of frozen rhubarb in the chest freezer which is never a bad thing, but my rhubarb patch outside is growing strong and I will have all the fresh rhubarb I could possible eat within the next few weeks. So found rhubarb just means I need to eat it right fast before the fresh stuff comes in. (I haven%u2019t had a problem with that. it%u2019s almost gone already). Plus the other day while I was digging up and transplanting raspberry bushes to the back yard, my neighbor came over and gave me a gallon of frozen raspberries, harvested from said bushes that I was currently planting in my yard. Score for me! Free bushes and berries%u2026I have such nice neighbors.
So the logical thing to do with my new found and giving bounty was of course to hurry up and bake something. Cobbler. Why cobbler? Well, why not? I figured the mr would really like it and eat it and I also didn%u2019t want to make anything to fussy because I was just to dang busy spending all of my extra time outside doing outside things. And cobbler, it%u2019s not fussy because it is basically biscuits and jam baked up all together. Not a lot to think about and comes out looking all homey and sweet and smelling all nice and cozy. Doesn%u2019t that sound nice? And not a pain in the ass?
And best part. A made cobbler works as dessert or breakfasts or just a snack. Just asked the mr. He ate it for all the reasons. With a dollop of yogurt or cream of course because he is fancy like that.
And yeah the fruit I used was frozen, but fresh works just the same here too.
Now, lets get to that cobbler.
The stuff. Raspberries (frozen), rhubarb (frozen), sugar, flour, salt, baking power, cinnamon ,almond milk, apple cider vinegar, cornstarch, and oil.
Raspberries, rhubarb, sugar, cinnamon, cornstarch. Its all there in the bowl. Just needs to be mixed. So mix it.
Dump fruit mixture into well greased 8 inch pan and pop it into a hot oven to get a head start on baking.
While the fruits in the oven, make the biscuit dough. Mix the dry together then mix in the wet until just incorporated and a sticky dough forms.
Pulled from the oven, the fruit is starting to cook down and whoa, it just smells so good!
Drop on the biscuits dough on top of the fruit (careful of the hot pan). Evenly if possible, but don%u2019t work to hard to make it look perfect. Imperfection makes it look perfect, you know?
Once biscuits are on, lightly brush the tops with a little milk and sprinkle with more sugar then pop it back into the oven for another 25-30 minutes or until the biscuits are baked.
Pulled from the oven with a bubbly filling and a golden brown biscuity top. Things are looking good here.
And now it%u2019s time.
Dig on in my friend. Sever with something creamy like whipped coconut cream or some type of yogurt or ice cream situation of your choice. And again, this can be your breakfast.
Happy spring people!
-C
make a a 8 inch round which serves 5-6
For the Filling
2 cups raspberries (fresh or frozen)
2 cups rhubarb chopped into 1/2 inch to inch long pieces (fresh or frozen)
1 1/2 tablespoons corn starch
3/4 -1 cup sugar (lesser amount if you like a little more tartness. I used lesser amount)
1 teaspoon cinnamon
For the dough
1 cups all purpose flour
1 1/2 teaspoon baking powder
1/2 teaspoon salt
3 tablespoons sugar
3 tablespoons neutral flavored oil
1/2 cup plant based milk
1 teaspoon apple cider vinegar
Preheat oven to 350.
In a large bowl mix together the rhubarb and raspberries with the corn starch, sugar, and cinnamon. Grease a 8 inch round pan the is at least 2 inches deep (can use a slightly large pan or a square) and dump in fruit mixture. Place into oven to bake for about 15 minutes or the fruit starts to break down.
While fruit is baking, mix up biscuit dough. Flour, salt, 2 tablespoons sugar, and baking powder go in a large bowl and mixed until combined. Add in the oil, the milk, and the vinegar. Mix until just incorporated and a dough has formed.
Remove the fruit cooking from the oven. Turn heat up to 375.
Carefully drop spoonfuls of biscuit batter on top of fruit. Brush the top of the biscuits with a little milk and sprinkle with remaining tablespoon sugar. Place the pan back into the oven and bake for another 25-30 minutes or until the biscuits are all nice and golden brown on top.
Remove from oven and let cool for a few minutes before serving. Serve warm with a scoop or dollop of soothing creamy (coconut cream, yogurt, ice cream%u2026..whatever floats your boat.)
Left overs can be stored in pan, just cover it with something and place in fridge. Can be eaten cold to or reheated in microwave or oven.
Who doesn’t like a good bun, right? %u00a0And just because this is where my mind wonders, peachy sweet buns. Doesn’t that sound like a pick up line or something you say to your significant other. Like, “Oh hey peachy sweet buns, you are looking good. Woo hoo”…….. Anyway, this is not about anyones peachy sweet buns, it it about actually sweet buns so u-hum, yeah.%u00a0
I am not trying to float my own boat here, but I am really really good at making buns, and you know what, I bet that you are too. They may seem a little intimidating, but really, it’s quite easy. I think what throws some people off is the yeasted dough and having to knead and waiting for the dough to rise,%u00a0but don’t let that stop you from sweet sweet buns. They are no harder to make then a boxed cake (maybe a little harder) and the results are by far more amazing and delightful (we don’t use the word delightful enough around here) then any old box or pre-made thing will ever be. Ever. Freshly made buns are what is right in this world.
If you are awesome and decide to make buns like any good person with a baking itch or a need for some sweet bun goodness does, make them peachy because its peach season and how can a peach bun not be that much more amazing? %u00a0Just think. Soft sweet dough, jammy cinnamon peaches, covered in a sweet lemony glaze……
Go on now, go and get yourself some peachy sweet buns.
The stuff. Flour and salt in the bowl, melted earth balance, brown sugar, yeast, warm soy milk, cane sugar, cinnamon, powdered sugar, a couple of lemons, and af course, peaches.
Warm (not hot) soy milk, yeast, cane sugar, an melted (but again, not hot) earth balance go into a big bowl and get whisked around. Then add in the flour and salt ans mix around until you just can’t.
Time to knead. Dump the dough ad all the little bits onto a flour surface. Gather it all together and knead away, for about 5-8 minutes, or until the dough looks like….
This. Nice and soft and glossy. %u00a0Lightly grease the bowl ans stick the dough back into it, covered with a towel, and set for about 1 hour to rise and double in size.%u00a0
As soon as the dough is set ti rise, start on your peach filling. Chop up enough peaches that you have about 2 1/2 cups of chunks.
Brown sugar and peach chunks go into a pot and stuck on a medium heat until they start to bubble then set to a low simmer for about 20 minutes or until the peaches all break apart and reduce by half.
Add in the cinnamon and stir.. Peachy goodness. Now quick and stick that shit in the fridge or freezer to cool down.
BOOM. Dough did what it’s job and doubled. Time o make the buns.%u00a0
Place the dough on a lightly floured surface and roll our into a rectangle of sorts that is about 1/2 an inch thick%u00a0
Cover the surface with all the peachy jammy goodness, and sprinkle on the remaining finely chopped peaches.
And roll, as tightly as you can, without squeezing all the filling out. I roll towards me, but roll away from you if it is easier. %u00a0It might get a little sloppy… it’s ok, just lick your fingers and keep going.%u00a0
Rolled and cut into 12 pieces.
Place the rolls carefully onto a grease and parchment lined baking 9×13 baking dish. In my picture I used a baking pan, which was not what I wanted to do, but I wasn’t thinking properly and so that’s what I did. Something with sides is preferable, but the baking pan did the job so really, your call.%u00a0
When you place the buns in the dish, place them toughen a bit, it helps then bake up high instead of out. %u00a0And any remaining go on jam that spilled out can get scraped right on top of the buns,%u00a0if you didn’t already eat it.
Now into the preheated oven these %u00a0babies go.
Look at those beauts. And they smell. A-MAZ-ING!!%u00a0
Right away get that glaze made. Powdered sugar, lemon zest, ans lemon juice. Super easy, just add the zest and juice to sugar and mix until smooth and glaze.%u00a0
Pour glaze over warm buns. Make sure to hit them all or someone is going to be pissed they didn’t get enough glaze…..%u00a0
Then it’s really just up to you whether you wait for coffee or tea or not, but really, just eat right away. There should be very little time between newly glazed buns and a bun in your face.
Enjoy the peaches!
-C
Makes 12 Buns
For the Dough%u00a0
3 1/2 cups all purposes flour
1/4 %u00a0cup cane sugar
1 cup warm soy milk
2 teaspoon or 1 packet yeast
4 tablespoons melted vegan butter%u00a0
1 teaspoon salt
For the Filling%u00a0
3-4 good sized ripe peaches (about 3 cups chopped peaches)
3/4 cup brown sugar
1 tablespoon cinnamon
Juice of half a lemon
For the Glaze
1 lemons
1 1/2 cup powered sugar
In a large bowl mix together the yeast,%u00a0warm (not hot) soy milk,%u00a0sugar, and melted but cooled butter. Now add in %u00a0the salt and the flour. Mix until it’s too hard to mix then dump it all onto a lightly floured surface and knead for 7-10 minutes until the dough is %u00a0soft, elastic-y,%u00a0and smooth. Place dough back into a clean lightly greased bowl and drape with a damp towel. Let dough rise for about 1 to 1.5 hours or until it has doubled in size.
While the dough is rising, chop the peaches up until you have about 3 cups.%u00a0Place 2 1/2 cups of the %u00a0peaches into a medium sized pot with the brown sugar and lemon juice and stick on medium heat. Set the rest aside. Cook for about 20 minutes, stirring and mashing with a wooden spoon every few minutes,%u00a0until mixture has become thick and reduced by about 1/2. Remove from heat, stir in cinnamon,%u00a0%u00a0and place in fridge to cool.%u00a0
Once thee dough has doubled, dump onto a flour surface and roll our into a retacnge that is about 1/2 inch thick %u00a0Grab your peach mixture and spread the mixture evenly over the dough. Evenly distribute %u00a0the remaining chopped peaches over jam. %u00a0And then it’s the to roll.
Start from the long side and start to roll toward the other end, keeping it as tight as possible without squeezing out all the filling. %u00a0Once rolled, slice into 12 even sized buns.
Place on a lightly greased and parchment lined 9×13 inch baking sheet or pan and let rest and rest for another20 minutes or so. OR if you want to wait to bake them off,%u00a0cover them with plastic and set into the fridge for up to 24 hours. When you are ready to bake, remove from fridge and let the buns set on counter to come to room temperature before baking.%u00a0
Preheat oven to 350.
Place rolls into oven. Bake for 30-35 minutes or until all the buns have gotten a nice golden brown on top, and if you want to take the internal temp, that the temp has reached 190.%u00a0
Once the buns are done %u00a0baking, mix together the zest and juice of the lemon and powdered sugar. If the glaze seems to thick, add more juice or water, to think, add more sugar. Pour glaze all over warm (but not hot) buns.
And now all you need to do is serve up those buns right away, nice and warned.
Any left overs should be stored in the fridge for 3-4 days but should definitely be warmed up in the microwave for a minute or two before serving. They also freeze well too.%u00a0
Do you have a gazillion tomatoes, like so many that they are practically coming out of your ears? Me too…. Me too. This year the tomatoes have been gang busters, a explosion of the sweetest and most delicious fruit and now I have tomatoes littered everywhere, tucked into all the corners and baskets all over the house. It’s getting kinda tomato crazy over here.
%u00a0I can only eat so many tomatoes a day before all I have eaten are tomatoes and I start to feel slightly sick. Same with the mr, he has been a tomato eating champ as well but I think he was getting a little bored with all the tomato salads that I have been making. So I thought I would try something new and make a tomato cake. I figured why the heck not, tomatoes are technically a fruit and fruit and cake are great together and yeah. So tomato cake is going to be fantastic. I also wanted to make something that the mr would eat for breakfast. I have been doing this new thing in the mornings for the mr. I have coffee ready, some breakfast food (its been zucchini bread for a while), and a little vase of fresh flowers that I pick on my morning walk, all set out on the counter for when he wakes up. I know, I am so great right. Really I do it cause I want him to eat something before working all morning and plus if I am all sweet in the morning, he can’t be an old man cranky pants (at least he tries not to be).%u00a0 Now for the next few days the tomato cake is breakfast cake and all is good.
Anyway, the cake come out great. Bright reddish orange, dense but fluffy and most, and smells so good. The mr tells me it’s amazingand I shared a chunk with some of my family and everyone (minus a little) where fans. I am for sure going to be making this again soon, although I have been toying with the idea of eggplant sweet bread (too far??) but I’ll get to that later.
Now for the tomato cake!
The stuff. Flour, baking soda, baking powder and salt (all in the bowl). Brown sugar, oil, vanilla, apple cider vinegar and a few nice and juicy tomatoes.
First off, remove the core from tomatoes and cut into some chunks. Stick the chunks into a blender and blend.
Fresh and smooth tomato puree.
Now just dump the rest of the liquid stuff into the blender now and give it a whirl to mix it all up.
And pour the blended wet into the dry and mix until incorporated.
Pretty pink batter goes in a well greases bundt pan. I had got brown sugar everywhere while I was measuring it out and decided to just toss it on the cake as not to waste it…doesn’t hurt.
And now the batter goes into a preheated oven to bake .
A bit of time later you have yourself a cake.
The scary part. Flip the pan and hope all that grease does it’s job and the cake pops out. Lucky me this one popped out like a champ.
One de-panned, let the cake cool for a bit before cutting into it.
And now all you have left to do it eat it, so eat it.
Have a great weekend. Eat lots of tomatoes and make lots of cake.
-C
Makes one bundt cake
2 -1/3 cup all purpose flour
1 teaspoon baking soda
1 -1/2 teaspoon powder
1/2 teaspoon salt
2-3 large tomatoes (2 -1/2 cups after blended)
1/2 cup brown sugar (for a tad sweeter, add another 1/4 cup)
1/2 cup of any neutral flavored oil
1 teaspoon vanilla
1 tablespoon apple cider vinegar
Preheat oven to 350
Start by whisking together all the dry ingredients into a big bowl. Take tomatoes, remove core, chop into chunks, and place into a blender. Blend tomatoes until a smooth and frothy puree. Now add in the sugar, oil, vanilla, and apple cider vinegar and blend until incorporated. Pour wet mixture into dry and stir until combined.
Pour the cake batter into a greased (and floured if you want. I find it helps to make sure all the nooks are greases) and stick into preheated oven. Bake for 45-50 minutes until it’s a dark reddish golden brown and a tester (I use a fork) comes out clean when stabbed.
Remove from oven and let cool for a minute or two then invert cake, give the pan a few tap taps and hope that it comes out all nice and clean. (don’t worry if a piece gets stuck, you can just dust the top with some powdered sugar)
Let cake cool and when ready, cut a slice and eat it up. I was told no glaze, but I was going to make a simple lemon glaze (lemon juice and powdered sugar) for the top. The mr said it was perfect, but glaze would have been pretty.%u00a0 So glaze it up if you want.
I bought a tub of ricotta cheese about a month ago to make the mr his birthday lasagna, and for some reason, I can’t seem to get rid of it. I have been adding spoonfuls of the stuff into his food every now and then, but I still have not managed to go through it. I am starting to think that I bought a magic container that will never empty. And if that is that case, is there a never ending tub of hummus I can buy?
Yesterday I cleaned out the fridge.%u00a0 The cleaning that involves defrosting, washing the shelves, removing the stuck on crap that has so steadily hung on for the past few months and using any food that needs to be used up. To be honest, there isn’t much in the fridge at the moment(which is why I am cleaning the it) but there is the freaking tub of ricotta, ans I want it gone, it is taking up to much space. (for real,. my fridge is tiny) And because we all know that I am the worlds greatest girlfriend lady person in all the land, I decided to, once ans for all, get rid of the ricotta and make the mr some biscuits.
Off topic here but… It’s SNOWING!! And not just a tiny bit, we are going to have a couple of inches of white stuff. I am so excited! I must get my winter boots out (I have to find them first)
But the biscuits. These biscuits are super freaking easy. Just a few simple ingredients and 15 minutes and you got yourself home made goodness to make your people(or yourself) happy. They would make a great breakfast thing, made for a brunch situation, or even made with the help of the littles that may or may not be hove from school and eaten as a afternoon snack.%u00a0 As for me, I am just thrilled to have the space back in the fridge and an empty container that may or may not be magical.
The stuff. A bowl of self rising flour, ricotta cheese, a little bit of honey, and an orange.
Dump the ricotta, a few couple tablespoons of honey, and the zest of the orange into the flour.
And say hi to my new amazing bowl! (Hi bowl, you are so pretty!)
Juice the zested orange and add in 1/2 a cup of the juice.
Now mix everything together until just incorporated.
Scoop dough onto a baking sheet in 12 similar sized balls. Brush the tops with any remaining orange juice you have (if you don’t have any, use water) and stick those puppies into the oven (not actual puppies please)
After a quick 9-10 minutes, the biscuit cooking is complete! Golden brown and smelling all biscuit like.
Bust one open, maybe a smear of honey or jam…
And so the things you do with biscuits.. Eat them. I served the first one up tothe mr with a little drizzle of honey (cause I am sweet like that)
Keep on people!
-C
makes 12respectable sized biscuits
1 1/2 cups self rising flour
1 navel orange (1/2 cup juice and 2 teaspoon zest)
2 tablespoon honey
1 cup ricotta cheese
In a large bowl, mix together the flour, honey and ricotta. Zest in the rind of the oragne (about 2 teaspoons) then juice the orange and hopefully get at least 1/2 a cup of juice. Add in the 1/ 2 cup of juice and mix until everything is just combined. Scoop out dough into 12 similar sized blobs and place onto a baking sheet. Brush tops of biscuits with any remainingorange juice or water if you don;t have it
Place in oven and bake for 9-11 minutes or until the tops are golden brown and the insides are completely baked.
Remove from baking sheet and let cool for a few minutes.
Bust one open and either eat as is or slather with honey, butter, jam, or all three.
Any left overs can be stored in airtight container for 2-3 days. Can be frozen.
Oh do I love a good Sunday. The picture above was taken last Sunday and what a glorious day that was. The mister and I took the pup hiking and it was the most spectacular of days. Sunny, 30 degrees and no wind..I could’t have asked for better weather. %u00a0
The rest of the week turned out alright. The weather went back to hell again and I was a little frantic and super busy, but all in all, good. I accomplished some things %u00a0that needed to be done and got to spend time with just about everyone in my family. The highlight%u00a0was when my sister slept over and we finally watched the Fault in our Stars while eating lots of food, cuddled together on the couch. (movie was good, but book was better. Books are always better) We then woke up early the next day and we (the mister too) %u00a0journeyed across state lines to the closest Target where we purchased some hand soap, %u00a02 seltzer waters and 2 jars of baby food. (I needed the jars) On our way out, the lady experienced her first ever taco from the taco bell in the food court before heading back to Vt. We spent the car ride singing terrible pop songs and eating the babyhood (Blueberries and sweet potato, and yes, they are tasty) We then came back tom my house, listened to more awesome music while she did her homework and I played on the computer and made dinner. %u00a0It was the best.%u00a0
Heres a few of this weeks happy bits from the internet.%u00a0
– I will be making these wire baskets%u00a0this week. I need storage and I love a good wire basket.
-I have been ending %u00a0up on this website every night..Making plans
-I need this shirt!!! Feel free to buy it for me!
-Throw Back Song!%u2026 And yes, I was sure I was going to be Mrs. Zac Hanson when I was 11.%u00a0
-My sister sent me this link,%u00a0Wool and the Gang.%u00a0So cool.
-These pictures made me laugh. I end up with veggies like this all the time.
And here are a few pictures of my real life happy%u2026..
Playing on the frozen lake. It was so freaking cold and windy, but we just had to do it!
Beach stairs. Hopefully soon they will be a little less icy and maybe even lead to some sand and not waist high drifts of snow.
%u00a0Two of my favorite people in the world.
And I made brunch with 2 more of my favorites.
My little brothers (can I say little if they are bigger then me?) came over and we all had dinner together while listening to music from when they were born. Nothing like a few 17 year olds to make a person feel old.
Blooming daffodils. I love to watch my flowers open up, it’s just as good as the flower itself.%u00a0
When your neighbor tells you to pick as many raspberries as you can, well you go pick as many raspberries as you can. Just a few houses down the street, she has a yard full of the heaviest fruited raspberry bushes that have seen. So I grabbed my biggest mixing bowl and went at it. So many raspberries, they were basically falling off into the bowl (and into my mouth). Fresh raspberries, there is not much better.
And she wants me to come back for anther round. We have good neighbors.
I had quite the raspberry loot. The mr and I ate some (maybe too many), froze some, and then I made danishes for no other reason then I wanted to. And that was a just decision because everyone loves a good danish.
And these were good, or sooo good, according to the mr. He ate half while the other half were demolished when I brought them to my moms for dessert which was the plan so it worked out. People and their danishes. It%u2019s a thing you know.(No, not really)
Now to the danishes!
The stuff. Fresh raspberries (You can use frozen or if you really want, raspberry jam) flour, sugar, salt, plant milk, oil, yeast, a lemon, powdered sugar, vanilla. and that is it.
Start with mixing the yeast with the oil, milk, and sugar in a large bowl. Add in the flour and slat ads mix mix mix until you can%u2019t mix no more.
Dump onto a floured surface aaaaaanf. Knead. 5-8 minutes until the dough is all soft and smooth and uniformly dough.
Place the dough into cleaned bowl and cover. Set somewhere warm to rise.
In the mean time, make raspberry jam. Place raspberries and sugar into a pot and cook down until mixture is thick and jam like. Once the mixture sticks to a spoon like warm jam, turn heat off and let cool.
Dump dough out and cut into 12 equal pieces. Roll each piece into ball then roll out into a dish about a 1/2 inch thick.
Place dough disks onto splat or parchment lined baking sheet then indent each dough disk with a spoon or your fingers. Dollop a good plop of raspberry jammy into said intents. Once they are all jammed, pop them into the oven to bake. 15-18 minute should do it.
Look at those. Get them out of the oven and on to a wire rack for cooling time.
Make glaze. Sugar, lemon zest, vanilla, and lemon juice Mix until combined and yeah, that it glaze.
Drizzle the glaze all over those lovelies.
And then you eat becucae that is why you made them.
Share with your people. Or just eat them all to yourself, you made them and they are yours.
-C
makes 12
4 cups of all purpose flour
1 teaspoon salt
2 teaspoons yeast
1 cup room temperature plant based milk
1/2 cup neutral oil
1/3 cup white sugar
For raspberry jam
1/4 cup white sugar
2 cups fresh raspberry
For glaze
1 lemon
1 1/2 cups powdered sugar
splash of vanilla
In a large bowl combine the yeast, sugar, oil and milk. Really mix well and let sit for a minute to just get yeast activated. Dump in flour and salt and mix with a wooden spoon or whisk until it becomes to hard to stir. Dump mixture onto a lightly floured surface and knead dough for about 5-8 minutes or until the dough is soft and smooth. Place dough in a clean bowl and cover and let rise for about an hour or so or until the dough doubles in size.
While dough is rising, make raspberry jam. Mix raspberries and sugar together into a pot and place on medium heat on stove. Let cook for a couple minutes and once the raspebrries start to break down, stir. Let mixture cook down for about 10 minutes, stirring often, until the mixture becomes thick and sticks to a spoon like warm jam should. Take off heat and let cool.
Preheat oven to 350
Once dough has doubled in size, dump onto it onto a floured surface and with a knife or dough scraper, cut into 12 equal sized pieces. Roll each piece into a ball then flatten out into a disk about 1/2 inch thick. Place dough disks on a parchment or splat mat lined baking sheets (you will need 2). With a spoon, lightly push a intent into the center of each disk then place a good plop or the cooled raspberry jam into the intent. Once all the dough has its berries, place the baking sheets into the oven to bake, for about 15-18 minutes, or until the danishes are a nice golden brown.
When they are done baking, remove from oven and place on wire rack to cool.
While cooling, make the glaze. Zest lemon and place in a bowl with the powdered sugar and vanilla. Add in half the juice of the lemon and stir until completely combined. If the mixture is too thick, add more juice, to thin, add a little more powdered sugar.
And once the danishes are cooled, drizzle on the glaze. And then thats it. You can eat them now.
Any left over why are there left overs?) should be stored in a airtight container for a few days at room temp or in the fridge . They also freeze well.
Zucchini. One of the best summertime veggies. If you have been around here (as in my blog) for long enough, you all know how I am a zucchini feen. Once they start growing, I take them all. From my garden, from your garden, even my sisters mother in laws extra, plus the million I get with my farm share. At any given time I could have upwards of fifty zucchini spilling out all over the counter and shoved into any crevice I can find in the fridge. But the excess never lasts long because I eat them all. Mostly to myself, and I feel great about it. (Ok, I do end up freezing some of it for winter, but I am still eating it all!)
And every year when the first zucchinis start to hit the ground, all the people are up in my squash asking for zucchini bread, like they can%u2019t possibly make it themselves or anything. But I don%u2019t mind what so ever because sharing is caring and I guess I care. Plus I like to bake so it works, you know?
When I was recently asked to bake a loaf of zucchini bread, I made the decision to go the muffin route instead because aren%u2019t muffins just individual little breads that take half the time to cook them a loaf? Yup, and that is very nice when you want to minimize any hot oven time because summer is hot enough as it is.
And because they are muffins, they acceptable for breakfast, even with all the chocolate chips.
Win!
Now to the muffins!
The stuff. A good sized zucchini, flour, baking soda and powder, salt, brown sugar, oil, cinnamon, raw sugar, apple cider vinegar, and some chocolate chips.
In a large bowl, whisk together the flour, baking soda and powder, salt, cinnamon, and brown sugar until completely incorporated and there are no lumps of sugar.
Shred the zucchini. I used a smaller shredder so the pieced are very thin but a normal sized box grater shred works just as well
Add zucchini, oil, and vinegar to bowl and fold in until completely combined.
Then fold in chocolate chips. Duh.
Scoop batter into a greased muffin pan and sprinkle the tops with raw sugar. Pop into the hot oven to bake.
Pop out of tins to cool on a rack.
And eat. All to yourself or share, that is on you.
-C
makes 12 muffins
2 1/2 cups all purpose flour
1 1/2 teaspoon baking powder
1 teaspoon baking soda
1/2 teaspoon salt
1 tablespoon cinnamon
3/4 cup packed brown sugar
1/2 cup neutral flavored oil
2 tablespoons apple cider vinegar
1 medium zucchini (2 cups packed shredded zucchini)
2/3 cup chocolate chips
1/4 cup raw sugar (to sprinkle the tops) optional
Preheat oven to 350.
Grab a large bowl and add in the flour, baking powder and soda, cinnamon, and salt. Whisk together then add in the brown sugar and whisk in, making sure there are no big clumps.
Shred zucchini uniti you have 2 hefty cups. If you have a fine shredder, use that, if not, a normal sized shred will do.
Place shredded zucchini into the bowl along with the oil and the vinegar. Start folding with a spatula until everything is incorporated. Resist the urge to aggressively mix, it takes a minute for the liquid from the zucchini to absorb into the flour. (Over mixing it will make the muffins tough) Once the batter is uniform, fold in chocolate chips.
Scoop batter into a well greased or lined muffin tin. Sprinkle the tops with raw sugar and pop the pan into the preheated oven. Bake for about 30 minutes or until fluffily and domed and a tester stuck in one comes out clean.
When baked, remove from oven and pop out if tin. Let cool on a wire rack but feel free to eat one warm.
Store uneaten muffins in airtight container at room temp for a 2-3 days but if it is really hot out, just stick them in the fridge. Also can be frozen.
I have been on a good long kick here with eating oats at night for my after dinner snack. Just about every night after cleaning up the dinner dishes, sweeping the floors, going for a nice after dinner walk with the mr, I come home, put the hot water on, grab my oats, my peanut flour, and sometimes a banana. As soon as the water boils I mash up some banana (if using), add in some oats, pour in some boiling water, and let them sit. I also pour a huge jar of tea then plop my butt down at the counter to do any brain tasks that need doing like checking the email, left over billing things, maybe check the old phone for the first time in hours%u2026 After about 5 minutes of that, I stop brain tasks because I just can%u2019t, grab oats, and dump in a few big ass tablespoons of peanut flour and cinnamon and give it a good stir. Voila, snack time. A delicious, nutritious, tummy filling and easy dish that is full of all sorts of things that my body needs. I grab a spoon, my tea, and open my book. For sure one of my favorite times of day.
Now lets talk about peanut flour. I have been eating peanut flour for a few years now. Not to confuse with powered peanut butter which is basically peanut flour but usually with added sugar and salt. Peanut flour is just peanuts, with the oil pressed out and then ground up into a super fine flour. And not a flour is the typical sense. Like you can%u2019t make bread with it, but you could add it to bread. You can also use it to thicken things like soups or sauces up. Or add it to smoothies, make a cake frosting with it , or just mix it with a little water and eat it with a spoon. It is delicious and amazing and full of protein without all the added fat and high calorie content. I started to add it to foods because of the protein but now I just eat it all the time because I freaking love the stuff. (Another favorite way to eat it is cut up carrot sticks tossed in the flour%u2026 SO GOOD!) Anyway, truth be told, it is not the most widely available stuff. I have only seen it in a few store over the years, so I have been buying it online. But recently someone told me that Trader Joes is selling it now (I haven%u2019t checked yet) so I figured now is a good time to share the greatness of the flour and how you might want to use it.
Anyway, these oats here are my favorite way to eat oats. Warm and creamy, but not cooked and gruel like. They are like a cross between stove top oats and overnight oats except they take all of 5 minutes to make and you don%u2019t need to dirty a pot. Then mixed with banana for extra sweetness and flavor, the peanut flour for all the peanut butter taste and protein. These oats are unstoppable.%u00a0 Delicious and nutritious for breakfast, lunch, snack time, or dessert, these oats are all win win. Add another win just because. Win, Win, WIN!
Now to the oats!
The stuff. Old fashion oats, a small banana, peanut flour, cinnamon, and boiling hot water.
Mash up the banana until smoothish then add in half the hot water and mix. Dump in the oats and mix those too.
Top with the rest of the boiling water and let sit for about 5 minutes.
After the oats absorbed the hot banana water, dump on the cinnamon and the peanut butter flour and mix in.
Grab yourself a spoon friend.
Eat.
-C
Makes 1 serving. Can be halved for smaller portion
1 small banana
1/2 cup old fashion oats
2 (or more if you want) tablespoons peanut flour
1 teaspoon cinnamon (optional)
1 cup boiling water
Place peeled banana in a bowl and mash with a fork unit smooth. Add in half the boiling water and mix.. Dump in oats and mix until incorporated then add in the rest of the hot water. Let sit for 5 minutes until oats absorb all the water. Stir in peanut flour and cinnamon. Eat.
Mid week, I was doing a little pantry cleaning/ inventorying of what I had and needed when I came upon not one, not two, or even three. No, six. SIX, jars of jam. And there are 2 that are already opened in the fridge. I don%u2019t know why, but knowing that there was that much jam in the house made me a little uneasy. Six unopened jars is about 3 jars past my comfort zone. Sure there are so many things you can do with a jar of jam (jelly, preserves, and marmalade included) and now that I am thinking about it, is one of the reasons why I bought a few jars a while back. Then there was Christmas and I think we got at least two jars as gifts so it%u2019s not all my fault, but still, that is just too many jars of jam. Right there I needed to get rid of at least one jar. So muffins. Jam muffins, with poppyseed crust because it%u2019s pretty and nobody ever complains about poppy seeds, or at least they don%u2019t until after they eat them and have poppy seeds stuck in their teeth all day. But that is just our mouths way of saving a little for later, am I right? HA
Anyway, a quick and simple muffin recipe for all of you people out there that might have a jar or two too many of jam in the fridge or pantry%u00a0(I used apricot but any flavor(s) would work) and could use yourself a tasty little muffin situation. I mean who doesn%u2019t want a tasty muffin?
To the muffins.
The stuff. In the bowl is white and white whole wheat flour, baking powder and soda, and salt. Also have apricot jam, oil, almond milk, apple cider vinegar, and orange, and some poppy seeds.
Grab a zester and zest the orange into the bowl with all the dry stuff. Whisk to combine.
Jam, oil, milk, and vinegar. All on top of dry. Whisk that up until just combined. No over mixing. You will get tough (not in a good way) muffins.
Scoop into well greased muffins tins then cover the tops with poppy seeds.
And out of the oven, looking all pretty like.
Pop those muffins out of the tins and cool on a wire rack for a bit. And by all means, don%u2019t wait until they are completely cool.
Now eat you a warm muffin and if they are mini, grab a few. You can%u2019t just eat one mini muffin, that is just crazy.
-C
Make 12 normal size muffins or 24 mini muffins
1 cup all purpose flour
1 1/4 cups white whole wheat flour
2 teaspoon baking powder
1/2 teaspoon baking soda
1/2 teaspoon salt
1 cup plant milk
1/3 cup neutral oil
1 tablespoon apple cider vinegar
zest of an orange
1 heaping cup apricot jam or preserves (can sub in any flavor you like)
1/3 cup poppy seeds
Preheat oven to 350
In a large bowl whisk together the flours, salt, baking powder and soda, and the zest of the orange. Add in the oil, milk, jam, and vinegar and whisk until just incorporated. Scoop batter into well grease muffin pans (12 regular or 24 mini) then cover the tops with poppy seeds. Pop into hot oven and bake until risen and a tester comes out clean when one is poked. For mini muffins, check after 13 minutes, for normal muffins, after 16 minutes.
Once baked, remove from oven and pop out of pans when cool enough to handle. Place on a wire rack to cool completely or just start eating them warm.
Store left over muffins in an airtight container for 3-4 days at room temperature. They also freeze well.
I don%u2019t think I can ever eat potatoes any other way ever again.
It started with me, doing my weekly pantry cleaning, you know, when I wipe down ever surface, count all the beans and lentils in the jars to make sure I am not running low, and inspect every squash for soft spots. I was just going about my thing when I looked over at my waffle iron. Poor, sad, underused. And it hit me. When was the last time I waffled anything? I remember how excited I was when I found it a few years back at a thrift store. Such a cutie little iron. When I brought it home, I used it a bunch of times for maybe a week or two. And then it was put away and I think I have busted it out like 3 times in the past 2 years. So not cool.
I also noticed I had a shit load of potatoes left from thanksgiving.
And there I had it, a reason to use the waffle iron and a way to use up the potatoes. And now, now I am a potato on the waffle iron addict, which is weird because I am not a overly potatoy person in general. But now with this new waffled hash brown thing, well I might just be eating potatoes all day, every day. (At least until I get sick of them or I run out of potatoes.) They come out soft and fluffy inside, super crispy in ever little nook and cranny, outside. Evenly, perfectly cooked. It%u2019s hard to explain, but they are just, ugh, so good, especially dipped in mustard for a fantastic hash brown snack. (Yes mustard, no not ketchup. Let me do me, you do you.) Or smothered in refried black beans topped with salsa and avocado (that was the dinner version). These hash browns. Just make some and you will see.
And no matter what happens with my hash brown phase, I will be damned if I ever let the waffle iron go so long without use. It deserves better then that.
To the best hash browns EVER!
The stuff. Potatoes, salt and pepper, and a little oil.
Shred potatoes. Simple, easy.
Place the shredded potatoes into a clean dish towel (avoid paper towels because paper towels are the devil) and squeeze as much of the liquid out as you can.
Dump the squeezed out shredded taters back into the bowl and sprinkle with salt and pepper and mix it around.
Oil your hot iron and pile on the potatoes. Then close it and press it down. It%u2019s a bit dependent on your iron how long they will need to cook fully, mine took about 9 minutes on high. But maybe just stand close by and check yours after 7ish minutes but expect maybe 10 or so.
Deep golden brown and crispy all over.
I mean, really look. Every surface browned and crispy. It is freaking perfection!
And then like any good waffled food, you plate it, and eat it. Me, with horseradish mustard and a big stupid smile.
Thank you waffle iron. You done good.
-C
makes 2-3 servings
2-3 small to medium sized starchy potatoes (Russet or Yukon Gold)
couple teaspoons olive oil
teaspoon each of salt and pepper
Preheat your waffle iron to high
Shred potatoes on a box grater. Once shredded, gather in a clean kitchen towel and squeeze as much of the liquid as you can from the potatoes. Place potatoes back into bowl and add in about a teaspoon of each salt and pepper and mix around.
Open iron and brush with oil. Place shredded potatoes on the iron, kind of pack together, and close. If it locks, lock it shut, if it doesn%u2019t push it down. And let cook, for about 10 minutes, checking after 7ish (you iron might have more power the mine does). Once the potatoes are a deep golden crispy brown, remove from iron.
Then eat. Any way you want. Plain, with mustard or ketchup. Next to some scramble something or another. Piled high with some black beans and salsa. Whatever. Just eat them and be happy for the waffle iron.
10 years ago, or maybe even longer, the mr and I planted 2 little blackberry canes in the way way back yard of our first house. Nothing big and we were not expecting much, which was good because for the years we lived there after that, nothing really happened with them beside becoming bigger and more thorny.
And then we moved and I kind of forgot about them.
But the other day while the mr was over there (we still own the building and have a barn that the mr works out of) he told me to go check out the bushes. Holy shit, those suckers are humongous, viscous as all hell, and were dripping (literally) with big, fat, juicy blackberries. So many in fact that I could barely pick them off before they all started to just fall off. I filled up two big containers, after eating like 2 pounds at least, and could have gotten more but I had no where else to stick them. Plus I was covered in gashed from the thorns. So I left the rest for another day.
I asked what the mr wanted me to make with the berries (in between eating big handfuls of the berries) and he asked for scones. So scones it was. Easy enough but I felt that I needed to add a little something something to spice it up a bit and that is why I added the black pepper. And because I like pepper and berried together and figured everyone will too. And let me tell you, so far they do, like really really do.
I mean who wouldn%u2019t like a sweet and spicy scone made with hand picked berries from berry bushes long ago planted with love that grew into monsters with thorns the size of knives that nearly killed me?
No one wouldn%u2019t. Everyone wants a scone.
And don%u2019t worry if you don%u2019t have killer blackberry bushes in which to harvest berries from. You can buy them too. Just won%u2019t be as special is all. HA.
To the scones.
The stuff. Flour, baking powder, baking soda, and salt are in the big bowl. Then there is coconut oil, almond milk, sugar, vanilla, and apple cider vinegar. And course ground black pepper and blackberries that I froze. You need to use frozen berries or else you will have yourself a hot mess.
Easy peasy. Dump pepper and sugar into the bowl with the rest of the dy and mix well. Dump in the solid coconut oil and cut it in like you would butter, until it is crumbly. Add in the milk, vinegar, and vanilla and gently mix until most the dough starts to come together, then add in in frozen berries.
Dump the dough onto a lightly flour surface. Yes, the dough is barely sticking together but that is alright, just smash and pat it until it sticks and comes together. Once together, pat it down into a round disk about an inch thick. Just know, as you are working it, the berries are gonna start to break apart which is totally fine, but your hands will turn purple.
Flatten and cut. Just about scones now, but not quite.
Place scones on a baking sheet and brush the tops with a little milk then lighty sprinkle more sugar and black pepper on the tops and then pop them into a hot oven.
Bakes and lovely and cooling ever so slightly..
Grab a plate, something hot to drink, and more berries because you can never have to many berries.
And eat. Still warm and all sorts of good.
Blackberry black pepper scone. Now you have them and everyone will want them. But know, there is no shame in hiding what you don%u2019t not want to share.
-C
makes 8-12 scones (depending how big you cut them)
2 1/2 cups all purpose flour
1/3 cup white sugar plus a tablespoon more for dusting tops
2 teaspoons baking powder
1/2 teaspoon baking soda
1 1/2 teaspoons course ground black pepper plus a little more for dusting tops
1/2 teaspoon salt
1/2 cup solid coconut oil
1 teaspoon vanilla
1 hefty cup frozen blackberries
1 tablespoon apple cider vinegar
3/4 cup cold plant milk plus about a tablespoon more for brushing on top
Preheat oven to 375
In a large bowl mix together the flour, baking powder and soda, salt, sugar, and pepper until well combined. Dump in the solid coconut oil and using a fork or pastry cutter, cut it into the dry until the mixture becomes crumbly. You do not want to fully incorporate the oil. Now dump in the cold milk, the vanilla, and the vinegar and gently mix until a dough starts to form. Dump in the blackberries and continue to gently mix until the dough just start to stick together.
Dump dough onto a lightly flour surface and gently squish, mush, and part the dough until it forms a ball. The berries will start to break apart and that is ok. Then flatten the dough into a disk that is about an inch thick. Take a knife of dough cutter and cut in half, then those halves into half, and then those halves in half. (8 pieces) You can even cut a few smaller if you want.
Place cut scones on a baking sheet and brush the tops with remaining milk then sprinkle tops with sugar and a little more pepper
Bake for 30 minutes or until golden brown. Once baked, remove from oven and place on a wire rack to cool.
Eat, warm of room temperature. Just don%u2019t wait too long.
Store left overs in airtight container at room temperature for 2 day, 3-5 in fridge, or freeze individual scones for months. Just pop them back into a hot oven for 10 or so minutes to reheat.
I recently found my old cast iron muffin pan hiding in the basement over at the loft. I totally forgot I had it and was very much happy to find it not covered in rust and still looking all nice and basically ready for use. Not even the seasoning and non stickness that I worked hard to produce on it was messed up, which is amazing because I also found another cast iron pan that I left down there and it did not fair as well. It had a little rust and was grimy. Fine by me, I didn%u2019t even want that pan anyway.
And that is basically why I made muffins. Because I wanted to use my muffin pan again.
These muffins. First off, muffins are muffins and are not meant to be a pain in the ass to make. This muffins are not, unless you think pitting cherries is a pain. For that I am sorry, but that is a small price to pay for a tasty ass muffin situation. Secondly, these muffins are well worth the tiny effort it takes to pit cherries because you end up with cherry muffins, and that alone should be enough of a reason. And the fact that they are damn tasty. The mr, who eats everything but never says too much about whatever is going into his mouth, texted me at 630 in the morning while I was at the gym just to tell me how amazing he thought they were%u2026.
Amazing at 630 am. That%u2019a validation.
Now go get yourself some cherries and make some muffins. And it is ok if you don%u2019t have a super sweet cast iron muffin pan. Most don%u2019t. But you are still cool, don%u2019t worry.
To the muffins!
The stuff. In the bowl is flour, rolled oats, baking soda and powder, salt and cinnamon. Also have cherries, brown sugar, almond milk, canola oil, apple cider vinegar, vanilla extract, and a lemon.
Hardest part of the whole shebang%u2026 pitting the cherries. Not my favorite thing to do, but definitely not the worst.
Do it any way you see fit, but I just cut them in half and kind of wedge the pit out with my thumb.
Once all the pits are removed, chop those sherries up into small pieces.
Then make the batter. Mix the dry together with the sugar and the zest of the lemon. Just make sure there are not huge clumps of the sugar in the mixture. Then add in all the wet and gently mix until combined. And then fold in the cherries.
Fill up well grease muffin pans with the batter then sprinkle a little brown sugar and a few oats on top.
Pop those soon to be muffins into a hot oven.
Remove the muffins from pan and let cool on a wire rack.
Cherry oat muffins. You are good.
-C
makes 11-12 muffins
1 1/2 cup all purpose flour
2/3 cup of old fashion rolled oats (plus 2 tablespoons to sprinkle tops with)
1/2 teaspoon baking soda
1 1/2 teaspoon baking powder
1/2 teaspoon salt
1/2 cup brown sugar (plus 2 tablespoons to sprinkle tops with)
1/2 teaspoon cinnamon
A lemon (juice and zest)
1 teaspoon vanilla
1 tablespoon apple cider vinegar
1 cup plant based milk
1/3 cup canola oil
Preheat oven to 350
First thing first, remove steams and pits from cherries. Do it any way that you want, but I find just cutting them in half and kind of popping the pit out with my thumb works best for me. Anyway, once the pits are remove, chop cherries up into small pieces.
Place flour, oats, baking powder and soda, salt, cinnamon, brown sugar, and zest of lemon into a big bowl. Mix together until completely incorporated. Make sure there are not huge clumps of brown sugar, if there are, break them up with your fingers. Add in the milk, oil, vanilla, vinegar, and juice of half a lemon. Gently mix until just incorporated. Now fold in chopped cherries.
Evenly scoop the batter into a well greased muffin tin. (There is enough batter for12 normal sized muffins.) Sprinkle the tops with the extra brown sugar and oats then pop the pan Ito the oven. Bake for 28-32 minutes or until the tops of the muffins are a nice golden brown and a taster poked into one of the muffins comes out clean.
When fully baked, remove muffins from oven and pop them out of the pan. Let cool on a wire rack but feel free to eat one or two warm.
Store any extra in an airtight container on counter for a day or two but in the fridge for about a week. Individual muffins can be wrapped and frozen for a good long will too.
Yes you read that right. Corn. In a popsicle.
What?
No it is not weird or gross or anything. I wouldn’t do that to you. These popsicles are down right deeee-lightful. Rich and creamy and sweet. Both the creamy coconut and the toasted coconut pair perfectly with the sweet corn flavor. They truly are delicious and I think that if you give them a try, you will think so too. And really, now that it is like almost summer, who doesn’t have a little extra corn laying around. So you might as well just make a batch.
And then you will thank me for introducing you to the goodness that is a toasted coconut and corn popsicle. Heck, the mr even ate one and he (still, after I have proven him wrong on a many occasions) says he hates corn. So if a corn hater likes these, imagine what a corn lover will think. HAHA. Corn lover.
To the popsicles!
The stuff. Corn, full fat coconut milk, shredded coconut, and maple syrup.
First, remove corn from cob and place on a baking sheet. Bake in oven for 10-ish minutes until corn is cooked and all nice and sweet.
And don%u2019t forget to toast the coconut. A few minutes in the oven is all it needs.
Now to blend. Corn and coconut milk go in first to blend until nice and smooth. Then add in the maple and coconut and blend until just combined. That will leave a little coconut texture. If you want it smooth, well just blend until completely smooth. Do what feels right to you.
Thick, rich and creamy popsicle mixture.
Now pour it into the molds and stick into the freezer. You could probably stick the sticks in now or wait a little while for the mixture to set a bit, but just don%u2019t forget to get sticks in those popsicles before they completely freeze. That would suck.
Pop those lovelies out of the molds and there you go.
The anticipation is over. Eat a popsicle
-C
makes 4 average sized popsicles
2 ears corn (about a cup of corn kernels)
1 cup full fat coconut milk (the canned stuff)
1/4 cup shredded unsweetened coconut
2- 4 tablespoons maple syrup
Note. If you have left over cooked corn, just use that. You don%u2019t need to recook it so skip the cooking corn step.
Preheat oven to 400
Remove corn kernels from cob and place on a baking sheet pretty evenly. Pop into the oven for 10 minutes of so or until the corn is cooked through and nice and sweet.
Remove corn and dump it into blender and set aside to cool for a few minutes. Place the coconut onto the baking sheet and pop into the oven for 3-4 minutes to just lightly toast. When the coconut is toasted, remove from oven.
Grab the blender with the corn and pot in the coconut milk. Blend until smooth. Add in the maple (start with 2 tablespoons and work your way up to the sweetness you like) and the toasted coconut. Blend quickly just to combine for a slightly more textures popsicle or blend completely smooth if you would rather a smoother popsicle.
Pour mixture into popsicles molds and place into freezer. After the mixture sets up (about an hour) pop sticks into molds. Continue to freeze until completely frozen. Usually 4-6 hours.
And then when it is popsicle time, remove popsicles from molds and eat them.
I found another bag of frozen rhubarb in the chest freezer which is never a bad thing, but my rhubarb patch outside is growing strong and I will have all the fresh rhubarb I could possible eat within the next few weeks. So found rhubarb just means I need to eat it right fast before the fresh stuff comes in. (I haven%u2019t had a problem with that. it%u2019s almost gone already). Plus the other day while I was digging up and transplanting raspberry bushes to the back yard, my neighbor came over and gave me a gallon of frozen raspberries, harvested from said bushes that I was currently planting in my yard. Score for me! Free bushes and berries%u2026I have such nice neighbors.
So the logical thing to do with my new found and giving bounty was of course to hurry up and bake something. Cobbler. Why cobbler? Well, why not? I figured the mr would really like it and eat it and I also didn%u2019t want to make anything to fussy because I was just to dang busy spending all of my extra time outside doing outside things. And cobbler, it%u2019s not fussy because it is basically biscuits and jam baked up all together. Not a lot to think about and comes out looking all homey and sweet and smelling all nice and cozy. Doesn%u2019t that sound nice? And not a pain in the ass?
And best part. A made cobbler works as dessert or breakfasts or just a snack. Just asked the mr. He ate it for all the reasons. With a dollop of yogurt or cream of course because he is fancy like that.
And yeah the fruit I used was frozen, but fresh works just the same here too.
Now, lets get to that cobbler.
The stuff. Raspberries (frozen), rhubarb (frozen), sugar, flour, salt, baking power, cinnamon ,almond milk, apple cider vinegar, cornstarch, and oil.
Raspberries, rhubarb, sugar, cinnamon, cornstarch. Its all there in the bowl. Just needs to be mixed. So mix it.
Dump fruit mixture into well greased 8 inch pan and pop it into a hot oven to get a head start on baking.
While the fruits in the oven, make the biscuit dough. Mix the dry together then mix in the wet until just incorporated and a sticky dough forms.
Pulled from the oven, the fruit is starting to cook down and whoa, it just smells so good!
Drop on the biscuits dough on top of the fruit (careful of the hot pan). Evenly if possible, but don%u2019t work to hard to make it look perfect. Imperfection makes it look perfect, you know?
Once biscuits are on, lightly brush the tops with a little milk and sprinkle with more sugar then pop it back into the oven for another 25-30 minutes or until the biscuits are baked.
Pulled from the oven with a bubbly filling and a golden brown biscuity top. Things are looking good here.
And now it%u2019s time.
Dig on in my friend. Sever with something creamy like whipped coconut cream or some type of yogurt or ice cream situation of your choice. And again, this can be your breakfast.
Happy spring people!
-C
make a a 8 inch round which serves 5-6
For the Filling
2 cups raspberries (fresh or frozen)
2 cups rhubarb chopped into 1/2 inch to inch long pieces (fresh or frozen)
1 1/2 tablespoons corn starch
3/4 -1 cup sugar (lesser amount if you like a little more tartness. I used lesser amount)
1 teaspoon cinnamon
For the dough
1 cups all purpose flour
1 1/2 teaspoon baking powder
1/2 teaspoon salt
3 tablespoons sugar
3 tablespoons neutral flavored oil
1/2 cup plant based milk
1 teaspoon apple cider vinegar
Preheat oven to 350.
In a large bowl mix together the rhubarb and raspberries with the corn starch, sugar, and cinnamon. Grease a 8 inch round pan the is at least 2 inches deep (can use a slightly large pan or a square) and dump in fruit mixture. Place into oven to bake for about 15 minutes or the fruit starts to break down.
While fruit is baking, mix up biscuit dough. Flour, salt, 2 tablespoons sugar, and baking powder go in a large bowl and mixed until combined. Add in the oil, the milk, and the vinegar. Mix until just incorporated and a dough has formed.
Remove the fruit cooking from the oven. Turn heat up to 375.
Carefully drop spoonfuls of biscuit batter on top of fruit. Brush the top of the biscuits with a little milk and sprinkle with remaining tablespoon sugar. Place the pan back into the oven and bake for another 25-30 minutes or until the biscuits are all nice and golden brown on top.
Remove from oven and let cool for a few minutes before serving. Serve warm with a scoop or dollop of soothing creamy (coconut cream, yogurt, ice cream%u2026..whatever floats your boat.)
Left overs can be stored in pan, just cover it with something and place in fridge. Can be eaten cold to or reheated in microwave or oven.
It%u2019s a smoothie. And no, we have never really been smoothie people in this house, but what can I say, sometimes smoothies happen, especially when you have about 20 ripe bananas in the fruit bowl with no room in the freezer and no need for 7 loafs of banana bread.
So I smoothied. And I like it (a lot).
This is a smoothie of simplicity. Nothing fancy. Simplest of simple. Straight to the point. And all sorts of good.
You might think, does this simple smoothie you speak of taste very good? Yes, yes indeed it does. It is all sorts of fantastic. Basically if you like creamy, nutty, oaty, bananery things, you will like this. And it%u2019s a perfect breakfast, snack, dessert, or just wanting a little treat like thing that is not garbage food. A smoothie of all smoothies with the most basic ingredients. And takes about 15 seconds to whip up. Can%u2019t complain about that.
To the smoothie goodness!
The stuff. A ripe banana, some old fashion rolled oats, a pinch of salt, water, and a smidge of maple syrup if you want it.
Everything goes into blender.
And blended until smooth. Hence the word smoothie.
Pour it into a cup (or if you are feeling primal, drink it straight from the blender%u2026 it%u2019s totally cool)
And done.
A banana oat smoothie.
Let the good time roll!
-C
makes 1 smoothie
1 very ripe banana
1/3 cup raw old fashion oats
1 1/2 cups water
pinch of salt
a tablespoon or two of any sweetener you like (optional)
a pinch of cinnamon (optional)
Place everything into a blender and blend until smooth. Pour into a cup, sprinkle with cinnamon if you wish, and drink right away.
I am sadly at my last few bags of frozen garden foods from last season. As of now I have a bag of tomatoes, a couple bags of shredded zucchini, and a bag of rhubarb. Well, had a bag of rhubarb. I think I have eaten almost all of it already. My rhubarb patch better get up and producing stalks soon. And as for the rest of the veggies that I will require. Guess I am going to be surviving mostly on roots from farm share (we are getting a lot more greens though!!!!) and probably doing a bit more grocery shopping then I care too. A few more months. I can do it.
Anyway, enough about my freezer and lack of fresh produce problems.
Here in Vermont maple season is well on it%u2019s way making it a perfect time for anything maple. And rhubarb. Yeah I am using my frozen rhubarb from last year, but any time now (after the snow melts) there will be plenty of stalks for the taking. There will be so much maple and so much fresh rhubarb which are the perfect taste combination. Exciting times! And when added to oatmeal, things just get more gooder. (I know gooder is not a word but I think it should be) Oatmeal, especially baked, is the stuff where all gooder things start.
Have you had baked oatmeal yet? It truly is fantastic. Not at all gummy and gloopy like stove topped cooked oatmeal (but I like it like that too). It still has a good bite to it while still being soft and creamy and boy oh boy is it just the bees knees. With the addition of some crunchy almond friends, well even better. Trust me. If you are a oatmeal eater, you must try it baked. Best part is that it can be eaten as breakfast but also I have been serving it to the mr for dessert with a healthy drizzle of more maple. It%u2019s that good friends. From breakfast to dessert. Everyone is happy.
To the baked oatmeal.
The stuff. Old fashion oats, cinnamon, salt, baking powder, rhubarb (fresh or frozen), REAL maple syrup, some plant milk, a few flax eggs, a bit of tahini, and some almonds.
To start. Oats, cinnamon. salt, baking powder and almonds get a quick toss together in a big bowl.
If you rhubarb is not already chopped up into inch long pieces, do that. I already did before freezing it so yea me. Once its chopped, layer almost all of it (reserve a few small needful to toss on top) into a lightly greased 9×9 inch baking dish then cover evenly with the oat mixture.
In now empty bowl mix together the milk, the flax eggs, the tahini, and the maple until evenly incorporated.
Pour the wet mixture all over the oats and let it absorb.
Once the liquid is all absorbed , top with any left over almonds and the left over rhubarb. For good looks.
Pop into a hot oven to bake.
Golden brown with crispy edges. Rhubarb and maple baked oatmeal for all your maple, oaty and rhubarbie needs.
Fresh from the oven scooped warm into bowls. Top with extra maple if thats what you should want do.
Enjoy and happy maple season!
-C
Make a 9×9 pan of oatmeal
2 1/2 cups old fashion oats (make sure gluten free if need be)
2 1/2 cups fresh or frozen rhubarb chopped into inch long pieces
1 1/2 cup plant milk (water works but it won%u2019t be as creamy)
1/2 cup chopped almonds (optional)
Preheat oven to 375
Lightly grease a 9×9 inch baking pan (I used metal because it makes for crisper edges but glass works too) and dump 2 cups of the rhubarb in and evenly distribute on the bottom. In a large bowl mis the oats, the baking powder, salt, and cinnamon together. Mix in chopped nuts if you are using. Evenly cover rhubarb with oat mixture. In now empty bowl mix together the milk, flax eggs, maple syrup, and tahini until evenly incorporated. Pour mixture over oats. Let the mixture sit for a few minutes until the oats have abosbed all the liquid. Toss the rest of the diced rhubarb and a few more chop nuts to the top and pop into the oven to bake.
Bake for 30-40 minutes (shorter time for a wetter oatmeal, longer for a denser crispier oatmeal)
Once baked to your likeness, remove from oven and let cool for a few minutes just so it is not super hot. Scoop into bowls and serve warm with extra maple and milk or whatever you might want to serve with it.
Left overs last great in fridge for 3-4 days or individual portions can be frozen for a month or two. Just pop into microwave for a couple minutes to warm up.
I love pomegranates but barely ever buy them because they are usually really expensive. A few weeks ago I was pleasantly surprised to find that that the grocery store was selling them at a reasonable price so I bought one. Duh. Anyway, that was a few weeks ago and I have had the pomegranate chillin in the fridge, just waiting for the perfect time to bust open and retrieve all the bright pink jewel like seeds. But I also kind of forgot about it. It was hiding behind a giant rutabaga. When I finally grabbed the rutabaga for some soup, the pomegranate reviled itself again. It was time, it needed to be eaten. And me being me, I can%u2019t not share right? So I asked the mr what he wanted me to bake. He said muffins, and that is how I came to pomegranate orange and poppyseed muffins. Look at me, poster child for sharing good things. I should get a gold star!.
Anyway, these muffins came out awesome. First, they smell so good because anything baked smells good but the orange really shines and the smell is still lingering in my hair. Secondly, people really were into them. The mr said they were amazing when I finally let him eat one (two actually because I made them mini) and when I brought them over to Megans house for dinner, my Dad at one, then two, then three.. ..He stopped at 5, and this was after dinner. When a guy eats 5 muffins and is not a muffin man, you take it as a good sign.
Do yourself a solid this cold ass weekend and bake something. These muffins are a good place to start.
To the muffins!
The stuff. Flour, baking soda and powder, and salt in a bowl. Poppy seeds, an orange, a pomegranate, sugar, oil, vanilla extract, and a little apple cider vinegar.
First, remove arils from the pomegranate. Cut the fruit in half, hold the cut side face down in your hand and place over a large bowl. Take a wooden spoon and wack the outside of the fruit and the seeds will just fall out. And yes , the juice stains so watch out.
Next, whisk together all the dry ingredients and add in the sugar, poppyseeds and the zest of the orange. Whisk again to combine.
And then add in the oil, milk, vanilla, and the juice of the orange.
Mix until just combined. Don%u2019t over mix or the muffins will get gummy.
Last but not least, fold in the pomegranate arils.
Such a pretty muffin batter.
Scoop batter into well greased muffin tins and pop into a preheated oven.
Orange and crimson and golden brown goodness.
Out of tins and onto a rack to cool
And now you eat.
Stay warm this weekend and bake some muffins.
-C
makes 24 mini muffins or 12 regular muffins
2 cups all purpose flour
2 teaspoon baking powder
1 teaspoon baking soda
1 teaspoon salt
1/2 cup white sugar
1/3 cup canola oil
1 teaspoon vanilla
1 tablespoon apple cider vinegar
1 cup soy or plant based milk
1 orange
1/4 cup poppyseeds
1 cup pomegranate arils
Note. To easily remove arils (the seeds) from a pomegranate, cut it in half, hold the cut side down in the palm of your hand over a large bowl and wack the outside of the fruit with a wooden spoon. The arils will fall right out into the bowl.
Preheat oven to 350
In a large bowl, whisk together the flour, baking soda, baking powder, salt, and sugar. Zest the orange into the bowl and add in the poppyseed and whisk. Next add in the oil, juice of the orange (about 1/4 cup) the milk, and the vanilla. Mix until just combined. Fold in pomegranate seeds.
Scoop batter into well greased muffin pans and place in oven to bake until golden brown and a tester stuck into the muffins comes out clean, which should take about 15 minutes (22 fish if normal sized)
Once baked, pull form oven and pop from pans. Place on a wire rack to cool.

 Miraculous.
 Rutabaga. Sweet Potato. Beet. That’s what I was working with. I chose these roots for color as well as for taste. Separately the flavors are amazing. Together they are out of this world. If you wanted you could omit any of these and sub in, lets say, pureed cauliflower, or maybe parsnips. I would stay away from potato, it’s a little to starchy, but maybe acorn or butternut squash. Oh man, now I want to make celeriac, carrot and acorn squash marble. Pureed vegetables are trouble for me. I can’t stop eating when they are around. I know, but don’t judge, instead lets prepare.


 So you got a pile of roasted rutabaga, a pile of roasted beets and a baked sweet potato.
 I used my handy emulsion blender to puree everything but a food mill or a food processor is equally as good. Puree each root separately . Start with the rutabaga. Go to the sweet potato, then end with the beet. That way you don’t have to clean in between purees. Add little amounts of water when pureeing if it needs a little help to loosen up. Blend until smooth.
 I just took a spoon and threw piles in that bowl. I could have done more of a checkerboard pattern to make it a more uniform marble, but I just went for it. Do it any way you want. Don’t be afraid, you can’t screw this up!
 I took a fork and kind of rain it throw the top to start the effect. I then took a cake knife and just leaved it out. That’s what I did and then I was done. After all the oohing and aching, I stuck the dish into the oven for another 10 minutes just to keep hot, but you can serve this at room temp as well.
 Now tell me that isn’t a thing of beauty. I fell in love. I want to puree and marble everything. This could be my thing.
 Empty bowl…Ok, I’ll admit I ate half of it..I couldn’t help it. Next time I will have to make a bigger batch.
 Is it really for real April? Where has all the time gone and where the hell is the warm weather? It’s not funny anymore. I am officially OVER winter! Ok, so now that I got that off my chest…..
 The Stuff. Cornmeal, water, navy beans and parmesan for the polenta. Crushed tomatoes, garlic, dried basil, onion, carrot, zucchini, and summer squash for the sauce. Salt, pepper, and olive oil all around.
 Cornmeal and water go into a cast iron skillet (or any oven safe dish) with a pinch of salt and pepper. Give it a little mix and stick it into the oven at 400 degrees .
 Once the polenta is in the oven, make the sauce. Chop up all the veggies and stick into a dutch oven or sauce pot with a pinch of salt, the basil and a good drizzle of olive oil. Stick on medium heat and let veggies cook down a bit. When the veggies are tender, add in minced garlic, crushed tomatoes and another drizzle or oil. Turn burner to lowest setting and simmer (giving it a stir every now and then) for about 45 minutes or until the polenta is done.
  After about 30 minutes when the water had pretty much all cooked down, take the polenta out of the oven and stir in the beans, the parmesan, a tablespoon or two of olive oil and salt and pepper. Smooth top out and sprinkle with more pepper, parmesan and drizzle with a bit more oil. Stick back into oven for another 1/2 or until polenta has formed a crust and no longer giggles when you wiggle the pan.
 Pull polntna from the oven and let sit for at least 1o minutes.


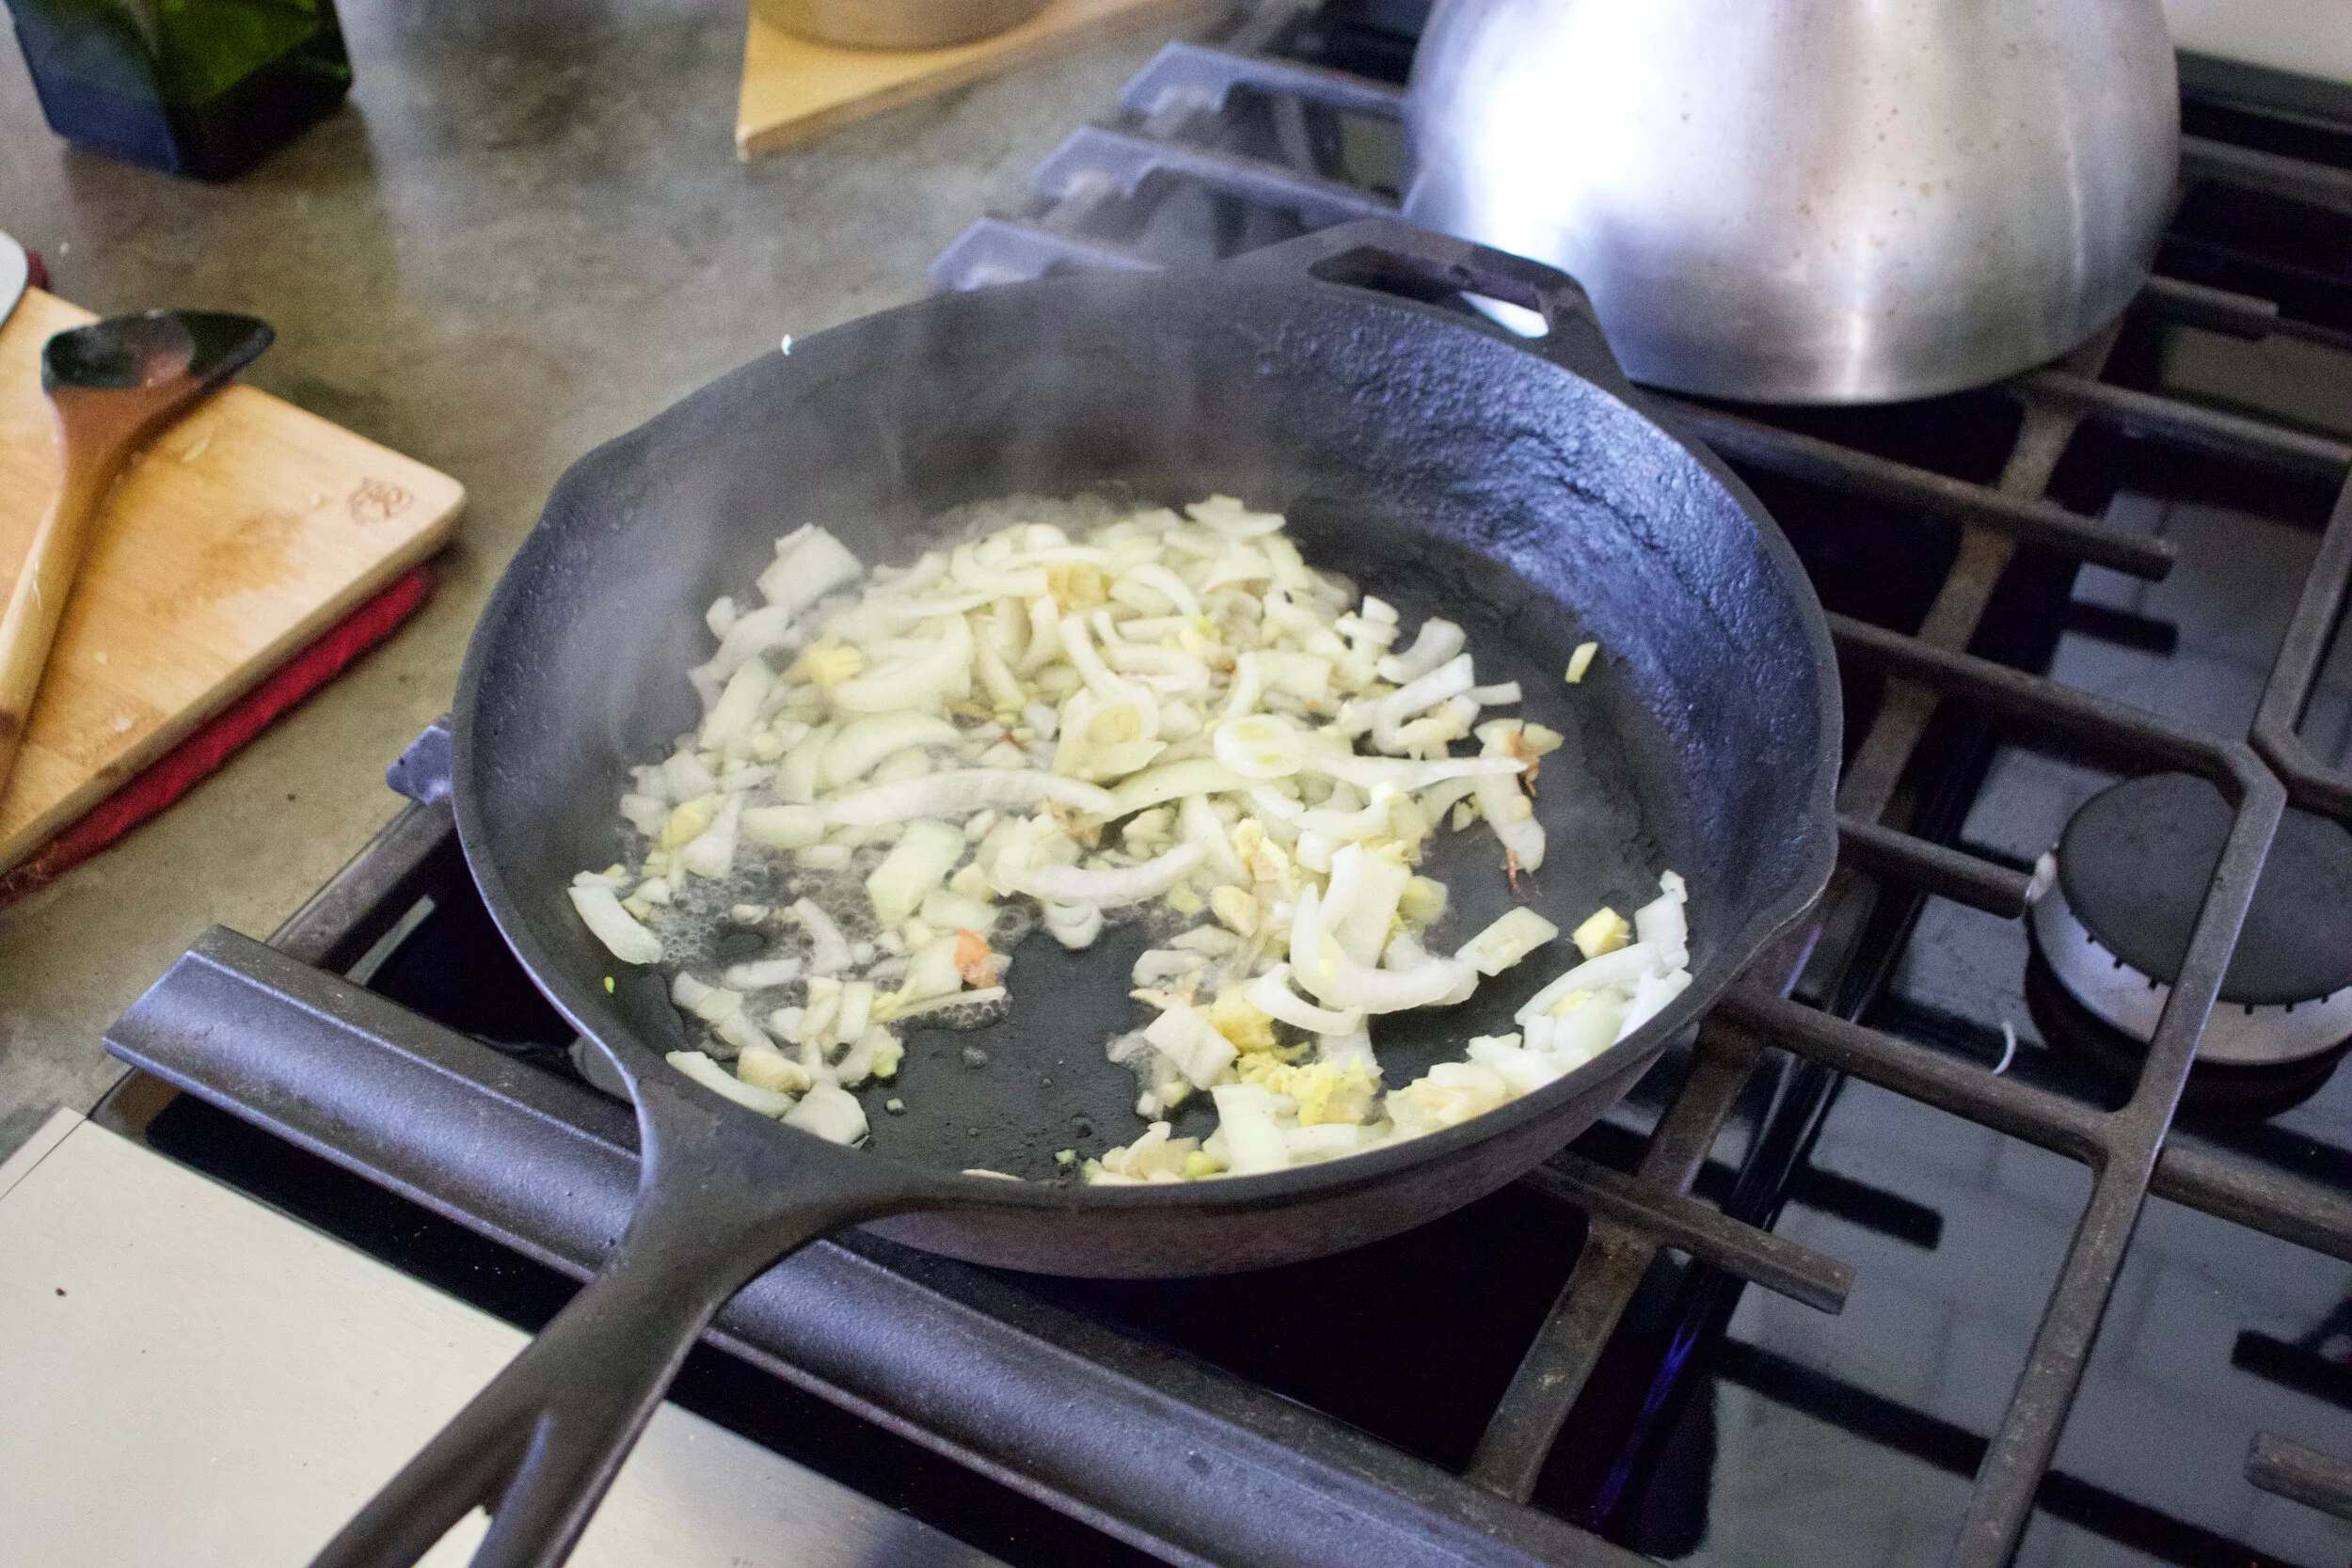
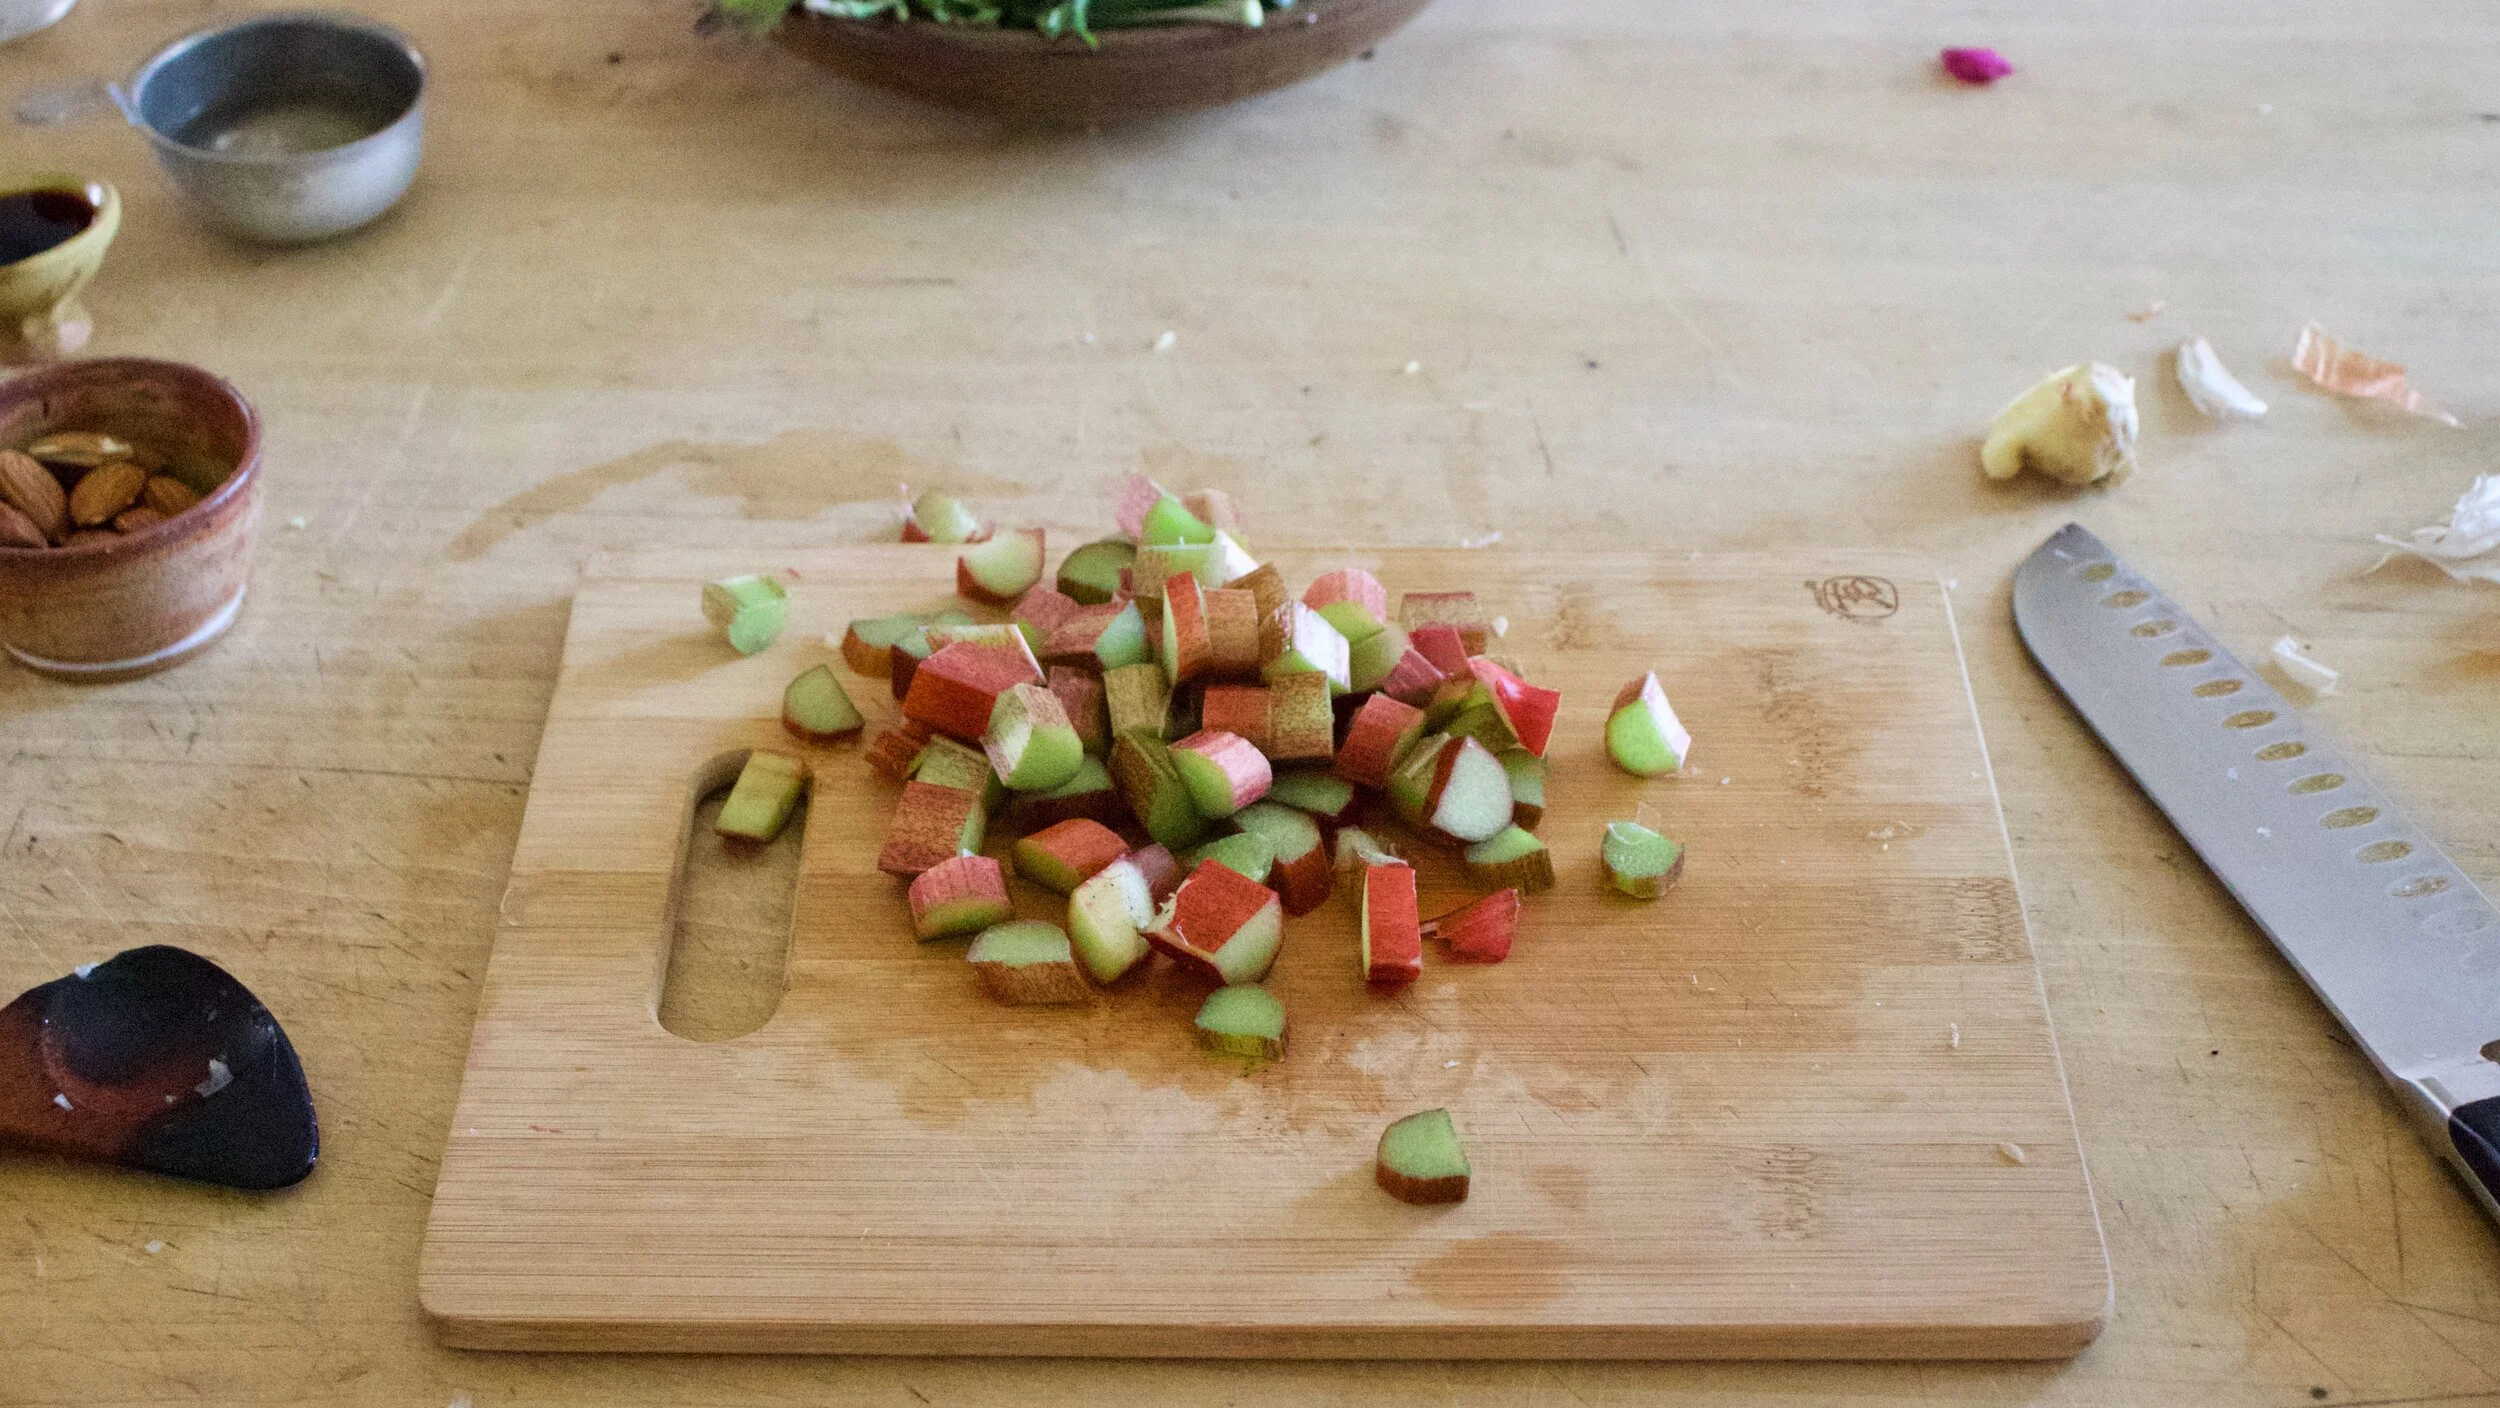
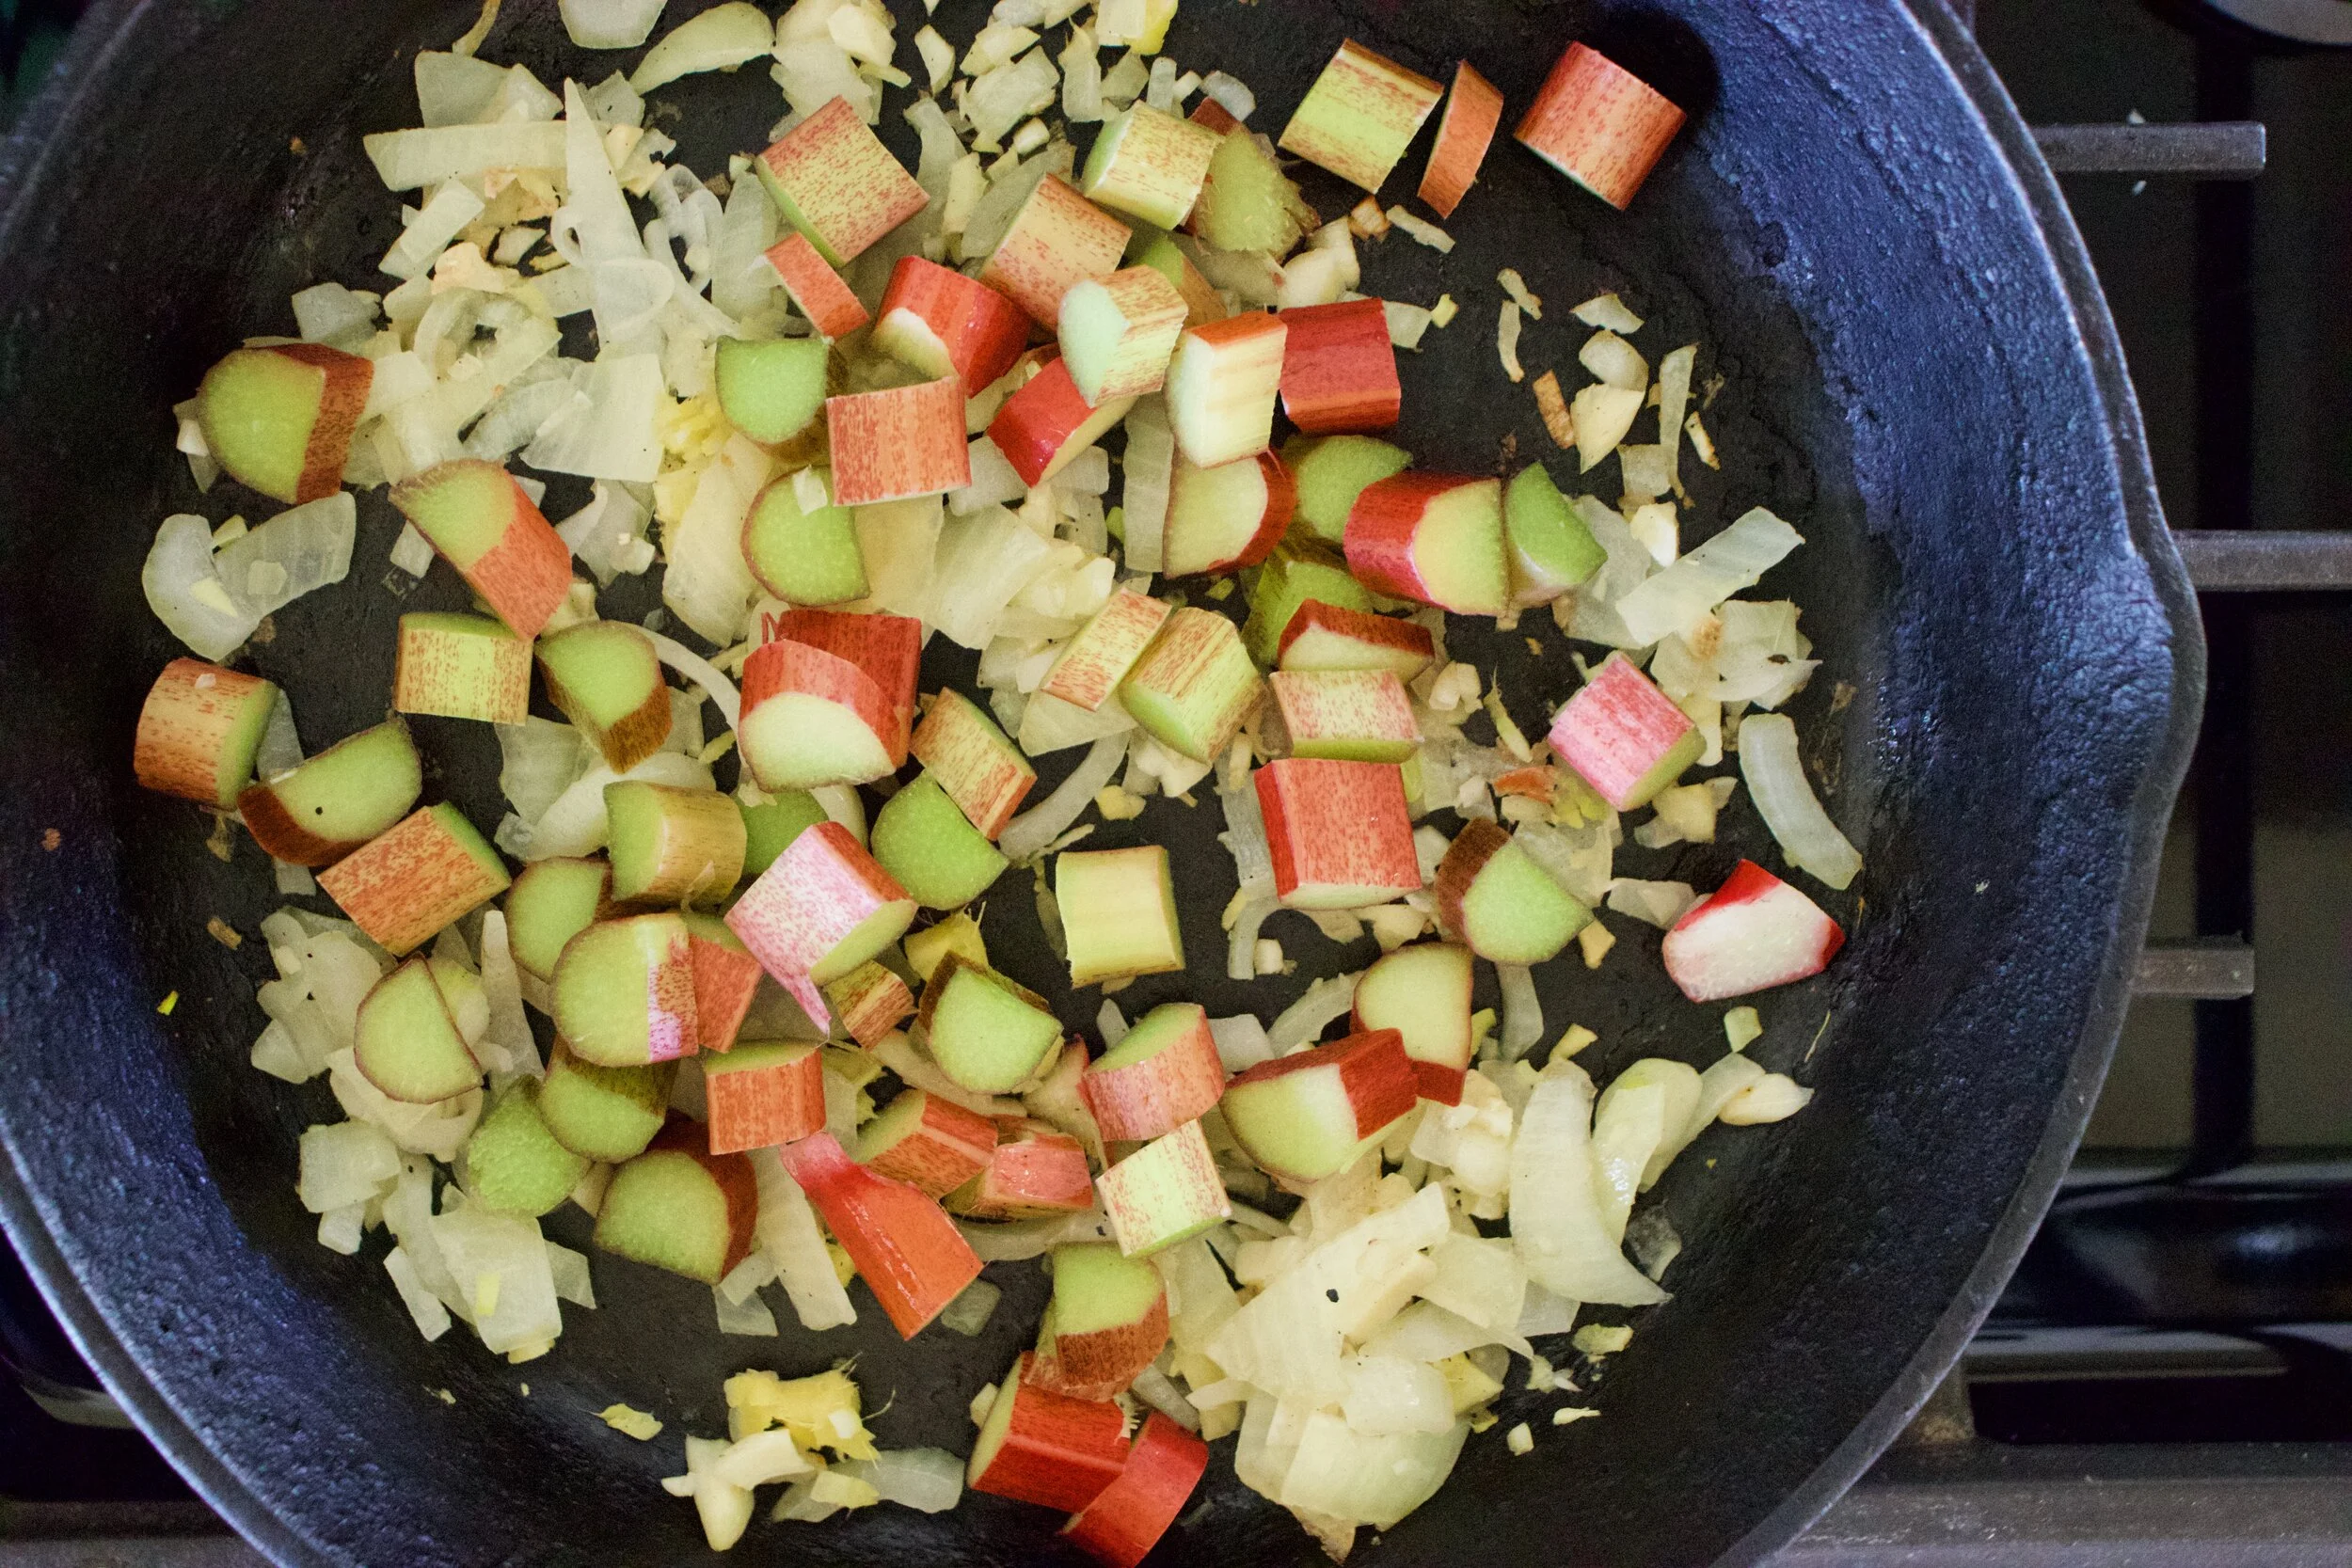
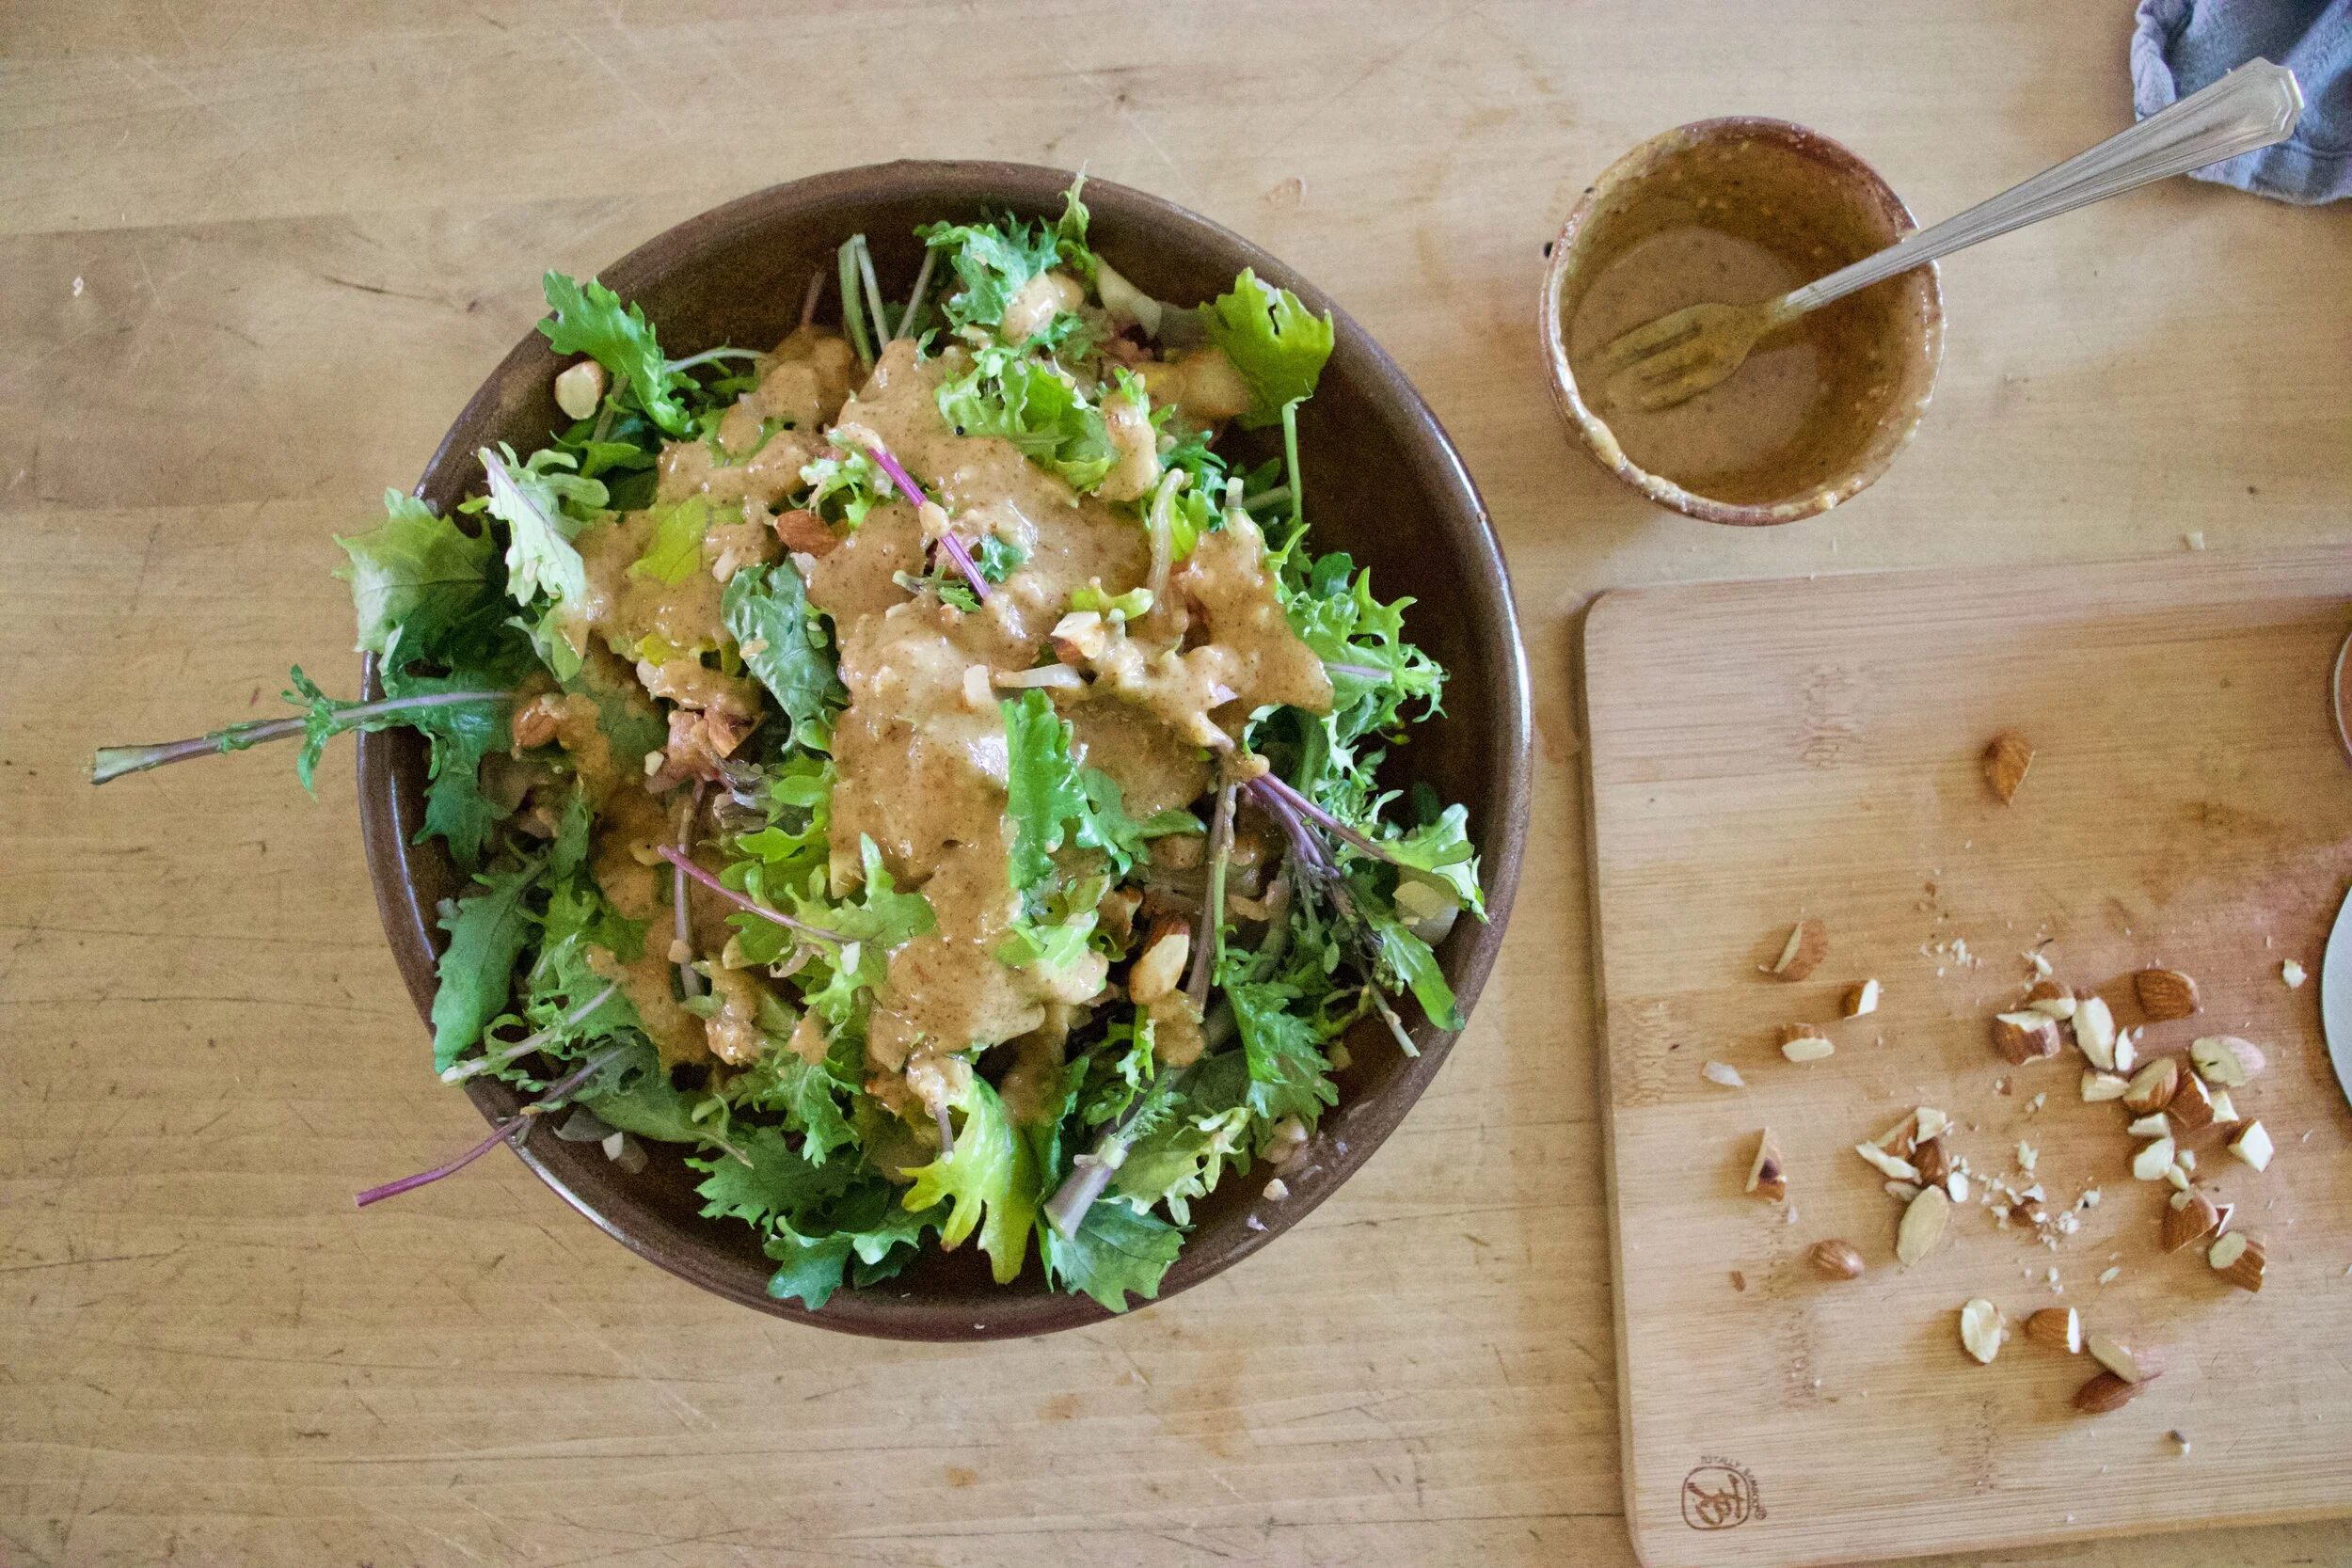
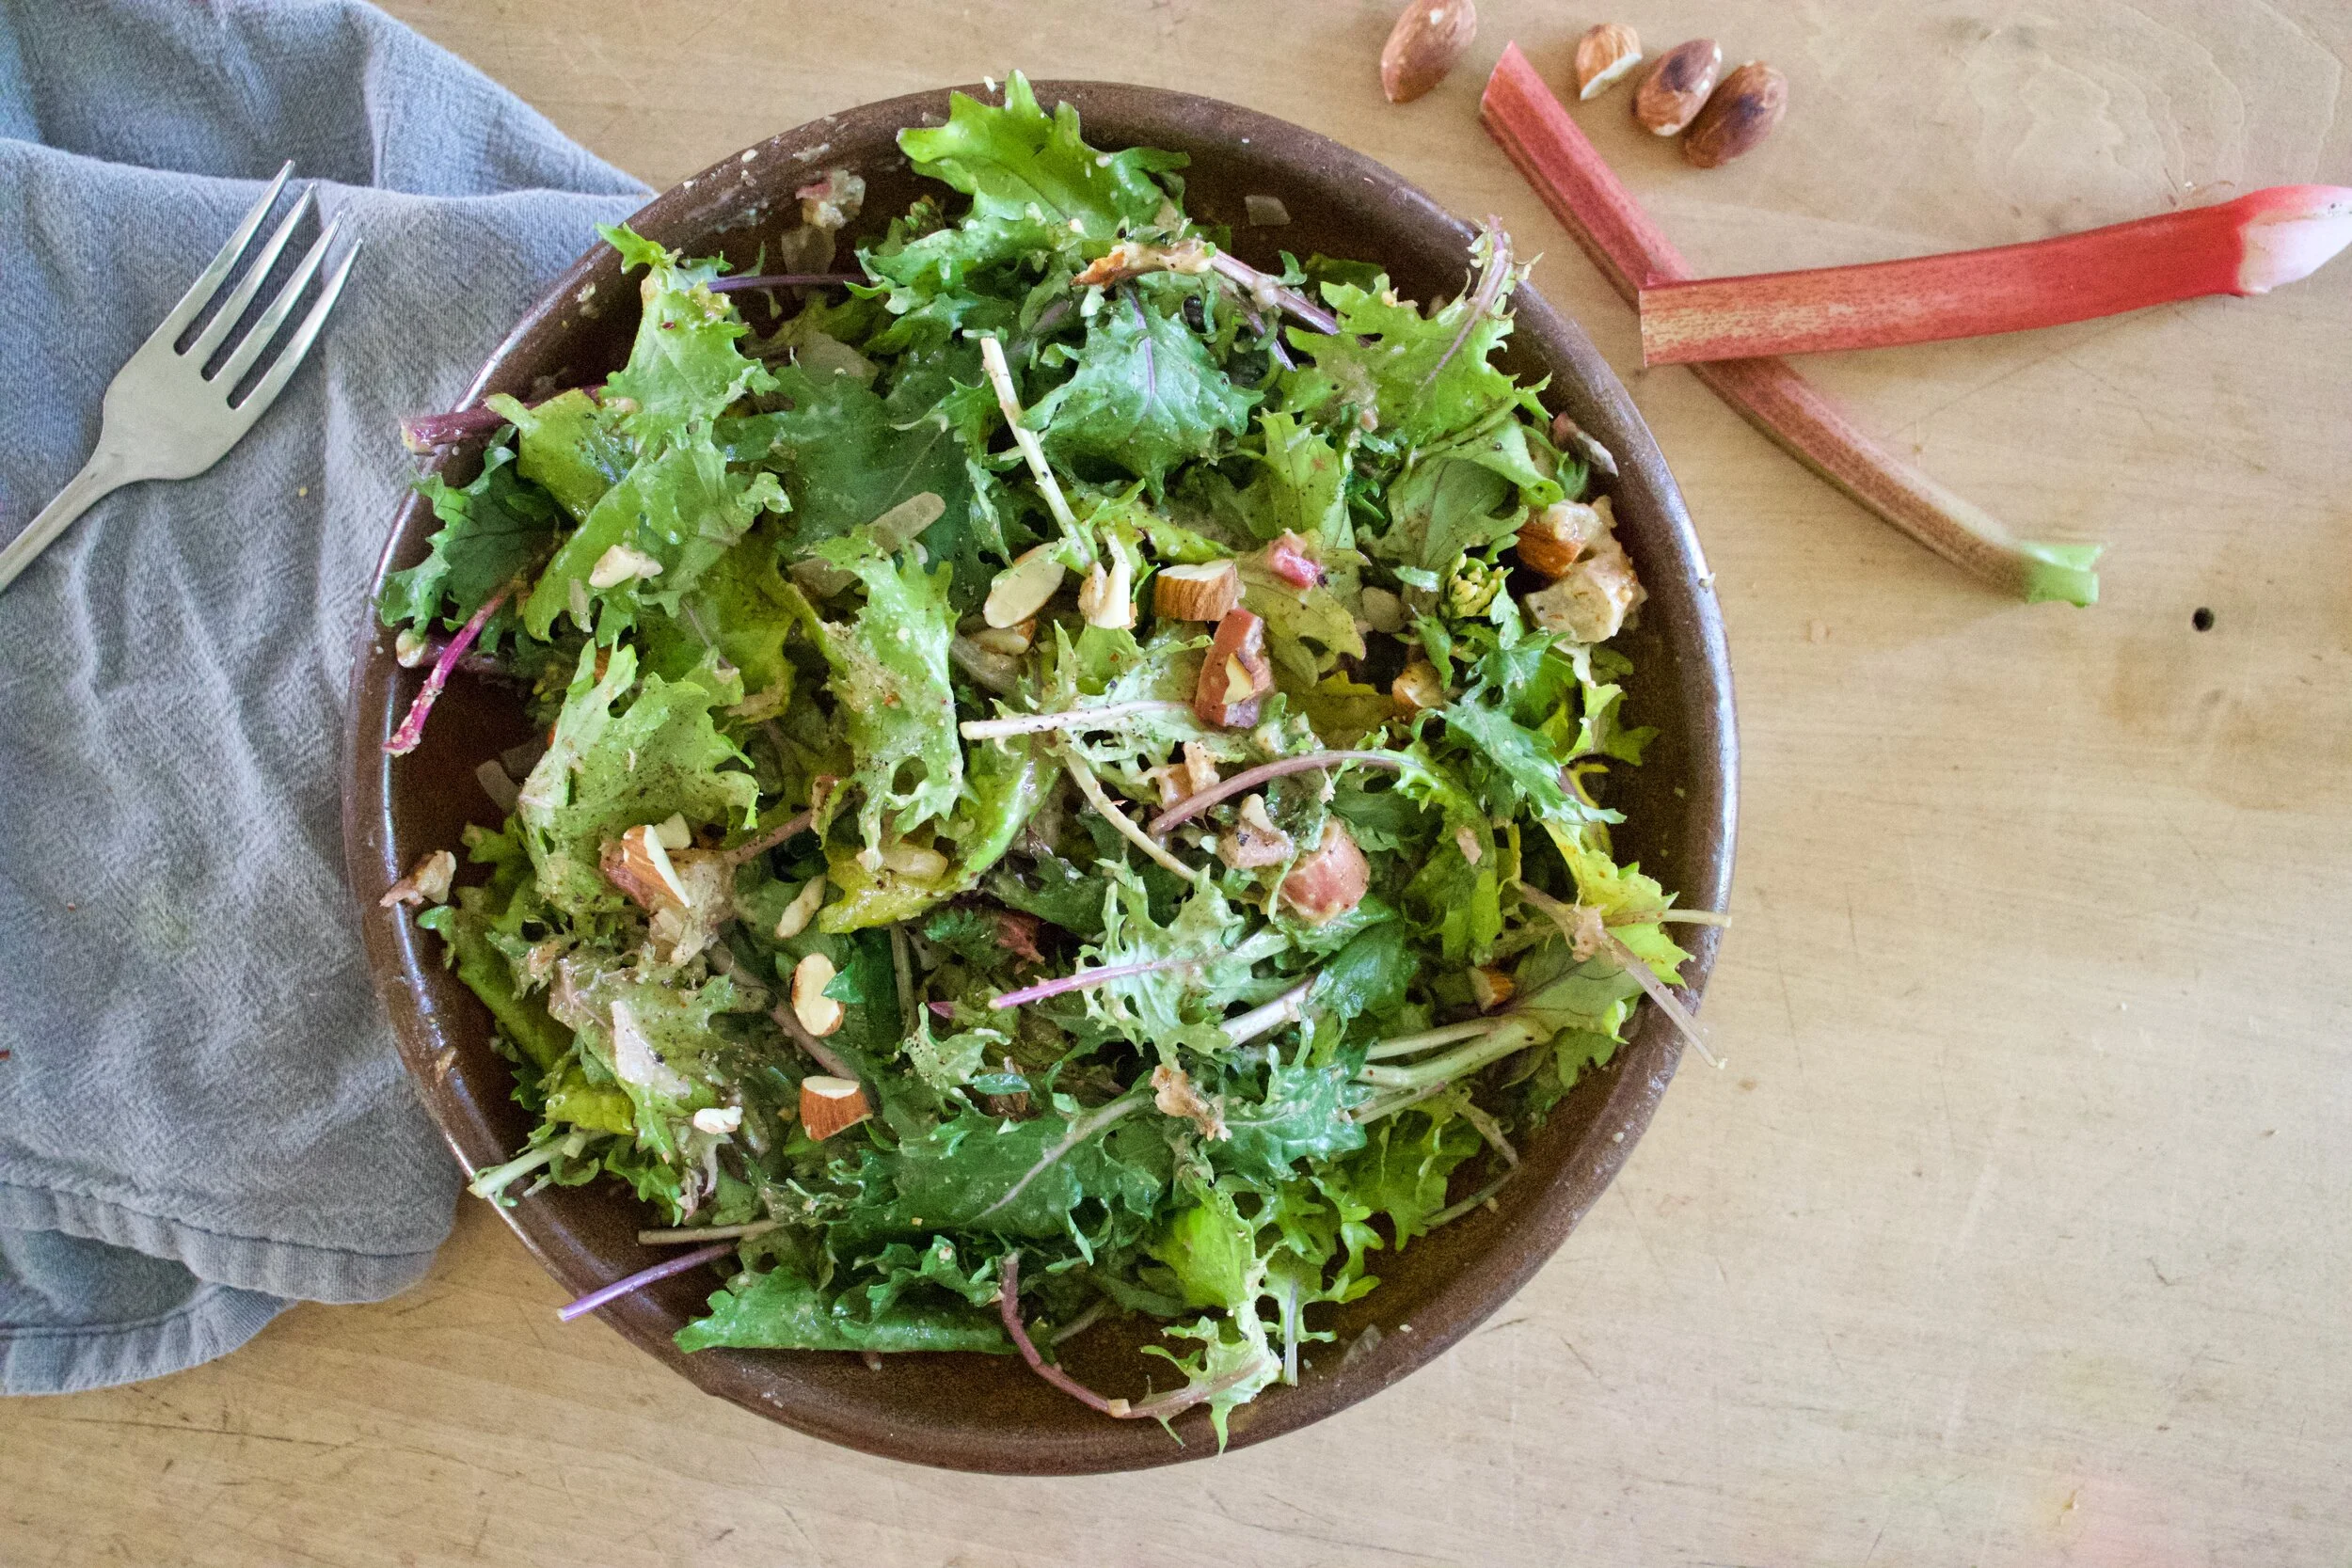


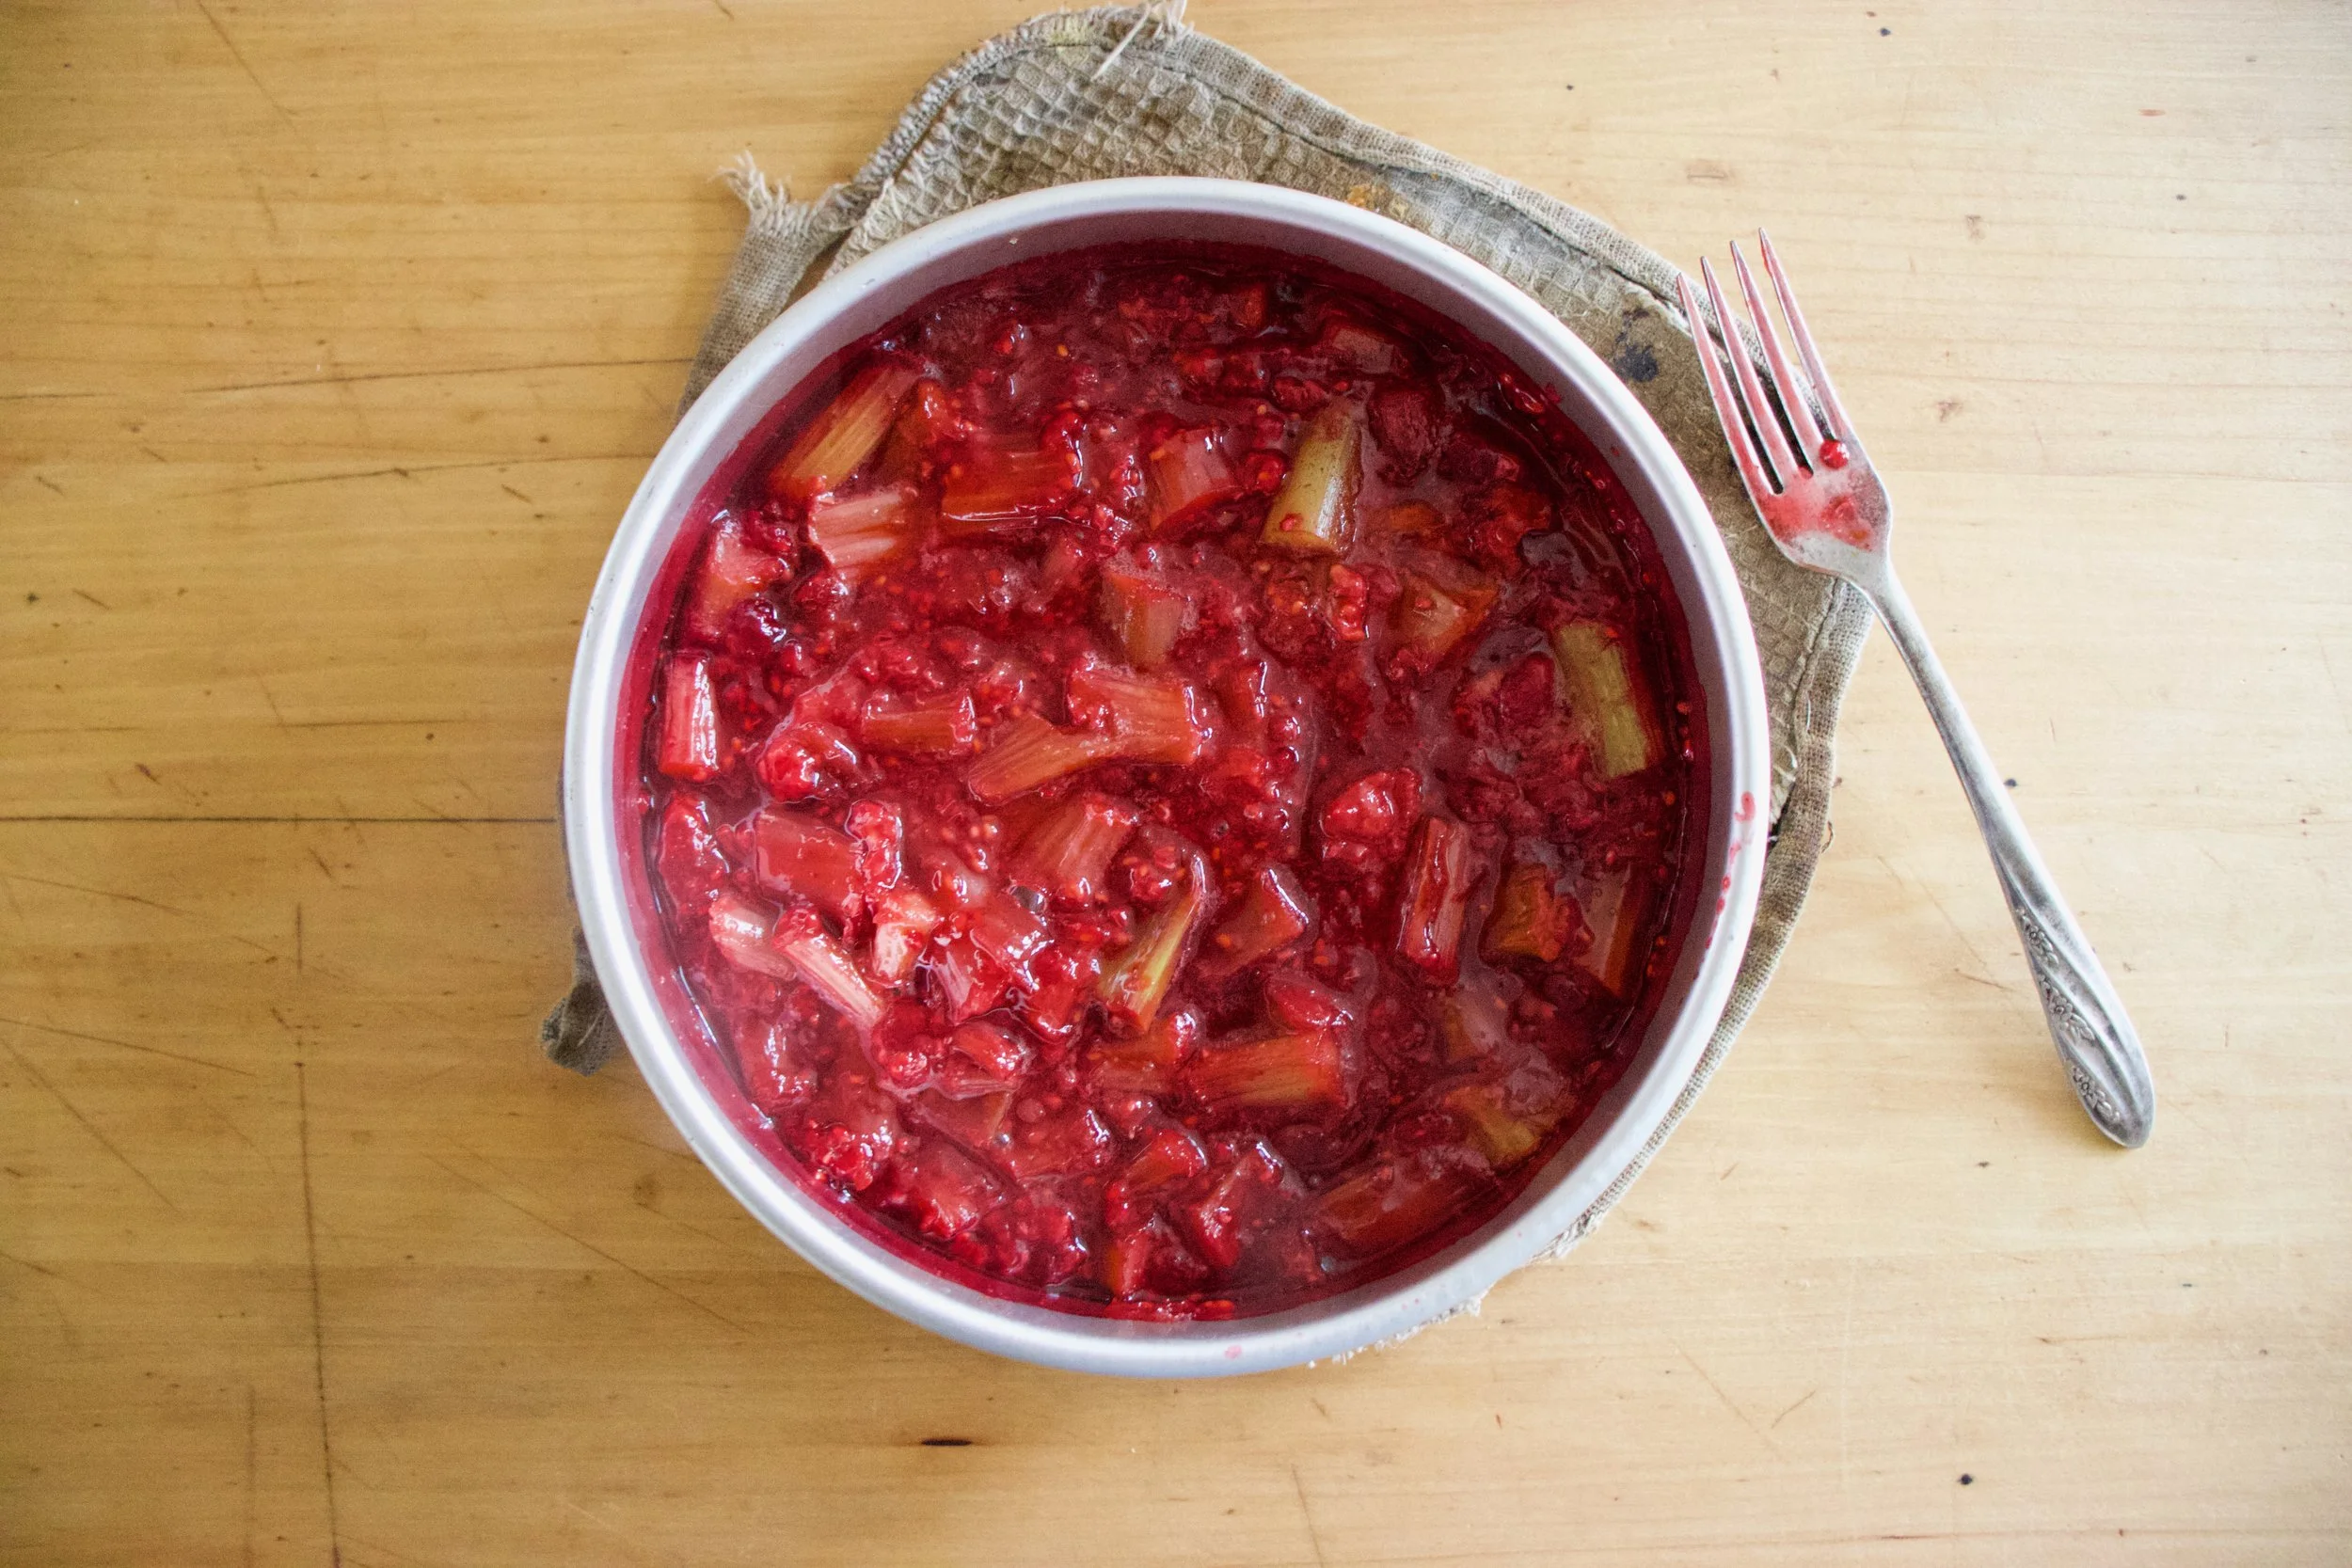


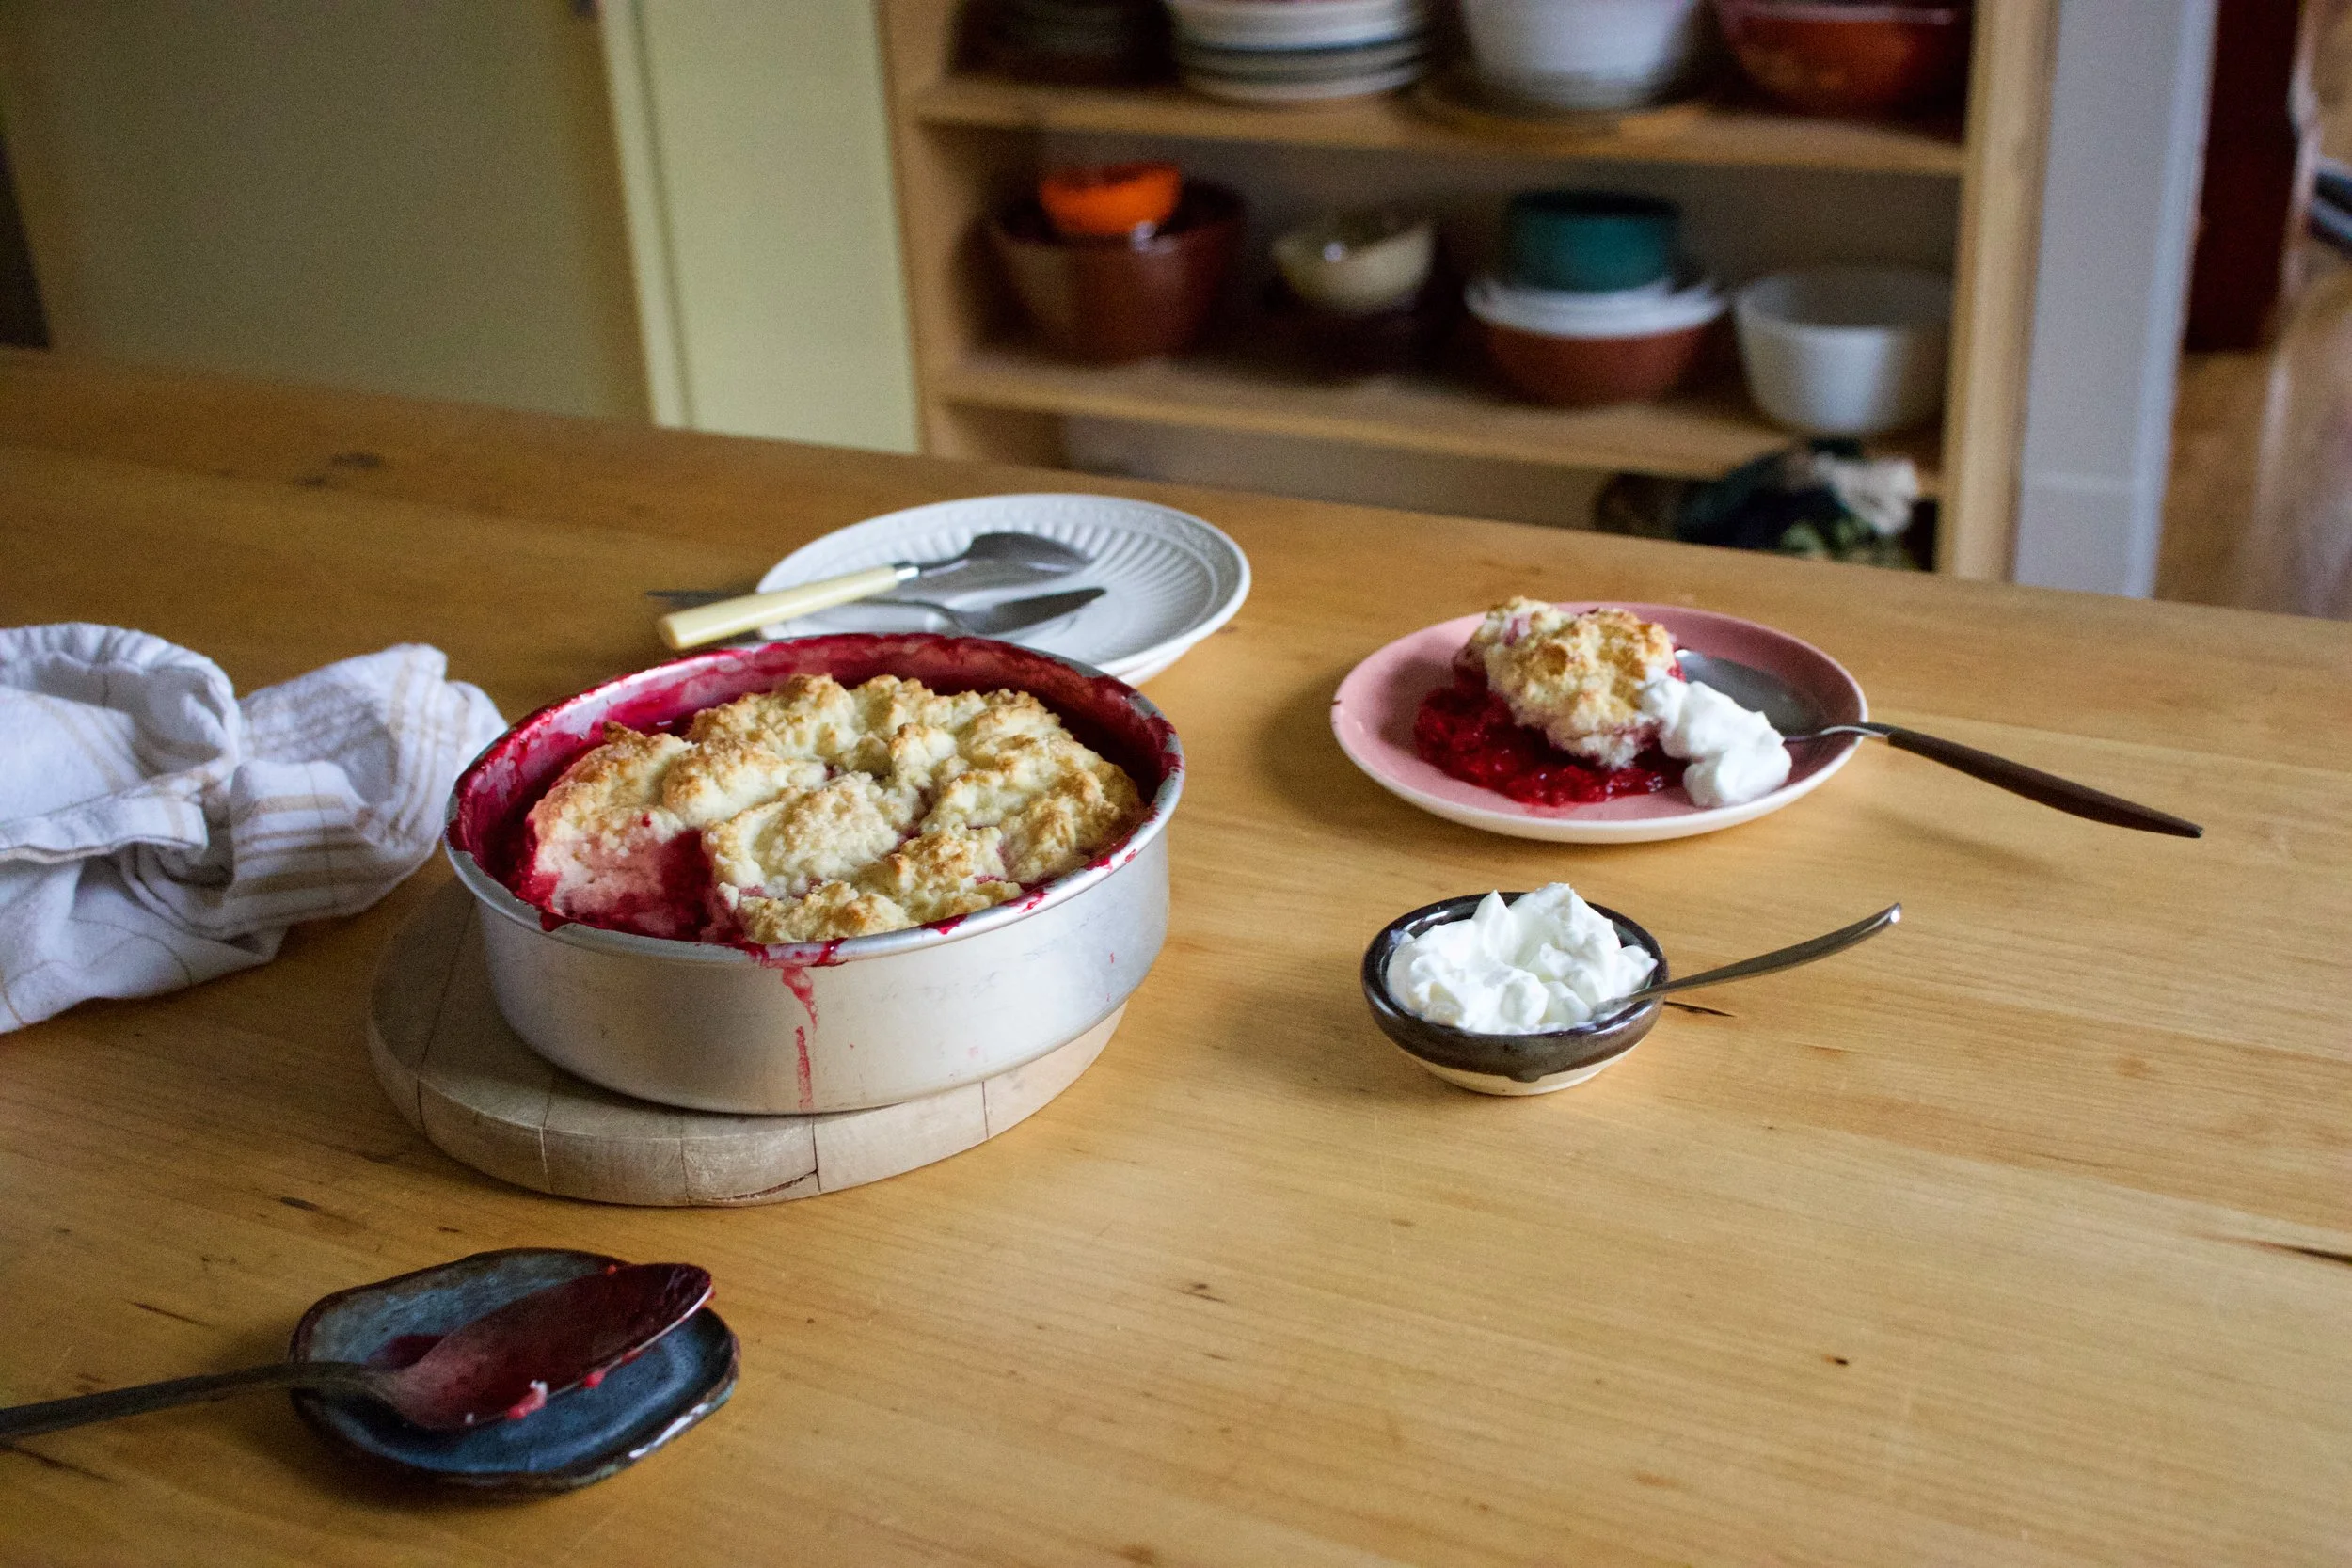

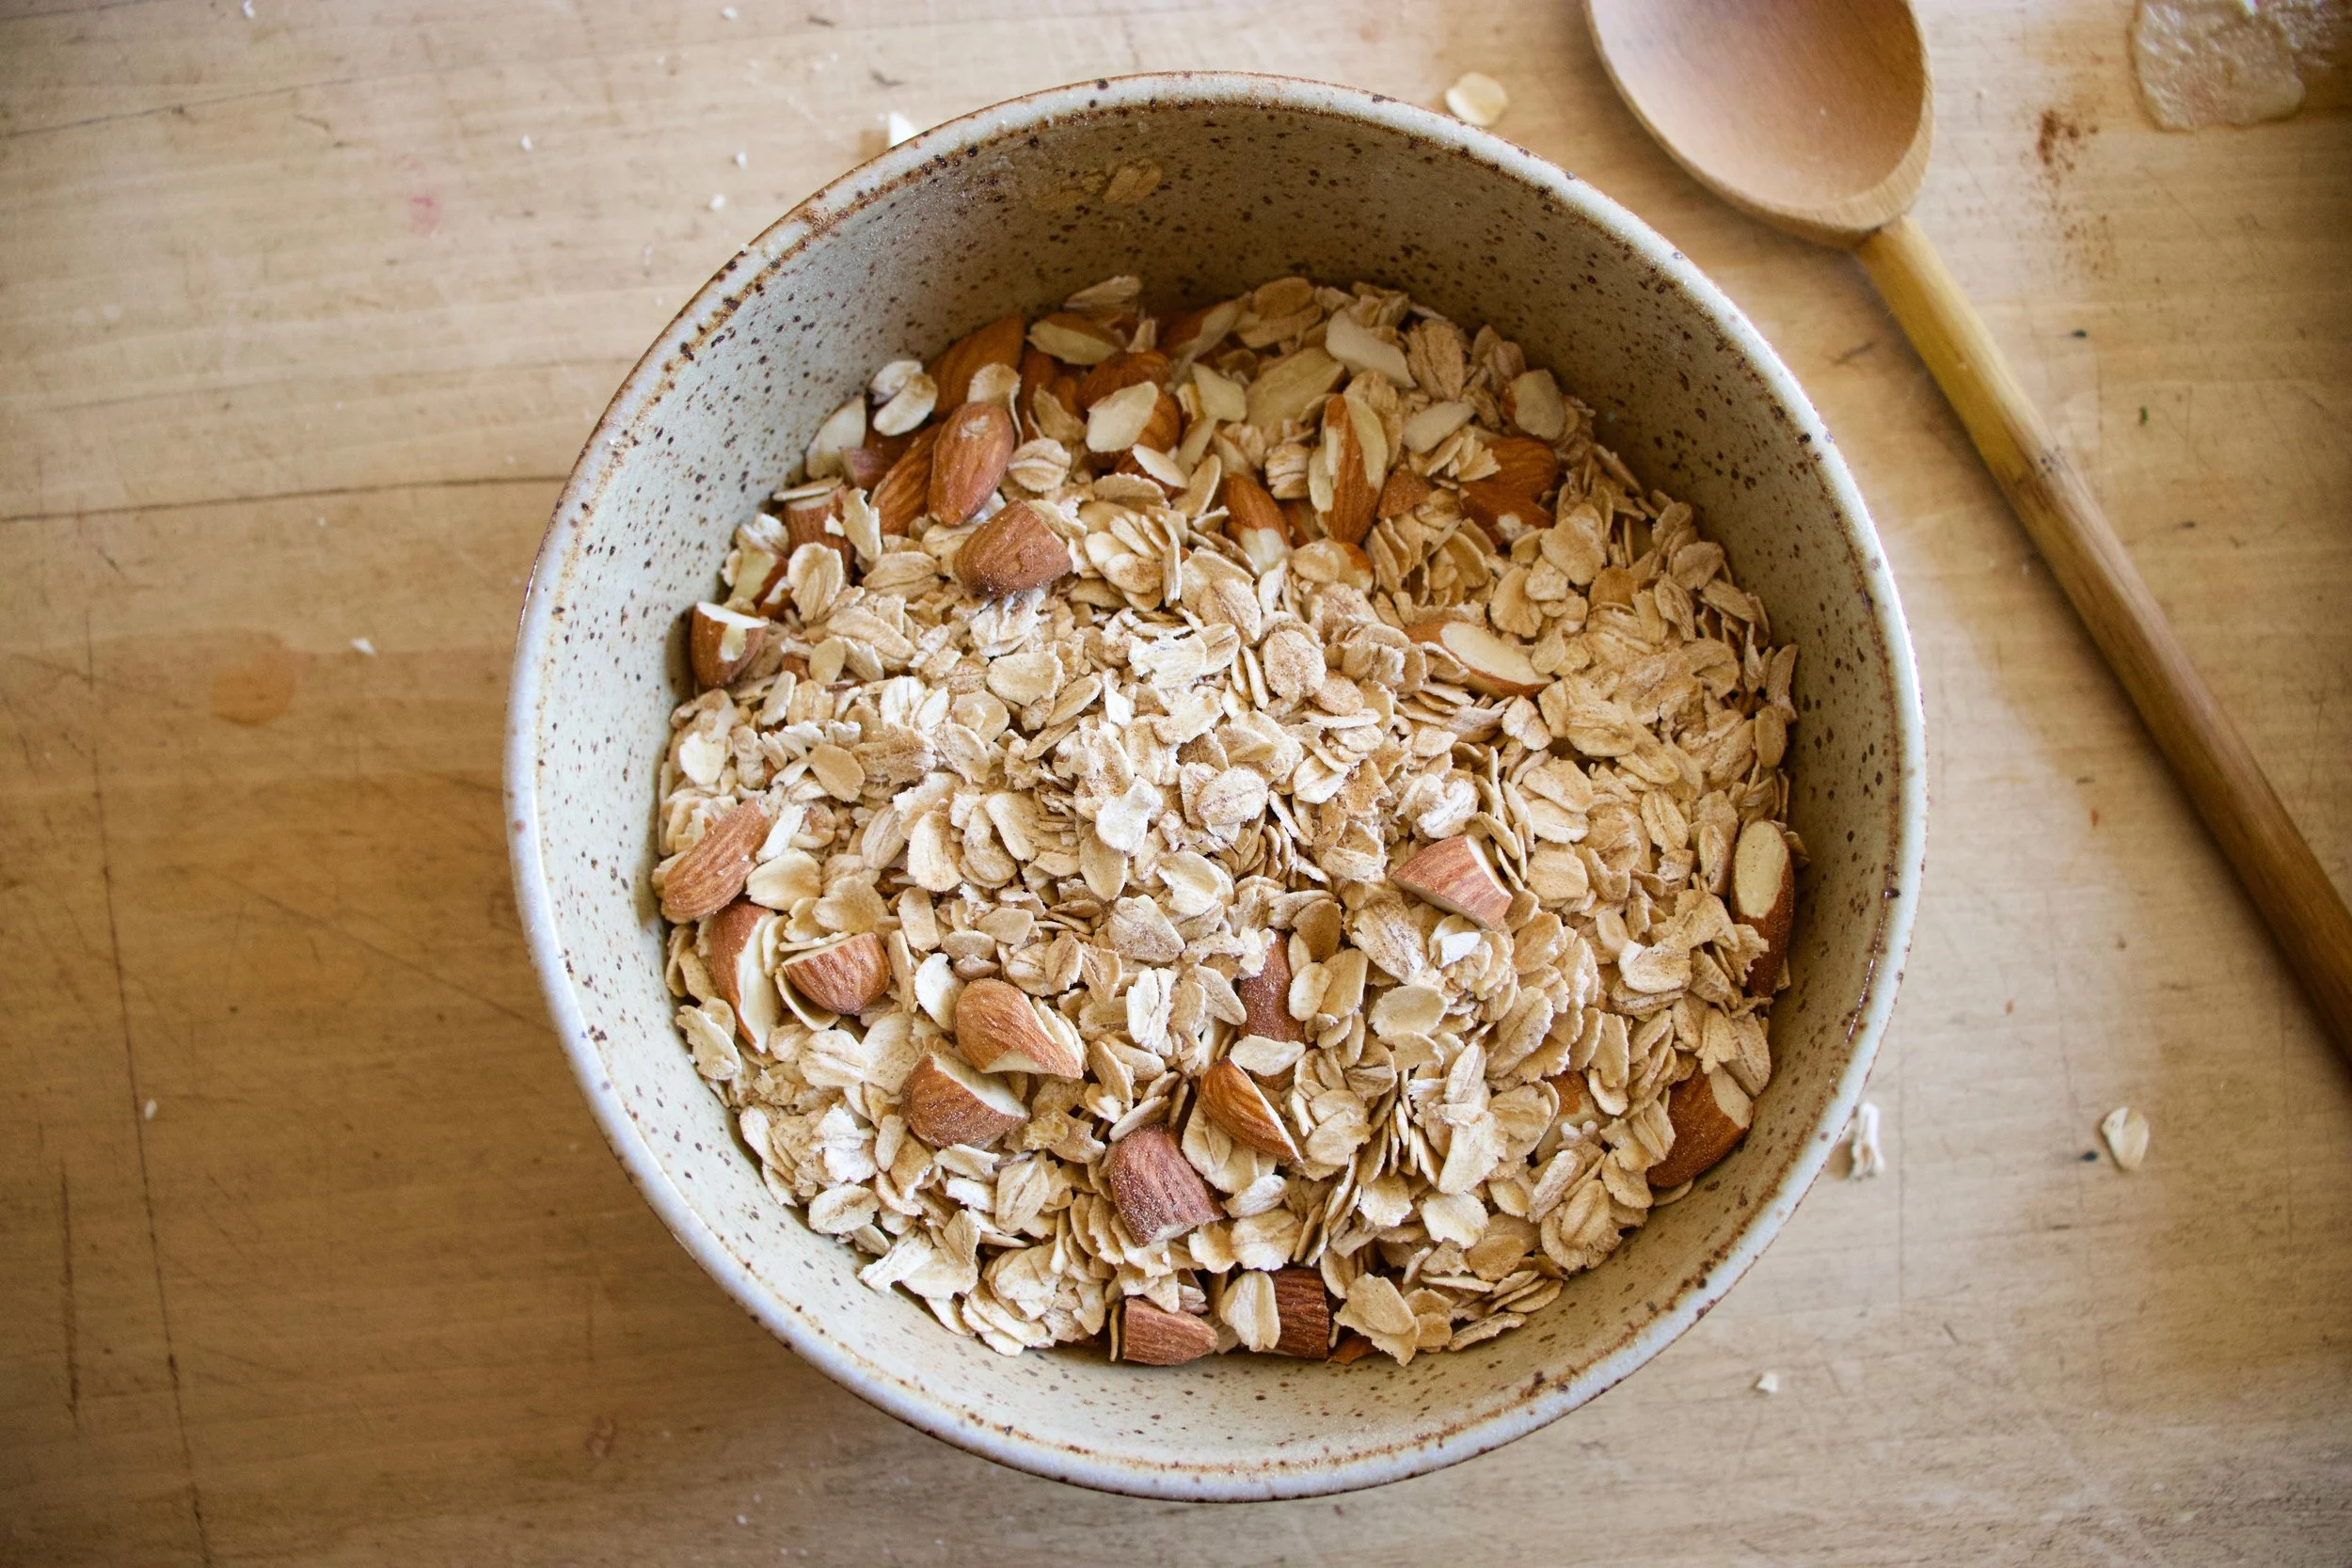


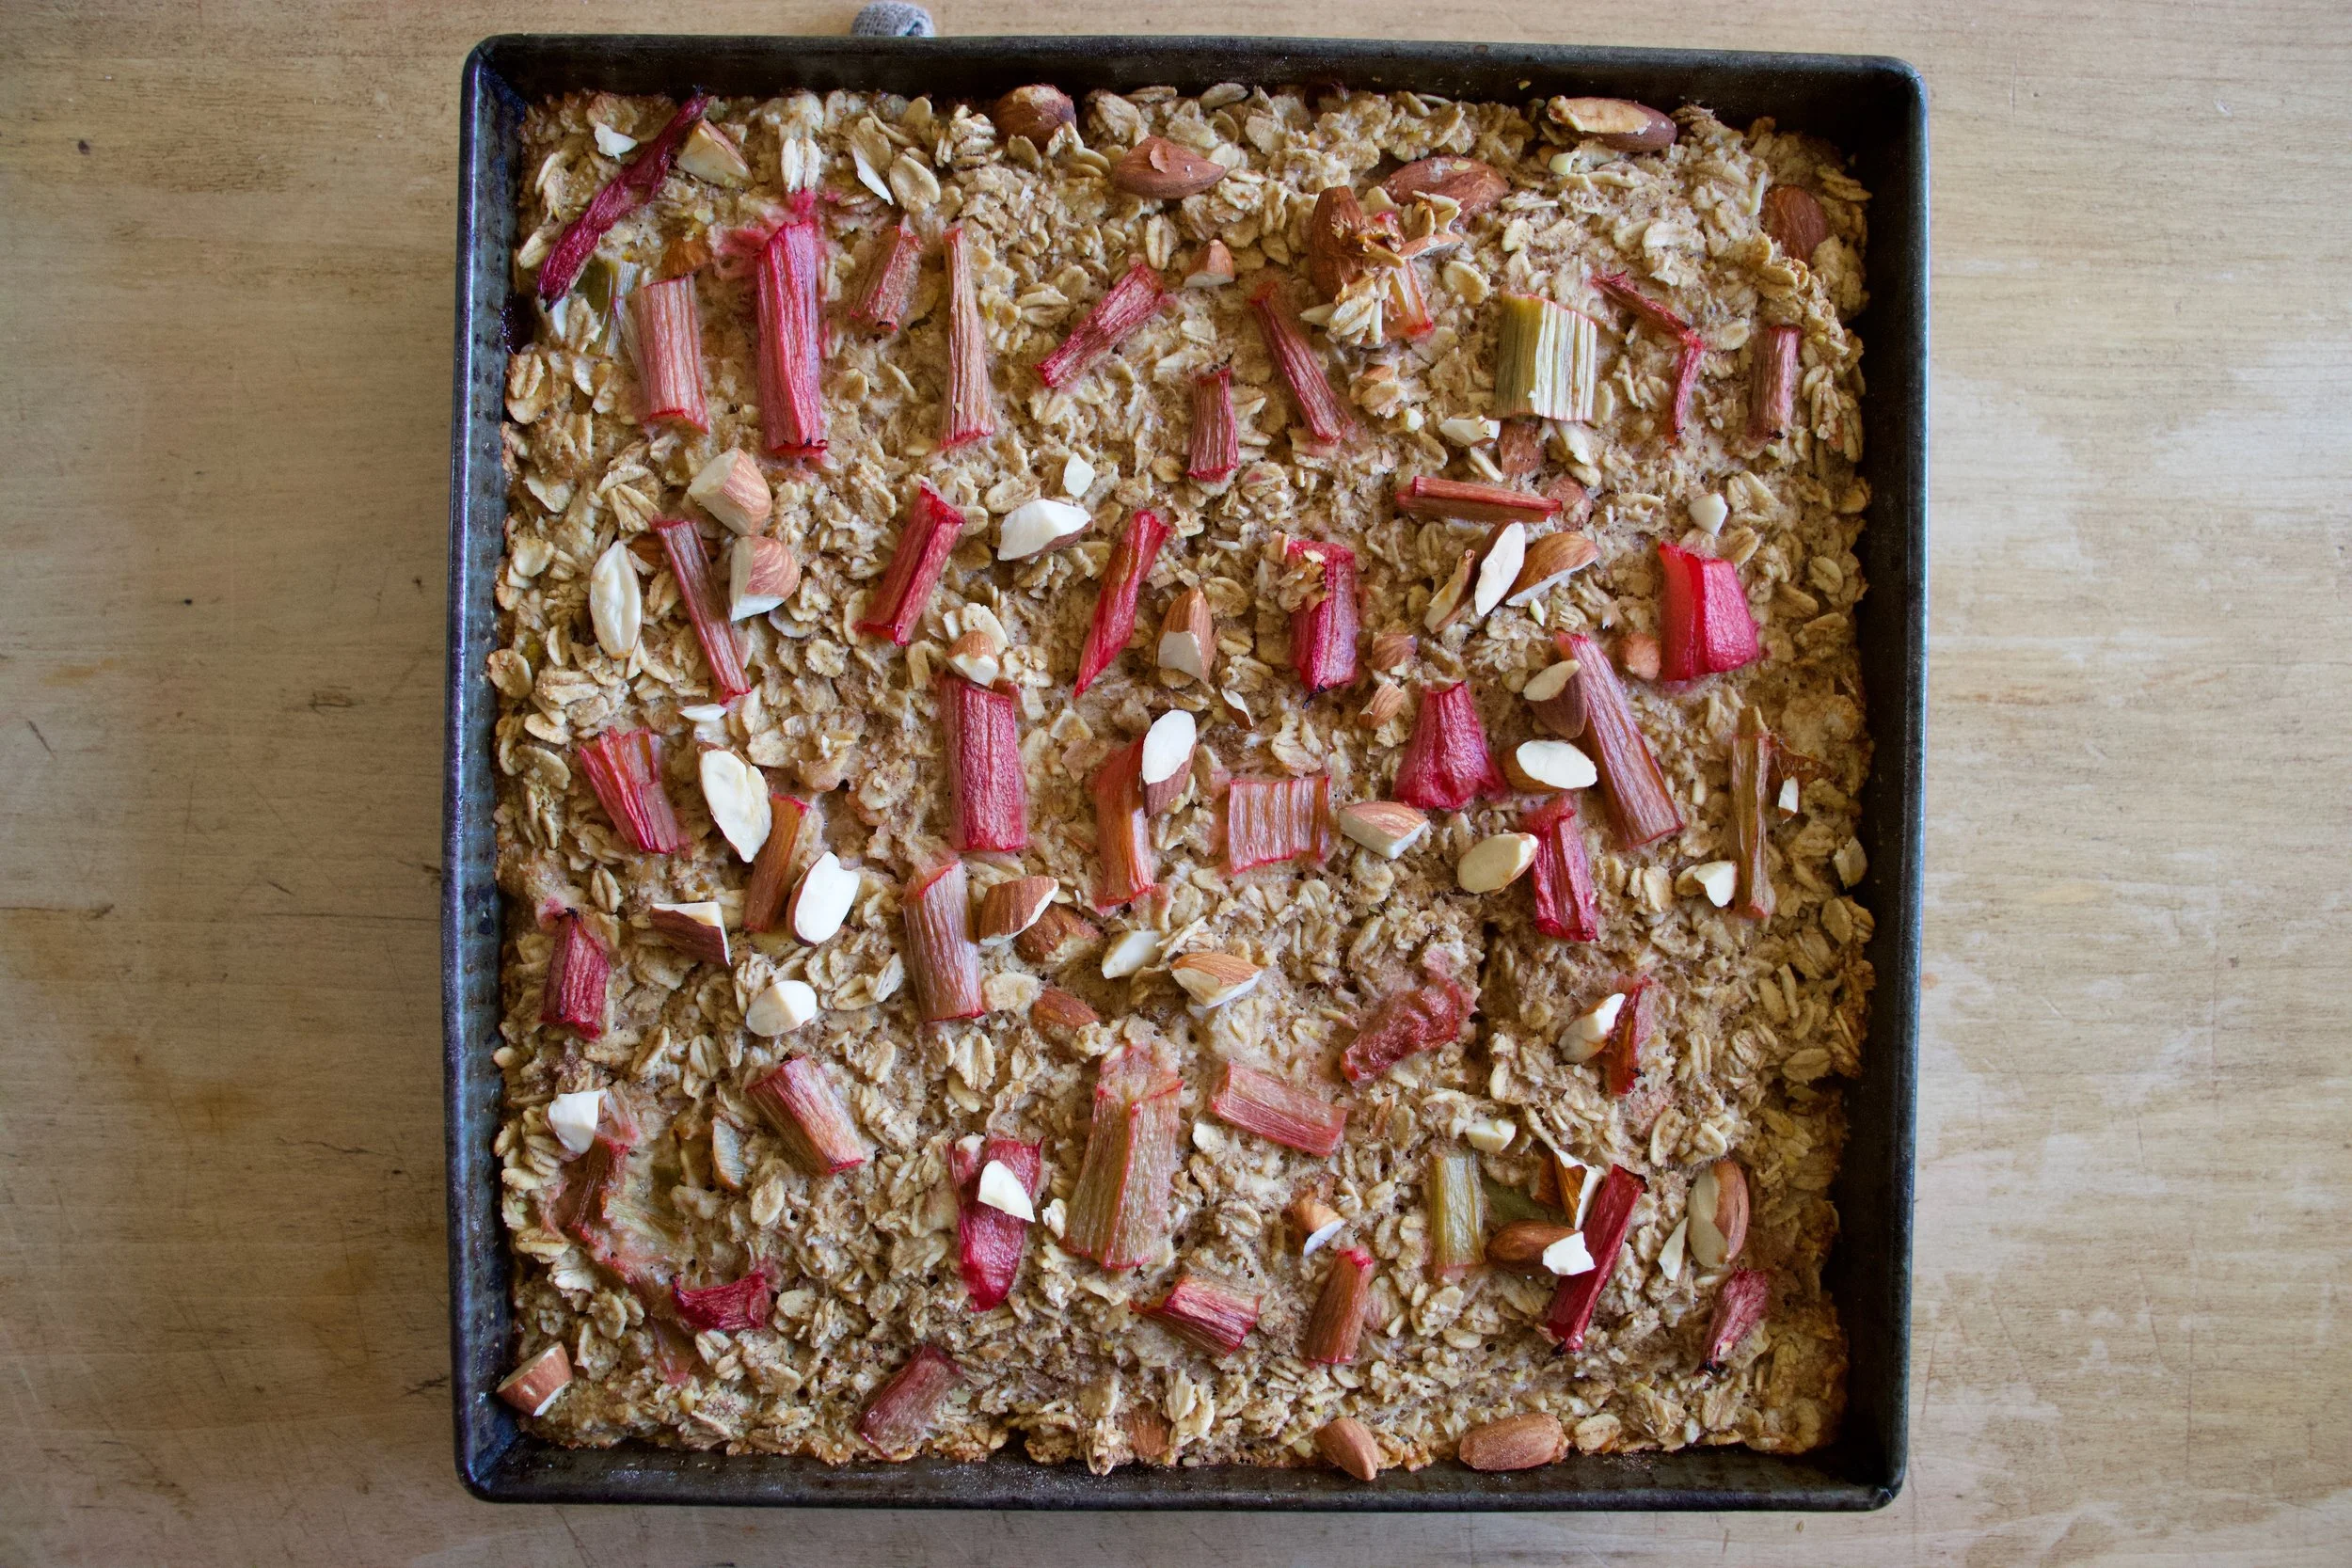
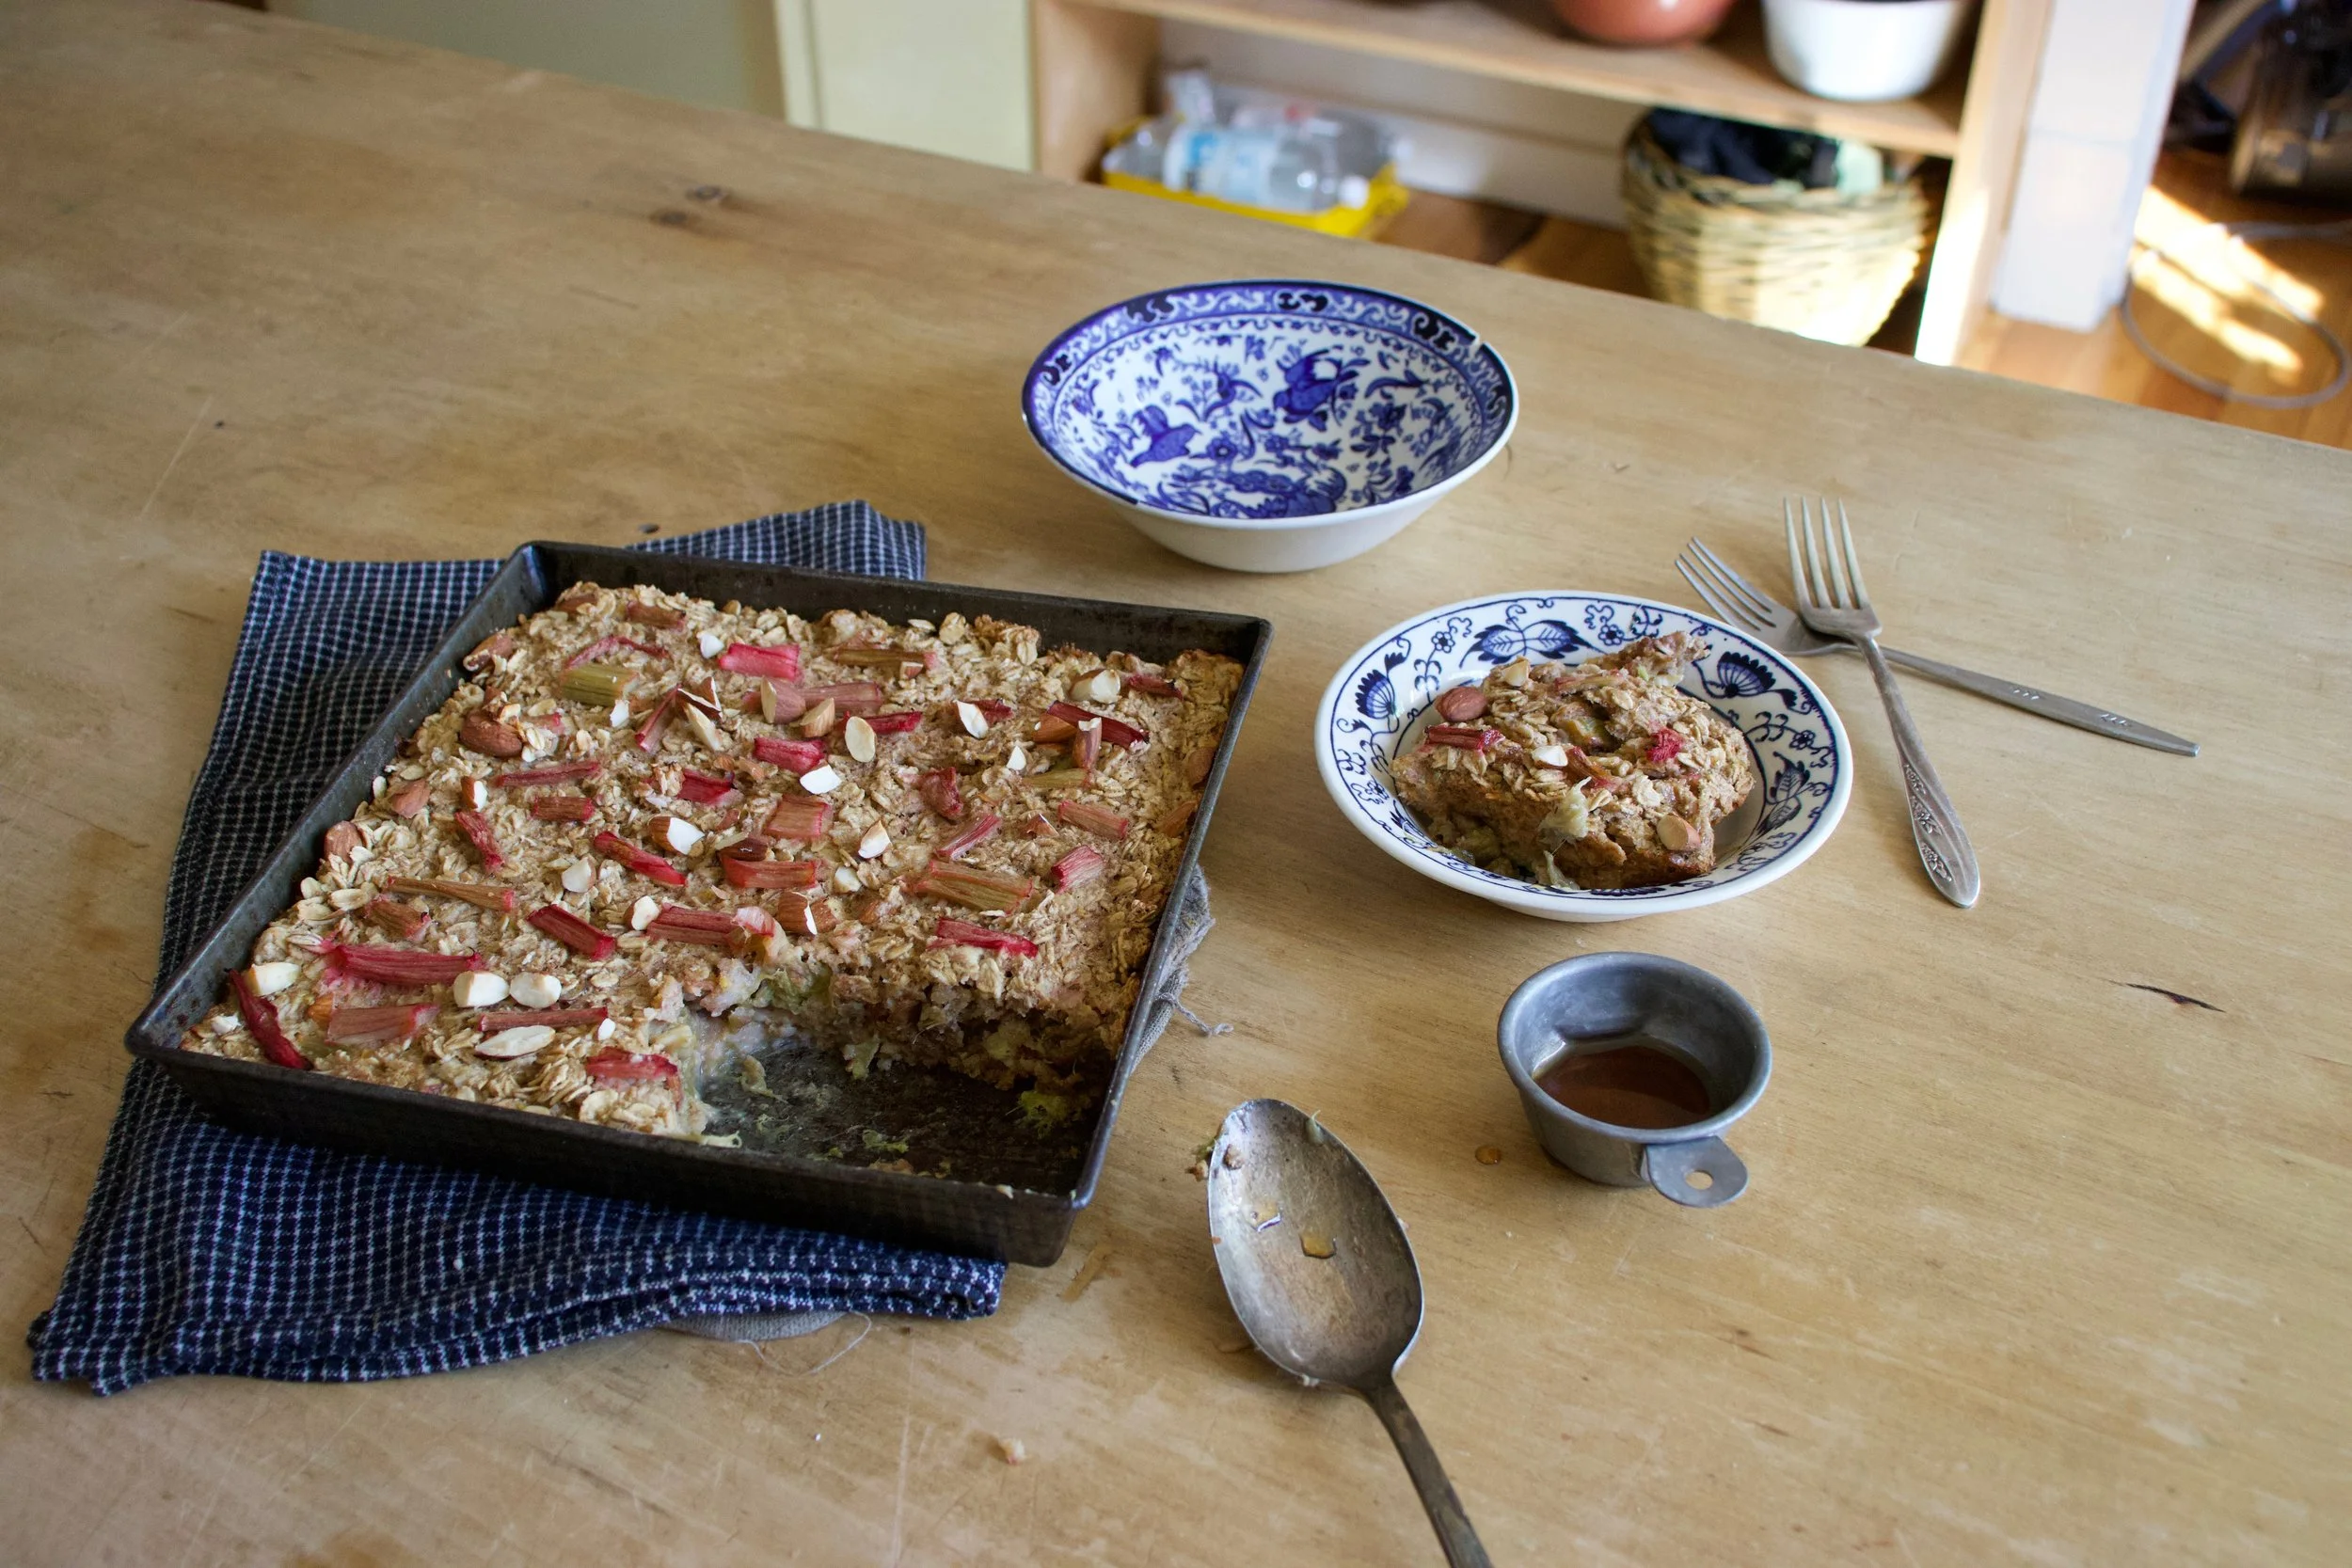


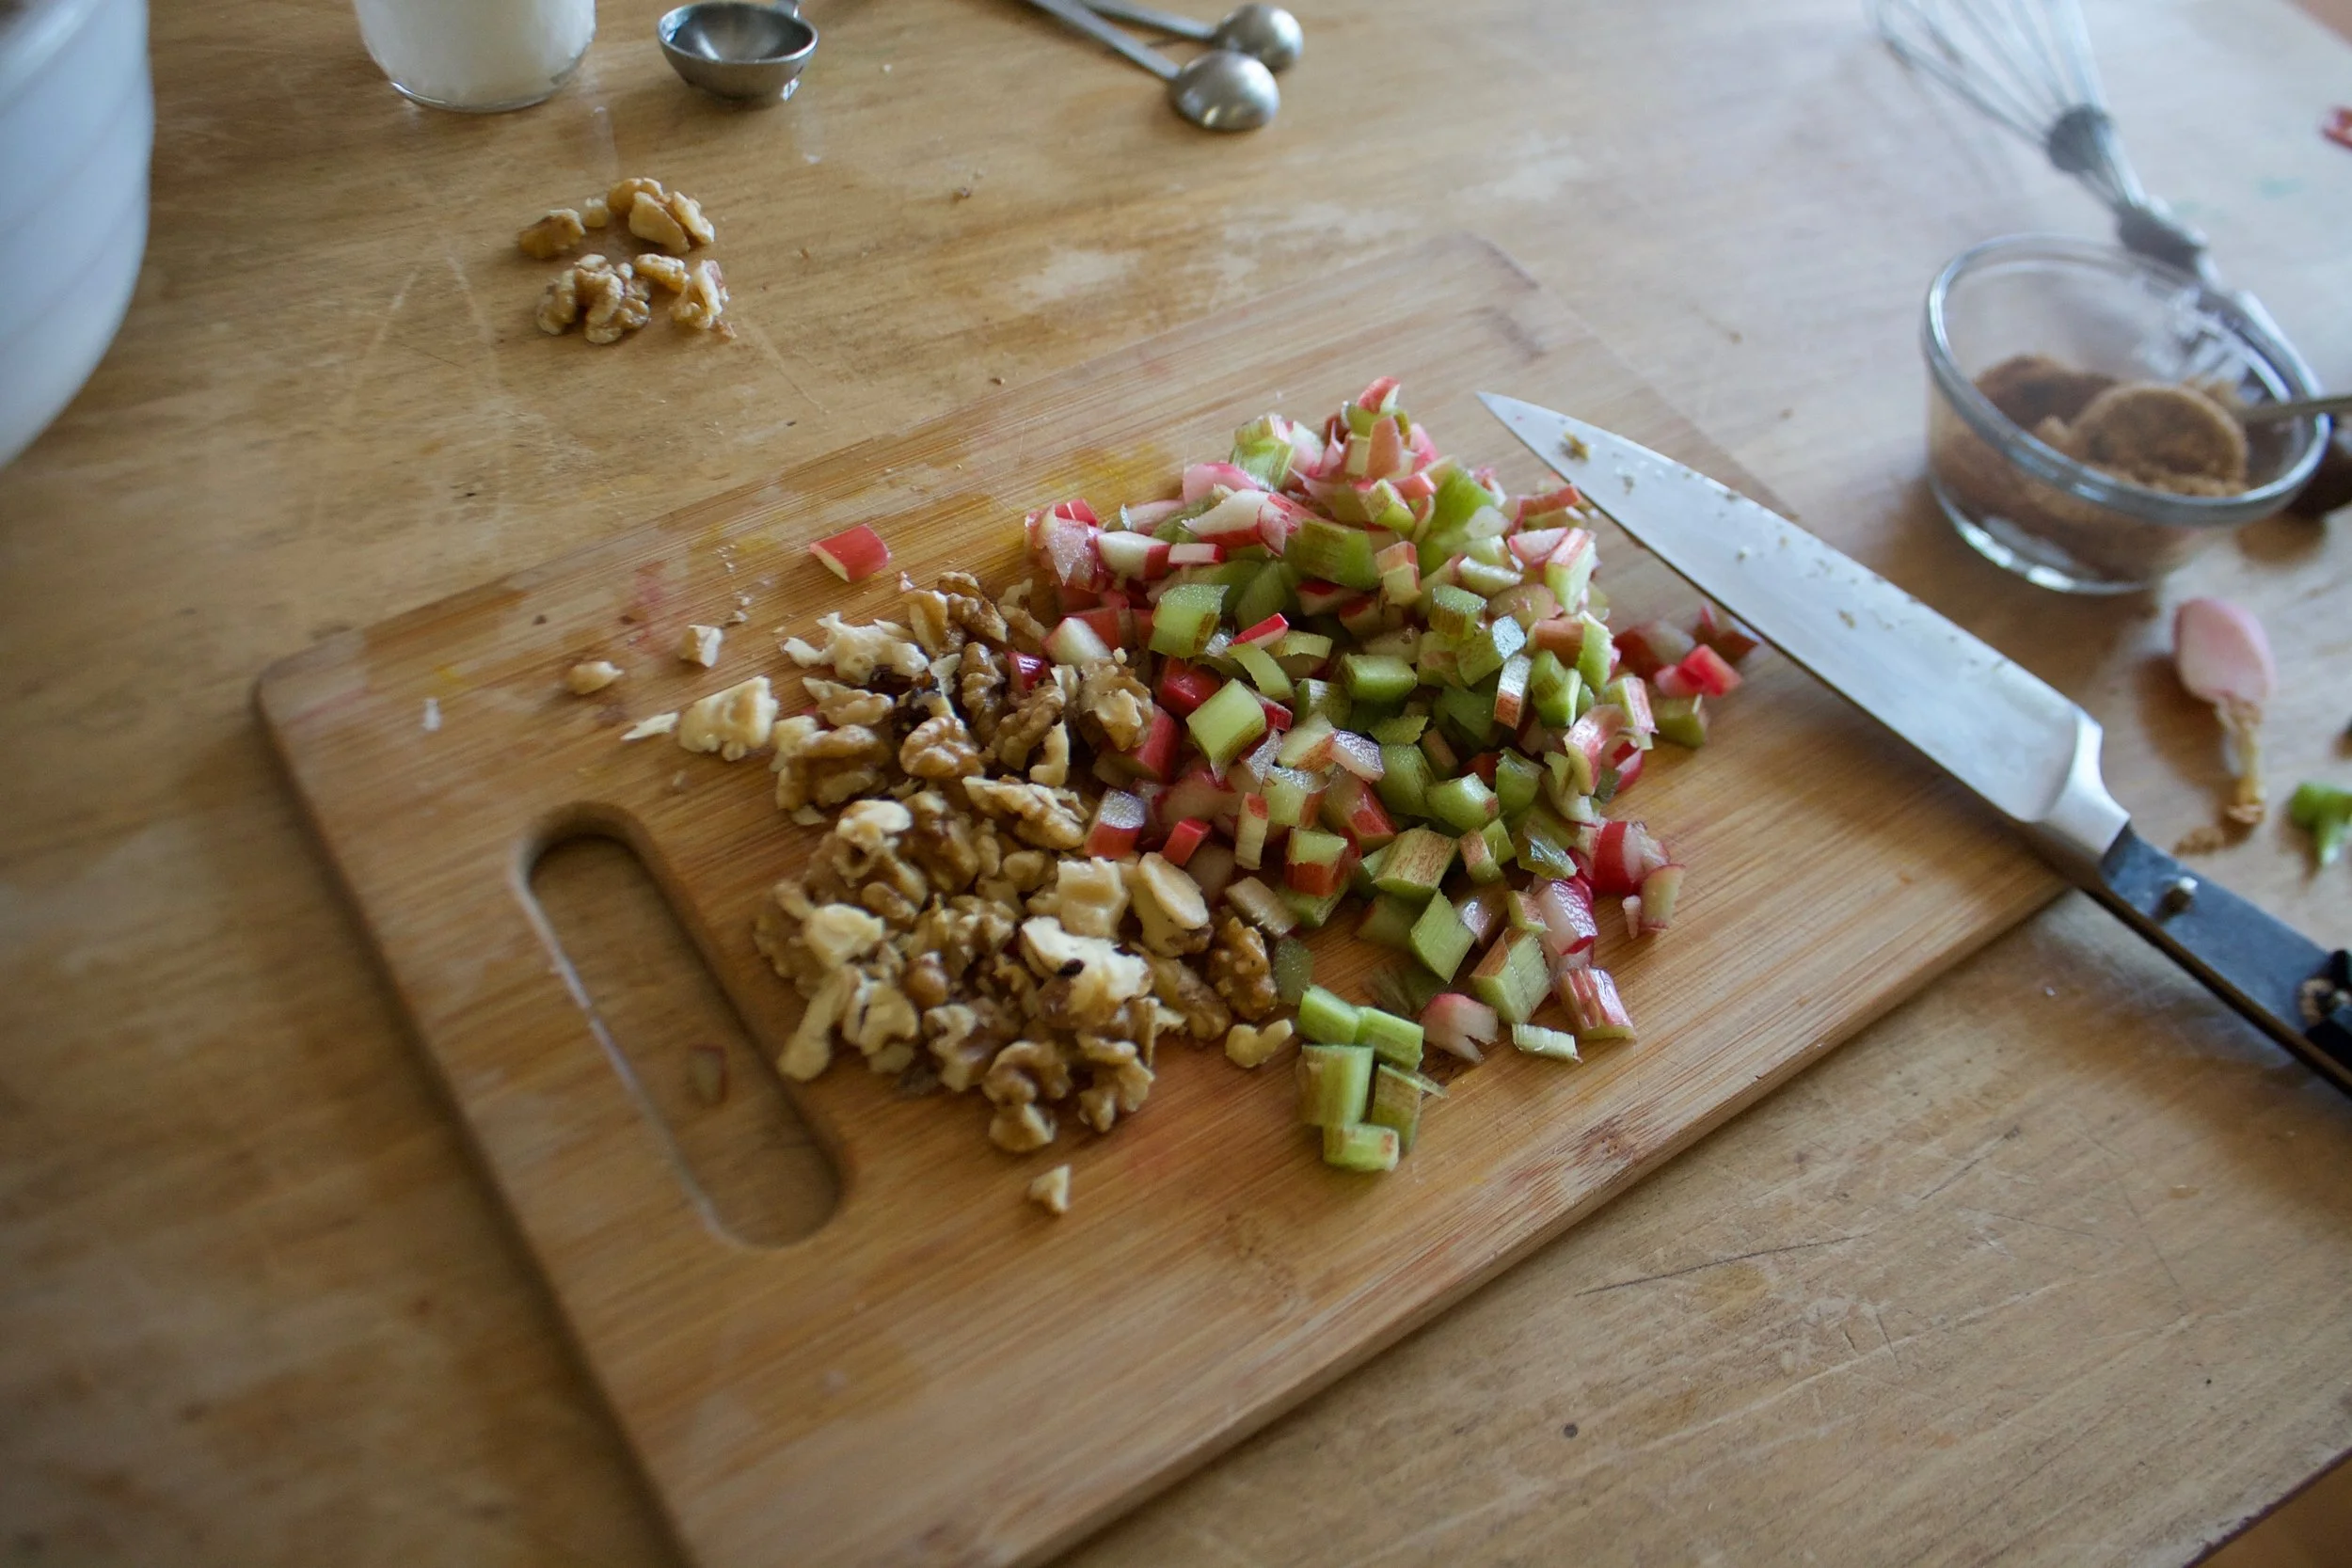


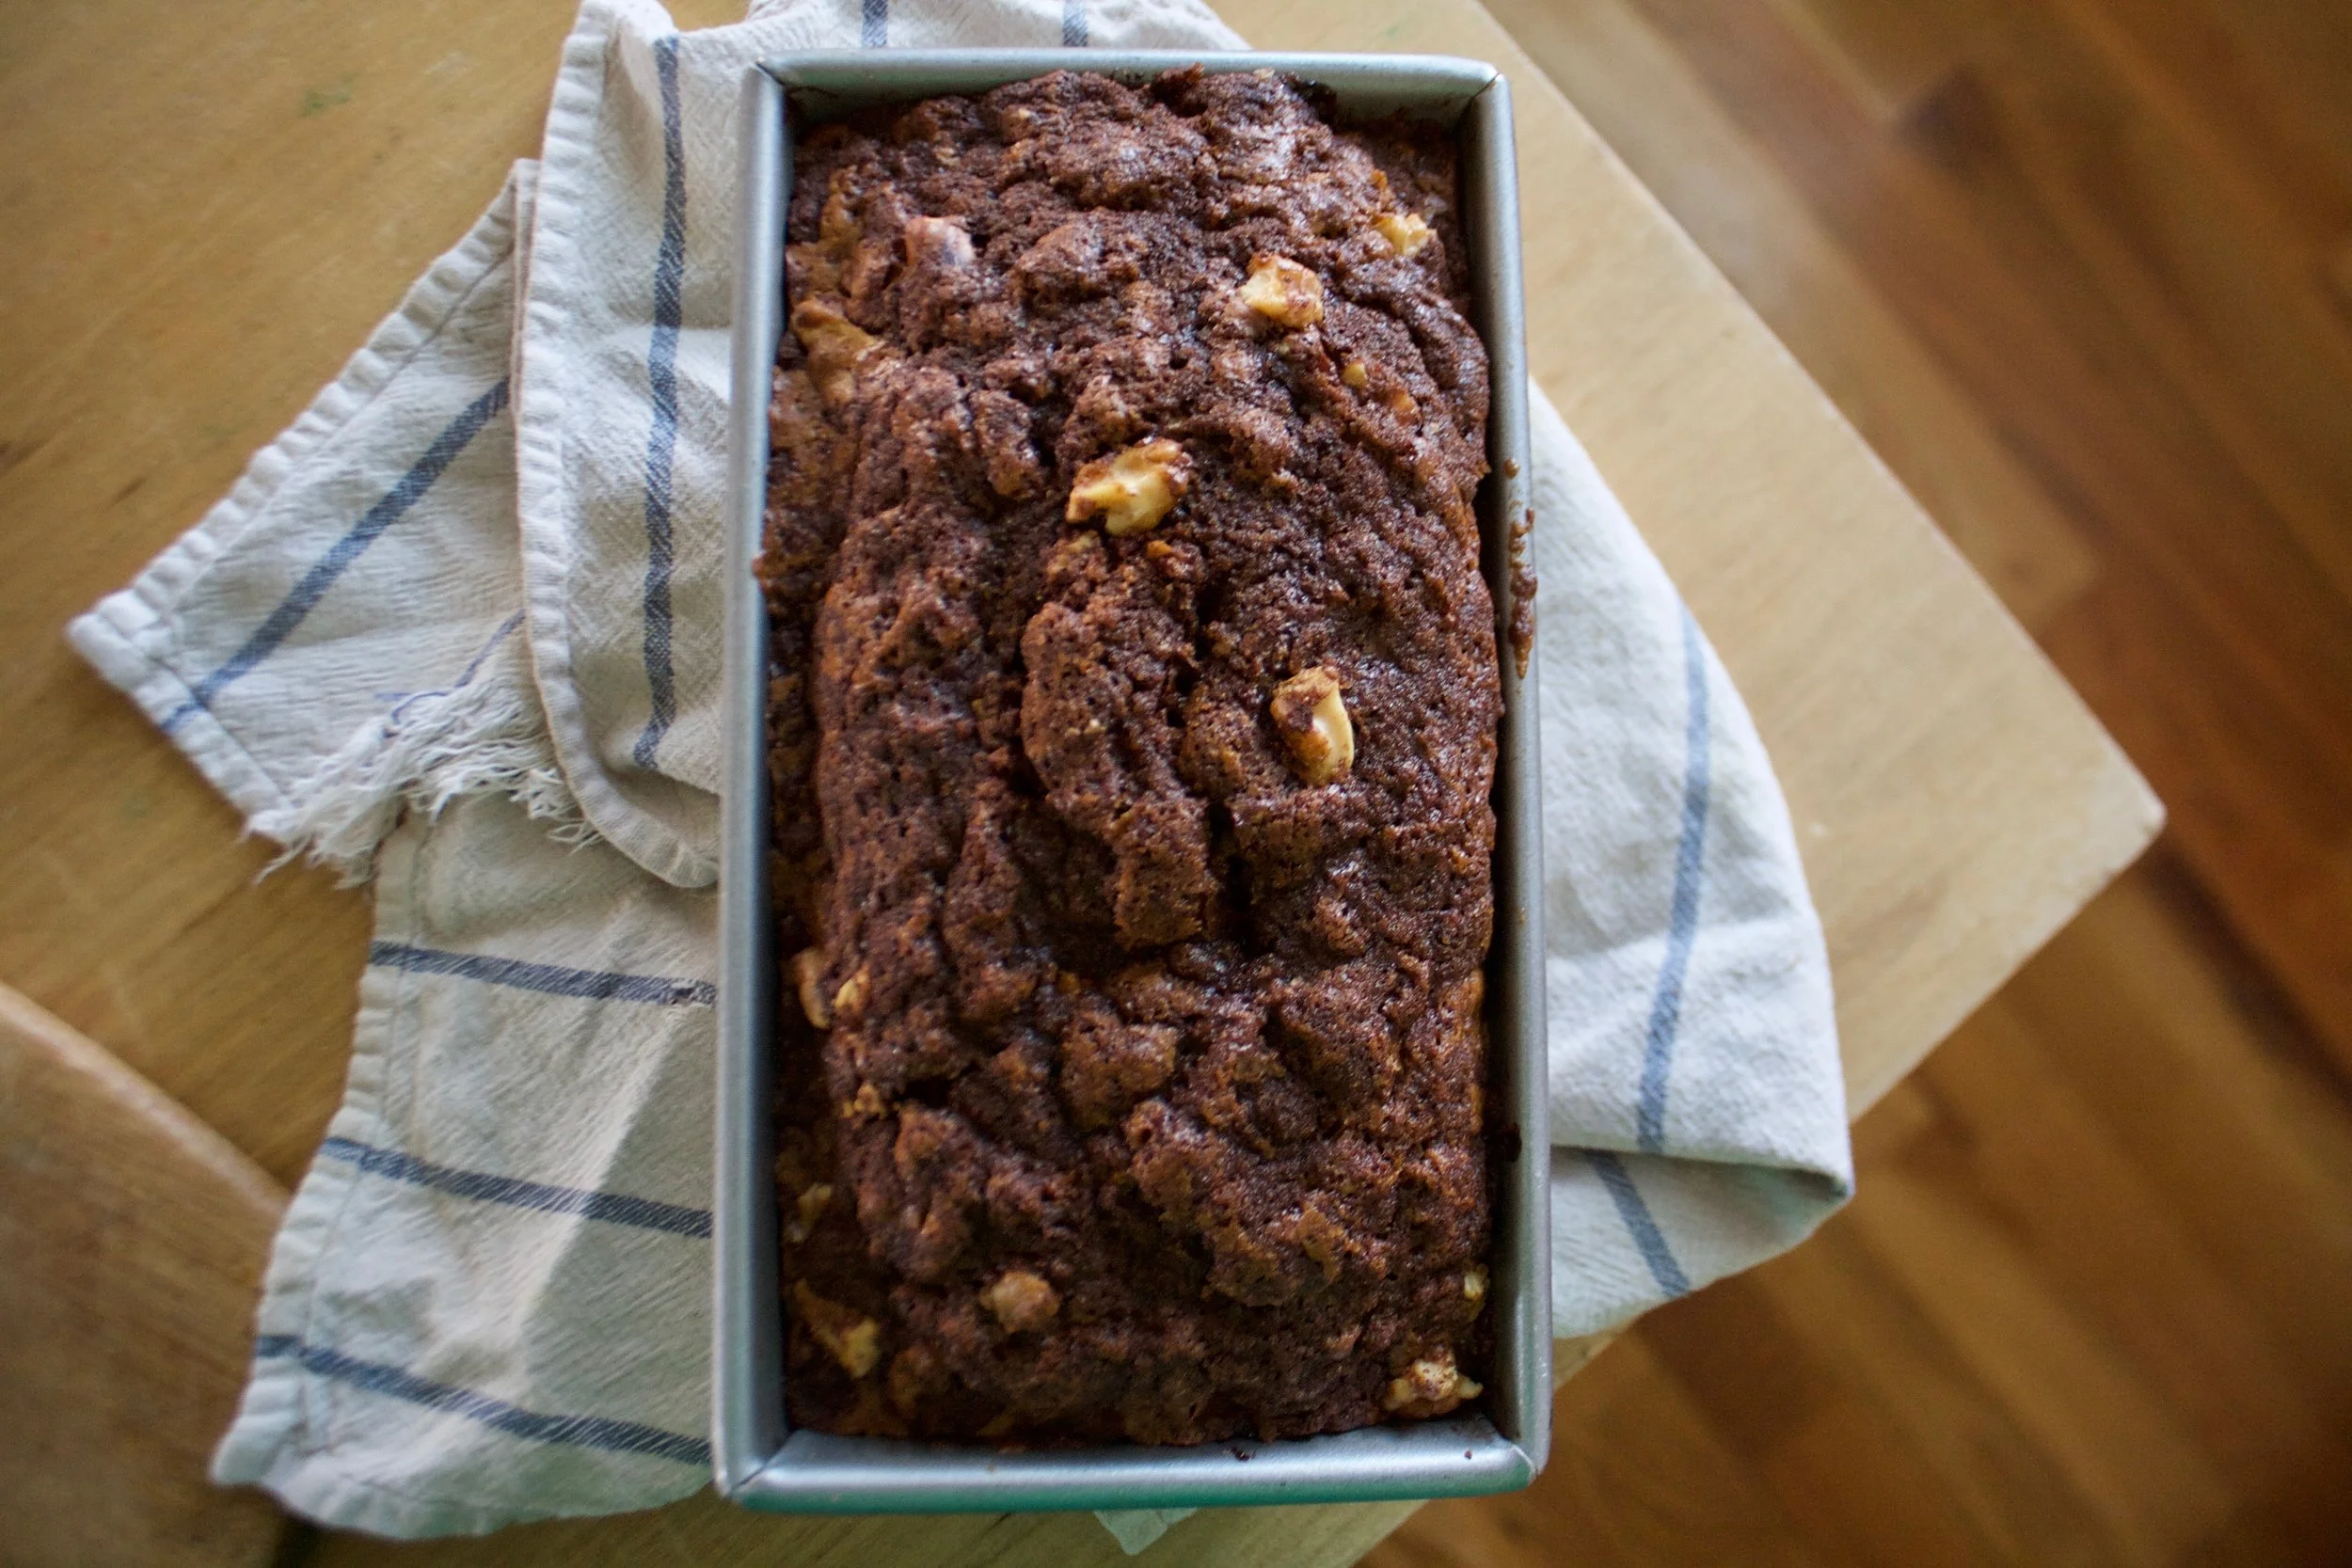
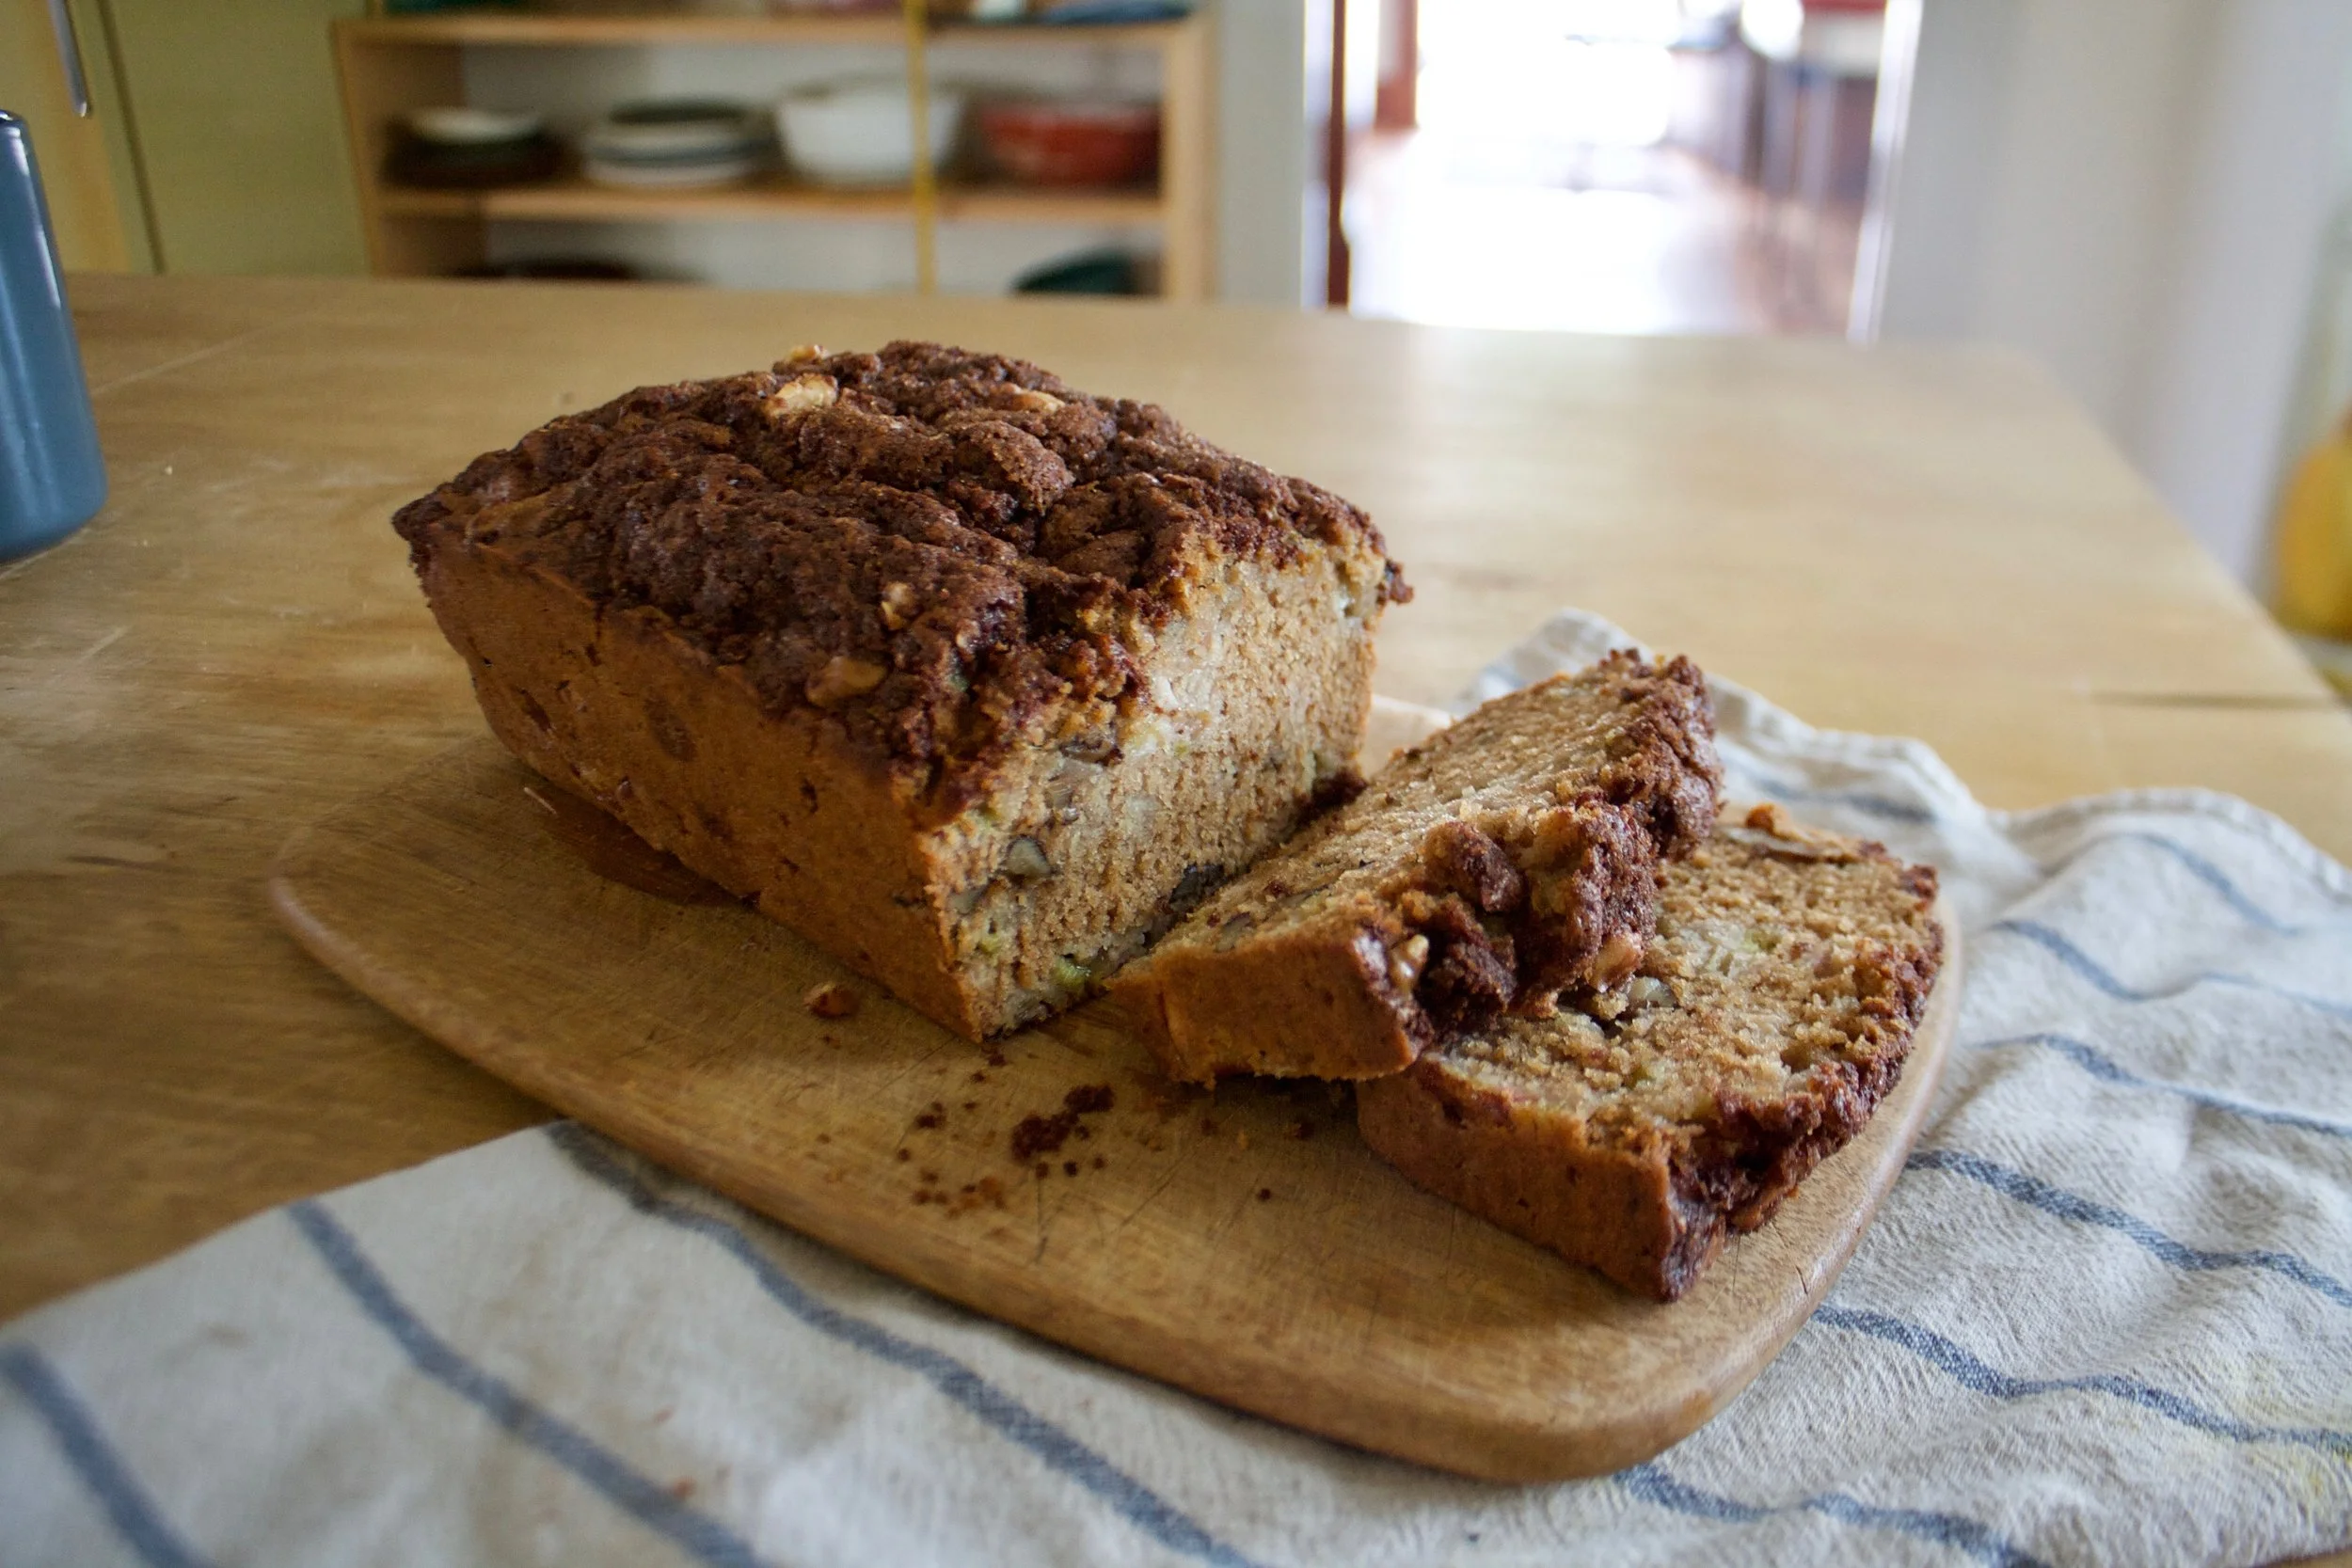


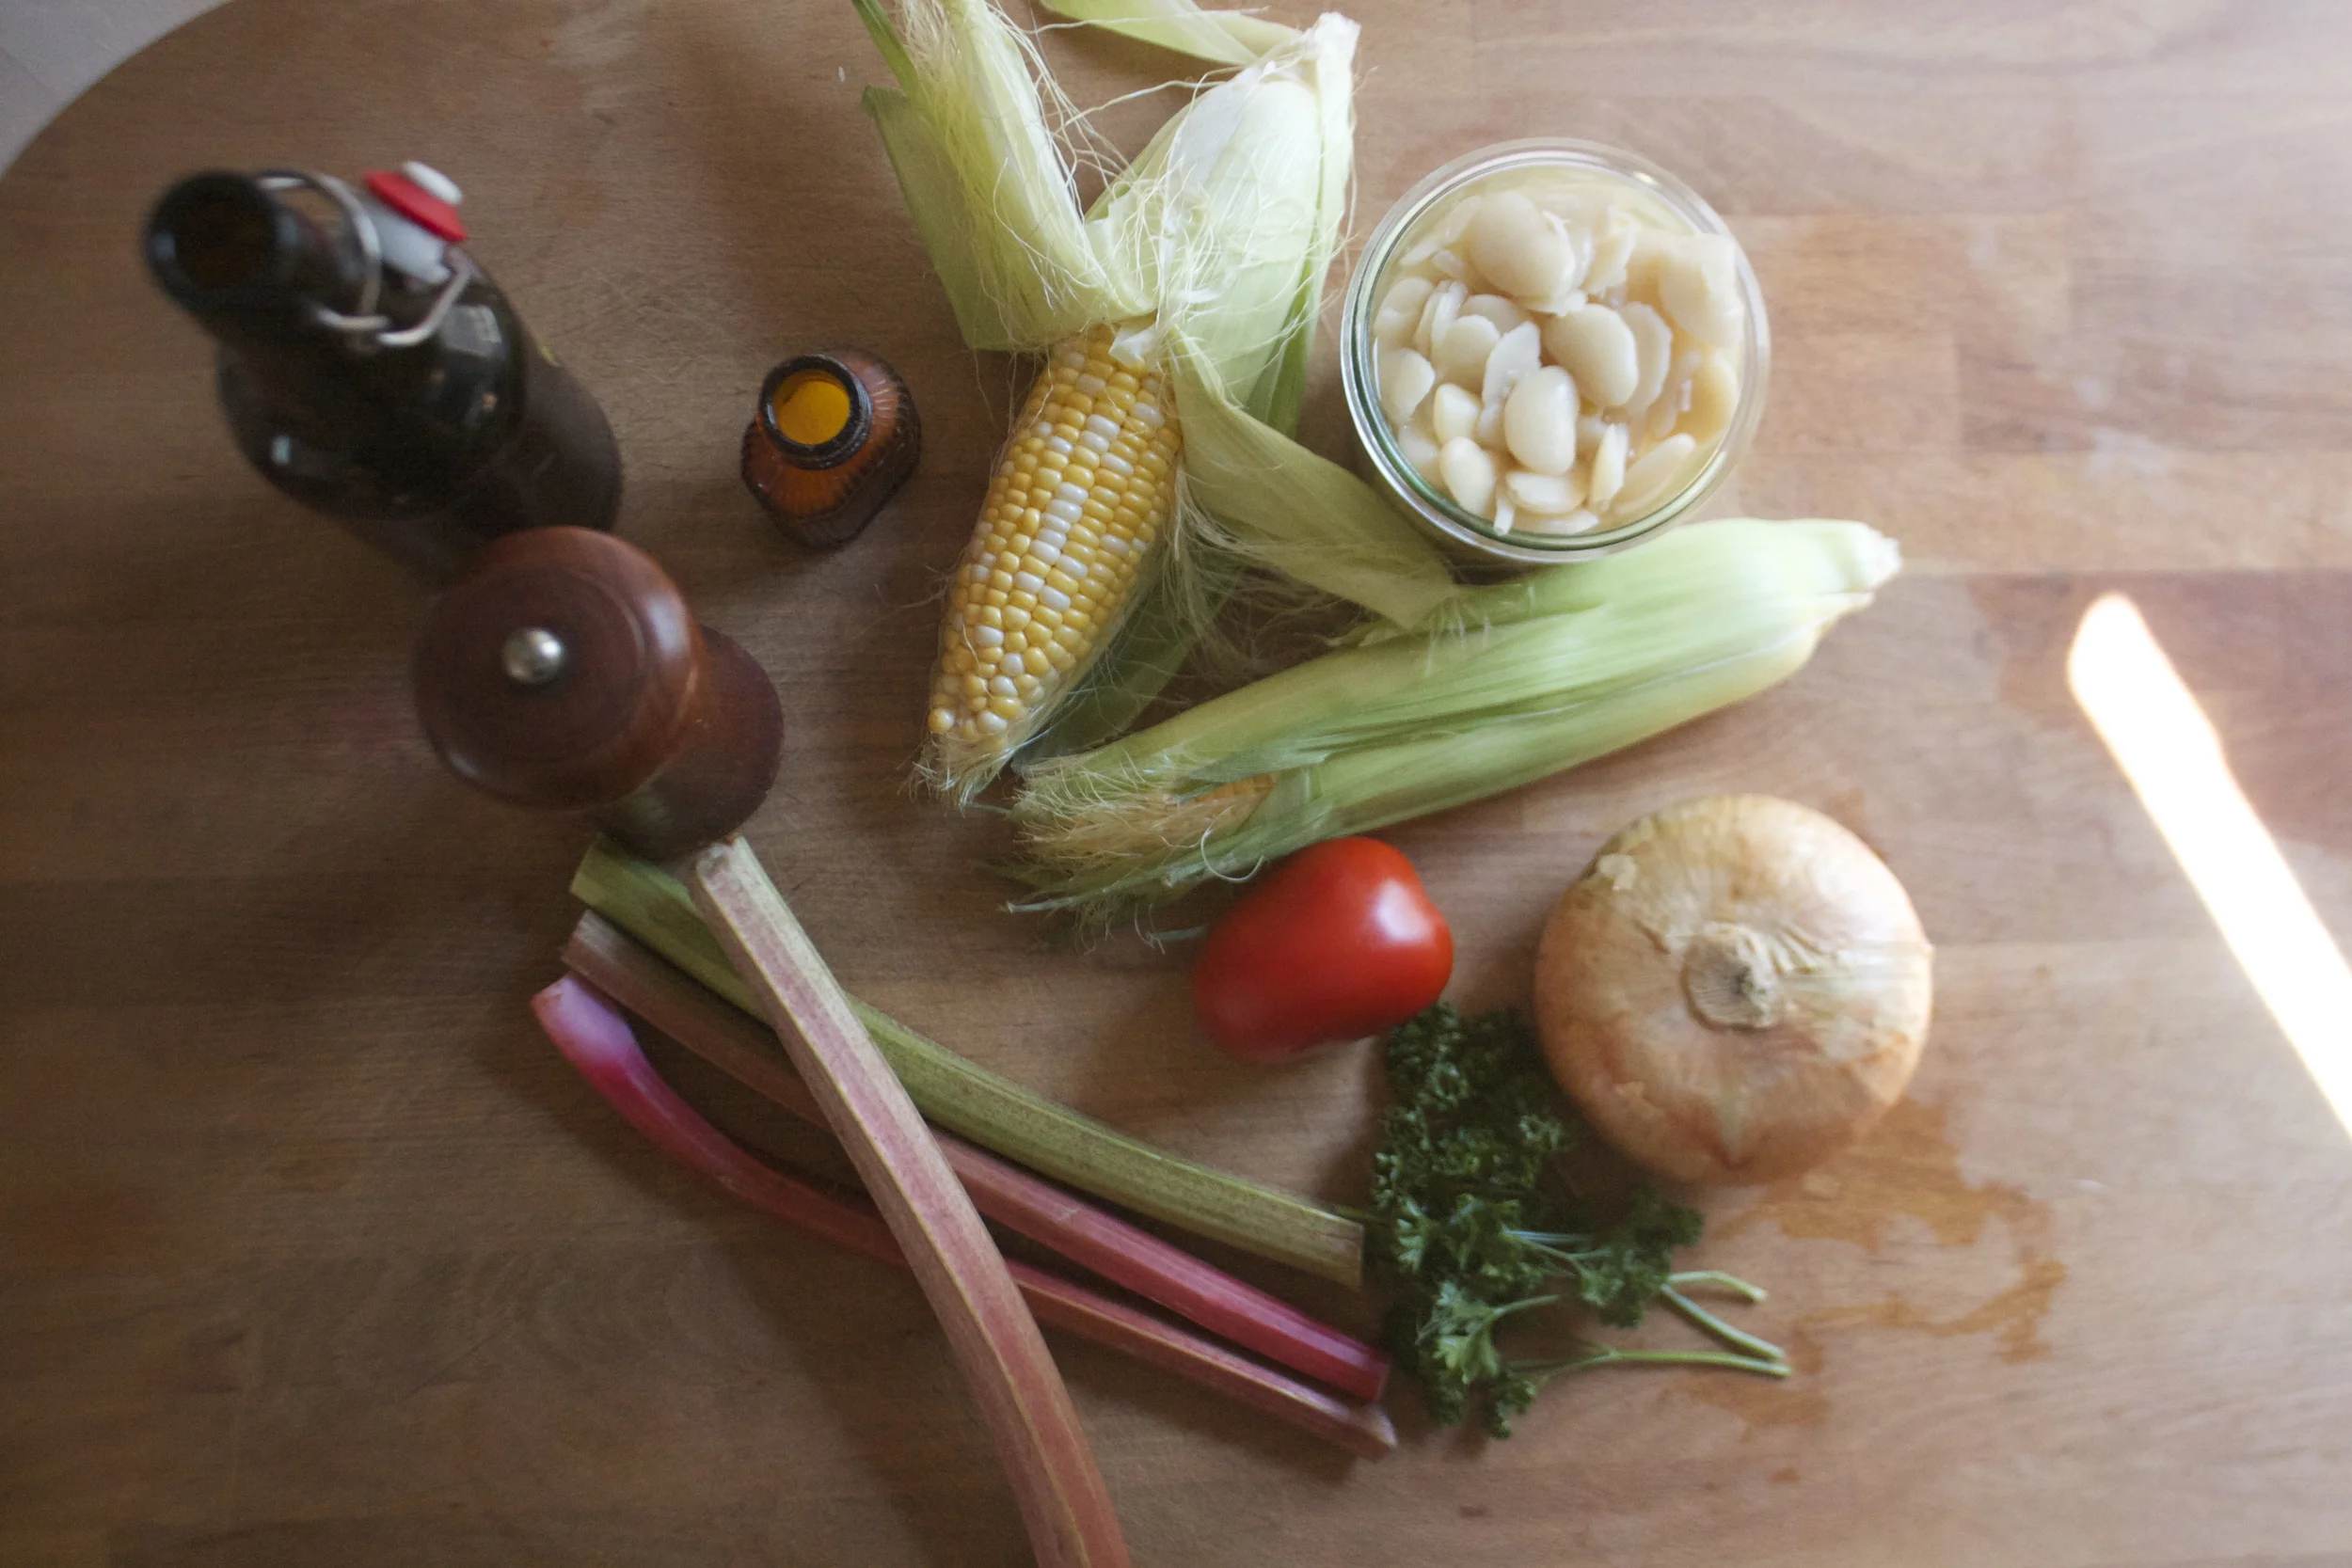
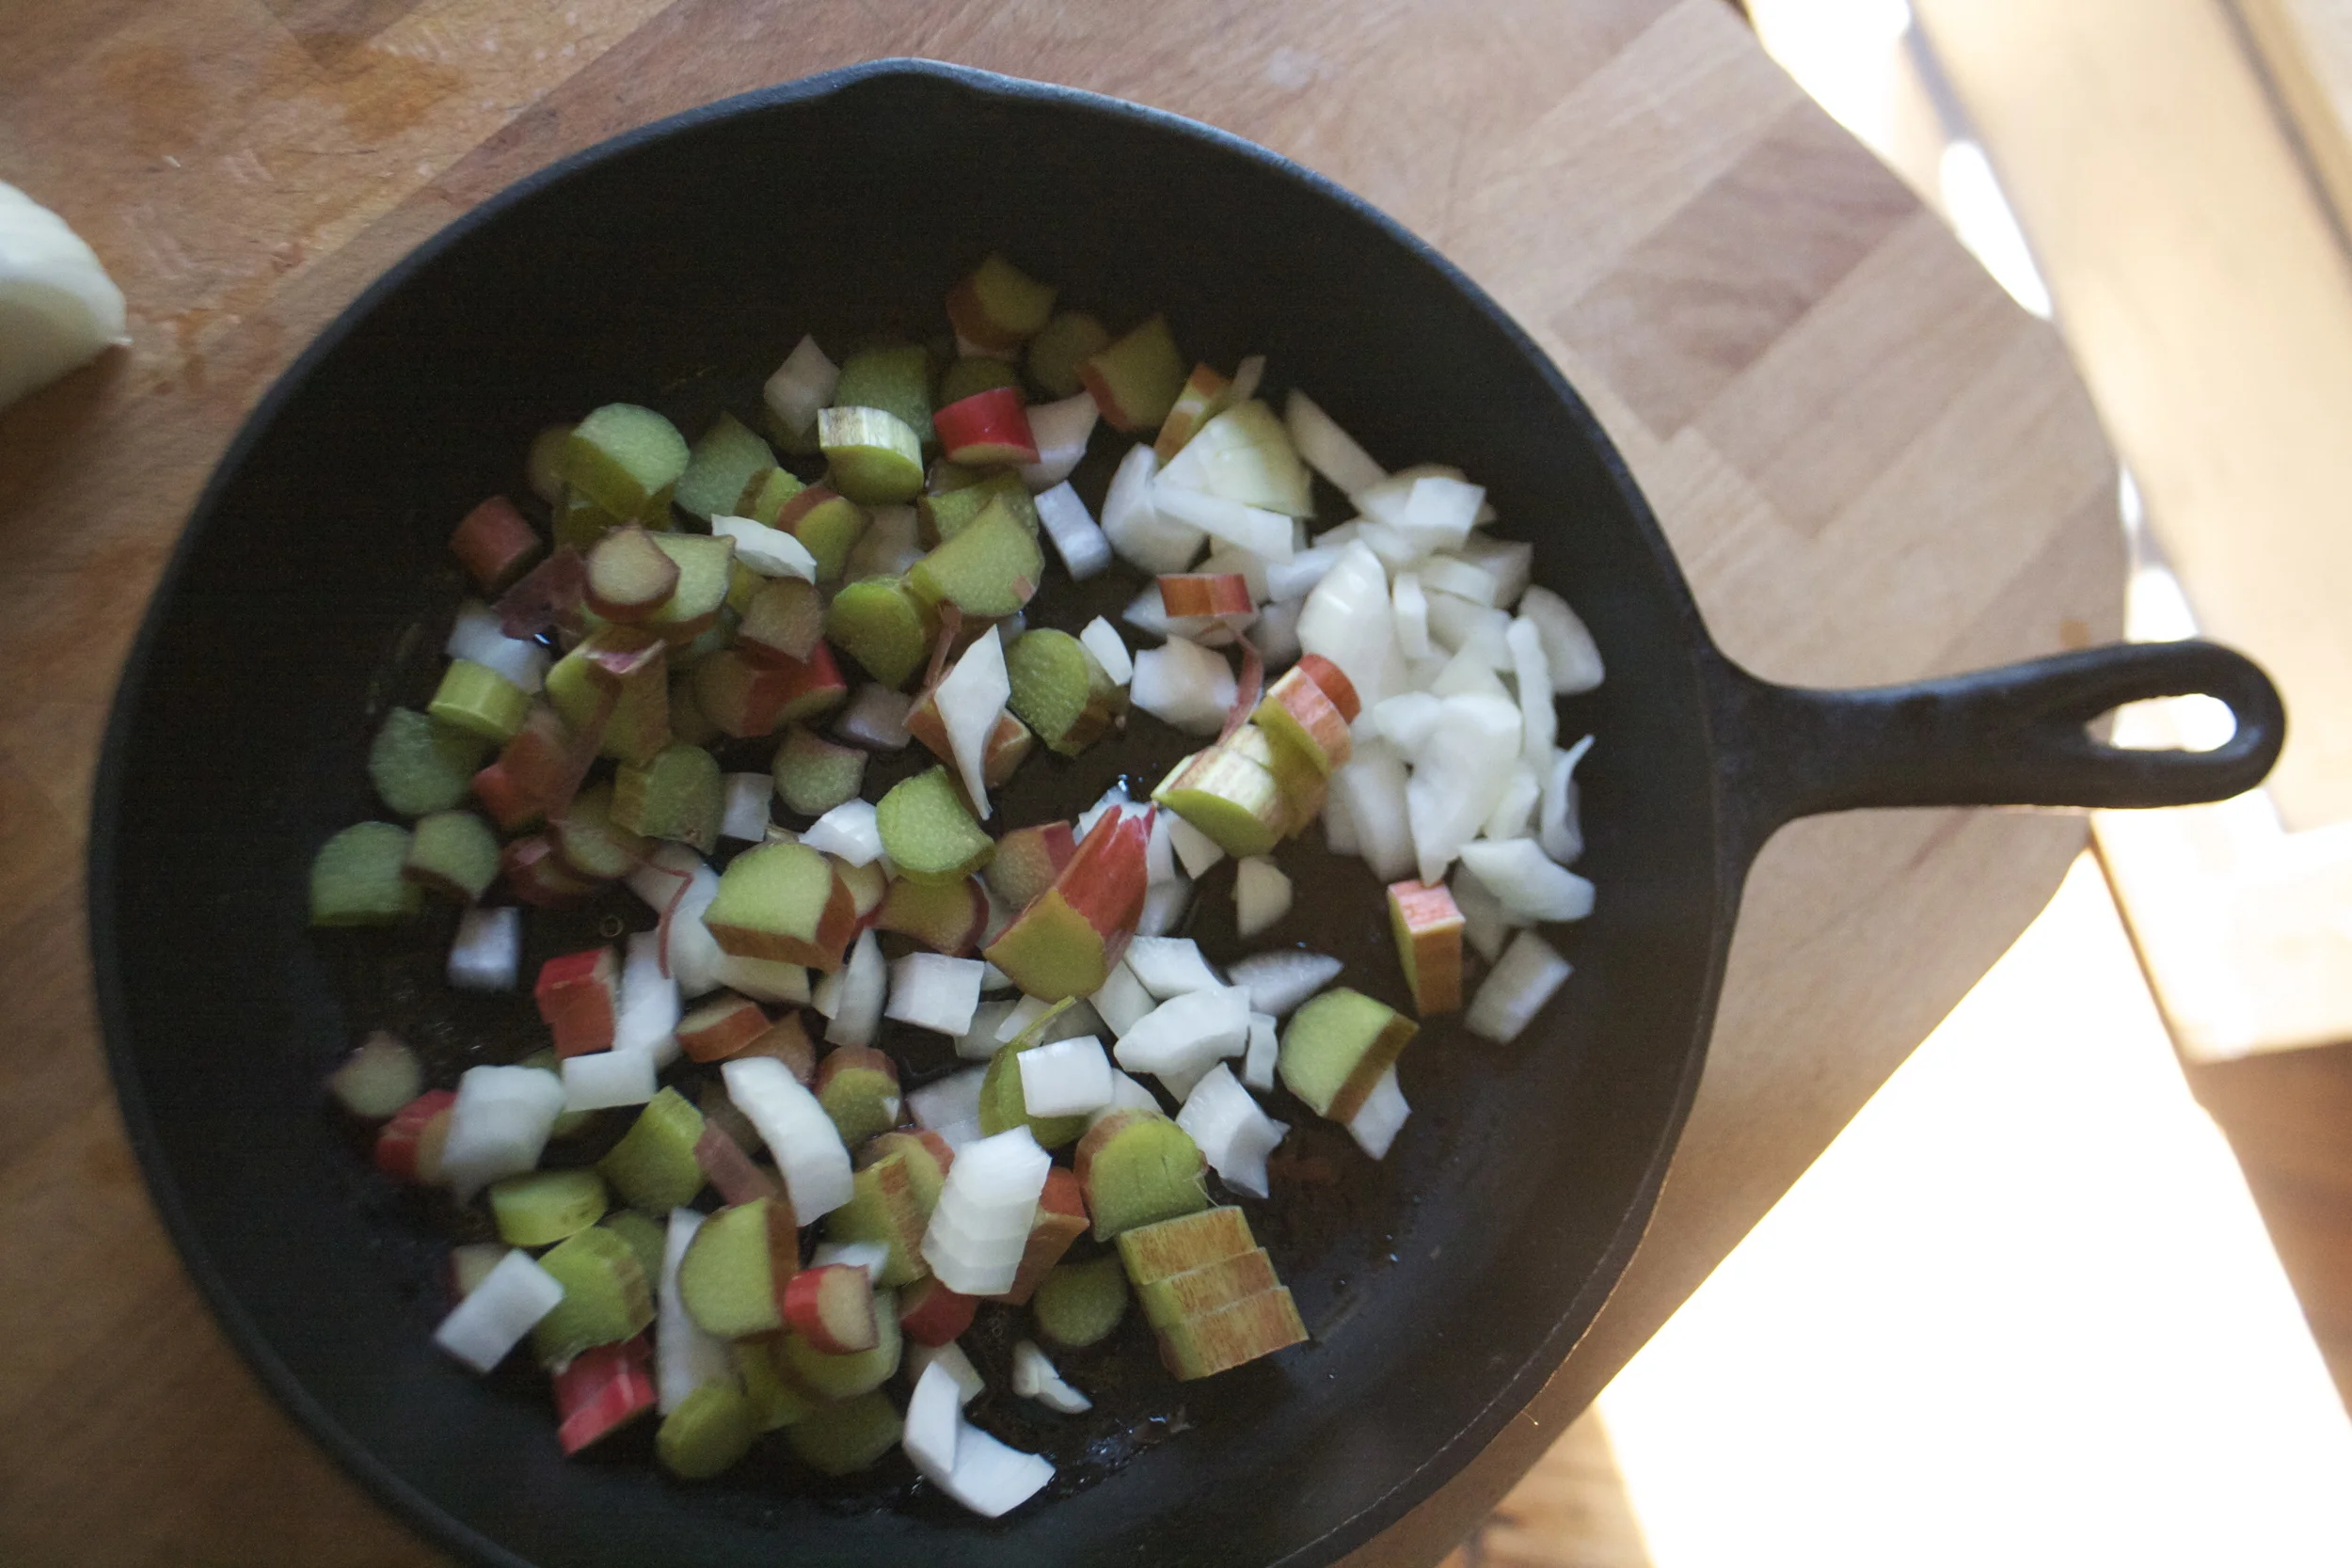
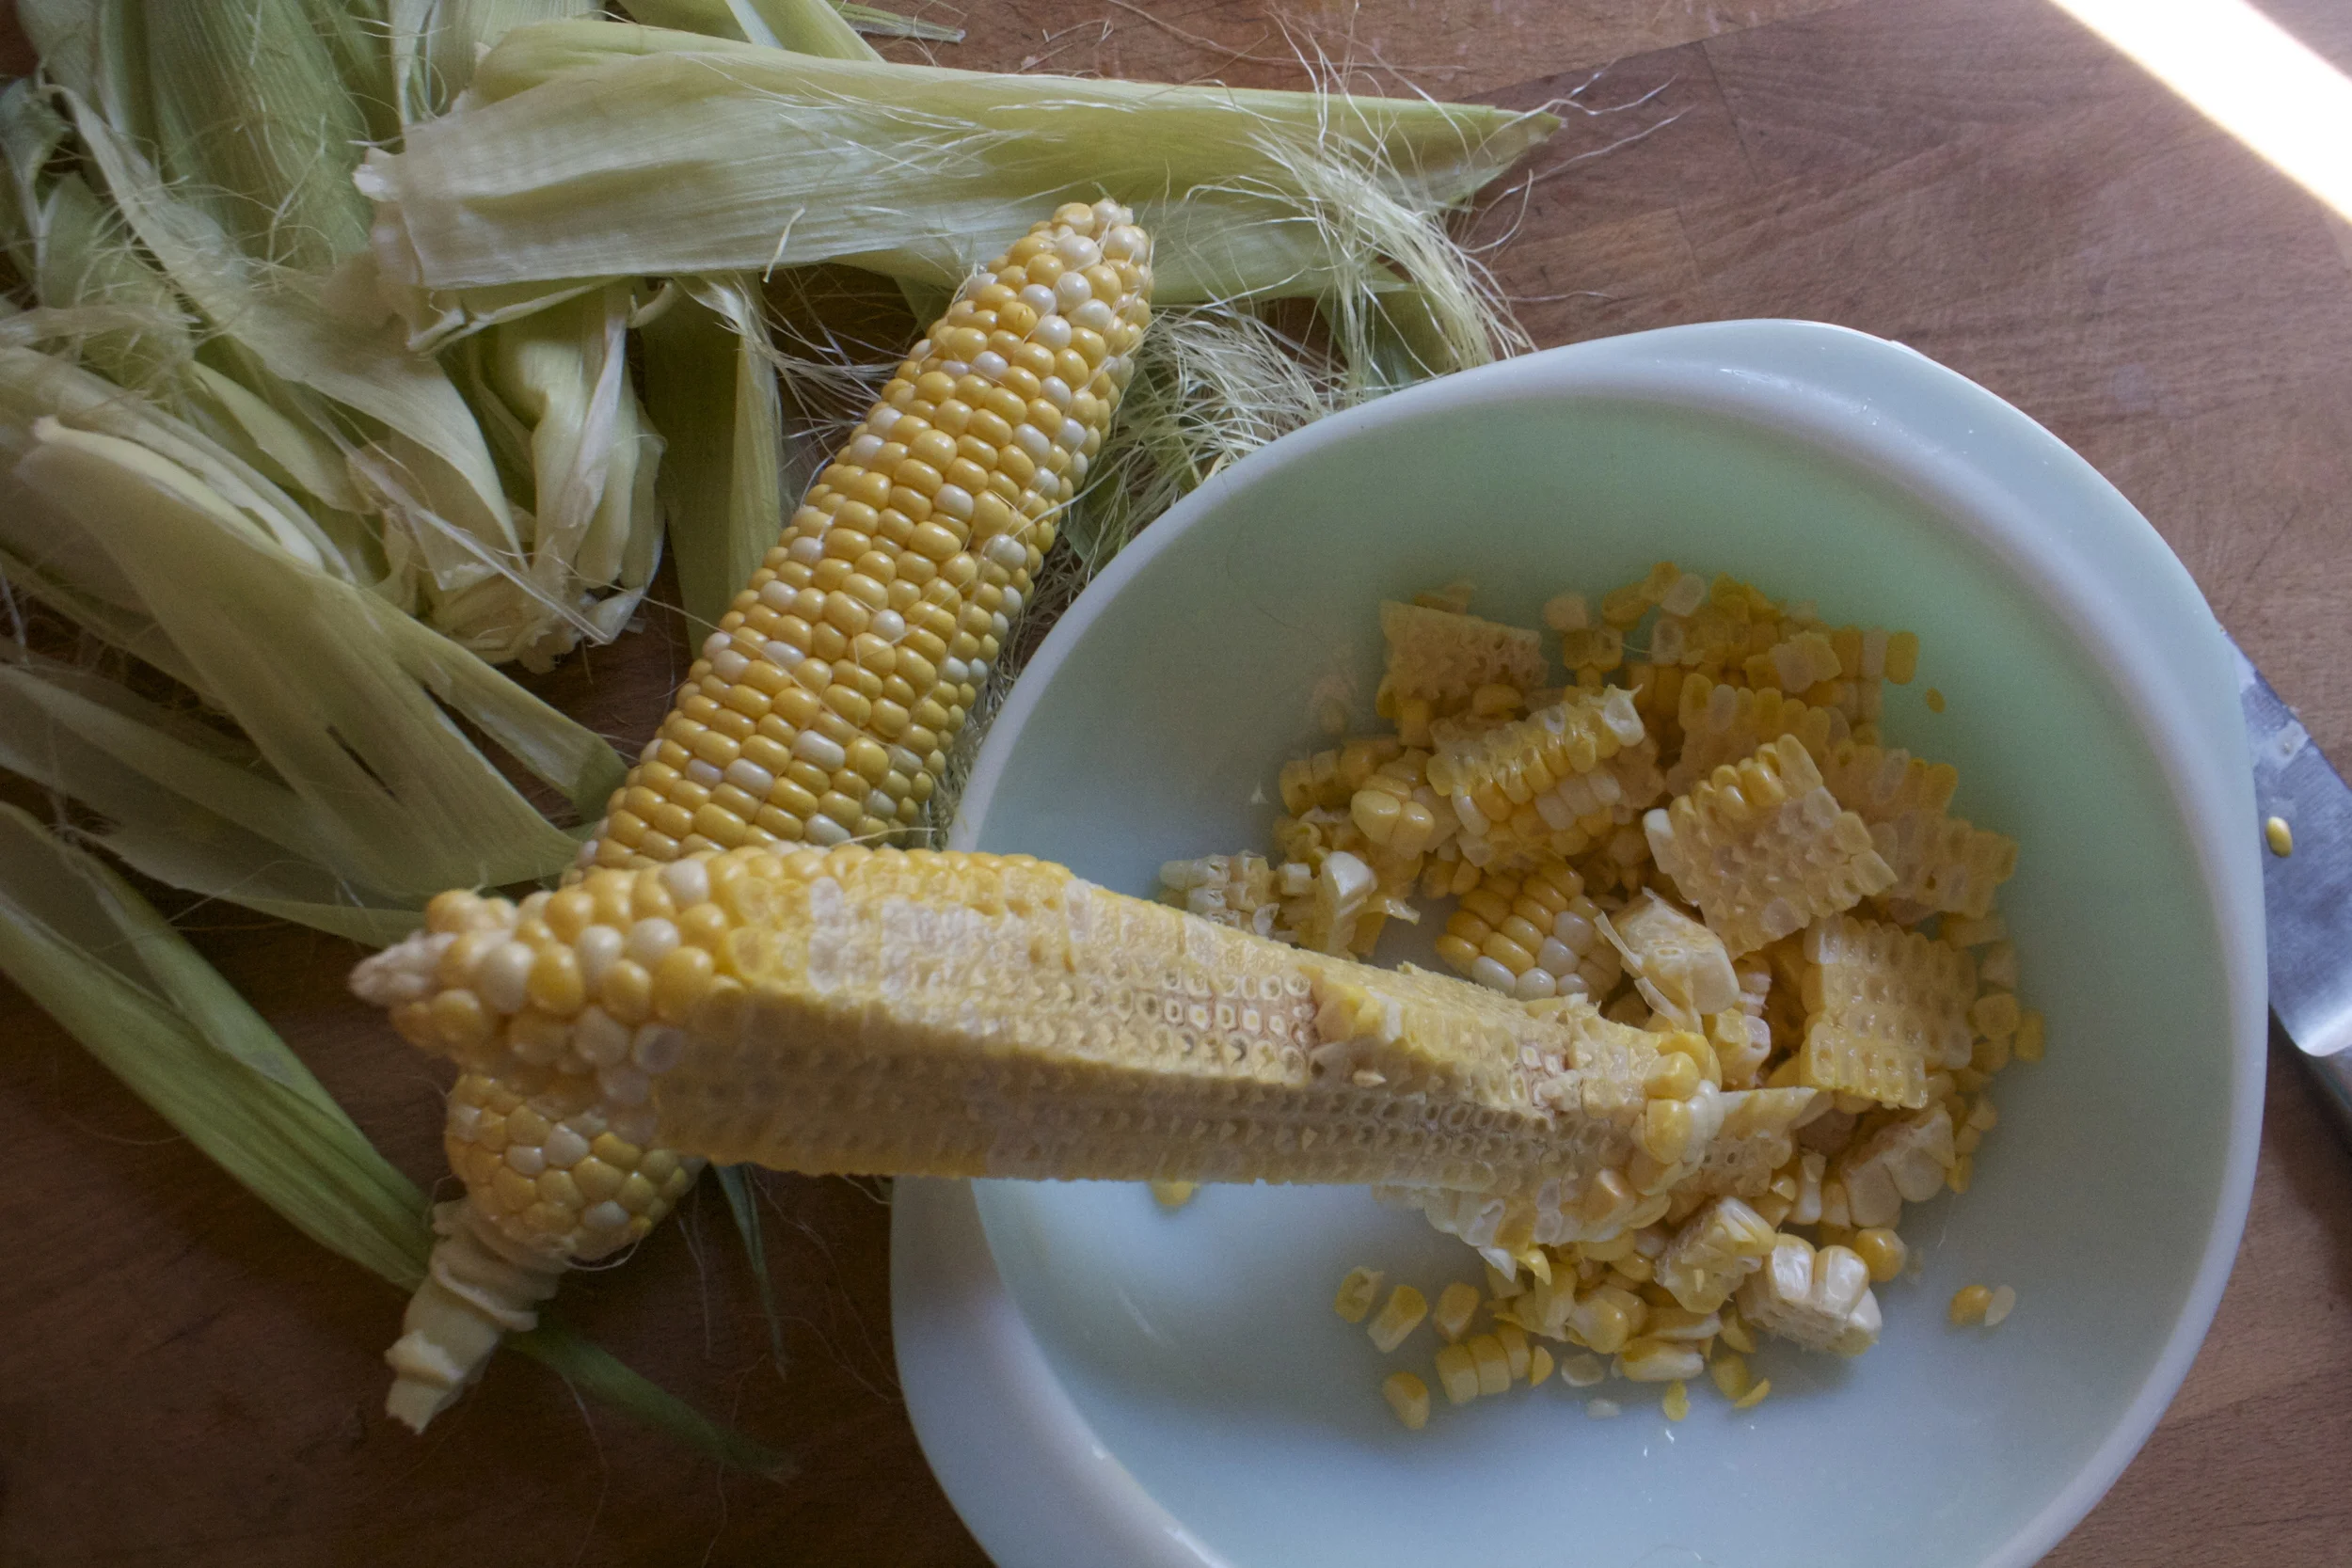
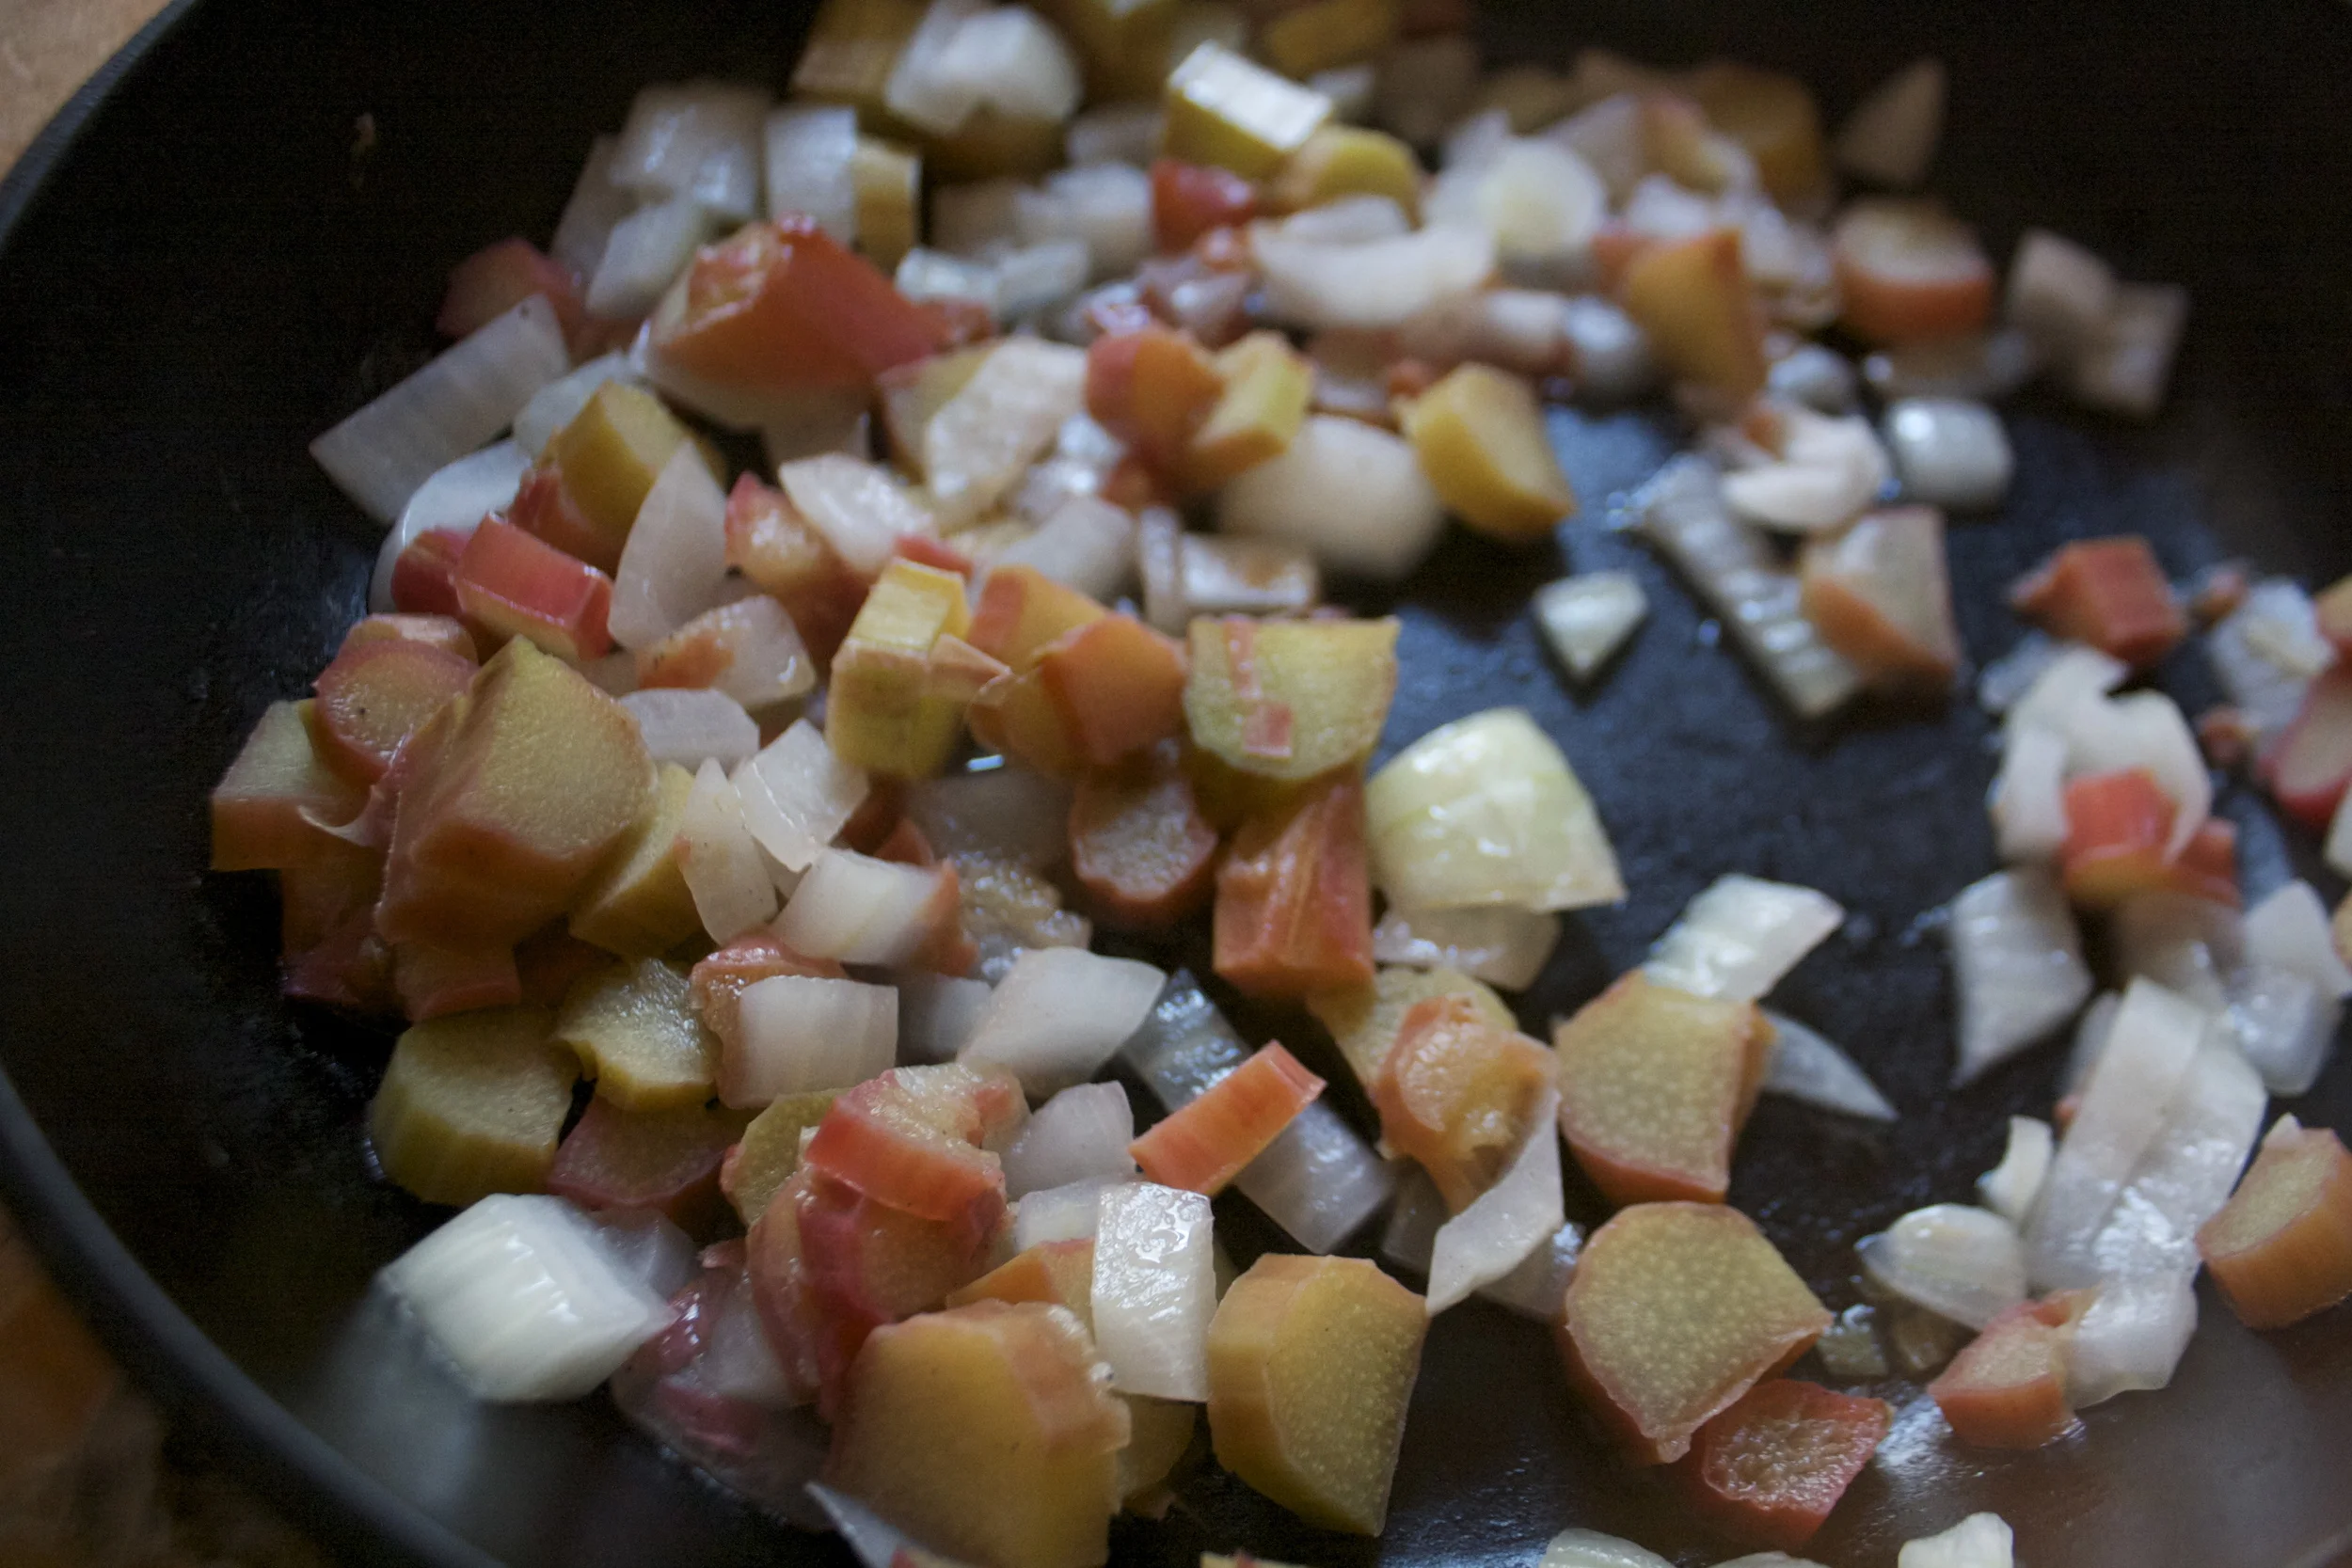
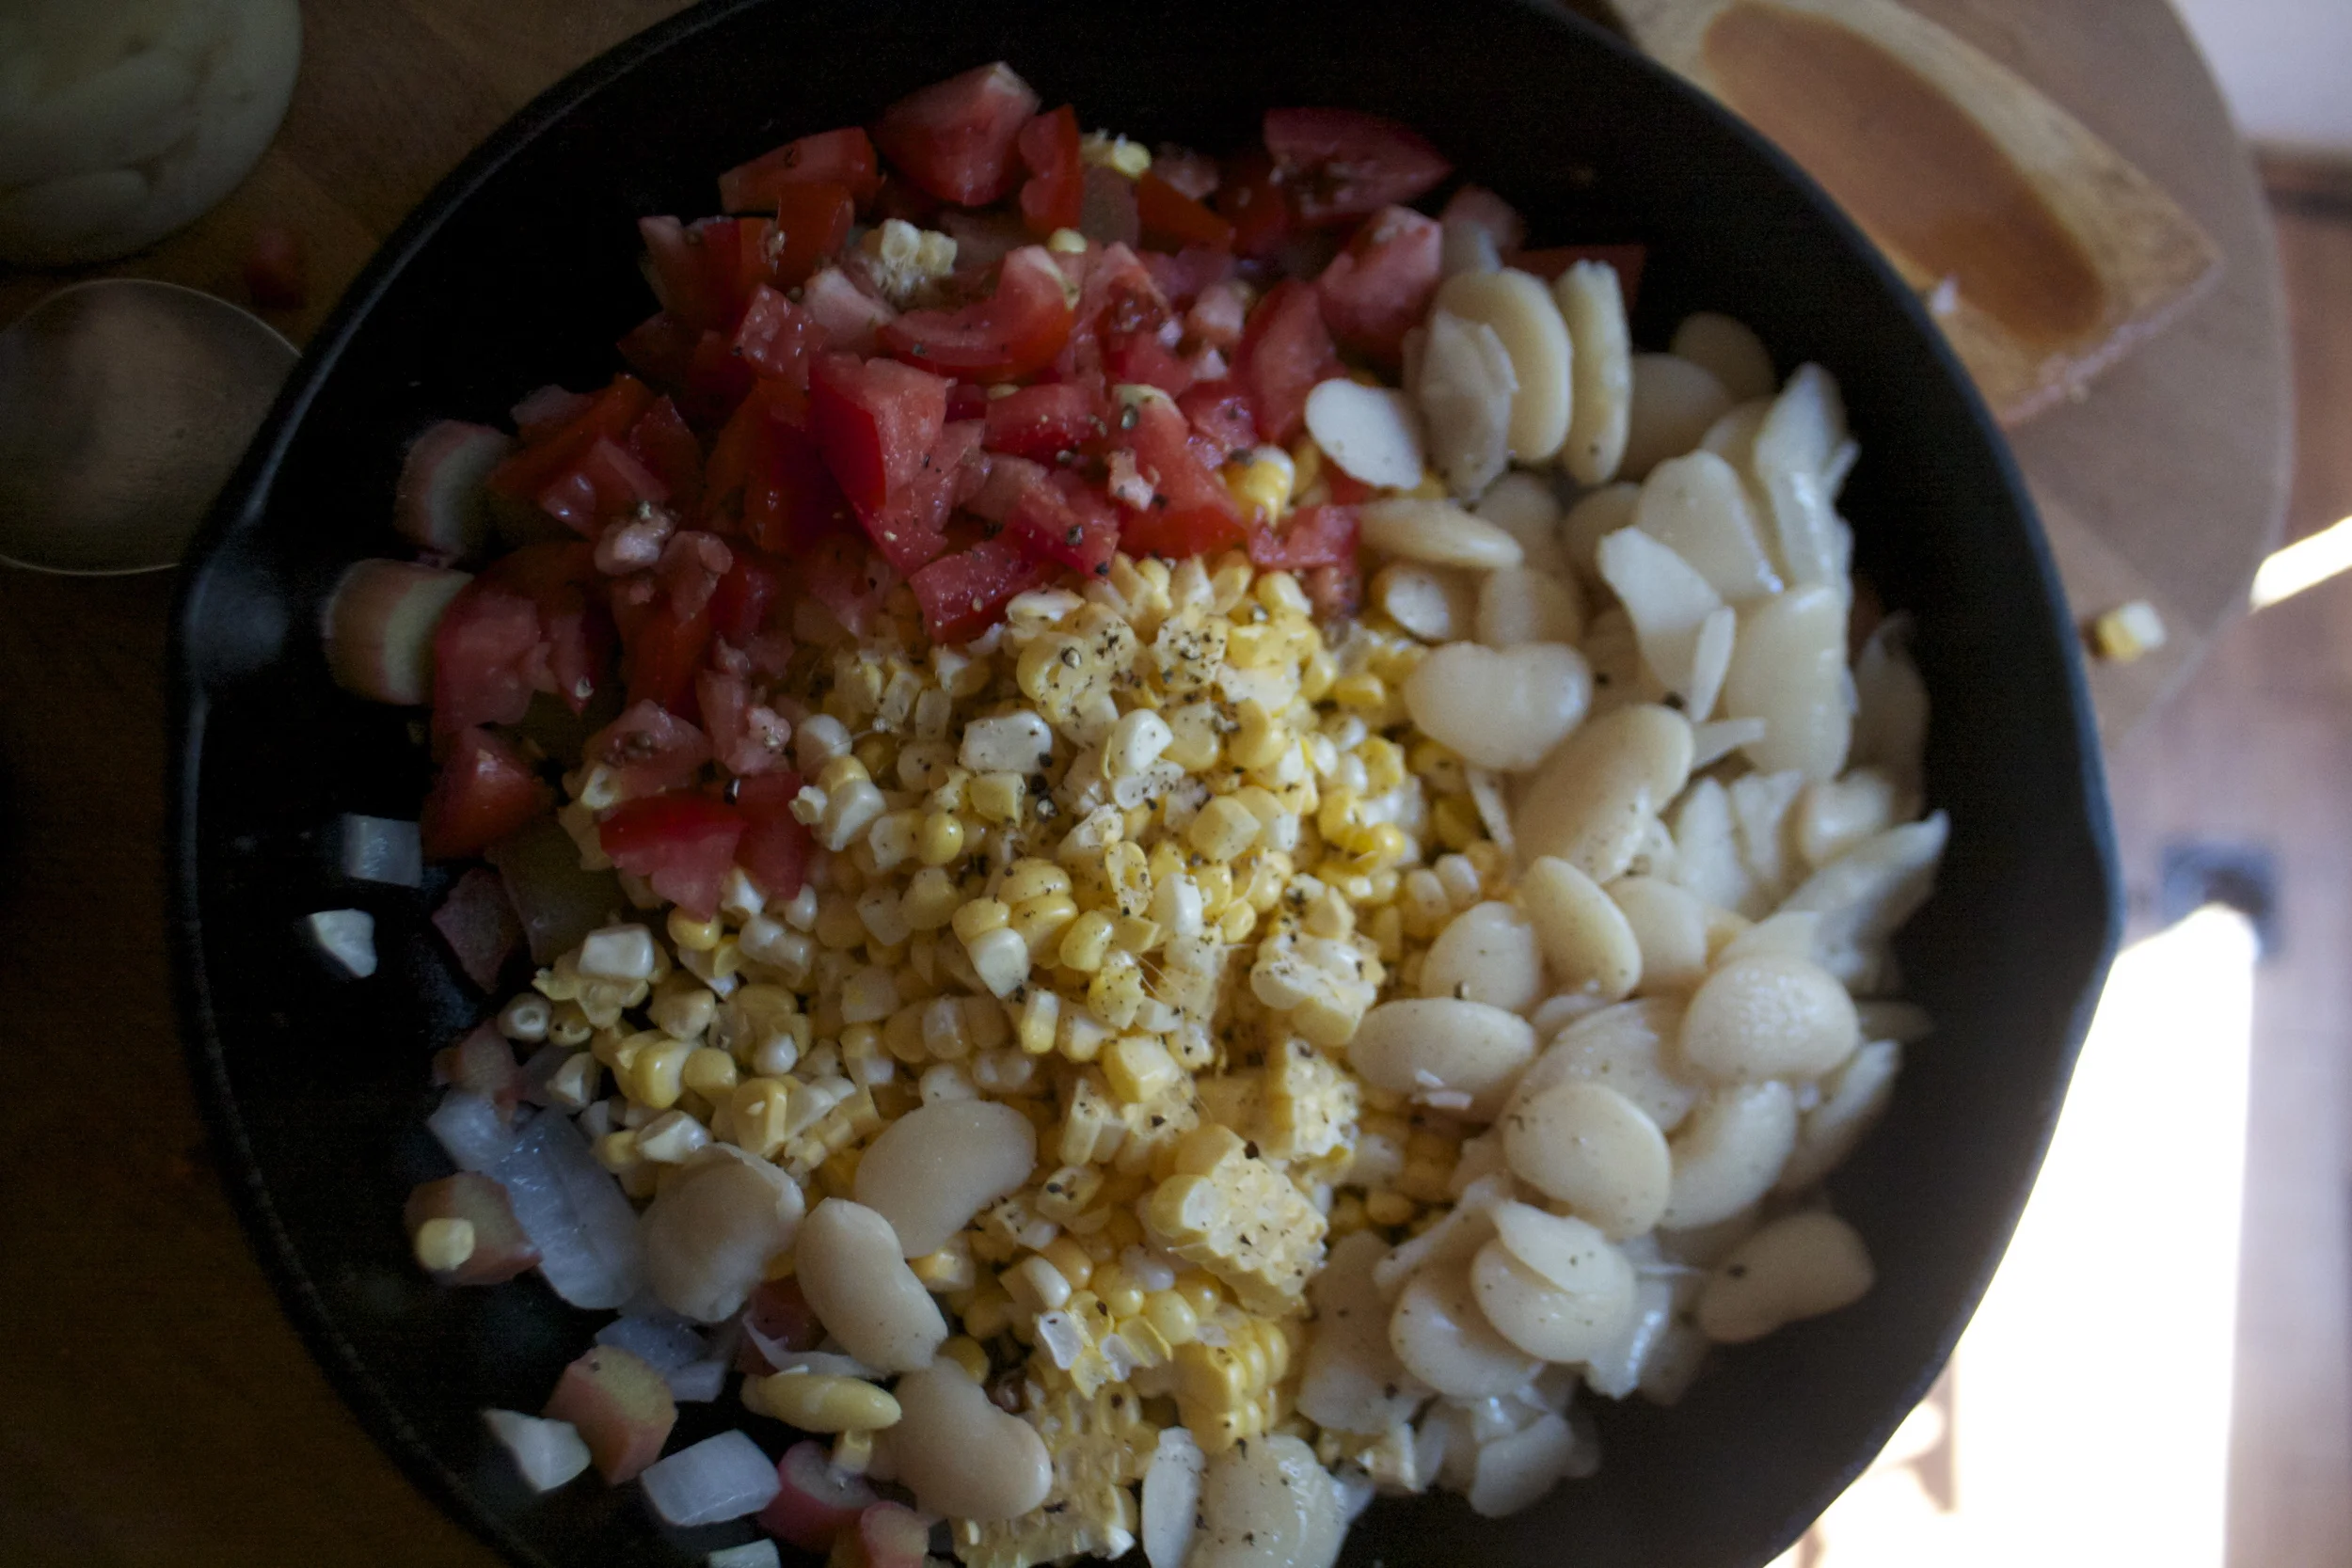
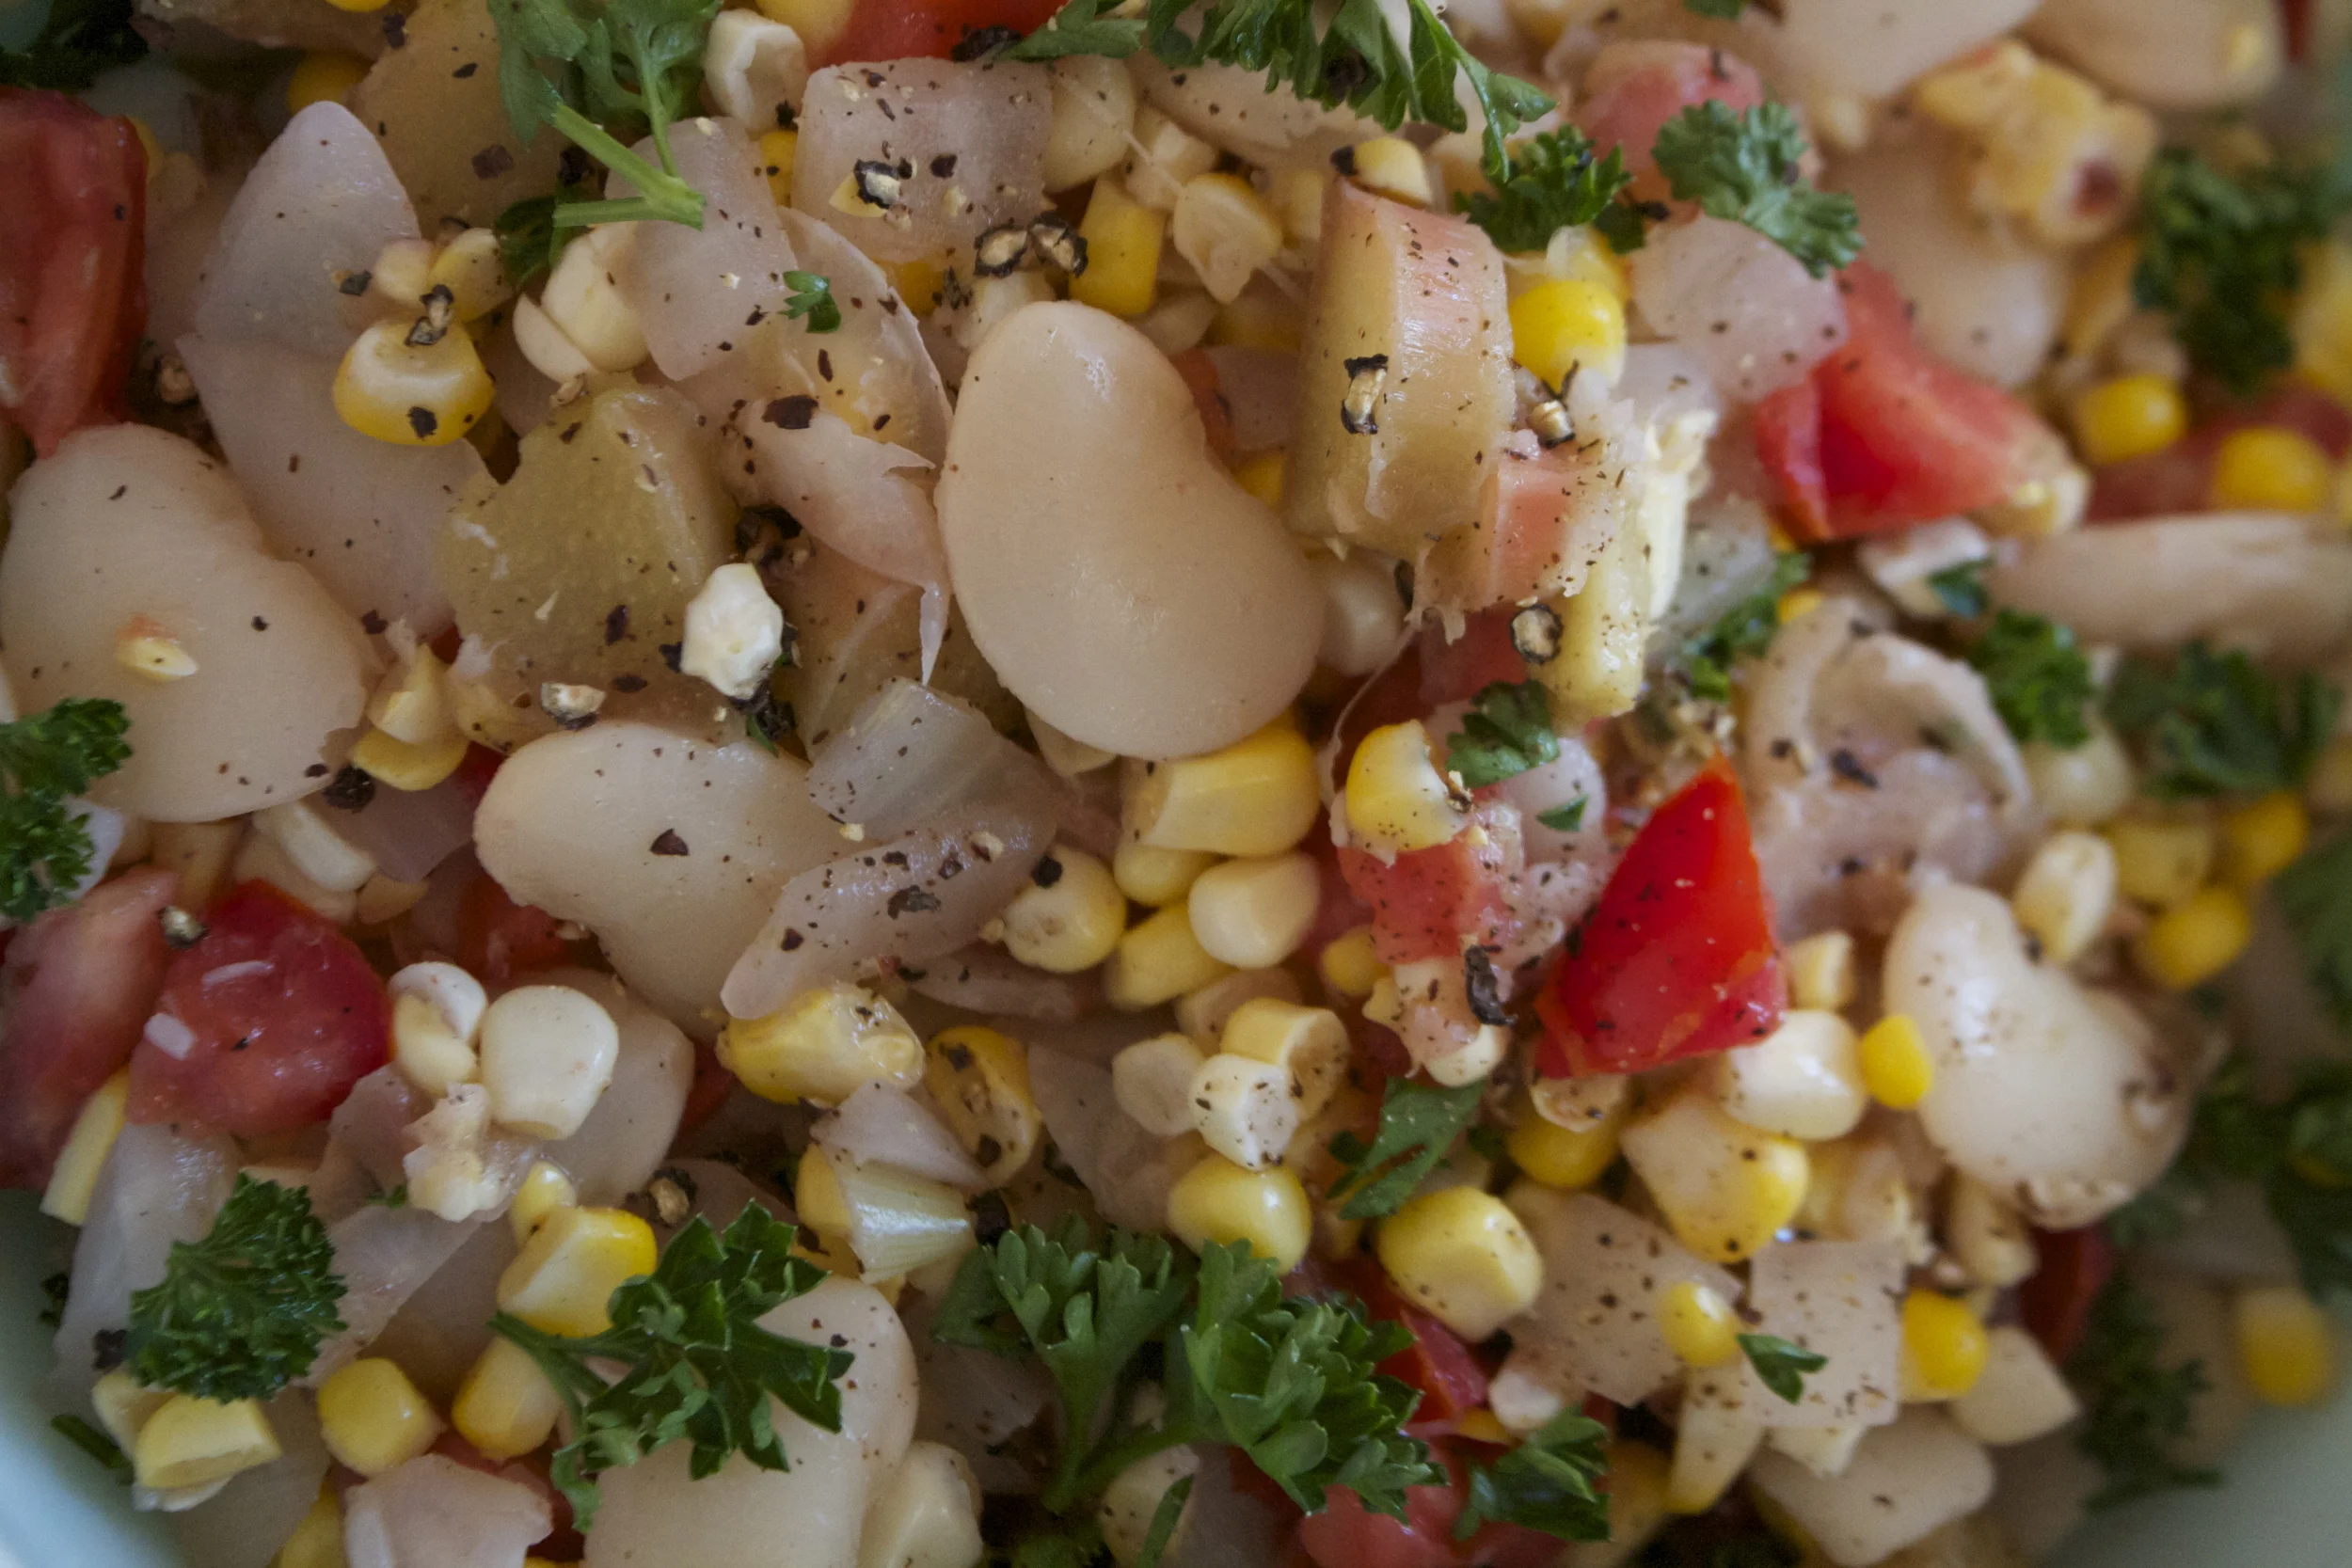

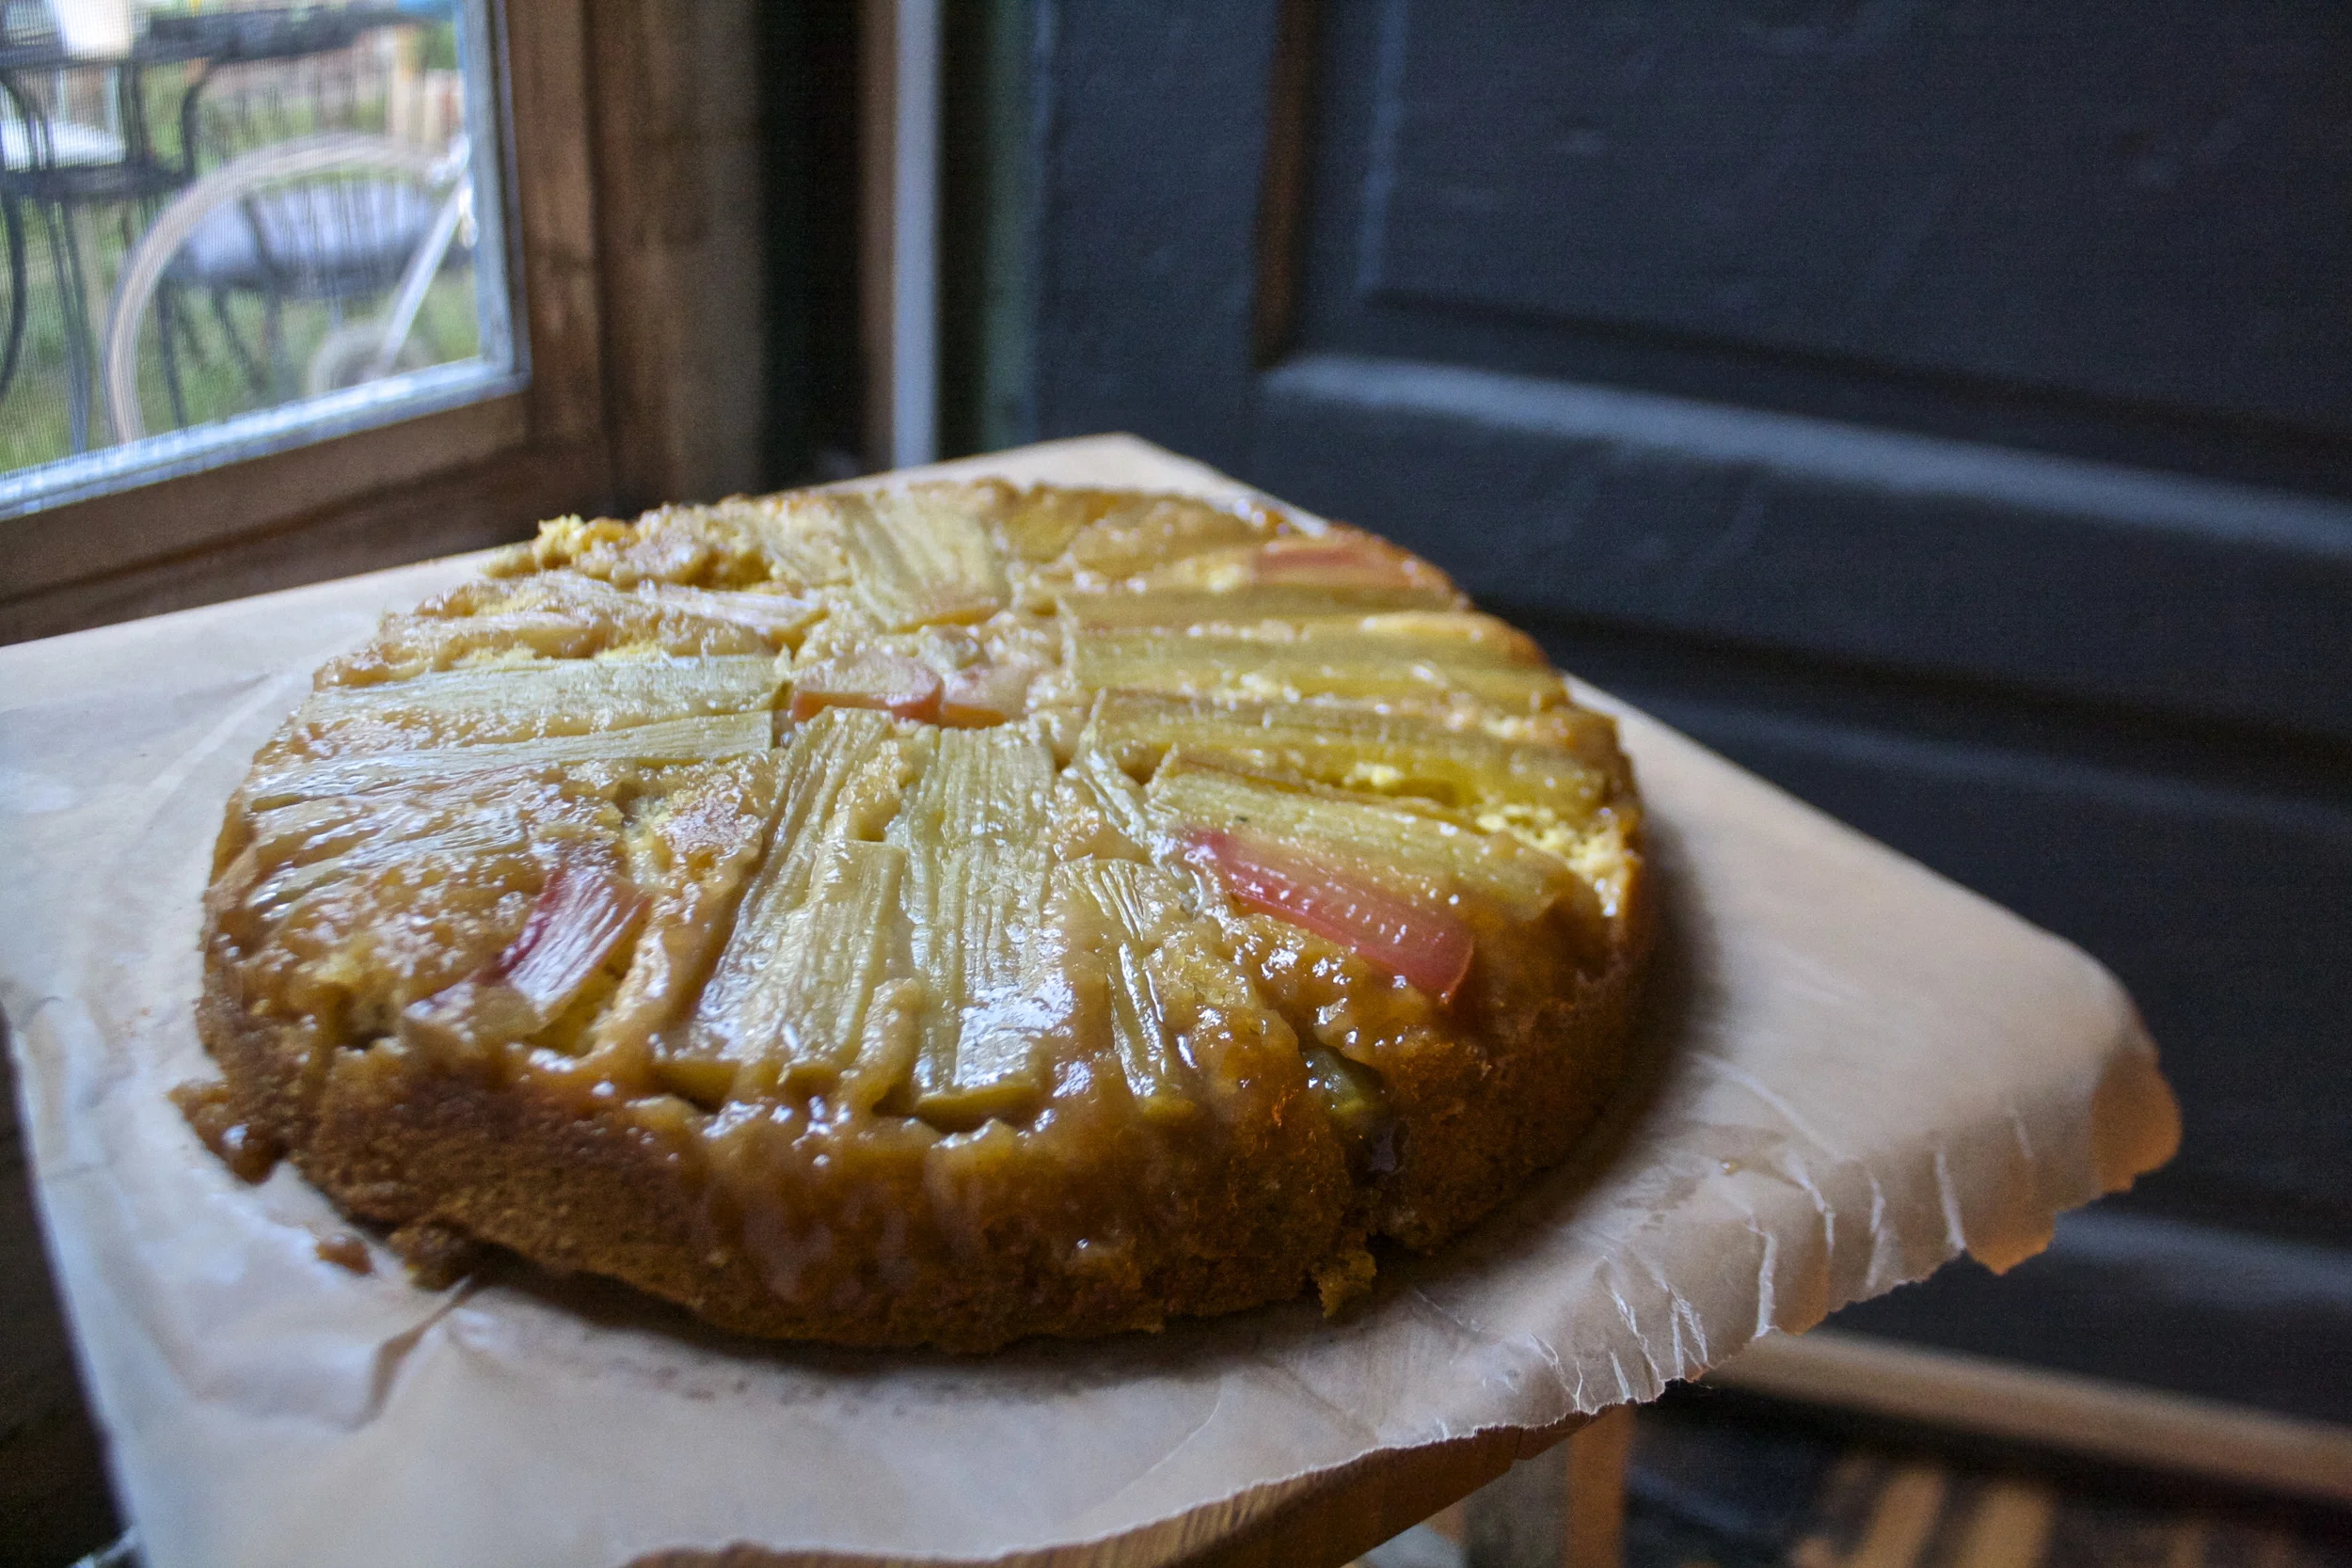
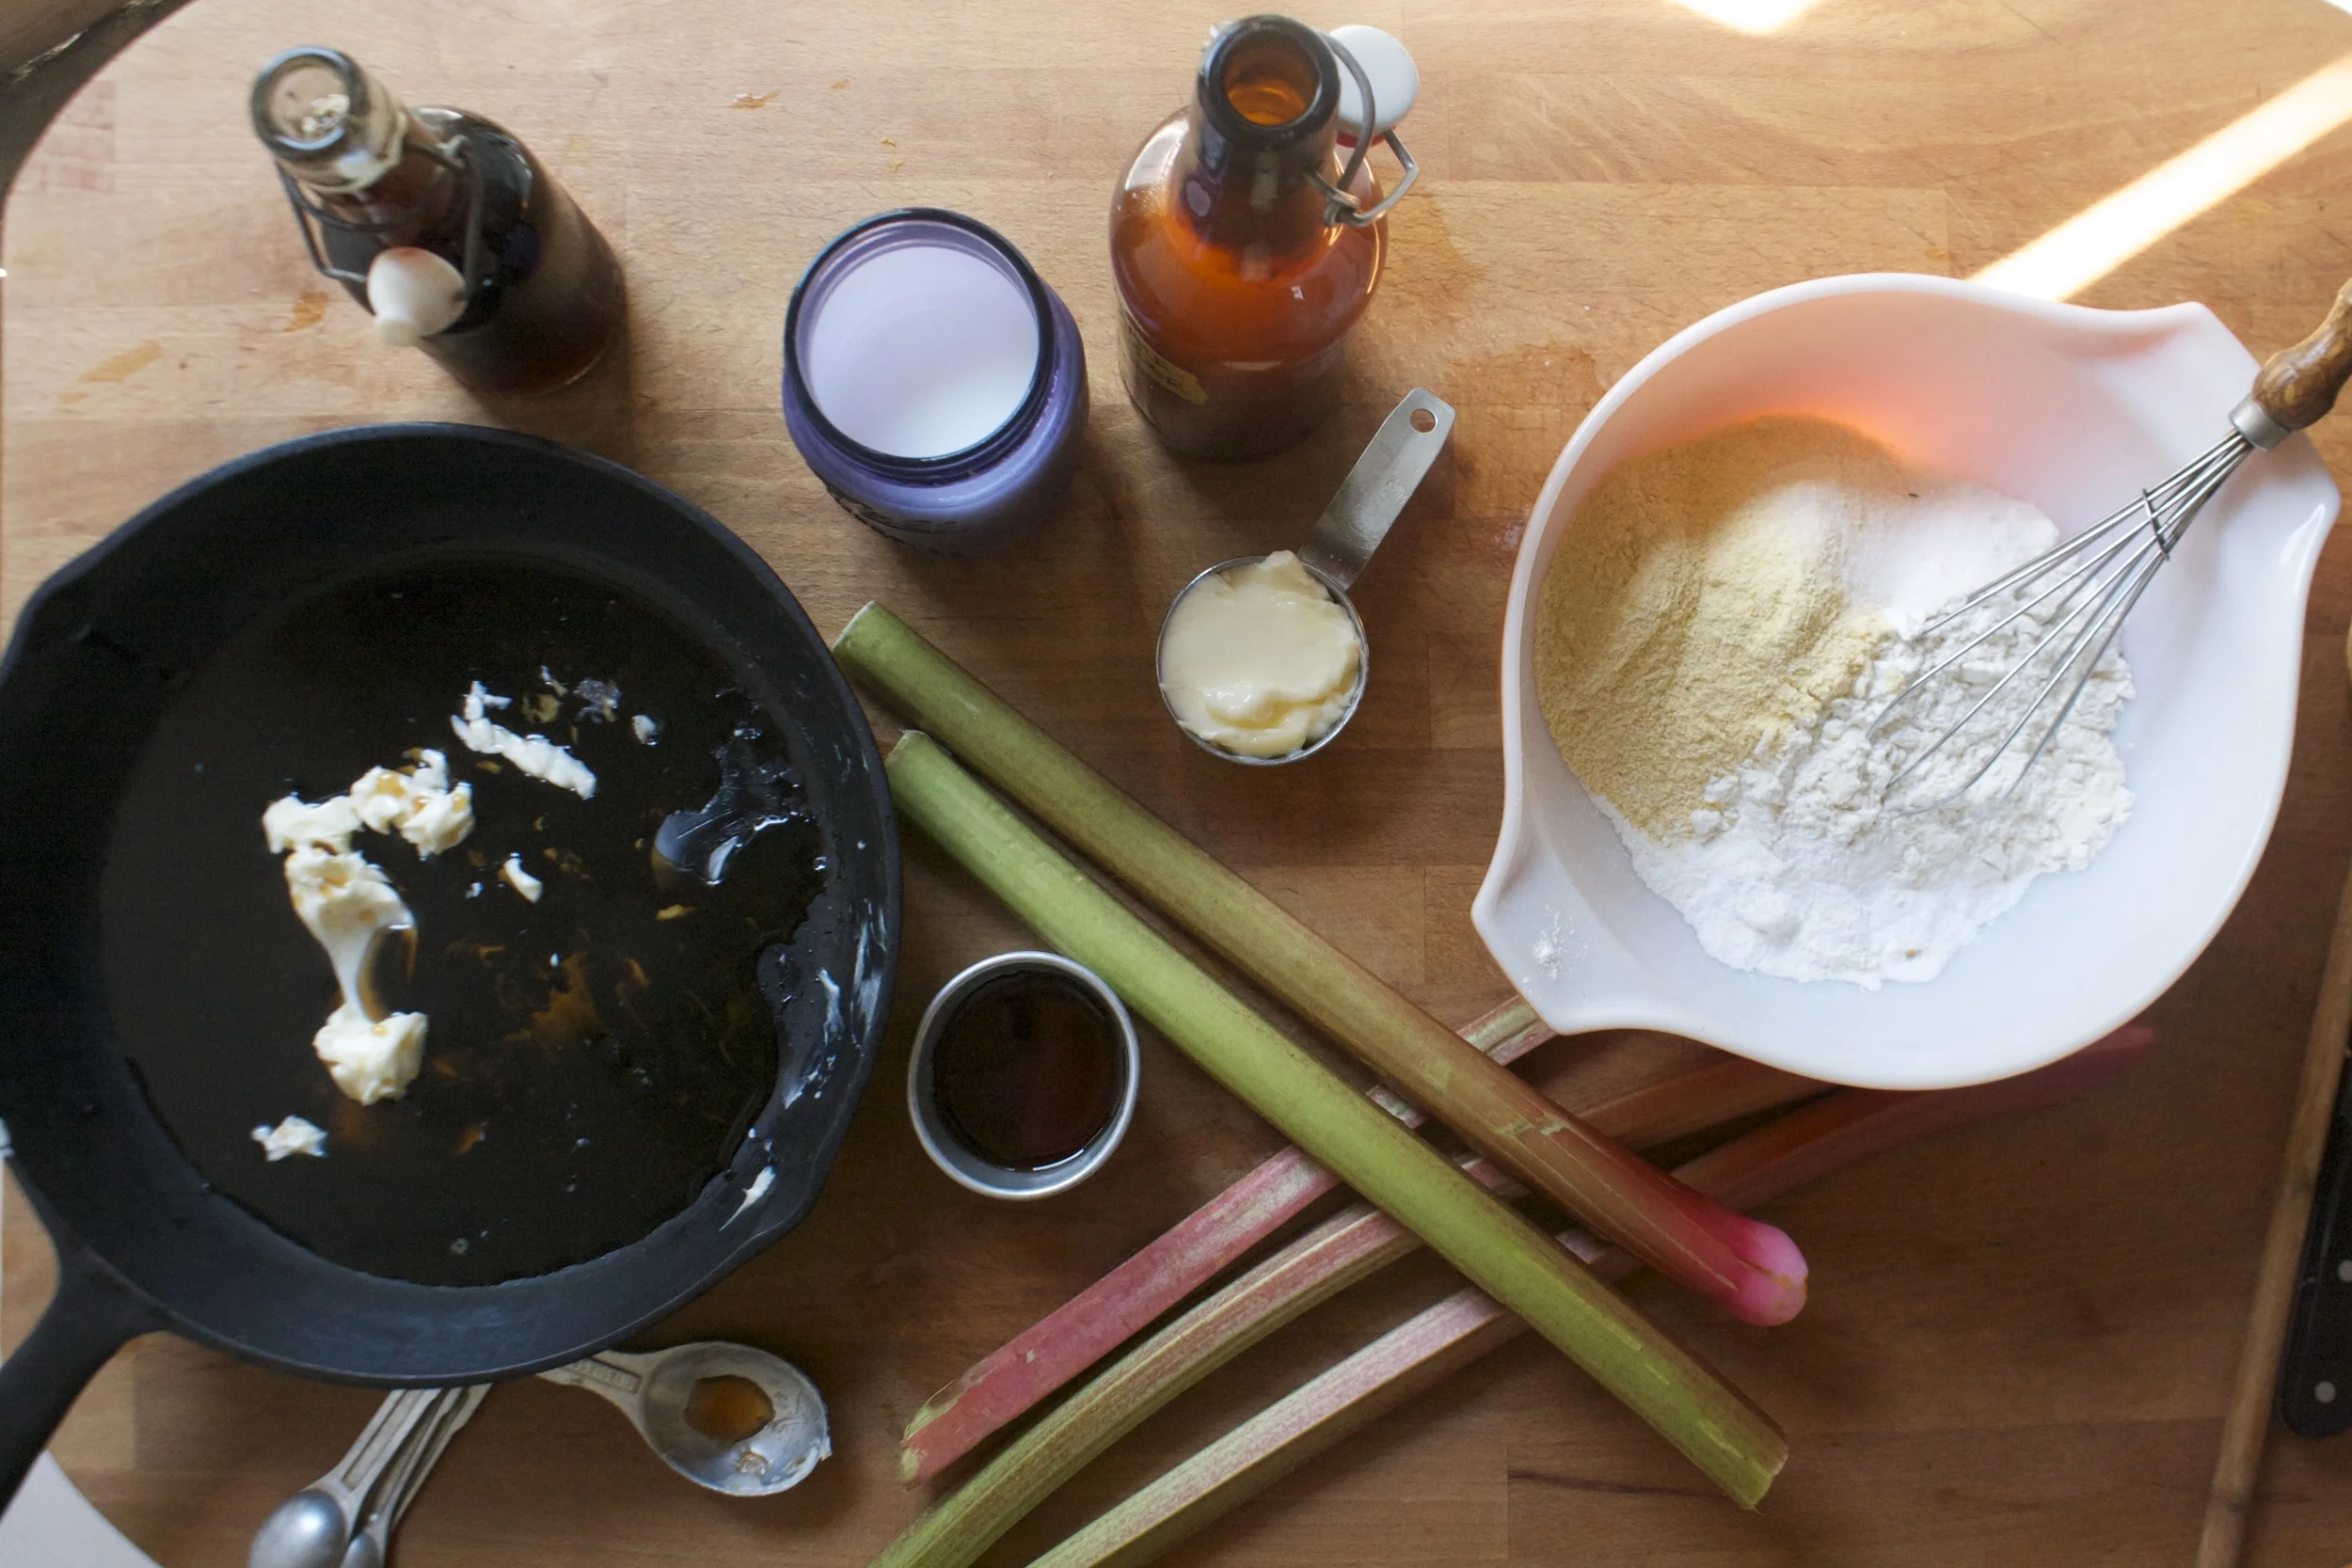


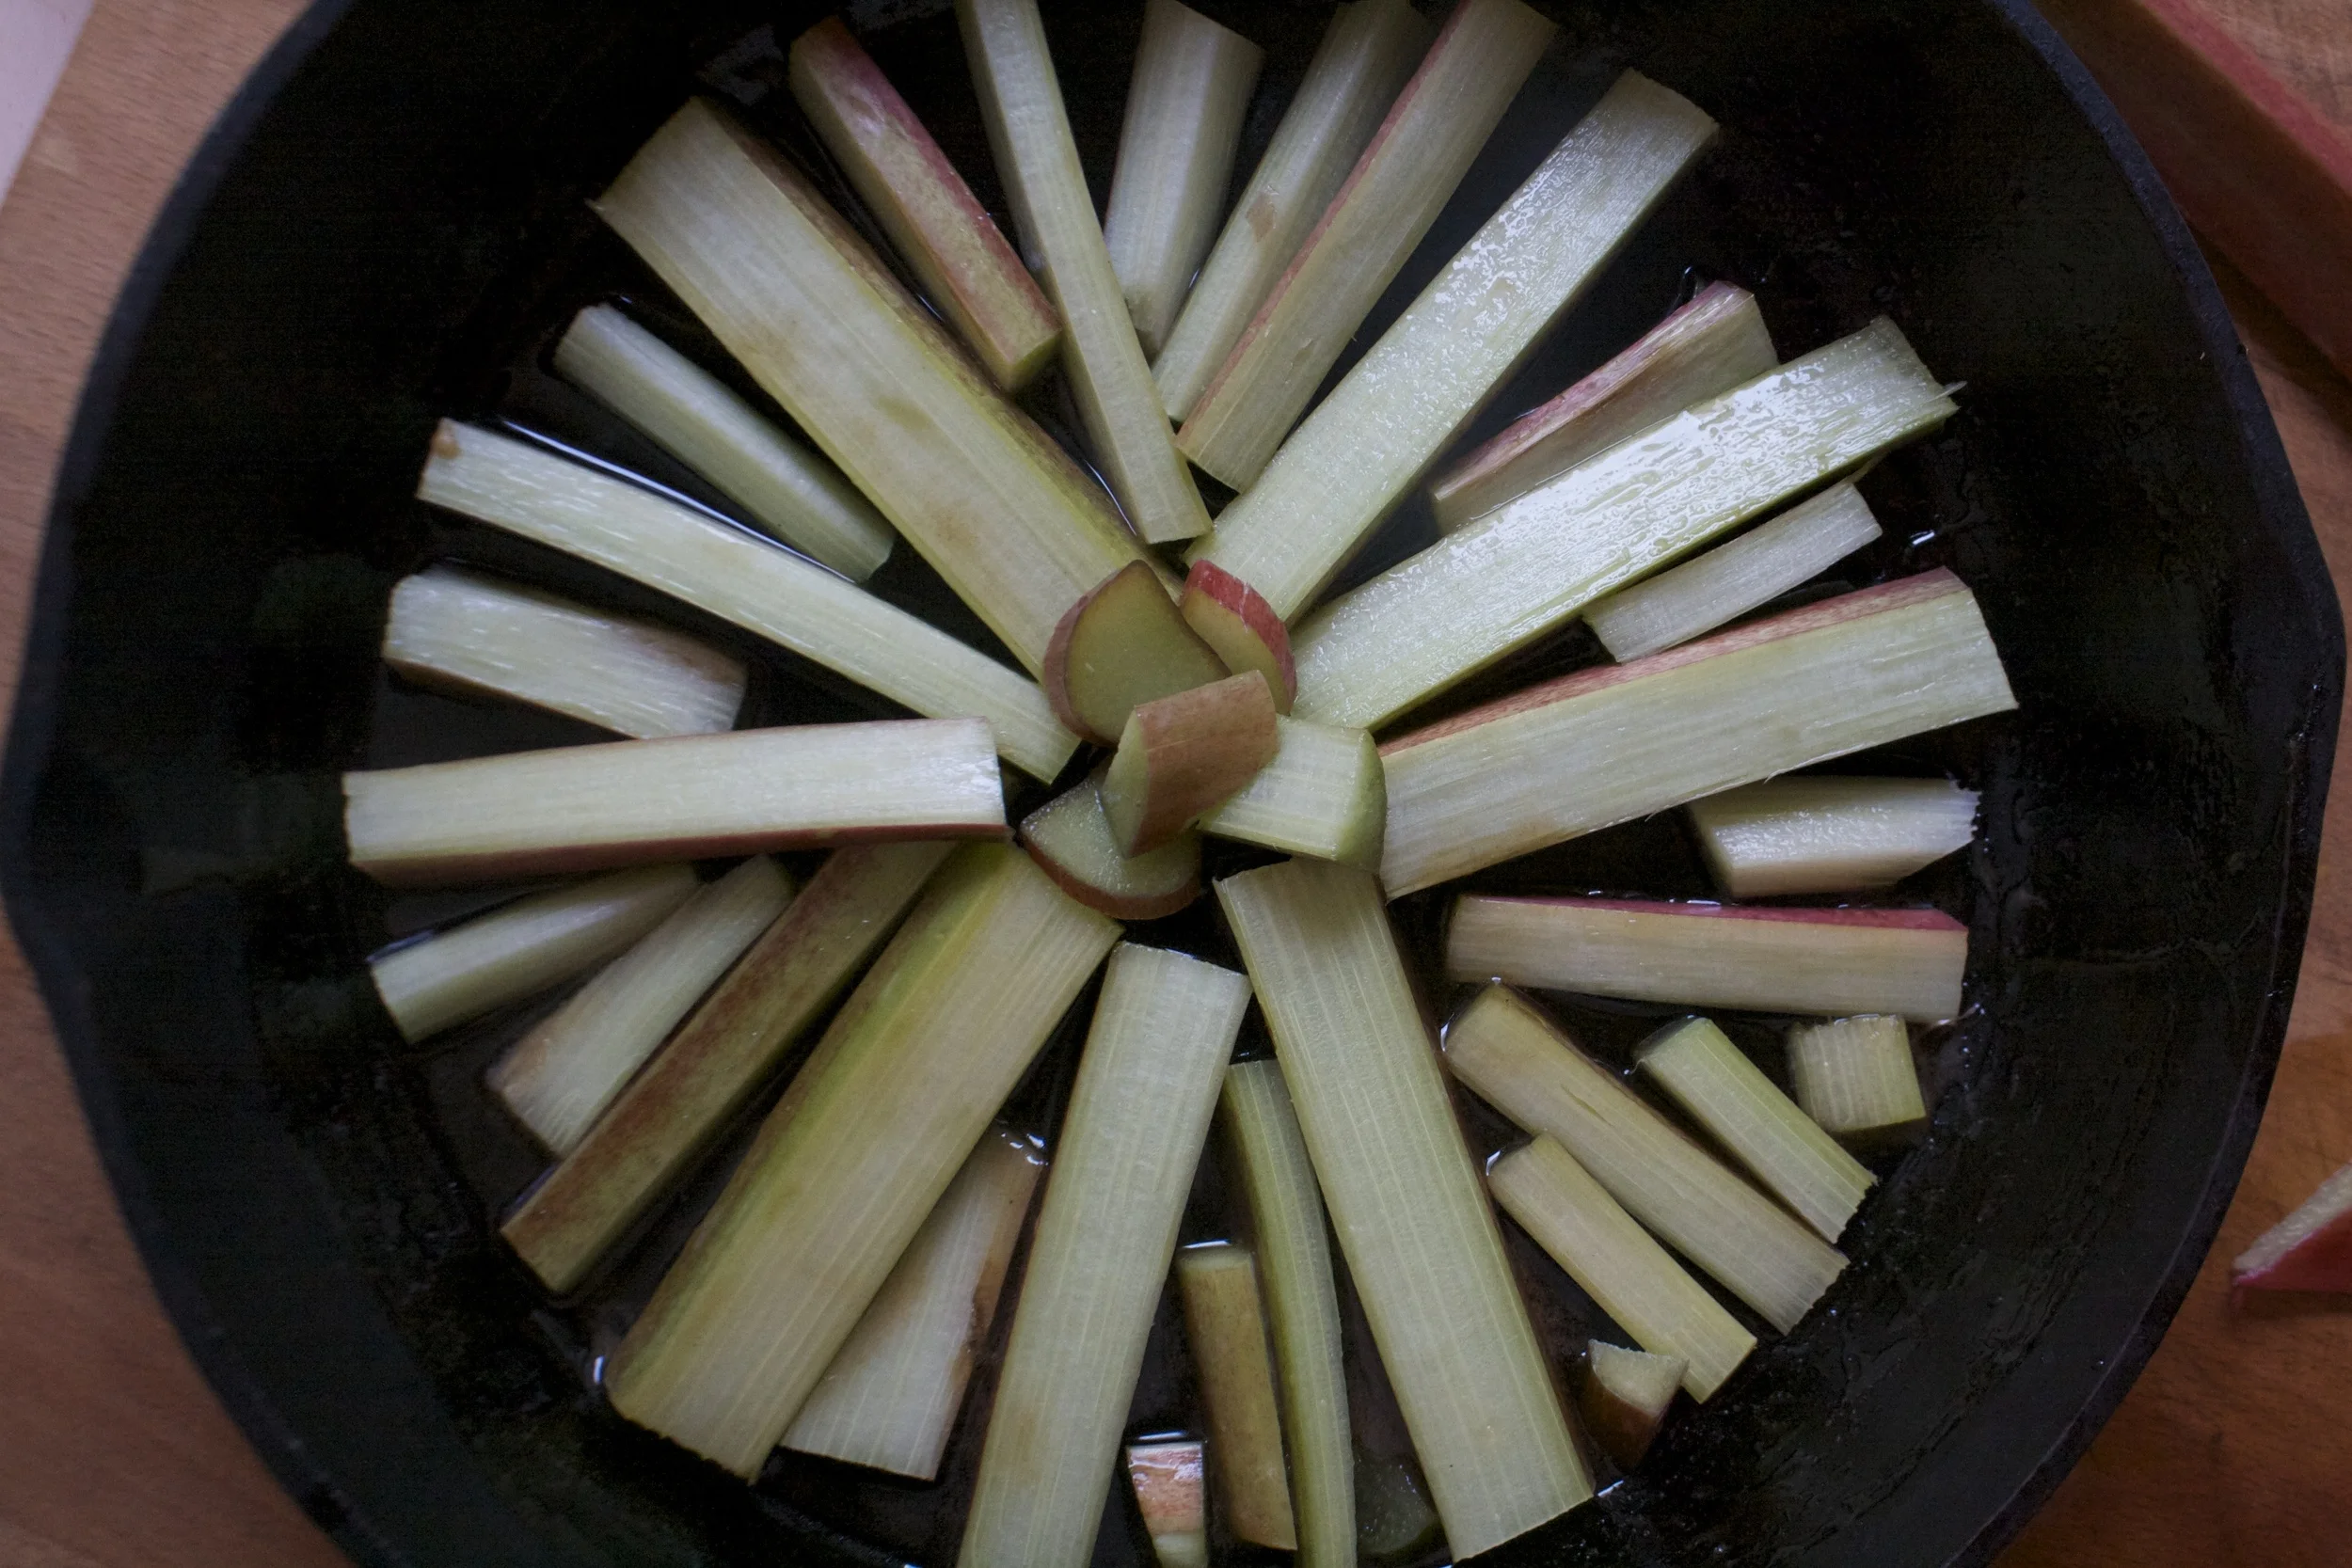
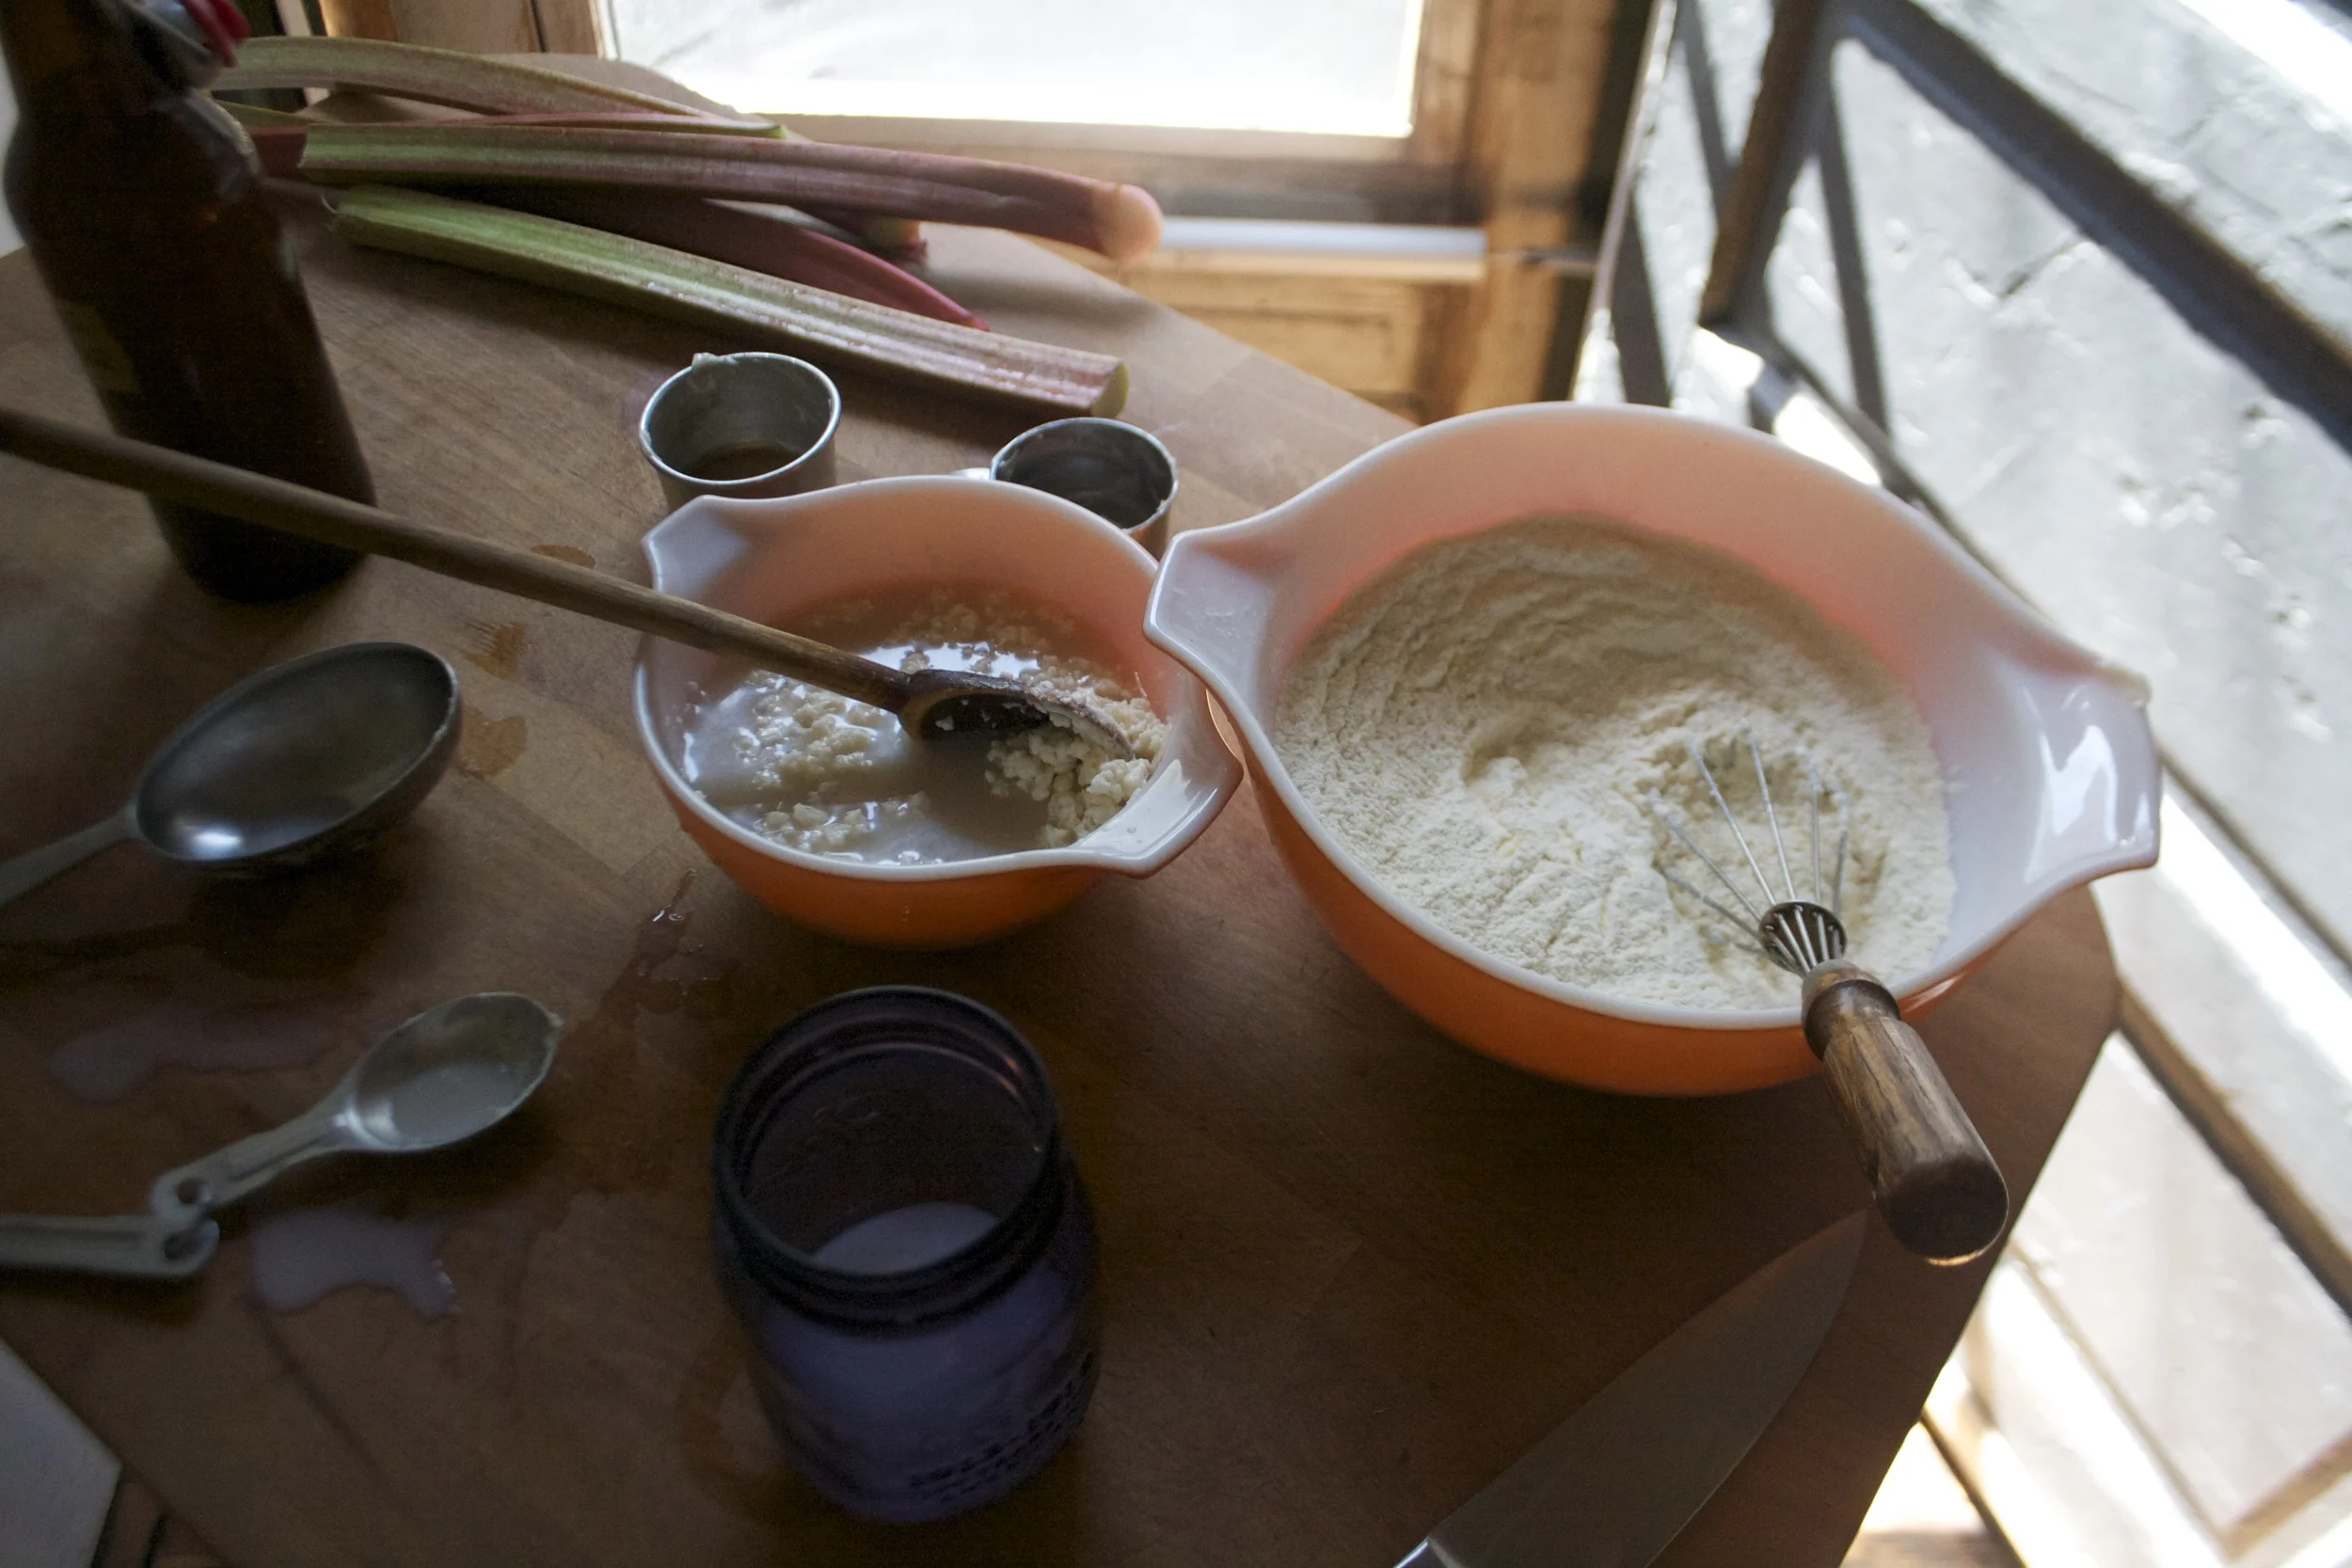

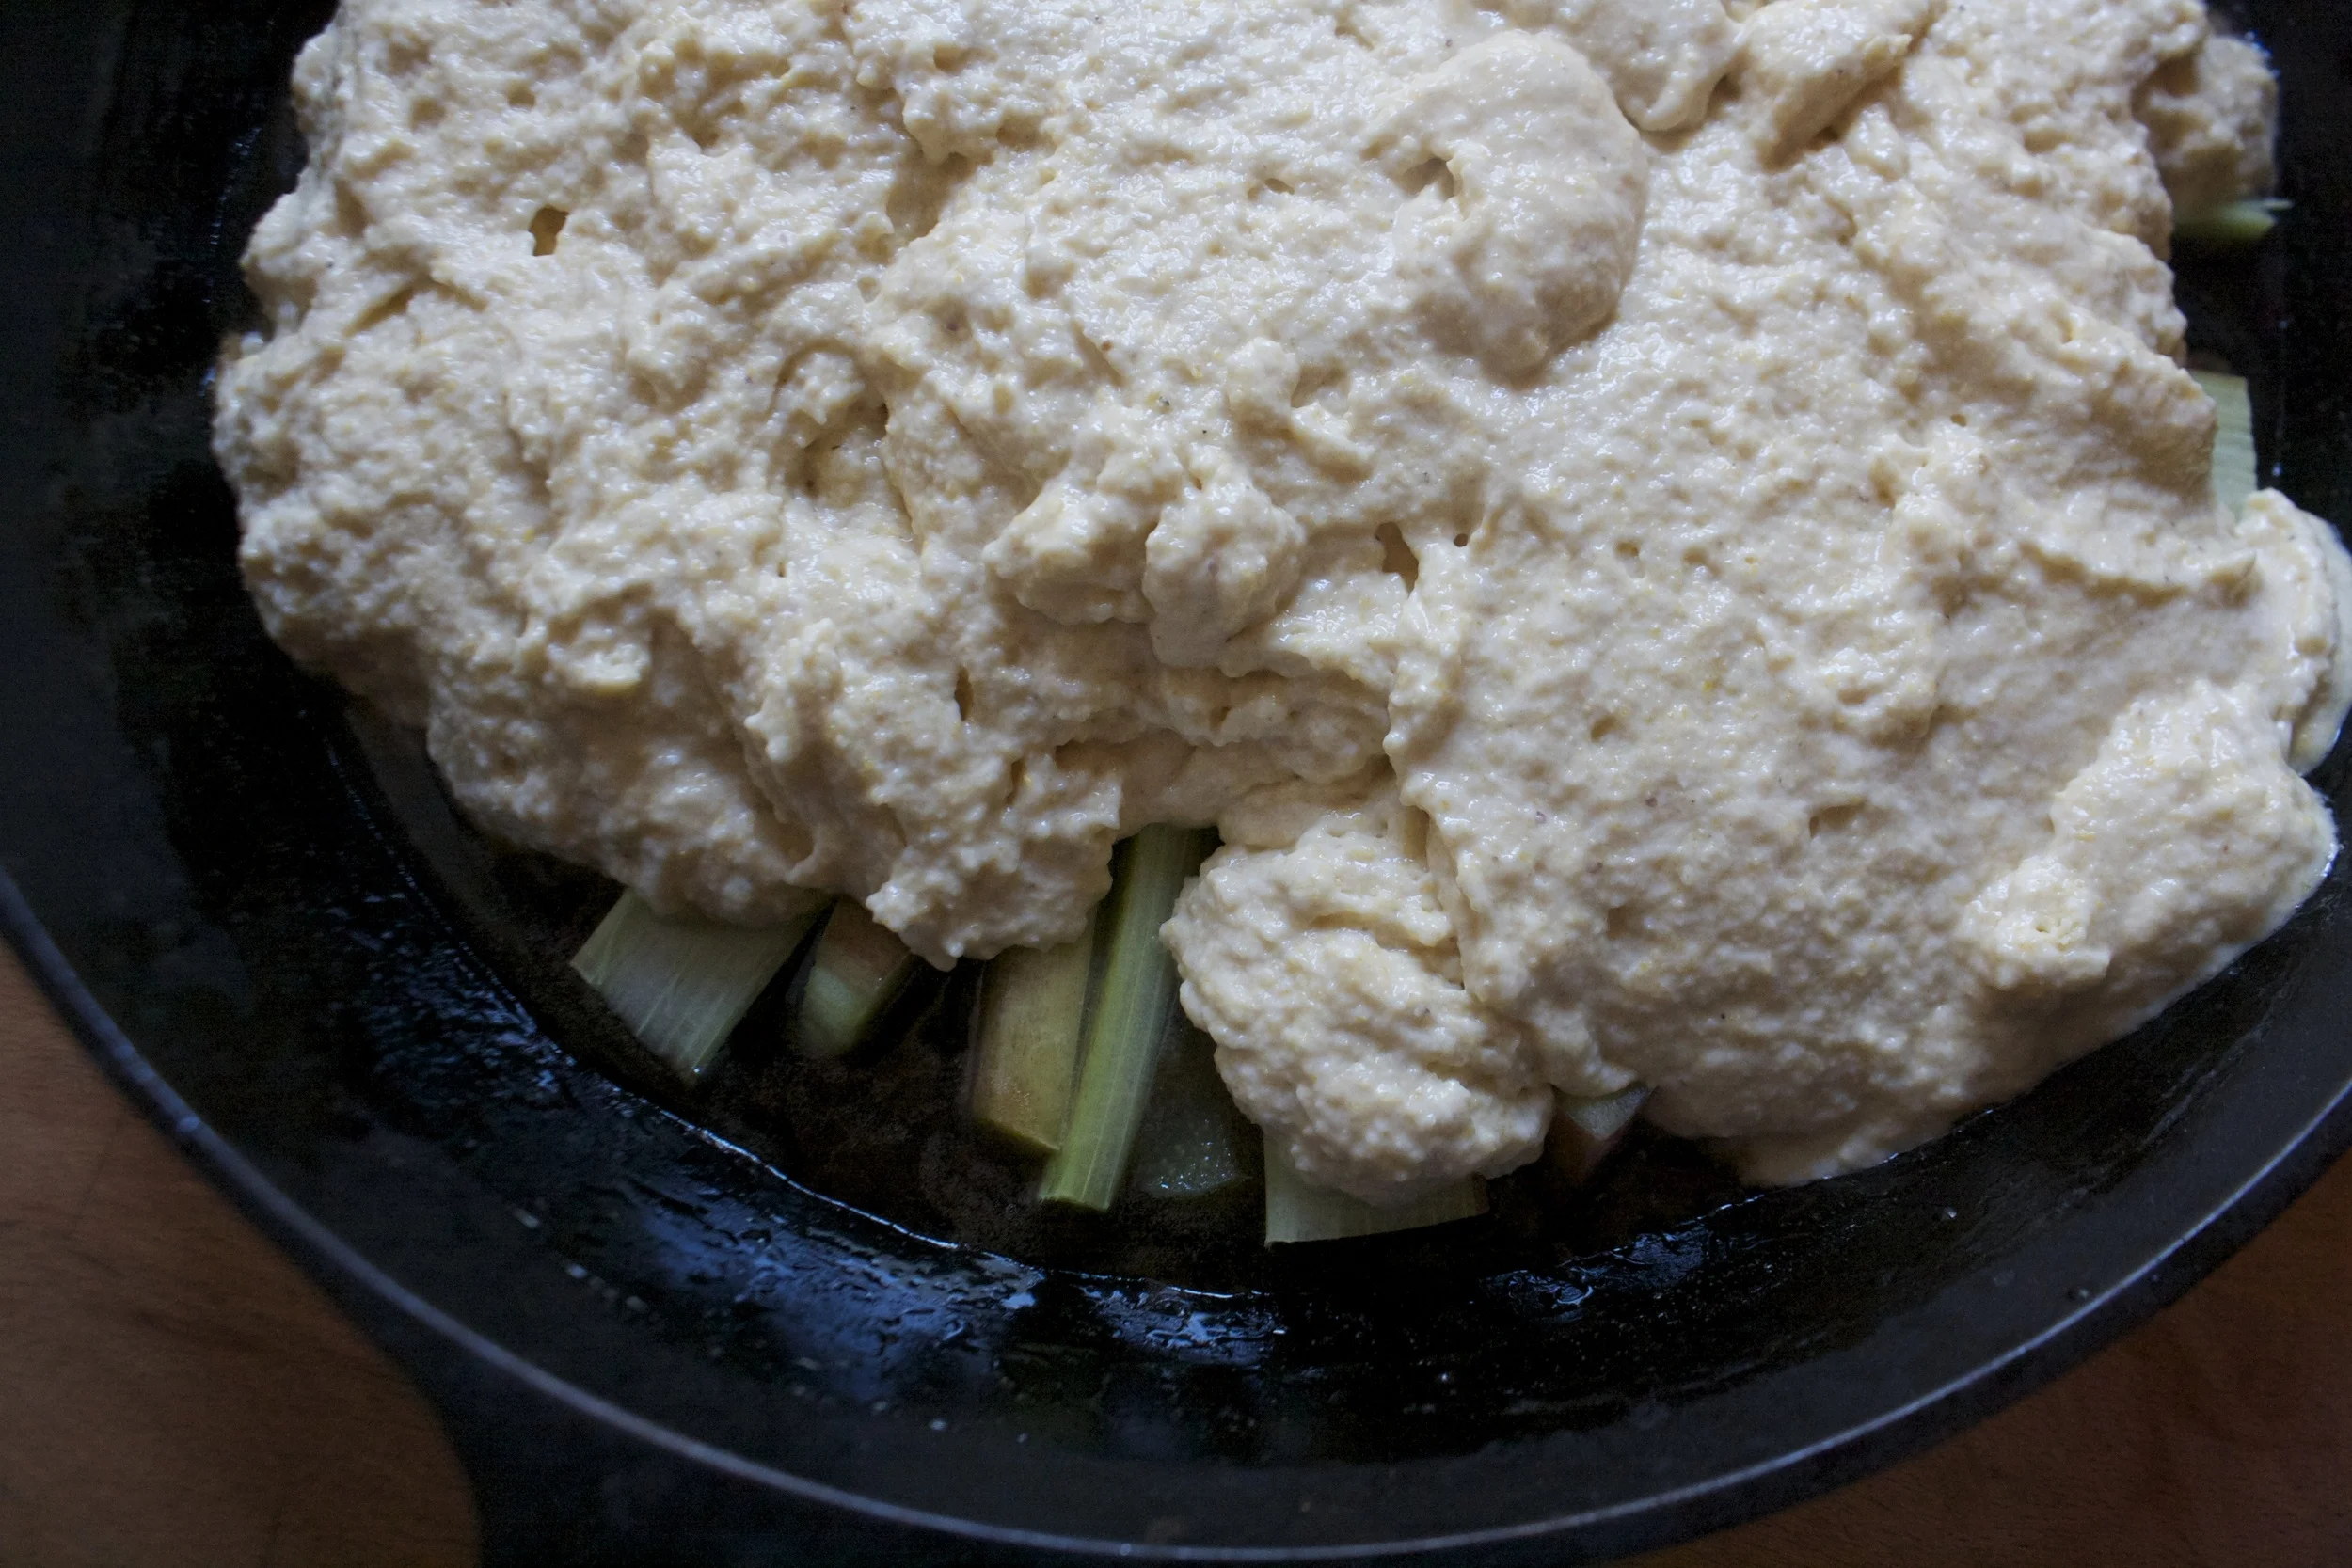
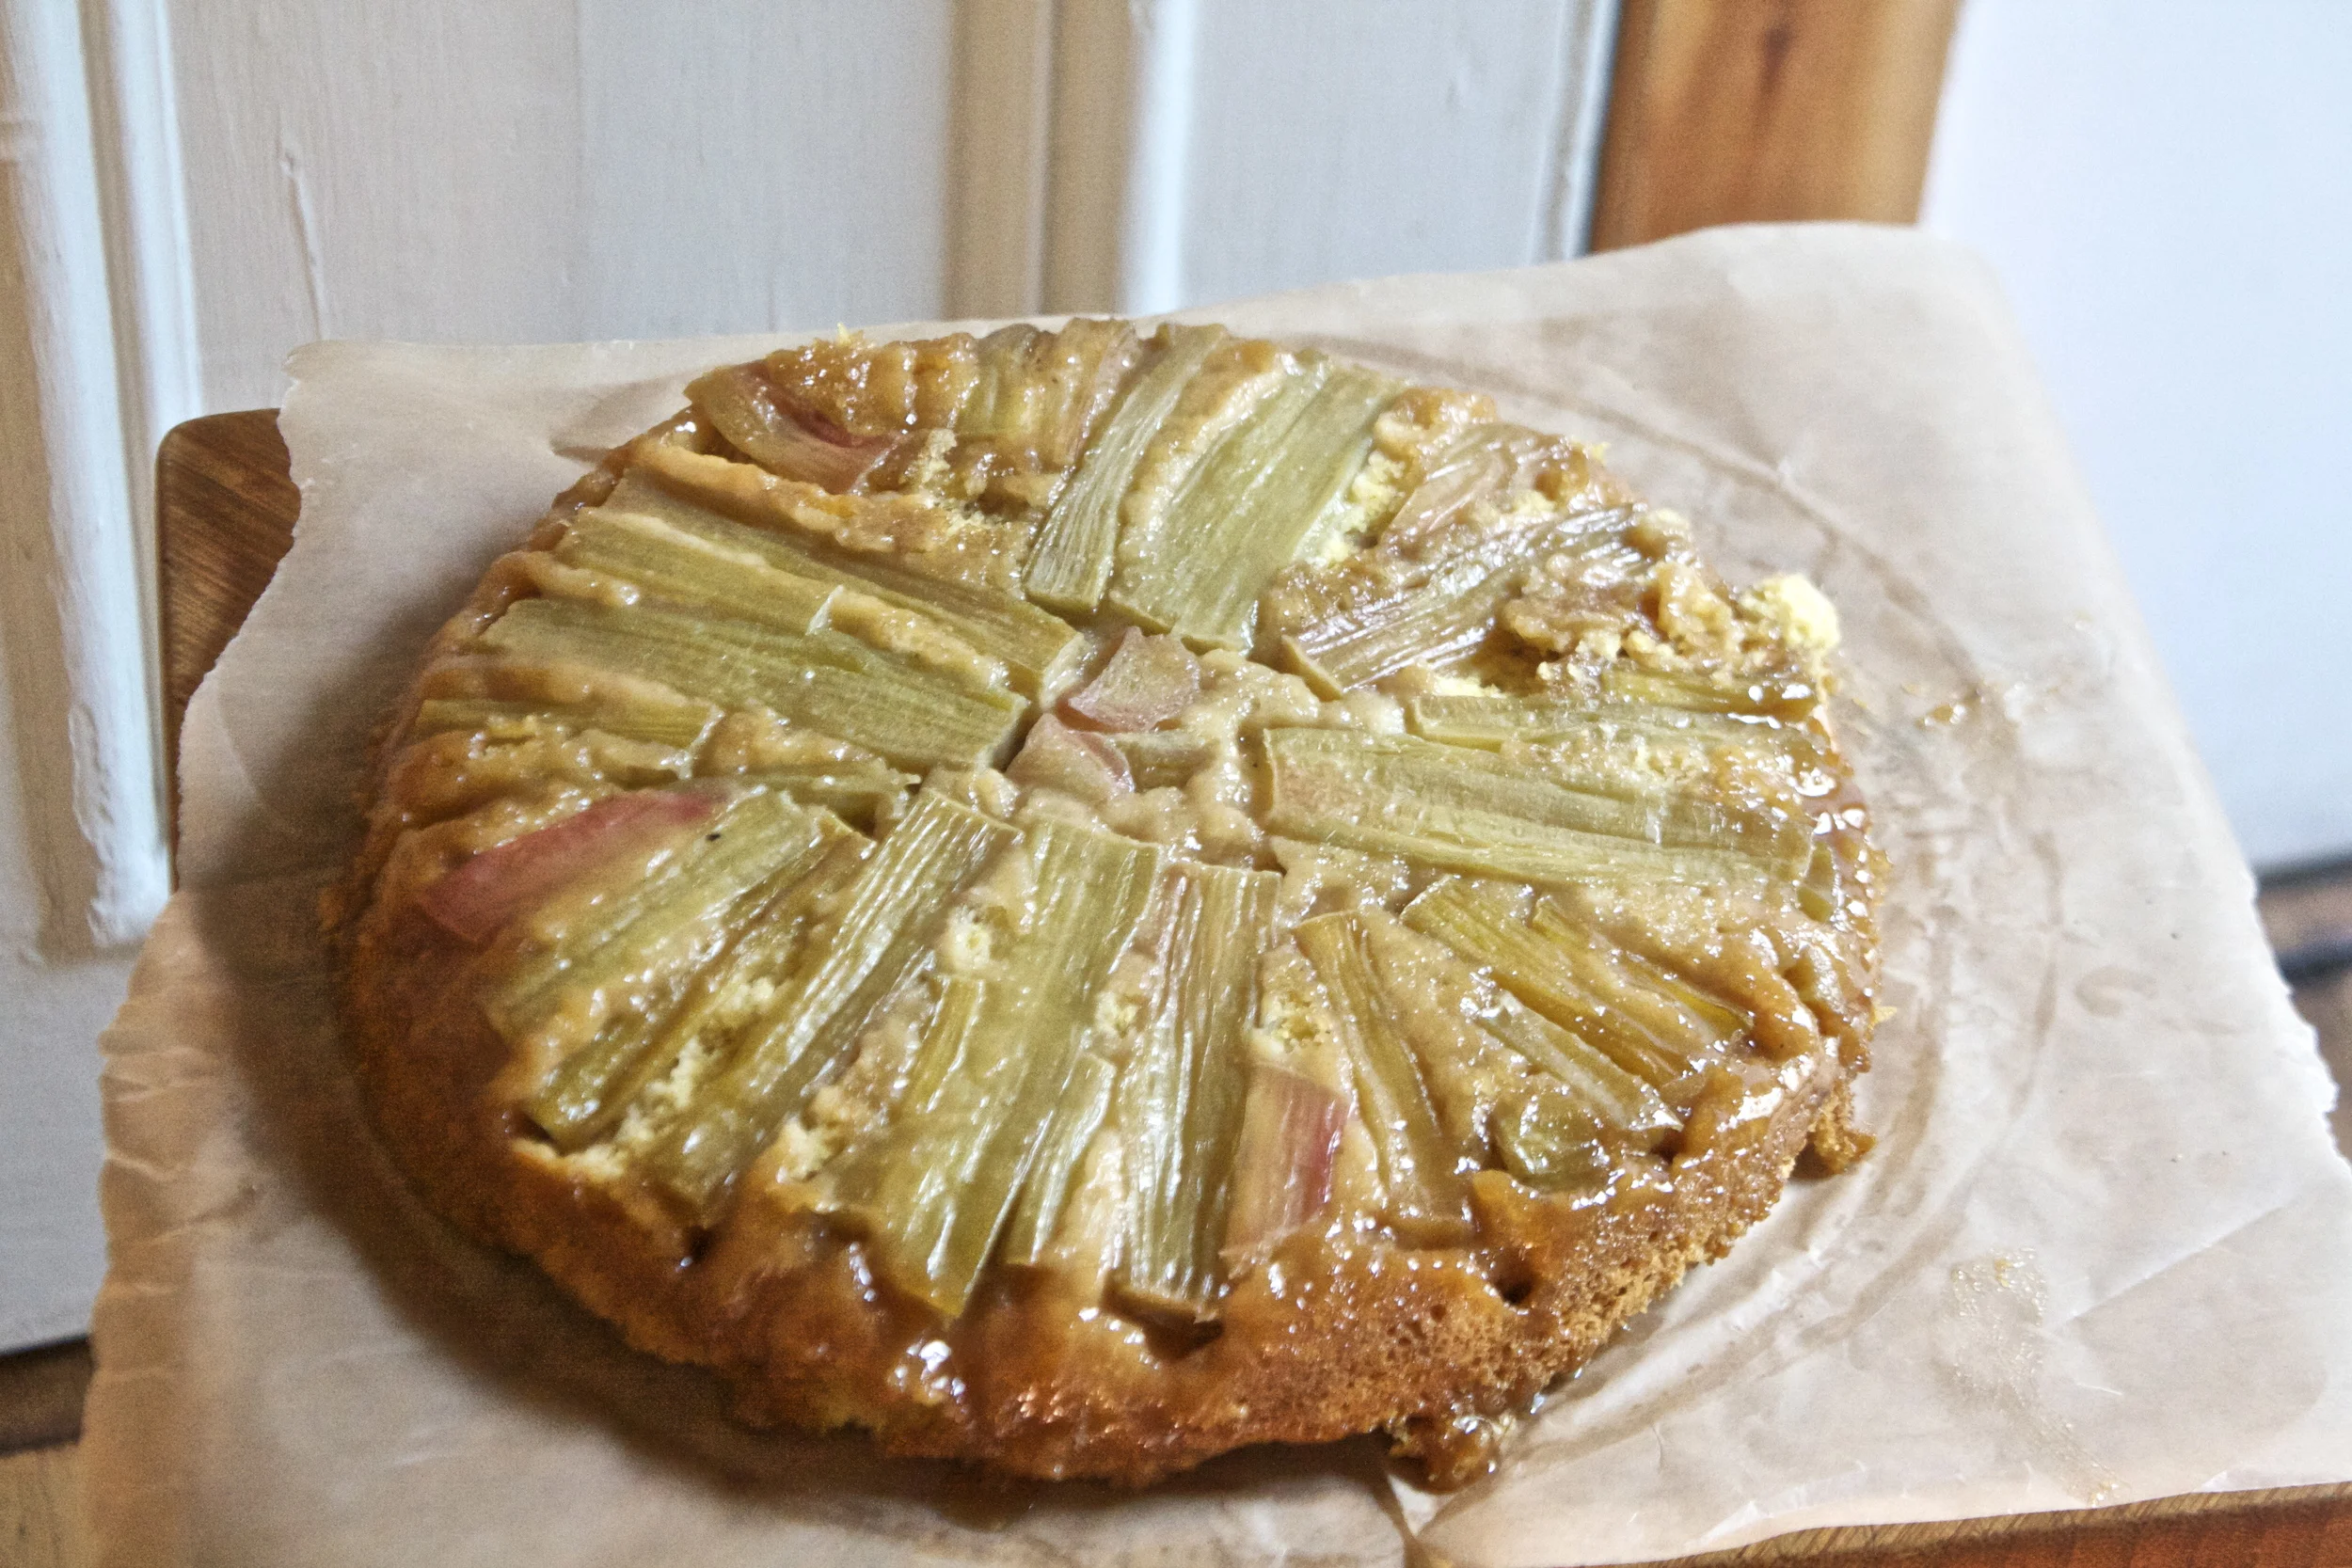
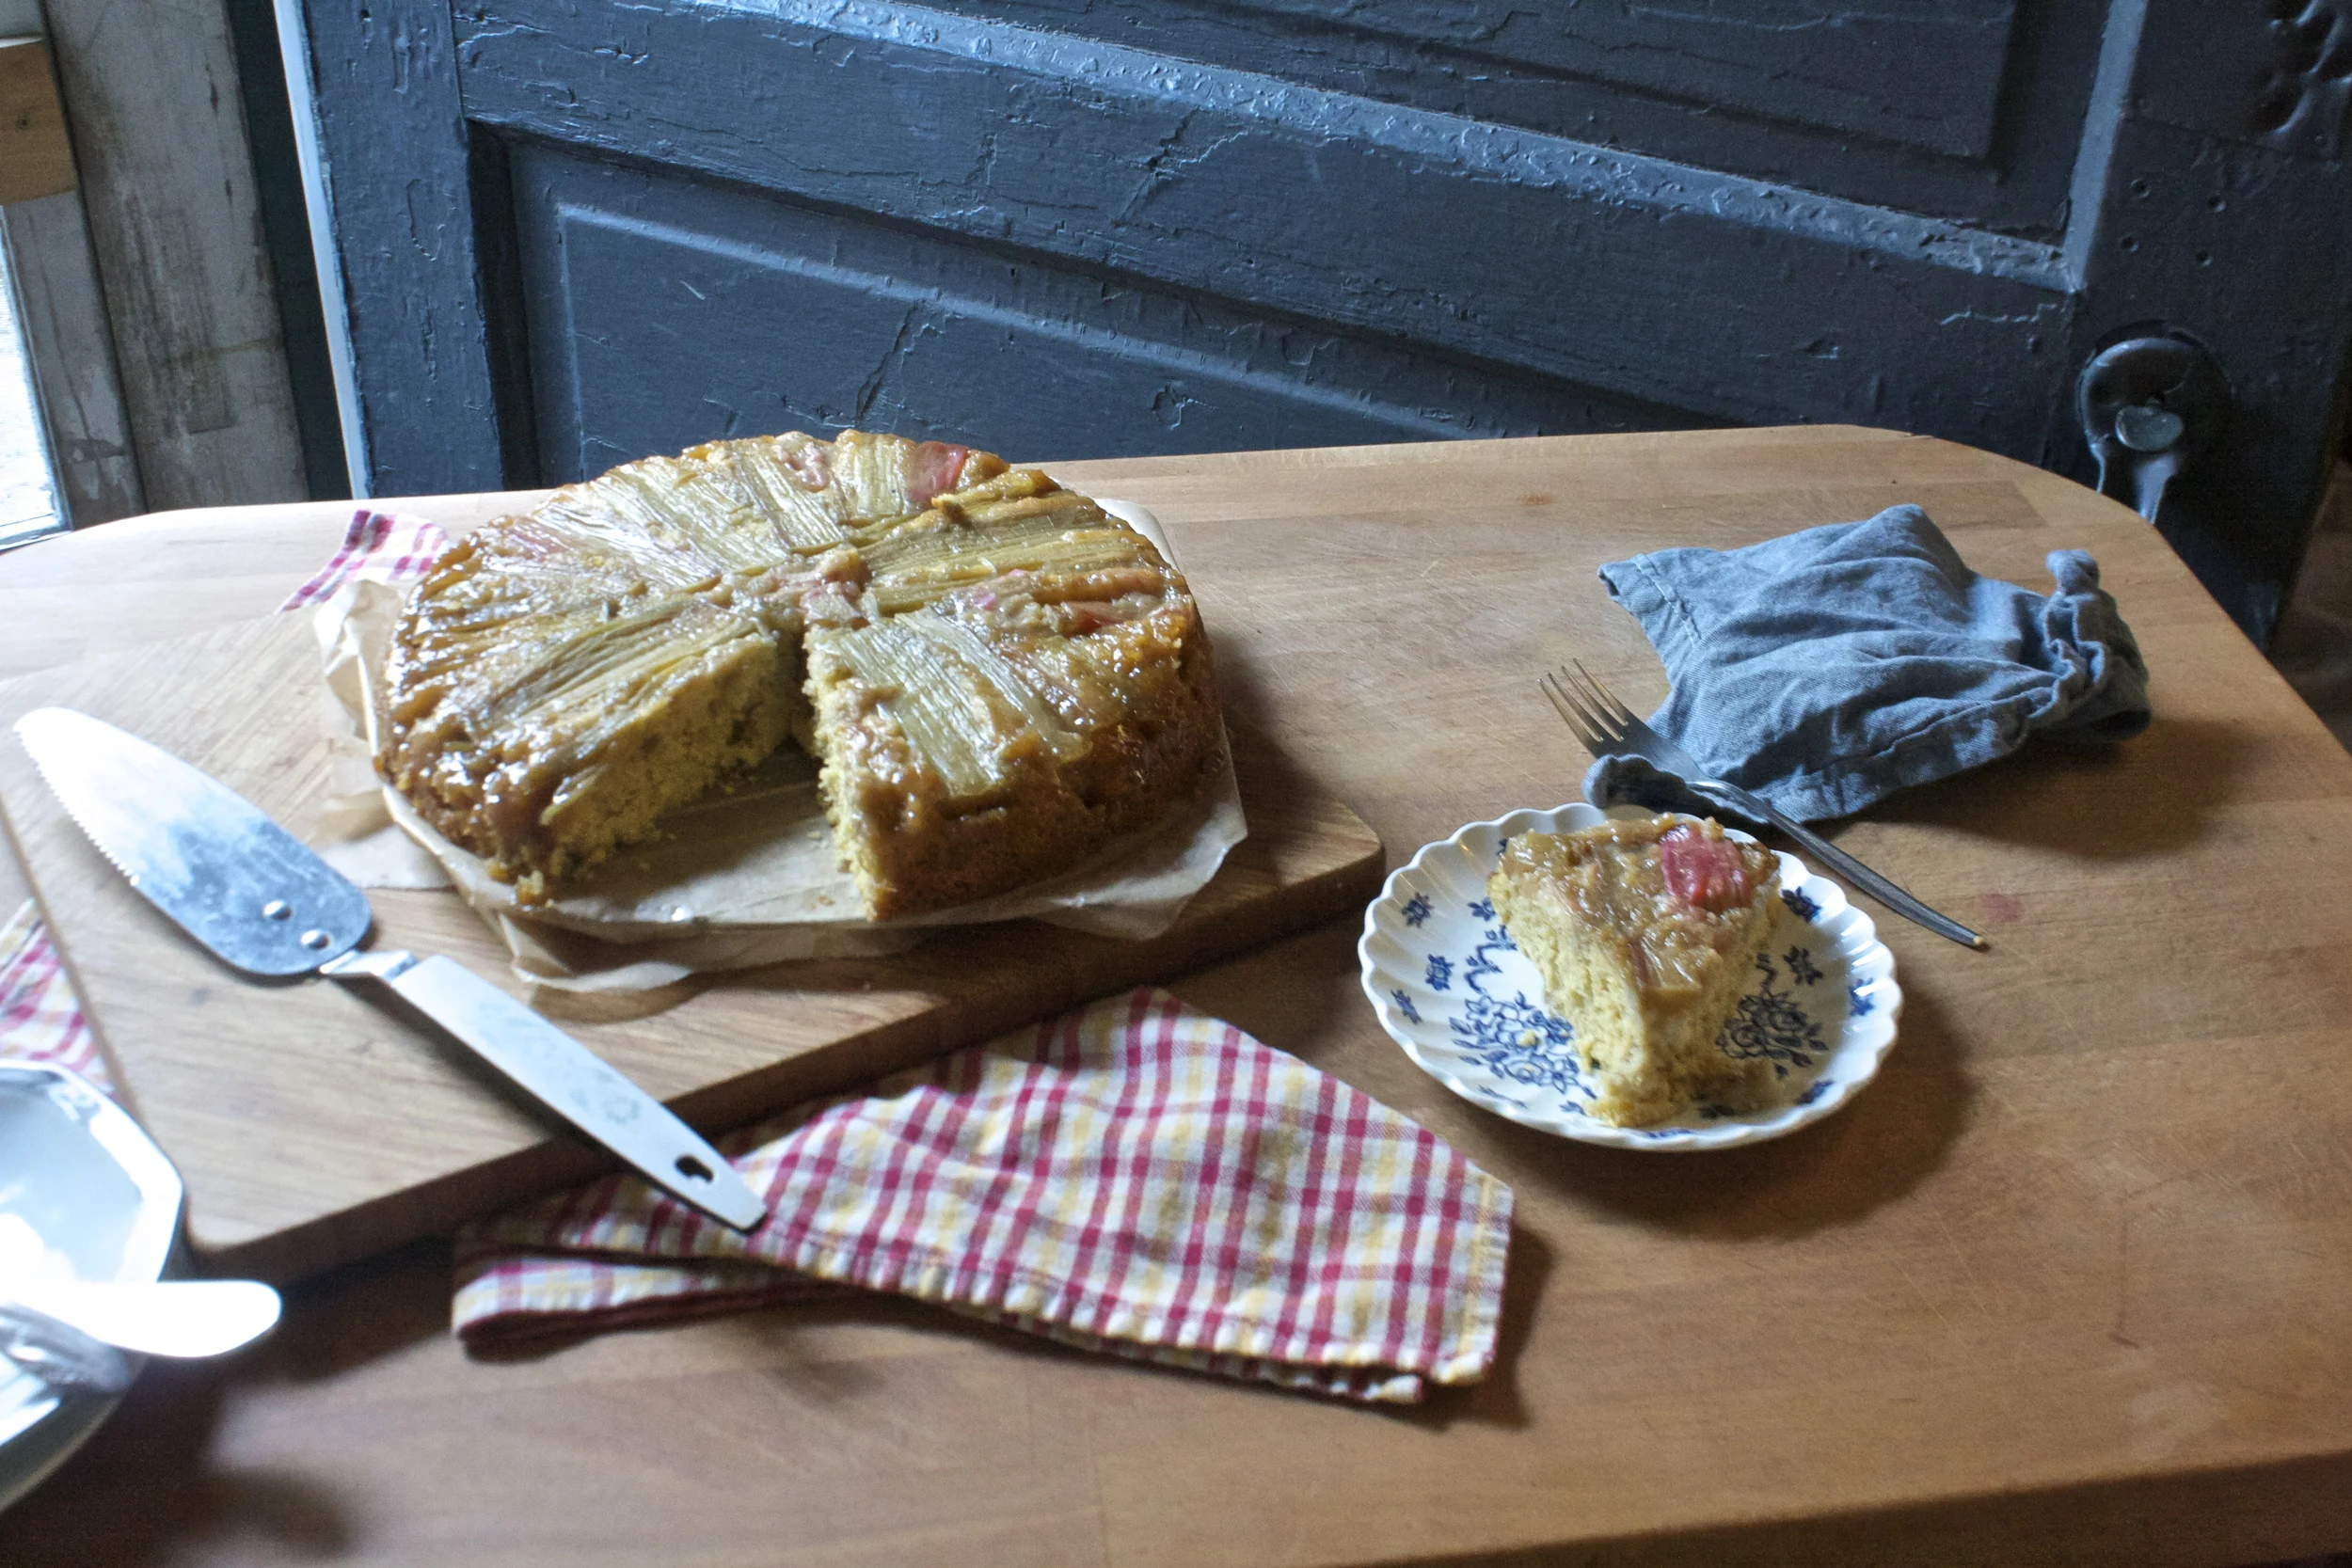
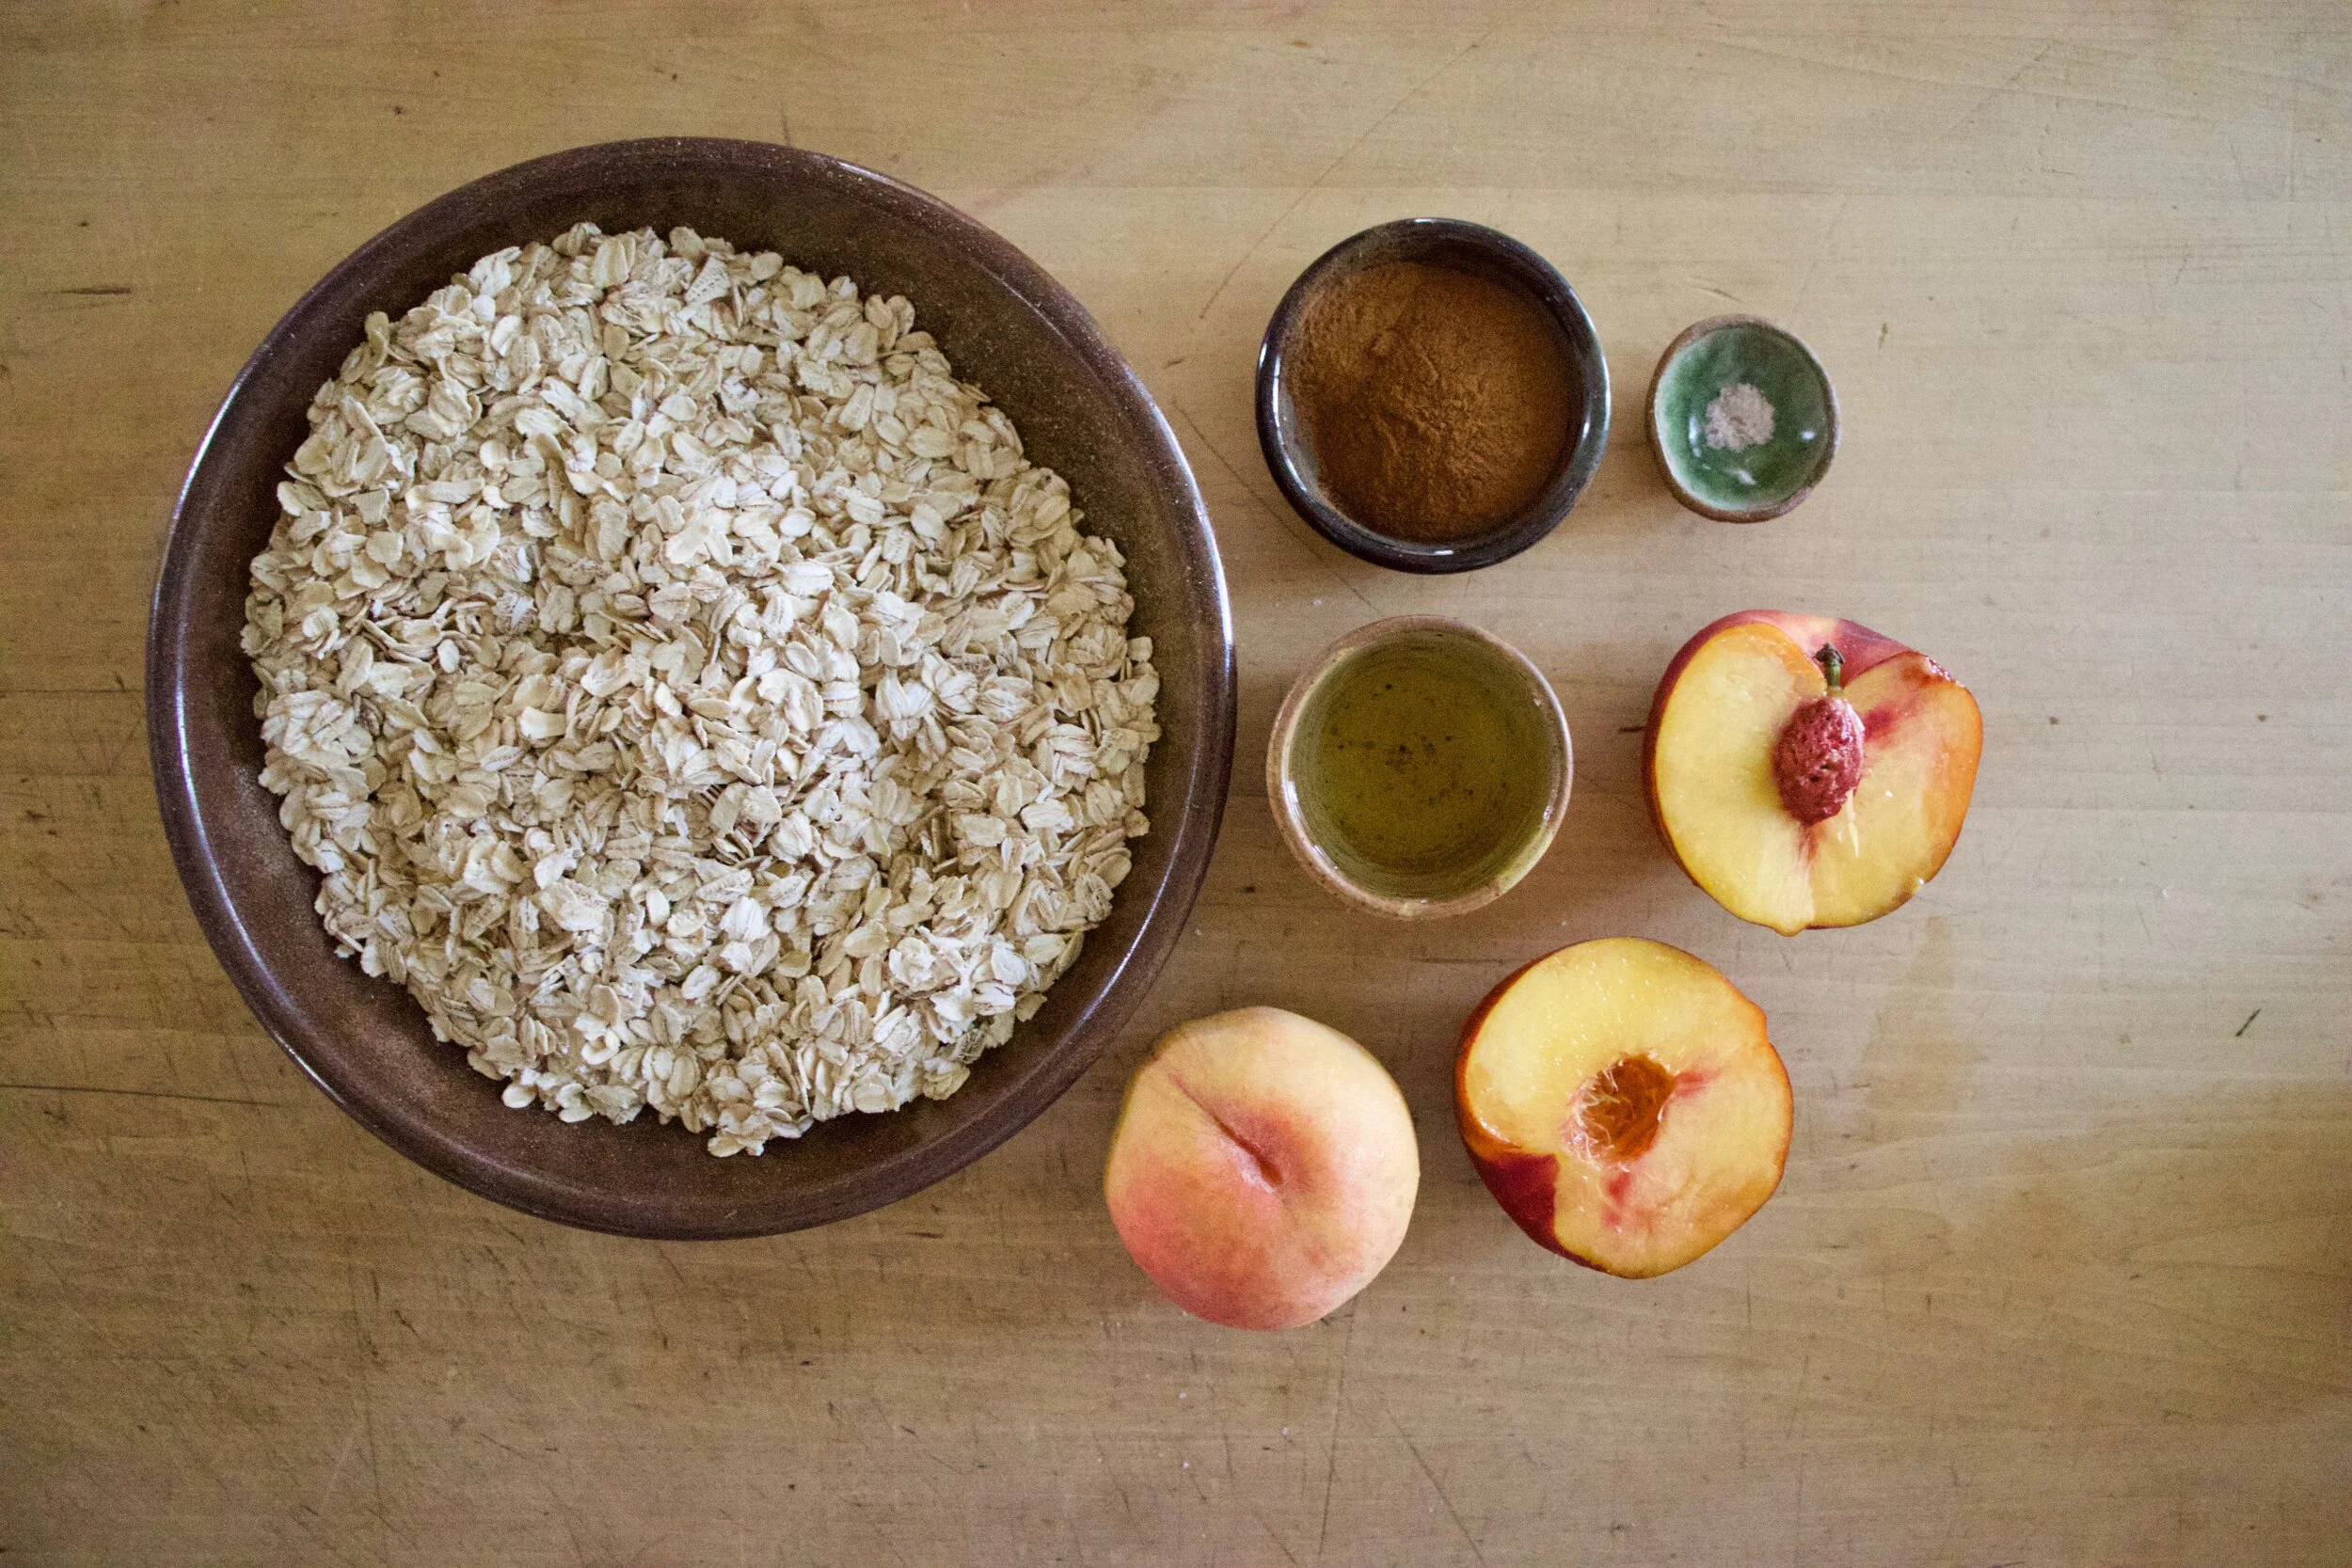
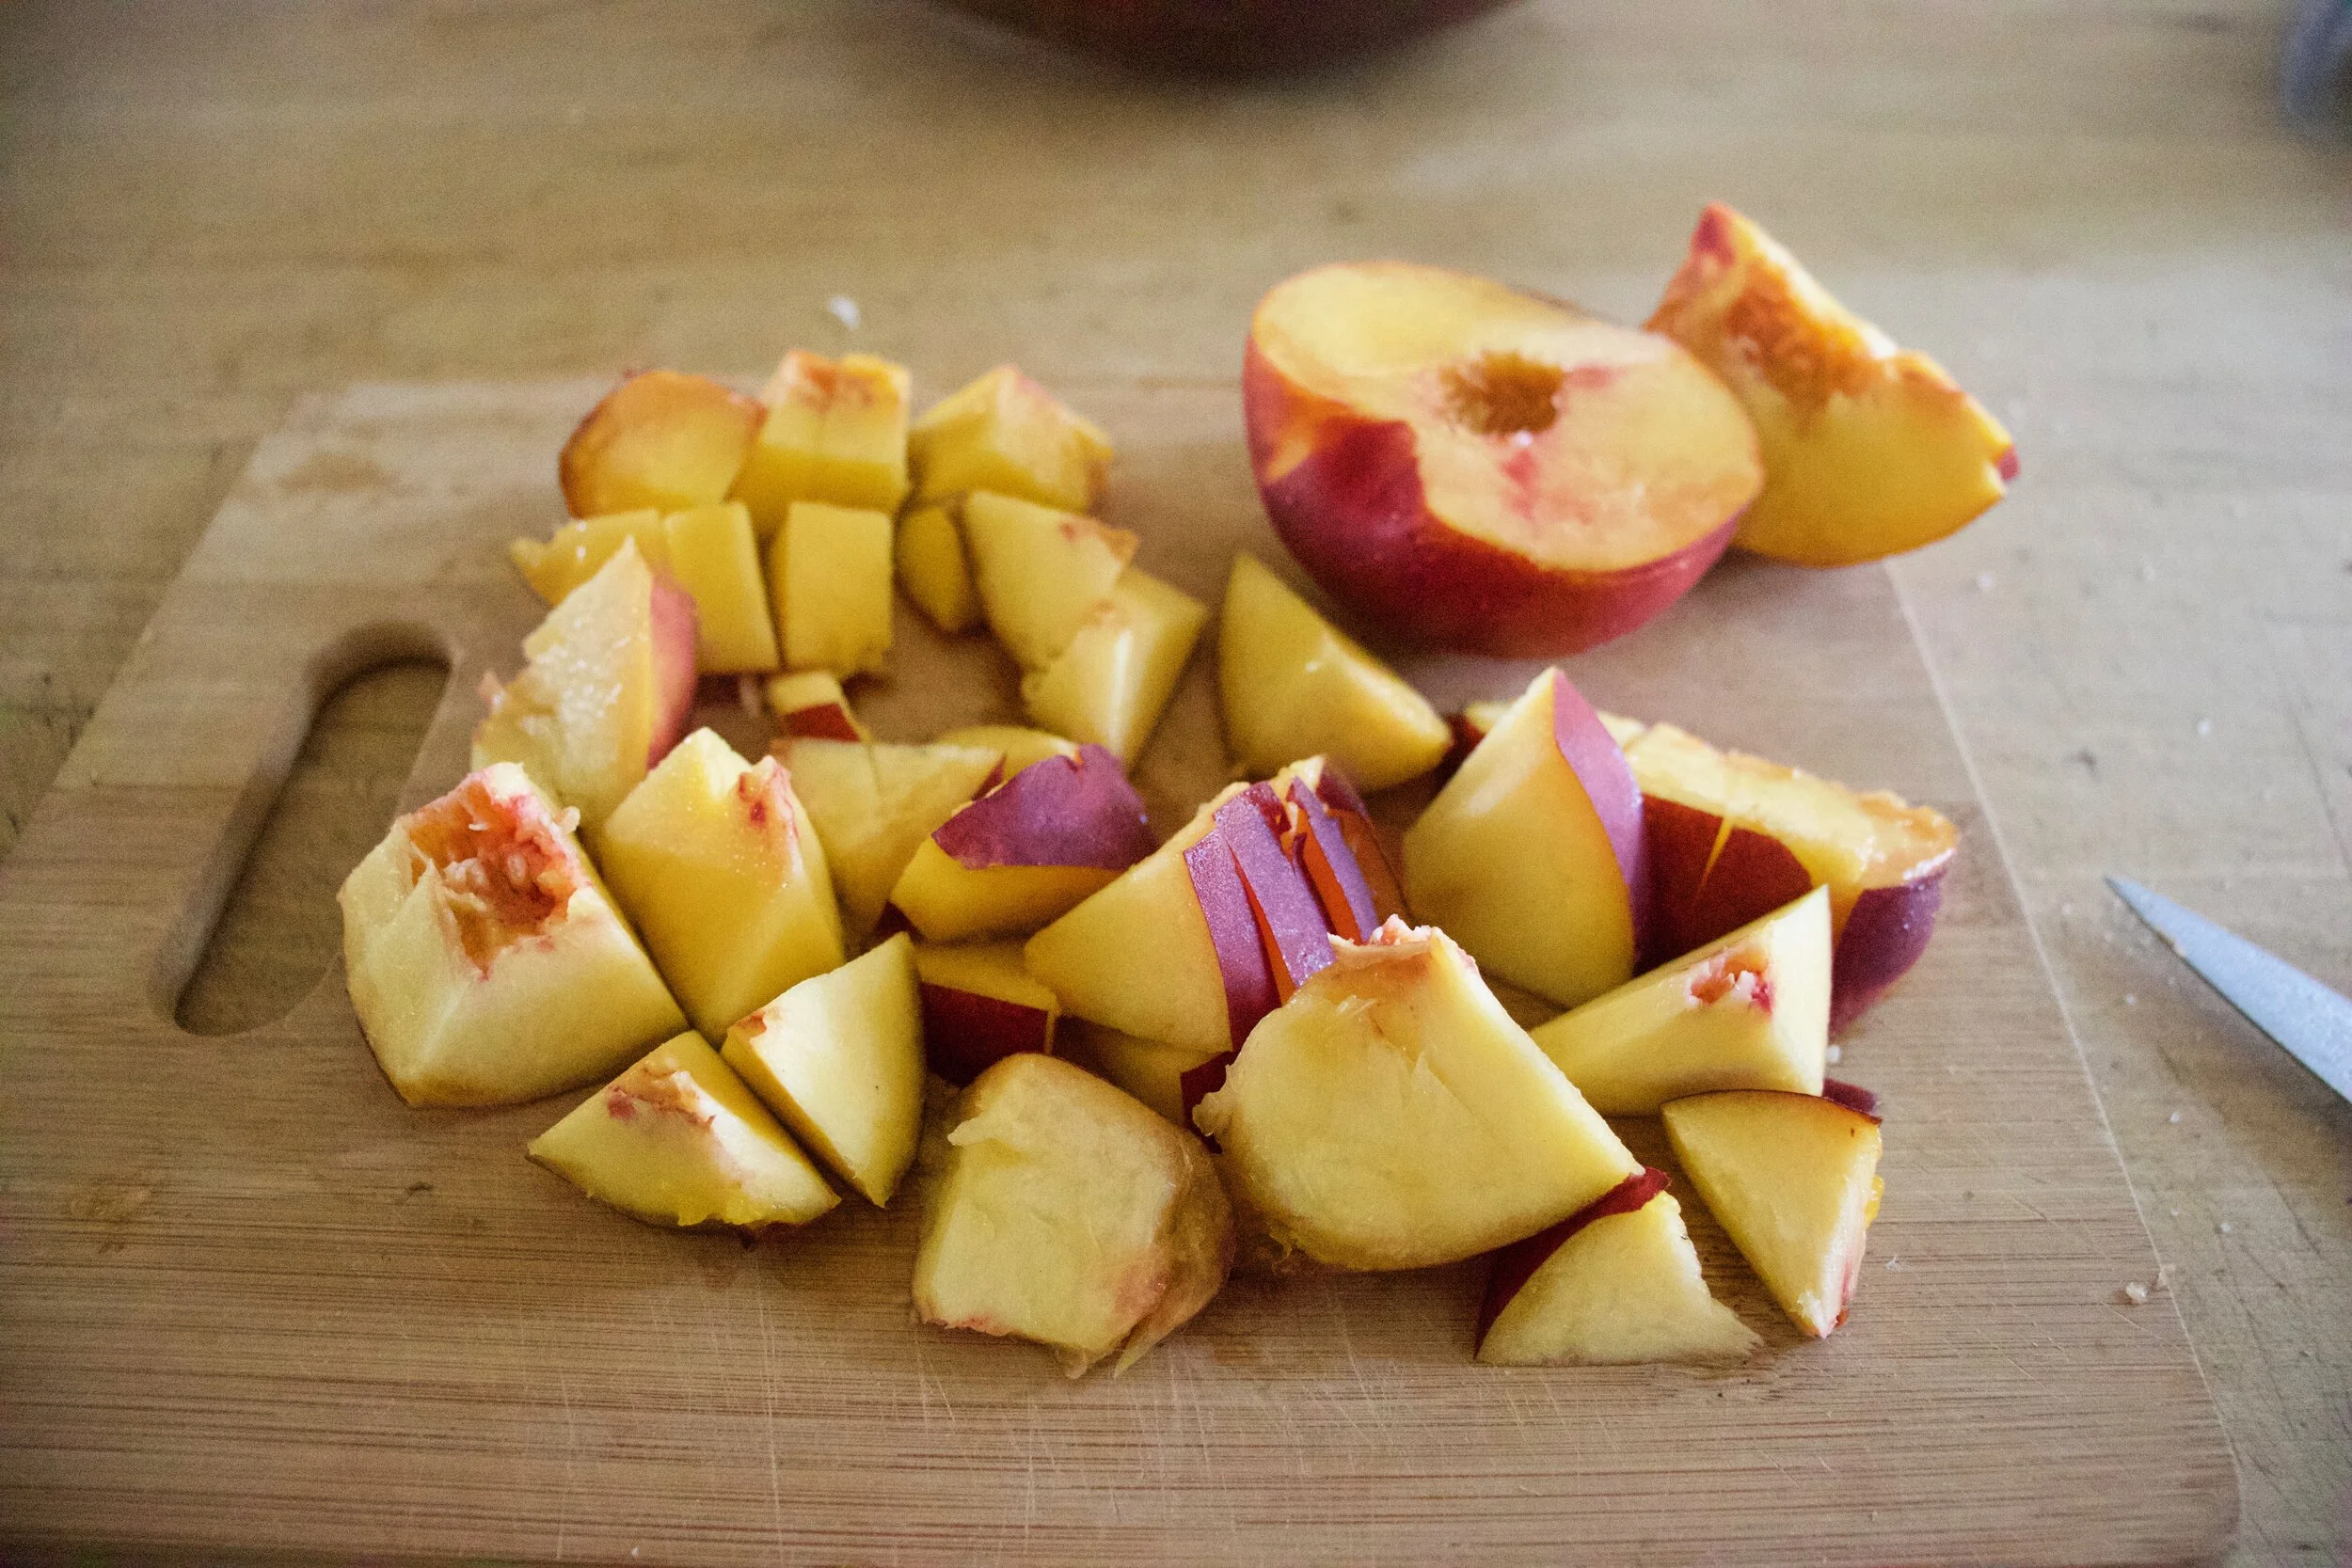
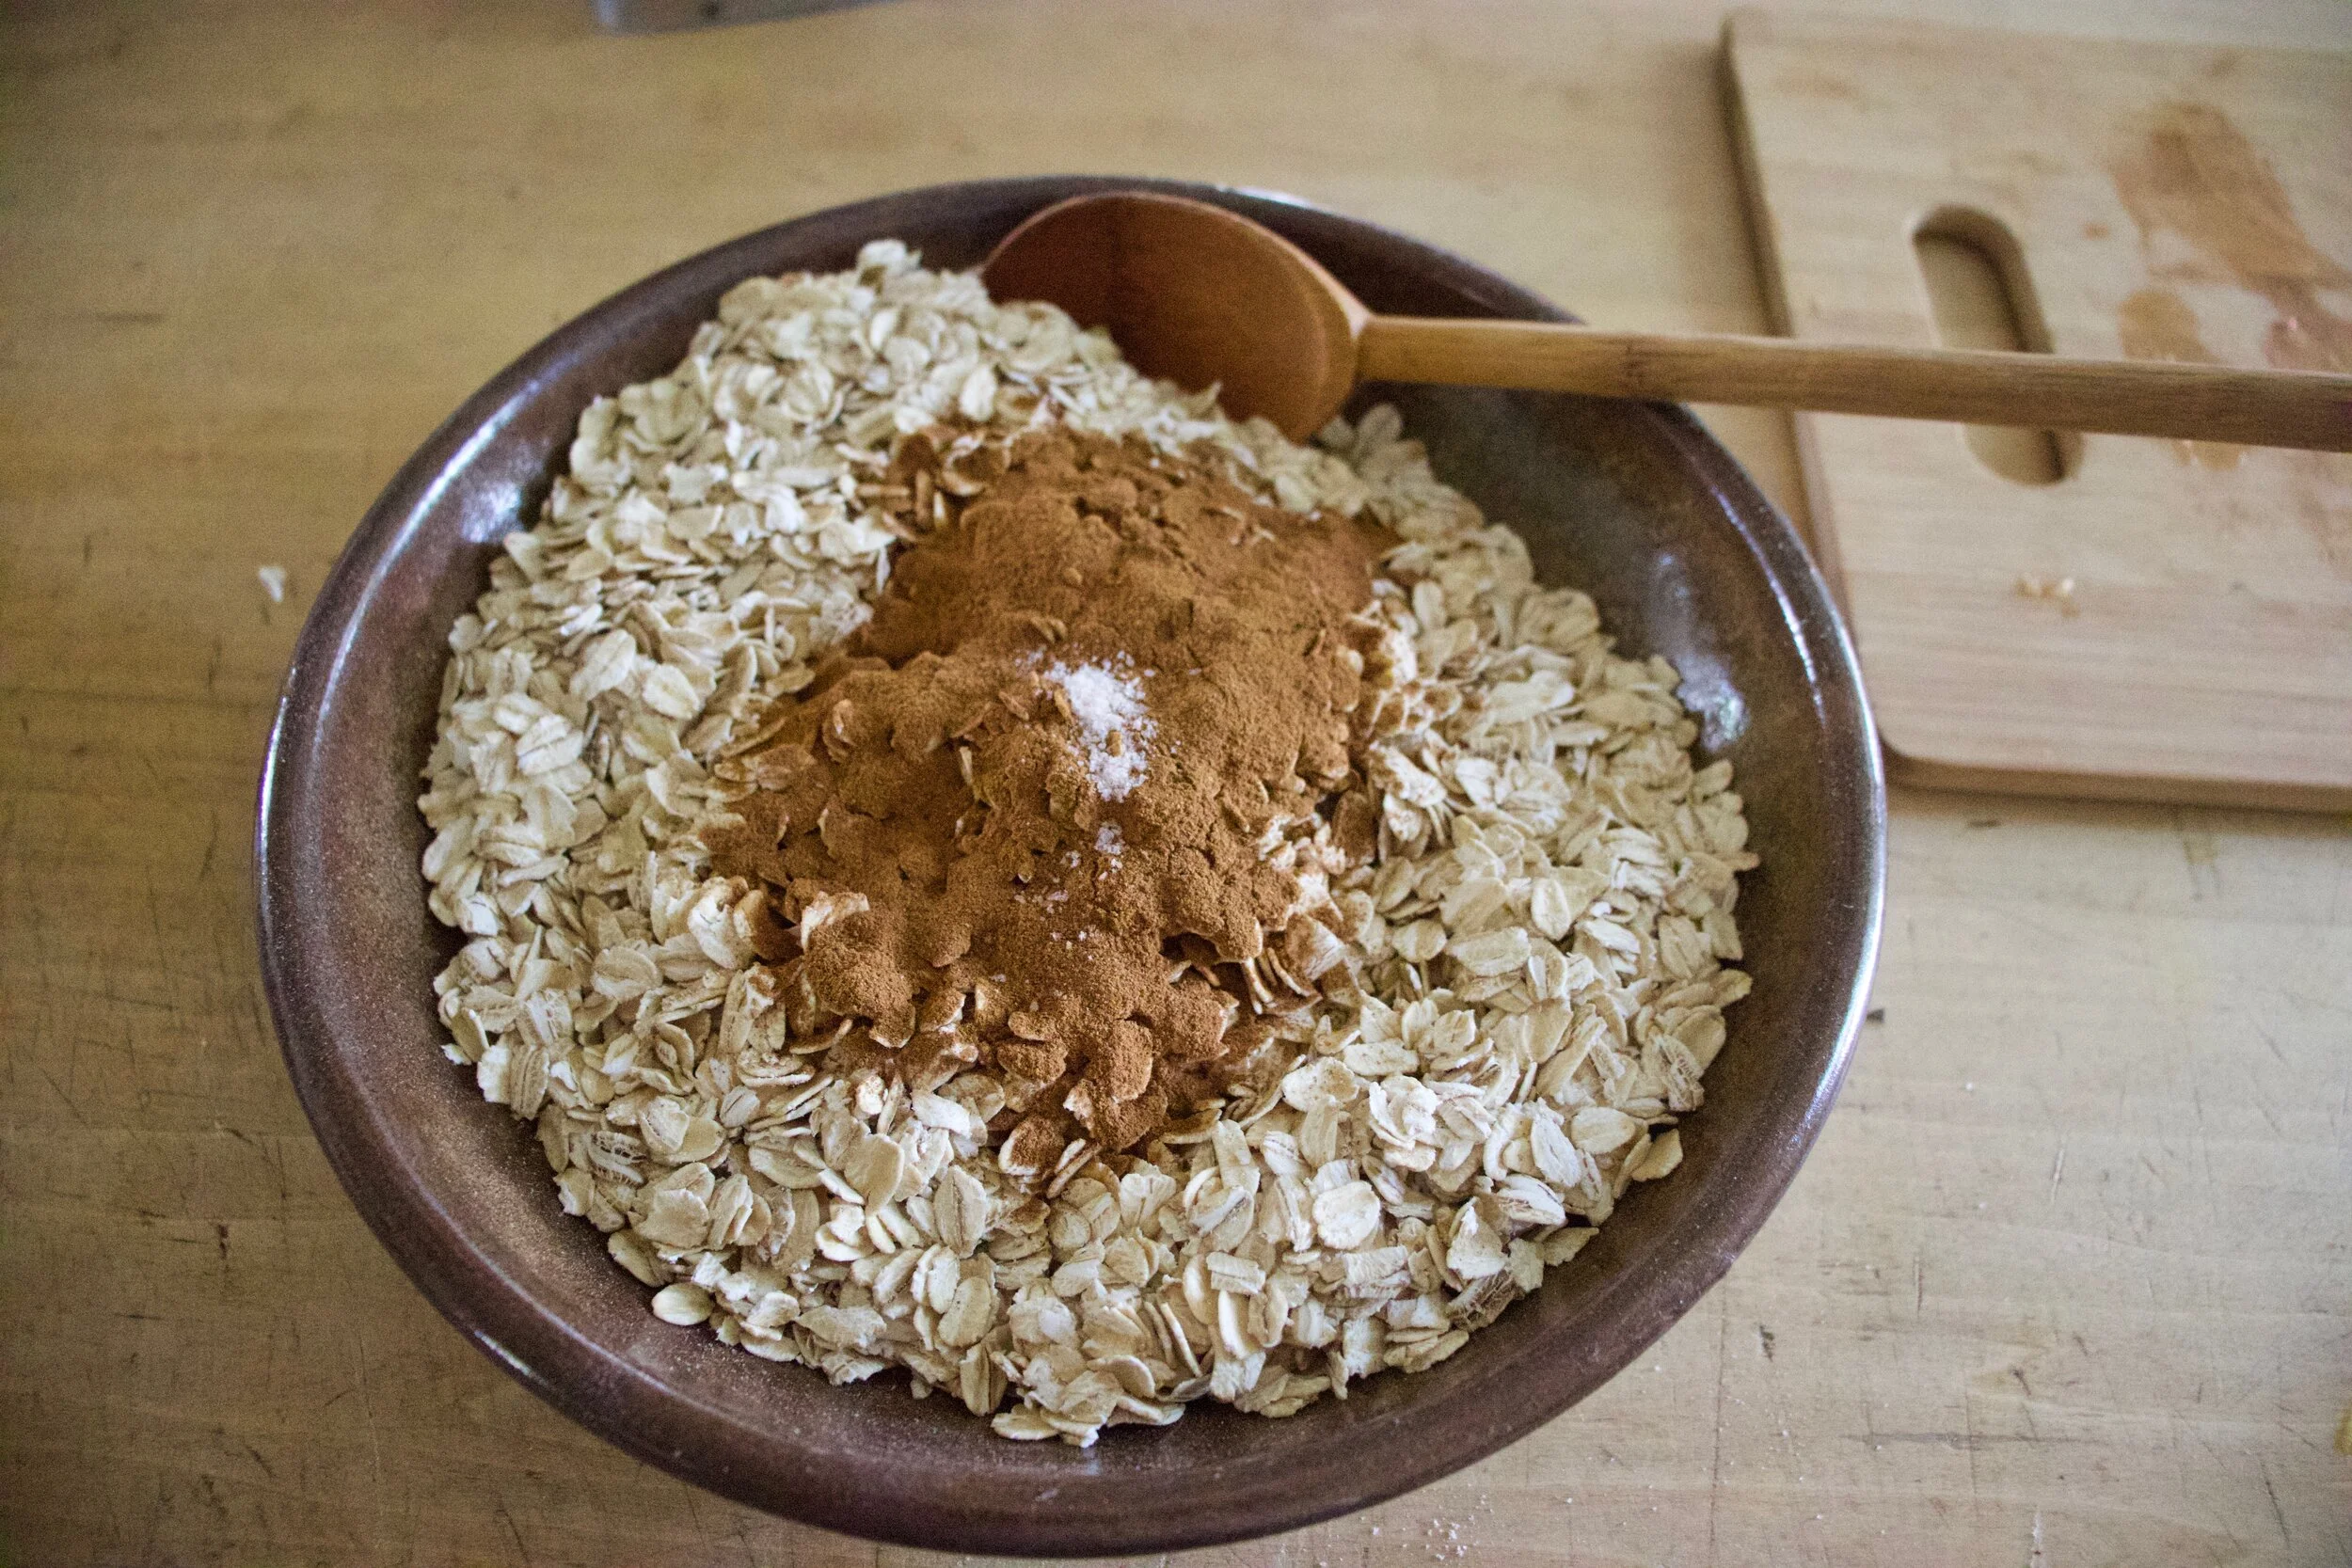
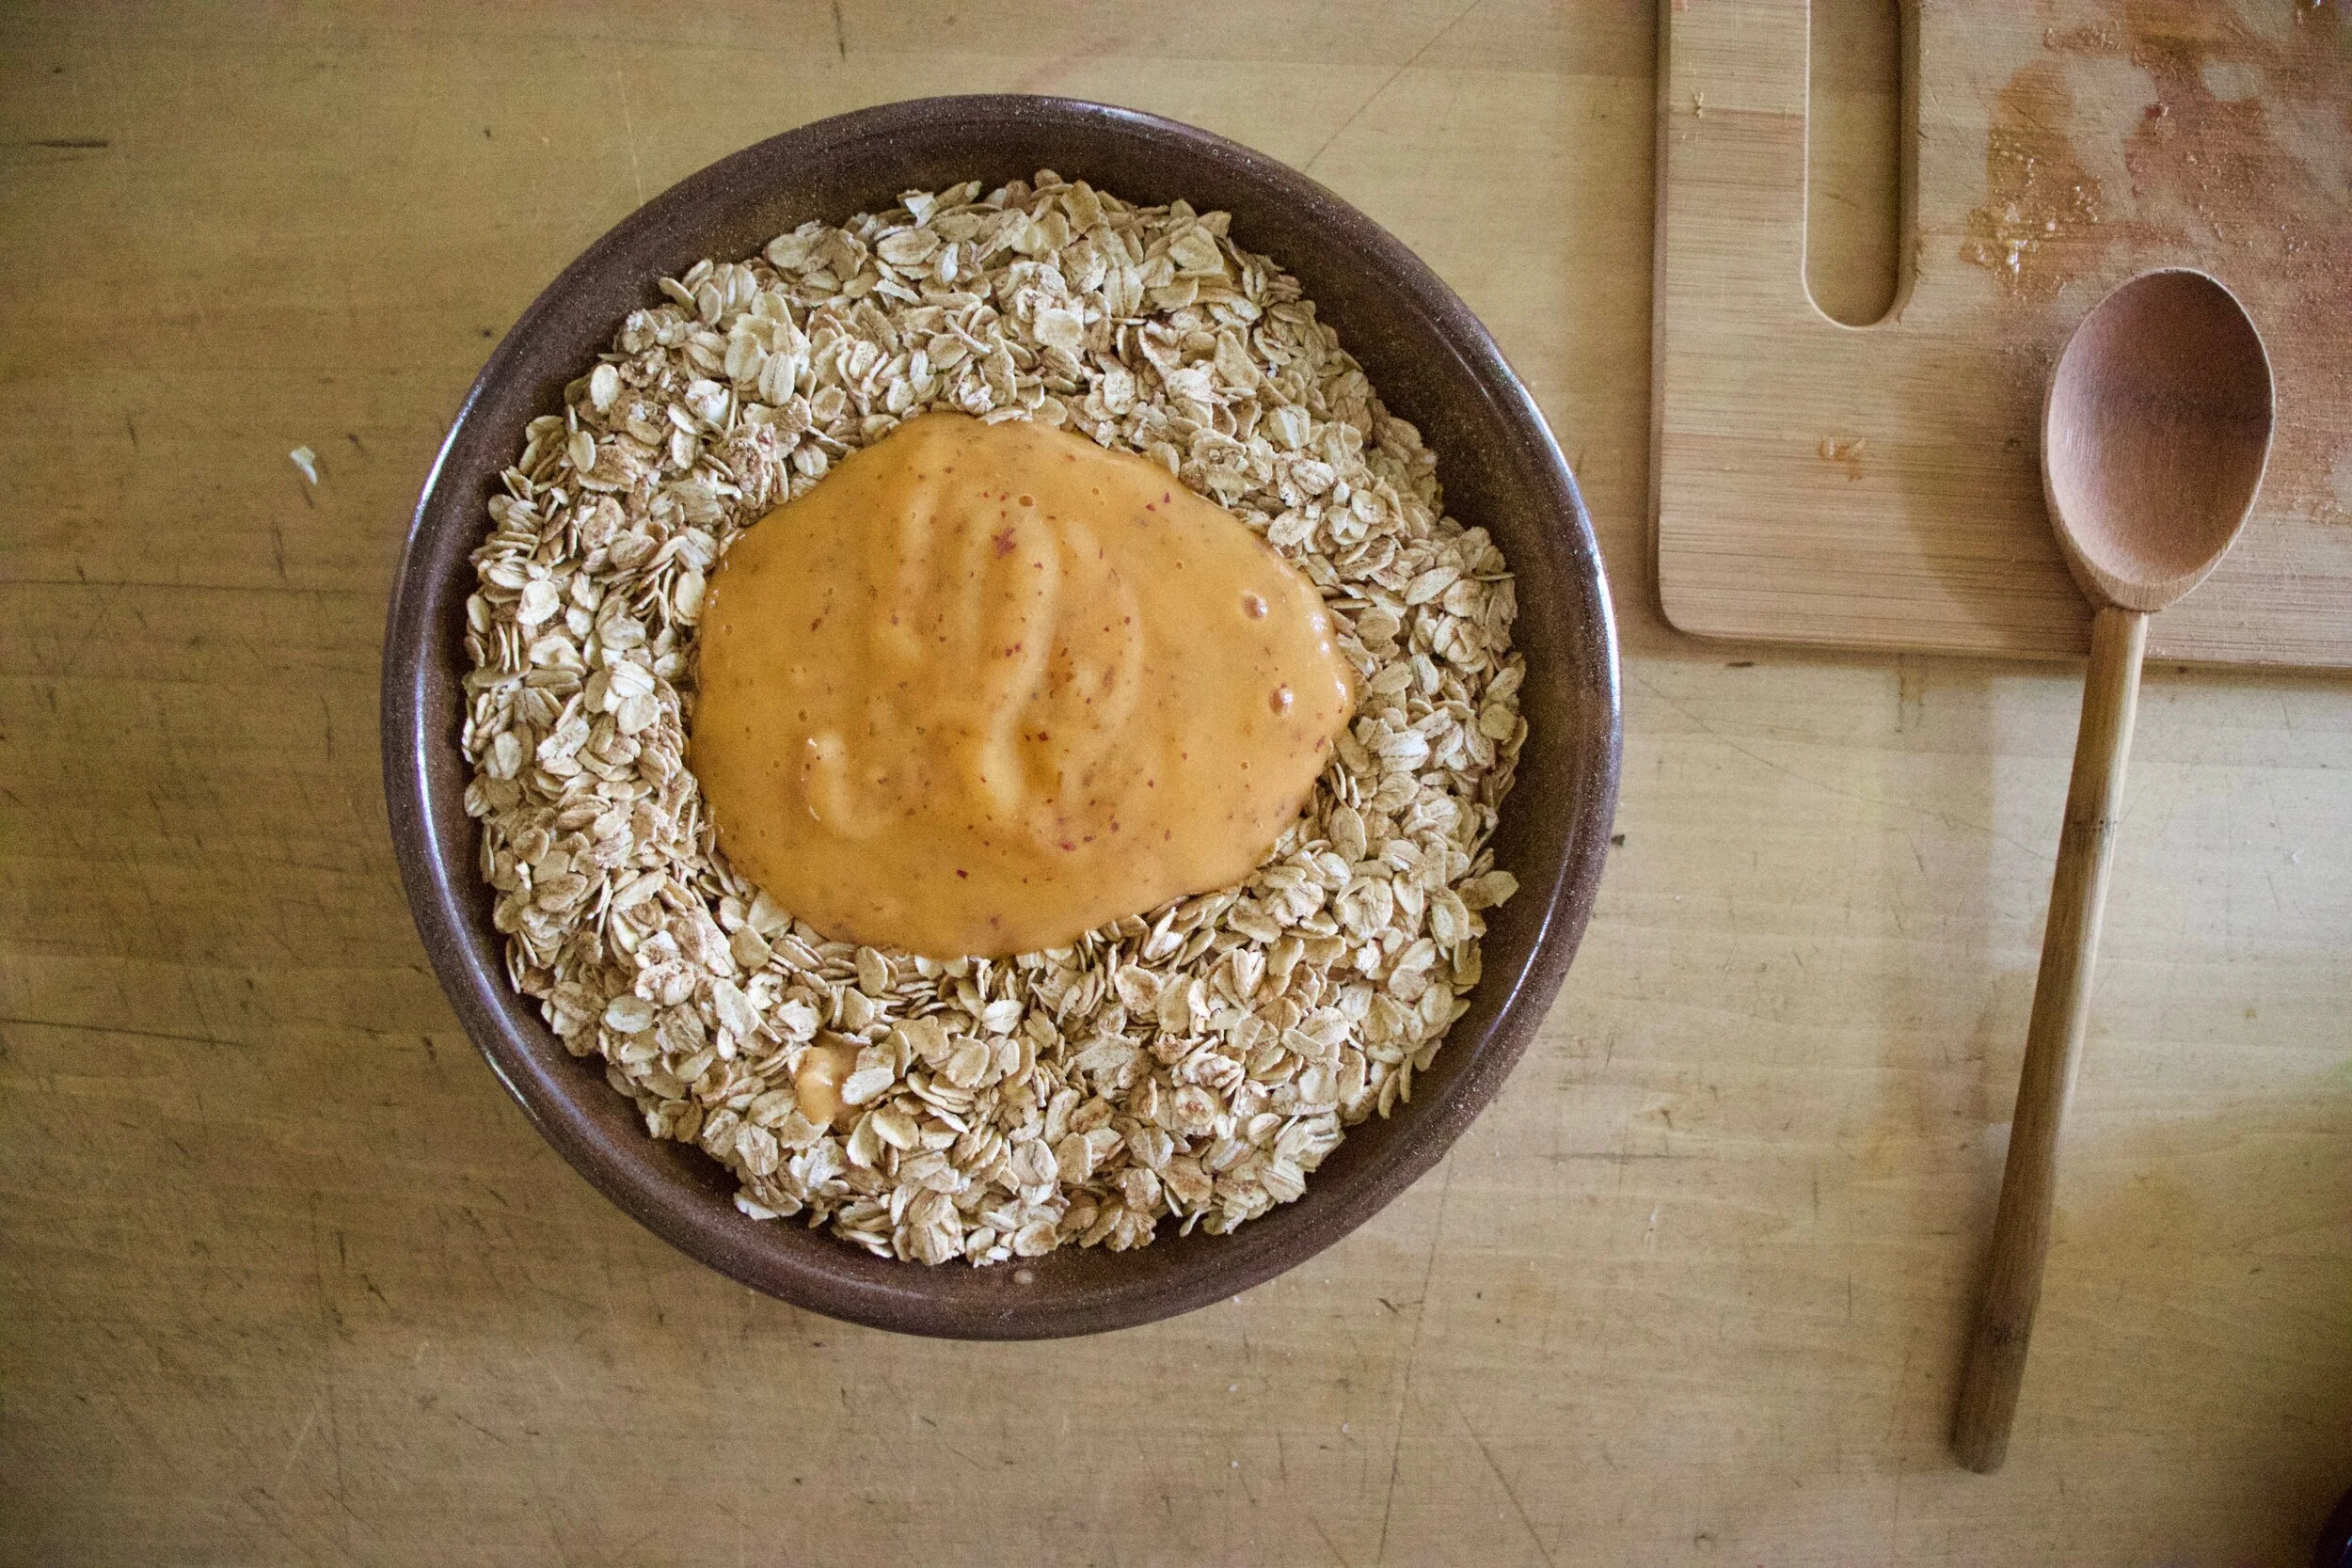
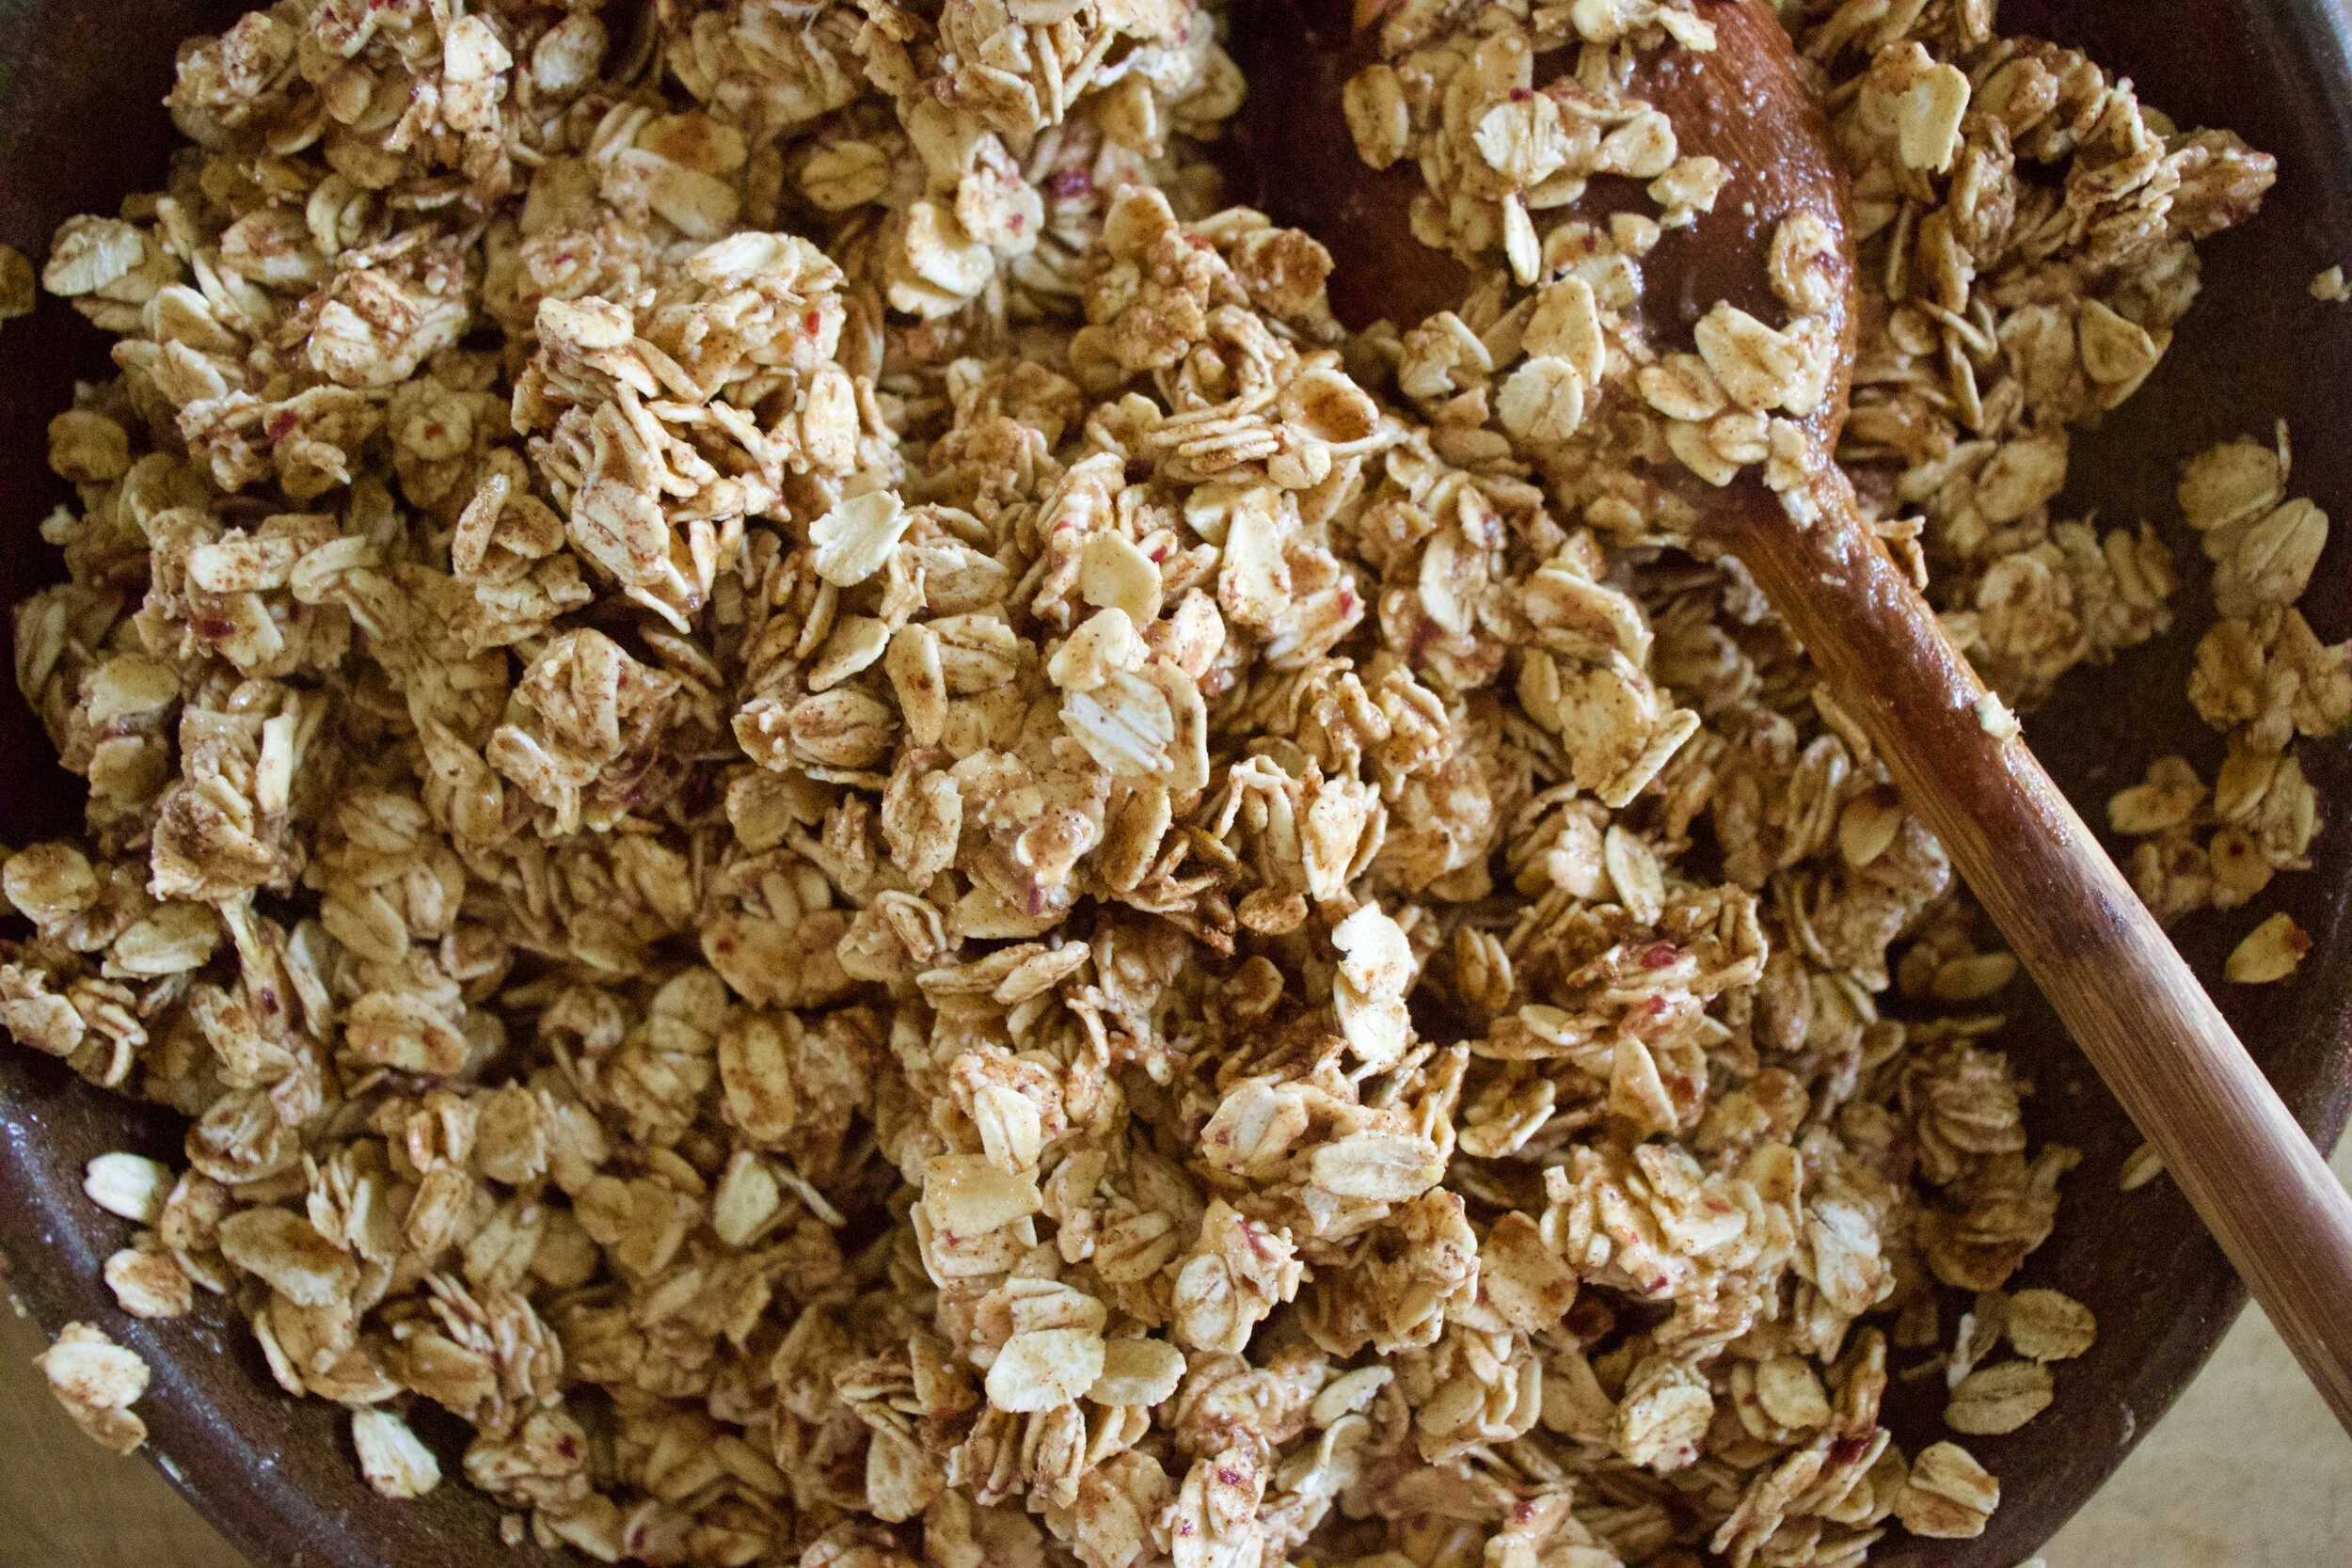
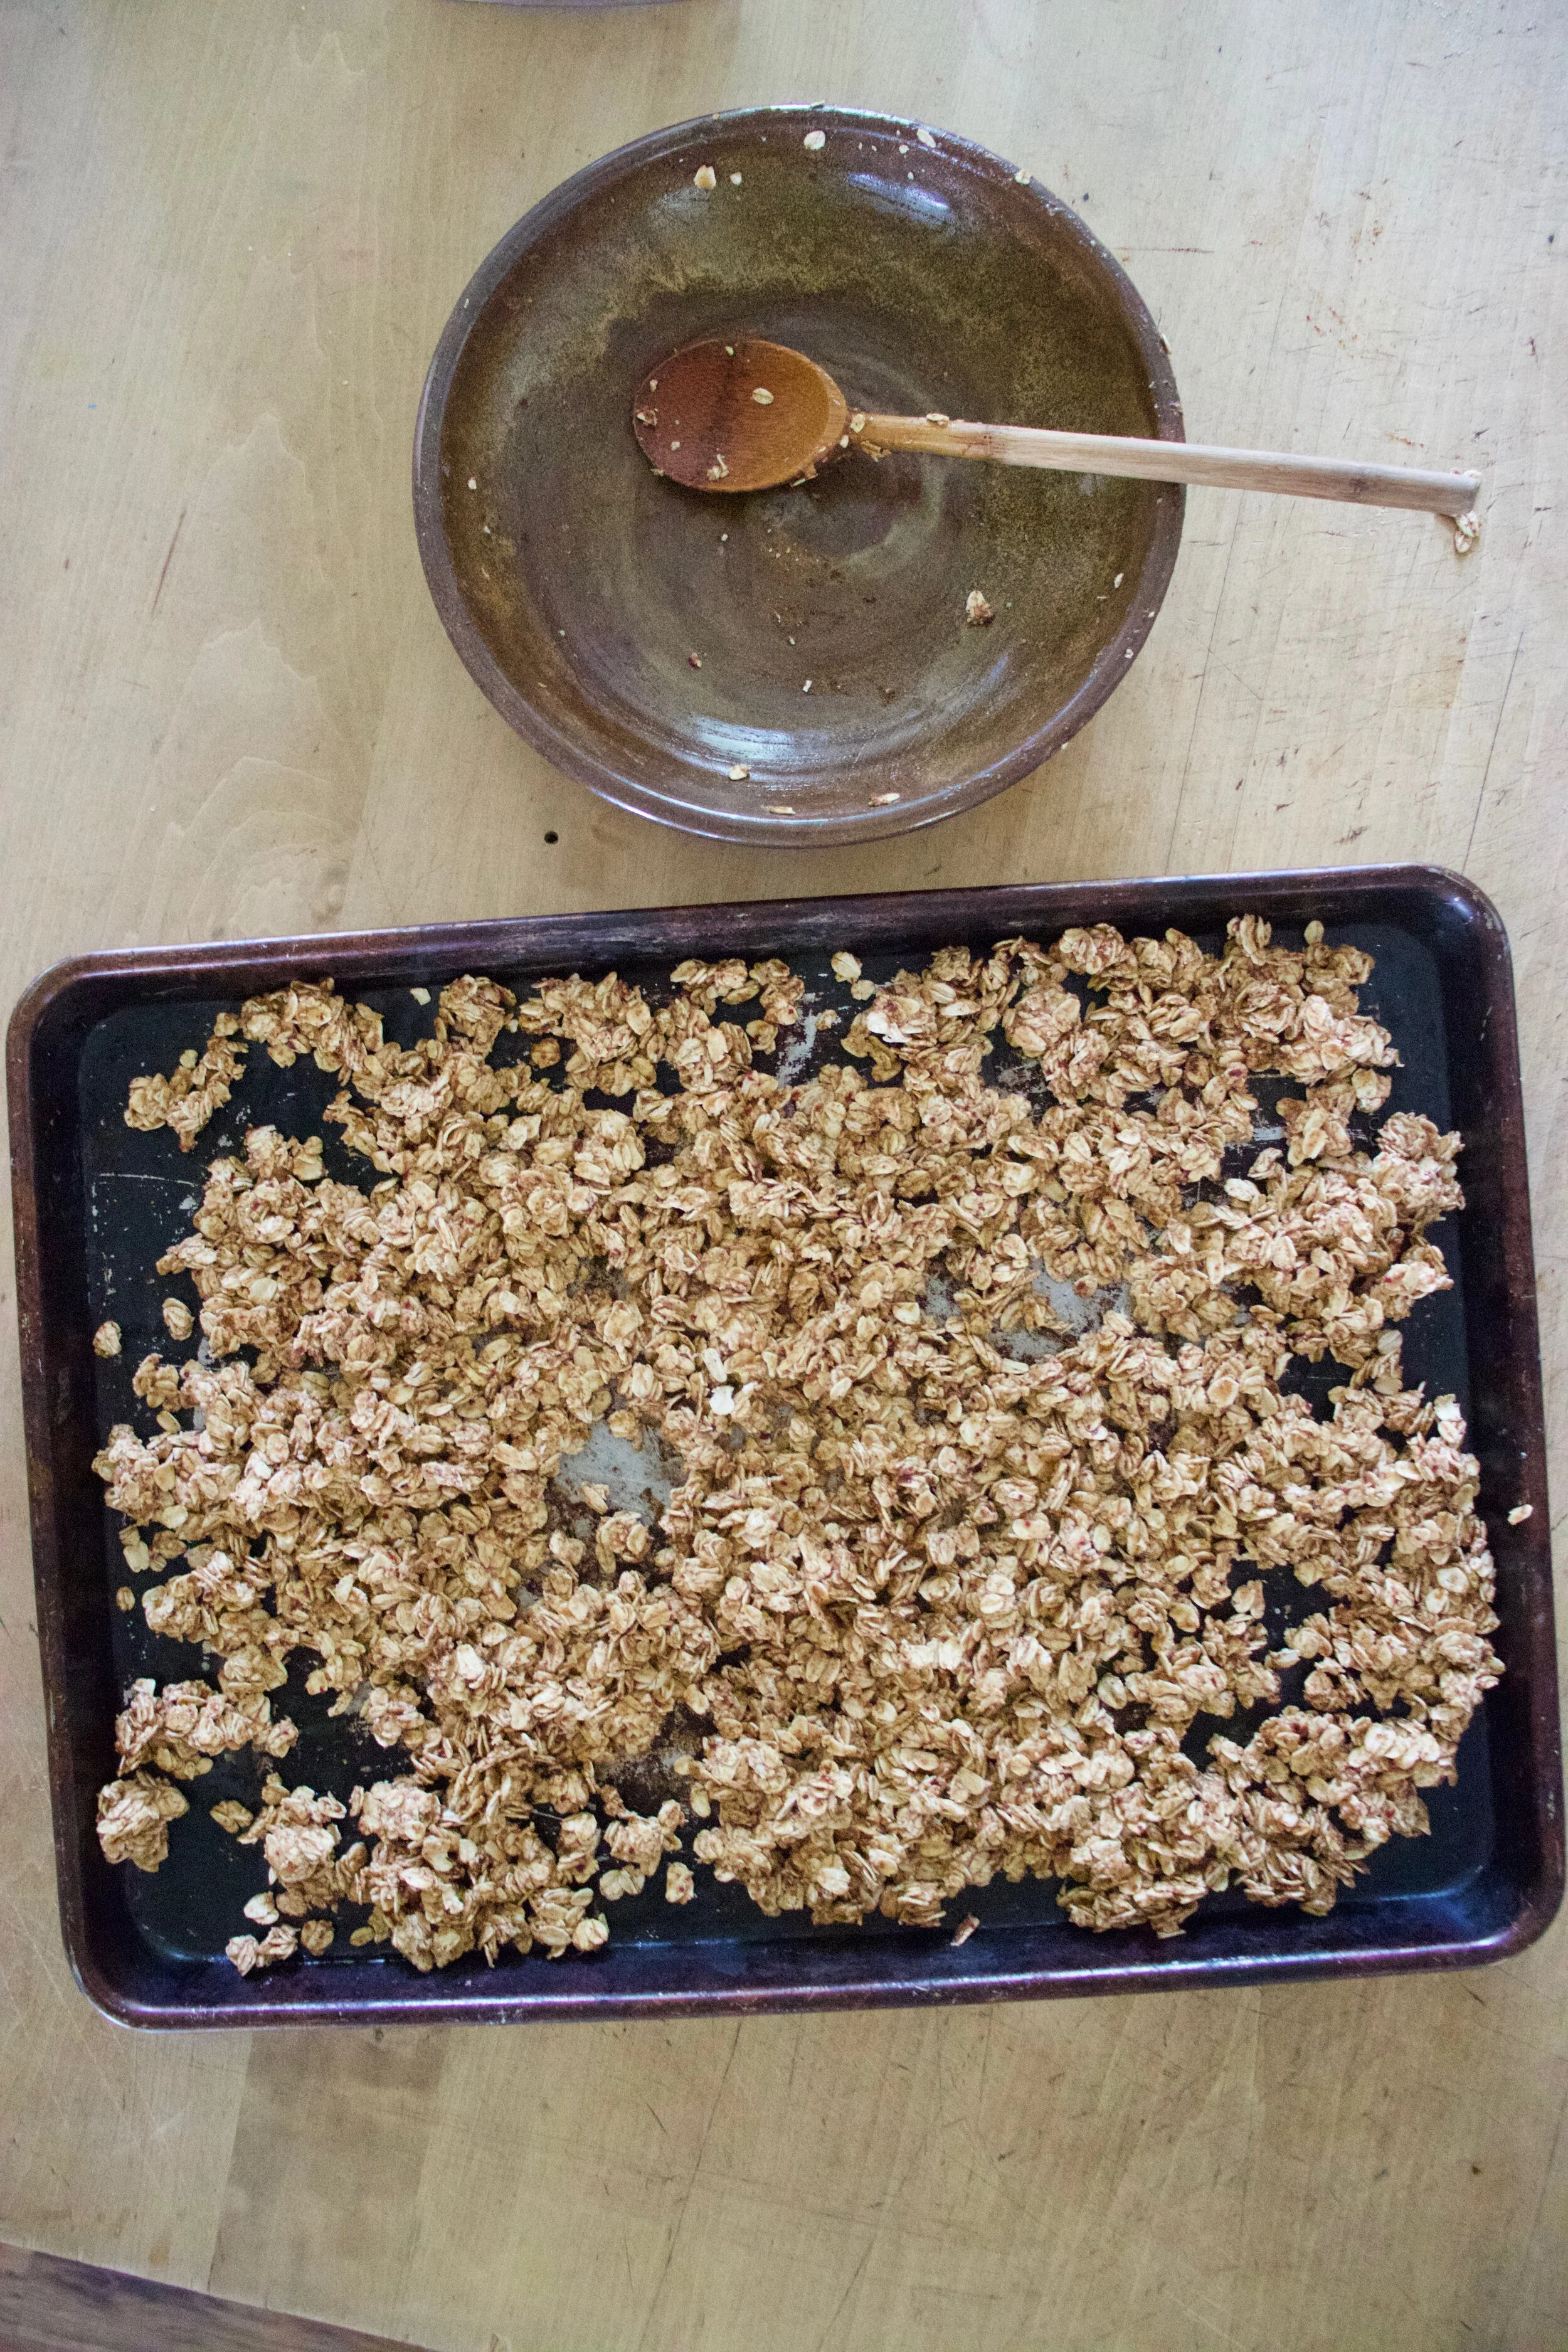
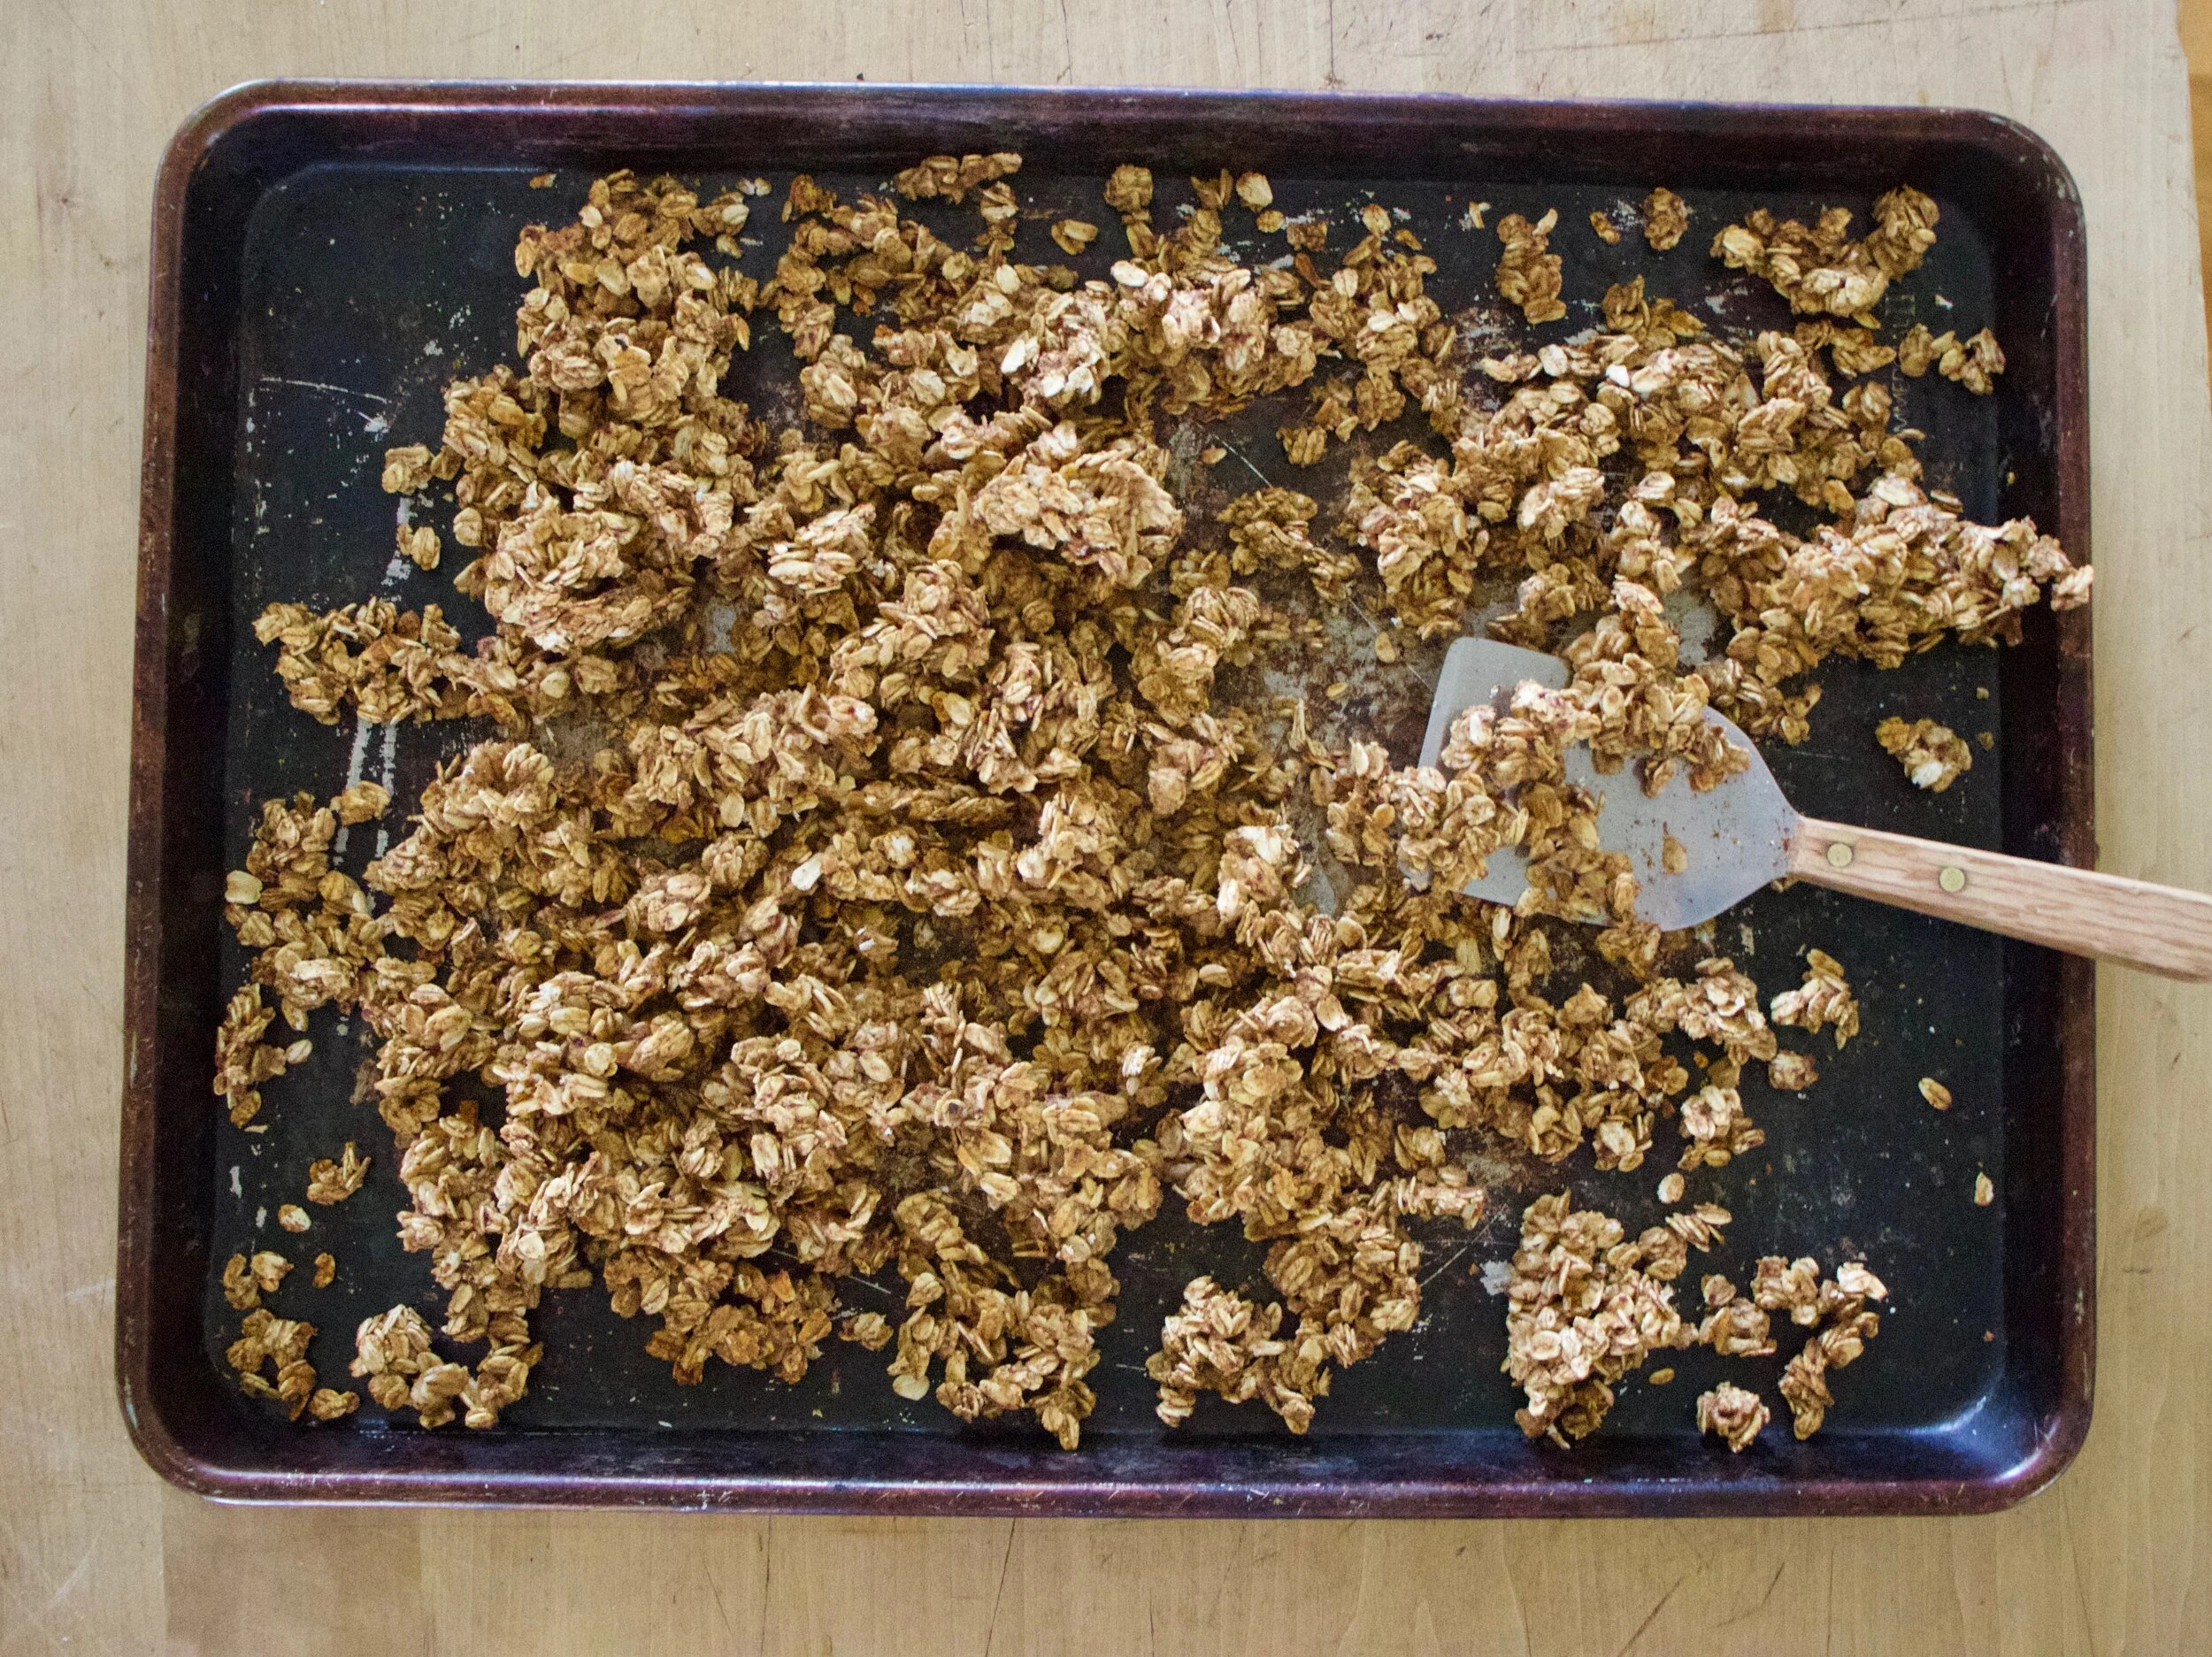


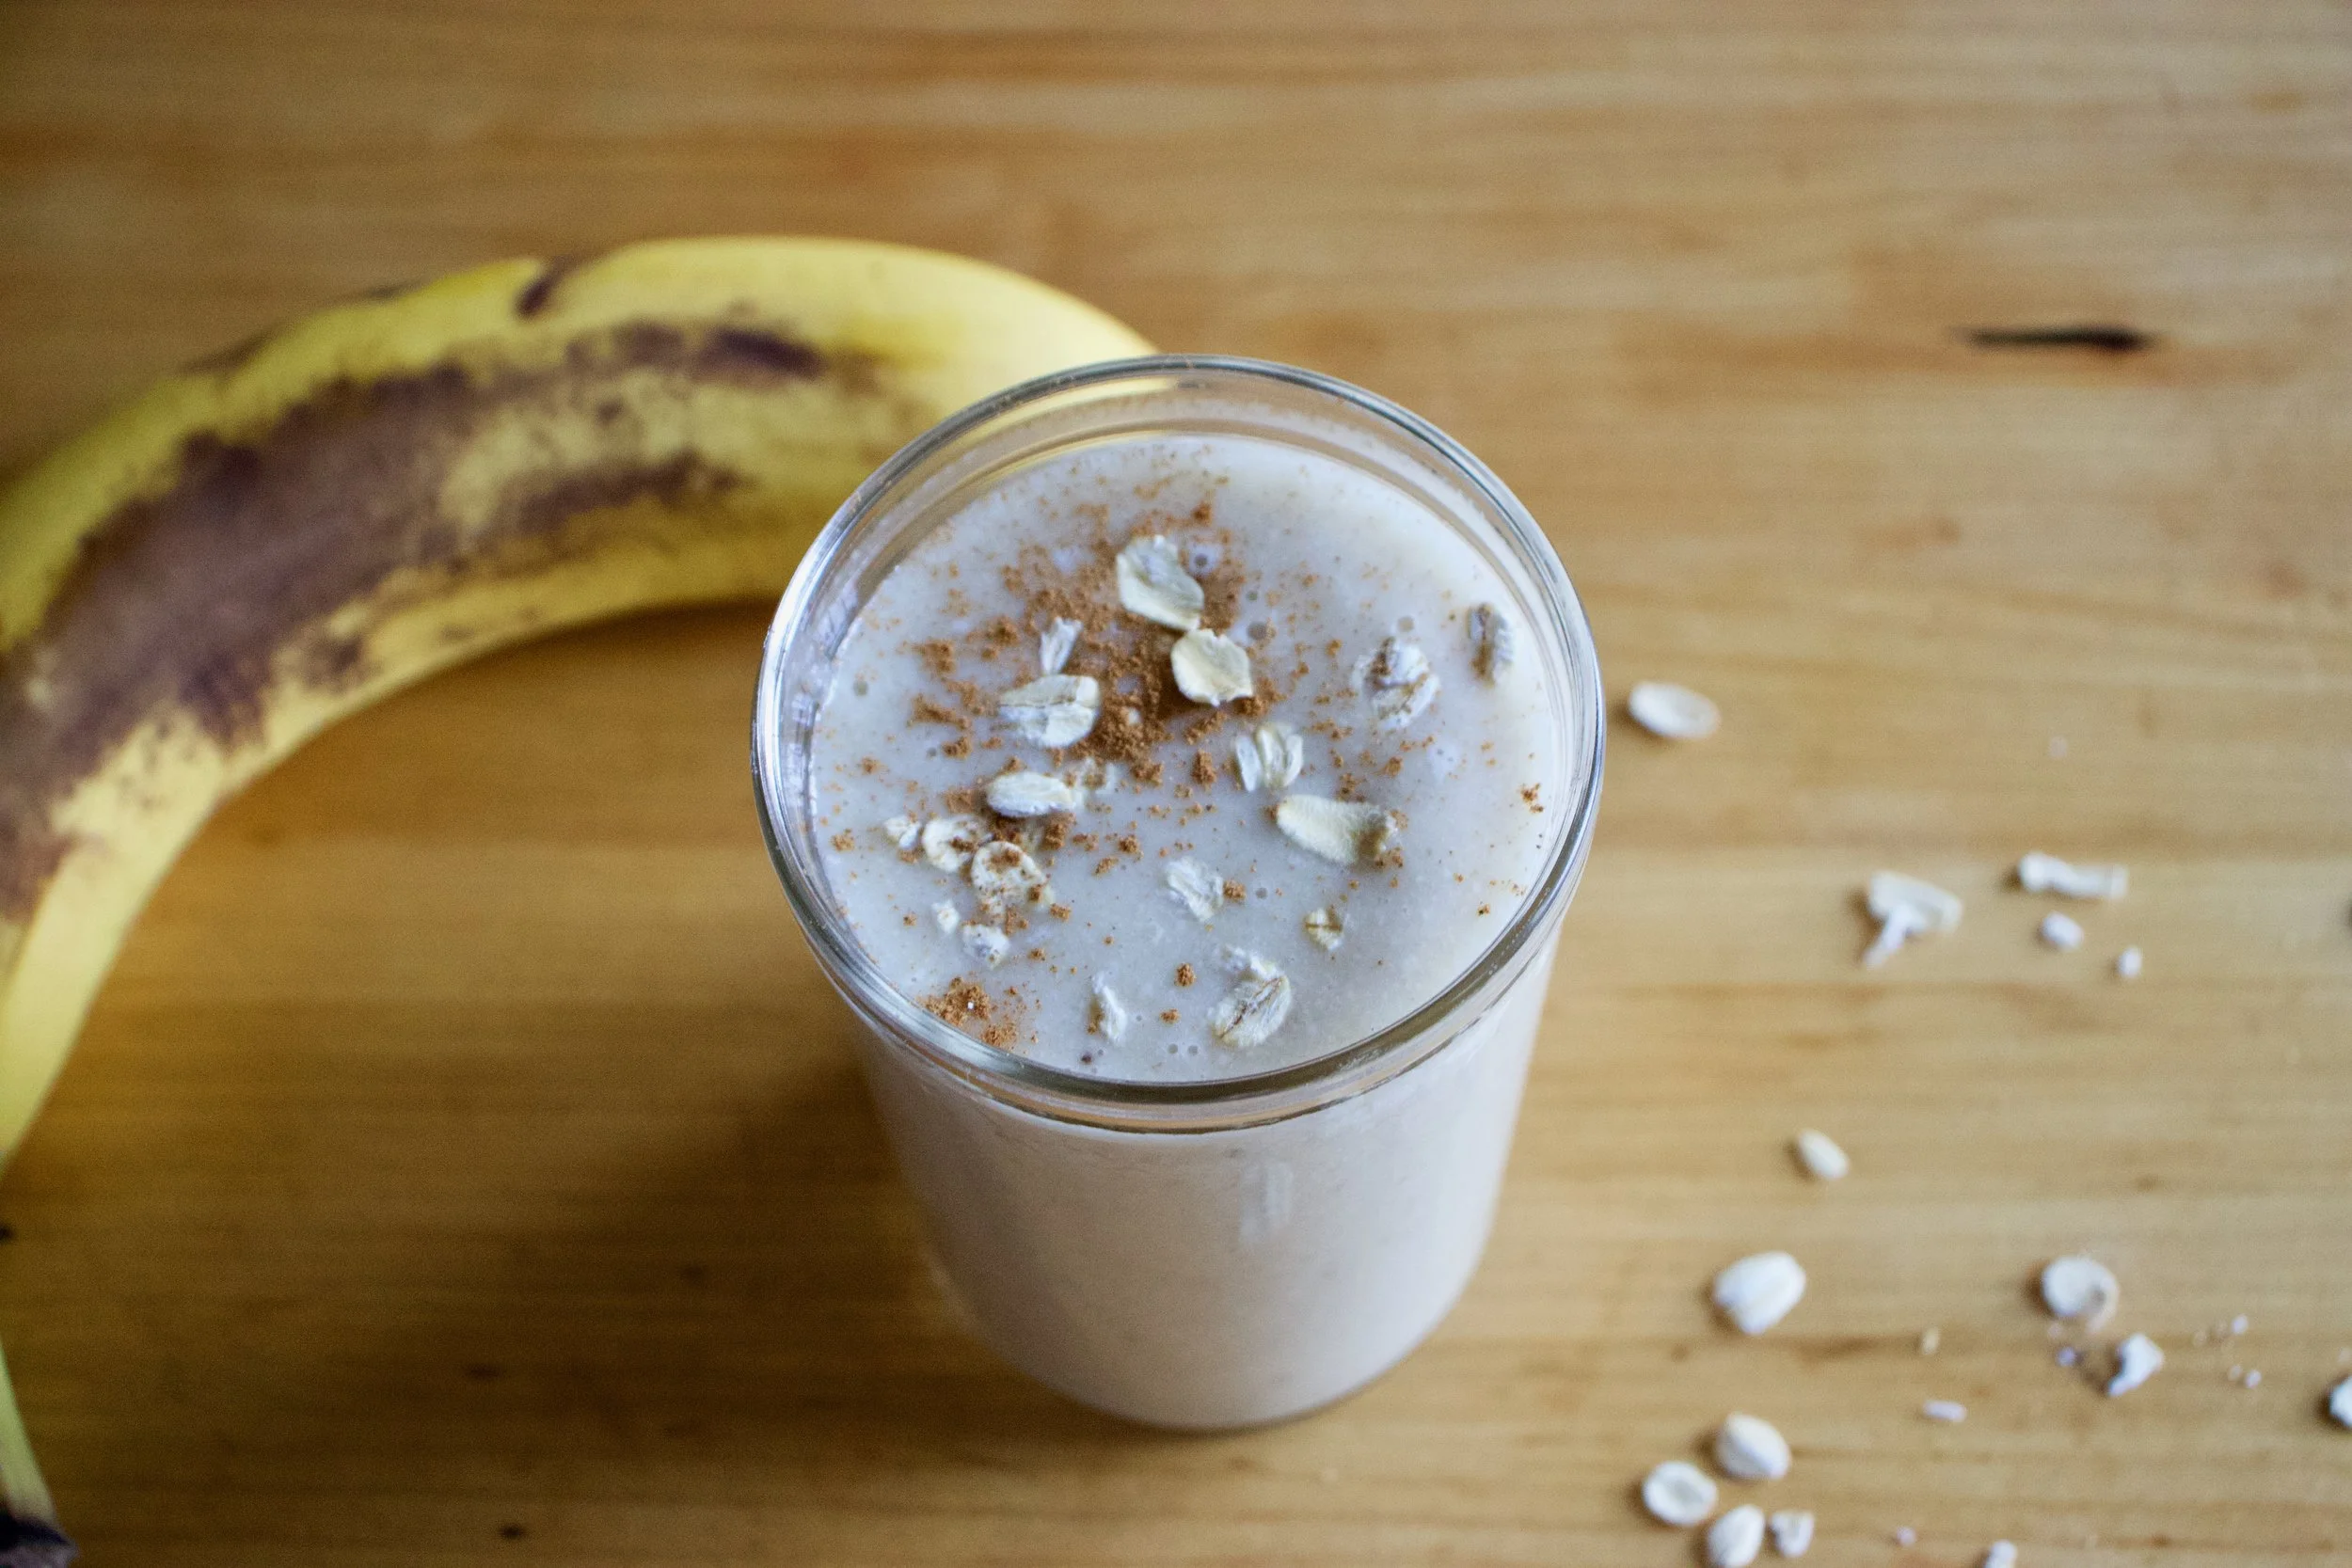

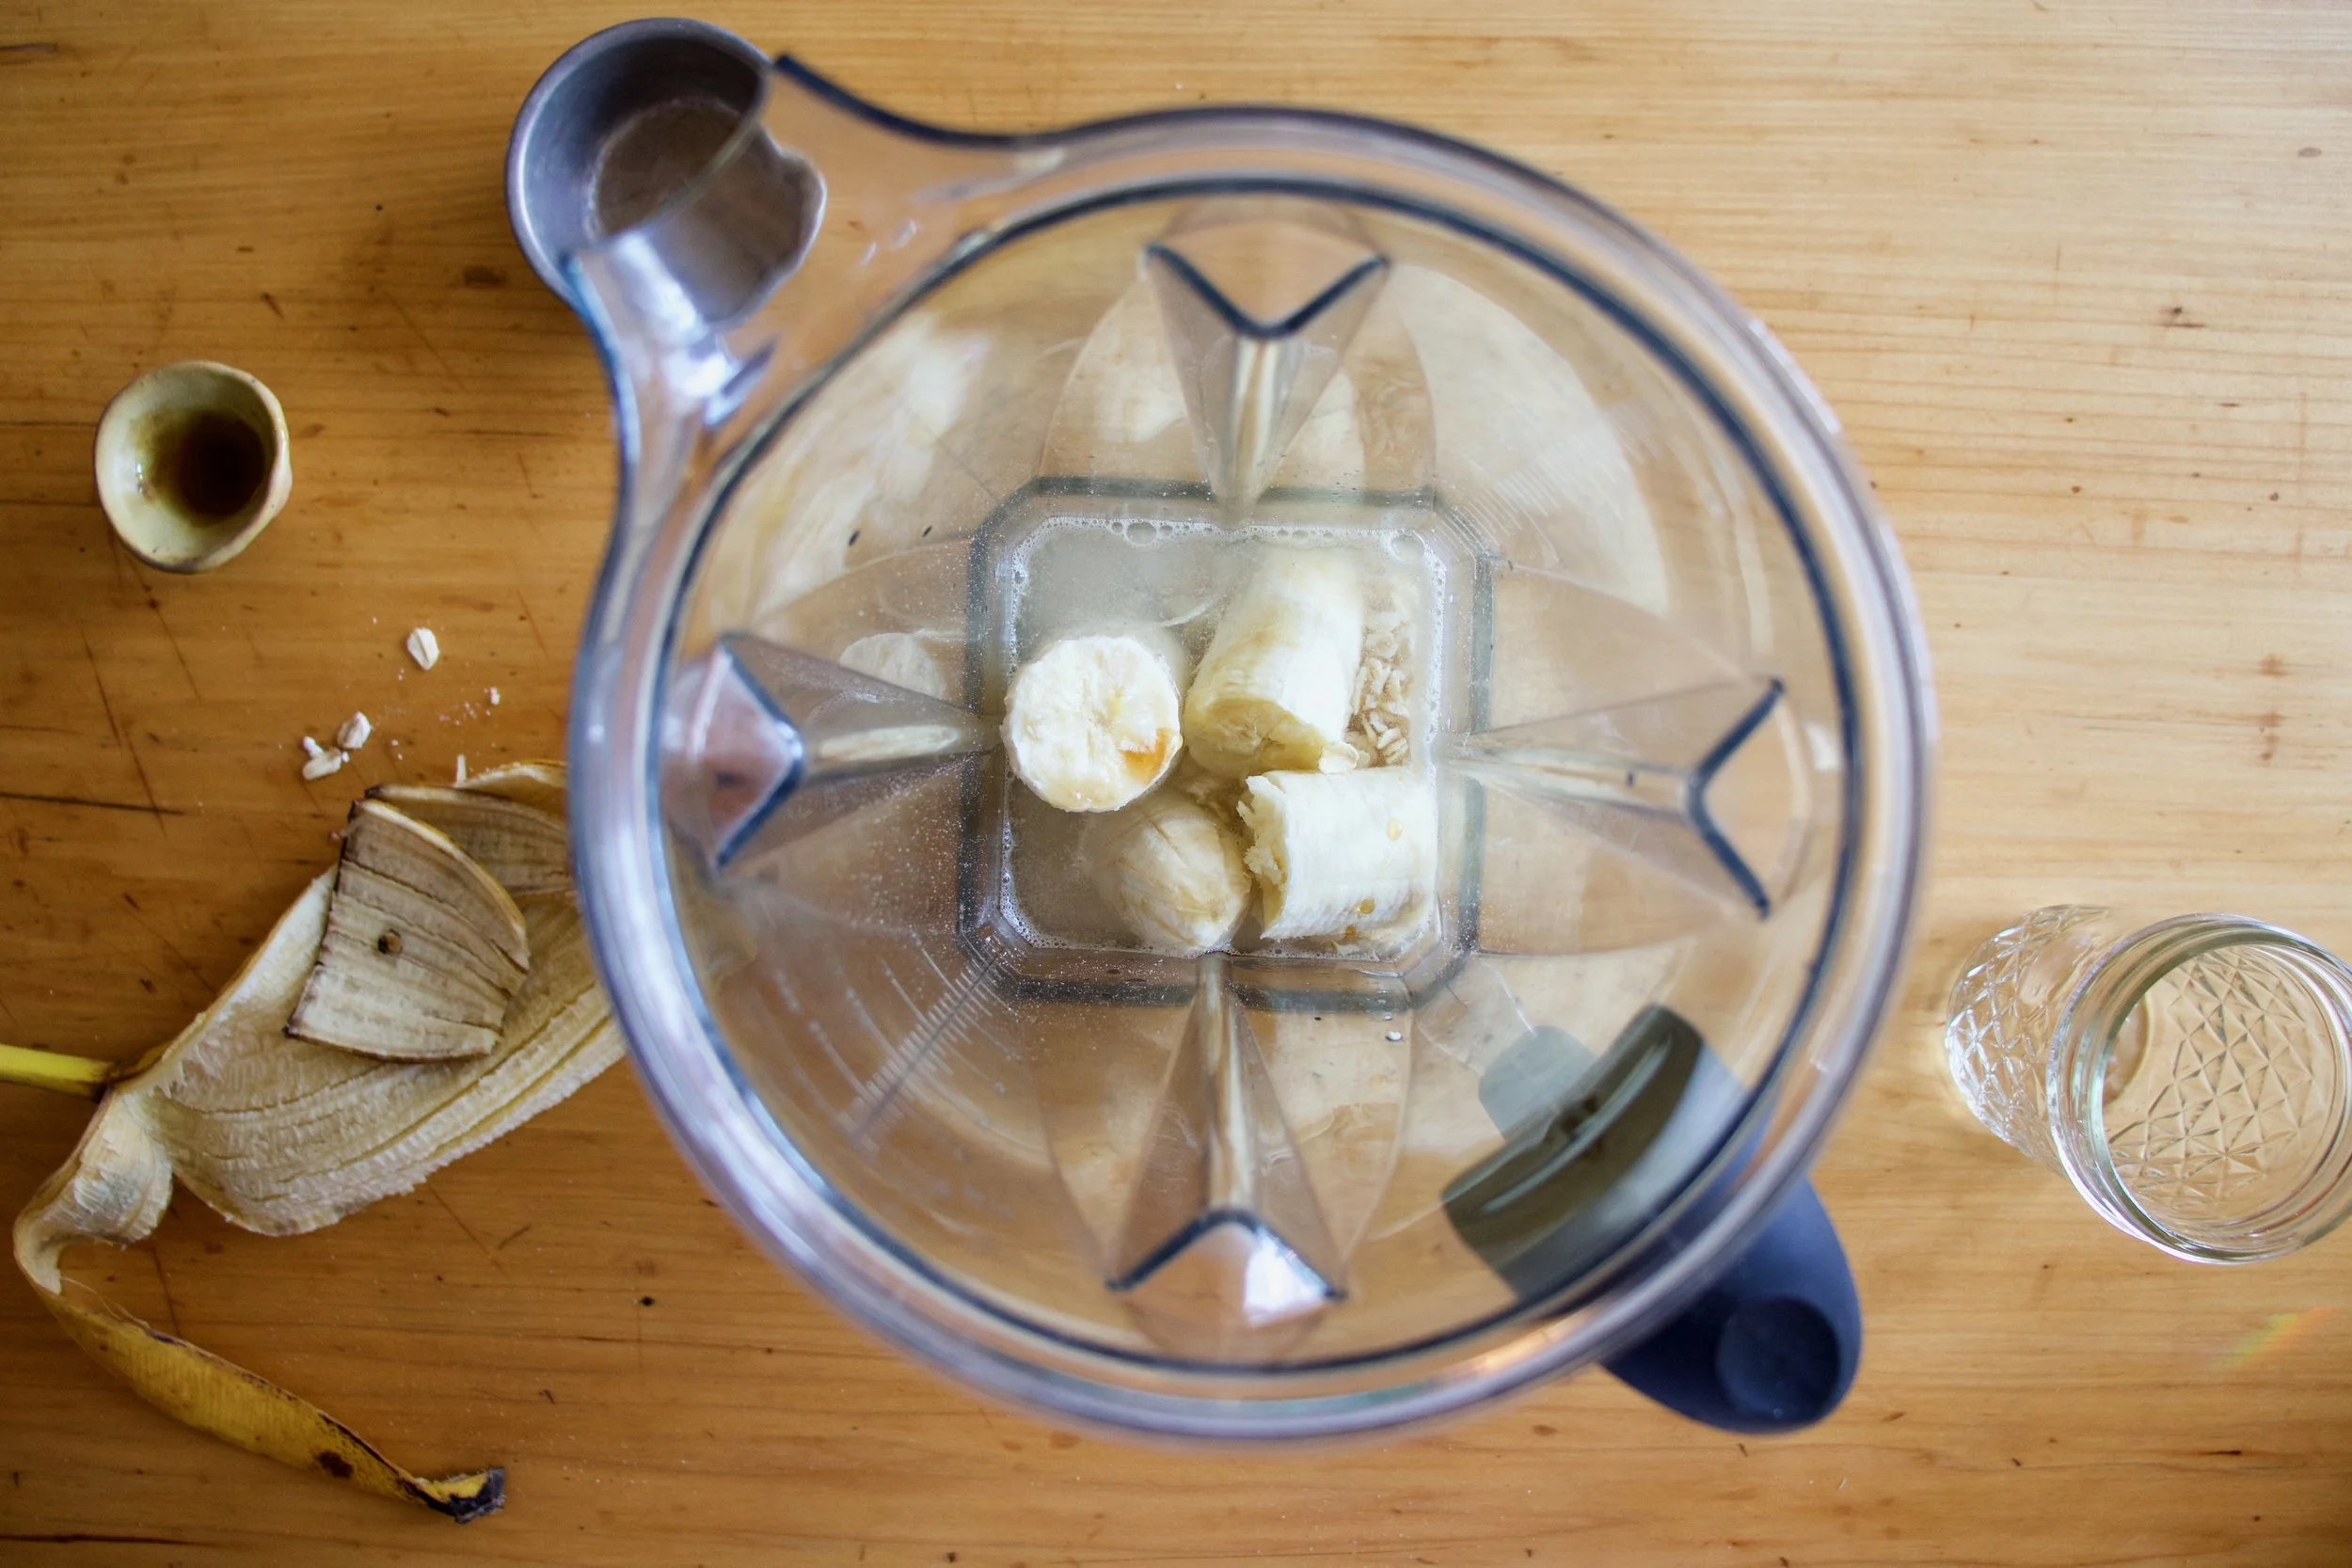

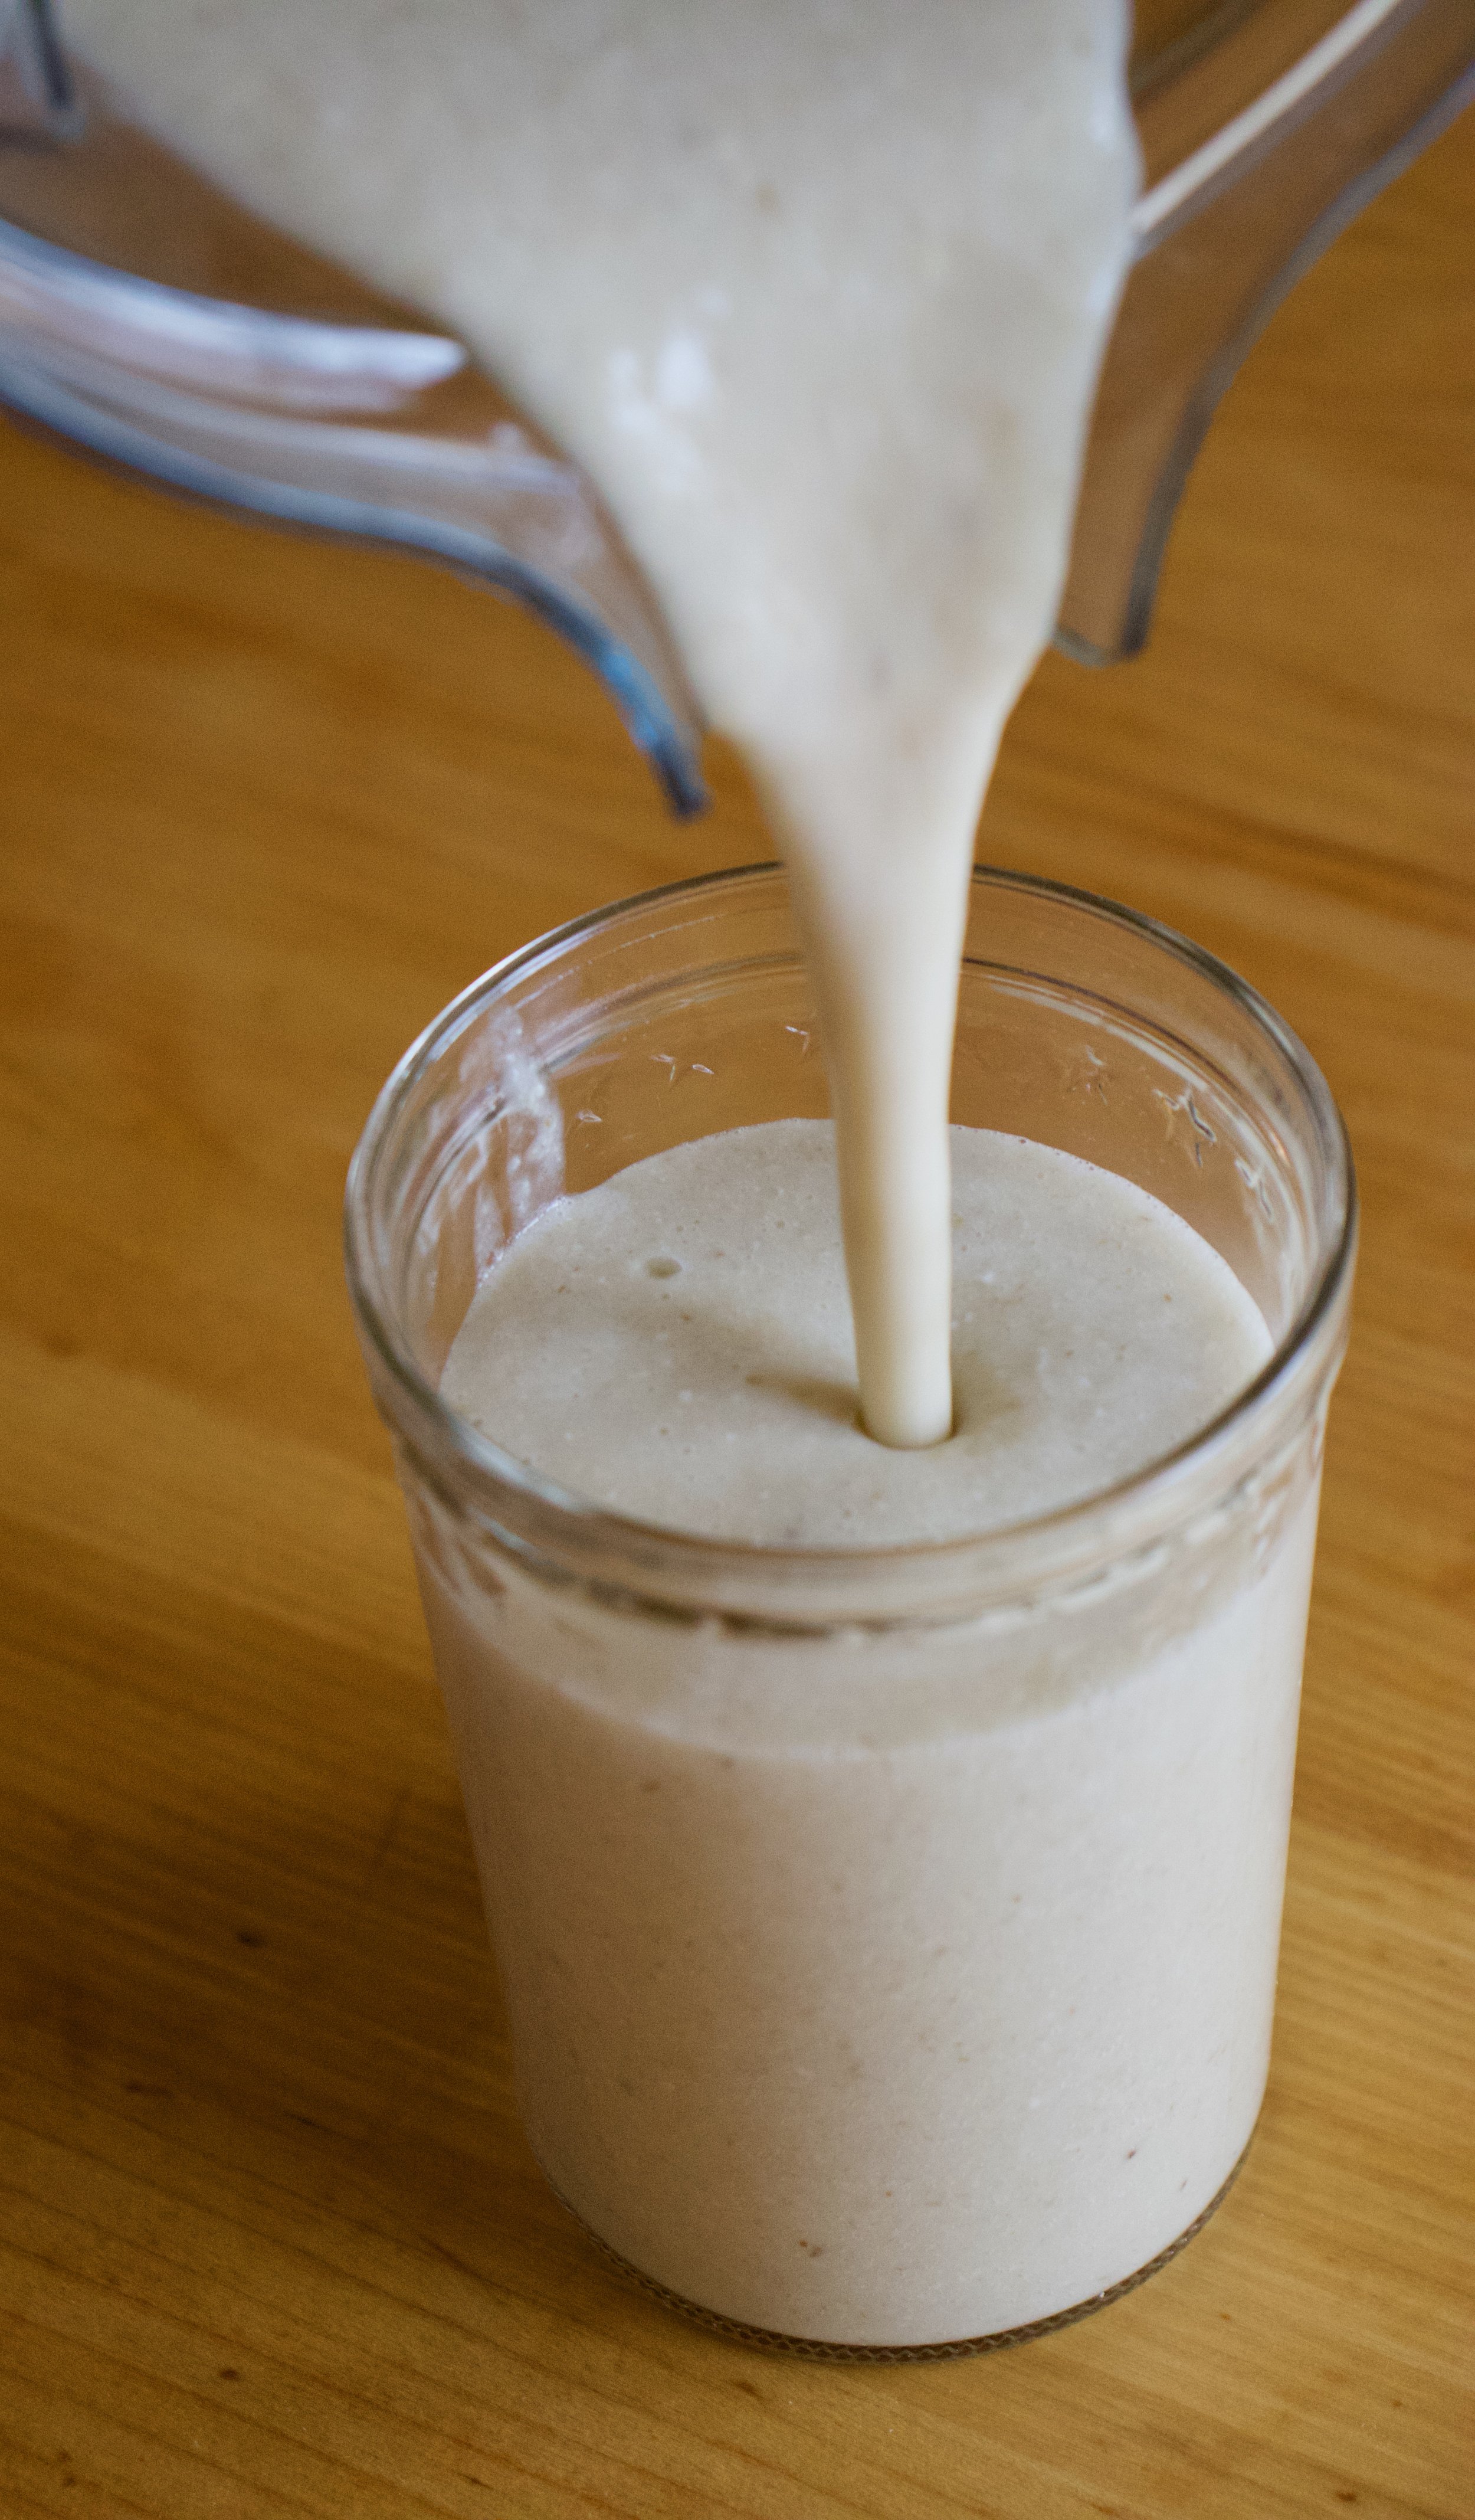


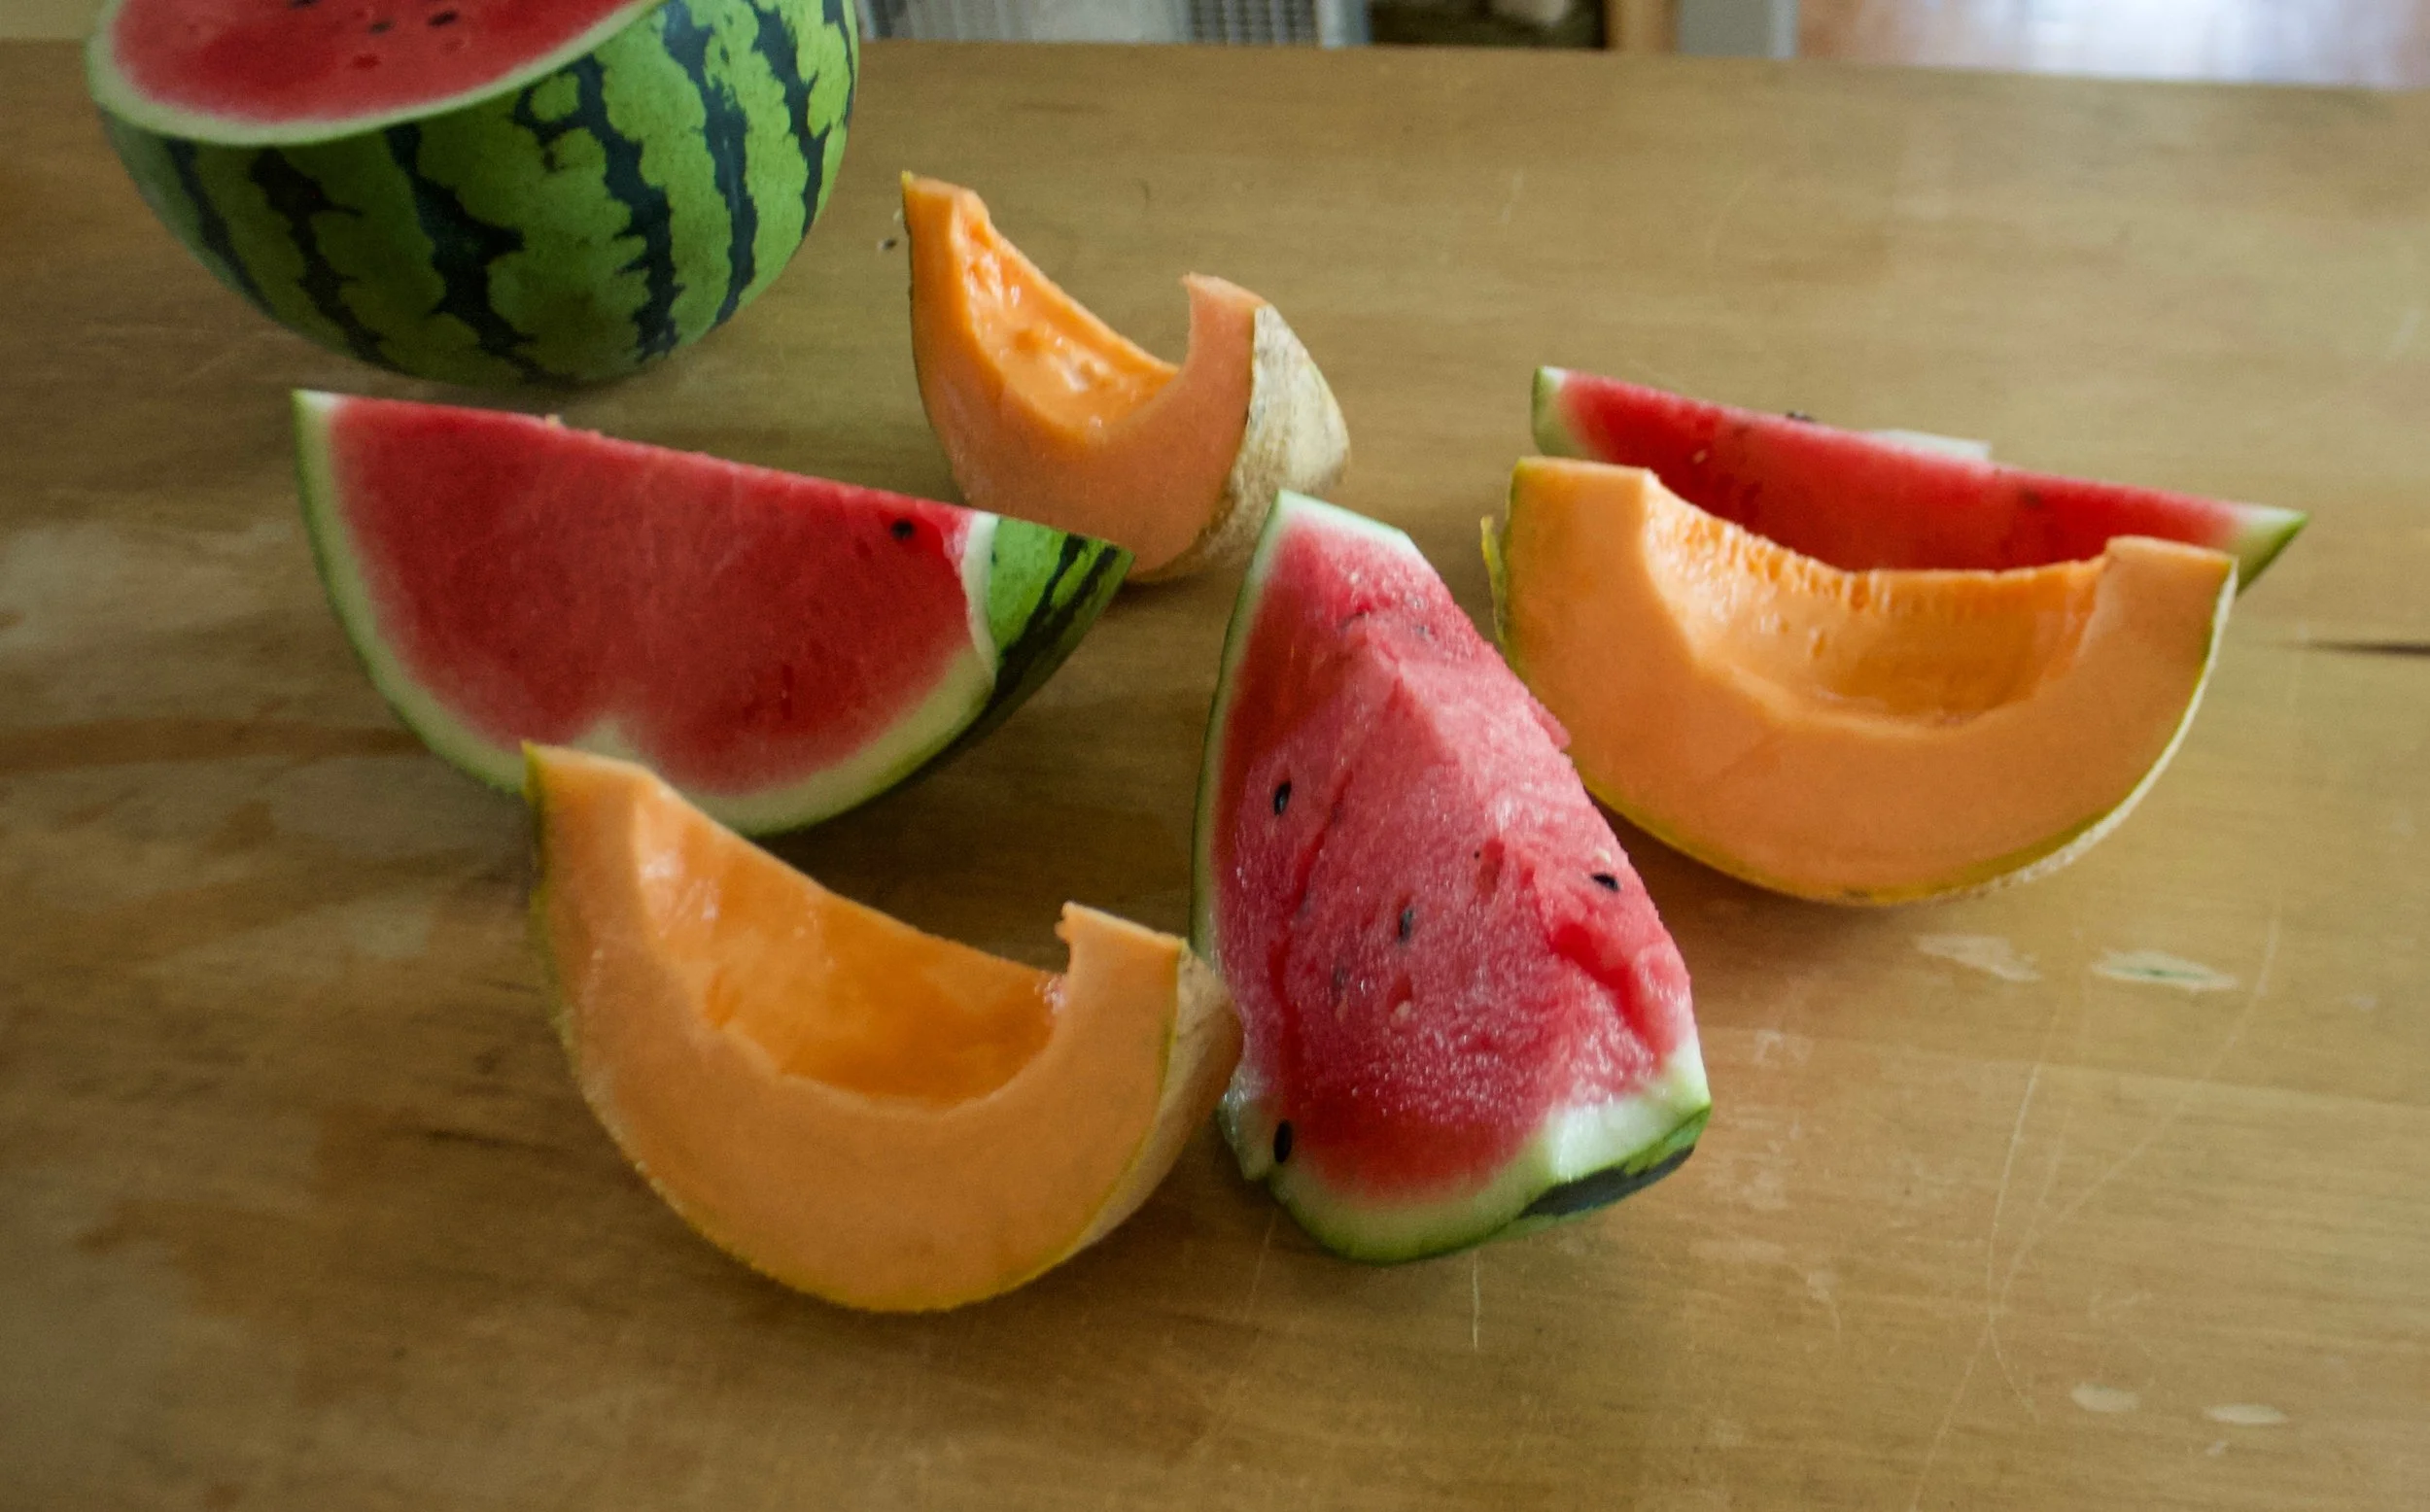

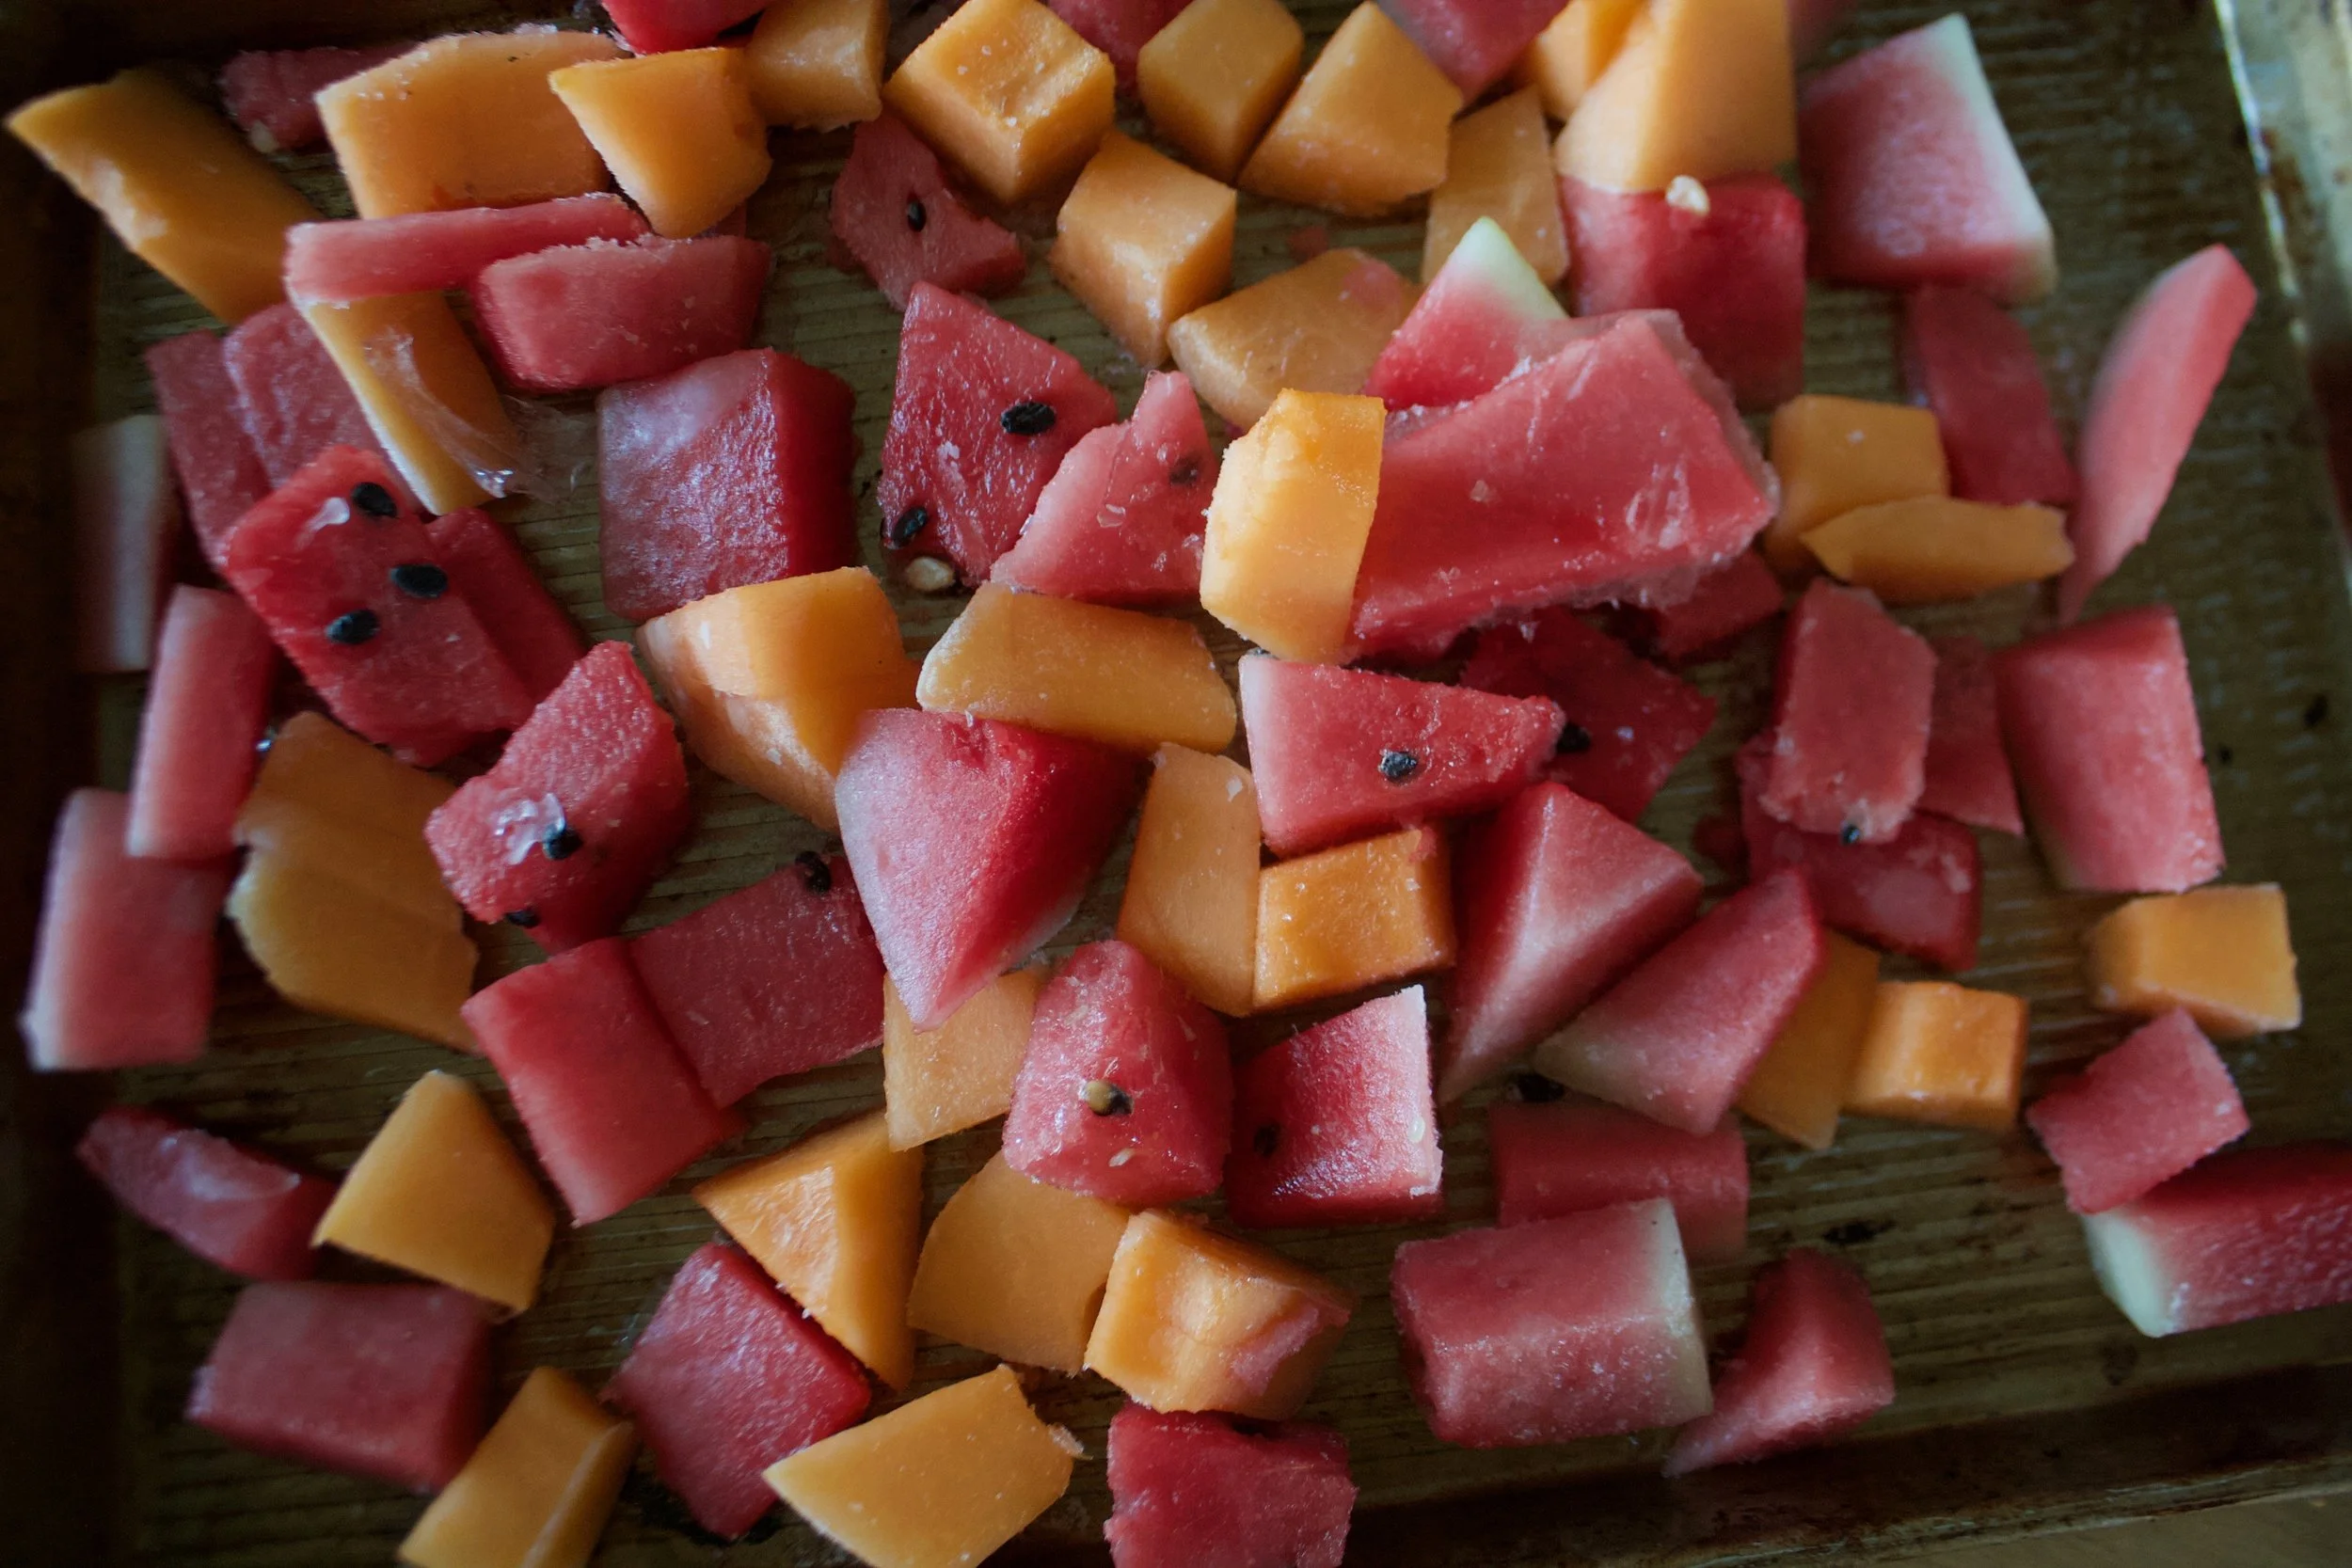

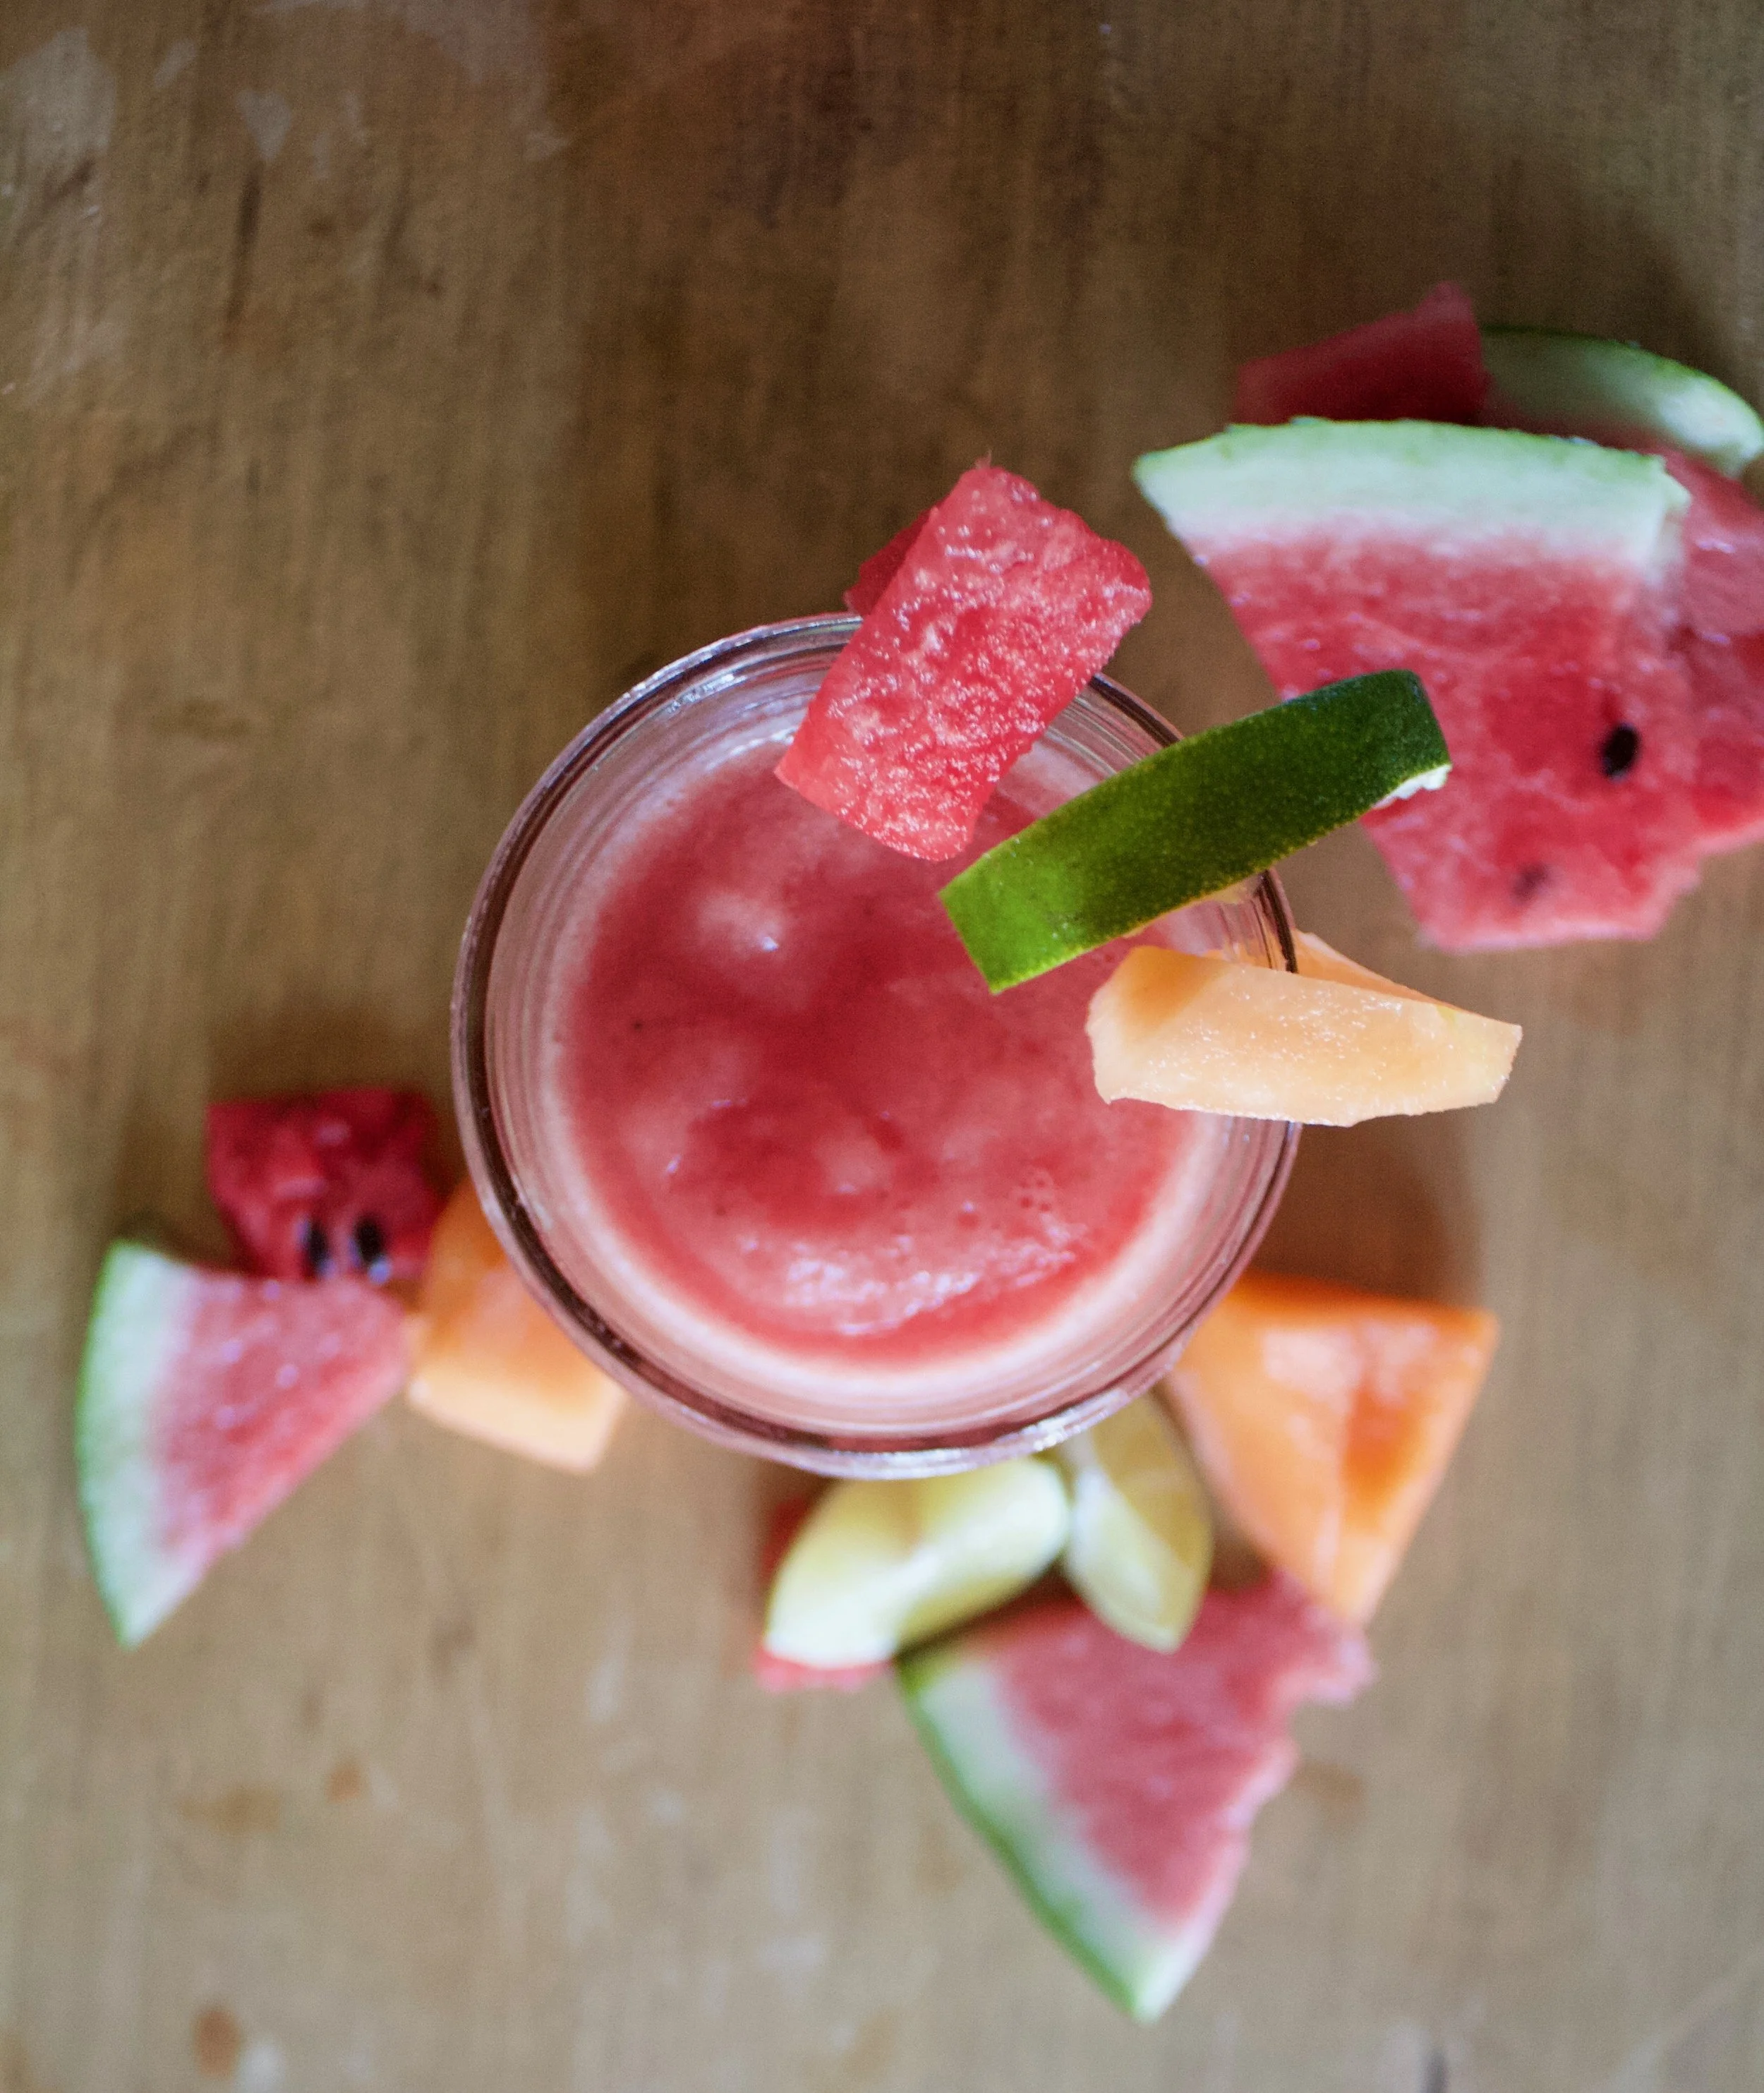

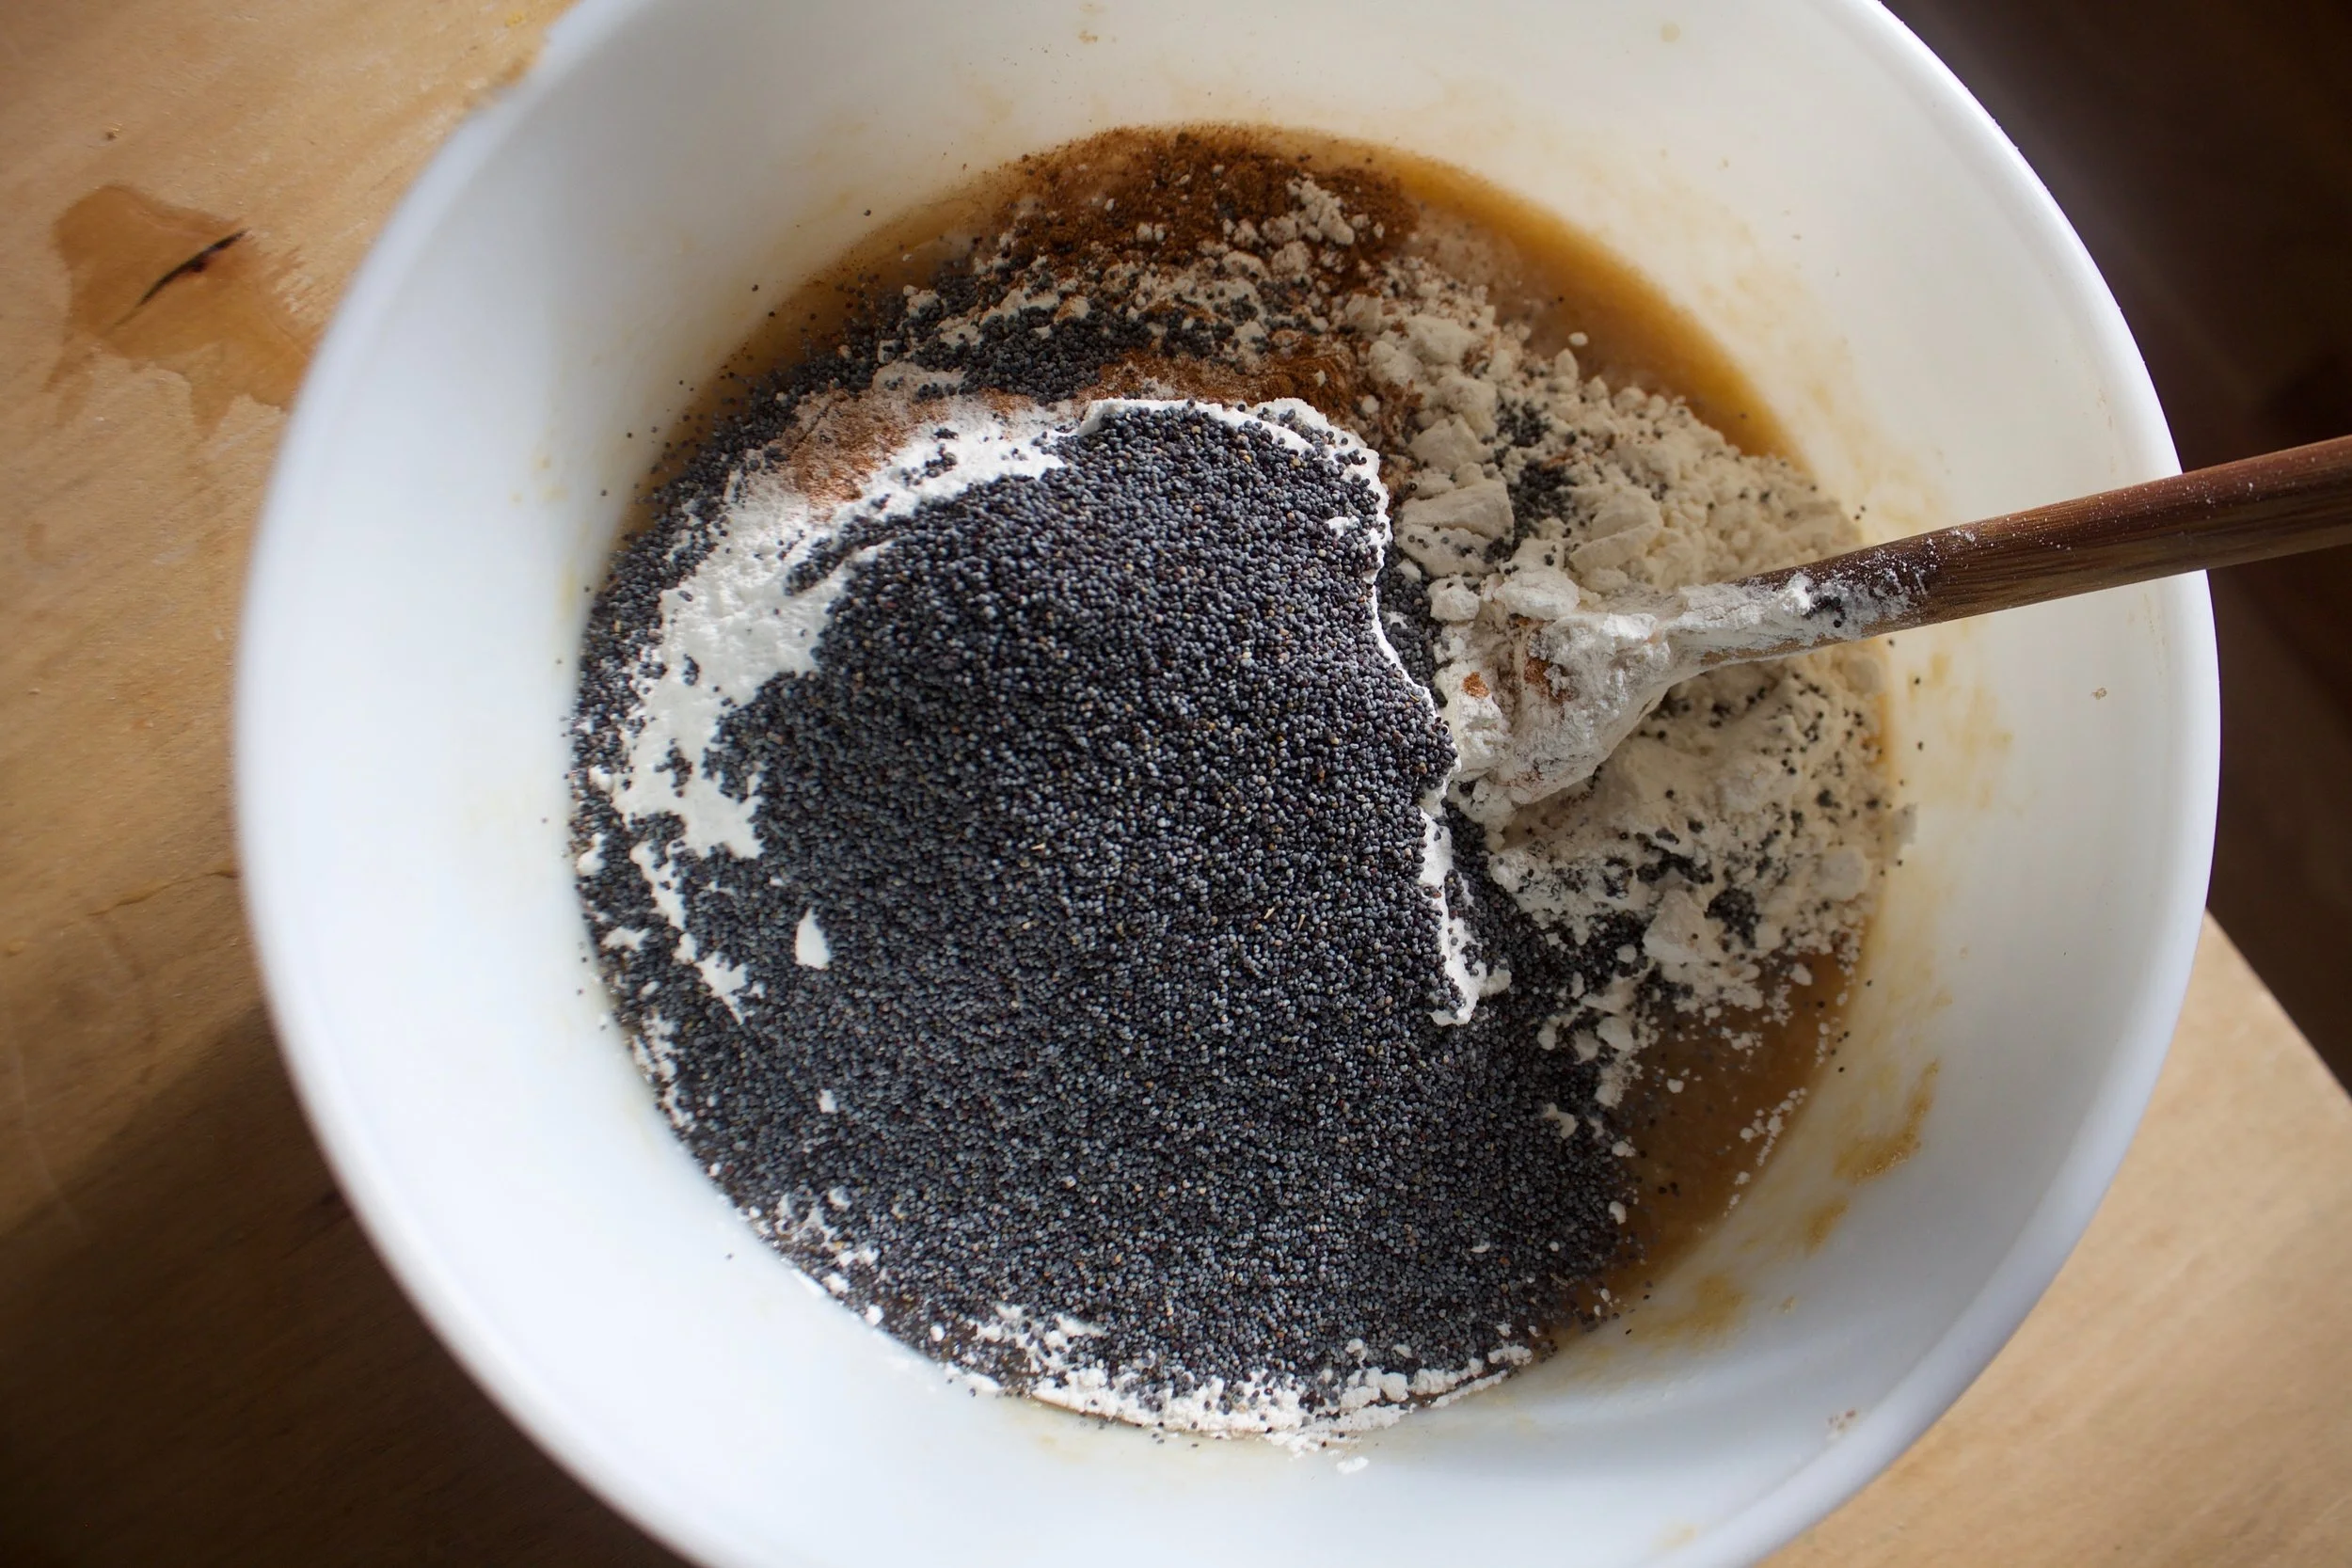
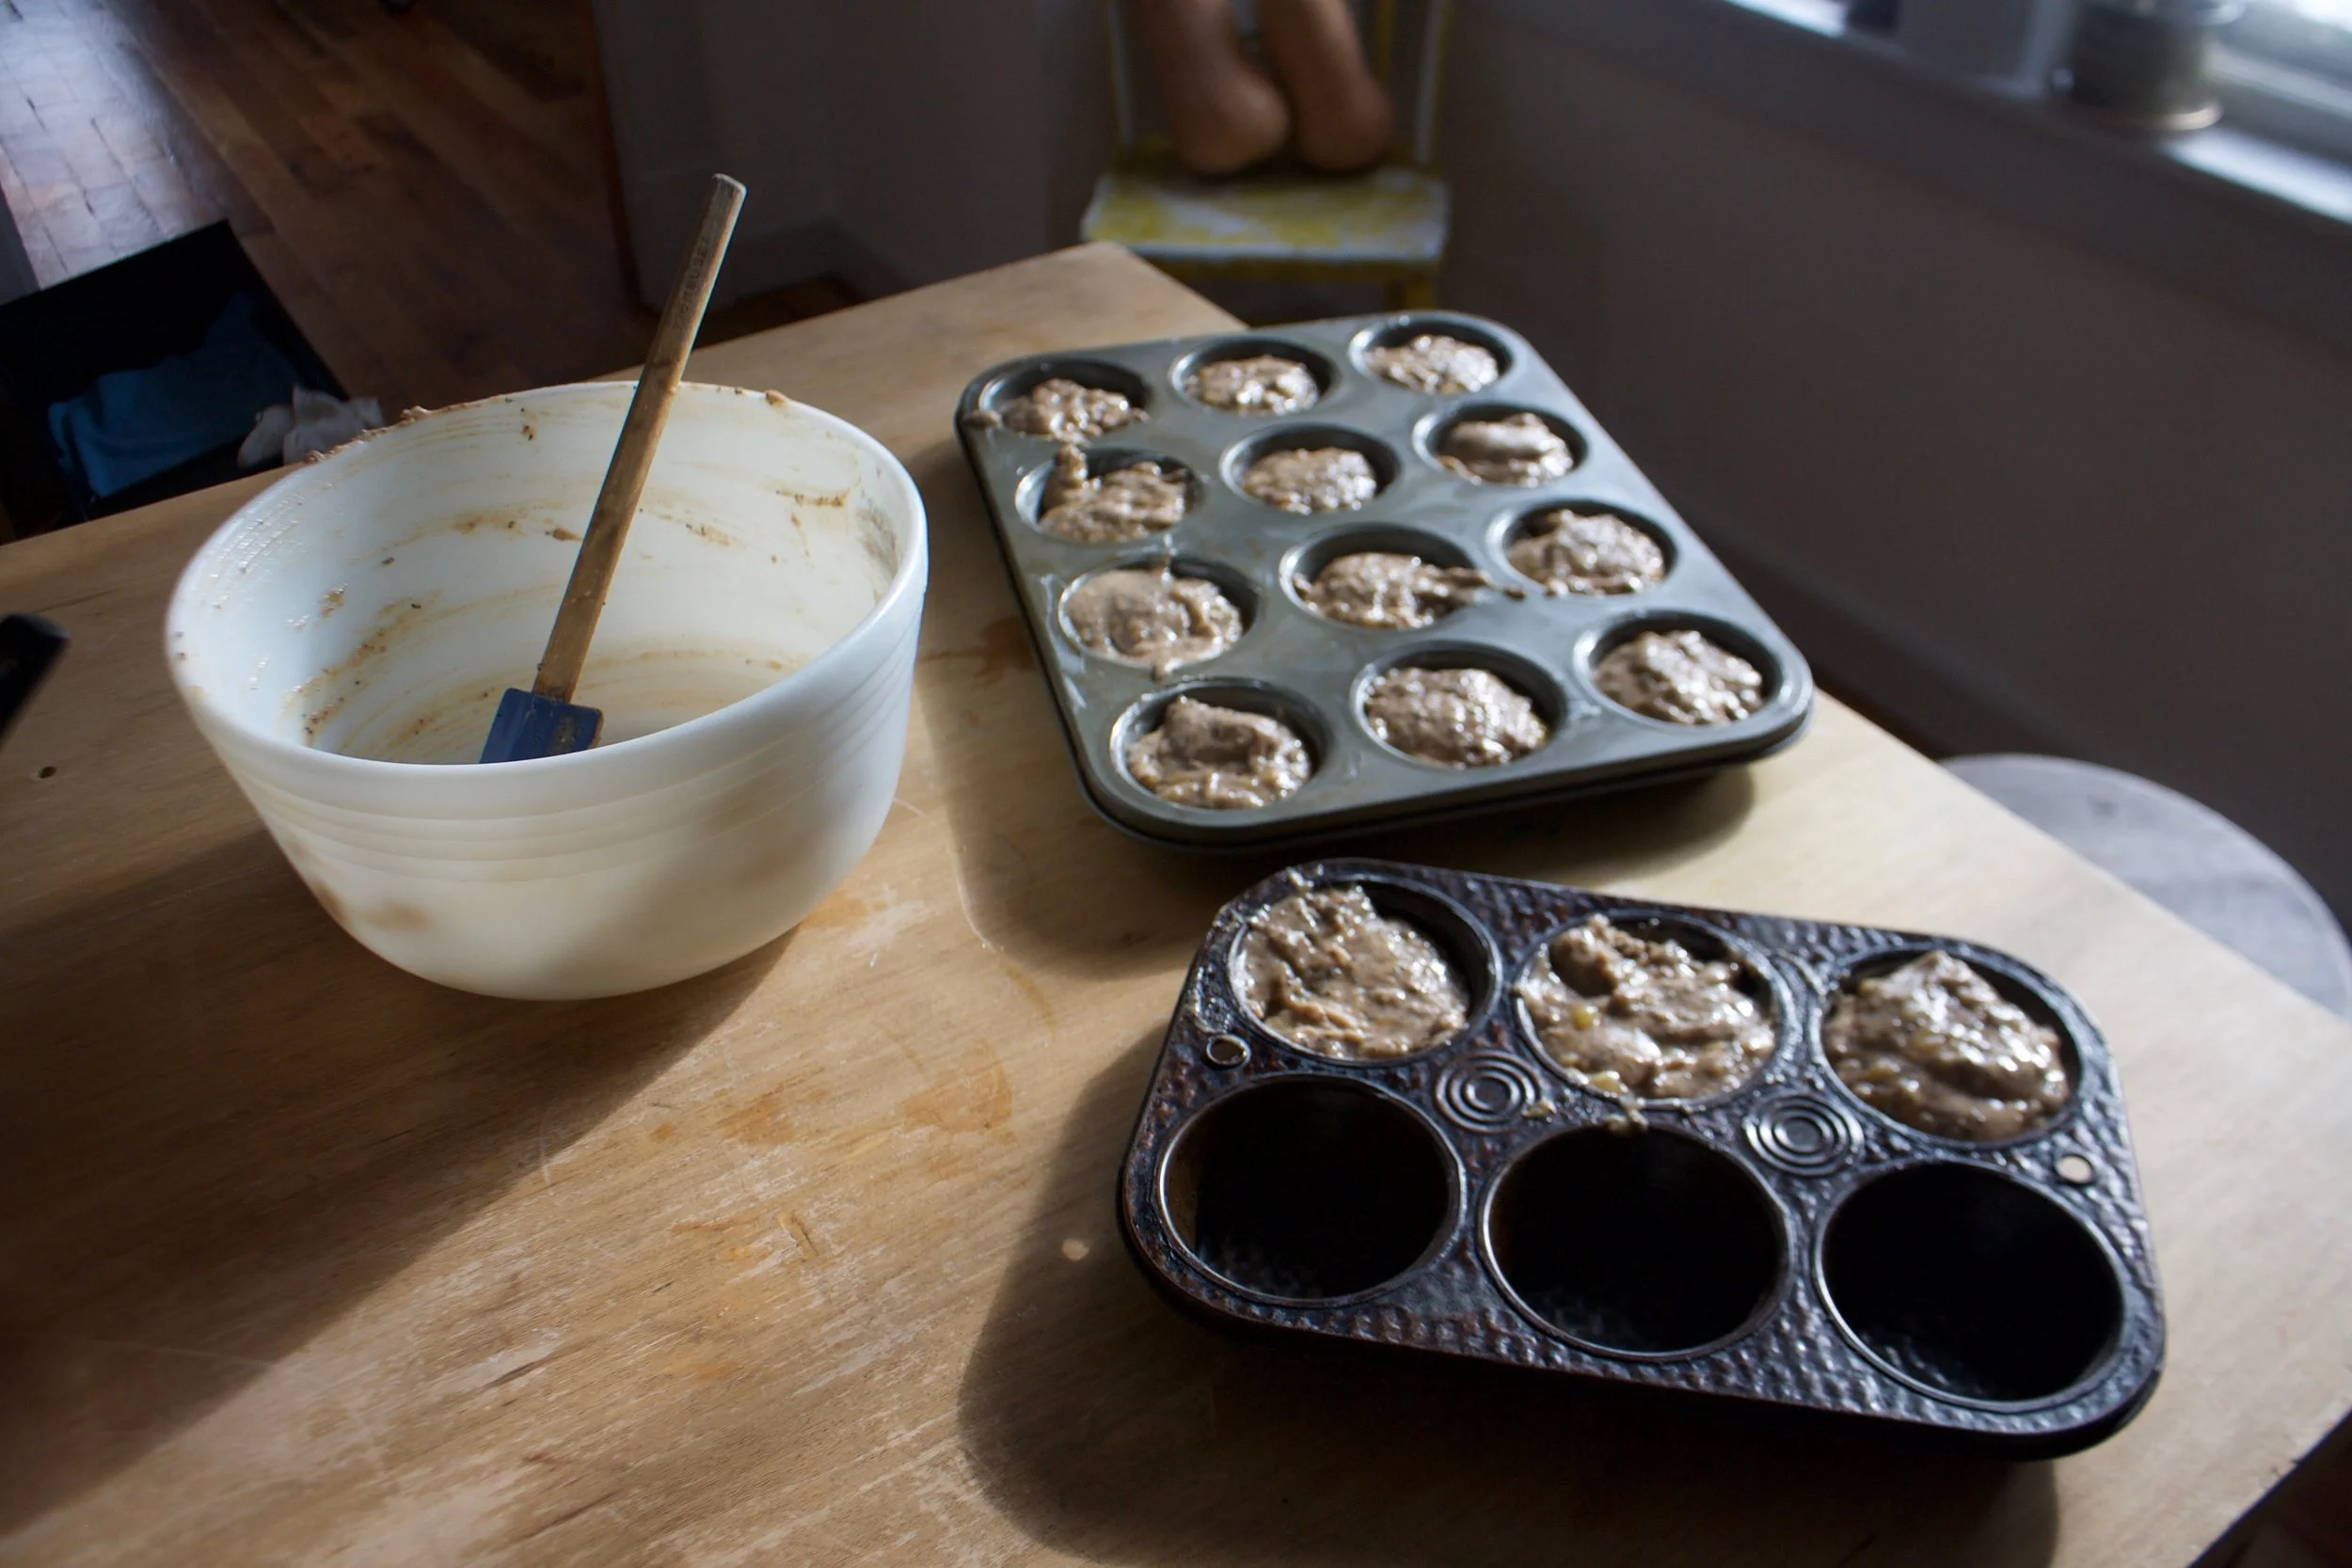
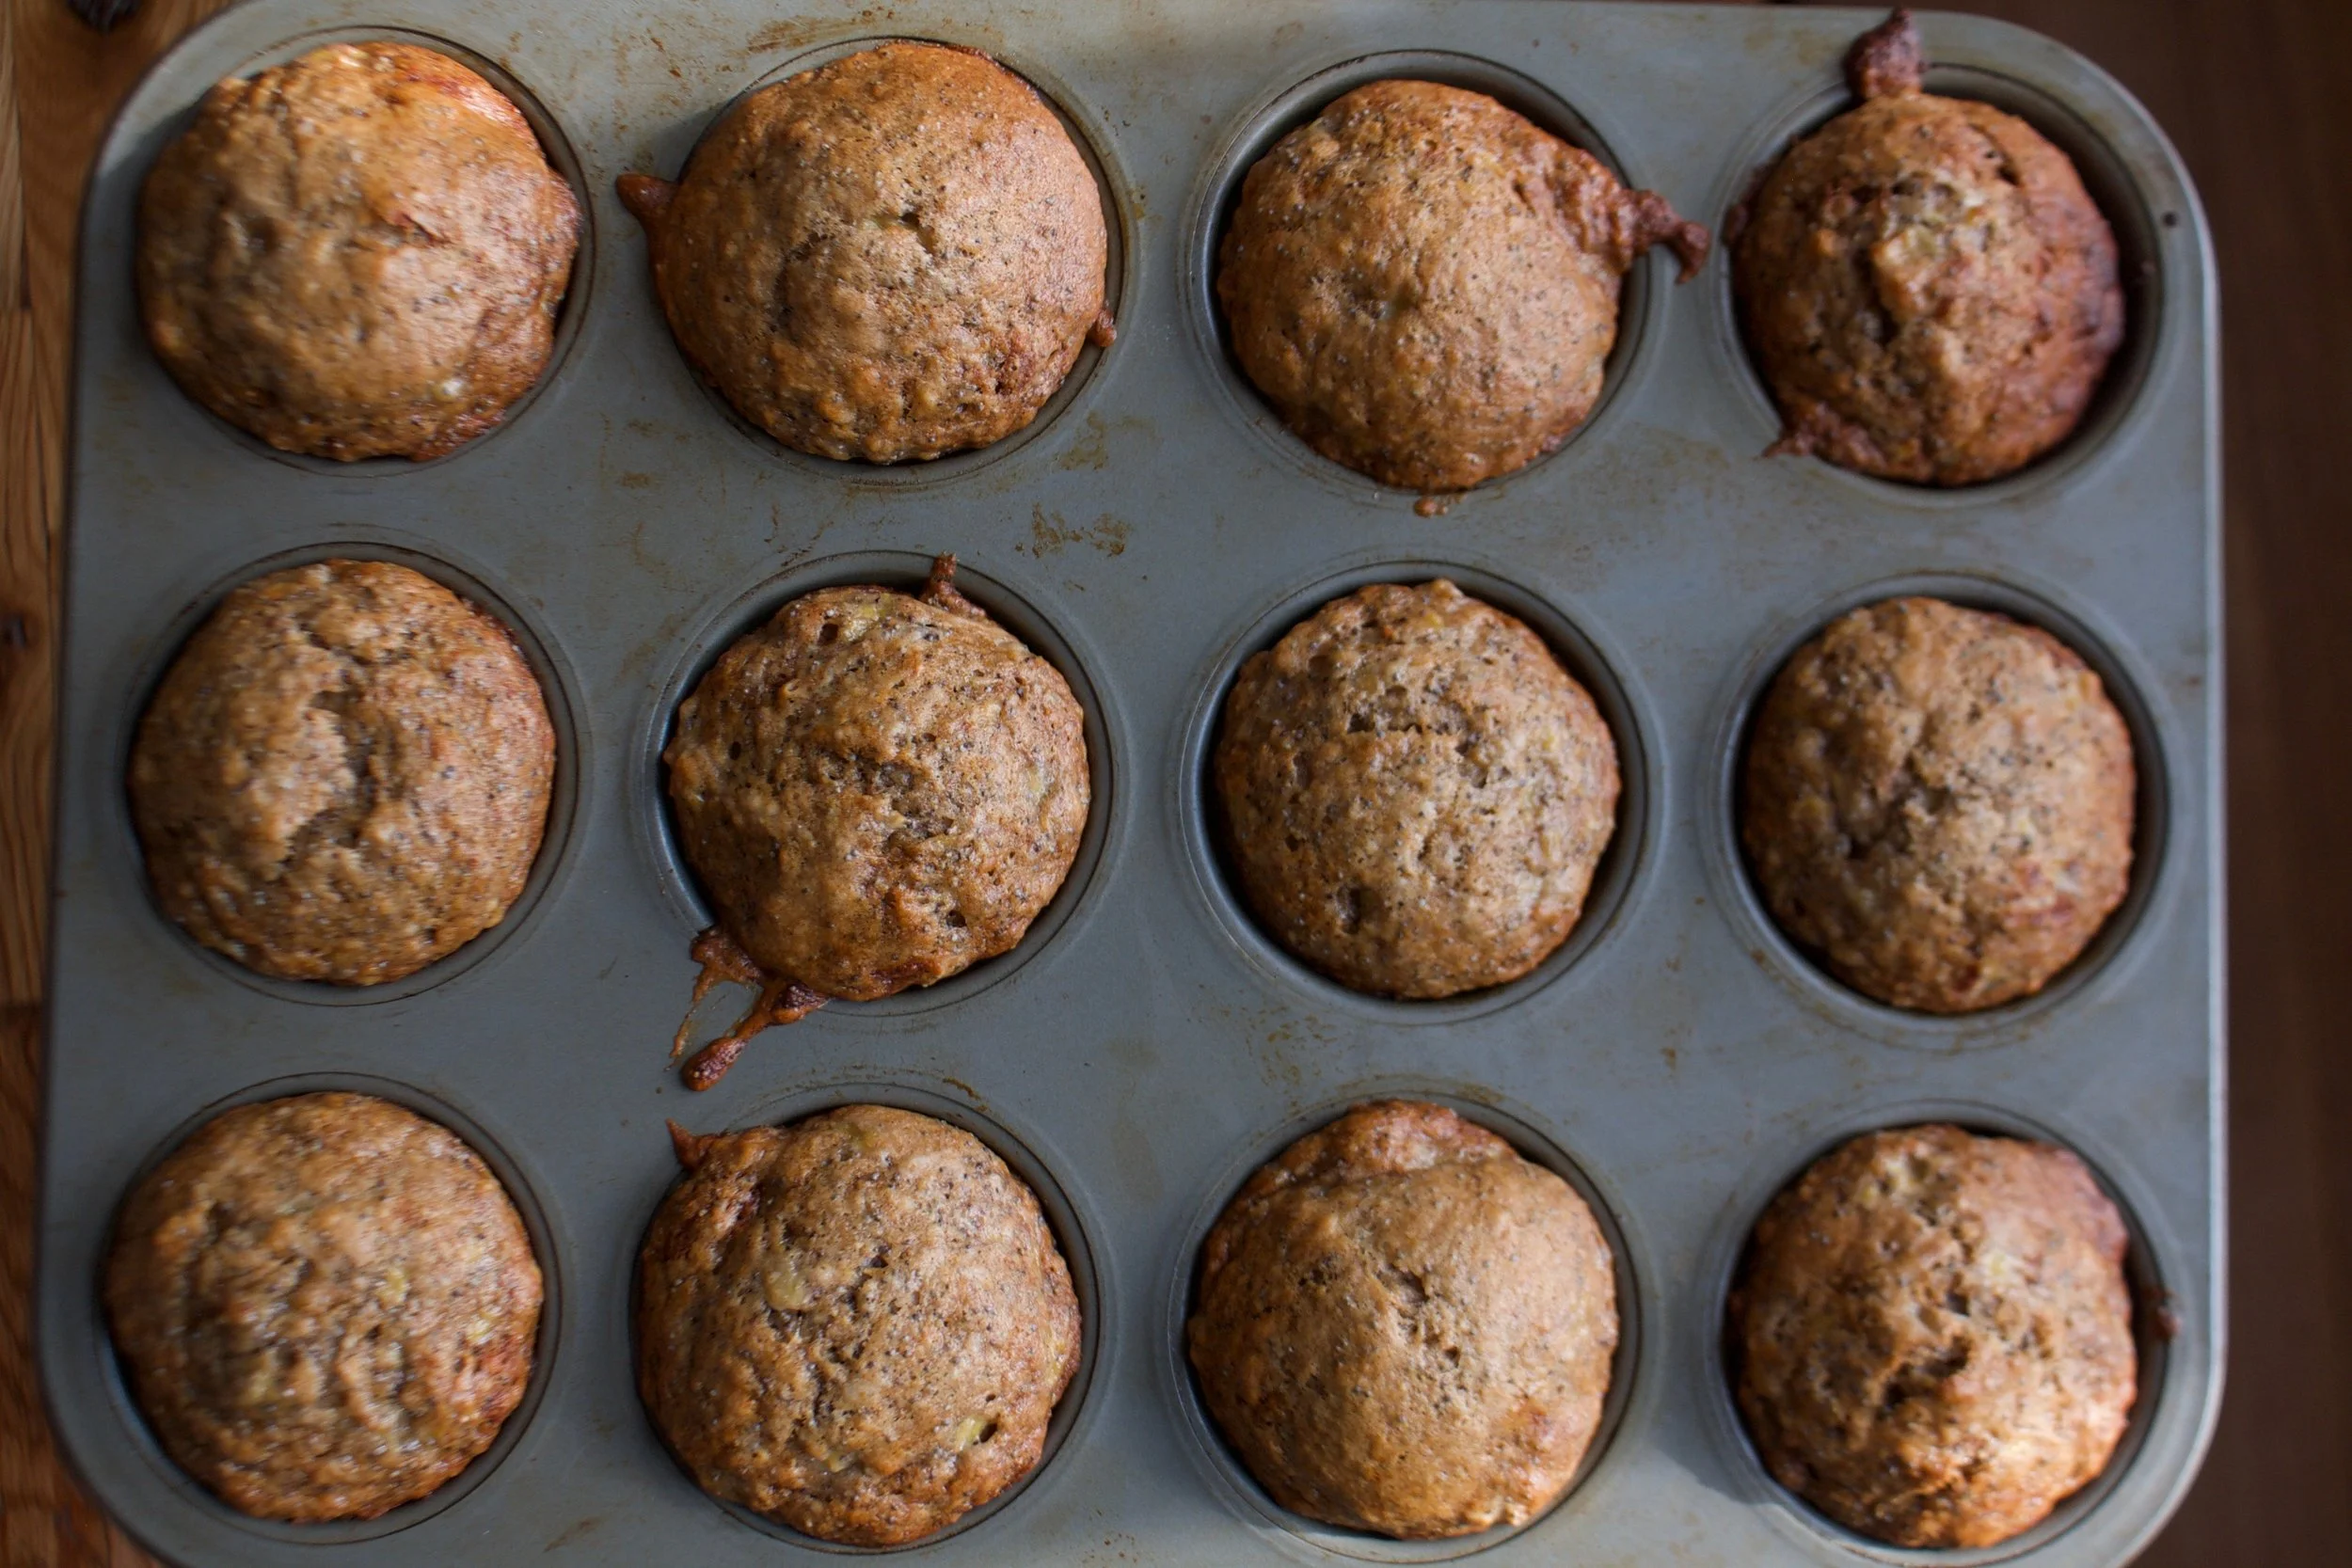


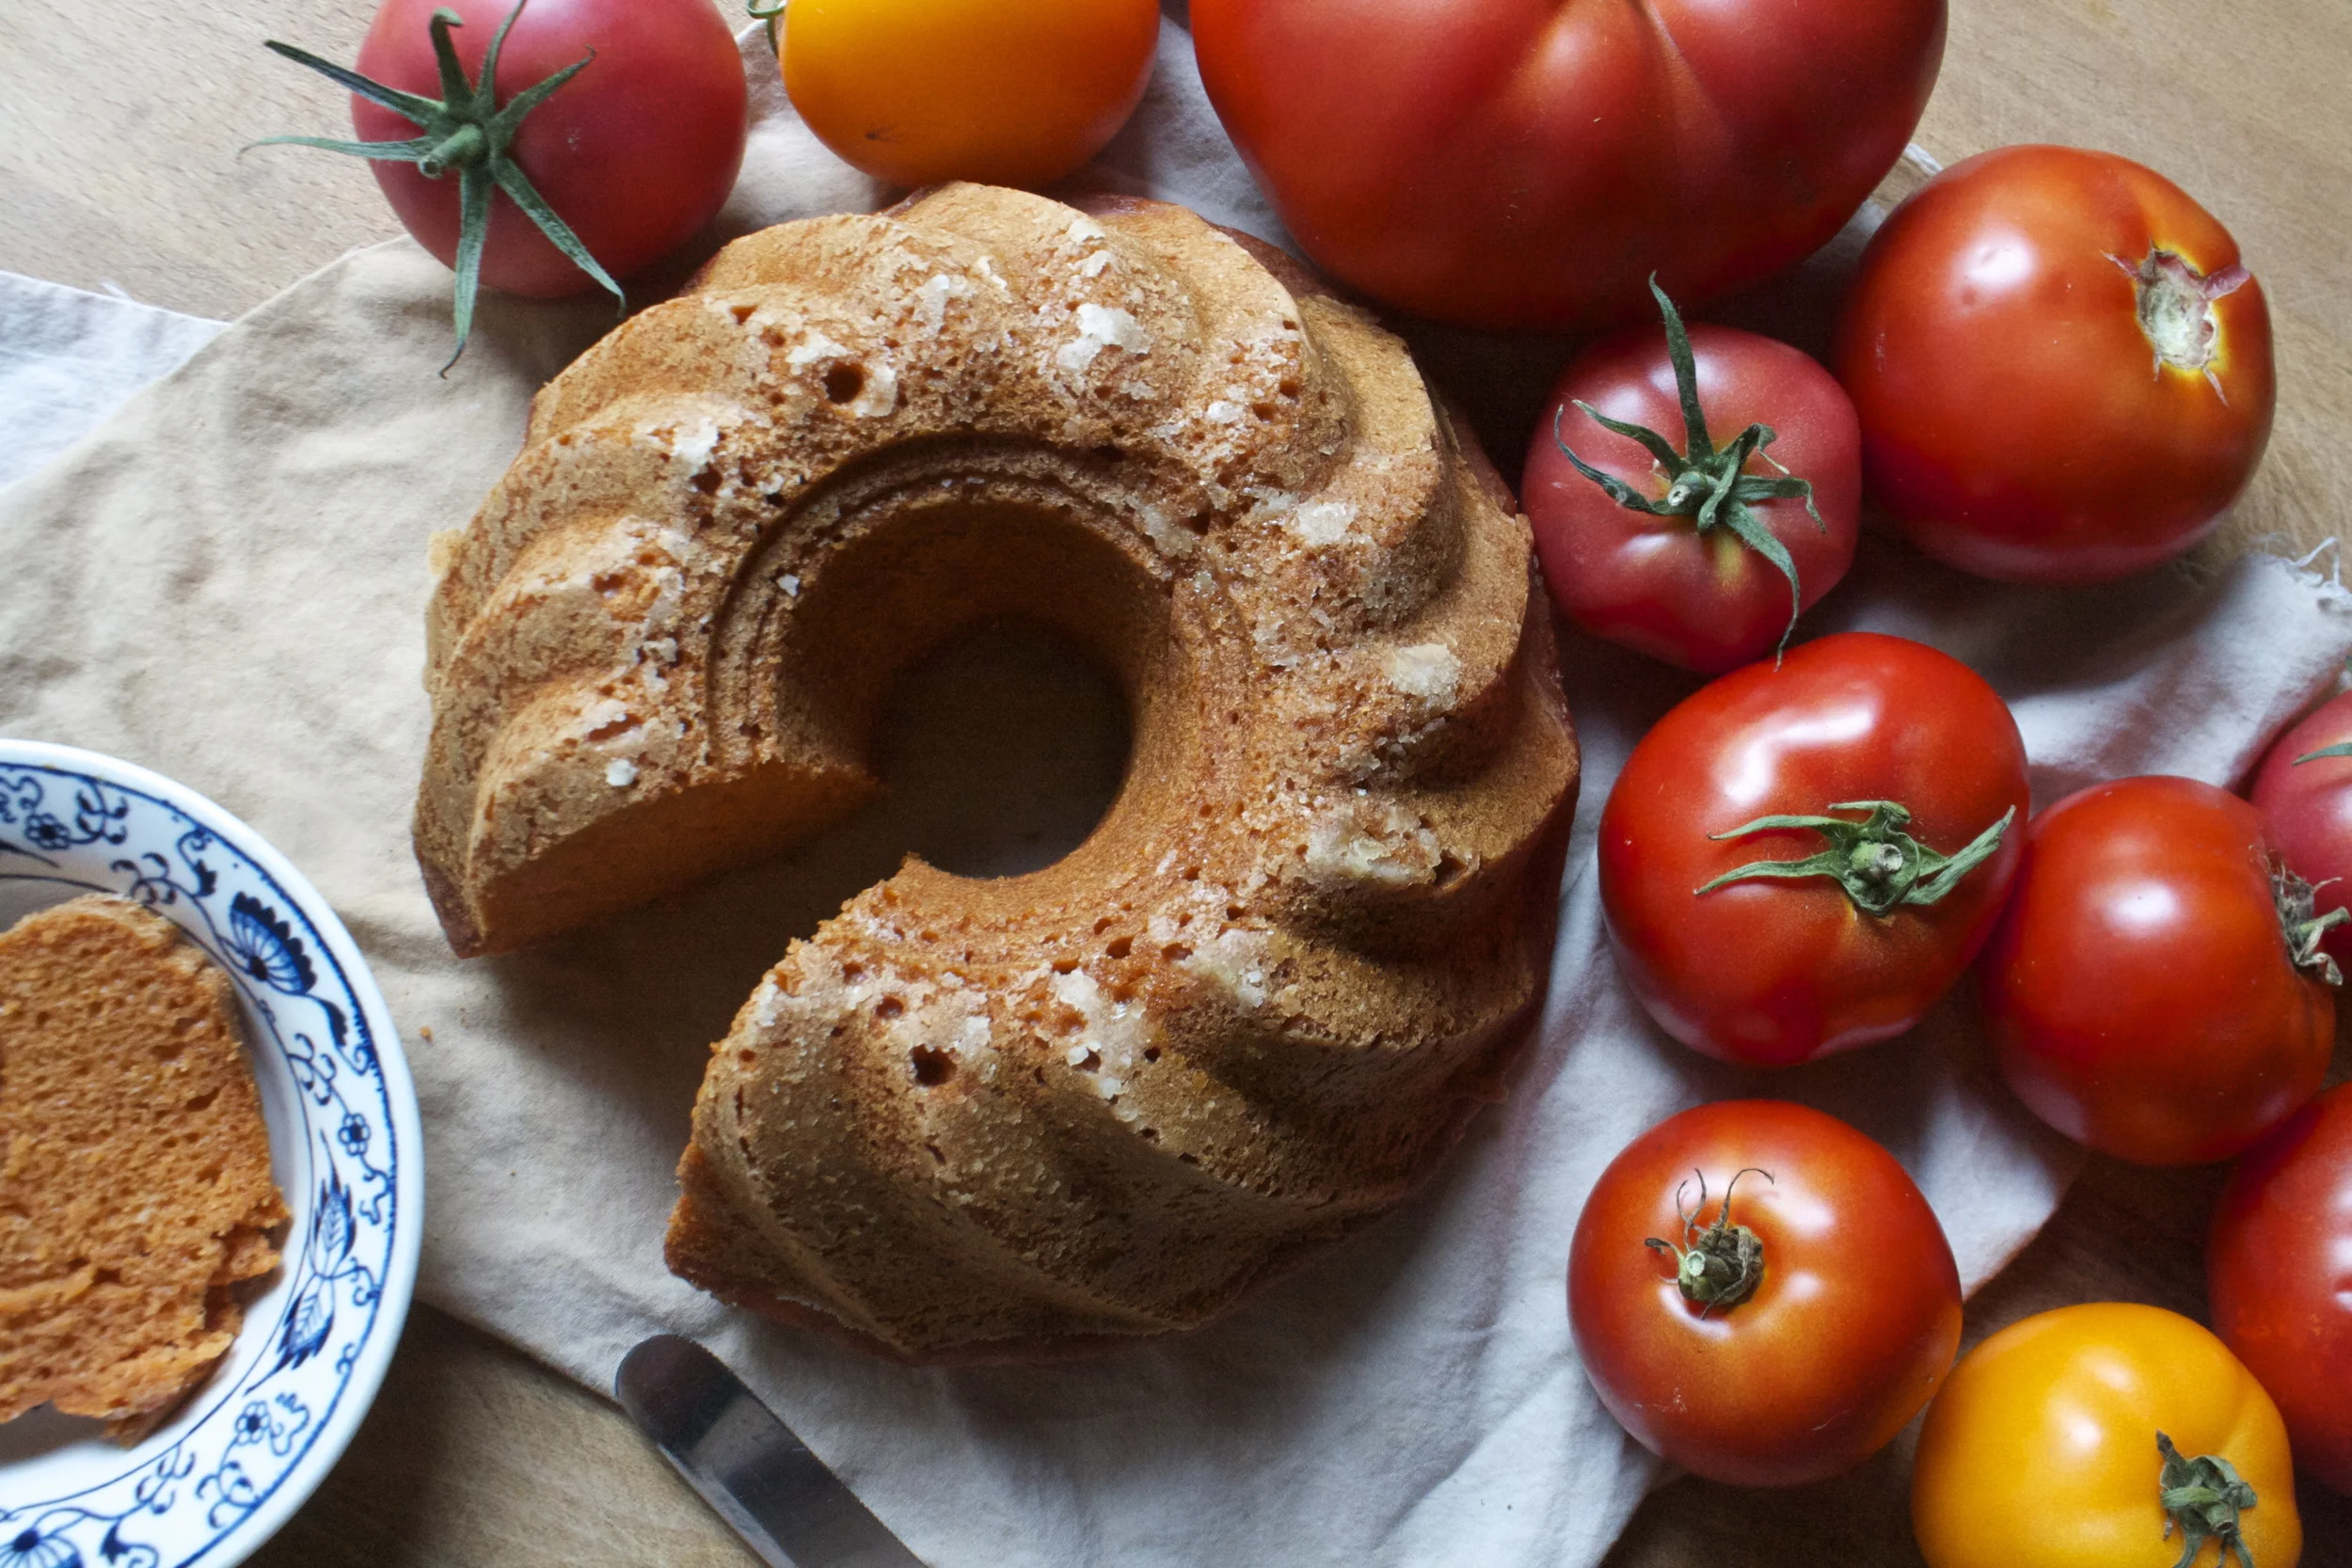
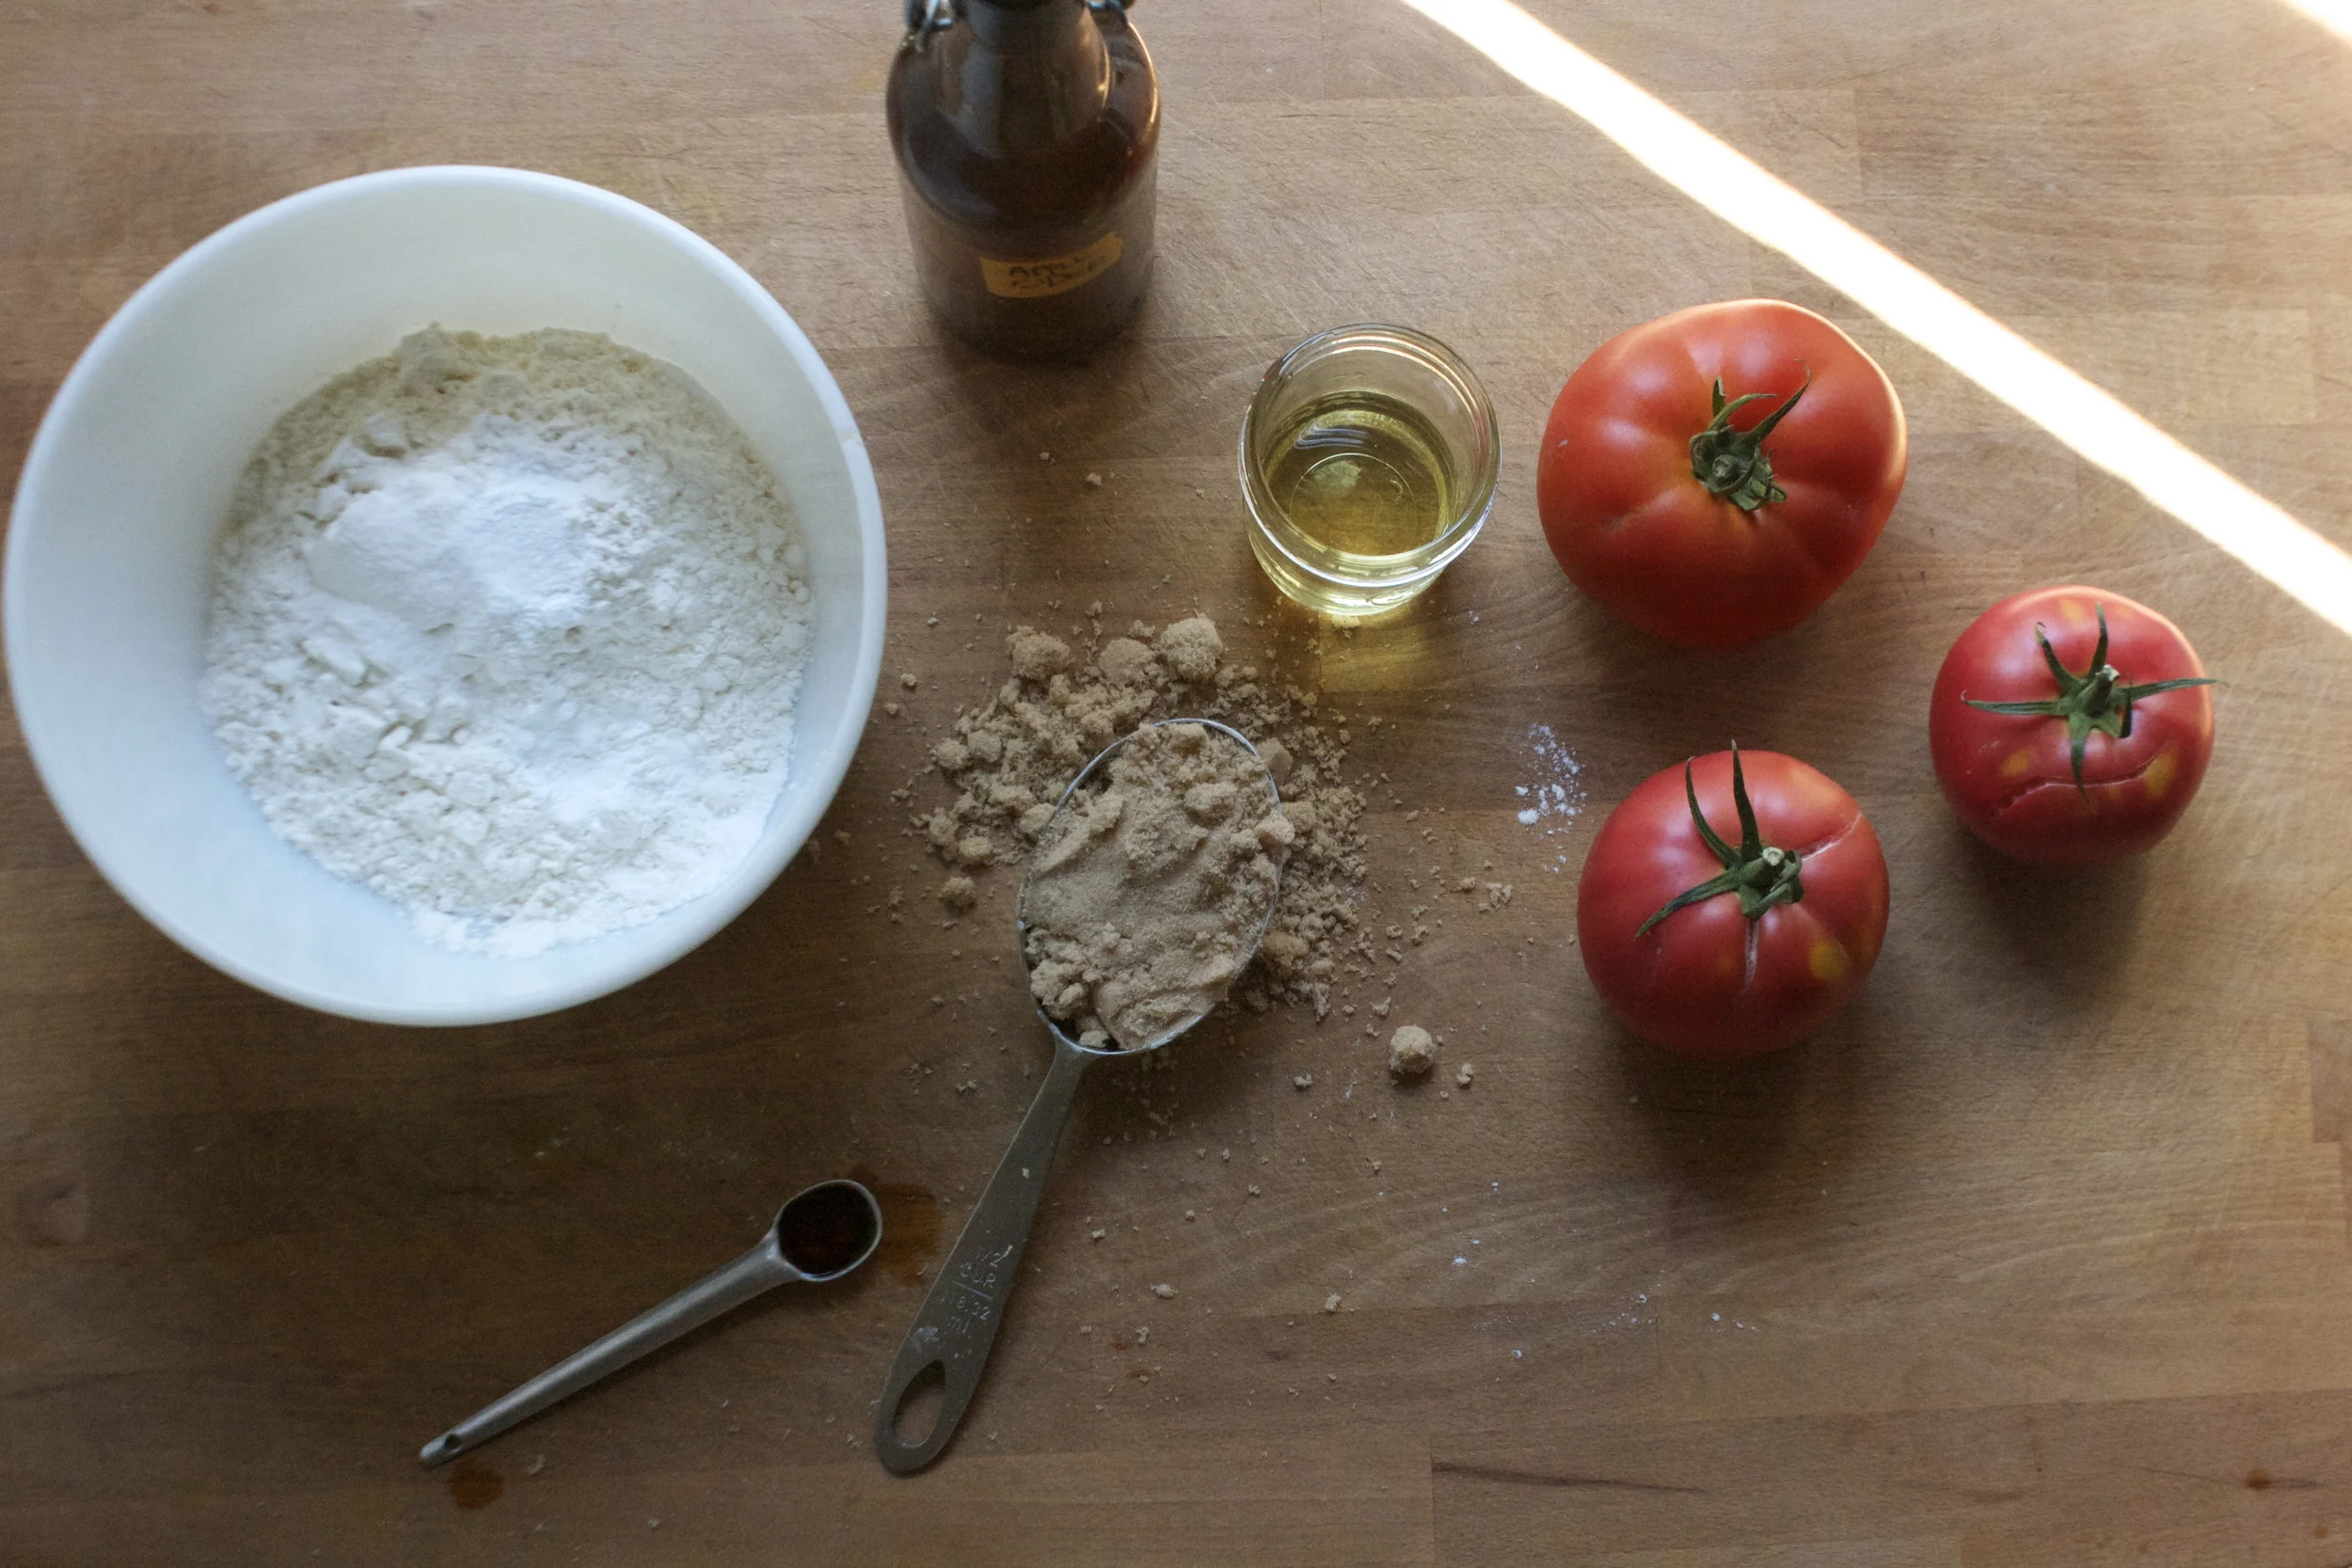
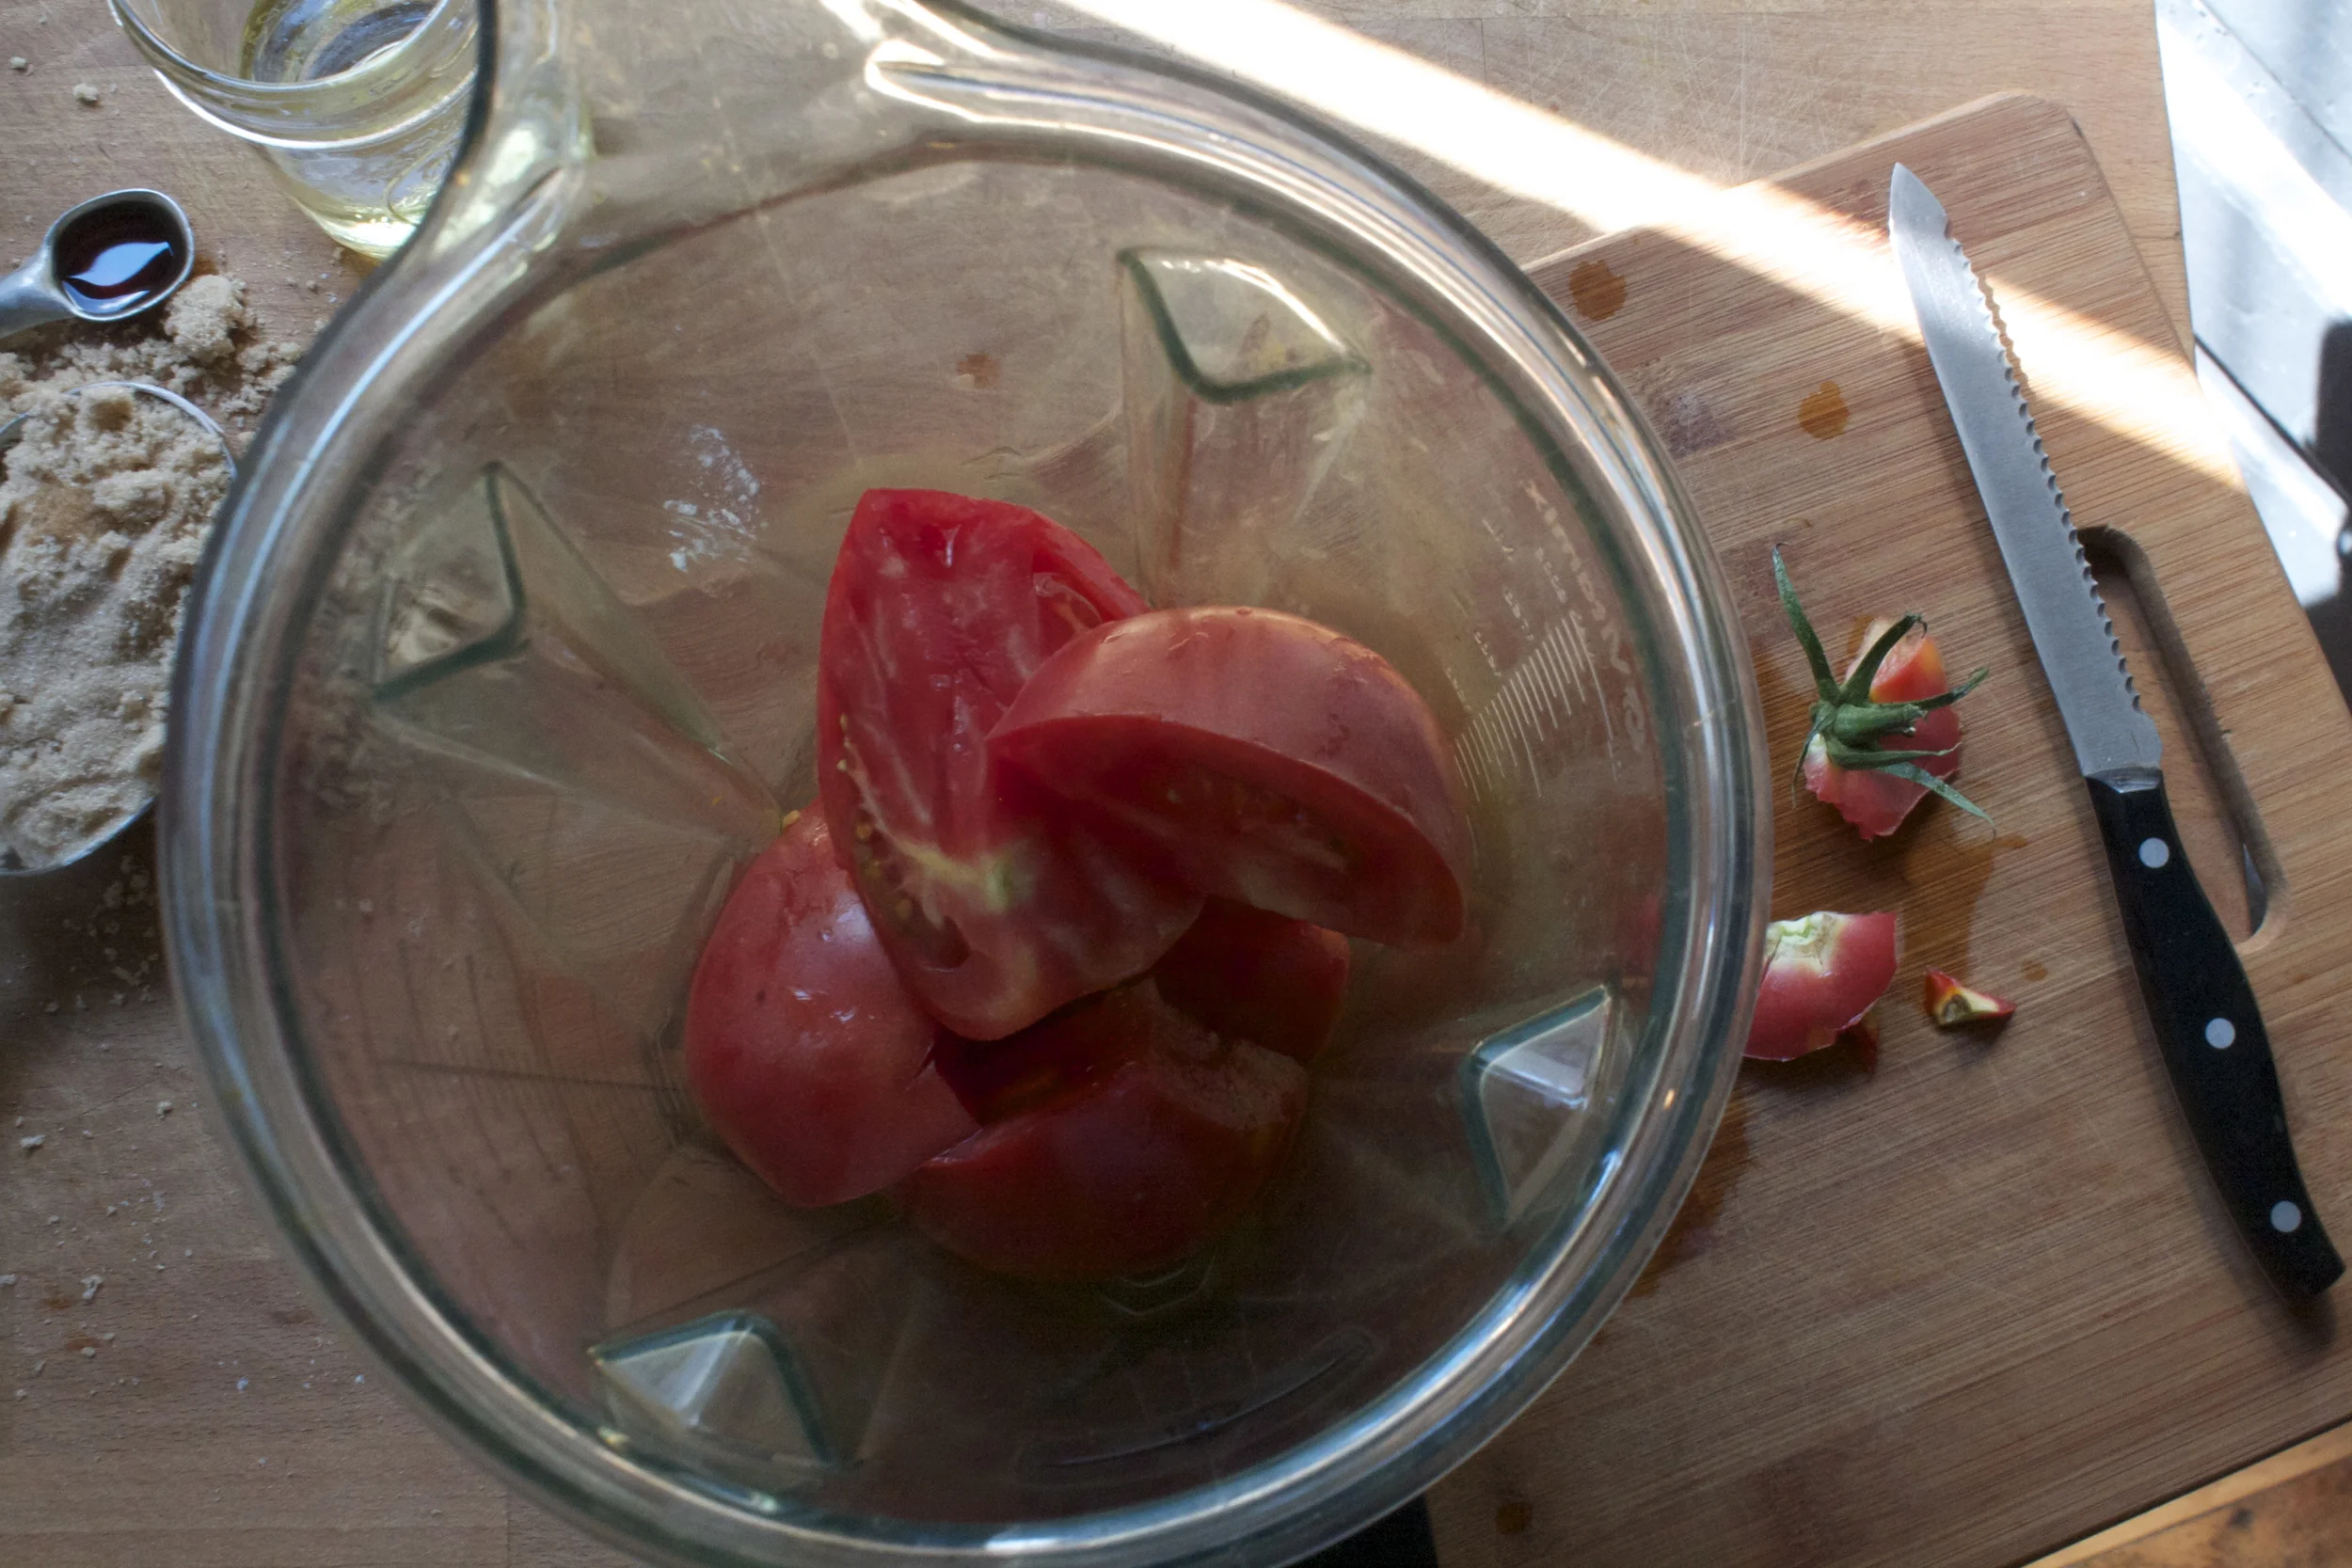


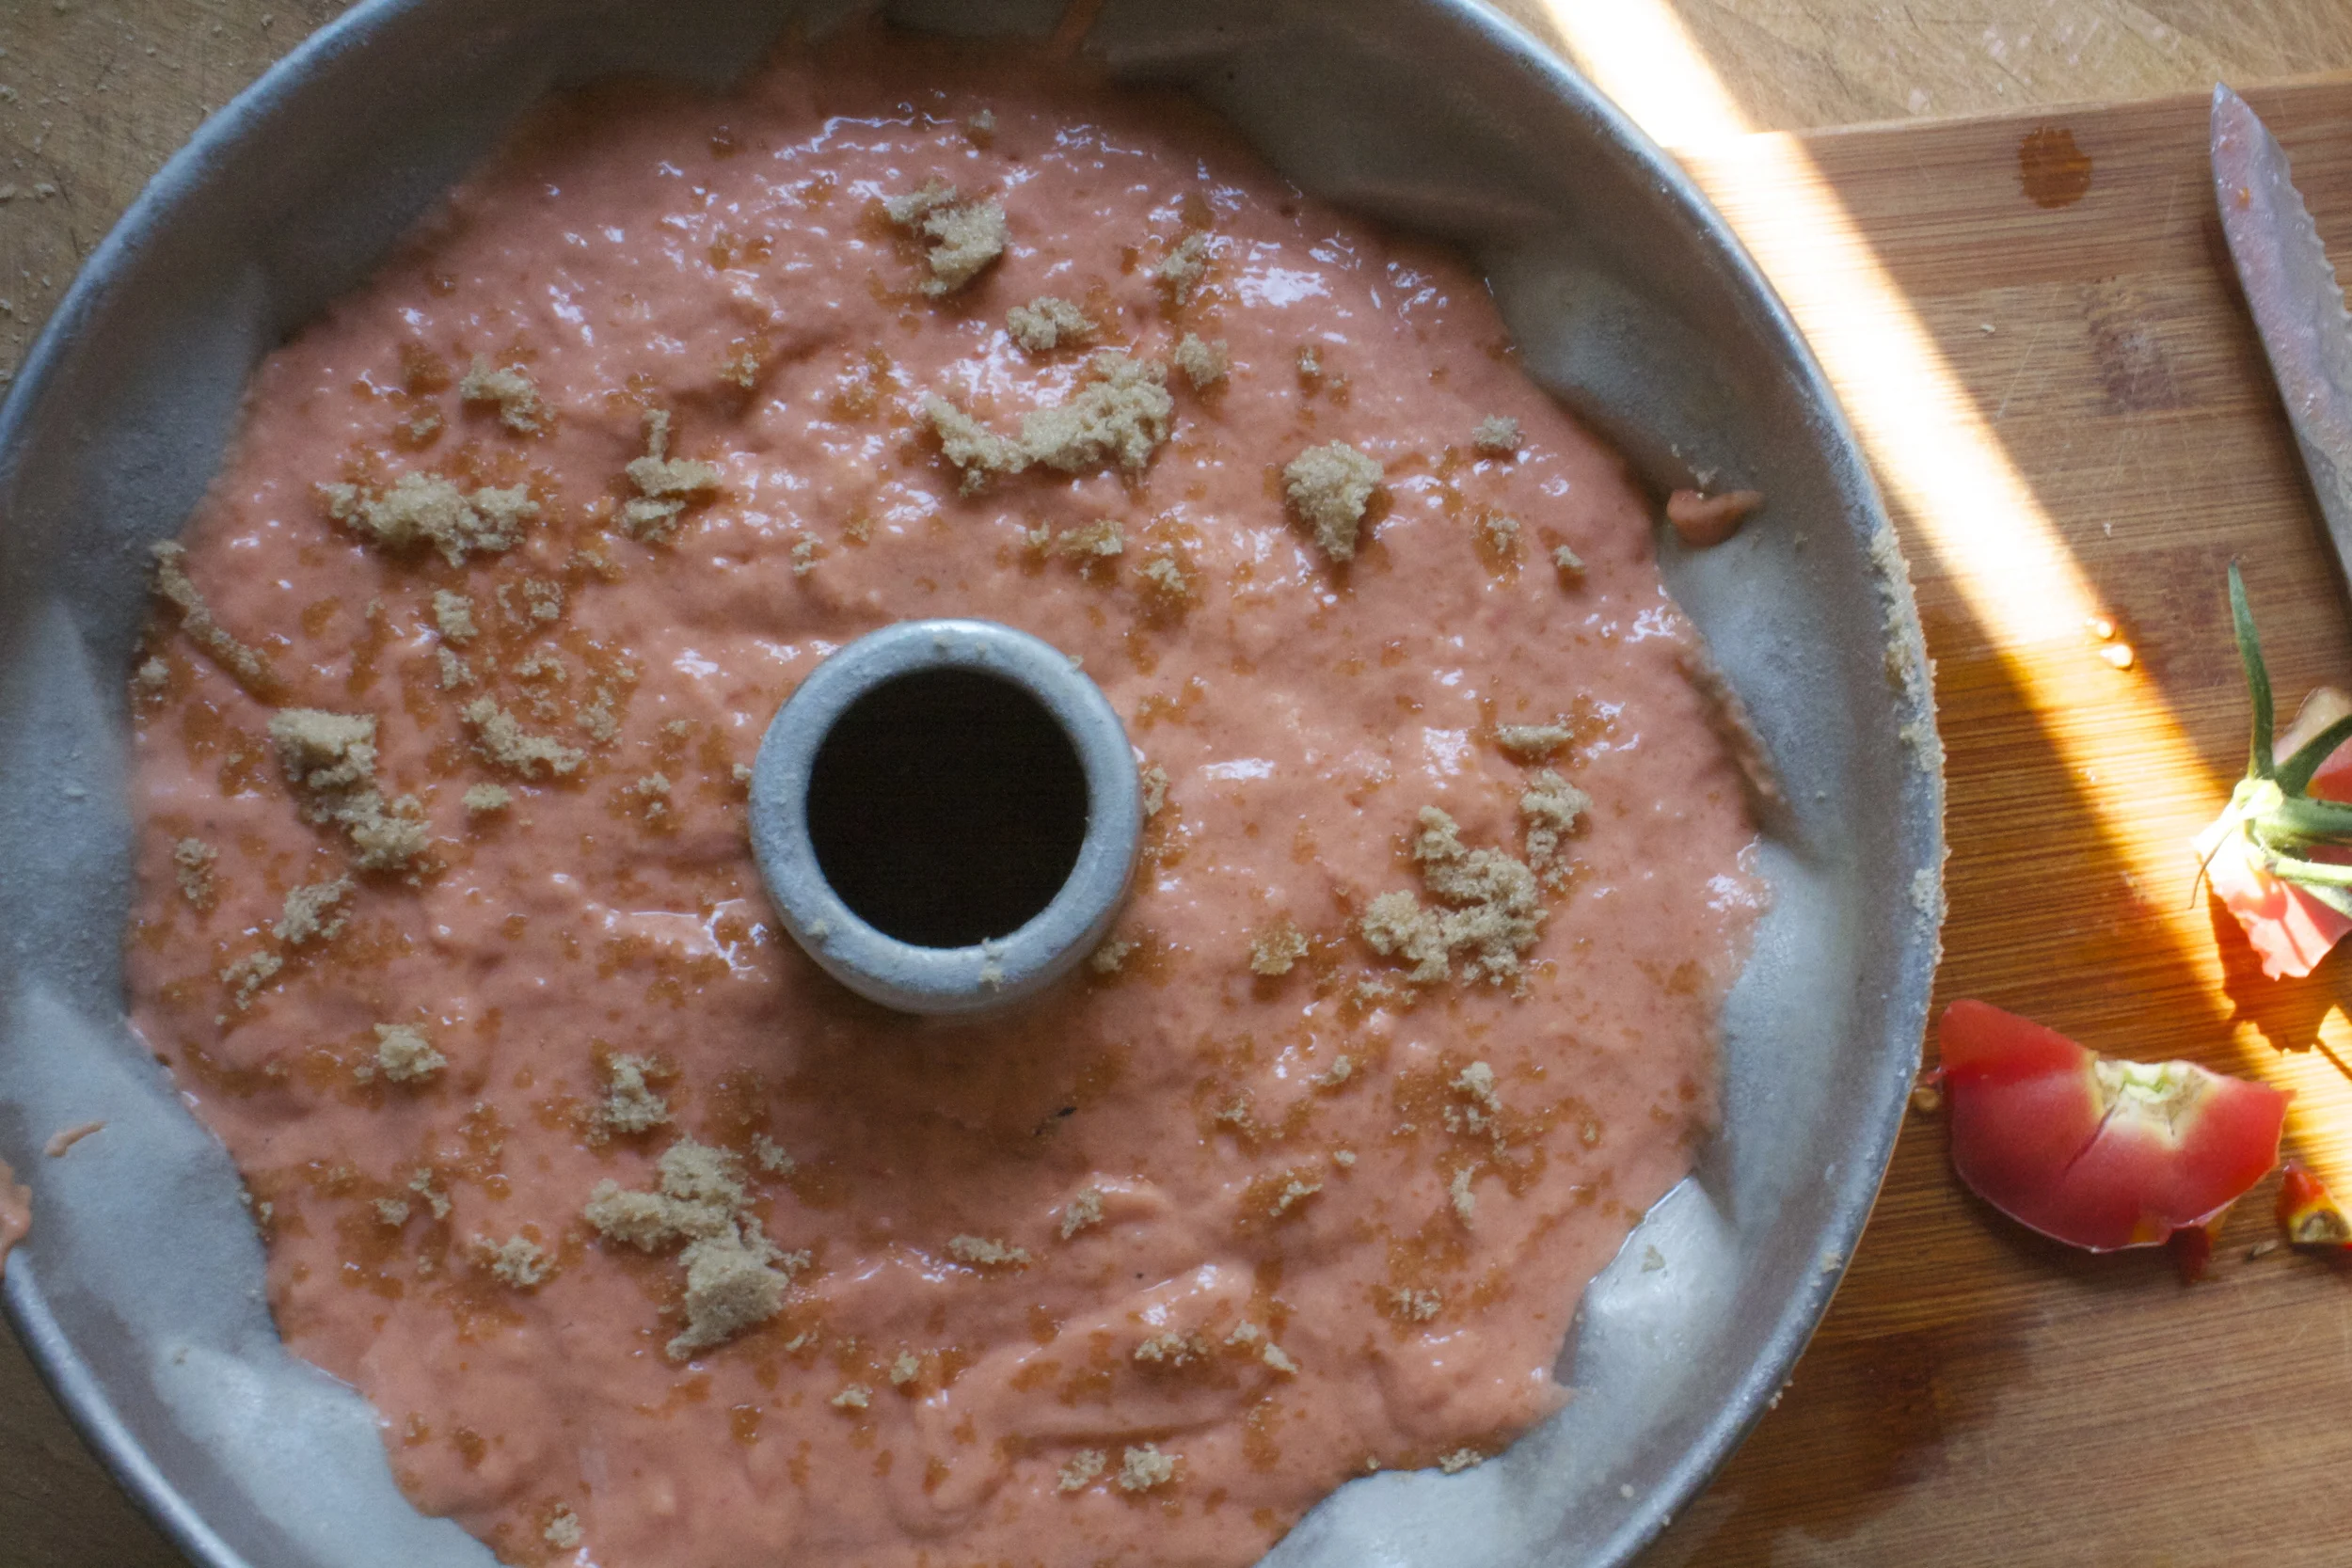

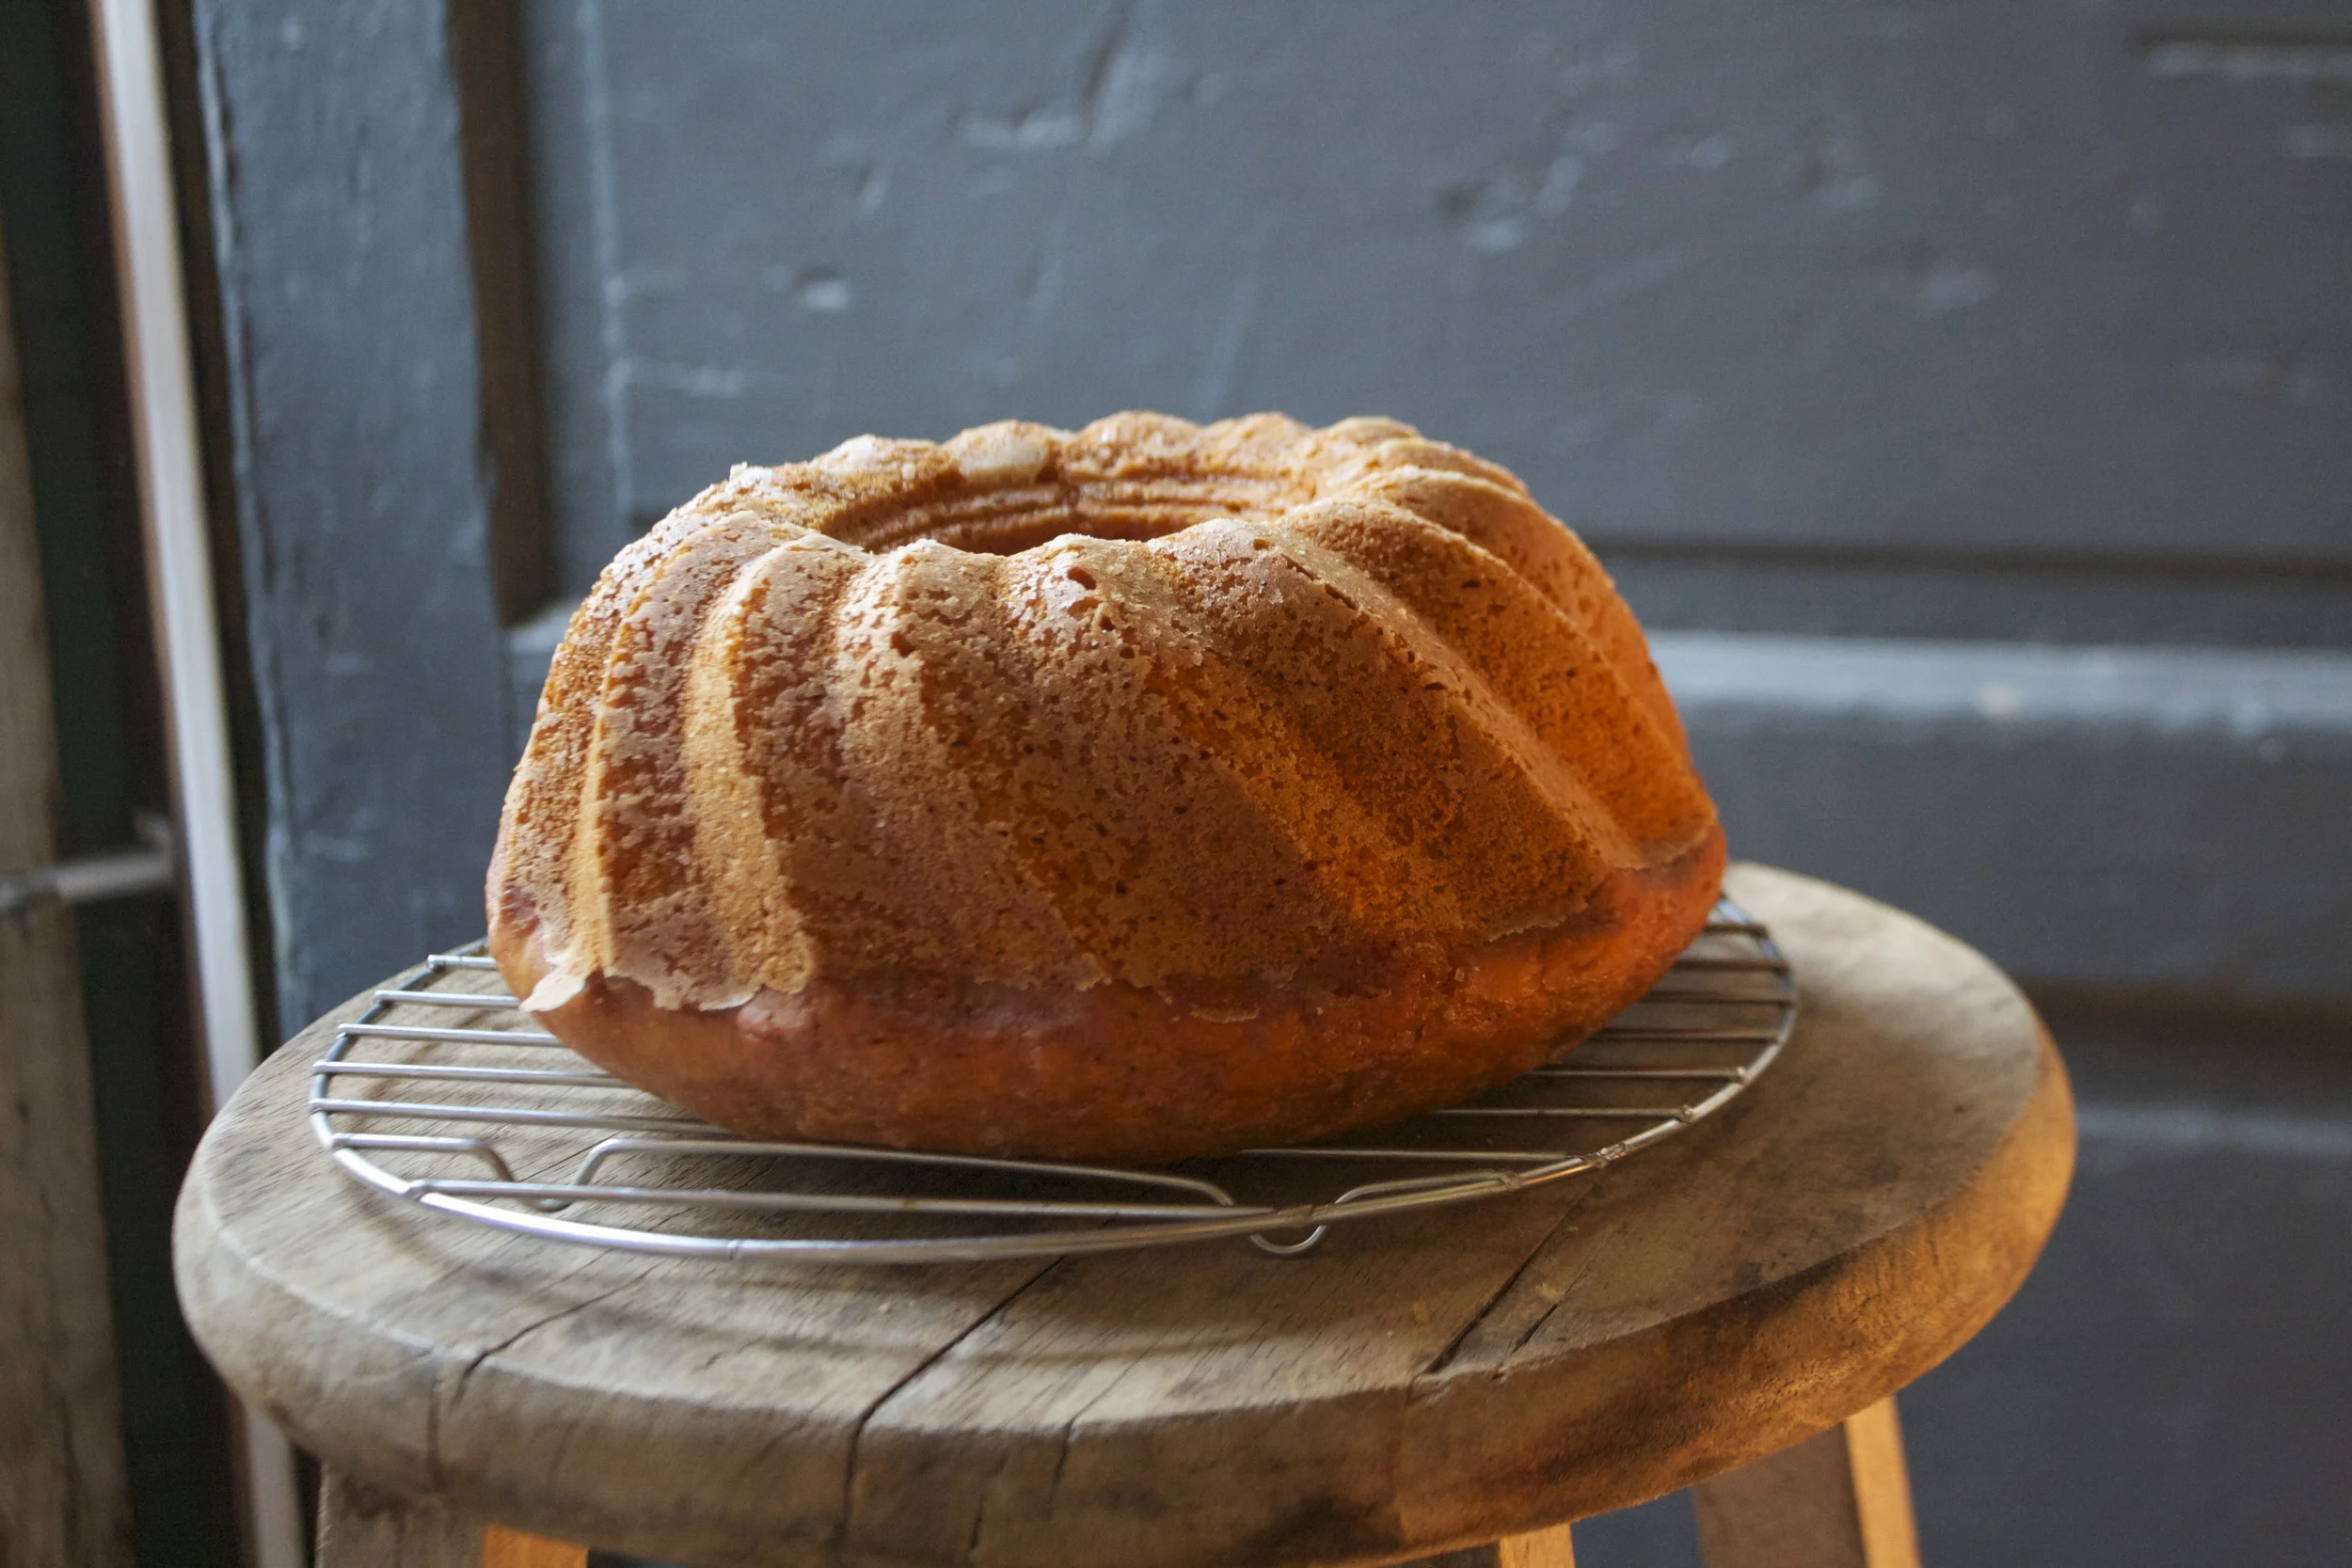
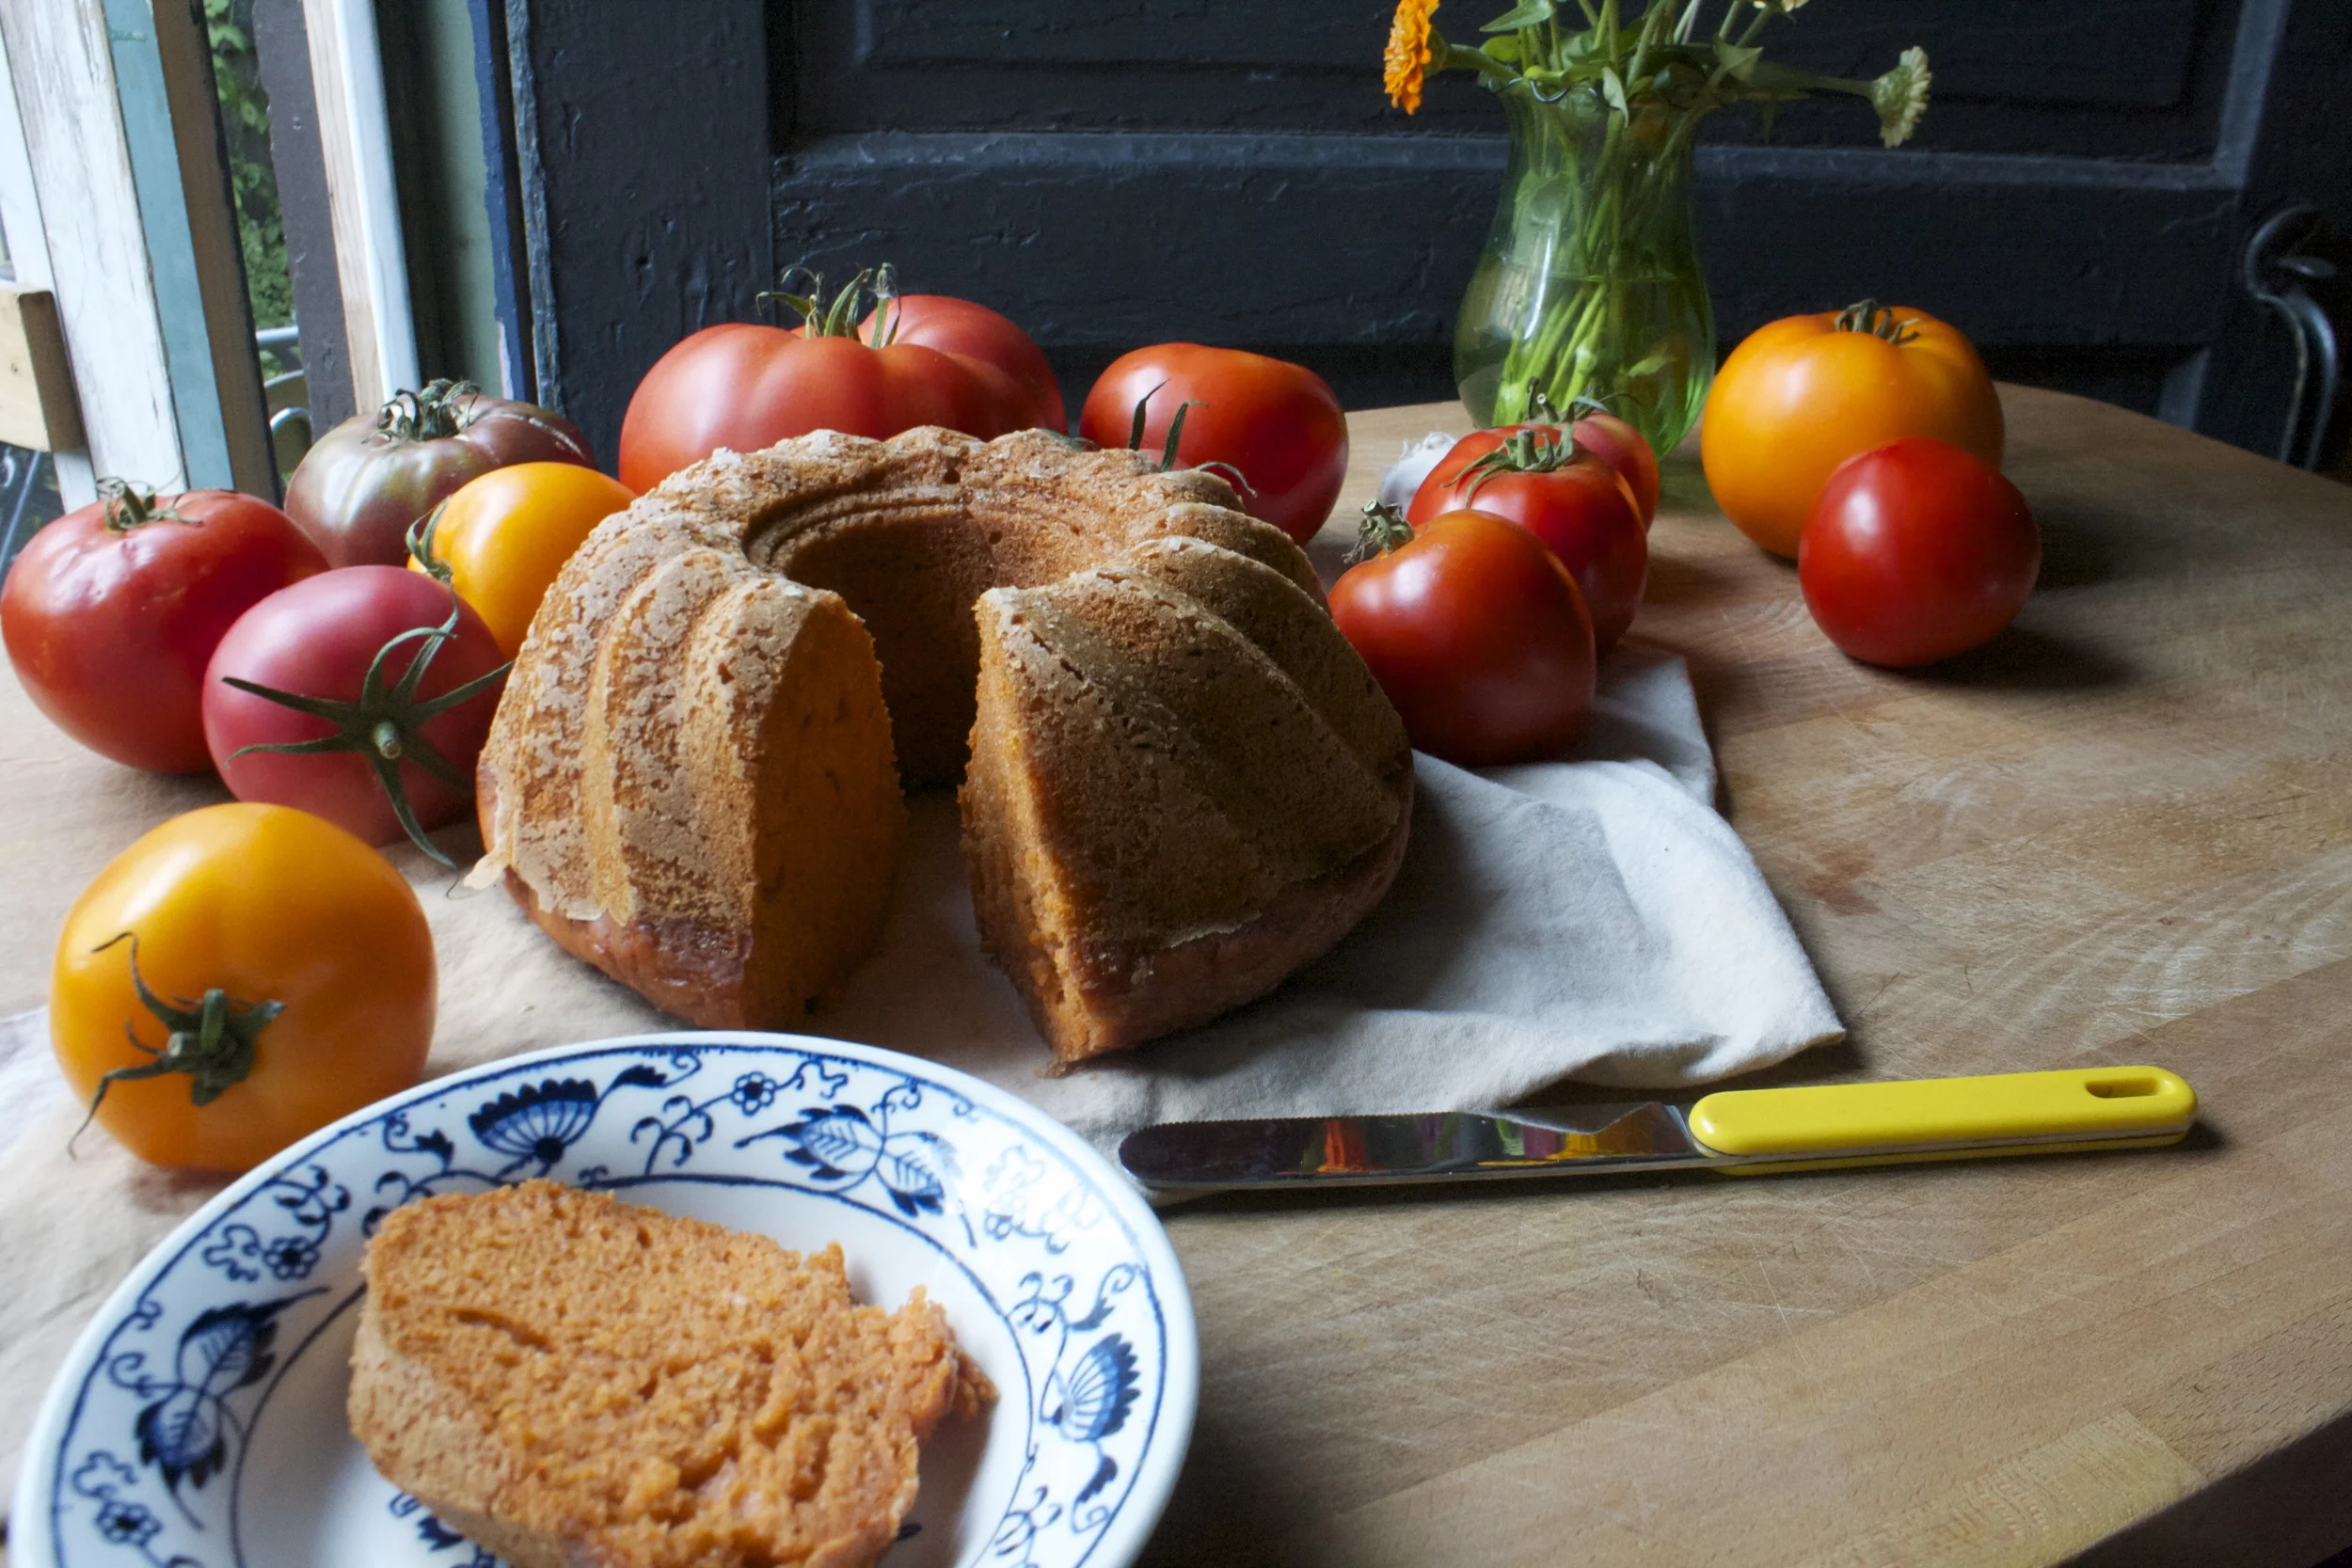

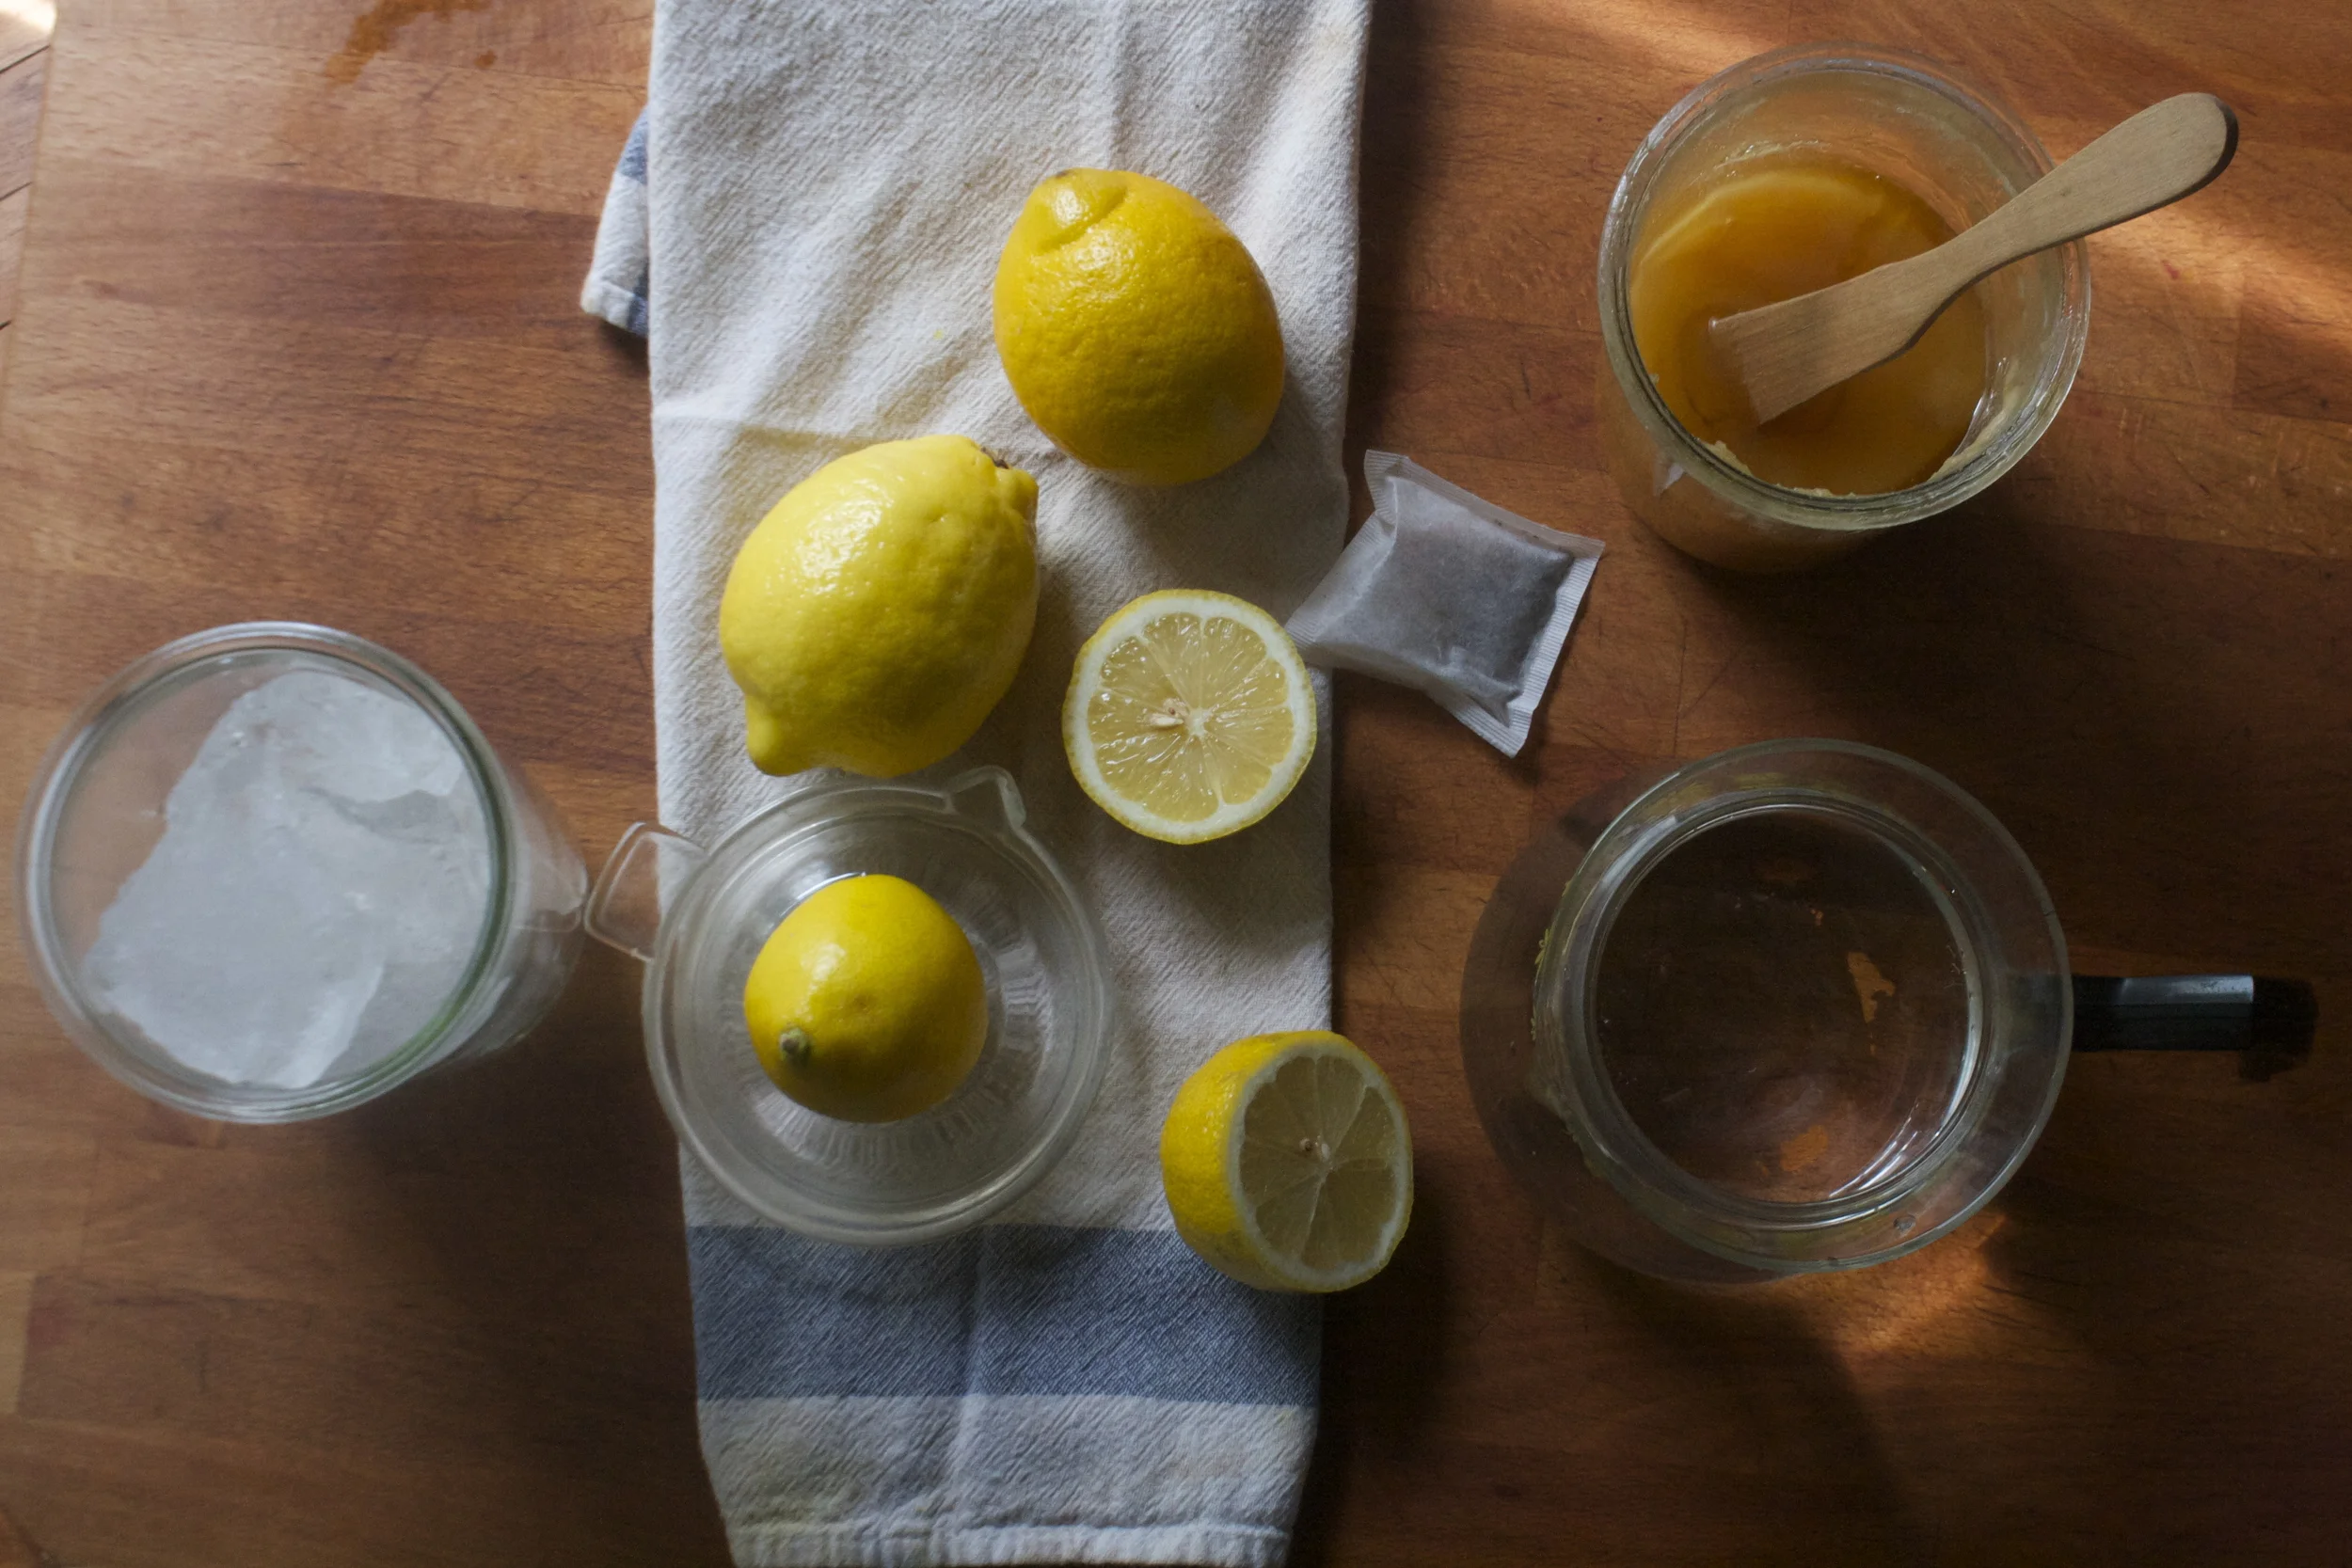

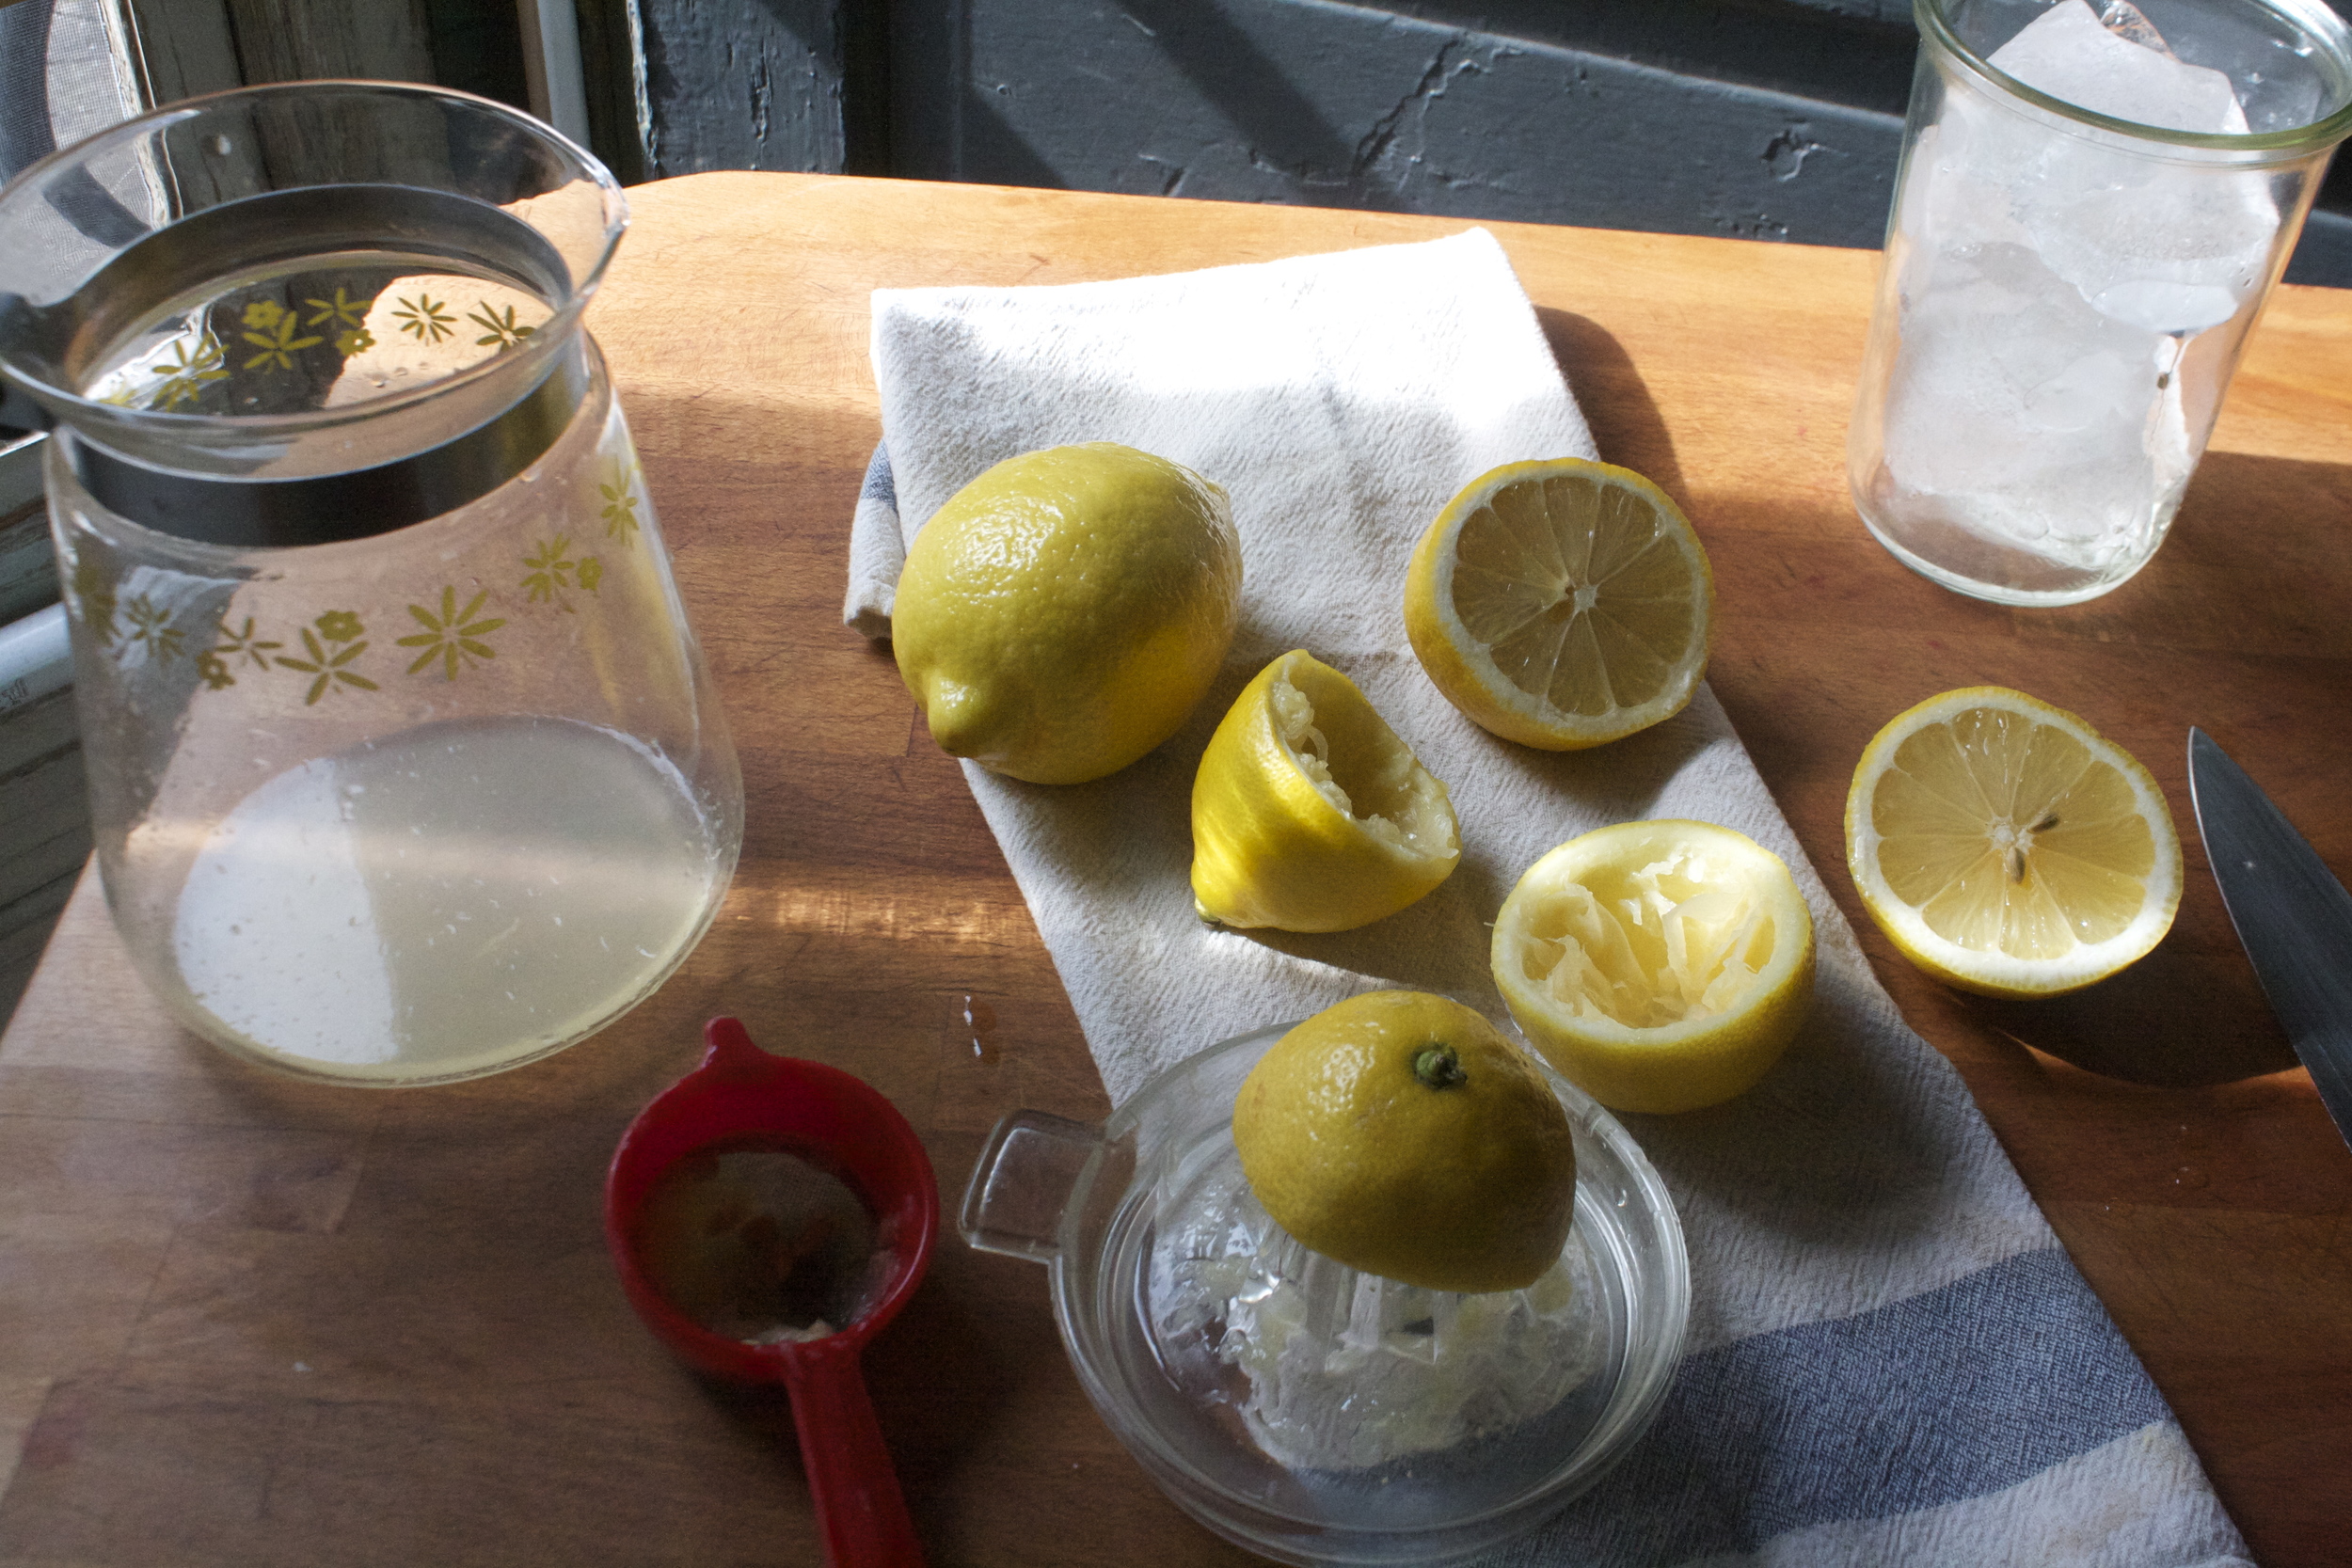
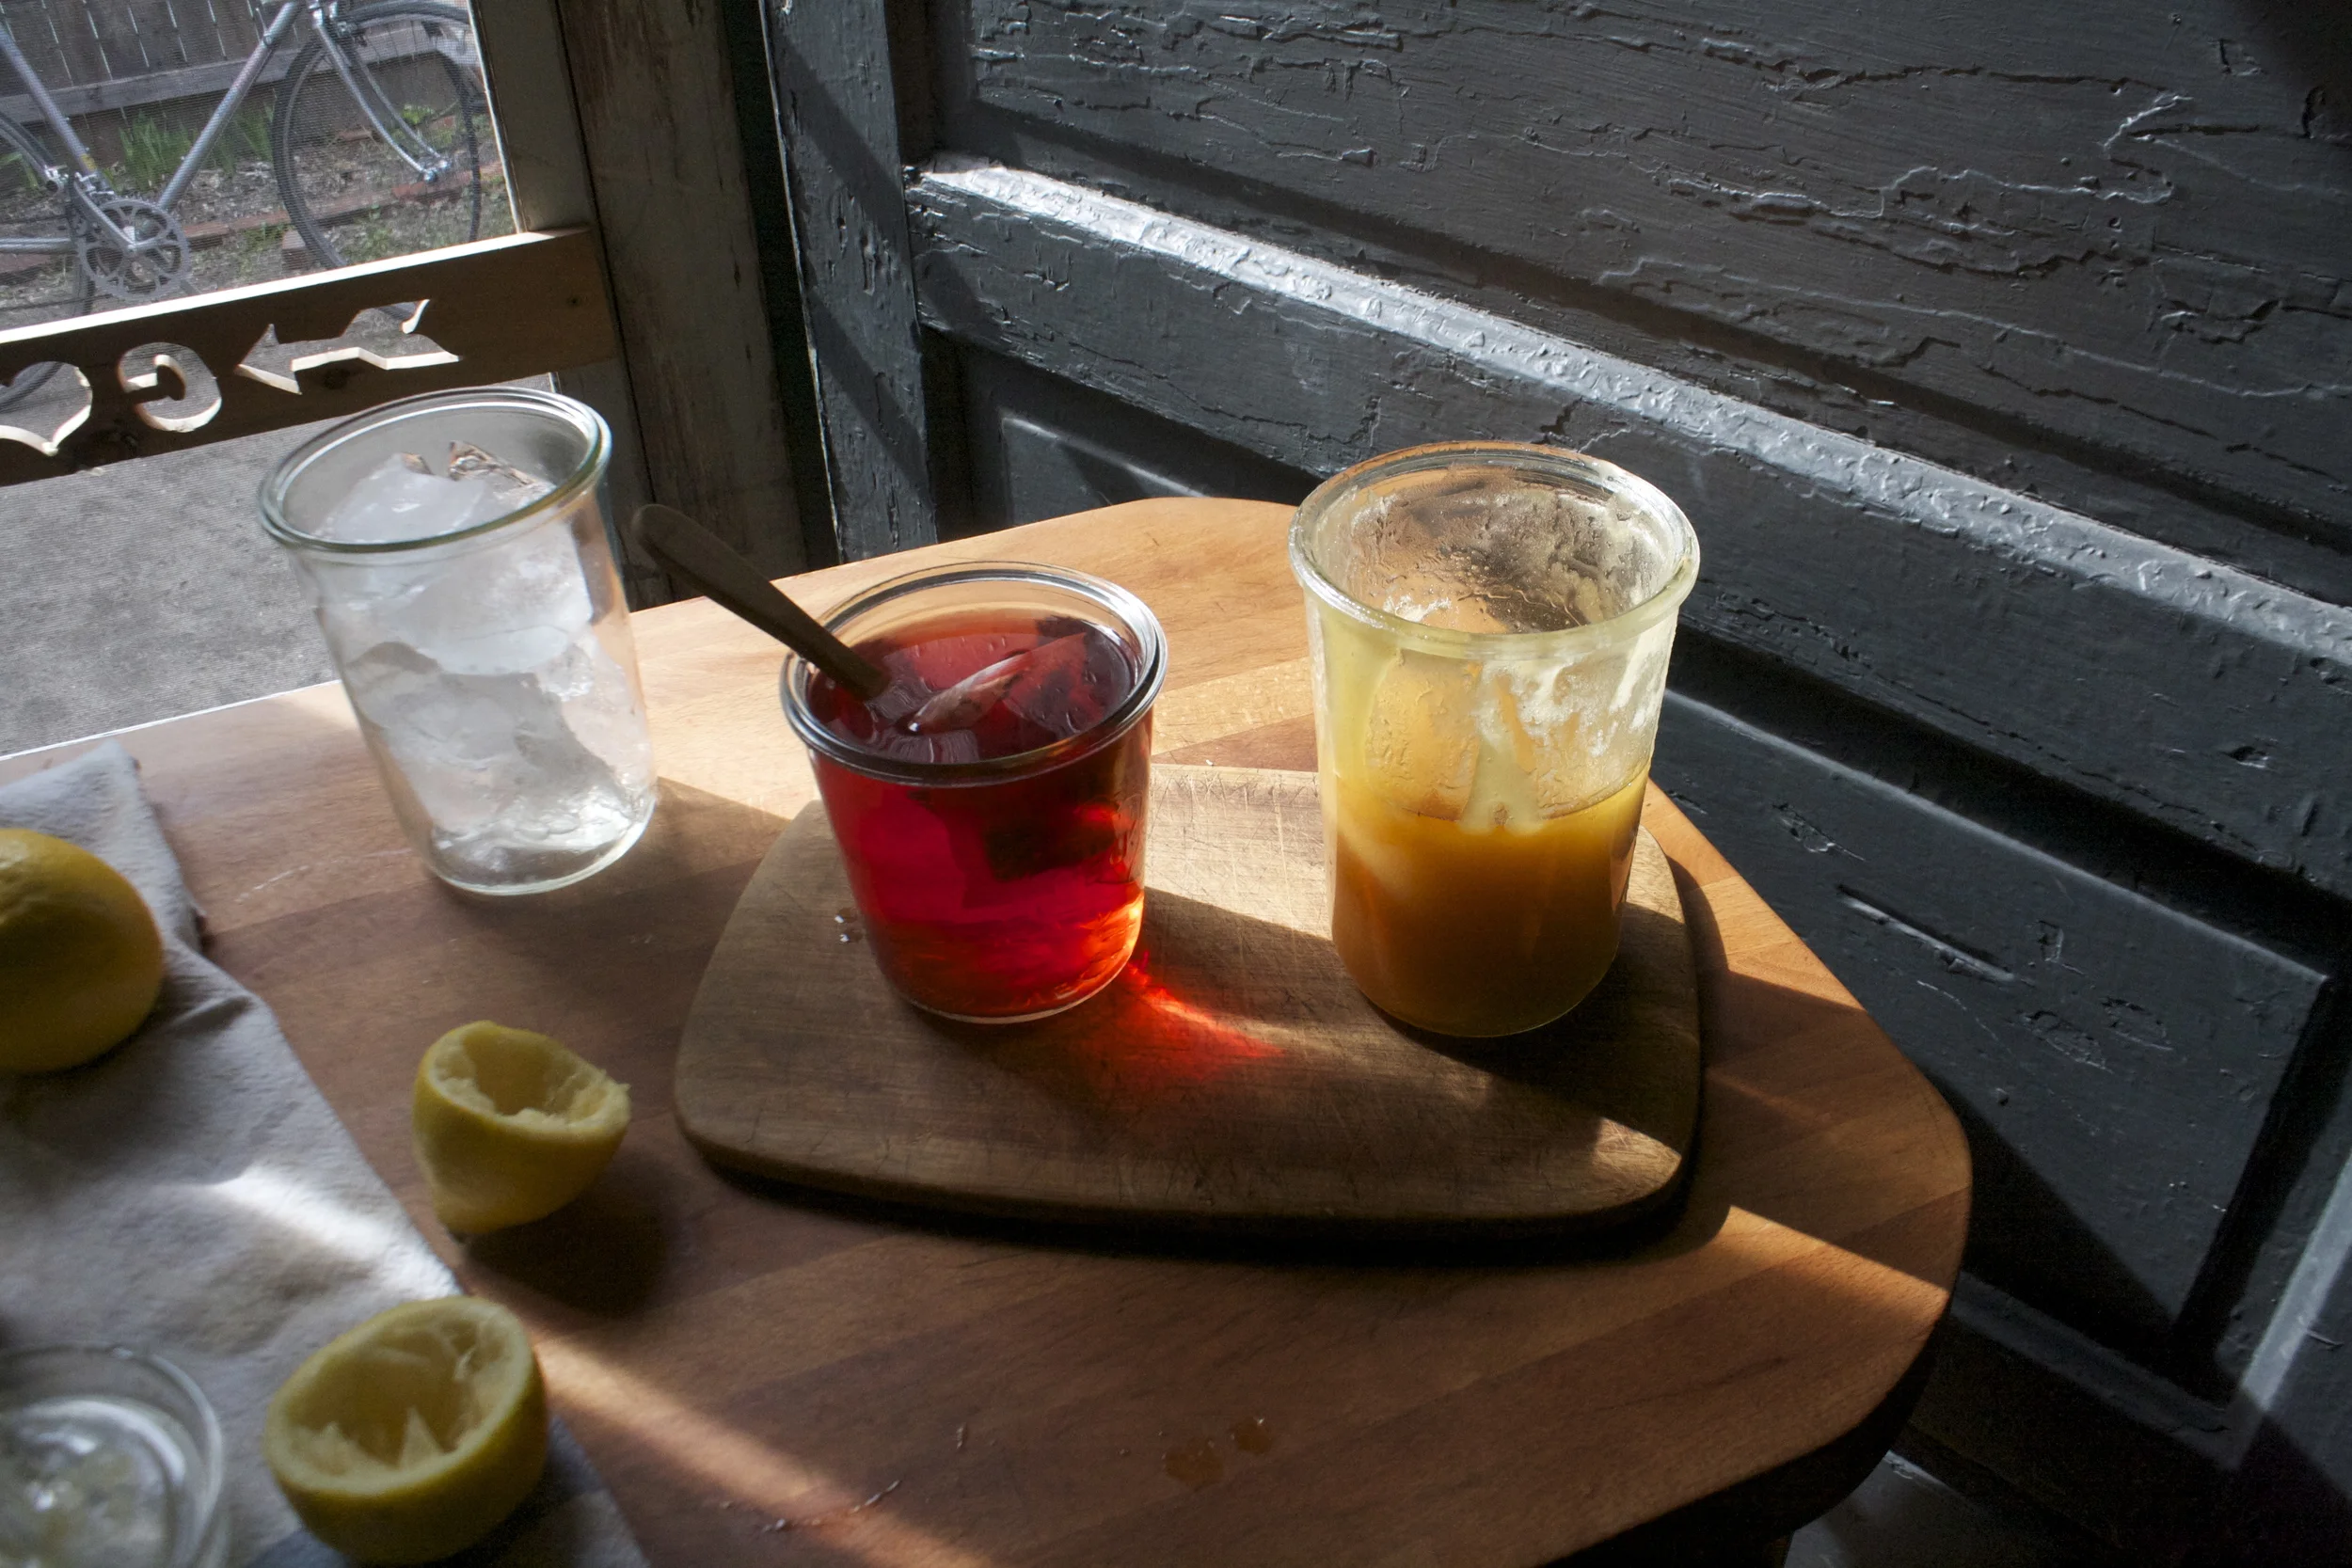


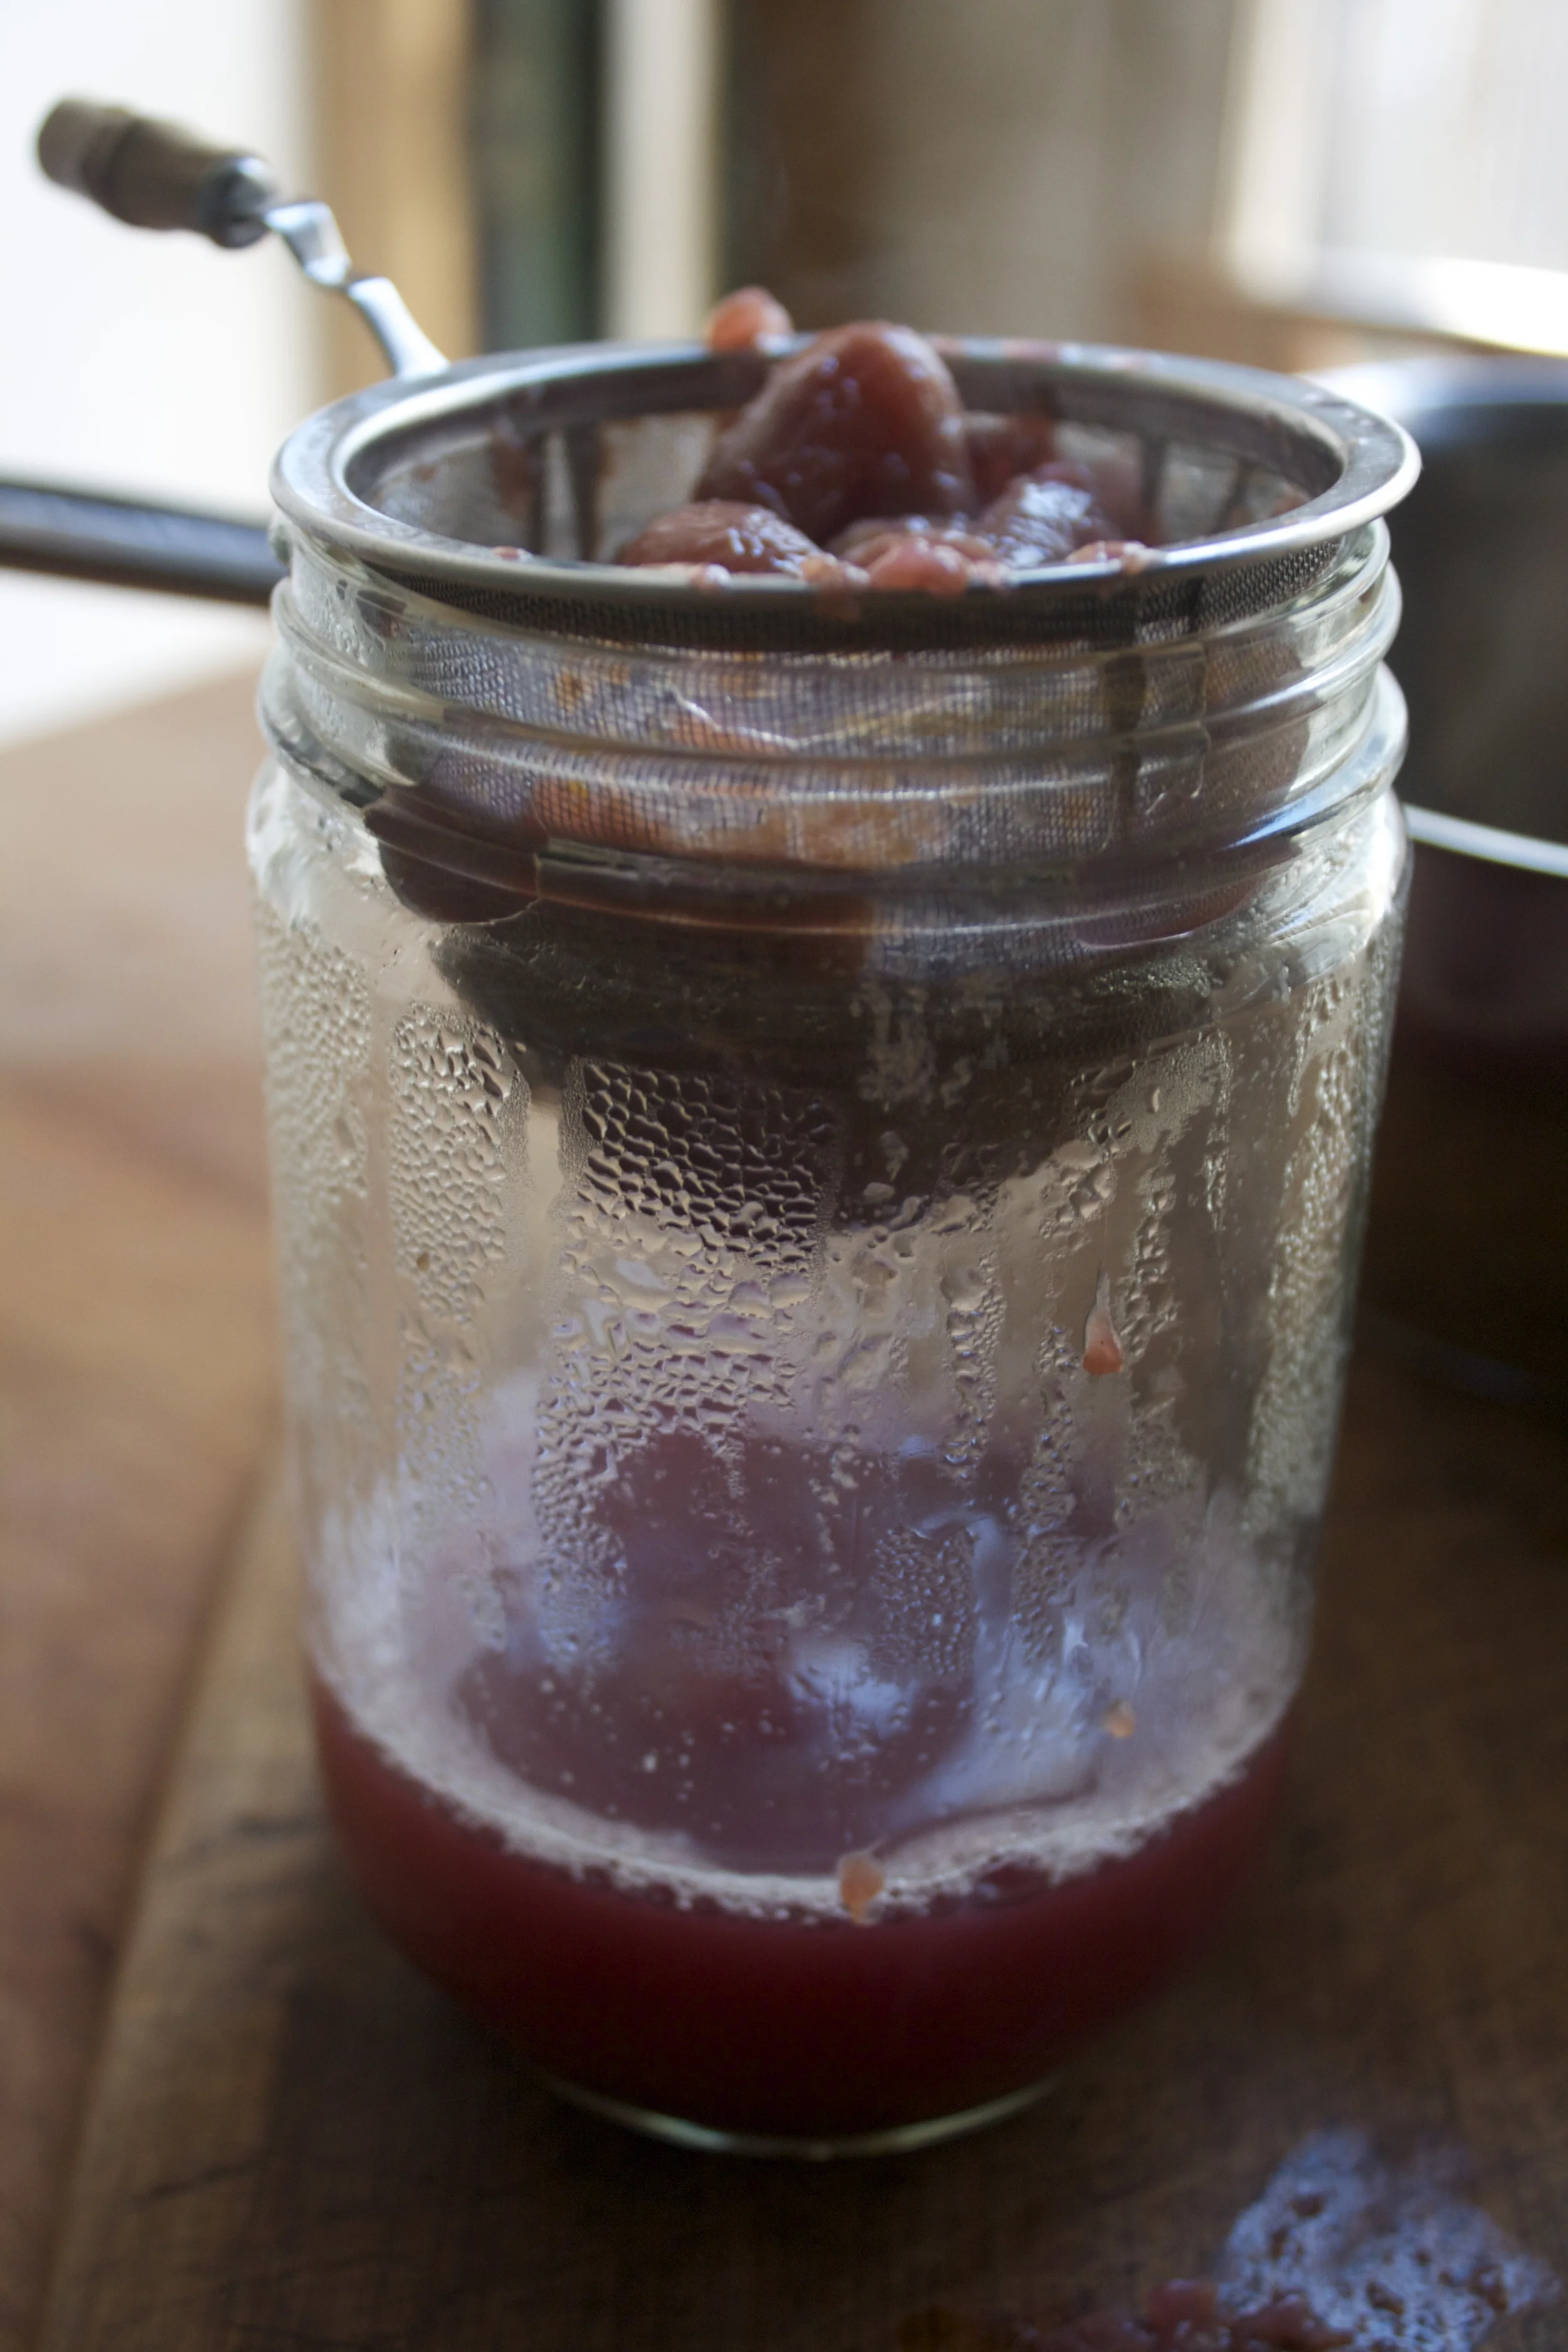

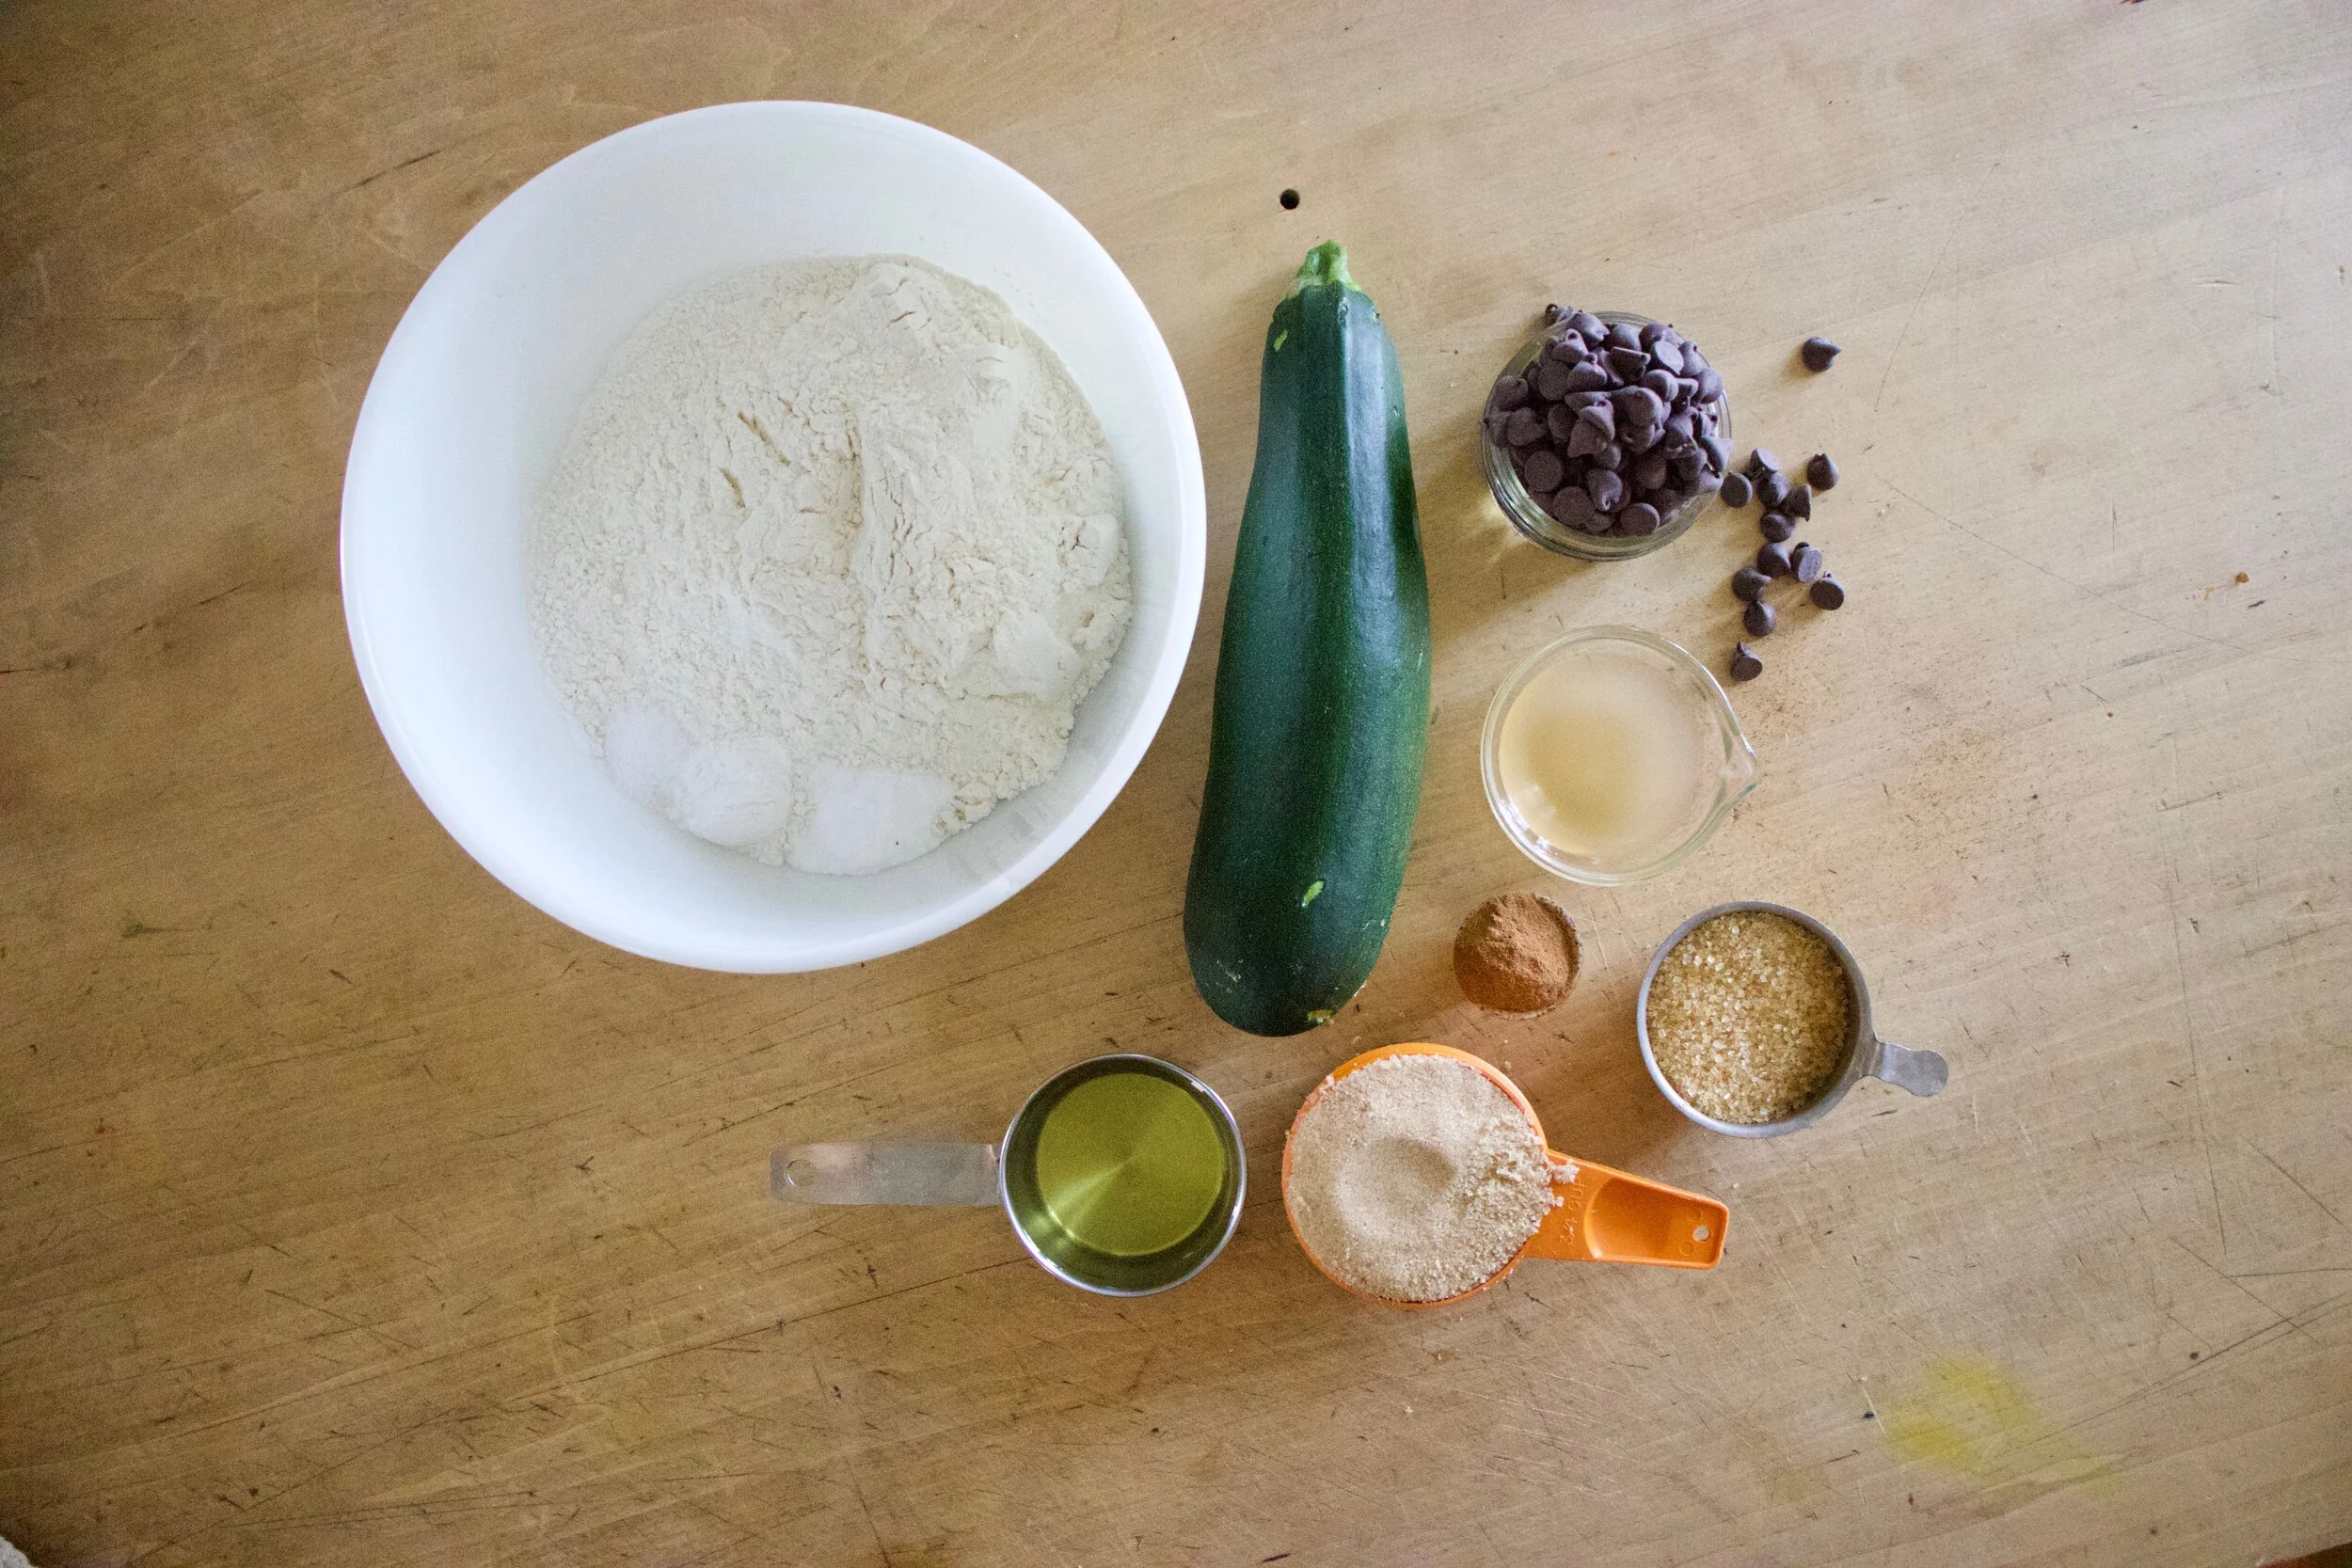
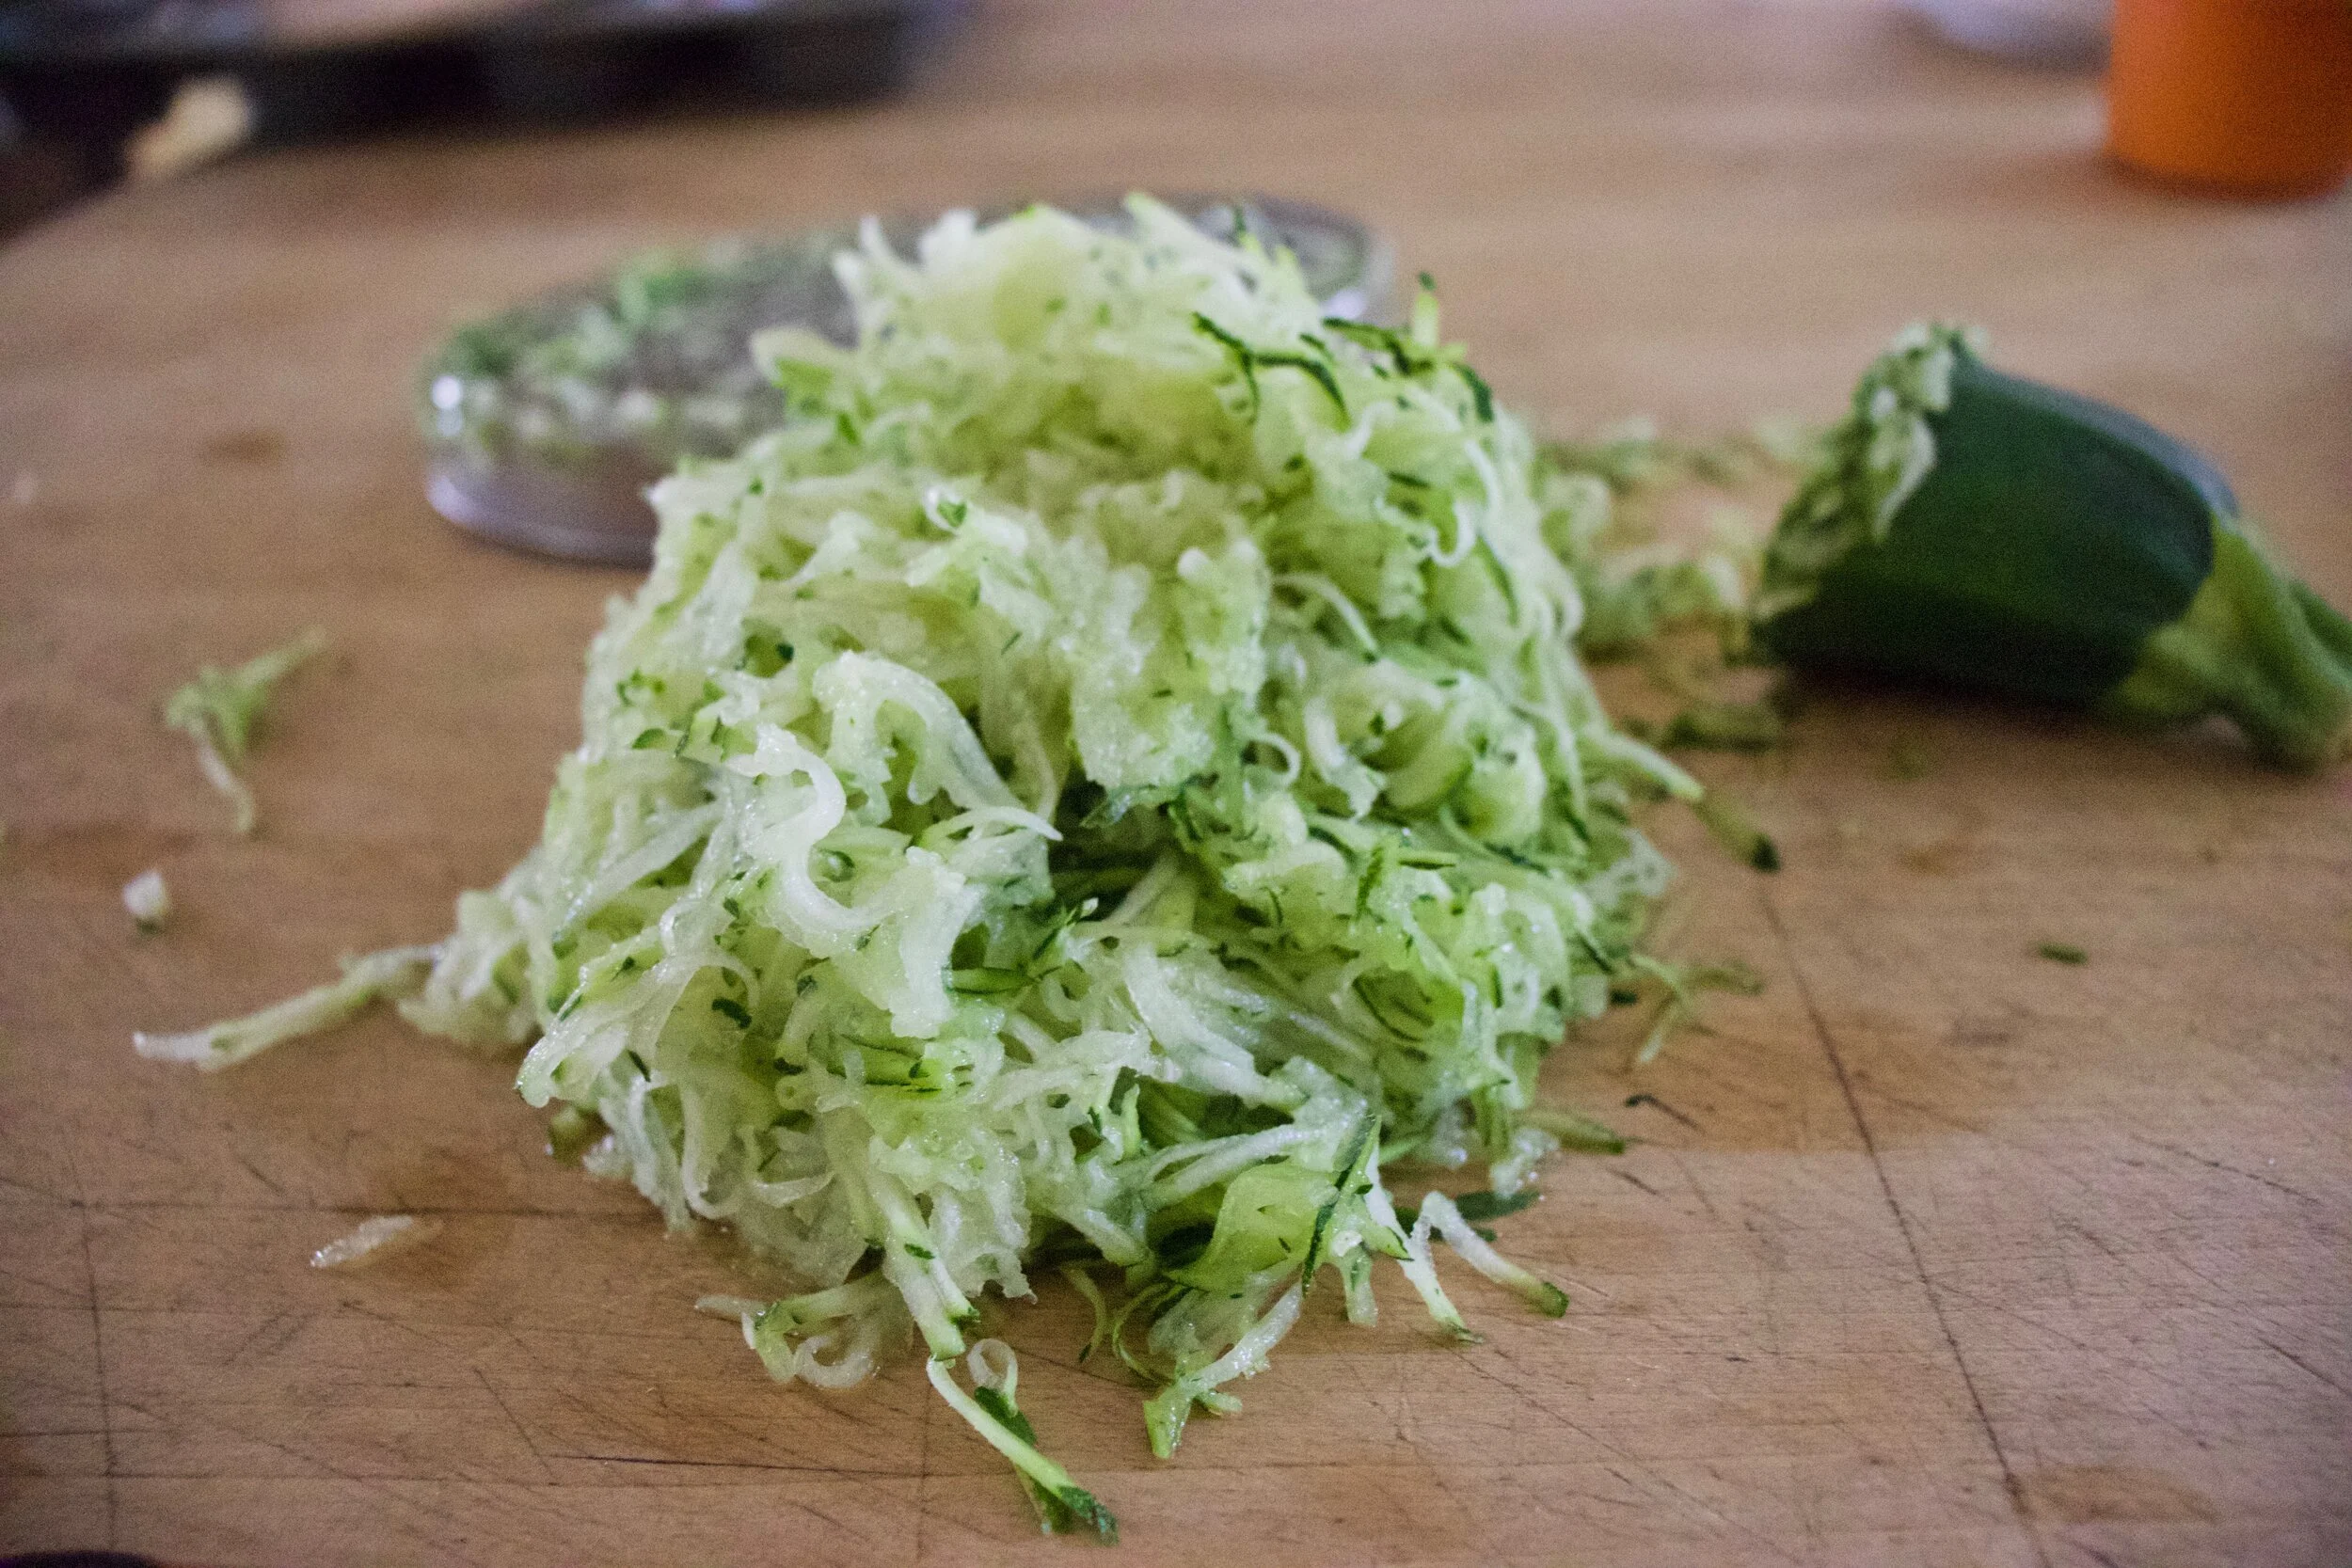
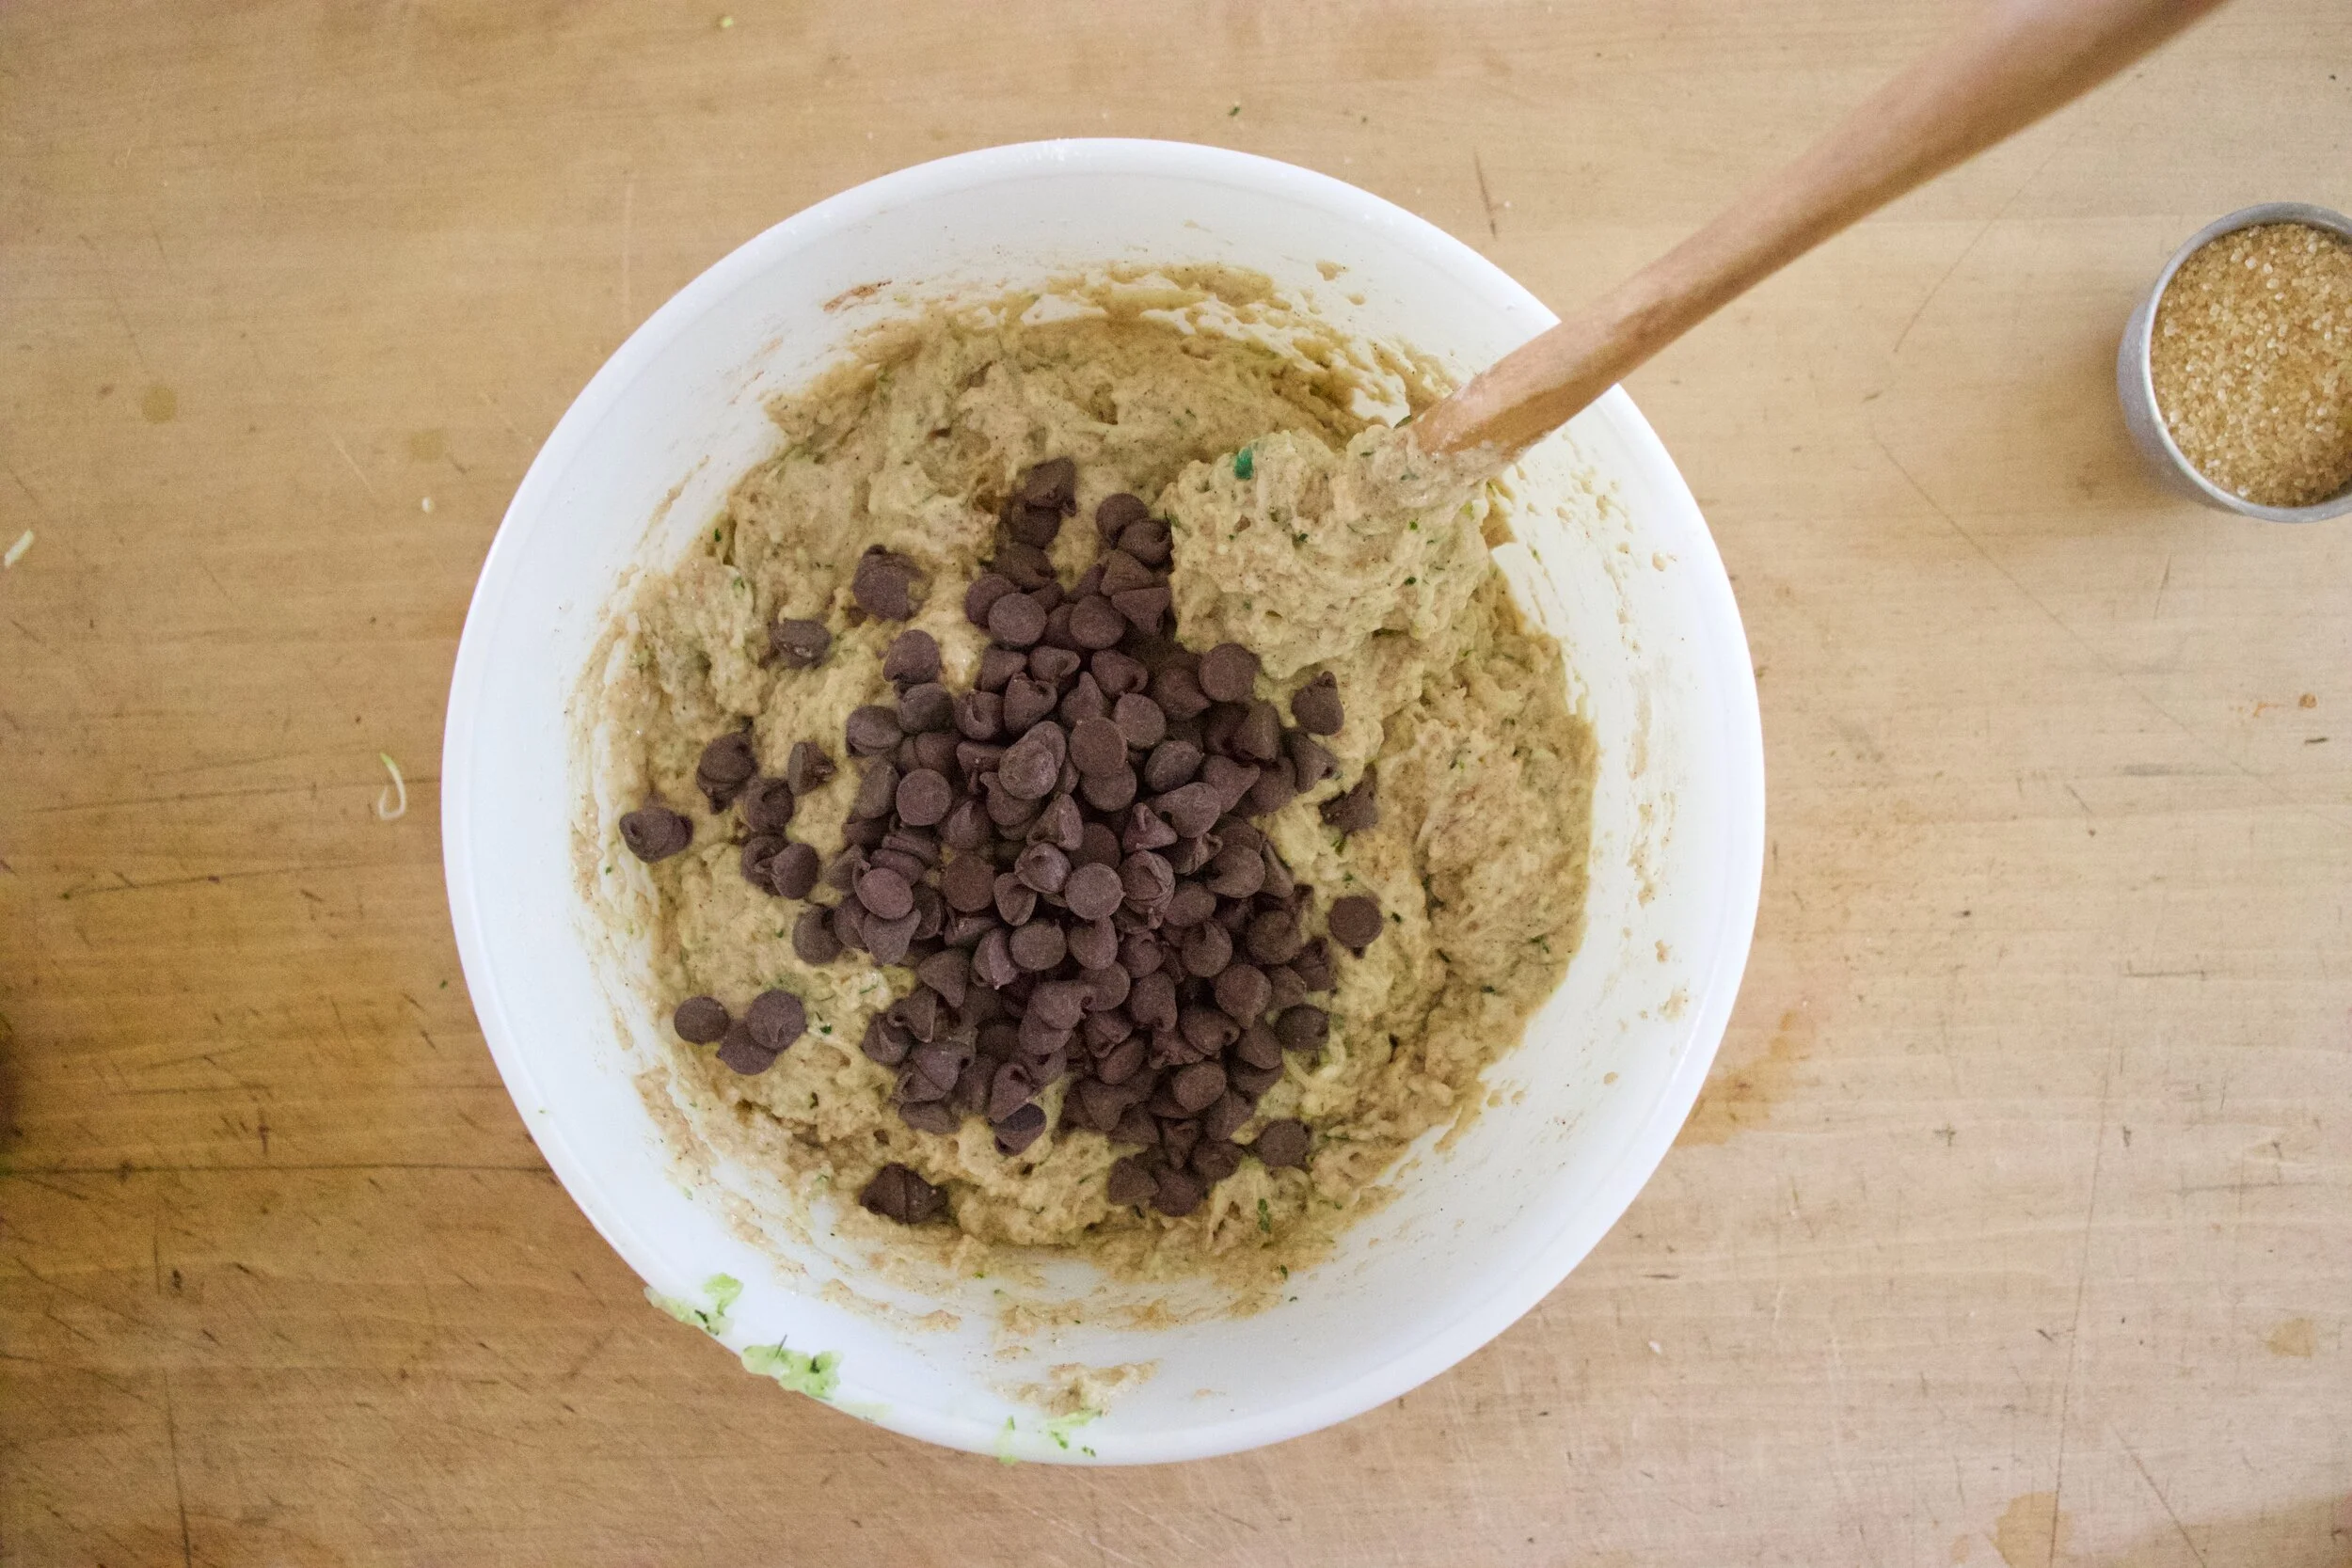
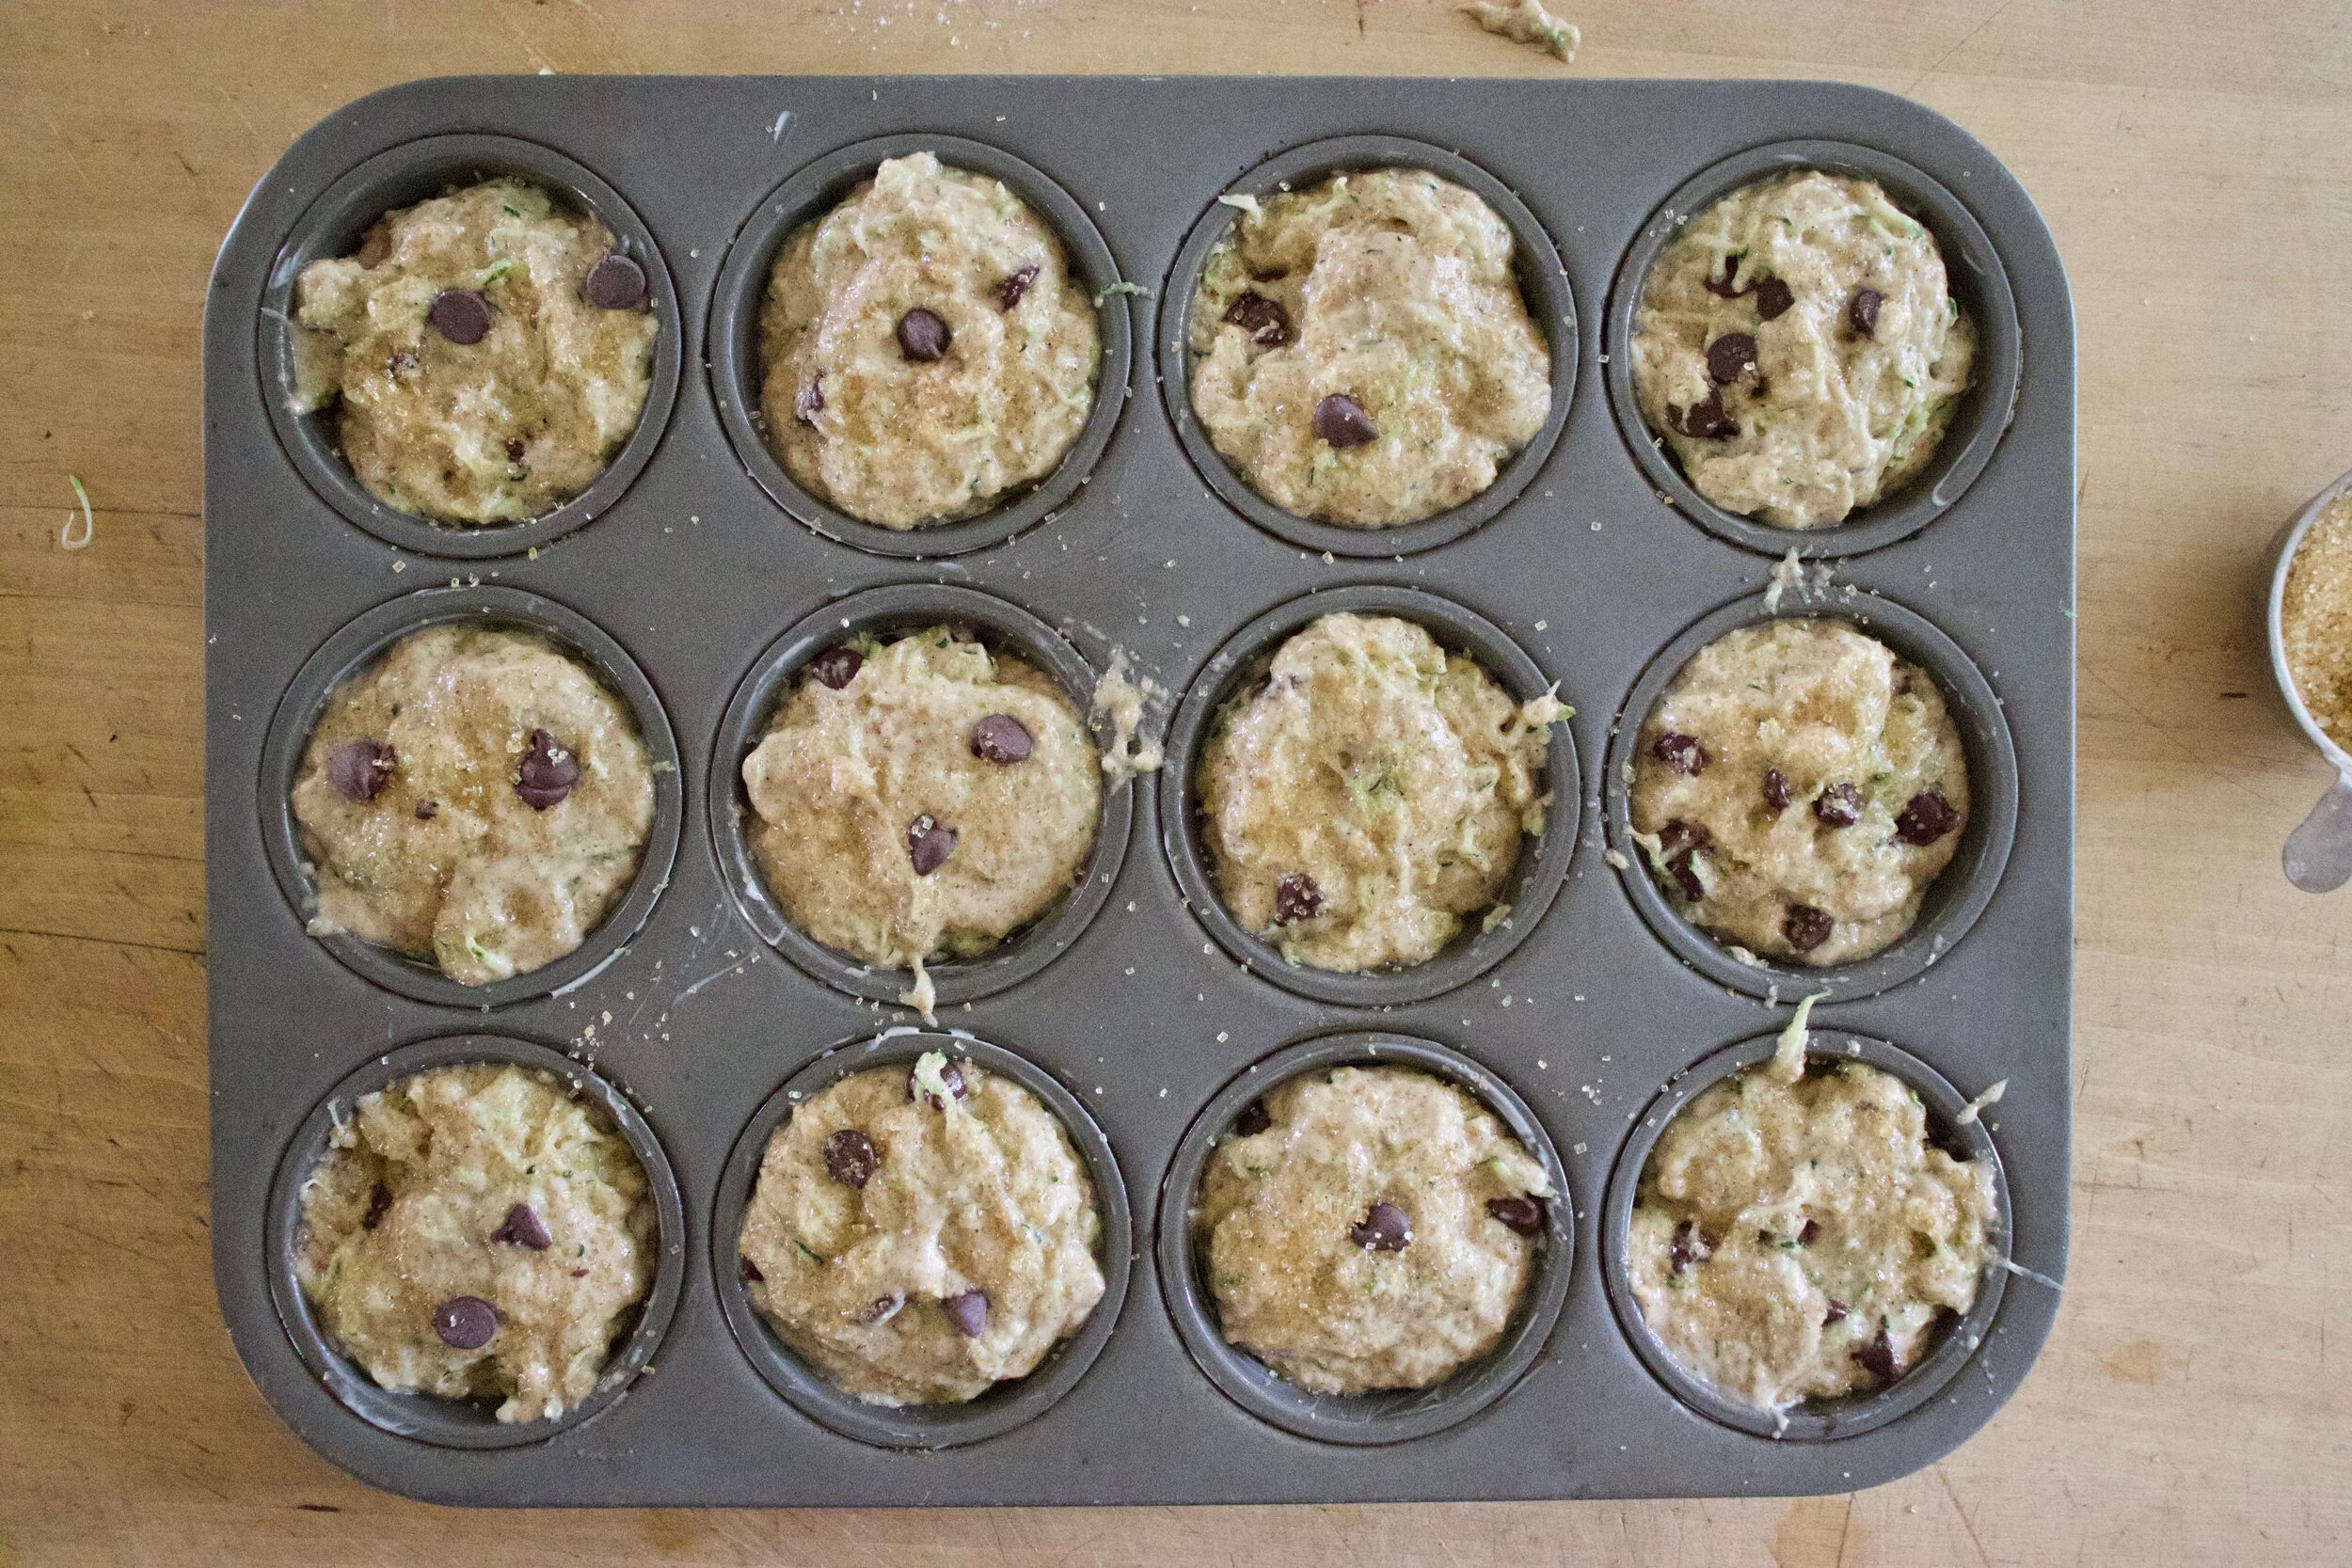
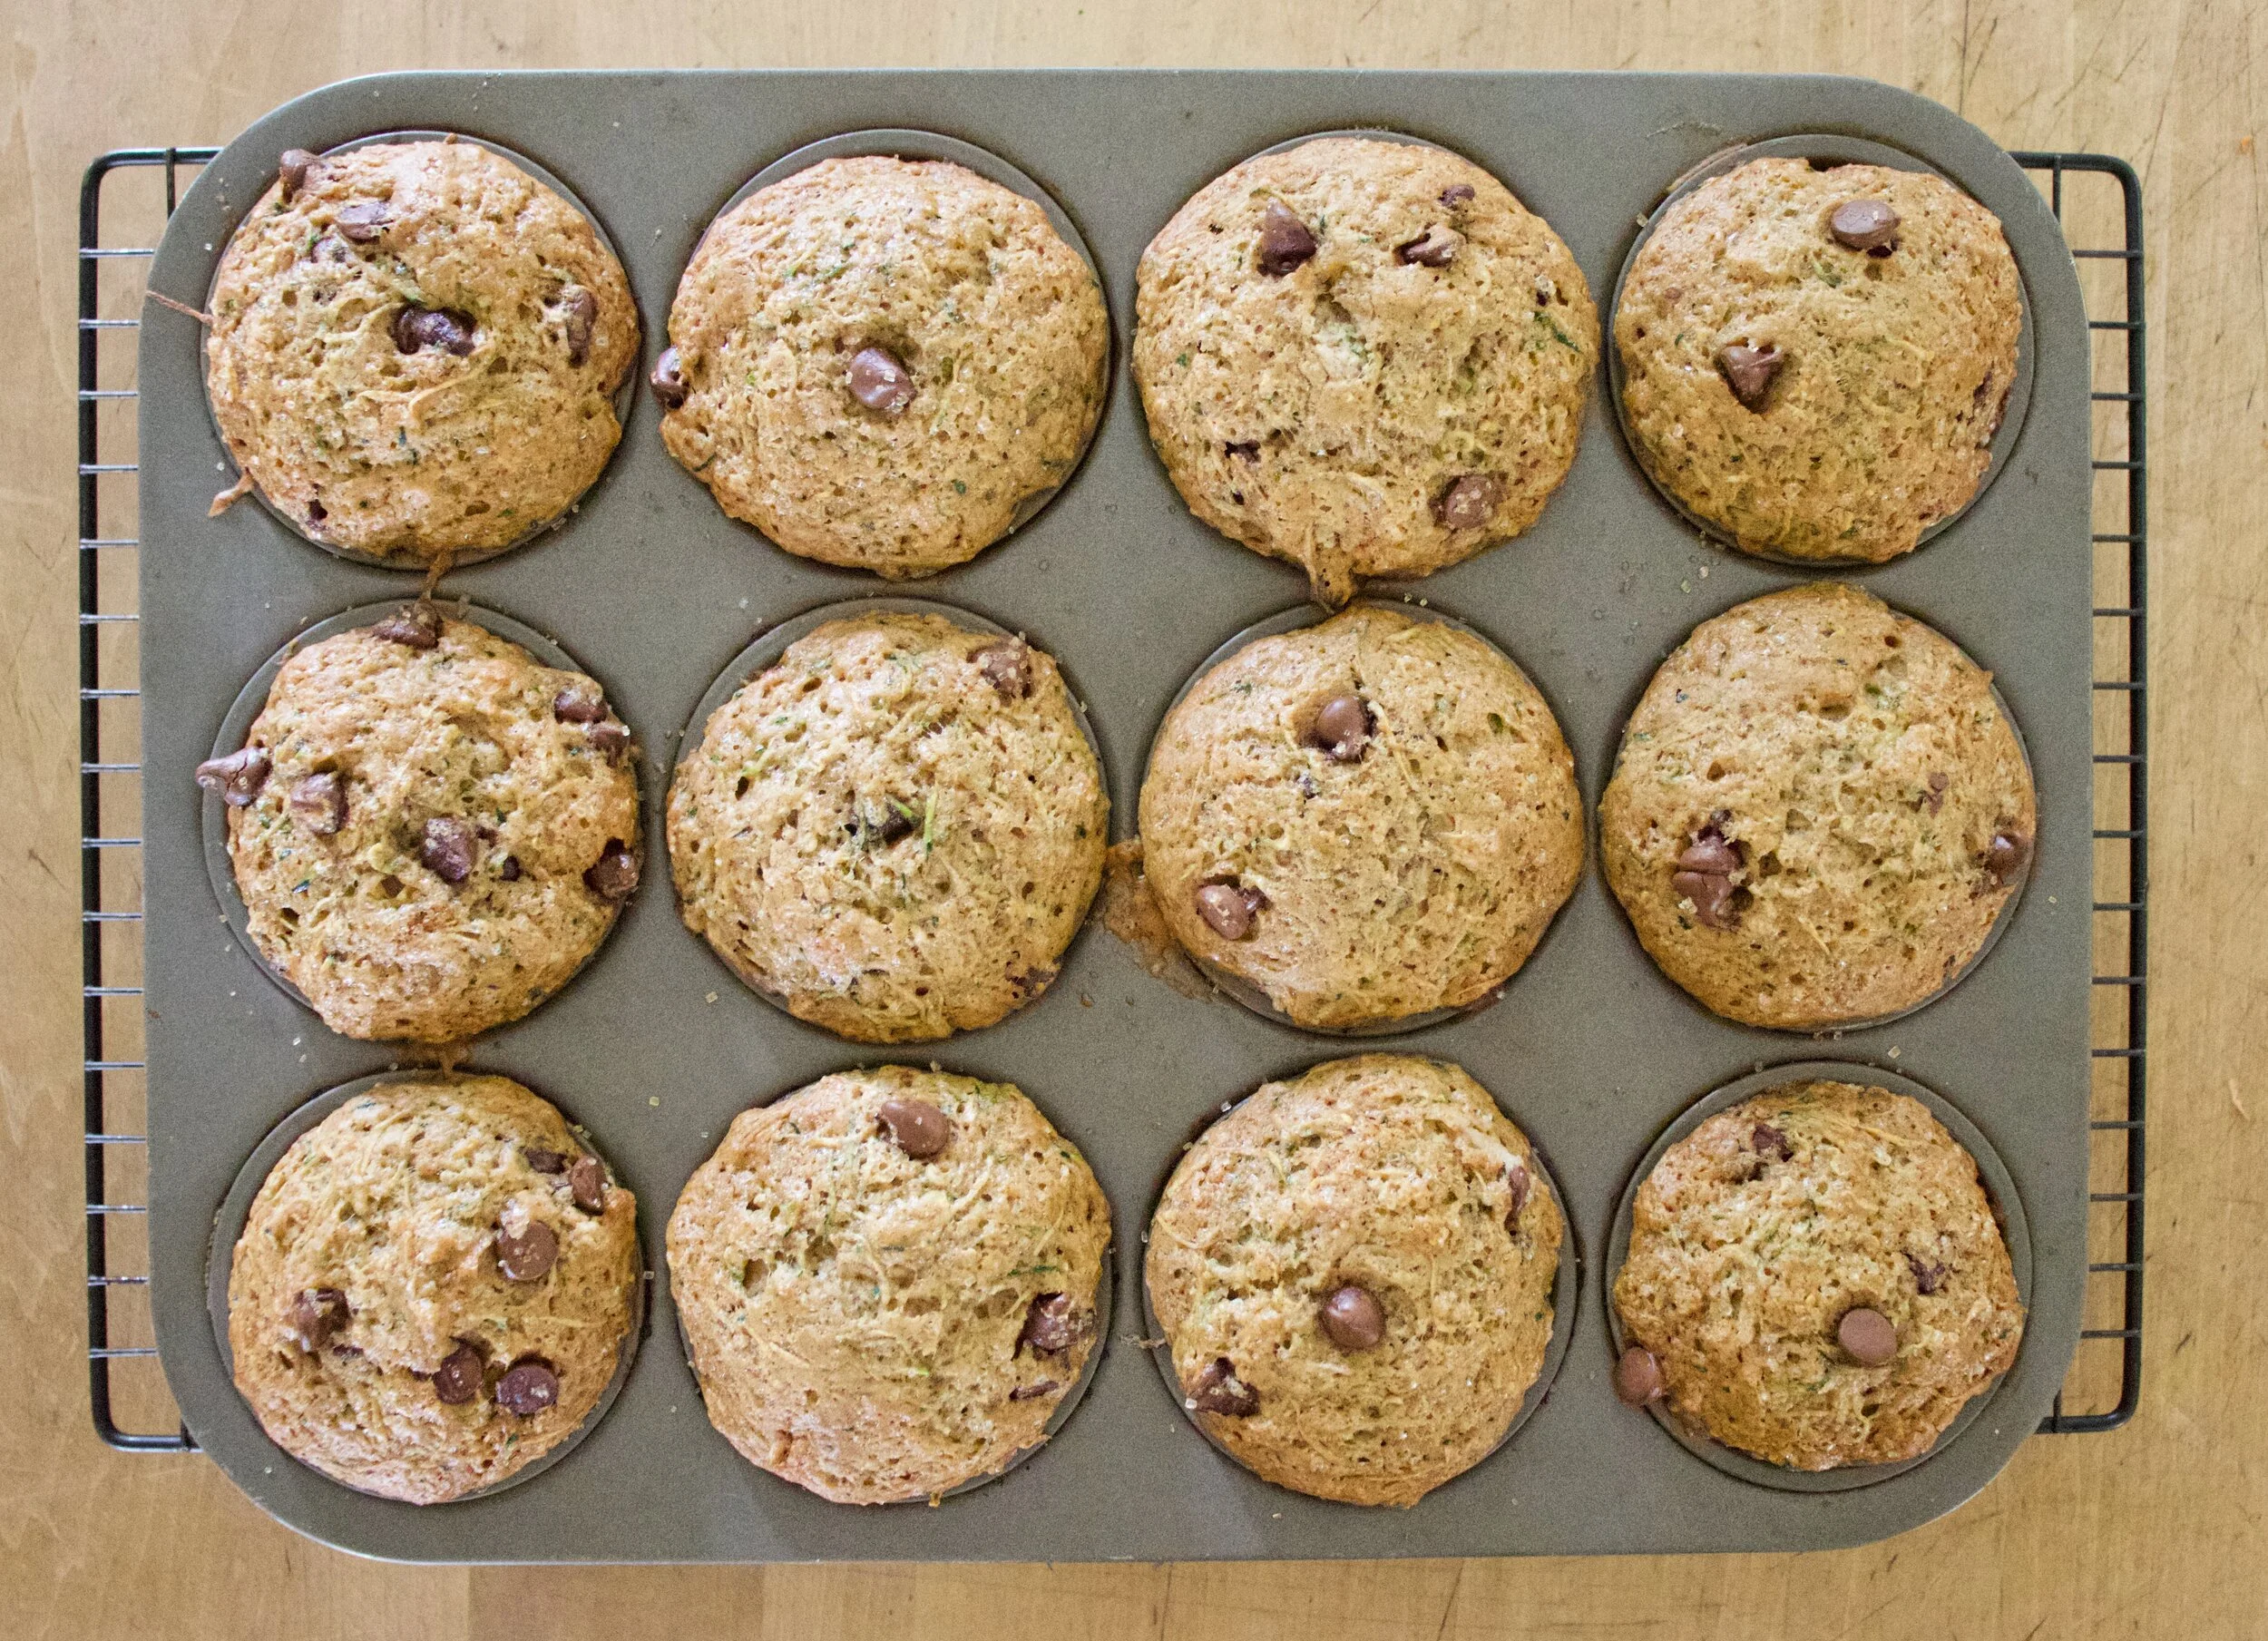
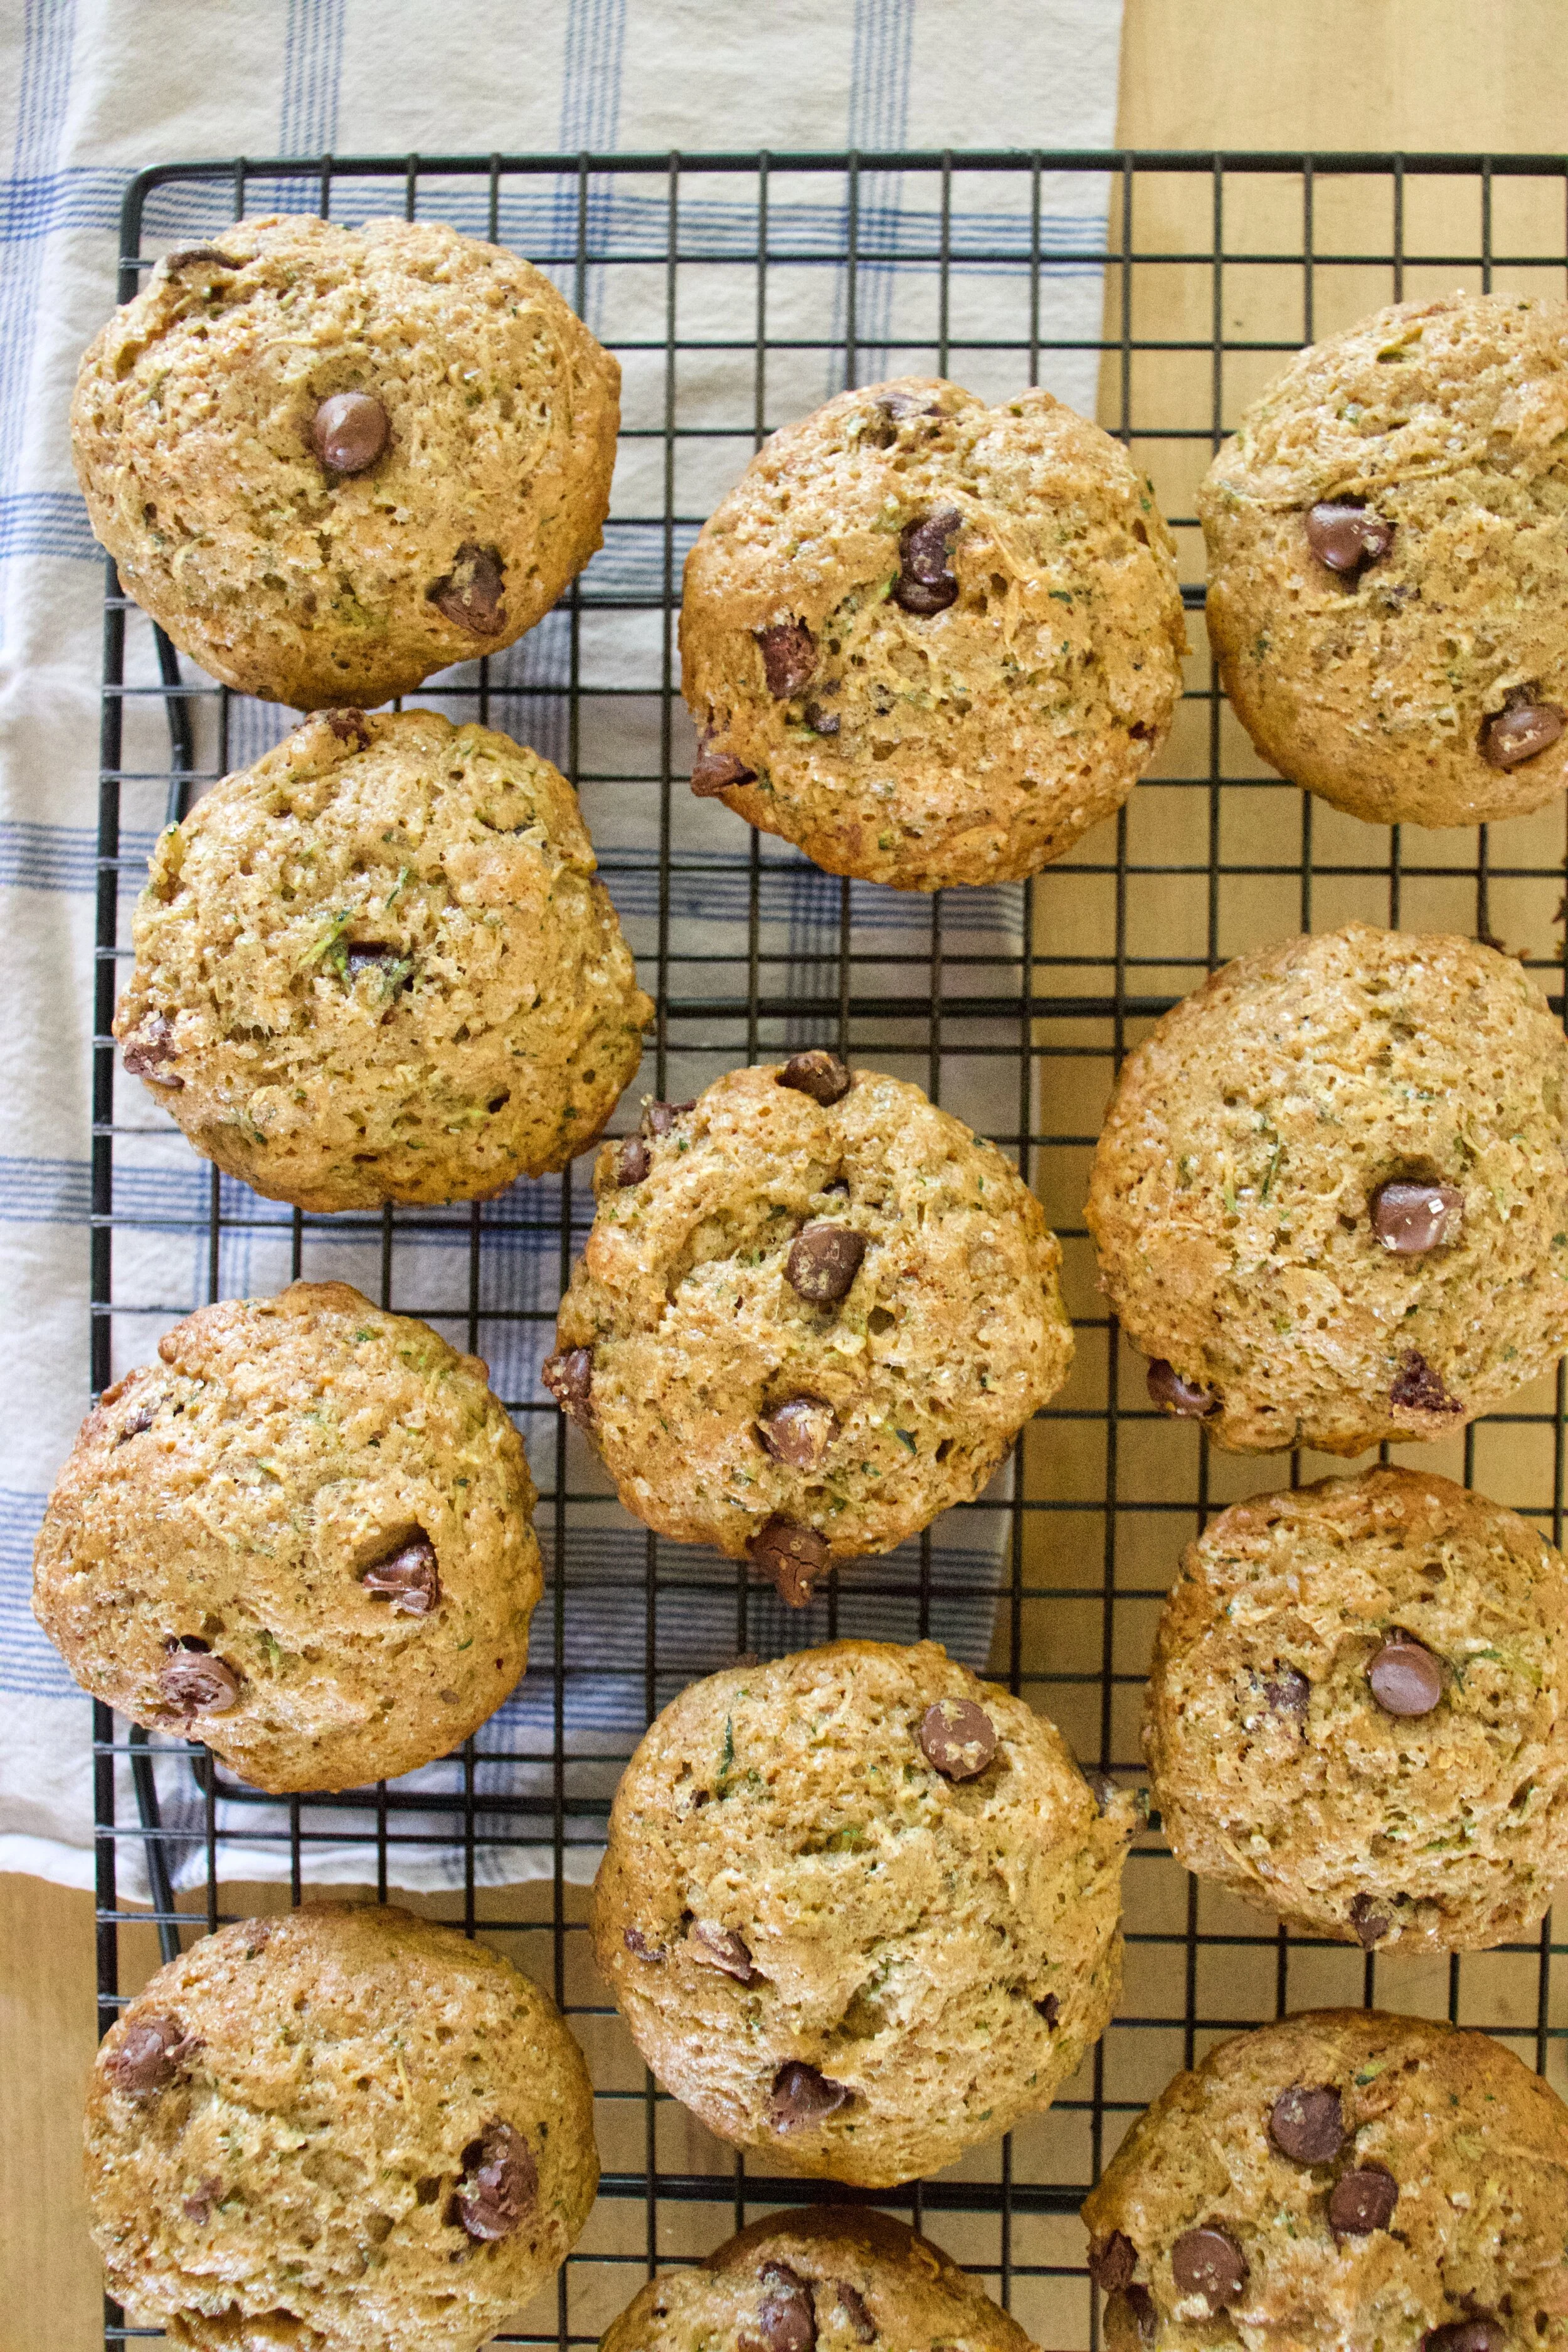
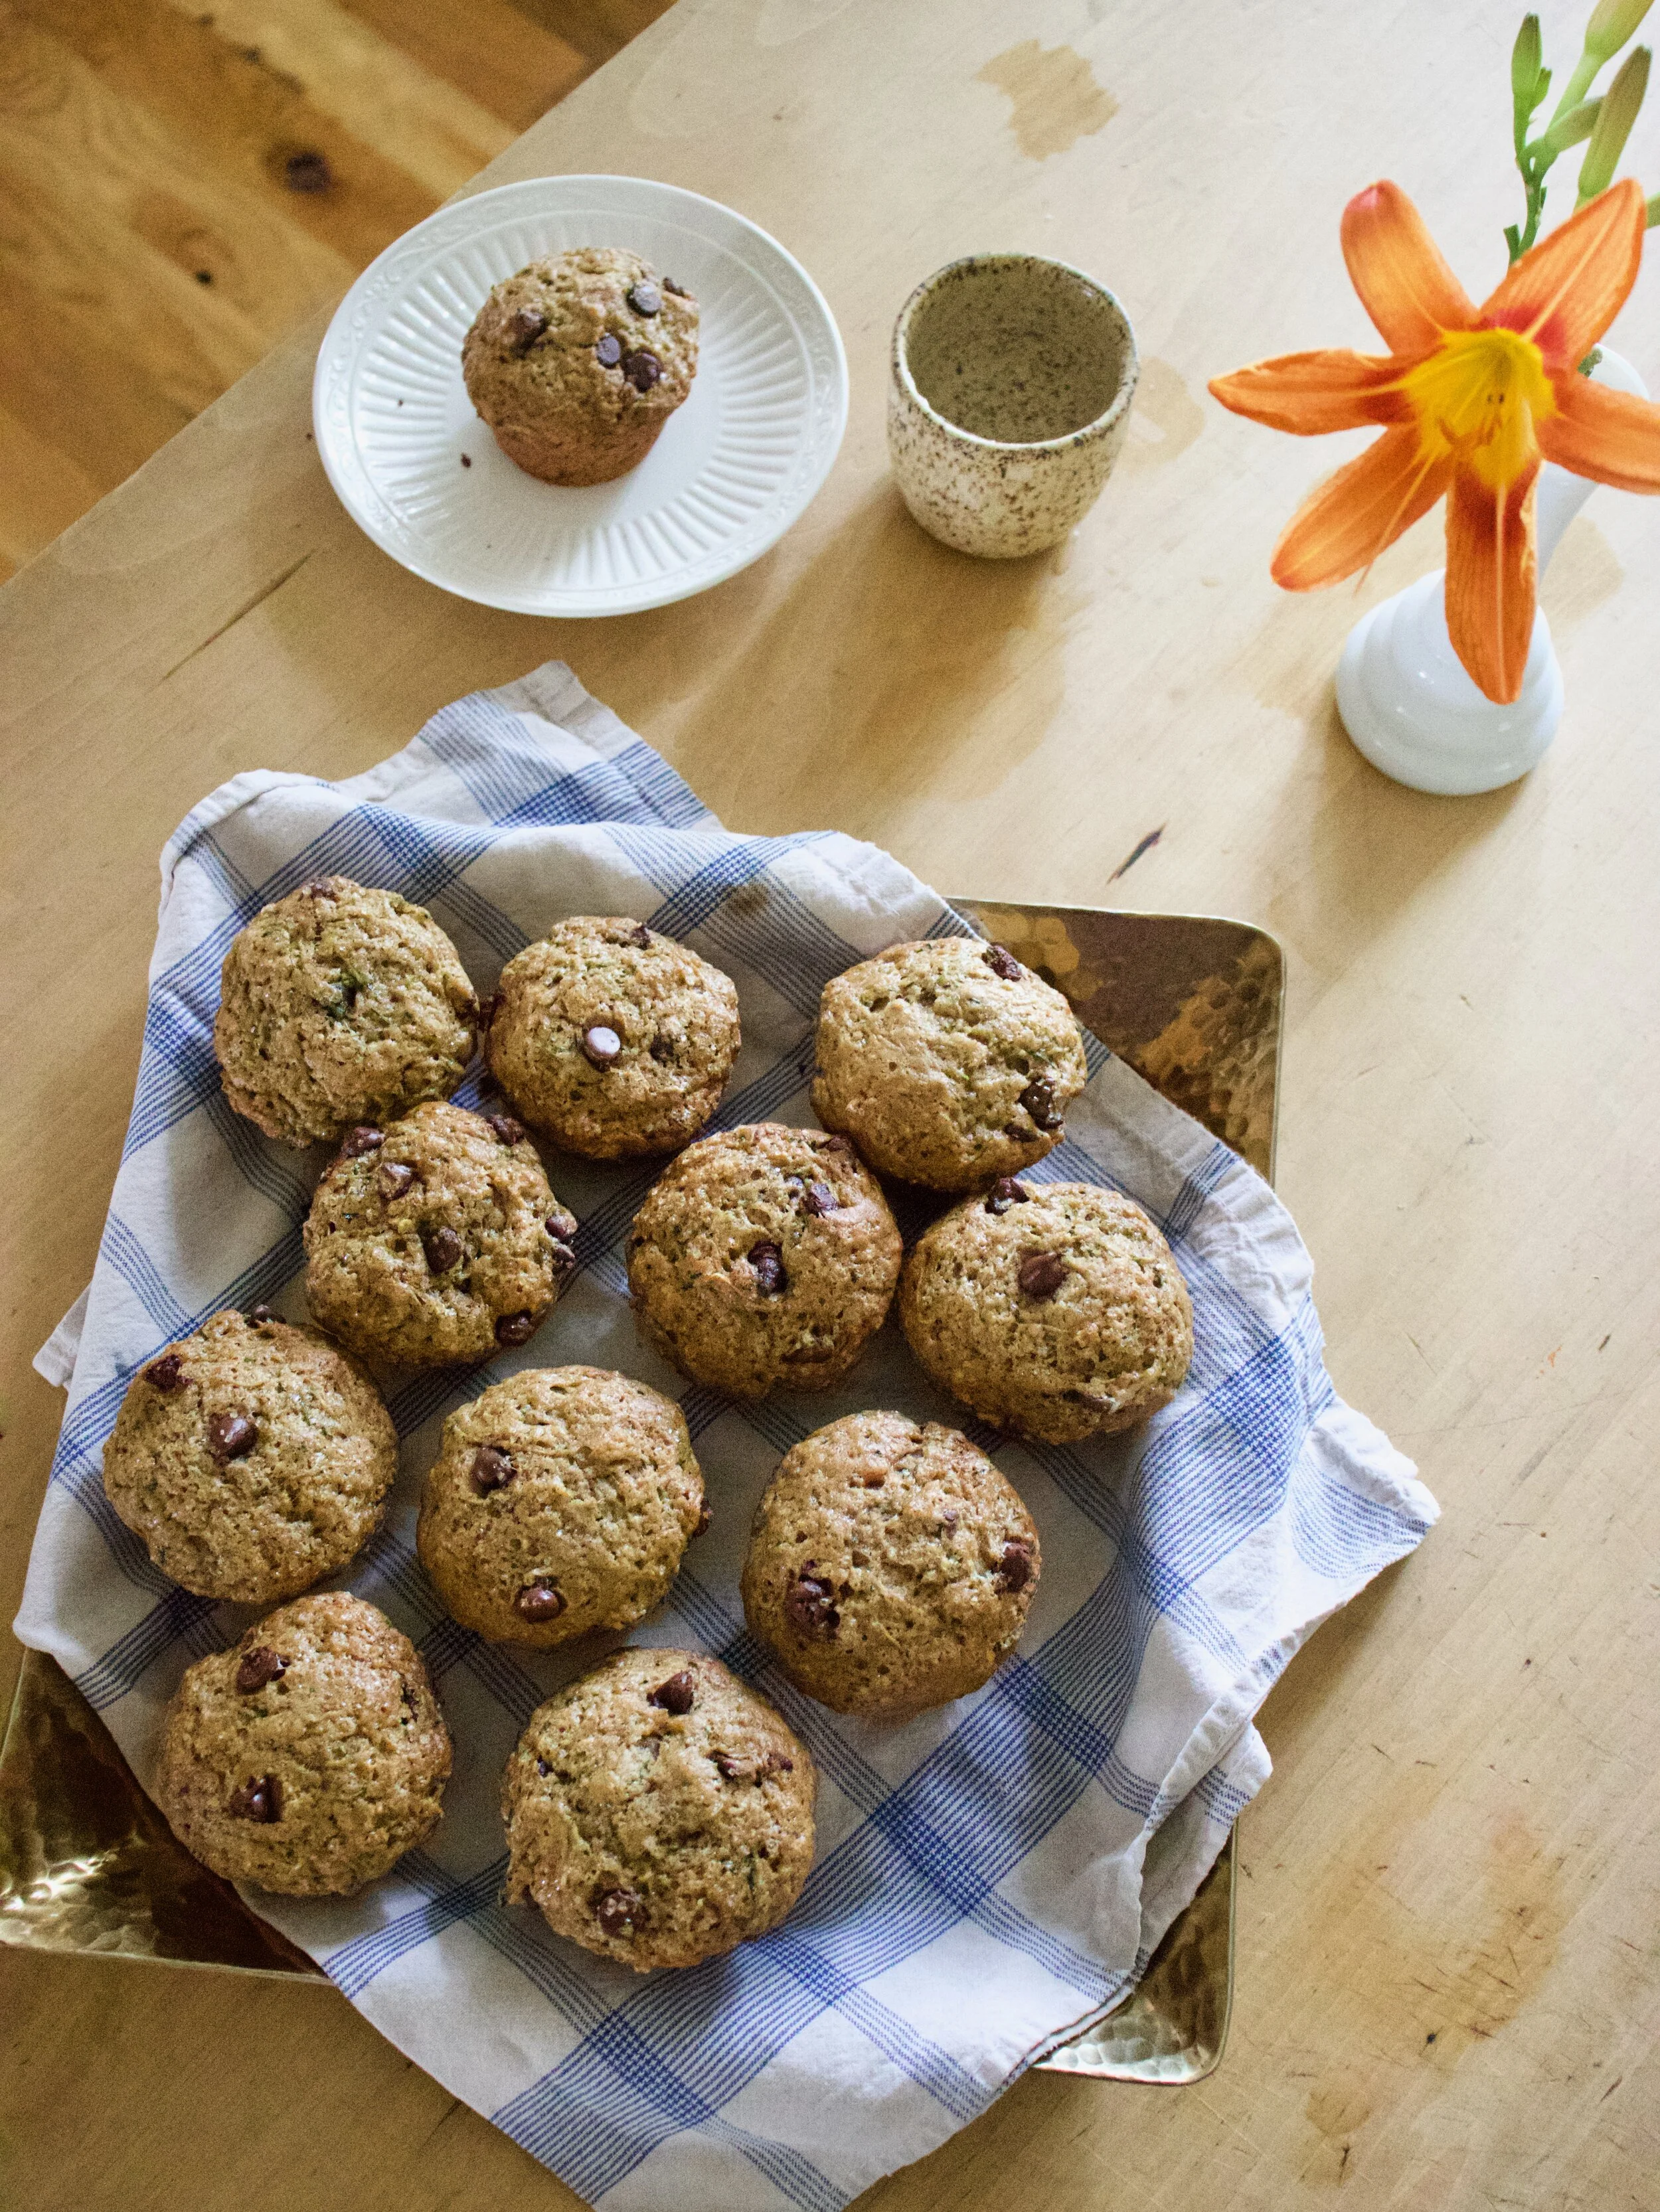
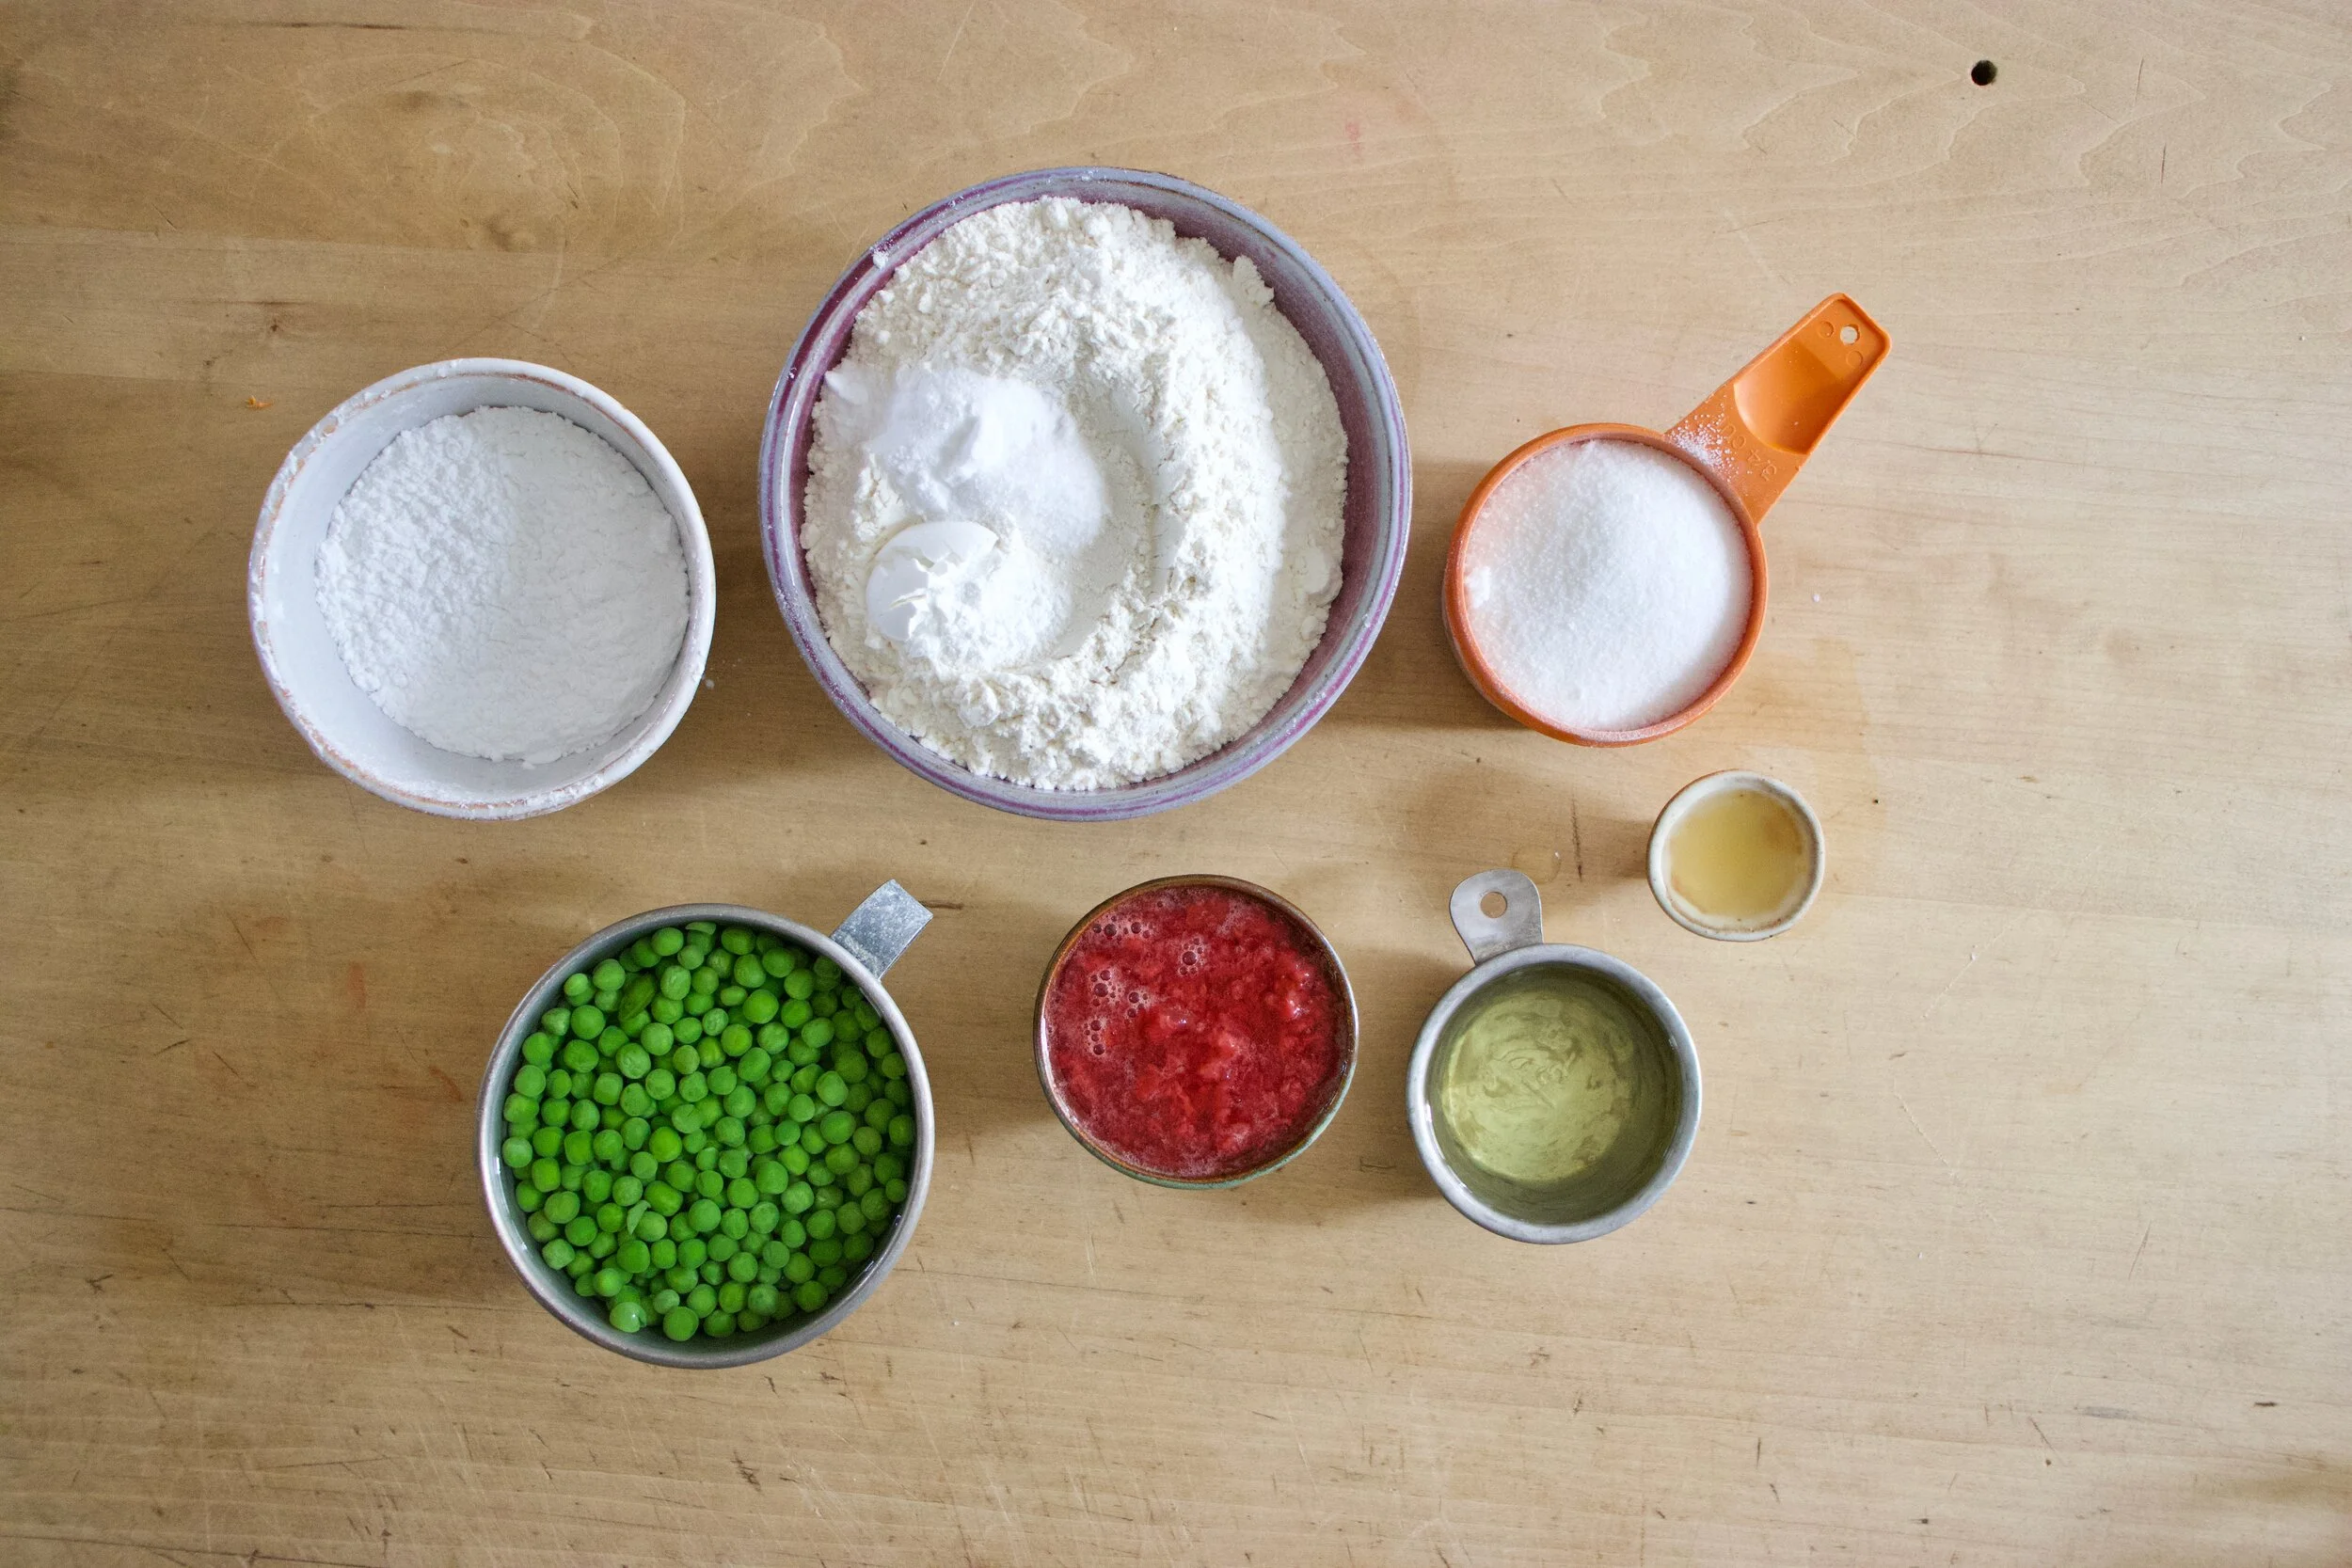

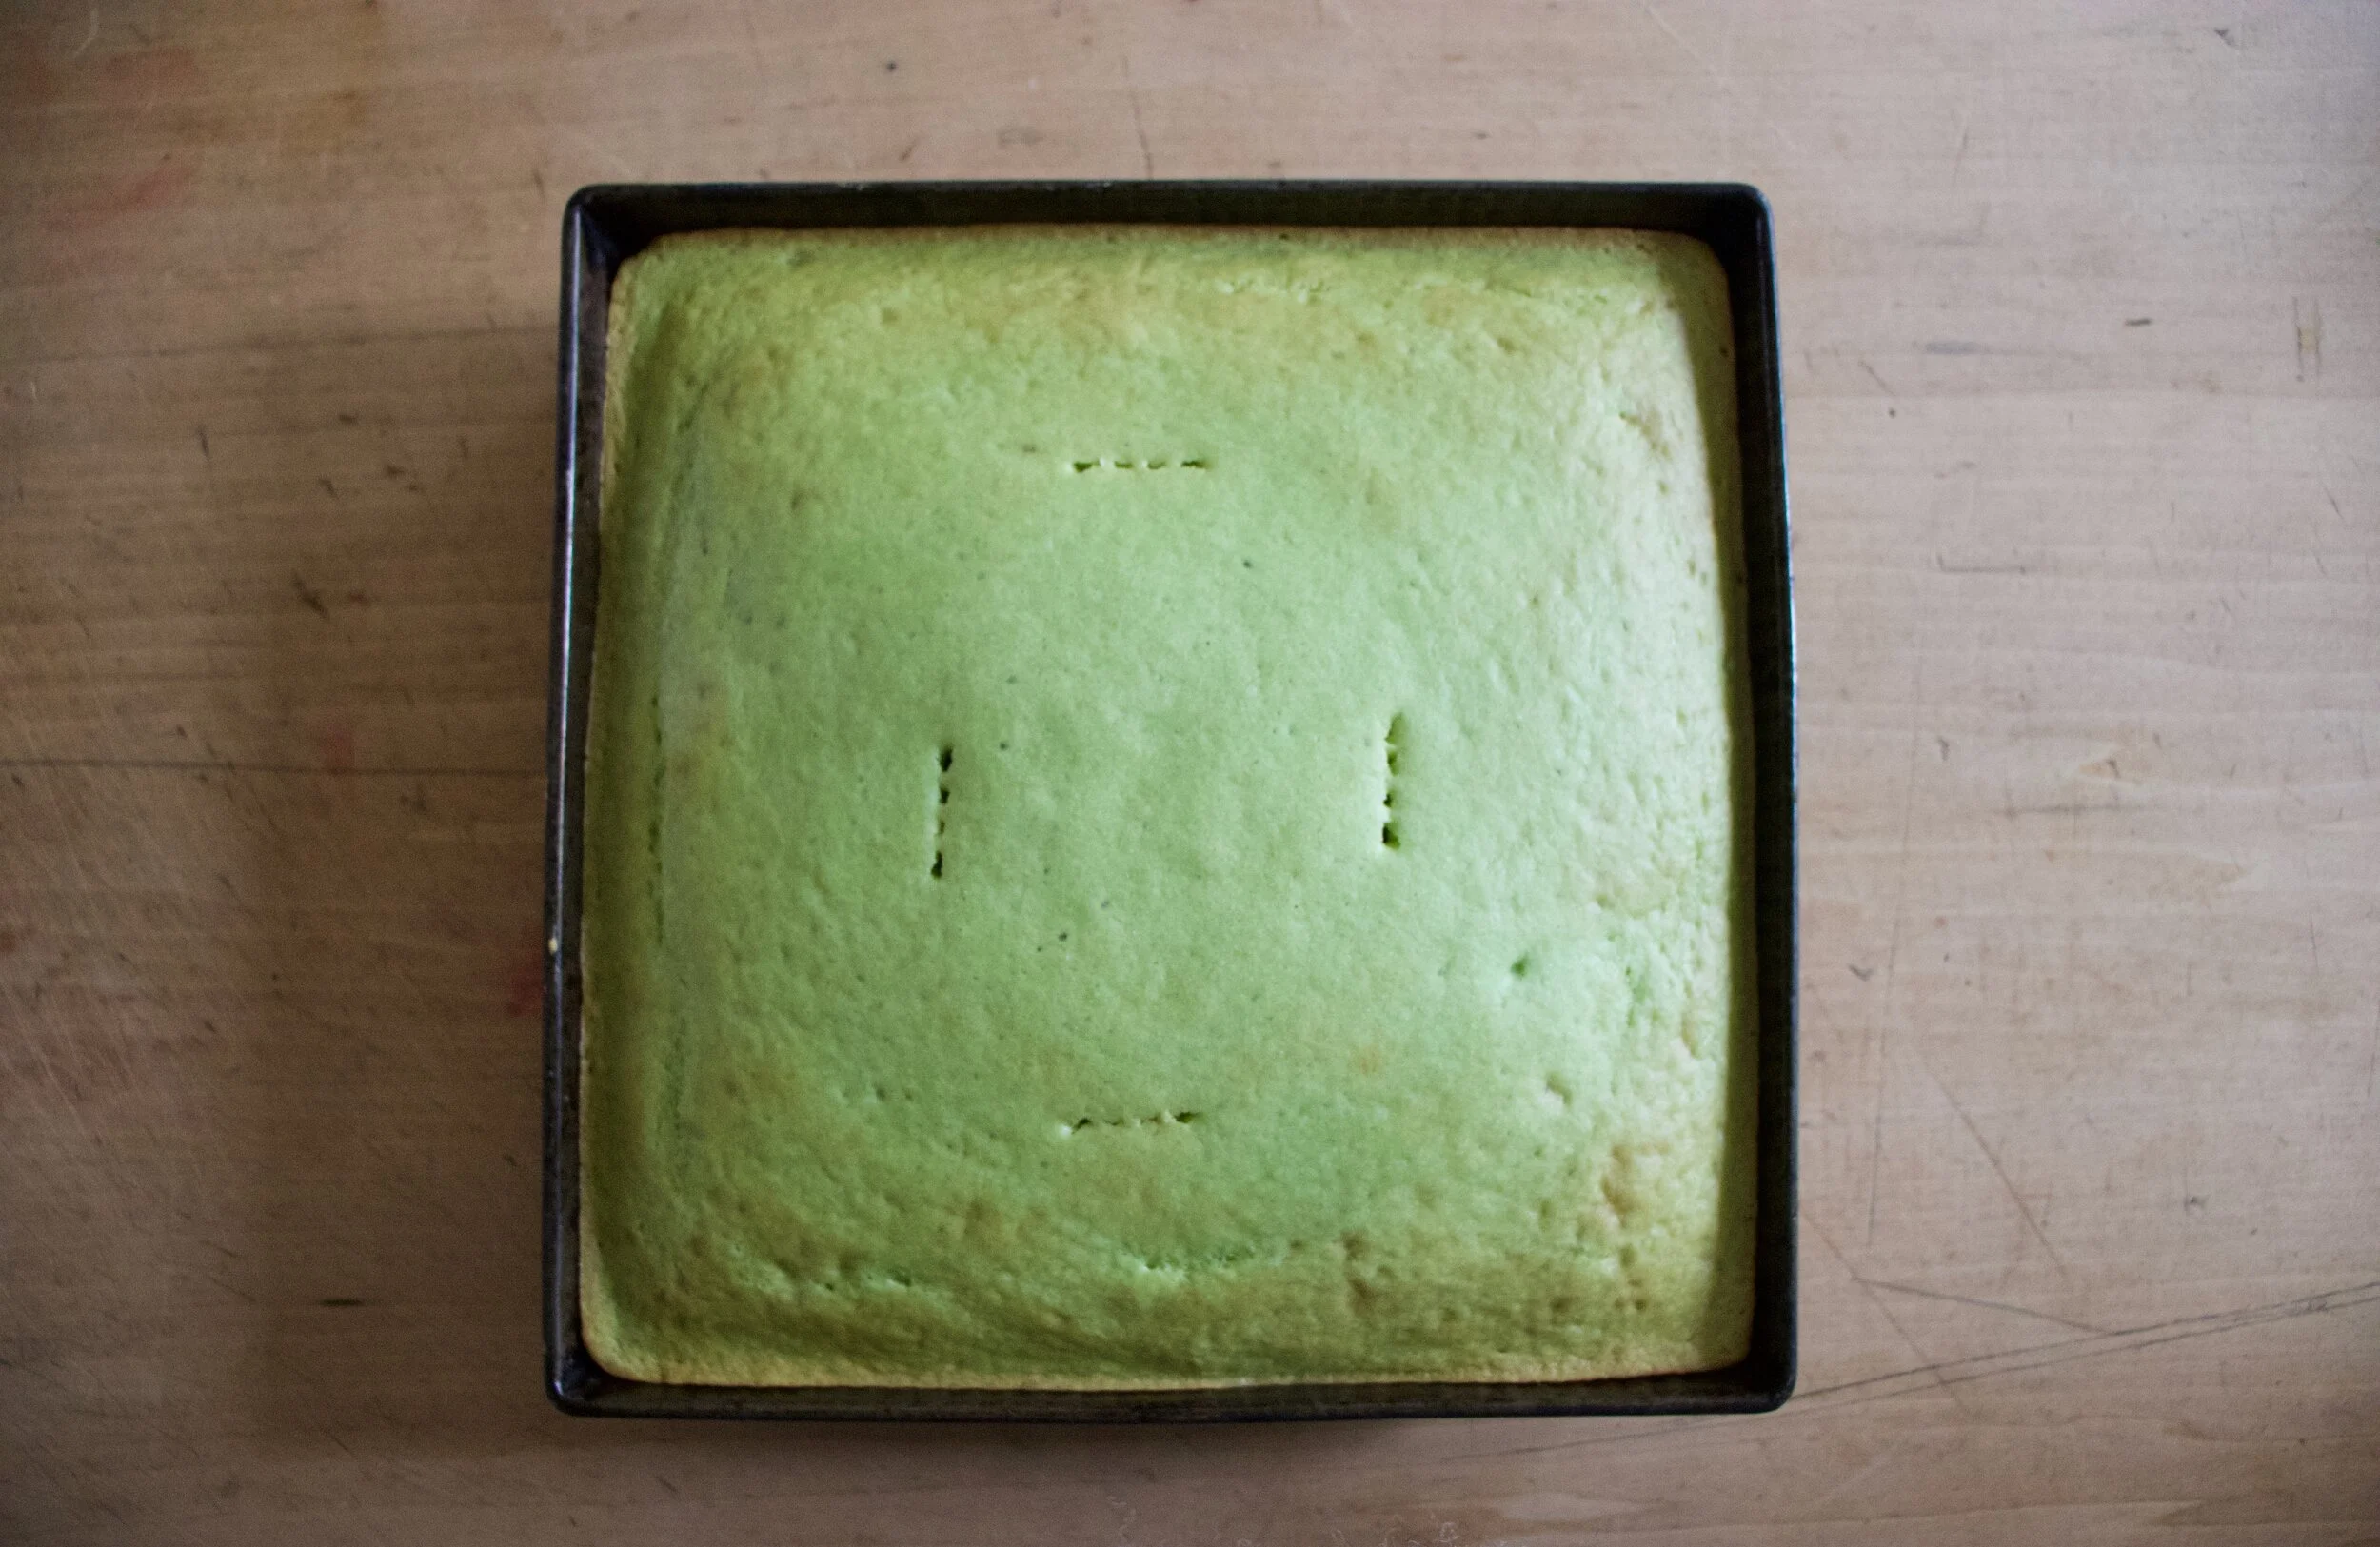


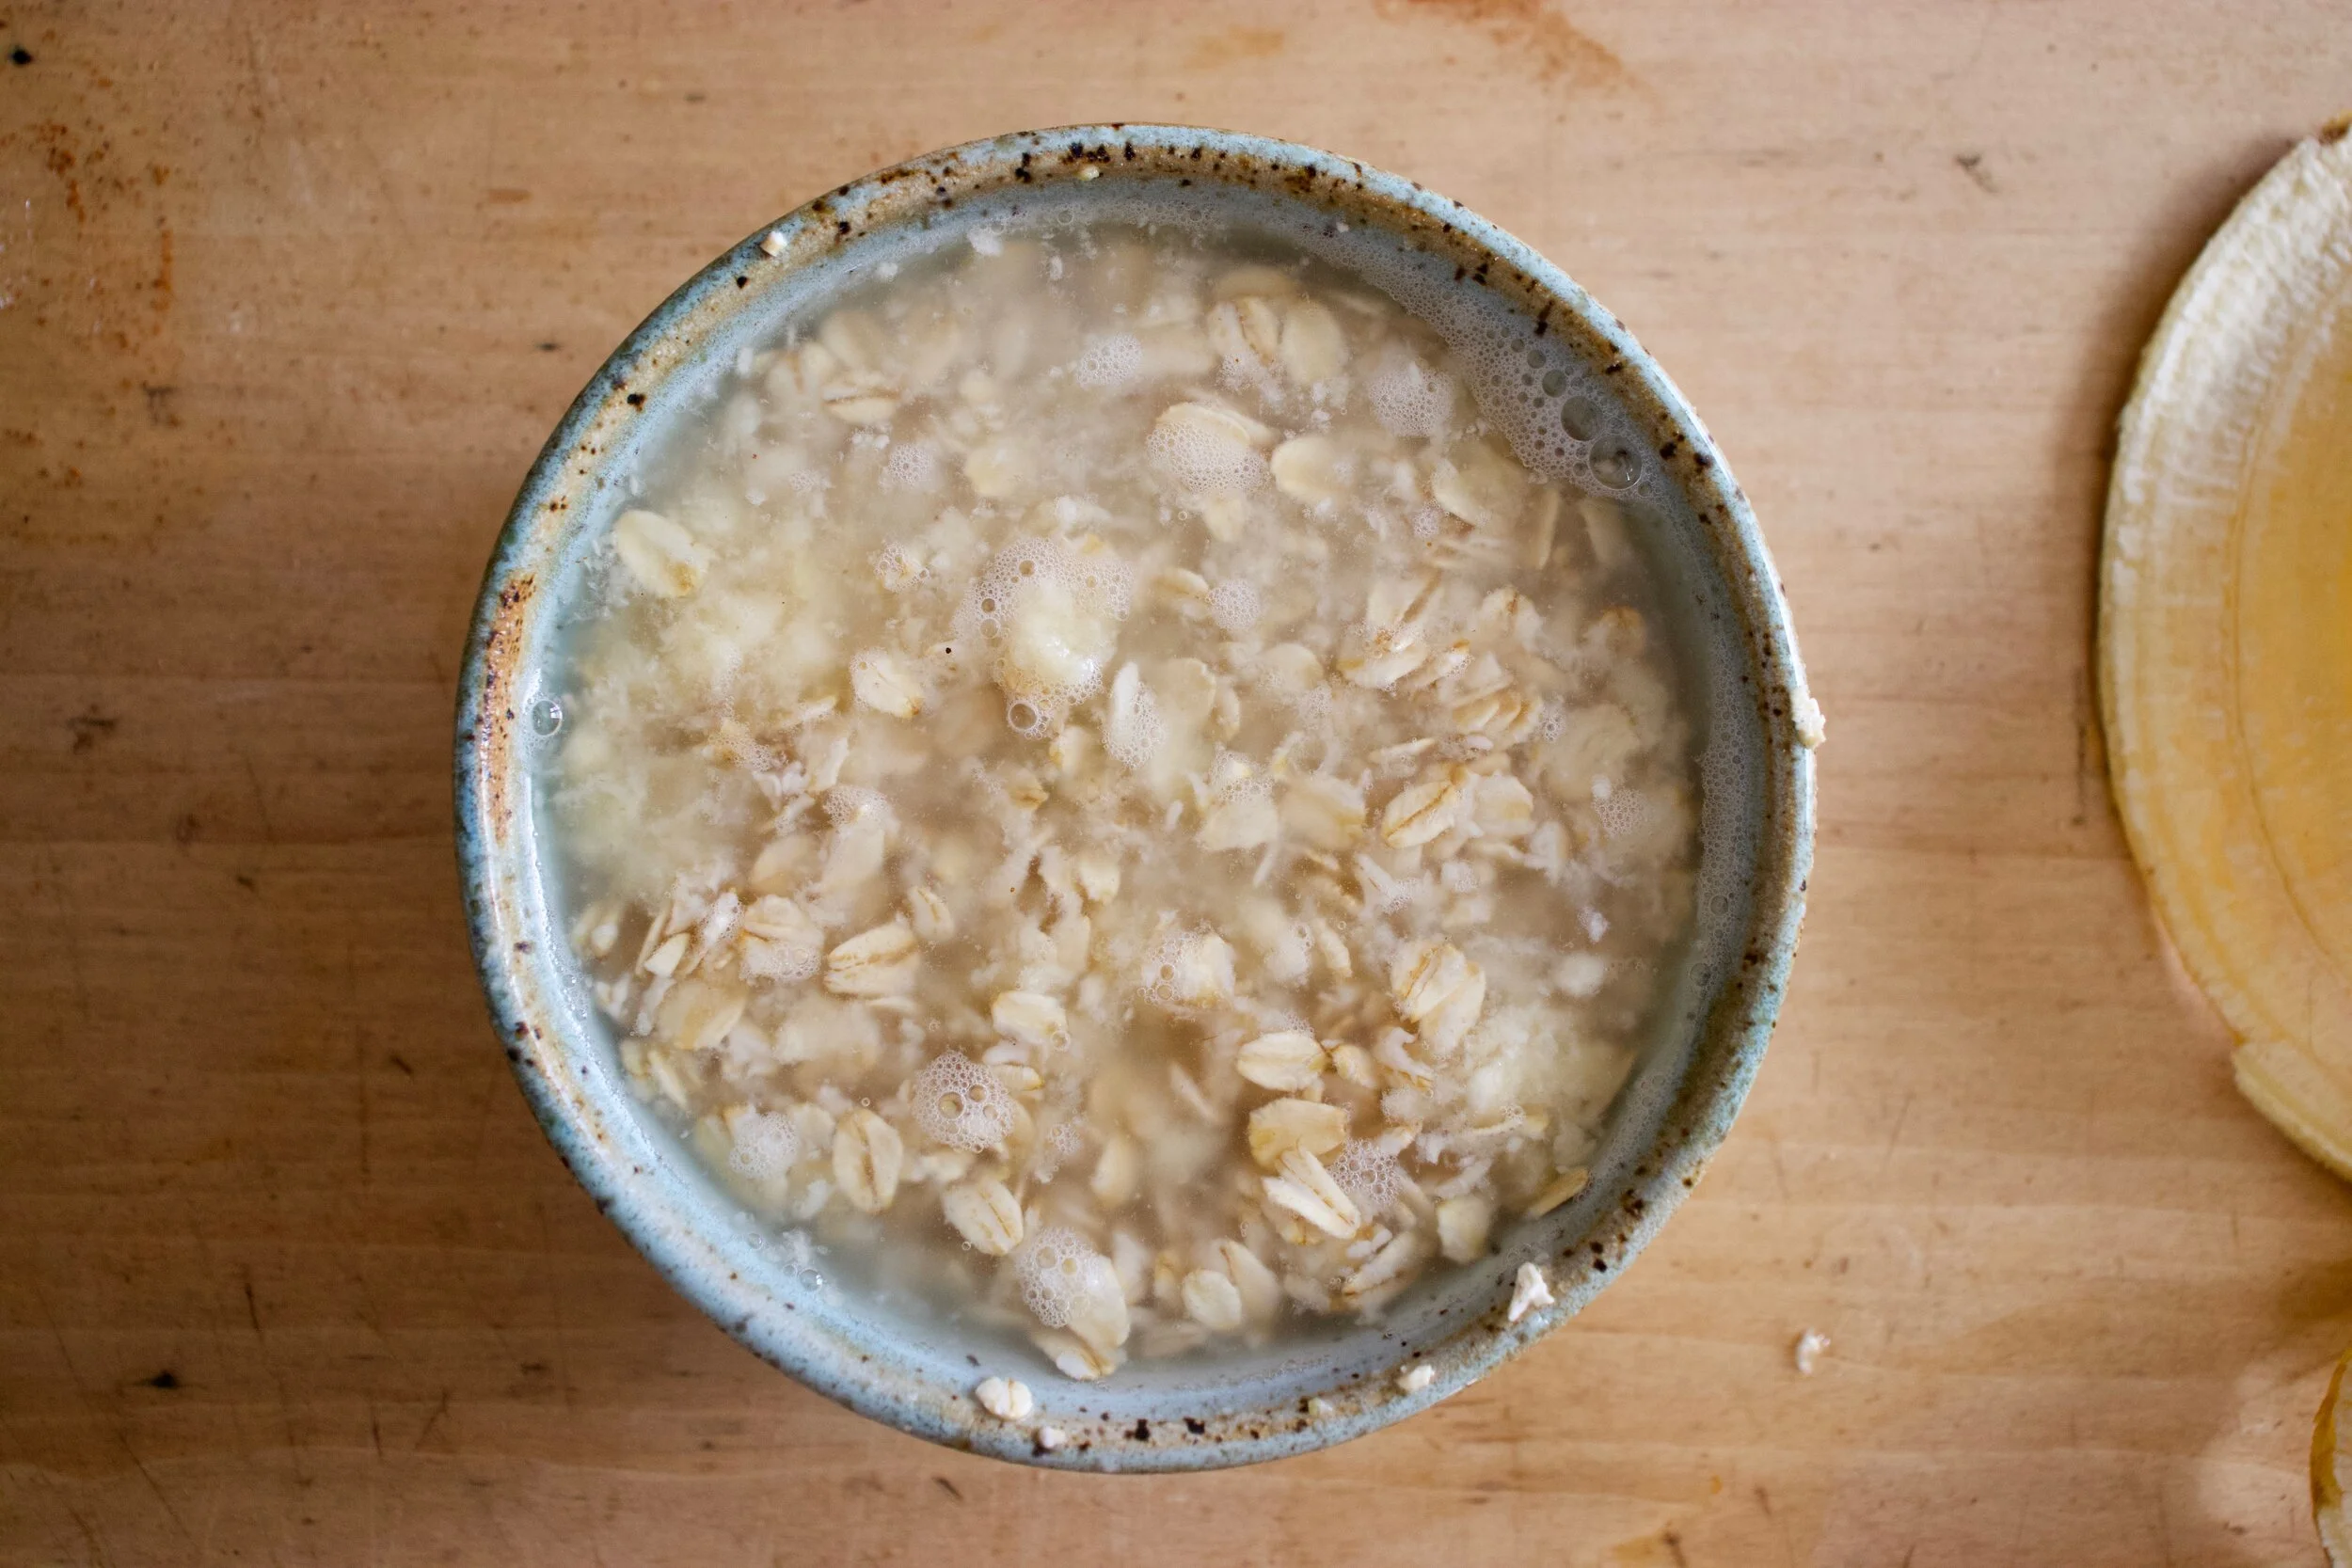
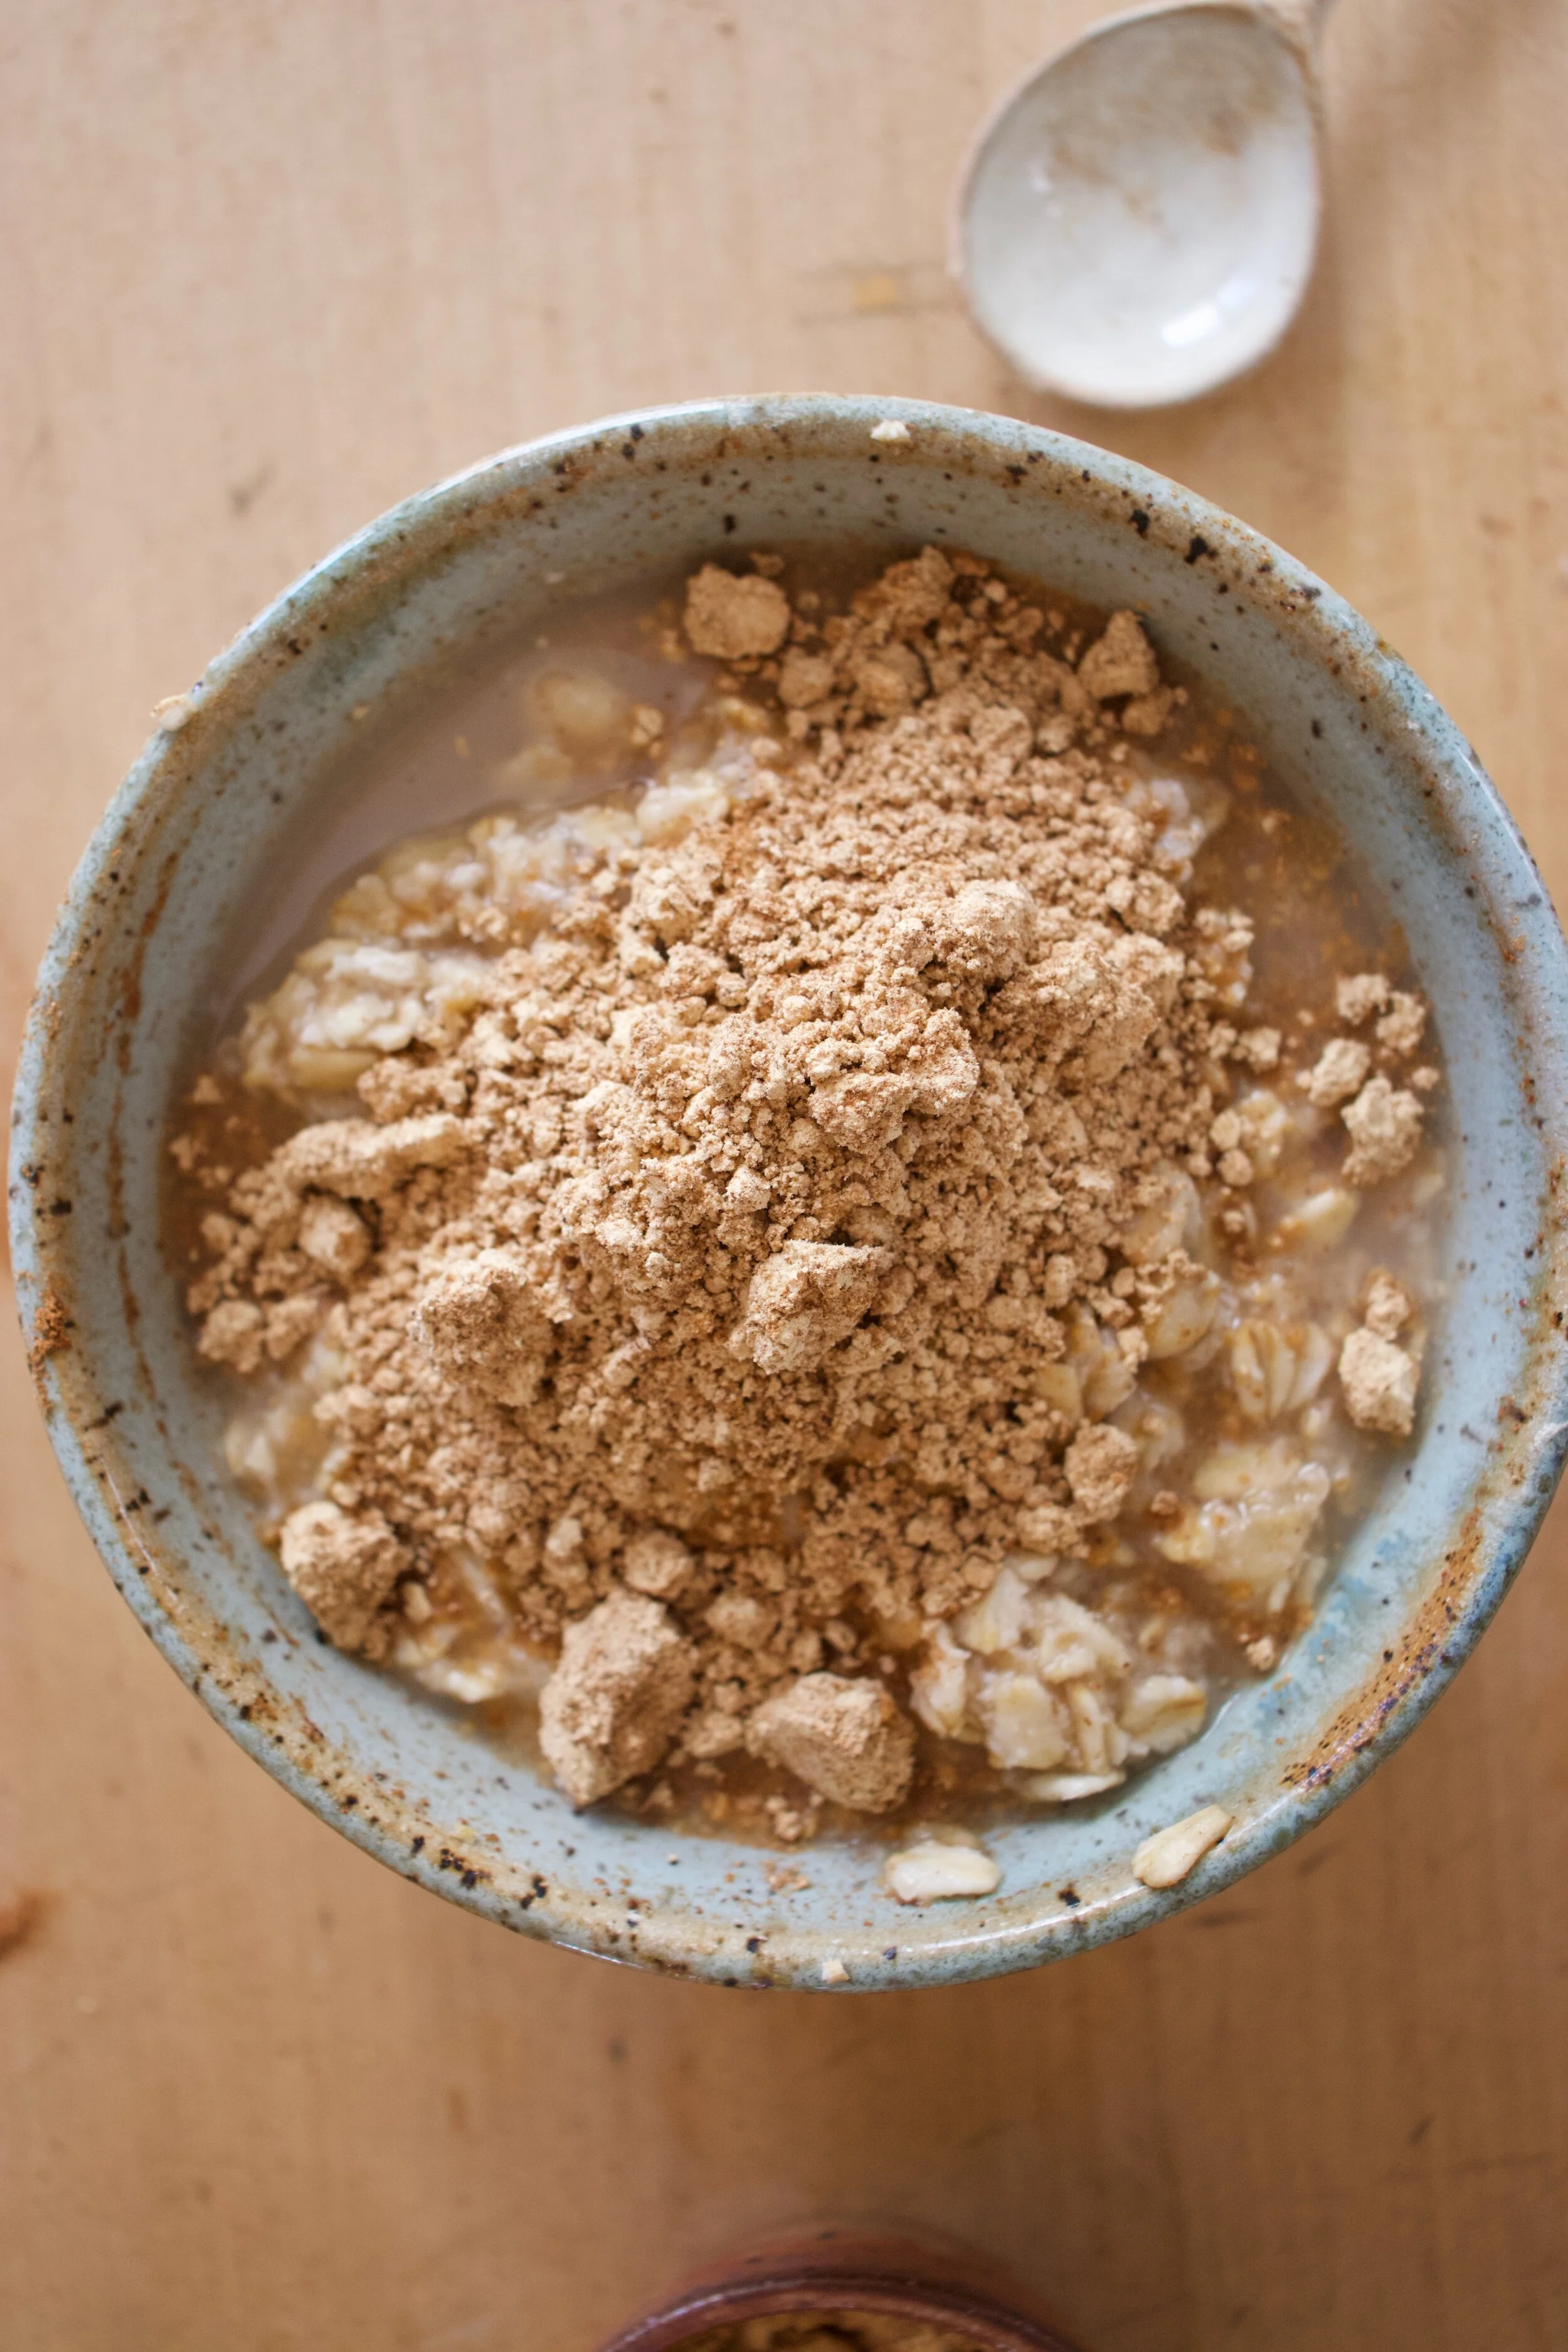
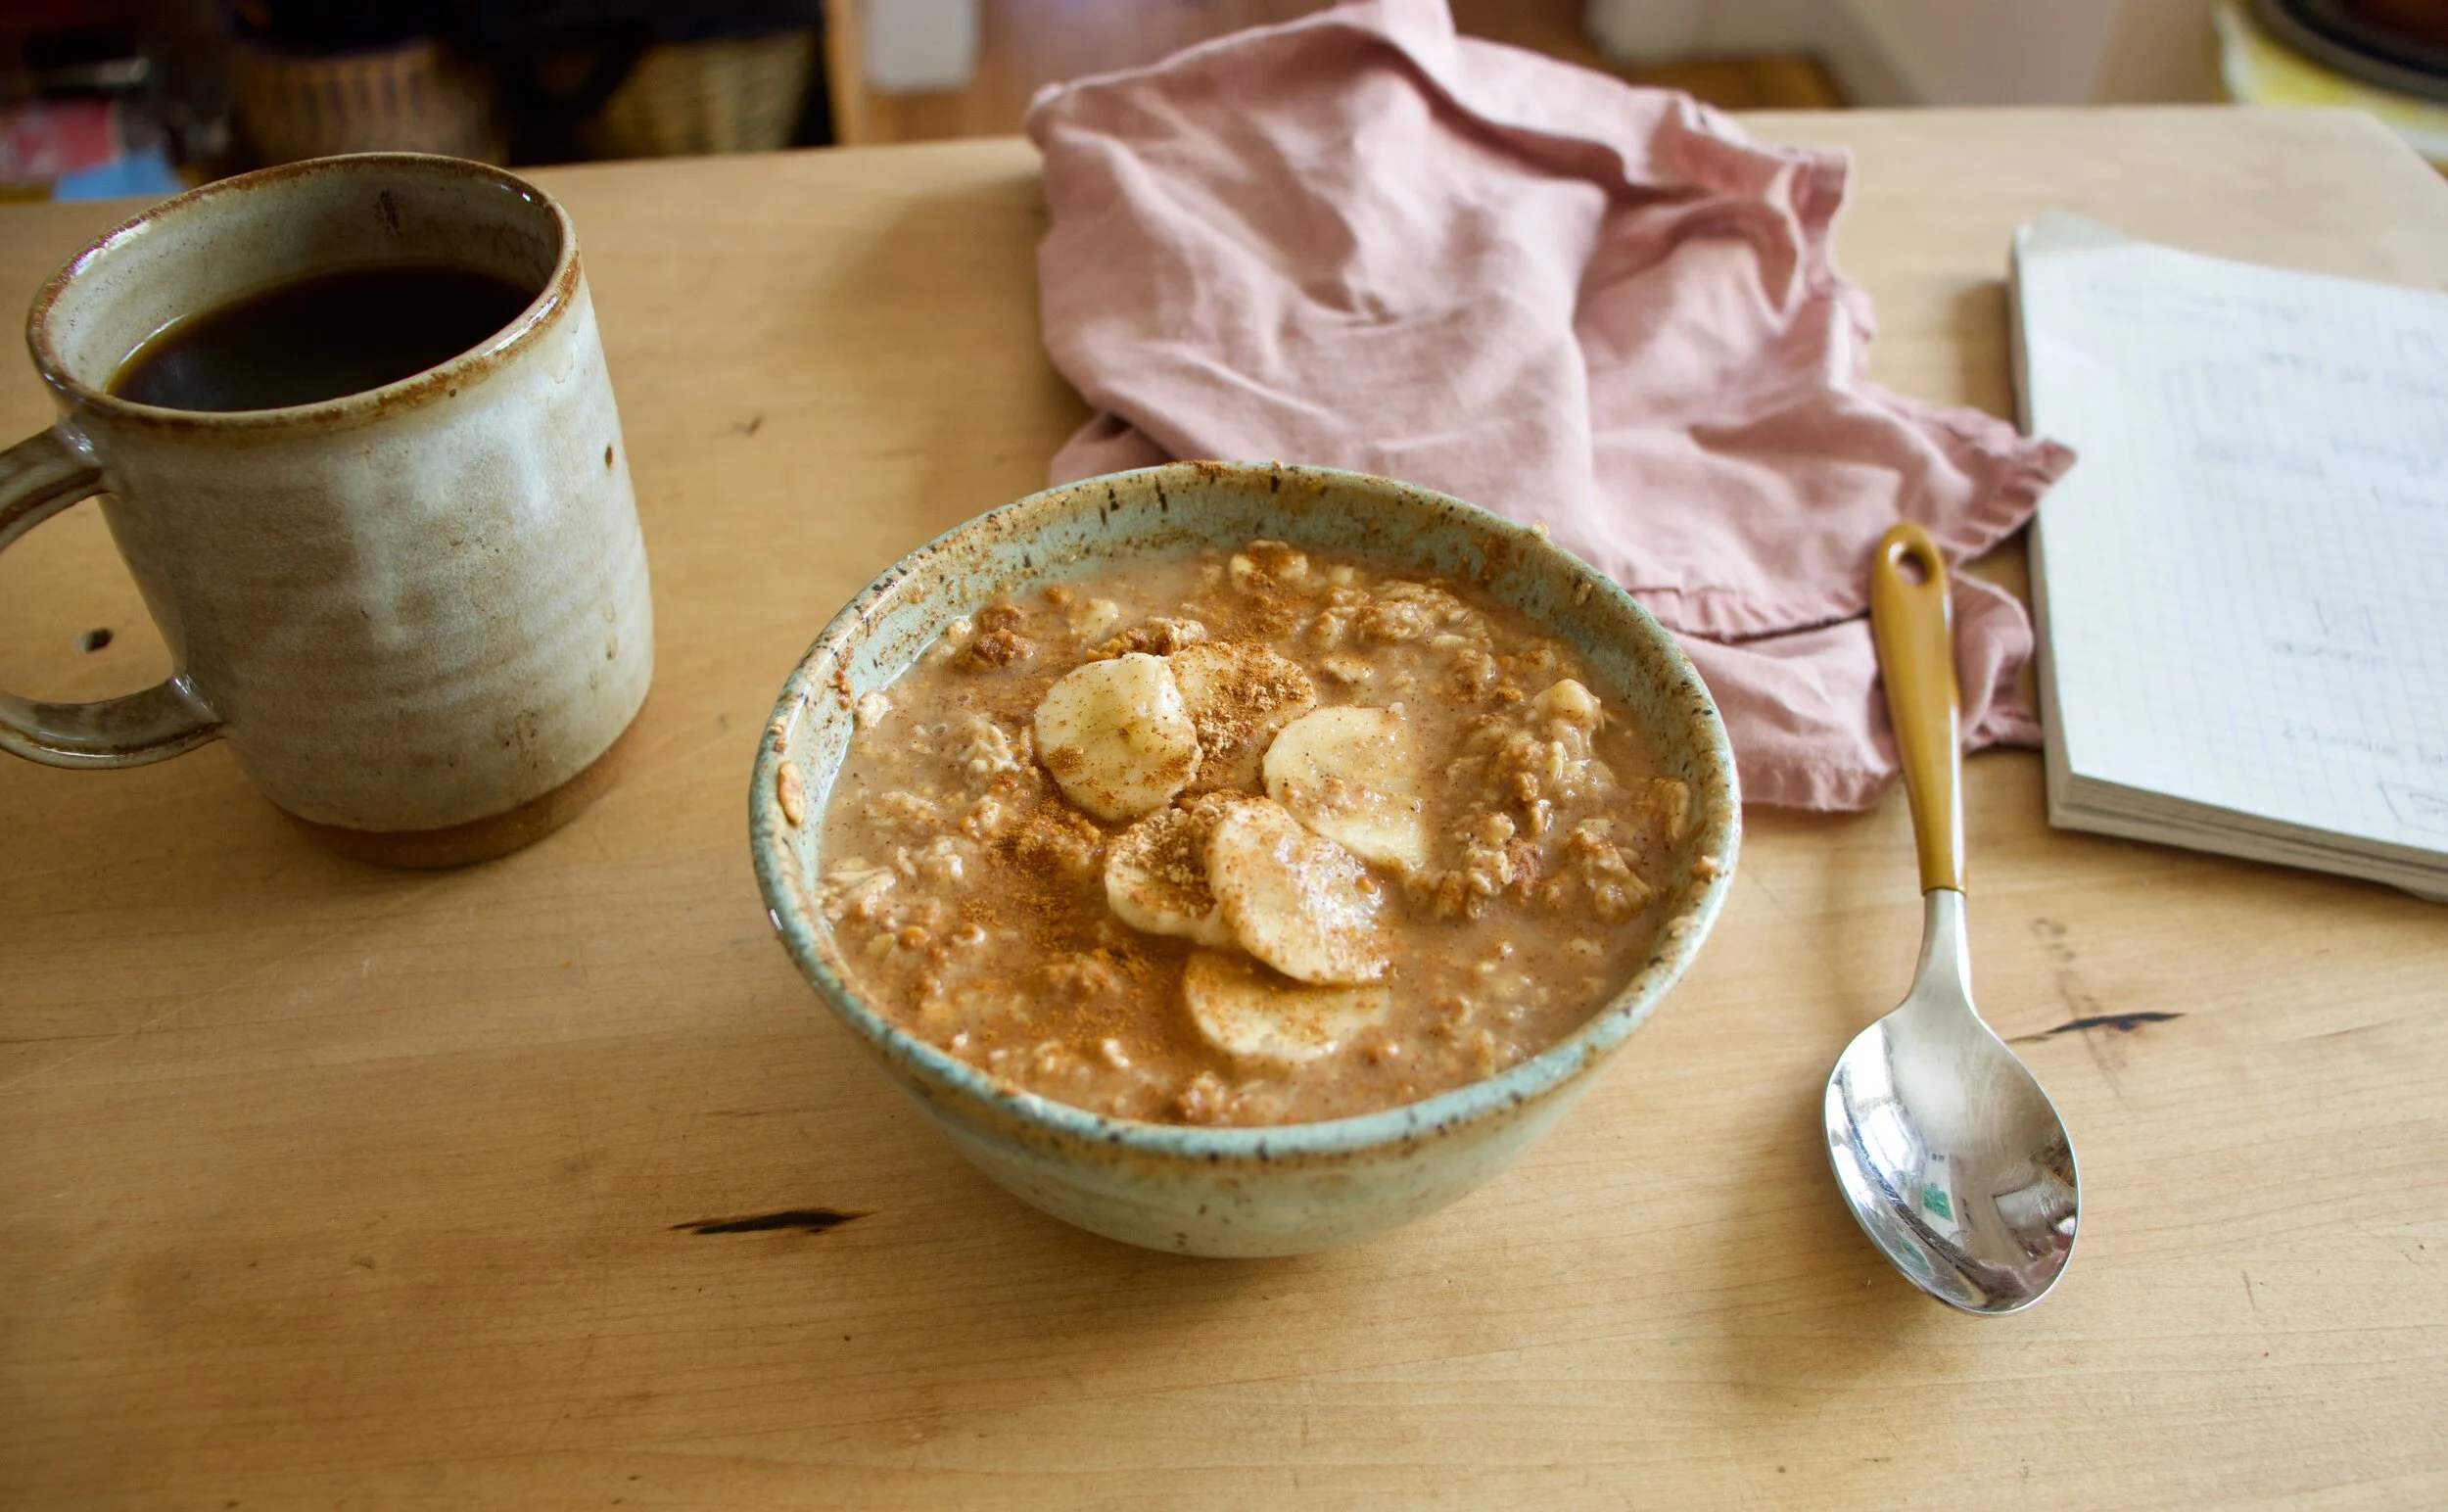

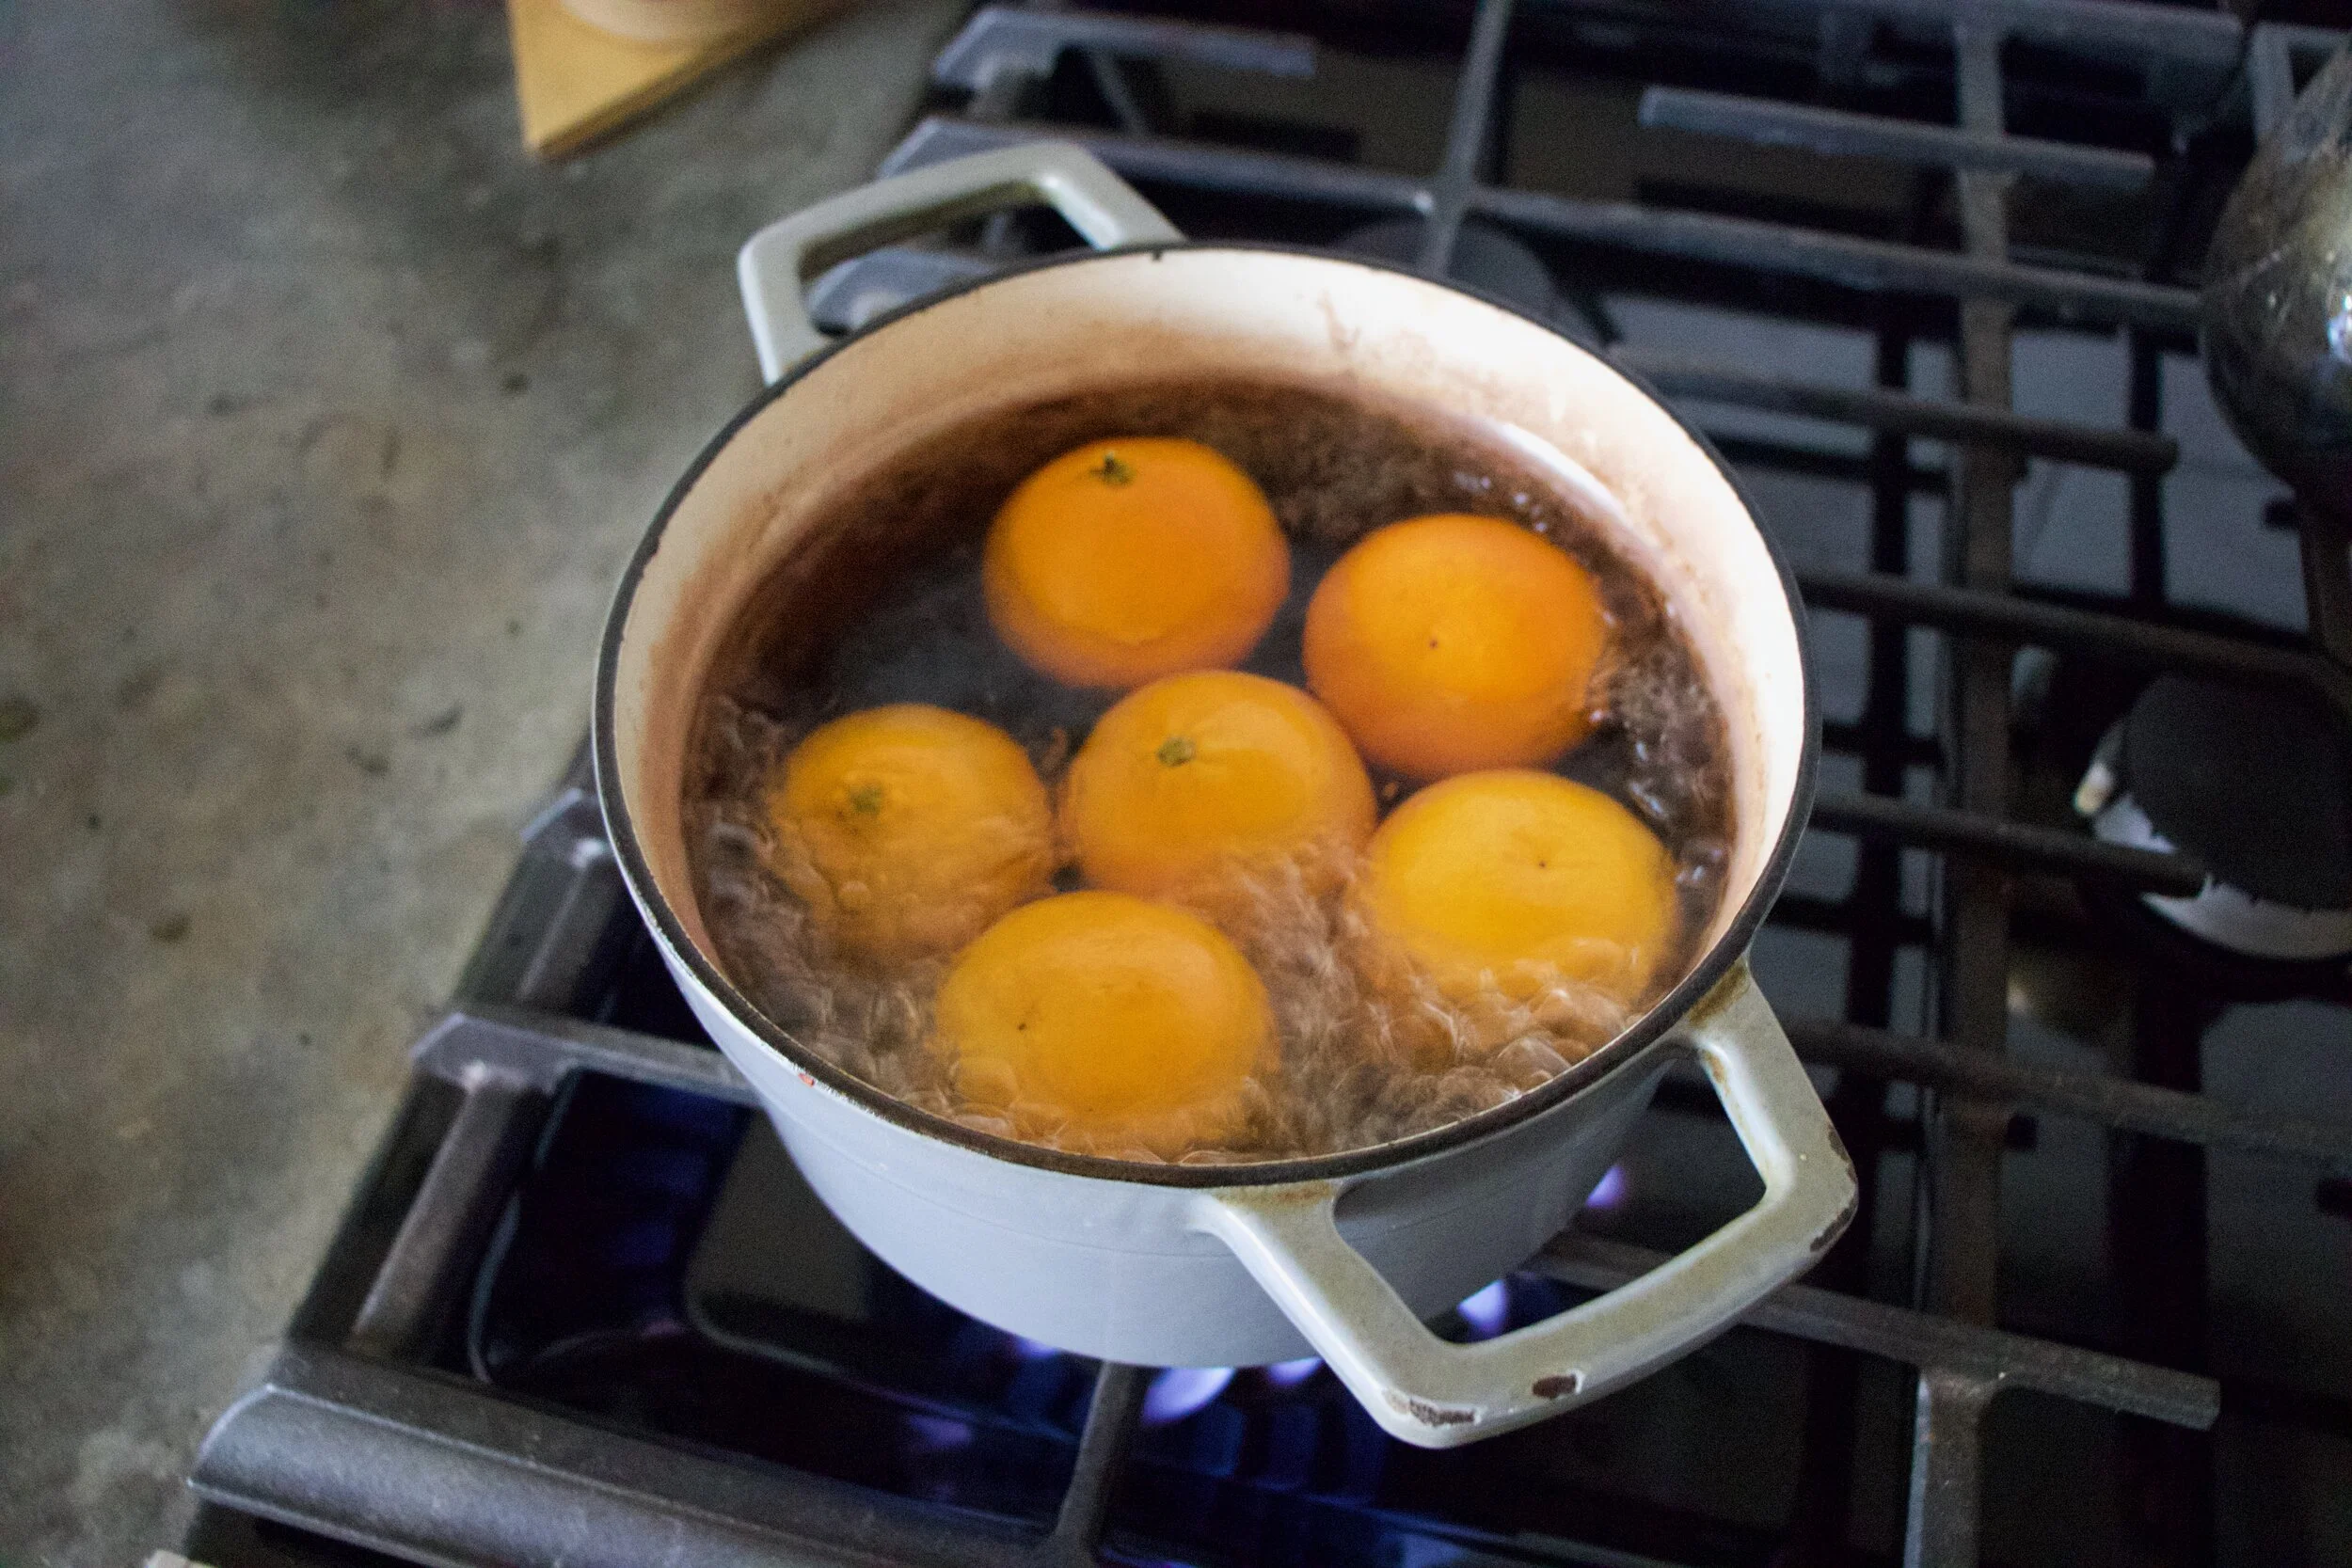

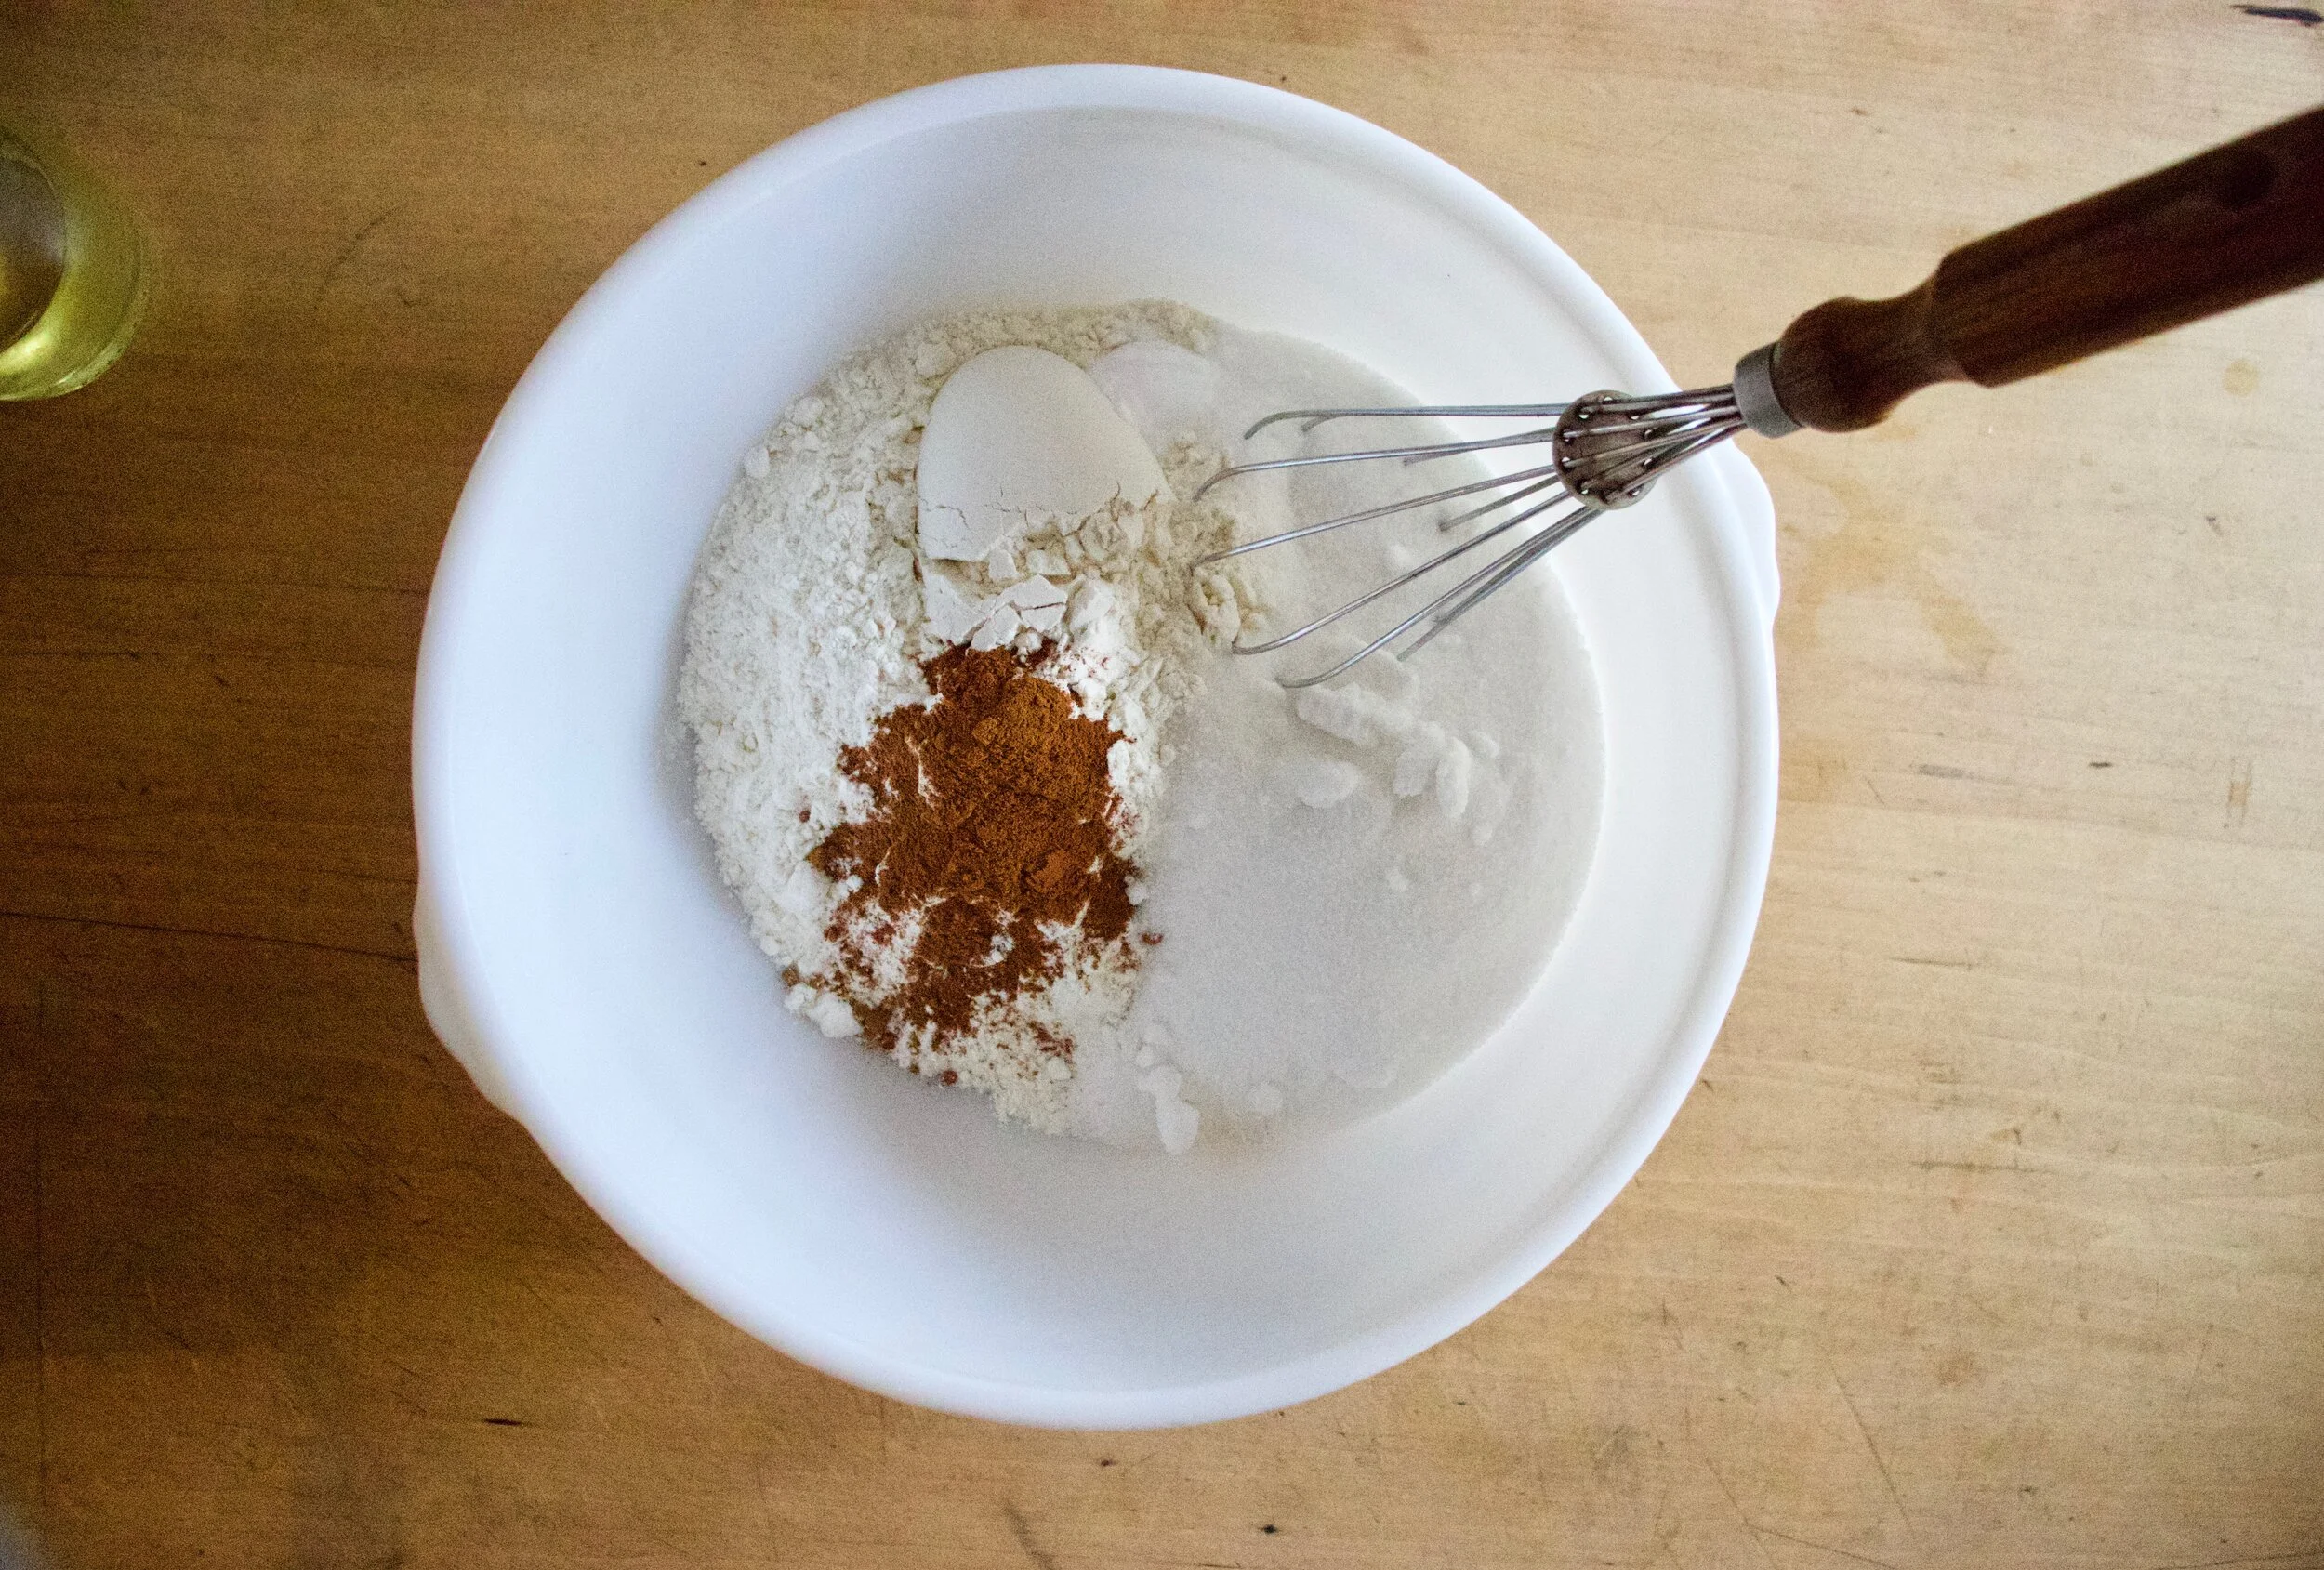
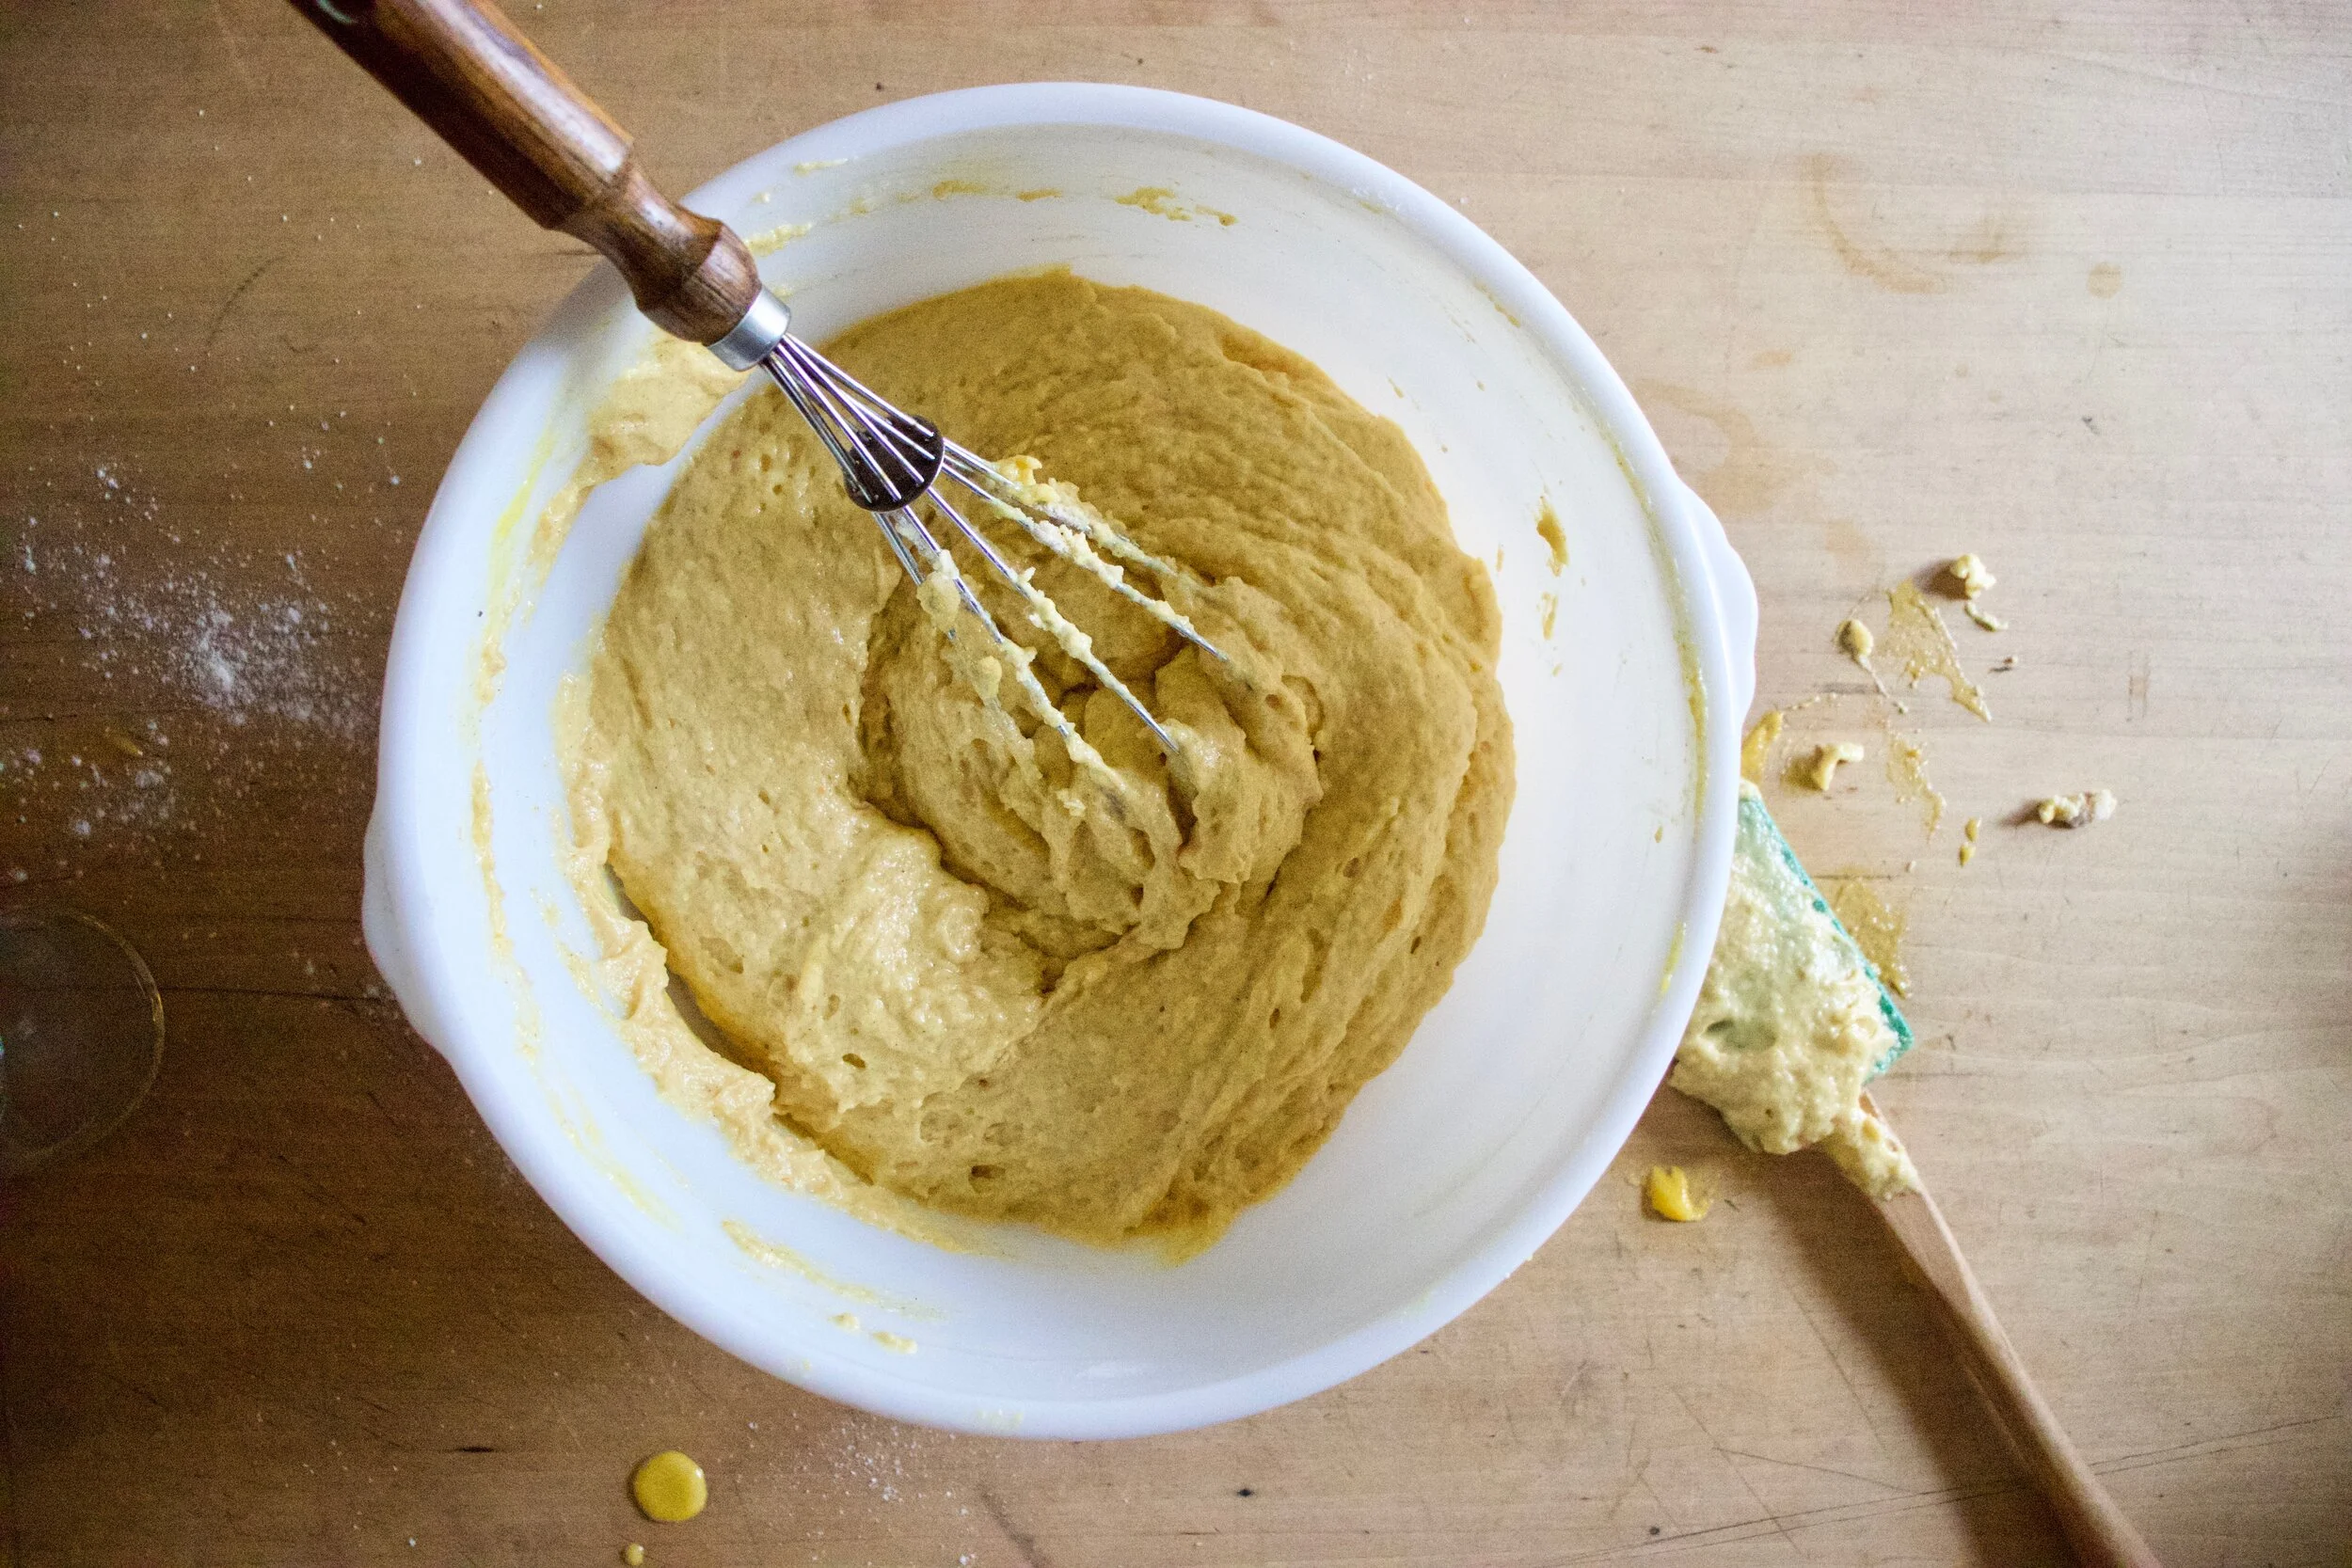
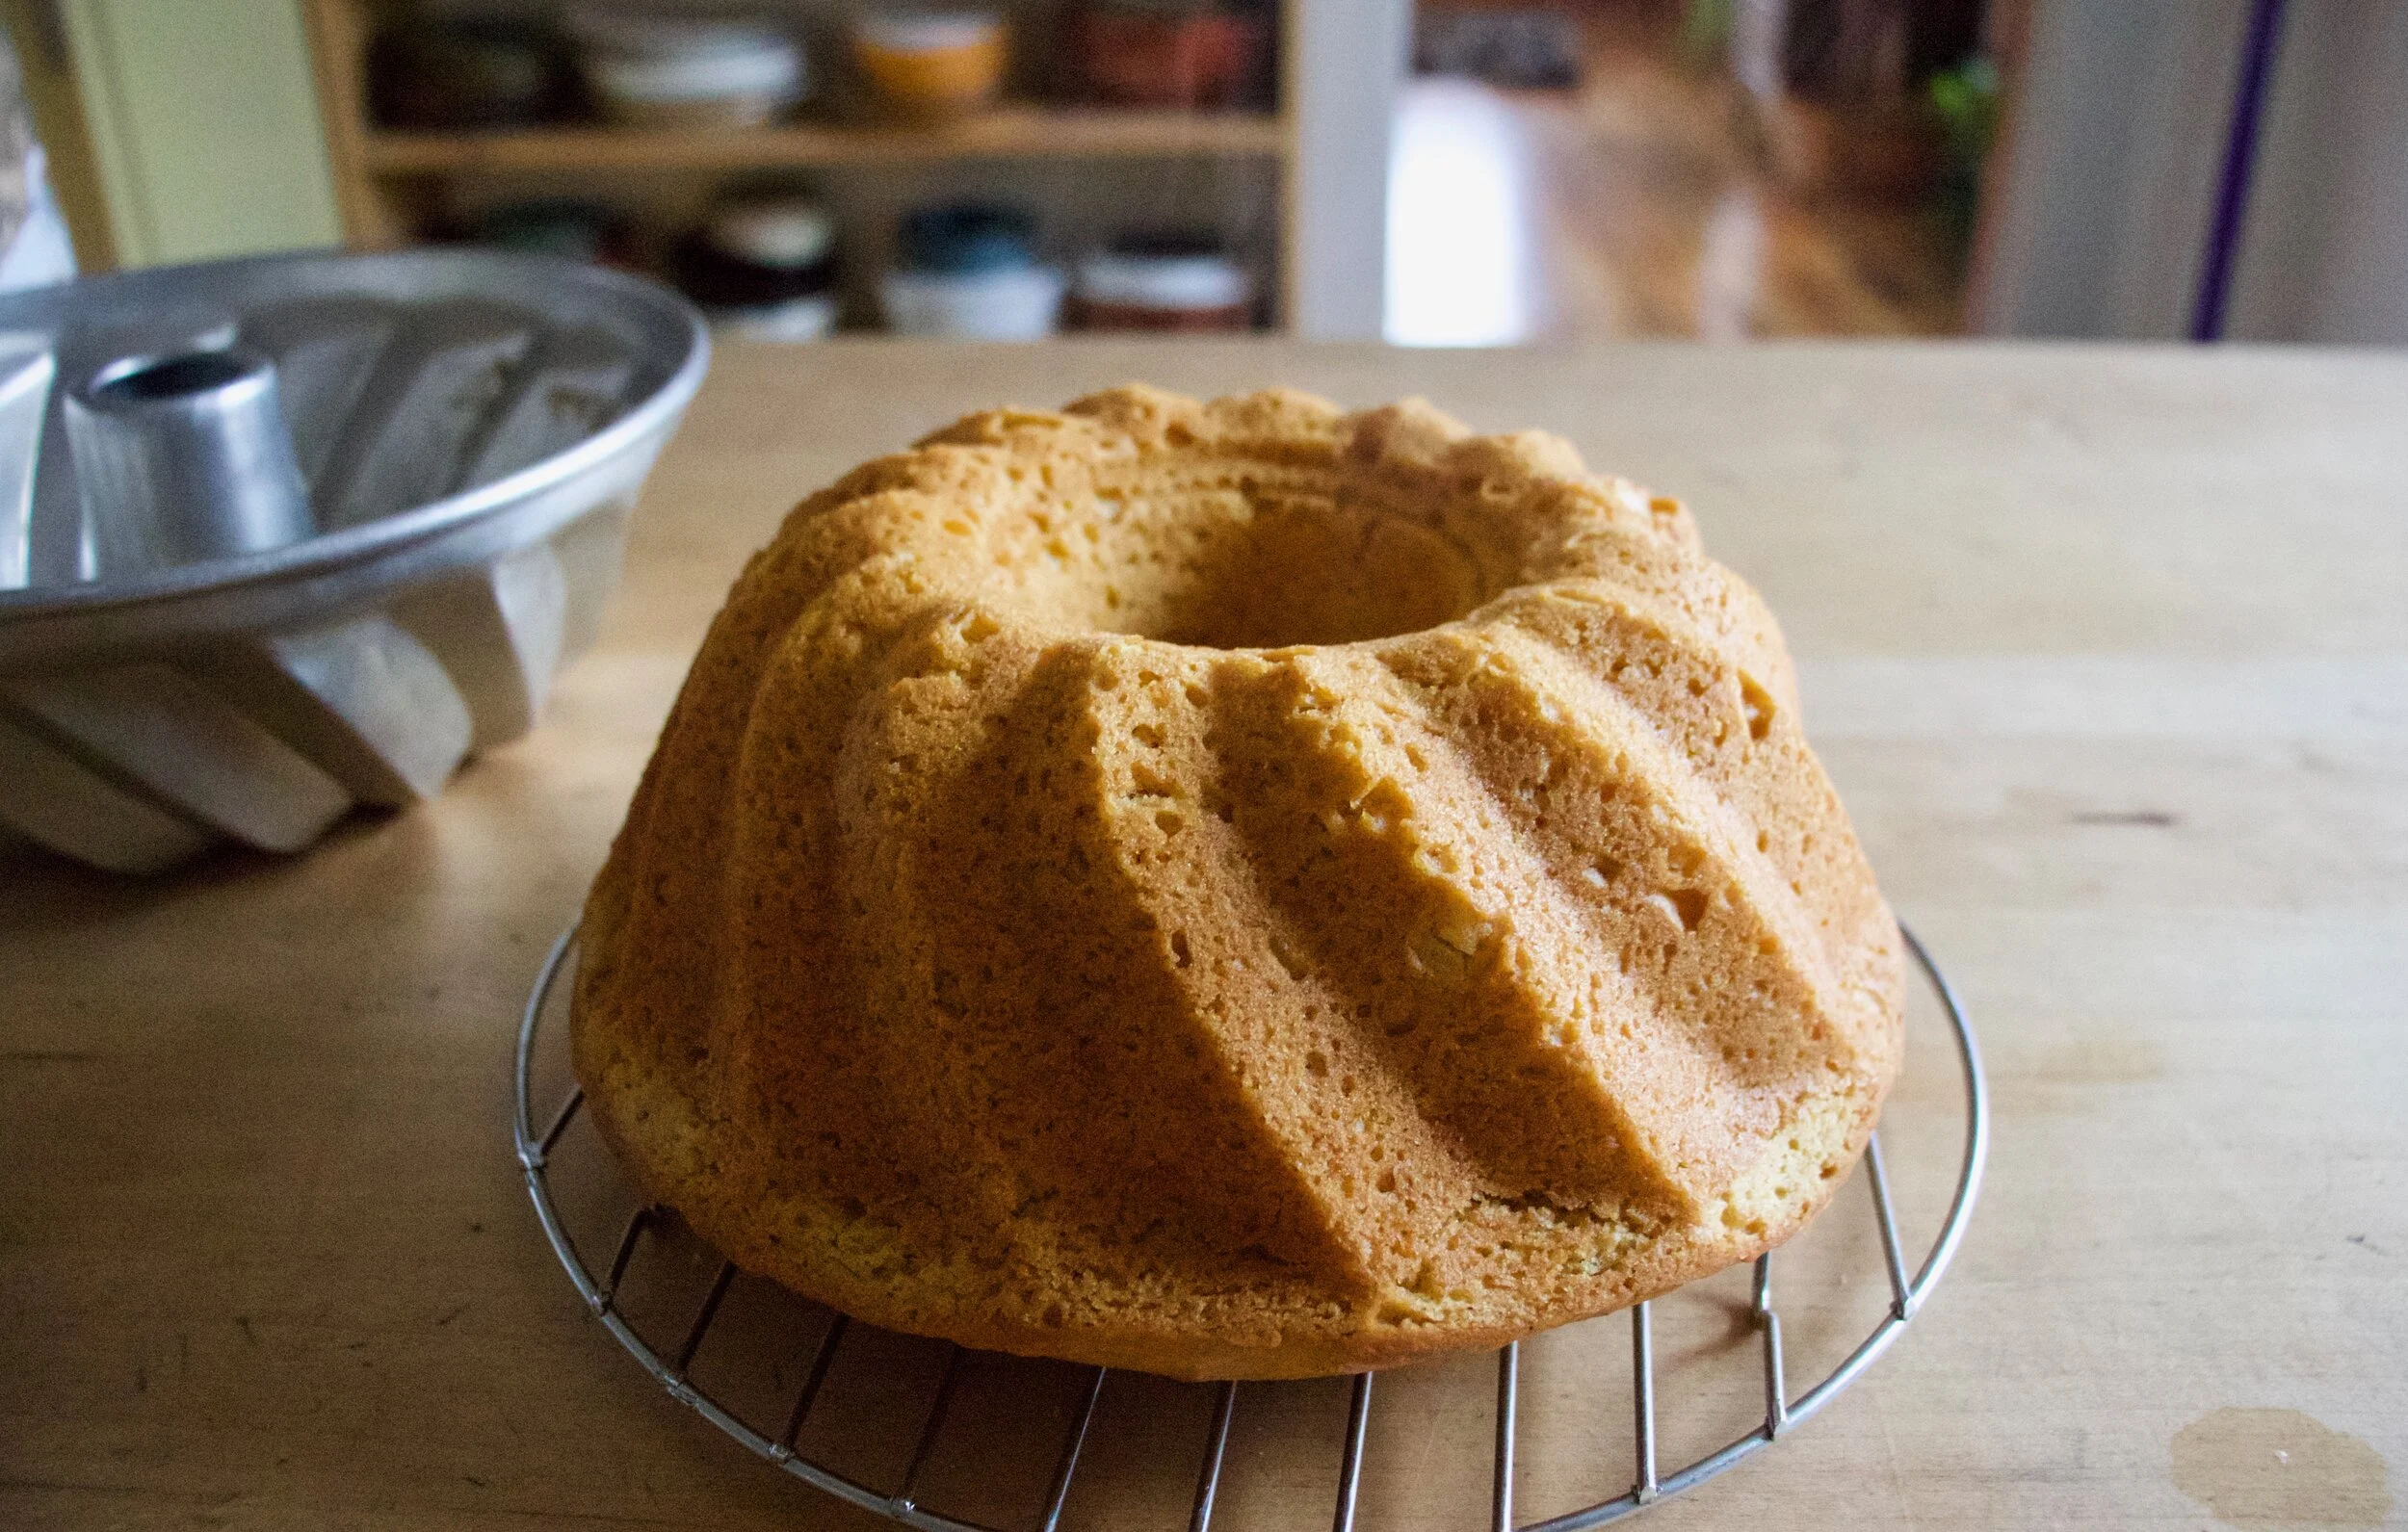
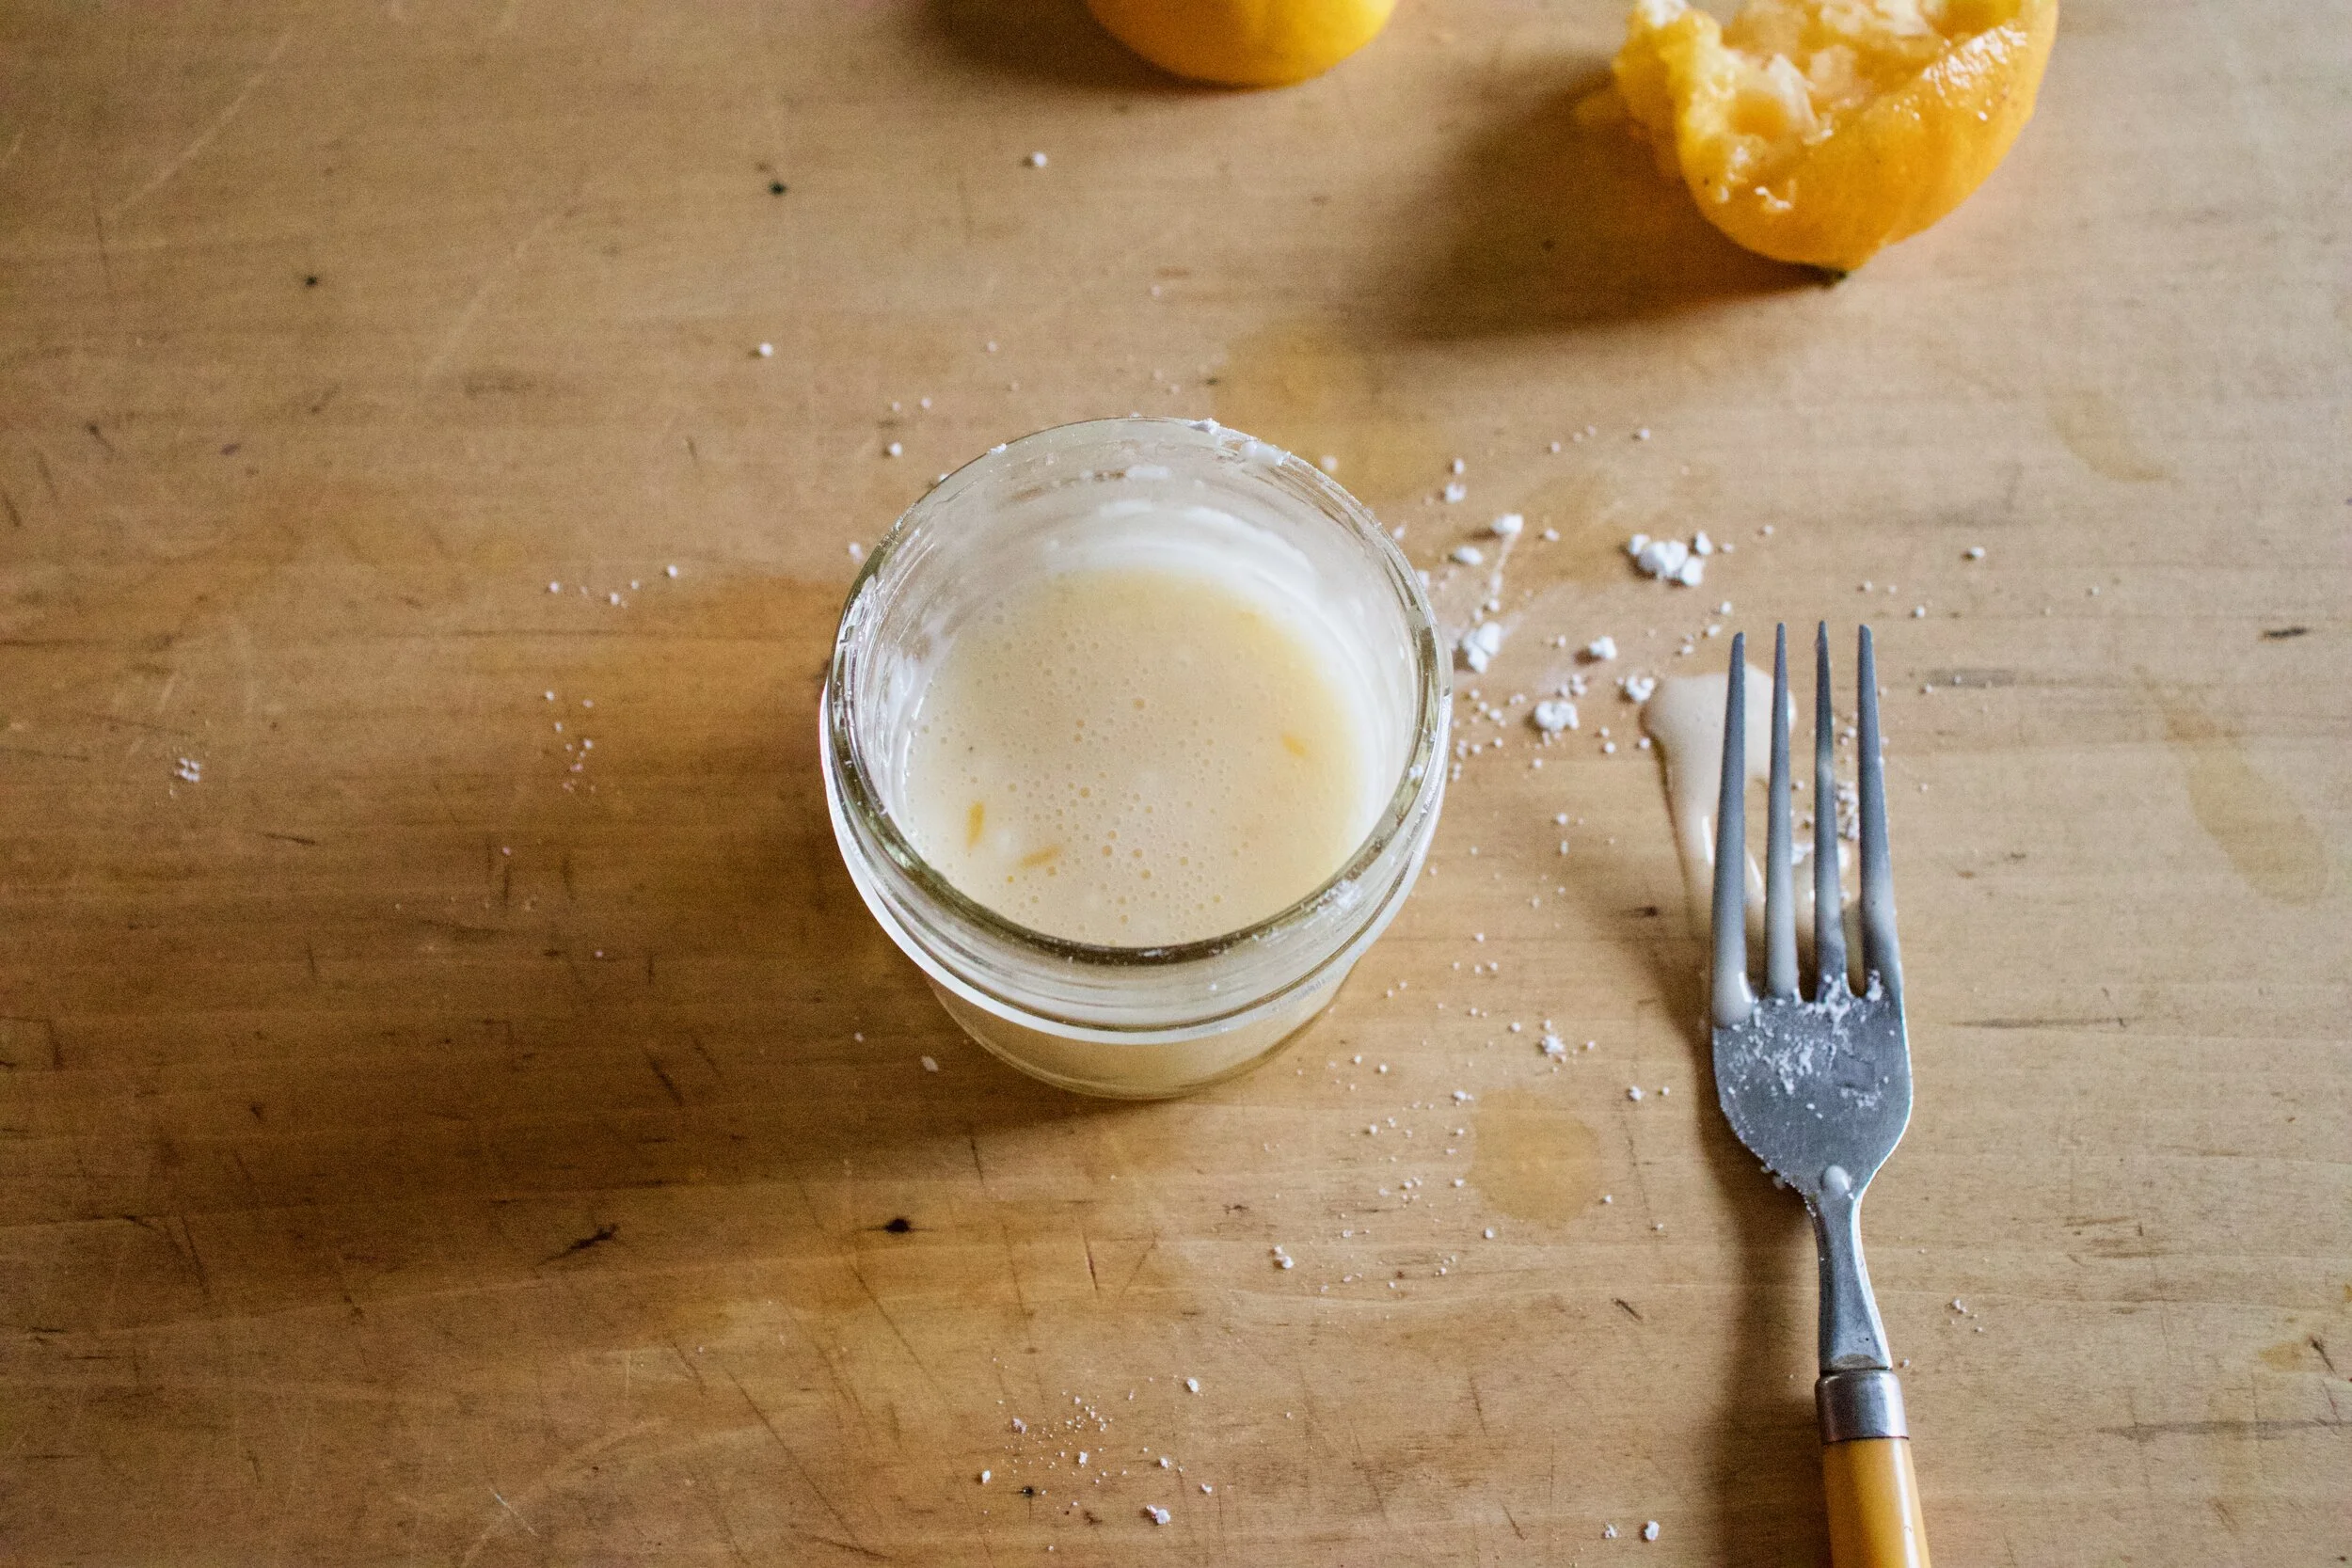


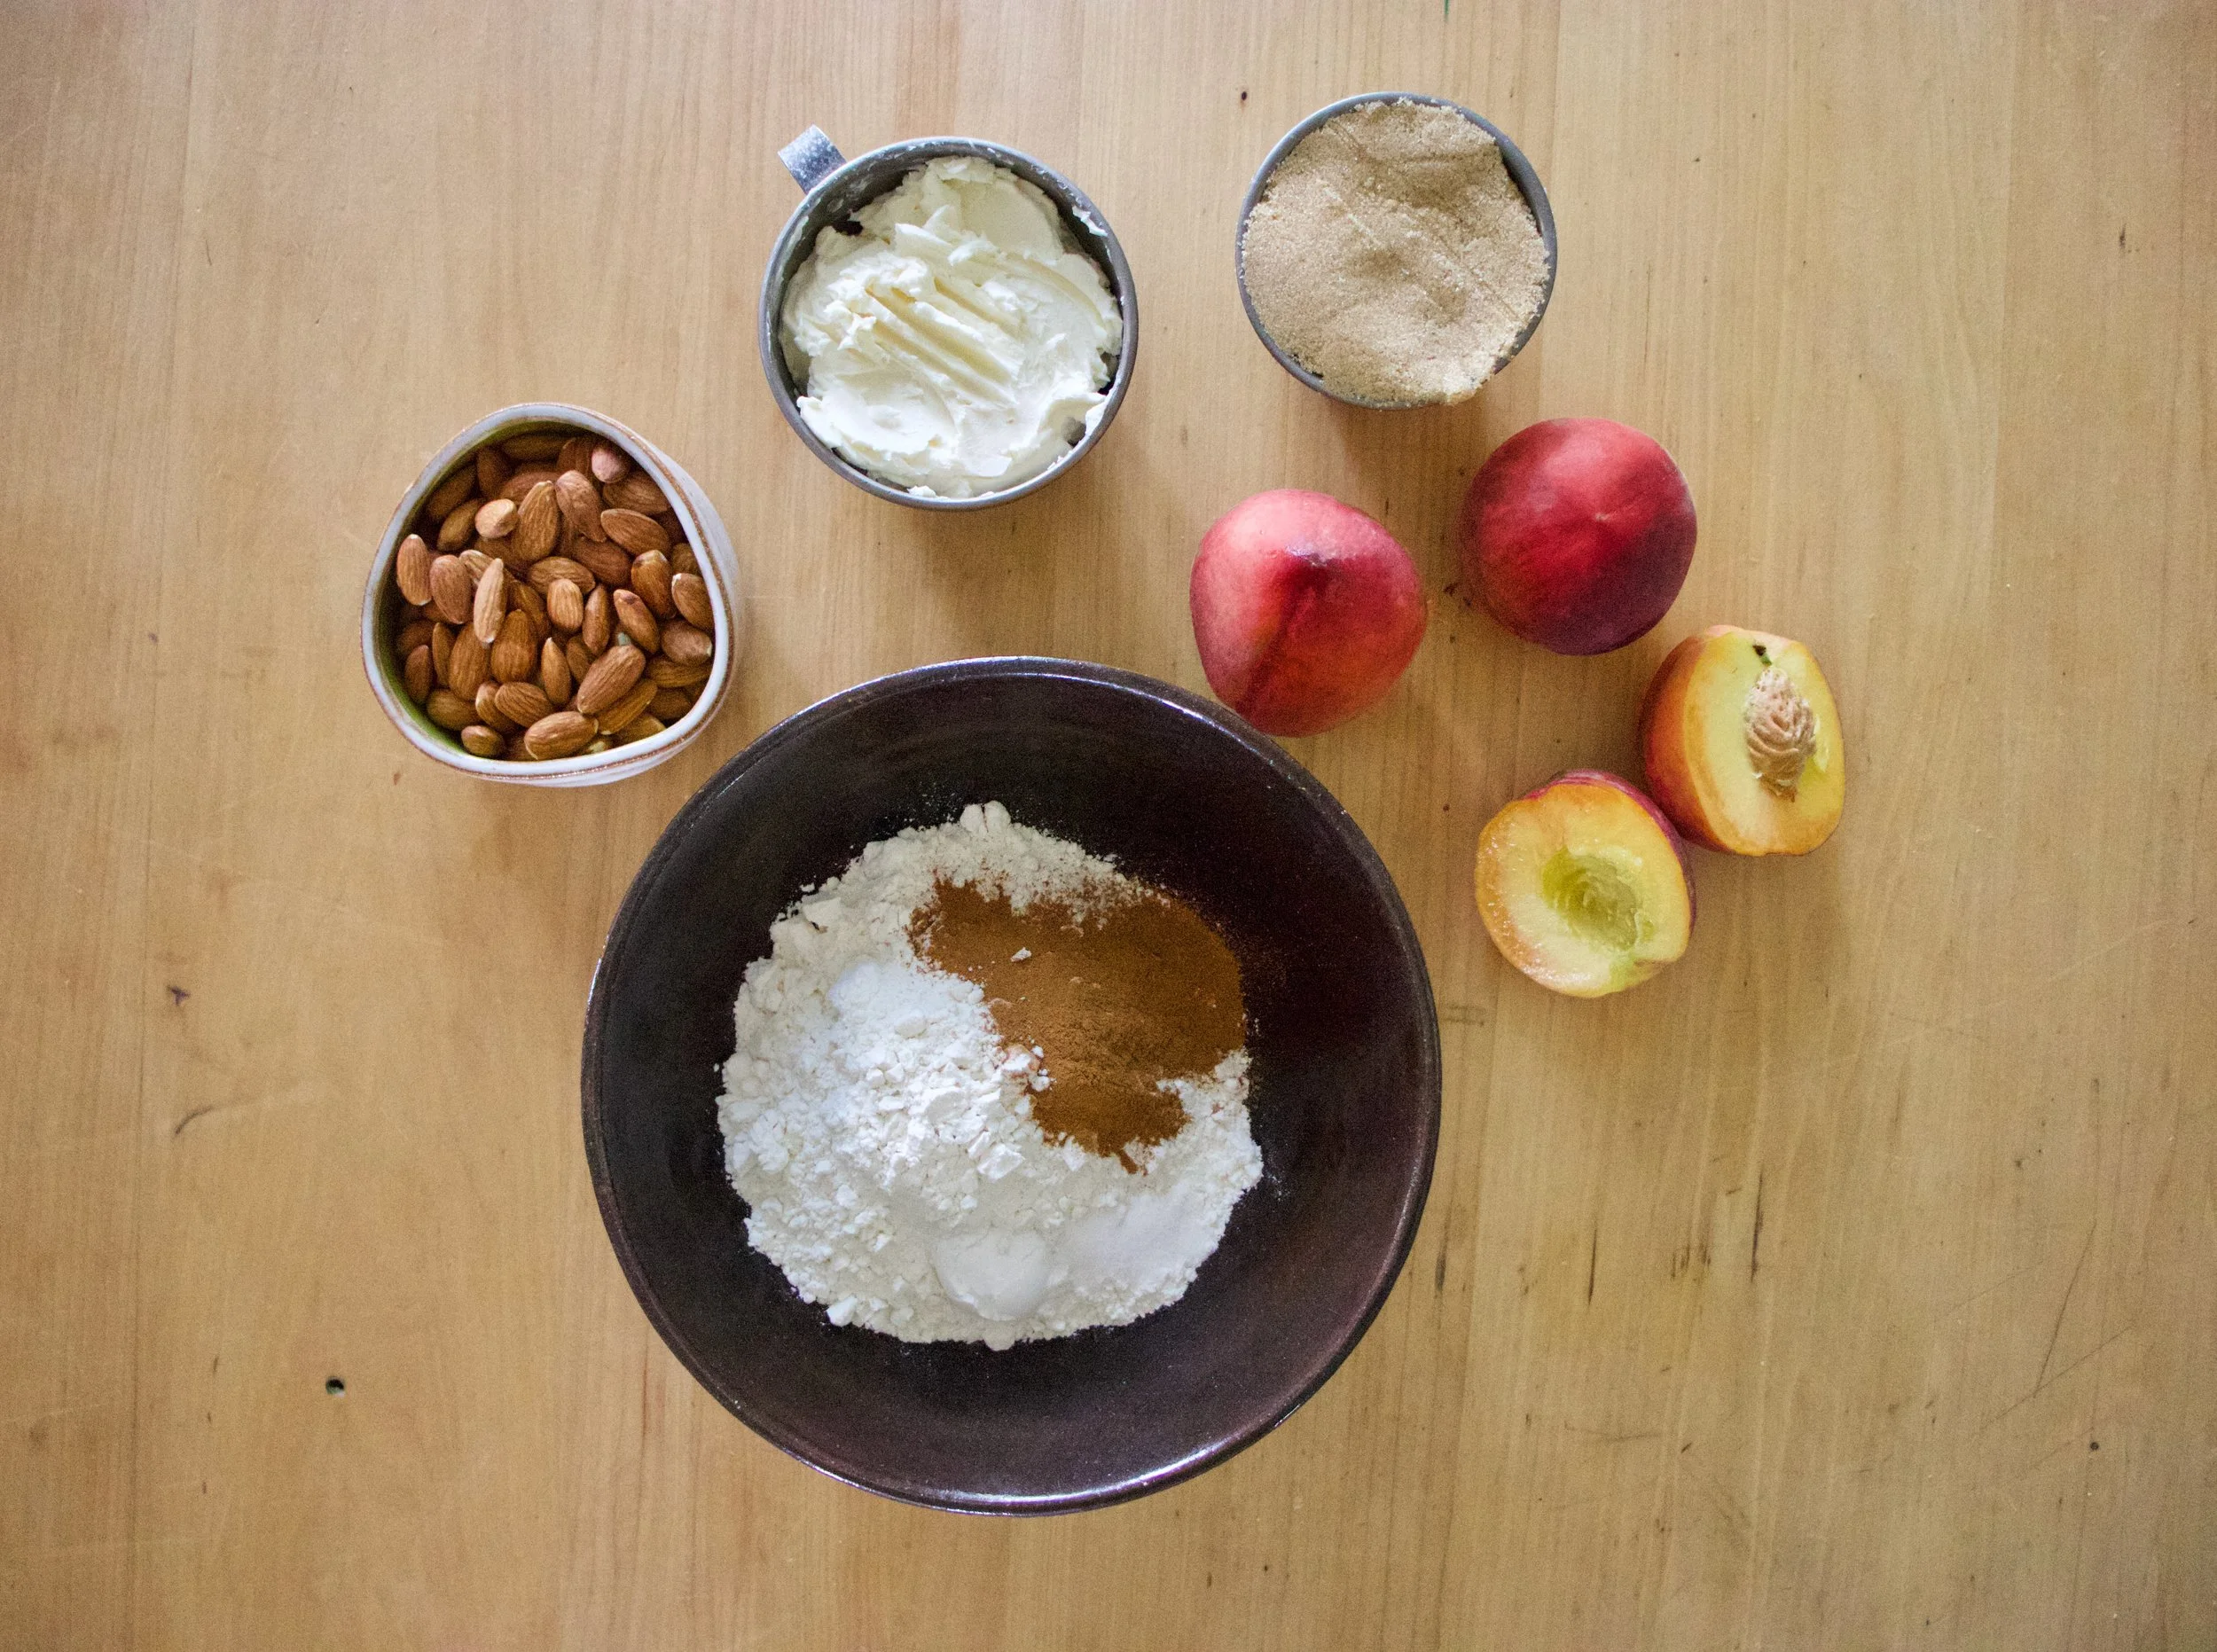


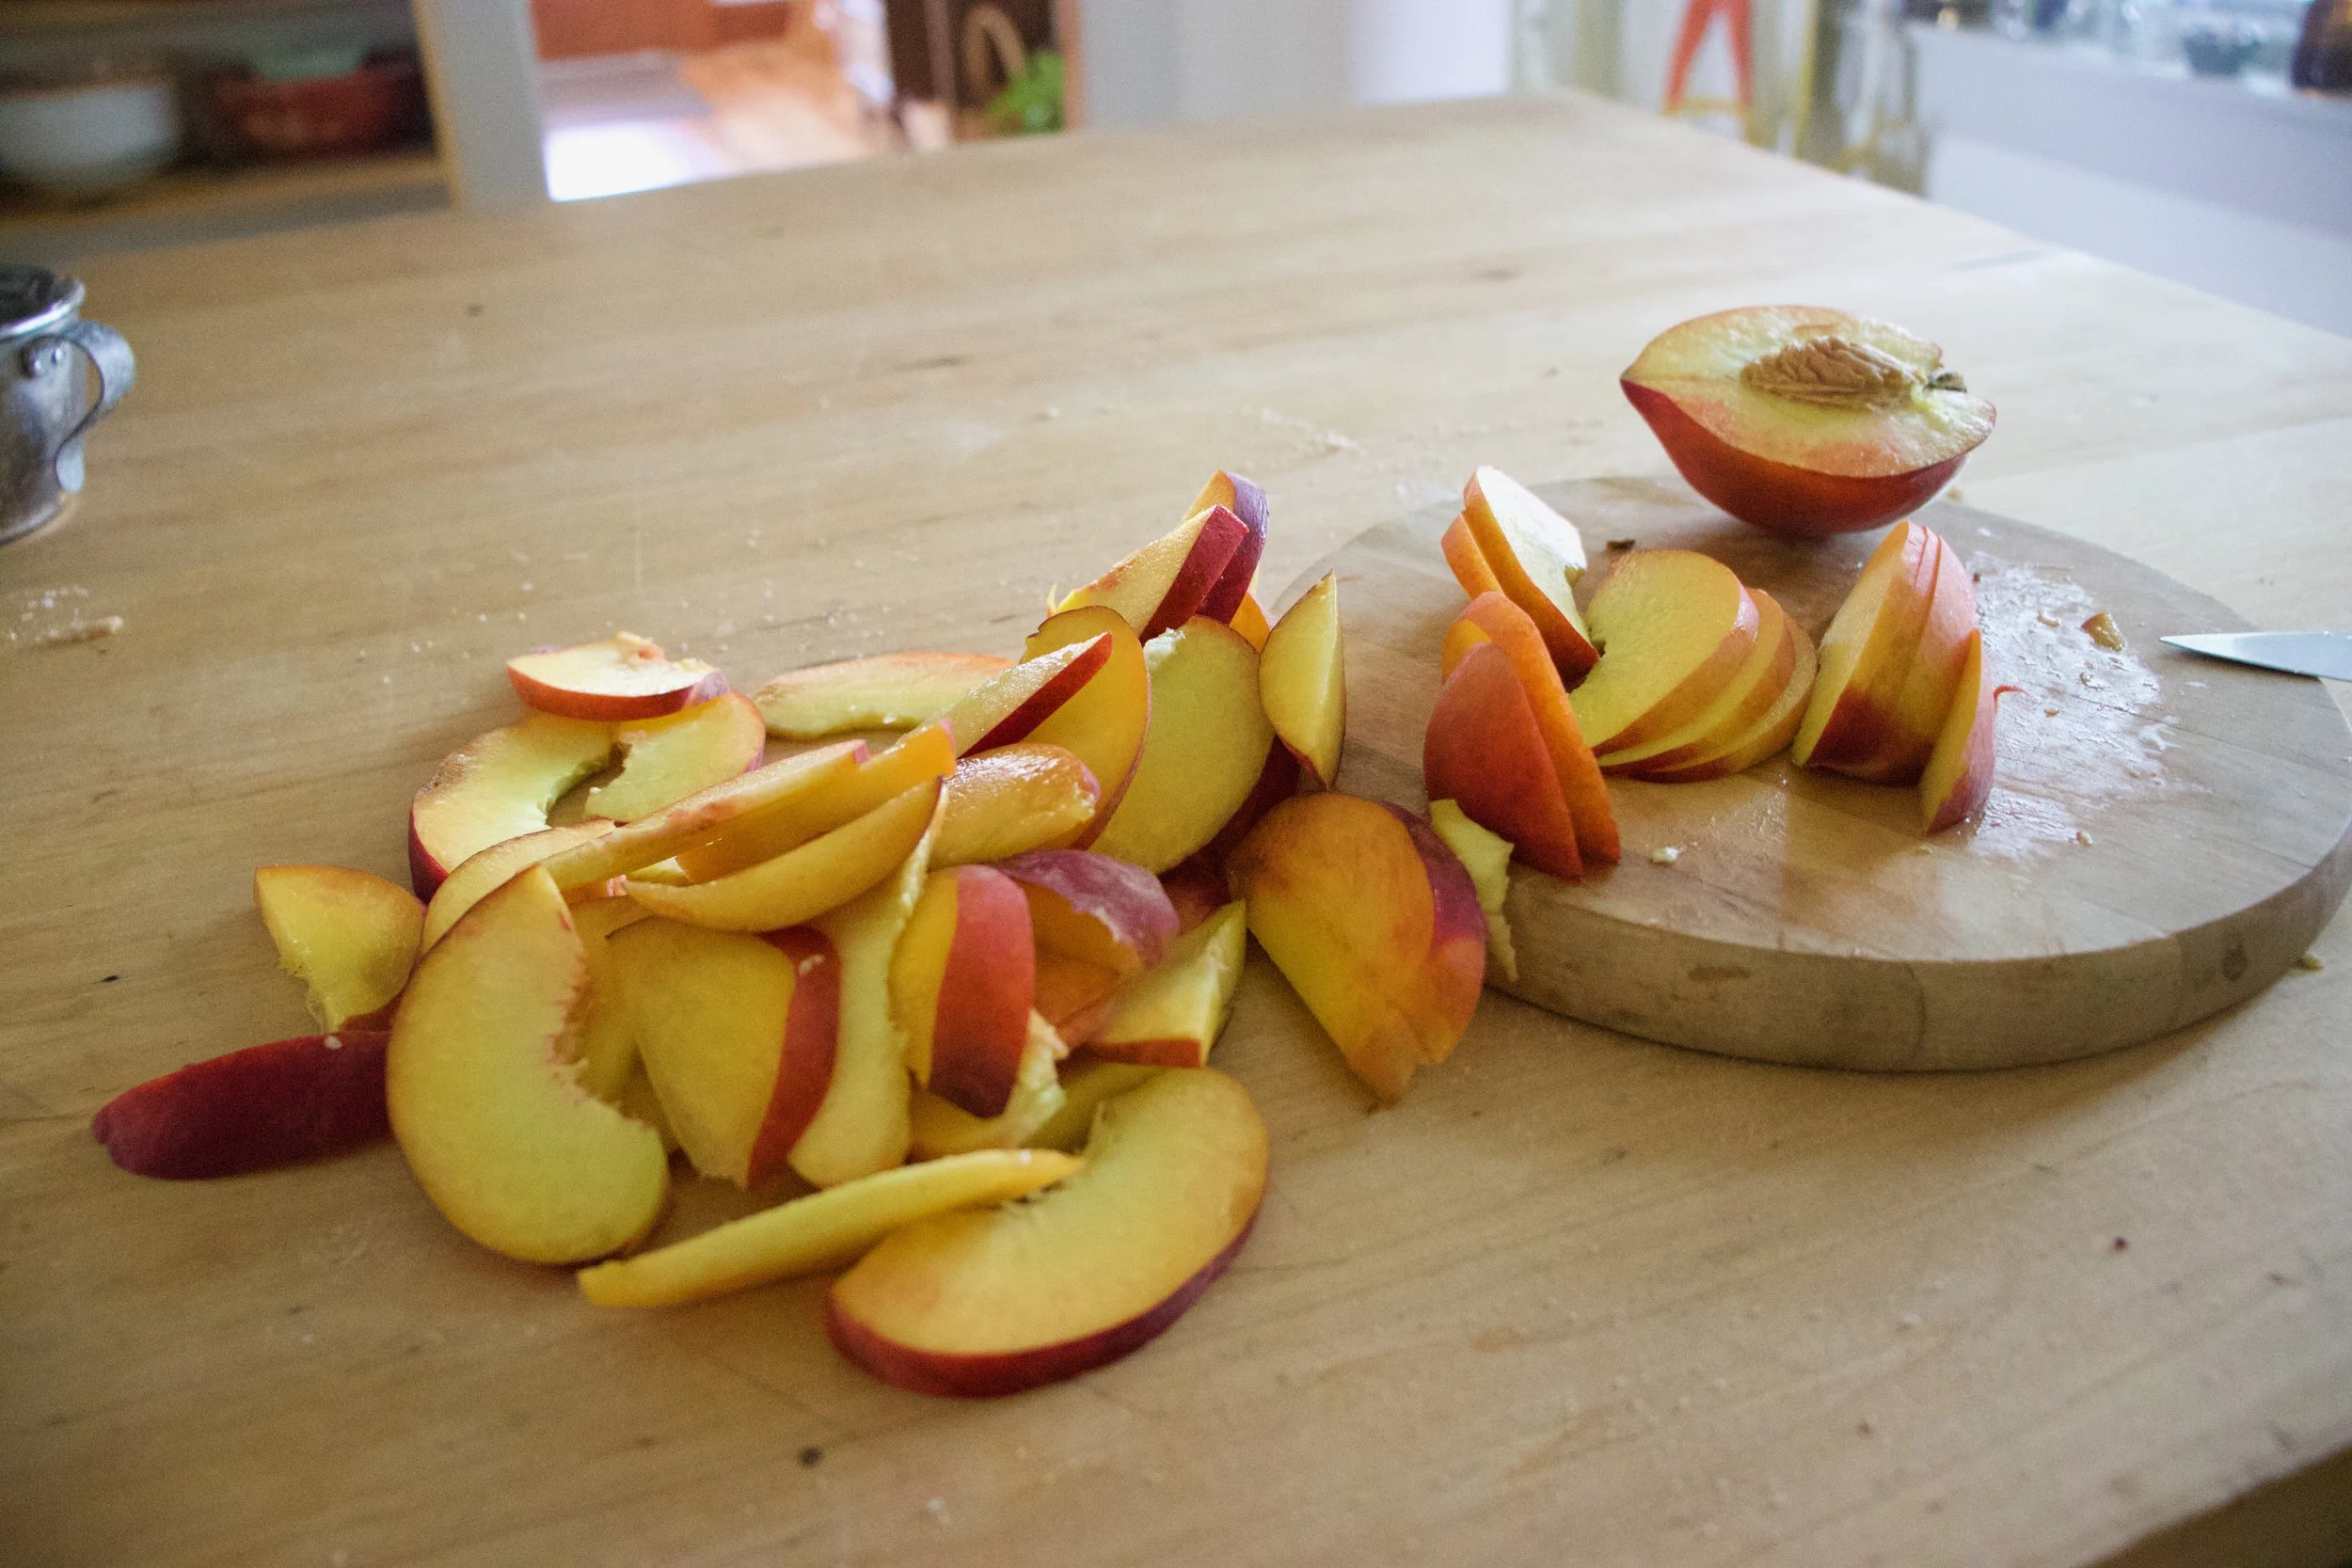


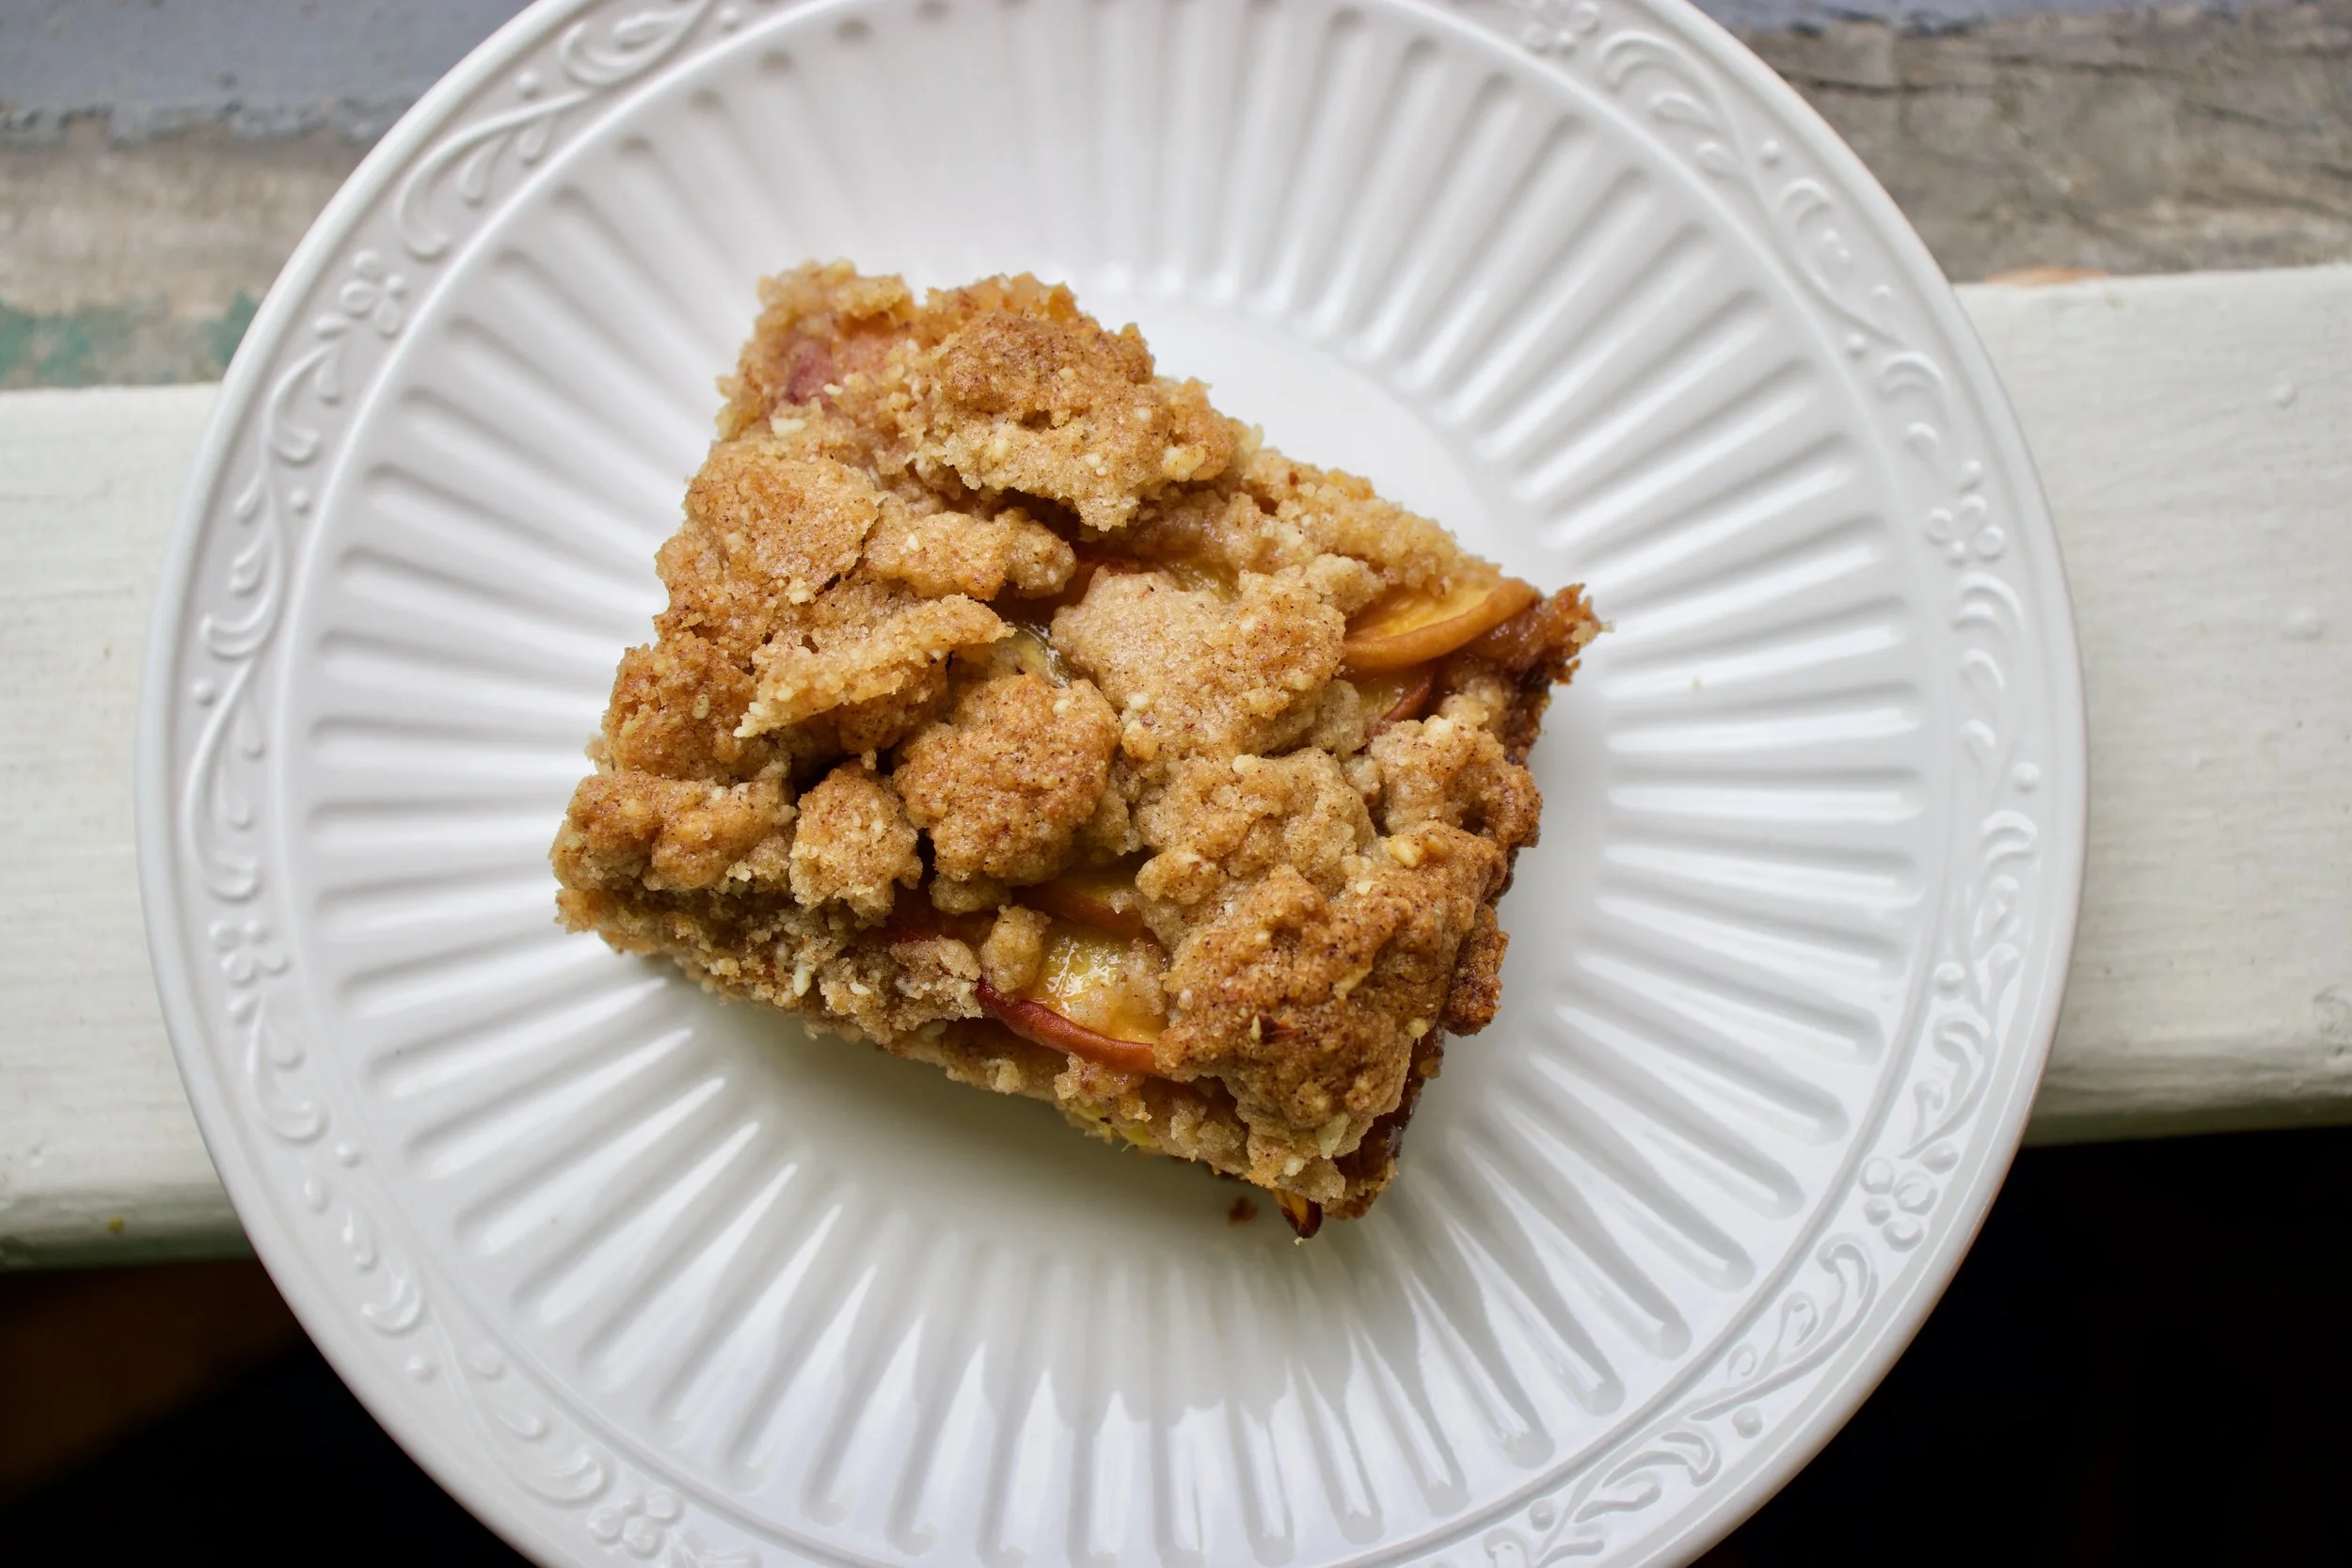


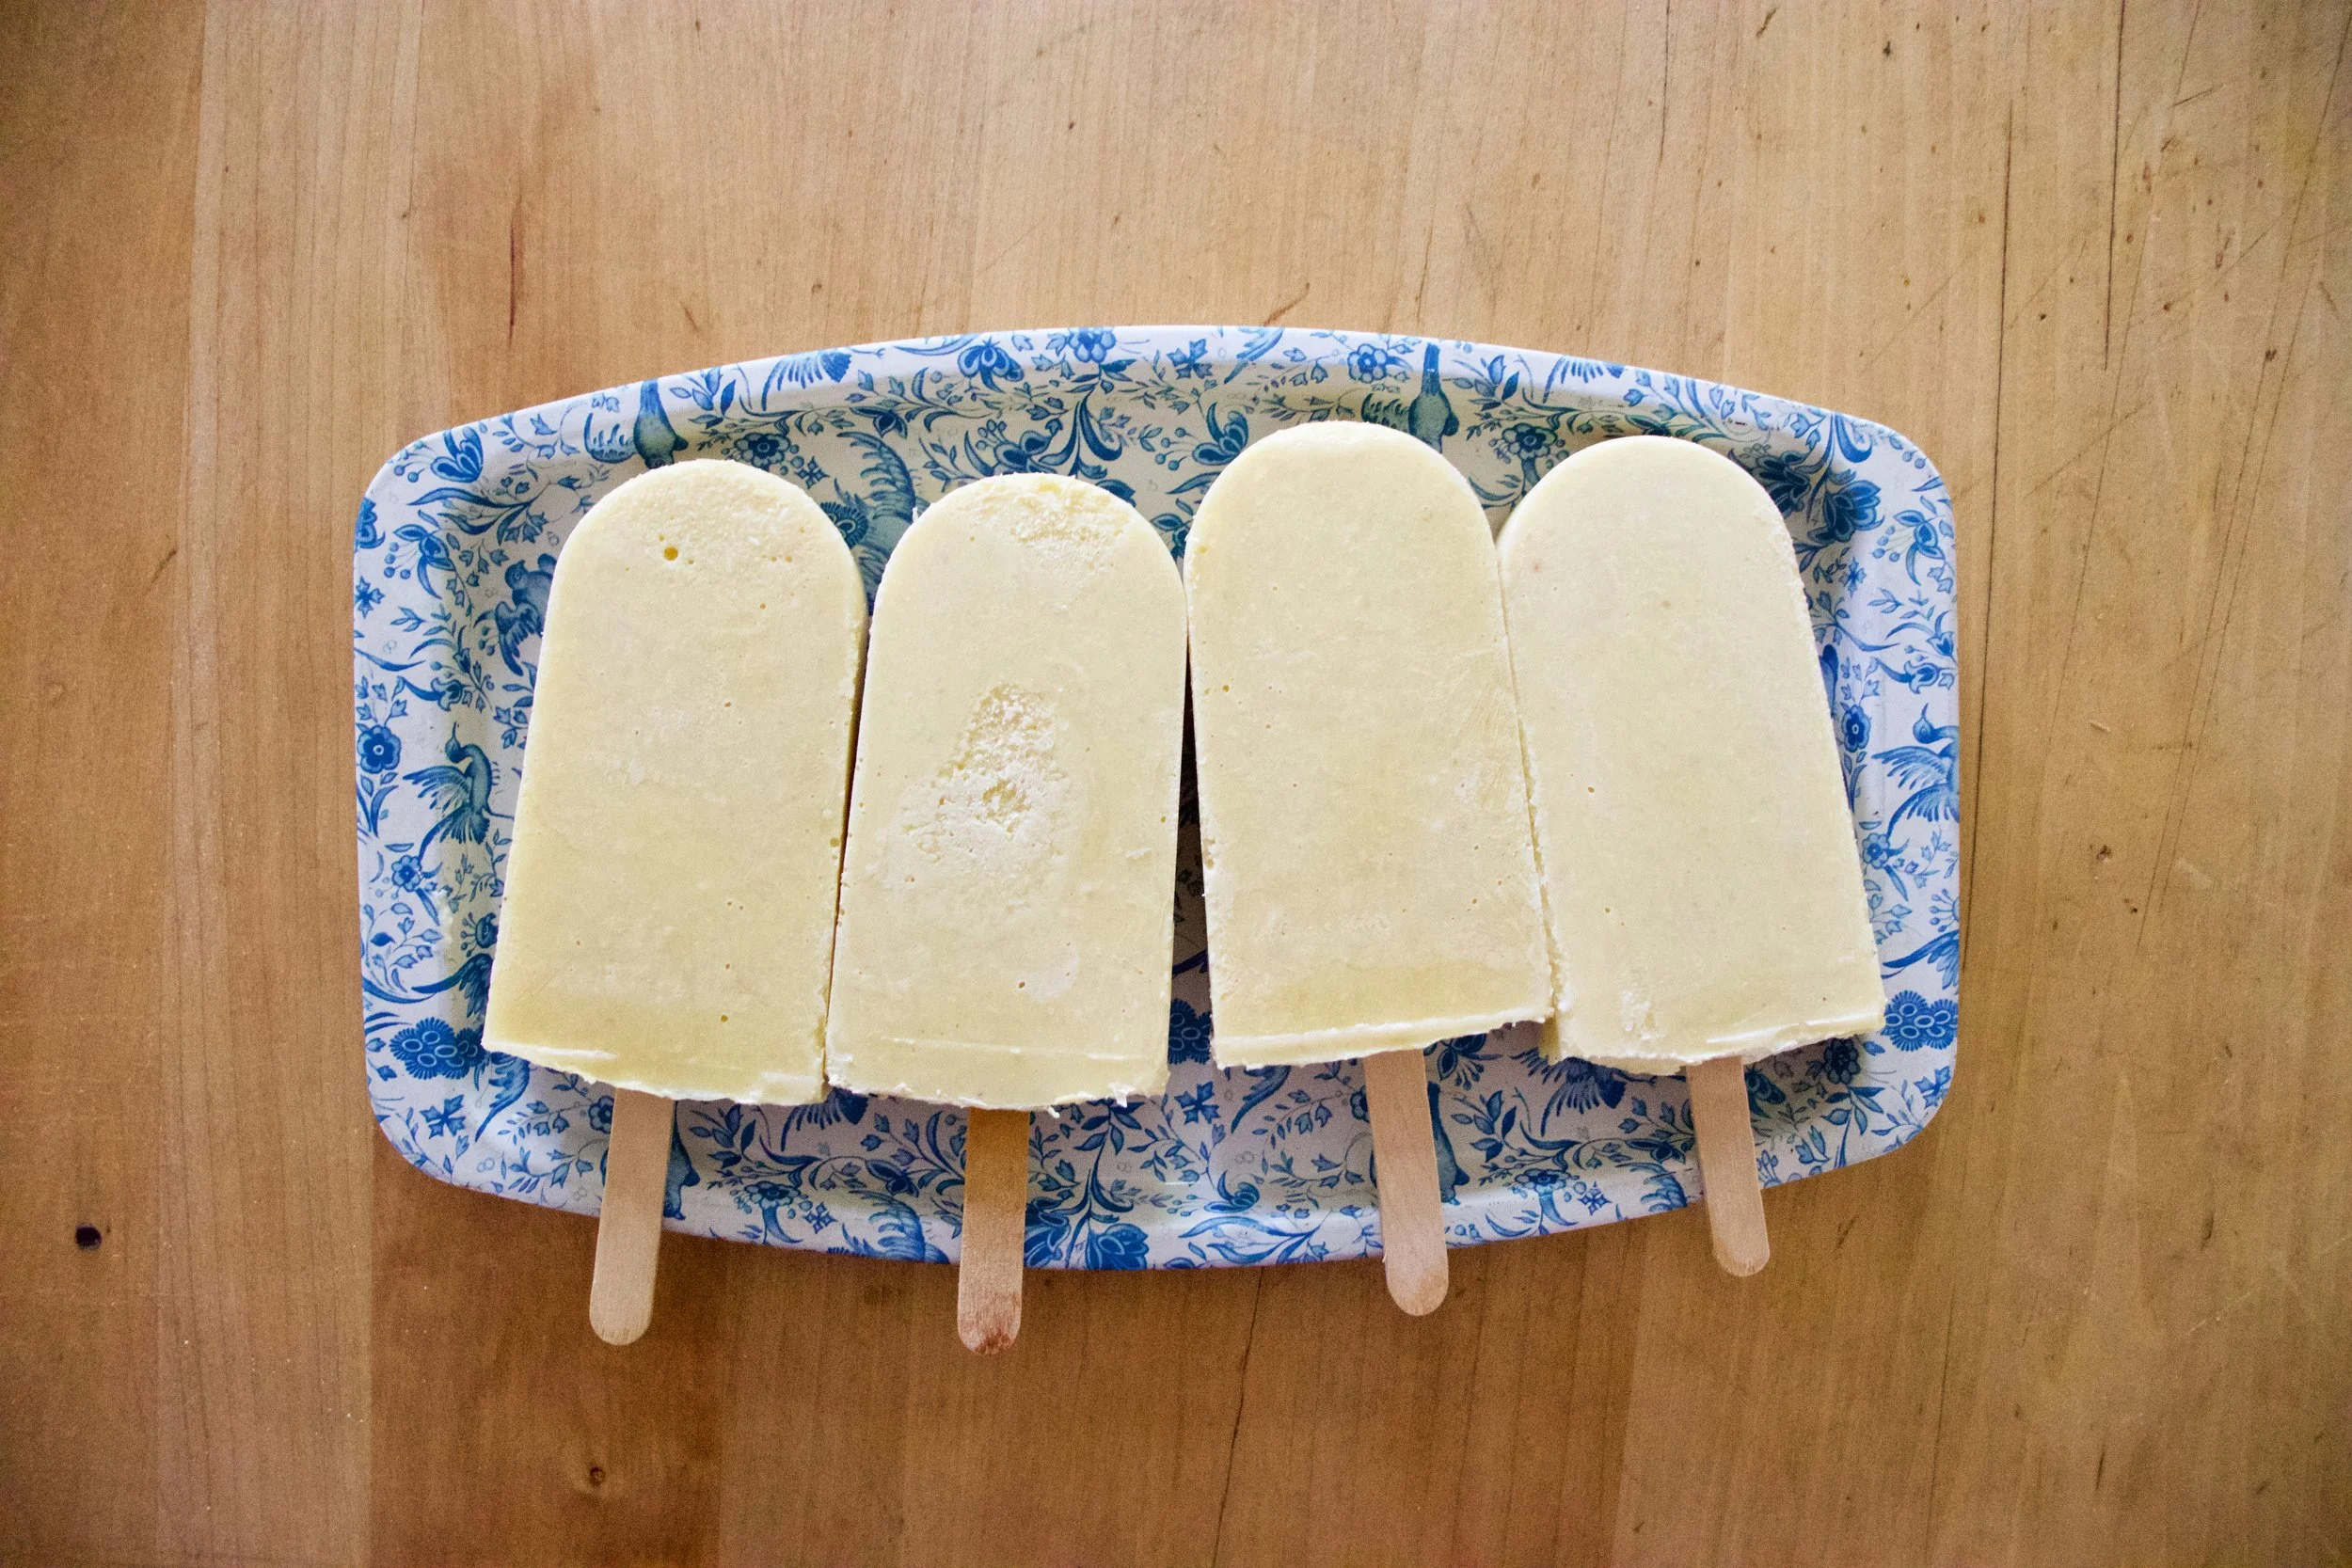

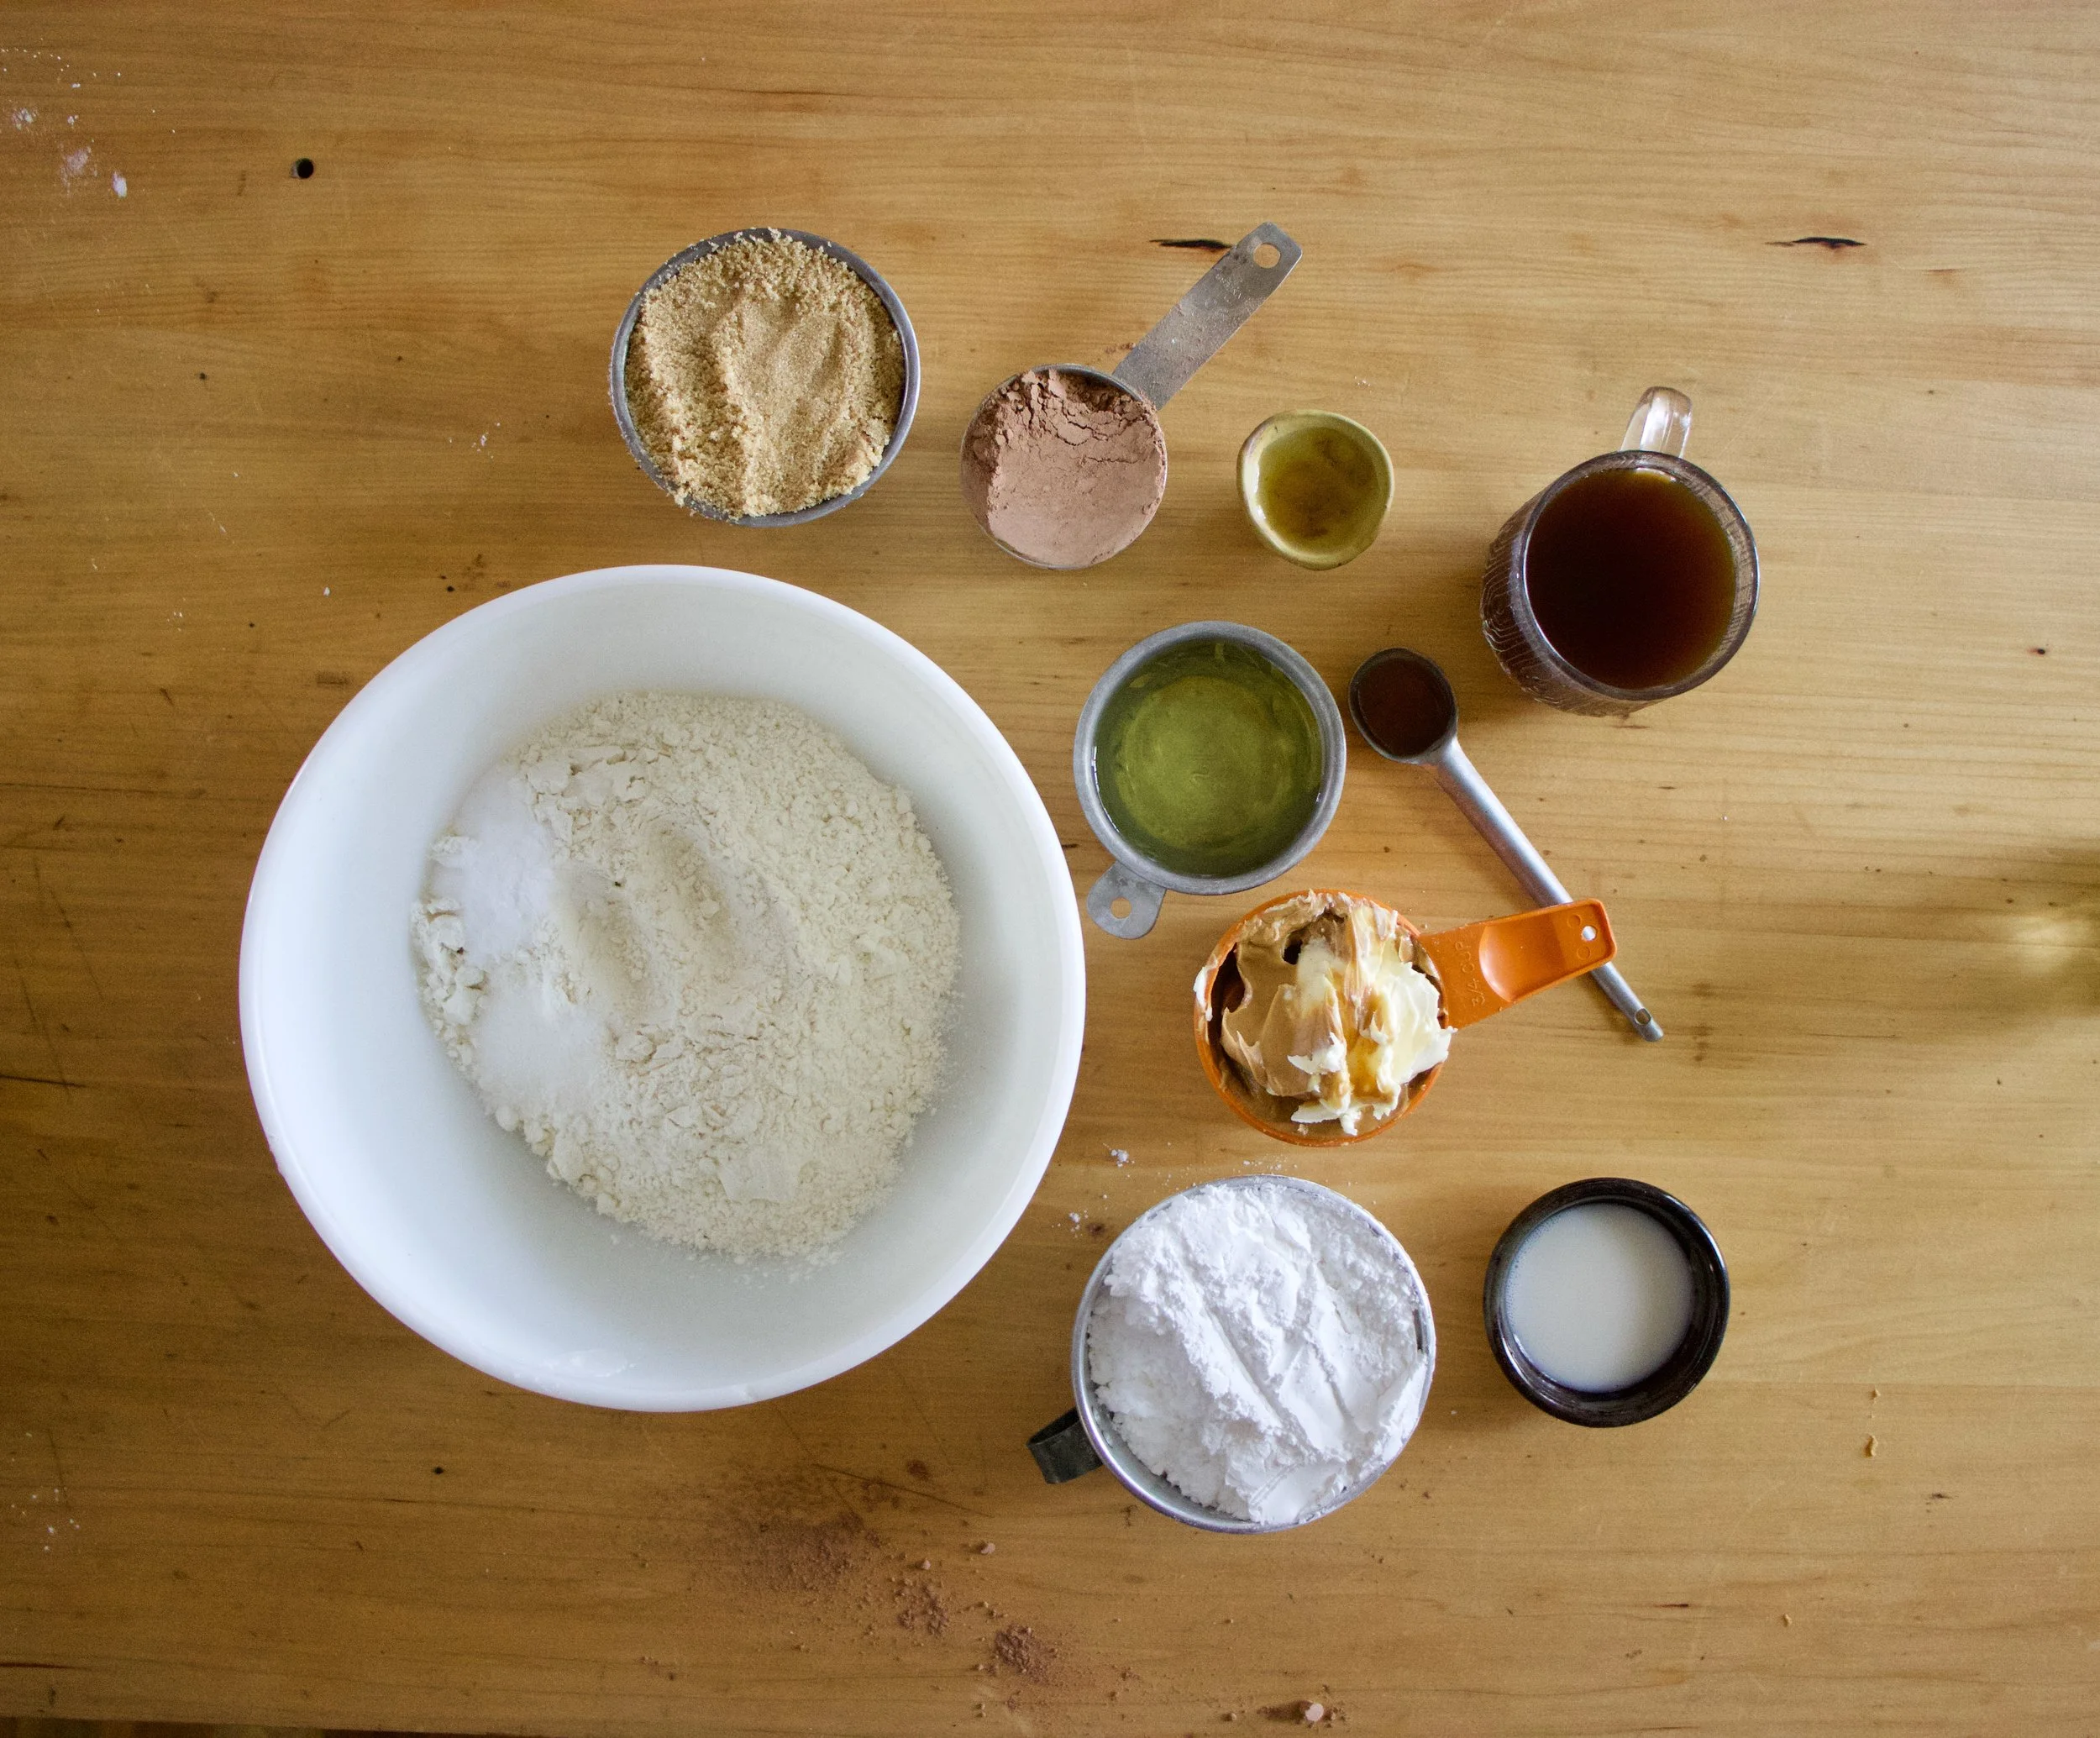


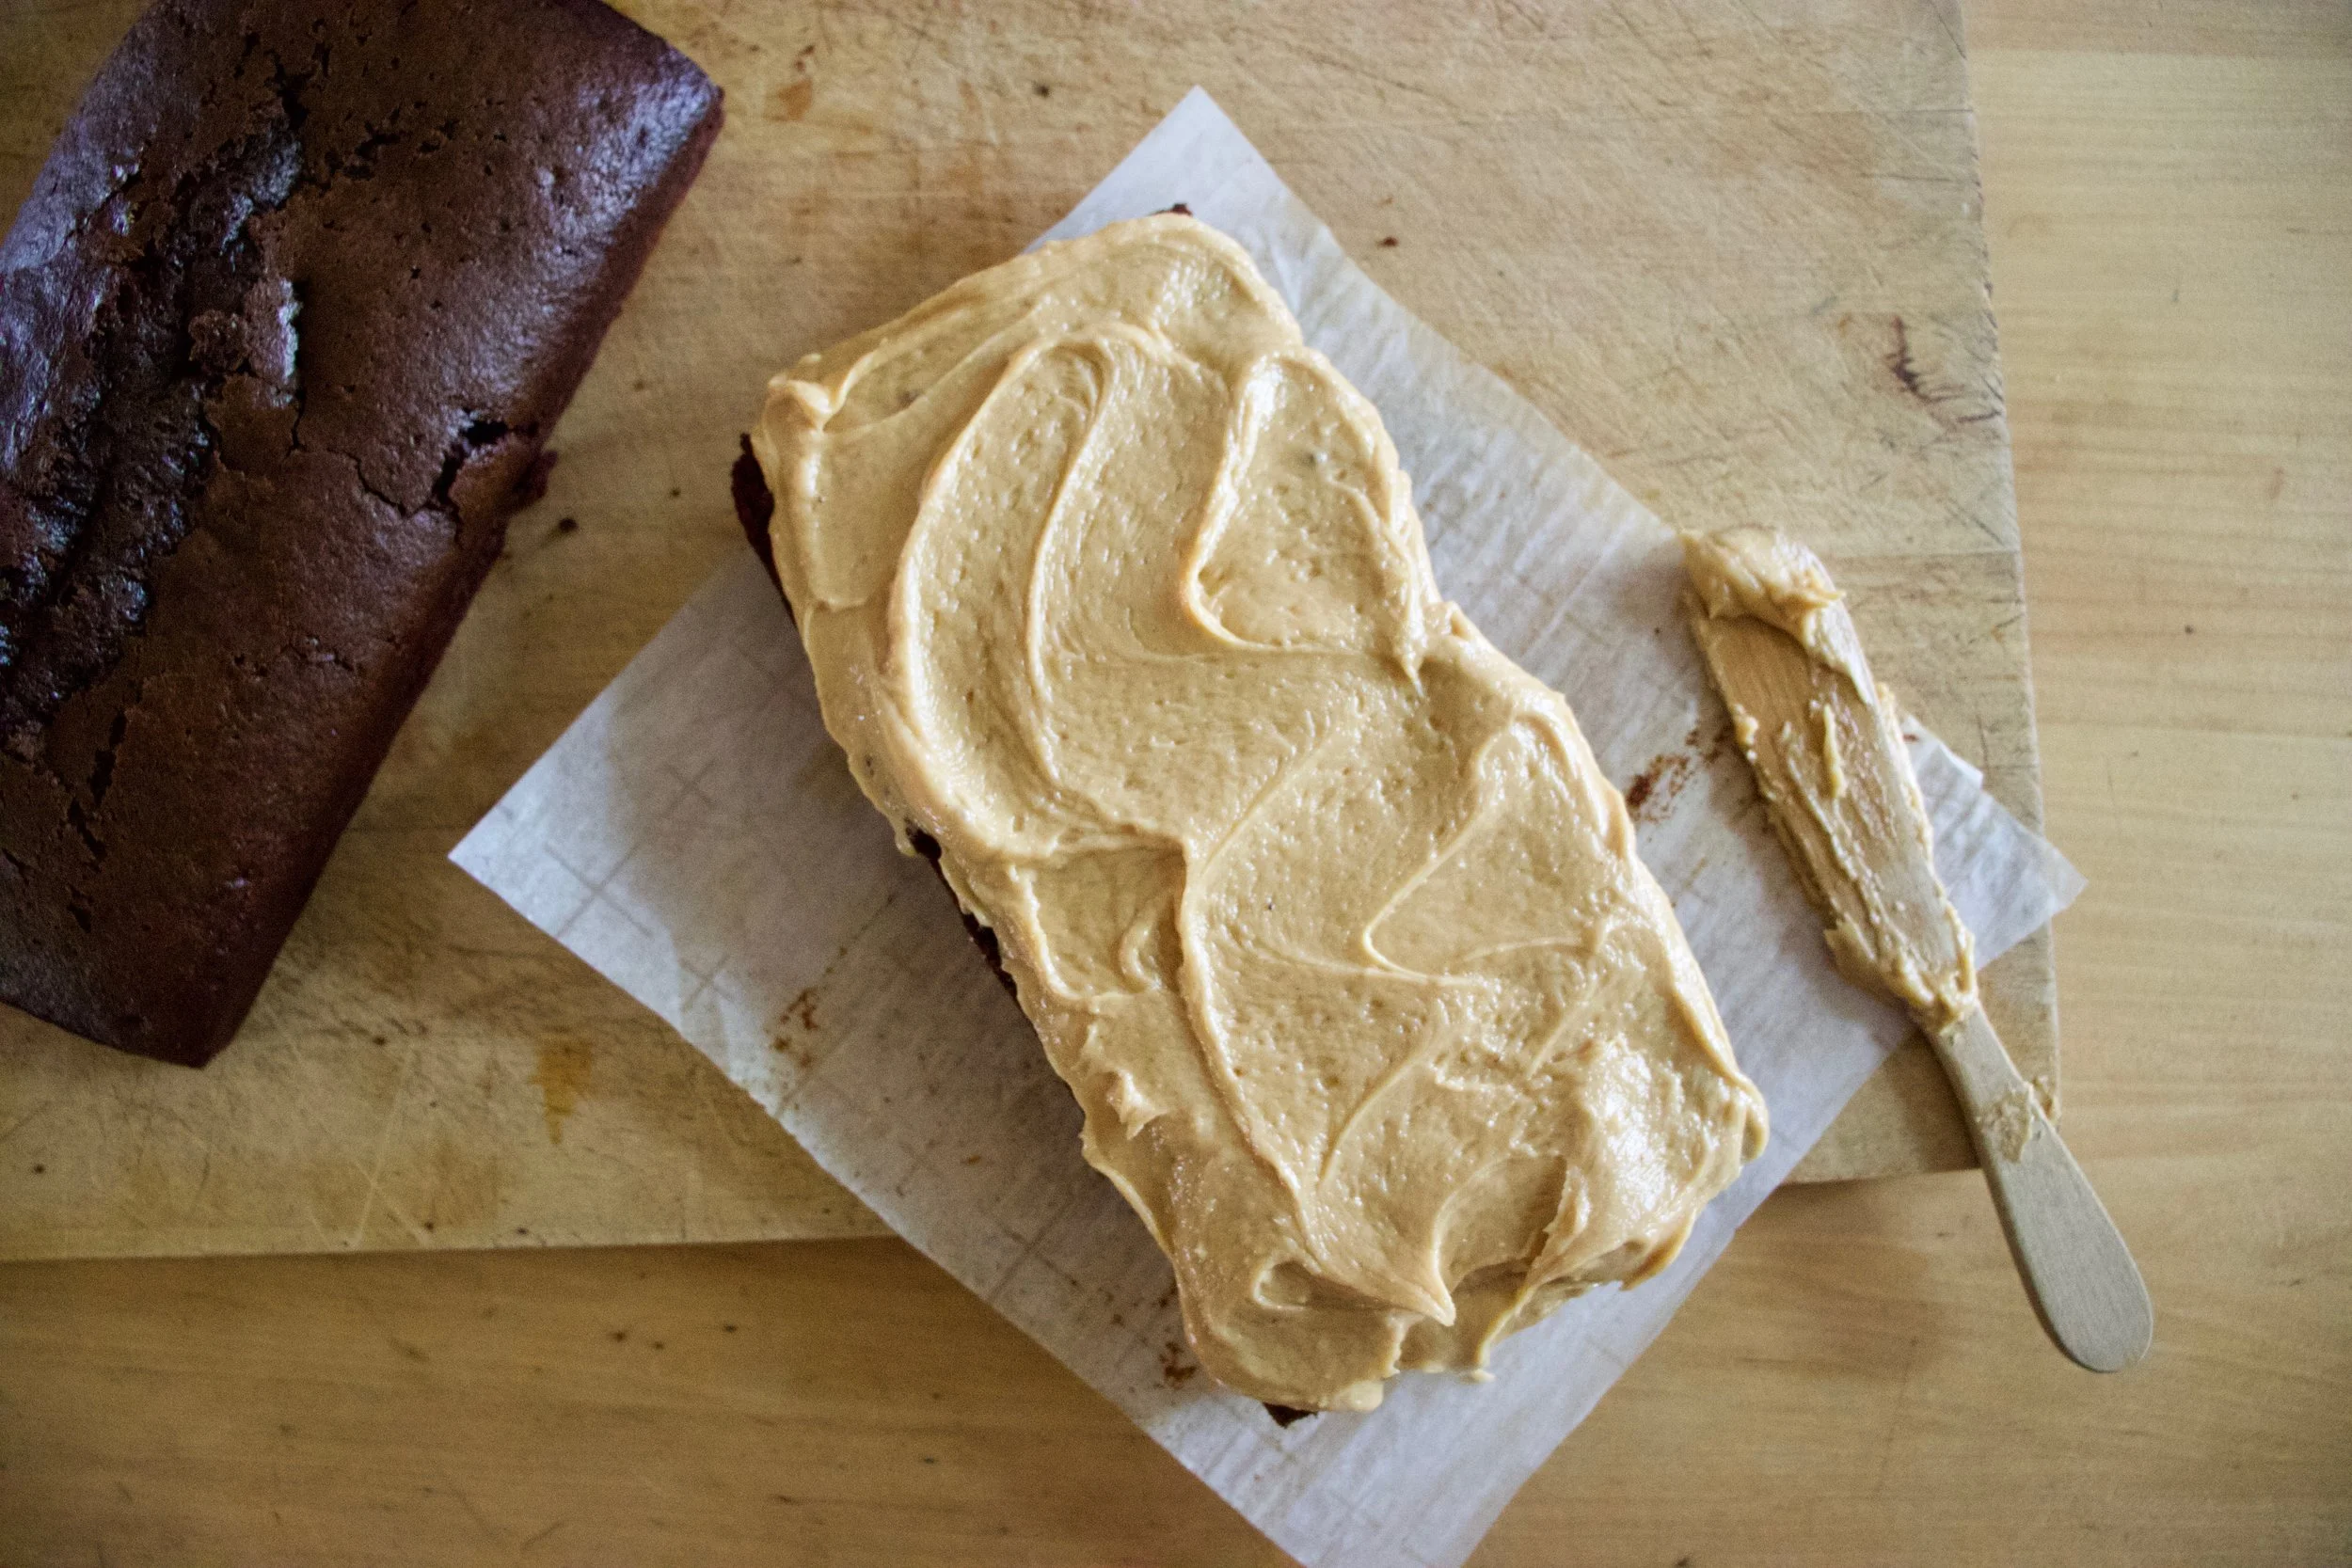

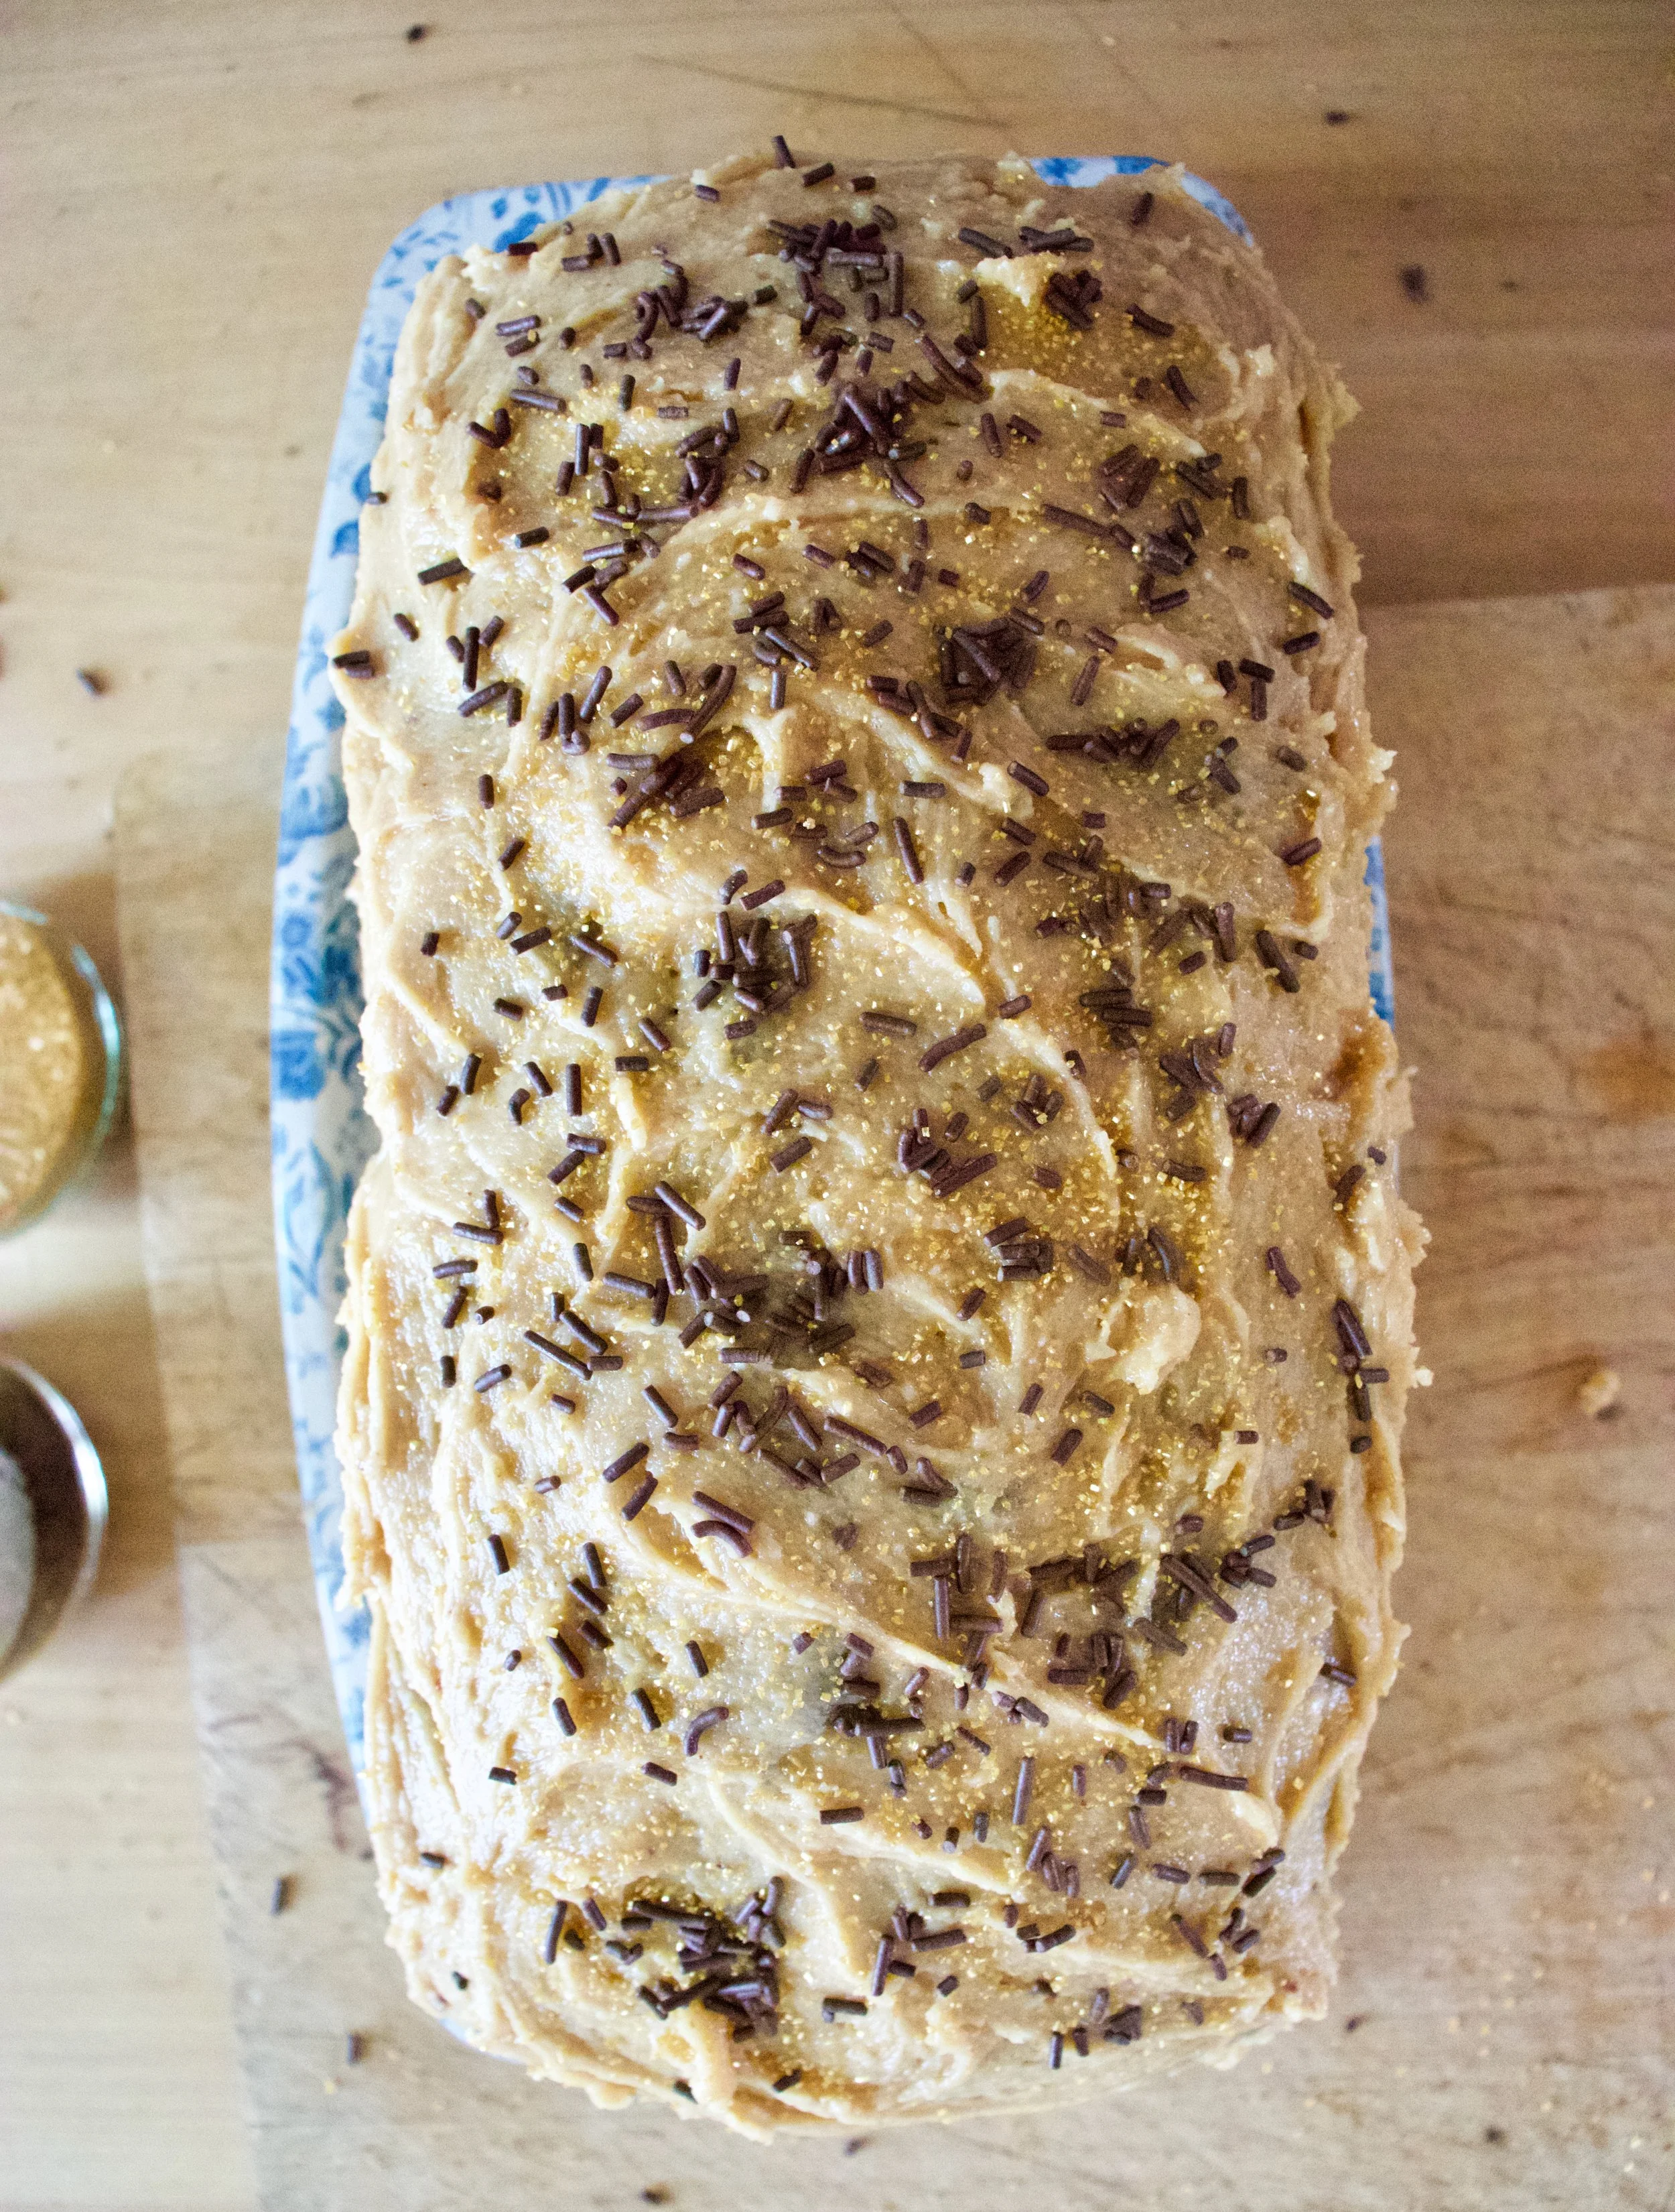
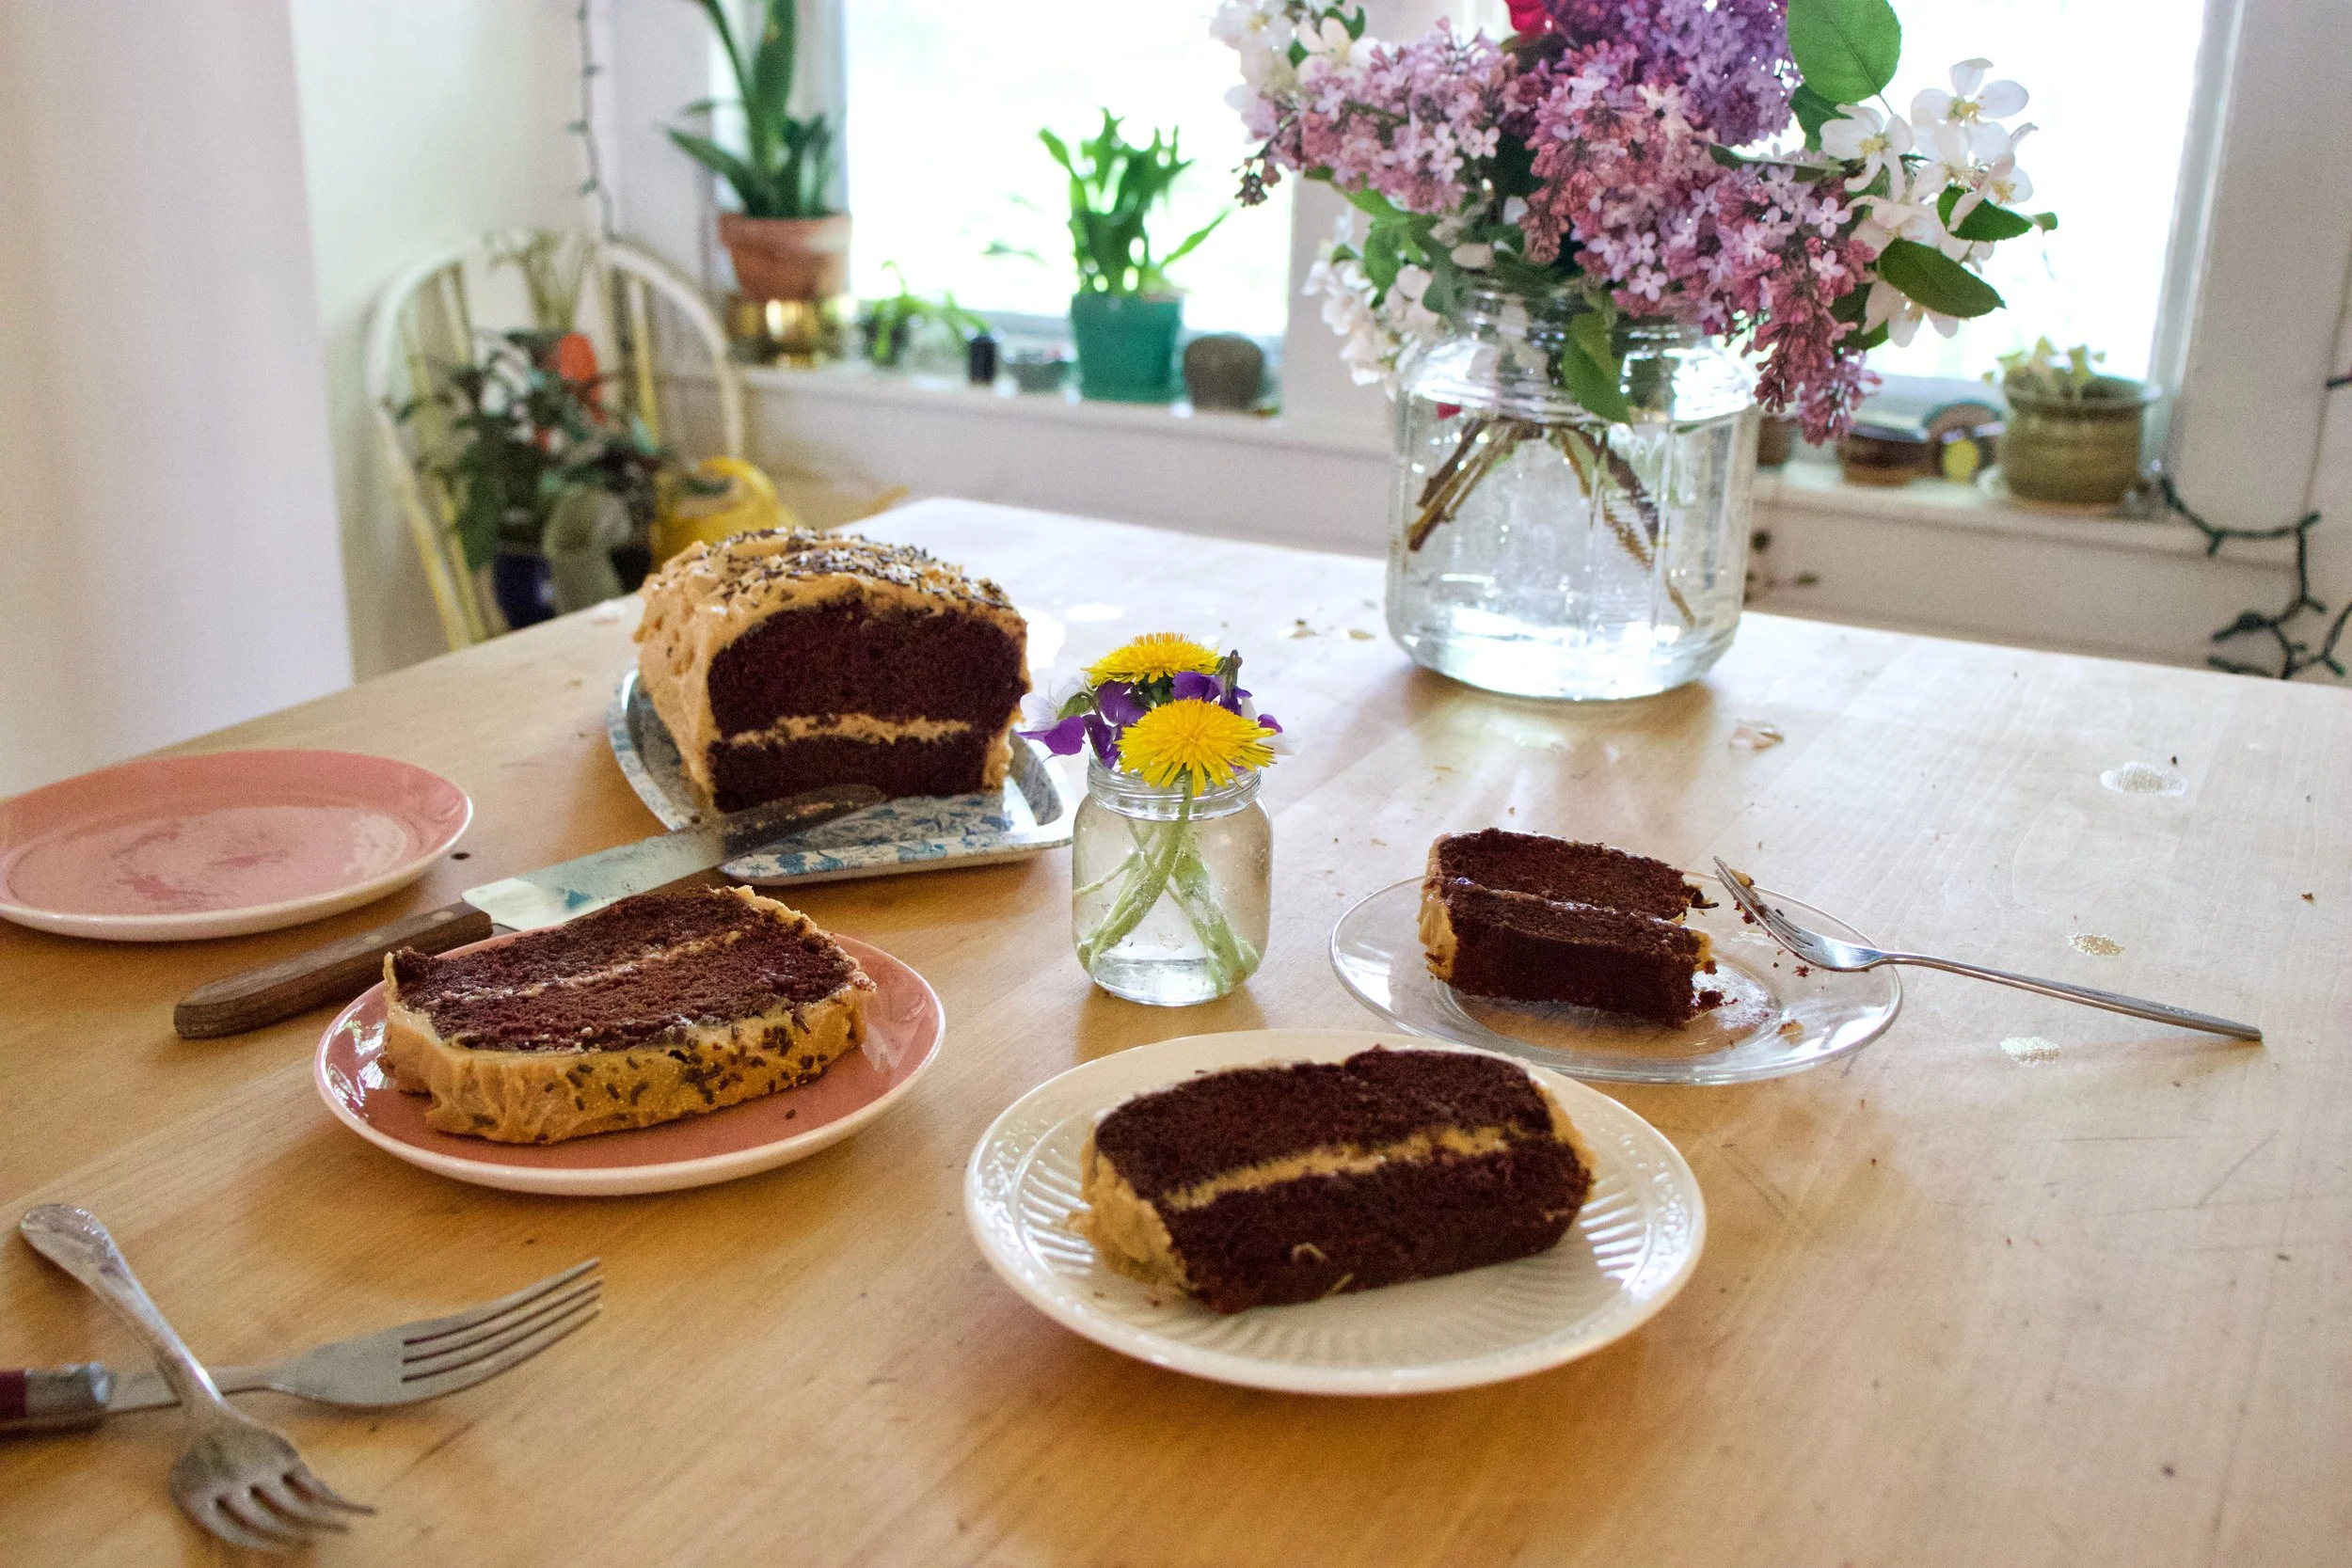
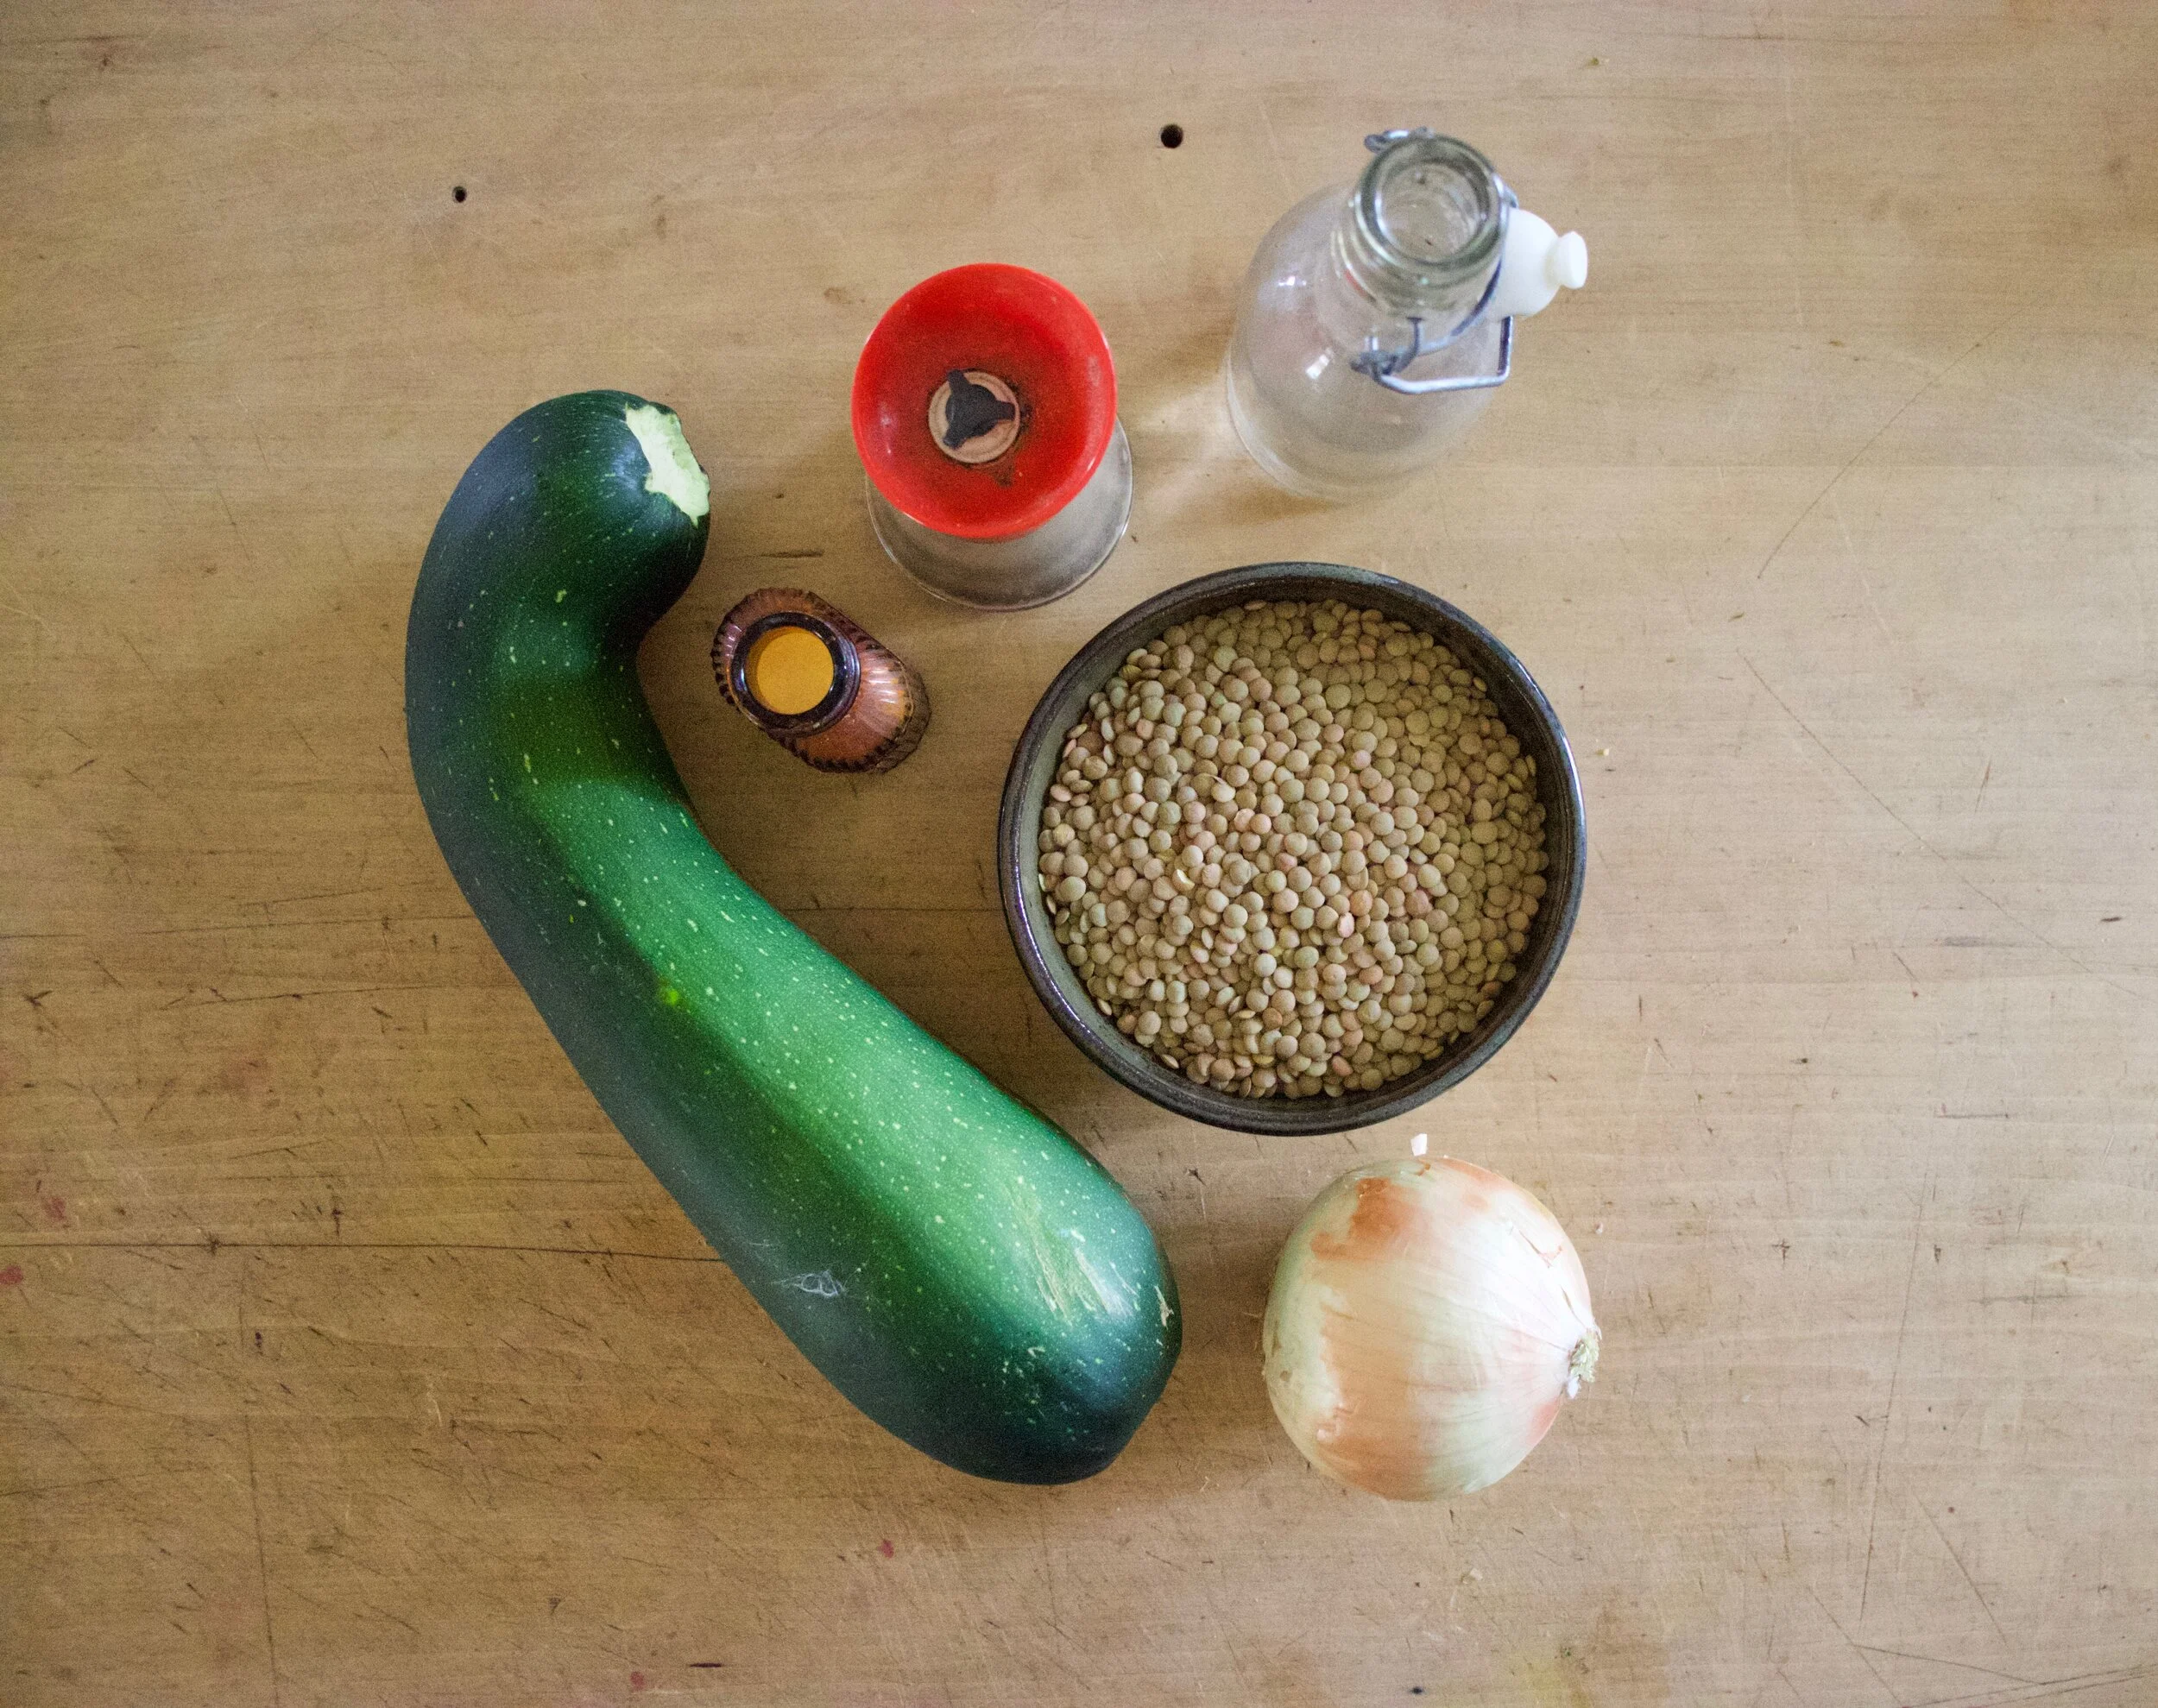
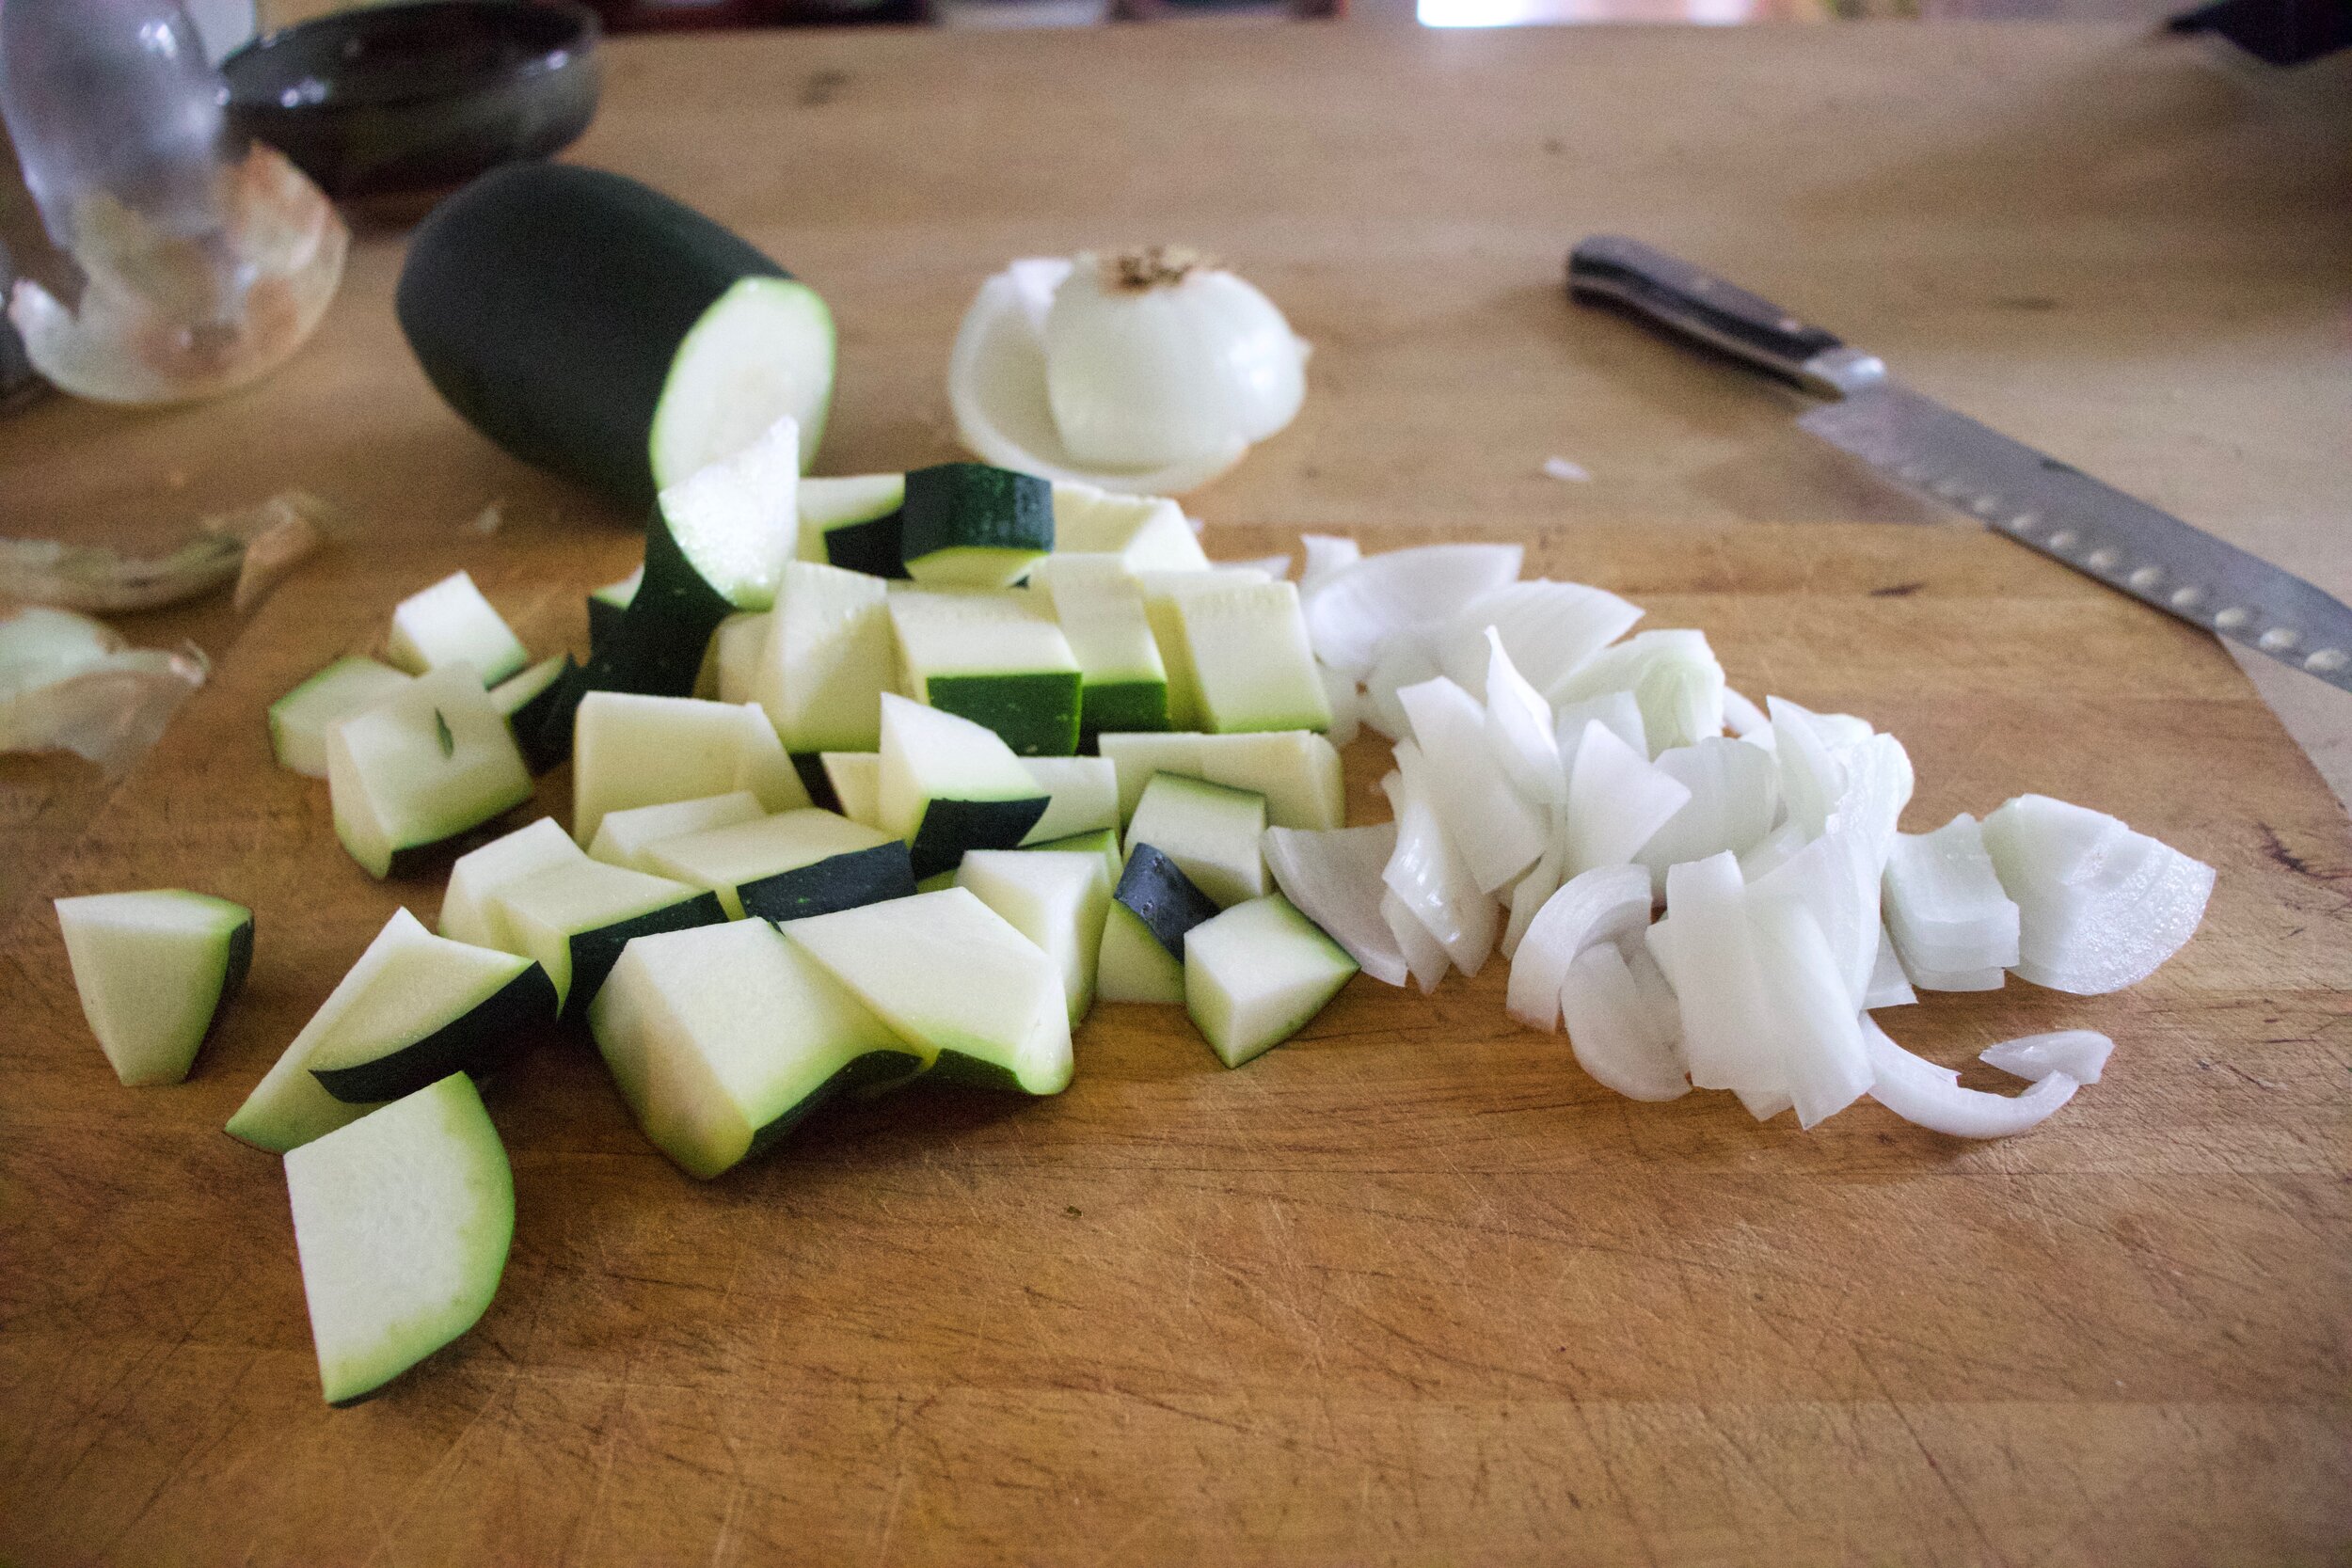
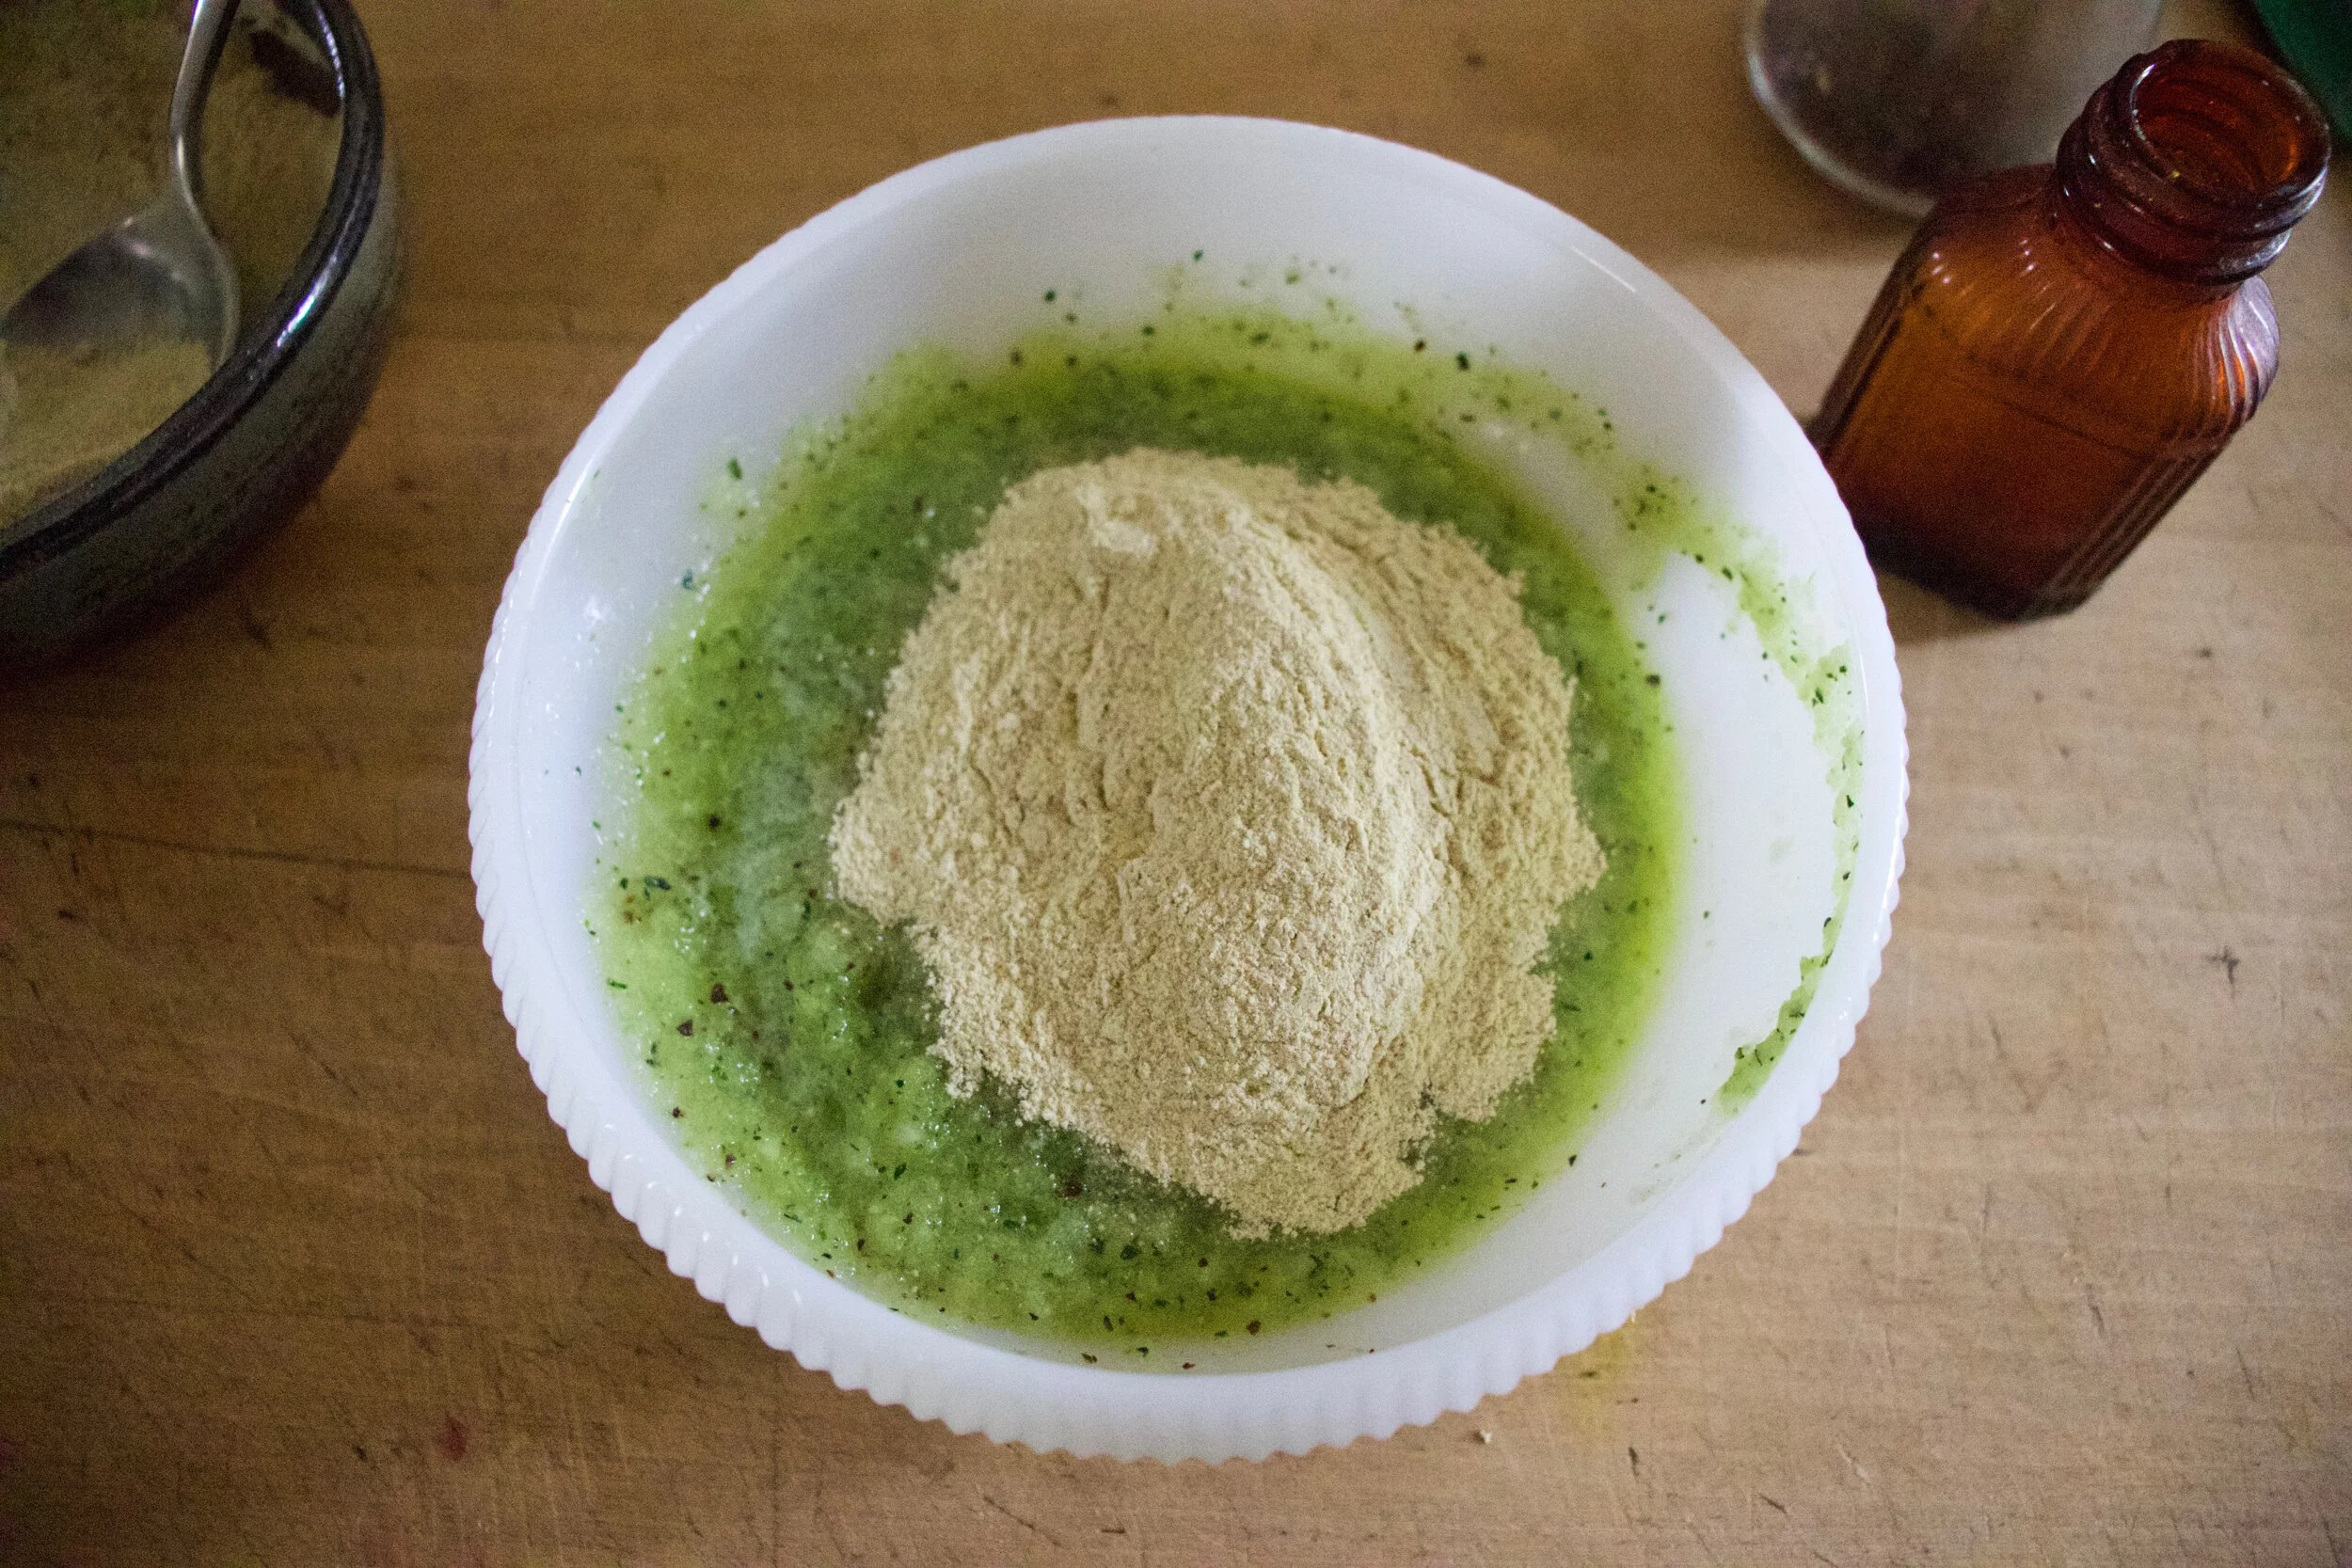

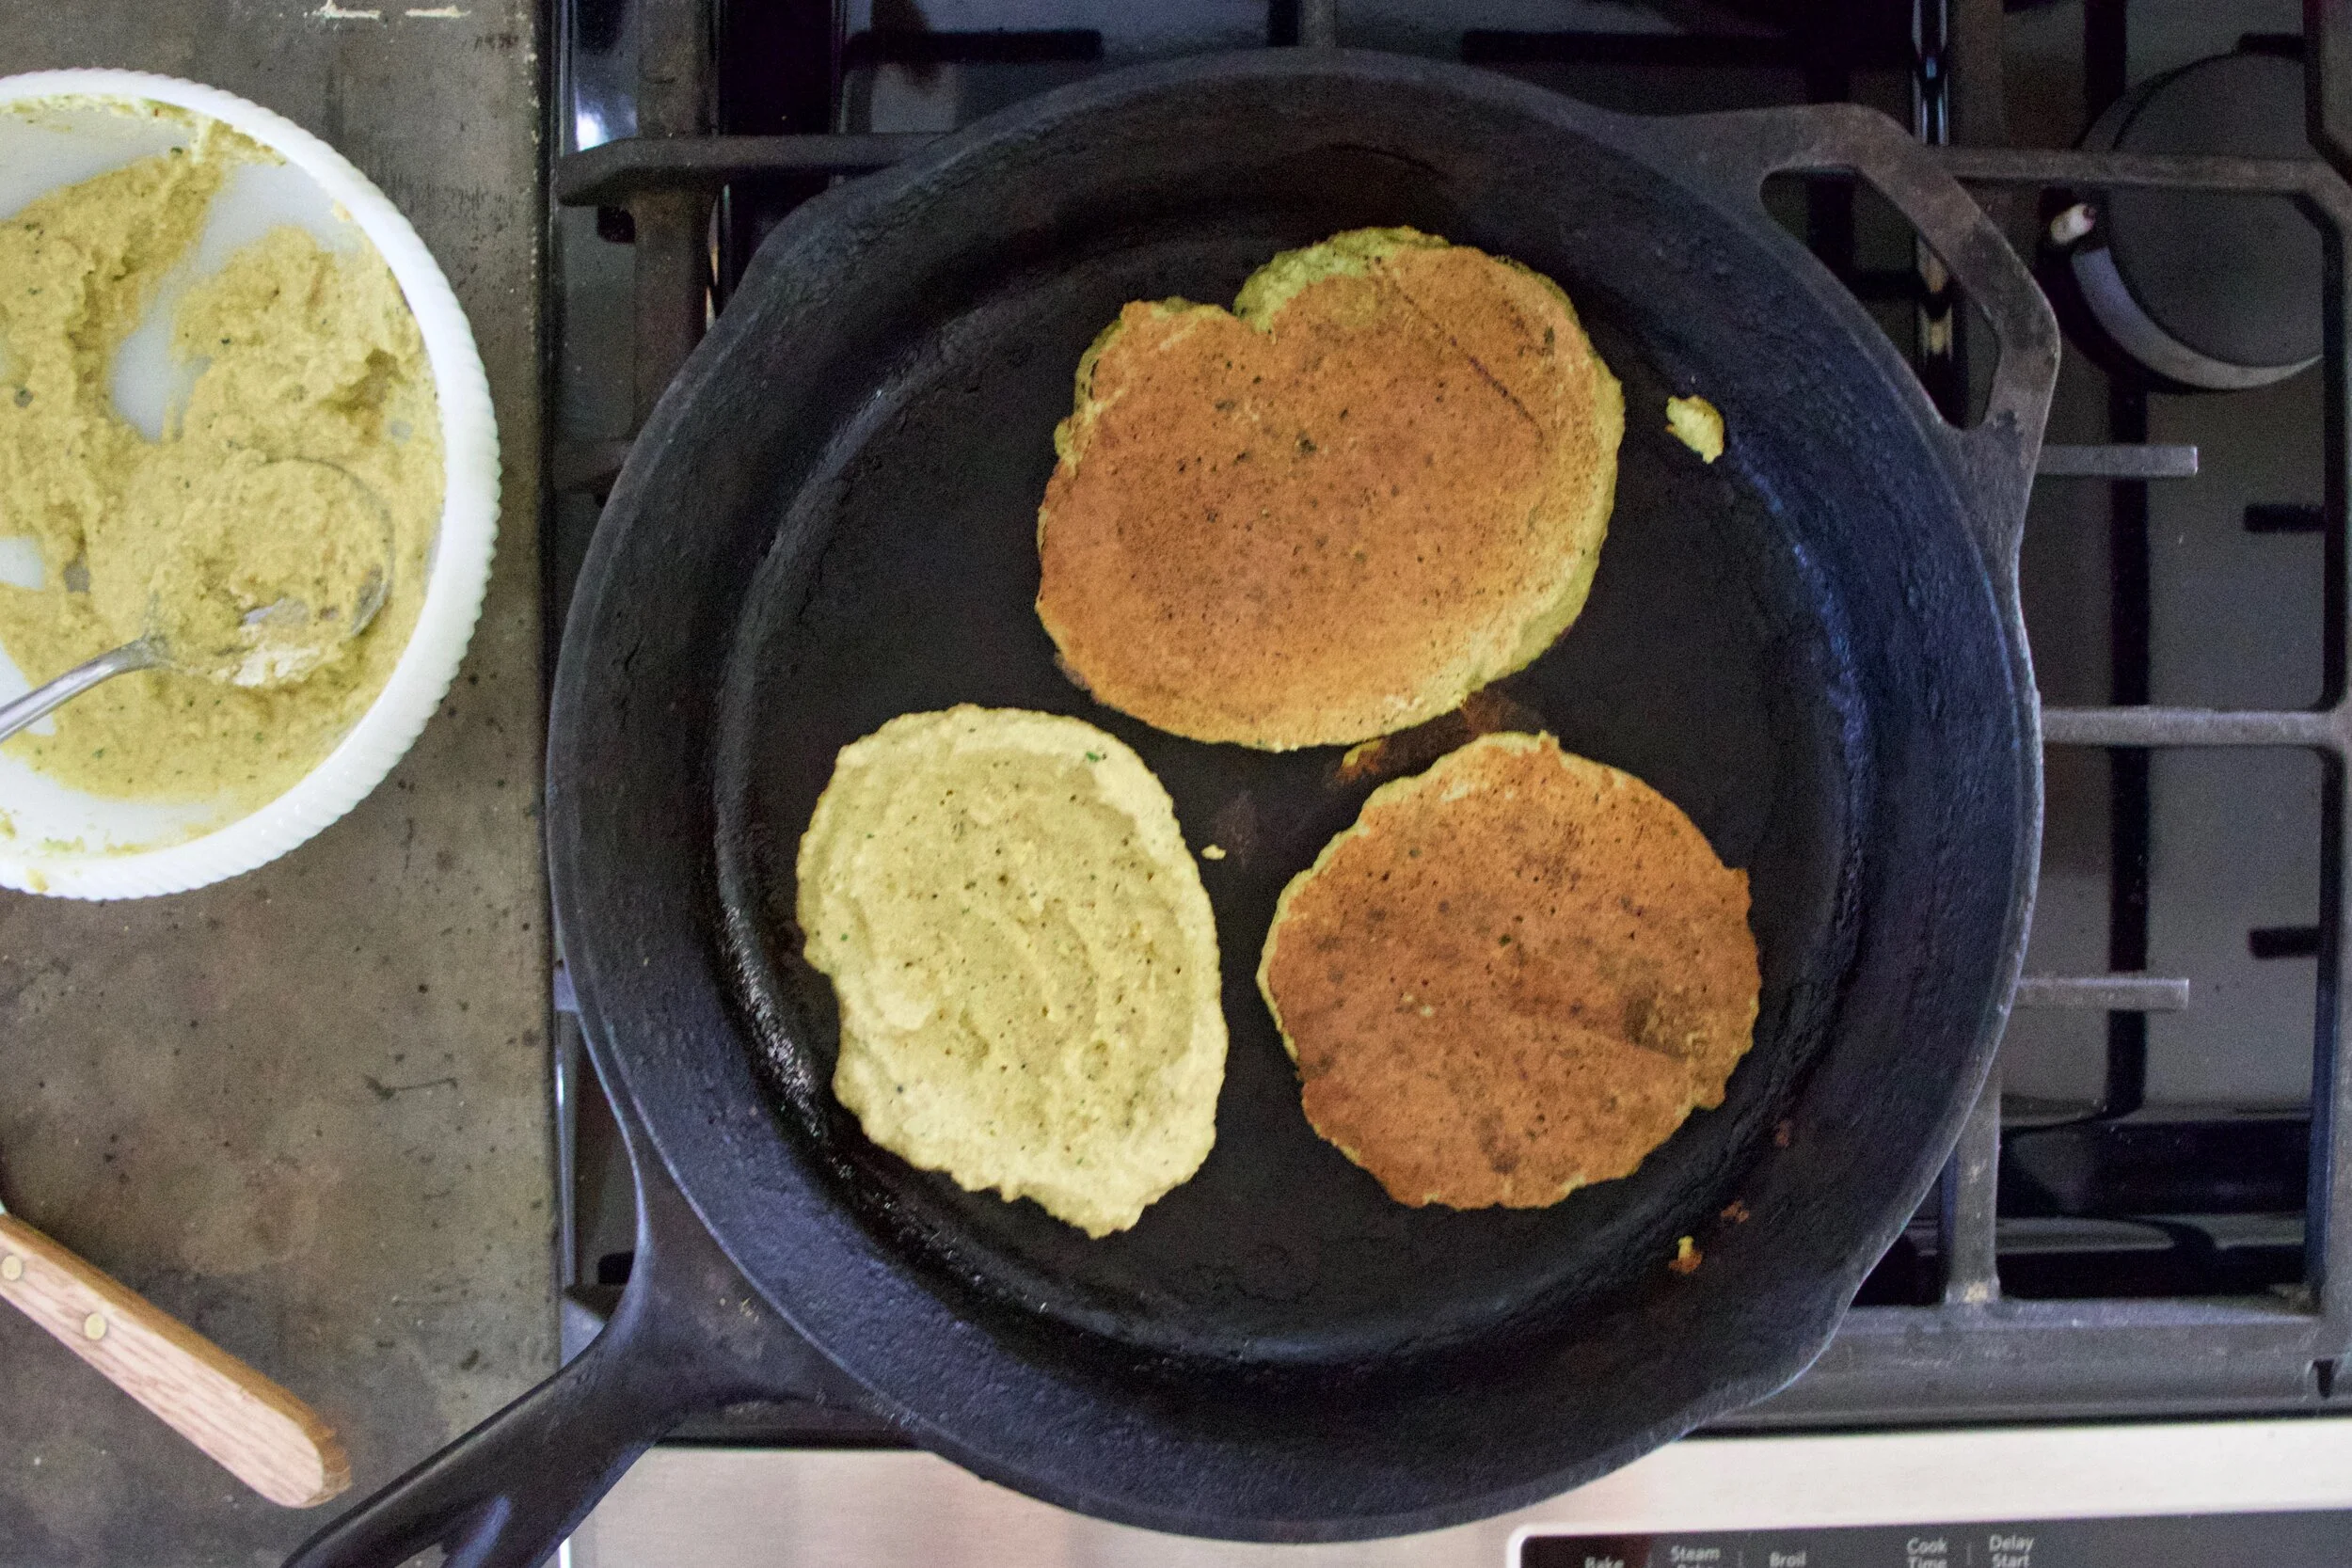
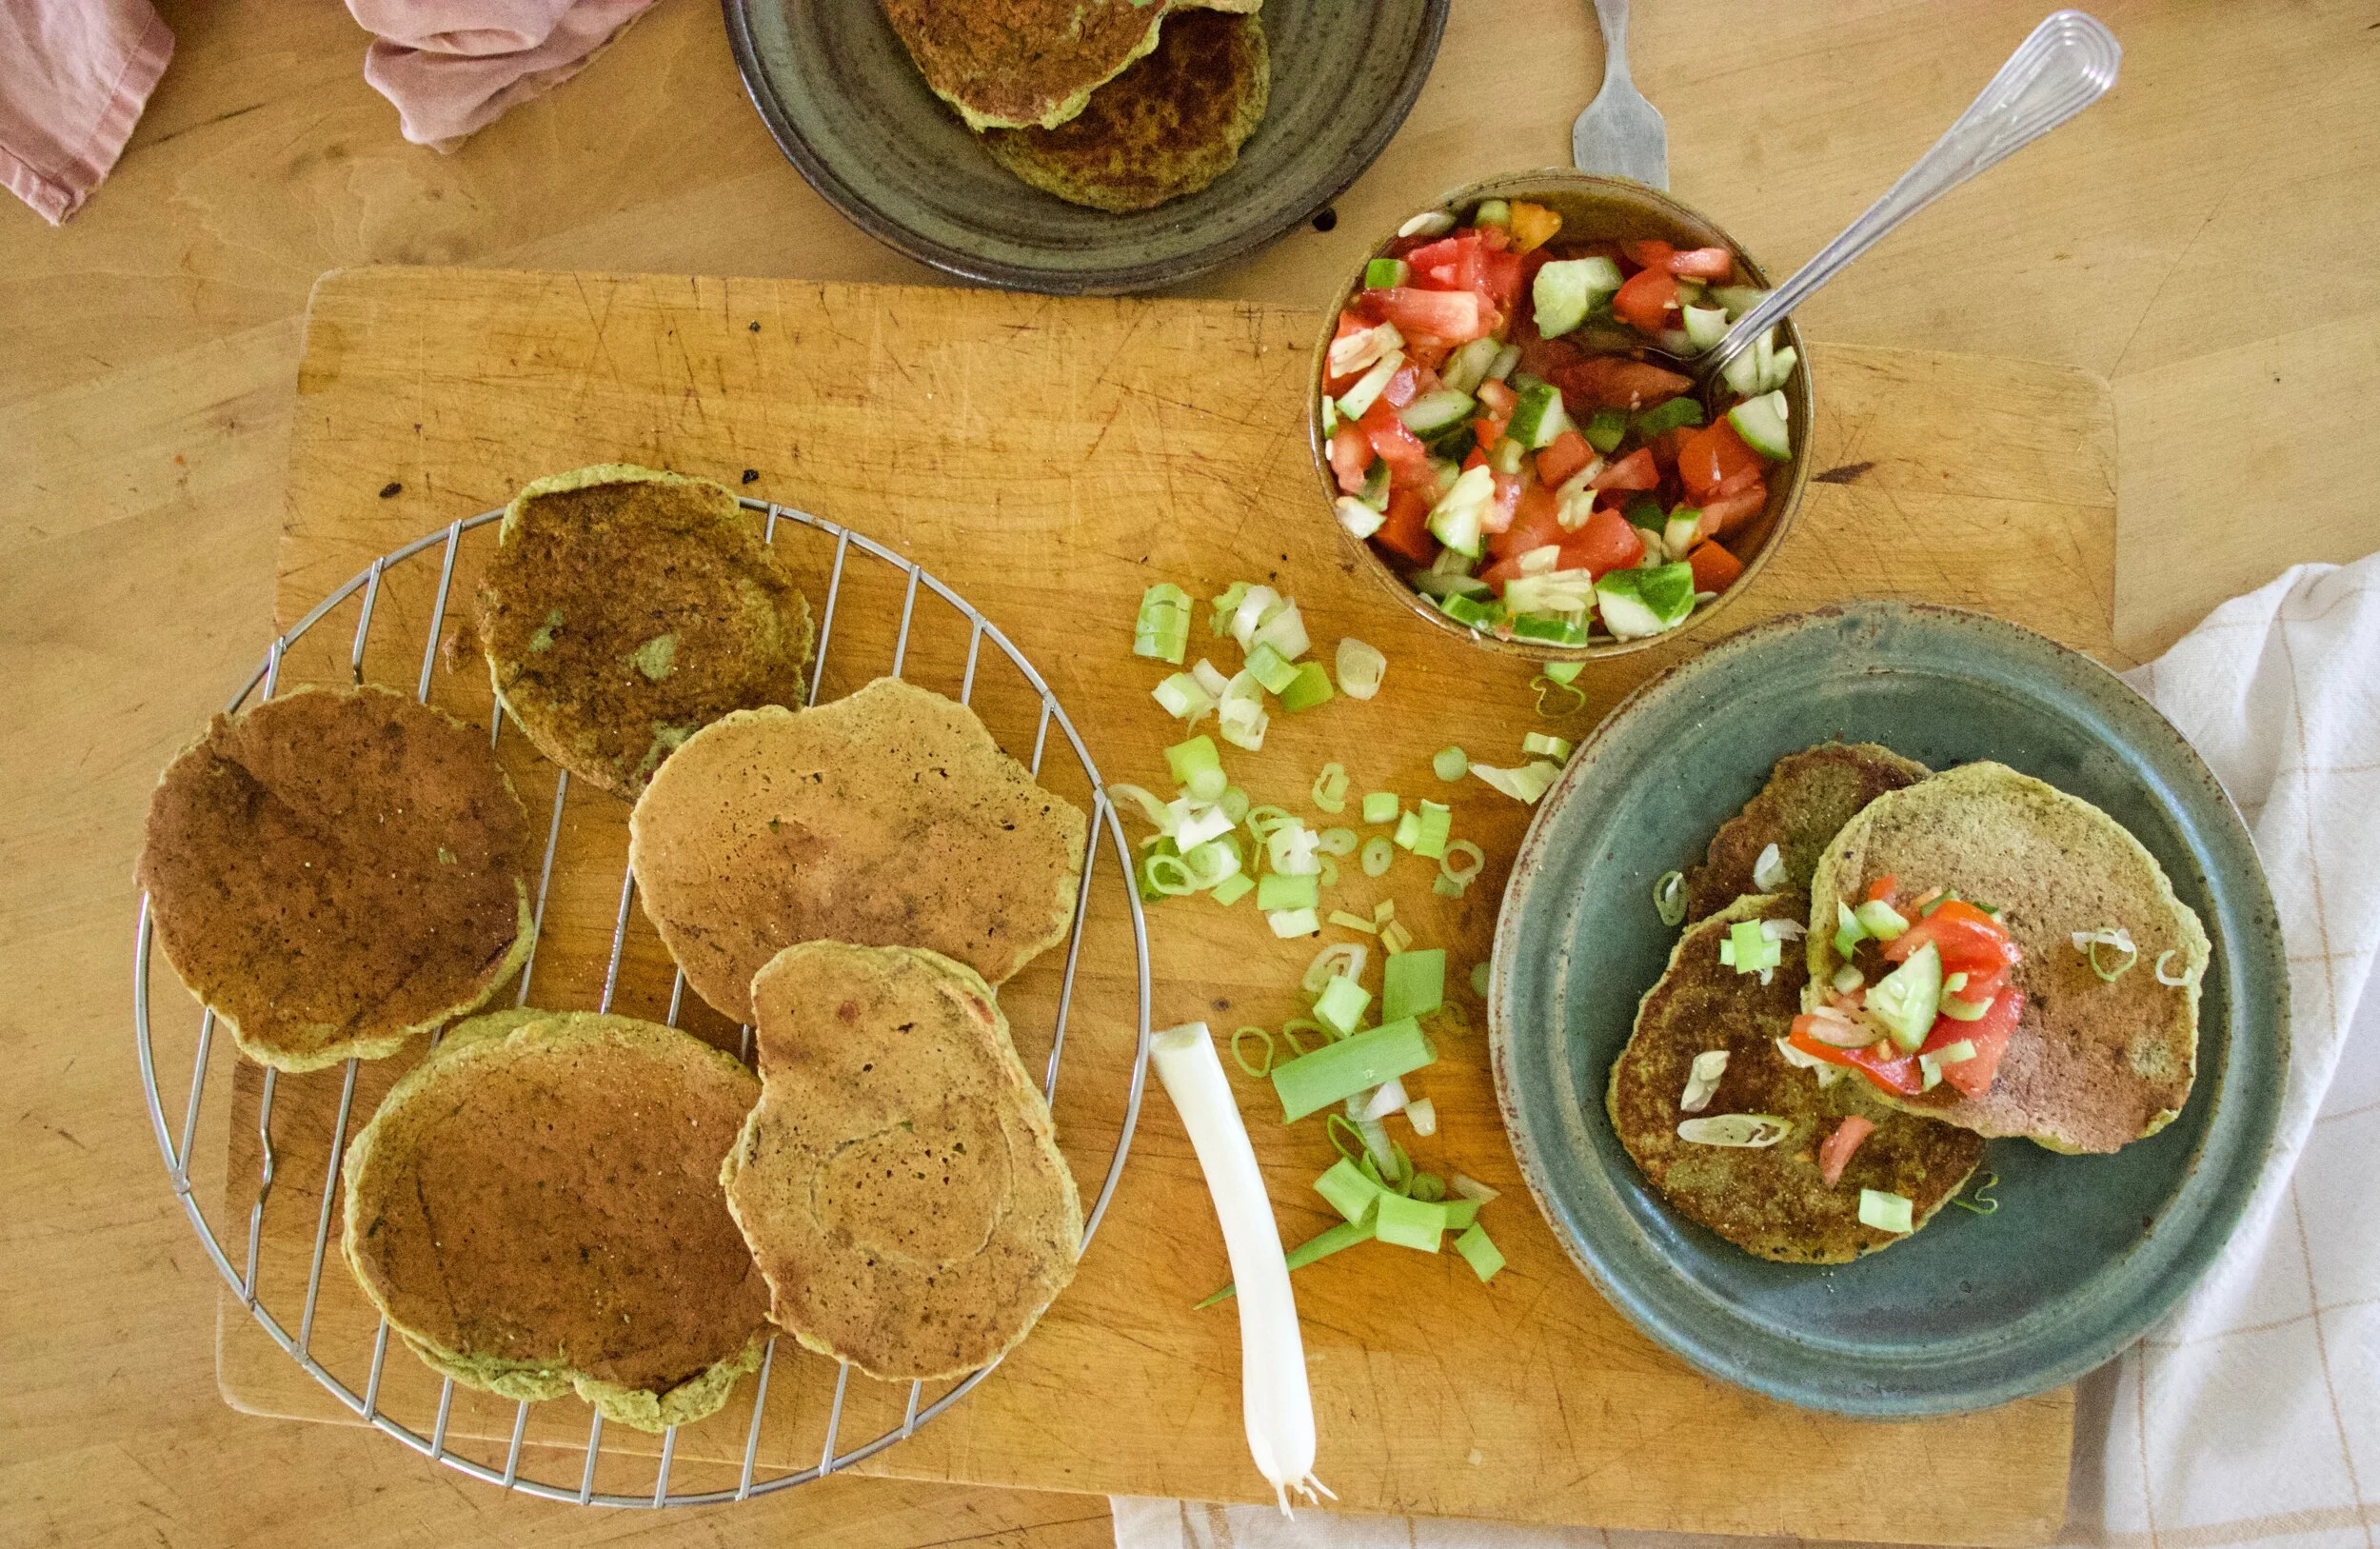
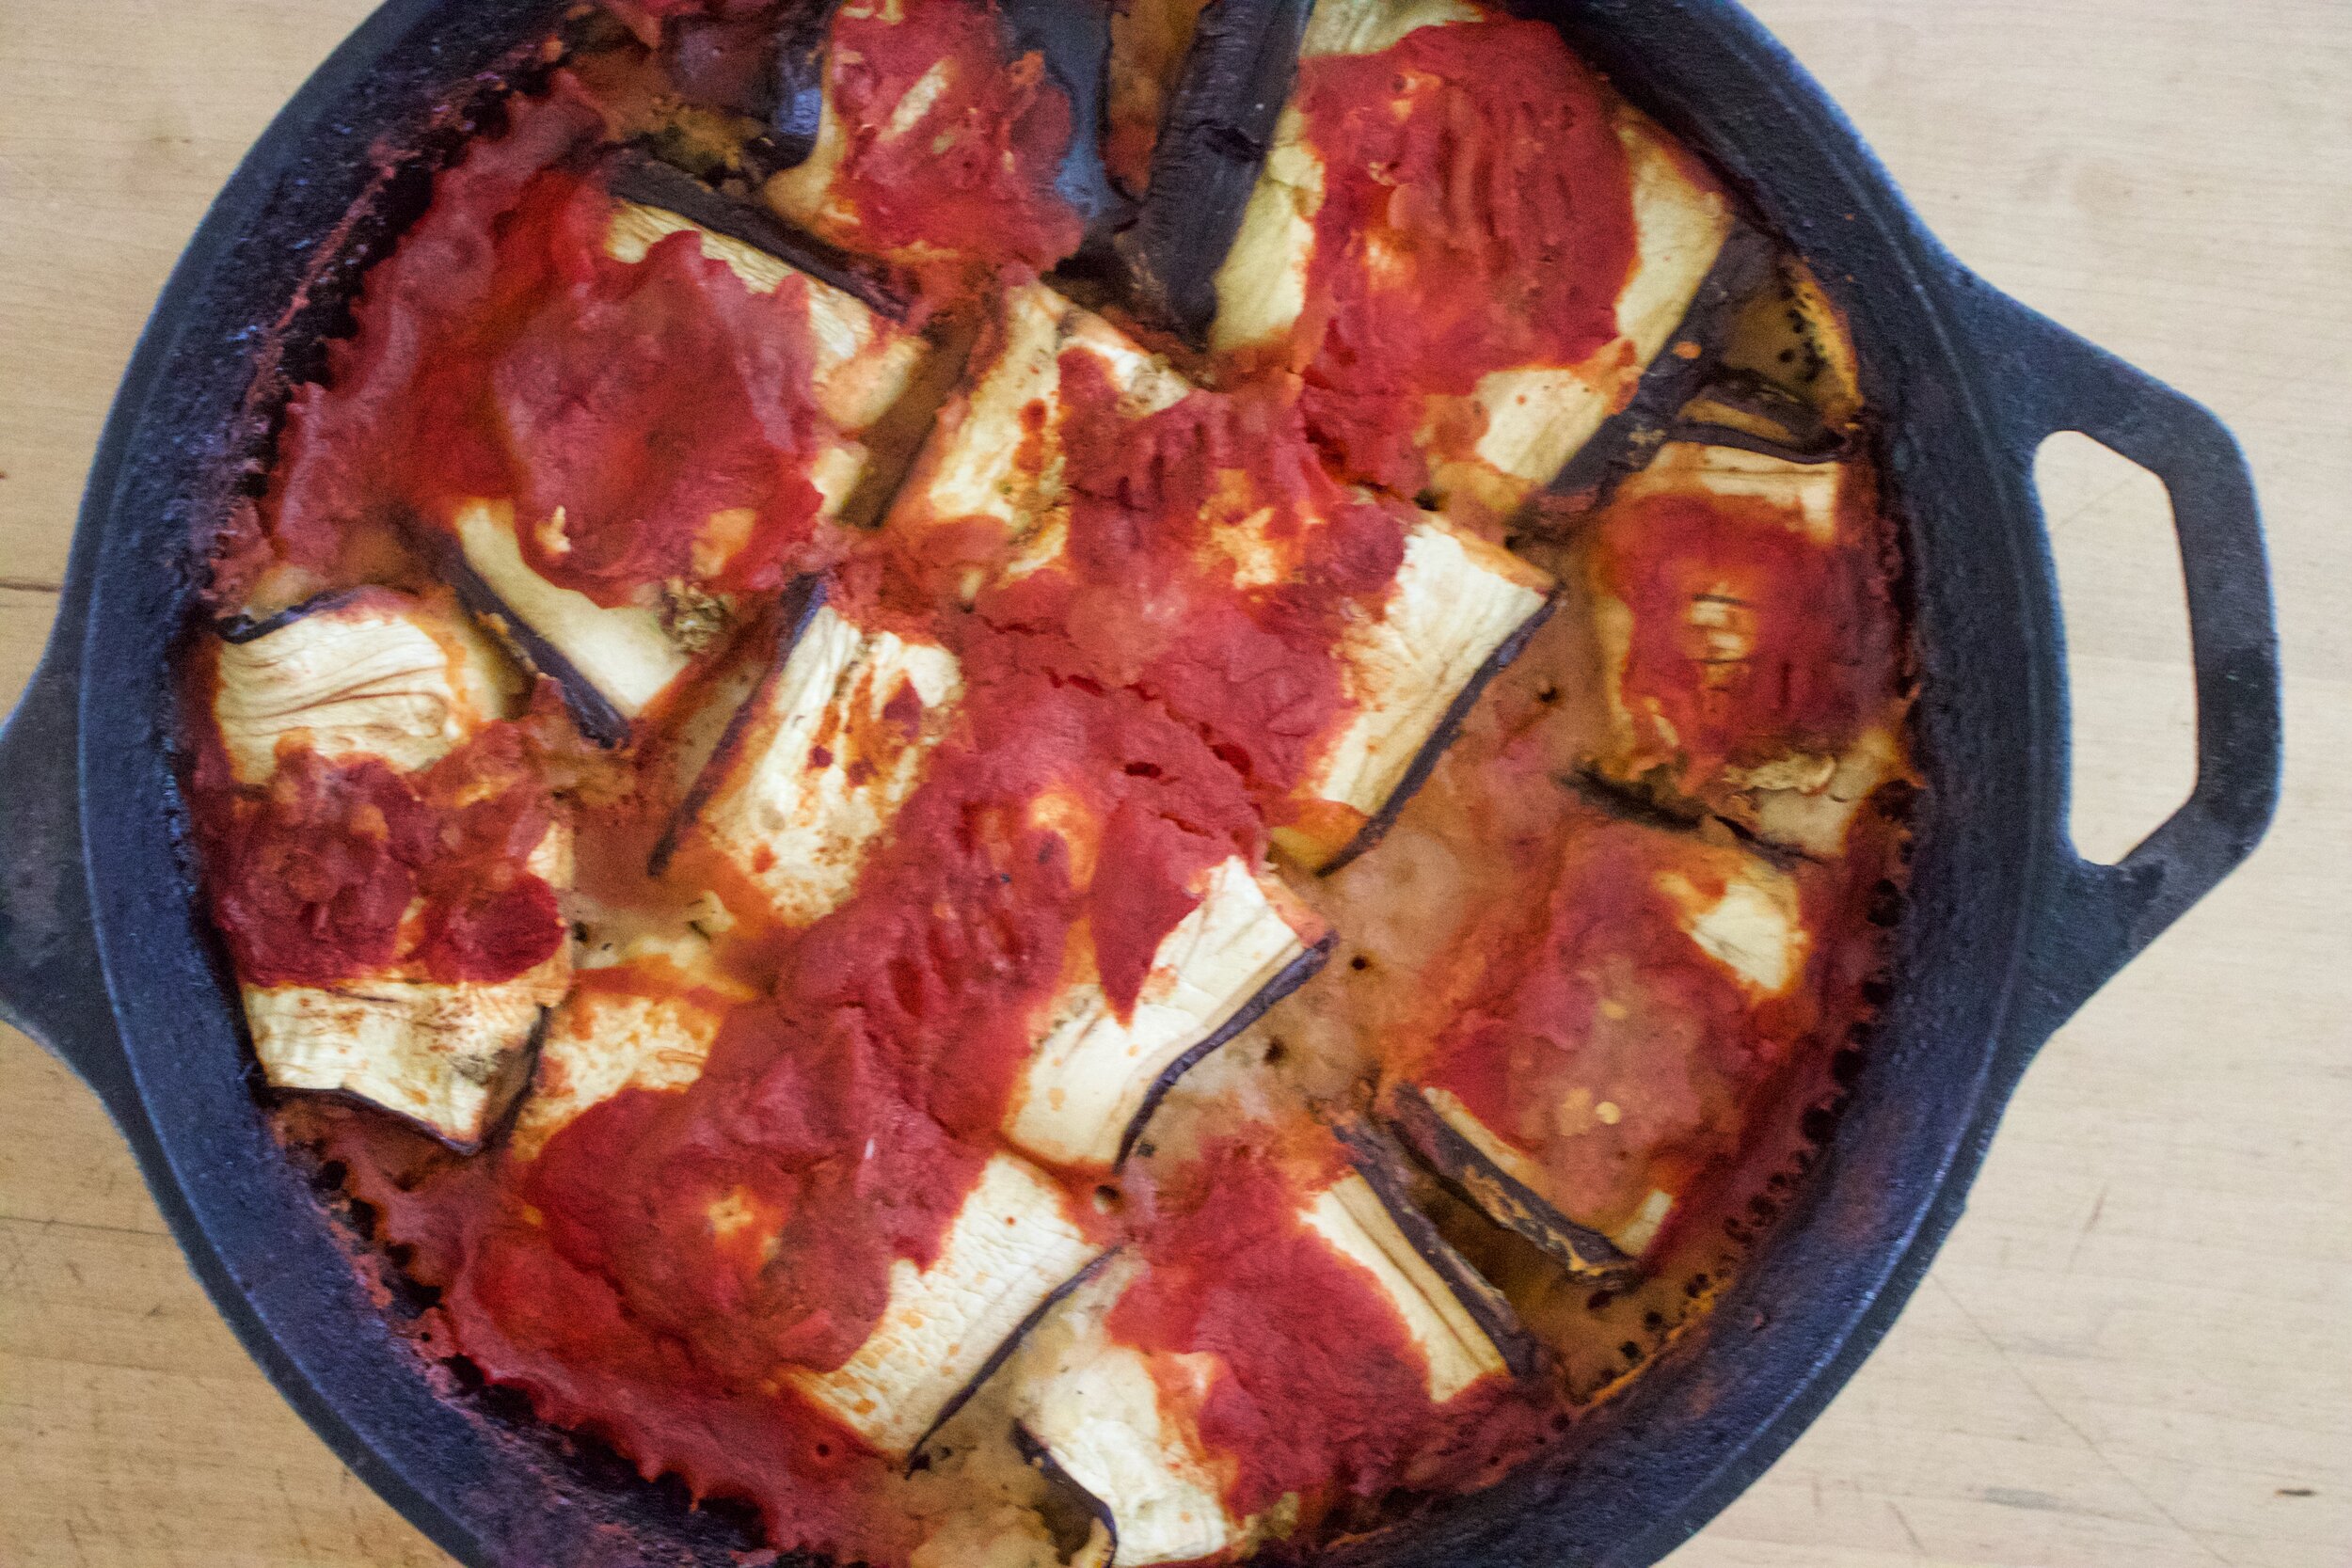

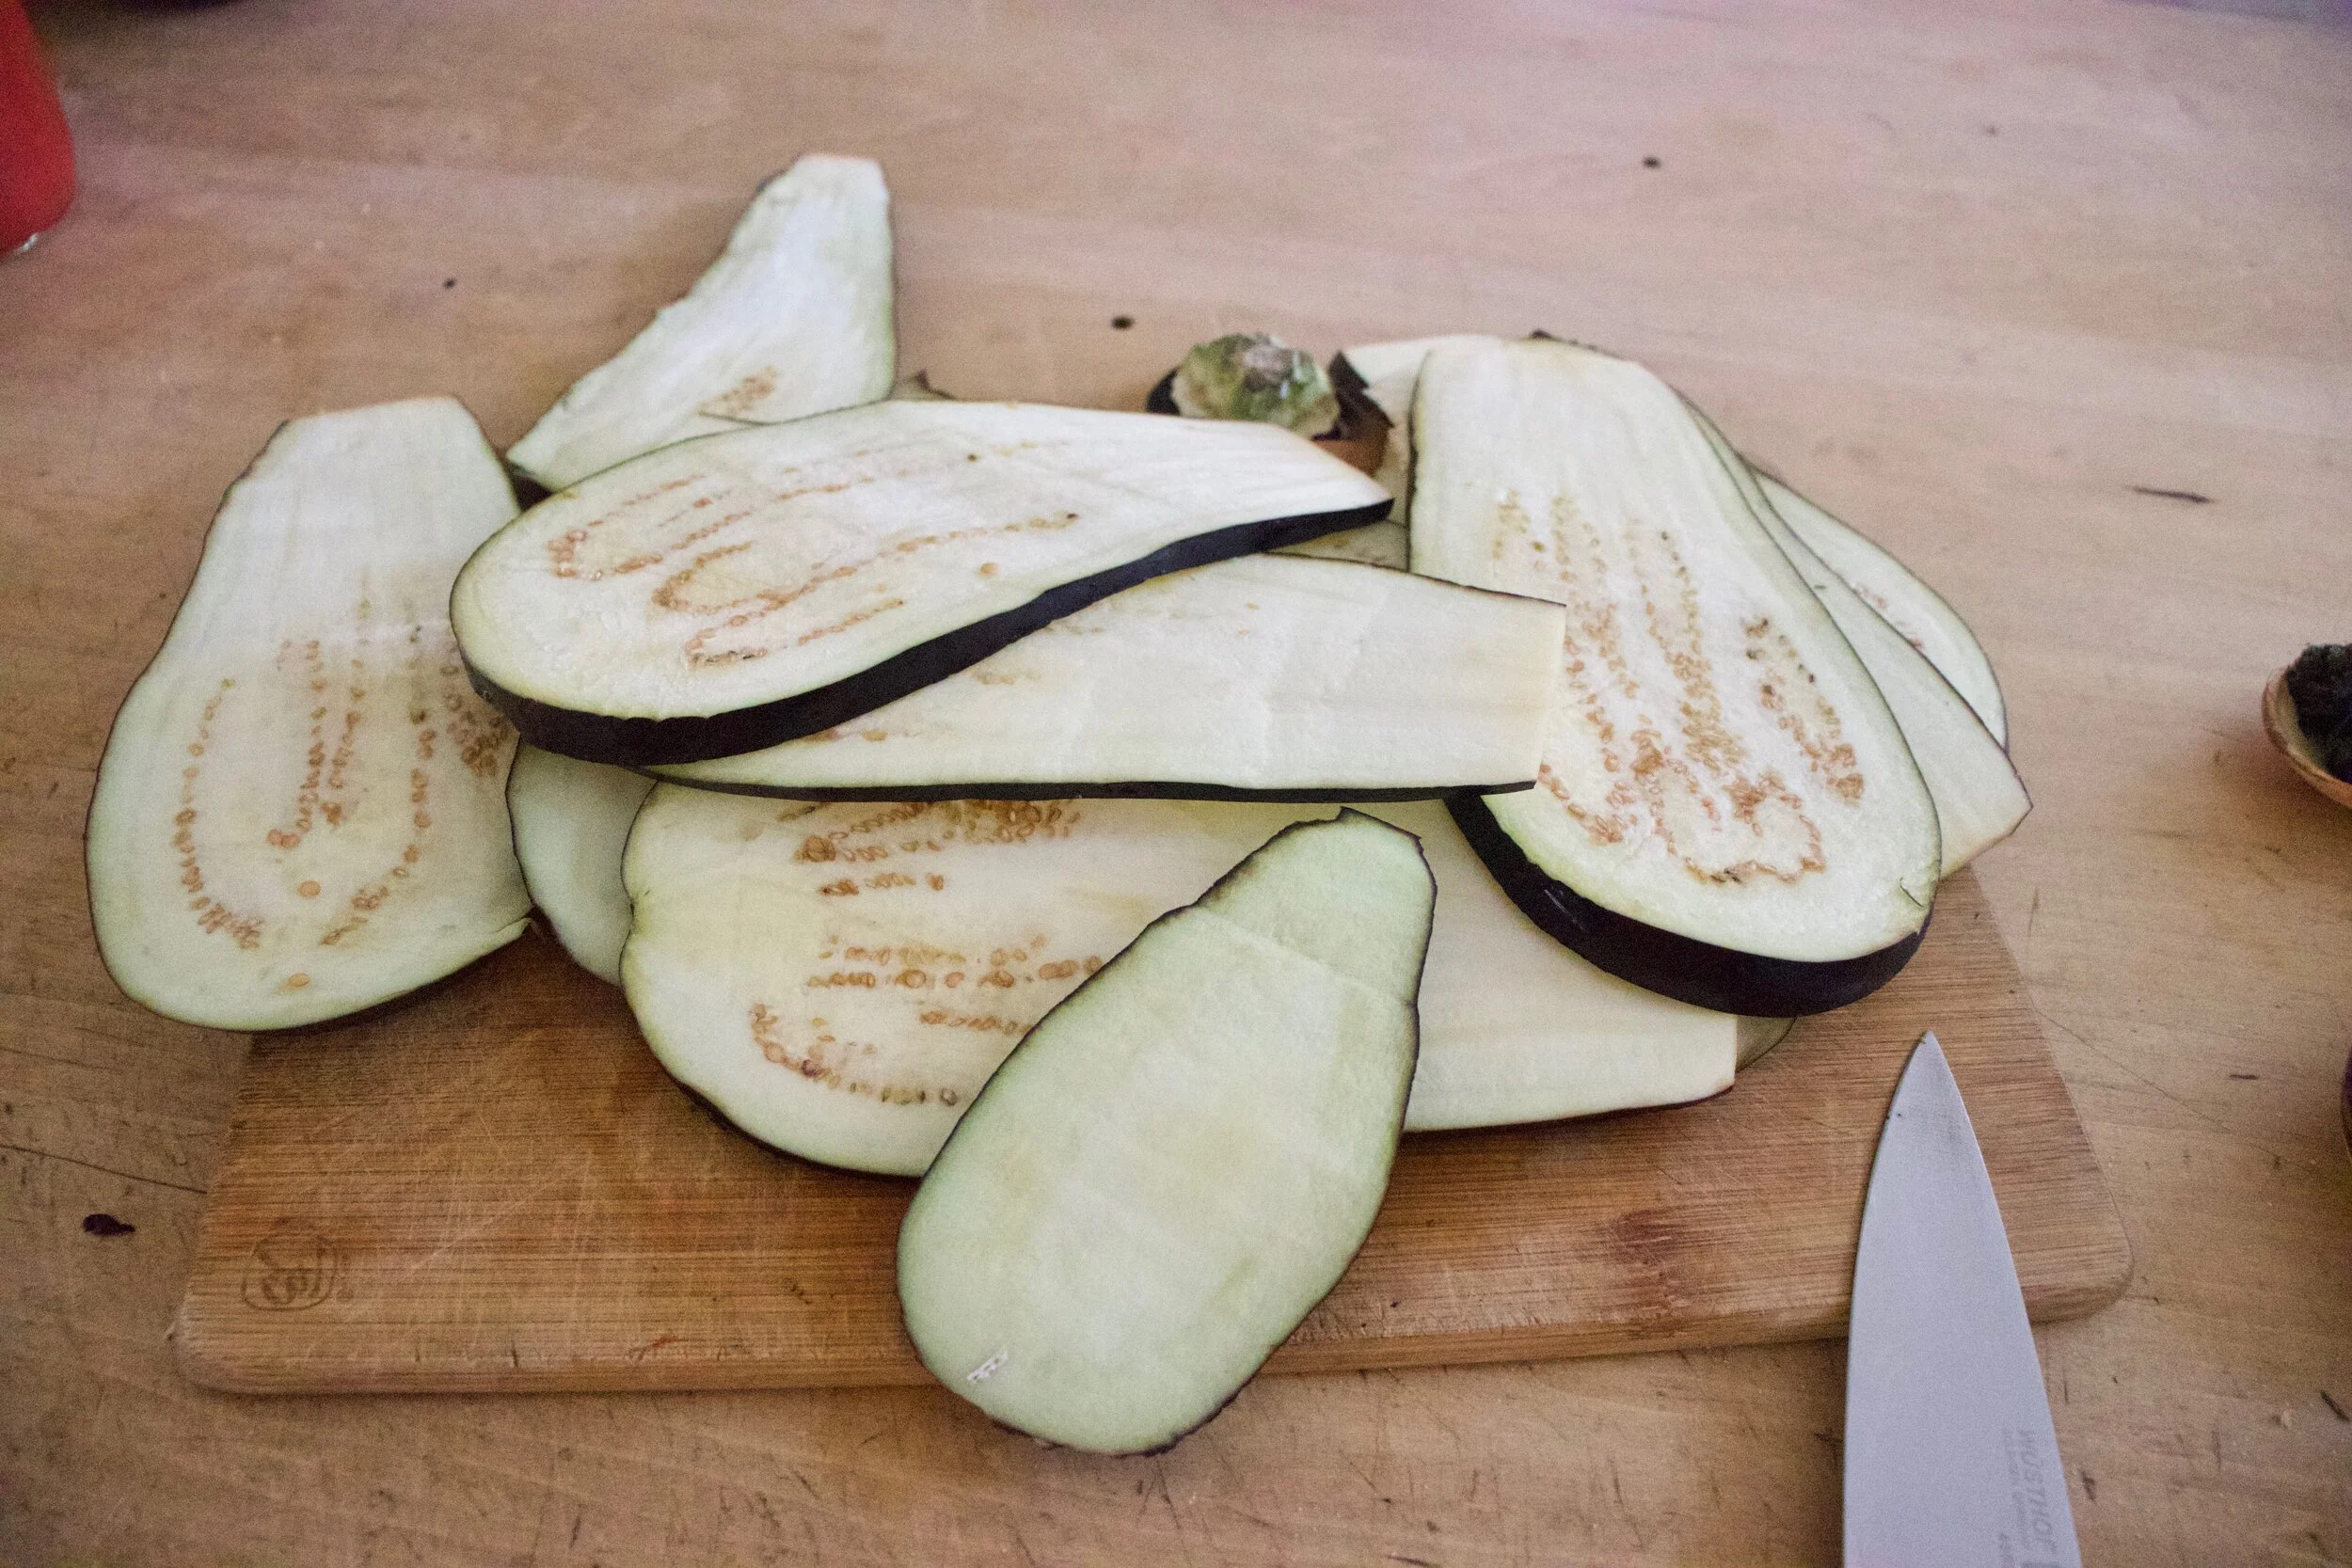


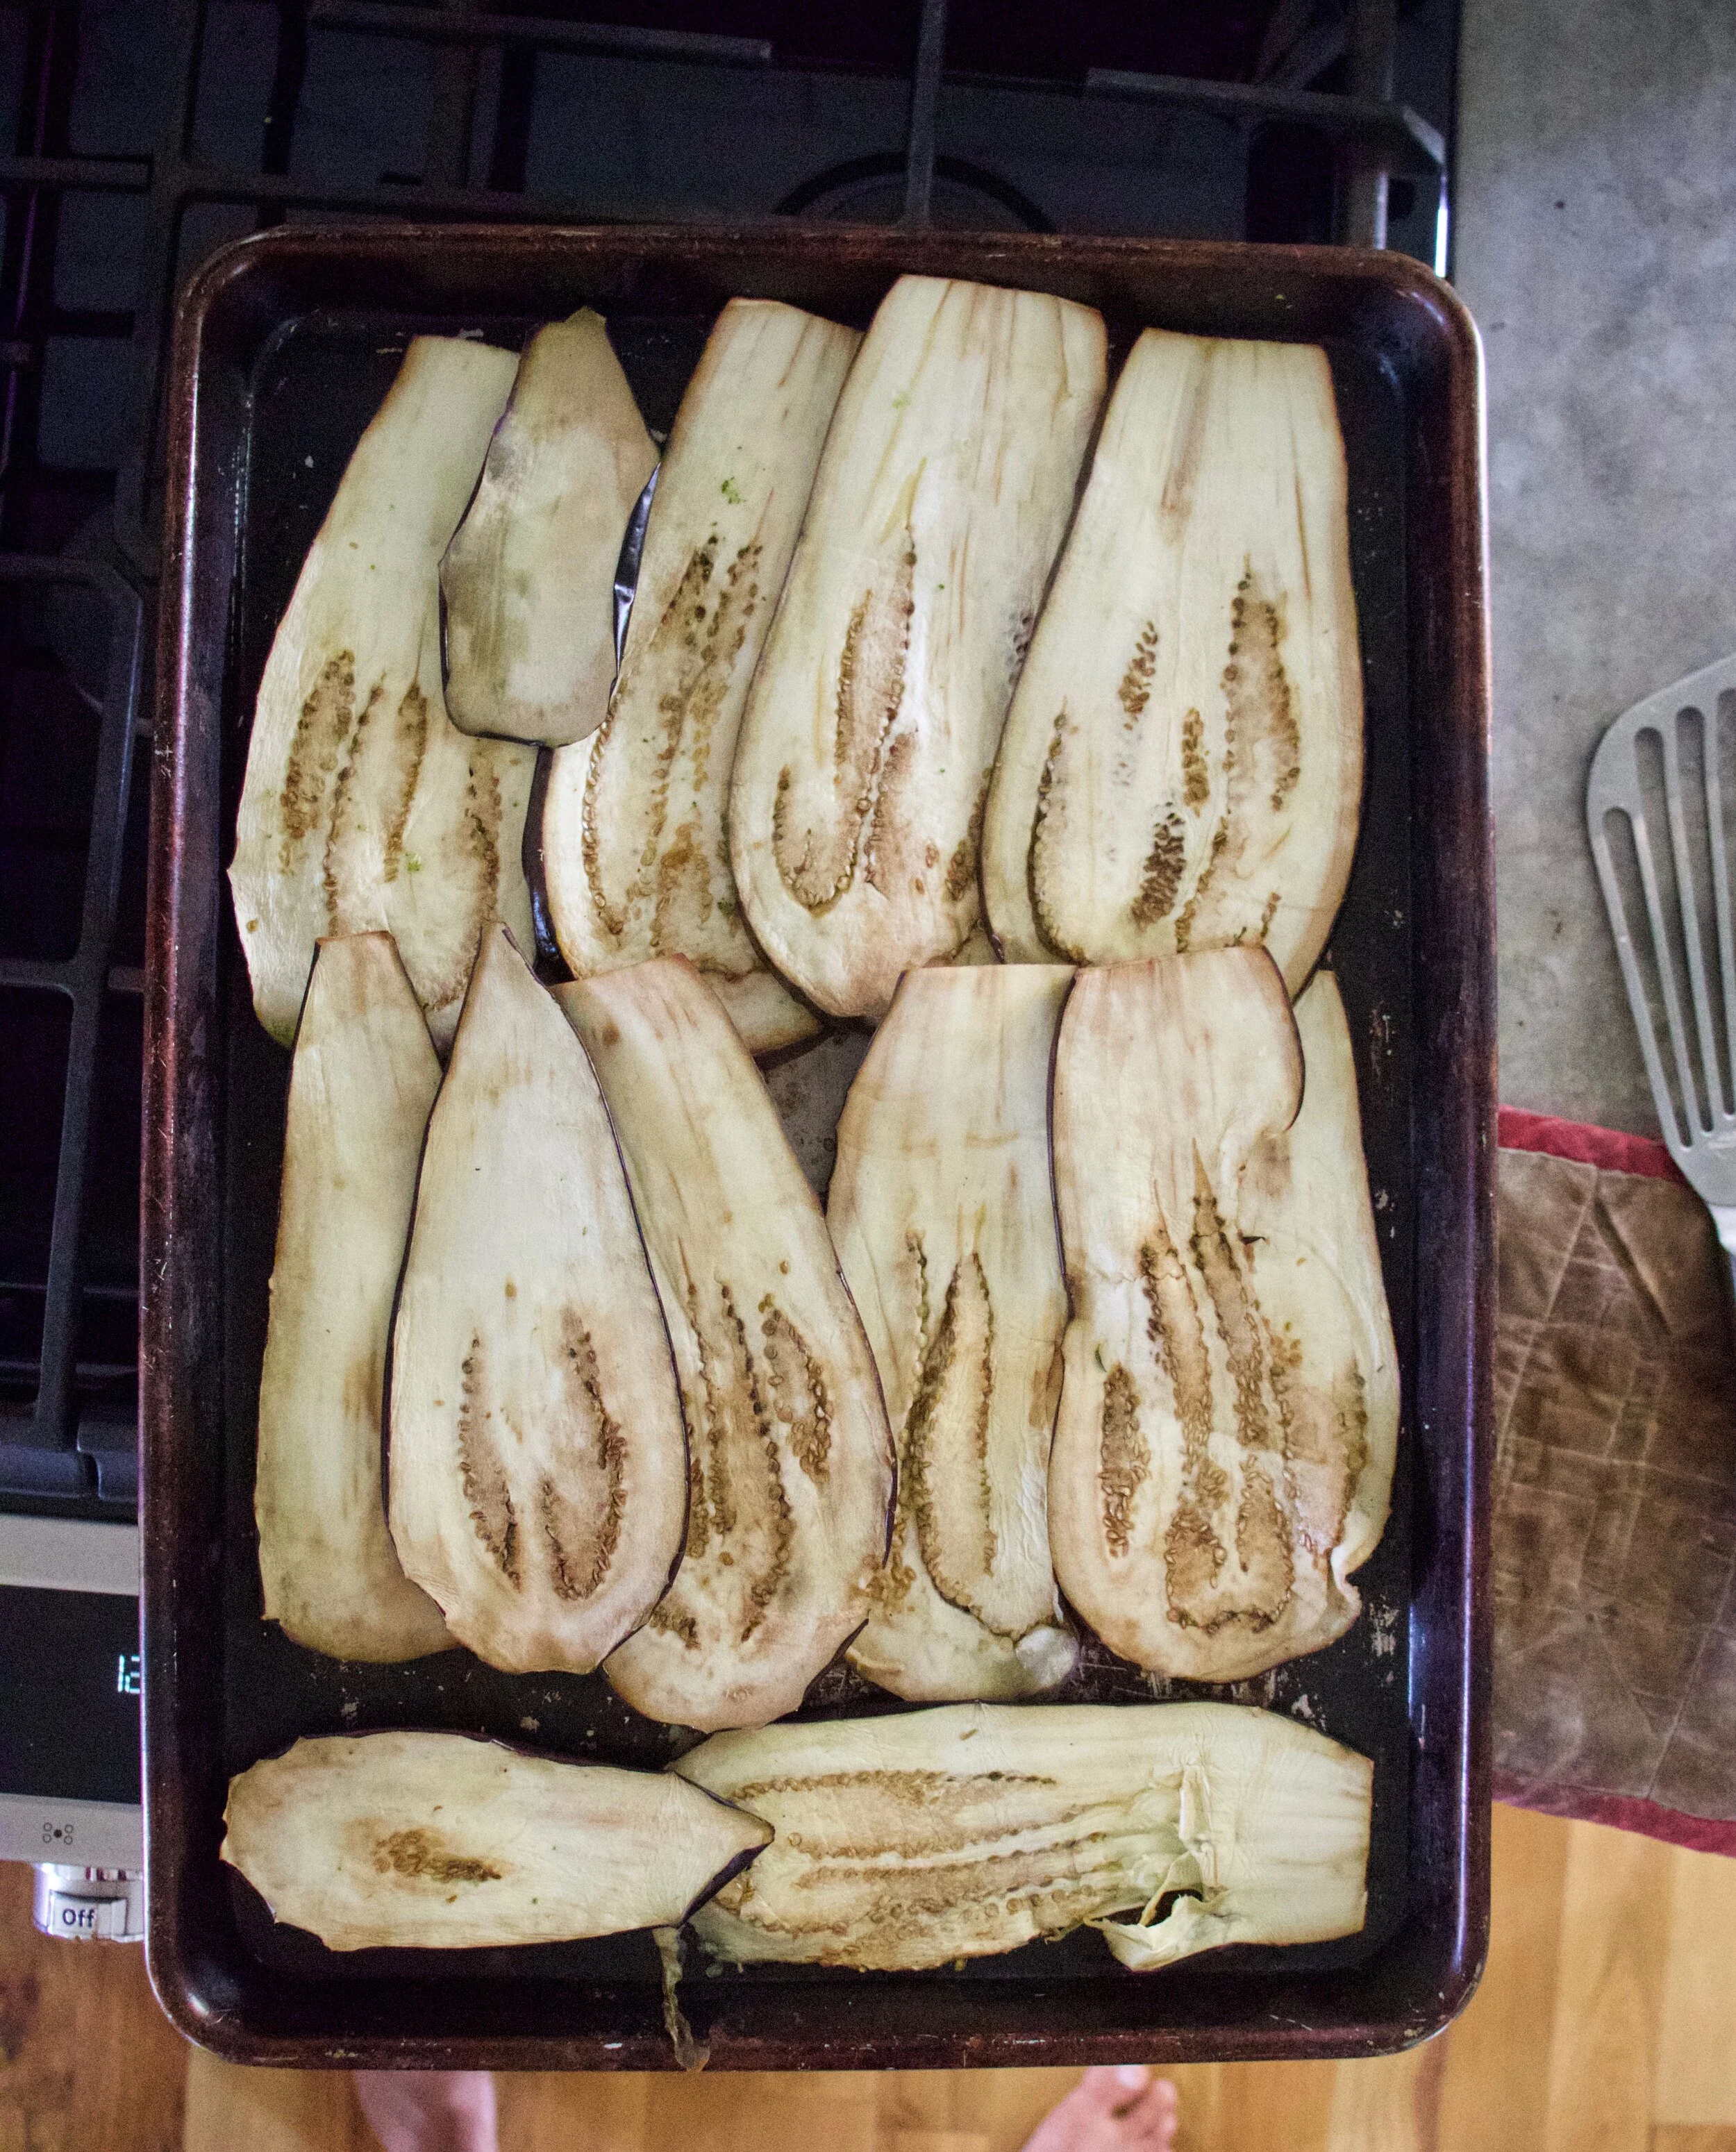
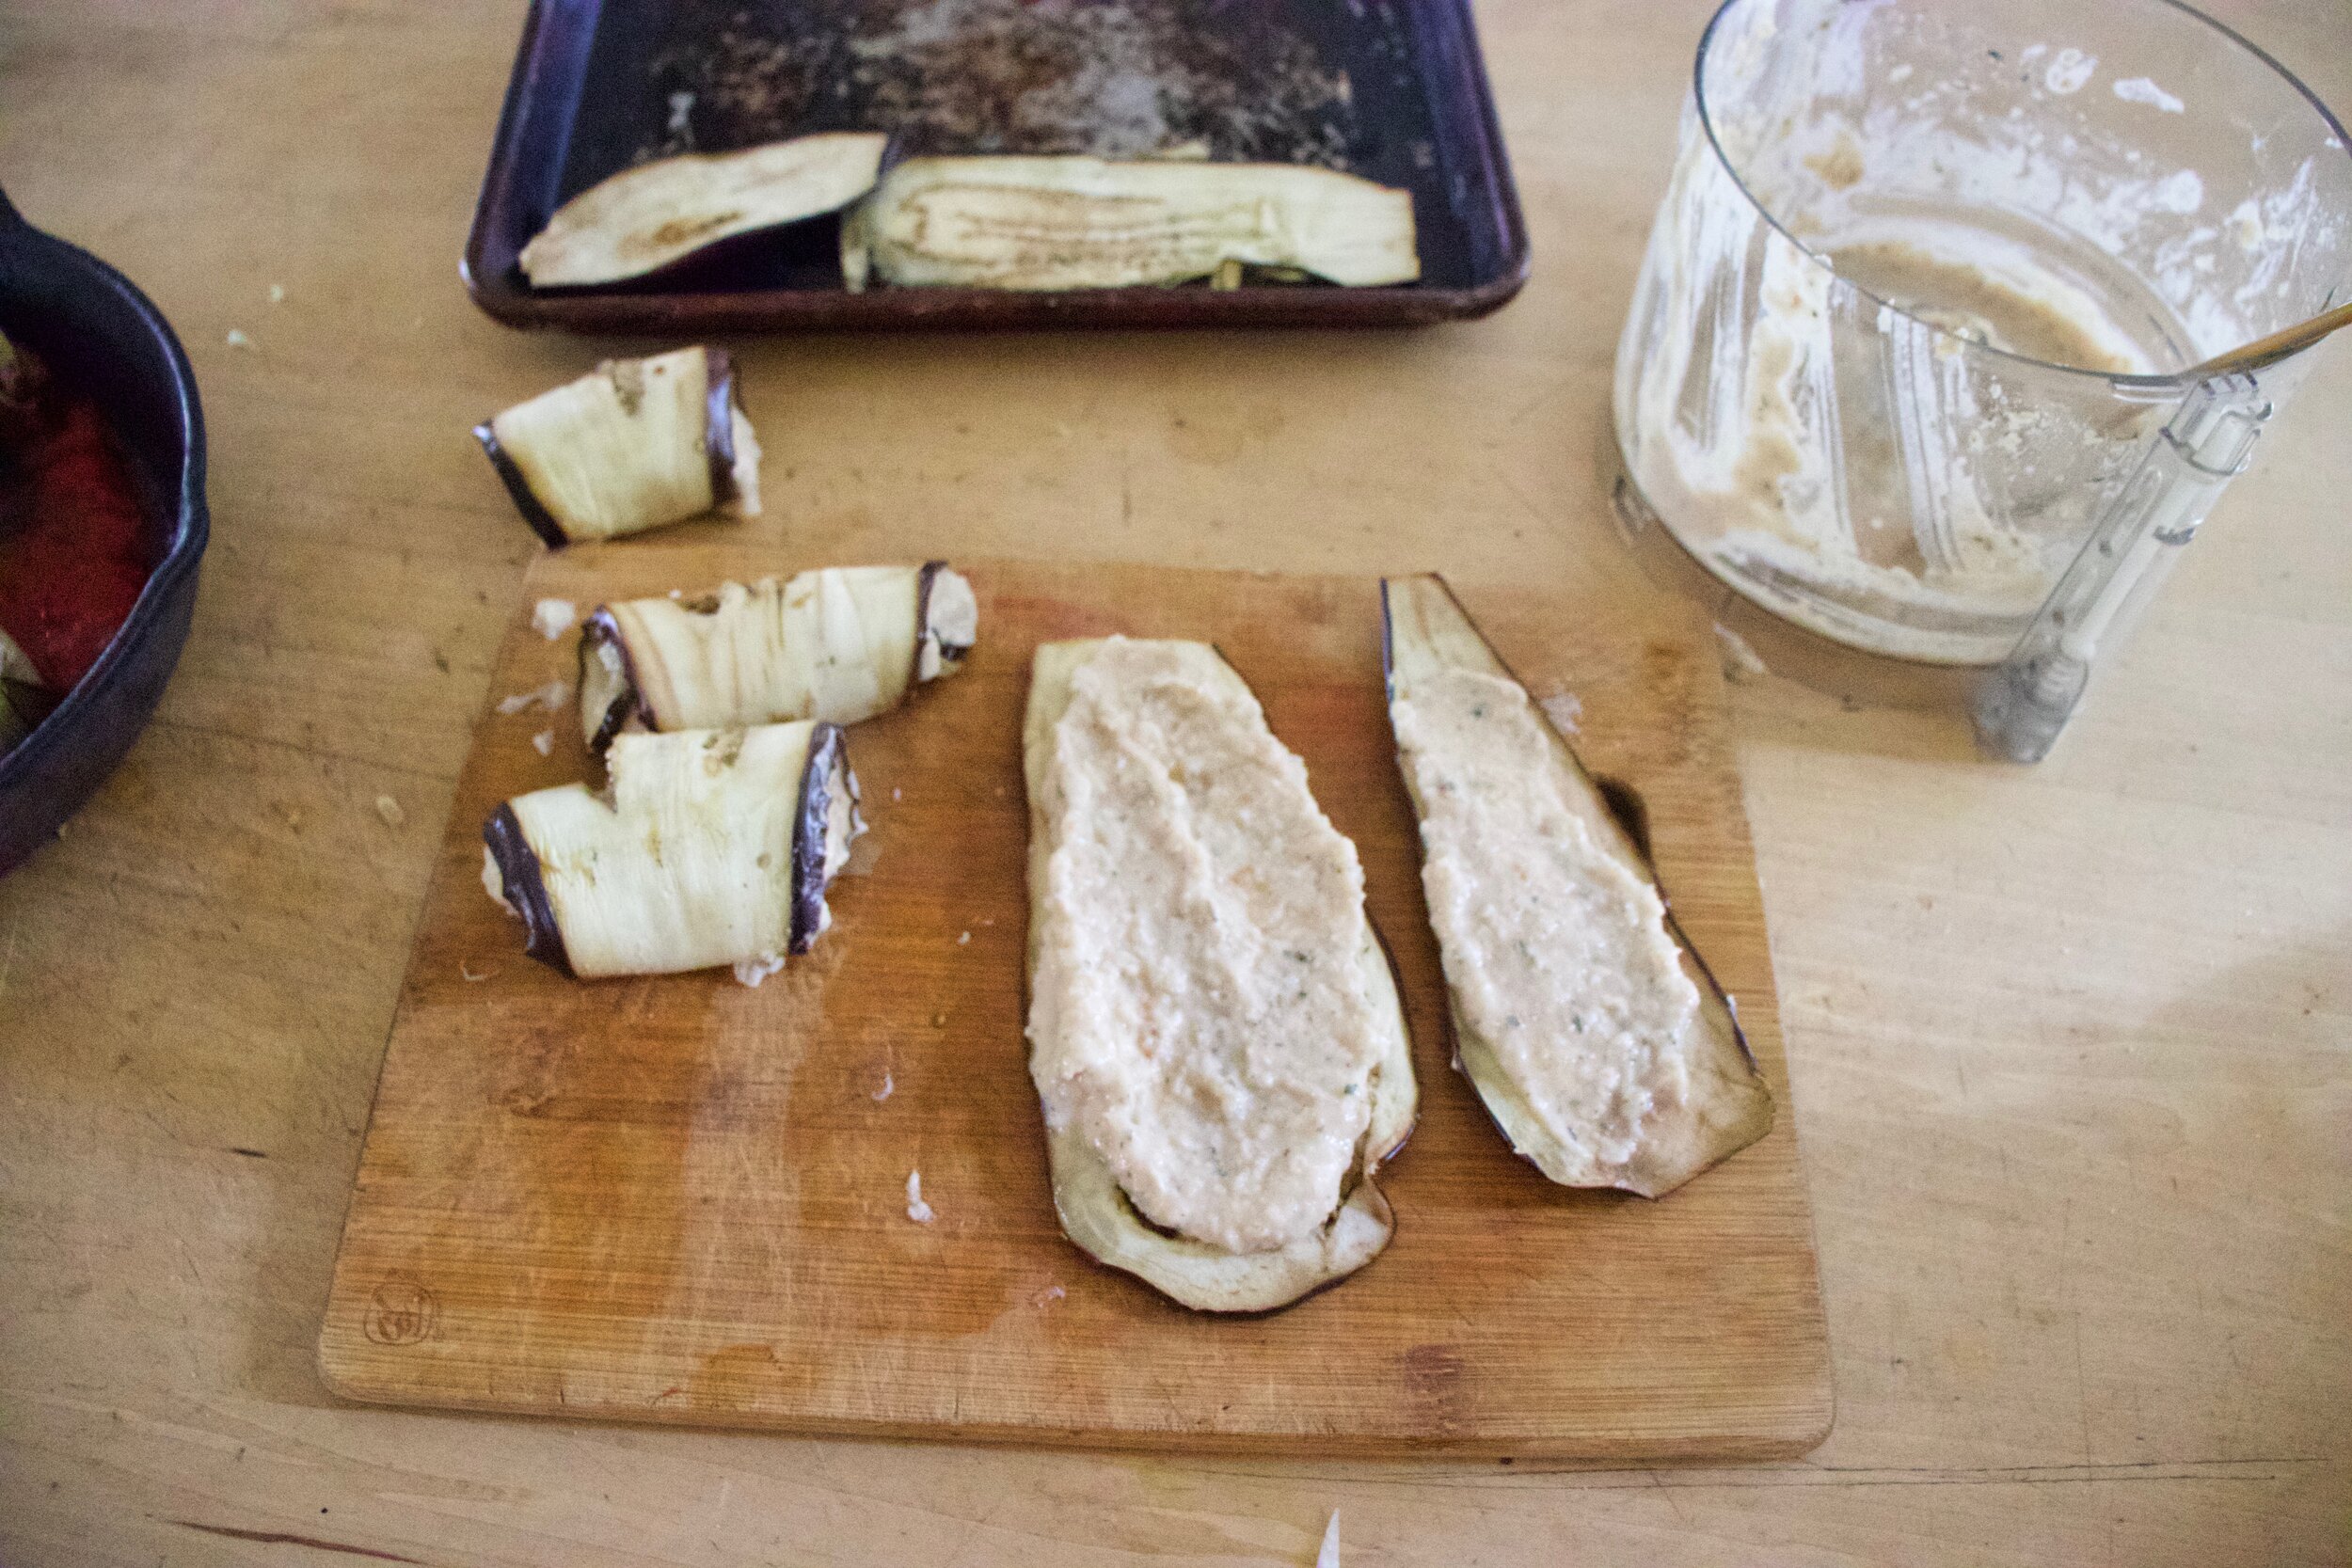


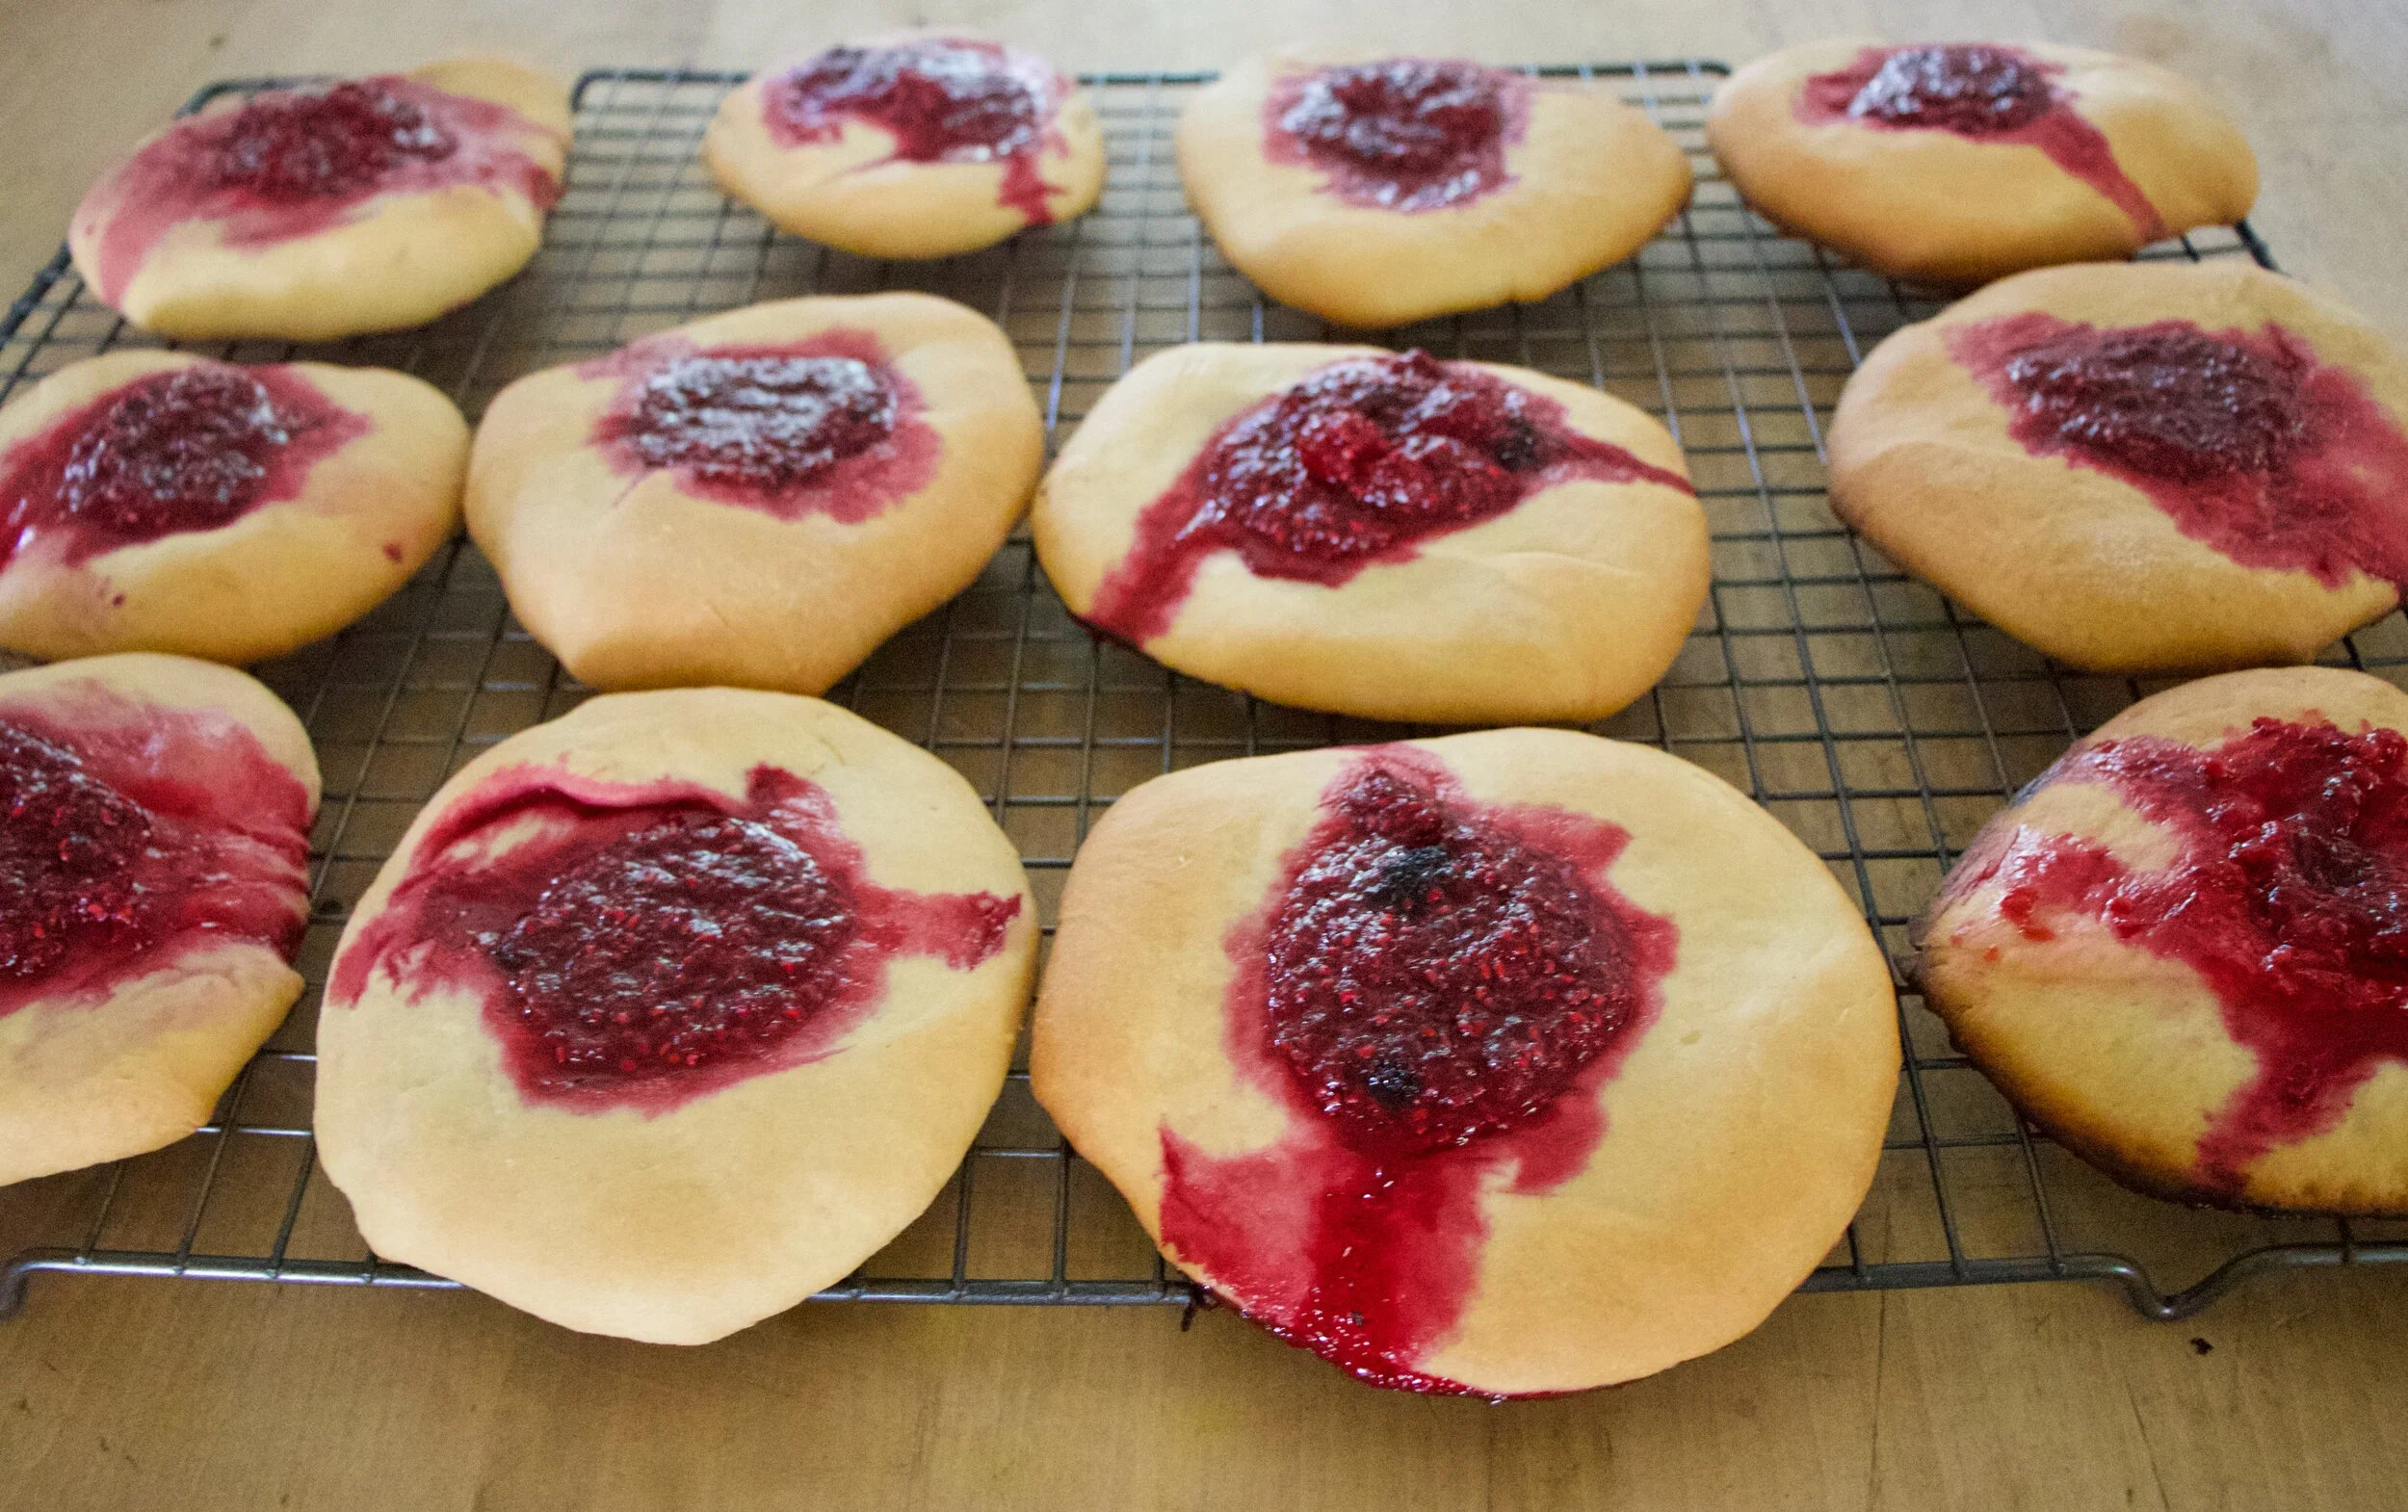


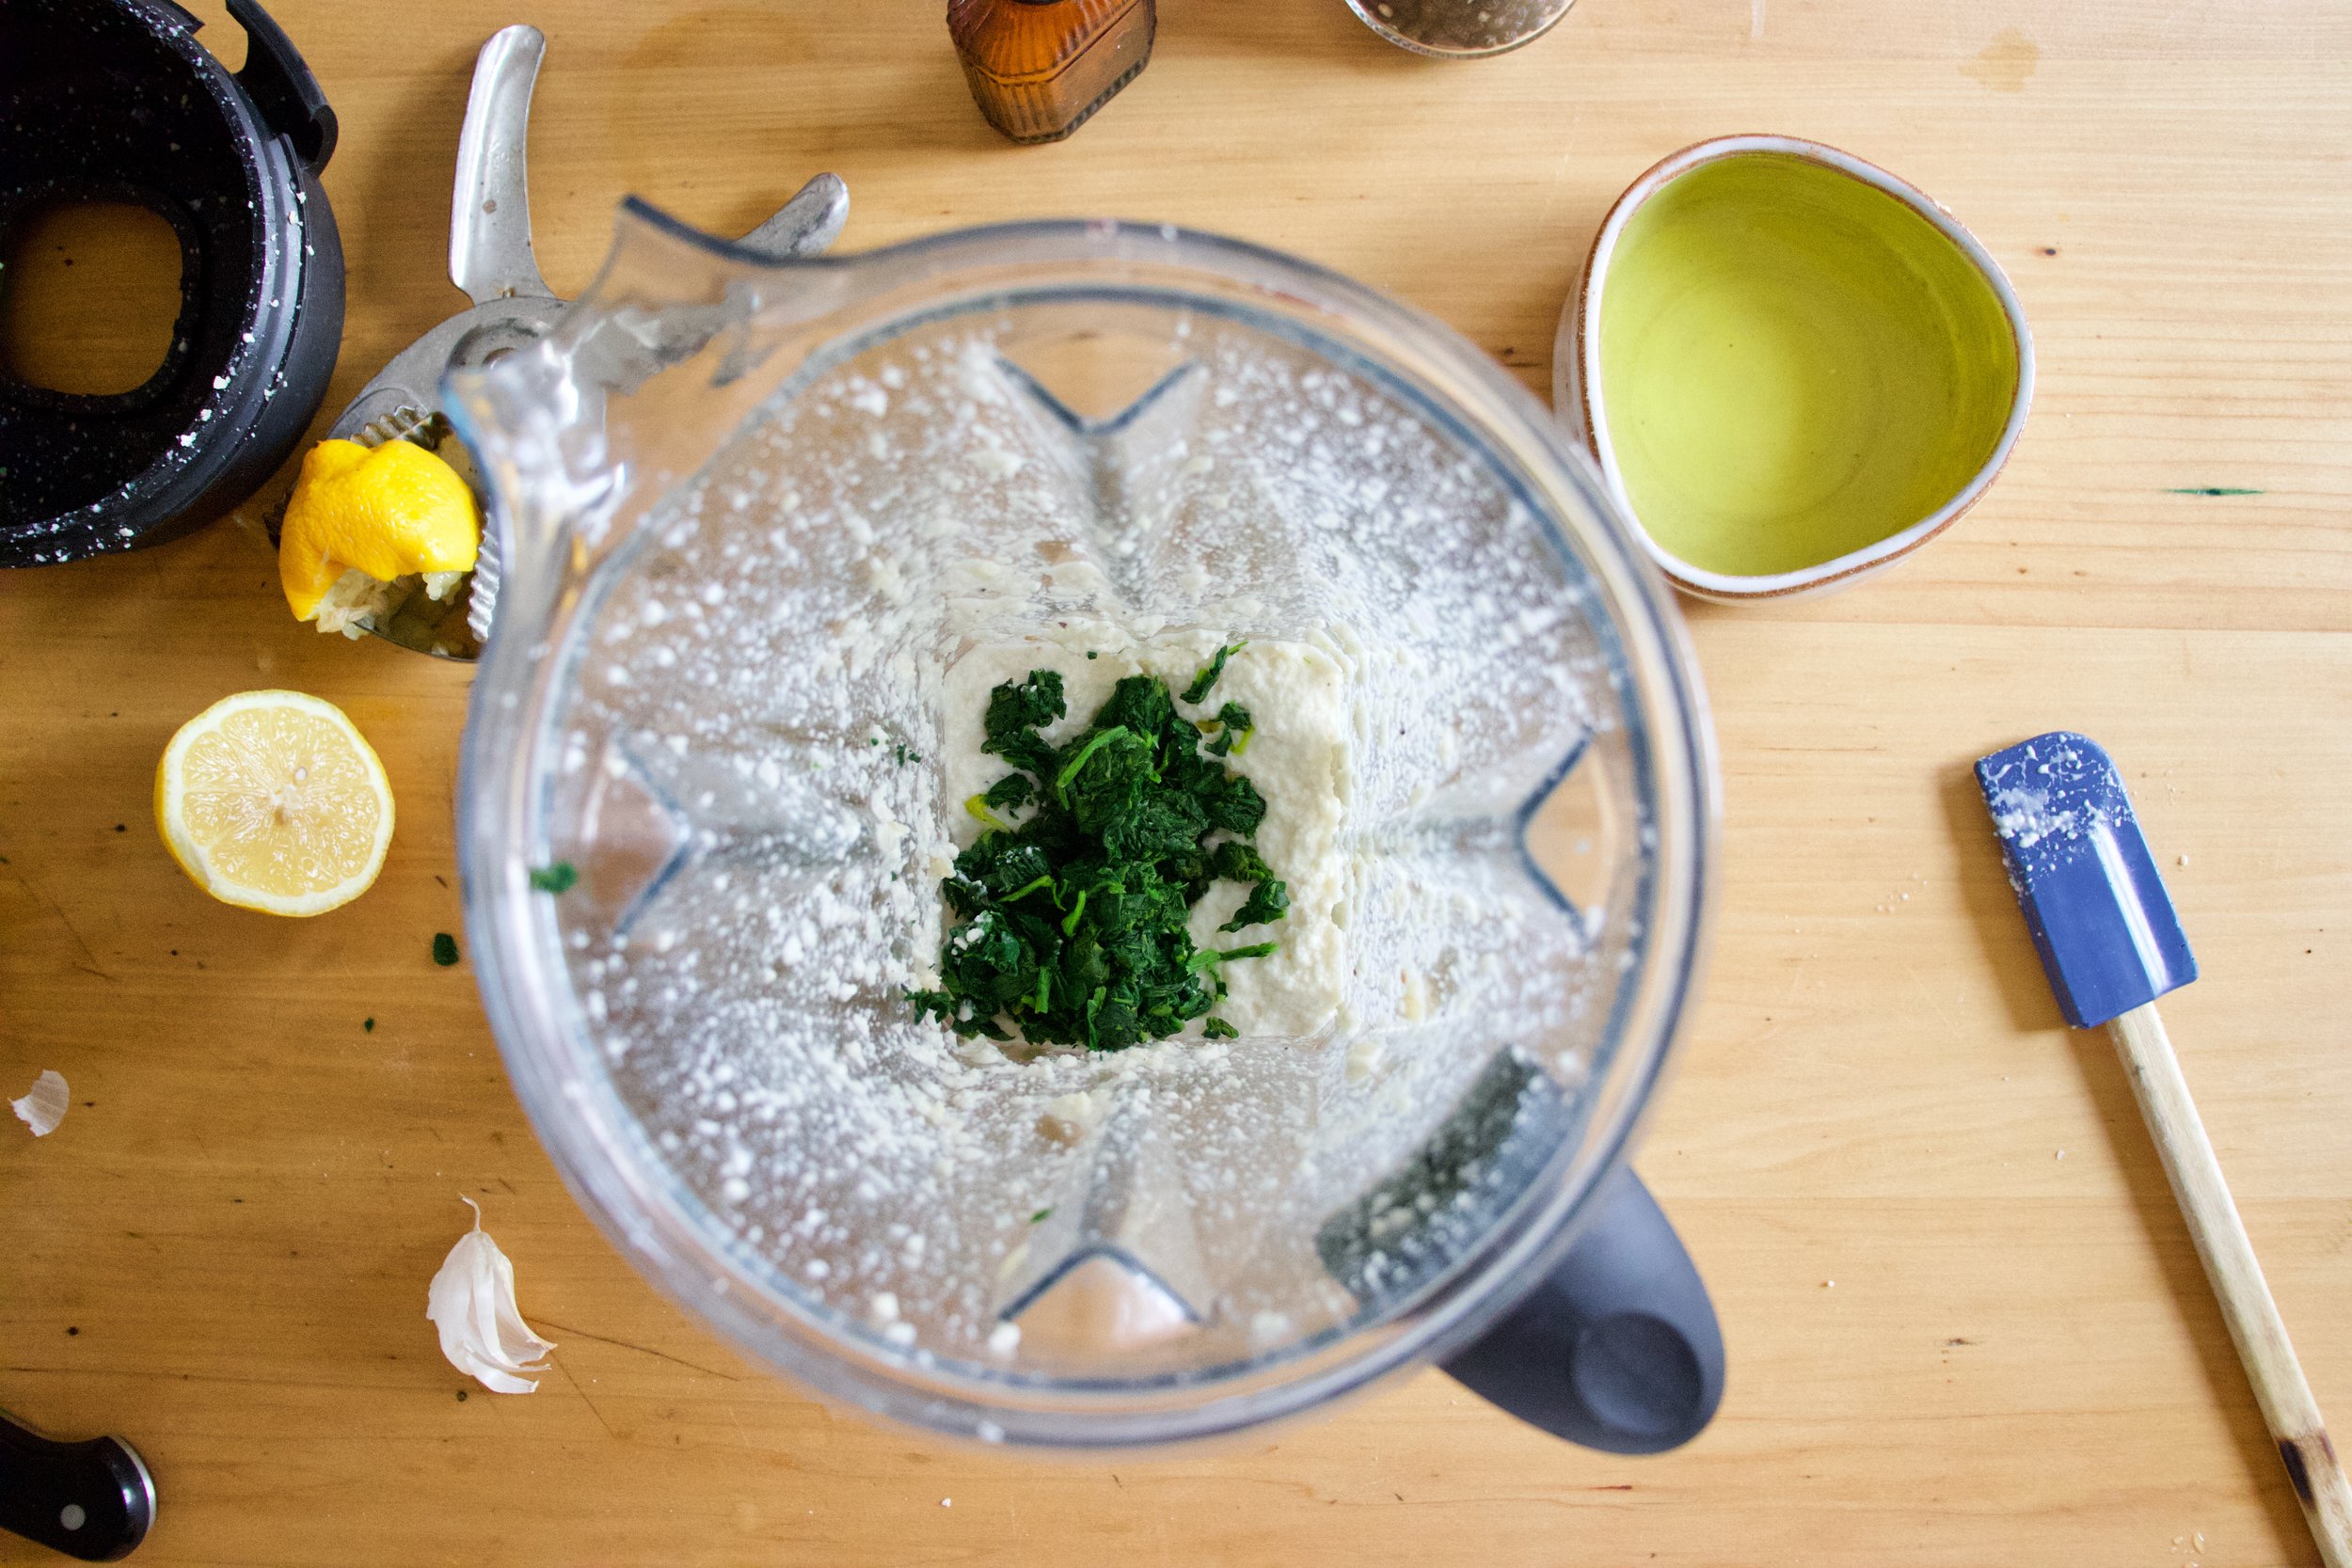
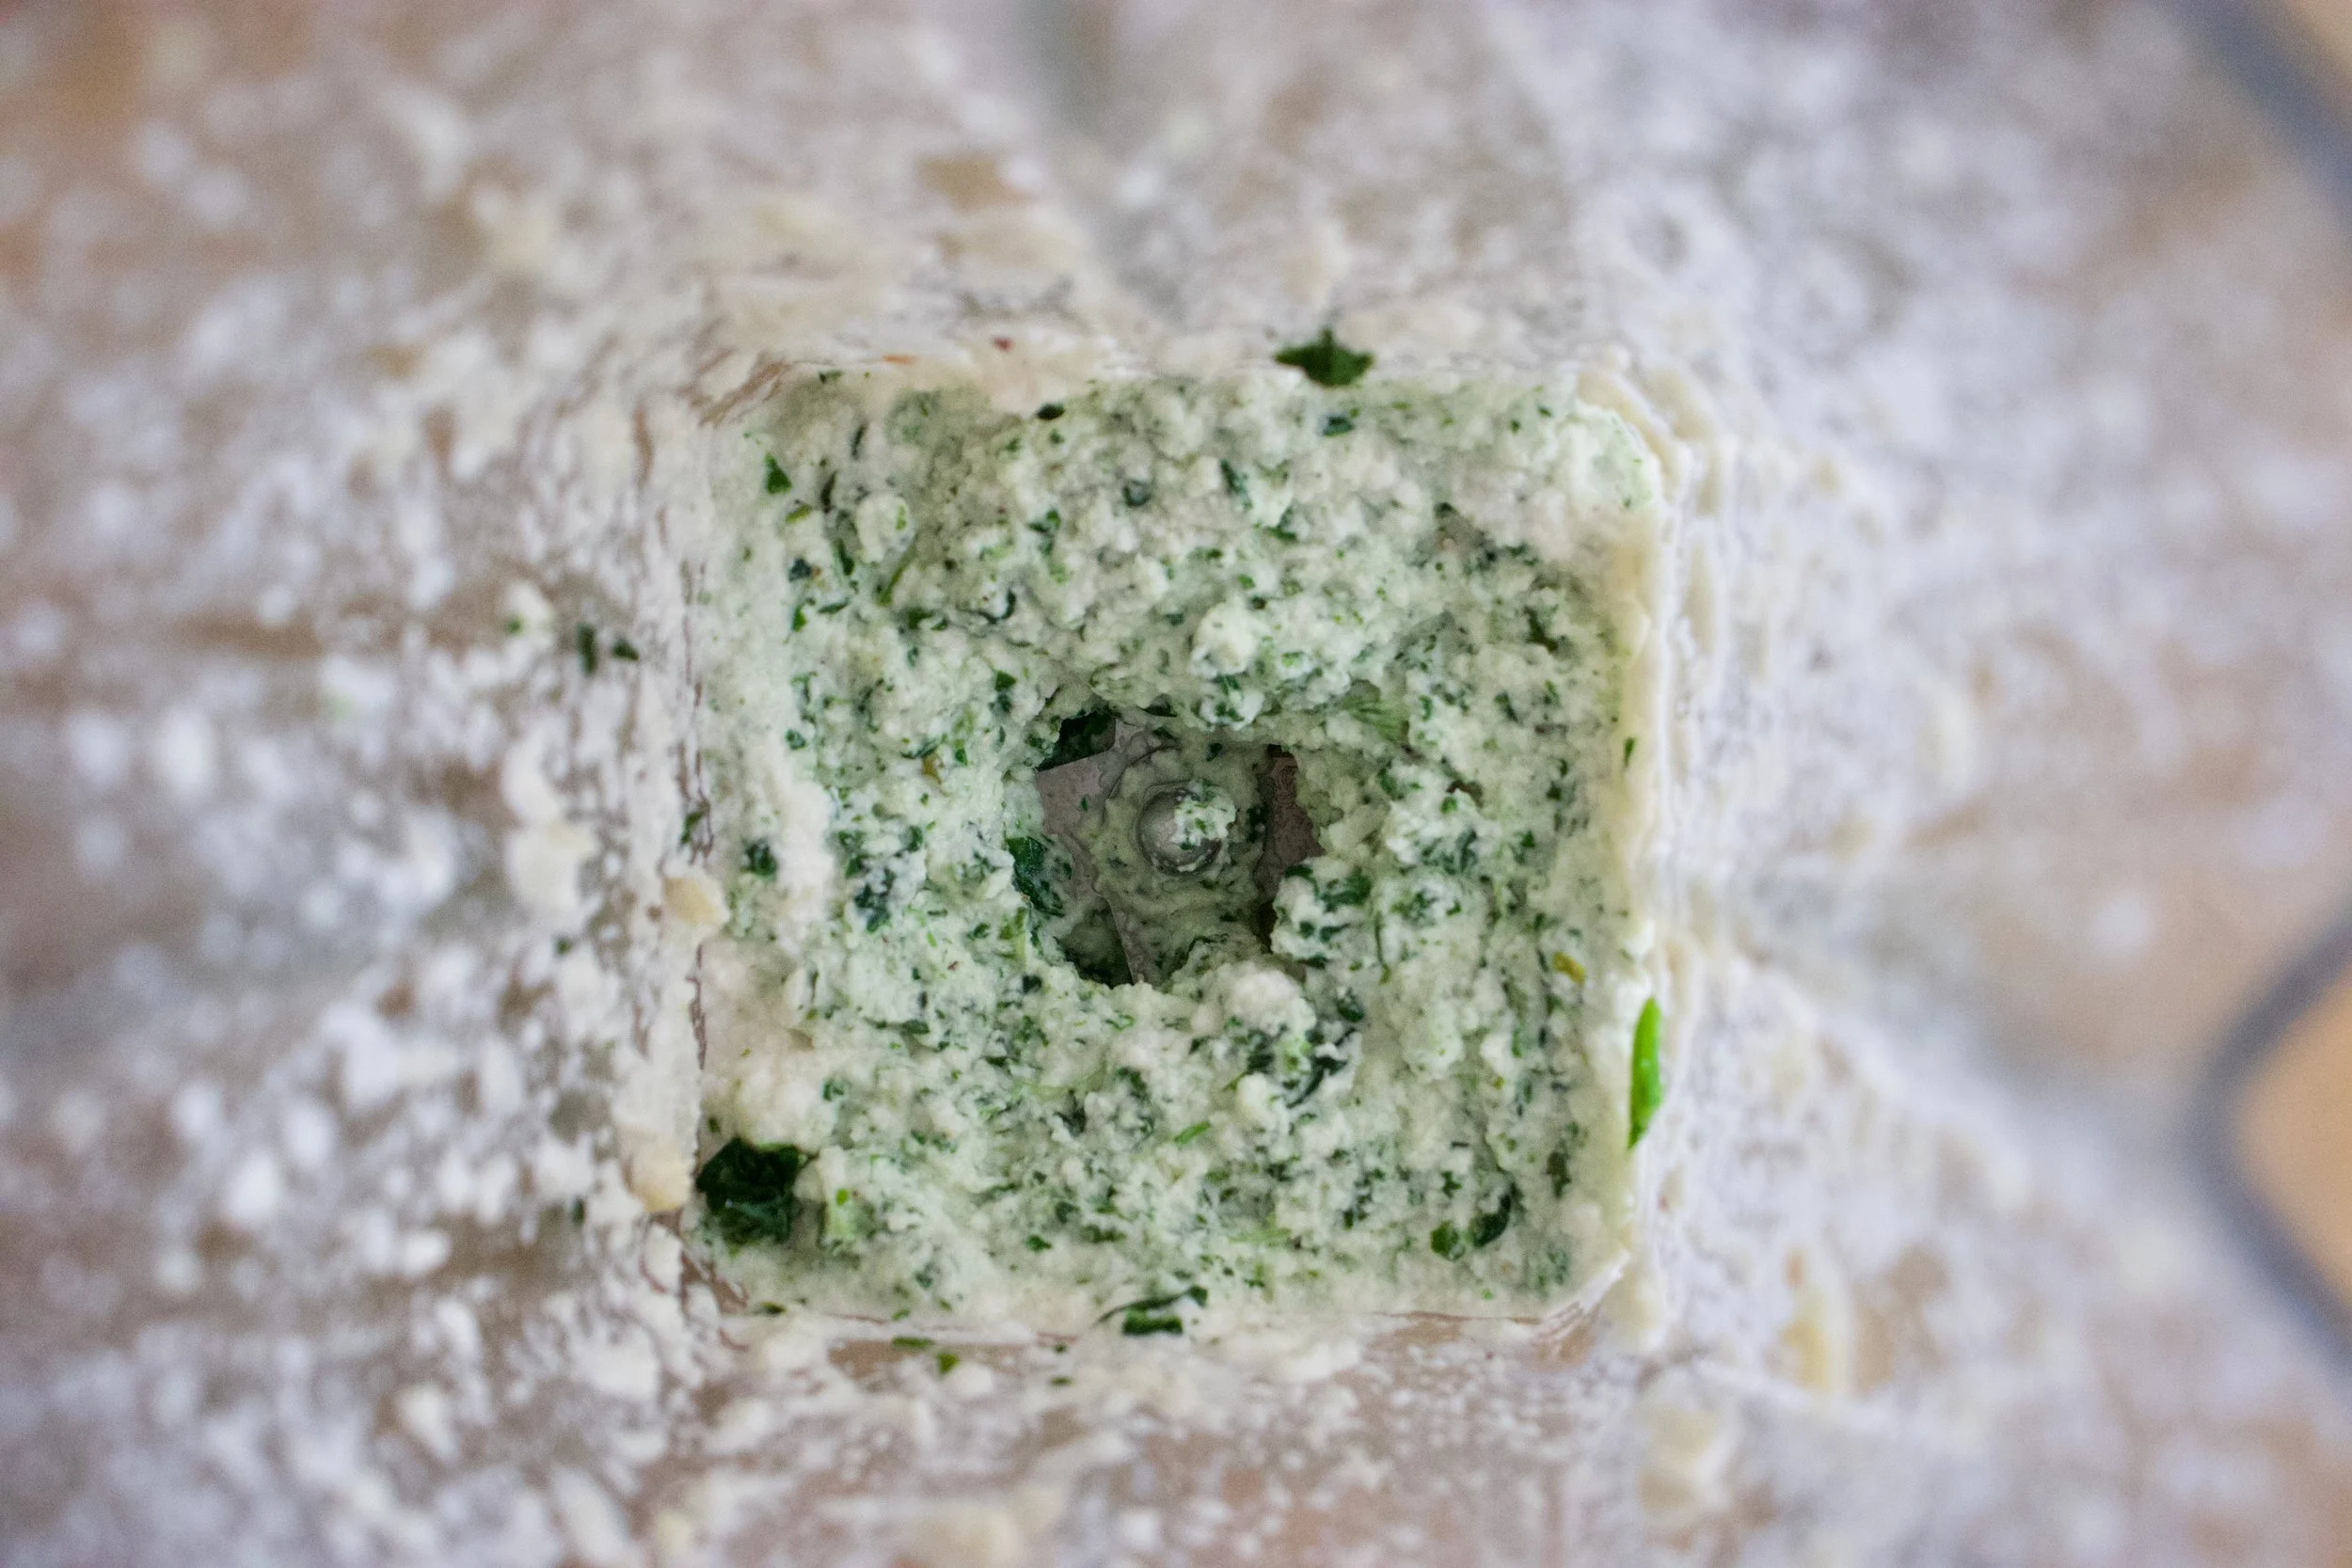
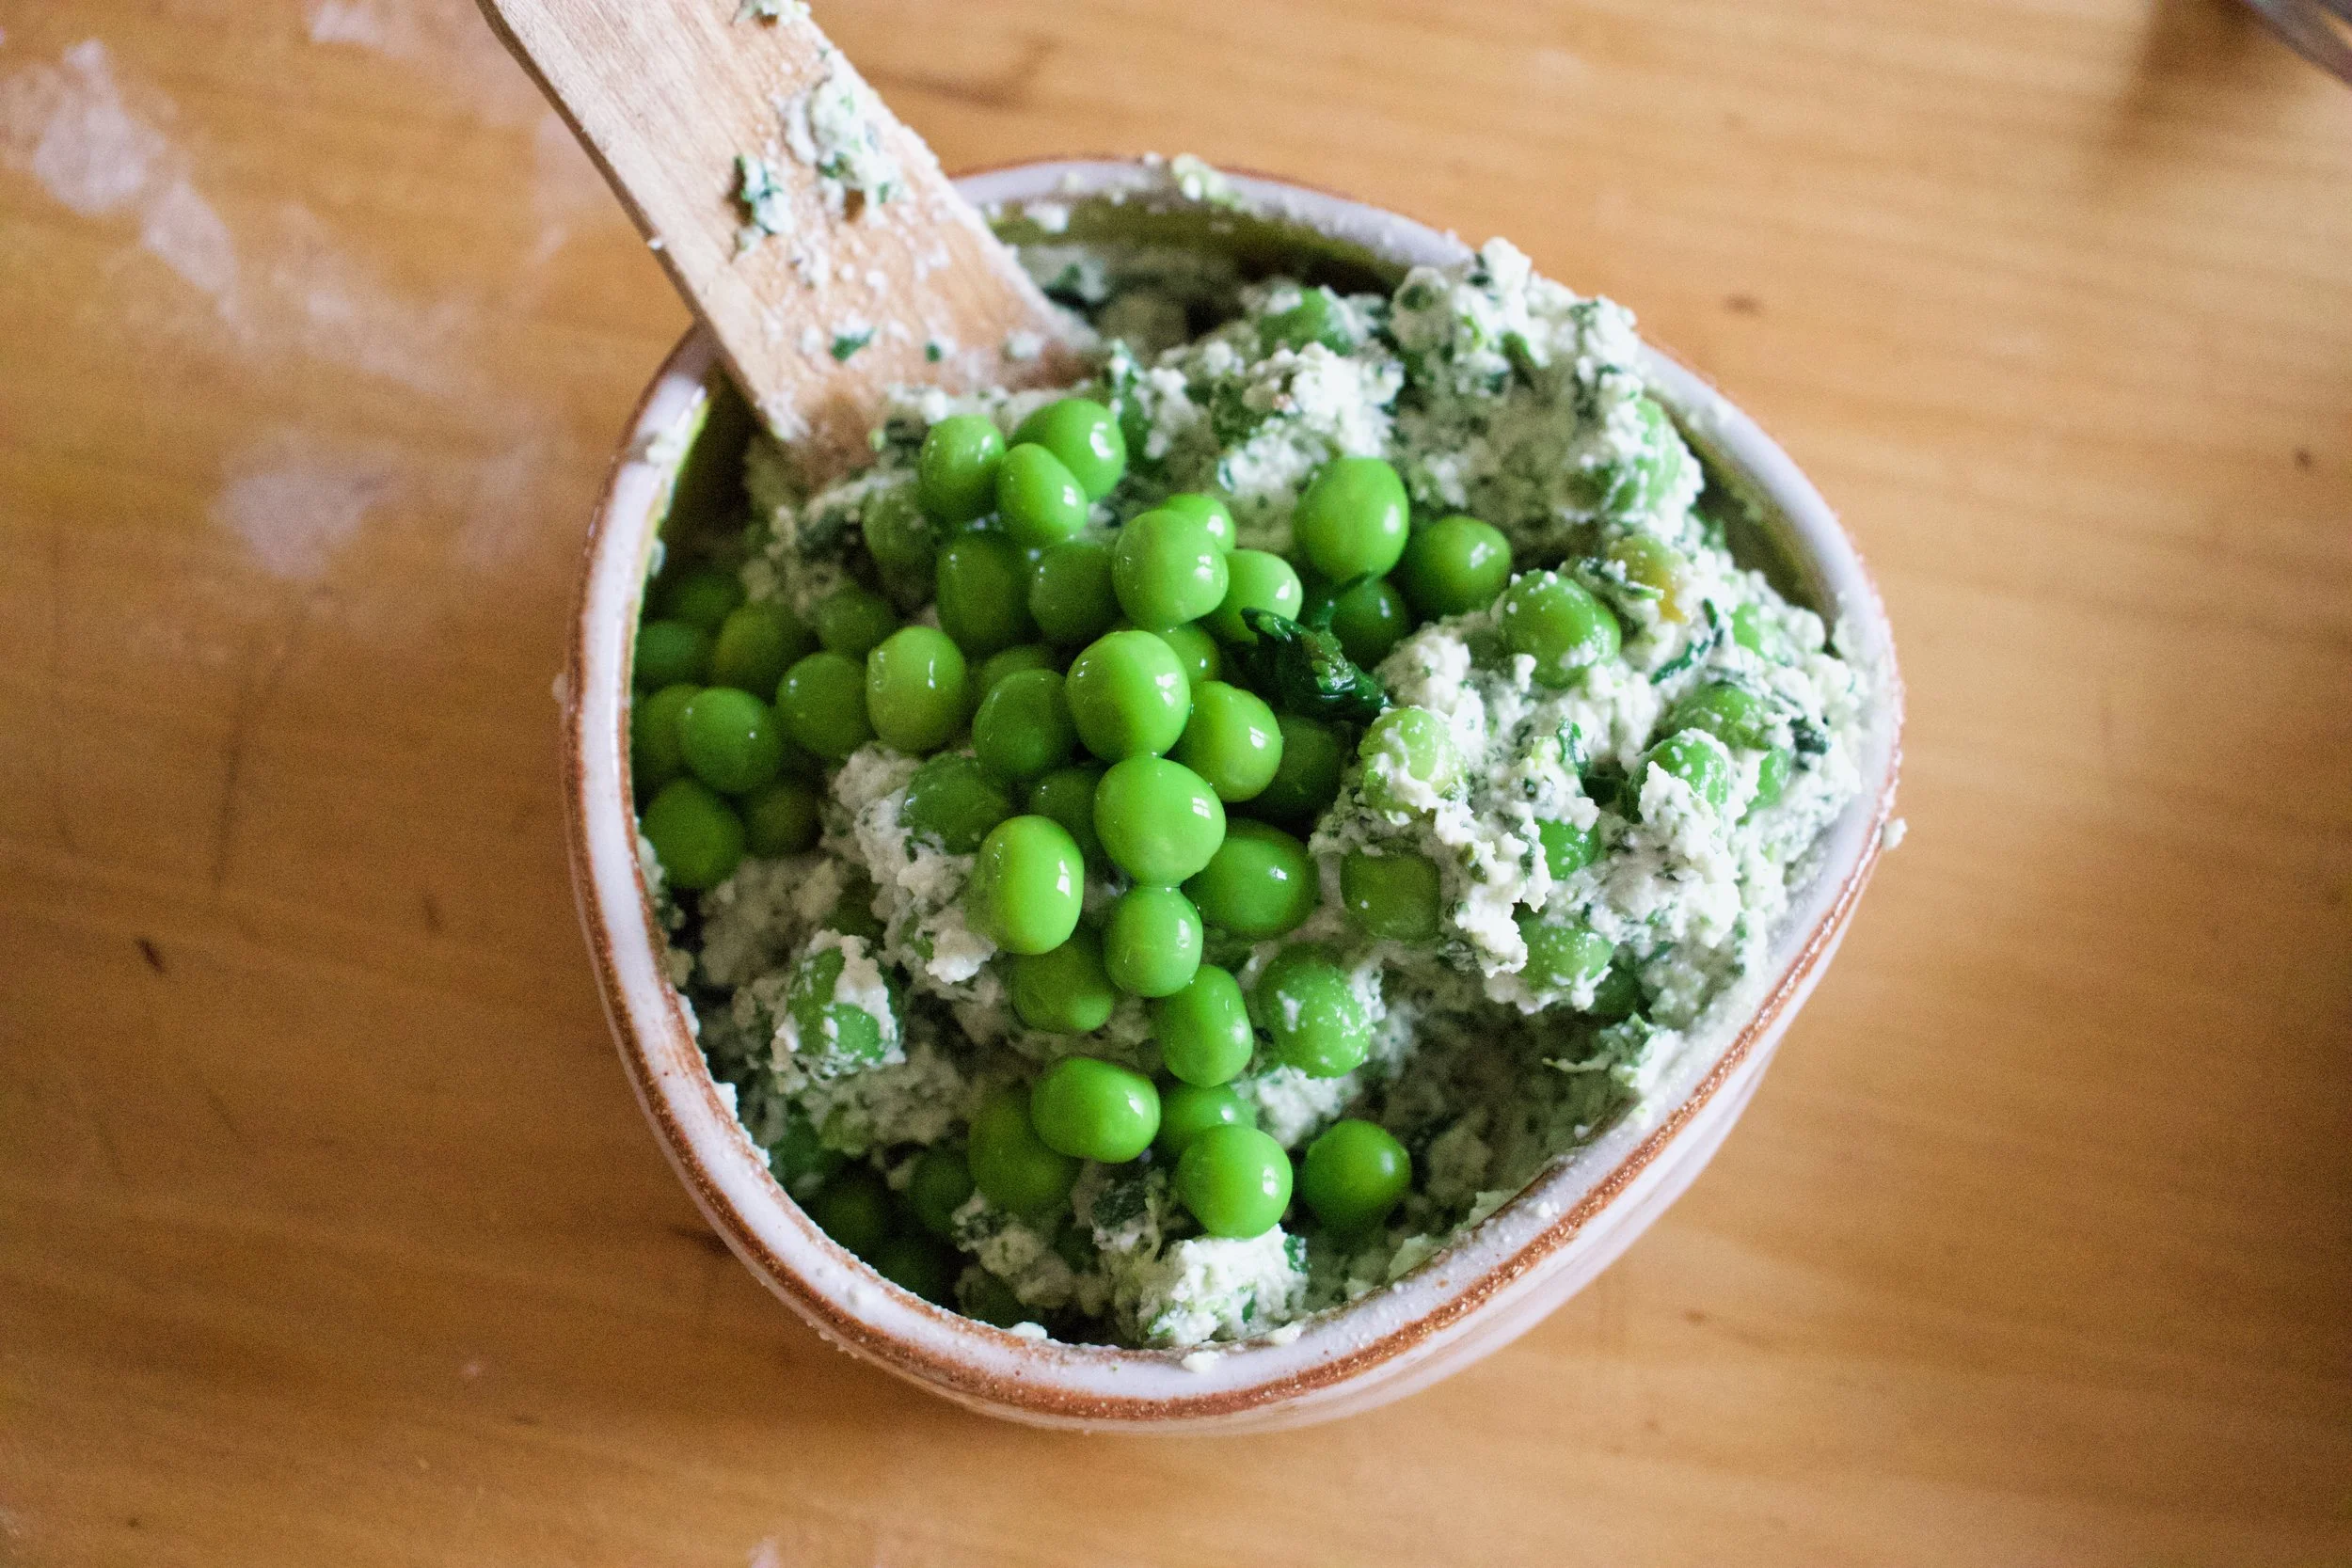


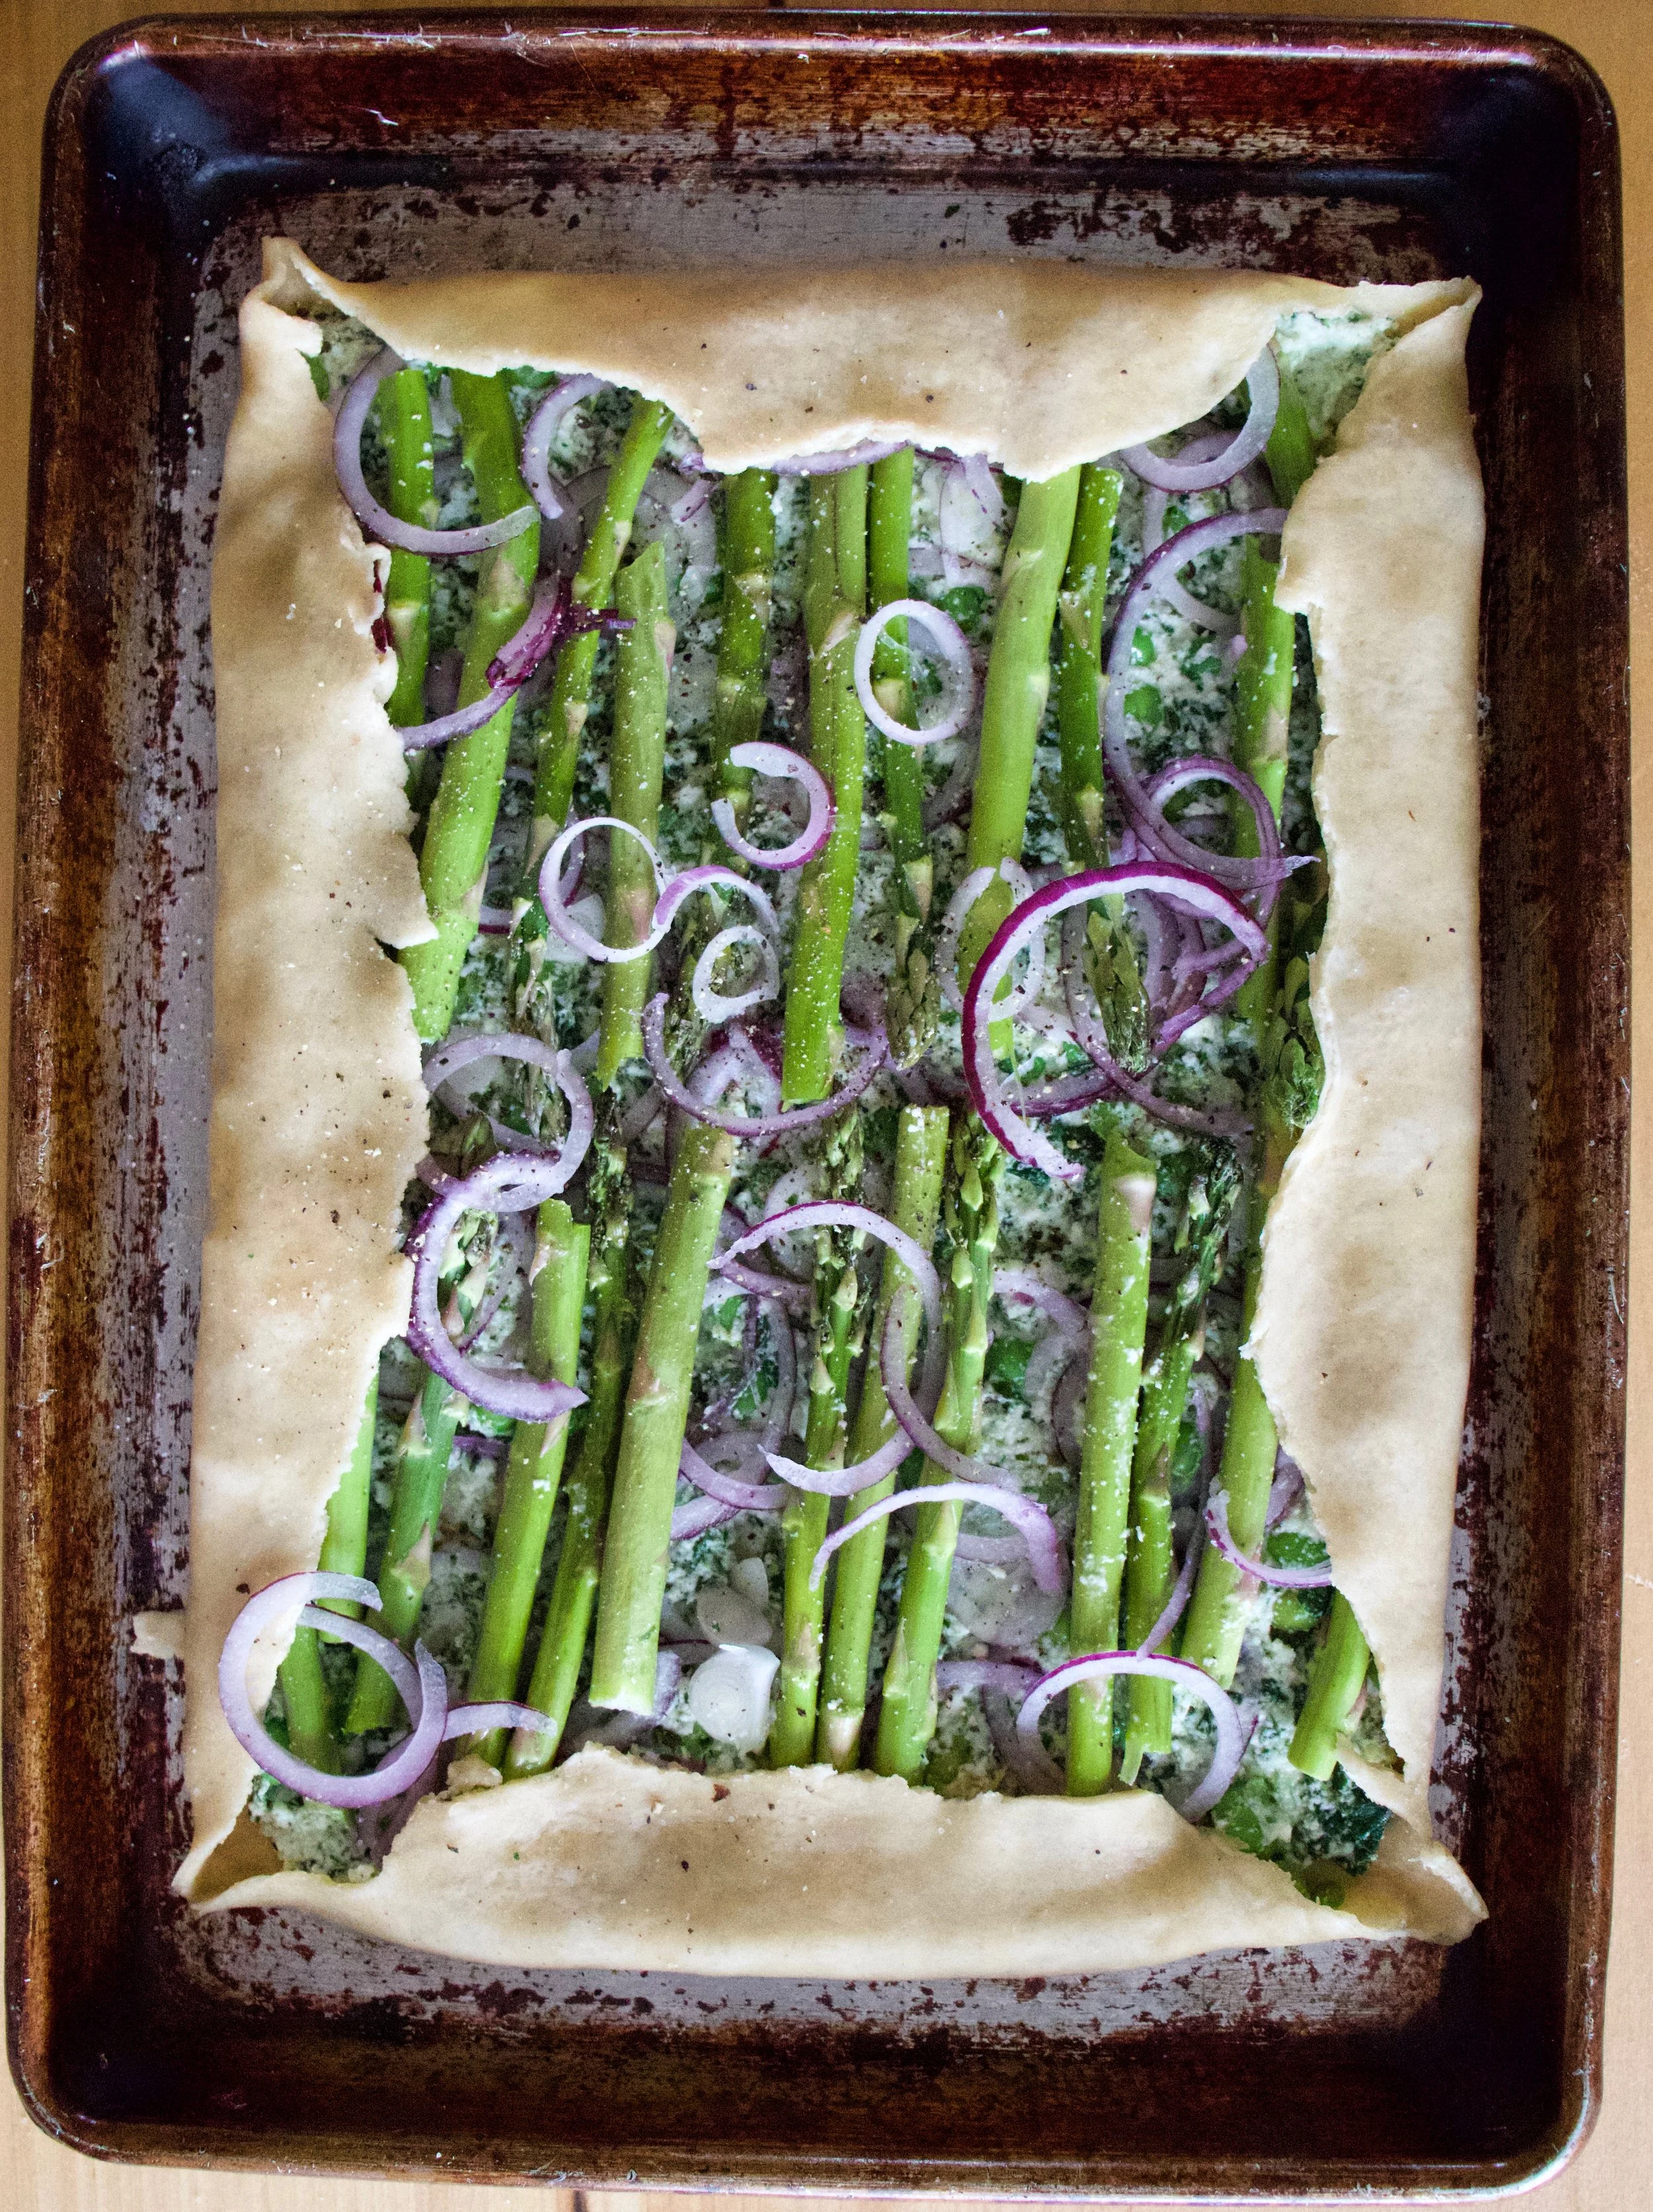
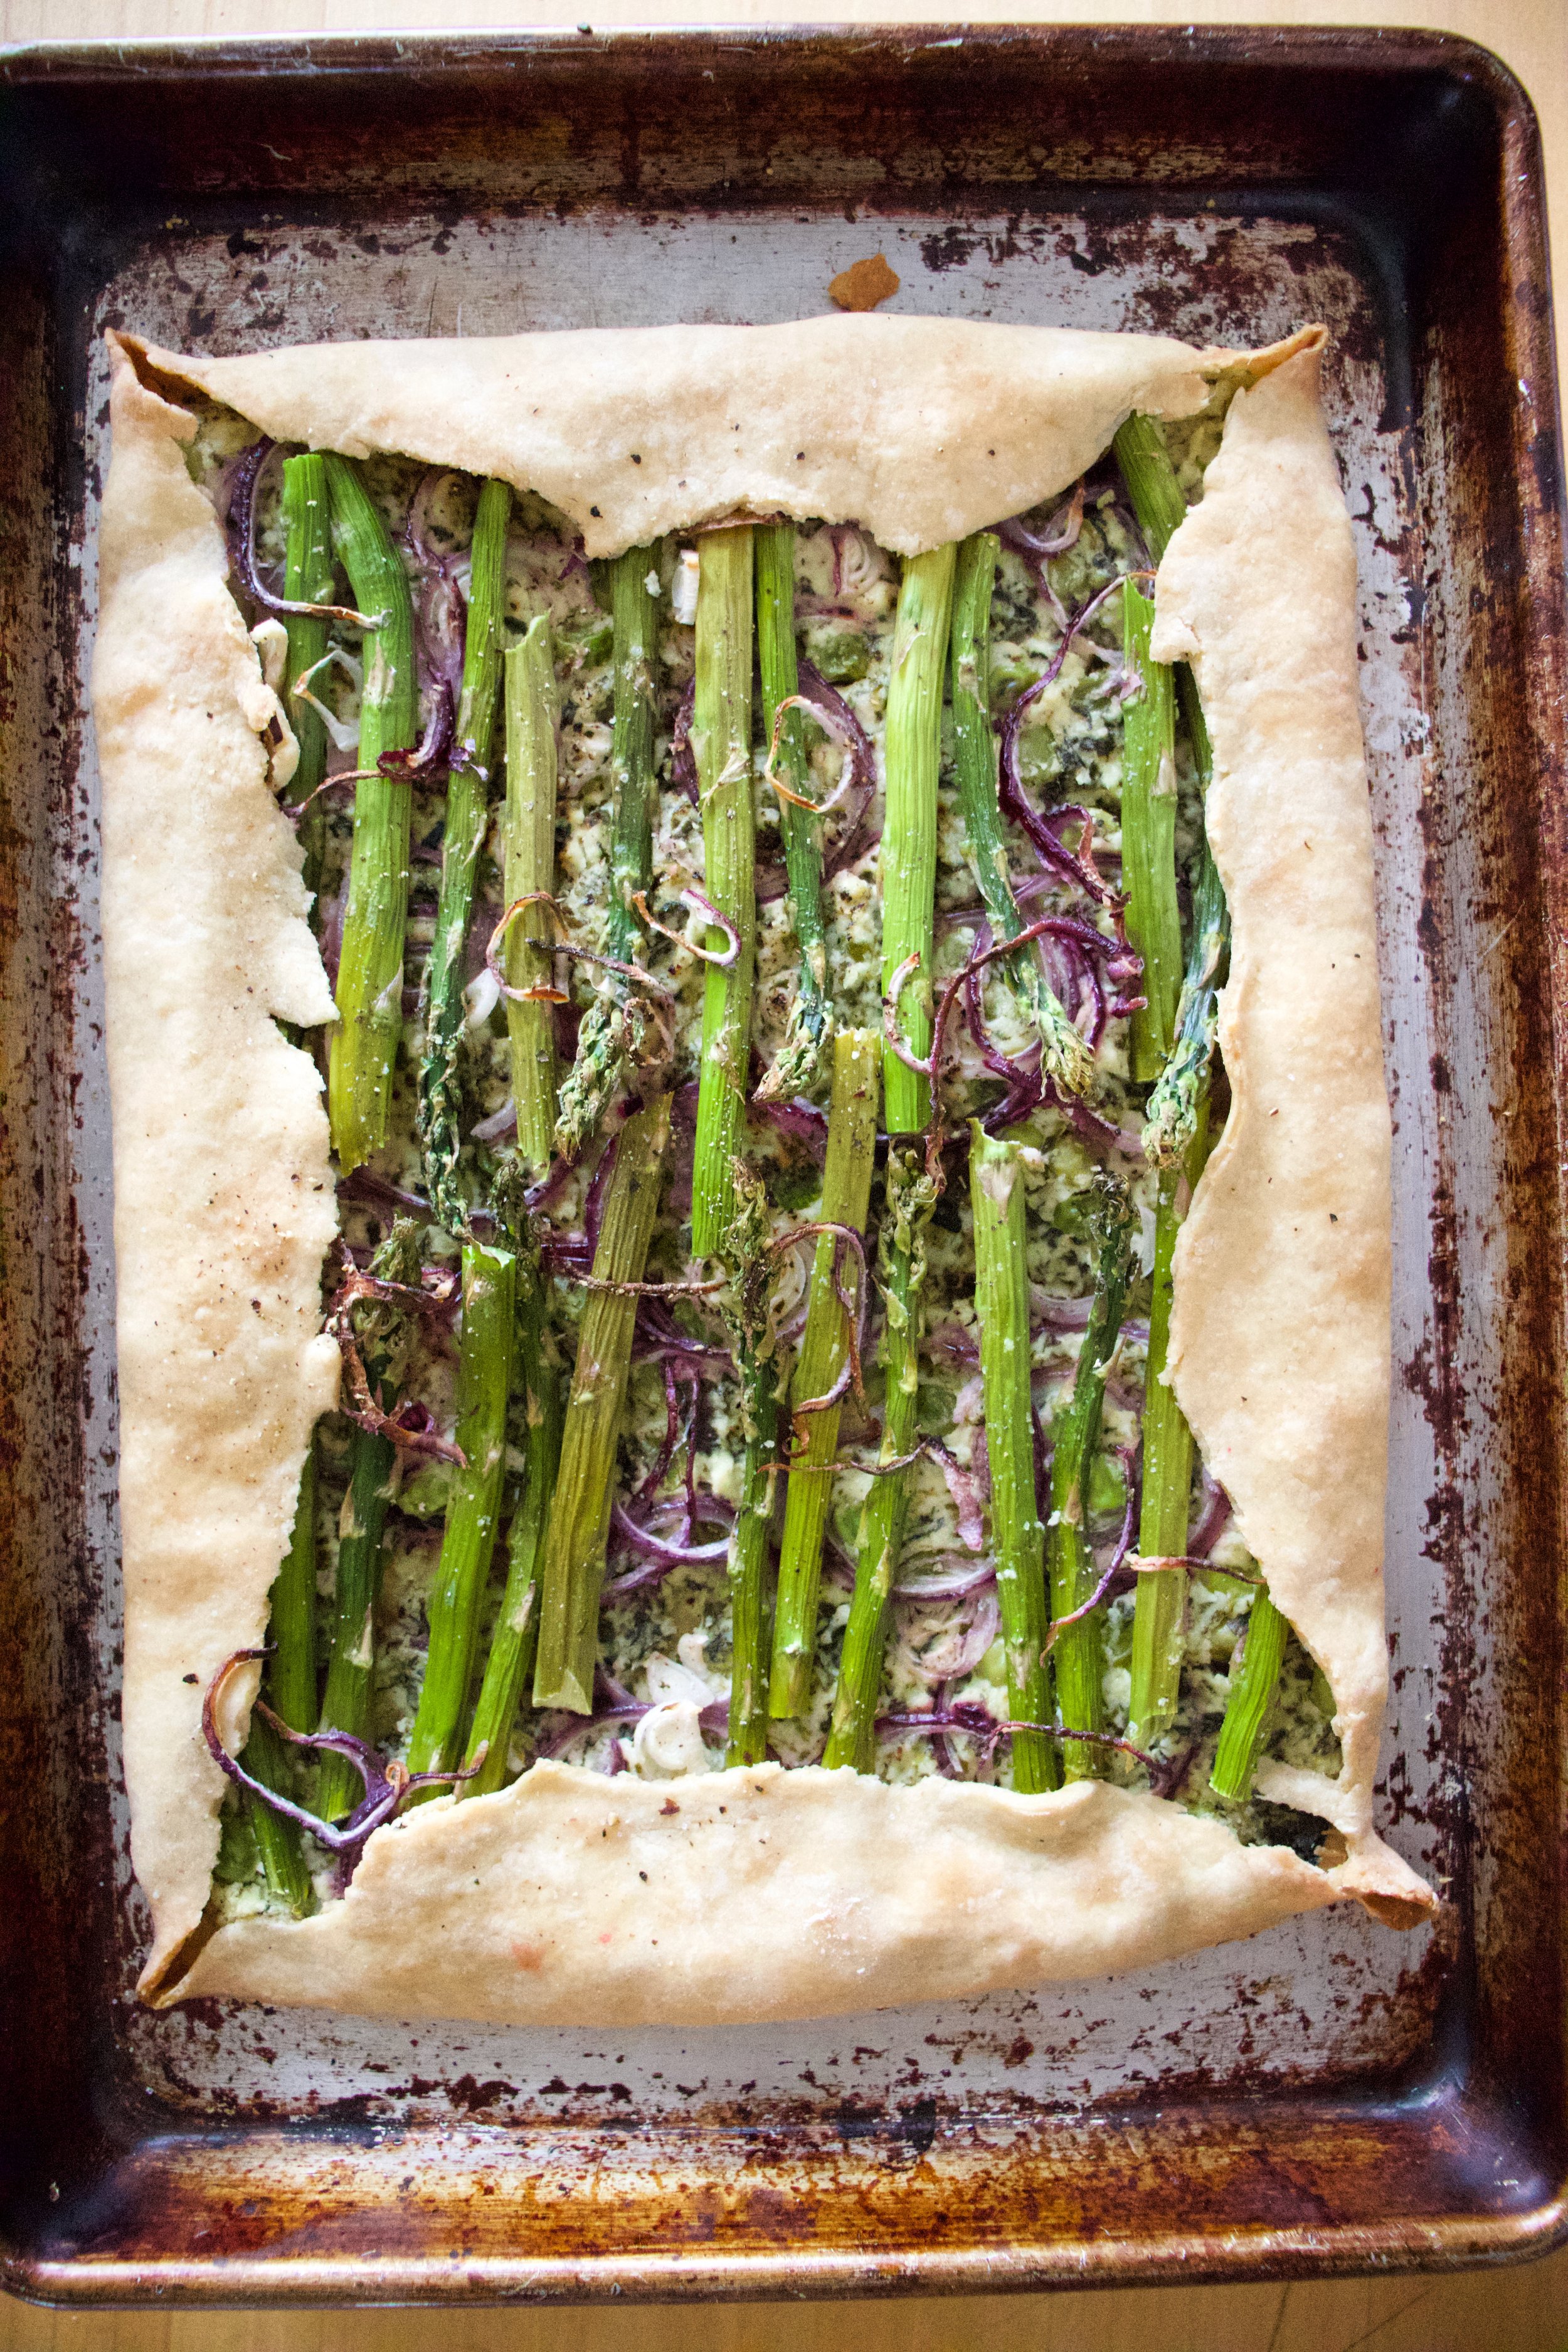
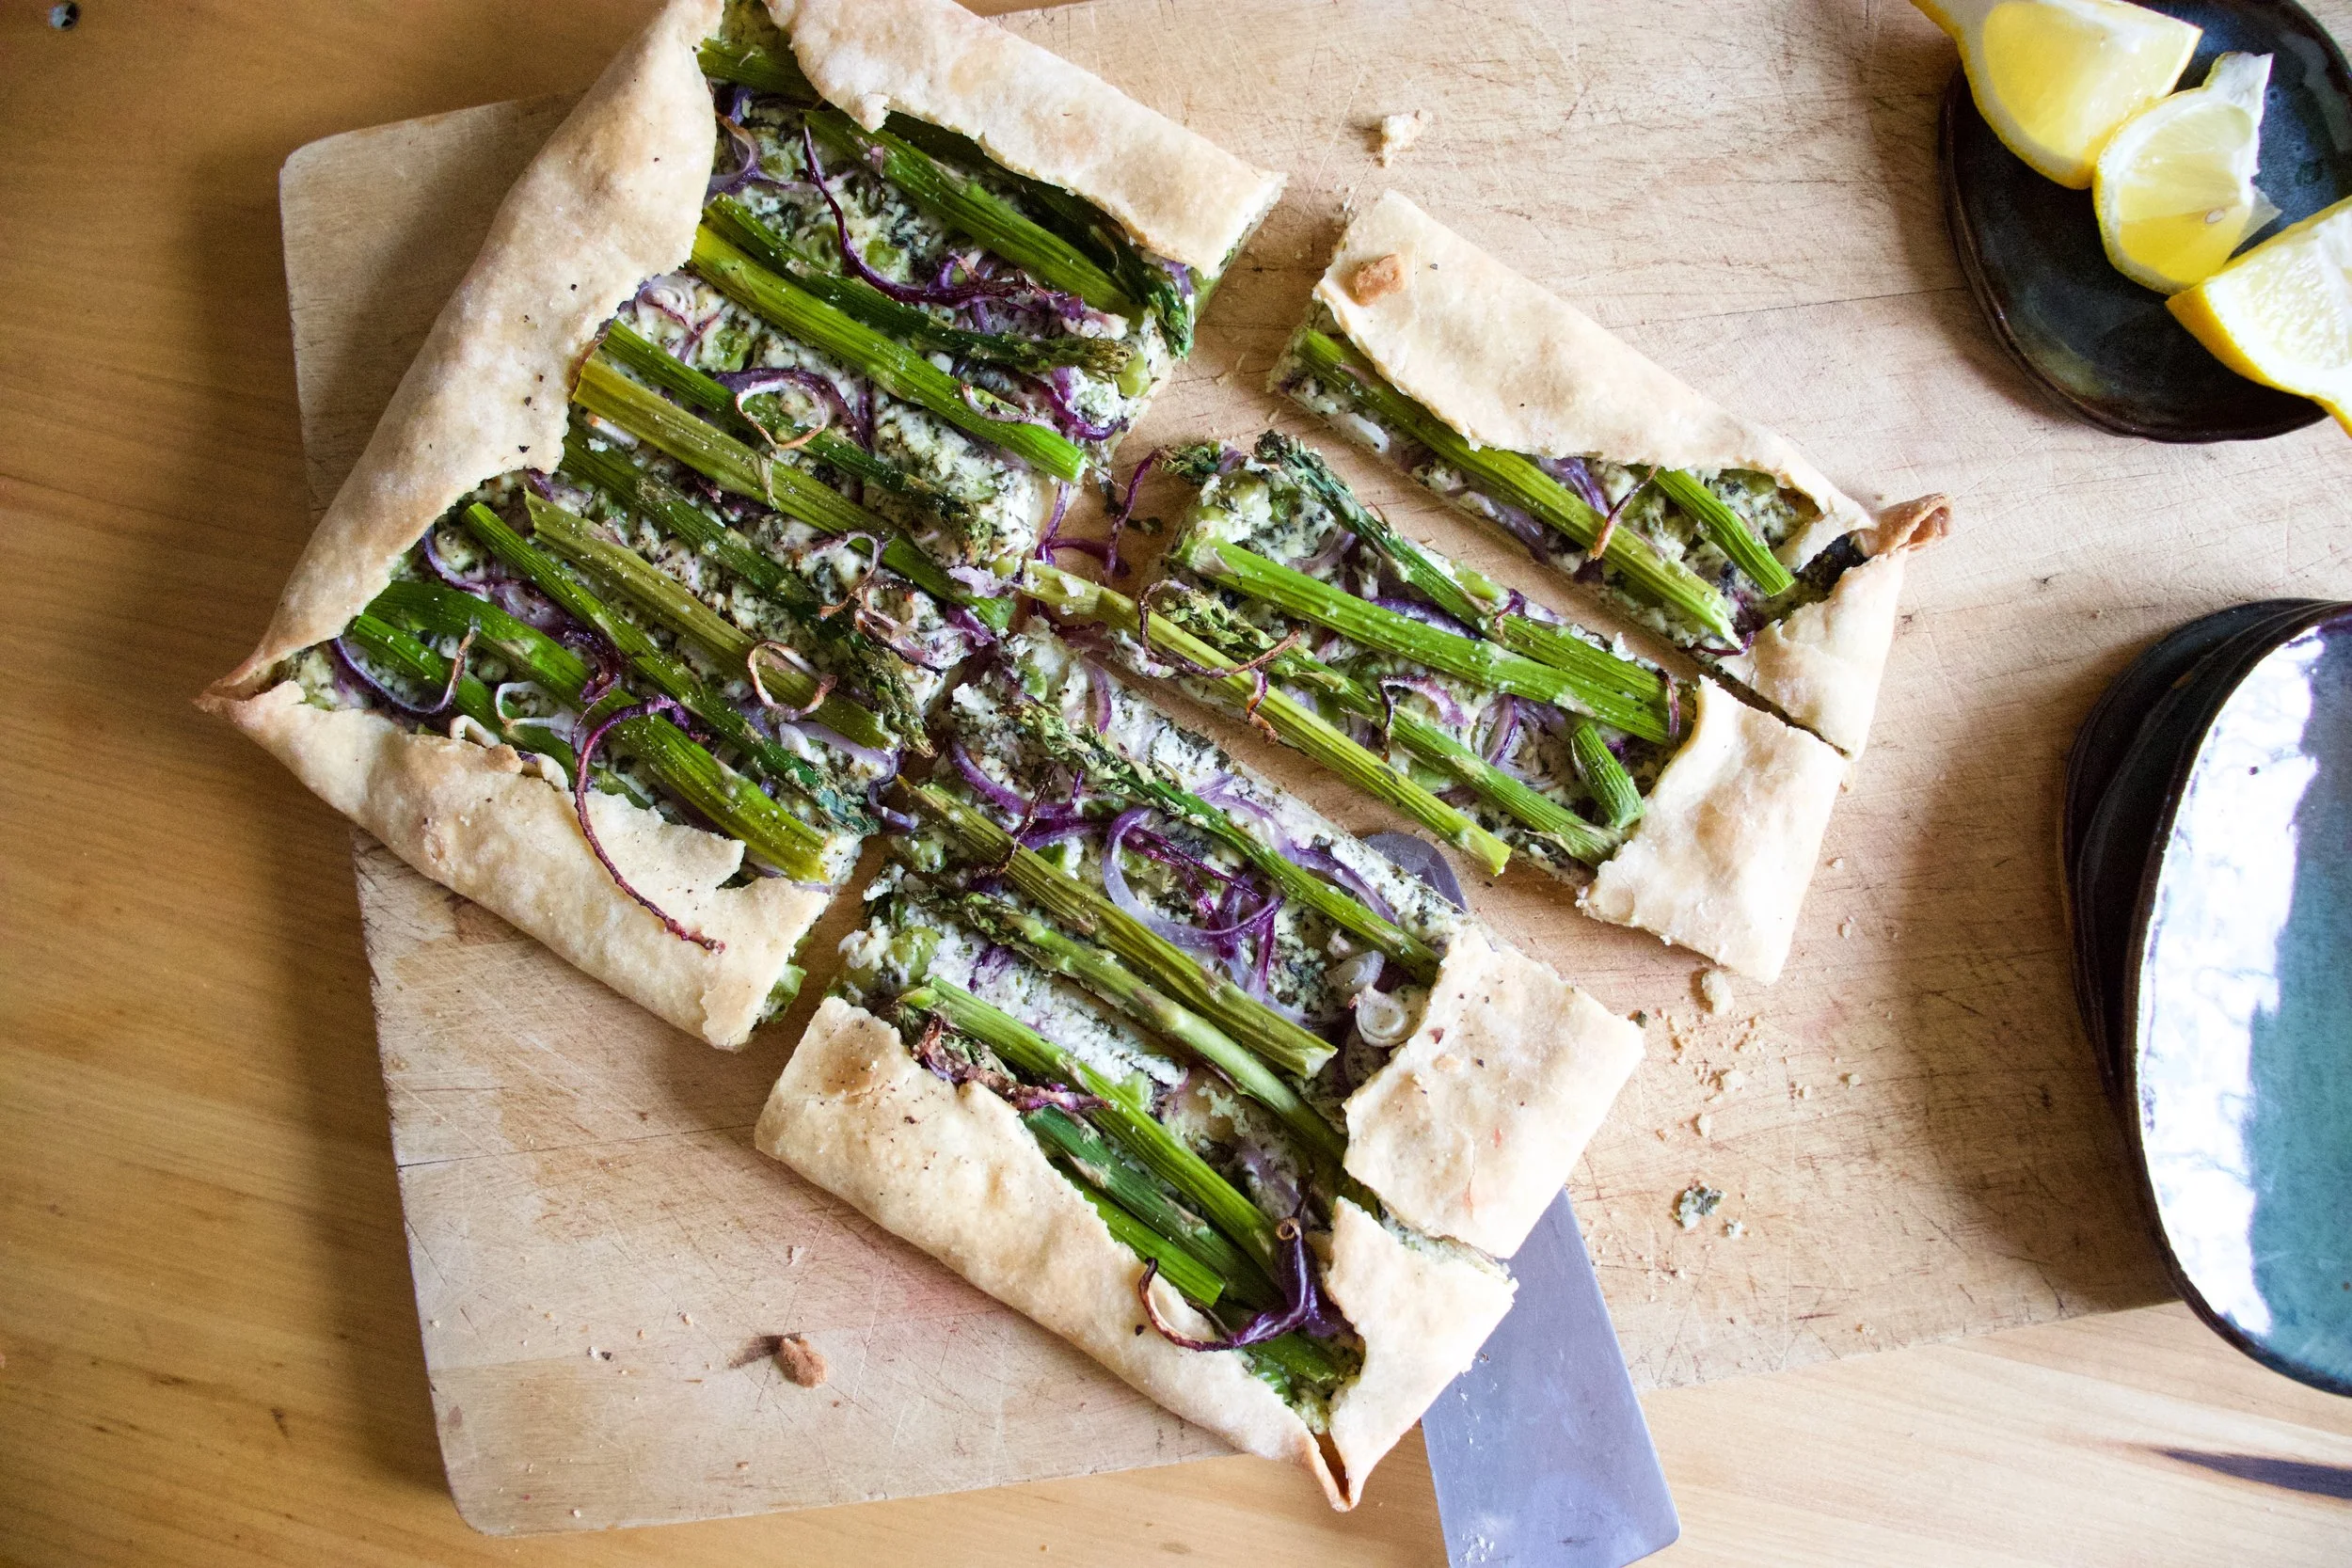


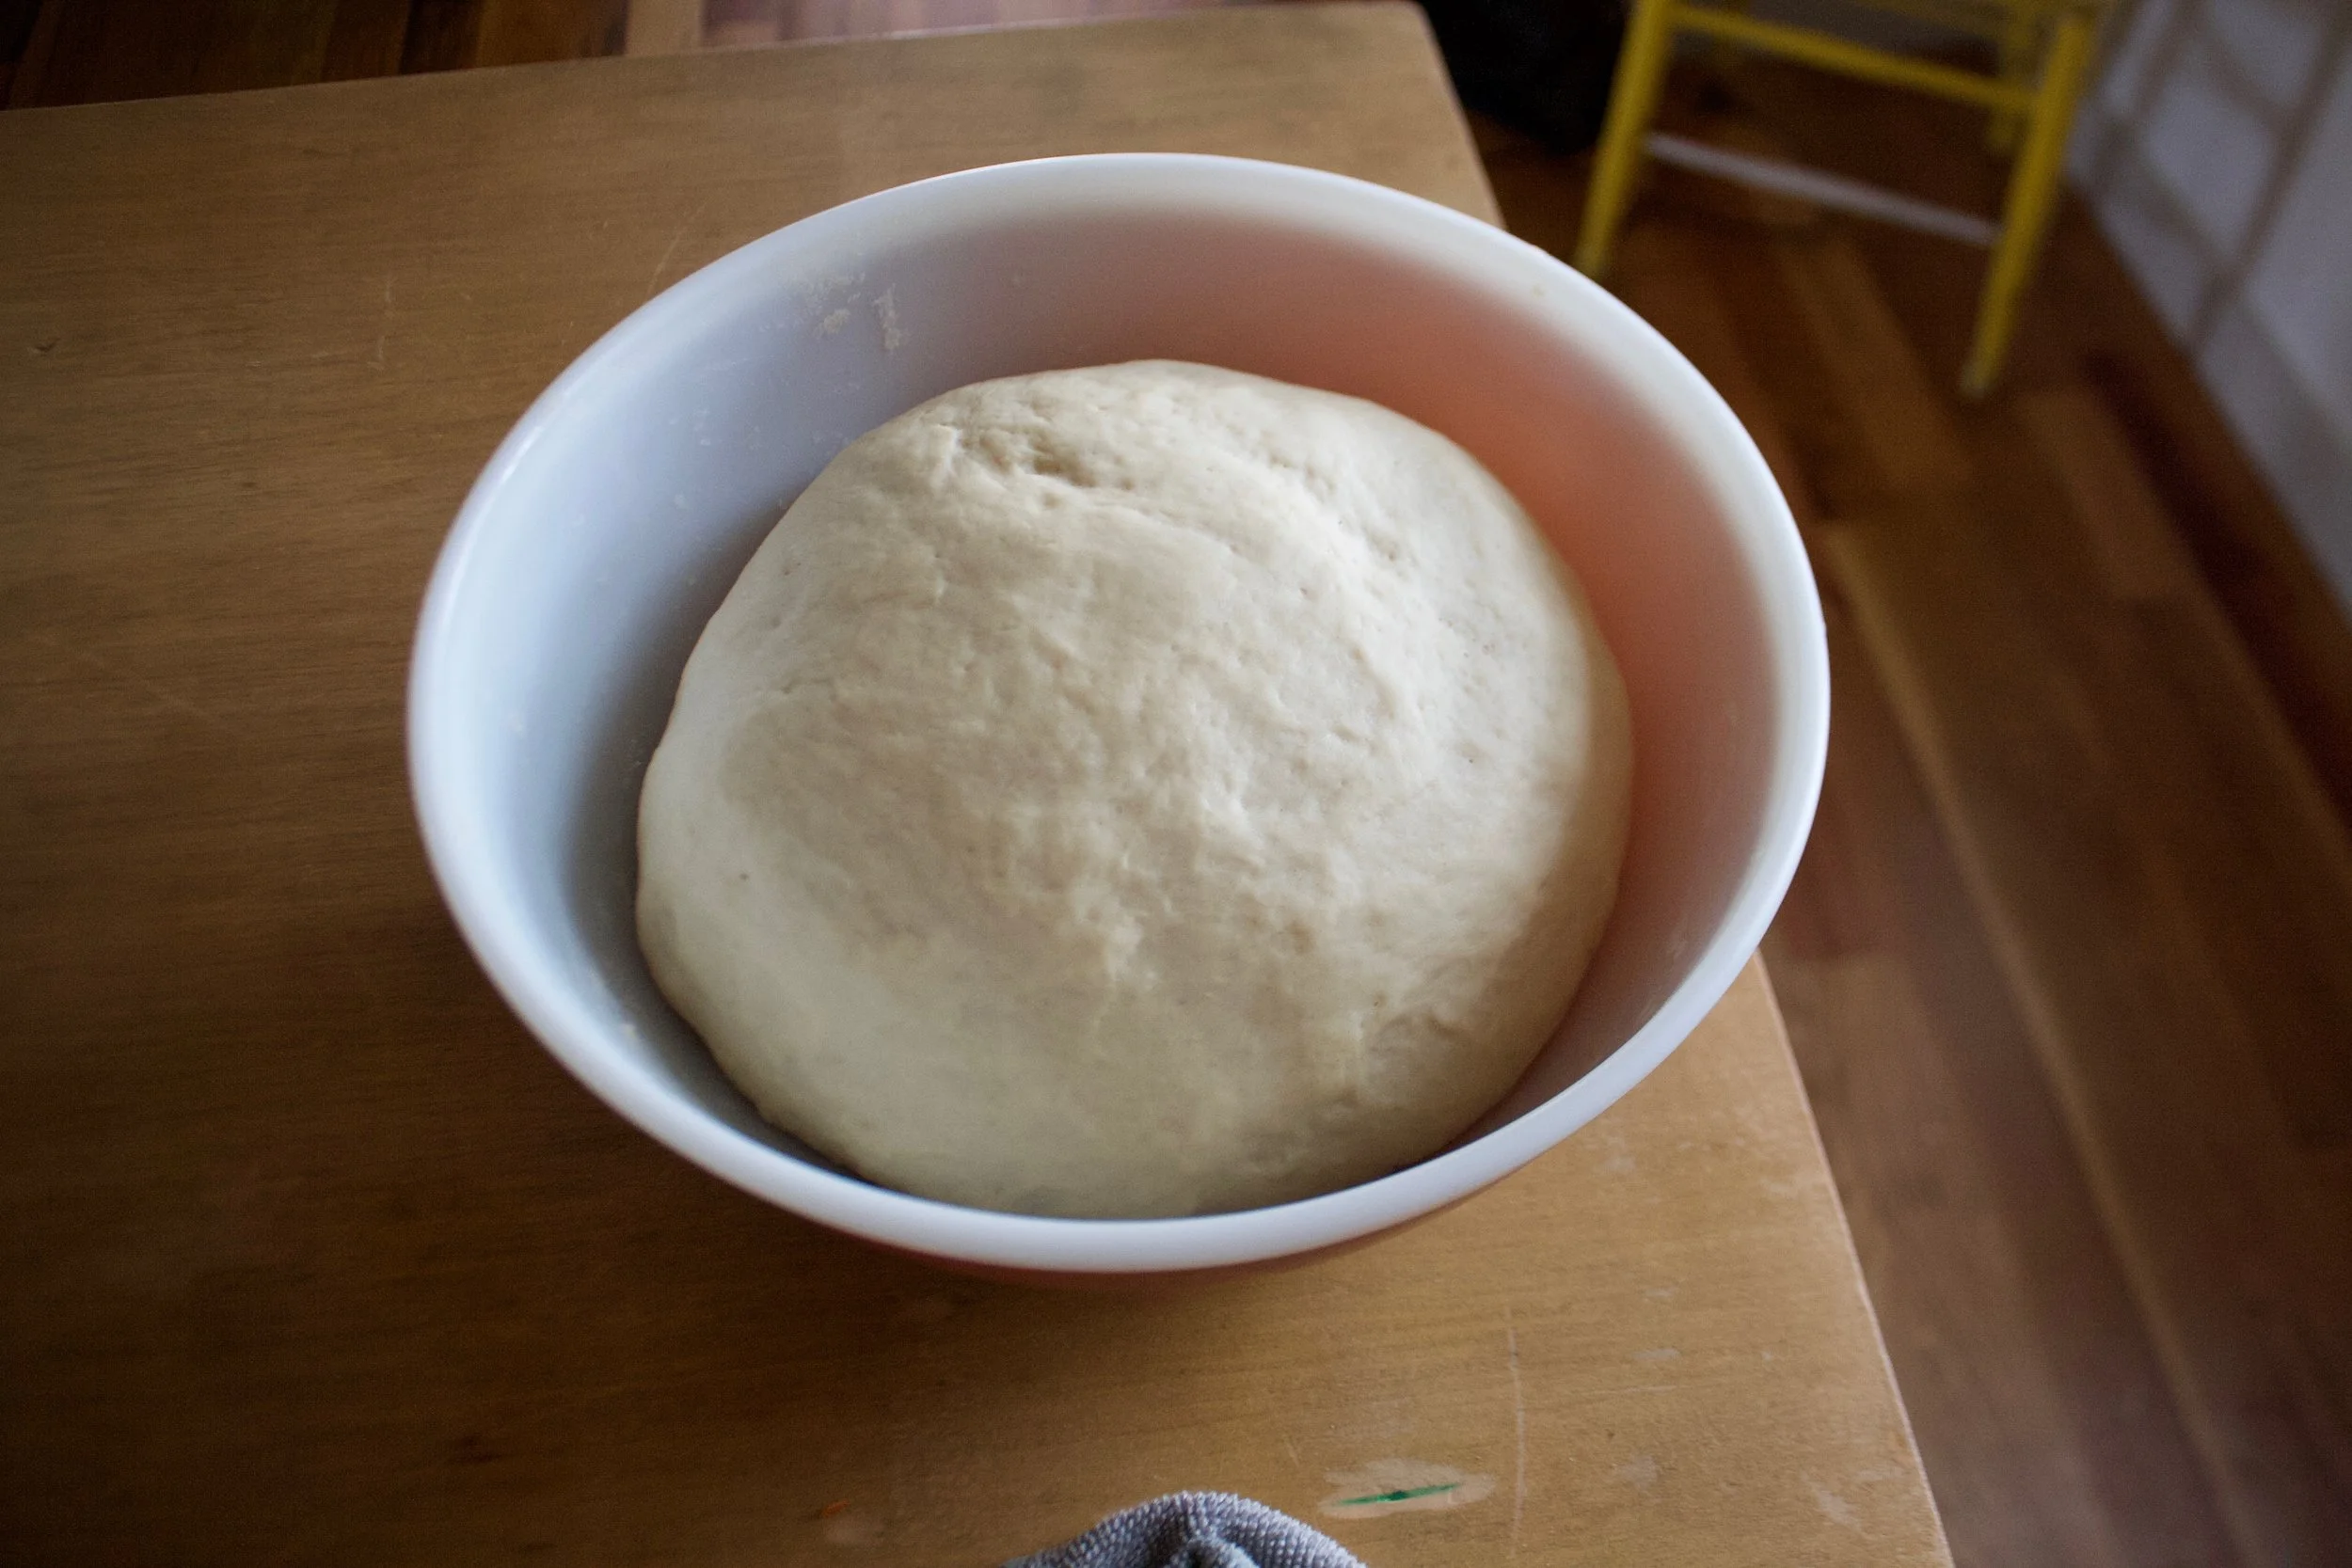

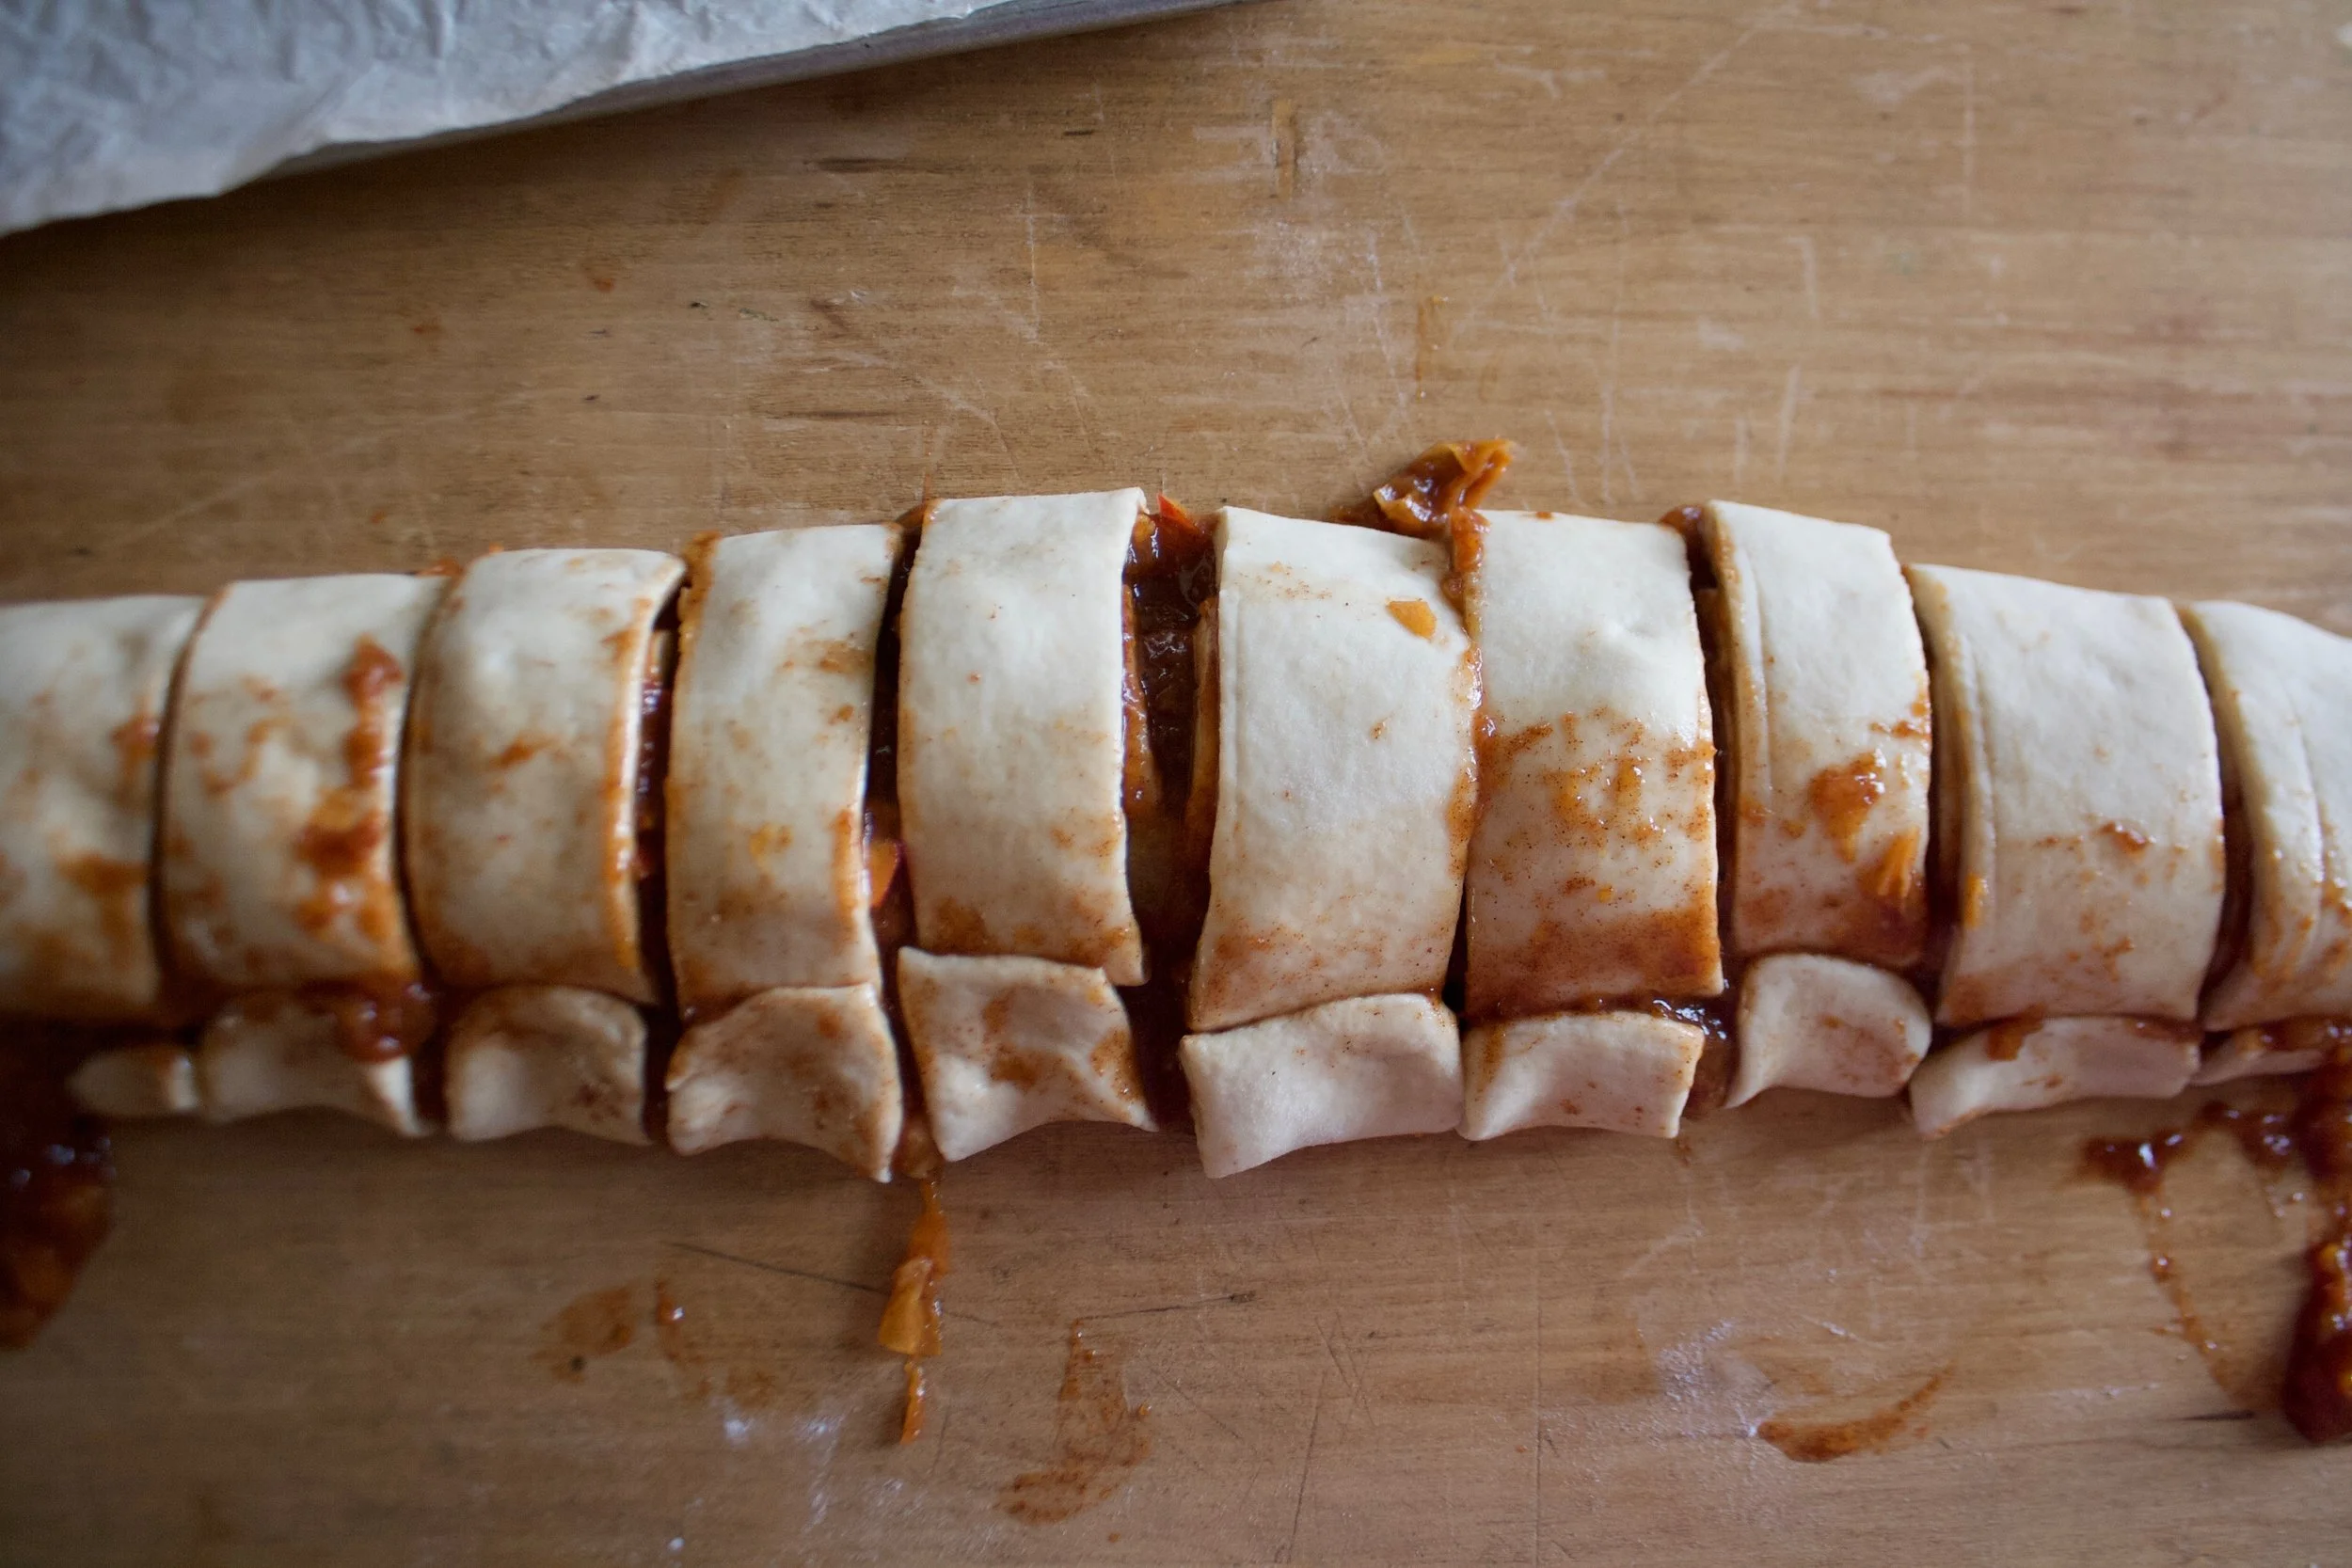
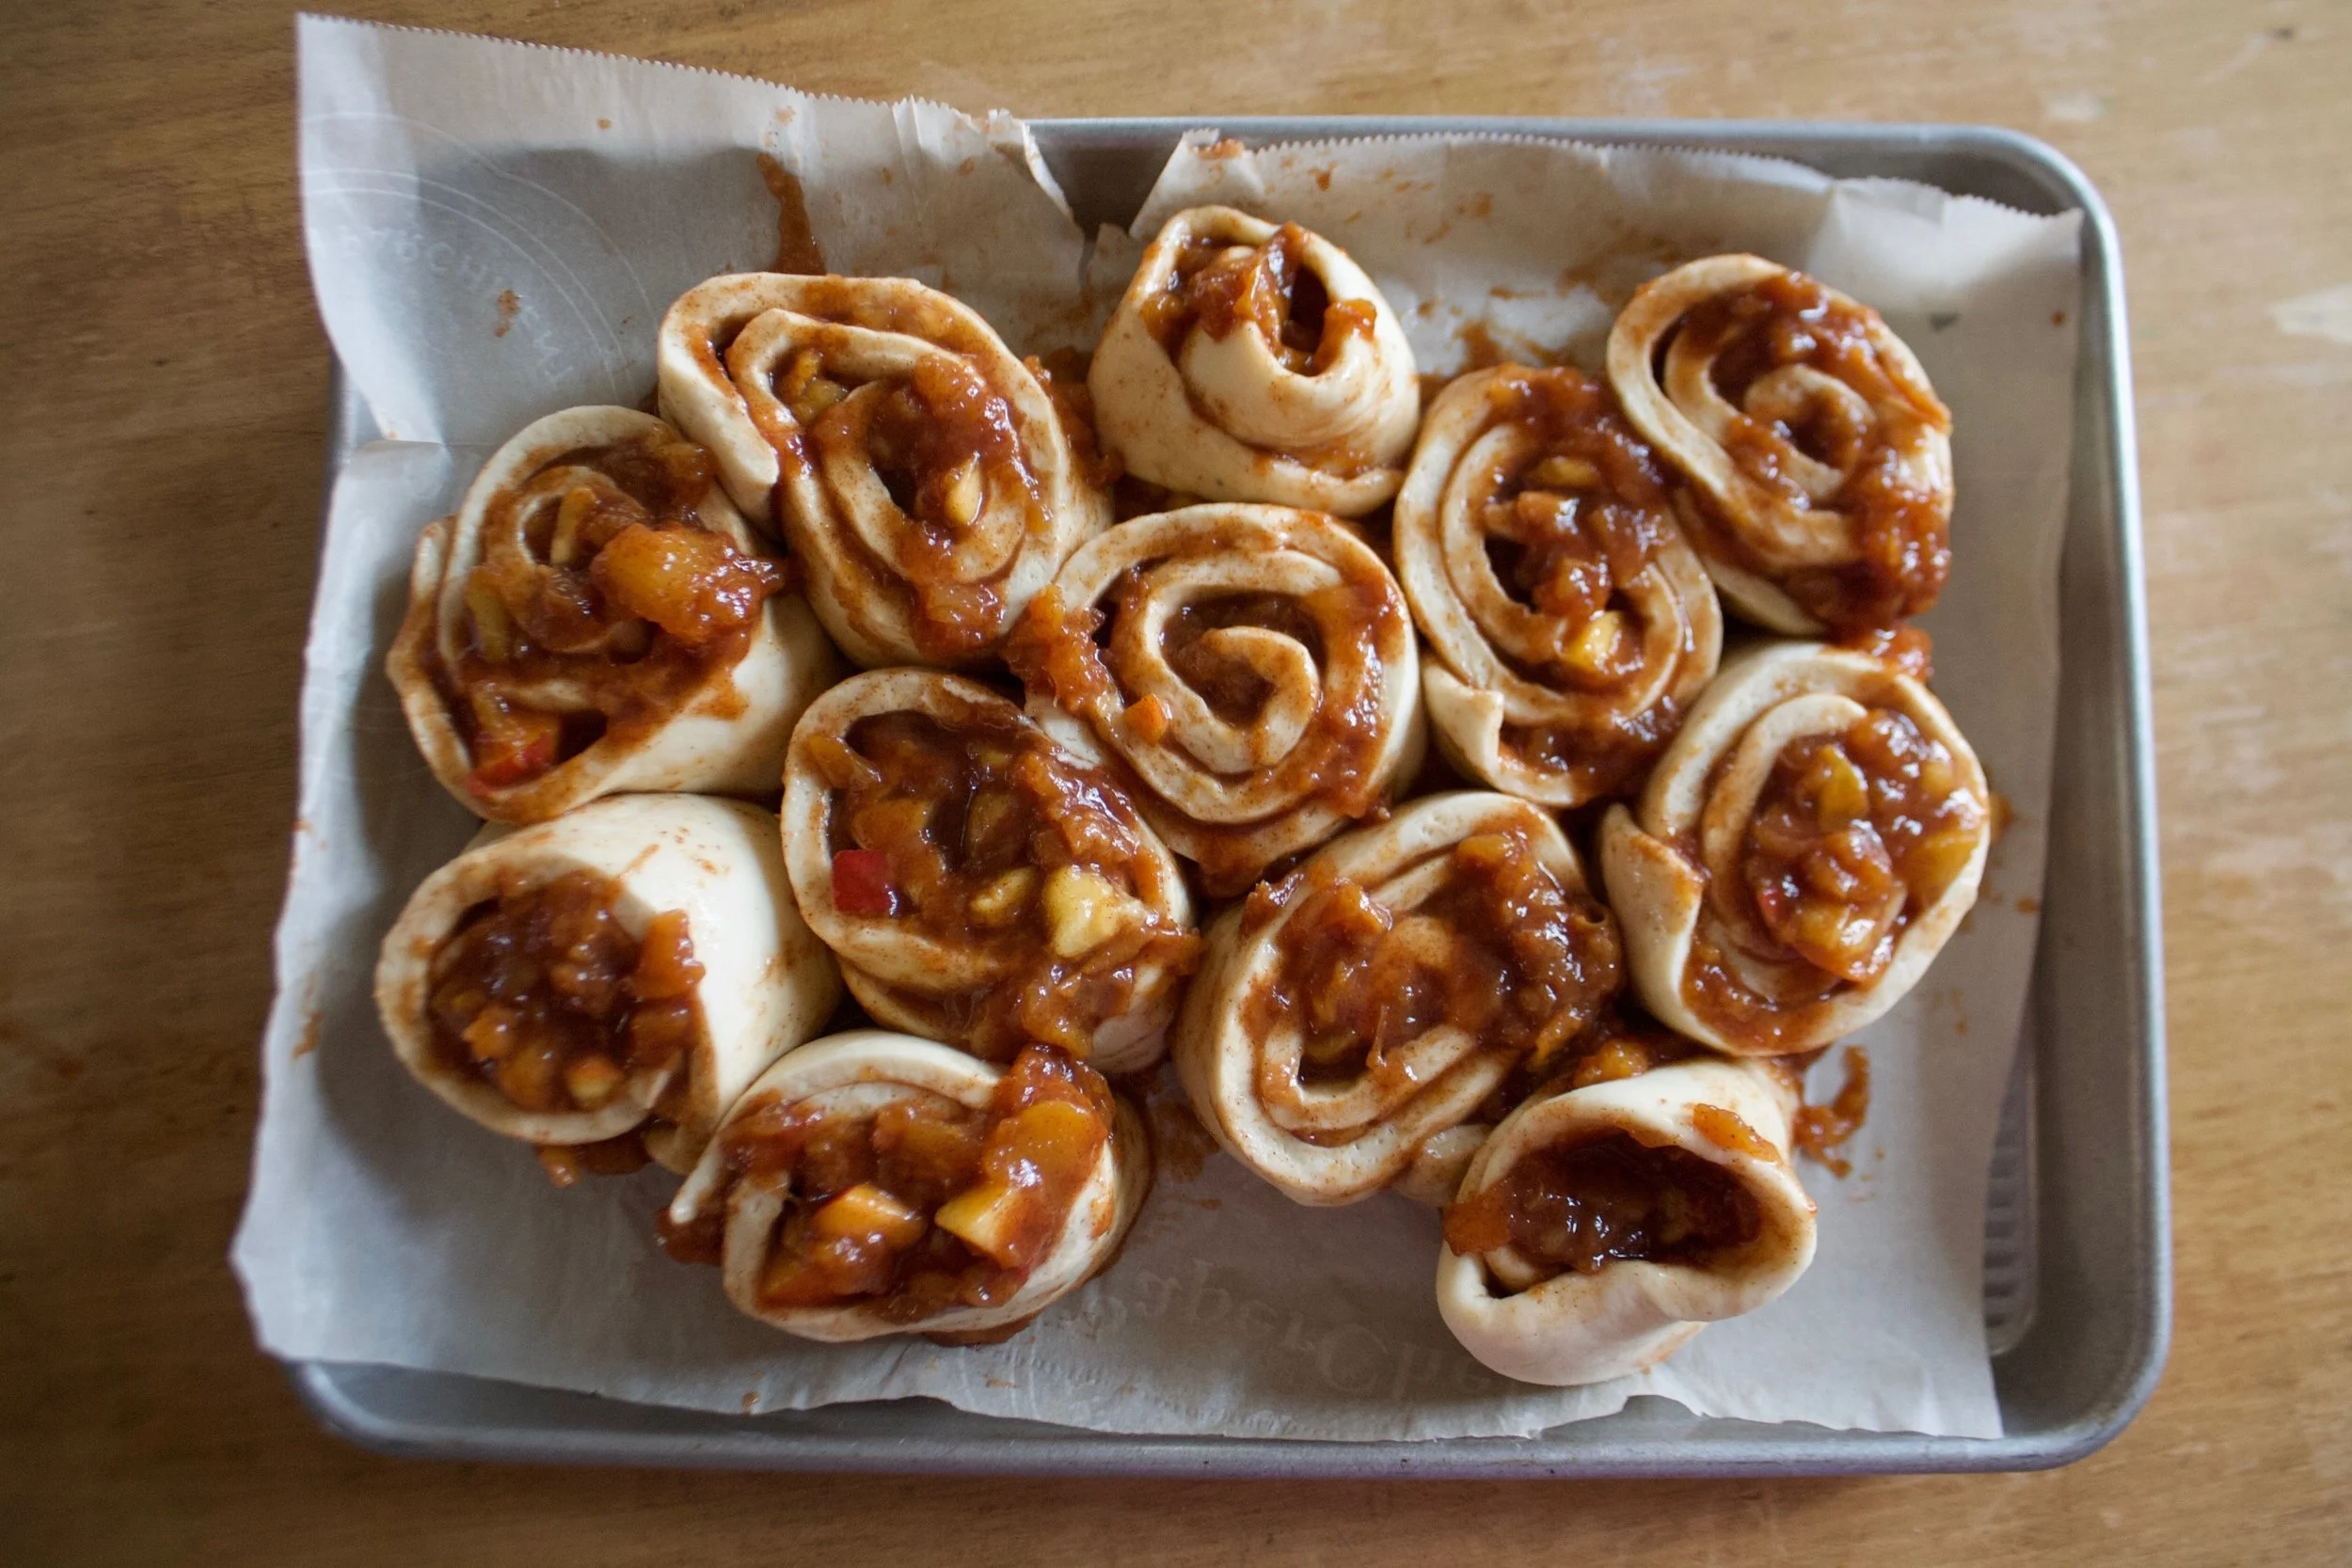


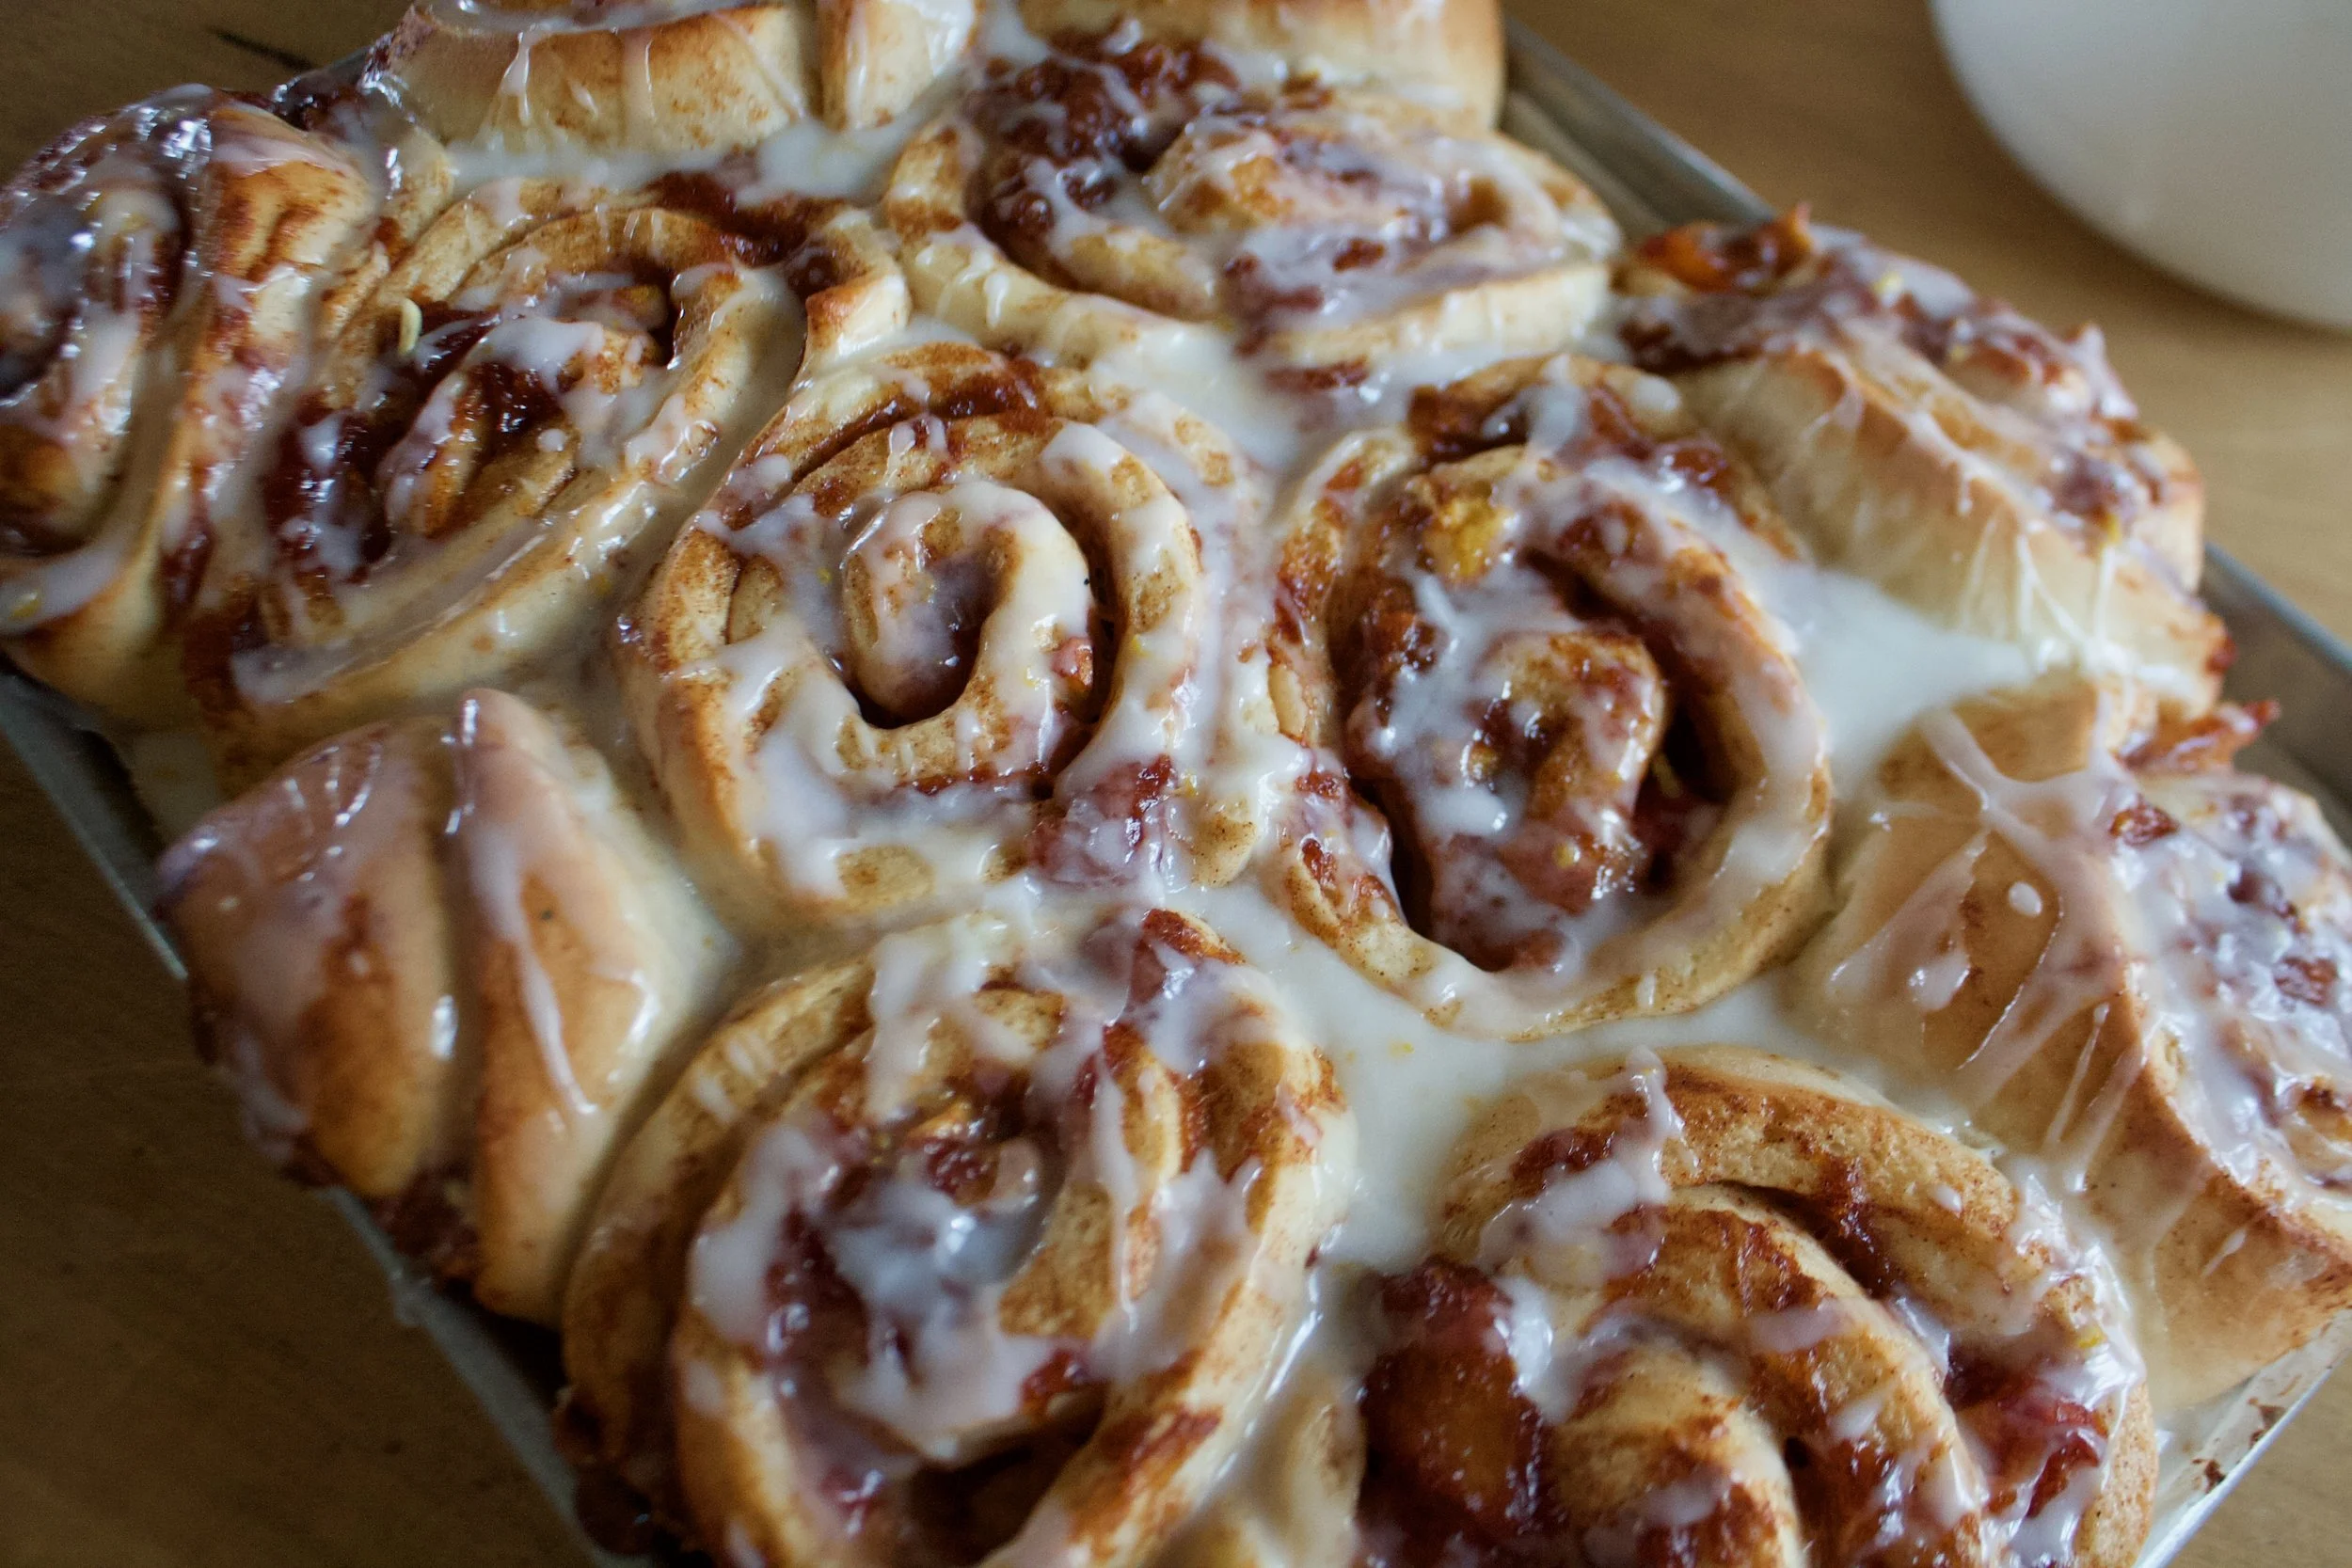
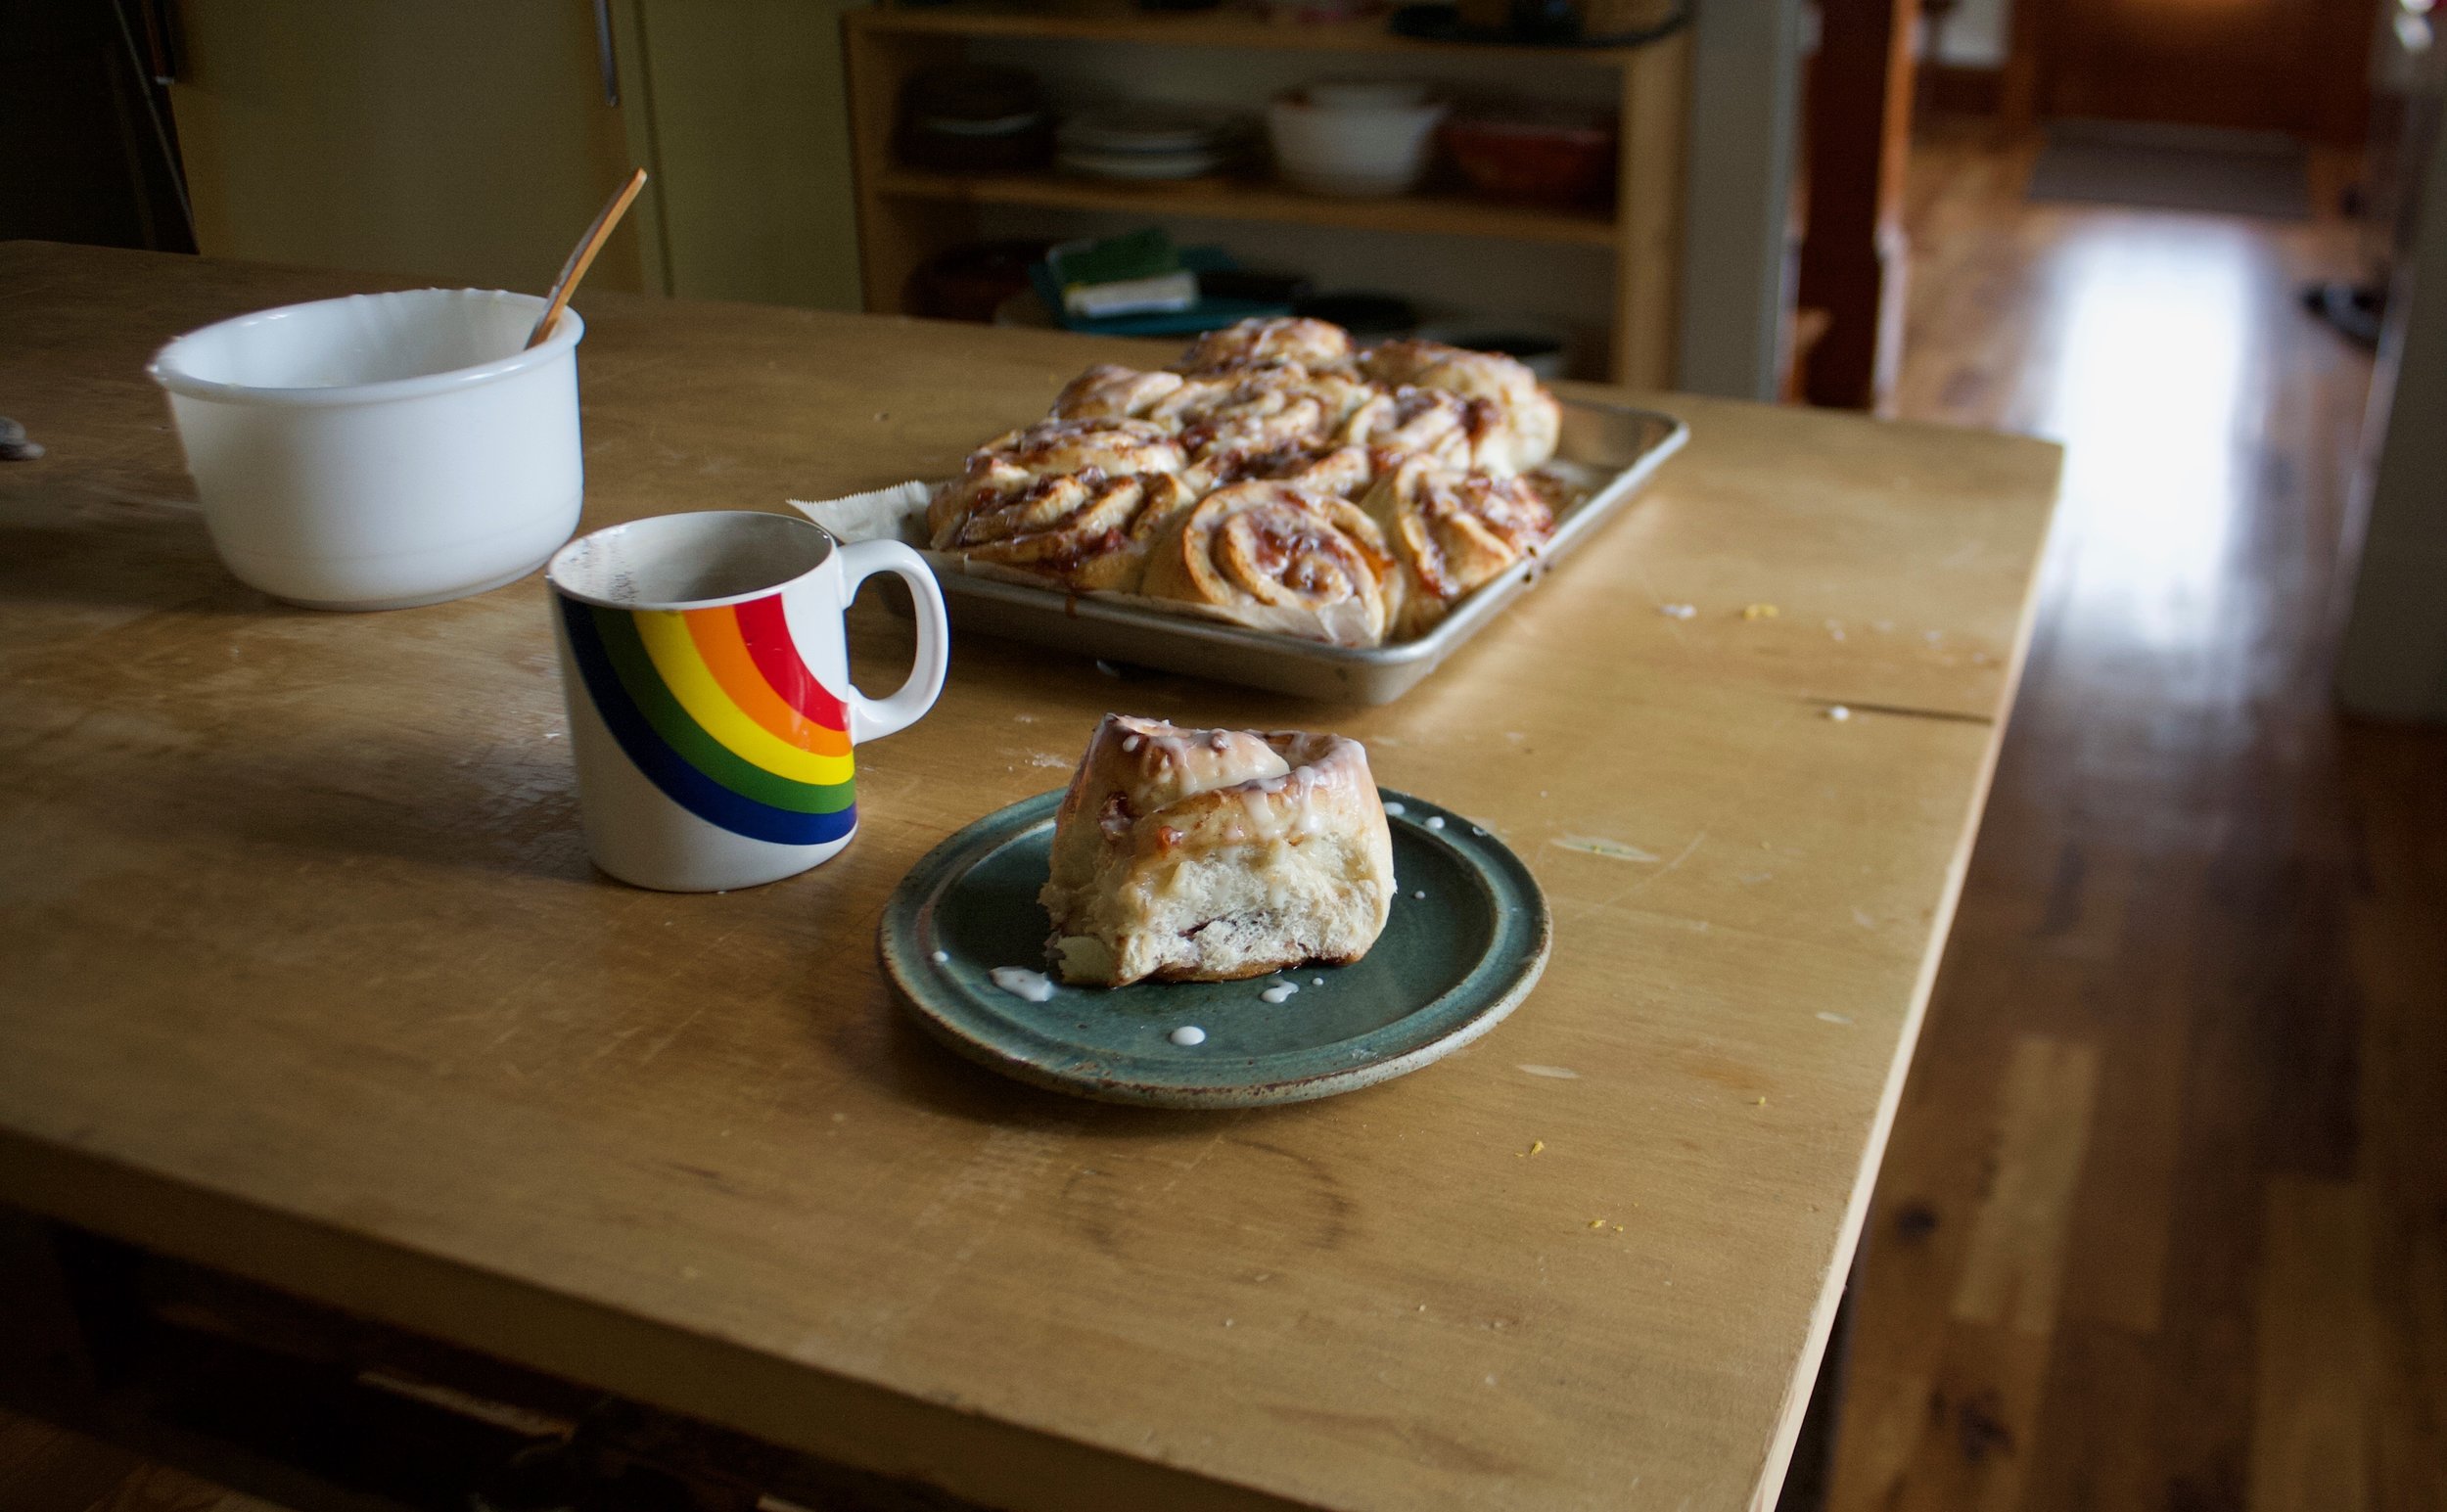
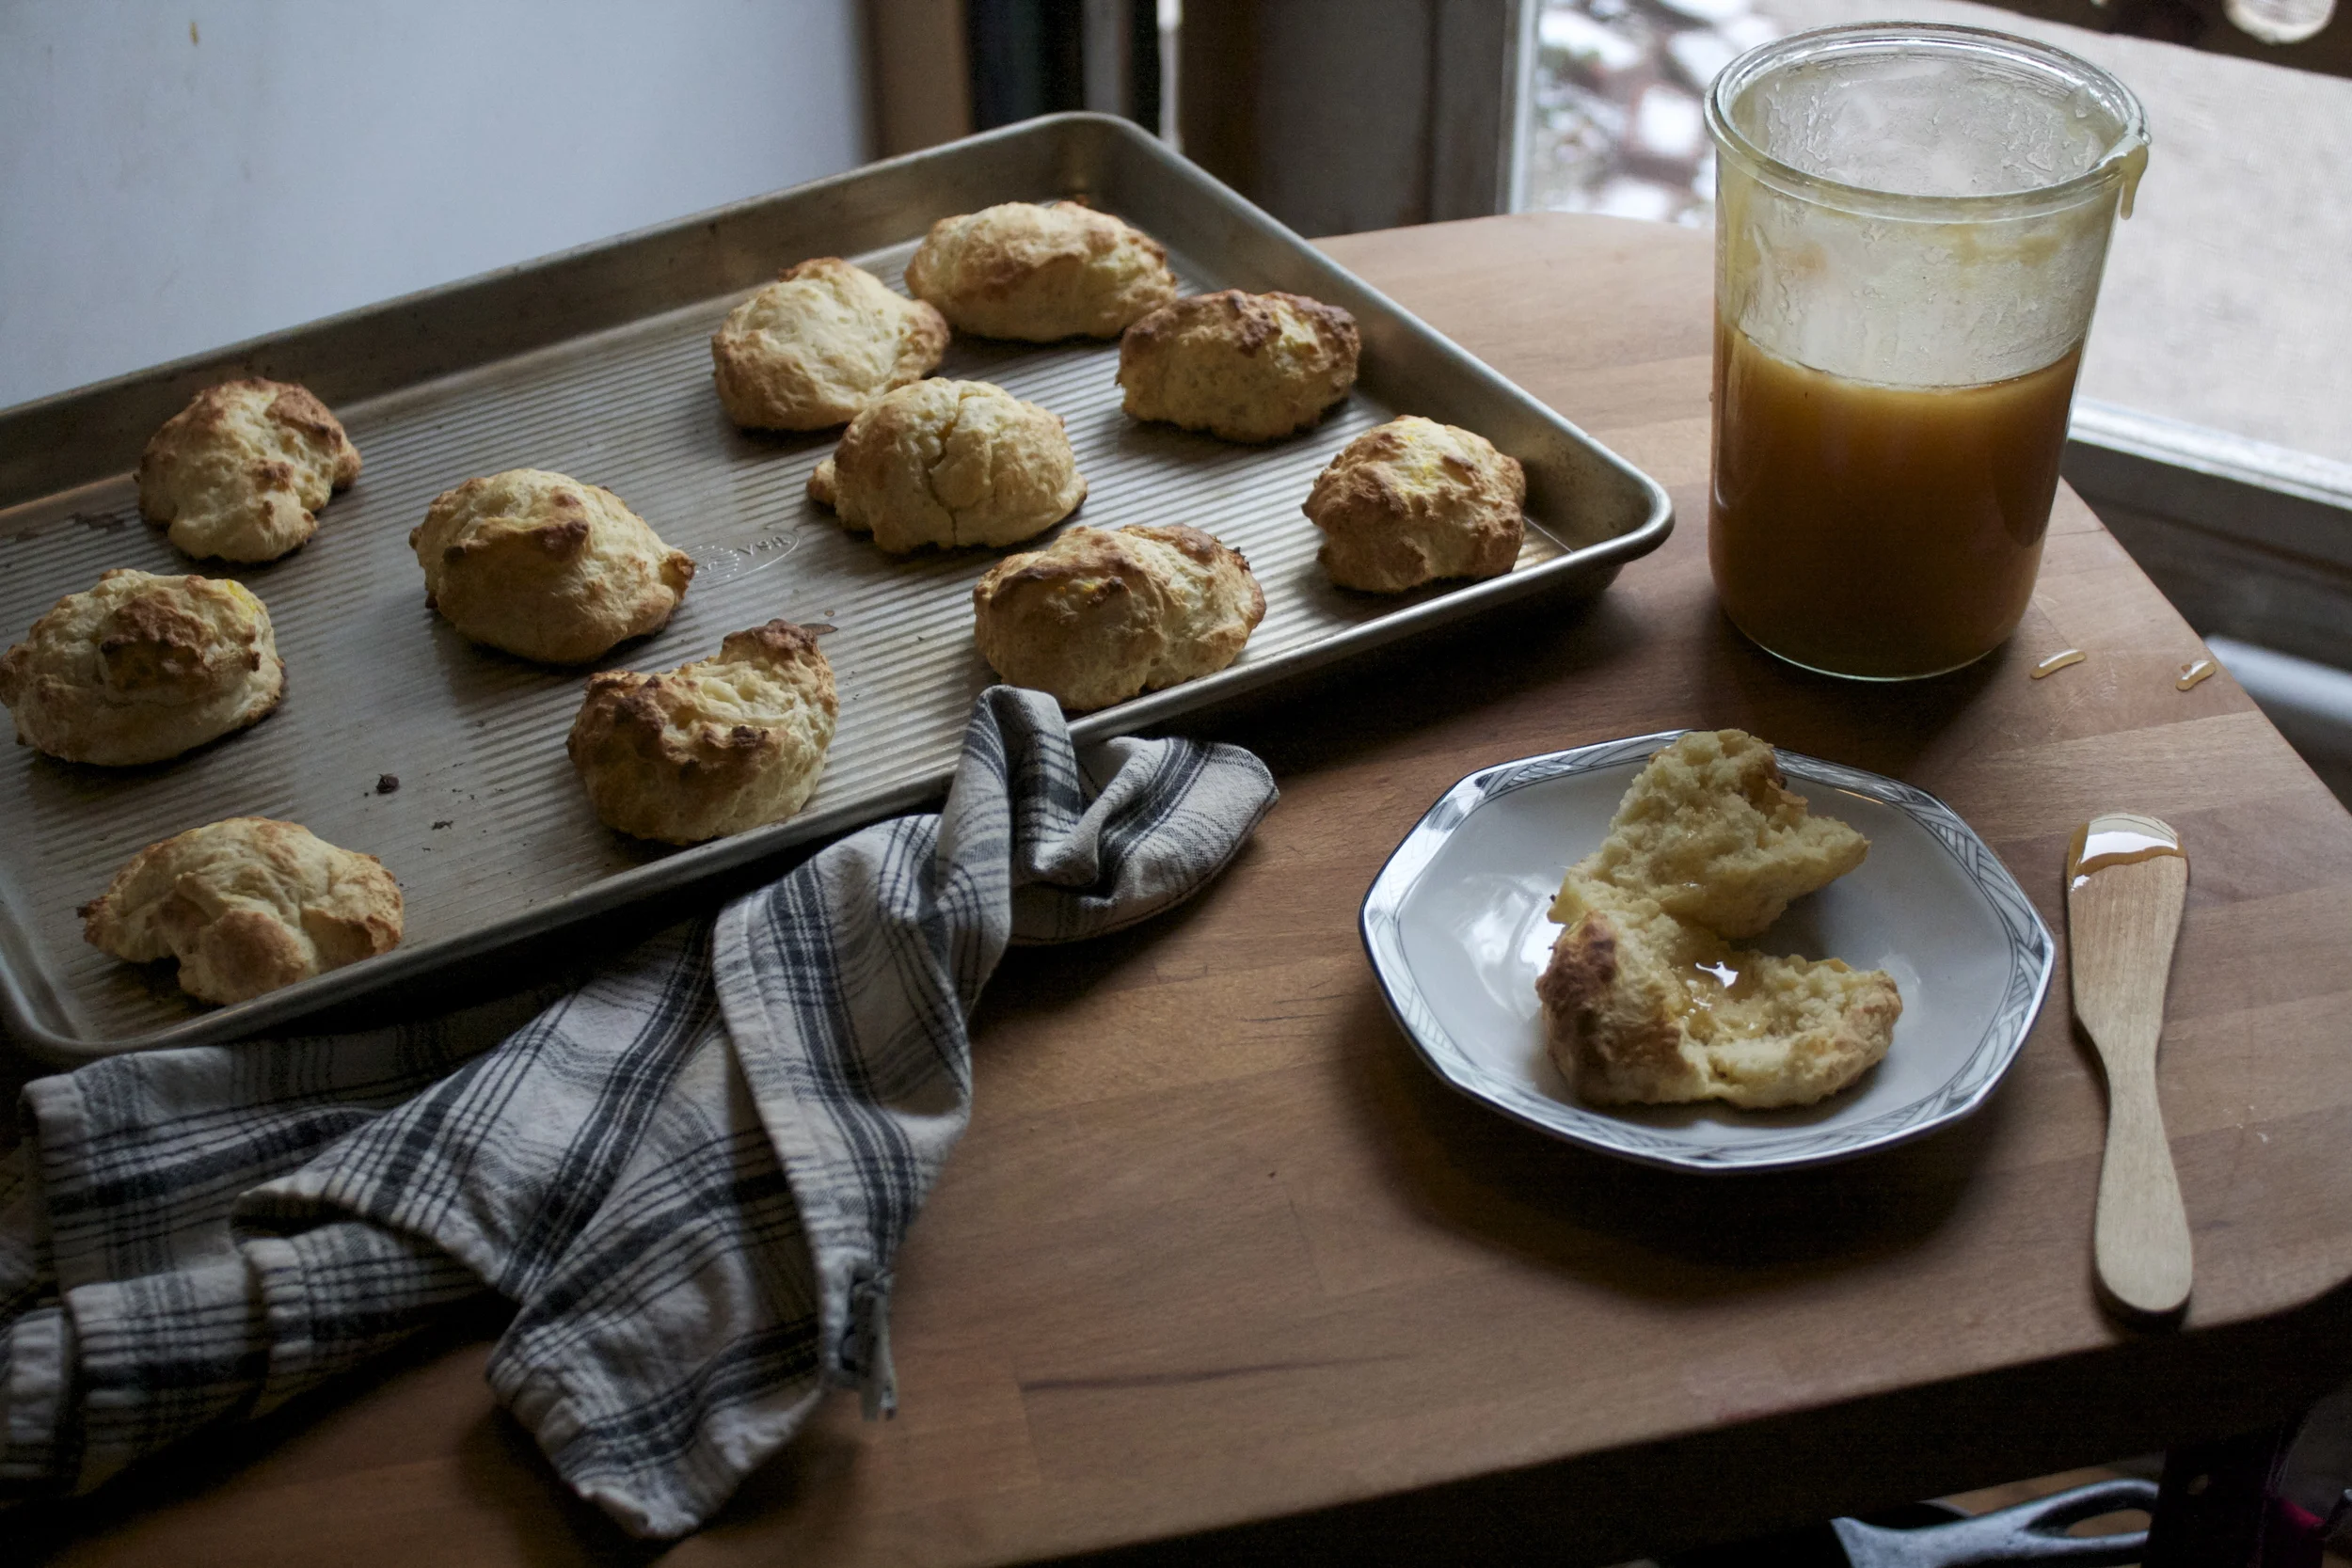

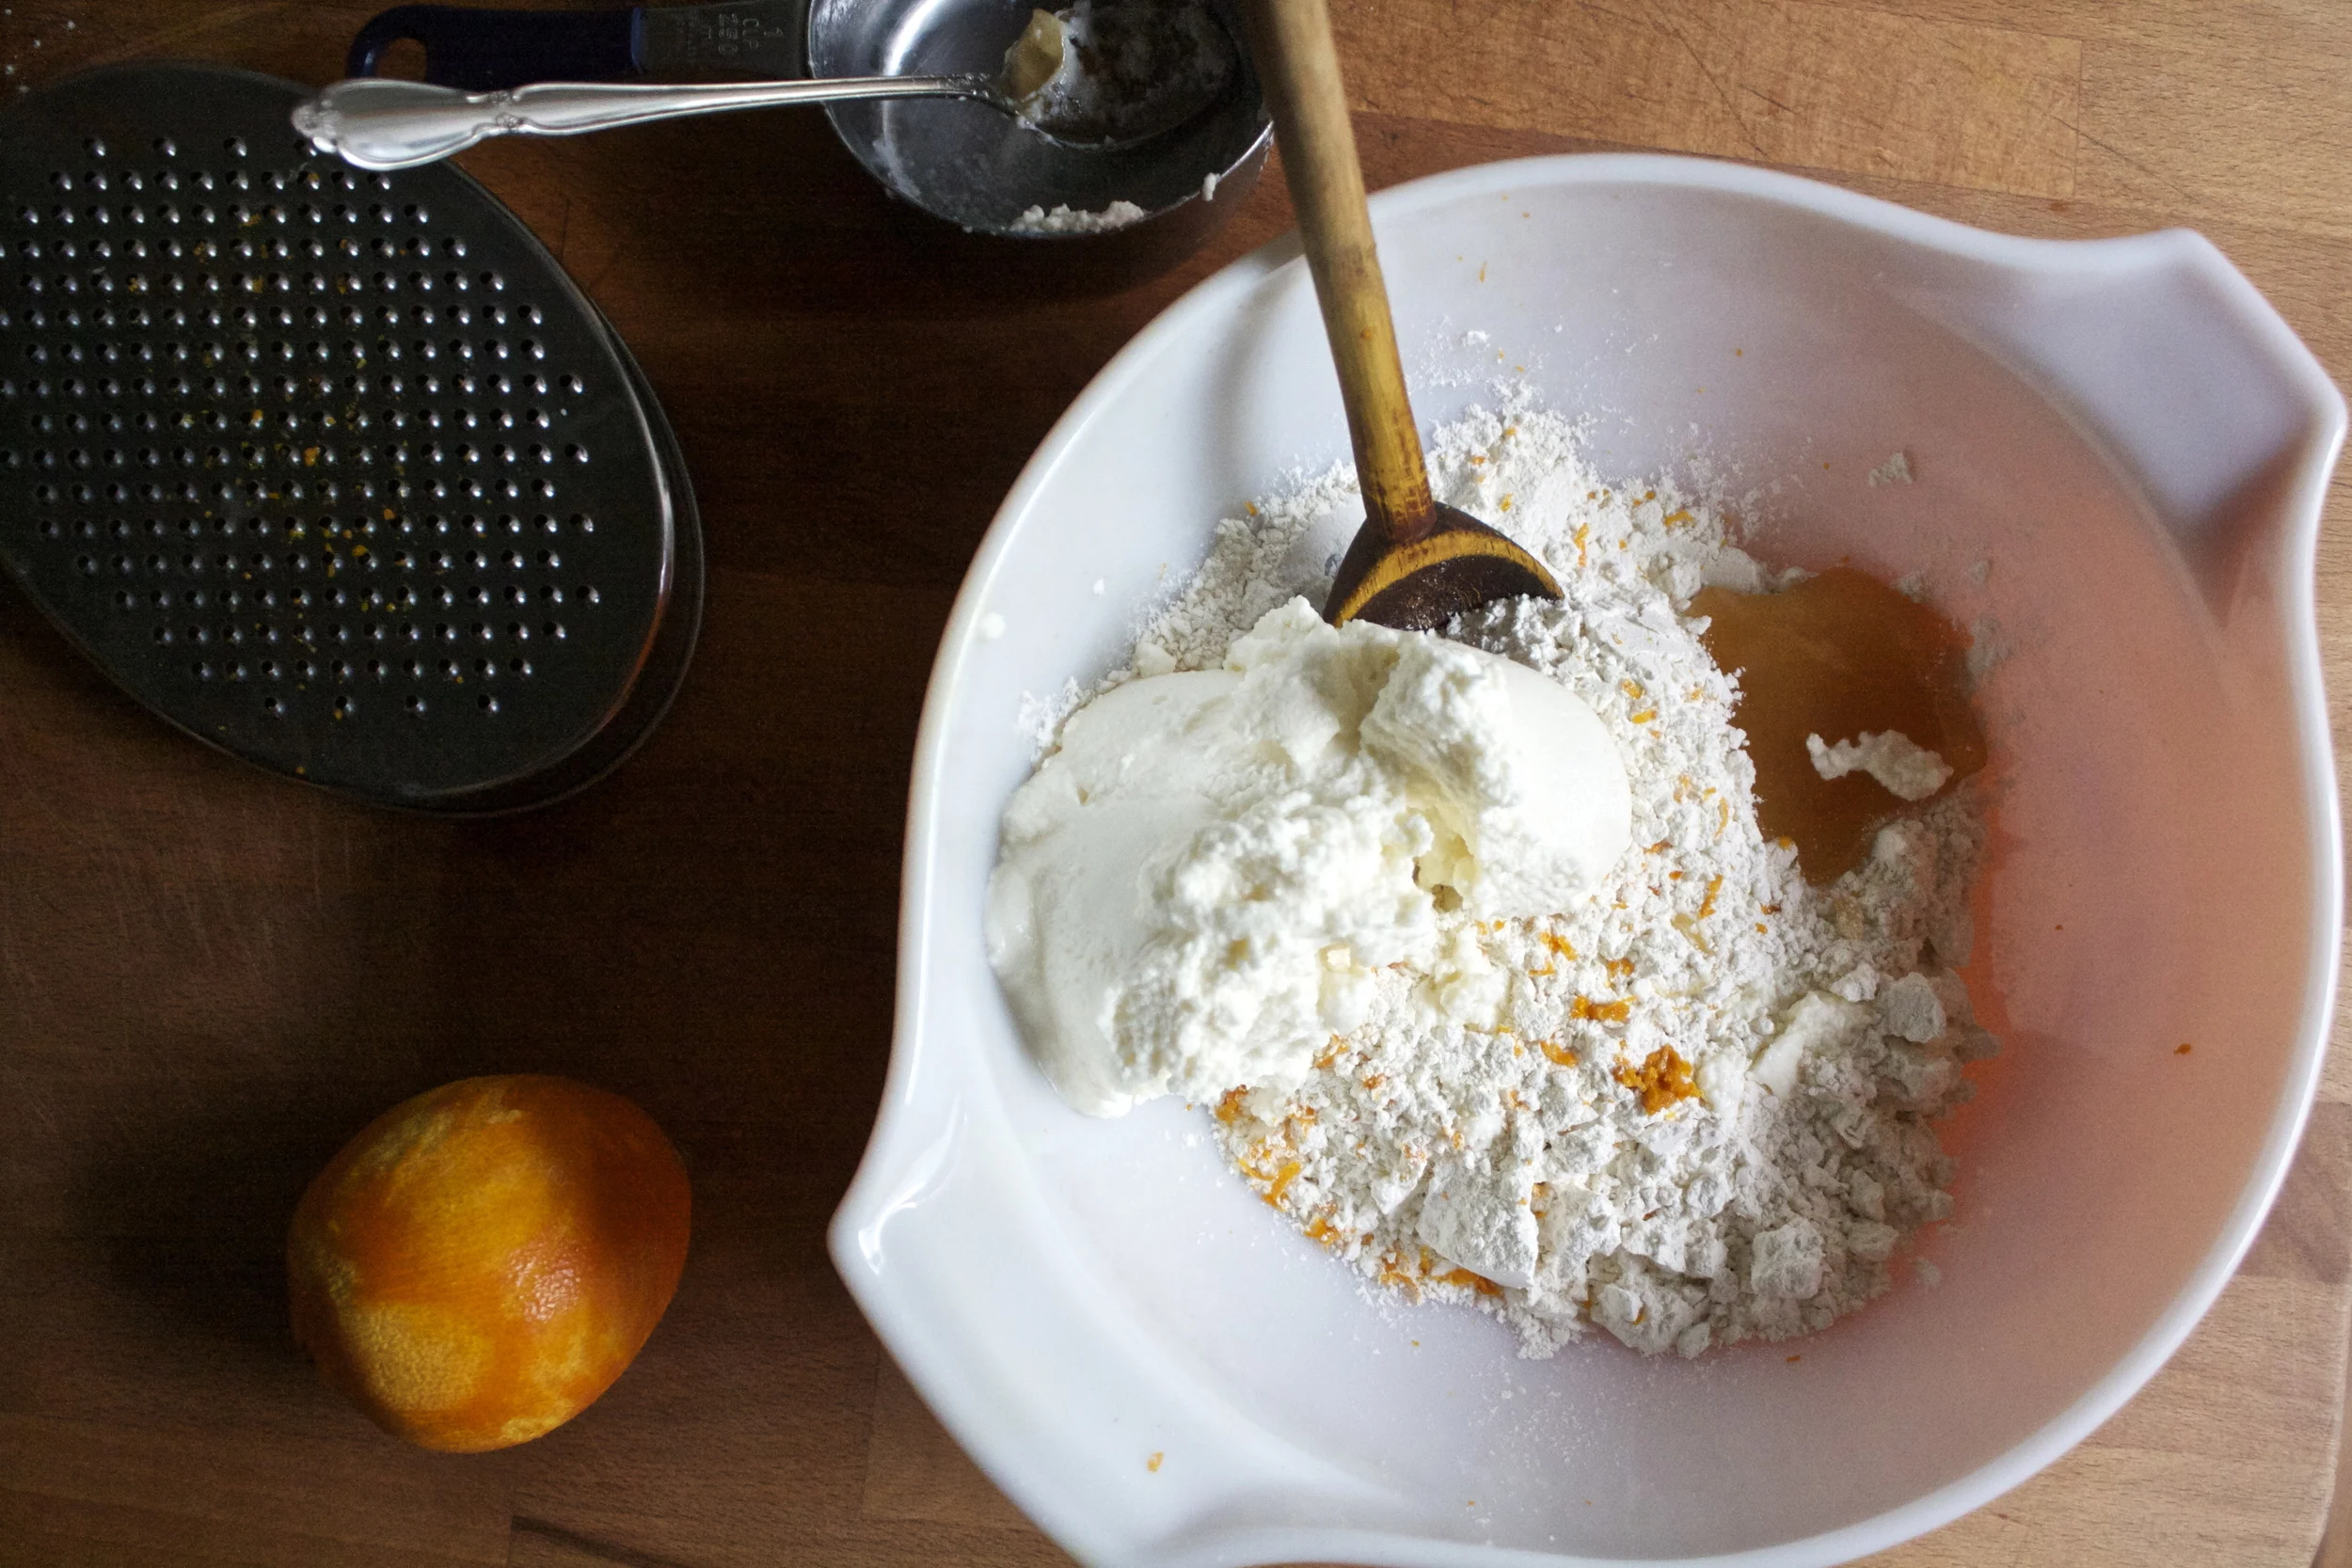
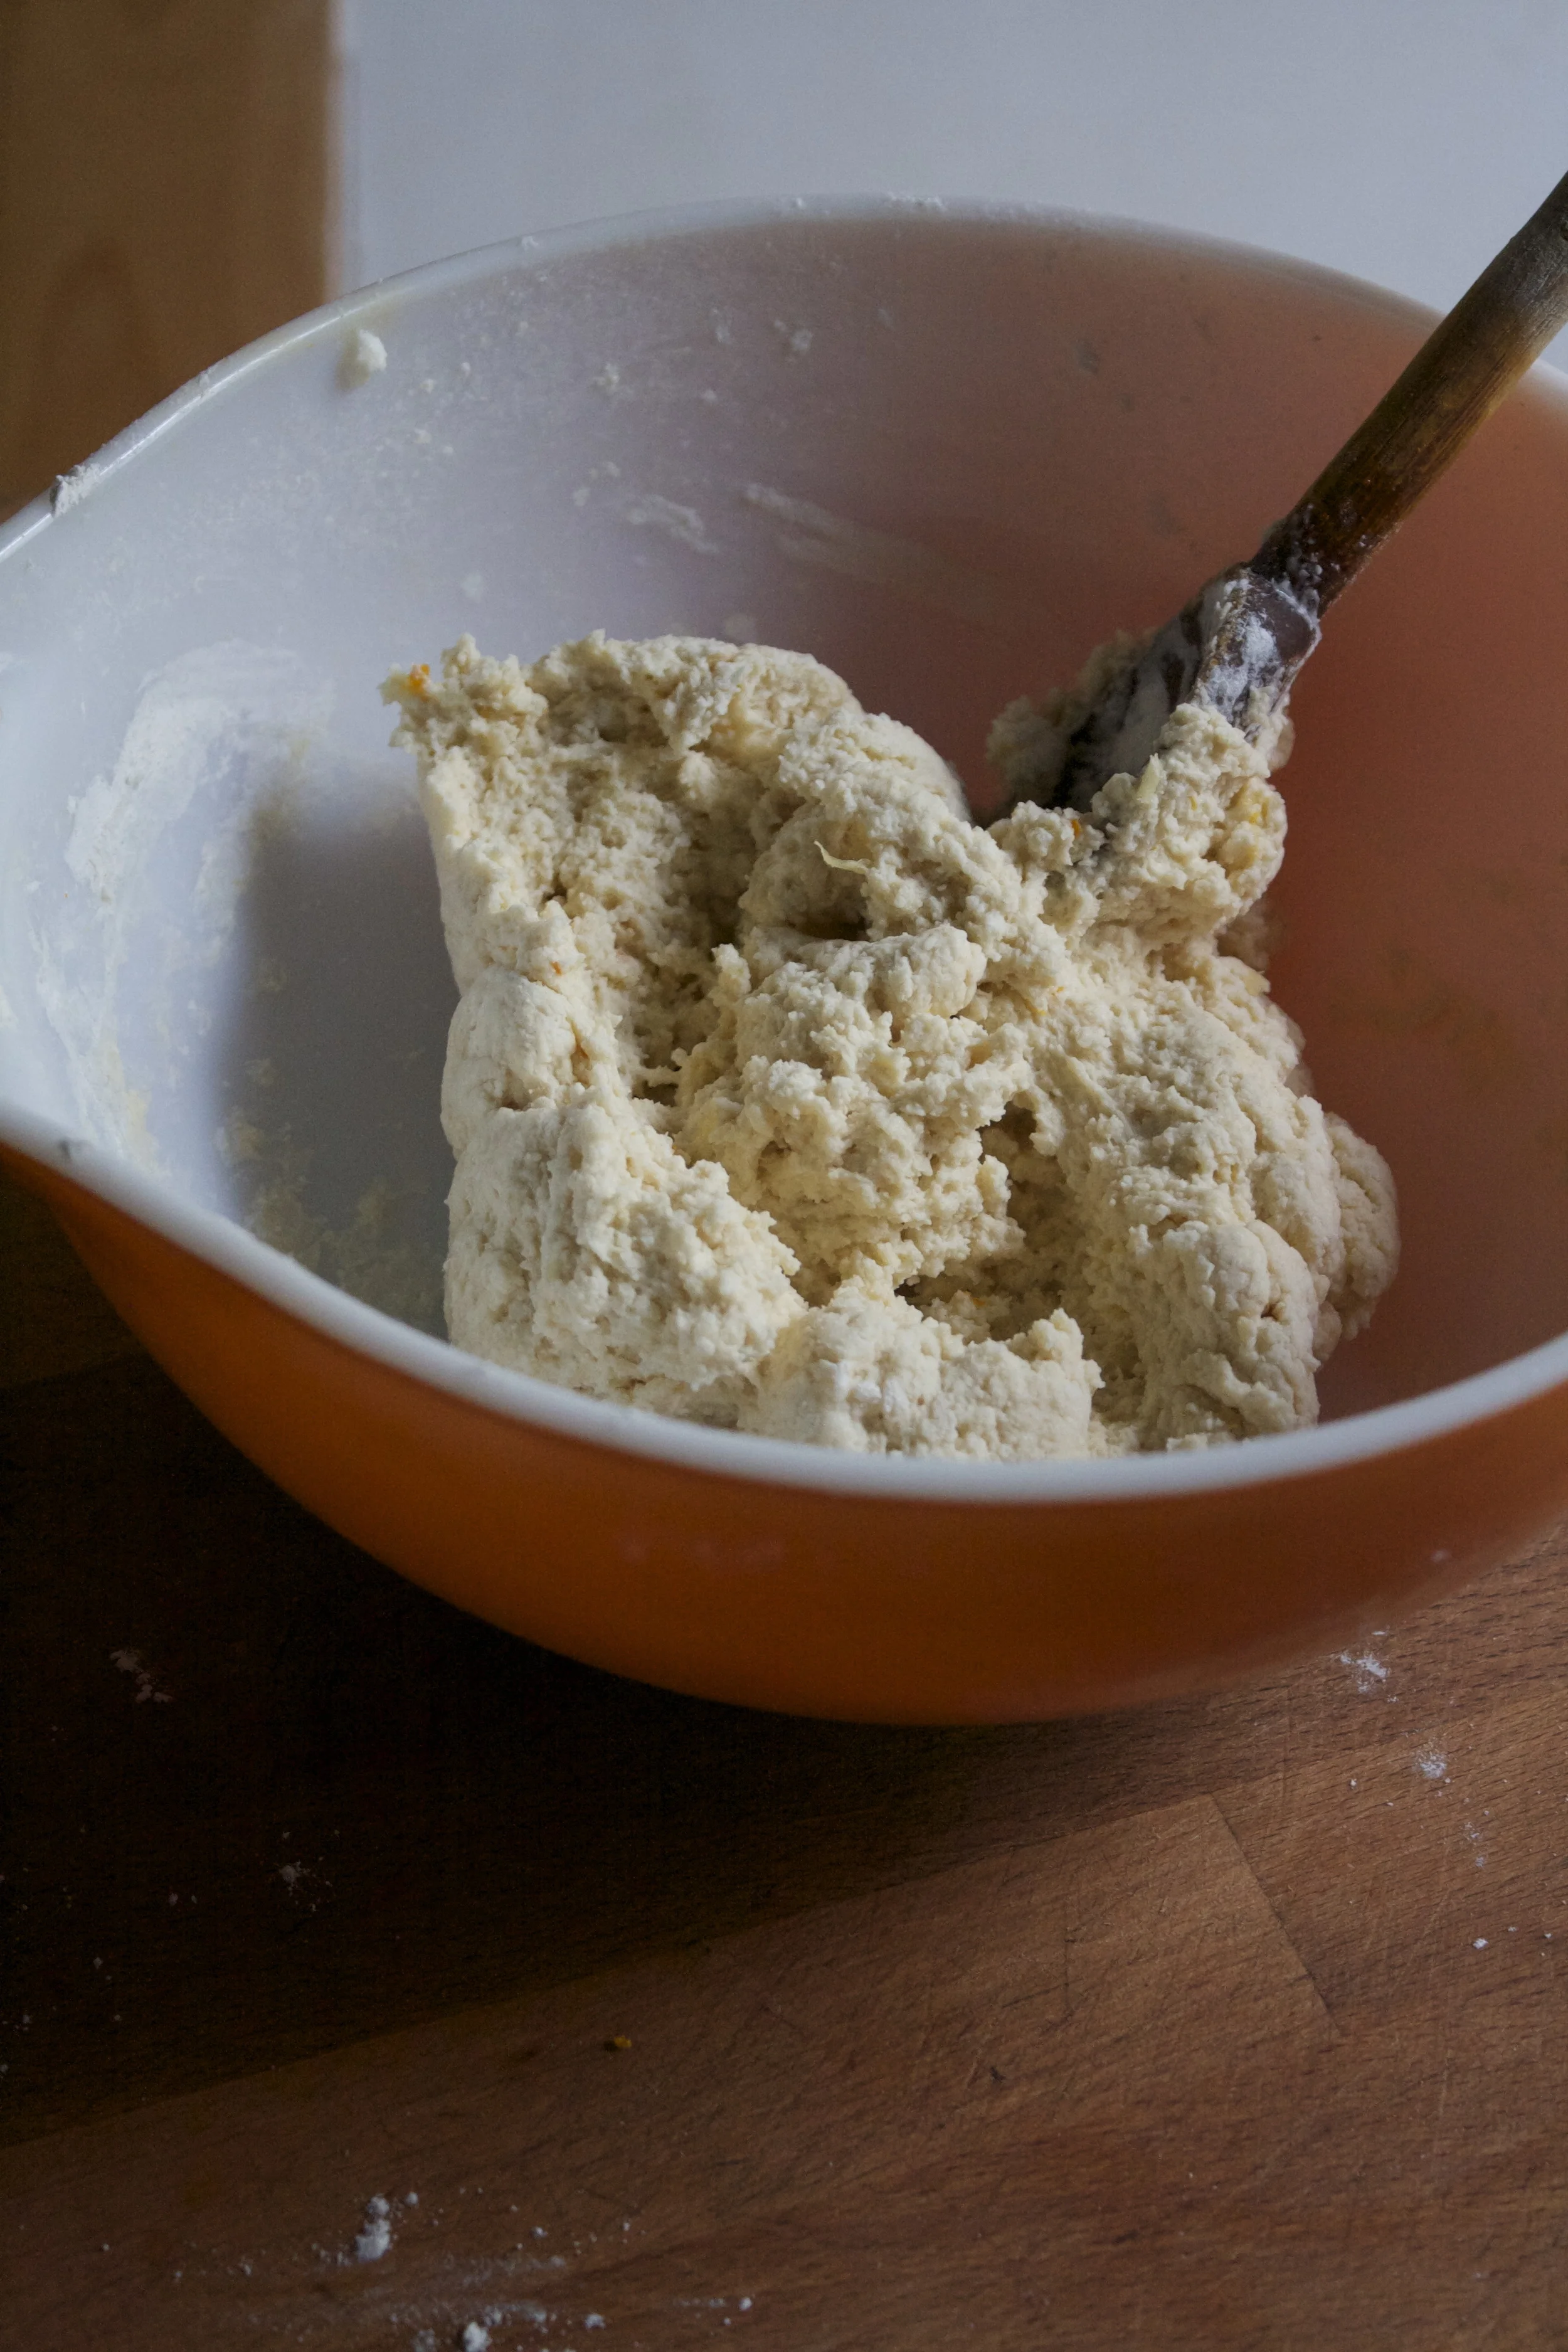


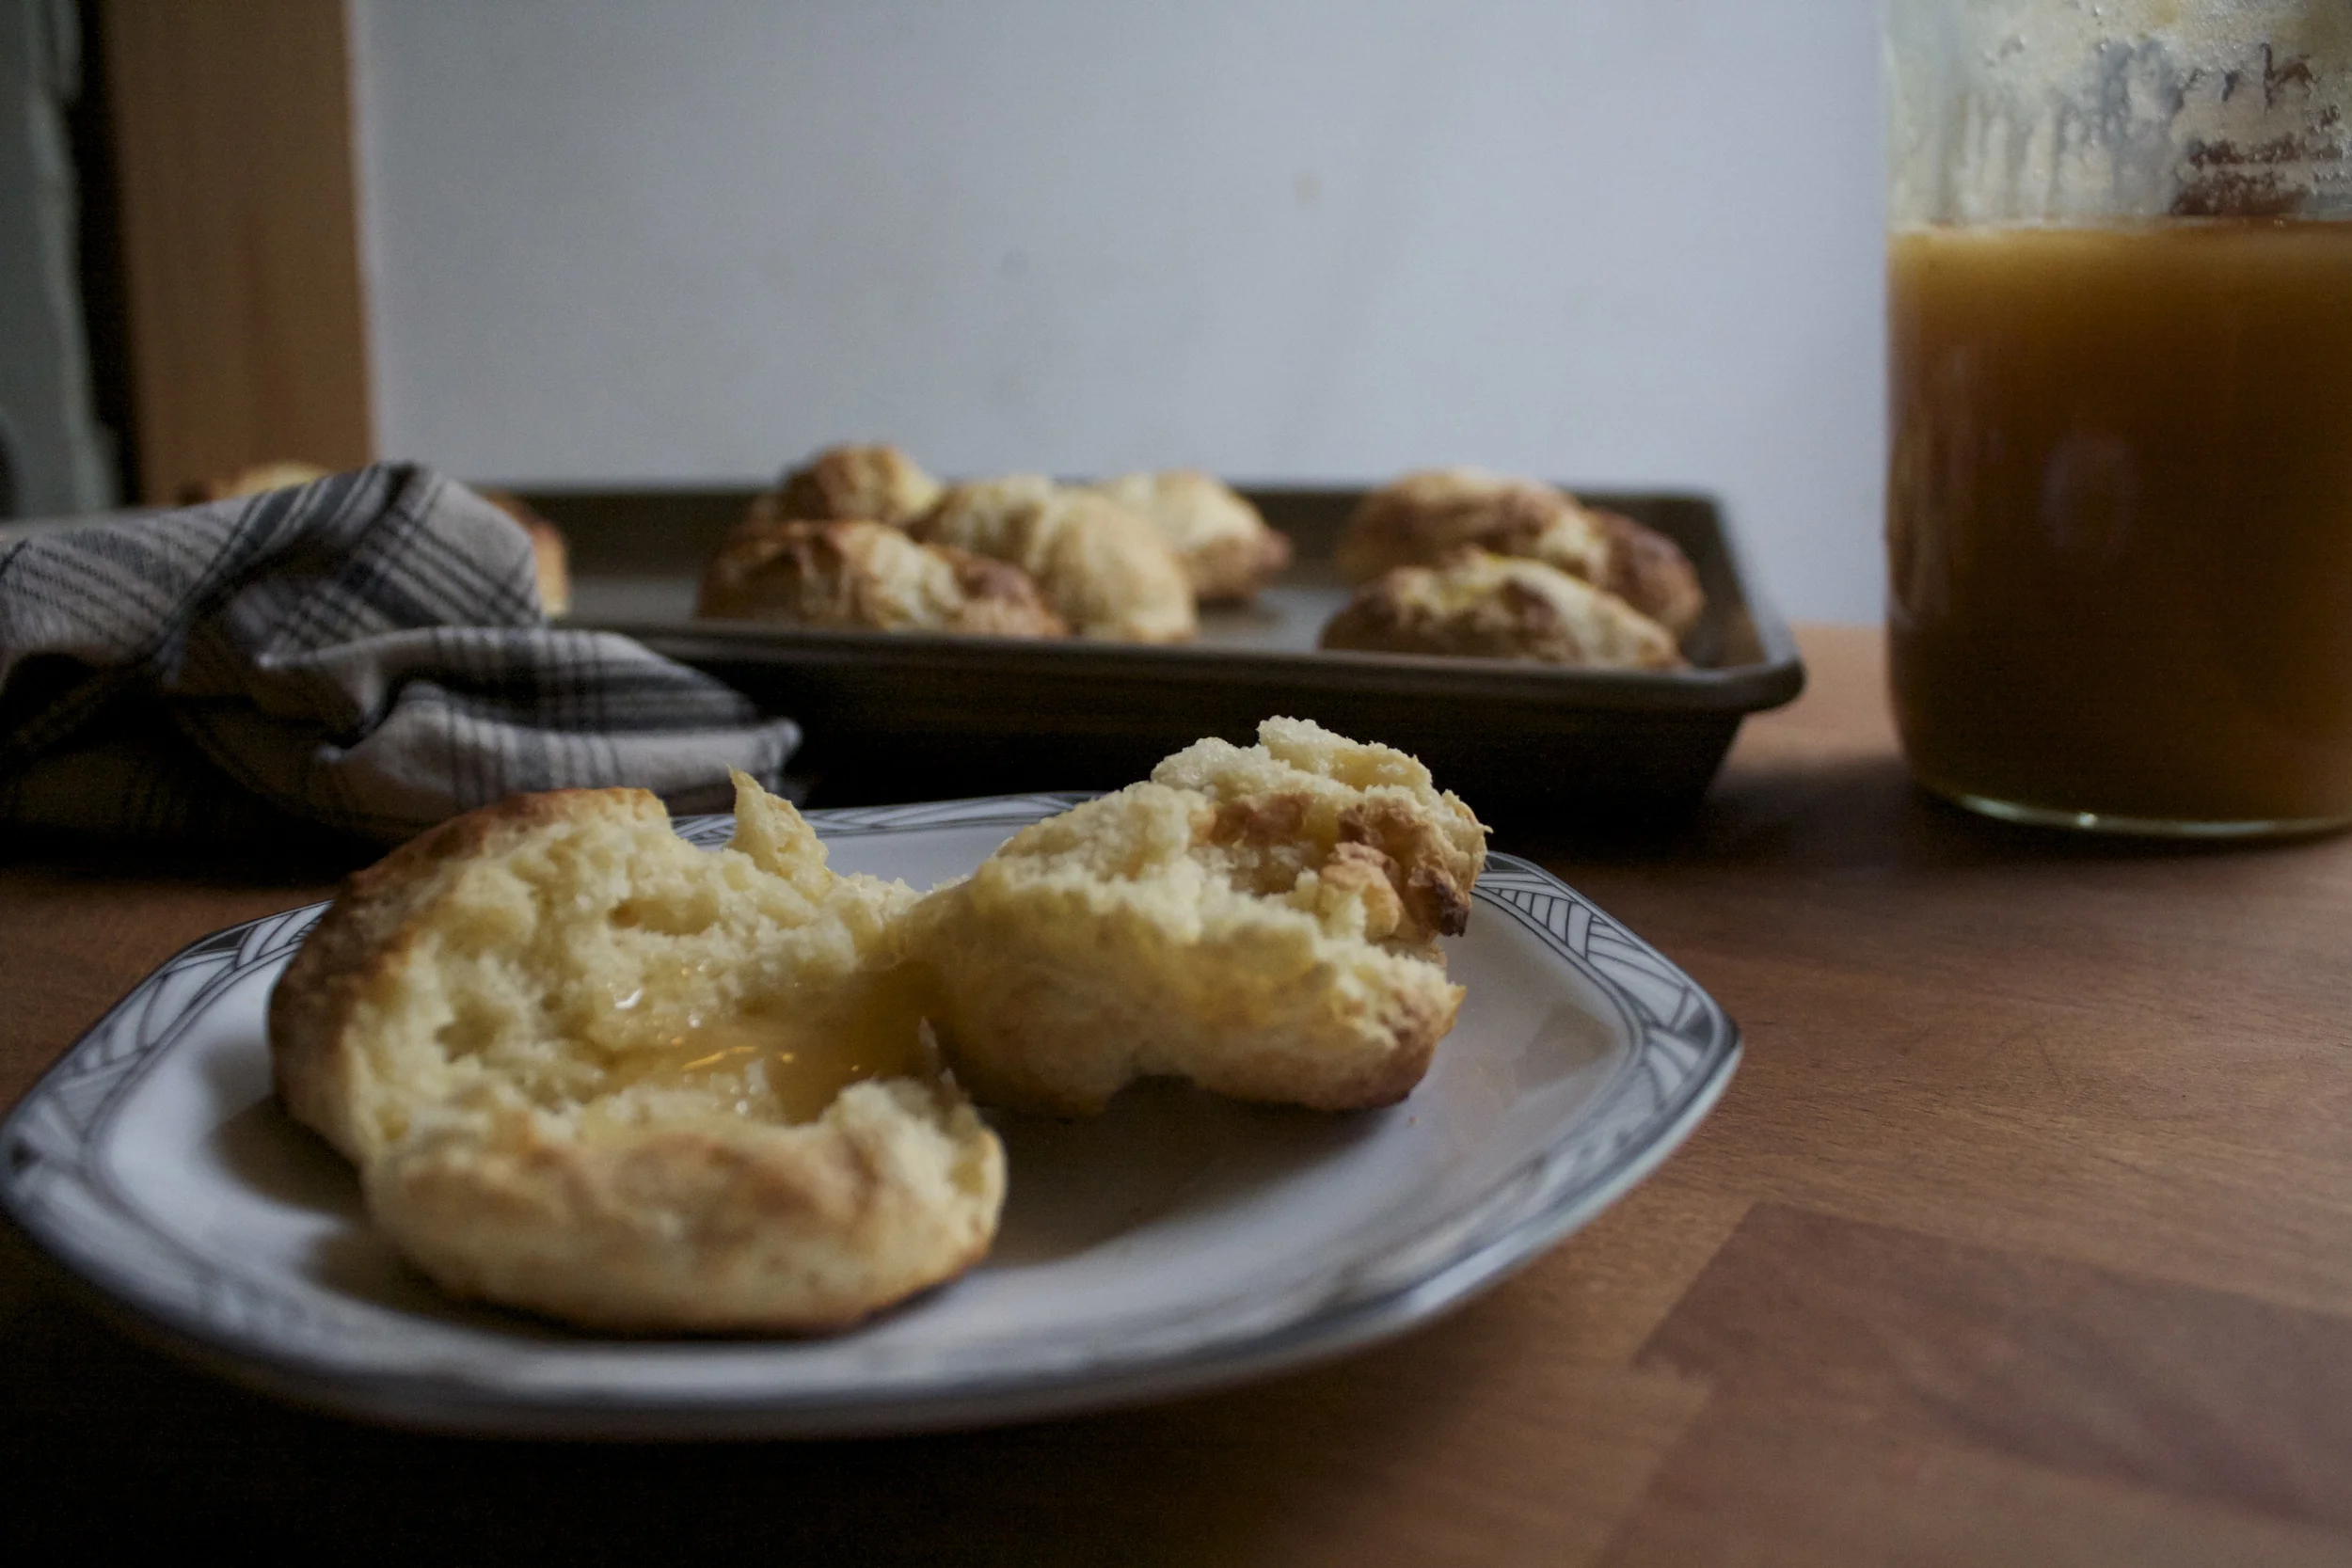
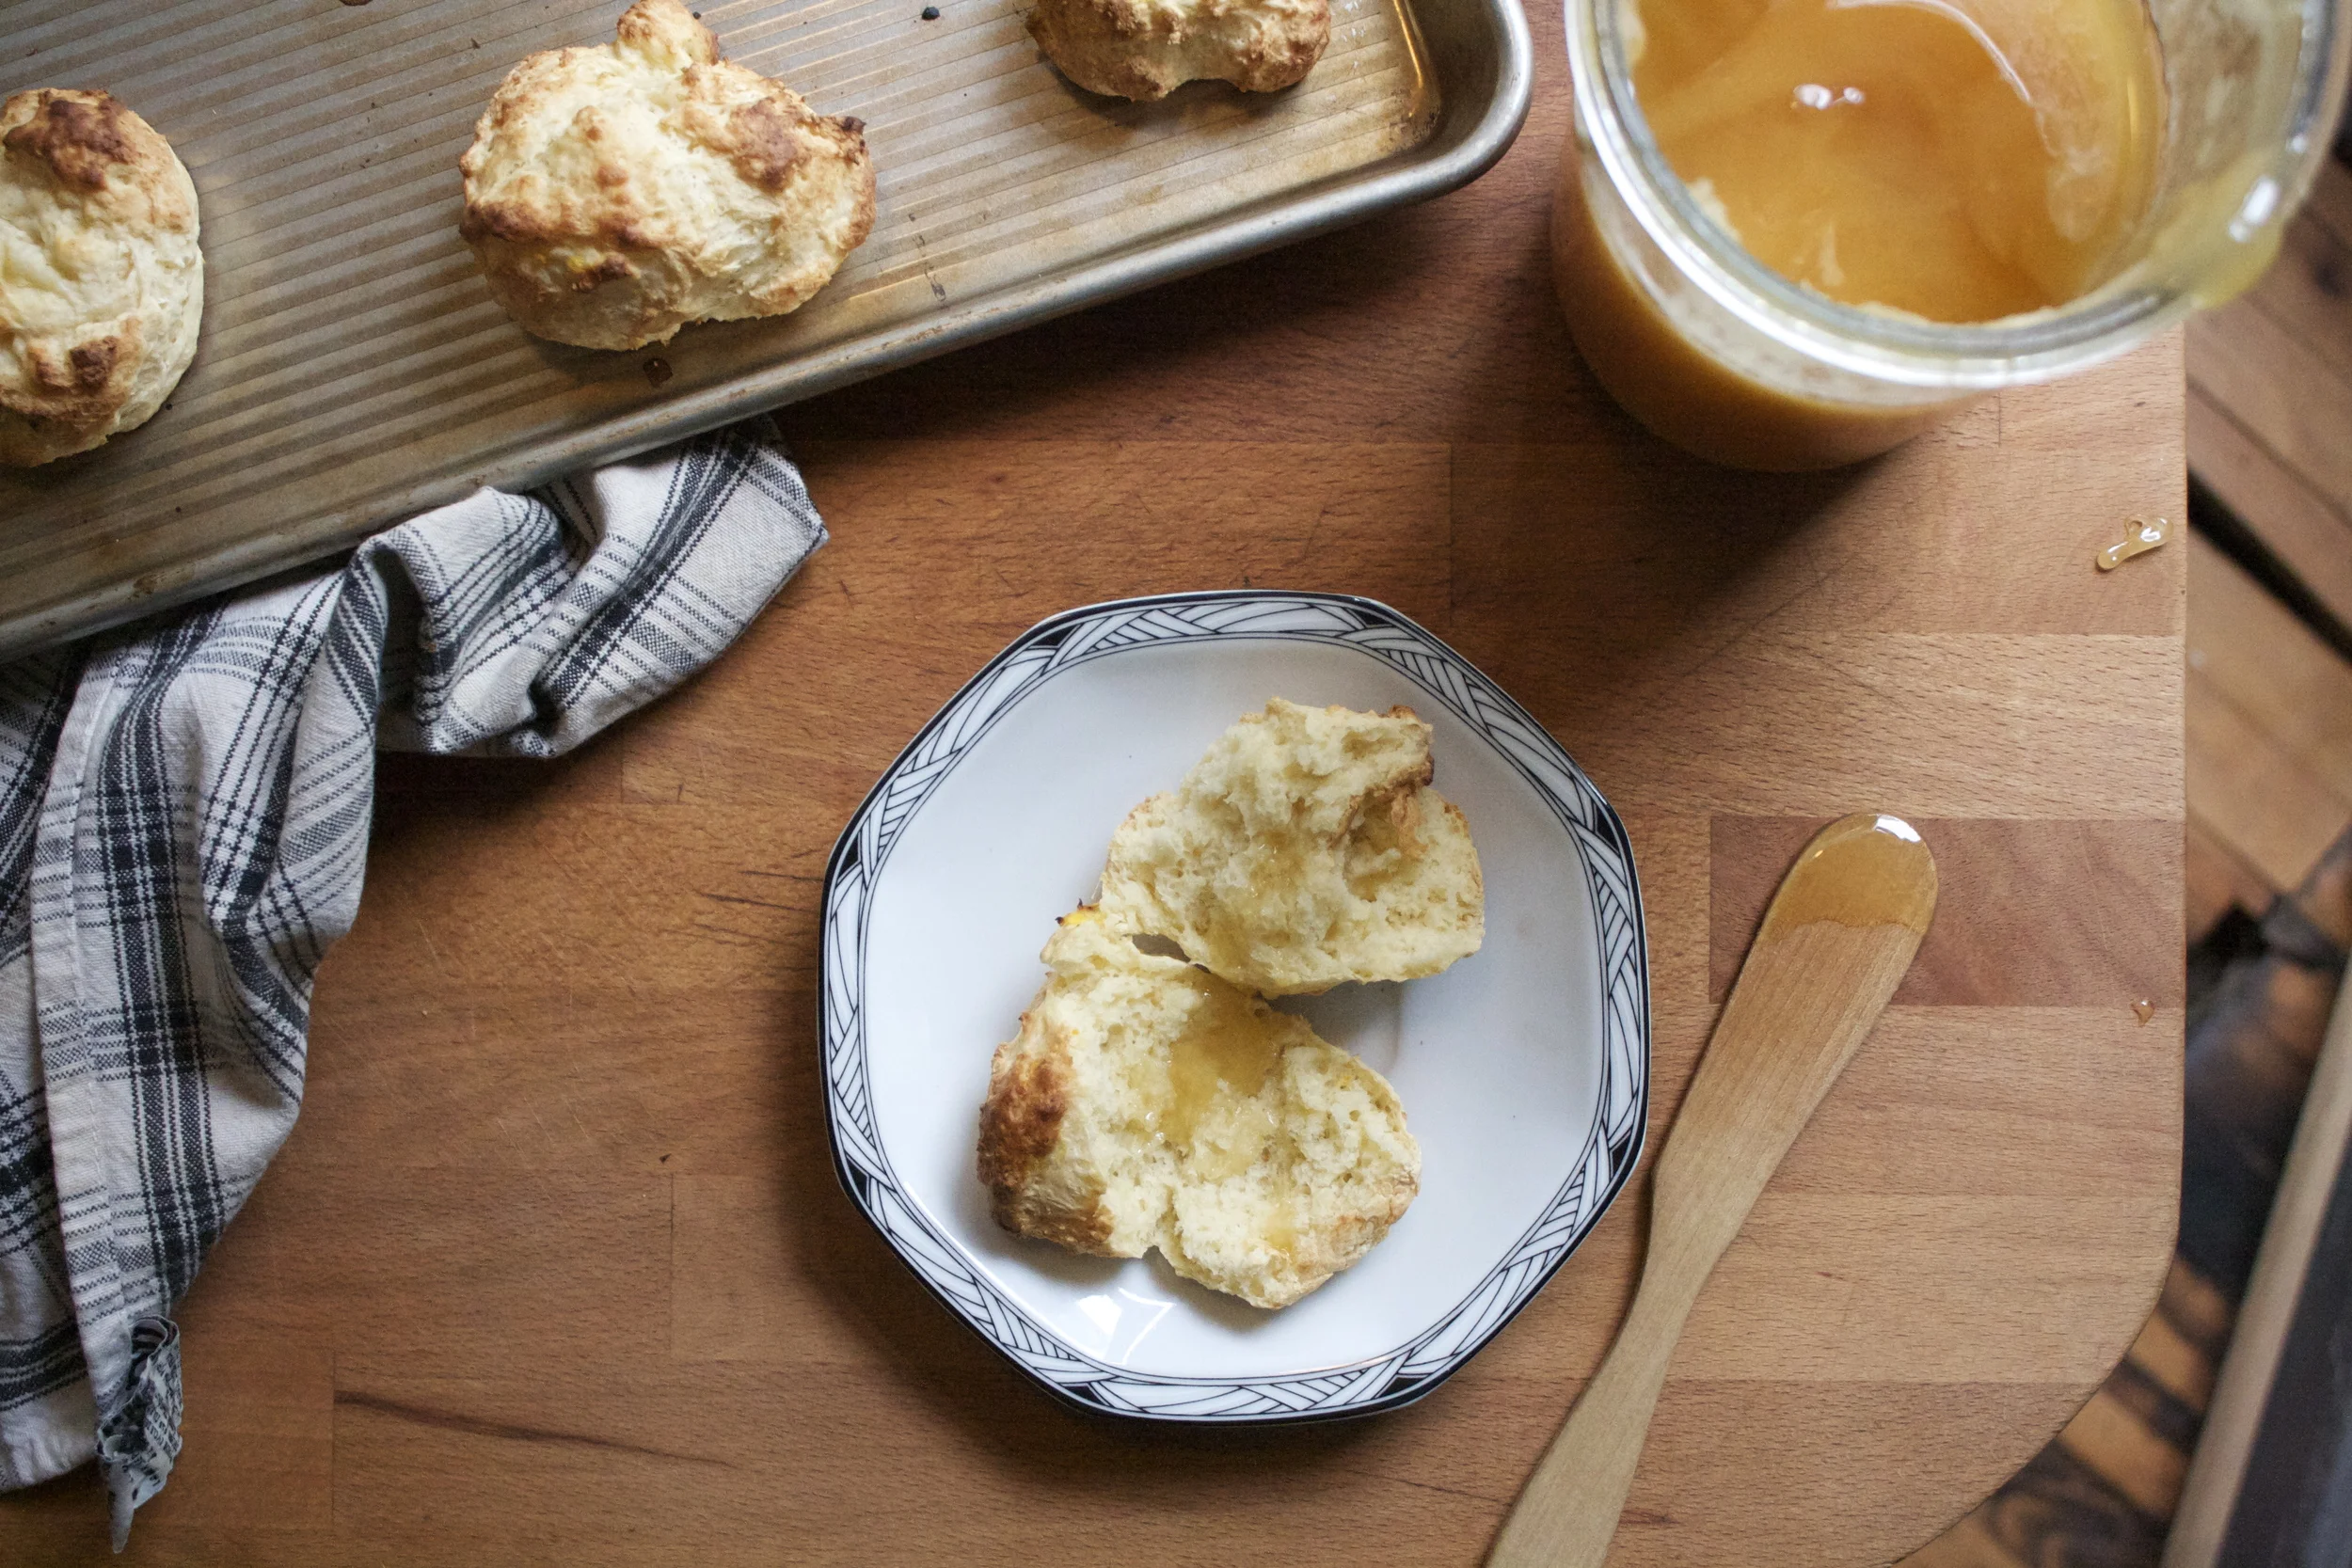
 Oh do I love a good Sunday. The picture above was taken last Sunday and what a glorious day that was. The mister and I took the pup hiking and it was the most spectacular of days. Sunny, 30 degrees and no wind..I could’t have asked for better weather. %u00a0
 Playing on the frozen lake. It was so freaking cold and windy, but we just had to do it!
 %u00a0Two of my favorite people in the world.
 And I made brunch with 2 more of my favorites.
 My little brothers (can I say little if they are bigger then me?) came over and we all had dinner together while listening to music from when they were born. Nothing like a few 17 year olds to make a person feel old.
 Blooming daffodils. I love to watch my flowers open up, it’s just as good as the flower itself.%u00a0
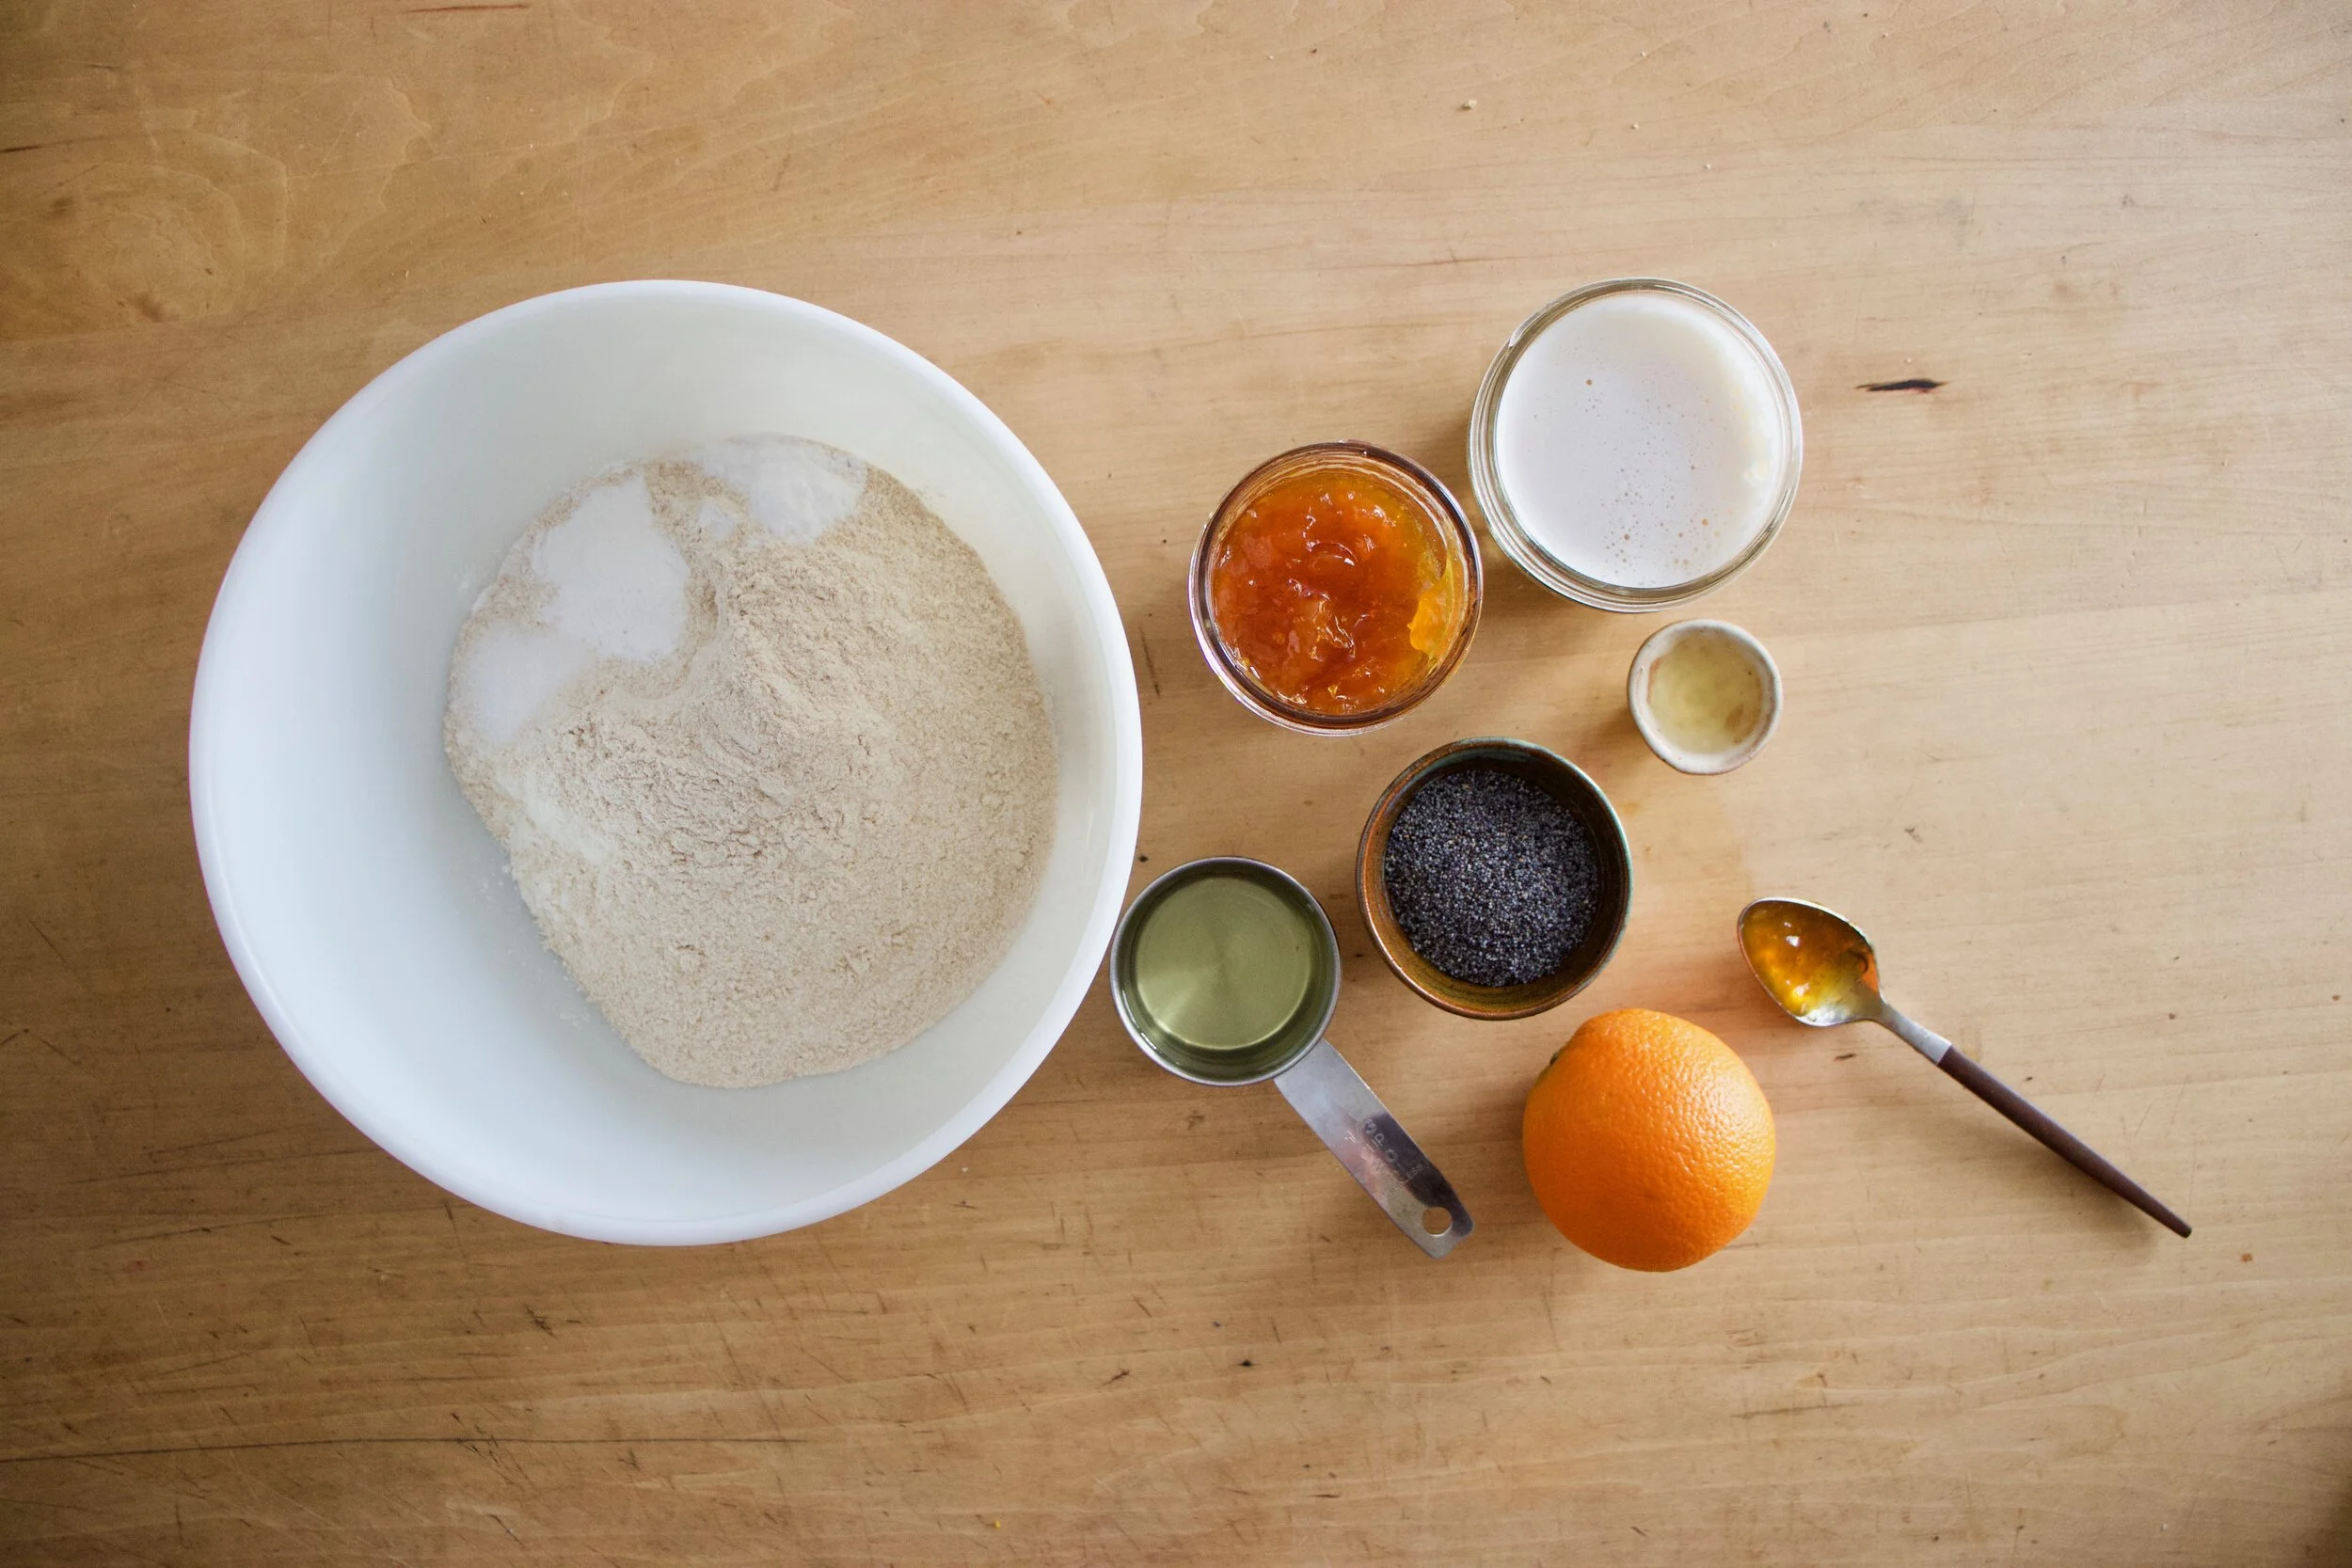
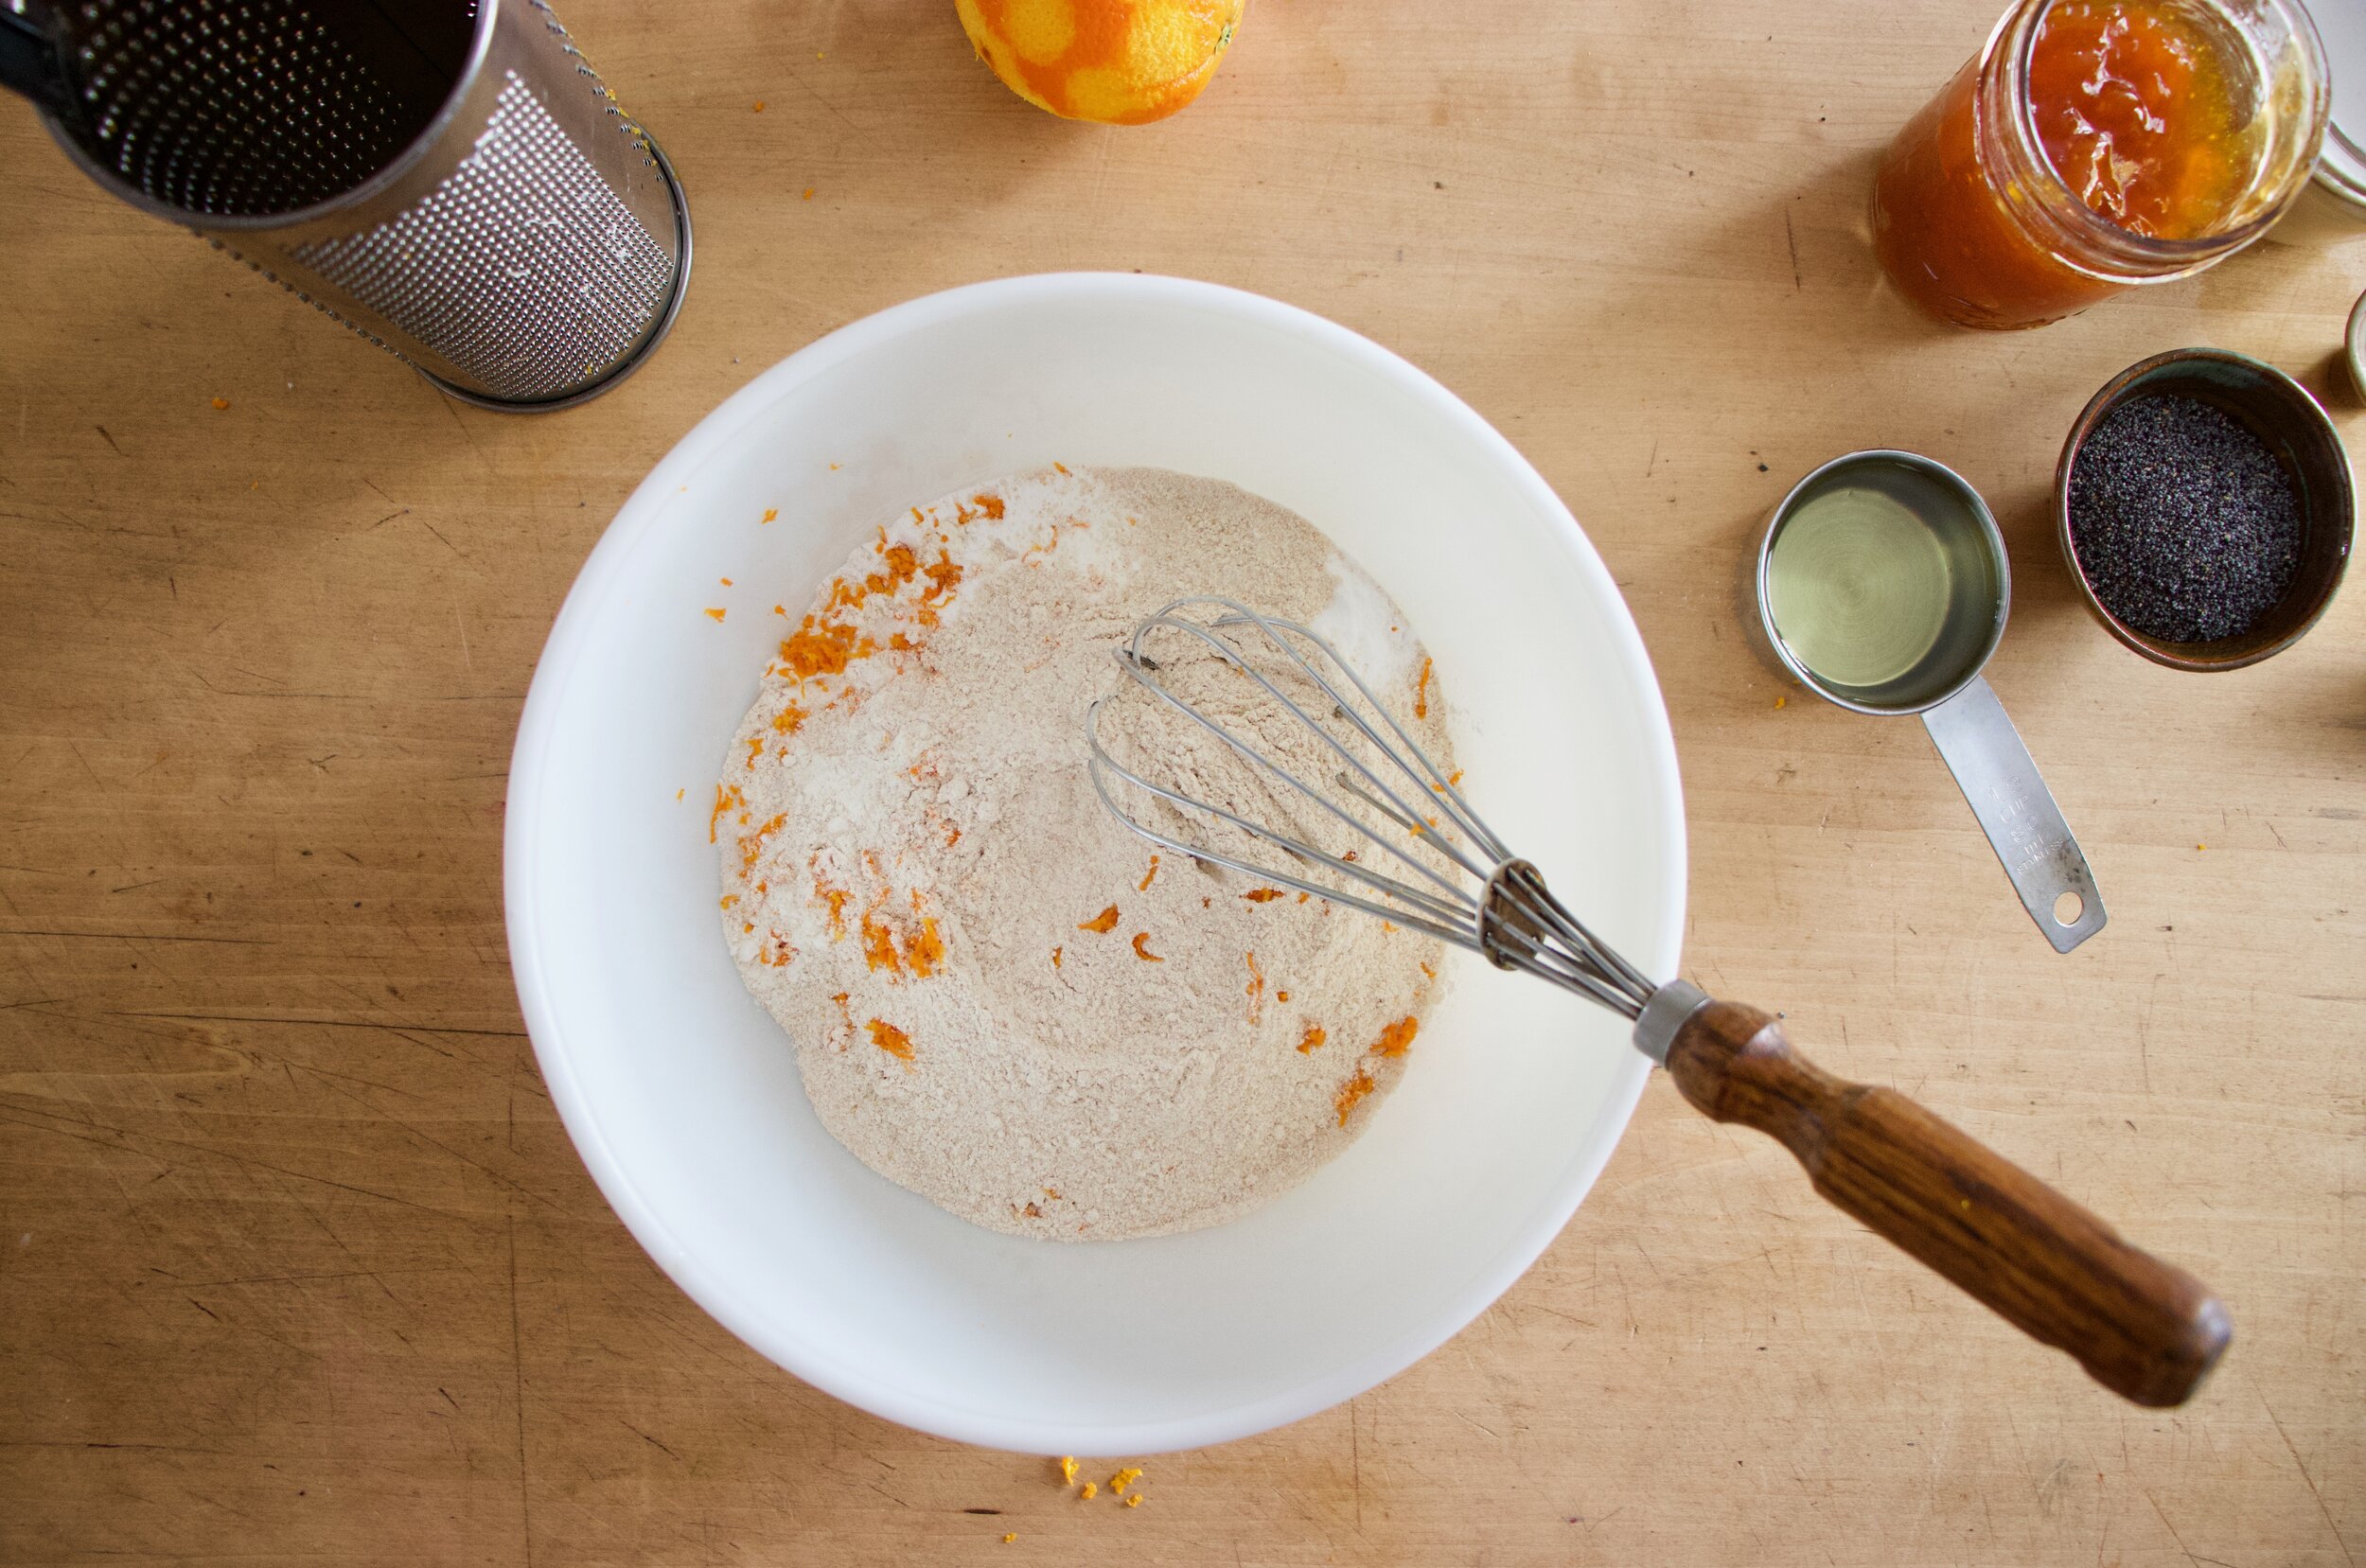
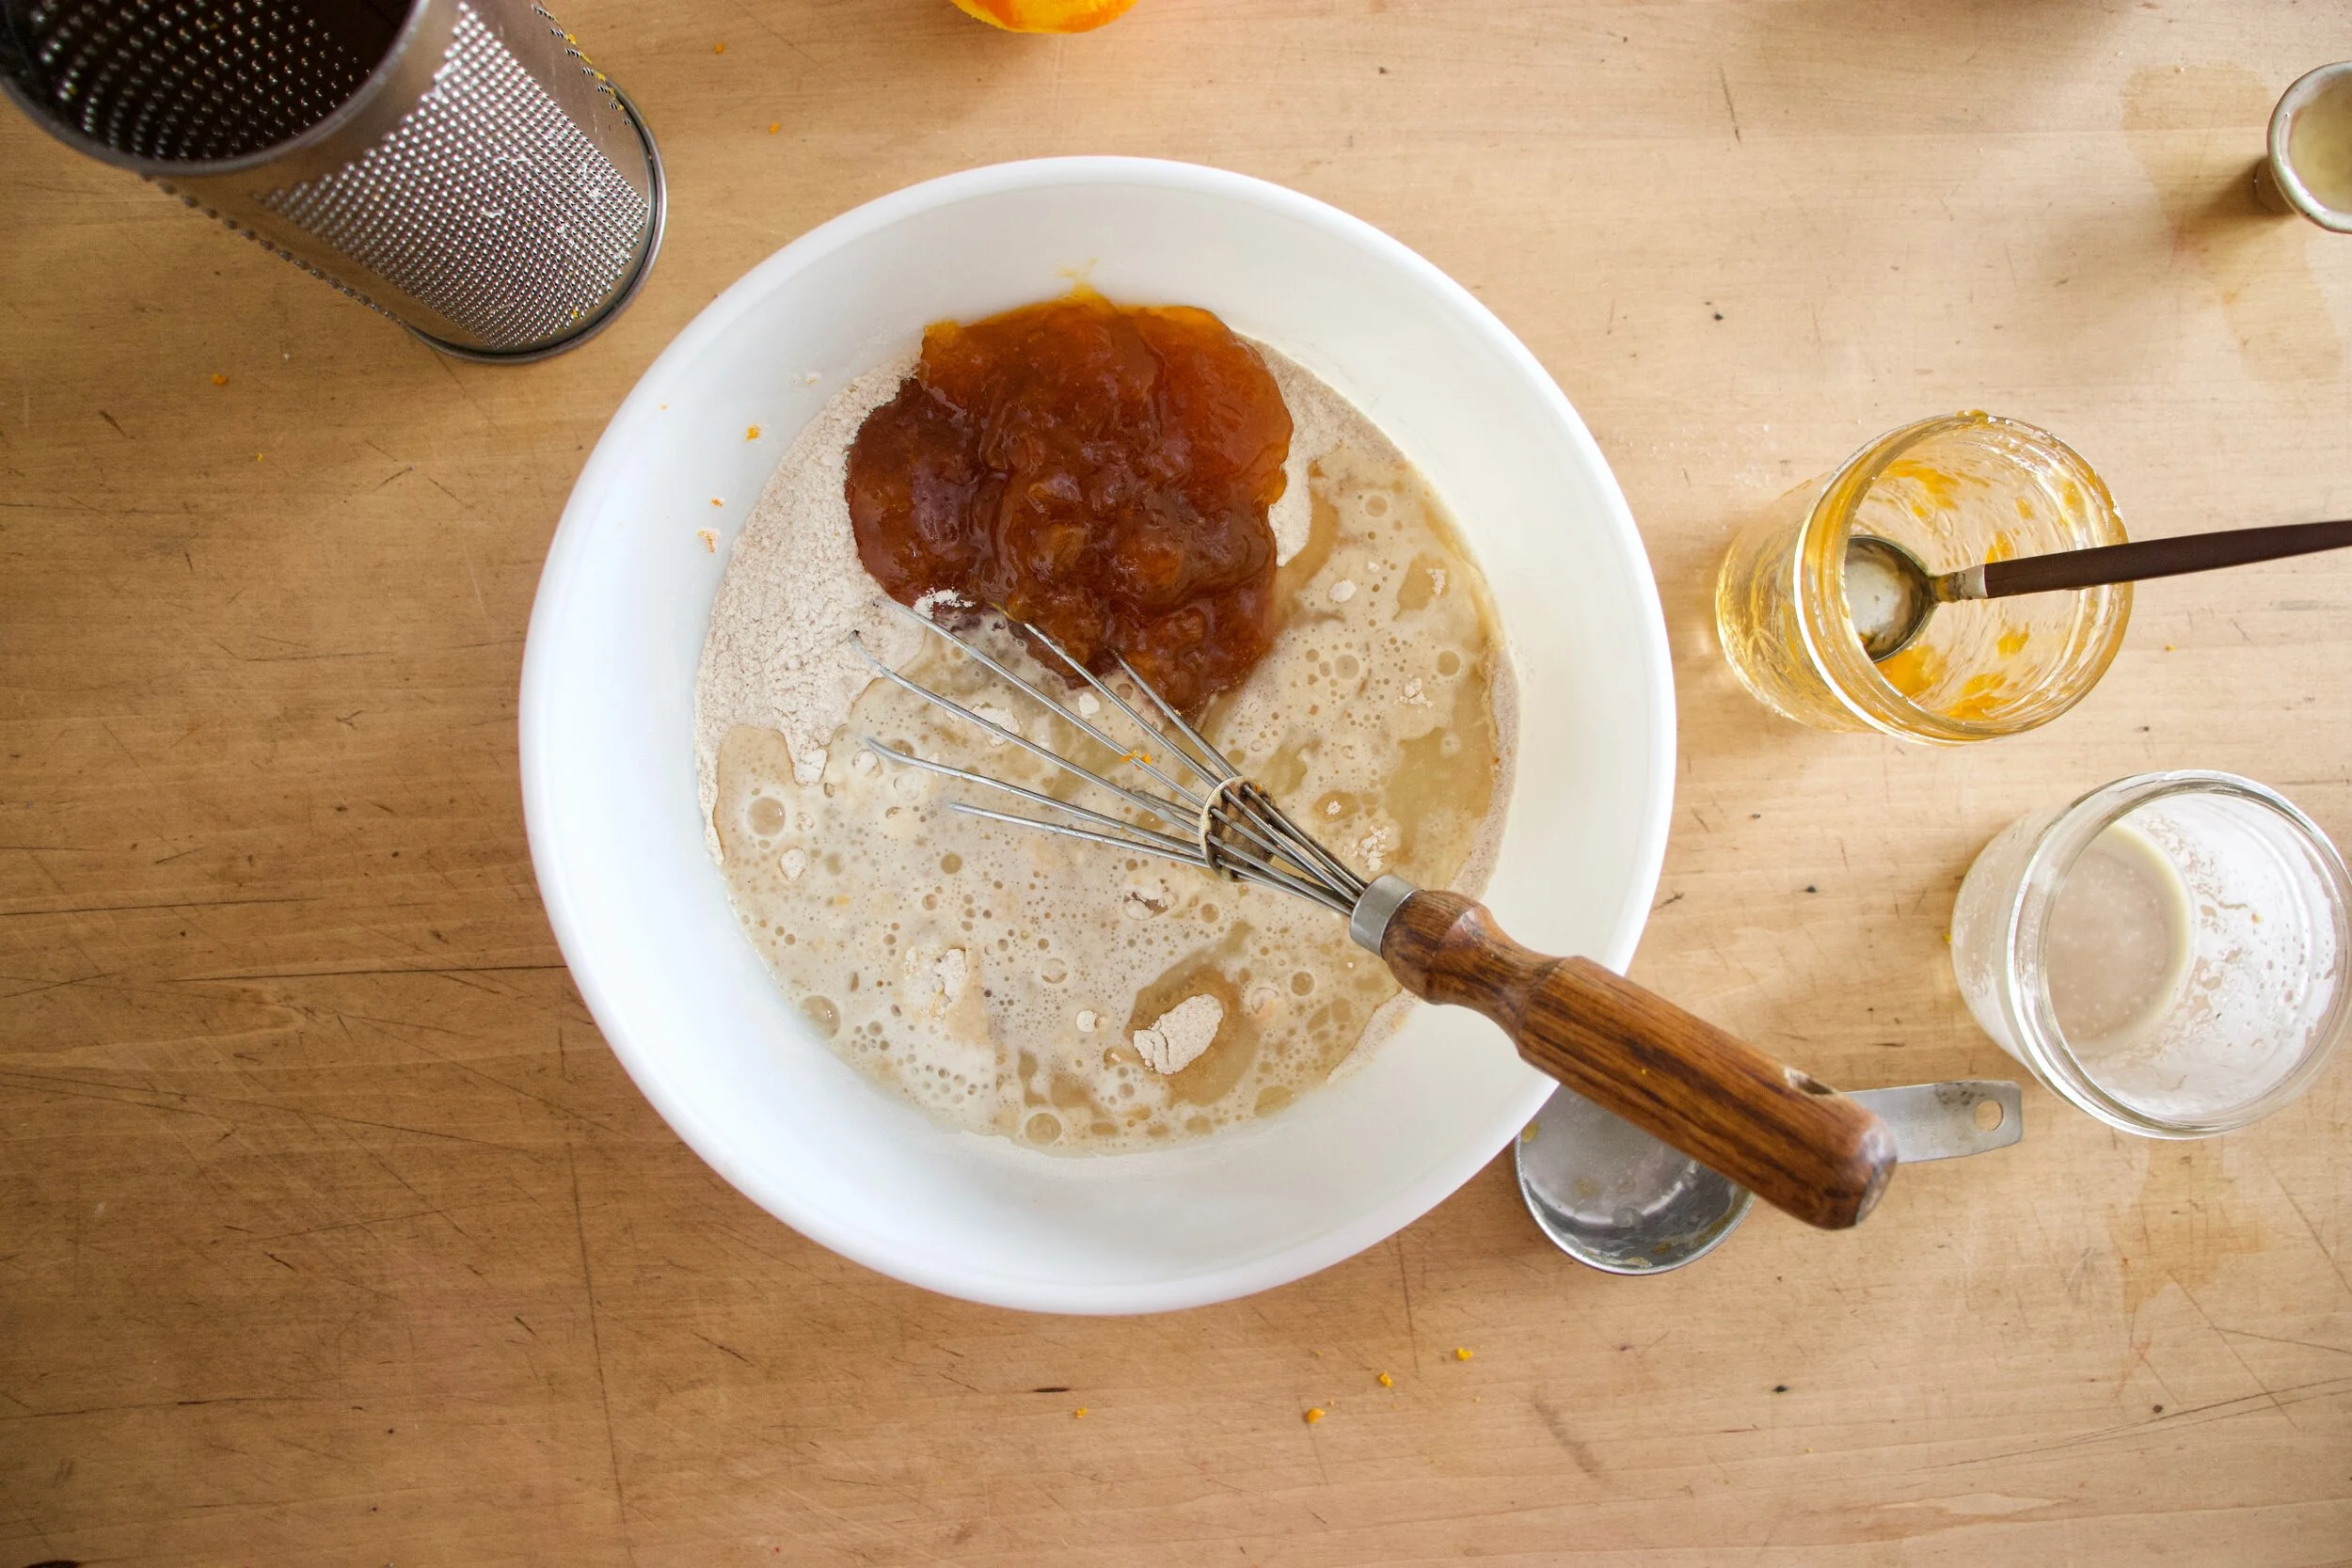
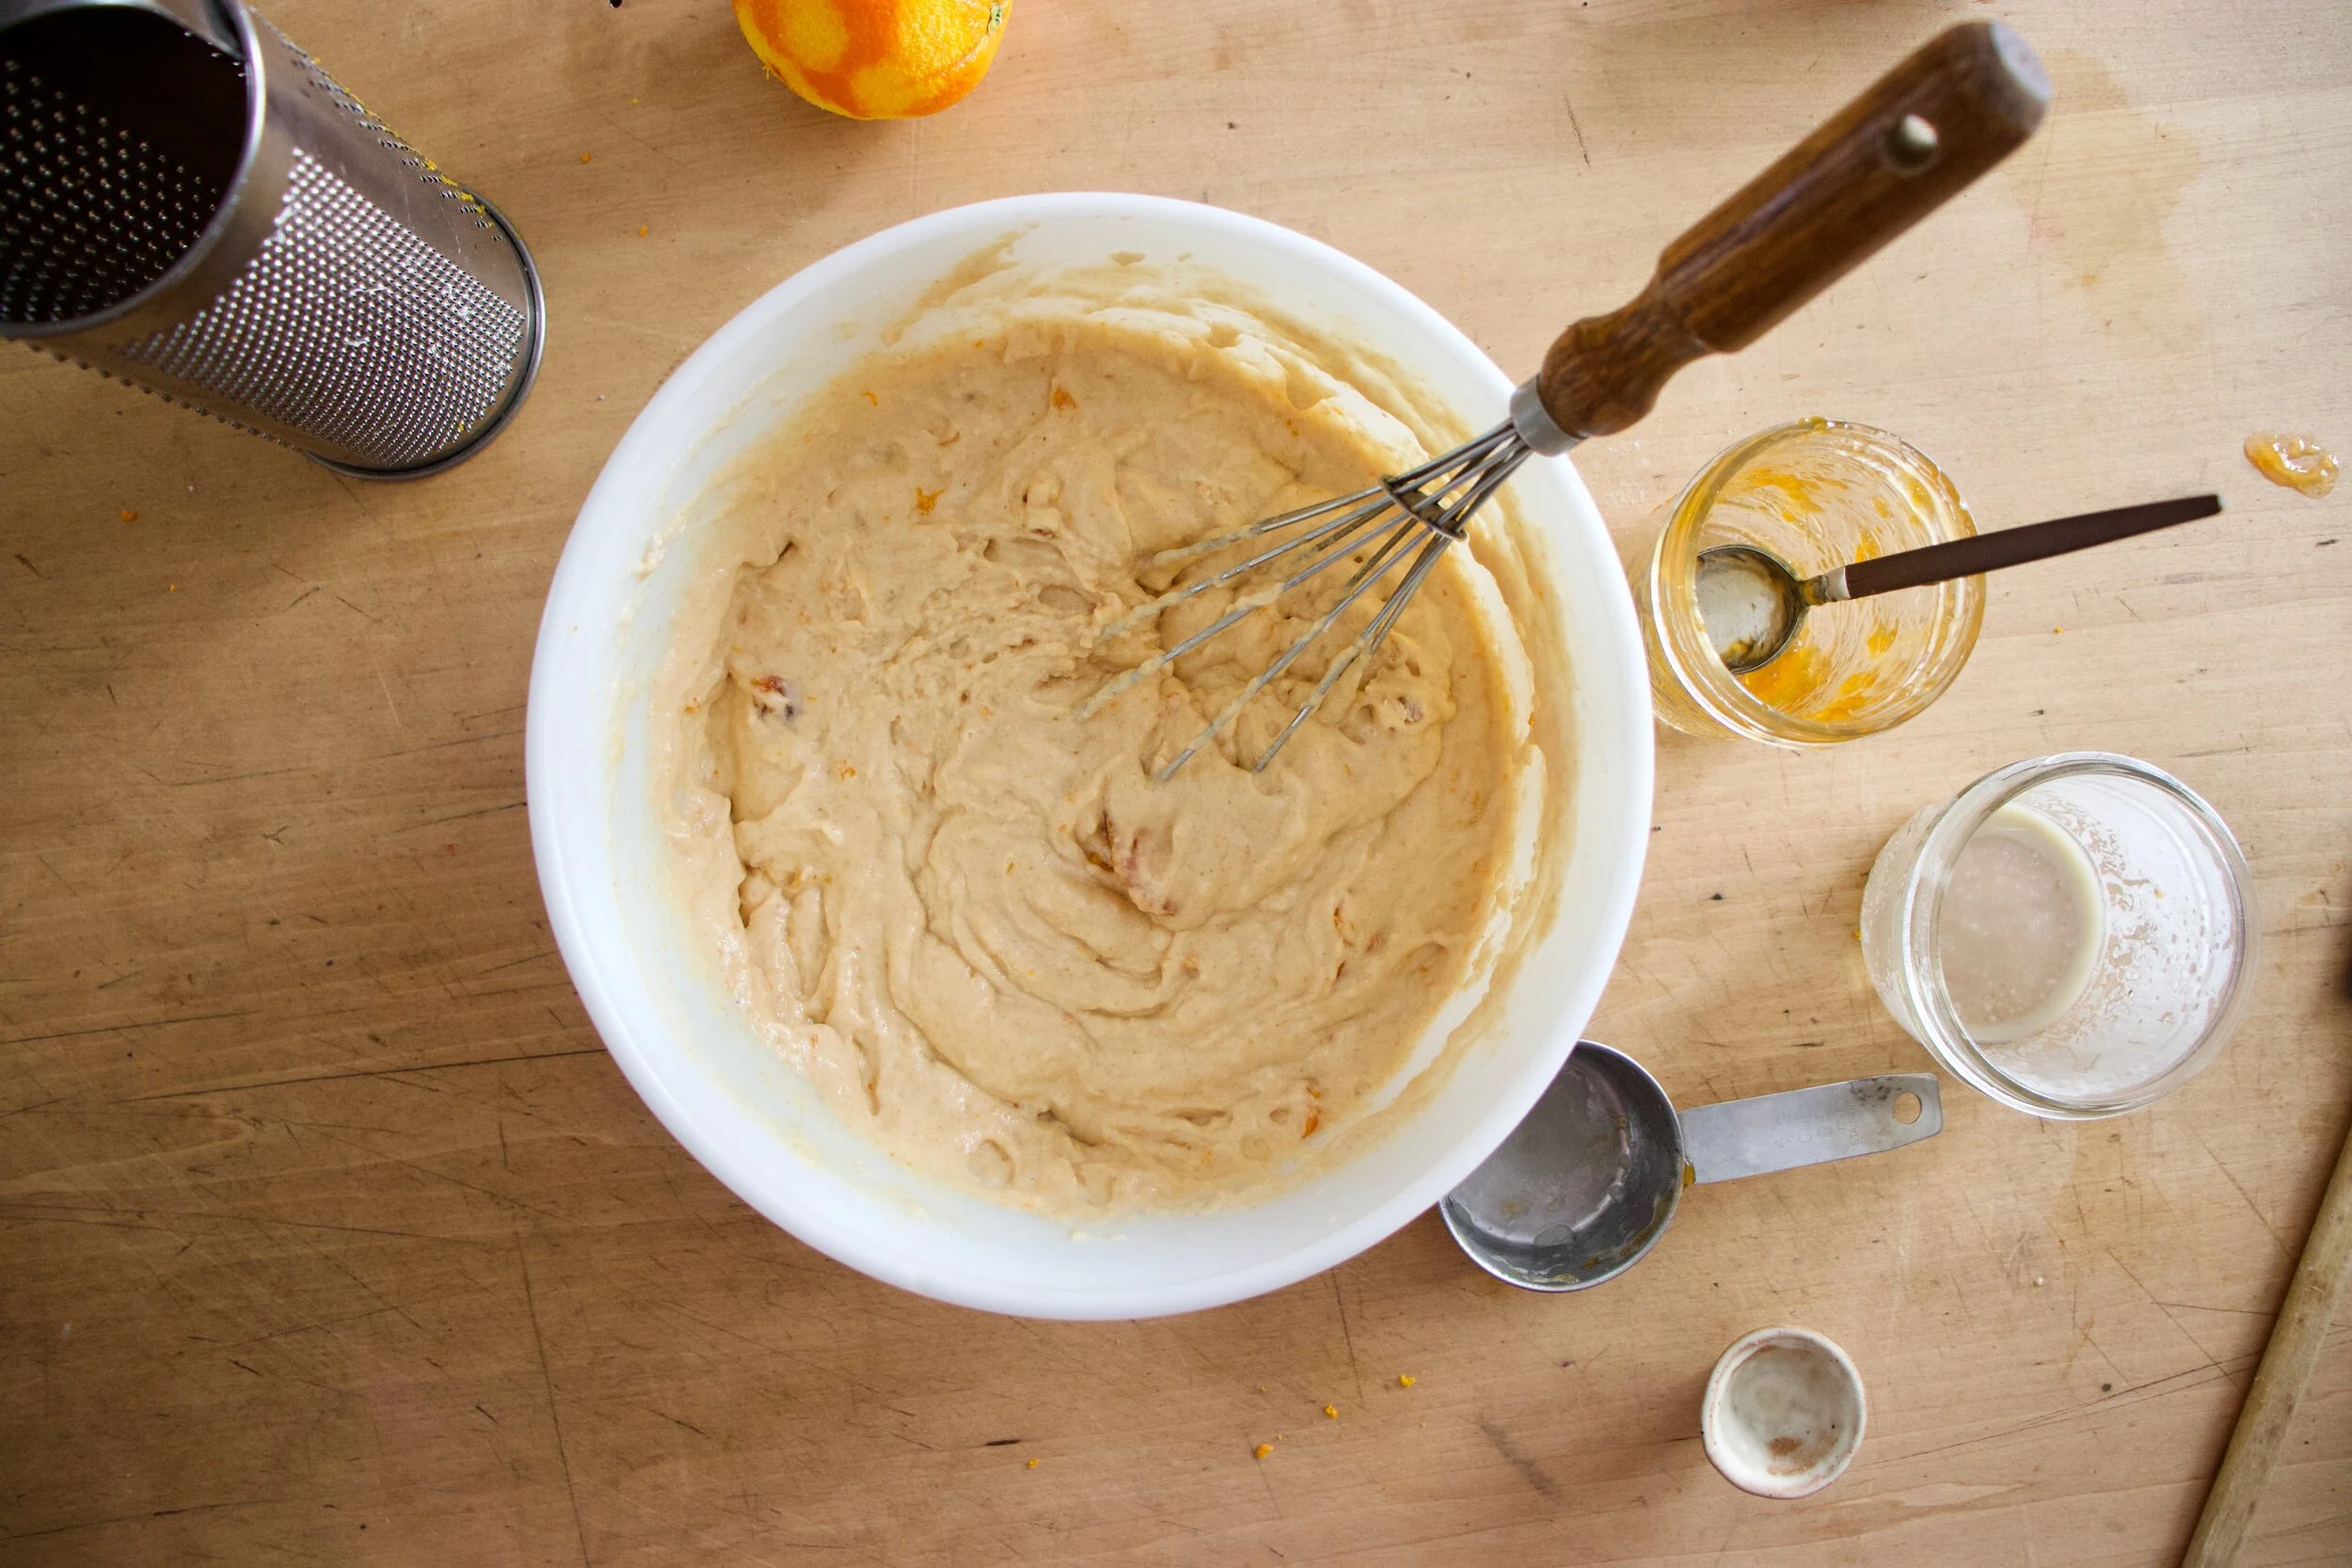
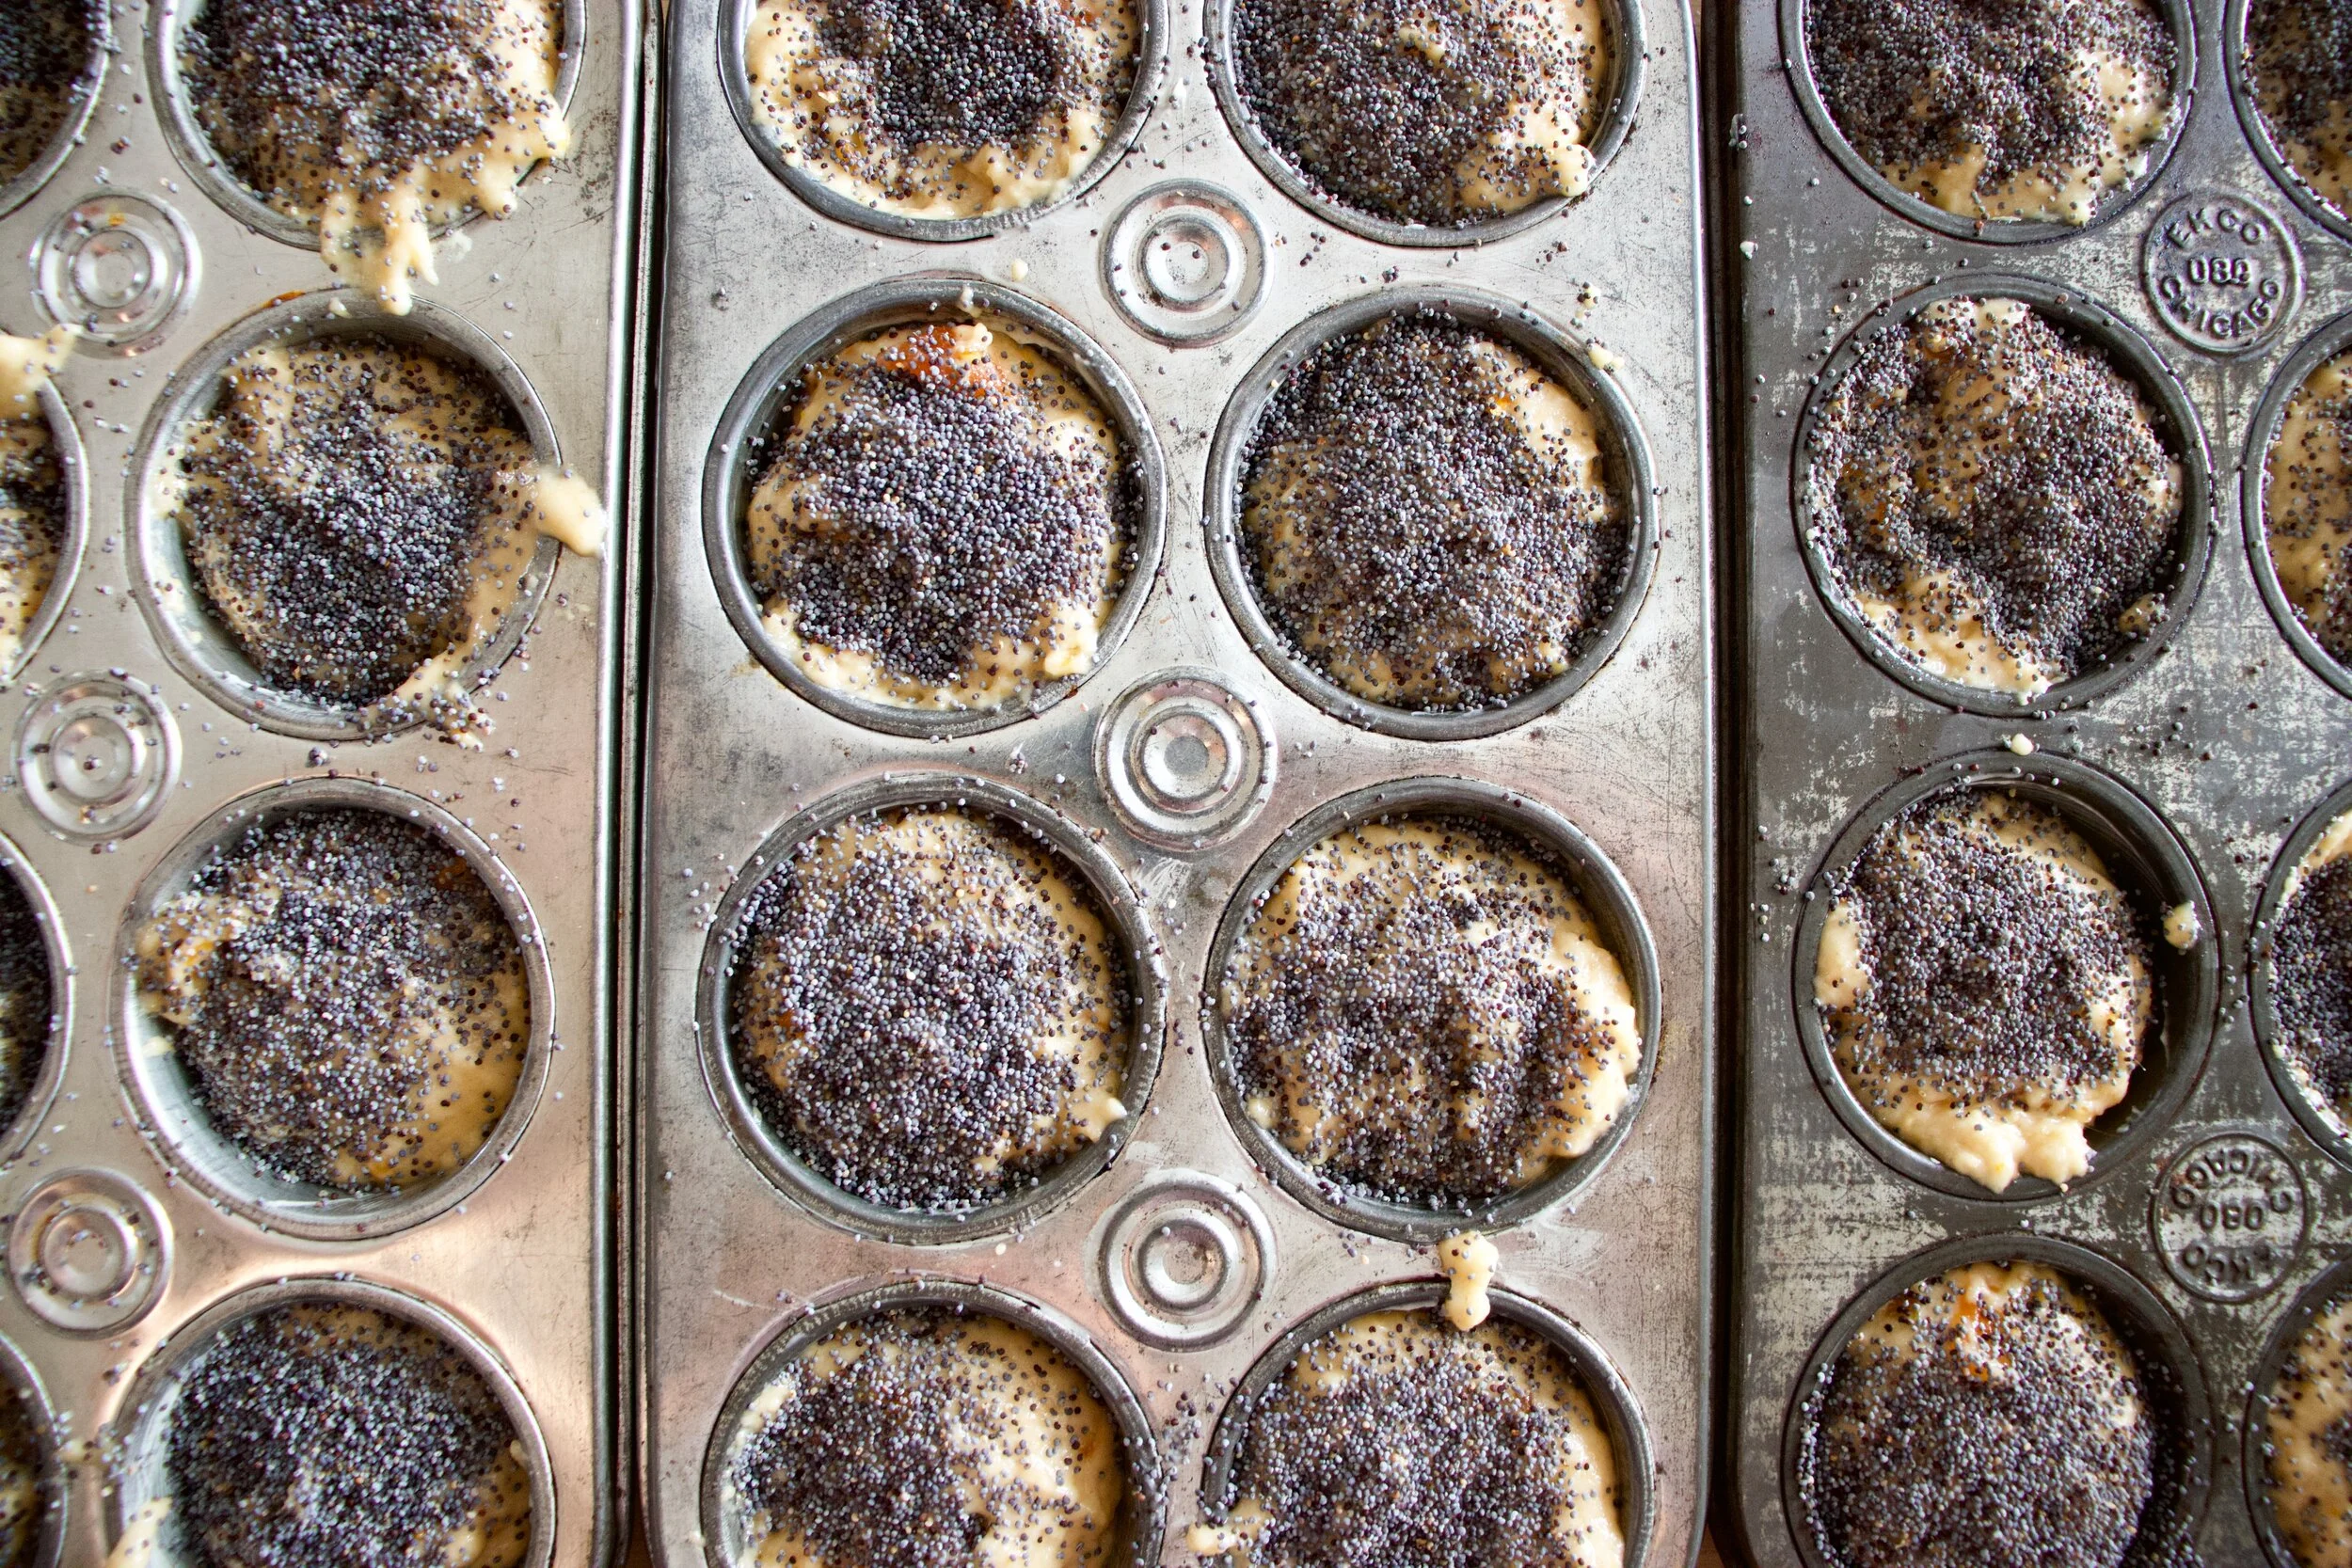
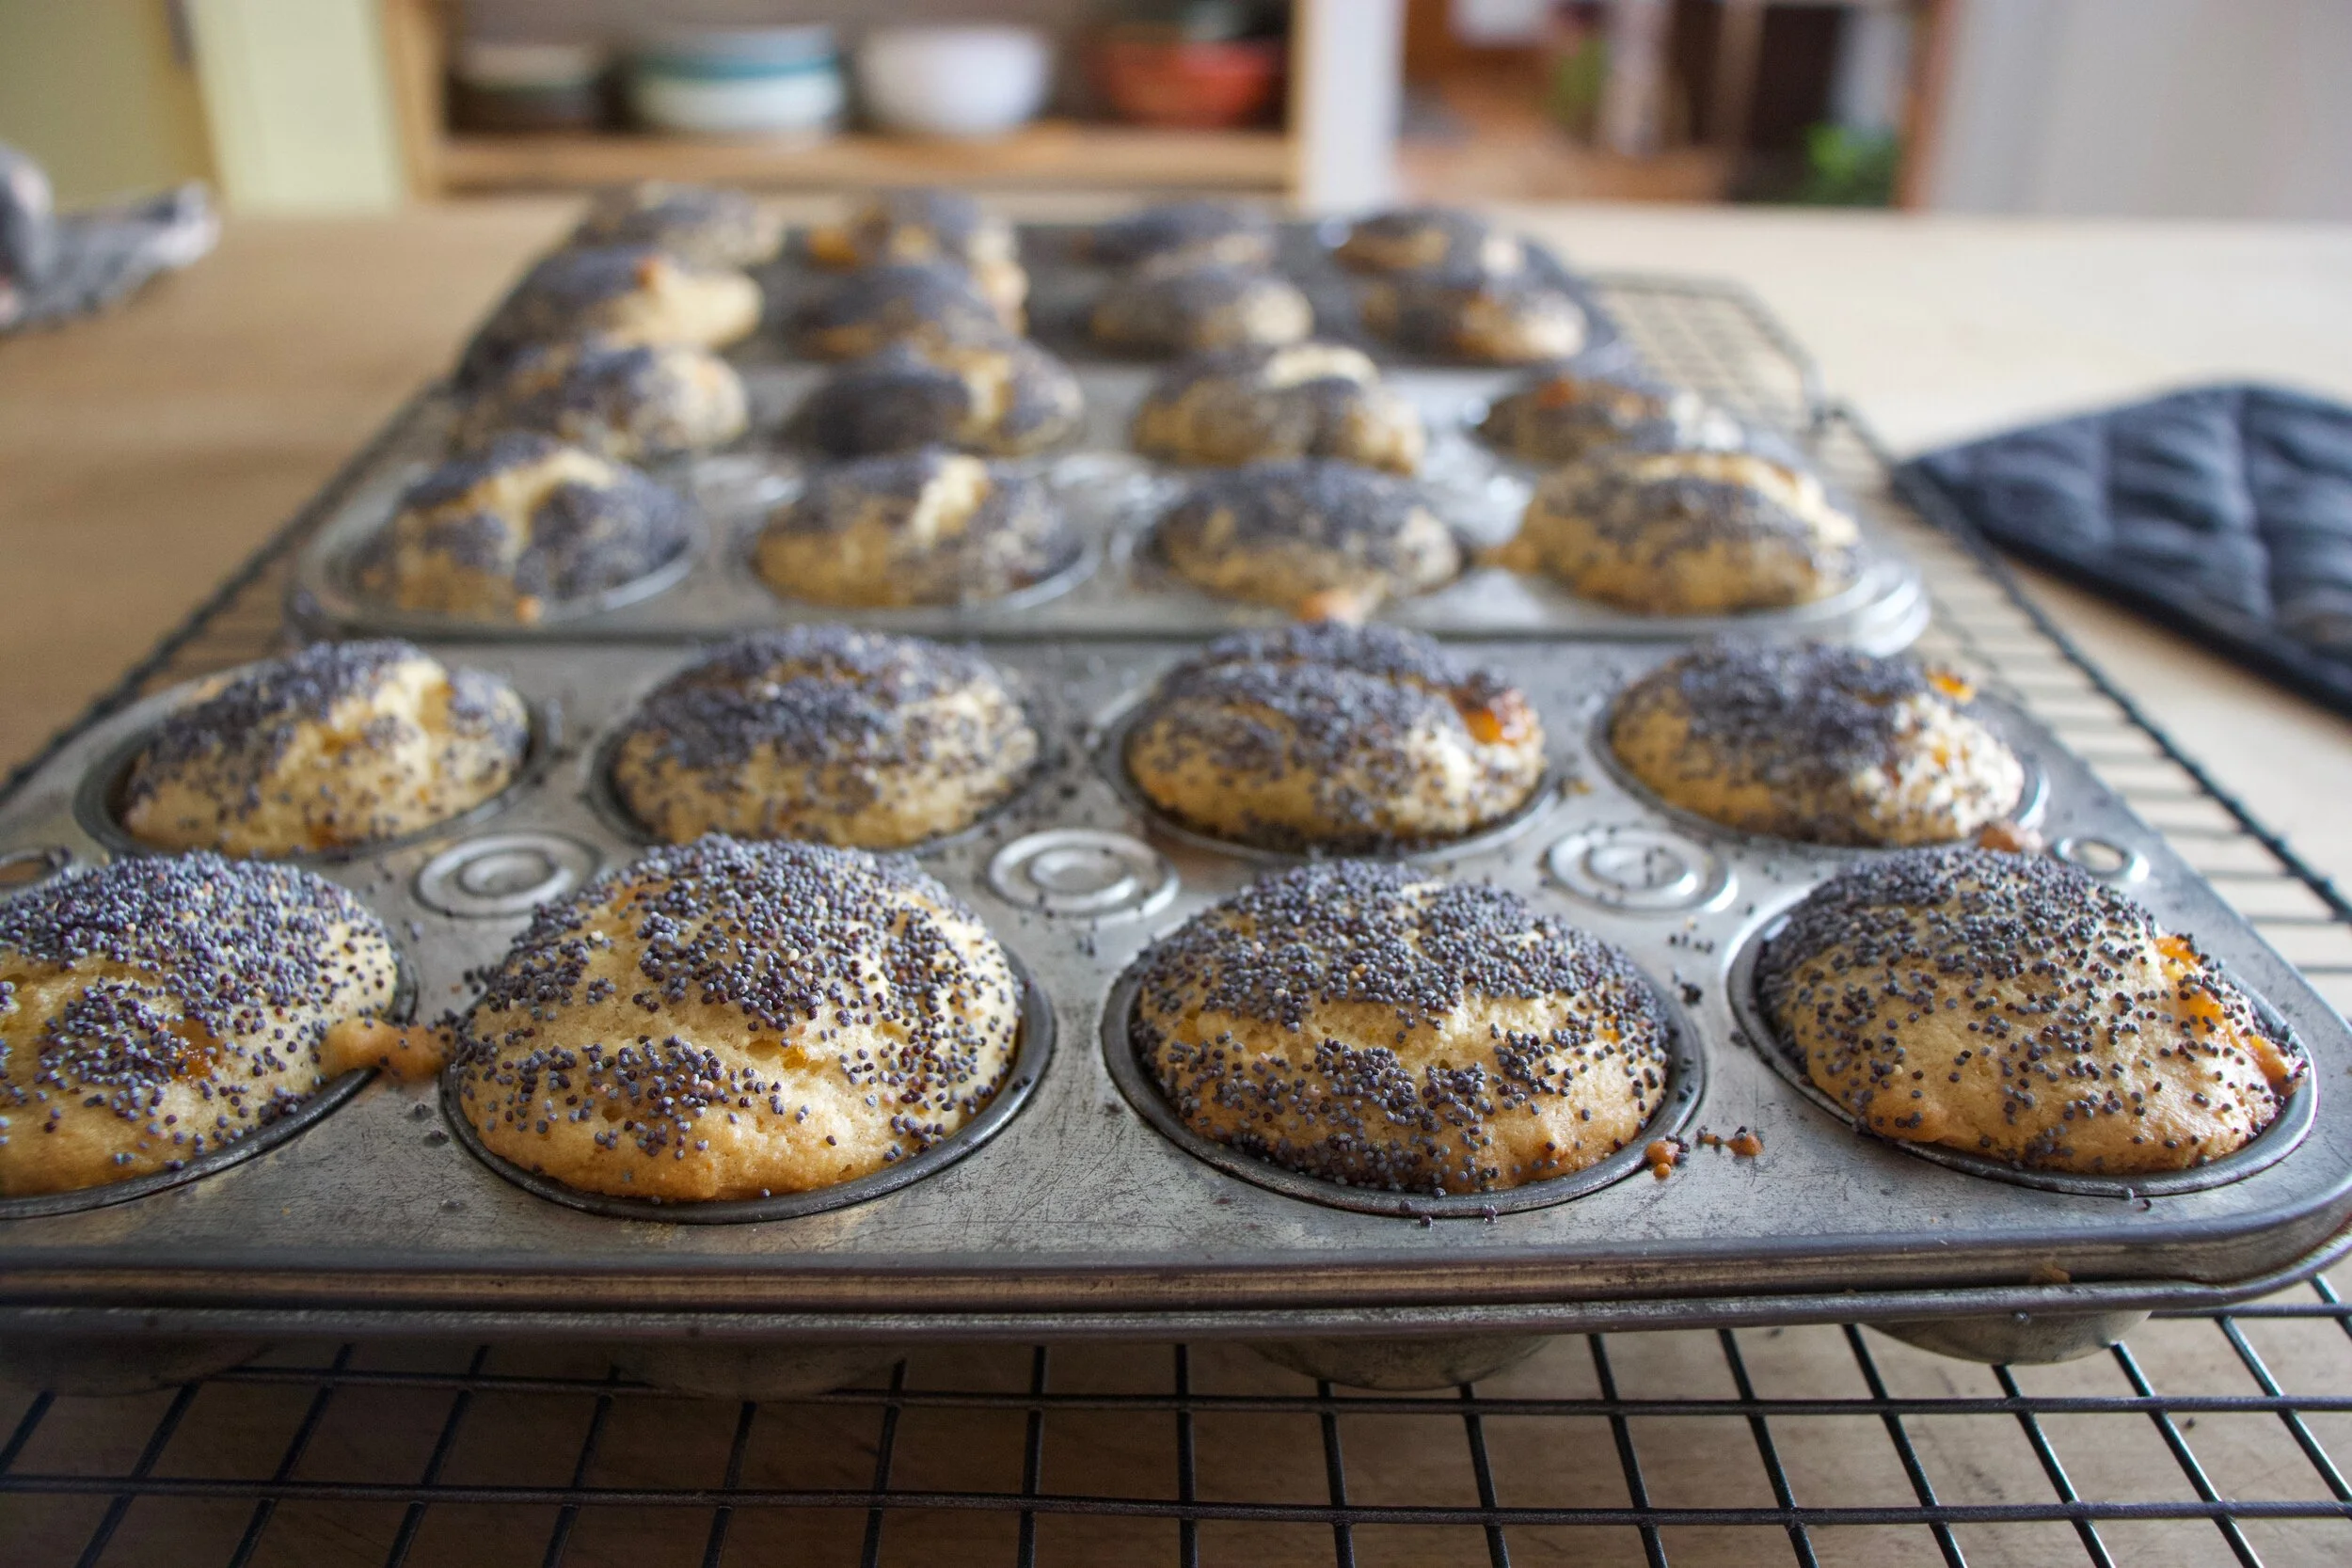
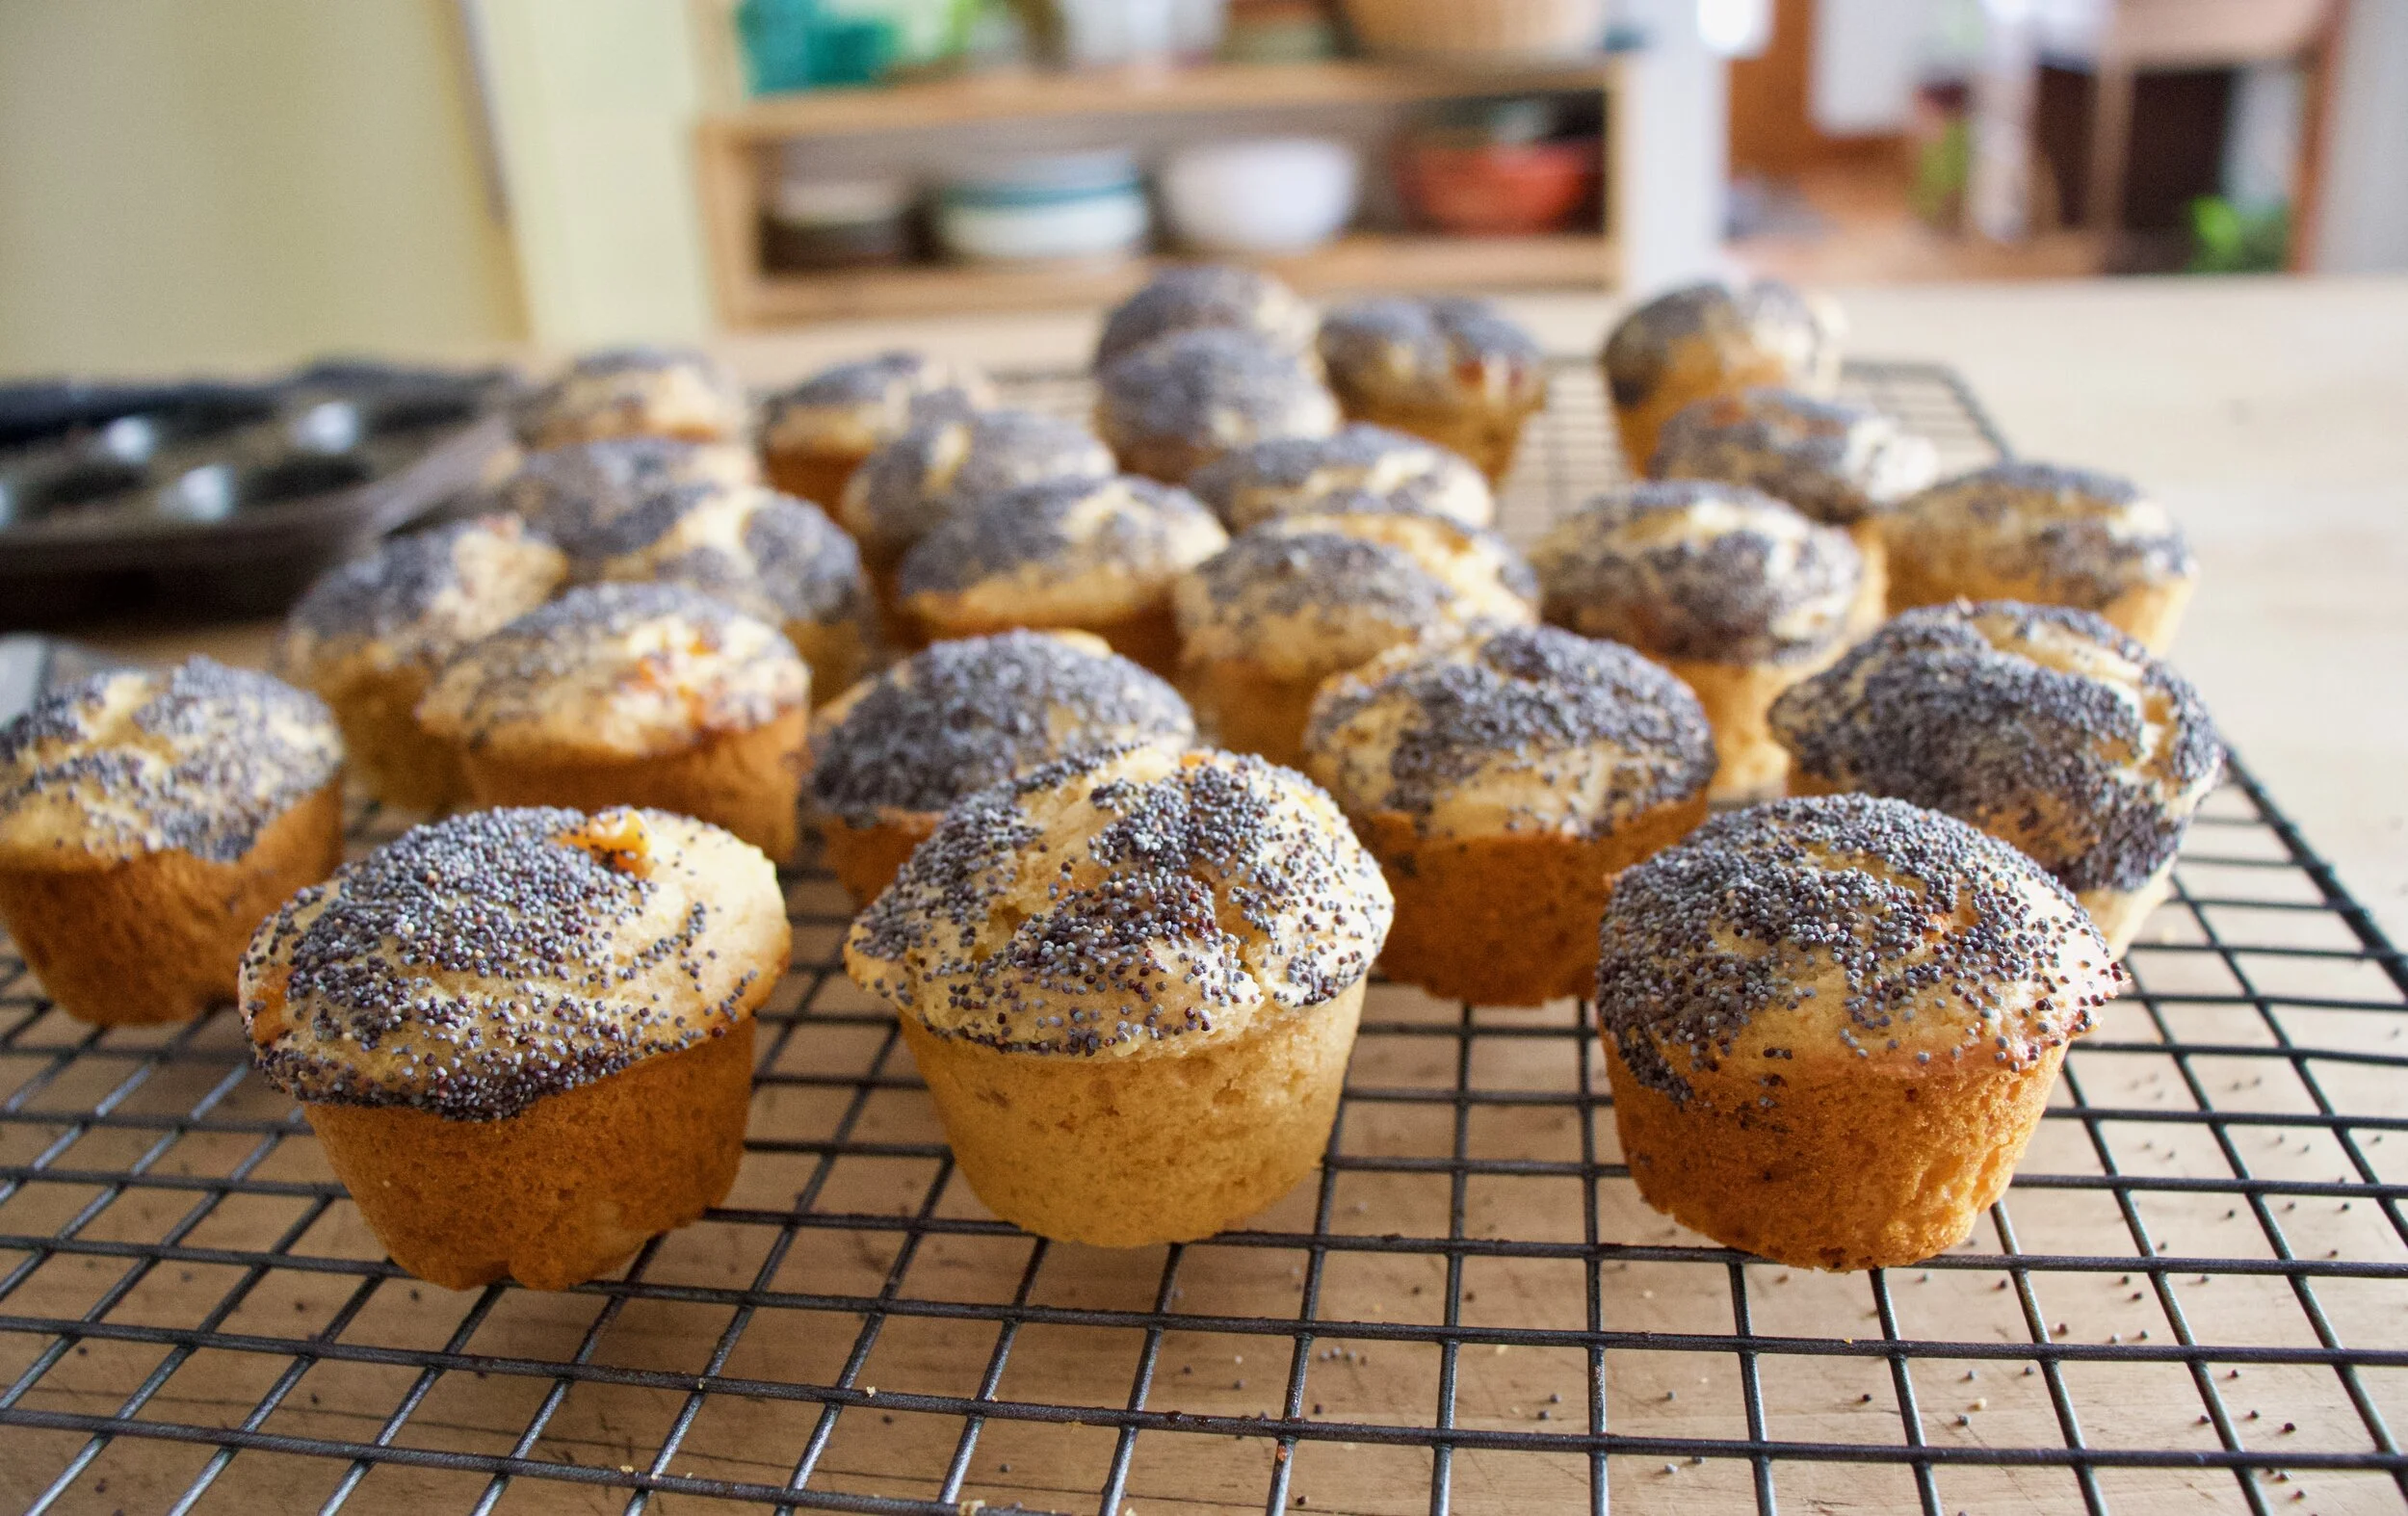

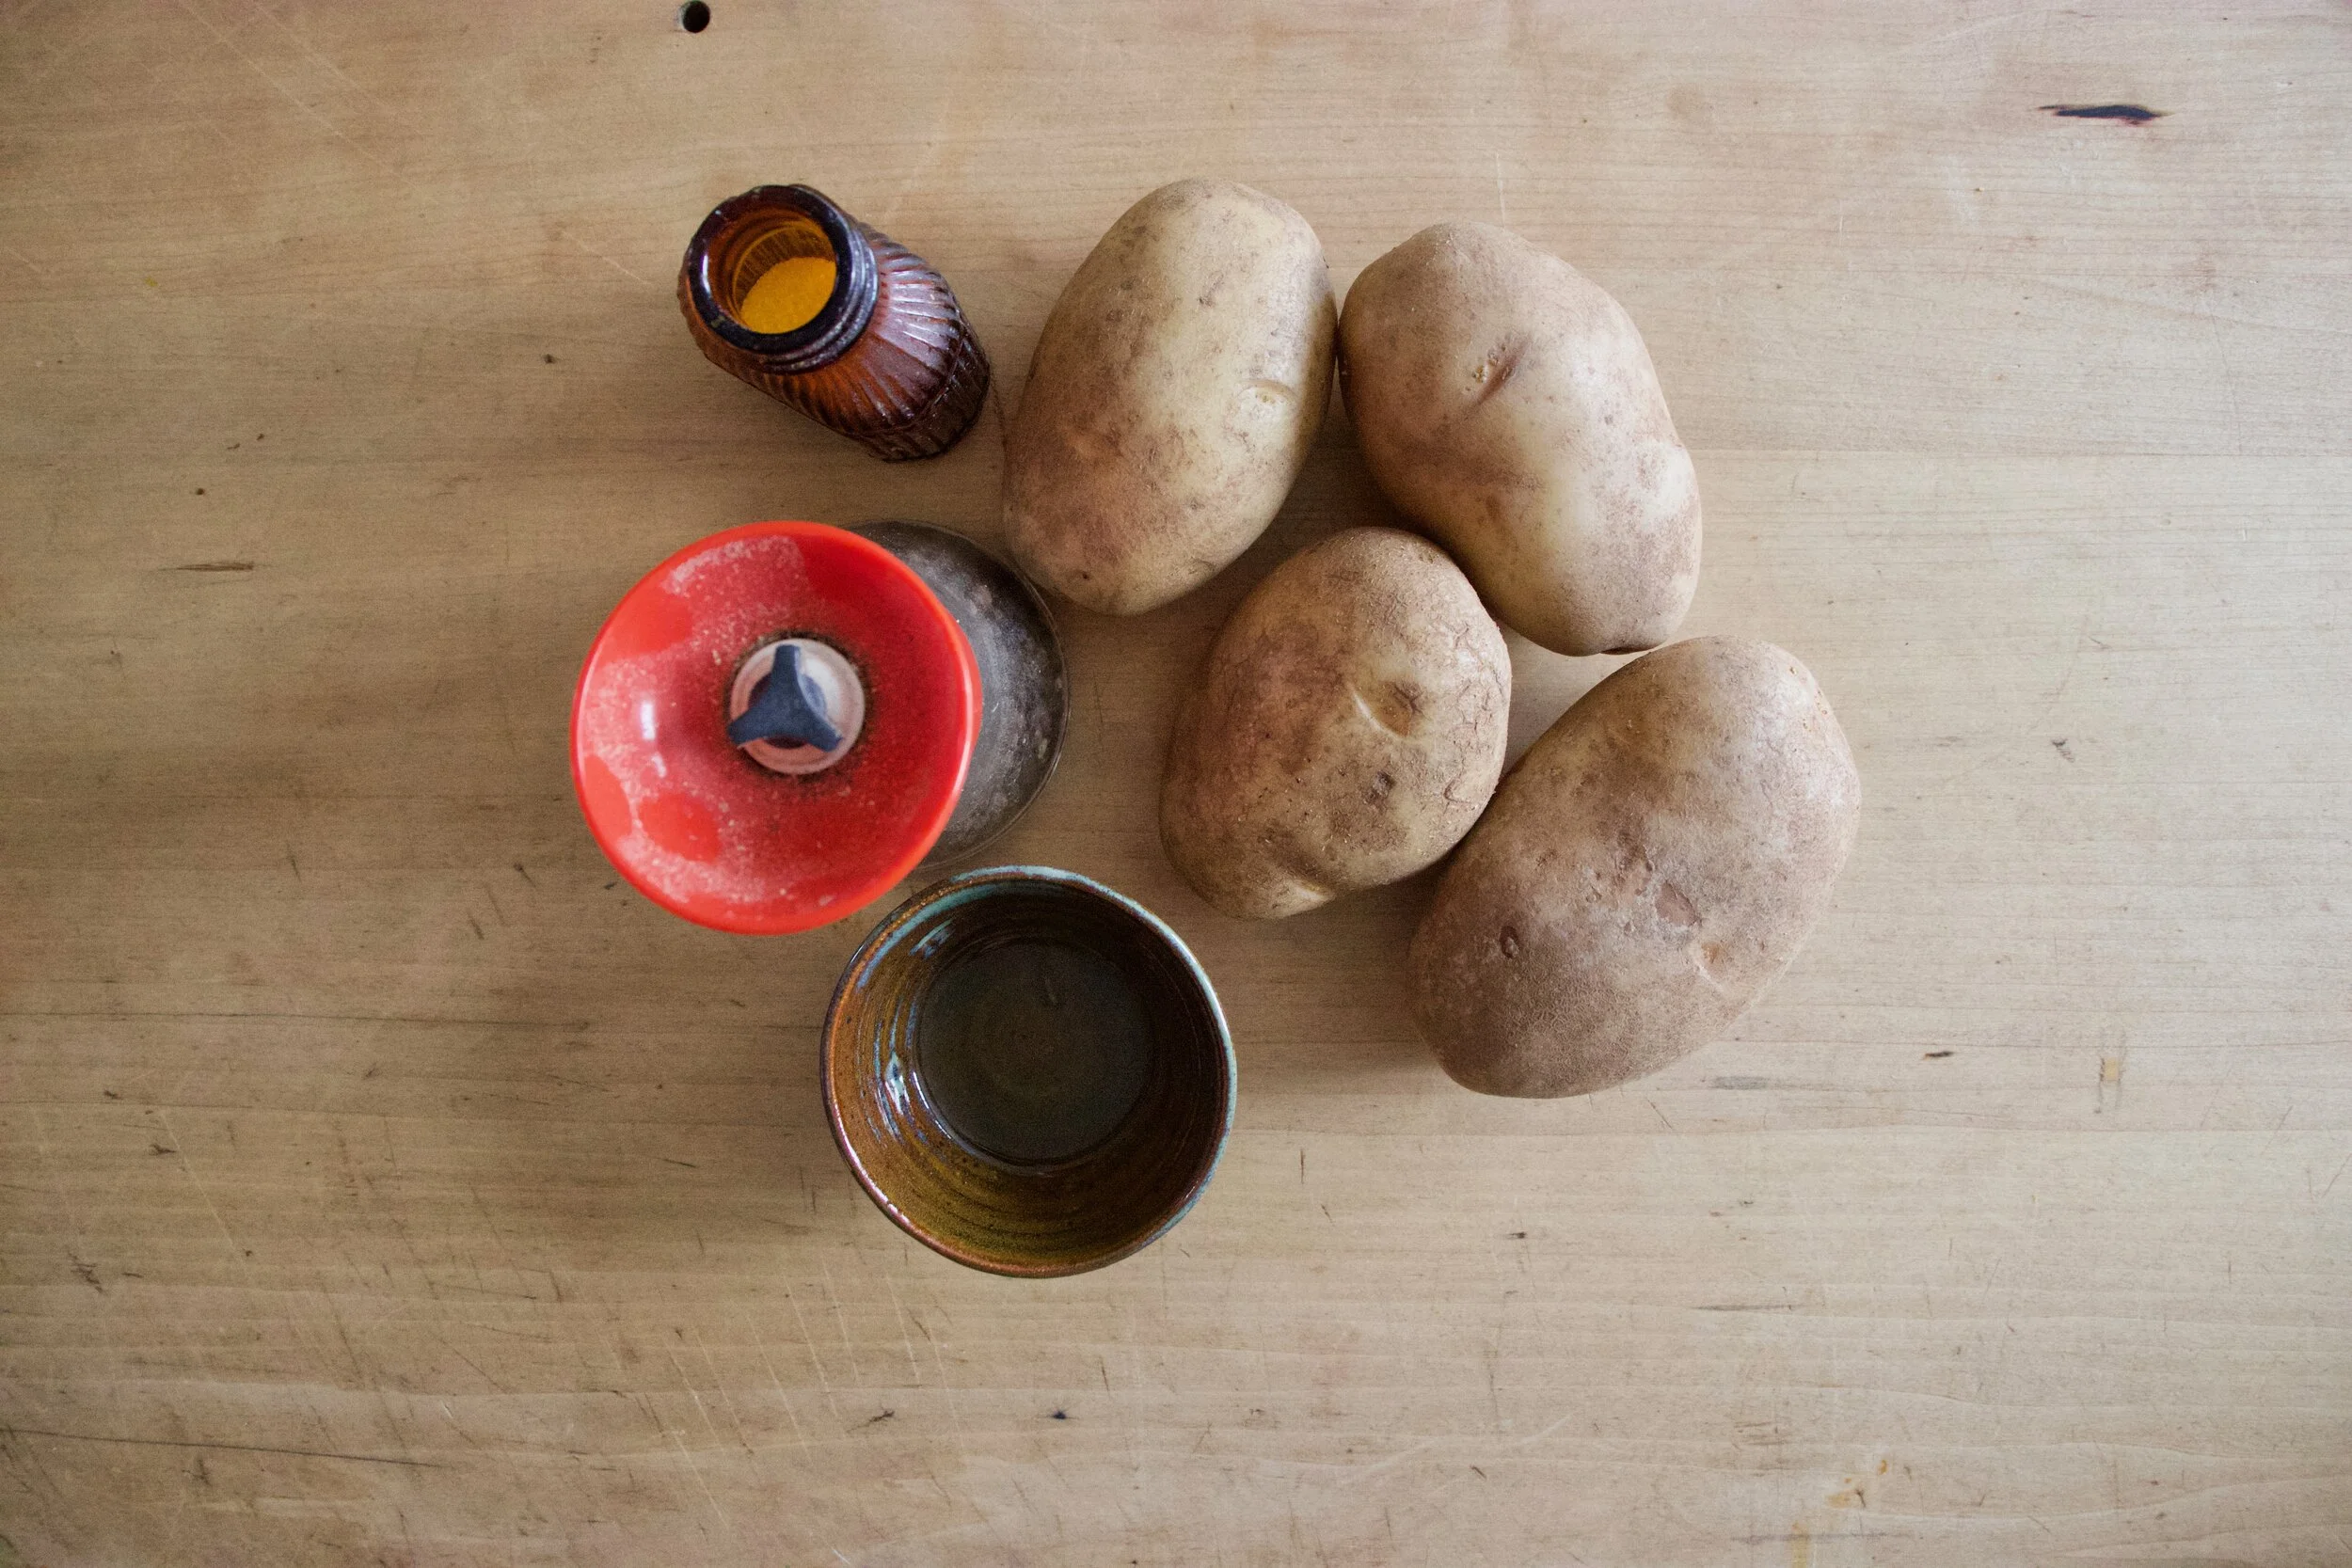

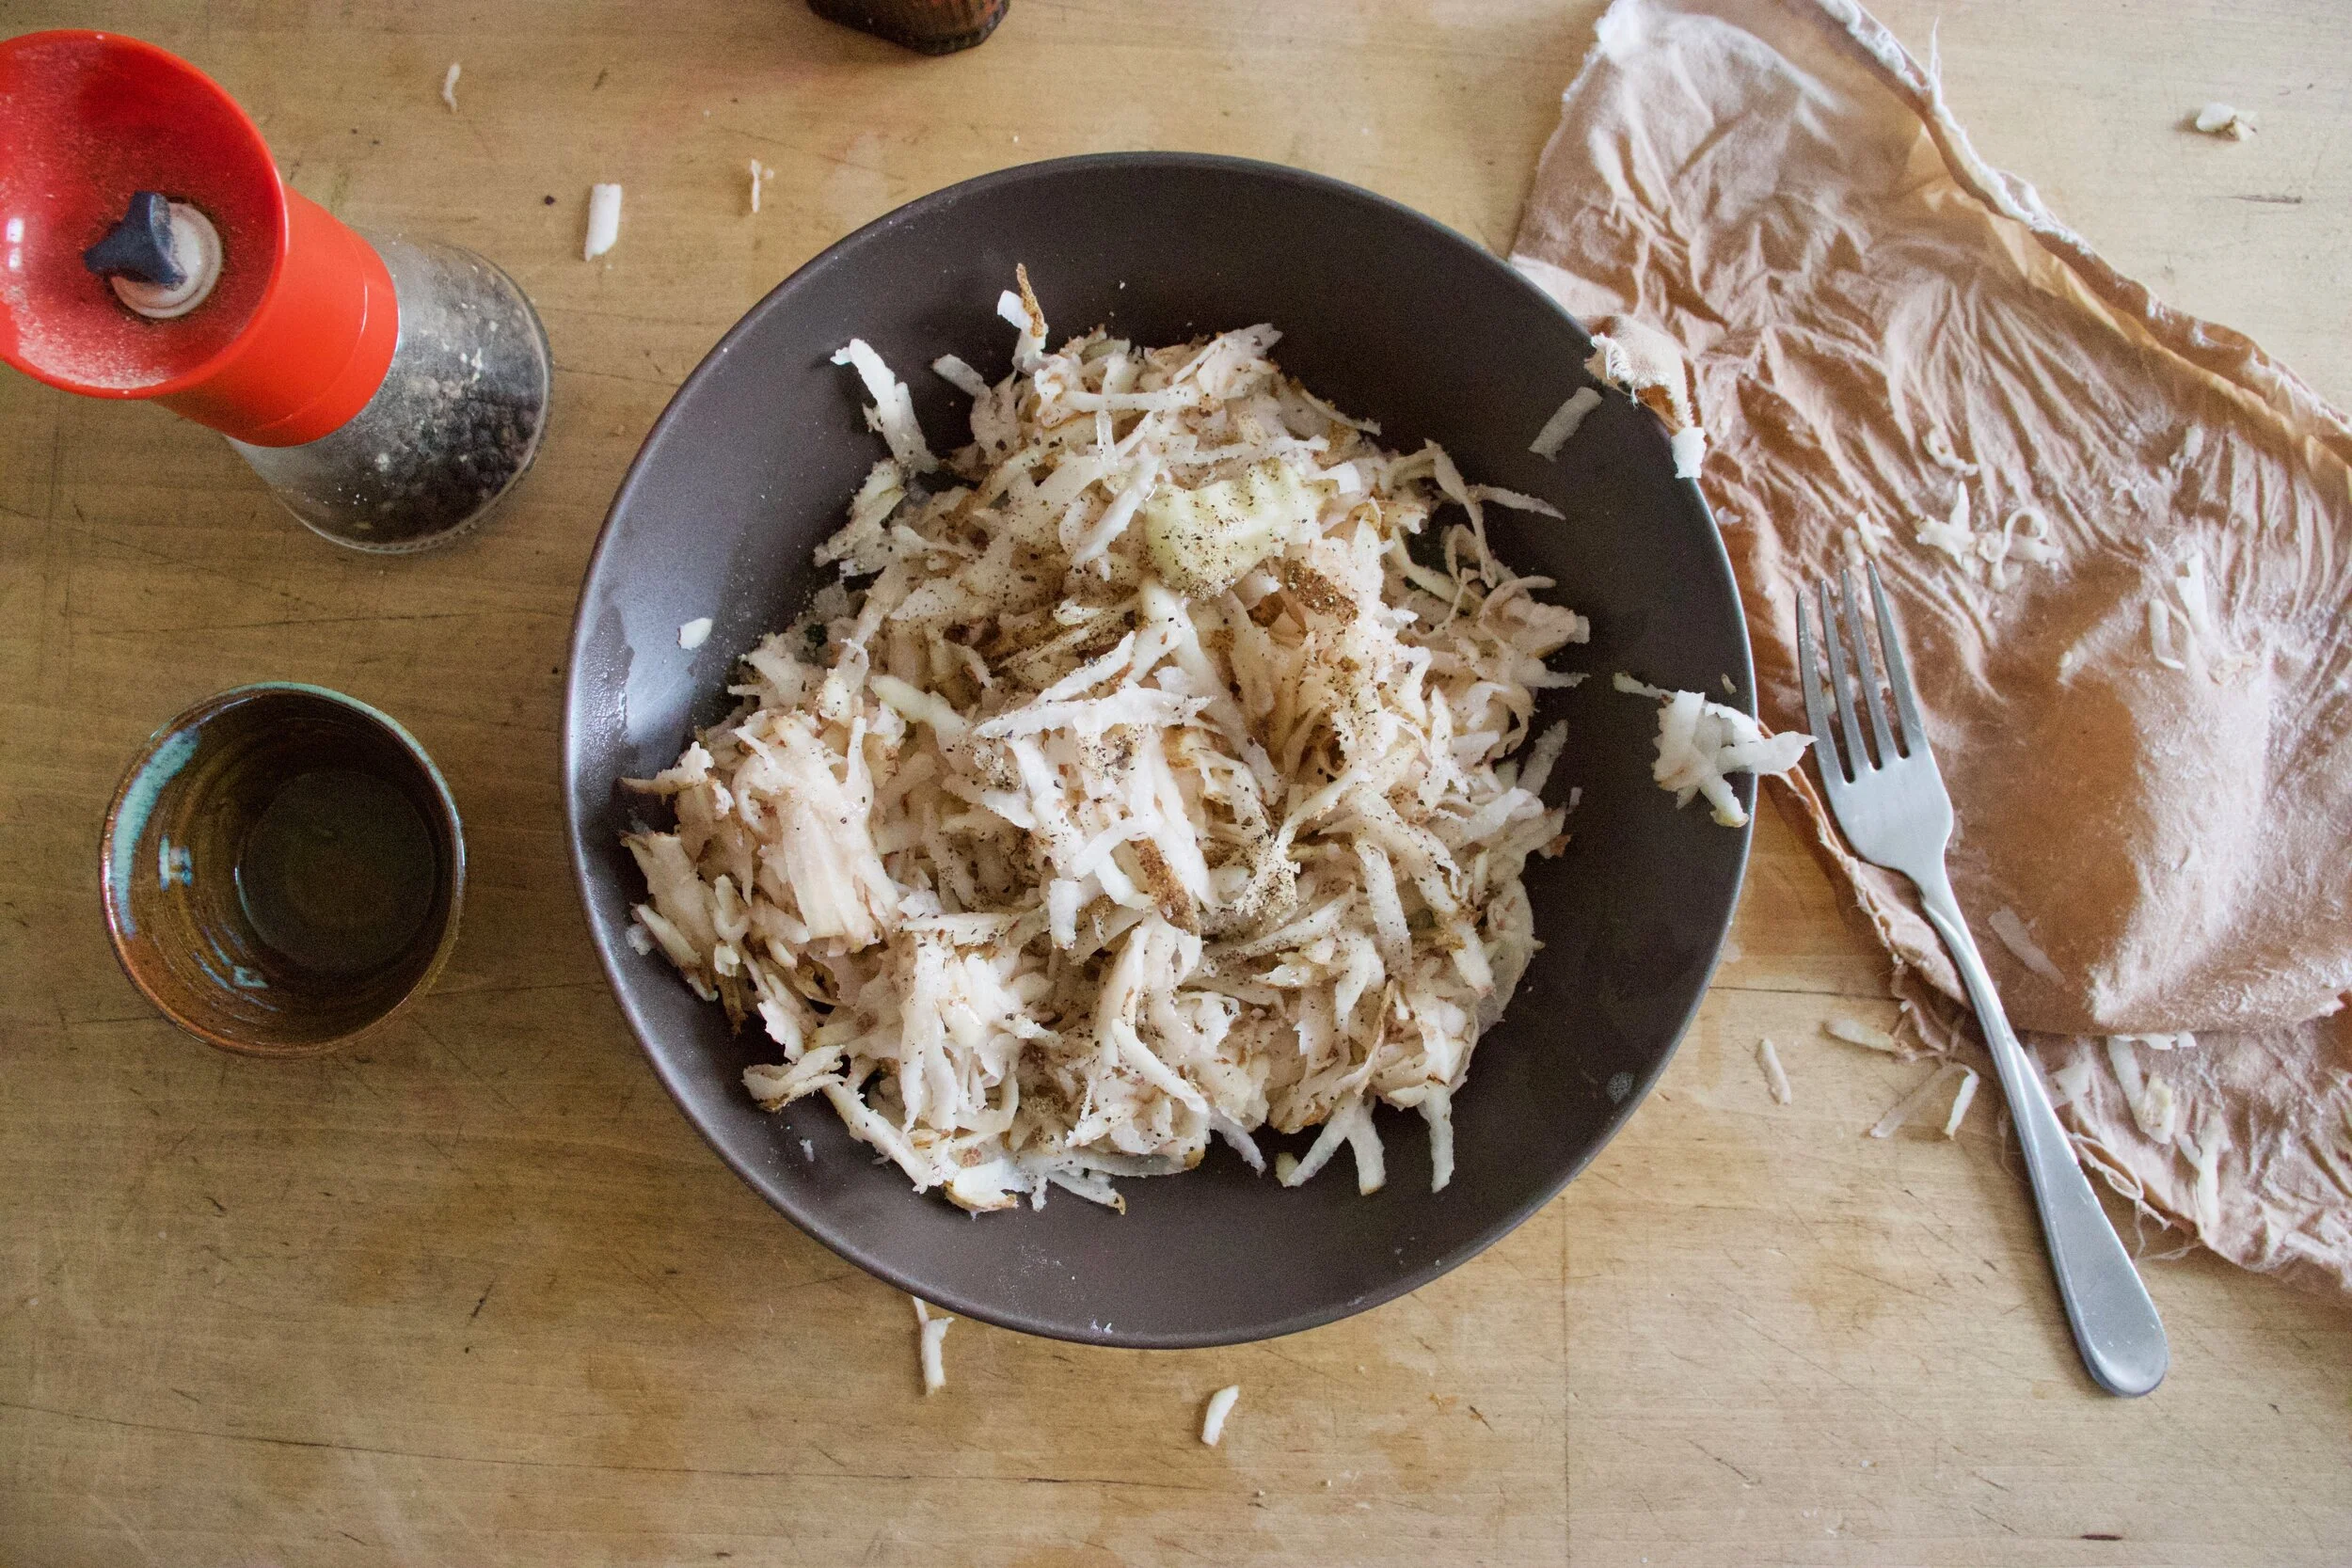


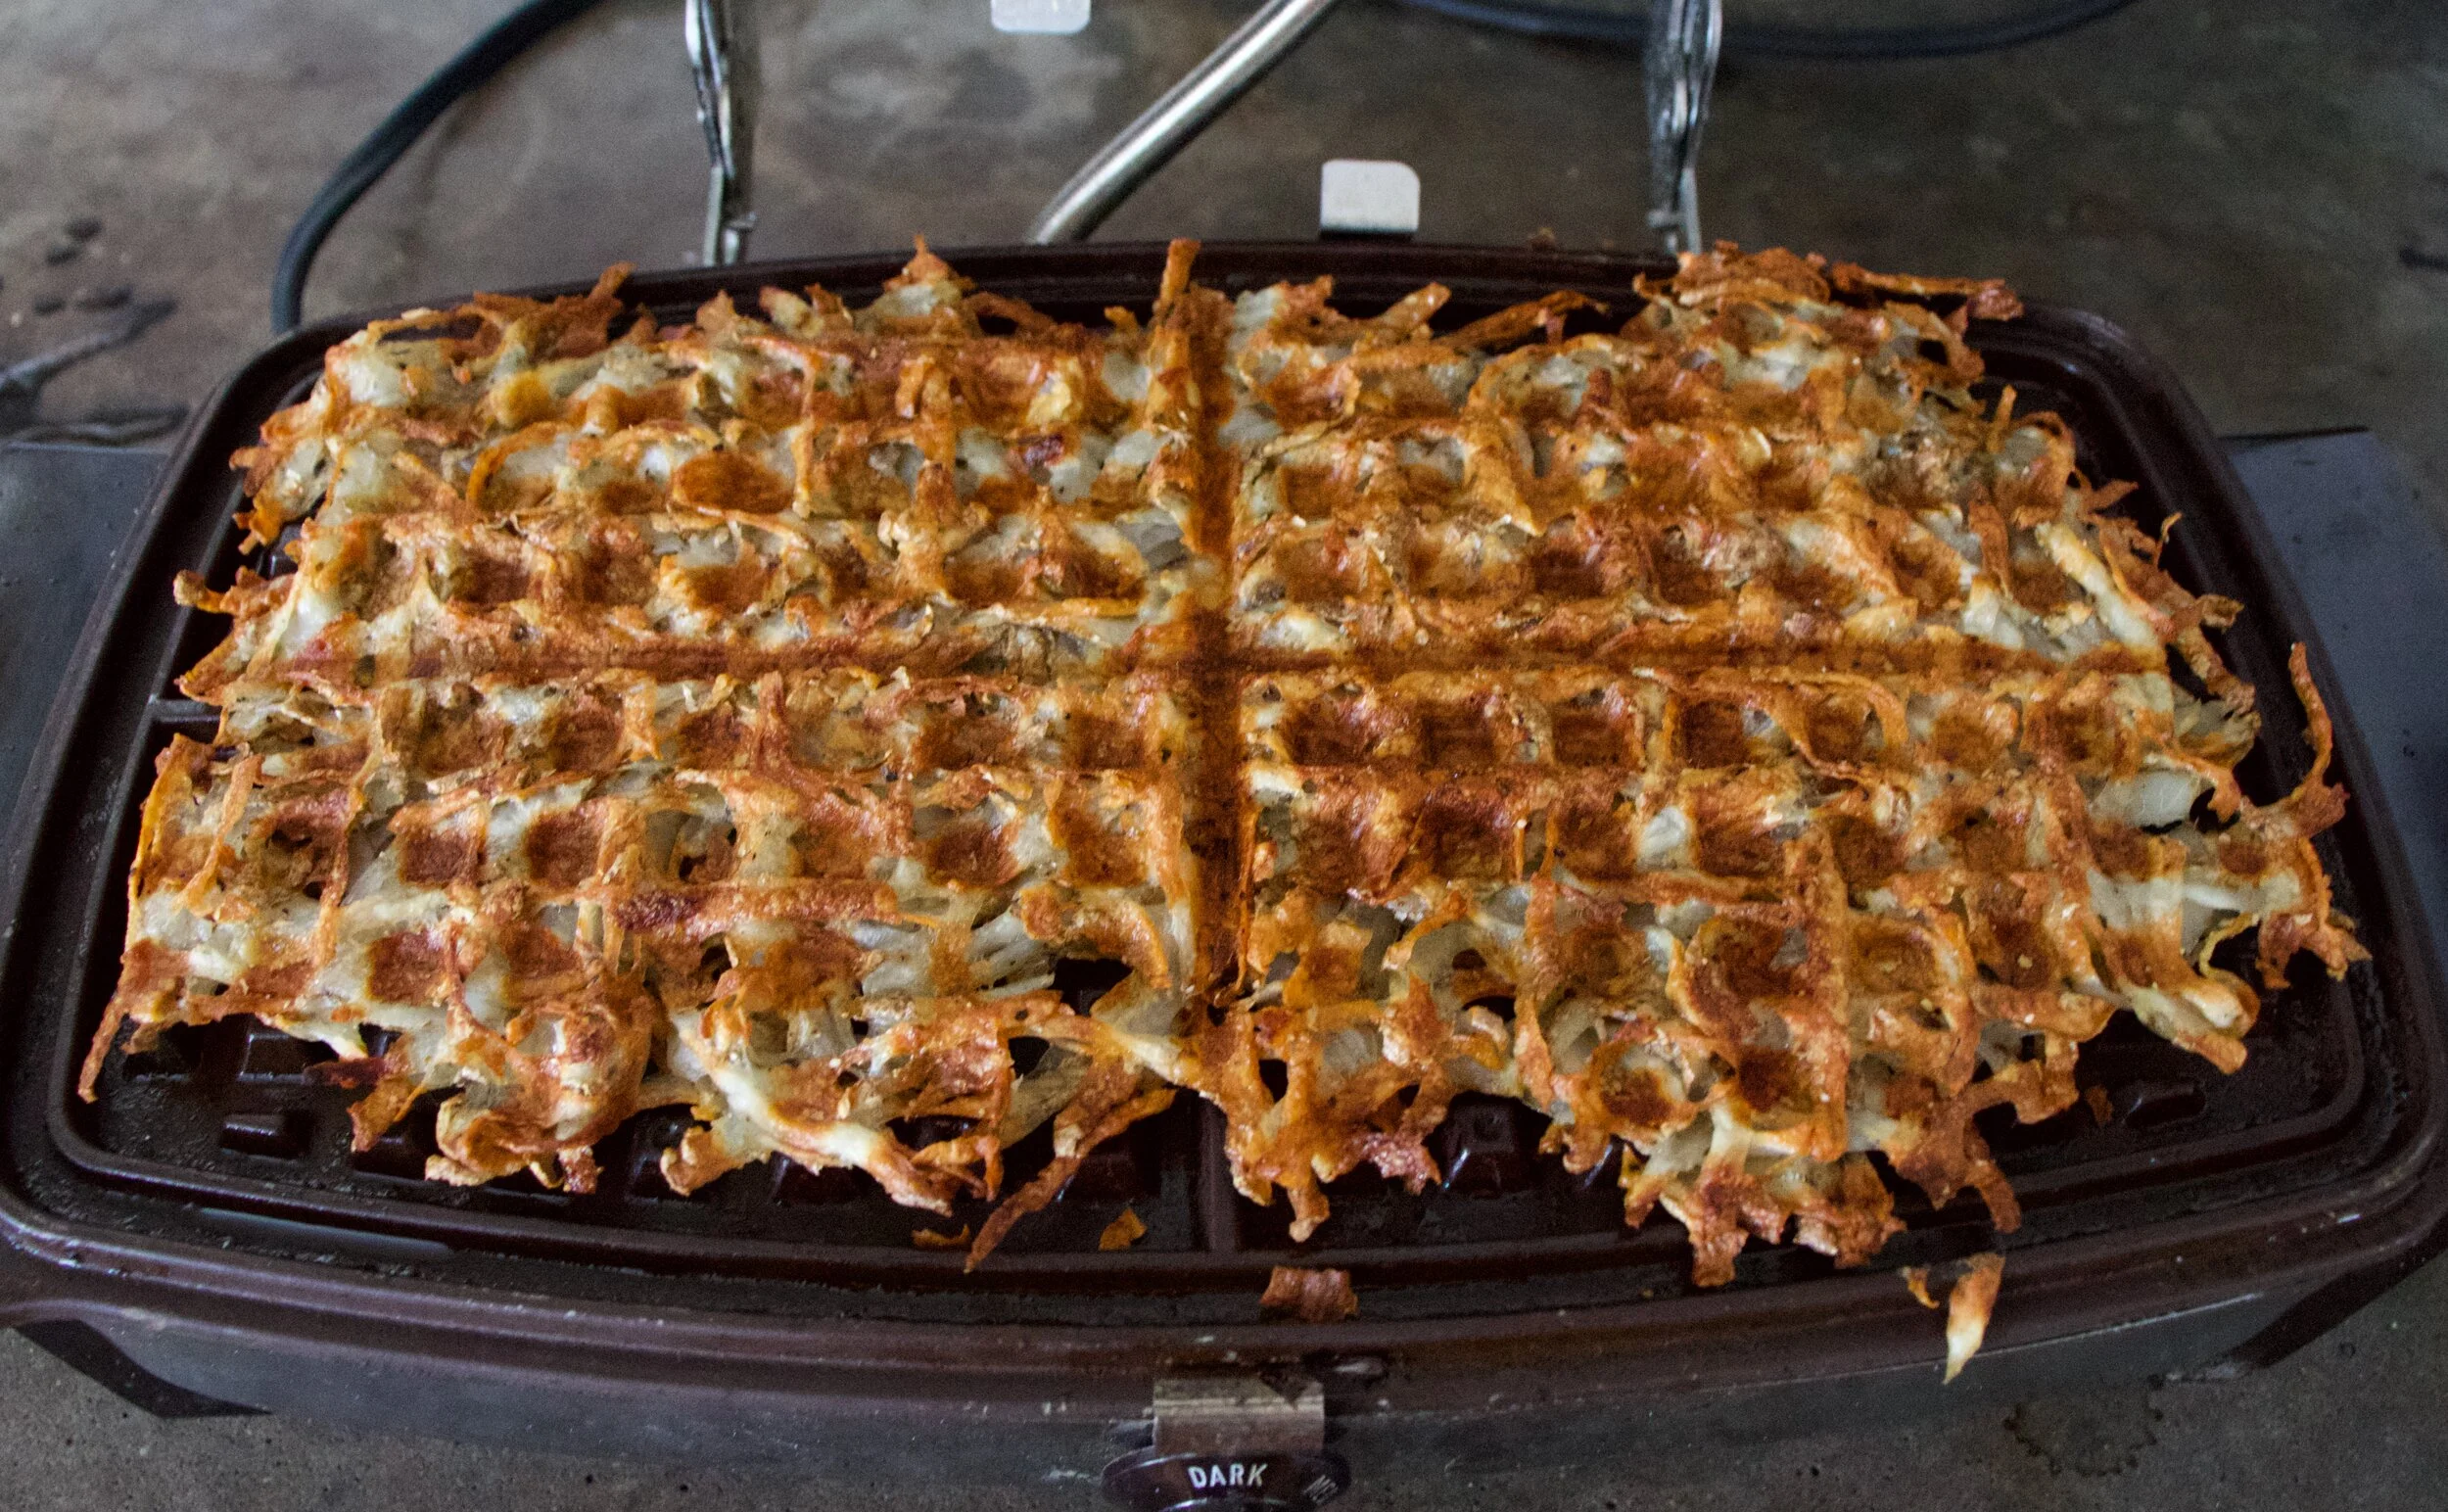


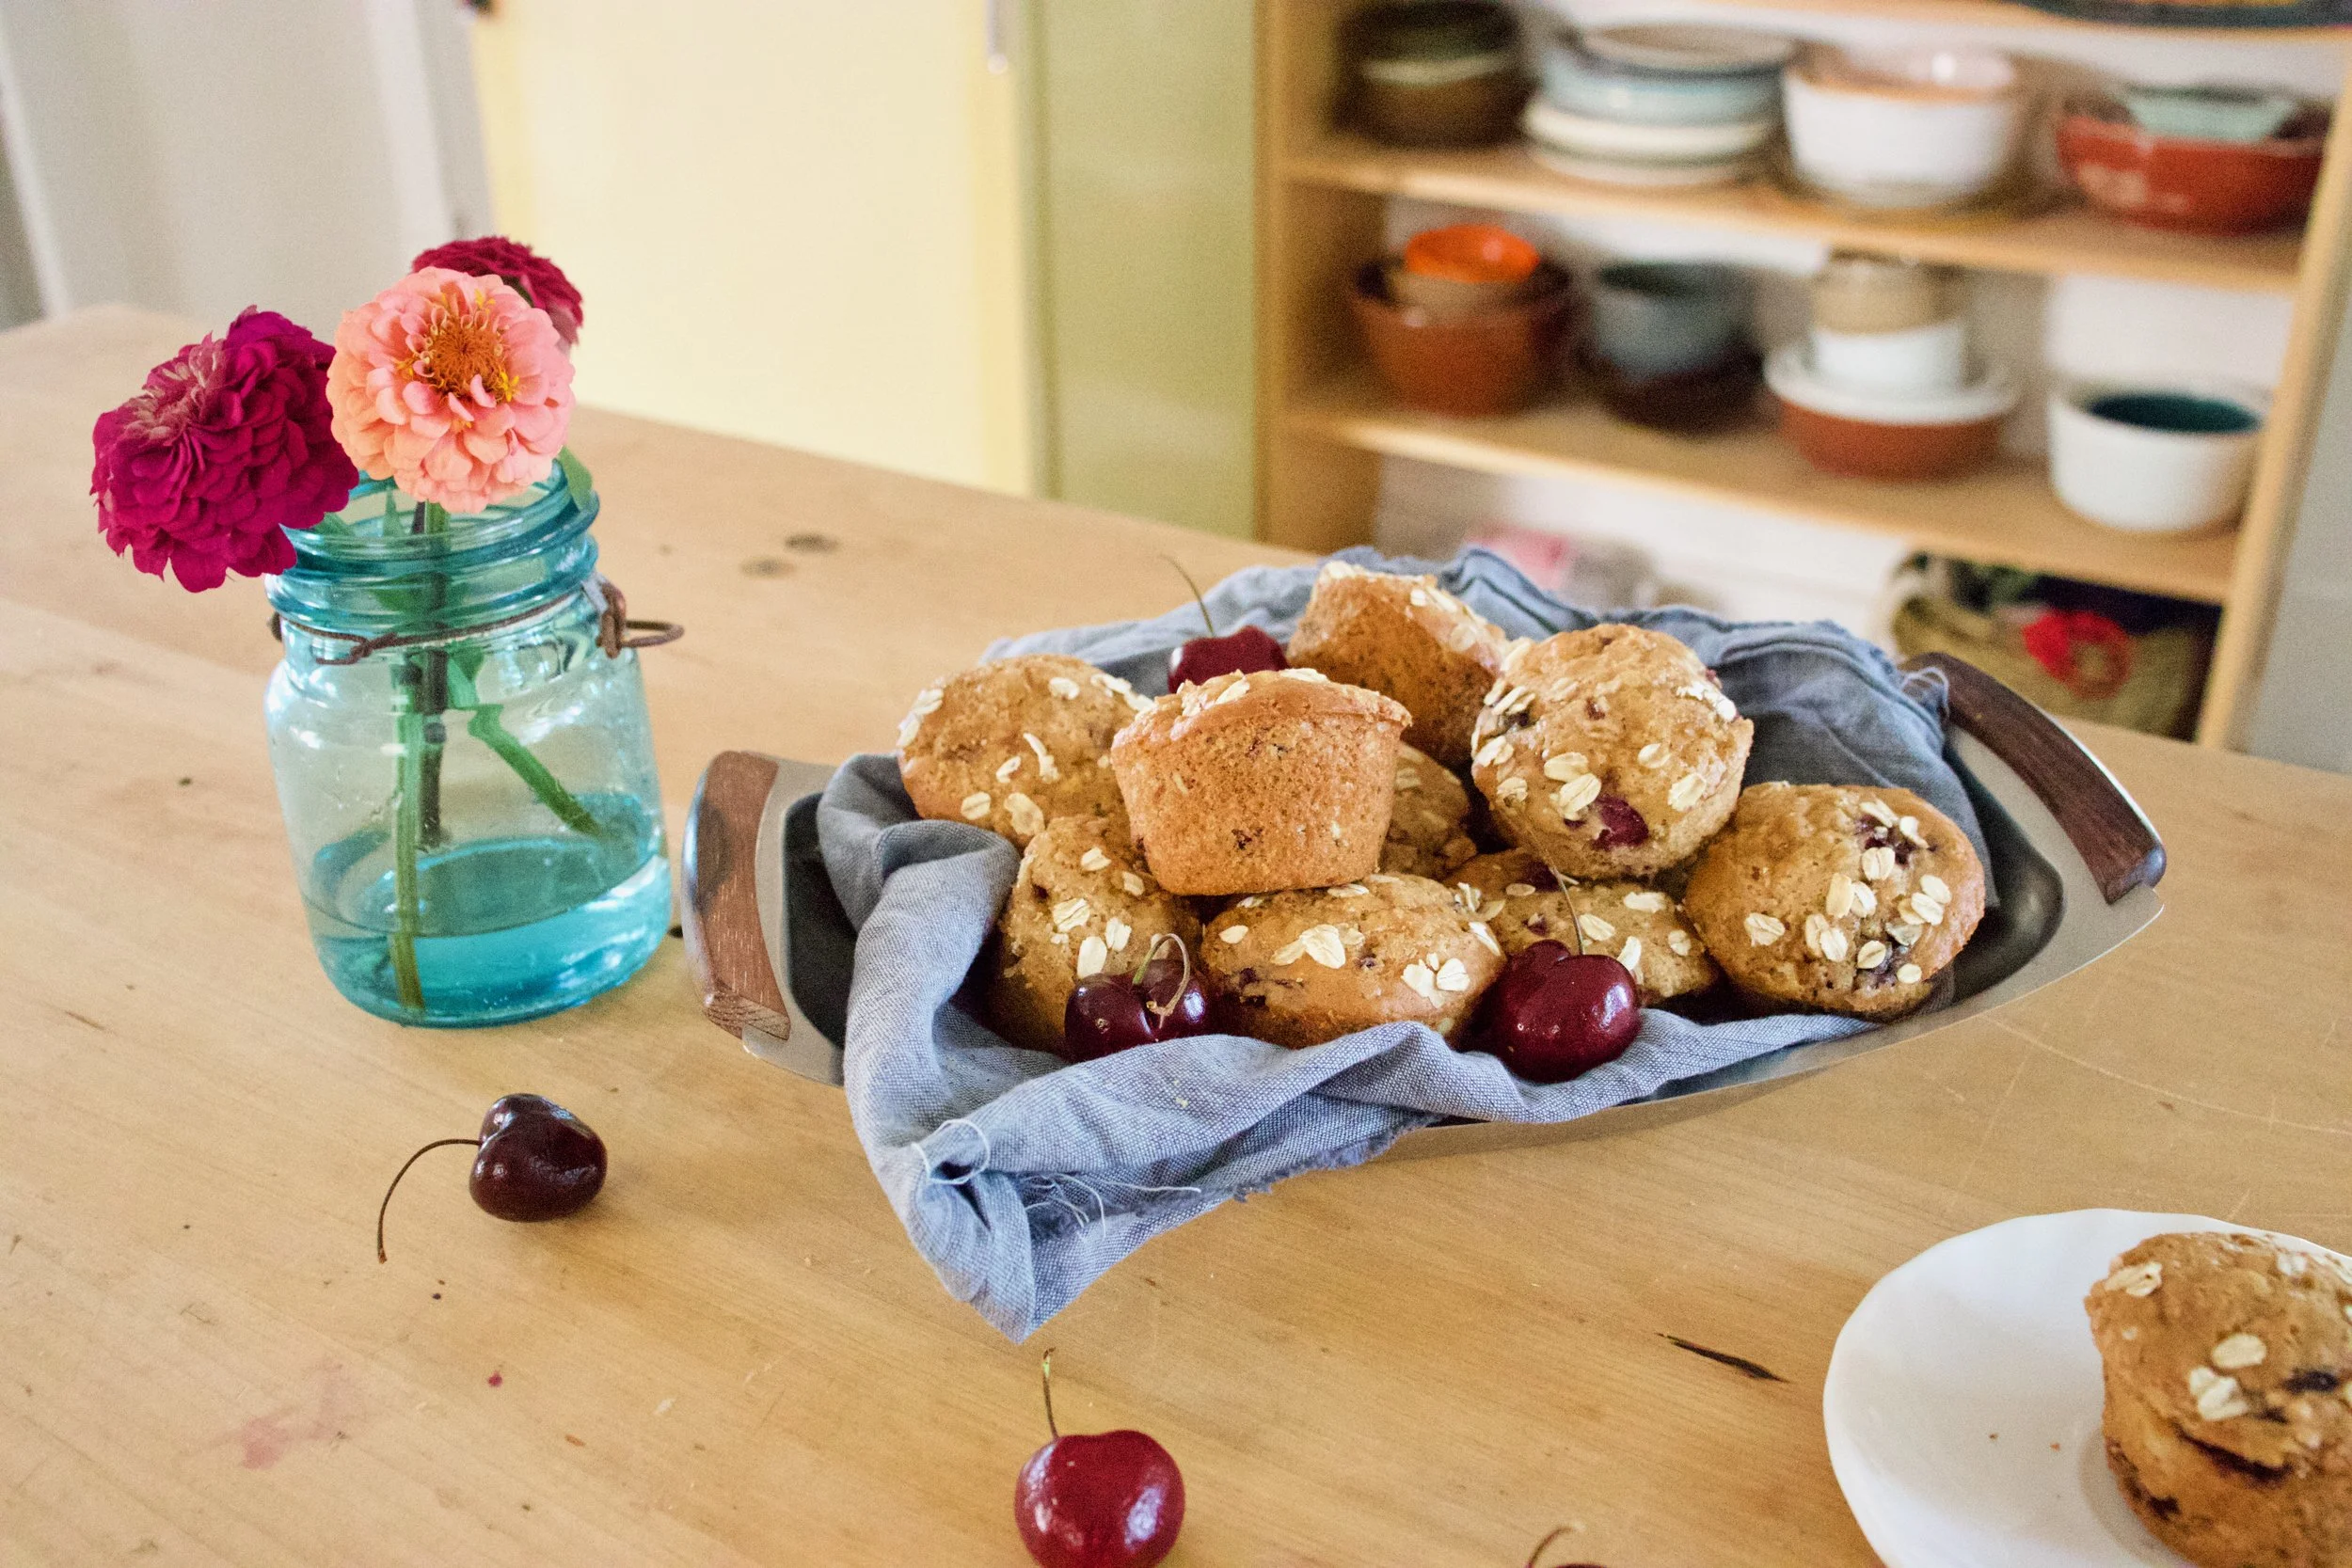
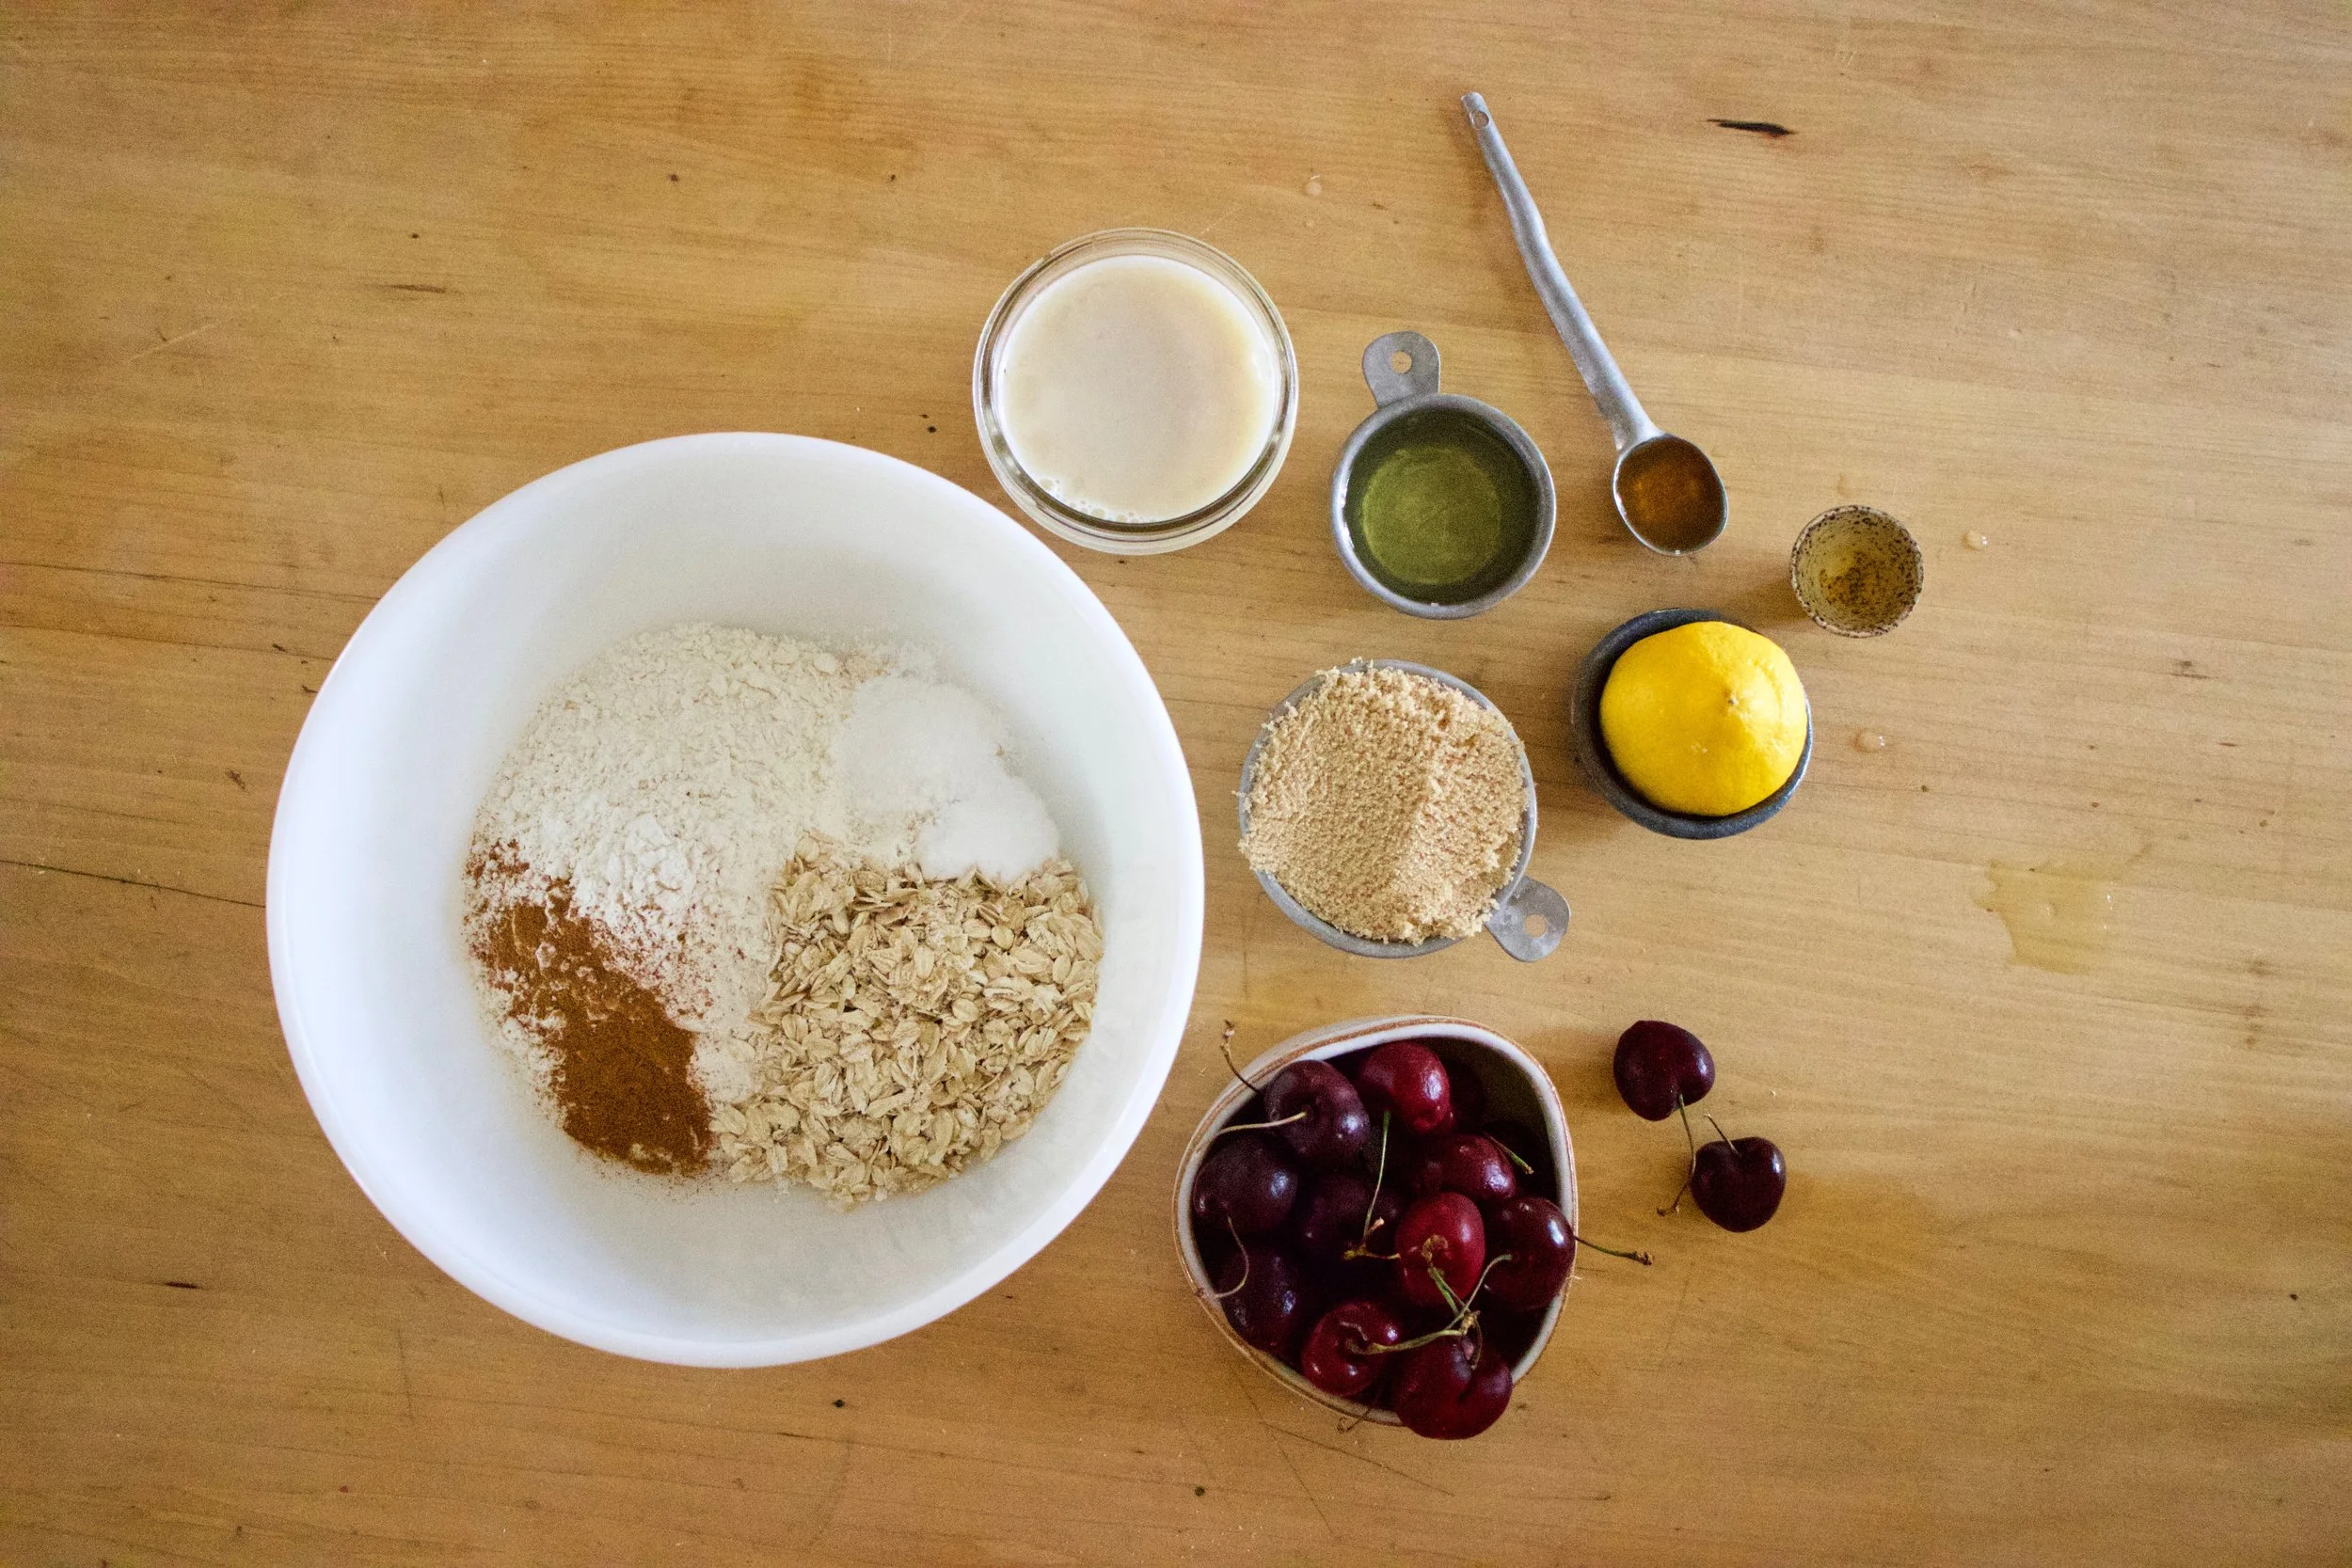

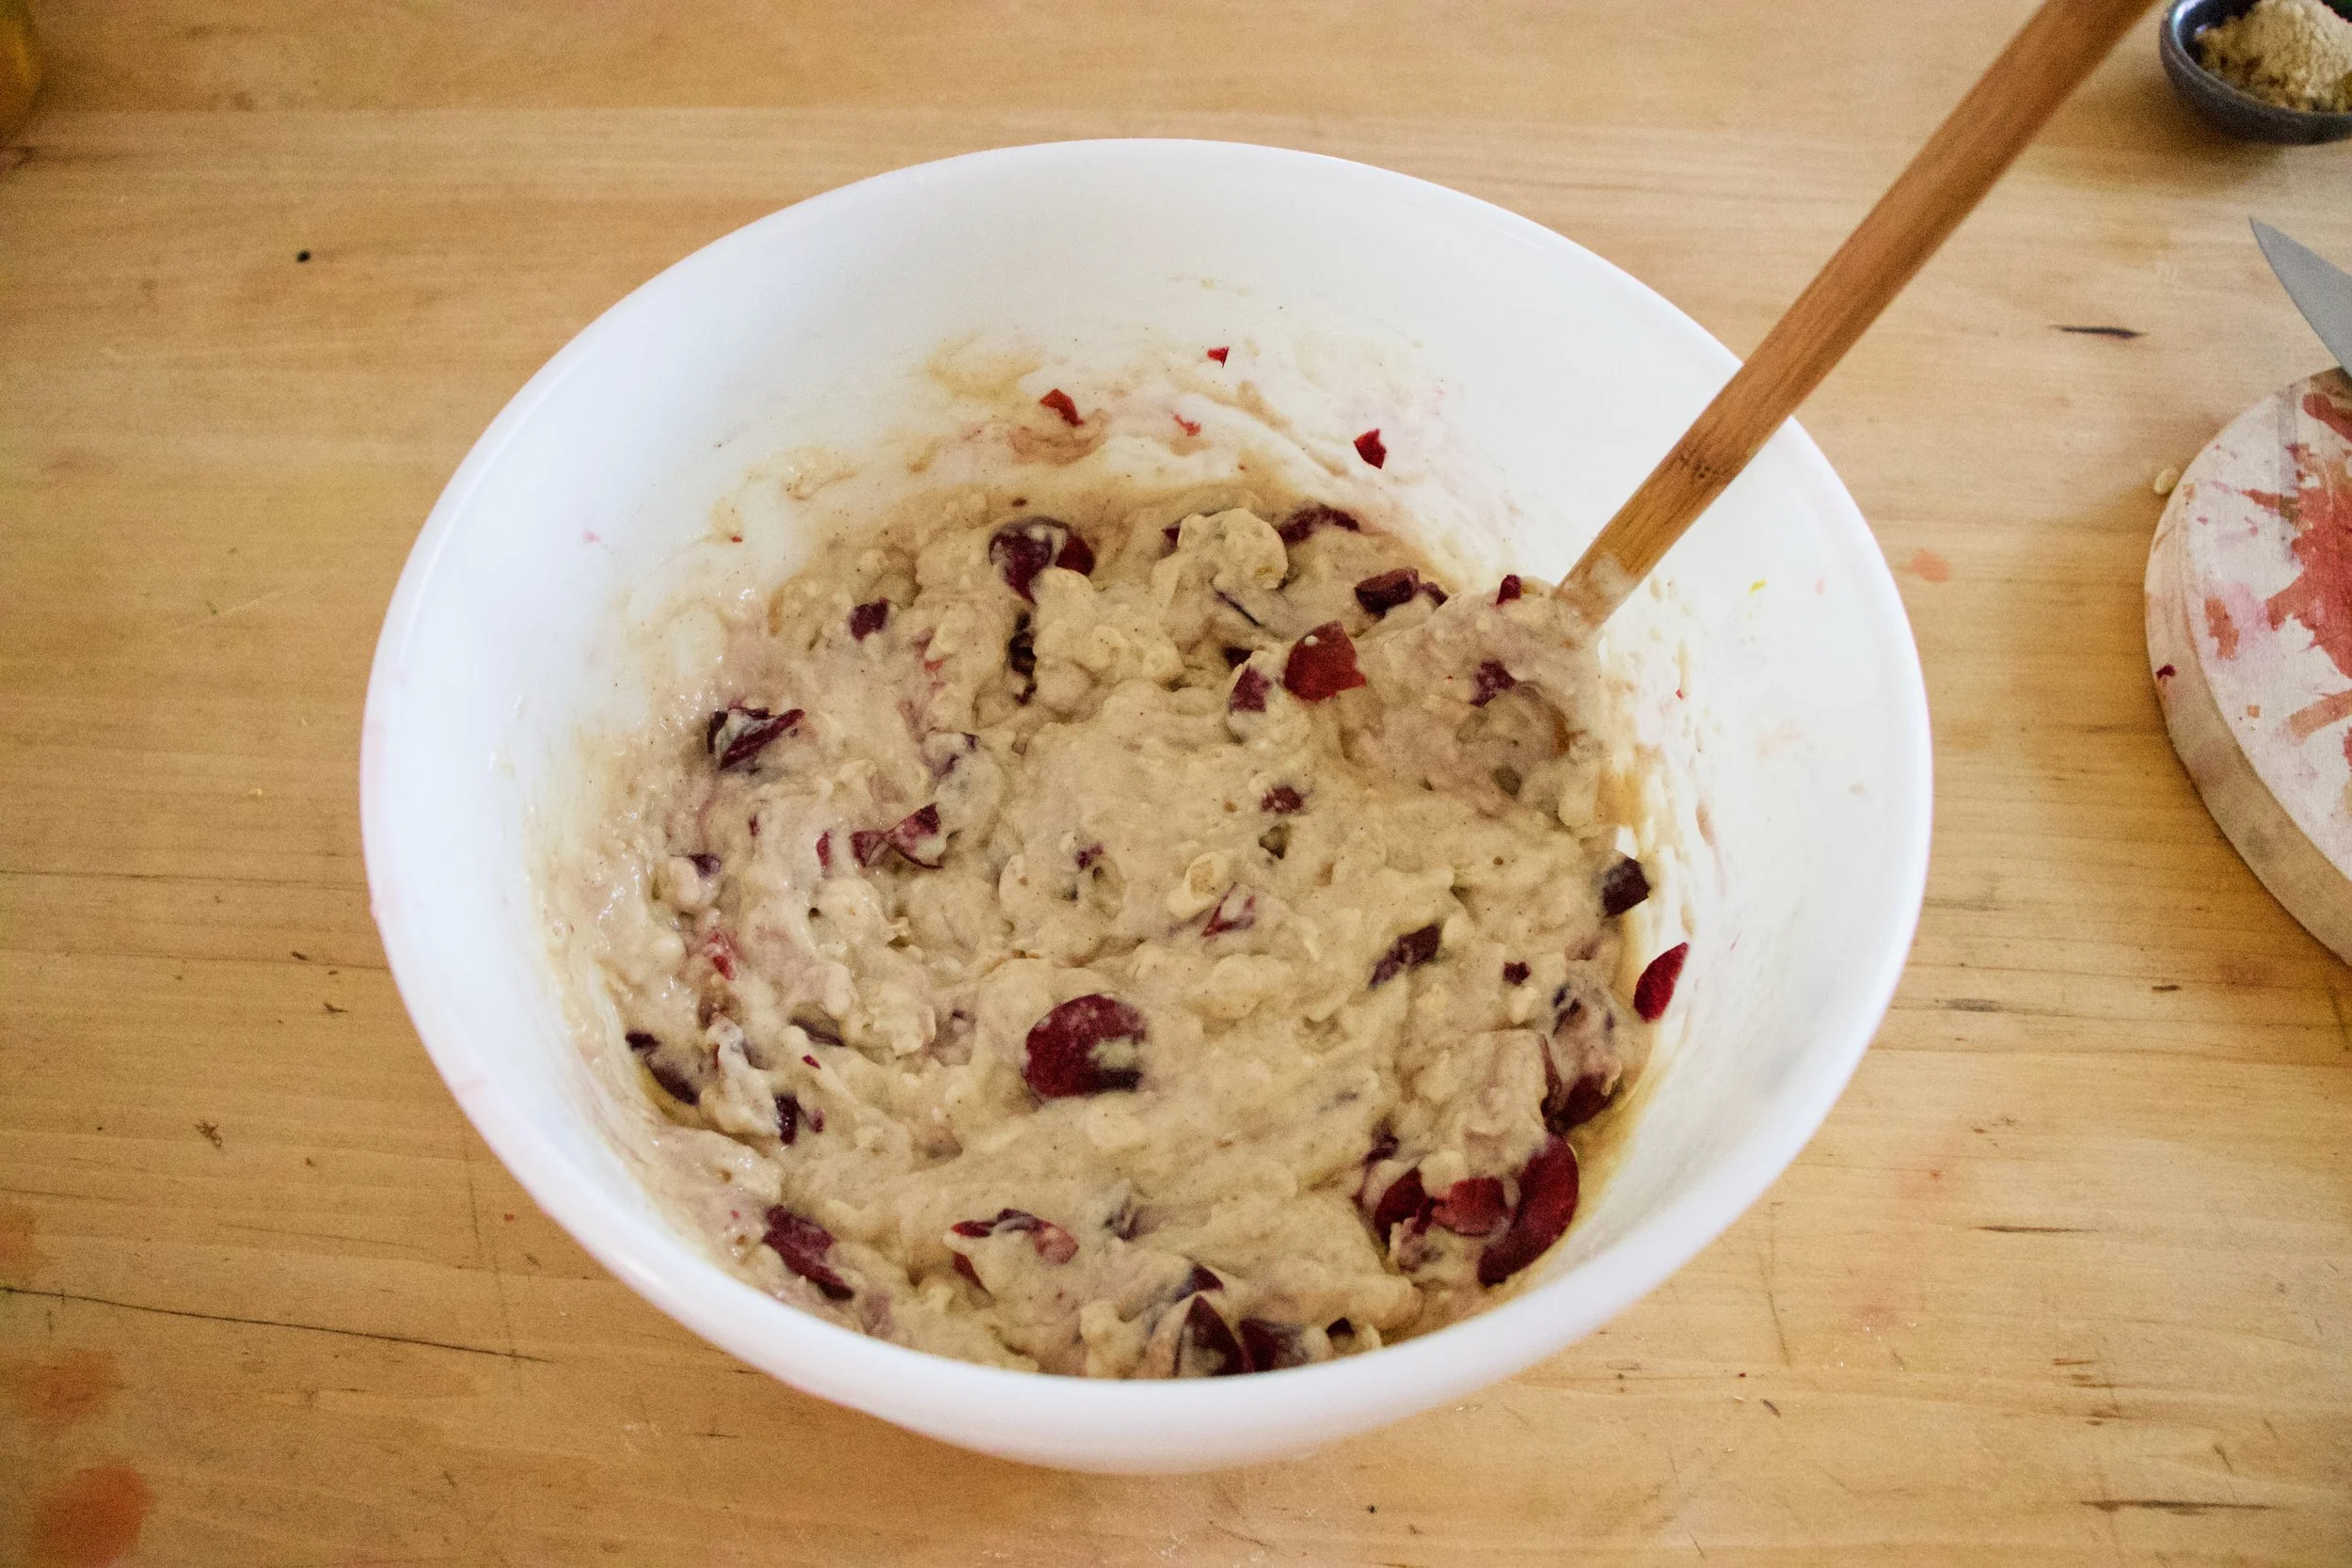
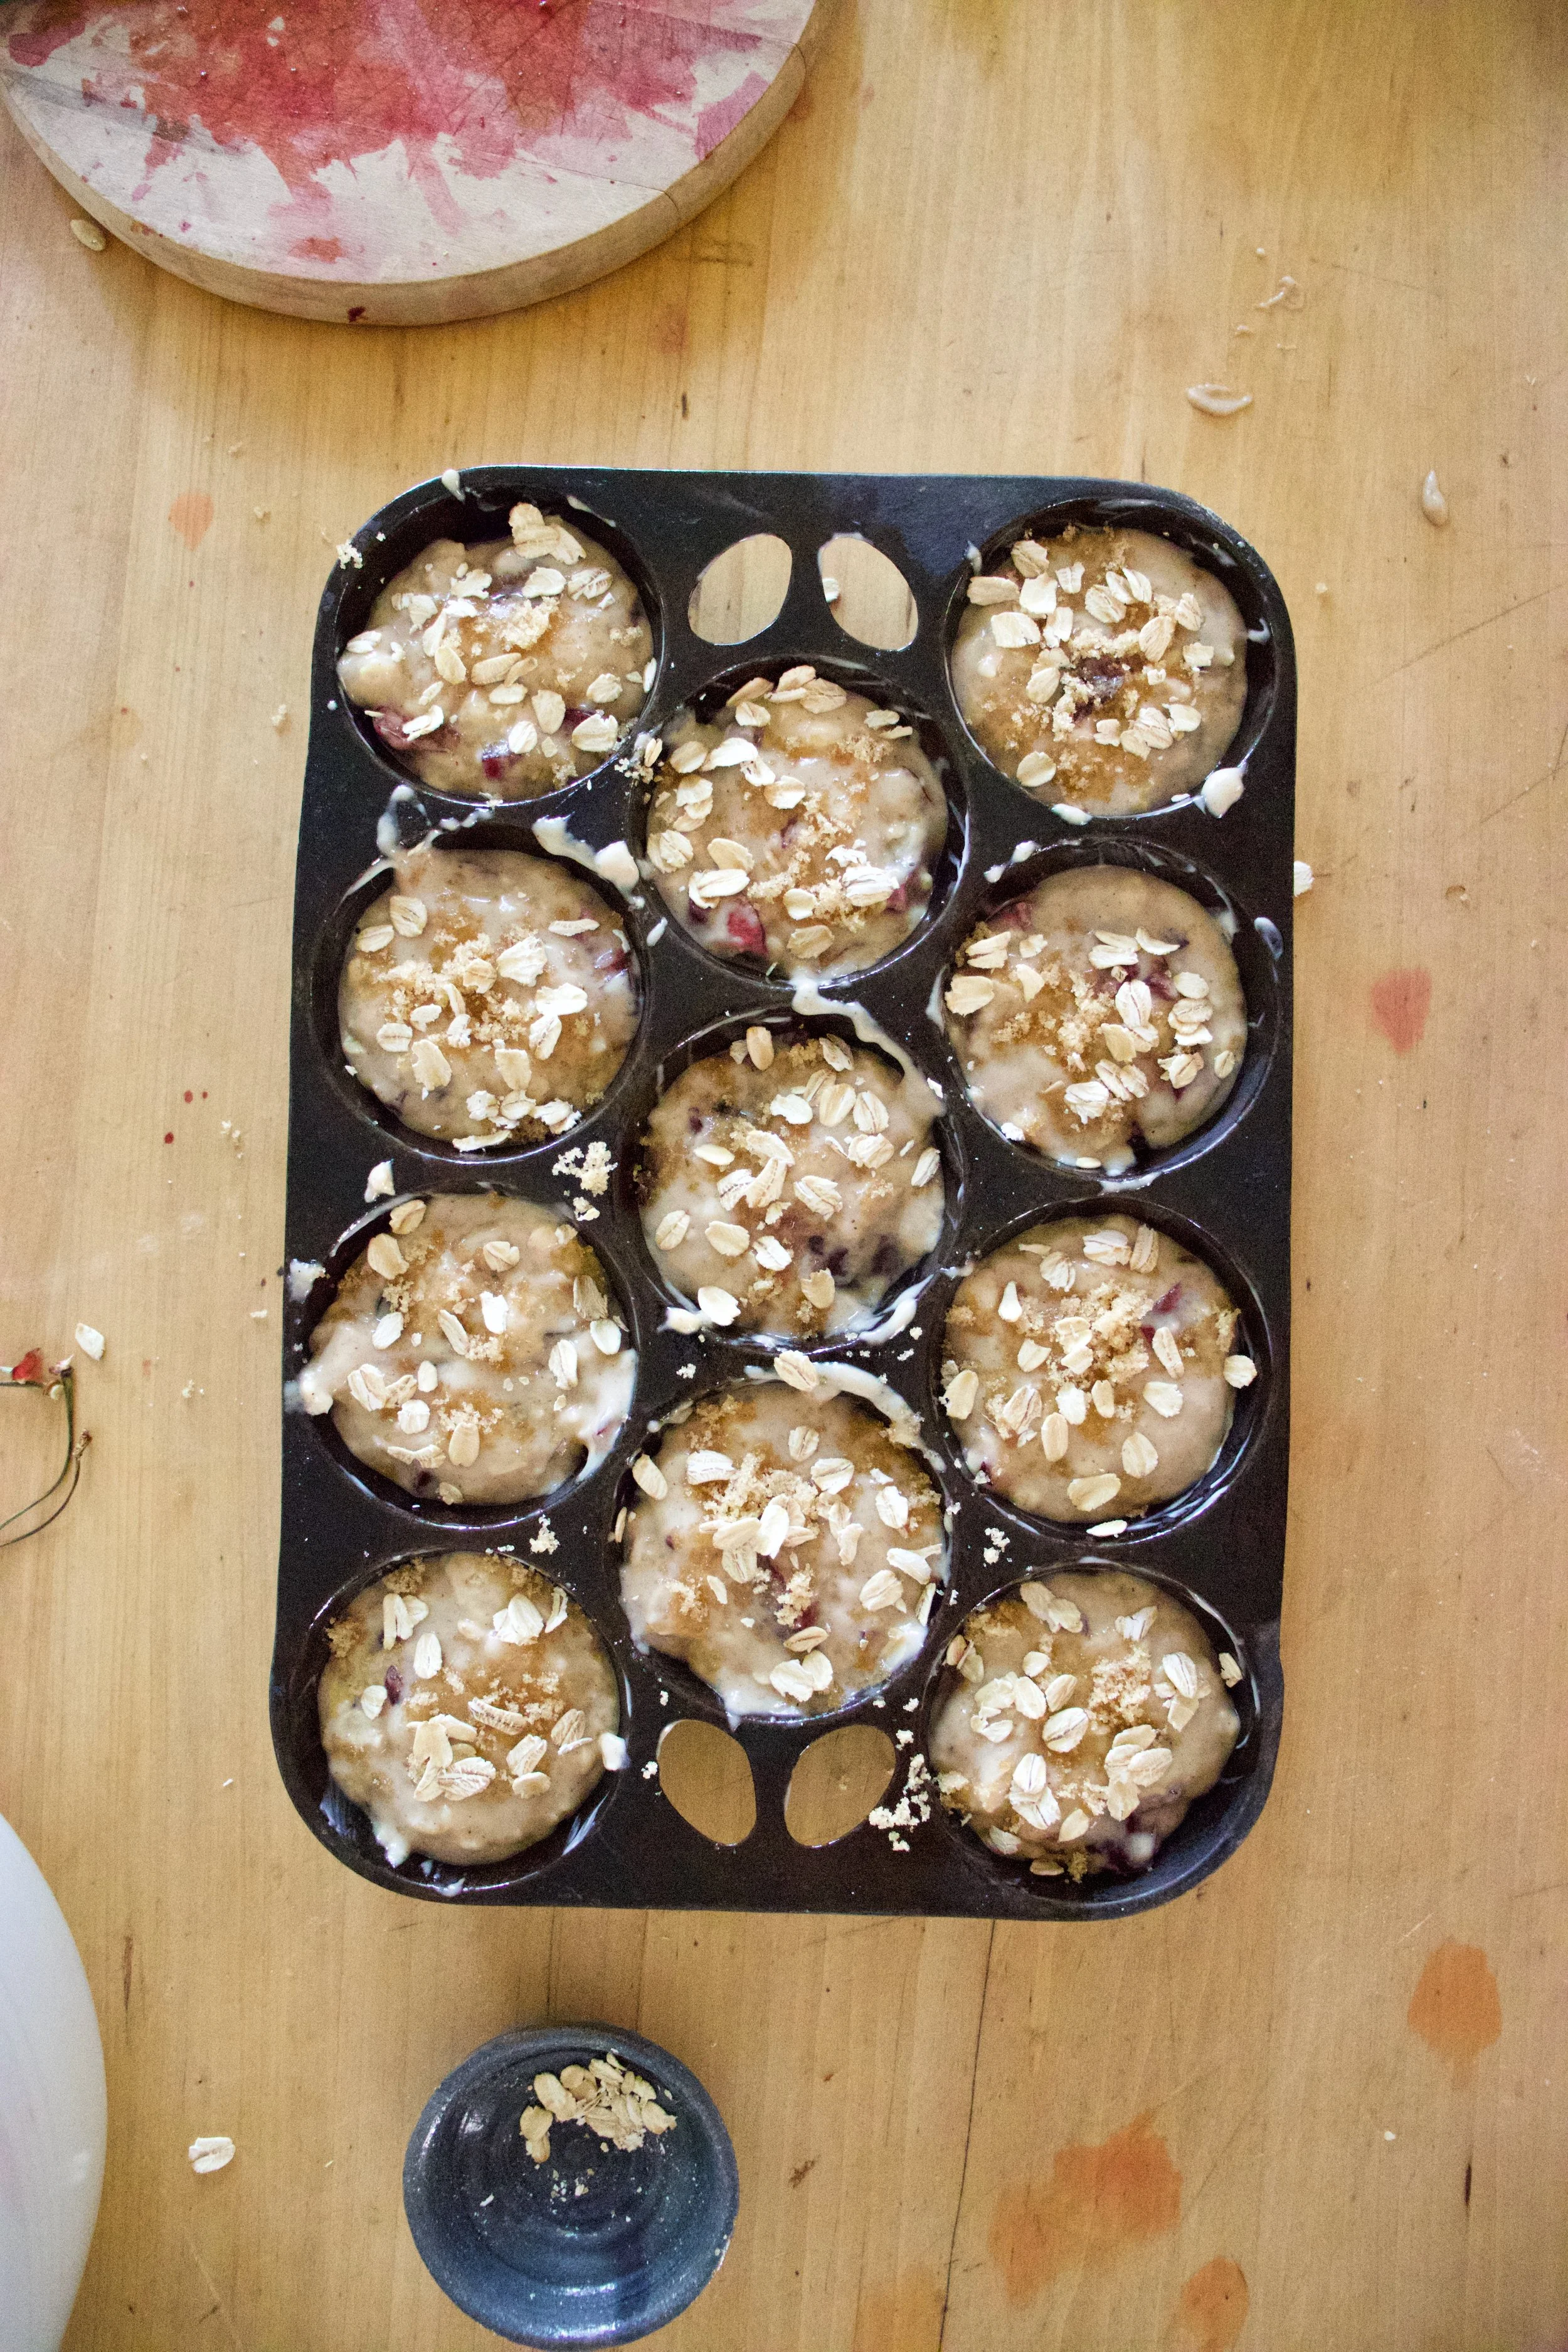
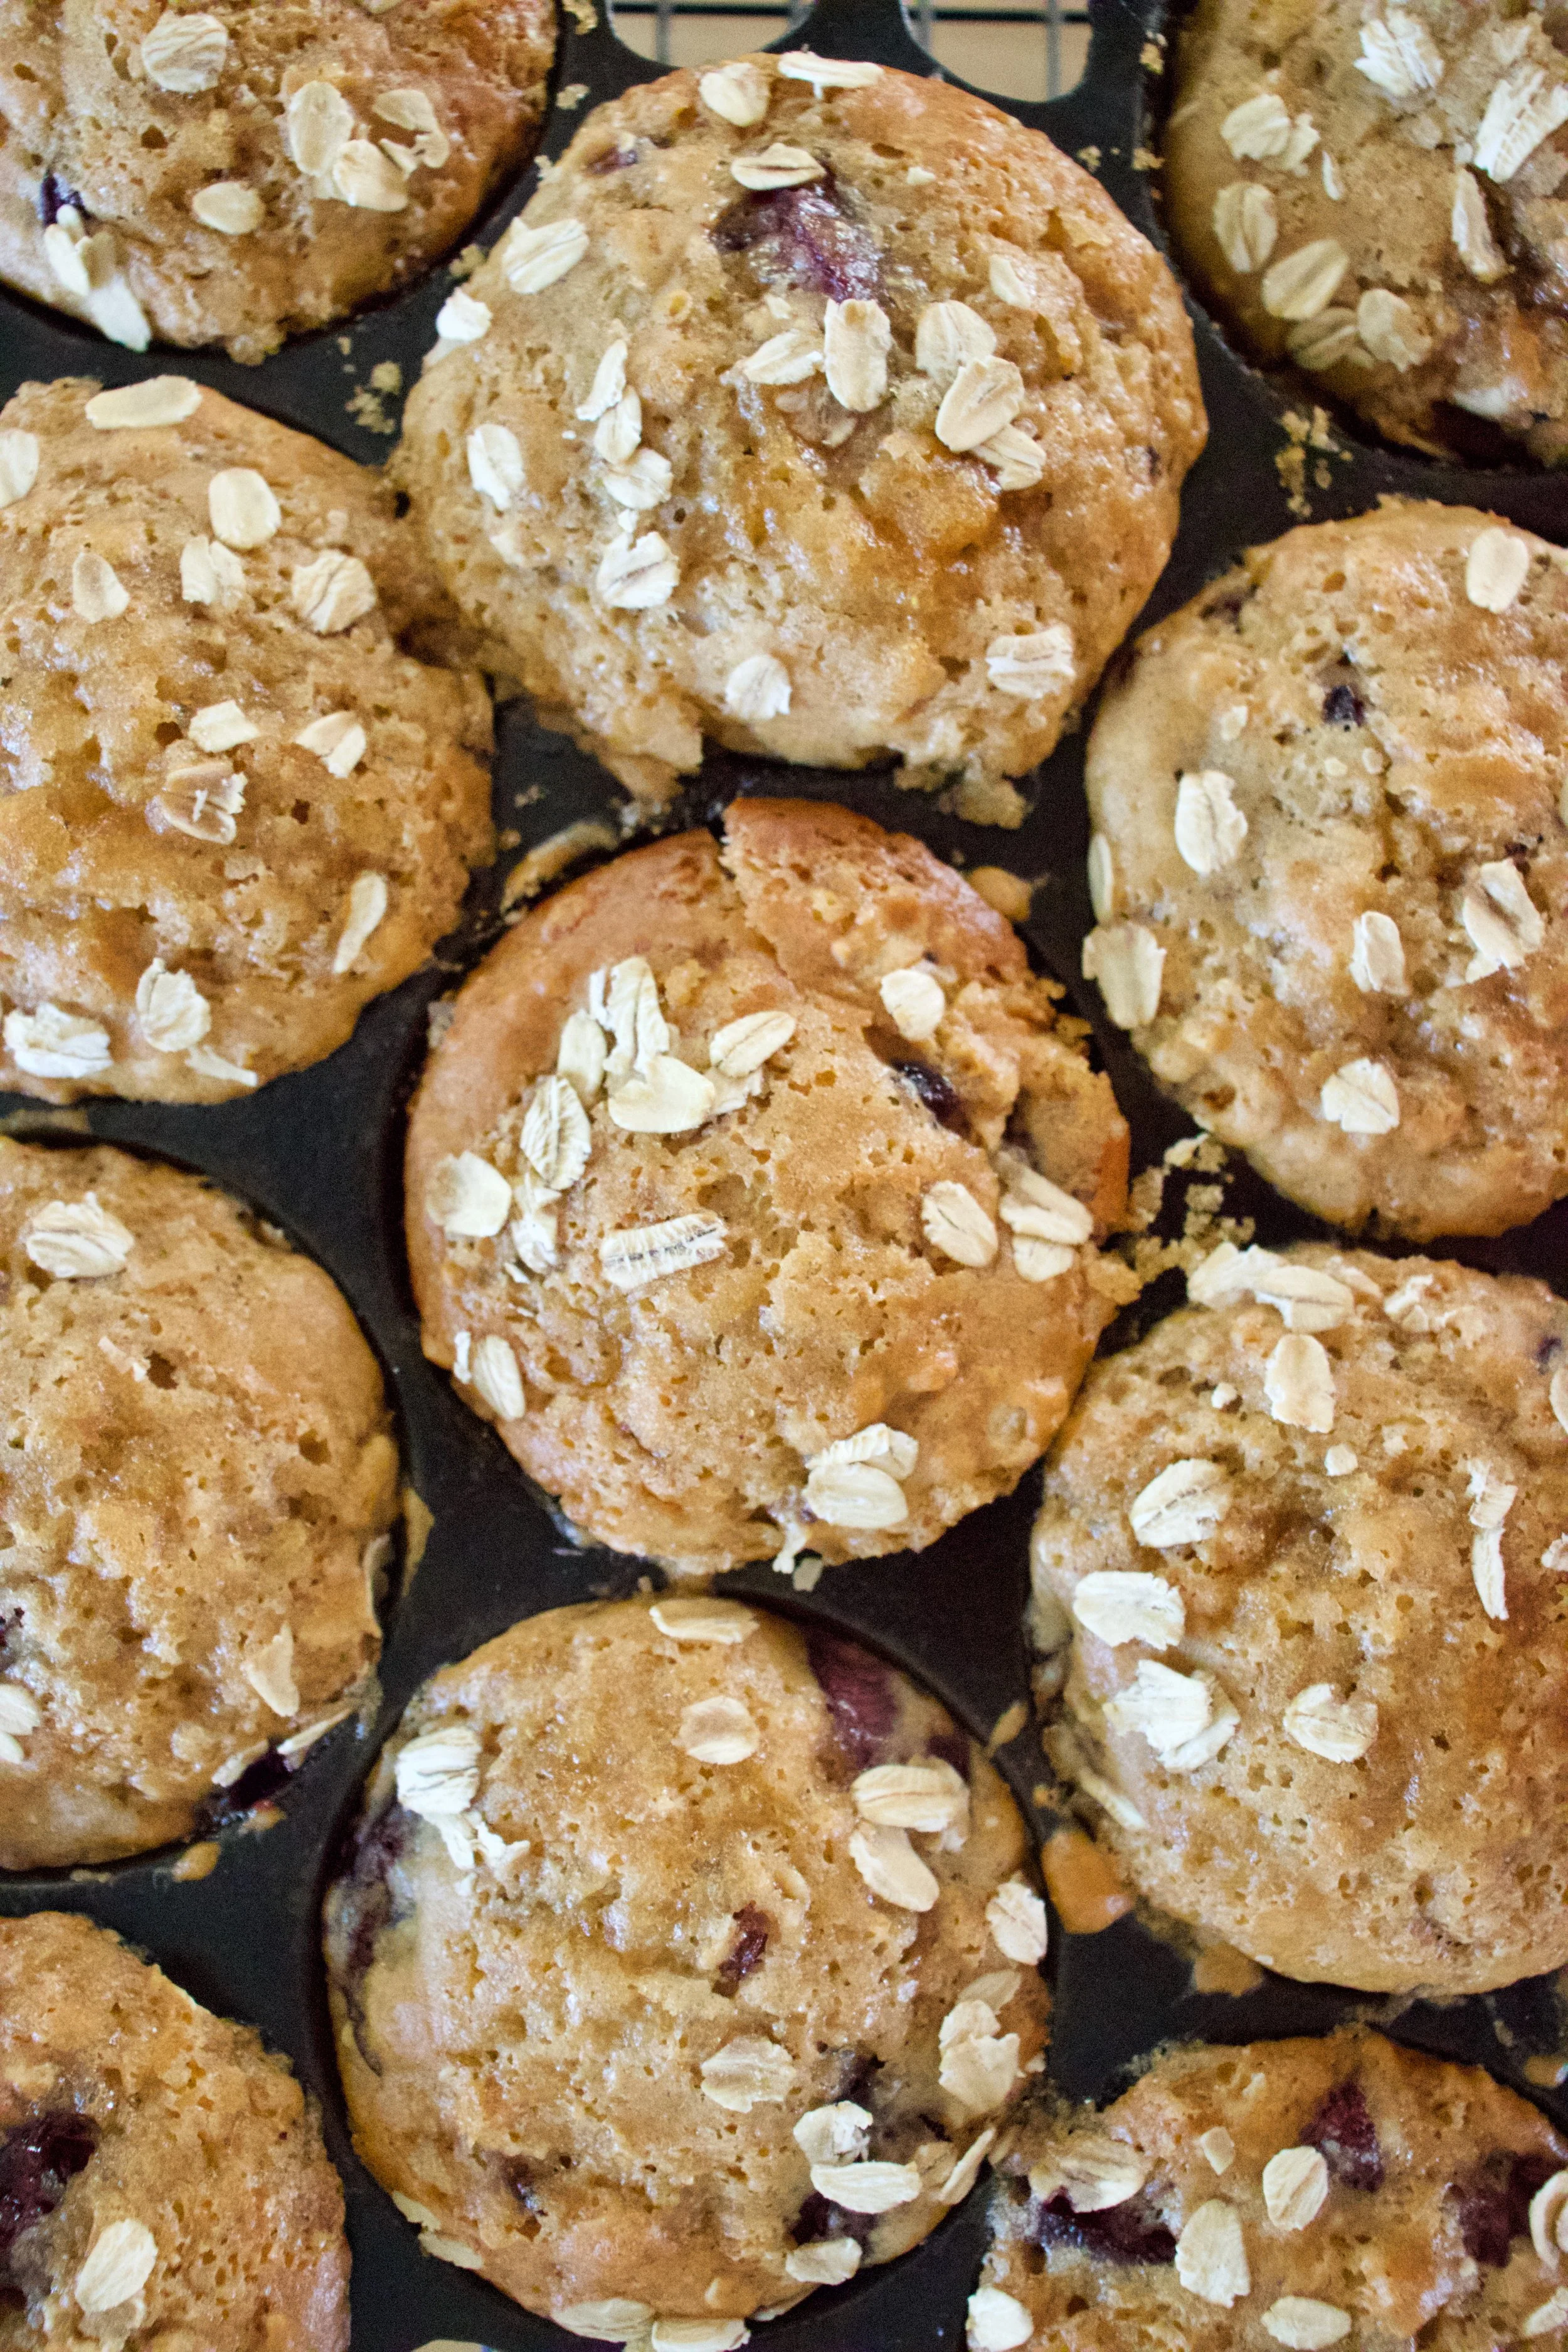

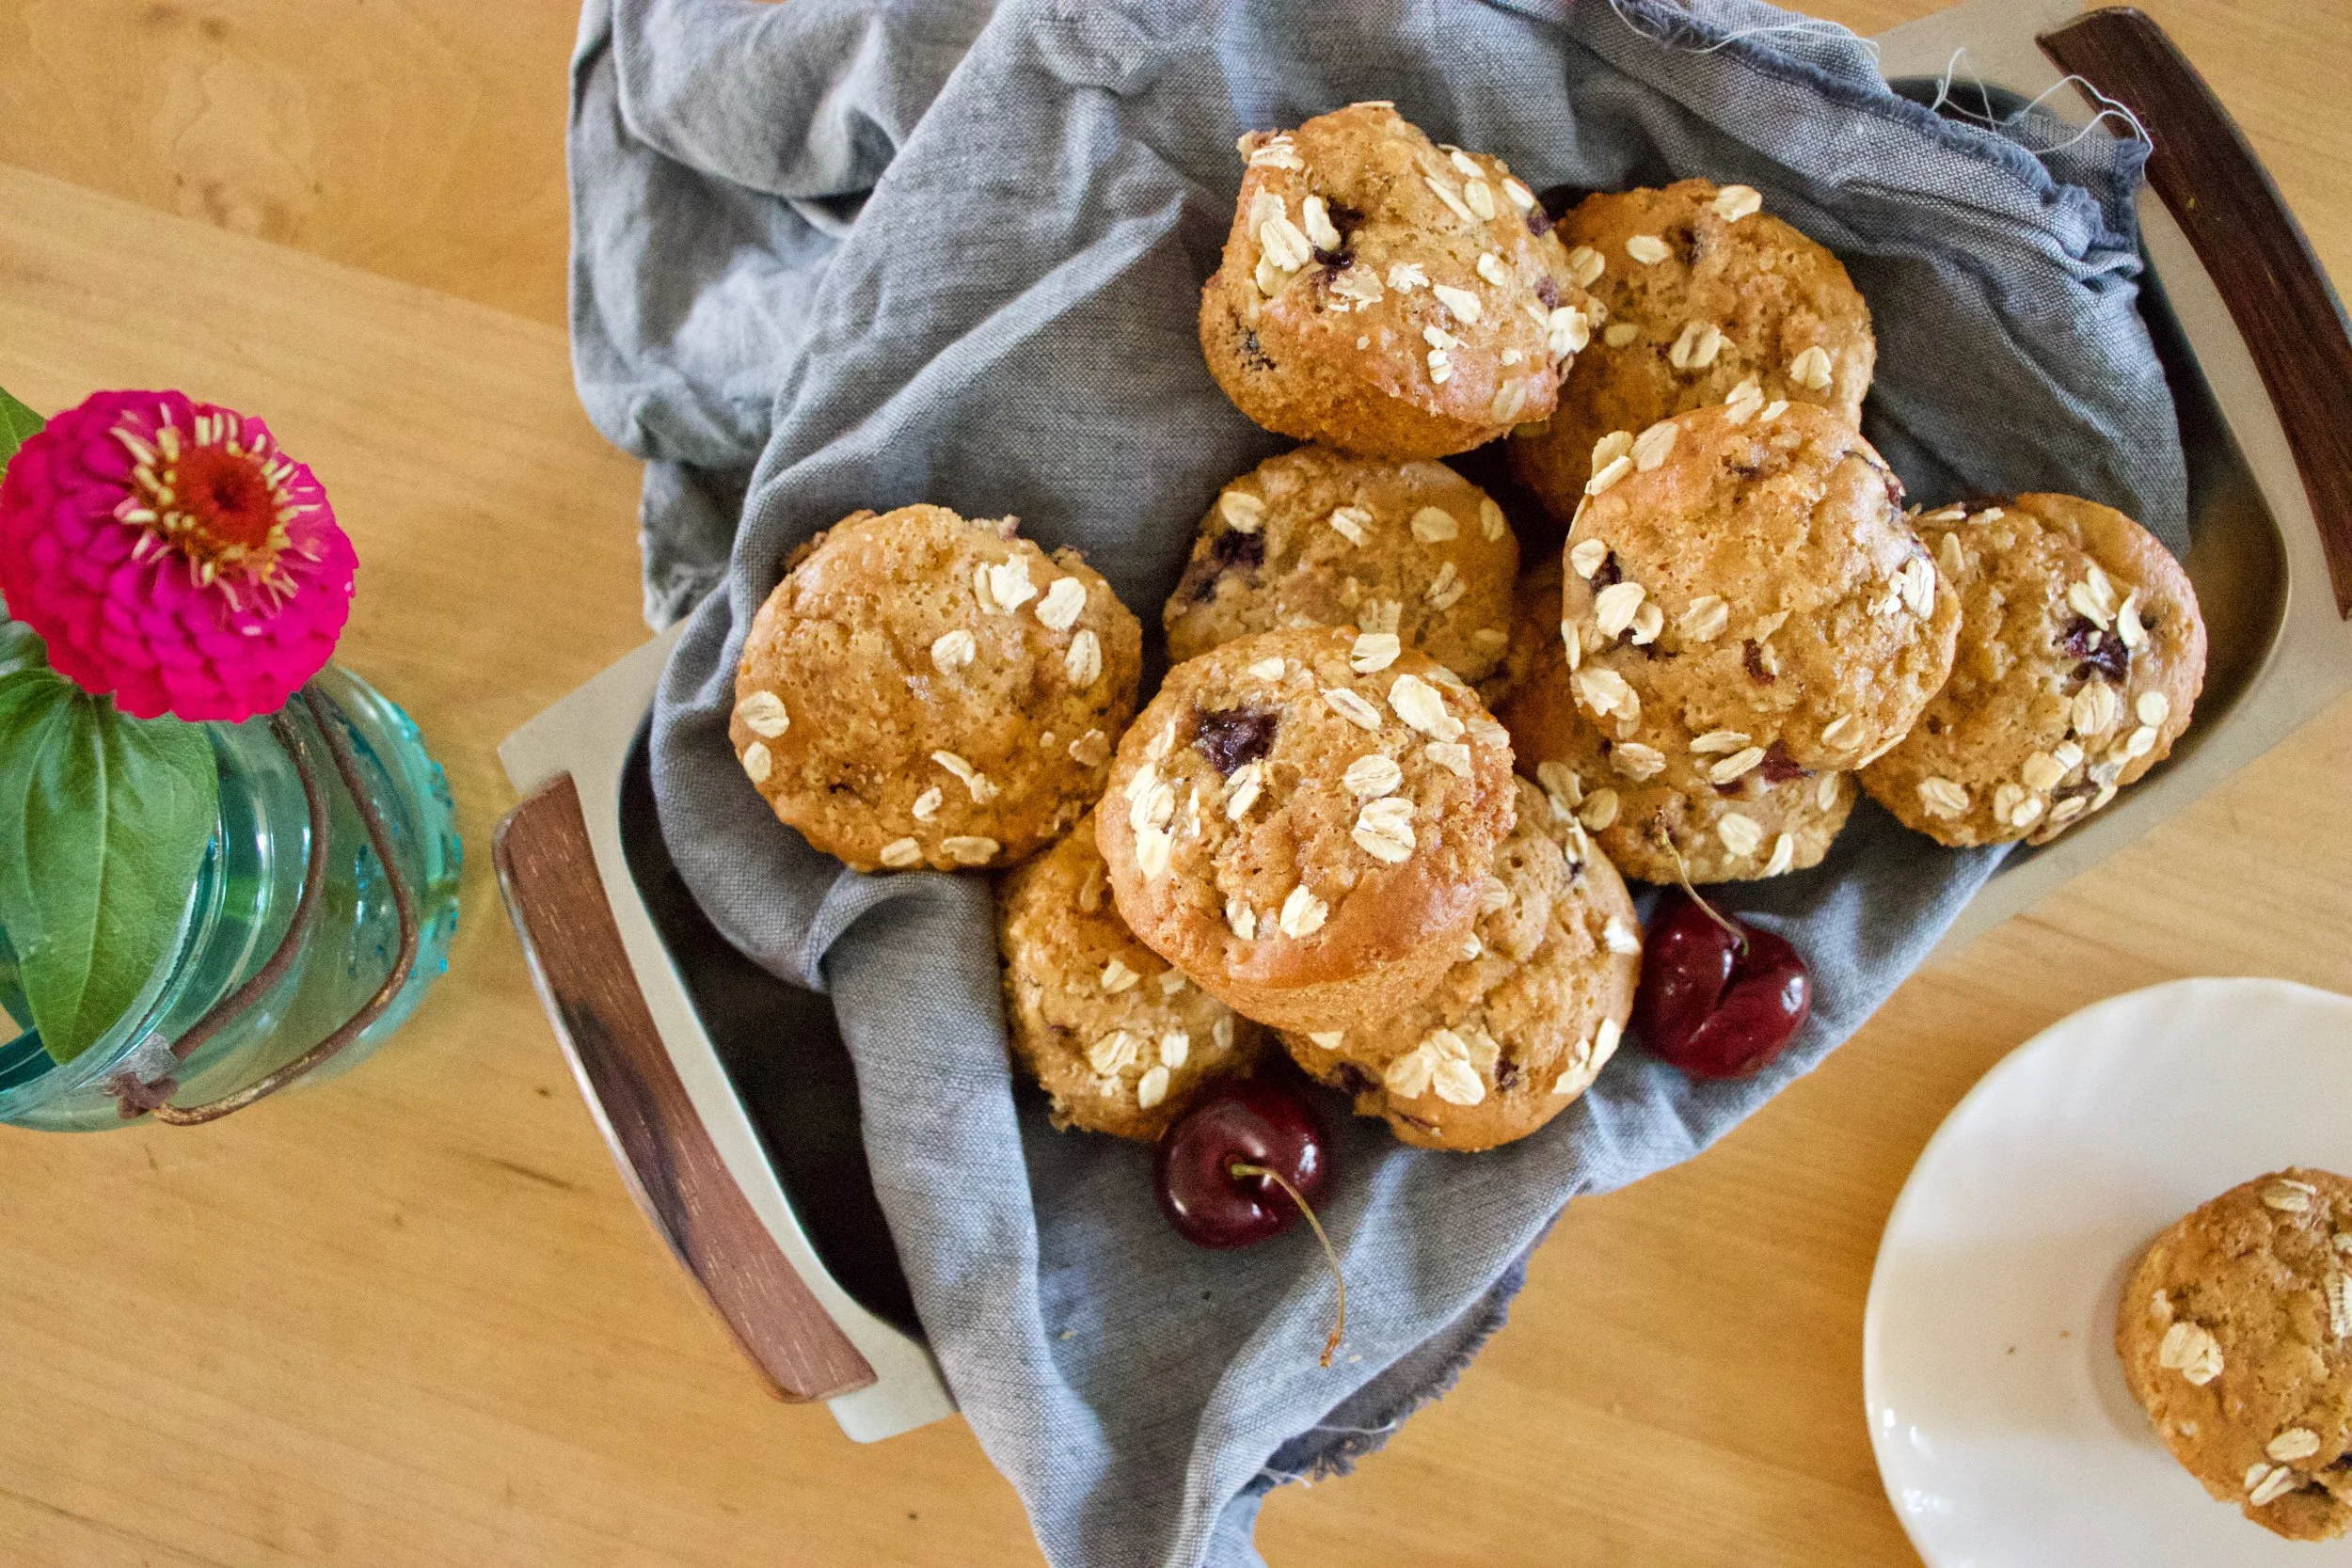

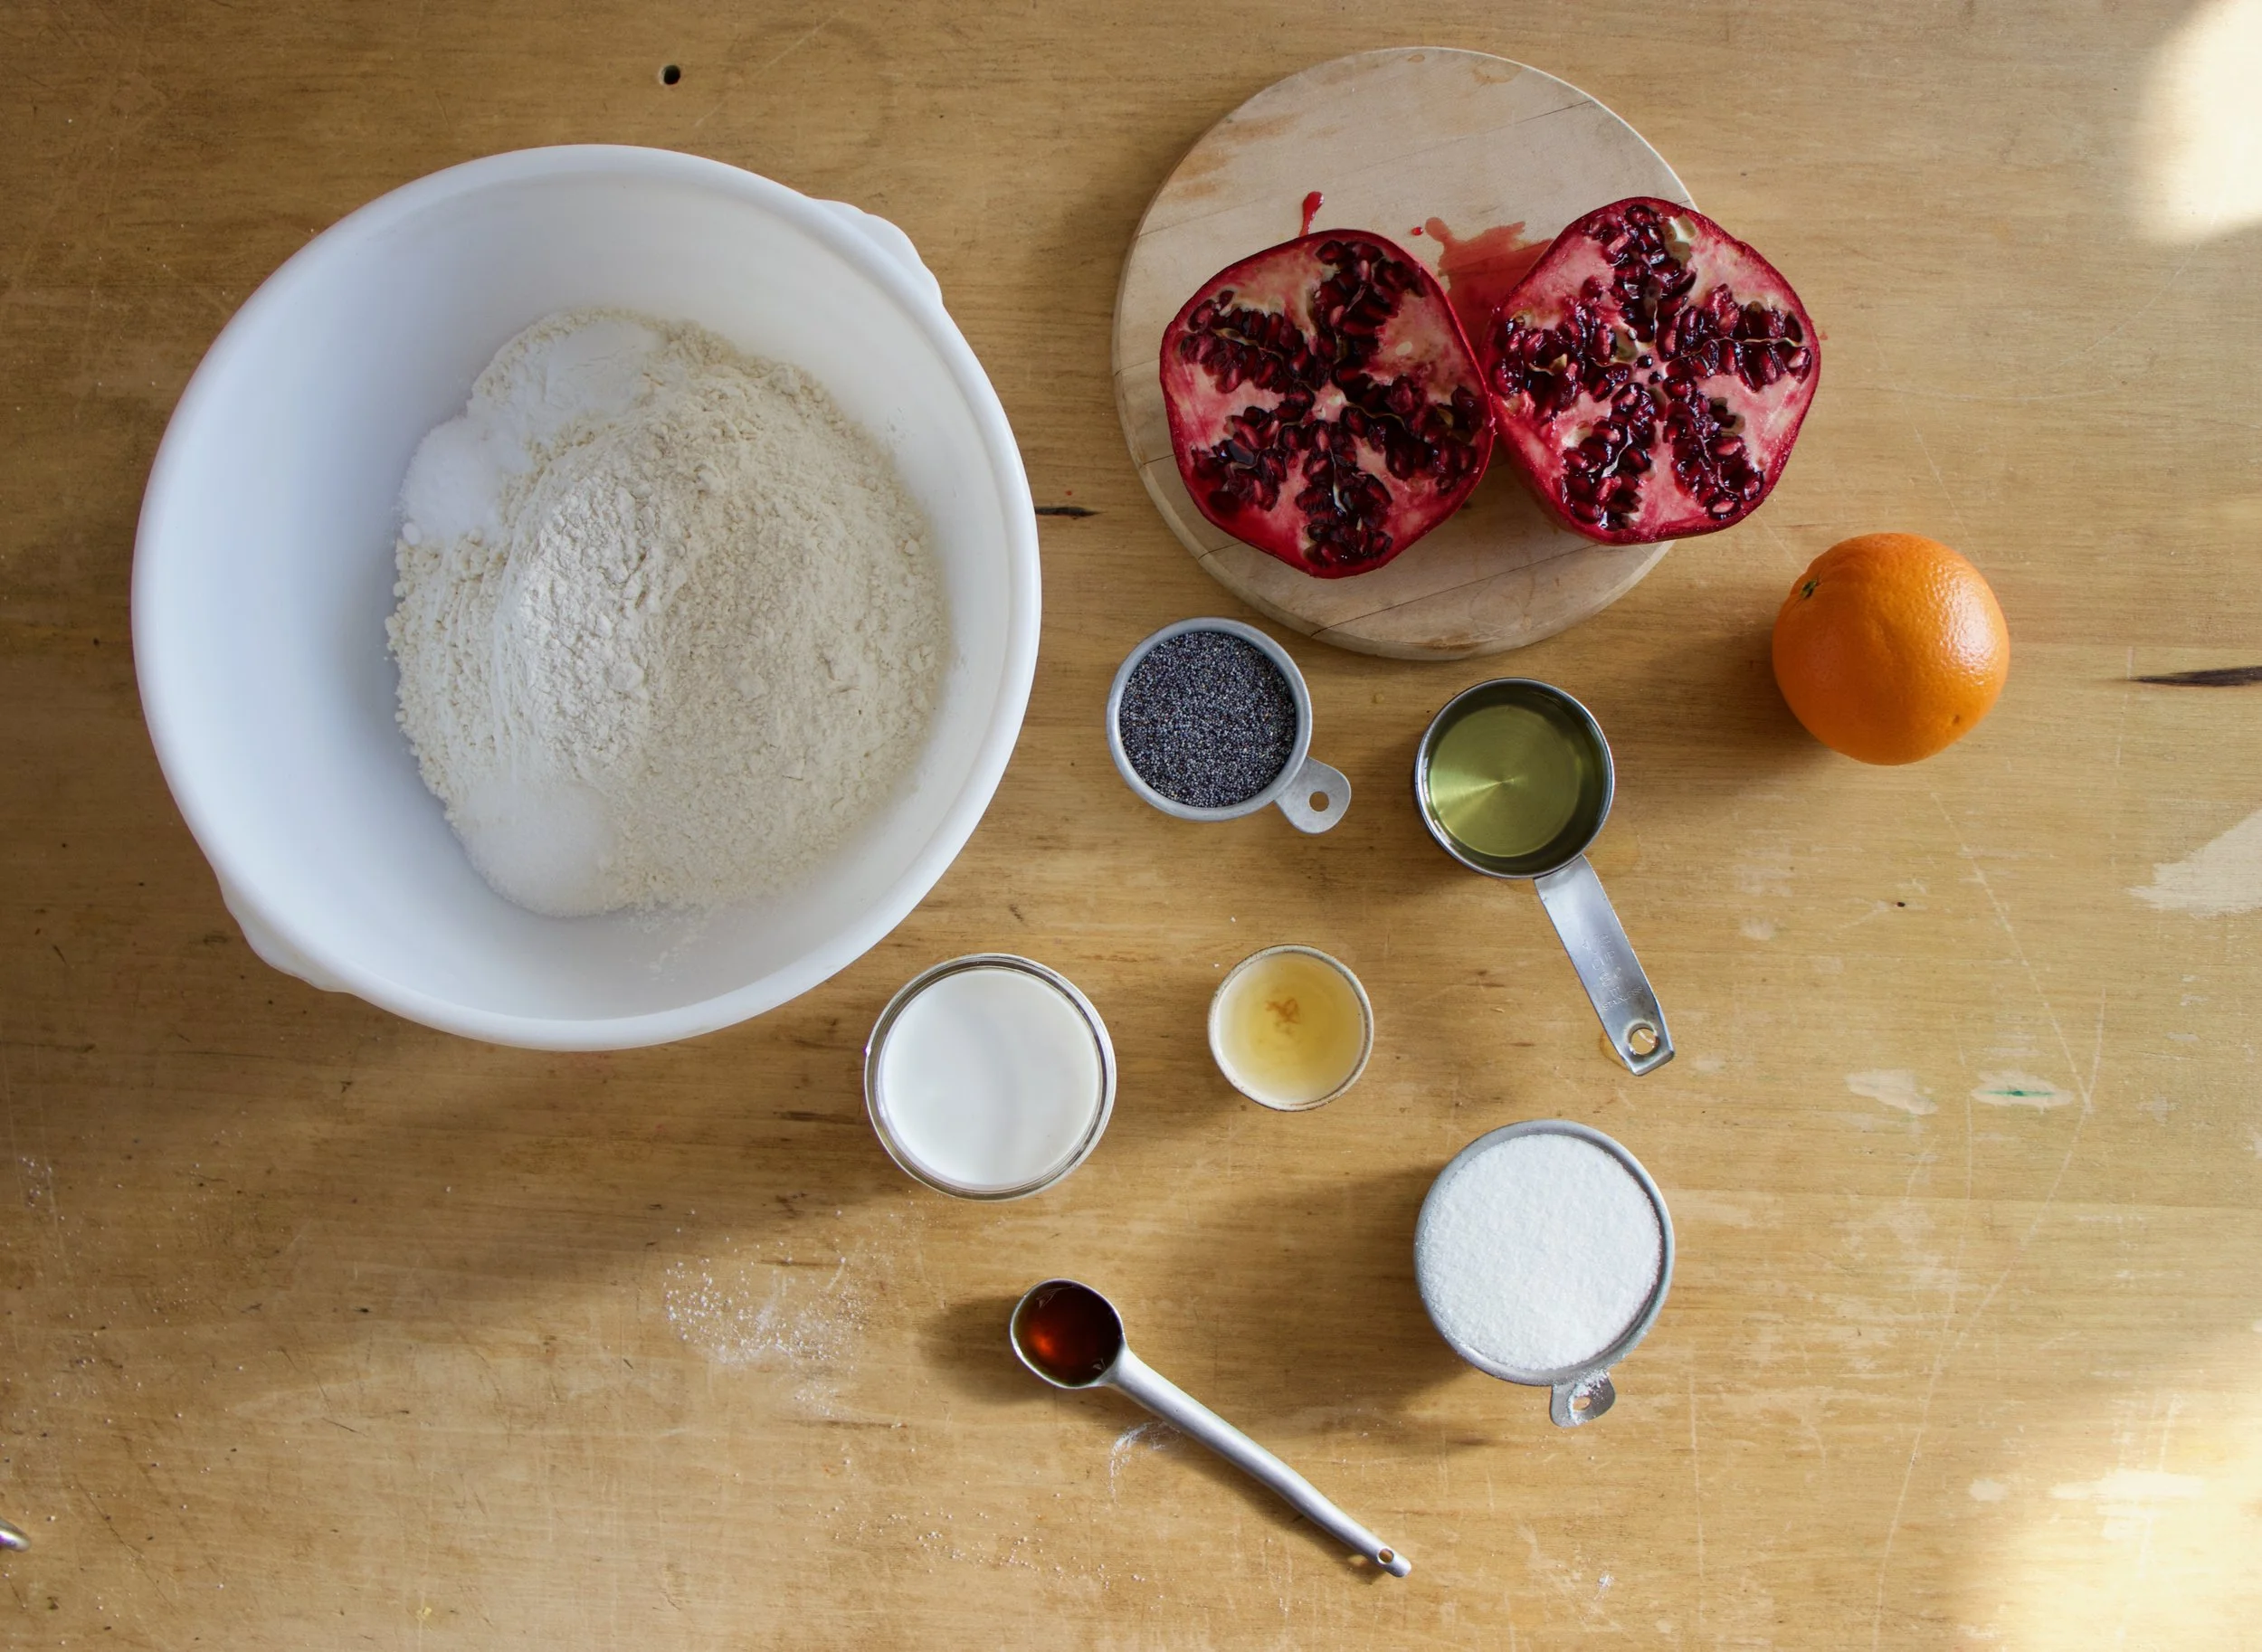
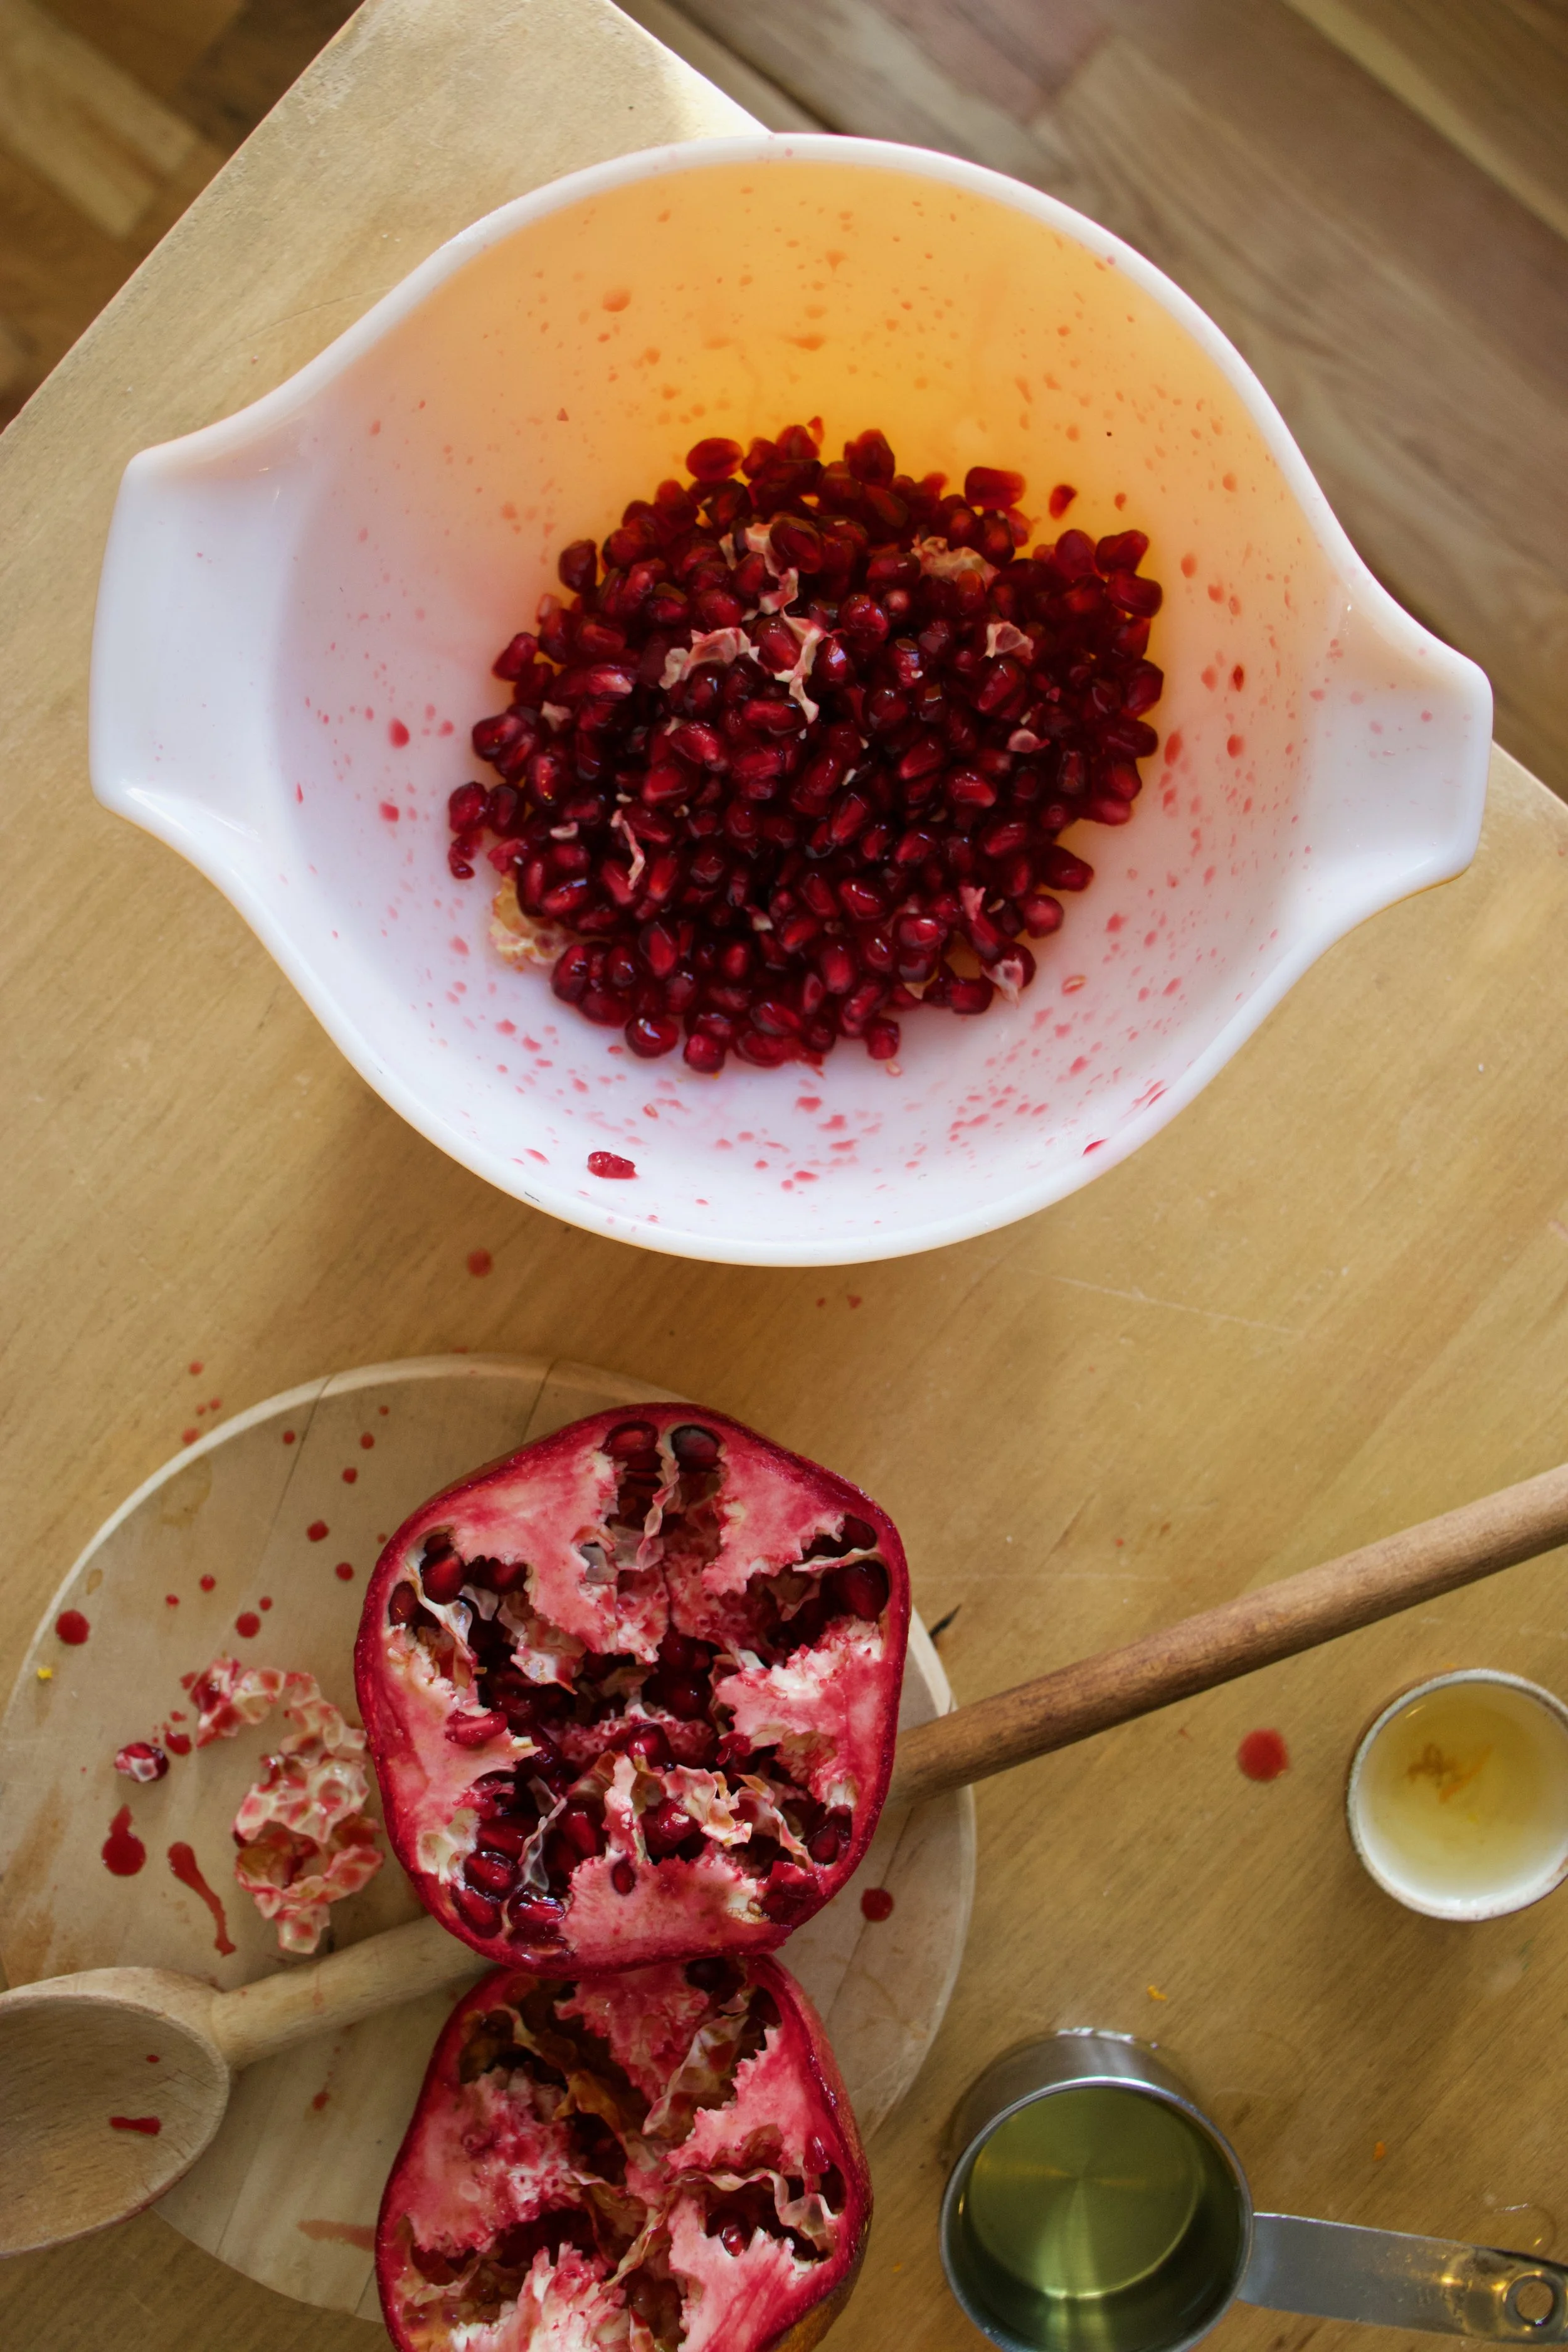
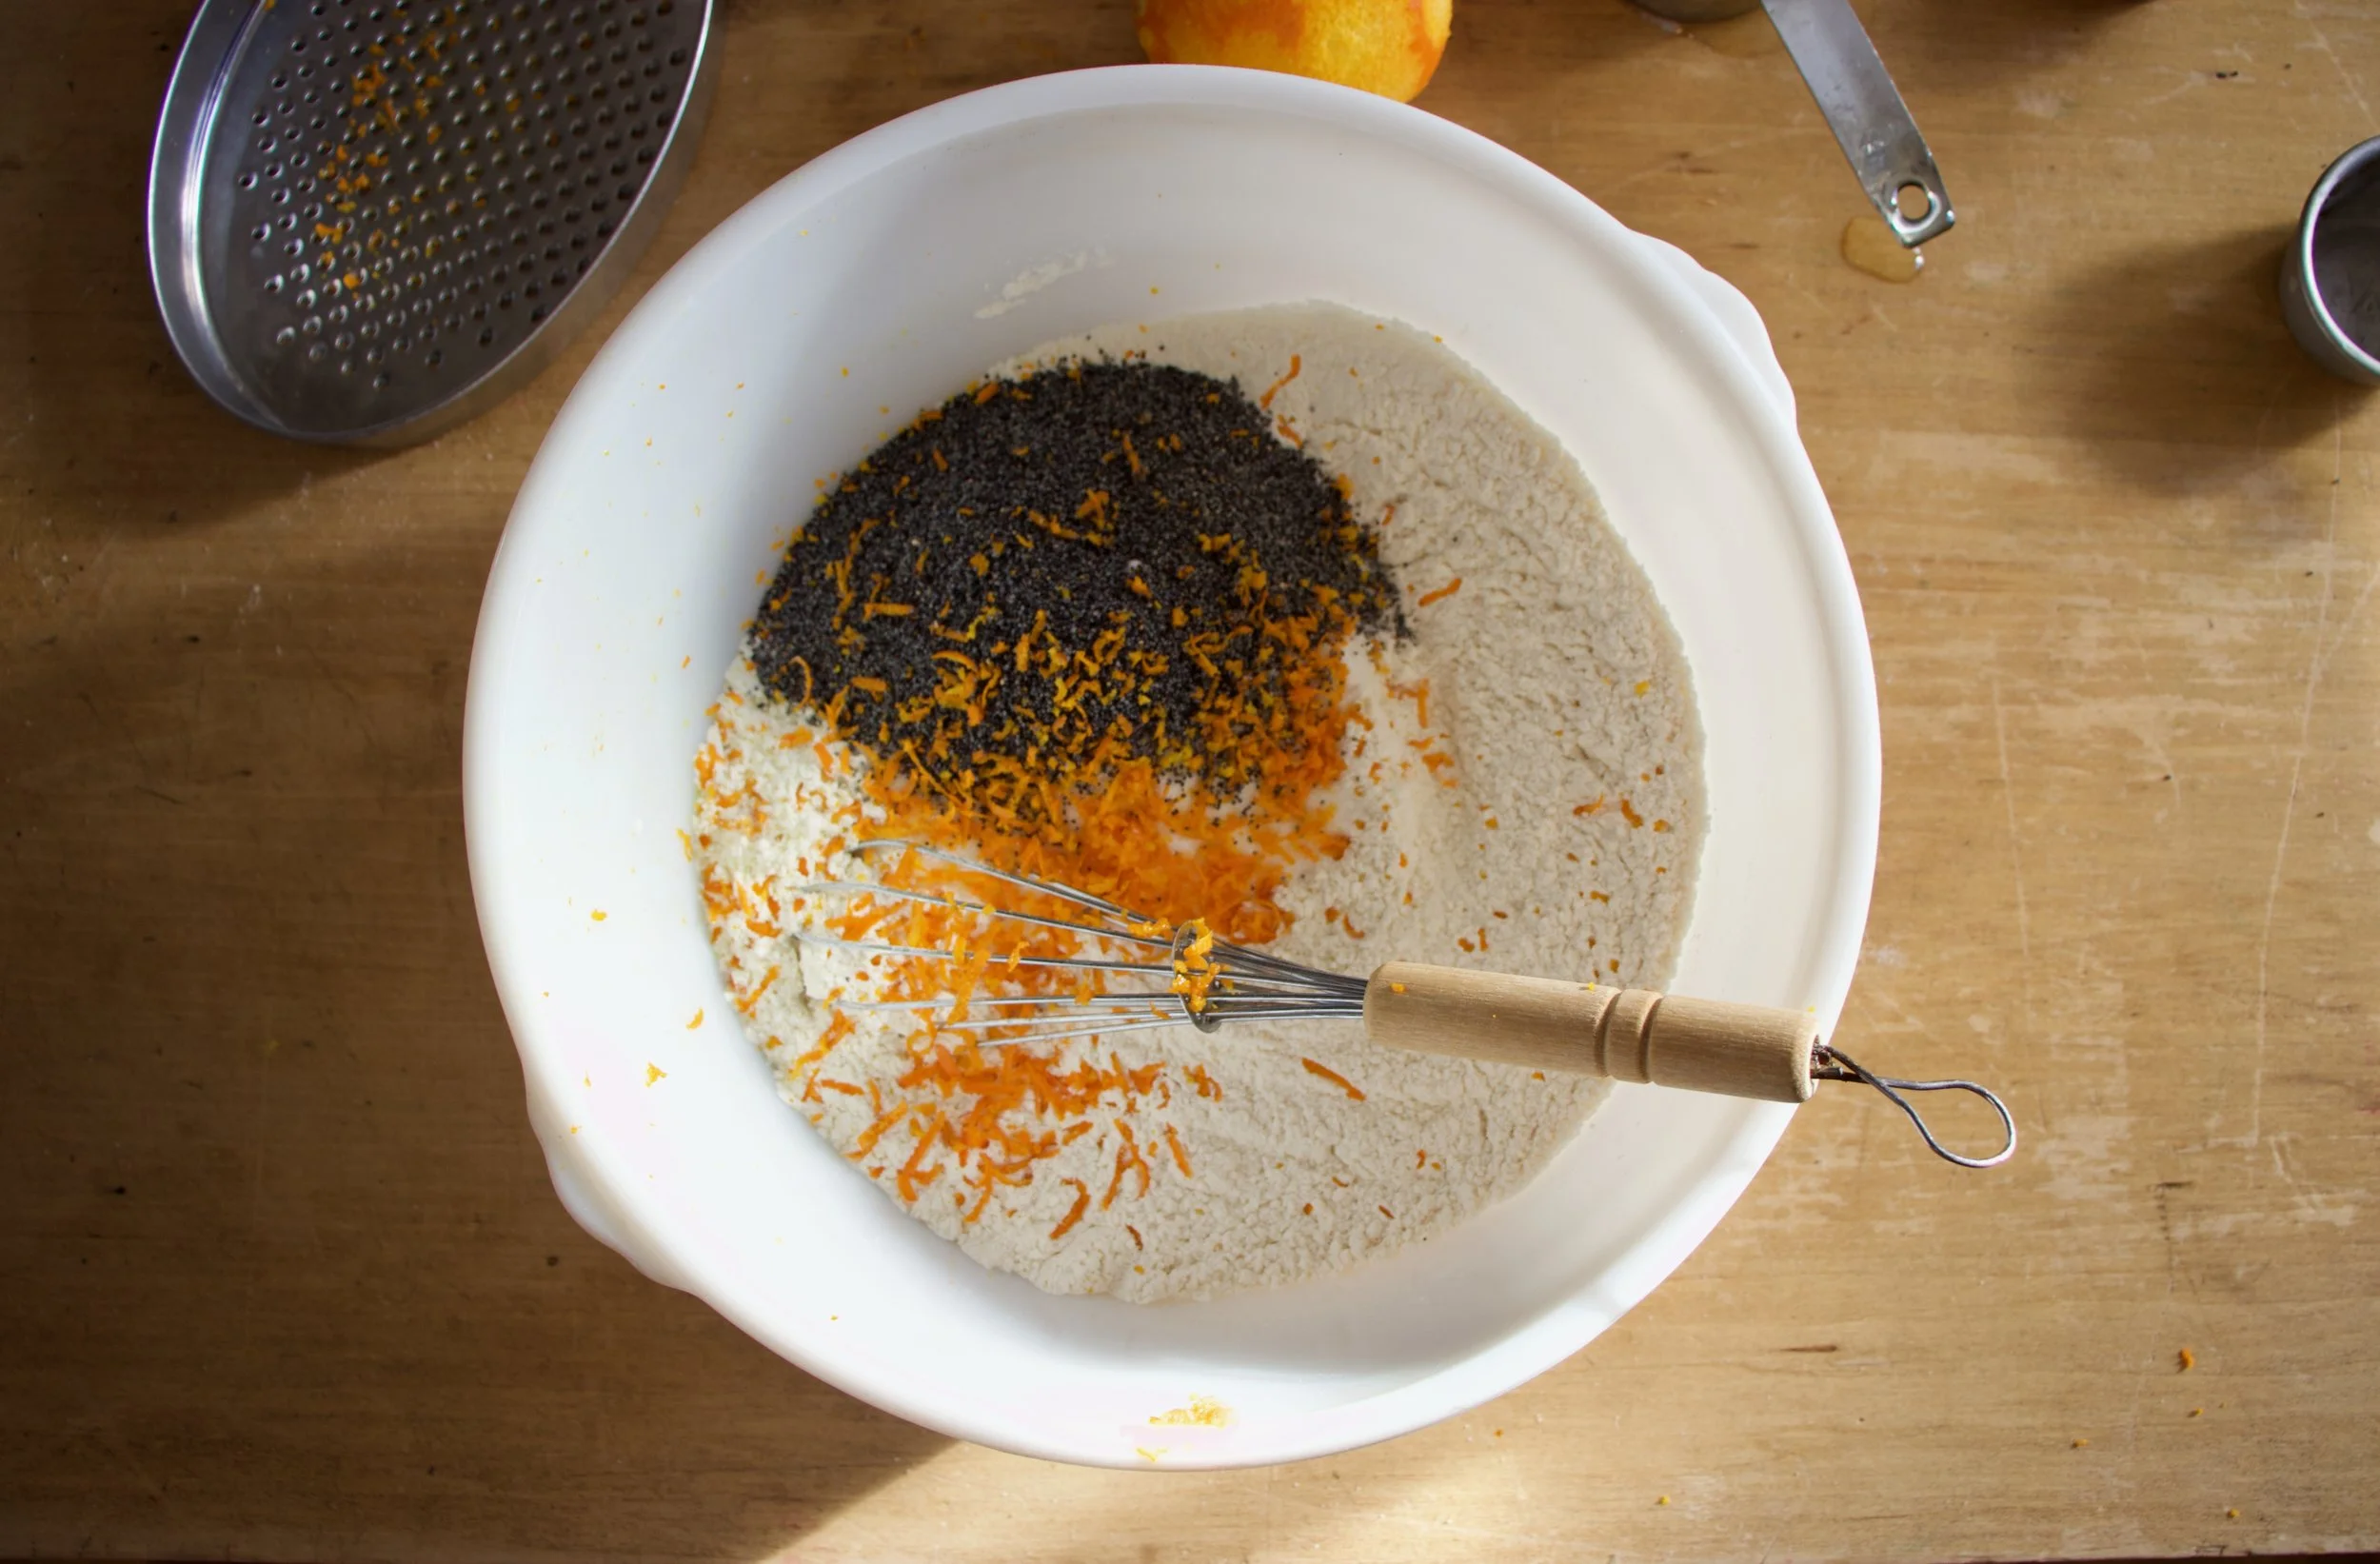


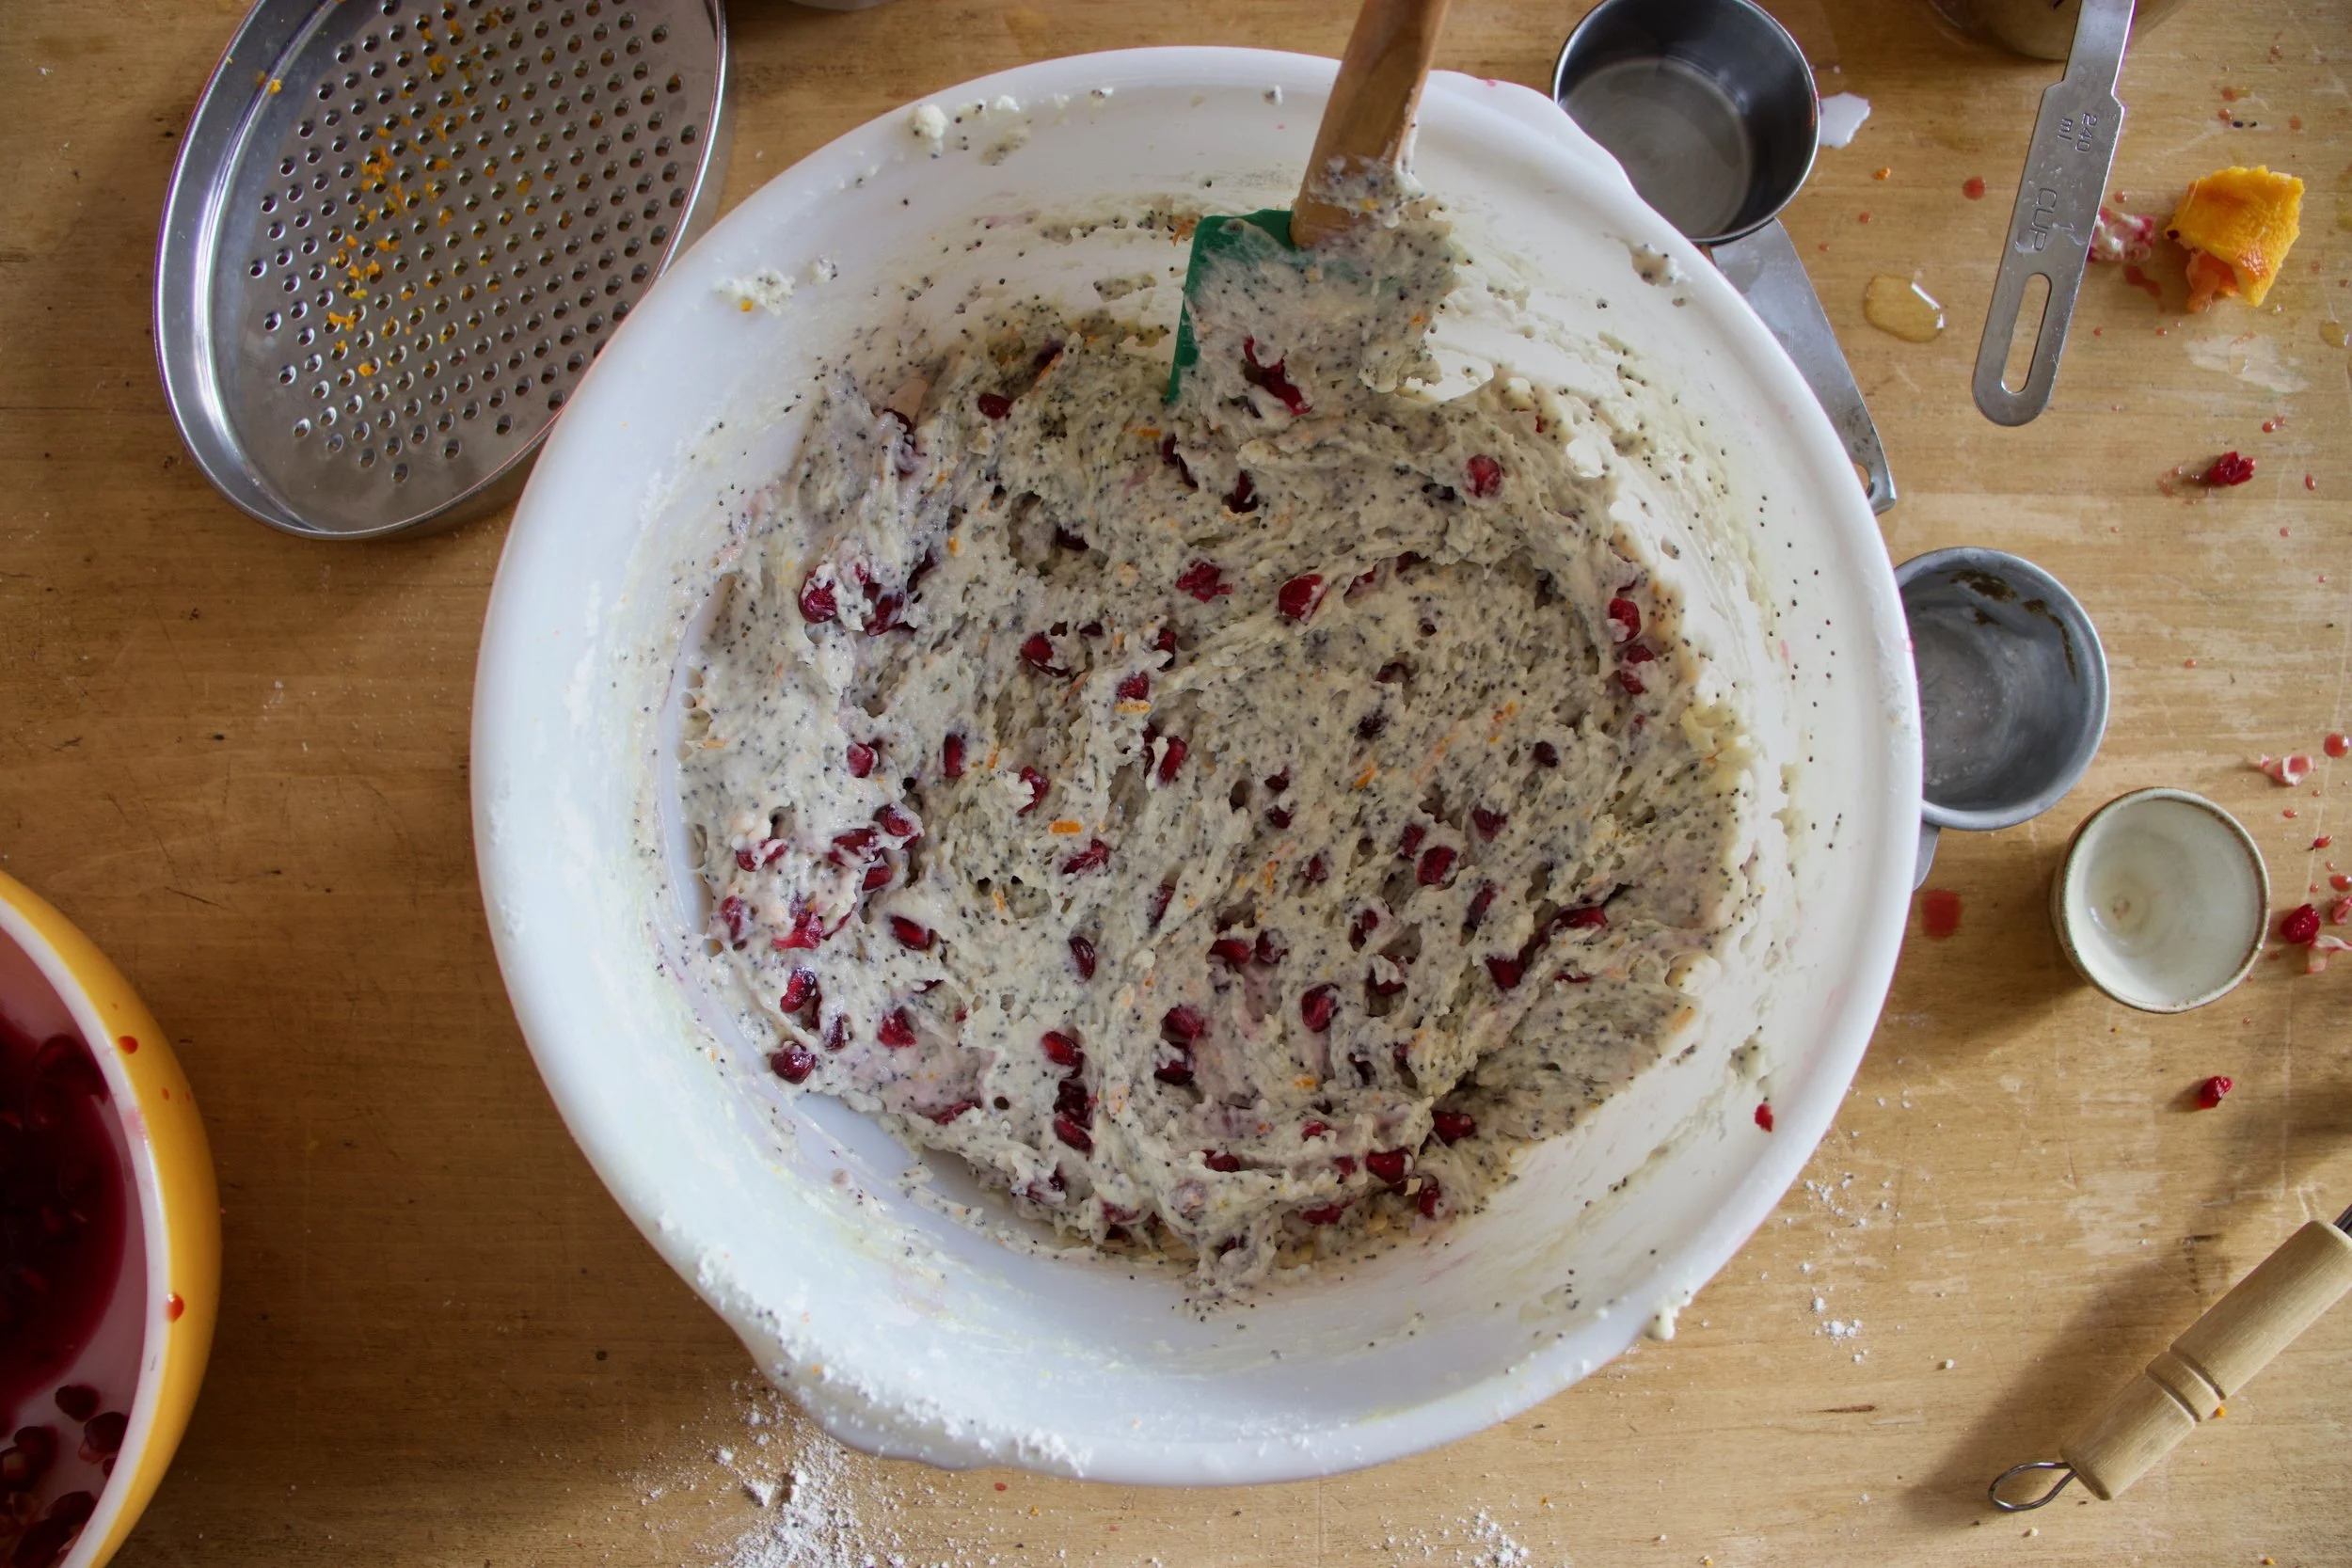
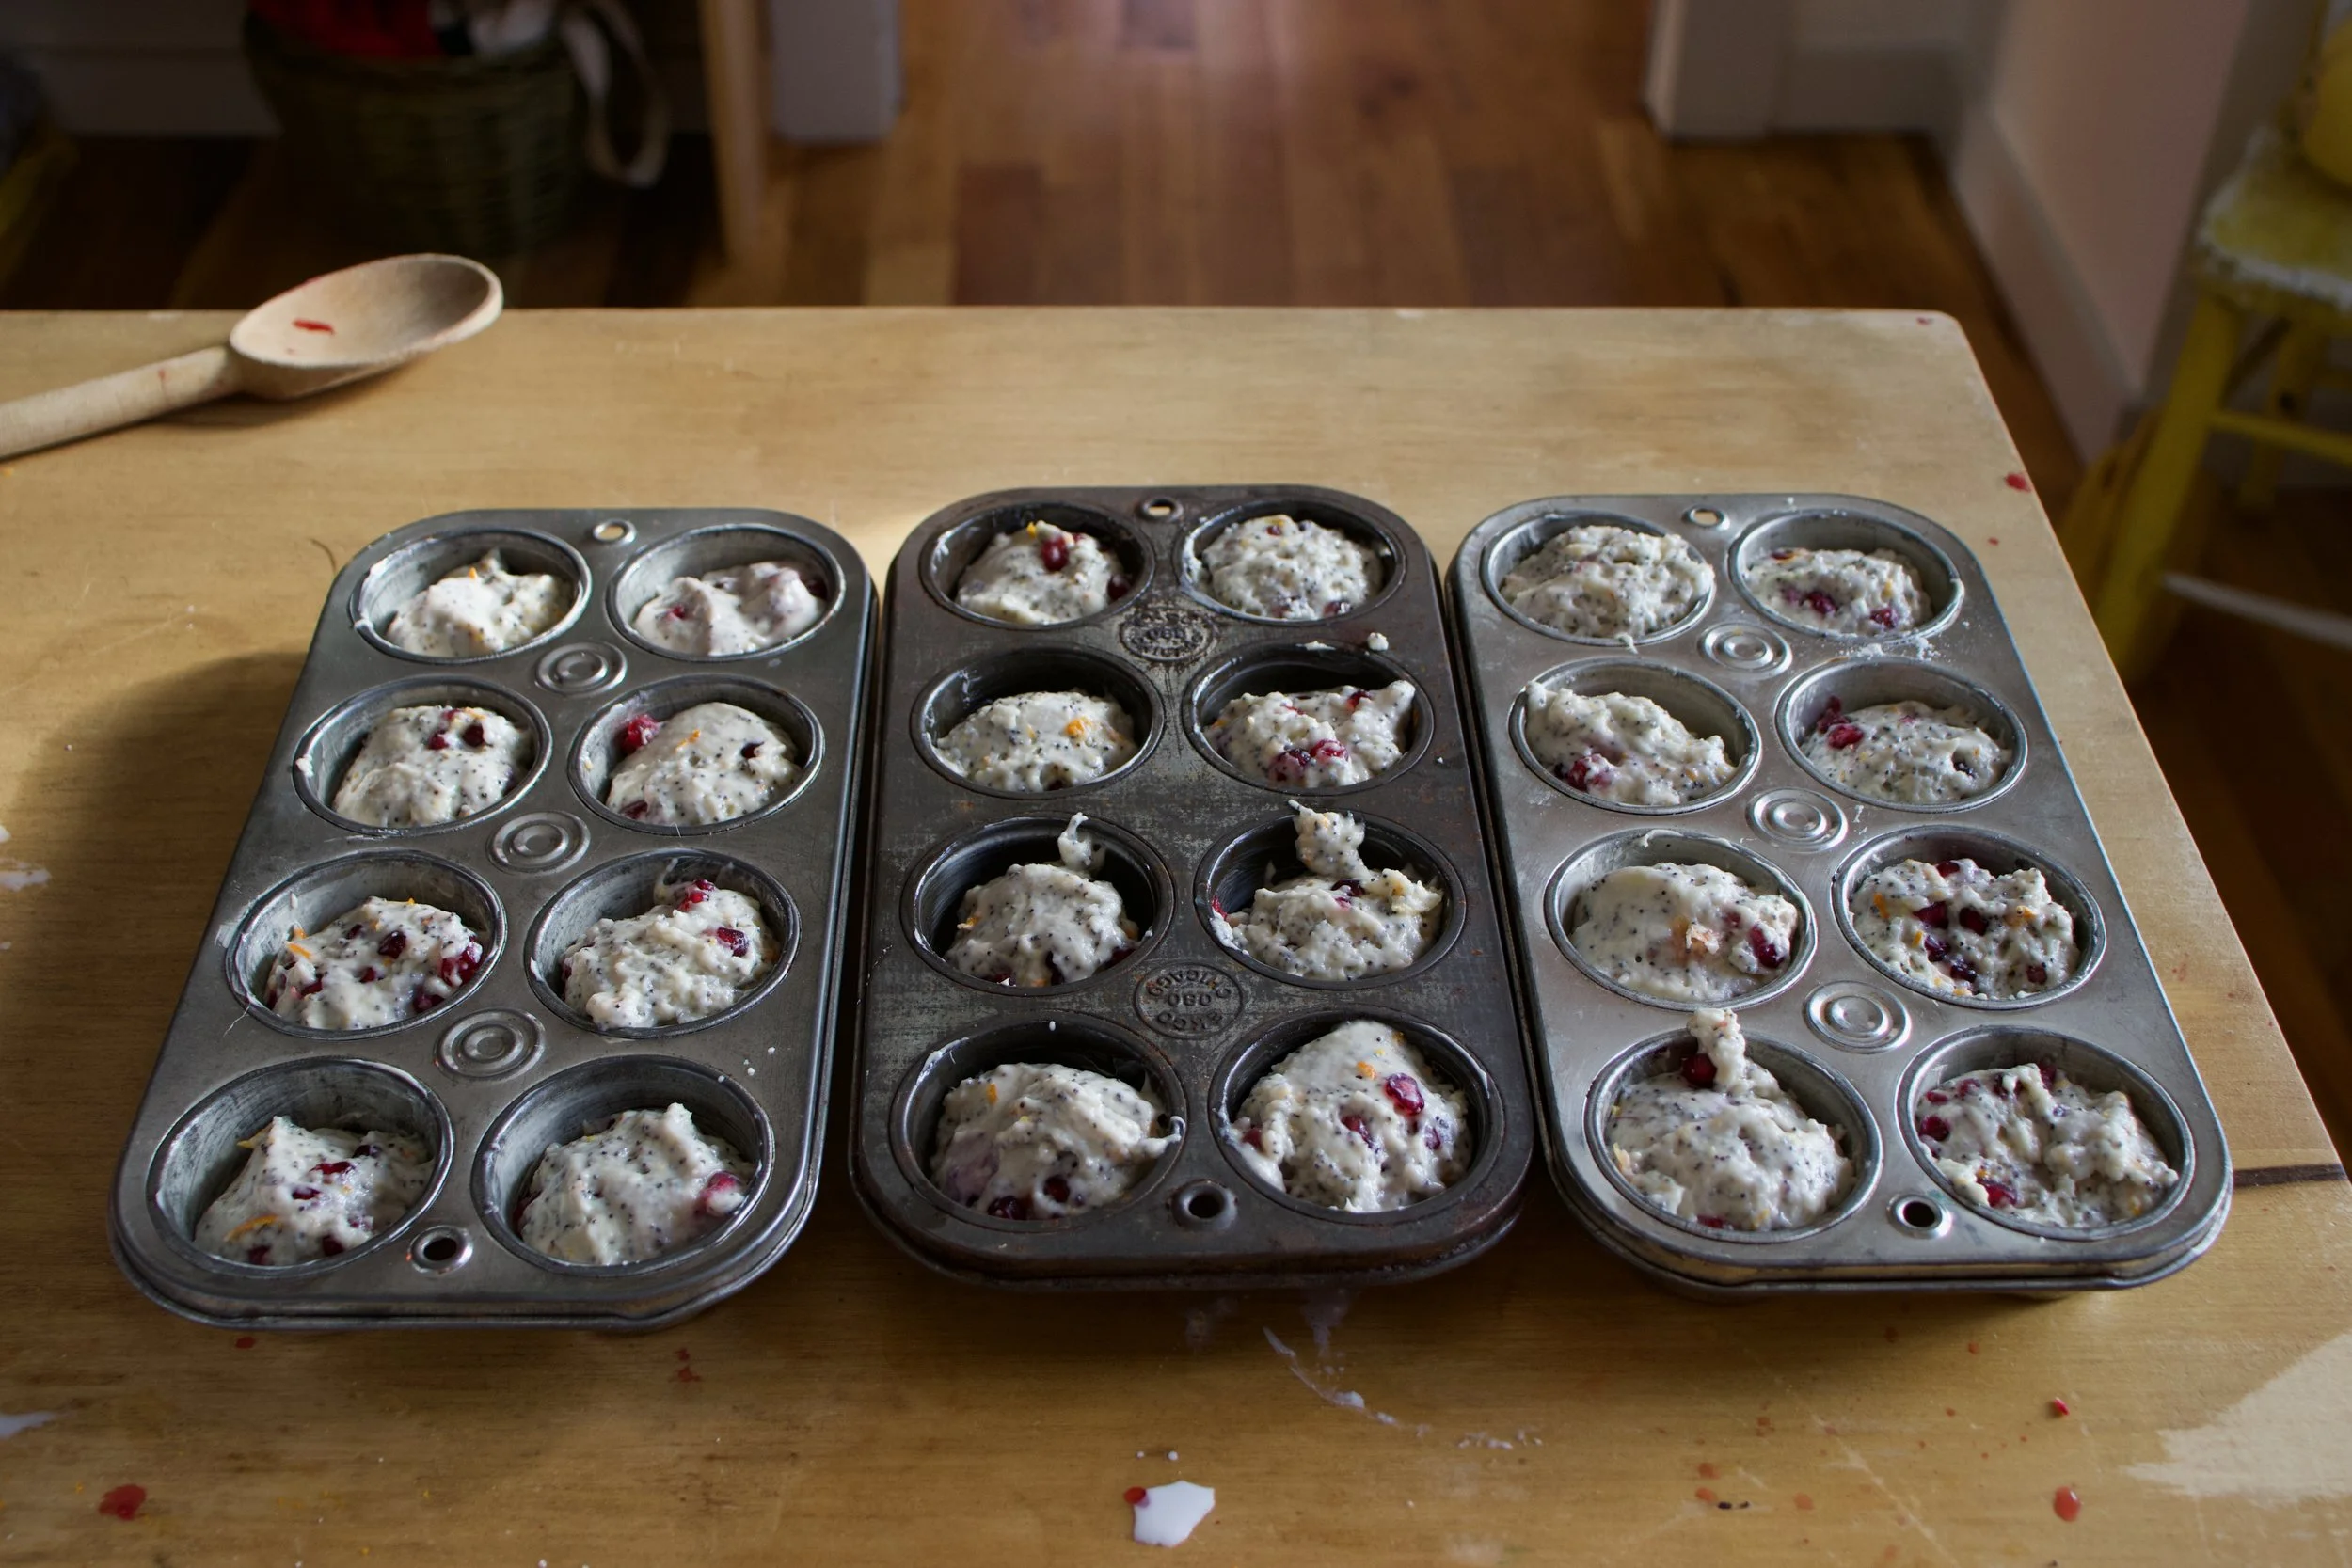
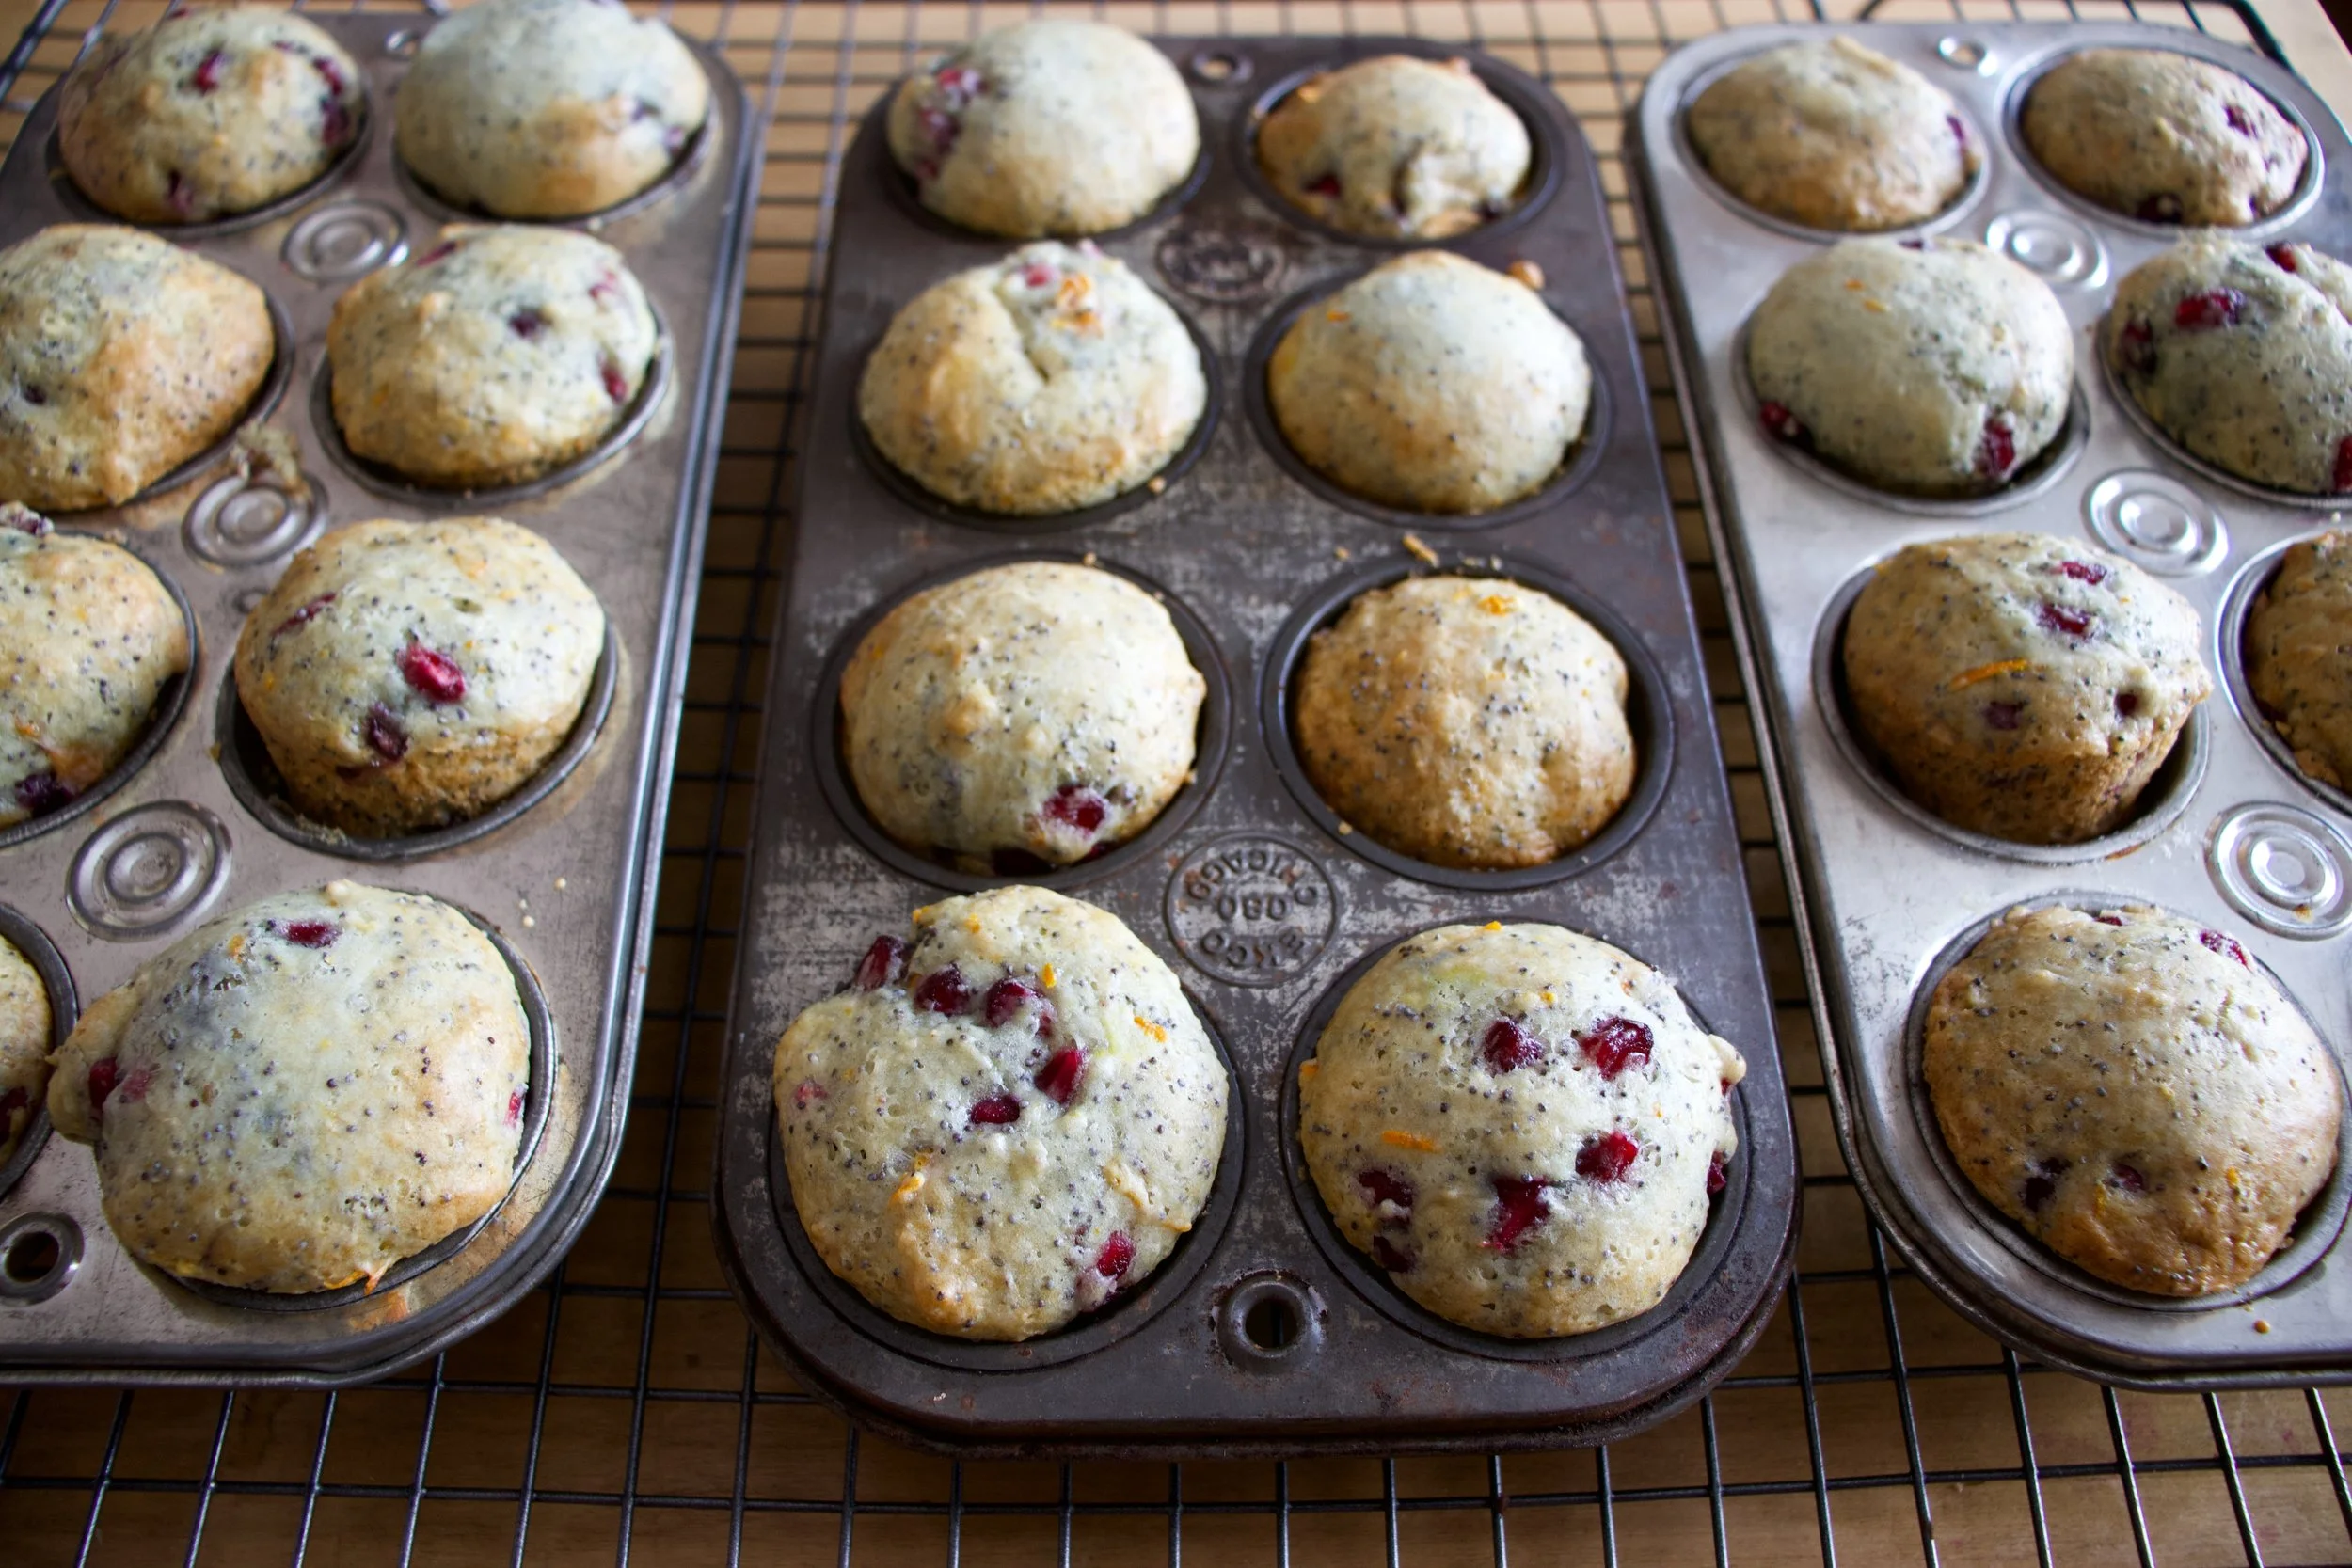
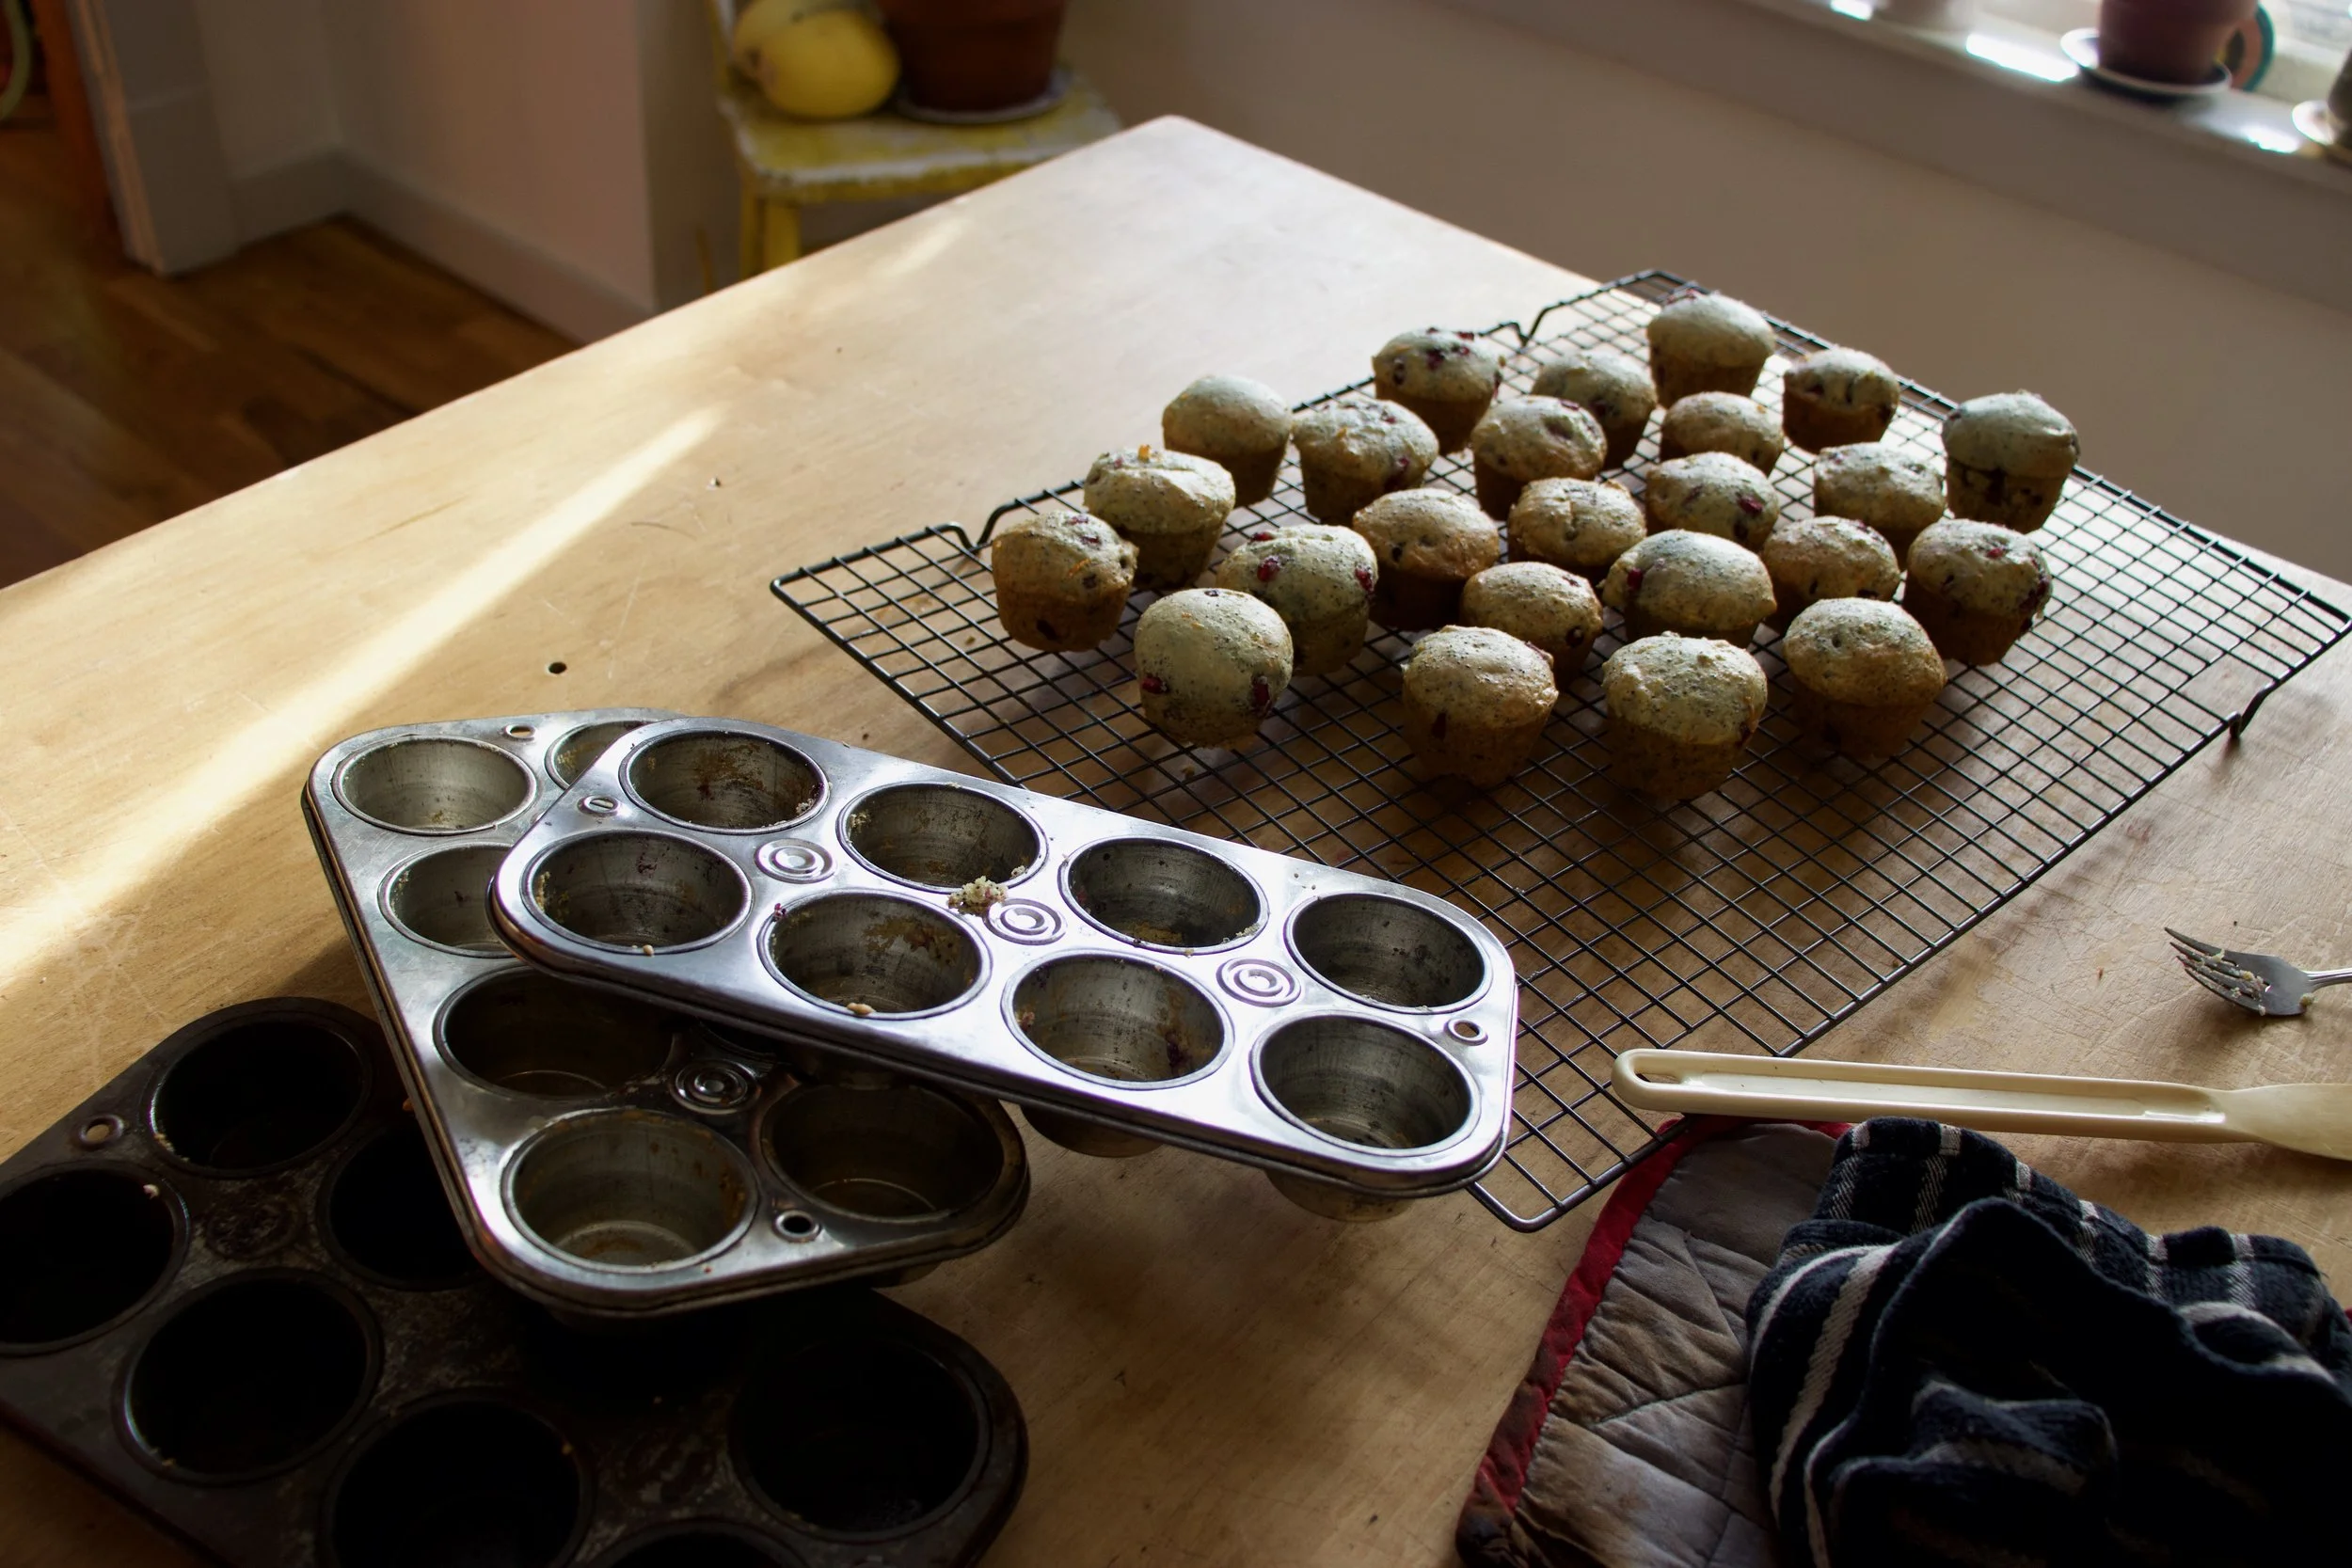
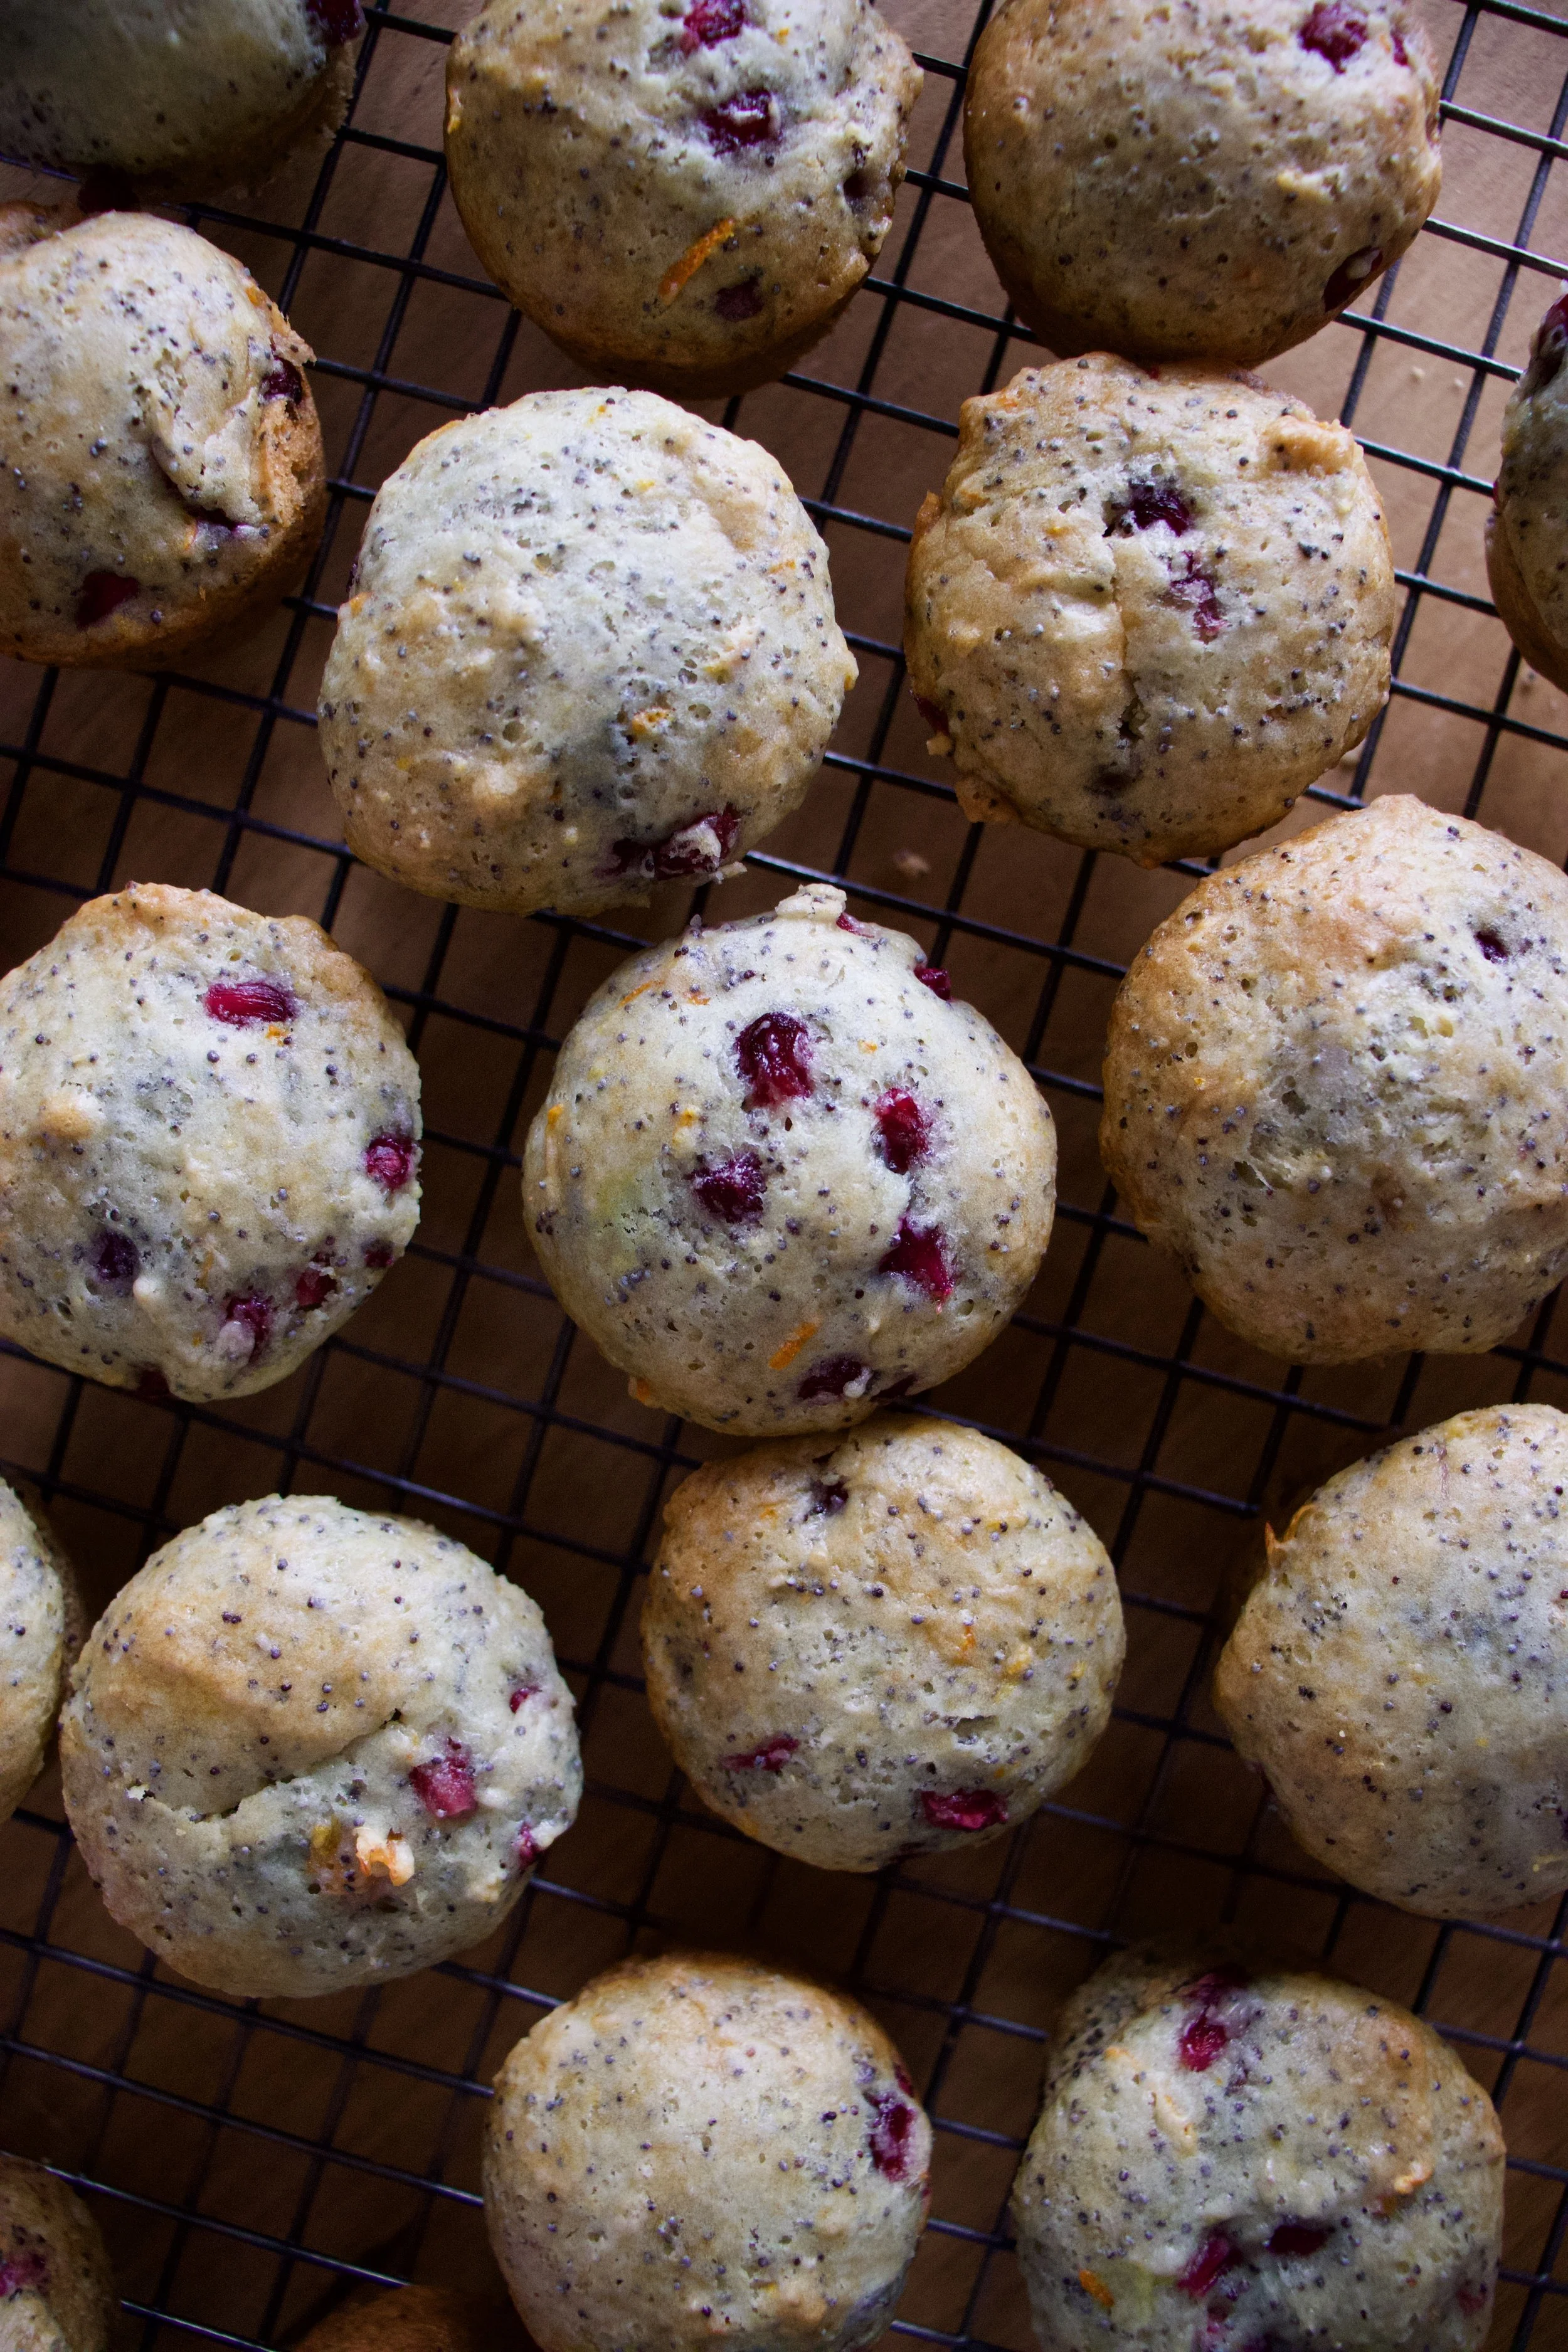
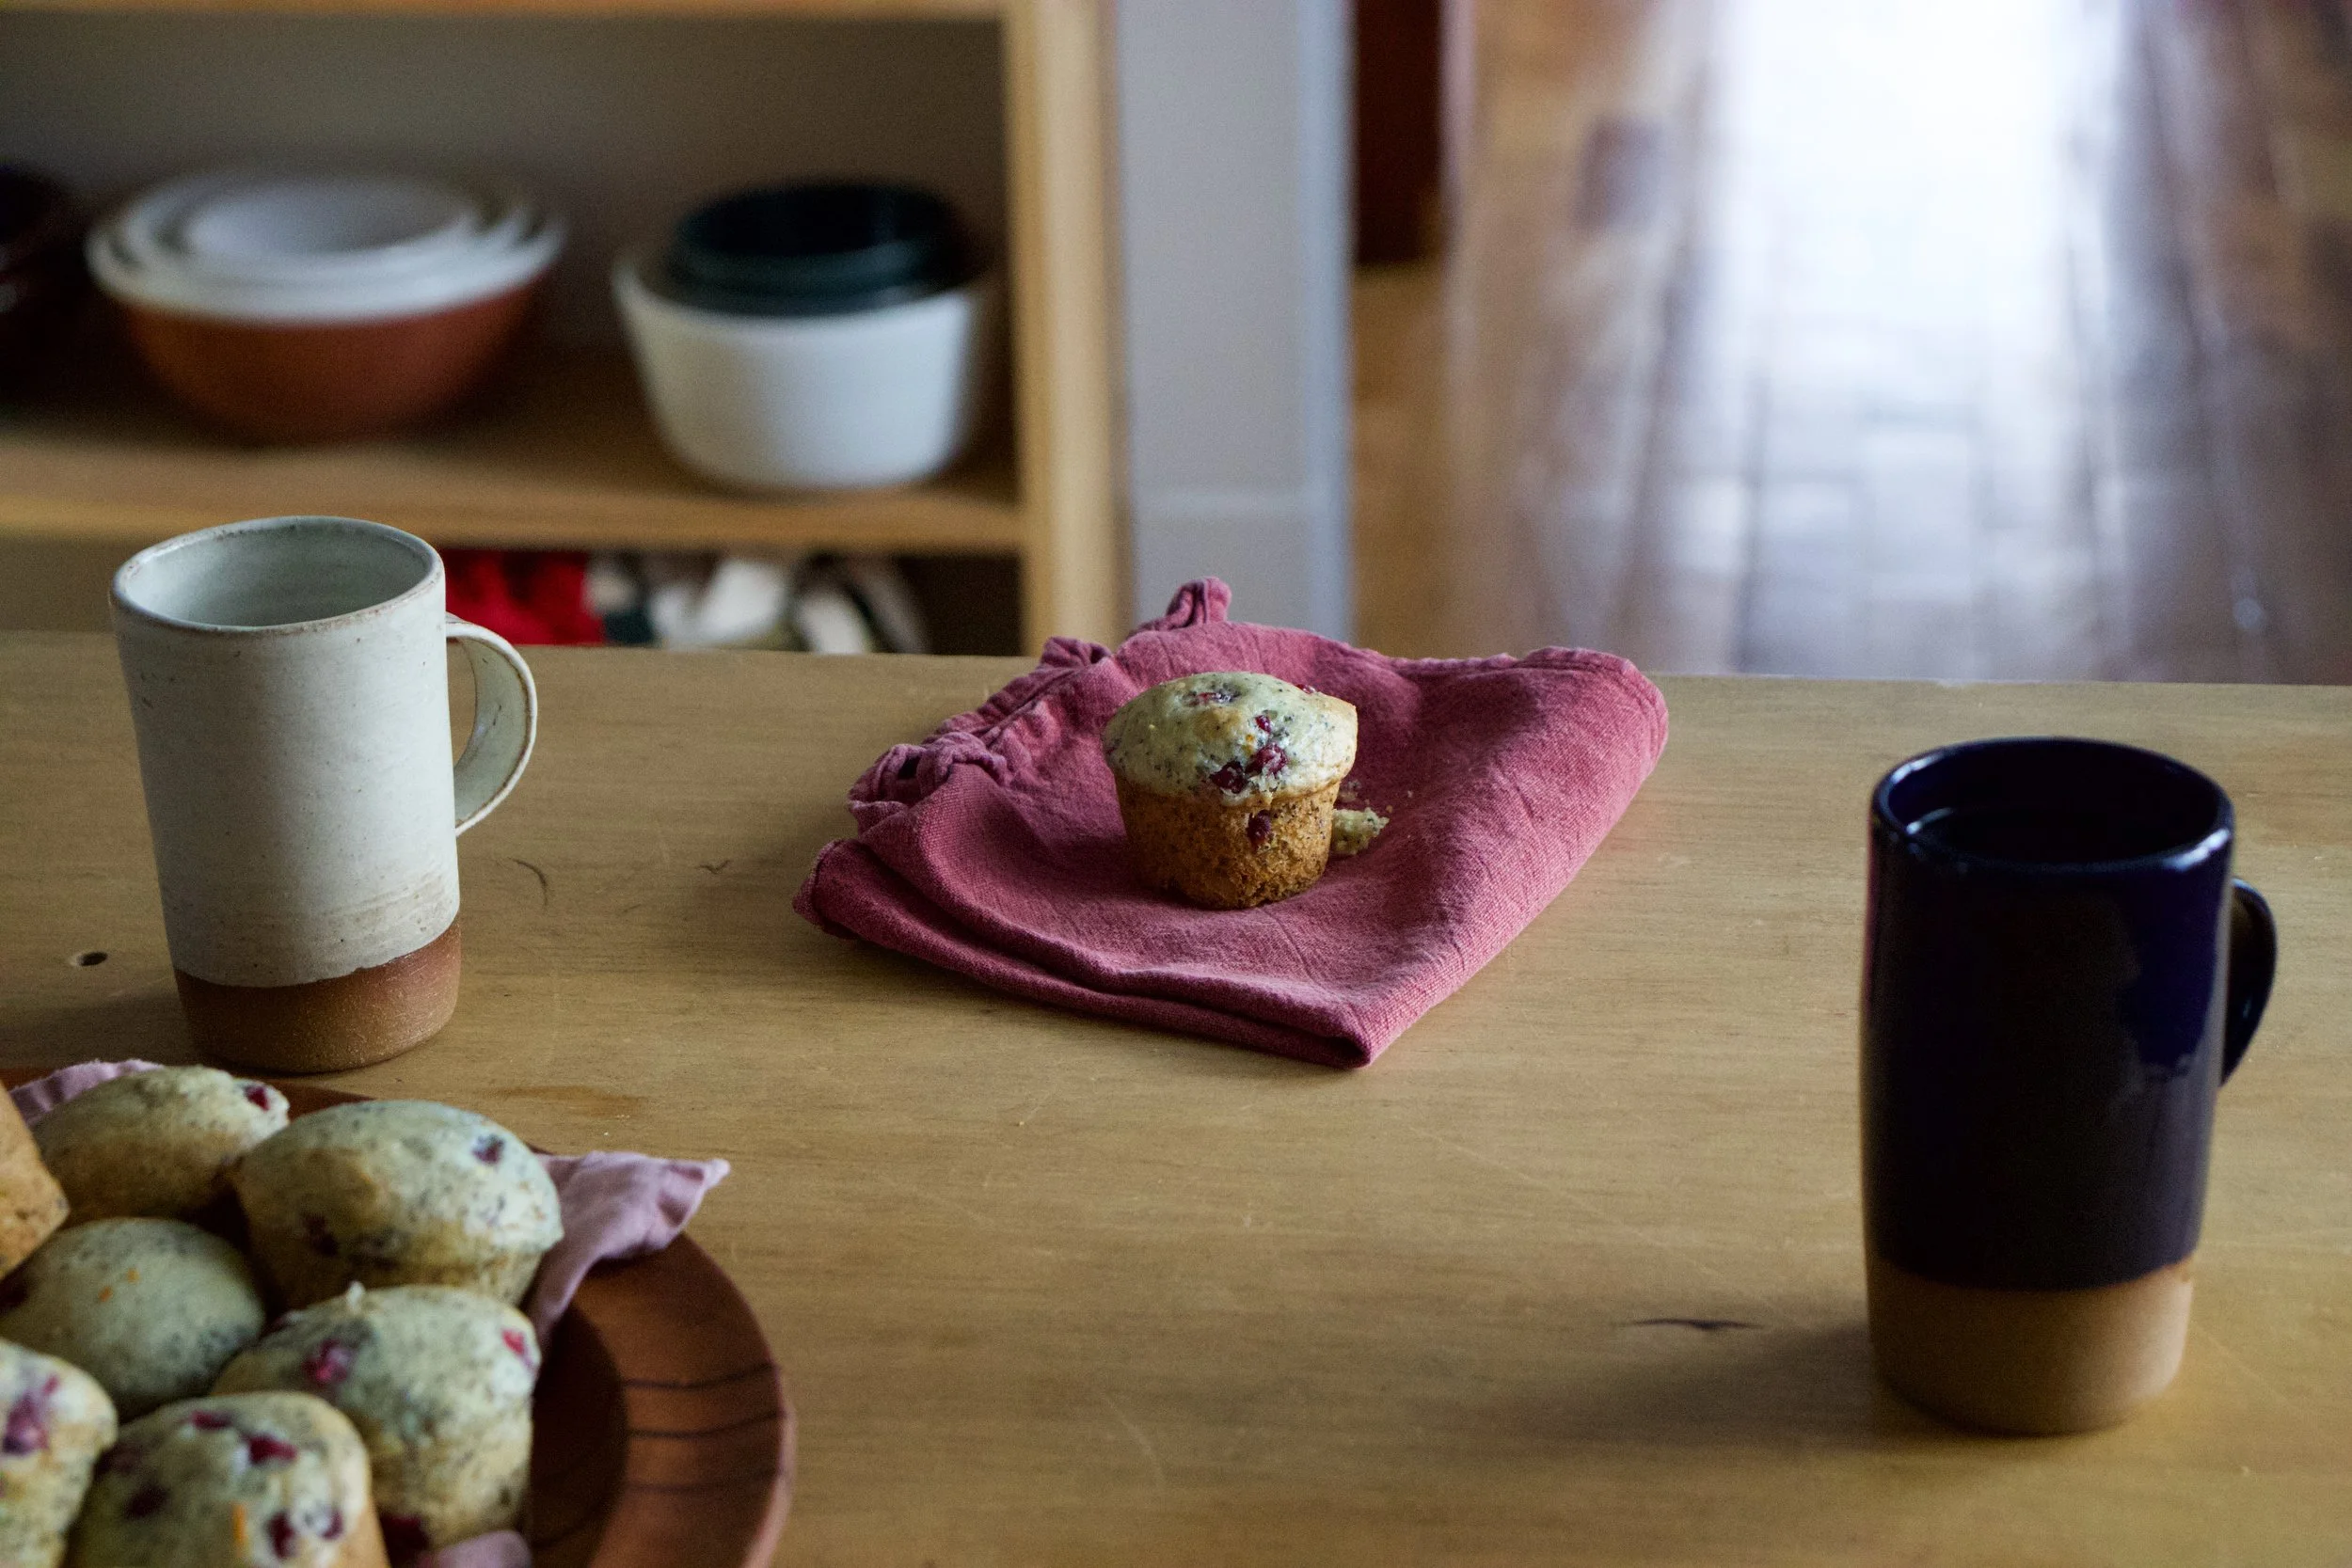
Whole Grain Mustard — The Lovely Crazy
August 22, 2020 by maximios • Blog
So if you are anything of a mustard connoisseur, you really must, at least once, make your own batch.(It’s so easy!) And you will love it and share it with all your friends and they will think you are a bad ass for making your own mustard and your life will just be so great. All because you are now a mustard maker. Yes.
Note- If you want, add in a pinch of any spice that you want.. Chili flakes, granulated garlic, turmeric…. And you can use the vinegar of your choice. I like apple cider because its mellow with a slight sweetness but white or sherry or any vinegar would be great. Even left over picked juice is fantastic too.
Taste and add another pinch of salt if its needed and……..
Enjoy and have a great Tuesday full of mustard and stuff!
-C
Combine all ingredients into a large jar that has at least a few extras inches for the seed to expand. Leave on counter for 8-12 hours.
Once seeds are nice and soft and have expanded, either eat as is (Mustard seed caviar) or blend the seeds to desired consistency (I like it half smooth, half seedy) Add a pinch more or salt and another splash or two of vinegar to help blend.
Refrigerate and use on anything and everytihng.