
THE LOVELY CRAZY
Let%u2019s talk about how soup is the perfect food. It can be light and fresh, hearty and deep, chunky or smooth. You can eat it with a spoon, or somtime a fork if warranted, or just drink it from a mug. It%u2019s usually a one pot meal, a small pot for one, a big pot for many. Make a pot of soup and eat some now and save some for later. It freezes amazingly well. Got a few extra sad carrots and wilted greens? Toss them into a pot with whatever you have on hand, maybe those veggies scraps and you got yourself a meal. Want something more filling, just add in some grains. Feeling sick, warm soup will make it all better. Feeling fresh and springy, well soup is there for you too. Seriously soup, you can do anything. If I could, I would marry you. %u2665%ufe0f
This soup is one of this velvety smooth, light but rich, delicious beyond delicious soups. A fresh spring time soup. Not to hearty or heavily spiced. Super rich and creamy and flavorful. Bright ass green which makes it amazing in itself, but then with a nice tangy sumac tahini swirl on top, well it is just about the most perfect soup. I made to share, which I did, (and everyone licked their bowls clean) but then hoarded the little bit left over and ate it cold for a late afternoon snack. That is another thing about soup, you can eat is cold and it is still amazing.
Tasty and delicious, and nutritious. This soup does it all.
To the soup!

The stuff. Peas, chopped broccoli, and chopped cauliflower which are all frozen and slightly thawed. You can totally use fresh here too, but I just so happen to have it frozen so you might as well save the fresh stuff for fresh eating. Also have a big yellow onion, a few cloves garlic, some tahini, a lemon, sumac, and salt and pepper. You need water which I did not picture here.
A pot, some water and a roughly chopped onion and the garlic start off this soup. Bring the pot to a boil, then turn to medium and let the onion and garlic cook until very tender. I have been making a lot of soups starting with this step lately. Boiling the onion and garlic until tender and fragrant really make for a super flavorful and clean soup base. Or soup in itself.

Now add in the broccoli and cauliflower to the pot and cook until tender.
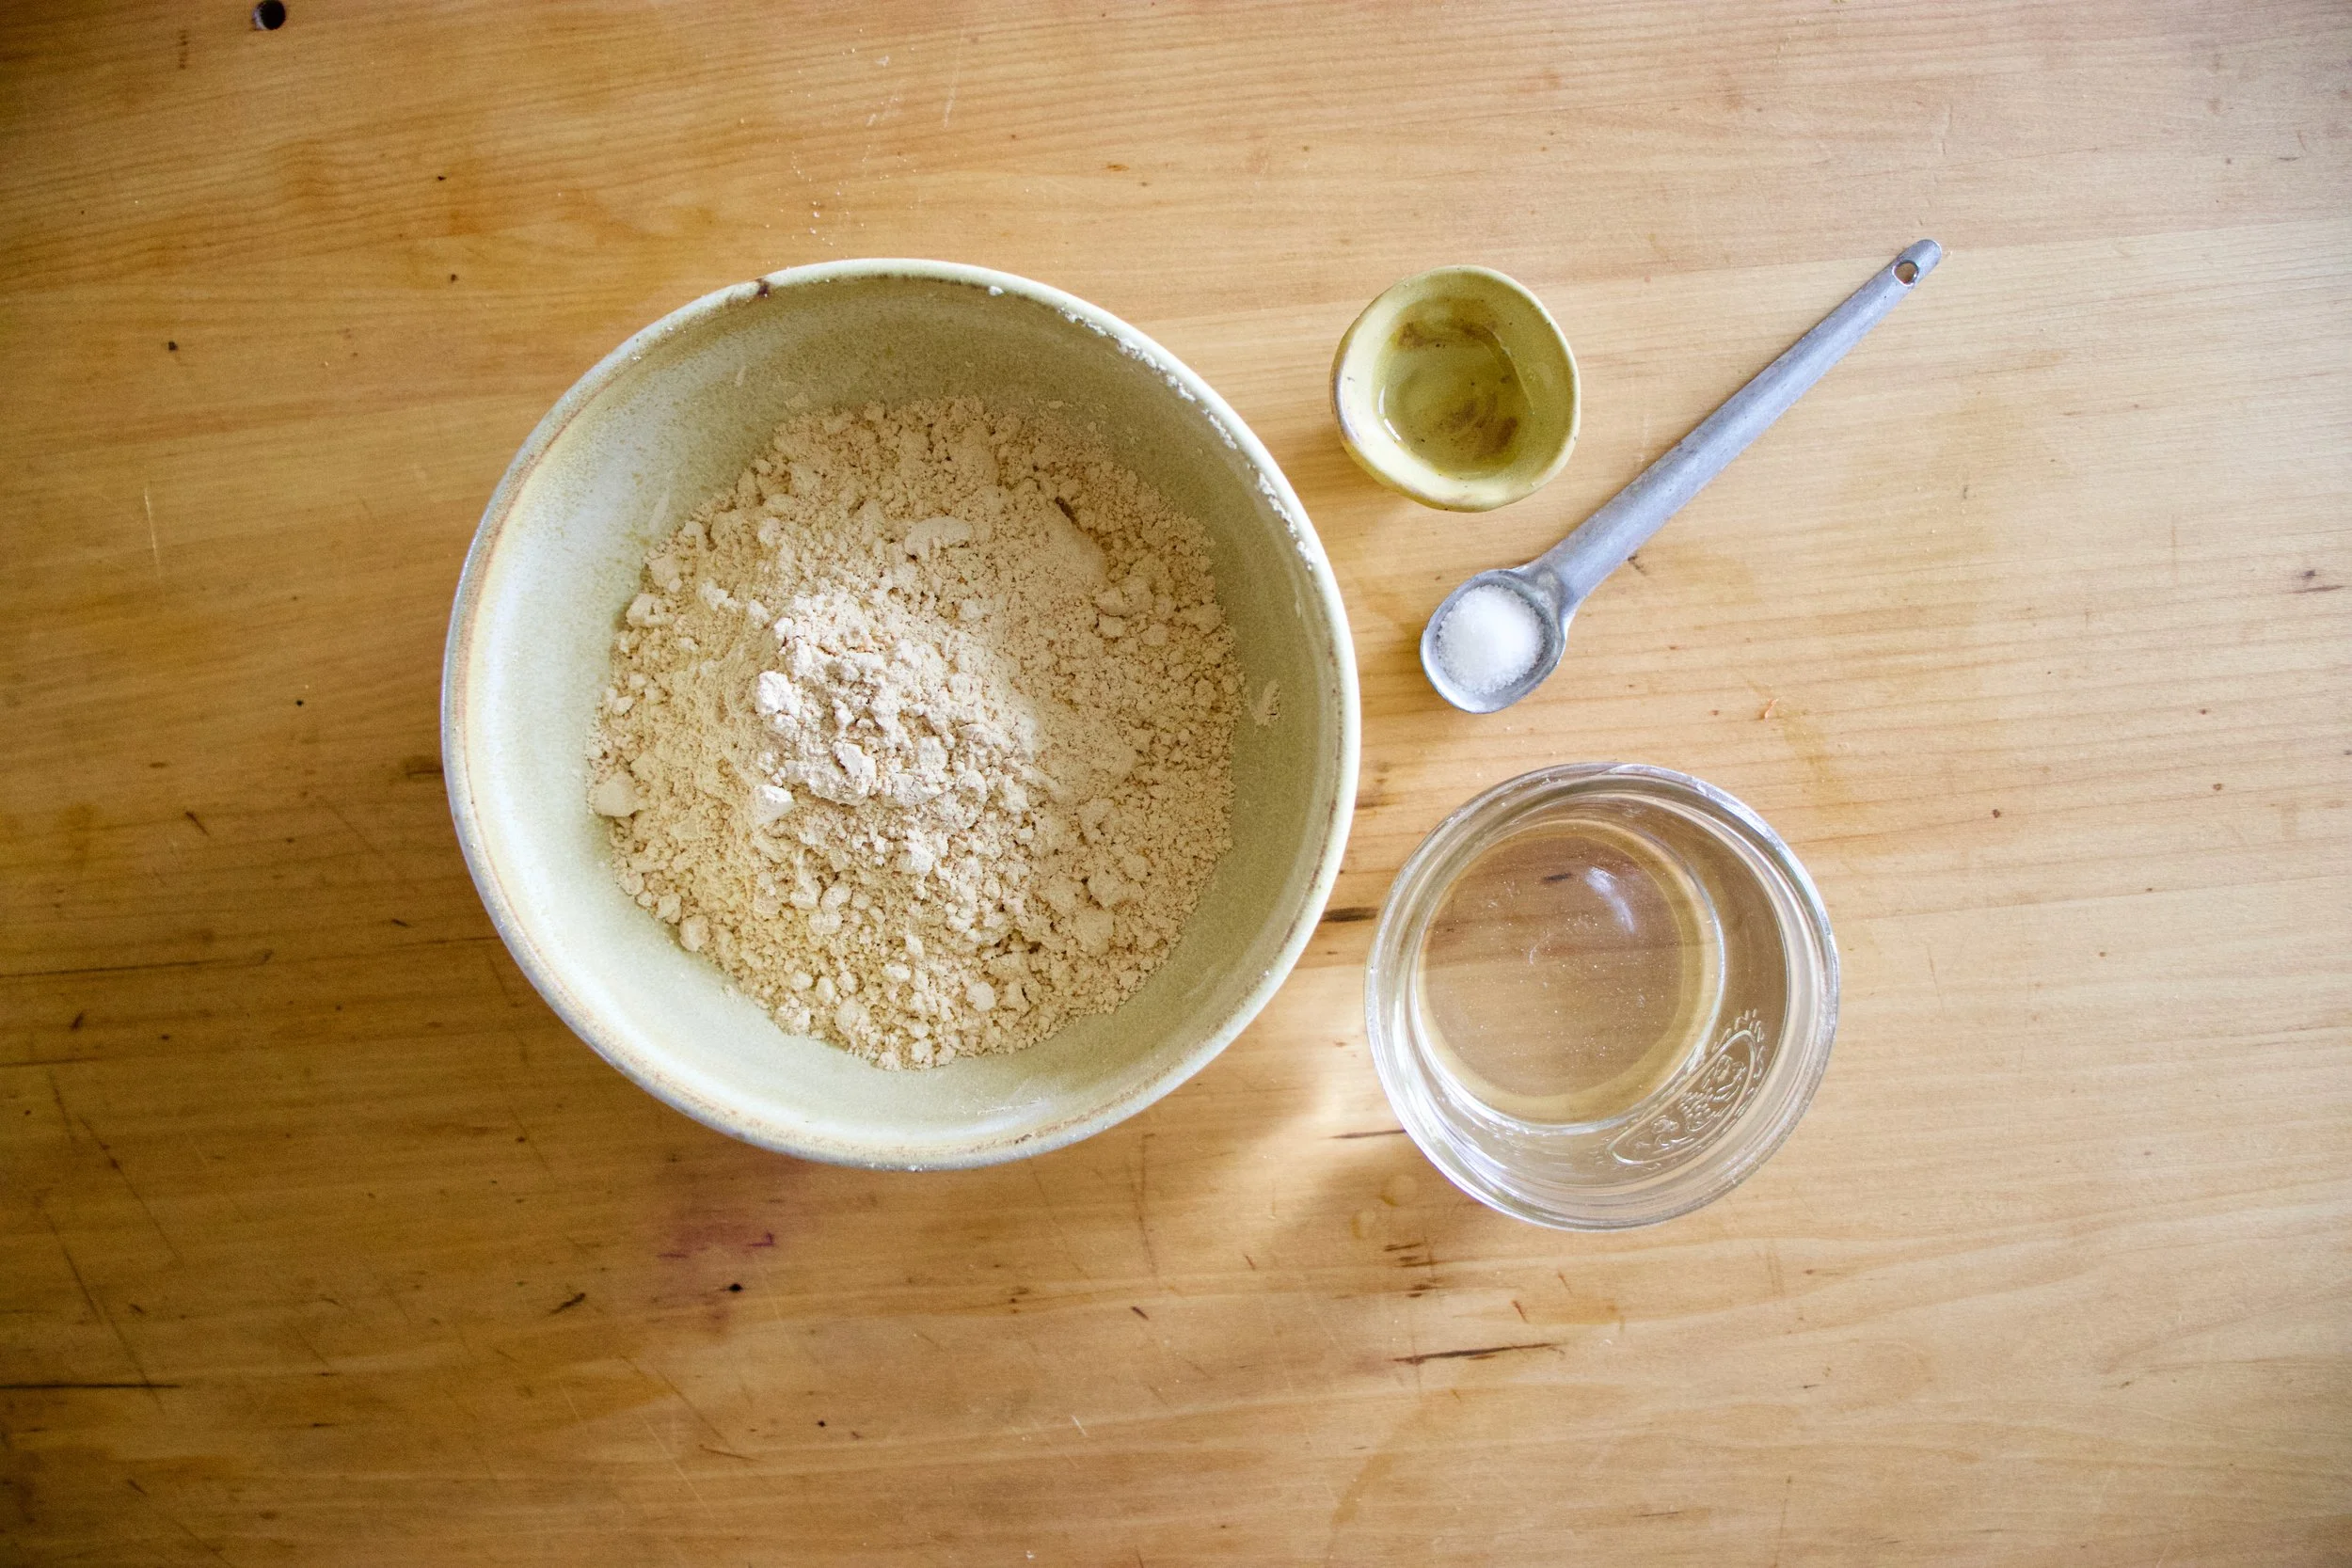
Mid soup cooking time is a good time to make the sumac tahini sauce for the swirl. Basics here, just mix the tahini, the sumac, a pinch of salt and pepper, the juice of the lemon and a tablespoon of warm water together until smooth.

Last but not least, the peas. Add them in and they just need a few minutes to cook through.
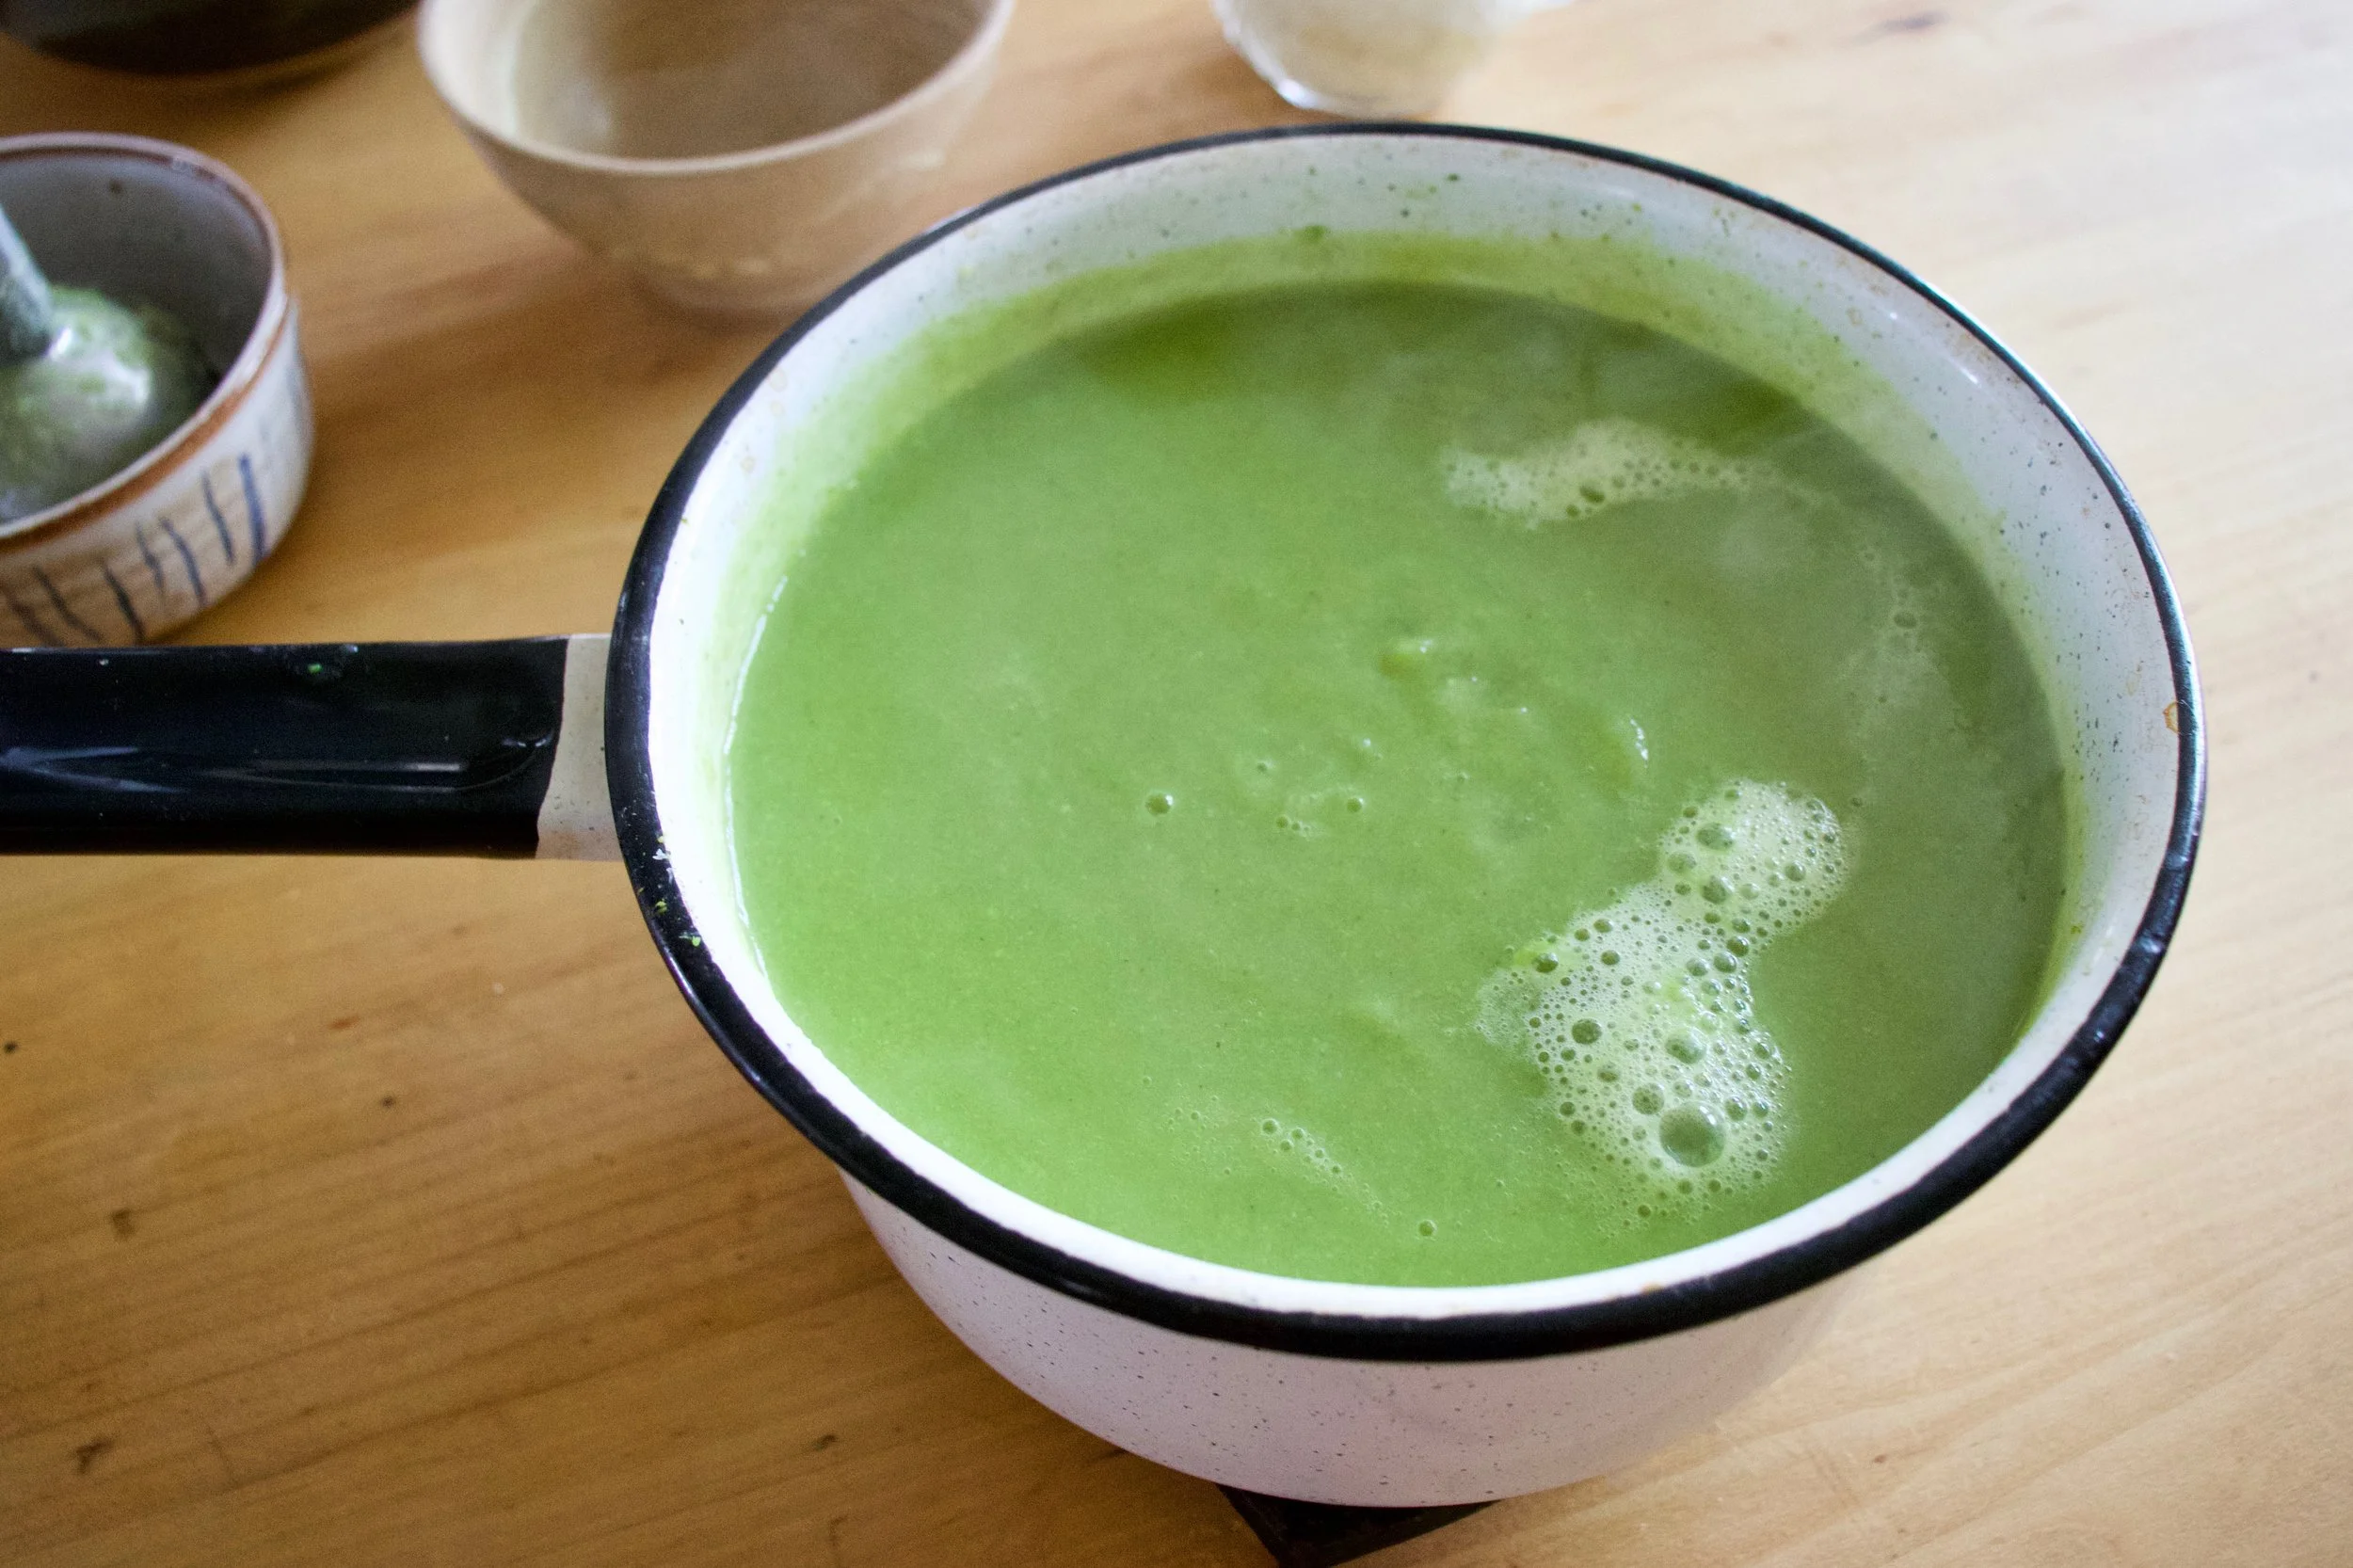
And then it all gets blended to become this green creamy goodness.
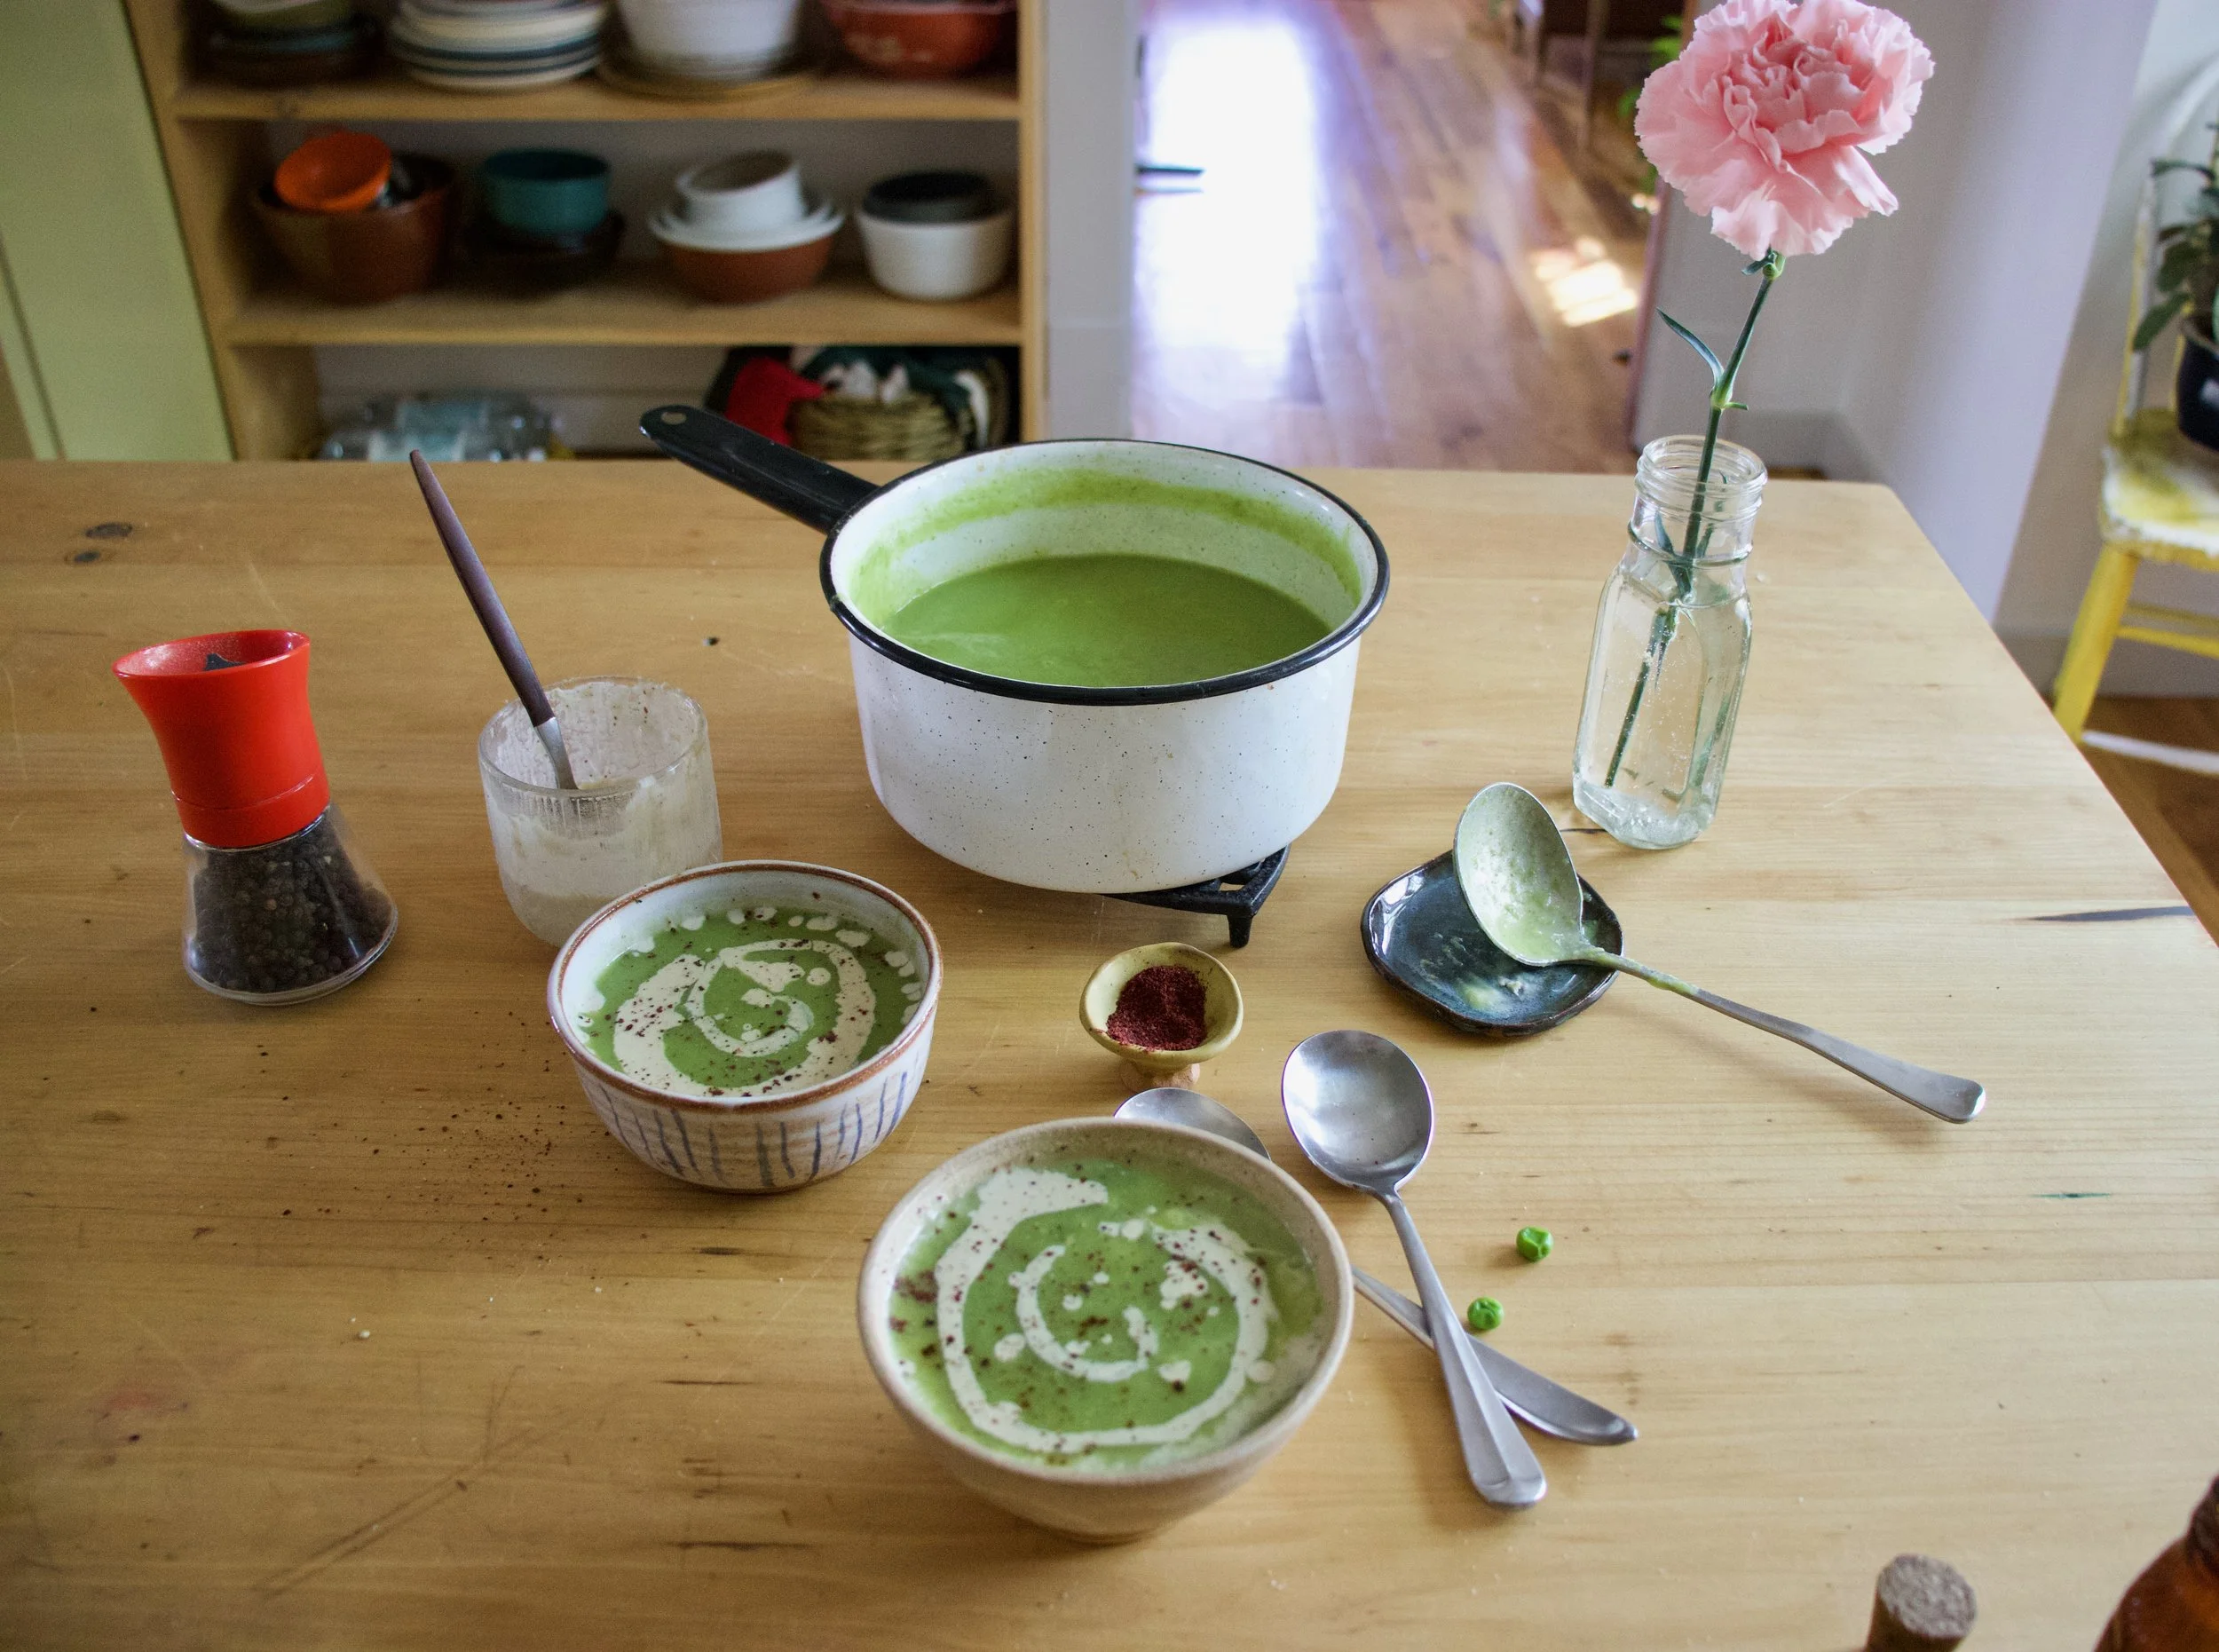
Ladle into bowls, grab the sumac tahini sauce and swirl it on in. A tablespoon or so is good. And don%u2019t forget a little more pepper and another pinch of sumac for good measure.
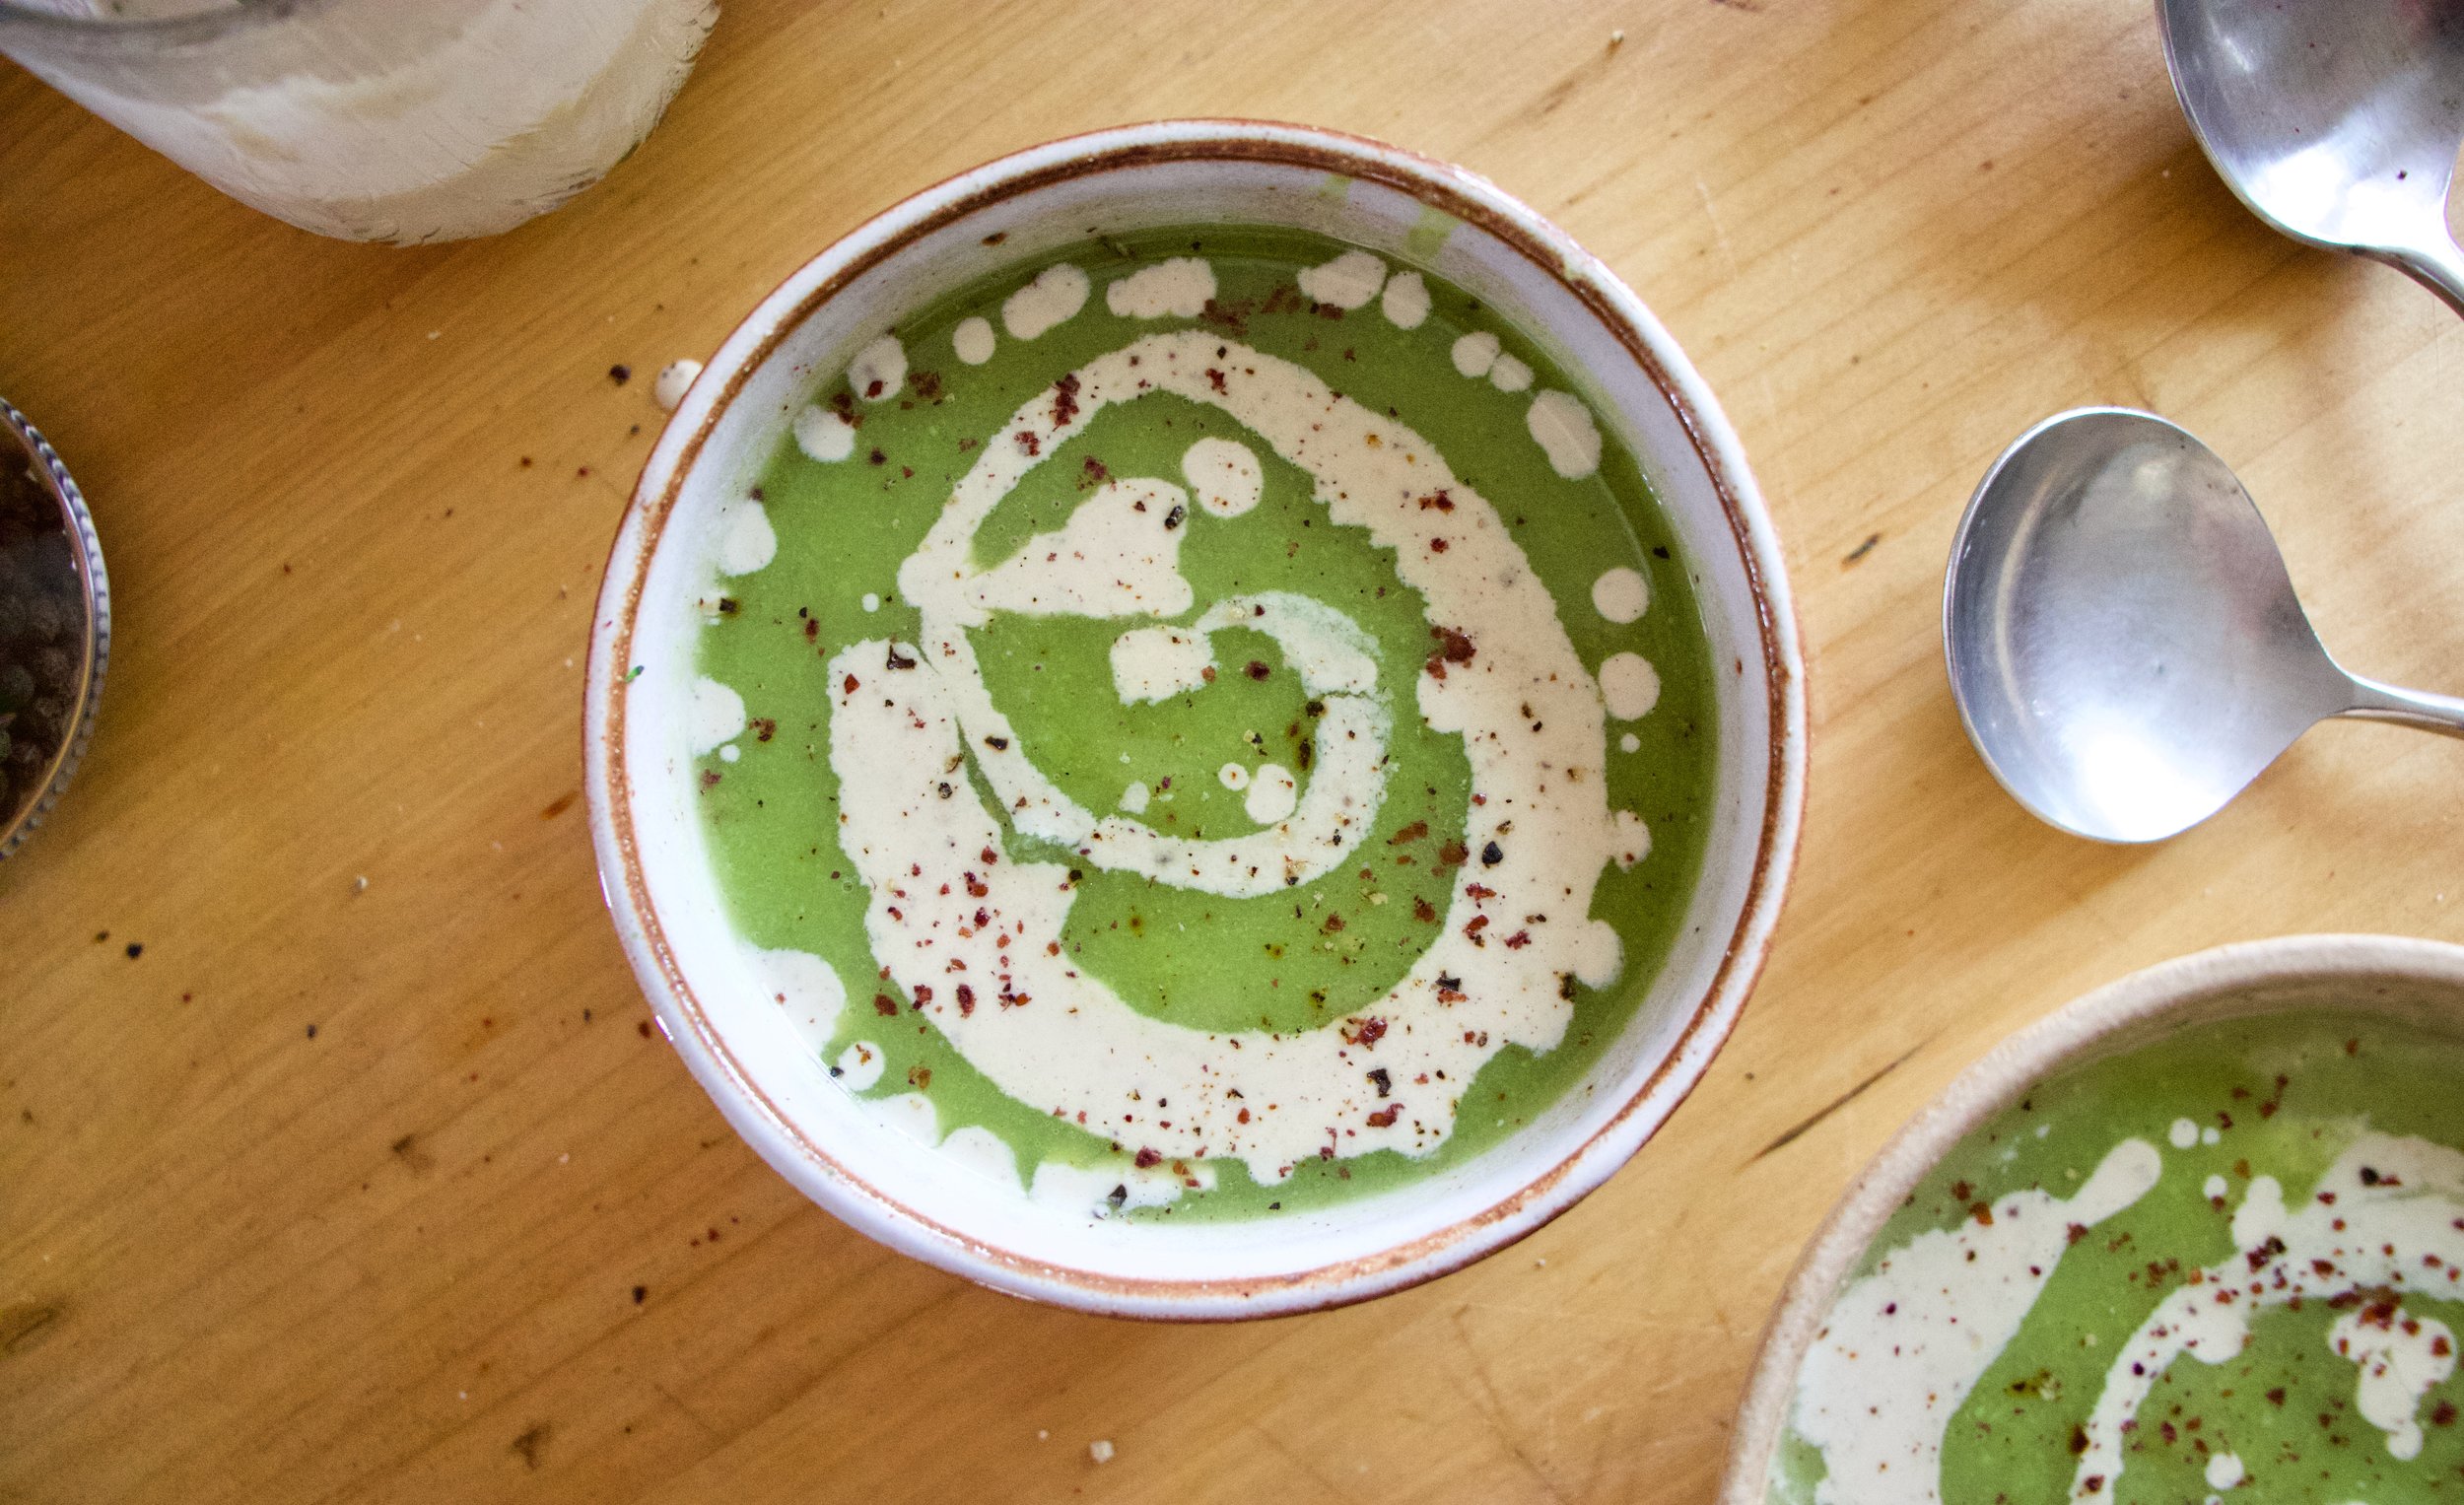
Just appreciate for a moment. That is one good looking bowl of soup. And it taste even better then it looks.
-C
Makes about 4 serving
-
1 1/2 cups fresh or frozen peas
-
1 1/2 cup chopped fresh or frozen cauliflower
-
1 1/2 cup chopped fresh or frozen broccoli
-
1 large onion
-
3-4 cloves garlic
-
4-5 cups water
-
Salt and pepper
-
1 teaspoon sumac
-
2 tablespoons tahini
-
2-4 tablespoons warm water
Start by removing the papery skin from the onion and chop into a few big chunks. Remove the skin from garlic too. Place into pot with 4 cups water. Turn heat on high and bring to a boil then turn heat to medium and let onion are garlic cook until tender which should take about 15-20 minutes
Once the onion is cooked, add in the broccoli and cauliflower. Turn heat back to high and bring to a boil again then turn back down to medium heat. Keep cooking until tender (another 15 minutes or so) then add in the peas. Keep on heat until peas are cooked through then remove the pot from heat and either transfer to a blender or use a immusrian blender to blend the soup until smooth. Add a little more water if needed to get to the right consistency to blend right. Or if you want a thinner soup.
For the tahini sumac swirl just mix the tahini and sumac together along with the juice of the lemon, two tablespoon warm water and a pinch of salt. Mix together until smooth. If the mixture is to thick, add another tablespoon of water.
To serve. Ladle or pour soup into bowls and drizzle and swirl the tahini sumac on top. Sprinkle with pepper and a pinch more sumac and you are good to go.
Spring is here for reals, I think. No, it is here, it has just been a bit raw and maybe a bit more rainy then it really needs to be, but whatever, it is spring and it is good. Things are greener by the day, the temperatures although not exactly warm are still inhabitable and without cause for winter jackets (although I have still been rocking the mittens) and spring veggies are popping up all over. Things are looking good.
So last week I made a pie crust with the intention to make a veggie pot pie and stuck it into the freezer. When the time came to make said pot pie, I forgot to take it out of the freezer so the crust was not meant to be for pot pie (it will probably end up as a rhubarb pie%u2026we shall see). Without pie crust, I wasn%u2019t exactly feeling like I should make a pot pie, but a tart, well yeah, sure. A crispy and chewy crackery crusted thing with almond ricotta a spring veggies because that is where the mind went and what the mr agreed sounded good. (When I make up recipes I just start taking about ingredient and preparations and wait til the mr says %u201cYea, that loud good. I%u2019ll eat that %u201c He usually will say it right away and for anything. Very easy to please or he just doesn%u2019t care%u2026hum? )
And so the tart was made and the tart was eaten in all entirety for dinner by the mr alone. Usually when he eats all of something it means it was one of the really good things. Or he is really really hungry. But he said it was a really good thing. I trust him because I agreed. I got in a few spoonfuls of the almond ricotta mixture and it is really freaking good if I do say so myself (I could eat bowls of almond ricotta all day long).
Anyway, heres to spring and all things that are green and good.
To the tart.

The stuff. Flours (white and white whole wheat), baking powder, and a little salt in the bowl. Water and olive oil, blanched almonds, a lemon, a clove of garlic, asparagus, peas, frozen and thawed spinach, a small red onion, and salt and pepper.
Start with making the crust. Mix the dry together then add in the oil and water to form a dough. Knead dough a minutes until the dough is uniform and place back in bowl and cover. Dough needs a few alone minutes to rest. I can relate to that.

While dough is resting, make the almond ricotta. Almonds, garlic, the juice of the lemon, and a bit of water go into blender. Add in a pinch of salt and pepper too.

Blend until creamy and smooth.
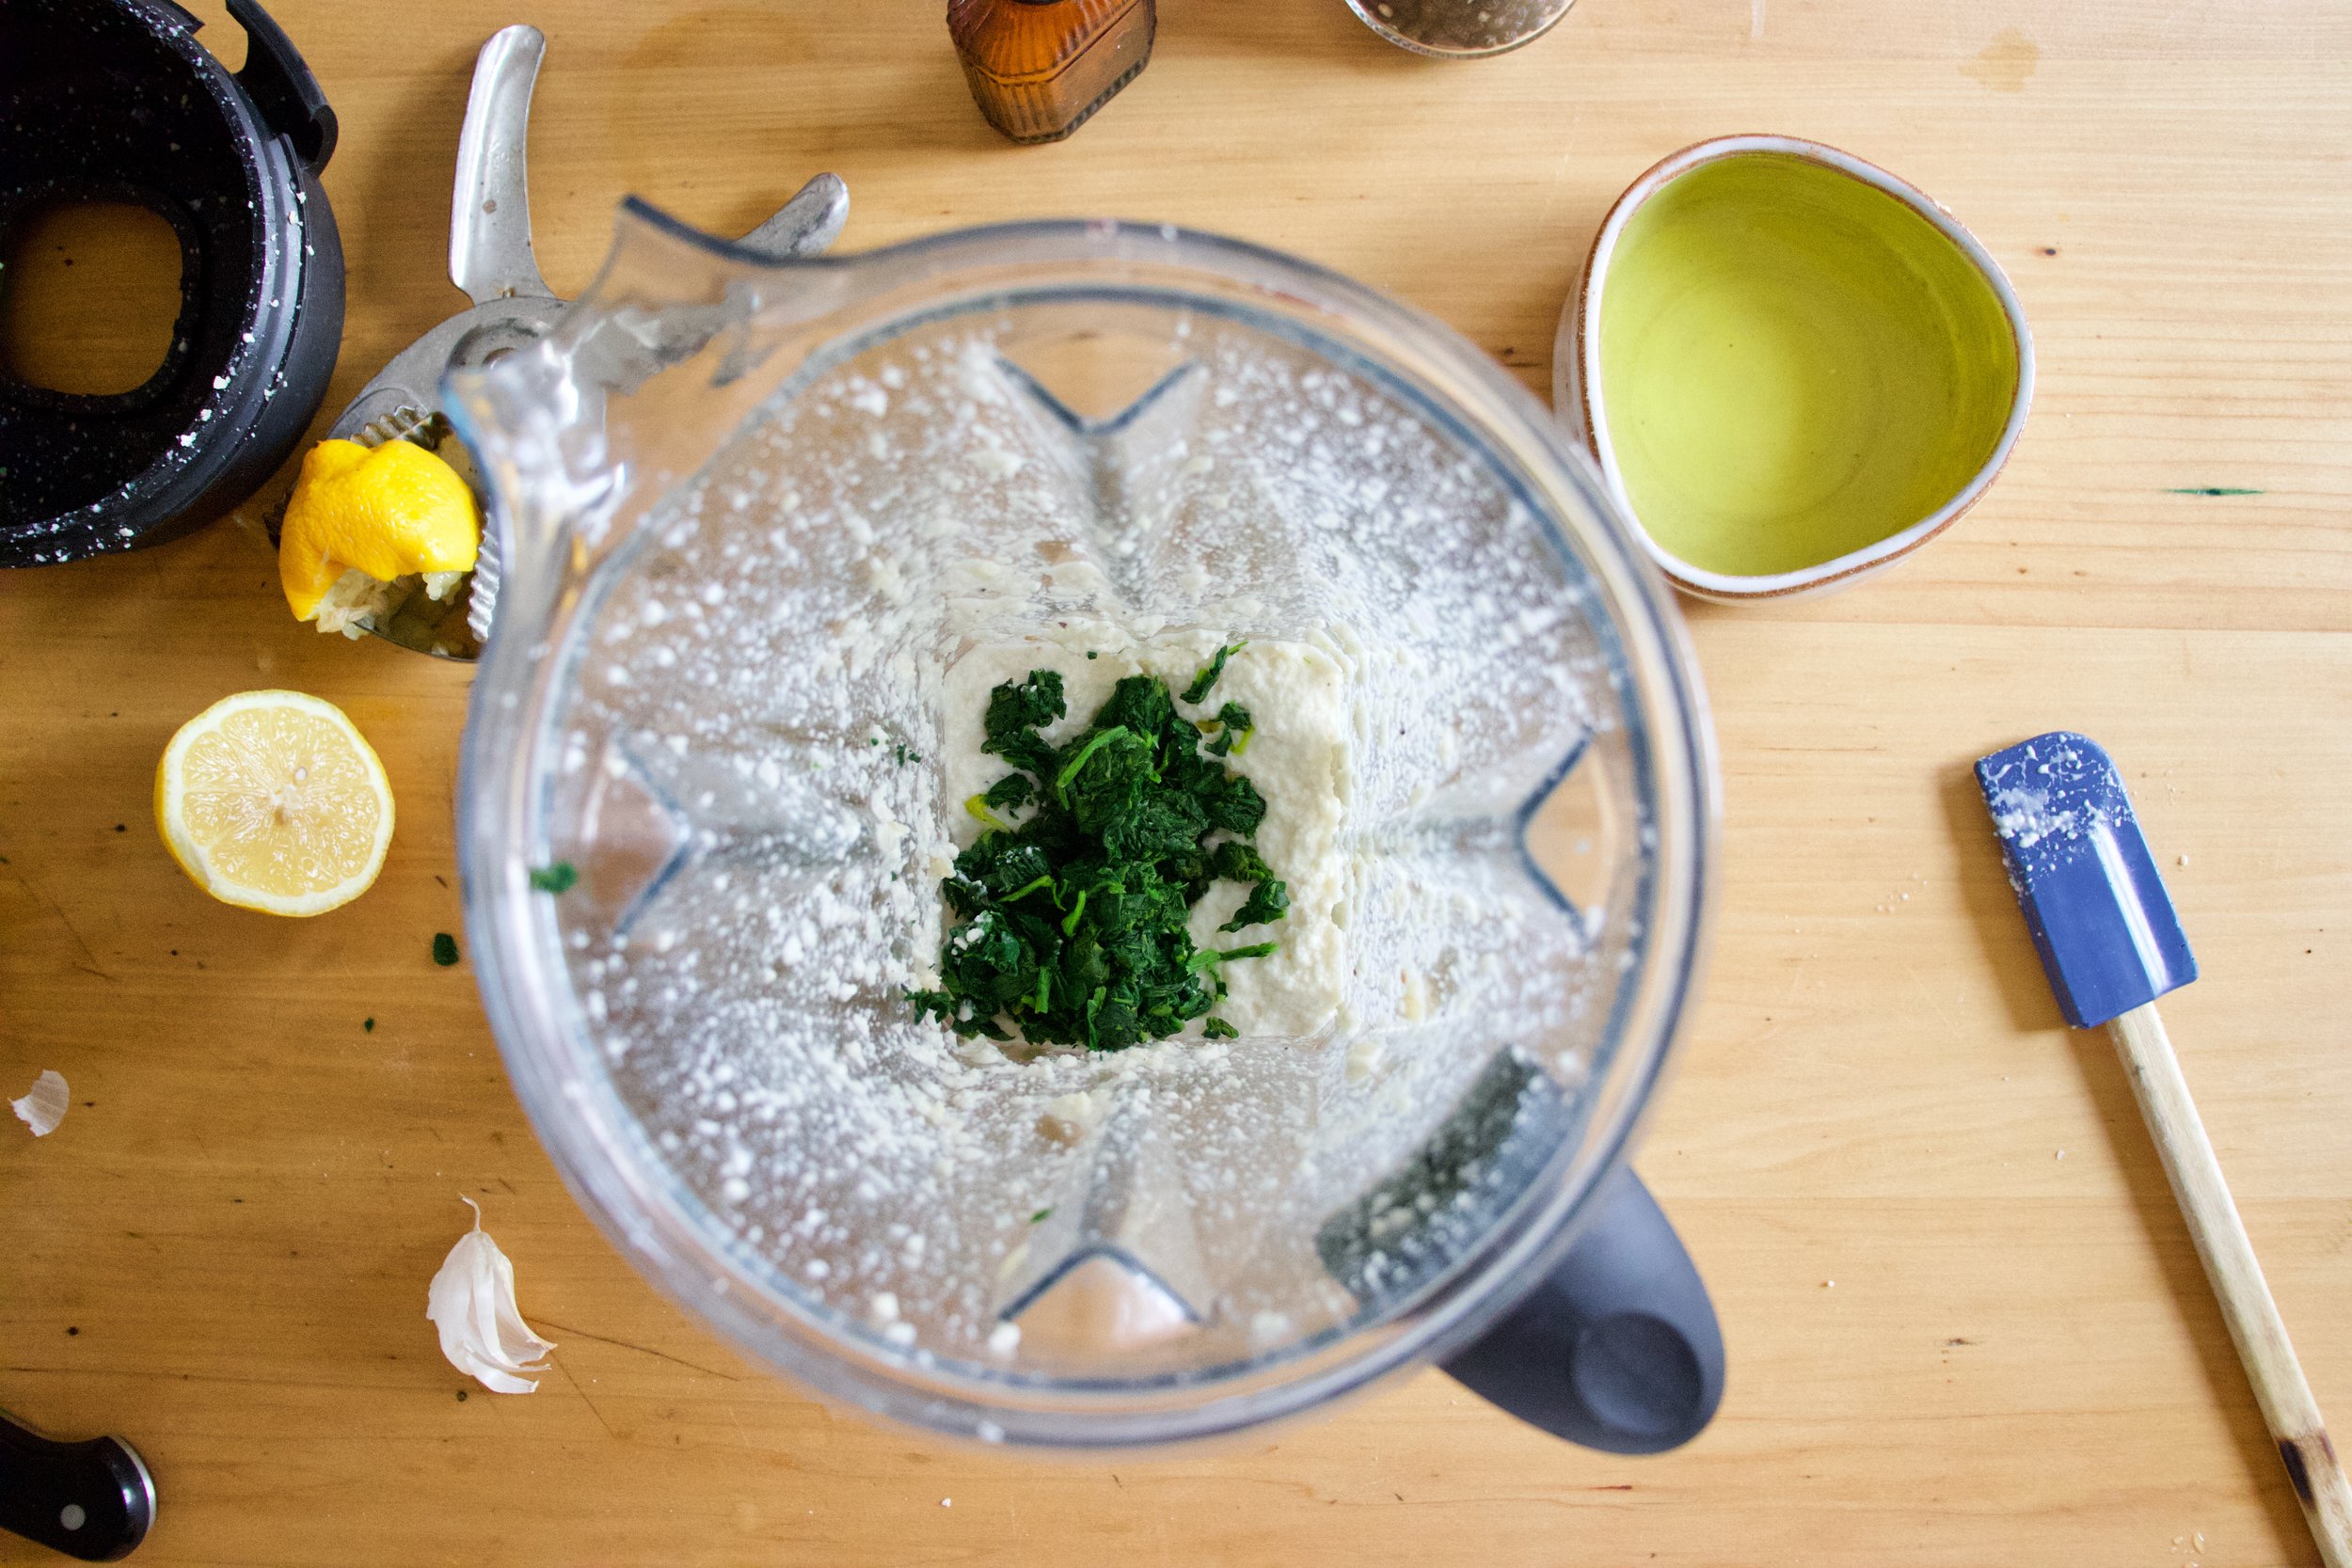
Dump in the spinach and blend, just until combined.
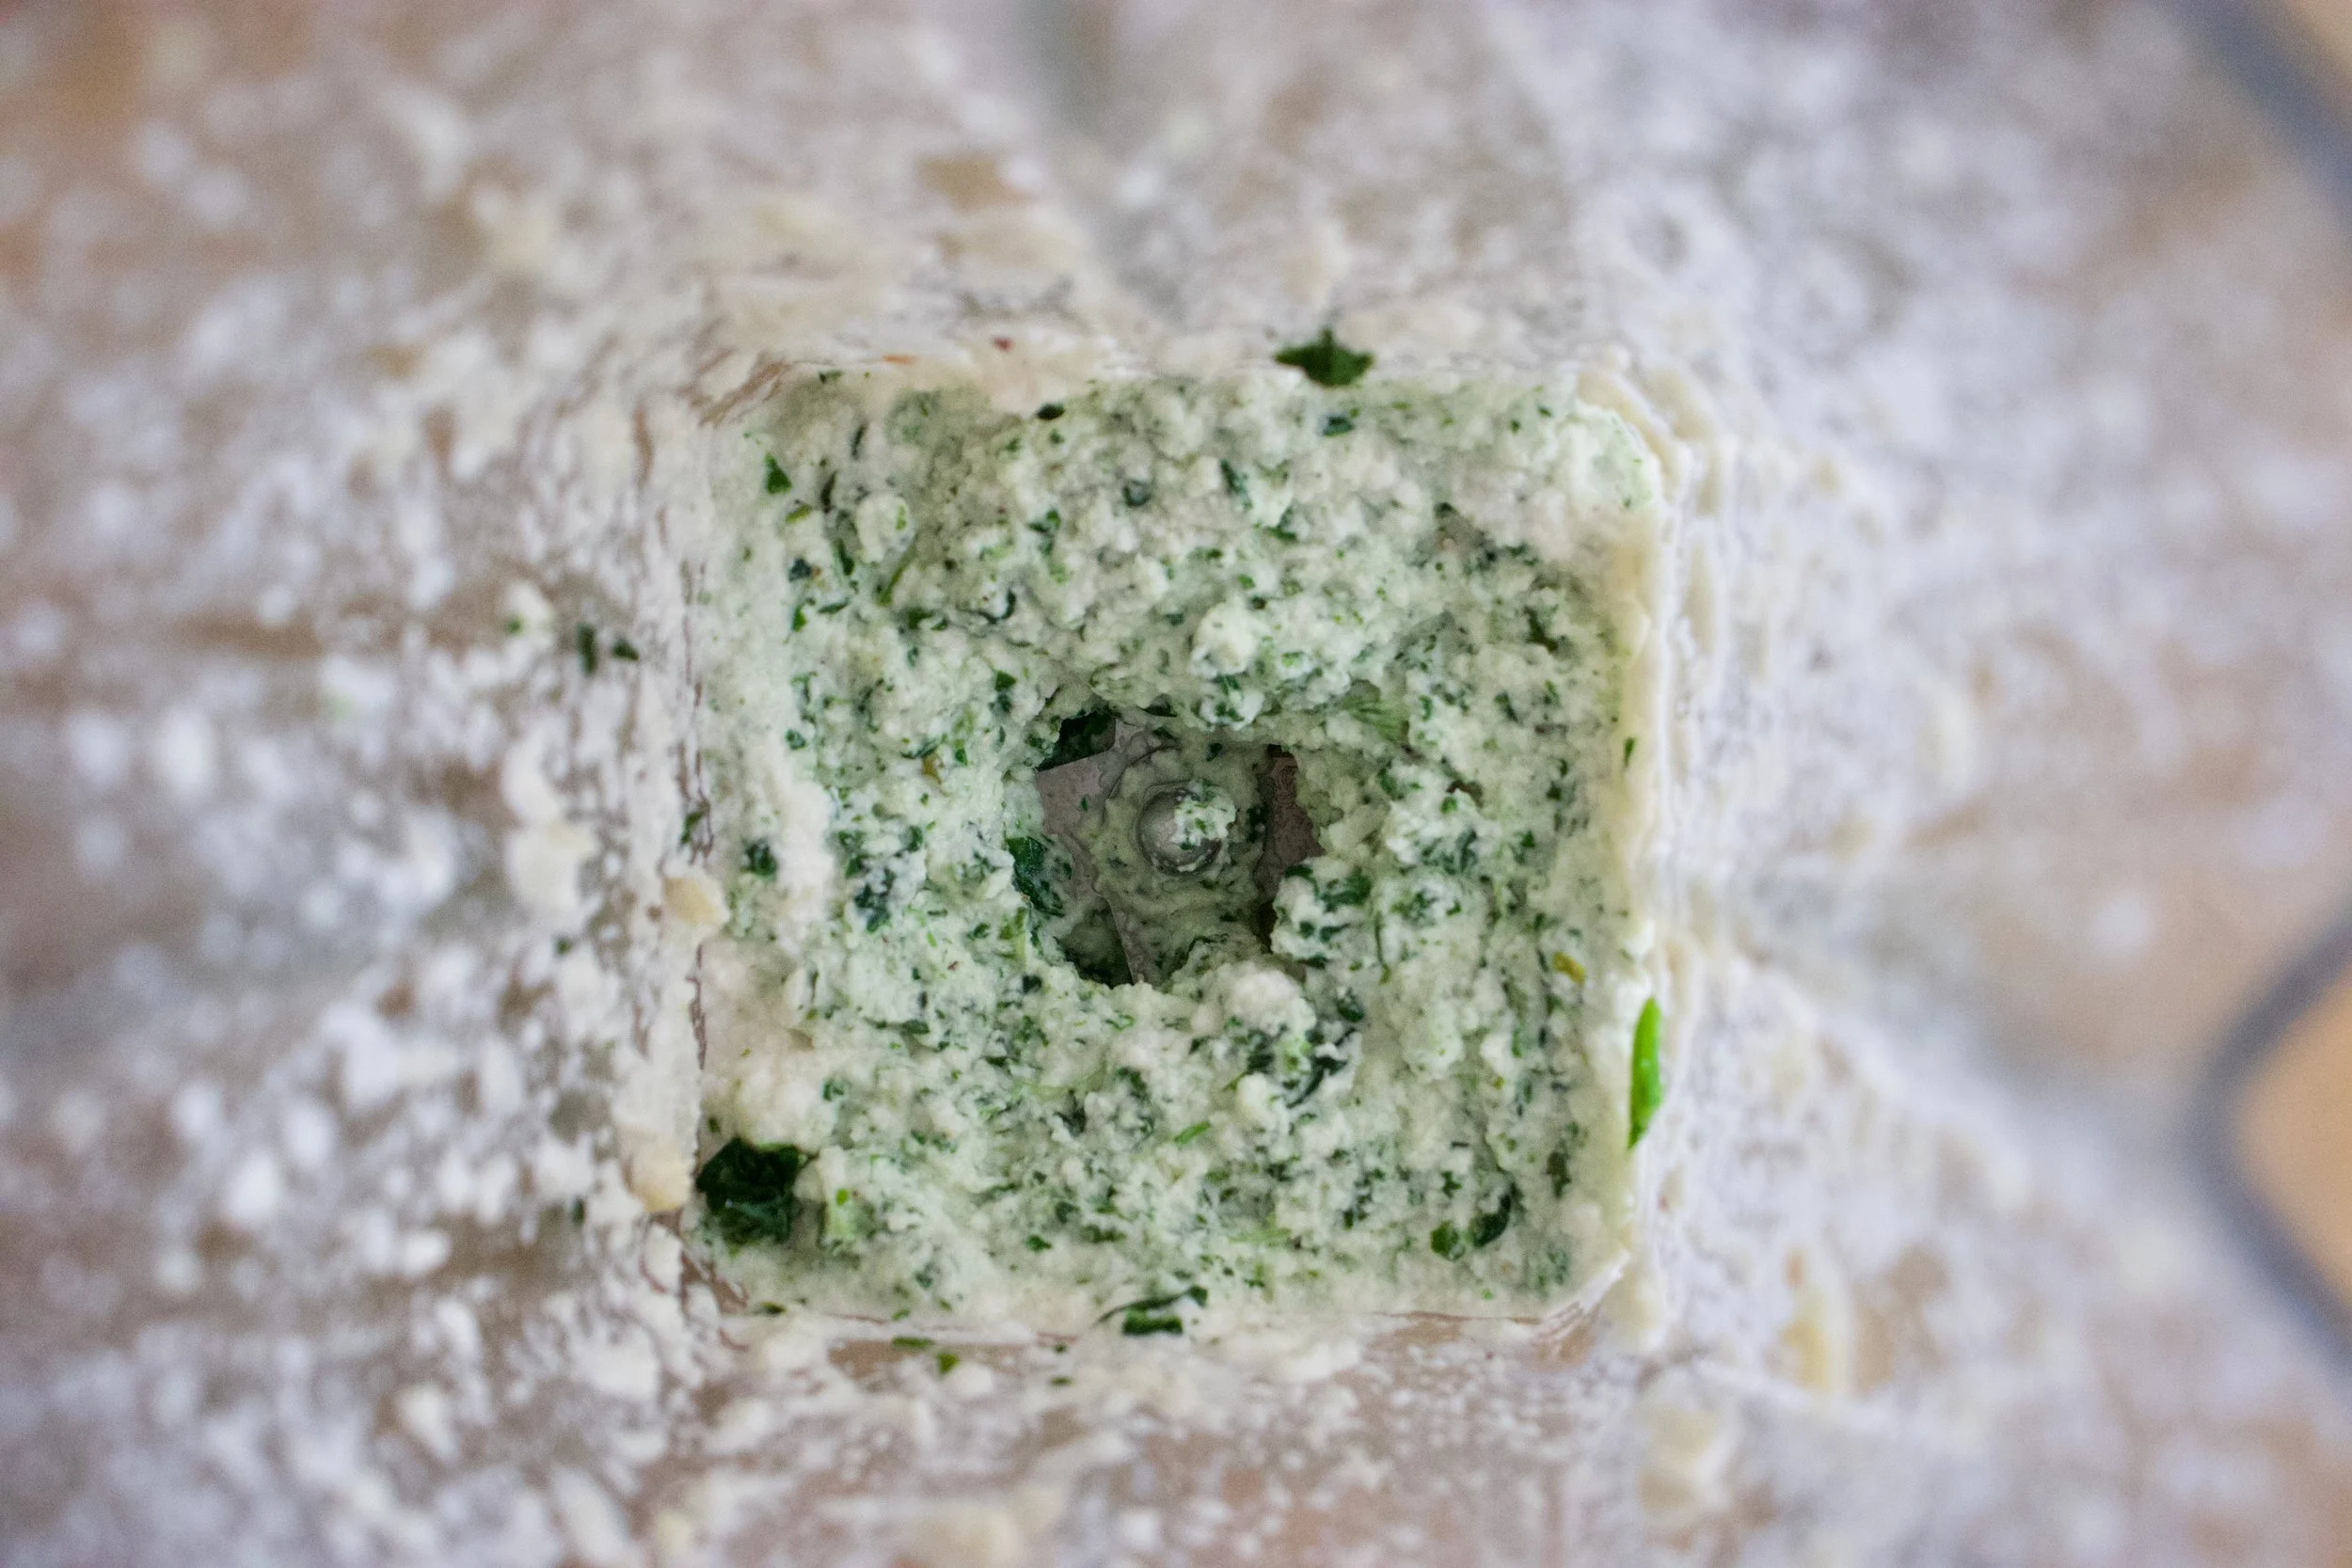
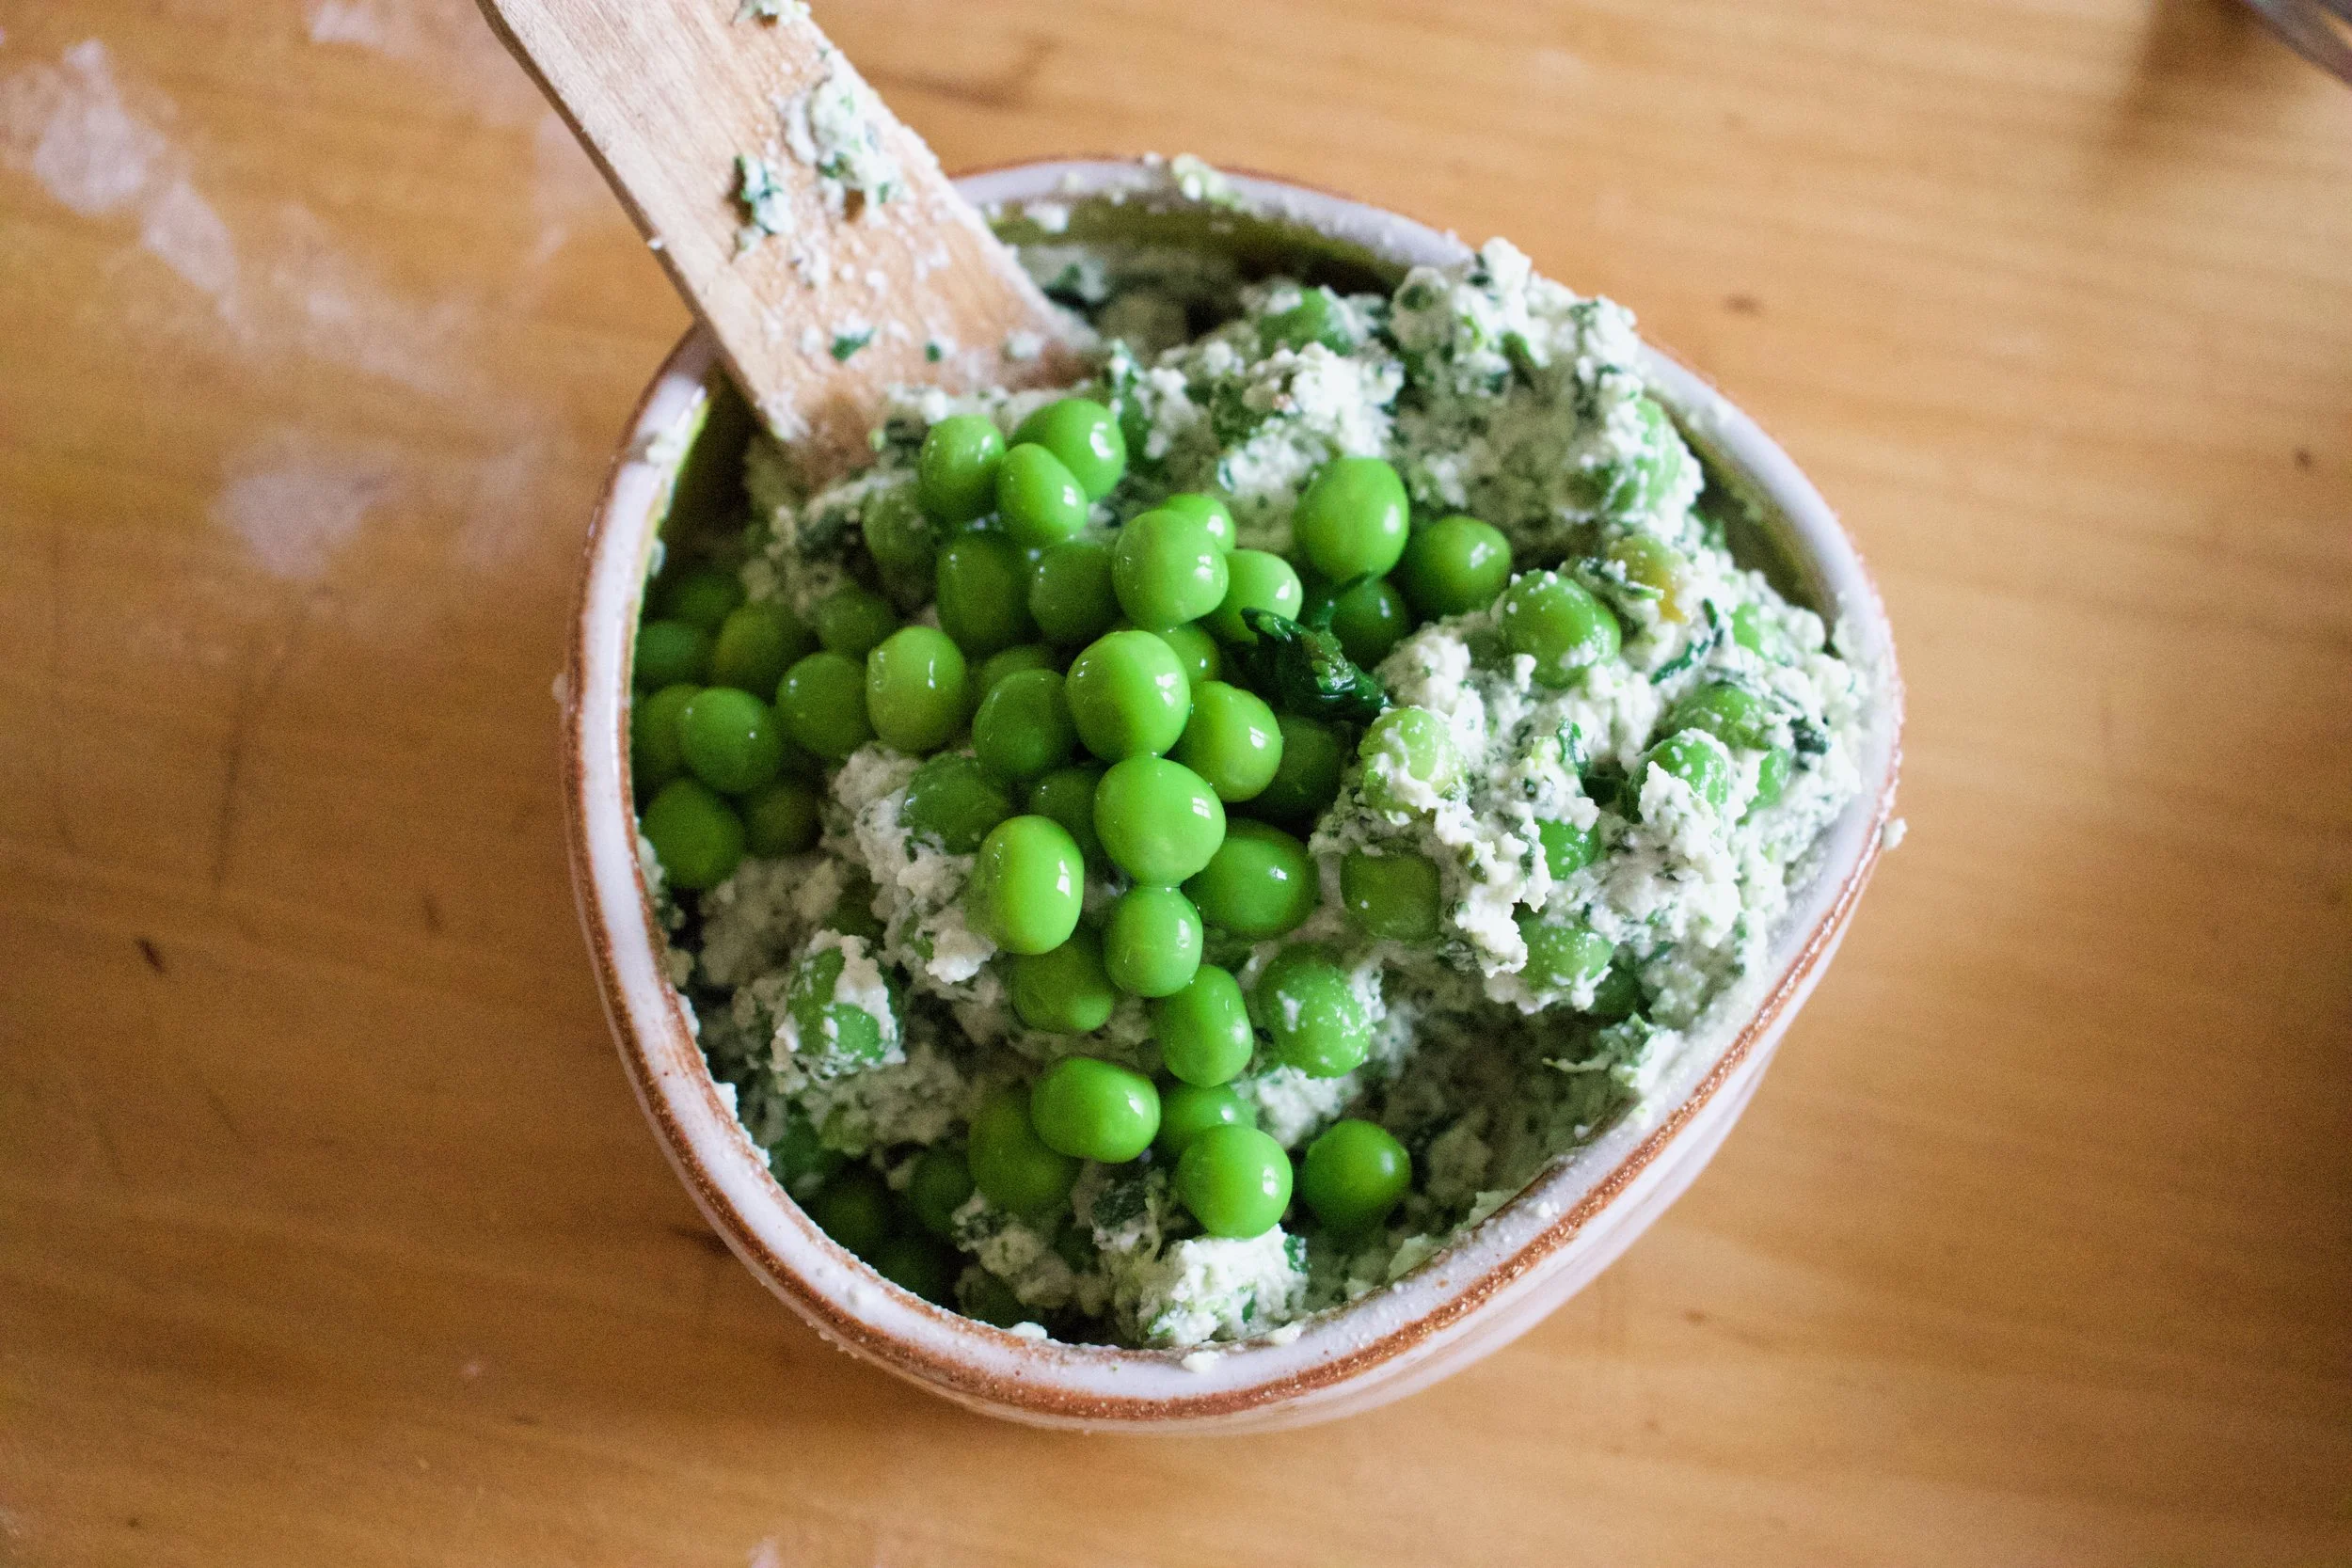
Scoop ricotta into a bowl and mix in the peas. And sure give it another taste but try not to eat it all.
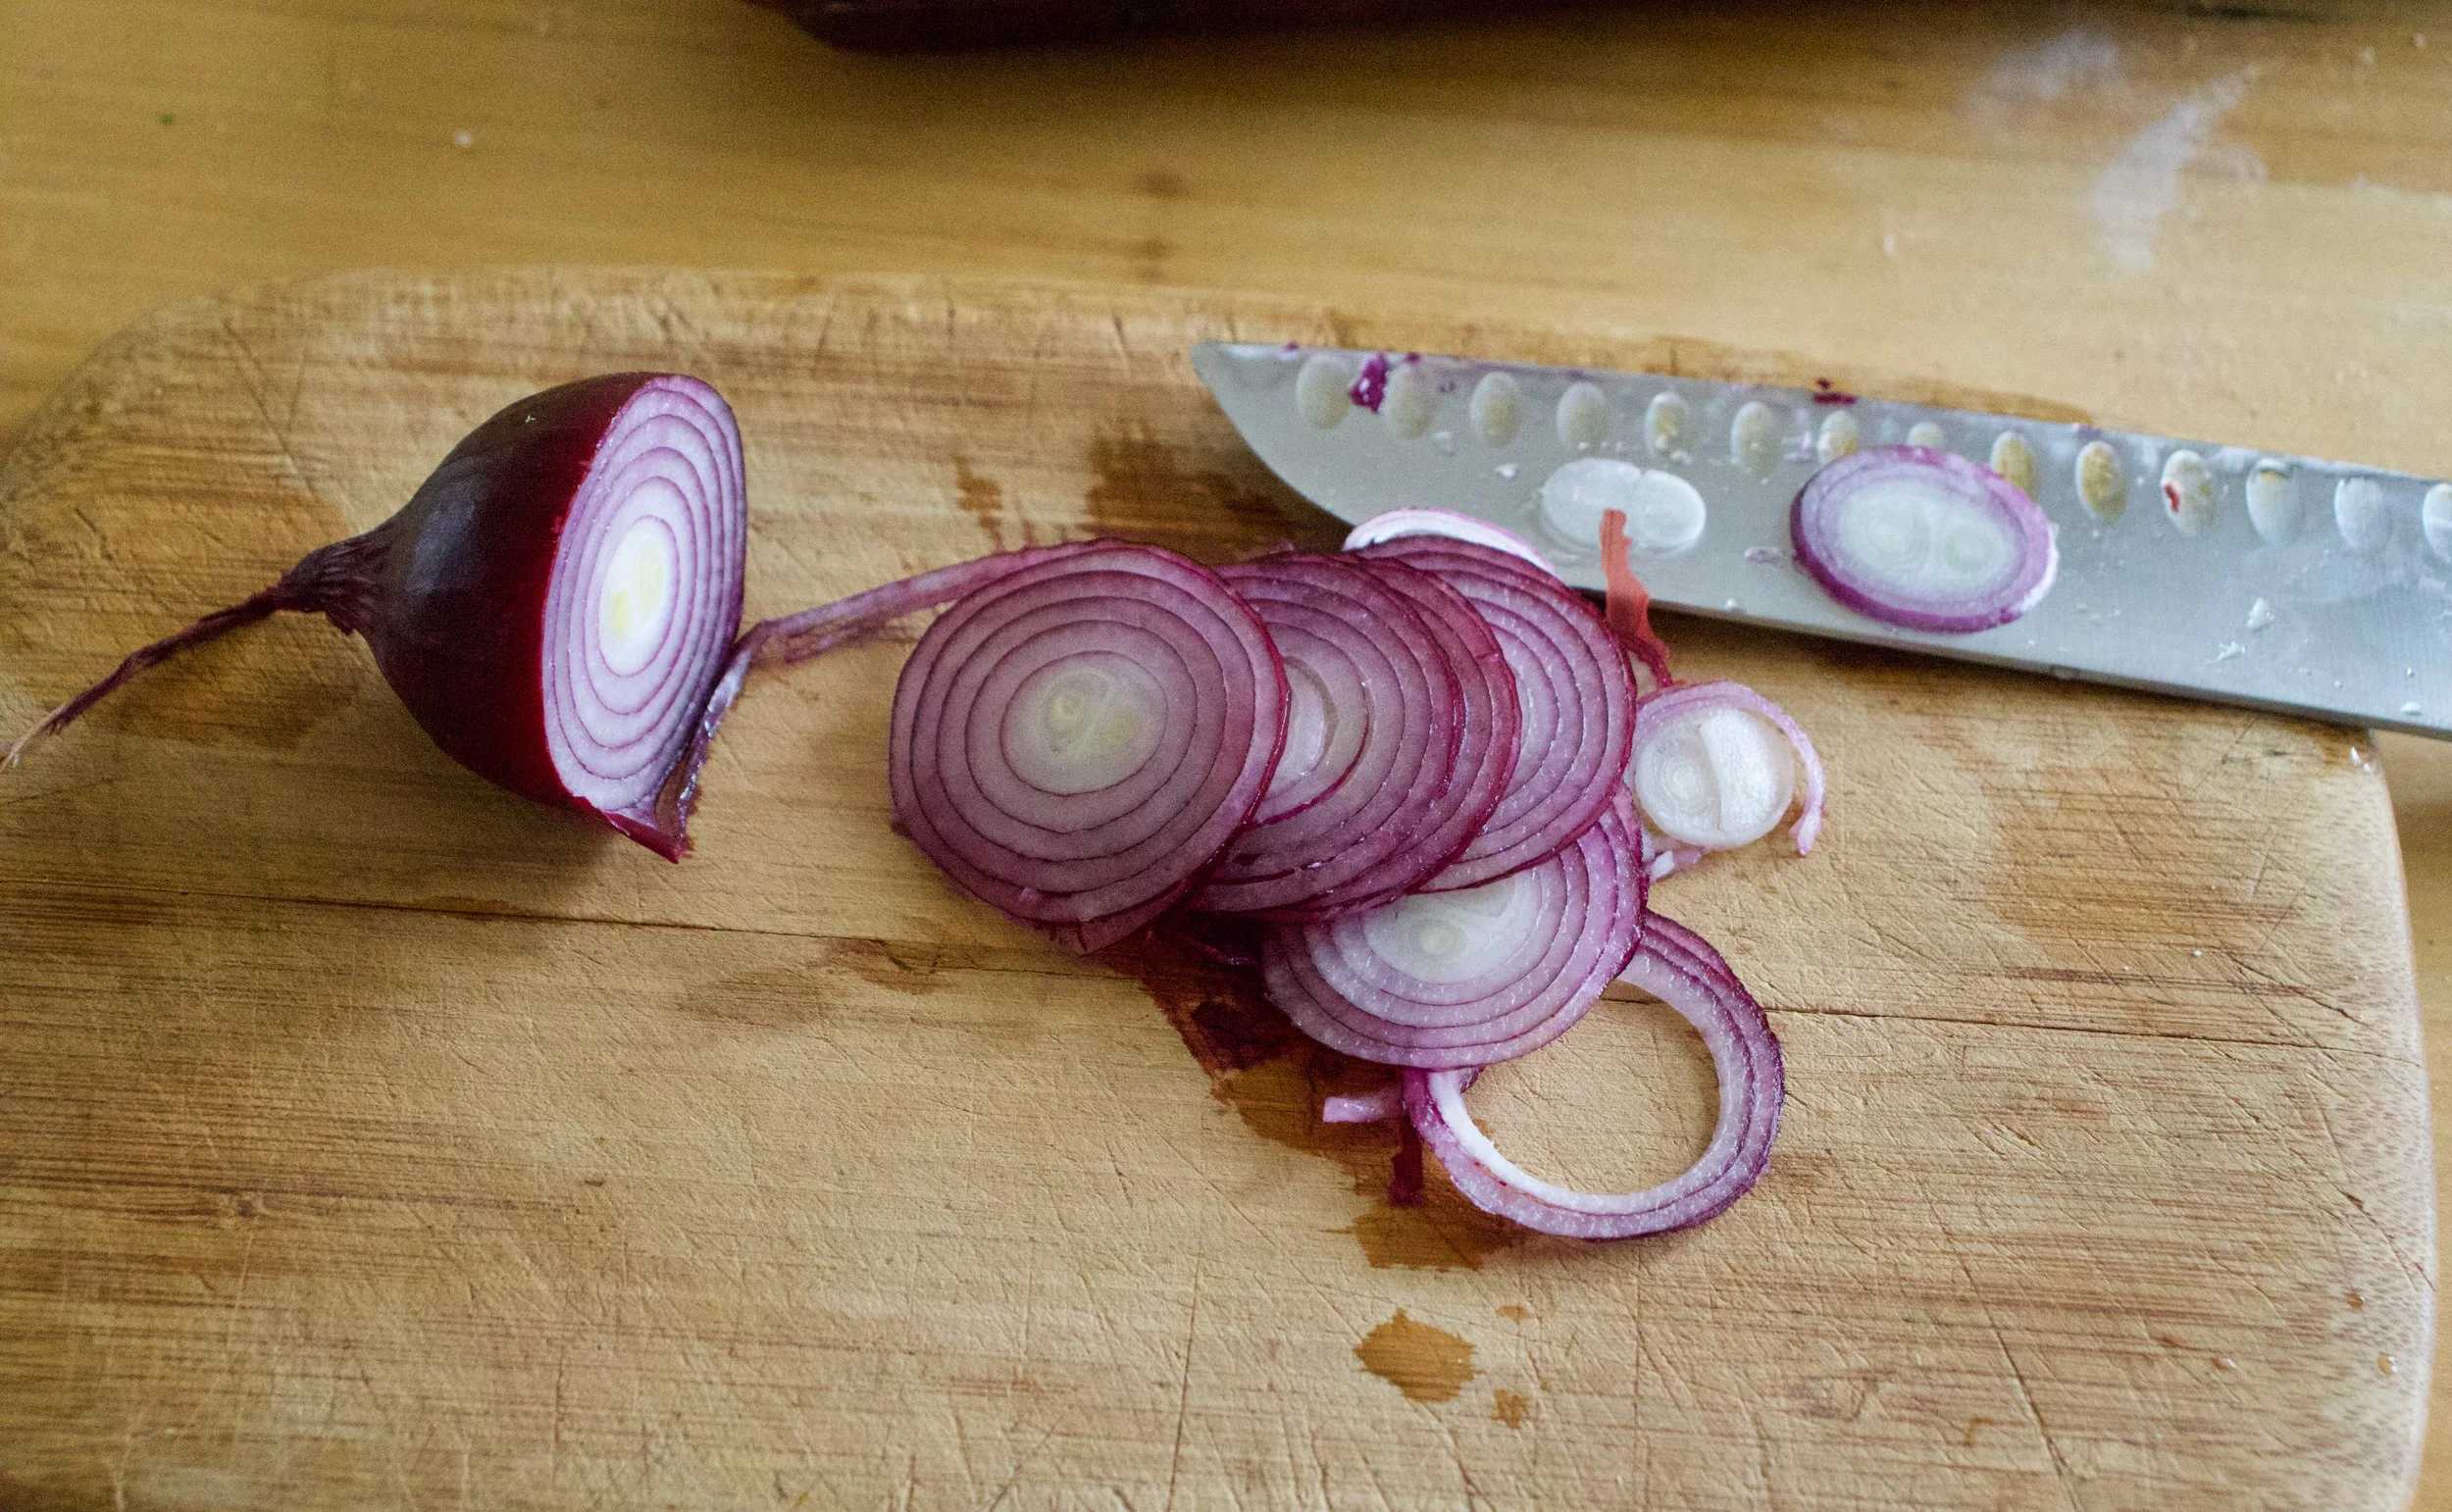
Grab the onion and slice it all nice and thin.

And after the resting time, grab dough and roll it out. Try for a rectangular shape or as rectangular as you can get it, but nice and thin. Thiner is better.
Place rolled out dough onto a baking sheet and poke the bottom with lots of little hole. Take ricotta mixture and spread evenly all over crust, leaving a 1 1/2 border all the way around.


Then top with the asparagus and more onions.
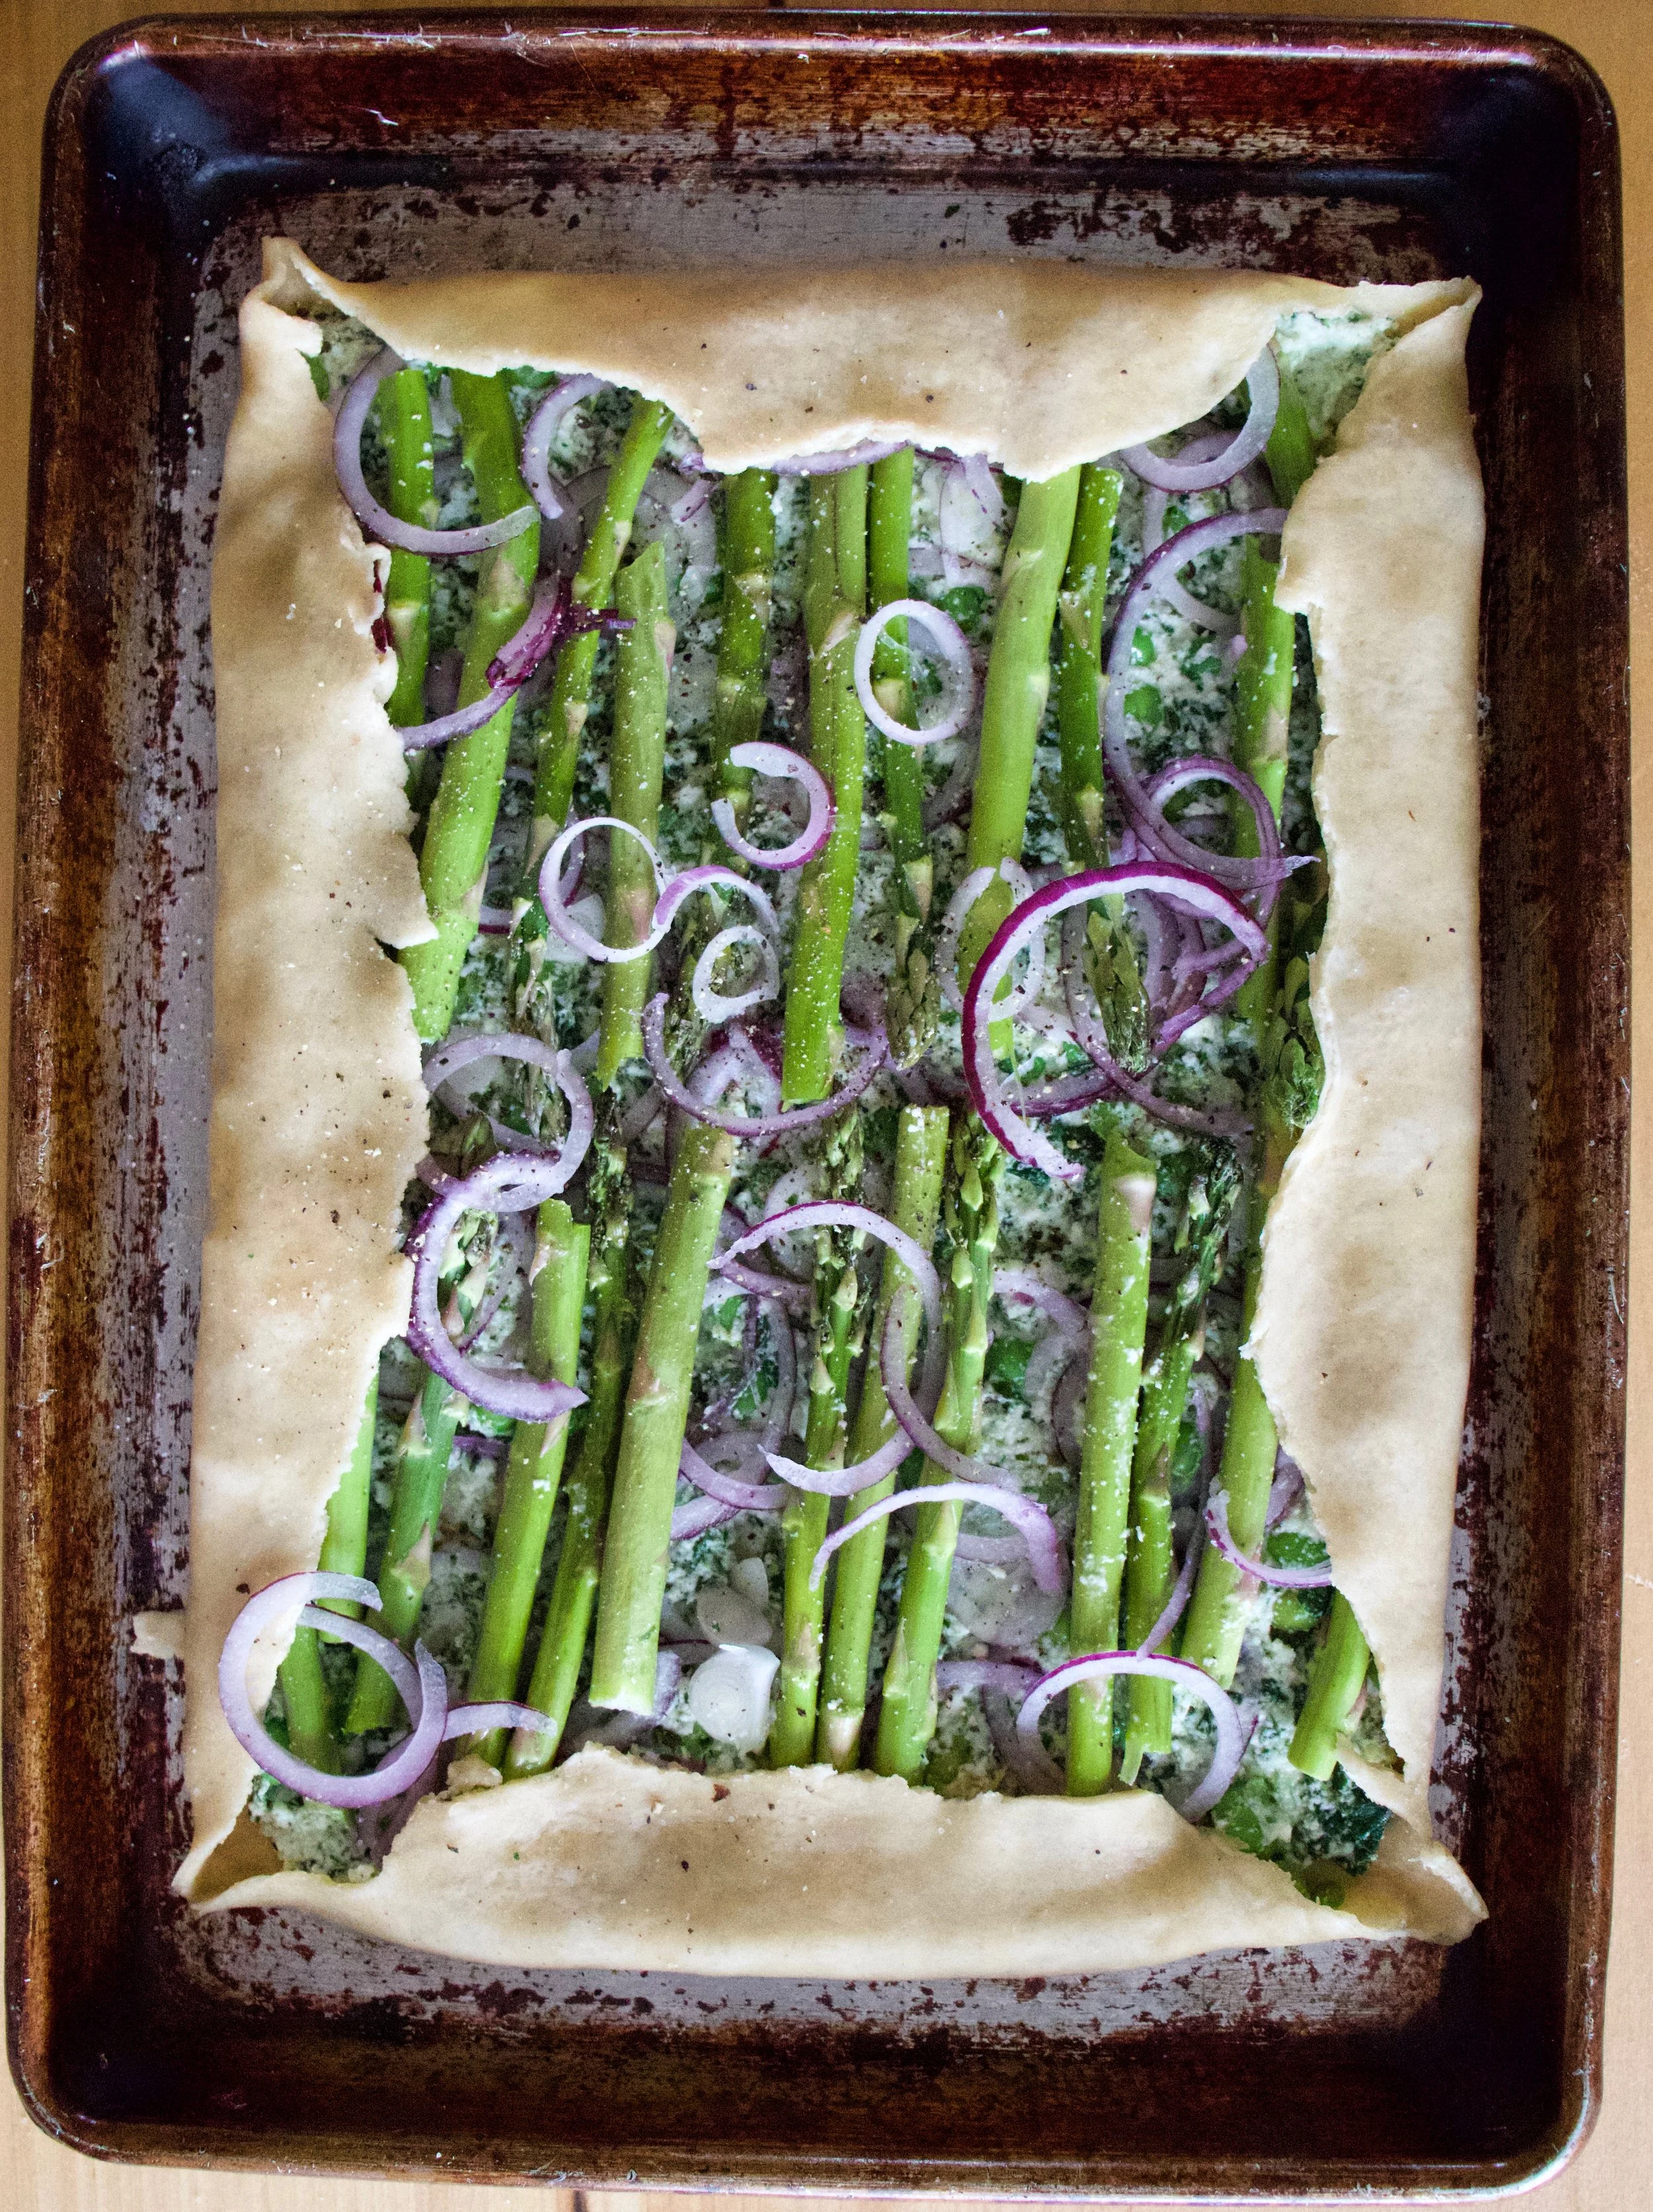
Fold over the edges of the crust, sprinkle with a pinch of salt and pepper, and into the oven it goes to bake.
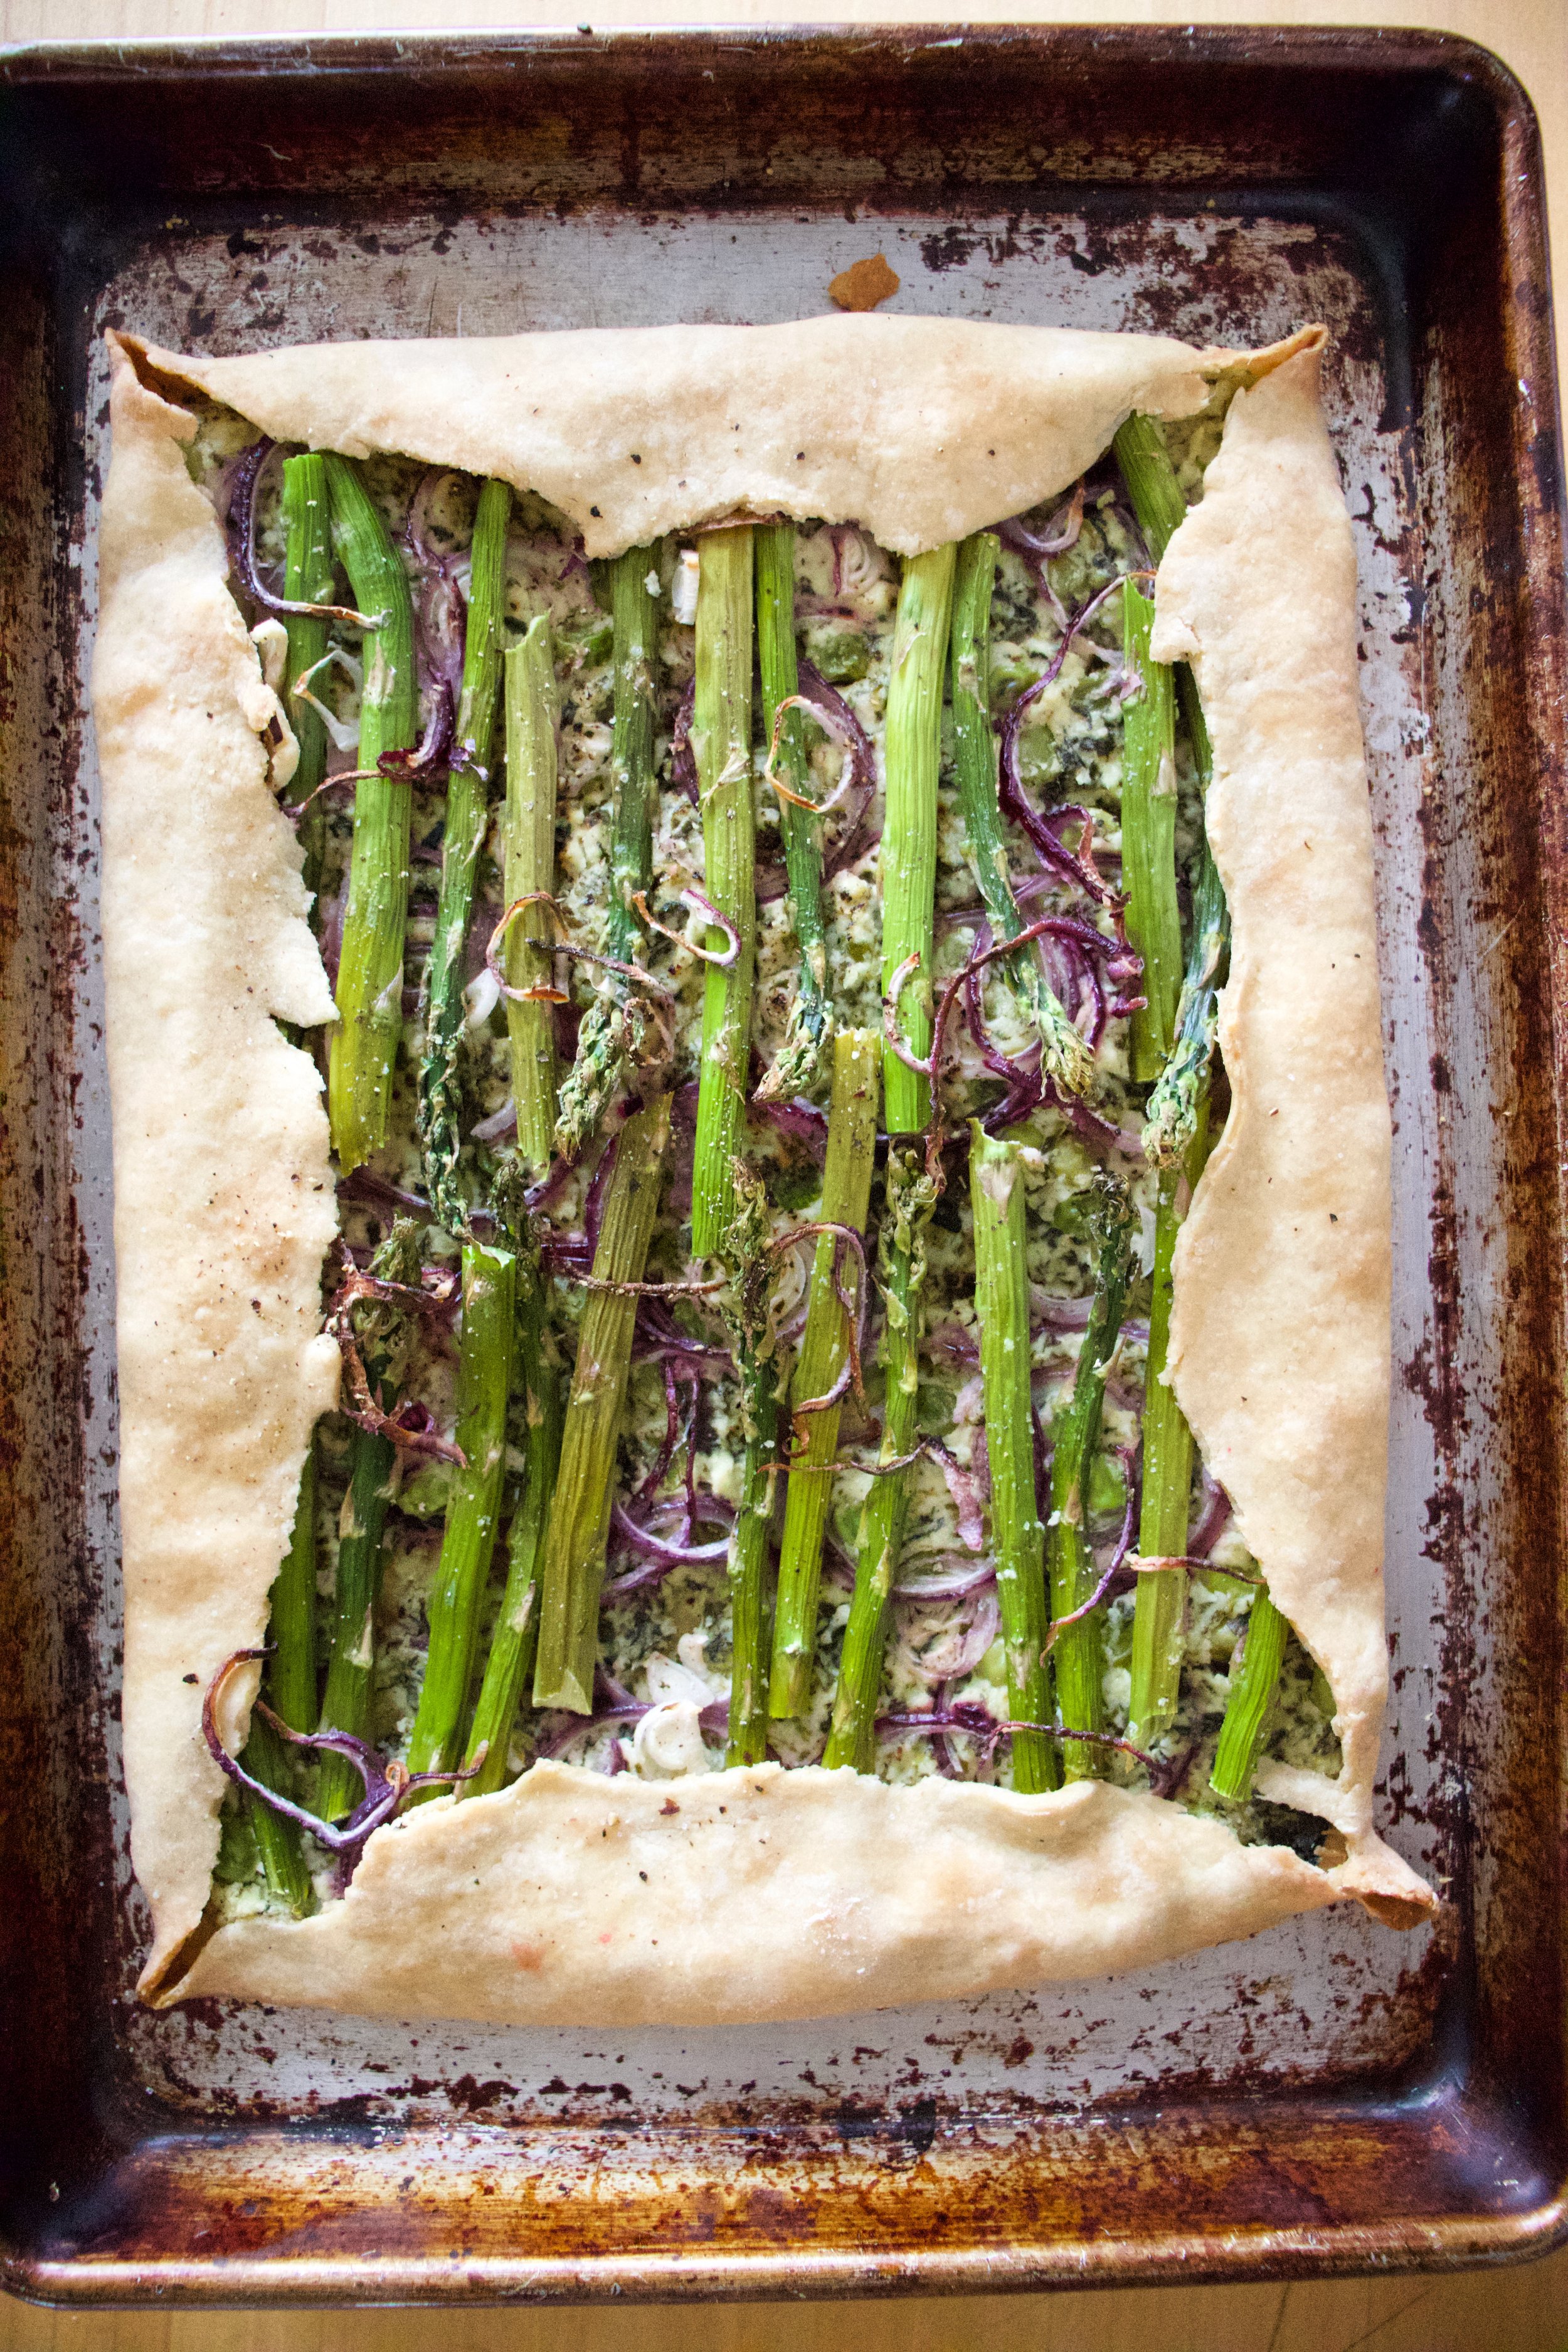
And then it is baked. And ready to eat (after a few minutes of cooling).
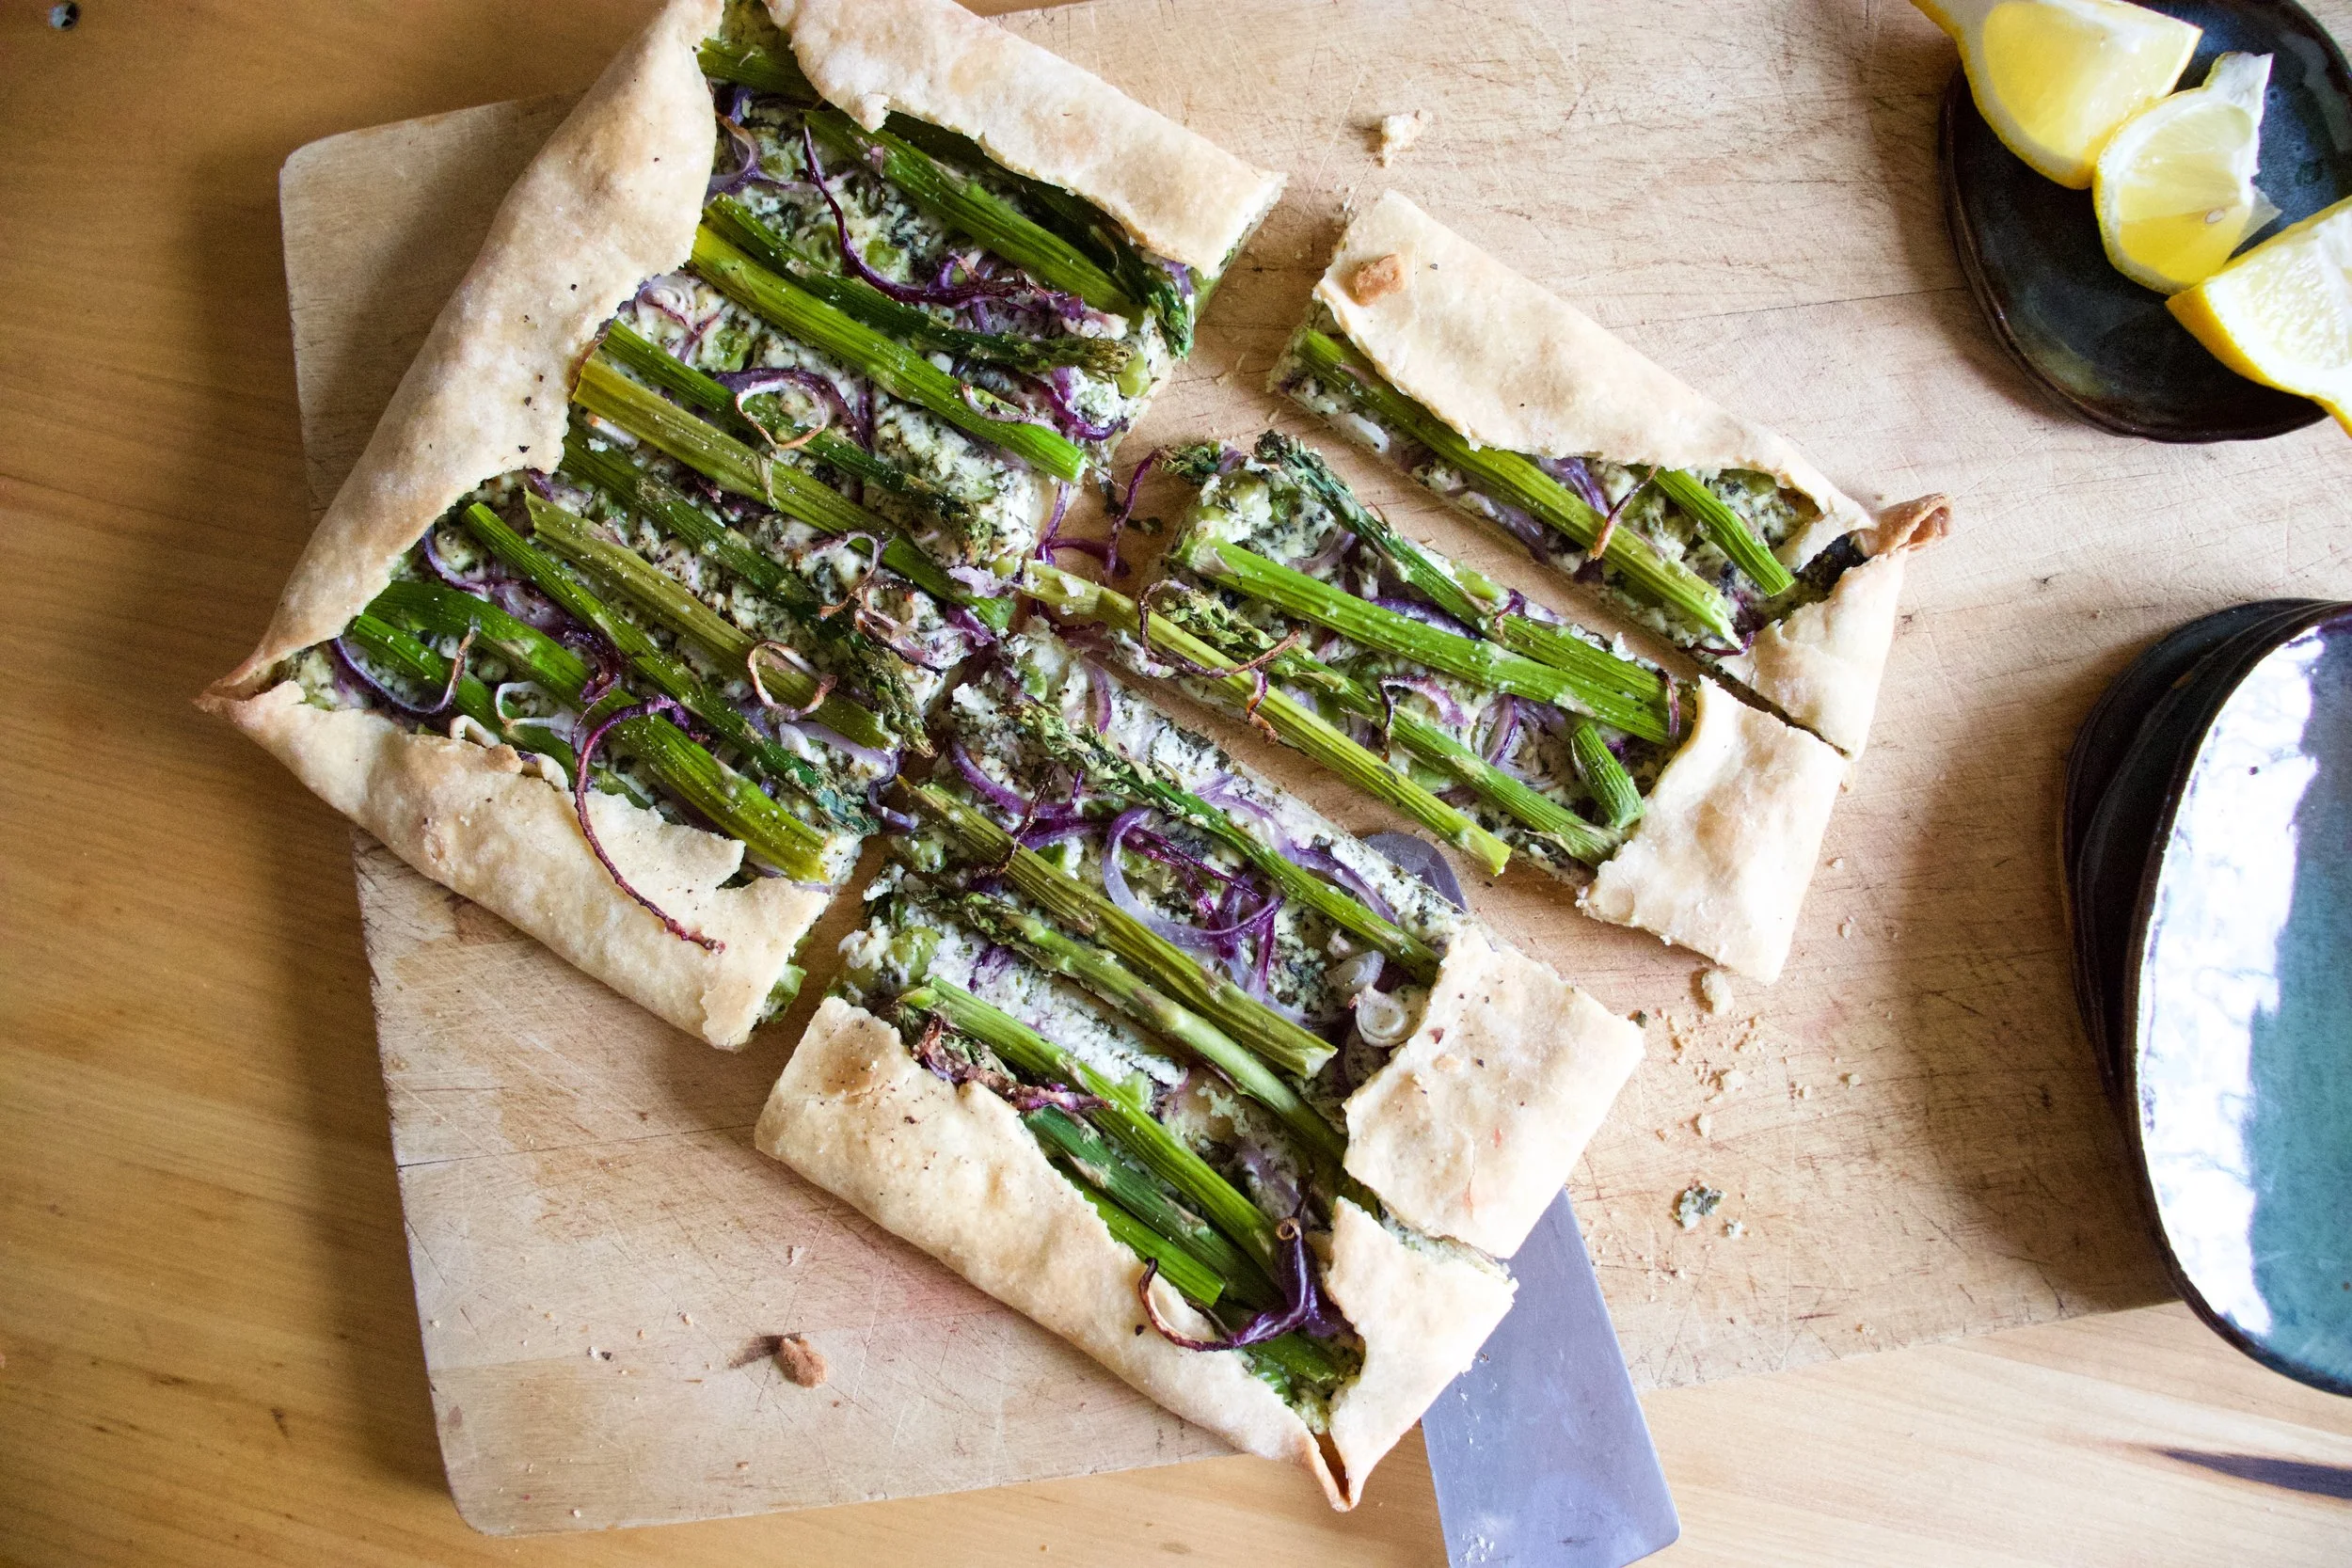
Nothing left but to cut it up and eat it.
Spring. Green. Food.
Things are good.
-C
Makes a 8×12(ish) tart
-
For the Crust
-
1/2 cup all purpose flour
-
1/2 cup white whole wheat (can sub for all purpose)
-
3 tablespoon oil
-
1/3 cup room temp water
-
1/4 teaspoon baking powder
-
1/2 teaspoon salt
-
For the Almond Ricotta and Veggies
-
1/2 cup blanched almonds
-
1/4- 1/3 cup warm water
-
1 lemon
-
1 clove garlic
-
1/2 teaspoon salt and pepper or more to taste
-
1/4 cup frozen and thawed spinach squeezed of liquid
-
9-10 spears of Asparagus
-
1/4 cup peas (fresh or frozen and thawed)
-
1 /2 red onion
First make the crust. Whisk together the flours, salt, and baking soda. Add in the oil and water and mix until a dough forms. Form dough into a ball and knead for minute or two on counter then place dough back into the bowl and cover. The dough needs to rest for 10-15 minutes.
While dough is resting, make the almond ricotta. Place almonds, garlic, and juice of lemon into a blender. Start blending and add in the lesser amount of water, adding a little more until the stuff all starts to blend. Blend on high for a minute or two until the mixture is nice and creamy. Season with salt and pepper, blend a second to mix then add in the squeezed out spinach. Blend until mix together then dump or scoop the mixture into a bowl and mix in the peas. Then thinly slice up the onion.
Preheat the oven to 450
After doughs little rest, lightly flour a counter and roll it out, thin as you can, in a rectangular shape. Try for at least 12in x 16in. The rectangle doesn%u2019t need to be perfect. Rough is good.
Place the rolled out crust onto a baking. Take a fork and dock the surface (poke holes into it to prevent air bubbles). Take the ricotta and pea mixture and spread evenly on crust, leaving about a 1 1/2 inch border all the way around. Add a layer of sliced red onion and then take asparagus (trim off woody ends) and either lay on whole or break in half and lay on. Add more onions on top. Fold the border of the crust over the top. Sprinkle the whole thing with pepper and place into the hot oven.
Bake for 22-25 minutes or until the crust becomes a nice golden brown. Remove and let cool a few minutes
And then cut up and eat. Right away or at room temperature. Or some now and some later. All up you you.
Store left over in fridge in air tight container for up to a few days. the crust will not be crispy but more chewy. Can stick it back in oven for a few minutes to crisp it up.
I found another bag of frozen rhubarb in the chest freezer which is never a bad thing, but my rhubarb patch outside is growing strong and I will have all the fresh rhubarb I could possible eat within the next few weeks. So found rhubarb just means I need to eat it right fast before the fresh stuff comes in. (I haven%u2019t had a problem with that. it%u2019s almost gone already). Plus the other day while I was digging up and transplanting raspberry bushes to the back yard, my neighbor came over and gave me a gallon of frozen raspberries, harvested from said bushes that I was currently planting in my yard. Score for me! Free bushes and berries%u2026I have such nice neighbors.
So the logical thing to do with my new found and giving bounty was of course to hurry up and bake something. Cobbler. Why cobbler? Well, why not? I figured the mr would really like it and eat it and I also didn%u2019t want to make anything to fussy because I was just to dang busy spending all of my extra time outside doing outside things. And cobbler, it%u2019s not fussy because it is basically biscuits and jam baked up all together. Not a lot to think about and comes out looking all homey and sweet and smelling all nice and cozy. Doesn%u2019t that sound nice? And not a pain in the ass?
And best part. A made cobbler works as dessert or breakfasts or just a snack. Just asked the mr. He ate it for all the reasons. With a dollop of yogurt or cream of course because he is fancy like that.
And yeah the fruit I used was frozen, but fresh works just the same here too.
Now, lets get to that cobbler.

The stuff. Raspberries (frozen), rhubarb (frozen), sugar, flour, salt, baking power, cinnamon ,almond milk, apple cider vinegar, cornstarch, and oil.

Raspberries, rhubarb, sugar, cinnamon, cornstarch. Its all there in the bowl. Just needs to be mixed. So mix it.
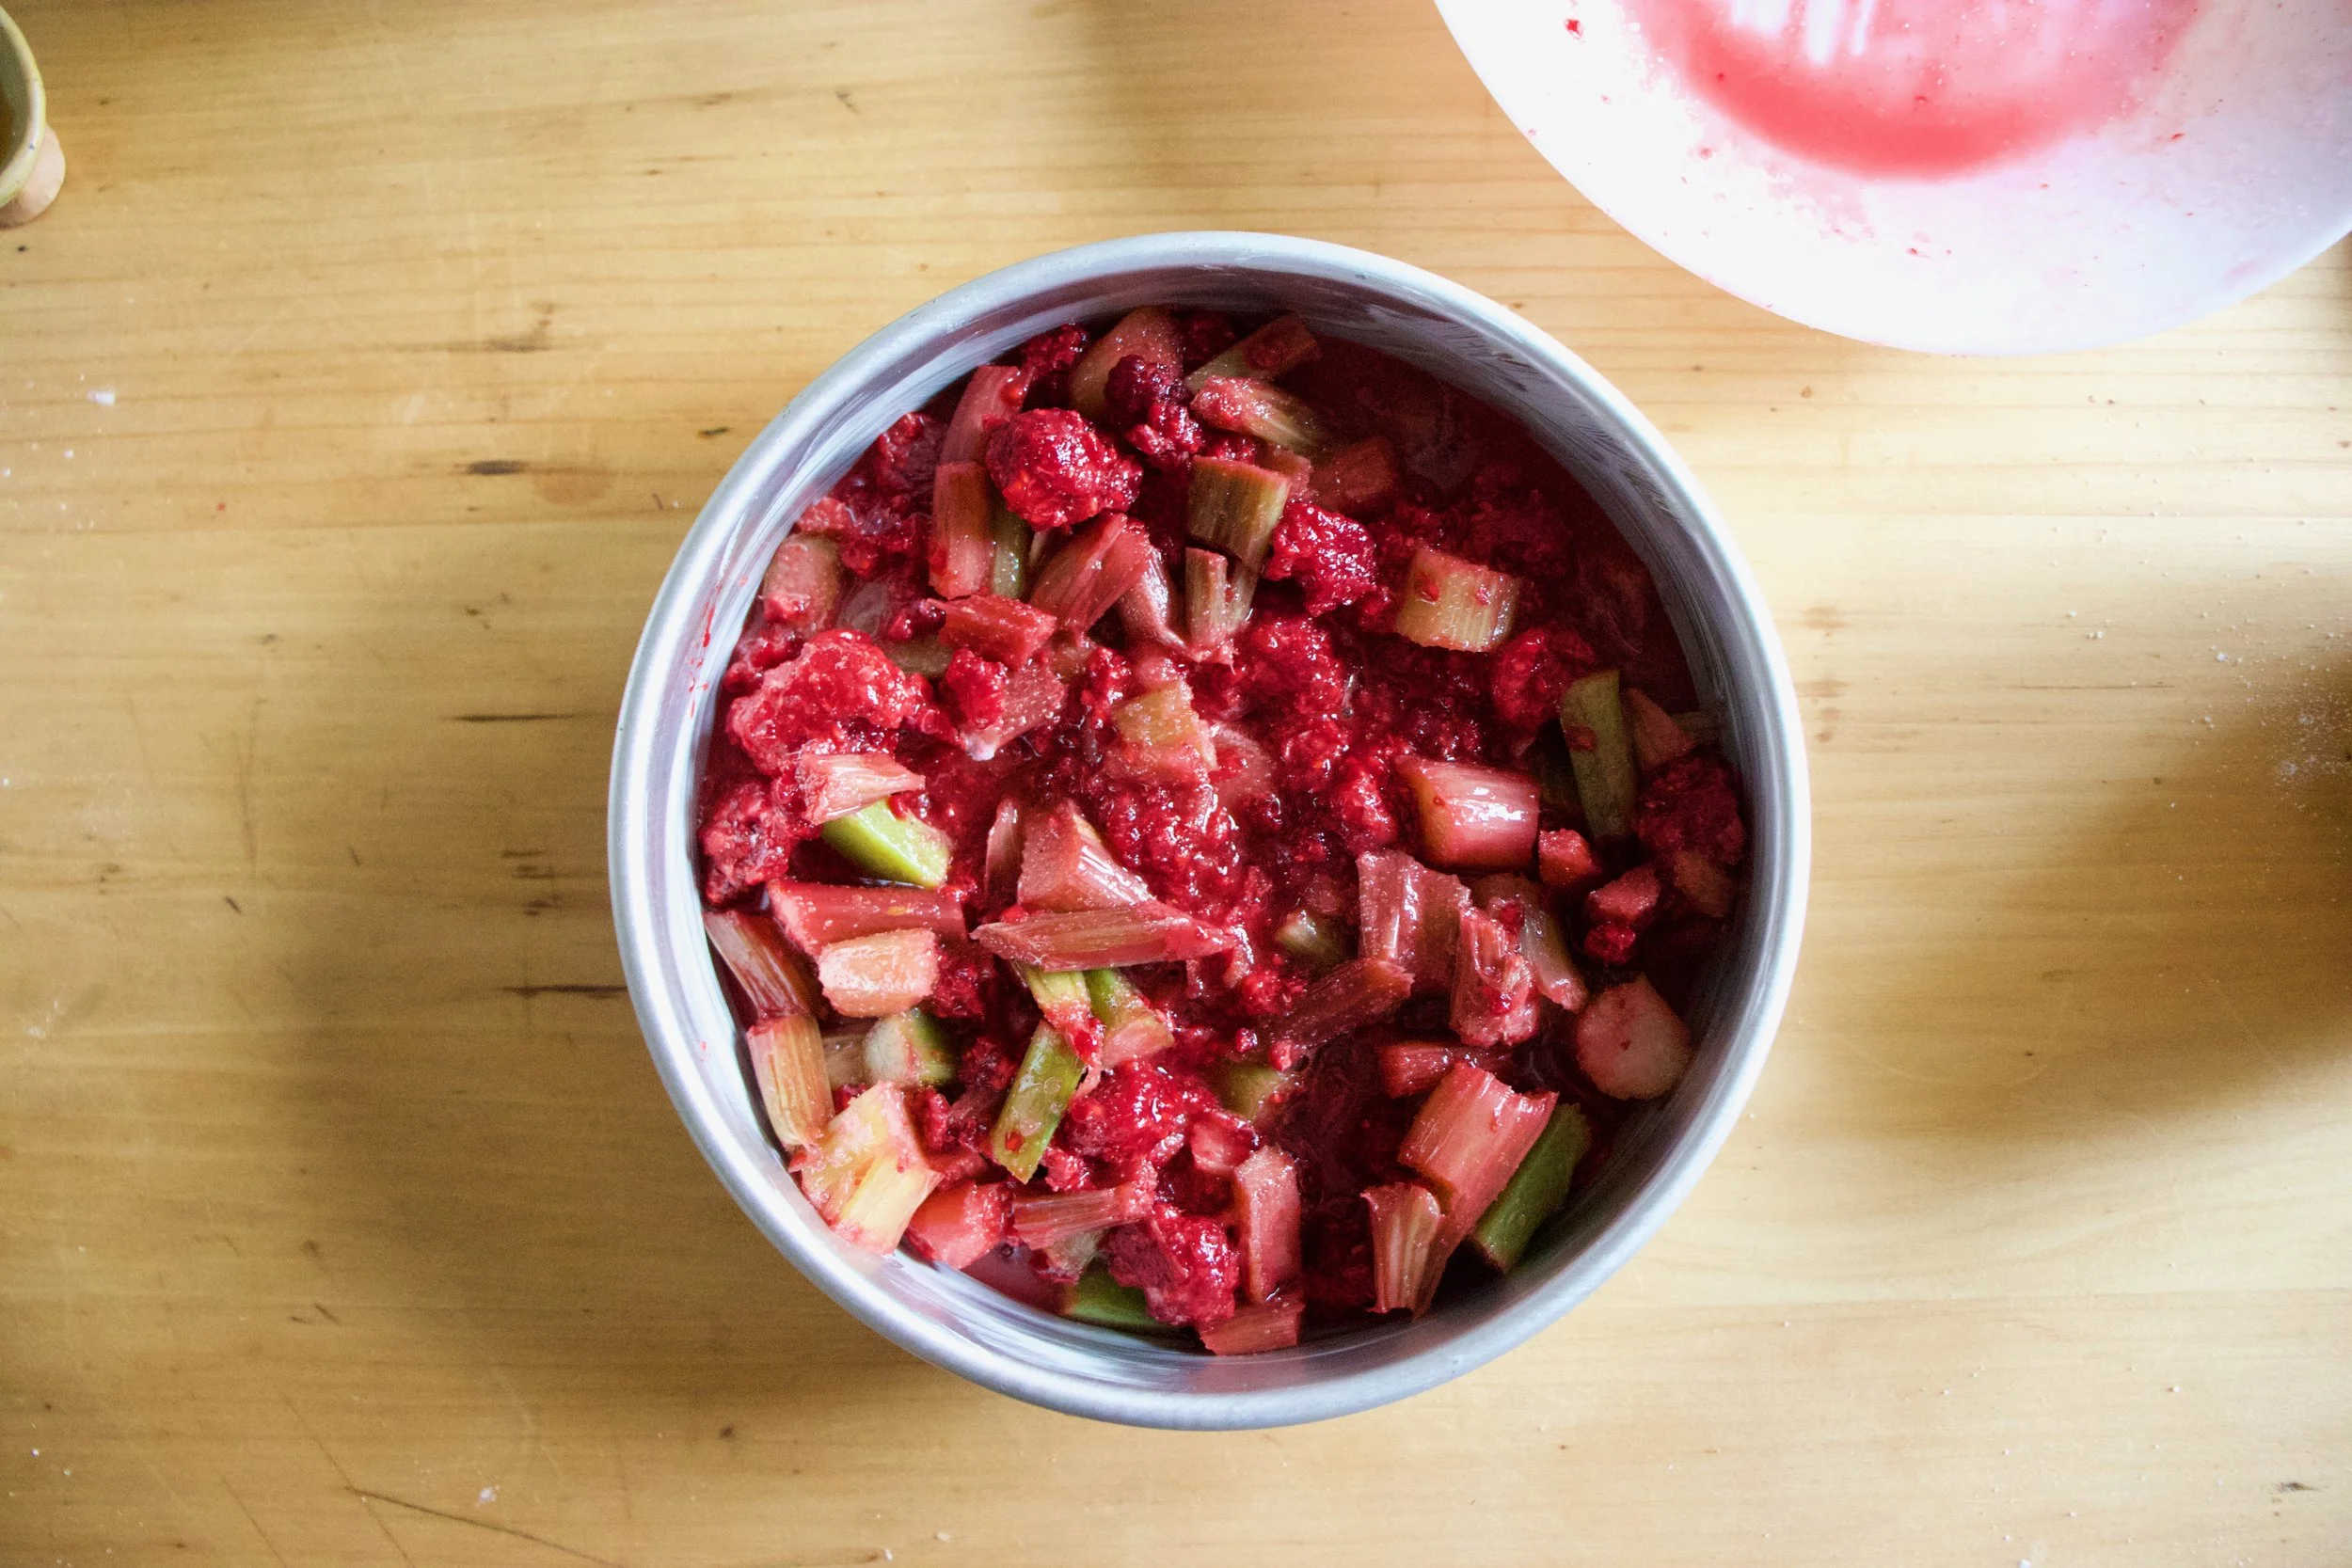
Dump fruit mixture into well greased 8 inch pan and pop it into a hot oven to get a head start on baking.
While the fruits in the oven, make the biscuit dough. Mix the dry together then mix in the wet until just incorporated and a sticky dough forms.
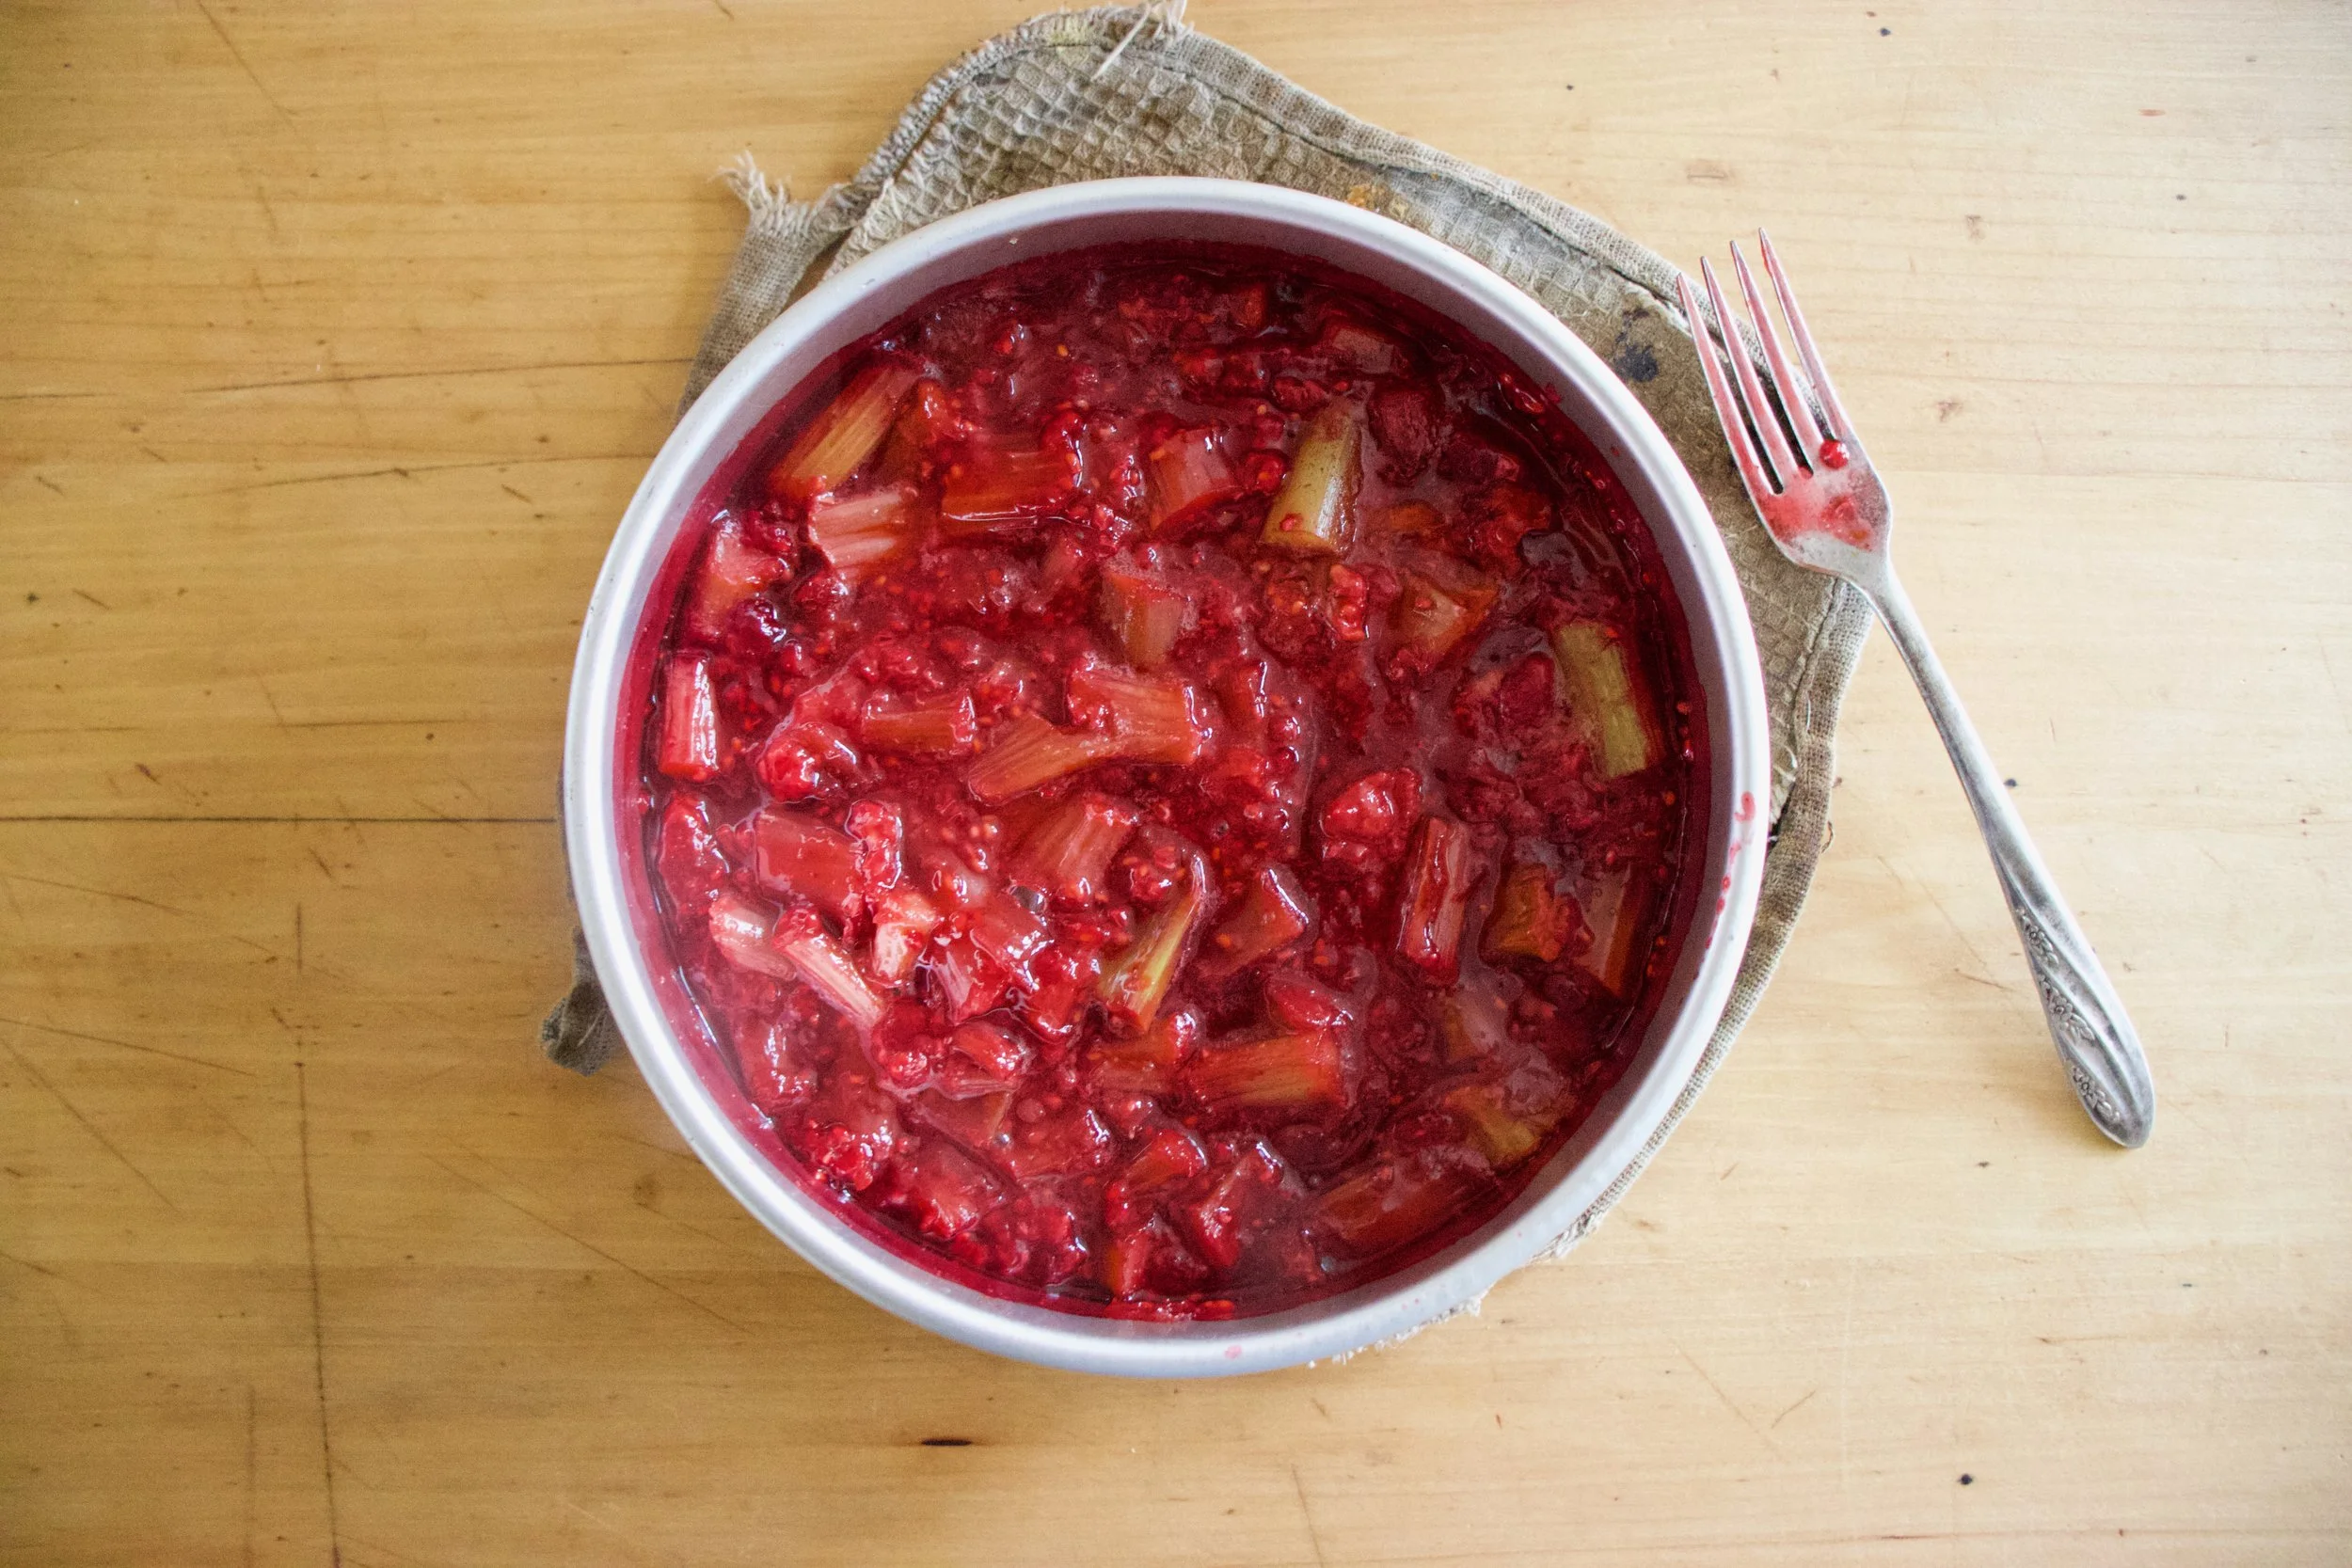
Pulled from the oven, the fruit is starting to cook down and whoa, it just smells so good!

Drop on the biscuits dough on top of the fruit (careful of the hot pan). Evenly if possible, but don%u2019t work to hard to make it look perfect. Imperfection makes it look perfect, you know?
Once biscuits are on, lightly brush the tops with a little milk and sprinkle with more sugar then pop it back into the oven for another 25-30 minutes or until the biscuits are baked.

Pulled from the oven with a bubbly filling and a golden brown biscuity top. Things are looking good here.
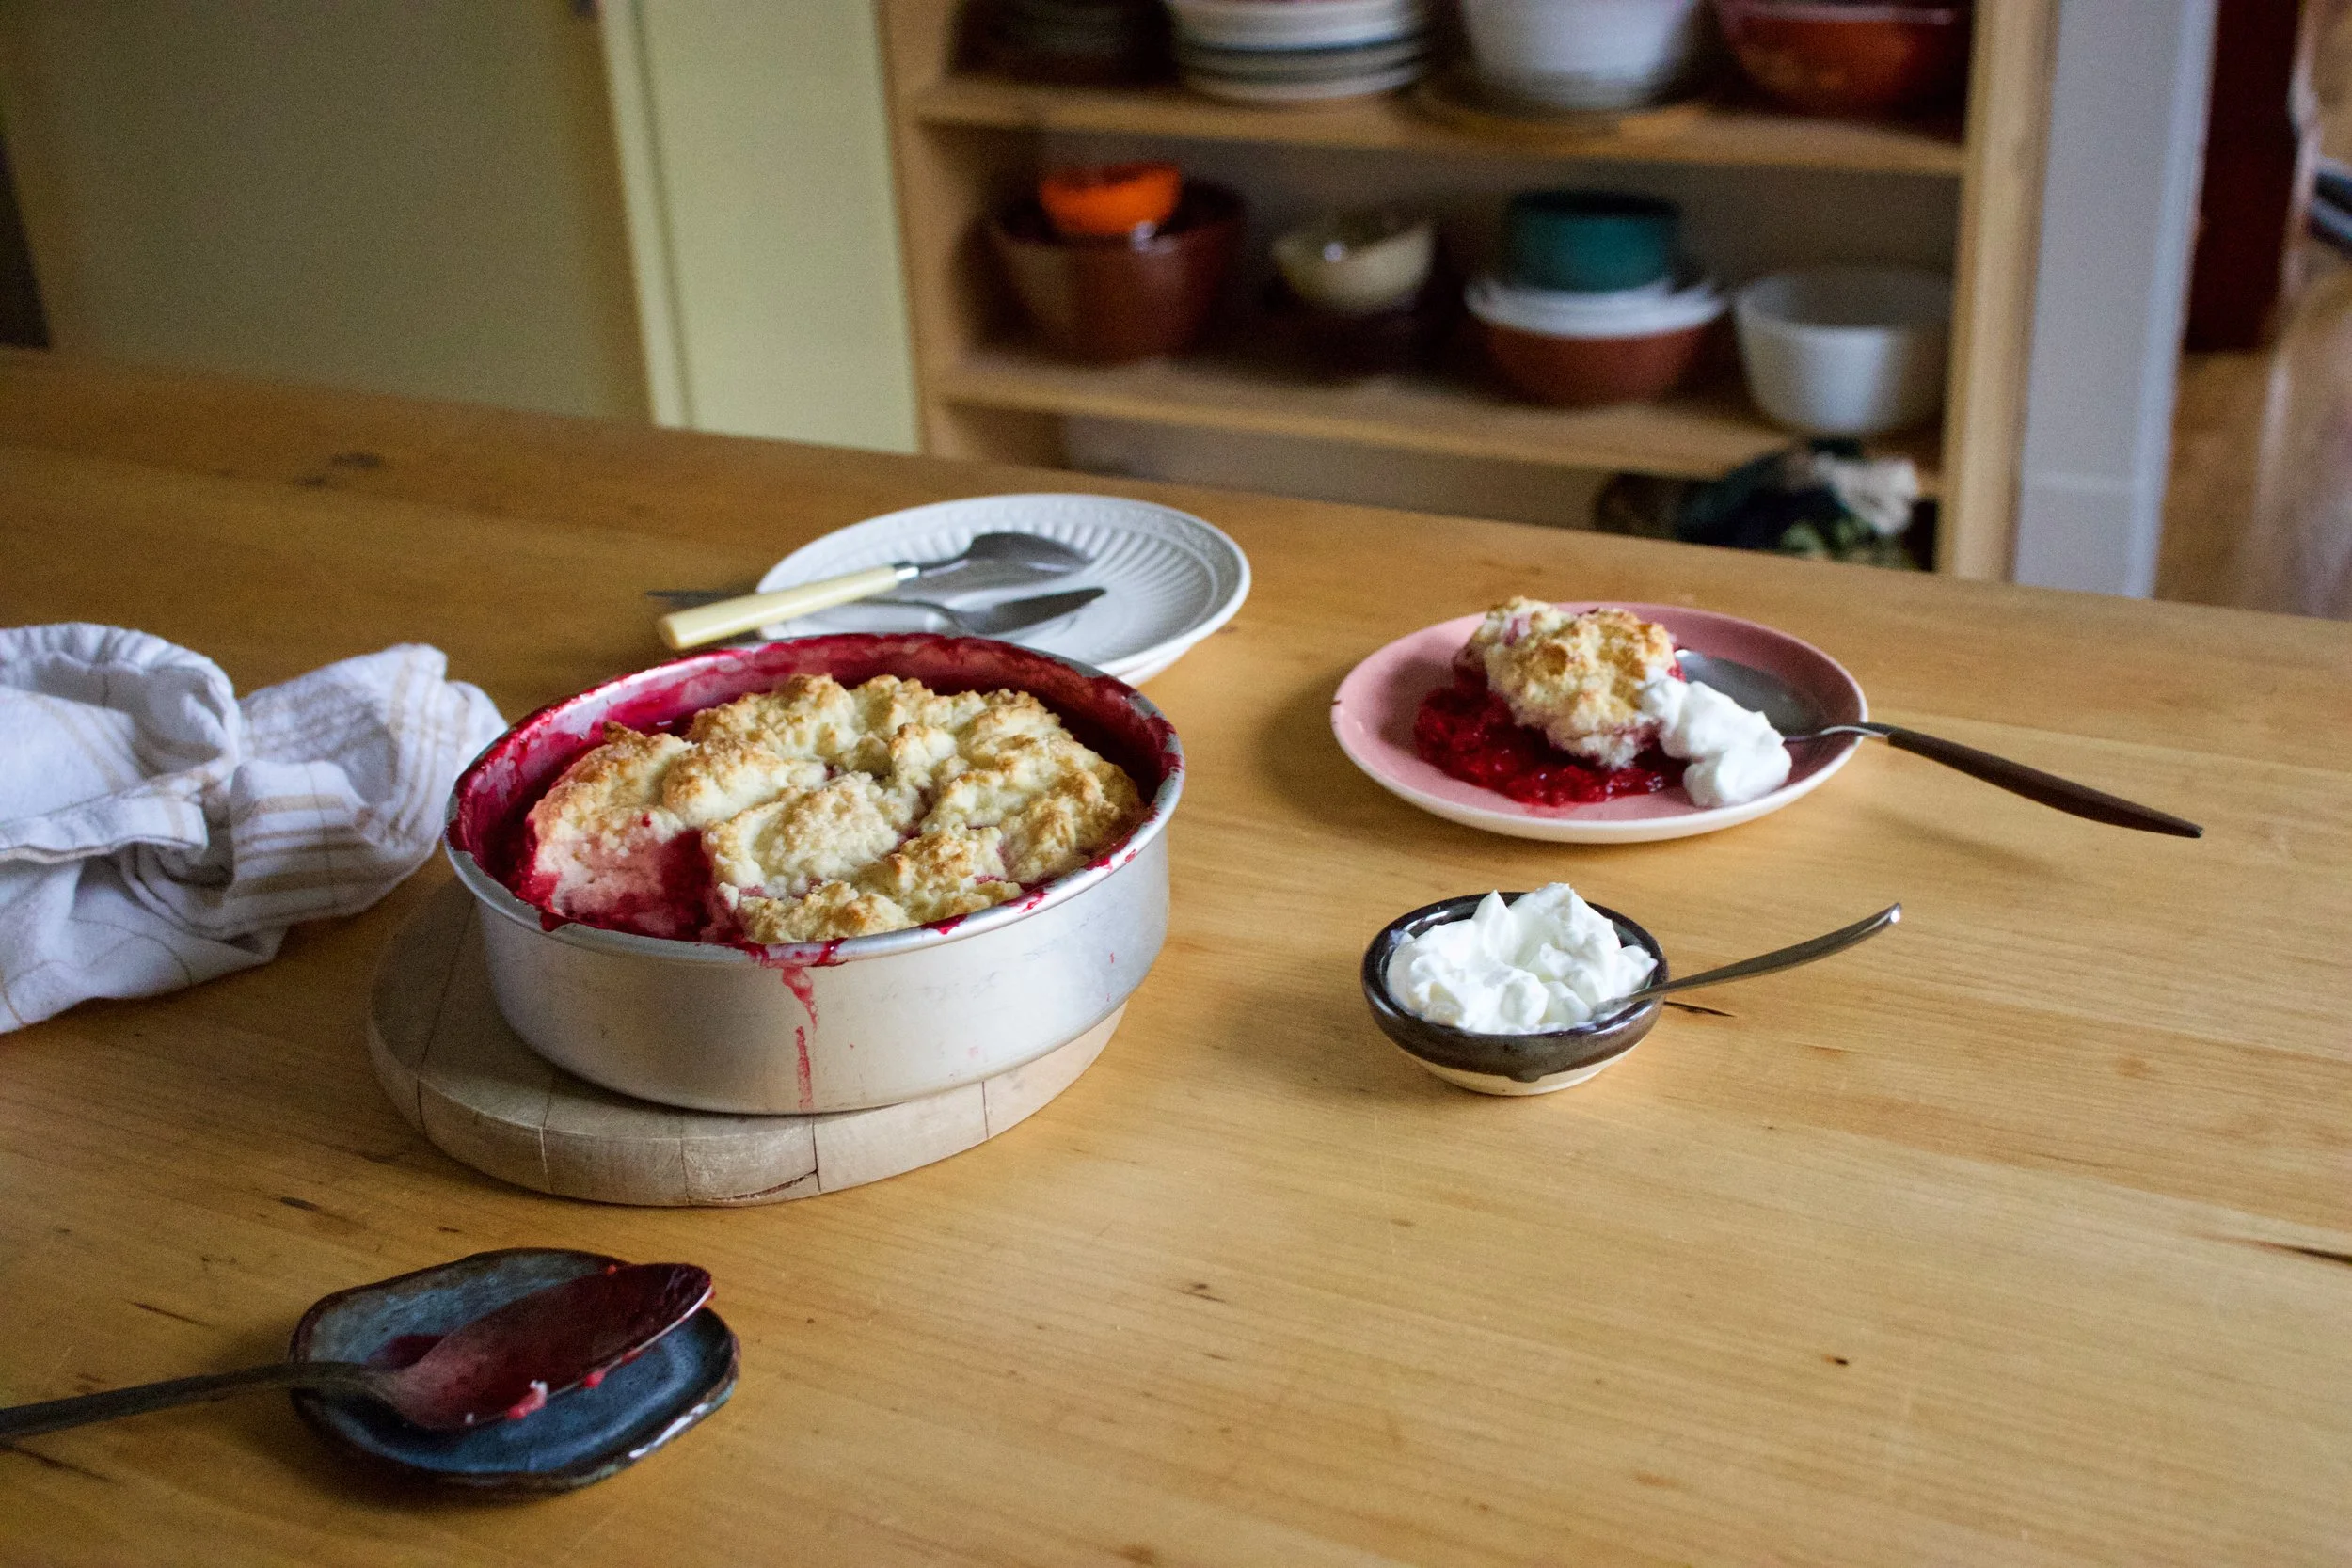
And now it%u2019s time.
Dig on in my friend. Sever with something creamy like whipped coconut cream or some type of yogurt or ice cream situation of your choice. And again, this can be your breakfast.
Happy spring people!
-C
make a a 8 inch round which serves 5-6
For the Filling
-
2 cups raspberries (fresh or frozen)
-
2 cups rhubarb chopped into 1/2 inch to inch long pieces (fresh or frozen)
-
1 1/2 tablespoons corn starch
-
3/4 -1 cup sugar (lesser amount if you like a little more tartness. I used lesser amount)
-
1 teaspoon cinnamon
For the dough
-
1 cups all purpose flour
-
1 1/2 teaspoon baking powder
-
1/2 teaspoon salt
-
3 tablespoons sugar
-
3 tablespoons neutral flavored oil
-
1/2 cup plant based milk
-
1 teaspoon apple cider vinegar
Preheat oven to 350.
In a large bowl mix together the rhubarb and raspberries with the corn starch, sugar, and cinnamon. Grease a 8 inch round pan the is at least 2 inches deep (can use a slightly large pan or a square) and dump in fruit mixture. Place into oven to bake for about 15 minutes or the fruit starts to break down.
While fruit is baking, mix up biscuit dough. Flour, salt, 2 tablespoons sugar, and baking powder go in a large bowl and mixed until combined. Add in the oil, the milk, and the vinegar. Mix until just incorporated and a dough has formed.
Remove the fruit cooking from the oven. Turn heat up to 375.
Carefully drop spoonfuls of biscuit batter on top of fruit. Brush the top of the biscuits with a little milk and sprinkle with remaining tablespoon sugar. Place the pan back into the oven and bake for another 25-30 minutes or until the biscuits are all nice and golden brown on top.
Remove from oven and let cool for a few minutes before serving. Serve warm with a scoop or dollop of soothing creamy (coconut cream, yogurt, ice cream%u2026..whatever floats your boat.)
Left overs can be stored in pan, just cover it with something and place in fridge. Can be eaten cold to or reheated in microwave or oven.
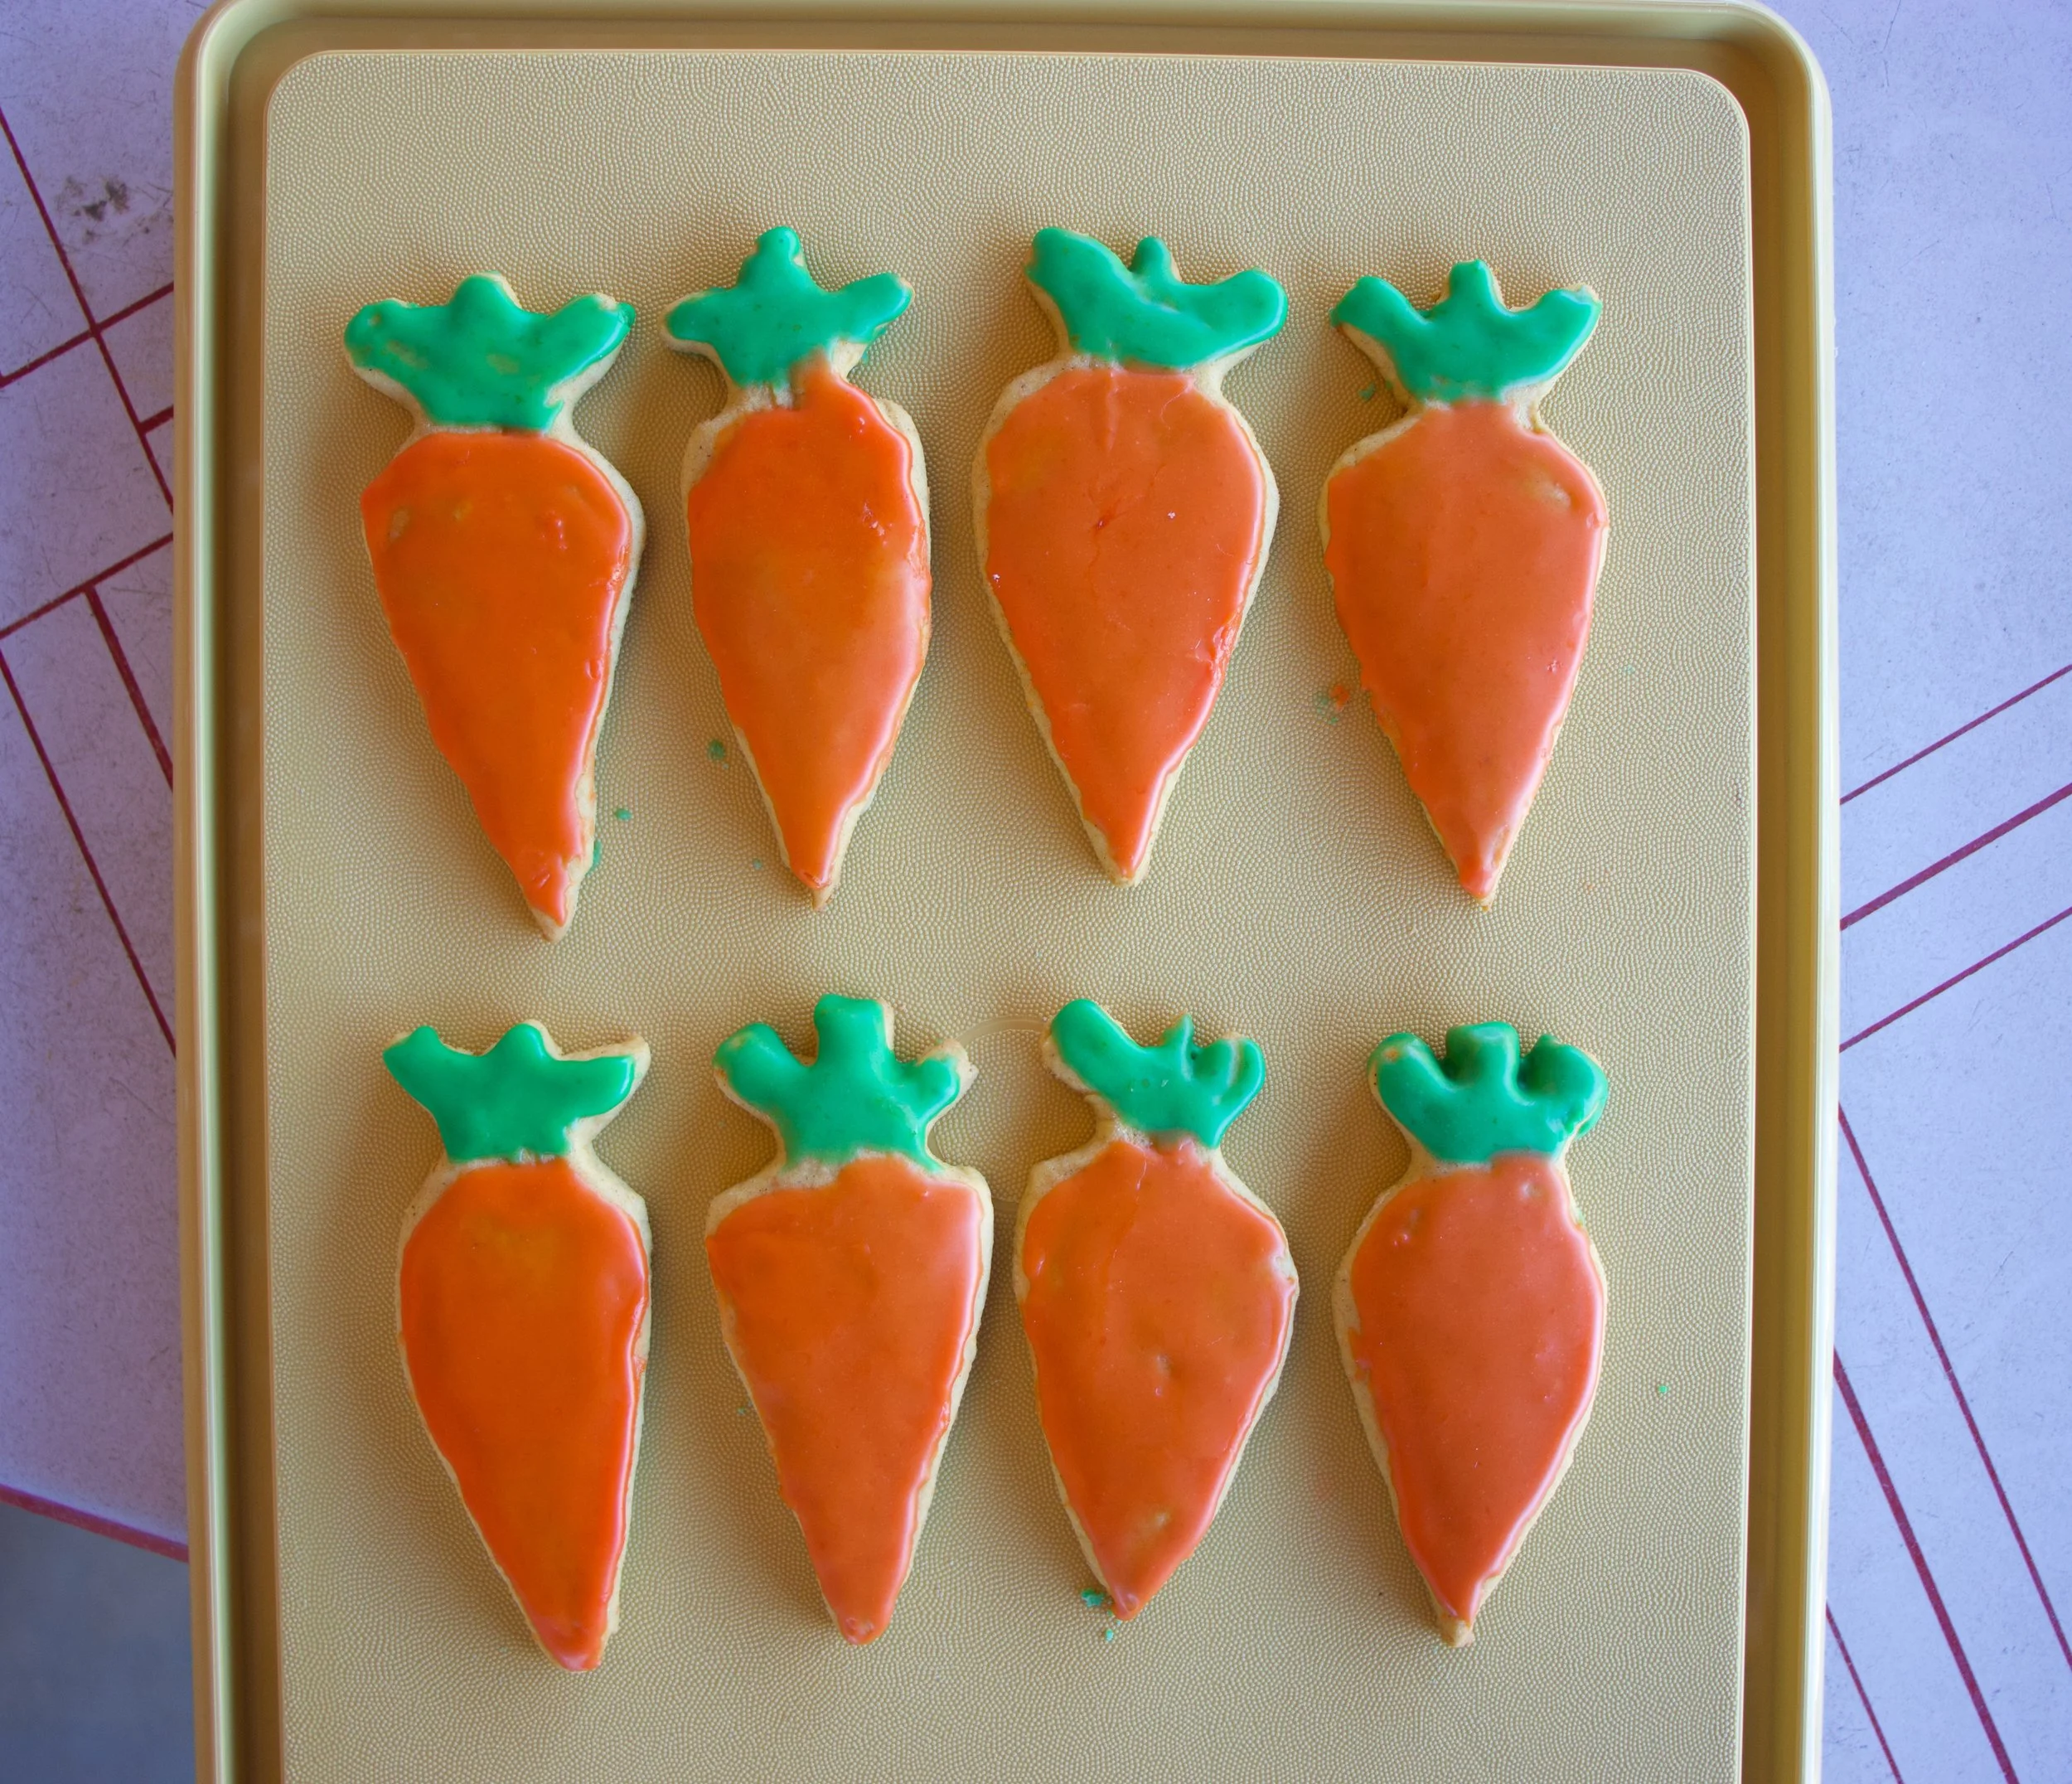
These are definitely my favorite shaped cutout cookies I have ever made. I mean seriously, carrot shaped carrot cookies, what could possibly ever be better? Nothing, and that%u2019s truth for you.
Not only are they carrot shaped, they are also carrot flavored. Yup, Carrot shaped, carrot flavored, awesomeness. A little cinnamon added to the cookie for little extra boost of flavor and an orange glaze because it works and orange is good and fresh and springing. All good stuff.
You might be thinking, huh, carrot puree in a cookie, well that doesn%u2019t sound right. But it is, it is right. And you know how I know that these cookies are awesome? Well I packed them up, (2 dozen of them) and took them over to the littles house for an after school treat. When I got there, the two older ones had friends over. I asked them if they wanted a carrot which earned me that look that said %u201care you serious%u201d but them showed them the cookies. Of course the wanted a carrot so I gave them each one. They ate their cookies then proceeded to beat the shit out of the mr. Then they asked for another cookies and beat the shit out of the mr some more. This when on and on for about a 1/2 hour until all the cookies were gone and the mr was crouched in the corner with a broom trying to defend himself against 4 rulely kids who where slashing at him with light sabers and spraying him in he face with kitchen cleaner. It%u2019s because they wanted more cookies. (and yes, the littles are getting crazy). So yeah, the cookies are good. Ass kicking good.
Anyway, a cookie with some goodness mix into it, shaped into a great shape, that will make everyone smile and happy. You could make them by yourself, make them with your friends, make them with some kids, with some old people. They are the perfect cookie to leave out for the easter bunny(do you leave carrots out for the easter bunny?) or to serve up at any easter party, spring party, or any garden party you might be attending. This cookie is pretty much perfect for any and every occasion that required a cookie. Or a carrot because carrots are always welcome.
To the carrots! I mean, the cookies!
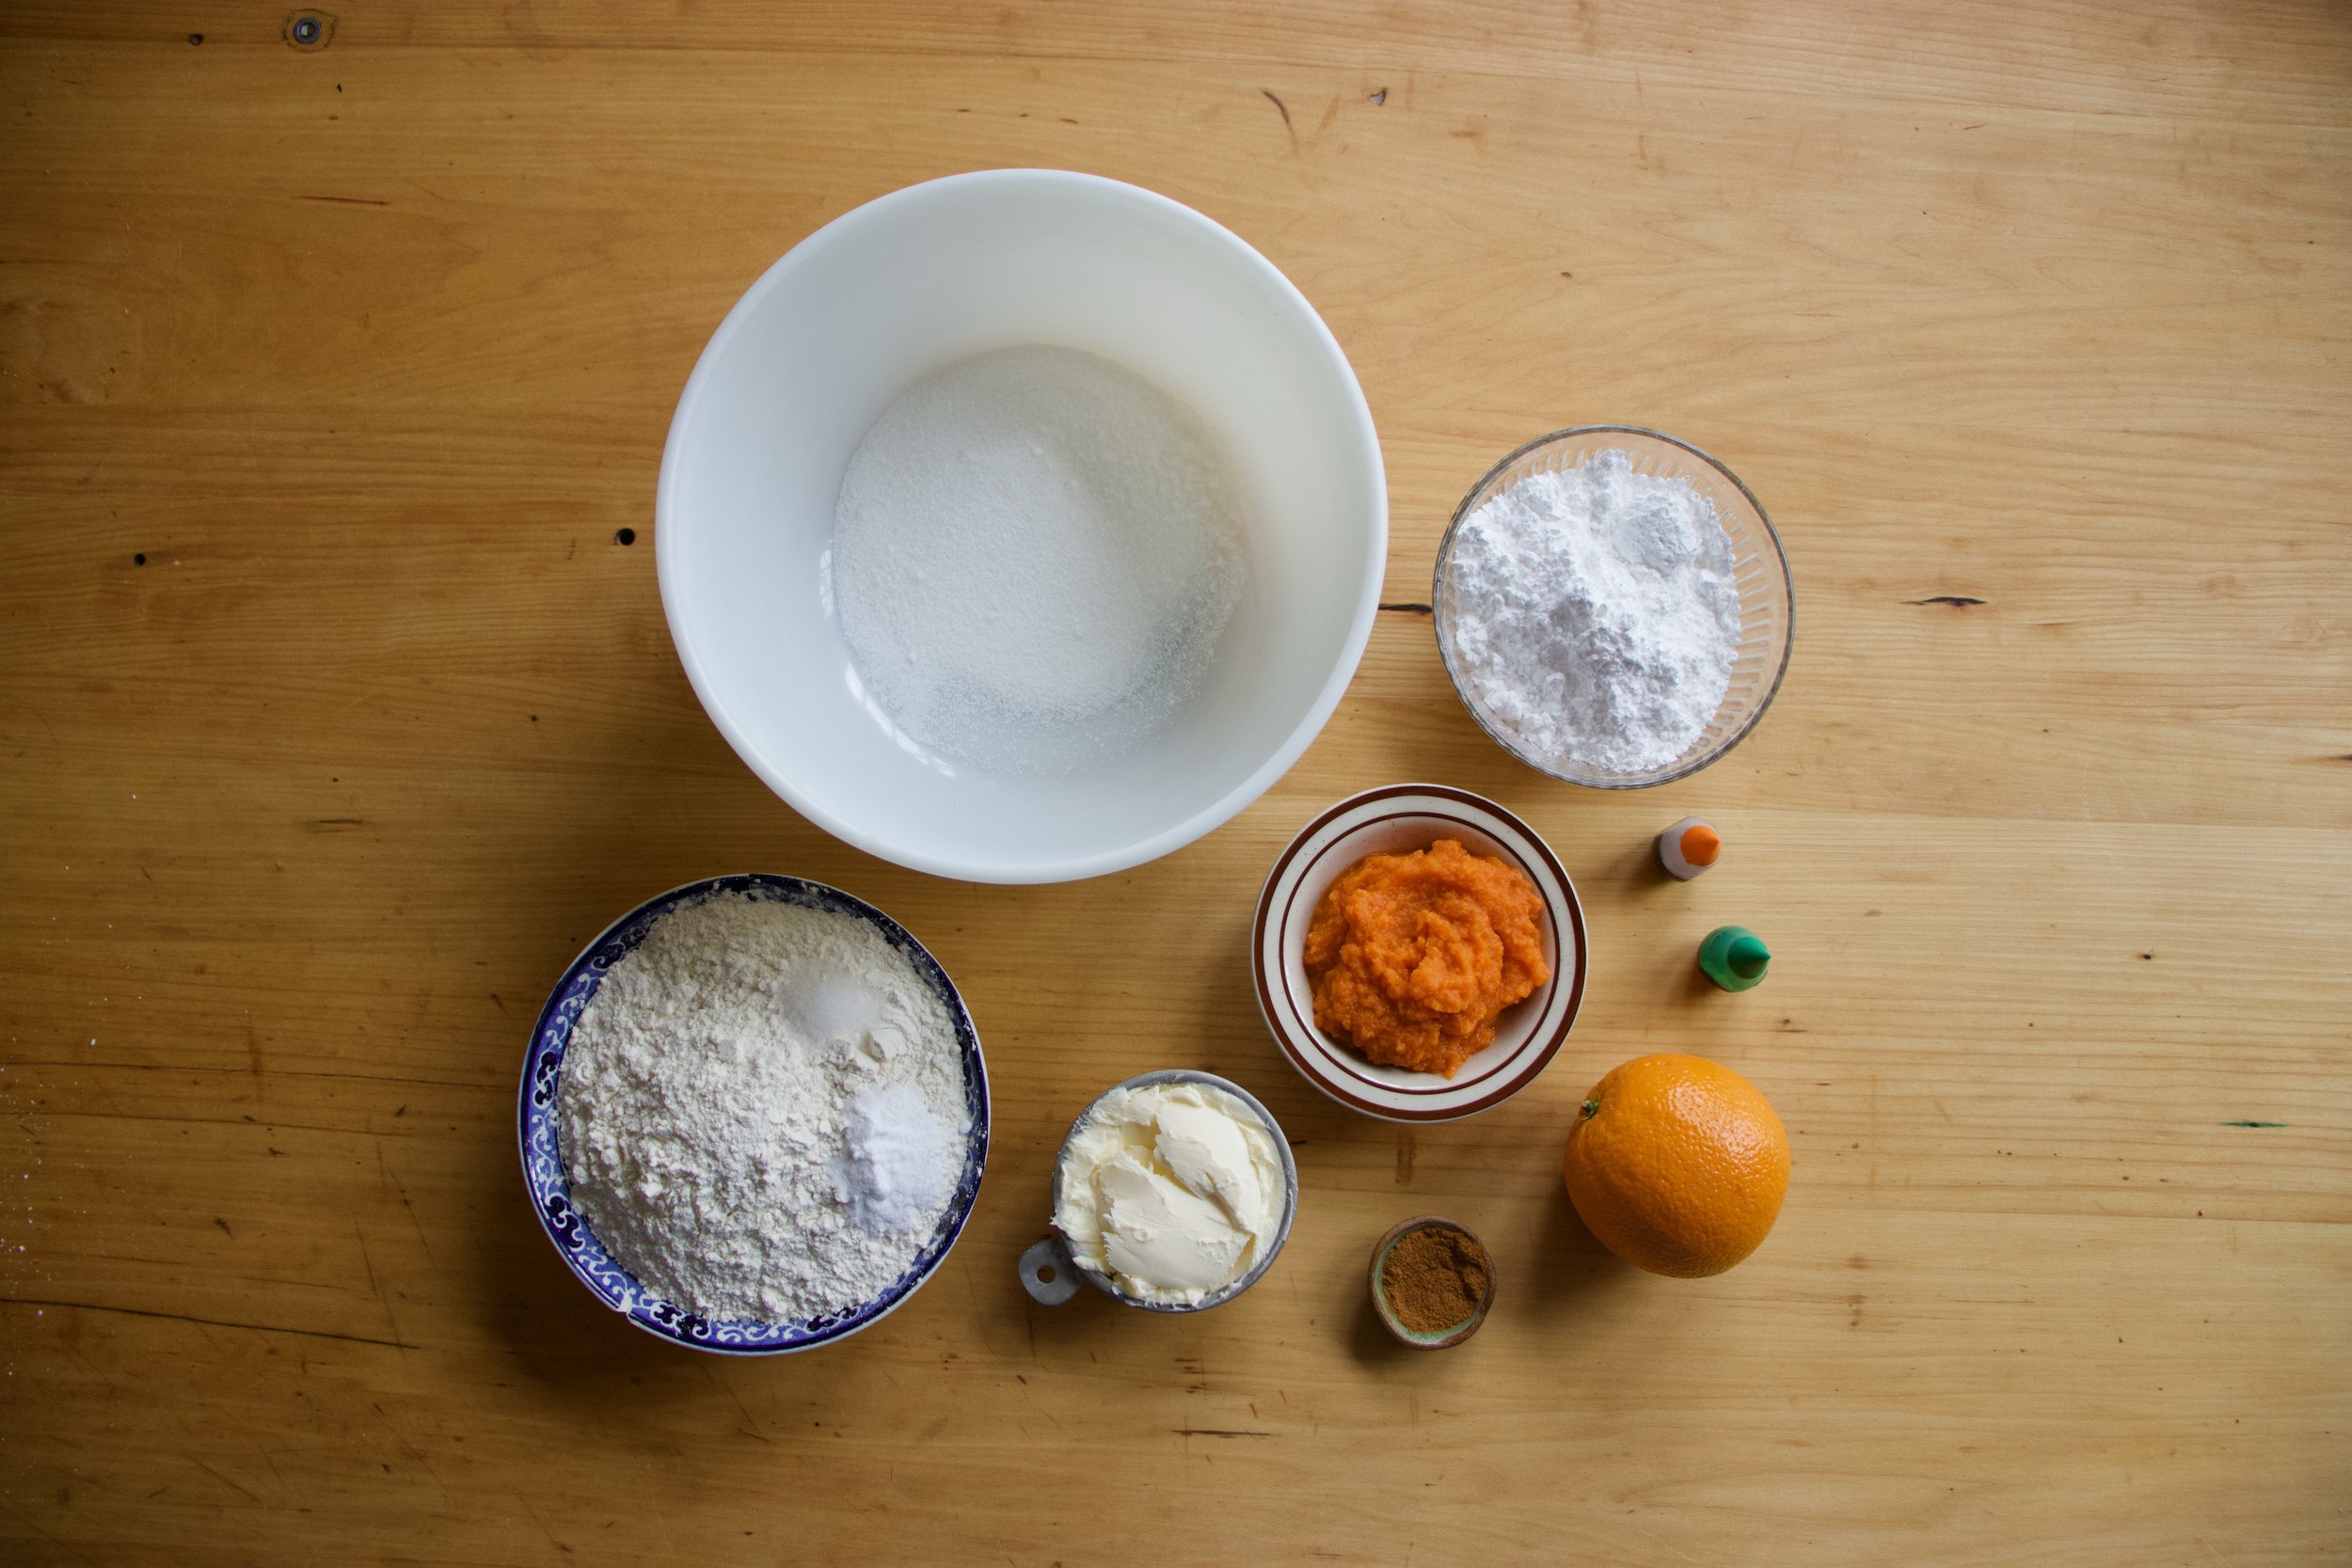
The stuff. Flour, baking soda, salt, sugar, vegan butter, carrot puree, cinnamon, an orange, some powdered sugar, and food coloring.

Into a big bowl the sugar, vegan butter, and carrot puree go.
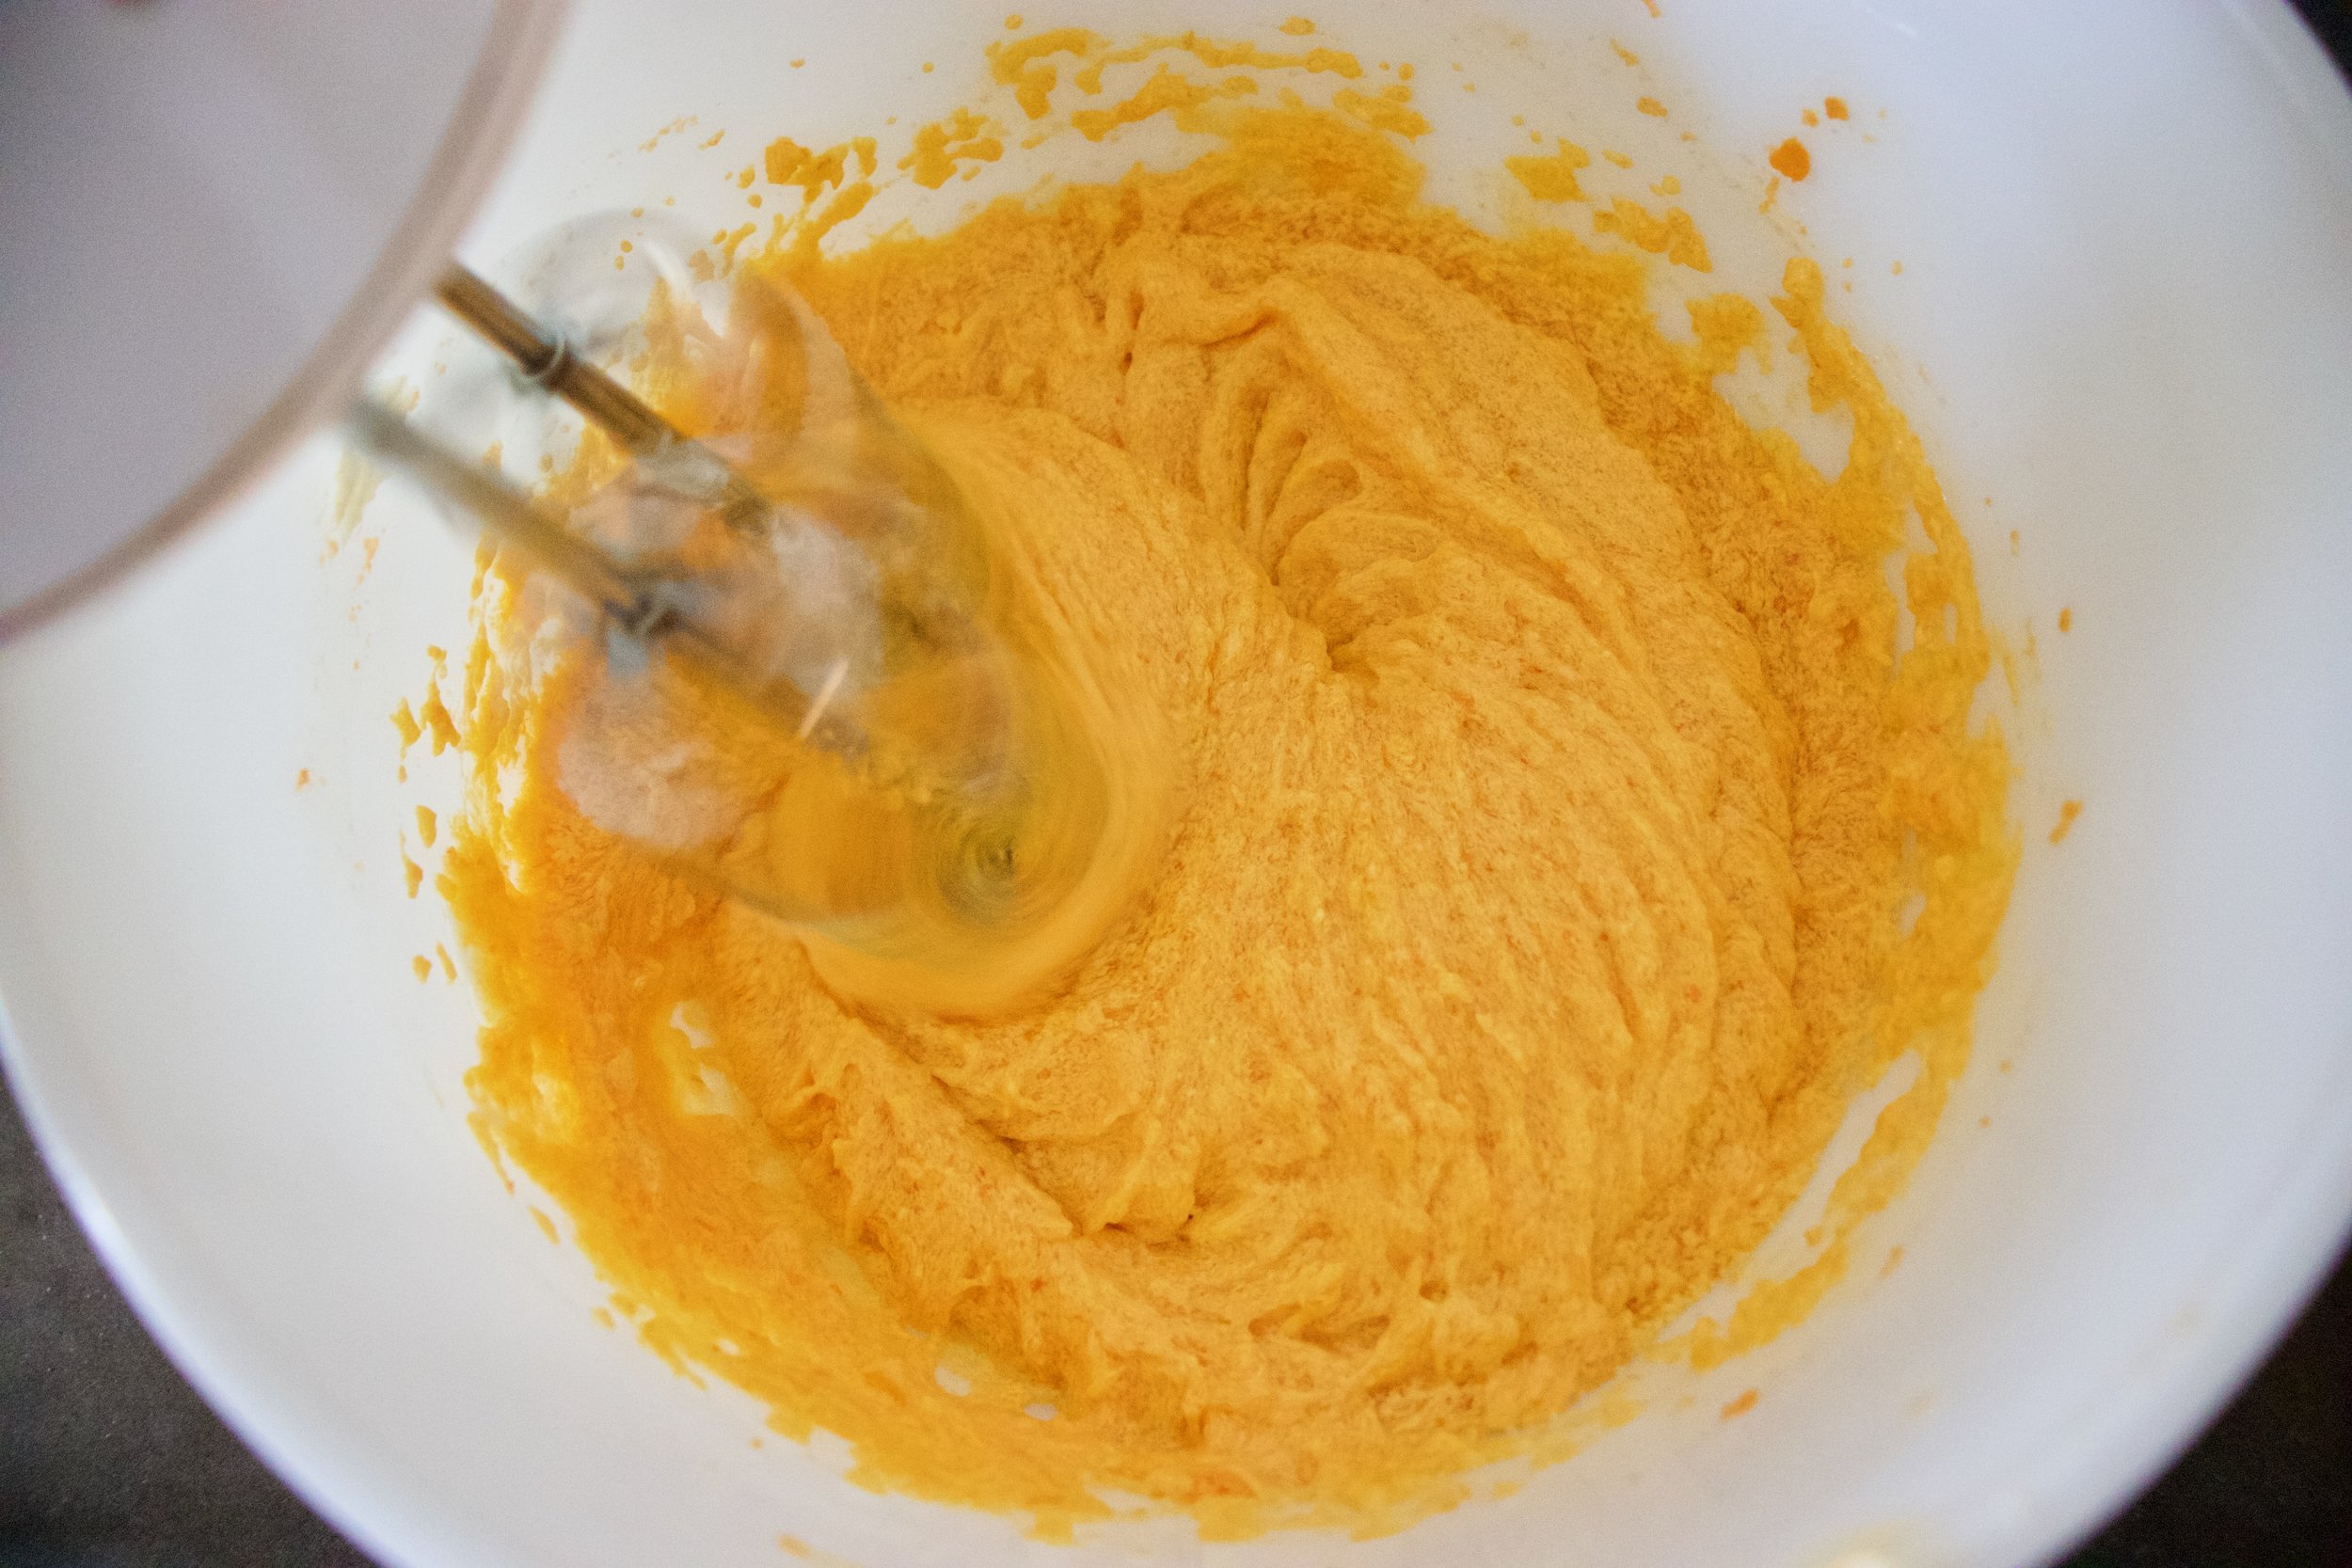
Beat for a minute or two until completely incorporated.

Add in all the rest of the dry stuff and mix by hand until it turns to dough.

This is the dough it turned into.
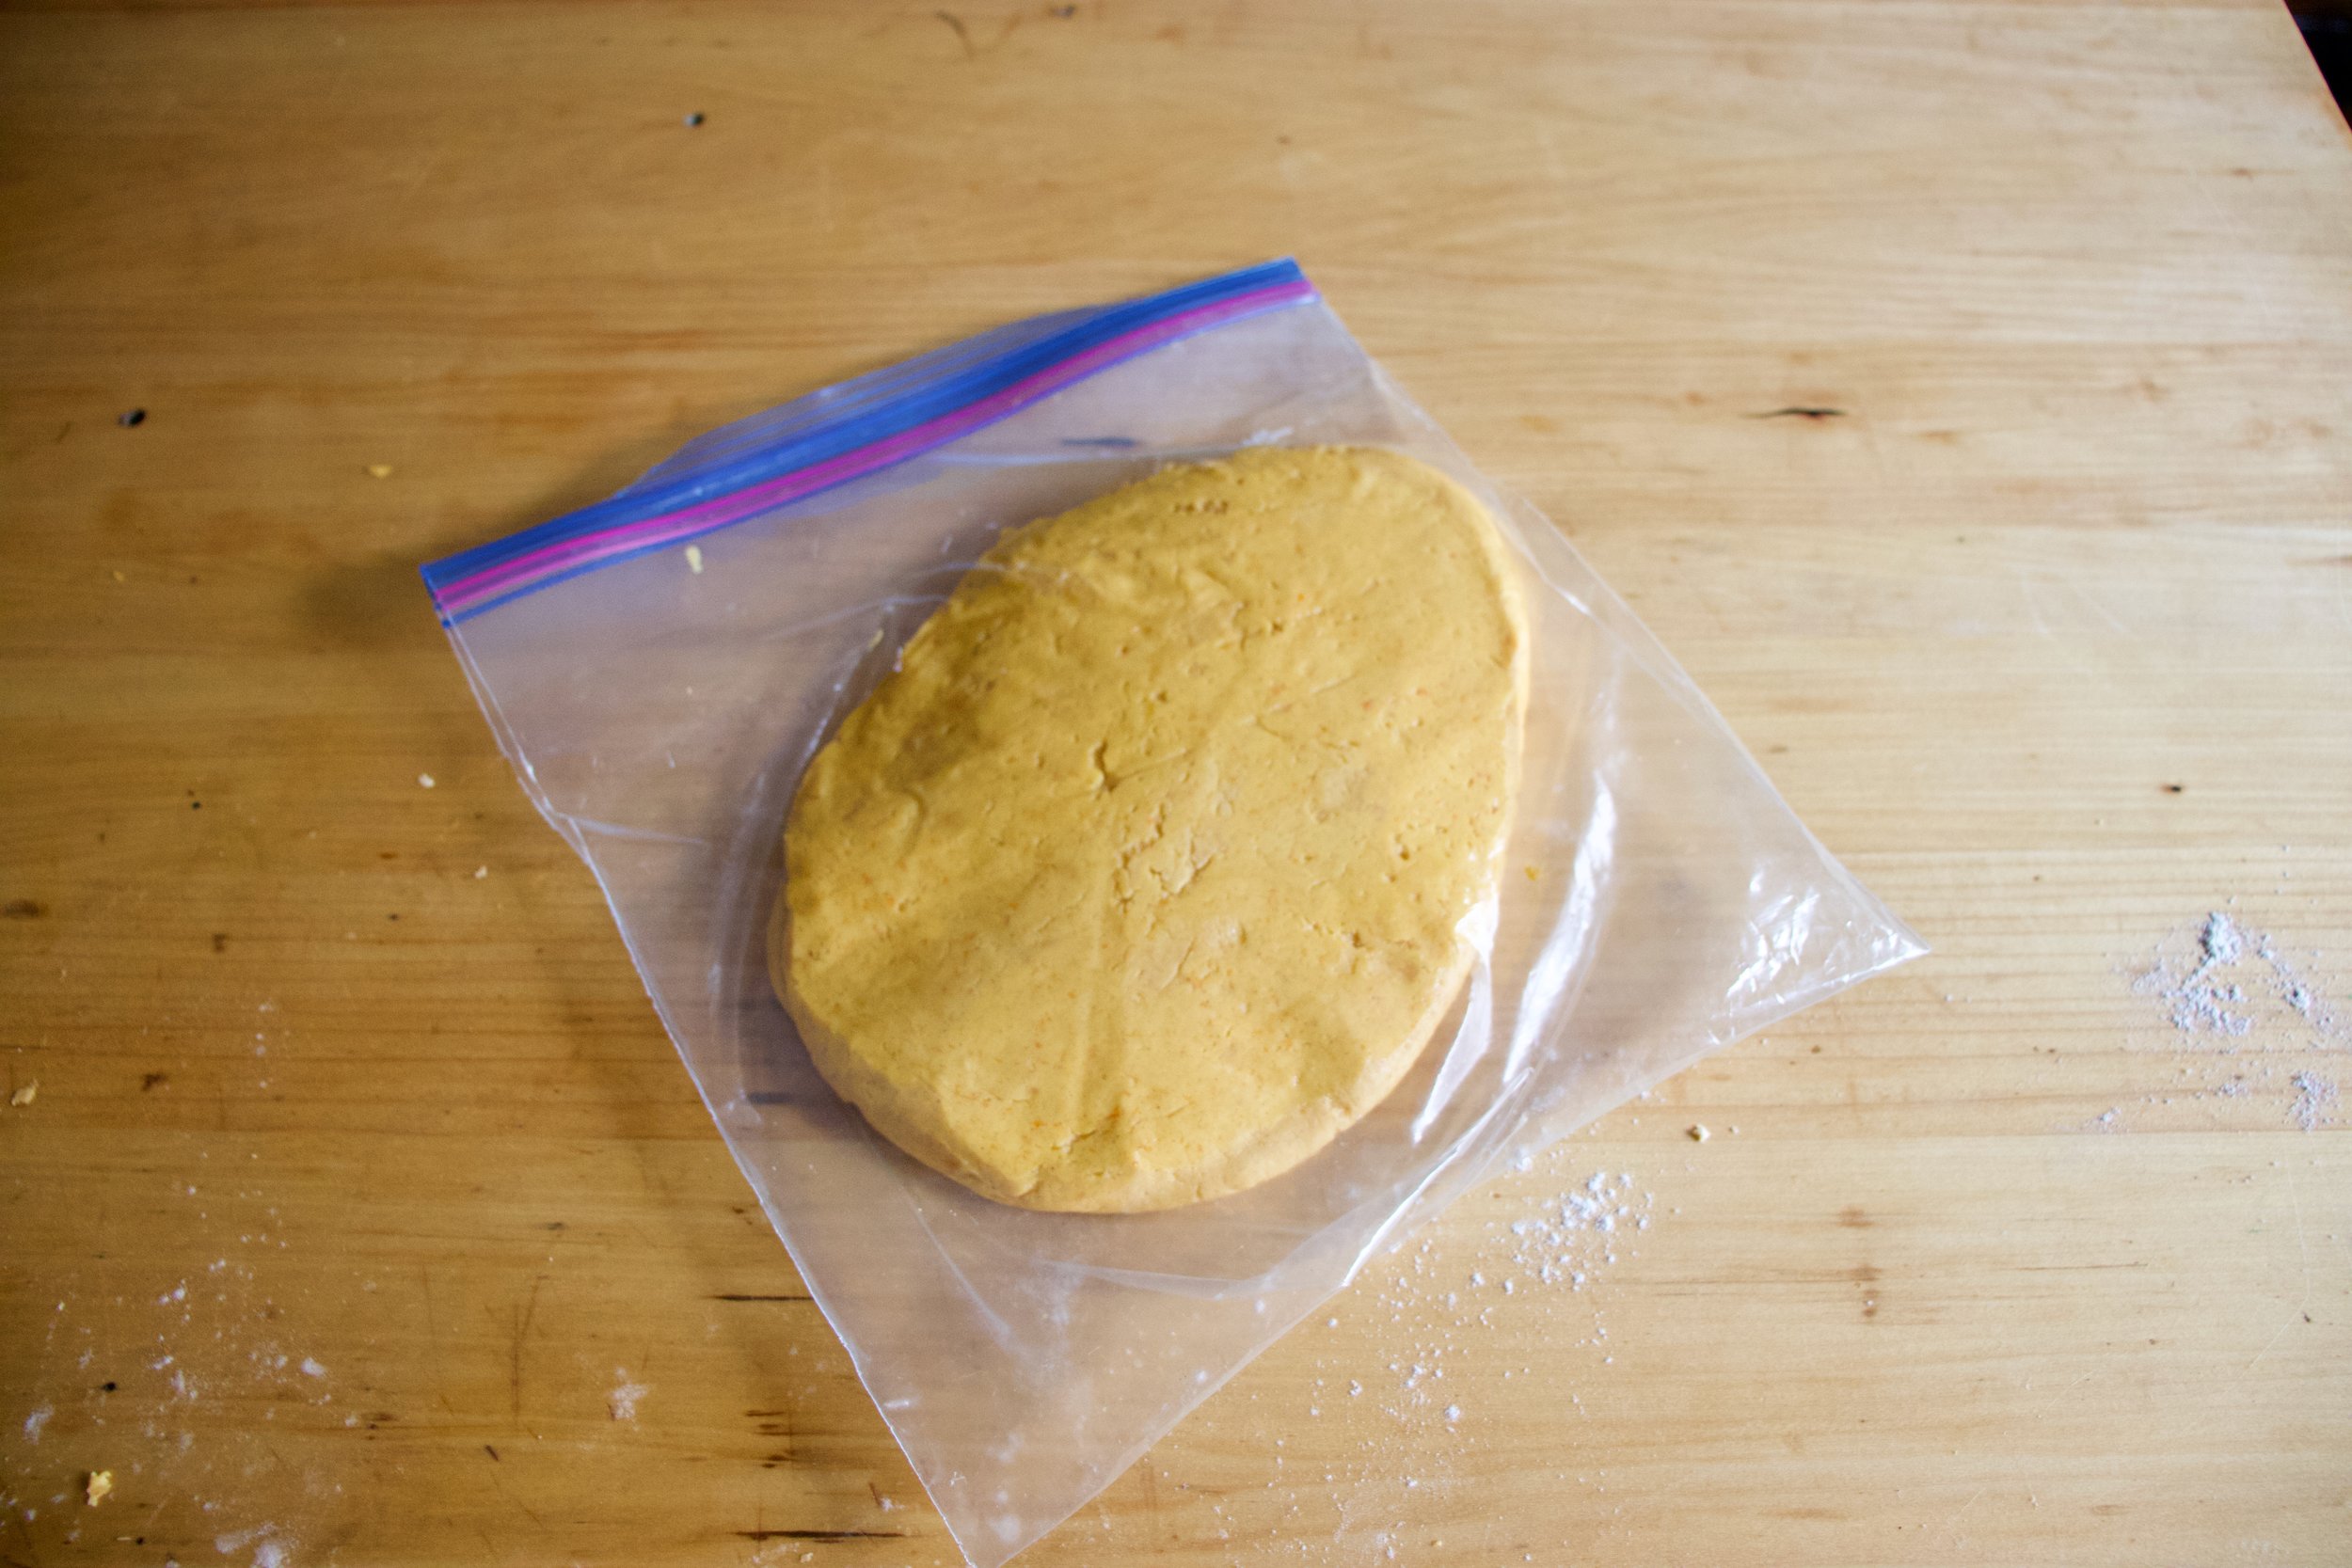
Gather the dough and wrap it or place in a plastic bag and stick it Into the fridge for a few hours or overnight. The dough NEEDS to chill.

After you let the dough be, remove from fridge, liberally dust counter, and roll out dough about 1/4 inch thick.
And then it%u2019s time to cut the cookies out. I unfortunately do not have a cookie cutter so I improvised and make 2 carrot cutouts from paper and hand cut each cookie. That worked but took forever so I got crafty and used a fat Christmas tree cookie cutter then just did a little trim and pinch to make it into a cookie. (I am a genius for that). Any way works, and you can also do other shapes too, the cookies don%u2019t change taste in different shapes. (but that would be so cool if they did)
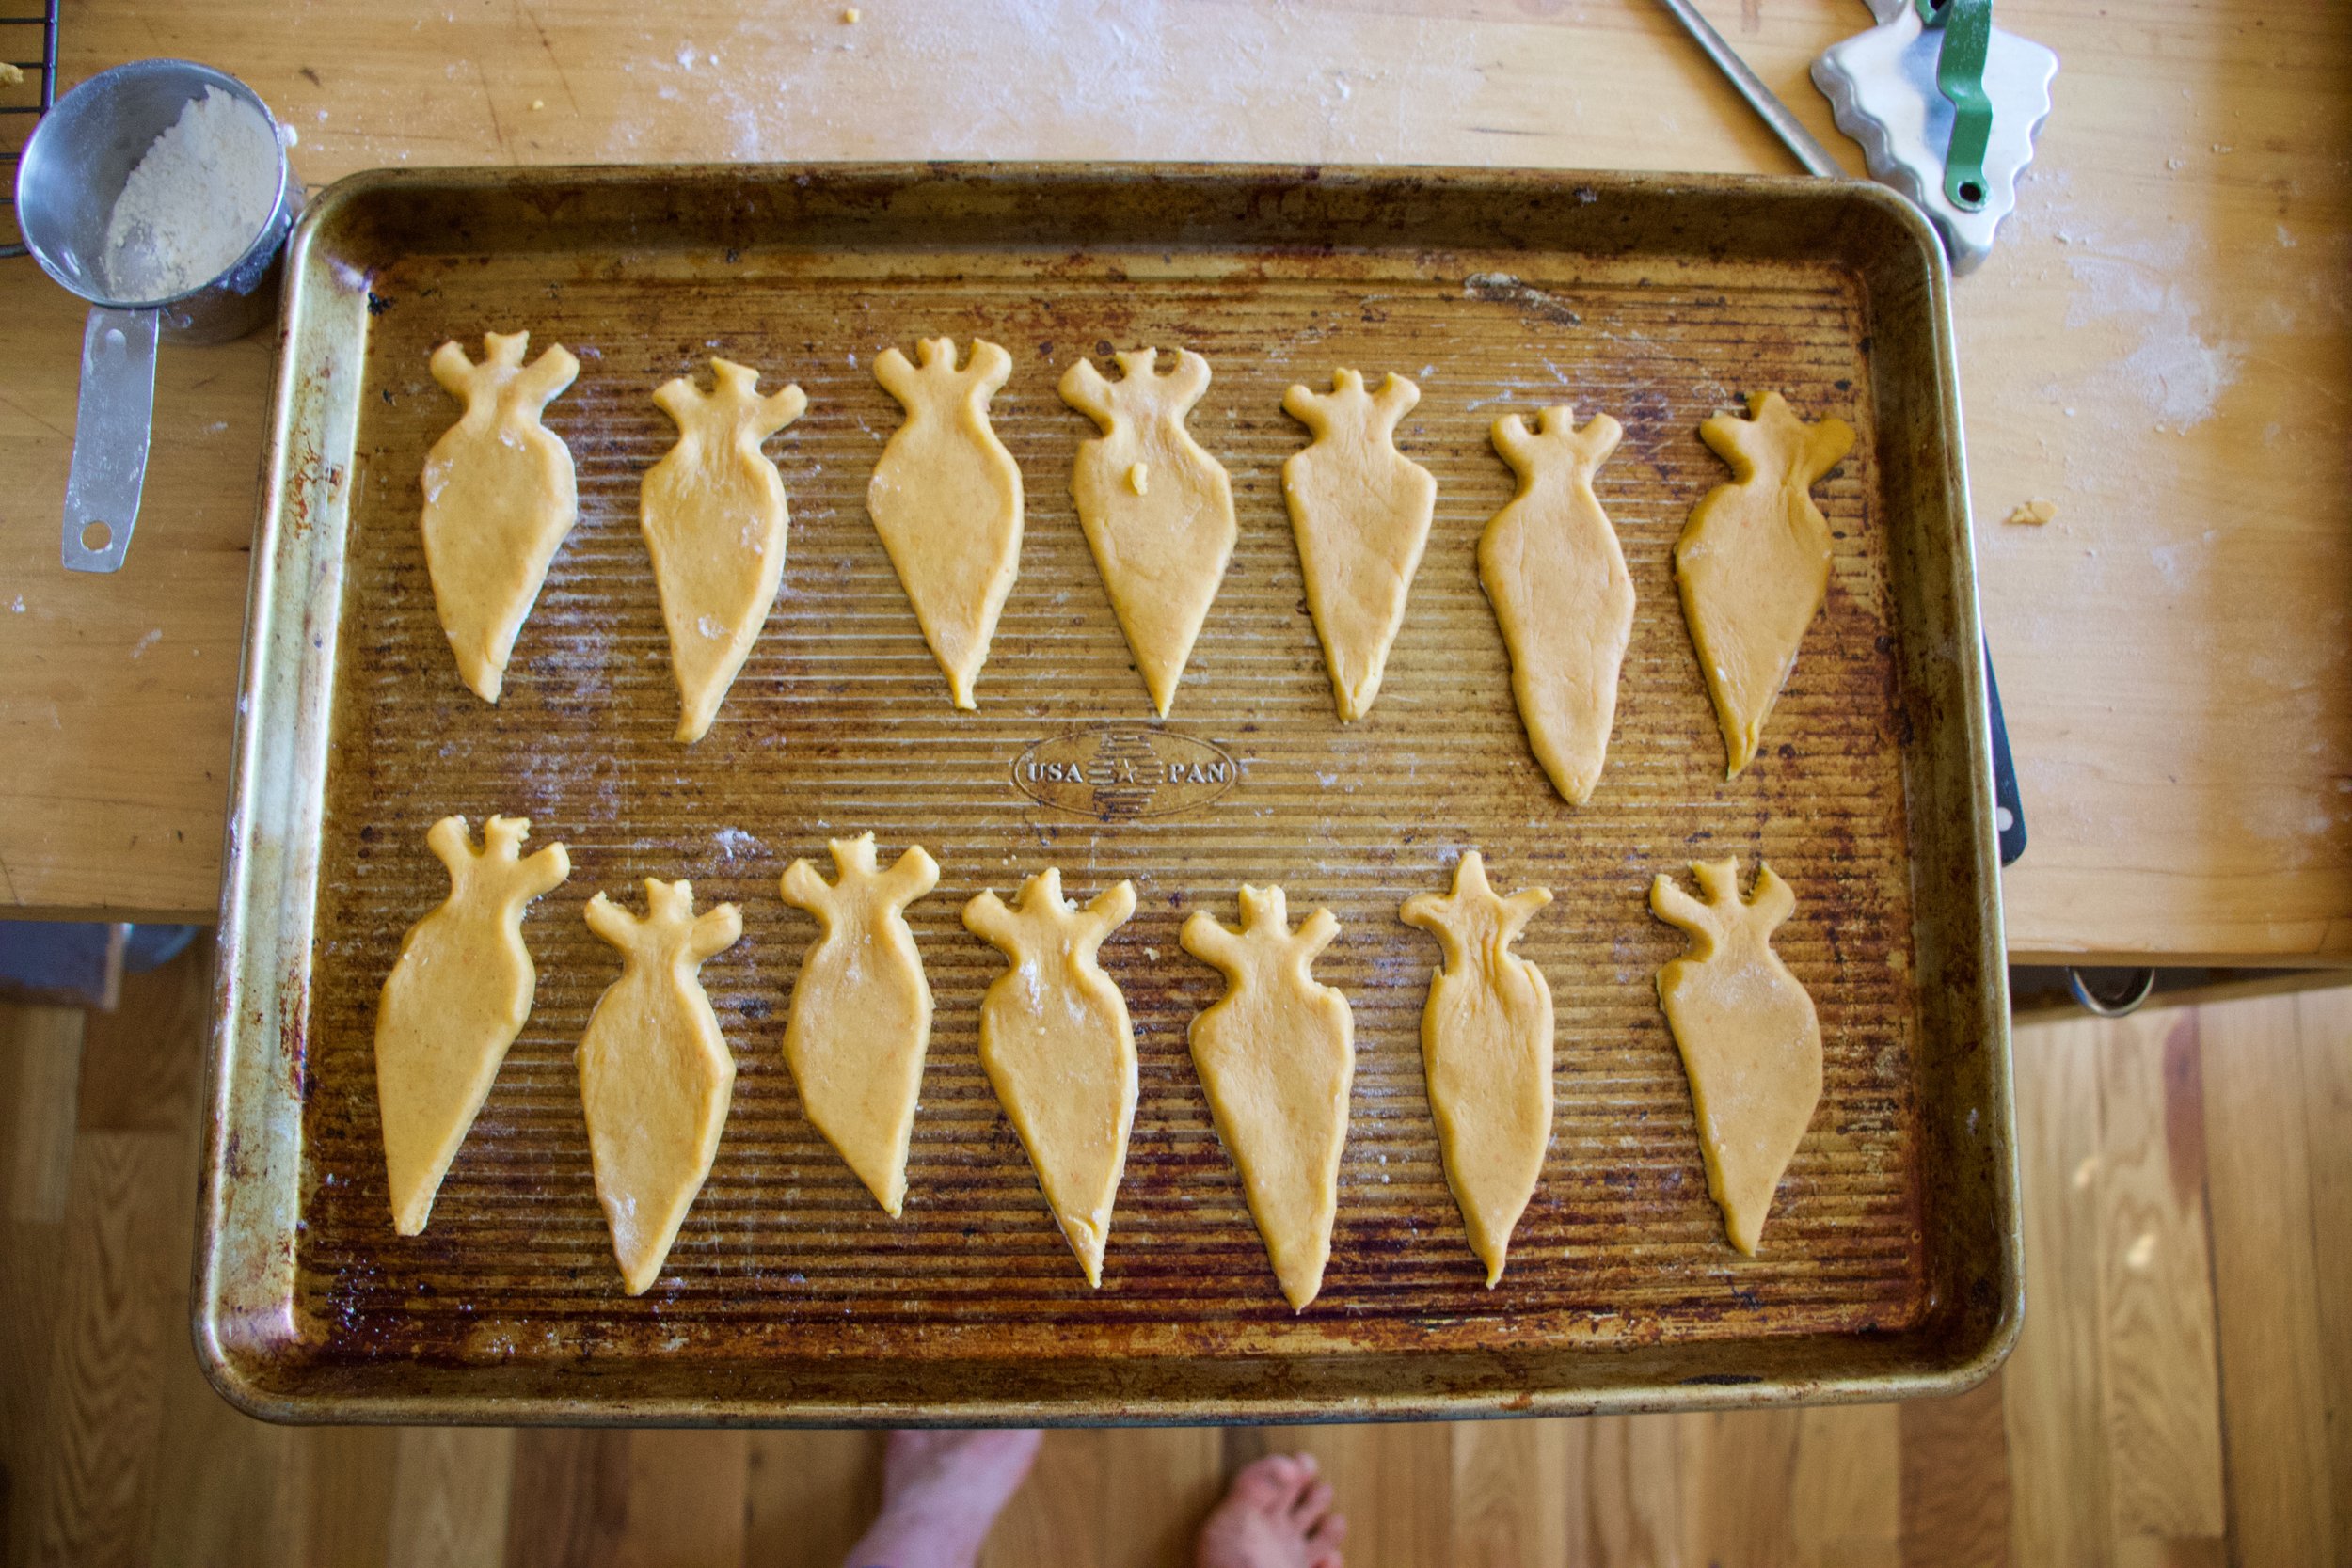
Carefully place cut out cookies onto a baking sheet, giving them a little space because they do spread a tiny bit.
And into the oven to bake they go.

Out in 10 minutes looking all carrot like.

Carrots waiting to cool so they can be glazed.
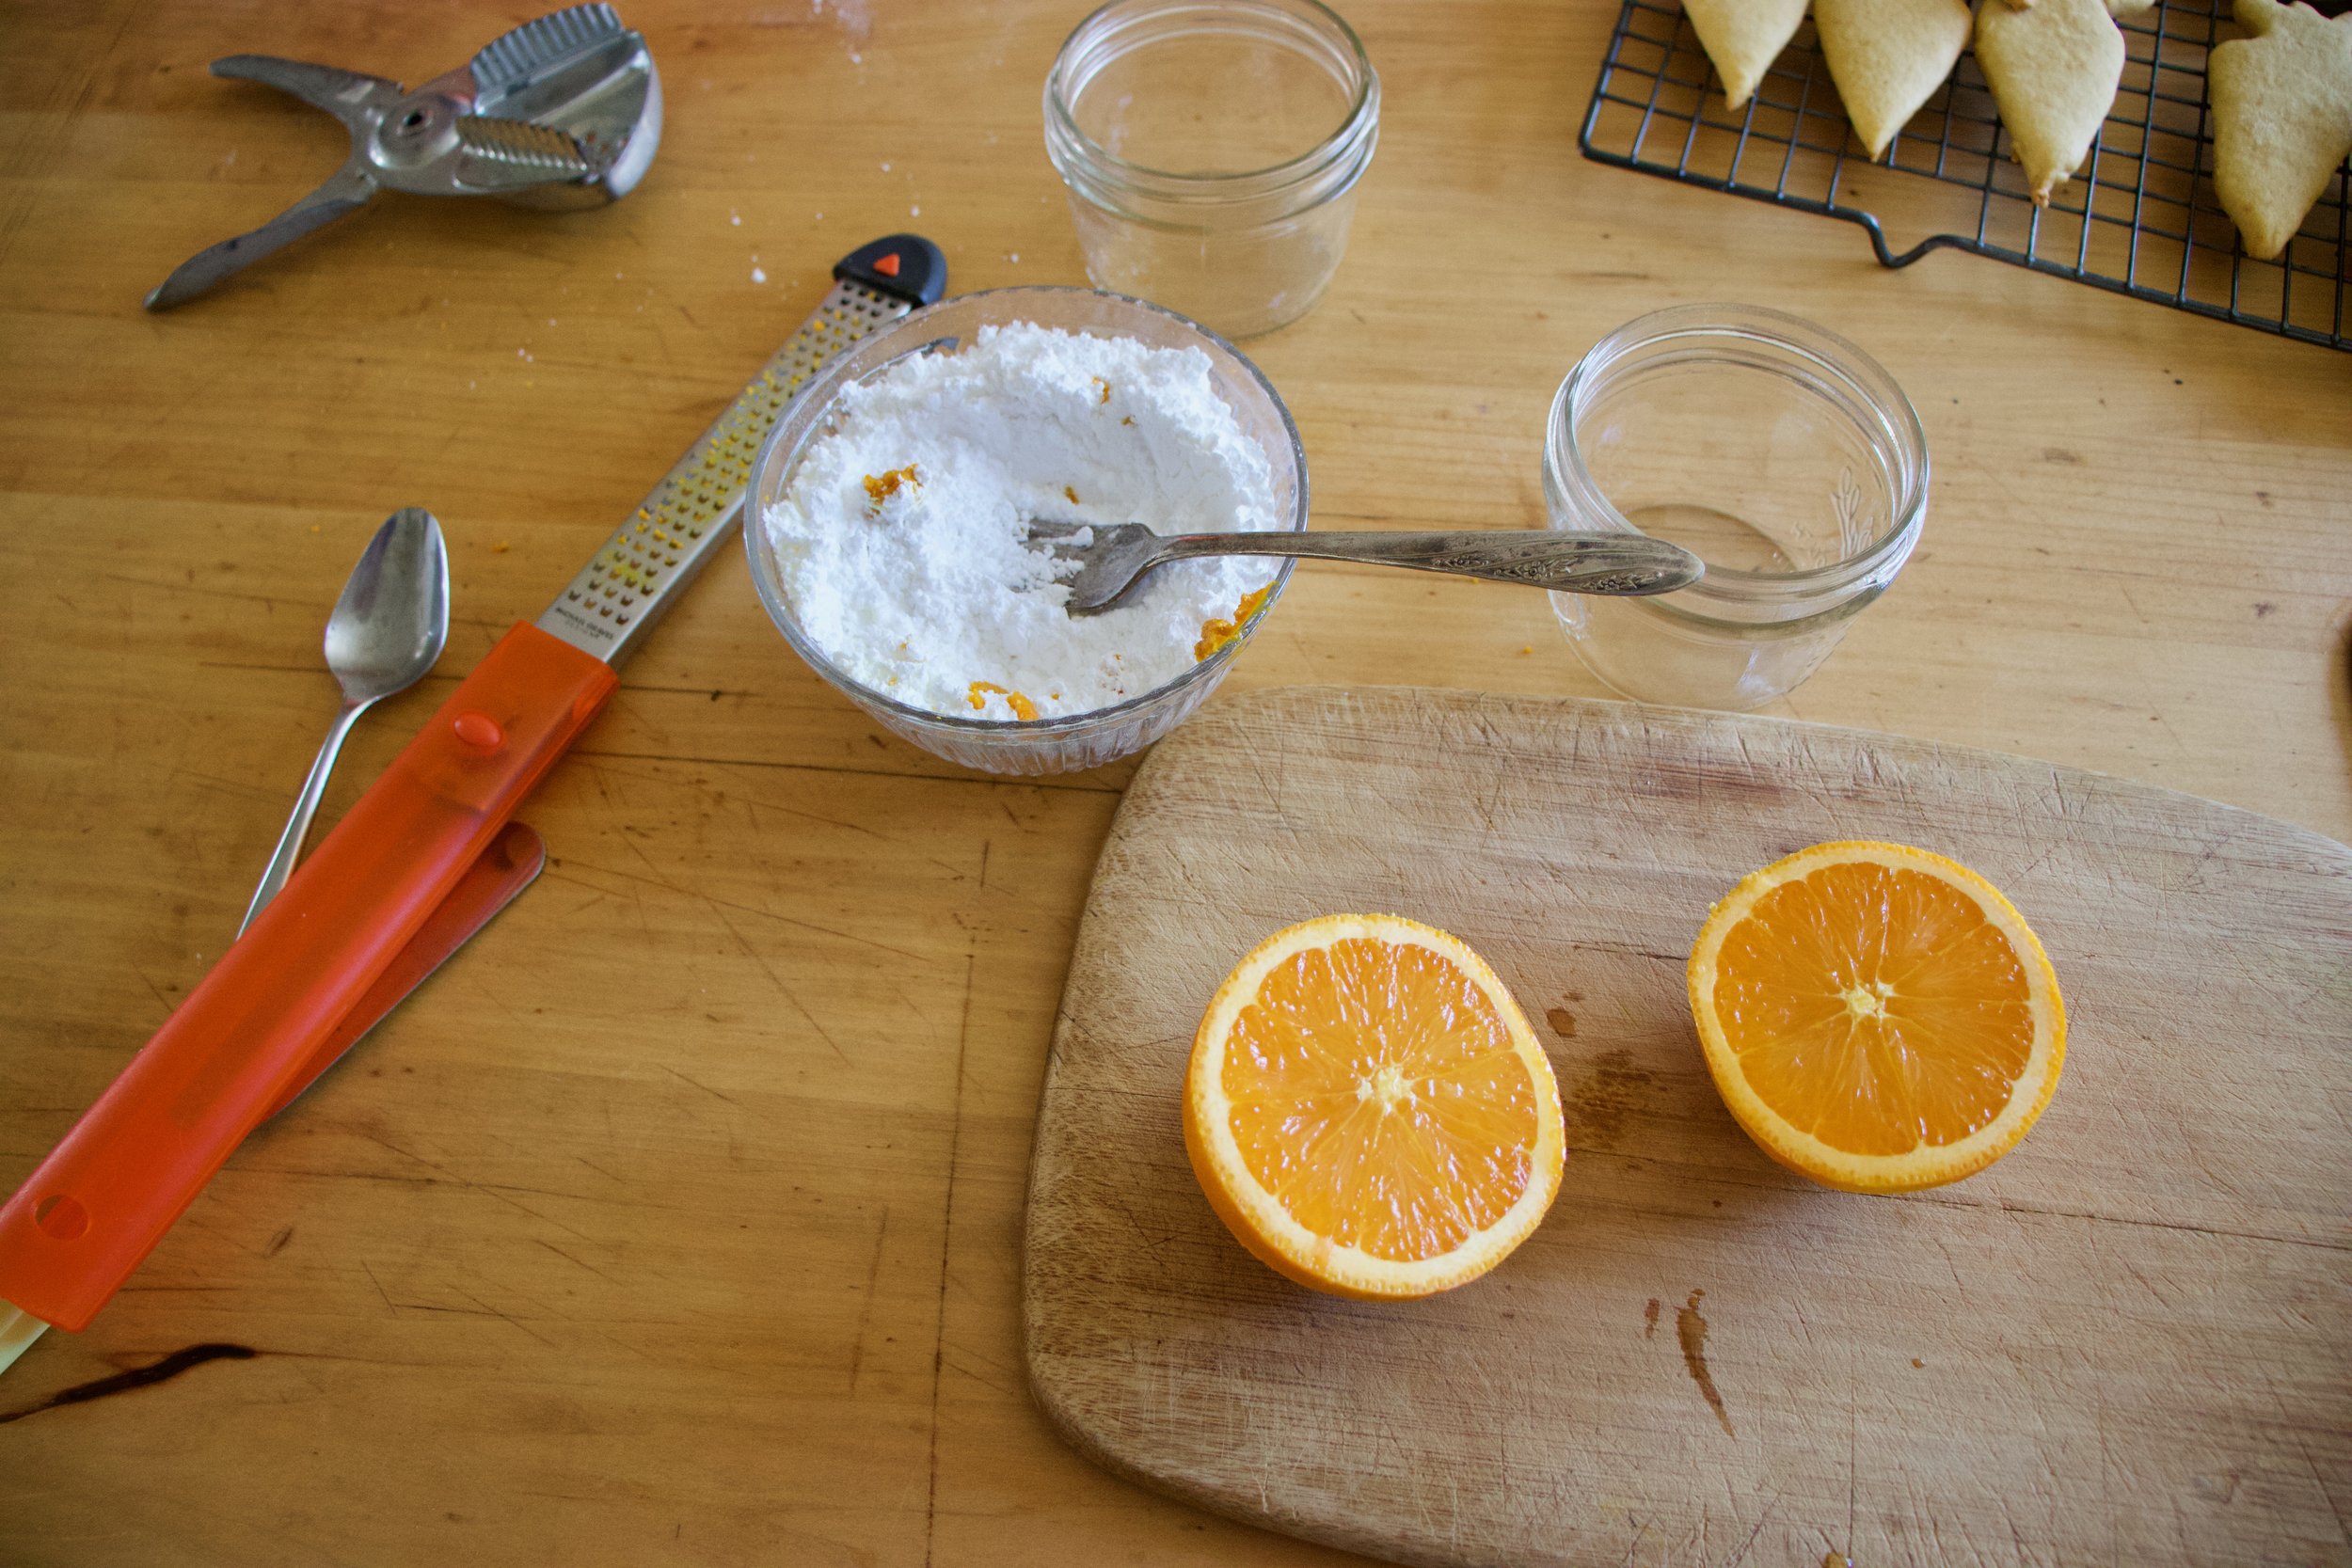
The glaze. Pretty straight forward. Just zest orange into powdered sugar and juice the orange into the sugar and mix.
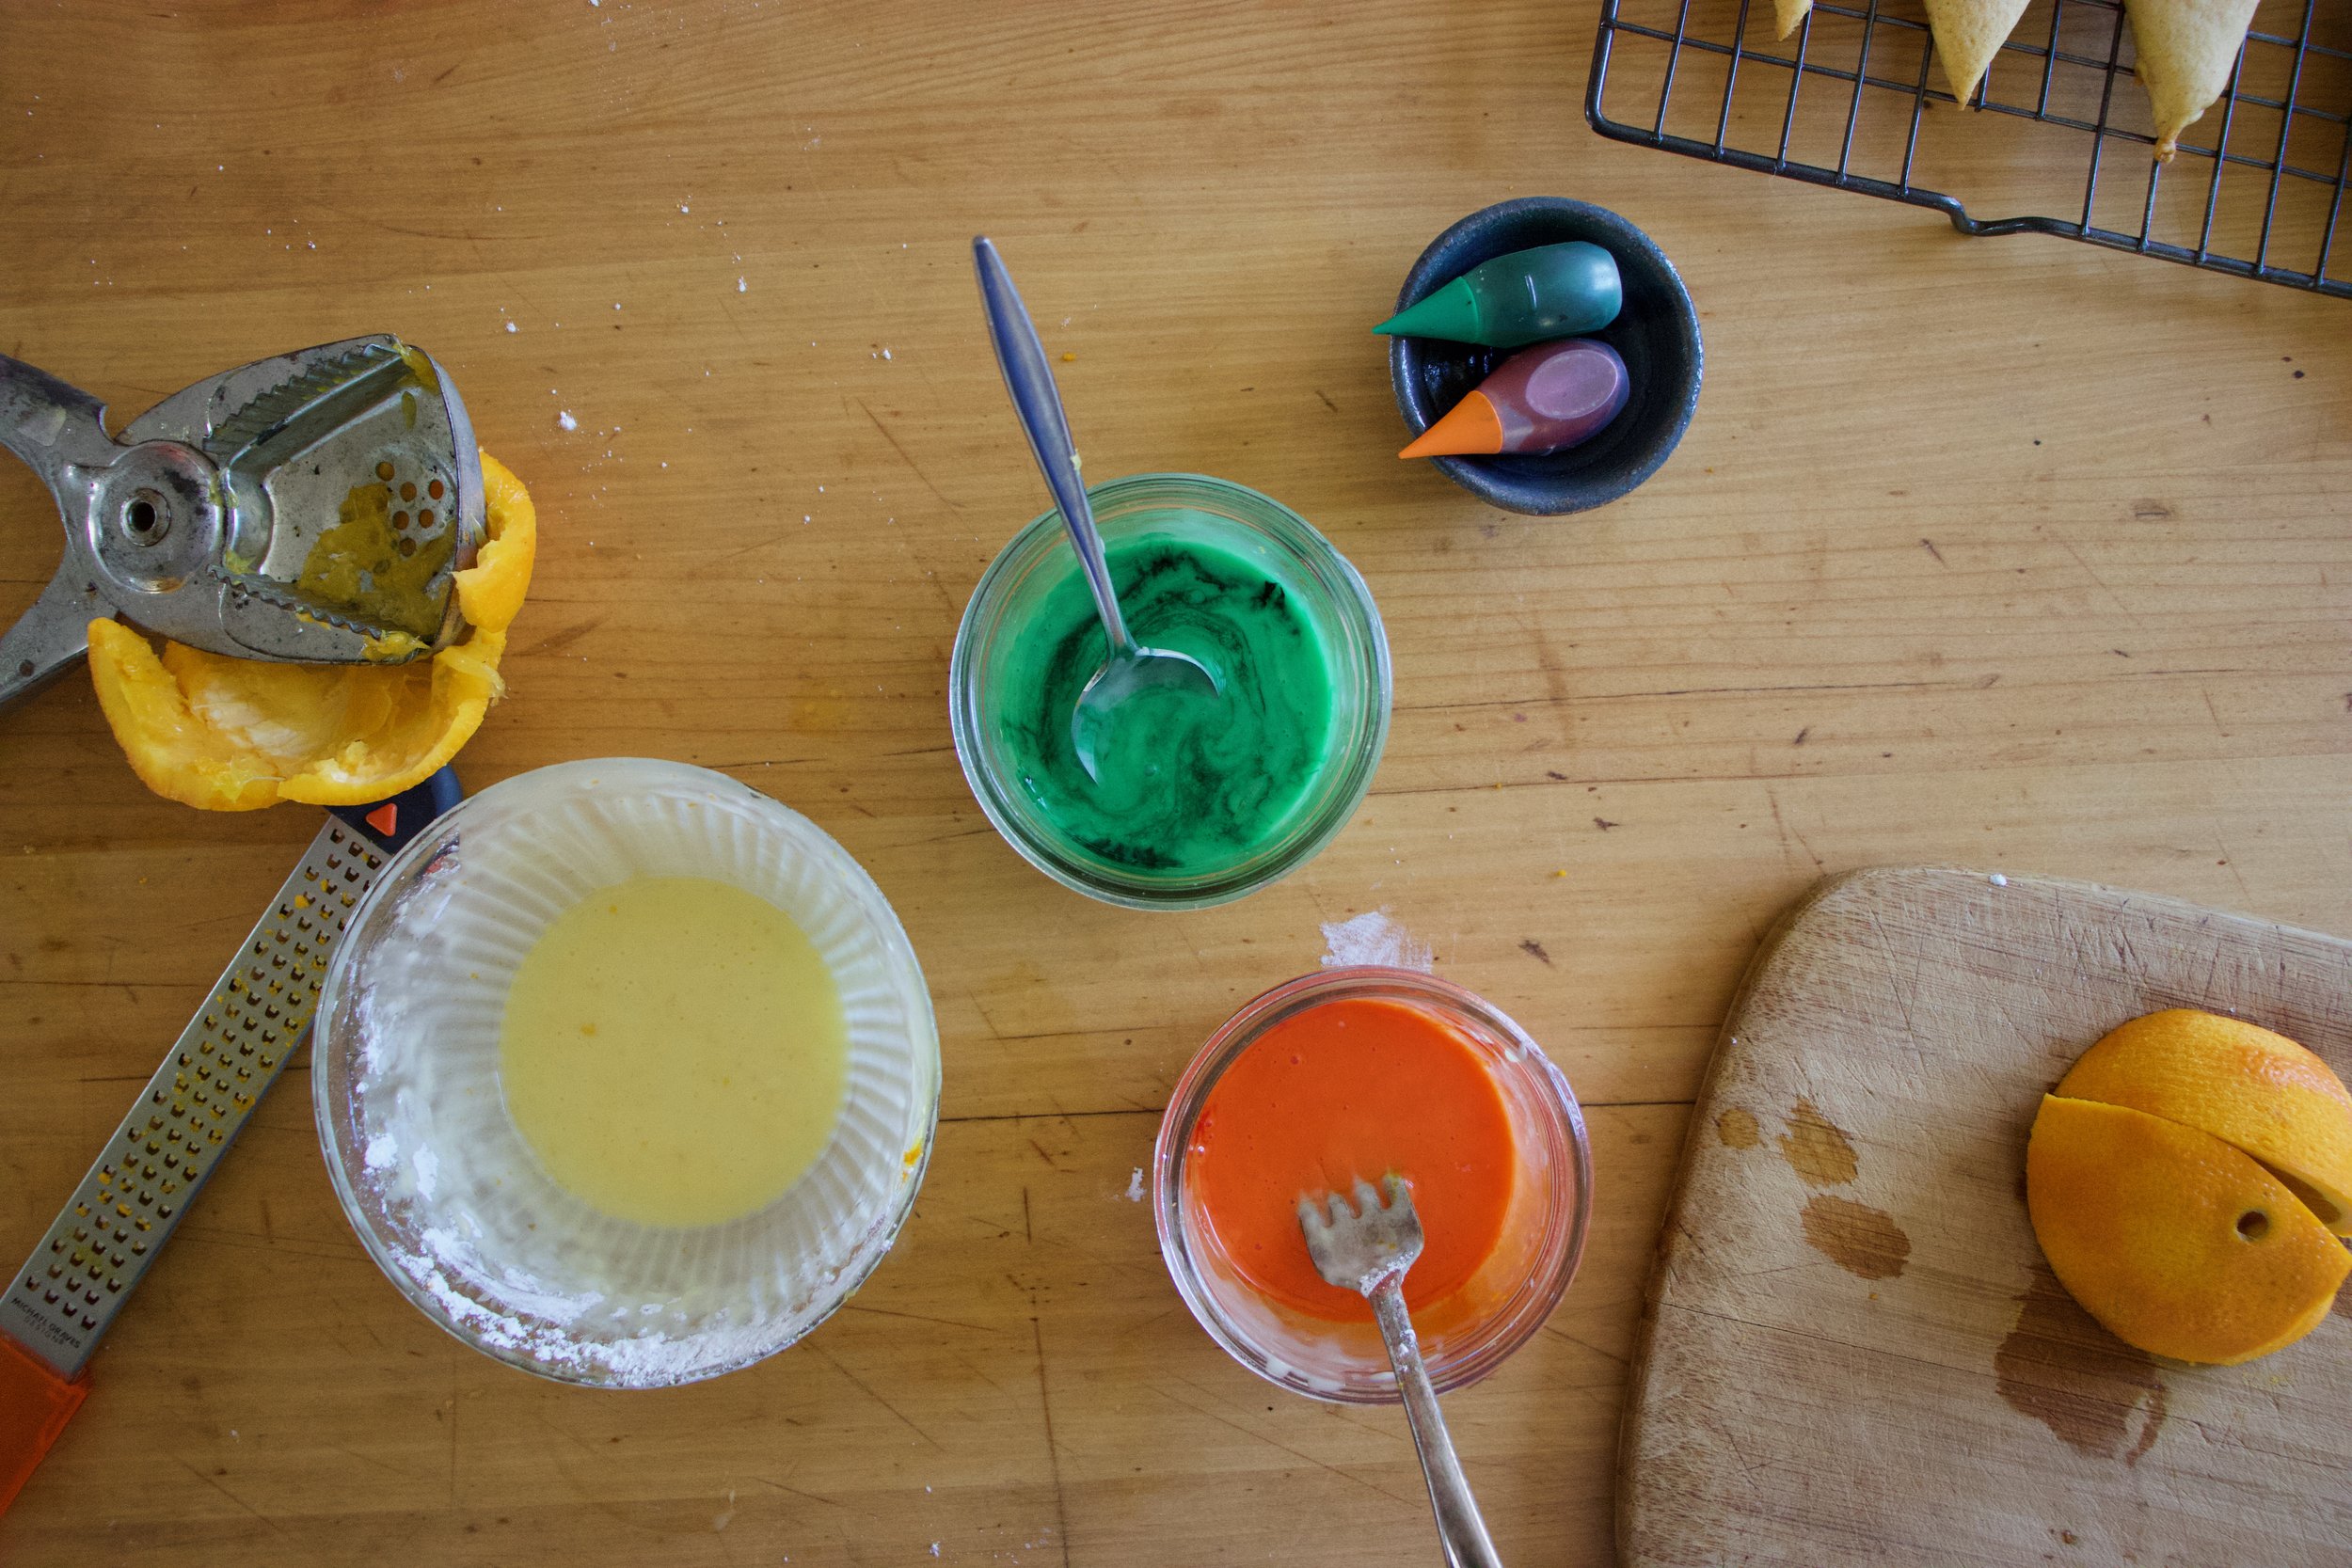
Divide glaze and dye one orange and one green

And glaze away. I recommend doing it over a rack and baking sheet to minimize mess because they do drip a bit.

Now just you look at that, carrot shaped carrot sugar cookies .What a sight!

And of course, carrots come in bunches. HA
Enjoy some carrots!
-C
makes about 2 and a half dozen (depending on size)
-
2 1/4 cups all purpose flour plus more for dusting
-
1 teaspoon baking soda
-
1/2 teaspoon salt
-
1 teaspoon cinnamon
-
1/2 cup vegan butter
-
3/4 cup granulated sugar
-
1/2 cup carrot puree ( see note about how to make puree)
For the glaze
-
2 to 3 cups powdered sugar
-
on orange
-
orange and green food coloring
Note. To make carrot puree, steam a couple carrots until completely soft them blend until smooth.
Place sugar, vegan butter, and carrot puree into a big bowl. Beat with a beater until light and fluffy. Add in the flour, baking soda, salt, and cinnamon and mix by hand until completely incorporated and mixture tunes into dough. Gather dough into a disk and wrap in plastic or place in a plastic bag and refrigerate for at least 2 hours or up to overnight.
Once dough has chilled enough and you are ready to go, preheat the oven to 350.
Place dough on a flour dusted counter and roll out about 1/4 inch thick. Cut out the cookies with a cutter or by hand and place on a baking sheet. Bake cookies for 10-11 minutes or until just starting to turn slightly brown around the edges. Remove from oven and place on a wire rack to cool.
Once cookies are all baked and cooling, make the glaze. Place powered sugar into a big bowl, zest in the orange then add in the juice od half the orange. Mix completely and check consistency. You want it to be slightly running but not liquid, but also not to stiff. Add more juice or more sugar to get it right. Once it is the right consistency, separate into 2 bowls. Dye one green and one orange. Now glaze you cookies. A knife or small spatula works best and yes, the glaze drips a little so do it over a baking sheet, but after about 10 minutes the glaze hardens.
And then you have carrot cookies and all is good. Now go eat a carrot cookie!
Store uneaten cookies in an airtight container for up to 5 days. They can be frozen too.
It is spring yes? I know it is officially spring but around here it has been more or less still winter which is to be expected but is, at this point, no longer welcomed. I, as well as everyone else I talk to, are over it. Enough snow. enough of the hats and jackets. Just enough.
But the bright side of the chilly, cold weather is that we can and still want to turn the oven on and cook things. And because I turned the heat off a little prematurely, I am cold so I really want the oven on.
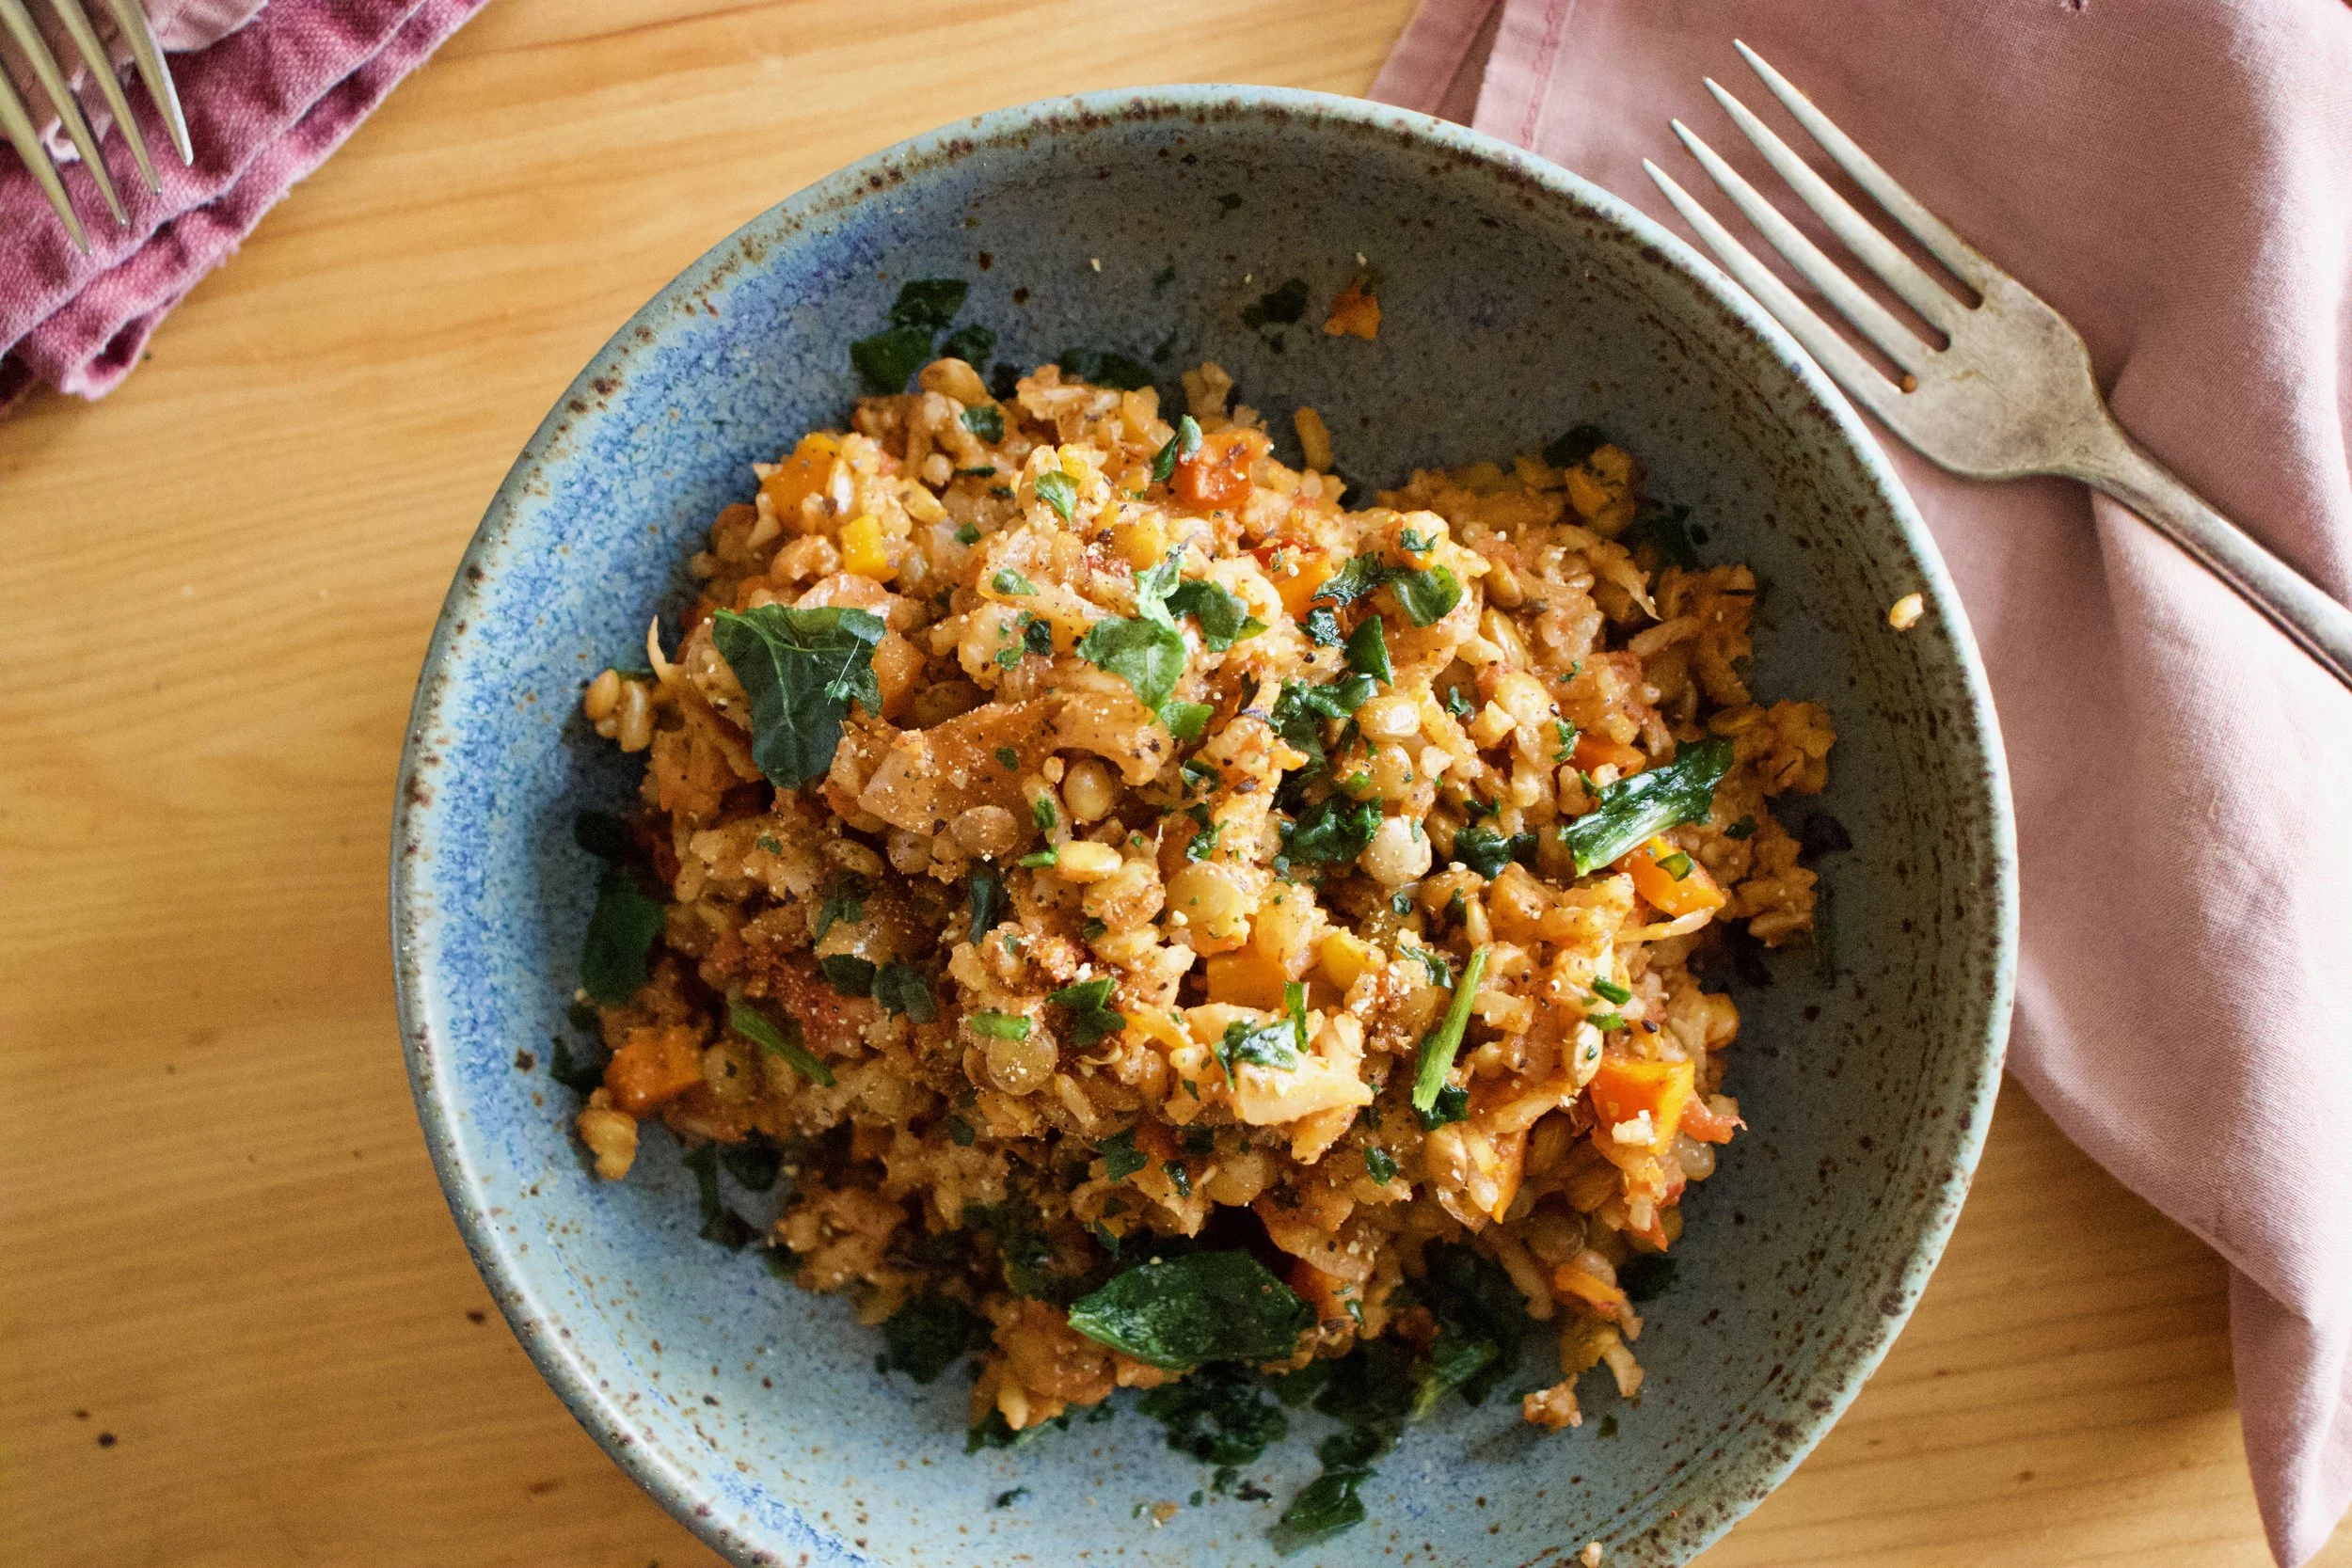
One skillet, a little chop action, a stir, some good time in the oven and there you go, food for your belly. Not a ton of dishes to do, steps to fallow, thoughts to think (other then eating thoughts). A good old, hearty, simple to toss together, spicy, delicious skillet of goodness. Prepare it fast, pop into warm oven, sit in kitchen drawing up plans for the spring veggie garden, and then eat yourself warm. What more can we ask for?
We can ask for spring weather because seriously. But other then that.
To the goodness of cajun lentils and rice!

The stuff. Lentils, brown rice, cajun seasoning, some crushed tomatoes, an onion, a carrot, a few cloves garlic, some cauliflower, water, oil, and salt and pepper.

First off, mince garlic and chop up the cauliflower, carrot, and onion into small pieces.
Toss it all into a good sized oven safe skillet with a splash of oil. Mix in the cajun seasoning too and stick o nth stove on medium heat for a few minutes.

Cook until fragrant and slightly tender. Taste it, it is good.
Dump in the lentils and rice. Then dump I the tomatoes and the water. Give it all a mix.


And after. All done. Now dinner.

Grab some green thing to chop and toss on for some color.
Now grab some bowls, a few forks, and get to eating.
-C
Serves 4-6
-
3/4 cup uncooked brown or white rice
-
3/4 cup dried green lentils
-
2 cups crushed tomatoes (preferably not salted)
-
2 1/4 cups water
-
3 tablespoons cajun seasoning (see note)
-
1 large carrot
-
1/4 head of cauliflower (about 2 cups chopped)
-
1 large yellow onion
-
2-3 cloves garlic
-
1 tablespoon olive oil
-
salt and pepper
Note. Store bought cajun seasoning usually contains salt and pepper so when seasoning, be aware of the amount of salt (if any) you choose to use.
Preheat oven to 350
Start by chopping the carrot, onion, and cauliflower into small pieces. Mince the garlic and toss it all into the skillet with the olive oil. Stir in the cajun seasoning and sprinkle in salt and pepper if it needs it. Place skillet on medium high heat and cook veggies until fragrant and slightly tender which should take about 5 minutes then remove from heat. Dump in the lentils, rice, water and tomatoes. Stir until mixed then either place a lid or foil over the top. Place into preheated oven for about an hour, removing the lid or foil after 40ish minutes and giving it a stir when you do. The bake is done when the rice and lentils are fully cooked, but if you are into a crispy top and crunchy sides, by all means, cook a little longer.
Remove from oven when fully cooked and you are happy with crispness. Let cool for a few minutes, toss on some chopped green something or another if you want, and serve it up.
Left overs store great in the fridge for a few day and freeze well too.
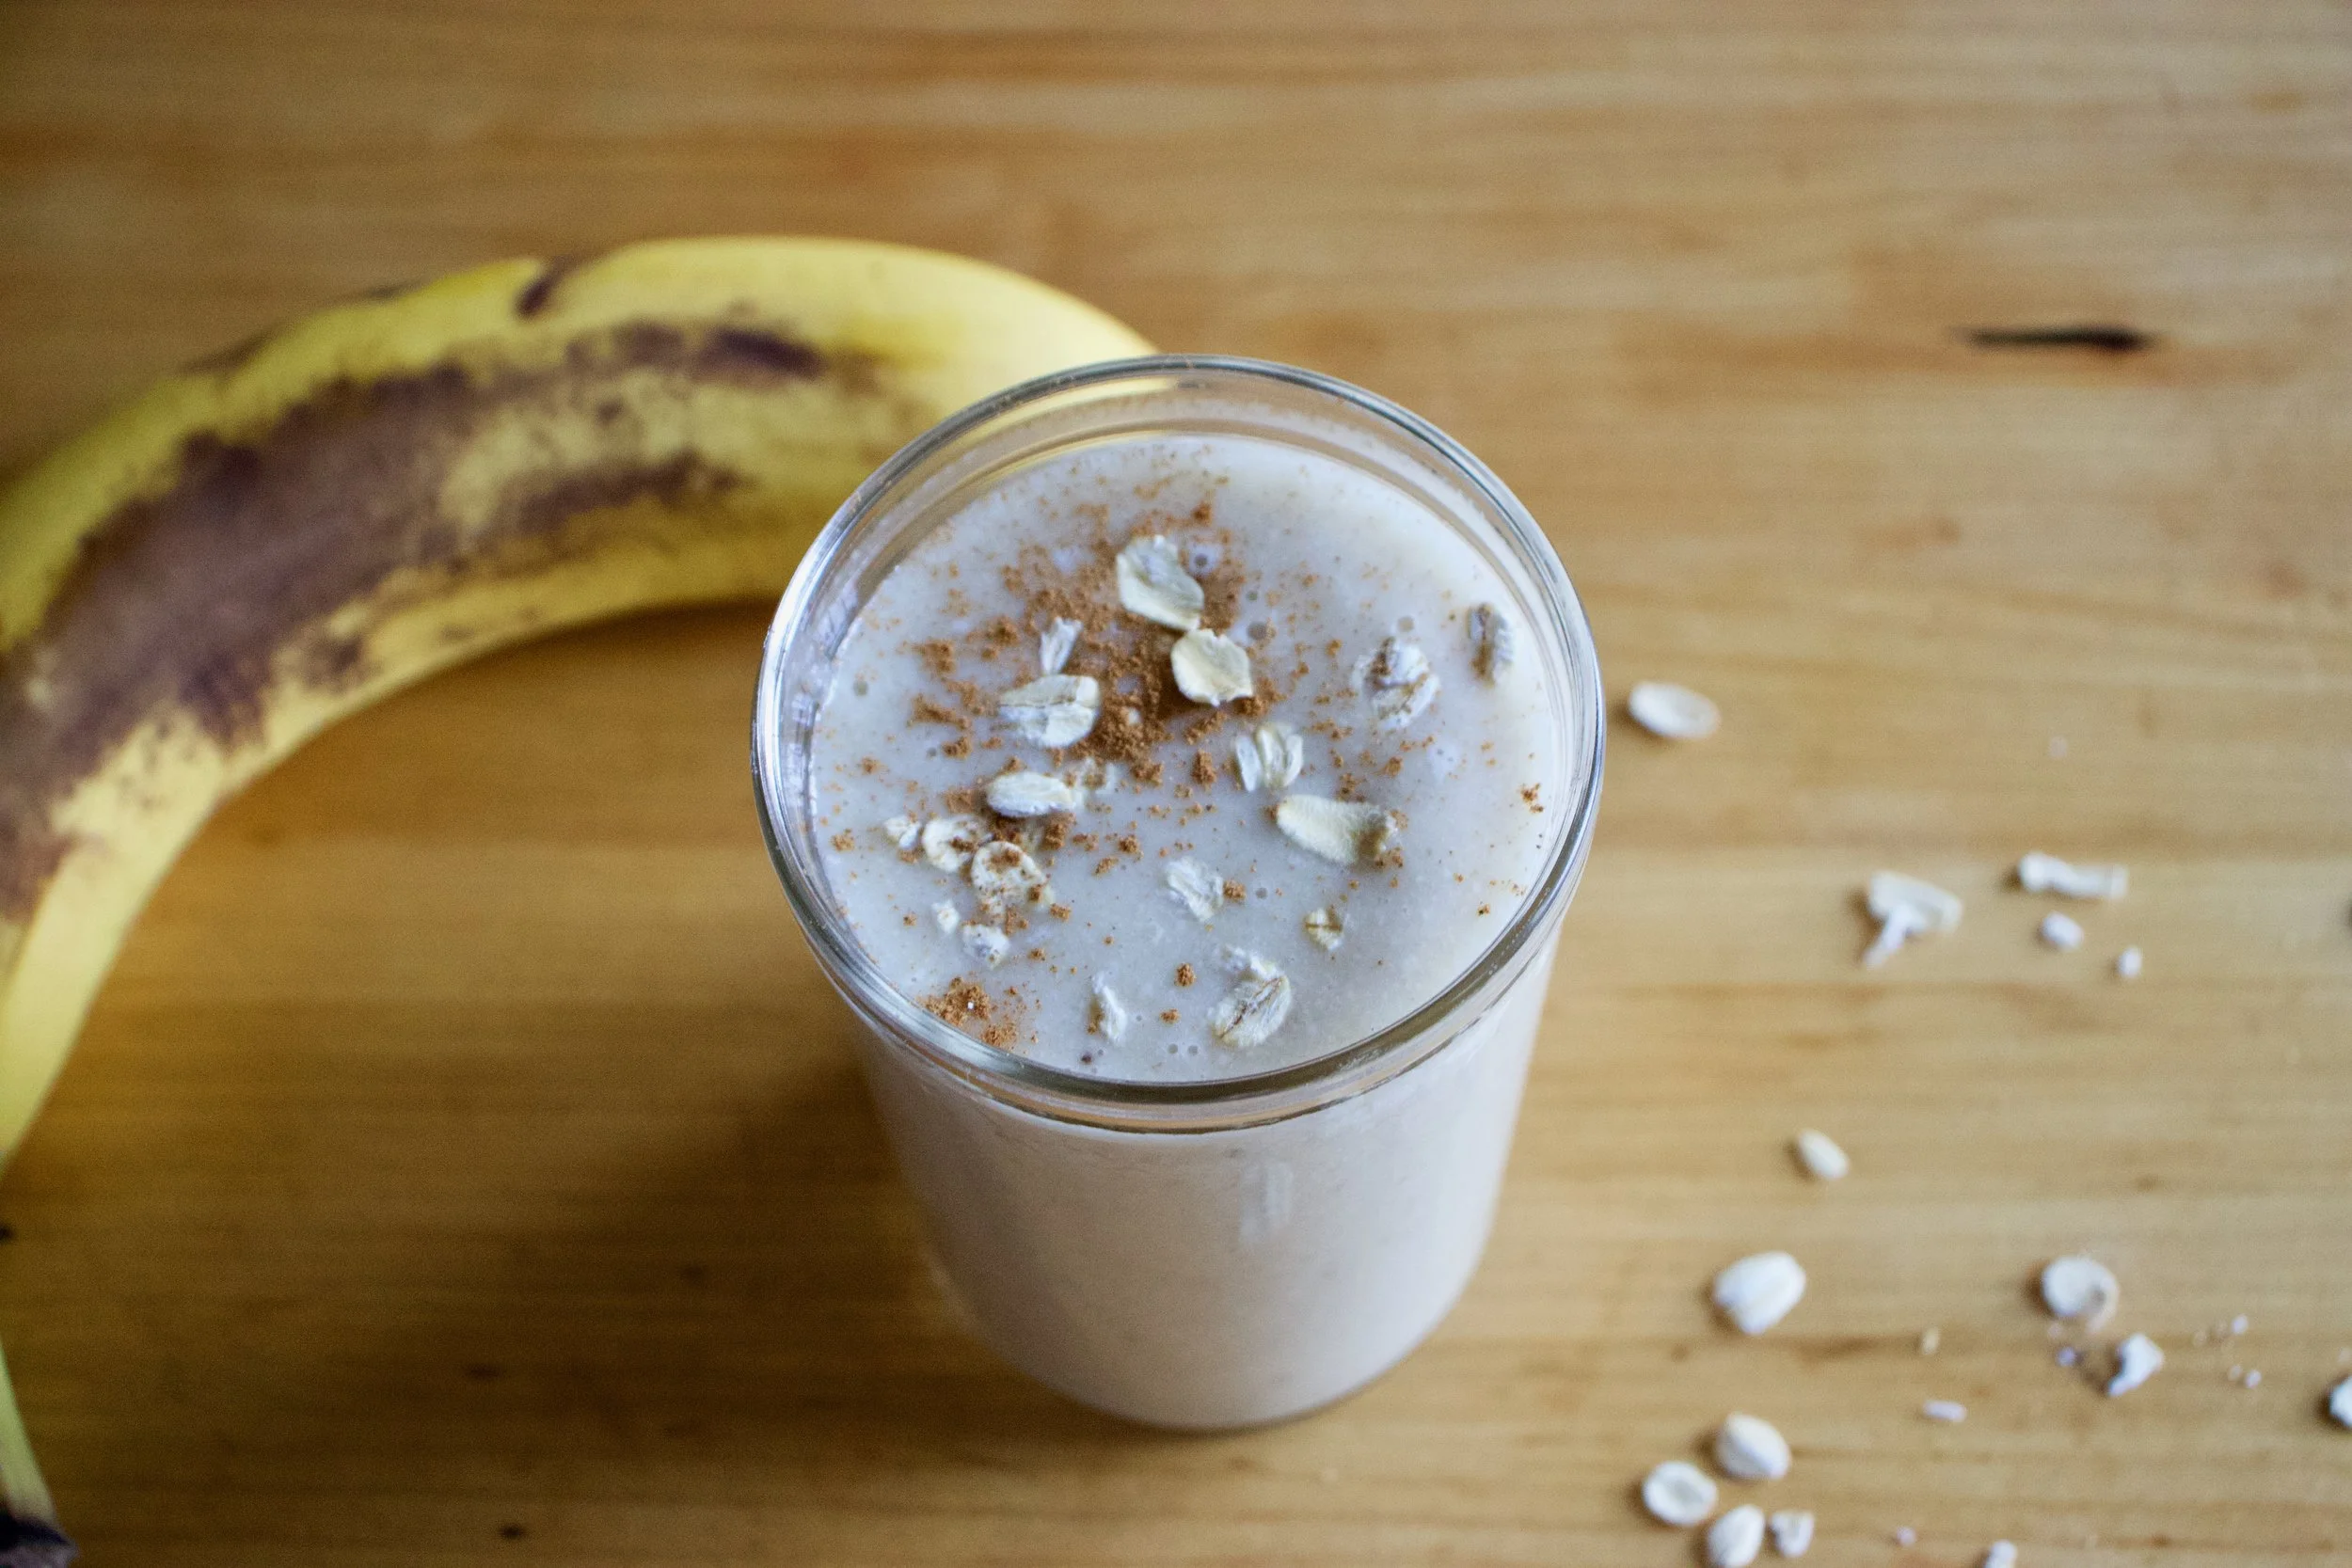
It%u2019s a smoothie. And no, we have never really been smoothie people in this house, but what can I say, sometimes smoothies happen, especially when you have about 20 ripe bananas in the fruit bowl with no room in the freezer and no need for 7 loafs of banana bread.
So I smoothied. And I like it (a lot).
This is a smoothie of simplicity. Nothing fancy. Simplest of simple. Straight to the point. And all sorts of good.
You might think, does this simple smoothie you speak of taste very good? Yes, yes indeed it does. It is all sorts of fantastic. Basically if you like creamy, nutty, oaty, bananery things, you will like this. And it%u2019s a perfect breakfast, snack, dessert, or just wanting a little treat like thing that is not garbage food. A smoothie of all smoothies with the most basic ingredients. And takes about 15 seconds to whip up. Can%u2019t complain about that.
To the smoothie goodness!

The stuff. A ripe banana, some old fashion rolled oats, a pinch of salt, water, and a smidge of maple syrup if you want it.
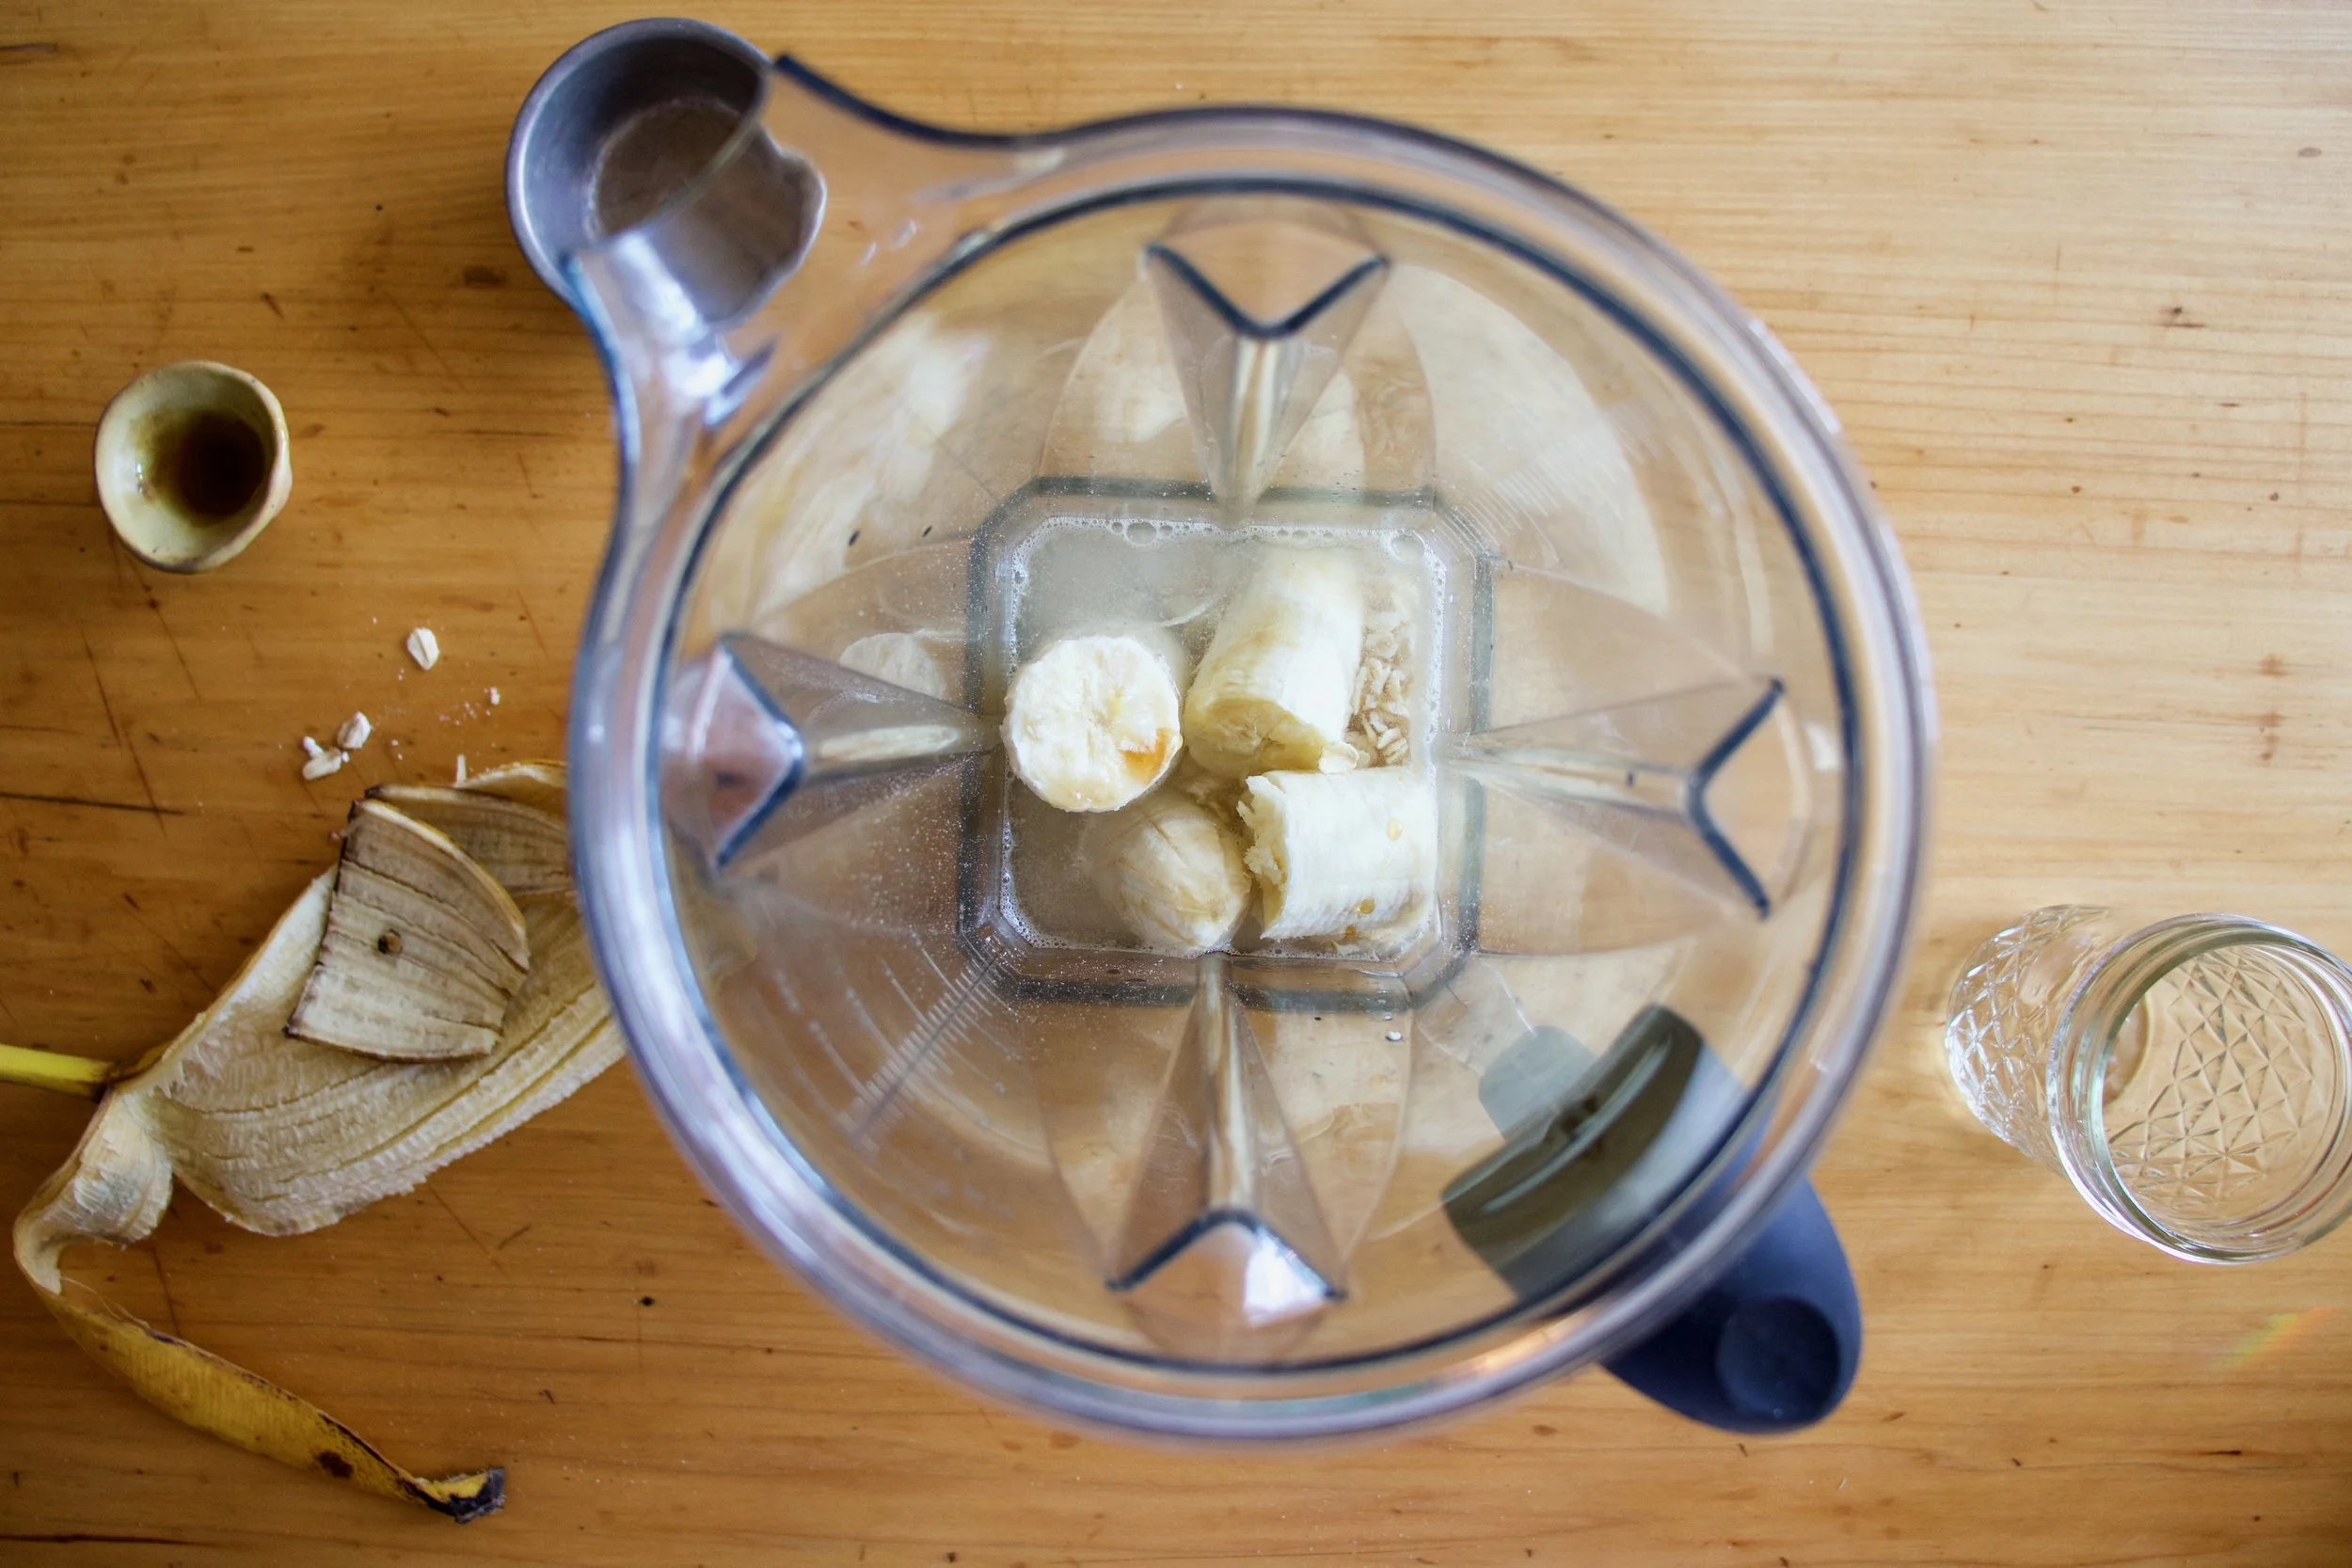
Everything goes into blender.

And blended until smooth. Hence the word smoothie.
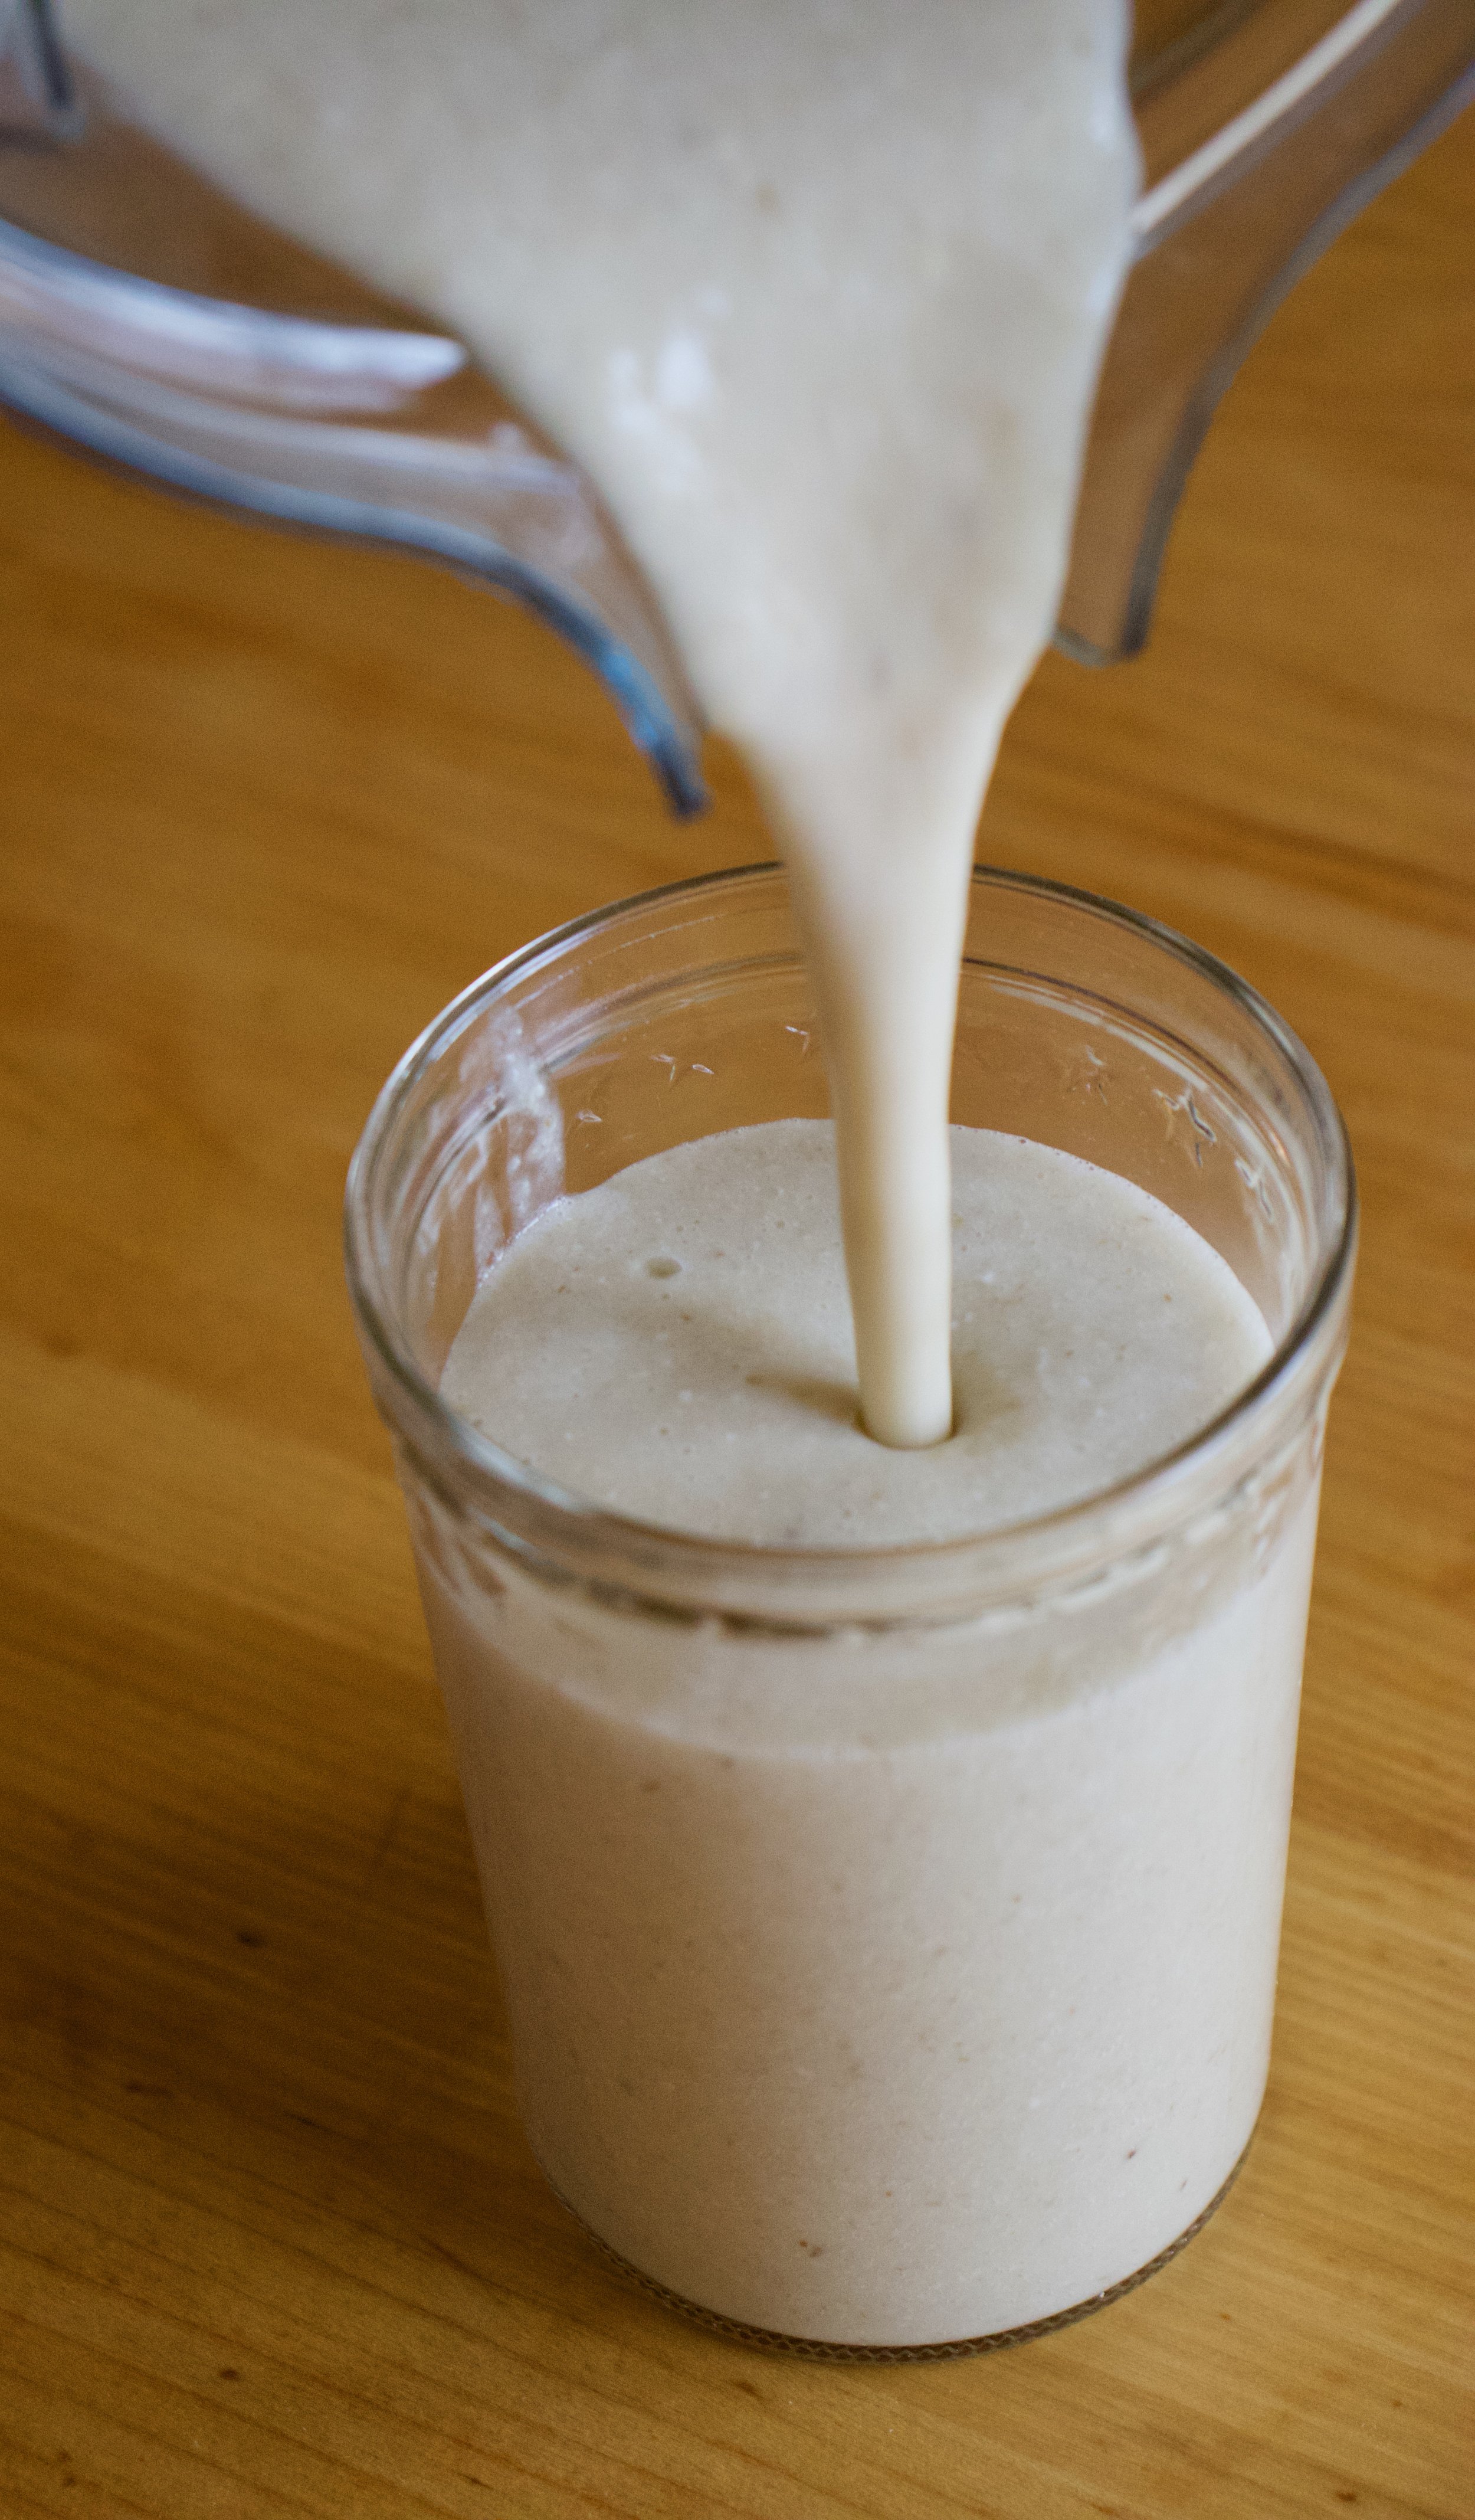
Pour it into a cup (or if you are feeling primal, drink it straight from the blender%u2026 it%u2019s totally cool)

And done.
A banana oat smoothie.
Let the good time roll!
-C
makes 1 smoothie
-
1 very ripe banana
-
1/3 cup raw old fashion oats
-
1 1/2 cups water
-
pinch of salt
-
a tablespoon or two of any sweetener you like (optional)
-
a pinch of cinnamon (optional)
Place everything into a blender and blend until smooth. Pour into a cup, sprinkle with cinnamon if you wish, and drink right away.
It is getting oh so much nicer out yeah? Springing and such, well kind of. Still a wee bit chillier then it should be around here but still, it is spring and I am taking it.
And with the spring, I feel the itch, the itch to spend all of my free time outside. Out doing things that are not inside because I spent the last 7 long months inside way too much. I needed to be outside as much as possible and as it gets even nicer and warmer and garden temperature-able, I am basically going to be living outside.
Bring in sesame noodles. Super fast, super easy, super duper in every way. Make a big old batch and eat now, eat later, eat hot or eat cold. Everyone loves them, they love you, etc. etc%u2026 A perfect meal to have in rotation when you know that you are not going to have or want to spend much time cooking in the kitchen because you will be outside playing in the dirt and soaking up the sun. And think about all the picnics and BBQ%u2019s to come. These suckers are fantastic to have at any outdoor eating event. They are even peanut free so you can safely bring them to potlucks and such and don%u2019t have to worry about accidentally kill a peanut allergy person. And you can make them gluten free as well if you sub in your favorite gluten free pasta. These noodles, I am telling you. They are a winner in every way.
So with out further ado, the noodles!

The stuff. Spaghetti noodles, tahini, a few cloves of garlic, some toasted sesame oil, soy sauce, red wine vinegar, honey (used whatever sweetener you like), red pepper flakes, tasted sesame seeds some cabbage, half a red onion and a carrot.
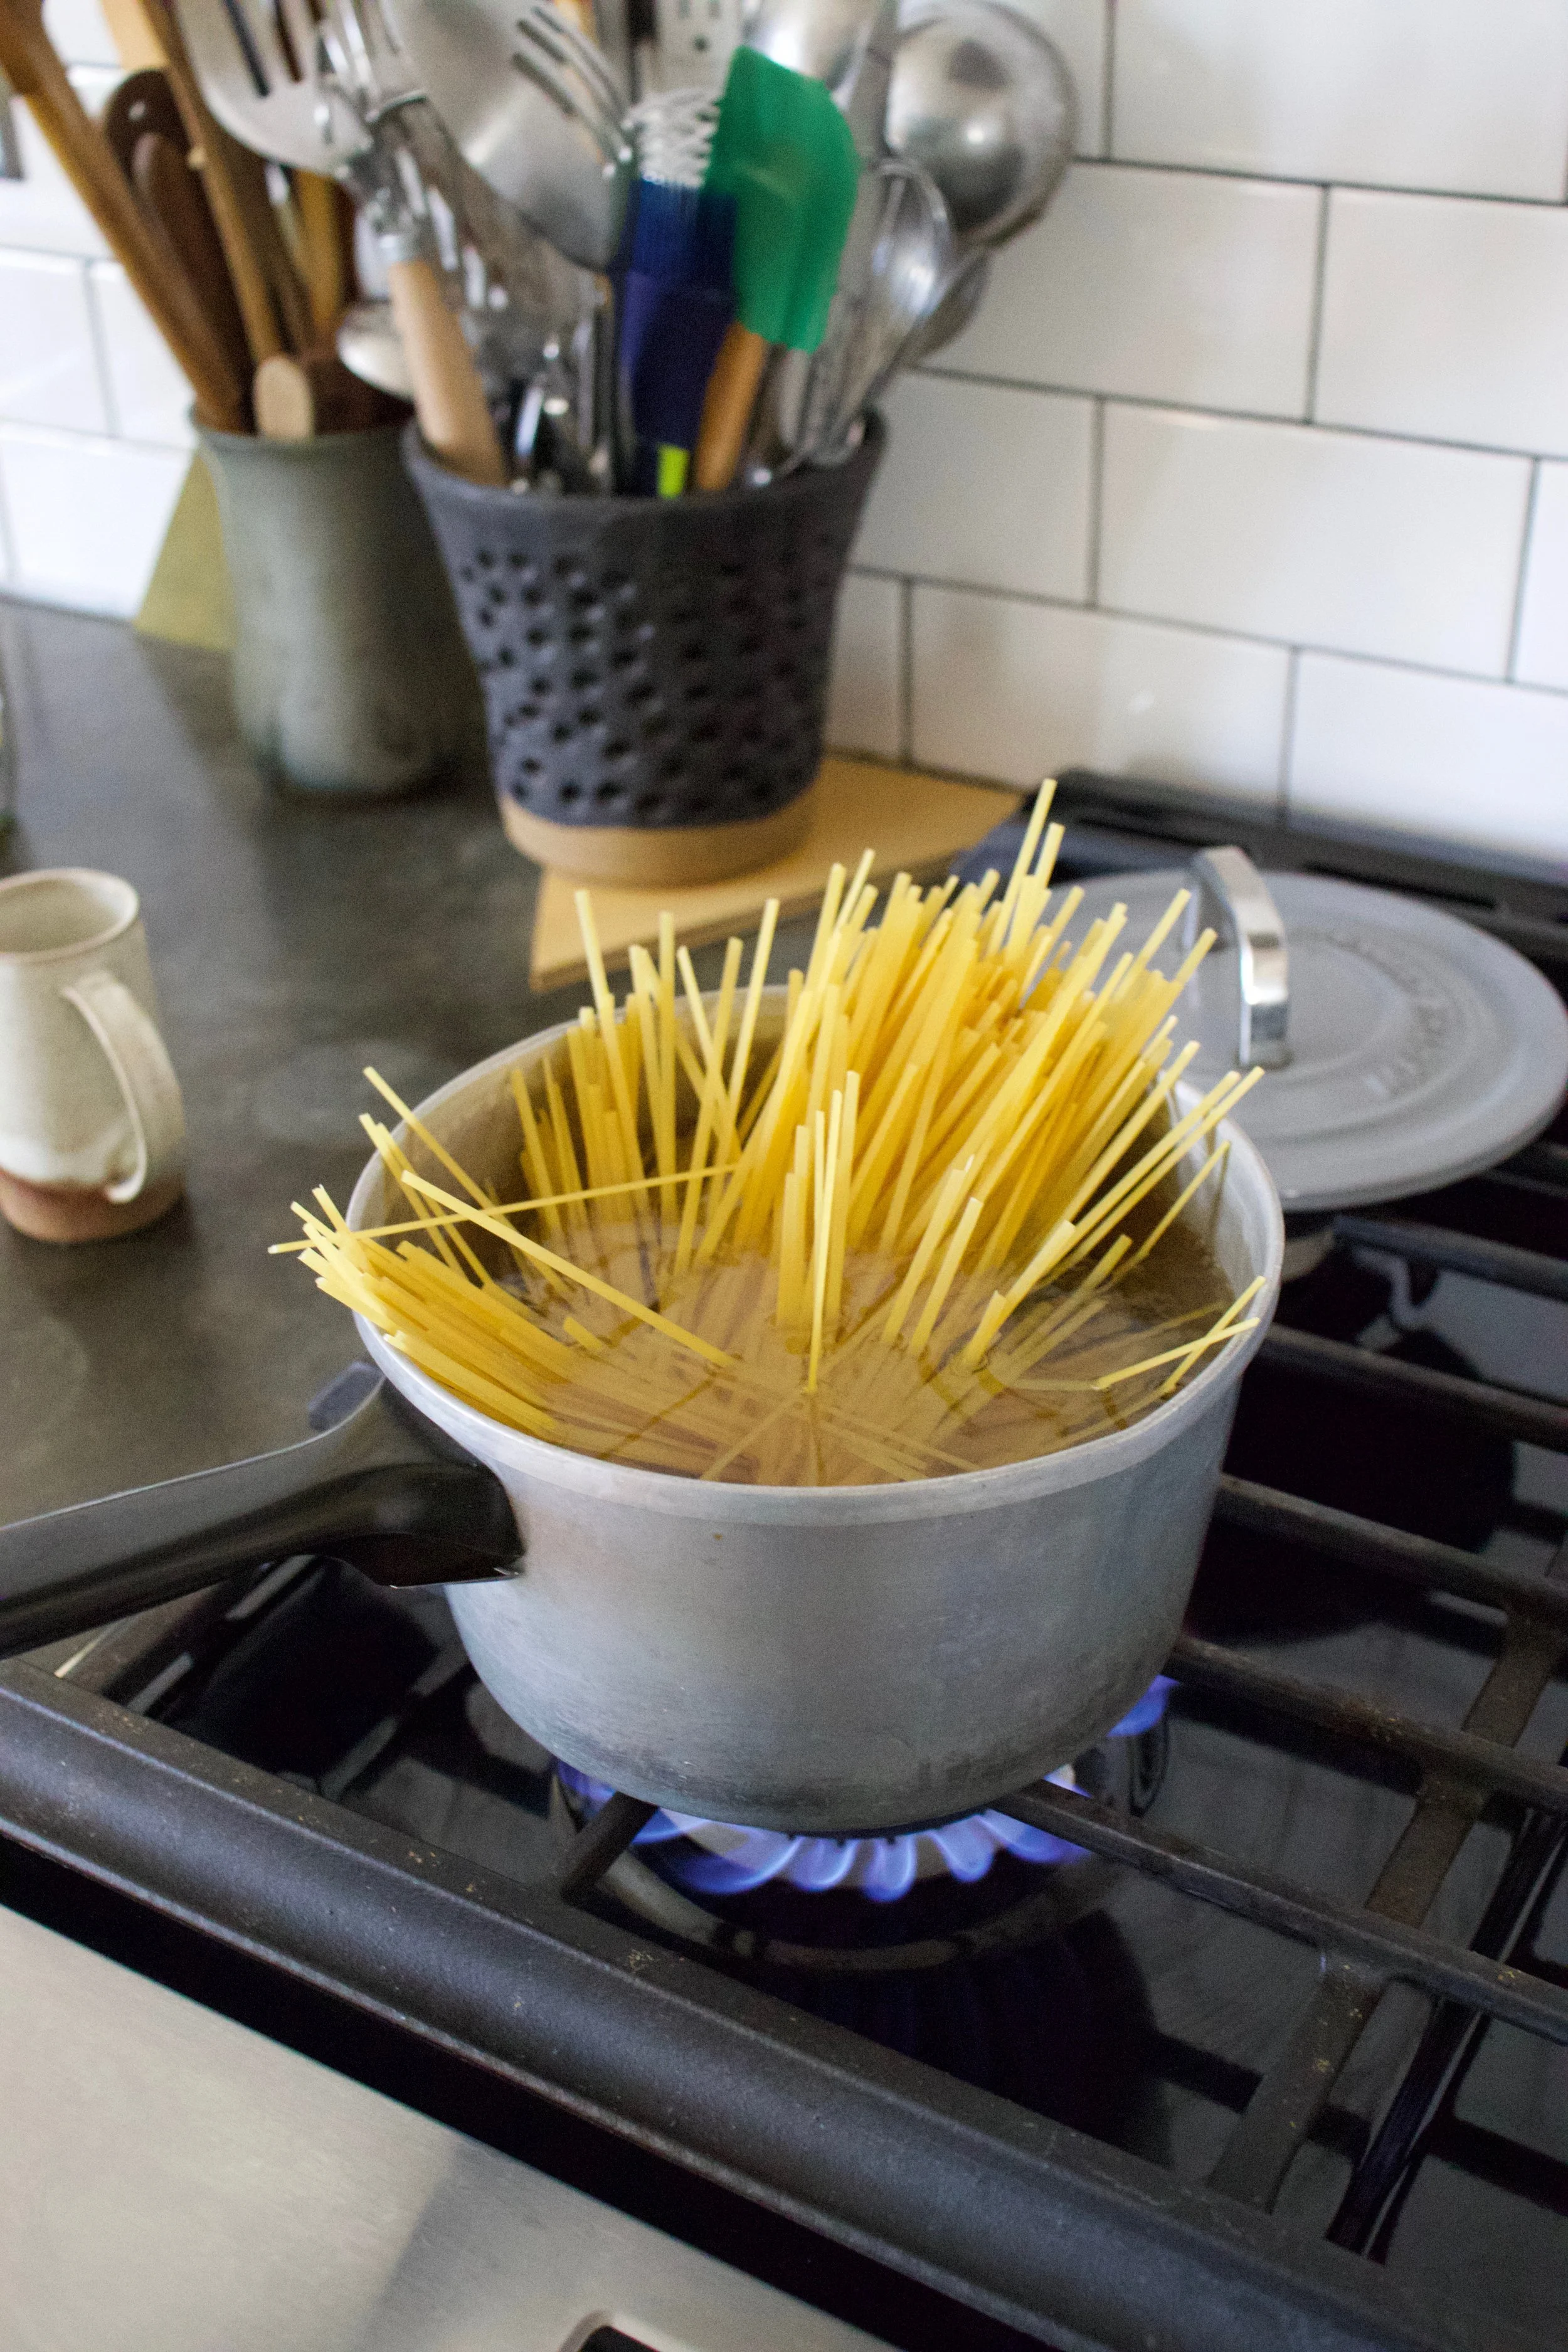
Get pasta cooking. Boil water, drop noodles in, you know the drill. Cook as long as the the noodles need cooking, just make sure to not over cook them cause soggy noodles are nasty.
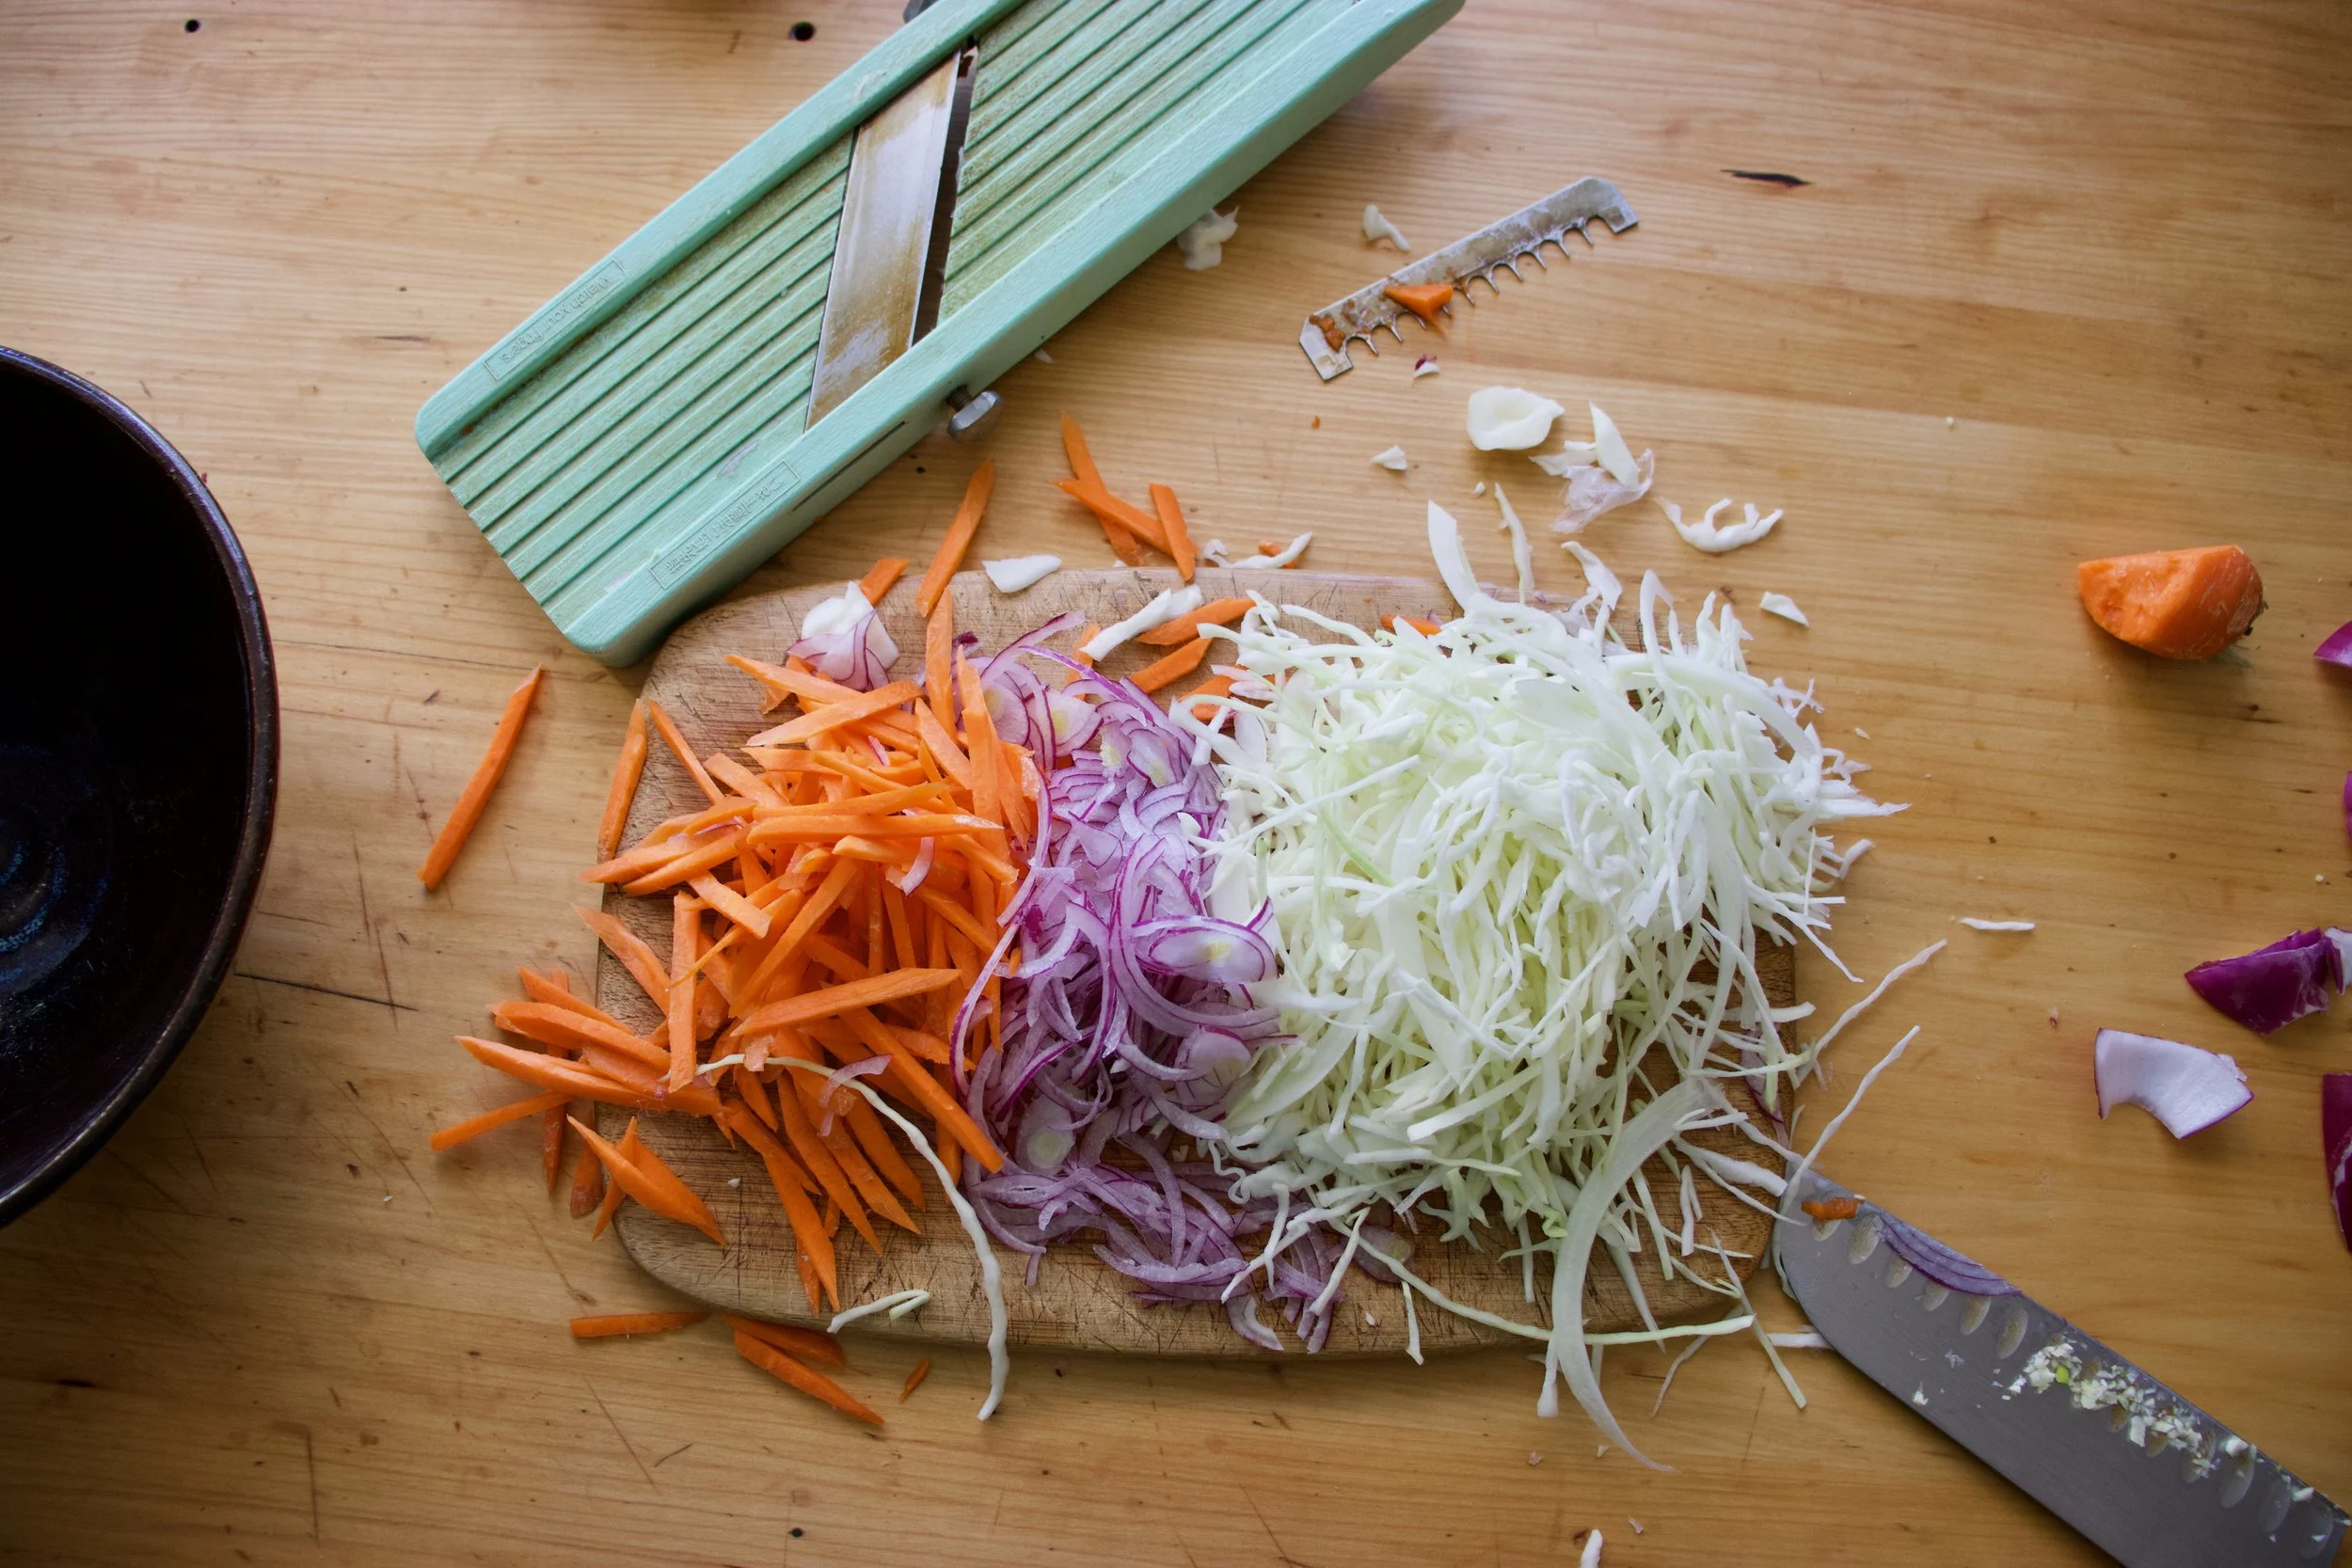
Chop, shred and julienne the cabage, onion and carrot. Nice and thin.

Mince the heck out of the garlic. Or use a garlic press if you want.
Now make the sauce. Add the minced garlic, along with the soy, sesame oil, vinegar, sweetener, and chili flakes to the bowl with the tahini. Mix, mix, mix until it is all incorporated and not lumpy. And that is that.

Noodles should be done by now so strain them out.

Add the prepared veggies to a big bowl.
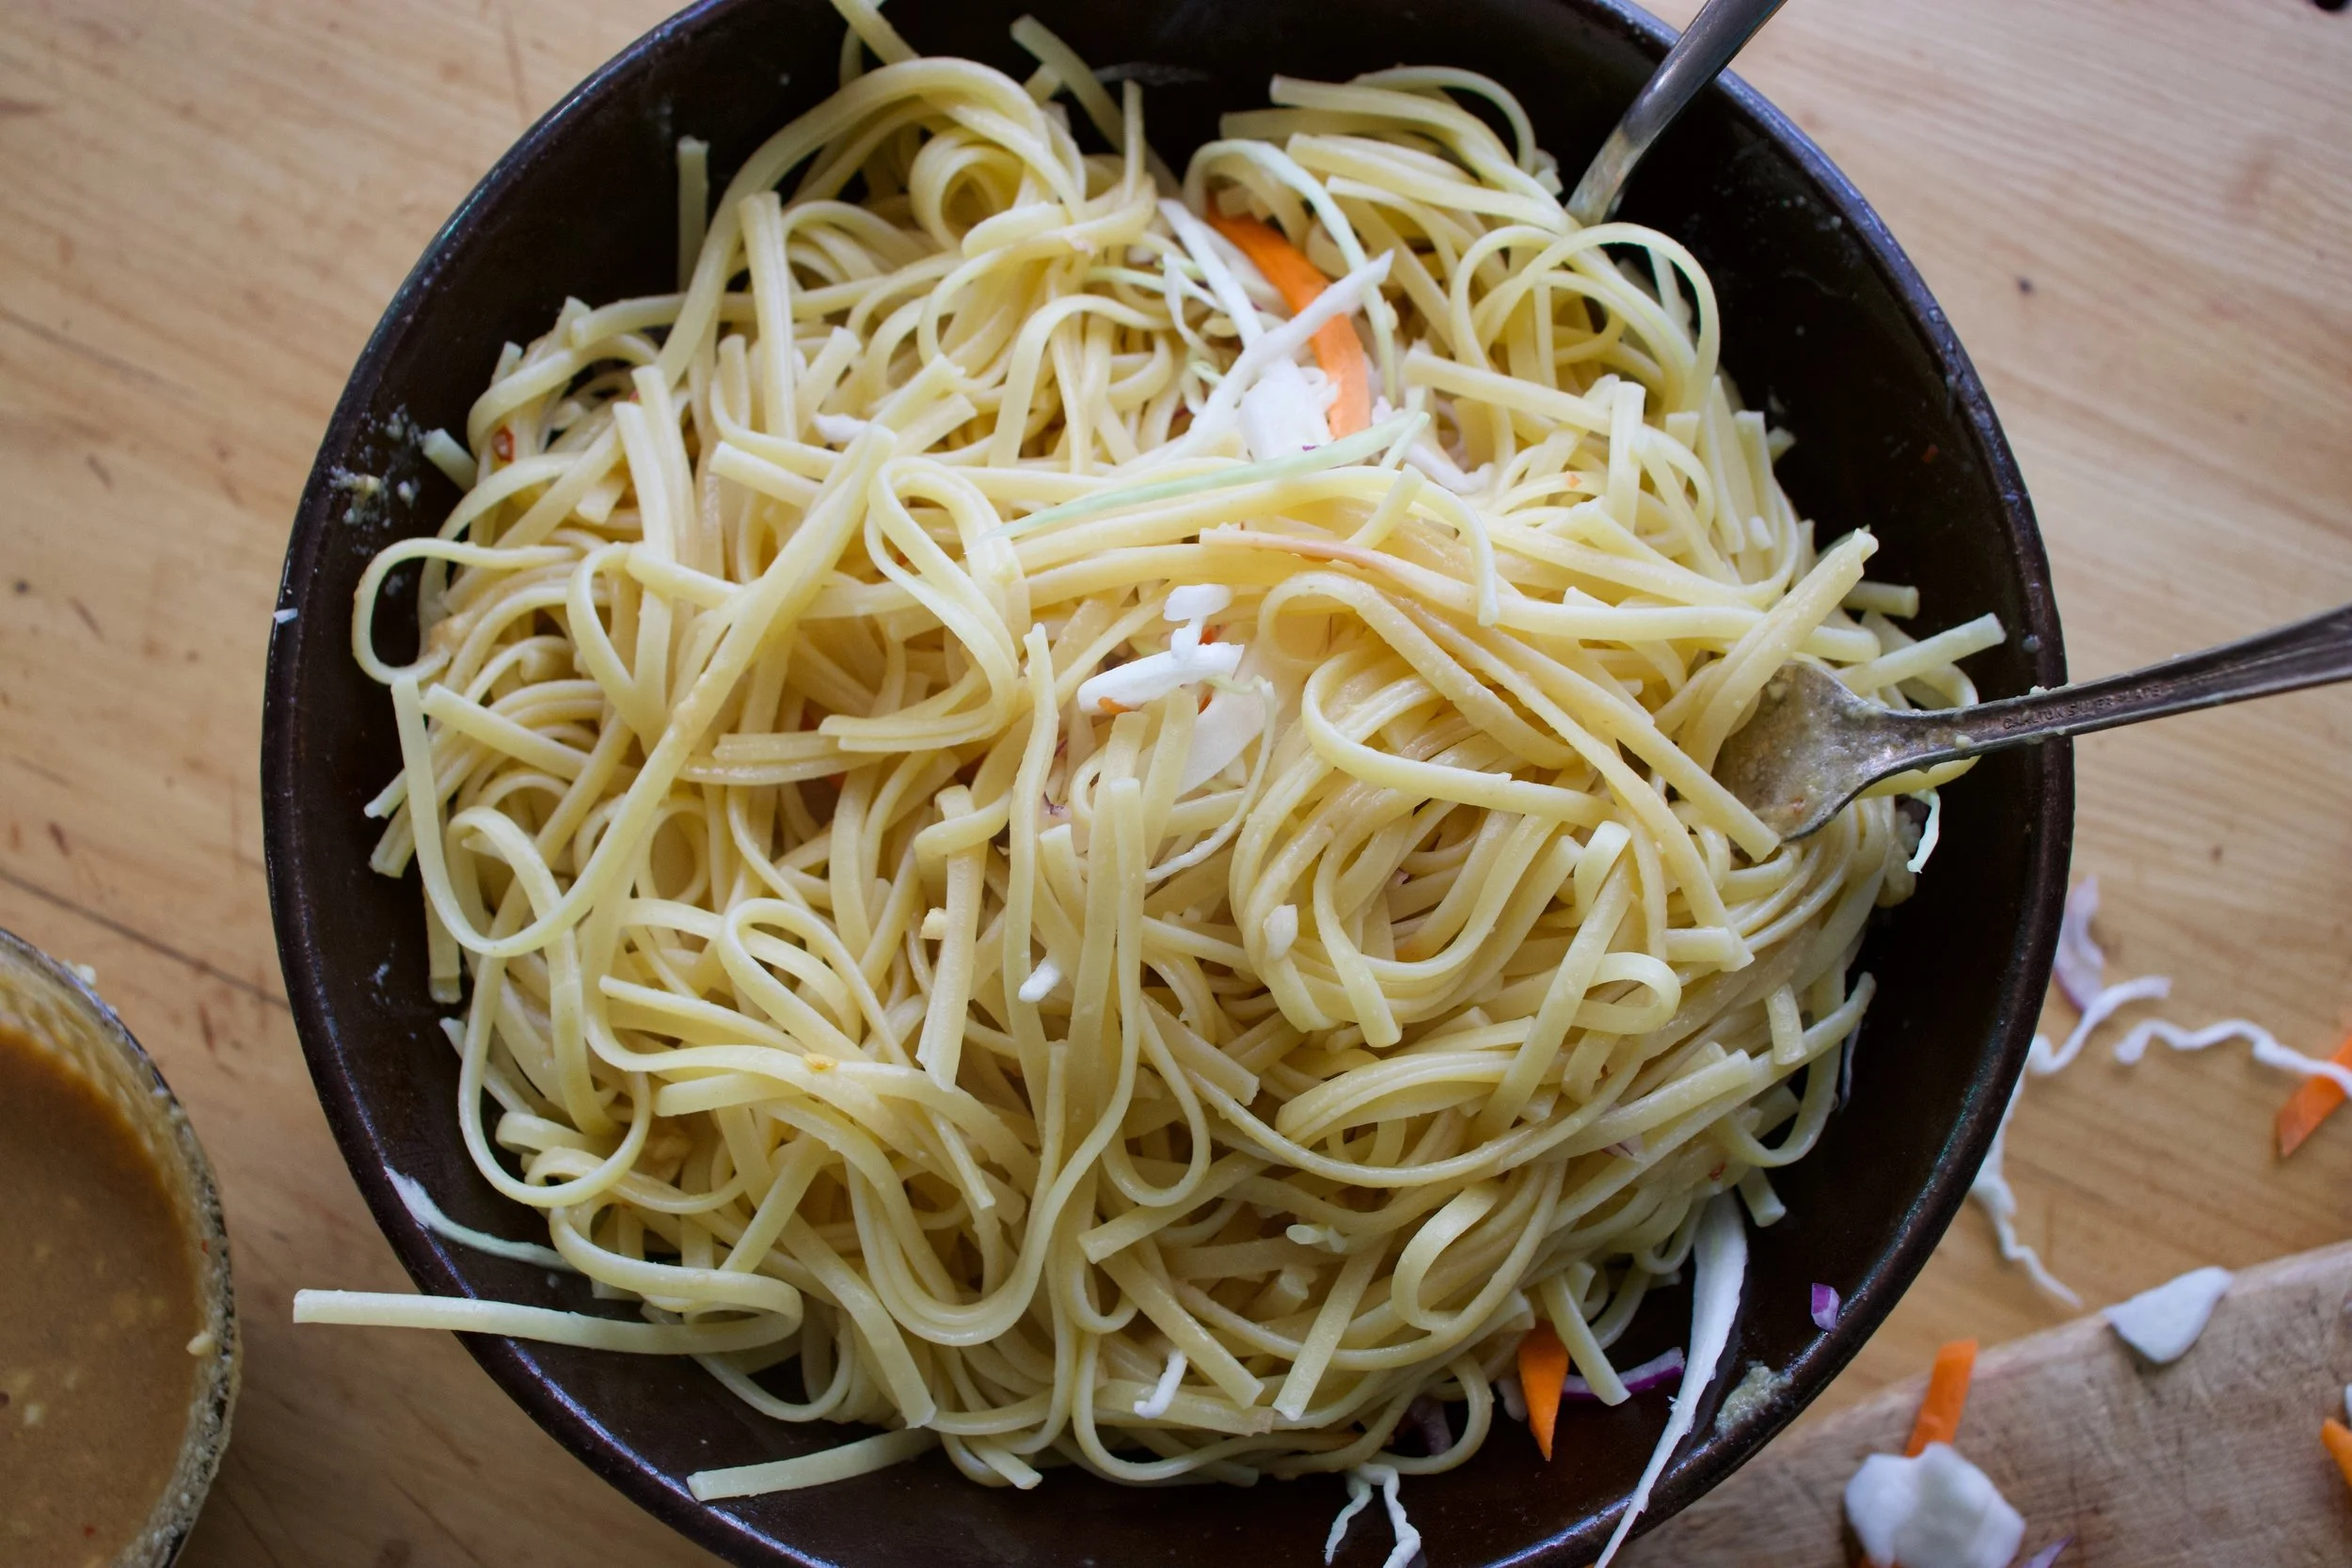
Add in the cooked noodles
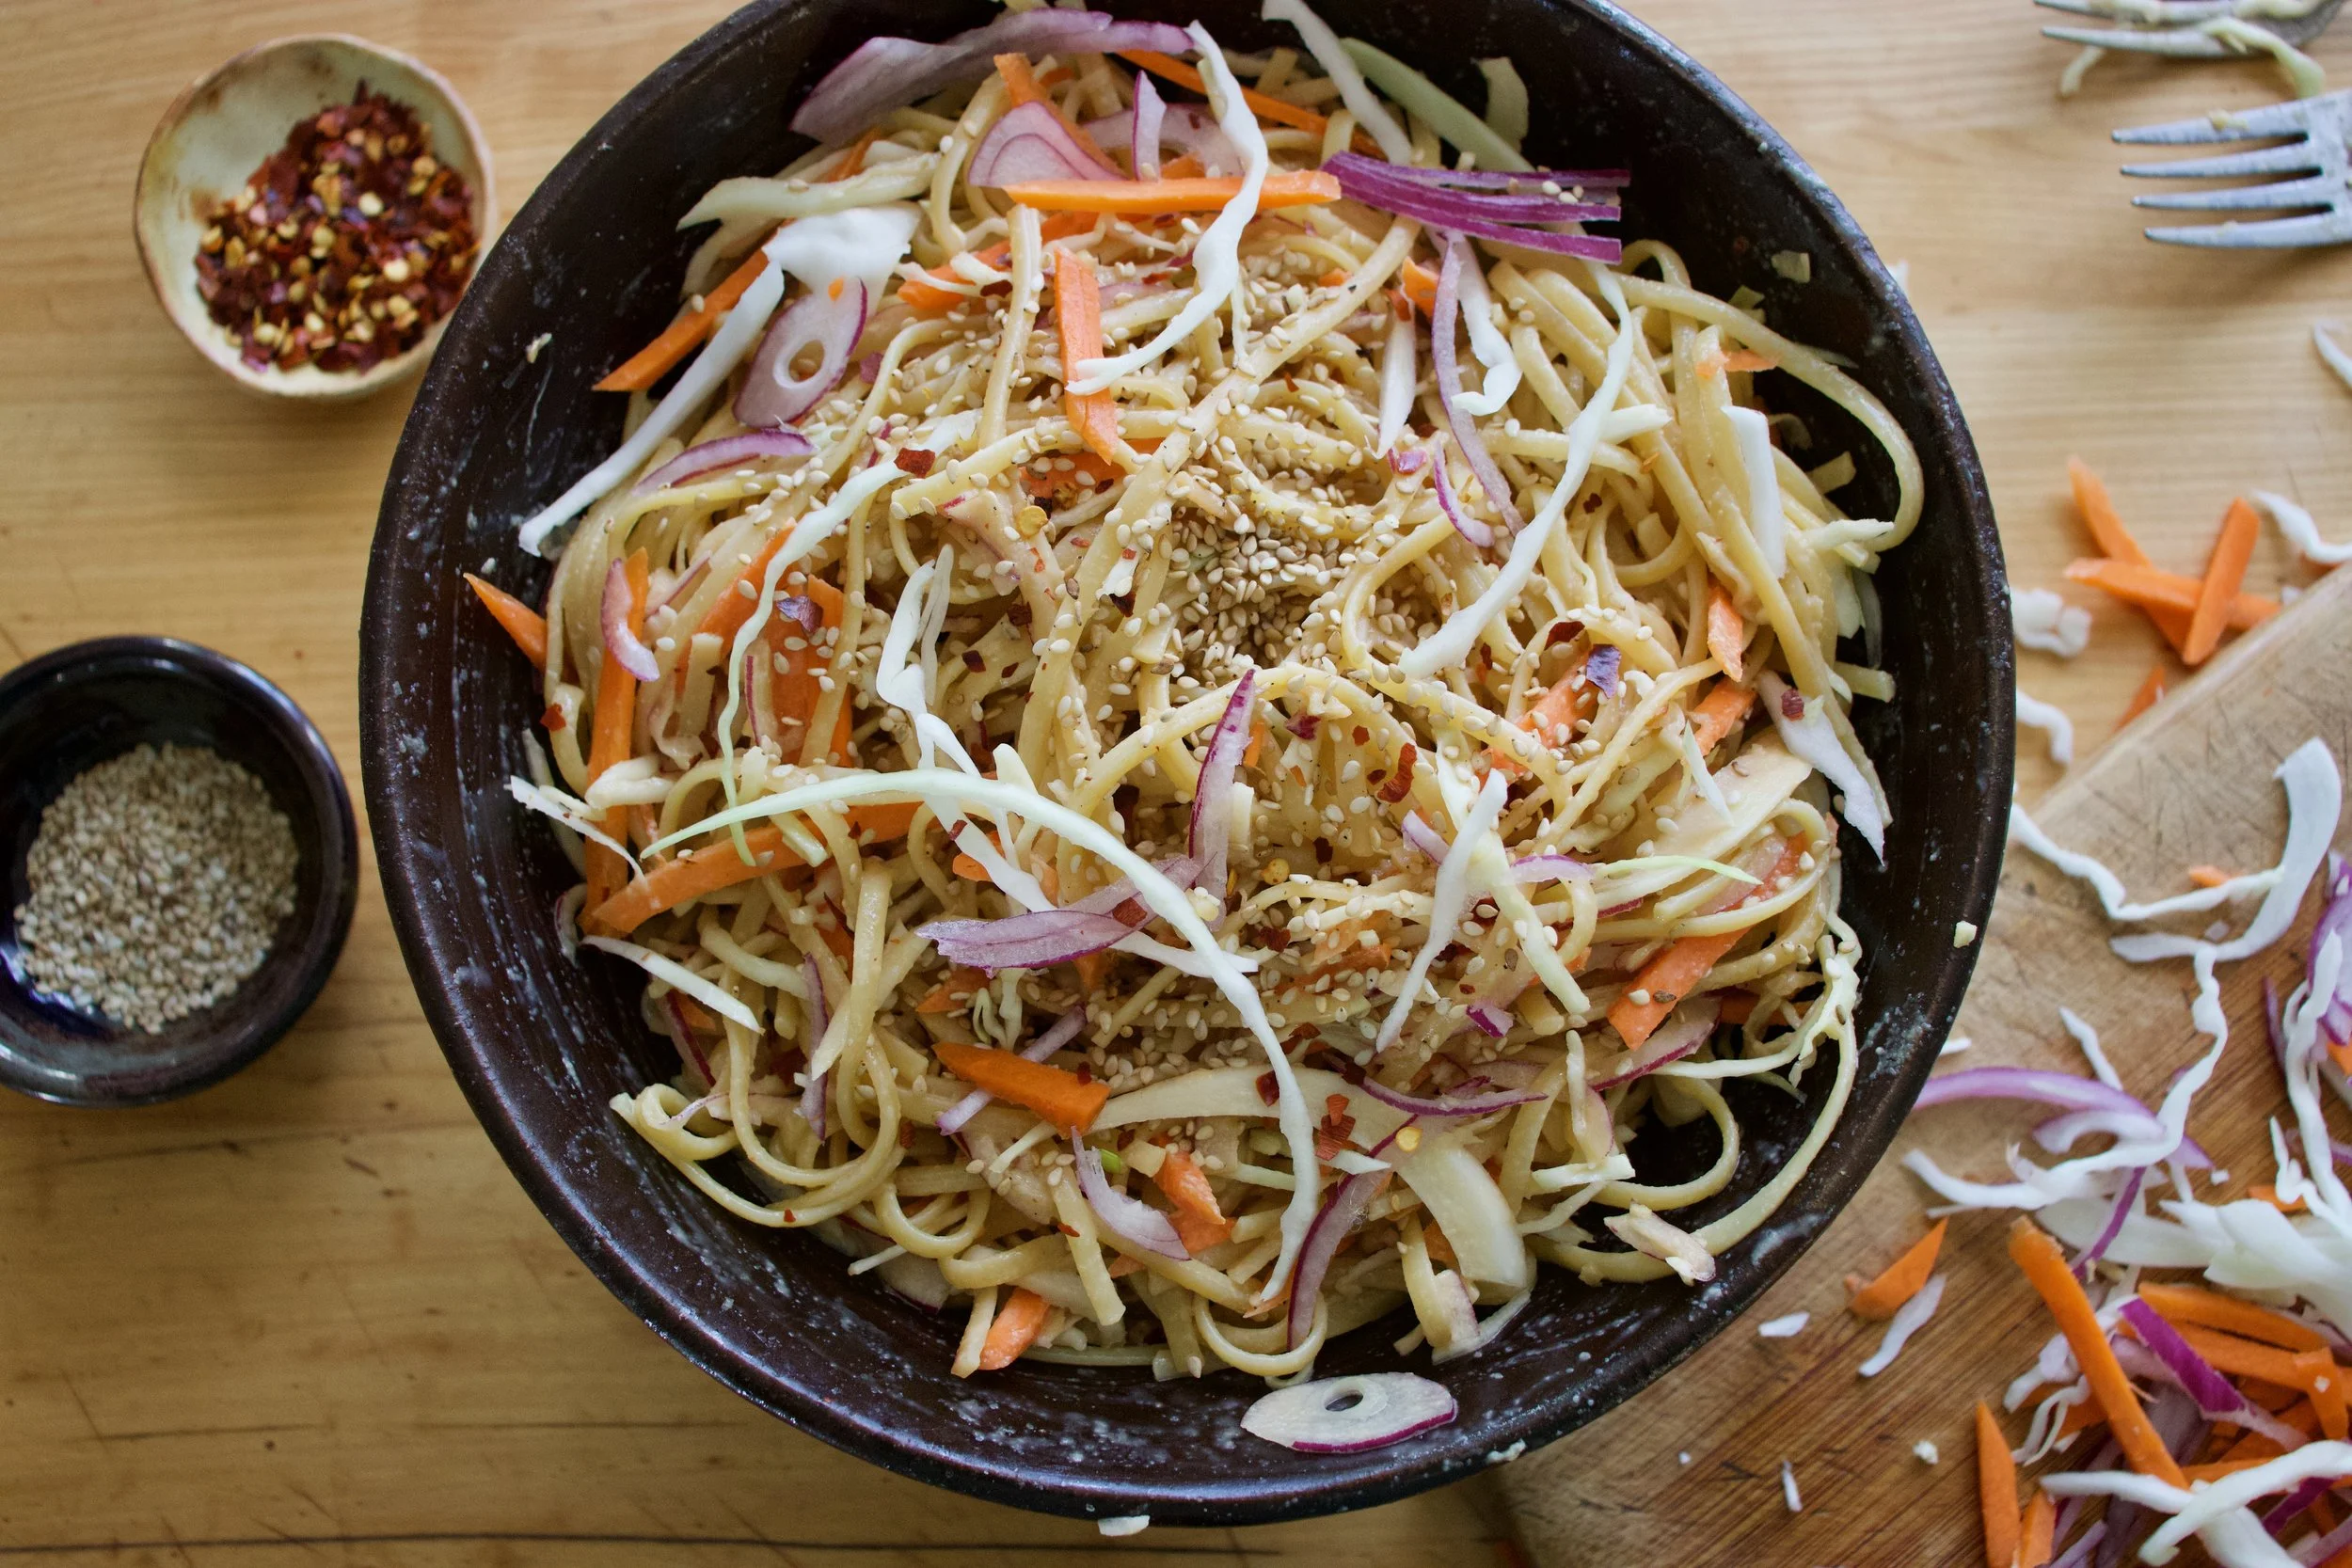
Cover with sauce and toss all around until all the noodles are coated and delicious. Sprinkle with sesame seeds and a pinch or so more of pepper flakes.

And then it is time. Eating time.
Happy spring!
-C
serves 3-6
-
3/4 lb (3/4 of a package) of your favorite spaghetti noodles (or linguine or similar noodle)
-
2 tablespoons toasted sesame oil
-
1/4 cup soy (low sodium if you have it and gluten free tamari if needed)
-
3 tablespoons red wine vinegar
-
3 tablespoons tahini
-
2-4 teaspoons red chili flakes
-
1-2 teaspoons sweetener of choice (maple, honey, or brown sugar)
-
4-5 cloves garlic
-
1-2 tablespoons toasted sesame seeds
-
about a 1/4 head of cabbage
-
a carrot
-
small red onion
Bring a pot of water to a boiling cook the noodles as directed on package. You want them al dente, cooked all the way, but barely. No soggy noodles. (unless you like them soggy)
In the mean time, shred the cabbage, julienne the carrot (or shred it) and slice the onion so very thinly. Place into a large bowl. Now mince garlic and place into a bowl along with the soy, sweetener, vinegar, tahini, sesame oil and a teaspoon or two (more for spicier) of chili flakes and whisk until completely incorporated. Taste and adjust if needed. Add more tahini for more body, more sweetener if needed or more hot pepper flakes for more spice.
Once noodles are cooked, drain and place into large bowl along with the shredded and julienned veggies. Pour in the sauce and toss it all around until all the noodles are covered. Sprinkle in the toasted sesame seeds and a small pinch more of the red pepper flakes.
Eat. Eat warm, room temp, or cold. They are delicious any way.
Any left overs just stick in fridge. Can be reheated or not. Also, you can make the sauce and the noodles a few day ahead of time of when you want to have the dish Just mix the sauce with the noodles when you are about to serve them%u2026 So simple!
I am sadly at my last few bags of frozen garden foods from last season. As of now I have a bag of tomatoes, a couple bags of shredded zucchini, and a bag of rhubarb. Well, had a bag of rhubarb. I think I have eaten almost all of it already. My rhubarb patch better get up and producing stalks soon. And as for the rest of the veggies that I will require. Guess I am going to be surviving mostly on roots from farm share (we are getting a lot more greens though!!!!) and probably doing a bit more grocery shopping then I care too. A few more months. I can do it.
Anyway, enough about my freezer and lack of fresh produce problems.
Here in Vermont maple season is well on it%u2019s way making it a perfect time for anything maple. And rhubarb. Yeah I am using my frozen rhubarb from last year, but any time now (after the snow melts) there will be plenty of stalks for the taking. There will be so much maple and so much fresh rhubarb which are the perfect taste combination. Exciting times! And when added to oatmeal, things just get more gooder. (I know gooder is not a word but I think it should be) Oatmeal, especially baked, is the stuff where all gooder things start.
Have you had baked oatmeal yet? It truly is fantastic. Not at all gummy and gloopy like stove topped cooked oatmeal (but I like it like that too). It still has a good bite to it while still being soft and creamy and boy oh boy is it just the bees knees. With the addition of some crunchy almond friends, well even better. Trust me. If you are a oatmeal eater, you must try it baked. Best part is that it can be eaten as breakfast but also I have been serving it to the mr for dessert with a healthy drizzle of more maple. It%u2019s that good friends. From breakfast to dessert. Everyone is happy.
To the baked oatmeal.

The stuff. Old fashion oats, cinnamon, salt, baking powder, rhubarb (fresh or frozen), REAL maple syrup, some plant milk, a few flax eggs, a bit of tahini, and some almonds.
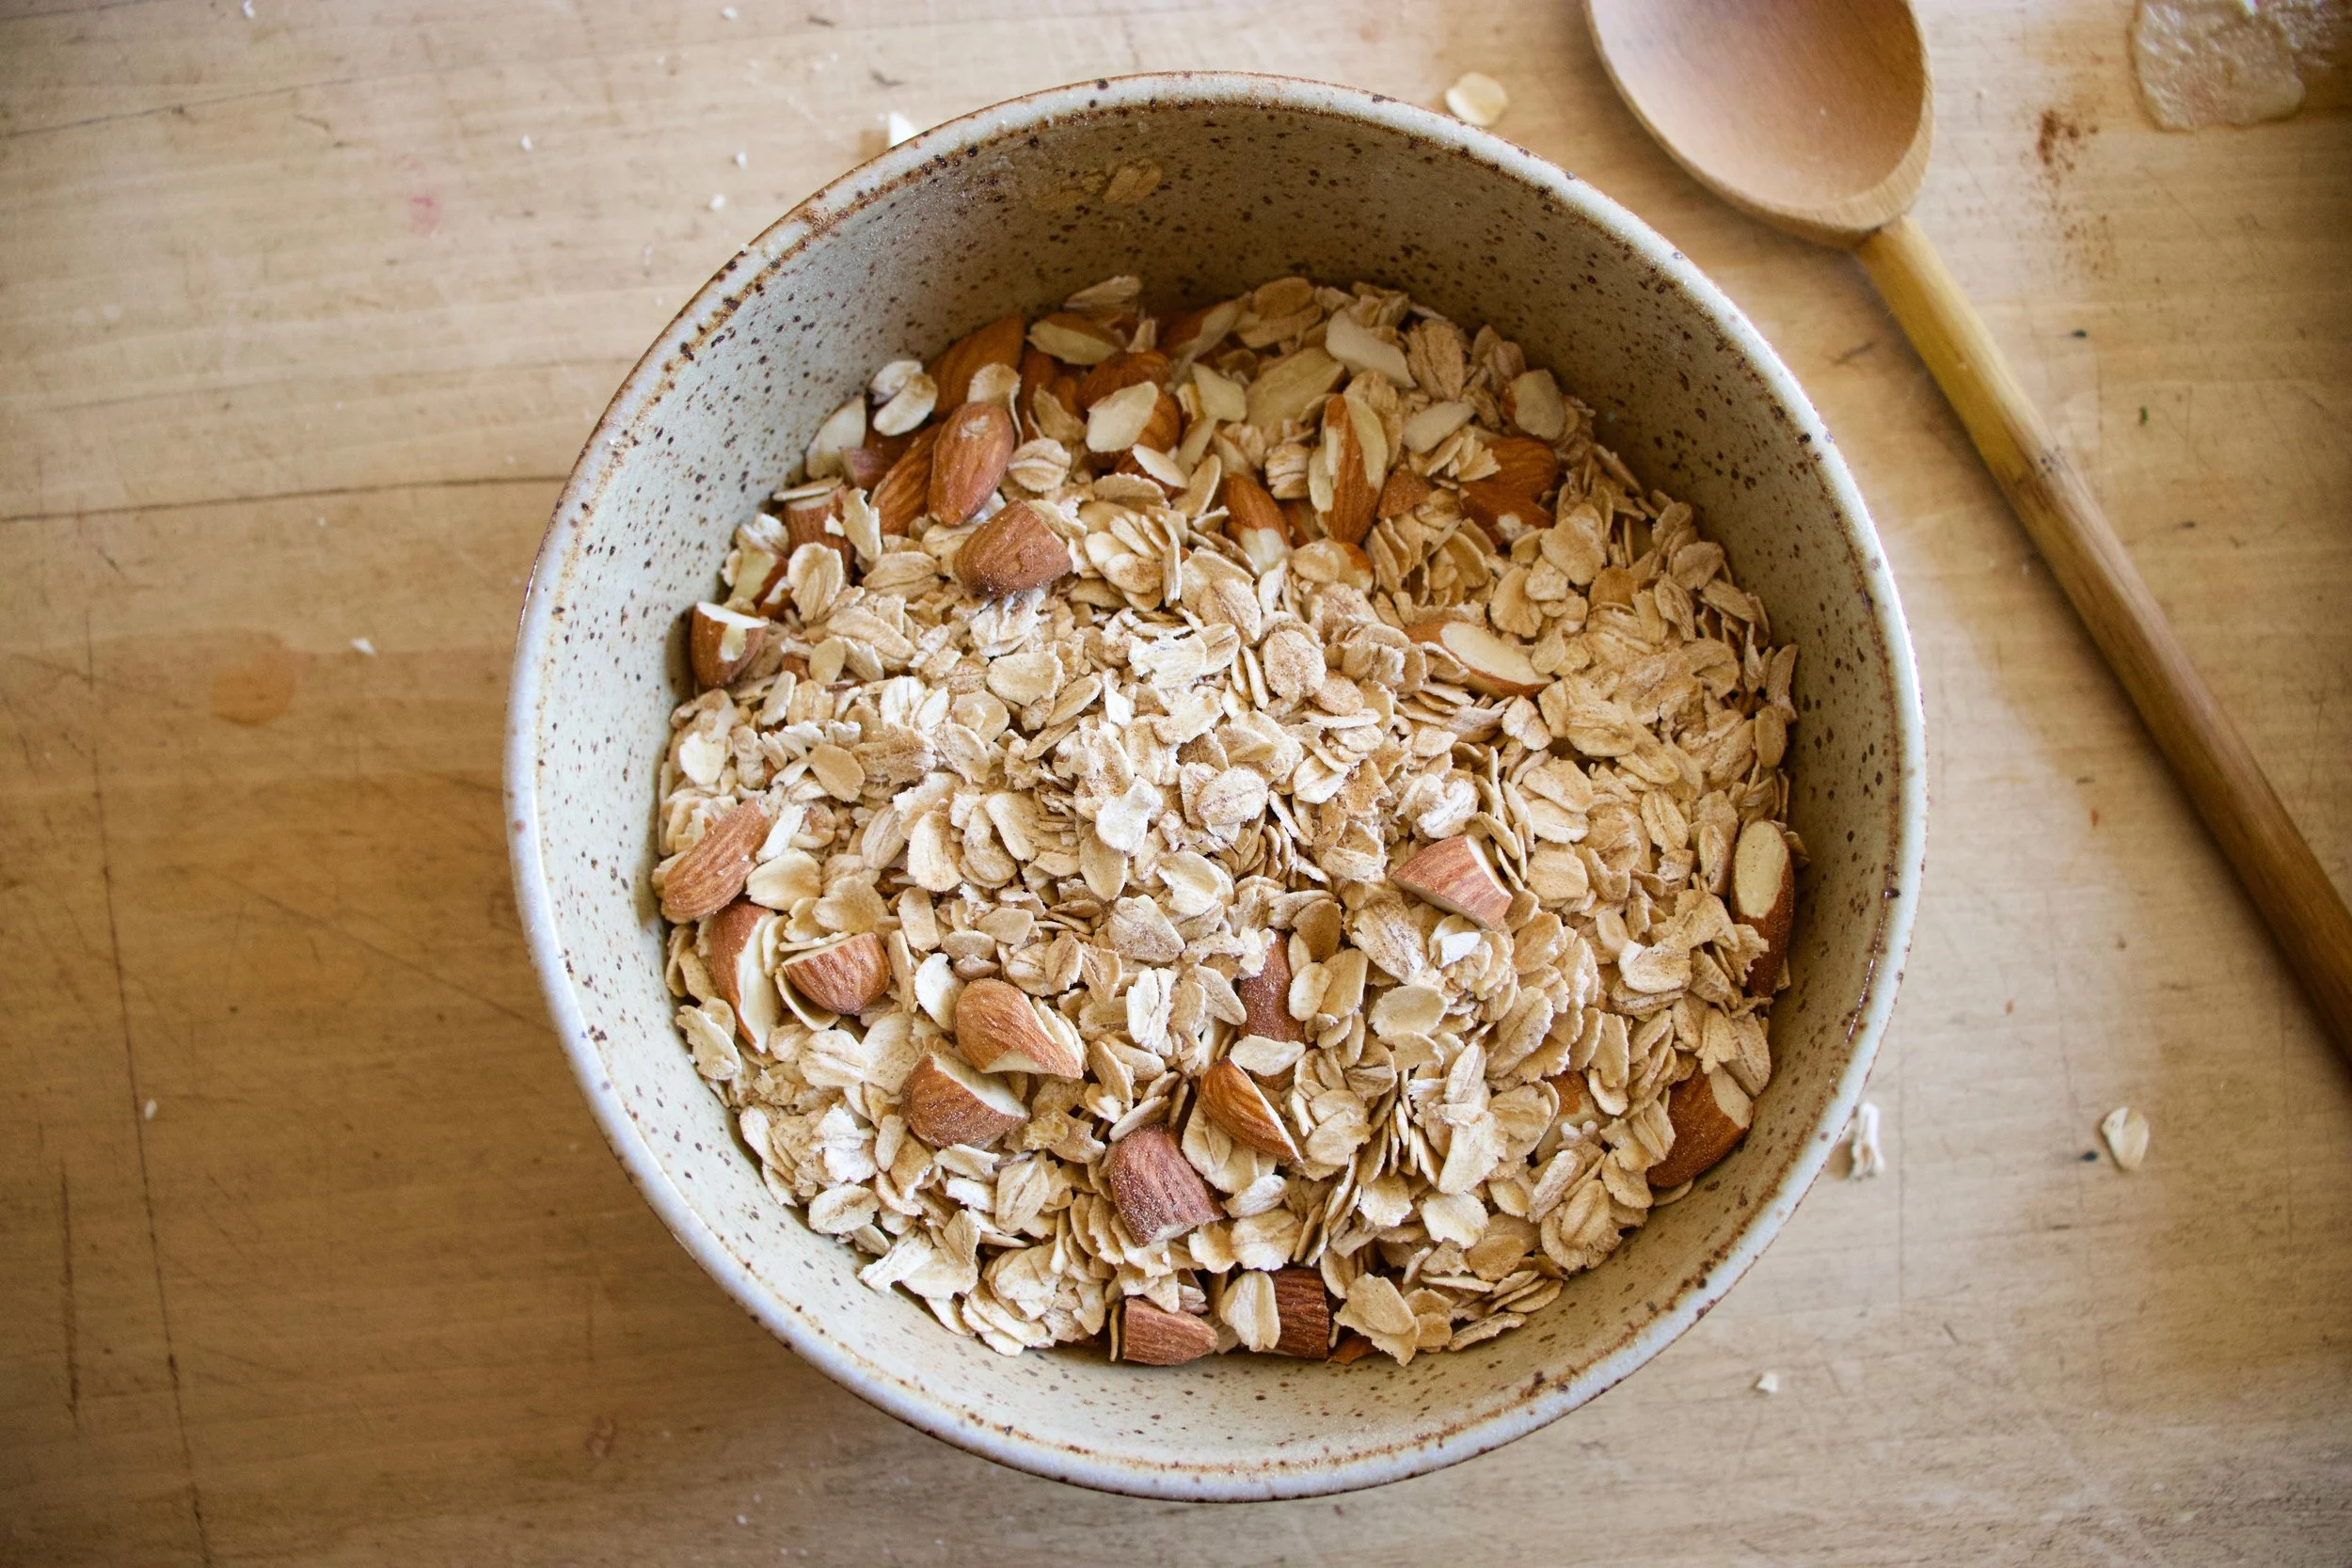
To start. Oats, cinnamon. salt, baking powder and almonds get a quick toss together in a big bowl.
If you rhubarb is not already chopped up into inch long pieces, do that. I already did before freezing it so yea me. Once its chopped, layer almost all of it (reserve a few small needful to toss on top) into a lightly greased 9×9 inch baking dish then cover evenly with the oat mixture.

In now empty bowl mix together the milk, the flax eggs, the tahini, and the maple until evenly incorporated.

Pour the wet mixture all over the oats and let it absorb.

Once the liquid is all absorbed , top with any left over almonds and the left over rhubarb. For good looks.
Pop into a hot oven to bake.
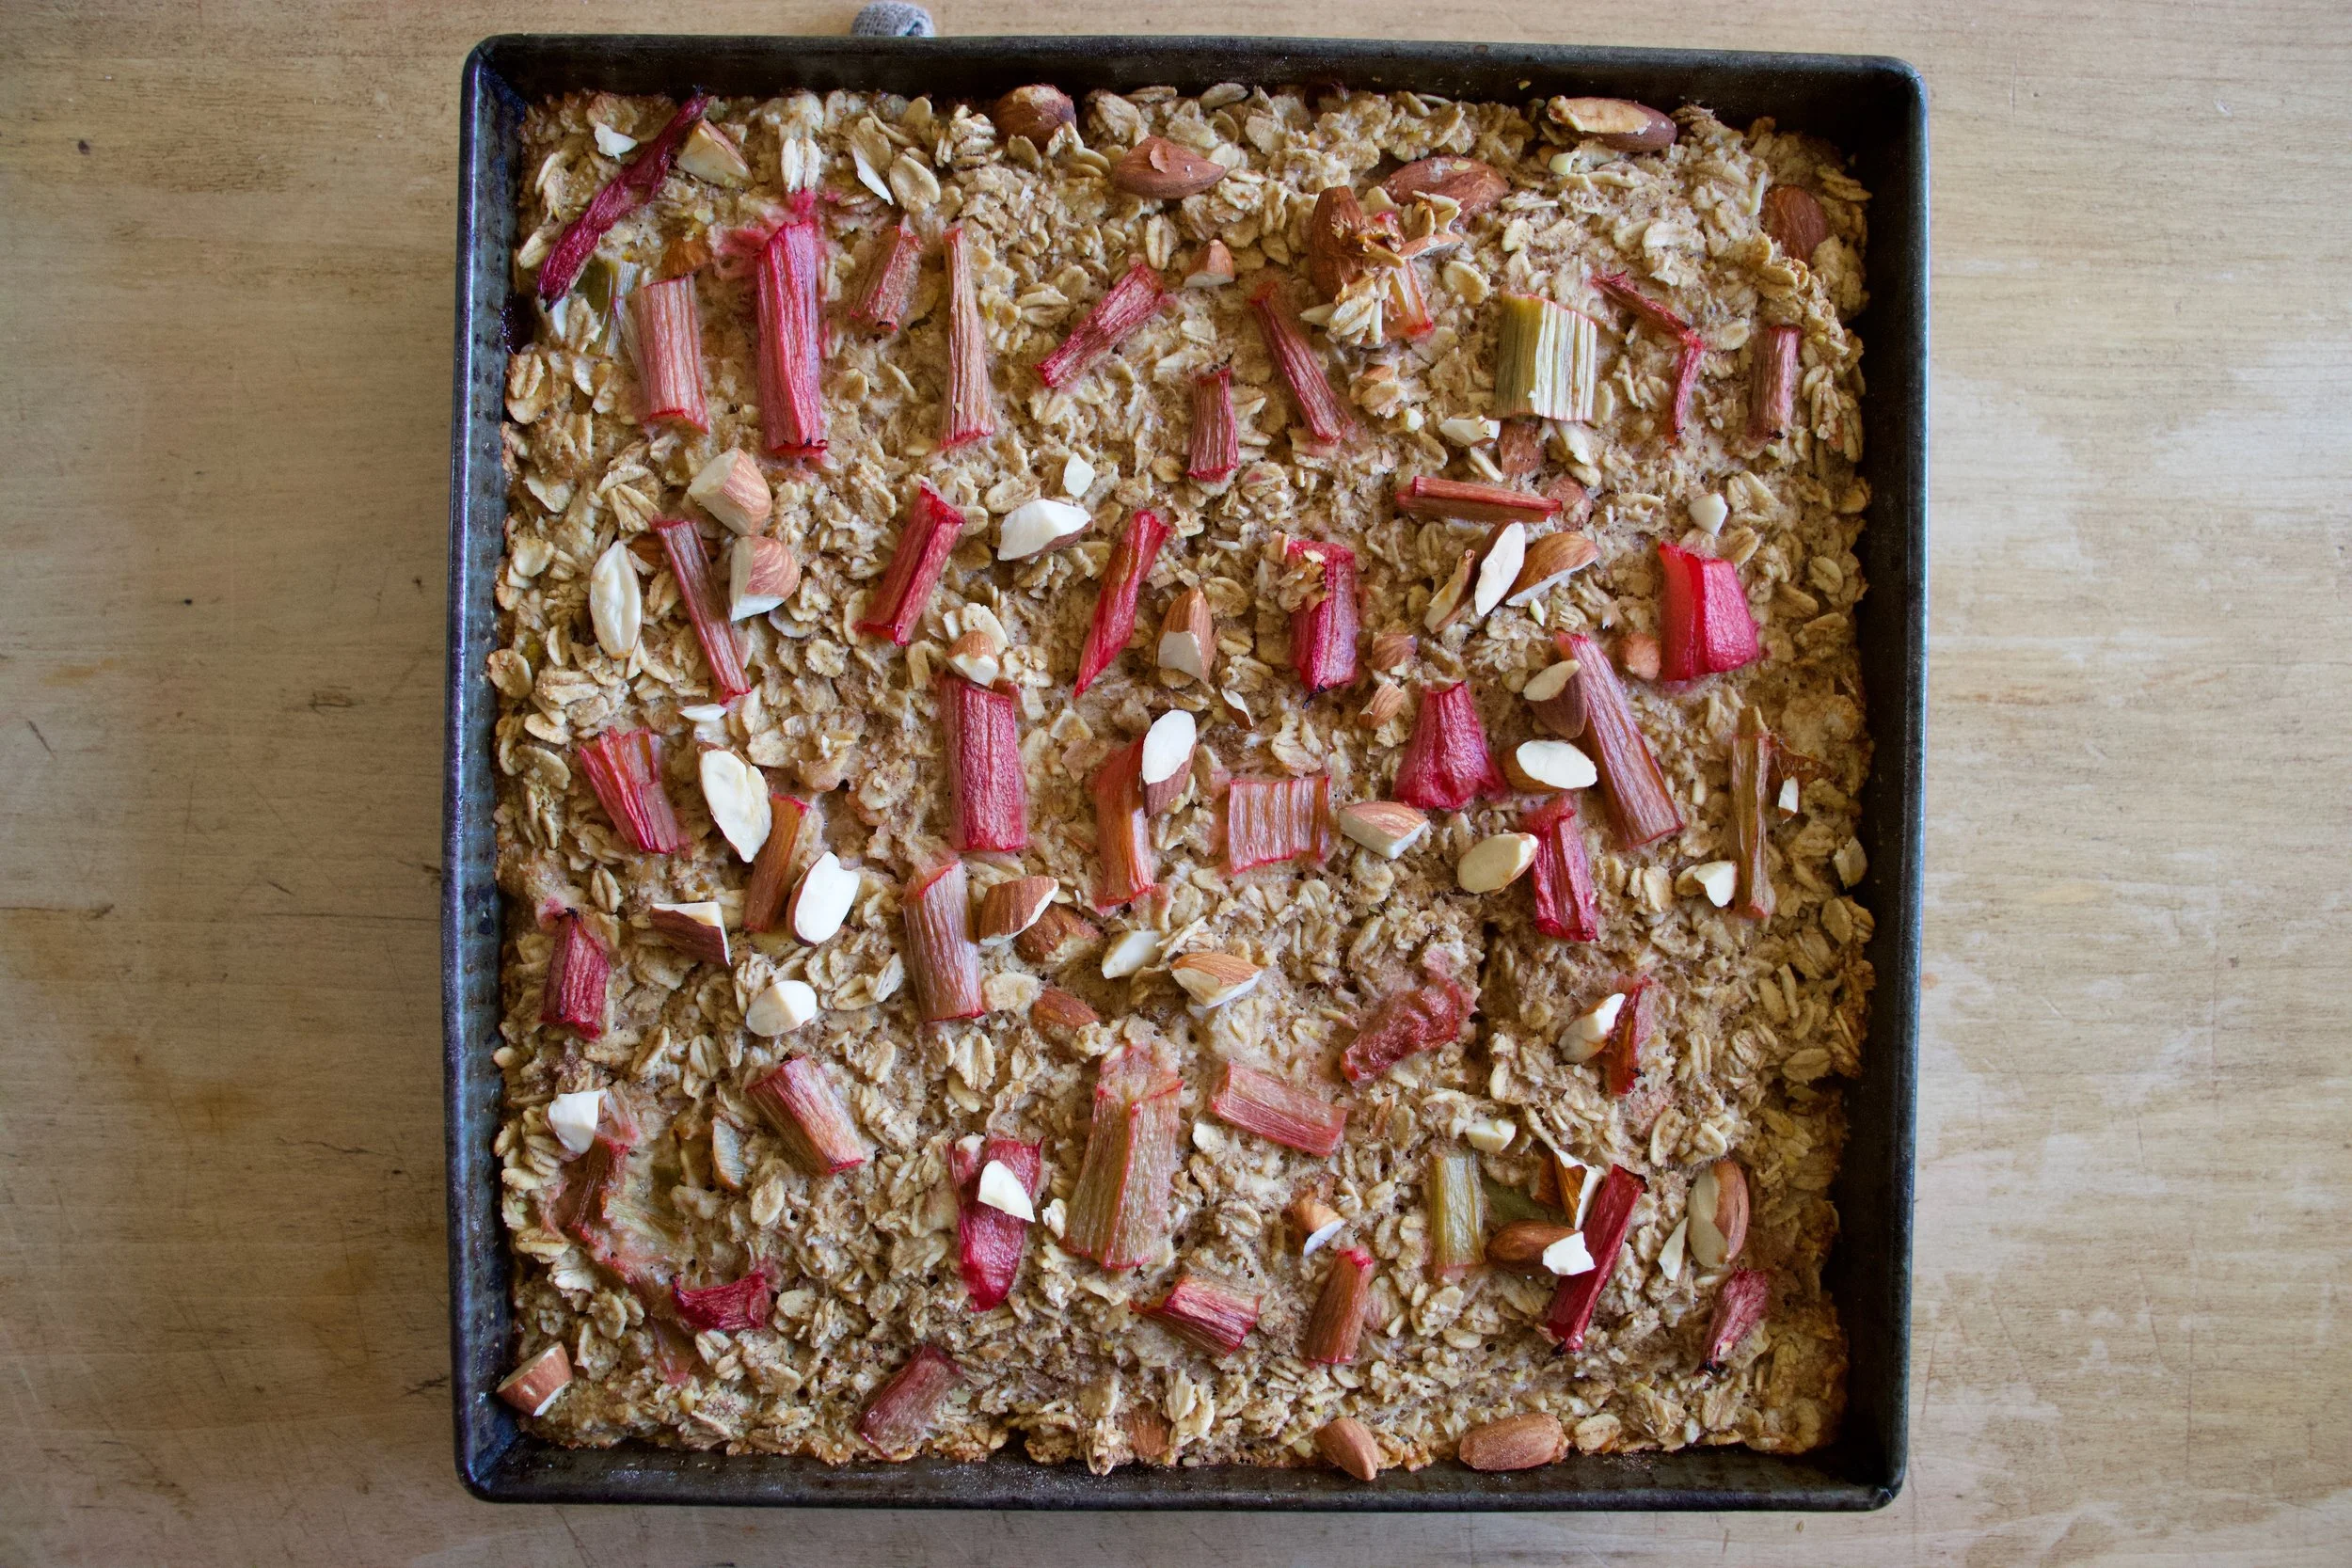
Golden brown with crispy edges. Rhubarb and maple baked oatmeal for all your maple, oaty and rhubarbie needs.
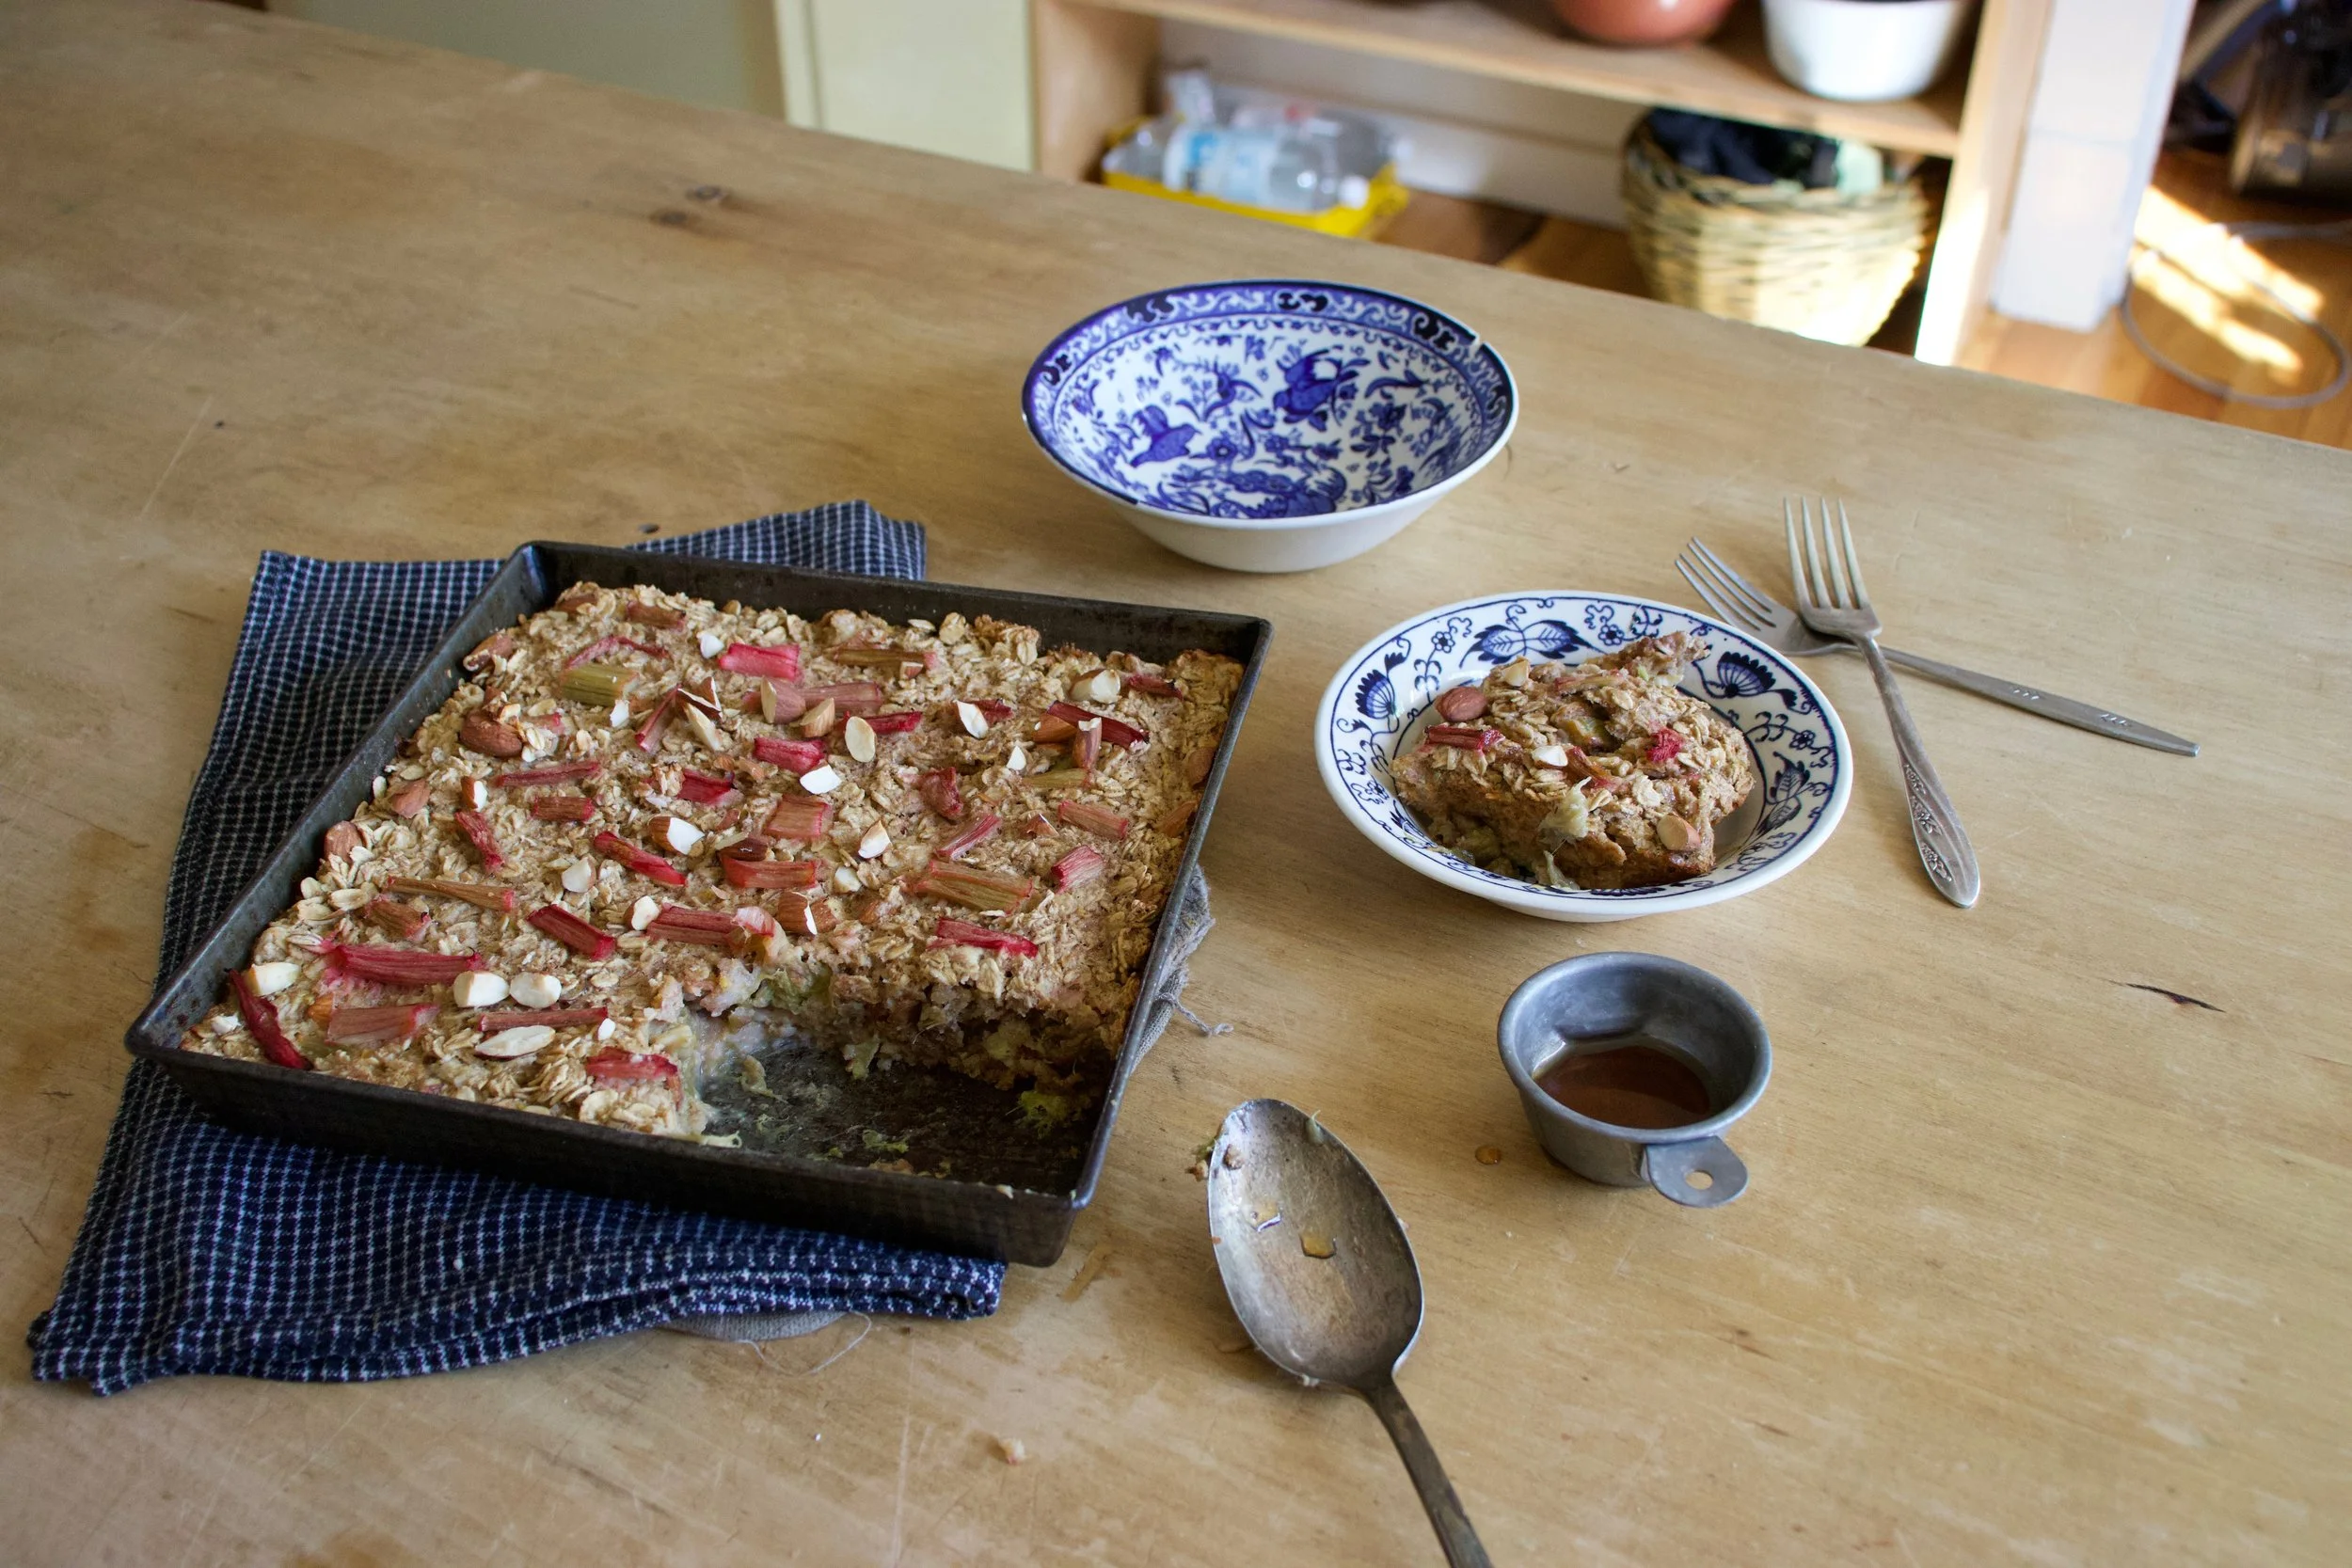
Fresh from the oven scooped warm into bowls. Top with extra maple if thats what you should want do.
Enjoy and happy maple season!
-C
Make a 9×9 pan of oatmeal
-
2 1/2 cups old fashion oats (make sure gluten free if need be)
-
1 teaspoon baking powder
-
1/2 teaspoon salt
-
2 teaspoon cinnamon
-
1/3 cup maple syrup plus more for serving
-
1 tablespoon tahini or any other nut butter
-
2 flax eggs (2 tablespoons ground flax seed with 6 tablespoons warm water)
-
2 1/2 cups fresh or frozen rhubarb chopped into inch long pieces
-
1 1/2 cup plant milk (water works but it won%u2019t be as creamy)
-
1/2 cup chopped almonds (optional)
Preheat oven to 375
Lightly grease a 9×9 inch baking pan (I used metal because it makes for crisper edges but glass works too) and dump 2 cups of the rhubarb in and evenly distribute on the bottom. In a large bowl mis the oats, the baking powder, salt, and cinnamon together. Mix in chopped nuts if you are using. Evenly cover rhubarb with oat mixture. In now empty bowl mix together the milk, flax eggs, maple syrup, and tahini until evenly incorporated. Pour mixture over oats. Let the mixture sit for a few minutes until the oats have abosbed all the liquid. Toss the rest of the diced rhubarb and a few more chop nuts to the top and pop into the oven to bake.
Bake for 30-40 minutes (shorter time for a wetter oatmeal, longer for a denser crispier oatmeal)
Once baked to your likeness, remove from oven and let cool for a few minutes just so it is not super hot. Scoop into bowls and serve warm with extra maple and milk or whatever you might want to serve with it.
Left overs last great in fridge for 3-4 days or individual portions can be frozen for a month or two. Just pop into microwave for a couple minutes to warm up.


 My winter farm share is coming to an end this week. One more pick and then a three week stretch until the summer share starts… WHAT AM I GOING TO DO!!! Stock up as much as I can is what.
 The stuff….For the split pea gravy we have a carrot, a parsnip and a large onion chopped into small chunks. Salt, thyme, a bay leaf and of course the split peas. Then there is the celeriac root* sliced into 1/2 inch thick rounds and some plain old yellow mustard .
 Toss the chopped parsnip, carrot, onion and the spices into a pot on medium heat and let veggies sweat a few minutes until tender. Add in the split peas and enough water to cover everything. Turn pot on high and bring to a boil, then cover and turn to low. Make sure to give the pot a good stir ever few minutes and add more water if needed
  Once the peas have soften, remove the bay leaf and puree until smooth and oh so creamy. Taste and add more salt and pepper if needed. If you find that the gravy seems to thick, just add in more water until it’s the consistency that you want.
  The gravy is made, the celeriac is roasted… now we are ready to eat!!
  Stick the celeriac on a plate and dump good amount of that gravy right on top. Feel free to add a bed of spinach, or a grain or anything you want, because why not, and also some chopped tomatoes for a little acid and prettiness.


 This week was good. Two days in a row the front door was open, the window was open and the heater was off, which pretty much made me that happiest person in the world. My spring cleaning brain has kicked in and I want to clean everything (even the walls). I even spent a good part of an afternoon moving and rearranging furniture. (The house ended up basically the same as when I started) And one of the best parts of the week….most of the snow melted! I am getting super hyped to start raking, cleaning, planting and weeding and and just getting really dirty! Oh how I love the spring!
 Oh Intervale Community Farm..I love you. I picked up my farm share and was especially pumped for another gigantic kohlrabi and some locally grown, locally milled wheat flour.
 The trees, they are a budding
 The perfect ripeness, destined for naner ice-cream!
 My sister and I took this little for a sled ride through the wood where there was snow (but it was 45 degrees!) The hike ended up with me pulling her through a field of mud. It was fantastic.
  One year ago today. Dinner with my favorite people.







THE LOVELY CRAZY
May 20, 2019 by maximios • Blog
Do you ever wake up first thing in the morning with a craving, a maybe somewhat strange food craving? Lately I have been waking up and within an hour of being up, I start to think about olives. My mouth starts to water and it%u2019s like I can almost taste the salty, briny, fattiness in my mouth, which in itself is kind of weird, but for me is really really weird because up until very recently I completely hated olives. Now, well now I just want to eat them all. And first thing in the morning.
I don%u2019t pretend to understand such things. My brain is going to do what it%u2019s going do. Tell me I like olives, well all right then.
Another thing I am desperately craving is freshy fresh greens which makes complete since because I always crave greens. I am still pretty deep in root veggies and cooked things because winter and Vermont and all, but all I really really really want to eat are buckets of greens. Any kind will do, but the sweet tender baby ones%u2026. So good.
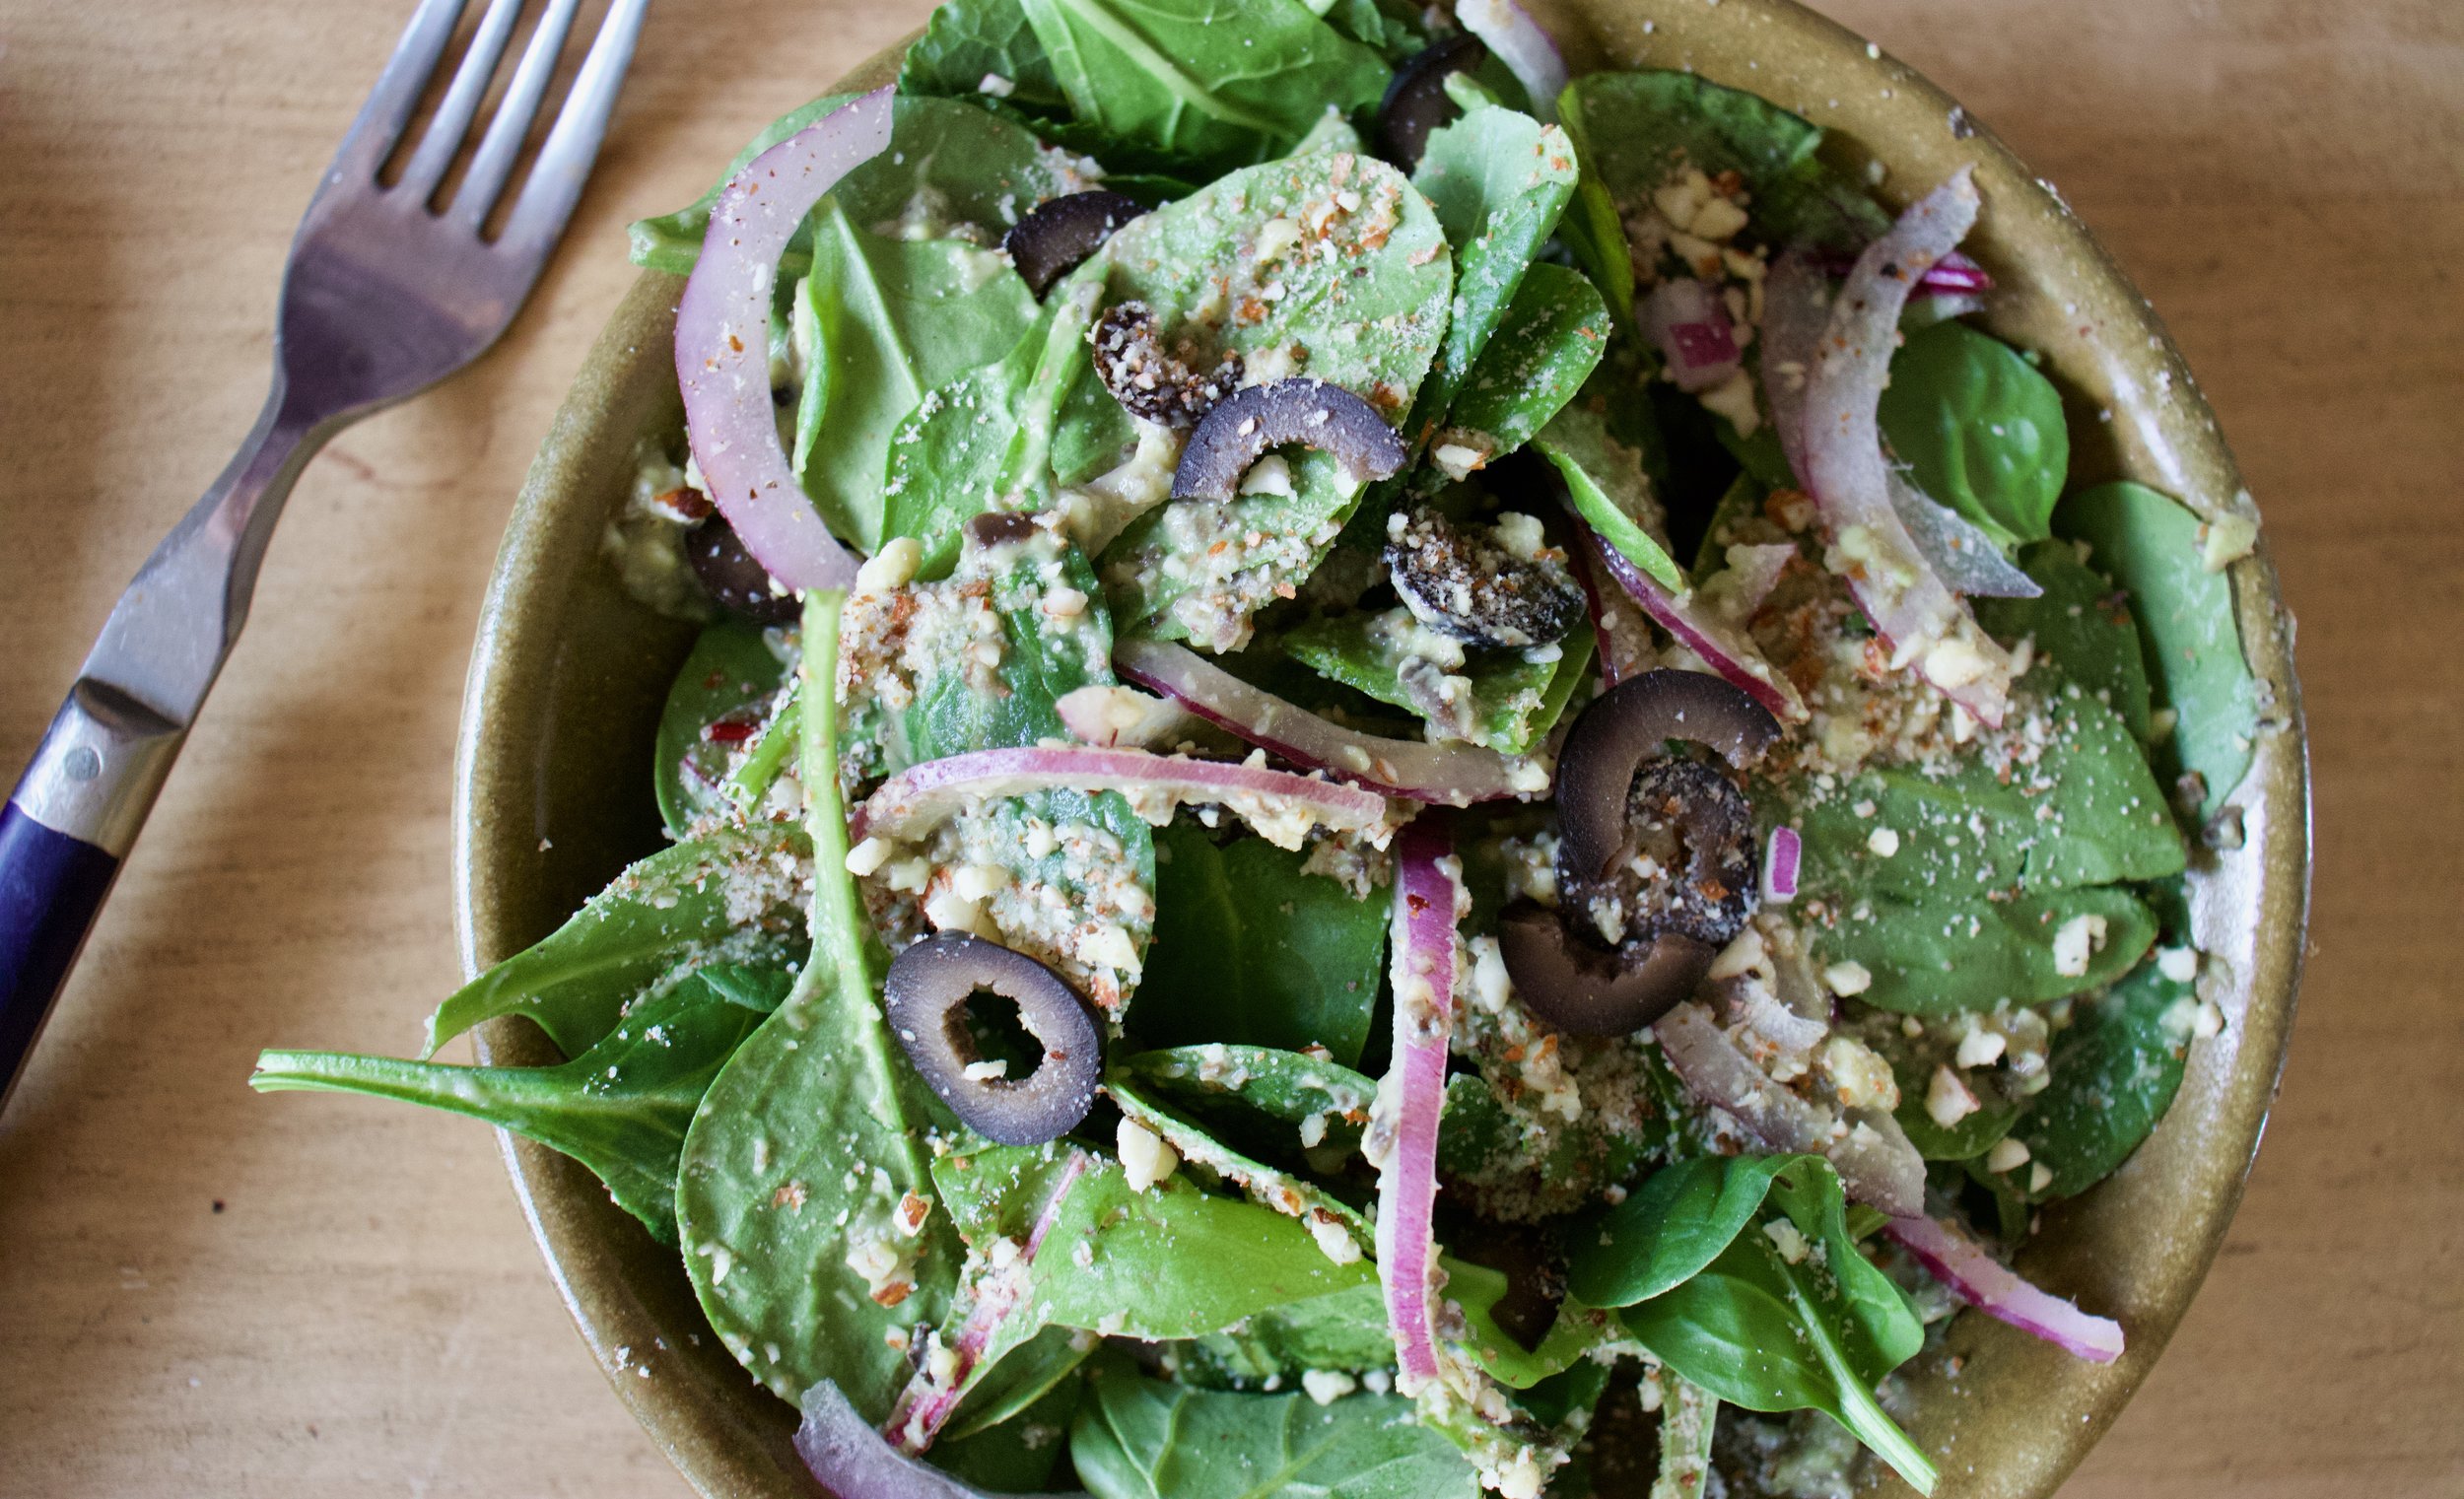
And so I combined my two cravings, greens and olives and hit those craving like POW! BAM! POOF? A salad so simple yet so amazing and mouth watering. I outdid myself here.
To the bestest, most amazingly perfect salad yet!
The stuff. A big ol%u2019 bowl of greens. Black pitted olives, half an avocado, a lemon, toasted almonds, a chunk of red onion, a couple cloves garlic, and pepper.
Almond crumbs. Exactly what it sounds like. Place almonds into a clean food prosessor and pulse until they are crumbs.
Dump the almonds into a bowl. Don%u2019t bother cleaning it out, you are about to use it again. Olives, avocado, garlic, and all the juice of the lemon now get a go in the food processor. Pulsed together into a creamy, kinda of chunky but mostly smooth, mixture of amazing. Add a few tablespoons of cold water if the mixture seems really thick, but other then that, you be done.
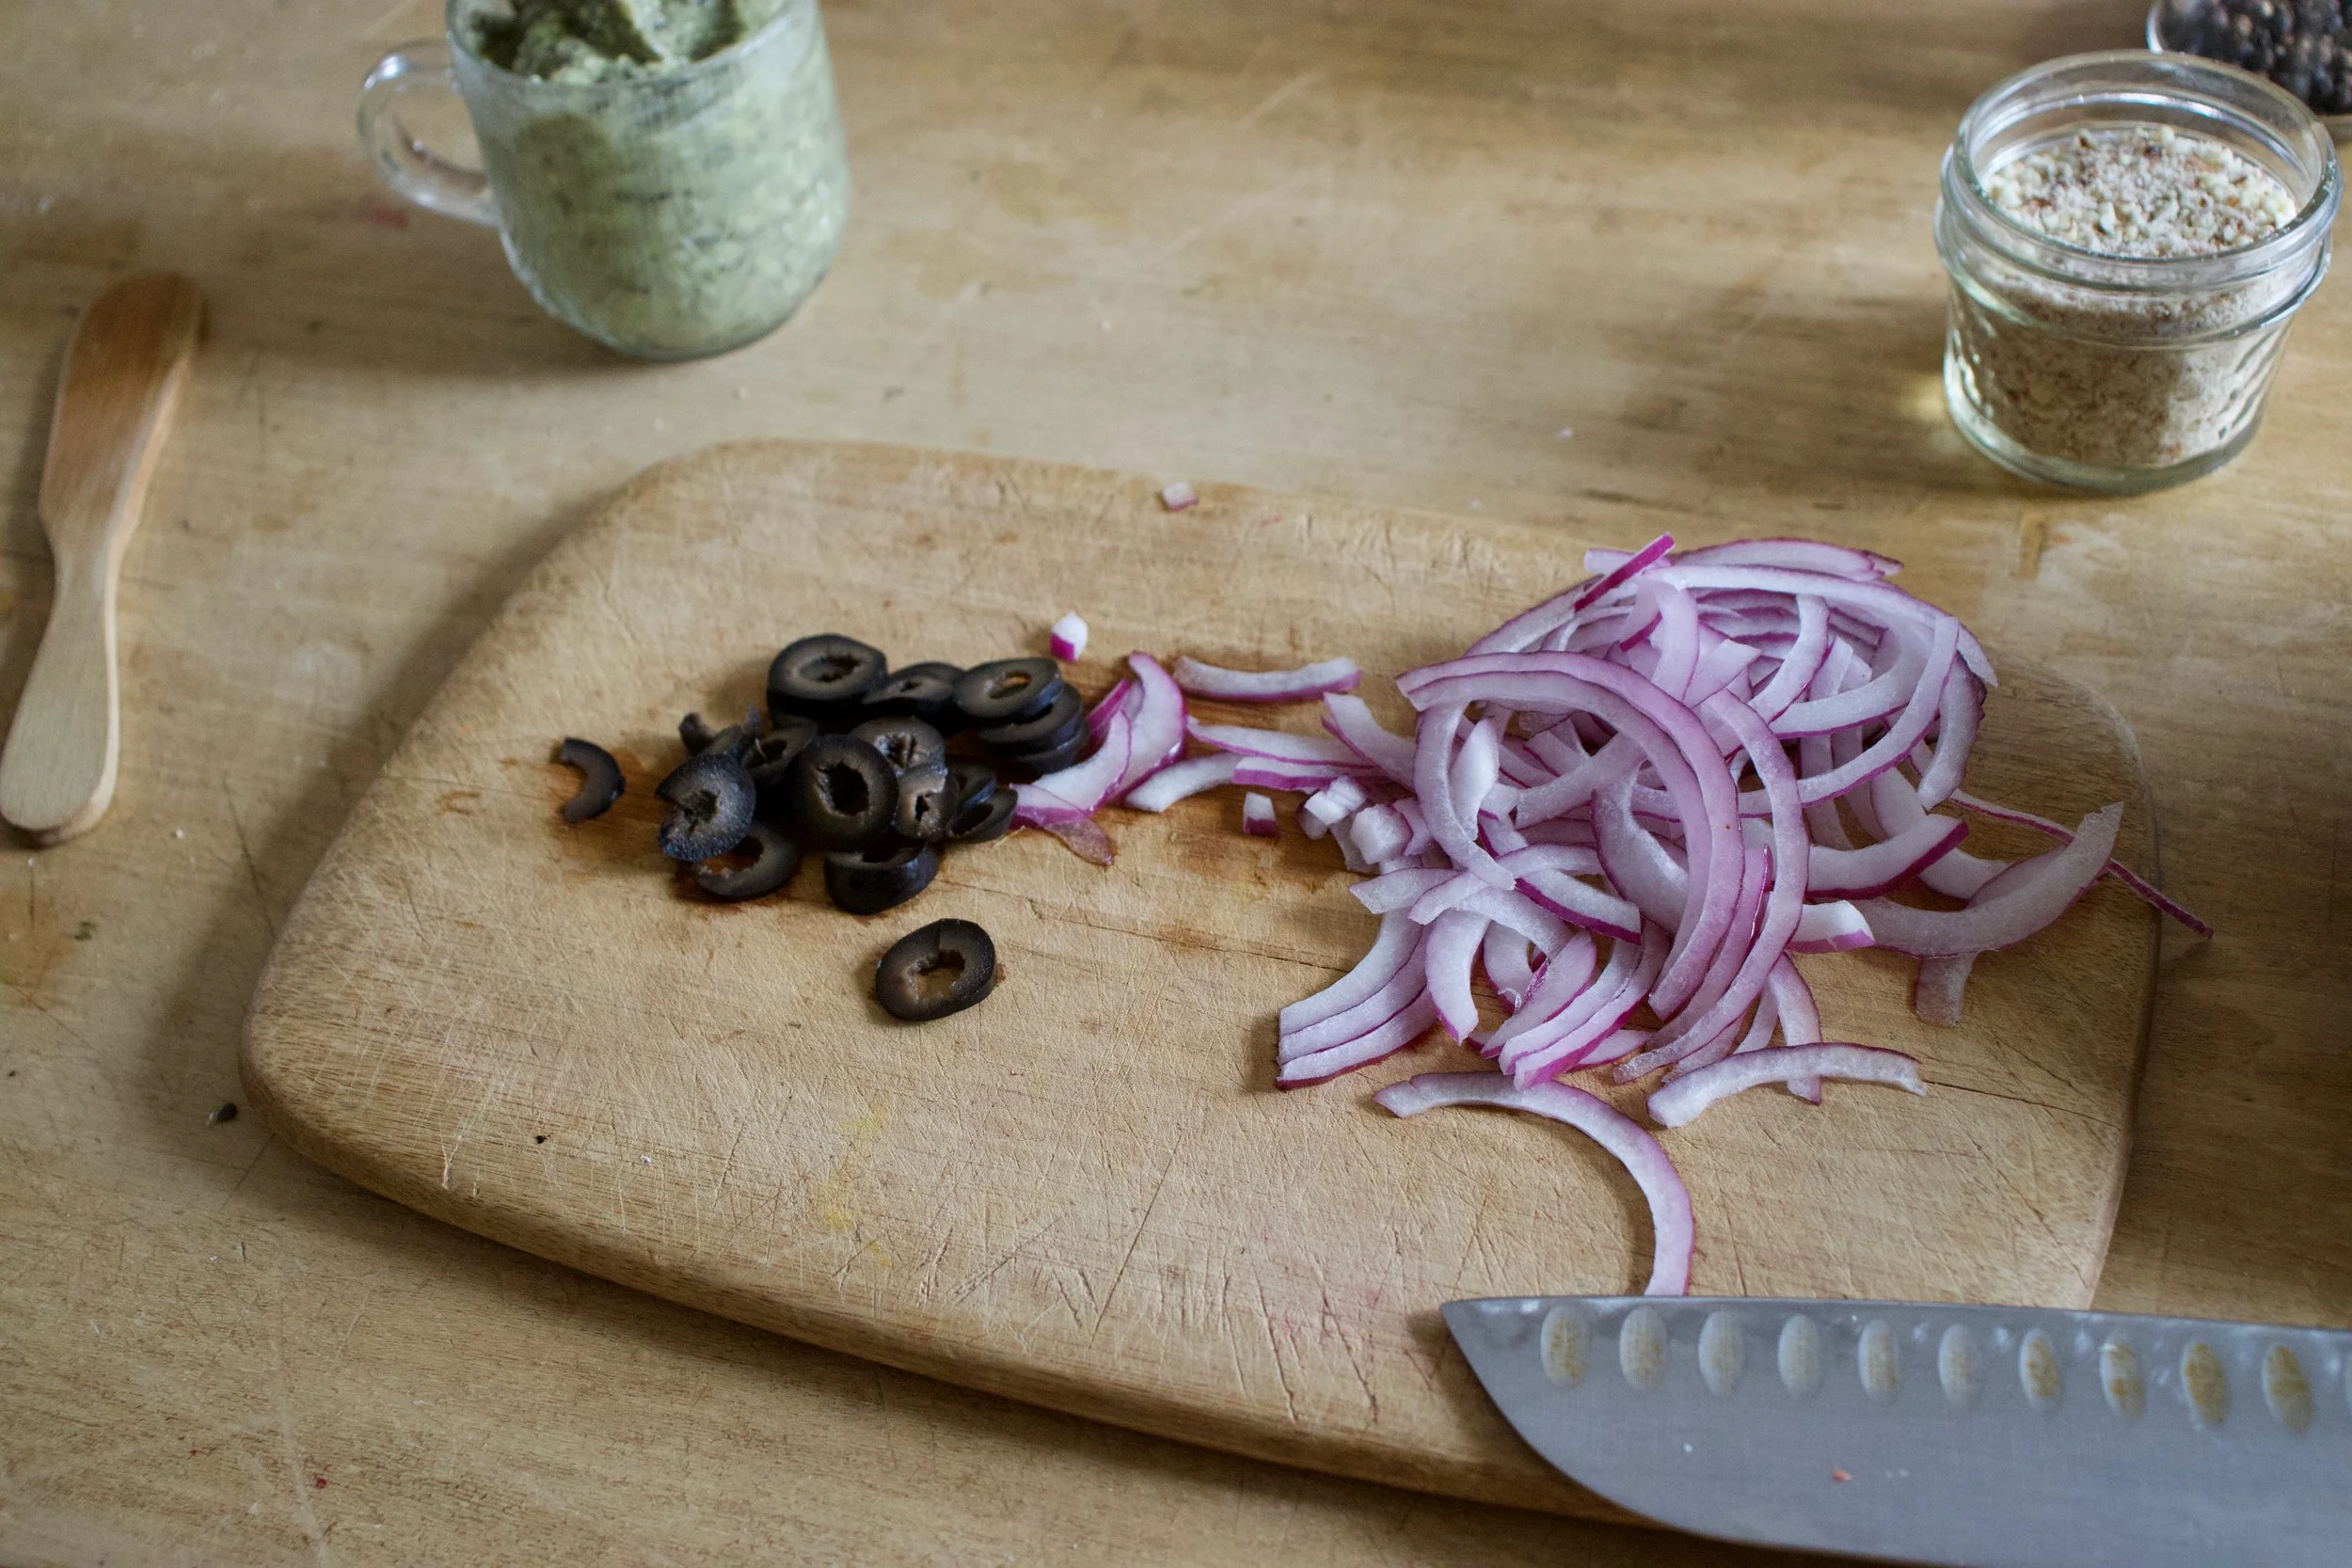
Very thinly slice up red onion and slice up a few extra olives.
All here, all ready to go. Just got to toss it together now.
Greens, some slices olives and onion tossed all together in a good amount of the olive avocado goodness then topped with a hardy helping of almond crumbs. Fresh pepper to finish it off.
I was barely able to stop myself from eating it all before snapping a few pictures.
All of my cravings come true%u2026
It%u2019s salad time!
-C
Makes enough dressing and crumbs to feed 2-4 people
1/2 of a ripe avocado
1 cup pitted black olives
1 lemon
2-3 tablespoons cold water
1-2 cloves garlic
1/4 cup toasted almonds
2-4 large handfuls of fresh greens (I used a mixture of baby spinach, baby chard, and baby kale. Spring mix or even chopped leaf lettuce would be grand as well)
about 1/2 a small red onion
pepper to taste
Place almonds in food processor and pulse until they are crumbly. Not to fine, a few big chunks are good.. Remove and set aside
Roughly chop the garlic and place in the food processor (no need to clean it out after the almonds). Add in the avocado and most of the olives (leave few behind to slice up). Add in the juice of the lemon. Pulse until mixture is combined but with little specks of olive left.or completely smooth if you wanted too. Scoop out into a container. You want it to be slightly loos so it will mix well with the greens. If the mixture seems really thick, add in a a few tablespoons of cold water to thin out.
Grab the onion and remaining olives and thinly slice.
Now to assemble salad. Place a handful of clean greens into a bowl. Toss a some onions and extra sliced olives into greens. Add as little or as much olive avocado dressing as desired then sprinkle as much or as little of the almond crumbs all over that. Top with freshly find pepper
Then eat it.
I feel like this salad is kind of a summery salad, or better yet, a salad that highlights all the best of what summer has to bring. All the fresh tender dill that is still growing (but not for long) , all the brightly colored and amazing veggies that are being harvested and are nearing the end (bye fresh cucumbers.) This salad might just be my little last hurrah of summer cooking before it is all root veggies and dried herbs and hot and hearty food. And not going to lie and say that I am sad to see summer go because I am so so ready for it to be over, but I will miss all the fresh fresh produce. And I will especially miss all the fresh dill because fresh dill is seriously the best.
Eat up what is left of summer now before it%u2019s too late!
The stuff. Quinoa, a bunch of dill, a cucumber, a pepper, an onion, and some cherry tomatoes. Also a clove of garlic, some salt and pepper, and red wine vinegar.
Mince the garlic, chop the onion, mince the pepper and the cucumber, half the tomatoes, and last but noblest, rough chop the dill.
All that goodness goes into. big bow, along with a sprinkle of salt and pepper, and the vinegar Tossed around and left to meld.
Uncooked quinoa with water turns to cooked quinoa
Quinoa meets the bowl of veggies
And after a good mix, viola!
You got yourself a yummers fresh dill and veggie quinoa salad.
-C
serves 3-5 as a side or 2 as a meal
1 cup uncooked quinoa
2 cups water
I bunch fresh dill (like a 1/3 cup chopped%u2026 But use as much as you want)
1/2 a small red onion
1 clove garlic
1 small Persian cucumer
1/2 of a sweet red or yellow pepper
handful or two of cherry tomatoes
4 tablespoons red wine vinegar
salt and pepper to taste
Start by cooking the quinoa. Place the water and the uncooked quinoa into a medium sized pot. Place on high heat until sorts to boil, then reduce heat to a simmer and place lid on the pot. Let cook for about 15 minutes, checking at 10 minutes, to see if all the water has absorbed. When it has, remove from heat and let sit for a few more minutes then fluff with a fork.
While the quinoa id cooking, mince the garlic and chop all the veggies into small little pieces. Place into a big bowl. Chop up the fresh dill and toss into bowl too, along with the vinegar and a good sprinkle of salt and pepper. Mix it all around and let sit on the counter for a little so the veggies get nice and vinegary. Once quinoa is cooked and fluffed, dump into the bowl and mix around. Season with more salt and pepper if needed. Eat warm or refrigerate and eat cold. It%u2019s defiantly one of those salads that taste great right away but tastes even better the next day.
I think that my favorite thing abut summer is probably the food. Yeah, no, definitely all the food. If it weren’t for all the delicious amazing things that grow during these summer months, I would probably hate summer. %u00a0Well, I mean, not hate it because summer is nice when it it nice, but lately it has not been so nice and so I am trying to make myself feel better by finding all the good things that I like about summer. Summer trees, summer flowers, the smell of fresh cut grass, river rocks, summer sandals, summer… well that’s what I got right now. But summer produce, that is the best and what keeps me happy when I am extremely over heated and over sunned and just want a blast of cold air accompanied by some dark clouds, a sweater and the smell of decomposing leaves. Obviously I am being a little crank butt, and I actually do usually like me some summertime, I am just over this summer. To hot, to humid, to dry. I am ready to move on.%u00a0
But back to the good parts of summer that I am not over.%u00a0The food.%u00a0The corn is flowing steadily (I am getting on average 10 pieces of corn a week from the farm. That is a lot of corn for 2 people, one of which says he doesn’t like corn), the kale is growing in super abundance in the garden, and it’s is for sure blueberry season. When we %u00a0have those three things and we toss in a avocado, as little onion, and lots of lime juice ,%u00a0BAM,%u00a0another super fantastic summertime eating time, reason that summer can be a ok. Makes %u00a0all the heat a little worth it.%u00a0
I am telling you, this is my new favorite food combination. Blueberries are magical (I think so anyway) and really add the perfect little sweetness, tartness, and texture to this salad. Crisping up the kale and corn elevates the deliciousness, and avocado always is welcome is any salad situation. This is one of those salads that you will make for yourself and then immediately want to make for someone you like because it is so good you want to share. OR you just want to make it for yourself again because you could share or you could just eat more of it yourself. It’s ok either way, you do you.%u00a0
The stuff. A cob of fresh corn. some fresh blueberries, a bunch of dinosaur kale, a lime, an avocado, a piece of a sweet onion, sea salt, pepper, and a little oil.%u00a0
First off preheat the oven then cut the corn off the cob.
Then deal with the kale. Each leaf needs just the slightest bit of oil. The easiest way to do this is to dump a little oil into your hands and grab each piece of kale and rub your oily hands all over the kale.
After the kale is oiled, chop it into chunks. First place the corn on a baking sheet then add the kale on top. Placet it into the oven to get all crispy… The kale will might get crispy before the corn, which is fine because you can remove the kale then pop the corn back into the oven for a few more minutes to keep cooking if you want. Or you might just want to call it cooked, it’s your call.%u00a0
I popped the corn back into the oven to get a little more color. I like a real crispy corn.%u00a0
Cut up some onion and avocado into chunks.%u00a0
And time to compile. Kale, onions, corn, avocado, blueberries, and lime juice. And don’t or get a sprinkle of sea salt and pepper.%u00a0
Toss it all around and be delighted.%u00a0
Just look at that salad. Who wouldn’t want to eat that?%u00a0
Heres to summer salads….The reason I can barely stand the heat!
-C
makes one salad
Preheat oven to 350
Cut the corn off the con and place on a lightly oiled baking sheet. Take a little oil and rub into hands then grab the kale leaves ans rub oil all over them. Once oiled, rough chop into medium sized pieces (don’t chop small, it will shrink a lot in the oven). Place chopped kale on top of corn and stick into hot oven. Bake until the kale is crispy, about 12-15 minutes.. What closely after 10 minutes to prevent burning.
Remove the kale from the baking sheet and place in a large bowl. The corn will be cooked, but if you want to make it a little crispier , just toss it back into the oven for a few minutes. %u00a0Once corn is to your liking, remove from pan and toss into two with the kale.
Small dice up some onion and dice up half of the avocado. Toss into the bowl with the kale and corn. And the blueberries, add those in. Sprinkle the whole shebang with a little sea salt and pepper and squeeze the juice of at least half of a lime all over (use the whole lie if you want) Give it all one last toss and that is it.%u00a0
Eat your new favorite salad. Think about making it for all your favorite friends and family and how impressed they will be because this is one of those impressive salads. T
Cucumber melon is a classic food pairing. It also reminds me of when I was a young tween, stealing my older sisters cucumber melon face mask that you smeared all over your face, let dry, then peeled off like a layer of skin. I remember thinking that that stuff was the shit and if my sisters where using it, then I really should start using it too before I got an old lady face. Plus it was cool to peel off and made me feel grown up because I was taking care of my skin. So steal it I would until I eventually started buying it myself. Then one day I realized, I could get the same results with a bottle of Elmers glue and also I didn’t really want to spend my money on face mask when I could be buying other unmentionable things.%u00a0%u00a0And that was the end of that.%u00a0
I wonder if they still sell that shit…. I wouldn’t buy it though cause you know it is probably really is just sweet smelling glue. Plus it’s to late for me. I am already old. Ha.%u00a0
Anyway. Back to the cucumber, cantaloupe, avocado, mint salad. What can I say that the name doesn’t? That is is f-ing fantastic and refreshing and easy to through together and required ZERO heat to make. Also that on the hottest of hot and nasty days, this here combination , what with the refreshing mint and crisp clean flavors of the cucumber and melon, really can make a shitty day feel a little less shitty, maybe even %u00a0a little brighter. I don’t know about you, but this past super hot heat wave week was hard for food, like I didn’t really want to eat anything. This salad was fresh and clean enough to eat all day, everyday. It was so good, even the mr liked it and he says he hates fruit in any salad situation. (I have called bullshit in this so many times. He actually does like it, he just wants to give me a hard time.)%u00a0
Fresh crisp, all sorts of refreshing. A true blue summer salad. Get on it.%u00a0
The stuff. Some cantaloupe, a cucumber or two, an avocado, a lemon, mint, cracked pepper, and even though it’s not in the picture, sea salt.
Remove seeds and rind from cantaloupe then chop into small mouth sized pieces ans toss it into a bowl.
Cut the cucumber up into simutlar sized pieces as cantaloupe and toss into bowl.
. I ended up only using %u00a0one and a half of the cucumbers so the cucumber/ cantaloupe ratio was the same. Plus I wanted to eat the half of cucumber tight then and there.. so I did.%u00a0
Scoop the avocado meat onto the cutting board. Sprinkle it with sea salt and a little squueze of lemon juice and roughly chop. You don’t want it mashed, but a little mashy avocado is good. Perfect cubes are ok too. You do you.
Mince some mint leaves. You know where they go.
It’s all there. Cantaloupe, cucumbers, avocado, mint. Salt and pepper and all the lemon juice. Now just stir it up and you are good to go.%u00a0
A simple summer dish. No heat, not sweat, just fresh and clean goodness.
Stay cool friends.
-C
Serve 2-3%u00a0
Note. This salad is so simple and easy and really, you can adjust the quantities of any of the ingredients to your liking. You could also try subing basil or dill %u00a0for mint leaves and you could use any other type of melon for the cantaloupe.%u00a0
Remove seeds and rind from melon and cut into small mouth sized pieces and place into a big bowl. Cut cucumber(s) into small mouth sized pieces (same size as cantaloupe) and toss into bowl. Scope the meat of the avocado onto cutting board, add a sprinkle of sea salt and %u00a0a little squeeze of lemon juice and with your knife, roughlycut/ slighty mash it into a chunky pile. Scope the avocado into the bowl. %u00a0Mince the mint leaves and add those to the salad. Lastly, squeeze the juice of the lemon all into that bowl too.%u00a0Grab a spoon and mix it all together. Sprinkle with pepper, a pinch more sea salt (to taste) and thats that.
Eat. Left over s last a day or two in fridge but you should just probably just eat it all right away.%u00a0
I am one of those people that hangs out for far to long in the grocery store, mostly in the bulk section, looking al all the types of rice, and grains, and beans, and seeds, admiring the variety and colors and also wishing I was one of those people that had an extra $25 to drop on a pound of pistachios.%u00a0%u00a0(Them were some pricey pistachios fo sho.) I take my time, peruse the bins, maybe take a little taste or two, %u00a0and go for what I need. And maybe if something is on sale, get a little of that too. Things that usually make the list are spices,%u00a0oats, beans, maybe rice or quinoa, flours, and seeds. Pumpkin seeds were on sale so those were the seeds of choice and I also got some barely because when I was starting at all the grains,%u00a0it dawned on me that I don’t know many people that eat barley, or even care about it, which is a shame because it is awesome. It might not be trendy like farro or freekeh, but it is just as good, and damn if it is not a hell of a lot cheaper.%u00a0
With the barley and pumpkins seed in hand, I had the start of a salad. So I grabbed some oats, a few spices, some beans and ran away from the builk section, past the nuts before things got bad and I either a) got kicked out for eating my weight in cashews and almonds,%u00a0pretending to just need a taste, or b) paid the $25 for a pound of pistachios that I might not eat because I would need to save them for something really special because they cost $25 a pound. Then I grabbed veggies, walked around the wellness section for good measure, did another lap around the store just in case I forgot something, then finally made my way out of the store only to realize when I got home that I forgot something. (I always forget something)%u00a0
But I had all I needed for a barley salad situation so things went well. This is a fantastic salad. It’s quick and easy and tasty and good. Barley, tahini, veggies and pumpkin seeds… It’s all you need for a just right dinner, or a fantastic side to any meal. Or as a snack at anytime. Bring it to a BBQ, a graduation party, or a pot luck. it will get eaten, and if by chance you end up with a little left over, bring it on home and eat it for breakfast. It will still be just as good.%u00a0%u00a0
The stuff. Pearled barley, tahini, pumpkin seeds and garlic. And some red wine vinegar, salt and pepper, kale, a carrot, some cauliflower, a lemon, a red onion, and a cucumber. (you are not going to need the full amount of all these veggies)%u00a0
First off, cook the barley. The barley and water go into a pot, brought to a boil, then left on low %u00a0to cook until tender. Once cooked, strain away excess water
While barley is cooking (or is cooked) chop up the veggies into mouth sized pieces. I used half the cucumber, half the onion, some of the cauliflower, all the kale, and all the carrot. It’s not an exact measurement, you just want a good amount to toss into the salad.%u00a0
Barley in bowl, topped with the veggies and pumpkin seeds…. The pretty before the mix. You don’t need to add it like this, I just did it cause it looks good.
And the tahini sauce. Mince garlic and add to a jar or bowl with the juice of the lemon, vinegar, a pinch of salt and pepper and give it a really good mix.
Creamy, zippy, oh so good.%u00a0
Drizzle and toss the dressing with the barley and veggies.
And that’s that. Now you are ready for eating.%u00a0
Enjoy wherever this salad takes you.%u00a0
-C
If eaten as a meal, serves 2-3. As a side dish, serves 6-8
Note. The vegetable amount and type is more of a preference. You could use all cucumber and onion or add %u00a0broccoli and pepper, just make sure to have a least 3 good cups of some chopped up color.%u00a0
Place barley and water into a pot and bring to a boil. Turn heat down to low and continue to cook until barley is tender, but not mushy, which should take about 45 minutes. Once cooked, strain excess water.
While the barley is cooking, chop all the veggies into small mouth sized pieces.%u00a0%u00a0And make the tahini sauce. Mince garlic and place in a bowl or jar. Add in tahini, the juice of the lemon, and the vinegar. Mix well until smooth then season with salt and pepper to taste. %u00a0
When barley is cooked and drained, let cool for a few minutes then place in a big bowl. Add in all the veggies and the toasted pumpkin seeds, then drizzle with the tahini sauce and toss all around. Season with salt and pepper to taste..%u00a0
Now eat still warm, or later at room renature, or place in fridge for it to get cold. It can be a filling meal or a great side dish.%u00a0It’s good all ways, any way.
Another note. This salad is great for parties and BBQ’s and can be made a day or two ahead. If you do make ahead, hold off on mixing the pumpkin seeds and the tahini sauce with the rest of the salad until you are about to serve it.%u00a0
We need fresh, we need green, we need color.
We need salad. %u00a0
The other night I made Megan’s birthday dinner which consisted of pizza and salad. The pizza was pizza and everyone loved it and ate it, but what surprised me was how everyone was really into the salad. A big ass bowl or fresh greens with onions and I think carrots and cabbage and some cranberries I pulled form the freezer and candies almonds. Simple and not fussy, and everyone was just so happy to eat it. I felt like a salad genus and now I am full on into making fun awesome spring salads. (I have to keep reminding myself that yes, it is indeed spring.%u00a0So what we got snow yesterday, it will melt, right????%u00a0)%u00a0
So I bring to you a a bowl of fresh crispy spring greens with crunch and bite and creaminess and flavor. A salad that will bring you joy and satisfaction and maybe even anticipation for your next salad adventure.%u00a0Not to mention a salad that looks so dang pretty.%u00a0
Get into the green. You will be as happy as a rabbit in a garden.%u00a0
The stuff. Greens, red onion, an avocado, almonds, blueberries, and a lemon. Also need some maple syrup, olive oil, red wine vinegar, and salt and pepper.%u00a0
A couple teaspoons of maple %u00a0go in with the almonds. Really toss make sure they are all coated.
Place the almonds into a hot skillet cook for about 5-7 minutes or until the maple has become sticky and the almonds no longer raw.%u00a0
When they are done,%u00a0dump them onto a piece of parchment to cool. Don worry if they clung a little, you can break them apart once they are hard.%u00a0
Easy ass dressing. Blueberries. juice from the lemon, olive oil, vinegar, a tiny splash of maple, and a good pinch or pepper.%u00a0
Blended then done. Taste and season with salt if needed.%u00a0
Avocado gets cut into small chunks and the onion get s thinly sliced.
It’s all ready, so now make a salad
Makes 2-3 %u00a0salads%u00a0
For the Almonds%u00a0
For the Blueberry lemon Vinaigrette%u00a0
To make the %u00a0candied almonds, preheat a skillet to on medium heat on top of the stove.%u00a0Place almonds into a small bowl and drizzle with maple syrup. Stir to coat. When the pan is hot, dump the maple covered almond into it and spread them out. Cook for a 3 minutes, then give a stir and cook for a 3 or so more minutes or until the maple has evaporated and the almonds are starting to brown. Dump the almonds directly onto a piece of parchment paper to cool and hardened. Do worry if they stick together a bit, you can break them apart after.%u00a0
To make the vinaigrette,%u00a0place the berries into a jar (if using stick blender) or blender with the juice of the lemon, olive oil, vinegar, maple, and a pinch of pepper Blend until smooth. Taste then add a very small pinch of salt or more to taste.%u00a0
For salad. Thinly slice the onion and dice the avocado. Place greens into bowl(s) and toss with onions and avocado. Top with %u00a0candied almonds and drizzle all over with the vinaigrette. Grab a fork and eat.
Any left over dressing will last in fridge for about a week and left over almonds will be good for.a few weeks in a airtight container.%u00a0%u00a0%u00a0
Here’s one for the cabbage lovers our there, maybe even the haters as well. (I don’t understand those people, cabbage is king in my stomach).%u00a0I really believe that a good bit of cabbage can really change a persons perspective on the humble cruciferous vegetable, maybe even the world. To far? Maybe but what I always say is, “When in doubt try it out!” Either way, this bit of cabbage is vey very good good.%u00a0%u00a0
A quick little warm up in a skillet with some sesame soy flavor and crunch and you got yourself a A plus little salad. It hits all the right notes for when a) its winter and fresh greens are more sparse (which it currently is and they currently are) b)%u00a0its cold out (again currently because it’s winter) and c) when you only have a head of cabbage in the fridge (was the case but I have sense remedied that).%u00a0
Chop it, toss, it, eat it. Quick and easy good food. Get on it.
The stuff. Cabbage (I used savoy but you can use any cabbage you want) soy sauce, toasted sesame oil, olive oil, and a lemon. The lemon is optional, but a little acid is alway welcome in my mouth.%u00a0
Chop the cabbage. Unless %u00a0you are making this for more then 2 people, you probably only need half a head. However much you use, chop in up into 1-2 inch peices. You could %u00a0also shreds it if you want, but I like the bigger pieces.%u00a0
Toss the cabbage into a hot skillet that has been drizzled with a little olive oil and toss the soy sauce in with it too.%u00a0
Cook on medium high heat until the cabbage has slightly soften.%u00a0
While the skillet is still hot, drizzle in a touch of toasted sesame oil and a good amount of sesame seeds. Give it a toss. Taste and add more toasted sesame oil if you want.
Pile it Into a bowl and that’s that. Serve with a wedge of lemon or lime if you like the addition of the acid.%u00a0
-C
serves 1-2 people
Preheat a large skillet to medium high with the olive oil. While its getting hot, chop the cabbage into 1- 2 inch pieces. When the skillet is hot, dump the cabbage in and toss around with the soy sauce. Let cook for 4-5 minutes, giving it a toss a few times, until the cabbage starts to soften. Depending on your preference you can stop cooking it now, or keep cooking until it reaches you preferred doneness. (I like it with a little crunch so I cook it for 5-6 minutes) Once it’s done but the skillet is still hot, drizzle in the toasted sesame oil and toss in the sesame seeds. Taste for flavor and add more toasted sesame oil if needed.%u00a0
Serve right away although cold left overs are also fantastic. A wedge of lemon or lime is a well received addition.%u00a0
I am spicing up my snack time these day, going an extra step and actually preparing a little something rather then just eating a pound of carrots. Yes yes, a pound of carrots is a great snack, but there are so many other fantastic veggies awaiting my belly and I can only accommodate %u00a0so much at once. So today the carrots had to wait, it’s time for the parsnips.%u00a0
After I made this and was eating it with all smiles and glee, I had the mr take a taste to see what he thought. What I learned is that If you do not like parsnips then you will not like this dish. But if you are awesome and do like parsnips, well then you will like this. But I guess if you like parsnips but don’t like cranberries then you might actually not like this either.
So what I guess I am saying is if you like parsnips and cranberries, you will freaking love this. And this, these cranberry roasted parsnips, are great as a snack or as %u00a0a fantastic accompaniment to any meal that you will be serving anytime soon. It’s quick and easy and delivers in all sorts of good ways, if you like cranberries and parsnips.%u00a0
The stuff. Parsnip. fresh (or frozen) cranberries, a little maple syrup, olive oil, and salt and pepper.%u00a0
Keeping it simple and just chopping the parsnip up into mouth sized pieces. If you are a peeler, go ahead and peel those parsnips first. Me, never a peeler.%u00a0
A little trick I have learned when roasting veggies is to roast them in a really hot cast iron pan. What I usually do is preheat the oven and while I am doing that I preheat the pan on the stove top. It gets hot fast and the veggies roast better when tossed into a hot pan. You can also preheat whatever dish you are using in the oven while it preheating. Whatever works for you.%u00a0
So parsnips Into a cast iron pan (or any oven safe dish)%u00a0tossed with just a touch of olive oil and salt and pepper.%u00a0
Parsnips cook pretty fast so after about 15 minutes check for doneness. Once they are for tender and browning, toss the cranberries into the pan and keeping roasting.
Once the cranberries are all roasted and bursted and nice, remove the pan from the oven and immediately drizzle with a touch of maple (just a touch or else it will be too sweet)%u00a0
There you go. Simple, fast, and oh so delicious.%u00a0
Have an awesome weekend!%u00a0%ud83e%udd4b%ud83e%udd3e%ud83c%udffb%u200d%u2640%ufe0f%ud83c%udf84%u2603%ufe0f (interrupt those any way you see fit)
-C
serves about 4 as a side dish %u00a0or makes for 2 good snack bowls
Preheat oven to 425
Grab whatever pan or oven safe dish you are using and %u00a0preheat either place it in the oven while its preheating of if you can place it on the stove, get it really hot on a high flame.
Grab your parsnips and chop into about an inch sized pieces (or a good size that will fit into you mouth. Feel free to peel the parsnips first if you want to. Once the oven and pan are preheated, drizzle the parsnips with a tiny bit of olive oil and toss with salt and pepper. Place onto really hot pan and stick into oven. %u00a0Roast for about 15-20 minutes or until the parsnips are golden brown and fork tender. Remove form oven and toss in the cranberries. Place back into oven for about another 10 minutes or until the cranberries start to burst and get soft. Remove again and drizzle with a teaspoon of maple syrup (or more if you like it sweeter)%u00a0
Serve right away.%u00a0