
THE LOVELY CRAZY
Every year I look forward to St Patrick’s day.. And not because I am Irish, (which I am) or because I want to drink on excess (which I do not) and no, green eggs and ham are not something that I plan on making. No Ido not look forward to any of those things (although I actually do like to pinch the littles that wear no green and talk about pots of gold and rainbows) I love this time of year because cabbage is always on a freaking super sale everywhere you go. Something that is usually 80-99 cents a pound goes down to like 20 cents a pound. And for someone that eats like 10 heads of cabbage a week, this is a hug savings. SO yeah, I buy so so much (I have already bought 12 heads, but I actually plan on buying a full case before the sale is over)
No, I am not crazy, I will eat it all….. and I am going to be making so much sauerkraut. Woo hoo!
But until then. A cabbage pot roast. Yes. I remember growing up my mom would make pot roasts once in a while. A big pot full of big chunks of veggies topped with a big slab of some kind of meat. I never liked the meat, but I always loved the big chunks of the veggies at the bottom of the pot. So I figured I would make a big pot roast, replace the meat with a head of cabbage (I have so much) and add beans because protein and because they are just so good. . And when it’s all cooked and said and done, you end up with a big pot of plump and so flavorful veggies and beans and the most tender wedged of roasted braised cabbage. This is my kind of pot roast.
Now go quick.. the cabbage sales will be over soon.
The stuff. One good sized head of cabbage, a few carrots, a big onion, and a hunk of rutabaga. Also have some dried kidney beans, caraway and fennel seeds, dried ground mustard, a bay leaf, some garlic, and salt and pepper. And water… water is needed.
Note. You can use just caraway or just fennel and you can replace or even add a potato in place of the rutabaga.
Dried beans, fennel and caraway into a pot with water. Stick the pot on the stove ans bring to a boil, then to a simmer to give the beans a quick head start before going into the oven.
While the beans are simmering, dice up the garlic and chop up the veggies into big chunks… you don’t want small chunks or they will kind of turn to mush while cooking.
And turn over the cabbage head, take a knife, and slice a deep x into the core. DO THIS or else the inside of the cabbage will not cook through. Oh and preheat the oven to 375.
Beans looking a bit plumped..
Top those beans with all the chopped veggies,(don’t stir them in., you want to keep the bean under submerged in the water) sprinkle those with the mustard, salt and pepper and place that lovely cabbage head right on top…
Place a lid on the pot and slide it into the oven to cook away. It’s going to take a bit of time (about an hour) but it’s pretty much hands off. Just take a look after about 45 minutes, check the bean doneness, add in another cup or so of water and place lid bacck on and cook for another 12-20 minutes until the beans are done. When they are, take the lid off, crank the oven to 450 and cook for another 15 or so minutes until the cabbage gets all golden brown
Look at that… Tender roasted veggies, plump beans. Everything about this is right.
Grab a knife and cut the cabbage (its so tender) into big wedges.
A wedge into a bowl along with a big spoonful or two of the beans and veggies..
Finished with a dash of salt and pepper and (not shown here,) lots of mustard.. Oh cabbage… you are so good!
Eat away and Happy St Patrick’s Day.
-C
serves 3-4
- 1 cup dried kidney beans
- 3-4 cups water
- a medium sized head of cabbage
- 2-3 carrots
- 1 large onion
- a potato or a a small rutabaga(or both)
- 1 heaping teaspoon caraway seeds
- 1 heaping teaspoon fennel seeds
- 1 heaping teaspoon ground mustard
- a bay leaf
- salt and pepper
Place the fennel, the caraway, and the bay leaf into a large dutch oven along with the dried beans and 3 cups of water. Place on the stove and being to a boil then, turn heat to low and simmer the beans for about 15 minutes.
While beans are simmering, chop up the carrot, onion and rutabaga into big chunks and dice up the garlic. Take head of cabbage and slice a deep x into the core.
Preheat oven to 375
Once the beans have simmered a bit, add in the chunks of veggies, the ground mustard and salt and pepper (Don’t stir, you want to keep the bean submerged in the water). Place the head of cabbage right on top of the veggies and sprinkle with salt and pepper.
Place a lid on the pot and stick the whole thing into the oven. After about 45 minutes, check the roast and the beans for doneness and adding in another cup of water id needed. Back into oven with the lid for another 15-20 minutes or until the beans are tender Onnce they are, remove the lid form the pot and crank the oven up to 425. Cook for another 15 minutes or so until the cabbage turns a nice golden brown.
Remove from oven, let cool for a few minutes, cut the cabbage head into wedges and serve it up with big spoonfuls of beans and veggies.
Eat until your full.
.
Are you ready for this weekend? You know what’s coming right? Yup, another arctic blast. -30 degree temperatures, windchill warnings and local news forecasters warning of dangerously cold conditions. “Don’t go outside , your face will freeze off”
Oh yeah, and Valentine Day.
What are your thoughts on the V day? The mr and I, well we could kind of care less, but at the same time, we like the excuse to spend the day together, traditionally going for a hike with the pup (not this year… we would die) and just spending the day together being sweet (pretty much the same way we spend any days off together) We don’t get fancy with dinner dates or overly large stuffed animals. No boxes of chocolate, bottles of champagne or fancy undies. We keep it caj, maybe a sweet hand made card covered in glitter (never a store bought.) a stop for a good cup of coffee and an afternoon trip to the plant store to by a new pretty house plant (1. I really hate red roses and 2. I would much rather get a house plant then flowers that will die) But honesty, we just use V day as an excuse to not work and spend the day together, being left alone, eating whatever we want and doing whatever fun stuff we want.
This dish was kinda inspired by being so pretty bright pink, but also it was just what I wanted to eat for dinner. Spaghetti squash doesn’t get as much play as it should. Sure it’s not the most sweet and nutty of the squashes, but it has a really nice subtle flavor that makes it a fantastic base for pretty much anything. And the beet sauce. Again, it’s such a pretty color, but beside that, I can’t get enough of them. I love me some roasted beets (way better then any chocolate or sweet treat)
I could lie to you and say that this is the dish that I will be making for me and the mr on Valentines day, but no,this dish already happened this week and the mr got into it, but would rather eat his favorite meal (pizza) for dinner. And I will be eating the left over beet sauce with carrot sticks (this beet sauce id for real.. topped with a little yellow mustard… I could eat it for life) then make a hugmongo batch of popcorn covered in peanut butter. We wiil sit on he couch and watch a lot of Netflix (still working my way through the fresh prince) and maybe a cute Wes Anderson movie. I will be in bed by 9.
But don’t mind us old folks here. Go for it. Do up the Valentines Day. Make a pretty dish of food for your sweetheart, or if alone, make it for yourself, especiallyif you are hanging by your lonesome. Valentinesday is about being happy and this dish will make you happy, whether or not you plan on sharing it.
The stuff. One spaghetti squash big enough for at least 2 people (I love left overs so maybe big enough for 4), 2 largish beets, a a small onion. Also grab a clove of garlic of 4, a lemon, the salt and pepper, and some olive oil. Optional, but a very nice addition is a handful of tasted walnuts.
Quick and crank up the oven (make sure you take out the cast iron you left in there from last night), then stick the squash, beets and onion into the hot oven to roast. I stuck them all on a baking sheet and left them completely whole, but if you want, you could chop the beet and onion into chunks and drizzle with oil or you could wrap the beets in foil and bake them that way but really, why go through all that when you can just not? And don’t bother peeling them.(unless you think you must.. but you really really don’t need too)
And same for the squash. You could cut in half and roast it that way, but again, why when you don’t need to.
So anyway, roast the beets and onion until fork tender. And the squash as well (check by stabbing with a fork) All my stuff roasted up pretty much perfectly at the exact same time, but it really depends on the size of your stuff. So check after 40ish minutes.
And once you pull that roasted stuff from the oven, let it cool just enough where you can handle it. Chop the onion into a couple chunks, the beets into smaller chunks and slice the squash in half length wise and set aside.
Grab a blender and toss in the onion, beets the juice of the lemon (start with half) apinch of salt, a few pinches of pepper, and a clove or 2 of garlic (ok, I love raw garlic and used a lot. If you do not like the taste of raw garlic, just toss it with a little oil and stick into the oven with the beets for about 10 minutes. Or you could omit the garlic entirely)
Once all the stuff is in the blender, turn it on. Drizzle in about a tablespoon or two of olive oil and blend until a nice smooth sauce has formed. Taste, season with more salt and pepper if needed. Add the other half of lemon if you think it needs it. You can also add a bit of water to thin it out more.. if you want
So now the squash should be cool enough to handle. Scoop out the seeds and with a fork, scrape up into spaghetti!
Heaps of squash go into bowls then topped with a generous mound of beet sauce. Topped with some roughly chopped toasted walnuts, a sprinkle of pepper and some bits of green stuff (I just diced up some kale)
Look at that. So pretty, so pink and all ready to go. Dinner for 2 with a good bit of left overs for later!
Happy weekend! And Happy Valentines Day if you do it, or if you don’t!
-C
makes 3-4 servings
- 1 medium sized spaghetti squash
- 2 large beets
- 1 small onion
- 1 lemon
- 2-4 cloves garlic
- handful of toasted walnuts (optional)
- olive oil
- salt and pepper to taste
Note. You might want to thin out sauce out a bit without the use of a ton of oil. Go ahead and add a little water. Also, I used raw garlic in mine, but some people might not like it raw. Just toss a few cloves of garlic in a bit of oil and stick into the oven for 10-15 minutes with the other stuff to give it a little roast. OR just omit.
Preheat oven to 425.
Stick the onion, beets and squash onto a baking sheet, drzzle the beet and onion with a tiny bit of oil and stick the sheet into the oven. Roast everything until fork tender which should take around 45-50 minutes. (depending on the size of your produce, some thing might take longer or shorter, so just check after 40ish minutes)
Once everything is roasted, let the beets and onion cool just enough to handle and cut into chunks and toss into a blender. Add in the garlic, the juice of the lemon, a few drizzles of olive oil and a pinch of salt and pepper. Now turn blender on and blend until smooth.
And the squash. Cut the thing in half and remove the seeds. Then with a fork, scrap the squash from the skin into spaghetti like strands.
Place squash into bowls, sprinkle with salt and pepper, add a drizzle of oil if you want and top with a good hearty heap of beet sauce. Top with more cracked pepper and a few chopped walnuts and maybe add a little something green, you know, to make it pretty.
Serve warm with love and a fork.. your lips might turn pink with beet love.
Once in a while I make a dinner that the mr does not want to eat, like anything with too much corn or things made with lots of vinegar… not his taste. Don’t get me wrong, most of the time, he will eat what I make (casue he loves me) but he clearly doesn’t really like it. And that’s when pup usually gets left over for dinner. (He always likes everything that I cook)
One of those things that I know the mr doesn’t like are beets. Sure, he will eat things that has a few beets in it, but once he found out that this casserole starred beets, his eyes widened and he looked worried, like “oh great, but please don’t make me eat this”. Not to worry. He was getting pasta for dinner because this casserole was not for him. It was for me. It has everything that I love in the word (food wise ) tossed together and baked into a pretty skillet, just for me. Plus the beets, sweet potato and kale were the last from the farm share. So it was my good by farm food, casserole of greatness. And I didn’t want to share.
So yeah, if you are not a fan of beets, or any of the other stuff in this casserole for that matter, then don’t make it. But if you are awesome and know the greatness of the beet, especially paired with lentils and sweet potato, well I suggest you go and make this right away. And bonus… it’s super healthy and hardy which make for a great dinner on a cold night and after all the holiday food last week.
The stuff. A large sweet potato, a couple of big beets and some dried lentils. Gonna want some veggies, like an onion, carrots, cabbage and kale. Also want garlic, some salt and pepper, water and tiny bit of olive oil.
First thing first, get the beets and the sweet potato in a pot to boil* Just dice then up and toss into a pot with enough water to submerge the roots. Sprinkle in a bit of water ad bring to a boil, stick a lid on pot, and turn hat to medium.
*Note. I boiled my beets and sweet potato in one pot because well, I just didn’t want to have one more pot to wash. But if you do this, your sweet potato will turn slightly pink, whichI think is really pretty. If you want your sweet potato puree to look orange, gonna have to dirty another pot and boil the beets separately.
And chop up our veggies and mince the garlic. Drizzle a tiny amount of oil into a skillet or pot, toss in veggies (minus the kale) and cook on medium heat just until they start to soften a tiny bit. Once the veggies are cooked, remove them from heat, add in chopped kale, and set aside.
And make your lentils. (i used the pot I just cooked the veggies in. The less dishes the better!) Water and lentils into pot with a pinch of salt, bring to boil, cover and place on low until lentils are tender.
When the beets and sweet potato are fork tender, drain water into a jar and separate the beets from the potato (if you boiled them together). Blend the beets then the sweet potato until it’s the consistency that you would enjoy eating it (I like a little bit of chunk, not completely smooth) Use the drained water to thin out as much as you need/want.
All the stuff ready to compile.
Grab the cooked veggies and toss them into a oven safe skillet or casserole dish and mix together with the lentils. Sprinkle with salt and pepper.
Now evenly spread the beet puree on top of the veggies
Then ever so gently, spread the sweet potato on top of that.
Give the top a good pinch of salt and pepper and stick the thing into the oven.
Remove from oven when the sweet potato has browned andis slightly crispy.
And scoop a big old scoop into a bowl, grab a fork, and stuff your face!
Happy today day!
-C
Remove from oven, let cook for a few minutes then eat it with a fork, a spoon, or your fingers.
Beet Sweet Potato and Lentil Casserole
Make 3-4 servings (or one serving for me!)
- 1 large sweet potato
- 2 medium beets
- 1 cup cried lentils
- 2 cups water
- 3-4 cloves garlic
- a medium yellow onion
- 2 carrots
- ¼ head of cabbage
- a few kale leaves
- salt and pepper
- olive oil
Note.. I did not add extra seasoning to this because I love the taste just as it is. But if you are feeling like it needs some seasoning, just add some in.
Start by chopping the beets and sweet potato into medium sized chunks and boiling them until they are fork tender. You can do this either in two separate pots or in one large pot. (if in one pot, the sweet potato will turn a little pink)
Once those are boiling, chop up all the veggies (not the kale yet) and the garlic and toss into a pot or skillet with a drizzle of olive oil and cook on medium heat until the veggies are slightly tender. Remove from heat, add in chopped kale and set aside.
And make the lentils ( I cooked the veggies in the pot, removed them ans used the pot to make the lentils… less dishes). Dump the 2 cups water, a pinch of salt, and the lentils into a pot. Bring to boil, cover, then turn heat to low. Cook for about 20 minutes until the lentil are tender.
Preheat oven to 400
Once everything is cooked and ready to go, dump the lentils and the veggies into oven safe skillet or casserole dish and mix around. Take beet puree and spread evenly over the mixture. Then do the same with the sweet potato puree. Sprinkle the top with salt and pepper and stick the casserole into the oven to bake until the top is all browned and slightly crunchy (about 30 minutes)
Remove from the oven, let it cool for a few minutes, then eat it. Fork, spoon, or your fingers work.
 Last week pineapples were on sale everywhere……So I bought 5. Don’t judge
And I bet I am not the only one that got overly excited at $1.50 pineapple and bough themselves a few. We will just call ourselves opportunists. Now we have plenty of pineapples and don’t have to pay the $4 a piece prices. (Justification)
But if you don’t have a pineapple laying around, you must go get one. (Maybe if your lucky, there might still be some sales going on) because you must make this salad. I am on a mission to make everyone I know eat it because, for lake of a better way to say it…….It will rock your world.
Dill and pineapple are a serious match made in heaven. Pineapple, with its sweet, tangy, citrusness and dill with it’s super fresh earthiness. Mixed together with a few other helpers to create a fresh, clean, chunky, tangy, over the top, flavor. I could stop right there, but toss in a handful of lentils, some creamy avocado and a bed of kale…It’s like the best spring time, celebration on you tongue, happiness in you tummy, kind of salad.
A salad that will make you smile. (and maybe buy 5 pineapples)
 Stuff for the goodness. We got the kale, some avocado because all salads should have avocado and some cooked lentils because, well, all salads should have lentils (or beans or nuts.. so you could totally something else) Then a few sprigs of fresh dill, a clove of garlic, red wine vinegar, salt and a bowl of chunked up pineapple.
  The pineapple, dill, garlic, red wine vinegar, a splash of water and a pinch of salt get blended in a blender or whatever blending device you use. Go as smooth or chunky as you like, I recommend going smooth, but leaving a little chunk, like half blended.
The prep is done, now compile. Kale in bowl, top with lentils,. Toss on avocado chunks, and, last but not least, the blended pineapple dill mixture. So good……So so good.
Happy Friday!!
-C
So Good Pineapple Dill Kale Salad
Serves Two
- 3 cups washed and chopped Kale
- 1/2 a avocado, diced
- 1 cup fresh pineapple chunks
- 1-2 springs fresh dill
- 1 tablespoon Red Wine Vinegar
- Salt
- 1/2 cup cooked lentils (or any bean or nut will do)
Note. No fresh dill? You can use dried, just sub in 1 teaspoon for the fresh and after blending with the pineapple, let sit a little longer to really let the flavors meld together.
Place pineapple, dill, pinch of salt, vinegar and garlic into a blender or whatever you own that blends and blend stuff together, leaving it a little chunky. Let sit for 5-10 minutes.
Kale goes into a bowl and add the lentils and diced avocado. Pour the blended pineapple on. Toss around.
Now eat.
 Being that it was St. Patricks day this week and lots of folks buy up a good amount of cabbage, I figured that this is a good time to get people to try one of my most favorite of favorite meals…..Beet bean and cabbage steaks. I love to play around with food, how to pair textures and colors plus tastes while trying to make whatever I am making healthy and balanced. This is one of my fav creations. And sure, this may seem like a somewhat weird combo, maybe a little like a extremely hippy dippy vegan fake meat thing, and you might be kind of right, but screw if it doesn’t taste like A-mazing. First off, notice how freaking dang pretty this thing is. The roasted beets bring a earthy hearty flavor but also pack a huge punch of color, especially when blended together with the ever so sweet white bean, which brings a nice mellow taste and a great serving of protein. (Beets and beans are meant for each other). Spread that brightly colored, tasty mixture onto of a huge slab of one of my favorites, roasted cabbage with all its crunch and cabbagy flavor and you got yourself a hearty healthy meal of deliciousness.
  Cabbage, white beans, and beets. There is a lemon involved, but it didn’t make it into the picture.
 Cabbage is cut into inch thick slabs… I like to us the inter most part of a cabbage head cause I like the core. But use any cut that you want. 2 beets are chopped into chunkers and both the cabbage and the beets are placed on a lightly oiled baking sheets, seasoned with salt and pepper, and stuck into the oven for 20-25 minutes at 400 degrees.
 Once the beets are tender and the cabbage is cooked to a nice withered golden pretty, take out of the oven, but leave the oven on. Leave the cabbage on the pan but throw the beets into a blender or a big bowl if using a hand blender with the white beans
 Beans and beets get pureed together. Add the juice of 1/2 a lemon (or the whole lemon, depending on your taste) and a pinch of salt and pepper. With a big spoon or spatula, scoop equal amounts of the bean/beet mixture on top of the cabbage steaks and spread around. Sprinkle with cracked pepper and place back into oven for another 5-10 minutes. (You could totally skip the second bake, but I like my cabbage well done and crispy)
 Oh ho boy… And with a good squirt of mustard to finish off… I could eat this all day, everyday
  Happy St Patricks Day!!!! As a kid, St Patricks day always meant green milk, green eggs, and those nasty gold foil covered chocolate coins. (you know, from the pot of gold) Not to mention all the leprechaun hunting and pinching. In my family, if you were unlucky enough to forget to wear green, you ended up as a walking target. It all started out nice an innocent, a pinch here or there, but by the end of the day, someone would end up pinching a little to hard or maybe just one too many times and the game would go from pinches to punches.
  The stuff…. Super pretty red potatoes, red cabbage, shallots, kale, salt and pepper, and olive oil.
 Dice up the pretty potatoes and stick them into a pot and fill up with water and add in a good tablespoon of salt. Stick on high heat and bring to a boil, then turn the heat down to medium and cook those taters until super fork tender. (bring them to the edge of falling apart)
 Once the potatoes are super tender, drain the water and dump them into the pan with the sautéed veggies. With a potato masher or a fork, mash up the potatoes and mix in the veggies, adding a drizzle or more of olive oil as you go. (Start with a drizzle and work your way up until it tastes good to you) Salt and pepper to taste.
  The most pretty pan of smashed up potatoes that I have ever seen. Eat as a side dish or even a light main dish. Fork is a good utensil to use, but I found that my fingers worked just as well.


 No matter what is going on in my day, seeing a blue sky like this puts a smile on my face….To bad that smile turned to ice and my face froze in place. Because for some reason, winter around here now means below zero all the time. I mean, I love winter, but I am not going to lie… I wouldn’t mind if the wind would stop blowing and we had a couple of days of above zero weather.. and maybe a good foot of snow. I guess I’ll just have to be patient, cause its bound to happen. I mean, we live in Vermont, and if nothing else, we get weather.
  The mister called these snow mounds goosebumps… I think that is exactly what they are
 And oh how I cannot handle how freaking cute she is!! Plus, a shout out to my brother in law….MADLOVE!
 Fresh snow..Even though it was -15, I had to stop and take this picture. The colors were amazing
 Cabbage at the farm share pick up! Love ICF!!!
 89 cents a pound for fresh organic cranberries. Score!! Made these Oatmeal fresh cranberry coconut chocolate chip cookies with them. Big hit.
 This picture was taken exactly a year ago…..The mister and I were finally putting in the bathroom of our tiny little home…. And look at that awesome sink! (another amazing salvage yard find) If you ever need or want to remodel a bathroom, I suggest using a old cast iron utility sink. So practical, so functional, so pretty.….it makes me happy everyday!
 I eat vegetables like I breath air… constantly and almost mindlessly. Some people are addicted to sugar or coffee, but me, I am addicted to veggies. ( I am also extremely addicted to coffee) This is my truth, but I am ok with it.
  Pretty much a little bit of everything that I have in my fridge….Shredded red cabbage, carrots, beets. Some sliced of red onion, tomato and red pepper. Hummus and a little mashed avocado
 Yes, it may look like a mess, but that’s just me trying to make five different things at once. But really, making these wraps are simple simple. Just take rinsed and dried green or red leaf lettuce, smear on hummus and mashed avocado and pile on the veggies. Roll and stick with a toothpick to keep from unrolling. See…. simple.
 So many colors…… so much pretty.
  Wrapped and rolled…Sliced down the middle, just to see all the pretty inside.
 These might be veggie wraps, but man, look at those sausage fingers…(hehehe)
 A birthday bouquet of veggies. My lover knows me oh so well.
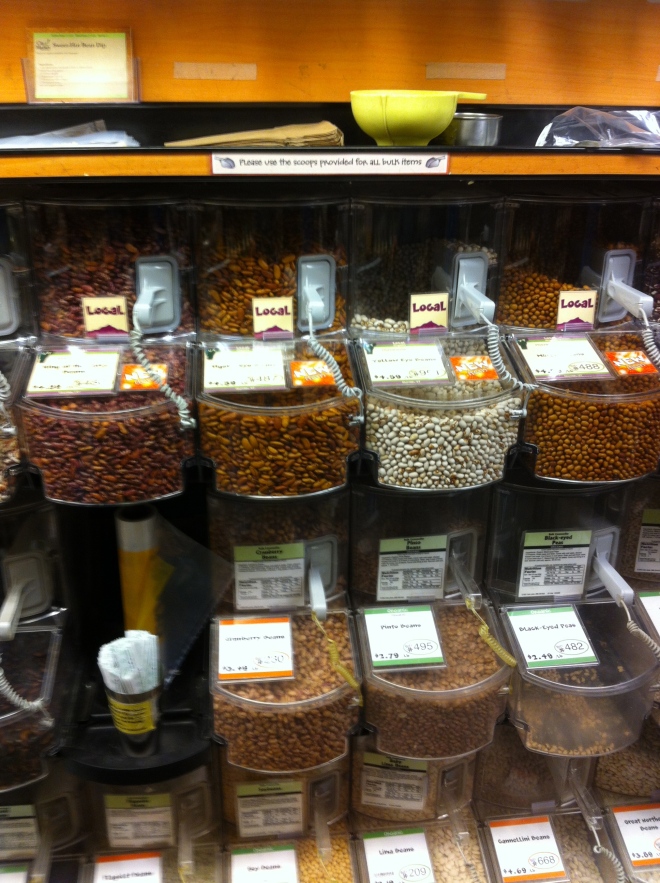 Every year I buy myself some special food for my birthday week. This is the bulk section at the local coop. They got in a bunch of new local dried beans!!!! Local birthday week beans. ( yes, beans make me happy)
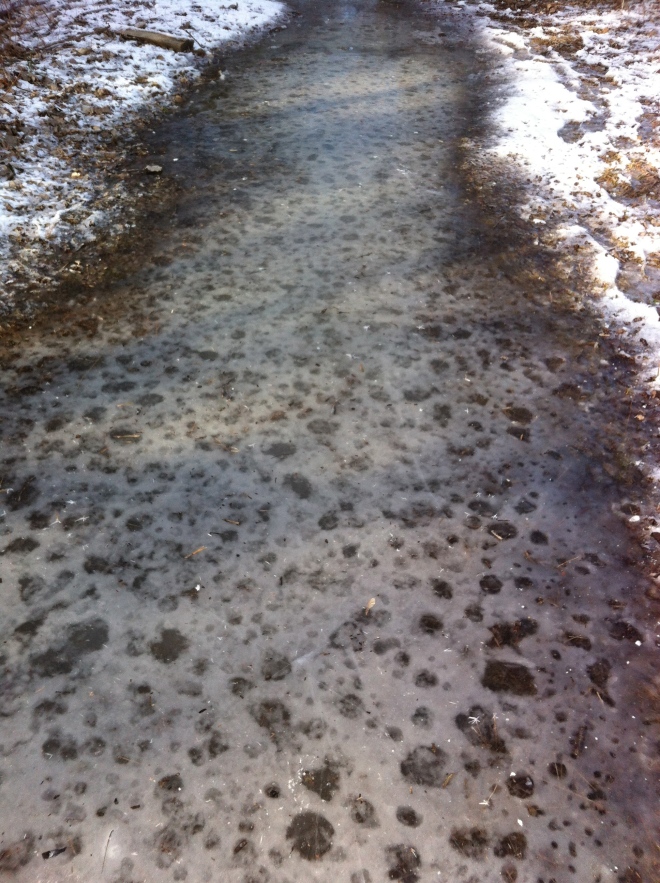 This hike was pretty treacherous, the whole trail was covered in this ice…. but look how cool it is.
  Huggable mountains
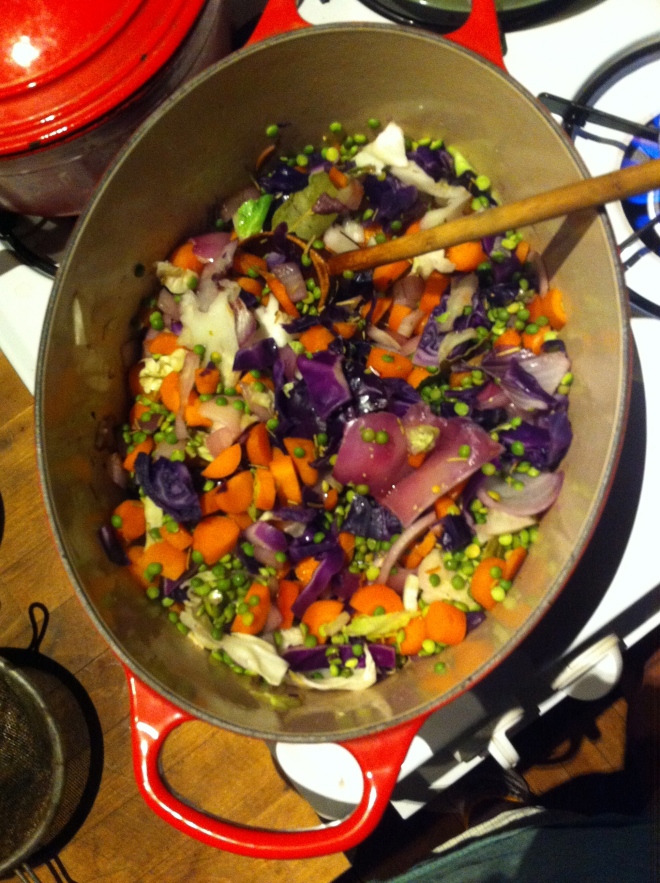 Split peas with tons of purple cabbage and purple onions plus chunks or bright orange carrots.. So freaking pretty and so freaking tasty!
 And last but not least..a throw back that made me smile…Moving day last summer. Our truck full of my house plants. I love my plants.


 Last night I had my sister and her kiddos come over for dinner. Nothing fancy, nothing to complicated, just something fast and something that I knew the littles would eat. Spaghetti and meatballs, except replace meatballs were bean balls So they came, we played, did a little drawing and had a bit of first grad gossip. Then came dinner time when I was told by one little that she was not going to eat.. She had pasta for lunch. Well I made her sit anyway and she mainly just ate carrots (I was ok with that) Then the other little was all into his pasta and bean balls, 1 down, 3 more to go, when the mister let slip that the meatballs were not really meat. He ate around the remaining balls, said he didn’t want them anymore. And my sister, well she doesn’t eat anything that is not pizza.
 I feel like I don’t need to tell you how to boil pasta or heat up the sauce, so I left that portion of the recipe out. I have faith that you are capable in doing that part without my instruction.
 Small chop all the veggies and toss them and the dry spices into a skillet with a drizzle or two of olive oil. Stick on medium heat and add about 1/4 cup of water to pan. Top with slid and let veggies cook down until soft and fragrant.
 Add the cooked veggies to a food processor or blender with the rinsed and drained chickpeas.
  The mixture gets pulsed until combined, keeping a little bit of chunkiness. Now go warhead and taste the mixture. Add another pinch or two of salt , pepper or any of the spices that you think it need. Dump the mixture into a bowl and mix in the chickpea flour than stink the mixture into the fridge for a least a 1/2 hour. Cooling to off is really important to forming the balls. If you don’t, it’s much harder to keep mixture from falling apart and sticking to your hands.
 After the mixture has had time to cool and set, start rolling the mixture into balls roughly the size of ping pong balls. In a shallow bowl, add a few tablespoons of the chickpea flour with a pinch of salt, pepper and garlic powder. Take each ball and roll in flour and place each ball on a well oiled baking sheet. When the balls are all rolled, stick into the oven and bake away for about 30-40 minutes, flipping balls after about 20. After you flip the balls, get the pasta ready so its finished about the same time the balls are done.
 You pasta and sauce is cooked and the balls are all crispy and oh so nice.
 As the weather gets warmer and the days get longer, my food brain turns to fresh colorful simple spring food. (which is totally a thing). Spring food is a combination of the last of the winters hardy root veggies combined with the springs bounty of fresh greens and early growers. Spring food is the best!
 Dressing stuff. A nice and ripe avocado, the juice of a juicy lemon, a bit of garlic powder (raw garlic is nice too, but grate it super fine) and salt. Simple simple and sometimes simple can be the best.
 All stuff get mashed super mashed until smooth and scooped into a jar with a lid. Add about 1/4- 1/2 cup water (depending on how thick you like it) and shake that jar all around.
 A roasted beet and carrot, all sliced up
 Tossed onto a bed of tender baby spinach
 And topped with creamy avocado dressing. Fantastic, so pretty, and makes the day super springy!
 You ever have one of those days where its 9 am and your ready to call it a day? . Yesterday was one of those day for me. Its spring vacation around here (more like an arctic vacation) and I had volunteered my day to babysitting/ hanging out with 2 of my nephews, ages 11 and 13. (I know, I am the greatest sister). I had all of these great ideas and plans of things to do, but when it came down to it, they wanted to do nothing but play video games and not really listen to anything I said. I basically had to drag them outside to go for a walk we me and that’s all I could get them to do My great little nephews, I love them so much, but yesterday they had their minds set on being little monsters.
 What we have going here…… Chopped up onion, celery, and carrot in a pot. Stick that pot on the stove for a few minutes on medium heat to start the cooking process. While that happening get the other stuff ready. A big can of diced tomatoes, hot sauce, worcestershire sauce*, prepared horseradish*, celery salt, garlic powder, salt and pepper And last but not least a good squirt of yellow mustard. Now add it all to the pot and bring to a boil. Turn down to low and stick a lid on it.
 After about 20 minutes the veggies should be soft and the flavors should all have melded together. Taste soup as it is cooking and add any more spice that you want.
 I stopped when I got to a smooth consistency with the littlest bit of texture.
 And there it is…served with a stock of celery and a wedge of lemon (I forgot to add them to the pictures!) A bloody Mary to take the edge off any drag of a cold weather day. And best part.. left over soup is great served chilled with a shot of vodka to loosen this Mary up!
 Before we get to the fries, I just want to mention that yesterday was one of those fantastic winter days that reminds me why I love living in Vermont. Pretty white snow everywhere, the sun was out, and 20 degrees without a gust of wind. The trash dog an I were even able to go for a little hike. It was so nice and soooo sooo needed! Anyways, the other day as me, my sister and the mister where putting together one more piece of Ikea furniture, (I am the master at Ikea assembling!) a little runs into the room and presents the mister with a Dominos pizza. Yup, a whole pizza just for him. Why you might ask? Well I guess my sister was delivered the wrong pizza and the place didn’t want it back and she didn’t want it, so she gave it to him.
 The carrots and the parsnips are all sliced up into big matchsticks and ready to be baked to crispy browned perfection. I added the oil to the pan to toss the fries in and then sprinkled with a fair amount of salt and pepper. If you don’t have and or want to use a cast iron pan, a baking sheet works just the same.
 Oh saucy sauce stuff. Tomato puree, sriracha, and yellow mustard. Add a little bit of honey to lighten it up (can use brown sugar if keeping it vegan), a splash of apple cider vinegar and a couple minced cloves of garlic. Topped off with the smokey delightful spice of cumin. I cold eat this on everything…and I kind of did.
  Fries are done, Sauce is ready. Served in super cute tea cups.(from now on I want to serve everything in tea cups.) A perfect side dish, snack, or even a light meal. It lead the mister to ask the question…What pizza?


 Mustard and carrots. It’s that simple.
 For the past few days I have heard more complaining then happy. The biggest complaint…tummy issues. A week of gorging on heavy, rich, and indulgent foods is finally catching up with people, turning them into grump asses. I can handle a little grump, but its time to get get out of that funk and take care and stop bitching. May I make a suggestion? Eat this… You will be happy. Your body will feel clean and nurised. Your tummy will get back on track. It what I call satisfaction This salad is a complete meal .Chopped and shredded veggies atop a small heap of quinoa, tossed on a handful of lentils and topped with a dollop of lime avocado… Thats it and it is good. For the sake of picture-taking, I made a plate look all nice and pretty, with layers of colors, but to be honest with you, I rather toss into a big bowl, grab a moderately large-sized fork and food to face… and it’s just as pretty.(the bowl of food is pretty, not food on my face) Quick note: the vegetables that I used here are what I had at home. If you don’t have one or two of these specific veggies, don’t worry about it. Sub in something else, like pepper or spinach., Still have extra brussel sprouts, green beans or asparagus from thanksgiving? Go ahead and use those. If there is a specific veggie you know your stomach doesn’t tolerate well, then maybe avoid using it. This is a happy feel good salad!
 A pile of vegetables is always a good start to any meal, especially these veggies.. All but the avocado came from my farm share. This is one local organic meal of love.
 Green Kale, purple cabbage, beets, red onion, carrots…I did a little shredding and some grating. I like to have different sized and textures in a salad.
 Quinoa.. 1 part quinoa to 2 parts water..Bring to a boil and let simmer until light and fluffy. When I make quinoa, I always make more than is going to be eaten, its great to have pre made for any meal. Quinoa goes with everything, even a sprinkle of cinnamon and diced up apple for a nice breakfast or snack.
 Barely steamed kale, just enough to soften it. Again. raw is awesome too.
  Half a lime, half an avocado and a clove or two of garlic… guacamole…Call it what you will.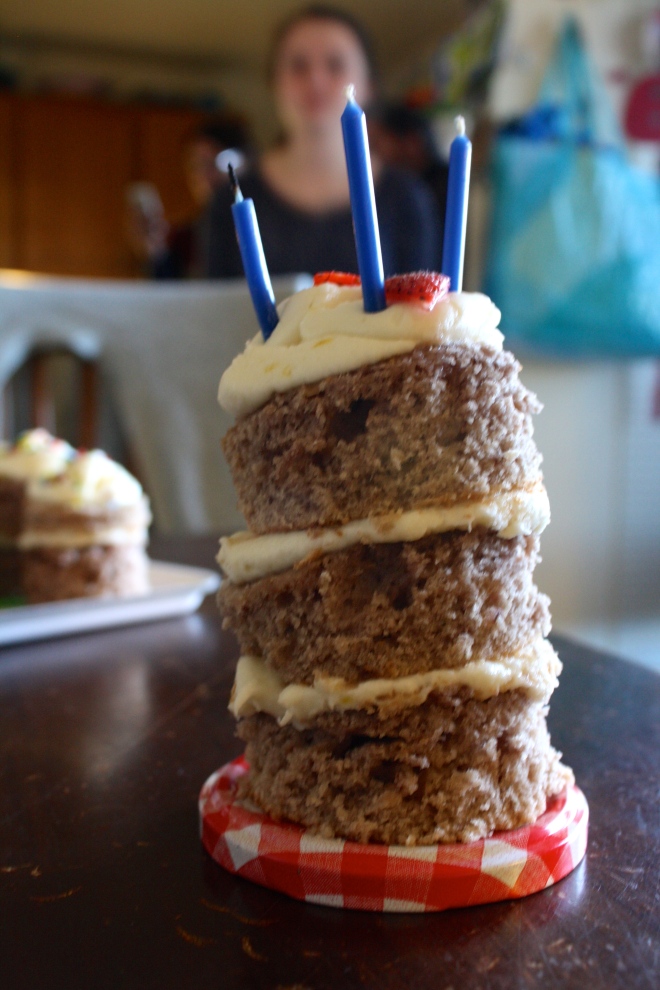

 My Moms birthday was this past week, and naturally, I made the cake for our big family birthday gathering. (and I bought and made dinner and cleaned everything up, although the mister did do all the dinner dishes) Word to my sisters… You guys suck! (but I still love you)
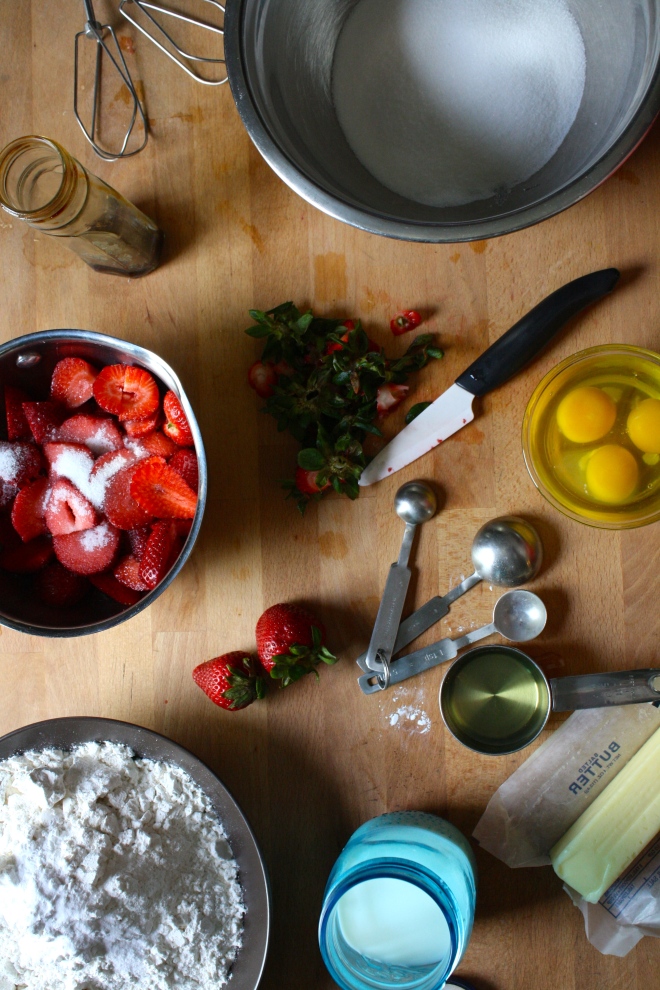 Cake Stuff. Flour, baking soda, baking powder, and salt whisked together in a bowl. Butter, a little oil, vanilla, eggs and buttermilk. Then of course we have strawberries cause it wouldn’t be a strawberry cake with out them.
 First things first. Wash, trim and dice up the strawberries. Stick them into a pot and sprinkle with a few tablespoons of sugar. Heat on low and let the strawberries cook for about 10 minutes, stirring frequently, until they turn into a thick syrup.
  The sugar and the butter get beaten together until light and fluffy. Then goes in the oil, eggs, and vanilla. The milk is then added to the strawberry mixture. Add half the dry mixture to the wet, mix, then mix in half the strawberry mixture to that. Mix the rest of the dry in and finish off with the strawberry mixture.
 Cake gets pulled from the oven and set on a rack to cool.
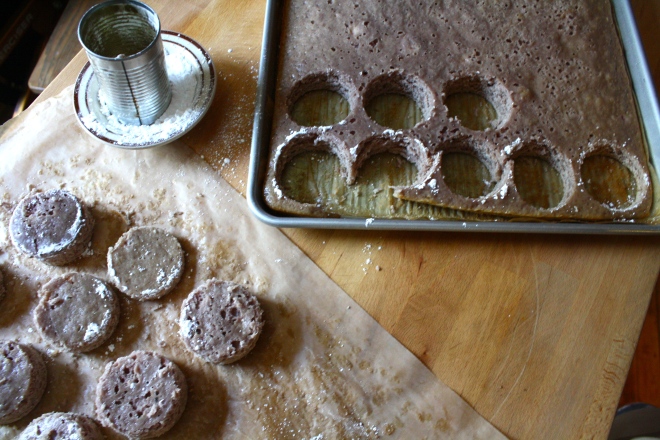 Tomato can cutout. (I couldn’t find my biscuit cutters) A biscuit or cookie cutter would probably work a little better.. The cakes kept getting stuck in the can.
  Frost the cake!! Place frosting into a piping bag or a big plastic zip lock with the tip cut off. 2 rounds to a cake. A squeeze of frosting goes on one, topped with another and given a little smoosh. A nice big dollop of frosting on top then….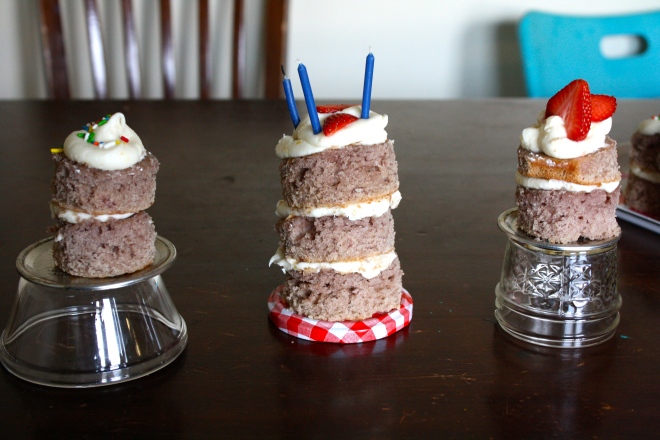
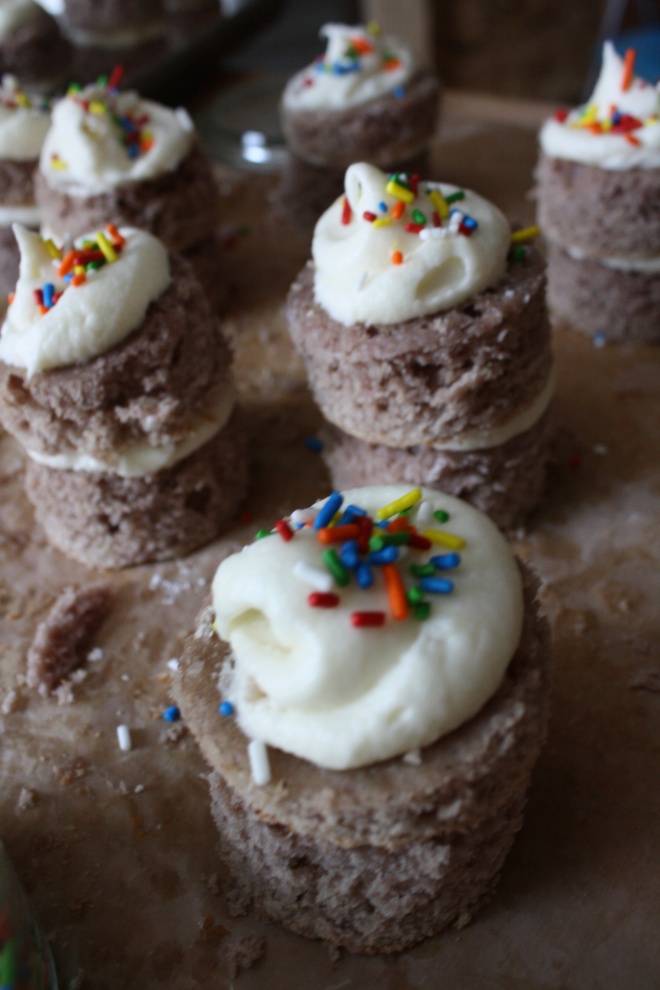
 What is better for a bake sale then Oreo cookies? Oreo cookies made from scratch!.
 Cookie Time! Whats going on here is brown sugar and butter have be beaten together until nice and fluffy Then a good big splash of vanilla and another 2 big splashes of coffee are added to that.(I sacrificed my last few sips of my coffee for these cookies) The dry stuff, flour, salt and cocoa powder, are whisked together, waiting to be added to the wet.
  Mix the dry ingredients into the wet and mix. I ended up just using my hand and kind of squish mixing everything together until in tuned into a nice lovely uniformed dough. Form the dough into 2 balls and give each a few kneads to get any air bubbles out. Place dough back into bowl and stick in the fridge to sit for 10-15 minutes( it makes the dough a little easier to work with)
 Once the dough has had a little time to rest and cool, remove from fridge, one ball at a time. Place on a lightly cocoa or powdered sugar dusted surface and roll out the dough. Grab any size circle (or other shape) cookie cutter and get to shaping the cookies. Notice the tin can in the bowl? I could’t find my biscuit cutters anywhere but the can was the perfect size, and it worked really well. Keep a little bowl of either powered sugar of cocoa to dip the cutter in in between making the cookies. It really helps the dough from sticking and breaking.
  While the cookies are getting their cool on, make the cream filling. All you need is a stick of butter, about 4 cups of powdered sugar, some vanilla and a few splashes of heavy cream. Beat that all up until nice and creamy thick and spoon it into a pastry bag (I used a big old ziplock bag) to be piped on the cookies.
  Filling the cookies is for sure the best part. Separate the cookies into pairs and pipe a big blob of filling onto one of the two cookies. Take the names cookie and place on top, giving it a little smooth to the disperse the cream. Keep doing that until the cookies are all filled.
 I don’t know if I have bitched enough about it, but I only have one window in my living space. And as much as I love love love our little tiny loft, I am a person who needs the sun. So when I am home I spend a lot of time siting in front of the window. Over the past few weeks I have been doing a lot of watercolor painting in front of that window and somehow between drawings of carrots and vintage fans, I ended up making these marbled window stained glass hoops. And I am glade I did because these little watercolor gems really do make a big impact on my one source of sunlight. Even when the day is kind of gray and gloomy, having these in the window make the light seem brighter and happy.
  So this project is really easy and fast. I recommend that if you are going to go to the trouble (it’s really no trouble) of making one, you might as well make 2 or 5. I actually made a bunch (think Mothers day or Easter presents) and ended up only keeping a s couple. I am going to have to make a few more soon.
 Take a piece(s) of paper a little bit bigger then the hoop you are working with and stick it into a pan or tray of water. Let it sit there for a few minutes until the paper is completely soaked.
 Take the wet paper and, oh so gently, crumple into a ball. This part can be a little tricky. You want to make as many creases as possible without ripping that paper. (I ripped a few pieces) I found that if I folded that paper a few time, then crumpled that it was less likely to rip.
 Uncrumple the paper and lay it gently onto the inner part of the hoop. Now the fun part. Go to town with the watercolors. I used 2 colors per piece, but you could do 1 or 3, or more. When applying the color, use big gentle strokes and let the colors kind of meld together. Watch as all the crumple veins soak up the paint. Try using different dilutions of color. I applied some color on thinly and some on the thicker side. But really, you can’t go wrong, just keep applying paint until you are happy. I stopped a few times and held it up to the window just to see what it looked like. When it looked good, I was done.
 When you are happy with the colors, let the paper dry for a while on the hoop until it is not longer super wet. I would say about an hour or so, but if you stick it near the heater, it might dry faster. (Just don’t stick it in the oven while you are making bread like I did with one.. It just ended up setting on fire. Oops)
THE LOVELY CRAZY
August 12, 2016 by maximios • Blog
My fingers are almost always stained a bright pink. My cutting board and counter tops, pink. Look closely at at dish towels and you will find pink blotches all over them as with any of my light colored clothes. You would think after years of trying to remove beet stains form everything that I would have gotten a system down or at least had a designated cutting board for them, but no. That would be to easy and really, I think I kinda don’t care. So pink my things will be.
Beets. You either love them or you hate them. I love them (so much), the mr, well I am making him love them. He needs to love them because I end up putting beets in everything. If you are a hater, there is still turn into a lover. But maybe you have never even eaten a beet or haven’t in a long long time. I am actually surprised at how many people I have talked to that have never tried beets before. If you are one of those people, stop being that person and eat one already. OR if you think you hate them, why don’t you give them a second try, I bet you will change your mind. Sweet but earthy and nice and crisp but kind of juicy..they really are super tasty. And not to mention all the great health benefits(you can look those up yourself) Yup, beets be the shit!
And I love a good roasted beet, but really, I prefer my beets raw. Which brings us to this salad. A simple salad of grated up beets, orange juice and toasted hazelnuts. Fast, easy, and tummy satisfying. As long as you don’t hate beets (how could you) then you will love it.
Now you get those beets!
The stuff. A big beet, (or two smaller ones) an orange,( I bought navel oranges and sliced into this one to find it was a blood orange… not complaining), hazelnuts (raw or toasted) apple cider vinegar, and salt and pepper. Optional but also very nice, some greens and or some type of grain. (I happen to have a some quinoa in the fridge)
Hazelnuts. If yours are already toasted, then no need to do it again, but if they are raw, toss them into the oven for a few minutes (hazelnuts taste so much better toasted)
And grab the beet and a shallow dish and grate it all up.
Add to the beet the juice of the orange, a small splash of vinegar to cut the sweetness, and salt and pepper to taste. Give it a good toss and let it sit for at least 5 minutes, if not longer.
And if the hazelnuts are in the oven, take them out when they are slight golden brown. If you want to remove the skins, just stick them in a clean towel and rub it off.
Everything all ready to go.. Any extras are added to bowls.
Beets into bowls, topped with toasted nuts and a cute little orange segment.(if you happen to have one lying around)
Isn’t that just something. Beets are so pretty,, but more importantly, so freaking tasty good.
Enjoy Today!
-C
makes enough for 2 people as a side
If you hazelnuts are raw, toss them onto a baking sheet ans place them into the oven at 300 for about 6-8 minutes until slightly golden brown and smell so nice. When done remove and if you don’t like the skins, place nuts in a clean towel and rub the skins right off.
Wash beet(s) and grate into a swallow bowl. I don’t peel mine, but peel if you must. Add in the juice of the orange, a splash of vinegar and a dash of salt and pepper. Mix around and let sit for at least 5 minutes (the longer the better)
When you are ready for food, grab a bowl (add anything you want to add to the bottom, like quinoa or greens) and fill that bowl up with the beet salad and top with roasted hazelnuts.
Grab a fork and eat.
I have been strategic about the roots and veggies that I have chosen to bring home the past few weeks.(My farm lets you pick what you want) I know what I can buy at the store, things like carrots and potatoes, so I have been passing those up, but the roots like beets and celeriac… I have been bringing home baskets of those and hoarding them in the fridge and basement in preparation for the laps in farm fresh food and knowing that if I want to by these at the store it s going to coast me a million dollars a pound. (a for real million dollars)
Yup, lots of roots around here, especially celeriac root which is fantastic. I am kind of obsessed with celeriac, with its fibrous, knobby exterior, soft but almost meaty texture inside, and a flavor that is close to celery but so much better. I don’t know why it has taken me so long to do a posting featuring this amazing root vegetable (I eat it almost every day)
So here, an amazingly tasty, hearty but not heavy, celeriac recipe. Perfect for spring and the change into summer…. Mustard roasted celeriac with an fanatic split peas gravy that will have you licking you bowl clean.
*Note. I don’t peel my celeriac root. I really enjoy the fibrous exterior but realize that some don’t(The mister does not like it) so peel it if you want.
While the gravy is cooking, take the celeriac rounds and brush each side with yellow mustard, sprinkle with pepper, and place on a baking sheet. Stick into the oven to roast for about 25 minutes, flipping the rounds after about 10 minutes.
Serve with the fanciest knife and fork you can find. Extra yellow mustard and sriracha sauce are great condiments to have close by.
Happy Tuesday!
-C
Mustard Roasted Celeriac with Split Pea Gravy
Preheat oven to 400 degrees
Small dice the carrot, parsnip and onion and throw into a large pot. Spinkle with salt and pepper, add in the thyme and bay leaf and add a splash of water. Stick on stove on medium heat and stir. Let cook until the veggies become soft and fragrant. Now add in the split peas and 2 cups of water. Bring to a boil then cover and turn heat down to medium low. Let cook until the split peas become tender (about 25 minutes) string on occasion and adding more water if the peas are not completely summered while cooking.
Once the peas are tender, let cool for a few minutes, remove bay leaf, and either dump into a blender or blend with an immersion blender until nice and creamy. If gravy seems to thick, add in more water.
Scrub or peel celeriac roots and slice them into 1/2 inch think rounds. Place on a baking sheet and brush mustard on both sides and spindle with pepper. Stick into oven for about 10 minutes, flip, then back into the oven for another 15 or so minutes, or unit the celeriac is tender.
When the celeriac is done remove from oven and stick a few rounds on a bed of spinach (or not, or any kind of grain or green you like) Top with a hearty helping of the gravy and toss on some chopped up tomatoes.
Eat with at knife and fork like a fancy person.
A perfect soup for spring! (or summer, winter, or fall)
Soup so good.
-C
Parsnip Thyme and Turmeric Soup
Dice up the parsnips, carrots, garlic and onion and place into a large dutch oven or pot. Drizzle with a bit of olive oil, sprinkle on the spices, salt and pepper and add about 1/2 cup of water. Turn heat on medium and start cooking down the veggies. Once the water evaporates and the veggies start to caramelize, deglaze pot with about a 1/2 cup of water. Give pot a stir, and continue to cook until water evaporates. Repeat this 2-3 more times until the veggies are super soft and fragrant.
When the veggies are ready, add enough water to the pot to submerge the veggies. Bust out the immersion blender or dump into a blending device and blend until smooth (or the consistency that you want) Have a cup of water ready to thin out if needed. When blended, taste for salt and pepper, add more if you want, and cook on low heat until you are ready to serve.
Garnish with a lot of good cracked pepper
Eat from a vessel, use a spoon
I spent a lot of time indoors this week, due to the fact that my eyelids would freeze shut when going out for more than a few minute..(for real, walking to the gym the other day, I had my head tightly wrapped and the condensation from my breath went up, into my eyes, and froze.) I mean, I love winter, I love the cold, but I am not a huge fan of -30 with wind chill… I get cold bones. After that morning, the mister insisted on diving me…Love. So we (me, Nick, and especially Washer) might have felt a little trapped this week, and when trapped inside, we get a little antsy, but we have been trying to make the most of it. Cooking, baking, cleaning, drawing, reading, knitting, drinking lots of coffee and tea, and overall trying to stay warm (and sane) Yup. trying to ward of the cabin fever, especially this year, living in a little tiny bit of a room with one window..has been a little difficult. And I know it’s going to be a bitch when it hits. But it’s all cool, We have plans in the making, places to look forward to, things to see. It always helps to have an adventure awaiting to keep the fever at bay.
Anyway, not a bad week, maybe a little stuffy, but nothing to complain to much about. Here are a few of highlights that made(make) me happy.
The trash dog and I went for a lovely little hike by ourselves…It was so nice to get out of the house. We both really really really needed it that day. And look how handsome he looks.. so red against the world.
I love to look up… don’t forget to look up.
I made a large quantity of banana dream (what I call banana ice cream). This stuff is like crack.. Once I start eating it, I can’t stop. I might overdose on bananas but I am ok with that.
I went to a granite and marble showroom this week. And like whoa, so freaking cool. Walking among huge pieces of gorgeous slabs of stone is kind of magical… and a little cold.
A basket of roots….More like a basket of rainbows.
I currently don’t have a pretty vase of zinnias on my table, (these beauts are from this past summer) but I really wish I did. Fresh flowers are one of my favorite things. This picture has inspired me, I am on the hunt for some pretty fresh.
That sums up the week…Stay warm!
-C