
THE LOVELY CRAZY
I am pretty sure making pretzels was one of the best ideas that I had all week. Making them into the shape of hearts, that WAS the best idea I had all week. Take note. Making anything into the shape of a heart is always the best idea.
So why pretzels? Well why not. I make so much bread in this house that I felt like making a little something different. I was thinking bagels, but I didn’t really want to have dough in the fridge for a day and plus I wanted to do something then and there and have it be done. Like pretzels. From start to finish they takes less then 2 hours. And you get to twist the dough and boil it and it is just fun. Like I could totally see making pretzels with a few littles or maybe a friend or a %u201cfriend%u201d. A pretzel making date. Now that is a good idea. Oh me, I am so full of all those good ideas. HAHA!
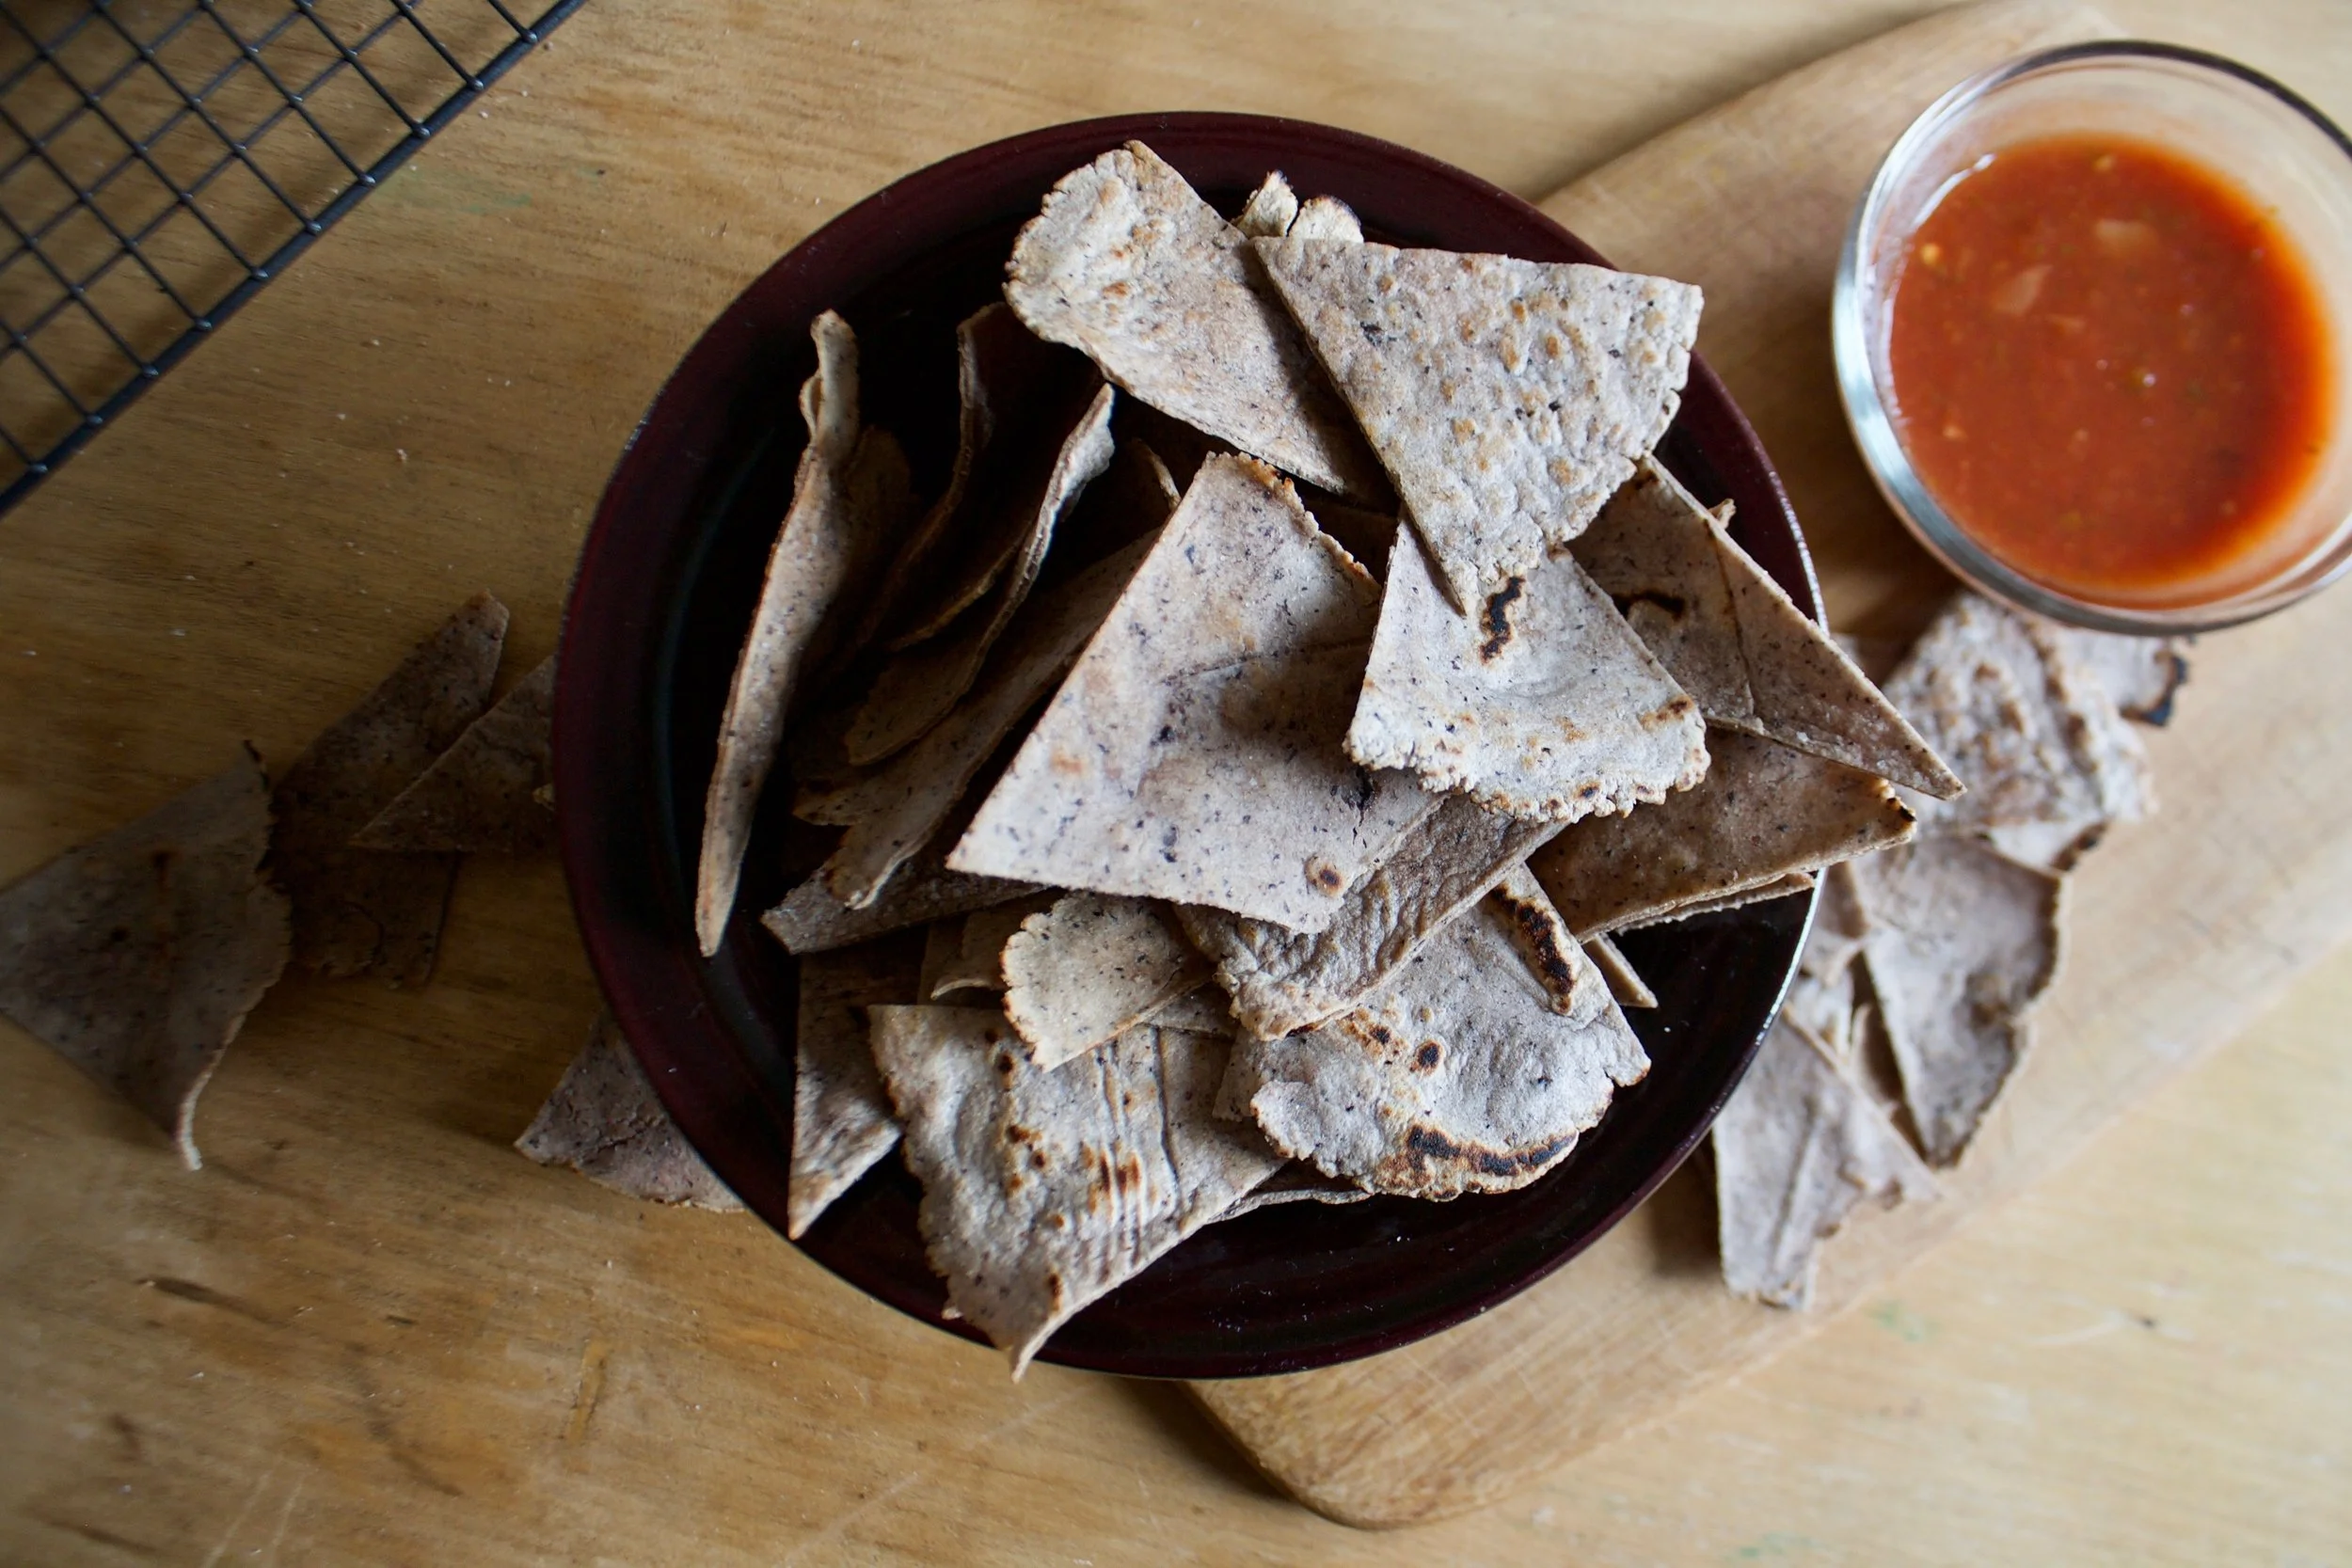
These pretzels are of the soft variety. And to make them pretzels, and not just bread, the kneaded dough gets shaped and then boiled in a baking soda bath (not lye%u2026don%u2019t have any lying around). Then they are sprinkled in course salt and baked til a deep golden brown. They come out soft and chewy just like a good soft pretzel should be. Then they need to be eaten right away, slightly warm, because that is how you are suppose to eat them.
And so the pretzels were made. The mr came home right after I pulled these puppies out of the oven and went for a walk to get some fresh air. When I got home I found him salivating over a plate, waiting for his cue to eat. The cue was given (once I put the camera away) and eat one he did. And then another. And another. Because really, what the hell, I made him heart shaped pretzels. He loved them so much that I just let him eat as many as he wanted. He was happy, I was happy, there where hearts. No complaints. Even when I told him he was having pretzels for all meals until they were gone. He just smiled he pretzel filled mouth at that.
To the pretzels!
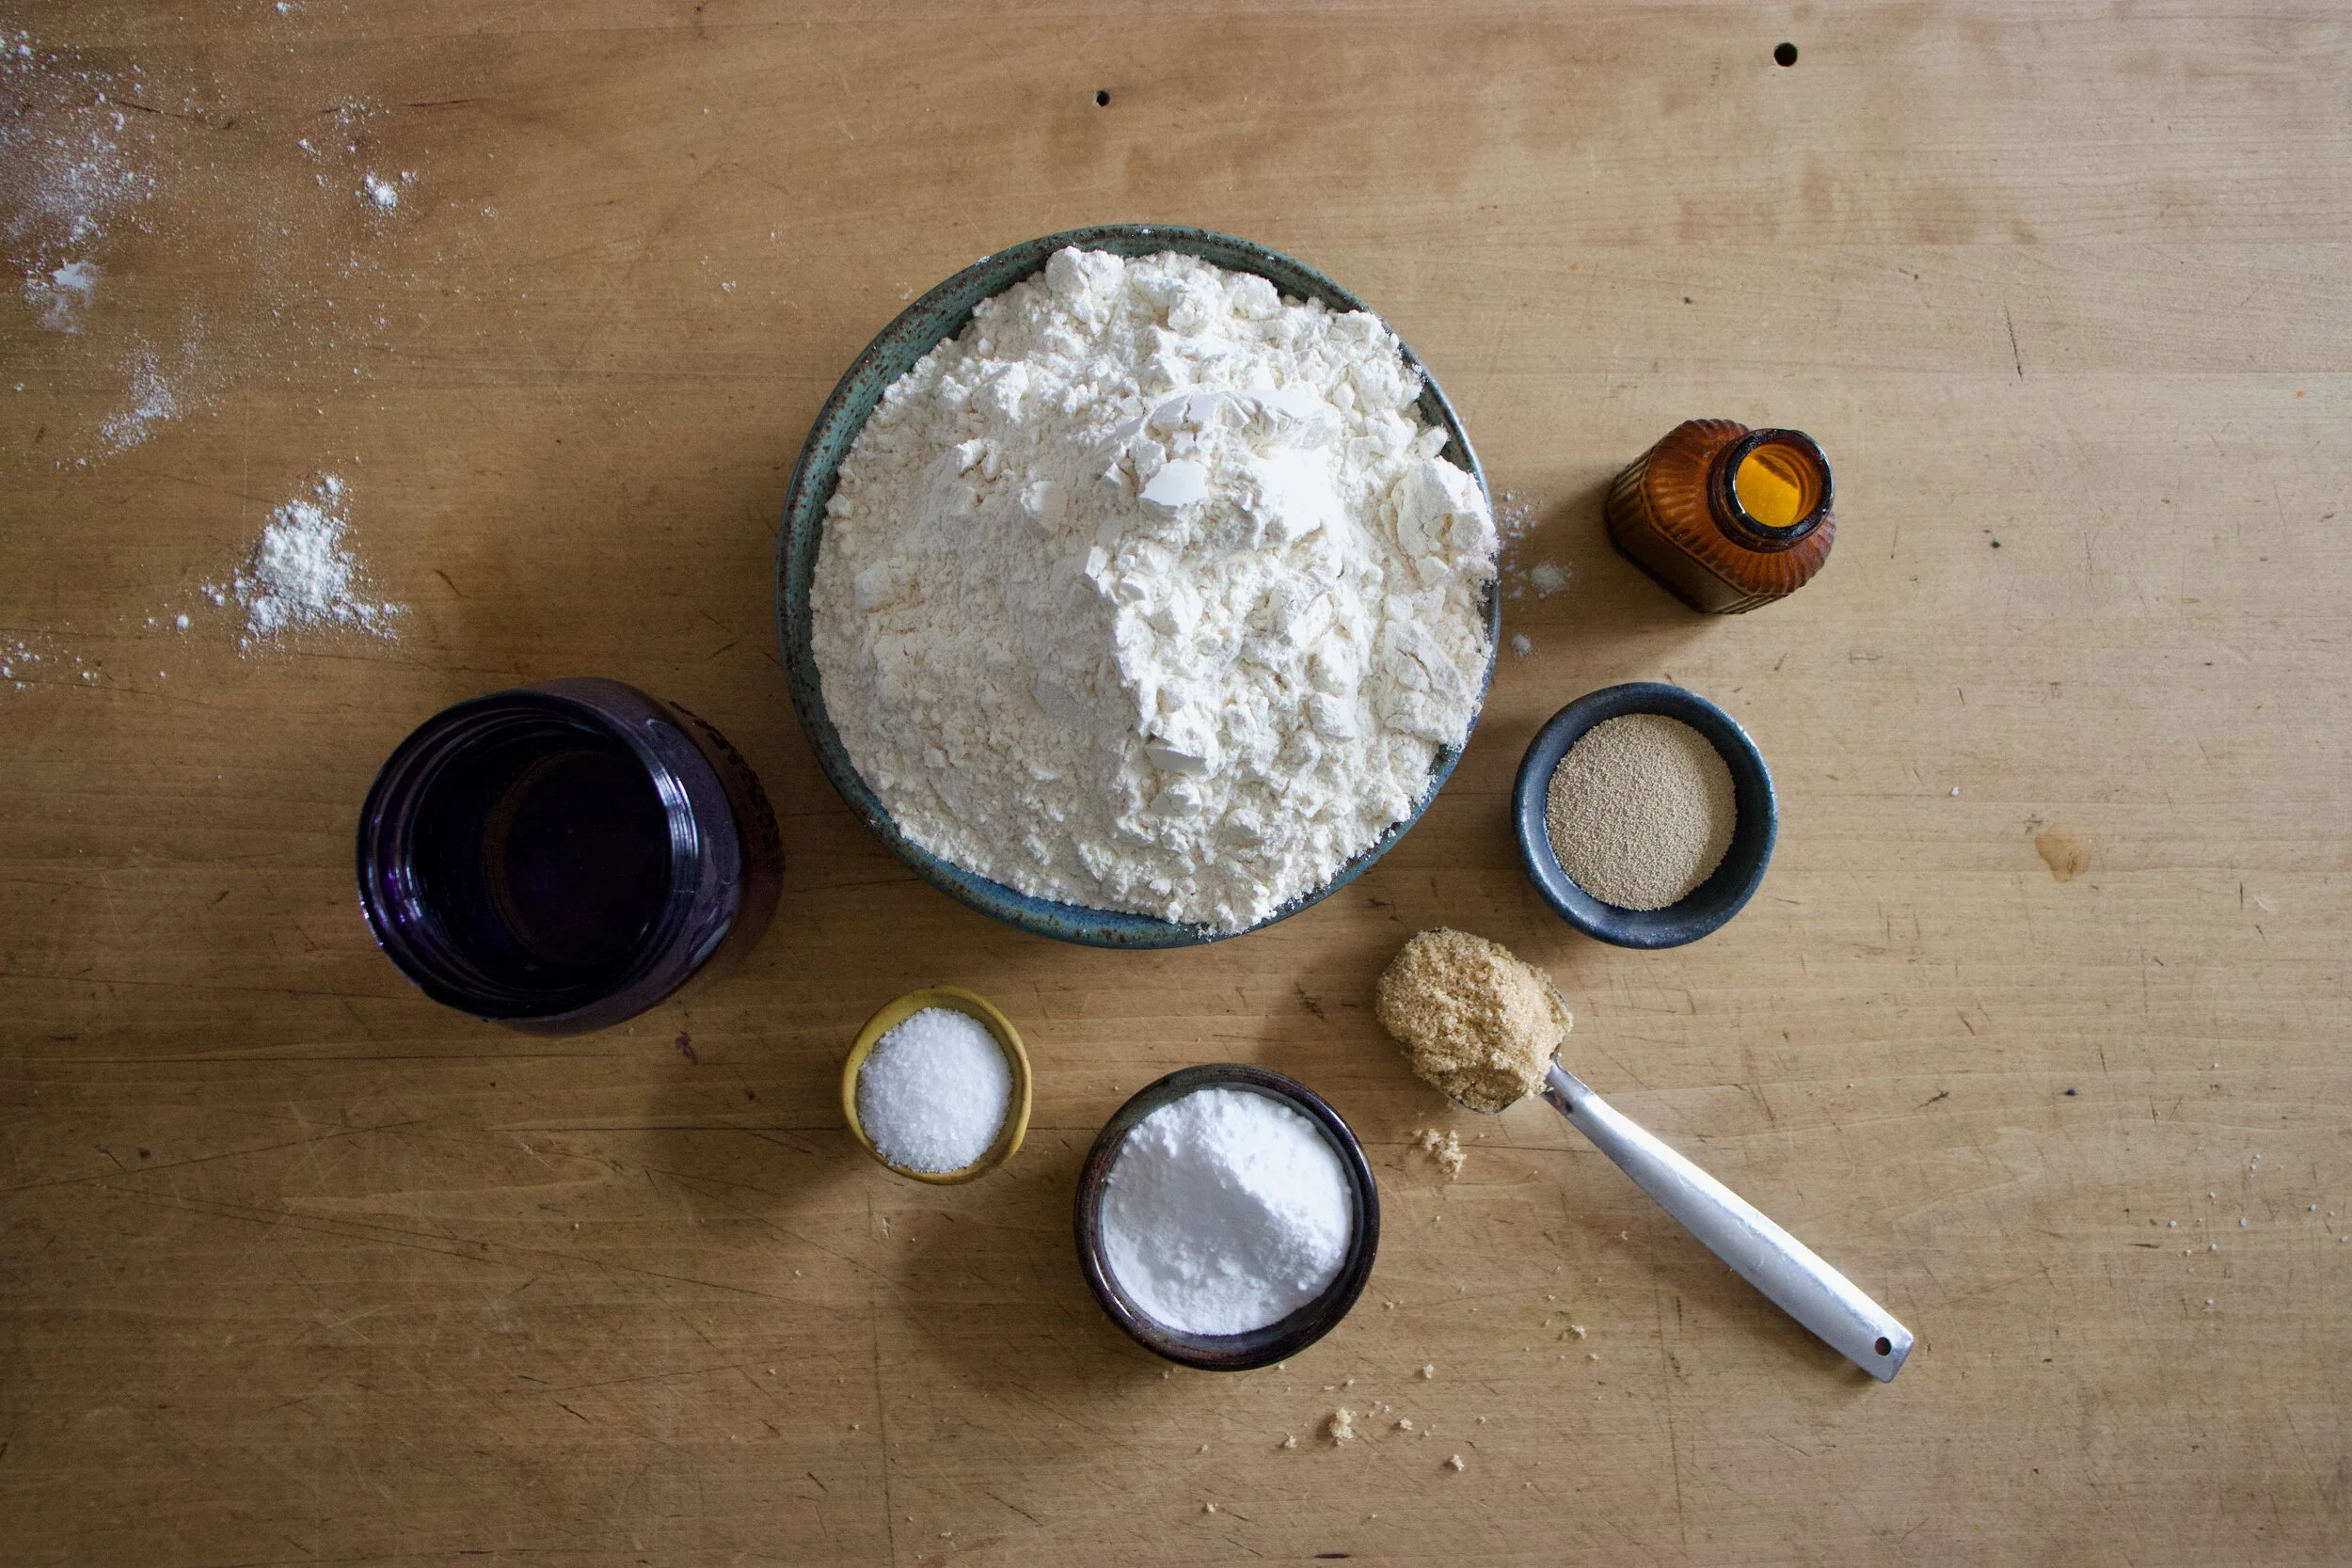
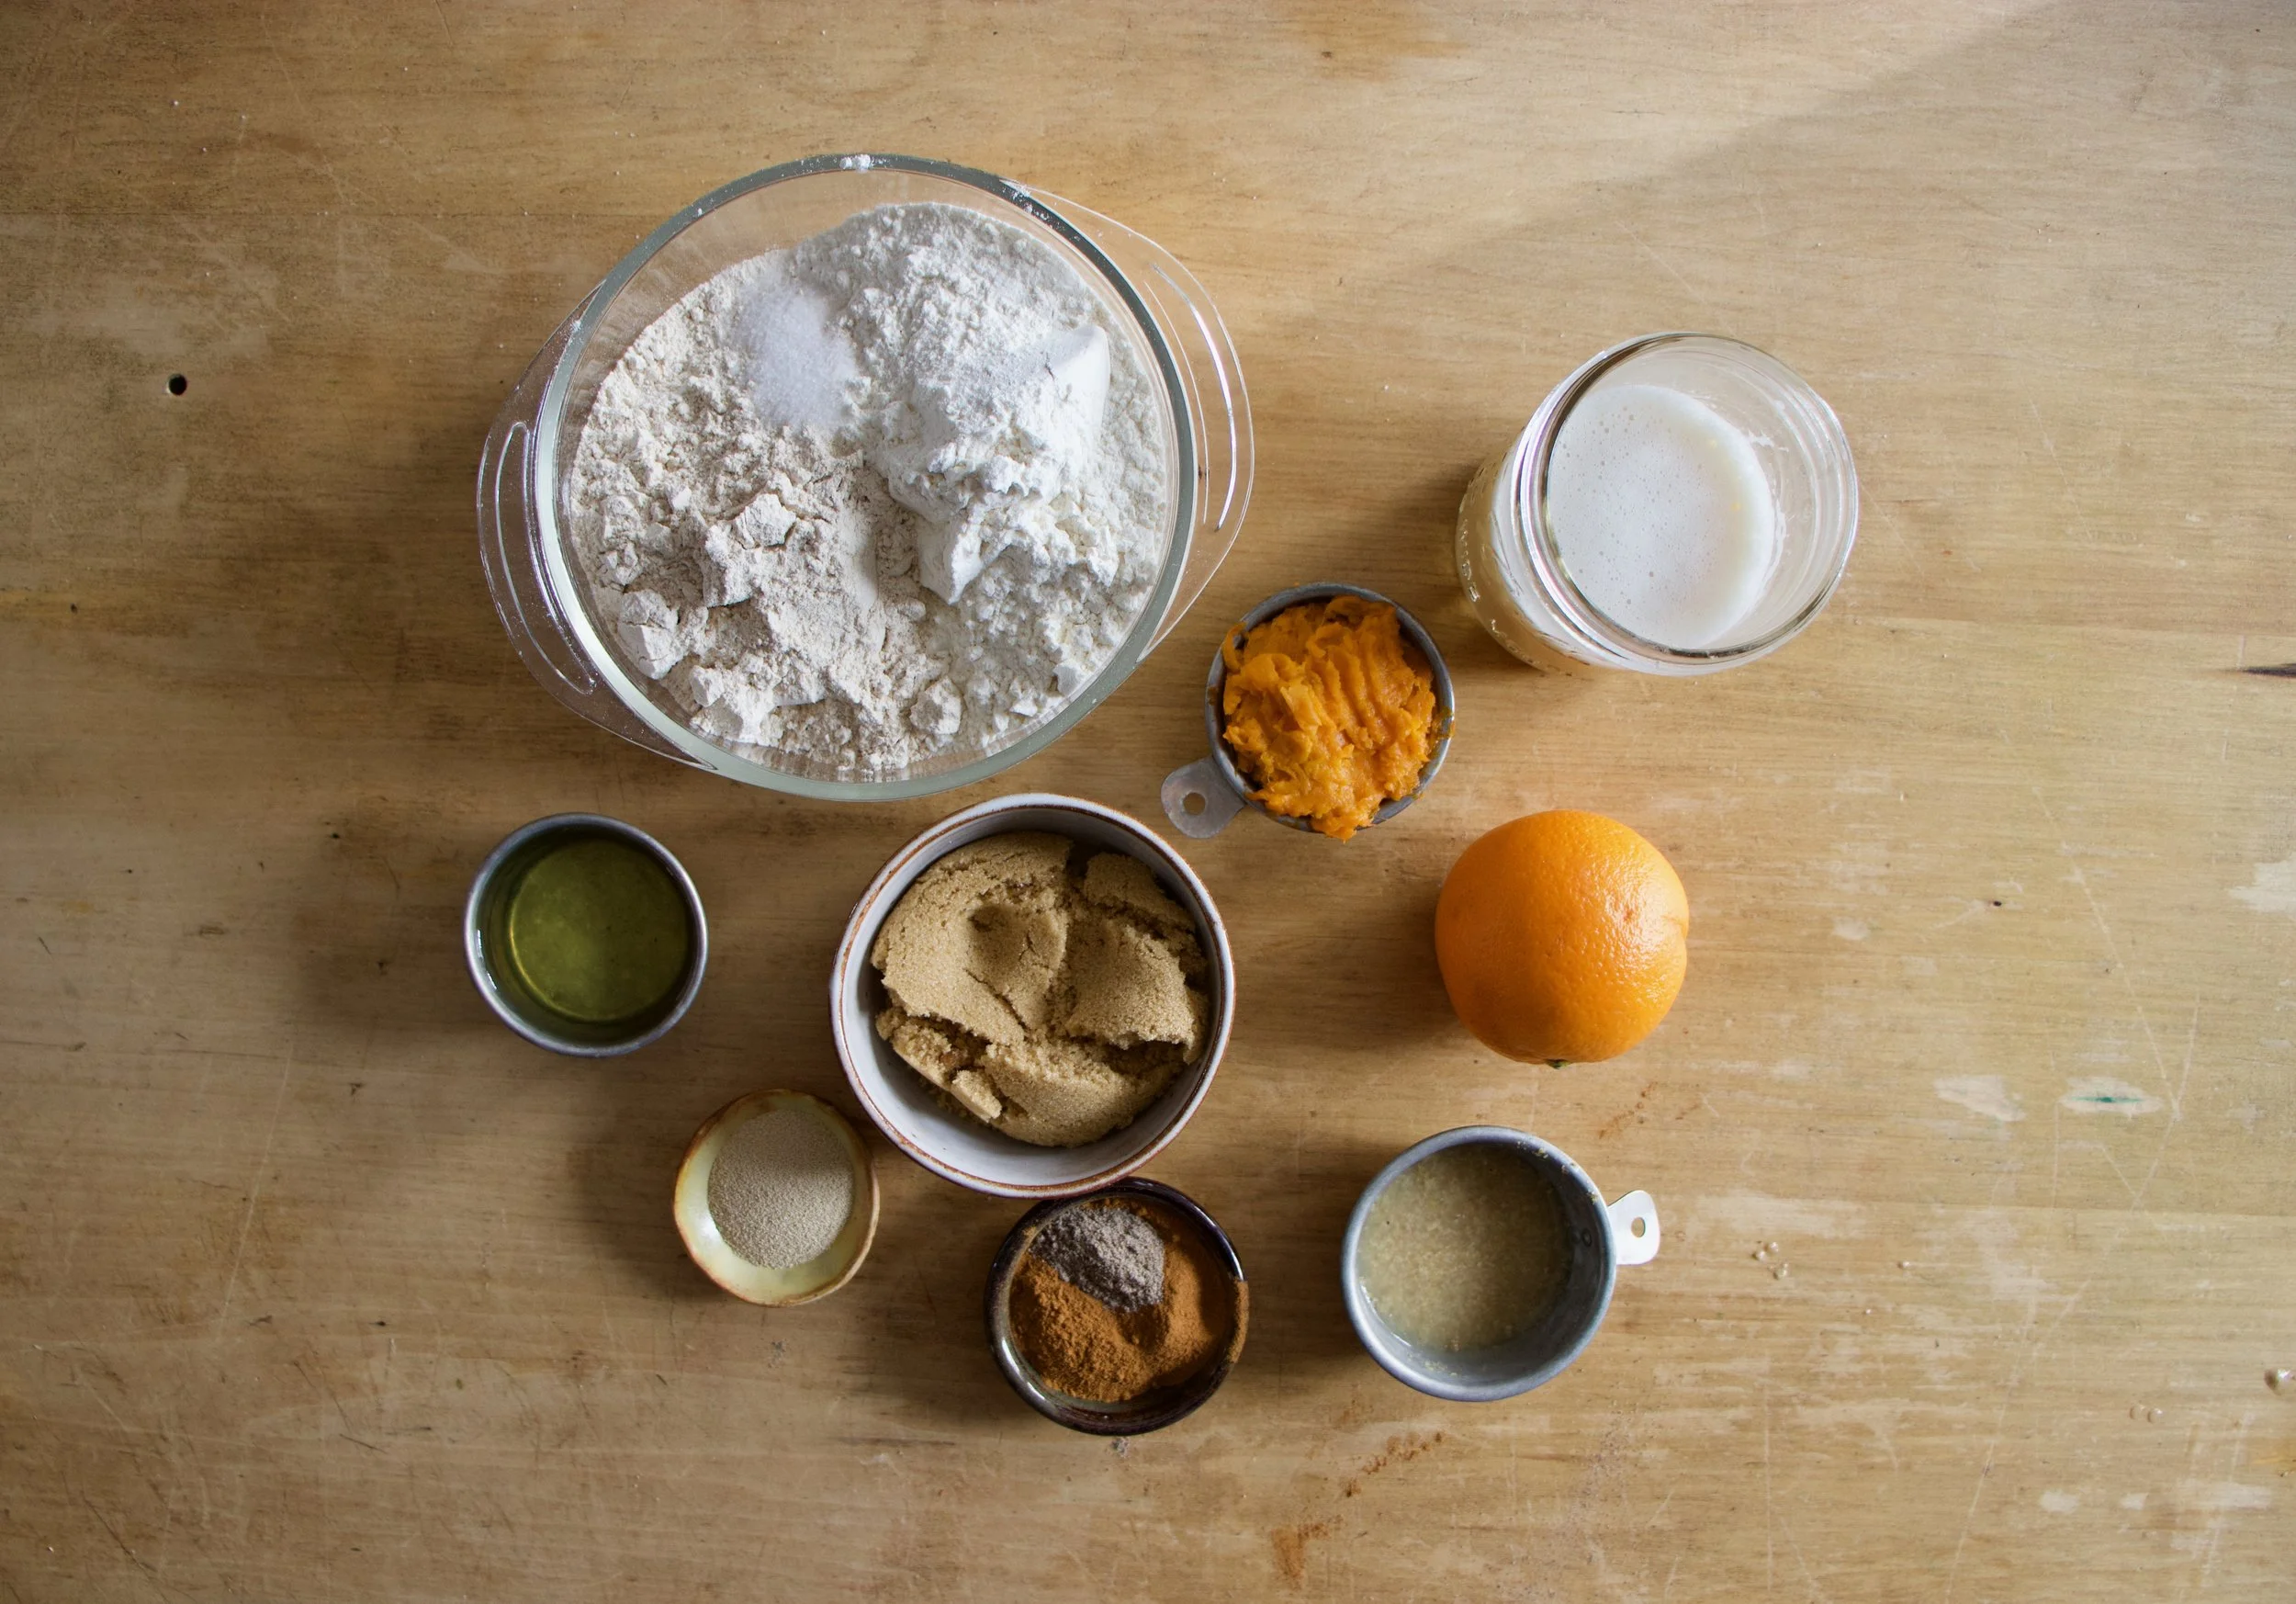
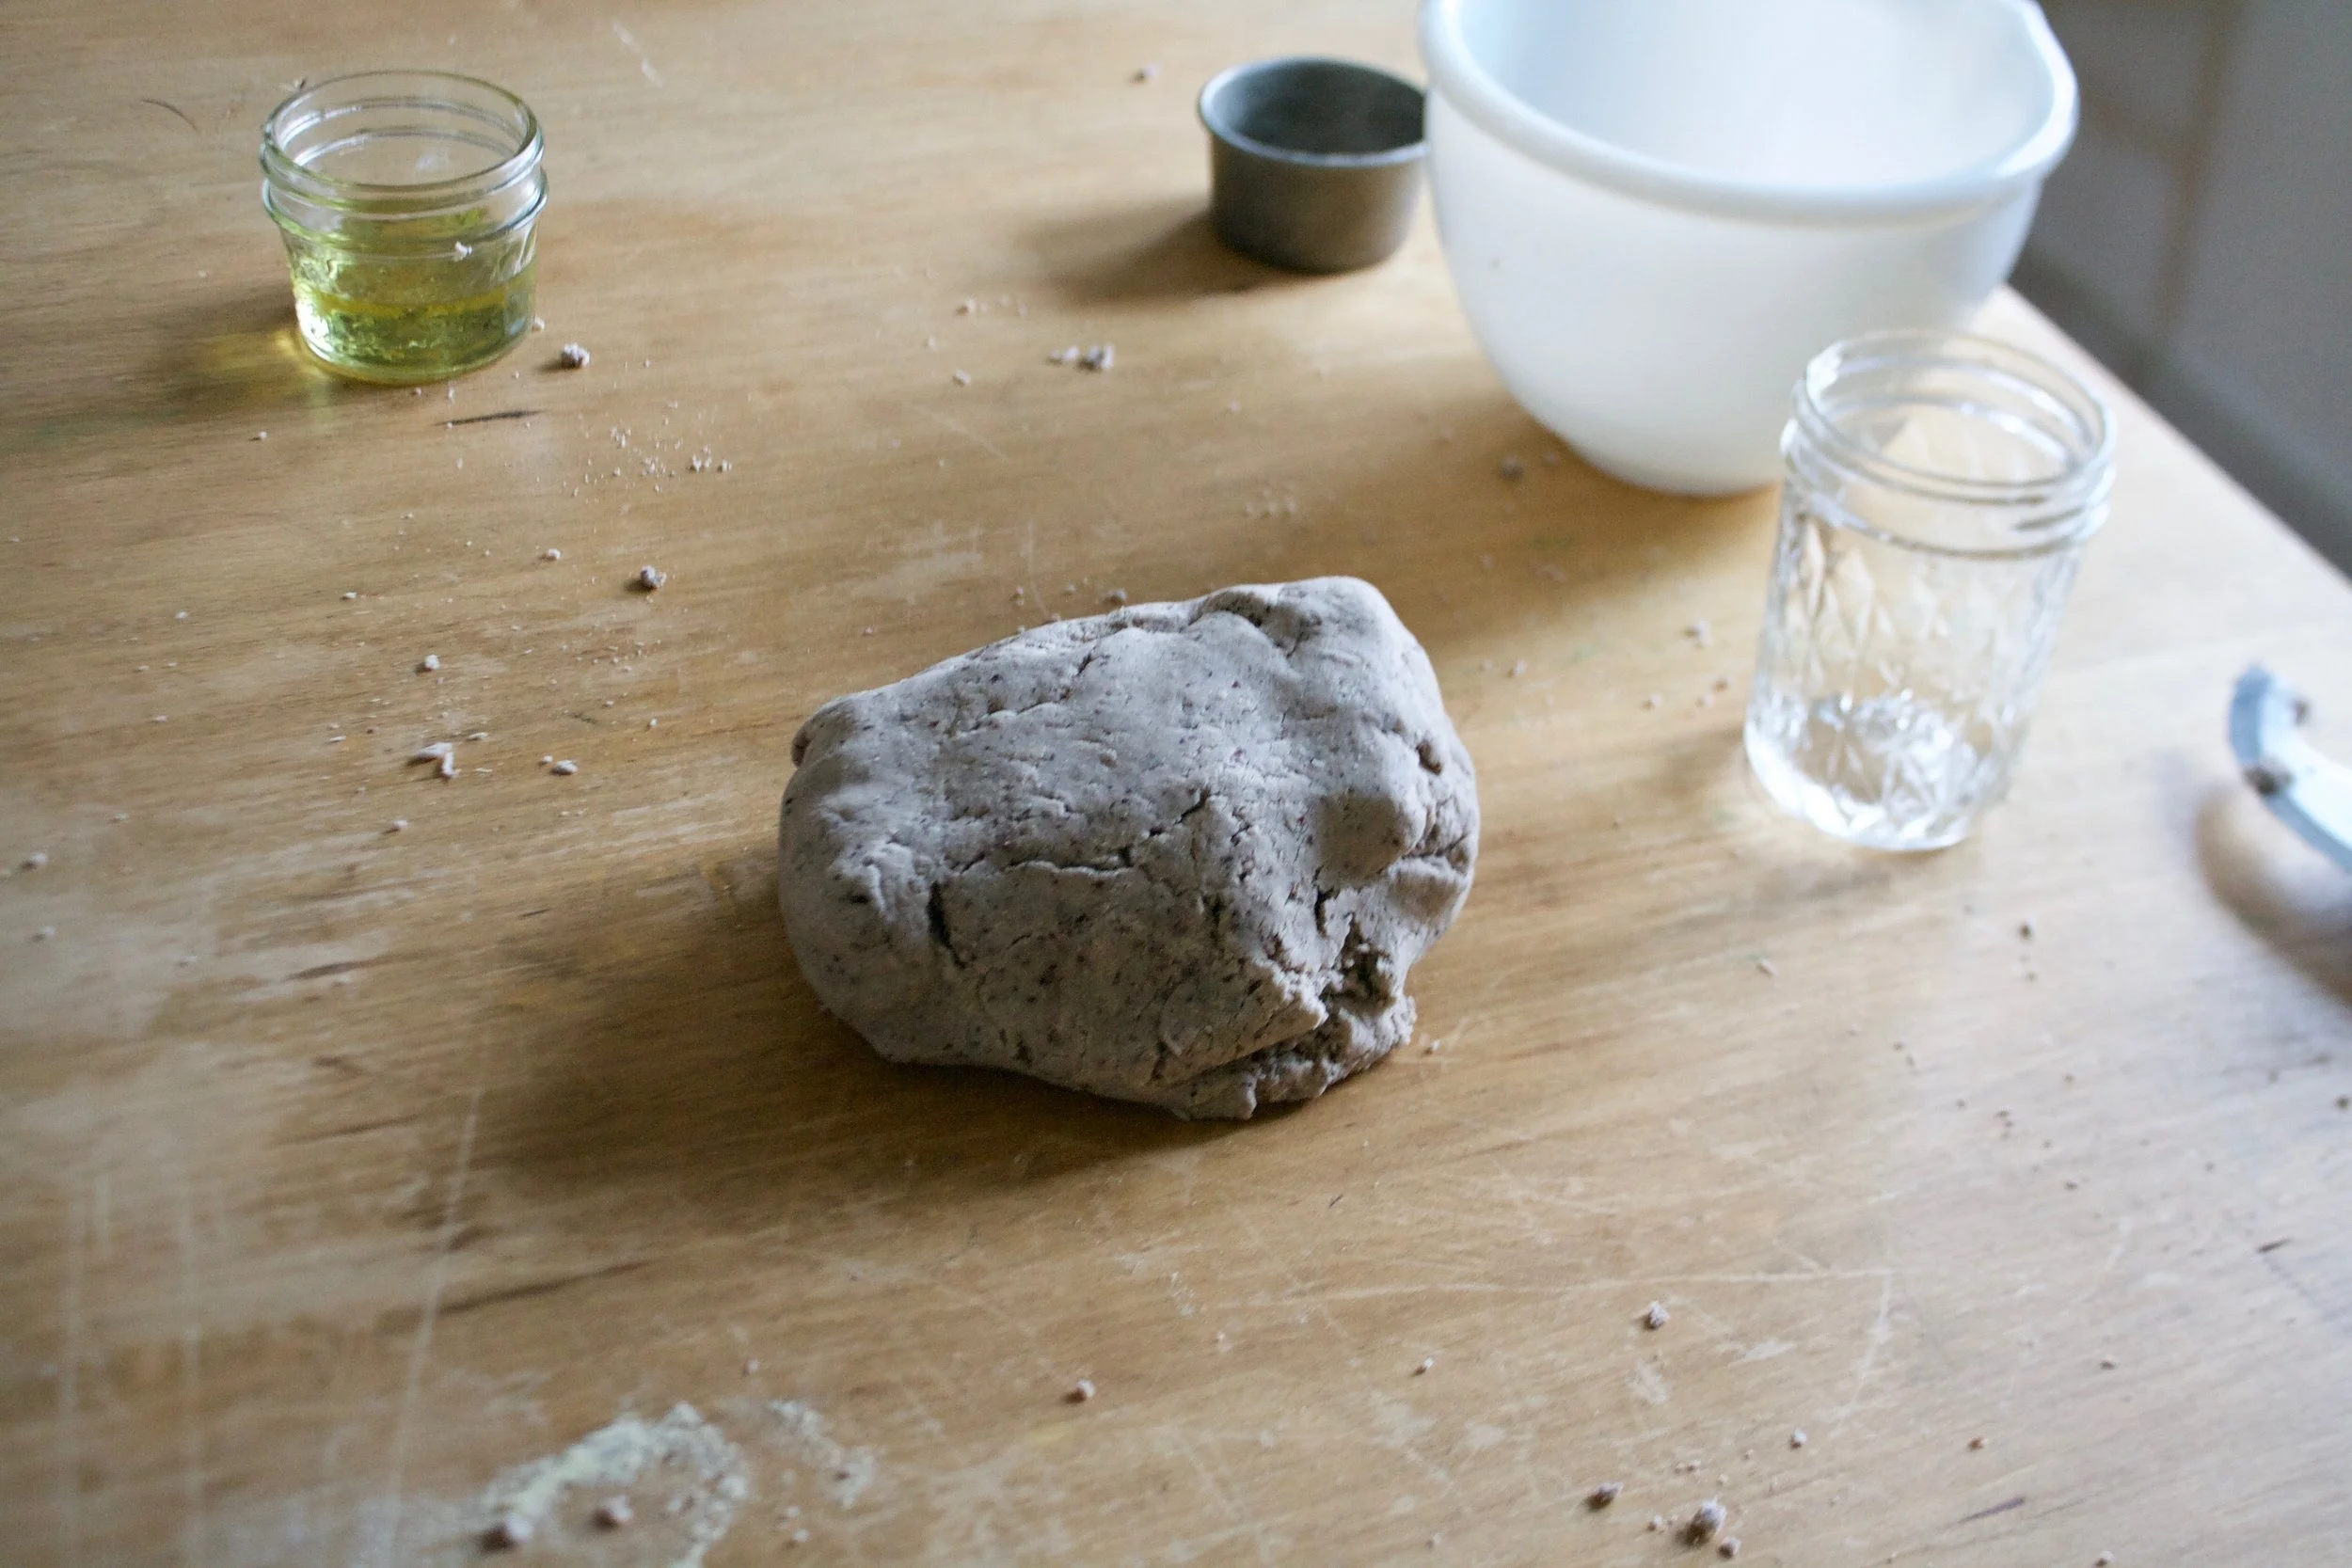
The stuff. Flour, salt, course salt, brown sugar, yeast, water, and some baking soda.
The yeast, brown sugar and warm water go into a big bowl to activate. Once it starts to bubble, dump in the flour and salt and mix until a shaggy dough forms.

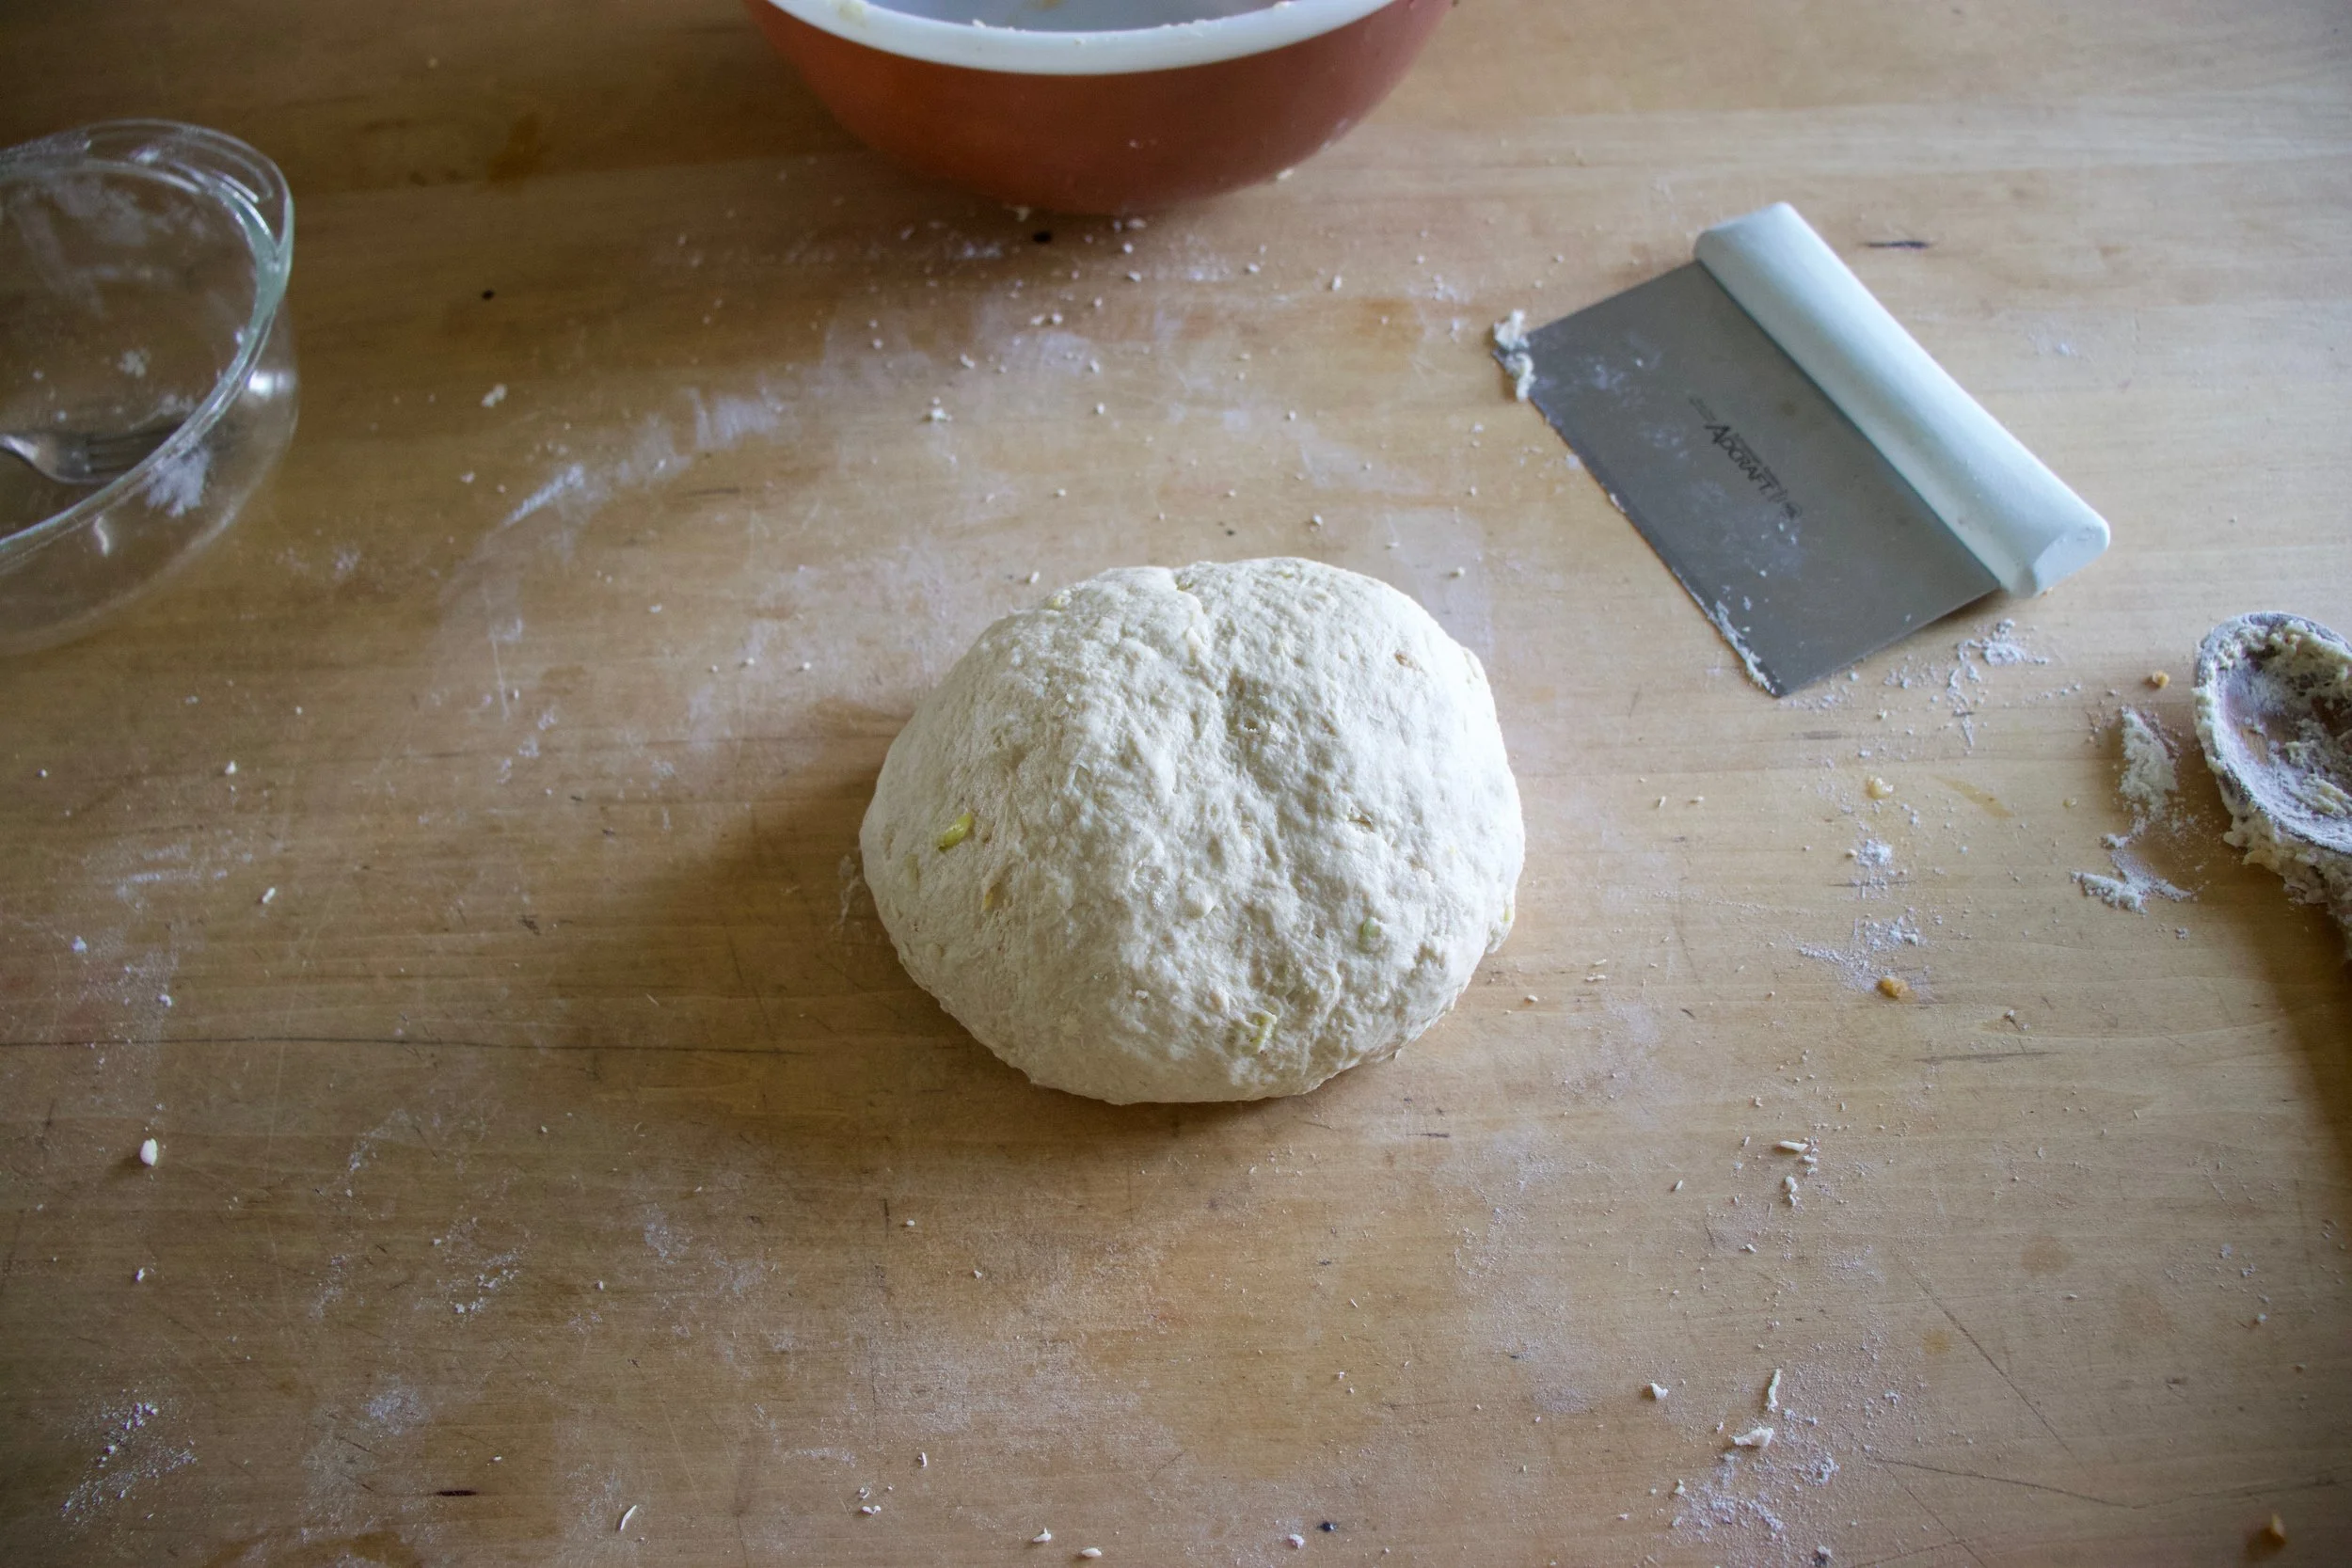
Dump dough onto a floured surface and knead for about 5 minutes.
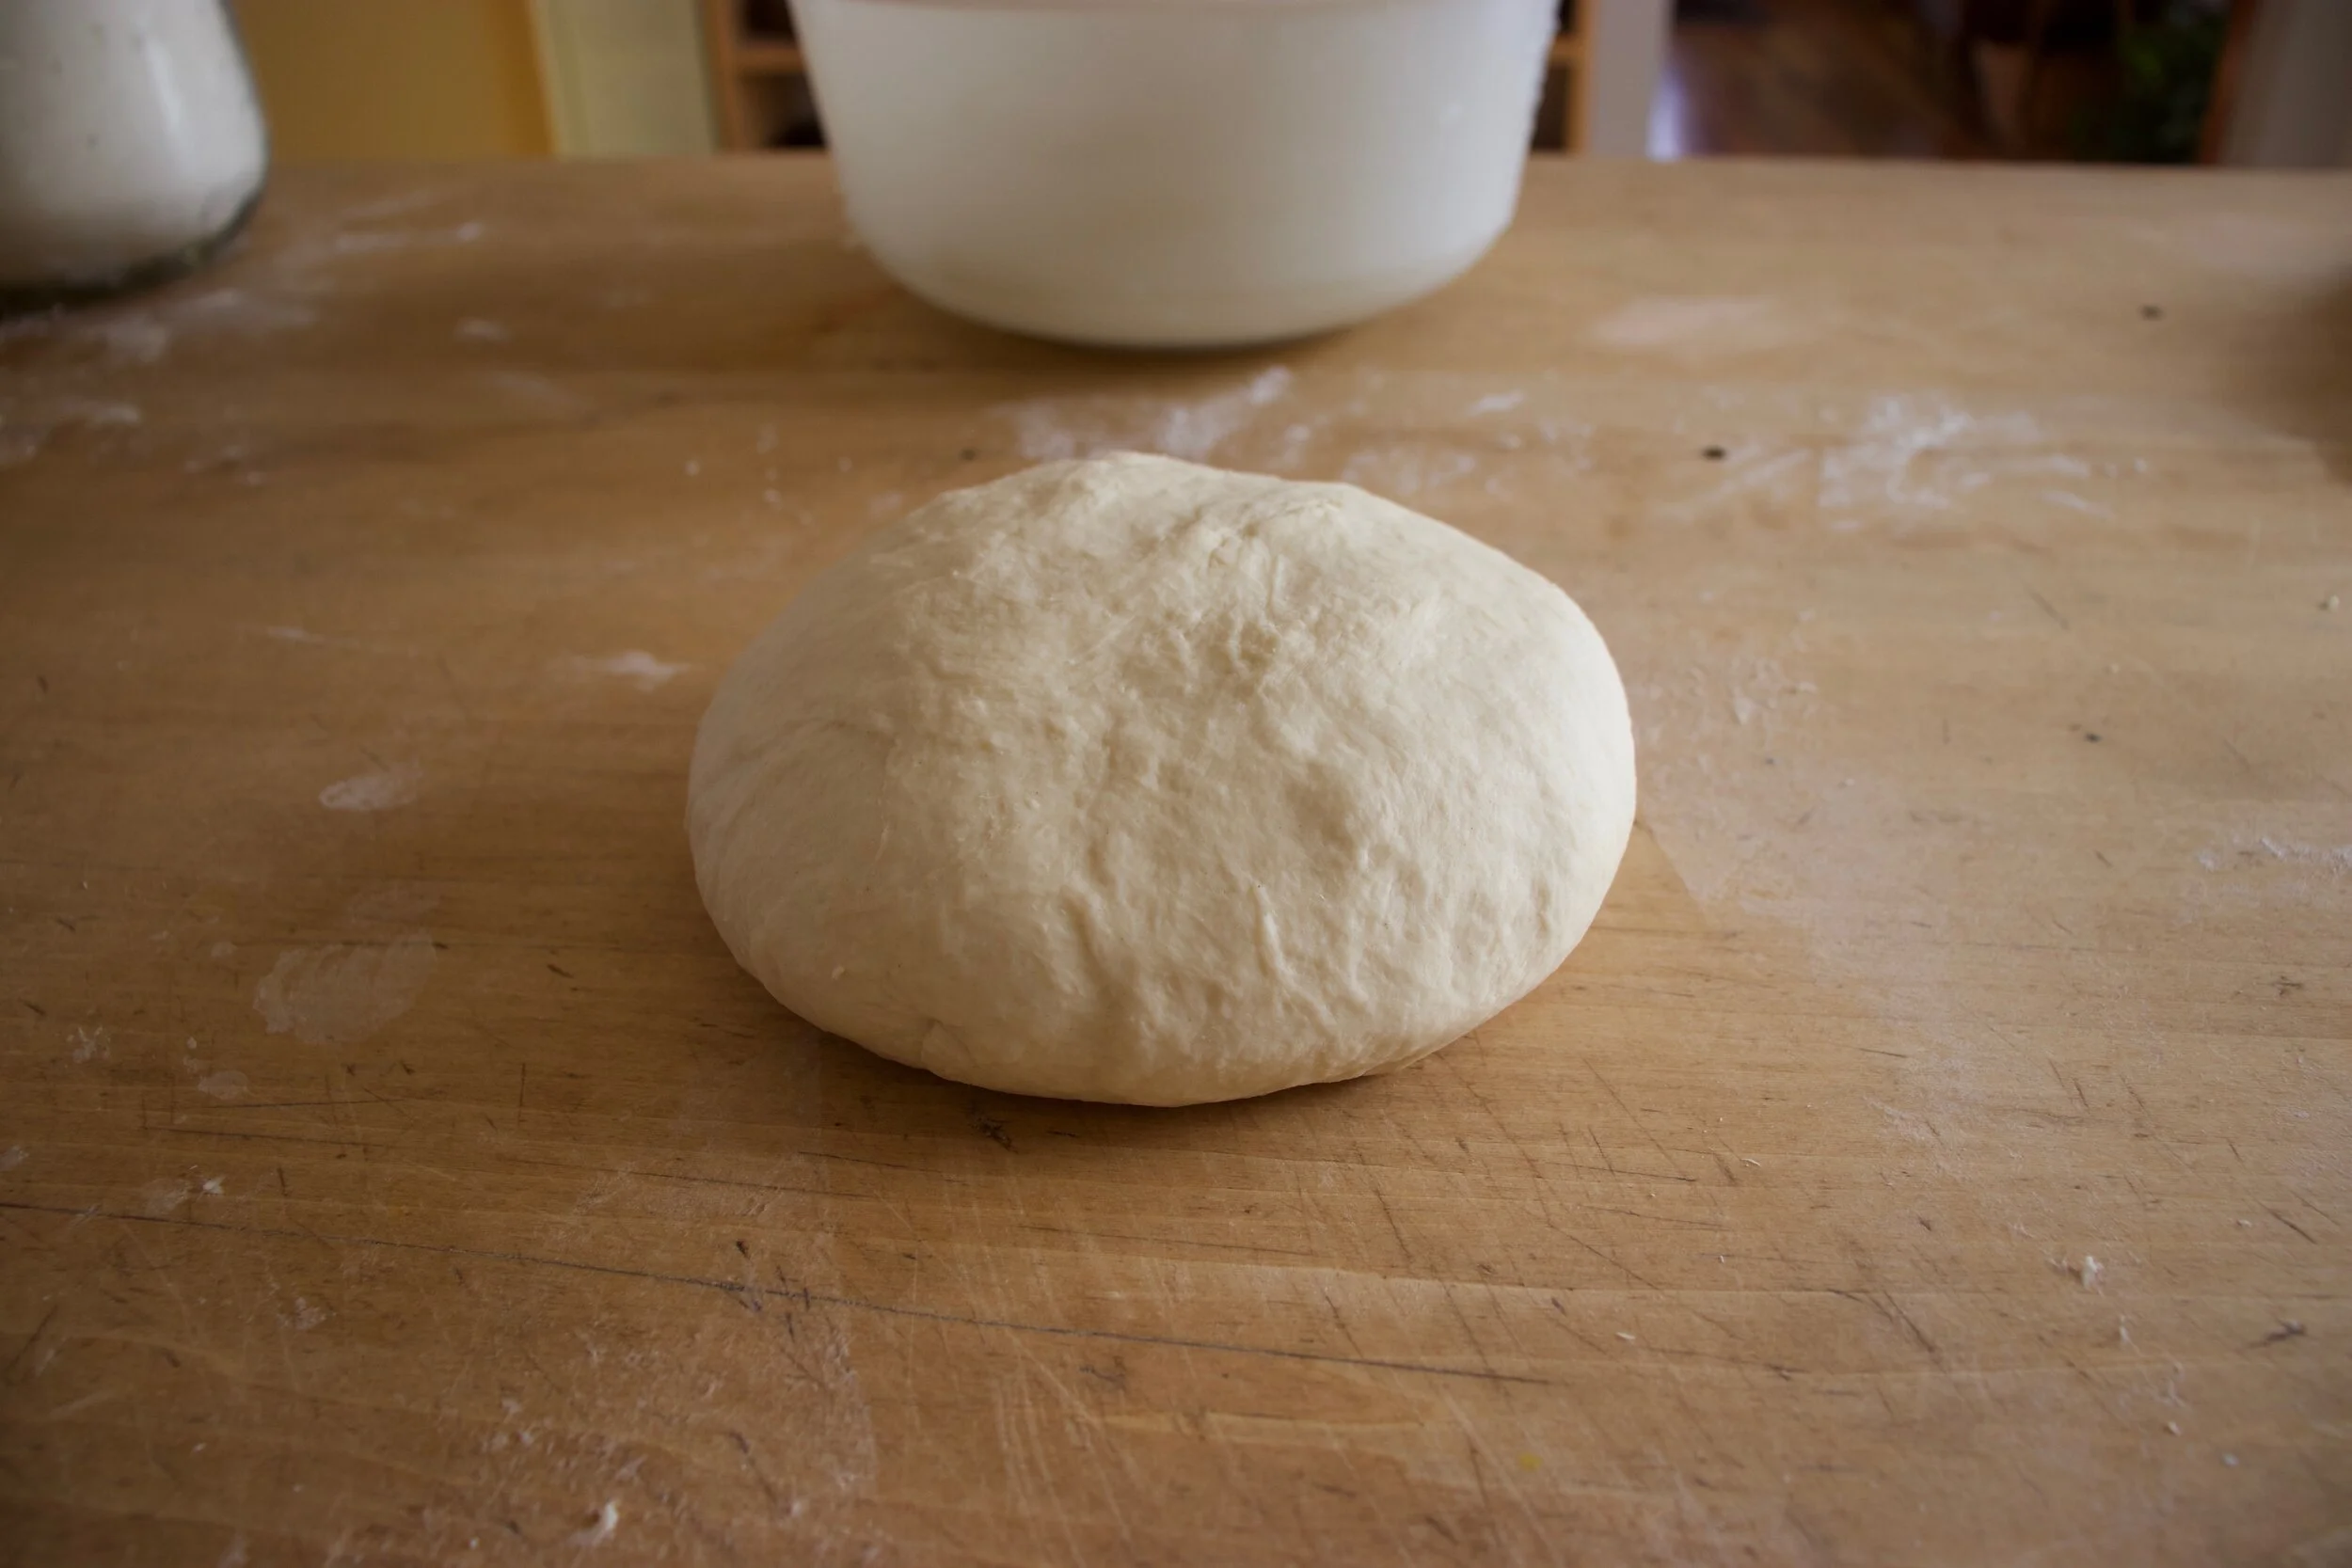
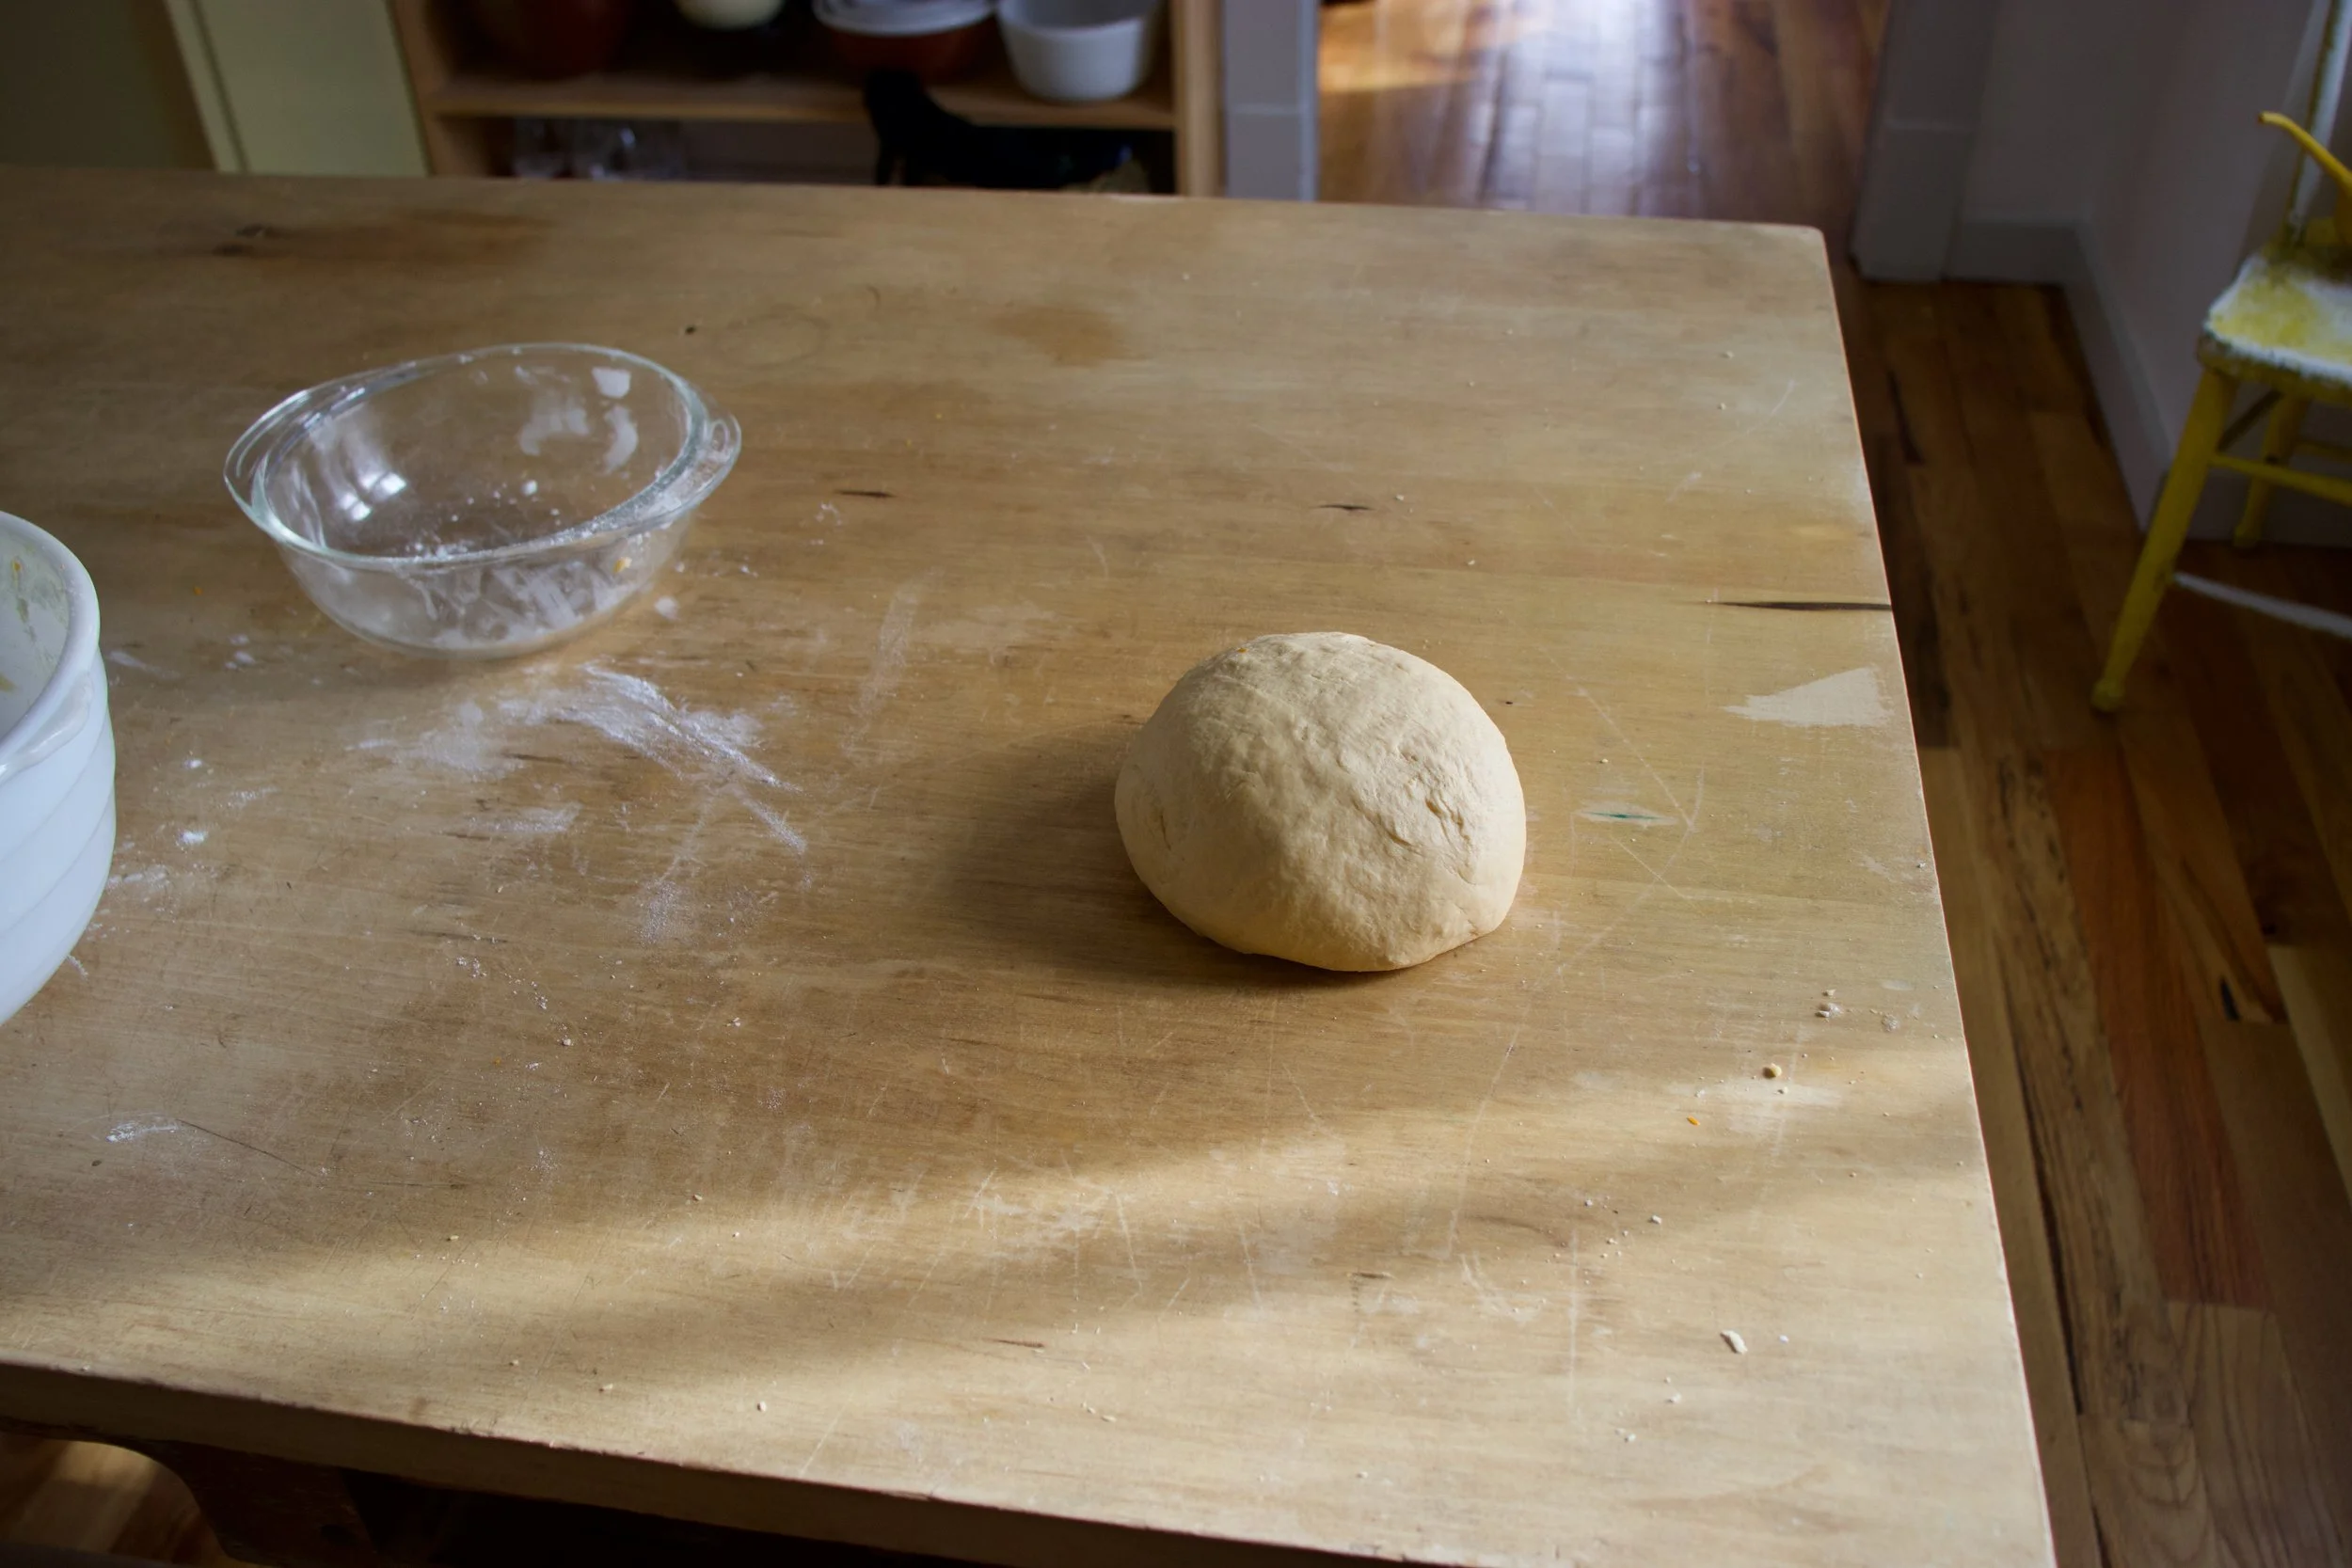
Kneaded all nice to soft and supple.
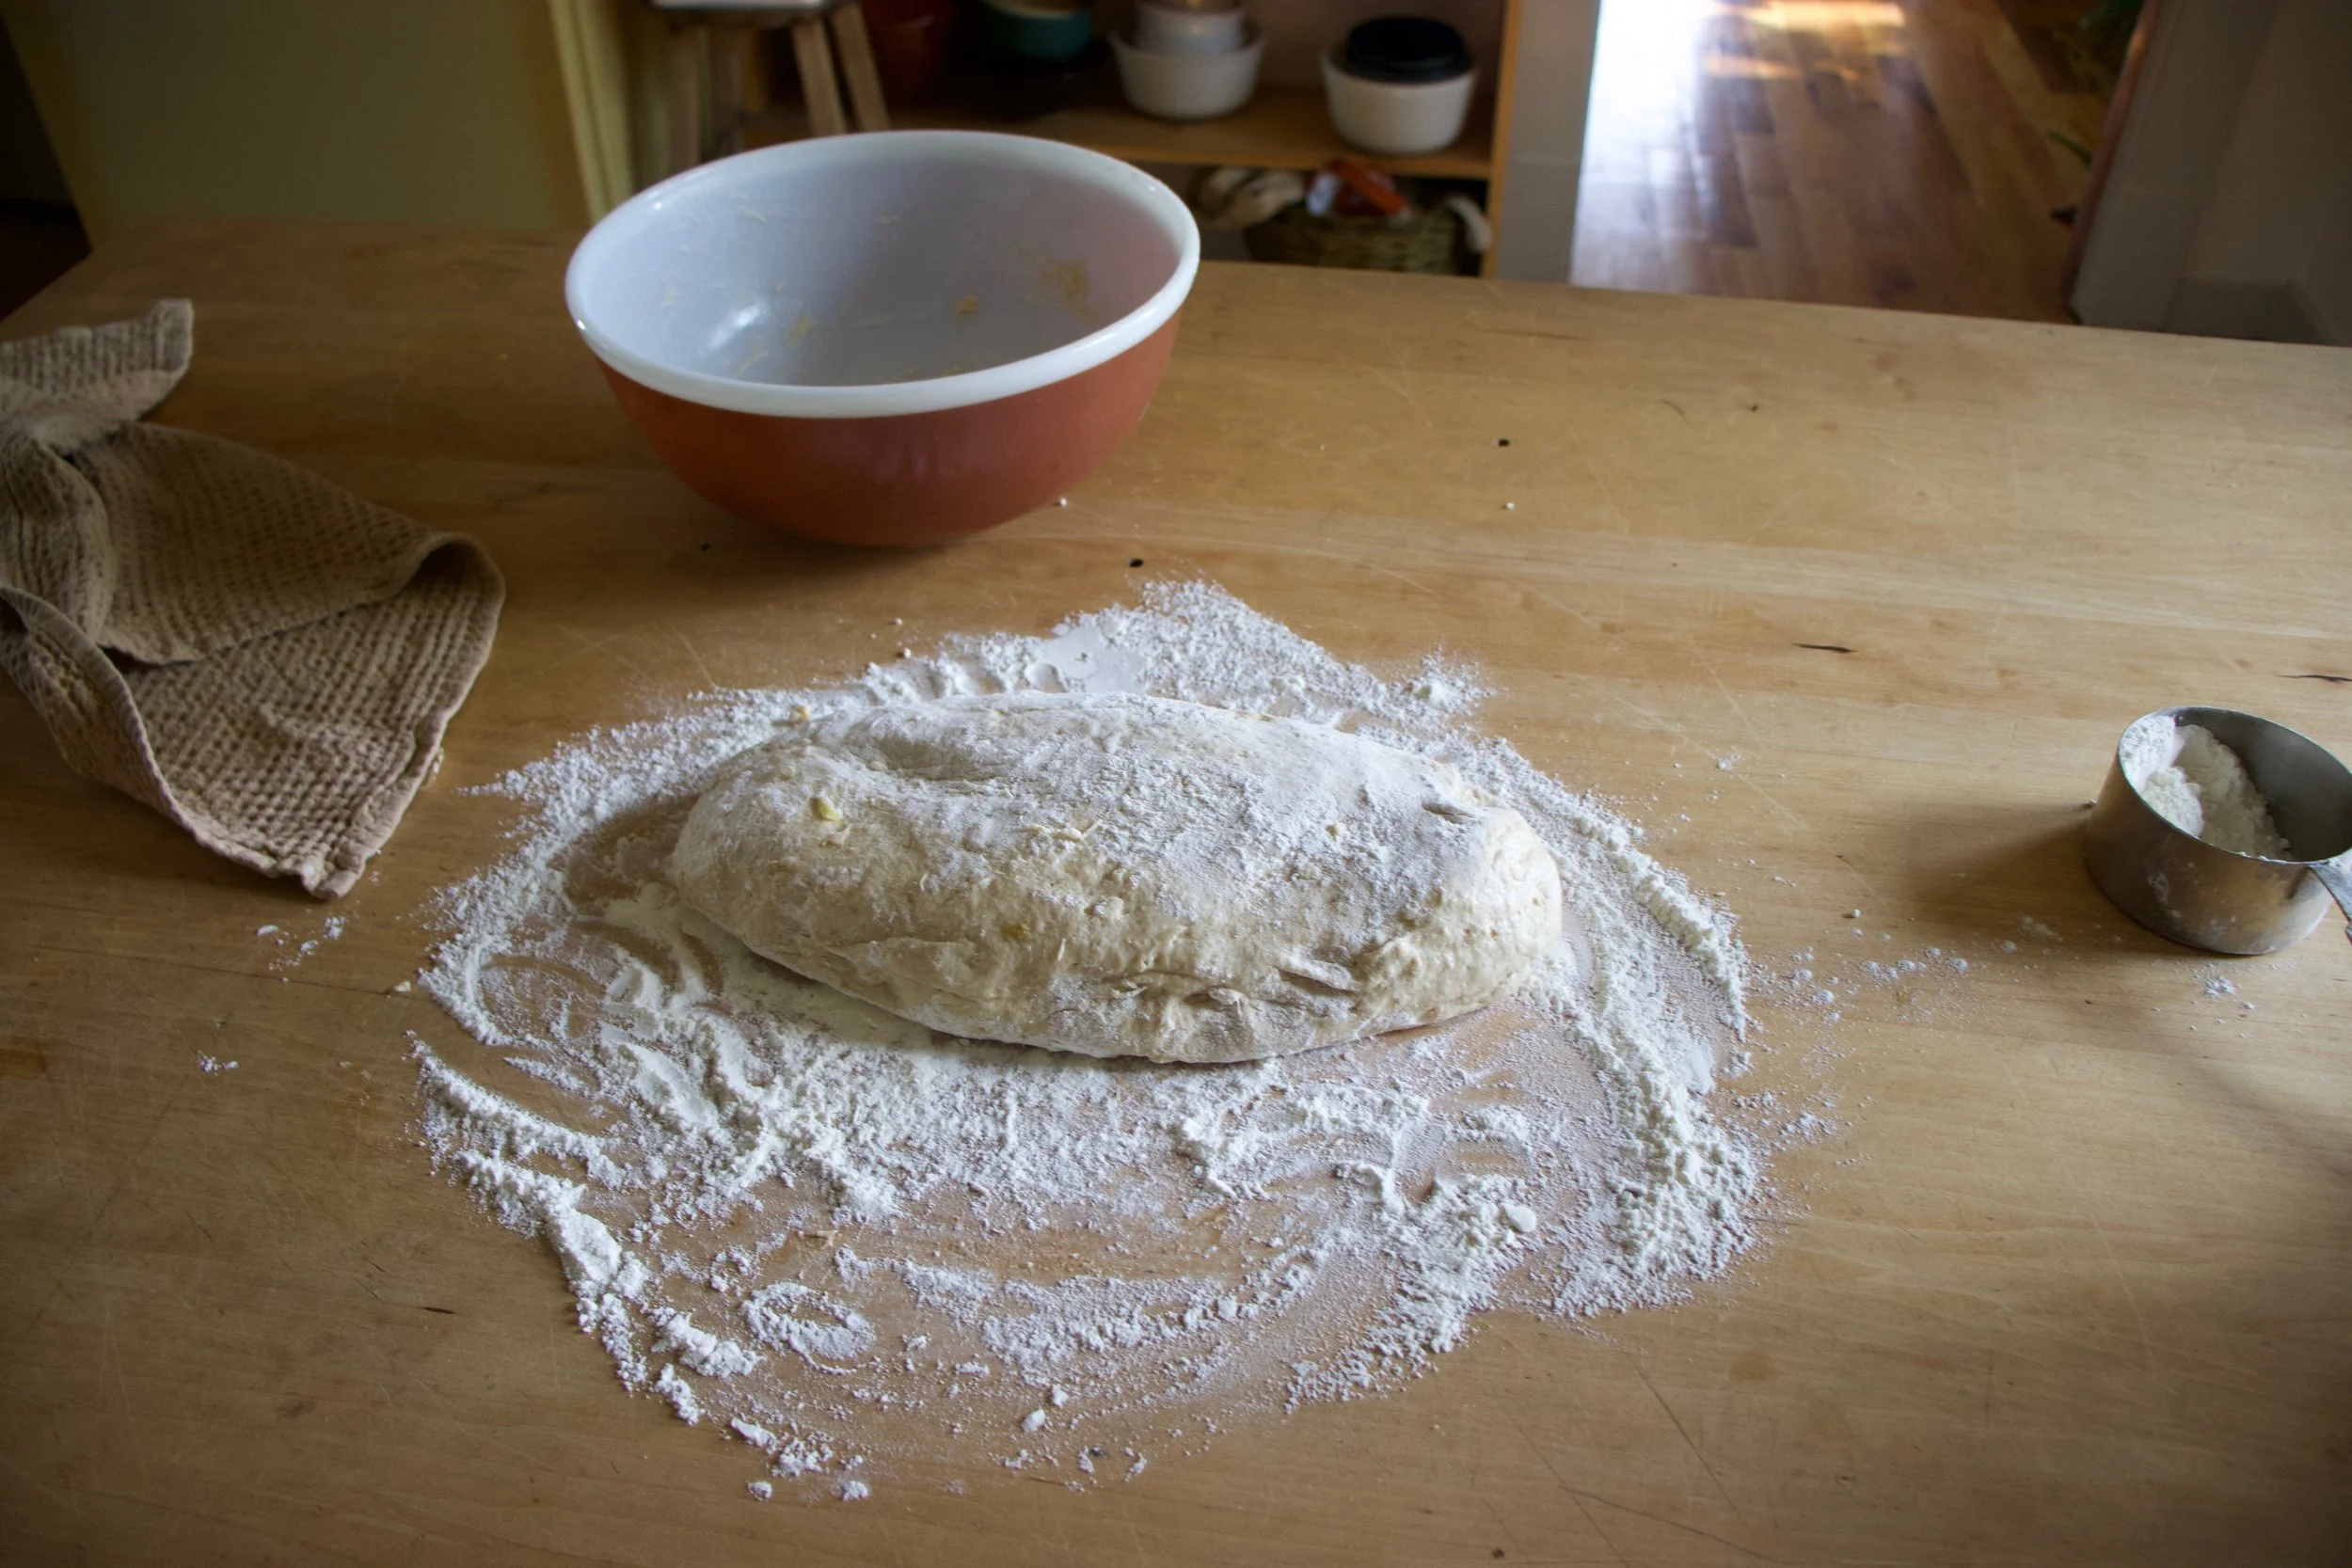
Place the kneaded dough into a clean bowl and cover. Let sit for about an hour or until it doubles in size.
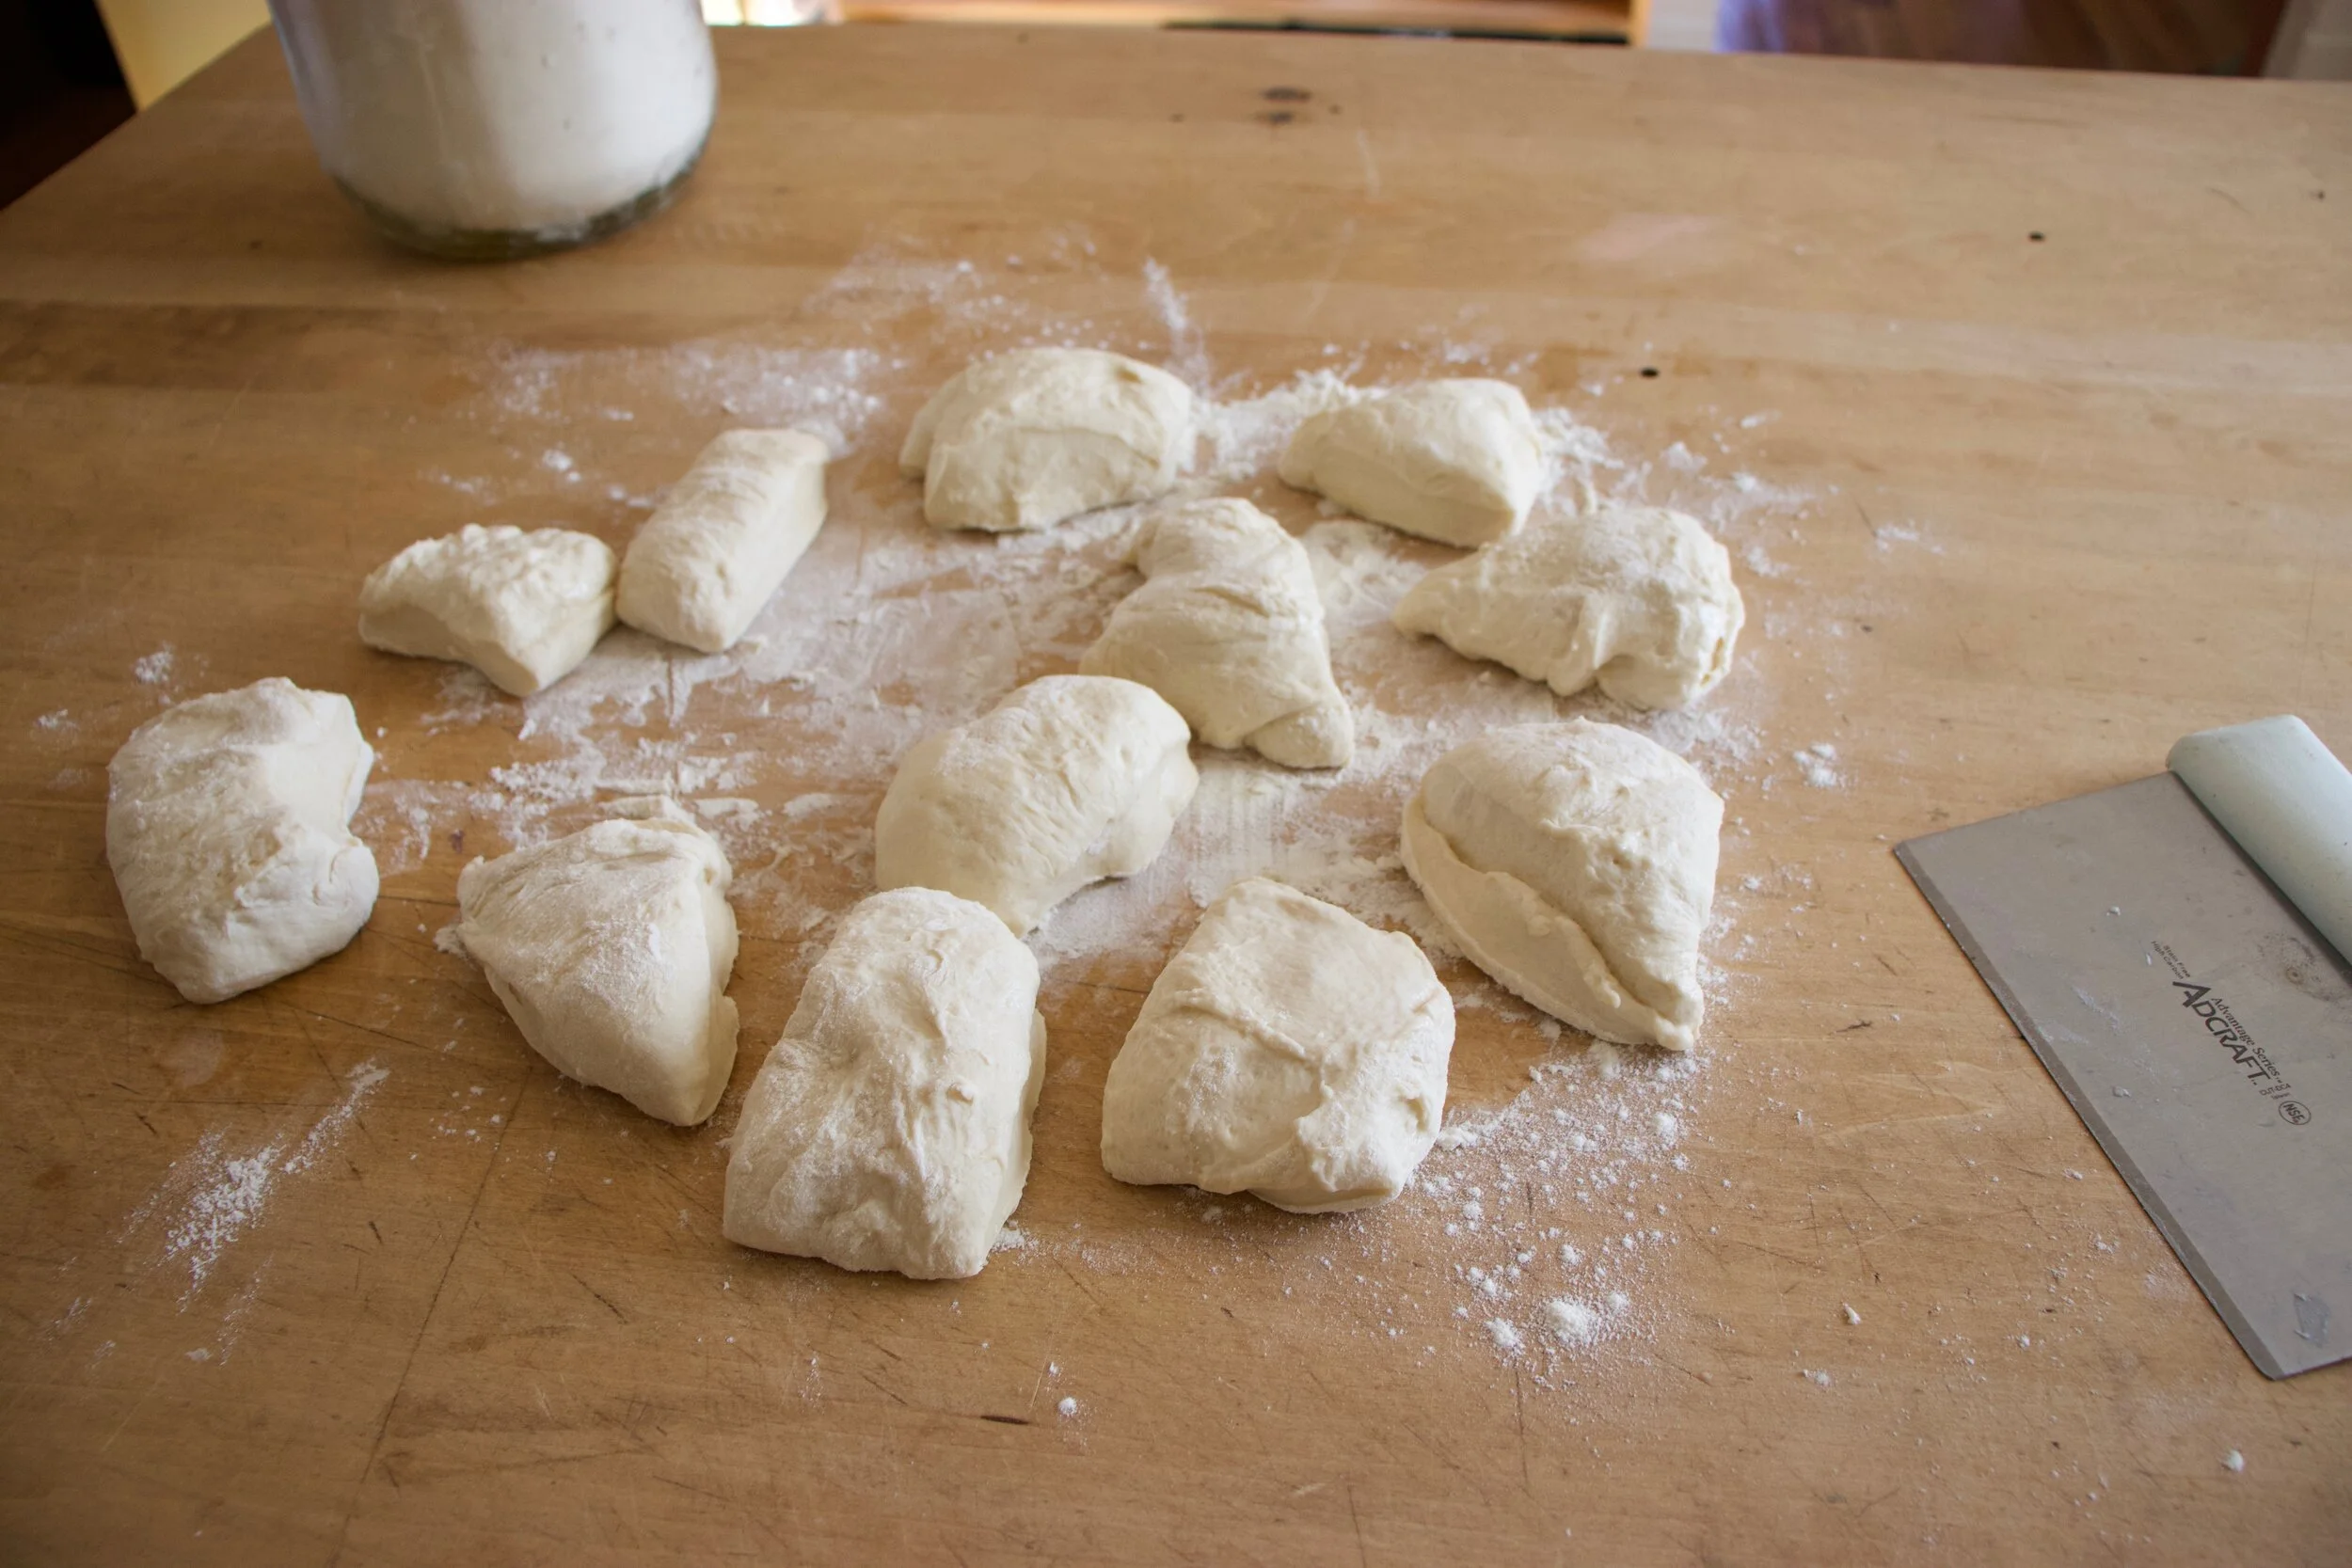
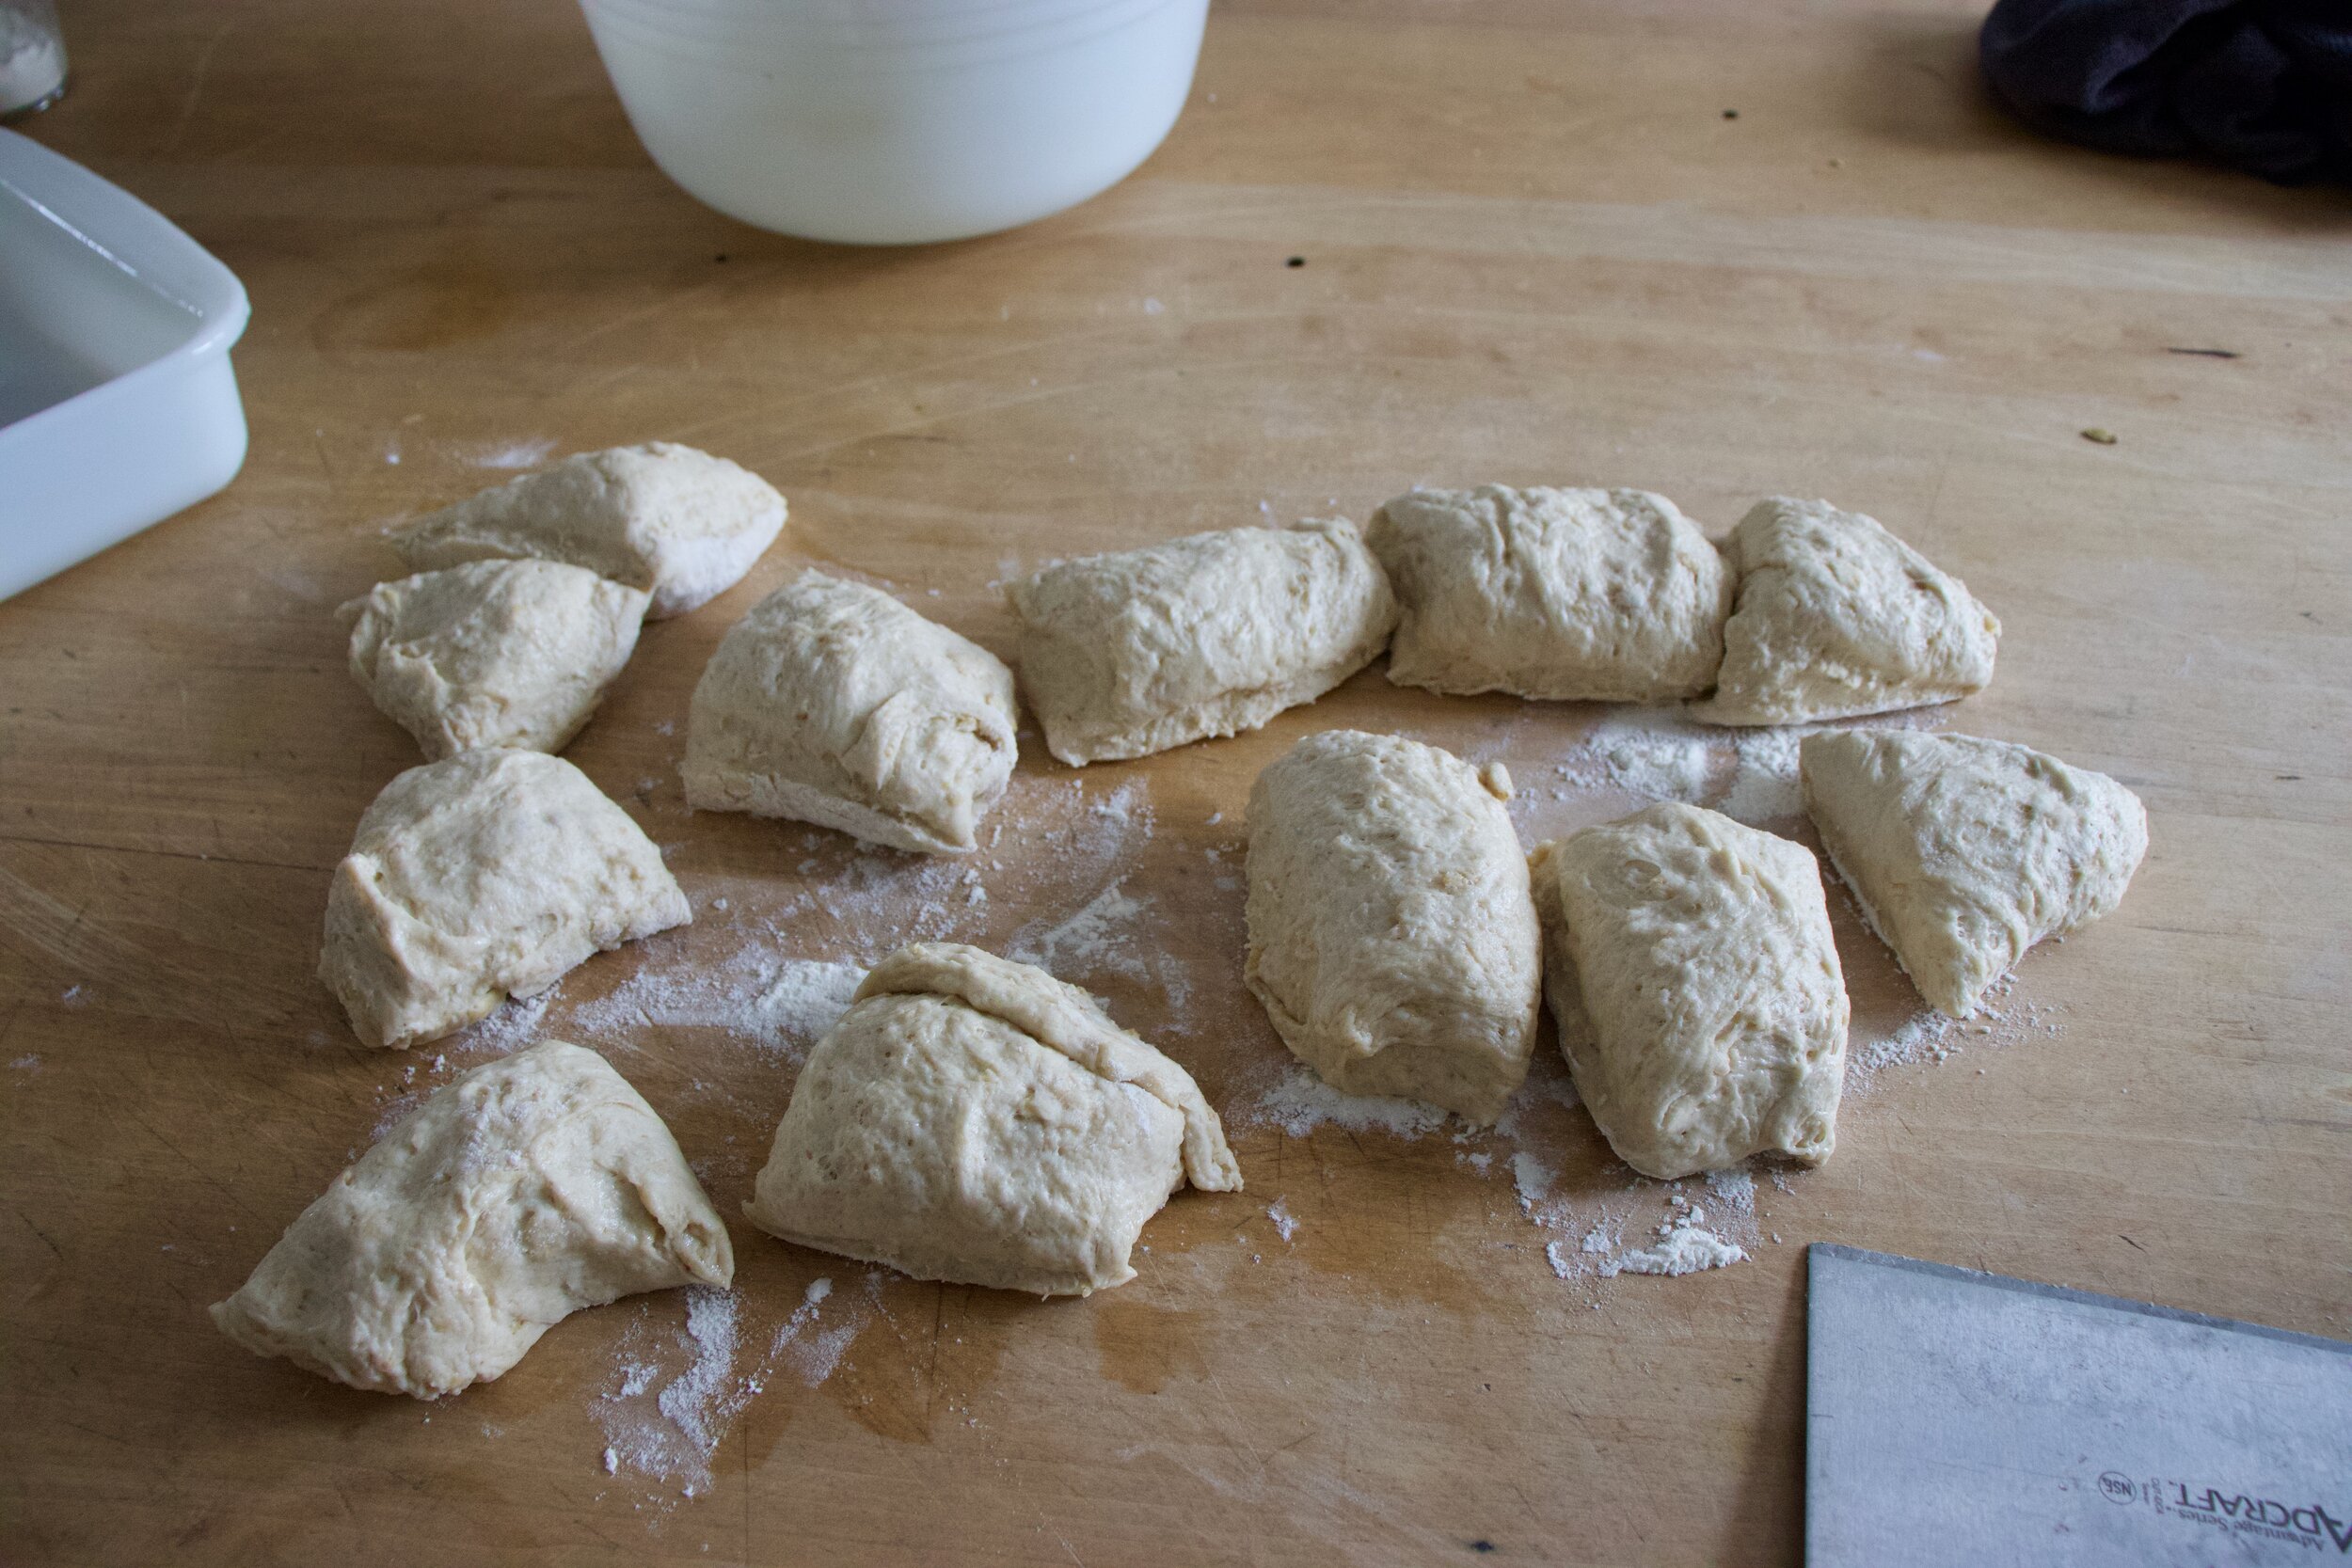
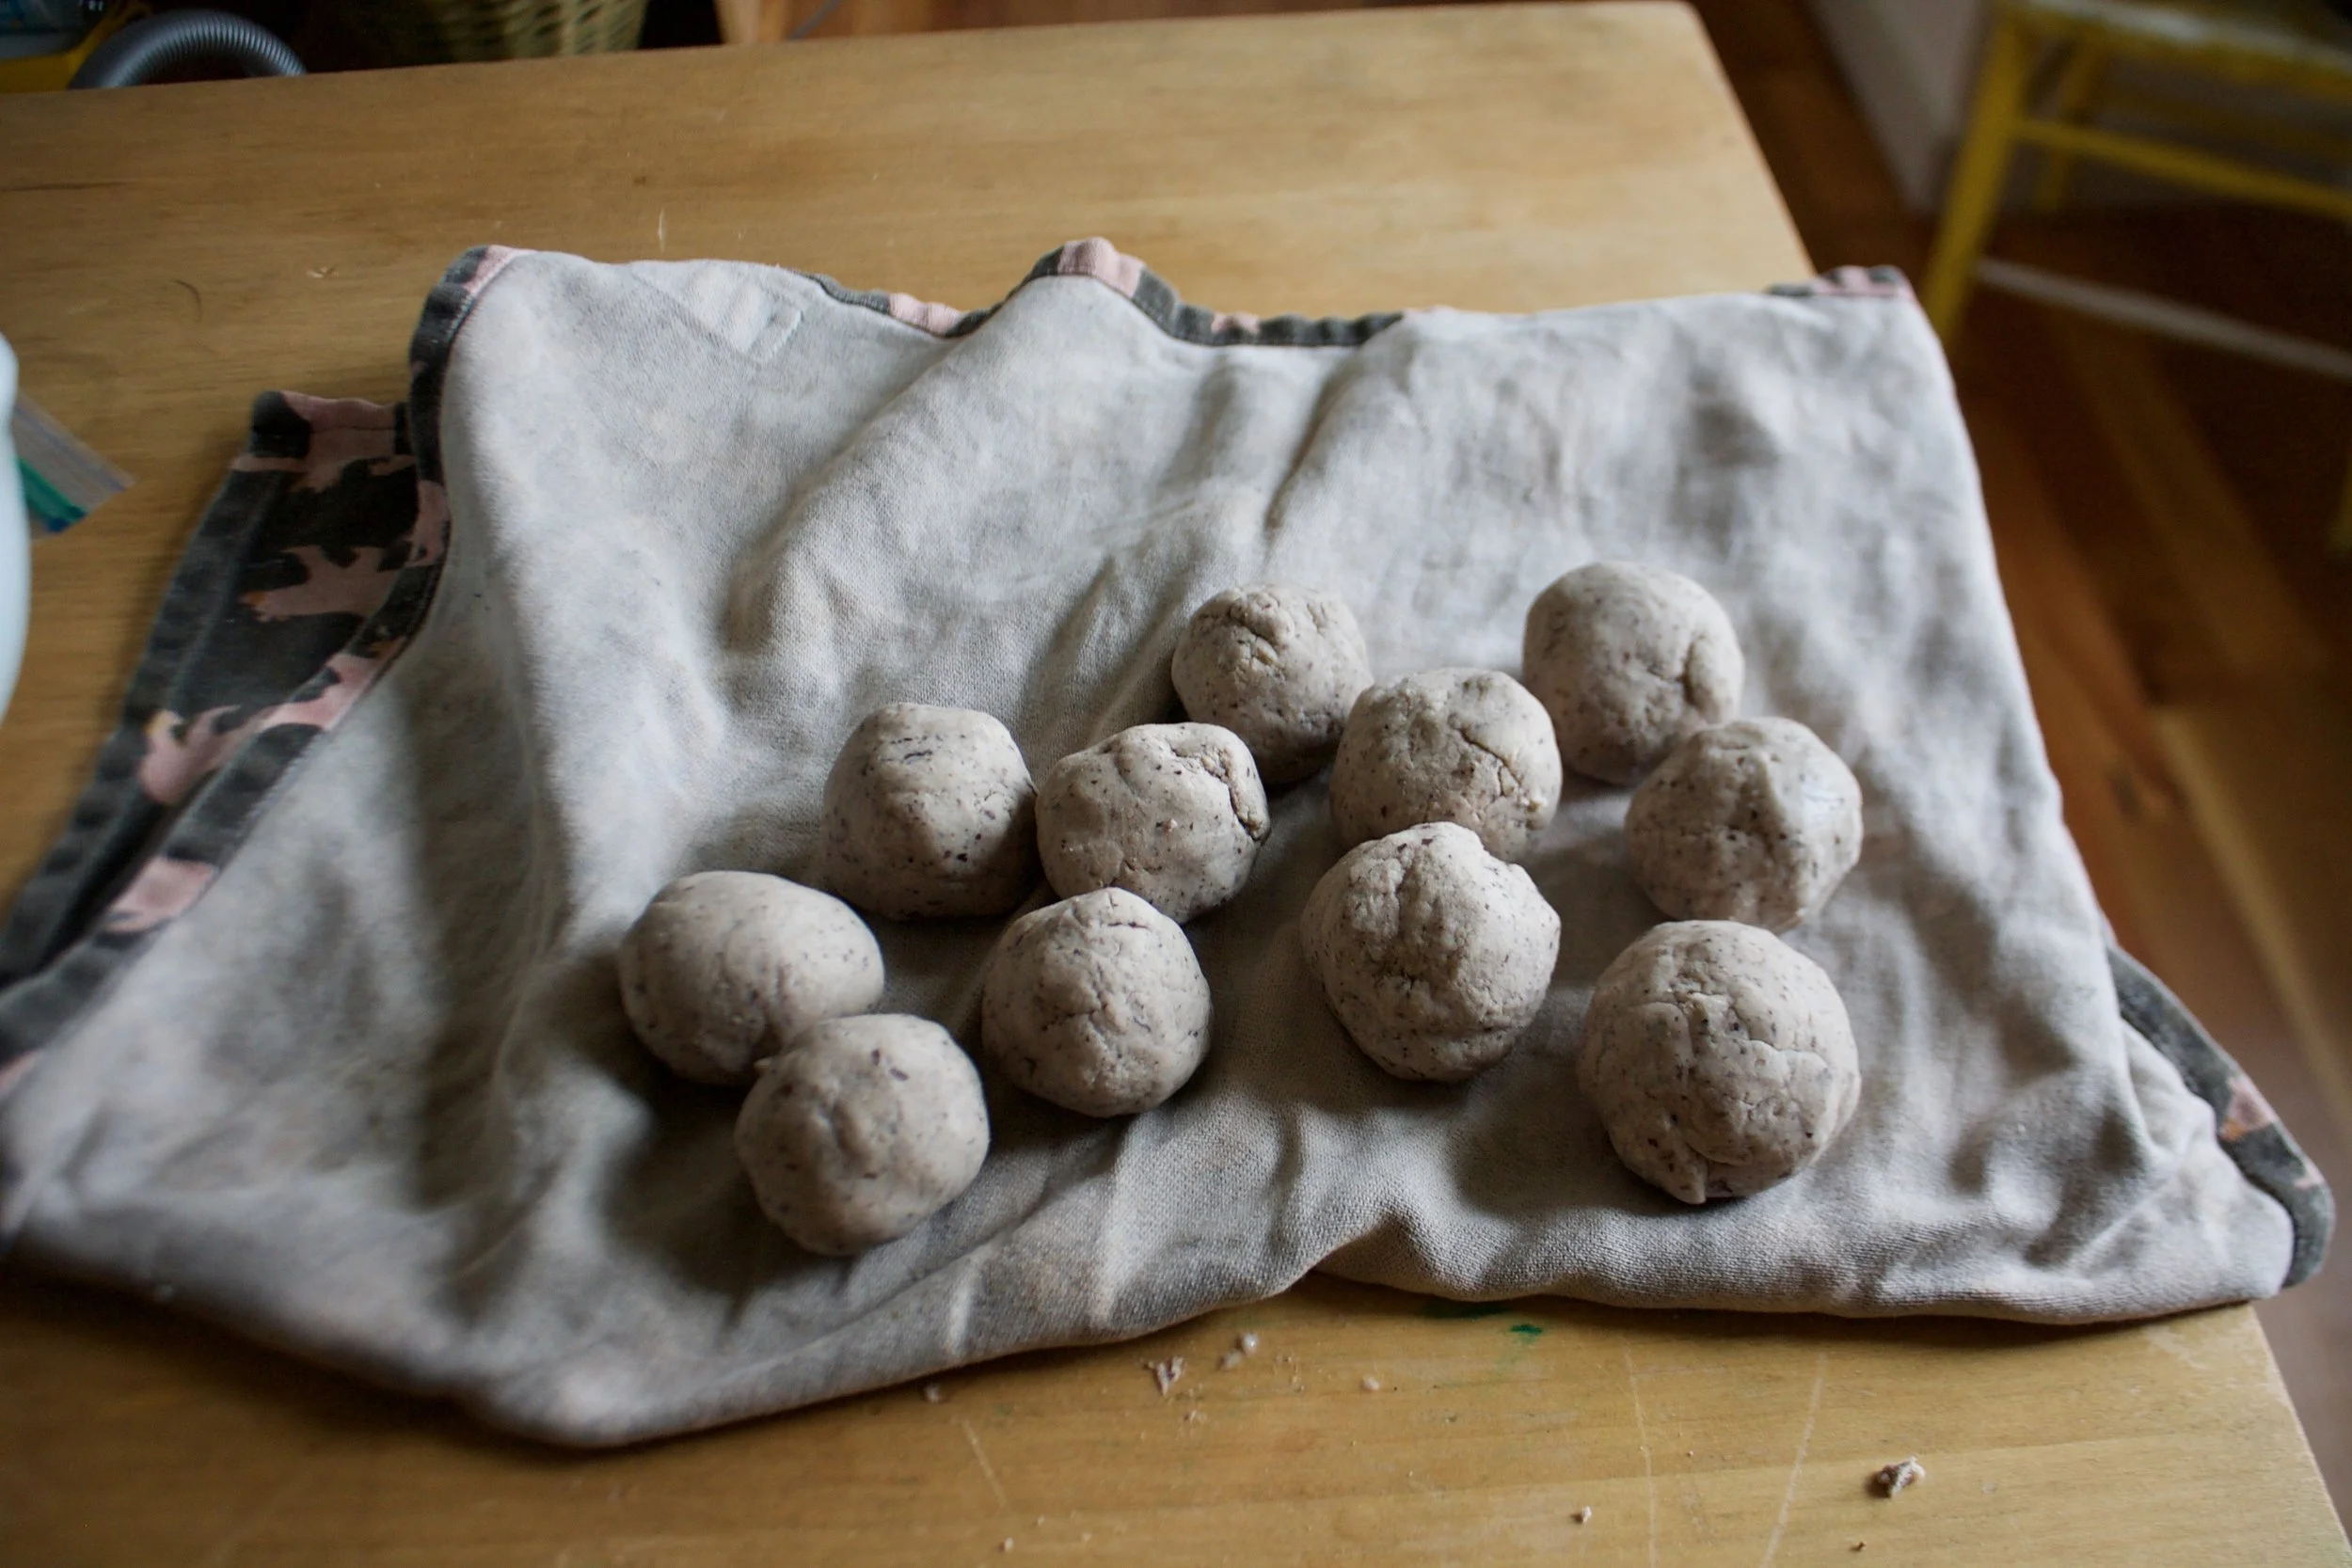
Once doubled, dump dough onto a lightly floured counter and cut into 12 equal pieces.
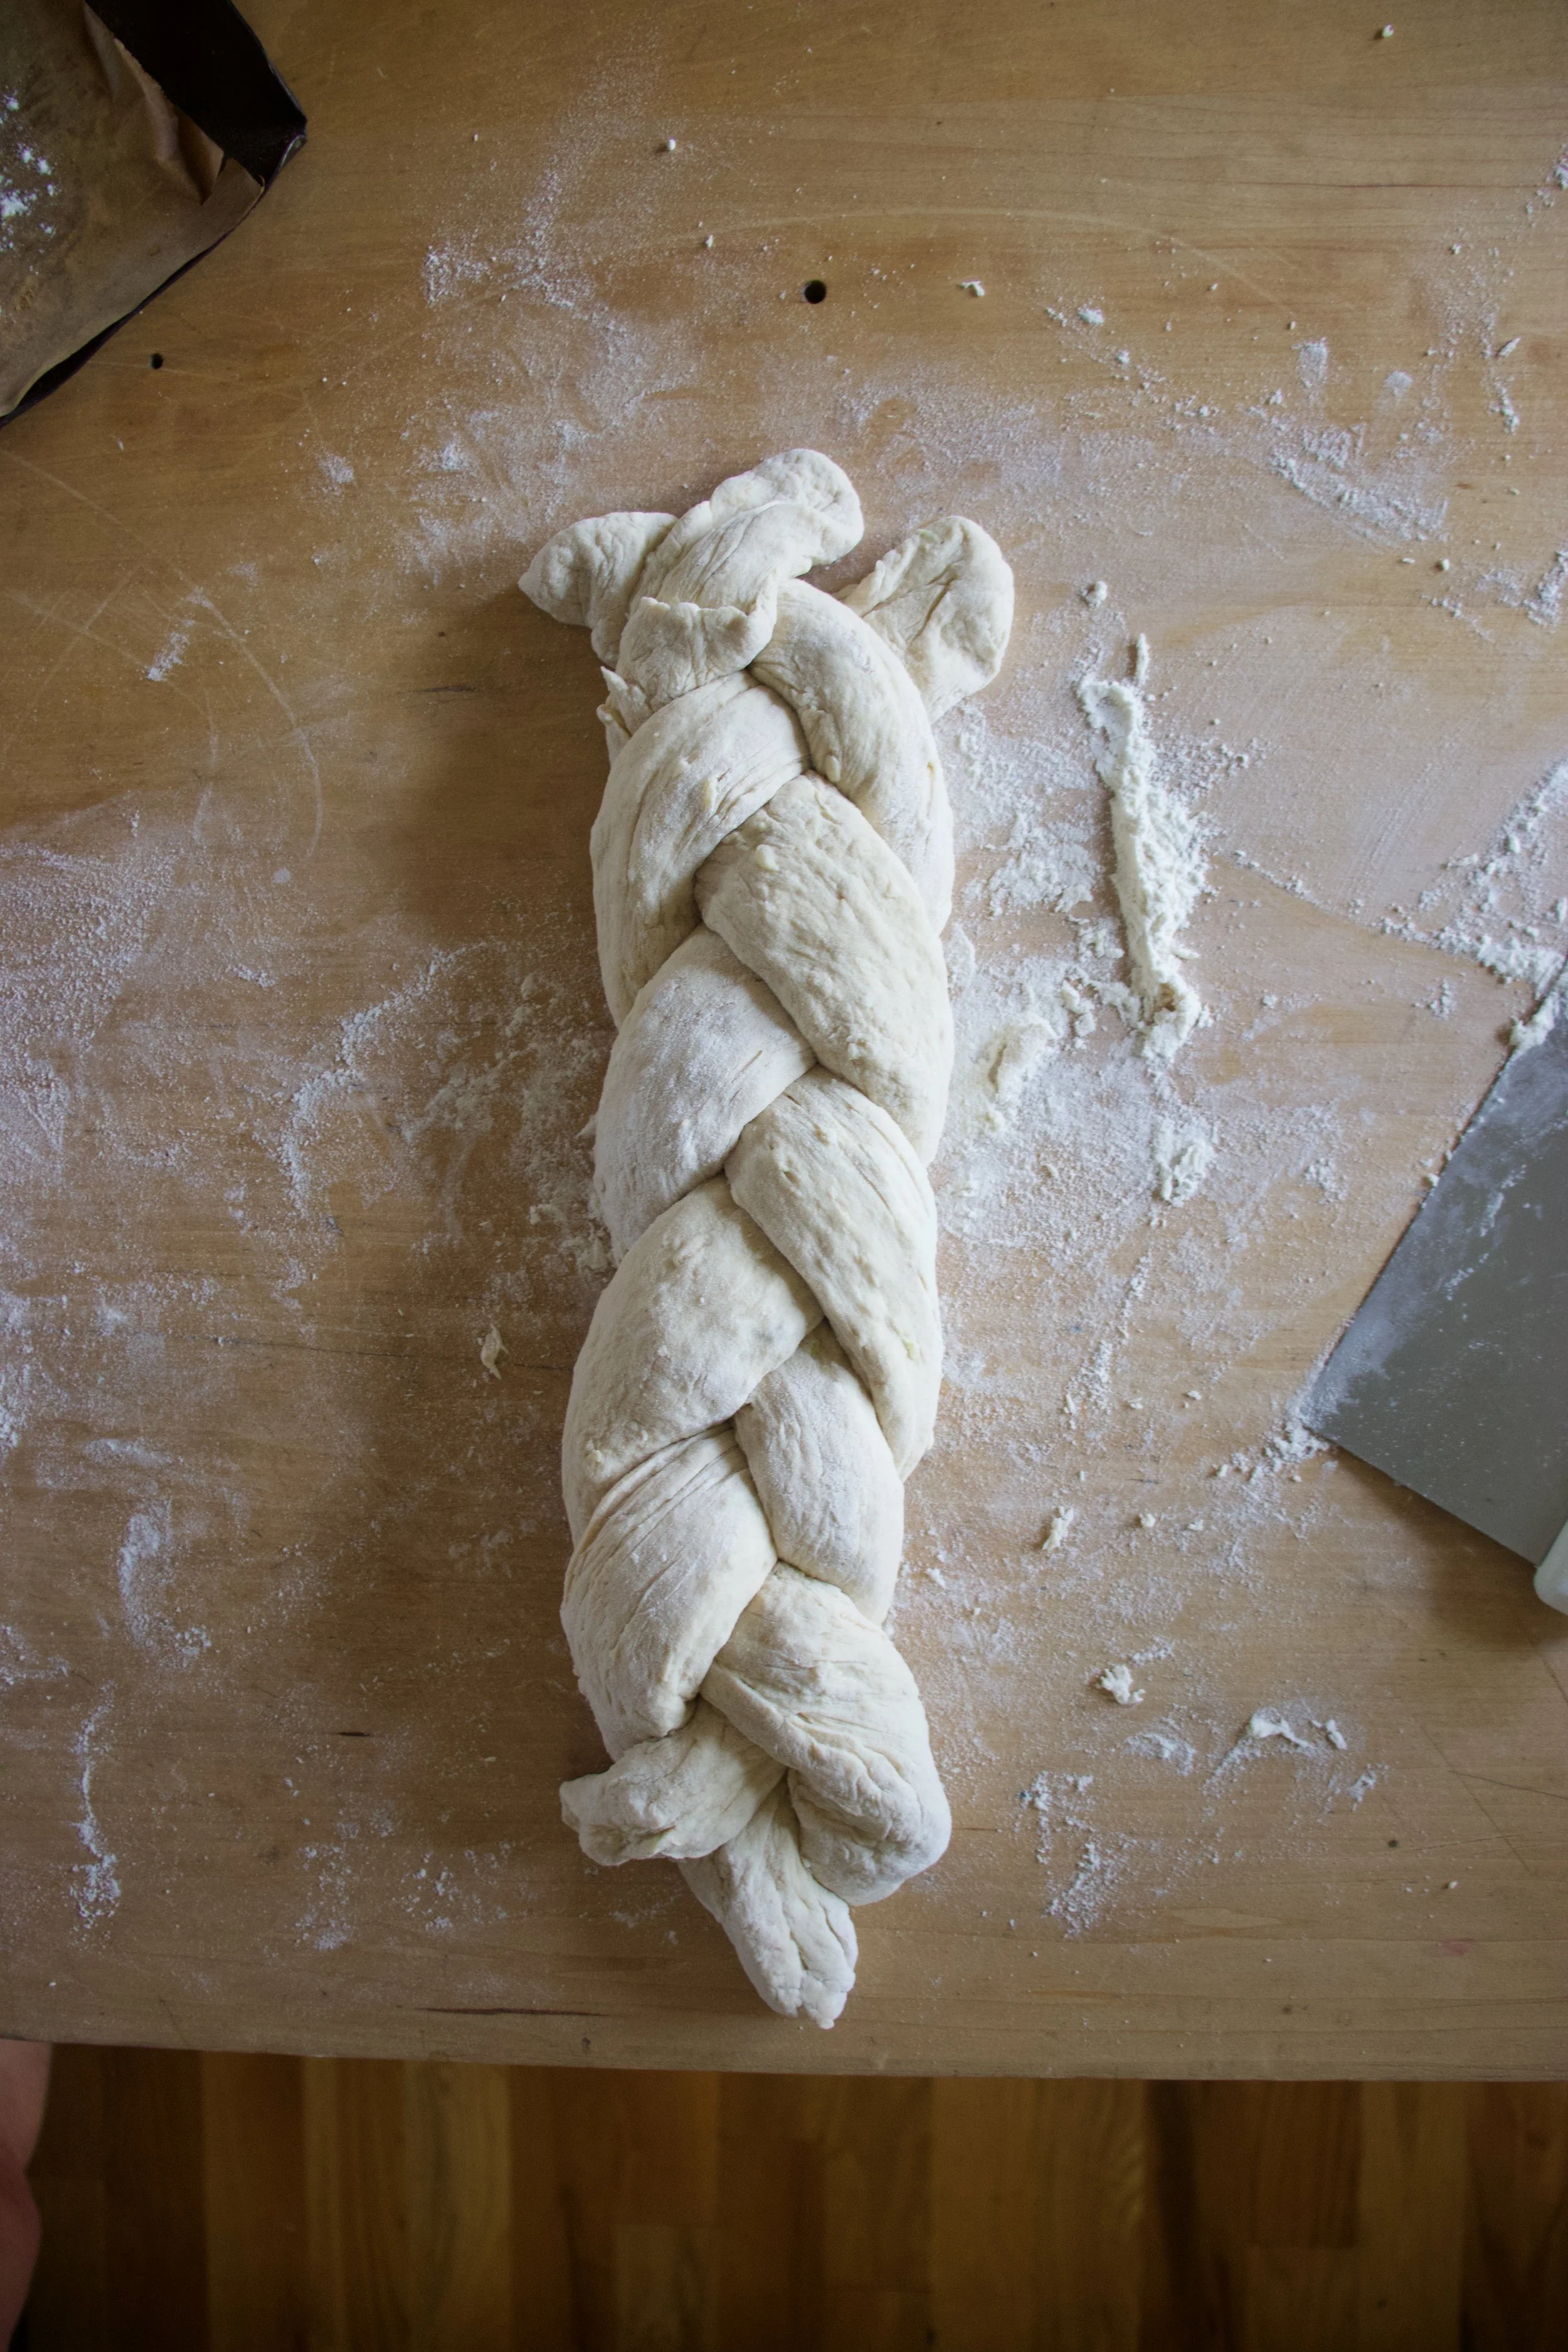
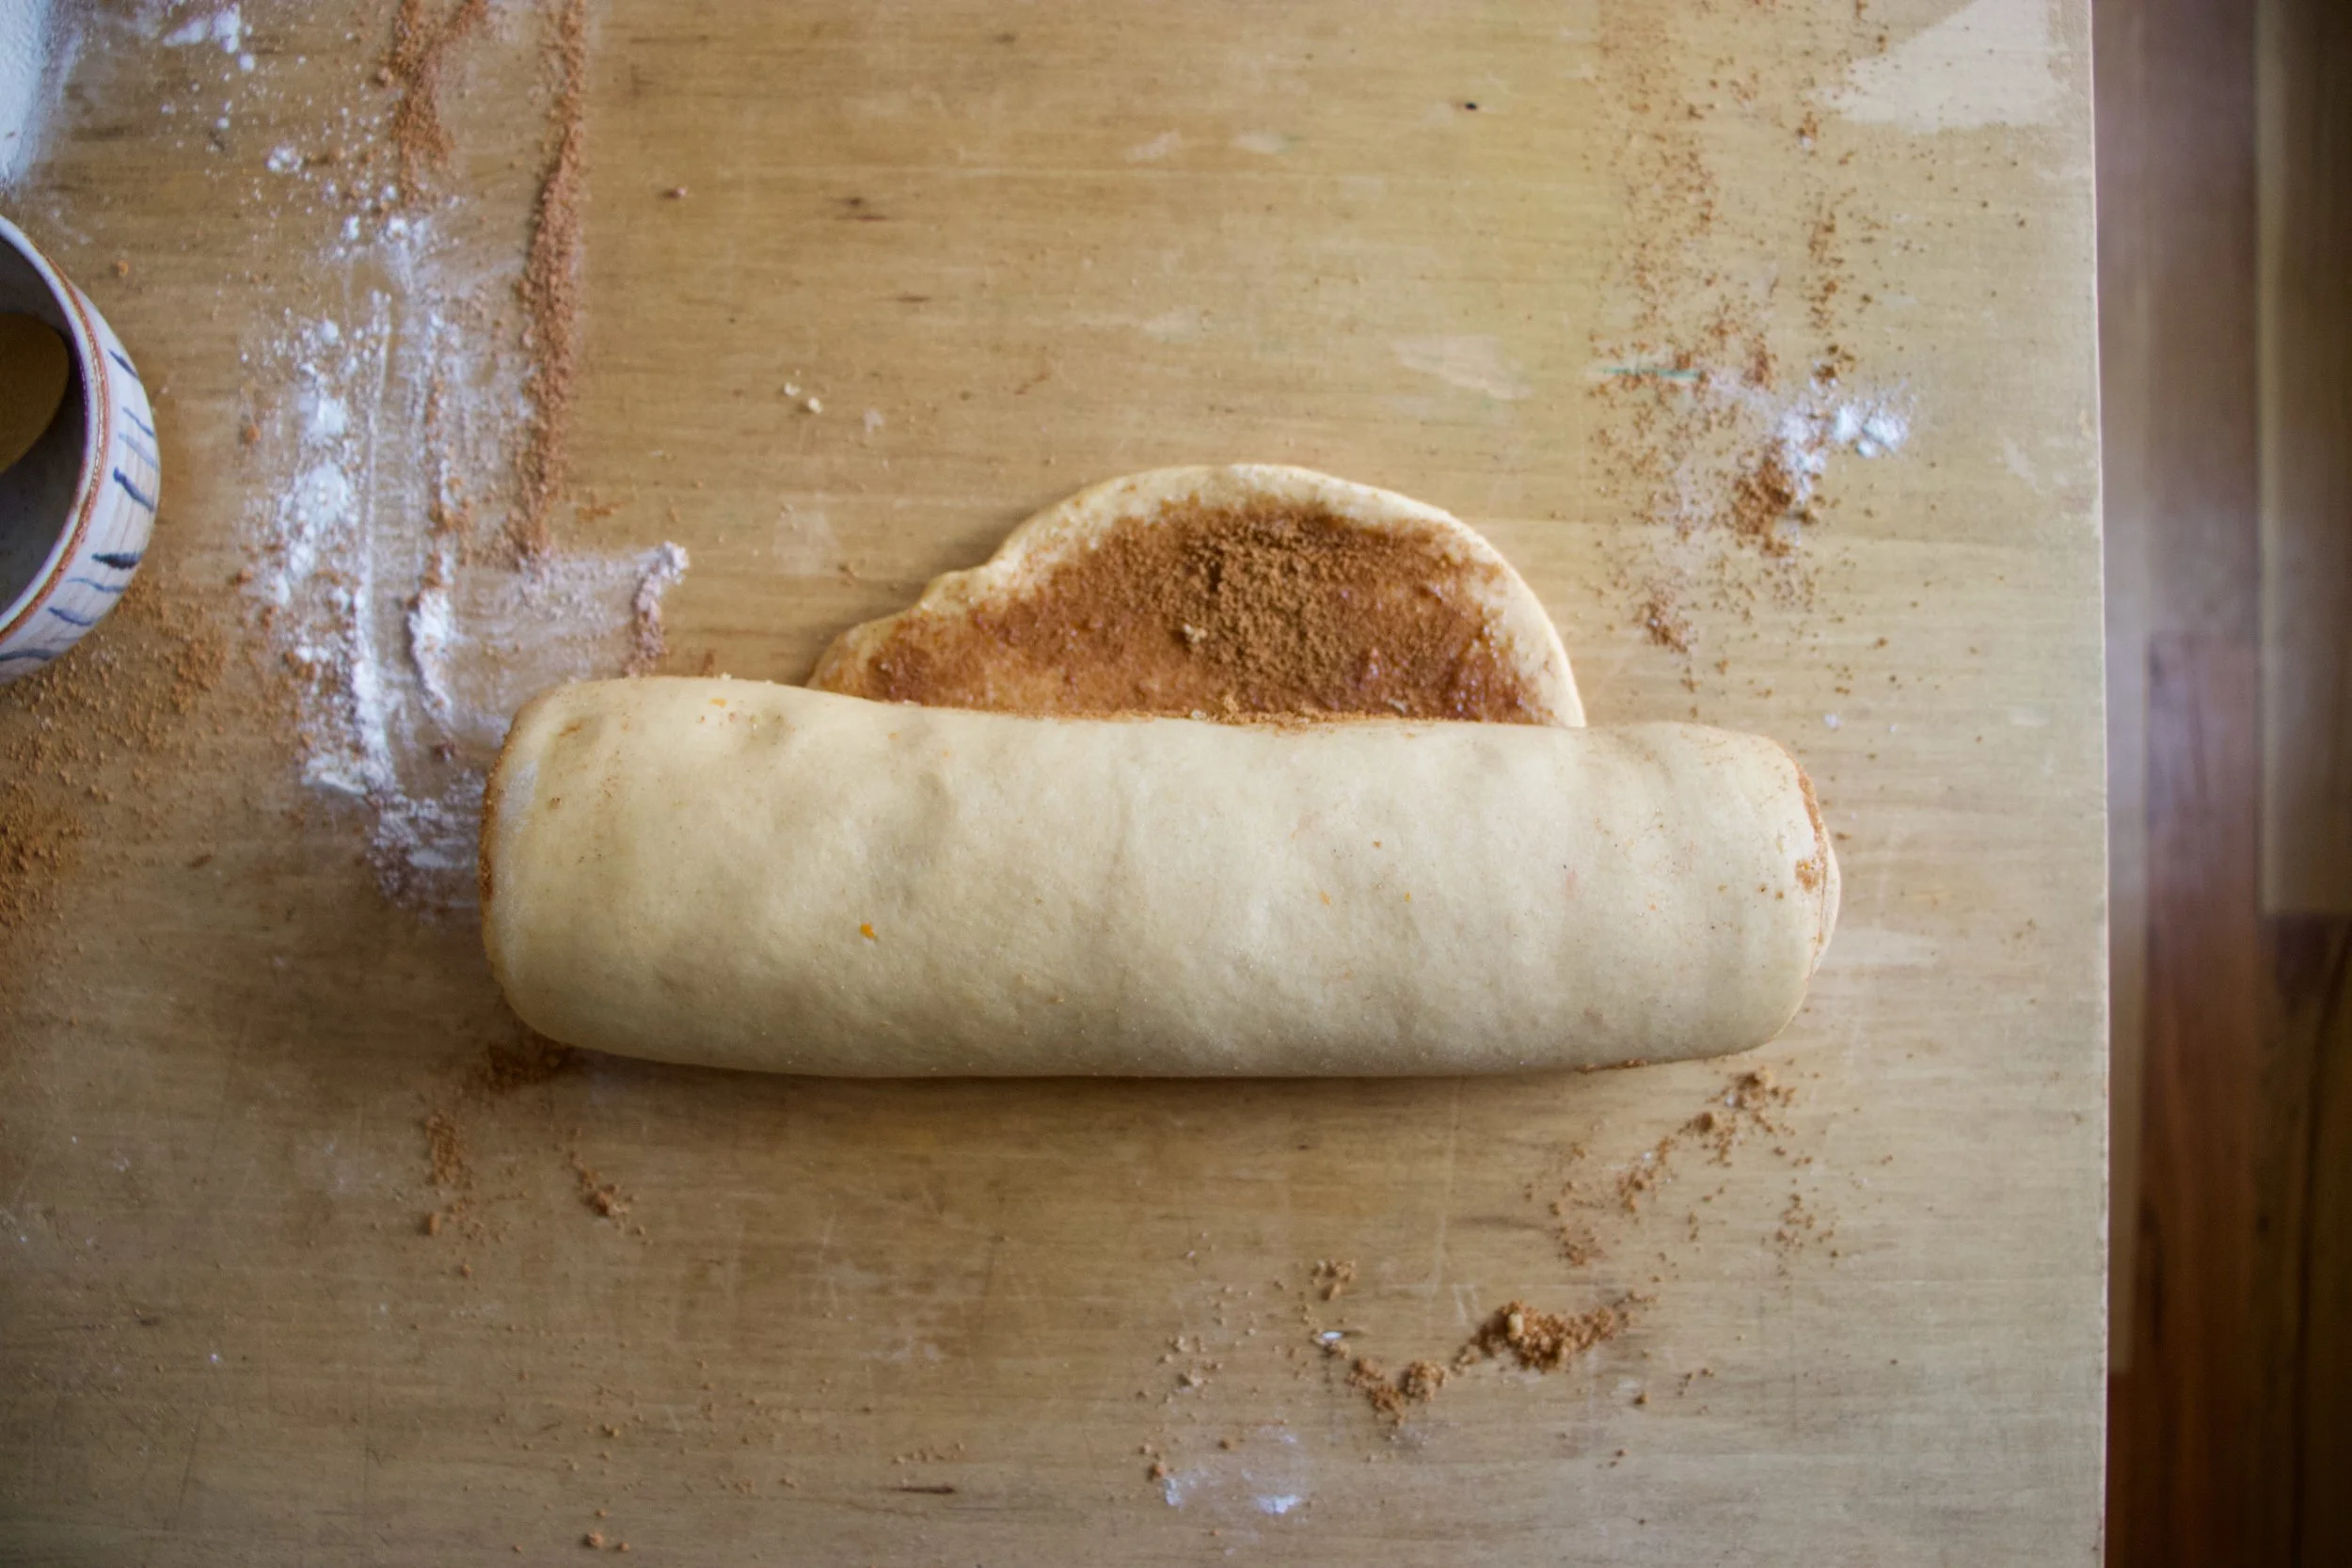
Now to shape. Roll each piece into a long rope, 16-20 inches long if you can. Fold the ends together and twist then fold twisted ends down back into itself.
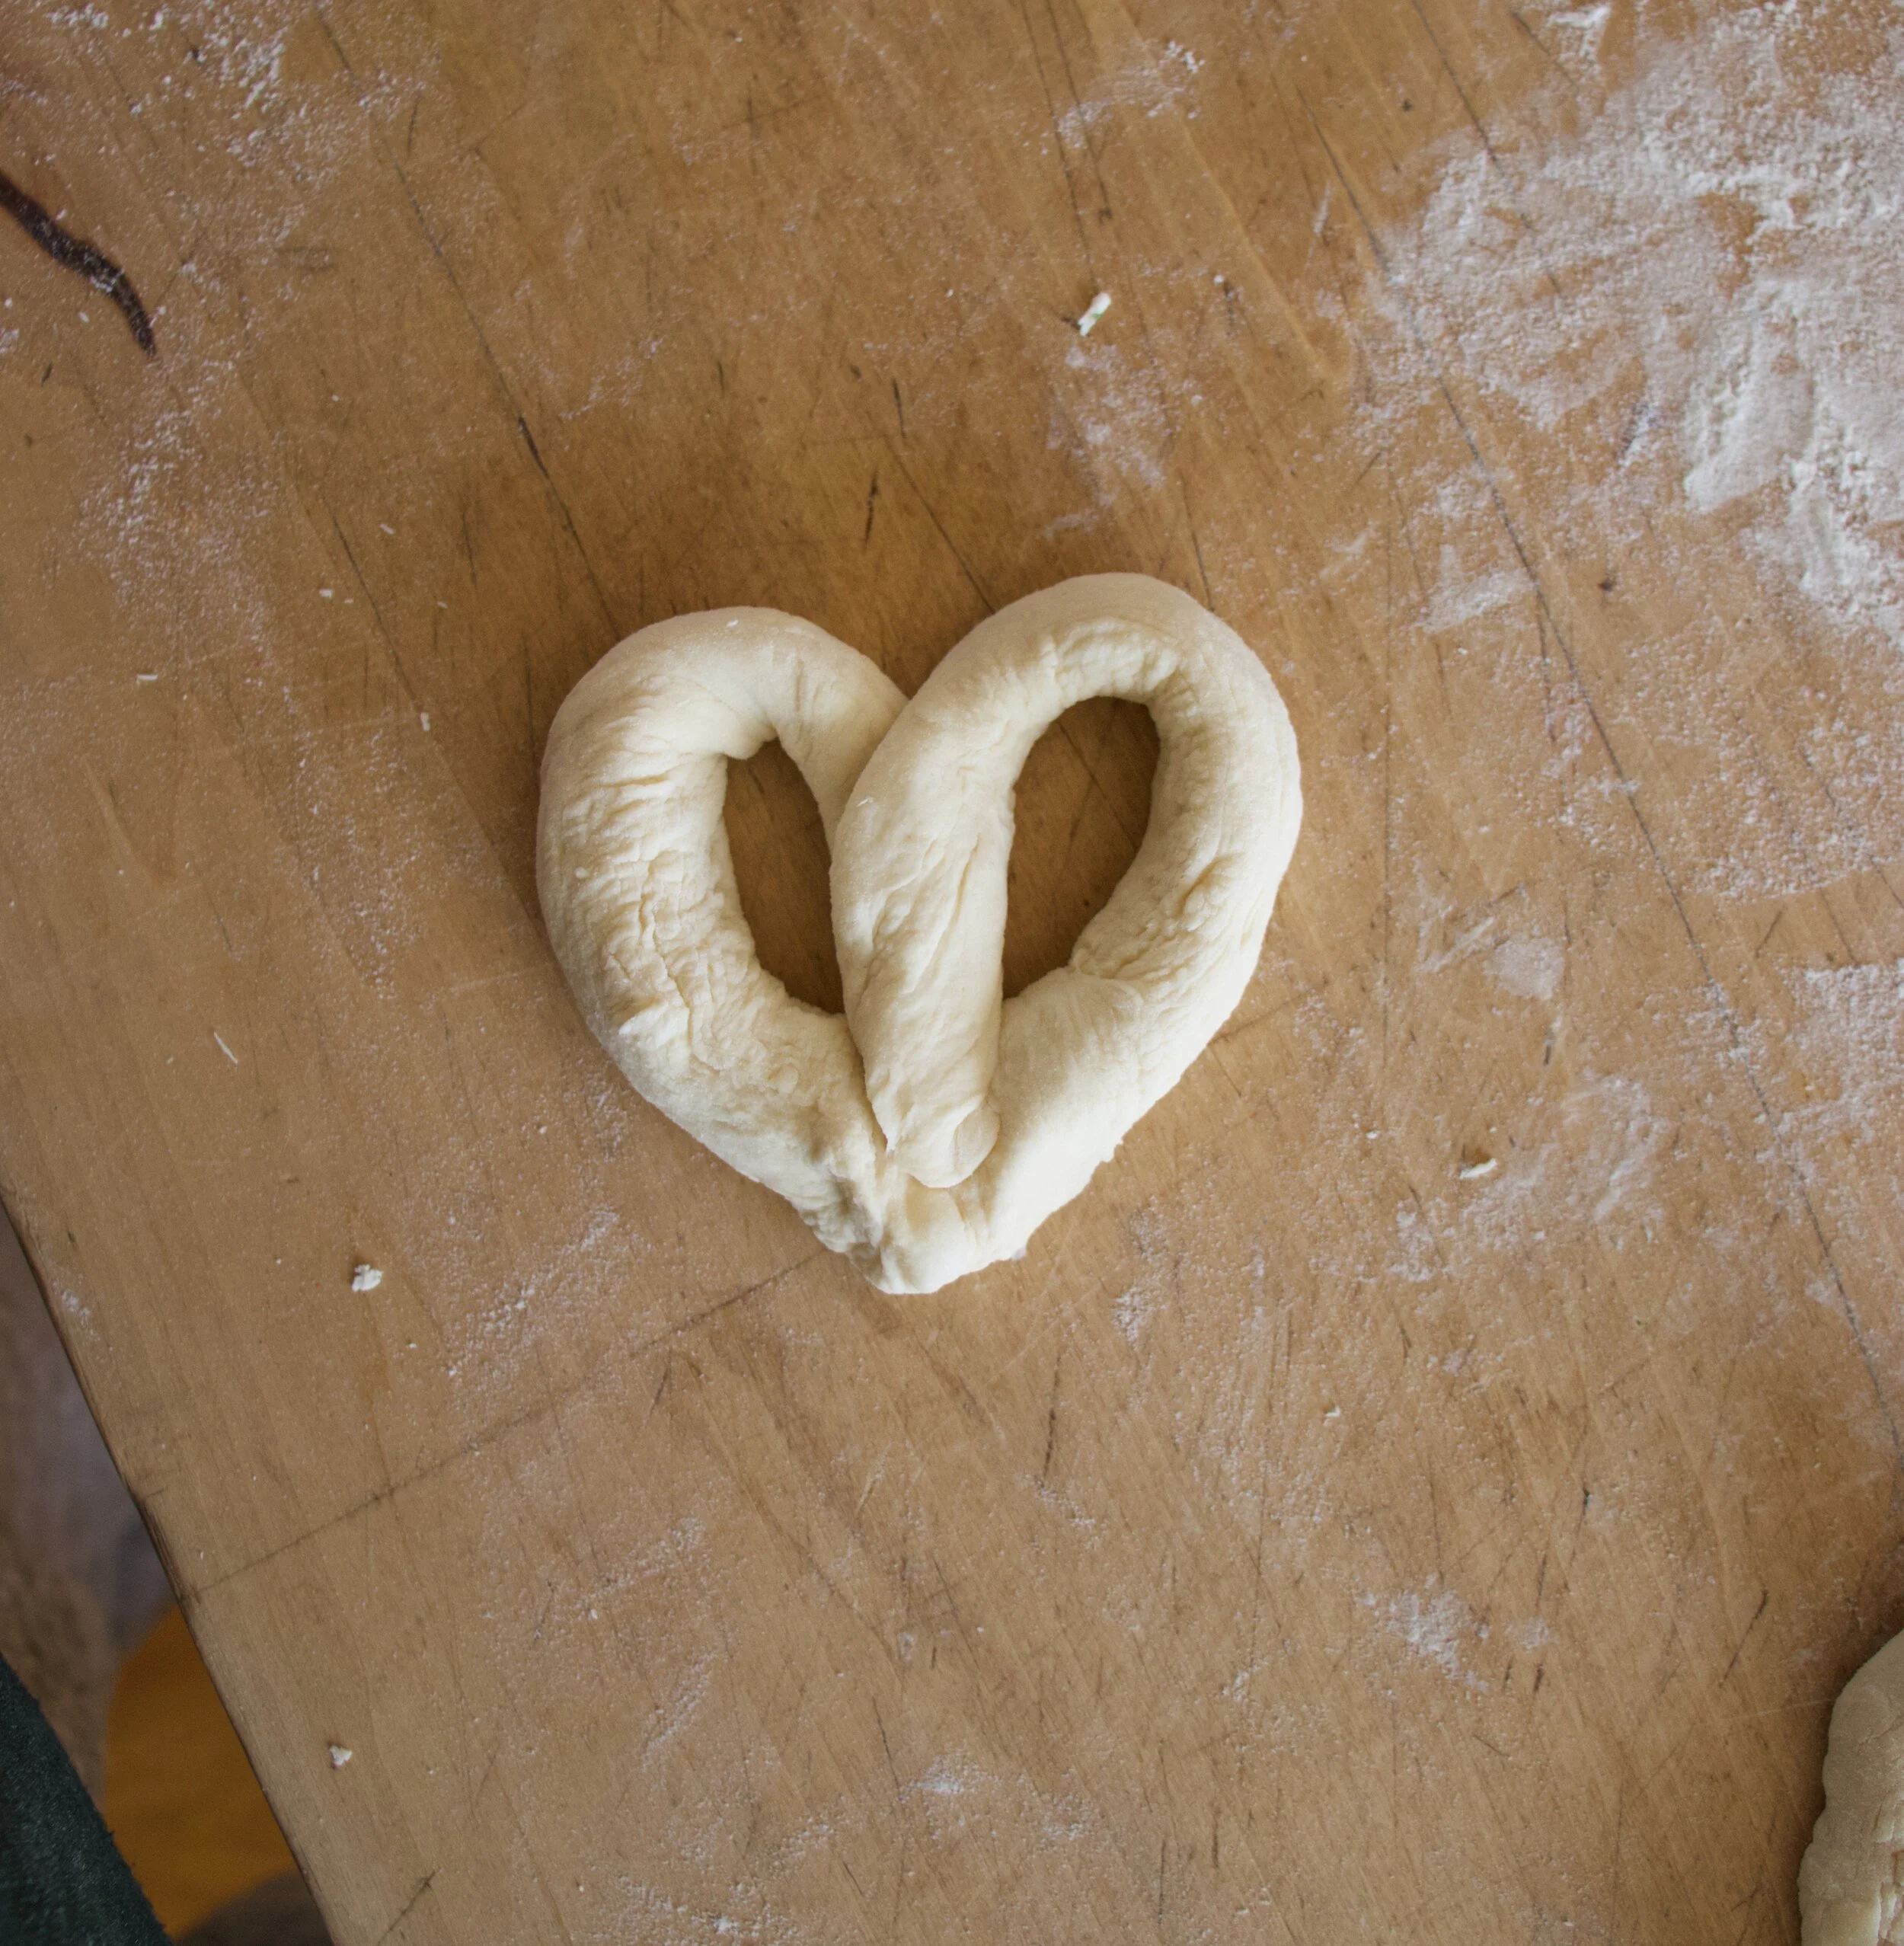
Pinch the end into a point and there you go. A heart! %u2665%ufe0f
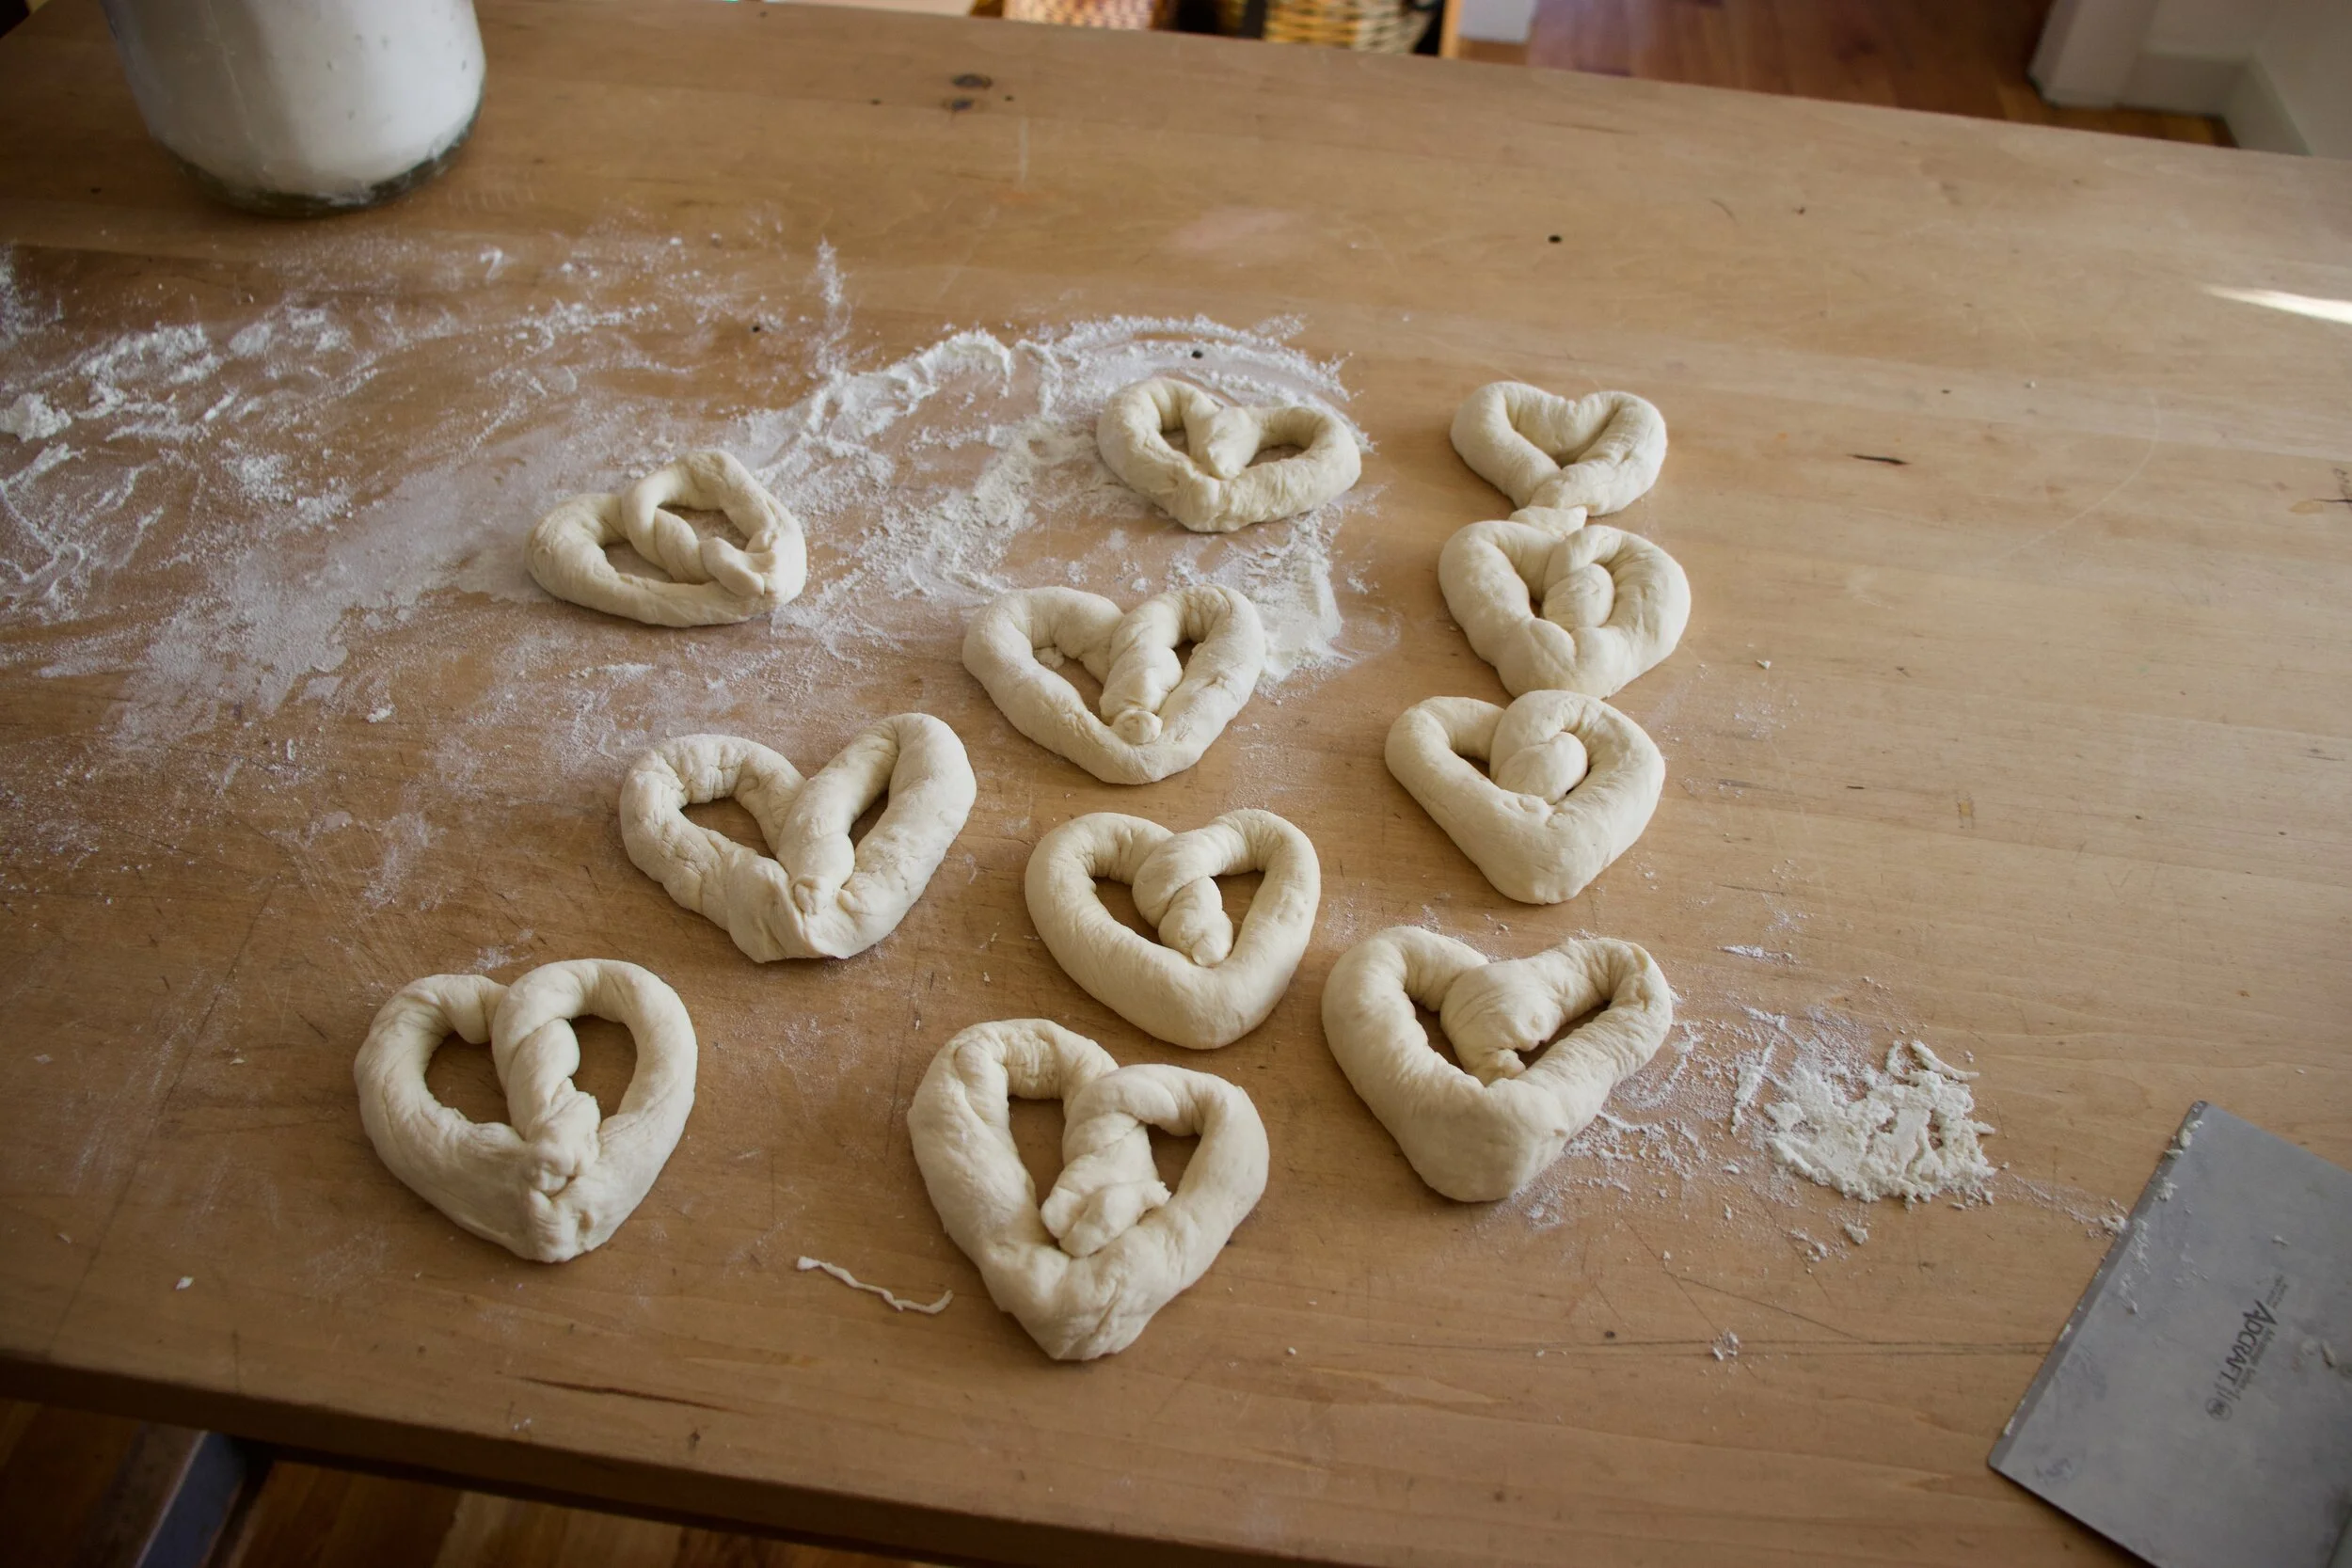
And then do it to all the dough.
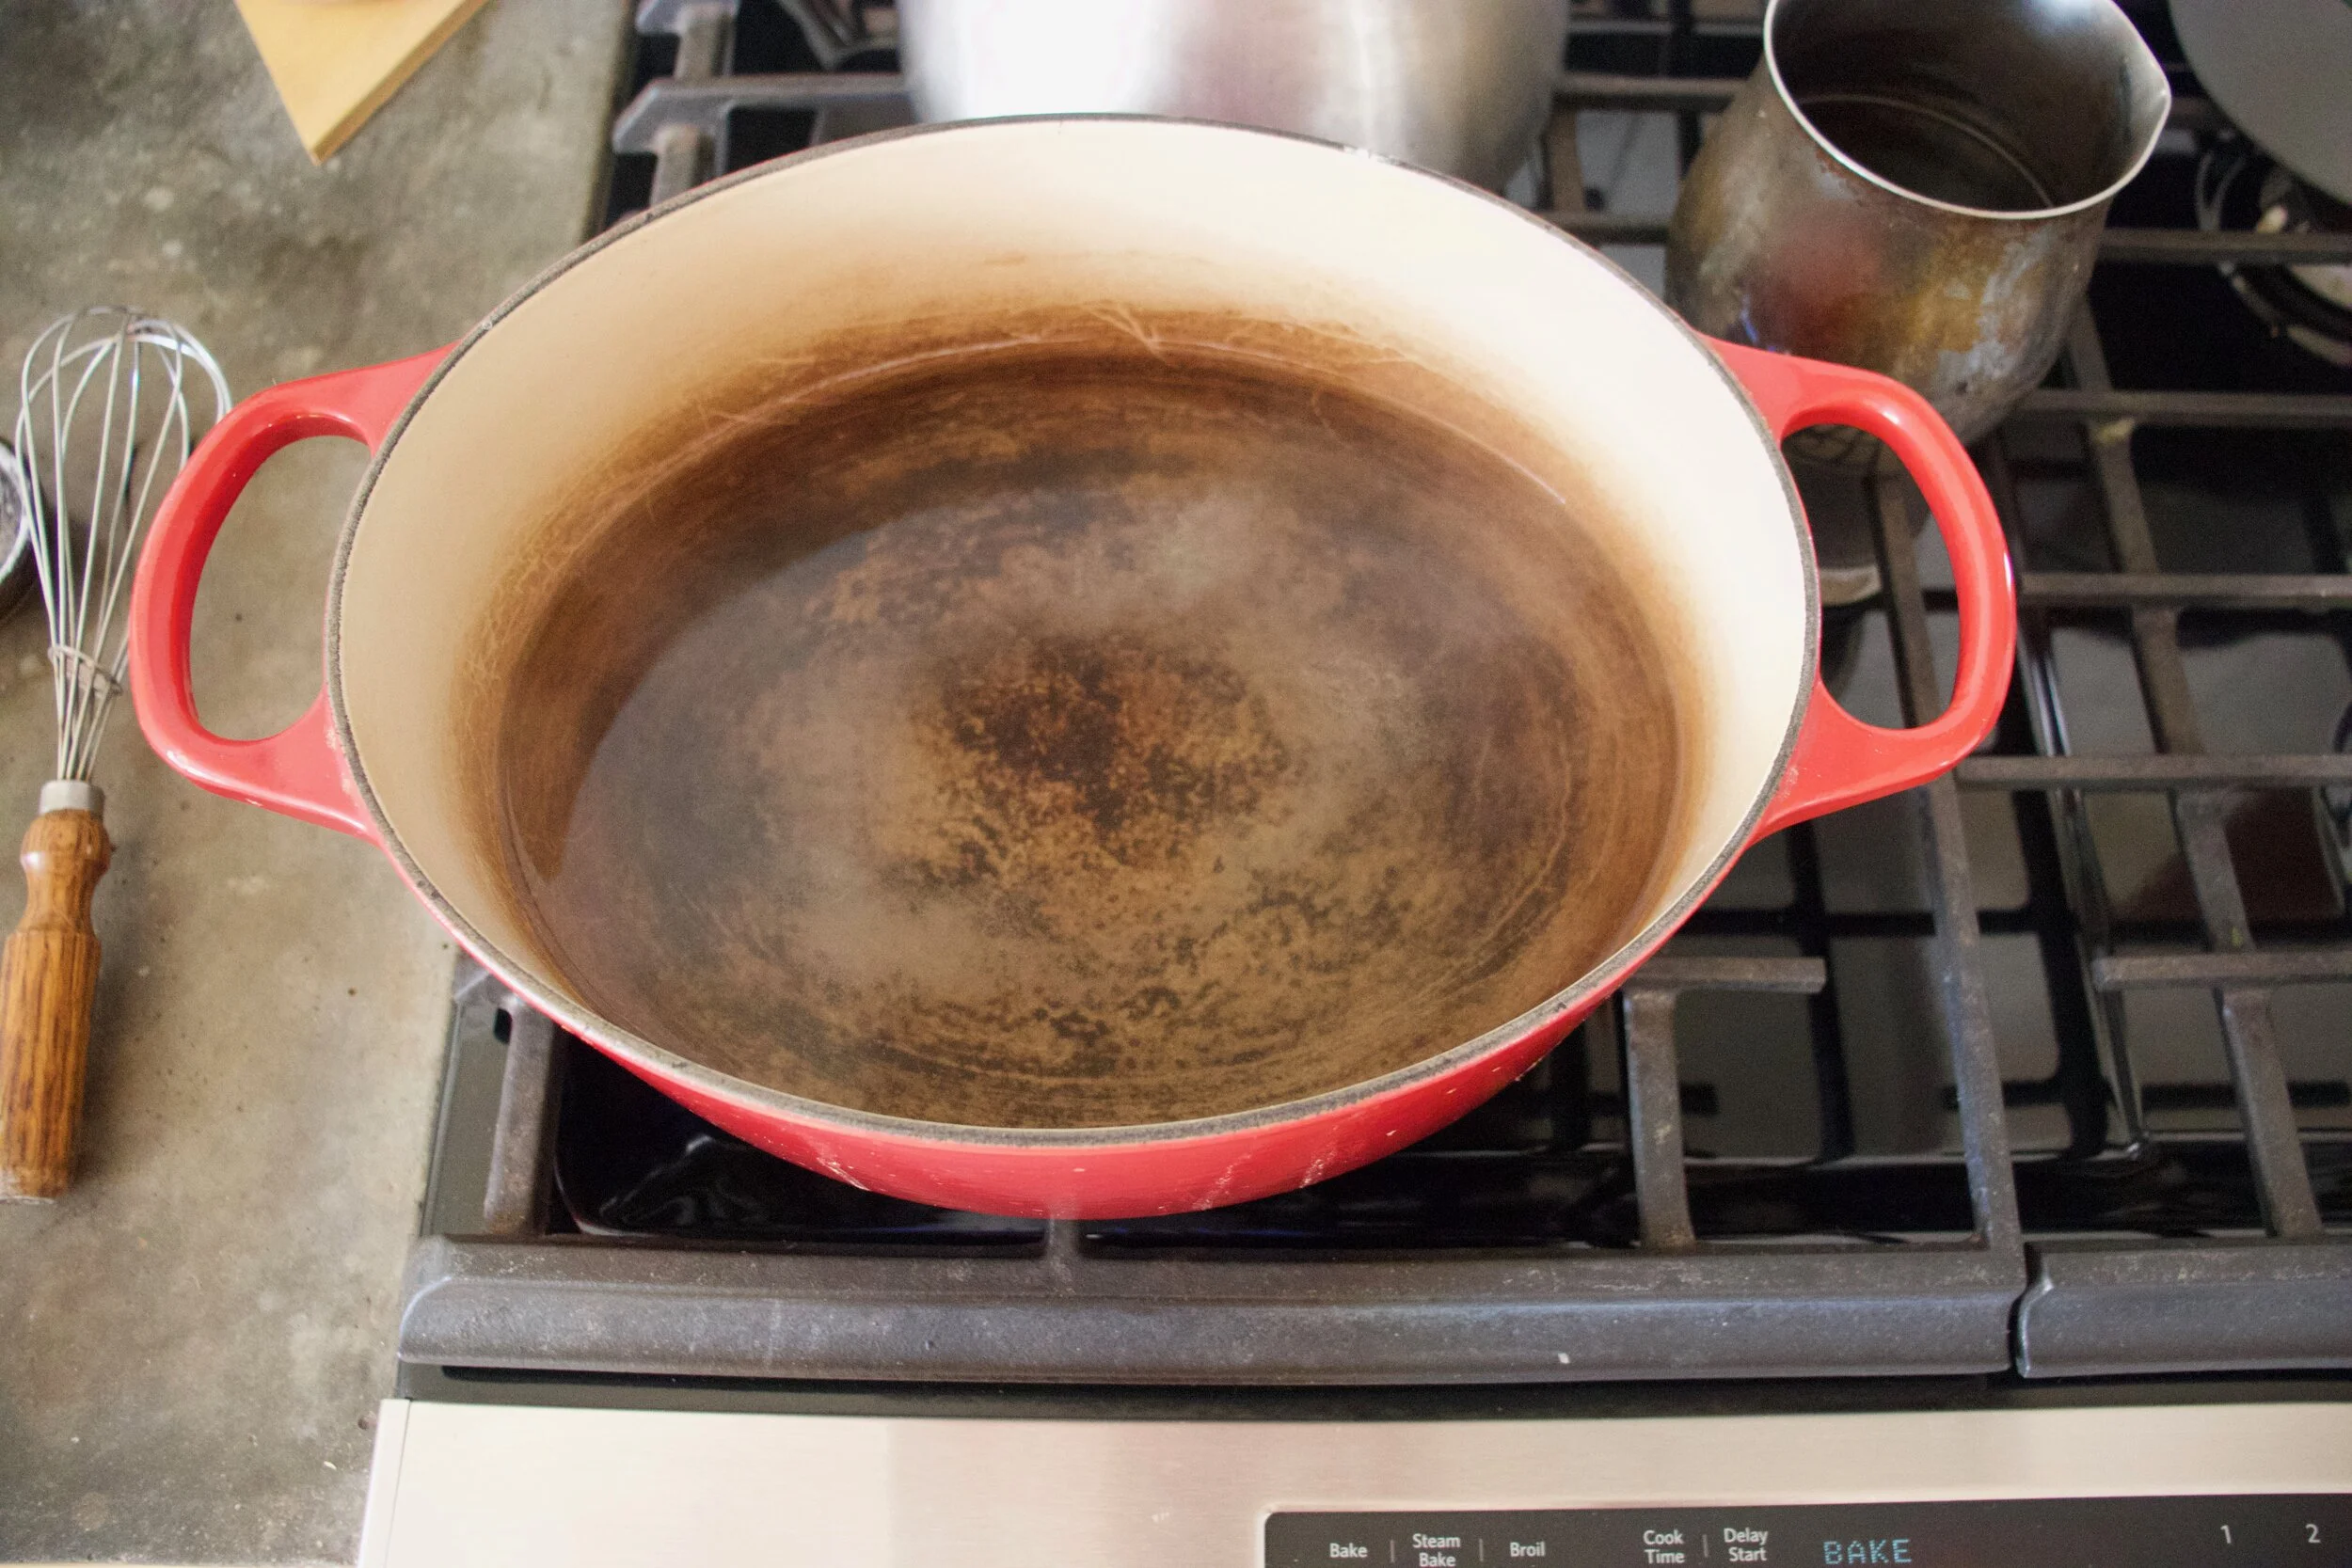
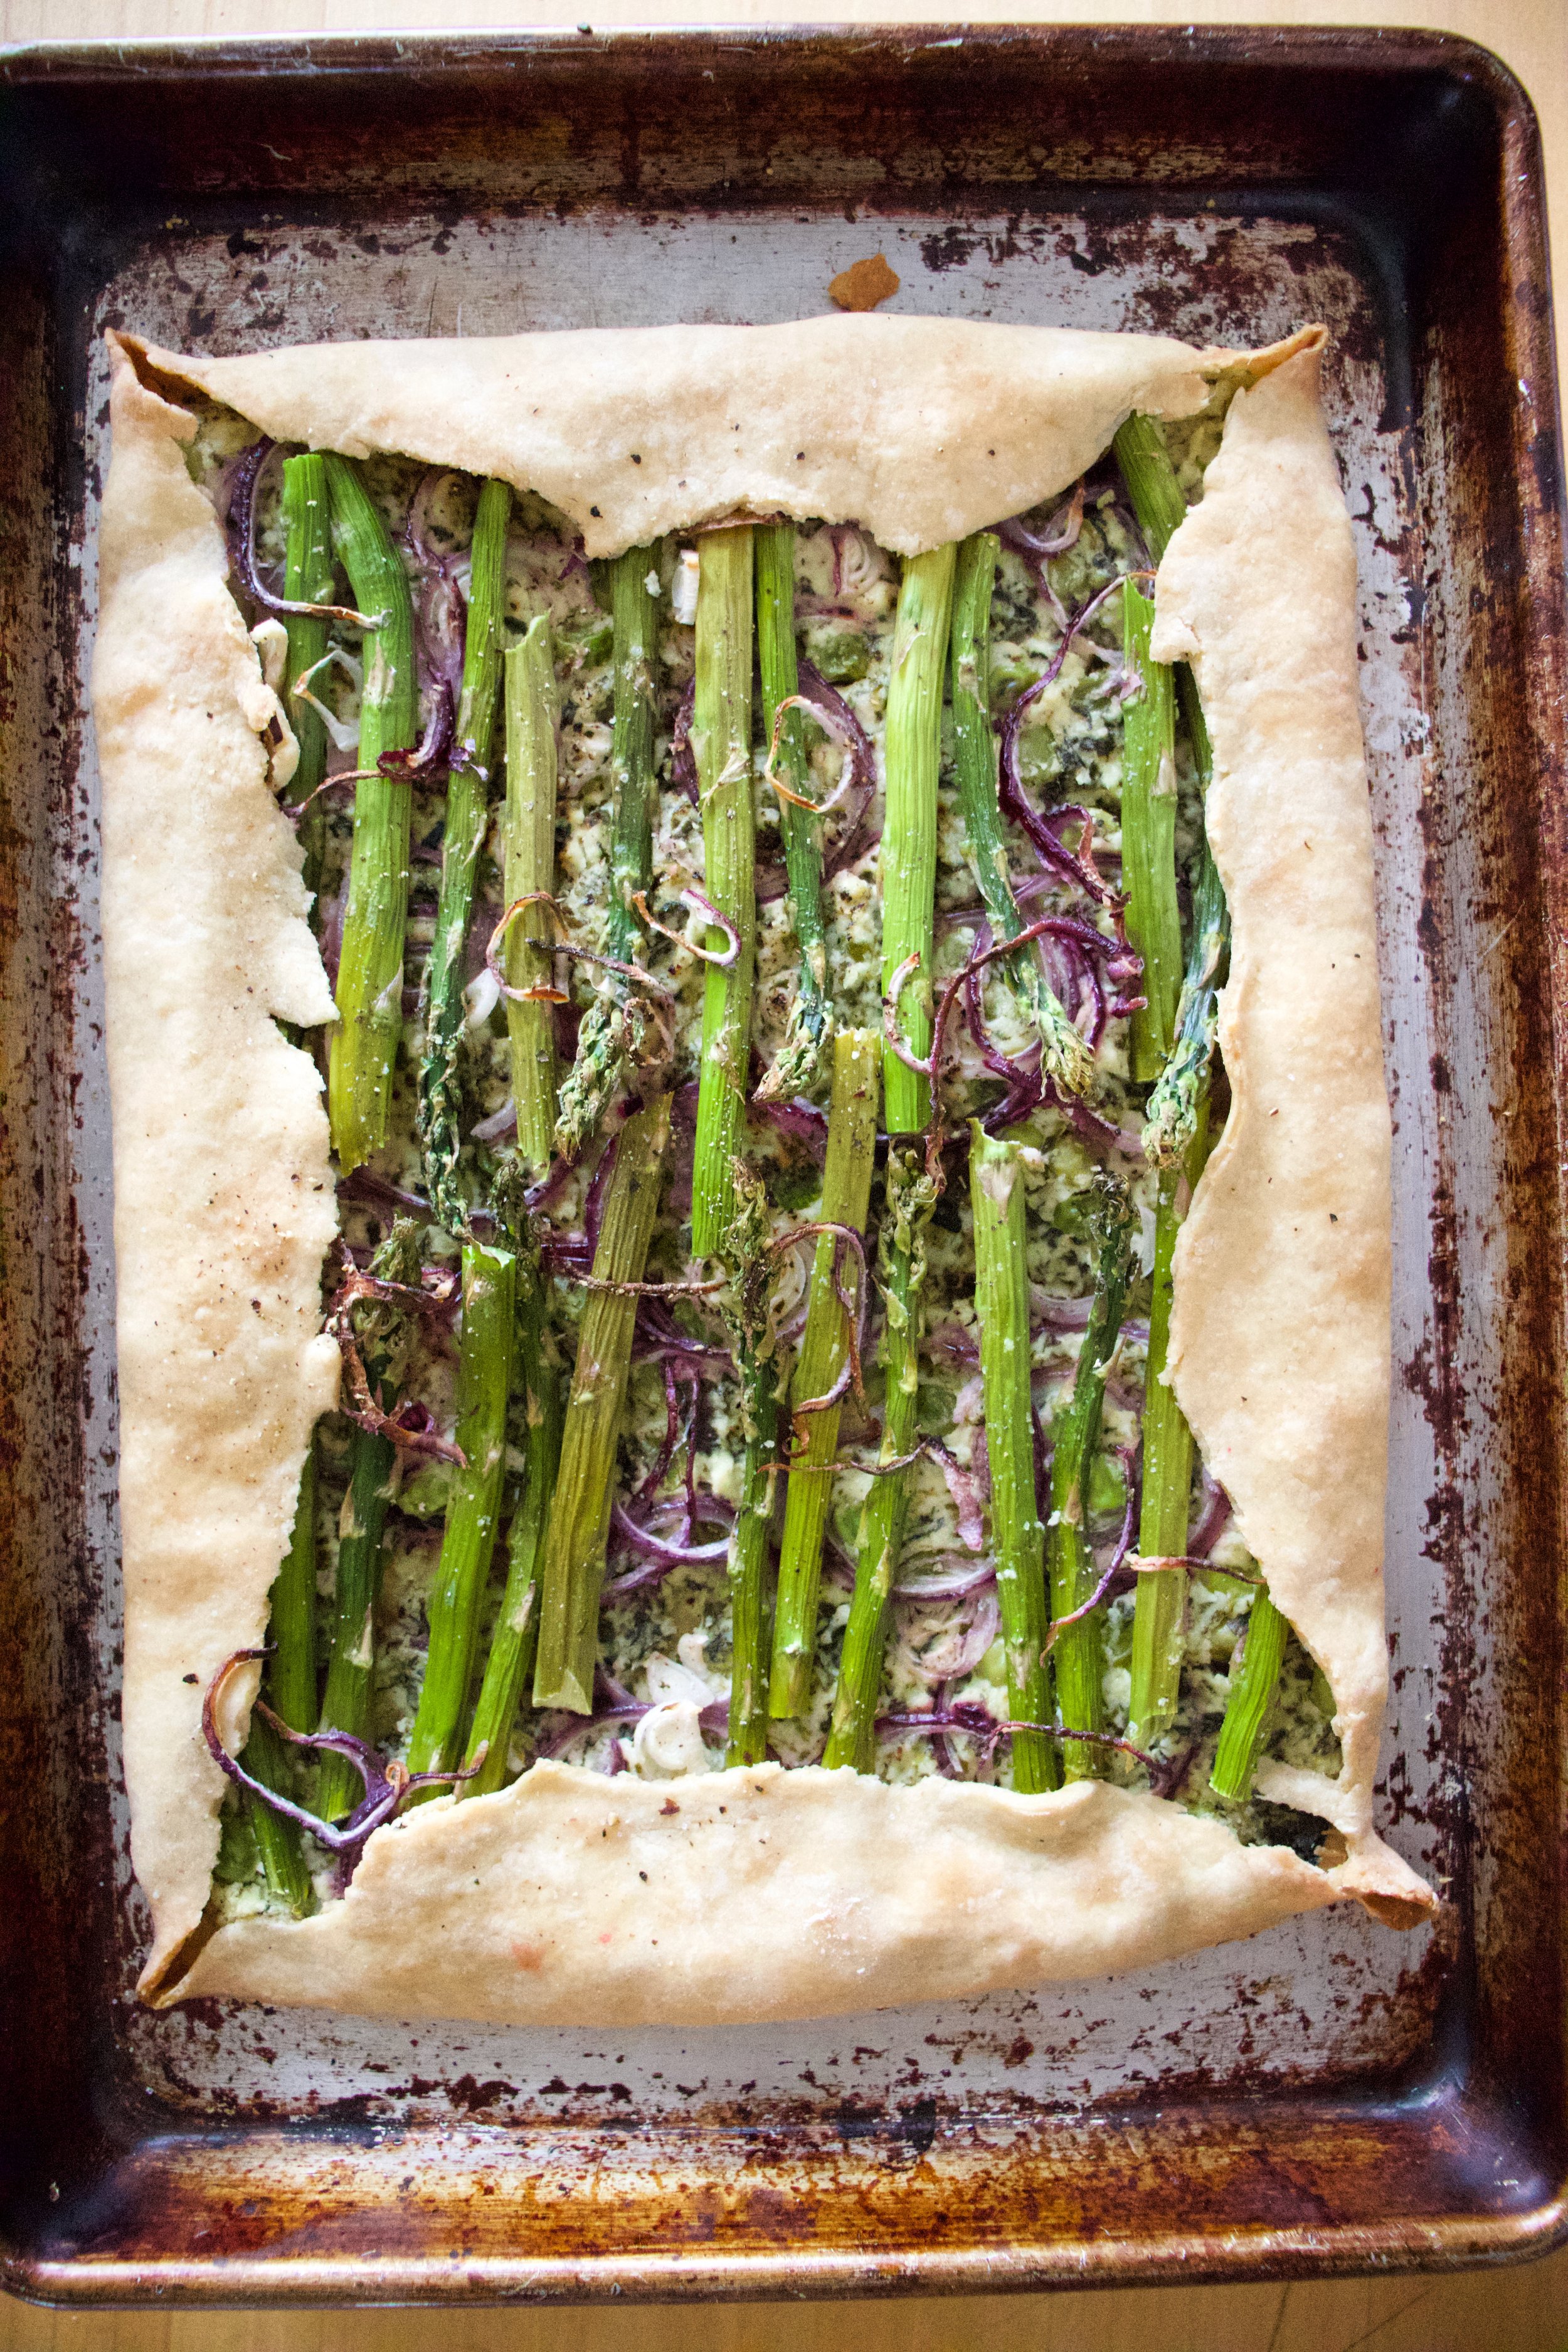
Water and baking soda bath boiling away.

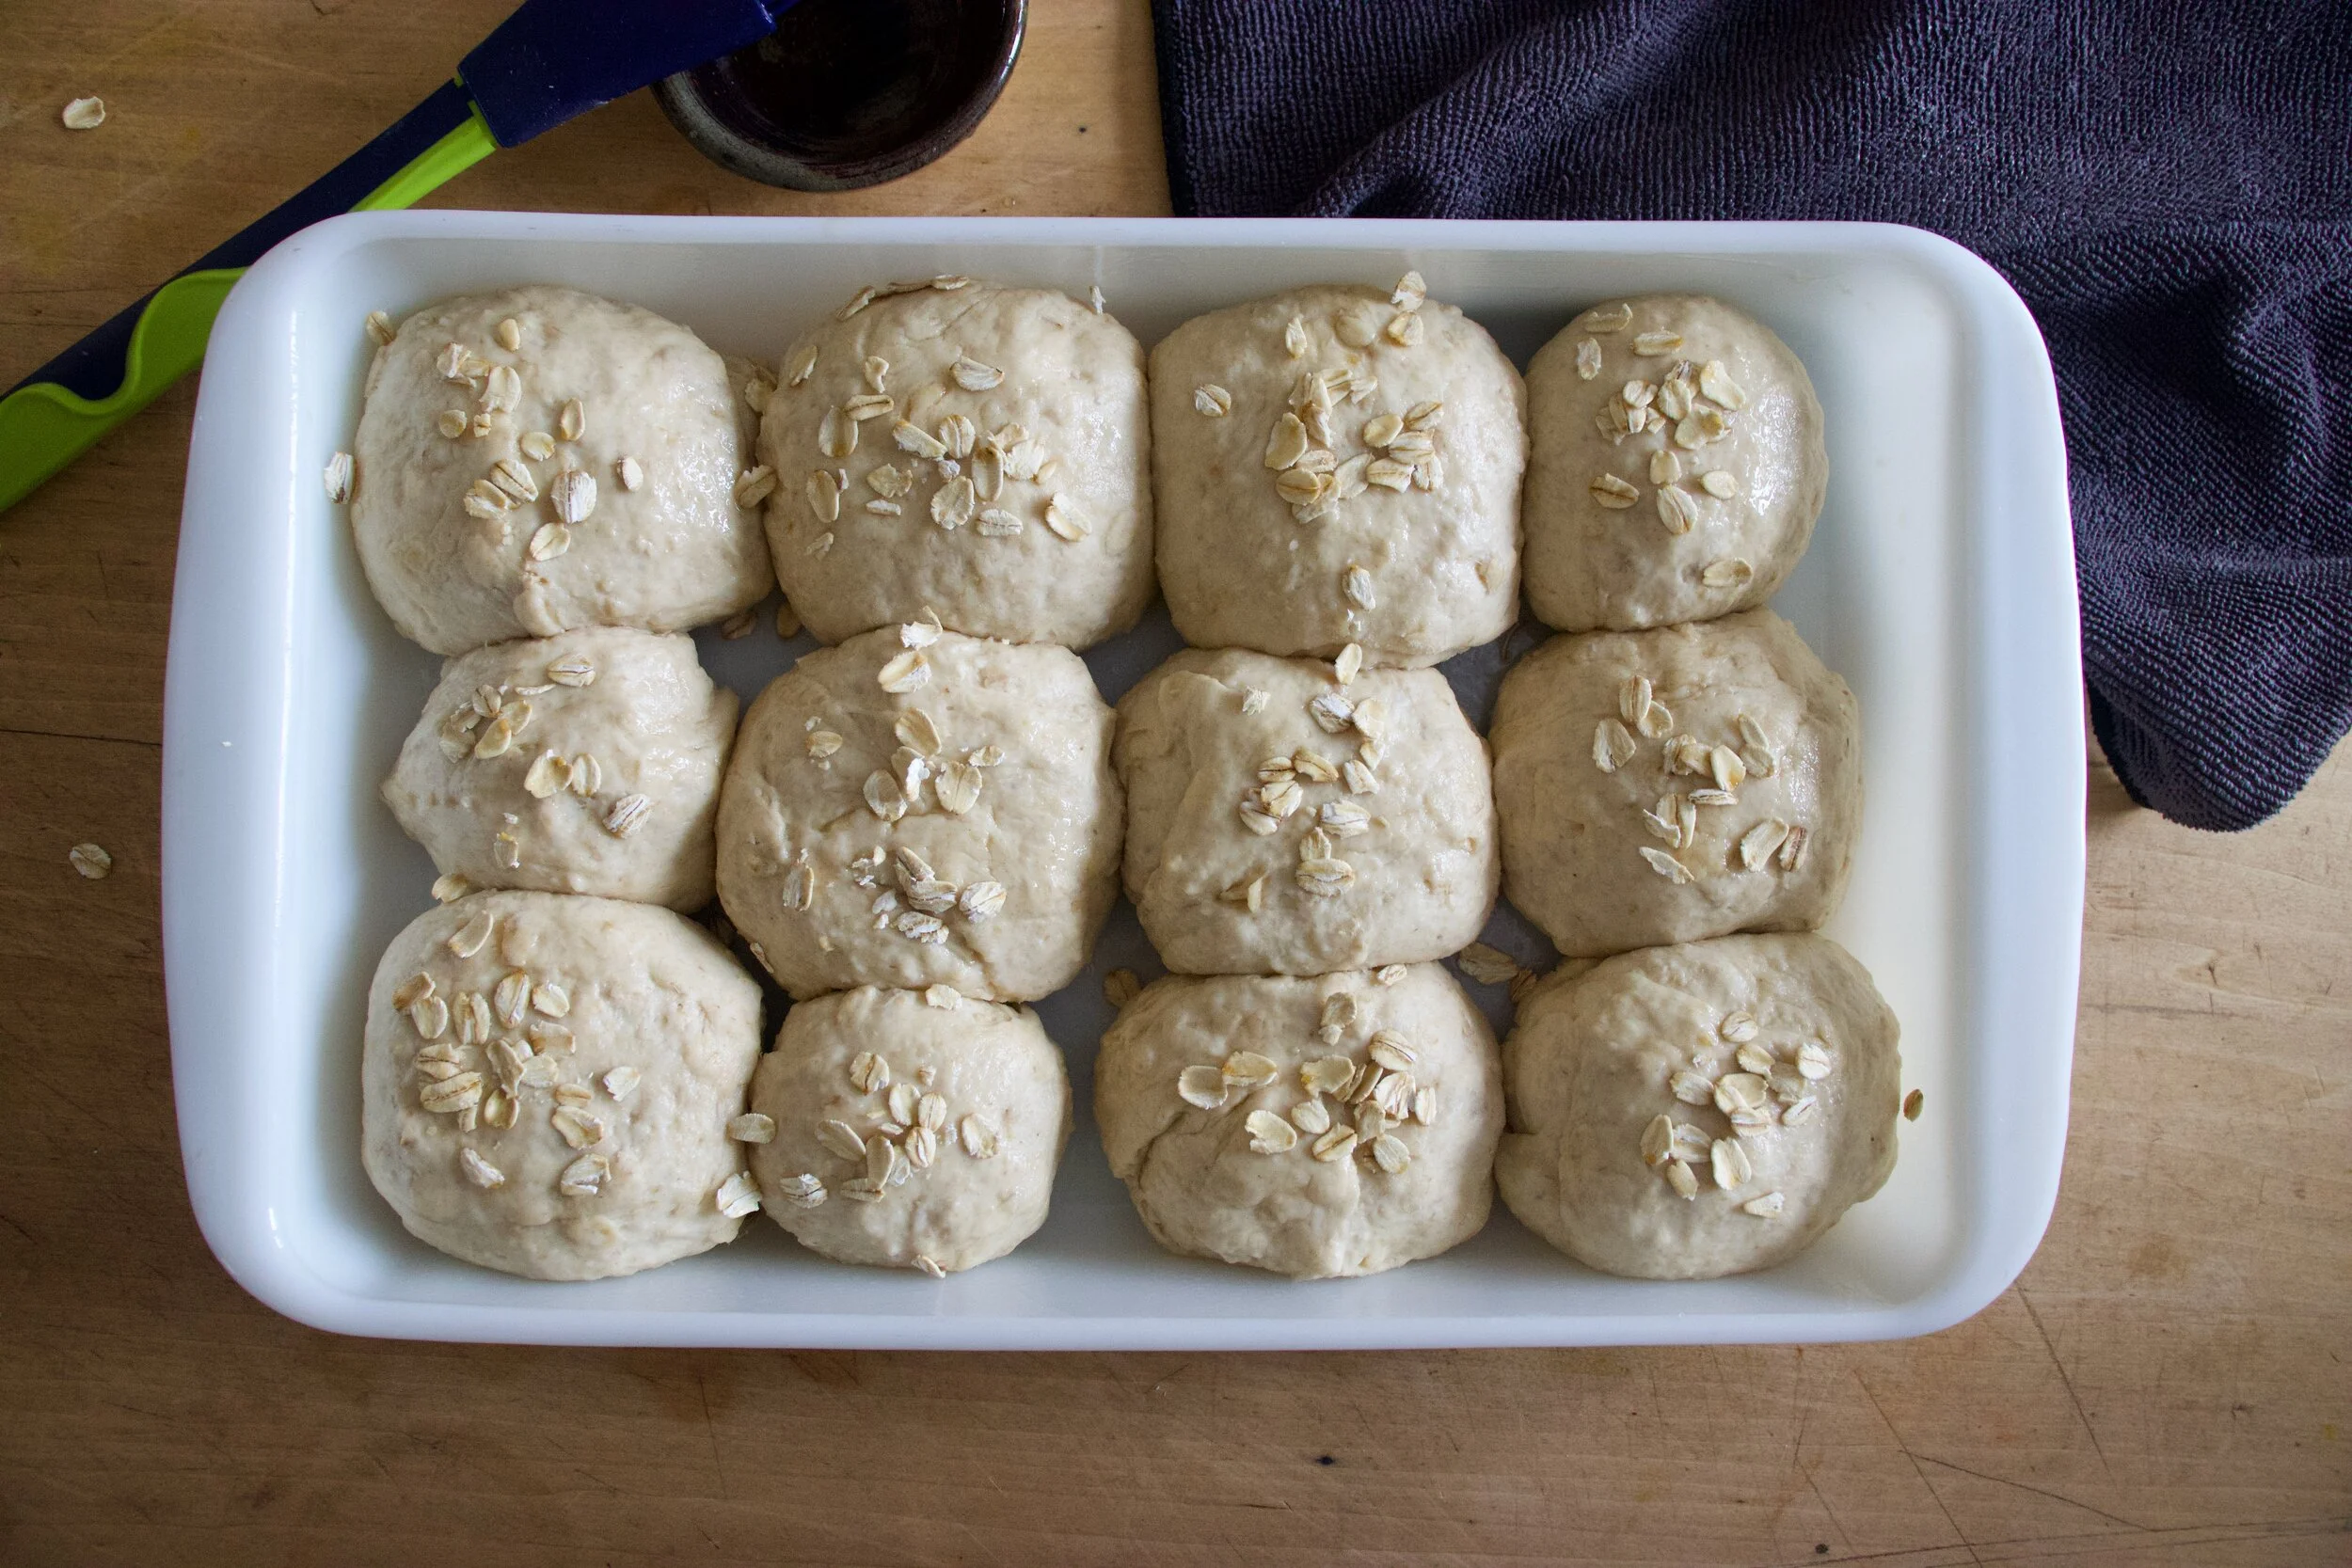
Grab the hearts and place a few at a time, gently, into the water for about 45 seconds then pull them out with a slotted spatula.

Onto a baking sheet either lined with parchment or a splat mat.
And don%u2019t forget to sprinkle them all with course kosher salt.
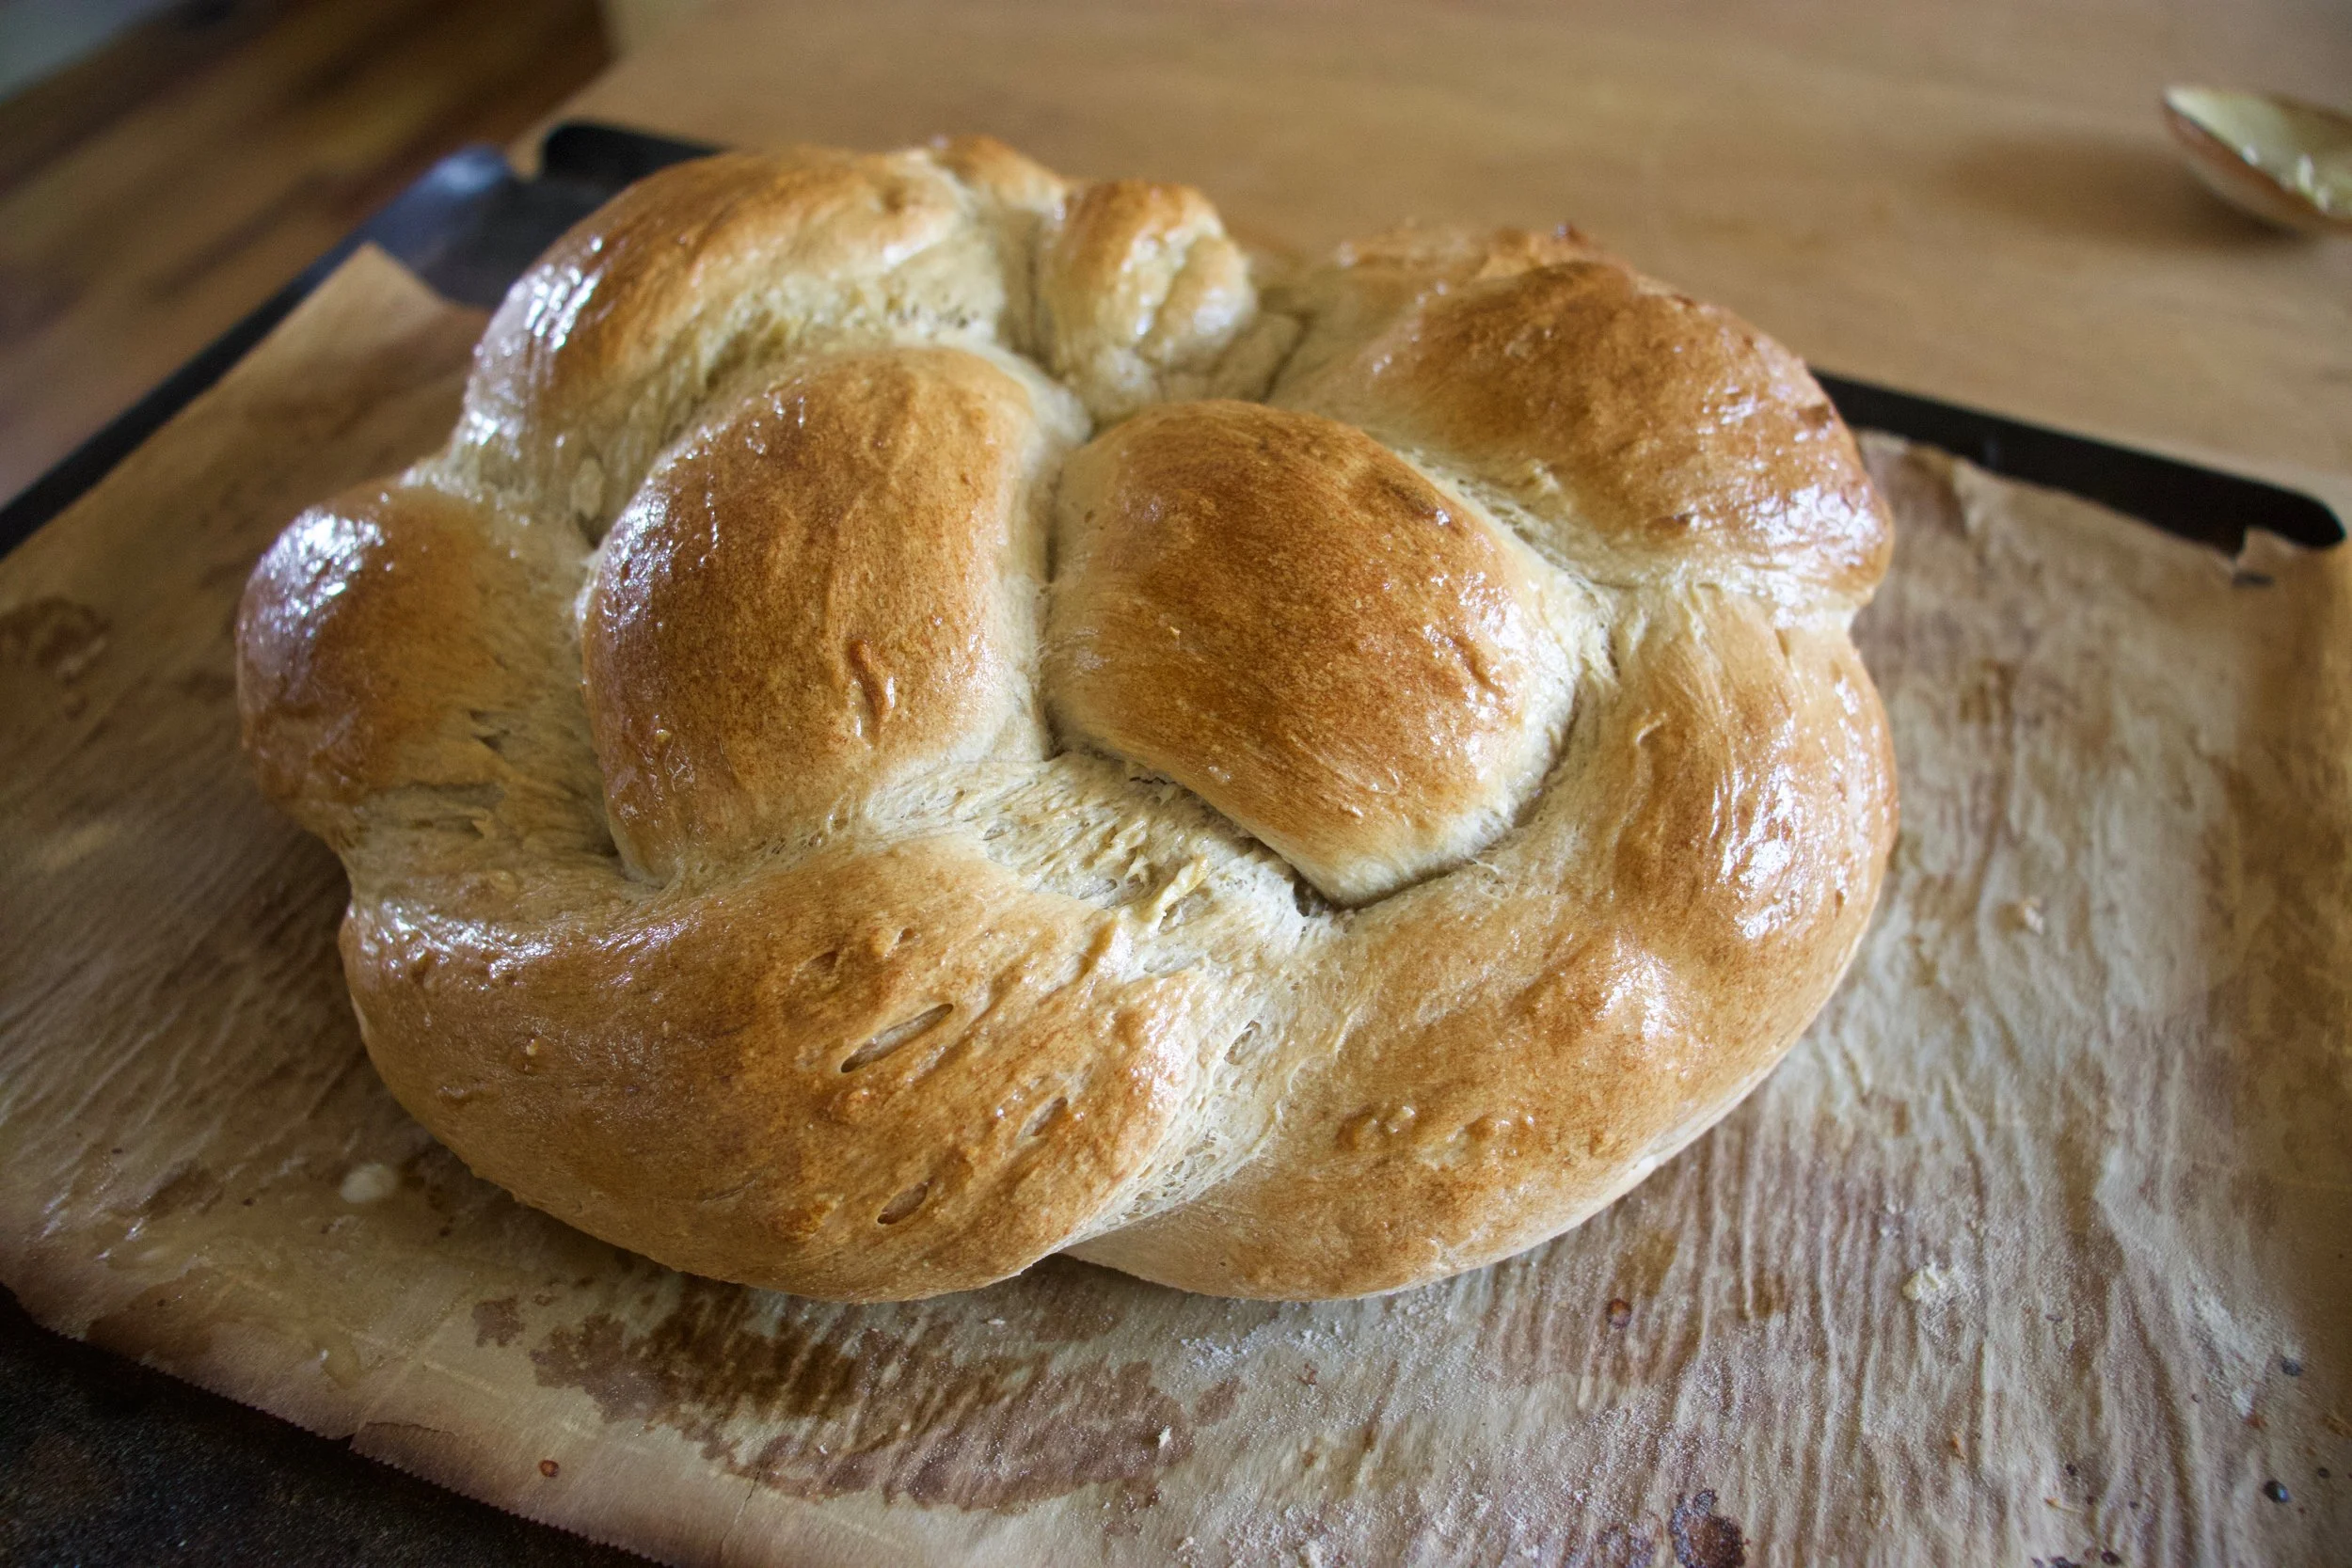
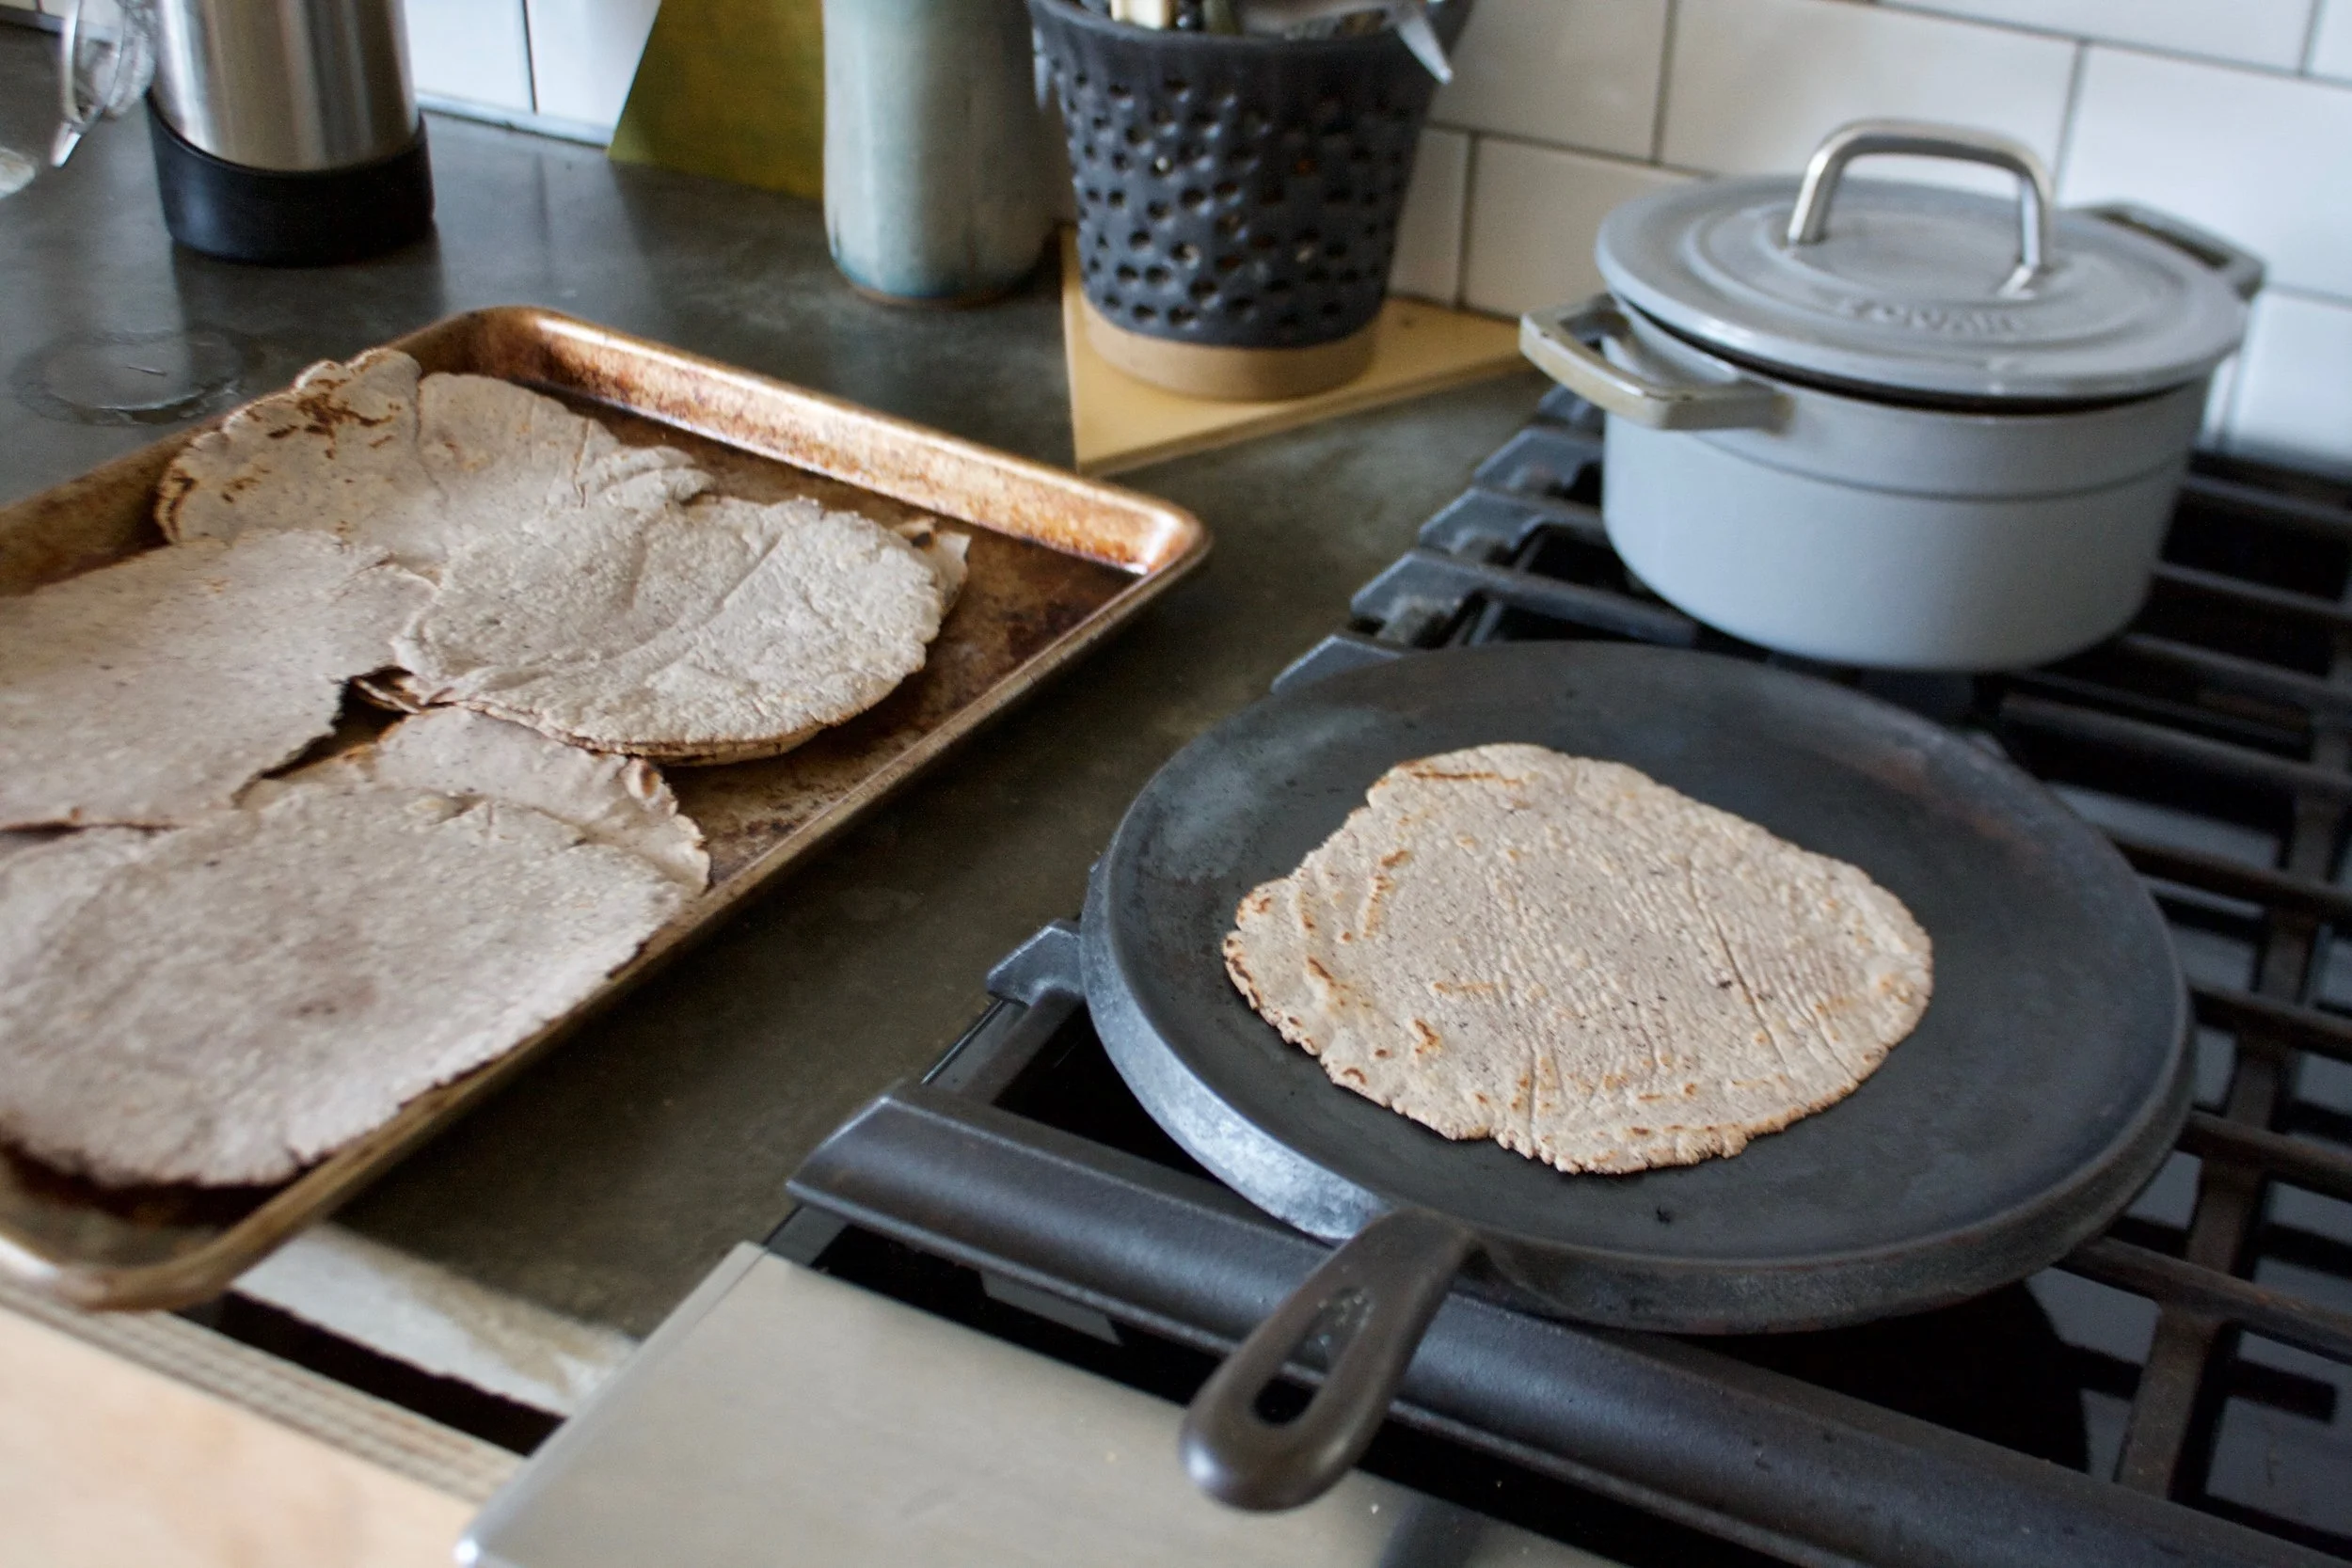
Into the oven they go.

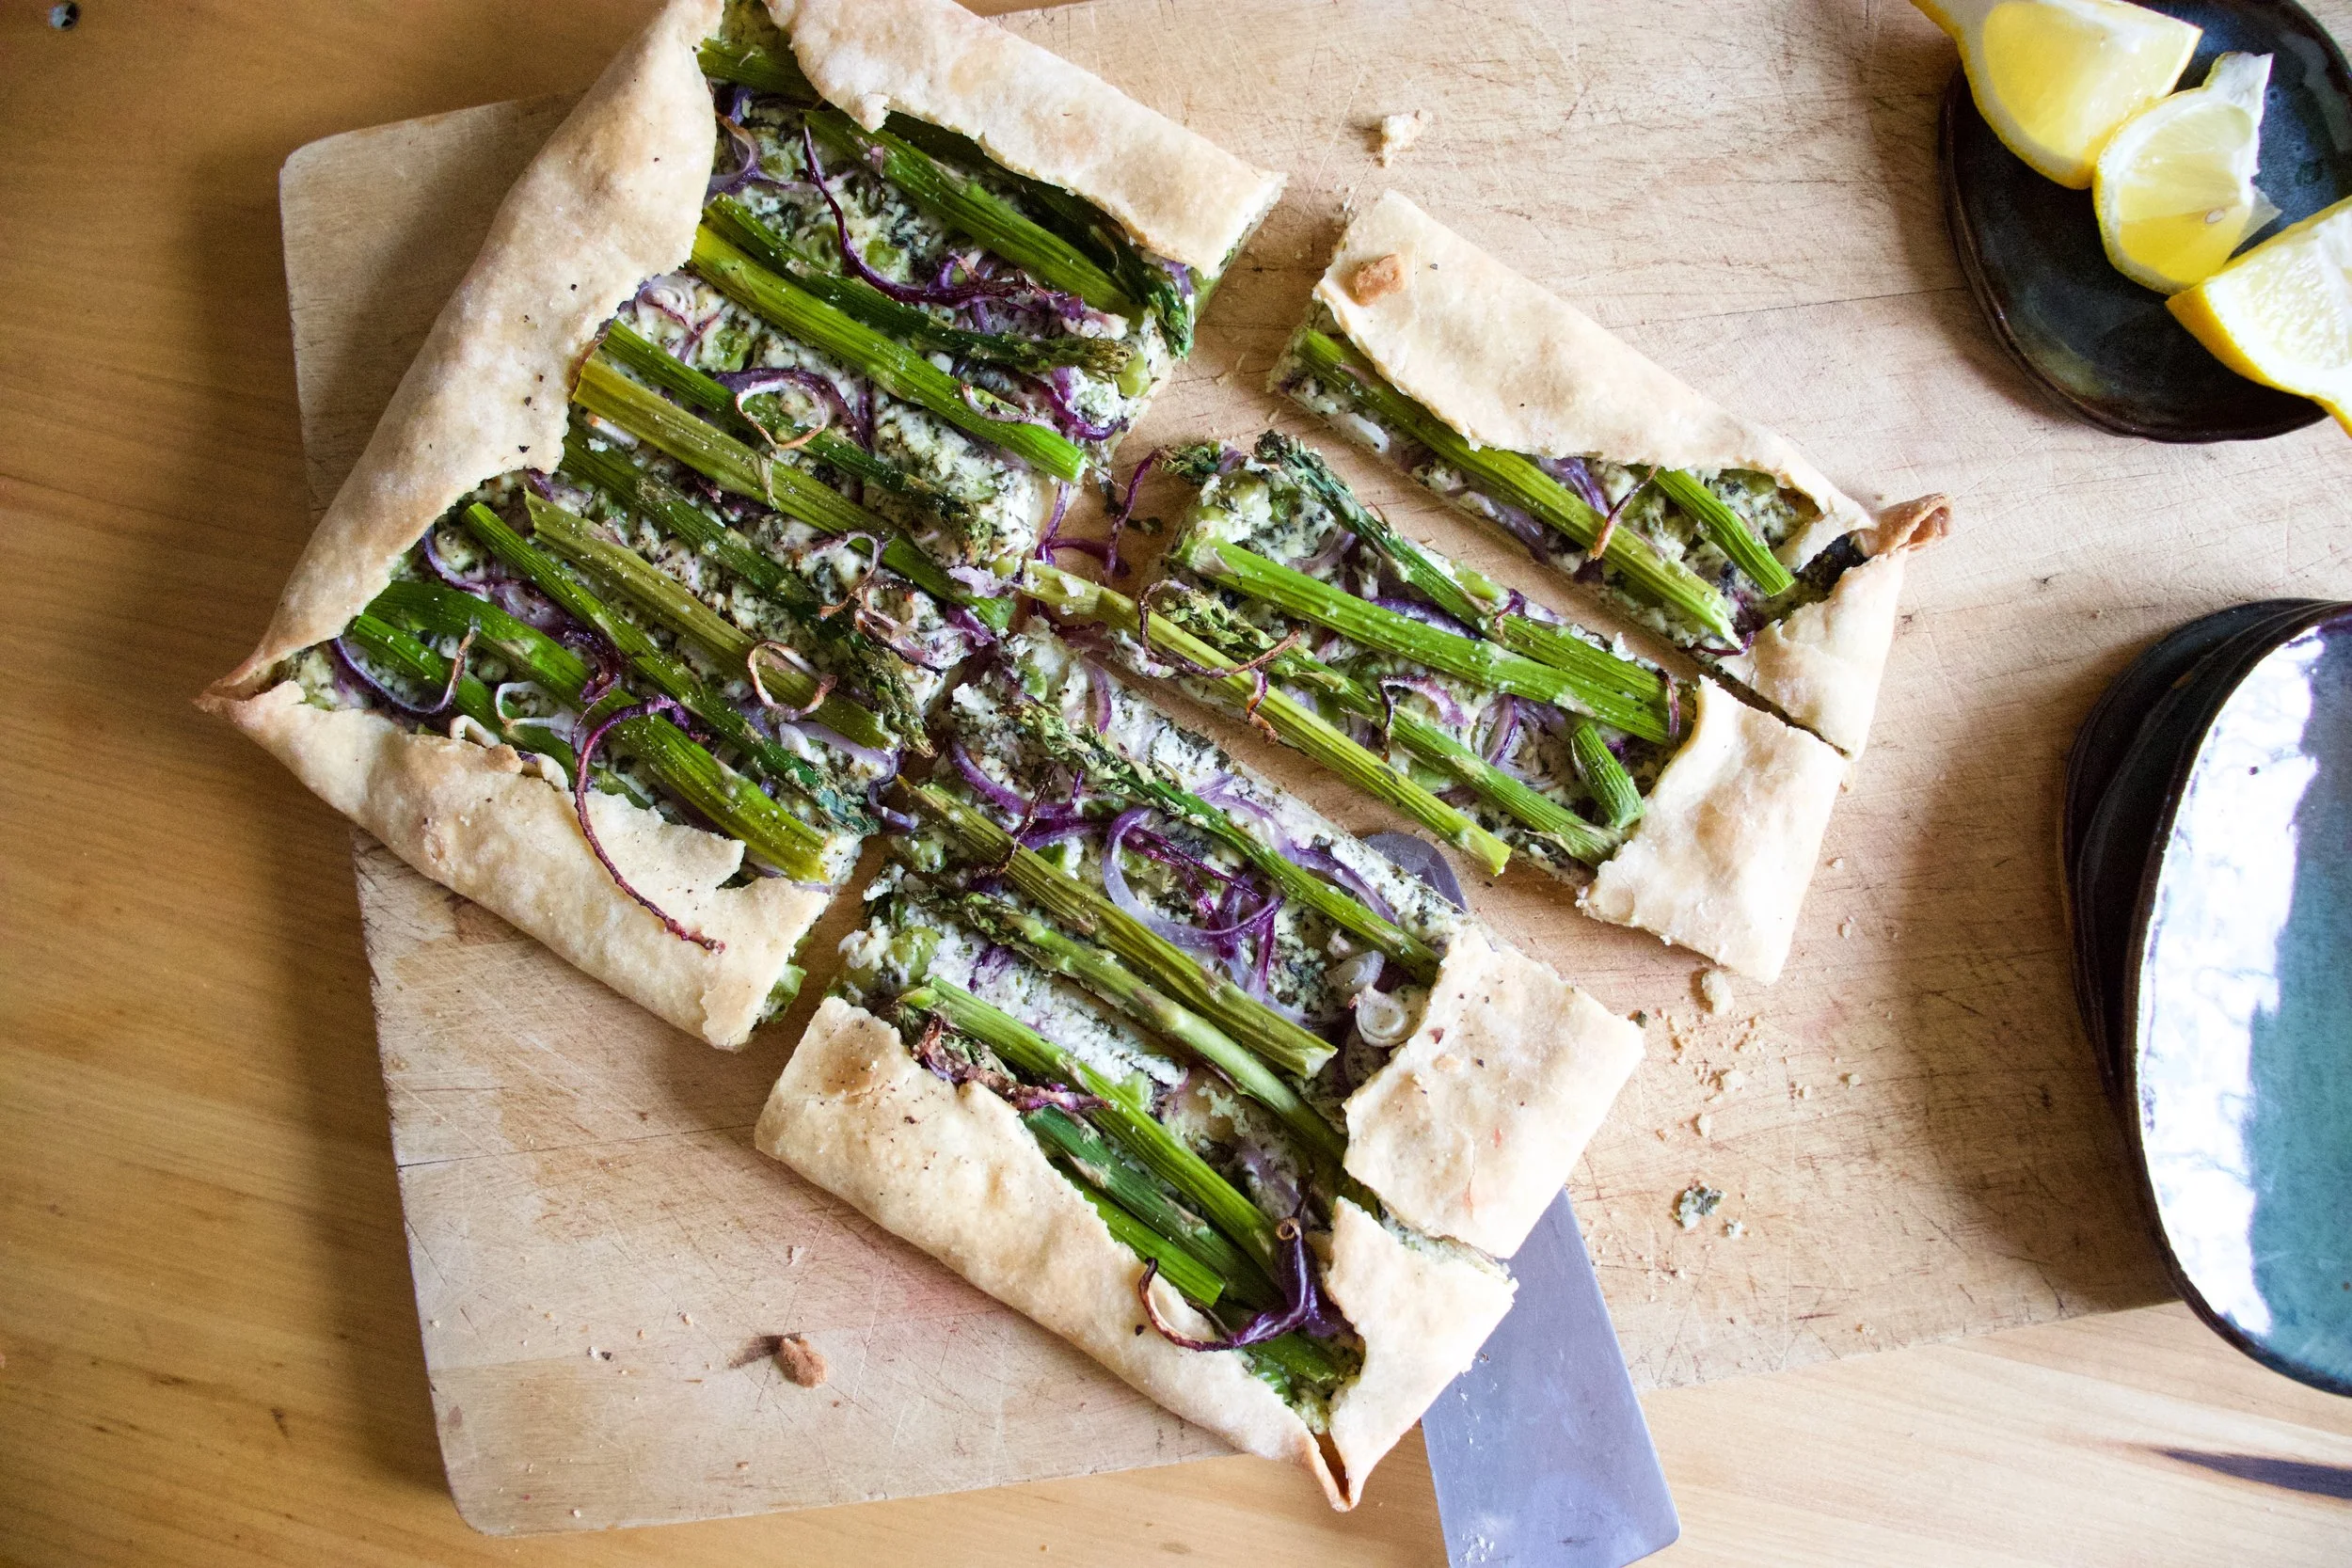
About 18-20 minutes later%u2026 PRETZELS

Get them onto a cooling rack to cool just enough.

And then you just eat them because what else are you suppose to do.
And yes, grab the mustard because duh.
makes 12 pretzels
For the dough
-
3 1/2 – 4 cups all pupse flour
-
2 teaspoons yeast
-
1 heavy tablespoon brown sugar
-
1 teaspoon salt
-
1 1/2 cups warm water
-
2 tablespoons course kosher salt (for topping)
For water bath
-
7 cups water
-
2 tablespoons baking soda
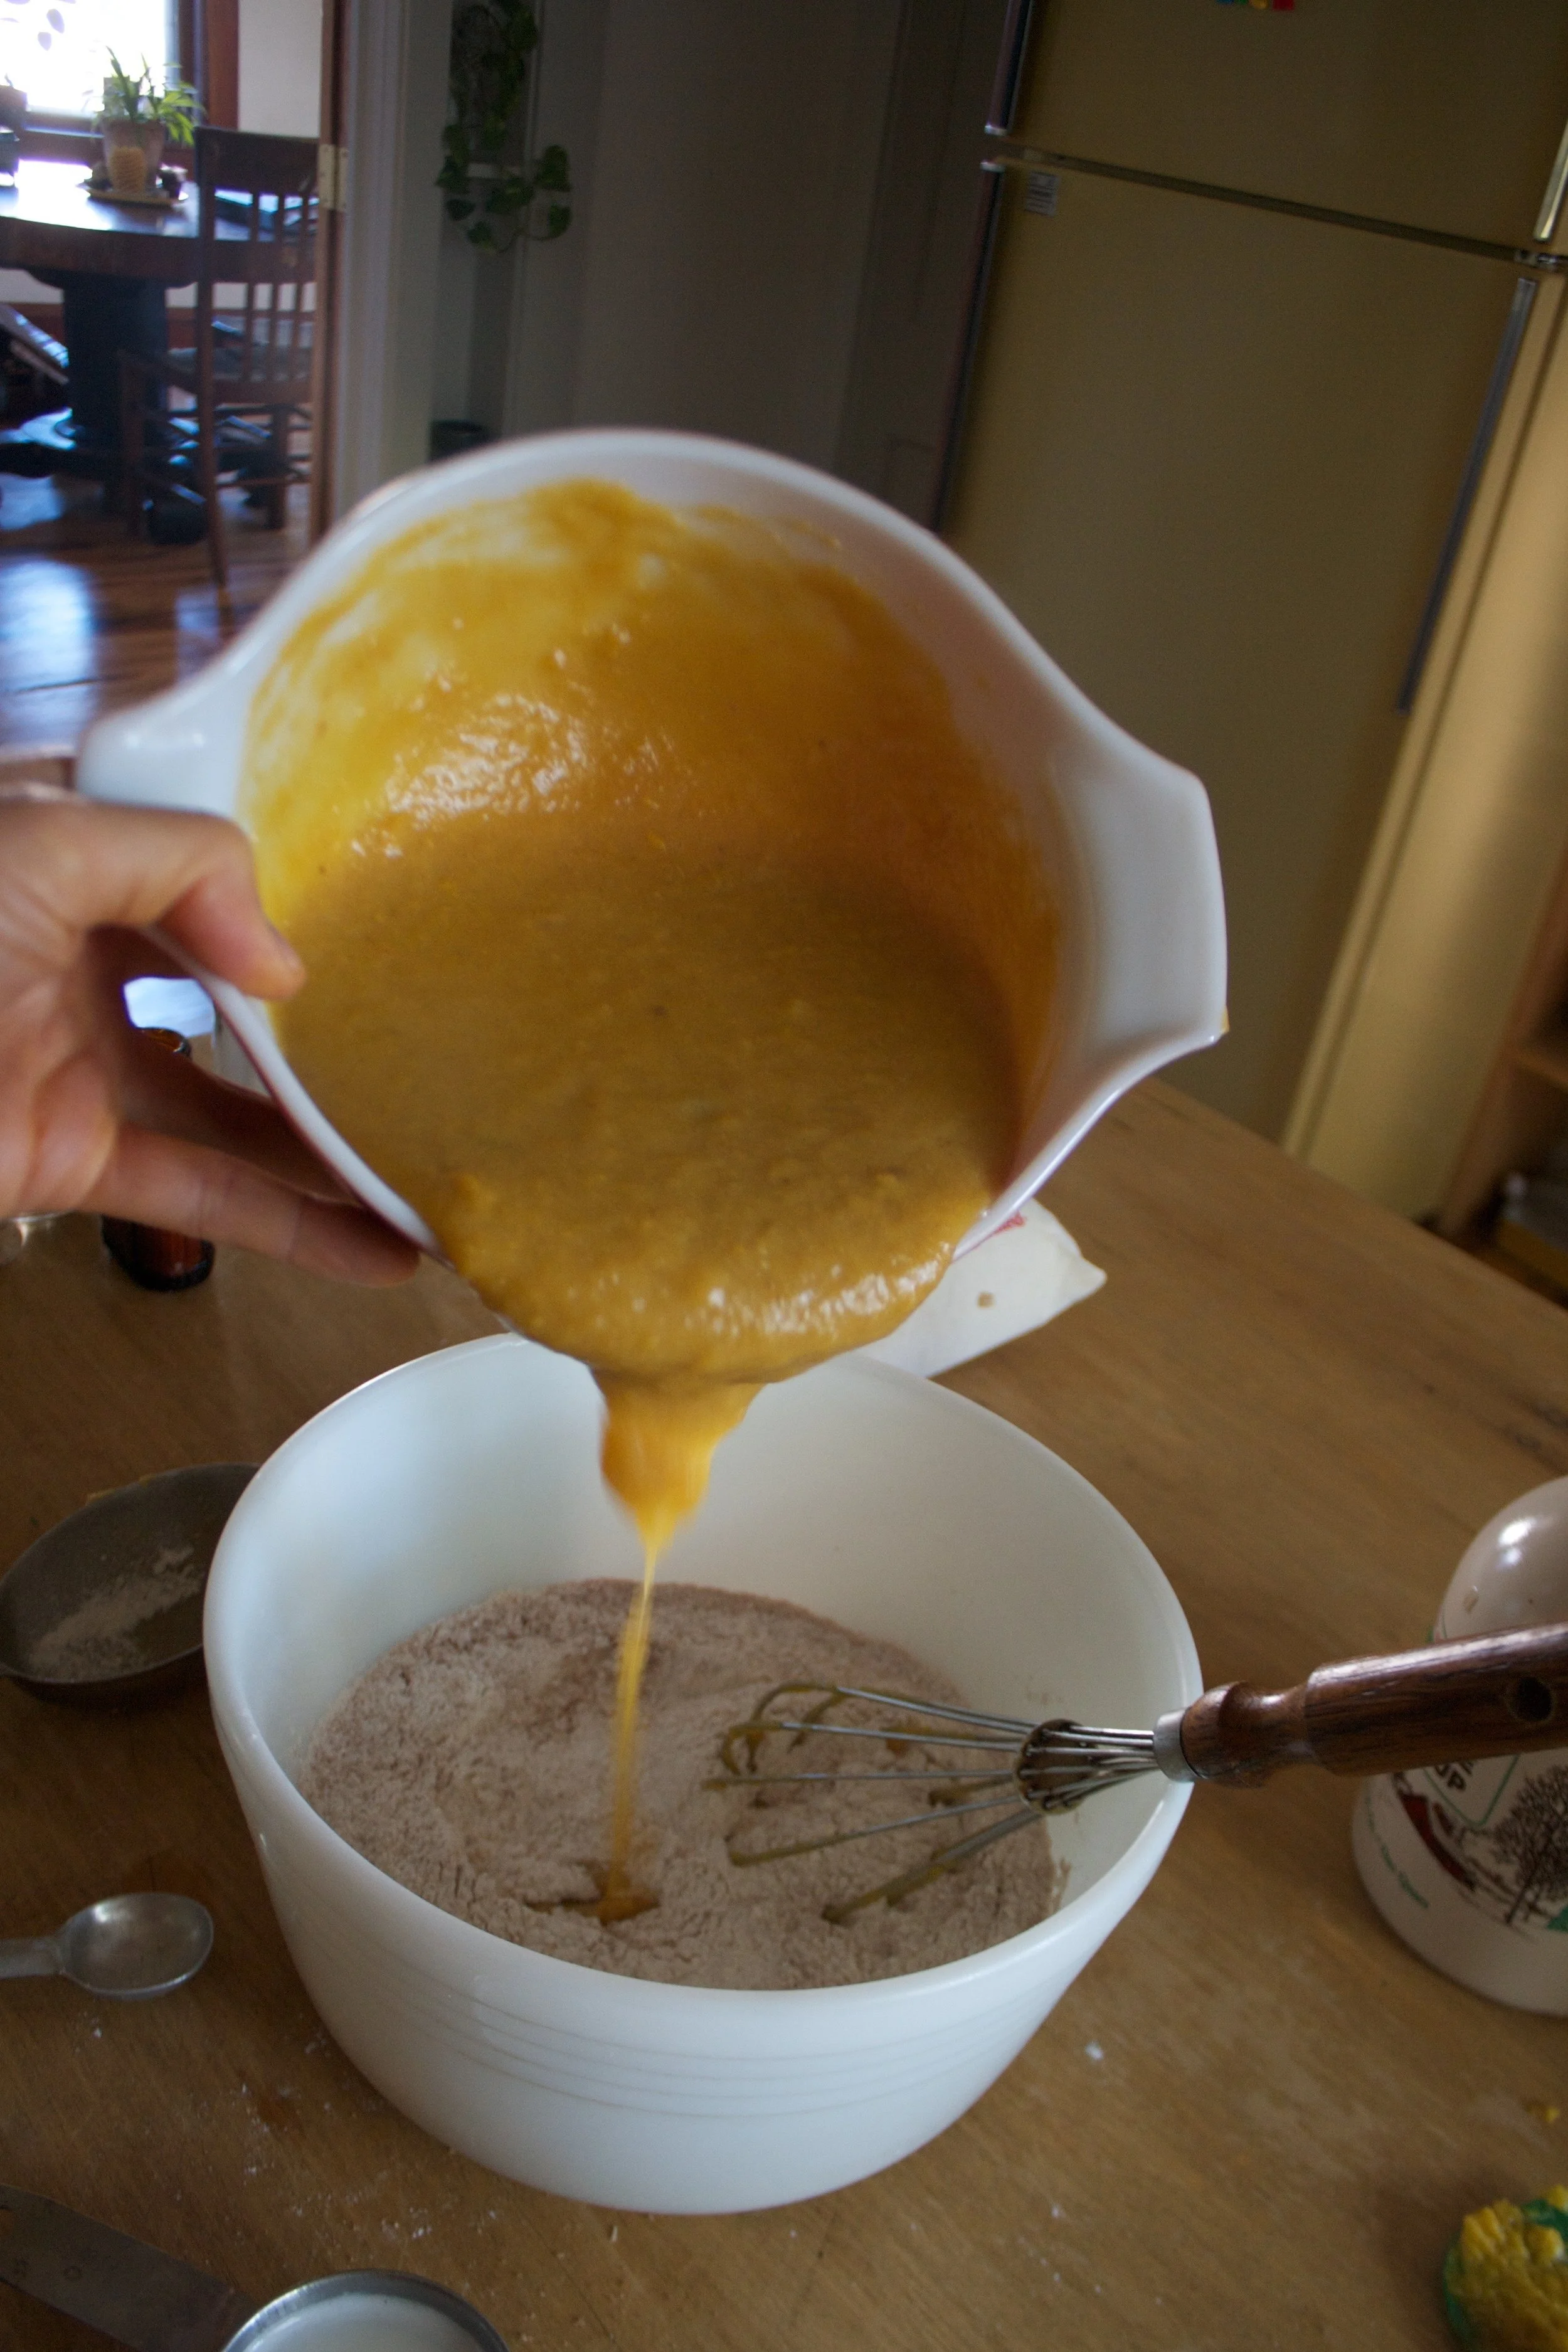
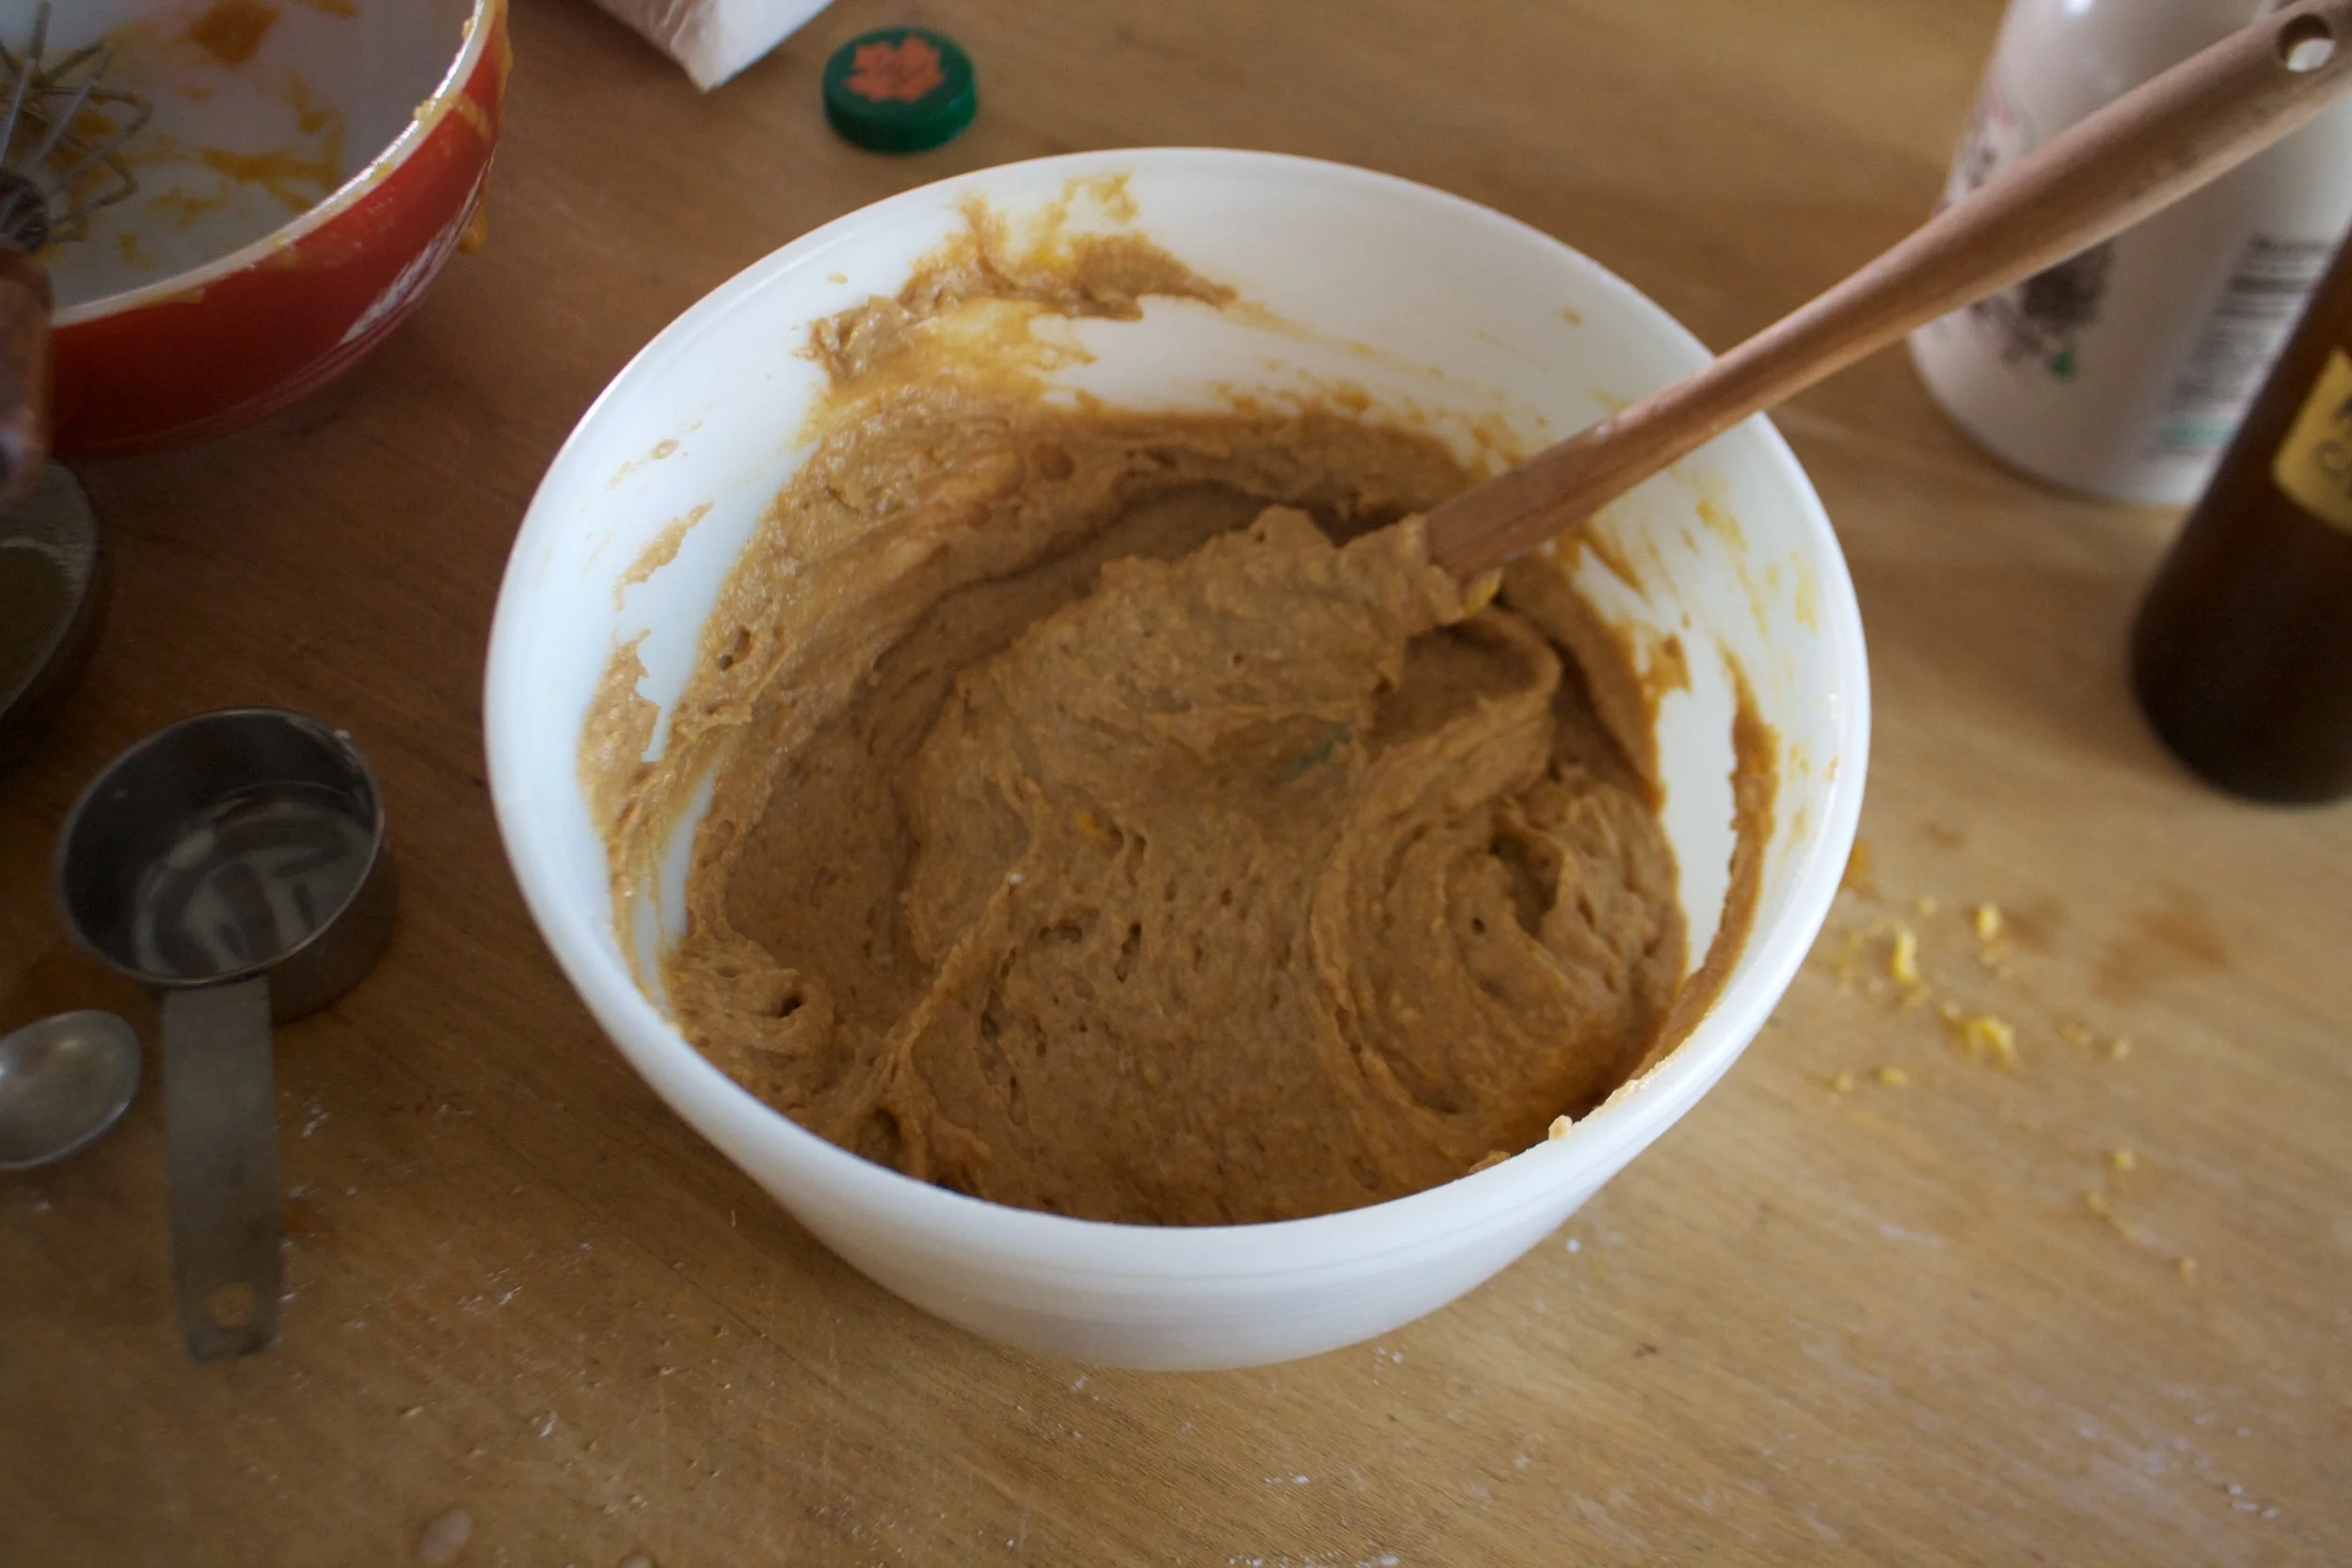
Start by placing yeast, brown sugar, and warm water into a big bowl and mix. Let sit for a few minutes to activate yeast. Once active, dump in the lesser amount of flour and salt. Mix until a shaggy dough forms. If the dough seems super wet, add in a little more flour. Dump dough onto a floured surface and knead until soft and elastic for about 5 minutes, adding in a little more flour as needed to keep it from getting too sticky. Once dough had been kneaded, place into a clean bowl, cover, and let sit in a warm place for about an hour or until the dough doubles in size.
Once dough has doubled, preheat oven to 450. Also get the water bath ready by placing the water into big pot and placing on heat.
Back to dough. Dump the dough onto a lighty floured surface and cut into 12 equal sized pieces. Then shape each piece by rolling the dough into a rope between 16 to 20 inches long then twisting the two ends together a few times. Fold the ends over to the middle of the dough and pinch the end into a heart. (check images above if that doesn%u2019t make sense) Once all the dough has been shaped, its time to boil. When the water is at a rolling boil, dump in the baking soda and mix around. Place 2-3 pretzels gently into the water at a time and boil for about 45 seconds. Remove from water with a splatted spoon or spatula and place on a parchment or lightly oiled baking sheet. Repeat until all dough is boiled. Make sure when you place the pretzels onto the baking sheet you give them room so they are not touching. If you need to, use 2 baking sheets. And now before the placing them into the oven, sprinkle them with the course salt.
Now into the hot oven they go, for about 18-20 minutes or until they turn a deep golden brown.
Once baked, pull from oven, place on a wire rack to cool a bit, then eat them. Dipped in mustard or any other dipping situation you find appropriate.
Left overs, should there be any, should be stored individually either wrapped or in a bag at room temp for a few days. OR better yet, just freeze them. And when you want to eat one, just warm it up again in the oven.
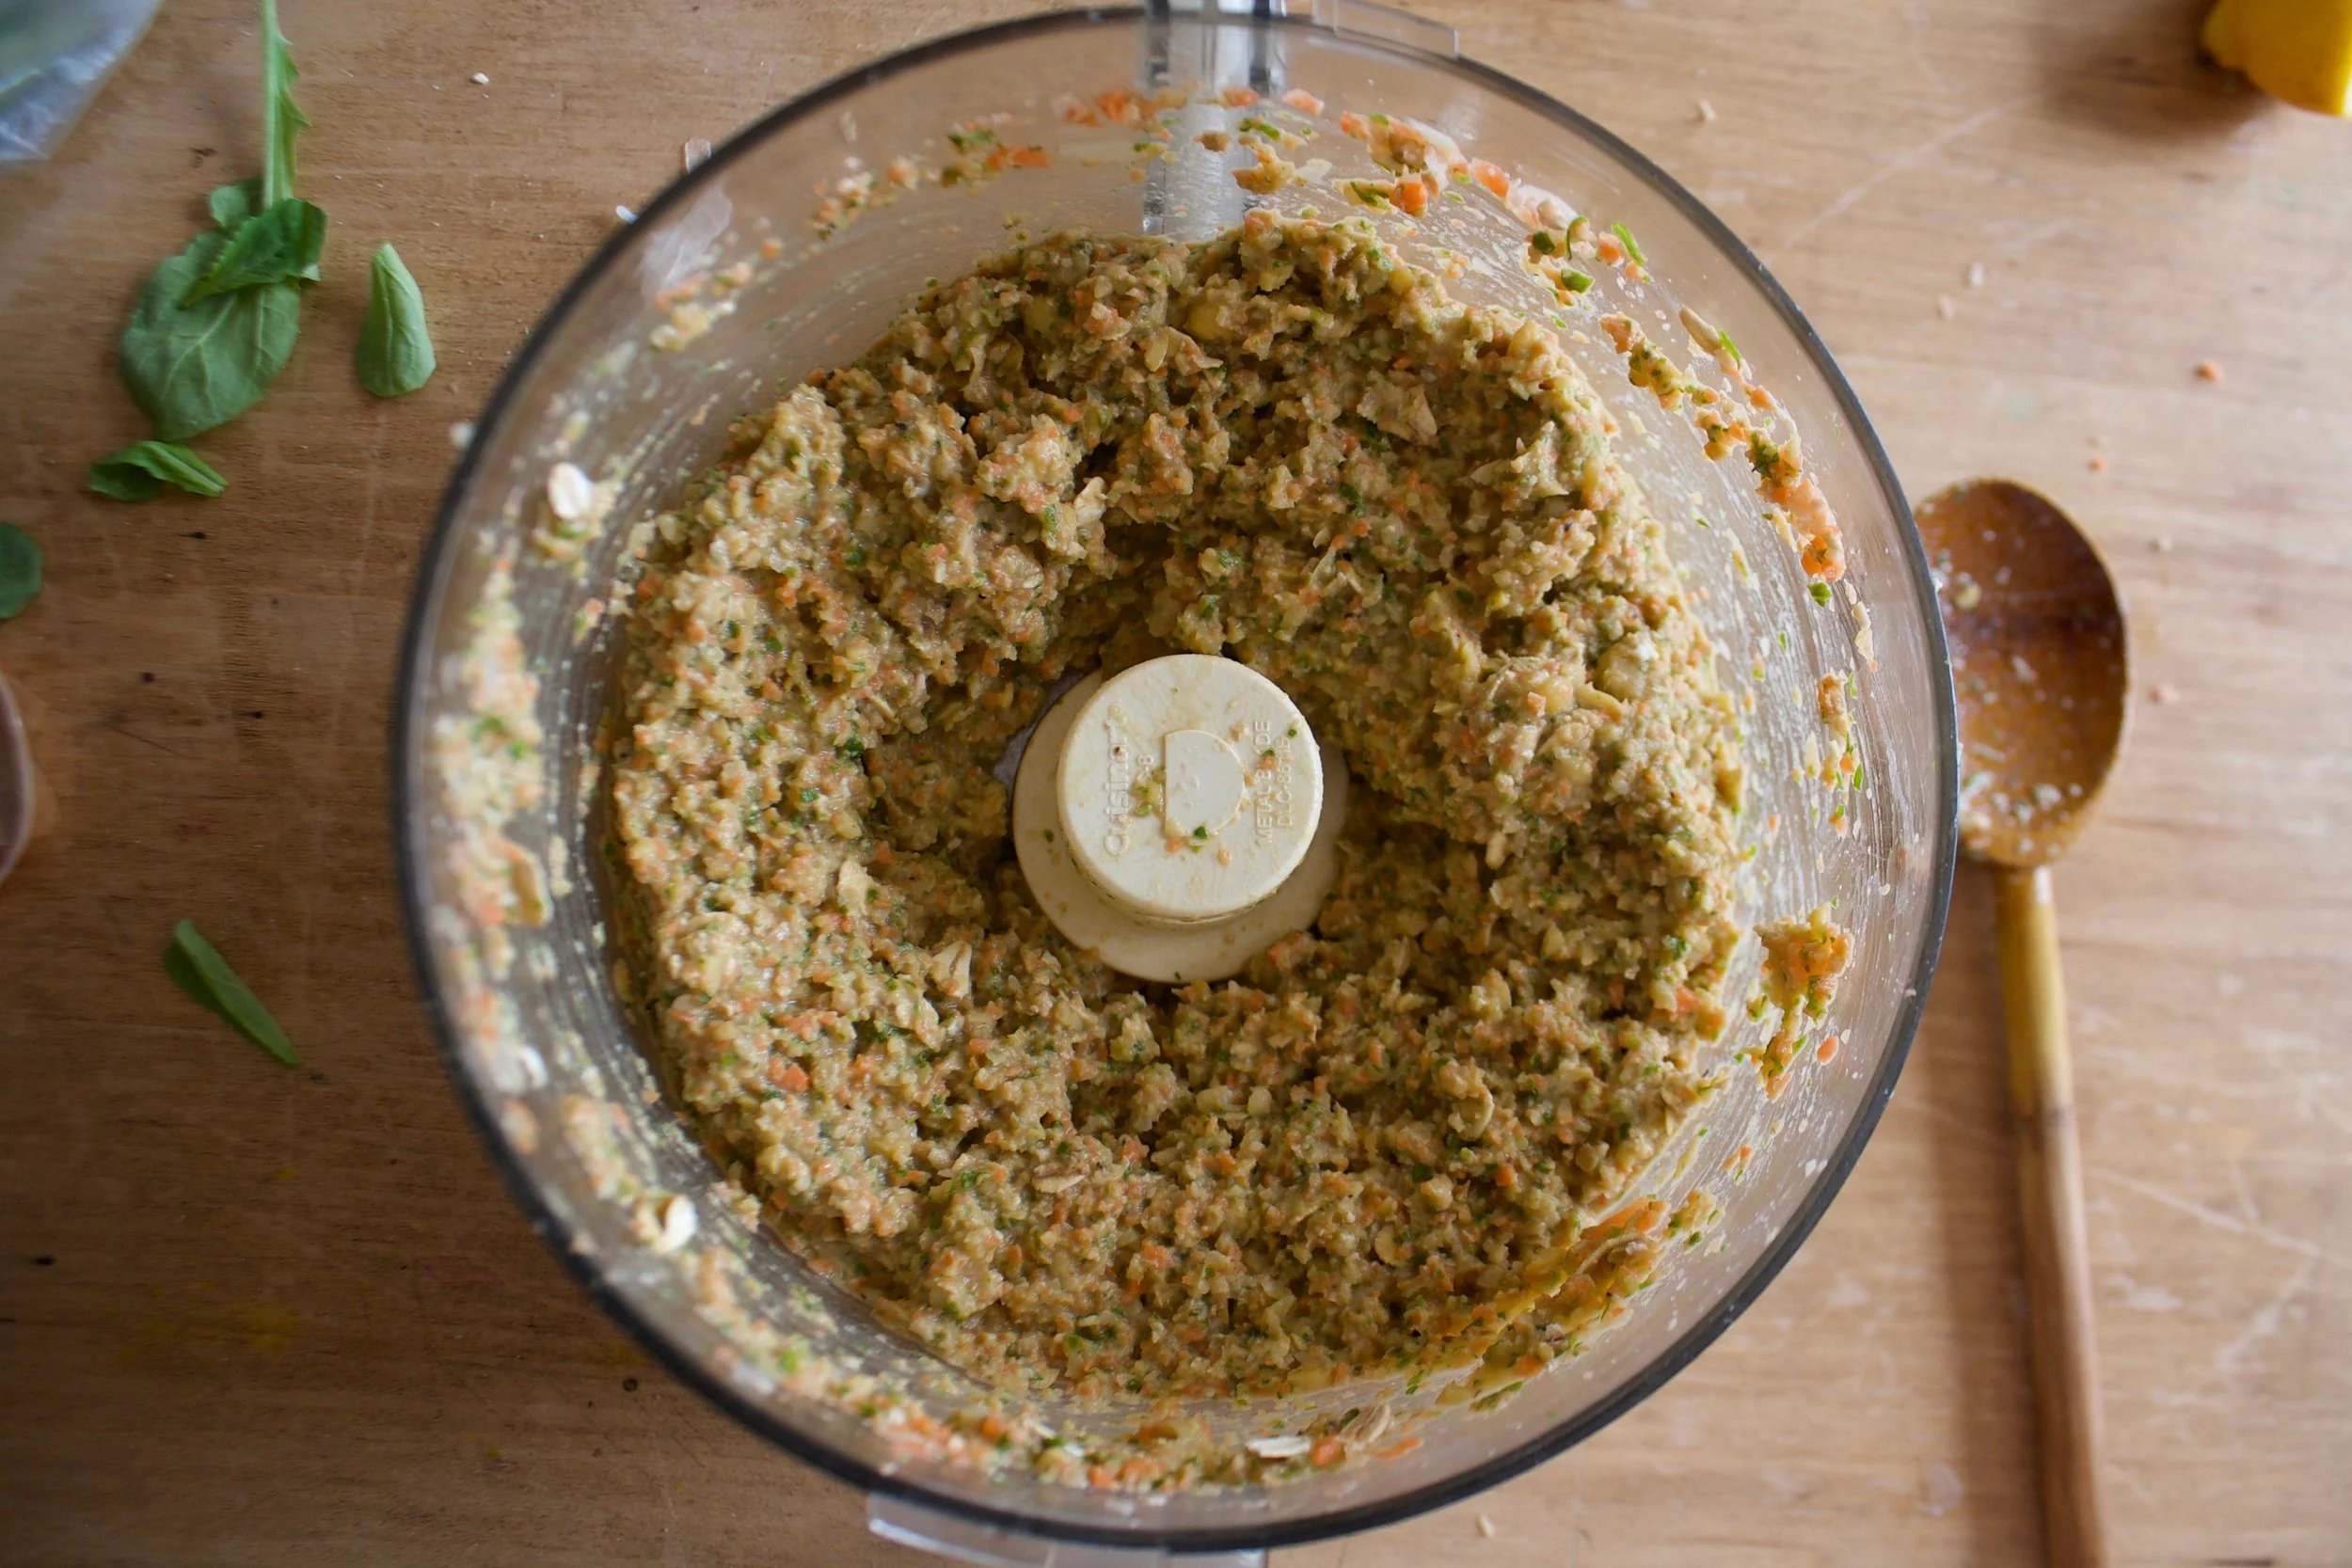
I have been on a good long kick here with eating oats at night for my after dinner snack. Just about every night after cleaning up the dinner dishes, sweeping the floors, going for a nice after dinner walk with the mr, I come home, put the hot water on, grab my oats, my peanut flour, and sometimes a banana. As soon as the water boils I mash up some banana (if using), add in some oats, pour in some boiling water, and let them sit. I also pour a huge jar of tea then plop my butt down at the counter to do any brain tasks that need doing like checking the email, left over billing things, maybe check the old phone for the first time in hours%u2026 After about 5 minutes of that, I stop brain tasks because I just can%u2019t, grab oats, and dump in a few big ass tablespoons of peanut flour and cinnamon and give it a good stir. Voila, snack time. A delicious, nutritious, tummy filling and easy dish that is full of all sorts of things that my body needs. I grab a spoon, my tea, and open my book. For sure one of my favorite times of day.
Now lets talk about peanut flour. I have been eating peanut flour for a few years now. Not to confuse with powered peanut butter which is basically peanut flour but usually with added sugar and salt. Peanut flour is just peanuts, with the oil pressed out and then ground up into a super fine flour. And not a flour is the typical sense. Like you can%u2019t make bread with it, but you could add it to bread. You can also use it to thicken things like soups or sauces up. Or add it to smoothies, make a cake frosting with it , or just mix it with a little water and eat it with a spoon. It is delicious and amazing and full of protein without all the added fat and high calorie content. I started to add it to foods because of the protein but now I just eat it all the time because I freaking love the stuff. (Another favorite way to eat it is cut up carrot sticks tossed in the flour%u2026 SO GOOD!) Anyway, truth be told, it is not the most widely available stuff. I have only seen it in a few store over the years, so I have been buying it online. But recently someone told me that Trader Joes is selling it now (I haven%u2019t checked yet) so I figured now is a good time to share the greatness of the flour and how you might want to use it.
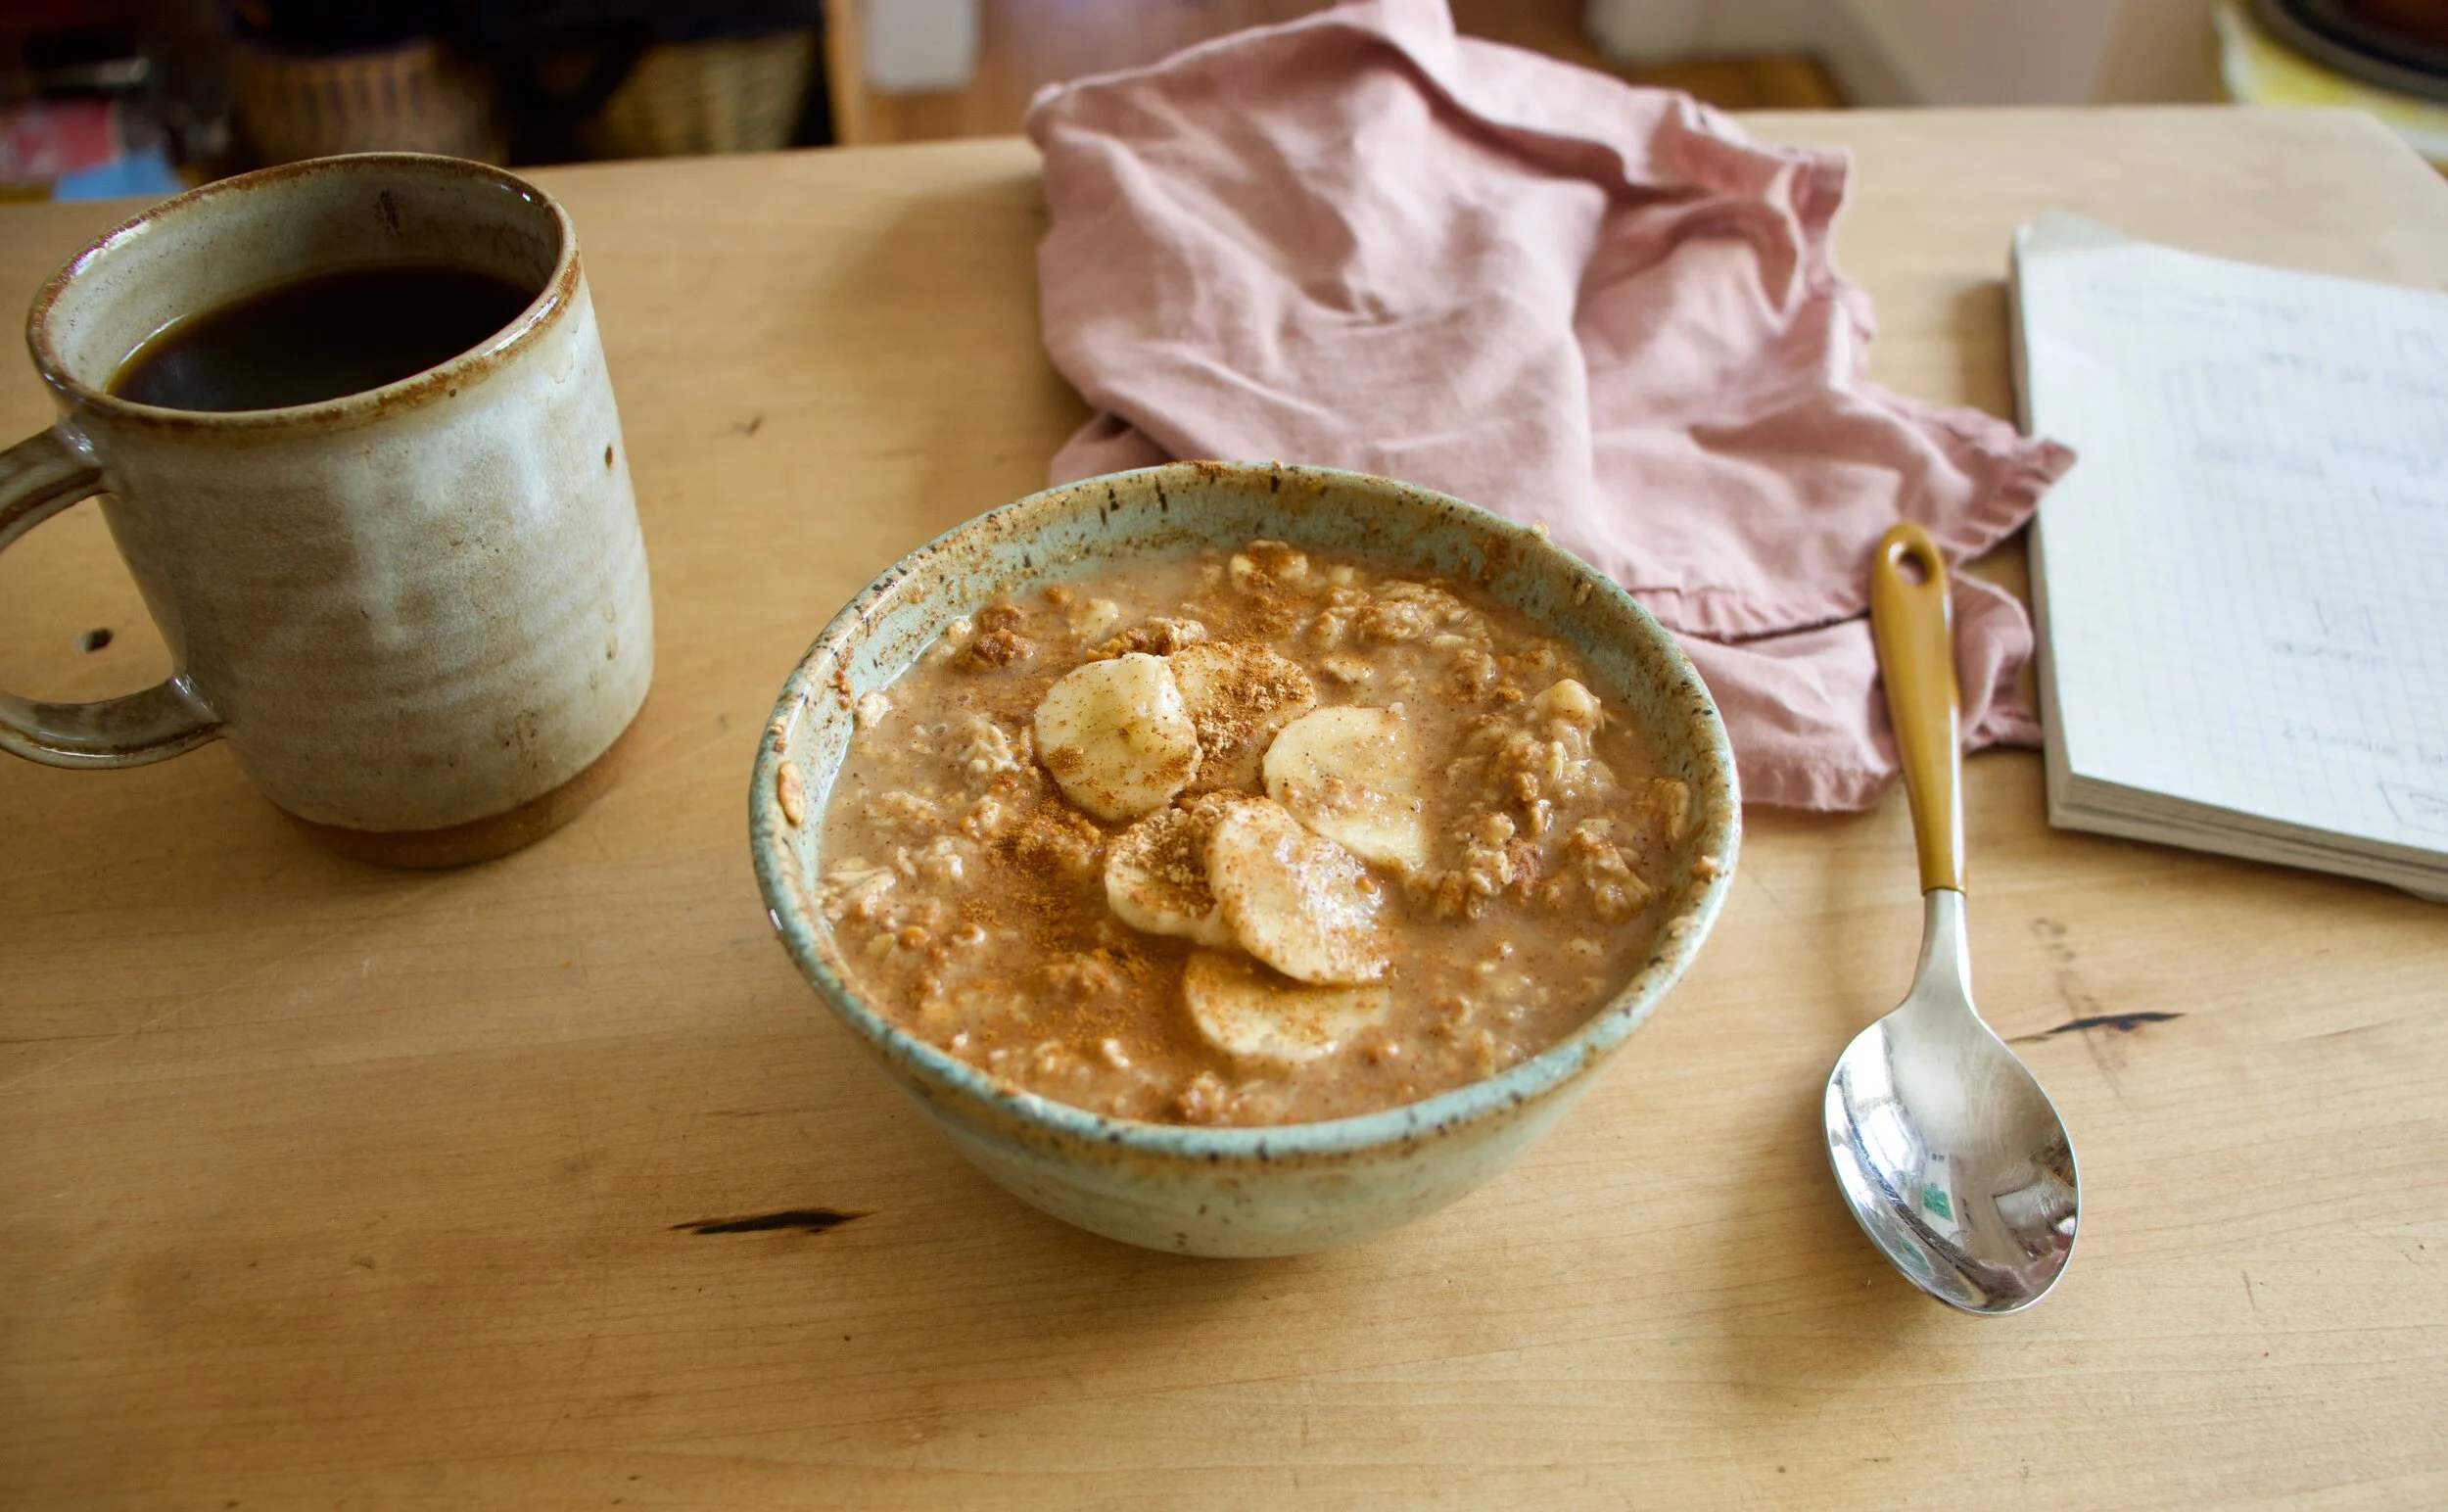
Anyway, these oats here are my favorite way to eat oats. Warm and creamy, but not cooked and gruel like. They are like a cross between stove top oats and overnight oats except they take all of 5 minutes to make and you don%u2019t need to dirty a pot. Then mixed with banana for extra sweetness and flavor, the peanut flour for all the peanut butter taste and protein. These oats are unstoppable.%u00a0 Delicious and nutritious for breakfast, lunch, snack time, or dessert, these oats are all win win. Add another win just because. Win, Win, WIN!
Now to the oats!
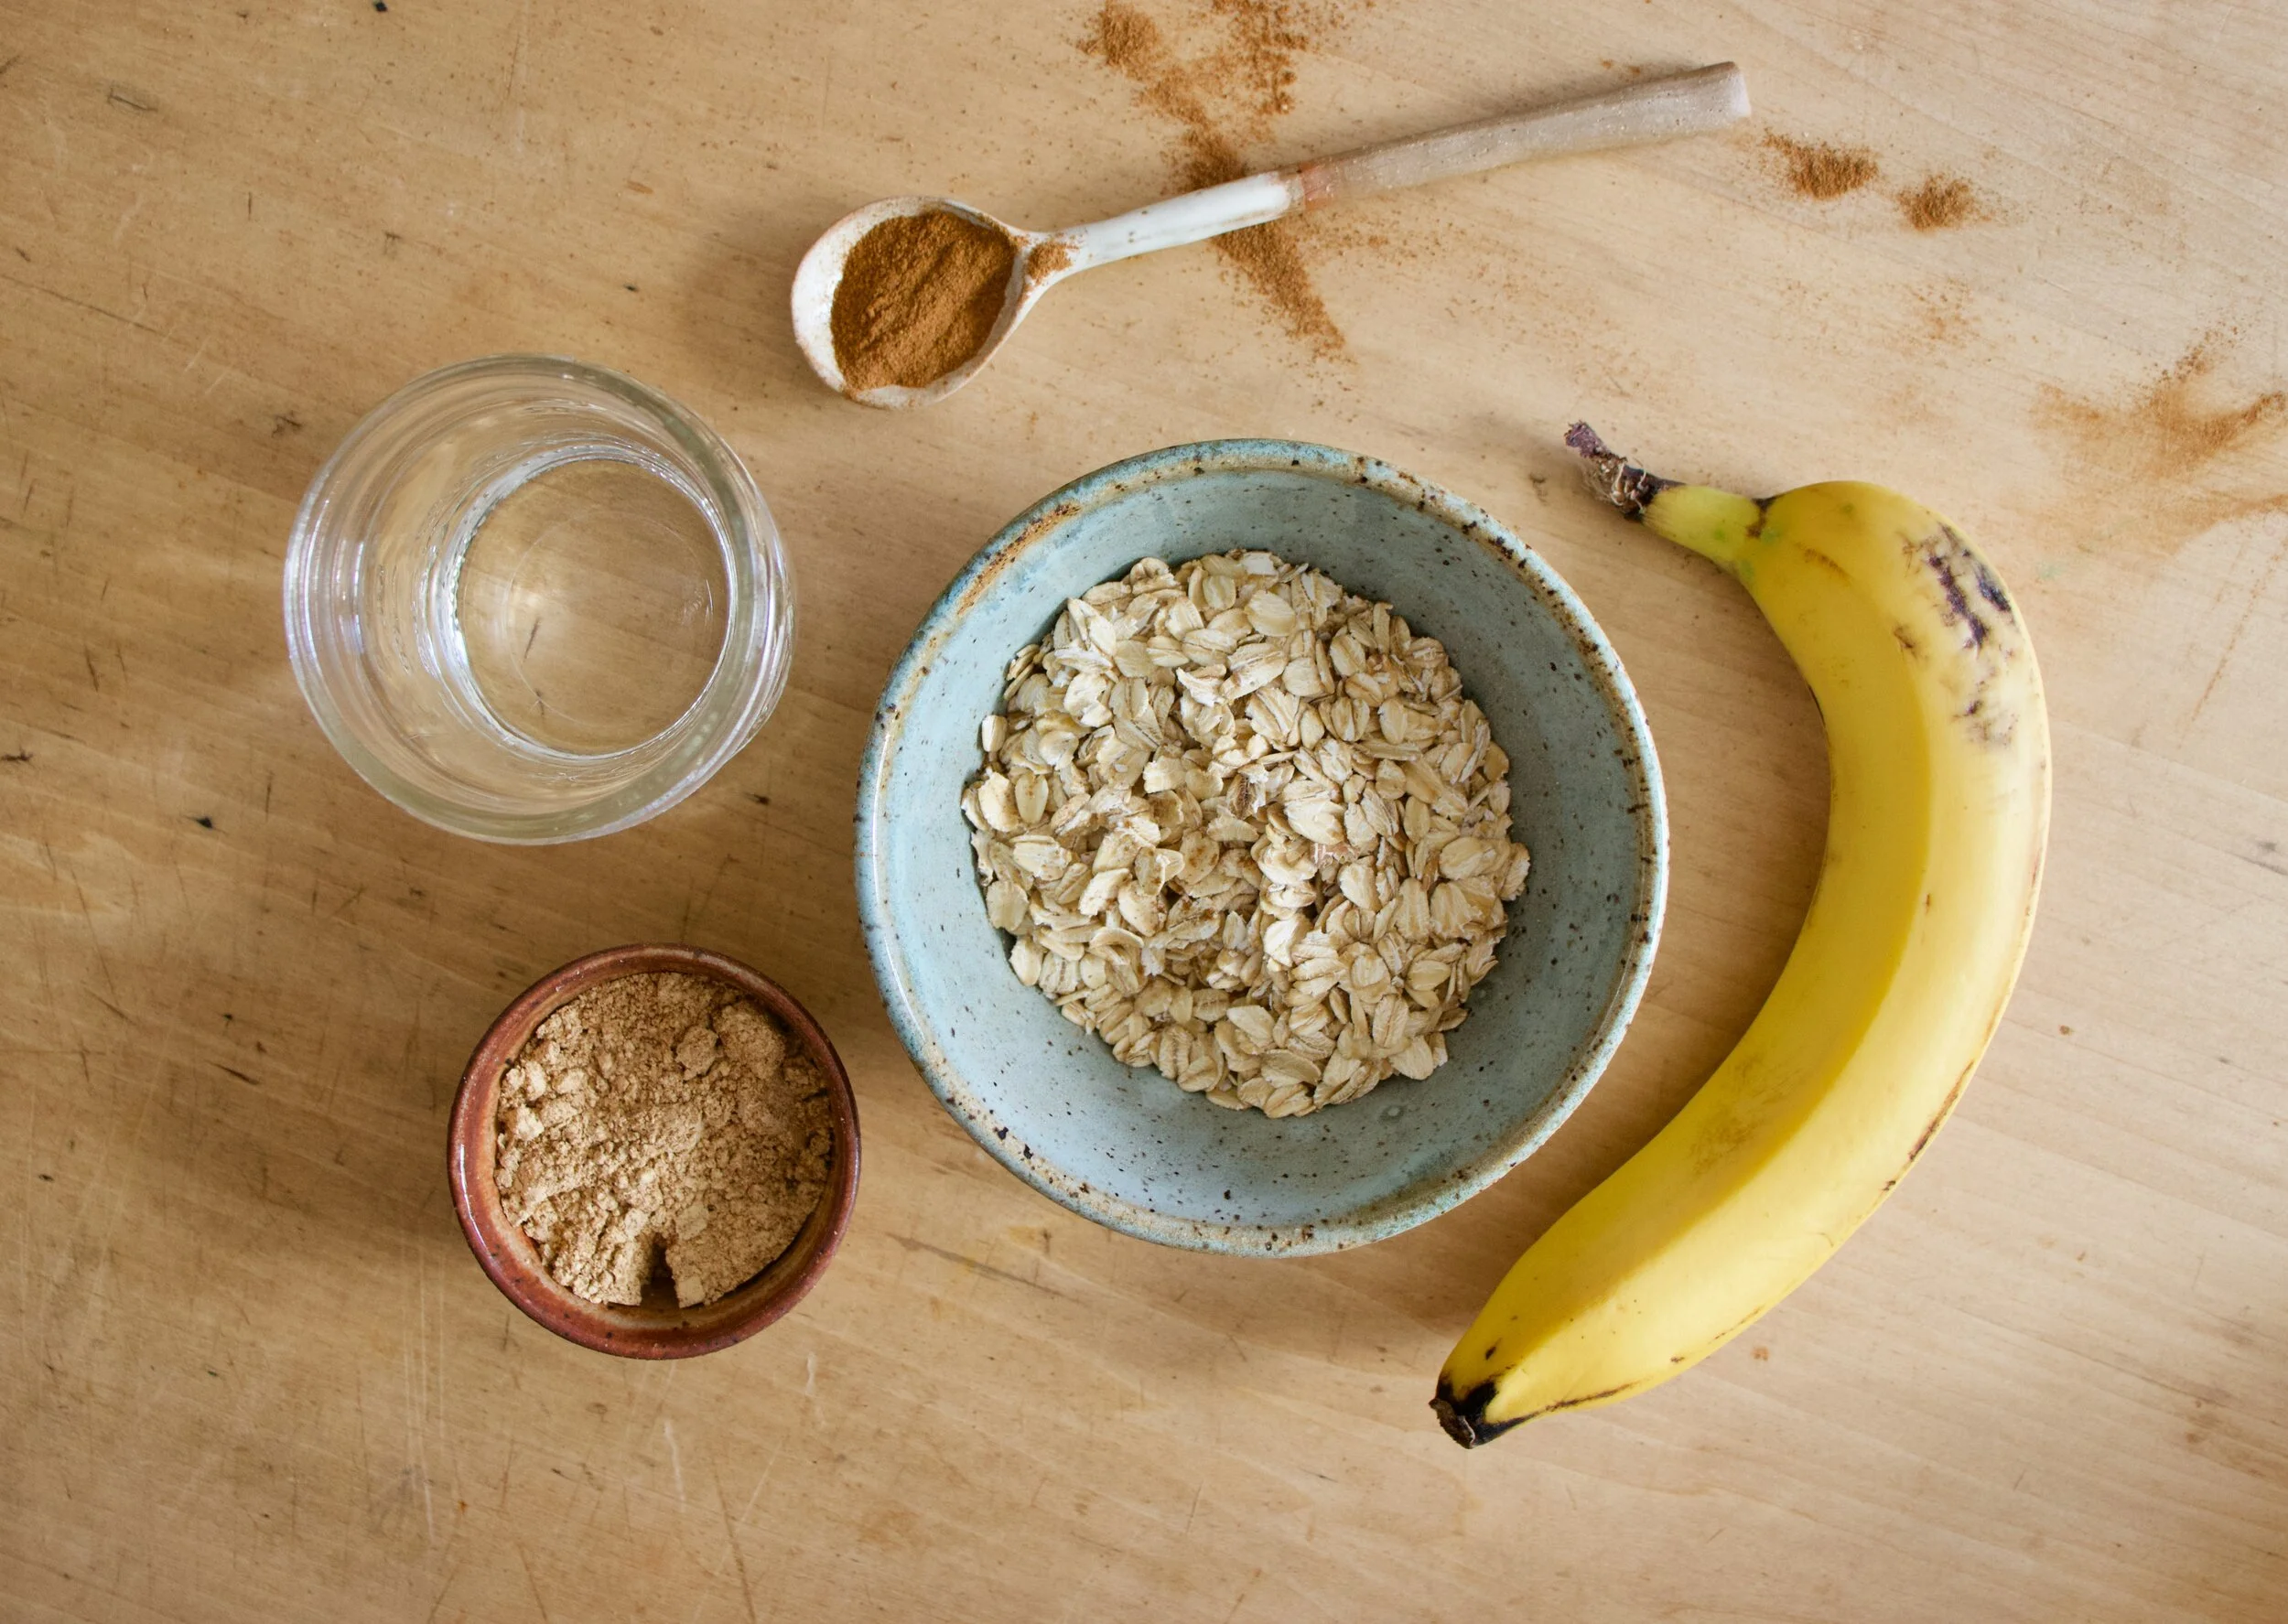
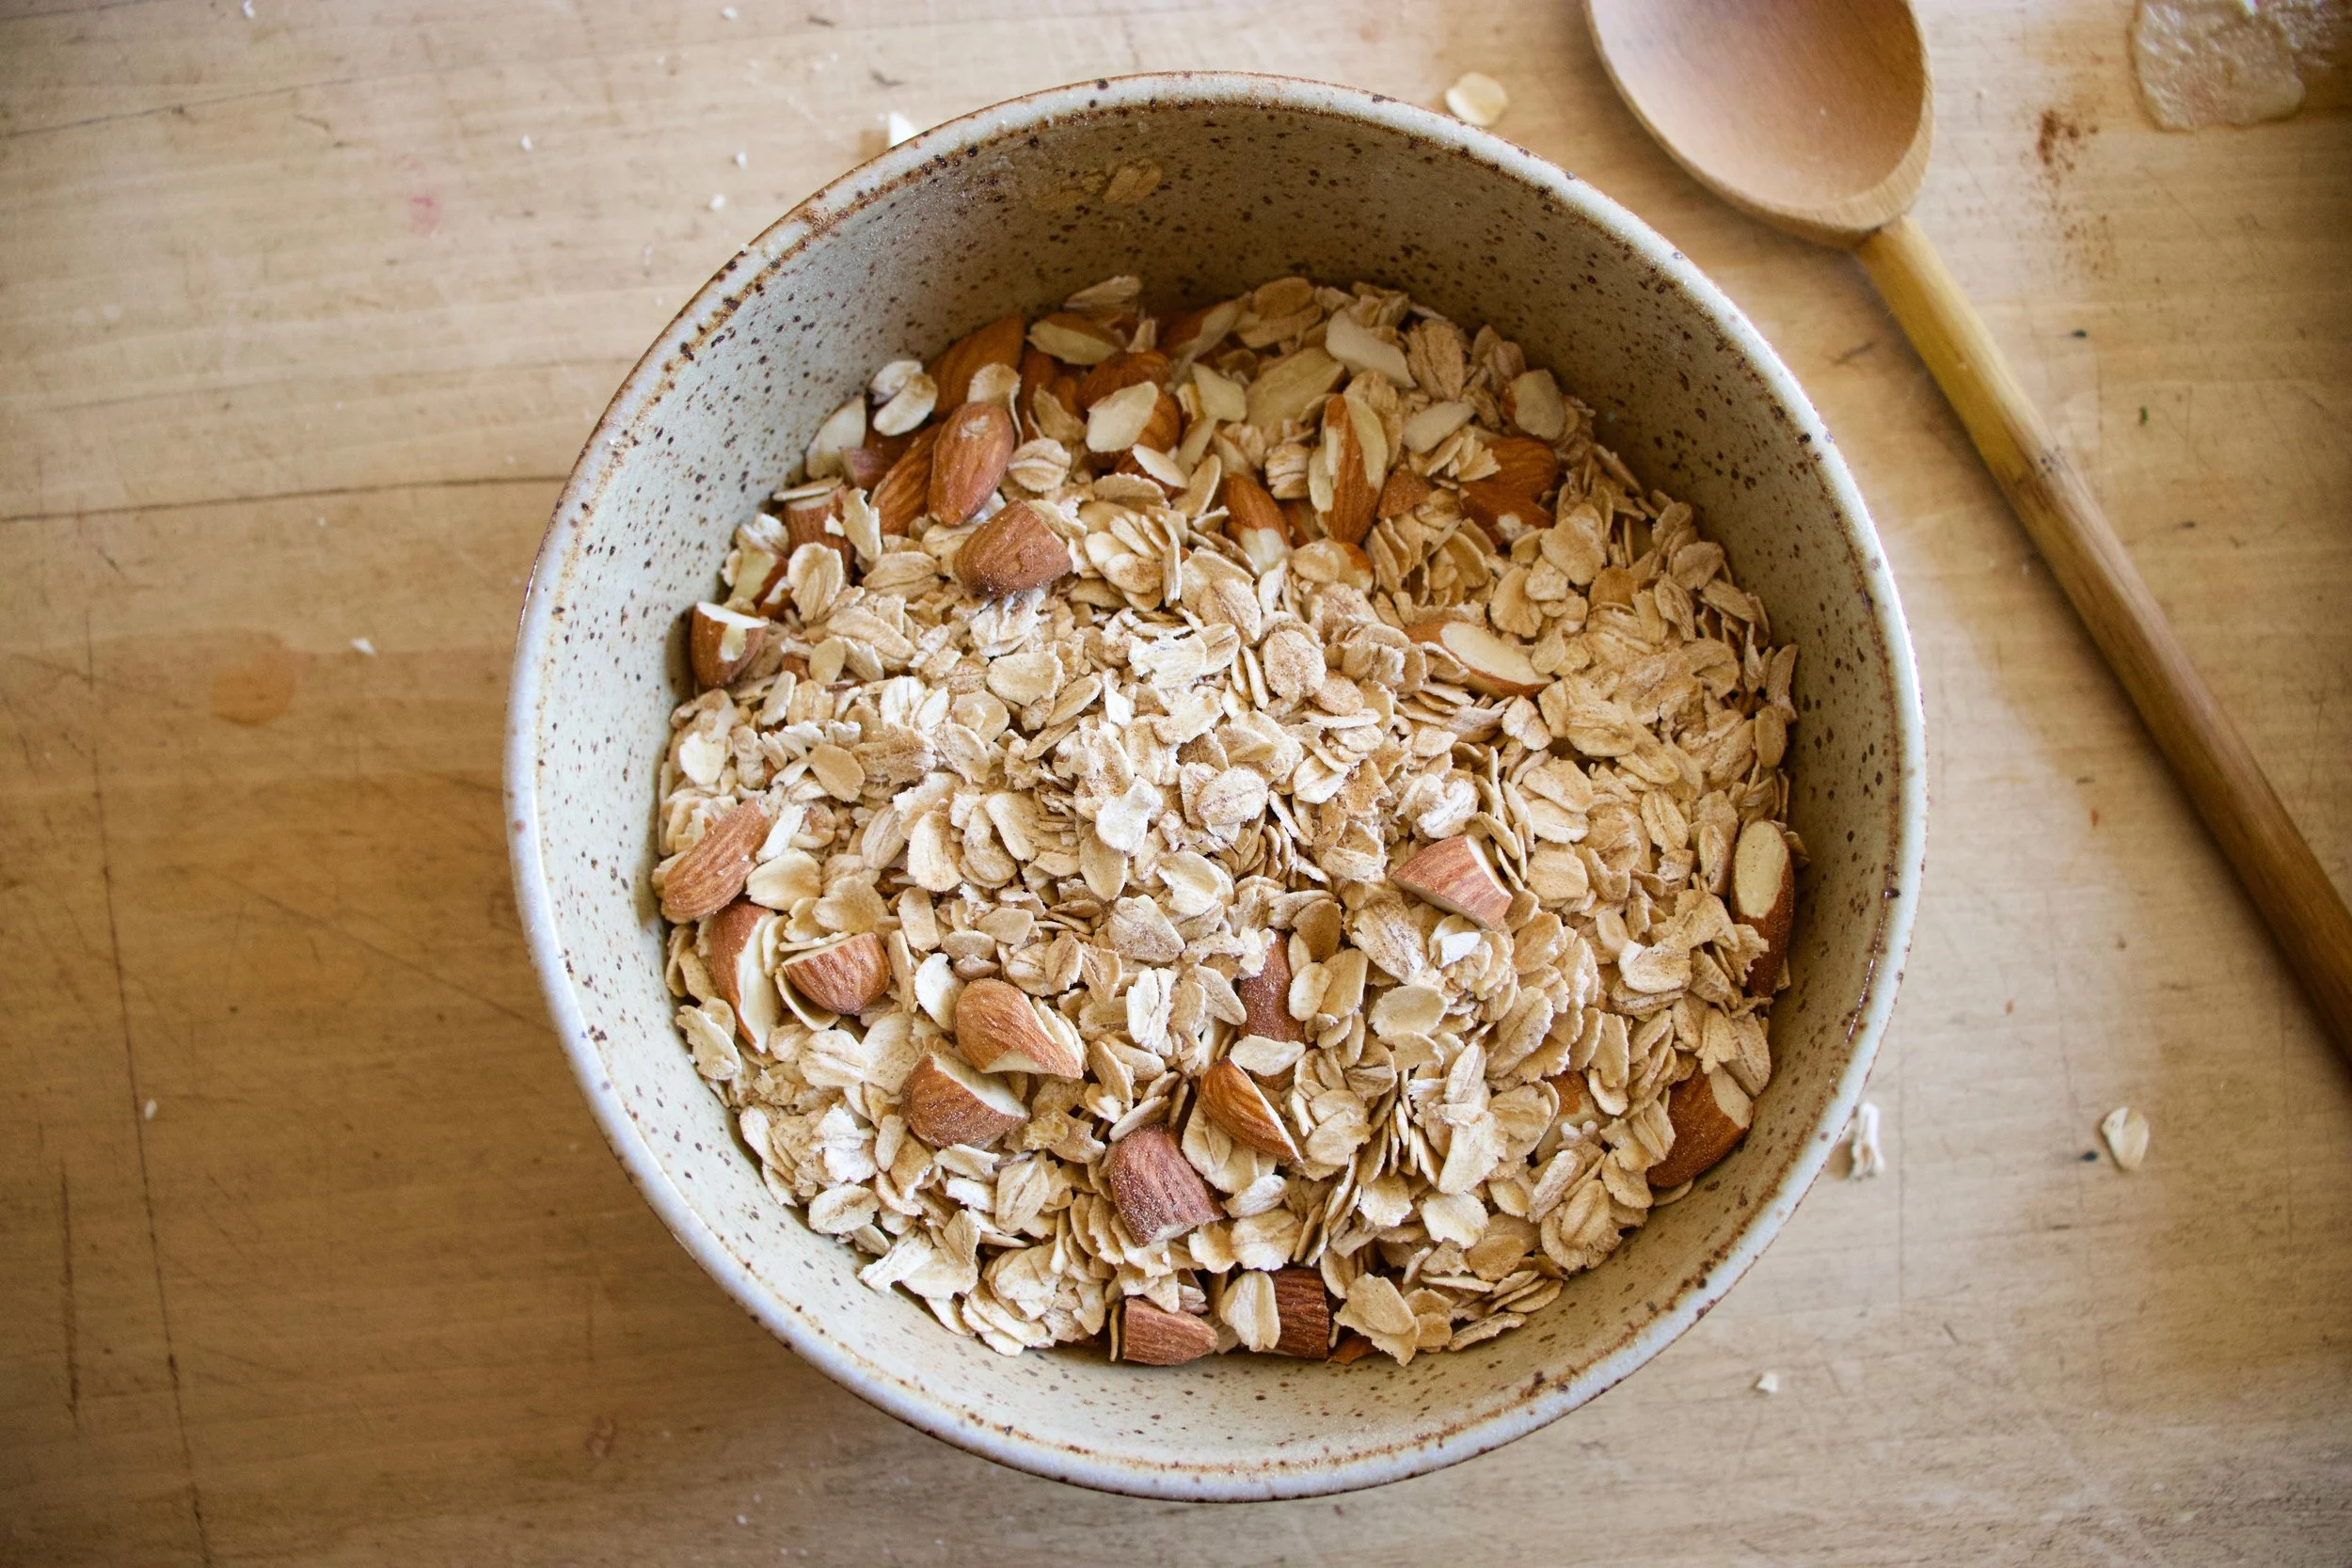
The stuff. Old fashion oats, a small banana, peanut flour, cinnamon, and boiling hot water.
Mash up the banana until smoothish then add in half the hot water and mix. Dump in the oats and mix those too.
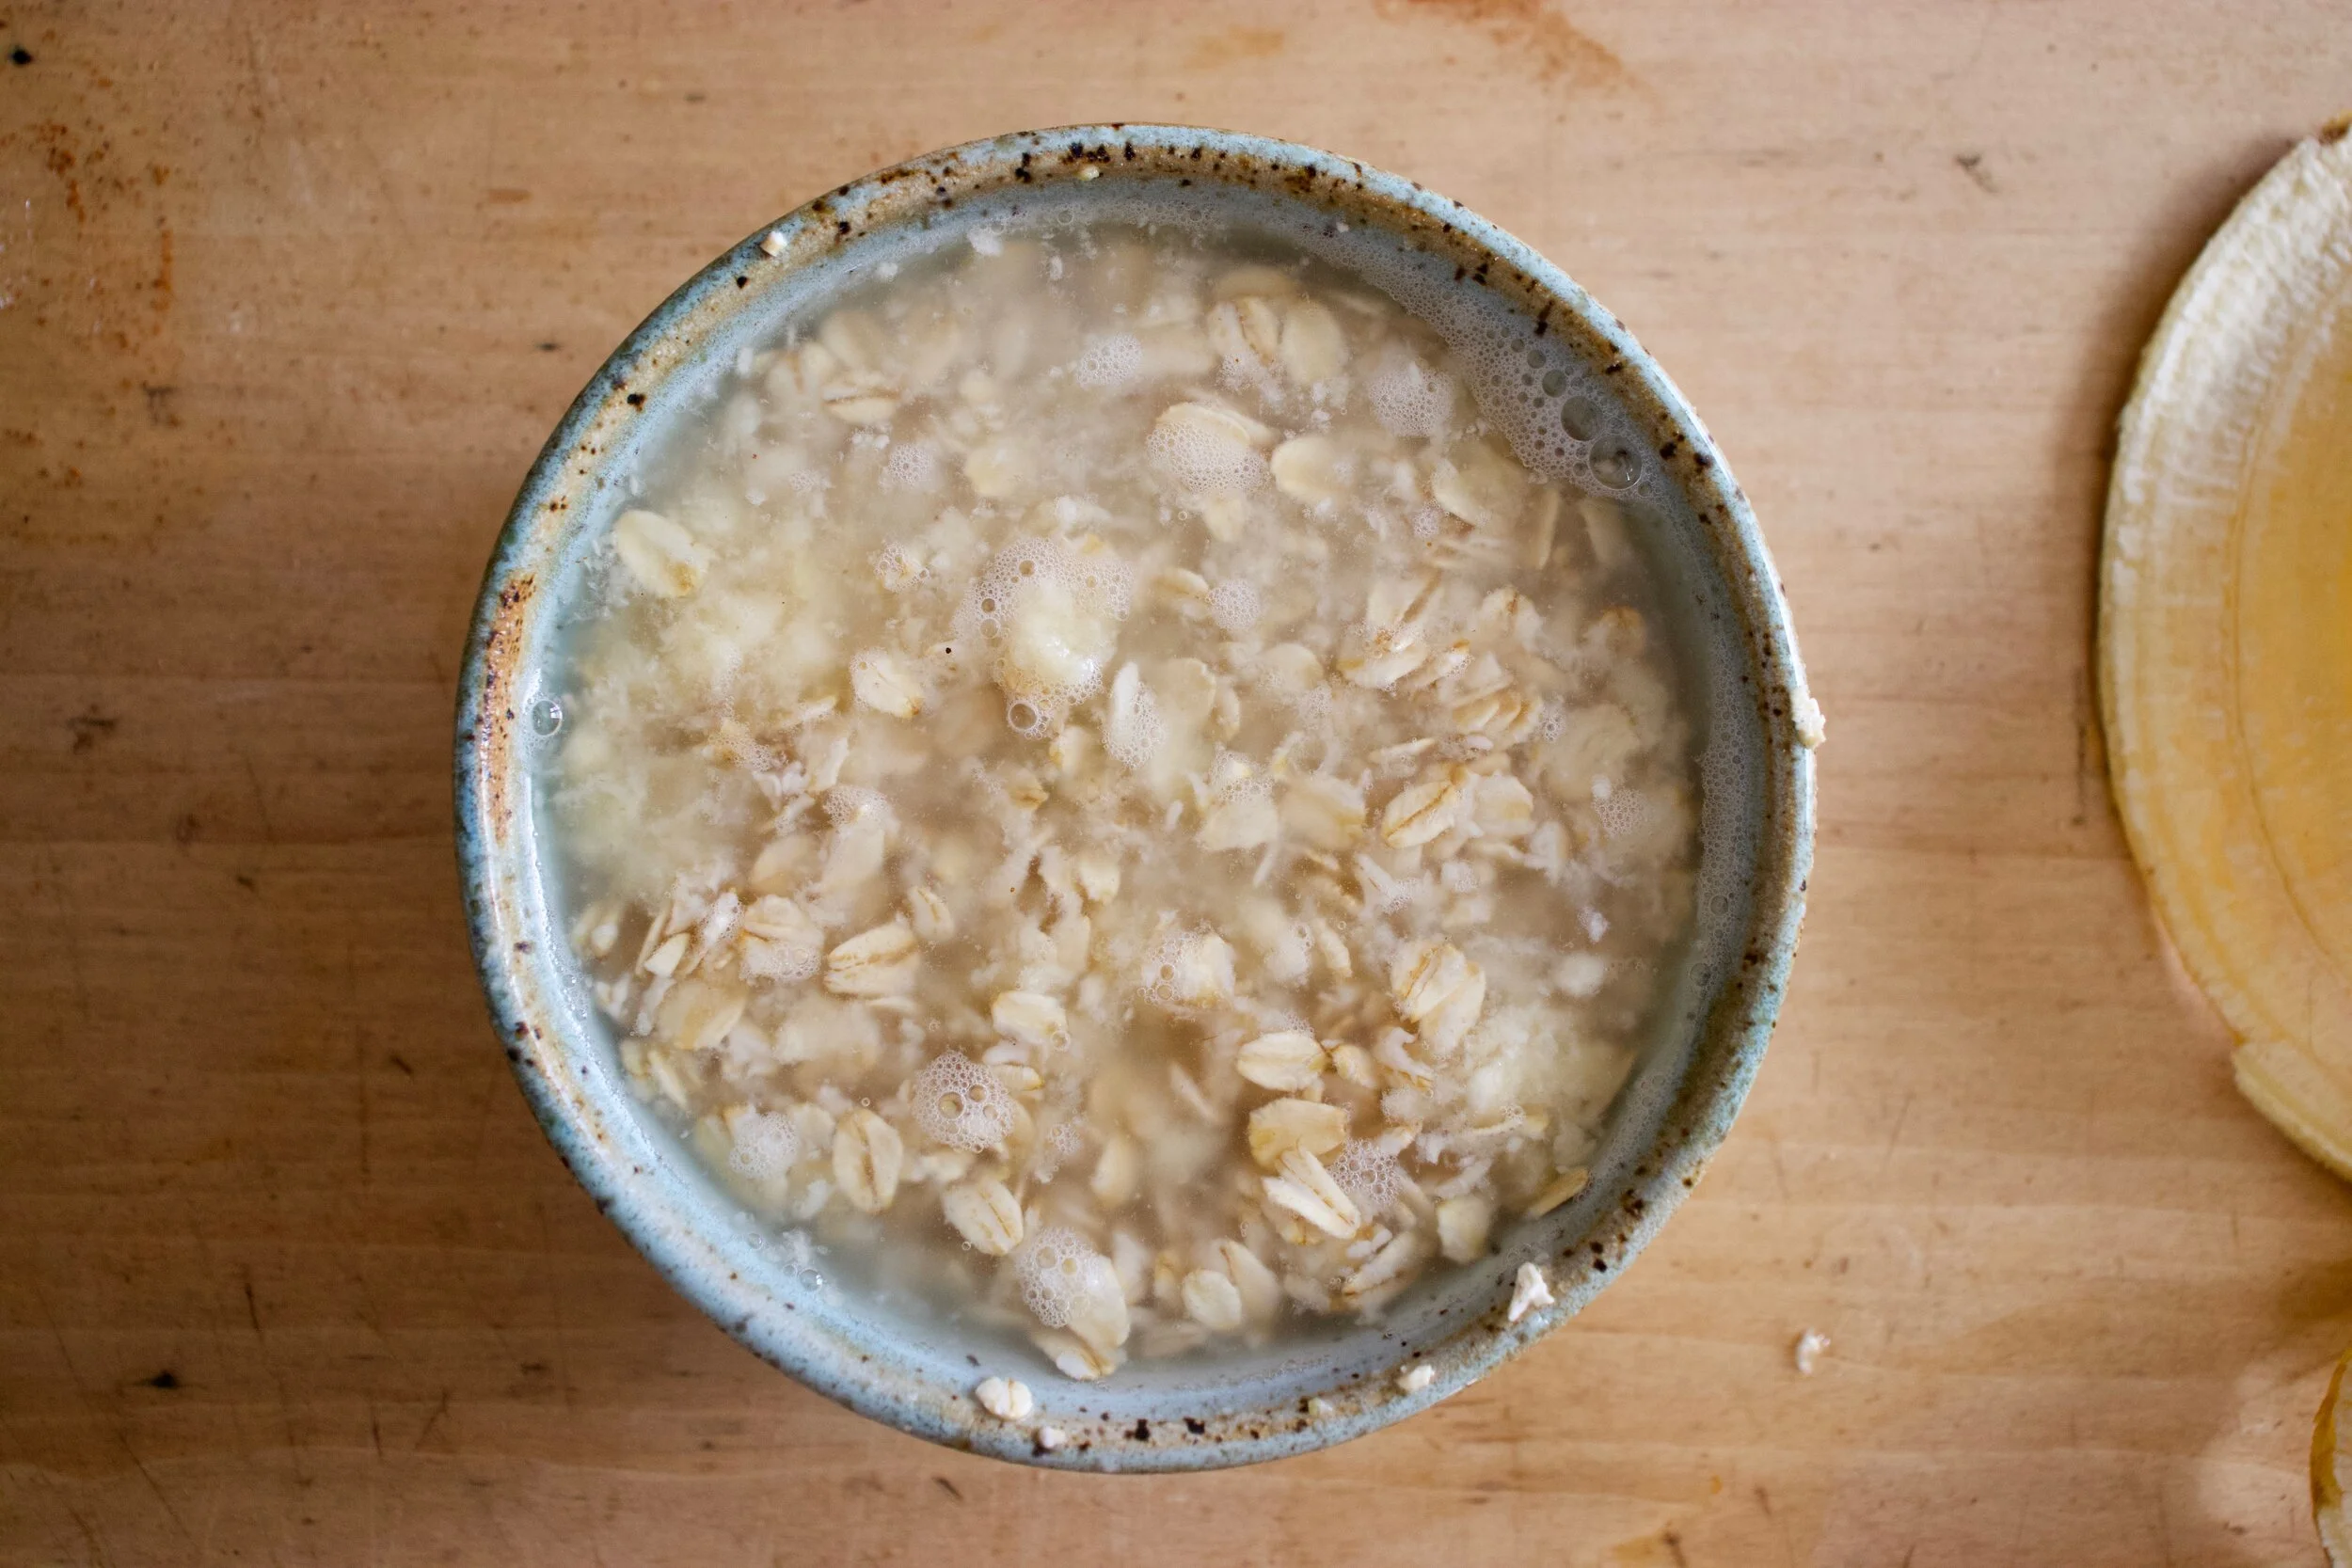
Top with the rest of the boiling water and let sit for about 5 minutes.
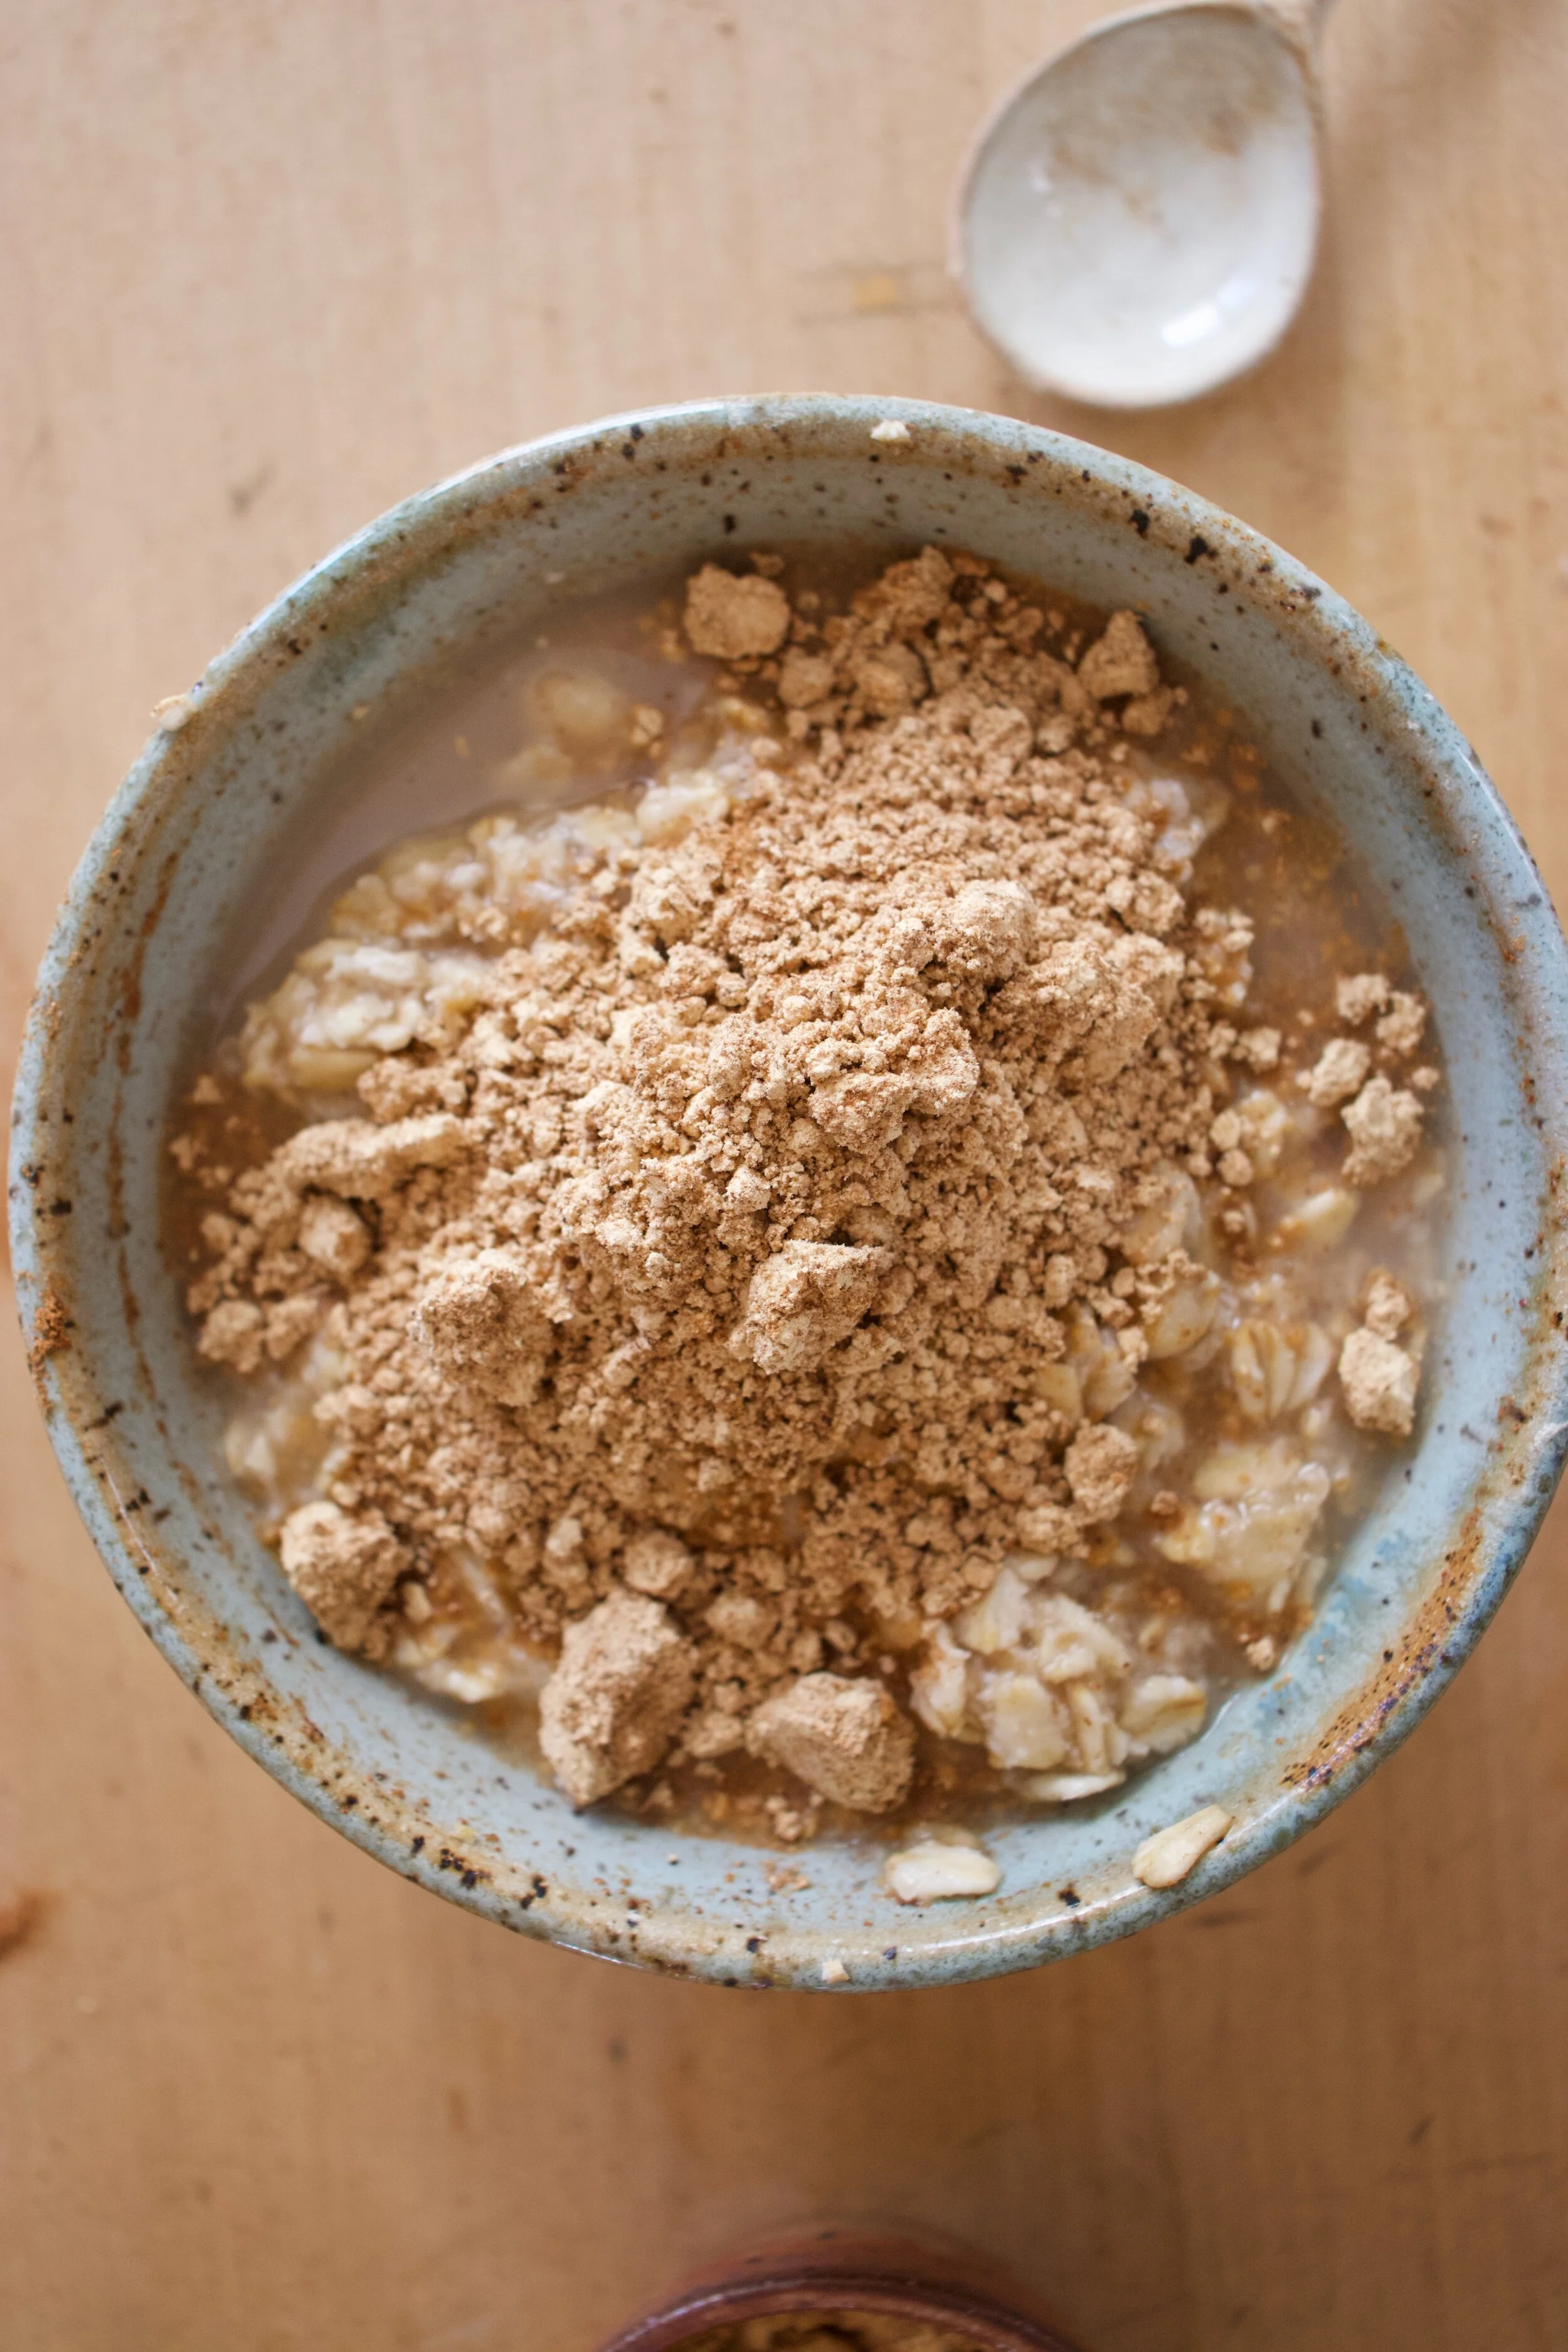
After the oats absorbed the hot banana water, dump on the cinnamon and the peanut butter flour and mix in.
Grab yourself a spoon friend.
Eat.
-C
Makes 1 serving. Can be halved for smaller portion
-
1 small banana
-
1/2 cup old fashion oats
-
2 (or more if you want) tablespoons peanut flour
-
1 teaspoon cinnamon (optional)
-
1 cup boiling water
Place peeled banana in a bowl and mash with a fork unit smooth. Add in half the boiling water and mix.. Dump in oats and mix until incorporated then add in the rest of the hot water. Let sit for 5 minutes until oats absorb all the water. Stir in peanut flour and cinnamon. Eat.
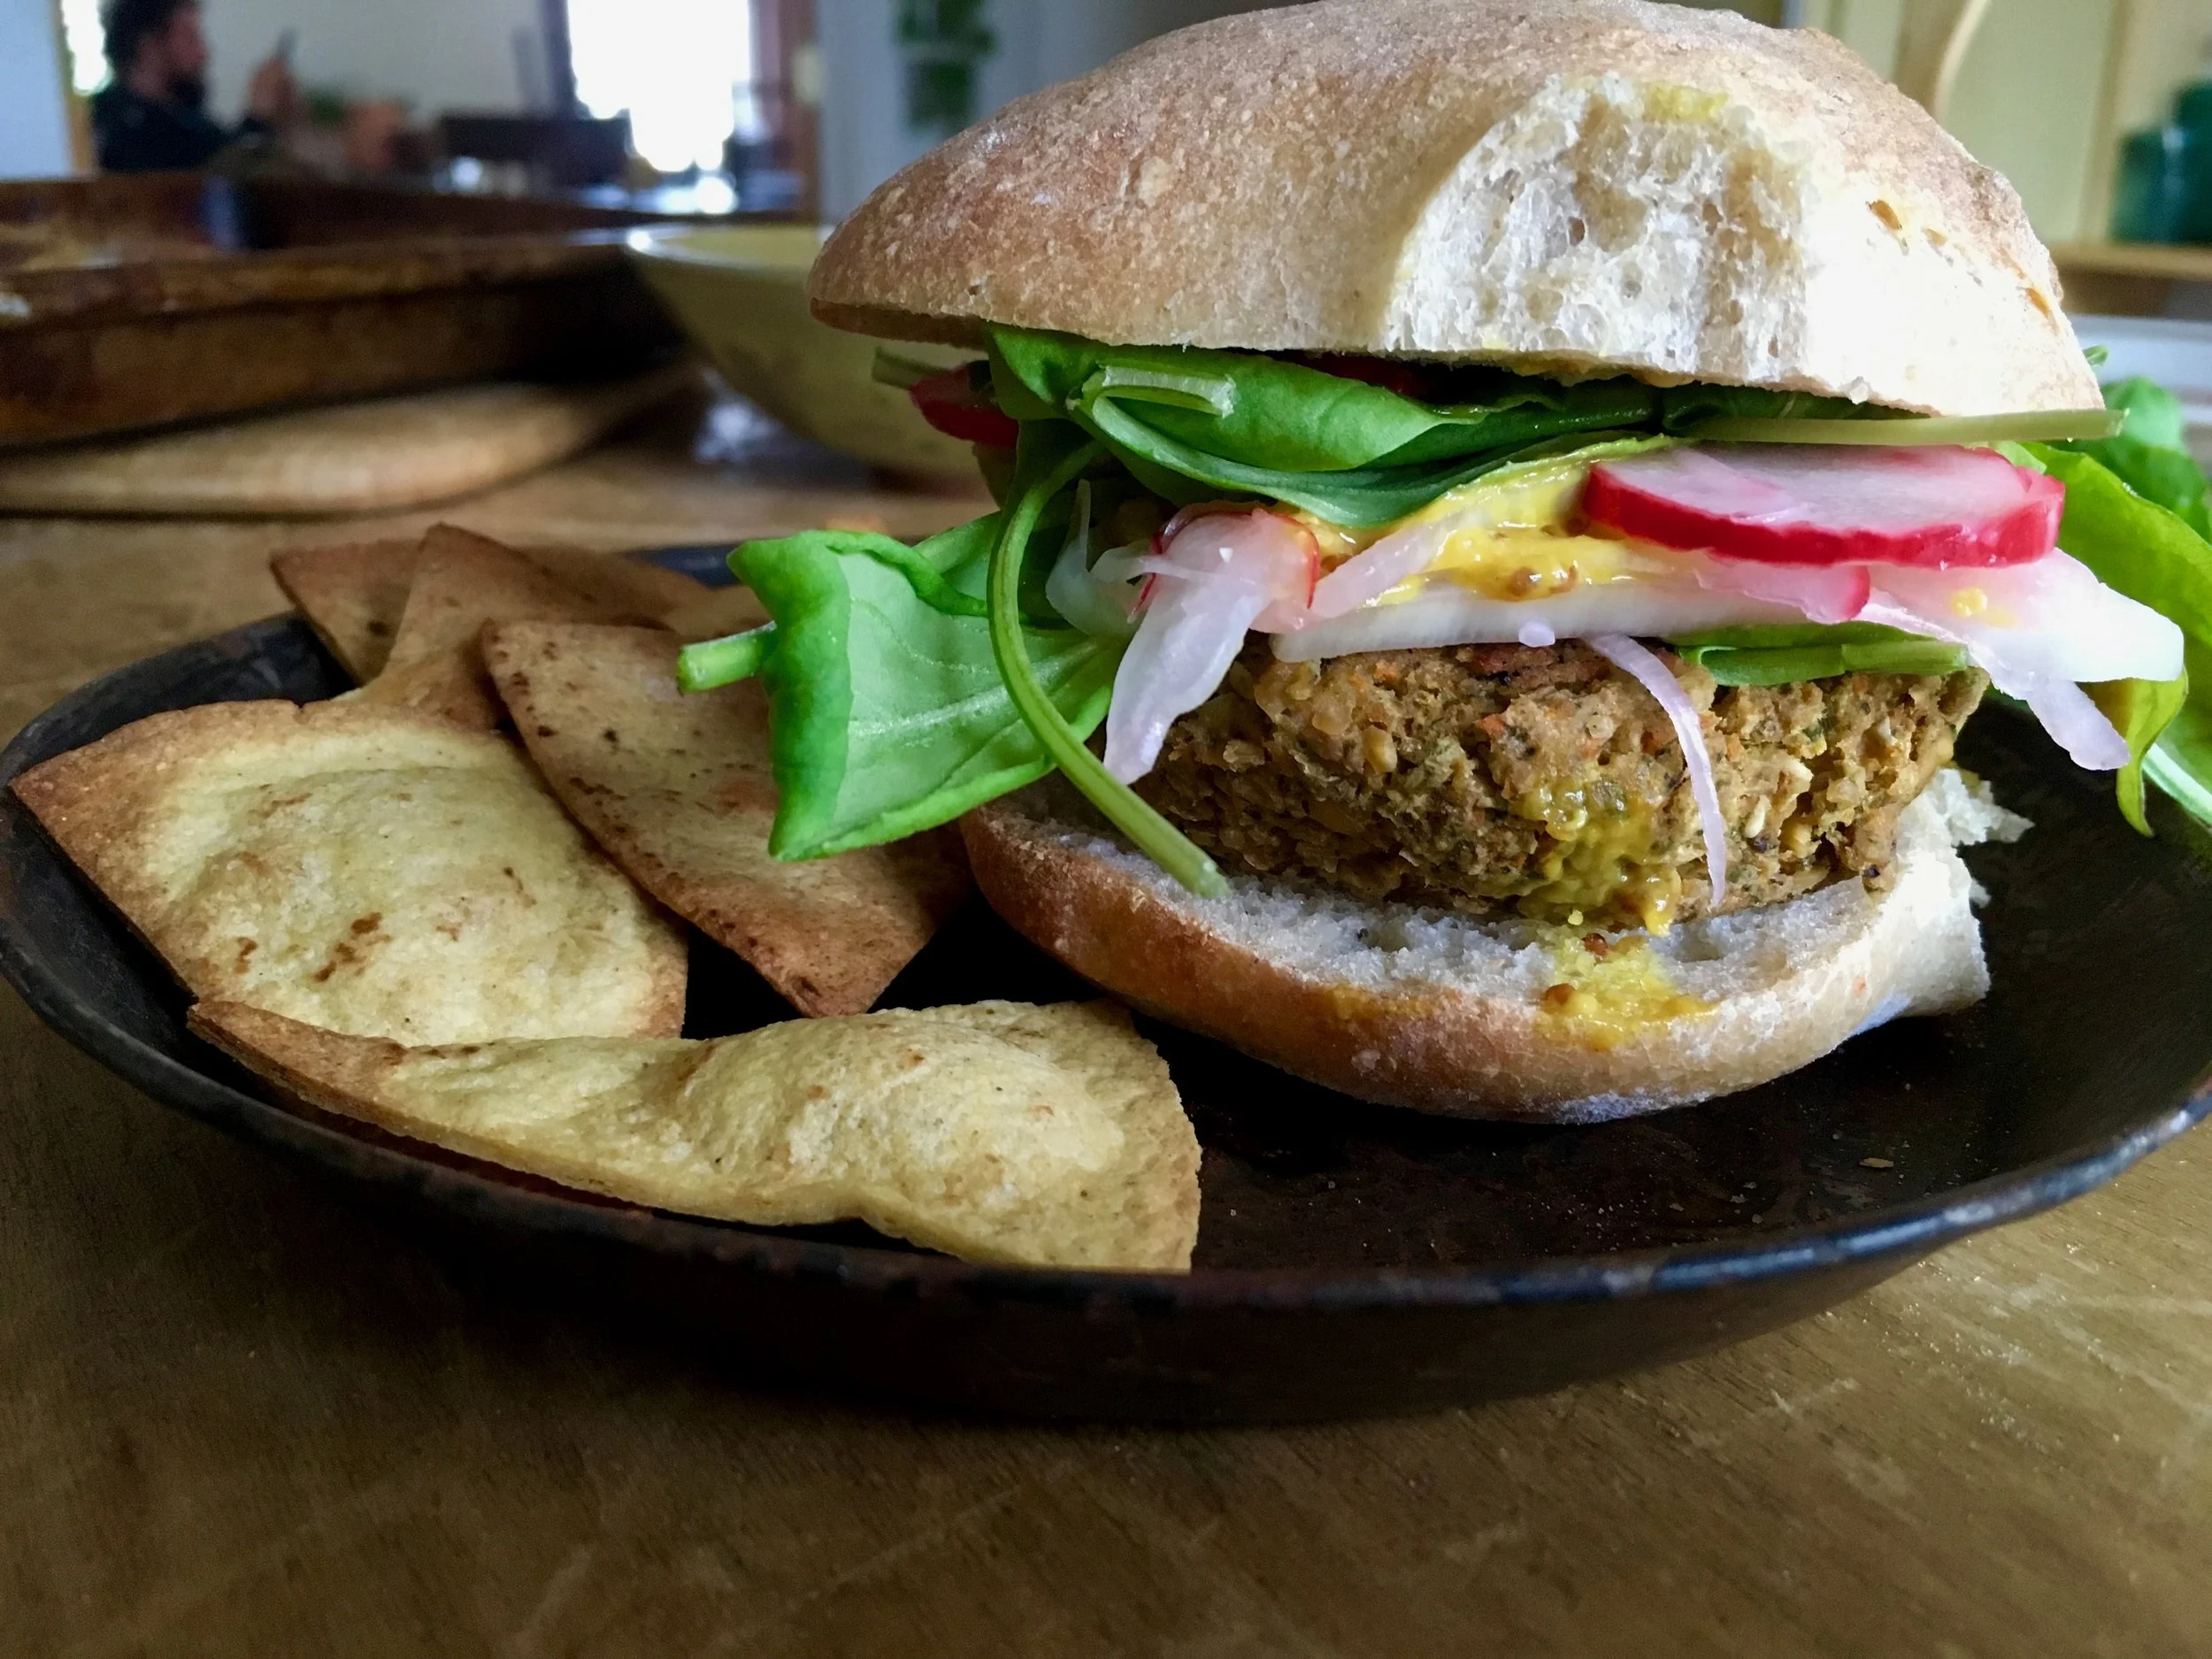
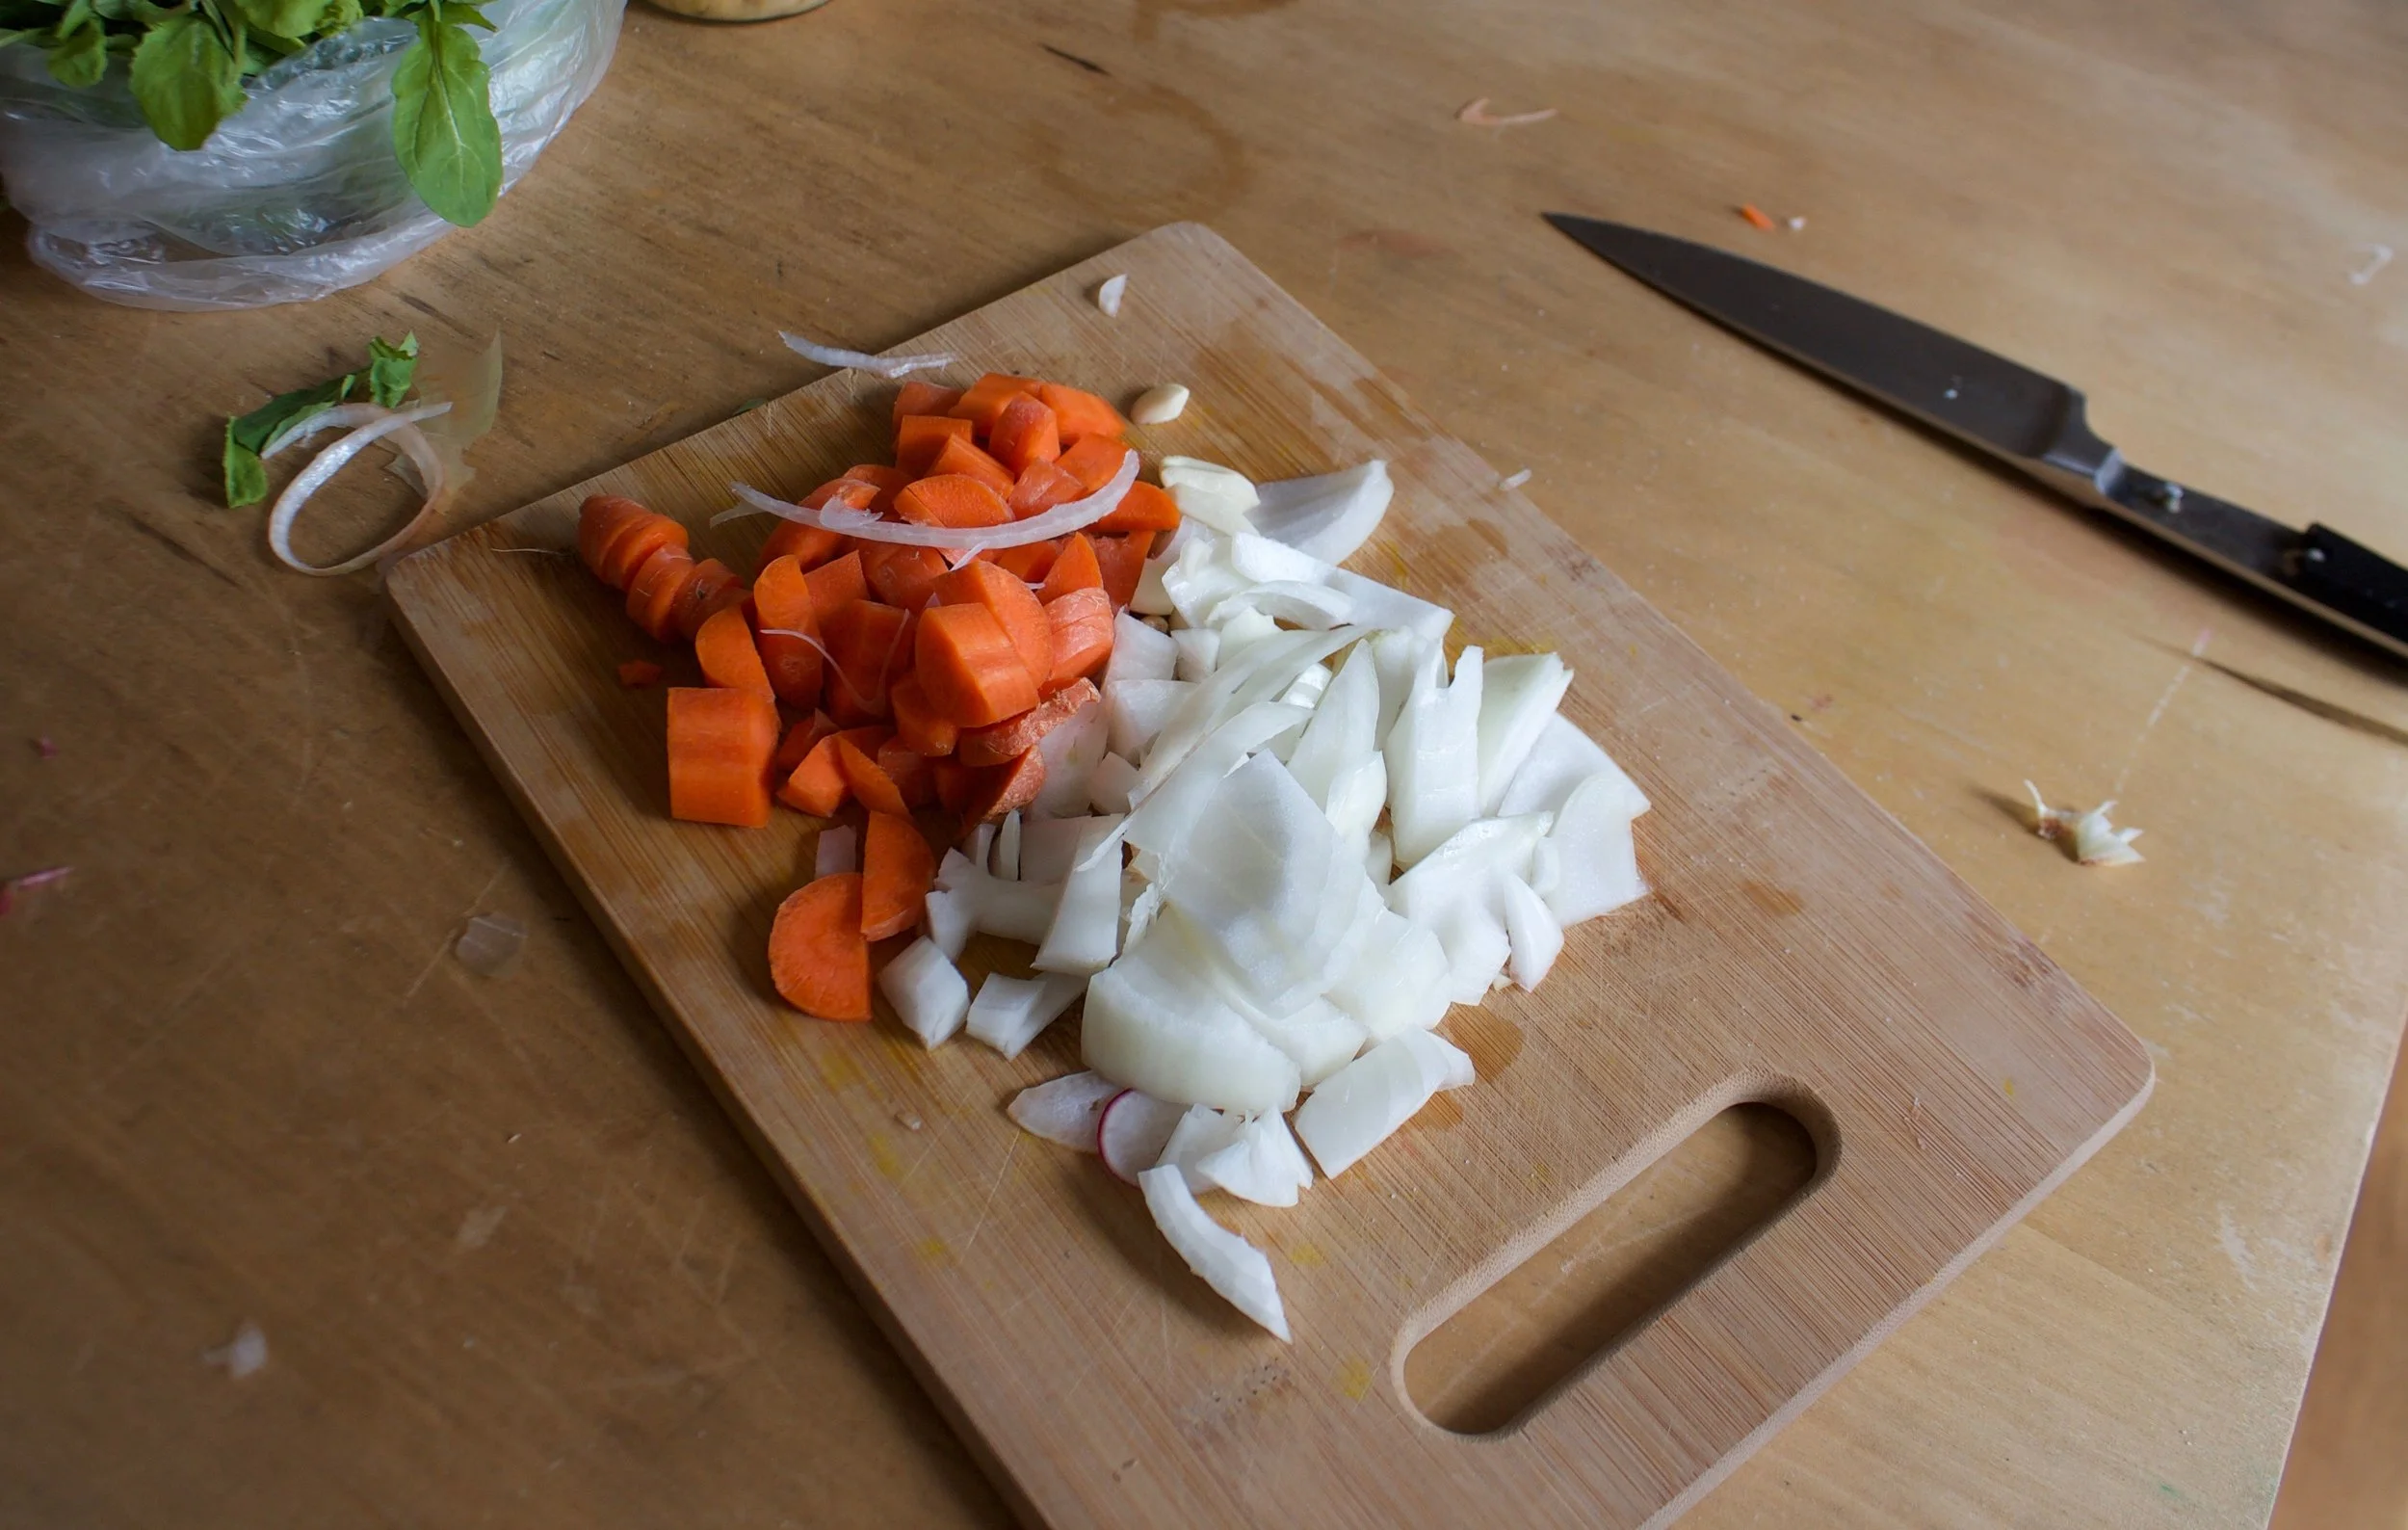
When your sister drops off 50 lbs of beets, on top of the 50 lbs that you have to harvest that are growing in your garden, what do you do?
Well chips of course.
Yeah, chips. That%u2019s right. When I got home from camping on Monday and there was a humongous pile of beets sitting next to my front door, I am not going to lie, I was a little shocked. I mean there wasn’t just a few little ones. These beets were freaking huge, like the size of my arm, and so many. But pretty much right after my initial shock I knew what needed to be done. First, eat a few roasted, second, roast extra to freeze for later, and lastly, make a few bunches of chips.
Have you ever had beet chip? They are amazing. Crispy, crunchy, tasty as all heck. If you like beets, even in the slightest, you will love these. If you hate beets, well maybe don%u2019t? Either way, beet chips are the best chip. Wha’t%u2019s not to love? Pink, and chippy. Sweet, and salty. And then you add the fact that making beets into chips is a good way to get your veggies in and that you can eat a whole bowl full and feel zero guilt because you are just eating beets. Plus making beets into chips is a good way to use up any extra beets you might have laying around or that have been dropped off at your front door.
These chips, once they are made, will not last long. So when you do make them, know you will probably be making them again soon there after. Me, I have still have to harvest all my garden beets so beet chips are happening again soon. Real soon (like this afternoon!)
To the beets!
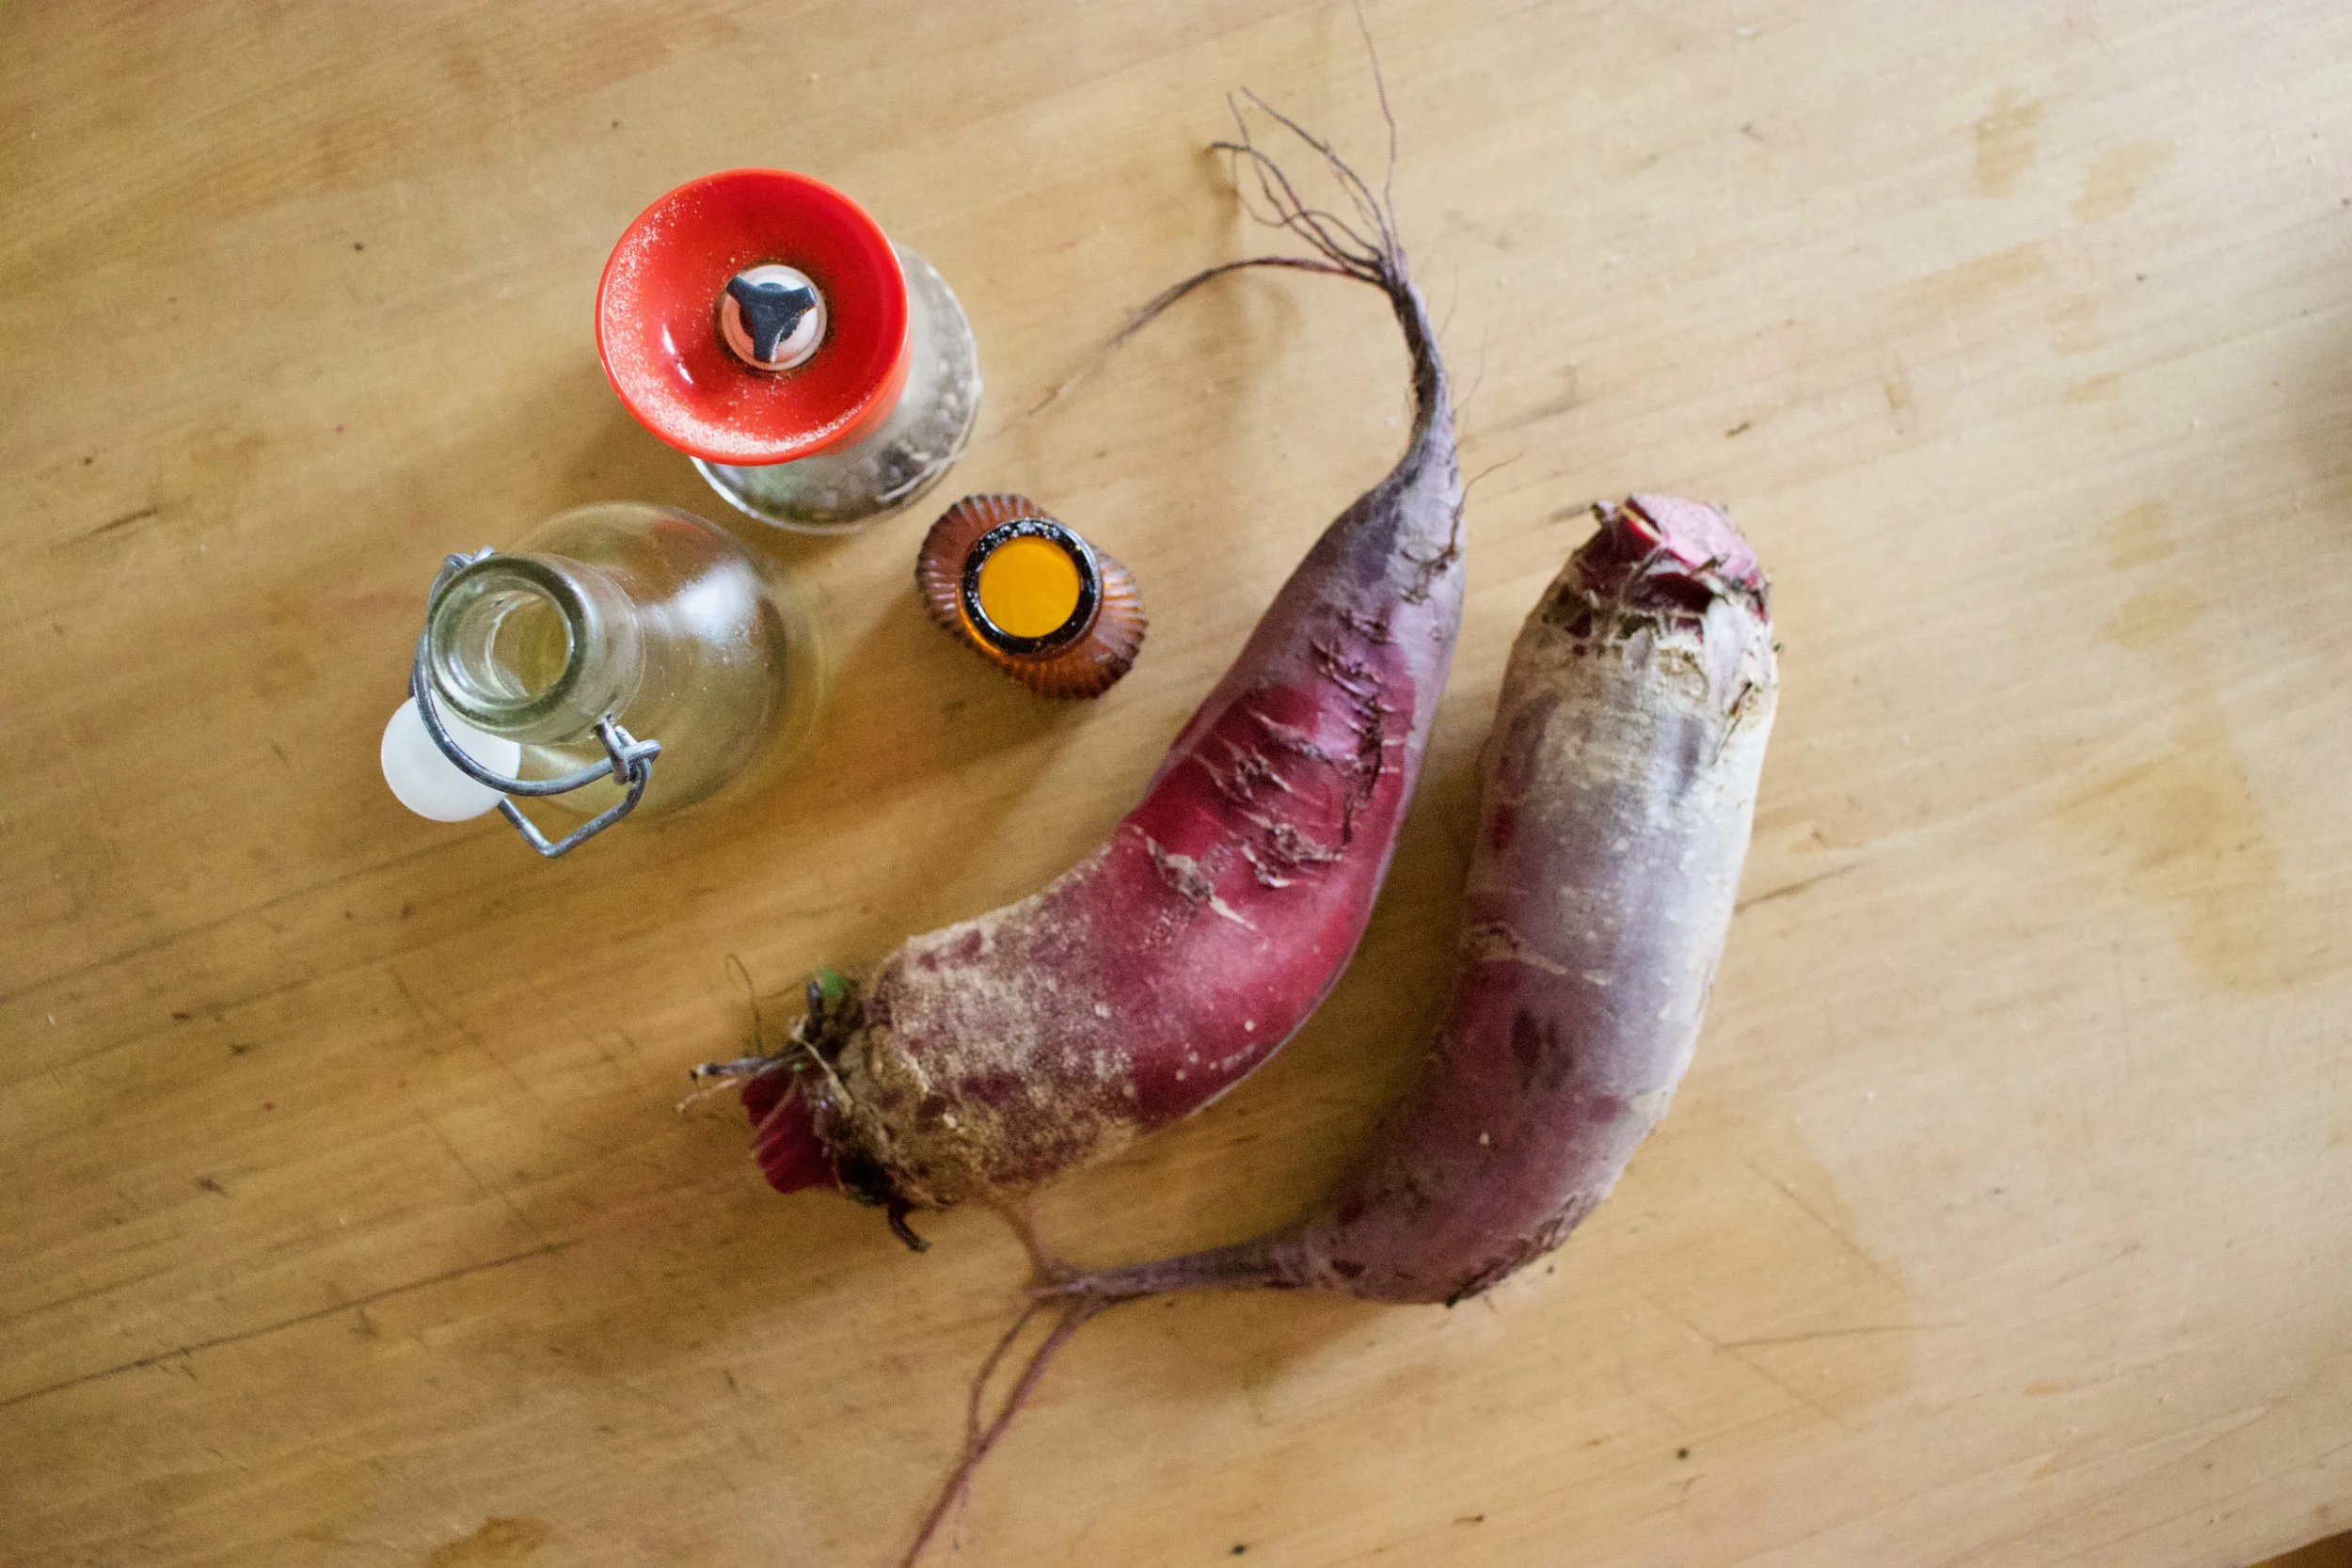
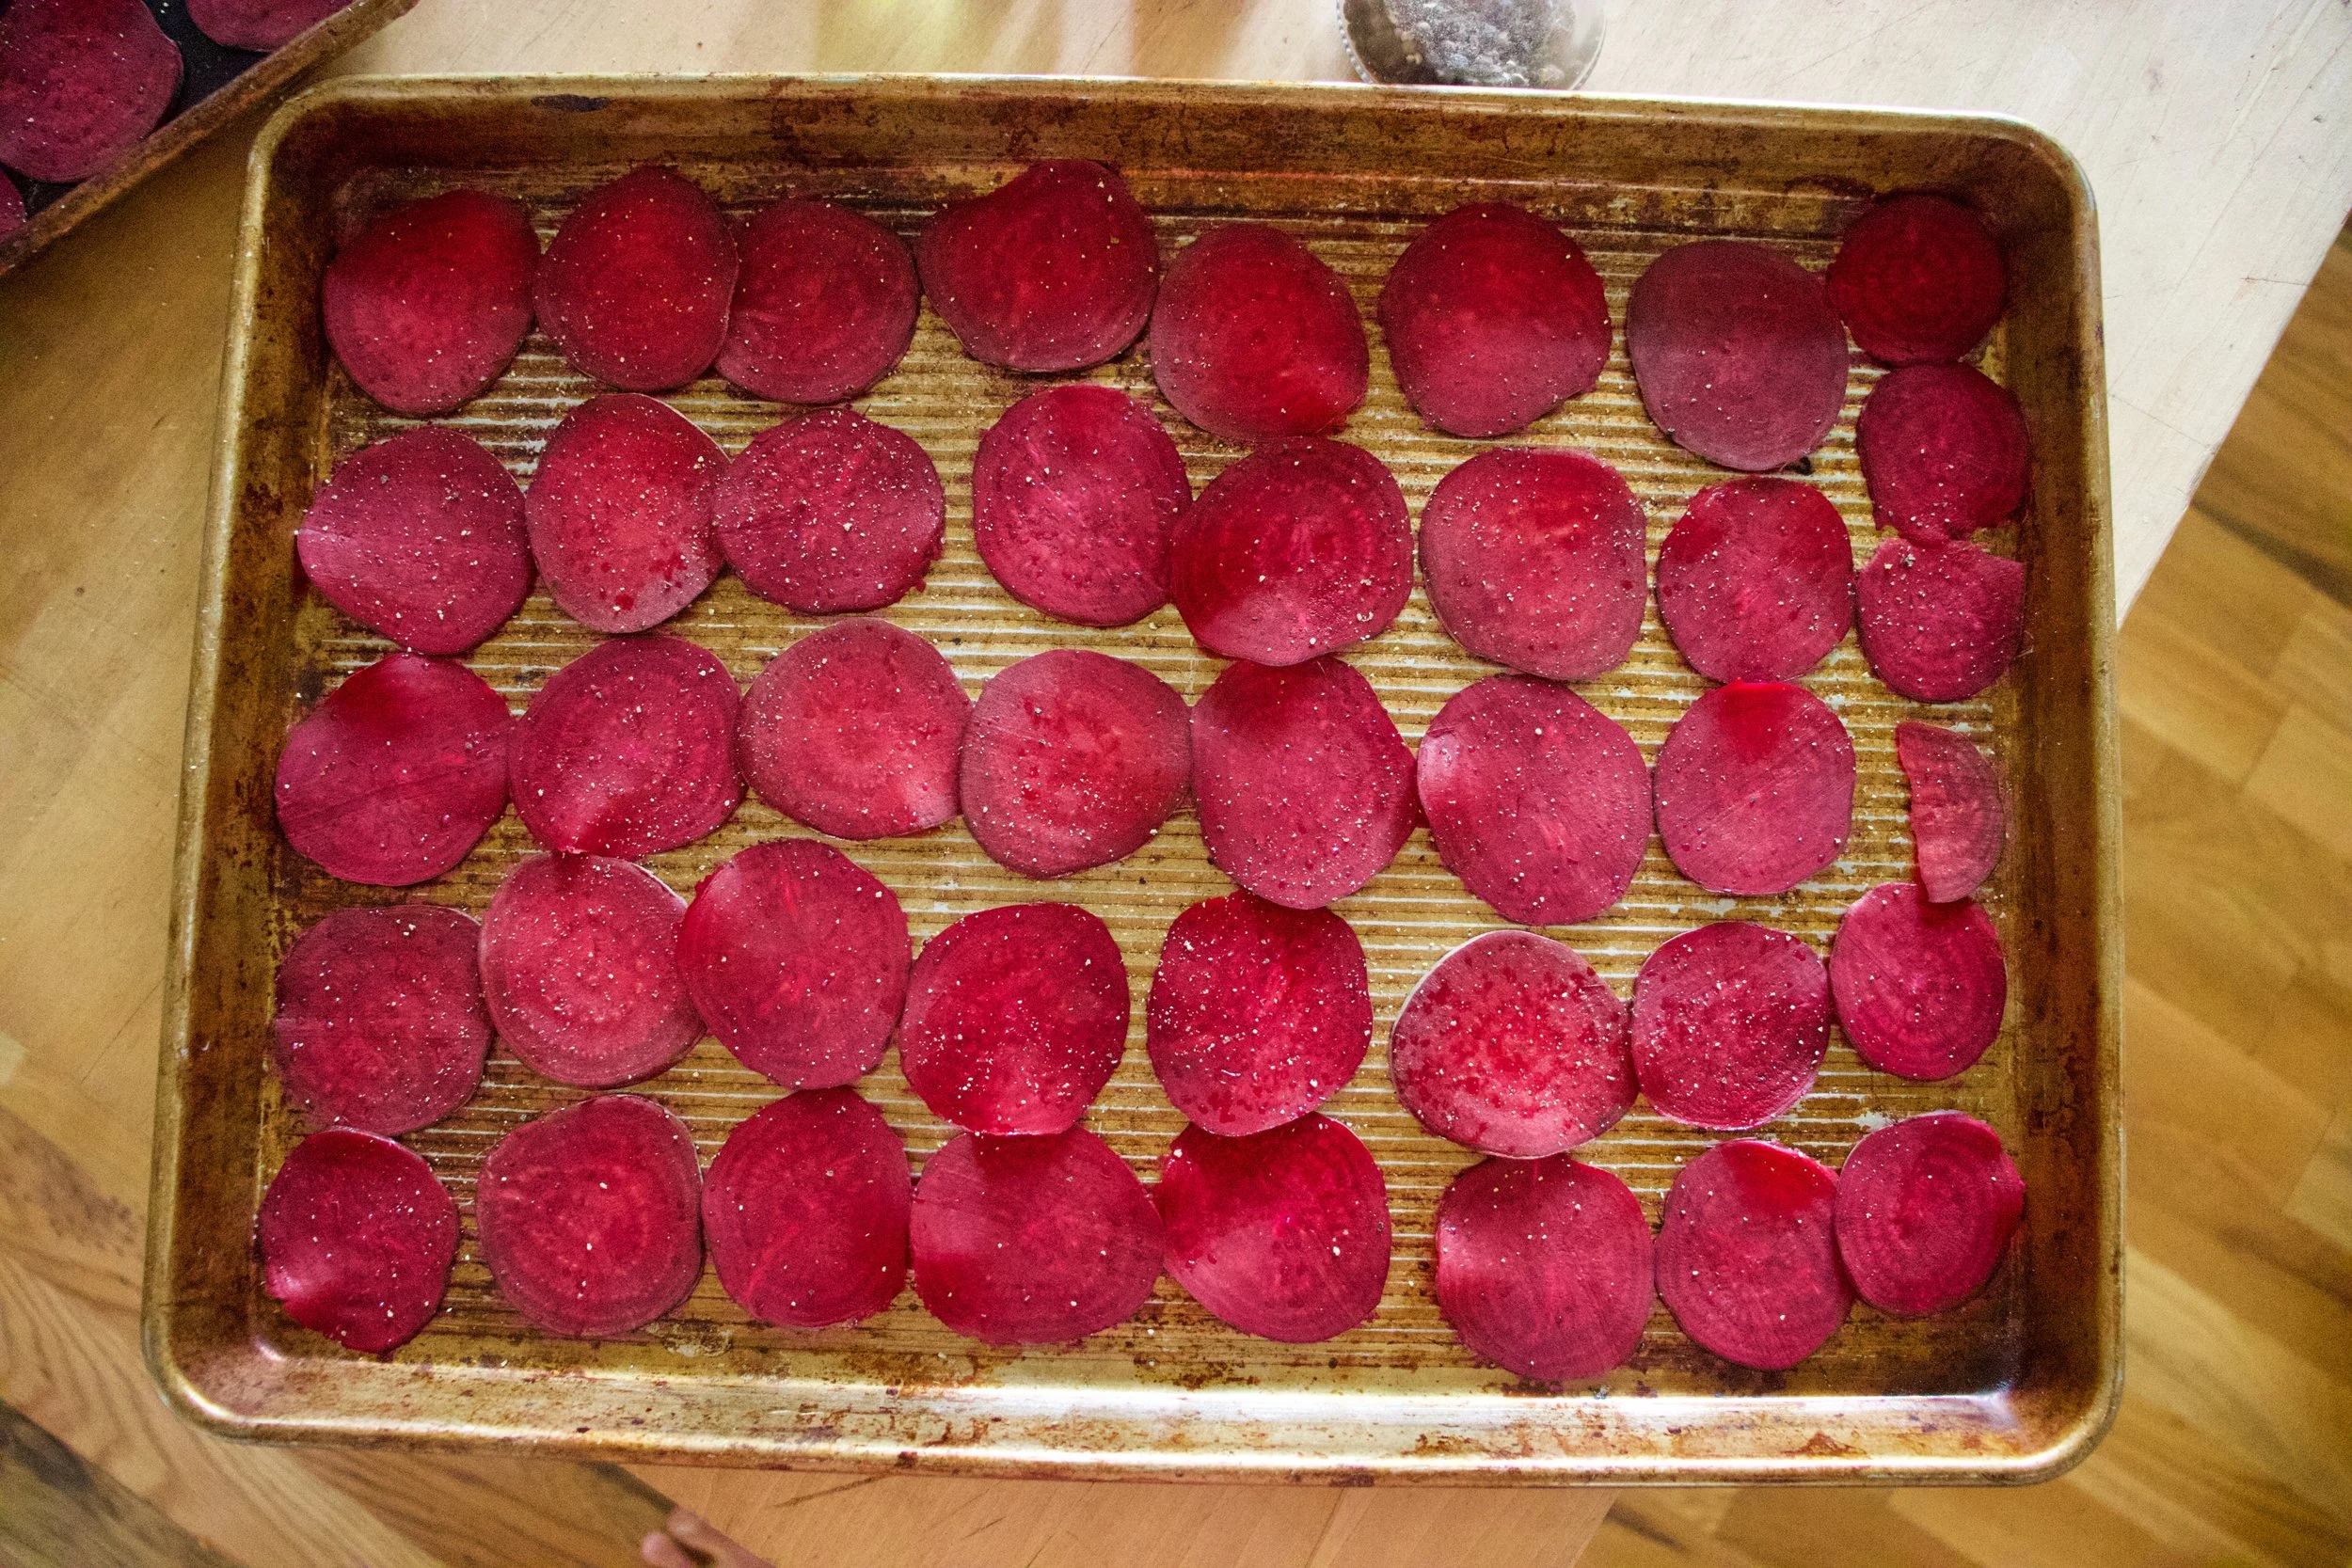
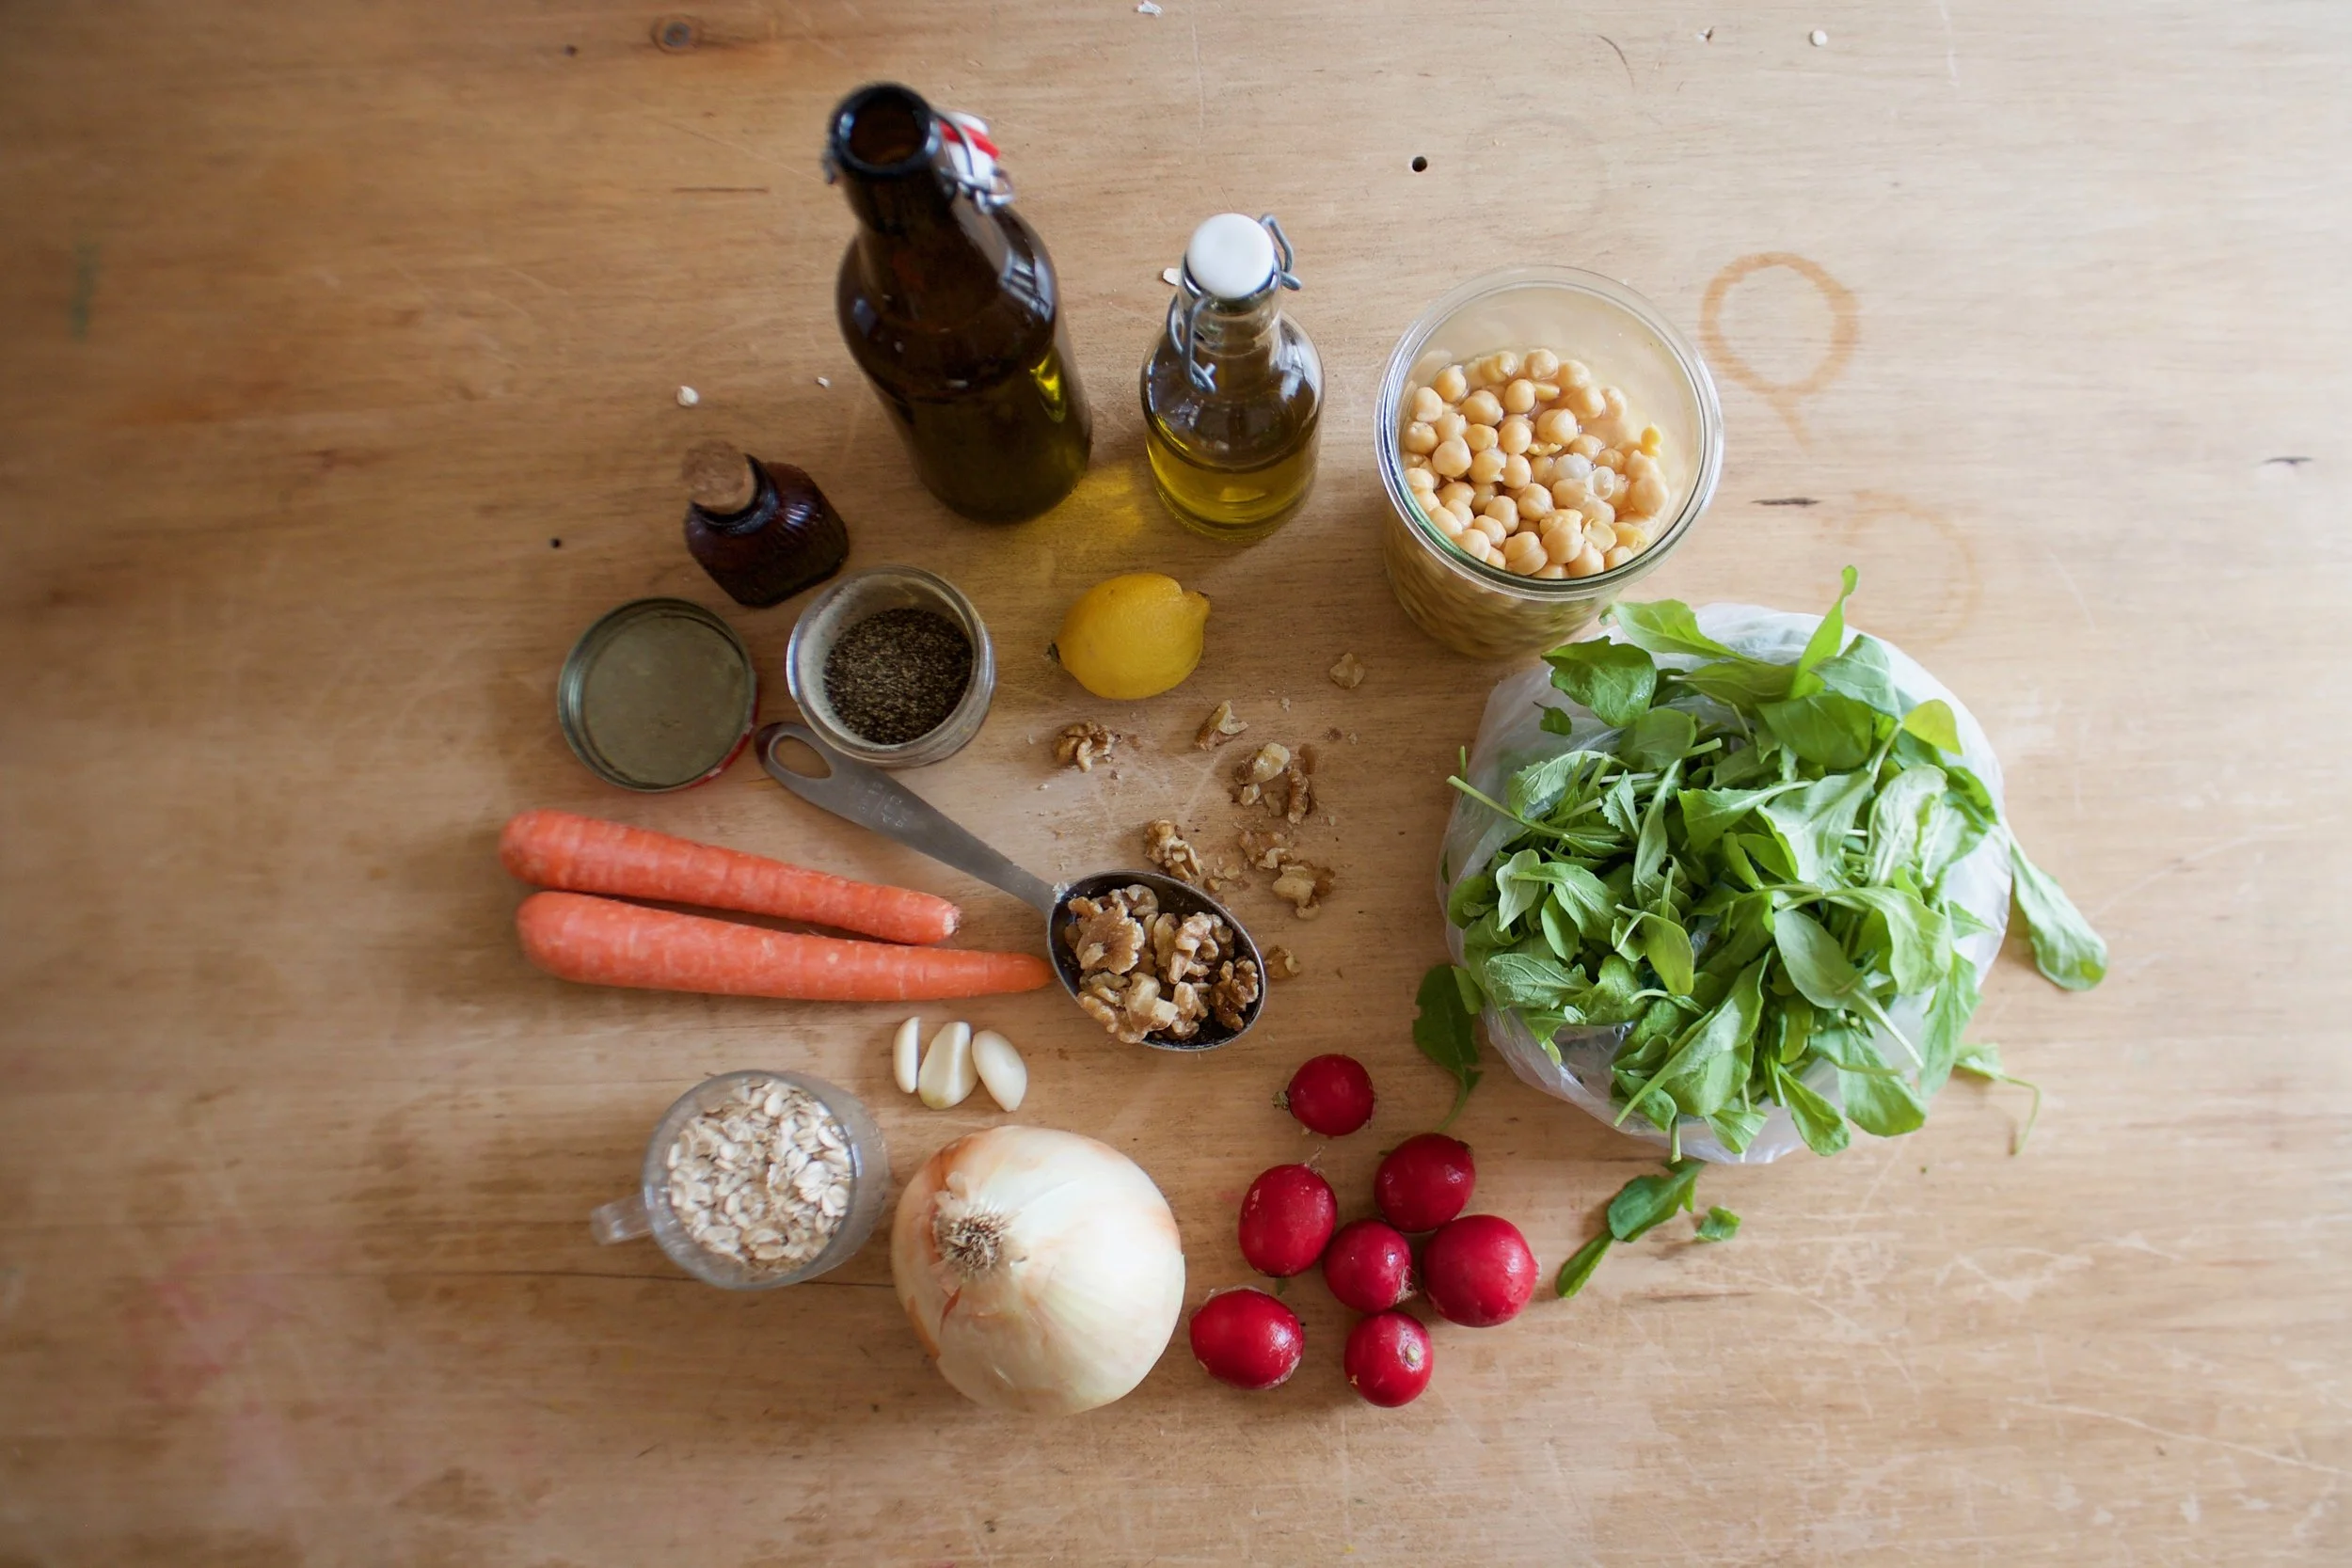
The stuff. Beets (these are Formanova beets but any variety works) salt and pepper ,and oil.

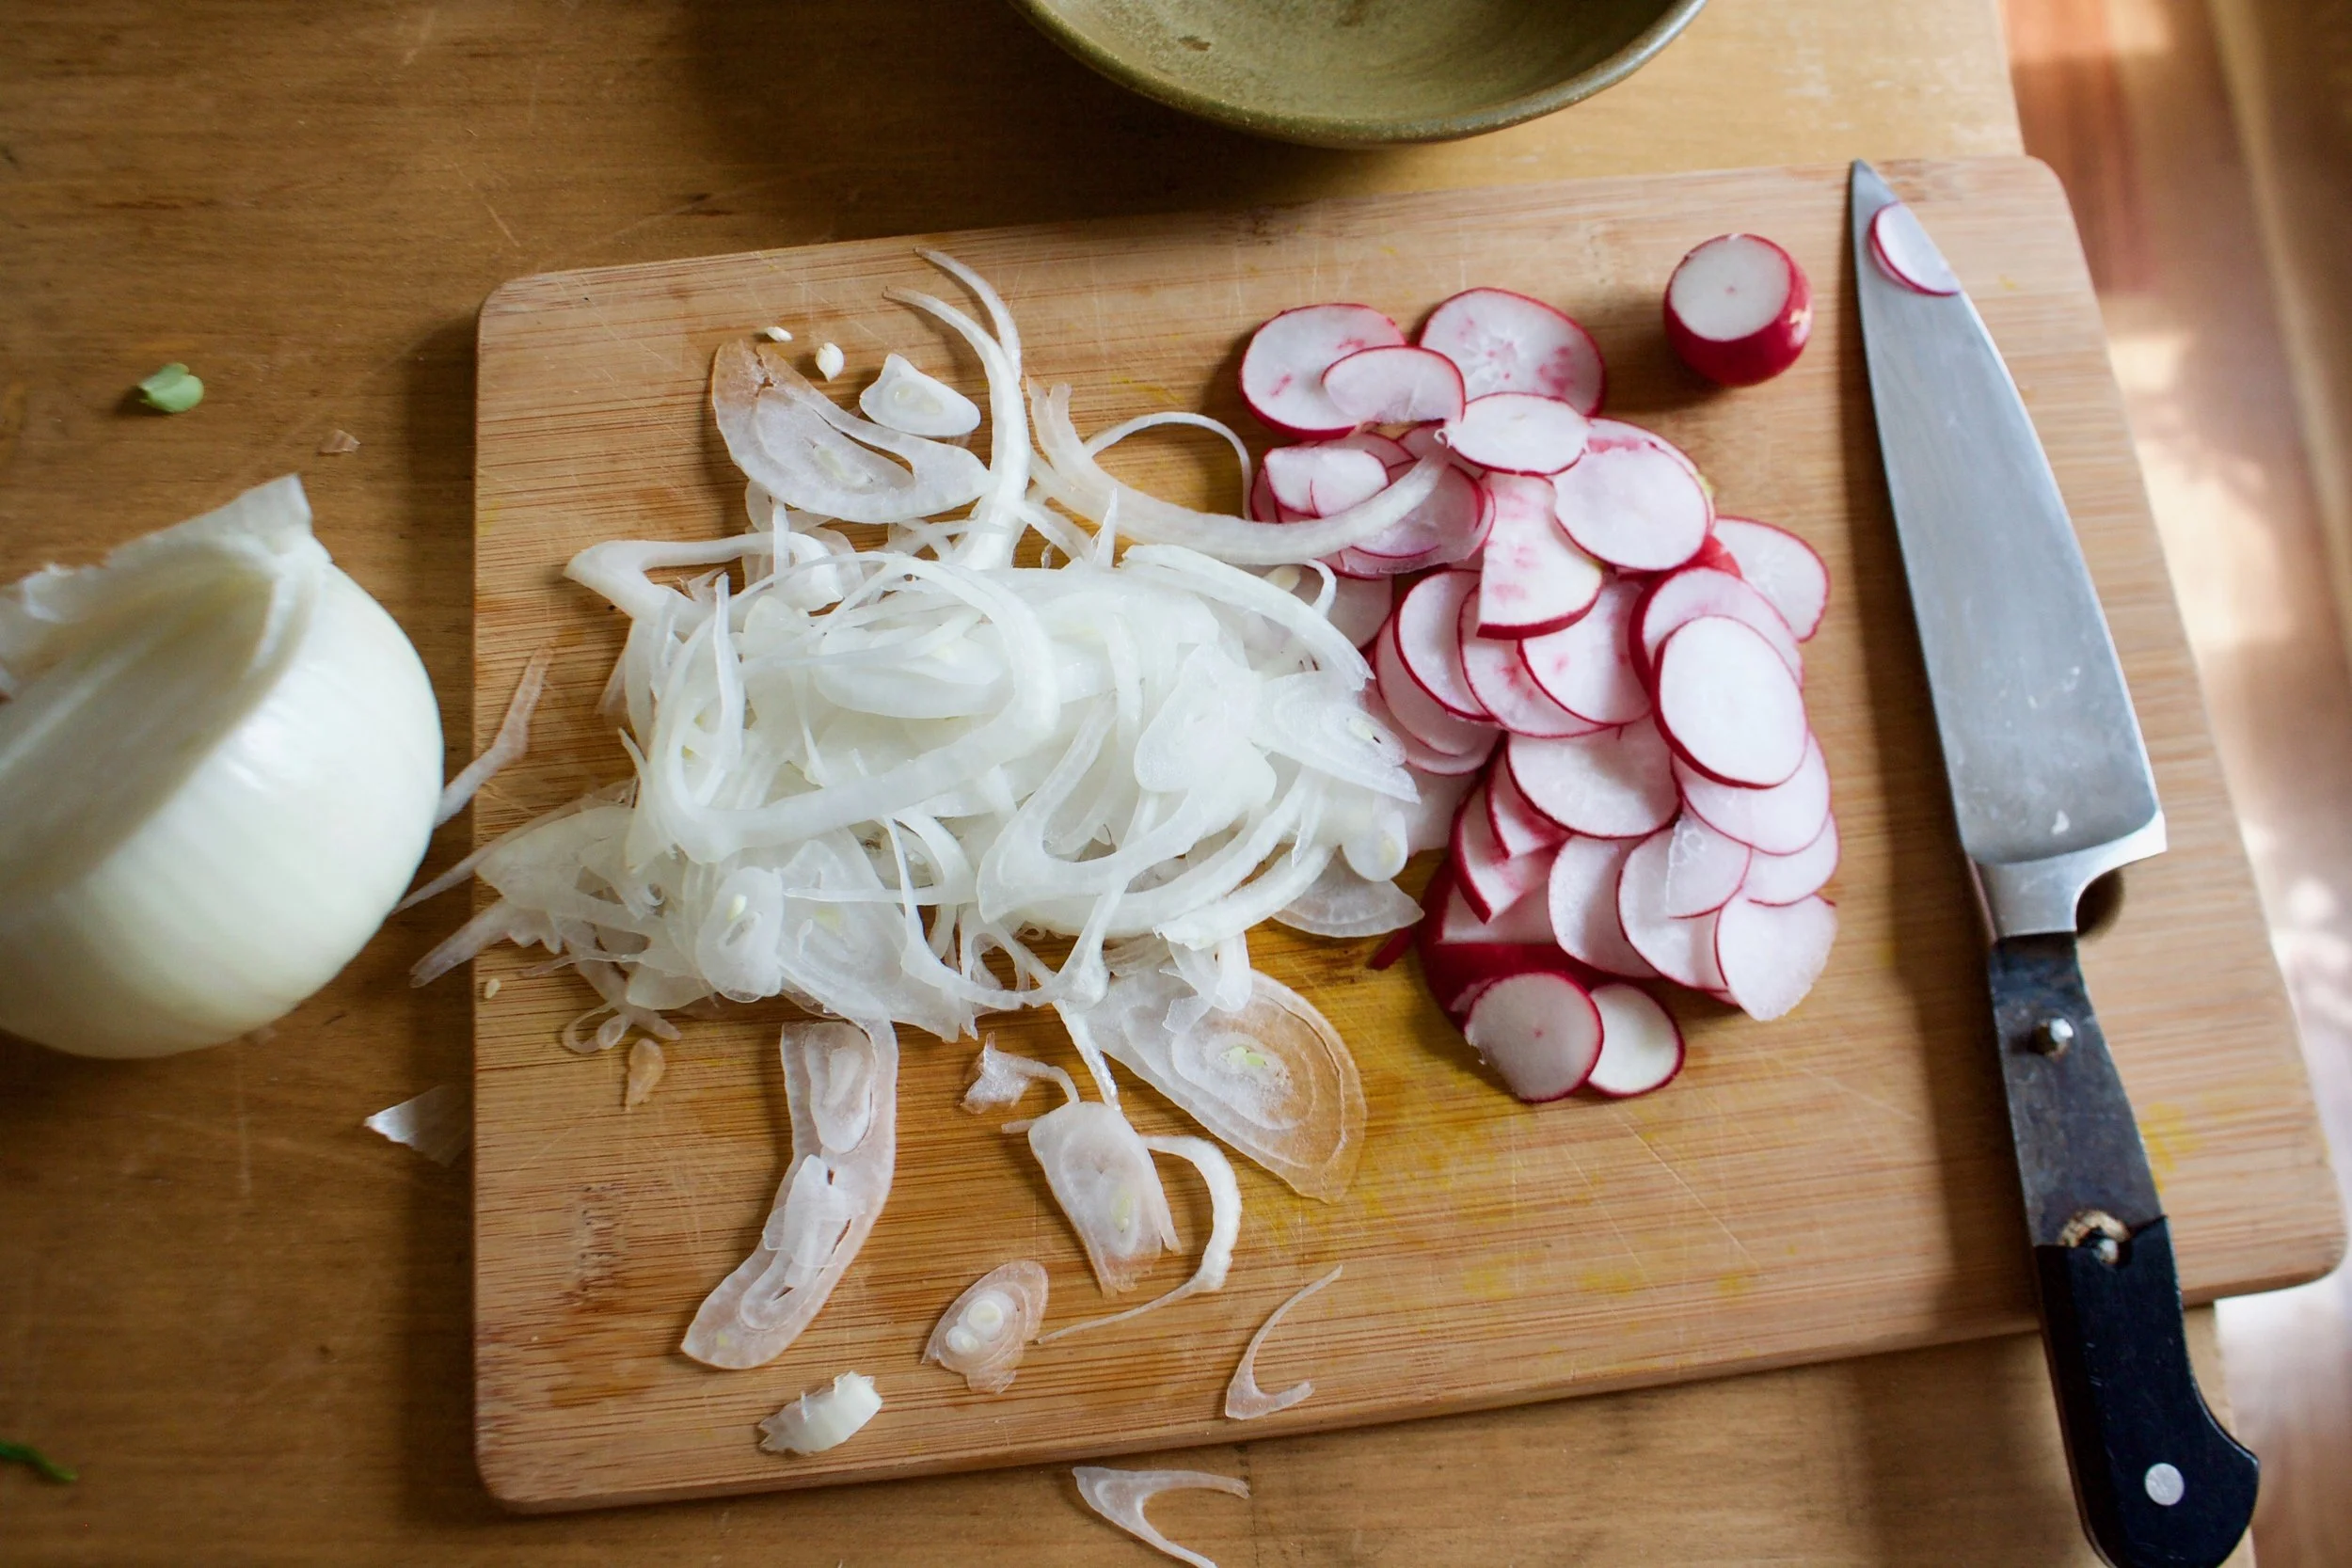
Ok so you need to cut these bad boys reallllllly thin. Like 1/15th a inch. So, what I am saying is, use a mandolin. If you don%u2019t have one, a knife will do, but you are going to have a hard time getting them as thin as you need to and all of them consistent so baking is going to be a little more tricky so maybe you should just go borrow or invest in a mandolin.
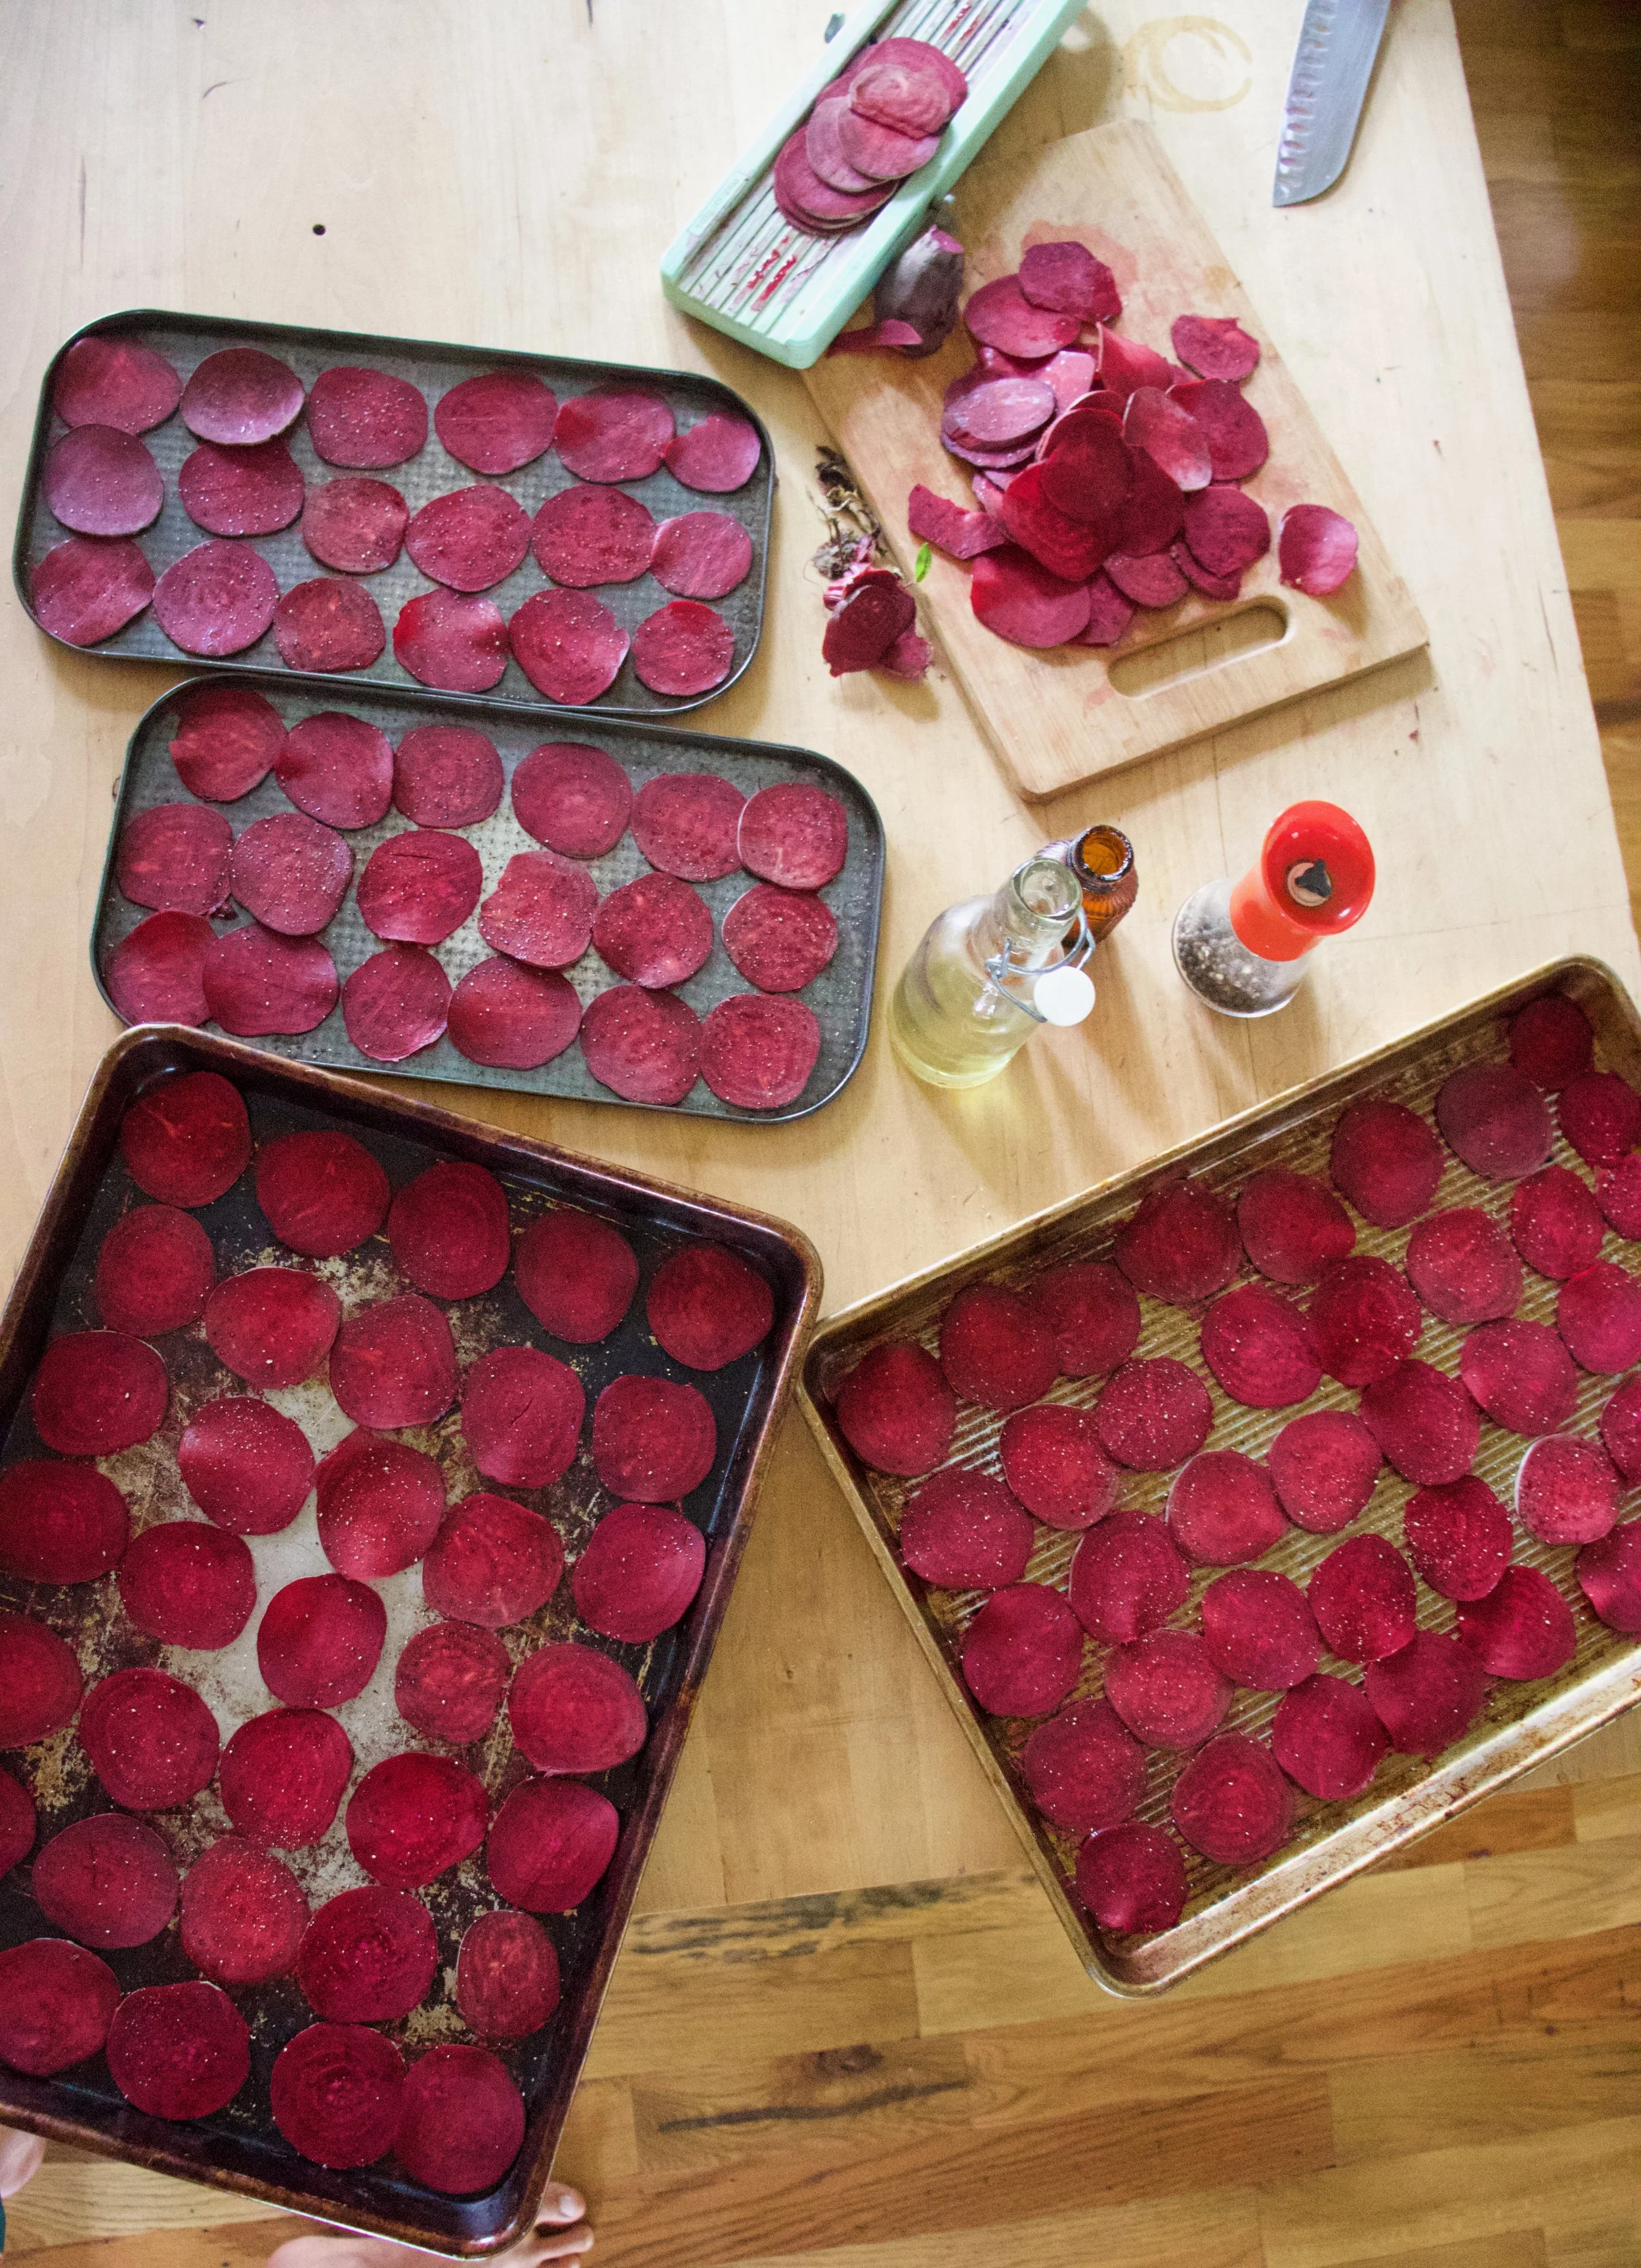
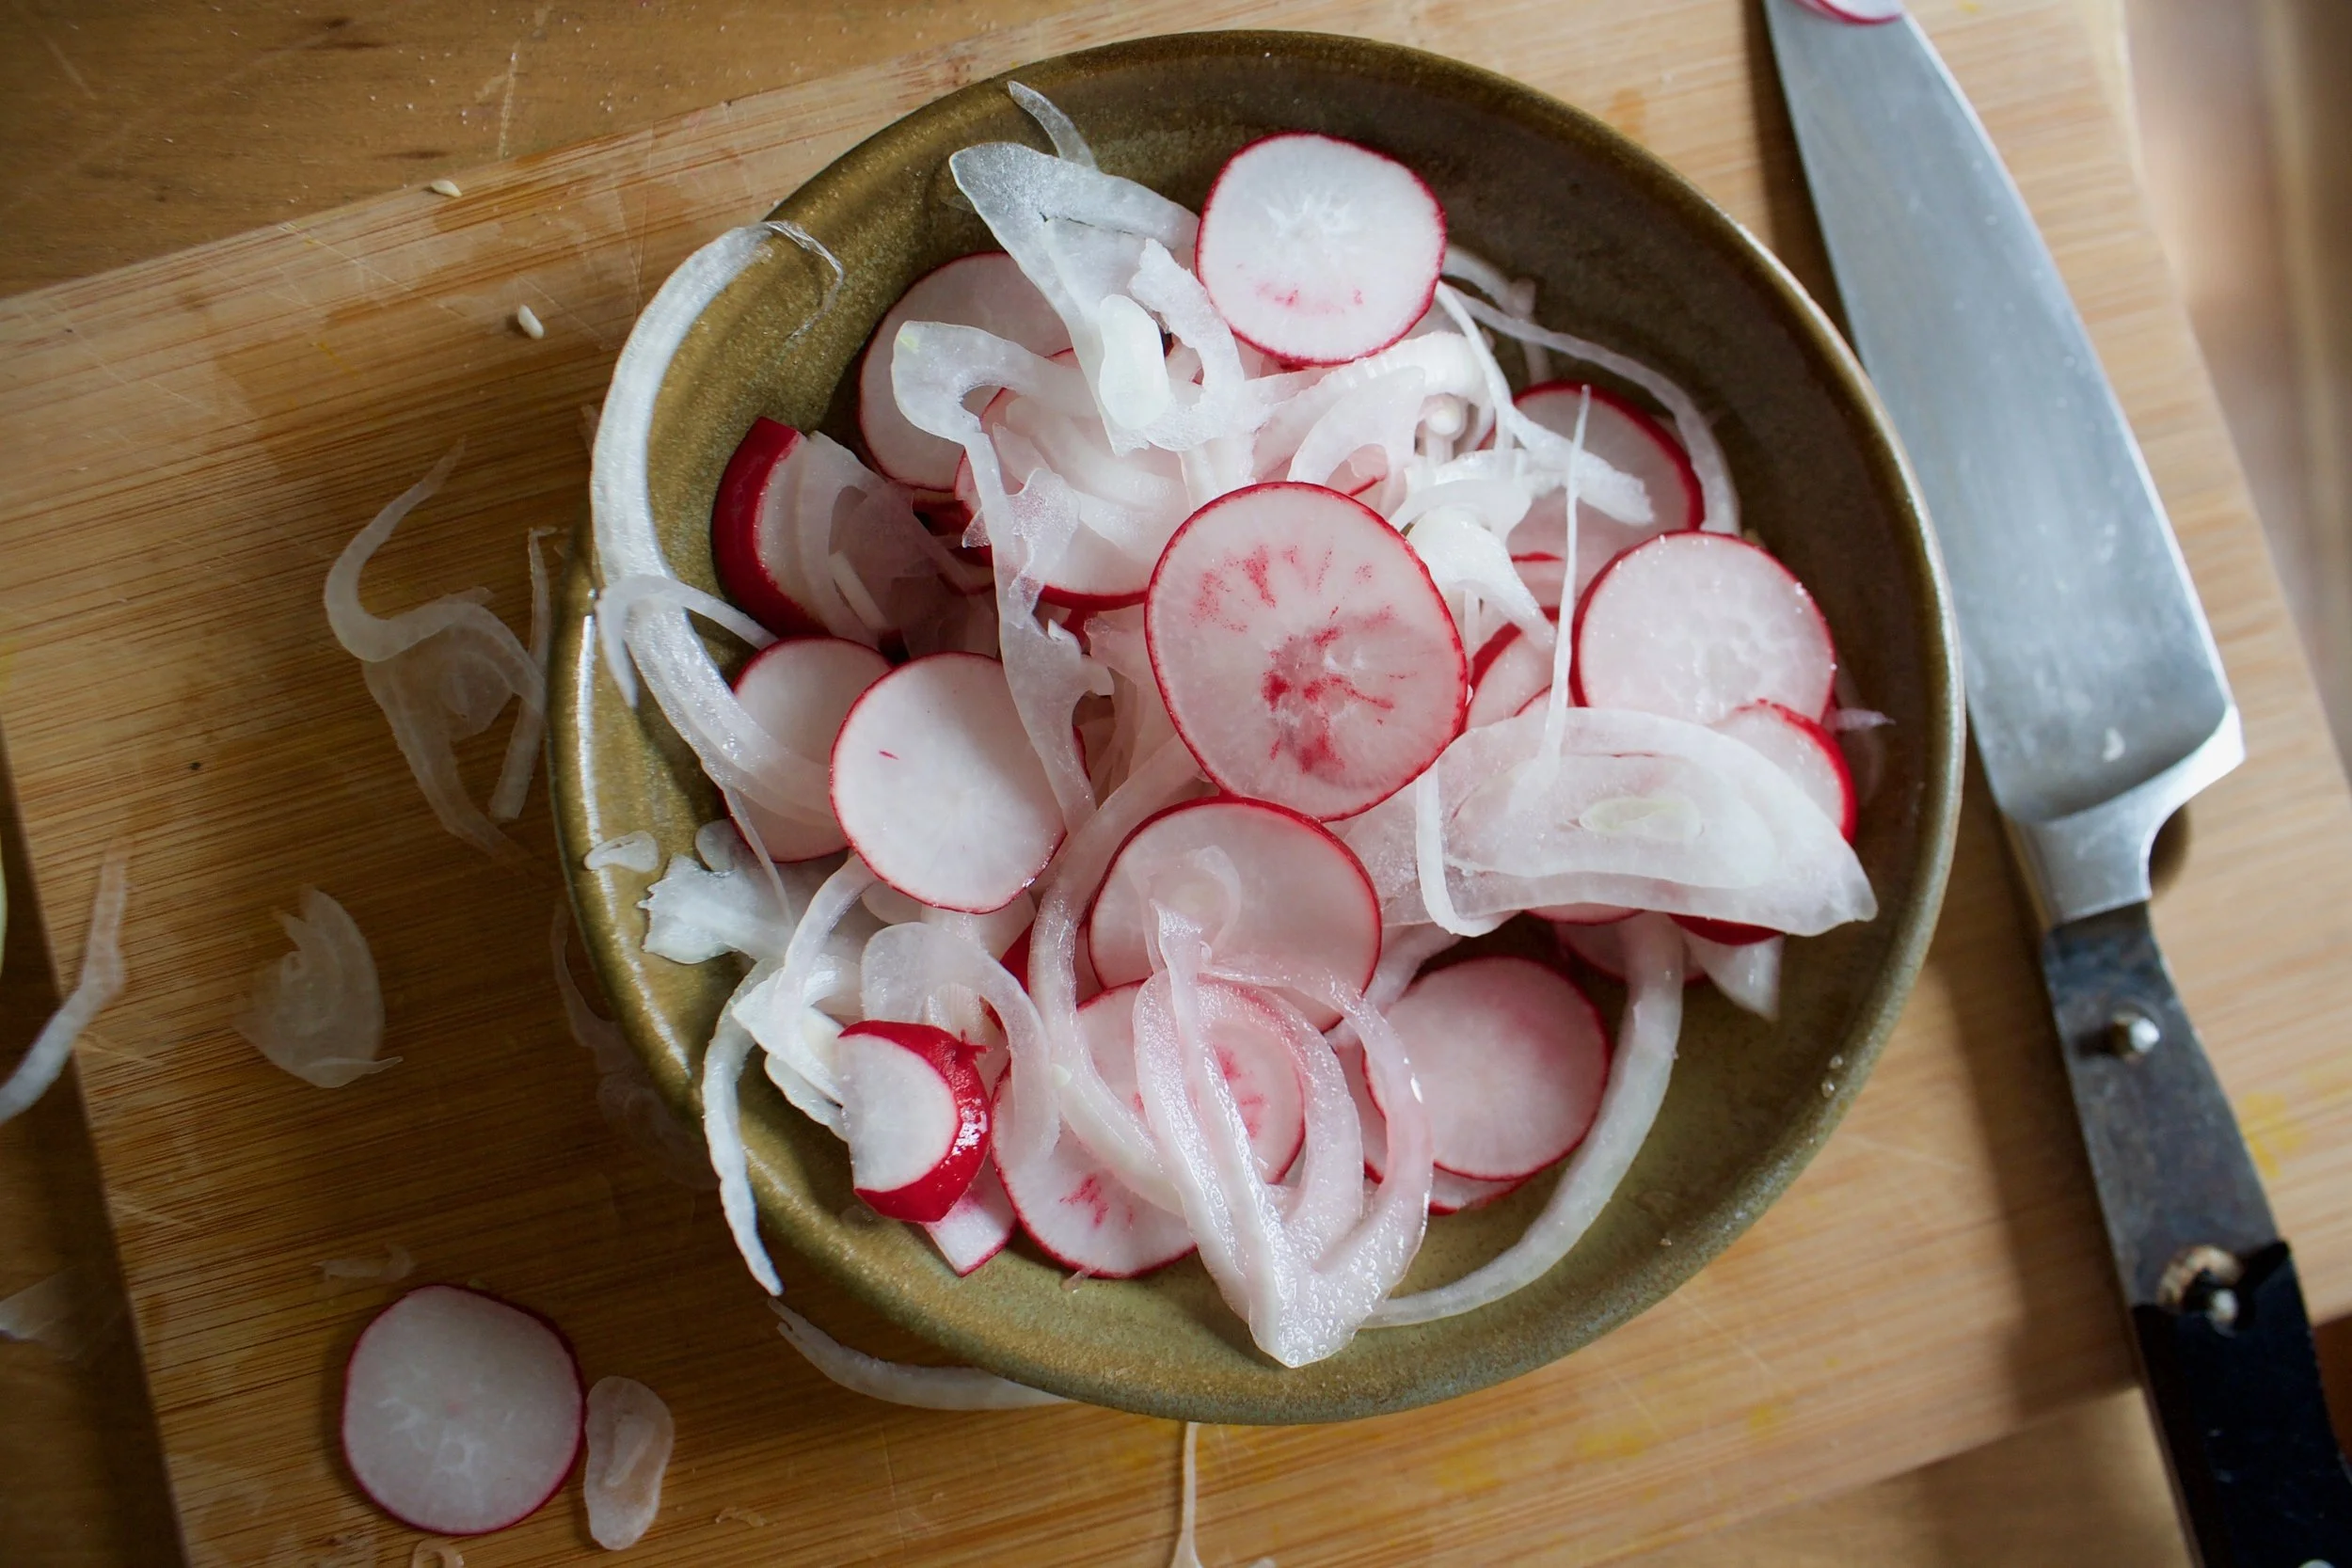
Grab baking sheets, oil, and salt and pepper. You can either dump the oil directly onto the pile of sliced beets and really toss to make sure each one has been coasted or do what I did which was I drizzled oil into my hands and rubbed each sliced beet between my oiled hands before placing on the sheet.
After you get them on there, single layered with no overlapping, sprinkle tops with a pinch of salt and pepper.
On the way into the oven.
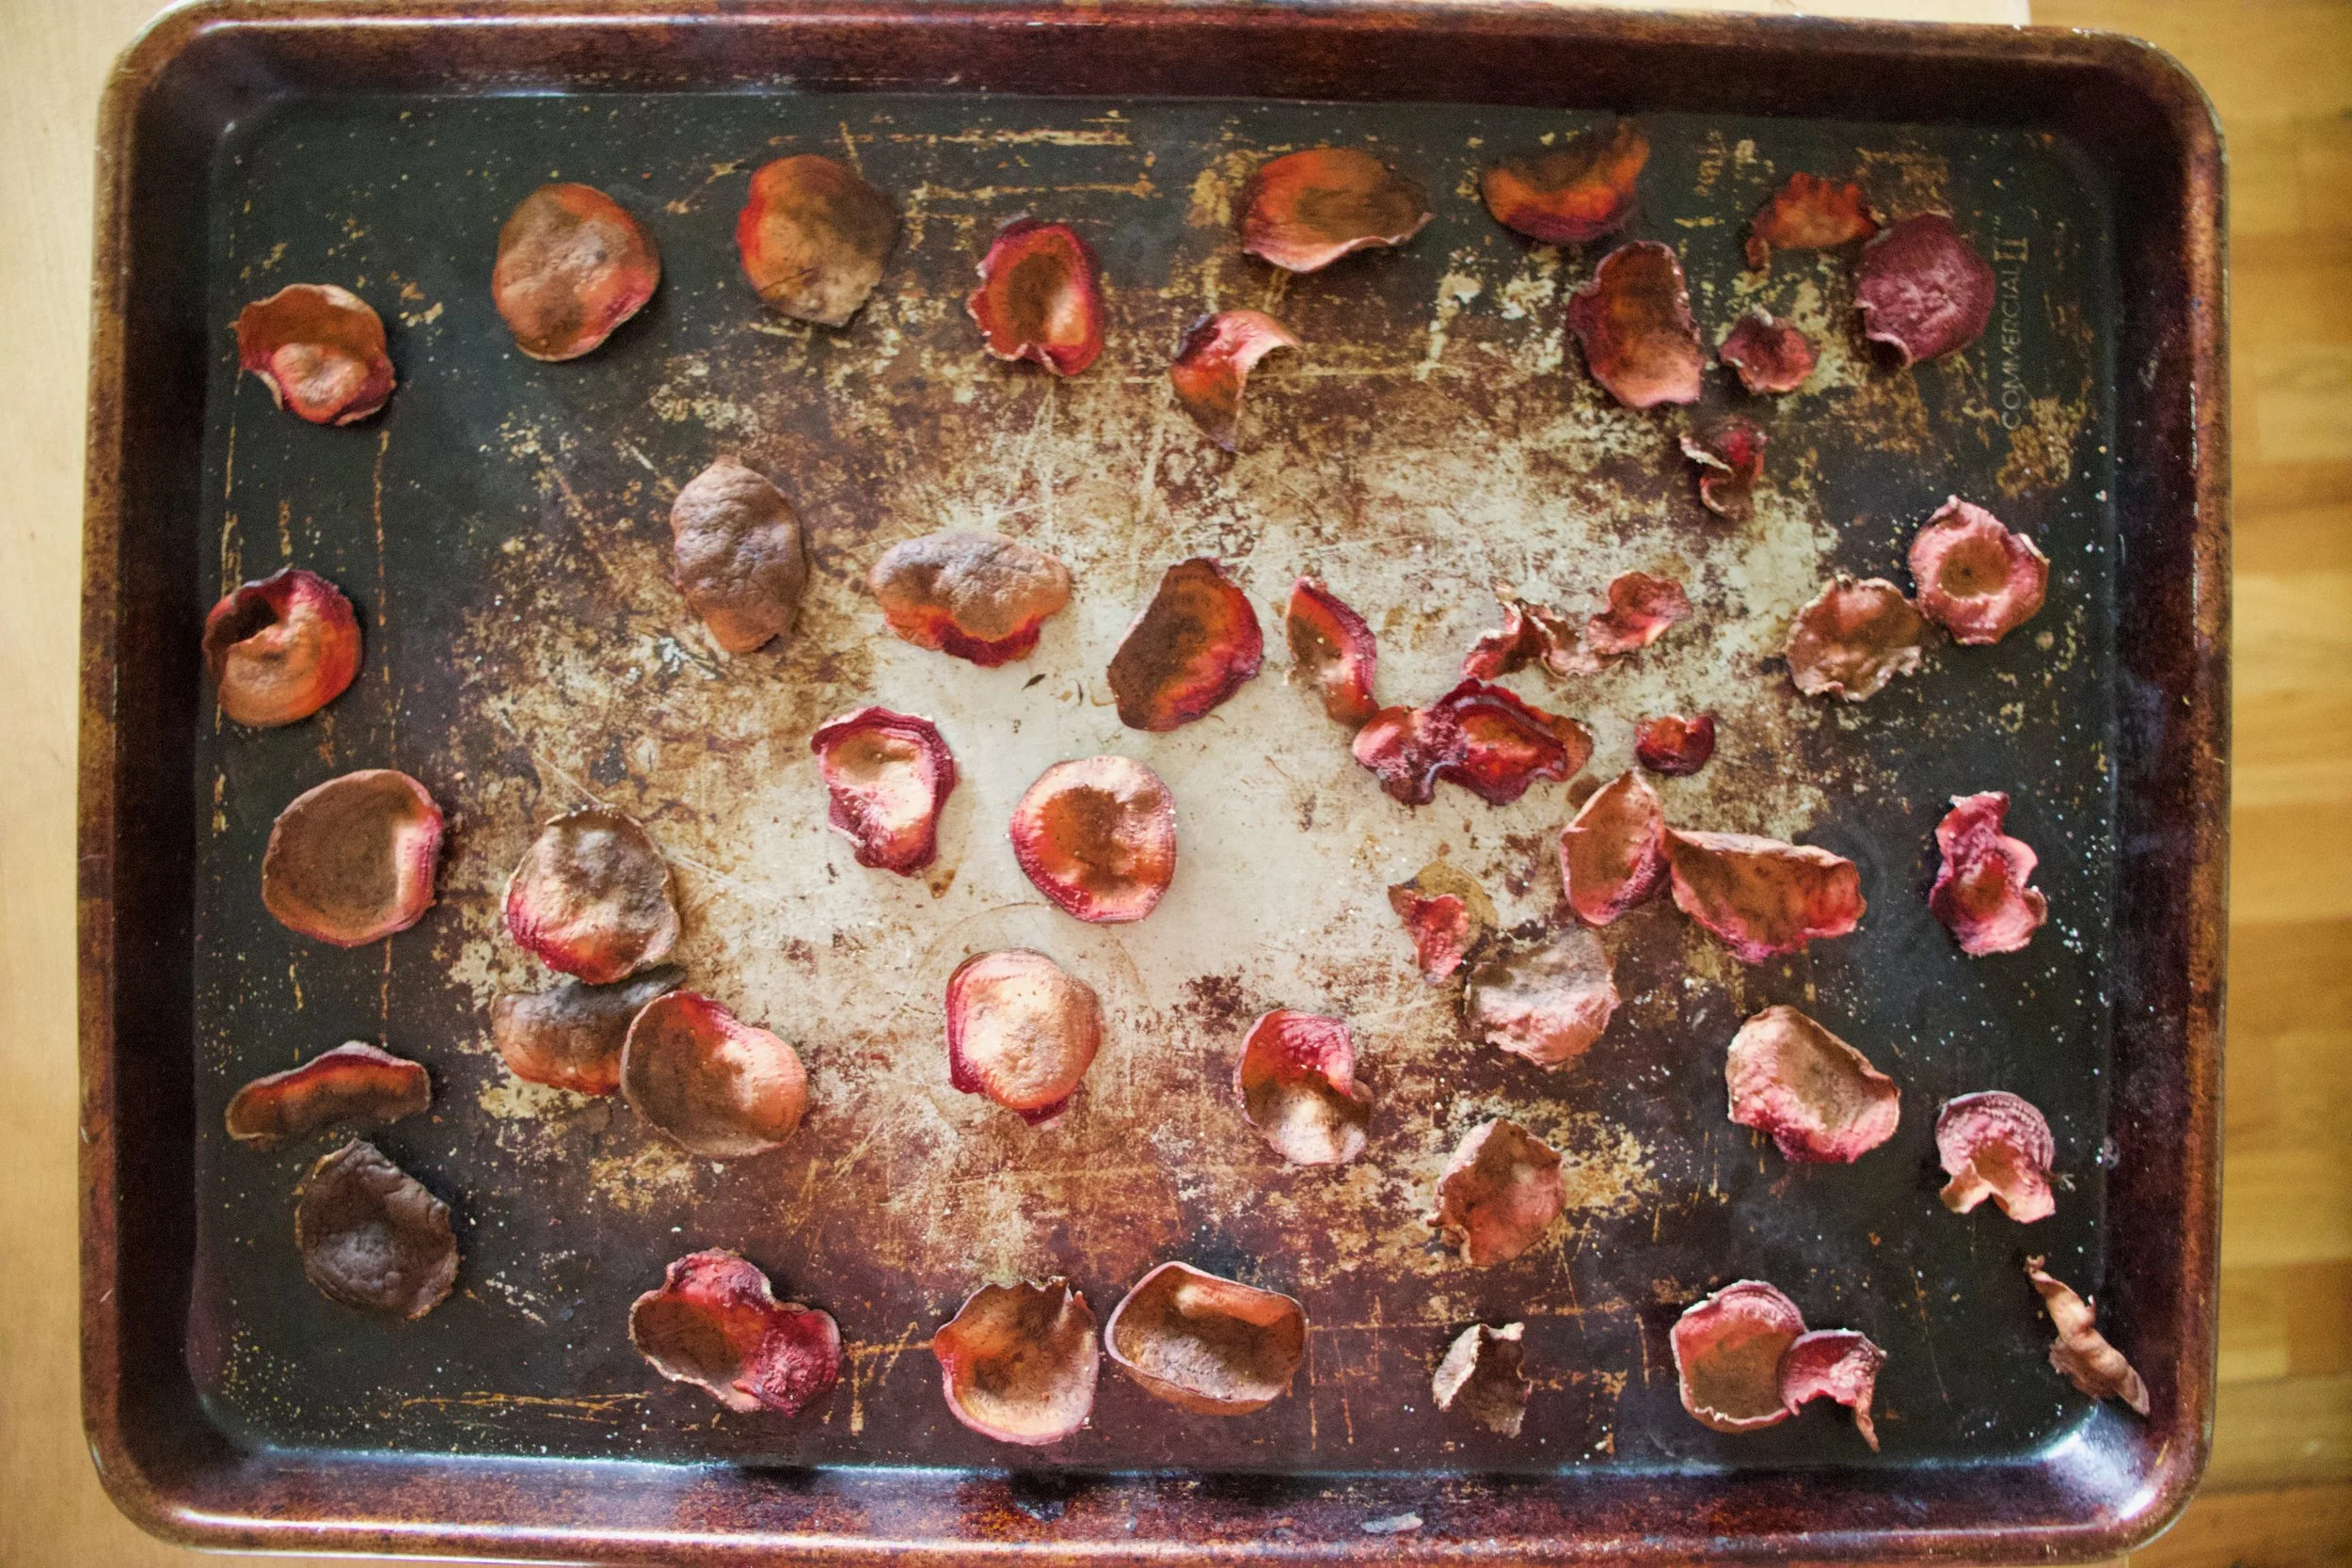
After the oven. Baked for about 18 minutes. You really have to watch after the first 13 or so minutes to make sure you catch them at the perfect time. Crispy, but not burnt.

A side by side shot. Crazy shrinking will happen!
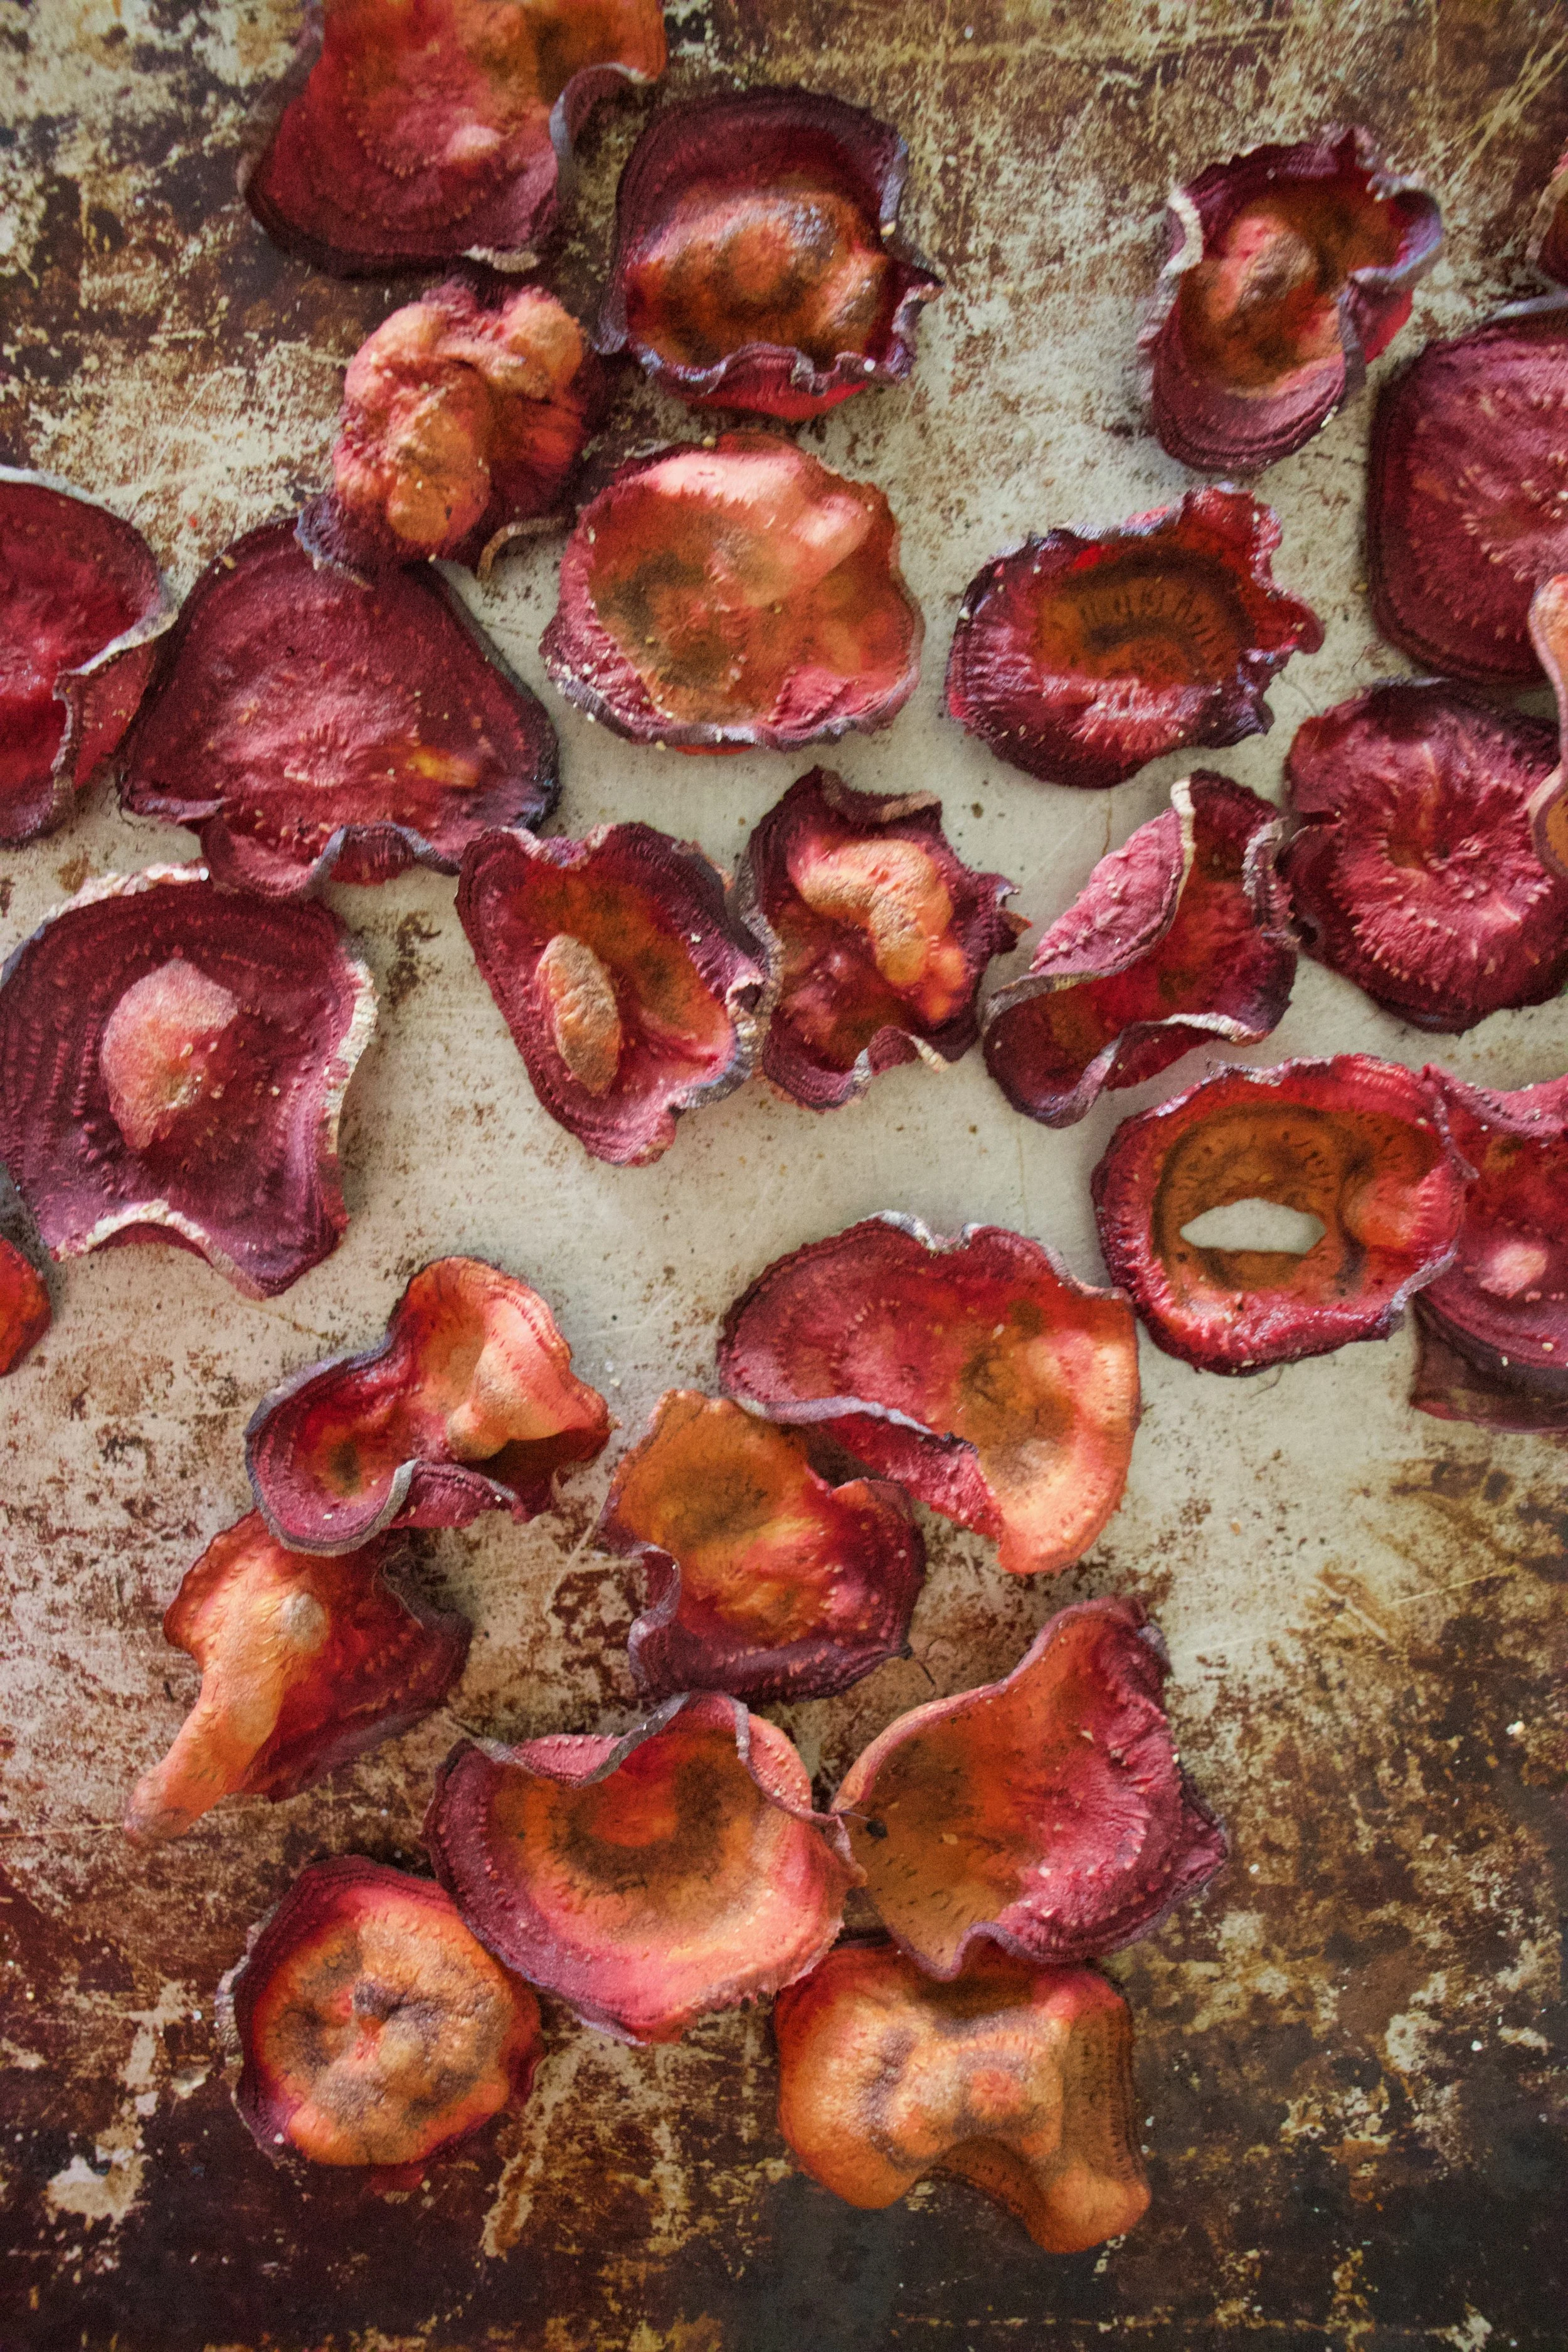
Oh man, so delicious. And so pretty!.
Let the chips cool before eating, you know, so you don%u2019t burn your tongue. Plus they crisp up a wee bit more.
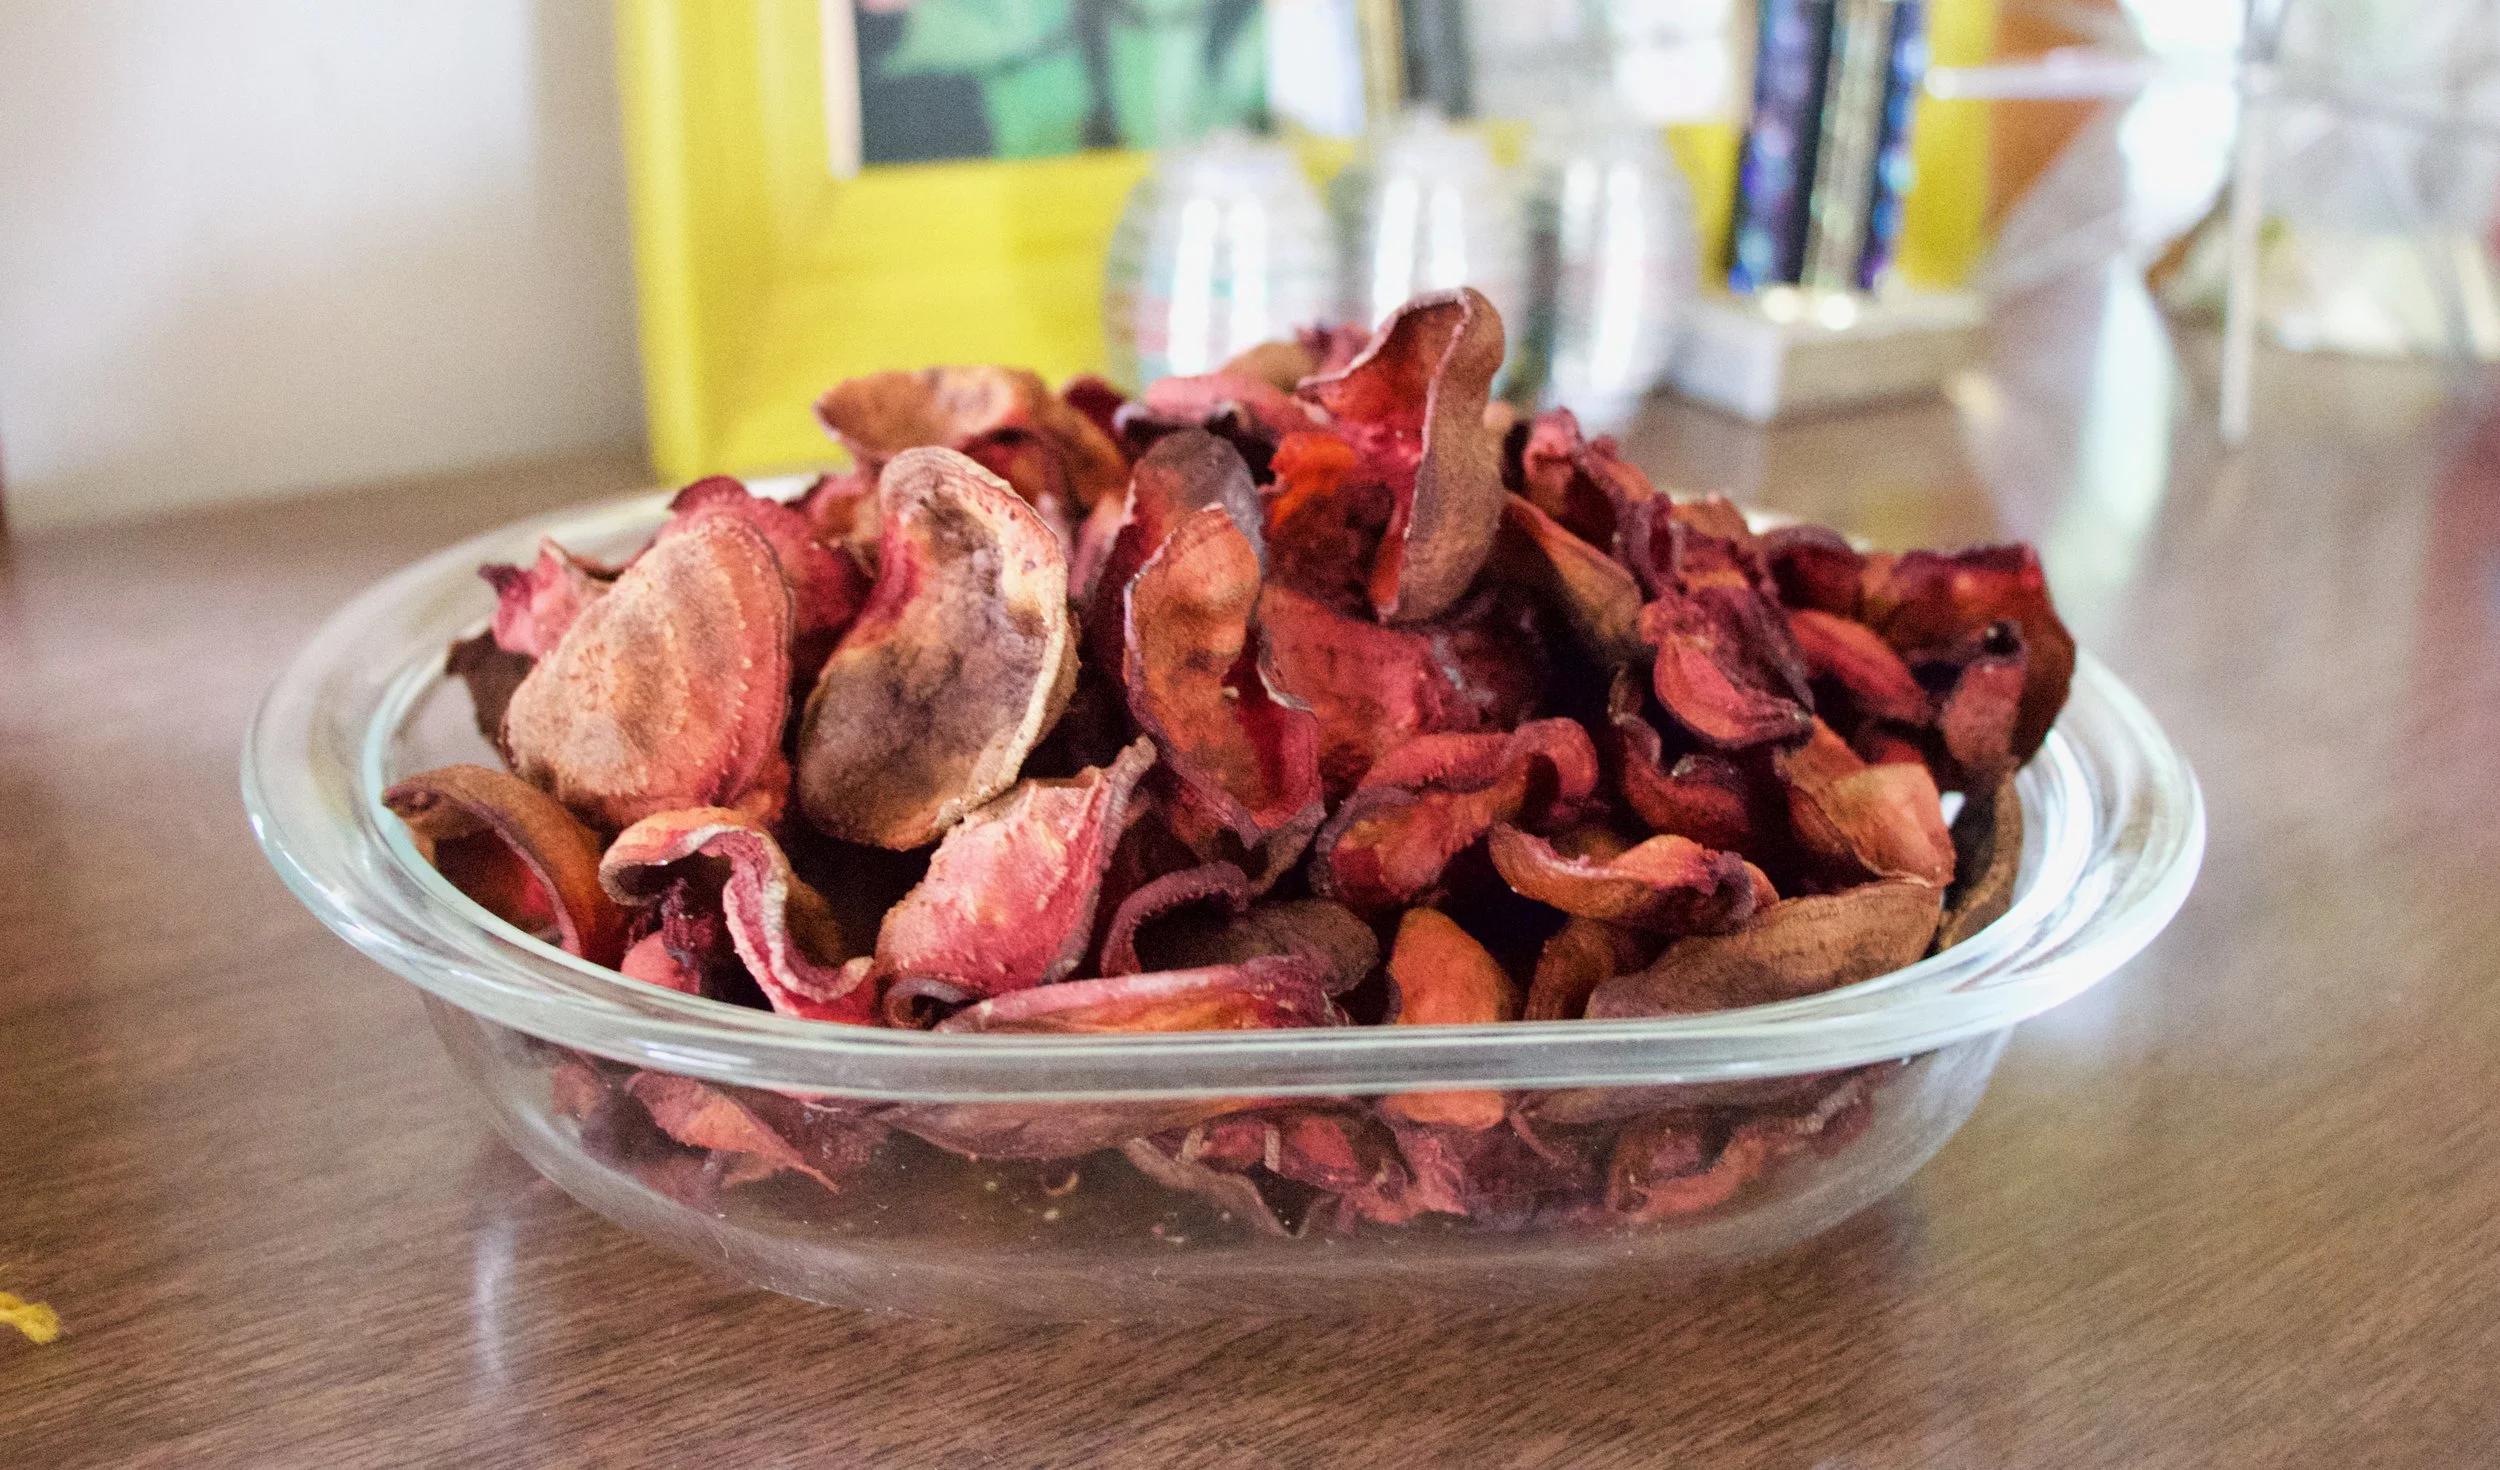
Once cooled, pile them into bowl, and then eat them. And eat them all. They are only beets after all. And you won%u2019t be able to stop yourself anyway. Ha
-C
Makes enough for an evening of chip eating for 1-2 people
-
2 Large beets (think softball sized)
-
a tablespoon or two of oil (I used grape seed but really any would work)
-
salt and pepper
Note. Making these without cutting with a mandolin will be a pain in the ass. It can be done, but if you have a mandolin, use it.
Preheat oven to 350
With a mandolin, slice the beets about 1/15 inch thick. (No need to peel the beets unless you want to.) Once beets are all sliced, either drizzle them all with a tablespoon or so of oil and toss until all are coated. OR what I did and found worked really well was drizzled oil into my hands and rubbed each beet between my oiled hands as I was placing them on the baking sheets. Either way.
Now place oiled beets, single layered, without overlapping, on baking sheets. Sprinkle with a pinch of salt and pepper and place into oven. Bake for about 13 minutes without worrying then start to check every minute or so until the beets are a deep golden brown and crispy ,which will be between 15-20 minutes. Also, even though you cut them all the exact same thickness, some might crisp up faster so you should remove done chips as they happen. Once they are done, place on a rack to cool. And then do another batch. And not, they do crisp up a tiny bit more as they cool.
Once chips are cool and crisp, eat.
Store uneaten (how did you not eat them all?) chips in an air tight container. If you notice that they turned a bit chew, just place them back into oven while preheating oven to 300 then turn oven off and let sit in there for a few minutes.
We have officially kicked off our summer camping adventures. And with camping comes all the greatness of all the things, including camping food.
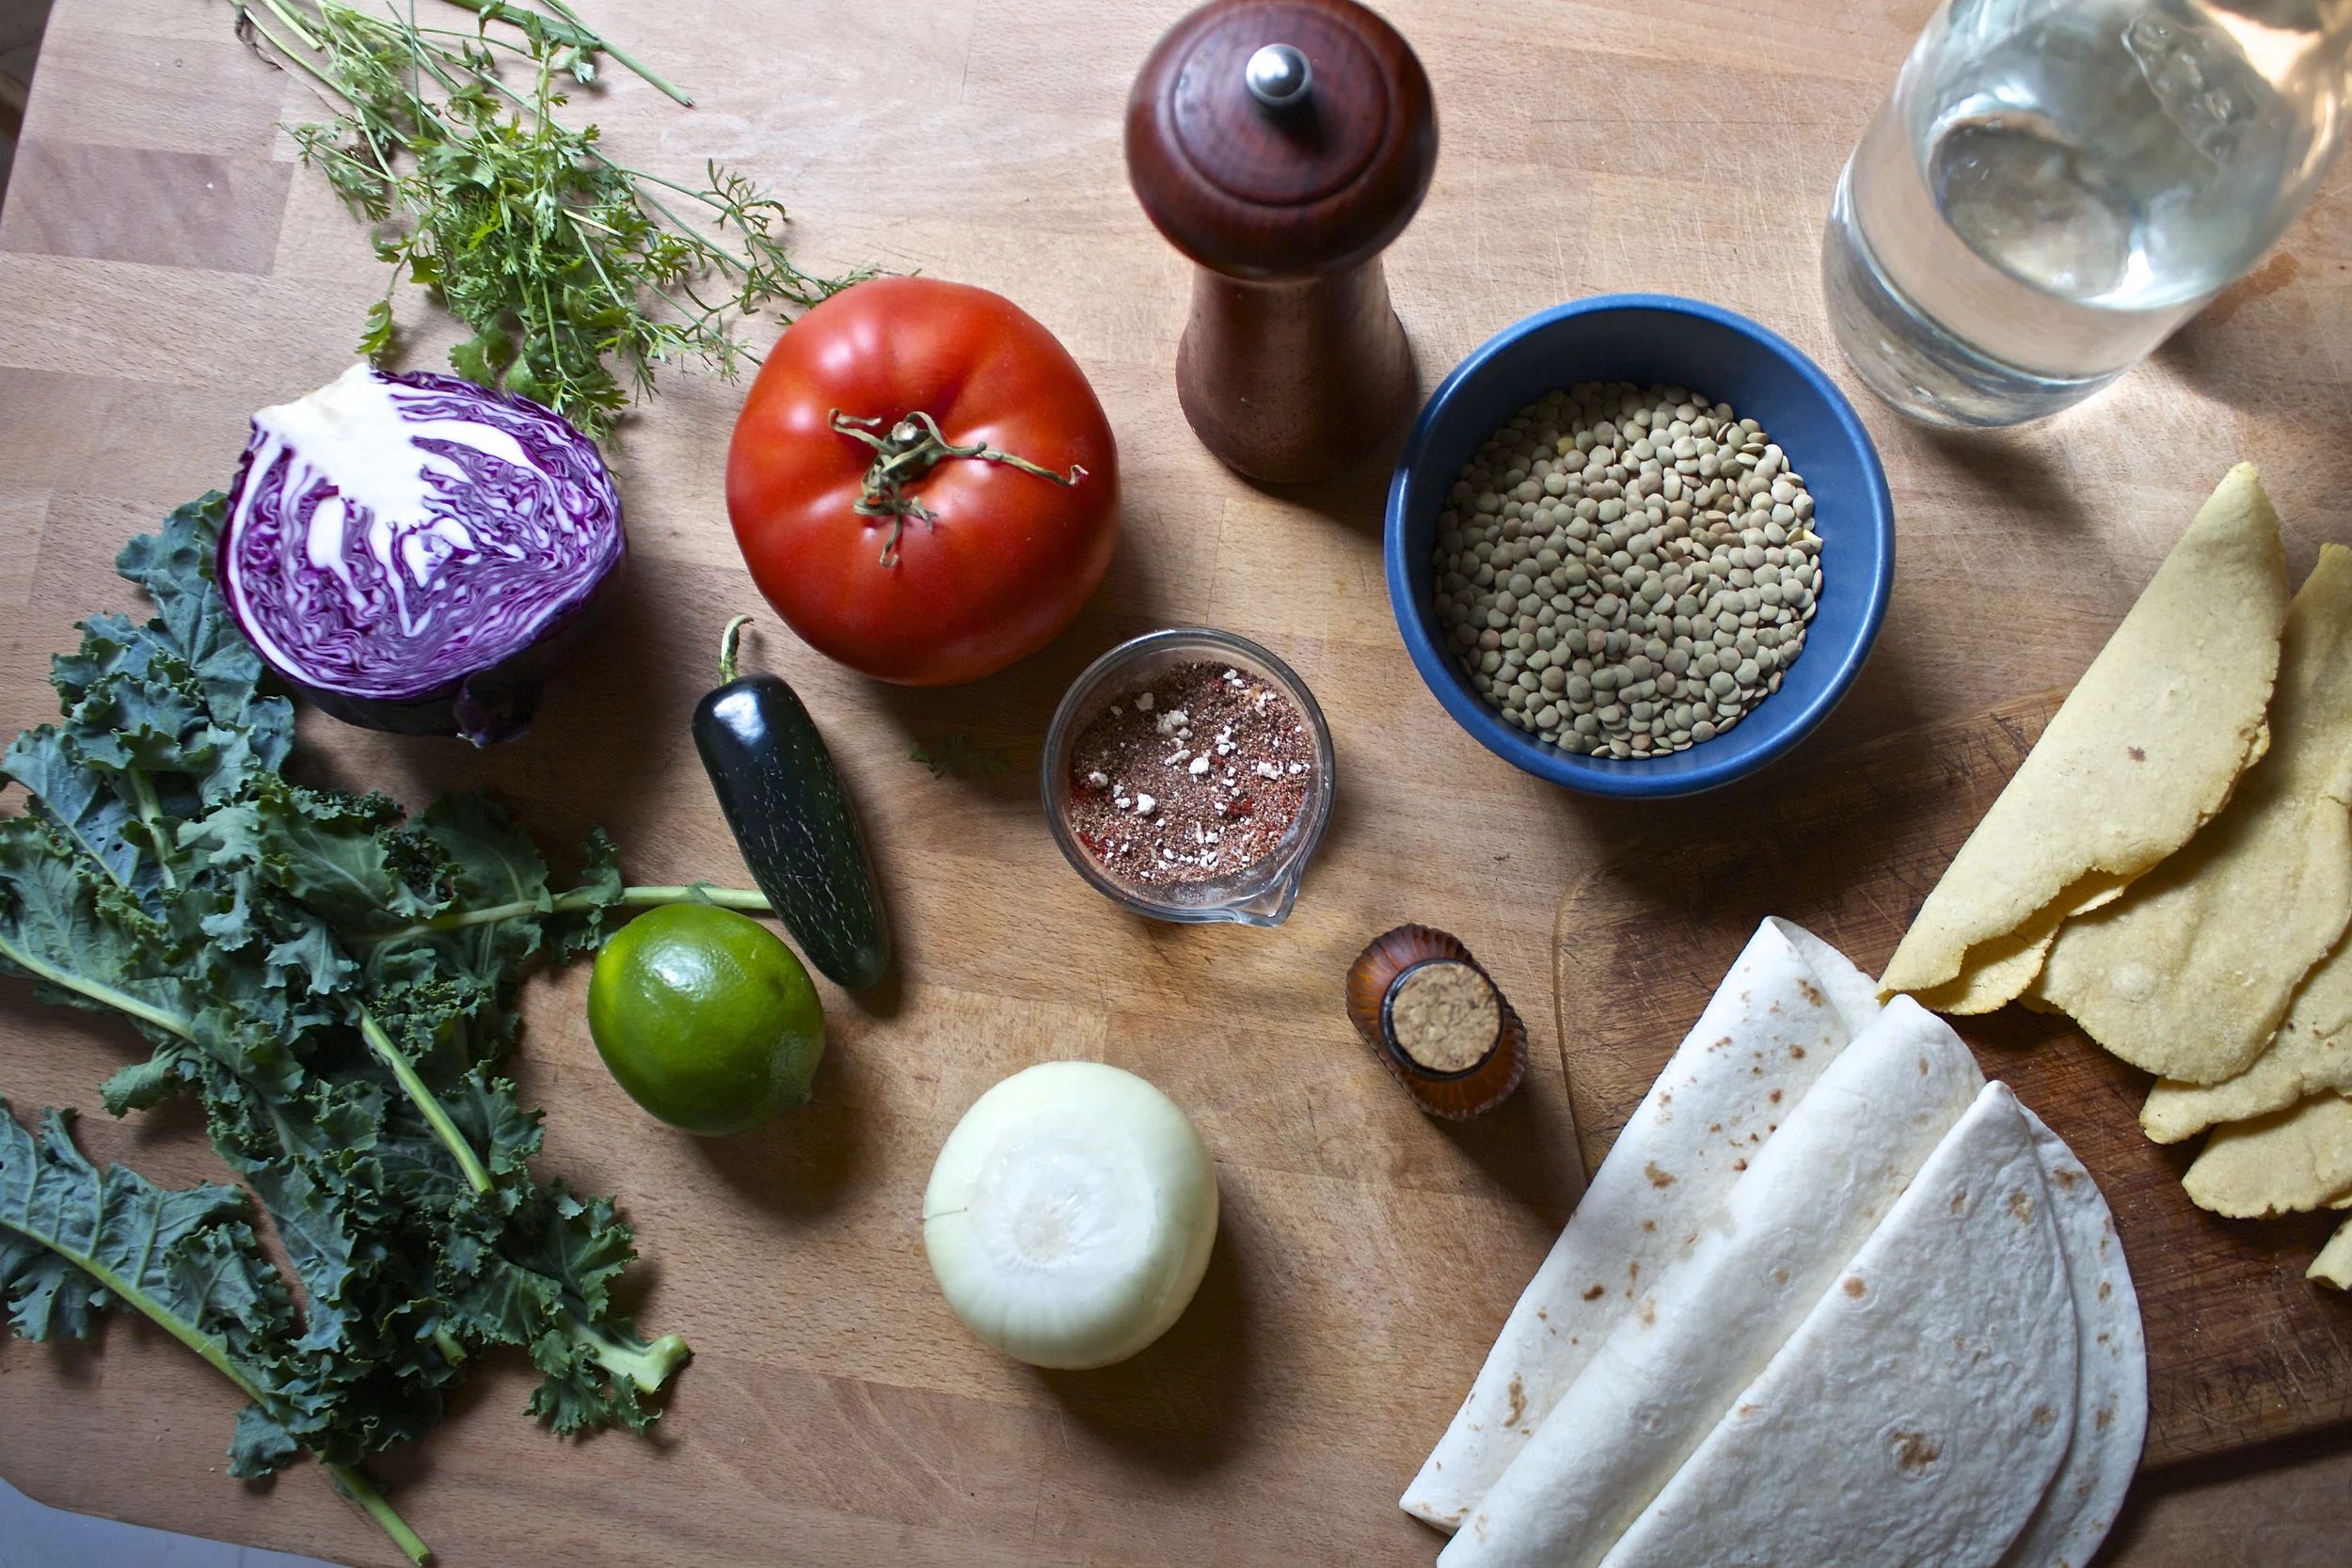
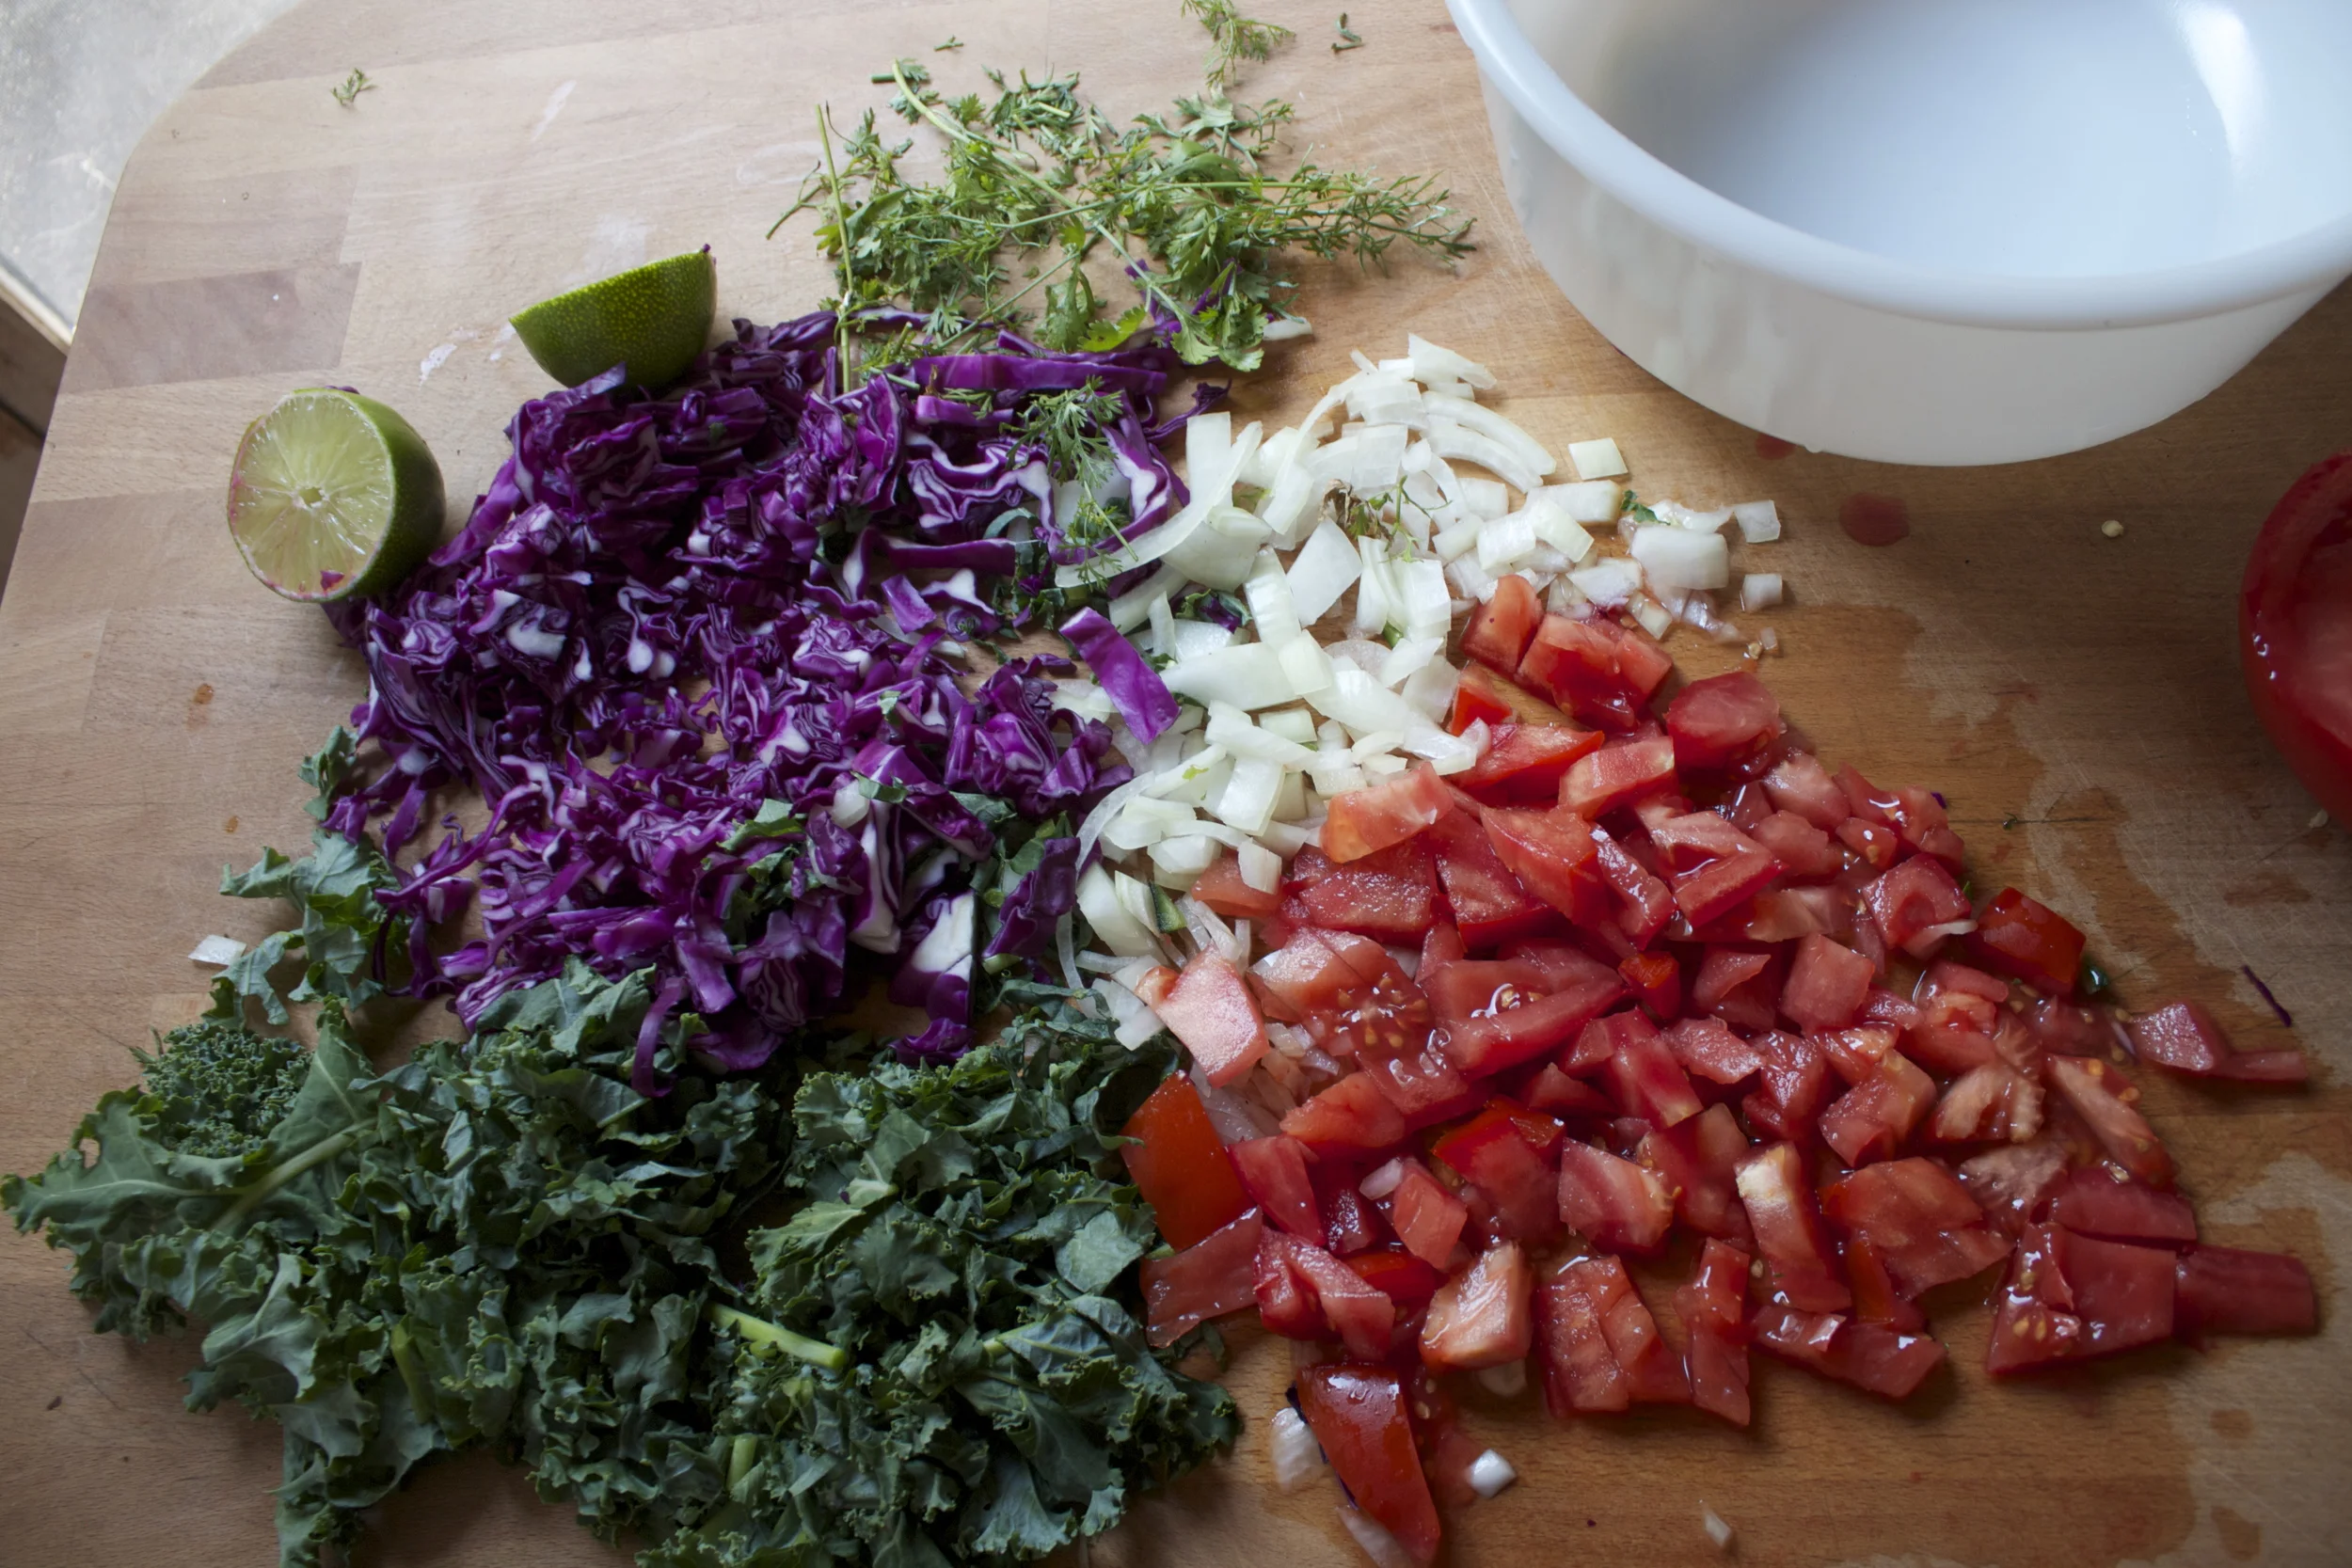
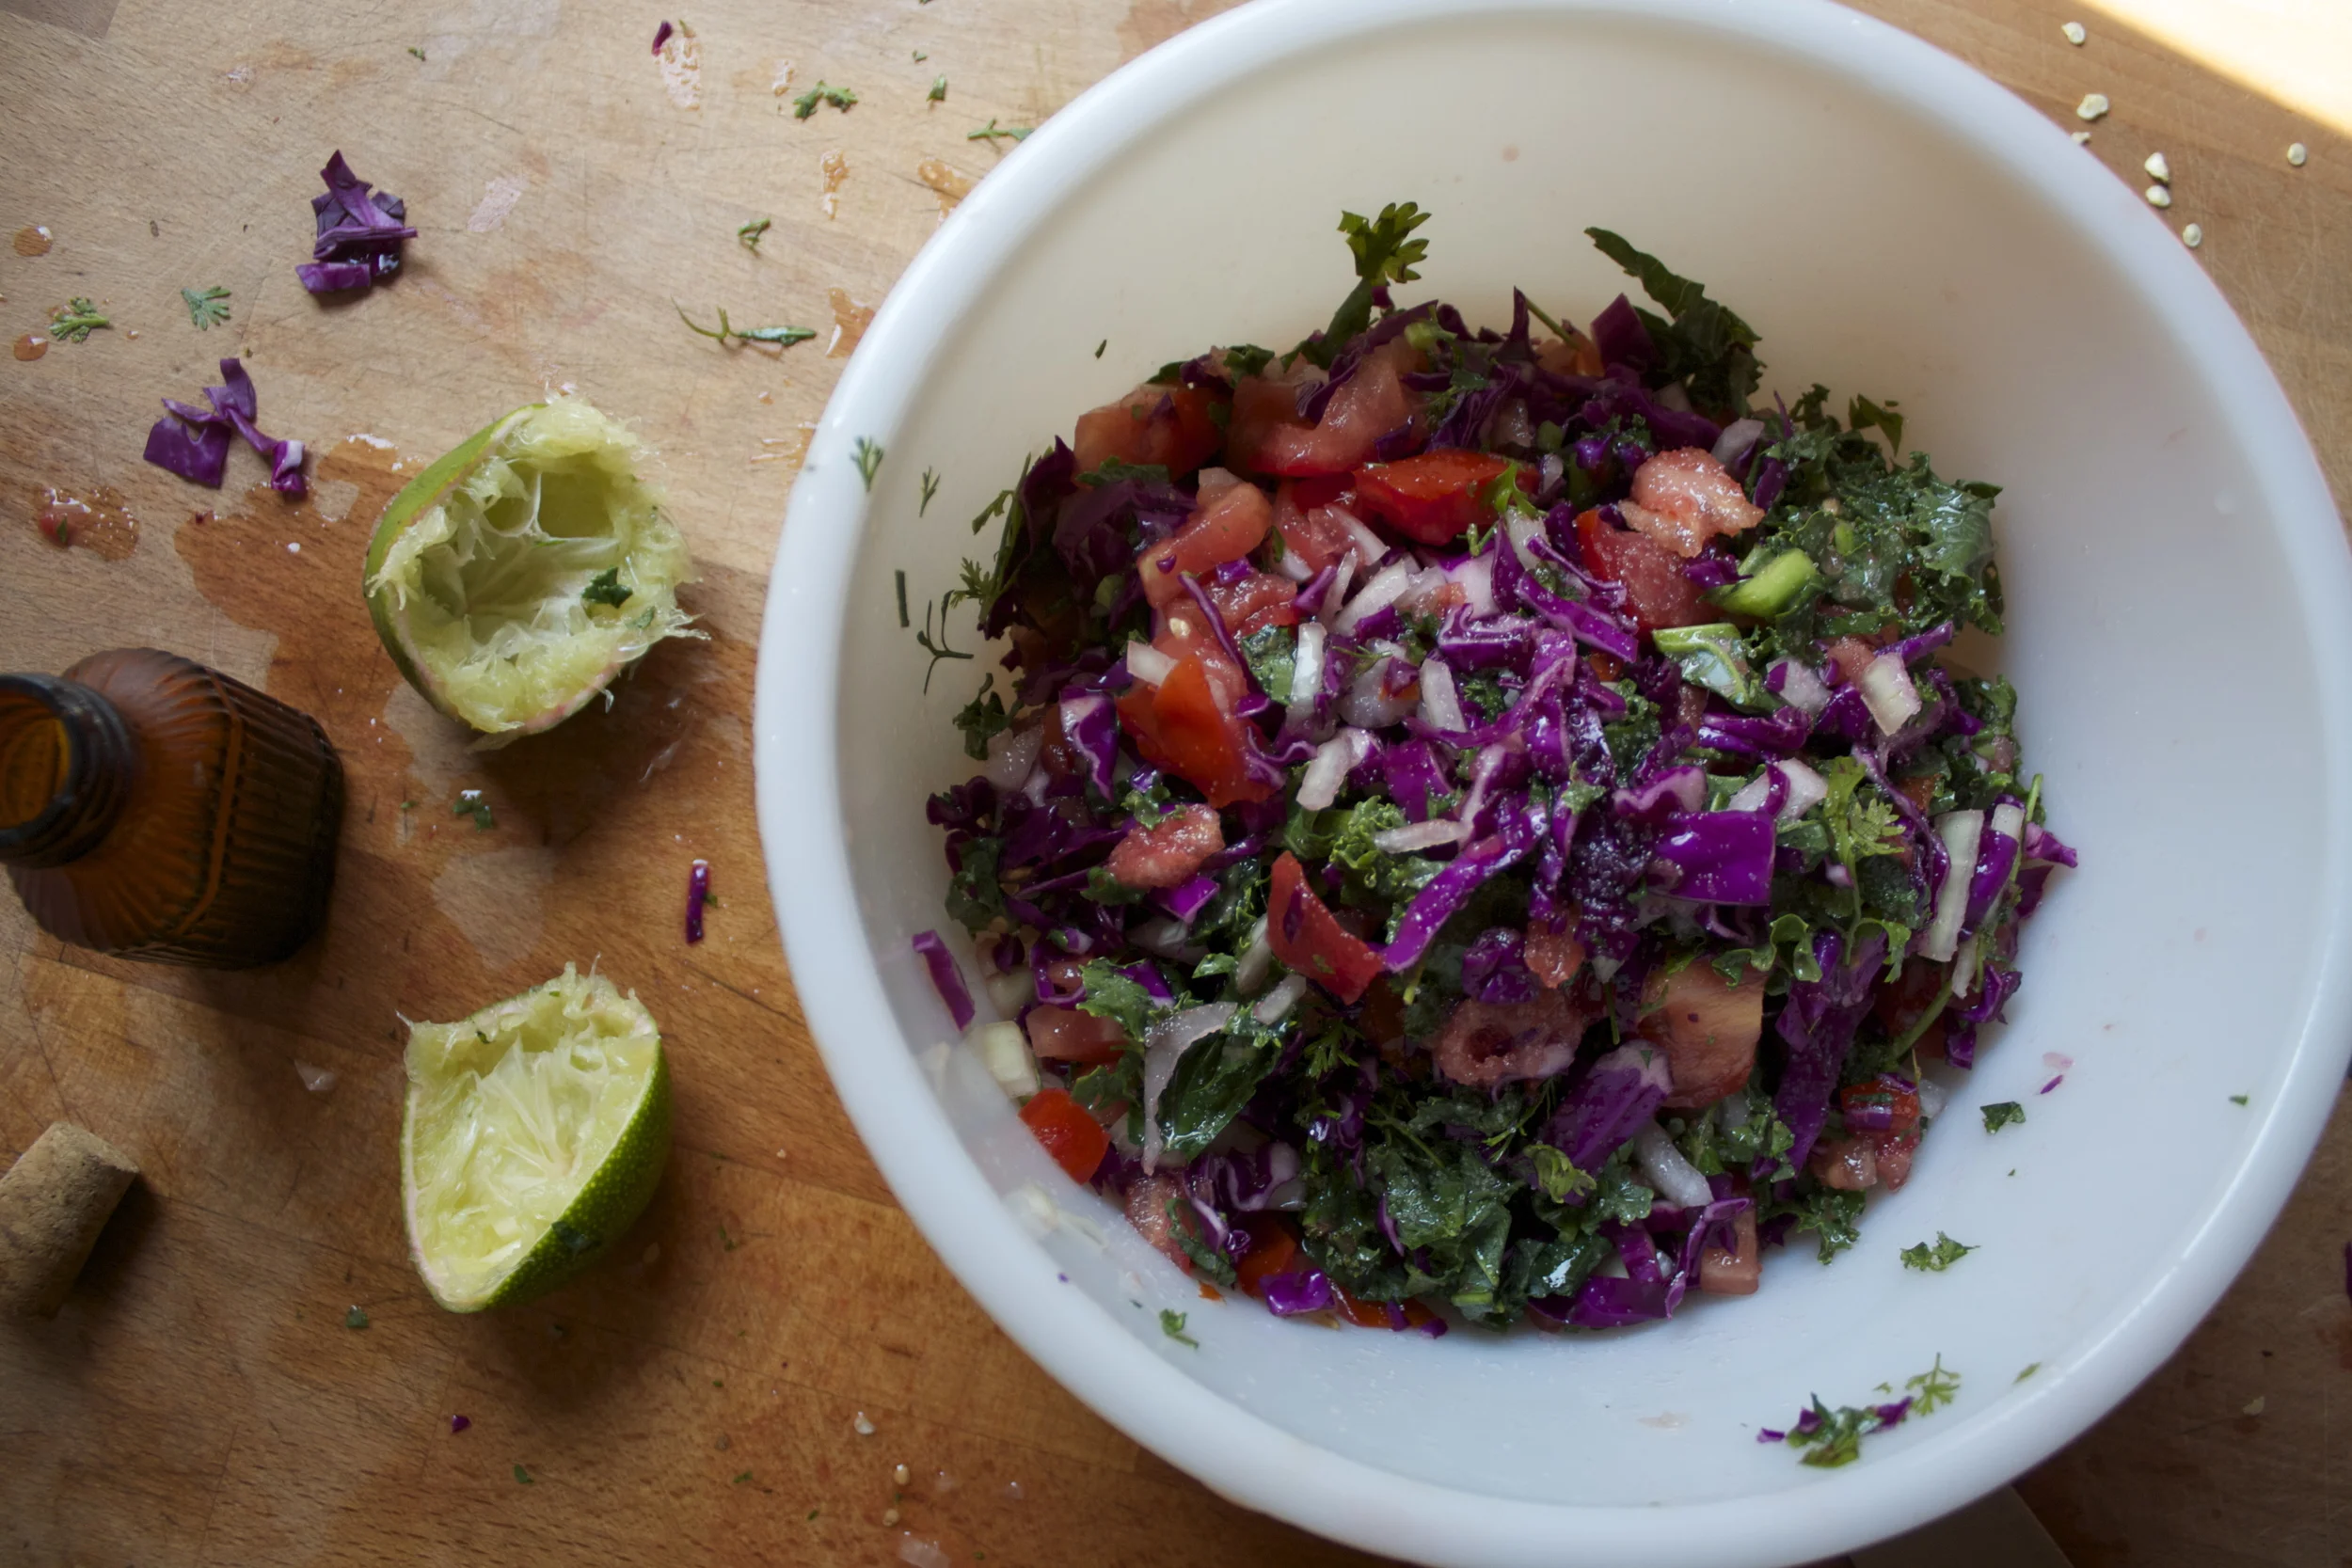
Recently a friend asked me what it is that we do for camp food. So I told her. Camp food is basically aways the same and consists of a big pot of spiced warm lentils or split peas (both cook really fast and have lots of protein), a shredded summer squash in the summer, or pumpkin in the colder months, maybe fresh tomatoes or a bunch of kale to chop and mix in, and a side of cut up carrots, cucumbers, green beens or whatever else I have.. Then I’ll bring a hunk of bread for the mr to eat and me, usually a small head of cabbage to squirt mustard on and crunch into. (Always have the mustard on hand.) And I bring apples to snack on too, but that usually it. (Sometime I%u2019ll back a desert for the mr. If I am feeling nice.)
She was a little taken aback. Said when she (and basically everyone in the world, which I disagreed with) goes camping it is bags of chips, cookies, meat, and everything and anything that she (they) wanted. Basically that camp food was junk food and that she though we were weirdos. But cool weirdos so you know.
So our camp food%u2026 not like many others. But honestly it is everything that I want to eat and I love it so whatever whatever. As for the mr, he is happy with the food and when he is not, he brings along something else, but that rarely happens because my lentils be so good. HA!
But she got me thinking that I should have a few more snack options beside cut up carrots and apples. So that is why I made crackers. These chickpea chili lime, freaking amazing crackers. Because crackers are a very appropriate snack food, and these crackers in particular are even greater because they are made with the goodness of chickpea flour which is packed full of protein and is well received after a day of hiking or other fun outdoor camping activities. And how can you go wrong with chili lime? Well i%u2019ll tell you, you really can%u2019t
So the plan was to make a batch, eat a few, save the rest for this camping weekend. But guess what? I have to make another batch. They didn%u2019t make it. We ate them all. (not sorry) At least I know we will be liking our new camping snack addition well and right.
So if you like crackers, camping or elsewhere, you should really gives these a go. They will not disappoint.
Now to the crackers!

The stuff. Chickpea flour, chili powder, a lime, a little baking powder, olive oil, salt and pepper, and water.
Combine the flour, zest of the lime, half the chili powder and half the salt, and the baking powder and some pepper in a bowl. Mix until completely combined then add in the oil, water and the juice of the lime.

Mix until dough forms. It might feel a little sticky, if that is the case, just mix other tablespoon of chickpea flour.

Knead dough on a well chickpea floured surface for a good minute until the dough is a even consistency then let it sit for a few minutes to rest. Once rested, cut dough into 2-3 pieces because working smaller is easier.
Roll out your first piece of dough about 1/8 inch thick. (Again, make sure to really flour your work surface and rolling pin.) Mix salt and chili powder together and sprinkle on top. Cut out your crackers (squares are nice but triangles would be nice too) then poke each cracker with a fork.

Crackers on a baking sheet before baking and after baking looking all crackery and delicious. And yeah, they shrink a bit.

And lastly, cool the crackers on a cooling rack. They will crisp up a even more. Then it%u2019s all you.
Ready to eat whenever you make the move. You can pack them away for later or place these delicious crackers in a very pretty bowl and eat them away. Or both.
A cracker win!
-C
make 75 crackers
-
1 1/2 cups chick pea flour plus about 1/3 more for dusting and rolling
-
1/2 teaspoon baking powder
-
1 tablespoon olive oil
-
1/3 cup room temp water
-
1 teaspoon chili powder split in half
-
1 lime
-
1 teaspoon salt split in half
-
1/2 teaspoon fresh crackers pepper
Preheat oven to 350.
In a bowl combine the chick pea flour, baking soda, pepper, 1/2 teaspoon chili powder, and half a 1/2 teaspoon salt. Mix until evenly incorporated. Add in oil, the juice of the lime, and and water and mix until a dough forms. Dump dough onto counter and knead until completely uniform in texture. Add more flour if the dough is really sticky. Set dough aside for a few minutes to rest.
To make the crackers, really dust the counter with chickpea flour. Cut the dough into 2-3 pieces and roll1 piece out at a time to about an1/8 inch thin. Again, really flour the surface and rolling pin or else the dough will stick Once rolled, combine the remaining chili powder and salt and sprinkle the top with it. And then cut the crackers. Take a knife of bench scrapper or pizza cattier and cut the dough into inch long strips vertically, then diagonally. Poke each cracker with a fork then gently place them onto a baking sheet. Repeat with remaining dough.
Bake crackers for 15-20 minutes or until a nice deep golden brown. Remove from oven and let cool on a wire rack.
And then eat.
Store uneaten crackers in an airtight container for about a week.
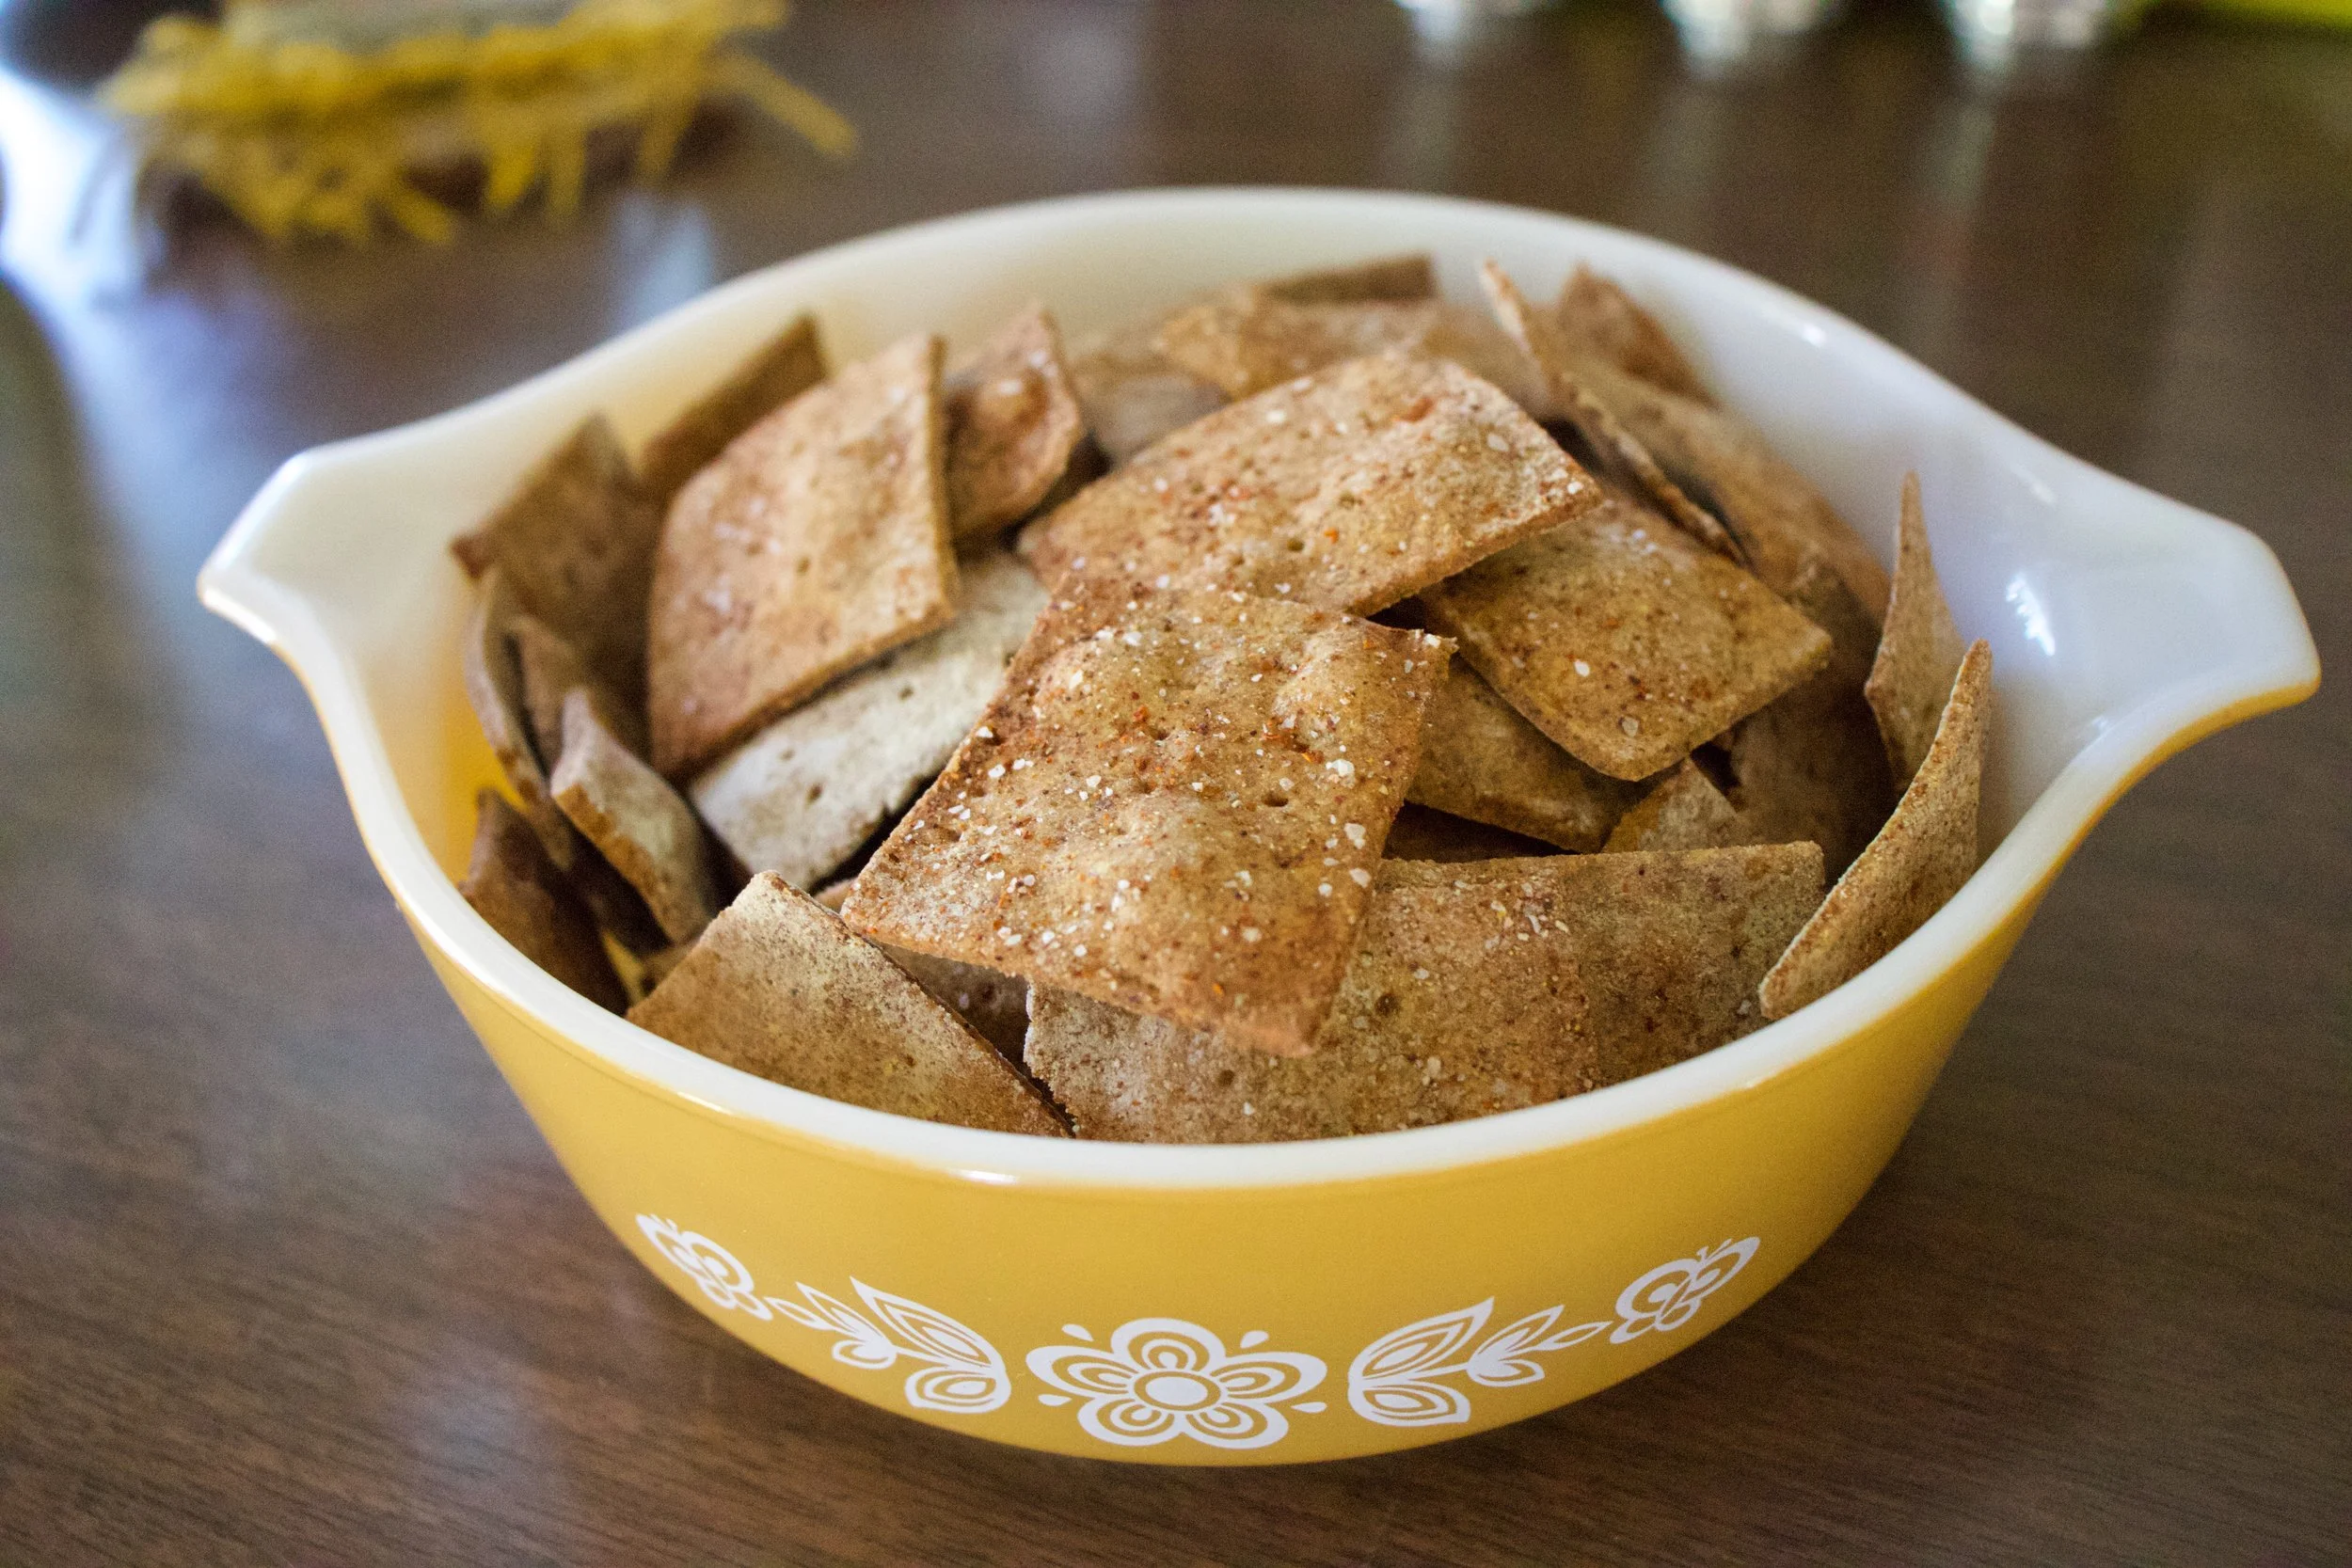
I am obsessed. For real. That might seem like a strong statement for a feeling about a food, but right now, it is truth. I spend more time then I want to admit thinking and drooling over Socca, which is, to those who do not know, the most basic chickpea flour pancake-y bread thing. Chickpea flour, water and salt. Cooked fast under the broiler in a screaming hot skillet. That is it. And it is amazing. Depending on how you make it, it can be creamy and soft or more cracker like with some crisp crunch to it. Either way, it is just so freaking good. Of course, what I am dreaming about regarding it is not just plan basic socca (which I have made 3 times in the past 3 days) but different flavored soccas (I have experimented with lot of seasoning, and they are all A+) with all sorts of different topping and using it in all sorts of different ways. But for now, I wanted to keep basic so we all know how good simplicity is. We will go from here.
There is no stopping me. There is no stopping the socca.
Now to my new favorite food, the socca.
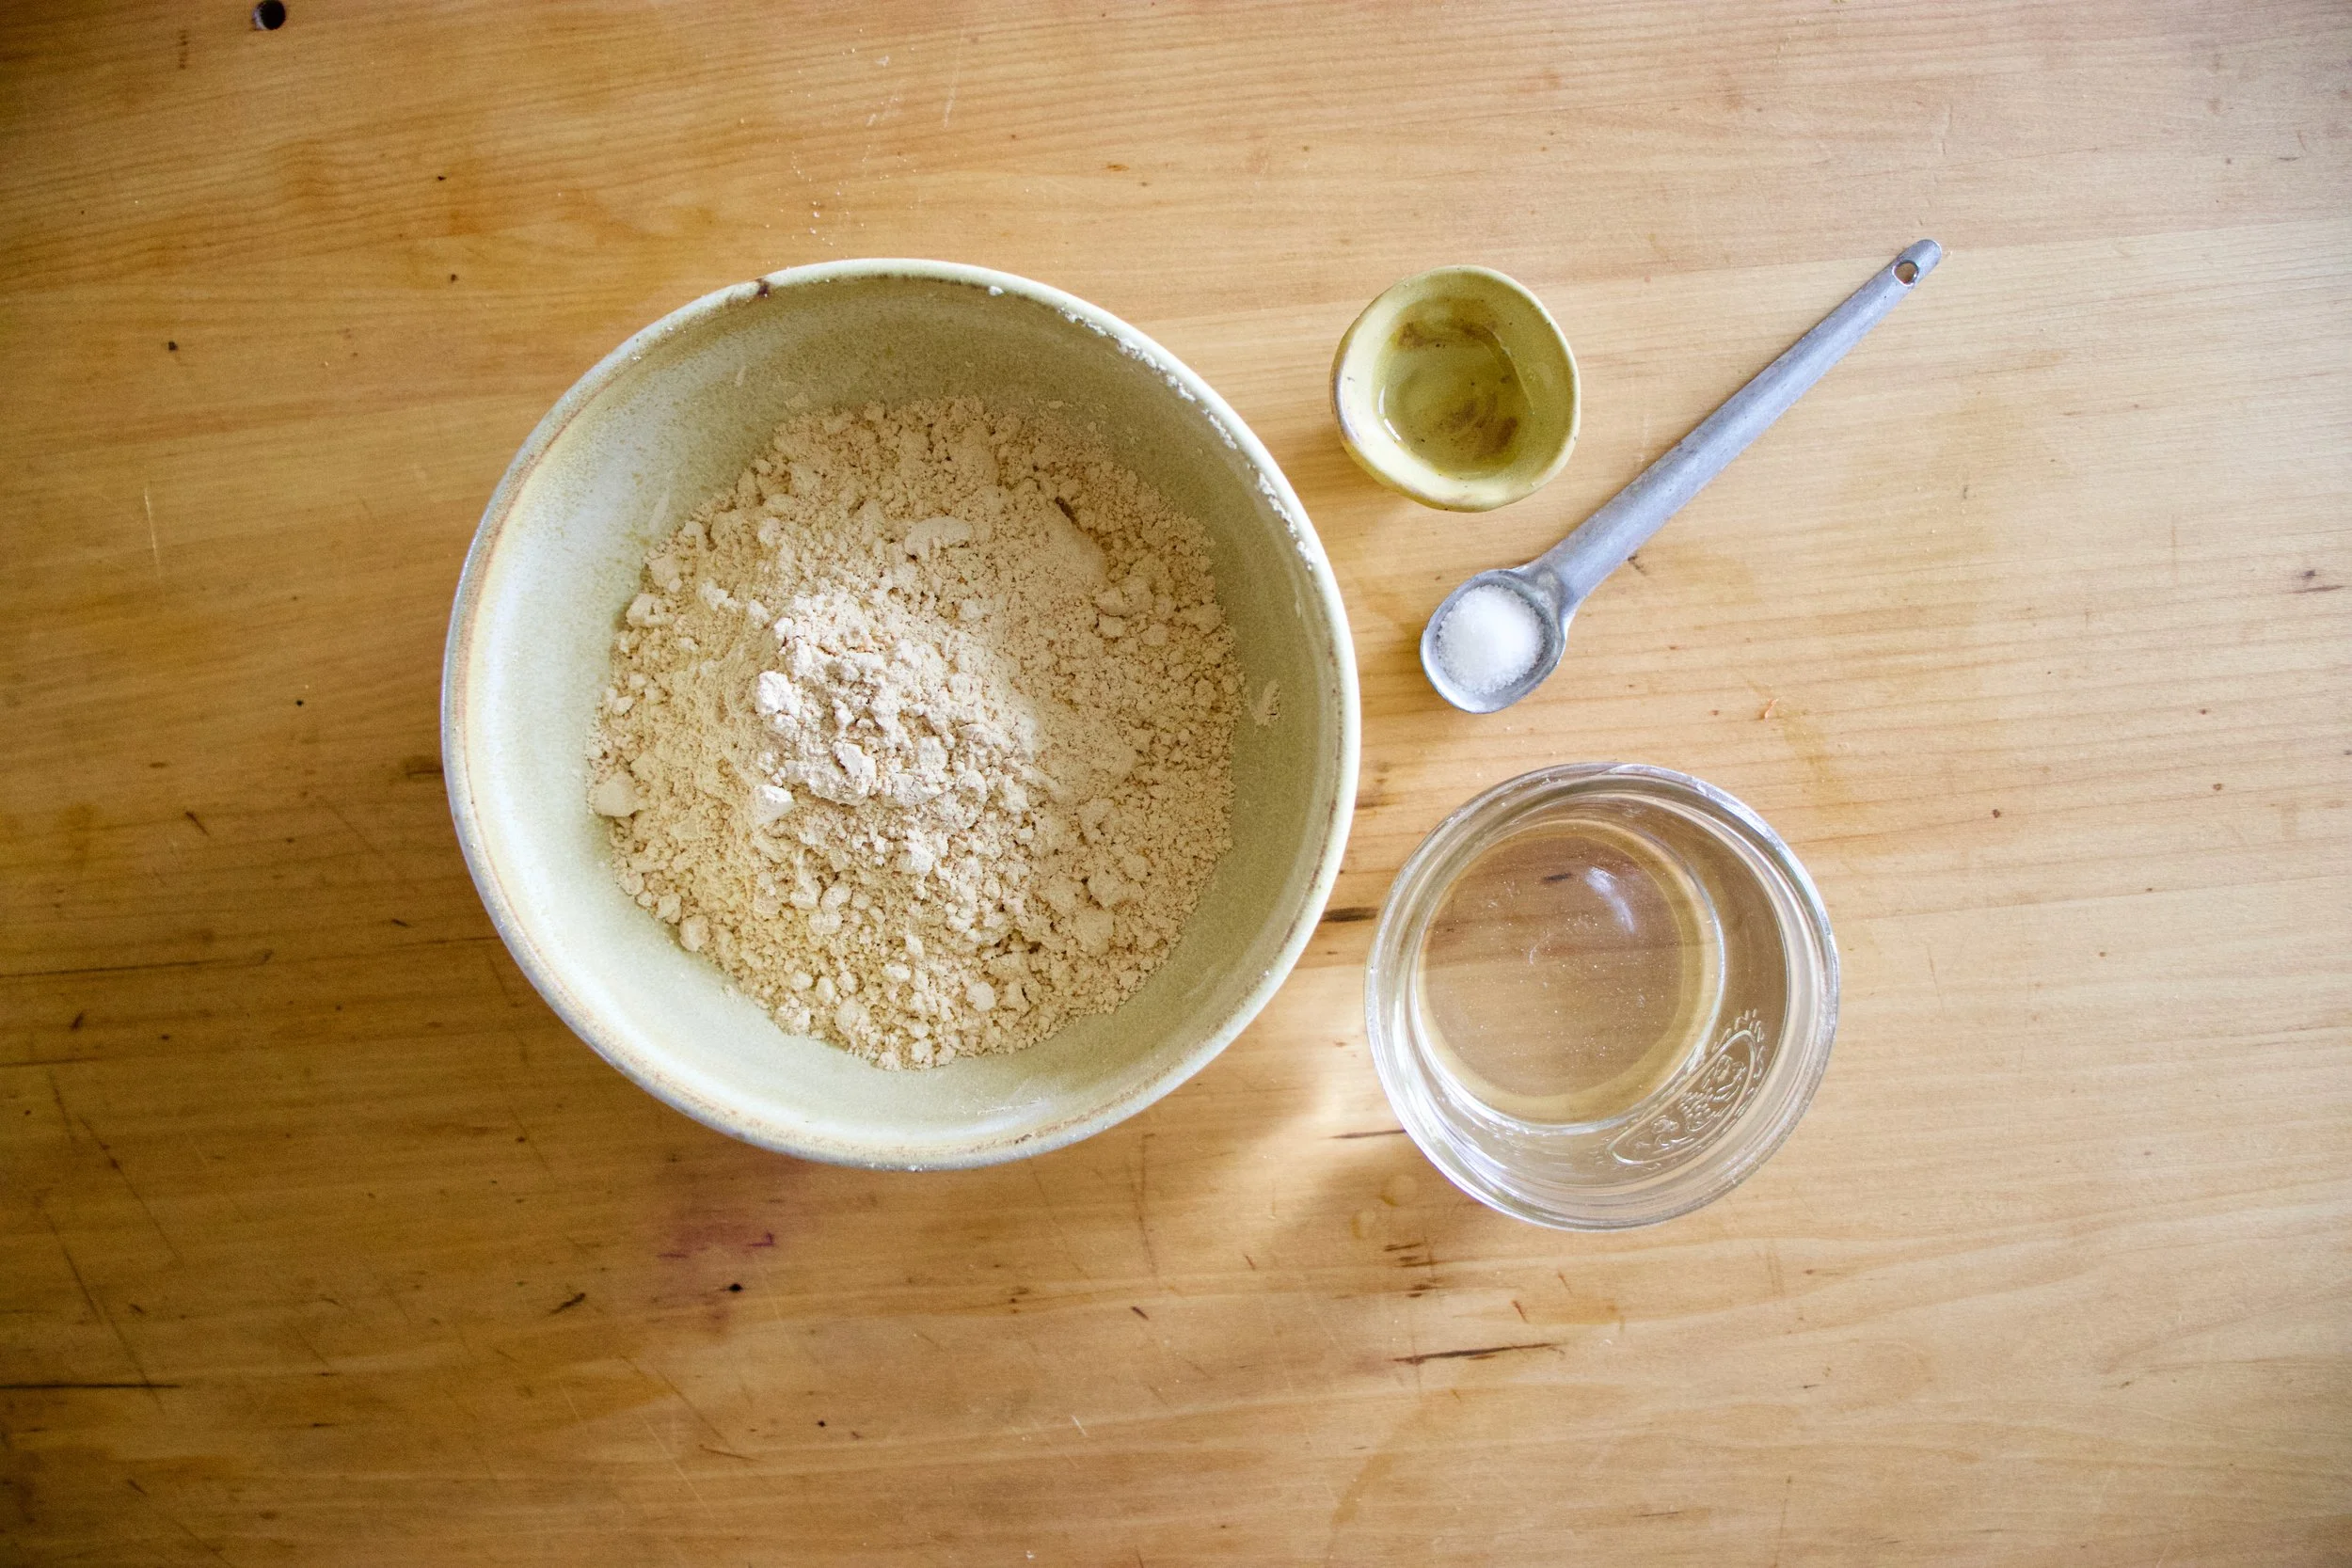
Chickpea flour, salt and water. That is it. Mix it all up.

Batter all smooth and now in need of a rest. Half an hour or up to a day of rest is good.
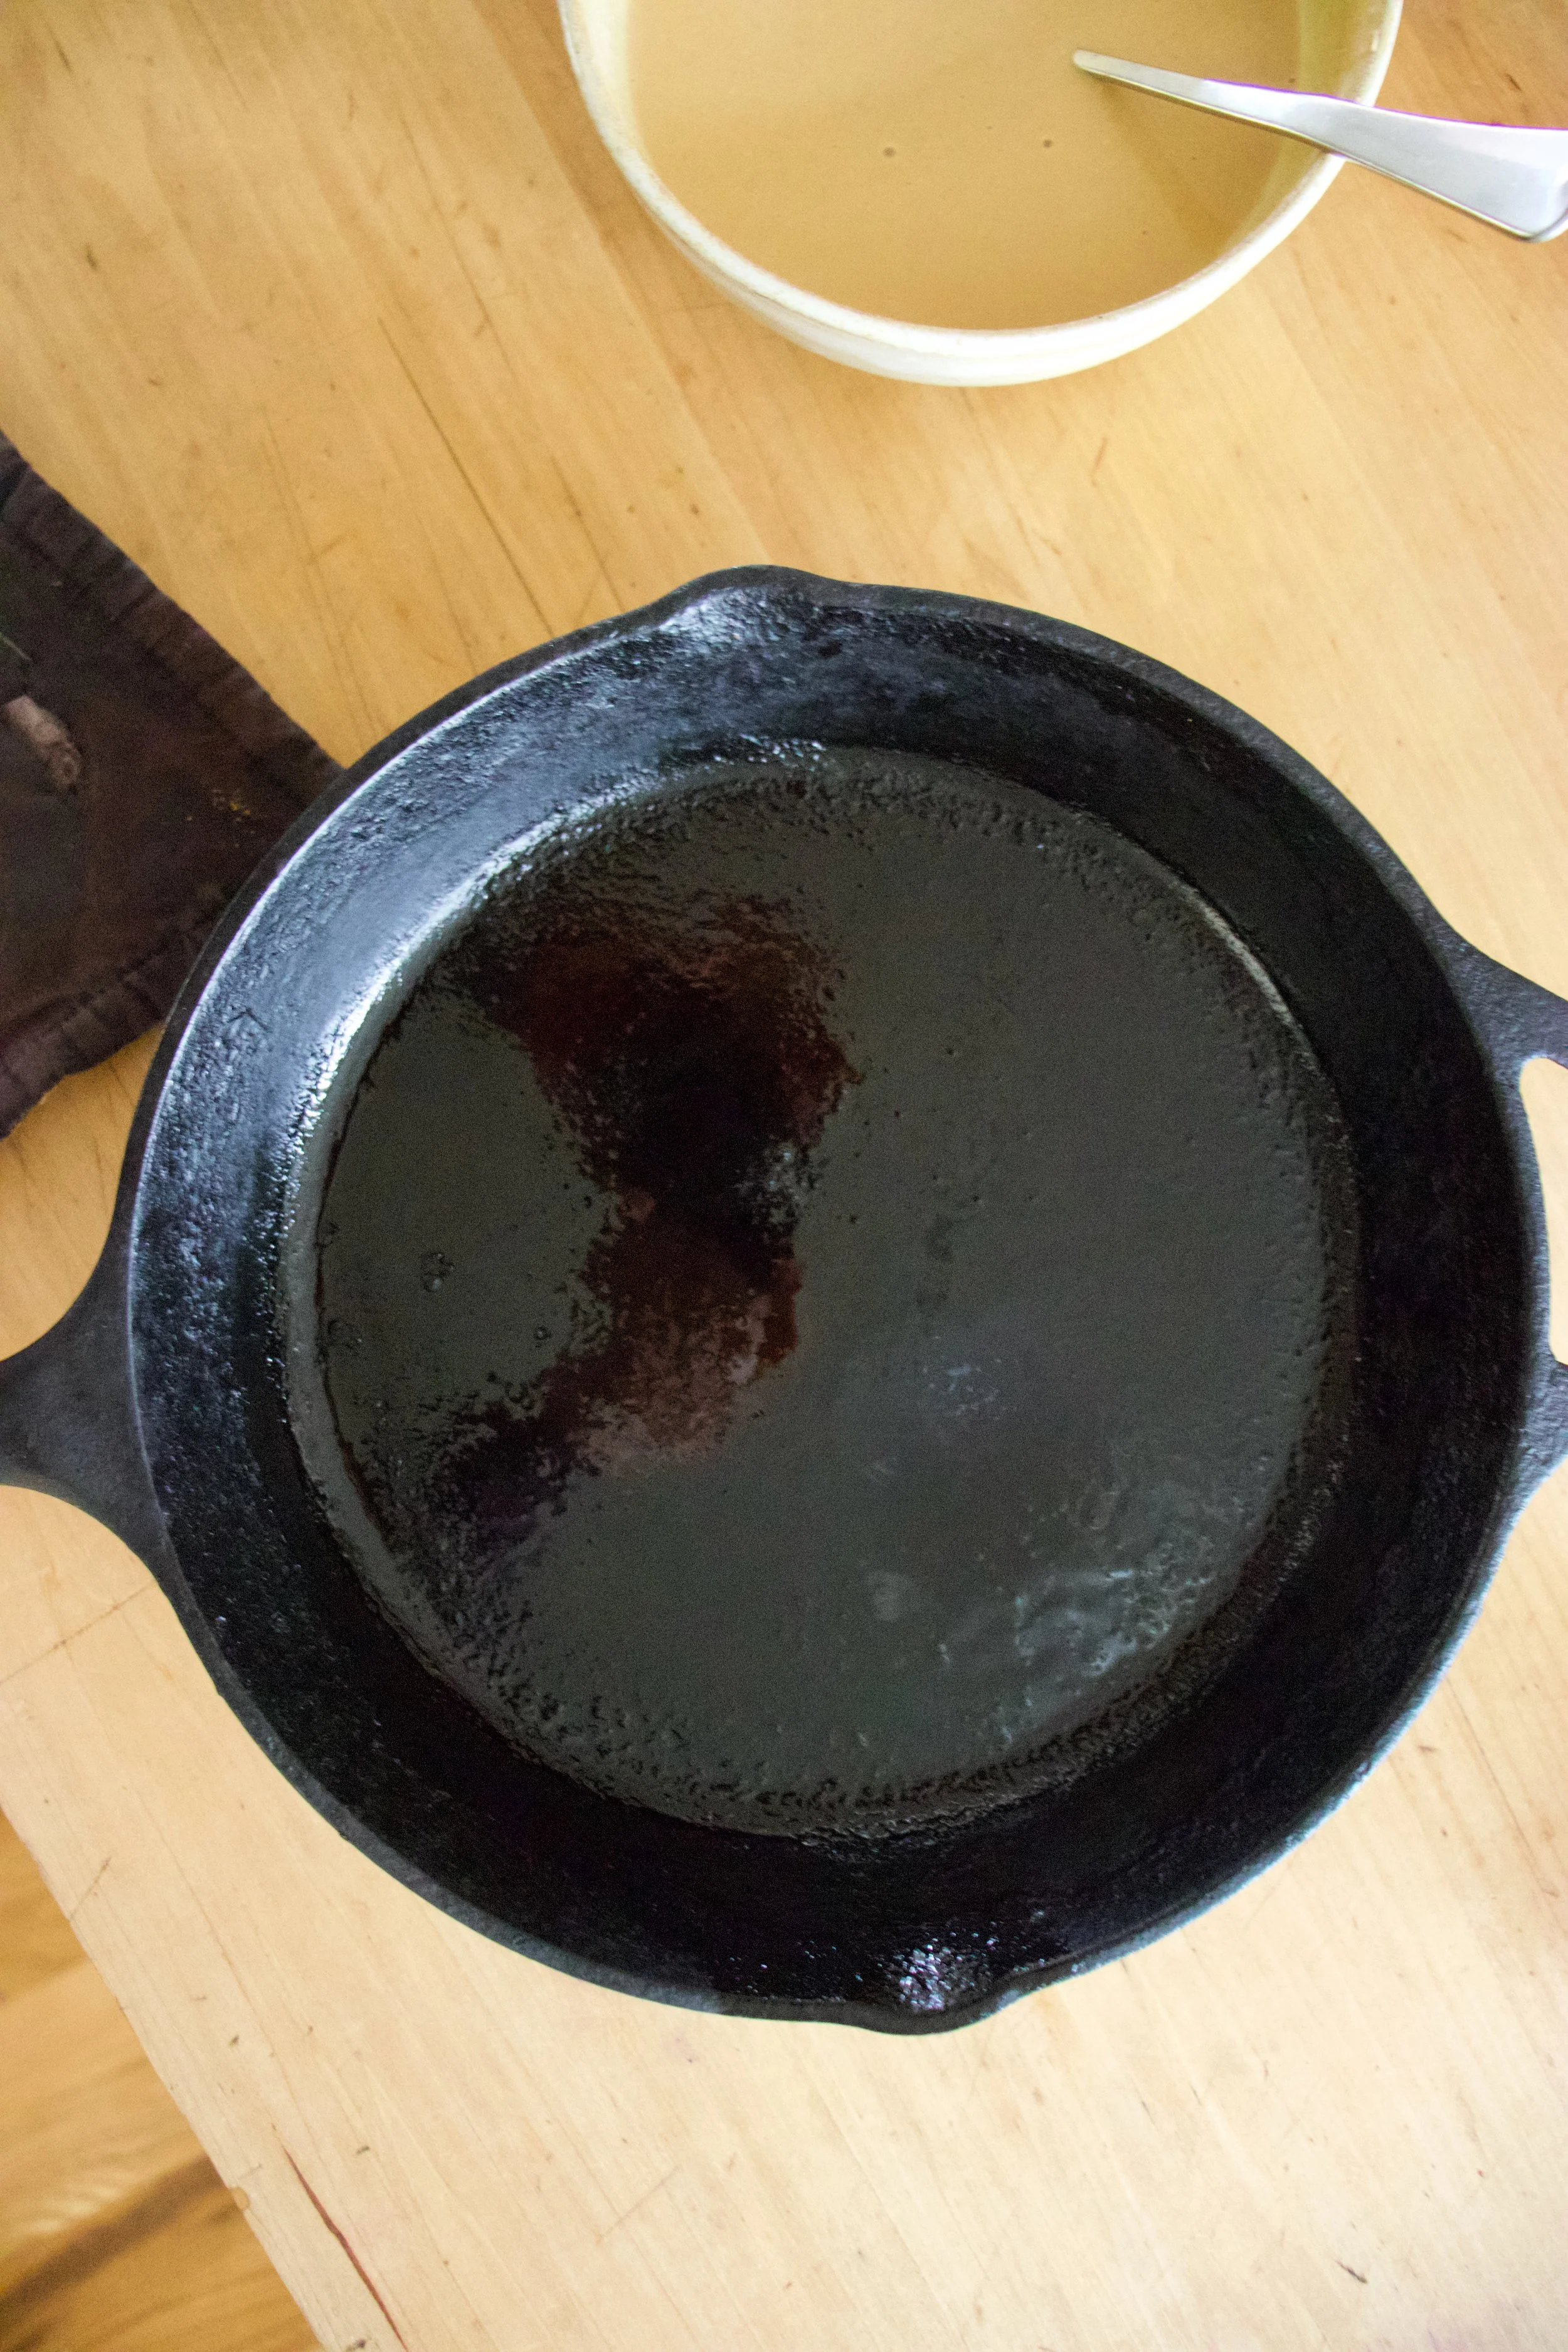
Now to cook the socca. You need to use something oven safe like cast iron. The trick here is to preheat the skillet while you are preheating the oven. Crank oven to 450 with the skillet in oven and once the oven reaches temp, turn oven over to a high broil. Let the skillet get really hot for another minute or two then remove skillet from oven (carefully!!!) and give it a splash of oil. Don%u2019t preheat the skillet with oil in it or else it will start to smoke and get gross.
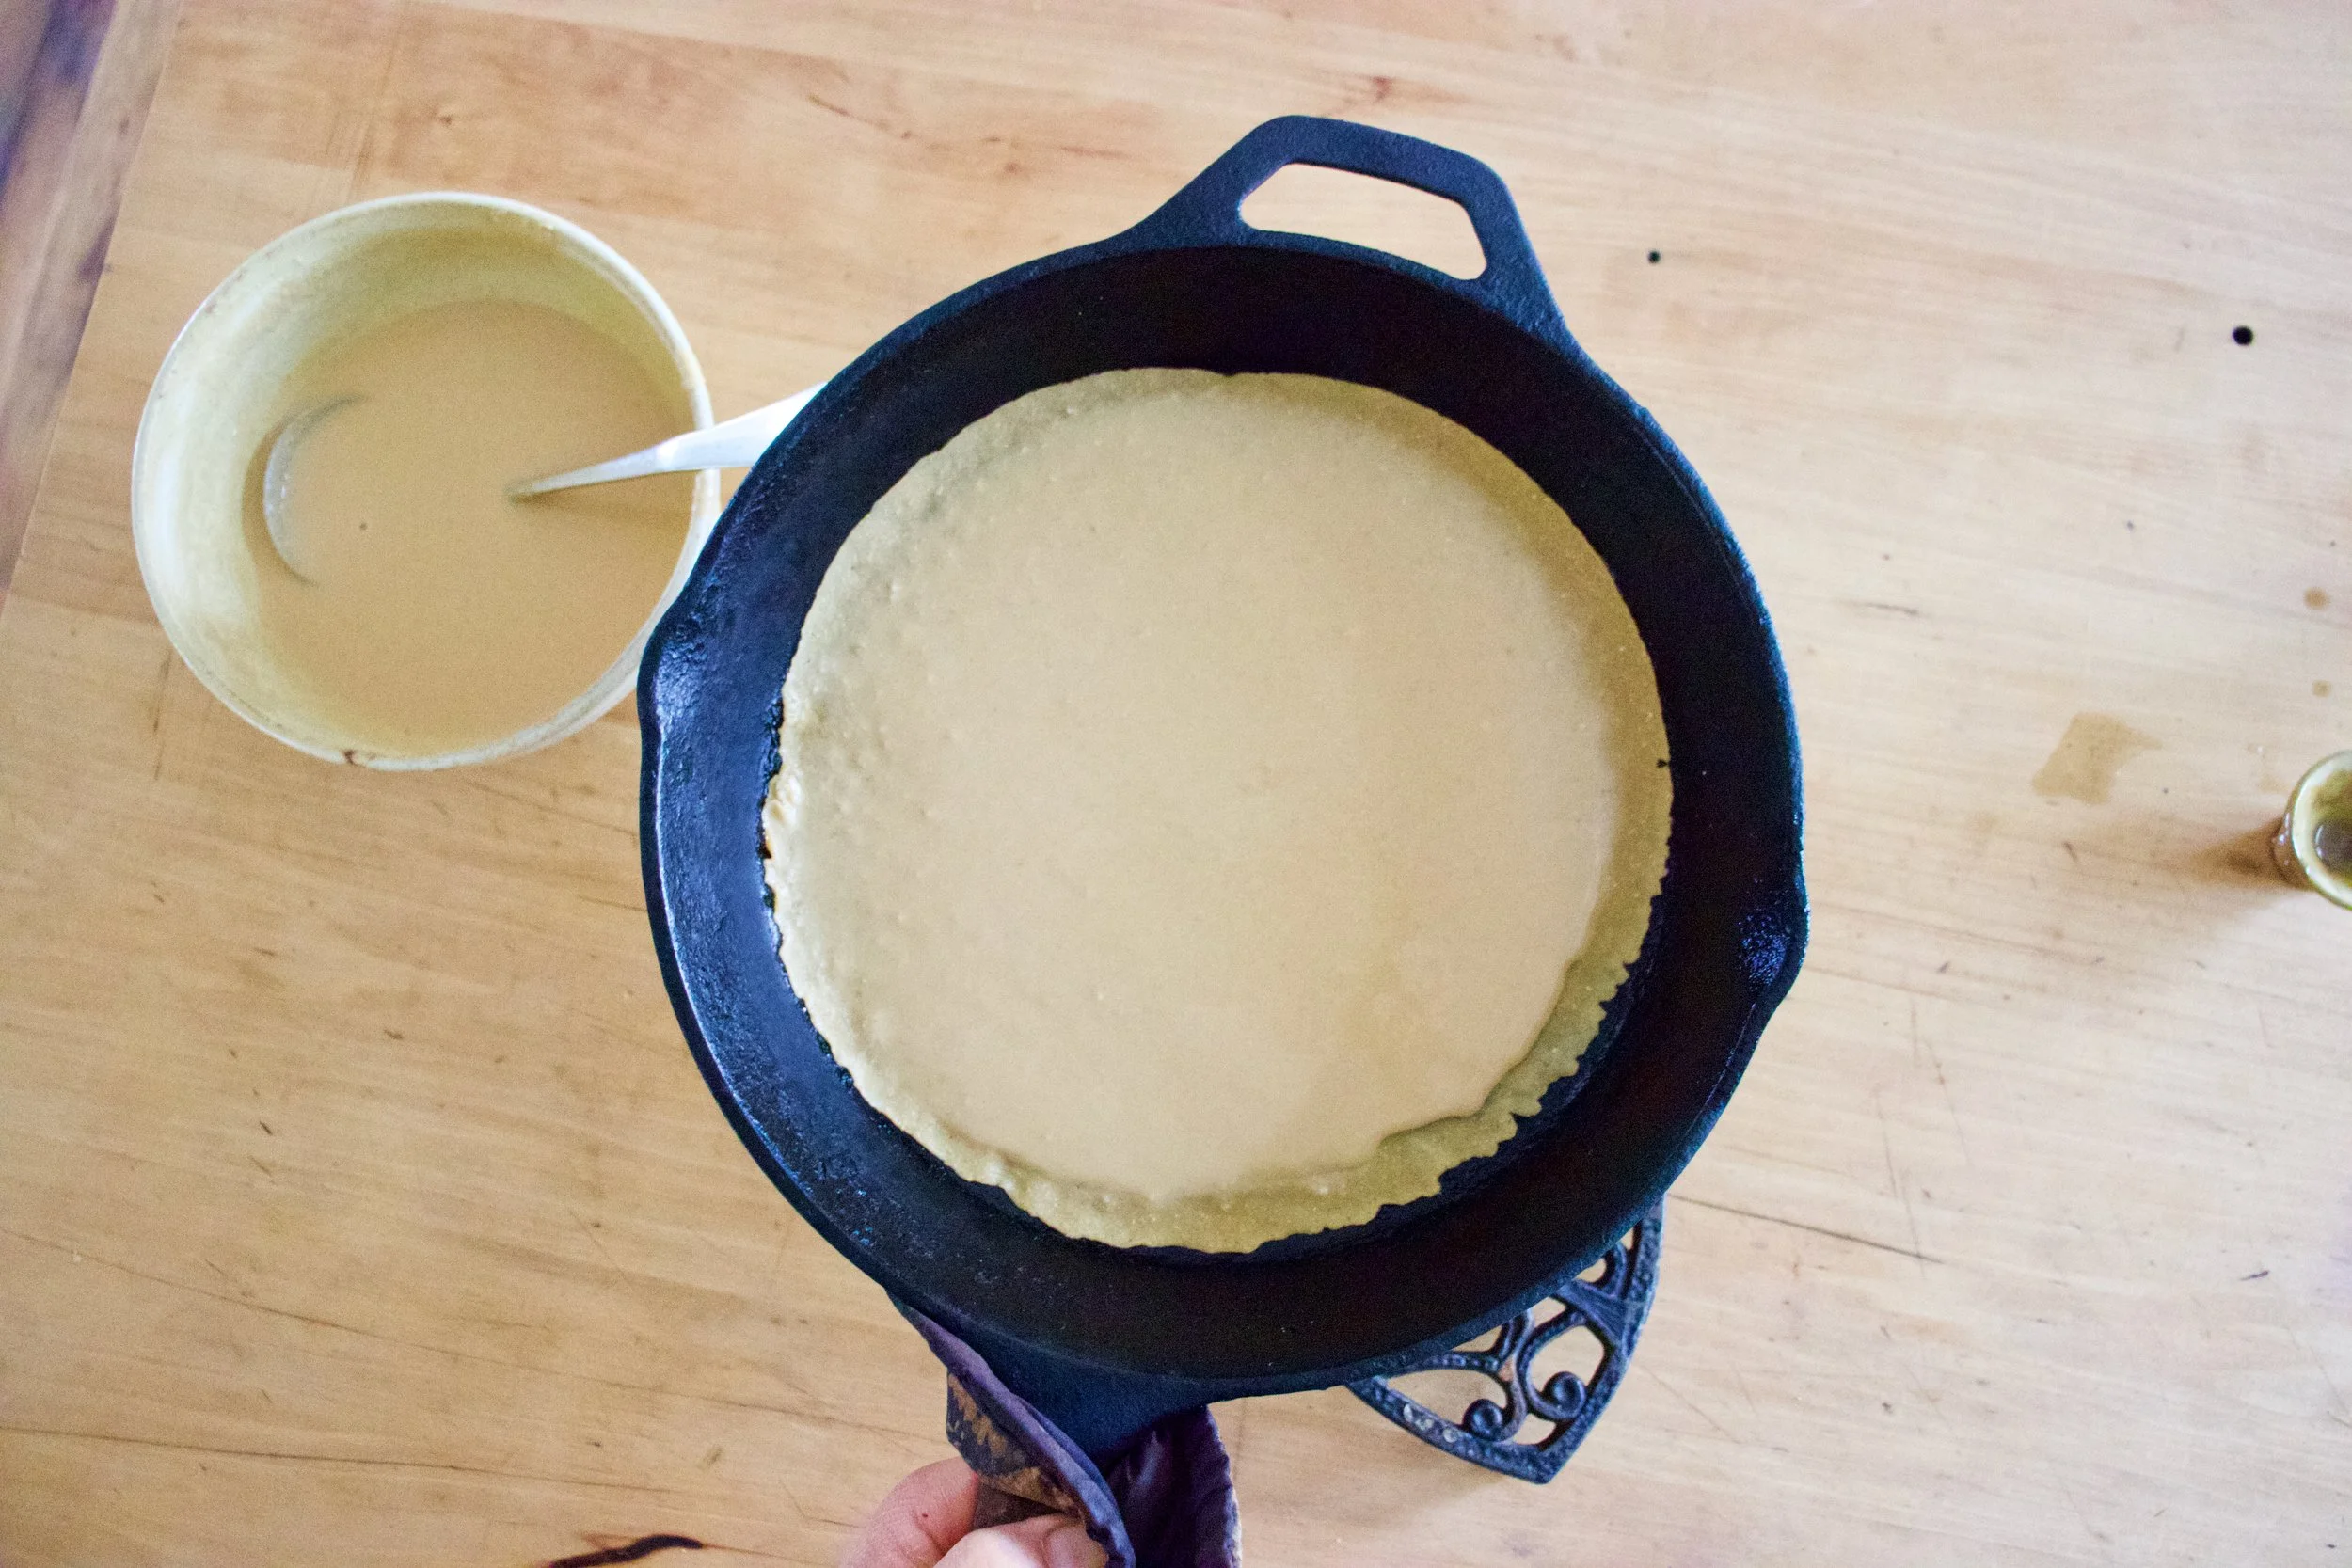
Now that you got a nice hot and oiled skillet, grab the rested batter and pour half of it in. Tilt skillet around to coat bottom then stick skillet back into oven under broiler and cook for 4-8minutes. ( It depends on your broilers strength and your preference for blisters)
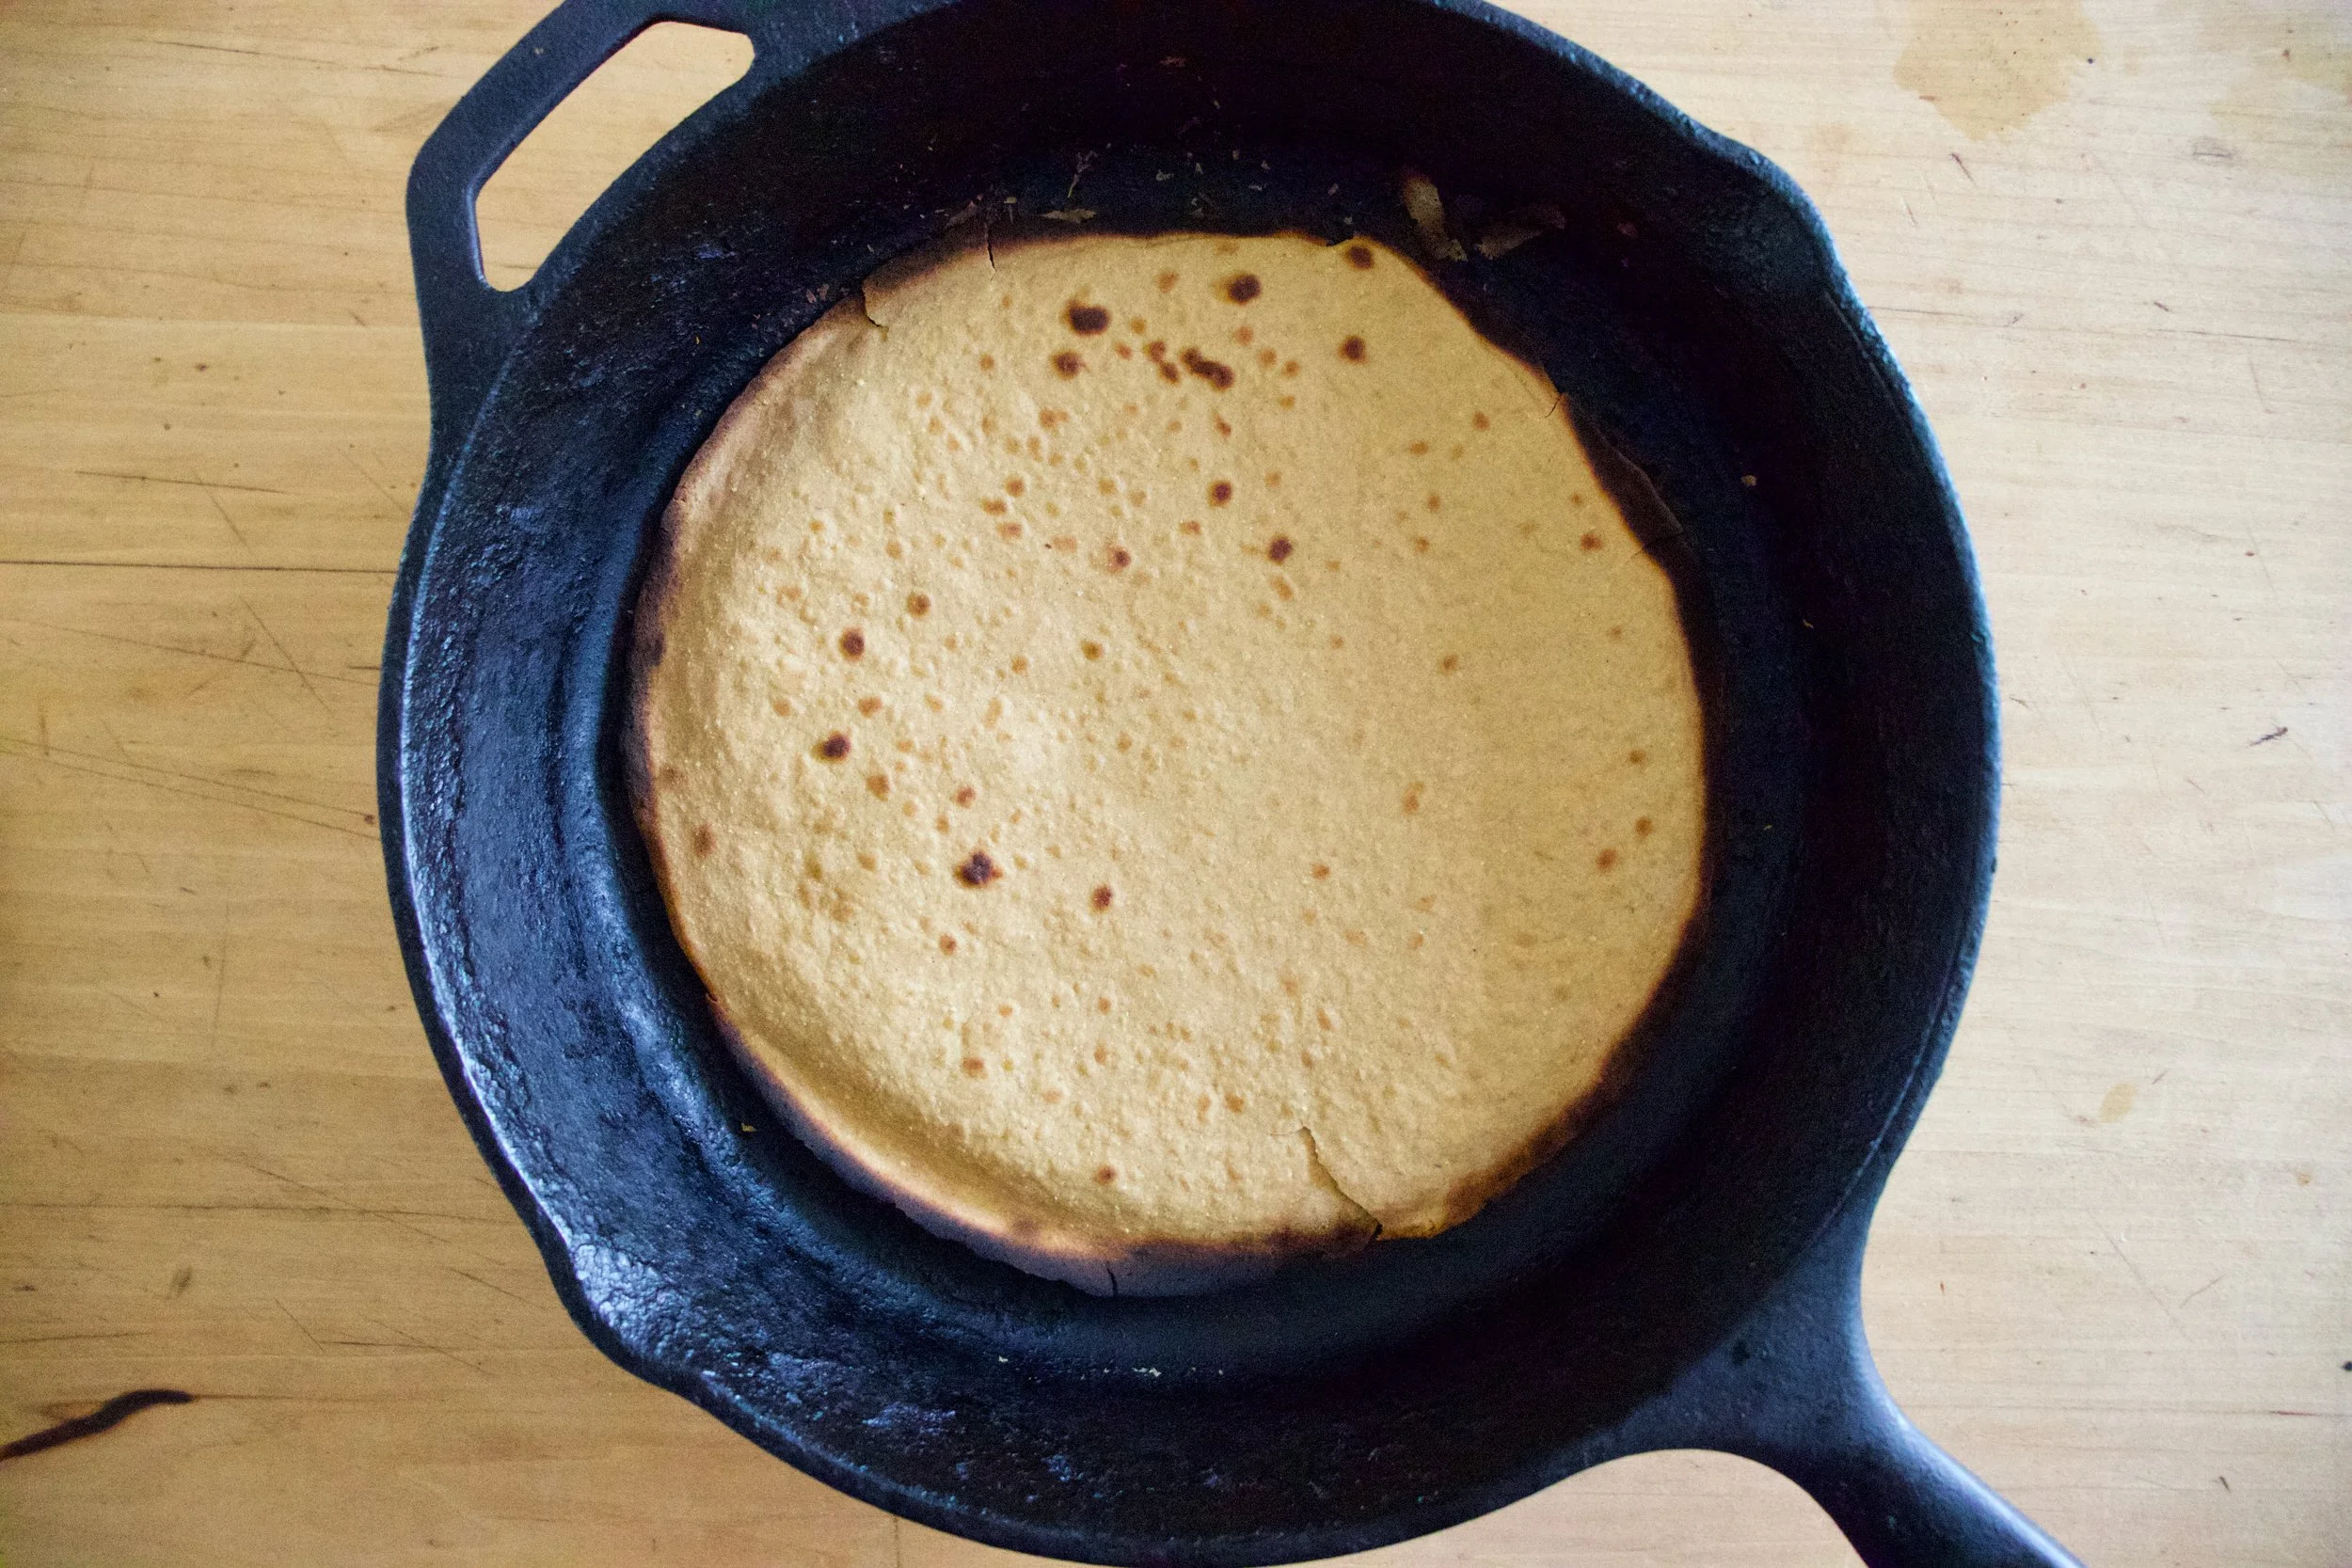
Out from the broiler. Cooked and slightly blistered. I went easy on this one. The next one got a few more blisters.
2 soccas, one a little thicker then the other. One a little more blistered then the other. Both in my belly.
So many Soccas to come.
So. many. Soccas.
-C
makes two 10 inch soccas
-
1 cup chickpea flour
-
1 cup room temperature water
-
1/2 teaspoon salt
-
olive oil for pan
Mix chickpea flour, salt and water together into a bowl until smooth. Let mixture rest for at least half an hour or up to a day.
When ready to make the socca, preheat oven to 450 with a 10 inch oven safe skillet (I used cast iron but any oven safe dish would work) in oven.
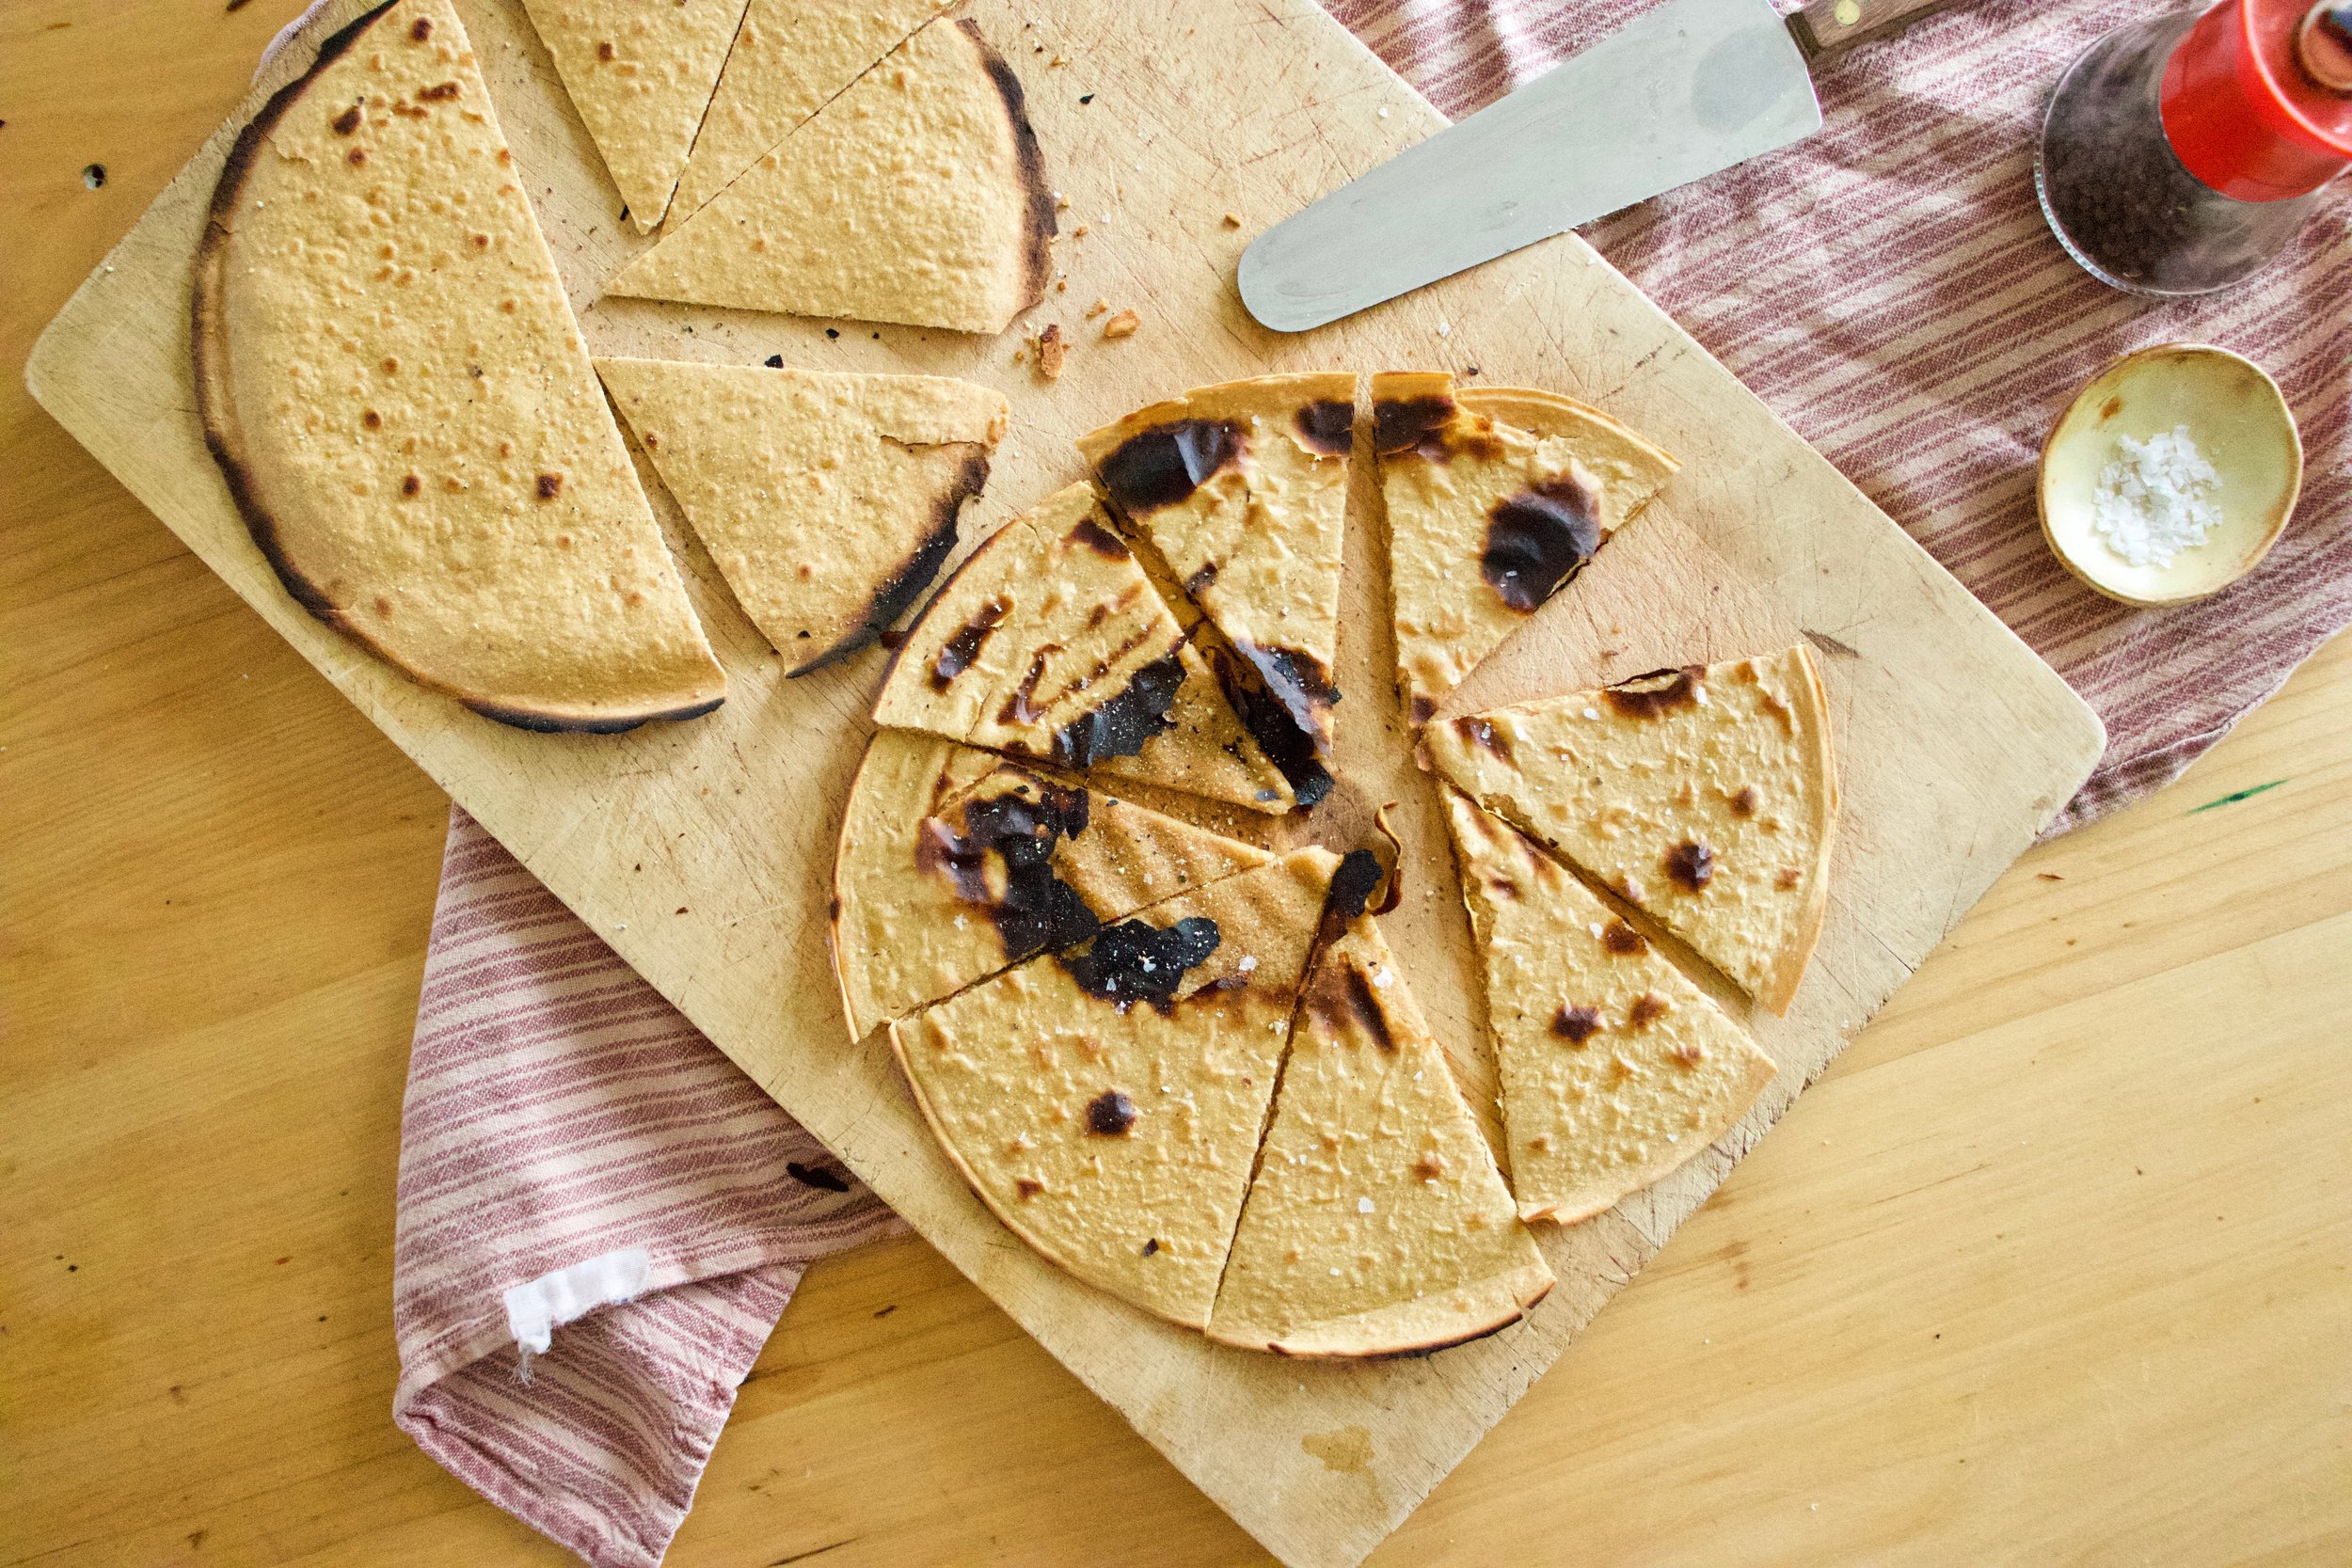
Once oven reaches temp, turn oven over to broil and place skillet under it for a minute to really heat the skillet. Carefully, with oven mitts, remove hot skillet from oven and brush or pour a smidge of oil into the hot skillet to coat bottom. Pour in half the batter and tilt around until bottom is coated then place skillet back into oven under broiler and cook for 4 -8 minutes or until the socca starts to blister. (it kind of depends on your broiler so keep a close eye on it) Remove from oven and slip socca onto cutting board. Sprinkle with salt and pepper. Drizzle with olive oil if you like. Then all you do is cut and eat.
Left over socca can be stored in fridge and reheated in oven or toaster.
Note. IF you want a slightly thicker socca, use a 8 inch skillet. For a thiner, more cracker like socca, pour in 1/3 of the batter at a time (you will end up with 3 instead of 2)
It%u2019s a smoothie. And no, we have never really been smoothie people in this house, but what can I say, sometimes smoothies happen, especially when you have about 20 ripe bananas in the fruit bowl with no room in the freezer and no need for 7 loafs of banana bread.
So I smoothied. And I like it (a lot).
This is a smoothie of simplicity. Nothing fancy. Simplest of simple. Straight to the point. And all sorts of good.
You might think, does this simple smoothie you speak of taste very good? Yes, yes indeed it does. It is all sorts of fantastic. Basically if you like creamy, nutty, oaty, bananery things, you will like this. And it%u2019s a perfect breakfast, snack, dessert, or just wanting a little treat like thing that is not garbage food. A smoothie of all smoothies with the most basic ingredients. And takes about 15 seconds to whip up. Can%u2019t complain about that.
To the smoothie goodness!

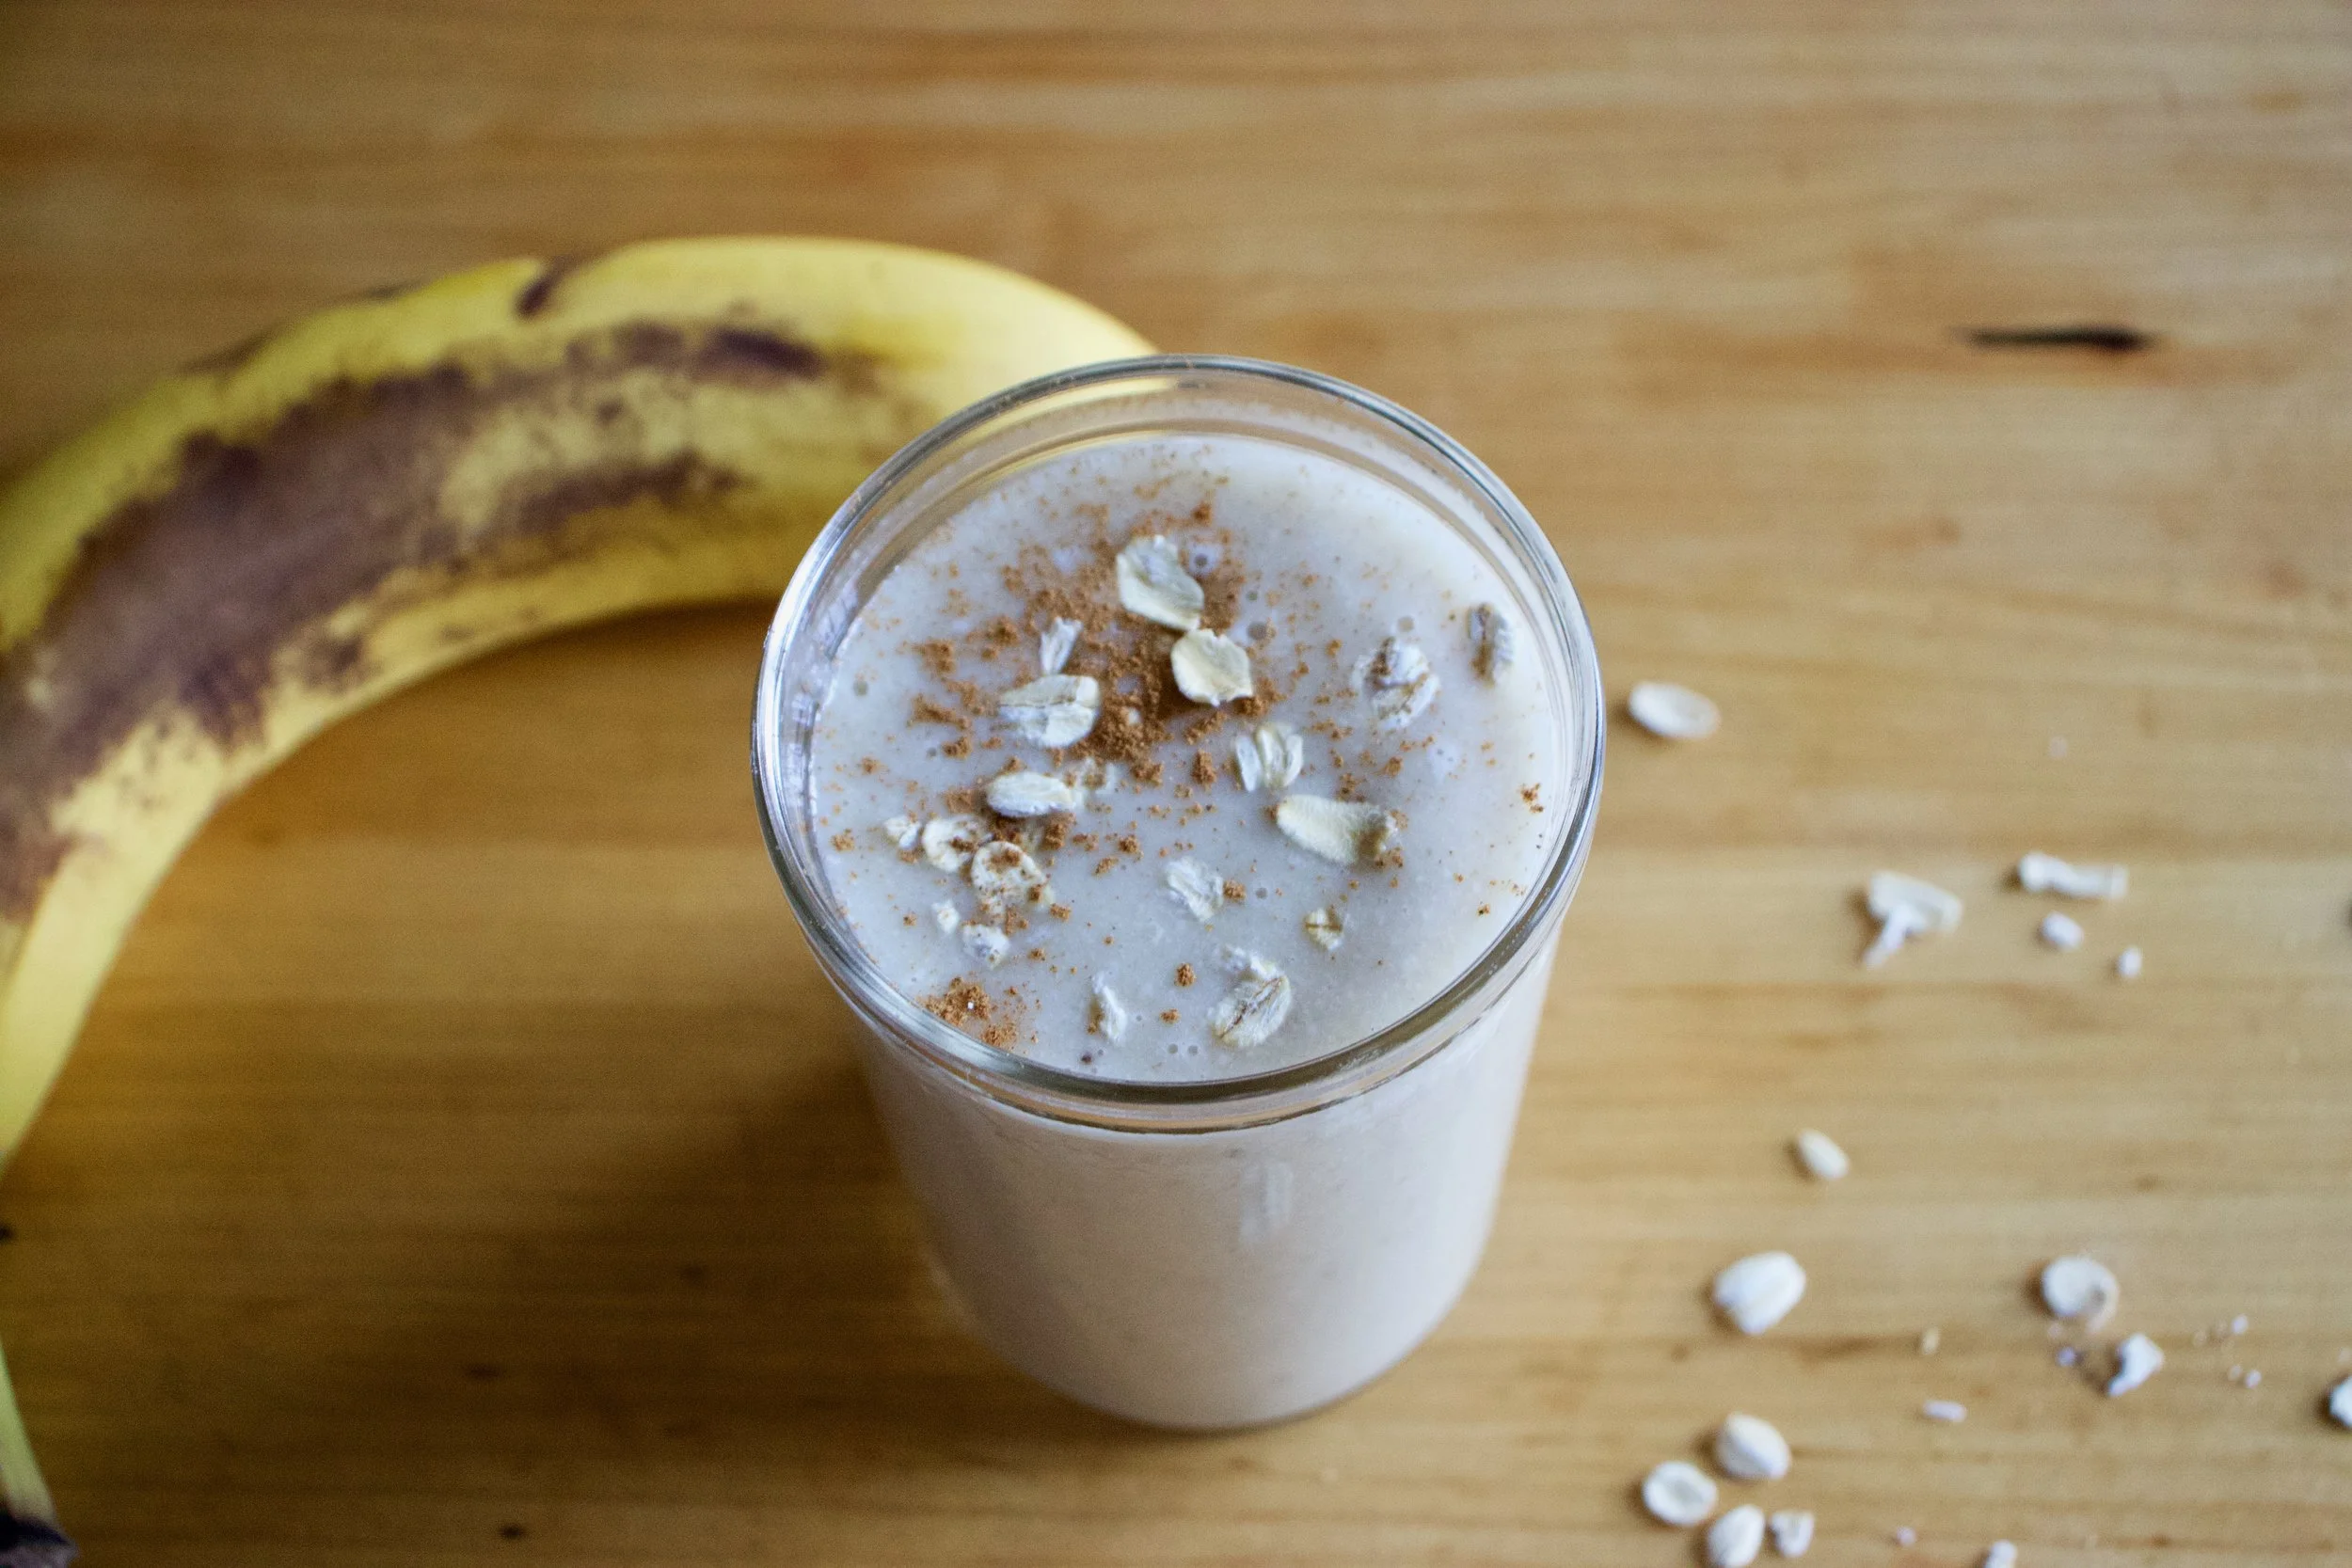
The stuff. A ripe banana, some old fashion rolled oats, a pinch of salt, water, and a smidge of maple syrup if you want it.
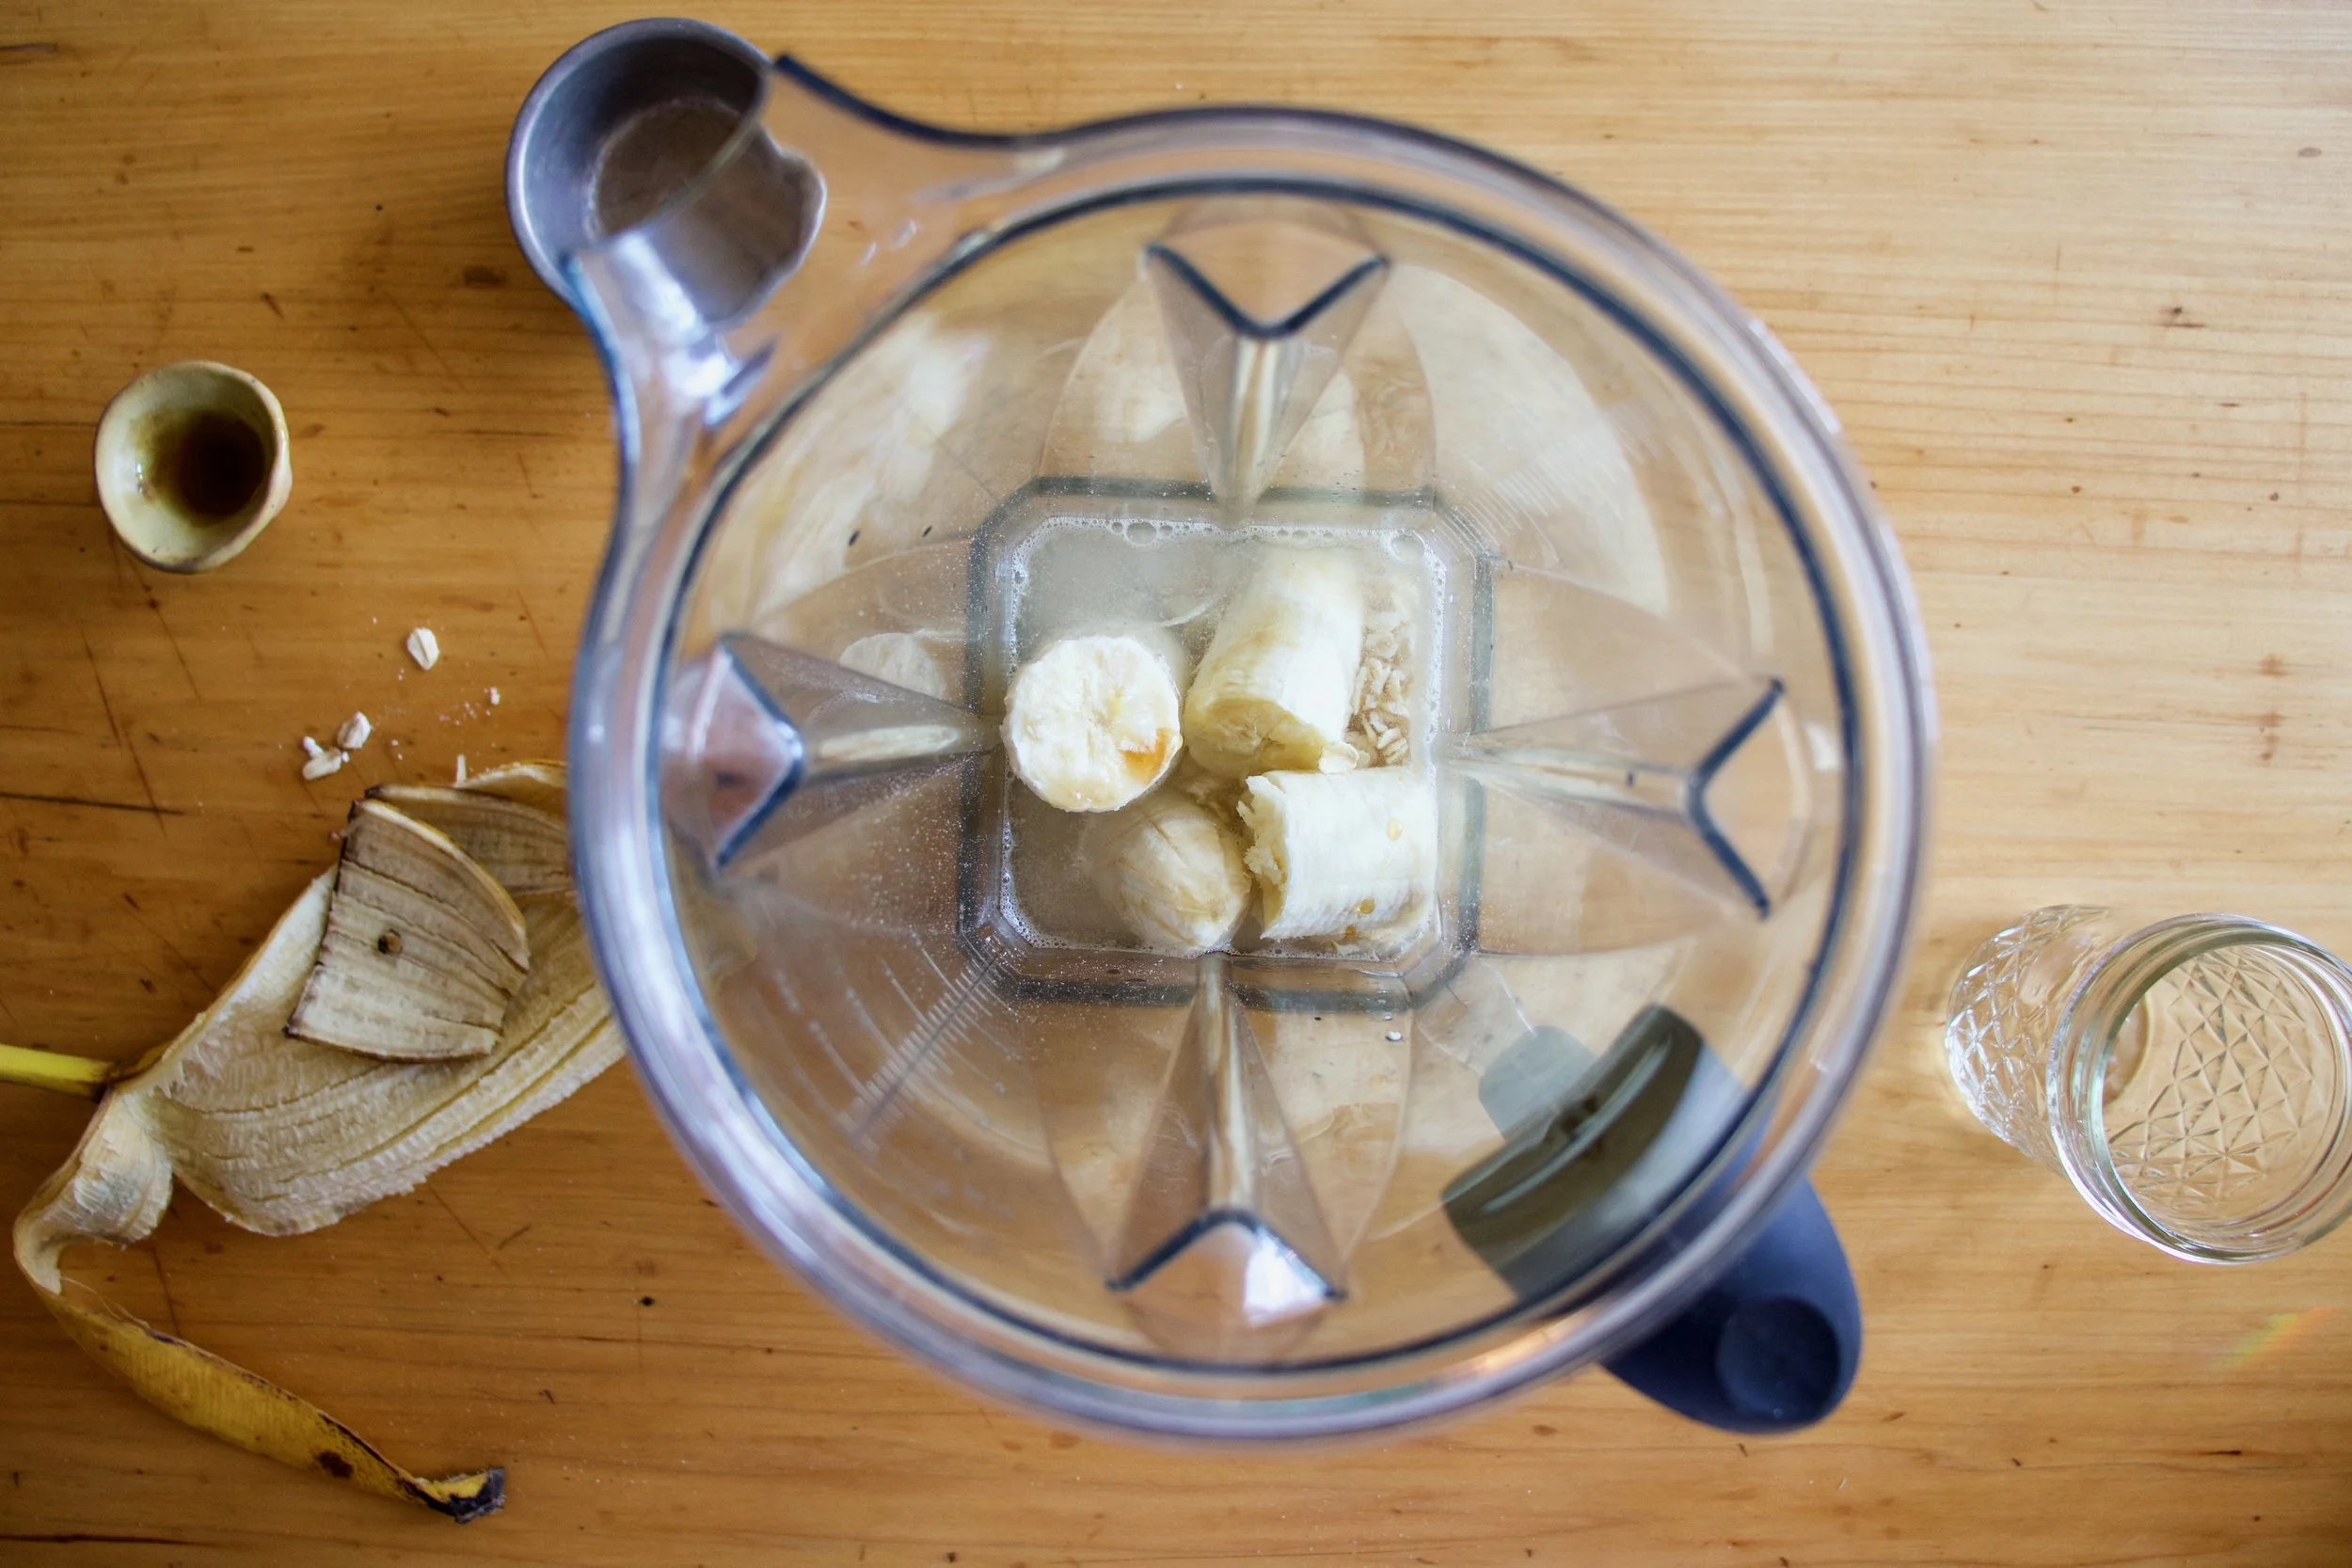
Everything goes into blender.

And blended until smooth. Hence the word smoothie.
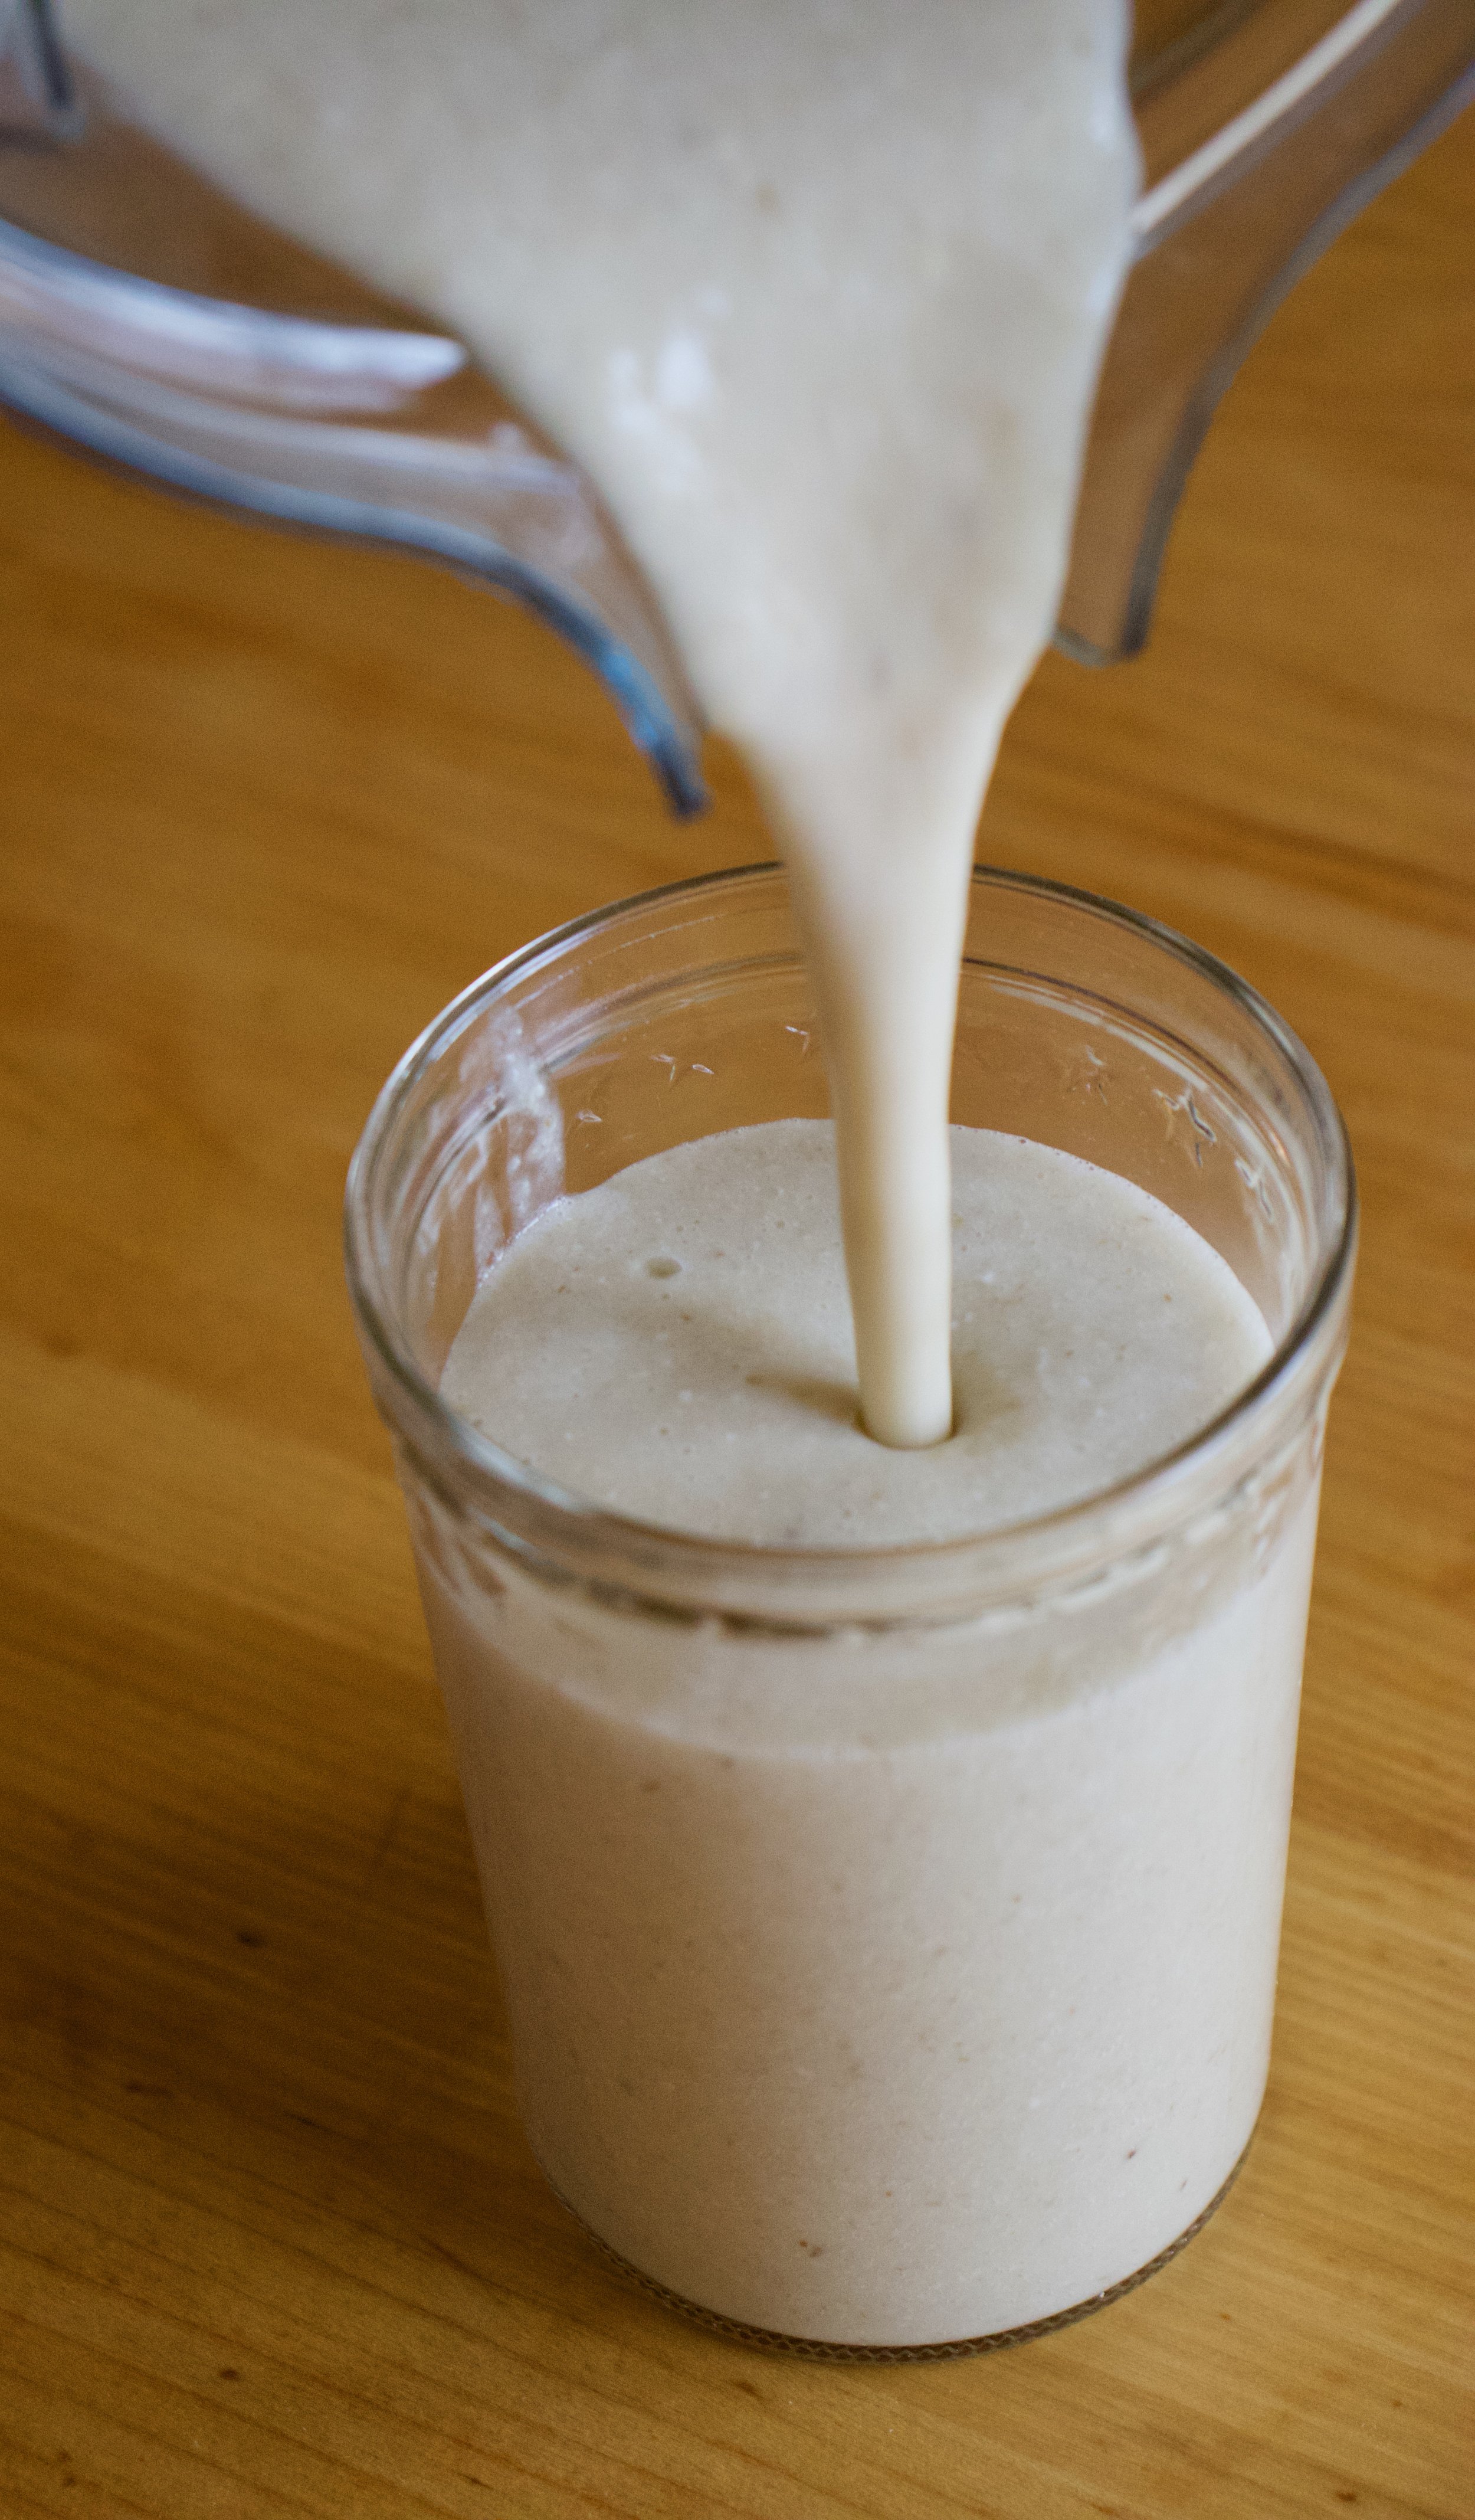
Pour it into a cup (or if you are feeling primal, drink it straight from the blender%u2026 it%u2019s totally cool)

And done.
A banana oat smoothie.
Let the good time roll!
-C
makes 1 smoothie
-
1 very ripe banana
-
1/3 cup raw old fashion oats
-
1 1/2 cups water
-
pinch of salt
-
a tablespoon or two of any sweetener you like (optional)
-
a pinch of cinnamon (optional)
Place everything into a blender and blend until smooth. Pour into a cup, sprinkle with cinnamon if you wish, and drink right away.

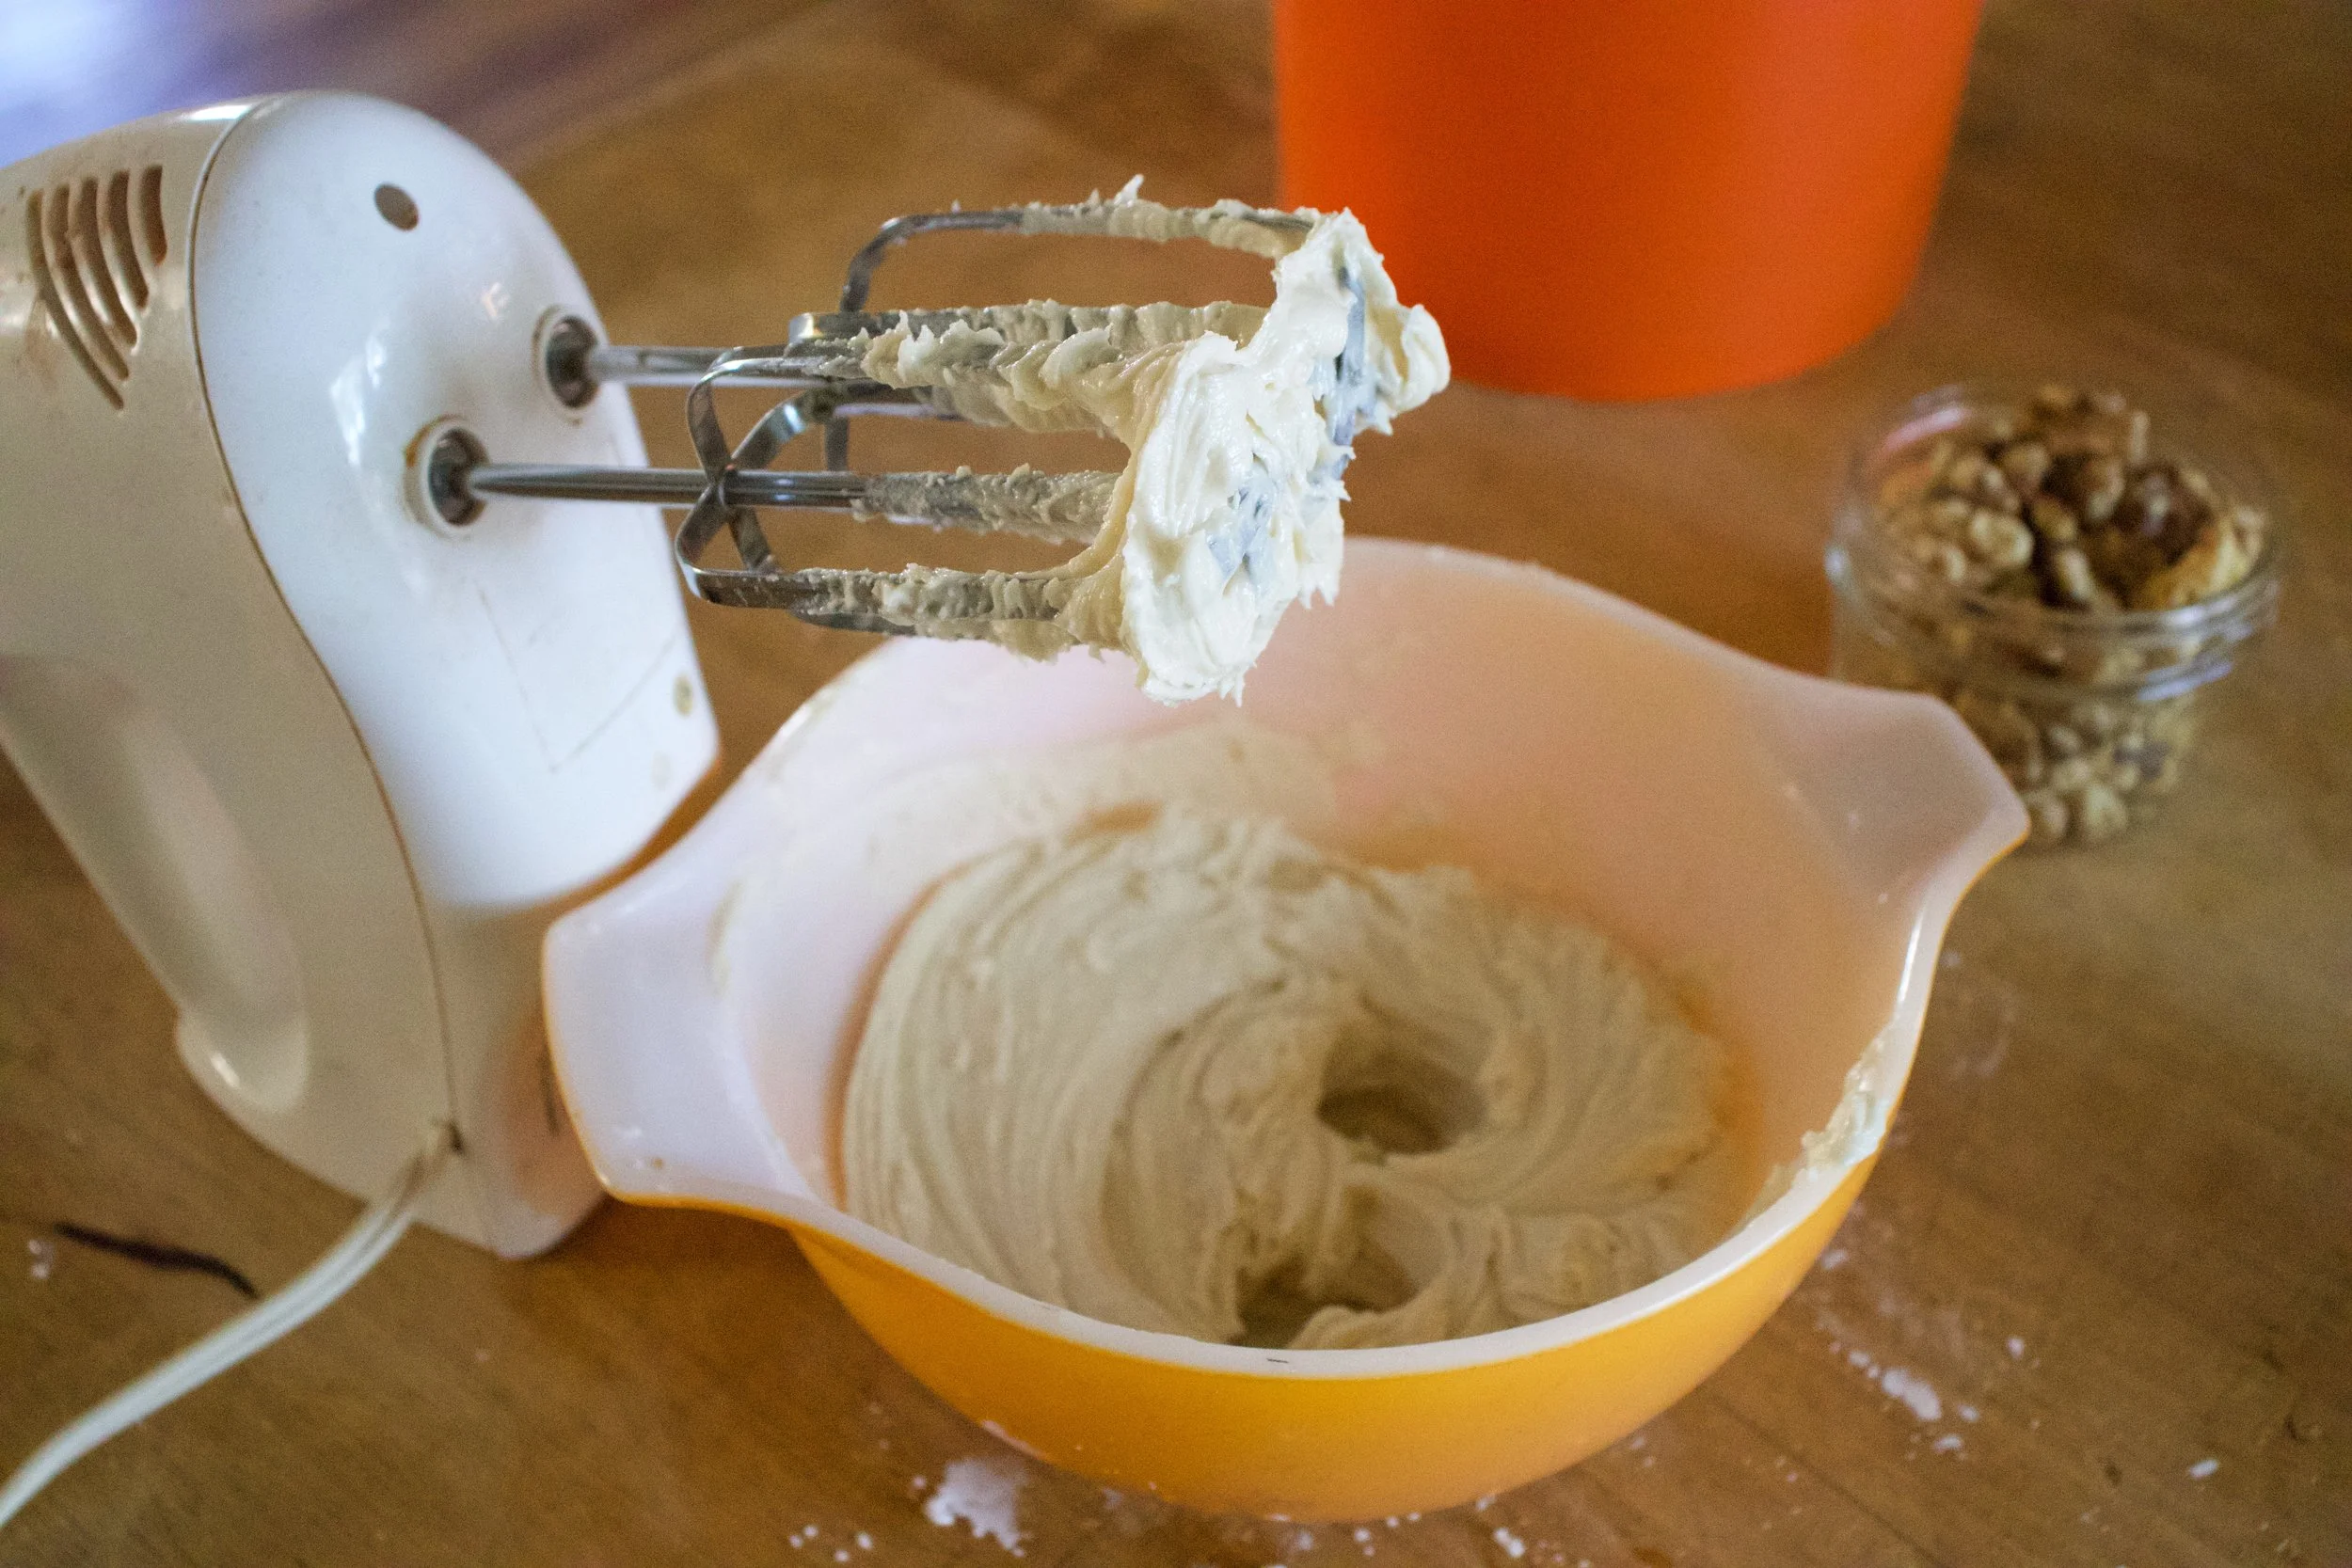
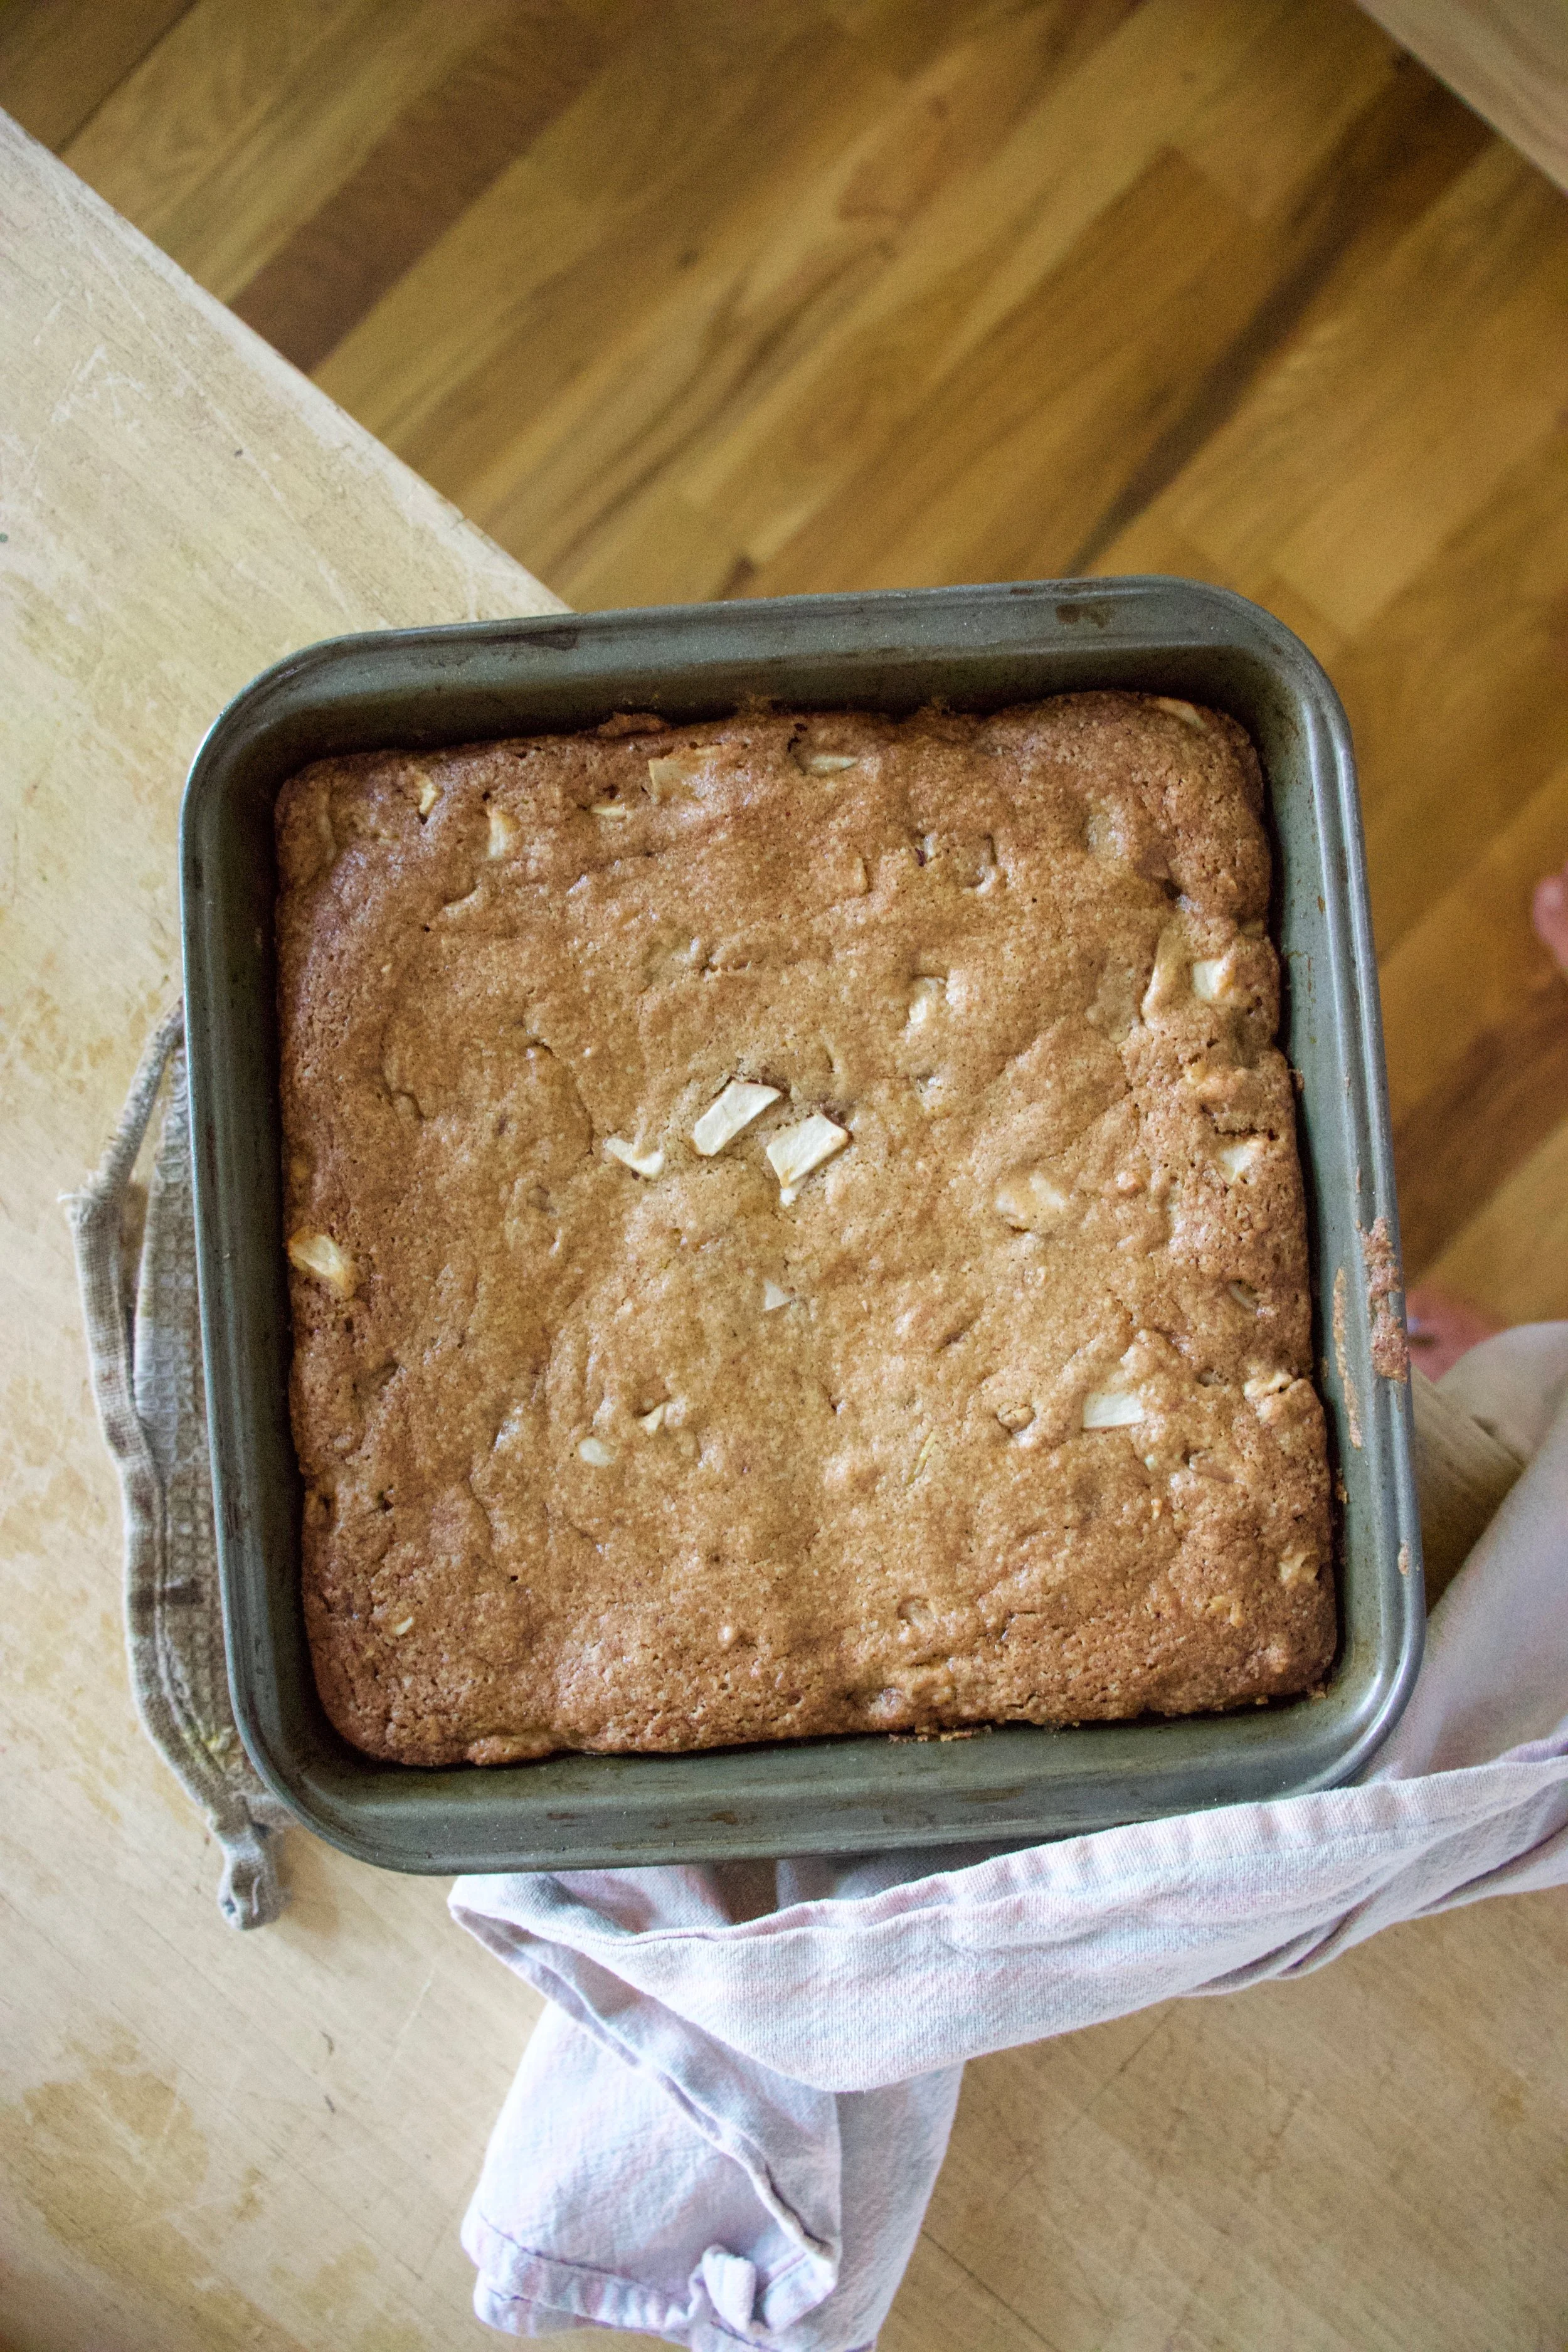
I have a bag of coconut flour that I need to use up so I have made coconut snack cake a few times the past couple weeks. Once with orange instead of lime. Once I added chocolate chips. This time I stepped it up made a little glaze action, toasted a little coconut for some extra coconutiness and took these here pictures and wrote down the recipe. Just. For. You.
Not that I don%u2019t know already that my snack cake creation is good, but I guess it was just super A+++. I threw this one together right before the mr and I headed down to PA to hang with my dad. As soon as he (and sister and nephews) started in on it, well the responses were more then average. My dad even snuck a piece off and hid it for later. They really, really, really were into it. Wanted me to make another right then and there. Normally I would but my dad doesn%u2019t keep coconut flour on hand and I don%u2019t make it a habit to travel with any myself. (I might have to change that.) Next time he will know to stock the coconut flour.
I didn%u2019t realize my people were such coconut people. Good thing for them that I like coconut people. As a matter of fact, I consider myself a coconut person. And coconut is not code for awesome, but I am that too. HA
Anyway enough about me. Coconut snack cake is what you want to know about. It is soft and dense. Moist, not overly sweet. Lots of lime and coconut flavor and is just perfect for snack time. Eat it with a fork on a plate with coffee or tea or grab an piece and eat it walking down the street while thinking about green leaves and warmer weather. Or wherever and whenever. If you make it then it%u2019s up to you when and where you eat it. That only seems fair.
Now to the snack cake of your coconut lime dreams.

The stuff. Gonna need all purpose flour, coconut flour, salt, baking soda, baking powder, a couple flax eggs, some warmed coconut oil, plant milk, brown sugar, vanilla extra, apple sider vinegar, a couple lime, some powdered sugar, and some lightly toasted shredded coconut.
Grab a big bowl. Add in the brown sugar, flax eggs, warmed coconut oil, apple cider vinegar, and vanilla. Mix it all up until evenly incorporated.

Dump in the flours, baking soda and powder, and salt. Zest in lime, squeeze in lime juice and start to mix. Add in the milk as you are mixing.

Cake batter mixed and done. Now to bake it.
Dump the cake batter into a well greased baking pan and level it off with a spoon or spatula.
Now it%u2019s oven time to bake into a great and well cake.
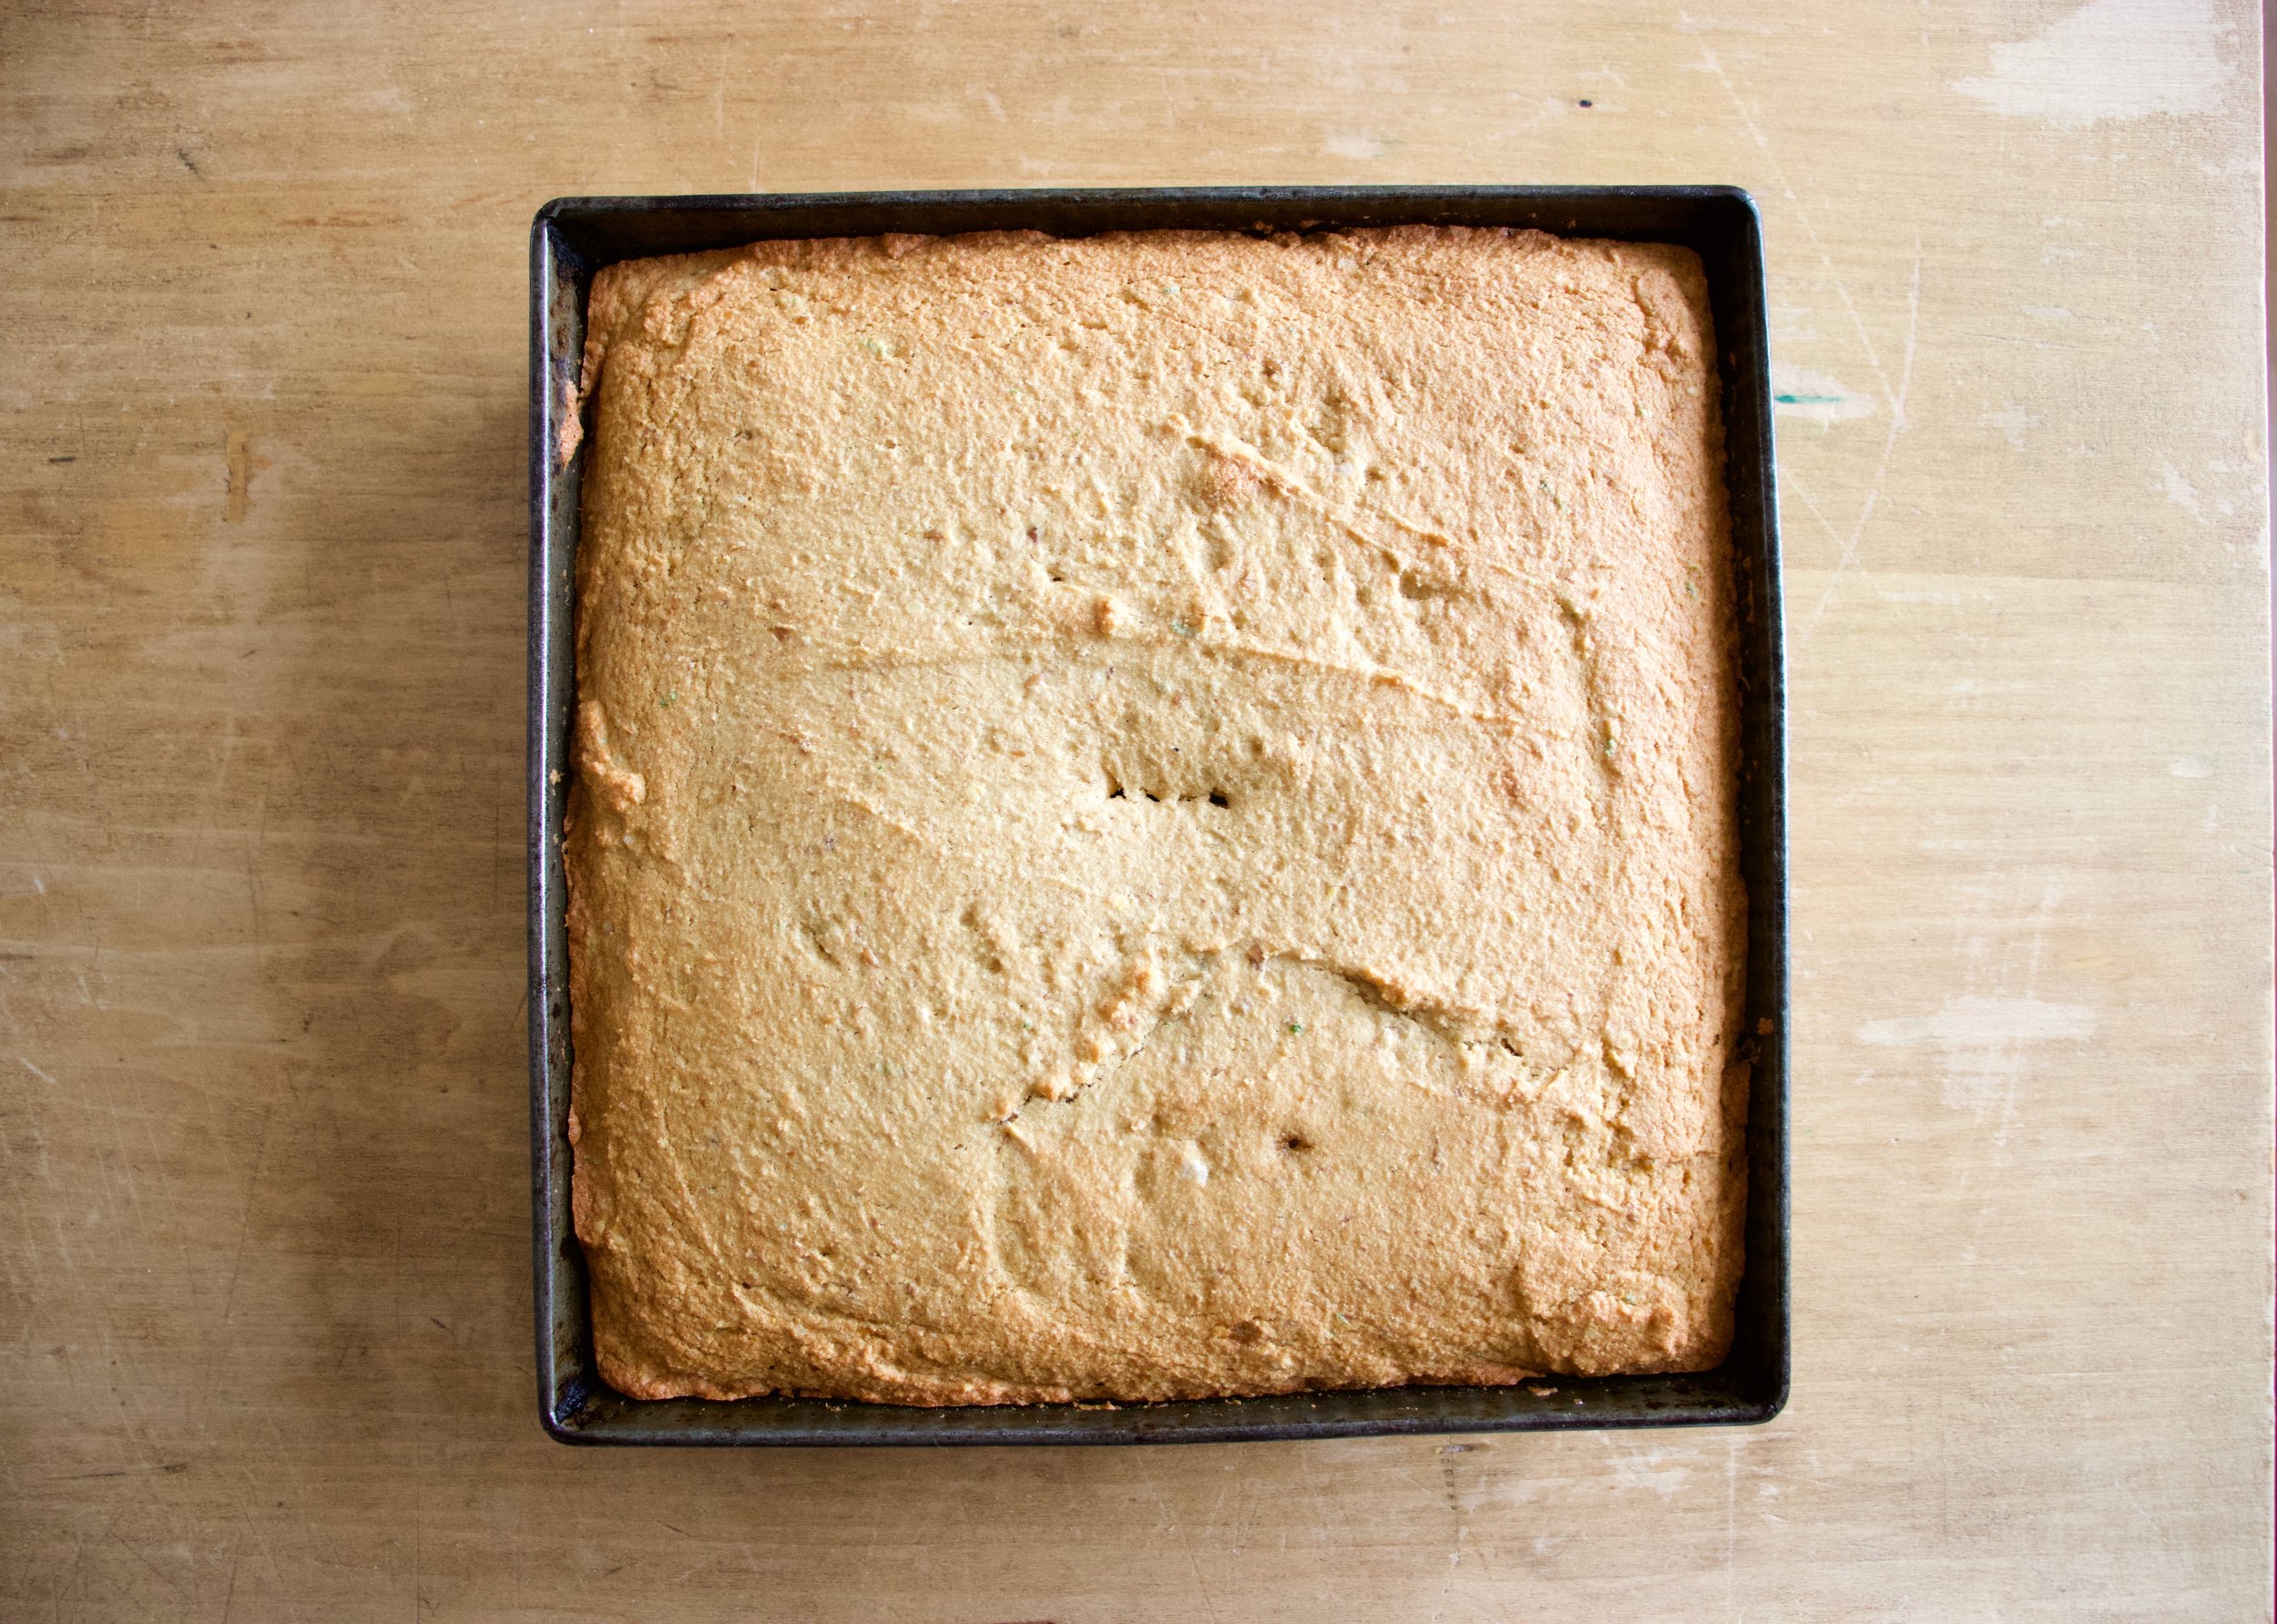
A cake out of the oven, great and well. Golden brown and smells of all the goodness that a coconut cake could possible smell.
While cake is cooling, which it should be now, make the glaze. Powdered sugar, lime zest, and lime juice. Mix until it%u2019s glazy.

Pour the glaze all over cooled cake.

Don%u2019t forget the shredded coconut. Get it on before the glaze starts to set.
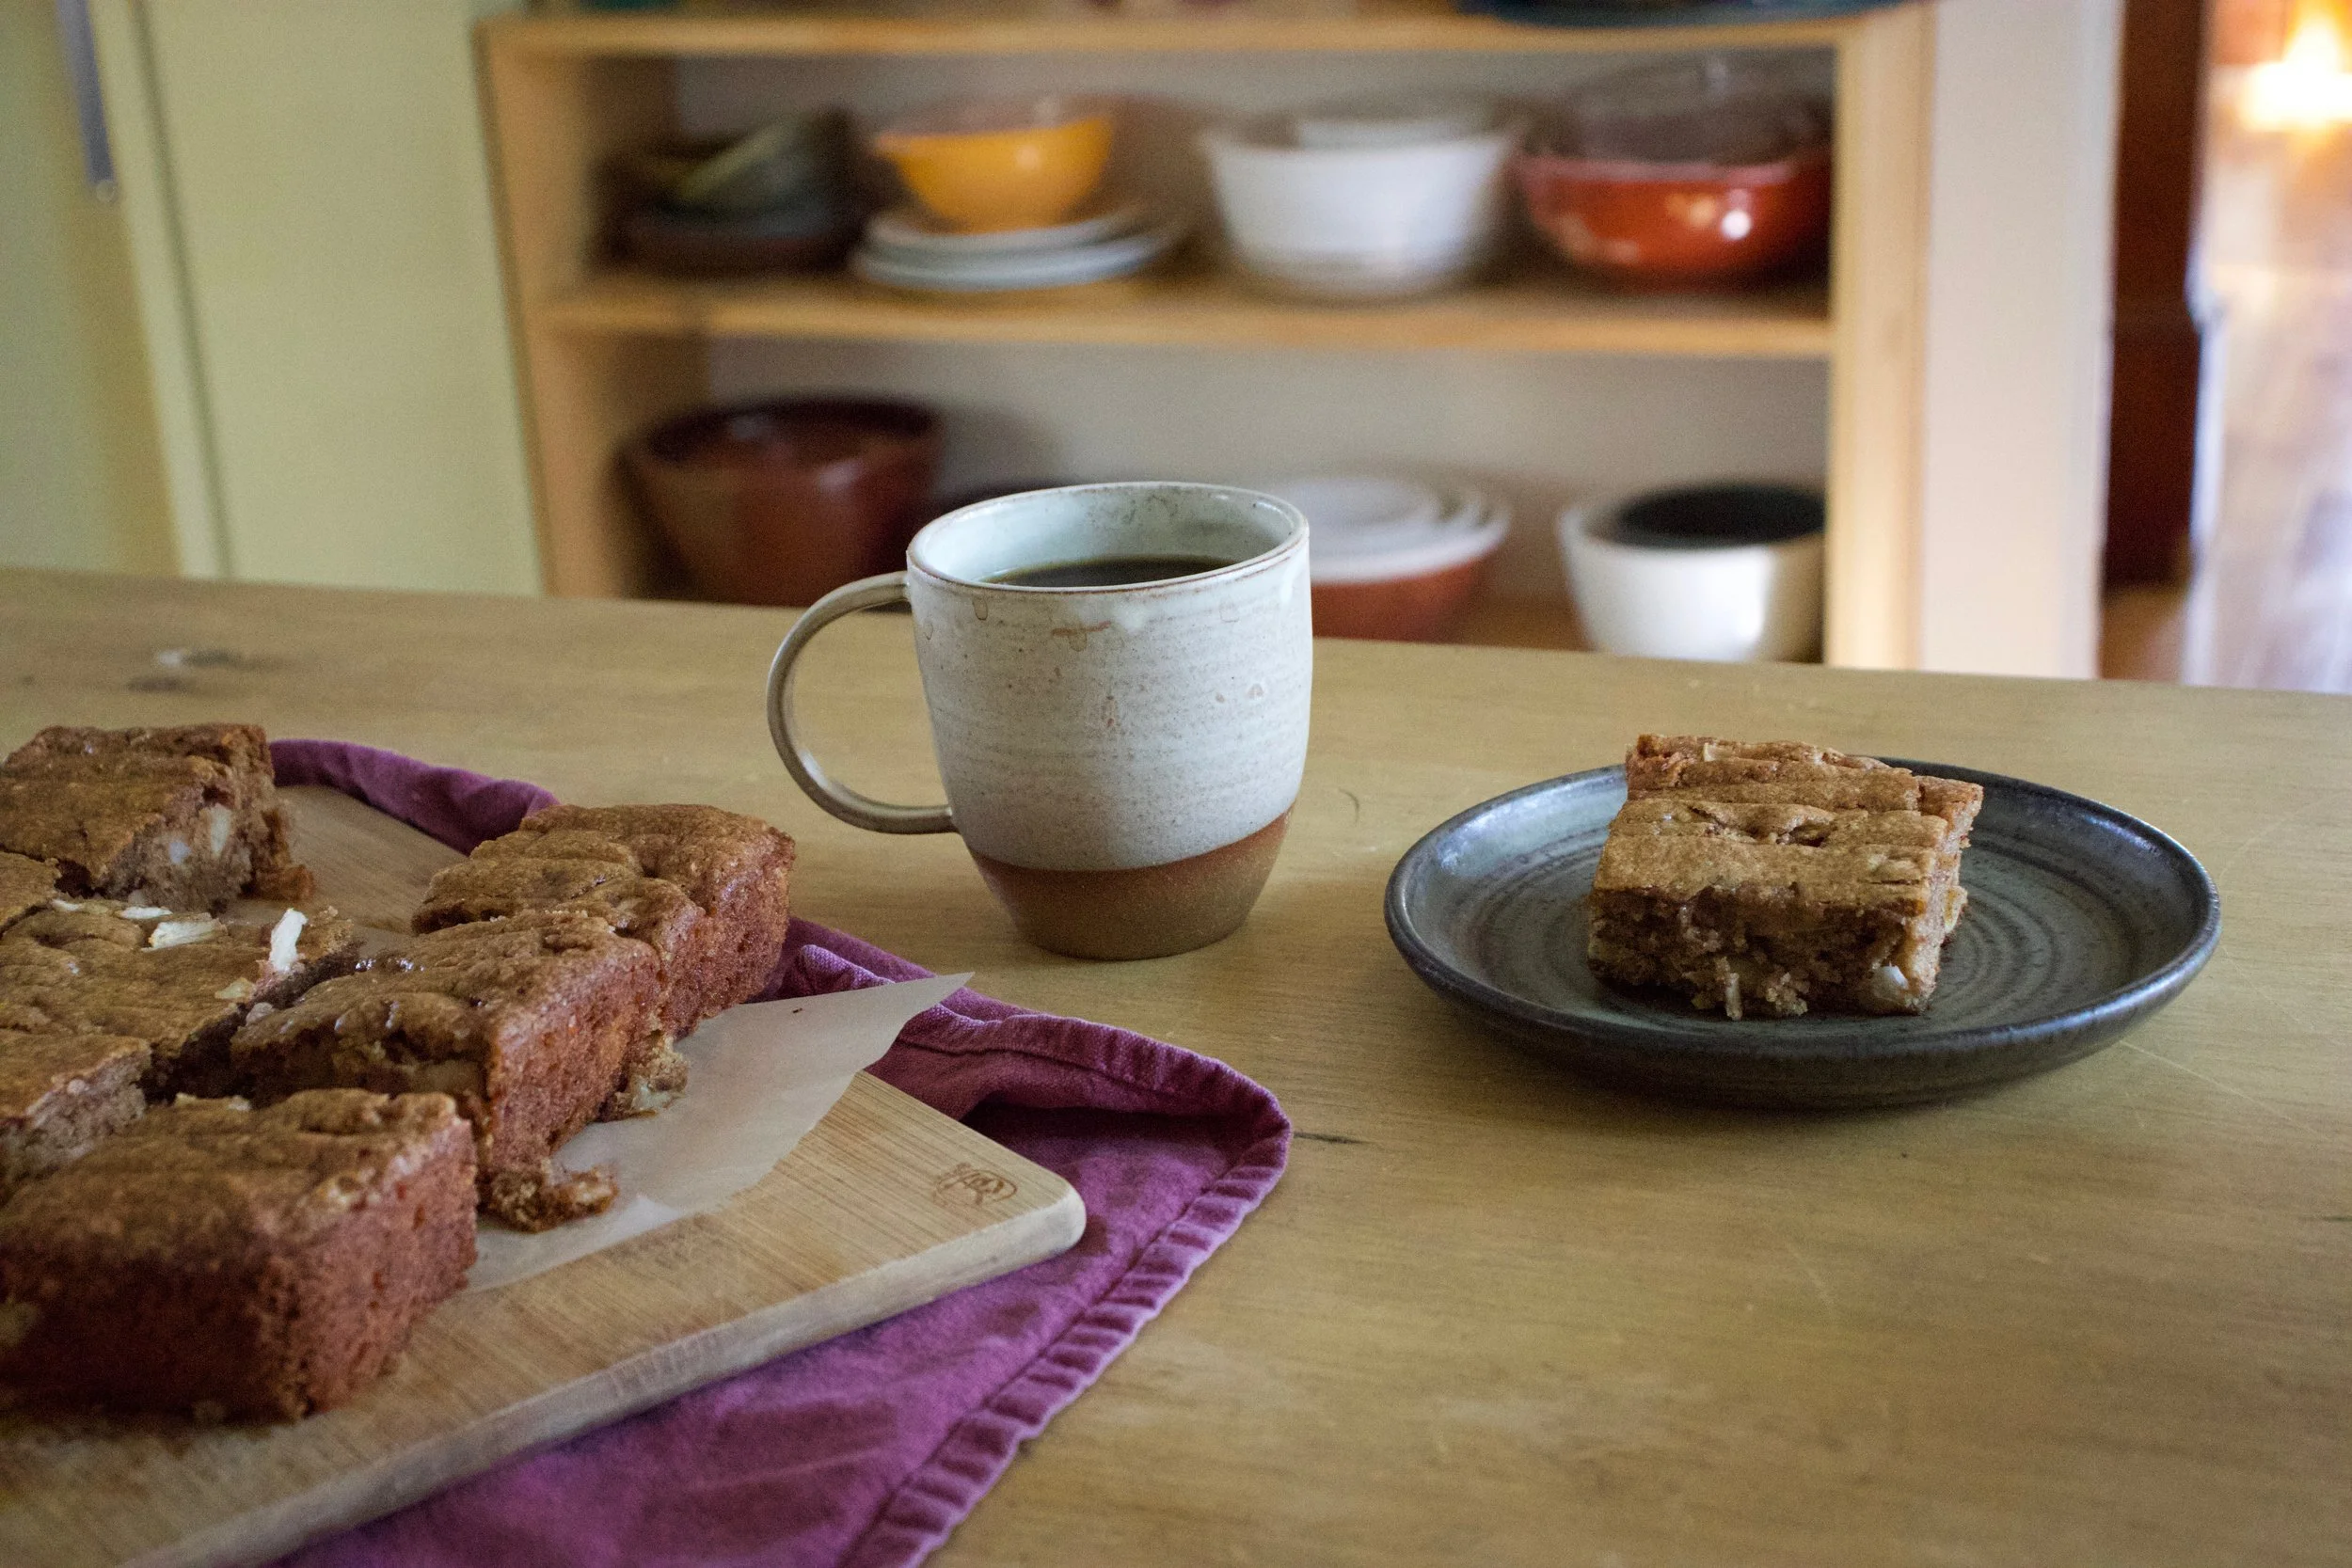
And then it%u2019s just the matter of cutting cake%u2026%u2026.

You know once you cut it, that means snack time right? Coconut lime snack cake for all of your coconut time, lime time, hungry snack time needs.
Keep it good.
-C
Makes a 9×9 cake
-
1 1/2 cups all purpose flour
-
1/2 cup coconut flour
-
3/4 packed cup brown sugar
-
1 teaspoon salt
-
1 teaspoon baking soda
-
1 teaspoon baking powder
-
1/2 cup coconut oil (warmed to liquid)
-
1 1/4 cup plant milk (I used almond)
-
2 flax eggs (2 tablespoons ground flax seeds with 1/2 cup warm water)
-
1 teaspoon vanilla
-
1 tablespoon apple cider vinegar
-
A lime
-
For the glaze
-
3/4 cup powdered sugar
-
a lime
-
1/4 cup or so toasted shredded coconut to sprinkle on top (optional)
Preheat oven to 350
In a large bowl, mix together the bbrown sugar, flax eggs, warmed coconut oil, vanilla, and apple cider vinegar until completely incorporated. Next dump in the flour, coconut flour, salt, baking soda and baking powder. Zest the lime into bowl. Start mixing, adding in the juice of the lime and the plant milk. Mix it all together until completely incorporated.
Dump mixture into a well greases 9×9 baking pan and level off with a spoon or spatula. Place into oven and bake for 30-35 minutes or until golden brown and a tester stuck into the middle of cake comes out clean.
Once baked, remove from oven, let cool in pan for a few minutes then carefully remove cake from pan and let cool on a wire rack.
While cake is cooling, make the glaze. Just zest other lime into powered sugar then add the juice (or as much juice as you needed) of the lime until a pourable glaze forms. If your lime is not particularly juicy enough and the glaze is still really thin, just add a splash of water to thin out as needed.
And when cake is completely cooled, pour glaze all over cake and cover with toasted coconut flakes.
Now cut. And eat.
Store left over cake in a air tight container for 3-4 days. Individual pieces freeze well for all your future snacking needs.
Nothing here but a mere craving, the fact that I had a fresh head of cauliflower, and I really wanted tahini. TA DA. I made exactly what I wanted and it was so so sooooo good. Maple Cumin is one of those super A+++ taste pairings and anything roasted cover in tahini is basically going to be a win so I had no fear when making this dish that it was going to be anything but fanatic.
And of course I was right. It was so freaking good, like now I am going to make it again and again because I don%u2019t want make cauliflower any other way ever or at least until I get sick of it or of roasted vegetables. But that probably won%u2019t happen for a while.
So if you like cauliflower and tahini and amazingness, here, make this.
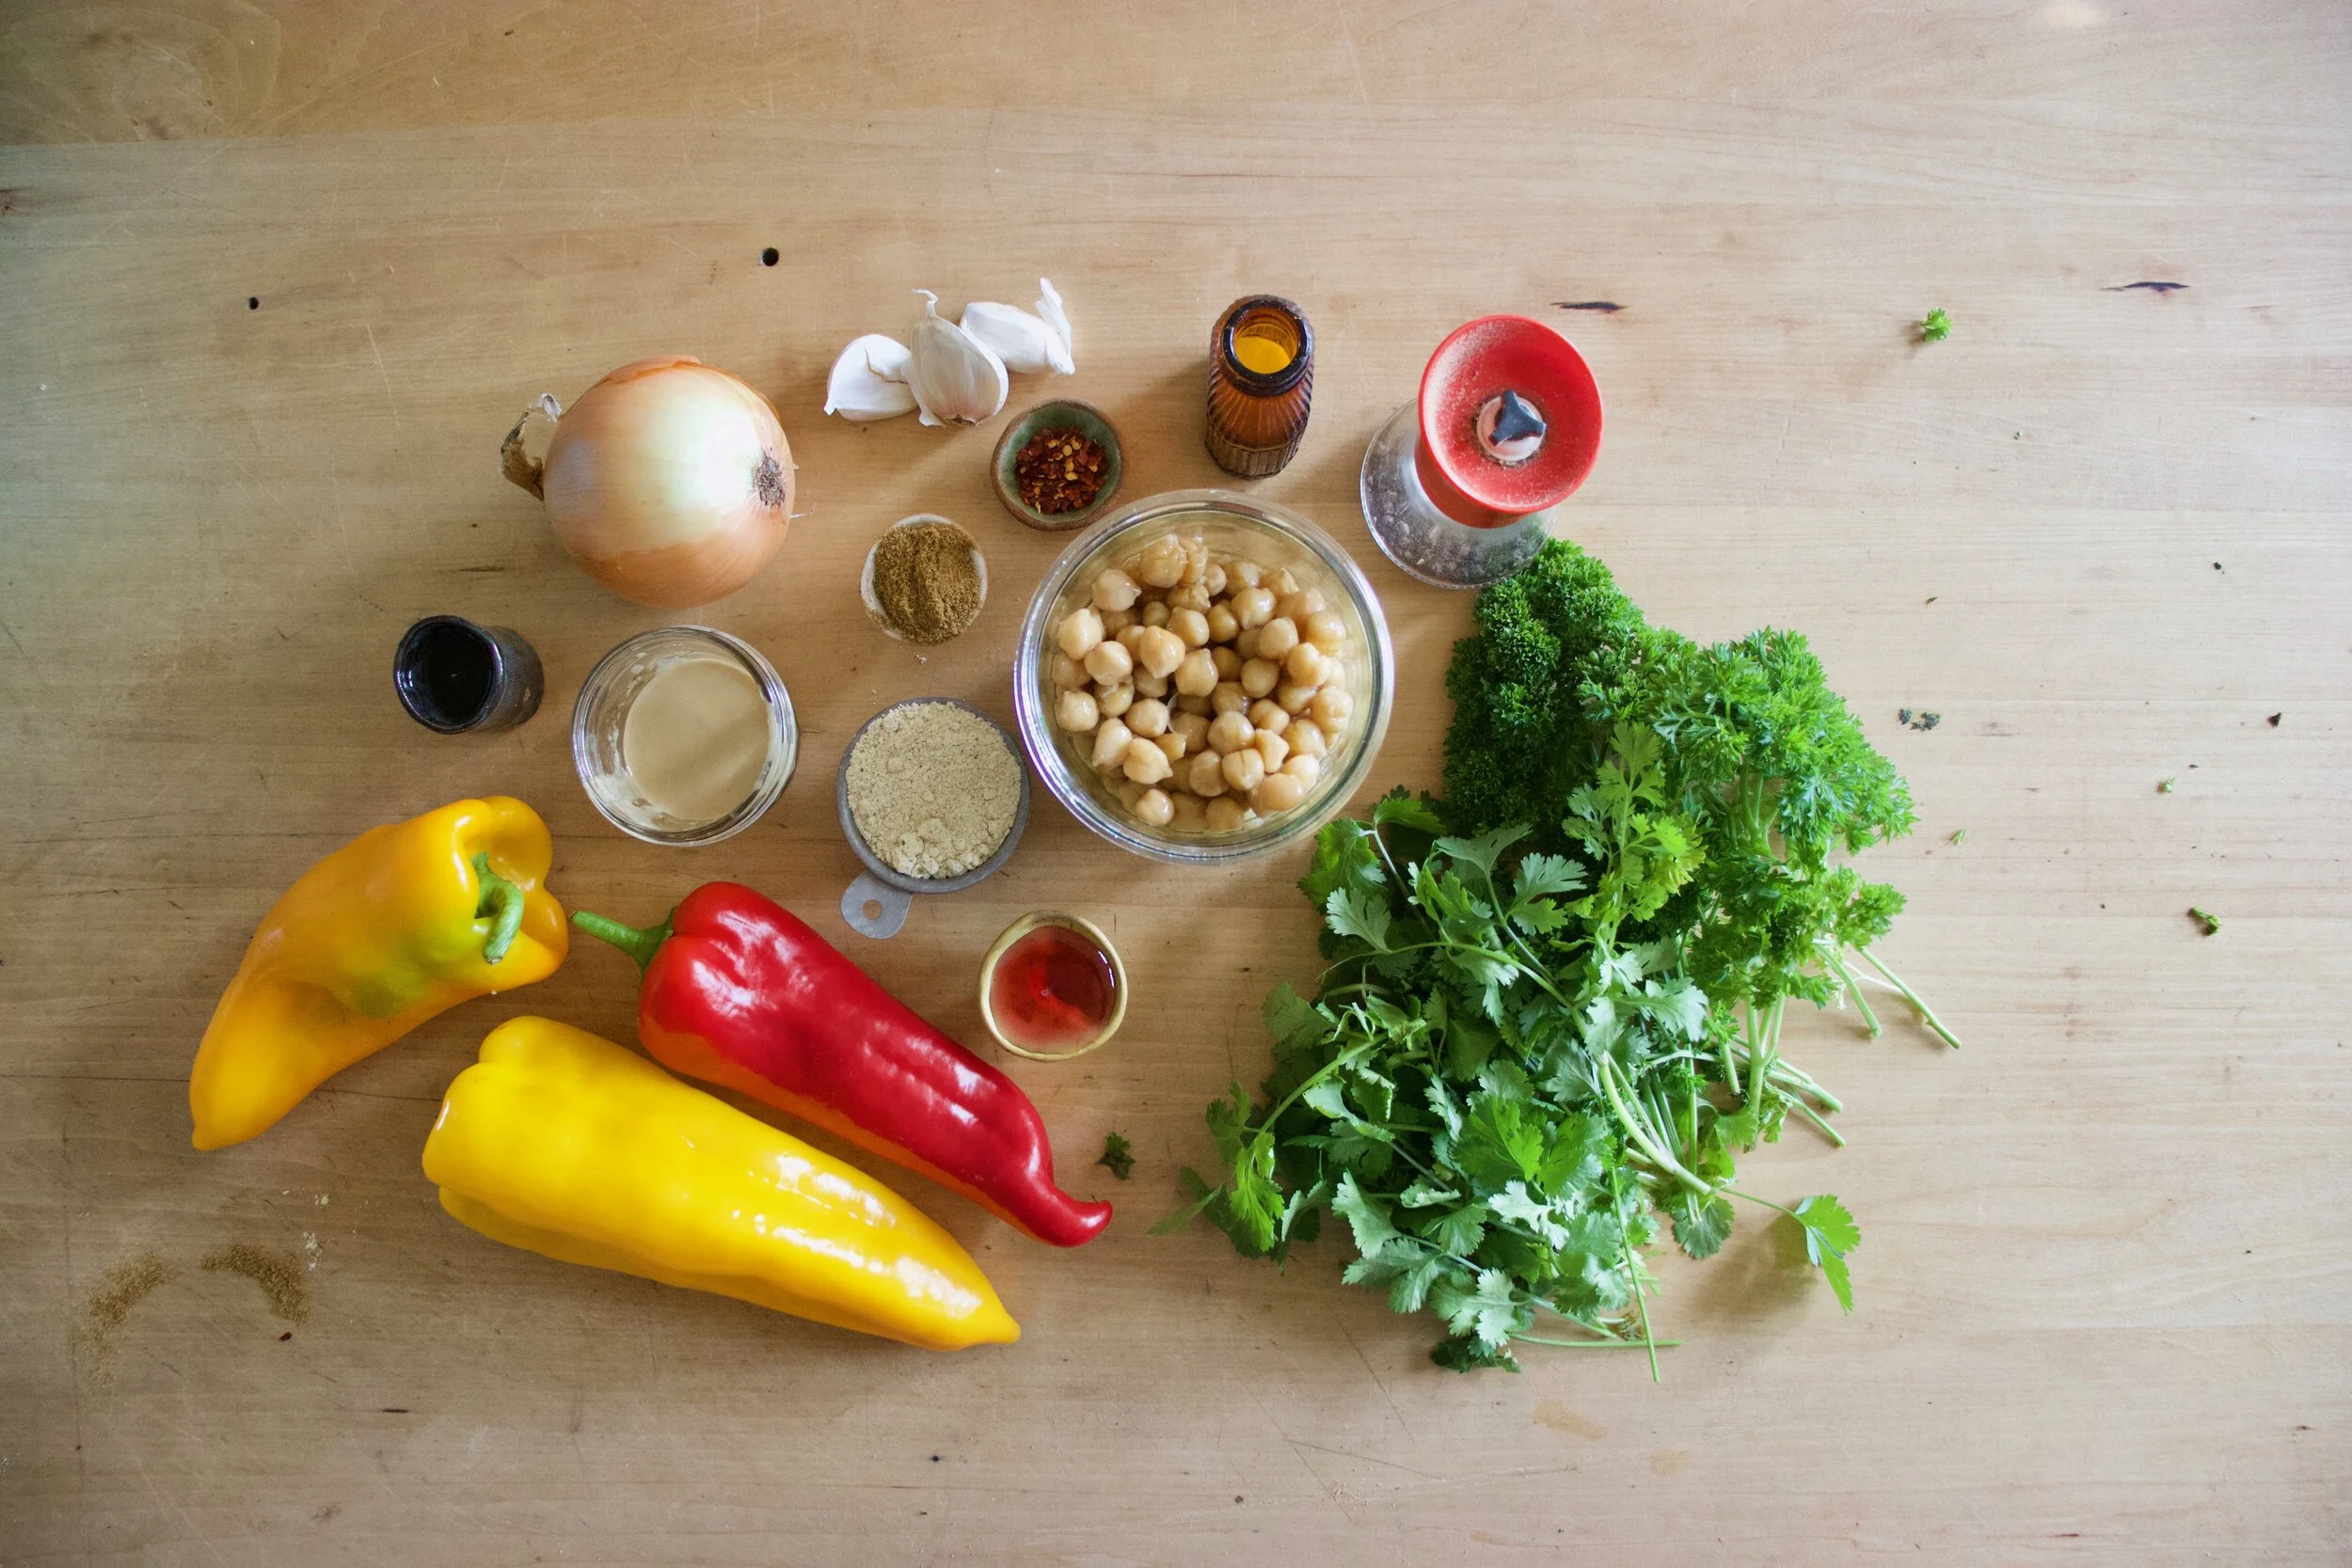
To the cauliflower
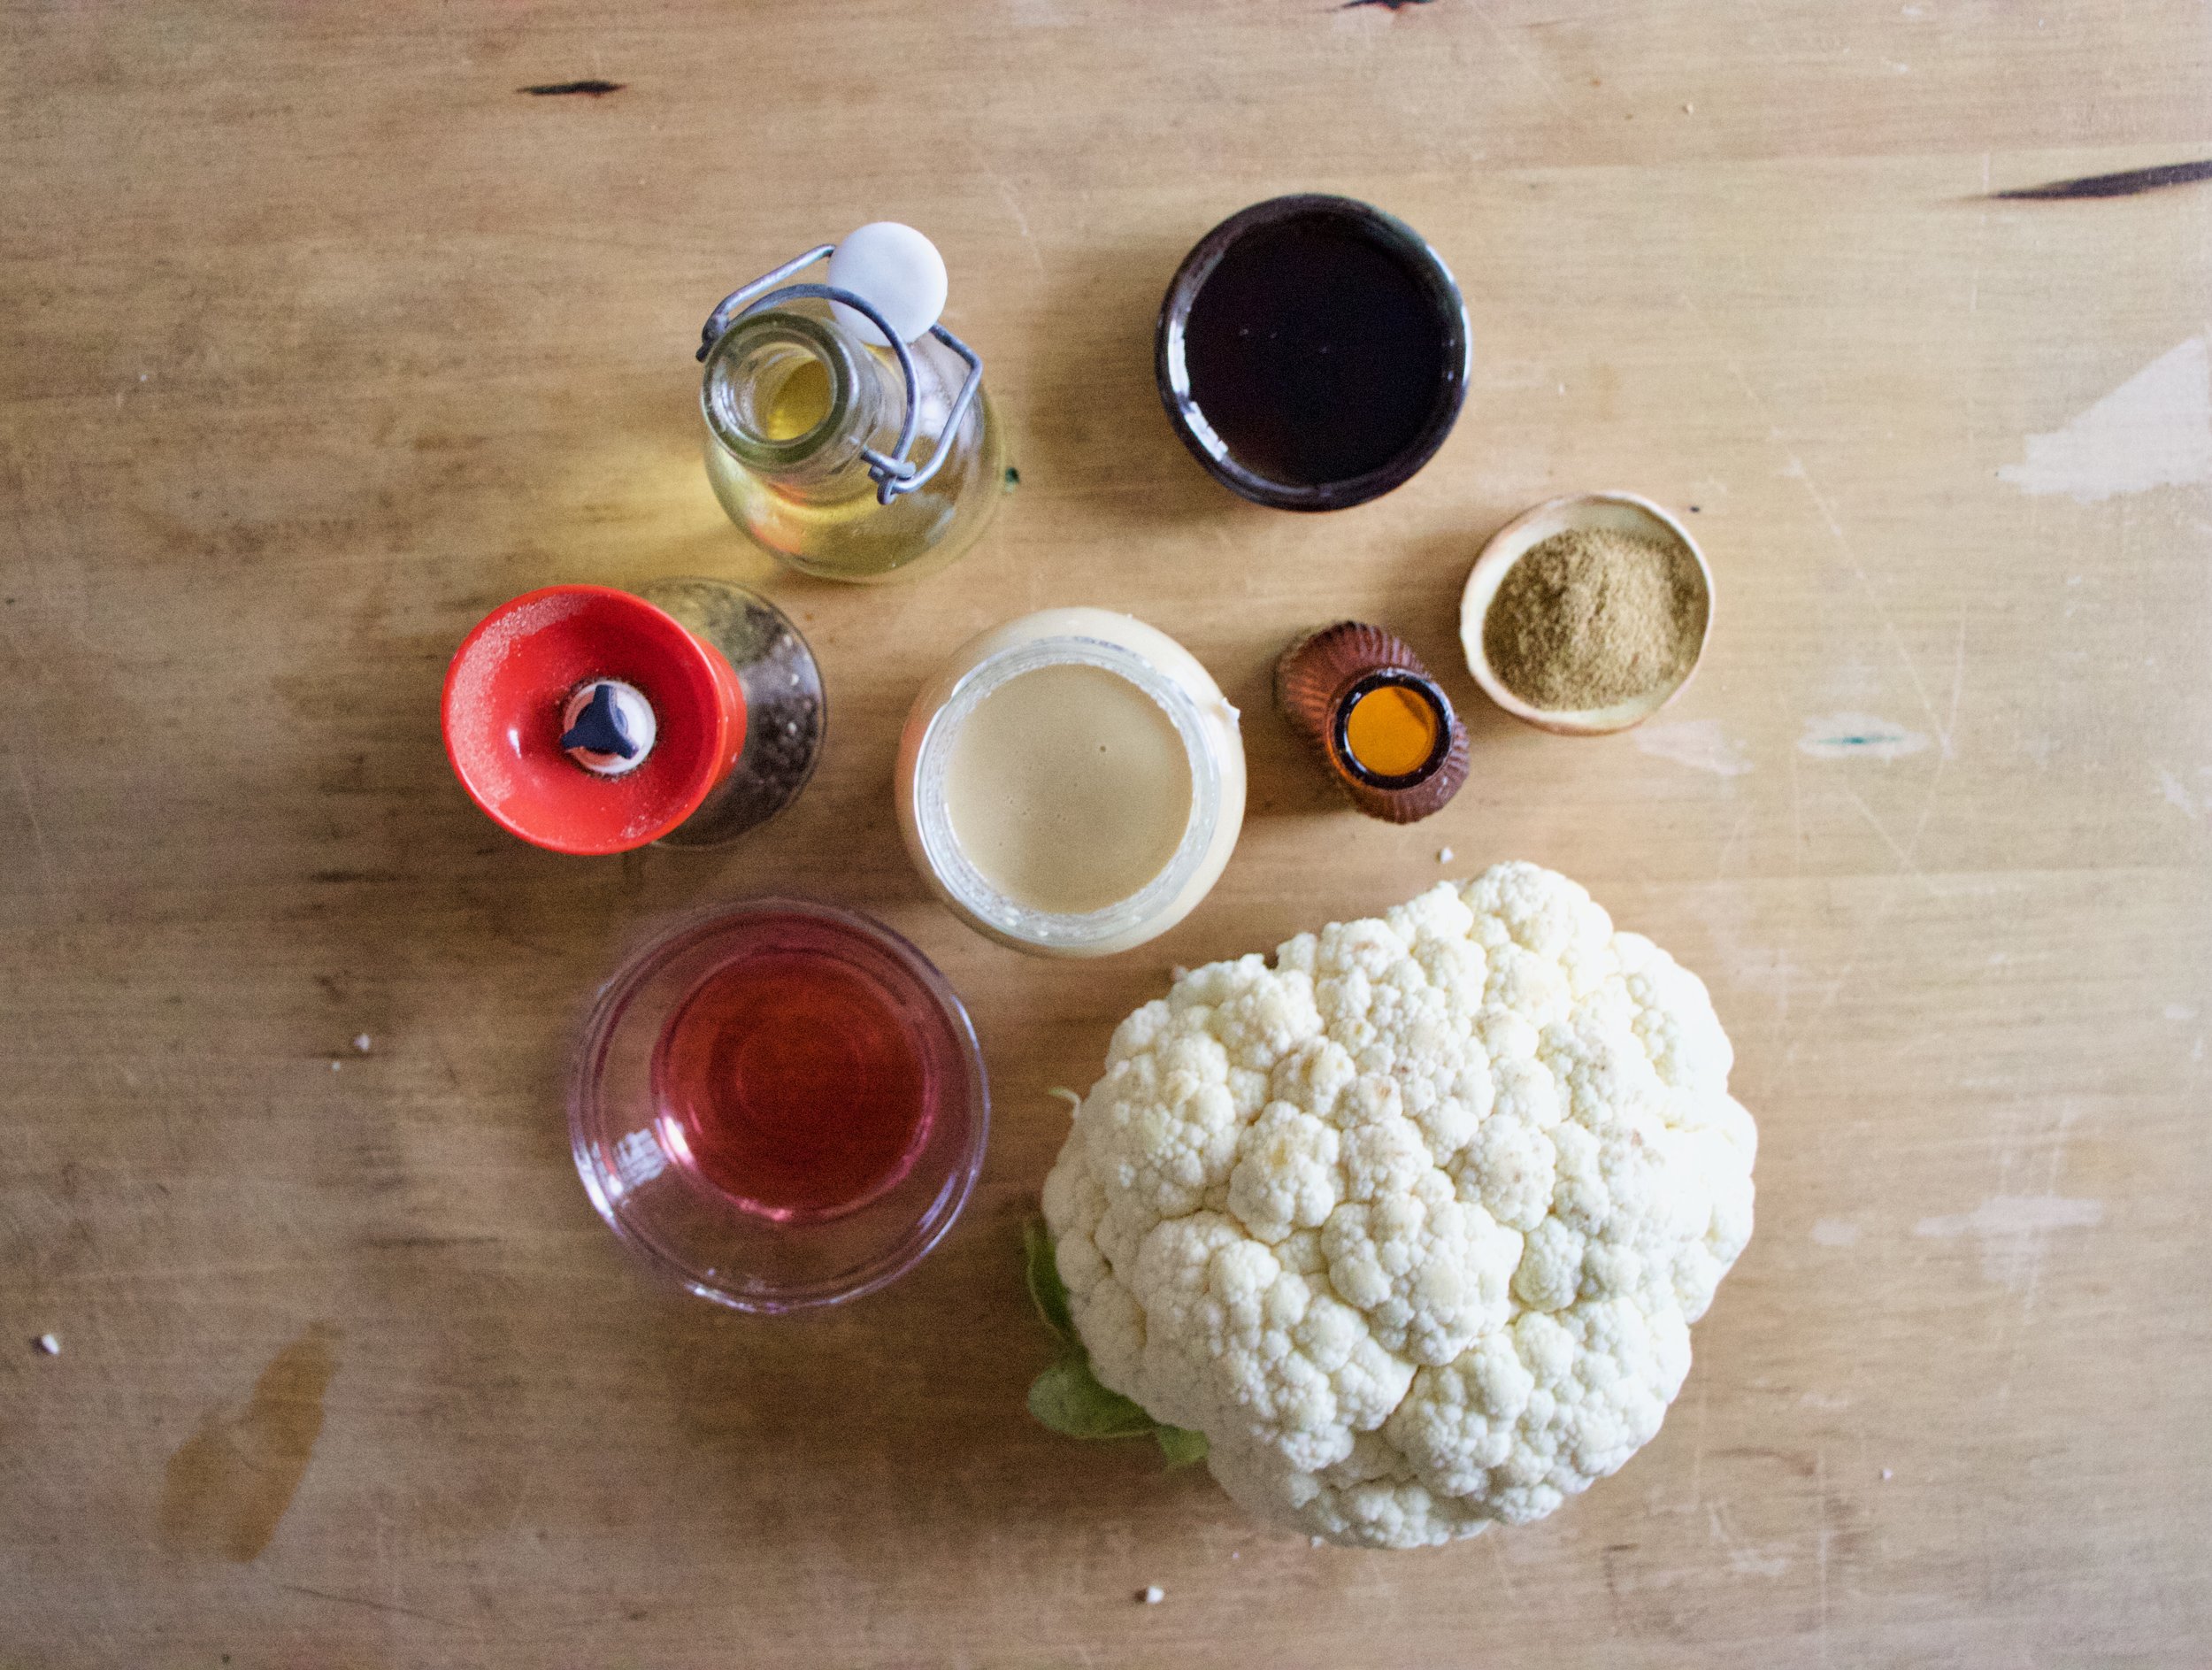
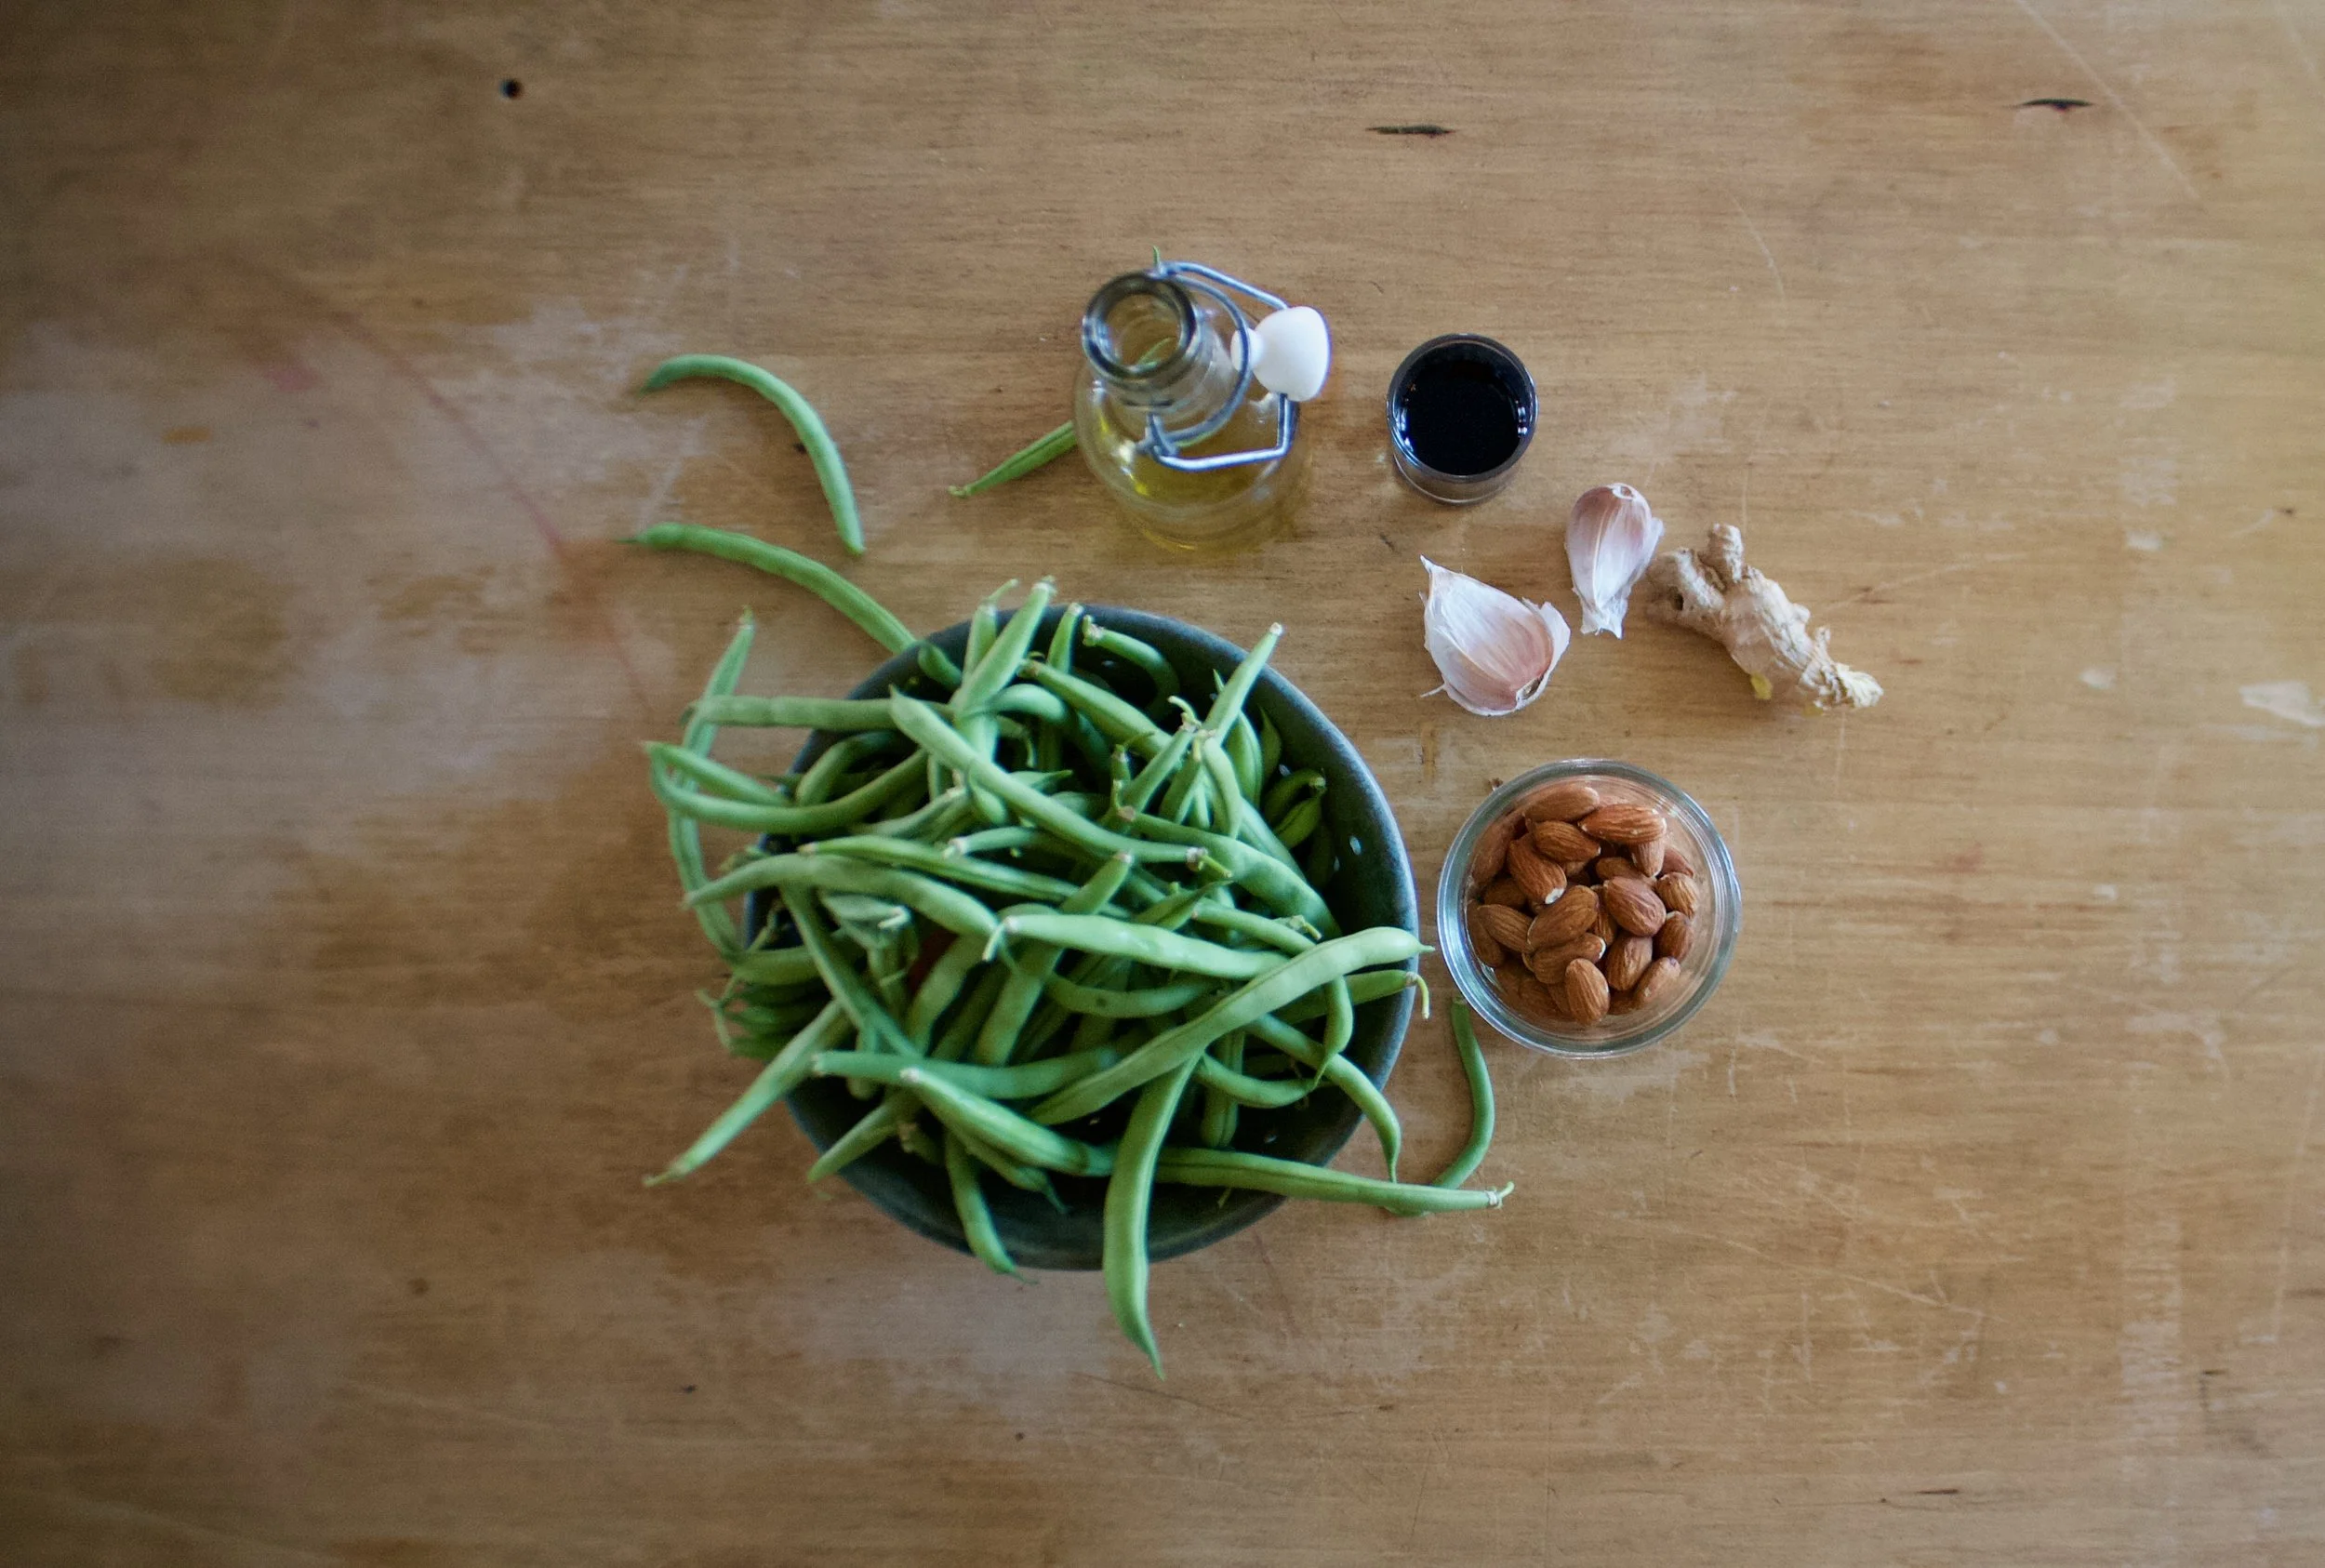
The stuff. A head of cauliflower, tahini, maple syrup, cumin powder, red wine vinegar, salt and pepper, and olive oil.
Break or cu the head of cauliflower up into florets and toss with a little oil, the maple and cumin, and a little salt and pepper.

Scatter on a baking sheet and stuff it into a hot oven.

Meanwhile mix tahini with vinegar, salt and pepper, and enough warm water to thin out.
Roasted all nice and crisp and delightful.

And now you gather up all that cauliflower and cover with all the tahini you want. Grab a bowl, or just eat off baking sheet, and get to it.
And there is no shame in eating a whole head of cauliflower because hey, its cauliflower.
-C
Makes a meal for one or a side for a few
-
a head of cauliflower
-
3 teaspoons cumin
-
2 tablespoons maple syrup
-
olive oil
-
3 tablespoons tahini
-
2 tablespoons red wine vinegar
-
2-3 tablespoons warm water
-
salt and pepper
Preheat oven to 450
Break or cut the cauliflower into medium sized florets. Place in a bowl and drizzle with a teaspoon or so olive oil and toss around. Drizzle in maple, add in the cumin, and a pinch of salt and pepper. Toss until coated then dump the cauliflower onto a baking sheet. Place in hot oven for 25-30 minutes or until roasted to your liking.
While that%u2019s roasting, mix up the tahini, vinegar, and a pinch of salt and pepper. Add in warm water until the mixture is a drizzlable consistency.
Once cauliflower is out of oven, cover with tahini.
Now eat.
There will be no left overs so don%u2019t worry about it.


 The other day the mister and I started reminiscing about some of our earliest memories of what our parents fed us or what they used to eat when we were growing up. One of the dishes that we both remember eating was the classic creamed beef on toast, or as my mom use to call it, shit on a shingle. Yup, shit on a shingle. (who ever started calling creamed meat on toast is a freaking genius) I think that as a kid, I liked the dish just for the mer fact that I could say the word shit and get away with it. I think my mom liked it for few reasons; she could make a big butt load of it really fast, for a crap load of kids, on the super cheap. And I think that she just really like it.
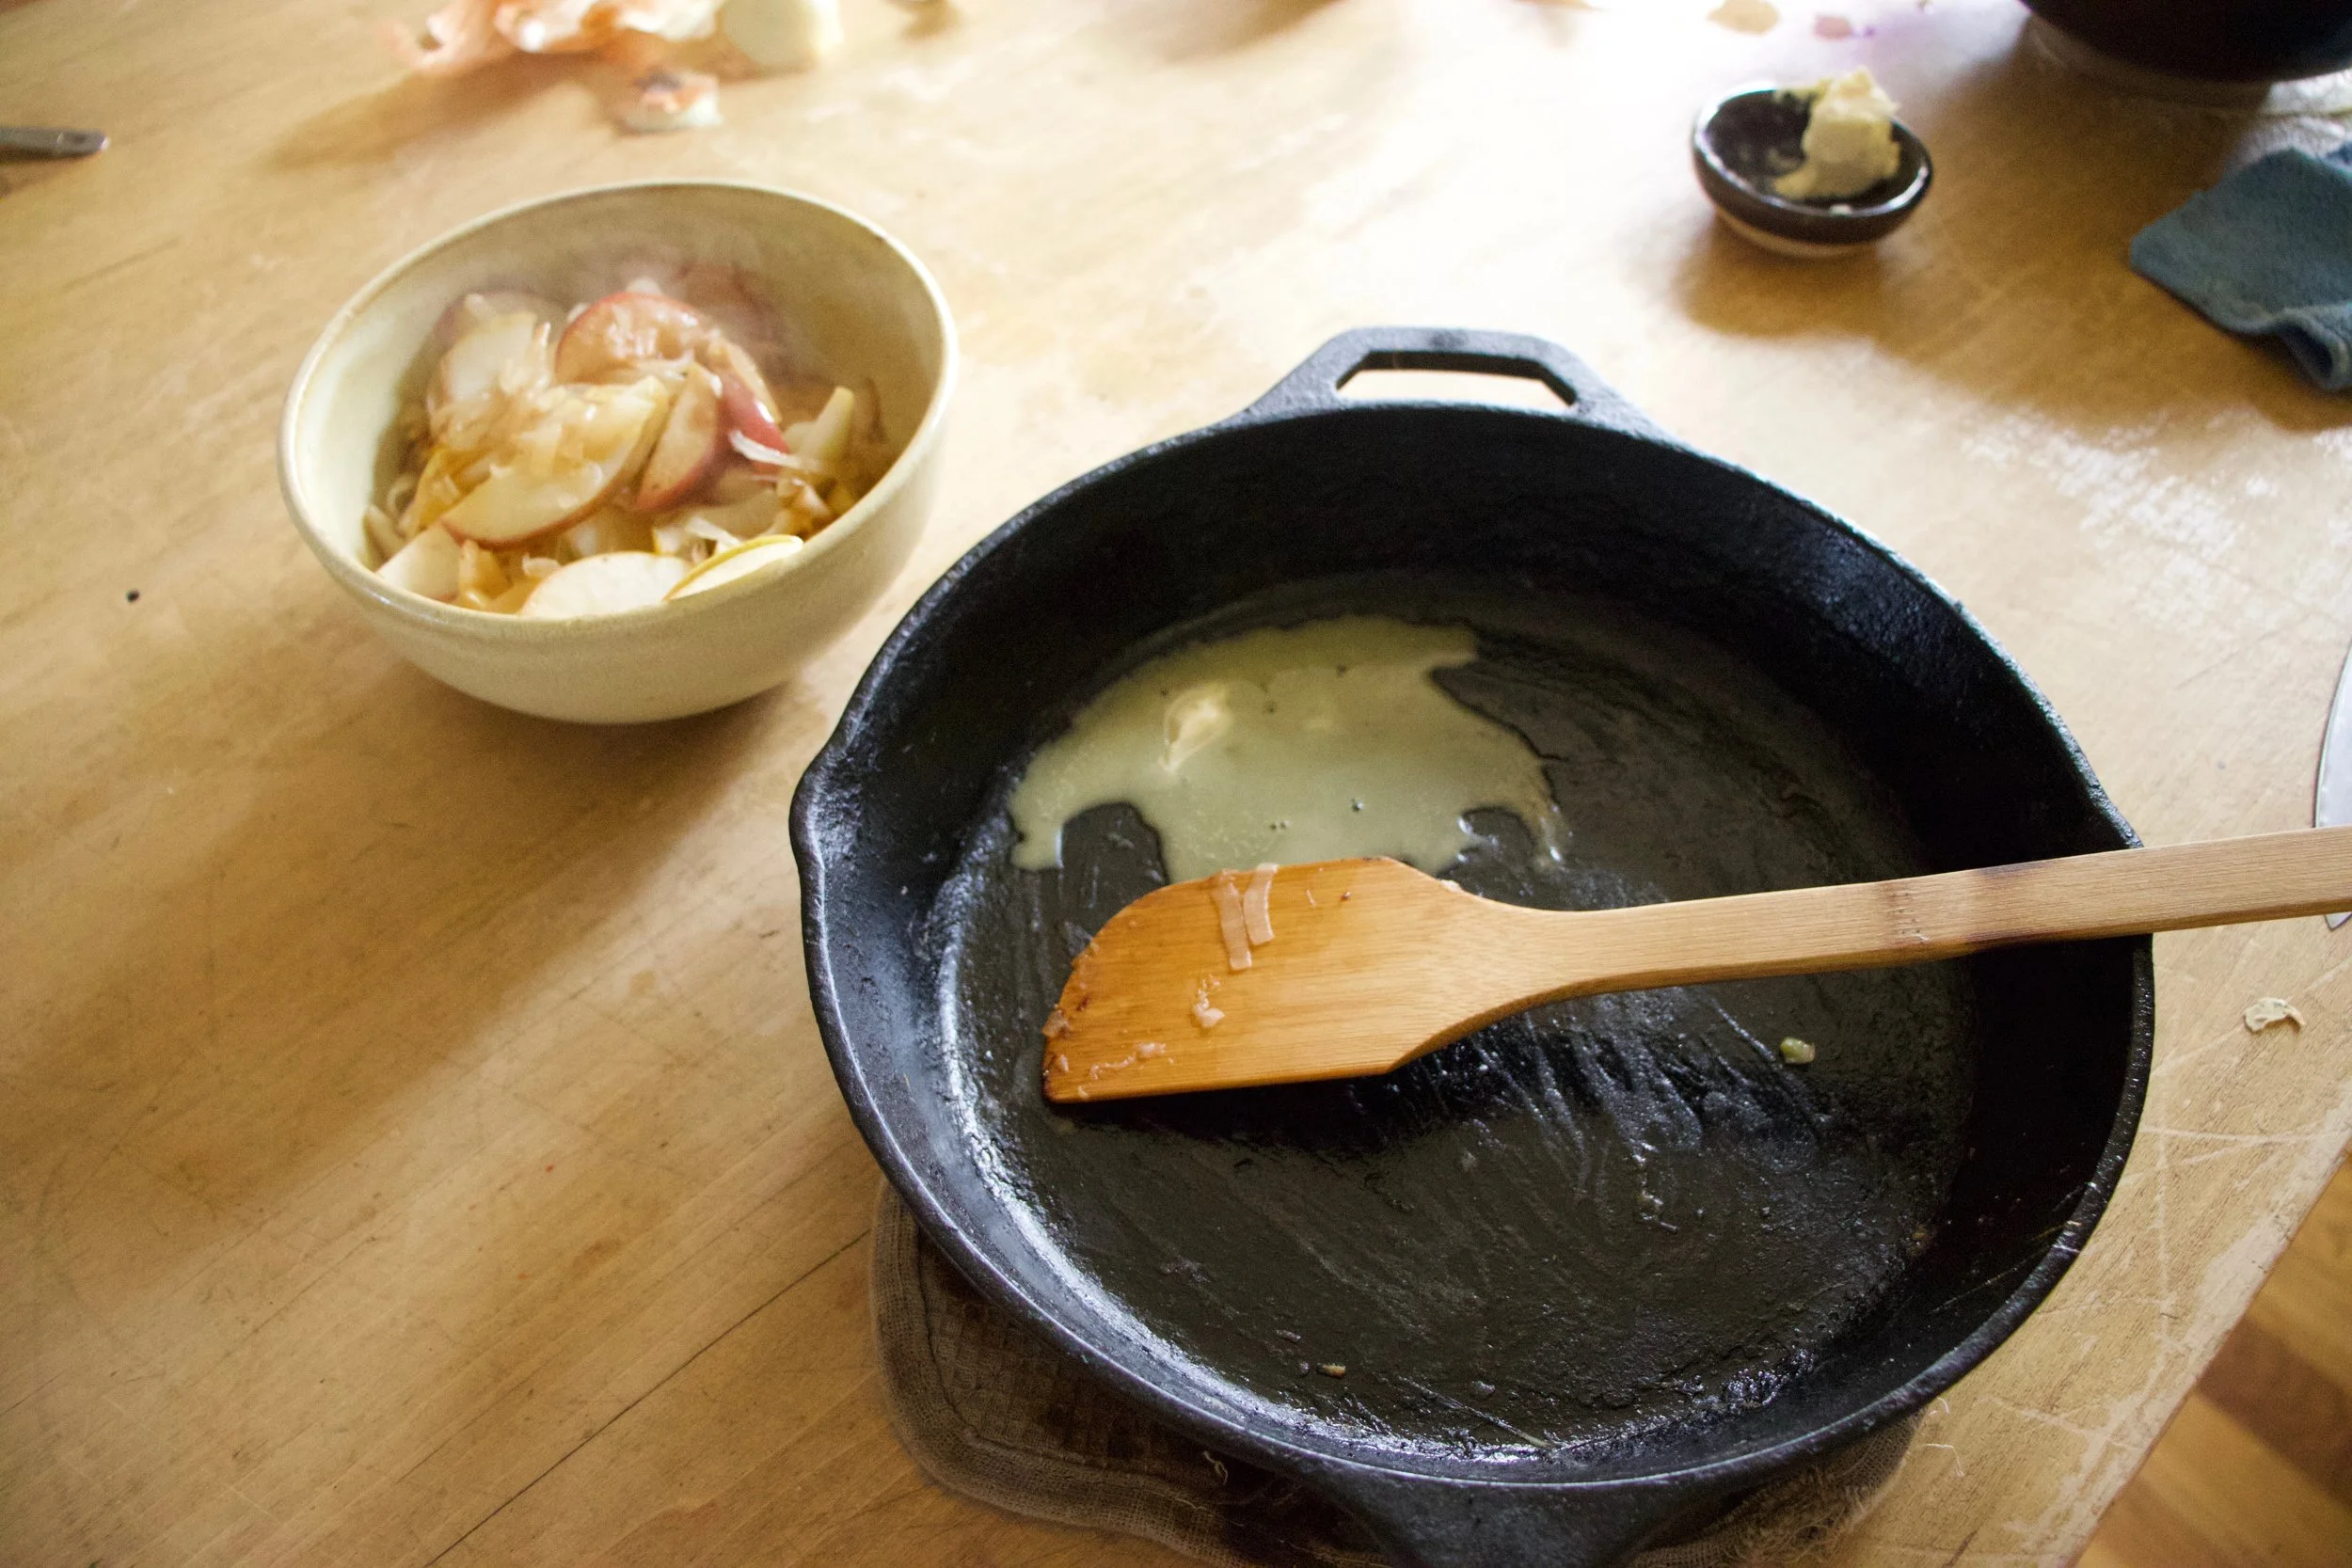
  The shit….. A few mushrooms, a bit of onion, cooked lentils, flour, milk, oil, salt and pepper, and garlic powder. And the shingles.. 2 pieces of thick white country bread.
  Slice the mushrooms and the onion and toss into a skillet with a drizzle of oil. Cook on medium heat until browned and fragrant..Remove from pan.
 In the empty pan still on medium heat, add in the olive oil and the flour. Whisky constantly, slowly add in the milk. Keep whisking until sauce thickens. Remove from heat. Add in salt, pepper, and garlic powder.
 Add the mushrooms and the lentils into the sauce and give it a good mix. Oh, and don’t forget to toast up the bread.
  Now dump that shit all over those shingles! Oh the memories.


THE LOVELY CRAZY
February 22, 2020 by maximios • Blog
I love December, basically because it is a month long excuse to always be baking cookies. And listen to Christmas music. And have a lovely big ass tree in the house covered in lights and dried fruit. Plus snow if we are really lucky. December. It%u2019s a good month.
And we are getting to that time when now most of us have serious cookie making on the brain. I bet if you ask 5 people what they are planning on doing in the next few days leading up to Christmas, at least 3 of them will tell you they are making cookies because really, that is what you should be doing. That is if you like to bake. If not, then by all means, skip cookie baking.
Now what cookies to bake? Well you got to have chocolate chip, and peanut butter. Plus some no bakes and sugar cookies, but also, I think, some type of gingerbread.
These cookies are the gingerbread something. I added cardamon because I think cardamom is delicious and think everyone will think so too, And lemon because lemon goes with cardamom and ginger and lemon cardamon ginger just has a nice ring to it. Then crinkle because I didn%u2019t really want to roll out dough and cut out shapes (I was being lazy), but I wanted pretty and I am really Into the crinkle look.
These cookies were a huge hit. Not crispy like a snap, but not cakey or overly soft. A nice chew and deep in flavor. The mr was basically smuggling these cookies all day before I had a chance to really hide them and he is not a typical gingerbread lover but he told me that these cookies might just be the best cookies he has ever had. So yeah, I guess this is now my new winner gingerbread cookie recipe.
And no joke, these are probably the best smelling cookies I have ever made. I wanted to bottle up the smell and wear it on me like a teenage boy wears a new bottle of axe. Seriously, I kept sniffing my sweater all day long just to get a good hit of the smell. So good!
Now to the cookies!
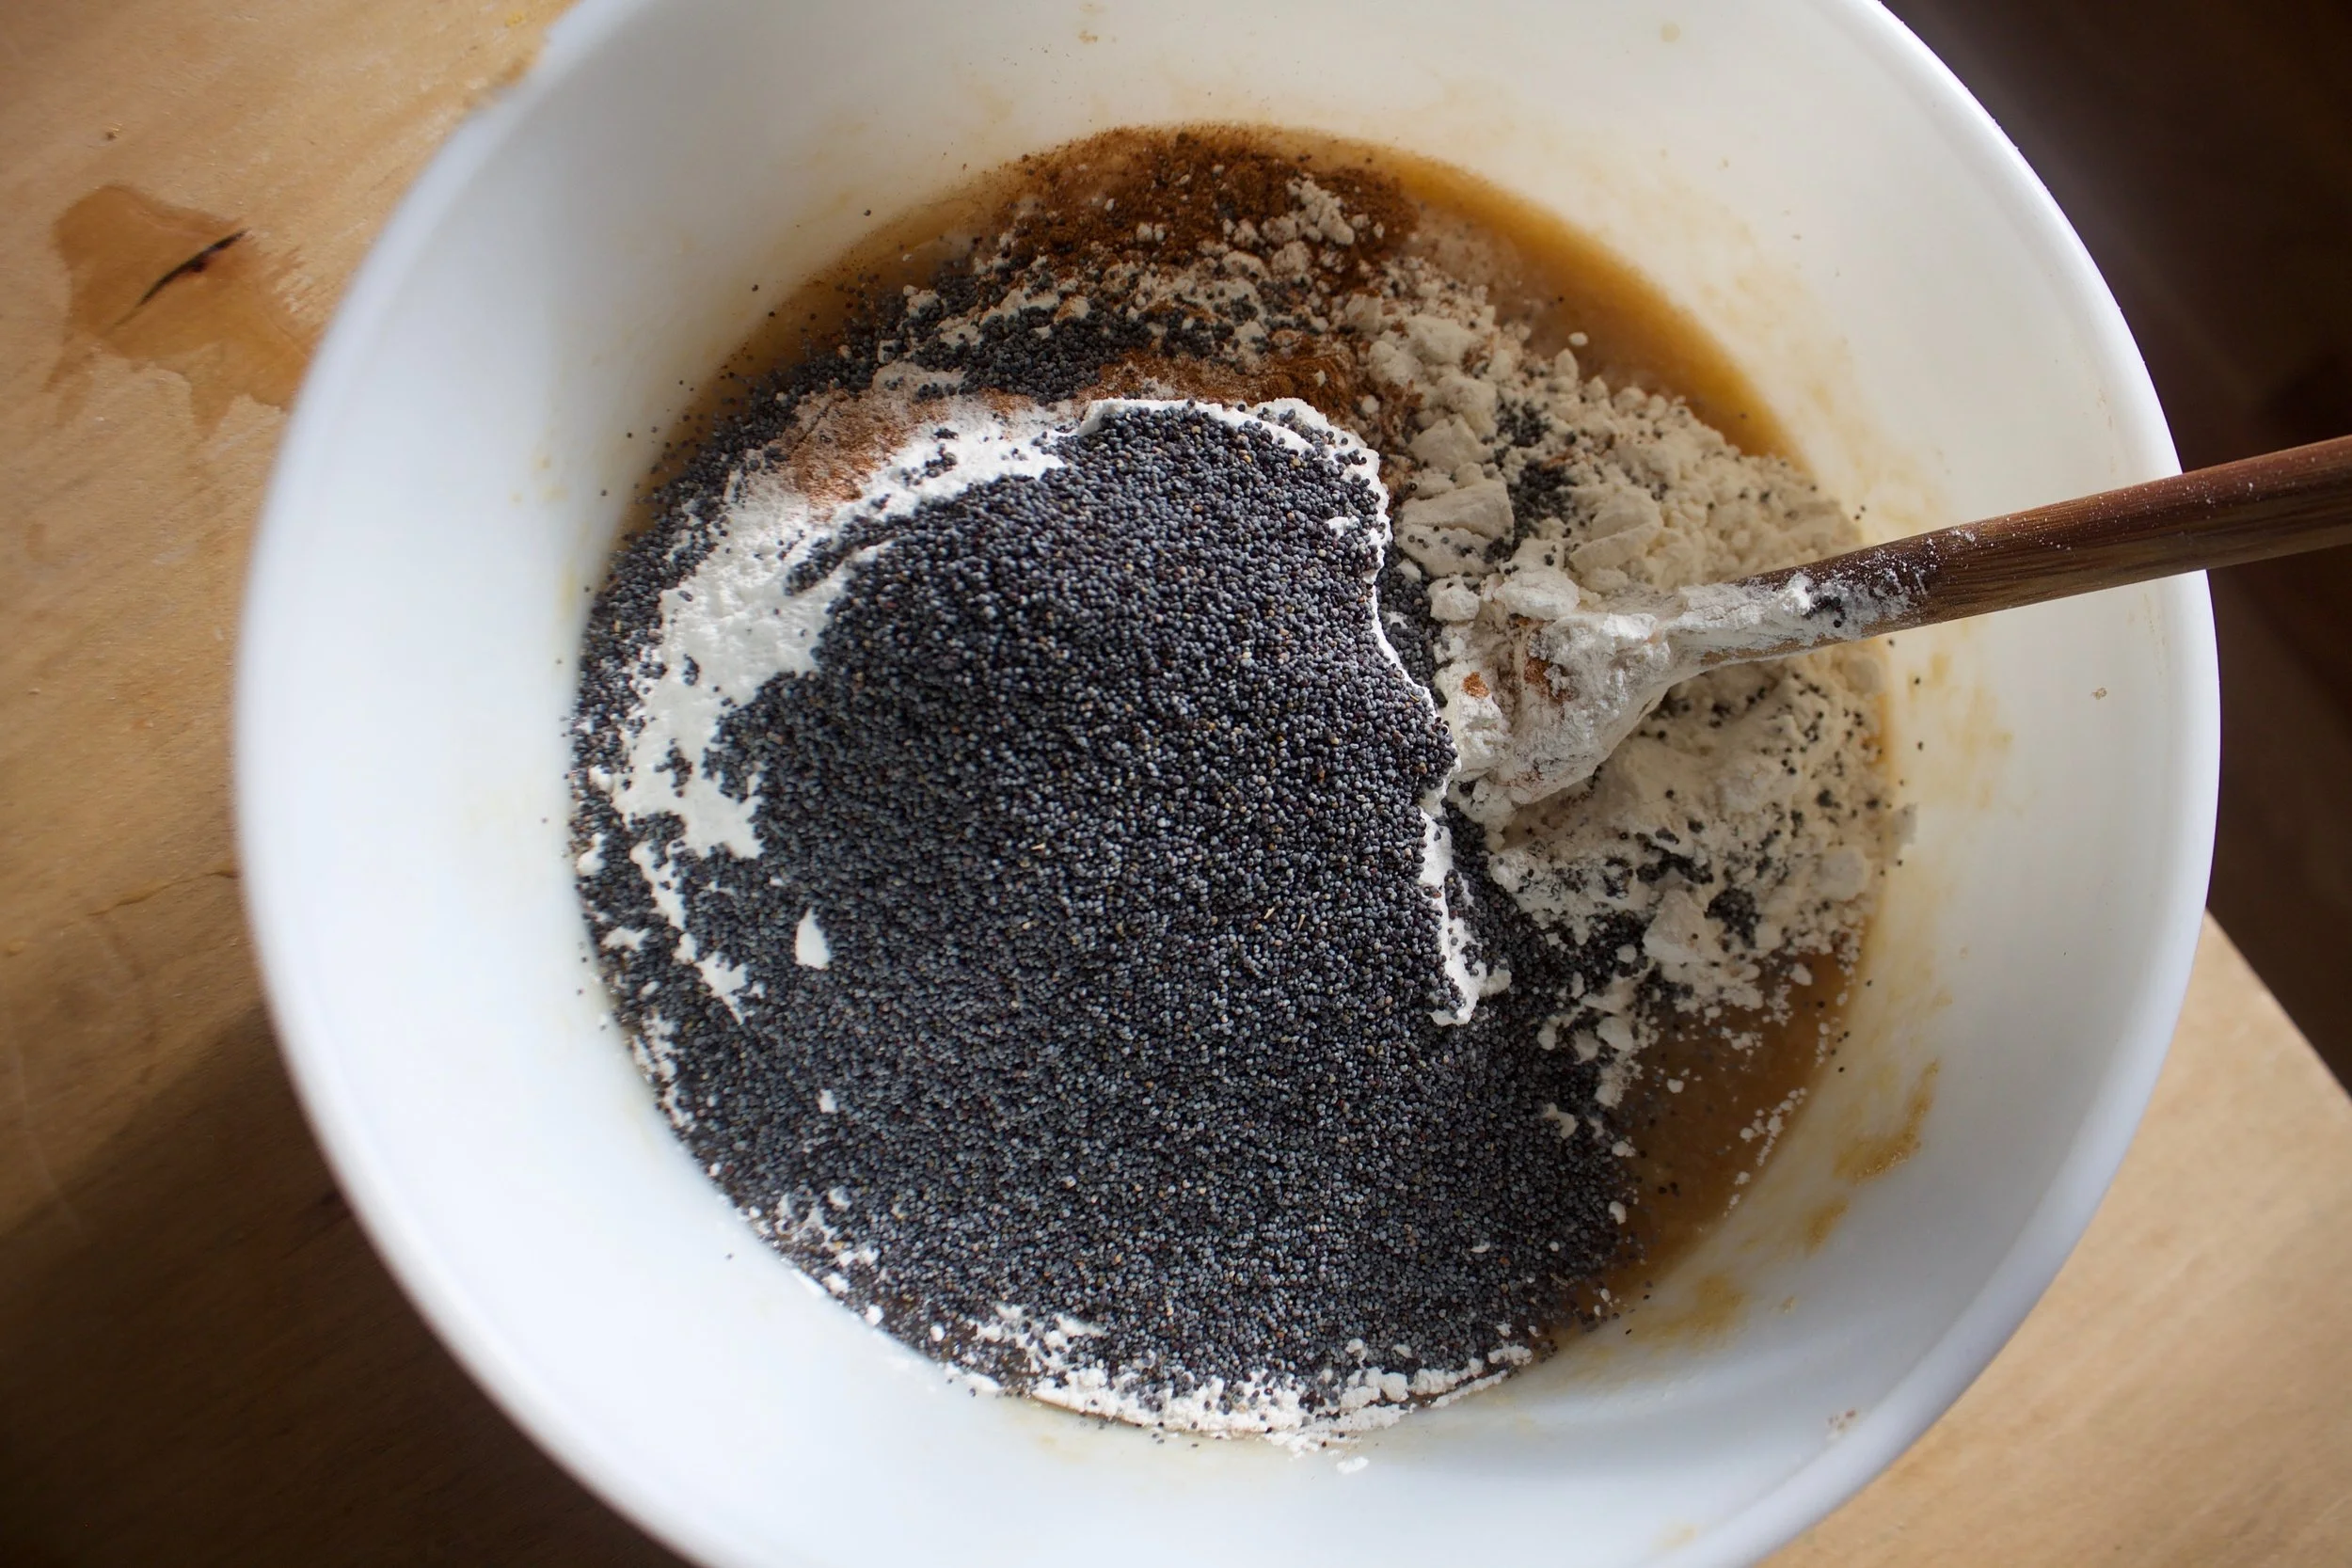
The stuff. In one bowl there is flour, salt, and baking soda and powder. The other bowl is brown sugar and molasses. There there is a couple flax eggs, some oil, a lemon for it%u2019s zest, and spices of ginger, cardamon, cinnamon, and black pepper. Also powdered sugar to roll and crinkle these cookies.
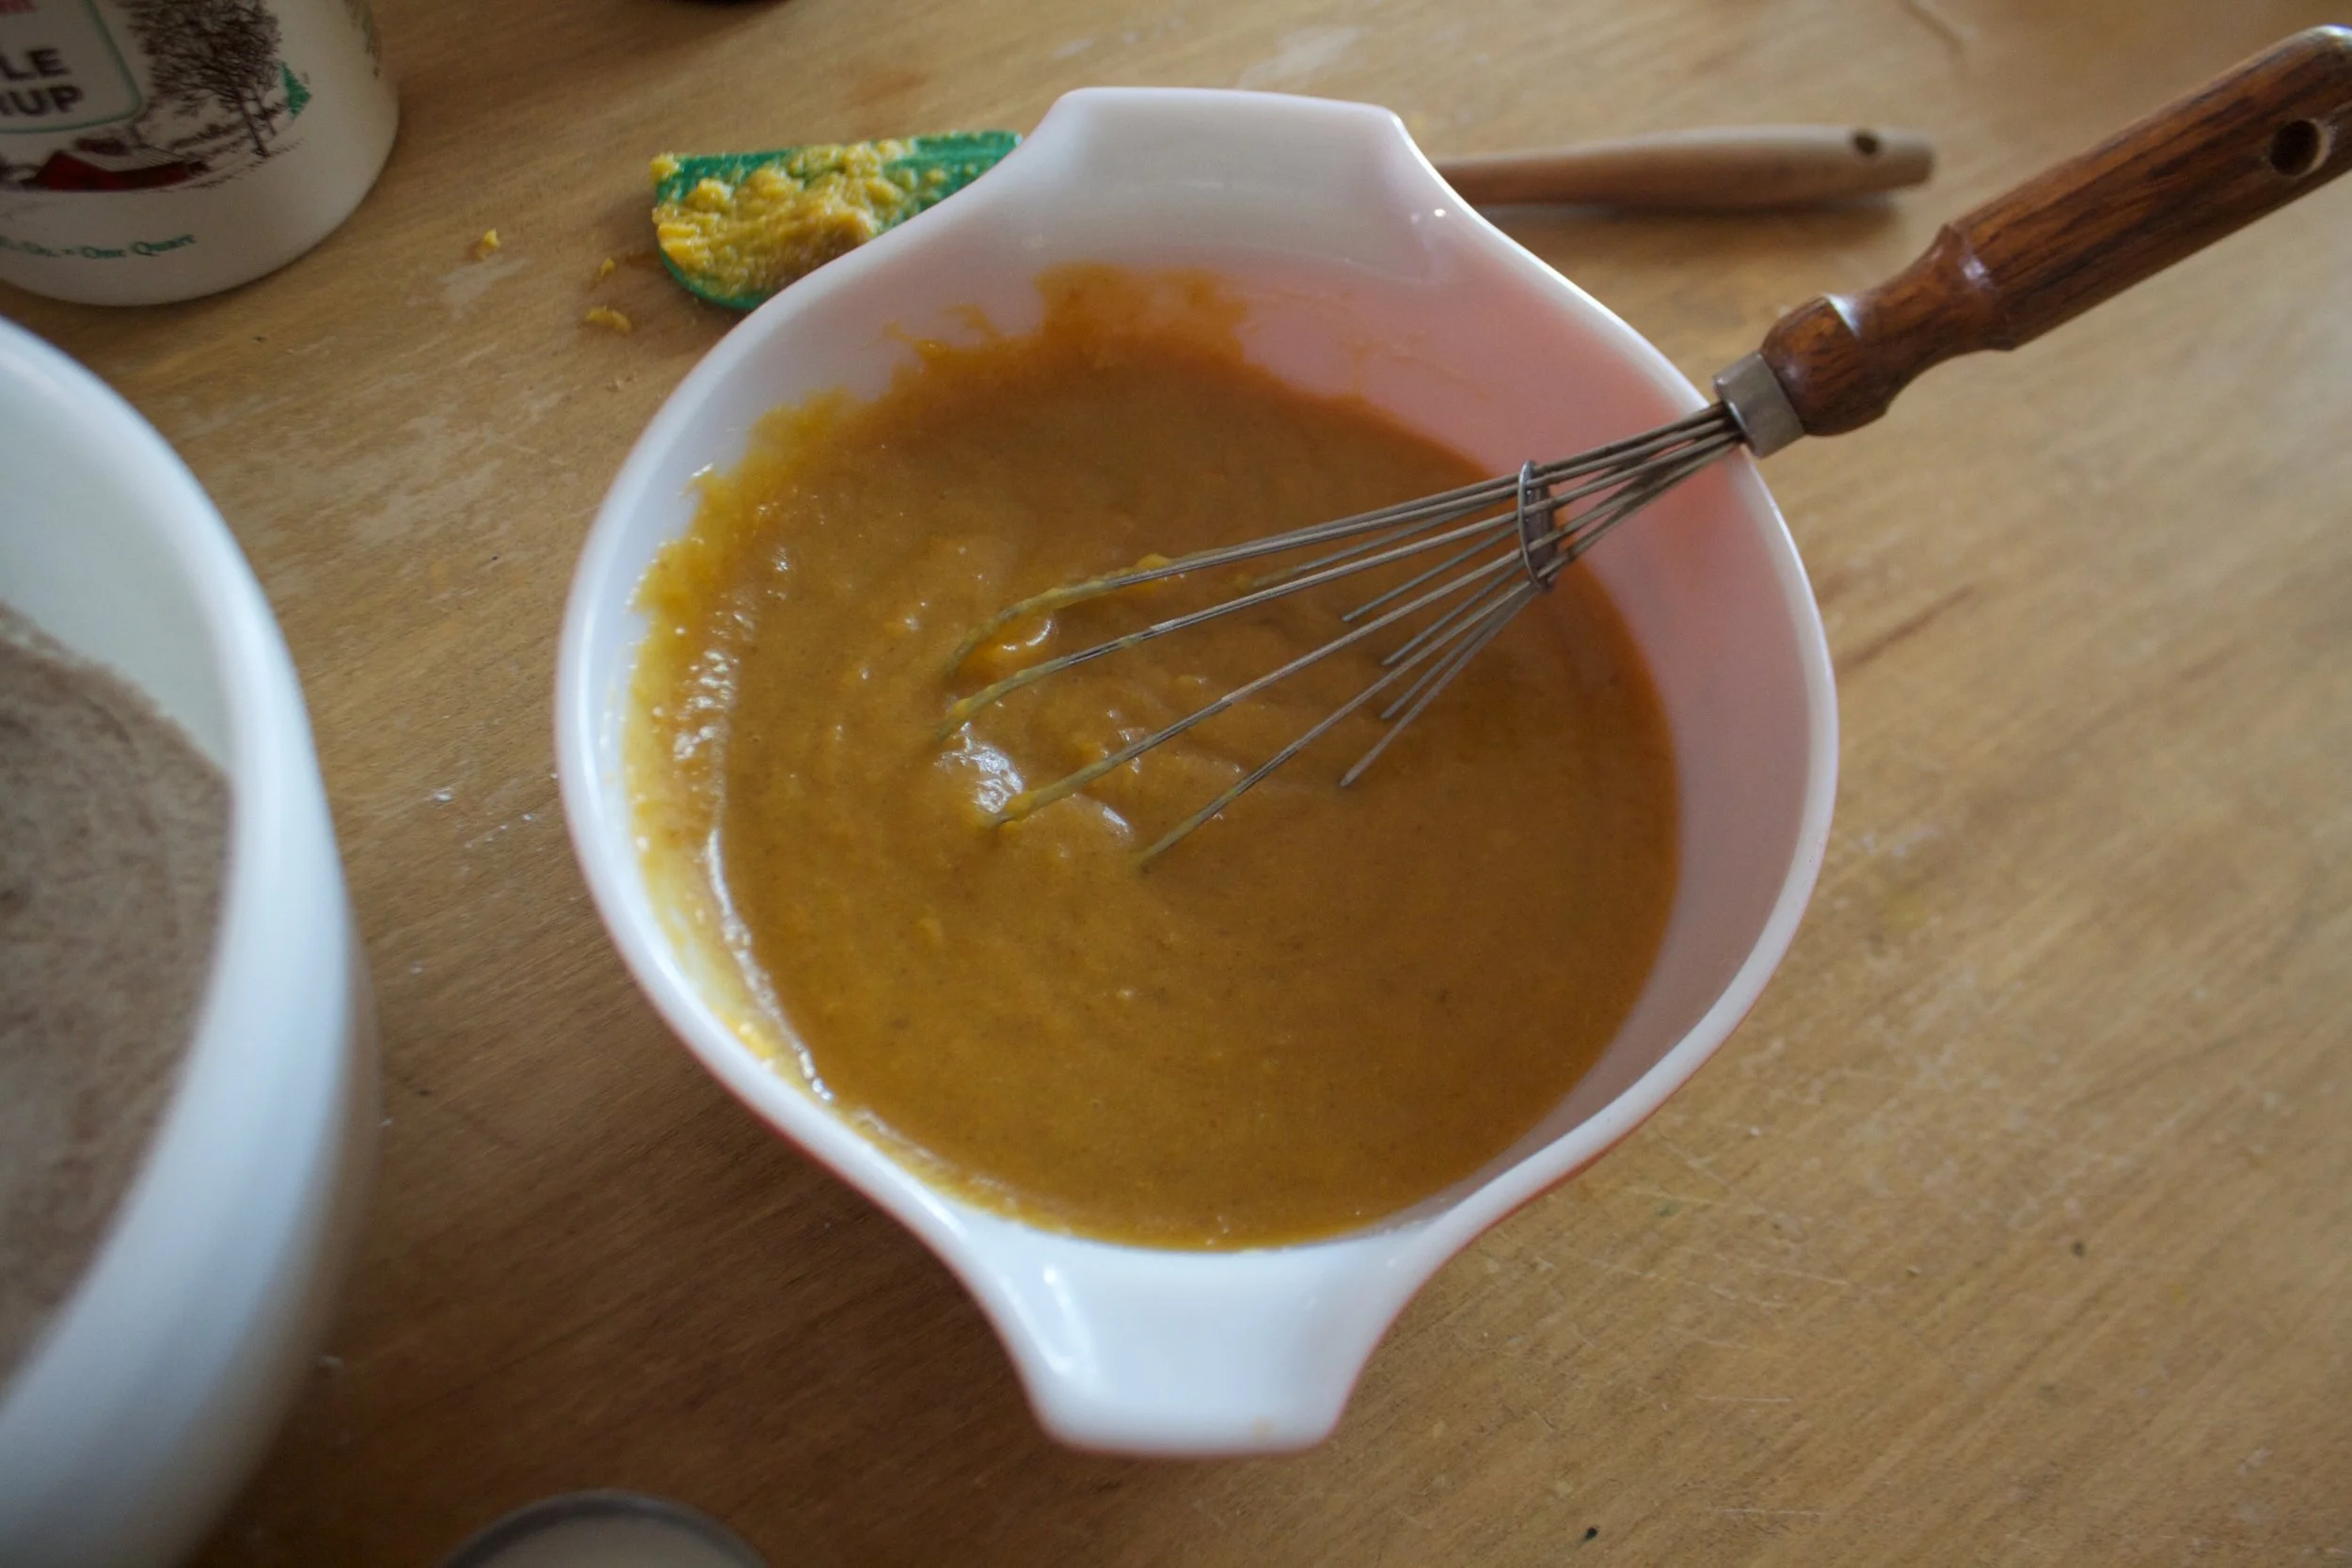
Wet stuff. Sugar, molasses, flax eggs, and oil. Mix until combined.
Dry stuff. Flour, baking soda and powder, salt, and the spices. Add in the lemon zest too and whisk to combine.
Wet into dry. Grab a wooden spoon and mix until a cohesive dough forms. And yes you can give up the spoon after a minute and use your hands to complete the mixing%u2026 I did.
After dough is mixed and uniform, pop the bowl into the fridge for a little while to give he dough some time to rest. Half an hour is good and you could even leave it for a day if you wanted to, just cover it if you do.
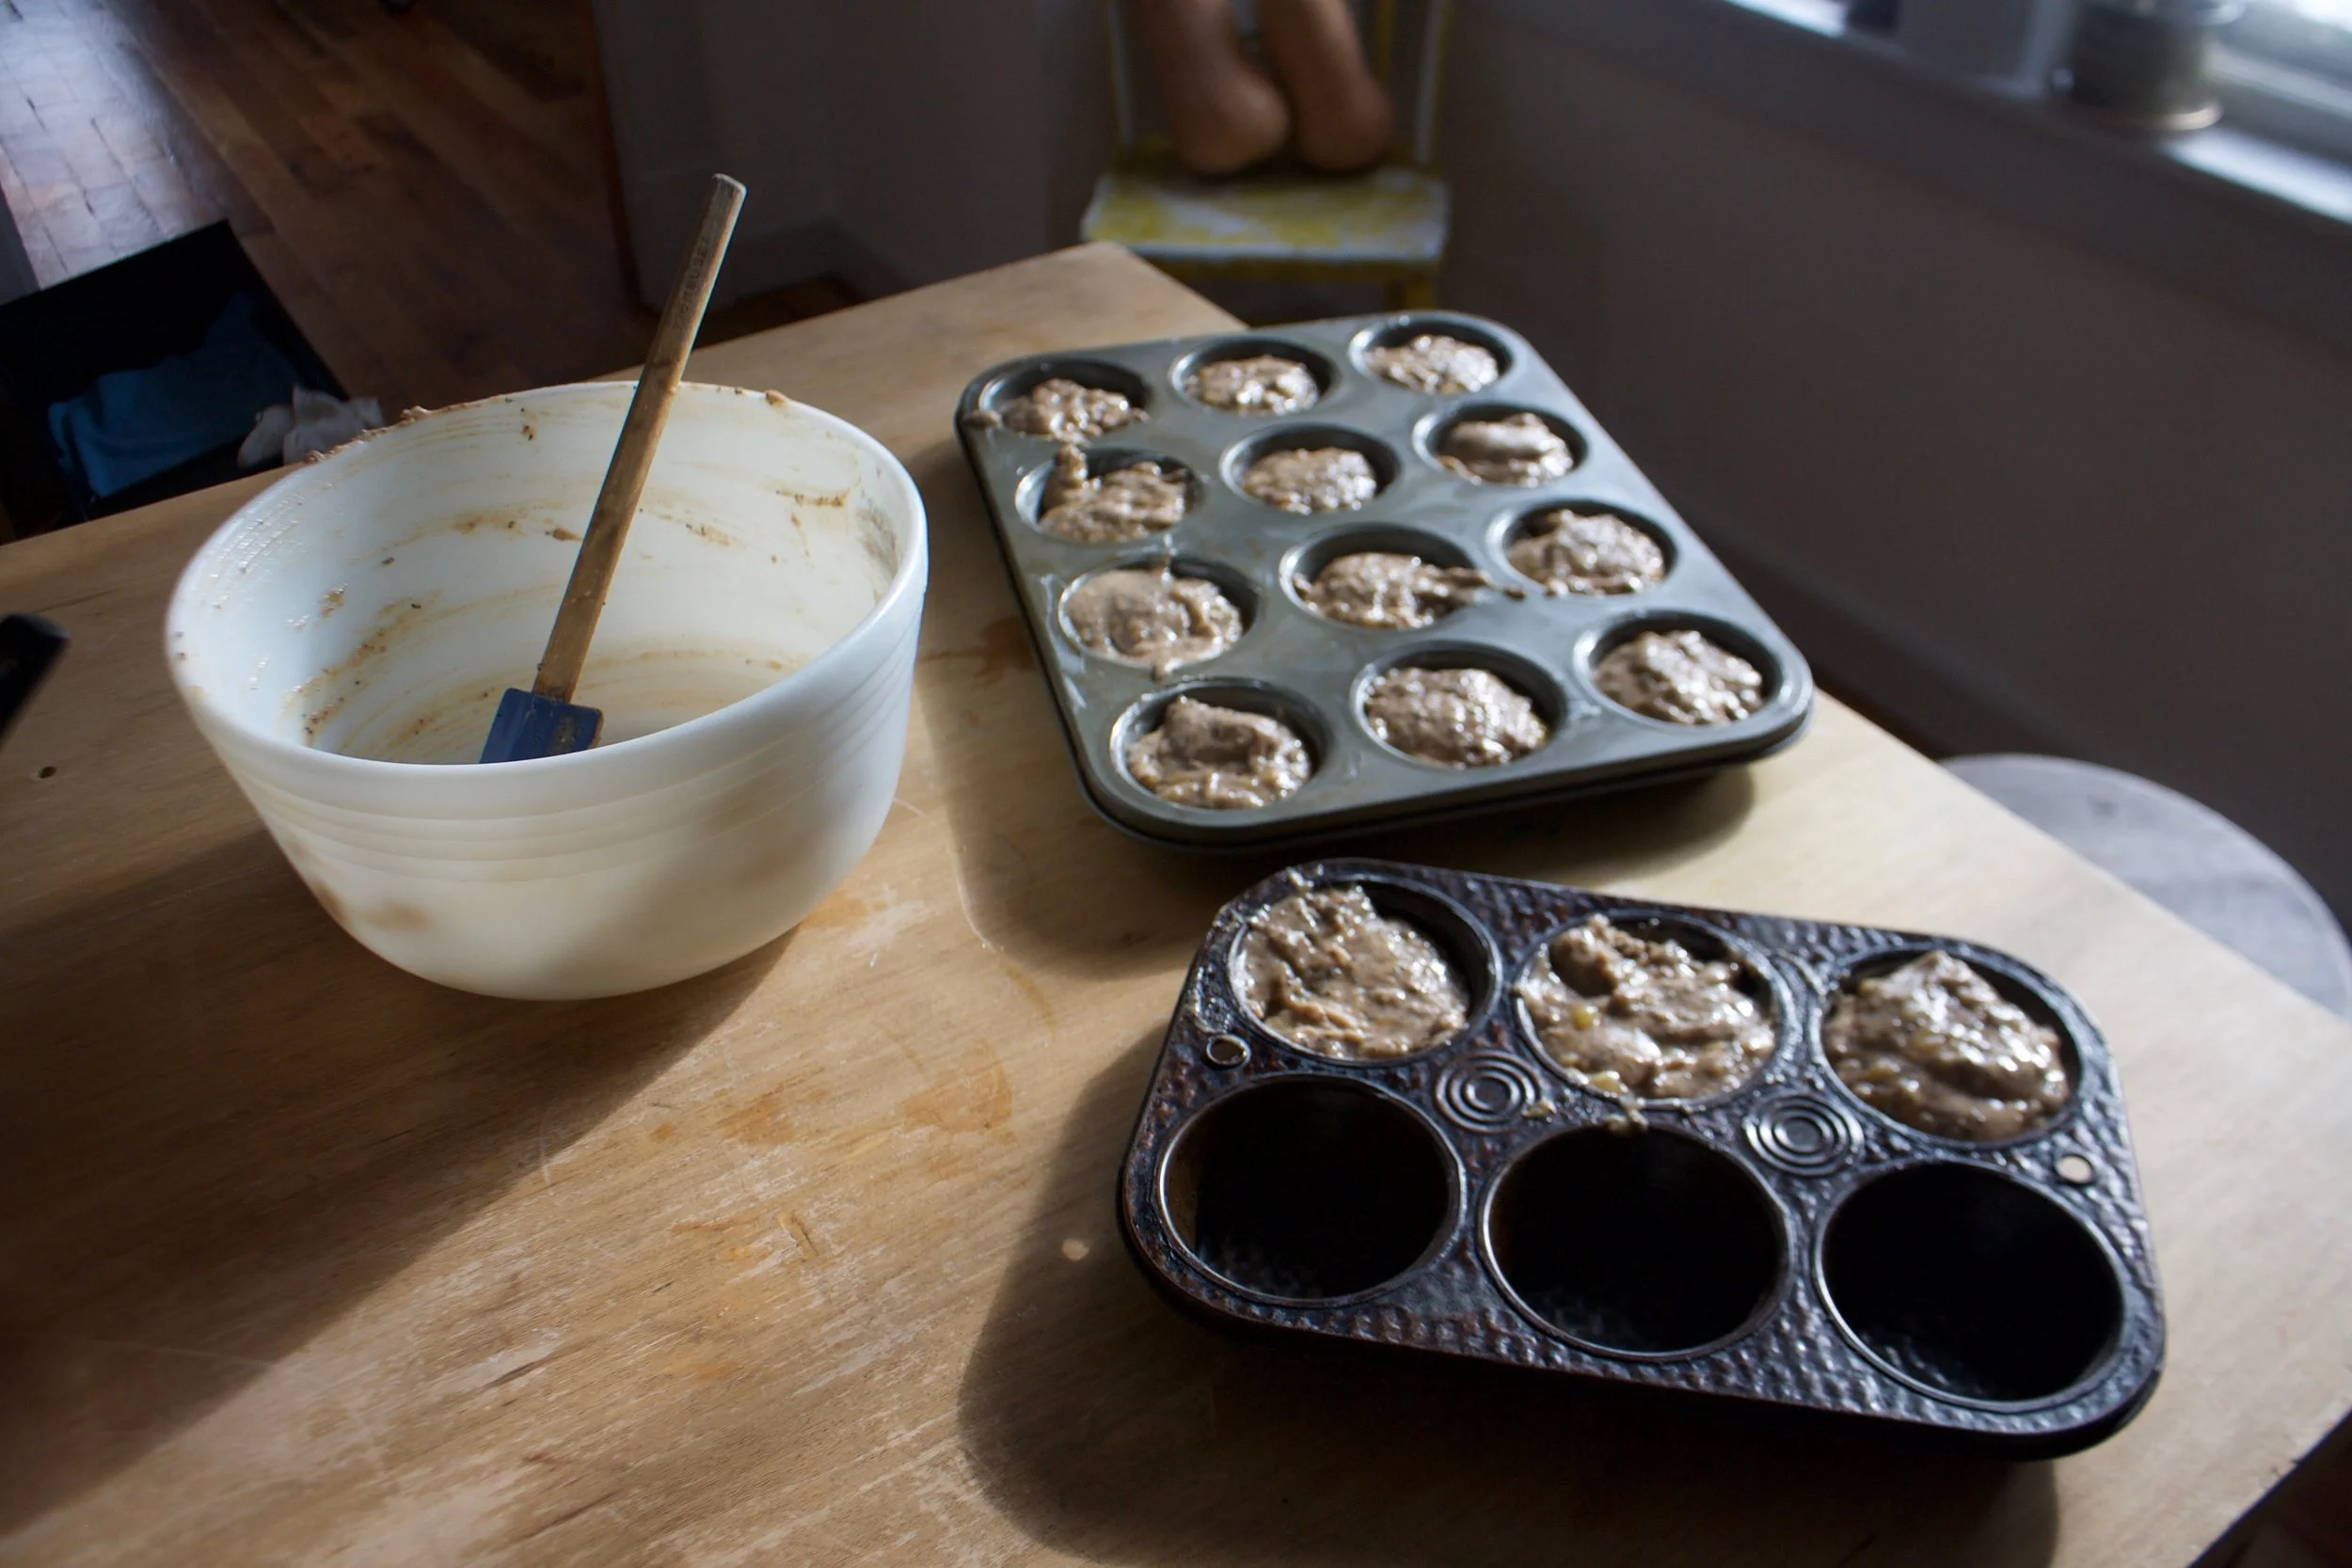
And when the dough has had it%u2019s time, scoop, roll into balls, ans roll around and completely coat in powdered sugar.
Sugars balls of dough. Now pop them into the oven.
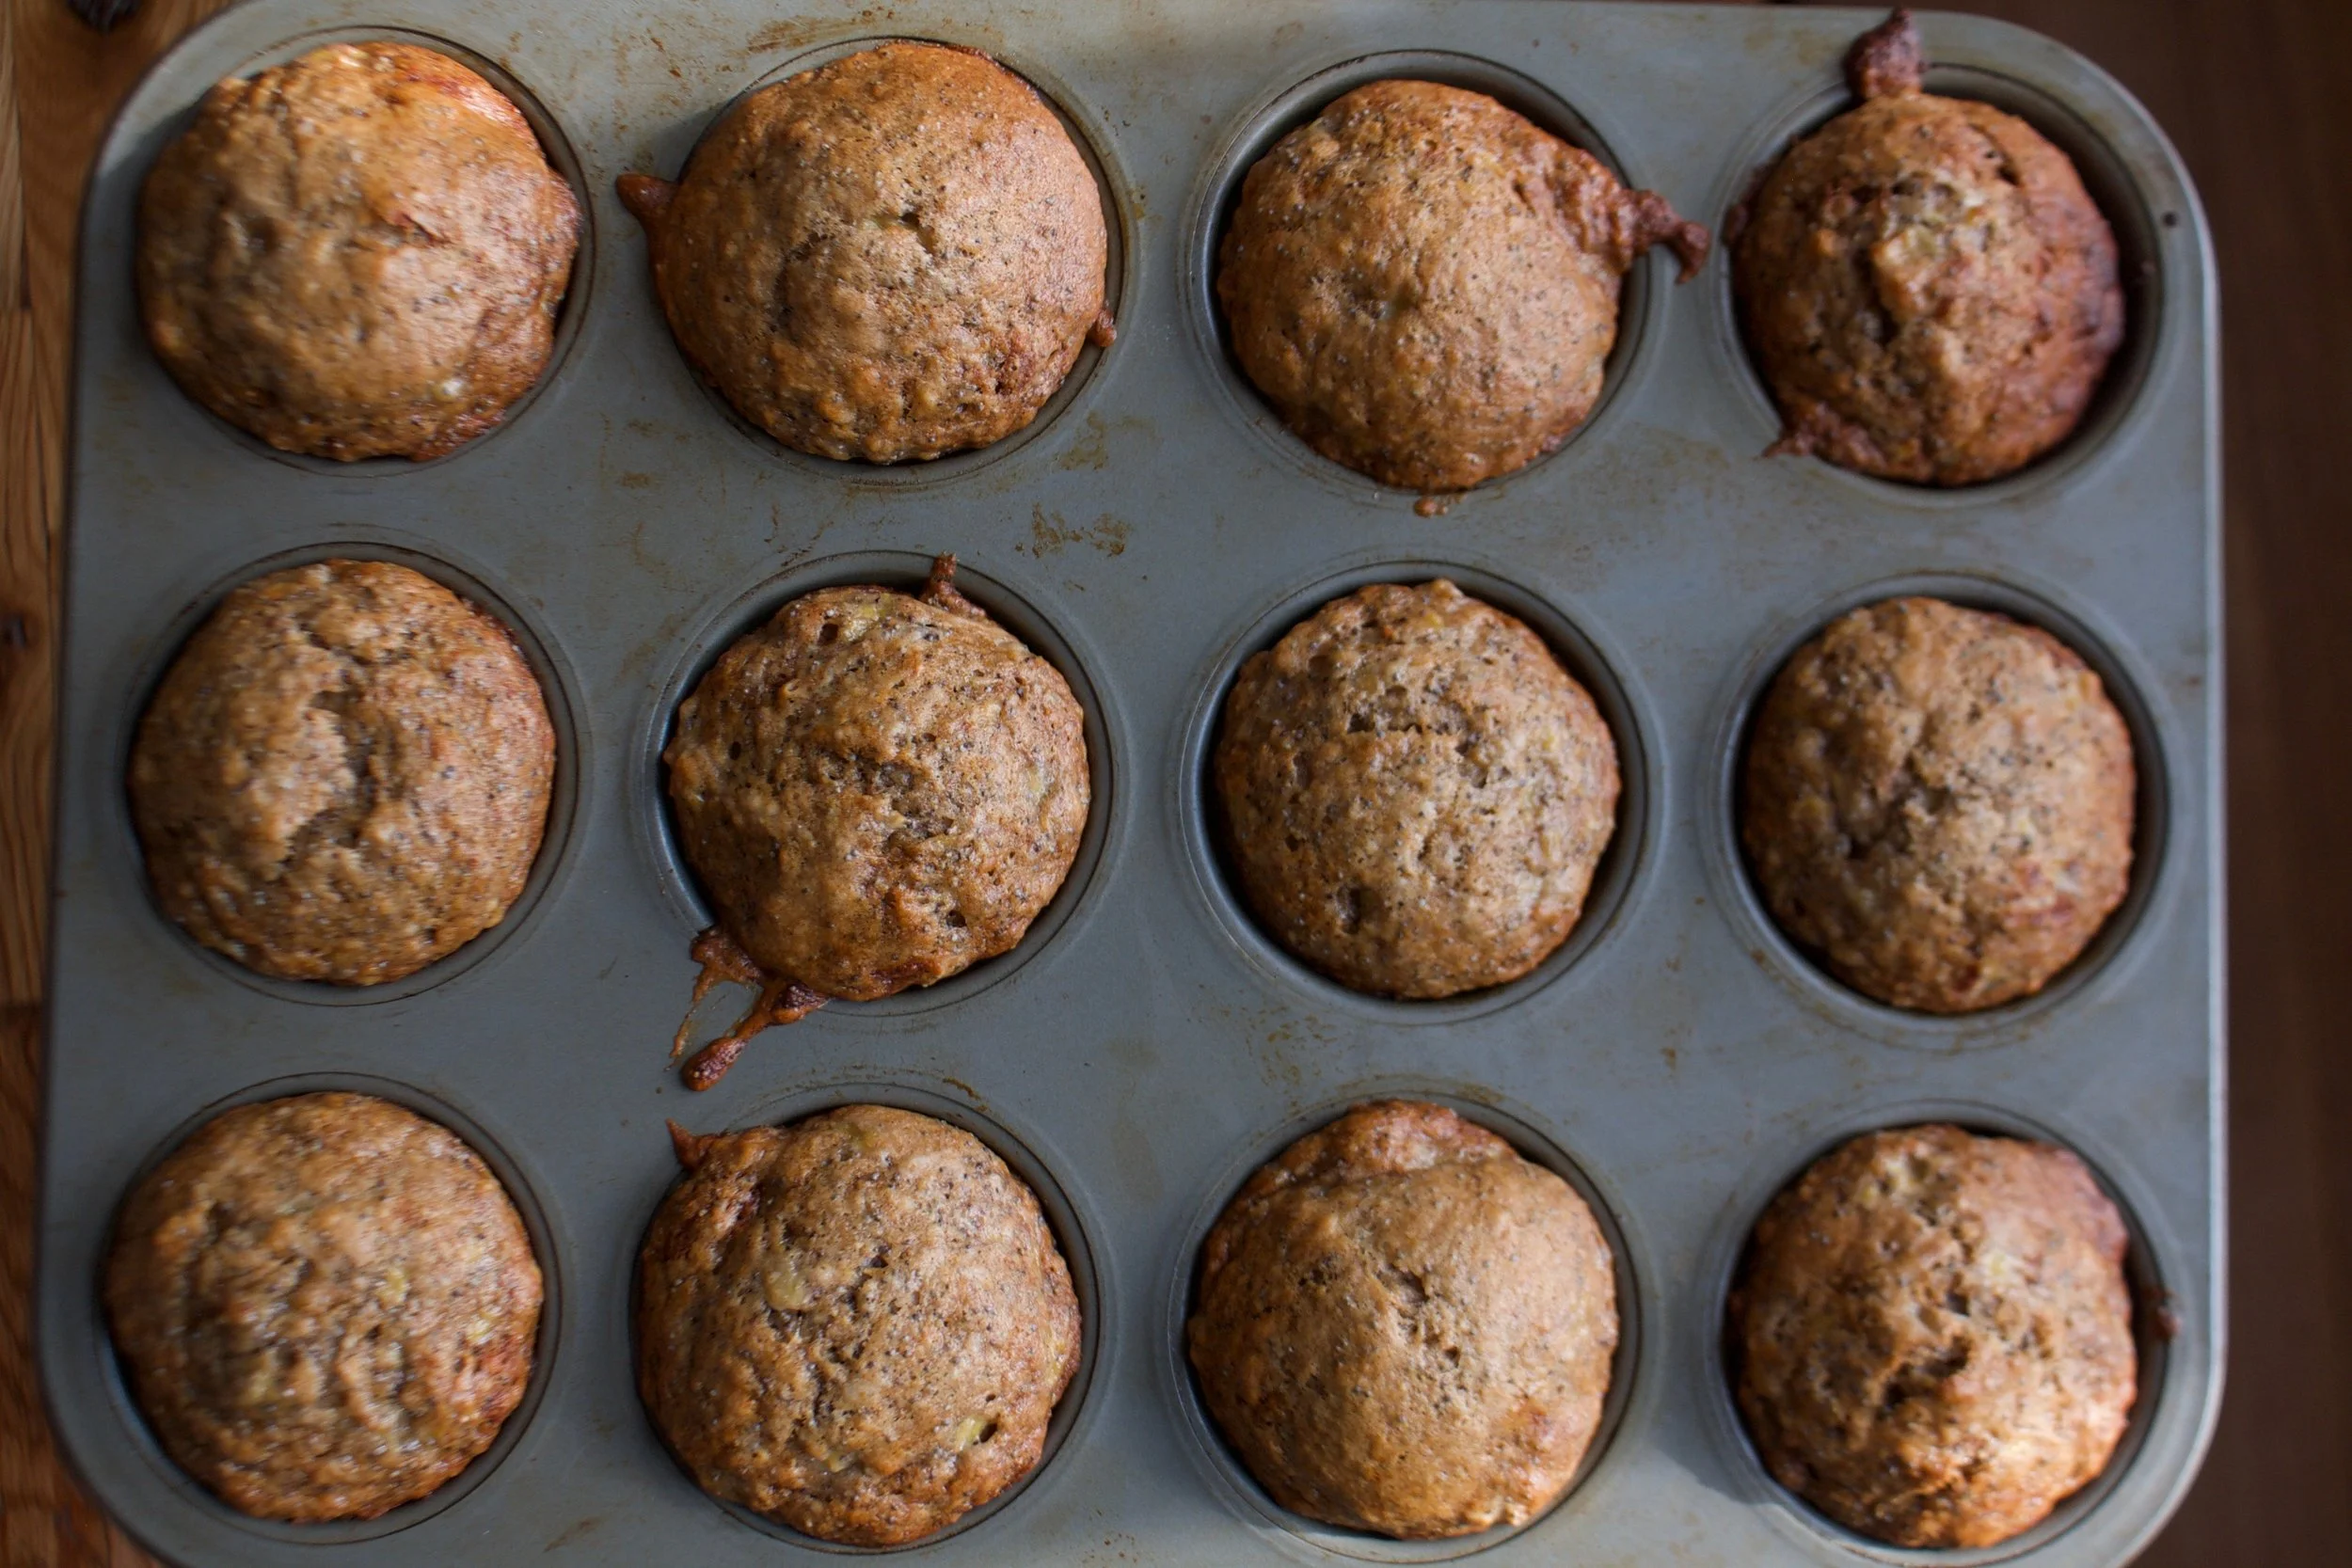
TA DA! Baked and all crinkly.
Let the cookies cool on a wire rack because that%u2019s how all cookie cool. And smell that delicious oh so lovely smell. It really is amazing, no?
Then onto a serving plate and now you have cookies for your mouth face.
Happiest happys of all the days to come! Now go eat cookies!
-C
makes around 2 dozen cookies
2 1/2 cups all purpose flour
1 teaspoon baking soda
1/2 teaspoon baking powder
1/2 teaspoon salt
1 tablespoon ground ginger
3/4 teaspoon ground cardamom
2 teaspoon cinnamon
1 teaspoon pepper
zest of a lemon (about 2 teaspoons)
3/4 cup brown sugar
1/4 cup molasses
2/3 cup neutral oil (I used canola)
2 flax eggs (6 tablespoon warm water mixed with 2 tablespoon ground flax seed)
1/2 -3/4 cup powdered sugar
To start, grab a bowl and mix together the brown sugar, molasses, oil, and flax seed eggs until completely combines. In another large bowl, whisk together the flour, all the spices (ginger, cardamon, cinnamon,and pepper), baking powder and soda, and salt. Pour the wet mixture into the bowl with the dry and mix together until a cohesive dough forms. Place dough in fridge for about a 1/2 hour to up to a day to let dough rest for a bit. If you are going to keep in the fridge for a while, just cover it up.
When ready to bake, preheat oven to 350 and measure out powdered sugar into a bowl
Remove dough from fridge and using a scoop or just eyeballing it, scoop about 2 tablespoons worth of dough. With each scoop, roll the dough into a ball and place into the bowl of the powdered sugar and roll around unit completely coated. Place ball on a baking sheet, giving it a little pat down, NOT squishing it down, just a little indent. And don%u2019t overcrowd balls, give them a little space.
When your baking sheet full, place Into hot oven and bake for 12-13 minutes or until the cookies have puffed and flattened out a bit, are golden brown on the bottoms, and the tops are all crinkly and lovely. Once cooked all the way, remove from oven and transfer cookies onto a wire rack to cool.
Then eat a warm one. Heck, eat 2 warm ones, then do what you will with the rest.
Store cooled cookies in an air tight container at room temp for 3-4 days. They can also be frozen for long term storage but why do you need to store your cookies? Jest eat them.
As of right now, these are by far the best cookies I have ever made. Look at them. They are SO CUTE!. Worth all the effort, seeing that I do not own a ghost cookie cutter (although I think my version of ghosts are pretty fantastic) and had to hand cut out each cookie with a knife and a ghost cutout I made a few weeks back. They make me happy just looking at them. That right there is saying something. And I don%u2019t know about you and where you are, but it is getting pretty freaking cold out and I refuse to turn the heat on for a few more weeks so I do what I need to do to stay warm. If that means turning on the oven to bake cookies, then so be it. I have a feeling I am going to be making a few more batches of cookies before the months over. HA! (For reals though.)
These cookies are more or less a traditional sugar cookie with a chocolate ganache type filling, both with a hint of coconut flavor from the use of coconut oil. Something about the whole combination; the cookie, the coconutieness, and the chocolate that really had everyone (I gave them out a Barbs birthday party) praise my amazingness. I guess they are pretty freaking delicious.
Cute and delicious. Best kind of cookie!
And quick note. Yes these are ghosts but think of all the fun shaped sandwich cookies you could make. I am thinking moose shaped cookies next or maybe Christmas trees%u2026 Oh the possibilities!
Now, to the cookies!
The stuff. White sugar, coconut oil, flour, baking powder, salt, vanilla, almond milk, cocoa powder, and powdered sugar. For cookies and filling.
To make cookie dough. Beat toghetet the coconut oil with sugar and vanilla until smooth and fluffy. Add in all the dry ingredients and the almond milk and mix until a dough forms.
Wrap dough in plastic and squish tight. Place in fridge for an hour or up to a day.
After dough has had time in the fridge, grab it and roll it out on a lightly floured surface to about 1/4 inch thick.
Cut out cookie shapes. If you want to cut out eyes or a few different shapes, remember each cookie needs a top and bottom so even numbers folks.
Place cut out cookies on a baking sheet then into the oven they go.
Bakes and ghostly! Place them on a wire rack to cool and keep baking the rest of the cookies.
While cookies are cooling, make chocolate filling. Super soft, almost melted coconut oil goes in a bowl with vanilla and gets beaten together. Add in the cocoa powder, powdered sugar and pinch of salt and kept beating slowly anding in a bit of milk until the whole shebang comes together into chocolate filling awesomeness.
Once the cookies are completely cooled, fill them. The filling might have tightened up a bit so if it is not spreadable, pop into microwave for like 8 seconds to get it to move. Scoop or smear equal amounts of filling onto the bottoms of the cookies and top them off with their tops.
Done, and ready to eat.
Ghosts cookies for all your ghost fueled festivities.
-C
makes at least 16 sandwich cookies
For the cookies
2 1/4 cups all purpose flour
3/4 cup white sugar
1 teaspoon baking powder
1/2 teaspoon salt
1 teaspoon vanilla extact
2/3 cup soft coconut oil
5 tablespoons plant milk (I used almond)
For the filling
1 1/2- 2 cups powdered sugar
1/3 cup cocoa powder
4 tablespoons melted coconut oil
1/2 teaspoon vanilla extract
2-3 tablespoons plant milk
1/8 teaspoon salt
Preheat oven to 350
In a bowl beat together the white sugar with the coconut oil and vanilla extract. Add in the flour, baking powder, and salt and start to mix with a spoon or fork, adding in the milk as you go. Keep mixing until completely incorporated and turns to a ball of dough. Gather together into a ball and wrap in plastic. Pat flat and place into fridge for an hour or up to a day.
To cut out cookies. Roll fridgerated dough out on a floured surface to about 1/2 inch thick. Cut out shapes, making sure to have a top and bottom for each cookie. Gather left over dough into a ball and repeat until all the dough is used.
Place cookies on a baking sheet and bake for 13-15 minutes or until they are just starting to lightly brown around the edges. Remove from oven and place on a wire rack to cook.
For chocolate filling. Beat together the melted coconut oil with vanilla. Add in the lesser amount of powdered sugar, salt, and cocoa powder. Beat on low, adding in 2 tablespoons plant milk. Beat until mixture comes together into a thick but spreadable consistency. If it seems too thick, add more milk, too thin, a little more powdered sugar.
Cookie assembly. 2 cookies at a time. A top and bottom. Spread about a tablespoon of chocolate filling to bottom cookies and pop the top on.
Eat cookies. Store what is not eaten in a airtight container for up to a week, but these ghosts will definitely not last that long.
Kind of a spur of the moment cake situation. I was in the middle of doing some paper work and remembered that I had made plans with the littles to go bike shopping and do dinner. Usually when they come over for dinner I don%u2019t make a point to have a dessert (they are happy with a handful of chocolate chips if I have nothing) but I felt the need to have something special. I mean, bike shopping, that%u2019s a big deal and they were so excited so I wanted to have a little celebration cake thing. A, YIPPIE YOU GOT BIKES! cake. It just seemed like the right thing to do.
So I made cake. I running a little short on time (yet I still had time to take pictures%u2026.) so I went with my trusty one bowl, super easy chocolate cake. (This is everyone in my families favorite cake). Peanut butter frosting because it was right in from of me and really, it was for Coco the fat baby. He basically eats nothing but peanut butter these days. And of course because peanut butter and chocolate together are never going out of style. I cooked the cake in a loaf pan because I was just feeling loafy I guess. But This cake could totally be cooked into a cake round or square if you wanted to.
And that was that. I made that cake, they got the bikes (YEA!!!!, although I told them both that they sucked because they walked into a store and picked out bikes in less then an hour. I on the other hand have been bike shopping for more then a month and still haven%u2019t made a decision.) We then came back here to my house, biked around for a while, then ate cake (after dinner of course.)
Anyways. This cake. Rich, dense, chocolatey peanut butter goodness. Has been described as the best cake ever and like a Reese peanut butter cup. If you are into any of that, well this is the cake for you.
To the cake.
The stuff for the cake.. Flour, baking soda, salt, cocoa powder, oil, coffee, vanilla. brown sugar, and apple cider vinegar. And the stuff for the frosting. Peanut butter, butter, powdered sugar, and almond milk.
In a big bowl, whisk together the dry stuff, pinching and breaking apart any big clumps of cocoa or sugar. Then just dump in the wet.
Whisked until glossy and smooth. A perfectly perfect chocolate cake batter.
Pour batter into a greased and lined loaf pan and into the oven it goes. 50-60 minutes or so or until a tester poked in the middle comes out clean. Then pop the cake right on out. Remove cake from tin and let cool on a wire rack.
While cake is cooling, make frosting. Beat together powdered sugar, peanut butter, butter, and milk.
Fully beaten. Ready to frost a cake.
Once cake is cooled, cut in half down the middle, length wise. Then frosting the middle. (Make sure it is cooled in the middle before frosting. If it is still warm, let it cool)
Pop the top back on and frost the rest.
And don%u2019t forget the sprinkles. Went with chocolate and gold because. But you do you and use whatever sprinkles you want.
And then you eat the cake.
I ended up stick it in the freezer to hide for a while%u2026 I guess this cake cold or slightly frozen is just about the best thing ever. The littles damn near ripped my arm off trying to get seconds.
-C
makes 1 loaf cake
For the Cake
1 3/4 cup all purpose flour
1 cup packed light brown sugar
1/3 cup cocoa powder
1 teaspoon baking soda
1/2 teaspoon salt
1/2 cup neutral oil
1 1/2 cups warm coffee
1 teaspoon vanilla
1 tablespoon apple cider vinegar
For frosting
3/4 cup minus 2 tablespoons peanut butter
2 tablespoons vegan butter
1/4 cup plant based milk
1 1/2 cups powdered sugar
Preheat oven to 350 and grease and line a loaf pan.
In a large bowl mix together the flour, baking soda, salt, cocoa powder, and brown sugar. Break apart any big clumps of sugar or cocoa with your fingers. When that%u2019s mixed, dump in the wet and whisk together until just fully incorporated. Pour batter into the greased pan and stick into oven.
Bake for 55- 60 minutes or until a tester poked into the middle comes out clean.
Once cooked, remove from oven and carefully remove from pan. Place on a wire rack to cool.
While cake is cooling, make the frosting. Just beat together the butter, peanut butter, and milk until nice and creamy. If you find your frosting be too thin, add in more powdered sugar, too thick, a splash more milk.
When it is cooled, cut the loaf in half length wise. Make sure the inside is complete cooled as well. I totally stuck my cake in the freezer for little bit to speed up the cooling process%u2026..
When the cake is cut and completely cooled, frost it. Spread a little less then half the frosting on the bottom layer, stick top back on, and finish the frosting. Cover with sprinkles (if you want) and then that is it.
Serve room temperature or what my people really like is served slightly frozen, which is great because I just cut the cake up and froze individual pieces making for a perfect quick dessert.
These are definitely my favorite shaped cutout cookies I have ever made. I mean seriously, carrot shaped carrot cookies, what could possibly ever be better? Nothing, and that%u2019s truth for you.
Not only are they carrot shaped, they are also carrot flavored. Yup, Carrot shaped, carrot flavored, awesomeness. A little cinnamon added to the cookie for little extra boost of flavor and an orange glaze because it works and orange is good and fresh and springing. All good stuff.
You might be thinking, huh, carrot puree in a cookie, well that doesn%u2019t sound right. But it is, it is right. And you know how I know that these cookies are awesome? Well I packed them up, (2 dozen of them) and took them over to the littles house for an after school treat. When I got there, the two older ones had friends over. I asked them if they wanted a carrot which earned me that look that said %u201care you serious%u201d but them showed them the cookies. Of course the wanted a carrot so I gave them each one. They ate their cookies then proceeded to beat the shit out of the mr. Then they asked for another cookies and beat the shit out of the mr some more. This when on and on for about a 1/2 hour until all the cookies were gone and the mr was crouched in the corner with a broom trying to defend himself against 4 rulely kids who where slashing at him with light sabers and spraying him in he face with kitchen cleaner. It%u2019s because they wanted more cookies. (and yes, the littles are getting crazy). So yeah, the cookies are good. Ass kicking good.
Anyway, a cookie with some goodness mix into it, shaped into a great shape, that will make everyone smile and happy. You could make them by yourself, make them with your friends, make them with some kids, with some old people. They are the perfect cookie to leave out for the easter bunny(do you leave carrots out for the easter bunny?) or to serve up at any easter party, spring party, or any garden party you might be attending. This cookie is pretty much perfect for any and every occasion that required a cookie. Or a carrot because carrots are always welcome.
To the carrots! I mean, the cookies!
The stuff. Flour, baking soda, salt, sugar, vegan butter, carrot puree, cinnamon, an orange, some powdered sugar, and food coloring.
Into a big bowl the sugar, vegan butter, and carrot puree go.
Beat for a minute or two until completely incorporated.
Add in all the rest of the dry stuff and mix by hand until it turns to dough.
This is the dough it turned into.
Gather the dough and wrap it or place in a plastic bag and stick it Into the fridge for a few hours or overnight. The dough NEEDS to chill.
After you let the dough be, remove from fridge, liberally dust counter, and roll out dough about 1/4 inch thick.
And then it%u2019s time to cut the cookies out. I unfortunately do not have a cookie cutter so I improvised and make 2 carrot cutouts from paper and hand cut each cookie. That worked but took forever so I got crafty and used a fat Christmas tree cookie cutter then just did a little trim and pinch to make it into a cookie. (I am a genius for that). Any way works, and you can also do other shapes too, the cookies don%u2019t change taste in different shapes. (but that would be so cool if they did)
Carefully place cut out cookies onto a baking sheet, giving them a little space because they do spread a tiny bit.
And into the oven to bake they go.
Out in 10 minutes looking all carrot like.
Carrots waiting to cool so they can be glazed.
The glaze. Pretty straight forward. Just zest orange into powdered sugar and juice the orange into the sugar and mix.
Divide glaze and dye one orange and one green
And glaze away. I recommend doing it over a rack and baking sheet to minimize mess because they do drip a bit.
Now just you look at that, carrot shaped carrot sugar cookies .What a sight!
And of course, carrots come in bunches. HA
Enjoy some carrots!
-C
makes about 2 and a half dozen (depending on size)
2 1/4 cups all purpose flour plus more for dusting
1 teaspoon baking soda
1/2 teaspoon salt
1 teaspoon cinnamon
1/2 cup vegan butter
3/4 cup granulated sugar
1/2 cup carrot puree ( see note about how to make puree)
For the glaze
2 to 3 cups powdered sugar
on orange
orange and green food coloring
Note. To make carrot puree, steam a couple carrots until completely soft them blend until smooth.
Place sugar, vegan butter, and carrot puree into a big bowl. Beat with a beater until light and fluffy. Add in the flour, baking soda, salt, and cinnamon and mix by hand until completely incorporated and mixture tunes into dough. Gather dough into a disk and wrap in plastic or place in a plastic bag and refrigerate for at least 2 hours or up to overnight.
Once dough has chilled enough and you are ready to go, preheat the oven to 350.
Place dough on a flour dusted counter and roll out about 1/4 inch thick. Cut out the cookies with a cutter or by hand and place on a baking sheet. Bake cookies for 10-11 minutes or until just starting to turn slightly brown around the edges. Remove from oven and place on a wire rack to cool.
Once cookies are all baked and cooling, make the glaze. Place powered sugar into a big bowl, zest in the orange then add in the juice od half the orange. Mix completely and check consistency. You want it to be slightly running but not liquid, but also not to stiff. Add more juice or more sugar to get it right. Once it is the right consistency, separate into 2 bowls. Dye one green and one orange. Now glaze you cookies. A knife or small spatula works best and yes, the glaze drips a little so do it over a baking sheet, but after about 10 minutes the glaze hardens.
And then you have carrot cookies and all is good. Now go eat a carrot cookie!
Store uneaten cookies in an airtight container for up to 5 days. They can be frozen too.
I have a bag of coconut flour that I need to use up so I have made coconut snack cake a few times the past couple weeks. Once with orange instead of lime. Once I added chocolate chips. This time I stepped it up made a little glaze action, toasted a little coconut for some extra coconutiness and took these here pictures and wrote down the recipe. Just. For. You.
Not that I don%u2019t know already that my snack cake creation is good, but I guess it was just super A+++. I threw this one together right before the mr and I headed down to PA to hang with my dad. As soon as he (and sister and nephews) started in on it, well the responses were more then average. My dad even snuck a piece off and hid it for later. They really, really, really were into it. Wanted me to make another right then and there. Normally I would but my dad doesn%u2019t keep coconut flour on hand and I don%u2019t make it a habit to travel with any myself. (I might have to change that.) Next time he will know to stock the coconut flour.
I didn%u2019t realize my people were such coconut people. Good thing for them that I like coconut people. As a matter of fact, I consider myself a coconut person. And coconut is not code for awesome, but I am that too. HA
Anyway enough about me. Coconut snack cake is what you want to know about. It is soft and dense. Moist, not overly sweet. Lots of lime and coconut flavor and is just perfect for snack time. Eat it with a fork on a plate with coffee or tea or grab an piece and eat it walking down the street while thinking about green leaves and warmer weather. Or wherever and whenever. If you make it then it%u2019s up to you when and where you eat it. That only seems fair.
Now to the snack cake of your coconut lime dreams.
The stuff. Gonna need all purpose flour, coconut flour, salt, baking soda, baking powder, a couple flax eggs, some warmed coconut oil, plant milk, brown sugar, vanilla extra, apple sider vinegar, a couple lime, some powdered sugar, and some lightly toasted shredded coconut.
Grab a big bowl. Add in the brown sugar, flax eggs, warmed coconut oil, apple cider vinegar, and vanilla. Mix it all up until evenly incorporated.
Dump in the flours, baking soda and powder, and salt. Zest in lime, squeeze in lime juice and start to mix. Add in the milk as you are mixing.
Cake batter mixed and done. Now to bake it.
Dump the cake batter into a well greased baking pan and level it off with a spoon or spatula.
Now it%u2019s oven time to bake into a great and well cake.
A cake out of the oven, great and well. Golden brown and smells of all the goodness that a coconut cake could possible smell.
While cake is cooling, which it should be now, make the glaze. Powdered sugar, lime zest, and lime juice. Mix until it%u2019s glazy.
Pour the glaze all over cooled cake.
Don%u2019t forget the shredded coconut. Get it on before the glaze starts to set.
And then it%u2019s just the matter of cutting cake%u2026%u2026.
You know once you cut it, that means snack time right? Coconut lime snack cake for all of your coconut time, lime time, hungry snack time needs.
Keep it good.
-C
Makes a 9×9 cake
1 1/2 cups all purpose flour
1/2 cup coconut flour
3/4 packed cup brown sugar
1 teaspoon salt
1 teaspoon baking soda
1 teaspoon baking powder
1/2 cup coconut oil (warmed to liquid)
1 1/4 cup plant milk (I used almond)
2 flax eggs (2 tablespoons ground flax seeds with 1/2 cup warm water)
1 teaspoon vanilla
1 tablespoon apple cider vinegar
A lime
For the glaze
3/4 cup powdered sugar
a lime
1/4 cup or so toasted shredded coconut to sprinkle on top (optional)
Preheat oven to 350
In a large bowl, mix together the bbrown sugar, flax eggs, warmed coconut oil, vanilla, and apple cider vinegar until completely incorporated. Next dump in the flour, coconut flour, salt, baking soda and baking powder. Zest the lime into bowl. Start mixing, adding in the juice of the lime and the plant milk. Mix it all together until completely incorporated.
Dump mixture into a well greases 9×9 baking pan and level off with a spoon or spatula. Place into oven and bake for 30-35 minutes or until golden brown and a tester stuck into the middle of cake comes out clean.
Once baked, remove from oven, let cool in pan for a few minutes then carefully remove cake from pan and let cool on a wire rack.
While cake is cooling, make the glaze. Just zest other lime into powered sugar then add the juice (or as much juice as you needed) of the lime until a pourable glaze forms. If your lime is not particularly juicy enough and the glaze is still really thin, just add a splash of water to thin out as needed.
And when cake is completely cooled, pour glaze all over cake and cover with toasted coconut flakes.
Now cut. And eat.
Store left over cake in a air tight container for 3-4 days. Individual pieces freeze well for all your future snacking needs.
Currently it is like 50 degrees outside and raining buckets of cats and frogs and what not. I live in Vt for a few reasons, and one of them is winter, so the warm rain is just not nice. Apparently these cookies are the closest thing to snowflakes I will be seeing for a little while%u2026(sad face inserted here) But I am hoping that juuuust maybe it will turn, and all of a sudden it will be snow coming down and not rain. And that it snows and snows and snows, like a foot or 2 of it. I want so much snow that I am stuck in my house for a least a solid 24 hours (of course with the power still on and all the necessities I would need) and the only way out being by foot or sled. And you know what I would do if I was snowed in? Lounge around in my pj%u2019s all day (or at least until like 10 am), have a never emptying cup of hot coffee in hand, play around outside and make a snow fort, and definitely make cookies. Doesn’t that just sound so nice?
But I am not snowed in, and wasn%u2019t snowed in and probably will not be snowed in for the foreseeable future. But I can still, and did make cookies so there is that. Chocolate cut out snowflakes with orange glaze to be exact. A good all around chocolate cookie jazzed up with a citrus kick. Simple, elegant and perfect for all of your holiday cookie needs. Plus it is just a really pretty cookie. I just might make a few more batches and liter the front yard with them. I%u2019ll make my own freaking snow, even if it is out of cookies. Then I really wouldn%u2019t be able to leave my house due to the crazy fat squirrels attacking the lawn. That would be something. HA.
To the snowflake cookies! (They can be any shape really, but snowflakes are so nice)
The stuff. Sugar, vegan butter, flour, cocoa powder, baking powder, salt, canola oil, brewed coffee, grind chia seeds, vanilla extract, an orange, and some powdered sugar.
First, mix the ground chia seeds with the coffee for caffeinated chia eggs.
Beat the butter with the sugar to give it a good fluff, then add in the oil, vanilla, and chia eggs to the mix.
Place all the dry into a bowl and whisk together until fully incorporated.
Dump the mixed dry into the were and grab a wooden spoon. Start mixing.
Cookie dough is a-formin.
Collect the dough in some plastic and smash into a disk. Place in fridge to rest for at least a few hours, but a day is good too.
Chilled dough, flour, a cookie cutter, and a rolling pin. I think you know what to do. Just really make sure to keep the counter and rolling pin floured or else the dough will stick and that is just so annoying.
Yes this dough is a little delicate, but not in a bad way. It might tear or slightly crumble but you just smoosh it back in there and you are all set. Anyway, after rolling dough out to about 1/2 inch thick, cut cookies out with a well floured cutter.
Cookies on the baking sheet ready for the oven.
Cookies on a baking sheet right out of the oven.
Now those cookies got to cool so get them on a rack.
While cookies are cooling, fix yourself some glaze. The powdered sugar, zest of orange and juice of orange will do the trick.
A good looking glaze. Thick put drizzable consistency.
And to finish. Drizzle the cookies with glaze, dunk the tops in the glaze, or do a little of both (I say both). The glaze does harden after a few minutes so these are very much stackable cookies.
And then what you do with the finished cookies is up to you. I let the mr eat a good few, saved a few for Christmas and dropped some off to some peps. They were well received for sure.
Hope you are enjoying the weekend and are able to get in on some cookie making.
-C
makes about 3 dozen cookies
2 1/2 cups flour
1/2 cup cocoa powder
1 teaspoon baking powder
1/2 teaspoon salt
1/3 cup vegan butter
1/2 cup oil
1 cup white sugar
1 teaspoon vanilla
2 tablespoons ground chia seeds
6 tablespoon coffee or water (coffee brings out the chocolate flavor more)
1 orange
1 cup powdered sugar
In a large bowl, cream together the white sugar and butter until light and fluffy. Add in the oil, vanilla, and coffee chia eggs. Mix until incorporated. In a separate bowl mix together the flour, cocoa. salt. and baking powder. Dump dry into wet and mix until a dough forms. Gather dough into a ball and place in plastic and flatten into a disk. Place in fridge for at least an hour or overnight.
When you are ready to bake, preheat oven to 350
Take dough from fridge and unwrap. Place on a well floured surface and roll until it is about 1/4 inch thick. The dough is delicate and a little crumbly, but don%u2019t worry to much, just squish it back together and keep rolling it out. With a floured cookie cutter, cut your shapes and gently place them on a cookie sheet. Gather remnants of dough back into a ball and re-roll out and cut more cookies until you have used up all the dough. Place cookies into oven and bake for 11-12 minutes or until the cookies have puffed up a bit and the bottoms are slightly browned. Once cookies are cooked, let cool on a wire rack.
While cookies are cooling make the glaze. Mix about a tablespoon of the zest of the orange with the powdered sugar and add in a few tablespoons of the juice of the orange until the glaze is slightly runny. Once cookies are cooled either dip the tops in the glaze or drizzle the glaze on top of cookies (or do some of both). Then eat. If you wait a little while, the glaze will harden and then you can stack them and then if you want, maybe wrap on a few in little packages to give to someone you like. Either way, place uneaten cookies in a airtight container. Should last about a week, but can you not eat them for that long?
I have been making at least one cake, if not 3, a week for the past month. Last week I did not have a cake that I needed.to make, so what did I do? I made a cake.
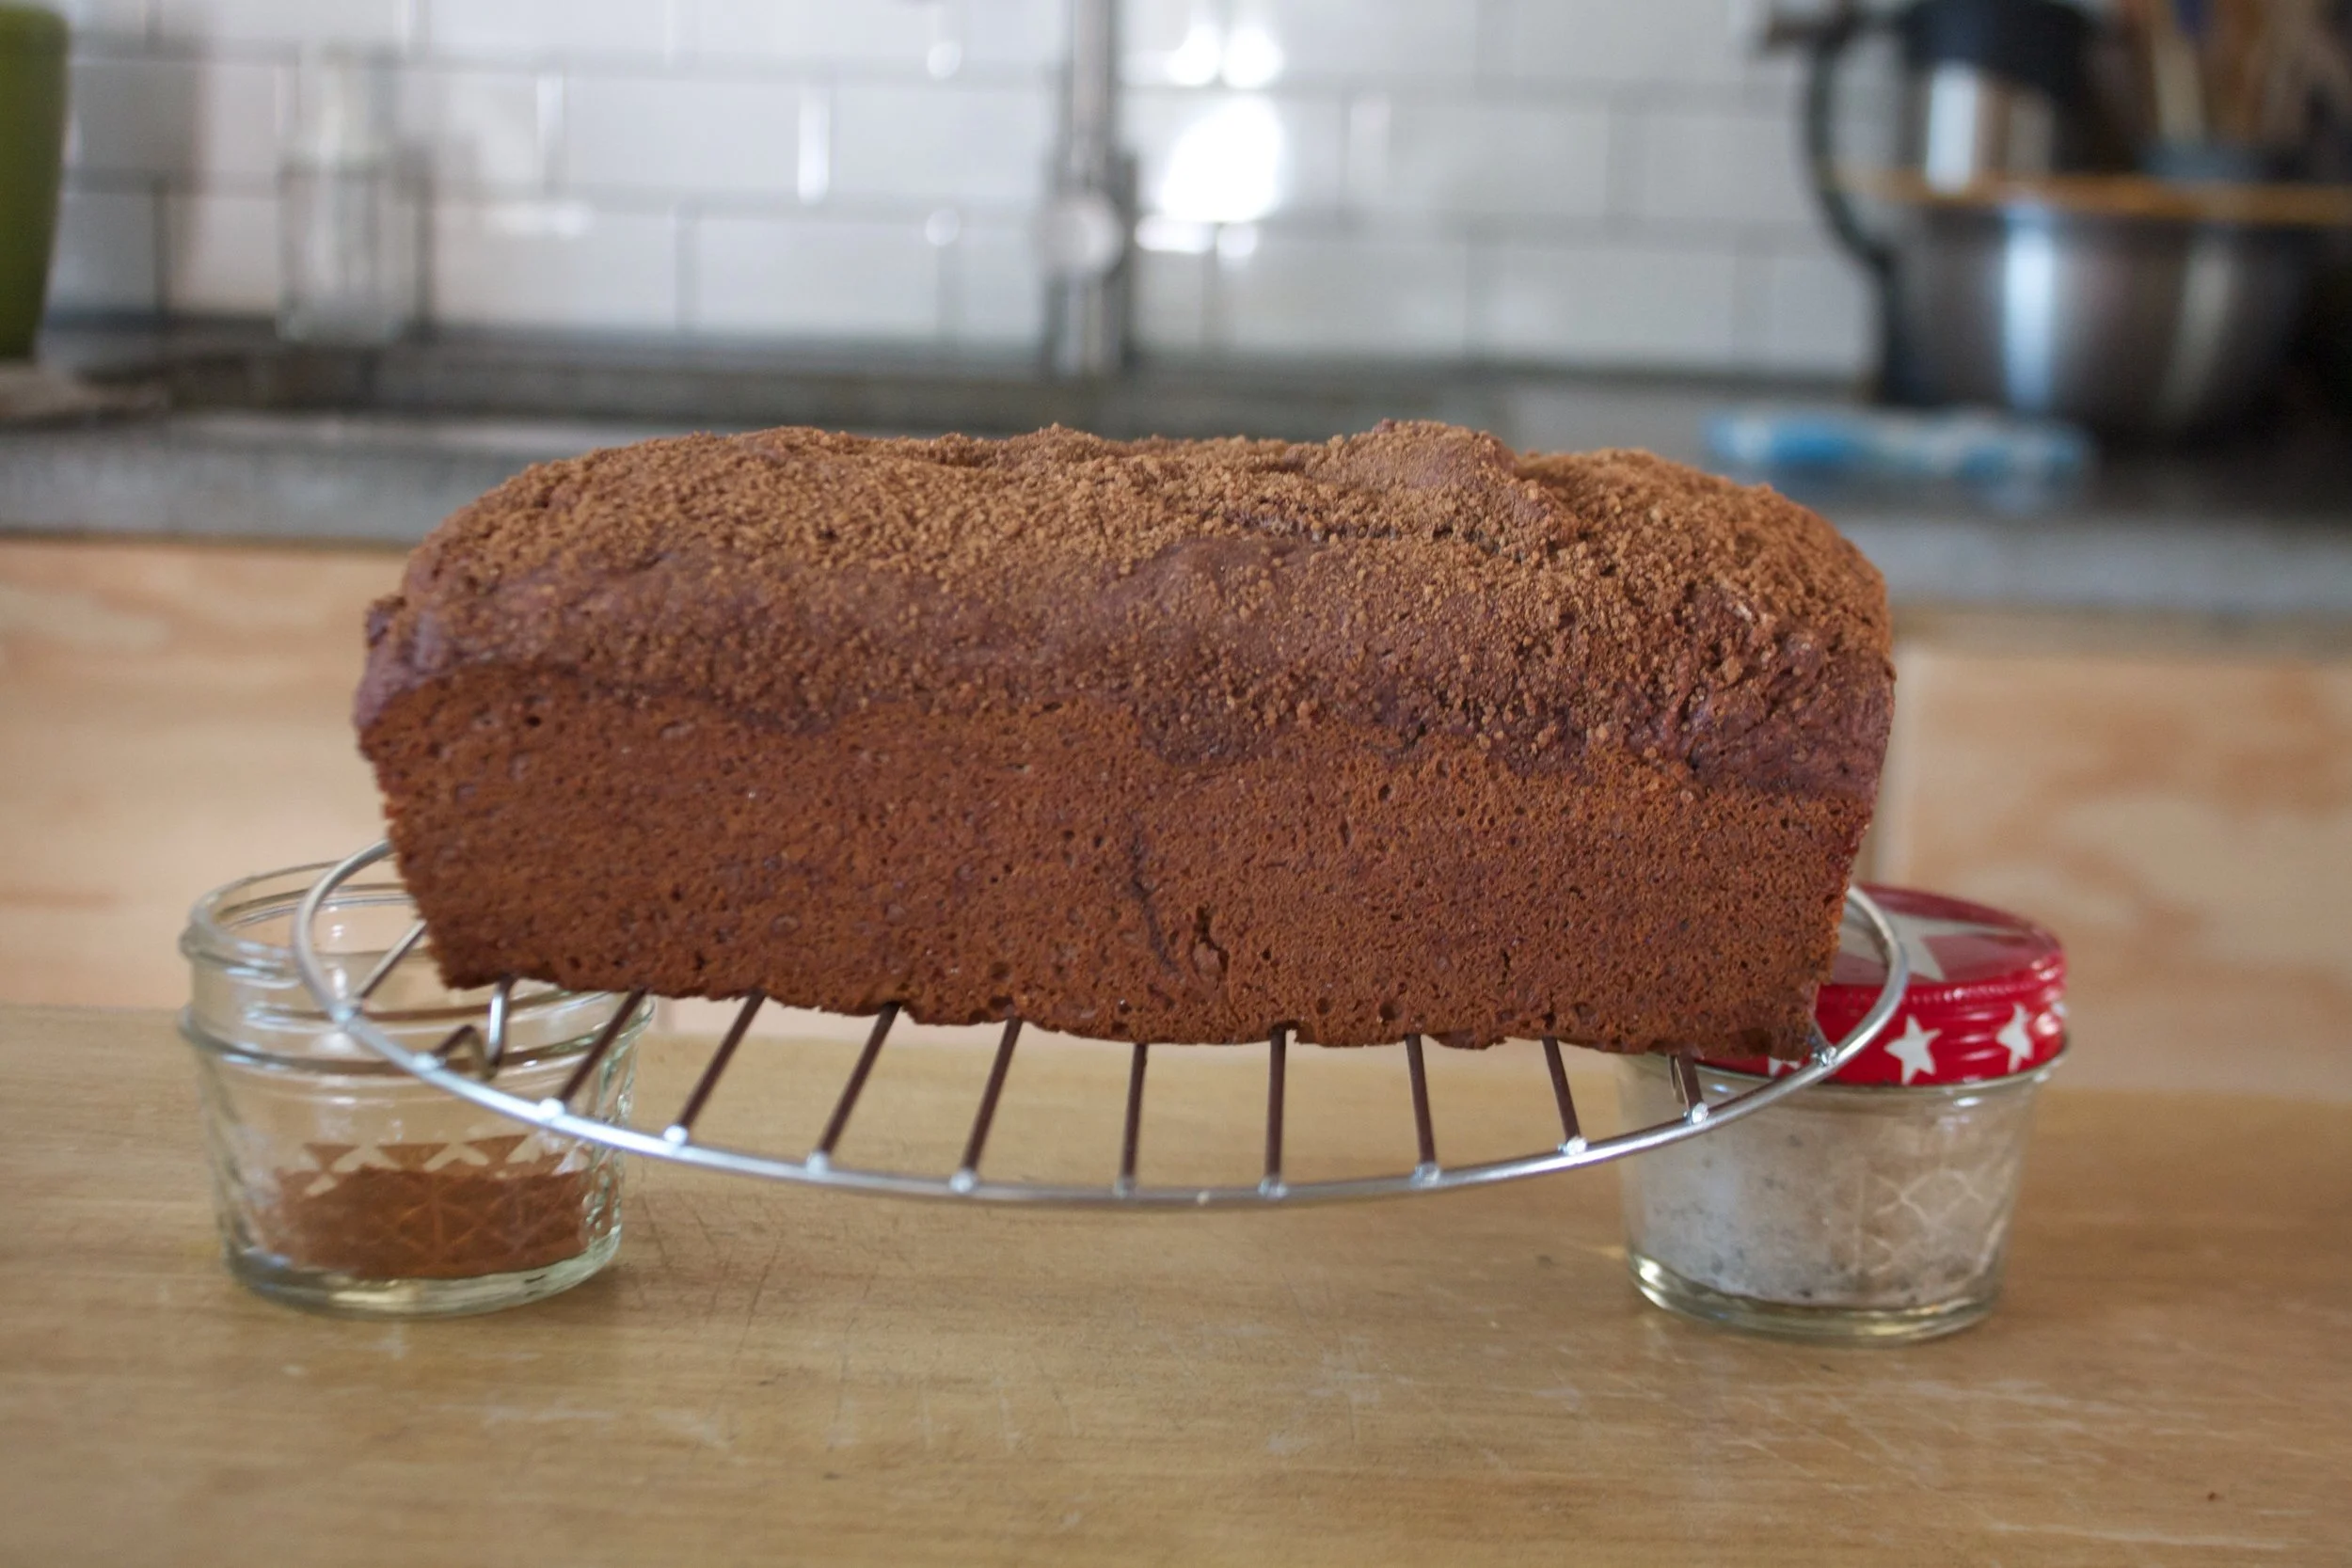
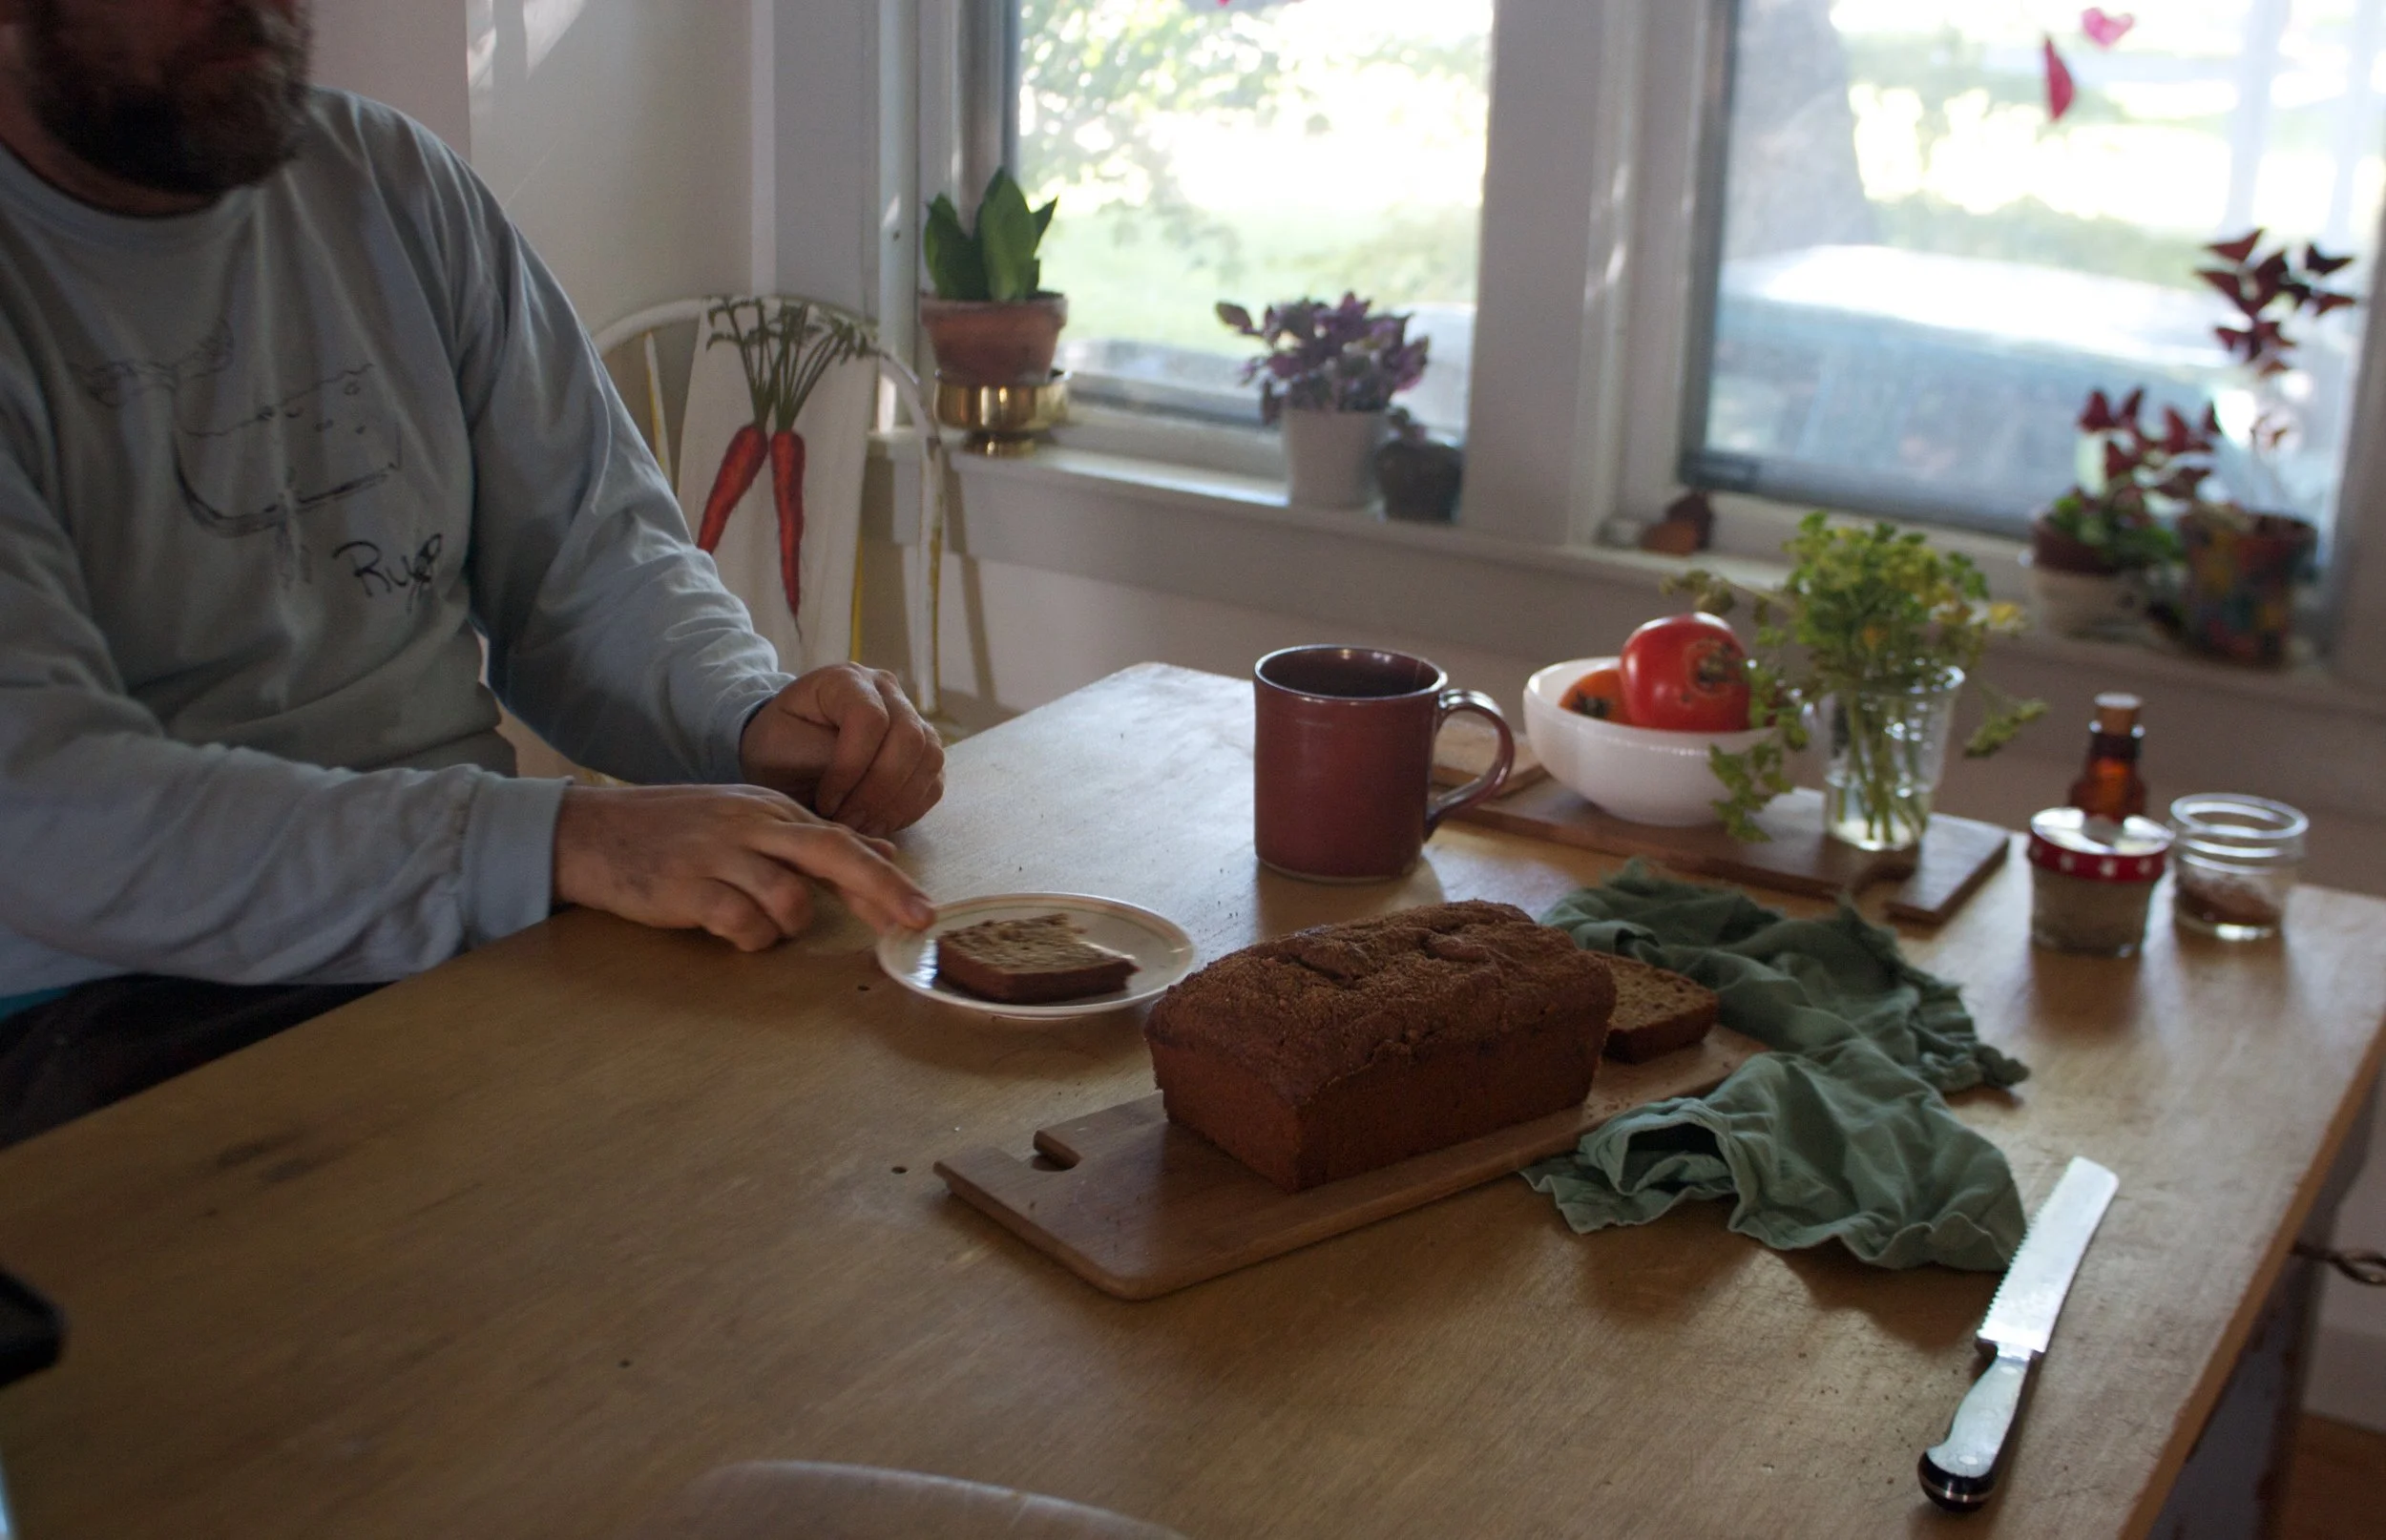
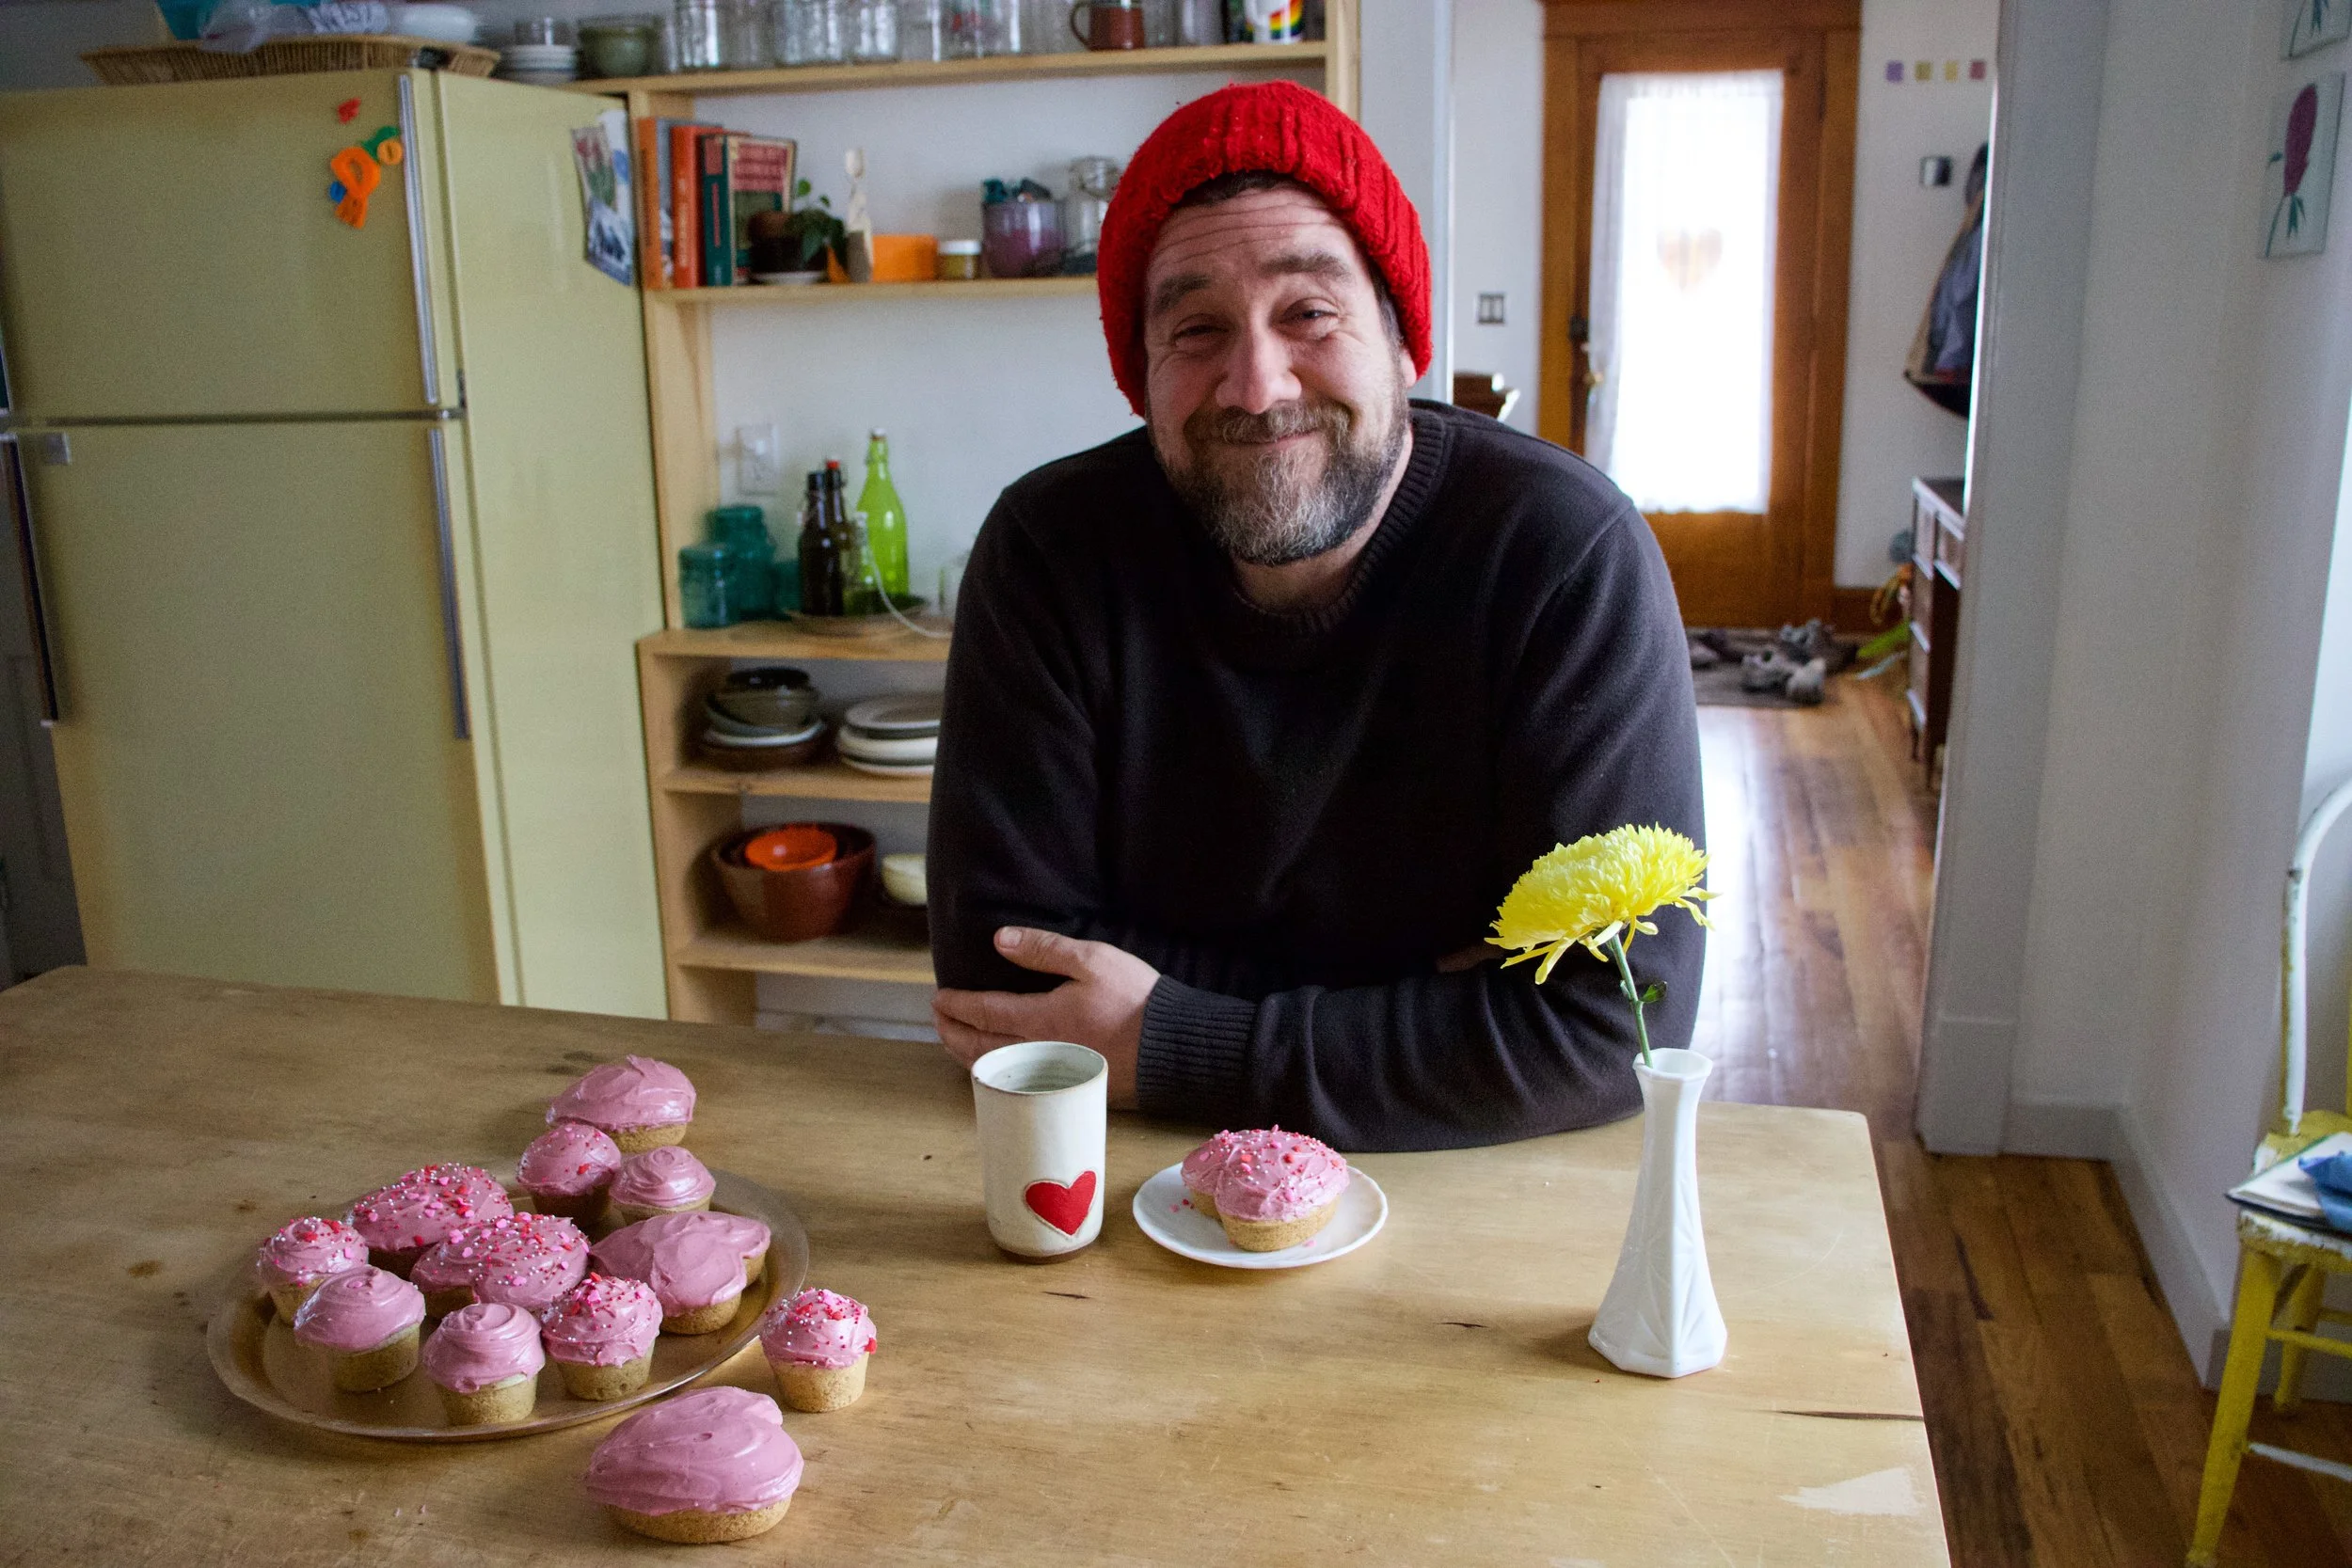
I might have an alternative motive here, I have started my winter squash stash, and already it is looking pretty impressive. I have delicata, acorn, kombucha, and sugar pumpkins littered all over the house. As of now I think I have a count of about 27. Some came fro the garden, some from (and still coming, all winter long) from farm share, and some came from when they went on sale at the grocery store and I filled the shopping cart up. The cashier checking me out thought I was crazy, but I get that a lot. (Like when I buy 20 heard os cabbage.. it%u2019s like I scare them) The alternative motive is that some of the squashes don%u2019t have the shelf life of some of the others so I need to get on to eating the ones that don%u2019t last as long, like the delicata and pumpkins, which I am doing, gladly might I add. So while I am eating those, I figured I would use up an acorn squash for cake because well, I don%u2019t want to have a million acorn squash laying around and I am just too busy eating the pumpkins to get the acorn. And this is why I made an acorn squash cake.
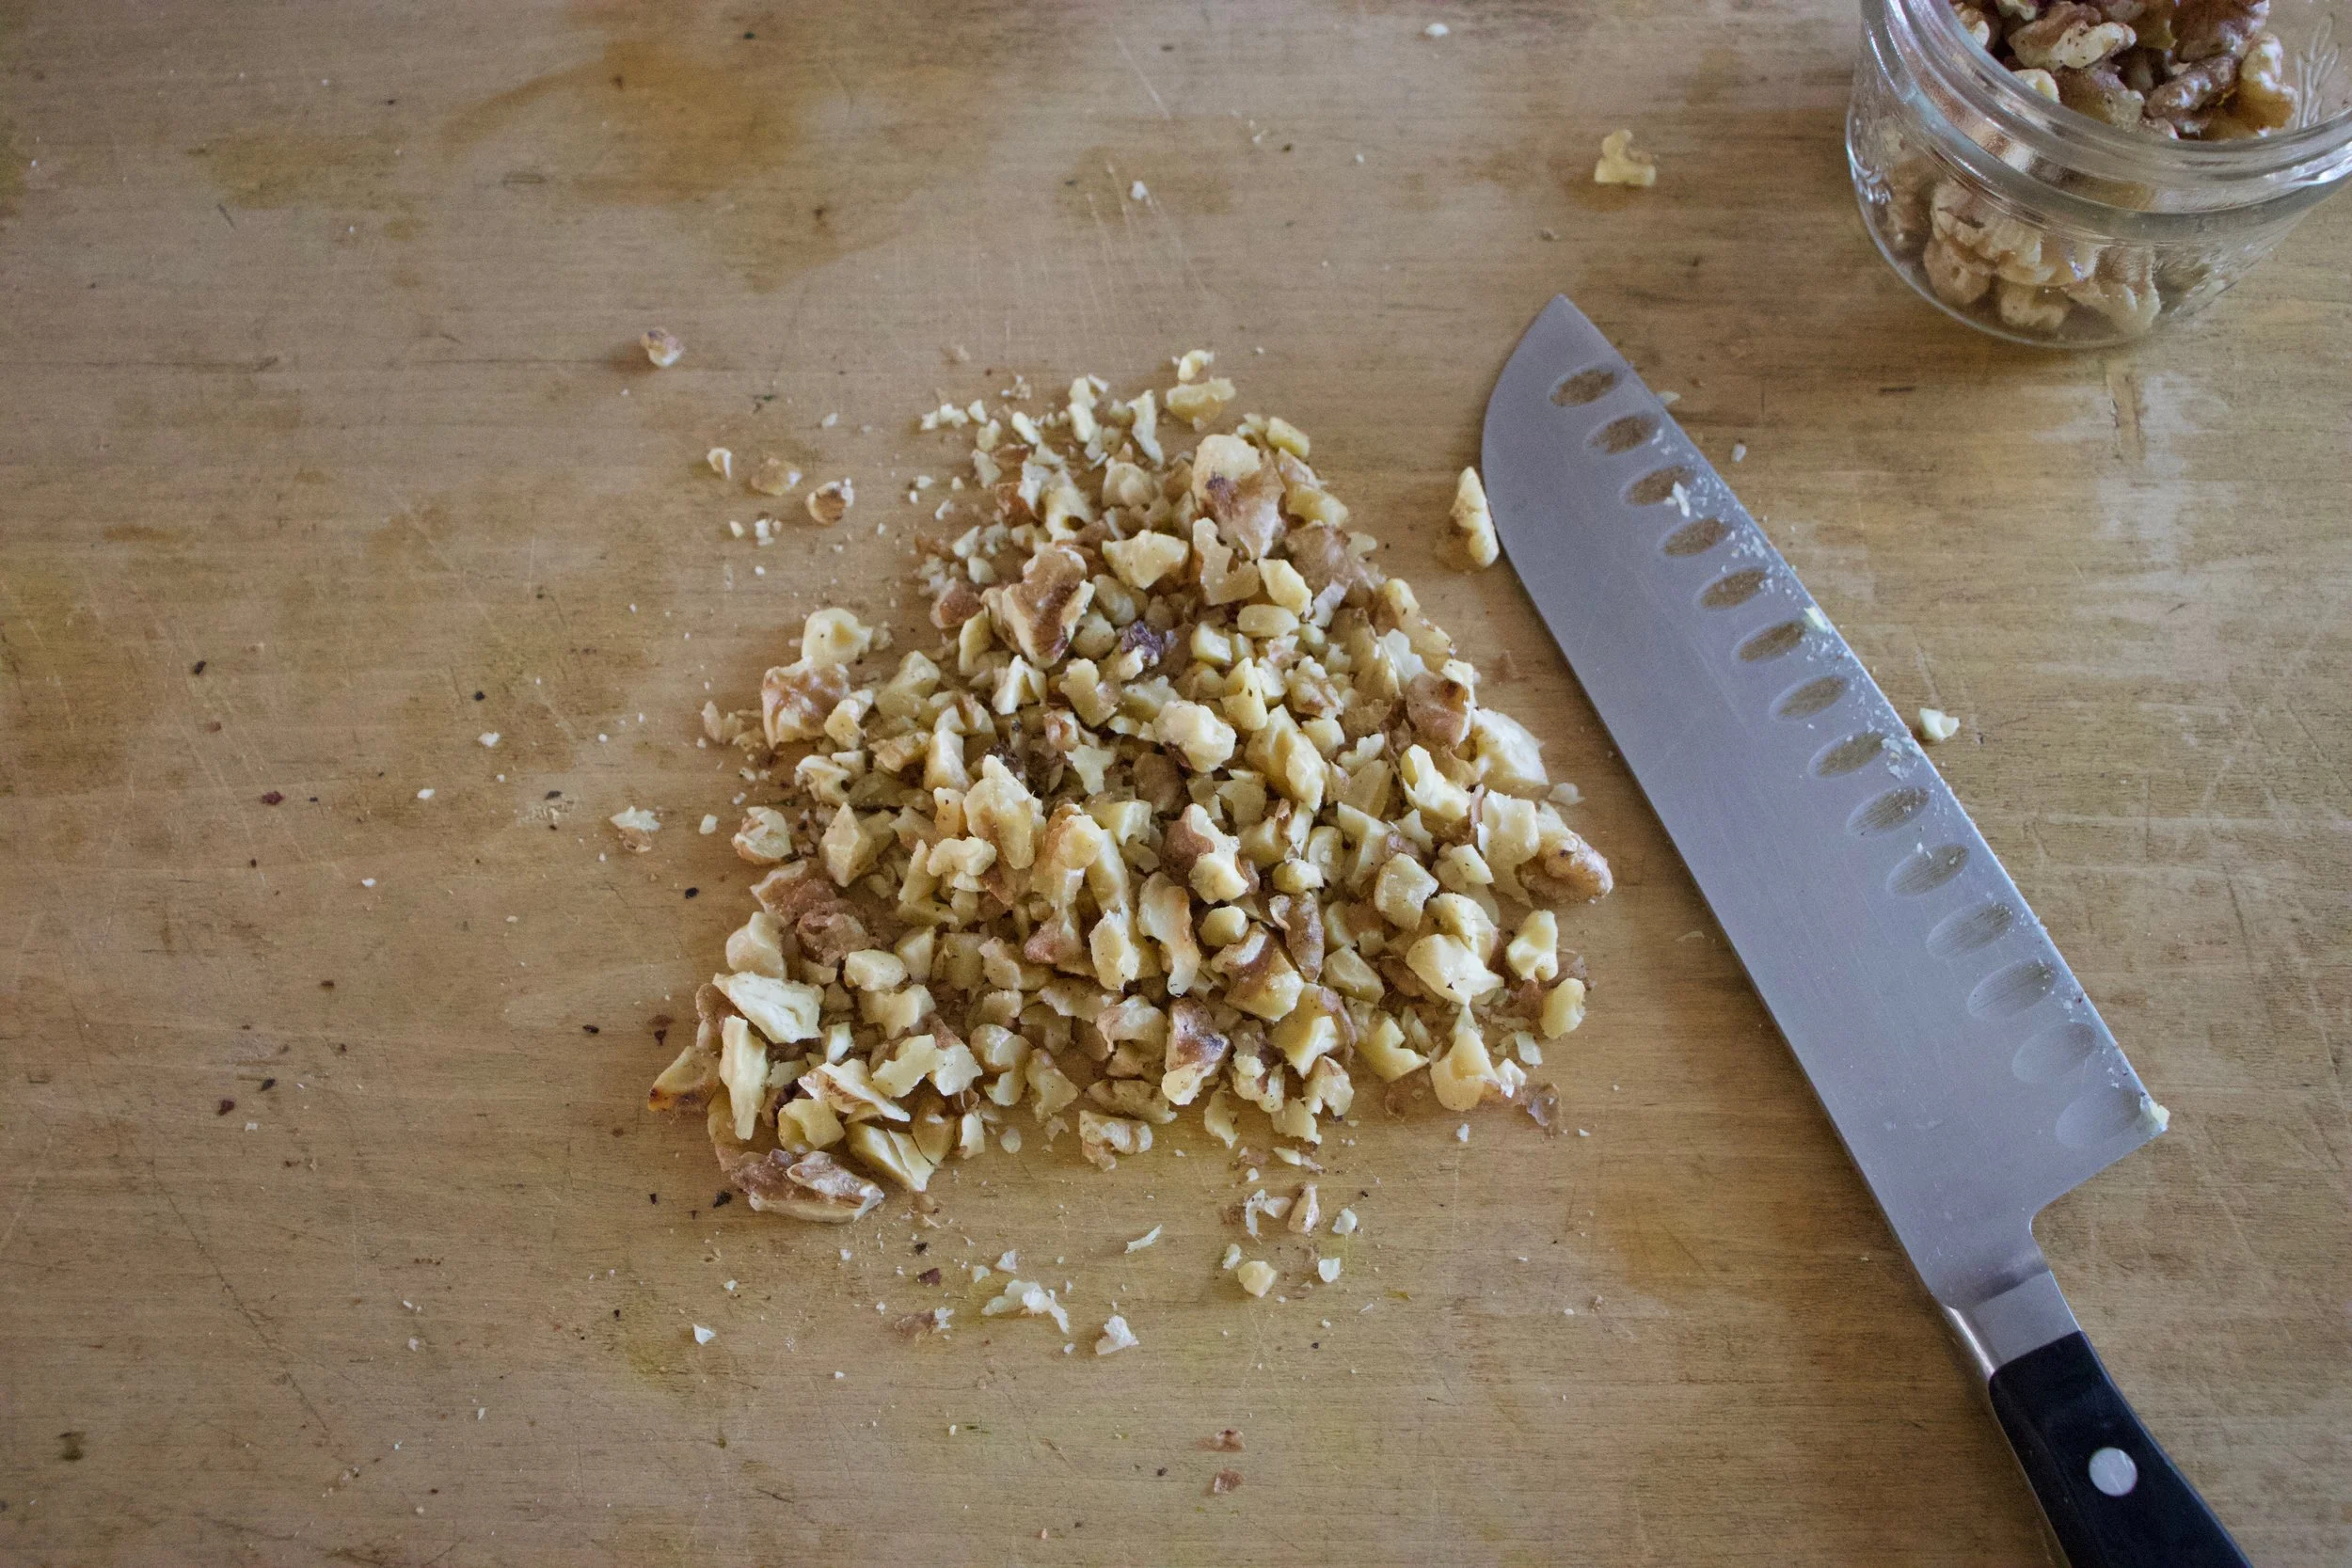
What does acorn squash cake tase like? Basically like pumpkin cake. Every time I make any sweet thing with any squash other then pumpkin, no one really seems to notice the difference, but that is not to say there isn’t one. I would say that acorn has a slightly sweeter and nutter flavor then pumpkin so you might get a more flavorful flavor out of an acorn squash. And really, if you like pumpkin, your gonna like the acorn. And people love them some maple frosting so smothering that along with walnuts on this cake, well I know made some people really really happy.
That%u2019s the real reason why I made this cake. To make some people happy. Jeeze, I am just so nice. Ha HA!
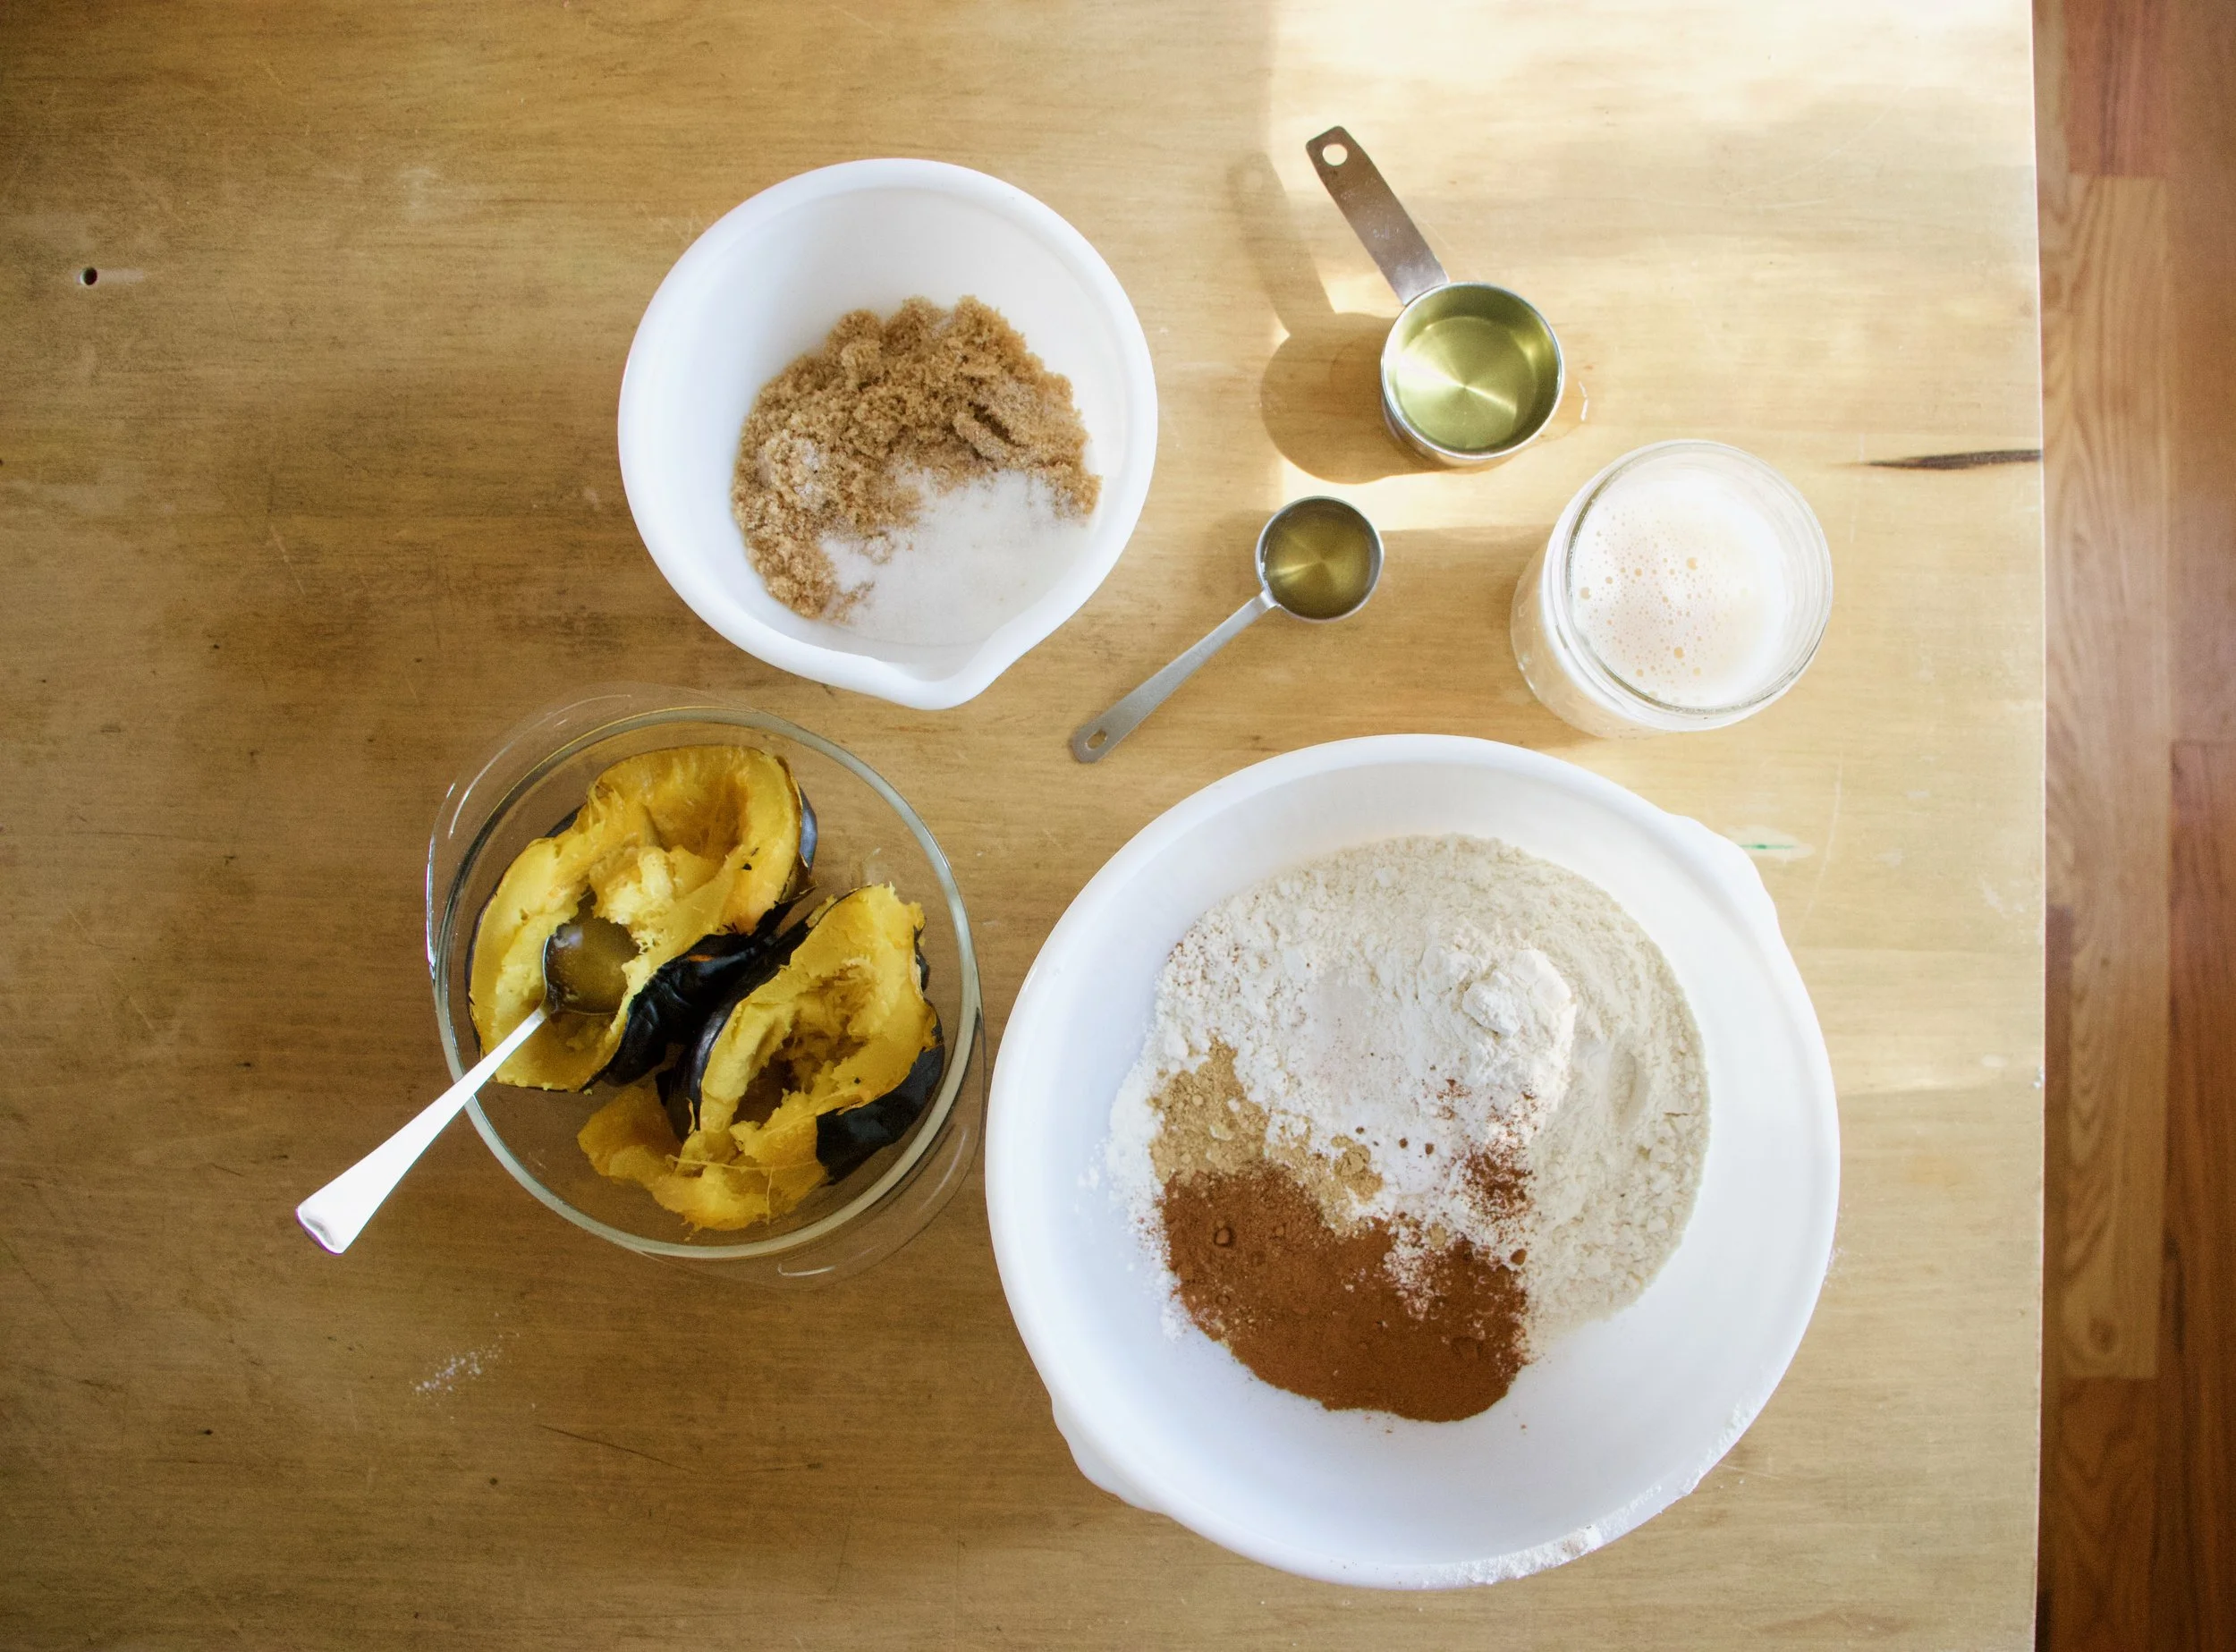
The stuff. A roasted acorn squash. flour, baking soda and baking powder, spices of cinnamon, ginger and a pinch of nutmeg, salt, oil, soy milk, brown sugar, white sugar, and a little apple cider vinegar.
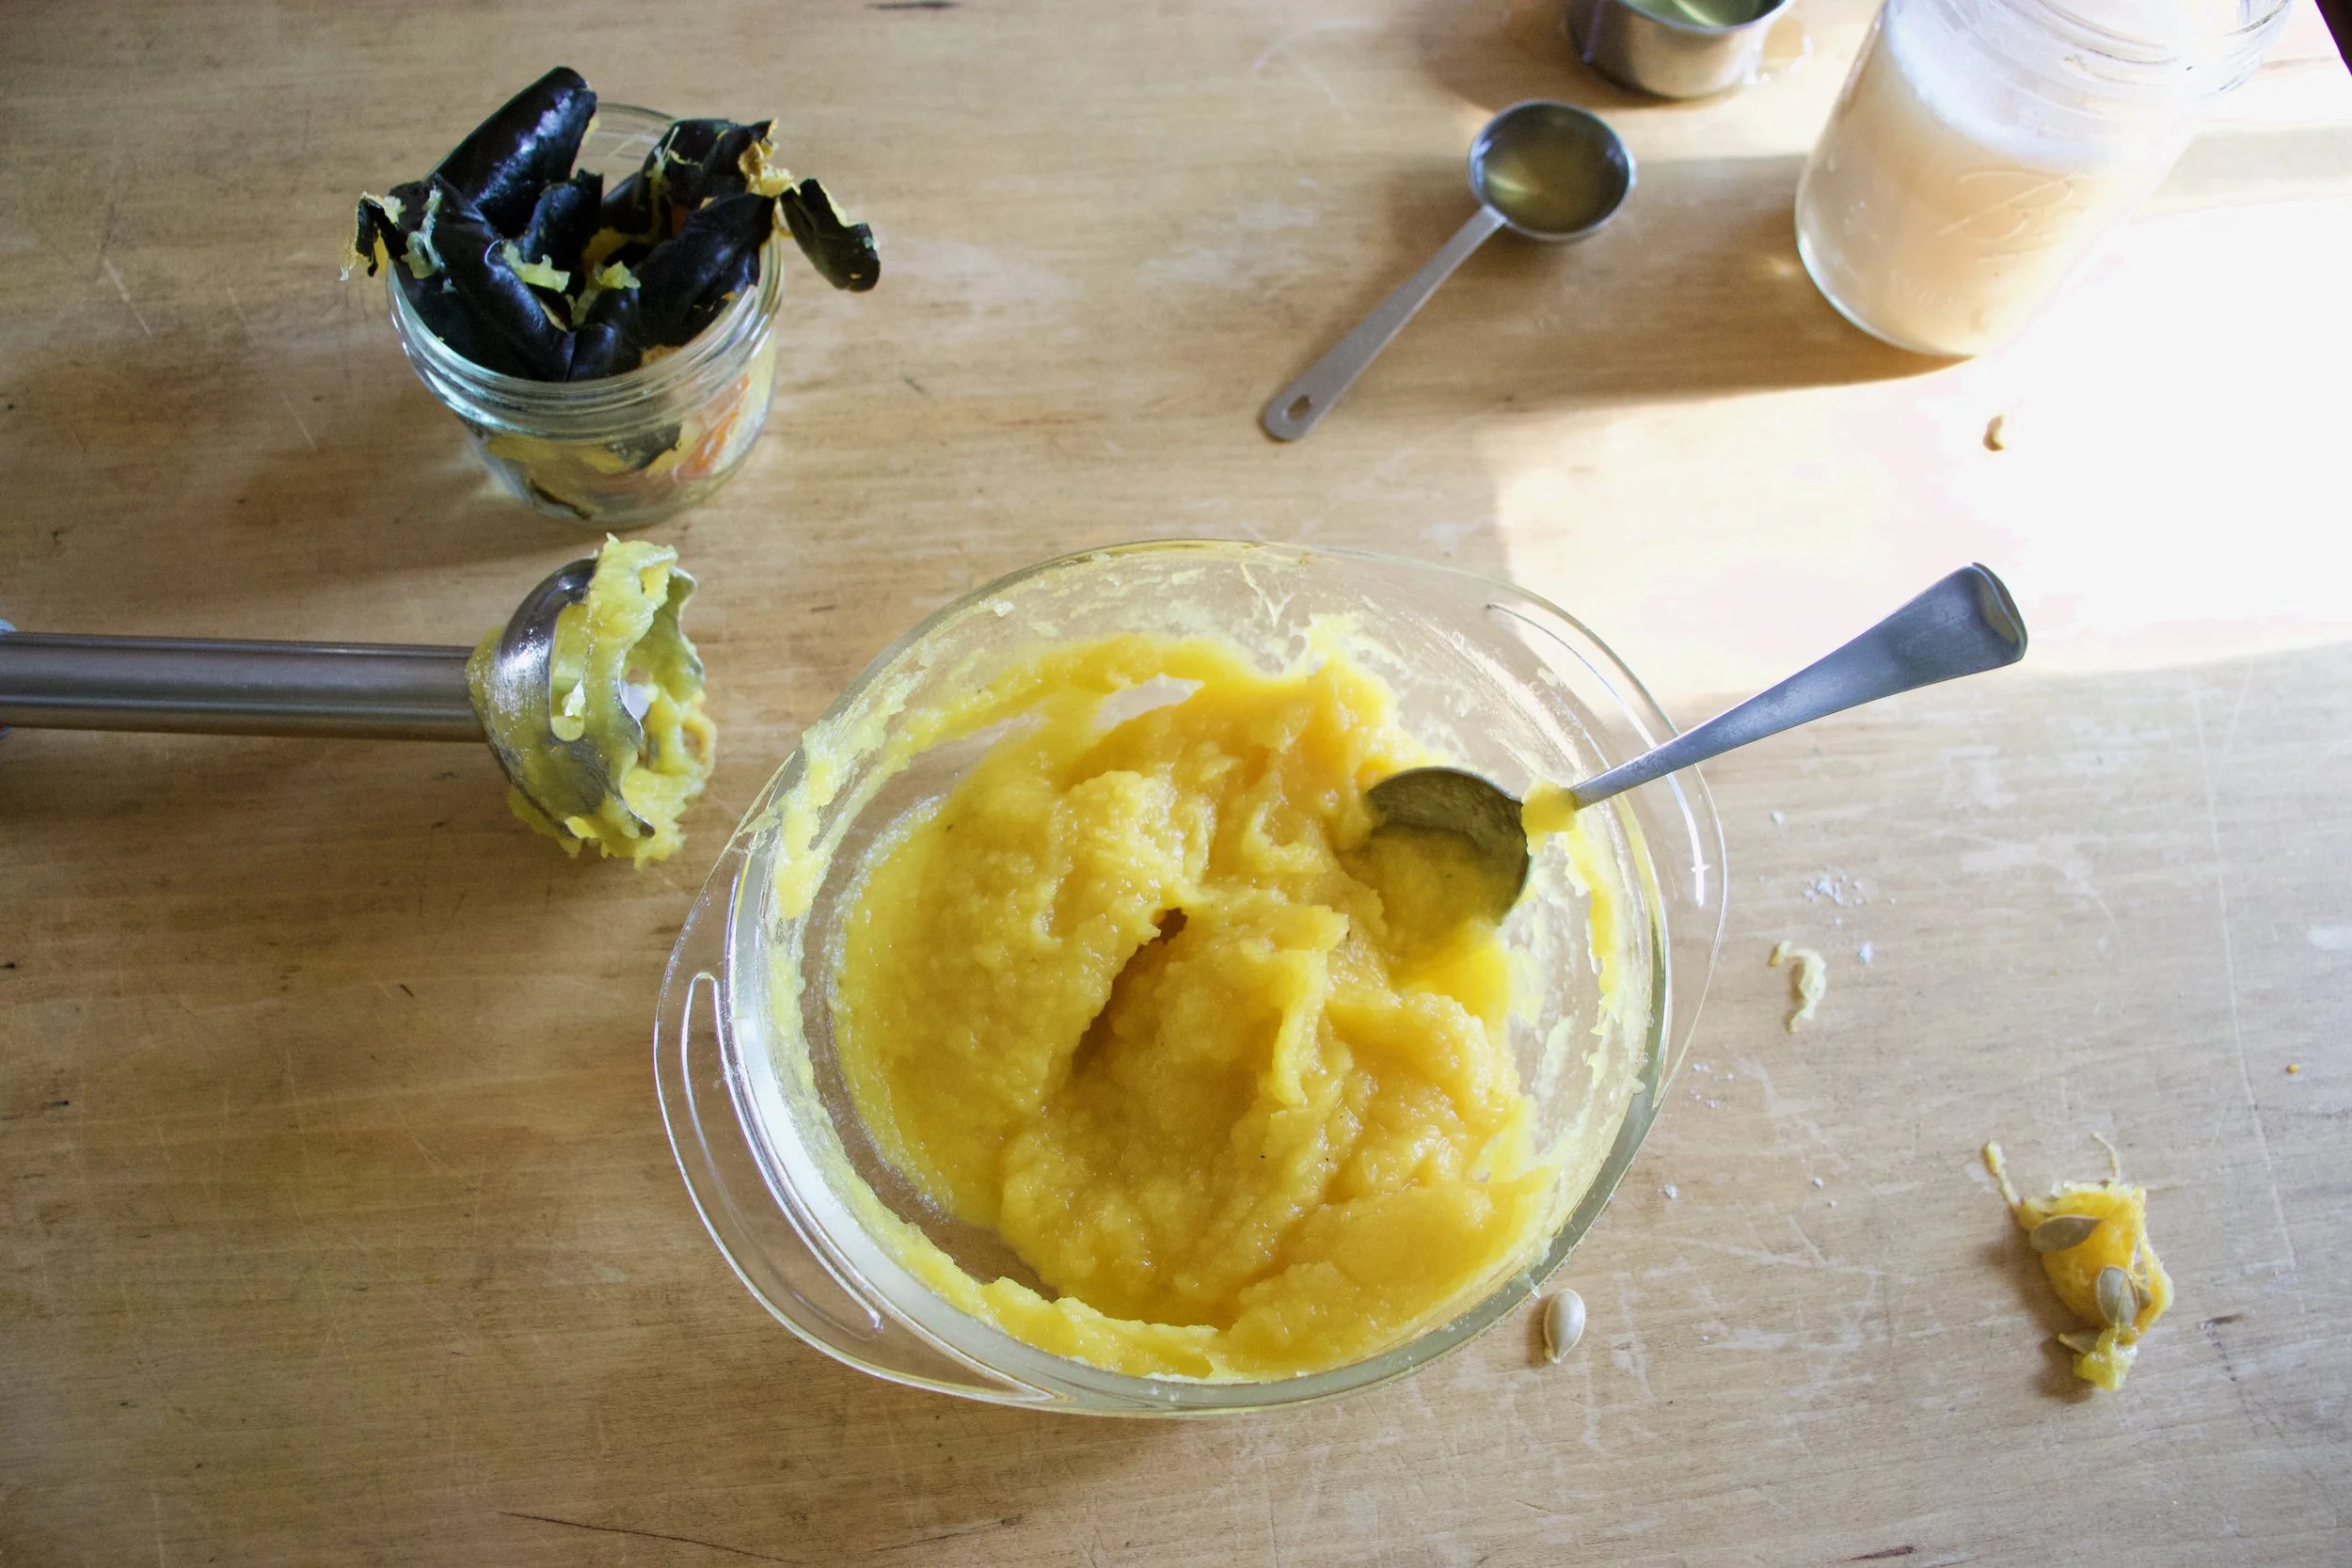
Start by pureeing your squash If you haven%u2019t already which basically involved removing seeds and skin (save seeds to rest, eat skin, it delicious) and blending the squash until smooth.
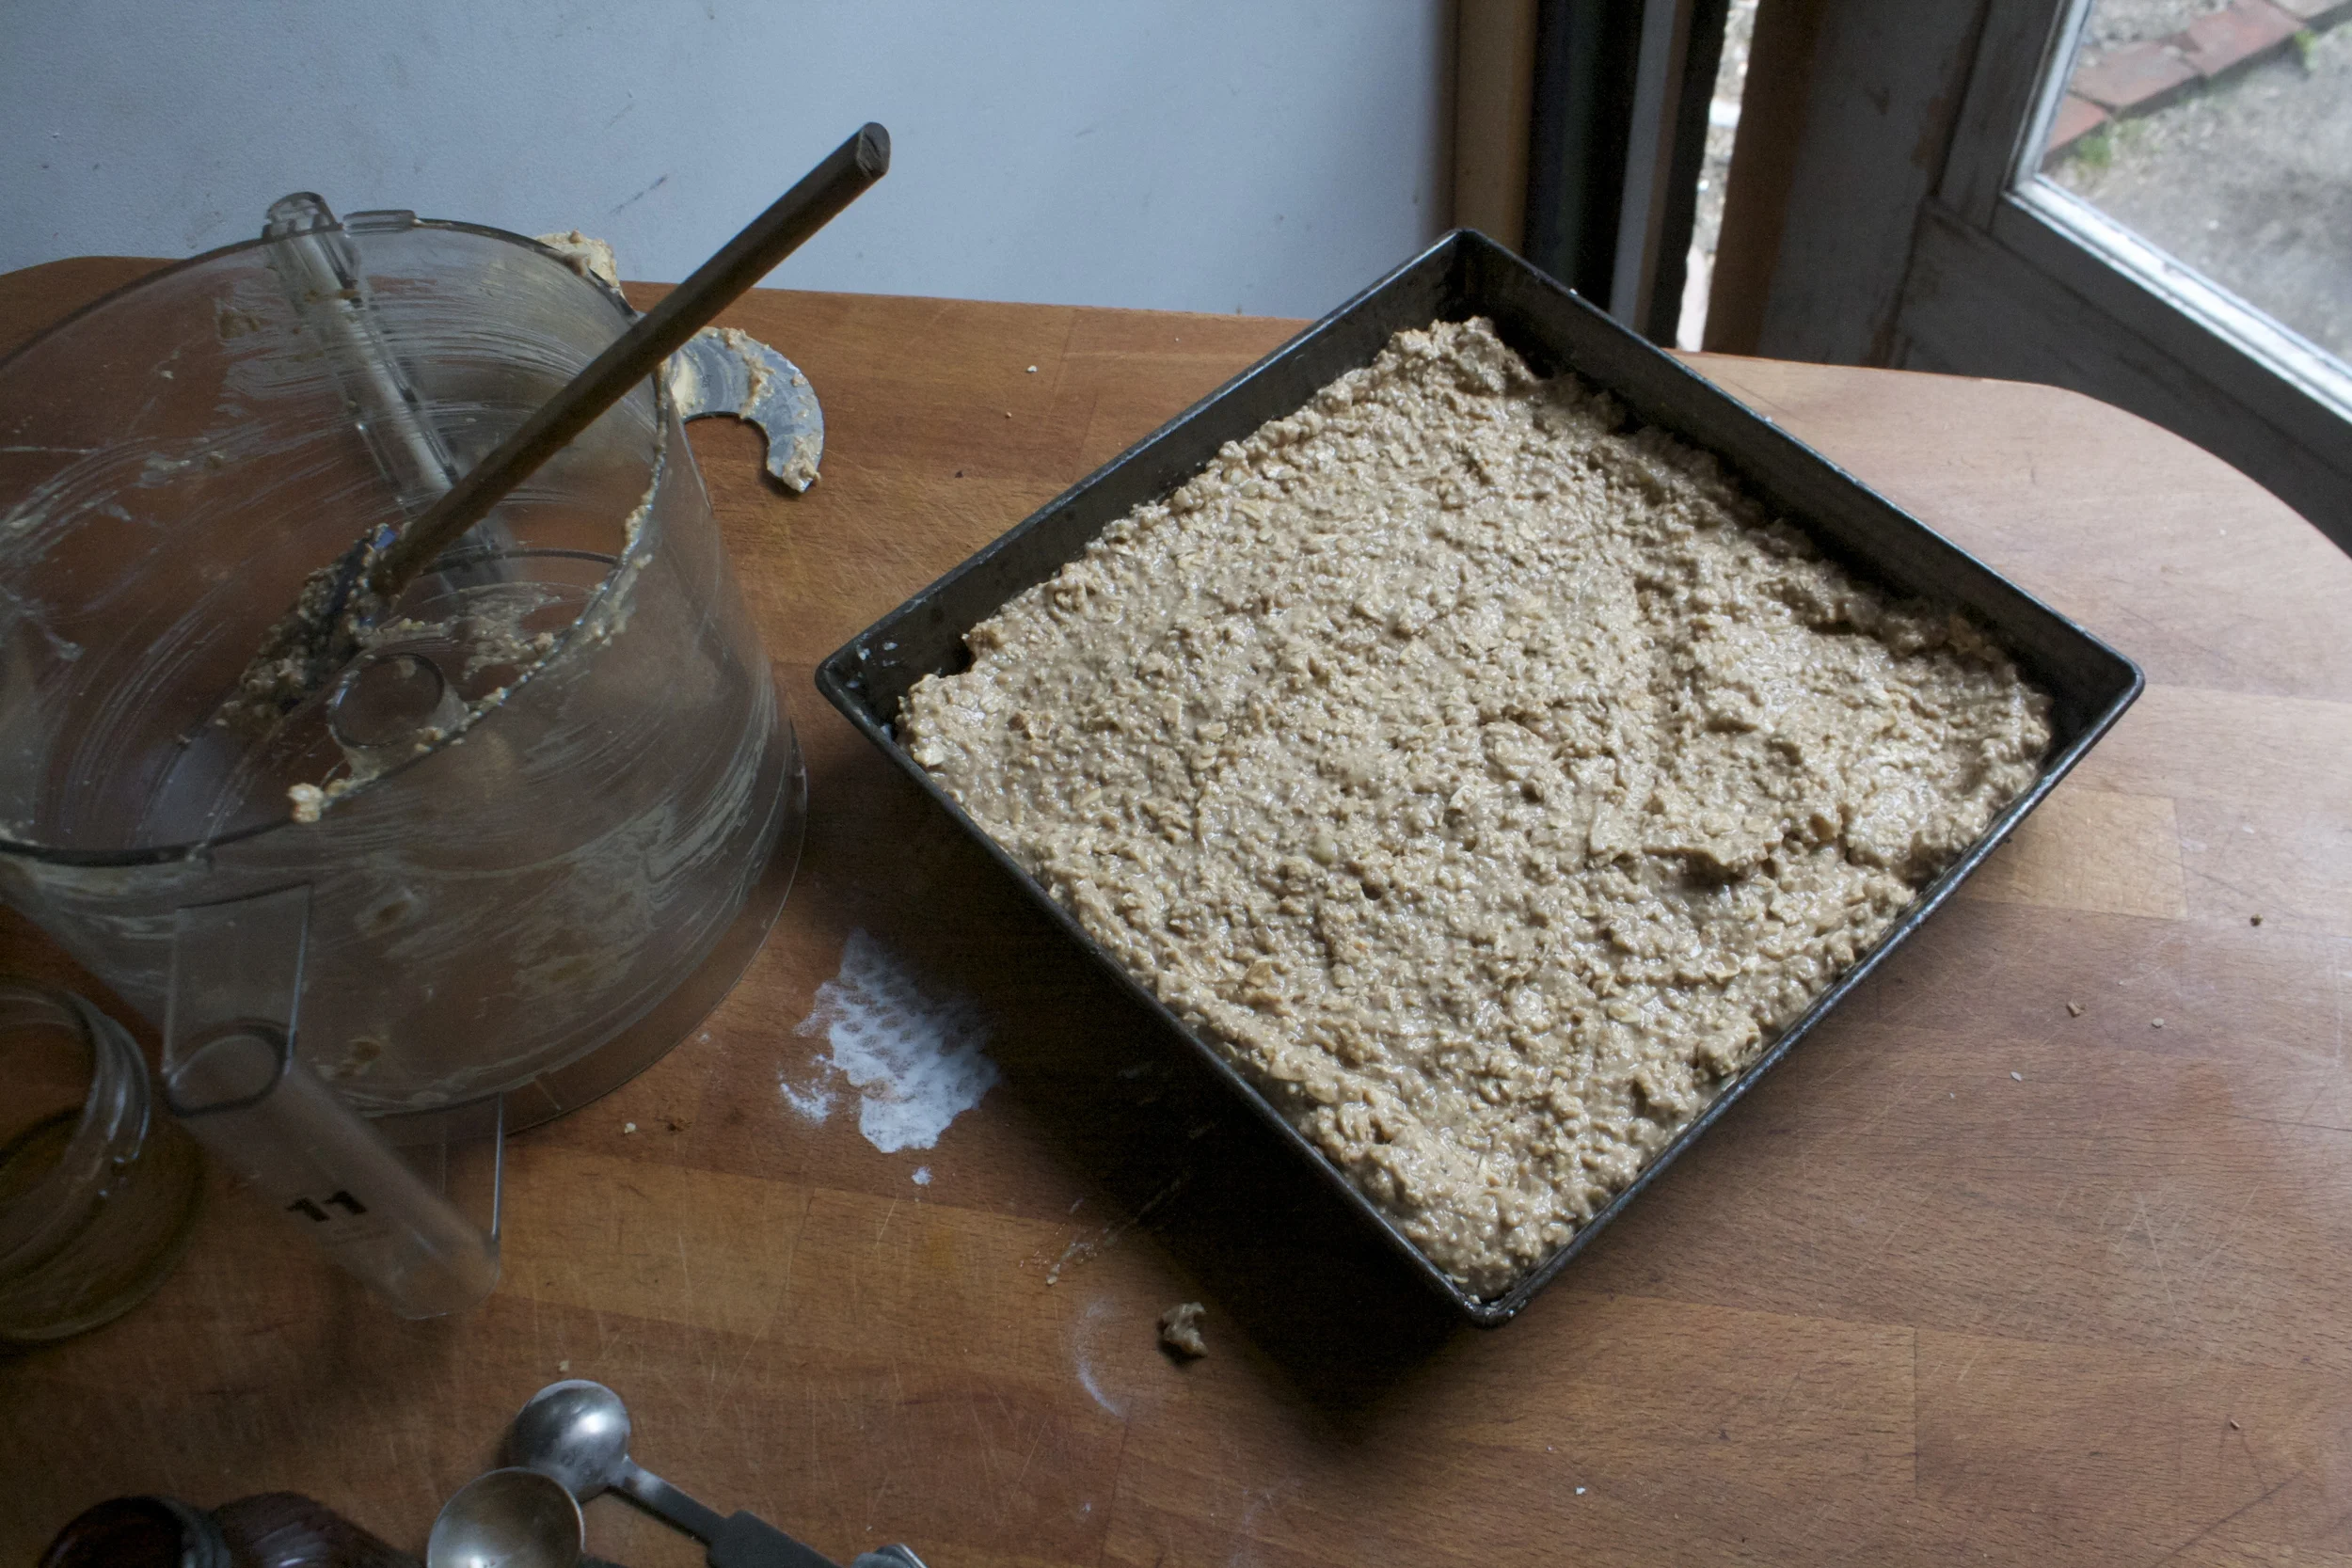
You are now ready to cake. Add squash puree and oil into bowl with the sugars and mix until completely combined. Whisk together all the dry ingredients then add in the sugar, squash, oil mixture to the wet along with the milk and apple cider vinegar. Mix until just combined then stop mixing so you don%u2019t over mix.
Batter then gets poured evenly into two greased and lined cake pans.
And into the oven they go.
Golden brown and smelling all nice and cozy. A tester in the middle making sure that they are cooked completely.
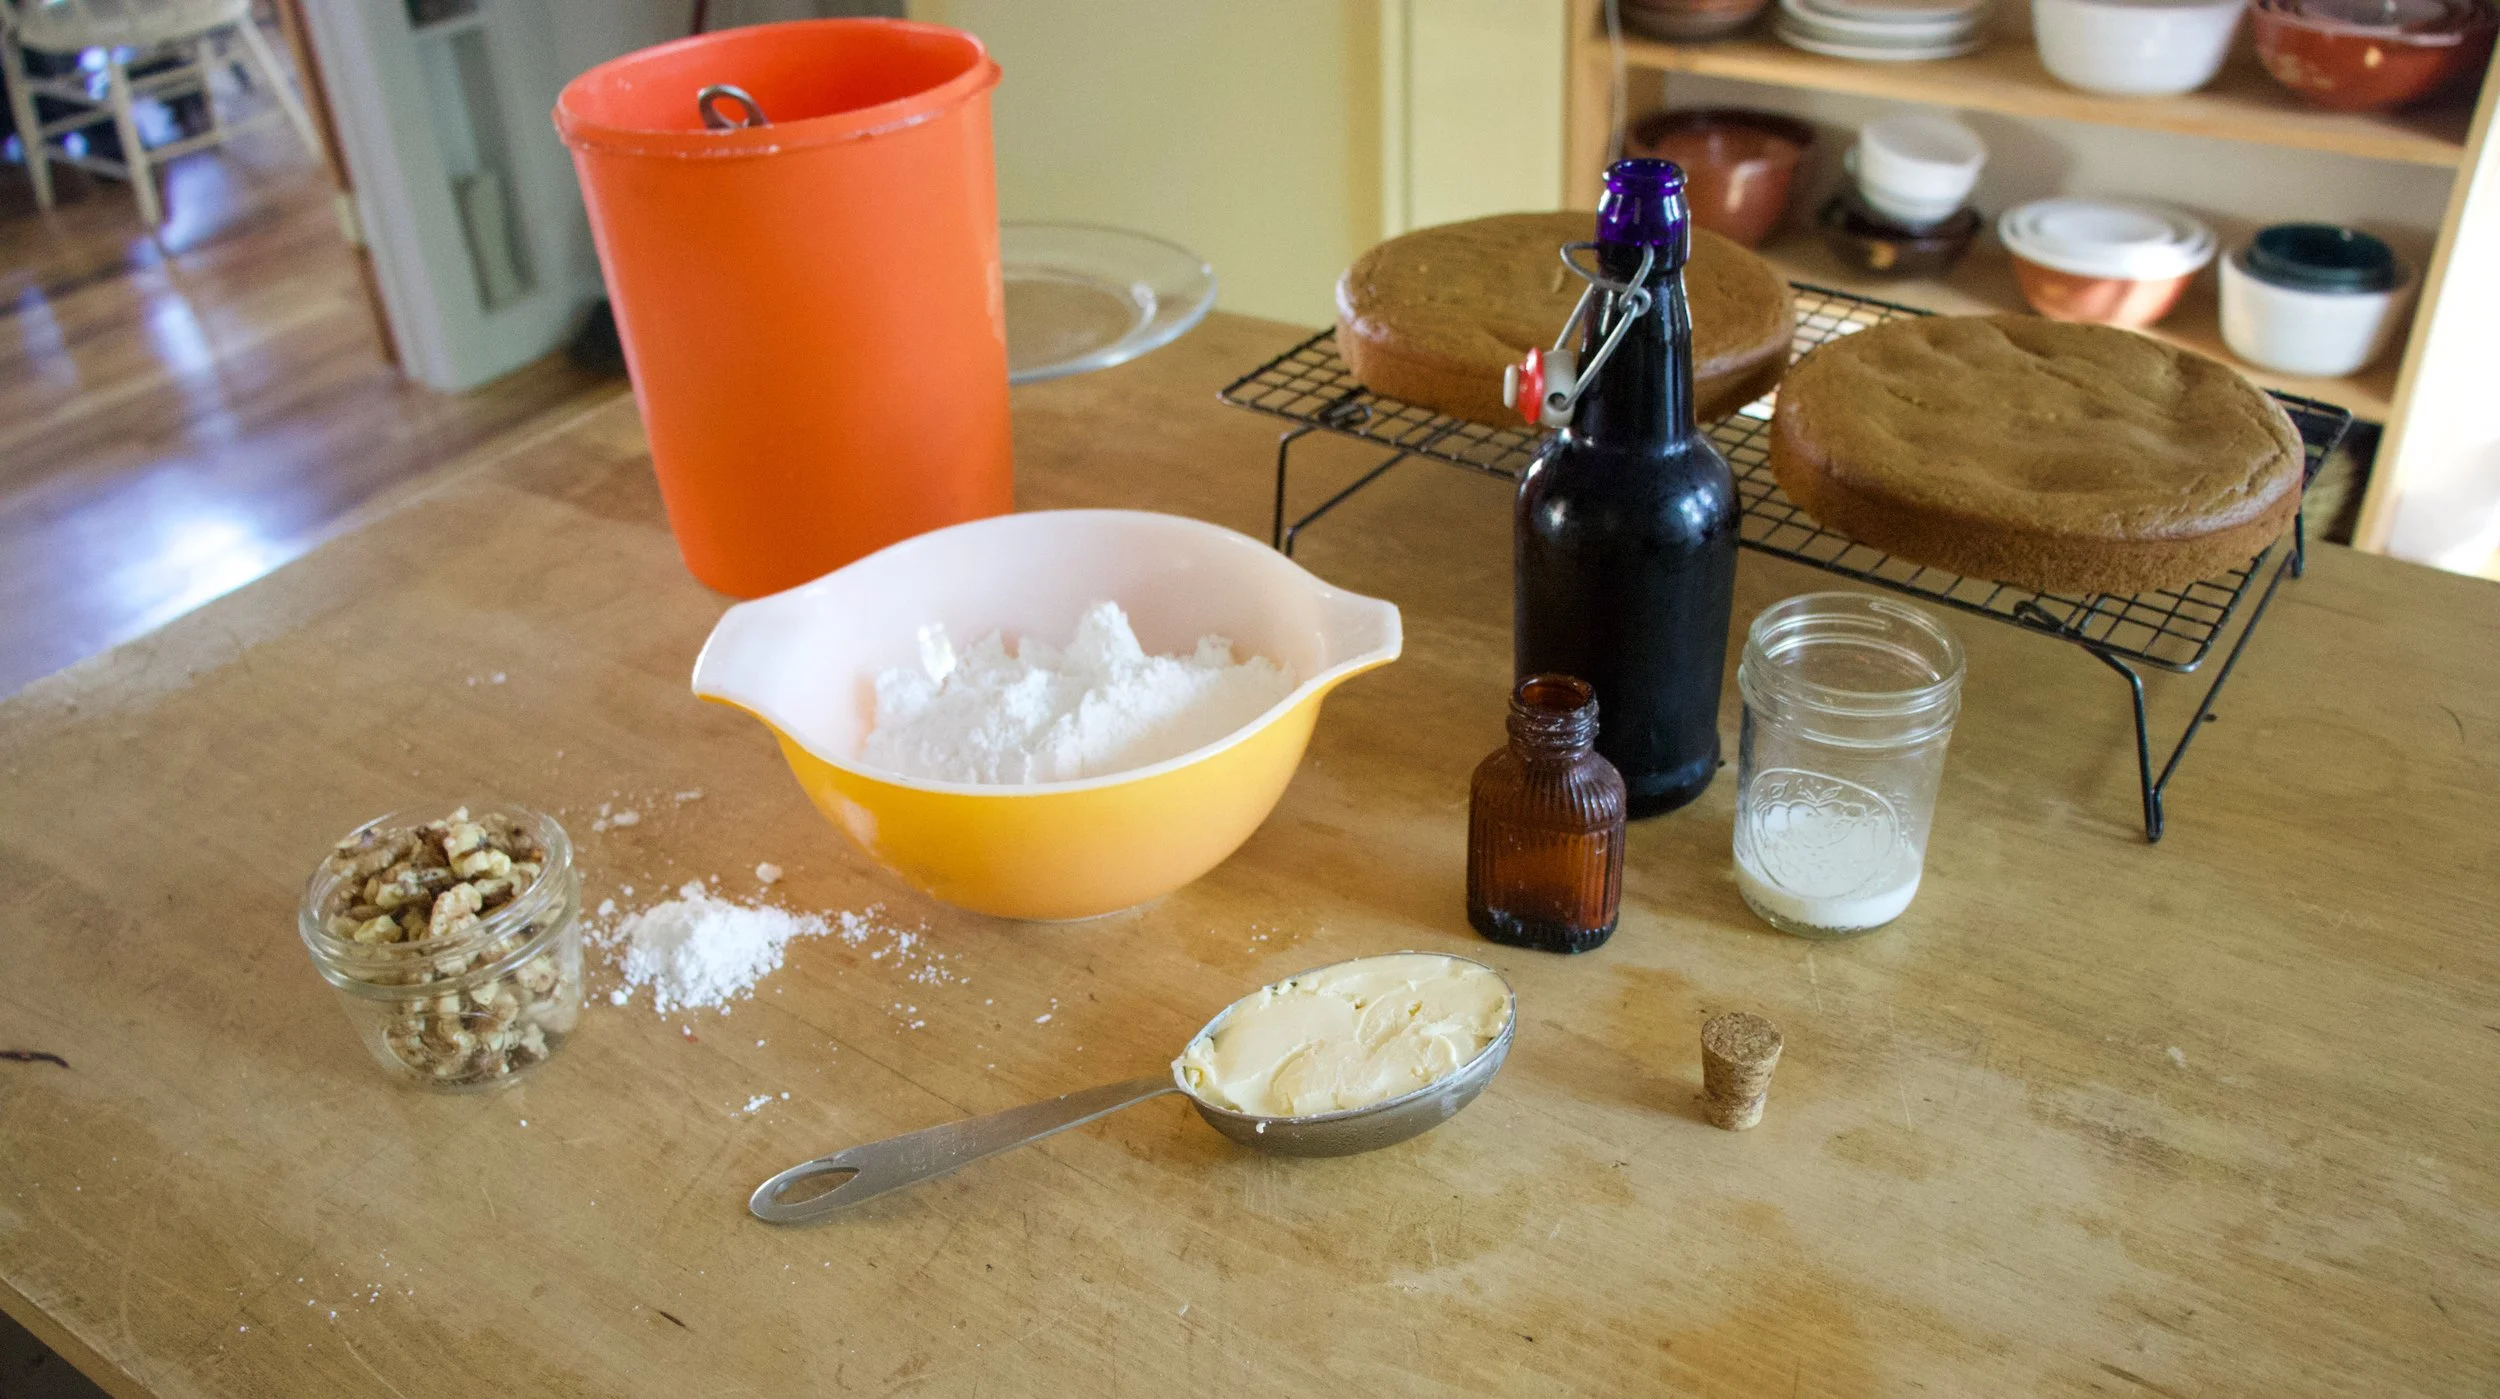
Cakes get popped out of pans and and placed on a rack to cool completely. In the mean time, make the frosting. Powdered sugar, salt, vegan butter, maple syrup, and maybe a splash of soy milk (you might or might not need it). And don%u2019t forget the walnuts.
Sugar, salt, butter, and maple get beaten together until creamy and smooth.
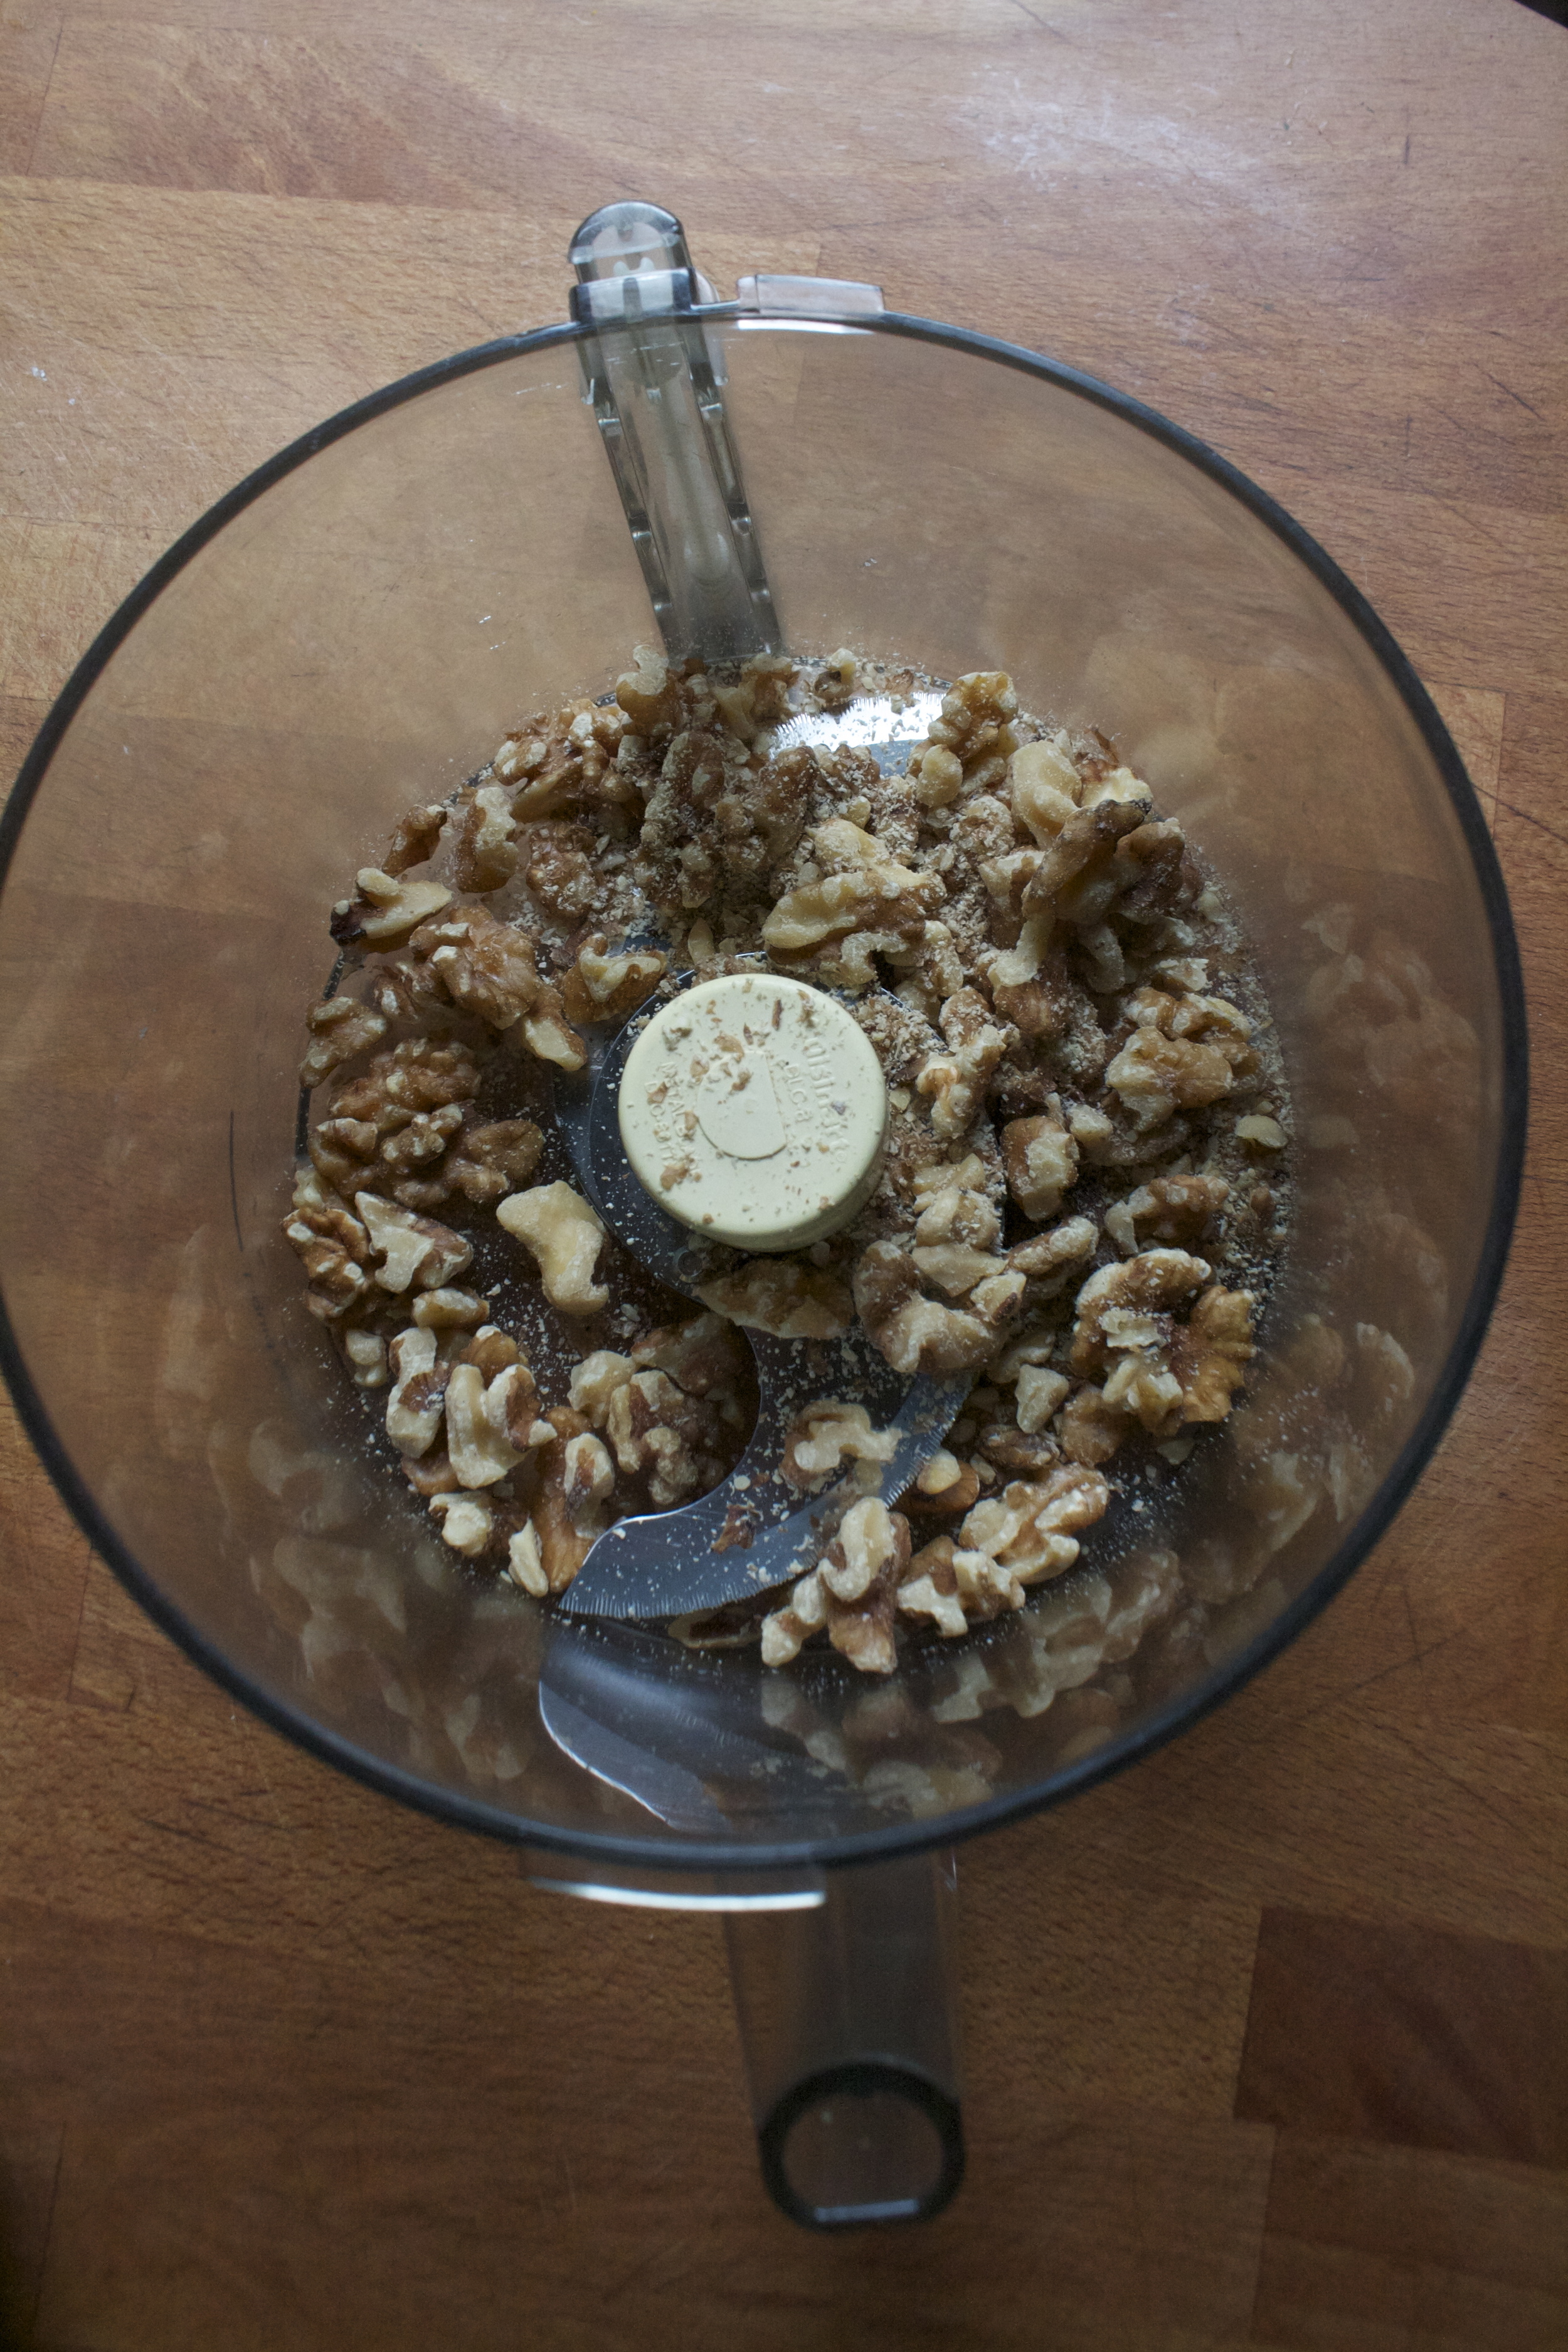
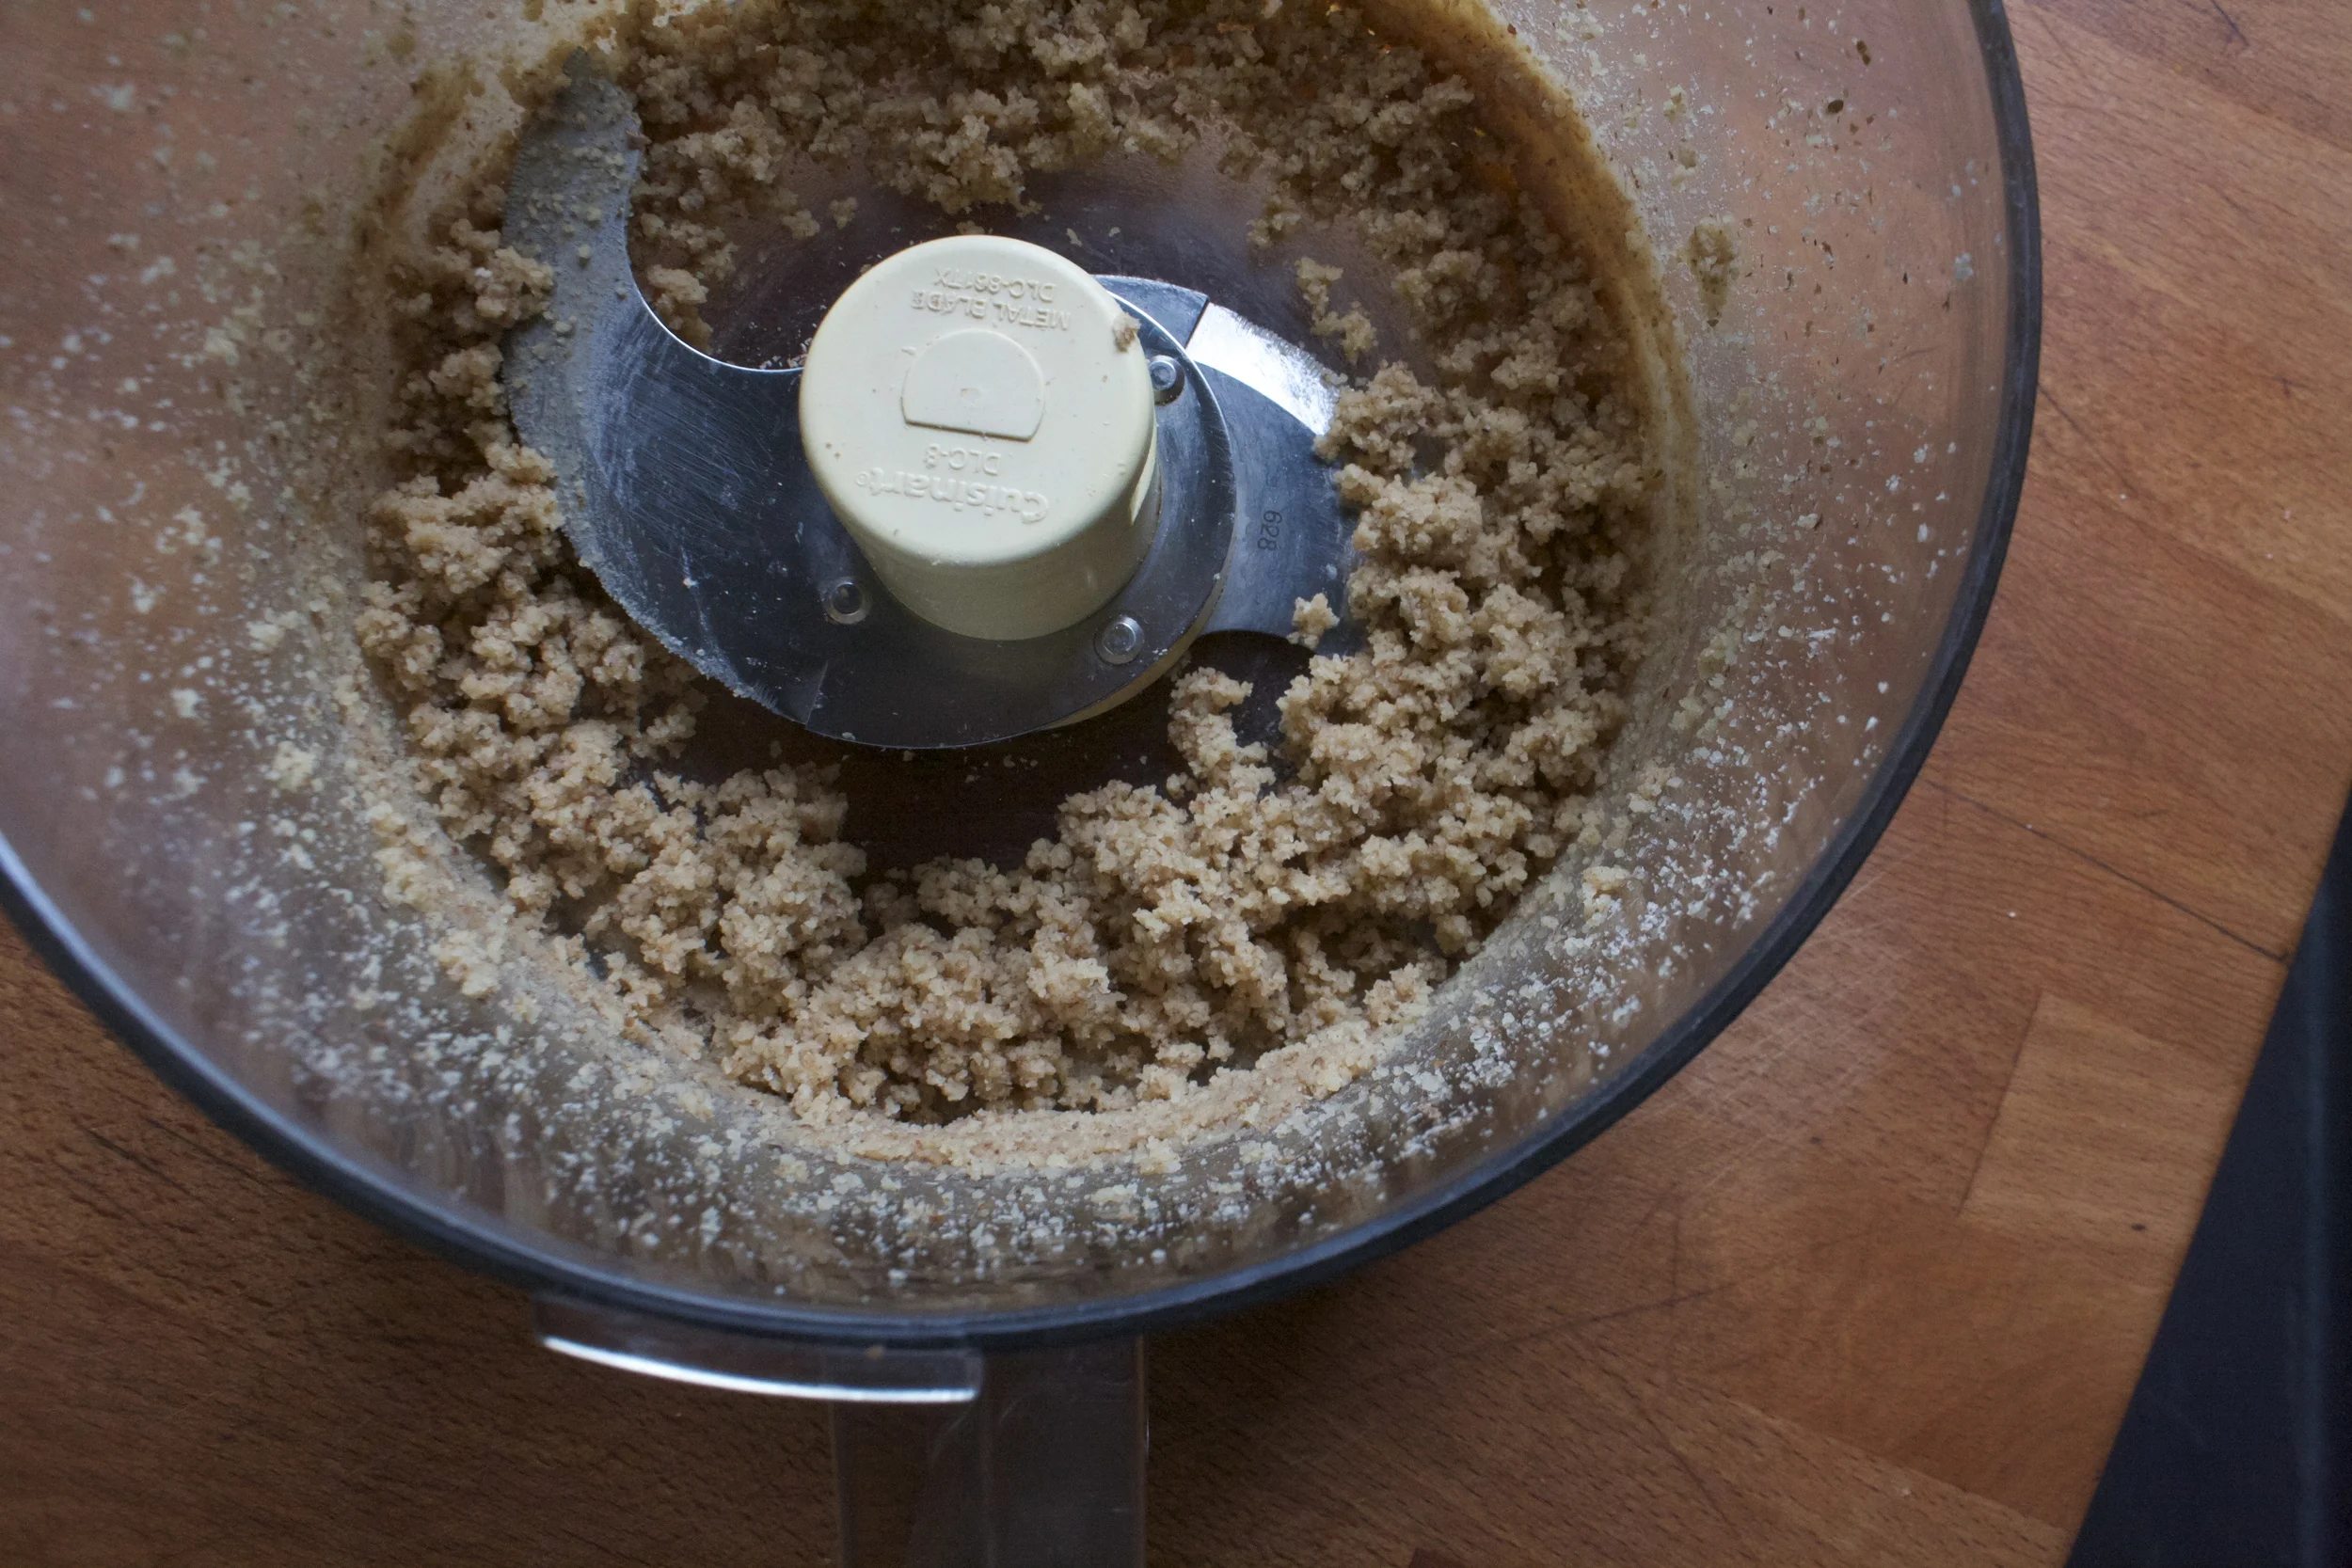
Toasted walnuts get chopped into bits.
And now it%u2019s cake assembly time. Place one completely cooled layer on a cake plate and spread half the frosting on top. Sprinkle with half the chopped nuts. Place second layer on, spread rest of frosting on top, and sprinkle with the rest of the nut.
Now eat.
Enjoy the fall weekend and all the squash.
-C
makes and 8 inch 2 layer cake
For the Cake
2 1/4 cups all purpose flour
1/2 cup white sugar
1/2 cup brown sugar
1/3 cup neutral oil
2 cups acorn squash puree*
1 1/2 teaspoons baking powder
1 teaspoon baking soda
1 teaspoon salt
1 tablespoon cinnamon
1 teaspoon ginger
pinch of nutmeg
1 1/2 cups plant milk (I used soy)
1 tablespoon apple cider vinegar
For the frosting
3 cups powdered sugar
1/2 cup earth balance or any vegan butter
1/2 cup real maple syrup
1/4 teaspoon salt
1-2 teaspoons plant milk (if needed)
1 cup toasted walnuts
Note. For acorn squash puree. roast an acorn squash by place entire squash into oven at 425 degree for about 1/2 hour or until fork tender. Once cooked, cut in half, let cool a few minutes, then scoop out all the seeds. Remove skin and blend the squash until smooth.
Preheat oven to 350
Place brown and white sugar into bowl along with the oil and squash puree. Mix until completely incorporated. In a larger bowl, mix together the flour, baking soda and powder, salt, and spices. Pour wet mixture into dry almond with the soy milk and apple cider vinegar. Mix until just completely incorporated then stop to prevent over mixing.
Grease and parchment line two 8 inch cake pans. Pour batter evenly between pans then place into oven for 30-35 minutes or until Depp golden brown and a tester stuck into middle of cakes comes out clean. When it%u2019s done, remove from oven, let cook a few minutes, then remove from cake pans. Place on a wire rack o cool completely.
While cake is cooling, make the frosting. Beat together the powdered sugar, salt, maple, and earth balance until nice and creamy. If the frosting seems to thick, add a splash of milk, to thin, add a 1/4 cup more of powdered sugar.
Chop walnuts into small bits if they are not already.
Once cakes are completely cooled, assemble. Place first layer on cake plate and spread 1/2 the frosting onto first layer and sprinkle on half of the chopped walnuts. Place on second layer, spread the rest of the frosting on top, and sprinkle on the rest of the nut. And that is it. Now you just need to eat it.
Store any left overs in for a day on the counter, but any longer place in an airtight container in the fridge. I even froze a few pieces and the mr loved them frozen to if you like frozen cake%u2026..
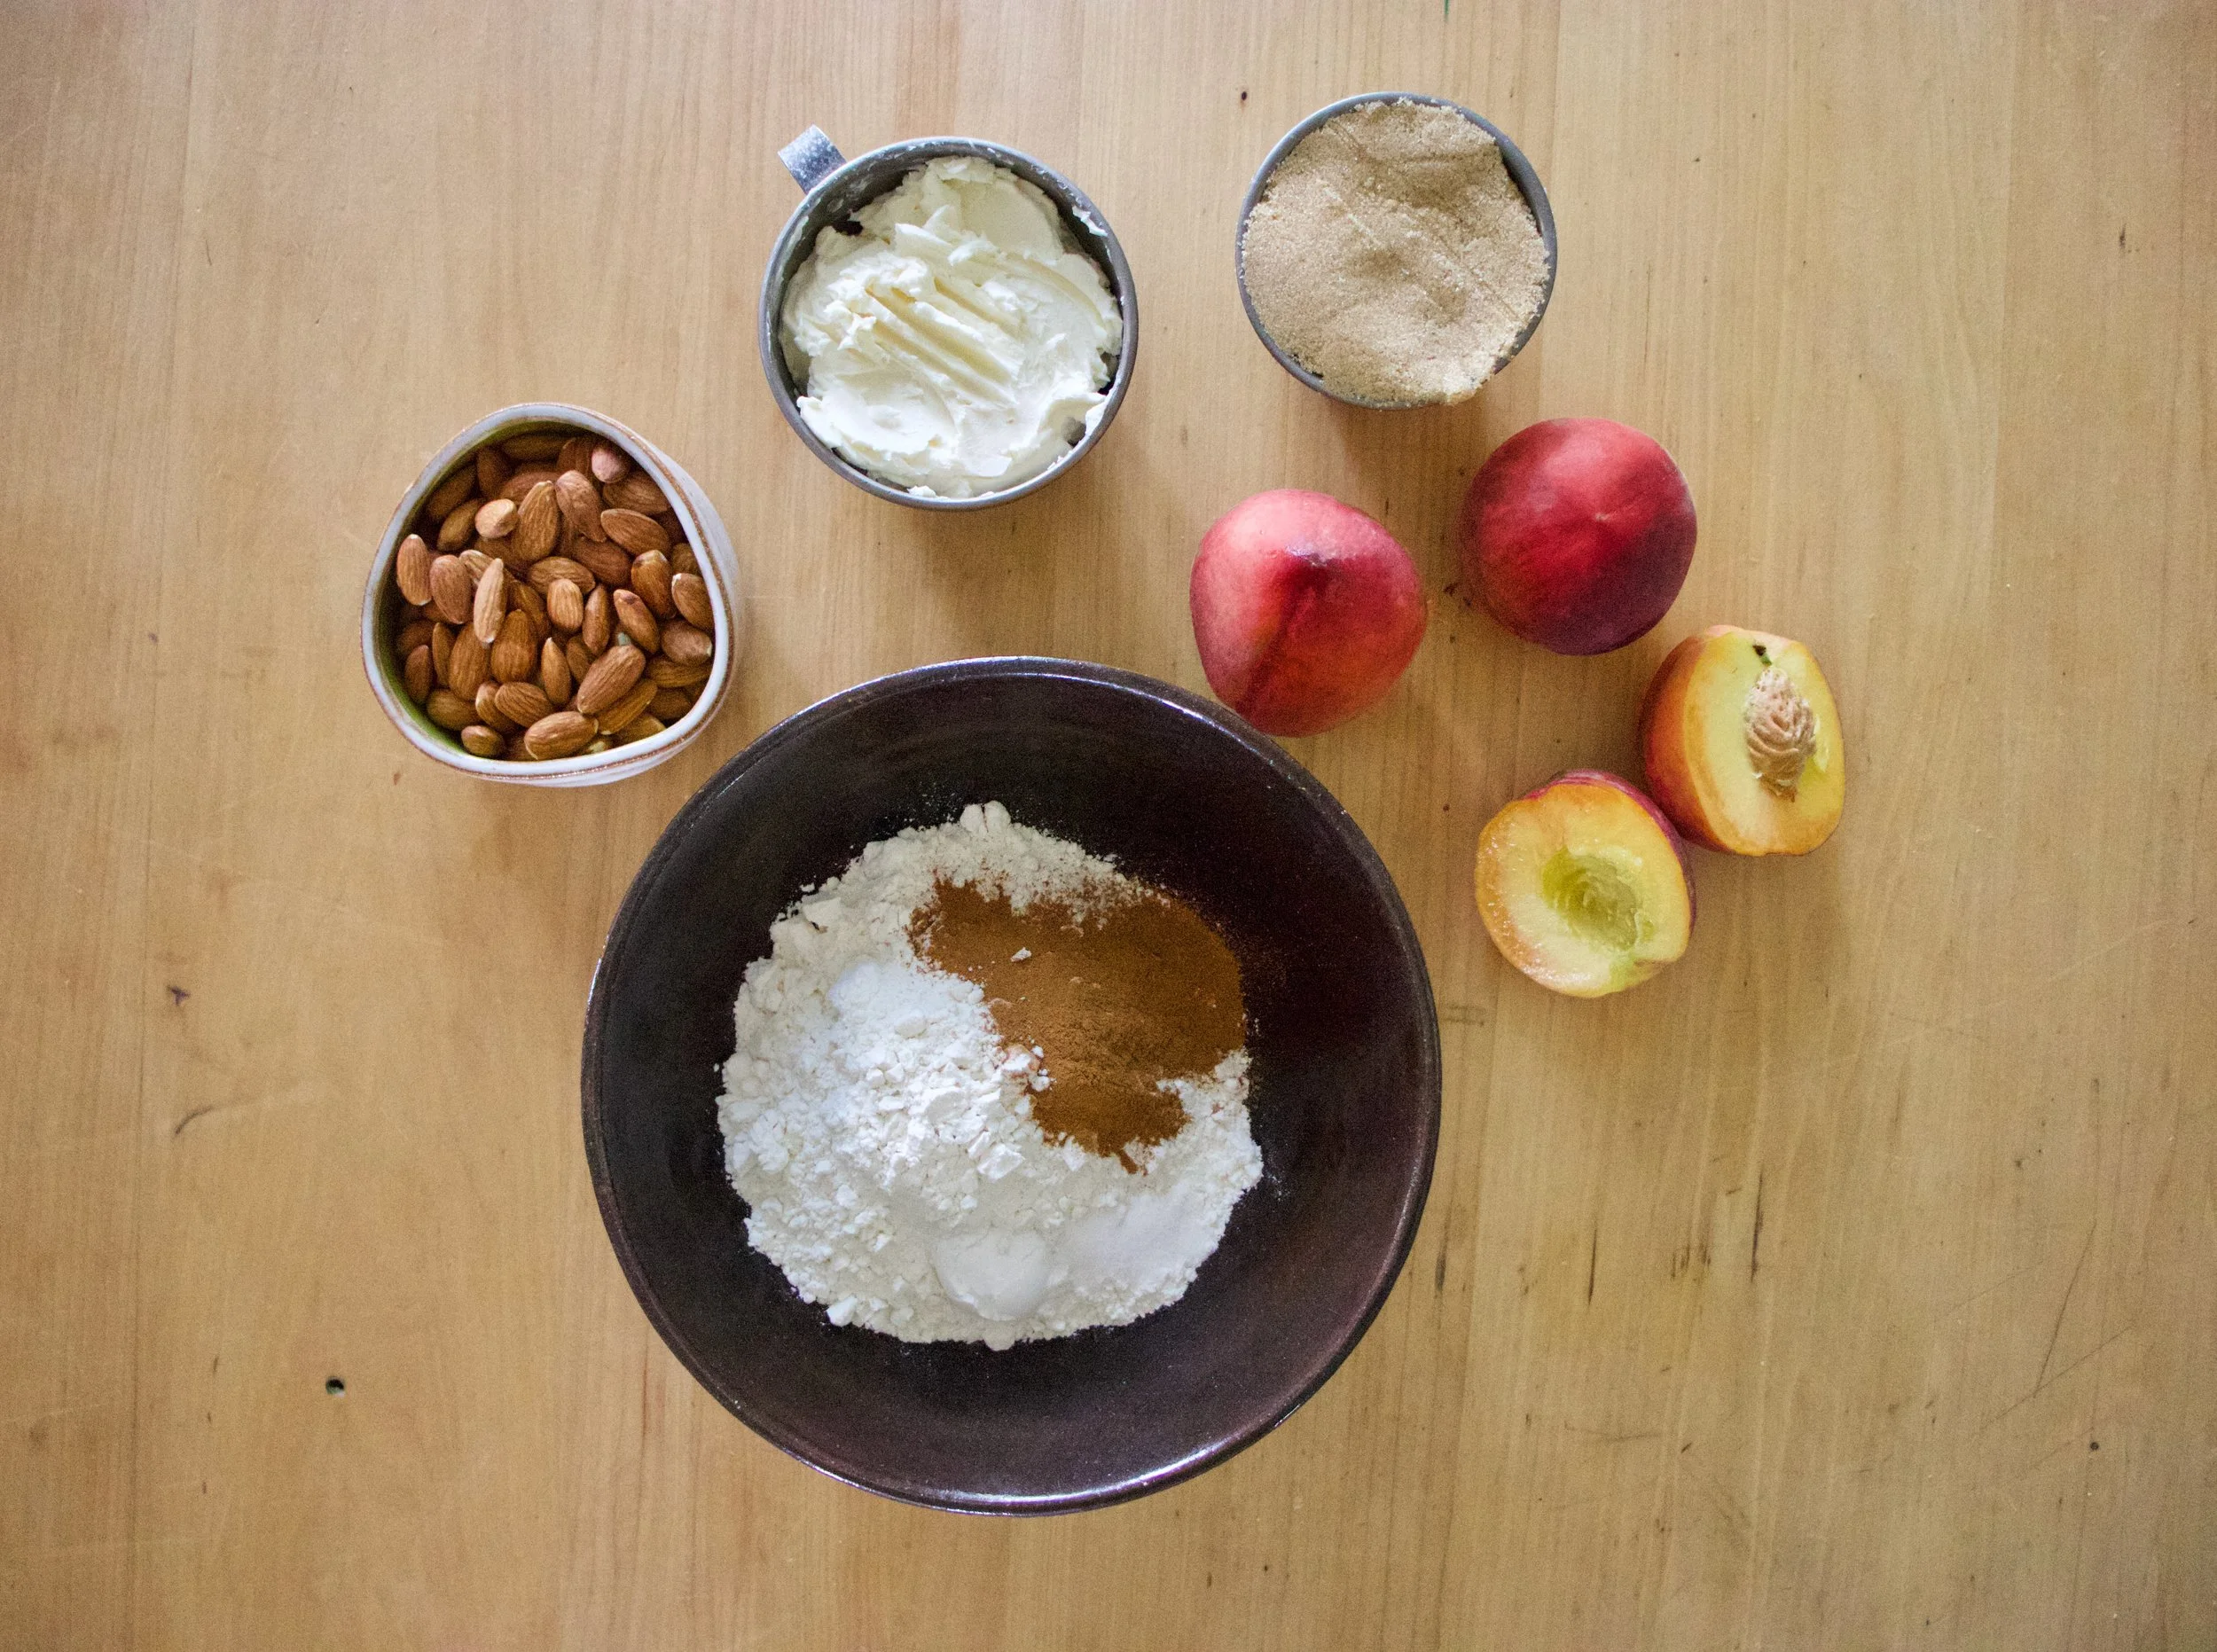
Who doesn’t like a good bun, right? %u00a0And just because this is where my mind wonders, peachy sweet buns. Doesn’t that sound like a pick up line or something you say to your significant other. Like, “Oh hey peachy sweet buns, you are looking good. Woo hoo”…….. Anyway, this is not about anyones peachy sweet buns, it it about actually sweet buns so u-hum, yeah.%u00a0
I am not trying to float my own boat here, but I am really really good at making buns, and you know what, I bet that you are too. They may seem a little intimidating, but really, it’s quite easy. I think what throws some people off is the yeasted dough and having to knead and waiting for the dough to rise,%u00a0but don’t let that stop you from sweet sweet buns. They are no harder to make then a boxed cake (maybe a little harder) and the results are by far more amazing and delightful (we don’t use the word delightful enough around here) then any old box or pre-made thing will ever be. Ever. Freshly made buns are what is right in this world.
If you are awesome and decide to make buns like any good person with a baking itch or a need for some sweet bun goodness does, make them peachy because its peach season and how can a peach bun not be that much more amazing? %u00a0Just think. Soft sweet dough, jammy cinnamon peaches, covered in a sweet lemony glaze……
Go on now, go and get yourself some peachy sweet buns.
The stuff. Flour and salt in the bowl, melted earth balance, brown sugar, yeast, warm soy milk, cane sugar, cinnamon, powdered sugar, a couple of lemons, and af course, peaches.
Warm (not hot) soy milk, yeast, cane sugar, an melted (but again, not hot) earth balance go into a big bowl and get whisked around. Then add in the flour and salt ans mix around until you just can’t.
Time to knead. Dump the dough ad all the little bits onto a flour surface. Gather it all together and knead away, for about 5-8 minutes, or until the dough looks like….
This. Nice and soft and glossy. %u00a0Lightly grease the bowl ans stick the dough back into it, covered with a towel, and set for about 1 hour to rise and double in size.%u00a0
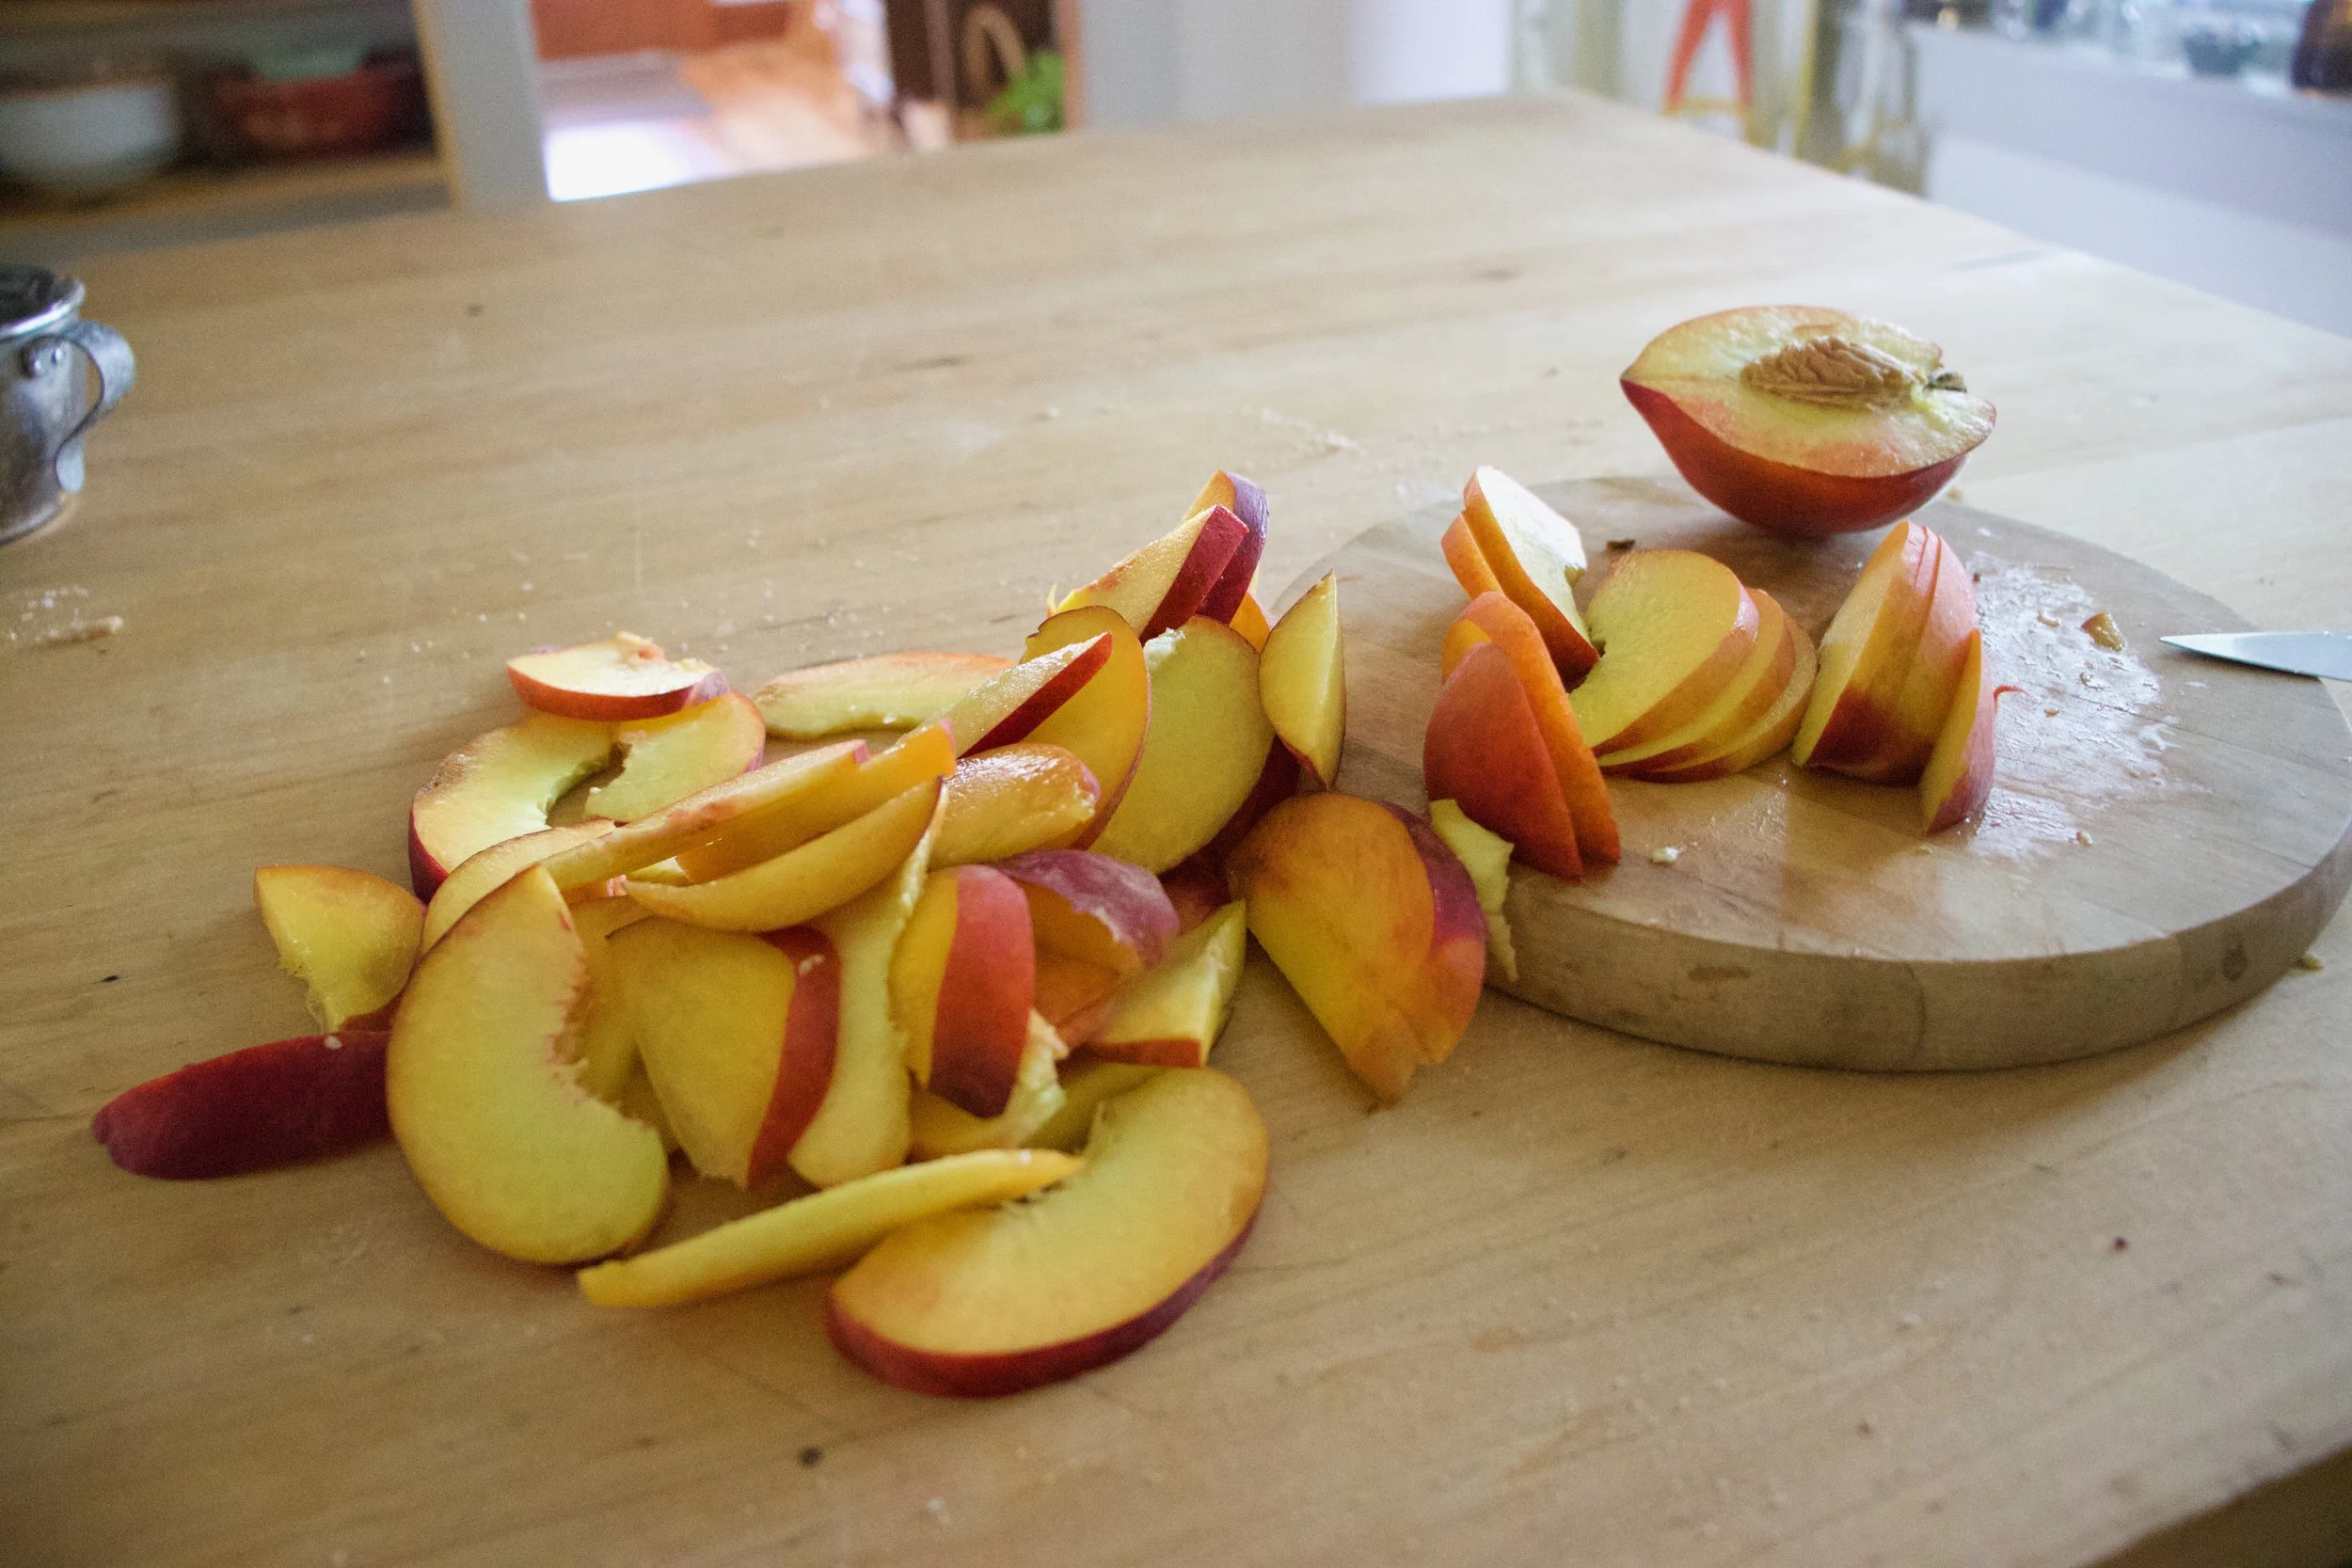
As soon as the dough is set ti rise, start on your peach filling. Chop up enough peaches that you have about 2 1/2 cups of chunks.
Brown sugar and peach chunks go into a pot and stuck on a medium heat until they start to bubble then set to a low simmer for about 20 minutes or until the peaches all break apart and reduce by half.
Add in the cinnamon and stir.. Peachy goodness. Now quick and stick that shit in the fridge or freezer to cool down.
BOOM. Dough did what it’s job and doubled. Time o make the buns.%u00a0
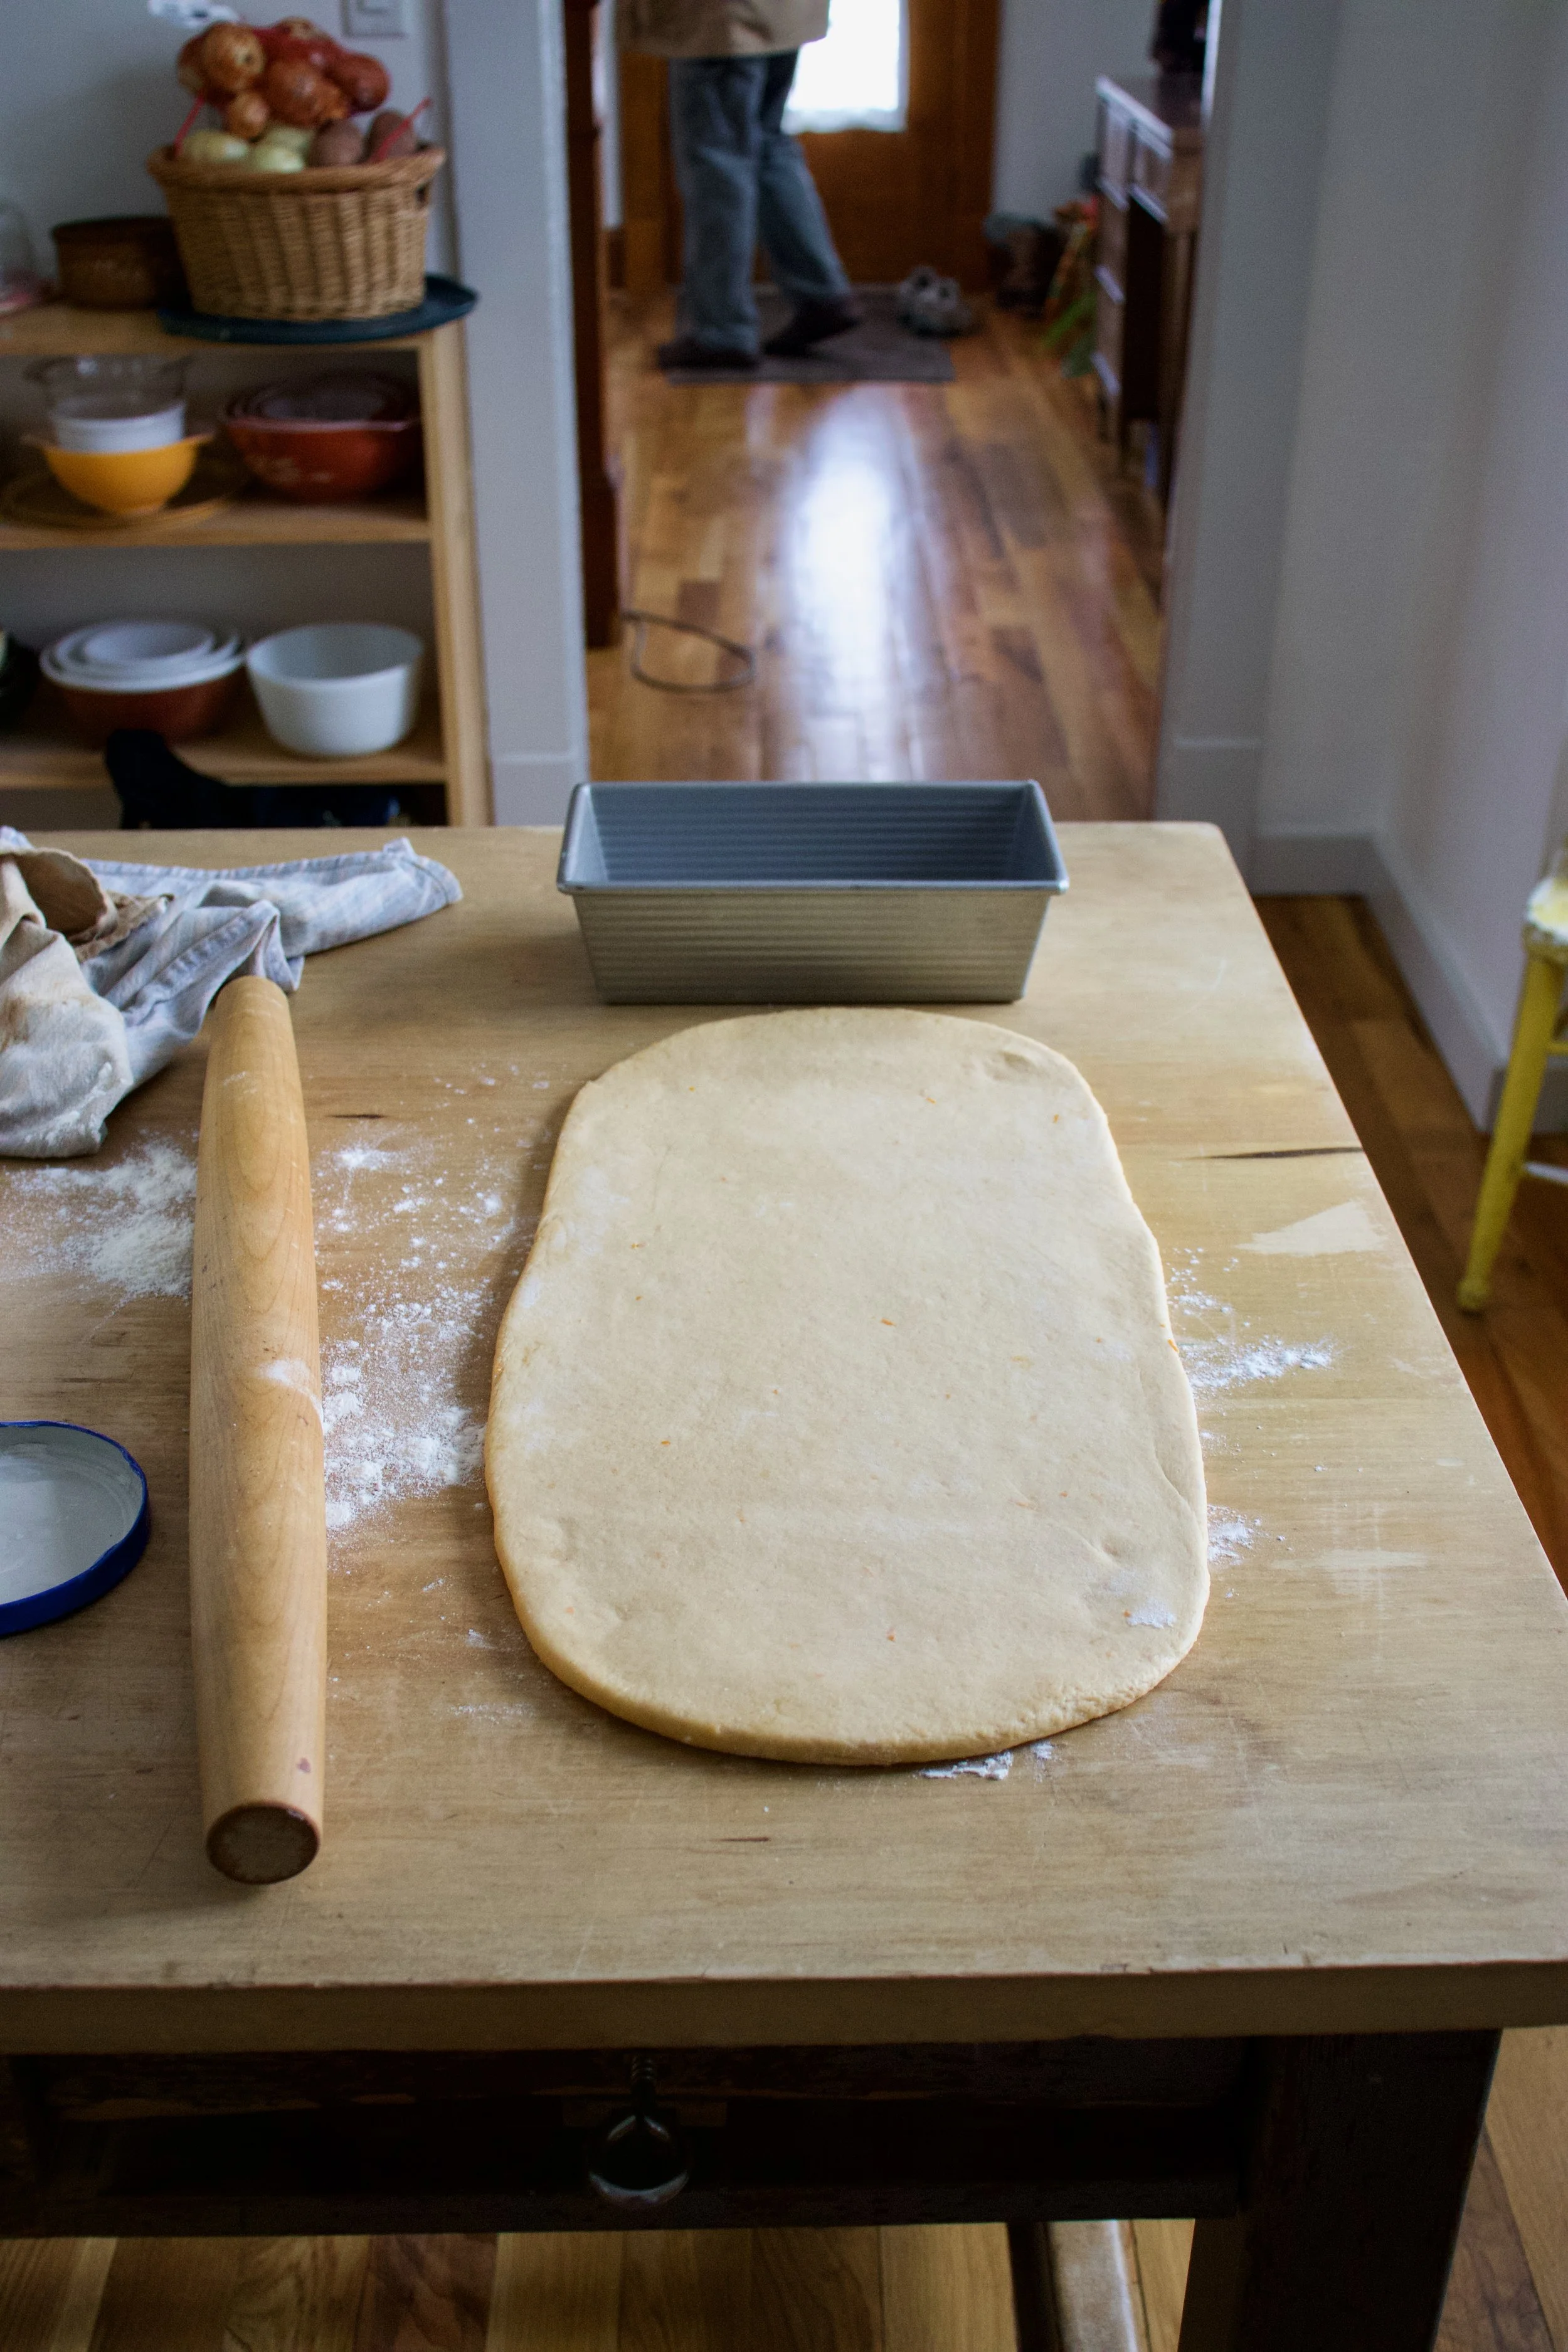
Place the dough on a lightly floured surface and roll our into a rectangle of sorts that is about 1/2 an inch thick%u00a0
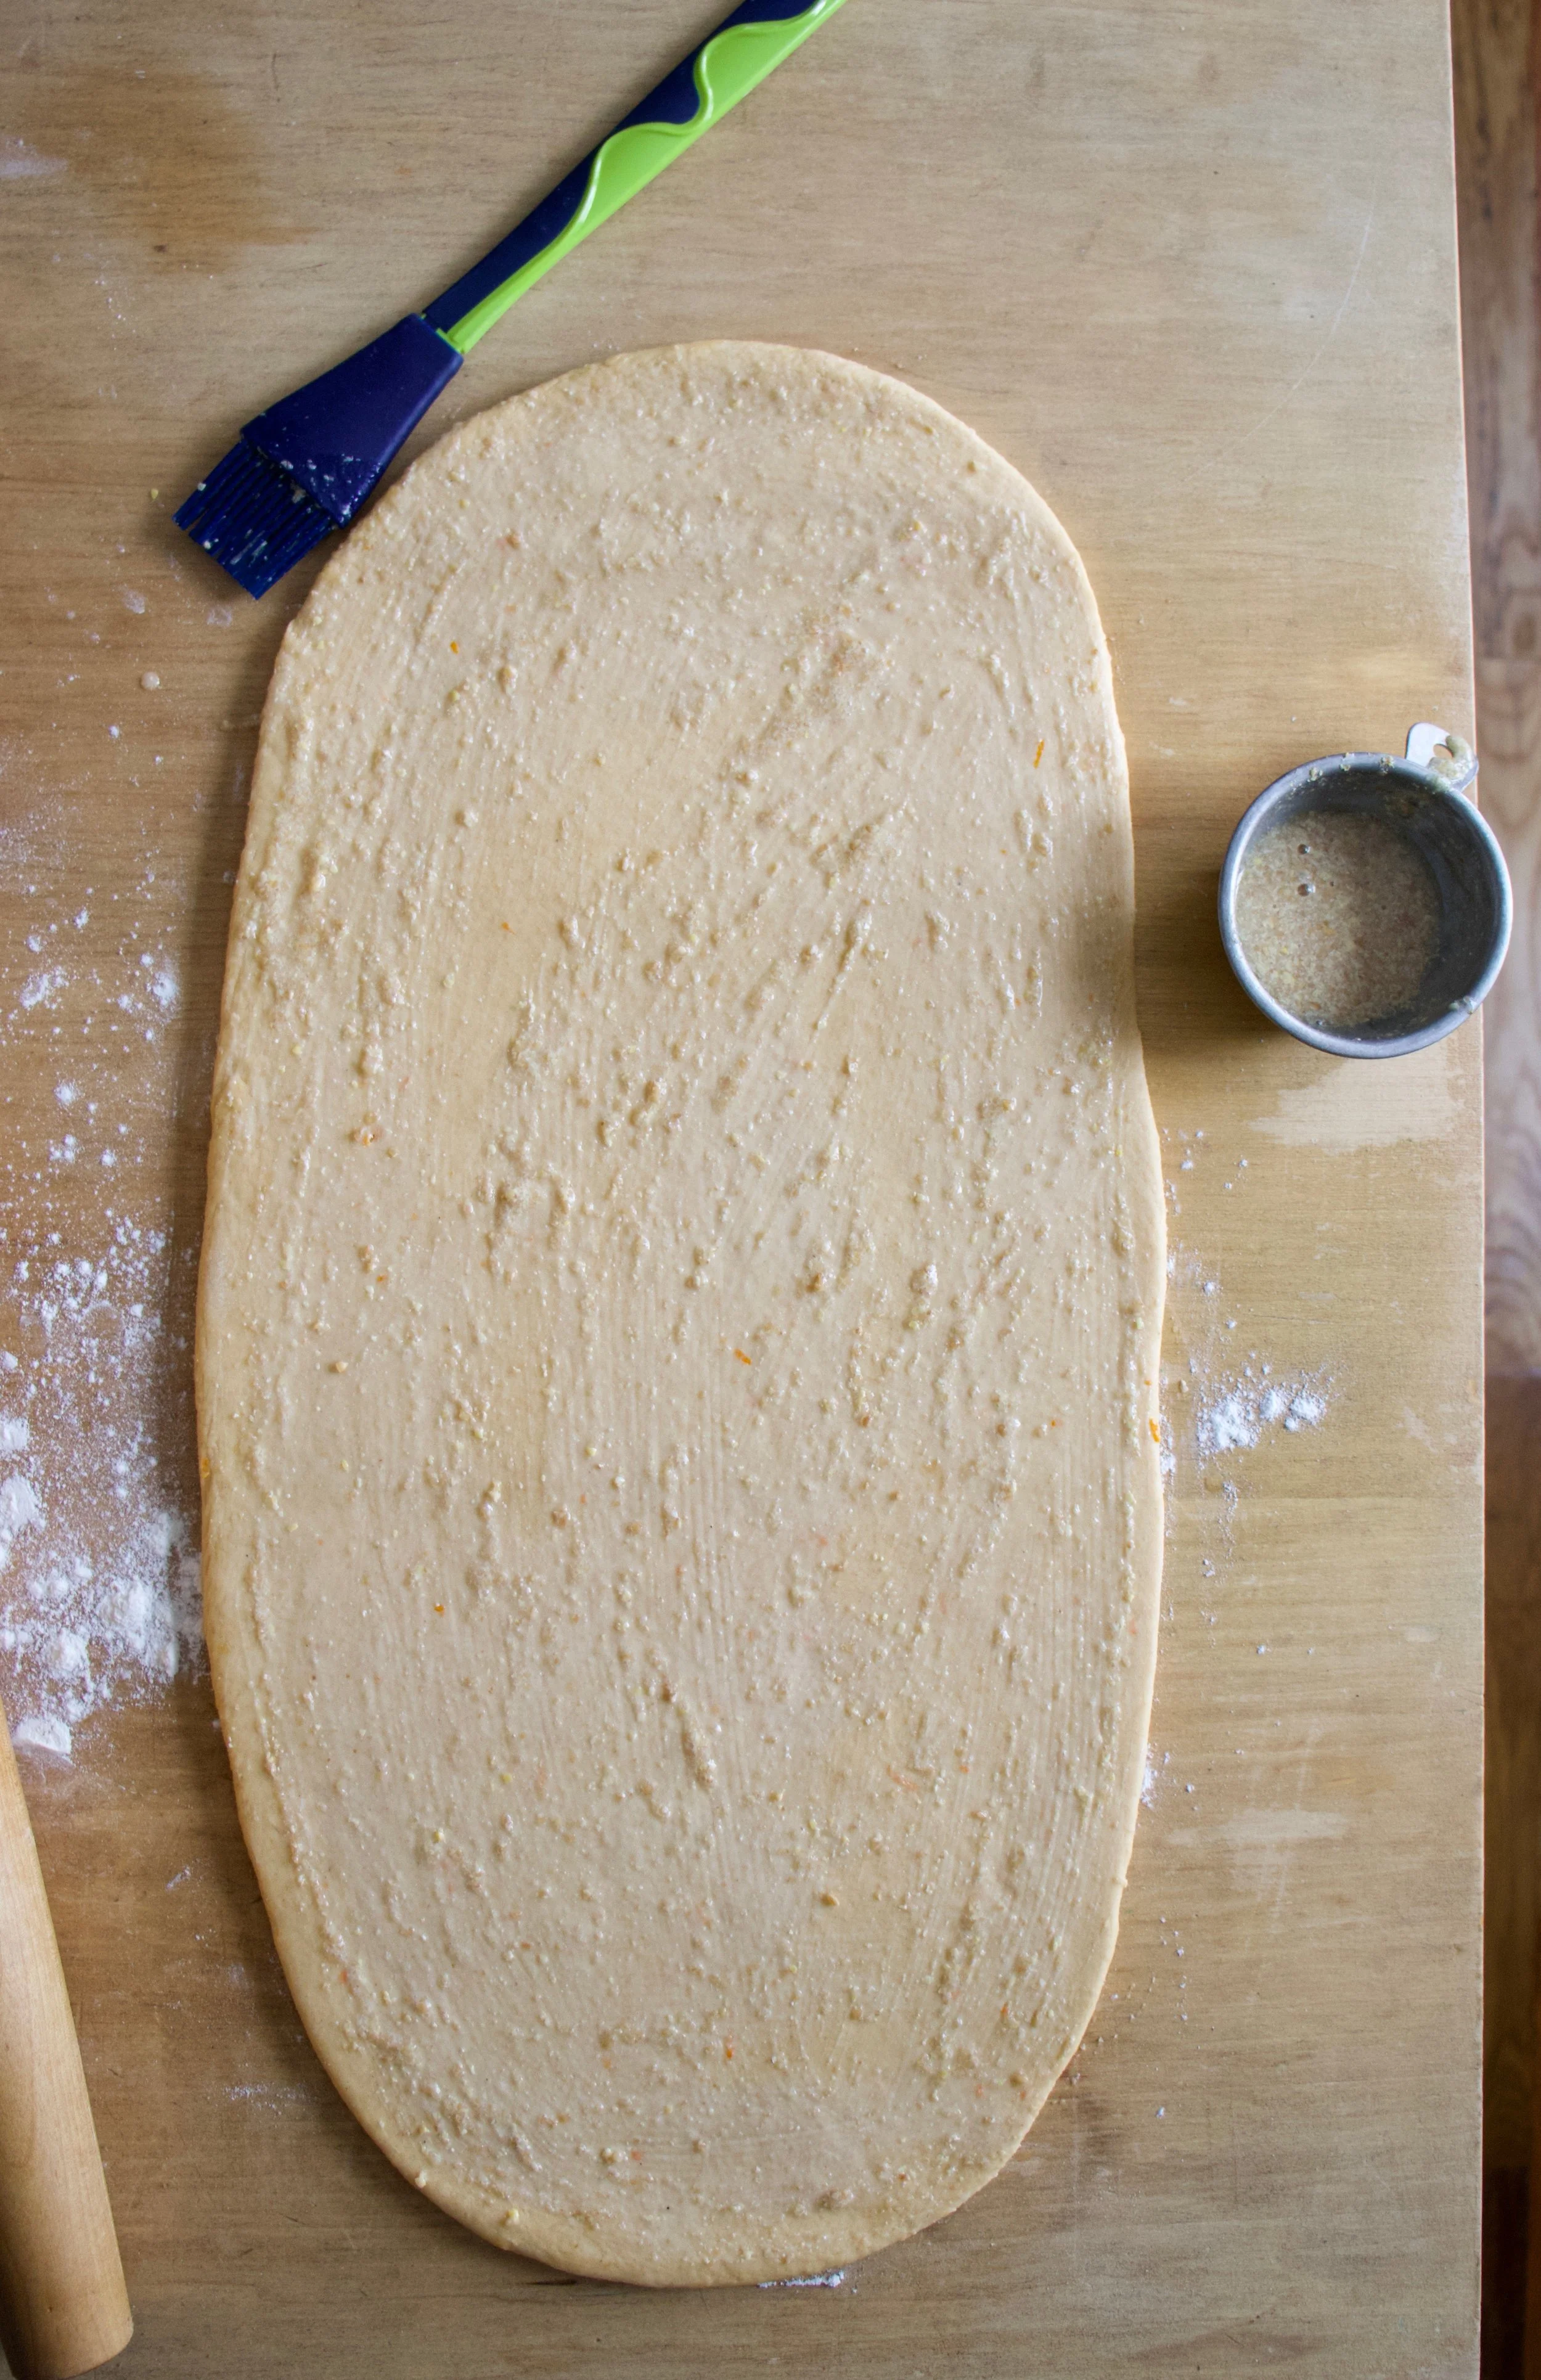
Cover the surface with all the peachy jammy goodness, and sprinkle on the remaining finely chopped peaches.
And roll, as tightly as you can, without squeezing all the filling out. I roll towards me, but roll away from you if it is easier. %u00a0It might get a little sloppy… it’s ok, just lick your fingers and keep going.%u00a0
Rolled and cut into 12 pieces.
Place the rolls carefully onto a grease and parchment lined baking 9×13 baking dish. In my picture I used a baking pan, which was not what I wanted to do, but I wasn’t thinking properly and so that’s what I did. Something with sides is preferable, but the baking pan did the job so really, your call.%u00a0
When you place the buns in the dish, place them toughen a bit, it helps then bake up high instead of out. %u00a0And any remaining go on jam that spilled out can get scraped right on top of the buns,%u00a0if you didn’t already eat it.
Now into the preheated oven these %u00a0babies go.
Look at those beauts. And they smell. A-MAZ-ING!!%u00a0
Right away get that glaze made. Powdered sugar, lemon zest, ans lemon juice. Super easy, just add the zest and juice to sugar and mix until smooth and glaze.%u00a0
Pour glaze over warm buns. Make sure to hit them all or someone is going to be pissed they didn’t get enough glaze…..%u00a0
Then it’s really just up to you whether you wait for coffee or tea or not, but really, just eat right away. There should be very little time between newly glazed buns and a bun in your face.
Enjoy the peaches!
-C
Makes 12 Buns
In a large bowl mix together the yeast,%u00a0warm (not hot) soy milk,%u00a0sugar, and melted but cooled butter. Now add in %u00a0the salt and the flour. Mix until it’s too hard to mix then dump it all onto a lightly floured surface and knead for 7-10 minutes until the dough is %u00a0soft, elastic-y,%u00a0and smooth. Place dough back into a clean lightly greased bowl and drape with a damp towel. Let dough rise for about 1 to 1.5 hours or until it has doubled in size.
While the dough is rising, chop the peaches up until you have about 3 cups.%u00a0Place 2 1/2 cups of the %u00a0peaches into a medium sized pot with the brown sugar and lemon juice and stick on medium heat. Set the rest aside. Cook for about 20 minutes, stirring and mashing with a wooden spoon every few minutes,%u00a0until mixture has become thick and reduced by about 1/2. Remove from heat, stir in cinnamon,%u00a0%u00a0and place in fridge to cool.%u00a0
Once thee dough has doubled, dump onto a flour surface and roll our into a retacnge that is about 1/2 inch thick %u00a0Grab your peach mixture and spread the mixture evenly over the dough. Evenly distribute %u00a0the remaining chopped peaches over jam. %u00a0And then it’s the to roll.
Start from the long side and start to roll toward the other end, keeping it as tight as possible without squeezing out all the filling. %u00a0Once rolled, slice into 12 even sized buns.
Place on a lightly greased and parchment lined 9×13 inch baking sheet or pan and let rest and rest for another20 minutes or so. OR if you want to wait to bake them off,%u00a0cover them with plastic and set into the fridge for up to 24 hours. When you are ready to bake, remove from fridge and let the buns set on counter to come to room temperature before baking.%u00a0
Preheat oven to 350.
Place rolls into oven. Bake for 30-35 minutes or until all the buns have gotten a nice golden brown on top, and if you want to take the internal temp, that the temp has reached 190.%u00a0
Once the buns are done %u00a0baking, mix together the zest and juice of the lemon and powdered sugar. If the glaze seems to thick, add more juice or water, to think, add more sugar. Pour glaze all over warm (but not hot) buns.
And now all you need to do is serve up those buns right away, nice and warned.
Any left overs should be stored in the fridge for 3-4 days but should definitely be warmed up in the microwave for a minute or two before serving. They also freeze well too.%u00a0