alz-il.net
  • Home
  • Blog
  • YouTube
  • TikTok
  • Instagram
RSS

Sunday Happy — The Lovely Crazy

September 19, 2015 by maximios • Blog

And I am home. The mister and I woke up at 2:15 am Friday morning to drive to Easton PA and spend the weekend with family, going to the Crayola crayon factory, wondering a  grave yard, and hearing some fantastic stories about my family from the mouth of my 95 year old grandmother. (I’ll show some pictures and tell you some stuff later this week) Than we drove back late last night… I don’t know how I am even awake right now…I am sooooo much tired! But that’s how I work I  guess.  The coffee is almost ready, calling my name, telling me its totally cool to drink it all.

I’ll leave you with a few little internet things I liked this week..

– I just love looking at other peoples homes. Treehouse in the city 

– These puppies make me think of my little nephew., he is in love with bulldogs. 20+ Beautiful Bulldog Puppies That Will Melt Your Heart

-Holy Shit  YES!!!! ‘Full House’ Reunion on Netflix Is Officially Happening

-How cool would to find one of these? New Urban Geodes on the Streets of L.A. by Paige Smith

-I don’t know if I would want to stick stuff on these shelves.These Wall Shelves are Dollhouses for Adults

– And if you need a push…On Your Mark, Get Set, Grow: A Guide To Speedy Vegetables

A few pictures from earlier in the week..

 My forsythia bush in from of one of my houses… Always the first one to bloom.  This is how washer sleeps in the warmer months.. All feet in the air.  I ate it all and it was good. Two pretty ladiesVeggies Plants!!!! 

So yeah, I am tired and happy and in need of a day to processing, lounge and drink tons of coffee.

Hope your weekend was fantastic and today brings all the whatever you want and more.

-C

THE LOVELY CRAZY

September 19, 2015 by maximios • Blog

The other day the mister and I started reminiscing about some of our earliest memories of what our parents fed us or what they used to eat when we were growing up. One of the dishes that we both remember eating was the classic creamed beef on toast, or as my mom use to call it, shit on a shingle.   Yup, shit on a shingle. (who ever started calling creamed meat on toast is a freaking genius) I think that as a kid, I liked  the dish just for the mer fact that I could say the word shit and get away with it.  I think my mom liked it for few reasons; she could make a big butt load of it really fast, for a crap load of kids, on the super cheap. And I think that she just really like it.  

Shit on a shingle is one of those foods that I like to call “trash food”, you know stuff like beefaroni or pork and beans. Stuff that we all loved as little kids but might think twice about feeding to anyone now. ( I’ll still feed nick a can of beefaroni.. he likes it) As a throwback to our earliest food memories, (also a lack of food in the house and wanted to make something fast, easy, and cheap.. thanks mom!) I made the mister my rendition of the classic. Creamy Lentils and Mushrooms on toast. Not quite as trashy as creamed beef (lentils, mushrooms and onions are not trashy) but you get the same reminiscing feeling. I guess I could call it something like “stuff on a shingle” or lumps on a shingle”, but what kid (or adult)  would want to eat that. Let’s just stick with shit, it makes it more awesome to eat it.

The shit….. A few mushrooms, a bit of onion, cooked lentils, flour, milk, oil, salt and pepper, and garlic powder. And the shingles.. 2 pieces of thick white country bread. Slice the mushrooms and the onion and toss into a skillet with a drizzle of oil. Cook on medium heat until browned and fragrant..Remove from pan.In the empty pan still on medium heat, add in the olive oil and the flour. Whisky constantly, slowly add in the milk. Keep whisking until sauce thickens. Remove from heat. Add in  salt, pepper, and garlic powder.Add the mushrooms and the lentils into the sauce and give it a good mix. Oh, and don’t forget to  toast up the bread. Now dump that shit all over those shingles! Oh the memories.

If you need to, make it classy by serving it with a cloth napkin and a nice fork and knife. But eat it however you need to. (As kids we like dirty hands and no fork, preferably with a big tall glass of overly sweetened red flavored kool-aid)

Enjoy this fantastic Spring weekend!

-C

 Shit on s Shingle (Creamy Lentils and Mushrooms on Toast)

One serving

  • 1 cup cooked lentils
  • 2- 3 mushrooms
  • 1/2 small onion
  • 1 cup milk (cow, nut, plant… whatever you want)
  • 1 tablespoon olive oil
  • 1 tablespoon flour
  • 1 teaspoon garlic powder
  • salt and pepper
  • 2 pieces of nice thick but soft white sandwich bread

Slice the mushroom and onion and toss into a pan or skillet with a drizzle of oil. Cook on medium heat until brown and fragrant than dump onto a plate. In same skillet, add the oil and the flour and mix with a whisk while slowly adding in the milk. Keep whisking until sauce starts to thicken. Turn heat to simmer and add in the cooked lentils and the sautéd mushrooms and onions. Push down the bread in the toaster.. and when it pops up, dump the shill over it.

I can’t stop eating these. They are like little balls of crack and I am an addict.

Frozen peanut butter grapes… I mean, I just can’t stop.

So you say you have never frozen your grapes? Well you should. It’s the only way I like to eat them anymore.  I was never a huge grape fan, but one day long ago, I discovered the wonder that is the frozen grape and it is amazing, Now whenever grapes are on sale at the grocery store, I buy way to many and end up filling our tiny little freezer with jars and bowls of grapes.  Then whenever the mister goes to grab the bag of  frozen peas for his sore back or knees, there is almost always a frozen grape avalanche. Why I don’t put a lid on those containers is even a mystery to me.  Oh, now I remember.. I want easy access.Oopen the freezer, grab a few grapes, and go on my way… not having a lid to take off makes the process a little easier.

Then one day, the frozen grape game turned into something else, something a little more decadent and even more addicting. Where it came from, I do not know. Maybe it’s some subconscious throwback to a childhood full of peanut butter and grape jelly sandwiches, or maybe it’s just that fact that I think peanut butter can pretty much go with anything. But no matter why, I started dipping those frozen grapes into peanut butter and never looked back. And now when I have grapes, it’s all I want to eat.

I am warning you now, once you start making these, watch out, because before you know it, you will develop a frozen grape addiction too. And littles.. they are as easily  addicted to these as well. I have seen kids that hate grapes go totally bonkers for these.  Just so you know.

The stuff  you will need. Washed and drained fresh grapes (green or red. I usually use red but the green were half the price and the red ones didn’t taste very grapie*) Creamy peanut butter, skewers, and a little bit of cinnamon or cocoa powder (optional)

*Note. When you are the store, try  before you buy. You know what I mean, eat a few while shopping aground. I say this because not all grape are created equal. Some taste way better than others. I have bought grapes before that didn’t taste like anything or that have really tough skins, and those just piss me off, so eating a few will guarantee that your money is being well spent and that the grapes won’t disappoint you.

Ok, so now let’s make these bad boys.

Simple simple. Two grapes per skewer (or toothpick) Lay on a wax paper covered dish or pan and stick them in the freezer until frozen. When the grapes are frozen, melt peanut butter. Take a big glob and stick in a tall skinny cup or bowl and stick in the microwave or heat in a sauce pan and then transfer to a tall skinny vessel.  Take frozen skewed grapes and, one skewer at a time, dip in the peanut butter. Cover with as much or as little of the peanut butter as you want and place on wax paper. If you are feeling feisty, add a sprinkle or cinnamon or even a dash of cocoa powder. Or, this may seem a little crazy, but garlic powder is so F*ing good.(it’s worth at least giving it a try) When all grapes are dipped, place back into freezer for another 10 minutes or so to let the peanut butter set up a bit.

Whenever your ready… Eat. And be so happy. And always keep a back stock of frozen grapes in the freezer. They are the best.

Keep it realz.

-C

Peanut Butter Freezer Grapes

the quantity is up to you, but I recommend making a shit ton!

  • Creamy Peanut butter (I use organic creamy from Trader Joes, or natural skippy)
  • Green or Red Grapes
  • Cinnamon and or cocoa powder (Optional)
  • Toothpicks or skewers

Wash grapes and skewer 2 grapes onto a stick. Place on a flat surface and stick into the freezer until frozen, which usually takes about an hour.

Once grapes are frozen, stick a big glob of peanut butter into a tall skinny vessel (Like a juice cup or a 4 oz ball jar) and warm to a liquid constancy in the microwave (about 30-45 seconds) or if you don’t have a microwave, stick in a sauce pan, warm on stove, and pour into a glass (what I do)

Remove frozen grapes from freezer and dip into melted peanut butter. Place on a wax paper line tray or pan and sprinkle with cinnamon and or cocoa powder, or not, or a few (whatever you want) and stick back into freezer for another 10 minutes.

Eat as many as you want… Make so many because you will become addicted!

First day of Spring!! Well kind of I guess. I think it actually starts at like 6:20 tonight, when the temperature is going to dip back done to 10.(Spring my ass) I don’t know about you people out there but here in Vermont, we are really hanging on to winter. I have to keep telling myself…” It will be warmer soon and you’ll be looking forward to this weather in a few months.. so stop bitching!”  I give myself good pep talks.

Anyway, last week at the farm share pick up, there was a nice little surprise. We got a few pounds of some sweet locally grown and milled whole wheat flour. There was a little sign with the information about the wheat and where it came from, but in my haste of gathering all of my other veggies, I failed to take notes and forgot the name of the farm that it came from. But I do know that my farm traded some celeriac for the wheat.  I was really excited because I am really into the idea of using locally grown grains and I don’t know, it just made me really happy, especially because it was a trade.  Food framing and local sharing is stuff that makes me happy.

I wanted to make something to kind of showcase the hearty, nutty flavor of the wheat and I also wanted to make something that my mister would eat for breakfast. Well what better way to do that then with muffins! Banana coconut whole wheat (that just happen to be vegan) Hearty, fruity, and smells like the word lovely and the color yellow. A few to eat and a few to share. Hanging at home, running away or  getting ready for a day of spring cleaning….This is a great weekend to make muffins! 

The stuff… Light, nutty local whole wheat flour, ripe oh ripe bananas and coconut flakes are the stars in this muffin… But we need the other stuff too. Brown sugar, vanilla, coconut oil and a chia egg.  Baking powder, baking soda, and last but not least, salt.

 Yup, that sounds about right   The salt, baking soda, and baking powder are whisked together. The banana and all the rest of the stuff are mixed up… Then mix the wet mixture into the dry. Stir until combined and then add in the coconut flakes,Scoop mixture  into 12 lined muffin cups… A scoop like mine works very nicely. Don’t have one, well I recommend you get yourself one. Until then, use a spoon. Something I always do when baking any muffin is sprinkle the tops of each muffin with a bit of  sugar or brown sugar. It melts and caramelizes and adds a sweet little crunch to the tops. 

Now stick the muffins into the oven. Remove from oven when they look like this, nice and golden brown. Also good idea to check with a tester stuck into the middle. When it comes out clean, they are done.12 happy little muffins cooling on a rack, waiting to be eaten with you mouth. 

Doesn’t the sight of pretty food make you happy, like sing a song happy? Muffins, whoa yah!!  Friday yah yah!!  Spring…What, Yah!!  Yah…Yah Yah!!!

Terrible I know, but at least you were spared hearing my actual voice. 

Have a great weekend. Do lots of springy stuff!

-C

  • 2 Cups Whole Wheat Flour
  • 4 Ripe bananas
  • 1 Teaspoon Baking Soda
  • 1/2 Teaspoon Baking Powder
  • 1 teaspoon Salt
  • 1 teaspoon Vanilla Extract
  • 3/4 Cup Brown Sugar
  • 1/3 cup melted Coconut Oil
  • 1 Tablespoon Chia Seeds + 3 Tablespoons warm water
  • 1/2 Cup Unsweetened Coconut Flakes

Preheat oven to 350

In a small bowl, mix 3 tablespoons warm water to the chia seeds and let sit for at least 5 minutes (10 is better) In a large bowl, peel and mash the bananas until they turn into a kind of chunky soupy puree.  Add in brown sugar, chia seed mixture, vanilla extract, and the melted coconut oil (make sure it’s melted or it won’t incorporate into the mixture) Mix together. In another bowl, whisk together the flour, baking soda, baking powder and salt. Mix the wet mixture with the dry until combined then mix in the coconut flakes. 

Line a 12 cup muffin tin and fill each cup about 3/4 the way up with batter. Sprinkle each muffin with brown sugar and place in oven on center rack. Bake for 25-30 minutes or until the tops 0f the muffins are golden brown and a tester inserted into the middle comes out clean. 

Remove muffins from tin and let cool.

Serve as is or maybe with a smudge of coconut butter, or anything you want really.

No need for fork, just use you mouth.

I swear I didn’t plan this, but today is officially Pi Day! Pi being the mathematical constant of the ratio of the circumference of a circle to its dimeter (did I say that right?) 3.1415…… And today’s date is 3.14.15.   Whoa…I guess that means that this pie was meant to be. 

But the real reason I made this pie was for a surprise treat for the mister. He left for a couple of days and me being the super assume lady love of his, thought it would be nice for him to come home to his favorite dessert.. plain old rhubarb pie.( I know, I be the best) And it didn’t hurt that when I went to the grocery store, there was a big old pile of fresh, gorgeous rhubarb staring me right in the face, and on sale to boot.

The funniest thing. Me and the mister have been together for a very long time (12+ years….we started dating in high school, so I am not that old!) and I have known that his favorite dessert is plain rhubarb pie for ever. Every time we have one of our food discussions about our favorite foods, (which happens more than it should and usually consists of me running my mouth and him grunting or nodding once in a while) rhubarb pie always comes up. He even talks about the old lady who used to make him rhubarb pie for mowing her lawn. And guess what…  I have never once made him a plain rhubarb pie. Why? Honestly, I have no idea. Maybe I secretly think I was going to screw up his one favorite dessert, or maybe I never quit had enough rhubarb for a pie, or maybe I am really just an awful lady. But for whatever reason, it doesn’t matter anymore because I finally made him a plain rhubarb pie. 

The stuff for the makings of pie… One single pie crust, flour, sugar and rhubarb. I mean, come on, this might be one of the simplest pies ever.  

Note…The first thing the mister said to me when he saw the pie was. “Where is the top crust? My response what “Screw you ass face” but then chuckled. This pie would be great with a top crust, but I was thinking how pretty it would be without it. And honestly, I only made a single crust. What I am saying is.. make a double crust if you want a top.

    The chilled pie crust gets rolled out, placed into a pie plate, trimmed and made all pretty. The bottom is sprinkled with a 1/4 cup of sugar and stuck back into the fridge while the oven preheats  to 350.  Now is a good time to dice the rhubarb into inchish chunks. Once the oven is preheated, remove crust from fridge and add in the diced rhubarb.

   The remaining sugar and flour get mixed together in a bowl  and dump on top of the rhubarb. Give it a tiny toss with you fingers just to get some of the mixture to sink down a little. (Don’t worry, the filling will be perfect when you do it like this) I also cut up the pie crust trimmings and placed on top… not necessary, but looks pretty and is a good use of the scraps.

Now cover the entire pie with tinfoil. Cut and x through the middle and fold foil back to expose the filling but keep the crust covered. (so much easier than trying to squish strips of foil together..you know what I am talking about) 

And then the pie is ready to be baked.

In the oven for 5o minutes with the foil, then 10 or so minutes without to finish.And then you take it from the oven and marvel at the beauty.

I am now truly the best super awesome lady love. I should get a freaking crown but would settle for a stand mixer or blender as a reward instead. 

Important…..Let the pie cool completely (or just about) before cutting.The filling needs a bit of time to set.

Happy Saturday, Happy Weekend, Happy PI Pie Day!!!

-C

Rhubarb Pie

  • Single Pie Crust.. Recipe here
  • 4-5 large Rhubarb Stocks (4 cups chopped)
  • 1 1/4 cups white sugar
  • a hefty 1/3 cup flour

Make you pie crust.. and make sure it’s chilled!

Roll our pie crust and place in pie plate. Trim and make edge all nice and pretty. Add 1/4 cup of sugar to the bottom  and stick back in the fridge to relax while you get the other stuff together.

Preheat oven to 350

Wash and dice rhubarb into inchish chunks. In a bowl, mix together 1 cup of sugar and the flour. Once the oven is preheated, remove crust from fridge and fill crust with the chopped up rhubarb. Now dump the sugar, flour mixture on top, slightly tossing it around with your fingers. Cover entire pie with tin foil and with a knife, cut an x through the middle of the foil. Fold foil back to expose the center of the pie, but keep the crust covered. Stick into oven. Bake for about an hour, removing the tin foil after about 50 minutes. Pie is done when the crust is golden brown and a fork or knife stuck into the middle of pie comes out with a thick jam like sauciness.

Let pie cool and set for a bit.

Slice. Serve on a plate with an eating utensil and maybe a scoop of vanilla bean ice cream.  Lick plate clean.

One of the best things about winter is that I can have something in the oven at any time and not worry about how hot the house is going to get.  I get to spend my free time (or my in between free minutes) baking up all the thing that I would not dare bake in the summer. (lots of bread and cakes) Yeah, I might complain a little about how cold it is outside (to my defense, -20 is kind of a bitch) but then I think of the super hot humid days that come during the summer and cringe.  At least when its cold out I am able to get warm, (que oven)  but when its super hot and humid, I just turn into something that border lines a wet towel and the rabbit animal… Not so pleasant.   I much prefer cooler weather. So no big surprise….I made bread.. or focaccia to be exact. And now you should too because first off, you want to eat it, and secondly, you can probably whip this up faster then it would take to get all of you winter warmies on and leave the house. Don’t leave, just turn the oven on.  The stuff, which isn’t a whole lot… Flour and salt.  A mixture of honey, water, and yeast. And olive oil. Its pretty much my pizza dough recipe, tweaked with the addition of oil, less flour and no kneading.  Mix together the wet and dry…I used my nifty dough whisk, but a wooden spoon or even your hand works. Mix mix mix. The dough should  be really slack and sticky.  And guess what.. no need to knead! Just make sure the dough is uniformly incorporated…hehe.. uniformly incorporated… sounds weird.         Drizzle the dough (don’t worry about making it into a ball, a blob is good) with a little oil and place in a nice warm place topped with a towel to rise for about an hour or until dough has doubled in size. Once is has fully risen, drizzle 2 tablespoons oil in two 9 inch cake pans.  Divide dough in half, and kind of smoosh dough into pans. Cover and let rise for another 20 minutes or so. When dough has finished its second rise, drizzle each  with another tablespoon of oil and with your fingers, fill out the pan and indent the dough, kind of like playing a piano or tickling a puppy(?)….Then layer your toppings (if you want any)  Start with any herbs, then the veggies. Then last, any cheese you got. I used thyme, cracked black pepper, tomato, onion, topped with parmesan cheese. And the other one is just plain old salt.  Pulled from the oven when nice and golden brown..set on a wire rack to cool for a few minute and removed from the pans. The mister was practically salivating waiting for a slice… and he was so not disappointed. Crispy outside with soft airy insides… Everything a perfect focaccia should be. The one with the toppings was the favorite for the first night, but for a peanut butter and cheese panini for lunch the next day…plain is the way to go.. My suggestion, do what I did, jazz one up and leave one plain. And then make more if you need too because the forecast call for another week of below zero!!! Oh the things that I’ll get to make! (me being positive) Stay warm! -C

Focaccia with out without stuff

  • 3 cups all-purpose flour 
  • 1 tablespoon salt plus 2 teaspoons for topping (can use more or less if you want)
  • 2 teaspoons active yeast (or one package)
  • 1 1/2 cups warm water
  • 1 tablespoon honey (or sugar if vegan)
  • 6 tablespoons olive oil

Optional toppings

  • Fresh cracked pepper
  • Thyme or any other spices
  • Thinly sliced tomato
  • Thinly sliced onion 
  • Parmesan Cheese 
  • Anything you want!

In a bowl or jar, mix honey (or sugar), yeast and warm water together and let sit for about 5 minutes or until yeast is activated and starts to foam In a large bowl, whisk together flour and 1 tablespoon of salt. With either a wooden spoon, dough whisk, or if you have one, a stand mixer with a dough hook, mix the yeast mixture with the flour. The dough is going to be really sticky so mixing might get a little gloppy, but keep at it until everything is full incorporated.. for about 3-5 minutes and don’t be afraid to use your hand… you can wash it off.  Once mixed drizzle with oil and cover with a towel. Let rise for about an hour or until dough has dubbed in size. When dough has double, coat two 8 or 9 inch cake pans each with 2 tablespoons olive oil. Dump dough onto floured surface and cut in half. Take each half a place in pan. cover and let rise again for another 20ish minutes. preheat over to 400 degrees After second rise, lightly take your fingers and push down dough, making little indents all over the surface. Drizzle each with another tablespoon of olive oil and sprinkle each with a teaspoon of salt. If using spices or any other toppings, nows the time to layer them on. And do any cheese last! Place in oven and bake for about 30 minutes or until the tops are golden brown. When done, place on a wire rack and let cool a bit before removing  from pans. Done!!  To store, place in a paper bag.. best eaten within a few days!

So the mister wants to know…”Why would anyone ever buy those crappy english muffins from the store when they could be eating these?”

Good question…And we will all answer….”Never again! Because I now make the sickest E.M.s around.!”(E.M.s is the cool short way to say english muffins and now that you are going to make your own….man, your so cool!)

These E.M.s are perfect. Easy to make, not overly fussy, and you end up with a super yummy, extremely versatile, individually portion super sweet little disk of bread. And the best part is..nooks and crannies! I think that is why I decided to make these E.M.s,  so Nick and I can talk the about nooks and crannies…(Sometimes we need light conversation)


We start with flour and salt whisked together in a bowl. The honey, yeast and warm water are getting on proofing in a jar. An egg waiting to be cracked, some milk, and 2 tablespoons of butter. All this good stuff equals…nooks and crannies!

Oh you like my nifty dough whisk….me too, I use it all the time. Maybe I should have a dough whisk give away  ……maybe…..

Everything all mixed together, dumped onto a floured surface and kneaded for 10 minutes by hand…..If you have a stand mixer, you can use it if you want, but you are missing out on the fun of doing it by hand….

When the dough has been sufficiently kneaded, gather dough into a nice ball, coat with a little oil and place back into bowl. Cover with a towel and stick in a warm place to rise for about an hour or until it has doubled in size.

When dough has doubled, punch down and plop out onto floured surface. Dust the bottom of a griddle or in my case, two cast iron pans, with corn meal. Divide dough into 8-10 equal balls and smash into 2 inch thick disks. 

Place on griddle or pans and sprinkle more corn meal on top of each E.M. Cover and let rise for another 15 minute. 

Now the E.M.s  have rested, turn the griddle (or pans) on to low heat. Once your griddle (or pans) gets hot, continue to cook that side for another 7-10 minutes, or until golden brown. Flip and cook other side for 10-12 minutes or until golden brown. Once browned, check for doneness with a thermometer. The inside should reach 200 degrees.( if you don’t have a thermometer, fork split one open and check…. you are going to eat it anyway) If the outside cooked faster then the inside, no worries, just pop them into the oven at 350 for 8-10 minutes. I had to pop mine into the oven for to cook completely.

 Remove form griddle, let cool a bit, and ……Fresh, fluffy fat, fantastic….Everything and more that a real english muffin should be. Split open with a fork and……. the nooks and crannies! So spot on.  Serve with anything your heart desires…I served these with whipped honey butter…. and eat the only kind of E.M. you will ever again eat. Grocery store english muffins be damned!

Enjoy and Happy Tuesday!

-C

English Muffins

Ingredients

  • 2 1/2  cups unbleached all-purpose flour
  • 2 teaspoons honey
  • 1 teaspoon salt
  • 2 tablespoon butter at room temperature
  • 1 1/4 teaspoons active dry yeast
  • 1/4 cup warm water
  • 3/4 cup milk
  • 1 egg
  • cornmeal for pan

Combine warm water, honey and yeast in a bowl to active..about 5-10 minutes or until yeast is foamy.

In a separate bowl, whisk together flour and salt. Mix in butter(I use my fingers) When yeast mixture is done proofing, whisk together mixture with the egg and milk. Add wet  to dry and mix until just incorporated  Dump out onto floured surface and knead dough for 8 minutes, adding a bit of flour whenever dough starts to get too sticky.  Roll into a ball, coat with oil and place back into bowl and cover with a towel. Let rise for 60 minutes or until sought has doubled in size.

Once the first rise is done, deflate dough and divide into 8 equal pieces(10 for a slightly smaller muffin).  Smoosh each ball into a flat disk, about 2 inches thick) and place on a cold cornmeal dusted cast iron griddle. (I used 2 cast iron pans) Sprinkle tops of muffins with more corn meal and let dough rest for another 15 minted.  Turn burners on low heat. Let griddle get hot and continue to cook the muffins for another 10 minutes or until golden brown. Flip and cook opposite side until gold brown and remove from griddle. To make sure the muffins are cooked completely, stick an instant read thermometer into the center…it should read 200 degrees. (if you don’t have a thermometer, split one open… the tester E.M.)  If the E.M.s are not completely cook, just stick in the oven on 350 for 5-10 minutes or until cooked throughout.

Remove and let cool.  To serve, split open with a fork and give a light toast. Spread with butter, jam, peanuts butter, anything you want…maybe  make E.M pizzas! 

The perfect way to start your day. APPLES, PEARS, CARROTS, tossed in Cinnamon!  Whats that you say? You don’t think carrot and fruit go together, that this couldn’t possible taste right… Well guess what,  you are wrong. Yes, it may seem like a strange combination, but trust me, it works and it works so so good. This is what I eat almost every day for breakfast. And man oh man, with a cup of hot coffee and a  good book,  I welcome 5am. Note that this can be eaten throughout the day. Its even a fantastic night time snack!

To compile this bowl of yum, all you have to do is chop up an apple, a pear, and a carrot and toss in a bowl with cinnamon to taste. I use Vietnamese cinnamon which has a spicier flavor to it, but plan old cinnamon works too. You could even try adding a pinch of ginger or nutmeg. Heck, drizzle a bit of honey if your feeling it. I also suggest using your favorite bowl, fork, and if your drinking something, your favorite mug. When your dishes and utensils are right, it just makes your food that much better.

Monday Monday!!!! Try to enjoy it!

THE LOVELY CRAZY

September 19, 2015 by maximios • Blog

I am kind of obsessed with  pickled jalapeños… like I want to eat a whole jar with a fork and then drink the juice. So much hot and spicy love.  One of my sisters is the same way, pickled  hot pepper obsessed. We used to buy the humongo gallon sized jars of jalapeños at Costco and go through them in like a month. But sadly, Costco stopped selling those humongous jars and we have been left buying the itty bitty jars that actually fit in a normal fridge. (I know, so sad).  And maybe because the jars were normal sized and I was more aware that I shouldn’t eat a of cup of jalapeños at one sitting, or just the mire fact that a tiny jar cost the same as a gallon, but the store bought little jars weren’t doing it for me anymore.  And then fate happened. The grocery store was having a super sale on fresh jalapeños and  I figured it was time to make make my own. Now I don’t think I can ever go back to those store bought jars of blah  because the ones I made are the best freaking pickled jalapeños this girl has ever eaten.  I might even start making my own gallon sized jars!!!!

Note….Don’t toss the pickled juice! It is a super yummy, full of flavor, liquid gold. You can use it as a straight up salad dressing or add to a homemade dressing. Add juice to soups, casseroles, marinades. Replace some of the liquid in a bread recipe and use the pickled juice. Use it in your favorite cocktail drinks. There is no end to what you can use the juice for. 

-C

Pickled Jalapeños

for a half pint jar

  • 8-10 Jalapeños 
  • Apple cider Vinegar
  • 1 teaspoon salt

Remove stem and seeds*of  jalapeños and thinly slice. (I used a mandolin which works really well, but a sharp knife does the trick) Pack Jalapeños into a clean glass half pint jar and fill with half water/half apple cider vinegar and a teaspoon of salt. Dump  into a pot  with a lid, and bring to a boil. Take of heat and let cool for a few minutes. Stick back into jar (leave an inch of head room) Stick in fridge for at least a day. Eat your heart out.

*I like to keep some of the seeds. It adds heat.

Mustard and carrots.  It’s that simple.

Yup, I eat this at least once a day. It’s that good (and easy).  Now I must admit that I don’t usually have such pretty carrots (The mister gave me this rainbow of carrots for my birthday) and I usually don’t chop the carrots oh so nicely or have a little vessel of mustard, but I figured for the sake of a picture, you would rather see this then a picture of me standing with the fridge open, chomping on a huge unpeeled carrot, squirting mustard directly in my mouth. (that’s how I usually eat most of my snacks)

Today I kept it simple with plain yellow mustard,  but I sometimes spice it up with horseradish or jalapeno mustard. Or once in a while I’ll do mustard and sprinkle on (or in my mouth) some nutritional yeast, garlic powder or even red pepper flakes for a little kick. The possibilities of mustard on carrots it endless.

You might be saying to yourself that this is crazy, but really, is it any weirder then some of the things that you eat that others find kind of strange? So maybe just try it.  I promise, you won’t be disappointed.

Happy Monday!

-C

CHILI MONDAY!Well it is, but I am talking about making some super duper, yes I’ll have seconds, tummy filling, bone warming, pumpkin chili.. And heathy oh so healthy to boot. Reals, it’s the best.

This pumpkin chili recipe had evolved over the years. The first time I made pumpkin chili was for my very first dinner party that I  threw back in college.  Instead of cutting the pumpkin and adding it into the chili, I chopped the little pumpkins in half, roasted them, and used the halves as bowls..A good idea except no one at the pumpkin and I was left with a bunch of slobbered on roasted pumpkin halves. ( I probably should have said something, but being a few drinks in, I didn’t think to say anything about the edible bowls and I don’t think I noticed the abandoned pumpkins until the next morning). After that somewhat failed attempt, I started adding the pumpkin to the chili and left the drinking tip after the food is served. ( I learned so much in college)

But yeah, this recipe has traveled a few years with me and every time I make it, I always think, jeez, why don’t I make this every weekend.  Well maybe now I will.

Don’t let this spread scare you.. it’s just veggies from the fridge, a chopped up pie pumpkin and pre soaked beans. Oh and some canned tomato and spices. It took about 10 minutes of hands on time and one big pot. No big mess to clean up and you can get rid of those veggies in the fridge that are on the way out. WIN WIN WIN!

All the chopped veggies, the chopped pumpkin go into the pot with salt. pepper , and spices.( I added a fresh jalapeno and about 5 cloves of garlic to this mixture) Let the mixture sweat for about 5 minutes, giving it a  quick stir or two.

Now toss in the beans and the tomatoes… Add a cans worth of water as well. Bring to a boil, then turn to low heat and cover.

A last minute addition.. I added a few chopped up kale leaves. I wanted a little more bright color and adding kale to anything is a good idea.

I added a little sliced avocado to one of the bowls (I only had enough for one) and cut up some lime wedges to squeeze on top. (I did, Nick didn’t) 

Best chili I have made in a long time…and yes, there is a bunch of left over which is fantastic because now I have lunch for the next couple days… 

HOORAY FOR FOOD!!!

Have a good Monday!

-C

  •  small sugar pie pumpkin
  • 2 cups dried beans..I used a 1 1/2 cups black and 1/2 cup kidney or 2 cans of beans
  • 28 oz can of crushed or diced tomatoes
  • 1 small onion
  • 1 small
  • 1 carrot
  • 1 /4 head of cabbage
  • a small broccoli crown
  • 1/4 head of cauliflower
  • a few kale leaves
  • 1 jalapeño 
  • 5 cloves garlic
  • 2 tablespoons chili powder
  • 2 tablespoons cumin
  • 1 tablespoon coriander
  • salt and pepper

Either the night before or morning of, presoak dried beans..(beans in pot with about 4 cups water and a sprinkle of salt)

Take pumpkin and slice in half, de-seed and chop flesh into little chunks. (You can peel it if you want, but really, there is no reason to) Rough chop all the veggies (minus the kale) and stick into a large pot with the pumpkin. Pot on medium heat.. let the veggies sweat for about five minutes.  Now add the garlic and the spices and let cook for a few more minutes.

When the mixture starts to become fragrant… drain, rinse and add presoaked (or canned) beans. Then the tomatoes, and 1 1/2 cans worth of water. 

Bring chili to a boil then cover and reduce heat to low. Let cook for about an hour, giving it a stir every now and then………

Add in chopped kale a few minutes before serving

Serve in a bowl and top with sliced lime, avocado, a sprinkle of cheese….Whatever you want. 

What we got here is an easy one pan meal for the beginning of a hectic(but fun) holiday week . But I am sure that you  have your wits about you, that you are not feeling like a stretch Armstrong doll. No, you are all calm and collected… Well that’s nice because I feel like my head going to explode. So what I need this week is easy,  fast food  with lots of healthy good stuff and maybe to get rid of the meatballs that are in the freezer….. Mission accomplished with this dish. It’s basically a hug pan of veggies with a few left over meatballs from Nicks bday dinner and a little cottage cheese.  Nothing fancy… hearty and warm..Nick likes it so it’s a winner. 

The spaghetti squash is the main component in this dish so if you want to use other veggies, go for it. You can make this vegan and leave out the cheese and use fake balls or no balls at all (hehe)  You can even toss in some beans, lentils, or tofu. I make variations of this dish often… and lentils are a really good addition..

Besides the squash and the meatballs, I used mushroom, onion, kale, tomato and garlic  plus about a half cup of cottage cheese, cause that was what I had in the fridge. 

First thing first, cook the squash.  Just stick it in the oven for half hour at 425.. Once you can stick a fork into it, pull it out and let it cool enough to handle.. While thats cooling off, cook down the veggies. Started with a little oil in a cast iron skillet on medium heat, toss the onion and mushrooms ands frozen meatballs*(or whatever you want to use) and heat  until meatballs are cook through and the onion and mushroom are browned. Now add the garlic, kale and tomato, Turn heat off.  When the squash is cooled enough to handle,. slice open, scoop out the seeds and scoop the flash out. Spaghetti squash and cottage cheese into the skillet and toss.. Sprinkled a bit of mozzarella or parmesan cheese on top.  Lots of crushed black pepper and into the oven for about 15 minutes. or until the cheese is nice and melty and you are hungry and want to eat. 

*Note. If you want to make meatballs fresh, my recommendation would be to make them in the skillet first and then just toss all the veggies into that pan to cook down… No need to make more dishes. 

Pulled straight from the oven….Served nice and hot, placed right onto my wooded counter. I need to stop placing hot pans on the wood, I am leaving burn marks. There is actually a lot of thing that I need to stop doing in the kitchen, like setting towels on fire, burning myself at least once a day, slicing my fingers,.breaking dishes…….So maybe place skillet on a trivet of  some kind and serve it up!

So easy and fast.. Served with a piece of crusty bread… Man, I wish everything this week could be this fast sans easy….. but I am not complaining. 

Have a good Monday!

Spaghetti Squash and Meatballs

  • 1 small Spaghetti Squash
  • 5-7 pre cooked meatballs
  • Small red onion
  • 2 -3 big mushrooms
  • 1 small tomato
  • a few kale leaves
  • 3-5 cloves garlic(or as many as you like)
  • half a cup of cottage cheese
  • a handful of shredded parmesan or mozzarella
  • salt and pepper
  • oil (for pan)

Preheat oven to 425

Place spaghetti squash in oven. Let bake for about a half hour or until fork tender. Remove and let cool enough to handle.

While that’s happening, chop the veggies into any size you want.. Drizzle olive oil in medium skillet and place diced sliced mushrooms, onion, and pre made meatball to brown. Once meatballs are warmed through, add the kale, garlic, tomato, and cottage cheese. Take the cooked spaghetti squash and remove seeds and scoop flesh into the skillet. Toss everything together, sprinkle with salt pepper, top with shredded cheese and place in oven for 15 minutes

Take it out of the oven and let cool. for a minutes and……

EAT!

Sometimes, no matter whats going on with the week, Monday seems like, well, like a Monday. I drag a little on Mondays. I think it stems from the Monday through Friday school week that was beaten into me for 16 plus years. Hate Mondays, Love Fridays.. Yup, I blame the public educational system(I have to blame someone) I want my day back. I don’t want to feel the drag today. I am going to have a fantastic day.  I’m getting excited, pumped up and ready for the week. I am turning my Mondays into fun days. Funday Monday…Yes, yes I did just say that. .  See, don’t we all feel better already?
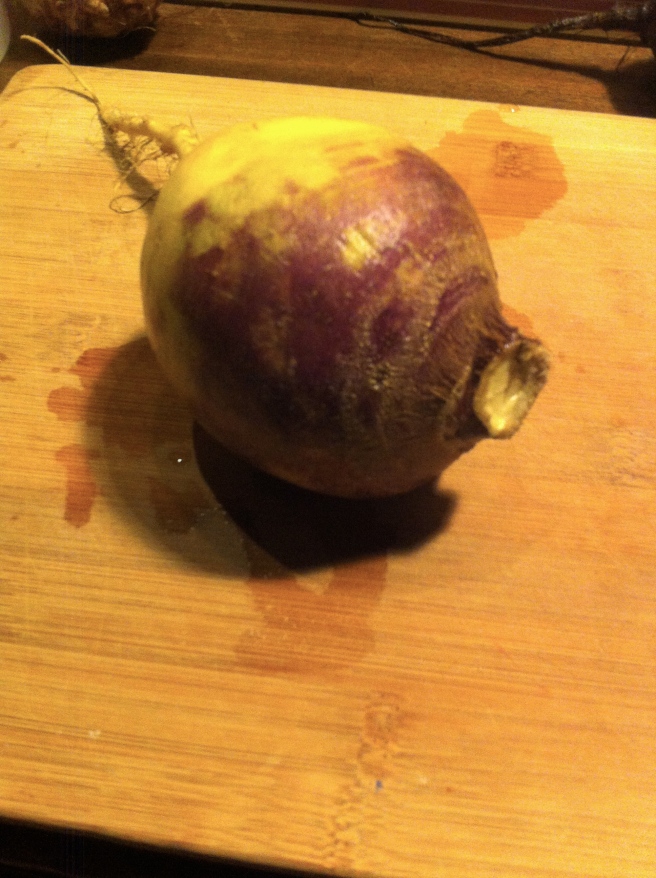
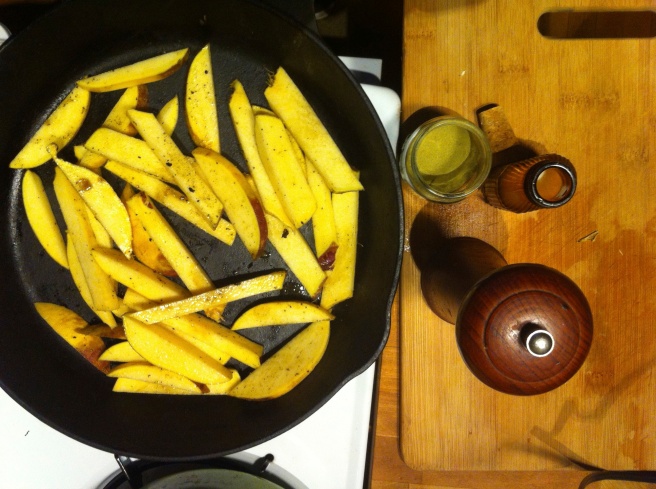
On this Funday, I don’t want to worry all day what I am going to make for dinner, I just want something tasty and easy. .Whats better than a plate of fries?……. a plate of roasted rutabaga fries! Yes! See, we are already having a great day. A plate of fries, easy, delicious and nutritious. Not a bad start to the week. You can eat them with  just about anything, a grilled cheese tomato and avocado sandwich, a bowl of curried lentil soup..or just straight up eat a big old pile of these roasted rutafries (That a word, I swear) Just have fun with it. Its funday Monday after all.

One large rutabaga… This one fed 2 as a side… but if your eating just the fries, eat a whole one to your face. It’s totally cool.Chop the rutabaga into fries and toss with a smidge of oil, salt, pepper and ground up rosemary. Don’t like the rosemary… don’t use it. Maybe try something else like sage or garlic and onion powder or curry powder. Just use whatever you like. Throw into a 425 degree oven for 20 minutes, give them a flip and back in for another 15, Simple. Easy.
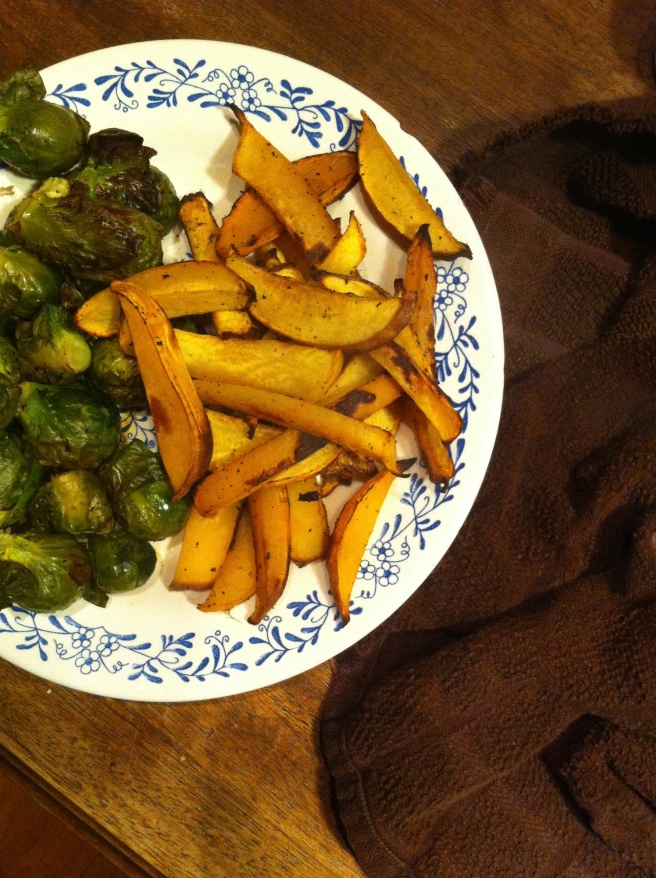
Remove from oven when crisped to your liking and eat.

Yes, this was a dinner of rutafries and brussel sprouts, is that a problem? I don’t think so .A suggestion, .dip in mustard….its fantastic, but go the ketchup route if that s your fancy.

Alright people..Have a great day and remember to not let today be a drag of a Monday, make it fun, looking forward to a  plate of rutafries for dinner and think of how great the rest of the week is going to be!( I might have been a motivational speaker in a past life)

FUNDAY MONDAY!!!!!

THE LOVELY CRAZY

September 19, 2015 by maximios • Blog

Last week pineapples were on sale everywhere……So I bought 5. Don’t judge 

And I bet I am not the only one that got overly excited at $1.50 pineapple and bough themselves a few. We will just call ourselves opportunists.  Now we have plenty of pineapples and don’t have to pay  the $4 a piece prices. (Justification)  

But if you don’t have a pineapple laying around, you must go get one. (Maybe if your lucky, there might still be some sales going on) because you must make this salad. I am on a mission to make everyone I know eat it because, for lake of a better way to say it…….It will rock your world.

Dill and pineapple are a serious match made in heaven. Pineapple, with its sweet, tangy, citrusness  and dill with it’s super fresh earthiness. Mixed together with a few other helpers to create a fresh, clean, chunky, tangy, over the top, flavor. I could stop right there, but toss in a handful of lentils, some creamy avocado and a bed of kale…It’s like the best spring time, celebration on you tongue, happiness in you tummy, kind of salad.

A salad that will make you smile. (and maybe buy  5 pineapples) 

 Stuff for the goodness. We got the kale, some avocado because all salads should have avocado and some cooked lentils because, well, all salads should have lentils (or beans or nuts.. so you could totally something else) Then a few sprigs of fresh dill, a clove of garlic, red wine vinegar, salt and a bowl of chunked up pineapple. The pineapple, dill, garlic, red wine vinegar, a splash of water and a pinch of salt get blended in a blender or whatever blending device you use. Go as smooth or chunky as you like, I recommend going smooth, but leaving a little chunk, like half blended.

The prep is done, now compile.  Kale in bowl, top with lentils,. Toss on avocado chunks, and, last but not least, the blended pineapple dill mixture.So good……So so good.

Happy Friday!!

-C

Serves Two

  • 3 cups washed and chopped Kale
  • 1/2 a avocado, diced
  • 1 cup fresh pineapple chunks
  • 1-2 springs fresh dill
  • 1 tablespoon Red Wine Vinegar
  • Salt 
  • 1/2 cup cooked lentils (or any bean or nut will do)

Note. No fresh dill? You can use dried, just sub in 1 teaspoon for the fresh and after blending with the pineapple, let sit a little longer to really let the flavors meld together. 

Place pineapple, dill, pinch of salt, vinegar and garlic into a blender or whatever you own that blends and blend stuff together, leaving it a little chunky. Let sit for 5-10 minutes.

Kale goes into a bowl and add the lentils and diced avocado. Pour the blended pineapple on. Toss around. 

Now eat.

THE LOVELY CRAZY

September 19, 2015 by maximios • Blog

There is corn everywhere!!

This past weekend, the mr and I were out and about in the sticks of Vermont and got an eyeful of this very familiar sight of corn fields forever. It’s just part of the landscape.. Blue sky, big lush mountains, little rives and big fields of corn. It is ever so lovely… and so telling. Tall high corn fields just means  two things. 1.We will be eating lots of corn, and, 2. the summer is winding down. So soon we will be talking apples and root veggies, but until then, we will just eat the corn and revel in what I consider one of the best and most beautiful times of the year here in Vermont.

And after seeing all the corn (and we have been getting a bunch in the farmshare) I realized that I need to step up my corn game.

What better why to fancy up some corn then to fancy up the stuff people like to smother on it…. butter. 

Whenever I think about butter, I think about my sister, the one that, as a little kid, used  sneak to the kitchen and eat whole sticks of butter. This (to me) just seemed like a pretty gross option for a snack, but you know, whatever floats your boat I guess.

Bur after making making this coconut butter, I can see the draw, for I would sure love to eat the entire contents of a jar of this butter. (I have been eating a spoonful here and there)

Lime cilantro coconut butter.. Its my new thing…corn or not.

The stuff. We have some lovely, super fresh from the farm, corn on the cob. Then for the coconut butter we have , unsweetended coconut flakes, a lime, som ecilantro and salt.

Dump coconut flakes into a food processor. Turn to on and let it go.

After about 7 minutes… you coconut will start to clump together and look like this. And maybe you are like, “this shit isn’t going to happen”.. well be patent. Scrap the coconut off the sides and keep the processor going.. scraping down the sides whenever you need to. 

And eventually, after another 8-10 minutes,  it will turn into this.. a nice creamy buttery butter. 

Now add in the zest of the lime, the lime juice, a pinch of salt,  and cilantro into the butter. Turn processor back on until combined.

And you got yourself some freak yeah cilantro lime coconut butter… ready to smother your corn with. 

This amount is good for 6-8 corn cobs… Any extra is excitlent on any veggies, bread, cake, or spoon.

And stick that butter in a jar.

I dare you not to eat a spoonful right now. (I licked the bowl down clean)

 So I hope I am not being presumptuous when I think that you know how to cook corn. Or maybe you have a specific way you like to cook your corn. But just in case,  husk corn and stick either in a pot and boil until cooked,(about 8-10 minutes)  or like me, char on the grill, or under the broiler. 

So cook some corn….And smother it with the butter.

And there you have it, some freak yeah amazing lime cilantro coconut butter smothered on some corn.

So good…..so good.

Have a great day!

-C

  • 1 1/2 cups dried unsweetened coconut flakes
  • 1 lime
  • 1/2 bunch of fresh cilantro (about a 1/4 cup chopped)
  • salt
  • 1 tablespoon coconut oil (optional)
  • freshly cooked corn on the cob 

Note. Any extra butter is good on anything and everyhitng!!!

Place coconut into a food prosser and turn to on. Prosse until coconut start to stick to sides. Stop, scrap down bowl, then conuitne to process. Repet this until the coconut has turned into a creamy buttery goodness.  

Add the juice, the zest, a pinch of salt, and the cilantro to the butter. Pulse until combined. If you want to add in a little coconut oil here to make it a little smoother, go for it. 

Scoop into a jar. When your corn is hot and ready, smother butter all over.

And eat. There swill be stuff stuck in your teeth..Don’t worry about it. Think of it as a snack for later.

THE LOVELY CRAZY

September 19, 2015 by maximios • Blog

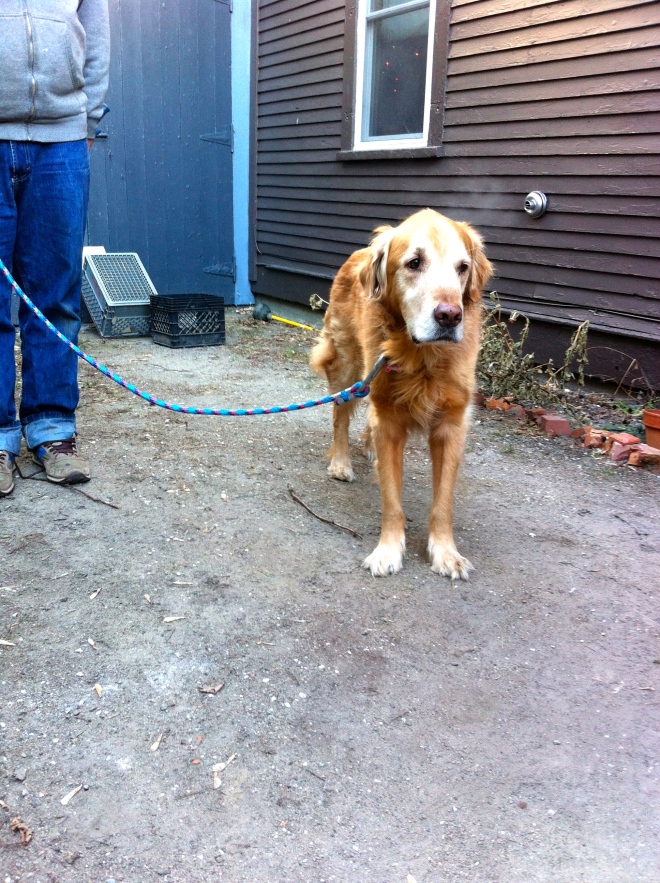
Look at that old man face…. how can anyone stay mad at him? (there was a recent incident involving bananas, you can read about it in the last post.)
Before we get started on the leash, I’ll give you a little background about Washer the trash dog. A little over 9 years ago,  Nick brought home this 8 week old little ball of fur for us as a Christmas present. Oh man, he was so so so freaking cute, but that didn’t stop me from crying… Why you ask? Because I didn’t want a golden retriever, we never talked about getting a golden, we talked about getting a husky or a german shepherd. And so I cried.(I was so pissed) But it didn’t last long. A few hours after he was home, I fell in love and we have been a little family ever since. Mind you that the first two years of his life, he was a terrible beast of a dog. Nick and I were really young and neither of us had ever had a puppy before so we kind of let him do whatever he wanted…..not a great idea. He was a shit.  He would eat everything  and anything. Seriously anything; book shelves, linoleum floors, windowsills.. You name it, he ate it. He also started to act a little jerky, growling at little people and getting aggressive around food which ended with us having to hand feed him for about 8 months. But eventually he grew out of his eating parts of the house, now he just eats anything food or trash .He doesn’t mind little people so much anymore just as long as they don’t try to play with him, and he now sits in front of his food bowl leaving great big puddles of drool until he is told he is allowed to eat. Oh how he has grown

One question that people always ask us is,”Where did that name Washer come from?” Truth is, it was kind of joke. We had had him for a few days and  hadn’t named him by the time we went to my Dads house on Christmas. Sitting around with my family, we came up with all sorts of stupid and inappropriate names. At one point appliances were named off and I guess the name Washer just kind of stuck out. We had planned on changing it right away, but as you can see, we still haven’t gotten around to that.

Anyway,  Washer has had the same leash for about 7 years. (His first 2 years he ate a few) That’s   a long time for a leash, especially if you think of all the times that it has been dragged through the mud, pulled into the lake, or my favorite, peed on. Yup, his current  leash is ripe and it’s about time we  made the old man a new one.(Ok, its more for us, but he seriously has been peeing on it a lot lately and I am not a fan of handling a pee soaked leash)

1 custom sized leash. Super simple and cheapy cheap.

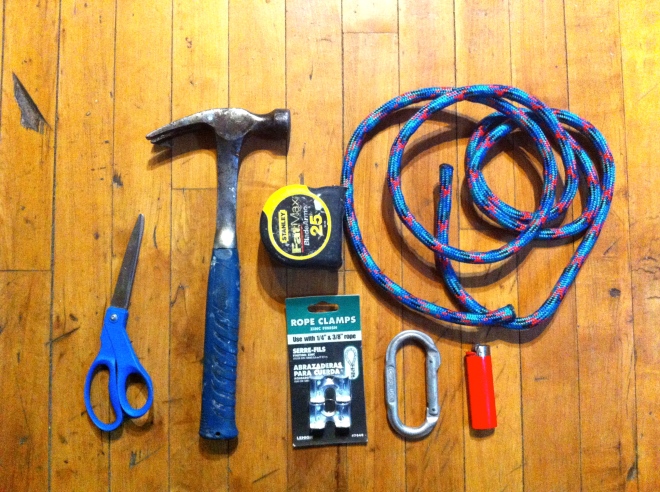
What you will need is….

  • 6-7 feet of 3/8 rope(or however long you want it)
  • two 3/8 inch rope clamps(1 package comes with 2)
  • carabiner
  • scissors
  • hammer
  • lighter
  • measuring tape if you want exact measurements(it’s not necessary)

Note: You can get the rope, clamps and the carabiner at any hardware store, but I think the big ones like Home Depot or Lowes sell rope by the foot so you don’t have to buy a 50 ft piece…unless you want it. 


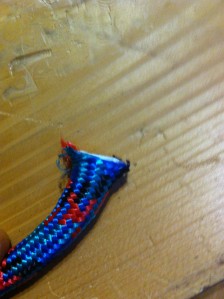
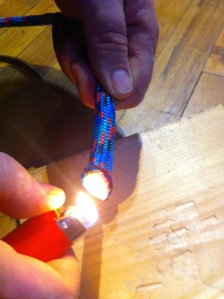
First thing.Trim the ends of the rope nice and clean. Take the lighter and melt the nylon around the end of the rope so it will stop it from fraying…BE CAREFUL….And do it over the sink or somewhere with water…It’s not hard to do, I just don’t want anyone to burn themselves or the burn their house down.(not that I think you are going to)


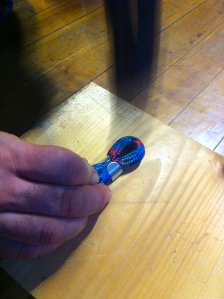
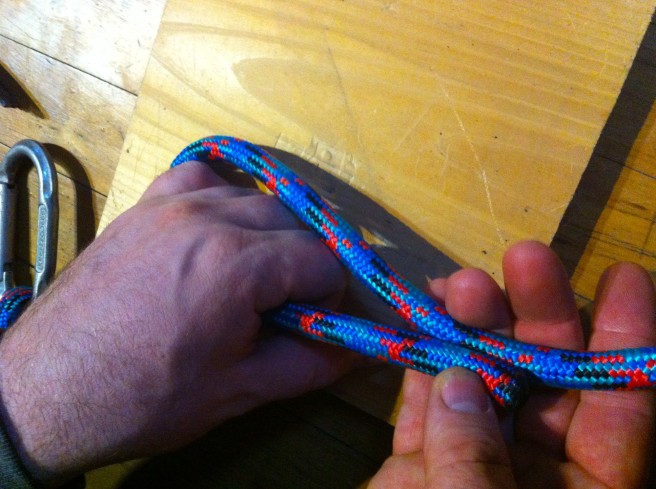
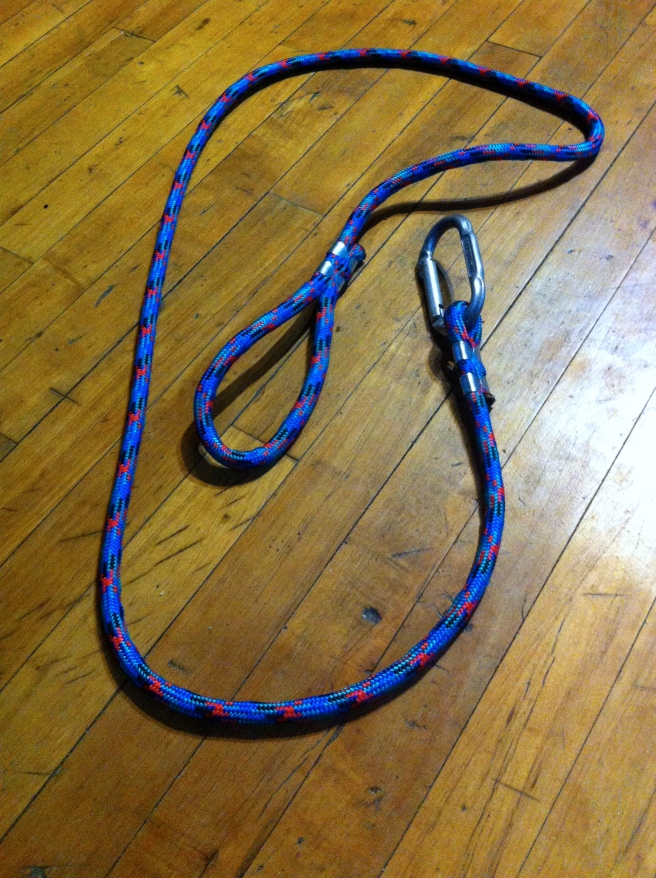
Once the nylon is melted and no longer hot…Make a small loop and place rope into rope clamp. Make sure to leave the loop big enough for the carabiner to fit. Now hammer the clamp around the rope, I mean, really smack that thing  We used a scrap piece of wood to hammer on… and I suggest you do the same.

For the handle, make a large loop, whatever size that works for you, and do the same hammer clamp situation on the ends here.

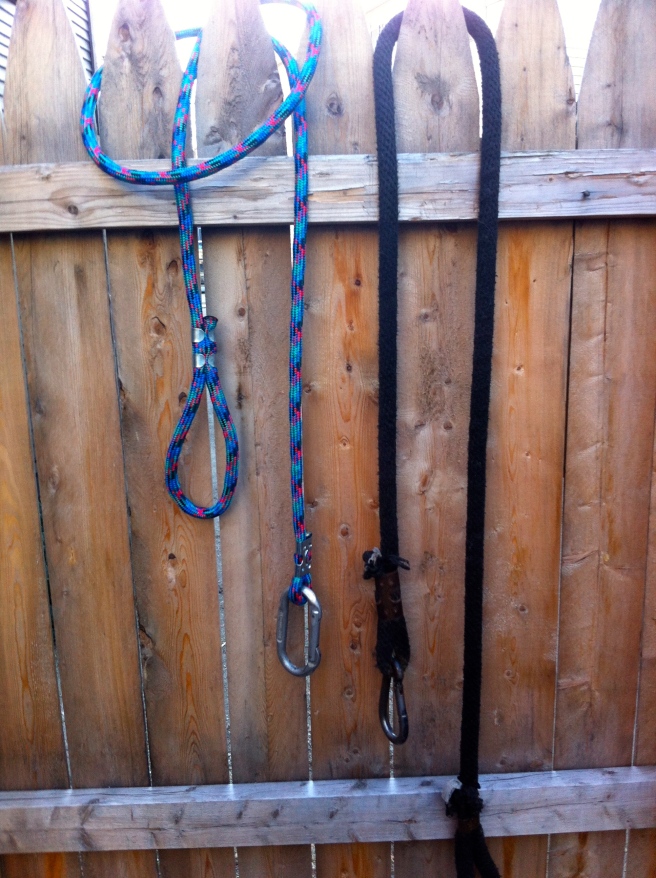
Pretty freaking simple….Thats it, you are done and now you have an awesome customized and pee free leash.

New and old. Hopefully he won’t pee on this one for a while.

Have a great weekend and l would love to hear from anyone that makes themselves a sweet ass new leash!

Have a great weekend!

-C

THE LOVELY CRAZY

September 19, 2015 by maximios • Blog

What a week. It was my birthday, which if you know me, is not usually something I like to talk about. I’m not sure exactly why, but I am not really big on celebrating my own birthday. Or its more like I hide away from everyone around my birthday.  ( I am not good with attention) But this year I tried. I had a couple little dinners with family, went on a few good hikes, gave the dog a bath (had to mention it because it was so needed and I was so happy to have a cleaner, less smelly dog..which lasted all of about 12 hours)  and tried to relax and enjoy myself. The mister and I also did a bunch of little house repair projects that have been needed to be done (Birthday wish list). All and all, I had a good week. And now the birthday week is over and we can get back to normal, not bugging me, hectic, crazy, life. That makes me happy. Here are a few of my happy bits from the big week.

 A birthday bouquet of veggies. My lover knows me oh so well.

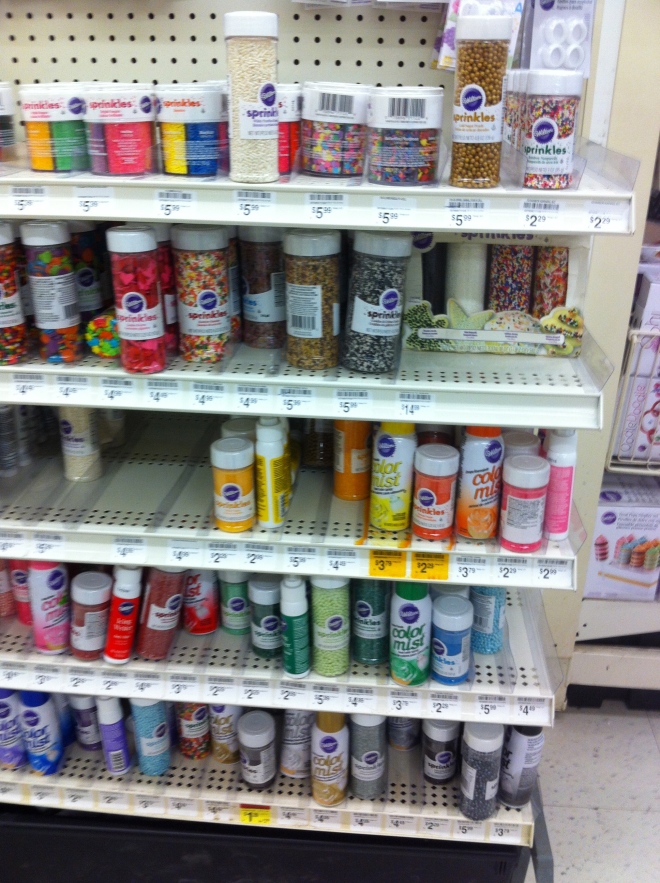
I went to get myself a new skien if yarn and stumbled upon this wall display of sprinkles.. It took a lot to not buy a bunch.

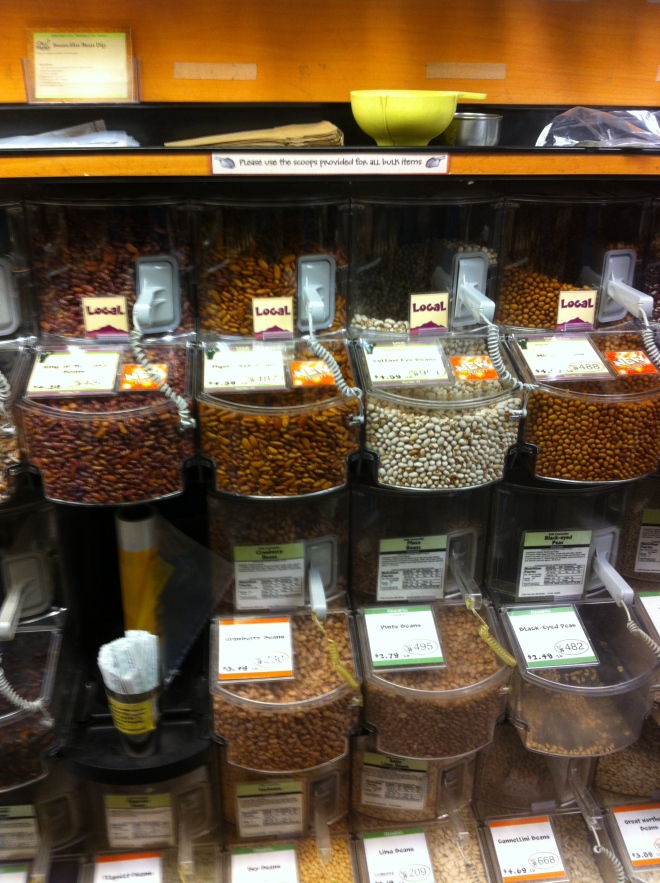
 Every year I buy myself some special food for my birthday week. This is the bulk section at the local coop. They got in a bunch of new local dried beans!!!!  Local birthday week beans. ( yes, beans make me happy)

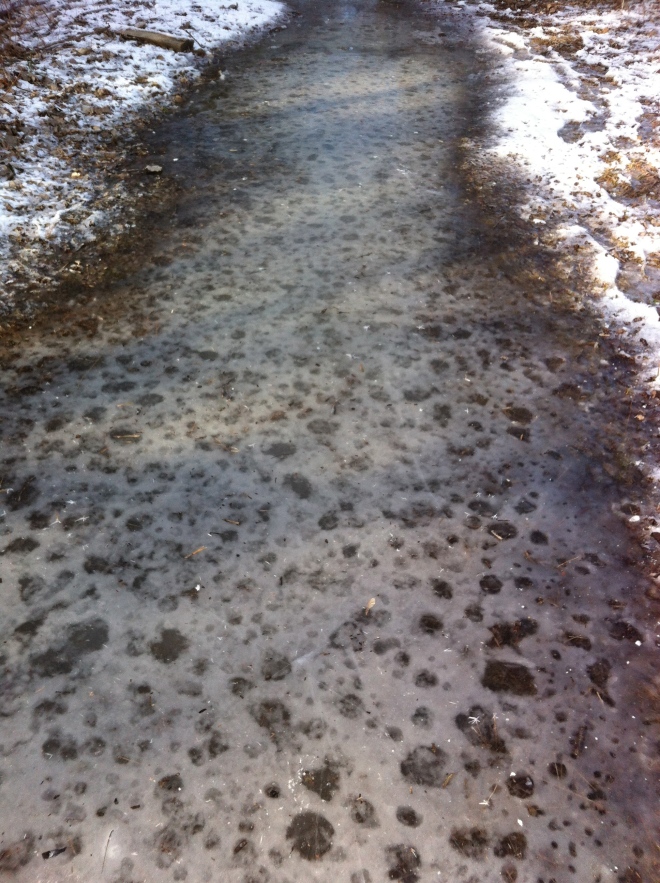
This hike was pretty treacherous, the whole trail was covered in this ice…. but look how cool it is. 

Huggable mountains

Birthday hike with big trees and a happy dog. 

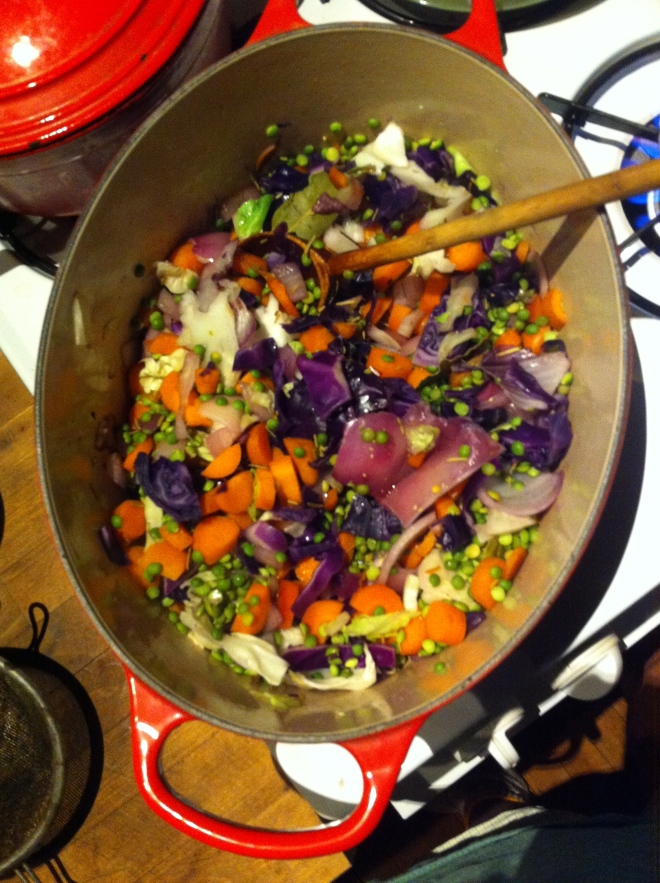
 Split peas with tons of purple cabbage and purple onions plus chunks or bright orange carrots.. So freaking pretty and so freaking tasty!

And last but not least..a throw back that made me smile…Moving day last summer. Our truck full of my house plants. I love my plants. 

So now we go onto the last week of January! (holy crap, where has the time go?)

Have a great week!

-C

THE LOVELY CRAZY

September 19, 2015 by maximios • Blog

Yesterday I spent the entire day (ok maybe not the entire day), but a the better part of the afternoon defrosting my freezer. Sure, I do the occasional chip chop here and there, just enough from around the freezer door so it will close, but ever few months I notice that everything in the fridge is not staying cold and that the freezer is not freezing stuff. Thats when I know its for real time to defrost. So a few days ago when I noticed my bananas were turing to liquid in the freezer, I knew it what I had to do….Completely empty the fridge  and melt/hack away the 2-4 inches of ice build up that accumulated. It is such a freaking pain in the ass.So on this defrosting day, I took all the stuff from the freezer, stuck it in a cooler, and the rest of the stuff, which is basically all veggies, I just tossed on the table. As I am hacking away with a metal spatual, a wooden spoon, and a constant rotation of pots of boiling water, I was thinking about dinner. I figured I might as well just eat up as much of the veggies as I could, you know, so I didn’t have to put them back in the fridge. And also, I was getting pretty annoyed because this particular defrosting session was taking way longer the anticipated, which made making dinner seem like another pain in the ass.  I figured I might as well just eat everything that is already out on the table, which pretty much narrowed down the “whats for dinner” conversations because it was already all over the place. And so dinner was a humongo salad for me, and for the mister, I made him a monster of a veggie sandwich. (my salad was exactly the same stuff as the sandwich, minus the bagel) Easy, fast, super duper yummy, pretty and piled so high with tons of veggies that the fridge is pretty much empty now. 

Look at the is beast. I don’t call it a monster sandwich for nothing.

The stuff included in this monster veggie sandwich..

Romaine lettuce, tomato, avocado for there is not real sandwich without them. Thinly sliced radishes, cucumber,a and onion for nice crispy crunch. Shredded beets, carrots, and purple cabbage to give  more crunch and a bit of sweetness. Then of course there needs to be something pickled, so I used banana peppers cause they are the SHIT!! And lastly some hummus for a nice creamy finish (plus a bit of protein) and yellow mustard because mustard on everything is just right.  Heres to a mountain if goodness that is no longer in the fridge! Served with a another mountain of roasted parsnips and carrots (more stuff from the fridge) and a tall glass of iced tea.

Lucky that today is farm share pick up cause the fridge is pretty much on empty. 

Yea it’s Thursday!!!!

-C

Note. This is just a guide.. Feel free to use whatever veggies you fancy. 

  • Either a bagel, 2 slices of bread, or a big chunk of baguette (use a gluten free bread if you want or need too)
  • Hummus- Homemade or store bought
  • Mustard
  • Something pickled like pickles, banana peppers , jalapeños or all three 
  • Lettuce, spinach or some kind of leafy green
  • Tomato
  • Avocado
  • Onion
  • Radishes
  • Cucumber
  • Shredded Carrots
  • Shredded Beets
  • Shredded Cabbage

To assemble. Ready your bread.. Toast if you want, and stick it on a plate

On either side, smear the hummus and the mustard.  

Pick a side, start to stack by evenly disrupting veggies on top of veggies. Place the second piece of bread on top and  giving a little smooth to keep it together.

And go at it. Cut in half or don’t. Have a napkin or a long sleeve ready to wipe your face.

THE LOVELY CRAZY

September 19, 2015 by maximios • Blog

Chomp Chomp Chomp… The sound I make as I eat this freaking fantastic crunchy granola. You know it’s good when the person sitting next to you is annoyed by the sound of you face while eating.  I eat a lot of crunchy stuff. And I am pretty sure I annoy the mister a lot. 

Oh well, he will live, and he eats his fair share of annoying stuff too so we can just call it even.

So granola. I love it. I make a batch every few weeks or so, and I usually make it just for me. (I almost never make things just for me) I like to keep it simple but flavorful. A tad sweet, but not really, and crunchy, without the oily fried taste. I also like a variety of sizes, some big clusters and some small pieces. 

This granola fits the bill perfectly. Made with 5 ingredients, no oil, and the perfect sweetness level.  It’s one of my favorite flavors yet. And I know I said I made it just for me, but the mister really liked it too. (I can’t help sharing)

The simplest of stuff. 1 smashed banana, a cup of pureed butternut squash, Vietnamese cinnamon*, honey, and old fashion oats. (and a dash of salt, not shown)

*Note. I only ever use Vietnamese cinnamon because once I start using it, regular old cinnamon just won’t  cut it anymore. It is a bit sweeter and a lot more spicy. If you don’t have it or don’t want to use it, use regular cinnamon and add in 1/2 a teaspoon of all spice.Toss the cinnamon and salt with the oats. Mix together the banana, squash and the sweetener and combine with the oats until full incorporated. 

Another note. Because I made this granola for me and no body else, I actually omitted the honey (I think that banana abs squash make it sweet enough) But if I was making this for lets say, the mister, or a friend, I would use add a bit. The sweetness level and sweetener of choice is up to you, but 2-3 teaspoons of honey or maple syrup is usually sweet enough for  people.

Dump the mixture on a parchment lined baking sheet and give it a little pat, you know, to settle all the bit and pieces together, all cozy and evenly spread out. Now stick into a preheated oven and after about 20 minutes, take out of oven and give the granola a toss, breaking apart any super big chunks or overly wet pieces. Put back into oven for another 20 minutes. (I like my granola super crispy crunchy so I cook it a little longer, like 30 more minutes)And when you are happy with the crunchiness of you granola, remove from oven and let cool, trying not to eat all of it while it sit’s on the counter looking all pretty and smelling like happiness. 

Grab a bowl, stick the rest into a jar with a lid, hide it from others, and chomp chomp chomp away!

-C

Banana Butternut Granola

  • 3 cups old fashion oats (use gluten free oats if needed)
  • 1 ripe banana, mashed 
  • 1 cup butternut squash puree (can use canned)
  • 2 tablespoons Vietnamese cinnamon (or 2 tablespoons regular cinnamon and 1/2 teaspoon of allspice)
  • 1-3 tablespoon honey or sweetener of choice (use greater amount for sweeter)
  • dash of salt

Preheat oven to 375

In a large bowl, mix together oats, cinnamon and salt. Mix the mashed banana, squash, and sweetener of choice together and combine with the oats. If the mixture seems really dry, add in a very small splash of water to loosen just enough to mix.

Dump mixture onto a parchment lined baking sheet and evenly disperse the mixture. Give it a kind of smoosh to compact the oats and to make sure all its all the same thickness on the pan.

Stick into oven for 20 minutes. Remove and give granola a little toss, maybe breaking apart any really big chunks (unless you like really big chunks) and put back into oven for another 20 minutes. (30 for a crunchier granola) Remove from oven and let cool on  baking sheet before storing in an air tight container. If you find that it is not as crunchy as you would like or is a few days old and lost some of its crunchiness, just stick it back into the oven for a few minutes to re crunch.

Eat as is, as a cold cereal,  dip in peanut butter, add to popcorn or whatever way you want to eat it. No utensil required.

THE LOVELY CRAZY

September 19, 2015 by maximios • Blog

It rained a lot this week, and it was fantastic. I love summer rain. I love to play in rain, I love to watch the sky turn grey and big storm clouds roll through.. Add in a little thunder and lightning.. even better. I think the only issue with I have when it rains is when it floods the basement. That and wet dog.(Washer smells like something died when he is wet)

And as usual, this week we did, we went, we came back. We took in a little for a the weekend and had the greatest of times. Puddle splashing walks, waffles, carrots, and lot and lot of gardening. But now I am tired. So today, like every Sunday, I am going to try and take a little breather and catch up on my, “me time”.  And maybe I’ll get a nap in since last night I got almost zero sleep because the little and the Mr. were all cuddled up and I ended on the edge of the bed receiving a pretty aggressive kick in the back every time I was about to nod off. (She is lucky I didn’t make her sleep in a laundry basket).

Anyway, here is some internet fun from the week.

-I think this is where I am meant to go to school. Hogwarts Hops The Pond: Rowling Reveals U.S. Version Of Wizards’ School   

 –This  DIY HANGING PLANT LAMP  is cool. I want to make it. 

-These  are cool. Modern Minimalist Bird Houses from Twig & Timber

– This guy is amazing.. Monzter: Artist Hides Monster Murals Inside Abandoned Buildings In Berlin 

– ‘Chunky Knits’ by Anna Mo. I need….

-I love this headboard 

-This house… And check out the tubs next to the beds. Weird, but who am I to say

-12 OF THE BEST IN COFFEE BREWING TECHNOLOGY. Coffee stuff makes me happy.

And some pictures from the past week. 

And I am home. The mister and I woke up at 2:15 am Friday morning to drive to Easton PA and spend the weekend with family, going to the Crayola crayon factory, wondering a  grave yard, and hearing some fantastic stories about my family from the mouth of my 95 year old grandmother. (I’ll show some pictures and tell you some stuff later this week) Than we drove back late last night… I don’t know how I am even awake right now…I am sooooo much tired! But that’s how I work I  guess.  The coffee is almost ready, calling my name, telling me its totally cool to drink it all.

I’ll leave you with a few little internet things I liked this week..

– I just love looking at other peoples homes. Treehouse in the city 

– These puppies make me think of my little nephew., he is in love with bulldogs. 20+ Beautiful Bulldog Puppies That Will Melt Your Heart

-Holy Shit  YES!!!! ‘Full House’ Reunion on Netflix Is Officially Happening

-How cool would to find one of these? New Urban Geodes on the Streets of L.A. by Paige Smith

-I don’t know if I would want to stick stuff on these shelves.These Wall Shelves are Dollhouses for Adults

– And if you need a push…On Your Mark, Get Set, Grow: A Guide To Speedy Vegetables

A few pictures from earlier in the week..

 My forsythia bush in from of one of my houses… Always the first one to bloom.  This is how washer sleeps in the warmer months.. All feet in the air.  I ate it all and it was good. Two pretty ladiesVeggies Plants!!!! 

So yeah, I am tired and happy and in need of a day to processing, lounge and drink tons of coffee.

Hope your weekend was fantastic and today brings all the whatever you want and more.

-C

What a week. It was my birthday, which if you know me, is not usually something I like to talk about. I’m not sure exactly why, but I am not really big on celebrating my own birthday. Or its more like I hide away from everyone around my birthday.  ( I am not good with attention) But this year I tried. I had a couple little dinners with family, went on a few good hikes, gave the dog a bath (had to mention it because it was so needed and I was so happy to have a cleaner, less smelly dog..which lasted all of about 12 hours)  and tried to relax and enjoy myself. The mister and I also did a bunch of little house repair projects that have been needed to be done (Birthday wish list). All and all, I had a good week. And now the birthday week is over and we can get back to normal, not bugging me, hectic, crazy, life. That makes me happy. Here are a few of my happy bits from the big week.

 A birthday bouquet of veggies. My lover knows me oh so well.

I went to get myself a new skien if yarn and stumbled upon this wall display of sprinkles.. It took a lot to not buy a bunch.

 Every year I buy myself some special food for my birthday week. This is the bulk section at the local coop. They got in a bunch of new local dried beans!!!!  Local birthday week beans. ( yes, beans make me happy)

This hike was pretty treacherous, the whole trail was covered in this ice…. but look how cool it is. 

Huggable mountains

Birthday hike with big trees and a happy dog. 

 Split peas with tons of purple cabbage and purple onions plus chunks or bright orange carrots.. So freaking pretty and so freaking tasty!

And last but not least..a throw back that made me smile…Moving day last summer. Our truck full of my house plants. I love my plants. 

So now we go onto the last week of January! (holy crap, where has the time go?)

Have a great week!

-C

 I spent a lot of time indoors this week, due to the fact that my eyelids would freeze shut when going out for more than a few minute..(for real, walking to the gym the other day, I had my head tightly wrapped and the condensation from my breath went up, into my eyes, and froze.)  I mean, I love winter, I love the cold, but I am not a huge fan of -30 with wind chill… I get cold bones.  After that morning, the mister insisted on diving me…Love. So we (me, Nick, and especially Washer) might have felt a little trapped this week, and when trapped inside, we get a little antsy, but we have been trying to make the most of it. Cooking, baking, cleaning, drawing, reading, knitting, drinking lots of coffee and tea, and overall trying to stay warm (and sane) Yup. trying to ward of the cabin fever, especially this year, living in a little tiny bit of a room with one window..has been a little difficult. And I know it’s going to be a bitch when it hits. But it’s all cool, We have plans in the making, places to look forward to, things to see. It always helps to have an adventure awaiting to keep the fever at bay.

Anyway, not a bad week, maybe a little stuffy, but nothing to complain to much about. Here are a few of highlights that made(make) me happy.

The kitchen, living room, dinning room, office…all over great room., covered in piles of clothes. Sometimes listening to music and folding laundry can be so, I don’t know, peaceful. I just felt happy at this moment. (might be the fact that I know have some clean clothes and dish cloths)


The trash dog and I went for a lovely little hike by ourselves…It was so nice to get out of the house. We both really really really needed it that day. And look how handsome he looks.. so red against the world. 

 Standing in line at the grocery store, saw this magazine and started to laugh. I love Oprah…but now…I really love Oprah. Best magazine cover ever!

Another picture of the pup. Letting his rino toy have the bed. A little pathetic…A lot cute

  I am doing little recipe testing and this situation in this pot is so freaking good! Just trying to work out a  few technical kinks. 

I love to look up… don’t forget to look up.


I made a large quantity of banana dream (what I call banana ice cream). This stuff is like crack.. Once I start eating it, I can’t stop. I might overdose on bananas but I am ok with that. 


I went to a granite and marble showroom this week. And like whoa, so freaking cool. Walking among huge pieces  of gorgeous slabs of stone is kind of magical… and a little cold.

A basket of roots….More like a basket of rainbows. 


I currently don’t have a pretty vase of zinnias on my table, (these beauts are from this past summer) but I really wish I did. Fresh flowers are one of my favorite  things. This picture has inspired me, I am on the hunt for some pretty fresh. 

That sums up the week…Stay warm!

-C

Look at that old man face…. how can anyone stay mad at him? (there was a recent incident involving bananas, you can read about it in the last post.)
Before we get started on the leash, I’ll give you a little background about Washer the trash dog. A little over 9 years ago,  Nick brought home this 8 week old little ball of fur for us as a Christmas present. Oh man, he was so so so freaking cute, but that didn’t stop me from crying… Why you ask? Because I didn’t want a golden retriever, we never talked about getting a golden, we talked about getting a husky or a german shepherd. And so I cried.(I was so pissed) But it didn’t last long. A few hours after he was home, I fell in love and we have been a little family ever since. Mind you that the first two years of his life, he was a terrible beast of a dog. Nick and I were really young and neither of us had ever had a puppy before so we kind of let him do whatever he wanted…..not a great idea. He was a shit.  He would eat everything  and anything. Seriously anything; book shelves, linoleum floors, windowsills.. You name it, he ate it. He also started to act a little jerky, growling at little people and getting aggressive around food which ended with us having to hand feed him for about 8 months. But eventually he grew out of his eating parts of the house, now he just eats anything food or trash .He doesn’t mind little people so much anymore just as long as they don’t try to play with him, and he now sits in front of his food bowl leaving great big puddles of drool until he is told he is allowed to eat. Oh how he has grown

One question that people always ask us is,”Where did that name Washer come from?” Truth is, it was kind of joke. We had had him for a few days and  hadn’t named him by the time we went to my Dads house on Christmas. Sitting around with my family, we came up with all sorts of stupid and inappropriate names. At one point appliances were named off and I guess the name Washer just kind of stuck out. We had planned on changing it right away, but as you can see, we still haven’t gotten around to that.

Anyway,  Washer has had the same leash for about 7 years. (His first 2 years he ate a few) That’s   a long time for a leash, especially if you think of all the times that it has been dragged through the mud, pulled into the lake, or my favorite, peed on. Yup, his current  leash is ripe and it’s about time we  made the old man a new one.(Ok, its more for us, but he seriously has been peeing on it a lot lately and I am not a fan of handling a pee soaked leash)

1 custom sized leash. Super simple and cheapy cheap.

What you will need is….

  • 6-7 feet of 3/8 rope(or however long you want it)
  • two 3/8 inch rope clamps(1 package comes with 2)
  • carabiner
  • scissors
  • hammer
  • lighter
  • measuring tape if you want exact measurements(it’s not necessary)

Note: You can get the rope, clamps and the carabiner at any hardware store, but I think the big ones like Home Depot or Lowes sell rope by the foot so you don’t have to buy a 50 ft piece…unless you want it. 


First thing.Trim the ends of the rope nice and clean. Take the lighter and melt the nylon around the end of the rope so it will stop it from fraying…BE CAREFUL….And do it over the sink or somewhere with water…It’s not hard to do, I just don’t want anyone to burn themselves or the burn their house down.(not that I think you are going to)


Once the nylon is melted and no longer hot…Make a small loop and place rope into rope clamp. Make sure to leave the loop big enough for the carabiner to fit. Now hammer the clamp around the rope, I mean, really smack that thing  We used a scrap piece of wood to hammer on… and I suggest you do the same.

For the handle, make a large loop, whatever size that works for you, and do the same hammer clamp situation on the ends here.
Pretty freaking simple….Thats it, you are done and now you have an awesome customized and pee free leash.

New and old. Hopefully he won’t pee on this one for a while.

Have a great weekend and l would love to hear from anyone that makes themselves a sweet ass new leash!

Have a great weekend!

-C

Oh, it definitely was a long week. Did a lot of holiday stuff, watched a lot of littles( got peed on) got sick and lost my voice for a couple of days.(that was fun). All sorts of good stuff. But for real, I had a great week. Here are some bits. Persimmons.,,,,,,,,,,,. Do I need to say more?

This new tea… I wasn’t sure I was going to like it but oh do I. It’s so freaking good, I have been drinking it every day. I must stock up before its gone!

Everything about getting our Christmas tree makes me happy. Every year, the mister, the dog, and I drive down to the rangers station,, get our tree tag , and hike into the Green Mountain National Forest to hunt for and cut down our Christmas tree. The tree is the thing for me. I don’t want presents, no shopping, take the food, just the tree and I will be happy.  Its our most fantastical tradition. We make is a whole day event. A nice drive, lunch, listening to Christmas music, lots of hot coffee, a long hike in the most beautiful place in the world. The perfect day. Look at how happy this guy is. Its hunting season and we forgot his bright colors so we improvised. Yellow trash bag ribbons. His new nickname is now Trash dog. It fits him.

Watching this little. She is an amazing human being and I love love love her.. I think she might be mine. She really likes soup..

My elf candle holders I got from CB2. I wanted them so bad for years and finally the last year they sold them I bought myself these guys. I heart them

Oh you like my new milk crate show bench? Its awesome,, one of the best uses of scrap wood and milk crate that I have ever done(Yes there has been other scape wood milk crate projects) Well you are in luck..I will show you how to made it.. watch for it next week!

I love old strainers. I kind of have a thing for them. This big guy is now in my collection. Bonus, green AND purple kale….

Hanging out with my sister. I haven’t seen her for what seems like the past 4 months(she is in nursing school). This was her last day of classes  so we cleaned her house, folded laundry while listening to music and I made her dinner.We wrapped up the night by mass texting our other sisters inappropriate pictures of the elf on the shelf. It got pretty crazy.  It was such a great night. I love my sisters.

Hope you found some bits of happy this week, if not, your not doing it right.

HAPPY HAPPY HAPPY!!!

«‹ 186 187 188 189›»

Recent Posts

  • 1xBet App for Matchday: A Football Fan’s Setup
  • Aviator Game Bonus and How It Applies
  • Aviator Original vs Copycats: How to Tell Them Apart
  • What $0 Subscriptions Actually Include on OnlyFans
  • First-Time Subscriber Budget Trajectory on OnlyFans

Wheel variants and live dealer options are explained in this online roulette casino Malaysia overview.

Every Singapore betting site on this list was checked for licence details, market depth and withdrawal time.

A nemzetközi sportfogadó oldalak jellemzően magasabb szorzókkal dolgoznak, mint a hazai piac szereplői.

Denne guide til casino uden rofus i 2026 – spil uden dansk licens forklarer regler, muligheder og risici ved udenlandske platforme.

Et casino med hurtige udbetalinger kan forbedre spiloplevelsen ved at sikre hurtig adgang til dine gevinster.

Vores guide til spillesider uden om rofus hjælper dig med at navigere blandt internationale casinoer.

We ranked the top online casino Malaysia platforms on withdrawal times, not on marketing claims.

Registration takes a few minutes, and this sg online casino guide walks through verification and the first deposit step by step.

A hazai fórumokon rengeteg tippet találhatsz arról, hogyan működik a casino befizetés nélküli bónusz aktiválása promóciós kódokkal.

@lonelyplanet
STUDIO ESCAPE Creative Getaways Quiet stays and bright worktables for a weekend reset. See Places
MAKER ROUTE World Nomads Travel-ready planning and practical coverage for makers. Read Tips