My winter farm share is coming to an end this week. One more pick and then a three week stretch until the summer share starts… WHAT AM I GOING TO DO!!! Stock up as much as I can is what.
I have been strategic about the roots and veggies that I have chosen to bring home the past few weeks.(My farm lets you pick what you want) I know what I can buy at the store, things like carrots and potatoes, so I have been passing those up, but the roots like beets and celeriac… I have been bringing home baskets of those and hoarding them in the fridge and basement in preparation for the laps in farm fresh food and knowing that if I want to by these at the store it s going to coast me a million dollars a pound. (a for real million dollars)
Yup, lots of roots around here, especially celeriac root which is fantastic. I am kind of obsessed with celeriac, with its fibrous, knobby exterior, soft but almost meaty texture inside, and a flavor that is close to celery but so much better. I don’t know why it has taken me so long to do a posting featuring this amazing root vegetable (I eat it almost every day)
So here, an amazingly tasty, hearty but not heavy, celeriac recipe. Perfect for spring and the change into summer…. Mustard roasted celeriac with an fanatic split peas gravy that will have you licking you bowl clean.
The stuff….For the split pea gravy we have a carrot, a parsnip and a large onion chopped into small chunks. Salt, thyme, a bay leaf and of course the split peas. Then there is the celeriac root* sliced into 1/2 inch thick rounds and some plain old yellow mustard .
*Note. I don’t peel my celeriac root. I really enjoy the fibrous exterior but realize that some don’t(The mister does not like it) so peel it if you want.
Toss the chopped parsnip, carrot, onion and the spices into a pot on medium heat and let veggies sweat a few minutes until tender. Add in the split peas and enough water to cover everything. Turn pot on high and bring to a boil, then cover and turn to low. Make sure to give the pot a good stir ever few minutes and add more water if needed
While the gravy is cooking, take the celeriac rounds and brush each side with yellow mustard, sprinkle with pepper, and place on a baking sheet. Stick into the oven to roast for about 25 minutes, flipping the rounds after about 10 minutes.
Once the peas have soften, remove the bay leaf and puree until smooth and oh so creamy. Taste and add more salt and pepper if needed. If you find that the gravy seems to thick, just add in more water until it’s the consistency that you want. The gravy is made, the celeriac is roasted… now we are ready to eat!! Stick the celeriac on a plate and dump good amount of that gravy right on top. Feel free to add a bed of spinach, or a grain or anything you want, because why not, and also some chopped tomatoes for a little acid and prettiness.
Serve with the fanciest knife and fork you can find. Extra yellow mustard and sriracha sauce are great condiments to have close by.
Happy Tuesday!
-C
Mustard Roasted Celeriac with Split Pea Gravy
2 medium celeriac roots
6 tablespoons mustard
1 large carrot
1 medium parsnip
1 large yellow onion
2/3 cup split peas
2-3 cups water
1 bay leaf
2 teaspoons thyme or italian spice mix
salt and pepper
spinach (optional)
diced tomatoes(optional)
Preheat oven to 400 degrees
Small dice the carrot, parsnip and onion and throw into a large pot. Spinkle with salt and pepper, add in the thyme and bay leaf and add a splash of water. Stick on stove on medium heat and stir. Let cook until the veggies become soft and fragrant. Now add in the split peas and 2 cups of water. Bring to a boil then cover and turn heat down to medium low. Let cook until the split peas become tender (about 25 minutes) string on occasion and adding more water if the peas are not completely summered while cooking.
Once the peas are tender, let cool for a few minutes, remove bay leaf, and either dump into a blender or blend with an immersion blender until nice and creamy. If gravy seems to thick, add in more water.
Scrub or peel celeriac roots and slice them into 1/2 inch think rounds. Place on a baking sheet and brush mustard on both sides and spindle with pepper. Stick into oven for about 10 minutes, flip, then back into the oven for another 15 or so minutes, or unit the celeriac is tender.
When the celeriac is done remove from oven and stick a few rounds on a bed of spinach (or not, or any kind of grain or green you like) Top with a hearty helping of the gravy and toss on some chopped up tomatoes.
Eat with at knife and fork like a fancy person.
The other day the mister and I started reminiscing about some of our earliest memories of what our parents fed us or what they used to eat when we were growing up. One of the dishes that we both remember eating was the classic creamed beef on toast, or as my mom use to call it, shit on a shingle. Yup, shit on a shingle. (who ever started calling creamed meat on toast is a freaking genius) I think that as a kid, I liked the dish just for the mer fact that I could say the word shit and get away with it. I think my mom liked it for few reasons; she could make a big butt load of it really fast, for a crap load of kids, on the super cheap. And I think that she just really like it.
Shit on a shingle is one of those foods that I like to call “trash food”, you know stuff like beefaroni or pork and beans. Stuff that we all loved as little kids but might think twice about feeding to anyone now. ( I’ll still feed nick a can of beefaroni.. he likes it) As a throwback to our earliest food memories, (also a lack of food in the house and wanted to make something fast, easy, and cheap.. thanks mom!) I made the mister my rendition of the classic. Creamy Lentils and Mushrooms on toast. Not quite as trashy as creamed beef (lentils, mushrooms and onions are not trashy) but you get the same reminiscing feeling. I guess I could call it something like “stuff on a shingle” or lumps on a shingle”, but what kid (or adult) would want to eat that. Let’s just stick with shit, it makes it more awesome to eat it.
The shit….. A few mushrooms, a bit of onion, cooked lentils, flour, milk, oil, salt and pepper, and garlic powder. And the shingles.. 2 pieces of thick white country bread. Slice the mushrooms and the onion and toss into a skillet with a drizzle of oil. Cook on medium heat until browned and fragrant..Remove from pan.In the empty pan still on medium heat, add in the olive oil and the flour. Whisky constantly, slowly add in the milk. Keep whisking until sauce thickens. Remove from heat. Add in salt, pepper, and garlic powder.Add the mushrooms and the lentils into the sauce and give it a good mix. Oh, and don’t forget to toast up the bread. Now dump that shit all over those shingles! Oh the memories.
If you need to, make it classy by serving it with a cloth napkin and a nice fork and knife. But eat it however you need to. (As kids we like dirty hands and no fork, preferably with a big tall glass of overly sweetened red flavored kool-aid)
Enjoy this fantastic Spring weekend!
-C
Shit on s Shingle (Creamy Lentils and Mushrooms on Toast)
One serving
1 cup cooked lentils
2- 3 mushrooms
1/2 small onion
1 cup milk (cow, nut, plant… whatever you want)
1 tablespoon olive oil
1 tablespoon flour
1 teaspoon garlic powder
salt and pepper
2 pieces of nice thick but soft white sandwich bread
Slice the mushroom and onion and toss into a pan or skillet with a drizzle of oil. Cook on medium heat until brown and fragrant than dump onto a plate. In same skillet, add the oil and the flour and mix with a whisk while slowly adding in the milk. Keep whisking until sauce starts to thicken. Turn heat to simmer and add in the cooked lentils and the sautéd mushrooms and onions. Push down the bread in the toaster.. and when it pops up, dump the shill over it.
This year for Christmas my family decided to do a mid day brunch lunch thing. Everyone has their own little families that they do the morning with and then everyone goes their own ways that nigh(Nick and I do our own Christmas celebrating at night)…That leaves a chunk of mid day to hang, talk, play, exchange stockings and then usually someone gets a little pissed and yup, time to go. Its totally cool, we see each other too much anyway. So food wise, it was pretty basic. Eggs, hash browns, a ham, fruit and bagels… The hash browns were store bought, Me and nick did the eggs frittata style and the ham was just stuck in the oven….Not much to do. But then one of my lovely sisters requested gravy…..and so it was made. And a basic brunch was turned into a gravy laden food feast. And so you know, I am not a huge gravy fan, or I never really have the opportunity to eat gravy, its just not in my food rotation..until now. I was really impressed with myself on this one.
We have white mushrooms, kale, red onion, garlic, soy, nutritional yeast(if you don’t have, no worries, you can get away with not using it), sage and thyme and corn starch…
Dice up onion, mushroom and garlic… Into a pan on medium heat with a bit of olive oil…just to soften up
Toss in the spices, nutritional yeast and the soy sauce and let meld together for a minute or 3
Add 2 1/4 water and whisk in a tablespoon of corn starch….and let it simmer
Once the gravy gets to that super nice consistency…add in finely chopped kale and let gravy simmer for another 5 minutes or so
Transfer to a nice bowl or gravy boat, stick a ladle or big spoon and get to graying up all your food!!!!!
Everyone was to busy eating for me to get a good picture of the gravy on food, but trust….it was all over everything!
Mushroom Kale Gravy
Ingredients
7-8 white or cremini mushrooms
1/2 small red onion
2 kale leaves
1 1/2 tablespoons soy or tamari
1 teaspoon ground sage
1 teaspoon thyme
1 tablespoon nurtitional yeast
2-3 cloves garlic
2 1/4 cups water
tablespoon corn starch
Dice onion into small bits, slice mushrooms nice and thin and dice garlic into wee little pieces.. Toss into a skillet with a bit of olive oil on medium heat and let mixture soften and smell nice and fragrant. Toss in the dried herbs, nutritional yeast and soy sauce and let cook for another few minutes until the mixture sucks up all the soy sauce and the veggies start to brown.
Add in the water and whisk in the corn starch. Turn heat to low and let simmer until gravy starts to thicken. Finely chop the kale and toss into gravy when its about done.. Simmer for another 5 or so minutes or until you can’t wait any longer….Serve straight from the pan or transfer to a gravy holding device,. Pour gravy on everything!
There is a joke about Vermonters, that all we talk about is the weather. Well, it’s kind of true. But to our defense, we get a lot of weather, and it’s always changing and intense and both lovely and crazy and all over. So yeah, we talk. A lot, about the weather. And on that topic, I am trying so hard not to complain, but honestly, I am getting a little sick, both physically and mentally from all of these super, to freaking cold temperatures. Yesterday the high was 0 ( which was at like 2 in the morning) and factor in the windchill, the temp stayed at like 25 below. It f**king sucks. I can’t stay outside for too long or else I will probably die. The dog is having a hard time making it around the block before he gets ice paws, and the mister, well he even started wearing gloves (he wears a sweater all winter and never gets cold…..he is officially cold)
And not only is the cold keeping us all indoors, but its making us all borderline sick. We both have been fighting something for the past few week. The headaches, stuffy nose, chest congestions. The puppy is getting super dry skin and gave himself a hot spot. BLAh!! Ok, enough! No more complaining
Because I do really love the winter and all the pretty snow!!!!
But we are feeling kind of sick so to make us feel oh so much better, a fantastic, super tasty, healing, good for me, good for you, soup. Turmeric ginger carrot… oh man. Made with lots of ginger, turmeric and garlic and finished with a drizzle of raw honey. This soup is exactly what we need. All ingredients scream.. FEEL GOOD, BE WARM AND COZY! Almost everything in it has antibacterial and anti inflammatory properties. The veggies are hearty and heathy and just eating soup helps to keep hydrated. And the best part..it tastes so freaking amazing.
So whether you are feeling a little mah, or just a little hungry.…this soup is where it’s at!
Lots of chopped up carrots, a small onion, a little bit of cauliflower I had left over and a small beet. If you don’t have the cauliflower and or a beet, just use ares pepper or another 2 carrots.. no biggy.
Then we have the fresh ginger ( you can use powdered) turmeric and garlic. All the good healthy spicy and yummy stuff.
I accidentally spilled the turmeric on the counter..but it kind of looks like I might have done it on purpose… yeah, let’s go with that. Chop the garlic and he ginger into chunksAnd toss into the pot to warm and activate. Just a little toasty toast.
And the veggies are roasted and tender and smell so good. It took a lot of will power to not eat the whole pan right there.
I added the roasted veggies and 3 cups water straight into my pot with the spices because I used an emulsion blender. If you are using normal blender, add the veggies, the toasted spices and the water to the blender and blend until smooth. Then transfer to a pot.
Pretty much all blended together….(I left a few big chunks in there to snack on while I was waiting to eat serve…I was really hungry) and let to simmer for a little longer…
And now ladle into a bowl and get ready for a fantastic finish… drizzle a spoonful of raw honey into soup…….so so good. You could add the honey before serving, but heating it kills all the good antibacterial stuff so that’s why we wait. Then I sprinkle some chopped kale and chives. (do it if you want, but not necessary)
Now enjoy. Let the warmth wash over you and feel all those good spices helping to fight the good fight to keep you well and all the yummy to satisfy your hunger.
And lets hope for some warm (above 0!!) weather!
-C
Turmeric Ginger Carrot Soup
Ingredients
5 large carrots
1 small onion
1 small beet*
quarter head cabbage ( or a cup of frozen)*
2-3 teaspoons turmeric
2-3 tablespoons fresh ginger (1/2 teaspoon if using powdered)
4-6 cloves garlic
salt pepper
raw honey (omit if vegan)
* If you don’t have or want to use beet and or the cauliflower, you can use a red pepper, a small sweet potato, or just use a few more carrots.
Chop all veggies into similar sized chunks and toss into a lightly oiled pan or on a baking sheet and sprinkle with salt. Stick in oven at 425 for about 30 minutes or until all veggies are fork tender.
In a large soup pot or dutch oven, toss chopped garlic, ginger and the turmeric and place on medium heat for a few minutes to activate the spices. Add the roasted veggies and 3 cups water to pot (if using emulsion blender) and blend until smooth. If using a blender, add the toasted spices, roasted veggie and 3 cups water and blend until smooth then transfer to a large pot or dutch oven. Add salt and pepper to taste. Turn heat down to simmer and let cook for an addition 10 minutes.
When ready to serve, ladle soup into bowl and drizzle a spoonful of raw honey into soup. Garnish with fresh chopped kale, chives, cabbage or whatever you want. (or nothing is good too)
The official, unofficial, last weekend of summer. A little sad, but not really, cause I am super pumped for fall. I have my sweaters unpacked, my knitting started, and am looking forward to eating nothing but apples and pumpkins for a while. I am ready.
Now to get through the next few days of close to 90 degree weather. (Globaly warming… you suck!)
This past week of summer has been great. We have managed to get a lot of work crap done, but also had time to do a little river hopping, have a sleep over with a few littles, and go to a family gathering. The mr, being the most bestest guy, even hand mowed out little yard so we can actually sit outside without being surrounded by 3 ft tall weeds and hay. He is so nice. We did get a chance to pick a few apples from our community garden (not sure of the variety, but they are so good!) and we played on one of the coolest,most dangerous, playgrounds around here. All in all, not a bad way to leave the summer behind.
And now it’s Sunday and I am feeling good. Going to sit around and read, knit, garden, and drink so much coffee. And best part? Tomorrow is Labor Day! Three day WEEKEND!!! so I will probably make tonight a party night and stay up past 9:30 (yes, I am an old lady) and binge watch the rest of season 1 of Playing House (fucking fantastic show) before it goes away and I don’t get a chance.
Lofty goals, but I think I can manage.
So how about you? Is this a three day weekend for you as well? Hopefully so and hopefully you are spending it doing you, and having fun, relaxing and remembering not to labor or at least not labor to hard.
Some internet stuff for you to peruse if you want.
–Another dream home/studio/camper. Why don’t I live here?
-Because I am support to live here! (This is the pretty much perfect in every way)
-Got 230K? If you do, you can buy a whole Spanish Village
-An oh so lovely home
–Writing in trees looks cool, but not something I would want to of by hand.
-Inspiration from 5 Super Organized Garages… If only
-Are you a stinky farter? Check these out! (hahaha)
-Which Hogwarts House Do You Belong In? Your Cooking Style Will Tell. I am a Ravenclaw
-So I don’t have a baby or one on the way, but when/if I ever do, I want this for baby.
-Why Are We Drawn To Heirloom Fruits And Veggies?
-A carrot cake that tastes like carrot. Because it should.
And some pictures from the past week.
Happy Weekend.. Hope your able to enjoy a long one!
-C
Another cold and blustery week… but it’s the middle of January in Vermont so its to be expected.( I just wish I could walk outside for more than 5 minutes without my nose ruining and having the snot freeze to my face) Yup, cold and busy. My Dad has come back to Vermont for a long visit (he moved to Michigan a few years ago… jerk) So while he is here I have been trying to put in as much time as possible with him all the while trying to do 8 million other things, I figured I owe him a little bit of my time (and lots of food) for helping to raise me…I am such a good daughter. (2 thumbs pointed at me with a big smirk..)
Let me take you through a few little happy highlights of my week.
The father and I went for a little hike with the pup on one of the milder temperature days… I drove to the trail, locked the car doors and off we went. After getting cold enough where I couldn’t feel my hands-feet-face… we made our way back to the car. And I reached for the keys…and shuffled around in my pockets….and felt around in all my pockets again…. and again. Finally, I had to admit it, I dropped the keys. I got a little panicky (I was so cold and the car key is like 300 bucks to replace) but we did the only thing we could do. I stuff everything back in my pockets and off we went in search of the key. We got lucky, my dad found the key only a few minutes into the trail!!! Hooray! A happy hike with a happy ending.
Me and this little made some donuts, but screw the donuts(sweet potato with chocolate frosting).. look at the overalls! I decided a long time ago that when I have kids, they will be wearing nothing but overalls. Osh Gosh FOREVER!
FARM SHARE PICK UP!!! I was starting to go through veggie withdrawals.
Shadow hearts for Valentines Day! I love Valentines Day..… or maybe I just love hearts and pink. Either way, I am getting ready for some V-day recipes! This one is a definite go….
And beet dyed coconut sprinkles…I mean, talk about happy.
A late Christmas gift from Nicks mom. Every year she gives us s few of her hand thrown pieces….. love!!
And I gave the mister a haircut!!! He has been asking me for about 2 months now to cut it, but for some reason we just haven’t gotten around to it. So finally this week it happened, and I can see his lovely face again!
How can you not be happy when your piece of ginger looks like a little man. (right after I took this picture I cut his legs off)
Flowers from our garden last summer….. Sunflowers are my favorite (these are teddy bear sunflowers)…. I love looking back at old picture, especially ones from opposite seasons, like flowers in winter or pictures of snow in summer. There like little glimpses of whats to come. I can not say it enough, I am so lucky to live in VT..we have excellent seasons so there is always something to look forward too!
Chomp Chomp Chomp… The sound I make as I eat this freaking fantastic crunchy granola. You know it’s good when the person sitting next to you is annoyed by the sound of you face while eating. I eat a lot of crunchy stuff. And I am pretty sure I annoy the mister a lot.
Oh well, he will live, and he eats his fair share of annoying stuff too so we can just call it even.
So granola. I love it. I make a batch every few weeks or so, and I usually make it just for me. (I almost never make things just for me) I like to keep it simple but flavorful. A tad sweet, but not really, and crunchy, without the oily fried taste. I also like a variety of sizes, some big clusters and some small pieces.
This granola fits the bill perfectly. Made with 5 ingredients, no oil, and the perfect sweetness level. It’s one of my favorite flavors yet. And I know I said I made it just for me, but the mister really liked it too. (I can’t help sharing)
The simplest of stuff. 1 smashed banana, a cup of pureed butternut squash, Vietnamese cinnamon*, honey, and old fashion oats. (and a dash of salt, not shown)
*Note. I only ever use Vietnamese cinnamon because once I start using it, regular old cinnamon just won’t cut it anymore. It is a bit sweeter and a lot more spicy. If you don’t have it or don’t want to use it, use regular cinnamon and add in 1/2 a teaspoon of all spice.Toss the cinnamon and salt with the oats. Mix together the banana, squash and the sweetener and combine with the oats until full incorporated.
Another note. Because I made this granola for me and no body else, I actually omitted the honey (I think that banana abs squash make it sweet enough) But if I was making this for lets say, the mister, or a friend, I would use add a bit. The sweetness level and sweetener of choice is up to you, but 2-3 teaspoons of honey or maple syrup is usually sweet enough for people.
Dump the mixture on a parchment lined baking sheet and give it a little pat, you know, to settle all the bit and pieces together, all cozy and evenly spread out. Now stick into a preheated oven and after about 20 minutes, take out of oven and give the granola a toss, breaking apart any super big chunks or overly wet pieces. Put back into oven for another 20 minutes. (I like my granola super crispy crunchy so I cook it a little longer, like 30 more minutes)And when you are happy with the crunchiness of you granola, remove from oven and let cool, trying not to eat all of it while it sit’s on the counter looking all pretty and smelling like happiness.
Grab a bowl, stick the rest into a jar with a lid, hide it from others, and chomp chomp chomp away!
-C
Banana Butternut Granola
3 cups old fashion oats (use gluten free oats if needed)
1 ripe banana, mashed
1 cup butternut squash puree (can use canned)
2 tablespoons Vietnamese cinnamon (or 2 tablespoons regular cinnamon and 1/2 teaspoon of allspice)
1-3 tablespoon honey or sweetener of choice (use greater amount for sweeter)
dash of salt
Preheat oven to 375
In a large bowl, mix together oats, cinnamon and salt. Mix the mashed banana, squash, and sweetener of choice together and combine with the oats. If the mixture seems really dry, add in a very small splash of water to loosen just enough to mix.
Dump mixture onto a parchment lined baking sheet and evenly disperse the mixture. Give it a kind of smoosh to compact the oats and to make sure all its all the same thickness on the pan.
Stick into oven for 20 minutes. Remove and give granola a little toss, maybe breaking apart any really big chunks (unless you like really big chunks) and put back into oven for another 20 minutes. (30 for a crunchier granola) Remove from oven and let cool on baking sheet before storing in an air tight container. If you find that it is not as crunchy as you would like or is a few days old and lost some of its crunchiness, just stick it back into the oven for a few minutes to re crunch.
Eat as is, as a cold cereal, dip in peanut butter, add to popcorn or whatever way you want to eat it. No utensil required.
The other day the mister and I started reminiscing about some of our earliest memories of what our parents fed us or what they used to eat when we were growing up. One of the dishes that we both remember eating was the classic creamed beef on toast, or as my mom use to call it, shit on a shingle. Yup, shit on a shingle. (who ever started calling creamed meat on toast is a freaking genius) I think that as a kid, I liked the dish just for the mer fact that I could say the word shit and get away with it. I think my mom liked it for few reasons; she could make a big butt load of it really fast, for a crap load of kids, on the super cheap. And I think that she just really like it.
Shit on a shingle is one of those foods that I like to call “trash food”, you know stuff like beefaroni or pork and beans. Stuff that we all loved as little kids but might think twice about feeding to anyone now. ( I’ll still feed nick a can of beefaroni.. he likes it) As a throwback to our earliest food memories, (also a lack of food in the house and wanted to make something fast, easy, and cheap.. thanks mom!) I made the mister my rendition of the classic. Creamy Lentils and Mushrooms on toast. Not quite as trashy as creamed beef (lentils, mushrooms and onions are not trashy) but you get the same reminiscing feeling. I guess I could call it something like “stuff on a shingle” or lumps on a shingle”, but what kid (or adult) would want to eat that. Let’s just stick with shit, it makes it more awesome to eat it.
The shit….. A few mushrooms, a bit of onion, cooked lentils, flour, milk, oil, salt and pepper, and garlic powder. And the shingles.. 2 pieces of thick white country bread. Slice the mushrooms and the onion and toss into a skillet with a drizzle of oil. Cook on medium heat until browned and fragrant..Remove from pan.In the empty pan still on medium heat, add in the olive oil and the flour. Whisky constantly, slowly add in the milk. Keep whisking until sauce thickens. Remove from heat. Add in salt, pepper, and garlic powder.Add the mushrooms and the lentils into the sauce and give it a good mix. Oh, and don’t forget to toast up the bread. Now dump that shit all over those shingles! Oh the memories.
If you need to, make it classy by serving it with a cloth napkin and a nice fork and knife. But eat it however you need to. (As kids we like dirty hands and no fork, preferably with a big tall glass of overly sweetened red flavored kool-aid)
Enjoy this fantastic Spring weekend!
-C
Shit on s Shingle (Creamy Lentils and Mushrooms on Toast)
One serving
1 cup cooked lentils
2- 3 mushrooms
1/2 small onion
1 cup milk (cow, nut, plant… whatever you want)
1 tablespoon olive oil
1 tablespoon flour
1 teaspoon garlic powder
salt and pepper
2 pieces of nice thick but soft white sandwich bread
Slice the mushroom and onion and toss into a pan or skillet with a drizzle of oil. Cook on medium heat until brown and fragrant than dump onto a plate. In same skillet, add the oil and the flour and mix with a whisk while slowly adding in the milk. Keep whisking until sauce starts to thicken. Turn heat to simmer and add in the cooked lentils and the sautéd mushrooms and onions. Push down the bread in the toaster.. and when it pops up, dump the shill over it.
Happy St Patricks Day!!!! As a kid, St Patricks day always meant green milk, green eggs, and those nasty gold foil covered chocolate coins. (you know, from the pot of gold) Not to mention all the leprechaun hunting and pinching. In my family, if you were unlucky enough to forget to wear green, you ended up as a walking target. It all started out nice an innocent, a pinch here or there, but by the end of the day, someone would end up pinching a little to hard or maybe just one too many times and the game would go from pinches to punches.
Ahh, memories.
Now as an adult (kinda adult) St Patricks is celebrated a little differently. The little ones in the family still get their green milk (which they are told is leprechaun pee) and those nasty gold coins, but I think the pinching has stopped.( a great tradition lost) I myself don’t have any littles at home so no little leprechaun games or gross dyed food for me. Nope, in my house we celebrate with a few beers and a more traditional irish dish, Colcannon. Mashed up potatoes with cabbage and kale… I mean, can it get much better? It can when you use red potatoes and red cabbage. Not only is it so tasty tasty, but it is so pretty pretty. No need for green milk or nasty candy.
But I still make sure to wear green and you might find me doling out a pinch or two.
The stuff…. Super pretty red potatoes, red cabbage, shallots, kale, salt and pepper, and olive oil.
Note. If you do not have or want to use red potatoes, russet or white will work, it just won’t be as pretty.
Dice up the pretty potatoes and stick them into a pot and fill up with water and add in a good tablespoon of salt. Stick on high heat and bring to a boil, then turn the heat down to medium and cook those taters until super fork tender. (bring them to the edge of falling apart)
While the potatoes are boiling, chop up the cabbage, shallots, and the kale and stick into a big skillet with a good drizzle of olive oil. Sauté on medium heat until soft and tender.
Once the potatoes are super tender, drain the water and dump them into the pan with the sautéed veggies. With a potato masher or a fork, mash up the potatoes and mix in the veggies, adding a drizzle or more of olive oil as you go. (Start with a drizzle and work your way up until it tastes good to you) Salt and pepper to taste.
The most pretty pan of smashed up potatoes that I have ever seen. Eat as a side dish or even a light main dish. Fork is a good utensil to use, but I found that my fingers worked just as well.
Have a great happy day full of green, potatoes, and pinches. Maybe even a leprechaun or two!
-C
Red Potato Colcannon
5-10 Red potatoes Red Potatoes depending on the size (about 3 1/2 – 4 chops chopped)
1 Cup Chopped Red or Green Cabbage
1 Cup Chopped Kale
1-2 Shallots
Olive Oil
Salt and Pepper
Rinse and dice potatoes and place into big pot. Cover potatoes with water and add about a tablespoon of salt. Place on high high heat and bring to a boil. Turn heat to medium low and let potatoes cook until super fork tender. While potatoes are boiling, chop up cabbage, shallots and kale and sauté in a large cast iron skillet (or any skillet) with a good drizzle of olive oil. Once the potatoes are done, drain water and add potatoes to the skillet with the sautéed veggies. With a potato masher or fork, mash the potatoes and mix with the veggies, adding a drizzle or two (depending on your taste) of olive oil as you go. Salt and pepper to taste.
Serve from skillet or dump into a fancy dish with a big spoon.
Eat as a main dish or as a side….Good hot, warm and cold.
HOORAY FOR SPRING!!!!!!!
Yesterday The mister and I went for a walk, a long walk. I was wearing a sweater, a light jacket and I left the mittens and hat at home. There was sunshine, huge puddles and mud. Birds were chirping. It was amazing.
After our nice long walk, we got home and I needed to start dinner. It was a little later than I usually so I wanted fast and easy I usually always have pesto in my fridge (I had to make some, but it only takes 5 minutes) because when it’s in there, I can whip up a big awesome meal in the time it takes to boil some pasta or quinoa or smear on toast or toss with potatoes. It really can be used on everything and can be made out of just about anything. Kale and walnuts are just one of so many fantastic combos. And frozen ravioli is always in the freezer too. I used just plain cheese, but use whatever kind you like.
Together, pesto and ravioli, well that’s a quick, easy, and tasty meal, perfect for a spring evening, And yea, there will be left over pesto from this recipe… just stick it in the fridge or freezer….you will be glad you have it.
Pesto stuff. Kale, walnuts, parmesan cheese(nutritional yeast to keep it vegan), garlic, lemon, olive oil, and salt and pepper.
A few little pre steps before the blending.. Toast the walnuts. Just toss onto a dry skillet and stick on medium heat for about 5 minutes or until they start to become née and fragrant. Remove from skillet and add in a bit of water. Add in chopped or ripped kale and cover to let the kale tenderize, but only for about 2 minutes. (you want the kale to still be crispy and fresh tasting) Drain water and add kale, garlic, toasted walnuts, cheese and the juice of the lemon into a food processor. Turn on and slowly add in olive oil until you get to a nice paste, adding more oil to get to your desired consistency. Oh and don’t forget to salt and pepper to taste!
Straight up frozen ravioli goes onto an oiled baking sheet.(make sure that non are overlapping) Place into an oven at 400 degrees for about 15-18 minutes, flipping after 10. If you want to add mushroom and a few more walnuts, just toss them onto the ravioli when you are flipping over the ravioli.
When the ravioli is nice and brown and crispy, remove from oven and dump the ravioli and the mushrooms into a bowl. Add a big old scoop of the freshly made pesto and toss around.
Look at this… fresh, crunchy, light and happy. Kinda like a spring day.
I am the best lady, making the mister a pretty yummy dinner.
Have a great Tuesday!
-C
Kale Pesto and Baked Ravioli
4-5 cups chopped Kale
1/2 cup Parmesan Cheese ( Nutritional Yeast to make it vegan)
1/2 cup Walnuts
1/4-1/2 cup Olive Oil
4-5 Cloves Garlic
1 Lemon
Salt and Pepper
1 bag of frozen ravioli(use vegan or gluten-free if you want)
3-4 mushrooms
Note..There will be plenty of left over pesto… Just fridge or freeze it
Place walnuts in a skillet and toast on medium heat for about 3-5 minutes or until the nuts become fragrant. In the same skillet, add enough water to cover bottom and add in all the kale. Place a lid on it and let kale wilt on medium heat for about a minutes or 2, Take off heat. Add walnuts. garlic, cheese, salt and pepper, and juice of lemon to a food processor. Blend. Now add in the kale and blend, slowly adding olive oil until a thick paste forms. You can add as much oil as you want to make it as thick or thin as you like.
Preheat oven to 400
Place frozen ravioli on an oiled baking sheet, making sure none are overlapping. Place into oven for about 15-18 minutes, removing after 8 minutes to flip. When you take the ravioli out to flip, slice up the mushrooms and grab a few more walnuts and toss onto baking sheet with the ravioli. When the ravioli’s are nicely browned and toasty, remove (mushrooms and walnuts too) and place into bowl. Add a big scoop of pesto and toss to mix.
Serve and eat.. fork is optional.
Note..Add a thin layer to the top of any left over pesto to keep it fresh and from turning black
One of the best things about winter is that I can have something in the oven at any time and not worry about how hot the house is going to get. I get to spend my free time (or my in between free minutes) baking up all the thing that I would not dare bake in the summer. (lots of bread and cakes) Yeah, I might complain a little about how cold it is outside (to my defense, -20 is kind of a bitch) but then I think of the super hot humid days that come during the summer and cringe. At least when its cold out I am able to get warm, (que oven) but when its super hot and humid, I just turn into something that border lines a wet towel and the rabbit animal… Not so pleasant. I much prefer cooler weather. So no big surprise….I made bread.. or focaccia to be exact. And now you should too because first off, you want to eat it, and secondly, you can probably whip this up faster then it would take to get all of you winter warmies on and leave the house. Don’t leave, just turn the oven on. The stuff, which isn’t a whole lot… Flour and salt. A mixture of honey, water, and yeast. And olive oil. Its pretty much my pizza dough recipe, tweaked with the addition of oil, less flour and no kneading. Mix together the wet and dry…I used my nifty dough whisk, but a wooden spoon or even your hand works. Mix mix mix. The dough should be really slack and sticky. And guess what.. no need to knead! Just make sure the dough is uniformly incorporated…hehe.. uniformly incorporated… sounds weird. Drizzle the dough (don’t worry about making it into a ball, a blob is good) with a little oil and place in a nice warm place topped with a towel to rise for about an hour or until dough has doubled in size. Once is has fully risen, drizzle 2 tablespoons oil in two 9 inch cake pans. Divide dough in half, and kind of smoosh dough into pans. Cover and let rise for another 20 minutes or so. When dough has finished its second rise, drizzle each with another tablespoon of oil and with your fingers, fill out the pan and indent the dough, kind of like playing a piano or tickling a puppy(?)….Then layer your toppings (if you want any) Start with any herbs, then the veggies. Then last, any cheese you got. I used thyme, cracked black pepper, tomato, onion, topped with parmesan cheese. And the other one is just plain old salt. Pulled from the oven when nice and golden brown..set on a wire rack to cool for a few minute and removed from the pans. The mister was practically salivating waiting for a slice… and he was so not disappointed. Crispy outside with soft airy insides… Everything a perfect focaccia should be. The one with the toppings was the favorite for the first night, but for a peanut butter and cheese panini for lunch the next day…plain is the way to go.. My suggestion, do what I did, jazz one up and leave one plain. And then make more if you need too because the forecast call for another week of below zero!!! Oh the things that I’ll get to make! (me being positive) Stay warm! -C
Focaccia with out without stuff
3 cups all-purpose flour
1 tablespoon salt plus 2 teaspoons for topping (can use more or less if you want)
2 teaspoons active yeast (or one package)
1 1/2 cups warm water
1 tablespoon honey (or sugar if vegan)
6 tablespoons olive oil
Optional toppings
Fresh cracked pepper
Thyme or any other spices
Thinly sliced tomato
Thinly sliced onion
Parmesan Cheese
Anything you want!
In a bowl or jar, mix honey (or sugar), yeast and warm water together and let sit for about 5 minutes or until yeast is activated and starts to foam In a large bowl, whisk together flour and 1 tablespoon of salt. With either a wooden spoon, dough whisk, or if you have one, a stand mixer with a dough hook, mix the yeast mixture with the flour. The dough is going to be really sticky so mixing might get a little gloppy, but keep at it until everything is full incorporated.. for about 3-5 minutes and don’t be afraid to use your hand… you can wash it off. Once mixed drizzle with oil and cover with a towel. Let rise for about an hour or until dough has dubbed in size. When dough has double, coat two 8 or 9 inch cake pans each with 2 tablespoons olive oil. Dump dough onto floured surface and cut in half. Take each half a place in pan. cover and let rise again for another 20ish minutes. preheat over to 400 degrees After second rise, lightly take your fingers and push down dough, making little indents all over the surface. Drizzle each with another tablespoon of olive oil and sprinkle each with a teaspoon of salt. If using spices or any other toppings, nows the time to layer them on. And do any cheese last! Place in oven and bake for about 30 minutes or until the tops are golden brown. When done, place on a wire rack and let cool a bit before removing from pans. Done!! To store, place in a paper bag.. best eaten within a few days!
It’s Friday!!! And what does that mean? Pizza Pizza!!!! But not just Fridays…pizza happens more times then not in our house…It’s the misters favorite food and for real, he could eat it everyday, all day.…He is kind of made of the stuff. As for me, well I don’t mind making it for him because it’s easy. And because I am making it, it doesn’t have 8 million calories, 9 million grams of fat and have 10 million milligrams of sodium like takeout of frozen. My pizzas are for the most part pretty freaking heathy. It really depends on how its topped. Like take this one.. Homemade pesto, good quaility cheese, (you can use vegan or low fat) chickpeas and tomatoes. Not to shabby. And really, it isn’t any more complicated then calling the take-out place or unwrapping the frozen plastic disk from the box. All you need is some good dough (I guess you could use store bought) and some good quality toppings… and you’re there…Pizza in your face.
For this pizza I used the skillet cooking method. This crust is one of the misters favorites. It is a basic pizza dough but cooked on the stove in a skillet. It’s almost like a pita bread, but not. And I like to make it this way because its really fast (once the dough is made) and I can even make up a few crusts to have on hand for later.
Fast, healthy, and tasty…..Why not eat pizza every day?
Not too many ingredients here. 3 cups of all purpose flour or 2 cups all purpose and 1 cup white whole wheat. A teaspoon salt, a teaspoon honey (use sugar if vegan), yeast and warm water…
Start with the dough. Add honey or sugar to yeast and warm water and let sit to active, which should take about 5 minutes.
Mix together the salt and flour(s) and add the foamy yeast mixture. Mix until it all comes together and dump out onto a floured surface. (if the dough seems to dry add a splash of water..if way to wet, add a little flour) Give the dough a good 2-3 minute knead session, adding flour as needed to keep the dough from sticking. Form a nice ball, place back into bowl and drizzle with oil. Cover bowl with a towel and stick in warm place to rise for about an hour or until it has doubled in size.
When dough has doubled, dump back onto a floured surface and divide into 4 equal sized balls (or as many balls at whatever size you want)
Now you have a few choices here. You can either cook up all the dough now if you need it, or freeze dough balls for future use. If you think you are going to make pizza again within the next few days, it can be refrigerated, or you could also blind bake the dough and freeze or fridragerate that and have pre baked crusts all ready to go. So many options… just do whatever works for you.
To make the dough in a skillet, oil the bottom of a 15 inch skillet, turn burner on to high and let preheat until the oil is sizzling. Roll dough out to roughly the size of the skillet and when it has preheated, place dough on in there and let cook for about 3-5 minutes, or until the dough starts to bubble and the bottom has started to brown. Turn burner down to medium and flip. Cook this side for another 3-5 minutes.
If you want oven crust, just roll out and place on a baking sheet and bake with topping on at 475 degrees for about 20 minutes
Now the crust is ready for the toppings!!
Preheat the oven to 450 degrees.
Smear the pesto (for this pie, I used the last of my homemade pesto from last summer…sad face) Mince garlic and distribute evenly on top of that. Then do the cheese, followed by the tomato slices and chick peas. Sprinkle with a bit of salt, cracked pepper and some parmesan cheese.
Stick into oven for 10 or so minutes or until the chesse is nice and bubbly and the crust os crispy and brown.
And that is pizza. A super duper, yummy, healthy, not too fatty or overly salty… can be eaten breakfast lunch or dinner time, pretty, satisfying, pizza.
Make it for yourself, for you lover, for a friend. Make it in the shape of a heart or an elephant. Give you kid(s) a ball of dough and have them make their own… I know… such a good idea.
Everyday, all day.. Happy Friday and Happy Pizza
Stay warm!
-C
Skillet Pizza Dough and Pesto Chickpea Pizza
Ingredients
For the dough
3 cups of all purpose flour or 2 cups all purpose and 1 cup white whole wheat
2 teaspoons of yeast or 1 packet
1 teaspoon of honey or sugar
1 teaspoon salt
1 1/2 cups warm water
The Pizza Toppings (for a 15 inch crust..adjust amounts to your need or liking)
1/4 cup of pesto
1 large roma tomato thinly sliced
a few cloves of garlic minced
1/1 cup of prepare chick peas.. rinsed and drained
1/2- 3/4 cup of cheddar cheese (or any kind you like..use vegan cheese if you want too)
salt, pepper, and parmeasan (optional) to sprinkle on top
To start, place honey, yeast and water into a jar or bowl and let sit to active until mixture starts to foam. Mix together flour and salt into a large bowl and add in yeast mixture. Stir until combined and dump onto a well floured surface. Knead dough for a a few minutes and form into a ball. Place back into bowl, drizzle with oil and top with a towel. Place somewhere warm to rise for an hour, or until dough has doubled in size.
When dough is done rising, dump back onto floured surface and divide into 4-8 equal sized balls.( 4 balls make 15 inch pizza… 8 balls are good for individual size pizzas) Place whatever dough you are not going to use into a closable plastic bag and either stick in fridge(if using within a few days) or freeze for future use.
Place skillet on high heat on stove and drizzle with oil. Also, preheat oven to 475 degrees. Roll out you dough and when the skillet is has gotten really hot, place dough right on in. Let cook for about 3-5 minutes or unit the cough has started to form bubbles and the bottom has started to brown. Turn heat down to low and cook other side for another 3-5 minutes or until browned.
Now pizzafy it.. Add on the toppings. Smear with pesto, add minced garlic, then evenly sprinkle cheese. Top with the chick peas and the sliced tomatoes. A sprinkle of salt and pepper and a dusting of grated parmesan……Right into the oven for about 10 minutes to melt it all together…..
Pizza Pizza!!!
I am such a sucker for the reduced price produce at the grocery store. I save at least half of the original price for stuff that might look a little weird or have a brown spot or something. Sometimes I can’t believe what ends up on in the bin, stuff that I wouldn’t consider reduced bin material, but hey, if they want to stick it in there, then I will be more than happy to buy it. A couple days ago I found some good looking roma tomatoes in that said reduced produce bin..the skins the tiniest bit wrinkled (like I could care less), least hen 50 cents a pound. Um, yea, I bought those and put them to good use.
Tomatoes roasted until they fell apart with a few other chunks of stuff, then piled onto a base of spinach and couscous. This meal cost me pennies and was stupid easy and fast to make. And pretty to boot. Perfect for a quick healthy meal on a busy day or maybe for those people looking for a tasty, not too completed dinner to make for a special someone for Valentines day? Or make just for yourself…its pretty much the perfectly dish. Anyone can get into it. And if you don’t happen to have a grocery store with a reduced produce bin full of tomatoes…it’s cool, you’ll just have to pay full price for the perfect ones.
So simple. A little olive oil in pan. Chunk the tomatoes and throw in pan with the chopped onion, carrot, cauliflower, garlic and chick peas. Drizzle a bit more oil and top with salt and pepper. Give it all a toss and stick into oven. That’s that. Just leave it in there until everything is so nice and soft and falling apart.
One of the best things about couscous is that you don’t even need to dirty a pot or a bowl to make it, just add dried couscous to the bowl you are going to eat out of with a cup of boiling water and a pinch of salt. (I added the spinach with the water too) After about 8 minutes, the couscous absorbs all the water and you just fluff it up with a fork. Easy, freaking Peasy!!! Out of the oven and piled on…..
I mean, if this isn’t one classy looking meal, then I don’t know what is.
Sprinkle with a little parmesan or nutritional yeast if you want and step back and admire. And now eat it to you face.
And barely any dishes to wash. No big mess to clean up. I could get used to that.
-C
Chunky Tomato and Stuff Couscous
Ingredients
Serves 2
3/4 cup Couscous
1 cup boiling water
Handful of chopped spinach
4-5 roma tomatoes chopped
1 medium carrot diced
Half of an onion diced
Cup or so of cauliflower (fresh or frozen)
Cup of prepared chick peas
4 or 5 cloves garlic minced
Olive oil to drizzle
Salt and pepper
Preheat oven to 400
Place onion, carrot, cauliflower,tomatoes, chick peas and garlic into a large skillet. Drizzle with olive oil, sprinkle with salt and pepper, and give everything a light toss. Stick into oven for 35-40 minutes until tomatoes are falling apart and everything is nice and roasted.
In a medium bowl, (or serving bowl) add cup of boiling water to dry couscous and spinach. Sprinkle with salt and cover. Let sit for at about 8 minutes, or until the couscous had fully absorbed all the water. Fluff with a fork and top with roasted tomato stuff.
Top with parmesan or nutritional yeast if you are into it.
Enjoy!
What a way to start the day, with a mouth full of c words…….Caraway, cauliflower, chick peas and cabbage…What did you think I meant?
This week has been nippy, no, its been chilly…..nah, it’s been freaking freezing! Yeah, freezing cold. When I woke up this morning to walk the pup, it was 5 degrees. So needless to say, when it gets this cold, I like to keep inside. Tying not to be a complete lazy bones, I went to town on my spices… refilling jars with all the little baggies scattering the kitchen, screwing on lids, and wiping down the shelves. Not a bad accomplishment for a day. While cleaning I came upon a little bag or caraway seeds, Not enough to warrant a jar on the wall, but defiantly enough for one dish.
When I think of the bright, somewhat sweet and peppery caraway, I think cabbage.(anything cabbage and I am sold) A big pan cabbage, added cauliflower for the mister,(his favorite) creamy chick peas because we need protein and they be tasty, and of course mustard, because everything tastes better with mustard.(I’ll let you in on a little secret.I eat a lot of mustard, I am kind of obsessed. Mustards of all kind; grainy, homemade, dijon…but usually just plan old yellow. And I eat it on everything.. but my go to is French’s yellow mustard and carrots…don’t judge) A warm, bright and filling dish, perfect for a freezing cold evening stuck inside. You can eat it as main dish or add a pile of quinoa or wild rice, or even a big plate of greens. What ever say you eat it, you and your stomach will be happy.(If your worries about cabbage bloat..don’t be. Cooking cabbage helps breaks down the enzymes that create gas, plus caraway has anti bloating properties…WIN!)
Cabbage, cauliflower,(fresh of frozen….I used frozen in this recipe) pre-cooked or canned chick peas, caraway seeds, yellow mustard, and salt..(I added pepper too)
Chop the cabbage and toss into a lightly oiled pan with the rest of the stuff. Heat pan with everything but water for a couple of minutes.. to warm the caraway and give everything a cooking head start, then add the water. Stick a lid on it and let simmer. After about 15 minutes, give it a stir or two and do a taste test. At this point, it’s up to you…how cooked you want the veggies? I kept mine cooking for another 10 minutes. I also added another 1/2 cup of water. Not enough water and the pan will burn, a little extra water is good, it creates a yummy broth.
When you are happy with the flavor and doneness, eat it. I made myself a bowl with a heap of pickled beets(holy yes!). I am sorry if you don’t have any pickled beets, but the dish is still amazing without them. Fresh ground pepper really does the trick too!
So there you go, make it tonight, it will make you warm,smart and happy
-C
serves 2-3
1/2 small head of green cabbage(about 2 cups chopped)
2 cups cauliflower(fresh or frozen)
1 cup cooked chick peas
1 1/2 -2 cups water
1 tablespoon caraway seed
2 tablespoons yellow mustard
salt and pepper to taste
Lightly oil a medium sized skillet and add all ingredients except water. Heat for a few minutes to warm up veggie and caraway seeds then add a 1 1/2 cups of water. Keep on medium heat with a lid and stir on occasion If water evaporates completely out, add another 1/2 cup. Dish is done when veggies are tender.. about 20 minutes….but whenever tastes best to you!
Happy Hanukkah!!! Today is the first day of the festival of lights and I wanted to send a little love towards those who celebrate it.
I am not going to lie, I don’t know much about Hanukkah but I do know that its customary to eat fried foods during the holiday. The oil represents the miracle of the oil that burned for eight days ands.nights when it should have lasted for only one night. That’s a cool reason to celebrate.. So a lot of food eaten during the holiday is fried, therefore I must fry, and what better than potato latkes.
I don’t usually fry anything. But again, I don’t think I used as much oil with these as I could have..just enough to cook and not stick. Hey, it’s the holidays and this oil had meaning so it’s completely a ok to eat a little fried, just make sure to eat lots of good healthy stuff too!
I didn’t actually use all the potatoes in the picture, but I wish I did. There was the perfect amount for dinner for two people, but I wanted to make a few extra for left overs….there were none. Oh well. I did a matchstick dice for the apples.. I didn’t want the apples to be to chunky and I didn’t want them to turn into sauce so the match stick worked well. After I diced the apples, I squeezed a little lemon over the top to keep the apple from turning brown.
I start grating the potatoes and onion, and whoa! Imagine my surprise when one of the potatoes was purple… I got pretty excited.The color is so beautiful. and made the latkes look so nice…It was meant to be.Super squeeze the juices out of the grated potato and onion. If you don’t get most of the liquid out, the potato won’t crisp up and will fall apart and be and it will be gross. So SQUEEZE! Add in the egg, cornstarch, salt and pepper and mix it on up. Did I mention that I was making these for the mister and the GF sister..No flour, just cornstarch. I think they might have come out even better without the flour…so yeah, these babies are gluten-free.
Your mixture is going to start to get a little watery again. Its cool, just squeeze it out with your hands and smash into patties.Enough oil to cover the bottom of the pan on medium heat. Test the oil to make sure its hot enough before sticking the latke n the pan. To test, sprinkle water in pan, if it sizzles, its ready.Working in batches, fry each latke on each side for around 5 minutes..you don’t want to cook to fast or the inside of the latkes will be raw. I always do a tester and feed it to nick. He’s my guinea pig….He said they were awesome.. With every batch made, stick on a wire rack and keep in the oven to stay warm. The rack keeps the bottom from getting soggy on the pan… so use it. Roasted apples are the BOMB!!! Its like eating apple sauce sticks or little bites of heaven(A bit dramatic, but these are so good) I roasted mine for 20 minutes, until they were nice and soft but not completely failing apart. If you are into it, add a touch of cinnamon…I did’t this time, but you bet I am going to be making myself a big ol bowl of roasted apples this week, and yes, I will top with cinnamon. A bowl of apple slaw, sour cream and lemon wedges….I put the latkes on a nice little pile of greens. A very good idea. A dinner worth celebrating! I also served the latkes with roasted chickpeas and cailflower…for more of a meal…( Mini recipe… Cauilfower and chick peas drizzled in olive oil, tossed in salt pepper and garlic, roasted 30 minutes and topped with lemon) A little added veggie and protein….I am looking out for you people.
There we have it…my variation on a traditional food. Enjoy your fried pancakes of potato and onion, they are a food worth a celebration.
HAPPY HANUKKAH!
Potato Latkes with Roasted Apple Slaw
Ingredients
3 medium potatoes
half of a small onion
2 eggs
2 tablespoons corn starch
vegetable oil
salt and pepper
2 medium apples
sour cream(optional)
Wash and cut apples into match sticks… Place on a parchment lined baking sheet and stick in oven. Let roast for 15-20 minutes or until the apple is nice and soft. Remove and set aside.
In a large bowl, grate the potatoes and the onion. Transfer the mixture into a clean towel and squeeze the crap out of it to remove as much liquid as possible. Return to bowl and add the two eggs, corn starch and salt and pepper. In a large skillet on medium heat, drizzle enough oil to completely cover the bottom..Work in batches and after each batch, add a bit more oil to cover the pan. Once the oil is hot place squashed latkes into oil. Fry each side until crispy and brown, about 3-5 minutes. When fully cooked, place on a wire rack in the oven to stay warm and crisp. When ready to serve, top with roasted apples and a dollop of sour cream. You can serve the latkes on top a bed of greens..Its a good way to make the pancakes more meal like.
Yesterday The mister and I went for a walk, a long walk. I was wearing a sweater, a light jacket and I left the mittens and hat at home. There was sunshine, huge puddles and mud. Birds were chirping. It was amazing.
After our nice long walk, we got home and I needed to start dinner. It was a little later than I usually so I wanted fast and easy I usually always have pesto in my fridge (I had to make some, but it only takes 5 minutes) because when it’s in there, I can whip up a big awesome meal in the time it takes to boil some pasta or quinoa or smear on toast or toss with potatoes. It really can be used on everything and can be made out of just about anything. Kale and walnuts are just one of so many fantastic combos. And frozen ravioli is always in the freezer too. I used just plain cheese, but use whatever kind you like.
Together, pesto and ravioli, well that’s a quick, easy, and tasty meal, perfect for a spring evening, And yea, there will be left over pesto from this recipe… just stick it in the fridge or freezer….you will be glad you have it.
Pesto stuff. Kale, walnuts, parmesan cheese(nutritional yeast to keep it vegan), garlic, lemon, olive oil, and salt and pepper.
A few little pre steps before the blending.. Toast the walnuts. Just toss onto a dry skillet and stick on medium heat for about 5 minutes or until they start to become née and fragrant. Remove from skillet and add in a bit of water. Add in chopped or ripped kale and cover to let the kale tenderize, but only for about 2 minutes. (you want the kale to still be crispy and fresh tasting) Drain water and add kale, garlic, toasted walnuts, cheese and the juice of the lemon into a food processor. Turn on and slowly add in olive oil until you get to a nice paste, adding more oil to get to your desired consistency. Oh and don’t forget to salt and pepper to taste!
Straight up frozen ravioli goes onto an oiled baking sheet.(make sure that non are overlapping) Place into an oven at 400 degrees for about 15-18 minutes, flipping after 10. If you want to add mushroom and a few more walnuts, just toss them onto the ravioli when you are flipping over the ravioli.
When the ravioli is nice and brown and crispy, remove from oven and dump the ravioli and the mushrooms into a bowl. Add a big old scoop of the freshly made pesto and toss around.
Look at this… fresh, crunchy, light and happy. Kinda like a spring day.
I am the best lady, making the mister a pretty yummy dinner.
Have a great Tuesday!
-C
Kale Pesto and Baked Ravioli
4-5 cups chopped Kale
1/2 cup Parmesan Cheese ( Nutritional Yeast to make it vegan)
1/2 cup Walnuts
1/4-1/2 cup Olive Oil
4-5 Cloves Garlic
1 Lemon
Salt and Pepper
1 bag of frozen ravioli(use vegan or gluten-free if you want)
3-4 mushrooms
Note..There will be plenty of left over pesto… Just fridge or freeze it
Place walnuts in a skillet and toast on medium heat for about 3-5 minutes or until the nuts become fragrant. In the same skillet, add enough water to cover bottom and add in all the kale. Place a lid on it and let kale wilt on medium heat for about a minutes or 2, Take off heat. Add walnuts. garlic, cheese, salt and pepper, and juice of lemon to a food processor. Blend. Now add in the kale and blend, slowly adding olive oil until a thick paste forms. You can add as much oil as you want to make it as thick or thin as you like.
Preheat oven to 400
Place frozen ravioli on an oiled baking sheet, making sure none are overlapping. Place into oven for about 15-18 minutes, removing after 8 minutes to flip. When you take the ravioli out to flip, slice up the mushrooms and grab a few more walnuts and toss onto baking sheet with the ravioli. When the ravioli’s are nicely browned and toasty, remove (mushrooms and walnuts too) and place into bowl. Add a big scoop of pesto and toss to mix.
Serve and eat.. fork is optional.
Note..Add a thin layer to the top of any left over pesto to keep it fresh and from turning black
Holy shit is it hot out. My brain is all fizzy, my hair is all frizzy, and my over all being is just blah. I am not a fan of super hot weather (as some of you may know) and am getting more pissy as the days go by and I continue to be a sweaty mess. I don’t want to feel like a big wet slob, I want to feel fresh and clean and wear clothes that are not drenched in sweat. I know, bitch, bitch, bitch, but seriously. Even the world around me is wilting, and in the nice, colorful fall foliage kind of way. It’s all crispy and brown. The garden is barely holding on, the flowers are shriveling in the ground, and a few plants are just plan dead. It’s just too hot.
I think that only plus side of this past week of hot crap weather are these popsicles that I made. They were actually suppose to be a treat for the littles, but guess what, me and the mr ate them and didn’t share, and no, I feel zero bad about it. They were so good, so refreshing, so cold(if only for a minute) and just so needed. A few minute reprieve from being miserably hot. And bonus, a great use of all the watermelon and tomatoes that I have taking over the countertops (I have so much watermelon and tomatoes)
And really, these probably (better freaking be) the last batch of popsicles for the summer so I think I am going to make another batch today, eat them, savor the flavors of summer, and move on from there.
. Maybe I’ll even share them this time.
The stuff. Some watermelon*, a tomato, a handful of basil, and a lime.
*My watermelon had seeds, but you can use seedless. I also removed the green skin, but kept on as much rind as I could, although this particulate melon had very little white rind.
Dump the melon, tomato (cut in a few pieces, the juice of the lime and the basil into a blender. If your melon has seed, don’t worry about removing them.
The stuff all blended up.
. This step is more necessary if you melon is seeded, straining the mixture pretty much caught most of the seed chunks. You can skip this if your melon is seedless.
Now pour the juice into your molds and stick into freezer to freeze.
After about 2 ish hours, remove and stick the sticks into the semi harder pops.
And a few more hours later……Frozen goodness.
And pop one of those suckers out of the mold and savor every frozen delicious bite.
Happy Tuesday… DON’T MELT!
-C
Make six 3.5 oz popsicles
1 ish cup watermelon (green skin removed.. rind is good)
1 large ripe tomato (about a cups worth)
a few sprigs of basil
Juice of 1 lime
Place all ingredients into blender and blend until smooth. Strain mixture through a fine strainer into a bowl or jar and pour into popsicle molds.
Place in freezer for a few hours. About 2-3 hours in the freezer, take them out and stick in sticks (or fallow you popsicle molds instructions) Place back into freezer
Once completely frozen, remove from molds and eat with your mouth.
This little guy asked me to make him some popsicles, and of course I said yes because, well look at him.
So we made a date. A popsicle and playground date to be exact.
For these particular pops, I decided to use watermelon, mainly because I had just broken into one and once I open a melon, I have a race with myself as to how fast I can consume the in entire thing. ( It’s a sick form of watermelon gluttony) But also because the little was really really excited to hear that I could in fact make watermelon popsicles. And the other stuff I added because I had it and it all tastes really good together.
I made the popsicles the day before so they would be ready for our date. He came over, we ate lunch,(peanut butter sandwich and carrot sticks) wondered around the neighborhood with the pup, and made a quick stop at the playground. (we only managed a couple runs on the slide before it was too hot and our sweat had us sticking to the slide and it was more of a painful scoot then a glide) We then made our way home and rewarded ourselves for a walk well done with these amazing, super refreshing, and healthy frozen treats that I made just for us. While we were eating the popsicles, our conversation turned to food. We talked about all the different varieties of popsicle that we could make, and how we could eat them for breakfast, lunch or dinner because they are made of only good things and are really healthy (he is really trying to eat healthy) It was the perfect ending to a fantastic afternoon with a five year old, or any human for that matter…
I would have a popsicle date with this kid every day
The Stuff. Fresh seedless watermelon (make sure to have lots on hand cause you are going to be eating it as you make these), a fresh lime, a handful of blueberries and a sprig of fresh mint. And don’t forget a mold of some kind that form the liquid into a popsicle (if you don’t have a mold, little paper cups work too)
Remove watermelon from rind and cut into small chunks. Juice the lime and add that, the watermelon chunks, the mint and the blueberries to a blender or vessel if using a hand blender) and blend everything until smooth.
Look at how pretty that is. And so tasty…. I am not going to lie and say that I didn’t make a little extra to drink, cause I did.
Now pour the puree into your molds to the fill line (follow the instructions that your molds give you) and place into the freezer.
And yes Shannon, these are in fact, your popsicle molds. Don’t worry, I’ll bring them back soon. (I am thinking some type of booze infused situation)
Once the freezer has done its job freezing… pop those suckers out.. (I let the mold sit on the counter for a few minutes so the popsicle pops out clean)
And heres to the best popsicle date ever!
Happy Summer! Happy Tuesday!
-C
A big chunk of seedless Watermelon (aboutt 11/2 cups)
1/2 ish cup of blueberries (fresh or frozen)
Juice of 1 lime
a few fresh mint leaves
note. The popsicle mold that I used only needed 2 cups of popsicle juice. If you have a larger mold, just use more of everything to get the amount you need
Remove rind from watermelon and add to a blender with the lime juice, mint and blueberries. Blend until eveytthing is pureed and mixed all together. Pour liquid into popsicle molds and stick in freezer for at least 4 hours.
When ready to eat…, pop those suckers out of there molds and EAT!
I can’t stop eating these. They are like little balls of crack and I am an addict.
Frozen peanut butter grapes… I mean, I just can’t stop.
So you say you have never frozen your grapes? Well you should. It’s the only way I like to eat them anymore. I was never a huge grape fan, but one day long ago, I discovered the wonder that is the frozen grape and it is amazing, Now whenever grapes are on sale at the grocery store, I buy way to many and end up filling our tiny little freezer with jars and bowls of grapes. Then whenever the mister goes to grab the bag of frozen peas for his sore back or knees, there is almost always a frozen grape avalanche. Why I don’t put a lid on those containers is even a mystery to me. Oh, now I remember.. I want easy access.Oopen the freezer, grab a few grapes, and go on my way… not having a lid to take off makes the process a little easier.
Then one day, the frozen grape game turned into something else, something a little more decadent and even more addicting. Where it came from, I do not know. Maybe it’s some subconscious throwback to a childhood full of peanut butter and grape jelly sandwiches, or maybe it’s just that fact that I think peanut butter can pretty much go with anything. But no matter why, I started dipping those frozen grapes into peanut butter and never looked back. And now when I have grapes, it’s all I want to eat.
I am warning you now, once you start making these, watch out, because before you know it, you will develop a frozen grape addiction too. And littles.. they are as easily addicted to these as well. I have seen kids that hate grapes go totally bonkers for these. Just so you know.
The stuff you will need. Washed and drained fresh grapes (green or red. I usually use red but the green were half the price and the red ones didn’t taste very grapie*) Creamy peanut butter, skewers, and a little bit of cinnamon or cocoa powder (optional)
*Note. When you are the store, try before you buy. You know what I mean, eat a few while shopping aground. I say this because not all grape are created equal. Some taste way better than others. I have bought grapes before that didn’t taste like anything or that have really tough skins, and those just piss me off, so eating a few will guarantee that your money is being well spent and that the grapes won’t disappoint you.
Ok, so now let’s make these bad boys.
Simple simple. Two grapes per skewer (or toothpick) Lay on a wax paper covered dish or pan and stick them in the freezer until frozen. When the grapes are frozen, melt peanut butter. Take a big glob and stick in a tall skinny cup or bowl and stick in the microwave or heat in a sauce pan and then transfer to a tall skinny vessel. Take frozen skewed grapes and, one skewer at a time, dip in the peanut butter. Cover with as much or as little of the peanut butter as you want and place on wax paper. If you are feeling feisty, add a sprinkle or cinnamon or even a dash of cocoa powder. Or, this may seem a little crazy, but garlic powder is so F*ing good.(it’s worth at least giving it a try) When all grapes are dipped, place back into freezer for another 10 minutes or so to let the peanut butter set up a bit.
Whenever your ready… Eat. And be so happy. And always keep a back stock of frozen grapes in the freezer. They are the best.
Keep it realz.
-C
Peanut Butter Freezer Grapes
the quantity is up to you, but I recommend making a shit ton!
Creamy Peanut butter (I use organic creamy from Trader Joes, or natural skippy)
Green or Red Grapes
Cinnamon and or cocoa powder (Optional)
Toothpicks or skewers
Wash grapes and skewer 2 grapes onto a stick. Place on a flat surface and stick into the freezer until frozen, which usually takes about an hour.
Once grapes are frozen, stick a big glob of peanut butter into a tall skinny vessel (Like a juice cup or a 4 oz ball jar) and warm to a liquid constancy in the microwave (about 30-45 seconds) or if you don’t have a microwave, stick in a sauce pan, warm on stove, and pour into a glass (what I do)
Remove frozen grapes from freezer and dip into melted peanut butter. Place on a wax paper line tray or pan and sprinkle with cinnamon and or cocoa powder, or not, or a few (whatever you want) and stick back into freezer for another 10 minutes.
Eat as many as you want… Make so many because you will become addicted!
Monday was kind of a suck until I made dinner. It was hot, I didn’t sleep well the night before, and I spent the morning calling the dentist over and over until someone picked up so I could get my butt in there to get my tooth fixed (sometime during eating on sunday I broke my back molar…. and that happened) . Whatever, I got the only appointment that they had available and was just happy that I was able to get in. So went about my morning, went to the gym, did my things then ran home, took a shower and headed to the appointment. When I got there, I checked in, sat down, and waited..Then waited some more, then was called in to the room and then did some more waiting. But finally, the doctor came in and took two minutes to check the tooth (the doctors said I was as badass… couldn’t believe that I don’t do novocain) and left the dental assistant lady to fix it. And ok, I know that people have to practice their craft to learn, but I am pretty sure that I was one of the first solo tooth fixings that this lady has ever done. And that’s cool, but I was hungry and just wanted to get the f out there.(did I mention that it was lunch time?) So taking her sweet time (at least she did a good job) she got it done. But then I had to wait some more, in the chair, for the doctor to come back and check. Holy hell I was there for way to long.
Then I got home and rushed out.. grabbing a carrot on the way. But I was still hungry.. And that just sent me to a dark place for the rest of the day.
So when I finally got home, I immediately went to the fridge to get dinner started. While aggressively riffling through bags of veggies and greens, I stubbled upon a big bag of mustard greens that I got last week at the farm….SCORE.., this made me happy.
Sure, I could have just eaten them right there, fresh and all spicy like, but I if I waited this long to eat, I could wait a little longer and I figured I would share.. and mabye do a little some thing fancy, like toss them with some cooked up onions and sweet potato and that left over quiona that was also in the fridge.
And thats what I did. And it was good. And the day didn’t seem so bad. (food always makes me better)
The stuff. Mustad greens oh lala. A small sweet potato and an onion (I used half of that big one). Cooked quinoa, garlic, salt and pepper, and a little olive oil.
Dice up the sweet potato into little chunks and toss into a big skillet with a drizzle of olive oil and a sprinkle of salt and pepper. Place skillet on medium heat and cook potato for a few minutes just to give it a little head start before adding the onions. When the potato starts to show a little browning, add in the onions and a splash or two of water. Stir around, stick a lid over it, and continue to cook until the onions are soft and the sweet potato is fork tender.
When the stuff is cooked, mince up the garlic and stir that in and cook for a little longer.
And now toss on the mustard greens. (Don’t worry if they are overflowing from the skillet, they will cook down really fast). Add another splash of water and place the lid back on. Cook for a couple minutes and mix everything together.
Place cooked quinoa (hot or cold) into a bowl.
And dump the stuff right on top. If your into it, drizzle with a bit of balsamic vinegar. (I highly recommend)
And eat to be happy.
Hears to a better day then yesterday!
-C
roughly 1/2 lb. of fresh mustard greens
1 small sweet onion or half a big onion
1 small sweet potato
3/4- 1 cup cooked quinoa*
few cloves of garlic
1-2 tablespoons balsamic vinegar(optional)
salt and pepper
olive oil
Note- To cook quinoa, use1 part quinoa- 2 parts water. Place quinoa in pot with water, bring to boil, place on a lid, then turn to simmer for 15 minutes. After 15, turn heat off and let sit of a few more minutes then fluff with fork. Also, i f you don’t have quinoa, just use rice or faro or nothing, the greens are good their own.
Dice up sweet potato into small picese and stick in a large, lightly oiled skillet on medium heat. Toss on some salt and pepper and cook potato for a few minutes until they start to slightly brown. Slice up onion and toss that into the skillet with the sweet potato. Add in a splash of water and place a lid on the skillet, giving it a stir ever now and then. (Watch the stuff carefully, it cooked pretty fast.) Cook until both the sweet potatoes and onion are browned and soft. Now mince garlic and mix that it and let cook for a few minutes..
Now everything is cooked, toss in the mustard greens. (It may seem like a lot, but its not) Hit with a splash of water, place a lid (it doesn’t have to be a snug fit) on top and cook for a few mites until greens are wilted. Toss everything around to mix together. Take your quinoa and place in a bowl. Top with cooked stuff and drizzle with balsamic vinegar.
Eat right away and maybe save a little for later cause it very much good cold too!
Chomp Chomp Chomp… The sound I make as I eat this freaking fantastic crunchy granola. You know it’s good when the person sitting next to you is annoyed by the sound of you face while eating. I eat a lot of crunchy stuff. And I am pretty sure I annoy the mister a lot.
Oh well, he will live, and he eats his fair share of annoying stuff too so we can just call it even.
So granola. I love it. I make a batch every few weeks or so, and I usually make it just for me. (I almost never make things just for me) I like to keep it simple but flavorful. A tad sweet, but not really, and crunchy, without the oily fried taste. I also like a variety of sizes, some big clusters and some small pieces.
This granola fits the bill perfectly. Made with 5 ingredients, no oil, and the perfect sweetness level. It’s one of my favorite flavors yet. And I know I said I made it just for me, but the mister really liked it too. (I can’t help sharing)
The simplest of stuff. 1 smashed banana, a cup of pureed butternut squash, Vietnamese cinnamon*, honey, and old fashion oats. (and a dash of salt, not shown)
*Note. I only ever use Vietnamese cinnamon because once I start using it, regular old cinnamon just won’t cut it anymore. It is a bit sweeter and a lot more spicy. If you don’t have it or don’t want to use it, use regular cinnamon and add in 1/2 a teaspoon of all spice.Toss the cinnamon and salt with the oats. Mix together the banana, squash and the sweetener and combine with the oats until full incorporated.
Another note. Because I made this granola for me and no body else, I actually omitted the honey (I think that banana abs squash make it sweet enough) But if I was making this for lets say, the mister, or a friend, I would use add a bit. The sweetness level and sweetener of choice is up to you, but 2-3 teaspoons of honey or maple syrup is usually sweet enough for people.
Dump the mixture on a parchment lined baking sheet and give it a little pat, you know, to settle all the bit and pieces together, all cozy and evenly spread out. Now stick into a preheated oven and after about 20 minutes, take out of oven and give the granola a toss, breaking apart any super big chunks or overly wet pieces. Put back into oven for another 20 minutes. (I like my granola super crispy crunchy so I cook it a little longer, like 30 more minutes)And when you are happy with the crunchiness of you granola, remove from oven and let cool, trying not to eat all of it while it sit’s on the counter looking all pretty and smelling like happiness.
Grab a bowl, stick the rest into a jar with a lid, hide it from others, and chomp chomp chomp away!
-C
Banana Butternut Granola
3 cups old fashion oats (use gluten free oats if needed)
1 ripe banana, mashed
1 cup butternut squash puree (can use canned)
2 tablespoons Vietnamese cinnamon (or 2 tablespoons regular cinnamon and 1/2 teaspoon of allspice)
1-3 tablespoon honey or sweetener of choice (use greater amount for sweeter)
dash of salt
Preheat oven to 375
In a large bowl, mix together oats, cinnamon and salt. Mix the mashed banana, squash, and sweetener of choice together and combine with the oats. If the mixture seems really dry, add in a very small splash of water to loosen just enough to mix.
Dump mixture onto a parchment lined baking sheet and evenly disperse the mixture. Give it a kind of smoosh to compact the oats and to make sure all its all the same thickness on the pan.
Stick into oven for 20 minutes. Remove and give granola a little toss, maybe breaking apart any really big chunks (unless you like really big chunks) and put back into oven for another 20 minutes. (30 for a crunchier granola) Remove from oven and let cool on baking sheet before storing in an air tight container. If you find that it is not as crunchy as you would like or is a few days old and lost some of its crunchiness, just stick it back into the oven for a few minutes to re crunch.
Eat as is, as a cold cereal, dip in peanut butter, add to popcorn or whatever way you want to eat it. No utensil required.

 There is a joke about Vermonters, that all we talk about is the weather. Well, it’s kind of true. But to our defense, we get a lot of weather, and it’s always changing and intense and both lovely and crazy and all over. So yeah, we talk. A lot, about the weather. And on that topic, I am trying so hard not to complain, but honestly, I am getting a little sick, both physically and mentally from all of these super, to freaking cold temperatures. Yesterday the high was 0 ( which was at like 2 in the morning) and factor in the windchill, the temp stayed at like 25 below. It f**king sucks. I can’t stay outside for too long or else I will probably die. The dog is having a hard time making it around the block before he gets ice paws, and the mister, well he even started wearing gloves (he wears a sweater all winter and never gets cold…..he is officially cold)
 I accidentally spilled the turmeric on the counter..but it kind of looks like I might have done it on purpose… yeah, let’s go with that. Chop the garlic and he ginger into chunks
 And toss into the pot to warm and activate. Just a little toasty toast.
  And the veggies are roasted and tender and smell so good. It took a lot of will power to not eat the whole pan right there.
 I added the roasted veggies and 3 cups water straight into my pot with the spices because I used an emulsion blender. If you are using normal blender, add the veggies, the toasted spices and the water to the blender and blend until smooth. Then transfer to a pot.
 Pretty much all blended together….(I left a few big chunks in there to snack on while I was waiting to eat serve…I was really hungry) and let to simmer for a little longer…

 Me and this little made some donuts, but screw the donuts(sweet potato with chocolate frosting).. look at the overalls! I decided a long time ago that when I have kids, they will be wearing nothing but overalls. Osh Gosh FOREVER!
  FARM SHARE PICK UP!!! I was starting to go through veggie withdrawals.
 Shadow hearts for Valentines Day! I love Valentines Day..… or maybe I just love hearts and pink. Either way, I am getting ready for some V-day recipes! This one is a definite go….
 And beet dyed coconut sprinkles…I mean, talk about happy.
  A late Christmas gift from Nicks mom. Every year she gives us s few of her hand thrown pieces….. love!!
 And I gave the mister a haircut!!! He has been asking me for about 2 months now to cut it, but for some reason we just haven’t gotten around to it. So finally this week it happened, and I can see his lovely face again!
 How can you not be happy when your piece of ginger looks like a little man. (right after I took this picture I cut his legs off)
 Flowers from our garden last summer….. Sunflowers are my favorite (these are teddy bear sunflowers)…. I love looking back at old picture, especially ones from opposite seasons, like flowers in winter or pictures of snow in summer. There like little glimpses of whats to come. I can not say it enough, I am so lucky to live in VT..we have excellent seasons so there is always something to look forward too!
 Chomp Chomp Chomp… The sound I make as I eat this freaking fantastic crunchy granola. You know it’s good when the person sitting next to you is annoyed by the sound of you face while eating. I eat a lot of crunchy stuff. And I am pretty sure I annoy the mister a lot.
  The simplest of stuff. 1 smashed banana, a cup of pureed butternut squash, Vietnamese cinnamon*, honey, and old fashion oats. (and a dash of salt, not shown)
 Toss the cinnamon and salt with the oats. Mix together the banana, squash and the sweetener and combine with the oats until full incorporated.
  Dump the mixture on a parchment lined baking sheet and give it a little pat, you know, to settle all the bit and pieces together, all cozy and evenly spread out. Now stick into a preheated oven and after about 20 minutes, take out of oven and give the granola a toss, breaking apart any super big chunks or overly wet pieces. Put back into oven for another 20 minutes. (I like my granola super crispy crunchy so I cook it a little longer, like 30 more minutes)
 And when you are happy with the crunchiness of you granola, remove from oven and let cool, trying not to eat all of it while it sit’s on the counter looking all pretty and smelling like happiness.
  The other day the mister and I started reminiscing about some of our earliest memories of what our parents fed us or what they used to eat when we were growing up. One of the dishes that we both remember eating was the classic creamed beef on toast, or as my mom use to call it, shit on a shingle. Yup, shit on a shingle. (who ever started calling creamed meat on toast is a freaking genius) I think that as a kid, I liked the dish just for the mer fact that I could say the word shit and get away with it. I think my mom liked it for few reasons; she could make a big butt load of it really fast, for a crap load of kids, on the super cheap. And I think that she just really like it.
  The shit….. A few mushrooms, a bit of onion, cooked lentils, flour, milk, oil, salt and pepper, and garlic powder. And the shingles.. 2 pieces of thick white country bread.
  Slice the mushrooms and the onion and toss into a skillet with a drizzle of oil. Cook on medium heat until browned and fragrant..Remove from pan.
 In the empty pan still on medium heat, add in the olive oil and the flour. Whisky constantly, slowly add in the milk. Keep whisking until sauce thickens. Remove from heat. Add in salt, pepper, and garlic powder.
 Add the mushrooms and the lentils into the sauce and give it a good mix. Oh, and don’t forget to toast up the bread.
  Now dump that shit all over those shingles! Oh the memories.
 Happy St Patricks Day!!!! As a kid, St Patricks day always meant green milk, green eggs, and those nasty gold foil covered chocolate coins. (you know, from the pot of gold) Not to mention all the leprechaun hunting and pinching. In my family, if you were unlucky enough to forget to wear green, you ended up as a walking target. It all started out nice an innocent, a pinch here or there, but by the end of the day, someone would end up pinching a little to hard or maybe just one too many times and the game would go from pinches to punches.
  The stuff…. Super pretty red potatoes, red cabbage, shallots, kale, salt and pepper, and olive oil.
 Dice up the pretty potatoes and stick them into a pot and fill up with water and add in a good tablespoon of salt. Stick on high heat and bring to a boil, then turn the heat down to medium and cook those taters until super fork tender. (bring them to the edge of falling apart)
 Once the potatoes are super tender, drain the water and dump them into the pan with the sautéed veggies. With a potato masher or a fork, mash up the potatoes and mix in the veggies, adding a drizzle or more of olive oil as you go. (Start with a drizzle and work your way up until it tastes good to you) Salt and pepper to taste.
  The most pretty pan of smashed up potatoes that I have ever seen. Eat as a side dish or even a light main dish. Fork is a good utensil to use, but I found that my fingers worked just as well.
 HOORAY FOR SPRING!!!!!!!
 Pesto stuff. Kale, walnuts, parmesan cheese(nutritional yeast to keep it vegan), garlic, lemon, olive oil, and salt and pepper.
 Straight up frozen ravioli goes onto an oiled baking sheet.(make sure that non are overlapping) Place into an oven at 400 degrees for about 15-18 minutes, flipping after 10. If you want to add mushroom and a few more walnuts, just toss them onto the ravioli when you are flipping over the ravioli.
  Look at this… fresh, crunchy, light and happy. Kinda like a spring day.
 One of the best things about winter is that I can have something in the oven at any time and not worry about how hot the house is going to get. I get to spend my free time (or my in between free minutes) baking up all the thing that I would not dare bake in the summer. (lots of bread and cakes) Yeah, I might complain a little about how cold it is outside (to my defense, -20 is kind of a bitch) but then I think of the super hot humid days that come during the summer and cringe. At least when its cold out I am able to get warm, (que oven) but when its super hot and humid, I just turn into something that border lines a wet towel and the rabbit animal… Not so pleasant. I much prefer cooler weather. So no big surprise….I made bread.. or focaccia to be exact. And now you should too because first off, you want to eat it, and secondly, you can probably whip this up faster then it would take to get all of you winter warmies on and leave the house. Don’t leave, just turn the oven on.
  The stuff, which isn’t a whole lot… Flour and salt. A mixture of honey, water, and yeast. And olive oil. Its pretty much my pizza dough recipe, tweaked with the addition of oil, less flour and no kneading.
  Mix together the wet and dry…I used my nifty dough whisk, but a wooden spoon or even your hand works. Mix mix mix. The dough should be really slack and sticky. And guess what.. no need to knead! Just make sure the dough is uniformly incorporated…hehe.. uniformly incorporated… sounds weird.
 Drizzle the dough (don’t worry about making it into a ball, a blob is good) with a little oil and place in a nice warm place topped with a towel to rise for about an hour or until dough has doubled in size. Once is has fully risen, drizzle 2 tablespoons oil in two 9 inch cake pans. Divide dough in half, and kind of smoosh dough into pans. Cover and let rise for another 20 minutes or so.
  When dough has finished its second rise, drizzle each with another tablespoon of oil and with your fingers, fill out the pan and indent the dough, kind of like playing a piano or tickling a puppy(?)….Then layer your toppings (if you want any) Start with any herbs, then the veggies. Then last, any cheese you got. I used thyme, cracked black pepper, tomato, onion, topped with parmesan cheese. And the other one is just plain old salt.
  Pulled from the oven when nice and golden brown..set on a wire rack to cool for a few minute and removed from the pans.
  The mister was practically salivating waiting for a slice… and he was so not disappointed. Crispy outside with soft airy insides… Everything a perfect focaccia should be. The one with the toppings was the favorite for the first night, but for a peanut butter and cheese panini for lunch the next day…plain is the way to go.. My suggestion, do what I did, jazz one up and leave one plain. And then make more if you need too because the forecast call for another week of below zero!!! Oh the things that I’ll get to make! (me being positive) Stay warm! -C
 It’s Friday!!! And what does that mean? Pizza Pizza!!!! But not just Fridays…pizza happens more times then not in our house…It’s the misters favorite food and for real, he could eat it everyday, all day.…He is kind of made of the stuff. As for me, well I don’t mind making it for him because it’s easy. And because I am making it, it doesn’t have 8 million calories, 9 million grams of fat and have 10 million milligrams of sodium like takeout of frozen. My pizzas are for the most part pretty freaking heathy. It really depends on how its topped. Like take this one.. Homemade pesto, good quaility cheese, (you can use vegan or low fat) chickpeas and tomatoes. Not to shabby. And really, it isn’t any more complicated then calling the take-out place or unwrapping the frozen plastic disk from the box. All you need is some good dough (I guess you could use store bought) and some good quality toppings… and you’re there…Pizza in your face.
 Not too many ingredients here. 3 cups of all purpose flour or 2 cups all purpose and 1 cup white whole wheat. A teaspoon salt, a teaspoon honey (use sugar if vegan), yeast and warm water…
  When dough has doubled, dump back onto a floured surface and divide into 4 equal sized balls (or as many balls at whatever size you want)
 To make the dough in a skillet, oil the bottom of a 15 inch skillet, turn burner on to high and let preheat until the oil is sizzling. Roll dough out to roughly the size of the skillet and when it has preheated, place dough on in there and let cook for about 3-5 minutes, or until the dough starts to bubble and the bottom has started to brown. Turn burner down to medium and flip. Cook this side for another 3-5 minutes.
 Now the crust is ready for the toppings!!

 I am such a sucker for the reduced price produce at the grocery store. I save at least half of the original price for stuff that might look a little weird or have a brown spot or something. Sometimes I can’t believe what ends up on in the bin, stuff that I wouldn’t consider reduced bin material, but hey, if they want to stick it in there, then I will be more than happy to buy it. A couple days ago I found some good looking roma tomatoes in that said reduced produce bin..the skins the tiniest bit wrinkled (like I could care less), least hen 50 cents a pound. Um, yea, I bought those and put them to good use.
 So simple. A little olive oil in pan. Chunk the tomatoes and throw in pan with the chopped onion, carrot, cauliflower, garlic and chick peas. Drizzle a bit more oil and top with salt and pepper. Give it all a toss and stick into oven. That’s that. Just leave it in there until everything is so nice and soft and falling apart.
 One of the best things about couscous is that you don’t even need to dirty a pot or a bowl to make it, just add dried couscous to the bowl you are going to eat out of with a cup of boiling water and a pinch of salt. (I added the spinach with the water too) After about 8 minutes, the couscous absorbs all the water and you just fluff it up with a fork. Easy, freaking Peasy!!!
  Out of the oven and piled on…..
 I mean, if this isn’t one classy looking meal, then I don’t know what is.


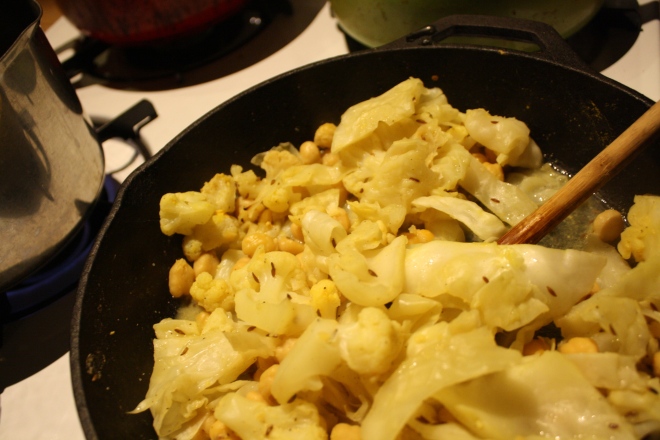


 Happy Hanukkah!!! Today is the first day of the festival of lights and I wanted to send a little love towards those who celebrate it.
 I didn’t actually use all the potatoes in the picture, but I wish I did. There was the perfect amount for dinner for two people, but I wanted to make a few extra for left overs….there were none. Oh well.
 I did a matchstick dice for the apples.. I didn’t want the apples to be to chunky and I didn’t want them to turn into sauce so the match stick worked well. After I diced the apples, I squeezed a little lemon over the top to keep the apple from turning brown.
 I start grating the potatoes and onion, and whoa! Imagine my surprise when one of the potatoes was purple… I got pretty excited.The color is so beautiful. and made the latkes look so nice…It was meant to be.
 Super squeeze the juices out of the grated potato and onion. If you don’t get most of the liquid out, the potato won’t crisp up and will fall apart and be and it will be gross. So SQUEEZE!
 Add in the egg, cornstarch, salt and pepper and mix it on up. Did I mention that I was making these for the mister and the GF sister..No flour, just cornstarch. I think they might have come out even better without the flour…so yeah, these babies are gluten-free.
 Your mixture is going to start to get a little watery again. Its cool, just squeeze it out with your hands and smash into patties.
 Enough oil to cover the bottom of the pan on medium heat. Test the oil to make sure its hot enough before sticking the latke n the pan. To test, sprinkle water in pan, if it sizzles, its ready.Working in batches, fry each latke on each side for around 5 minutes..you don’t want to cook to fast or the inside of the latkes will be raw. I always do a tester and feed it to nick. He’s my guinea pig….He said they were awesome..
 With every batch made, stick on a wire rack and keep in the oven to stay warm. The rack keeps the bottom from getting soggy on the pan… so use it.
  Roasted apples are the BOMB!!! Its like eating apple sauce sticks or little bites of heaven(A bit dramatic, but these are so good) I roasted mine for 20 minutes, until they were nice and soft but not completely failing apart. If you are into it, add a touch of cinnamon…I did’t this time, but you bet I am going to be making myself a big ol bowl of roasted apples this week, and yes, I will top with cinnamon.
  A bowl of apple slaw, sour cream and lemon wedges….I put the latkes on a nice little pile of greens. A very good idea. A dinner worth celebrating!
  I also served the latkes with roasted chickpeas and cailflower…for more of a meal…( Mini recipe… Cauilfower and chick peas drizzled in olive oil, tossed in salt pepper and garlic, roasted 30 minutes and topped with lemon) A little added veggie and protein….I am looking out for you people.
 There we have it…my variation on a traditional food. Enjoy your fried pancakes of potato and onion, they are a food worth a celebration.


 I can’t stop eating these. They are like little balls of crack and I am an addict.
 The stuff you will need. Washed and drained fresh grapes (green or red. I usually use red but the green were half the price and the red ones didn’t taste very grapie*) Creamy peanut butter, skewers, and a little bit of cinnamon or cocoa powder (optional)
 When the grapes are frozen, melt peanut butter. Take a big glob and stick in a tall skinny cup or bowl and stick in the microwave or heat in a sauce pan and then transfer to a tall skinny vessel. Take frozen skewed grapes and, one skewer at a time, dip in the peanut butter. Cover with as much or as little of the peanut butter as you want and place on wax paper. If you are feeling feisty, add a sprinkle or cinnamon or even a dash of cocoa powder. Or, this may seem a little crazy, but garlic powder is so F*ing good.(it’s worth at least giving it a try) When all grapes are dipped, place back into freezer for another 10 minutes or so to let the peanut butter set up a bit.
 Whenever your ready… Eat. And be so happy. And always keep a back stock of frozen grapes in the freezer. They are the best.
THE LOVELY CRAZY
September 19, 2015 by maximios • Blog
I have been strategic about the roots and veggies that I have chosen to bring home the past few weeks.(My farm lets you pick what you want) I know what I can buy at the store, things like carrots and potatoes, so I have been passing those up, but the roots like beets and celeriac… I have been bringing home baskets of those and hoarding them in the fridge and basement in preparation for the laps in farm fresh food and knowing that if I want to by these at the store it s going to coast me a million dollars a pound. (a for real million dollars)
Yup, lots of roots around here, especially celeriac root which is fantastic. I am kind of obsessed with celeriac, with its fibrous, knobby exterior, soft but almost meaty texture inside, and a flavor that is close to celery but so much better. I don’t know why it has taken me so long to do a posting featuring this amazing root vegetable (I eat it almost every day)
So here, an amazingly tasty, hearty but not heavy, celeriac recipe. Perfect for spring and the change into summer…. Mustard roasted celeriac with an fanatic split peas gravy that will have you licking you bowl clean.
*Note. I don’t peel my celeriac root. I really enjoy the fibrous exterior but realize that some don’t(The mister does not like it) so peel it if you want.
While the gravy is cooking, take the celeriac rounds and brush each side with yellow mustard, sprinkle with pepper, and place on a baking sheet. Stick into the oven to roast for about 25 minutes, flipping the rounds after about 10 minutes.
Serve with the fanciest knife and fork you can find. Extra yellow mustard and sriracha sauce are great condiments to have close by.
Happy Tuesday!
-C
Mustard Roasted Celeriac with Split Pea Gravy
Preheat oven to 400 degrees
Small dice the carrot, parsnip and onion and throw into a large pot. Spinkle with salt and pepper, add in the thyme and bay leaf and add a splash of water. Stick on stove on medium heat and stir. Let cook until the veggies become soft and fragrant. Now add in the split peas and 2 cups of water. Bring to a boil then cover and turn heat down to medium low. Let cook until the split peas become tender (about 25 minutes) string on occasion and adding more water if the peas are not completely summered while cooking.
Once the peas are tender, let cool for a few minutes, remove bay leaf, and either dump into a blender or blend with an immersion blender until nice and creamy. If gravy seems to thick, add in more water.
Scrub or peel celeriac roots and slice them into 1/2 inch think rounds. Place on a baking sheet and brush mustard on both sides and spindle with pepper. Stick into oven for about 10 minutes, flip, then back into the oven for another 15 or so minutes, or unit the celeriac is tender.
When the celeriac is done remove from oven and stick a few rounds on a bed of spinach (or not, or any kind of grain or green you like) Top with a hearty helping of the gravy and toss on some chopped up tomatoes.
Eat with at knife and fork like a fancy person.
Shit on a shingle is one of those foods that I like to call “trash food”, you know stuff like beefaroni or pork and beans. Stuff that we all loved as little kids but might think twice about feeding to anyone now. ( I’ll still feed nick a can of beefaroni.. he likes it) As a throwback to our earliest food memories, (also a lack of food in the house and wanted to make something fast, easy, and cheap.. thanks mom!) I made the mister my rendition of the classic. Creamy Lentils and Mushrooms on toast. Not quite as trashy as creamed beef (lentils, mushrooms and onions are not trashy) but you get the same reminiscing feeling. I guess I could call it something like “stuff on a shingle” or lumps on a shingle”, but what kid (or adult) would want to eat that. Let’s just stick with shit, it makes it more awesome to eat it.
If you need to, make it classy by serving it with a cloth napkin and a nice fork and knife. But eat it however you need to. (As kids we like dirty hands and no fork, preferably with a big tall glass of overly sweetened red flavored kool-aid)
Enjoy this fantastic Spring weekend!
-C
Shit on s Shingle (Creamy Lentils and Mushrooms on Toast)
One serving
Slice the mushroom and onion and toss into a pan or skillet with a drizzle of oil. Cook on medium heat until brown and fragrant than dump onto a plate. In same skillet, add the oil and the flour and mix with a whisk while slowly adding in the milk. Keep whisking until sauce starts to thicken. Turn heat to simmer and add in the cooked lentils and the sautéd mushrooms and onions. Push down the bread in the toaster.. and when it pops up, dump the shill over it.
Everyone was to busy eating for me to get a good picture of the gravy on food, but trust….it was all over everything!
Mushroom Kale Gravy
Ingredients
Dice onion into small bits, slice mushrooms nice and thin and dice garlic into wee little pieces.. Toss into a skillet with a bit of olive oil on medium heat and let mixture soften and smell nice and fragrant. Toss in the dried herbs, nutritional yeast and soy sauce and let cook for another few minutes until the mixture sucks up all the soy sauce and the veggies start to brown.
Add in the water and whisk in the corn starch. Turn heat to low and let simmer until gravy starts to thicken. Finely chop the kale and toss into gravy when its about done.. Simmer for another 5 or so minutes or until you can’t wait any longer….Serve straight from the pan or transfer to a gravy holding device,. Pour gravy on everything!
YUM YUM YUM ENJOY!!!!