It’s Mother’s Day weekend which means that you and I and everyone out there should feel the slightest bit obligated to at least do a little something nice for your mom for the mere fact that you were borned. And really what better way to celebrate mom than with food… It really is the least that you can do. (I think mom’s also like flowers and cards and handmade pasta necklaces) My mom is defiantly about the food. (she has had her fair share or pasta necklaces) A many years back on Mother’s day, this sweet little girl (me) made her mother a special breakfast treat…blueberry scones. And ever since that day, for every freaking holiday, birthday, whatever day, my mother requests (demands) a batch of those scones. She is always saying that these are her favorite treat and that no one has ever made them as good as I do. (I guess that just reiterates that I am her number 1 child)
And for the last few months my mom has been up my butt, trying to get me to make her some. Not going to lie, I have been saying I’ll get her a batch, but for some reason, I haven’t gotten around to making them. So two birds here.. Make the scones and she gets off my back for a least a little while (a month.. maybe 2) and I give her a fantastic Mothers day gift that I know she will love.
So here they are , oh mother of mine. Blueberry scones!
The stuff. Flour, baking soda, baking powder and salt. A bit of sugar, vanilla, buttermilk, and butter (use vegan butter and nut milk if you want to make them vegan) And of course we need the blueberries which can be fresh or frozen. I usually use fresh, but the store I stopped at only had really big containers of fresh that were like $1000 dollars a piece and the organic frozen happen to be on super sale. So you know, the cheap in me won that battle. So into the bowl goes all the dry stuff; flour, baking powder and soda, salt, and the sugar. Give it a good whisk.
Now for my special trick for a perfectly distributed cold butter in a pastry. Freeze your butter and grate it!
With a large wholed grater, grate the frozen butter directly into the bowl with the dry, stoping a few times to toss the butter chunks around so you don’t end up with a huge pile of grated butter. When it’s all grated, gently toss around so the butter is evenly distributed. Now dump the blueberries into the flour mixture. Toss them around to give them a coat of flour. Add in the buttermilk and vanilla and give a little mix until liquid is absorbed. We are trying to handle the dough as little as possible.Turn mixture onto counter. It’s very loose, but thats what it should look like. Very gently and with as little handling as possible, gather dough up, knead a few times till everything just comes together. Press dough into a disk that is roughly an inch thick…. and it doesn’t need to be perfect. Cut the disk into even sized pieces. Do 6 big, 8 normal, maybe even 10 smaller. Whatever size you like. (I did 8) Place the scones onto a baking sheet, using a spatula to transfer, and sprinkle the tops with a little bit of sugar. Into a preheated oven for about 20 minutes.And when the scones look all nice and browned and a tester comes out clean. remove and either serve right away warm, preferably with huge cup of coffee or tea, or stick on a rack to cool before storing in air tight container.
Perfect to serve as a breakfast pastry, at brunch, or even as a dessert. A nice little treat for a special lady. (dudes can eat them too)
Happy Mothers Day Mom! Thanks for having me!
And Happy Weekend!!!
-C
Blueberry Scones
2 cups all purpose flour
1/3 cup sugar plus 2 tablespoons to sprinkle on top
1 teaspoon baking powder
1 teaspoon baking soda
1/2 teaspoon salt
1/2 cup (1 stick) unsalted butter frozen or really cold (use non dairy butter like Earth Balance for vegan)
1 cup blueberries (fresh or frozen)
1 teaspoon vanilla
3/4 cup buttermilk (use non dairy milk for vegan)
Preheat oven t0 400 degrees
In a large bowl, whisk together flour, baking soda, baking powder, sugar, and salt. Take the frozen butter and grate directly into flour mixture, tossing around to evenly disrupted. Add in blueberries and toss around till coated with flour, then lastly, add vanilla to buttermilk and mix into mixture until just barely coming together. Turn mixture out onto counter and with your hands, knead mixture a few times until it forms a solid dough. Shape into a disk and smoosh down until about an inch thick. Cut into 6-10 triangles and place on a non greases baking sheet and sprinkle tops with remaining sugar. Stick into oven and bake for 20 minutes or until tops start turning a golden brown and a tester in the middle of a scone comes out clean.
Remove from baking sheet and serve warm or let cool on a rack.
Mom gets first dibs, and if she is willing to share, eat one yourself with your face.
I was informed yesterday that if I was going to make tortilla chips, that I better make some sweet ass dips to go with them. I kind of agree… tortilla chips need dip… or better yet, two dips. Queso and guacamole. It’s what needed to be done, and so I did it.
Guacamole is amazing… anything avocado is amazing…this guacamole is amazing. White bean guacamole is amazing. And not that we really care, but this guac is half the fat then straight up guacamole. Plus it’s packed full of protein making it a kind of super duper, must eat all of it, kind of dip. And sweet potato anything will make me happy. Making queso dip with sweet potato and cauliflower is probably one of my best food combos so far. (after eating a butt load, I felt like I was a genius and made an amazing discovery) Again, not that we need it to be, but this is also a fat-free, vegan, gluten-free, super healthy, packed full of B12, fiber and nutrients, dip for all kind of dip.…. just another reason why you cannot feel bad when you finish off half a batch before you get a chance to stick it in a serving bowl. (I might have done that)
Here is what you need for a good time:
−These tortilla chips ….Check.
−Some Chopped Veggies (I want the veggies)…..Check
−Cauliflower Sweet Potato Queso.…Check.
−White Bean Guacamole…Check.
You are now ready for it. It being this party, that party, the Super Bowl, or a Wednesday afternoon.
To the left we have the makings for the cauliflower sweet potato queso.. Steamed cauliflower, a baked sweet potato, nutritional yeast, garlic, and chopped up red onion, red bell pepper and jalapeño. To make all you need to do it take the chopped peppers, onion, and garlic and sauté for a few minutes just to slightly soften and bring out flavors. While that’s going on, take the steamed cauliflower and sweet potato(skin off..but eat it, or save it for soup or feed it to the dog) and puree together with a blender or food processor. Add in nutritional yeast, about a tablespoon or two of hot water and, salt and pepper to taste. Blend for about 5 minutes until super creamy smooth. Add in sautéed stuff and pulse just enough to incorporated the veggies but not complete blend in. Stick in a bowl.
To the right we have white bean guacamole stuff. Two cups (or one can) rinsed white beans, one ripe avocado, a lime, a few cloves of garlic,(I also added a bit of garlic powered…I like my garlic) and some chopped up red onion and tomato. Place beans, garlic, avocado and lime juice in a blender or food processor and blend until smooth. Add salt to taste and toss in the chopped tomato and onion. Blend for sec to mix that in…Stick in a bowl
Perfect…
To think that both of these dips took about 10 minutes total to make. (I had pre baked the cauliflower and sweet potato) And for real, I would spend much more time if I had too because both of these dips are so freaking good, I definitely will be making these on the regular.
So there , dips for those sweet ass chips or whatever you want to dip or them spread them on.
And he guys…It’s FRIDAY! Have a fantastic day!
-C
White Bean Guacamole
2 cups white beans (or 1 can) rinsed and drained
1 ripe avocado
3 cloves garlic
1 lime
1/4 small red onion
1 small tomato
1-2 teaspoons salt
Finley chop onion and tomato. Set aside. Place the beans, avocado, garlic, garlic powder, 1 teaspoon salt and the juice from one lime into a blender or food processor and blend until smooth. Add a splash of water if needed to help keep things moving. Taste and add more salt if needed. When smooth, add the onion and tomato and pulse a few times to mix in. Scoop into a serving dish and finish with a squeeze of lime and a bit of chopped onion and tomato.
Cauliflower Sweet Potato Queso
1 1/2 cups pre cooked steamed or roasted cauliflower
1 medium pre baked sweet potato
1/2 cup nutritional yeast
1-2 tablespoons hot water
1/2 a small red pepper
1/4 small red onion
1 jalapeño
3 cloves garlic
salt and pepper
Finely dice the red pepper, jalapeño, onion and garlic and sauté in a skillet for a few minutes until slightly soften and fragrant. Take the pre-cooked cauliflower, sweet potato (skin removed), and nutritional yeast and place in a blender or food processor. Blend for about 5 minutes until creamy and smooth. Add in a tablespoon of water to keep things moving. When completely smooth, add in sautéed veggies and pulse a few times to combine. Scoop into a serving dish. If your feeling it, top with scallions and cracked pepper.
Serve dips with chips, veggies or anything you want. Also make great spreads for sandwiches and crackers too!
My contribution to last nights dinner at my sisters…. Freshy fresh veggies spring rolls.I had about 30 minutes between work and getting over to my sisters house to throw something together so it needed to be something fast, easy, and something I could make without going to the store. She was making the main course (some teriyaki situation and rice) so I was doing up the veggies.
I had just bought a package of spring roll wrappers…. Bingo! The perfect and logical choice. I grab the wrappers, a variety of veggies and after spending 12 of my 30 minutes trying to scrub the oil based paint off of my face and hands, I still managed to completely prepare, construct, and take pictures of these lovely tasty spring rolls. and get over to my sisters in time for dinner.
Impressed?
Damn right!
The stuff. Carrot, beet, asparagus, red cabbage, and kohlrabi, which all (except asparagus, which I just cut into thirds) got cut into matchstick sized pieces with my mandoiln. Then there are the rice spring roll wrappers that we need to make the veggies into rolls. Also a bit of red wine vinegar to drizzle onto the veggies for a little extra zing. And lastly, soy, fresh ginger, and a couple cloves of garlic for a spicy salty dipping sauce.Start by having everything set out and ready to assemble. Fill a large shallow dish or baking sheet with really warm water. Working with one at a time,place a rice wrapper into water and let sit for about 10 seconds or until the paper starts to soften. Remove from water and place on a damp surface (just splash a little water on the counter) Take a little bit of everything and and place on the lower middle part of the paper. Fold in the sides first, then tuck and roll the wrapper as tightly as you can without ripping the wrapper.
Repeat until you have used up all you veggies.For the dipping sauce. Finely grate ginger and garlic and add to soy sauce. Stir… and it’s done.Freshy, pretty and fantastically delicious. And for real, took about 8 minutes to make. (I even had enough time to wash the dishes before we left!)
I am so awesome!
Hump Day Pow!!!!!
-C
Fresh Veggies Spring Rolls
Makes 8-10 but can easily be increased or decreased to desired amount
8-1o rice spring roll papers
Splash of Red wine or rice vinegar
1/4 cup soy or tamari sauce
2 cloves of garlic
teaspoon freshly grated ginger
1 medium carrot
1 medium beet
1/4 head of purple cabbage
10 thin fresh asparagus
1 small kohlrabi
Note… I used the veggies that I had in the fridge at the moment. If you have a bunch of veggies but not these particular ones, use what you have. Pretty much all veggies taste good inside a spring roll!
Gather your veggies and prep by either using a mandolin, a grater, or some sick knife skills, and julienne, shred, or slice you veggies into thin match sticks. Once all the veggies are prepared, sprinkle a little vinegar over the top.
For the rolls…Grab a large shallow vessel (a rimmed baking sheet works great) and add in warm water. Working one at a time, place the wrapper into the water for about 10 seconds or until the wrapper starts to soften. Remove and spread onto a clean, damp work surface. Gather a bit of each veggie that you are adding and place towards the bottom middle of the wrapper. Now fold the sides in over the pile of veggies. Then with the side closest to you, tuck and roll wrapper away from you, trying to keep it tight, but not to tight that it rips.. (Hopefully that makes since.) Place finished rolls onto a damp surface to keep from sticking and if not serving right away, drape with a damp towel or paper towel to keep from drying out.
For the soy ginger dipping sauce. Add grated ginger, minced garlic, and soy into a bowl and mix together. Serve with spring rolls.
Eat one, two, or a plateful. It’s nice to share but not a necessity.
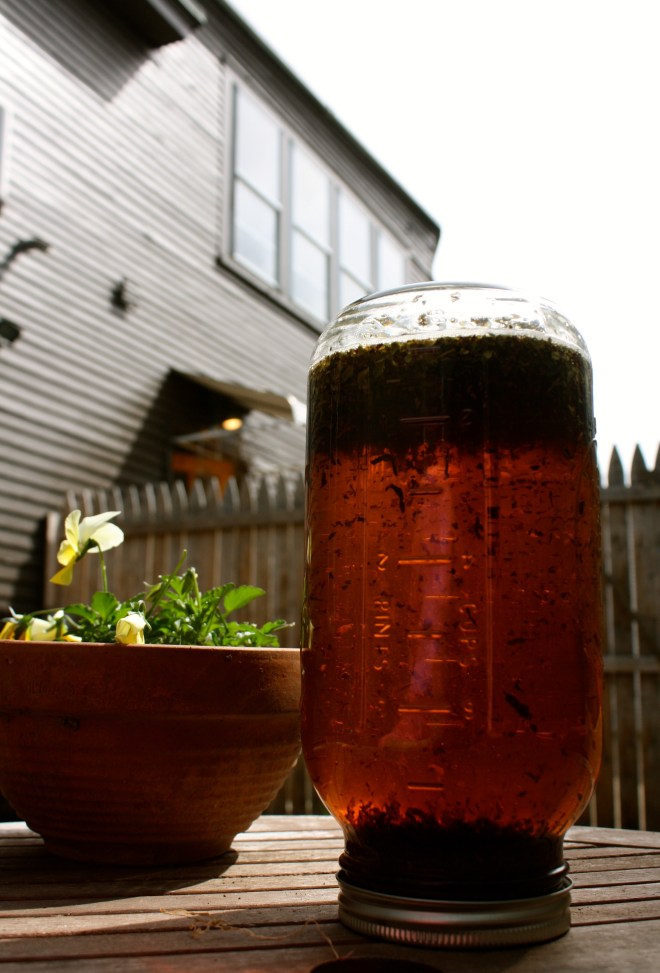
My flowers are coming up, I have packed away my winter jacket, and I haven’t worn anything but sandals for the past week. Plus yesterday I made the first batch of sun tea and saw my first hot air balloon of the season (which lead to a heated discussion with the mister about how hot air balloons take flight. We were both kinda right, but me more than him)So yeah, it’s for real… Winter is gone and spring has sprung, or more like spring sprung then bounced cause now it’s basically summer weather. Not complaining, but I hope we get a least a few more weeks of pleasant, not hot and humid weather.
Anyway. Sun tea, one of my favorite summer time drinks. Made by infusing regular old teas with water by using the almighty power of sun.
Why do we want to make iced tea this way instead of just using boiling water? Well you can still do that, but sun tea makes a more mellow, lovely, and I find, more sweeter tea. It brings out more complex flavors that you don’t get with the boiling water method. And it’s nice to know that it took zero effort on my part to make the drink (not that boiling water takes that much effort, but still)
It can be made with any variety of teas, infused with other fresh herbs, dried spices, or even chunks of fruit. You can also make the teas and add flavors after the infusing is over. Have fun and play with flavor combos.
A few of my favorite sun tea combinations
Any mellow black tea like orange pekoe or english breakfast with a few springs of mint
Chamomile and mint
Green with a fruity tea, like blueberry or pomegranate
Lemon Zinger with a few springs of Rosemary
These are just a few of the endless possible flavors. And you don’t have to get fancy with it either, you can totally use plain old lipton tea bags (I still do that too)
Now harness the sunshine and feel awesome and fancy by making some tea!
Woo Hoo Wednesday!
-C
SUN TEA
What you’ll need
Tea- Either bags or loose leaf
Water- Preferably Filtered
A glass jar with a lid
Sunshine
I use a ratio of 1 tea bag or 1 tablespoon loose leaf tea per 2 cups of water. And I usually make my teas in half gallon ball jars so I use 4-5 teabags or tablespoons of tea. (makes just enough tea for 4-6 tall glasses, depending on you glass size) If it’s a mint tea, I usually use a little less because I find that mint teas can become to strong and bitter so I use 3 teas bags or tablespoons of loose.
Directions
Place tea loose or bags into jar. Fill with water, leaving about an inch for tea expansion, place lid on tight, and stick in the sun for anywhere between 3-5 hours (depending on how strong you like your tea). When tea is infused to your liking, remove teabags or strain the loose tea and stick into the fridge to chill. Serve as is in a drinking vessel with a few ice cubes and add sweetener if that’s what you do.
Drink within a day or two, then rinse jar and make a new batch!
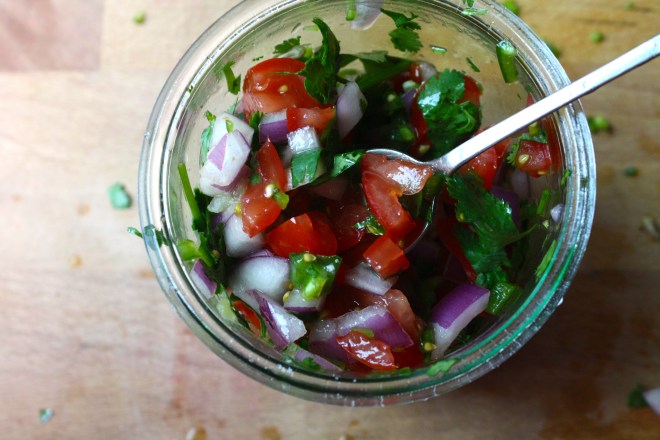
Happy Cinco de Mayo! And what better day to share my version of my oh so fantastic pico de gallo, or as I call it, super freshy salsa.
I love me some freshy salsa, It makes me oh so happy.
I make this stuff all the time, especially during the warmer months and tomato season. I usually make a batch right before a meal, just enough to eat right away, but sometimes I ‘ll make a big batched of it, thinking I’ll save some for the next day. It never makes it past the second day in the fridge because it’s just one of those things that when you see it, you want to eat it. Weird but true. And it’s totally ok to do so cause it’s basically eating a big bowl of healthy goodness, so eat on!
It takes no time to prepare, tastes super refreshing, goes on everything, and it’s just so freaking tasty. You can eat it with tacos and chips (the mister) or like me, I like to add it to everything; salads, popcorn, or directly in my mouth.
Make one batch, make 4, it doesn’t matter cause you will eat it all, and need to make more.
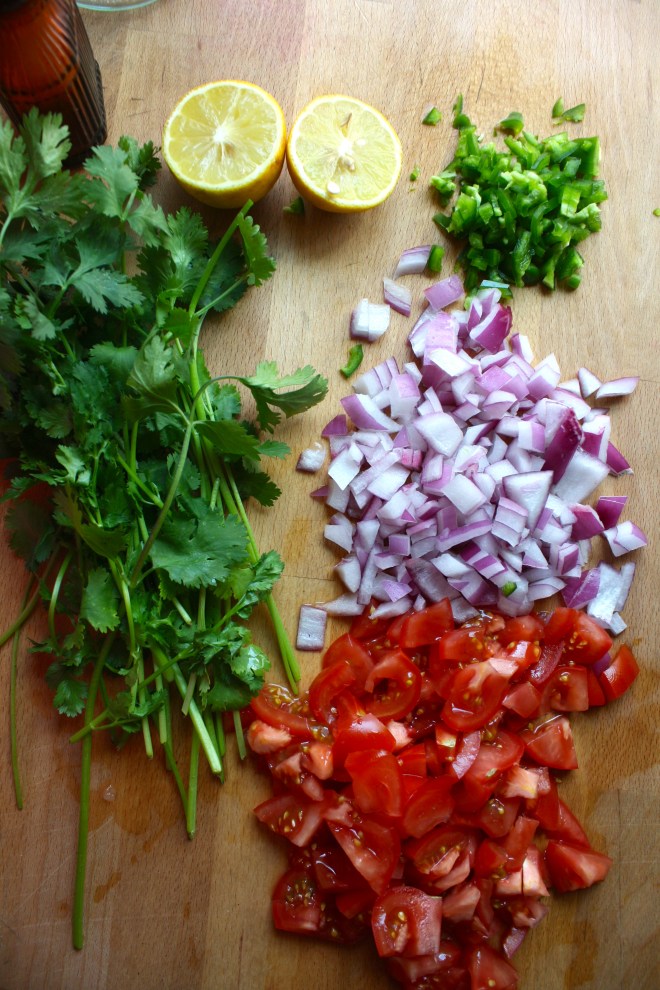
The stuff. Chopped Roma tomatoes, chopped red onion, a diced jalapeño, lemon, a bunch of cilantro, and salt.
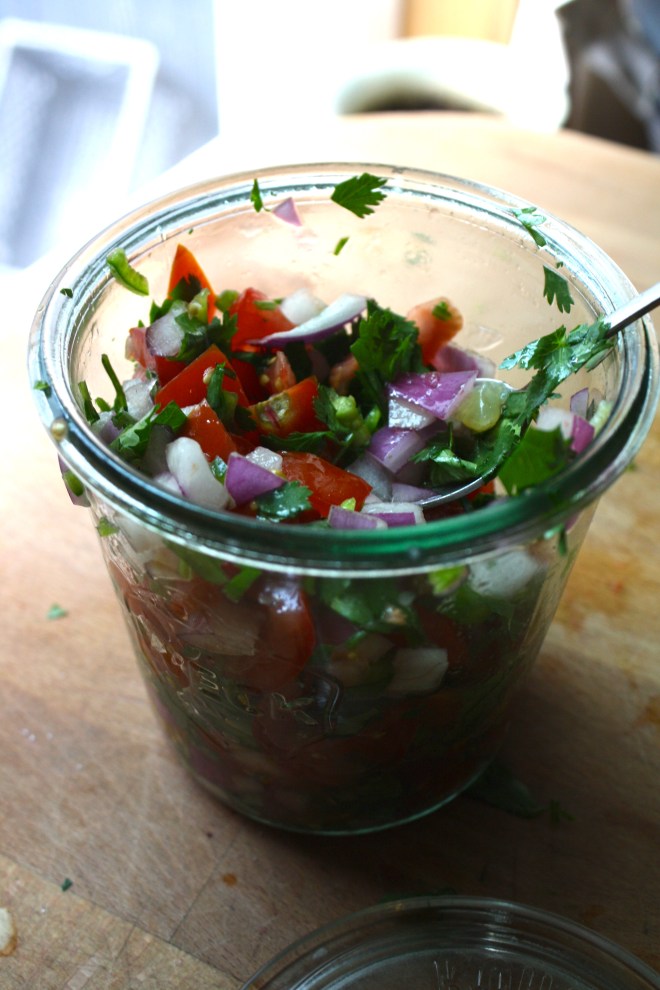
Stick all the chopped stuff into a jar and add in the juice of the lemon. Roughly chop the cilantro and add that on in with a sprinkle of salt.
Mix it up….And thats it. Now eat… with something or without.
A spoon out of the jar is one of my favorite ways to go at it.
Happy Cinco de Mayo, Happy Tuesday!
-C
Pico de Gallo… Freshy Salsa
4-5 Roma Tomatoes
1 small red onion
1-2 jalapeños (Depending on heat preference)
1 lemon or lime
salt
1 bunch of cilantro (don’t use it if you don’t like it)
Chop tomatoes and onion and toss into a bowl or jar. Cut seeds from jalapeño(s) and dice up into little bitty pieces and add that to the tomato and onion. Roughly chop the cilantro and toss that in as well with the juice of the lemon or lime. Sprinkle with salt. Stir, let sit for a minutes, taste and then add more salt if needed.
Eat right away or make ahead and store in the fridge until ready to use.
Goes great with corn chips, tacos, toss onto salads or eat as is standing in front of the fridge. If someone is judging you, they are stupid.
I can’t stop eating these. They are like little balls of crack and I am an addict.
Frozen peanut butter grapes… I mean, I just can’t stop.
So you say you have never frozen your grapes? Well you should. It’s the only way I like to eat them anymore. I was never a huge grape fan, but one day long ago, I discovered the wonder that is the frozen grape and it is amazing, Now whenever grapes are on sale at the grocery store, I buy way to many and end up filling our tiny little freezer with jars and bowls of grapes. Then whenever the mister goes to grab the bag of frozen peas for his sore back or knees, there is almost always a frozen grape avalanche. Why I don’t put a lid on those containers is even a mystery to me. Oh, now I remember.. I want easy access.Oopen the freezer, grab a few grapes, and go on my way… not having a lid to take off makes the process a little easier.
Then one day, the frozen grape game turned into something else, something a little more decadent and even more addicting. Where it came from, I do not know. Maybe it’s some subconscious throwback to a childhood full of peanut butter and grape jelly sandwiches, or maybe it’s just that fact that I think peanut butter can pretty much go with anything. But no matter why, I started dipping those frozen grapes into peanut butter and never looked back. And now when I have grapes, it’s all I want to eat.
I am warning you now, once you start making these, watch out, because before you know it, you will develop a frozen grape addiction too. And littles.. they are as easily addicted to these as well. I have seen kids that hate grapes go totally bonkers for these. Just so you know.
The stuff you will need. Washed and drained fresh grapes (green or red. I usually use red but the green were half the price and the red ones didn’t taste very grapie*) Creamy peanut butter, skewers, and a little bit of cinnamon or cocoa powder (optional)
*Note. When you are the store, try before you buy. You know what I mean, eat a few while shopping aground. I say this because not all grape are created equal. Some taste way better than others. I have bought grapes before that didn’t taste like anything or that have really tough skins, and those just piss me off, so eating a few will guarantee that your money is being well spent and that the grapes won’t disappoint you.
Ok, so now let’s make these bad boys.
Simple simple. Two grapes per skewer (or toothpick) Lay on a wax paper covered dish or pan and stick them in the freezer until frozen. When the grapes are frozen, melt peanut butter. Take a big glob and stick in a tall skinny cup or bowl and stick in the microwave or heat in a sauce pan and then transfer to a tall skinny vessel. Take frozen skewed grapes and, one skewer at a time, dip in the peanut butter. Cover with as much or as little of the peanut butter as you want and place on wax paper. If you are feeling feisty, add a sprinkle or cinnamon or even a dash of cocoa powder. Or, this may seem a little crazy, but garlic powder is so F*ing good.(it’s worth at least giving it a try) When all grapes are dipped, place back into freezer for another 10 minutes or so to let the peanut butter set up a bit.
Whenever your ready… Eat. And be so happy. And always keep a back stock of frozen grapes in the freezer. They are the best.
Keep it realz.
-C
Peanut Butter Freezer Grapes
the quantity is up to you, but I recommend making a shit ton!
Creamy Peanut butter (I use organic creamy from Trader Joes, or natural skippy)
Green or Red Grapes
Cinnamon and or cocoa powder (Optional)
Toothpicks or skewers
Wash grapes and skewer 2 grapes onto a stick. Place on a flat surface and stick into the freezer until frozen, which usually takes about an hour.
Once grapes are frozen, stick a big glob of peanut butter into a tall skinny vessel (Like a juice cup or a 4 oz ball jar) and warm to a liquid constancy in the microwave (about 30-45 seconds) or if you don’t have a microwave, stick in a sauce pan, warm on stove, and pour into a glass (what I do)
Remove frozen grapes from freezer and dip into melted peanut butter. Place on a wax paper line tray or pan and sprinkle with cinnamon and or cocoa powder, or not, or a few (whatever you want) and stick back into freezer for another 10 minutes.
Eat as many as you want… Make so many because you will become addicted!
I figured now is a good time to get this recipe out there before we get to far into spring and summer recipes because there is going to be a lot of banana ice cream filled recipe coming and I figured its a good idea to have the basic banana ice cream recipe ready for people to refer too. And because I made so much fantastic naner ice cream, I also made a cookies and cream naner ice cream for my sisters and the mister.
Comments that I got from my sisters and the mister when I made them this ice cream
-Sister one.”I give this my sister seal of approval.. It’s so good. The first dessert you have made that I liked! (not including all the other desserts that you have made that I liked)”
-Sister two- “Wow.. it looks like ice cream and feels like ice cream and tastes like ice cream.. You should make me this ice cream!” (I was confused too because I was pretty sure I just made her some)
-The mister- “I am so excited for my new fly fishing pole!”
Ok, so the naner ice cream isn’t new to the mister and he IS very much excited for his new fly fish pole. So excited that he forgot to tell me how amazing that I am and to thank me for making him a big bowl of yumminess. (It’s ok, I forgive him)
And yes, this is probably one of the easiest, most delicious, healthy and amazing frozen dessert that you will ever eat. You will probably find yourself buying mass amounts of bananas and stocking the freezer until things just start falling out. (which is also ok because it’s only bananas and you can’t have too many frozen bananas)
The stuff you need for this ice cream…. Nice and ripe bananas, peeled and then frozen* That’s it.
To make it, place frozen bananas into food processor and hit the on button. Process the crap out of the namers until nice and silky smooth.
*Note, the smaller the frozen chunks are , the faster and maybe a little easier for the blender to blend the naners into ice cream. So if you think of it, chop bananas into pieces before freezing or even after.
After all blended and smooth, either eat right away or scoop ice cream into a freezer safe container and stick in freezer. That’s the banana ice cream… And it is amazing and so so so so so addictive. I make a batch, think I am only going to eat a scoop, then find myself eating half of what I have made, but it’s ok cause it’s only bananas.
Now for the cookies and cream banana ice cream..One batch of banana ice cream, either freshly made, still in food processor or made ahead and placed in a food processor and given a good pulse to smooth it up.
Add cookies in, crushing a bit beforehand and pulse till combined. Now you have cookies and cream naner ice cream…. and everybody is happy.
Scoop into a cup, a bowl, a freezer safe container, or directly into your mouth. Be careful…. You can still get brain freeze from eating naner ice cream too fast!
Keep it real hump day drum bum!
-C
Basic Banana Ice Cream
Makes one batch. Good for 3-4 servings
4-5 ripe bananas peeled and frozen
Peel bananas and stick in a freezer bag or container and freeze. When bananas are completely frozen, break into pieces and stick into a food processor or blender and puree until silky smooth.
Eat right away or scoop into a freezer safe container for later.
Cookies and Cream Banana Ice Cream
1 batch banana ice cream
5-10 (depending on your cookie need) cream filled cookies like oreos or Trader Joe’s Joe Joe’s (These are gluten free)
In a food processor, blend banana ice cream with cookies.
Eat right away, with a utensil of choice in a container of choice.
It’s Mother’s Day weekend which means that you and I and everyone out there should feel the slightest bit obligated to at least do a little something nice for your mom for the mere fact that you were borned. And really what better way to celebrate mom than with food… It really is the least that you can do. (I think mom’s also like flowers and cards and handmade pasta necklaces) My mom is defiantly about the food. (she has had her fair share or pasta necklaces) A many years back on Mother’s day, this sweet little girl (me) made her mother a special breakfast treat…blueberry scones. And ever since that day, for every freaking holiday, birthday, whatever day, my mother requests (demands) a batch of those scones. She is always saying that these are her favorite treat and that no one has ever made them as good as I do. (I guess that just reiterates that I am her number 1 child)
And for the last few months my mom has been up my butt, trying to get me to make her some. Not going to lie, I have been saying I’ll get her a batch, but for some reason, I haven’t gotten around to making them. So two birds here.. Make the scones and she gets off my back for a least a little while (a month.. maybe 2) and I give her a fantastic Mothers day gift that I know she will love.
So here they are , oh mother of mine. Blueberry scones!
The stuff. Flour, baking soda, baking powder and salt. A bit of sugar, vanilla, buttermilk, and butter (use vegan butter and nut milk if you want to make them vegan) And of course we need the blueberries which can be fresh or frozen. I usually use fresh, but the store I stopped at only had really big containers of fresh that were like $1000 dollars a piece and the organic frozen happen to be on super sale. So you know, the cheap in me won that battle. So into the bowl goes all the dry stuff; flour, baking powder and soda, salt, and the sugar. Give it a good whisk.
Now for my special trick for a perfectly distributed cold butter in a pastry. Freeze your butter and grate it!
With a large wholed grater, grate the frozen butter directly into the bowl with the dry, stoping a few times to toss the butter chunks around so you don’t end up with a huge pile of grated butter. When it’s all grated, gently toss around so the butter is evenly distributed. Now dump the blueberries into the flour mixture. Toss them around to give them a coat of flour. Add in the buttermilk and vanilla and give a little mix until liquid is absorbed. We are trying to handle the dough as little as possible.Turn mixture onto counter. It’s very loose, but thats what it should look like. Very gently and with as little handling as possible, gather dough up, knead a few times till everything just comes together. Press dough into a disk that is roughly an inch thick…. and it doesn’t need to be perfect. Cut the disk into even sized pieces. Do 6 big, 8 normal, maybe even 10 smaller. Whatever size you like. (I did 8) Place the scones onto a baking sheet, using a spatula to transfer, and sprinkle the tops with a little bit of sugar. Into a preheated oven for about 20 minutes.And when the scones look all nice and browned and a tester comes out clean. remove and either serve right away warm, preferably with huge cup of coffee or tea, or stick on a rack to cool before storing in air tight container.
Perfect to serve as a breakfast pastry, at brunch, or even as a dessert. A nice little treat for a special lady. (dudes can eat them too)
Happy Mothers Day Mom! Thanks for having me!
And Happy Weekend!!!
-C
Blueberry Scones
2 cups all purpose flour
1/3 cup sugar plus 2 tablespoons to sprinkle on top
1 teaspoon baking powder
1 teaspoon baking soda
1/2 teaspoon salt
1/2 cup (1 stick) unsalted butter frozen or really cold (use non dairy butter like Earth Balance for vegan)
1 cup blueberries (fresh or frozen)
1 teaspoon vanilla
3/4 cup buttermilk (use non dairy milk for vegan)
Preheat oven t0 400 degrees
In a large bowl, whisk together flour, baking soda, baking powder, sugar, and salt. Take the frozen butter and grate directly into flour mixture, tossing around to evenly disrupted. Add in blueberries and toss around till coated with flour, then lastly, add vanilla to buttermilk and mix into mixture until just barely coming together. Turn mixture out onto counter and with your hands, knead mixture a few times until it forms a solid dough. Shape into a disk and smoosh down until about an inch thick. Cut into 6-10 triangles and place on a non greases baking sheet and sprinkle tops with remaining sugar. Stick into oven and bake for 20 minutes or until tops start turning a golden brown and a tester in the middle of a scone comes out clean.
Remove from baking sheet and serve warm or let cool on a rack.
Mom gets first dibs, and if she is willing to share, eat one yourself with your face.
Those are some for real chocolate chip cookies…….for real.
This is probably one of the first recipes that I ever really knew by heart. Some recipes I can bring up in my head, but if I haven’t used it in a while, I usually have to check to make sure I got it right… Not these… Chocolate chip cookie are forever imprinted in my brain.
Chocolate chip may seem like a simple cookie, but trust me, its more complex then one may think. There are so many little factors that really affect the over all cookie: The baking temperature, the exact perfect time to pull the cookies out of the oven. Weather the butter is hand mixed or beaten, softened or melted. The color of the baking sheet and how long you leave the cookie on the sheet before placing on the coloring rack…….This cookie is as much about method as it is about ingredients. ….But don’t let that scare you..you got this. Just don’t think that these are a mindless act of baking. You have to be committed, keeping on the oven the whole time these cookies are baking………….. It’s so worth it.
Full disclosure here…I have been making these cookies the same way for so long so I am not exactly sure, but this might actually be the same recipe as toll house. I haven’t looked….Either way…I have tried out other chocolate chip recipes and this one has always come out on top.
As usual, I forgot an ingredient in the line up…the chocolate chips, oh and the pinch of salt.. But rest assure, even though not pictured, there are indeed chocolate chips in these cookies!
Pre heat the oven to 375.
Room temperature butter creamed with both the white and brown sugar. Before you add the butter to the sugar, smash any of the big chunks of brown sugar. The key to my recipe is not melting butter or using an electric beater, it’s all hand mixin, no electric mixing(you could use a kitchen aid, but I don’t have one so I think you should use a wooden spoon too), plus it’s a good arm work out. Mix mix mix. I find smearing on the side of the bowl helps too. Mix/smear until both sugar and butter is a unified color and consistency, Once that happens, add the two room temperature eggs, the vanilla and mix a little more,
When everything is mixed, add the dry ingredients and mix that until fully incorpaerterd….
Take a minute here and sniff……I love the smell of cookie dough, it’s a happy smell.Now for the chocolate chips. I use only 1 1/2 cups of chocolate chips… You want just enough in each cookie, but don’t want to overwhelm it with too much chocolate. The cookie is as much of the star as the chocolate. See how may cookie sheet is nice and silver and clean? For a long time I used a very dirty and dark baking sheet. I would make cookies and they always seem to come out slightly burnt. Got myself a new baking sheet and……perfect cookies. If your baking sheet is dark, I would recommend using parchment paper.
Your ready to scoop and bake….my suggestion. Make 2-4 cookies for your first batch, or what I call the tester batch. I swear, there is some law of the universe that says the first batch always is overcooked. I have excepted that and learned to only make a couple for the first batch Scoop mounds of your preferable size(I do a spoonful) and place on sheet with each mound having good amount of spreading space. Place in preheated oven..
Now here is the really important part!!!!Baking time is essential to how your cookie turns out. If you want a more soft and chewy cookie, bake for about 7-9 minutes or until the cookies are just barely turning brown…just barely. They might seem a little undercooked, but the cookies will cook a bit more once pulled from the oven Trust…I know what I am talking about. .Let them cool for about a minute on sheet before transferring them to rack. If you like more crunchy milk dipping cookie..bake for 9-11 minutes or until they are golden brown.
Lovely right…
Now you have gone and done it…Made fantastic cookies!!! Maybe you are going to share? No pressure, but it is the holiday season. For real, you can’t go wrong with a chocolate chip cookie, every loves it. and then will in turn love you too.
Get people to like you with Cookies!!!! hahahaha… but you know its true!
Perfect Chocolate Chip Cookie
2 1/4 cups all-purpose flour
1 teaspoon baking soda
1 teaspoon salt
3/4 cup brown sugar
3/4 white sugar
1 cup (two sticks) unsalted butter at room temperature
2 eggs
teaspoon vanilla
1 1/2 cups chocolate chips
Preheat oven to 375.
In a bowl, whisk together flour, salt and baking soda
In a large bowl with a wooden spoon, cream together the brown and white sugar with the room temperature butter. Add eggs and vanilla and stir. Now add the dry ingredients and….. then the chocolate chips.
On a light-colored baking sheet to a parchment line sheet, use a spoon and drop a constant size mound of dough, leaving room for expansion. Place in oven for 7-9 minus until cookie is barely turning brown. Remove and let sit on sheet for another minute before transferring to cooling rack. Keep doing this until all of you dough is gone…
Last night had we had a couple littles (and my little sister who is not so little anymore) over for a cookout and watercolor evening.
It was fantastic. We set them up outside with paint, paper, and brushes and let them have at it. And while they were painting the mr took charge of the grill: cooking up potatoes, corn, and the tofu dogs.
I was cutting up fruit and making a special snack treat of popcorn (who doesn’t love popcorn?) consisting of almond butter, coconut, and chocolate….Almond Joy popcorn.
Addictive like crack. But still safe for children
The littles were more or less indifferent to it ( they are not big coconut fans..I know, but i am making it a mission to make them like it), but the sister and the mr… Lets just say I had to pull out my outdoor voice on them a few times (STOP EATING IT ALL!!!!!)
I think we have a winner here!
The stuff. A large quantity of air popped popcorn, almond butter, chocolate chip, coconut flakes and coconut oil. We also have some extra chocolate chips and a big handful of roasted almonds.
Licking your lips yet?
Start by dumpling your popcorn into the larges baking sheet to pan that you have.. the more surface area the better. Now heat up the almond butter. You can do this on the stove or in the microwave. The trick here is to heat it slowly so you don’t burn it. If doing on the stove, put in a sauce pot and with a fork, constantly stir until a drizzable consistency. If in microwave, stick it in there for 10 second intervals.
Note. I know from experience that there are many different types and consistency of almond butters out there. If your butter seems really stiff and thick, add a teaspoon of coconut oil.
As soon as your almond butter is melted, drizzle all over the popcorn.
With the same pot (no need to clean) place teaspoon of coconut oil in it. Heat oil until hot. Remove from heat and stir in the chocolate chips. Kepp string until the chips are melted.
And drizzle that all over
Then toss on the coconut chips, chopped almond bits, and the chocolate chip.
With your (clean) hands, give the popcorn a good toss, mixing everything all around.
And now place either in a big bowl or individual cups (great for littles) I happened to have some pink(beet juice stained) shredded coconut on hand, which made for a nice touch of pretty (totally not necessary,but it kinda was). Next time maybe some sprinkles would look nice……
Anyway, be ready to lick you fingers!
And I am giving you ample amount of time to get the ingredients needed for this. Makes the perfect snack for a cookout, a party, or movie night(or Netflix binge)
Happy Day!!!
-C
6-7 cups air poppped popcorn
1/3 cup smooth almond butter
1/2 cup unsweetened coconut flakes
1/2 cup chocolate chips plus a handful (use vegan chocolate chip if needed)
1 -2 teaspoon coconut oil
handful of toasted almonds, chopped into pieces
Feel free to play with proportion. You can adjust the amount and ratios of all the ingredients to your taste preference.
Take popcorn and dump on the biggest baking sheet or pan that you have and level it out. Either on the stove or in the microwave, heat almond butter until a melty a runny consistency. If doing so on the stove, make sure to consantly stir while heating* If in microwave, check ever 10 seconds. (burnt almond butter tastes like crap )
*Note. I find that all almond butters are not the same. IF you feel that yours is not melty and drizzable enough, add in a teaspoon of coconut oil.With a spoon or spatula, drizzle all over popcorn. .
Now take the coconut oil and melt on stove or in microwave until hot. Remove from heat, add in chocolate chips and mix around until fully melted. Drizzle all over popcorn .
And last but not least, take the coconut flakes, almond pieces, and the extra handful of chocolate chips and toss those in too. With clean hands, give everything a good mix Dump into a big bowl or individual container.
Eat with hands..lick your fingers clean..
Word of caution…Once you start, you will not be able to stop eating this.
I have been meaning do a post on seltzer and syrups for a while now and this one is perfect… Everyone around me has been getting sick and I am trying my hardest to not get anything.
Citrus and ginger…. Two of my favorite things, combined into one super refreshing, light and crisp, thirst quenching drink. Tasty and packed full of vitamin C from the citrus and blood warming, tummy healing ginger. Its kind of a feel better elixir, a good for you drink, a sparkler pop. A drink everyone can get into (the mister even liked it), And it has no added sugars or nasty coloring, it can’t get much better.
Feeling Happy, feeling crappy, or just plain feeling, this drink is a good for it all.
I made the ginger date simple syrup ahead of time.. All I did what chop 2 1/2 tablespoons fresh ginger and about 3 tablespoons pitted dates and added to a pot with a cup of water. Simmered the stuff until the dates were mostly dissolved, about 15 minutes, took off the heat and pureed it. I let it steep for another 5 minutes and strained….no biggy. This is a milder sweet simple syrup. If you like sweeter add more dates or even add a bit of honey… Do what tastes the best to you.
Juice the lime and blood orange…..so much pretty!
I ended up with about 12 tablespoons of juice from a the lime and the orange.. If you need or want to, juice an additional orange and lime.
Add 2-3 tablespoons of the fresh juice per 12oz glass and add about 2-3 tablespoons of the ginger date syrup…(adjust amounts to you taste) Top off with cold plain seltzer water and maybe an ice-cube or two. ( I would have if I had thought to make ice)
So lovely…. so nice. I really got into these flavors. This drink has the ability to make you feel warm and cozy while being cold and fresh. It makes me happy.
Double thumbs up here!
Stay un-sick!
-C
Blood Orange Ginger Lime Sparkler Pop
Ingredients
2 1/2 tablespoons fresh chopped ginger
3 tablespoons chopped dates (more if you want sweeter)
1 cup water
1 lime
1 blood orange
Plain Seltzer water
Ice (optional)
For the ginger date syrup
In a small pot on low heat, add chopped dates and ginger to a cup of water. Simmer until dates have mostly dissolved, about 15 minutes. remove from heat and puree with either a blender to a hand emulsifier. Let steep for another 5 minutes and strain, reserving the pulp (add it to soup or salad dressing). Let completely cool.
To assemble drink, juice blood orange, and lime. Add about 3 tablespoons of the ginger syrup and 2-3 tablespoons of the citrus juice per 12 0z cup. Top with plain seltzer water, give it a light swirl with a spoon or straw and add ice cube if you want. Now have at it!
First week of the New Year.. and I am ready to take this year and ride it like a bull.(I don’t know exactly what that mean, but it sounds right) I am not a new years resolution kind of gal, but I am a goal oriented person and this week I have been thinking a lot about my goals and wishes for life…. and I am on my way..Nothing is going to stop me!(unless I end up getting arrested, but that is not a goal) Anyway, as always, the mister and I spent a good chunk of time with the family. Everyone’s kids have had the past two weeks off and I think all of my sisters are about to kill a small child(possibly one of their own), so we tried to help out as much as we could.I mean, I am even happy that the kids all go back to school tomorrow. But it was a good week, we went to a bouncy castle birthday party (I didn’t get to bounce..so sad) and made balloon animals(well sort of. Nick knows how to do a few, I know how to make a snake and inappropriate jokes.) I got to bake a lot and test out a few new food recipes(tasty things to come!) Its been pretty freaking cold so we spent more time then usual indoors which meant I got to read a lot. We even cleaned out the basement and made it more human friendly..and didn’t kill each other doing it! All in all, not a bad start to the new year. Here are some happy highlights.
New Years Eve hike. Anything outside makes me happy.This giant tree fell over on the trail and it looked so pretty. And yes, Washer looks handsome too.
My Grammy Stems Poppy seed roll recipe…My Dad makes them every year and this is the first time I ever made them. I split the recipe in half( the recipe make 6 huge rolls) and turned one of the rolls into little rolls. Those little rolls might be one of the prettiest things I have ever made. I am going to be making them again soon.
We had to take out Christmas tree down…which is kind of sad, but I stopped watering it and Nick stopped watering it….and it turned into fire tinder. Nick took the popcorn garland from the tree and lined the fence…. that made up for not having the tree anymore. Best Christmas present ever…The Mister paid off my outrageous library fine so I can start taking books out again.!(what a guy) I am reading both of these at the moment… and both are excellent! I kinda don’t want to do anything but read.
This situation going on here…sometimes the most simplest of ingredients make the best dishes… This blue arrow, a marker in the woods. I love arrows
A visit to a green house. I am a house plant slut…I have a ton and always want more. But ever since we moved into our little cave(it has almost zero natural light) my plants have been sad and I am trying my hardest to keep them happy. I was on the hunt for some plant food to keep my green babies alive and I found myself happily wondering this greenhouses. I think everyone should have a green house full of plants, it’s impossible to not feel good in a light warm room of color.
Freshy snow walk. Our feet were the first to lay tracks around the neighborhood. Our feet are awesome.
I love my little kitchen wall, but I would love a little more space/storage/light. I am dreaming up a few kitchen projects for the mister and I to tackle, maybe more shelves, some hooks..Maybe a big old hole in the wall? I spend a lot of time fantasizing about little ways to make the kitchen a little more awesome(it’s pretty awesome now) But I mean, a window would make everyone happy. Just an idea…We will see.
So yeah, the little bits.
Hope You all had a great week and are staying warm and cozy!
-C
The past week has been pack full of everything.. Birthdays (3 nephews within the week), Christmas, family family family…..Its a lot, but its been great. Not going to lie, I am ready for a little quite time, maybe a nice long day of locked doors and dead phones….we will see. But anyway, here are a few little bits of happy that I managed to snap photos of(I have been slack on picture taking this week)This is an amazing book, full of pictures and information about 123 different varieties of apples….I am so excited to read it! My love got it for me for Christmas….So nice, so sweet. Its been a weird weather week..warm and gray.. This touch of blue really stood out.I found my favorite rag wool socks (Hooray!!!!).. and wore them all week.(don’t judge)
Ice Skating!!! One of my nephews was born on Christmas so we always do a skating party at the ice rink on Christmas eve……….another of my favorite family traditions…Always a super blast. Here my sister and nick were giving this little her first ever skating lessons. All I can say is good thing she was wearing a helmet.
Another gift from the mister…a weck juice jar……If you know me or are getting to know me, you will know that I am jar obsessed and weck jars are some of my favorite. I eat, drink, store everything in jars. This beauty is destined for tea and or coffee.
I am not saying this because he is my lover, but Nick is an amazing artist. He has really gotten into using spray paint and has been doing some really awesome large scale images(nothing illegal…….yet!!) He did this whale a few days ago.. I am always blown away at he talent.
Popcorn drizzled in melted peanut butter….. WHOA!!!!! I also like to add garlic salt and chunks of fresh apple. It is the best most fantastic movie snack ever………Maybe I’ll share with you sometime.An early morning walk with the pup to the waterfront…We watched the sun come up…I am so lucky to live in such a beautiful place.
I hope everyone is having a wonderful holiday.. eating some good food, relaxing, spending time with loved ones. So soon it will be 2015(Holly f***!!) Lets get ready!!!!!
It’s Mother’s Day weekend which means that you and I and everyone out there should feel the slightest bit obligated to at least do a little something nice for your mom for the mere fact that you were borned. And really what better way to celebrate mom than with food… It really is the least that you can do. (I think mom’s also like flowers and cards and handmade pasta necklaces) My mom is defiantly about the food. (she has had her fair share or pasta necklaces) A many years back on Mother’s day, this sweet little girl (me) made her mother a special breakfast treat…blueberry scones. And ever since that day, for every freaking holiday, birthday, whatever day, my mother requests (demands) a batch of those scones. She is always saying that these are her favorite treat and that no one has ever made them as good as I do. (I guess that just reiterates that I am her number 1 child)
And for the last few months my mom has been up my butt, trying to get me to make her some. Not going to lie, I have been saying I’ll get her a batch, but for some reason, I haven’t gotten around to making them. So two birds here.. Make the scones and she gets off my back for a least a little while (a month.. maybe 2) and I give her a fantastic Mothers day gift that I know she will love.
So here they are , oh mother of mine. Blueberry scones!
The stuff. Flour, baking soda, baking powder and salt. A bit of sugar, vanilla, buttermilk, and butter (use vegan butter and nut milk if you want to make them vegan) And of course we need the blueberries which can be fresh or frozen. I usually use fresh, but the store I stopped at only had really big containers of fresh that were like $1000 dollars a piece and the organic frozen happen to be on super sale. So you know, the cheap in me won that battle. So into the bowl goes all the dry stuff; flour, baking powder and soda, salt, and the sugar. Give it a good whisk.
Now for my special trick for a perfectly distributed cold butter in a pastry. Freeze your butter and grate it!
With a large wholed grater, grate the frozen butter directly into the bowl with the dry, stoping a few times to toss the butter chunks around so you don’t end up with a huge pile of grated butter. When it’s all grated, gently toss around so the butter is evenly distributed. Now dump the blueberries into the flour mixture. Toss them around to give them a coat of flour. Add in the buttermilk and vanilla and give a little mix until liquid is absorbed. We are trying to handle the dough as little as possible.Turn mixture onto counter. It’s very loose, but thats what it should look like. Very gently and with as little handling as possible, gather dough up, knead a few times till everything just comes together. Press dough into a disk that is roughly an inch thick…. and it doesn’t need to be perfect. Cut the disk into even sized pieces. Do 6 big, 8 normal, maybe even 10 smaller. Whatever size you like. (I did 8) Place the scones onto a baking sheet, using a spatula to transfer, and sprinkle the tops with a little bit of sugar. Into a preheated oven for about 20 minutes.And when the scones look all nice and browned and a tester comes out clean. remove and either serve right away warm, preferably with huge cup of coffee or tea, or stick on a rack to cool before storing in air tight container.
Perfect to serve as a breakfast pastry, at brunch, or even as a dessert. A nice little treat for a special lady. (dudes can eat them too)
Happy Mothers Day Mom! Thanks for having me!
And Happy Weekend!!!
-C
Blueberry Scones
2 cups all purpose flour
1/3 cup sugar plus 2 tablespoons to sprinkle on top
1 teaspoon baking powder
1 teaspoon baking soda
1/2 teaspoon salt
1/2 cup (1 stick) unsalted butter frozen or really cold (use non dairy butter like Earth Balance for vegan)
1 cup blueberries (fresh or frozen)
1 teaspoon vanilla
3/4 cup buttermilk (use non dairy milk for vegan)
Preheat oven t0 400 degrees
In a large bowl, whisk together flour, baking soda, baking powder, sugar, and salt. Take the frozen butter and grate directly into flour mixture, tossing around to evenly disrupted. Add in blueberries and toss around till coated with flour, then lastly, add vanilla to buttermilk and mix into mixture until just barely coming together. Turn mixture out onto counter and with your hands, knead mixture a few times until it forms a solid dough. Shape into a disk and smoosh down until about an inch thick. Cut into 6-10 triangles and place on a non greases baking sheet and sprinkle tops with remaining sugar. Stick into oven and bake for 20 minutes or until tops start turning a golden brown and a tester in the middle of a scone comes out clean.
Remove from baking sheet and serve warm or let cool on a rack.
Mom gets first dibs, and if she is willing to share, eat one yourself with your face.
Last week pineapples were on sale everywhere……So I bought 5. Don’t judge
And I bet I am not the only one that got overly excited at $1.50 pineapple and bough themselves a few. We will just call ourselves opportunists. Now we have plenty of pineapples and don’t have to pay the $4 a piece prices. (Justification)
But if you don’t have a pineapple laying around, you must go get one. (Maybe if your lucky, there might still be some sales going on) because you must make this salad. I am on a mission to make everyone I know eat it because, for lake of a better way to say it…….It will rock your world.
Dill and pineapple are a serious match made in heaven. Pineapple, with its sweet, tangy, citrusness and dill with it’s super fresh earthiness. Mixed together with a few other helpers to create a fresh, clean, chunky, tangy, over the top, flavor. I could stop right there, but toss in a handful of lentils, some creamy avocado and a bed of kale…It’s like the best spring time, celebration on you tongue, happiness in you tummy, kind of salad.
A salad that will make you smile. (and maybe buy 5 pineapples)
Stuff for the goodness. We got the kale, some avocado because all salads should have avocado and some cooked lentils because, well, all salads should have lentils (or beans or nuts.. so you could totally something else) Then a few sprigs of fresh dill, a clove of garlic, red wine vinegar, salt and a bowl of chunked up pineapple. The pineapple, dill, garlic, red wine vinegar, a splash of water and a pinch of salt get blended in a blender or whatever blending device you use. Go as smooth or chunky as you like, I recommend going smooth, but leaving a little chunk, like half blended.
The prep is done, now compile. Kale in bowl, top with lentils,. Toss on avocado chunks, and, last but not least, the blended pineapple dill mixture.So good……So so good.
Happy Friday!!
-C
So Good Pineapple Dill Kale Salad
Serves Two
3 cups washed and chopped Kale
1/2 a avocado, diced
1 cup fresh pineapple chunks
1-2 springs fresh dill
1 tablespoon Red Wine Vinegar
Salt
1/2 cup cooked lentils (or any bean or nut will do)
Note. No fresh dill? You can use dried, just sub in 1 teaspoon for the fresh and after blending with the pineapple, let sit a little longer to really let the flavors meld together.
Place pineapple, dill, pinch of salt, vinegar and garlic into a blender or whatever you own that blends and blend stuff together, leaving it a little chunky. Let sit for 5-10 minutes.
Kale goes into a bowl and add the lentils and diced avocado. Pour the blended pineapple on. Toss around.
Now eat.
When something goes on sale at the grocery store, I tend to buy it. Being that it is Valentines Day this week, all the stores are having specials on all sorts of sexy things… and strawberries are one of them. Now I am not a huge fan of buying produce that is terribly out of season, but I can’t help myself…a good deal is a good deal and the strawberries were a super good deal. I was just going to make some sweet ass strawberry jam or maybe a lovely strawberry cake with them (and I probably still will), but these strawberries are actually super juicy and full of flavor, and it’s always nice to eat some full flavor freshy strawberries… especially soaked in balsamic vinegar. And yeah, I think that this salad is pretty sexy, so it makes for a perfect Valentines day dish.
A handful of ingredients and 5 minutes will get you to a fantastic salad experience.
A bowl of baby spinach, a few chopped up strawberries*, half a sliced avocado and a small handful of toasted almonds.. Oh, and don’t forget the balsamic vinegar….
*Note.. Strawberries are kind of heart shaped already so if you want, reserve a few slices to fancy up you salad presentation, but chop up the rest into smaller pieces.
Pour the vinegar on the strawberries and let sit for at least 5 minutes. (the longer the strawberries can sit with the vinegar, the better)
Pile it on.. thinly slice avocado.. rough chopped toasted almonds… It’s pretty much as easy as it can get.And last but not least, toss on the balsamic soaked strawberries and drizzle the remaining vinegar. (if you made hearts, place on top to make pretty) Sprinkle with a pitch of salt and pepper and pow! Fancy, sexy, delicious salad.
Not to shabby for 5 minutes and a handful of ingredients. Anyone (don’t feed to a person with nut allergies) would be so syked to be fed a salad like this… You yourself should be pretty excited to eat a salad like this. Heck, I am excited to eat a salad like this!
A love salad for everyone and everyday!
YAY for Thursday and Happy meal planning!!!!
-C
♥ Balsamic Strawberries on Spinach Almond Avocado Salad ♥
Ingredients for 1 large or 2 small salads
3-4 ripe strawberries
handful of roasted almonds (slivers or whole)
1/2 avocado
2 tablespoons Balsamic Vinegar
3 cups baby spinach
Pinch of salt and pepper
Dice strawberries into small pieces (reserve a few whole slices for heart shapes if you want) and toss in a small bowl with the balsamic vinegar. Let sit for at least 5 minutes. Rinse and dry spinach. Place in a bowl(s) and top with thinly sliced avocado, chopped almonds and balsamic soaked strawberries. Drizzle the residual vinegar on top and sprinkle with a pinch of salt and pepper.
Eat with a fork
I needed something quick, something everyone would like and I needed it to come from food I had in the house……Pretzels, peanut butter and chocolate chips turned into little nutty nuggets. A last minute christmas treat. I have stumbled apron something that I am sure to make many more times to come. People were really into them and for real, so easy and took so little time to make.. Fast, happy, peanut butter and pretzels dipped in chocolate, I mean, do you know anyone that would say no to that? And just because I made them for Christmas does not mean that we cannot make these for any occasion, like New Years, maybe a birthday party or even laundry day. You can even make these as a fun afternoon activity with the kiddos.…Make them whenever you need a fun little treat! Note….This is one of those treats that is vegan, gluten-free (just get gluten-free pretzels) and doesn’t have a ton of sugar..Eveyone can eat them! Hooray!!!!!! (Maybe don’t feed them to a child with a peanut allergy)
Simple as this….Half a bag of pretzel rods(any shape would work)… A big scoop of peanut butter and some chocolate chips…
. Pretzels go into the food processor and pulsed until a mostly fine crumbly crumble. Now in goes the big ol scoop of peanut butter. Pulse until mixture comes togetherGo ahead and take a bite……so good right?..Start turning the mixtures into small balls..think grape sized.
Once the mixture is all rolled out, stick into the fridge or freezer for a little about a 1/2 hour to set up.
Right before you take the balls out of the fridge…melt down the chocolate. Like my make shift double boiler? I know….jealous. If you have one, use it, but if not, a big pot with water and a smaller thin metal or a glass bowl works.. The pot or bowl should fit onto the big pot, but I was having a hard time and couldn’t find any of my bowls…..so i did what I could. Bring water to a boil then turn to simmer. Place chocolate in small bowl on big pot and stir until chocolate is melted, silky and smooth. Remove bowl from boiler and start to dip those balls! Reheat chocolate if needed but be careful to not get any water into chocolate or else it will seize up and you won’t be able to melt it anymore.
Drop a few balls into the melted chocolate. I was doing 2-3 at a time. Take a spoon or spatula and gently roll or coat entire nugget. Remove and place on a parchment lined baking sheet.
That’s it…Imperfect little perfect candy nugget truffle thingys….I sprinkled the tops with colored sugar.. you know, for a little holiday fun.. 3 simple ingredients( oil doesn’t count).. and 10 minutes of hands on time…can’t get much better then that.
Peanut Butter Pretzel Truffles
Ingredients
3/4 cup Peanut Butter
10-12 Pretzel rods
1 1/4 cup chocolate chips
tablespoon coconut oil
Pretzels go into food processor and pulse until a fine mealy constancy.. Add peanut butter and pulse until combined and is easily handled. Add a bit more peanut butter if the mixture seems to dry or another pretzel if mixture is too loose.
Line a baking sheet with wax paper. Roll mixture into small grape sized balls. Pace in the fridge or freezer for 1/2 hour.
After the balls have chilled, place chocolate chips and coconut oil into a double boiler and heat until chocolate is fully melted. Place balls 2-3 at a time into melted chocolate, roll around to completely coat, then transfer back onto wax paper. Once all balls are chocolate coated, sprinkle with something( if you want) and place back in fridge to set up.
And for your Friday, I made these awesome little raw/ vegan/ gluten free cookies.
Now wait a minute. Don’t let all the labels of what is not in these cookies scare you away. Just focus on all the stuff that these cookies are made of. Almonds, Cashews, Coconut, Cocoa, Oatmeal. They are cookies made with lots of good yummy stuff that just happened to be enjoyed by those with specific food diets as well as those who eat anything. A cookie for all! See, don’t they sound excellent? Yes, yes they do. And they are good. So, so, good. Even the mr. is into them. And he is far from being raw/vegan/ gluten free.
And because these cookies are made with all sorts of good for you stuff (lots of proteins, good healthy fats, and complex carbs) you can pretty much feel zero percent guilt eating them. They a are a no joke, healthy, energy packed cookies of goodness. A fantastic way to start the morning, eat with lunch, as dessert, post work out, or eat as a late night snack. (Just don’t eat them all at once)
Now go for it!
The raw stuff. A cup of old fashion rolled oat that have been soaking in water for about an hour. Almonds(which I spent 20 minutes deshelling) cashews, dehydrated coconut flakes, some cocoa powder and a few medjool date. If your nuts are unsalted, add a pinch of salt too.
Dump everything into a food processor. BUT WAIT! Make sure to remove the pits from the dates)I have broken a blade in the past form a date pit)
Blend unit combined and a kind of rough dough is formed. It will be a little sticky. If it;s to sticky to handle, place into the fridge for a few minutes to set up.
Now take blobs of mixture and roll into balls
And you could totally leave them as balls… you can even play with your balls….
But I think they look nicer squished flat and topped with pieces of nuts and coconut. They look almost fancy, if I do say so myself.
Now have yourself a cookie, and place the rest in the fridge (they get harder and, if you can imagine, taste even better after a few hours of cold)
Freak Yeah FRIDAY! Do fu stuff!
-C
Makes 15 normal sized cookies (you can make more or less, depending on the ball size)
1 cups oat fashion oats soaked in 1 cup water for at least an hour (use gluten free oats if needed)
1/2 cup raw almonds
1/2 cup raw cashews
5-6 medjool dates
1/2 cup dehydrated flaked coconut
1/4 cup cocoa powder
a pinch of salt (if your nuts are unsalted)
Add all the ingredients into a food processer and blend until the mixer forms a cohesive dough. It;s going to be a tad sticky, but if it seems to sticky to handle, refrigerate for a little bit so it’s easier to handle. (I have no problem handling right away)
Scoop and roll into balls and either leave them as is or squish them flat. Sprinkle with chopped nuts and coconut
Eat one or two right away, then stick the rest in fridge.
A ok to eat as breakfast, with lunch, at dinner, as as snack, a post workout protein, or when sitting on the couch and watching TV.

 I was informed yesterday that if I was going to make tortilla chips, that I better make some sweet ass dips to go with them. I kind of agree… tortilla chips need dip… or better yet, two dips. Queso and guacamole. It’s what needed to be done, and so I did it.

 Perfect…
 To think that both of these dips took about 10 minutes total to make. (I had pre baked the cauliflower and sweet potato) And for real, I would spend much more time if I had too because both of these dips are so freaking good, I definitely will be making these on the regular.


 Happy Cinco de Mayo! And what better day to share my version of my oh so fantastic pico de gallo, or as I call it, super freshy salsa.
 The stuff. Chopped Roma tomatoes, chopped red onion, a diced jalapeño, lemon, a bunch of cilantro, and salt.
 And thats it. Now eat… with something or without.
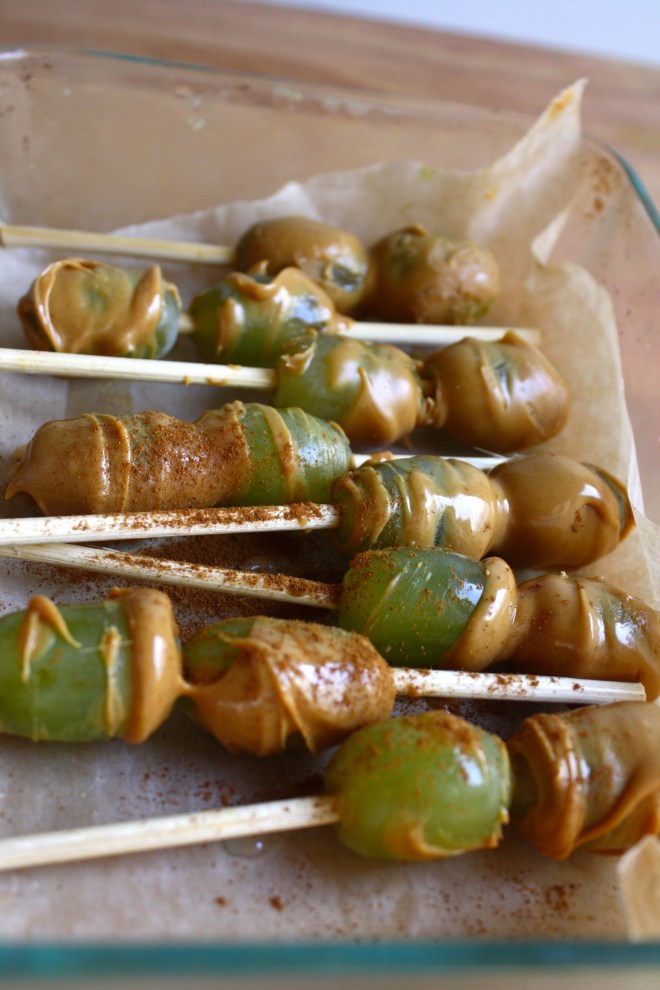 I can’t stop eating these. They are like little balls of crack and I am an addict.
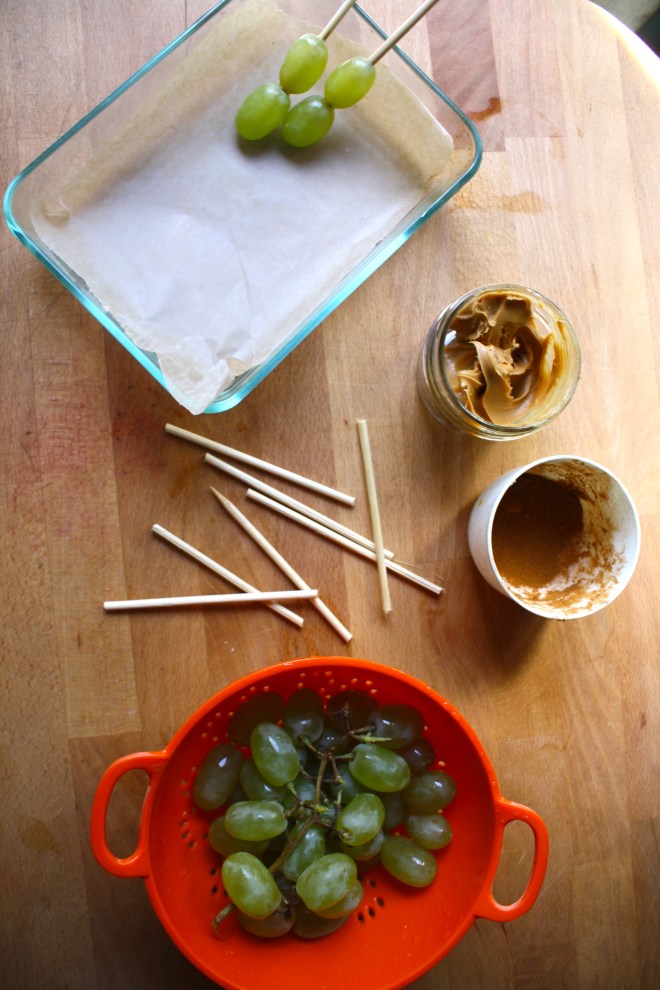 The stuff you will need. Washed and drained fresh grapes (green or red. I usually use red but the green were half the price and the red ones didn’t taste very grapie*) Creamy peanut butter, skewers, and a little bit of cinnamon or cocoa powder (optional)
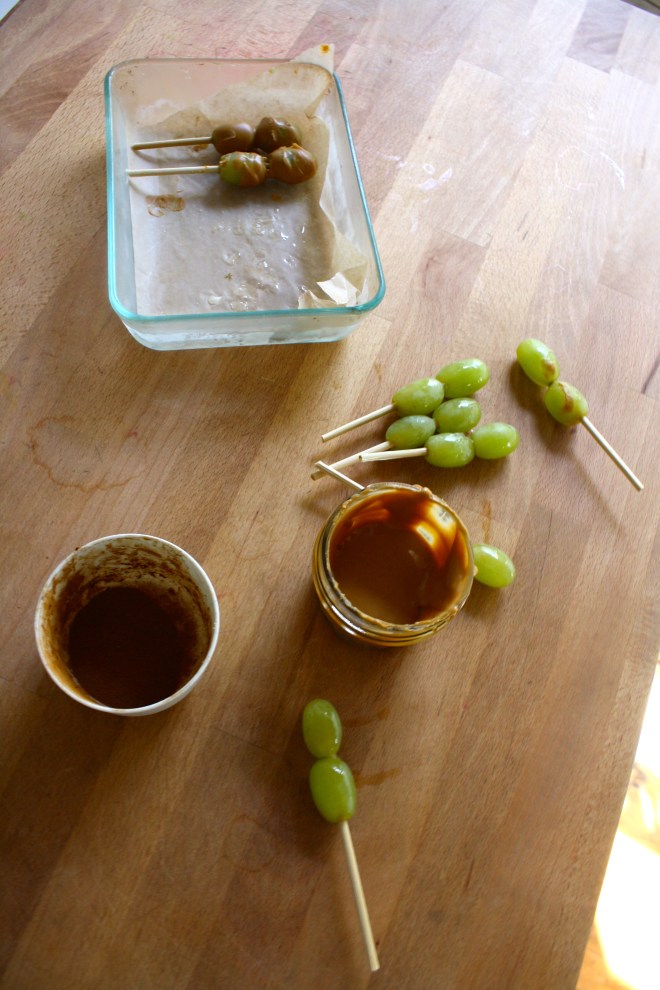 When the grapes are frozen, melt peanut butter. Take a big glob and stick in a tall skinny cup or bowl and stick in the microwave or heat in a sauce pan and then transfer to a tall skinny vessel. Take frozen skewed grapes and, one skewer at a time, dip in the peanut butter. Cover with as much or as little of the peanut butter as you want and place on wax paper. If you are feeling feisty, add a sprinkle or cinnamon or even a dash of cocoa powder. Or, this may seem a little crazy, but garlic powder is so F*ing good.(it’s worth at least giving it a try) When all grapes are dipped, place back into freezer for another 10 minutes or so to let the peanut butter set up a bit.
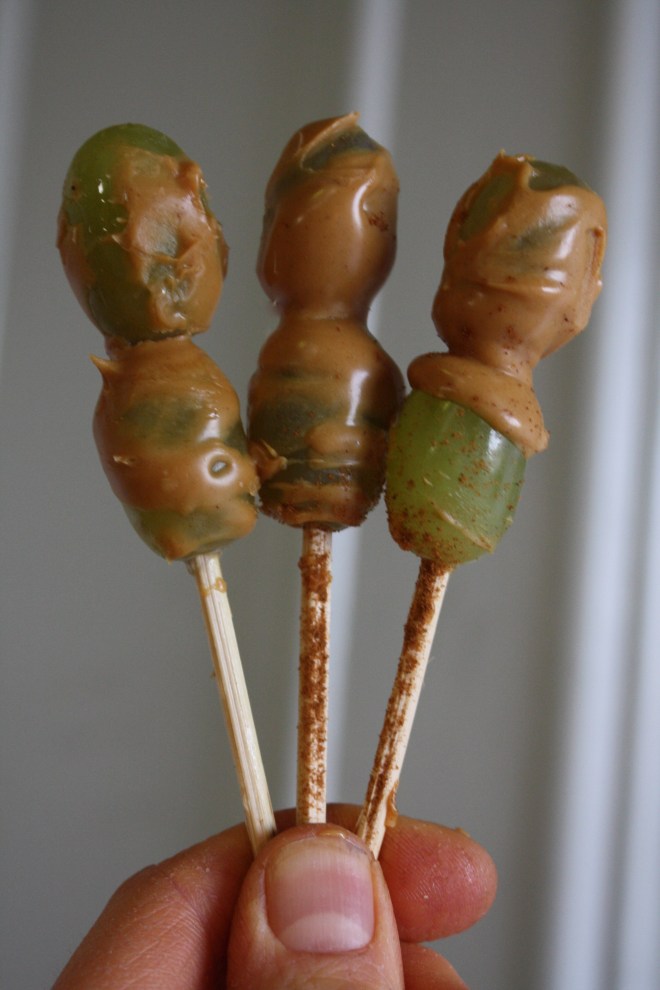 Whenever your ready… Eat. And be so happy. And always keep a back stock of frozen grapes in the freezer. They are the best.
 I figured now is a good time to get this recipe out there before we get to far into spring and summer recipes because there is going to be a lot of banana ice cream filled recipe coming and I figured its a good idea to have the basic banana ice cream recipe ready for people to refer too. And because I made so much fantastic naner ice cream, I also made a cookies and cream naner ice cream for my sisters and the mister.
 The stuff you need for this ice cream…. Nice and ripe bananas, peeled and then frozen* That’s it.
 After all blended and smooth, either eat right away or scoop ice cream into a freezer safe container and stick in freezer. That’s the banana ice cream… And it is amazing and so so so so so addictive. I make a batch, think I am only going to eat a scoop, then find myself eating half of what I have made, but it’s ok cause it’s only bananas.
  One batch of banana ice cream, either freshly made, still in food processor or made ahead and placed in a food processor and given a good pulse to smooth it up.
 Now you have cookies and cream naner ice cream…. and everybody is happy.
 It’s Mother’s Day weekend which means that you and I and everyone out there should feel the slightest bit obligated to at least do a little something nice for your mom for the mere fact that you were borned. And really what better way to celebrate mom than with food… It really is the least that you can do. (I think mom’s also like flowers and cards and handmade pasta necklaces) My mom is defiantly about the food. (she has had her fair share or pasta necklaces) A many years back on Mother’s day, this sweet little girl (me) made her mother a special breakfast treat…blueberry scones. And ever since that day, for every freaking holiday, birthday, whatever day, my mother requests (demands) a batch of those scones. She is always saying that these are her favorite treat and that no one has ever made them as good as I do. (I guess that just reiterates that I am her number 1 child)
 The stuff. Flour, baking soda, baking powder and salt. A bit of sugar, vanilla, buttermilk, and butter (use vegan butter and nut milk if you want to make them vegan) And of course we need the blueberries which can be fresh or frozen. I usually use fresh, but the store I stopped at only had really big containers of fresh that were like $1000 dollars a piece and the organic frozen happen to be on super sale. So you know, the cheap in me won that battle.
  So into the bowl goes all the dry stuff; flour, baking powder and soda, salt, and the sugar. Give it a good whisk.
 Now dump the blueberries into the flour mixture. Toss them around to give them a coat of flour. Add in the buttermilk and vanilla and give a little mix until liquid is absorbed. We are trying to handle the dough as little as possible.
 Turn mixture onto counter. It’s very loose, but thats what it should look like.
  Very gently and with as little handling as possible, gather dough up, knead a few times till everything just comes together. Press dough into a disk that is roughly an inch thick…. and it doesn’t need to be perfect.
  Cut the disk into even sized pieces. Do 6 big, 8 normal, maybe even 10 smaller. Whatever size you like. (I did 8) Place the scones onto a baking sheet, using a spatula to transfer, and sprinkle the tops with a little bit of sugar. Into a preheated oven for about 20 minutes.
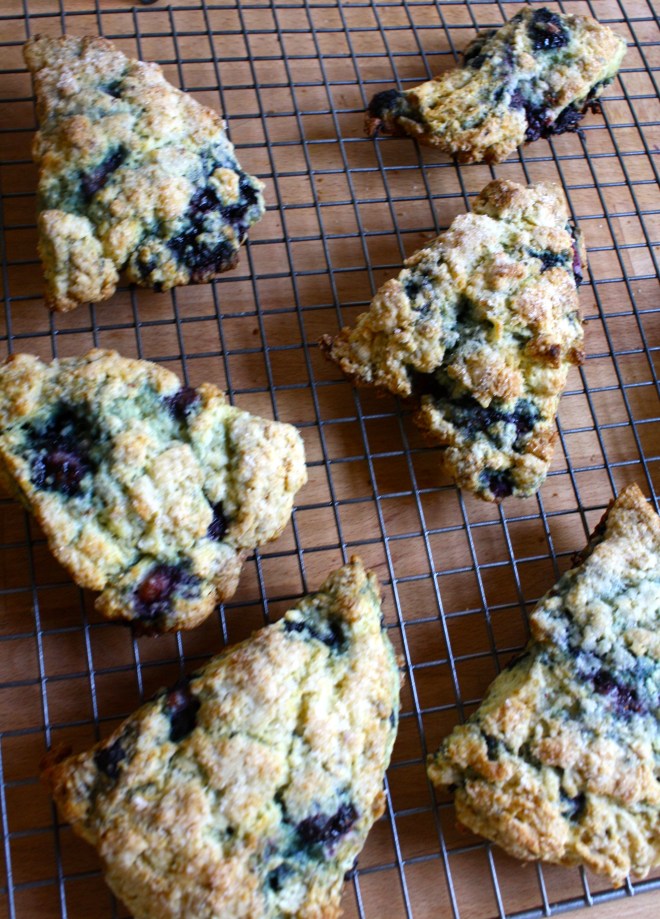 And when the scones look all nice and browned and a tester comes out clean. remove and either serve right away warm, preferably with huge cup of coffee or tea, or stick on a rack to cool before storing in air tight container.
 Those are some for real chocolate chip cookies…….for real.
 As usual, I forgot an ingredient in the line up…the chocolate chips, oh and the pinch of salt.. But rest assure, even though not pictured, there are indeed chocolate chips in these cookies!

 When everything is mixed, add the dry ingredients and mix that until fully incorpaerterd….
 Now for the chocolate chips. I use only 1 1/2 cups of chocolate chips… You want just enough in each cookie, but don’t want to overwhelm it with too much chocolate. The cookie is as much of the star as the chocolate.
  See how may cookie sheet is nice and silver and clean? For a long time I used a very dirty and dark baking sheet. I would make cookies and they always seem to come out slightly burnt. Got myself a new baking sheet and……perfect cookies. If your baking sheet is dark, I would recommend using parchment paper.
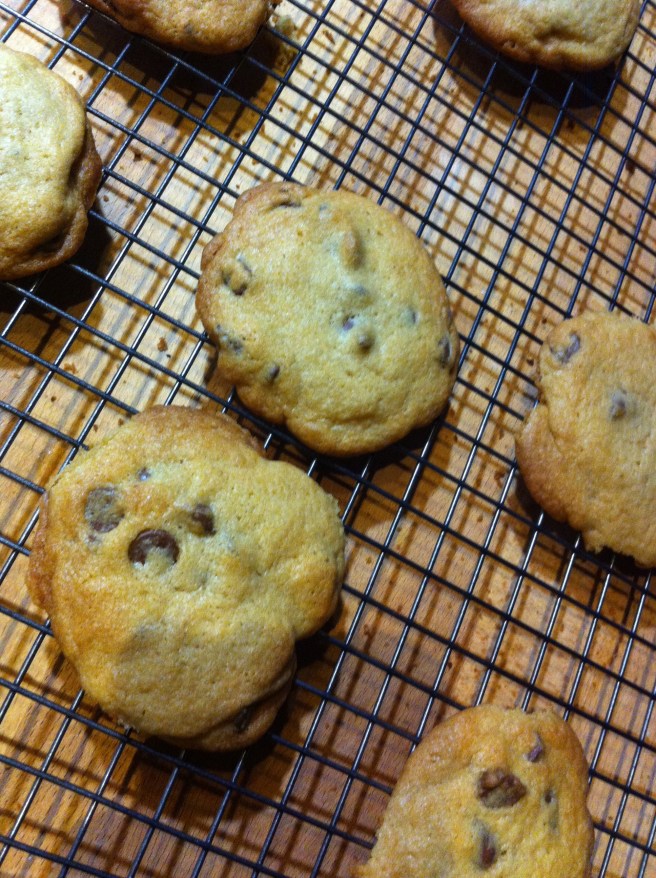 Lovely right…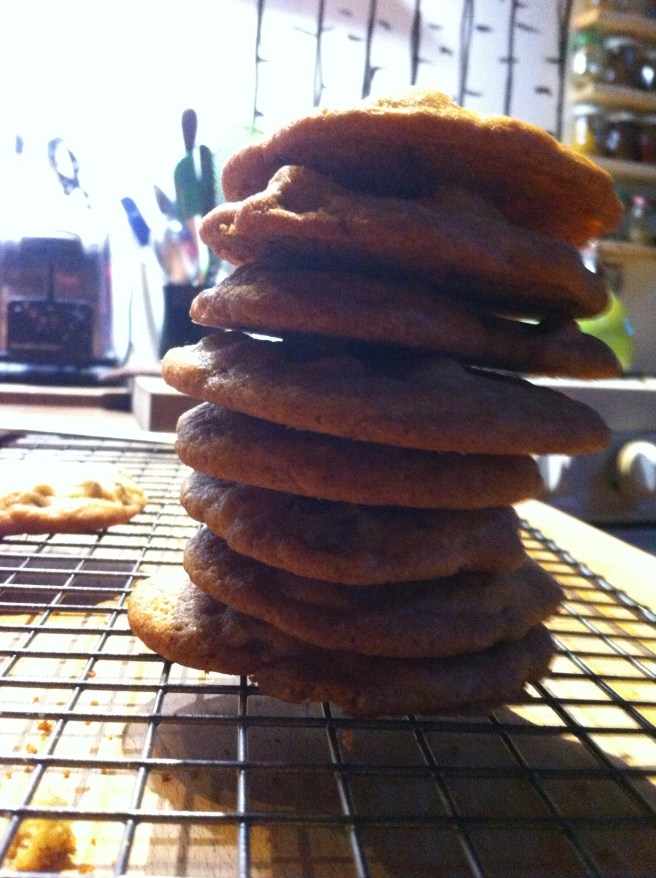


 I have been meaning do a post on seltzer and syrups for a while now and this one is perfect… Everyone around me has been getting sick and I am trying my hardest to not get anything.


 So lovely…. so nice. I really got into these flavors. This drink has the ability to make you feel warm and cozy while being cold and fresh. It makes me happy.
 New Years Eve hike. Anything outside makes me happy.This giant tree fell over on the trail and it looked so pretty. And yes, Washer looks handsome too.

 My Grammy Stems Poppy seed roll recipe…My Dad makes them every year and this is the first time I ever made them. I split the recipe in half( the recipe make 6 huge rolls) and turned one of the rolls into little rolls. Those little rolls might be one of the prettiest things I have ever made. I am going to be making them again soon.
  We had to take out Christmas tree down…which is kind of sad, but I stopped watering it and Nick stopped watering it….and it turned into fire tinder. Nick took the popcorn garland from the tree and lined the fence…. that made up for not having the tree anymore.
  Best Christmas present ever…The Mister paid off my outrageous library fine so I can start taking books out again.!(what a guy) I am reading both of these at the moment… and both are excellent! I kinda don’t want to do anything but read.
  This situation going on here…sometimes the most simplest of ingredients make the best dishes…
  This blue arrow, a marker in the woods. I love arrows
 A visit to a green house. I am a house plant slut…I have a ton and always want more. But ever since we moved into our little cave(it has almost zero natural light) my plants have been sad and I am trying my hardest to keep them happy. I was on the hunt for some plant food to keep my green babies alive and I found myself happily wondering this greenhouses. I think everyone should have a green house full of plants, it’s impossible to not feel good in a light warm room of color.
  Freshy snow walk. Our feet were the first to lay tracks around the neighborhood. Our feet are awesome.
 I love my little kitchen wall, but I would love a little more space/storage/light. I am dreaming up a few kitchen projects for the mister and I to tackle, maybe more shelves, some hooks..Maybe a big old hole in the wall? I spend a lot of time fantasizing about little ways to make the kitchen a little more awesome(it’s pretty awesome now) But I mean, a window would make everyone happy. Just an idea…We will see.
 This is an amazing book, full of pictures and information about 123 different varieties of apples….I am so excited to read it! My love got it for me for Christmas….So nice, so sweet.
  Its been a weird weather week..warm and gray.. This touch of blue really stood out.
 I found my favorite rag wool socks (Hooray!!!!).. and wore them all week.(don’t judge)
 Ice Skating!!! One of my nephews was born on Christmas so we always do a skating party at the ice rink on Christmas eve……….another of my favorite family traditions…Always a super blast. Here my sister and nick were giving this little her first ever skating lessons. All I can say is good thing she was wearing a helmet.
 Another gift from the mister…a weck juice jar……If you know me or are getting to know me, you will know that I am jar obsessed and weck jars are some of my favorite. I eat, drink, store everything in jars. This beauty is destined for tea and or coffee.
 I am not saying this because he is my lover, but Nick is an amazing artist. He has really gotten into using spray paint and has been doing some really awesome large scale images(nothing illegal…….yet!!) He did this whale a few days ago.. I am always blown away at he talent.
 Popcorn drizzled in melted peanut butter….. WHOA!!!!! I also like to add garlic salt and chunks of fresh apple. It is the best most fantastic movie snack ever………Maybe I’ll share with you sometime.
 An early morning walk with the pup to the waterfront…We watched the sun come up…I am so lucky to live in such a beautiful place.
 Last week pineapples were on sale everywhere……So I bought 5. Don’t judge
  Stuff for the goodness. We got the kale, some avocado because all salads should have avocado and some cooked lentils because, well, all salads should have lentils (or beans or nuts.. so you could totally something else) Then a few sprigs of fresh dill, a clove of garlic, red wine vinegar, salt and a bowl of chunked up pineapple.
  The pineapple, dill, garlic, red wine vinegar, a splash of water and a pinch of salt get blended in a blender or whatever blending device you use. Go as smooth or chunky as you like, I recommend going smooth, but leaving a little chunk, like half blended.
 So good……So so good.
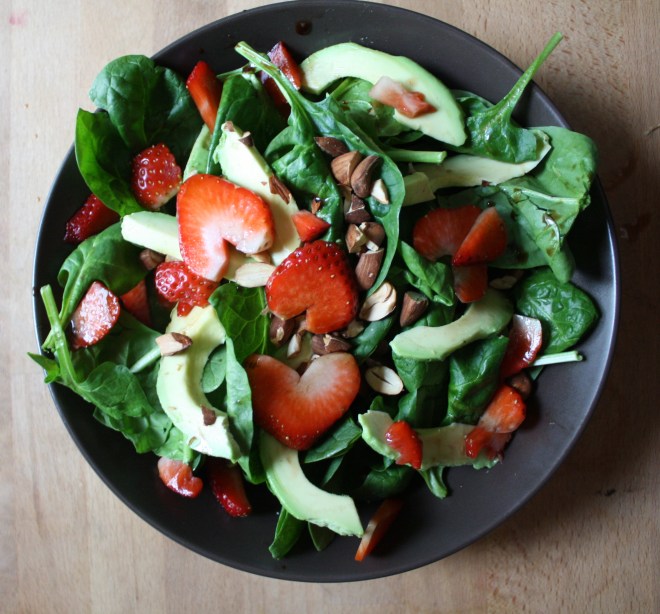 When something goes on sale at the grocery store, I tend to buy it. Being that it is Valentines Day this week, all the stores are having specials on all sorts of sexy things… and strawberries are one of them. Now I am not a huge fan of buying produce that is terribly out of season, but I can’t help myself…a good deal is a good deal and the strawberries were a super good deal. I was just going to make some sweet ass strawberry jam or maybe a lovely strawberry cake with them (and I probably still will), but these strawberries are actually super juicy and full of flavor, and it’s always nice to eat some full flavor freshy strawberries… especially soaked in balsamic vinegar. And yeah, I think that this salad is pretty sexy, so it makes for a perfect Valentines day dish.
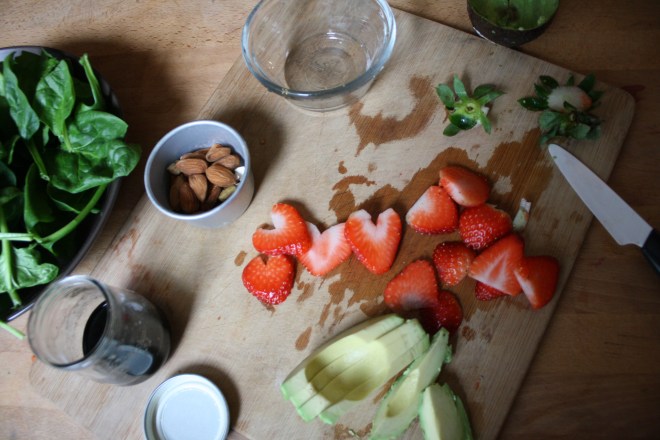 A handful of ingredients and 5 minutes will get you to a fantastic salad experience.
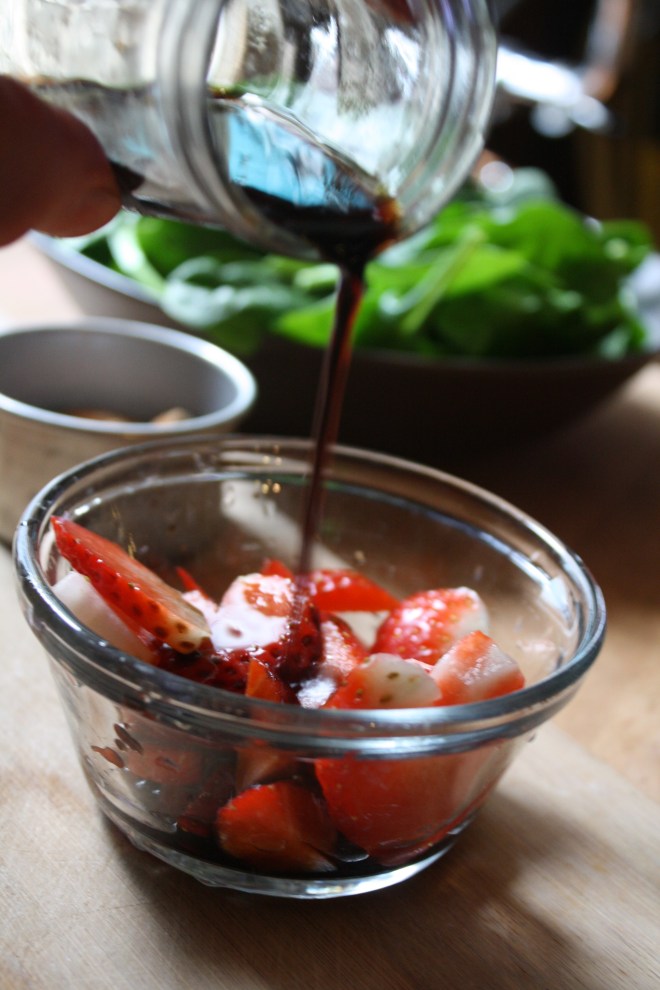 Pour the vinegar on the strawberries and let sit for at least 5 minutes. (the longer the strawberries can sit with the vinegar, the better)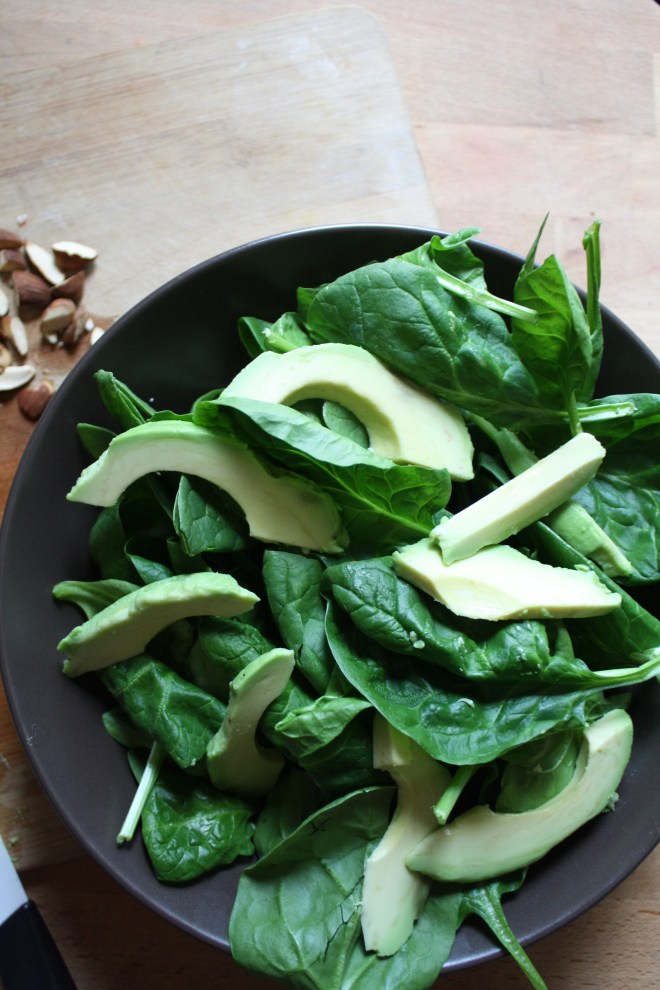
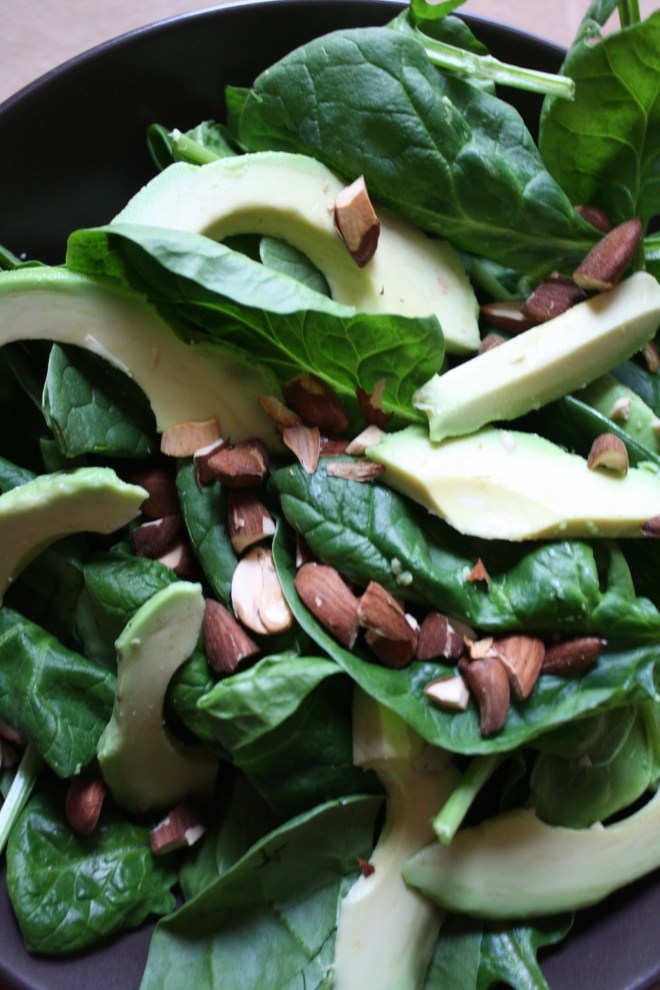 Pile it on.. thinly slice avocado.. rough chopped toasted almonds… It’s pretty much as easy as it can get.
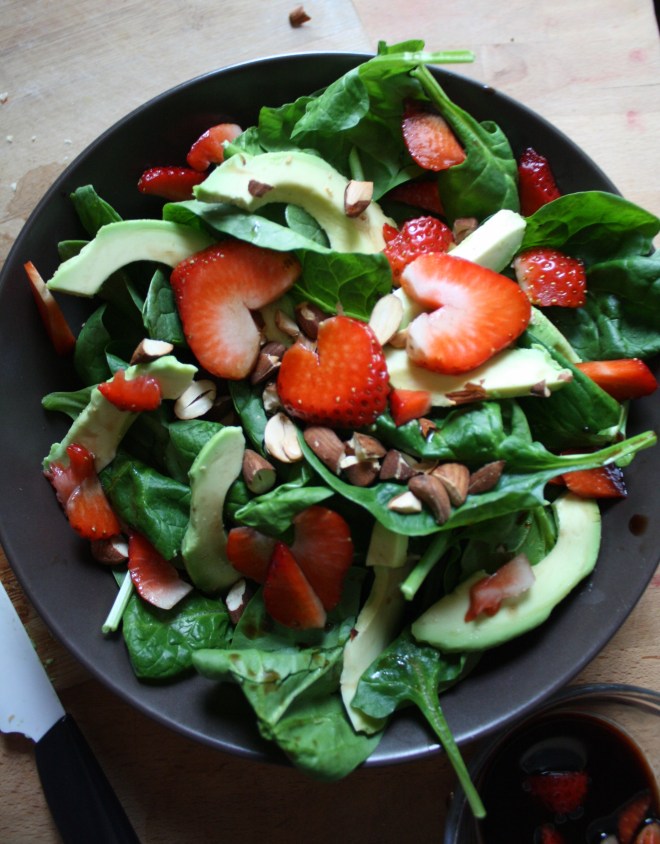 And last but not least, toss on the balsamic soaked strawberries and drizzle the remaining vinegar. (if you made hearts, place on top to make pretty) Sprinkle with a pitch of salt and pepper and pow! Fancy, sexy, delicious salad.
 I needed something quick, something everyone would like and I needed it to come from food I had in the house……Pretzels, peanut butter and chocolate chips turned into little nutty nuggets. A last minute christmas treat. I have stumbled apron something that I am sure to make many more times to come. People were really into them and for real, so easy and took so little time to make.. Fast, happy, peanut butter and pretzels dipped in chocolate, I mean, do you know anyone that would say no to that? And just because I made them for Christmas does not mean that we cannot make these for any occasion, like New Years, maybe a birthday party or even laundry day. You can even make these as a fun afternoon activity with the kiddos.…Make them whenever you need a fun little treat! Note….This is one of those treats that is vegan, gluten-free (just get gluten-free pretzels) and doesn’t have a ton of sugar..Eveyone can eat them! Hooray!!!!!! (Maybe don’t feed them to a child with a peanut allergy)
 Simple as this….Half a bag of pretzel rods(any shape would work)… A big scoop of peanut butter and some chocolate chips…
 Pretzels go into the food processor and pulsed until a mostly fine crumbly crumble. Now in goes the big ol scoop of peanut butter. Pulse until mixture comes together
 Go ahead and take a bite……so good right?..Start turning the mixtures into small balls..think grape sized.
 Once the mixture is all rolled out, stick into the fridge or freezer for a little about a 1/2 hour to set up.
 Right before you take the balls out of the fridge…melt down the chocolate. Like my make shift double boiler? I know….jealous. If you have one, use it, but if not, a big pot with water and a smaller thin metal or a glass bowl works.. The pot or bowl should fit onto the big pot, but I was having a hard time and couldn’t find any of my bowls…..so i did what I could. Bring water to a boil then turn to simmer. Place chocolate in small bowl on big pot and stir until chocolate is melted, silky and smooth. Remove bowl from boiler and start to dip those balls! Reheat chocolate if needed but be careful to not get any water into chocolate or else it will seize up and you won’t be able to melt it anymore.
 Drop a few balls into the melted chocolate. I was doing 2-3 at a time. Take a spoon or spatula and gently roll or coat entire nugget. Remove and place on a parchment lined baking sheet.
THE LOVELY CRAZY
September 19, 2015 by maximios • Blog
And for the last few months my mom has been up my butt, trying to get me to make her some. Not going to lie, I have been saying I’ll get her a batch, but for some reason, I haven’t gotten around to making them. So two birds here.. Make the scones and she gets off my back for a least a little while (a month.. maybe 2) and I give her a fantastic Mothers day gift that I know she will love.
So here they are , oh mother of mine. Blueberry scones!
Now for my special trick for a perfectly distributed cold butter in a pastry. Freeze your butter and grate it!
With a large wholed grater, grate the frozen butter directly into the bowl with the dry, stoping a few times to toss the butter chunks around so you don’t end up with a huge pile of grated butter. When it’s all grated, gently toss around so the butter is evenly distributed. Now dump the blueberries into the flour mixture. Toss them around to give them a coat of flour. Add in the buttermilk and vanilla and give a little mix until liquid is absorbed. We are trying to handle the dough as little as possible.
 Turn mixture onto counter. It’s very loose, but thats what it should look like.
  Very gently and with as little handling as possible, gather dough up, knead a few times till everything just comes together. Press dough into a disk that is roughly an inch thick…. and it doesn’t need to be perfect.
  Cut the disk into even sized pieces. Do 6 big, 8 normal, maybe even 10 smaller. Whatever size you like. (I did 8) Place the scones onto a baking sheet, using a spatula to transfer, and sprinkle the tops with a little bit of sugar. Into a preheated oven for about 20 minutes.
 And when the scones look all nice and browned and a tester comes out clean. remove and either serve right away warm, preferably with huge cup of coffee or tea, or stick on a rack to cool before storing in air tight container.
Perfect to serve as a breakfast pastry, at brunch, or even as a dessert. A nice little treat for a special lady. (dudes can eat them too)
Happy Mothers Day Mom! Thanks for having me!
And Happy Weekend!!!
-C
Blueberry Scones
Preheat oven t0 400 degrees
In a large bowl, whisk together flour, baking soda, baking powder, sugar, and salt. Take the frozen butter and grate directly into flour mixture, tossing around to evenly disrupted. Add in blueberries and toss around till coated with flour, then lastly, add vanilla to buttermilk and mix into mixture until just barely coming together. Turn mixture out onto counter and with your hands, knead mixture a few times until it forms a solid dough. Shape into a disk and smoosh down until about an inch thick. Cut into 6-10 triangles and place on a non greases baking sheet and sprinkle tops with remaining sugar. Stick into oven and bake for 20 minutes or until tops start turning a golden brown and a tester in the middle of a scone comes out clean.
Remove from baking sheet and serve warm or let cool on a rack.
Mom gets first dibs, and if she is willing to share, eat one yourself with your face.