
THE LOVELY CRAZY


My oldest sister graduated from nursing school this past weekend (wahoo!) and the friends and family had a party for her. I made these cupcakes for the party.But really, I made them just for her.
See, she is not a lady big on sweets. When I asked her what kind of dessert she wanted me to make her, she said if I could make a cake out of french fries, well that would be great. (I was close to making a french fry cake) But instead, I went a slightly different route and made cakes out of thing that I know she loves and can eat. Jalapeños because she is obsessed. Strawberries cause she likes her some fruit and are in season and I think, go with everything. Avocado frosting because she loves avocado and cornmeal because it makes the cakes a tad less sweet and a little more hearty. I also used GF flour cause she is GF.
Wow, I am the best sister. And here are a few more reasons why..
- I went to the party (I am not a big party person.. But I did have fun and her friends were cool)
- I changed into a clean outfit for her party (I really didn’t want to)
- I stayed out past my 6 (I made it until 7.. what!!!)
- I make her food
- I am awesome (I think so anyway)
So yeah. The cupcakes. The Nurse lady totally got down with these. I am pretty sure that I heard the words, amazing and oh my good, while they were being noshed on. The day after, the nurse lady told me that they were the talk of the party (bullshit, but thanks)
Whatever, I was just glad she liked them.

The stuff. For the cupcakes; cornmeal and some pre blended gluten free flour. Sugar, salt, baking powder and baking soda. Soy milk (use whatever milk you want) oil, apple cider vinegar, strawberries and a couple jalapeños . For the icing; an avocado, a lemon, and some powdered sugar.

This is not a hard batter to work, no need for a mixer or to cream anything, it can all be done with a wooden spoon.
First, preheat the oven.
Then trim and tiny dice the strawberries, remove seeds and tiny dice the jalapeños and toss it all into a bowl. Sprinkle with a bit of sugar.

In a large mixing bowl, whisk together the flour, cornmeal, baking soda and powder, salt and sugar. Then add in the rest of the stuff. Stir together until combined.Now fold in the chopped berries and jalapeños and scoop batter into a well greased (or lined) cupcake tin.
Stick into oven to bake…

Check cakes after 20 minutes and remove from oven when they are golden brown and a tester comes out clean when poked.
Remove from pan and place on a wire rake to cool.
While the cakes are a coolin, add avocado to a blender with the zest of half a lemon and the juice of that half of lemon and blend smooth. Add in the sugar and blend.
The icing should be thick, but spreadable. Using your judgement and you taste buds, add more sugar if the icing seems to thin or lemon juice if it seems to dry.
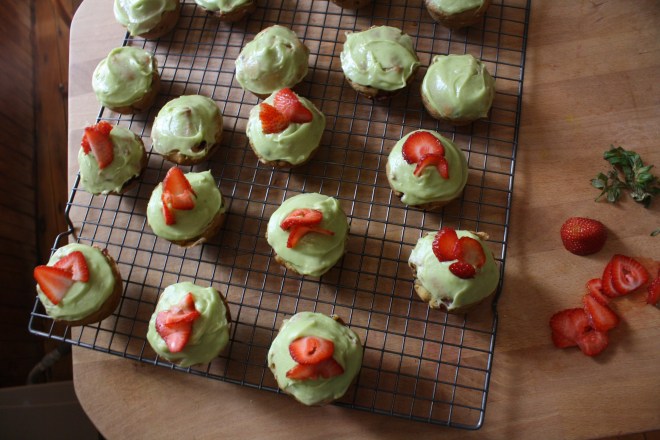
And once the cakes are cooled, spread with icing and top with sliced strawberries.
Your welcome Nurse Shannon!
Happy Friday!!!
-C
Jalapeño Strawberry Cornmeal Cupcakes with Avocado Frosting
makes 24 cupcakes
- 1 1/2 cup gluten-free flour blend (if you don’t need or want it gluten-free, just use all-purpose flour)
- 1 1/2 cups cornmeal
- 3/4 cup white sugar
- 1 teaspoon salt
- 2 teaspoons baking soda
- 2 teaspoons baking powder
- 1 tablespoon apple cider vinegar
- 2 cups nut or plant milk
- 1/2 cup oil
- 1 1/2 cups diced fresh strawberries
- 2 jalapeños
For the frosting
- 1 whole avocado
- 1/2 lemon (zest and juice)
- 2-2 1/2 cups powdered sugar
Pre heat oven to 350
Wash, trim and dice strawberries into little pieces and toss into a bowl. Remove stem and seeds from jalepenos and dice into small pieces.. add to bowl. Sprinkle with a little sugar.
In a large bowl, combine flour, cornmeal, baking soda, powder, salt, and sugar and whisk together. Now add in the oil, milk, and vinegar and mix together with a wood spoon until combined. Lastly, fold in the strawberries and jalapeños.
Scoop mixture into well greased (or lined) cupcake tin and stick into oven. Bake for about 20-25 minutes, or until cakes are gold brown and a tester comes out clean. Remove from oven, remove form tin, and sick on a wire rack to cool.
While the cakes are cooling, take the avocado, sugar, and the zest and juice of half a lemon and blend with your choice of blending drive until smooth. The icing should be thick enough to If the icing is to runny, add more sugar, or to thick, a little more lemon juice.
Now Ice cupcakes and top with sliced strawberries.
Eat for breakfast, lunch, dinner or dessert.
No utensils required, just some teeth.
 I love mustard, and when I say love, I mean LOVE. I eat it on anything and everything. And not just small quaintites, I buy jumbo sized containers of the stuff because I go through it so fast. Over the past few years I even started taking down others with my mustard eating obsession. Sisters, brothers, even some of the littles are now mustard eating feens. One of my little nieces is now just as bad as me. I don’t think I have seen her eat a single meal without a side of mustard. Her favorite snack, clementines and mustard, although sometimes she skips the clementines and just goes in with her fingers. Oh so good. I think that child could possible be mine. And yes, it’s mostly the yellow grocery store variety of mustard being consumed, but yellow mustard is just the tip of the ice berg. There is a whole world of flavors, textures and colors when it comes to the humble mustard seed. Whole grain mustard, to me, is one of the best and easiest to adapt to any persons specific taste. You can make it plan or add in just about any spice, vinegar, even a little sweetness that you might like. One of my favorite variations of this mustard is to skip the vinegar and use picked jalapeño juice. Aah, my mouth is watering just thinking about it.
So if you are anything of a mustard connoisseur, you really must, at least once, make your own batch.(It’s so easy!) And you will love it and share it with all your friends and they will think you are a bad ass for making your own mustard and your life will just be so great. All because you are now a mustard maker. Yes.
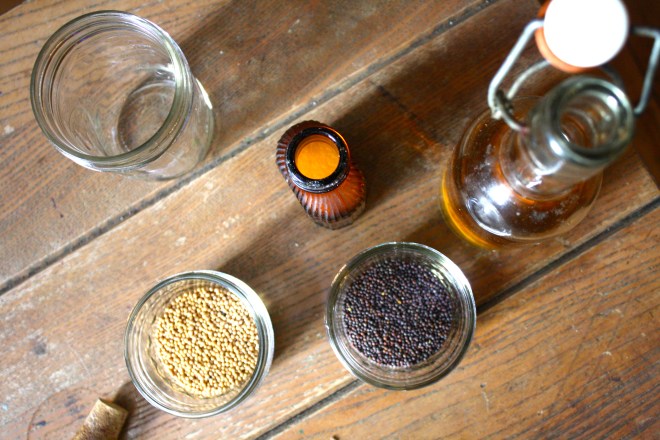 Yellow mustard seeds, brown mustard seeds, apple cider vinegar and salt. The most basic ingredients.
Note- If you want, add in a pinch of any spice that you want.. Chili flakes, granulated garlic, turmeric…. And you can use the vinegar of your choice. I like apple cider because its mellow with a slight sweetness but white or sherry or any vinegar would be great. Even left over picked juice is fantastic too.
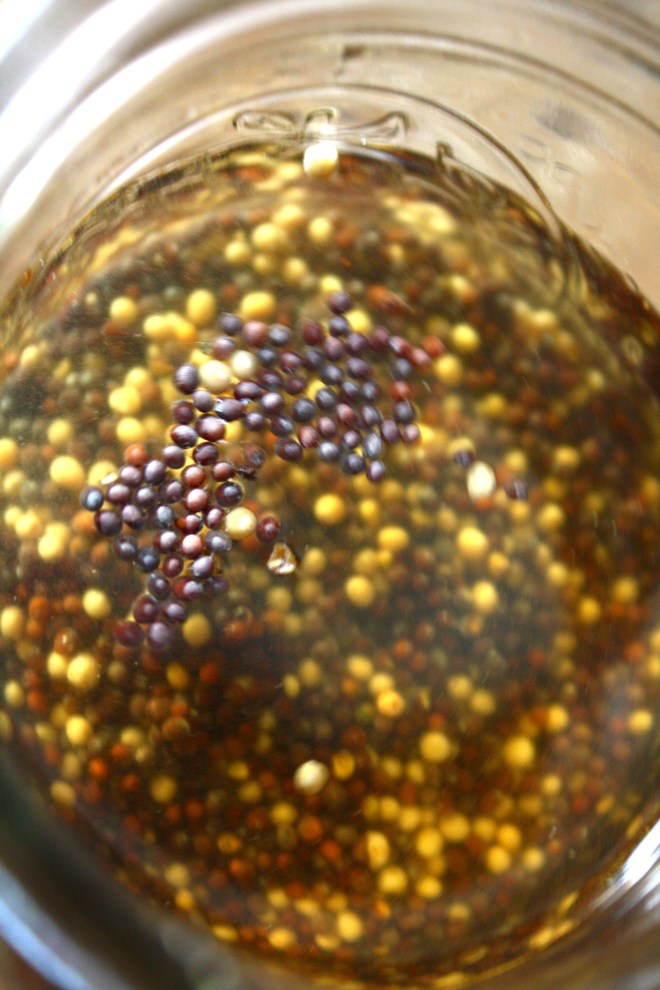
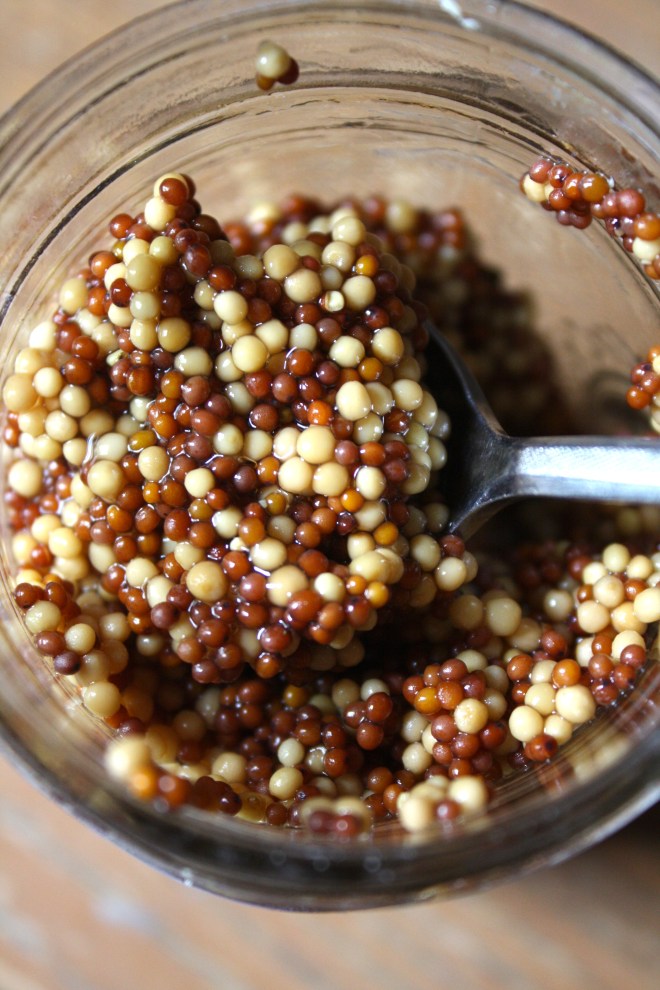
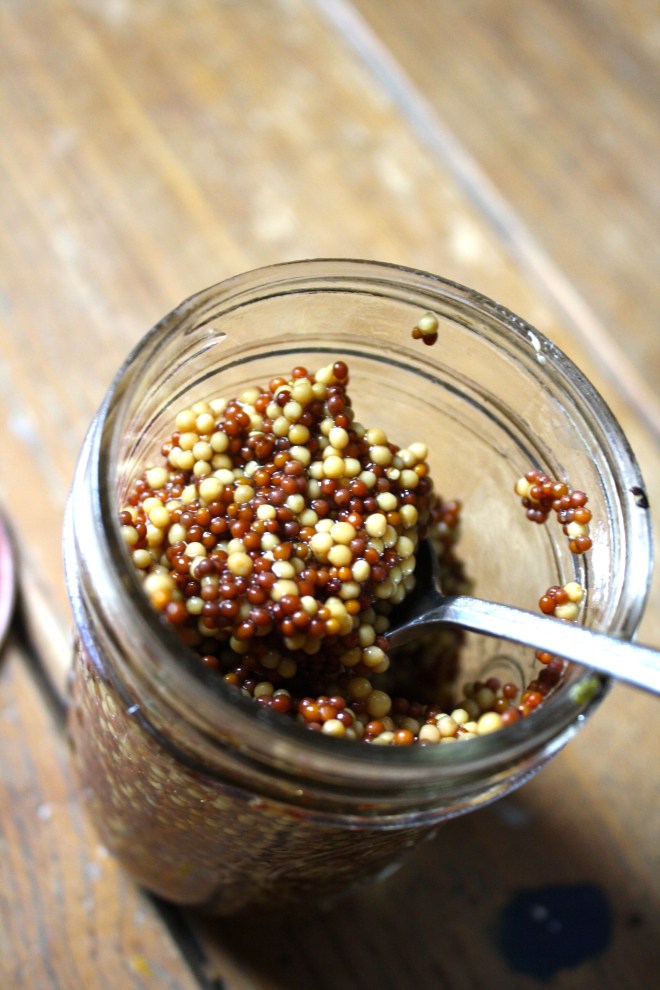 In a large jar, combine the mustard seed , twice as much vinegar and a pinch of salt. Cover and let sit for on the counter overnight until the seeds have soften and look almost like caviar.
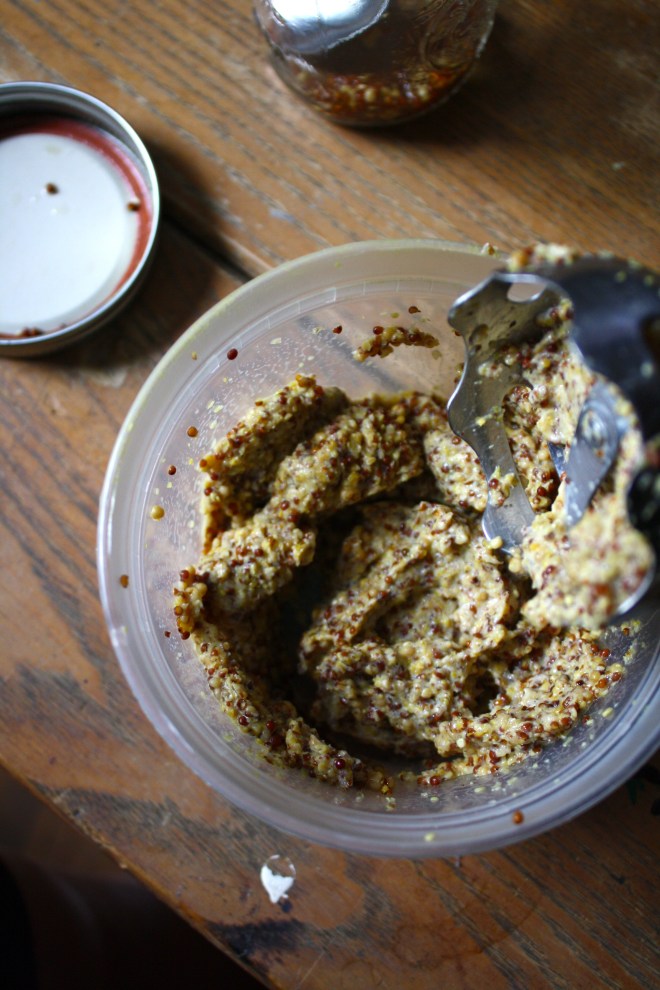 Now blend those seeds. You might want to add another splash or two of vinegar to help blend and to thin out a bit. Chose how creamy or seeded you like you mustard. I like to make it creamy but seedy so I blend it half way to creamy.
Taste and add another pinch of salt if its needed and……..
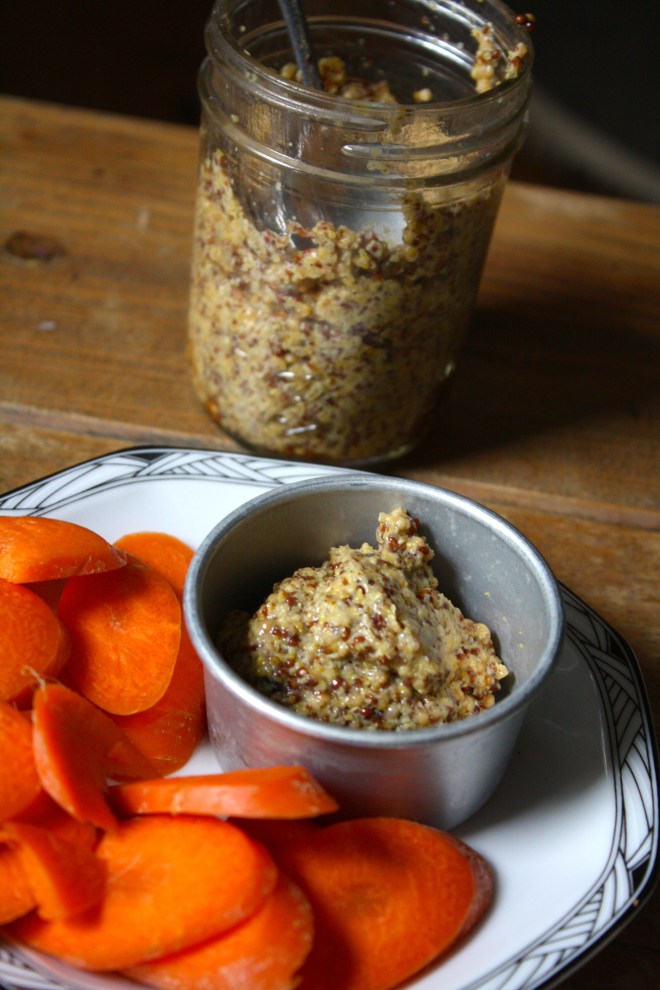
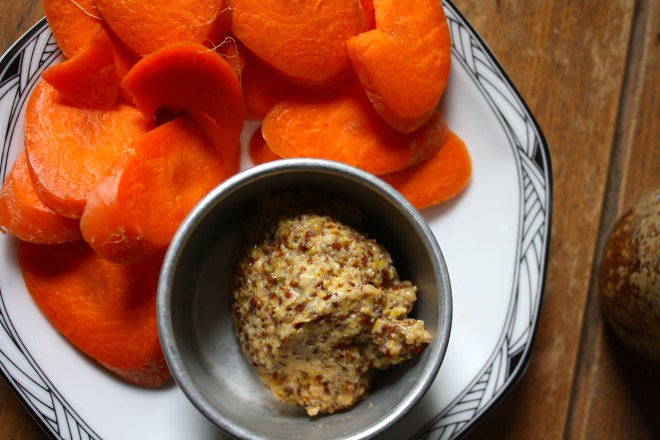 You have got mustard! Make sure you have a good snack ready to eat with it.. My go to is carrots. I could eat this all day long.
Enjoy and have a great Tuesday full of mustard and stuff!
-C
Whole Grain Mustard
- 1/4 Cup Brown Mustard Seeds
- 1/4 Cup Brown Mustard Seeds
- 1 Cup Apple Cider Vinegar
- 1 Teaspoon Salt
- Optional..A pinch of Garlic Graduals, Red Pepper Flakes, Curry Powder (Anything you want)
Combine all ingredients into a large jar that has at least a few extras inches for the seed to expand. Leave on counter for 8-12 hours.
Once seeds are nice and soft and have expanded, either eat as is (Mustard seed caviar) or blend the seeds to desired consistency (I like it half smooth, half seedy) Add a pinch more or salt and another splash or two of vinegar to help blend.
Refrigerate and use on anything and everytihng.
 No matter what is going on in my day, seeing a blue sky like this puts a smile on my face….To bad that smile turned to ice and my face froze in place. Because for some reason, winter around here now means below zero all the time. I mean, I love winter, but I am not going to lie… I wouldn’t mind if the wind would stop blowing and we had a couple of days of above zero weather.. and maybe a good foot of snow. I guess I’ll just have to be patient, cause its bound to happen. I mean, we live in Vermont, and if nothing else, we get weather.
Anyways.. another week full of stuff that fills. I am a little taken aback that its already February… when was it January? Time just keeps going by fast and faster, (especially when I get cabin fever) and I think, “What have I done in the past year?” Well, I have done a lot. I was just looking through pictures from a year ago and found some of our tiny home in working progress. Not to many people can remodel a five unit house and a meat locker to live in, within a year.. by ourselves. (ourselves being Nick and I)..So yeah, that made me feel pretty freaking awesome and accomplished. (I needed to remember that because I haven’t been feeling it) But now I am feeling inspired and am looking forward to some new projects and fun things to come! (hopefully getting my pottery studio up and running, maybe another house remodel and lots of traveling!!…. take that winter blues!)
Anyway.. here are a few little bits from my week that made me happy.
 The mister called these snow mounds goosebumps… I think that is exactly what they are

The only warm day this week. (20..woo whoo!) Took the little out for a sled ride. She spent the entire time dragging her hands in the fresh snow.
 And oh how I cannot handle how freaking cute she is!! Plus, a shout out to my brother in law….MADLOVE!
 Fresh snow..Even though it was -15, I had to stop and take this picture. The colors were amazing
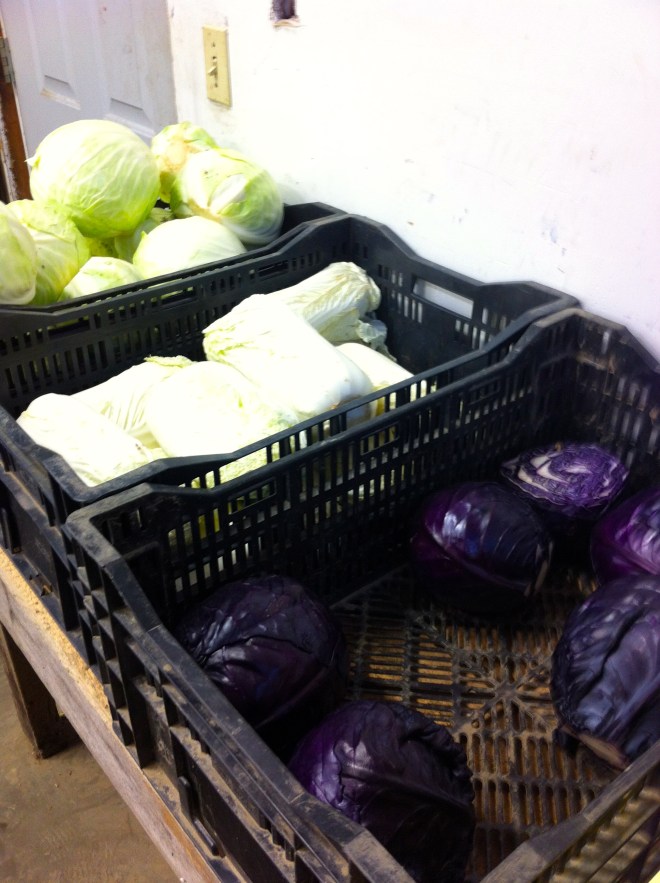 Cabbage at the farm share pick up! Love ICF!!!
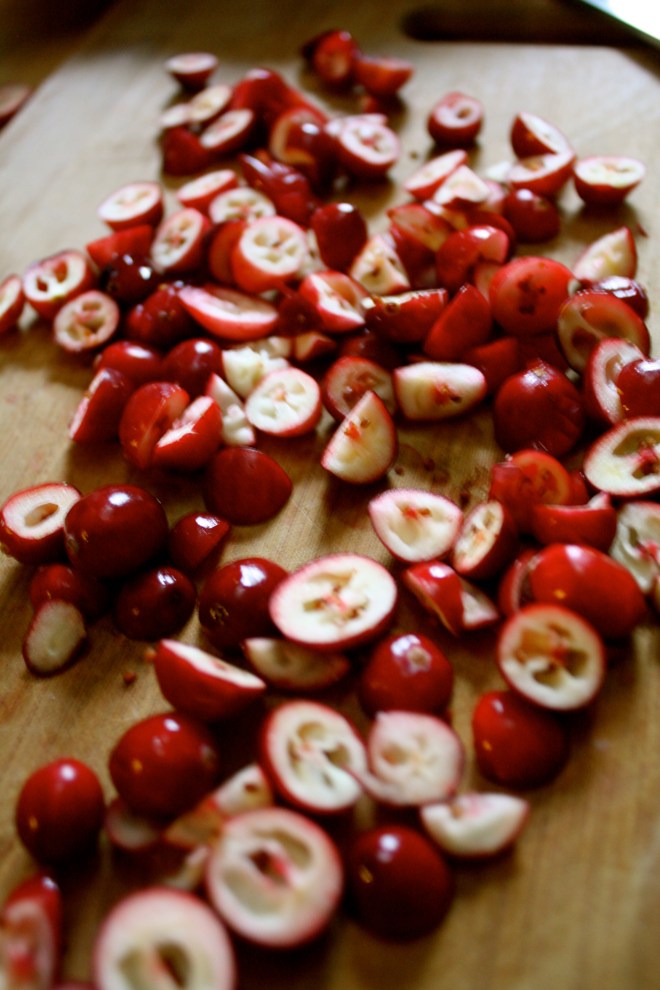 89 cents a pound for fresh organic cranberries. Score!! Made these Oatmeal fresh cranberry coconut chocolate chip cookies with them. Big hit.
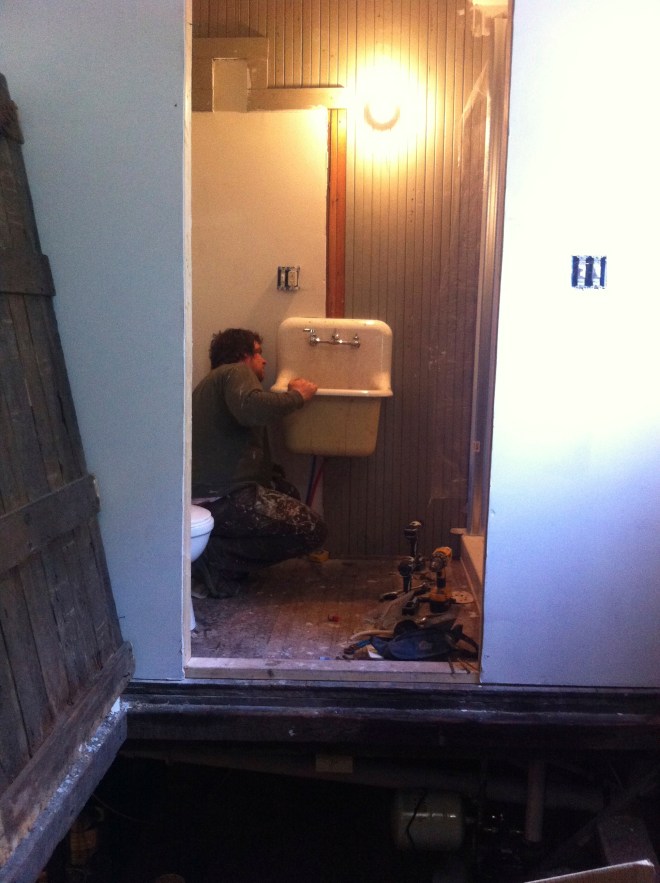 This picture was taken exactly a year ago…..The mister and I were finally putting in the bathroom of our tiny little home…. And look at that awesome sink! (another amazing salvage yard find) If you ever need or want to remodel a bathroom, I suggest using a old cast iron utility sink. So practical, so functional, so pretty.….it makes me happy everyday!
Happy Sunday!
Happy February!
And if you are into it….
Happy Football Super bowl Game and or party! ( If you need any awesome fast party recipes, I have bunch, just check out the recipes page!)
-C
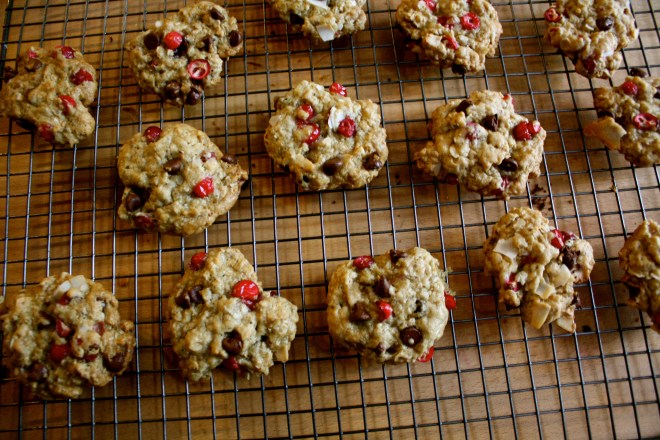 It hasn’t stopped snowing, the temperature is dropping fast (it’s getting to the point the dog doesn’t even want to be outside) and the mister is busy hand shoveling three long driveways. So I figured that in between all the laundry folding, plant watering , and all around sitting on my butt that I am doing INSIDE, that I would be so super nice and crank the stove up and make my love some cookies. I love making cookies, especially when I have chores to do. I think part of it is that cookies are baked in batches which breaks up the chores and gives a sort of rhythm to things. Plus everything is nice when the house smells like cookies. I was going to make chocolate chocolate chocolate cookies, but realized that I didn’t have cocoa powder, so I went with fresh cranberries (I just scored a pound of organic cranberries for 89 cents!) coconut flakes and chocolate chips. Plus I wanted to make them oatmeal because the mister likes oatmeal and oatmeal makes the cookies a little more hardy. (We need hardy when the temperature dips below zero) The verdict….. chewy, soft, slightly sweet oatmeal, bittersweet chocolate, nutty floral coconut, and the zing and pop of the fresh cranberries. He told me to hide them… hide so he will stop eating them….. because they be amazing!
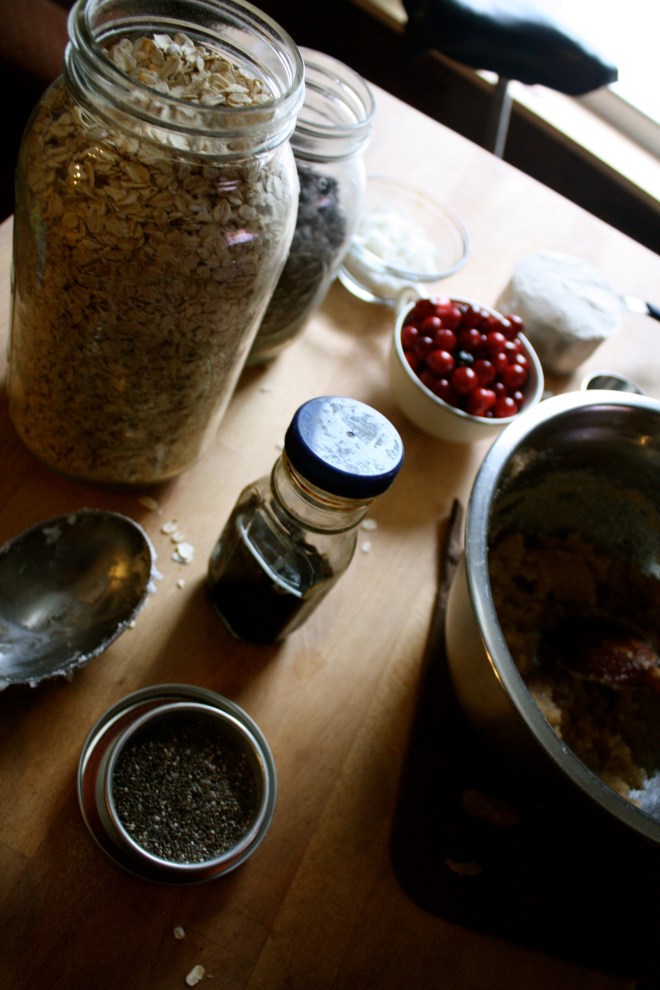 The base of this cookie….We are using regular old fashion oats and flour. Salt, baking soda and baking powder. Vanilla, chia seeds in hot water, coconut oil white and brown sugar…. You know, all the cookie stuff. Then all the goodness.. Chocolate chips, coconut flakes, and fresh cranberries. Goodness. Oh yeah, and they are vegan…if that matters to you.
 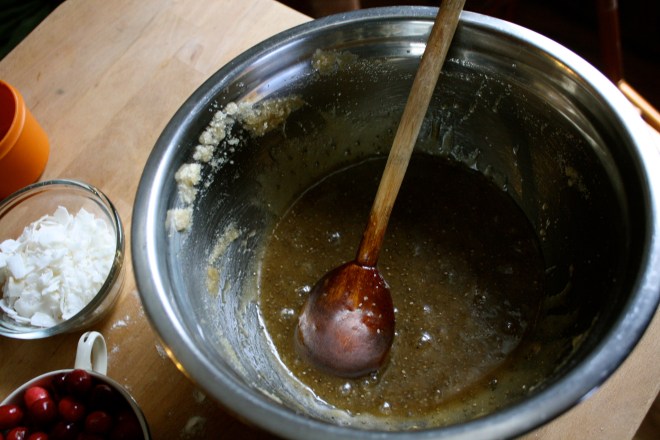 Warm the coconut oil and mix with the white and brown sugars. Then add the chia seeds soaked in hot water. Stir until nice and silky smooth.
 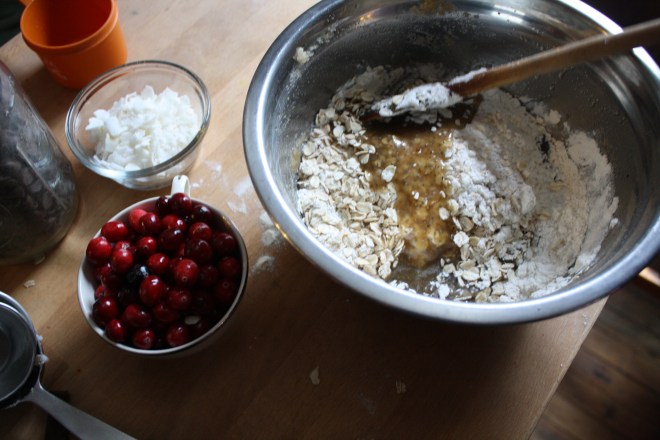 In goes some more stuff. I just dumped all the dry right on in that bowl and mixed it up nice and nice.
 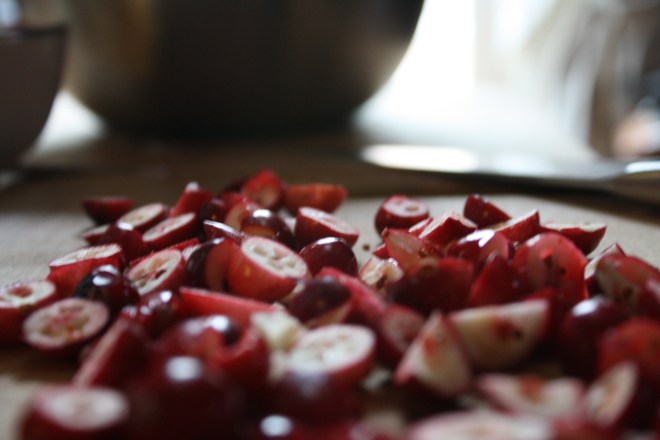 Chopped the fresh cranberries into chunks… One at a time…… Just kidding, I actually laid a cutting board on top of the cranberries, applied a little pressure and sliced through the cranberries.. Does that make sense? I hope so, because its is much easier and faster and the cranberries don’t all roll away.
 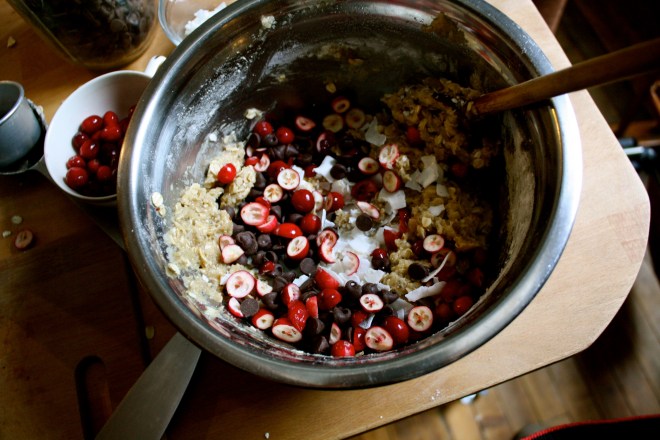 The chopped cranberries, coconut flakes and the chocolate chips go in to be mix all up.
 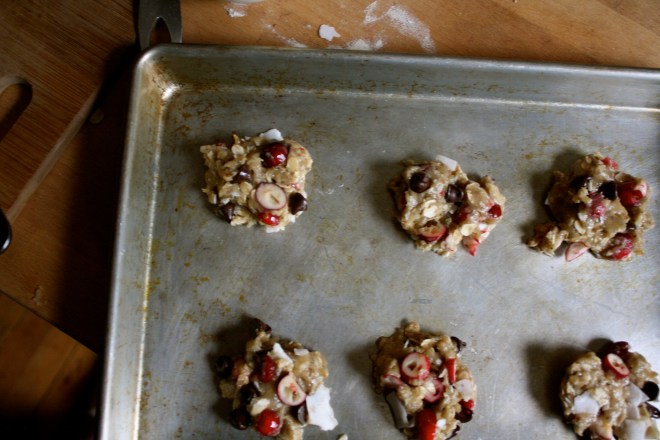 I used my hands to form the balls and gave each mound a little smoosh, but not completely flat. Then into a preheated 375 degree oven for about 13-15 minutes or until a nice golden brown.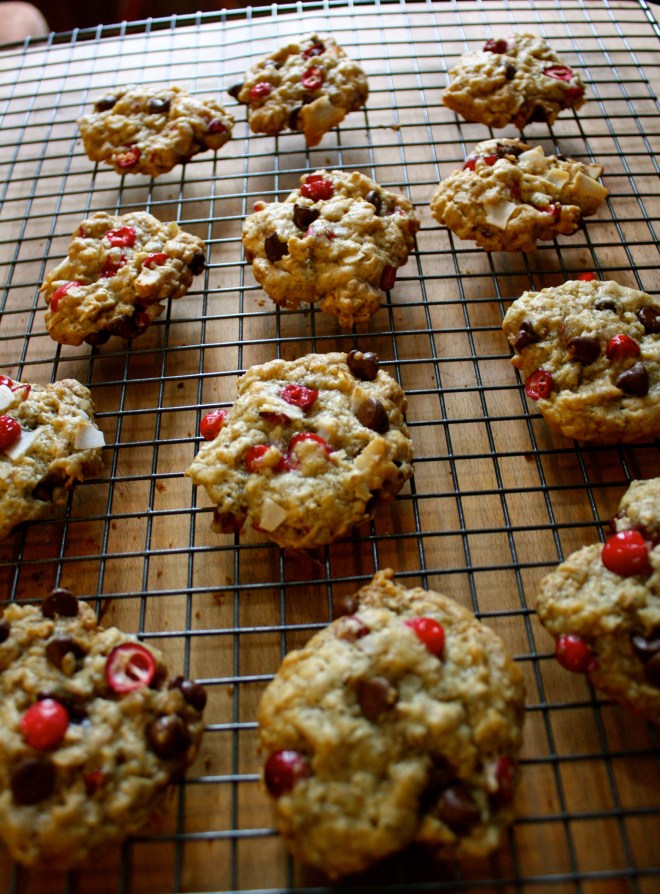
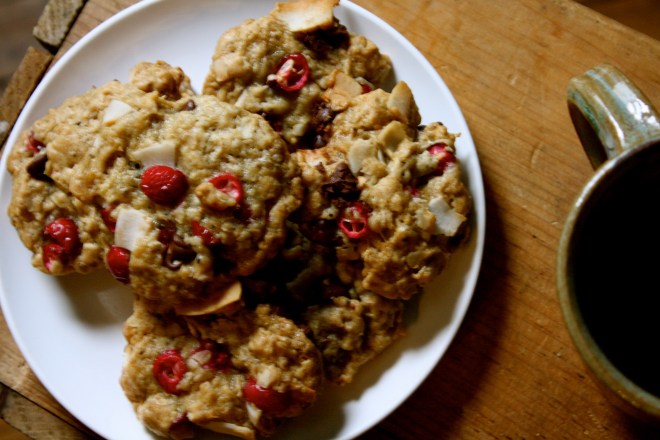 A cup of hot coffee and a plate of warm cookies… I am the nicest, right! (After his nice cookie rest I proceeded to do a little nagging, so the day evened out) So today is probably a great day for everyone to make cookies. It’s freezing out, its saturday and well, just cause. You might even be looking for a great recipe to make for that big party your going to. You should make these cookies. Have a Fantastic Weekend!!! -C
Oatmeal Fresh Cranberry Coconut Chocolate Chip Coookies
Ingredients
- 1 cup old fashion oats
- 1 1/4cup all purpose flour
- 1 teaspoon salt
- 1 teaspoon baking soda
- 1/2 teaspoon baking powder
- 1/2 cup coconut oil
- 3/4 cup sugar
- 3/4 cup brown sugar
- 1 teaspoon vanilla
- 1 tablespoon chia
- 4-6 tablespoons hot water
- 1/2 cup chocolate chips
- 1/2 cup fresh chopped cranberries
- 1/2 cup coconut flakes
Preheat oven to 375 To start, take the chia seed and soak them in the 4 tablespoon hot water for a few minutes. Then in a large bowl, mix together the white and brown sugar with warmed coconut oil. Add in the gelled chia seeds and vanilla and stir until silky and combined. (the warm chia seeds will help everything mix together nicely) Now mix in all the dry. I start with the oats, dump on flour, toss in the baking powder and soda and salt. Mix until fully combines. If the dough seems to dry, add in another tablespoon or two of hot water. Chop the fresh cranberries into halves or smaller and dump them, the coconut and chocolate chips into the bowl of dough and mix. Using a scoop, spoons, or your hands, make little balls and place on a cookie sheet, giving each ball a little smoosh. Into the oven for 13-15 minutes or until golden brown. Remove and cool on rack. Eat a few and hide the rest for later.
 I was informed yesterday that if I was going to make tortilla chips, that I better make some sweet ass dips to go with them. I kind of agree… tortilla chips need dip… or better yet, two dips. Queso and guacamole. It’s what needed to be done, and so I did it.
Guacamole is amazing… anything avocado is amazing…this guacamole is amazing. White bean guacamole is amazing. And not that we really care, but this guac is half the fat then straight up guacamole. Plus it’s packed full of protein making it a kind of super duper, must eat all of it, kind of dip. And sweet potato anything will make me happy. Making queso dip with sweet potato and cauliflower is probably one of my best food combos so far. (after eating a butt load, I felt like I was a genius and made an amazing discovery) Again, not that we need it to be, but this is also a fat-free, vegan, gluten-free, super healthy, packed full of B12, fiber and nutrients, dip for all kind of dip.…. just another reason why you cannot feel bad when you finish off half a batch before you get a chance to stick it in a serving bowl. (I might have done that)
Here is what you need for a good time:
−These tortilla chips ….Check.
−Some Chopped Veggies (I want the veggies)…..Check
−Cauliflower Sweet Potato Queso.…Check.
−White Bean Guacamole…Check.
You are now ready for it. It being this party, that party, the Super Bowl, or a Wednesday afternoon.


To the left we have the makings for the cauliflower sweet potato queso.. Steamed cauliflower, a baked sweet potato, nutritional yeast, garlic, and chopped up red onion, red bell pepper and jalapeño. To make all you need to do it take the chopped peppers, onion, and garlic and sauté for a few minutes just to slightly soften and bring out flavors. While that’s going on, take the steamed cauliflower and sweet potato(skin off..but eat it, or save it for soup or feed it to the dog) and puree together with a blender or food processor. Add in nutritional yeast, about a tablespoon or two of hot water and, salt and pepper to taste. Blend for about 5 minutes until super creamy smooth. Add in sautéed stuff and pulse just enough to incorporated the veggies but not complete blend in. Stick in a bowl.
To the right we have white bean guacamole stuff. Two cups (or one can) rinsed white beans, one ripe avocado, a lime, a few cloves of garlic,(I also added a bit of garlic powered…I like my garlic) and some chopped up red onion and tomato. Place beans, garlic, avocado and lime juice in a blender or food processor and blend until smooth. Add salt to taste and toss in the chopped tomato and onion. Blend for sec to mix that in…Stick in a bowl
 Perfect…
 To think that both of these dips took about 10 minutes total to make. (I had pre baked the cauliflower and sweet potato) And for real, I would spend much more time if I had too because both of these dips are so freaking good, I definitely will be making these on the regular.
So there , dips for those sweet ass chips or whatever you want to dip or them spread them on.
And he guys…It’s FRIDAY! Have a fantastic day!
-C
White Bean Guacamole
- 2 cups white beans (or 1 can) rinsed and drained
- 1 ripe avocado
- 3 cloves garlic
- 1 lime
- 1/4 small red onion
- 1 small tomato
- 1-2 teaspoons salt
Finley chop onion and tomato. Set aside. Place the beans, avocado, garlic, garlic powder, 1 teaspoon salt and the juice from one lime into a blender or food processor and blend until smooth. Add a splash of water if needed to help keep things moving. Taste and add more salt if needed. When smooth, add the onion and tomato and pulse a few times to mix in. Scoop into a serving dish and finish with a squeeze of lime and a bit of chopped onion and tomato.
Cauliflower Sweet Potato Queso
- 1 1/2 cups pre cooked steamed or roasted cauliflower
- 1 medium pre baked sweet potato
- 1/2 cup nutritional yeast
- 1-2 tablespoons hot water
- 1/2 a small red pepper
- 1/4 small red onion
- 1 jalapeño
- 3 cloves garlic
- salt and pepper
Finely dice the red pepper, jalapeño, onion and garlic and sauté in a skillet for a few minutes until slightly soften and fragrant. Take the pre-cooked cauliflower, sweet potato (skin removed), and nutritional yeast and place in a blender or food processor. Blend for about 5 minutes until creamy and smooth. Add in a tablespoon of water to keep things moving. When completely smooth, add in sautéed veggies and pulse a few times to combine. Scoop into a serving dish. If your feeling it, top with scallions and cracked pepper.
Serve dips with chips, veggies or anything you want. Also make great spreads for sandwiches and crackers too!
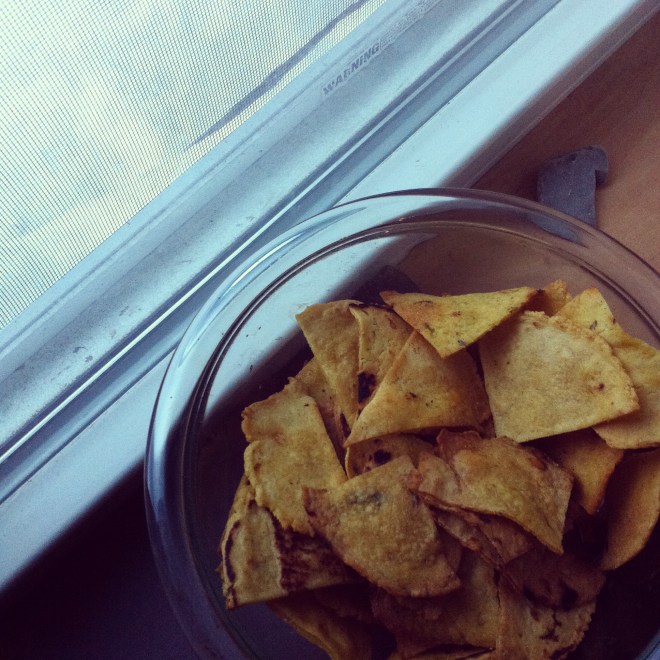 How awesome will you be when you bring the most freaking amazing tortilla chips to the party this weekend? You will be like..”what, it ain’t no thang.. I am just good like that” Yes, yes you are.
And yes, I am assuming that you will be making these awesome chippers to share at a Super Bowl part this weekend. I say this because even as I sit here writing this (with the TV on) there has been nothing but football talk…deflated balls, hot wings, half time shows and commercials. It’s almost as big as Christmas. Got to get the decorations, the special game day food and your football jerseys. It’s crazy and all over the place. So that’s why I am assuming you are making these for the game. But if you not going to be participating in any football parties.. by all means, make these chips for yourself anyways. Celebrate you day! Have a non football watching party. Or just make these whenever. Jalapeño Lime chips for everyday!
Note: You can make these chips without the jalaeno and or the lime if you need or want to. You can also stop after the first step and have some dank corn totillas for tacos ands stuff..But definitely make the chips… worth it for sure!
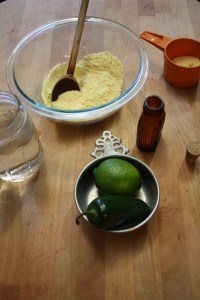
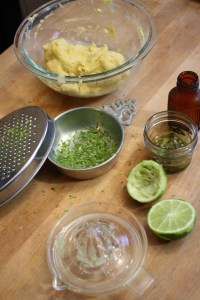
All the stuff.. Masa harina, hot water, salt, a lime and a jalapeño. Zest lime and place half the zest into a glass bowl with oil and either sit on warm oven or microwave for 30 seconds to infuse. Puree the jalapeño with a cup of hot water and add the puree and half the zest of a lime, plus salt, to the masa harina. Mix it all up with another 1/2 cup of water or enough to make the dough resemble play dough… You can add more water or masa if you dough is to wet or dry.
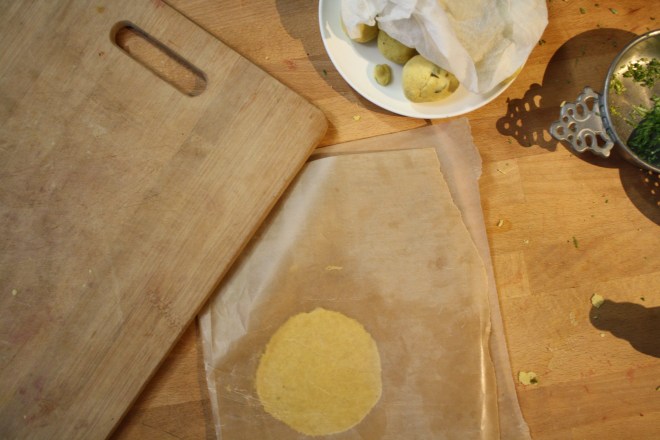 Knead dough a few times just to make sure it’s completely uniformed and divide into 12-14 equal pieces. Place balls on a plate and cover with a wet paper towl to keep from drying out.
I do not own a tortilla press so I used what I had… wax paper, a wooded cutting board and brunt force. I took each ball and place it between the two pieces of the waxed paper, placed the cutting board on top, and with all my might and body weight, pressed down to smoosh. It works like a charm.
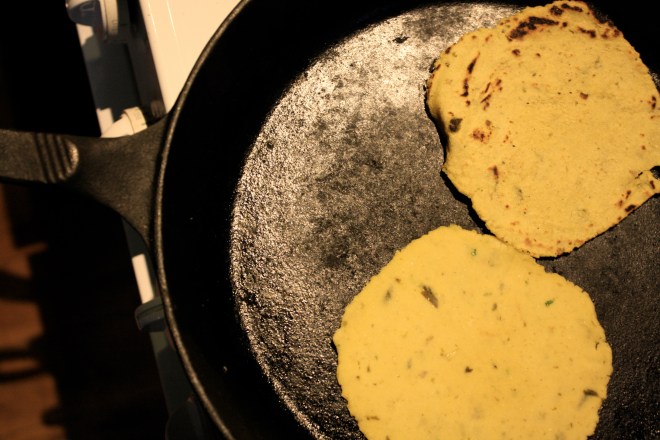 My cast iron skillet is big enough to cook 2 -3 at a time, but doing one at a time is cool too. Preheat the skillet to medium heat. Cook each tortilla for about 2-3 minutes ( or until starting to brown) on each side.
 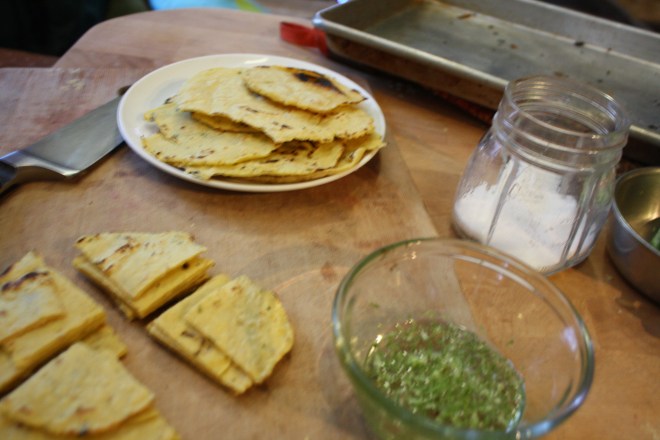 Half way there to chips!!!
With my fingers ( you can using a basting brush for sure), I rubbed a little of the lime oil all over both sides of each tortilla. Stacked a few high, then sliced those tortillas into triangle shapes. If you want to go crazy, you could cut them into strips or even use a cookie cutter and do some fun shapes… but triangle are easy, classic, and practical. A good shape for dipping!
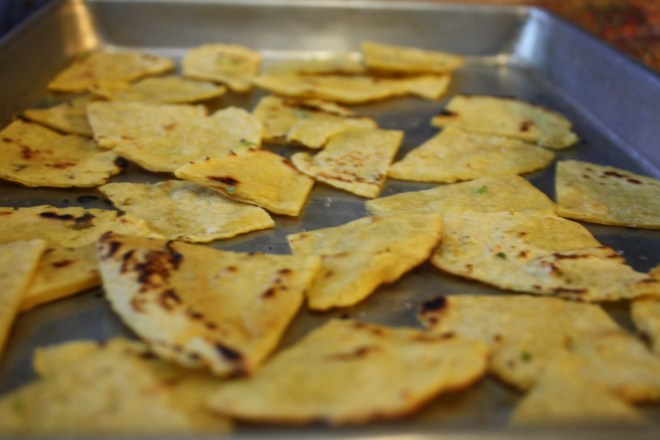 Placed all nice and cozy on a baking sheet. trying not to overlap. Into a 400 degree oven for about 20 minutes to complete the chip making process.. After about 15 minutes, check for doneness. When nice a crispy, remove from oven, squeeze lime juice all over and sprinkle with salt. I then stuck them back in the oven for a few more minutes just to dry the lime..
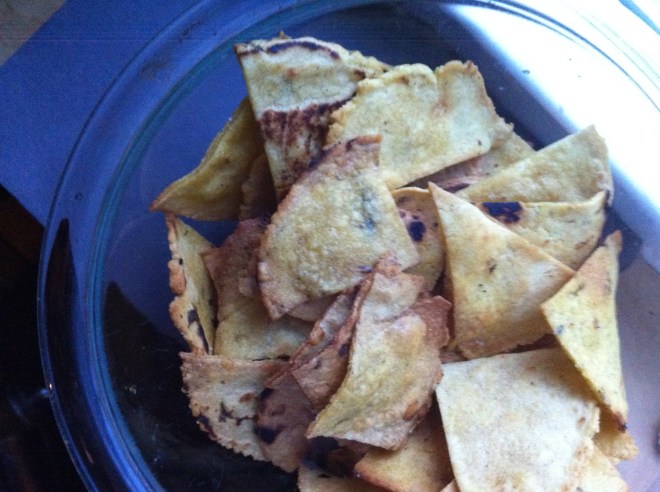 After cooling down, take those chips and stick them in a bowl.
Eat a few, but wait and save them for the party. Or better yet, make a few batches. Bring a batch, eat a batch. (Its ok, you are allowed)
Eat with some salsa, maybe some of this guacamole, or just as they are…Anyway is the right way as long as you are eating!
Have fun making these and have fun getting read for the party this weekend (Super Bowl or not!)
-C
Jalapeño Lime Tortilla Chips
Makes 12-14 tortillas.. then made into a medium bowl of tortilla chips.
Ingredients
- 2 cups masa harina
- 1 1/2 to 1 3/4 cups hot water
- 1 teaspoon salt
- 1 lime (juice and zest)
- 1 large or 2 small jalapeños
- 2 tablespoons olive oil
- salt
To start, zest lime and add 1/2 of the zest to bowl with the oil. Place oil on warm spot on stove to let the oil infuse the limeness.
Take jalapeno and puree with 1 cup of hot water. In a large bowl, add puree and remaining lime zest to the masa harina and mix, adding an additional 1/2 to 1 cup of hot water until the dough resembles play dough, not to soft, but not to dry and completely incorporated
Divide dough into 12-14 balls and place on a plate under a wet paper towel to keep dough from drying out.
One at a time, take a dough ball and place between two pieces of wax or parchment paper. Place either a plate or cutting board on top and press down as hard as you can (you could even stand on it). Remove flatten tortilla from paper and place in medium hot skillet. Cook each tortilla for 2-3 minutes on each side.
When all tortillas have been made, lightly rub lime oil on all over both sides. Stack a few on top of each other and cut into triangles. Place pieces on a baking sheets (I used 2) and bake at 400 for 15- 20 minutes or until lightly browned and crunchy. When chips are done, remove from oven, squeeze or sprinkle lime juice on chips and sprinkle with salt. Stick back into oven for another 2 or so minutes to re-crisp from the lime juice.
Remove and let cool completely, then dump into a bowl
Enjoy!
 All I want to do is make everything into hearts and turn everything pink…Is that a problem?
I’m going to admit it, I am one of those girls that love Valentines day! And no, I don’t love it for the flowers (although I do love flowers..but never roses..yuk) No, I don’t want a box of candy or the silly store-bought cards. I don’t want to get all gused up and go out to dinner, and I definitely would be pissed if the mister bought me any jewelry. What I love is a day of spending time with my lover. We always take the day to do something special together, and for each other, and to be happy……and there is always hearts involved. I love hearts.
I want to spread that loving love love feeling because no matter what your love situation is during this holiday..we should all be happy and spread love to each other and to ourselves… And what better way to spread happy and love then with a pretty heart shaped baked good? Chocolate because almost everyone is into chocolate. Coconut because I can’t stop eating whipped coconut cream and pink coconut sprinkle because that’s what make me happy. (I am a little obsessed with sprinkling things) These little hand-held pies of love are really easy to make and always a big hit, especially with the little ones.(I am thinking they are perfect for a Valentines Day school party) And yes, they are vegan so you can share with all your vegan friends!
So in the spirit of the coming Valentines Day holiday….Lets make WHOOPIE!!!! (pies)
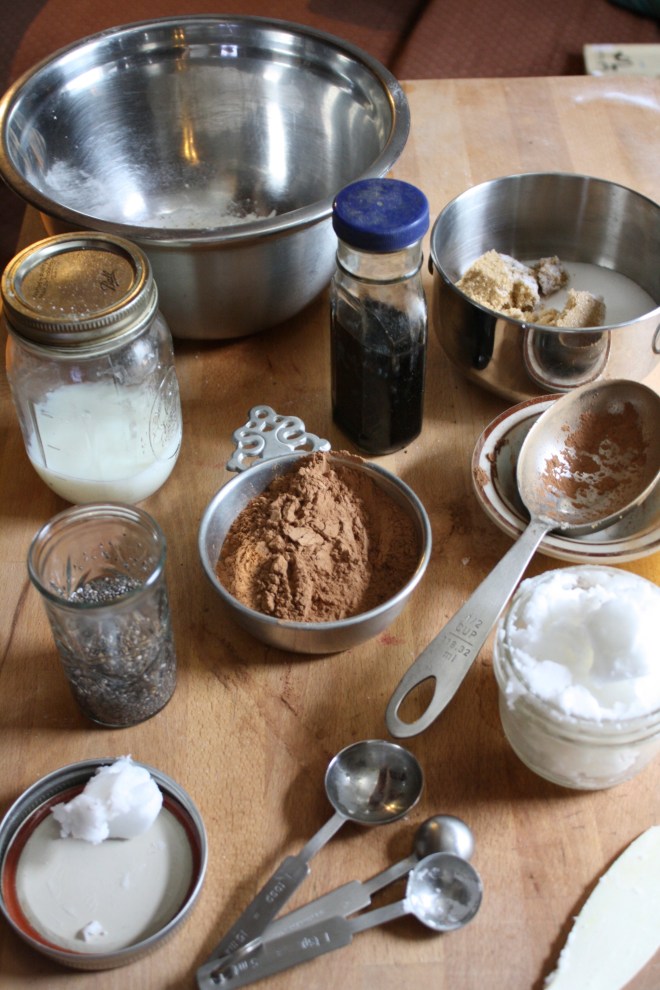
Flour, baking soda and powder, salt and cocoa powder. Soy milk with vinegar. Vanilla, coconut oil, and chia seeds jelling. Brown and white sugar…. you know whoopie stuff.
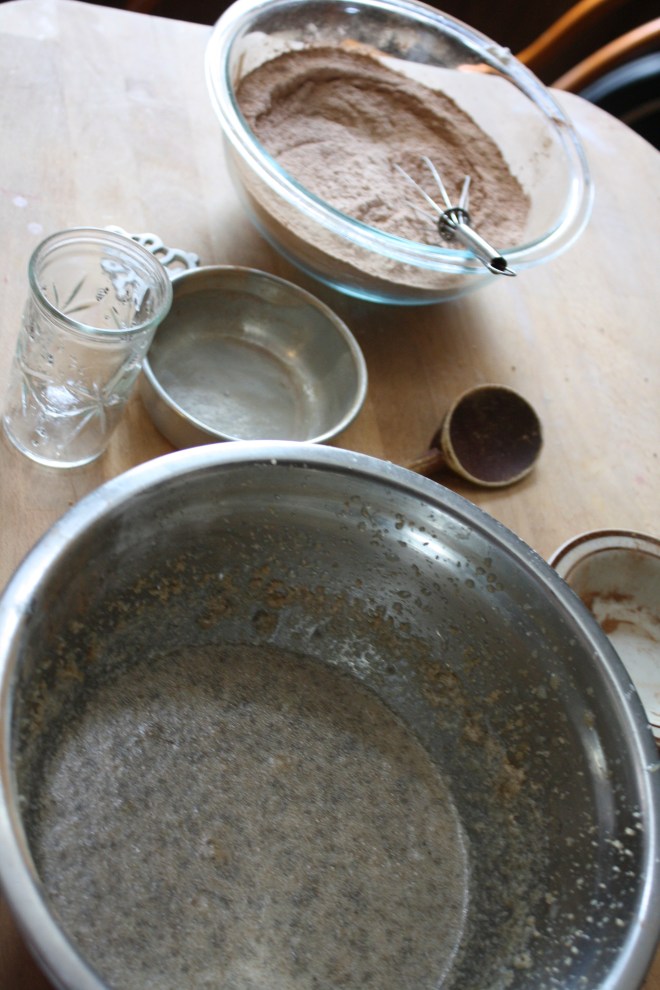
The dry in one bowl… sugar and all the wet in another.
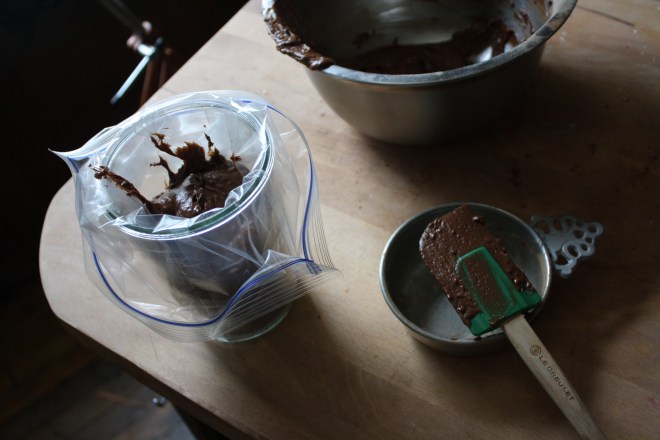
All the whoopie stuff mixed together and scooped into a large zip top bag. So fancy with my bag…a real pro here!
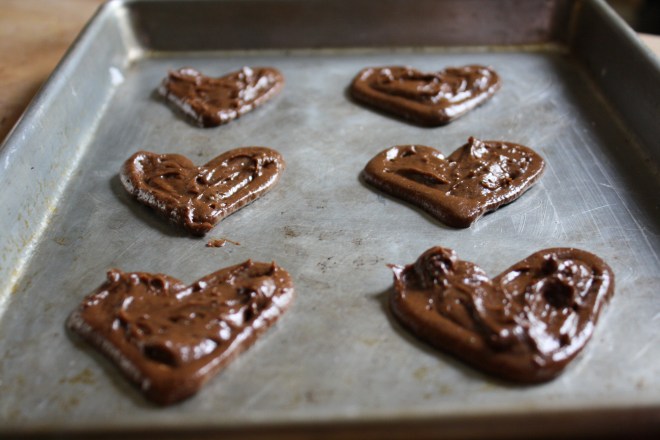
Snip the tip of the bag, do a little squeeze test, and have at it. squeeze hearts onto a lightly oiled baking sheet or use a piece of parchment paper.
You might get a little frustrated if you are trying for perfect. I was for the first two batches, but once I stopped trying to hard, I really got into how cool some of the hearts came out. Embrace the funky lop -sided hearts, because any heart is a good heart.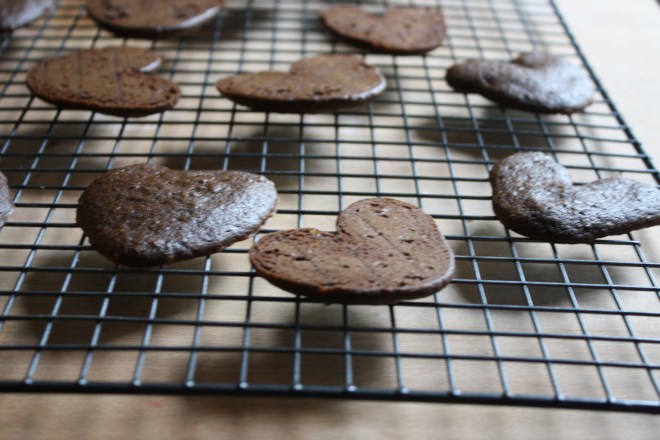 So lovely. Shadow hearts while the whoopie hearts cool.
 Whoopies all paired up
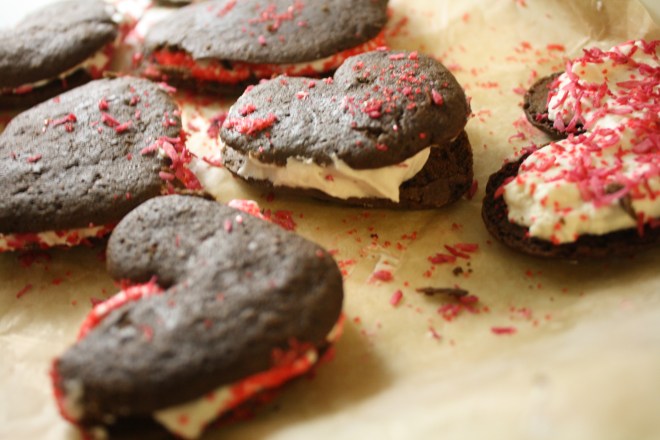 Stuffed with a generous dollop of whipped coconut cream ( a cold can of coconut cream whipped with a splash of vanilla and a tad bit of sweetener) and sprinkled with my home-made beet dyed coconut sprinkles…..

Are you happy now? Because I know that I couldn’t stop smiling when I was making these… they are just to cute!
A couple bits of advice… Try to assemble before serving.. I was trying to put them together while a punch of kids were trying to eat them. Things got a little messy and sprinkles ended up everywhere. Also, The coconut cream should stay fairly cold, so my suggestion is to make the hearts and fill only when you are going to serve them. Or if you want to make far in advanced, cover and refrigerate to keep from coconut cream from melting….But other than that…
Have fun making Whoppies!
-C
Coconut filled Chocolate Heart Whoopie Pies
Ingredients
- 1 1/3 cups all-purpose flour
- 2/3 cups cocoa powder
- 1 teaspoon baking soda
- 1 teaspoon baking powder
- 1 tsp salt
- 3/4 cup soy milk or milk of choice
- 1 Tablespoon apple cider vinegar
- 2 Chia eggs ( 2 tablespoons seed mixed with 6 tablespoons warm water)
- 1/3 cup coconut oil
- 1/2 cup brown sugar
- 1/2 cup white sugar
- 1 teaspoon vanilla extract
Preheat oven to 375
To start, make chia eggs( chia seeds in water) and add the vinegar to the milk. Let both sit for 5 minutes.
In a bowl, whisk together flour, cocoa powder, baking soda,baking powder, and salt.
In a large bowl, mix together chia eggs, sugars, and coconut oil. Add in dry ingredients and mix while slowly adding in the milk and vinegar mixture until fully combined.
Scoop Mixture into a large ziplock bag or piping bag. Clip tip and gently squeeze out heart shapes onto a lightly oiled or parchment lined cookie sheet. Bake each batch for 8-11 minutes, or until a toothpick come out clean.
Let hearts cool completely on a wire rack. Pair up like sized hearts and fill with desired amount of *coconut cream. If your feeling festive, dust sides and or tops of cake with sprinkles
* To make coconut cream, refrigerate a can or coconut milk or coconut cream for at least 4 hours. Open can, drain liquid and place the remaining coconut cream in a large cold bowl. Beat with a splash of vanilla and 2 tablespoons of the sweetener of your choice. …. (careful because this stuff is super addictive)
Now share.. and watch how happy everyone is when they receive a heart shaped whoopie pie!! That’s love!
Follow my blog with Bloglovin


 Spicy, crispy cauliflower… um yes please. I really like cauliflower. The mister loves it, or at least likes it better than any other vegetable. So when he asked for spicy cauliflower, well yea I am going to make it because I am so nice and really, could I say no to a veggie request? (I might have said no if it involved deep frying) Also, I found fresh cauliflower on sale! ($2.25) I don’t usually cook fresh cauliflower, but I figured at that price, it wouldn’t be bad to cook a head. (If I am cooking cauliflower, which I do a lot, I just use frozen….casue it be waaaay cheaper)
  The stuff. Cauliflower, chopped and broken into pieces. Corn meal mixed with salt, pepper, onion and garlic powder, and because I made this for the mister, parmesan cheese. And in the green bowl, srirsachi and a little oil.
  The cauliflower gets a coat of the hot sauce and then tossed around in the corn meal mixture. Handling as little as possible, place coated pieces on a lightly oiled baking sheet and stick those suckers in the oven for about a half hour, taking them out and flipping half way.
 And take them out of the oven when pieces tuned golden brown, stik them on a plate, and serve immediately.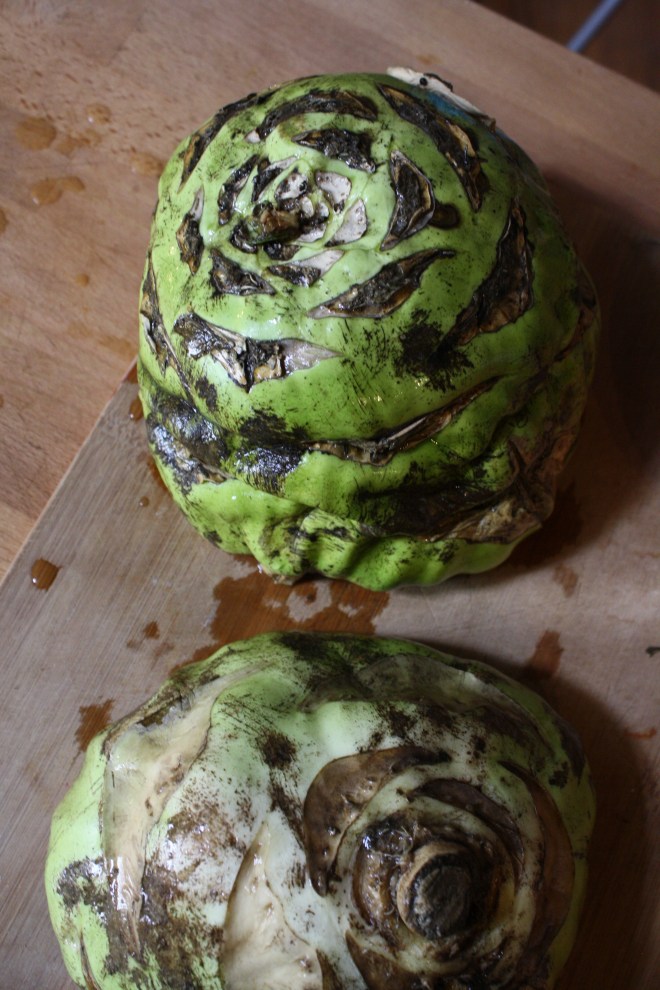
 I have never in my life seen, let alone received, a kohlrabi as big as the one I picked up from my farm share last week. It was, no joke, bigger then my head. (completely nuts) If I didn’t know the farm and the farmers of my CSA, I would have to question whether or not it was grown in radioactive sludge…(kind of like the dandelions in the Teenage Mutant Ninja Turtle movie from the 90’s)
 A gigantic kohlrabi cut in half ( I only used one of the halts) A whole yellow onion and 2 large carrots. I also added in 4 cloves or garlic
 All of those chopped veggies get thrown into a pot with two cups of water and a good sprinkle of salt and pepper. Cover and place on medium heat for about 20-25 minutes. (give a stir ever now and then) Keep cooking until the veggies are fork tender.
  Once the chunks are all cooked up, its time for the immersion blender. (or into a regular blender) Add in at least 3 cups of water, but more to thin out to your desired consistency and let it rip. Stop blending once the soup is nice and creamy. Taste and season with salt and pepper to taste. Leave on low heat to bring back to a good soup eating temperature.
 Now the soup is done.. and you can eat it just as it is, but you should really add in the asparagus. It is just so f*ing good. Just grab a few spears, dice them nice and small, and throw into the soup pot. Let it cook for another 5 minutes and wa la..
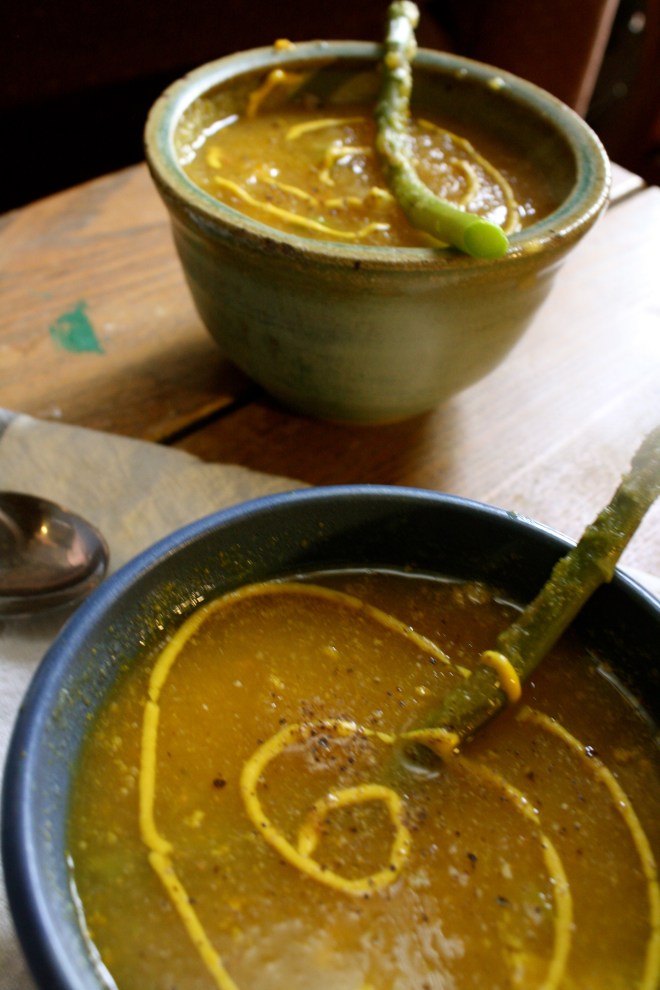
  Soup is done. Ladle into bowls and if you want a little fancy presentation, add a swirl of mustard (it’s so good) and a whole cooked asparagus spear.
 I am kind of obsessed with pickled jalapeños… like I want to eat a whole jar with a fork and then drink the juice. So much hot and spicy love. One of my sisters is the same way, pickled hot pepper obsessed. We used to buy the humongo gallon sized jars of jalapeños at Costco and go through them in like a month. But sadly, Costco stopped selling those humongous jars and we have been left buying the itty bitty jars that actually fit in a normal fridge. (I know, so sad). And maybe because the jars were normal sized and I was more aware that I shouldn’t eat a of cup of jalapeños at one sitting, or just the mire fact that a tiny jar cost the same as a gallon, but the store bought little jars weren’t doing it for me anymore. And then fate happened. The grocery store was having a super sale on fresh jalapeños and I figured it was time to make make my own. Now I don’t think I can ever go back to those store bought jars of blah because the ones I made are the best freaking pickled jalapeños this girl has ever eaten. I might even start making my own gallon sized jars!!!!
 You ever have one of those days where its 9 am and your ready to call it a day? . Yesterday was one of those day for me. Its spring vacation around here (more like an arctic vacation) and I had volunteered my day to babysitting/ hanging out with 2 of my nephews, ages 11 and 13. (I know, I am the greatest sister). I had all of these great ideas and plans of things to do, but when it came down to it, they wanted to do nothing but play video games and not really listen to anything I said. I basically had to drag them outside to go for a walk we me and that’s all I could get them to do My great little nephews, I love them so much, but yesterday they had their minds set on being little monsters.
 What we have going here…… Chopped up onion, celery, and carrot in a pot. Stick that pot on the stove for a few minutes on medium heat to start the cooking process. While that happening get the other stuff ready. A big can of diced tomatoes, hot sauce, worcestershire sauce*, prepared horseradish*, celery salt, garlic powder, salt and pepper And last but not least a good squirt of yellow mustard. Now add it all to the pot and bring to a boil. Turn down to low and stick a lid on it.
 After about 20 minutes the veggies should be soft and the flavors should all have melded together. Taste soup as it is cooking and add any more spice that you want.
 I stopped when I got to a smooth consistency with the littlest bit of texture.
 And there it is…served with a stock of celery and a wedge of lemon (I forgot to add them to the pictures!) A bloody Mary to take the edge off any drag of a cold weather day. And best part.. left over soup is great served chilled with a shot of vodka to loosen this Mary up!
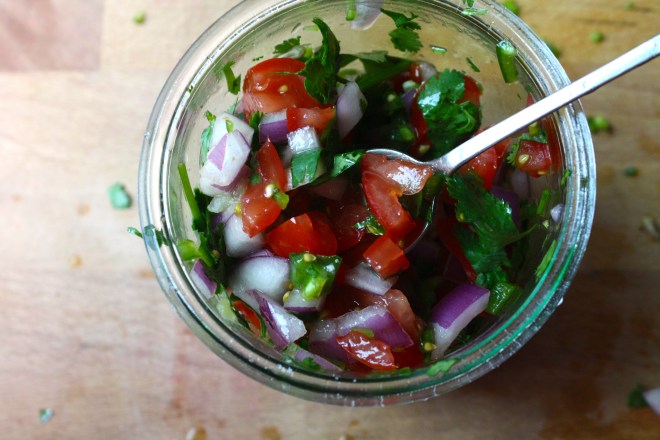 Happy Cinco de Mayo! And what better day to share my version of my oh so fantastic pico de gallo, or as I call it, super freshy salsa.
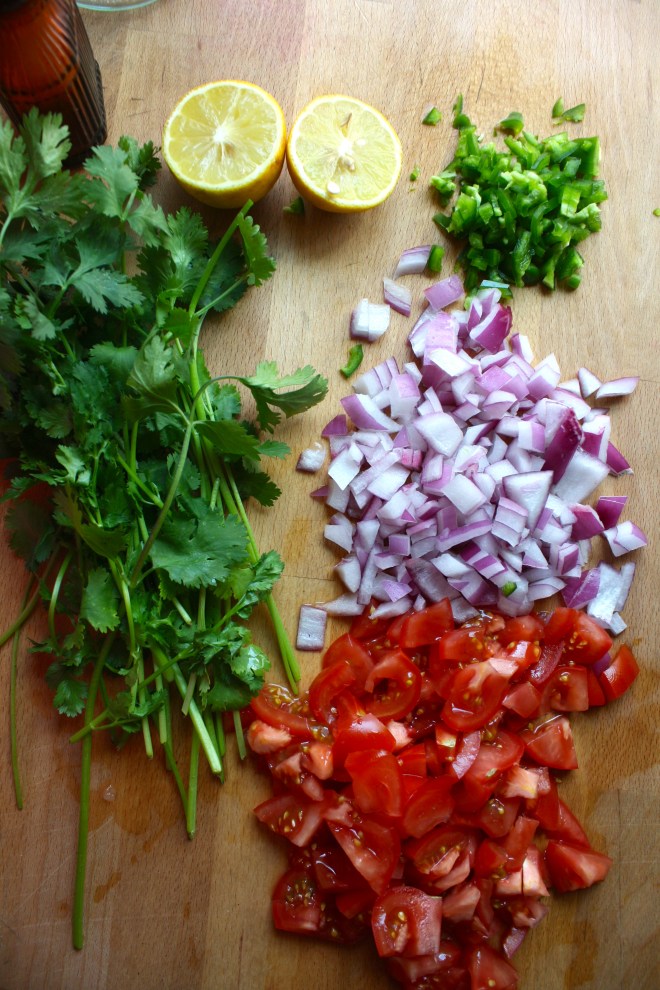 The stuff. Chopped Roma tomatoes, chopped red onion, a diced jalapeño, lemon, a bunch of cilantro, and salt.
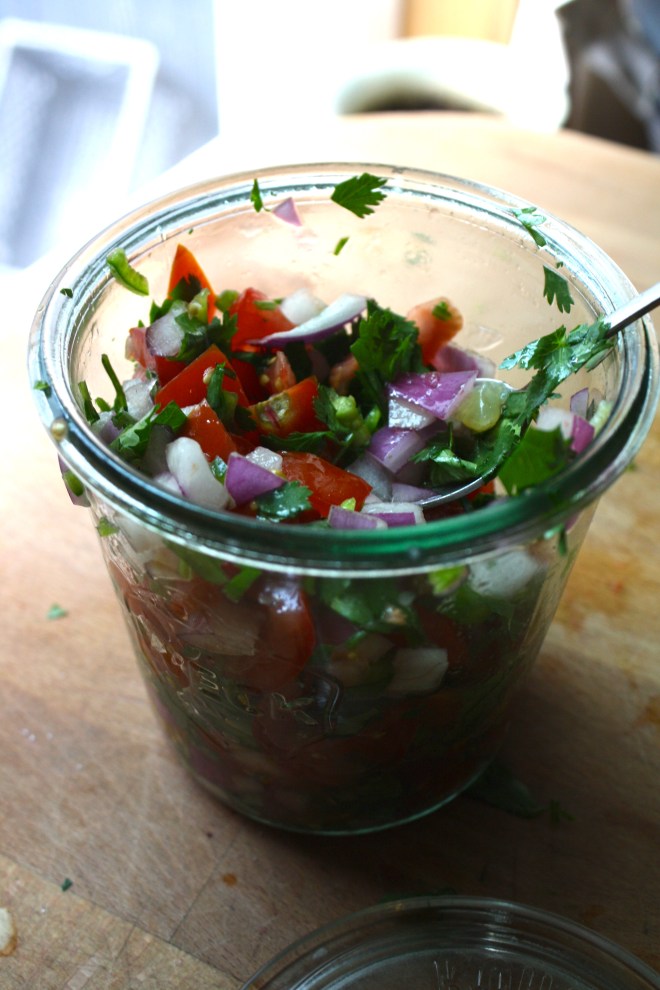 And thats it. Now eat… with something or without.
 It’s Mother’s Day weekend which means that you and I and everyone out there should feel the slightest bit obligated to at least do a little something nice for your mom for the mere fact that you were borned. And really what better way to celebrate mom than with food… It really is the least that you can do. (I think mom’s also like flowers and cards and handmade pasta necklaces) My mom is defiantly about the food. (she has had her fair share or pasta necklaces) A many years back on Mother’s day, this sweet little girl (me) made her mother a special breakfast treat…blueberry scones. And ever since that day, for every freaking holiday, birthday, whatever day, my mother requests (demands) a batch of those scones. She is always saying that these are her favorite treat and that no one has ever made them as good as I do. (I guess that just reiterates that I am her number 1 child)
 The stuff. Flour, baking soda, baking powder and salt. A bit of sugar, vanilla, buttermilk, and butter (use vegan butter and nut milk if you want to make them vegan) And of course we need the blueberries which can be fresh or frozen. I usually use fresh, but the store I stopped at only had really big containers of fresh that were like $1000 dollars a piece and the organic frozen happen to be on super sale. So you know, the cheap in me won that battle.
  So into the bowl goes all the dry stuff; flour, baking powder and soda, salt, and the sugar. Give it a good whisk.
 Now dump the blueberries into the flour mixture. Toss them around to give them a coat of flour. Add in the buttermilk and vanilla and give a little mix until liquid is absorbed. We are trying to handle the dough as little as possible.
 Turn mixture onto counter. It’s very loose, but thats what it should look like.
  Very gently and with as little handling as possible, gather dough up, knead a few times till everything just comes together. Press dough into a disk that is roughly an inch thick…. and it doesn’t need to be perfect.
  Cut the disk into even sized pieces. Do 6 big, 8 normal, maybe even 10 smaller. Whatever size you like. (I did 8) Place the scones onto a baking sheet, using a spatula to transfer, and sprinkle the tops with a little bit of sugar. Into a preheated oven for about 20 minutes.
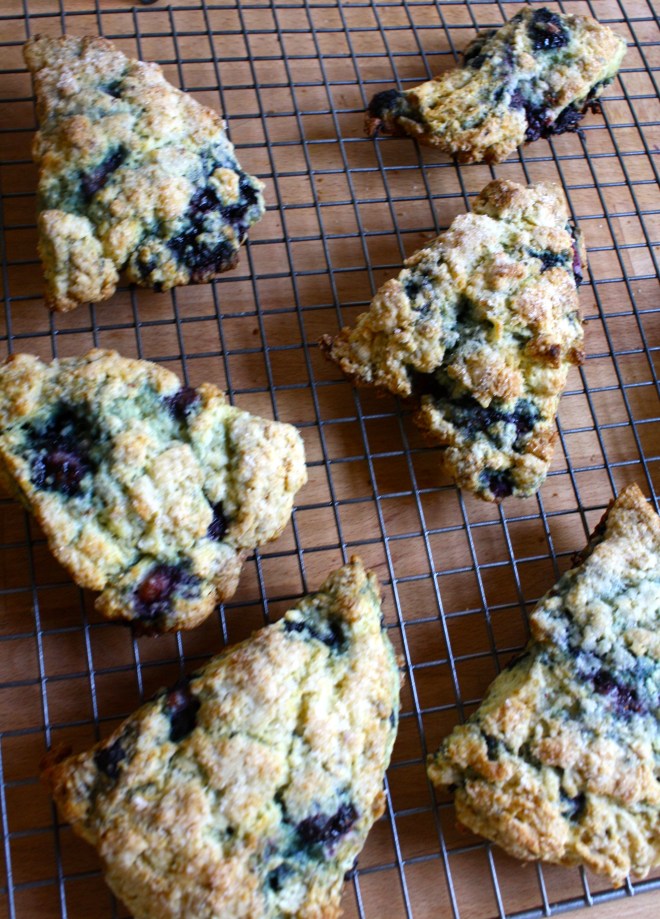 And when the scones look all nice and browned and a tester comes out clean. remove and either serve right away warm, preferably with huge cup of coffee or tea, or stick on a rack to cool before storing in air tight container.
Almond Joy Popcorn Crack — The Lovely Crazy
September 19, 2015 by maximios • Blog
Last night had we had a couple littles (and my little sister who is not so little anymore) over for a cookout and watercolor evening.
It was fantastic. We set them up outside with paint, paper, and brushes and let them have at it. And while they were painting the mr took charge of the grill: cooking up potatoes, corn, and the tofu dogs.
I was cutting up fruit and making a special snack treat of popcorn (who doesn’t love popcorn?) consisting of almond butter, coconut, and chocolate….Almond Joy popcorn.
Addictive like crack. But still safe for children
The littles were more or less indifferent to it ( they are not big coconut fans..I know, but i am making it a mission to make them like it), but the sister and the mr… Lets just say I had to pull out my outdoor voice on them a few times (STOP EATING IT ALL!!!!!)
I think we have a winner here!
The stuff. A large quantity of air popped popcorn, almond butter, chocolate chip, coconut flakes and coconut oil. We also have some extra chocolate chips and a big handful of roasted almonds.
Licking your lips yet?
Start by dumpling your popcorn into the larges baking sheet to pan that you have.. the more surface area the better. Now heat up the almond butter. You can do this on the stove or in the microwave. The trick here is to heat it slowly so you don’t burn it. If doing on the stove, put in a sauce pot and with a fork, constantly stir until a drizzable consistency. If in microwave, stick it in there for 10 second intervals.
Note. I know from experience that there are many different types and consistency of almond butters out there. If your butter seems really stiff and thick, add a teaspoon of coconut oil.
As soon as your almond butter is melted, drizzle all over the popcorn.
With the same pot (no need to clean) place teaspoon of coconut oil in it. Heat oil until hot. Remove from heat and stir in the chocolate chips. Kepp string until the chips are melted.
And drizzle that all over
Then toss on the coconut chips, chopped almond bits, and the chocolate chip.
With your (clean) hands, give the popcorn a good toss, mixing everything all around.
And now place either in a big bowl or individual cups (great for littles) I happened to have some pink(beet juice stained) shredded coconut on hand, which made for a nice touch of pretty (totally not necessary,but it kinda was). Next time maybe some sprinkles would look nice……
Anyway, be ready to lick you fingers!
And I am giving you ample amount of time to get the ingredients needed for this. Makes the perfect snack for a cookout, a party, or movie night(or Netflix binge)
Happy Day!!!
-C
Feel free to play with proportion. You can adjust the amount and ratios of all the ingredients to your taste preference.
Take popcorn and dump on the biggest baking sheet or pan that you have and level it out. Either on the stove or in the microwave, heat almond butter until a melty a runny consistency. If doing so on the stove, make sure to consantly stir while heating* If in microwave, check ever 10 seconds. (burnt almond butter tastes like crap )
*Note. I find that all almond butters are not the same. IF you feel that yours is not melty and drizzable enough, add in a teaspoon of coconut oil.With a spoon or spatula, drizzle all over popcorn. .
Now take the coconut oil and melt on stove or in microwave until hot. Remove from heat, add in chocolate chips and mix around until fully melted. Drizzle all over popcorn .
And last but not least, take the coconut flakes, almond pieces, and the extra handful of chocolate chips and toss those in too. With clean hands, give everything a good mix Dump into a big bowl or individual container.
Eat with hands..lick your fingers clean..
Word of caution…Once you start, you will not be able to stop eating this.