Ugh. It has been so nasty gross out. A four day heat wave, and no, not just hot hot days, but those gross, hot hot with all the humidity in the world, kind of days. My body has rebelled and turned into a slug and my hair… well let’s not talk about my hair.
Yup, it’s been way to freaking hot to do anything, especially cook. And eating food is’t even especially appealing either (living off raw kale and, yes, lots of tomatoes at the moment) . What we all want is to drink something nice and cold and refreshing (and boozy). And what do I do when I want this, and have a lot of that? I turn that into this. That being tomatoes, and this, being a cold drink. Did that confuse you?
What I am trying to say is that I have a butt load of cherry tomatoes to eat but what I really want is a cold drink. So I took the tomatoes and make them into a lemonade. And it is amazing. It hits all the end of summer, super gross heatwave, I don’t want to move, spots that needed to be hit. And just in time for the weekend sow e get to add a little splash or two of something hard, cause we all know that after this past week, we all deserve it.
Think that combination sounds weird? Well don’t cause lemons and tomatoes are perfectly paired together. Tart and tangy, but still with a bit of sweetness from the tomatoes ( especially if using a sweeter variety like the sun-gold). It really is a great, refreshing drink, with or without the booze. A perfect match!
Tomato lemonade here we go!
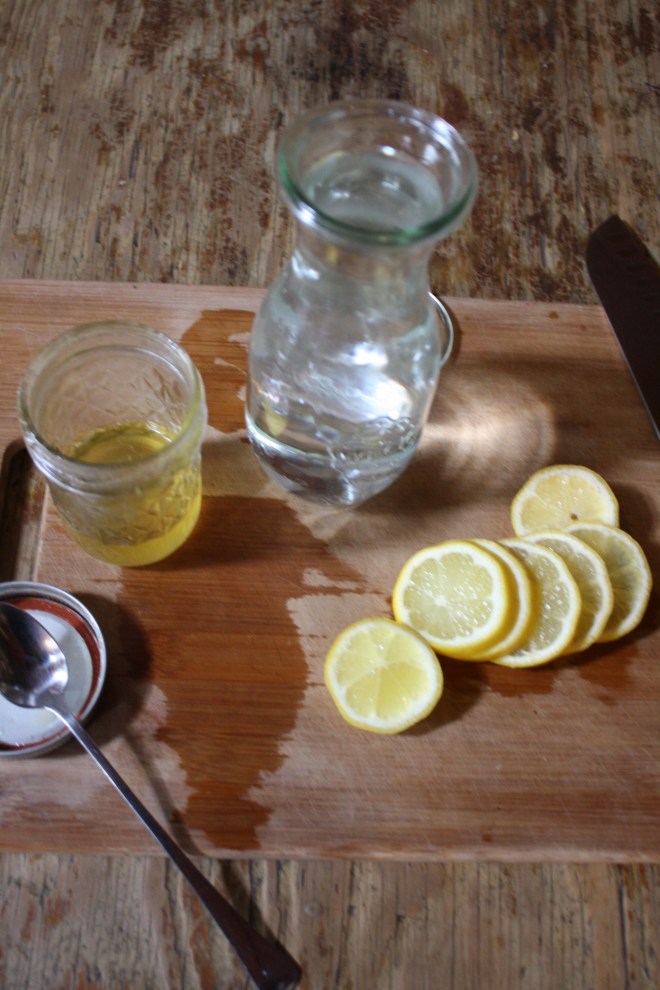
The stuff. Tomatoes ( I used sun-gold cherry cause I have a buttload, but you can sure use whatever tomato you have to many of), lemons, water, and if your into it vodka.
Note. The mr. and I are not big on sweet drinks, so I didn’t add any sweetener, the tomatoes being sweet enough. But feel free to add a little sugar or honey to yours.
Start by dumping tomatoes into a pot with water. Stick on high heat and bring to boil, then turn heat to medium low,stick a lid on pot, and let tomatoes simmer for a little while.
About 30 ish minutes later, the tomatoes have reduced to about 1/3 of what you started with and have turned into a a chunky like syrup.
Strain the juice from the solids into a big pitcher.
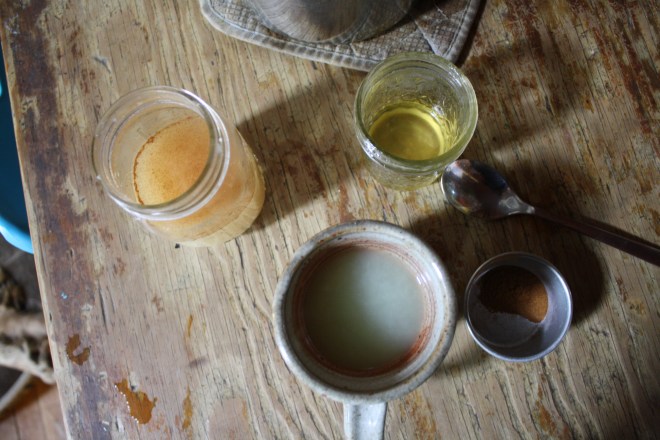
Tomato juice! and it’s so pretty bright gold. Now let it cool far a little bit.
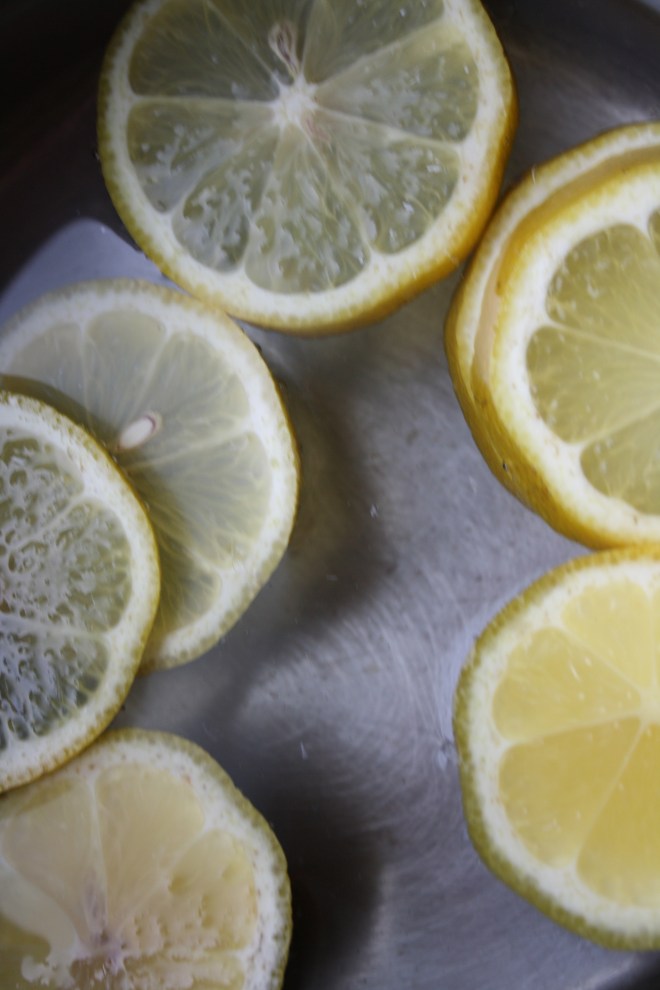
And while juice is cooling, juice your lemons
When the tomato juice is cooled off, add the lemon juice to the tomato.
Add water and stir
Taste, and if you think it need sweetener, by all means, add a drizzle or two of some honey or spoonful of sugar.
A couple of glasses of ice, and if you shall,, a shot of vodka (add the shot to the glass, not the pitcher)
Me being so fancy added a garnish/snack. Basil leaf and cherry tomato skewer looks so nice.
And sit back, put your feet up. and take it all in.
Weekend here we come!
-C
2 cups cherry tomatoes (can use 2 cups of any tomato)
1 cup fresh lemon juice (4-5 lemons)
1 cup water plus 3 1/2 -4 cups water
a few basil leaves and extra tomatoes for garnish (optional)
Note. I did not add any sweetener to my lemonade but you could totally add in a few tablespoons honey or sugar. Do what floats your boat.
Dump tomatoes into a pot with 1 cup of water. Bring to boil then cover and turn heat to a medium low heat. Cook tomatoes down for about 30 minutes or until the tomatoes have reduced about 1/3 and is almost sauce like.
Using a fine mesh strainer, strain the tomato mixture into pitcher or jug that you can serve your drinks from. Use a wood spoon or spatula to scrap the tomato around strainer to really make sure you get all the juicy goodness. Let tomato juice cool.
While cooling, juice lemons until you get a cup of fresh lemon juice. Add lemon juice to cool tomato juice along with 3 1/2 cups water. Mix and taste. If you think it needs a little sweetener, add a little in. If you think it tastes to strong, add in more water.
Good stir, ice in cups, a 2-3oz shot of vodka per 8-12oz cup of lemonade (the ratio is up to you my friend)… and your sitting pretty. Feeling a little fancy, take a basil leaf and wrap around a cherry tomato. Stab it with a tooth pick and garnish your drink. It ames for anise snack too.
It’s Mother’s Day weekend which means that you and I and everyone out there should feel the slightest bit obligated to at least do a little something nice for your mom for the mere fact that you were borned. And really what better way to celebrate mom than with food… It really is the least that you can do. (I think mom’s also like flowers and cards and handmade pasta necklaces) My mom is defiantly about the food. (she has had her fair share or pasta necklaces) A many years back on Mother’s day, this sweet little girl (me) made her mother a special breakfast treat…blueberry scones. And ever since that day, for every freaking holiday, birthday, whatever day, my mother requests (demands) a batch of those scones. She is always saying that these are her favorite treat and that no one has ever made them as good as I do. (I guess that just reiterates that I am her number 1 child)
And for the last few months my mom has been up my butt, trying to get me to make her some. Not going to lie, I have been saying I’ll get her a batch, but for some reason, I haven’t gotten around to making them. So two birds here.. Make the scones and she gets off my back for a least a little while (a month.. maybe 2) and I give her a fantastic Mothers day gift that I know she will love.
So here they are , oh mother of mine. Blueberry scones!
The stuff. Flour, baking soda, baking powder and salt. A bit of sugar, vanilla, buttermilk, and butter (use vegan butter and nut milk if you want to make them vegan) And of course we need the blueberries which can be fresh or frozen. I usually use fresh, but the store I stopped at only had really big containers of fresh that were like $1000 dollars a piece and the organic frozen happen to be on super sale. So you know, the cheap in me won that battle. So into the bowl goes all the dry stuff; flour, baking powder and soda, salt, and the sugar. Give it a good whisk.
Now for my special trick for a perfectly distributed cold butter in a pastry. Freeze your butter and grate it!
With a large wholed grater, grate the frozen butter directly into the bowl with the dry, stoping a few times to toss the butter chunks around so you don’t end up with a huge pile of grated butter. When it’s all grated, gently toss around so the butter is evenly distributed. Now dump the blueberries into the flour mixture. Toss them around to give them a coat of flour. Add in the buttermilk and vanilla and give a little mix until liquid is absorbed. We are trying to handle the dough as little as possible.Turn mixture onto counter. It’s very loose, but thats what it should look like. Very gently and with as little handling as possible, gather dough up, knead a few times till everything just comes together. Press dough into a disk that is roughly an inch thick…. and it doesn’t need to be perfect. Cut the disk into even sized pieces. Do 6 big, 8 normal, maybe even 10 smaller. Whatever size you like. (I did 8) Place the scones onto a baking sheet, using a spatula to transfer, and sprinkle the tops with a little bit of sugar. Into a preheated oven for about 20 minutes.And when the scones look all nice and browned and a tester comes out clean. remove and either serve right away warm, preferably with huge cup of coffee or tea, or stick on a rack to cool before storing in air tight container.
Perfect to serve as a breakfast pastry, at brunch, or even as a dessert. A nice little treat for a special lady. (dudes can eat them too)
Happy Mothers Day Mom! Thanks for having me!
And Happy Weekend!!!
-C
Blueberry Scones
2 cups all purpose flour
1/3 cup sugar plus 2 tablespoons to sprinkle on top
1 teaspoon baking powder
1 teaspoon baking soda
1/2 teaspoon salt
1/2 cup (1 stick) unsalted butter frozen or really cold (use non dairy butter like Earth Balance for vegan)
1 cup blueberries (fresh or frozen)
1 teaspoon vanilla
3/4 cup buttermilk (use non dairy milk for vegan)
Preheat oven t0 400 degrees
In a large bowl, whisk together flour, baking soda, baking powder, sugar, and salt. Take the frozen butter and grate directly into flour mixture, tossing around to evenly disrupted. Add in blueberries and toss around till coated with flour, then lastly, add vanilla to buttermilk and mix into mixture until just barely coming together. Turn mixture out onto counter and with your hands, knead mixture a few times until it forms a solid dough. Shape into a disk and smoosh down until about an inch thick. Cut into 6-10 triangles and place on a non greases baking sheet and sprinkle tops with remaining sugar. Stick into oven and bake for 20 minutes or until tops start turning a golden brown and a tester in the middle of a scone comes out clean.
Remove from baking sheet and serve warm or let cool on a rack.
Mom gets first dibs, and if she is willing to share, eat one yourself with your face.
Last night had we had a couple littles (and my little sister who is not so little anymore) over for a cookout and watercolor evening.
It was fantastic. We set them up outside with paint, paper, and brushes and let them have at it. And while they were painting the mr took charge of the grill: cooking up potatoes, corn, and the tofu dogs.
I was cutting up fruit and making a special snack treat of popcorn (who doesn’t love popcorn?) consisting of almond butter, coconut, and chocolate….Almond Joy popcorn.
Addictive like crack. But still safe for children
The littles were more or less indifferent to it ( they are not big coconut fans..I know, but i am making it a mission to make them like it), but the sister and the mr… Lets just say I had to pull out my outdoor voice on them a few times (STOP EATING IT ALL!!!!!)
I think we have a winner here!
The stuff. A large quantity of air popped popcorn, almond butter, chocolate chip, coconut flakes and coconut oil. We also have some extra chocolate chips and a big handful of roasted almonds.
Licking your lips yet?
Start by dumpling your popcorn into the larges baking sheet to pan that you have.. the more surface area the better. Now heat up the almond butter. You can do this on the stove or in the microwave. The trick here is to heat it slowly so you don’t burn it. If doing on the stove, put in a sauce pot and with a fork, constantly stir until a drizzable consistency. If in microwave, stick it in there for 10 second intervals.
Note. I know from experience that there are many different types and consistency of almond butters out there. If your butter seems really stiff and thick, add a teaspoon of coconut oil.
As soon as your almond butter is melted, drizzle all over the popcorn.
With the same pot (no need to clean) place teaspoon of coconut oil in it. Heat oil until hot. Remove from heat and stir in the chocolate chips. Kepp string until the chips are melted.
And drizzle that all over
Then toss on the coconut chips, chopped almond bits, and the chocolate chip.
With your (clean) hands, give the popcorn a good toss, mixing everything all around.
And now place either in a big bowl or individual cups (great for littles) I happened to have some pink(beet juice stained) shredded coconut on hand, which made for a nice touch of pretty (totally not necessary,but it kinda was). Next time maybe some sprinkles would look nice……
Anyway, be ready to lick you fingers!
And I am giving you ample amount of time to get the ingredients needed for this. Makes the perfect snack for a cookout, a party, or movie night(or Netflix binge)
Happy Day!!!
-C
6-7 cups air poppped popcorn
1/3 cup smooth almond butter
1/2 cup unsweetened coconut flakes
1/2 cup chocolate chips plus a handful (use vegan chocolate chip if needed)
1 -2 teaspoon coconut oil
handful of toasted almonds, chopped into pieces
Feel free to play with proportion. You can adjust the amount and ratios of all the ingredients to your taste preference.
Take popcorn and dump on the biggest baking sheet or pan that you have and level it out. Either on the stove or in the microwave, heat almond butter until a melty a runny consistency. If doing so on the stove, make sure to consantly stir while heating* If in microwave, check ever 10 seconds. (burnt almond butter tastes like crap )
*Note. I find that all almond butters are not the same. IF you feel that yours is not melty and drizzable enough, add in a teaspoon of coconut oil.With a spoon or spatula, drizzle all over popcorn. .
Now take the coconut oil and melt on stove or in microwave until hot. Remove from heat, add in chocolate chips and mix around until fully melted. Drizzle all over popcorn .
And last but not least, take the coconut flakes, almond pieces, and the extra handful of chocolate chips and toss those in too. With clean hands, give everything a good mix Dump into a big bowl or individual container.
Eat with hands..lick your fingers clean..
Word of caution…Once you start, you will not be able to stop eating this.
Because sometimes you just need to think of yourself and what will make you happy. Eating this makes me happy.
This flavor situation just made so much sense. All three flavors on their own are fantastic, but combined into one super amazing frozen sorbet treat.. I mean, like WHOA! I was inspired by the 4 really ripe and juicy mangos I had waiting on the counter. I had also just made a batch of jalapeño jam and was thinking about how nicely jalapeños and mangos go together. And I happened to have a can of coconut cream on hand. My first idea was to do a savory dinner type thing, but after a day of heat and humity, all I wanted was something cold and easy. Ding ding… Lets freeze this shit and turn it into a sorbet.
Such a good idea.
The Stuff. Simple as can be. 2 mangos, peeled, diced and frozen. A can of coconut cream, and some jalepno jam.
Frozen mango is really easy to blend. Just stick into a blending device and add a little bit of water. Mix until a nice creamy puree is formed. And try not to eat it all right now.
Whip up the coconut cream. You don’t need to go to crazy and make it all fluffy, just whisk it for a minute or two just to loosen it up.
Time to scoop. First a few big dollops of the frozen mango puree. Try to work fast to prevent the mango from completely thawing out.
Next, scoop some of the coconut cream and drop a few scoops of jalapeño jam right on in there to. Add more mango, more coconut , and more jam until you container is full.
Note.. My sister had the idea of mixing he jalapeño jam into the mango puree. I think I might try that next time.
Take a knife and cut through the sorbet, first width wise, then length, then width. or whatever. You’re just trying to kind of marble and swirl the flavors together.
Once your done playing and swirling, into the freezer it goes….
Remove from freezer when completely frozen and do what you need to do. I flipped the pan and sliced into slabs on a cooking sheet, and me, the sister and the mr. took turns with the fork and ate it off the pan. We be so classy. But go ahead and use o plate or scoop it or maybe even eat directly from the container with a fork. No judgement here.
Eat so good!
-C
2 1/2 cups fresh mango (2 large mangos), peeled, diced and frozen. (Or just buy frozen mango)
1/2 cup water
1/2 can of cold coconut cream (I used Ttrader Joes.. It’s the best)
around 1/3 cup Jalapeño Jam.. more if you like (Here is the recipe for that )
Place frozen mango into a blending device, add about 1/3- 1/2 cup water and blend until a smooth puree. Open coconut cream, drain the liquid, and place half the cream into a bowl. Whisk until loose and slightly fluffy .
In a freezer safe container. scoop a few dollops of the mango puree, add in a few dollops if coconut cream and then a few dollops of the jalapeño jam. Keep adding dollops of the stuff until you use up all of the ingredients. Take a knife and run through thet sorbet length and width wise a few times to swirl the flavors. Place in freezer for at least 3 hours or until fully frozen
Remove and either scoop, slice, or eat directly from container.
I was informed yesterday that if I was going to make tortilla chips, that I better make some sweet ass dips to go with them. I kind of agree… tortilla chips need dip… or better yet, two dips. Queso and guacamole. It’s what needed to be done, and so I did it.
Guacamole is amazing… anything avocado is amazing…this guacamole is amazing. White bean guacamole is amazing. And not that we really care, but this guac is half the fat then straight up guacamole. Plus it’s packed full of protein making it a kind of super duper, must eat all of it, kind of dip. And sweet potato anything will make me happy. Making queso dip with sweet potato and cauliflower is probably one of my best food combos so far. (after eating a butt load, I felt like I was a genius and made an amazing discovery) Again, not that we need it to be, but this is also a fat-free, vegan, gluten-free, super healthy, packed full of B12, fiber and nutrients, dip for all kind of dip.…. just another reason why you cannot feel bad when you finish off half a batch before you get a chance to stick it in a serving bowl. (I might have done that)
Here is what you need for a good time:
−These tortilla chips ….Check.
−Some Chopped Veggies (I want the veggies)…..Check
−Cauliflower Sweet Potato Queso.…Check.
−White Bean Guacamole…Check.
You are now ready for it. It being this party, that party, the Super Bowl, or a Wednesday afternoon.
To the left we have the makings for the cauliflower sweet potato queso.. Steamed cauliflower, a baked sweet potato, nutritional yeast, garlic, and chopped up red onion, red bell pepper and jalapeño. To make all you need to do it take the chopped peppers, onion, and garlic and sauté for a few minutes just to slightly soften and bring out flavors. While that’s going on, take the steamed cauliflower and sweet potato(skin off..but eat it, or save it for soup or feed it to the dog) and puree together with a blender or food processor. Add in nutritional yeast, about a tablespoon or two of hot water and, salt and pepper to taste. Blend for about 5 minutes until super creamy smooth. Add in sautéed stuff and pulse just enough to incorporated the veggies but not complete blend in. Stick in a bowl.
To the right we have white bean guacamole stuff. Two cups (or one can) rinsed white beans, one ripe avocado, a lime, a few cloves of garlic,(I also added a bit of garlic powered…I like my garlic) and some chopped up red onion and tomato. Place beans, garlic, avocado and lime juice in a blender or food processor and blend until smooth. Add salt to taste and toss in the chopped tomato and onion. Blend for sec to mix that in…Stick in a bowl
Perfect…
To think that both of these dips took about 10 minutes total to make. (I had pre baked the cauliflower and sweet potato) And for real, I would spend much more time if I had too because both of these dips are so freaking good, I definitely will be making these on the regular.
So there , dips for those sweet ass chips or whatever you want to dip or them spread them on.
And he guys…It’s FRIDAY! Have a fantastic day!
-C
White Bean Guacamole
2 cups white beans (or 1 can) rinsed and drained
1 ripe avocado
3 cloves garlic
1 lime
1/4 small red onion
1 small tomato
1-2 teaspoons salt
Finley chop onion and tomato. Set aside. Place the beans, avocado, garlic, garlic powder, 1 teaspoon salt and the juice from one lime into a blender or food processor and blend until smooth. Add a splash of water if needed to help keep things moving. Taste and add more salt if needed. When smooth, add the onion and tomato and pulse a few times to mix in. Scoop into a serving dish and finish with a squeeze of lime and a bit of chopped onion and tomato.
Cauliflower Sweet Potato Queso
1 1/2 cups pre cooked steamed or roasted cauliflower
1 medium pre baked sweet potato
1/2 cup nutritional yeast
1-2 tablespoons hot water
1/2 a small red pepper
1/4 small red onion
1 jalapeño
3 cloves garlic
salt and pepper
Finely dice the red pepper, jalapeño, onion and garlic and sauté in a skillet for a few minutes until slightly soften and fragrant. Take the pre-cooked cauliflower, sweet potato (skin removed), and nutritional yeast and place in a blender or food processor. Blend for about 5 minutes until creamy and smooth. Add in a tablespoon of water to keep things moving. When completely smooth, add in sautéed veggies and pulse a few times to combine. Scoop into a serving dish. If your feeling it, top with scallions and cracked pepper.
Serve dips with chips, veggies or anything you want. Also make great spreads for sandwiches and crackers too!
First things first… This is the BEST SOUP EVER! And yes, soup is for summer too.
I make a lot of soup, especially in the summer. It’s one of the best ways to use up an extra large bounty of any kind of veggie. And with me, I am that person that everyone know will take any or all of the extra veggies that come out of their gardens. I have been handed down bags of fresh produce, loving picked by some old man from his backyard garden who then gives it to his grand daughter, who then gives ti to a friend, which then gives it to a sister, then gives it to me. I think I end up with all the extra veggies in the county (keep them coming) And around these parts, the zucchini are starting to come in and I have already gathered a mound of beautiful green zucchinis on the eating table. It’s kind of fantastic I am more then happy to take all of your extra zucchini, even the kind of big ones… cause I can make just about anything out of zucchini. And I will for sure eat it all.
With that said, you might not want to give me ALL of your zucchini because you are going to want to make this soup.It’s smooth and creamy (thanks to all the zucchini) but still has a nice chunkiness from the lentils. And the spice is nice, even on a warm day. Plus, this is one of those soups that tastes just as good cool as it does hot..
I was serious when I said that this was the best soup ever, becauce it is. (for now)
So make the soup,then give me your extra zucchinis…. if you have any left after this.
The stuff. Lots of chopped up zucchini along with a chopped up carrot and an onion. Curry powder, salt and pepper, and some oh so sweet little red lentils.
Grab a large pot and toss all of the chopped up veggies, a good handful of curry powder, salt, pepper and a cup or so of water, right on in. Give it a stir and place on medium heat with a lid and let the veggies cook down until nice and soft.
Once all the veggies are tender, remove from heat and add in enough water to completely sumerege the veggies.
And now bust out the blender, or hand blender and blend the veggies as smooth as you like, adding more water if needed to get the soup moving. Here is a good tie to taste and season it with a bit more of whatever you need.
Now dump in the lentils into the soup along with another couple cups of water for good measure.(don’t worry if it seems watery.. the lentils will suck up the water) Stir, bring back to a boil, then turn heat down to low and stick the lid back on. Let that simmer until the lentils are cooked.
And maybe you want to be a little fancy… add a few thinly sliced zucchini to the pot, you know, for a tasty garnish.
Scooped into bowls, with the garnish and lots of cracked pepper.
Now go for it.
And watch out, I though I made enough for the mr. and I to eat for a few lunches, but we ended up eating almost all of it in one sitting and then I ended up eating the little bit left for a mid afternoon snack (I was amazing cold too!). But it’s cool, I up making it again today.. So f*ing good.
Have the most fantastic day!
-C
2 -3 zucchinis ( I used one really big one)
1 large carrot
1 medium yellow onion
1 uncooked cup red lentils
2 -3 teaspoons curry powder*
salt and pepper
water
*Use a pre blended powder, or make your own. I use a combination of equal(ish) parts cumin, cardamon, coriander, turmeric, cayenne, and ground mustard. And I tend to go heavy on the cumin and turmeric… But do whatever you like.
Chop up the veggies and toss into a big pot with the curry powder,a good pinch of salt and pepper, and about a cup of water. Stick on burner on medium heat and cover. Cook for about 8 minutes, making sure that the water never full evaporates (just add more if needed ) and conitunue to cook the veggies until they are all soft and tender. Remove from heat completely submerge the veggies with water. Now either with a hand blender, or a regular blender, puree the veggies until smooth . Place puree back into pot (or leave in pot) and add in the red lentils and another 2 cups water. Bring the soup back to a boil then turn heat down to low, cover and let the lentils cook through completely. The soup is done when the lentils are cooked through and you are ready to eat. And if you think that soup is to thick, add more water, or to thin, cook down fa little longer.
Scoop soup into bowls or cups, add a few thinly sliced pieces of zucchini on top with lots of freshly ground pepper (if you want) and enjoy with s smile and maybe a spoon.
I made a pie dough a little while ago with the intention of making a cherry pie…but I ate all the cherries . (I do that a lot… eat all of something that I was intending to use for something else)
And then I think about that saying.. The road to hell is paved in good intentions.
.Well I guess I am going to hell.
So no cherries, but I have a crap load of summer squash (and it’s only the beginning) and a few peaches that are in need of some eating. And what’s that, a container of ricotta in the fridge from lasagna a couple weeks back…. Meant to be and not in hell yet!
Sure, I could have made one single crust galette, sweet or savory, and thrown it to the masses for consumption, but I figured that I might as well just hit two birds with one stone. A dinner and a dessert, all at once, and call it a victory in time management and putting a dent in the pile of squash on the table. (don’t be fooled, I love excess amounts of squash.. It’s like the printer paper of the veggie world.. can be used for everything!) And bonus, only one set of dishes! I mean come on, this is so good, easy and just really pretty. I know, I know….. so smart.
Anyway, here, take a look, get inspired and make some pretty dinsert (dinner and dessert) galettes.
The stuff. For the base, we need one single crust pie dough (that’s going to be for two smaller galettes) and some ricotta cheese. The savory galette has summer squash, salt, pepper, lemon ( the zest) and a couple tomatoes. The sweet needs honey, a peach, and a few strawberries.
And if you want, change up your toppings. Pretty much any fruit or veggie combo would work. And spice up the ricotta if you wan. Garlic, fresh thyme, cinnamon… whatever will make you happy.
First things first. Roll ourt dough. You could cut the dough in half and roll two separate disks, but I just rolled out one big rectangle shape.
And onto the baking sheet and into the fridge to rest.
While the dough is chillin, take half of the ricotta and whip it up with some honey and thinly slice up your fruit.
Take the other half of the ricotta and add a bit os lemon zest, a sprinkle of salt and pepper, and mix that up. And thinly slice up the squashes and dice up the tomatoes.
Two crusts(or one cut in half. Smear the honey ricotta on one side, savory on the other, leaving a boarder so you can fold the dough over.
Now pile the fruits on the honey ricotta, veggies on the savory, and fold the uncheesed part of the crust over. just enough to keep everything from falling out. Sprinkle salt and pepper on the veggies.
Stick into a preheated oven and bake until the crust is cooked all nice and golden brown and crispy.
While the galettes are baking, toss the chunks of tomatoes into a skillet with a splash of oil, salt and pepper and stick it into the oven too. Just bake until the tomatoes are nice and soft. You can stick in the oven right away and let the tomatoes cool, or towards the end of the bake time so that you can eat them warm… these tomatoes are good hot or cold.
all baked up, removed from the oven, looking oh so pretty.
Pile the roasted tomatoes onto the savory tart. And if you got it, a bit of chopped freshy fresh basil
And drizzle a little bit more honey on the sweet.
And serve… Is it savory first or do you go sweet?
How about a pice of both. Dnner and dessert.. all on one plate!
Happy Tuesday!
Ba Bye!
-C
-Makes 2 small or one large galettes
a single pie crust (recipe here.. or use whatever dough you like)
1 cup of ricotta cheese
For the savory
2 cups thinly sliced green and yellow summer squash*
2 roma tomatoes
salt and pepper
teaspoon lemon zest
a few fresh basil leaves
olive oil
For the Sweet
2-3 tablesppons honey
1 peach thinly sliced*
3-4 strawberries thibky sliced*
*Note. Feeling like blueberry apricot or maybe potatoes and peas? Swap out any fruit and veggie (and spice) combination you want. The possibilities are endless! And if you want to do just one big galette, go for it.
Roll out pie dough in either 2 separate disks or one large rectange cut in half and.place on baking sheet and stick in fridge. While dough is resting, divide the ricotta into separate bowls. Add the salt, pepper and lemon zest to one, and the honey to the other. Using a fork, whip them up.
Preheat oven to 400 degrees
When the oven is preheated, grab the crust from fridge and smear the ricotta fillings evenly on the middle of each crust, leaving about an inch and a half boarder. Layer on the toppings, (sweet on honey, savory on lemon pepper.. or whatever floats your boat) and fold border over the edges of the filling. Place in oven and bake for about 35-40 minutes or until the crusts are nice and crispy and golden brown.
While those are baking, dice up the tomatoes and toss into a oven safe skillet with a little drizzle of oil and sprinkle of salt. Stick that into the oven for about 10 minutes or until the tomatoes are nice and soft. You can do this right away, or towards the end of the bake time of the galettes… roasted tomatoes are great warm or cold.
When the galettes are done baking, remove from oven and let sit for at least 5 minutes before serving. Top the savory galette with the roasted tomatoes and chopped fresh basil. Drizzle a little more honey on the one with the fruit .
Serve one, then the other, or both at the same time!
Eats good hot, warm, or cold. Utensils not required
It’s Mother’s Day weekend which means that you and I and everyone out there should feel the slightest bit obligated to at least do a little something nice for your mom for the mere fact that you were borned. And really what better way to celebrate mom than with food… It really is the least that you can do. (I think mom’s also like flowers and cards and handmade pasta necklaces) My mom is defiantly about the food. (she has had her fair share or pasta necklaces) A many years back on Mother’s day, this sweet little girl (me) made her mother a special breakfast treat…blueberry scones. And ever since that day, for every freaking holiday, birthday, whatever day, my mother requests (demands) a batch of those scones. She is always saying that these are her favorite treat and that no one has ever made them as good as I do. (I guess that just reiterates that I am her number 1 child)
And for the last few months my mom has been up my butt, trying to get me to make her some. Not going to lie, I have been saying I’ll get her a batch, but for some reason, I haven’t gotten around to making them. So two birds here.. Make the scones and she gets off my back for a least a little while (a month.. maybe 2) and I give her a fantastic Mothers day gift that I know she will love.
So here they are , oh mother of mine. Blueberry scones!
The stuff. Flour, baking soda, baking powder and salt. A bit of sugar, vanilla, buttermilk, and butter (use vegan butter and nut milk if you want to make them vegan) And of course we need the blueberries which can be fresh or frozen. I usually use fresh, but the store I stopped at only had really big containers of fresh that were like $1000 dollars a piece and the organic frozen happen to be on super sale. So you know, the cheap in me won that battle. So into the bowl goes all the dry stuff; flour, baking powder and soda, salt, and the sugar. Give it a good whisk.
Now for my special trick for a perfectly distributed cold butter in a pastry. Freeze your butter and grate it!
With a large wholed grater, grate the frozen butter directly into the bowl with the dry, stoping a few times to toss the butter chunks around so you don’t end up with a huge pile of grated butter. When it’s all grated, gently toss around so the butter is evenly distributed. Now dump the blueberries into the flour mixture. Toss them around to give them a coat of flour. Add in the buttermilk and vanilla and give a little mix until liquid is absorbed. We are trying to handle the dough as little as possible.Turn mixture onto counter. It’s very loose, but thats what it should look like. Very gently and with as little handling as possible, gather dough up, knead a few times till everything just comes together. Press dough into a disk that is roughly an inch thick…. and it doesn’t need to be perfect. Cut the disk into even sized pieces. Do 6 big, 8 normal, maybe even 10 smaller. Whatever size you like. (I did 8) Place the scones onto a baking sheet, using a spatula to transfer, and sprinkle the tops with a little bit of sugar. Into a preheated oven for about 20 minutes.And when the scones look all nice and browned and a tester comes out clean. remove and either serve right away warm, preferably with huge cup of coffee or tea, or stick on a rack to cool before storing in air tight container.
Perfect to serve as a breakfast pastry, at brunch, or even as a dessert. A nice little treat for a special lady. (dudes can eat them too)
Happy Mothers Day Mom! Thanks for having me!
And Happy Weekend!!!
-C
Blueberry Scones
2 cups all purpose flour
1/3 cup sugar plus 2 tablespoons to sprinkle on top
1 teaspoon baking powder
1 teaspoon baking soda
1/2 teaspoon salt
1/2 cup (1 stick) unsalted butter frozen or really cold (use non dairy butter like Earth Balance for vegan)
1 cup blueberries (fresh or frozen)
1 teaspoon vanilla
3/4 cup buttermilk (use non dairy milk for vegan)
Preheat oven t0 400 degrees
In a large bowl, whisk together flour, baking soda, baking powder, sugar, and salt. Take the frozen butter and grate directly into flour mixture, tossing around to evenly disrupted. Add in blueberries and toss around till coated with flour, then lastly, add vanilla to buttermilk and mix into mixture until just barely coming together. Turn mixture out onto counter and with your hands, knead mixture a few times until it forms a solid dough. Shape into a disk and smoosh down until about an inch thick. Cut into 6-10 triangles and place on a non greases baking sheet and sprinkle tops with remaining sugar. Stick into oven and bake for 20 minutes or until tops start turning a golden brown and a tester in the middle of a scone comes out clean.
Remove from baking sheet and serve warm or let cool on a rack.
Mom gets first dibs, and if she is willing to share, eat one yourself with your face.
Last week pineapples were on sale everywhere……So I bought 5. Don’t judge
And I bet I am not the only one that got overly excited at $1.50 pineapple and bough themselves a few. We will just call ourselves opportunists. Now we have plenty of pineapples and don’t have to pay the $4 a piece prices. (Justification)
But if you don’t have a pineapple laying around, you must go get one. (Maybe if your lucky, there might still be some sales going on) because you must make this salad. I am on a mission to make everyone I know eat it because, for lake of a better way to say it…….It will rock your world.
Dill and pineapple are a serious match made in heaven. Pineapple, with its sweet, tangy, citrusness and dill with it’s super fresh earthiness. Mixed together with a few other helpers to create a fresh, clean, chunky, tangy, over the top, flavor. I could stop right there, but toss in a handful of lentils, some creamy avocado and a bed of kale…It’s like the best spring time, celebration on you tongue, happiness in you tummy, kind of salad.
A salad that will make you smile. (and maybe buy 5 pineapples)
Stuff for the goodness. We got the kale, some avocado because all salads should have avocado and some cooked lentils because, well, all salads should have lentils (or beans or nuts.. so you could totally something else) Then a few sprigs of fresh dill, a clove of garlic, red wine vinegar, salt and a bowl of chunked up pineapple. The pineapple, dill, garlic, red wine vinegar, a splash of water and a pinch of salt get blended in a blender or whatever blending device you use. Go as smooth or chunky as you like, I recommend going smooth, but leaving a little chunk, like half blended.
The prep is done, now compile. Kale in bowl, top with lentils,. Toss on avocado chunks, and, last but not least, the blended pineapple dill mixture.So good……So so good.
Happy Friday!!
-C
So Good Pineapple Dill Kale Salad
Serves Two
3 cups washed and chopped Kale
1/2 a avocado, diced
1 cup fresh pineapple chunks
1-2 springs fresh dill
1 tablespoon Red Wine Vinegar
Salt
1/2 cup cooked lentils (or any bean or nut will do)
Note. No fresh dill? You can use dried, just sub in 1 teaspoon for the fresh and after blending with the pineapple, let sit a little longer to really let the flavors meld together.
Place pineapple, dill, pinch of salt, vinegar and garlic into a blender or whatever you own that blends and blend stuff together, leaving it a little chunky. Let sit for 5-10 minutes.
Kale goes into a bowl and add the lentils and diced avocado. Pour the blended pineapple on. Toss around.
Now eat.
TGIF!!!! For reals, because Monday-Thurday were monster days. And now that its friday, I can dig a hole and hide in it until it’s at least 30 degrees with some sunshine. (I might never get to come out.)
A few things I will bring in my hole:
food (lots of food and coffee, lots of coffee)
a soft blanket and pillow
a few books, preferably with pictures, on farming and gardening (think spring!)
the entire series of the Fresh Prince of Bel-air and a device to watch it on
toothpaste (I can use my finger to brush my teeth)
But before I leave for my hole in the ground, I made these little cake bites to get my people through the weekend. Sweet little lemony bites of rich dense cake dipped into bittersweet chocolate. (I am just so nice) They have all the pleasure or cake without the need of a fork and are much easier to give away then a big slice of cake. Plus, they are fun to make. My little sister helped and did most of the chocolate dipping. Then she and another little used their mouths to clean up the chocolate mess. It was an afternoon of chocolate all over the kitchen fun day.
So make some bites to have and to share. Or if you, like me, are digging a hole to hide in, make a batch of bites to bring with you. That’s the beauty of cake covered in a harden chocolate shell, they travel really well.Simple lemon cake stuff. Flour, baking powder and salt whisked together, Sugar and soft butter in a bowl. An egg, some vanilla, milk, and of course, the lemon.
To make the batter, cream the soften butter with the sugar until light and fluffy. Zest lemon(1 big or 2 small) into bowl with the juice of the lemon(s), the vanilla and the egg. Beat until combined. Now beat in the dry and then the milk. Keep beating for another minute until all mixed. Batter should be light and fluffy.
Batter goes into a greased and floured 9×13 baking sheet and stuck into a 375 degree oven for about 30 minutes (You can use a 9×9 baking pan. Just bake fir another 10 minutes and you will end up with thicker bites). Remove from oven and let cool for a few minutes and flip to remove cake from baking sheet. Cut cake into small pieces (I cut 4×6 to get 24 bites) and place bake into sheet and into freezer (I stuck mine outside, it was -2 degrees ) for at least 2 hours.
Frozen bites ready for the chocolate coating… Bittersweet chocolate chips and a little bit of coconut oil. Melted together all nice and shiny smooth.Now dip and slather those bites in the melted chocolate.
Oh what a lovely sister I have.. Look at her dunk….. like a boss!Fully coated and placed on a rack for the chocolate to harden. I ended up sticking the rack in the freezer for 10 minutes…They harder really fast in there.
And now you have some it, bites of cake covered in chocolate. 1 bite, 2 bites…5 bites. Eat however many you want because its Friday and because there small little bites and just because you can.
Now if you need me, I’ll be in my hole.
-C
Chocolate Lemon Cake Bite
1 1/2 cups all purpose flour
1 teaspoon baking powder
1 teaspoons salt
1 cup white sugar
1/2 cup (1 stick) soft butter
1 egg
1 teaspoon vanilla
1 cup milk
1 large or 2 small lemons
2 cups bittersweet chocolate chips
2 tablespoons coconut oil
Add butter and sugar to a large bowl and beat on medium unit light and fluffy. Ass in vanilla egg, the zest of the lemon and the juice of the lemon. Beat to incorporate. Now beat in the dry and lastly the milk.
Grease and flour either a 9×9 pan or a 9×13 baking sheet. dump batter in and smooth out. Stick in oven and bake for about 3o minutes or until a toothpick stuck into the middle comes out clean. Remove and let cool for a few minutes on a wire rack. Flip cake to remove from pan. Cut cake into bit sized pieces, 4×6 is a good size, and place back on baking sheet and stick into freezer for at least 2 hours.
When cake bites are as good as frozen, get the chocolate ready. Take the chocolate and the coconut oil and either melt in a double boiler or the microwave. Mix until smooth and make sure to full incorporate the oil. Now remove the cake bites from the freezer and dip each bite into chocolate, trying to full coat all sides. Stick onto a wire rack or a parchment lined pan to harden. They can be stuck back into the freezer to harden faster.
Once chocolate has harden, your good to go!
First off.. Happy Saturday and Happy Valantines Day!
Once again, it is so F-ing cold out and I don’t want to leave my house! And because of the cold we decided to forgoing the traditional V day hike(kinda sad) but instead are going to just hang at home and watch movies. (which is actually kind of nice because now I get to stay all frumpy and warm , hanging out in my baggy old sweats and oversized sweater (so sexy right?)
Anyways.. being all cozy usually entails something warm and yummy to drink. Neither of us are really big on hot chocolate, (plus we don’t have the stuff to make it) and sure we could crack open the fancy bottle of wine we bought for dinner (4.99 Trader Joes Special!!!!) or we can save that and I can whip up something a little spicy sweet.
Warm winter lemonade!! We are both big on lemon in everything and I just bought a bunch of sweet meyers lemons, so I think it’s meant to be.
Sweet, a little spicy, and warning….Perfect for a day of cuddling on the couch or for something to warm you after being outside. Great for anyone who wants a little something tasty that isn’t chocolate or booze, even good for those that might be feeling a little under the weather. Kids and adults alike…. this winter lemonade works for it all.
So whip some up and stay warm!
And have a fantastic day!!!
-C
Warm Winter Lemonade
Serves 2
1 Meyer lemon (can use regular lemon too)
3 cups water
2 tablespoon of honey (use sweetener of choice if vegan)
A few sprinkles of cinnamon(optional but recommended!)
Slice lemon and place into a pot with water, cover, and bring to a boil. Once boiling, remove from heat and let sit for a minute or two. Transfer to a blender (or use a emulsifier) and blend until frothy. Place a tablespoon of the honey or whatever sweeter into each cup. (add more if you like) Strain lemon mixture in equal amounts into mugs. Stir and sprinkle with cinnamon.
If you don’t want to use the blender method, you can juice 1 lemon, split into two mugs , add sweetener and top with hot water.. Don’t forget the cinnamon!
Whenever me and the mister get invited / show up for dinner at someone’s house, I like to bring at least one thing to contribute to the meal. First, because I am nice like that. Secondly, because I get to make food for other people besides Nick and get new feedback on recipes. (Sometimes I think he tells me things taste amazing when they might not) And thirdly, its nice to mess up someone else’s kitchen besides my own. So last night we went to my sisters and I made a salad. A very easy and virtually mess free salad…….I still made a mess (I cleaned it up myself!)
The salad I made was a light, crisp, and citrusy thing of beauty. Not exactly what one would think to eat on a freezing my face off cold day, but hey, you can’t help what the body craves. Plus, if you make it for. lets say, a sister that is making french fries and hamburgers for dinner..then a light and citusy salad is just what you need. Feedback from the mouths that ate it….Fanstastic combo! Best Salad ever! Never going to eat anything else! Ok, not so dramatic, but this was a winner. And for real, this salad takes about five seconds to compile and all the ingredients are really accessible right now so really, why not?
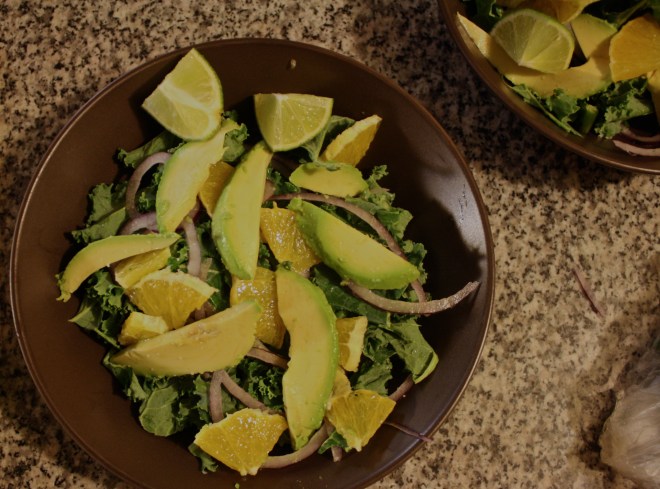
Nice crisp kale. Thinly slices red onion for a nice bite. Orange for that sweet citrusy and juicy smack and avocado to add a perfect creamy finish. Lime to make it perfect. Start with the base layer of kale… then first goes the sliced onion. (Make sure it’s thinly sliced or else it will be to overpowering) Add thinly sliced oranges…oh boy, your half way there!!!
Top with thinly sliced avocado, a sprinkle of salt and drizzle with lime juice. I also served with an extra wedge of lime, there is never too much lime.
Now you can stand back, take a picture, send to all your friends and make them jealous of you fantastically pretty and oh so delicious salad. They will ask, “What is that amazing looking dish you are eating?” Your response will be..”Check out the blog..the lovely crazy…and make it yourself! ” (yes, I am shamelessly plugging myself here)
Anyway, enjoy the day and try to keep warm!
-C
Citrus Avocado Salad (Makes 2)
Ingredients
A few good handfuls of kale leaves
1 orange
1 avocado
1 lime
1/2 a red onion
Remove tough stems from kale and chop leaves into small month sized pieces. Thinly slice onion, peel and thinly slice orange and cut avocado into…yup you got it, thin slices.
Kale into bowls, top with onion, orange and avocado. Top with the juice of half a lime…Add a sprinkle of salt.
Because sometimes you just need to think of yourself and what will make you happy. Eating this makes me happy.
This flavor situation just made so much sense. All three flavors on their own are fantastic, but combined into one super amazing frozen sorbet treat.. I mean, like WHOA! I was inspired by the 4 really ripe and juicy mangos I had waiting on the counter. I had also just made a batch of jalapeño jam and was thinking about how nicely jalapeños and mangos go together. And I happened to have a can of coconut cream on hand. My first idea was to do a savory dinner type thing, but after a day of heat and humity, all I wanted was something cold and easy. Ding ding… Lets freeze this shit and turn it into a sorbet.
Such a good idea.
The Stuff. Simple as can be. 2 mangos, peeled, diced and frozen. A can of coconut cream, and some jalepno jam.
Frozen mango is really easy to blend. Just stick into a blending device and add a little bit of water. Mix until a nice creamy puree is formed. And try not to eat it all right now.
Whip up the coconut cream. You don’t need to go to crazy and make it all fluffy, just whisk it for a minute or two just to loosen it up.
Time to scoop. First a few big dollops of the frozen mango puree. Try to work fast to prevent the mango from completely thawing out.
Next, scoop some of the coconut cream and drop a few scoops of jalapeño jam right on in there to. Add more mango, more coconut , and more jam until you container is full.
Note.. My sister had the idea of mixing he jalapeño jam into the mango puree. I think I might try that next time.
Take a knife and cut through the sorbet, first width wise, then length, then width. or whatever. You’re just trying to kind of marble and swirl the flavors together.
Once your done playing and swirling, into the freezer it goes….
Remove from freezer when completely frozen and do what you need to do. I flipped the pan and sliced into slabs on a cooking sheet, and me, the sister and the mr. took turns with the fork and ate it off the pan. We be so classy. But go ahead and use o plate or scoop it or maybe even eat directly from the container with a fork. No judgement here.
Eat so good!
-C
2 1/2 cups fresh mango (2 large mangos), peeled, diced and frozen. (Or just buy frozen mango)
1/2 cup water
1/2 can of cold coconut cream (I used Ttrader Joes.. It’s the best)
around 1/3 cup Jalapeño Jam.. more if you like (Here is the recipe for that )
Place frozen mango into a blending device, add about 1/3- 1/2 cup water and blend until a smooth puree. Open coconut cream, drain the liquid, and place half the cream into a bowl. Whisk until loose and slightly fluffy .
In a freezer safe container. scoop a few dollops of the mango puree, add in a few dollops if coconut cream and then a few dollops of the jalapeño jam. Keep adding dollops of the stuff until you use up all of the ingredients. Take a knife and run through thet sorbet length and width wise a few times to swirl the flavors. Place in freezer for at least 3 hours or until fully frozen
Remove and either scoop, slice, or eat directly from container.

 It’s Mother’s Day weekend which means that you and I and everyone out there should feel the slightest bit obligated to at least do a little something nice for your mom for the mere fact that you were borned. And really what better way to celebrate mom than with food… It really is the least that you can do. (I think mom’s also like flowers and cards and handmade pasta necklaces) My mom is defiantly about the food. (she has had her fair share or pasta necklaces) A many years back on Mother’s day, this sweet little girl (me) made her mother a special breakfast treat…blueberry scones. And ever since that day, for every freaking holiday, birthday, whatever day, my mother requests (demands) a batch of those scones. She is always saying that these are her favorite treat and that no one has ever made them as good as I do. (I guess that just reiterates that I am her number 1 child)
 The stuff. Flour, baking soda, baking powder and salt. A bit of sugar, vanilla, buttermilk, and butter (use vegan butter and nut milk if you want to make them vegan) And of course we need the blueberries which can be fresh or frozen. I usually use fresh, but the store I stopped at only had really big containers of fresh that were like $1000 dollars a piece and the organic frozen happen to be on super sale. So you know, the cheap in me won that battle.
  So into the bowl goes all the dry stuff; flour, baking powder and soda, salt, and the sugar. Give it a good whisk.
 Now dump the blueberries into the flour mixture. Toss them around to give them a coat of flour. Add in the buttermilk and vanilla and give a little mix until liquid is absorbed. We are trying to handle the dough as little as possible.
 Turn mixture onto counter. It’s very loose, but thats what it should look like.
  Very gently and with as little handling as possible, gather dough up, knead a few times till everything just comes together. Press dough into a disk that is roughly an inch thick…. and it doesn’t need to be perfect.
  Cut the disk into even sized pieces. Do 6 big, 8 normal, maybe even 10 smaller. Whatever size you like. (I did 8) Place the scones onto a baking sheet, using a spatula to transfer, and sprinkle the tops with a little bit of sugar. Into a preheated oven for about 20 minutes.
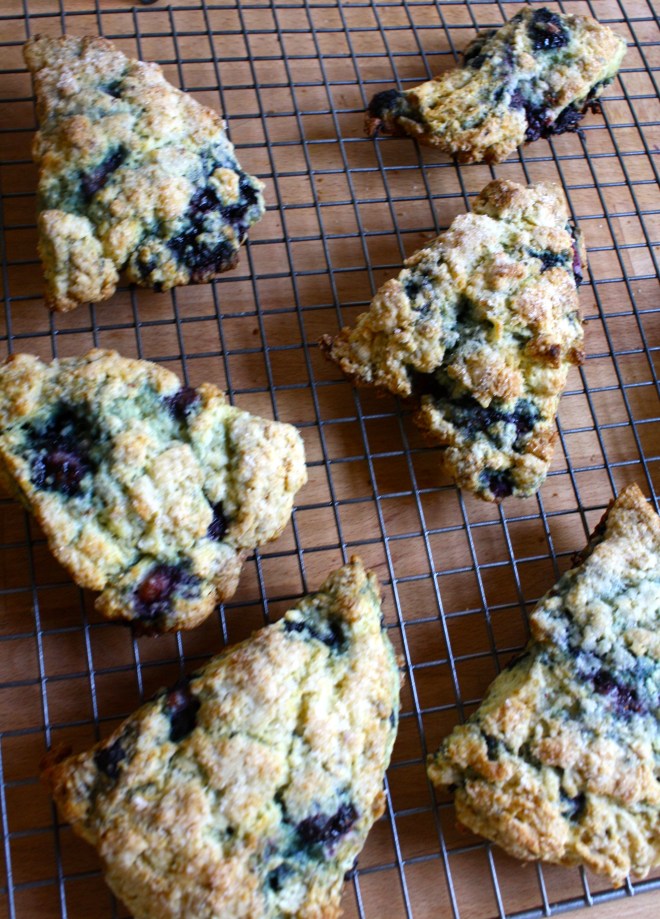 And when the scones look all nice and browned and a tester comes out clean. remove and either serve right away warm, preferably with huge cup of coffee or tea, or stick on a rack to cool before storing in air tight container.
 I was informed yesterday that if I was going to make tortilla chips, that I better make some sweet ass dips to go with them. I kind of agree… tortilla chips need dip… or better yet, two dips. Queso and guacamole. It’s what needed to be done, and so I did it.

 Perfect…
 To think that both of these dips took about 10 minutes total to make. (I had pre baked the cauliflower and sweet potato) And for real, I would spend much more time if I had too because both of these dips are so freaking good, I definitely will be making these on the regular.

 Last week pineapples were on sale everywhere……So I bought 5. Don’t judge
  Stuff for the goodness. We got the kale, some avocado because all salads should have avocado and some cooked lentils because, well, all salads should have lentils (or beans or nuts.. so you could totally something else) Then a few sprigs of fresh dill, a clove of garlic, red wine vinegar, salt and a bowl of chunked up pineapple.
  The pineapple, dill, garlic, red wine vinegar, a splash of water and a pinch of salt get blended in a blender or whatever blending device you use. Go as smooth or chunky as you like, I recommend going smooth, but leaving a little chunk, like half blended.
 So good……So so good.
 TGIF!!!! For reals, because Monday-Thurday were monster days. And now that its friday, I can dig a hole and hide in it until it’s at least 30 degrees with some sunshine. (I might never get to come out.)
 Simple lemon cake stuff. Flour, baking powder and salt whisked together, Sugar and soft butter in a bowl. An egg, some vanilla, milk, and of course, the lemon.
  Frozen bites ready for the chocolate coating… Bittersweet chocolate chips and a little bit of coconut oil. Melted together all nice and shiny smooth.
 Now dip and slather those bites in the melted chocolate.
  Fully coated and placed on a rack for the chocolate to harden. I ended up sticking the rack in the freezer for 10 minutes…They harder really fast in there.
 Whenever me and the mister get invited / show up for dinner at someone’s house, I like to bring at least one thing to contribute to the meal. First, because I am nice like that. Secondly, because I get to make food for other people besides Nick and get new feedback on recipes. (Sometimes I think he tells me things taste amazing when they might not) And thirdly, its nice to mess up someone else’s kitchen besides my own. So last night we went to my sisters and I made a salad. A very easy and virtually mess free salad…….I still made a mess (I cleaned it up myself!)
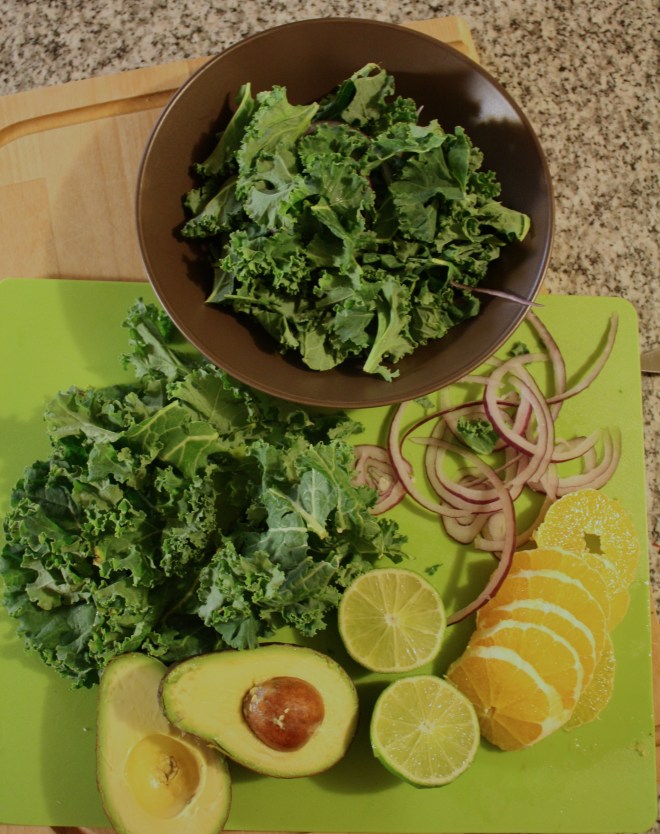
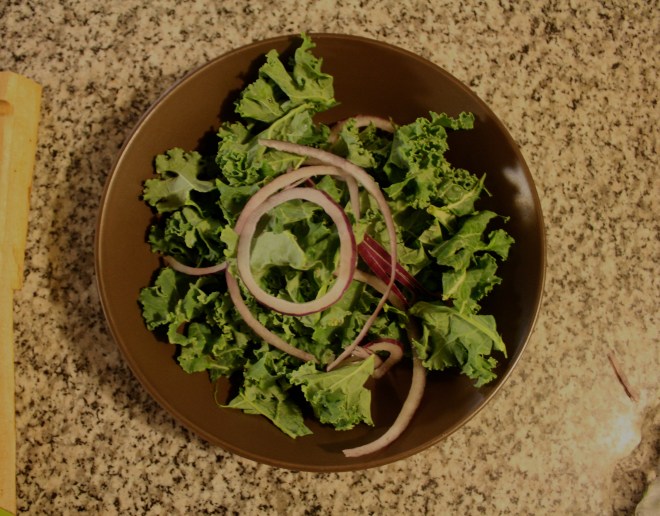 Start with the base layer of kale… then first goes the sliced onion. (Make sure it’s thinly sliced or else it will be to overpowering)
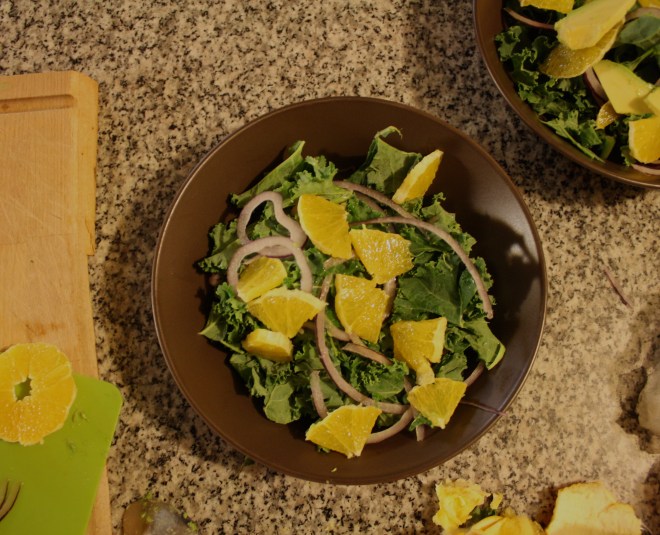 Add thinly sliced oranges…oh boy, your half way there!!!
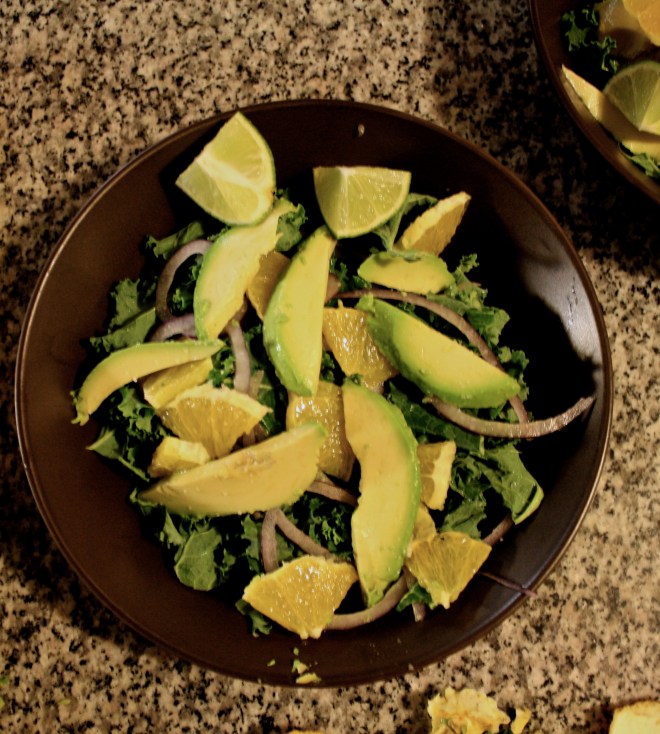 Top with thinly sliced avocado, a sprinkle of salt and drizzle with lime juice. I also served with an extra wedge of lime, there is never too much lime.
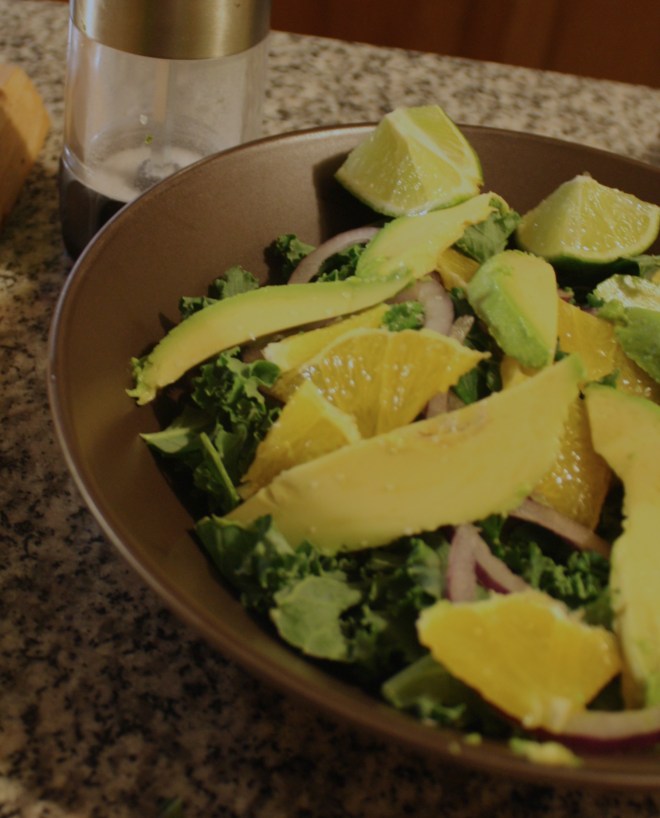
THE LOVELY CRAZY
September 19, 2015 by maximios • Blog
Ugh. It has been so nasty gross out. A four day heat wave, and no, not just hot hot days, but those gross, hot hot with all the humidity in the world, kind of days. My body has rebelled and turned into a slug and my hair… well let’s not talk about my hair.
Yup, it’s been way to freaking hot to do anything, especially cook. And eating food is’t even especially appealing either (living off raw kale and, yes, lots of tomatoes at the moment) . What we all want is to drink something nice and cold and refreshing (and boozy). And what do I do when I want this, and have a lot of that? I turn that into this. That being tomatoes, and this, being a cold drink. Did that confuse you?
What I am trying to say is that I have a butt load of cherry tomatoes to eat but what I really want is a cold drink. So I took the tomatoes and make them into a lemonade. And it is amazing. It hits all the end of summer, super gross heatwave, I don’t want to move, spots that needed to be hit. And just in time for the weekend sow e get to add a little splash or two of something hard, cause we all know that after this past week, we all deserve it.
Think that combination sounds weird? Well don’t cause lemons and tomatoes are perfectly paired together. Tart and tangy, but still with a bit of sweetness from the tomatoes ( especially if using a sweeter variety like the sun-gold). It really is a great, refreshing drink, with or without the booze. A perfect match!
Tomato lemonade here we go!
The stuff. Tomatoes ( I used sun-gold cherry cause I have a buttload, but you can sure use whatever tomato you have to many of), lemons, water, and if your into it vodka.
Note. The mr. and I are not big on sweet drinks, so I didn’t add any sweetener, the tomatoes being sweet enough. But feel free to add a little sugar or honey to yours.
Start by dumping tomatoes into a pot with water. Stick on high heat and bring to boil, then turn heat to medium low,stick a lid on pot, and let tomatoes simmer for a little while.
About 30 ish minutes later, the tomatoes have reduced to about 1/3 of what you started with and have turned into a a chunky like syrup.
Strain the juice from the solids into a big pitcher.
Tomato juice! and it’s so pretty bright gold. Now let it cool far a little bit.
And while juice is cooling, juice your lemons
When the tomato juice is cooled off, add the lemon juice to the tomato.
Add water and stir
Taste, and if you think it need sweetener, by all means, add a drizzle or two of some honey or spoonful of sugar.
A couple of glasses of ice, and if you shall,, a shot of vodka (add the shot to the glass, not the pitcher)
Me being so fancy added a garnish/snack. Basil leaf and cherry tomato skewer looks so nice.
And sit back, put your feet up. and take it all in.
Weekend here we come!
-C
Note. I did not add any sweetener to my lemonade but you could totally add in a few tablespoons honey or sugar. Do what floats your boat.
Dump tomatoes into a pot with 1 cup of water. Bring to boil then cover and turn heat to a medium low heat. Cook tomatoes down for about 30 minutes or until the tomatoes have reduced about 1/3 and is almost sauce like.
Using a fine mesh strainer, strain the tomato mixture into pitcher or jug that you can serve your drinks from. Use a wood spoon or spatula to scrap the tomato around strainer to really make sure you get all the juicy goodness. Let tomato juice cool.
While cooling, juice lemons until you get a cup of fresh lemon juice. Add lemon juice to cool tomato juice along with 3 1/2 cups water. Mix and taste. If you think it needs a little sweetener, add a little in. If you think it tastes to strong, add in more water.
Good stir, ice in cups, a 2-3oz shot of vodka per 8-12oz cup of lemonade (the ratio is up to you my friend)… and your sitting pretty. Feeling a little fancy, take a basil leaf and wrap around a cherry tomato. Stab it with a tooth pick and garnish your drink. It ames for anise snack too.
Sit back, sip and enjoy.