
THE LOVELY CRAZY
I made a pie dough a little while ago with the intention of making a cherry pie…but I ate all the cherries . (I do that a lot… eat all of something that I was intending to use for something else)
And then I think about that saying.. The road to hell is paved in good intentions.
.Well I guess I am going to hell.
So no cherries, but I have a crap load of summer squash (and it’s only the beginning) and a few peaches that are in need of some eating. And what’s that, a container of ricotta in the fridge from lasagna a couple weeks back…. Meant to be and not in hell yet!
Sure, I could have made one single crust galette, sweet or savory, and thrown it to the masses for consumption, but I figured that I might as well just hit two birds with one stone. A dinner and a dessert, all at once, and call it a victory in time management and putting a dent in the pile of squash on the table. (don’t be fooled, I love excess amounts of squash.. It’s like the printer paper of the veggie world.. can be used for everything!) And bonus, only one set of dishes! I mean come on, this is so good, easy and just really pretty. I know, I know….. so smart.
Anyway, here, take a look, get inspired and make some pretty dinsert (dinner and dessert) galettes.
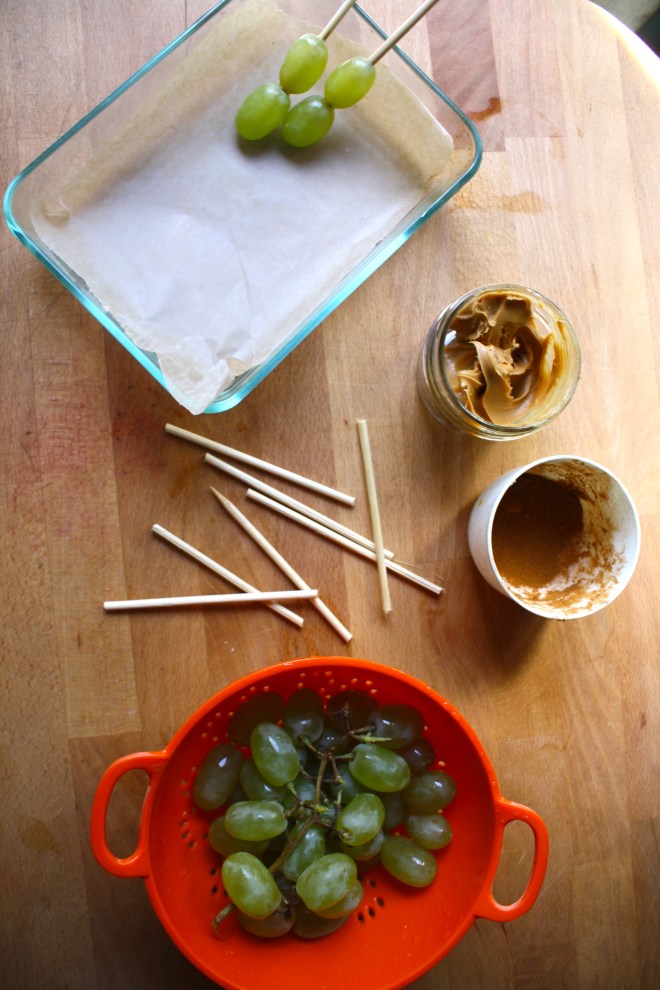
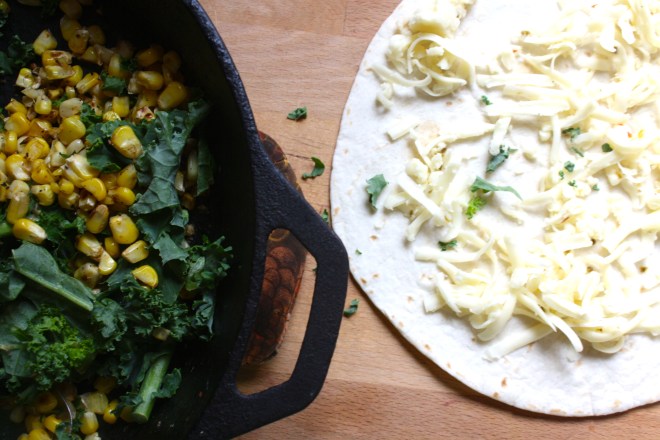
The stuff. For the base, we need one single crust pie dough (that’s going to be for two smaller galettes) and some ricotta cheese. The savory galette has summer squash, salt, pepper, lemon ( the zest) and a couple tomatoes. The sweet needs honey, a peach, and a few strawberries.
And if you want, change up your toppings. Pretty much any fruit or veggie combo would work. And spice up the ricotta if you wan. Garlic, fresh thyme, cinnamon… whatever will make you happy.
First things first. Roll ourt dough. You could cut the dough in half and roll two separate disks, but I just rolled out one big rectangle shape.
And onto the baking sheet and into the fridge to rest.
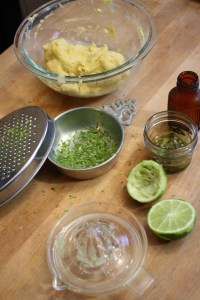
While the dough is chillin, take half of the ricotta and whip it up with some honey and thinly slice up your fruit.
Take the other half of the ricotta and add a bit os lemon zest, a sprinkle of salt and pepper, and mix that up. And thinly slice up the squashes and dice up the tomatoes.
Two crusts(or one cut in half. Smear the honey ricotta on one side, savory on the other, leaving a boarder so you can fold the dough over.
Now pile the fruits on the honey ricotta, veggies on the savory, and fold the uncheesed part of the crust over. just enough to keep everything from falling out. Sprinkle salt and pepper on the veggies.
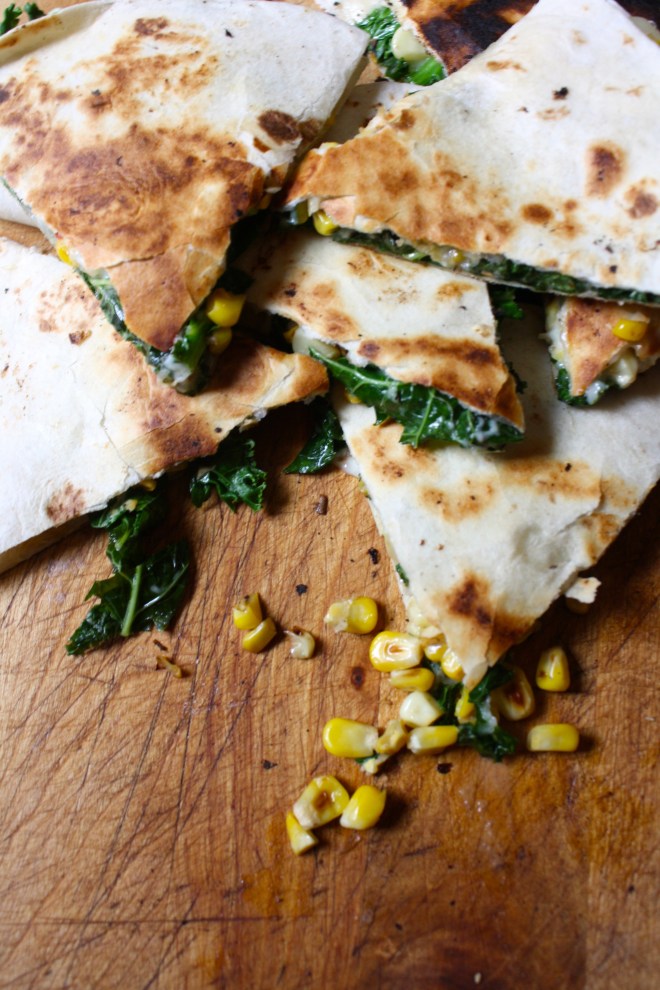
Stick into a preheated oven and bake until the crust is cooked all nice and golden brown and crispy.
While the galettes are baking, toss the chunks of tomatoes into a skillet with a splash of oil, salt and pepper and stick it into the oven too. Just bake until the tomatoes are nice and soft. You can stick in the oven right away and let the tomatoes cool, or towards the end of the bake time so that you can eat them warm… these tomatoes are good hot or cold.
all baked up, removed from the oven, looking oh so pretty.
Pile the roasted tomatoes onto the savory tart. And if you got it, a bit of chopped freshy fresh basil
And drizzle a little bit more honey on the sweet.

And serve… Is it savory first or do you go sweet?
How about a pice of both. Dnner and dessert.. all on one plate!
Happy Tuesday!
Ba Bye!
-C
-Makes 2 small or one large galettes
- a single pie crust (recipe here.. or use whatever dough you like)
- 1 cup of ricotta cheese
For the savory
- 2 cups thinly sliced green and yellow summer squash*
- 2 roma tomatoes
- salt and pepper
- teaspoon lemon zest
- a few fresh basil leaves
- olive oil
For the Sweet
- 2-3 tablesppons honey
- 1 peach thinly sliced*
- 3-4 strawberries thibky sliced*
*Note. Feeling like blueberry apricot or maybe potatoes and peas? Swap out any fruit and veggie (and spice) combination you want. The possibilities are endless! And if you want to do just one big galette, go for it.
Roll out pie dough in either 2 separate disks or one large rectange cut in half and.place on baking sheet and stick in fridge. While dough is resting, divide the ricotta into separate bowls. Add the salt, pepper and lemon zest to one, and the honey to the other. Using a fork, whip them up.
Preheat oven to 400 degrees
When the oven is preheated, grab the crust from fridge and smear the ricotta fillings evenly on the middle of each crust, leaving about an inch and a half boarder. Layer on the toppings, (sweet on honey, savory on lemon pepper.. or whatever floats your boat) and fold border over the edges of the filling. Place in oven and bake for about 35-40 minutes or until the crusts are nice and crispy and golden brown.
While those are baking, dice up the tomatoes and toss into a oven safe skillet with a little drizzle of oil and sprinkle of salt. Stick that into the oven for about 10 minutes or until the tomatoes are nice and soft. You can do this right away, or towards the end of the bake time of the galettes… roasted tomatoes are great warm or cold.
When the galettes are done baking, remove from oven and let sit for at least 5 minutes before serving. Top the savory galette with the roasted tomatoes and chopped fresh basil. Drizzle a little more honey on the one with the fruit .
Serve one, then the other, or both at the same time!
Eats good hot, warm, or cold. Utensils not required
 I swear I didn’t plan this, but today is officially Pi Day! Pi being the mathematical constant of the ratio of the circumference of a circle to its dimeter (did I say that right?) 3.1415…… And today’s date is 3.14.15. Whoa…I guess that means that this pie was meant to be.
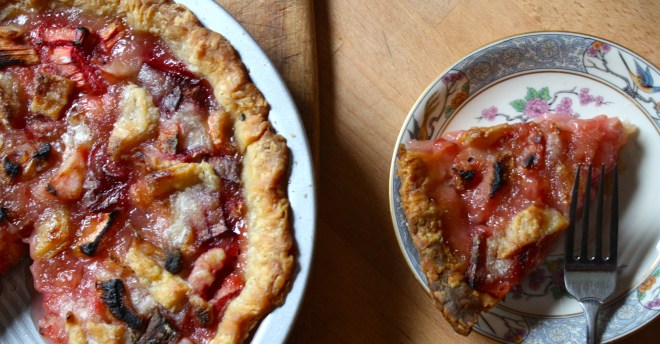
But the real reason I made this pie was for a surprise treat for the mister. He left for a couple of days and me being the super assume lady love of his, thought it would be nice for him to come home to his favorite dessert.. plain old rhubarb pie.( I know, I be the best) And it didn’t hurt that when I went to the grocery store, there was a big old pile of fresh, gorgeous rhubarb staring me right in the face, and on sale to boot.
The funniest thing. Me and the mister have been together for a very long time (12+ years….we started dating in high school, so I am not that old!) and I have known that his favorite dessert is plain rhubarb pie for ever. Every time we have one of our food discussions about our favorite foods, (which happens more than it should and usually consists of me running my mouth and him grunting or nodding once in a while) rhubarb pie always comes up. He even talks about the old lady who used to make him rhubarb pie for mowing her lawn. And guess what… I have never once made him a plain rhubarb pie. Why? Honestly, I have no idea. Maybe I secretly think I was going to screw up his one favorite dessert, or maybe I never quit had enough rhubarb for a pie, or maybe I am really just an awful lady. But for whatever reason, it doesn’t matter anymore because I finally made him a plain rhubarb pie.
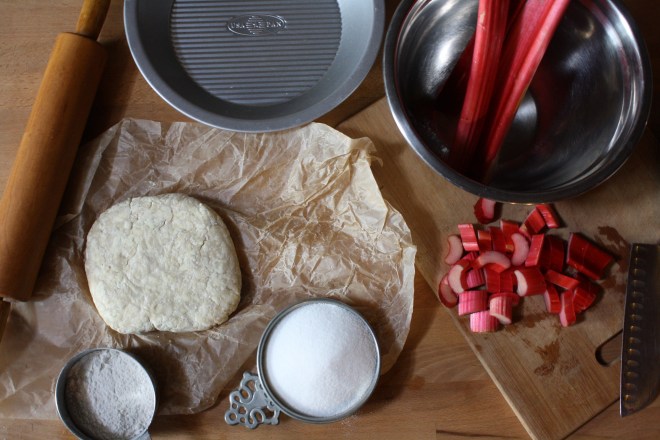 The stuff for the makings of pie… One single pie crust, flour, sugar and rhubarb. I mean, come on, this might be one of the simplest pies ever.
Note…The first thing the mister said to me when he saw the pie was. “Where is the top crust? My response what “Screw you ass face” but then chuckled. This pie would be great with a top crust, but I was thinking how pretty it would be without it. And honestly, I only made a single crust. What I am saying is.. make a double crust if you want a top.
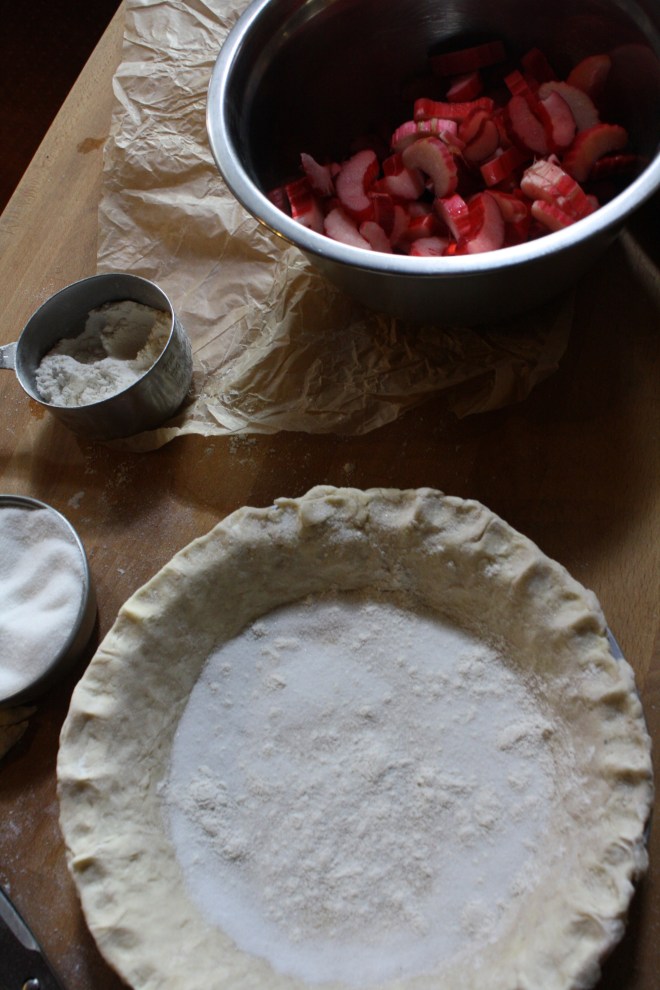
 The chilled pie crust gets rolled out, placed into a pie plate, trimmed and made all pretty. The bottom is sprinkled with a 1/4 cup of sugar and stuck back into the fridge while the oven preheats to 350. Now is a good time to dice the rhubarb into inchish chunks. Once the oven is preheated, remove crust from fridge and add in the diced rhubarb.
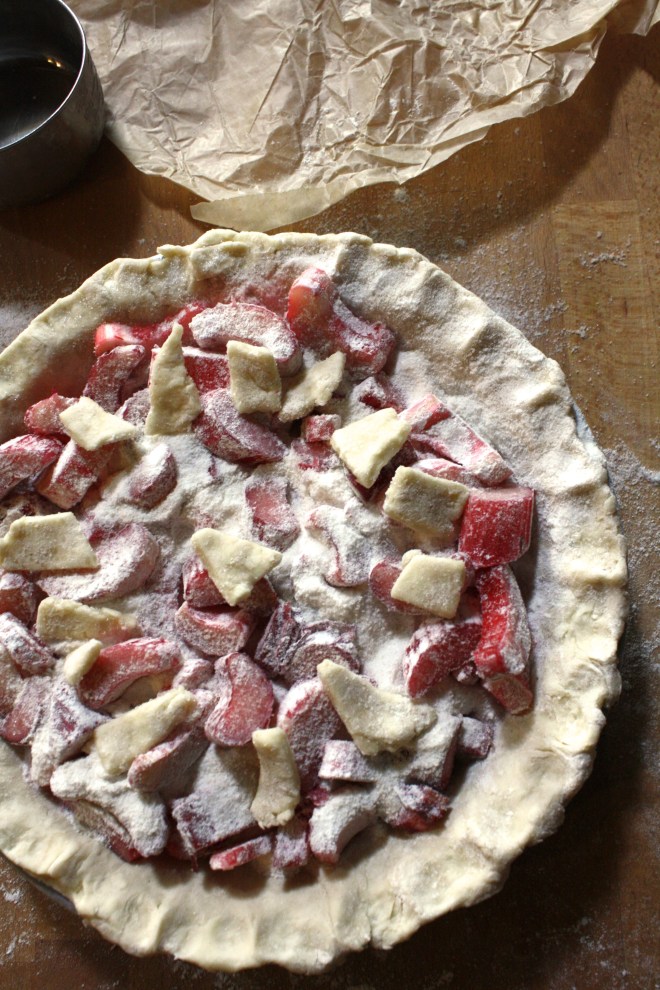
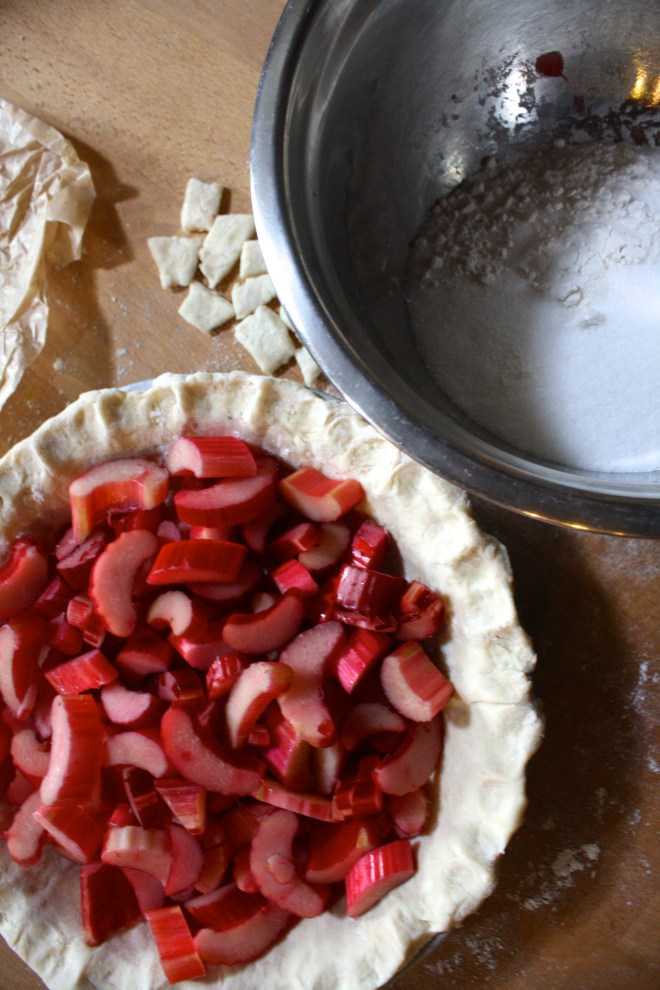
 The remaining sugar and flour get mixed together in a bowl and dump on top of the rhubarb. Give it a tiny toss with you fingers just to get some of the mixture to sink down a little. (Don’t worry, the filling will be perfect when you do it like this) I also cut up the pie crust trimmings and placed on top… not necessary, but looks pretty and is a good use of the scraps.
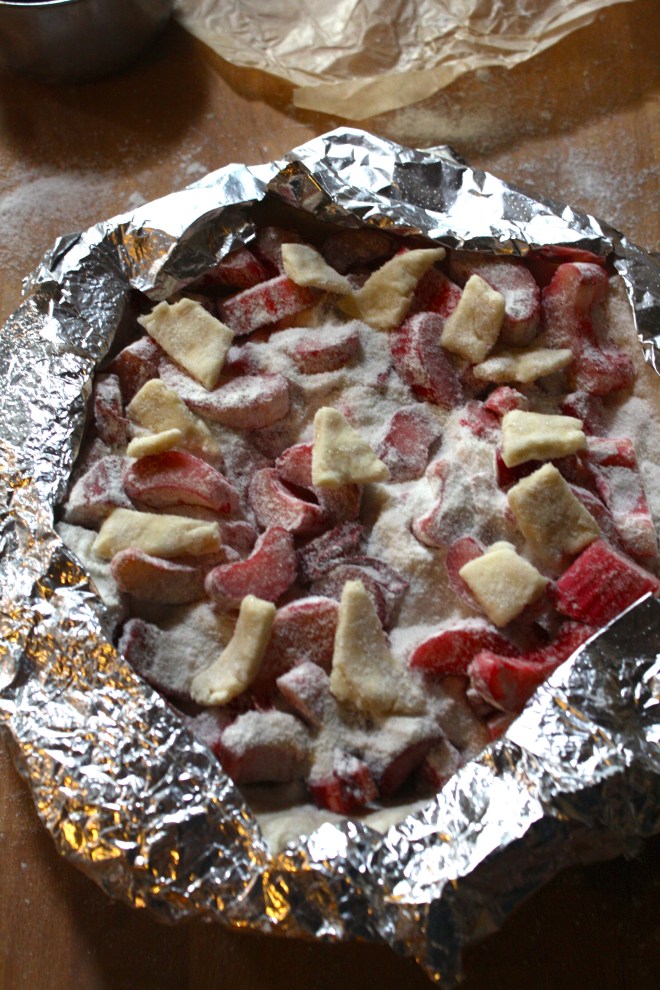
Now cover the entire pie with tinfoil. Cut and x through the middle and fold foil back to expose the filling but keep the crust covered. (so much easier than trying to squish strips of foil together..you know what I am talking about)
And then the pie is ready to be baked.
In the oven for 5o minutes with the foil, then 10 or so minutes without to finish.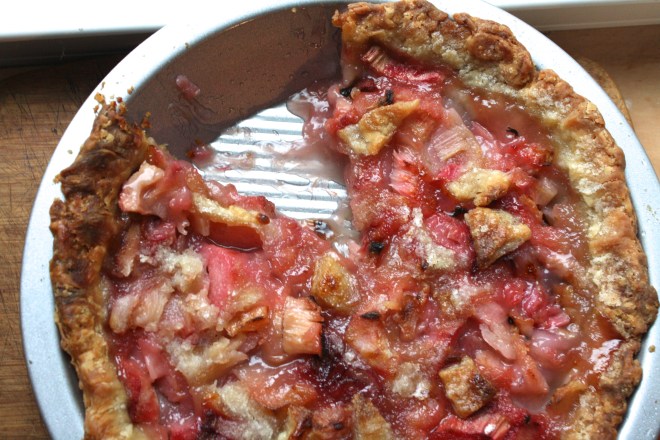 And then you take it from the oven and marvel at the beauty.
I am now truly the best super awesome lady love. I should get a freaking crown but would settle for a stand mixer or blender as a reward instead.
Important…..Let the pie cool completely (or just about) before cutting.The filling needs a bit of time to set.
Happy Saturday, Happy Weekend, Happy PI Pie Day!!!
-C
Rhubarb Pie
- Single Pie Crust.. Recipe here
- 4-5 large Rhubarb Stocks (4 cups chopped)
- 1 1/4 cups white sugar
- a hefty 1/3 cup flour
Make you pie crust.. and make sure it’s chilled!
Roll our pie crust and place in pie plate. Trim and make edge all nice and pretty. Add 1/4 cup of sugar to the bottom and stick back in the fridge to relax while you get the other stuff together.
Preheat oven to 350
Wash and dice rhubarb into inchish chunks. In a bowl, mix together 1 cup of sugar and the flour. Once the oven is preheated, remove crust from fridge and fill crust with the chopped up rhubarb. Now dump the sugar, flour mixture on top, slightly tossing it around with your fingers. Cover entire pie with tin foil and with a knife, cut an x through the middle of the foil. Fold foil back to expose the center of the pie, but keep the crust covered. Stick into oven. Bake for about an hour, removing the tin foil after about 50 minutes. Pie is done when the crust is golden brown and a fork or knife stuck into the middle of pie comes out with a thick jam like sauciness.
Let pie cool and set for a bit.
Slice. Serve on a plate with an eating utensil and maybe a scoop of vanilla bean ice cream. Lick plate clean.
 I am so happy its Friday, but like whoa, this week has flown by so fast. I think I need to make a pie to slow things down a bit.. What Kind of pie am I making? We will get to that, but first we must make a killer pie crust, one to hold of the goodness to come.
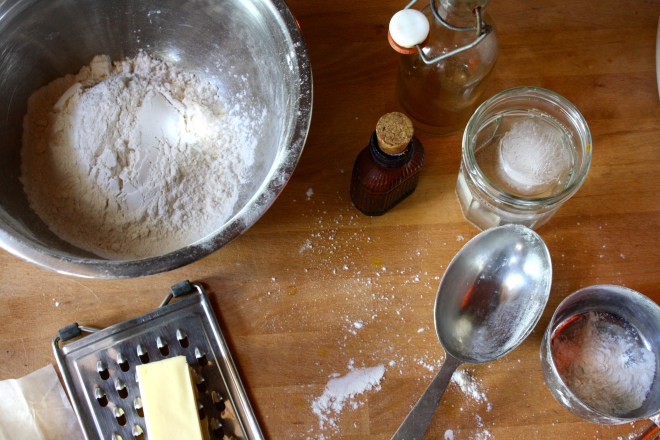 Crusty Stuff. Flour, a stick of frozen butter (or a stick of frozen Earth Balance, which I have used and it turns out much the same) a bit of sugar, some salt, ice water, and apple cider vinegar*.
Whats with the vinegar you ask? Well first off, don’t worry about tasting it, you won’t. Secondly, I add it because it helps keep gluten from forming in the flour, which in turns makes the pie crust more flakey and less doughy. If the though of vinegar really bothers you, you can use lemon juice or even leave it out. 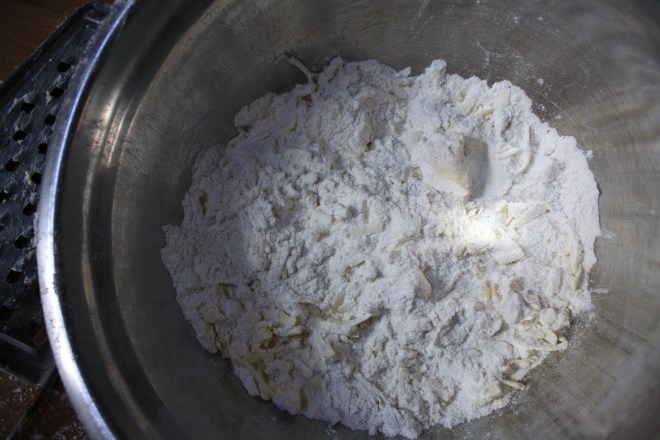
The flour, salt, ans sugar are mixed together into a bowl. Then with a box grater or hand grater with big hole, grate the frozen butter directly into the flour, stopping every few tablespoons to toss around in the flour. (DO this or you will end up with a big pile of shredded butter that is starting to melt back together) Also, hold the butter with the wrapper to keep from warming the butter with your hand.
Once the whole stick is shredded, take a fork and just toss the chunks around a bit more just to evenly distribute. Now add in vinegar and water. Toss with fork until the mixture starts to come together. If you think that dough seems way to dry, add in one more tablespoon of ice water.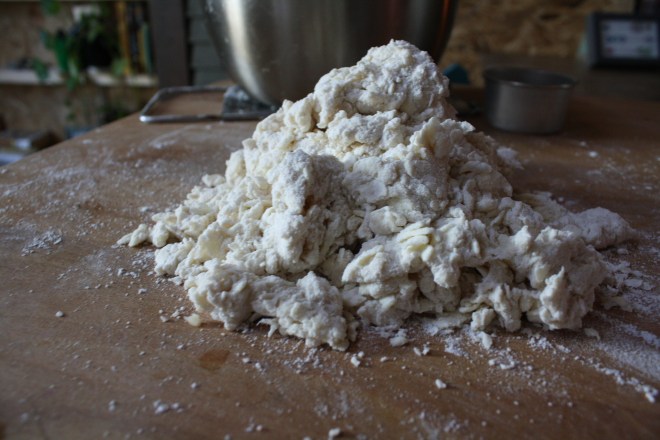 Dump the dough onto a lightly flour surface and kind of squish, smoosh dough into a pile. The dough is all clumpy and weird looking, Well thats what it is support to look like, so your good.
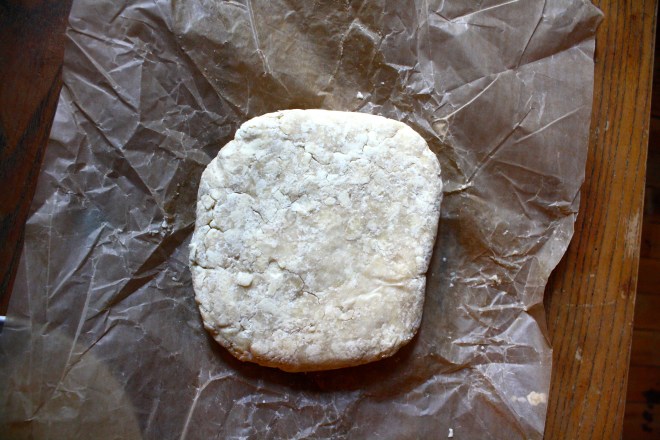
 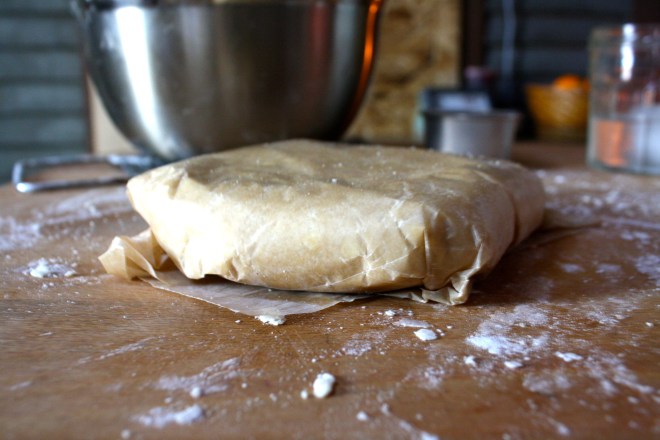 Once the dough is gathered into a ball, place onto a piece of wax paper and wrap. Now is the most satisfying part..Smoosh the wrapped dough into a disk but applying pressure. Aaahh, kind of looked like pie crust. Now Stick it in the fridge for a least a hour (Don’t skip this or your crust will be blah)
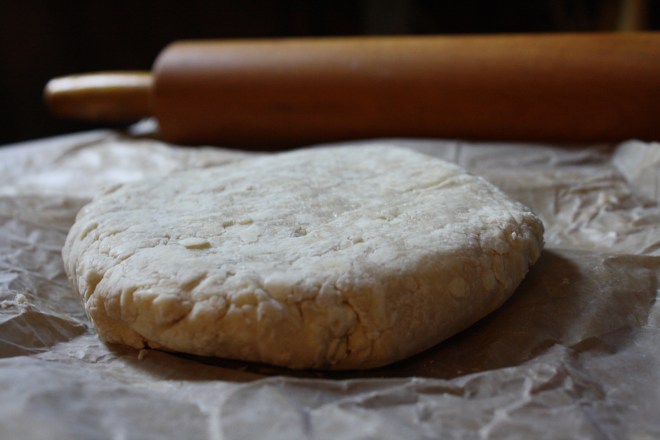
Out of the fridge and awaiting a roll and a filling.
Weekend plans for a pie are set!
Have lots of good times!
-C
Pie Crust
Notes… You can for sure make this pie crust vegan by replacing the butter for a stick of Earth Balance. Also, this is the stuff for a single pie crust but I usually habra bit left over to make a few little cutouts for the top of the pie or pie scrap cookies.
To make this a double pie crust, just double everything up.
- 1 1/4 cups all-purpose flour
- 1 tablespoons granulated sugar
- 1/2 teaspoon salt
- 1/2 cup unsalted butter (or Earth Balace), cold or frozen
- 1/4 cup ice water
- 1 tablespoon apple cider vinegar
In a large bow, whisk together the flour, salt, and sugar. Place grater in bowl and with the biggest grate hole, grate the frozen or cold butter directly into the flour mixture, stopping ever few tablespoons to toss around in the flour so you don’t end up with a big pile of grated butter. With a fork, toss around a bit until the butter is evenly disrupted in the flour being careful NOT to work the butter into the flour. Add in the vinegar and water and mix as little as possible with a fork until the mixture starts to come together. The mixture will seem kind of dry and almost like it is falling apart, but thats what you want. If dough is really too dry, add in another tablespoon of ice water. Dump mixture onto a lightly floured surface and squish together to form a ball, handling as little as possible. Place on a piece of wax paper and wrap. Give it a good squish to flatten out a bit and place back into fridgerater for a least one hour, if not longer.
And then you have crust
Crust can be frozen.. just wrap in plastic wrap and place into a freezer bag.
 All I want to do is make everything into hearts and turn everything pink…Is that a problem?
I’m going to admit it, I am one of those girls that love Valentines day! And no, I don’t love it for the flowers (although I do love flowers..but never roses..yuk) No, I don’t want a box of candy or the silly store-bought cards. I don’t want to get all gused up and go out to dinner, and I definitely would be pissed if the mister bought me any jewelry. What I love is a day of spending time with my lover. We always take the day to do something special together, and for each other, and to be happy……and there is always hearts involved. I love hearts.
I want to spread that loving love love feeling because no matter what your love situation is during this holiday..we should all be happy and spread love to each other and to ourselves… And what better way to spread happy and love then with a pretty heart shaped baked good? Chocolate because almost everyone is into chocolate. Coconut because I can’t stop eating whipped coconut cream and pink coconut sprinkle because that’s what make me happy. (I am a little obsessed with sprinkling things) These little hand-held pies of love are really easy to make and always a big hit, especially with the little ones.(I am thinking they are perfect for a Valentines Day school party) And yes, they are vegan so you can share with all your vegan friends!
So in the spirit of the coming Valentines Day holiday….Lets make WHOOPIE!!!! (pies)
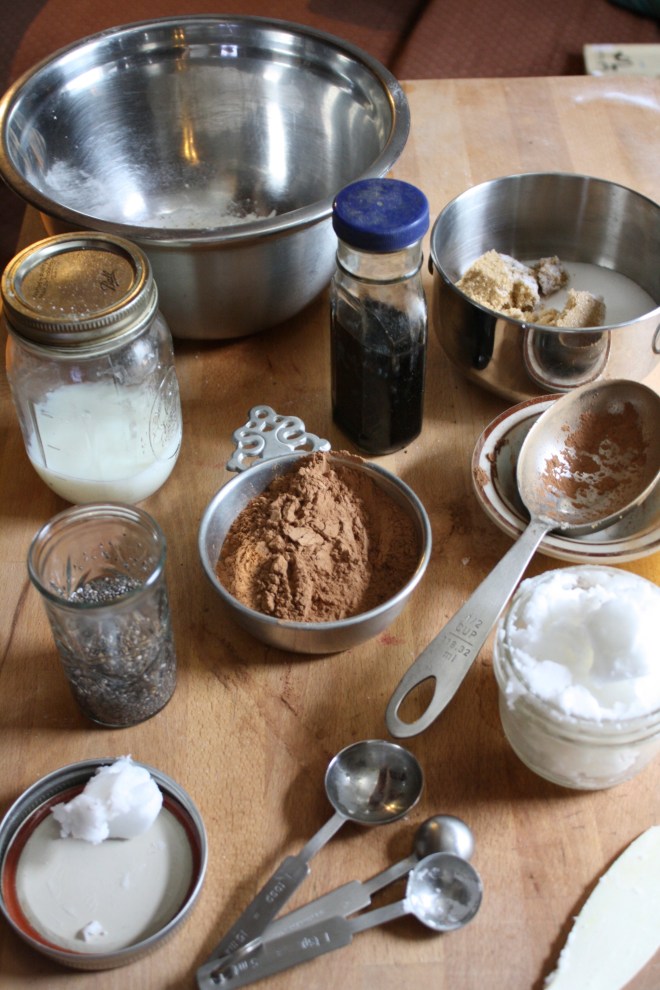
Flour, baking soda and powder, salt and cocoa powder. Soy milk with vinegar. Vanilla, coconut oil, and chia seeds jelling. Brown and white sugar…. you know whoopie stuff.
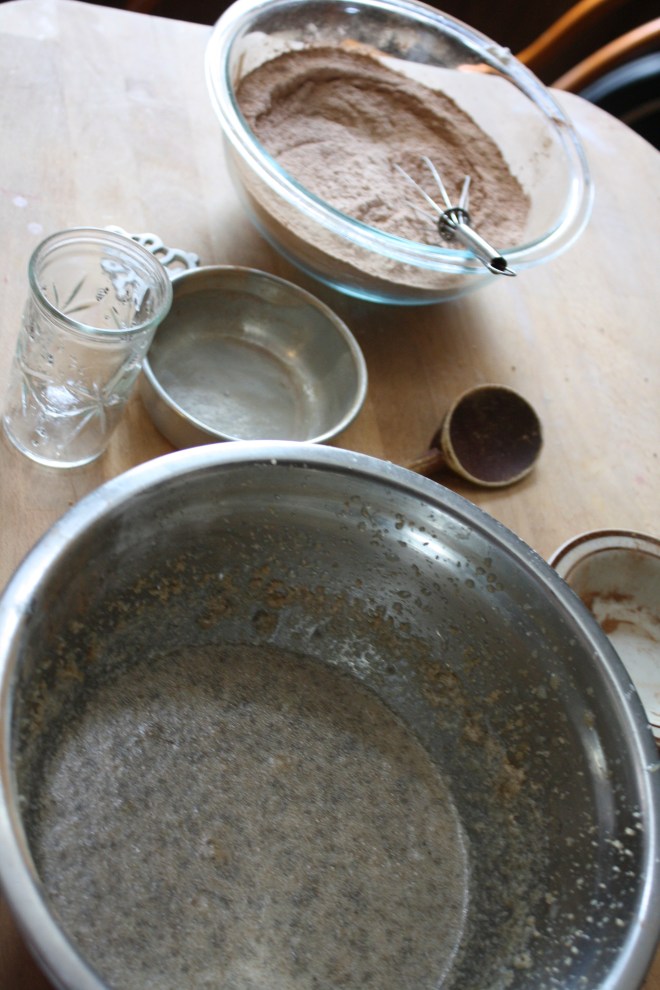
The dry in one bowl… sugar and all the wet in another.
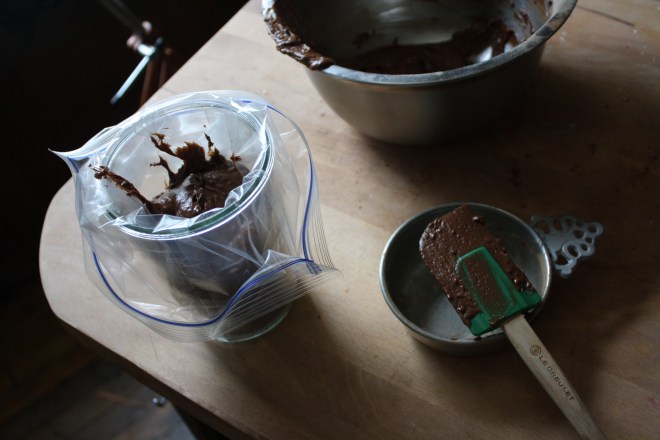
All the whoopie stuff mixed together and scooped into a large zip top bag. So fancy with my bag…a real pro here!
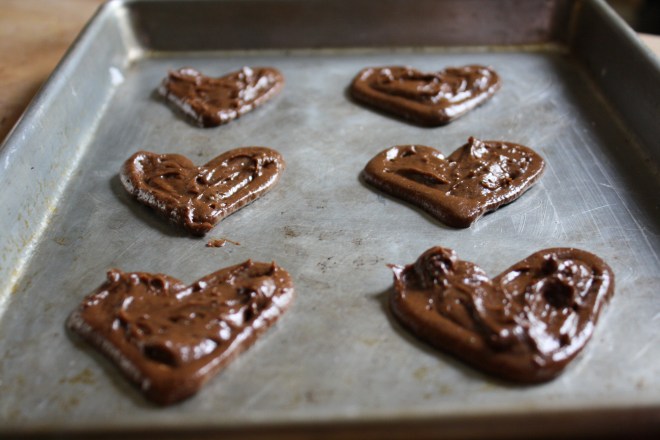
Snip the tip of the bag, do a little squeeze test, and have at it. squeeze hearts onto a lightly oiled baking sheet or use a piece of parchment paper.
You might get a little frustrated if you are trying for perfect. I was for the first two batches, but once I stopped trying to hard, I really got into how cool some of the hearts came out. Embrace the funky lop -sided hearts, because any heart is a good heart.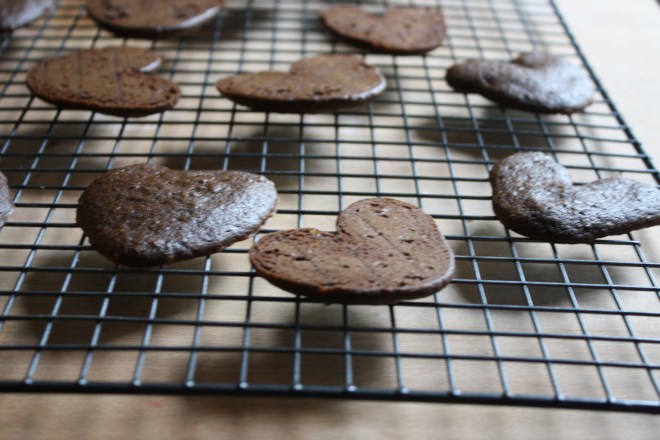 So lovely. Shadow hearts while the whoopie hearts cool.
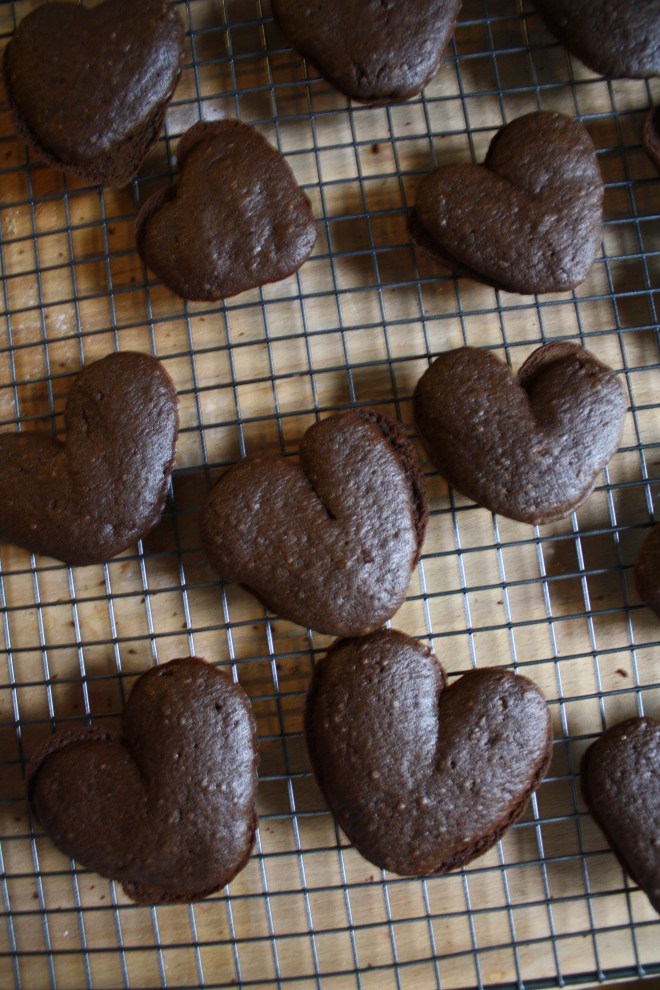 Whoopies all paired up
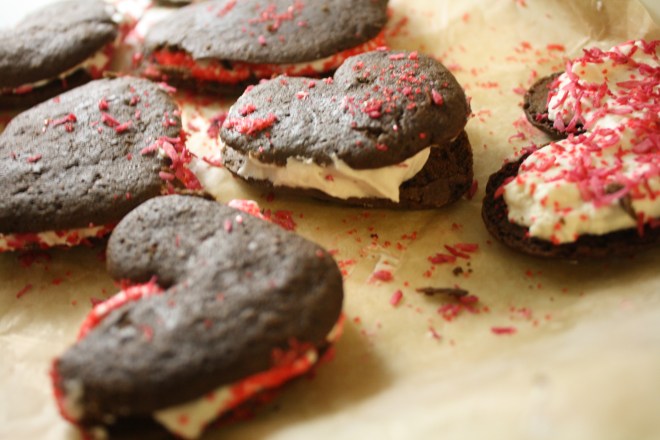 Stuffed with a generous dollop of whipped coconut cream ( a cold can of coconut cream whipped with a splash of vanilla and a tad bit of sweetener) and sprinkled with my home-made beet dyed coconut sprinkles…..
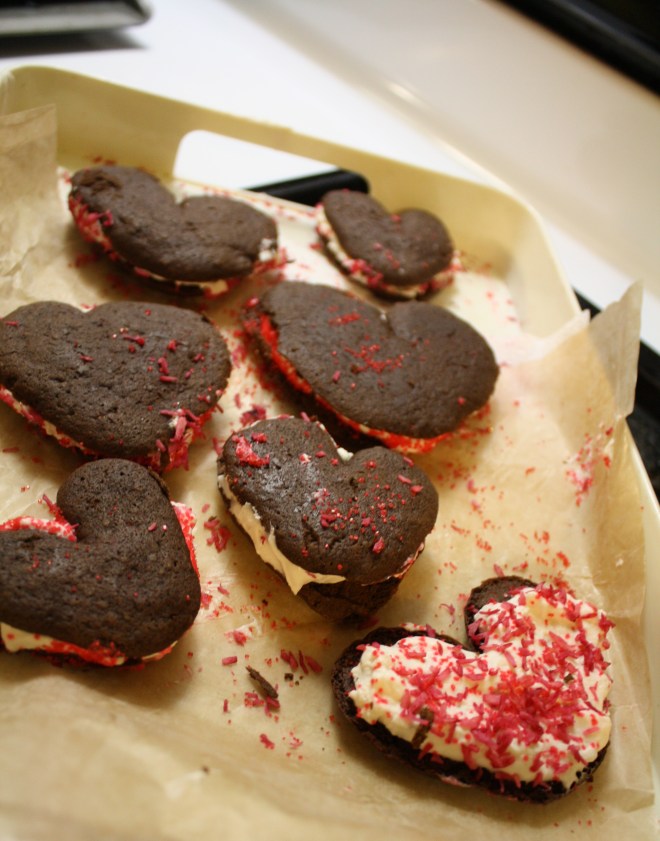
Are you happy now? Because I know that I couldn’t stop smiling when I was making these… they are just to cute!
A couple bits of advice… Try to assemble before serving.. I was trying to put them together while a punch of kids were trying to eat them. Things got a little messy and sprinkles ended up everywhere. Also, The coconut cream should stay fairly cold, so my suggestion is to make the hearts and fill only when you are going to serve them. Or if you want to make far in advanced, cover and refrigerate to keep from coconut cream from melting….But other than that…
Have fun making Whoppies!
-C
Coconut filled Chocolate Heart Whoopie Pies
Ingredients
- 1 1/3 cups all-purpose flour
- 2/3 cups cocoa powder
- 1 teaspoon baking soda
- 1 teaspoon baking powder
- 1 tsp salt
- 3/4 cup soy milk or milk of choice
- 1 Tablespoon apple cider vinegar
- 2 Chia eggs ( 2 tablespoons seed mixed with 6 tablespoons warm water)
- 1/3 cup coconut oil
- 1/2 cup brown sugar
- 1/2 cup white sugar
- 1 teaspoon vanilla extract
Preheat oven to 375
To start, make chia eggs( chia seeds in water) and add the vinegar to the milk. Let both sit for 5 minutes.
In a bowl, whisk together flour, cocoa powder, baking soda,baking powder, and salt.
In a large bowl, mix together chia eggs, sugars, and coconut oil. Add in dry ingredients and mix while slowly adding in the milk and vinegar mixture until fully combined.
Scoop Mixture into a large ziplock bag or piping bag. Clip tip and gently squeeze out heart shapes onto a lightly oiled or parchment lined cookie sheet. Bake each batch for 8-11 minutes, or until a toothpick come out clean.
Let hearts cool completely on a wire rack. Pair up like sized hearts and fill with desired amount of *coconut cream. If your feeling festive, dust sides and or tops of cake with sprinkles
* To make coconut cream, refrigerate a can or coconut milk or coconut cream for at least 4 hours. Open can, drain liquid and place the remaining coconut cream in a large cold bowl. Beat with a splash of vanilla and 2 tablespoons of the sweetener of your choice. …. (careful because this stuff is super addictive)
Now share.. and watch how happy everyone is when they receive a heart shaped whoopie pie!! That’s love!
Follow my blog with Bloglovin
 Yes Please. Thank you very much. Sweet Potato custard (I don’t know what else to call it) topped with coconut. My taste buds have found themselves in heaven. I have found myself sticking my butt out of the fridge with spoon in hand. Hey there, like what you see?
Now that thanksgiving is over you might be thinking.. oh we can’t or, no we shouldn’t or, that it’s too much work. Well you can, you should, and it’s not. This custardy crustless pie is nothing short of awesome and is super easy to make. All you really have to do is puree and mix a few ingredients together and bake it. The obstacle here is trying not eat it all in one sitting, But you know what. that would be ok..You eat this and it tastes so good and you feel like you have used your days worth of guilt on dessert but guess what, you didn’t. This pie is actually pretty darn healthy, even maybe good for you. There is no sugar, no gluten, no dairy, no crap. Hardy sweet potatoes and sweet little dates with so many vitamins, chai and coconut for protein and health fat and cinnamon, which is good for everything. I mean, AMAZING Now you can have dessert and save your guilt for say, buying a new sweater when you really don’t need it or for canceling your dentist appointment because, let’s be honest, you really just don’t feel like going( Its ok, I rescheduled for next week). See, you must make this. Pie, sweater and no dentist…It’s a winner.
 Custard ingredients. A whole lot of not much. Sweet potatoes are the star here. A few dates, chia seeds, and a bit of cinnamon spice. That’s it. Oh yes, this desert is 100% way acceptable for breakfast and comes with absolutely 0% quilt. Its magic.
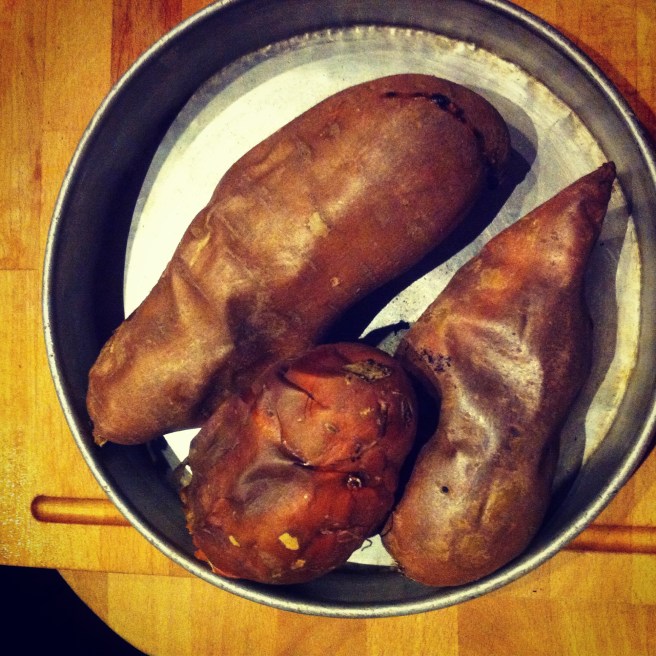 If you have left over sweet potato, this is your chance to use them up, but if not, 3 sweet potatoes, stuck in the oven at 400 degrees for about 45 minutes or until they are fork tender.
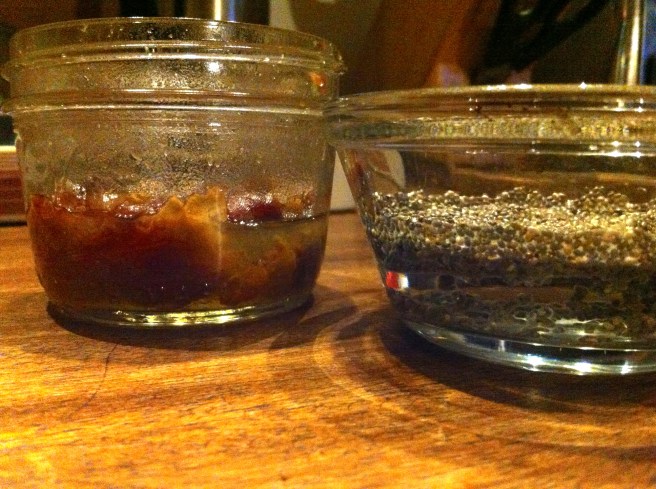 While the potatoes are baking, chia seeds go into water to soak.. I remember the first time I used chia seeds and they turned into gel, I thought something was very wrong. They are suppose to turn gloppy, so if your concerned, don’t be. Now take your dates..MAKE SURE TO REMOVE PIT!!!..and stick in some warm water, just enough to cover. If you are familiar with dates and use them often, you might already have date paste on hand…just use that. otherwise. we are going to turn these dates into a paste by simply letting them sit in a bit of water to soften and then pureeing.. It’s a really simple process that you can do every time you use date paste in a recipe, but my suggestion is to make a big batch and save the rest. It will turn into a new thing for you. You will want to eat it by the spoon full and then some. It’s that good..
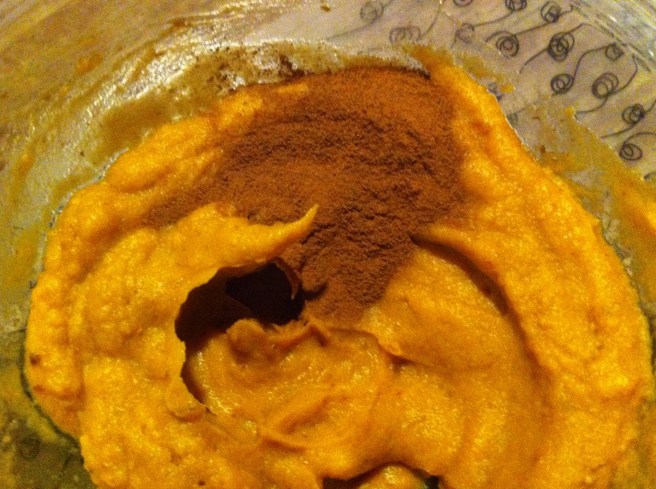 The potatoes are done and cooling… now is a good time to puree dates. The consistency doesn’t have to be silky smooth, but it doesn’t hurt to get close. Once the potatoes are cool enough to handle, remove skin( eat the skin) and stick into either a large bowl if you’re using a handle blender or emulsifier, or into the food processor. Puree those sweet roots of deliciousness, adding a splash of water or two if they need help whipping up. Add the chia seeds, the date paste, and spices….mix and POW!!. Go ahead, you must eat a bite….or two. Satisfied for now? Stick it into the fridge. Refrigerating for a bit to even over night makes the custard set up a smidge better, but you really don’t need to refrigerate. To be honest,, you don’t need to bake this either, just eat it like pudding(which is what I have been doing too) But you really want to bake it. Just stick the bowl in the fridge.
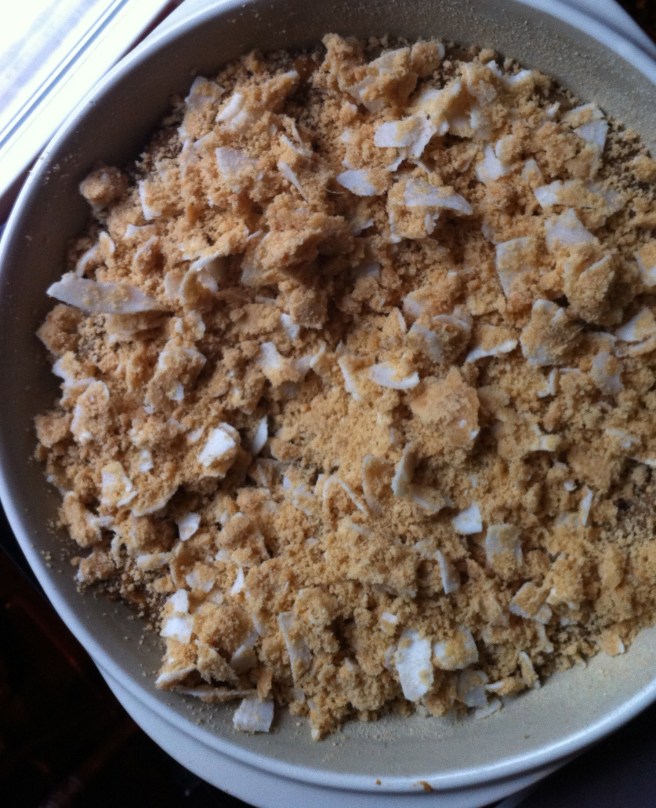
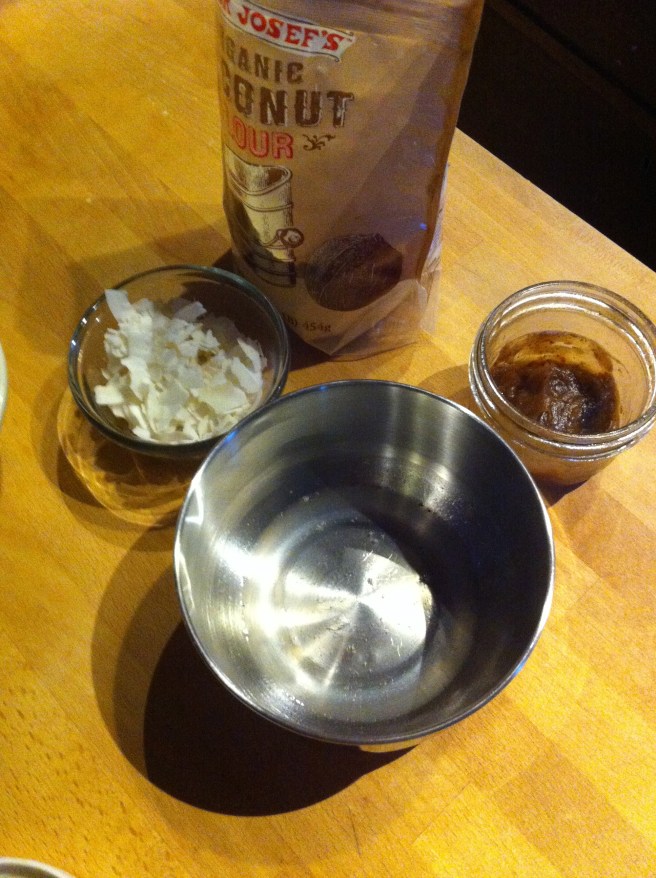 Now to make this custard even more awesome, we are going to add a little coconut topping. Here we have coconut flour, unsweetened coconut flakes, a little scoop of the custard filling and a little coconut oil
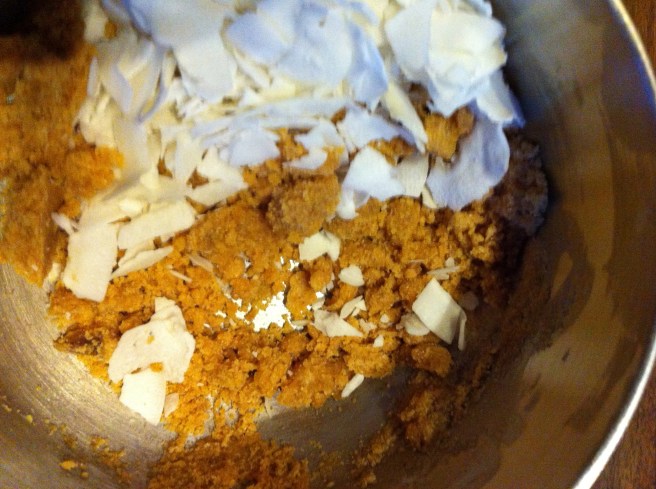
Mixed together for a bit of a crumble… and yea.
The custard is make.. The topping is ready. Take a pie plate and light oil with the coconut oil and dust with a bit of coconut flour. Transfer the sweet potato puree into plate and top with coconut topping. Move to oven and bake at 375 degrees for about half hour to 40 minutes…checking every now and then to make sure that coconut isn’t burning. Remove when top is golden brown
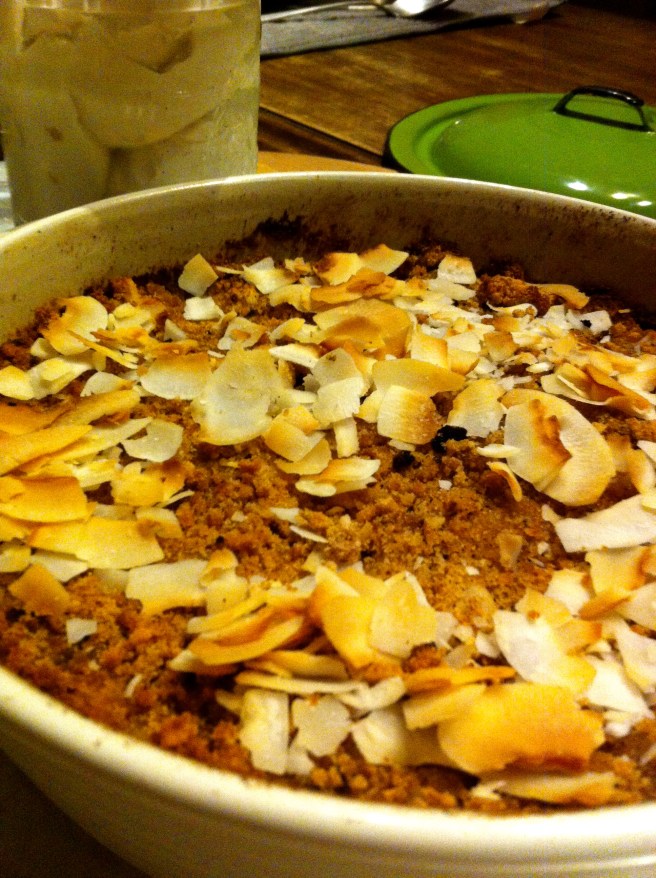
And one more thing, add a scoop of whipped coconut cream which I forget to photograph. All I did was whip a can of cold coconut cream with a tiny bit of vanilla. SOOOOOO GOOOOOD!!
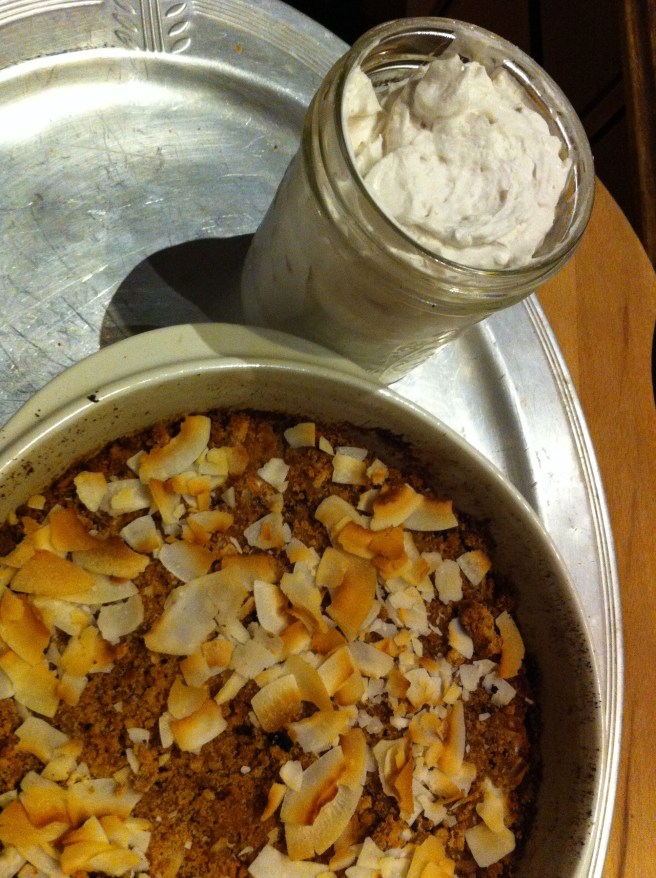
There you have it, the best, easiest, healthy, crustless custardy pie that ever was or will be.
Sweet Potato Coconut Crustless Pie
Ingredients
Custard
- 3 medium sweet potatoes
- 3-4 dates pureed. Raserve a teapoon for topping
- 2 tablespoons chia seeds
- 6 tablespoons water
- 3 teaspoons Vietnamese cinnamon or pumpkin pie spice
- 1/2 teaspoon allspice
- sprinkle of salt
Coconut topping
- 1/4 cup of coconut flour
- 2 tablespoons coconut oil
- 1 tablespoon prepared custard filling
- 1/4 cup of unsweetened coconut flakes
- Whipped coconut cream… I bought a can of Trader Joes coconut cream, stuck in fridge for the day, and just opened the can, scooped the hardened cream into a bowl and whipped it up. I did add a tiny splash of vanilla, but that’s it…And oh man it is sooooo sooooo good.
Place sweet potatoes in oven at 400 degrees and bake for 40 minutes or until fork tender.
While the potatoes are baking, place chia seeds in 6 tablespoons of water to soak. Place dates into just enough warm water to cover. REMOVE THE PIT! Let chia seeds and date soak while potatoes are cooking. When the potatoes are out of the oven cooling, take dates and either place in food processor or emulsify until smooth.
After potatoes are cooked and cool enough to handle, remove skin and place flesh in bowl or food processor and puree, adding a small amount of water if needed to keep it moving. Mix in date paste, chia seeds and spices. Refrigerate for 1 hour to overnight.
For coconut topping, place all ingredients into a bowl and crumble together.
Grease a 9 inch pie plate with coconut oil and dust with coconut flour. Scoop custard into plate and coat with coconut topping. Place in oven at 375 degrees for half hut to 40 minutes or until topping is golden brown.
Remove and let cool. Top with coconut whipped cream and eat all to your face.. Maybe saving a little for breakfast or even sharing with someone you love.
 When something goes on sale at the grocery store, I tend to buy it. Being that it is Valentines Day this week, all the stores are having specials on all sorts of sexy things… and strawberries are one of them. Now I am not a huge fan of buying produce that is terribly out of season, but I can’t help myself…a good deal is a good deal and the strawberries were a super good deal. I was just going to make some sweet ass strawberry jam or maybe a lovely strawberry cake with them (and I probably still will), but these strawberries are actually super juicy and full of flavor, and it’s always nice to eat some full flavor freshy strawberries… especially soaked in balsamic vinegar. And yeah, I think that this salad is pretty sexy, so it makes for a perfect Valentines day dish.
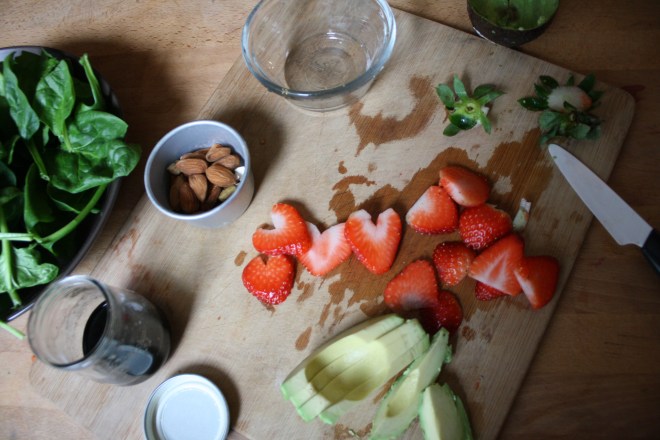 A handful of ingredients and 5 minutes will get you to a fantastic salad experience.
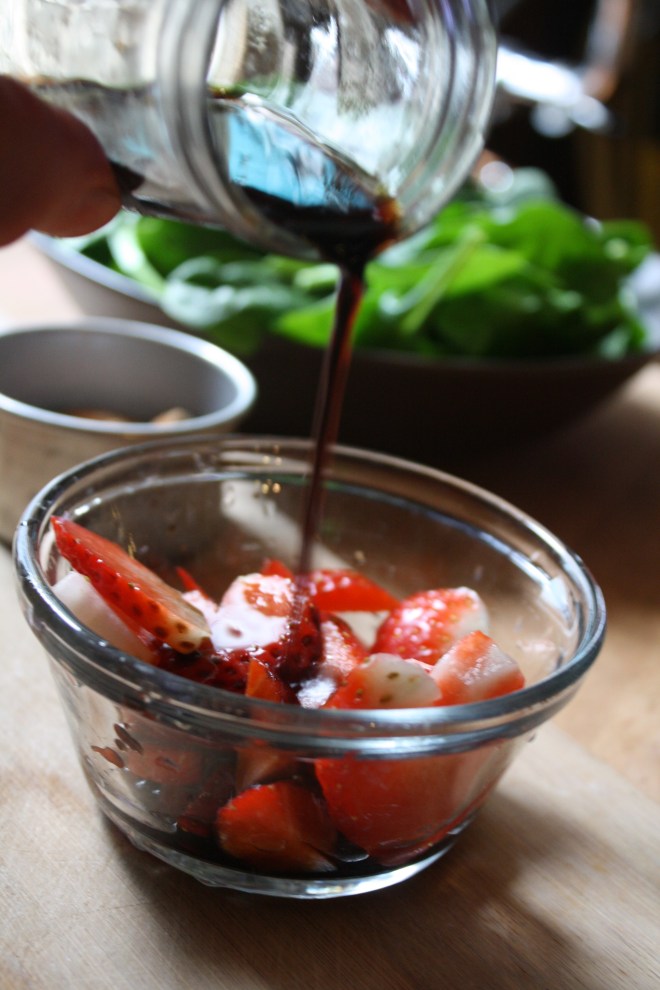 Pour the vinegar on the strawberries and let sit for at least 5 minutes. (the longer the strawberries can sit with the vinegar, the better)
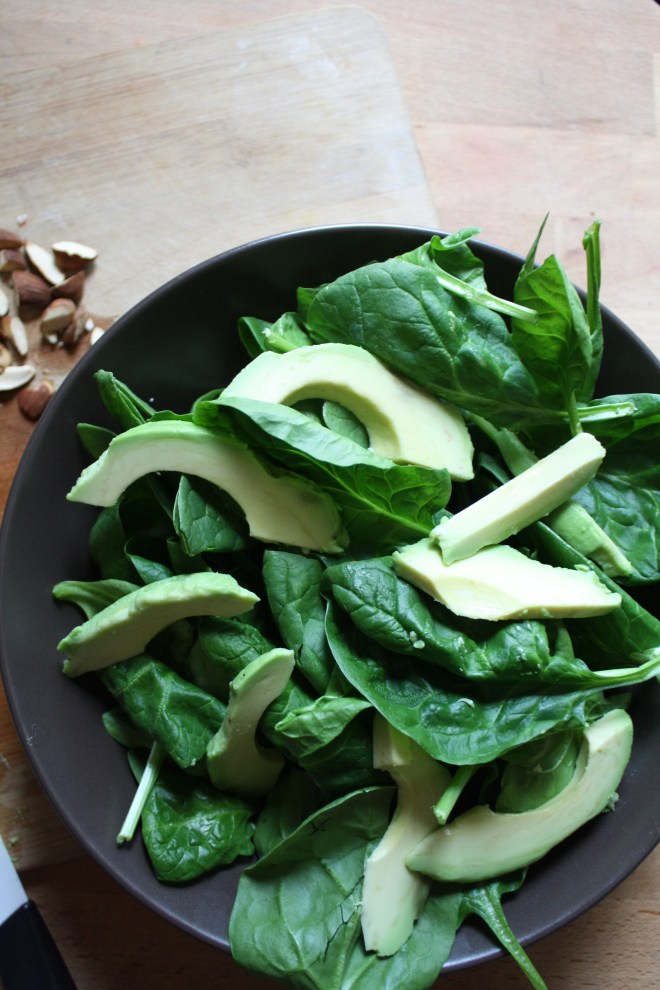
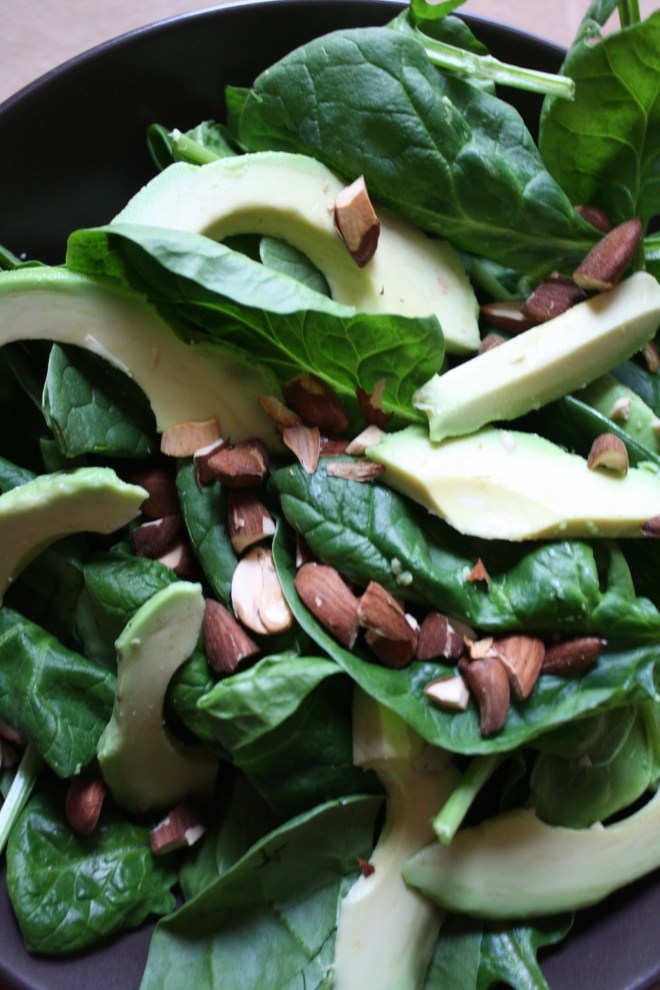 Pile it on.. thinly slice avocado.. rough chopped toasted almonds… It’s pretty much as easy as it can get.
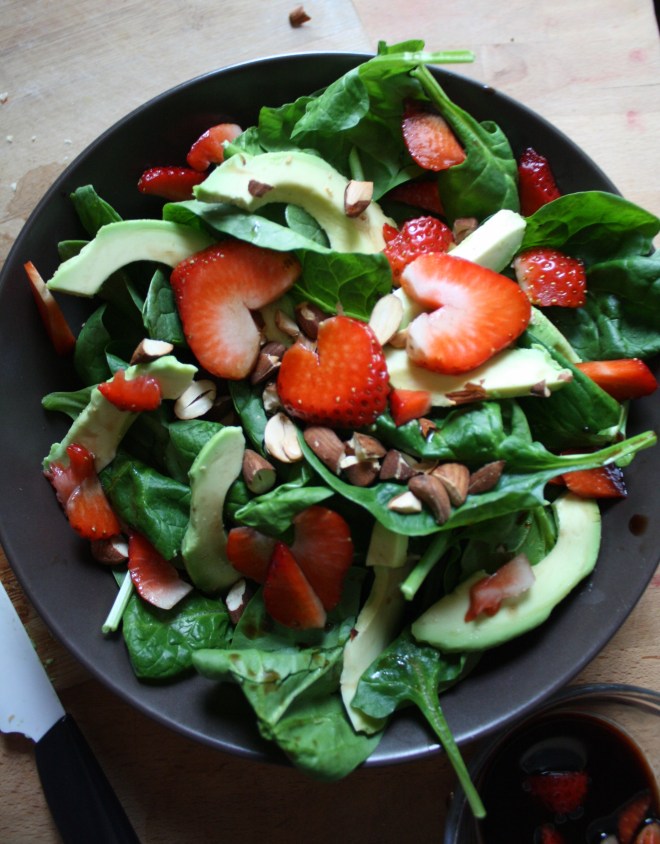 And last but not least, toss on the balsamic soaked strawberries and drizzle the remaining vinegar. (if you made hearts, place on top to make pretty) Sprinkle with a pitch of salt and pepper and pow! Fancy, sexy, delicious salad.

 Wowzers…Is it for real Memorial day weekend? Where has all the time gone? Let’s talk about a week gone by fast. My brain is on complete overdrive and I am having a hard time keeping it from exploding…SO MUCH TO DO! (Not bad stuff, just a lot of stuff) But lo, that’s life right? There is always a lots of “stuff” to do, but today I am going to try and let that stuff chill and maybe give myself a few hours of coffee, (so much coffee) reading a book in the sunshine, gardening, and just some overall chillin.
  Goodbye fiddleheads…. Hello ferns
  On our way to a geo catch…. And note clothing options for 2 in the afternoon. I am much fond of that little guy wearing a rain jacket without a shirt in when its sunny and 80 degrees. And a pink poke dot bath robe.. I mean, it’s so the cool thing to do.
  We didn’t find the geo, but we found this gigantic mushroom. Just as cool, maybe even cooler.
 I love brick and there is one street in all of burlington (that I know of) that has brick sidewalks. I like to walk down it a lot.
  Nurse lady making food… I compare this to a big foot sighting. I have heard stories that she cooks,but have never actually witnessed it myself. (Just kidding….kinda)


 A couple of days ago, during a grocery store porous, I stumbles upon a produce item that I have not seen sold in stores before, Broccoli leaf. And I was kind of surprised to see that they were selling bunches of the leaf, organic, at 2 bucks a bunch. I was very excited ! But wait.. You can eat broccoli leaves? Heck yes you can! Broccoli leaves are fantastic. They taste kind of like broccoli, have a hearty texture like a collard, and can be used raw or cooked just like any other green. Its just one more super yummy green to add to your repertoire. So when I bring home something that I find to be a good score, like a bunch of broccoli leaves, I feel like I have to share it with the mister. (I am so nice) And this dish was how I shared them…. Tossed into a bowl of garlic raging pasta.
  The stuff…. A bunch of broccoli leaves, lots of garlic, pasta, olive oil, salt and a lemon. Pretty simple right?
  Fist off, get your water boiling for the pasta. Once its ready, drop a pinch of salt into the water and stick pasta in for the amount of time recommend by pasta box people. While the pasta is boiling, mince up the garlic (I used my garlic press) into a skillet and add in the oil. Stick on a burner on medium for a few minutes, stirring around to make sure the garlic doesn’t stick and burn.
 Once you start to smell the garlic, turn heat onto low, chop up the broccoli leaves (stems and all) and stir around until wilted and add in the juice of half a the lemon.When the pasta is cooked, remove a few tablespoons of starchy water and strain the noodles. Add water and pasta right into the skillet with the other stuff. Toss around, taste, season with salt and pepper. Go ahead and add some chopped tomato and or parmesan cheese if you want.
  And serve your amazingly amazing pasta. And make sure that you are ok with really smelly garlic breath…Casue it’s going to happen. Keep it good! -C


 My winter farm share is coming to an end this week. One more pick and then a three week stretch until the summer share starts… WHAT AM I GOING TO DO!!! Stock up as much as I can is what.
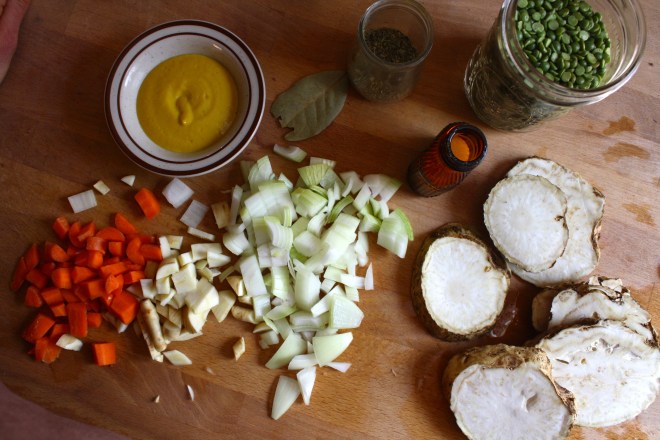 The stuff….For the split pea gravy we have a carrot, a parsnip and a large onion chopped into small chunks. Salt, thyme, a bay leaf and of course the split peas. Then there is the celeriac root* sliced into 1/2 inch thick rounds and some plain old yellow mustard .
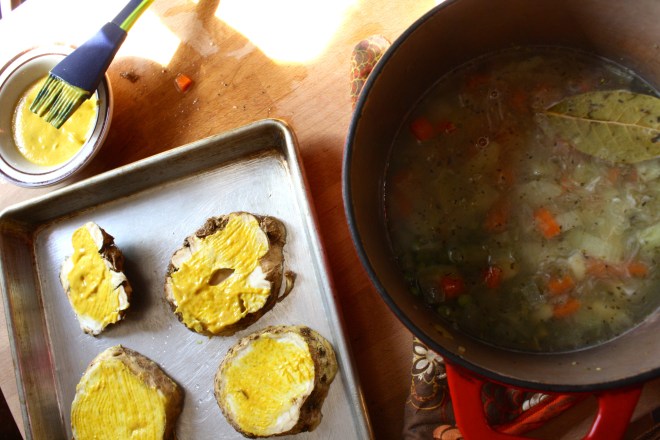 Toss the chopped parsnip, carrot, onion and the spices into a pot on medium heat and let veggies sweat a few minutes until tender. Add in the split peas and enough water to cover everything. Turn pot on high and bring to a boil, then cover and turn to low. Make sure to give the pot a good stir ever few minutes and add more water if needed
 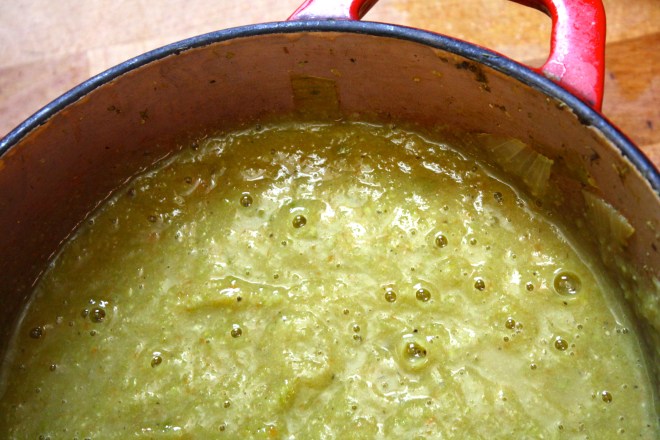 Once the peas have soften, remove the bay leaf and puree until smooth and oh so creamy. Taste and add more salt and pepper if needed. If you find that the gravy seems to thick, just add in more water until it’s the consistency that you want.
 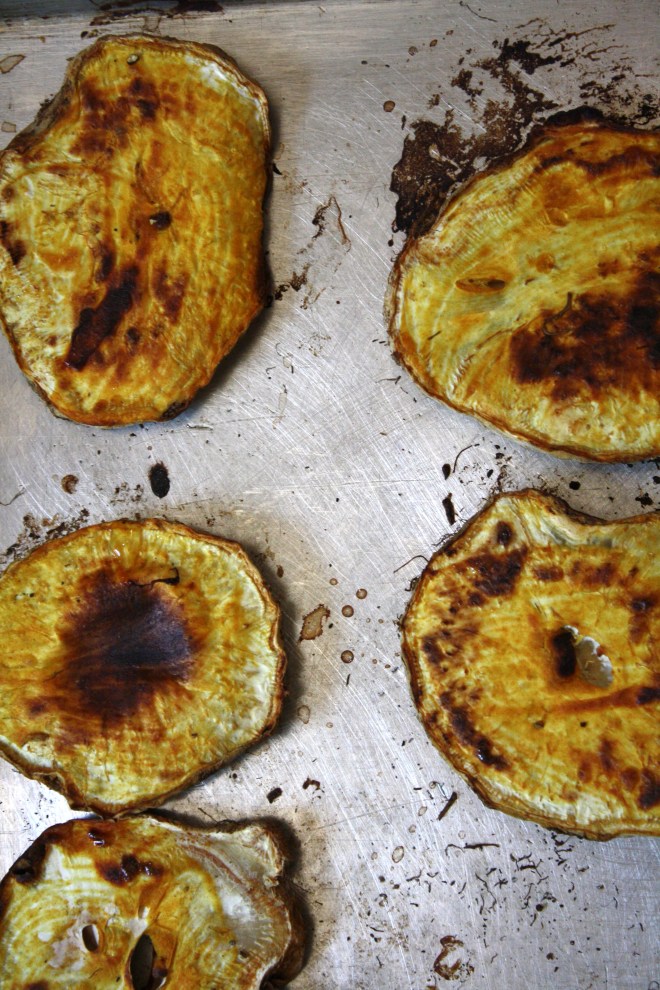 The gravy is made, the celeriac is roasted… now we are ready to eat!!
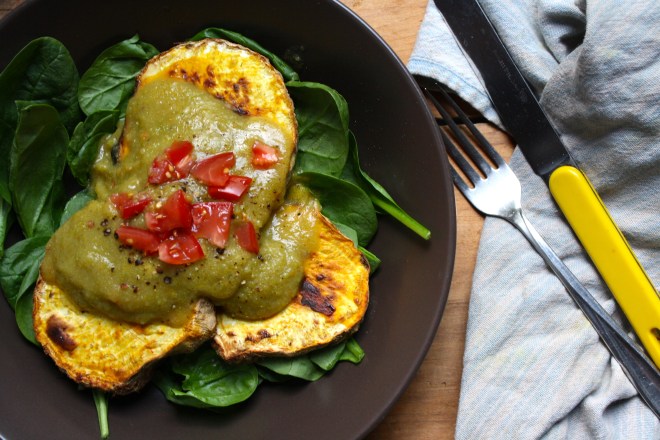
 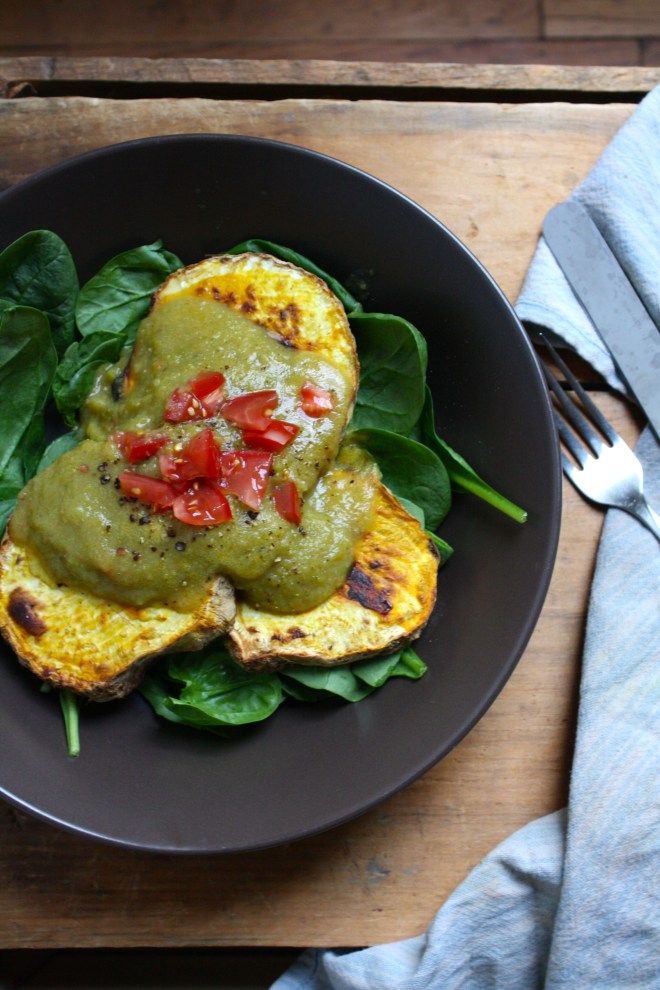 Stick the celeriac on a plate and dump good amount of that gravy right on top. Feel free to add a bed of spinach, or a grain or anything you want, because why not, and also some chopped tomatoes for a little acid and prettiness.
 No matter what is going on in my day, seeing a blue sky like this puts a smile on my face….To bad that smile turned to ice and my face froze in place. Because for some reason, winter around here now means below zero all the time. I mean, I love winter, but I am not going to lie… I wouldn’t mind if the wind would stop blowing and we had a couple of days of above zero weather.. and maybe a good foot of snow. I guess I’ll just have to be patient, cause its bound to happen. I mean, we live in Vermont, and if nothing else, we get weather.
  The mister called these snow mounds goosebumps… I think that is exactly what they are
 And oh how I cannot handle how freaking cute she is!! Plus, a shout out to my brother in law….MADLOVE!
 Fresh snow..Even though it was -15, I had to stop and take this picture. The colors were amazing
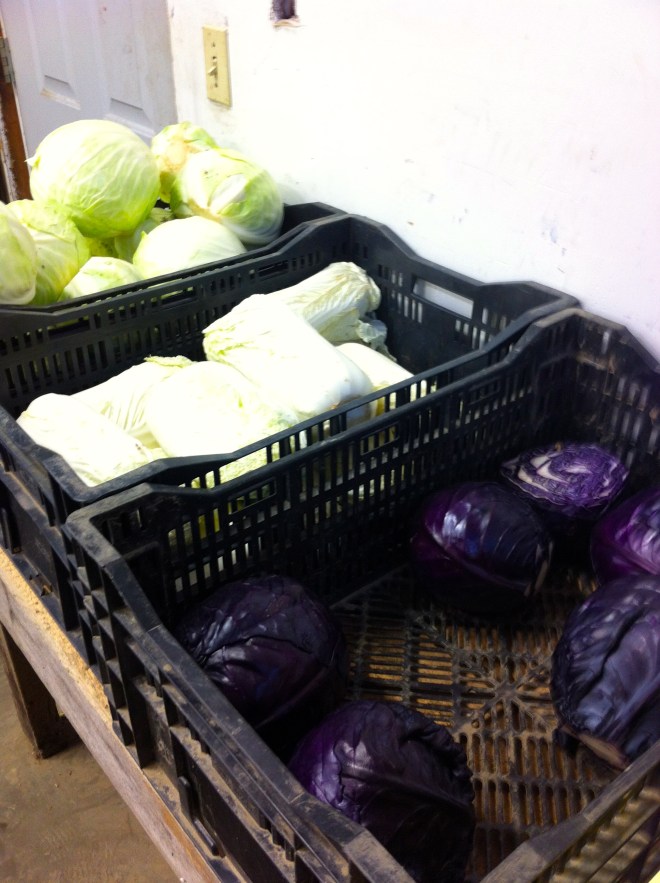 Cabbage at the farm share pick up! Love ICF!!!
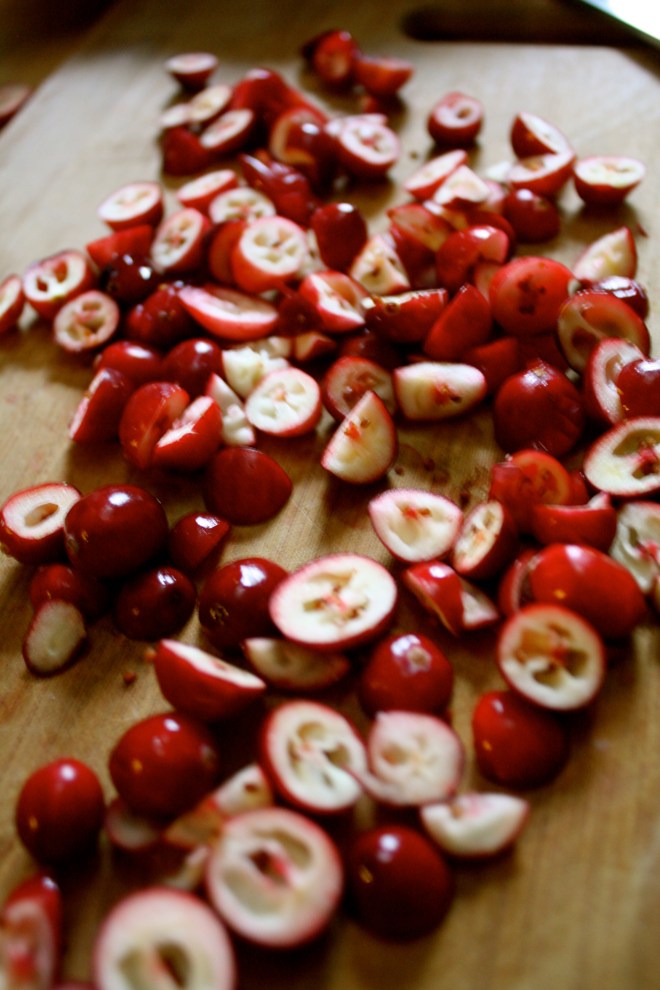 89 cents a pound for fresh organic cranberries. Score!! Made these Oatmeal fresh cranberry coconut chocolate chip cookies with them. Big hit.
 This picture was taken exactly a year ago…..The mister and I were finally putting in the bathroom of our tiny little home…. And look at that awesome sink! (another amazing salvage yard find) If you ever need or want to remodel a bathroom, I suggest using a old cast iron utility sink. So practical, so functional, so pretty.….it makes me happy everyday!
 It hasn’t stopped snowing, the temperature is dropping fast (it’s getting to the point the dog doesn’t even want to be outside) and the mister is busy hand shoveling three long driveways. So I figured that in between all the laundry folding, plant watering , and all around sitting on my butt that I am doing INSIDE, that I would be so super nice and crank the stove up and make my love some cookies. I love making cookies, especially when I have chores to do. I think part of it is that cookies are baked in batches which breaks up the chores and gives a sort of rhythm to things. Plus everything is nice when the house smells like cookies. I was going to make chocolate chocolate chocolate cookies, but realized that I didn’t have cocoa powder, so I went with fresh cranberries (I just scored a pound of organic cranberries for 89 cents!) coconut flakes and chocolate chips. Plus I wanted to make them oatmeal because the mister likes oatmeal and oatmeal makes the cookies a little more hardy. (We need hardy when the temperature dips below zero) The verdict….. chewy, soft, slightly sweet oatmeal, bittersweet chocolate, nutty floral coconut, and the zing and pop of the fresh cranberries. He told me to hide them… hide so he will stop eating them….. because they be amazing!
 The base of this cookie….We are using regular old fashion oats and flour. Salt, baking soda and baking powder. Vanilla, chia seeds in hot water, coconut oil white and brown sugar…. You know, all the cookie stuff. Then all the goodness.. Chocolate chips, coconut flakes, and fresh cranberries. Goodness. Oh yeah, and they are vegan…if that matters to you.
  Warm the coconut oil and mix with the white and brown sugars. Then add the chia seeds soaked in hot water. Stir until nice and silky smooth.
  In goes some more stuff. I just dumped all the dry right on in that bowl and mixed it up nice and nice.
  Chopped the fresh cranberries into chunks… One at a time…… Just kidding, I actually laid a cutting board on top of the cranberries, applied a little pressure and sliced through the cranberries.. Does that make sense? I hope so, because its is much easier and faster and the cranberries don’t all roll away.
  The chopped cranberries, coconut flakes and the chocolate chips go in to be mix all up.
  I used my hands to form the balls and gave each mound a little smoosh, but not completely flat. Then into a preheated 375 degree oven for about 13-15 minutes or until a nice golden brown.
 A cup of hot coffee and a plate of warm cookies… I am the nicest, right! (After his nice cookie rest I proceeded to do a little nagging, so the day evened out) So today is probably a great day for everyone to make cookies. It’s freezing out, its saturday and well, just cause. You might even be looking for a great recipe to make for that big party your going to. You should make these cookies. Have a Fantastic Weekend!!! -C
 I was informed yesterday that if I was going to make tortilla chips, that I better make some sweet ass dips to go with them. I kind of agree… tortilla chips need dip… or better yet, two dips. Queso and guacamole. It’s what needed to be done, and so I did it.

 Perfect…
 To think that both of these dips took about 10 minutes total to make. (I had pre baked the cauliflower and sweet potato) And for real, I would spend much more time if I had too because both of these dips are so freaking good, I definitely will be making these on the regular.
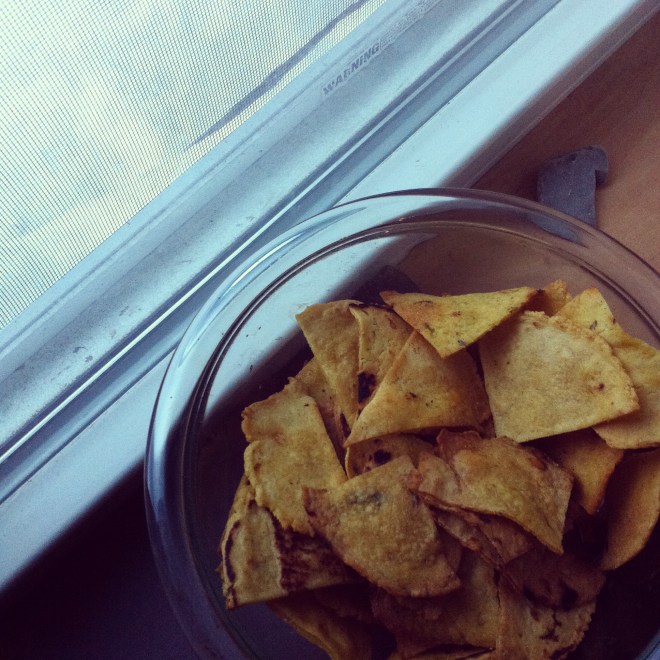 How awesome will you be when you bring the most freaking amazing tortilla chips to the party this weekend? You will be like..”what, it ain’t no thang.. I am just good like that” Yes, yes you are.
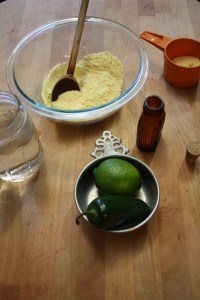
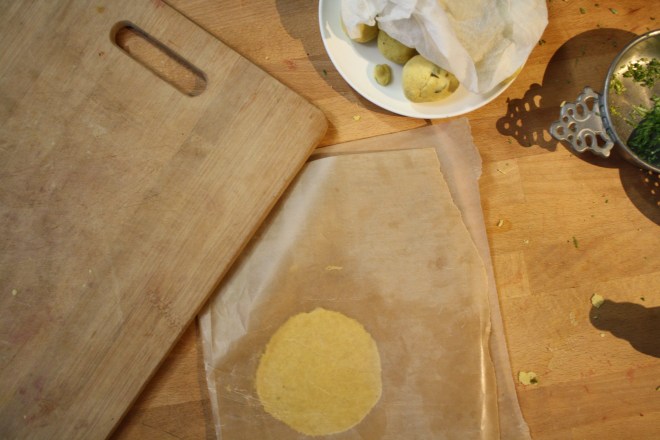 Knead dough a few times just to make sure it’s completely uniformed and divide into 12-14 equal pieces. Place balls on a plate and cover with a wet paper towl to keep from drying out.
 My cast iron skillet is big enough to cook 2 -3 at a time, but doing one at a time is cool too. Preheat the skillet to medium heat. Cook each tortilla for about 2-3 minutes ( or until starting to brown) on each side.
 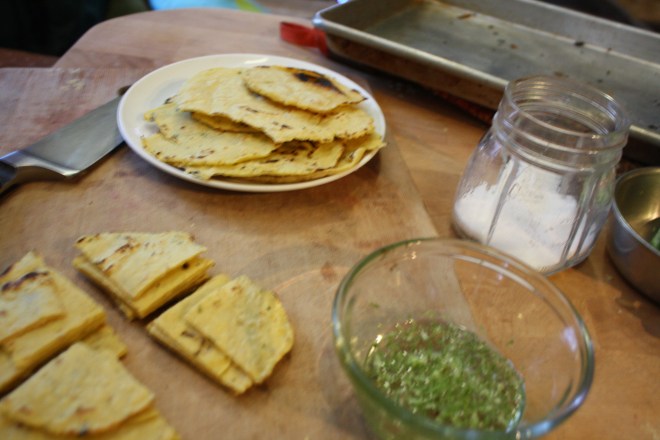 Half way there to chips!!!
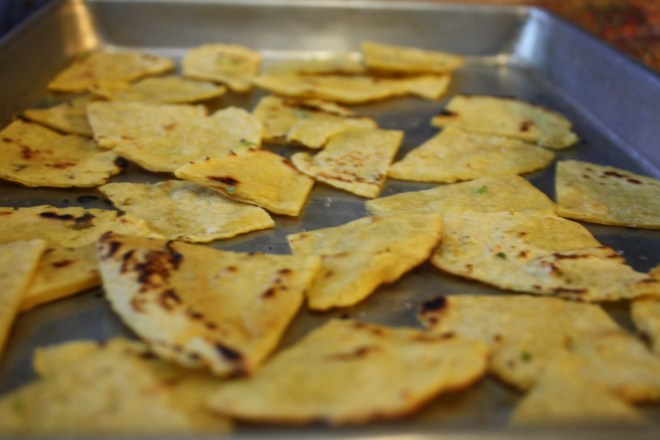 Placed all nice and cozy on a baking sheet. trying not to overlap. Into a 400 degree oven for about 20 minutes to complete the chip making process.. After about 15 minutes, check for doneness. When nice a crispy, remove from oven, squeeze lime juice all over and sprinkle with salt. I then stuck them back in the oven for a few more minutes just to dry the lime..
 After cooling down, take those chips and stick them in a bowl.
  I eat vegetables like I breath air… constantly and almost mindlessly. Some people are addicted to sugar or coffee, but me, I am addicted to veggies. ( I am also extremely addicted to coffee) This is my truth, but I am ok with it.
  Pretty much a little bit of everything that I have in my fridge….Shredded red cabbage, carrots, beets. Some sliced of red onion, tomato and red pepper. Hummus and a little mashed avocado
 Yes, it may look like a mess, but that’s just me trying to make five different things at once. But really, making these wraps are simple simple. Just take rinsed and dried green or red leaf lettuce, smear on hummus and mashed avocado and pile on the veggies. Roll and stick with a toothpick to keep from unrolling. See…. simple.
 So many colors…… so much pretty.
  Wrapped and rolled…Sliced down the middle, just to see all the pretty inside.
 These might be veggie wraps, but man, look at those sausage fingers…(hehehe)
 Don’t let the fact that these rich, fudgy, soft, oh so yummy brownies have beans in them scare you away, it just means that you can eat more, you know, like half a pan, and not think twice about it. (I think that is perfectly acceptable) And the carob. Well one of the things I always do for my birthday is to buy a new ingredient of some sort that I wouldn’t normally buy because it’s either too expensive or is hard to find. Carob is neither too expensive or hard to find, but I couldn’t find the really expensive stuff that I was looking for so I grabbed a bag of carob powder. If you have never tried carob, it’s a must. It’s kind of like chocolate, but more fruity, sweet, not bitter, and caffeine free, while still containing all the good health benefits as chocolate. It’s really good…..you will like it. (You can use cocoa instead, but then you are going to miss out on the awesomeness of carob and be left with a plain old normal black bean brownie)
 One bowl. Beans, oil, oats, baking powder carob and vanilla. I used an emulsion blender but a blender or a food processor does the same…..blend together until fully incorporated, smooth and creamy with little speckles of oats. It’s so simple and barely a mess to be made.
 Into a greases pan and into the oven for 25- 30 minutes…. Out of the oven when a toothpick comes out clean
 Let cool for at least 10 minutes (ok, maybe 5) and cut into squares of any size you like.
 Stacked on parchment….oh so pretty
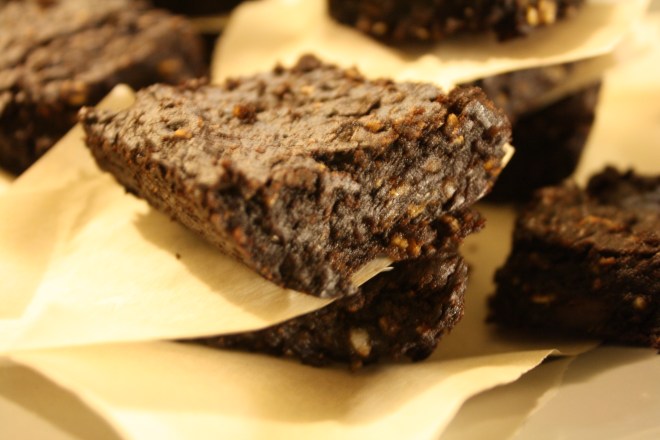


 Before we left for the weekend, I was was trying my hardest to empty the fridge out of all food with the intention of leaning it empty so I could leave it open to defrost while were were gone. Unfortunately I was not able to make it happen. What I did make happen was emptying it almost completely so that when we got home, we had pretty much no food in the house, except for a few things that probably should be eaten. Plus one of the last things that I want to do after sitting in a car for 6 hours is go to the grocery store, or anywhere for that matter, so I was determined to make with what wet had in the fridge:
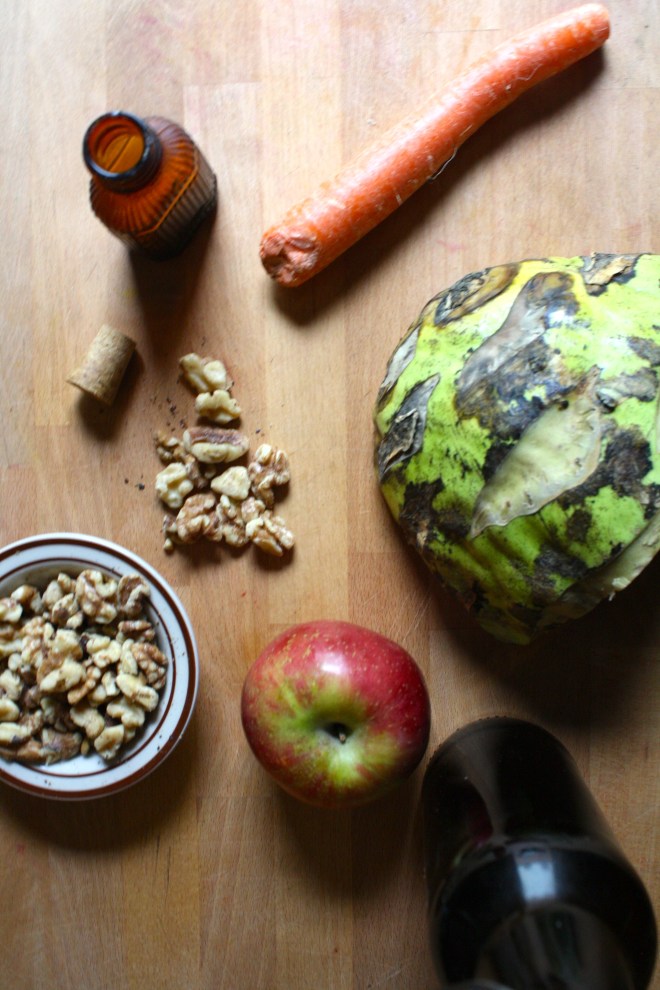
 The stuff… A huge hunk of a bigger then my head kohlrabi (or 2 normal bulbs). A carrot, an apple, toasted walnuts, red wine vinegar, and some salt.
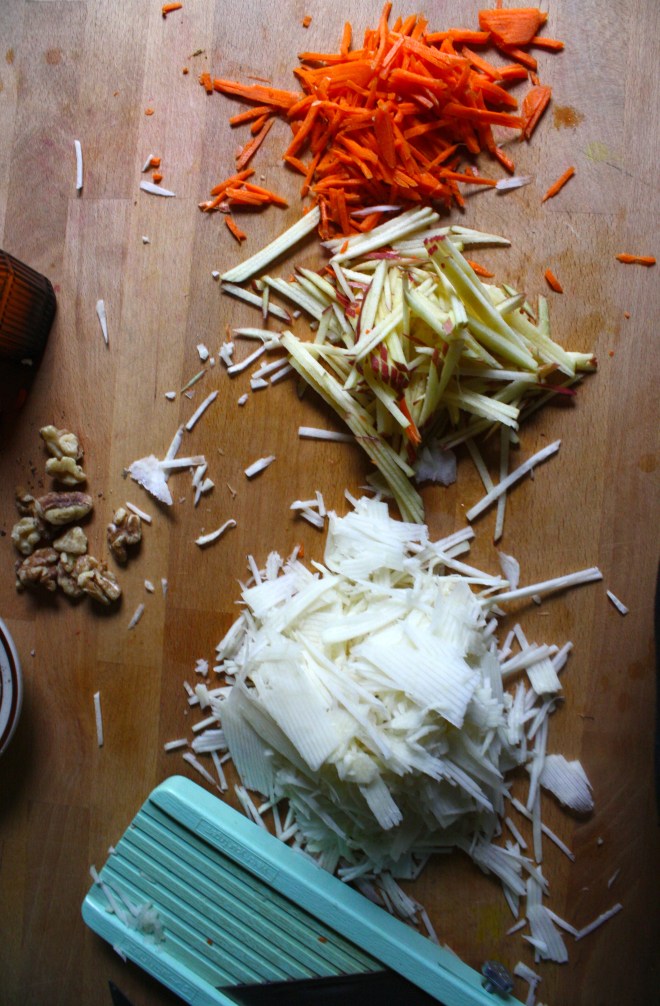
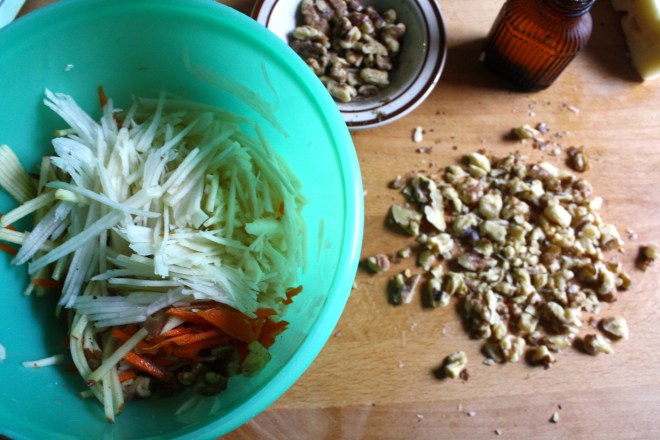 Sprinkle with salt and a good glug glug of red wine vinegar. Chop up the walnuts (some big chunks and some very small pieces makes for good eating), toss it all together and, well that’s it. But wait…. let it sit for a few minutes before serving to really let the flavors draw out.
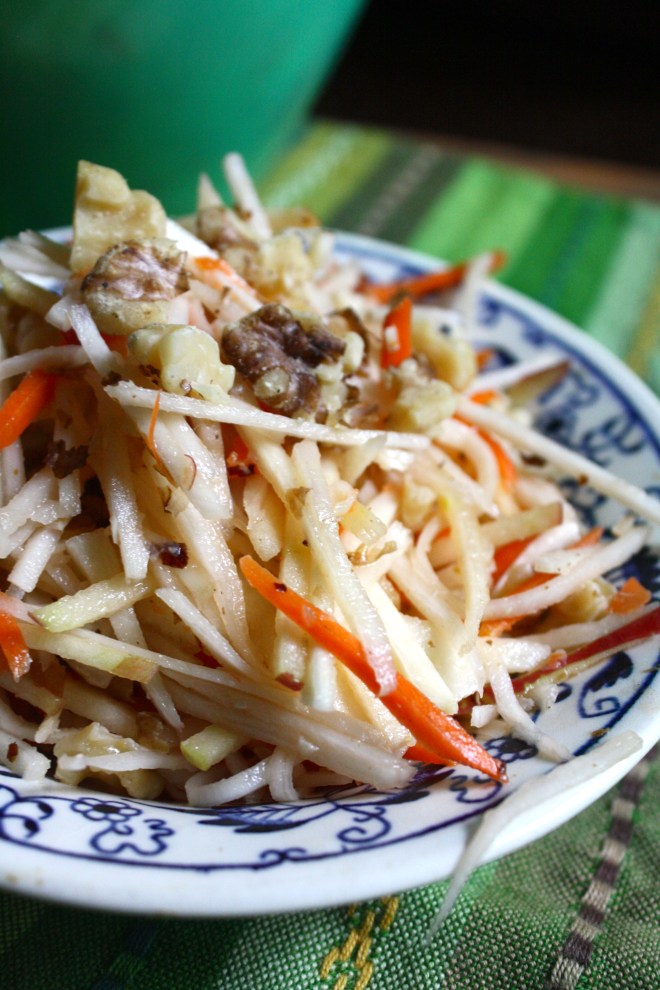 And there we have it. Super fast, full of flavors and crunchy texture. A salad slaw after my own heart.
 I’ll let you know now, I am a make and eat soup all year long person. I can think of few things better then sitting outside, basking in the sun, hopefully with a light wind, a book in hand, enjoying a nice big cup of some good homemade soup. (Doesn’t that sound so freaking lovely?) This soup right here is perfect for just that. Parsnips are the best, kind of like a big white sweet, yet starchy carrots. And cooked together with a little bit of light and lemony thyme, rich earthy turmeric and a couple more chopped veggie….. you got yourself a nice thick and fragrant bowl of happiness that fills you up without weighing you down. It’s food you can eat that fills you up, leaves you feeling cozy, yet still wanting to hop on a bike or lace up the running shoes. Hearty without the feeling of all the heaviness.
 The stuff. Parsnips, carrots, onion and garlic. Thyme and turmeric, salt and pepper. the tinniest bit of oil and water (water not shown)
 Chop all the veggies and the garlic, drizzle a dutch oven or a pot with oil, toss in the veggies. Add the turmeric, the thyme, and 1/2 cup of water.
  Sweet sweating the veggies. Turn pot on medium and cook until the water completely cooks out. When the veggies start to brown and stick to the pot, deglaze with water. Give a good stir and keep cooking. Repeat the deglazing process until the veggies are super soft and ready to blend. (I did this 4 times.. it only took 10 minutes)
 Add enough water to cover the cooked veggies.
  And now blend the heck out of it.. Go as smooth or chunky as you want. I blended as smooth as I could get with this crappy immersion blender. (Blender on loan until I finally decide on, and buy a new one)
 And there you have it. Scoop into bowls, add lots of cracked black pepper, and go to town. I made enough to save a bowl for later… it didn’t last for later.
 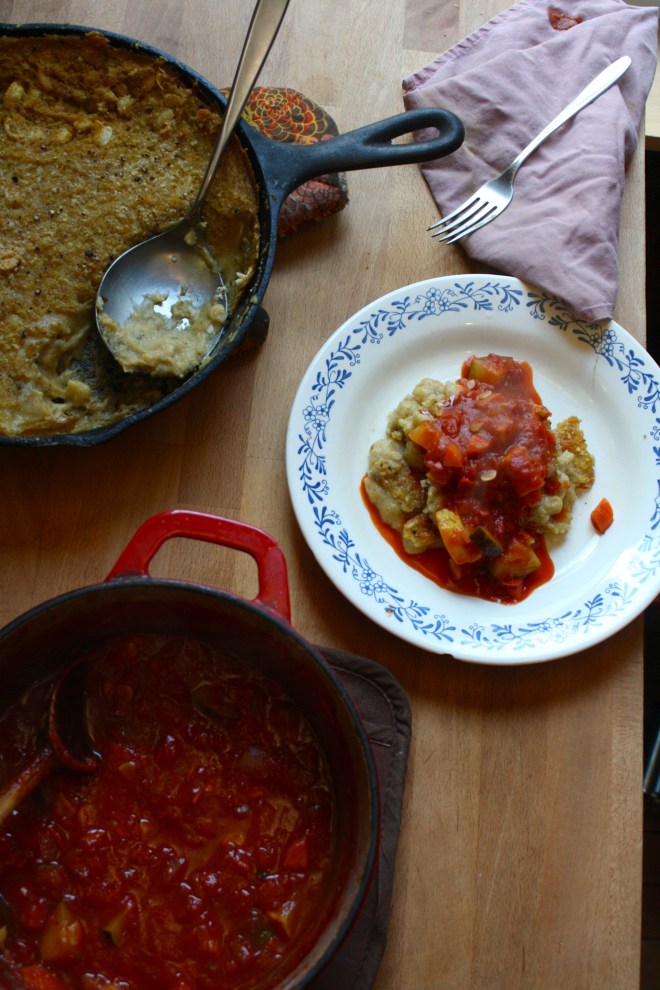 Is it really for real April? Where has all the time gone and where the hell is the warm weather? It’s not funny anymore. I am officially OVER winter! Ok, so now that I got that off my chest…..
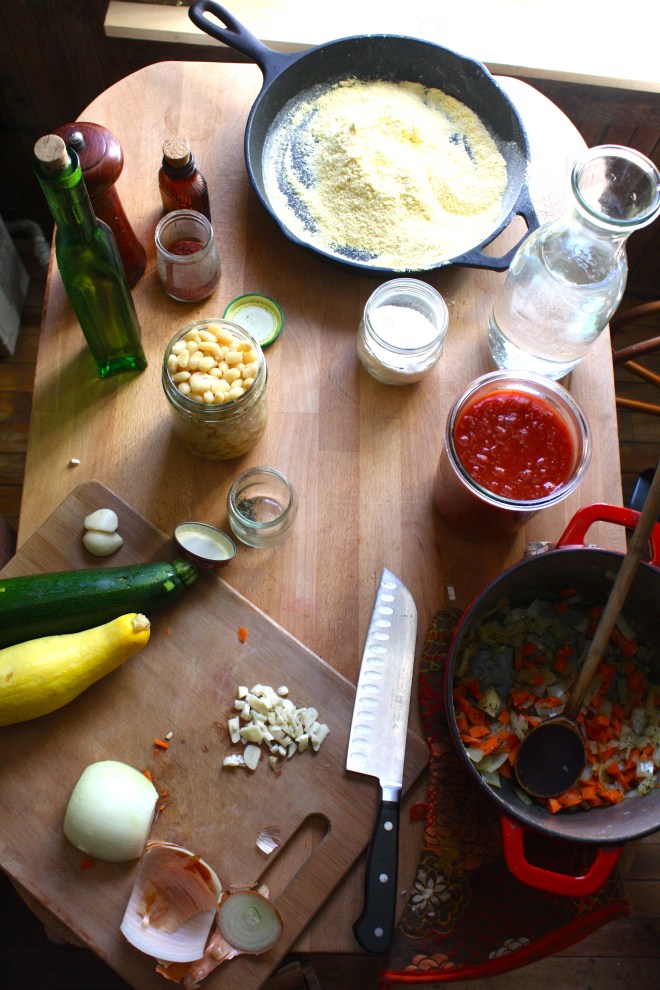 The Stuff. Cornmeal, water, navy beans and parmesan for the polenta. Crushed tomatoes, garlic, dried basil, onion, carrot, zucchini, and summer squash for the sauce. Salt, pepper, and olive oil all around.
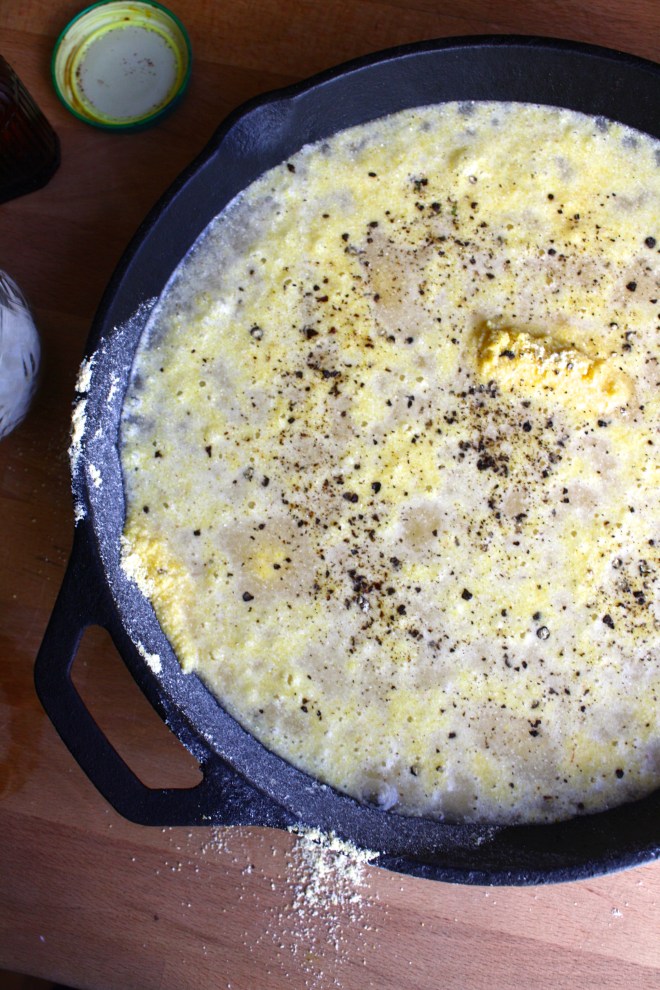 Cornmeal and water go into a cast iron skillet (or any oven safe dish) with a pinch of salt and pepper. Give it a little mix and stick it into the oven at 400 degrees .
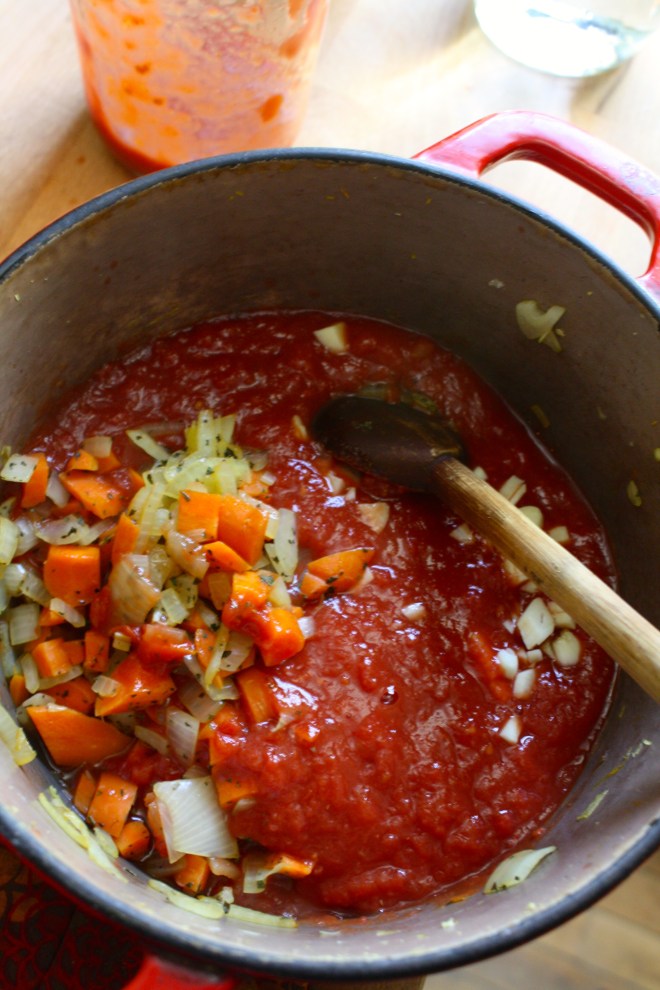 Once the polenta is in the oven, make the sauce. Chop up all the veggies and stick into a dutch oven or sauce pot with a pinch of salt, the basil and a good drizzle of olive oil. Stick on medium heat and let veggies cook down a bit. When the veggies are tender, add in minced garlic, crushed tomatoes and another drizzle or oil. Turn burner to lowest setting and simmer (giving it a stir every now and then) for about 45 minutes or until the polenta is done.
 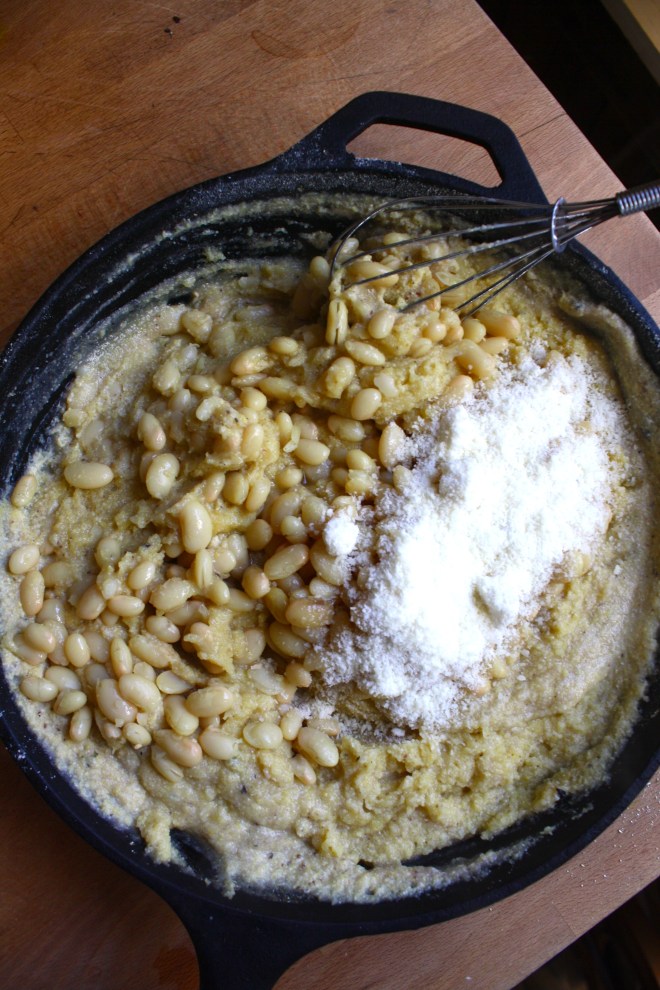 After about 30 minutes when the water had pretty much all cooked down, take the polenta out of the oven and stir in the beans, the parmesan, a tablespoon or two of olive oil and salt and pepper. Smooth top out and sprinkle with more pepper, parmesan and drizzle with a bit more oil. Stick back into oven for another 1/2 or until polenta has formed a crust and no longer giggles when you wiggle the pan.
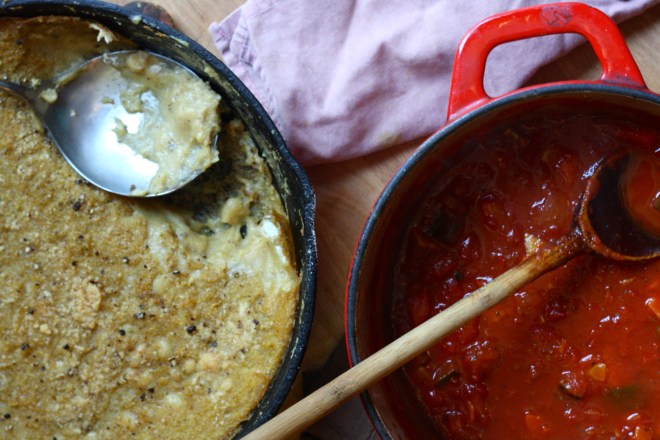 Pull polntna from the oven and let sit for at least 1o minutes.
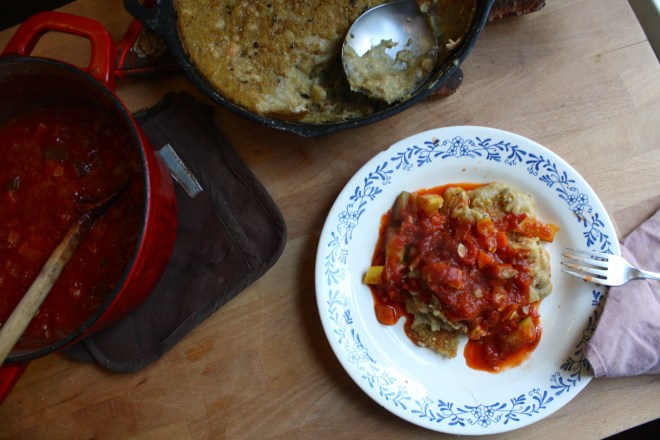

 I love mustard, and when I say love, I mean LOVE. I eat it on anything and everything. And not just small quaintites, I buy jumbo sized containers of the stuff because I go through it so fast. Over the past few years I even started taking down others with my mustard eating obsession. Sisters, brothers, even some of the littles are now mustard eating feens. One of my little nieces is now just as bad as me. I don’t think I have seen her eat a single meal without a side of mustard. Her favorite snack, clementines and mustard, although sometimes she skips the clementines and just goes in with her fingers. Oh so good. I think that child could possible be mine. And yes, it’s mostly the yellow grocery store variety of mustard being consumed, but yellow mustard is just the tip of the ice berg. There is a whole world of flavors, textures and colors when it comes to the humble mustard seed. Whole grain mustard, to me, is one of the best and easiest to adapt to any persons specific taste. You can make it plan or add in just about any spice, vinegar, even a little sweetness that you might like. One of my favorite variations of this mustard is to skip the vinegar and use picked jalapeño juice. Aah, my mouth is watering just thinking about it.
 Yellow mustard seeds, brown mustard seeds, apple cider vinegar and salt. The most basic ingredients.
 In a large jar, combine the mustard seed , twice as much vinegar and a pinch of salt. Cover and let sit for on the counter overnight until the seeds have soften and look almost like caviar.
  Now blend those seeds. You might want to add another splash or two of vinegar to help blend and to thin out a bit. Chose how creamy or seeded you like you mustard. I like to make it creamy but seedy so I blend it half way to creamy.
 You have got mustard! Make sure you have a good snack ready to eat with it.. My go to is carrots. I could eat this all day long.
 TGIF!!!! For reals, because Monday-Thurday were monster days. And now that its friday, I can dig a hole and hide in it until it’s at least 30 degrees with some sunshine. (I might never get to come out.)
 Simple lemon cake stuff. Flour, baking powder and salt whisked together, Sugar and soft butter in a bowl. An egg, some vanilla, milk, and of course, the lemon.
  Frozen bites ready for the chocolate coating… Bittersweet chocolate chips and a little bit of coconut oil. Melted together all nice and shiny smooth.
 Now dip and slather those bites in the melted chocolate.
  Fully coated and placed on a rack for the chocolate to harden. I ended up sticking the rack in the freezer for 10 minutes…They harder really fast in there.
THE LOVELY CRAZY
September 19, 2015 by maximios • Blog
Every year my mom asks for the same cake. Strawberry with Lemon frosting. Then a few years ago, other people in the family started asking for the same one. Now there is a weird strawberry cake thing going on between some of my family members. They have taken claim of the strawberry cake and don’t want me to make it for anyone else but them. They think that because I make them this awesome cake that they are somehow special. Well guess what people.. Your only special for one day, then you go back to being normal.
I have a family full of a bunch of weirdoes.
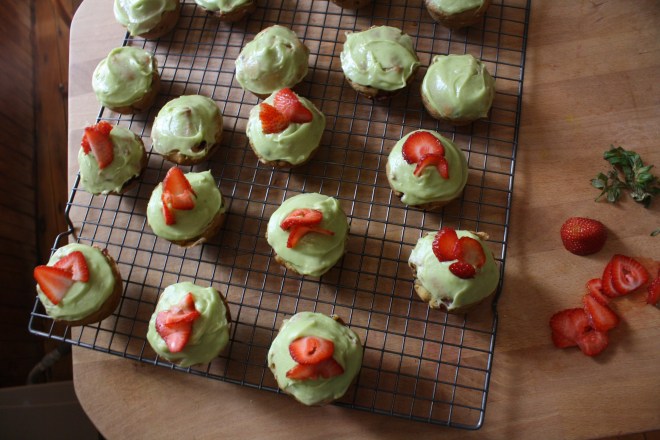
Anyways, My mom said she wanted the usual strawberry cake, but as cup cakes, or actually she asked me to make the little square cakes. I was kind of confused when she said square cakes because well, what the hell was she talking about? But then I remembered that a long time ago I use to have a square cupcake pan. (I lost in somehow) So no, I couldn’t make the cakes square, but I sure could make them cute. And cute as hell is what I did.
Pour batter into well greased and parchment lined baking sheet (or pans). Stick cake into preheated oven for about 35 minutes, rotating cakes after 15 minutes. Cake is done when it starts turning a light gold brown and a cake tester stuck in the middle comes out clean.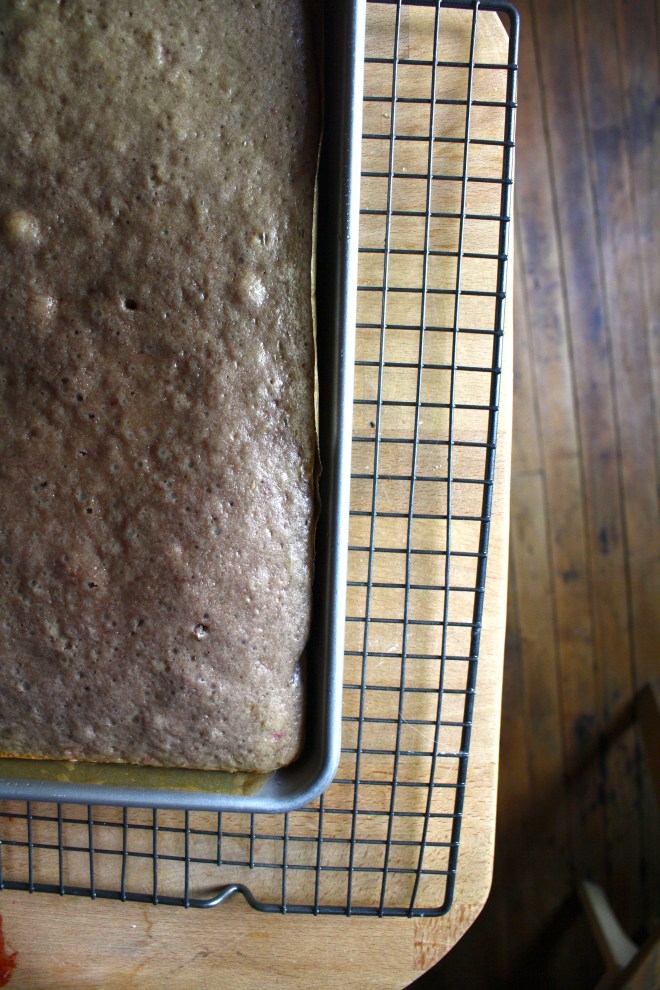 Cake gets pulled from the oven and set on a rack to cool.
I actually wrapped the cake when it was cool enough and stuck outside for a few hours. It didn’t completely freeze, but it was close. Frozen cake is easier to cut then soft non frozen cake. No necessary, but if you have the time….
While the cake is cooling, make the frosting. Powdered Sugar, a stick of butter, cream cheese, lemon zest, lemon juice, and vanilla get mixed together until it turns into a big bowl of thick lemony frosting. Tomato can cutout. (I couldn’t find my biscuit cutters) A biscuit or cookie cutter would probably work a little better.. The cakes kept getting stuck in the can.
  Frost the cake!! Place frosting into a piping bag or a big plastic zip lock with the tip cut off. 2 rounds to a cake. A squeeze of frosting goes on one, topped with another and given a little smoosh. A nice big dollop of frosting on top then….
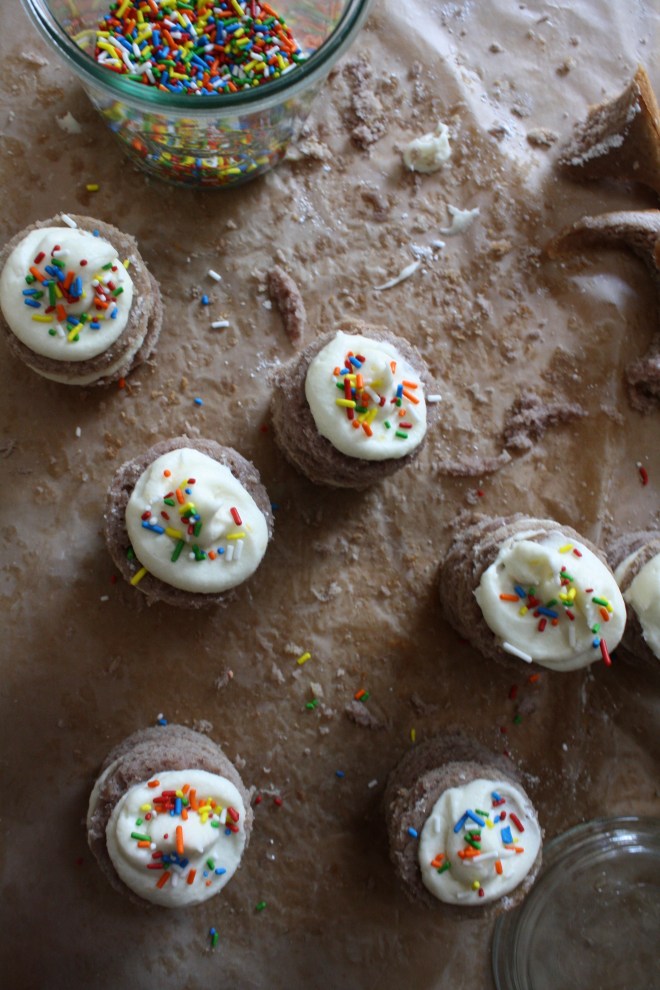 Sprinkles!!!! Or sliced strawberries (my mom doesn’t like sprinkles..I know)
So freaking cute. I don’t know if I can make a normal cake again.
Mom gets the bigger 3 tiered cake.. and a few more of the little ones.
HAPPY BIRTHDAY MOM!
-C
Strawberry Cake with Lemon Cream Cheese Frosting
makes 16 two tiers cupcakes or can be made in three 8 inch cake pans
The Cake
The Frosting
Preheat oven to 375
Grease a parchment lined 13×18 high rimmed baking sheet and dust with flour. If you baking sheet isn’t as big as mine, use whatever size you have and make a few cupcakes on the side. Or make one , 3 tiered cake with 8 inch cake pans. I trust that you can find a way to bake all this cake batter.
Wash, trim and dice strawberries. Toss them in a medium sauce pan and sprinkle with 2 tablespoons of sugar. Place on low heat and cook for about 10 minutes until strawberries break down and turn into a thick syrup. Take of heat and let cool.
Combine flour, salt, baking powder and soda in a bowl and whisk together, In another large bowl, add butter and sugar together and beat on medium until light and fluffy. Add in oil, vanilla and eggs. Beat together. Now add the milk to the strawberries and mix together. Beat in half the dry into the wet, add in half the strawberry mixture, then the rest of the dry, and finish off with the rest of the strawberry mixture.
Pour batter into prepare baking sheet (or pans) and place in oven. Check cake after about 15 minutes and rotate to help insure an even bake. Bake for another 15- 20 minutes, or until cake starts to turn golden brown and a tester (toothpick) comes out clean.
Remove from oven and let completely cool. (Not necessary, but once cake is cooled , wrap with plastic wrap and stick cake into the freezer of a little while before cutting the circles.. its makes it a little easier)
While cake is cooling, make the frosting. Place all ingredients in a big bowl and beat together until a nice soft but sturdy frosting forms. If. you frosting seems to thick add in a splash of milk. To thin.. add a little more sugar.
When the cake is cooled, get to it. With you cookie or biscuit cuter dipped in powdered sugar, cut as many circles as you can.
Fun Time!! Frost the cakes. Place frosting into a pastry bag, or like me, a large zip lock bag with the tip cut off. Partner up all the cake rounds and go through and give one of each of the pairs a good dollop of frosting. Top with the remaining cake, give it a lithe smooshto make sure they stick, and squeeze a nice dollop of frosting on top. Finish off with sliced strawberries and lots of sprinkles.
Sing Happy Birthday and eat!