Peas scream spring to me. The bright green color with that nice bright fresh taste….. kind of like a fresh spring day. Ah spring, so lovely, so nice, so hasn’t made its way here yet. So I guess I am left to eat my spring. And what better way to highlight those lovely spring tastes? A fantastic pesto my friends, and it can be made lickidy split.
Pesto is one of those things that I am constantly making, and not just the kind most people think of with basil and nuts, I pesto everything..peppers, greens, carrots, squash. And yea, I used this post to make a pesto pasta dish, but pesto has so many other fantastic uses. Like as a sandwich or wrap spread or a dip for veggies and crackers. I have used it as a soup base, a pizza sauce, on roasted potatoes and marinated tofu with pestos. It can also be thinned down and used as a salad dressing. See, so many uses.
And this pea pesto is no exception. It has such a great light, almost fruity, super bright taste. I mean, it’s peas so it taste just like peas but somehow even better. It really works in my mouth. I could eat a bowl of this stuff and be happy.
Whatever you plan on using it for, make the pesto. You will be thanking me later.
Pesto Stuff. We got the peas, garlic, lemon, oil, cheese if you please, and salt. Take a handful of peas and set aside for later. Juice the lemon and take that and the rest of the stuff and stick in a food processor and puree until smooth.
Oh my, so green, so good. I first made it without cheese and scooped a little out for me. It was perfect. Like the most brilliant bright pea flavor ever. It made me happy. After I added in the cheese, the mister said it tasted even better…. so cheese or not, it’s going to be good!The pesto is made, and it only took about 2 seconds, now boil up the pasta. If you were a thinker, you could start the pasta and make the pesto while its boiling. (I wasn’t being a thinker) I used bow ties cause they are super cute, but use whatever pasta you’re feeling. Shells or the ones that look like little brains would be good options.
Once the pasta is cooked, strain, reserving about 1/4 cup of the water. Add that bit of water back to the pot, add in the pesto, give a stir and dump pasta back into the pot. Toss in a handful of peas, maybe sprinkle some cheese and give it a good crack of some pepper.
Into a bowl and served with a fork to eat it with. A super green fresh springy meal of happiness. And all under 15 minutes in the kitchen.
Oh you want to thank me for this…
Hey, not a problem….not a problem at all.
-C
Spring Pea Pesto and Bow Ties
Makes enough pesto to coat a pound of cooked pasta and have some left over for sandwiches or to spread on crackers.
1 lb. fresh or frozen peas (thawed if frozen)
1 lemon
4-5 cloves garlic
2 ish tablespoons of olive oil
1/4 cup parmesan, really or vegan (optional)
salt
1 lb (an average box) of bow tie pasta (use any whole wheat, vegan, gluten free variety)
Place peas, (remove a handful and set aside to toss into the pasta) garlic, the juice of the lemon, olive oil and the parmesan (if you are using) into a food processor. Blend until smooth. Taste and salt as needed.
Pasta… Boil per instructions on box. Strain pastas but save about a 1/4 cup of starchy water. Toss pasta, starchy water and pesto together, adding in the handful or more of the whole peas. Sprinkle with more parmesan and or cracked pepper ,if wanted, and serve in big bowls.
Use a fork. Eat, smile and be happy.
I was informed yesterday that if I was going to make tortilla chips, that I better make some sweet ass dips to go with them. I kind of agree… tortilla chips need dip… or better yet, two dips. Queso and guacamole. It’s what needed to be done, and so I did it.
Guacamole is amazing… anything avocado is amazing…this guacamole is amazing. White bean guacamole is amazing. And not that we really care, but this guac is half the fat then straight up guacamole. Plus it’s packed full of protein making it a kind of super duper, must eat all of it, kind of dip. And sweet potato anything will make me happy. Making queso dip with sweet potato and cauliflower is probably one of my best food combos so far. (after eating a butt load, I felt like I was a genius and made an amazing discovery) Again, not that we need it to be, but this is also a fat-free, vegan, gluten-free, super healthy, packed full of B12, fiber and nutrients, dip for all kind of dip.…. just another reason why you cannot feel bad when you finish off half a batch before you get a chance to stick it in a serving bowl. (I might have done that)
Here is what you need for a good time:
−These tortilla chips ….Check.
−Some Chopped Veggies (I want the veggies)…..Check
−Cauliflower Sweet Potato Queso.…Check.
−White Bean Guacamole…Check.
You are now ready for it. It being this party, that party, the Super Bowl, or a Wednesday afternoon.
To the left we have the makings for the cauliflower sweet potato queso.. Steamed cauliflower, a baked sweet potato, nutritional yeast, garlic, and chopped up red onion, red bell pepper and jalapeño. To make all you need to do it take the chopped peppers, onion, and garlic and sauté for a few minutes just to slightly soften and bring out flavors. While that’s going on, take the steamed cauliflower and sweet potato(skin off..but eat it, or save it for soup or feed it to the dog) and puree together with a blender or food processor. Add in nutritional yeast, about a tablespoon or two of hot water and, salt and pepper to taste. Blend for about 5 minutes until super creamy smooth. Add in sautéed stuff and pulse just enough to incorporated the veggies but not complete blend in. Stick in a bowl.
To the right we have white bean guacamole stuff. Two cups (or one can) rinsed white beans, one ripe avocado, a lime, a few cloves of garlic,(I also added a bit of garlic powered…I like my garlic) and some chopped up red onion and tomato. Place beans, garlic, avocado and lime juice in a blender or food processor and blend until smooth. Add salt to taste and toss in the chopped tomato and onion. Blend for sec to mix that in…Stick in a bowl
Perfect…
To think that both of these dips took about 10 minutes total to make. (I had pre baked the cauliflower and sweet potato) And for real, I would spend much more time if I had too because both of these dips are so freaking good, I definitely will be making these on the regular.
So there , dips for those sweet ass chips or whatever you want to dip or them spread them on.
And he guys…It’s FRIDAY! Have a fantastic day!
-C
White Bean Guacamole
2 cups white beans (or 1 can) rinsed and drained
1 ripe avocado
3 cloves garlic
1 lime
1/4 small red onion
1 small tomato
1-2 teaspoons salt
Finley chop onion and tomato. Set aside. Place the beans, avocado, garlic, garlic powder, 1 teaspoon salt and the juice from one lime into a blender or food processor and blend until smooth. Add a splash of water if needed to help keep things moving. Taste and add more salt if needed. When smooth, add the onion and tomato and pulse a few times to mix in. Scoop into a serving dish and finish with a squeeze of lime and a bit of chopped onion and tomato.
Cauliflower Sweet Potato Queso
1 1/2 cups pre cooked steamed or roasted cauliflower
1 medium pre baked sweet potato
1/2 cup nutritional yeast
1-2 tablespoons hot water
1/2 a small red pepper
1/4 small red onion
1 jalapeño
3 cloves garlic
salt and pepper
Finely dice the red pepper, jalapeño, onion and garlic and sauté in a skillet for a few minutes until slightly soften and fragrant. Take the pre-cooked cauliflower, sweet potato (skin removed), and nutritional yeast and place in a blender or food processor. Blend for about 5 minutes until creamy and smooth. Add in a tablespoon of water to keep things moving. When completely smooth, add in sautéed veggies and pulse a few times to combine. Scoop into a serving dish. If your feeling it, top with scallions and cracked pepper.
Serve dips with chips, veggies or anything you want. Also make great spreads for sandwiches and crackers too!
My contribution to last nights dinner at my sisters…. Freshy fresh veggies spring rolls.I had about 30 minutes between work and getting over to my sisters house to throw something together so it needed to be something fast, easy, and something I could make without going to the store. She was making the main course (some teriyaki situation and rice) so I was doing up the veggies.
I had just bought a package of spring roll wrappers…. Bingo! The perfect and logical choice. I grab the wrappers, a variety of veggies and after spending 12 of my 30 minutes trying to scrub the oil based paint off of my face and hands, I still managed to completely prepare, construct, and take pictures of these lovely tasty spring rolls. and get over to my sisters in time for dinner.
Impressed?
Damn right!
The stuff. Carrot, beet, asparagus, red cabbage, and kohlrabi, which all (except asparagus, which I just cut into thirds) got cut into matchstick sized pieces with my mandoiln. Then there are the rice spring roll wrappers that we need to make the veggies into rolls. Also a bit of red wine vinegar to drizzle onto the veggies for a little extra zing. And lastly, soy, fresh ginger, and a couple cloves of garlic for a spicy salty dipping sauce.Start by having everything set out and ready to assemble. Fill a large shallow dish or baking sheet with really warm water. Working with one at a time,place a rice wrapper into water and let sit for about 10 seconds or until the paper starts to soften. Remove from water and place on a damp surface (just splash a little water on the counter) Take a little bit of everything and and place on the lower middle part of the paper. Fold in the sides first, then tuck and roll the wrapper as tightly as you can without ripping the wrapper.
Repeat until you have used up all you veggies.For the dipping sauce. Finely grate ginger and garlic and add to soy sauce. Stir… and it’s done.Freshy, pretty and fantastically delicious. And for real, took about 8 minutes to make. (I even had enough time to wash the dishes before we left!)
I am so awesome!
Hump Day Pow!!!!!
-C
Fresh Veggies Spring Rolls
Makes 8-10 but can easily be increased or decreased to desired amount
8-1o rice spring roll papers
Splash of Red wine or rice vinegar
1/4 cup soy or tamari sauce
2 cloves of garlic
teaspoon freshly grated ginger
1 medium carrot
1 medium beet
1/4 head of purple cabbage
10 thin fresh asparagus
1 small kohlrabi
Note… I used the veggies that I had in the fridge at the moment. If you have a bunch of veggies but not these particular ones, use what you have. Pretty much all veggies taste good inside a spring roll!
Gather your veggies and prep by either using a mandolin, a grater, or some sick knife skills, and julienne, shred, or slice you veggies into thin match sticks. Once all the veggies are prepared, sprinkle a little vinegar over the top.
For the rolls…Grab a large shallow vessel (a rimmed baking sheet works great) and add in warm water. Working one at a time, place the wrapper into the water for about 10 seconds or until the wrapper starts to soften. Remove and spread onto a clean, damp work surface. Gather a bit of each veggie that you are adding and place towards the bottom middle of the wrapper. Now fold the sides in over the pile of veggies. Then with the side closest to you, tuck and roll wrapper away from you, trying to keep it tight, but not to tight that it rips.. (Hopefully that makes since.) Place finished rolls onto a damp surface to keep from sticking and if not serving right away, drape with a damp towel or paper towel to keep from drying out.
For the soy ginger dipping sauce. Add grated ginger, minced garlic, and soy into a bowl and mix together. Serve with spring rolls.
Eat one, two, or a plateful. It’s nice to share but not a necessity.
As I sit here writing this, mind you typing is not a terribly labor intestive activity, I am drip drip dripping sweat… It’s just not right.
And today will be as hot as shit fuck. But its support to get so much better tomorrow. So that’s it, not more complaining. Everything is all good.
Now lets talk about this salad. This is such a fresh, clean, and full flavor salad made of just a few simple ingredients, the star being the fennel. Almost licorice-y and sweet, yet still has a crisp earthiness, it pairs so well with onion and kale and dressed with just lemon juice. Simple, easy, and very much satisfying. Kind of the perfect salad to make when you don’t want to make anything because the world is a sauna and nothing hurts you soul more then to think of turning on the oven.(full disclosure. Stove burn does go on for a few minutes.. but only a few)
Maybe you have never had fennel or think you don’t like it, Well if you haven’t had it, you must, and if you think you don’t like it, you should try it again. Up until recently, I kind of discarded fennel as a mah veggie. I didn’t hate it, but I never really cared for it, and I definitely did not seek it out. But this past year, for some odd reason (I blame/thank old age) I have really gotten into the yummy bulb. I have even gone out of my way to find it. And last week I was much excited when I went to farm share pick up and found that there was crate of fennel. Woo HOO!
Sweet fennel+hot weather and no desire to move = Fennel onion carrot salad
The stuff. A bulb of fennel (this was a big one so I use half of it),a medium onion , a big carrot, a bunch of kale, salt, pepper, a little olive oil and a lemon (I ended up using 2 smallish lemons)
Take you fennel and either with a mandolin or a knife, thinly slice the bulb. Do the same with the onion.
Toss the sliced fennel and onion into a lightly oiled skillet and sprinkle with a dash of salt. Place on medium low heat and cook jjust until the veggies are soften and starting to brown.
Chop the kale into pieces small enough to fit into your mouth and julienne or shred the carrot.
Compile the stuff. Juice the lemon. Kale into a bowl, dump most tot the lemon juice on that and sprinkle with salt and mix around (I used my hands). Dump the sautéed fennel onion onto of that and top with the carrot and the rest of the juice.
TA DA! Now that’s some pretty.
And toss it all around. I like to add a few thinly slices of raw fennel and lots of fresh cracked pepper.
Share with a friend. Or not. (a not for me)
Happy hump de dump day. Stay cool friends!
-C
Makes a big salad for one, or a few smaller sized side salads.
1 small or half of a large bulb of fennel
i medium white or hello onion
1 large carrot
a bunch of kale (like 3-4 cups chopped)
1 large juicy lemon (or two small lemons)
With either a mandolin or using a knife, slice up the fennel and onion super thin. Toss into a lightly oiled skillet, sprinkle with salt, and stick on the stove on medium low heat. Stir and let cook down for 5-8 minutes or until the fennel and onion have soften and are starting to brown.
While thats cooking, chop up the kale into small pieces and julienne or shred the carrot.
Place kale into bowl, juice the lemon and drizzle most of the juice all over the kale and give it a good mix. Dump on the cooked fennel onion and top with the carrots and a the rest of the lemon juice.. Sprinkle with salt and pepper to taste and give it a good toss. Top with a few fresh shaving of fennel.
Share with a friend, or eat it all to your self.
I am not complaining at the least bit, but man, so,so,so many tomatoes. Everyday more and more are ripe and ready for the picking, some even starting to fall off the plants.
If you were to come to my house, you will notice that I have bowls and baskets all over the place, just full of not just cherry tomatoes, but big baskets of the most beautiful heirloom tomatoes this girl has ever seen. It’s actually causing me a little anxiety. I cannot bare to think of one single tomato going bad. I and am on a mission to eat as many of the heirloom ones as I can ever day. But that still leaves all the sweet little cherry tomatoes, which I do still snack on, (and try and make the mr snack on too) but am having a had time keeping up with eating all of those on top of the other kinds. But again, not a complaint, cause one can never really have too many tomatoes.
So instead of just continuing to make sauces and soups, (I have yet to do a tomato canning day, which is in need of happing asap) I figured I would give the mr a break and make him something a little different. A big tomato slab tart. And a tart needs some type of cream, so fresh corn and avocado cream happened as well.
Lovely looking, yummy, and pretty easy to make. Uses a good amount of tomatoes (I was fooled.. I used two pints for this tart, went to garden afterword, got 4 more pints) and is perfect for a lunch situation or a light dinner. Add some greens, maybe some cheese (the mr and his cheese) and you are sitting pretty and ready to go.
Lets get tarting!
The stuff… For the tart we have flour, slat, a little vinegar, icy cold water, frozen olive oil* and a big bowl of cherry tomatoes. For the avocado and corn cream, well we gots an avocado, a cooked cob of corn,a few cloves of garlic (I forgot in the picture) and a lemon. Salt and pepper for everything.
*Note. I recently read on the food 52 website that freezing the olive oil for crust makes the oil distribute more like butter and makes the dough super flaky and crispy, which it indeed did. I will forever freeze oil for oil crusts, Thanks food 52 for being so smart.
Start by making the dough. Whisk together the flour and salt, then dump in the frozen olive oil. Using a fork or a pastry cutter and working as quick as you can, cut the oil into the dough.
When the mixture resembles a course crumb, add in vinegar and mix with fork, then add in water, one tablespoon at a time, until the dough starts to comes together. Dump mixture out onto a floured surface and form into ball. Wrap in plastic and stick in the fridge for at least an hour or even over night.
Chilled dough placed on a lightly floured surface, ready to roll.
You know what to do here.. roll it out and stick it in a baking sheet or, if you don’t have a small baking sheet, use a large casserole dish. You could use a pie plate, but you might have a little extra dough (pie dough cookies?)
And dump in the tomatoes. Don’t forget to remove the little green tops if they have them. Drizzle with a little olive oil, season with salt and pepper. and into the oven it goes.
While the tart is baking, make the cream. Scoop fruit of avocado, the corn off the cob, a clove or two of garlic, juice of lemon, and salt to taste, into a blender (or bowl if using a immersion blender) and blend until smooth. Taste and ass more swooning if needed. and if you want the cream a little thinner, add in a slash of water.
Cream oh creamy goodness. (So great on tart, but also makes a great dip, toast spread, salad topper, or eaten straight with a spoon.)
The tart has been baking and after about an 45 minutes, it should be done. Remove from oven when the tomatoes have all bursted and are starting to caramelize and the crust is cooked through and golden brown,
Let cool for a few minutes. I
You got you tart, the cream, and if you are in into it, a nice serving of some freshy greens to some extra heft and color…SOmething on the more bitter side like kale or young chard pairs very well with the sweetness of the tomatoes.
A big slab on greens with cream on slab.
The mr added a little cheese to his… if your a cheese person.(he sure likes his cheese)
Pretty food.. Food so good!
Happy Humpty hump!
-C
For the Tart
2 pints of any variety cherry tomatoes. A variety look nice
1 3/4 cups all purpose flour
1/2 cup olive oil (frozen ahead of time)
1 teaspoon salt for crust
1 tablespoon apple cider vinegar
3-4 tablespoons ice water
salt and pepper
9×11 baking pan*
For the Corn Avocado Cream
1 cooked and cooled cob of corn
1 avocado
1 lemon
salt
2 cloves of garlic
*Note. I used a 9×11 baking sheet, but if you don’t have one, you can use a big glass casserole dish. Or you could even use a pie plate, but you will end up with a little extra dough and you might not need all the tomatoes.
Start by making your dough. Whisk together the flour and salt. Cut in the frozen olive oil into flour with either a pastry cutter or a big fork until it has a crumbly texture. Add in the apple cider vinegar and a tablespoon of water at a time until dough starts to come together.(about 3-4)
Dump out onto a surface and fomr into a disk. Wrap with plastic and stick in the fridge for at least an hour or overnight.
Preheat oven to 375
Get your chilled dough and, on a lightly floured surface,roll out into a rectangle roughly the size of your baking sheet. Place in sheet pan and make it look pretty. You can use your fingers to lightly press the dough into pan Dump in your cherry tomatoes. If you want, once the tomatoes are in, slightly fold the edges towards the tomatoes and away form the side of the pan. Sprinkle with salt and pepper and the finest drizzle of olive oil. Stick into the oven for about 45-55 minutes. The Pie is done when the tomatoes have popped and starting to brown and caramelize and the crust is golden brown.
While the pie is baking, remove corn from cob. Add to a blender with the avocado, garlic and and the juice of the lemon. Puree until smooth. Season with salt and pepper to taste.
To serve, slice big slabs of tart and spoon on big globs of the avocado corn cream. If your into it, a bed of fresh greens is very much nice.
Shovel into face.
What are your weekend plans?
Me well, I need to can, pickle and eat as much zucchini as I can. And it’s not just zucchini anymore… we are getting into cucumbers too…AAAHHH I know I have said this a few times in the past weeks, but man, I have so manning freaking zucchinis.. and the more I eat, the more I end up with… It’s getting pretty crazy here!
So anyway, yesterday my dad came back to VT, WOO HOO! and I was his first stop on his rotating dinner schedule. (cause I am his favorite child. I think..maybe) I made zucchini noodles for dinner (I have made them every night for the past week) and I wanted to make him dessert, I have all sorts of pretty fruit that I wanted to make and prepare, but I also had little time and honestly, little desire to move all that much (it was so f ing hot!) I already had out the shredder and a bowl, and the zucchini was just sitting there, in the basket taunting me with it’s gigantic green whaleness. So I figured I’d just make a zucchini cake, or better yet, cause my dad really likes chocolate, a chocolate zucchini cake.
This cake is tender and moist, almost like a cakey brownie, so it does not require any frosting which is nice when your dead tired and it’s so hot that any frosting would probably just melt off anyway. (although you could totally frost it up) It makes a great dessert, but I would not hesitate to serve this for breakfast either because, 1. It has a lot of zucchini in it which automatically justifies eating it whenever, 2. also made with whole wheat, and 3. it’s totally ok to eat chocolate cake for breakfast. I mean people eat donuts for breakfast and that shit is usually fried.
Yeah, this is for sure a dessert/breakfast cake.
The stuff for cake…. Regular all purpose flour, white whole wheat flour, and cocoa powder. Some sugar, salt, baking soda and oil. A little vanilla extact and a splash of coffee. And of course, shredded zucchinn
Dump the sugar, salt and baking soda into flour, whisk together, then mix in the oil, vanilla and the coffee. Now add in the shredded zucchini, but right before adding it in, give it a squeeze to remove a little bit of the liquid.
Mix until combined.
And pour batter into a well oiled pan
Feeling fancy? I was so I peeled the green skin from a zucchini and make a little starburst on top
And into the oven to bake…
And it comes out looking so fancy. Let cake cool for a few minutes and carefully flip from pan.
Note. It might not be the best idea to test your cake with a blunt chop stick.. I did and it made the middle sink in a little. No big deal, but next time I will use a fork.
Cooled and removed from pan. Now all you need to do now is eat cake.. I think that’s something you can handle.
Happy Friday!!!!
-C
1 cup white whole wheat (can use regular whole wheat or all all purpose)
1 cup all purpose flour
1 cup sugar
1/2 cup cocoa powder
2 teaspoons vanilla extract
1/2 cup oil (veggie, canola, sufflower)
1 teaspoons baking soda
1 teaspoon salt
2 cups of shredded zucchini
2 tablespoons of coffee
Preheat oven to 350
In a large bowl, whisk together the flours, salt, baking soda, cocoa powder, salt and sugar. Then add in the oil, vanilla and coffee. Add in the zucchini, but right before, give it a squeeze to remove some of the liquid. (don’t got crazy, just get a little liquid out). Mix until incorporated.
Oil a 9 inch cake pan and pour in the batter. If you want, use zucchini skin to make a pretty design on top (completely optional), and place into preheated oven.
Bake for about 45-50 minutes, or until a tester stabbed in the middle comes out clean.
Remove from oven and let cool in pan for at least 5 minutes the gently invert pan to remove cake and place on a rack to cool.
Serve as soon as you want..
Place in mouth, chew, and swallow…..Smile!!!
Monday was kind of a suck until I made dinner. It was hot, I didn’t sleep well the night before, and I spent the morning calling the dentist over and over until someone picked up so I could get my butt in there to get my tooth fixed (sometime during eating on sunday I broke my back molar…. and that happened) . Whatever, I got the only appointment that they had available and was just happy that I was able to get in. So went about my morning, went to the gym, did my things then ran home, took a shower and headed to the appointment. When I got there, I checked in, sat down, and waited..Then waited some more, then was called in to the room and then did some more waiting. But finally, the doctor came in and took two minutes to check the tooth (the doctors said I was as badass… couldn’t believe that I don’t do novocain) and left the dental assistant lady to fix it. And ok, I know that people have to practice their craft to learn, but I am pretty sure that I was one of the first solo tooth fixings that this lady has ever done. And that’s cool, but I was hungry and just wanted to get the f out there.(did I mention that it was lunch time?) So taking her sweet time (at least she did a good job) she got it done. But then I had to wait some more, in the chair, for the doctor to come back and check. Holy hell I was there for way to long.
Then I got home and rushed out.. grabbing a carrot on the way. But I was still hungry.. And that just sent me to a dark place for the rest of the day.
So when I finally got home, I immediately went to the fridge to get dinner started. While aggressively riffling through bags of veggies and greens, I stubbled upon a big bag of mustard greens that I got last week at the farm….SCORE.., this made me happy.
Sure, I could have just eaten them right there, fresh and all spicy like, but I if I waited this long to eat, I could wait a little longer and I figured I would share.. and mabye do a little some thing fancy, like toss them with some cooked up onions and sweet potato and that left over quiona that was also in the fridge.
And thats what I did. And it was good. And the day didn’t seem so bad. (food always makes me better)
The stuff. Mustad greens oh lala. A small sweet potato and an onion (I used half of that big one). Cooked quinoa, garlic, salt and pepper, and a little olive oil.
Dice up the sweet potato into little chunks and toss into a big skillet with a drizzle of olive oil and a sprinkle of salt and pepper. Place skillet on medium heat and cook potato for a few minutes just to give it a little head start before adding the onions. When the potato starts to show a little browning, add in the onions and a splash or two of water. Stir around, stick a lid over it, and continue to cook until the onions are soft and the sweet potato is fork tender.
When the stuff is cooked, mince up the garlic and stir that in and cook for a little longer.
And now toss on the mustard greens. (Don’t worry if they are overflowing from the skillet, they will cook down really fast). Add another splash of water and place the lid back on. Cook for a couple minutes and mix everything together.
Place cooked quinoa (hot or cold) into a bowl.
And dump the stuff right on top. If your into it, drizzle with a bit of balsamic vinegar. (I highly recommend)
And eat to be happy.
Hears to a better day then yesterday!
-C
roughly 1/2 lb. of fresh mustard greens
1 small sweet onion or half a big onion
1 small sweet potato
3/4- 1 cup cooked quinoa*
few cloves of garlic
1-2 tablespoons balsamic vinegar(optional)
salt and pepper
olive oil
Note- To cook quinoa, use1 part quinoa- 2 parts water. Place quinoa in pot with water, bring to boil, place on a lid, then turn to simmer for 15 minutes. After 15, turn heat off and let sit of a few more minutes then fluff with fork. Also, i f you don’t have quinoa, just use rice or faro or nothing, the greens are good their own.
Dice up sweet potato into small picese and stick in a large, lightly oiled skillet on medium heat. Toss on some salt and pepper and cook potato for a few minutes until they start to slightly brown. Slice up onion and toss that into the skillet with the sweet potato. Add in a splash of water and place a lid on the skillet, giving it a stir ever now and then. (Watch the stuff carefully, it cooked pretty fast.) Cook until both the sweet potatoes and onion are browned and soft. Now mince garlic and mix that it and let cook for a few minutes..
Now everything is cooked, toss in the mustard greens. (It may seem like a lot, but its not) Hit with a splash of water, place a lid (it doesn’t have to be a snug fit) on top and cook for a few mites until greens are wilted. Toss everything around to mix together. Take your quinoa and place in a bowl. Top with cooked stuff and drizzle with balsamic vinegar.
Eat right away and maybe save a little for later cause it very much good cold too!
I am a year round maker and consumer of soup.
With that being said, the nature of my soups change seasonally. My summertime soups are usually on the lighter side, made with the fresh bounty of the season, and spiced more on the light and floral side, opposed to the really deep and warm spices that I use all winter long,
This corn chowder is made just right. It had the perfect balance of hearty and creamy from the potatoes and use of pureed onion cream, but still light and refreshing from the sweet fresh corn and the lemony fresh thyme. It is for sure a great summertime soup (chowder) Even the Mr. was even really into it, and he claims he doesn’t like corn. (I say bullshit to that.. he eats corn all the time)
Now to chowder!
The Stuff. Some super fresh corn on the cob, a couple onions, a few chopped up potatoes and a chopped up carrot. Then we have a little oil, a lemon, dried thyme and salt and pepper.
To start, take an onion, chop it up, and toss into a large heavy pot with a little olive oil and a sprinkle of salt. Stick pot on stove on medium heat and cook until onions are soft and traslutcent. When the onions are done, remove and add to a blender or bowl. (if using a hand blender) Add in the juice of the lemon and blend it all up until nice a smooth.
You have now made a nice creamy cream that will help make the final product more, well more creamy without the use of cream (lets say cream on more time !) .Set aside.
When the pot is empty again, add in the rest of the stuff, including the cobs of the corn, (they hold a butt load of flavor) the dried thyme, and salt and pepper. Place on stove and add enough water to completely submerge the veggies. Keep pot on a medium heat, add a lid, and stir ever once in a while. Cook until the potatoes are nice and tender. (when the potatoes are done, so is everything else)
Now that everything is all cooked up, remove the cobs and stir in the onion puree.
Now with a hand blender, blend up until the chowder is thick and smooth, but still nice and chunky. (If you are working with a blender, just remove about half of the soup and blend up, then dump back in) The optimal chunkiness is up to you , so blend, check the chunk, then blend a little more if needed. If you feel that the soup is to thick, add in a little more water, or to thin, just cook down o little longer.
Once you like the constituency,season to taste with salt and pepper and place pot back on a simmer until you are ready to serve.
And thats how we make corn chowder
It tastes best serves in the daintiest of the cups, sprinkled heavily with cracked pepper, and with a side of some cracker situation (Saltines would be best, but sometime there are only triscits in the house)
Summertime is for chowder!
HAPPY Humpday Wednesday!!!
-C
Makes a pot big enough for 4-6 nice decent sized servings
2 fresh ears of corn
3 medium (tennis ball sized) red or white potatoes
2 white or yellow onions
1 carrot
Juice of a lemon
1 tablespoon olive oil
1 1/2 tablespoons dried thyme
salt and pepper
To start, peel and dice one whole onion and toss into pot with olive oil and stick on medium heat. Cook onions until translucent and fragrant. Remove from pot and add cooked onions and the lemon juice to a blender and puree until smooth and set aside.
While you are cooking down the onions, dice up the carrot and onion, remove the corn kernels from the cob, and chop up the potatoes. Once you have removed the first batch of onions, toss in corn, onions, carrot, potatoes, and the dried thyme. Stir around in the pot on medium heat for a few minutes just to warm up the spices. Add the cobs into the pot and fill with enough water to cover the stuff in the pot. Place back on medium heat with a lid and cook for another 20ish minutes, or until potatoes are super tender and almost falling apart.
Remove cobs from pot and add in the onion puree. Now either remove about half the soup and place in the bender and blend up til smooth, or use a hand blender and blend up chowder until you get your desired chunkiness. If you think the chowder seems to thick, add in more water, or to thin, just cook down a little longer on the stove.
When ready to eat, ladle chowder into a cup or bowl and add lots of fresh cracked pepper.
Serve with a cracker and a spoon to eat it with.
My oldest sister graduated from nursing school this past weekend (wahoo!) and the friends and family had a party for her. I made these cupcakes for the party.But really, I made them just for her.
See, she is not a lady big on sweets. When I asked her what kind of dessert she wanted me to make her, she said if I could make a cake out of french fries, well that would be great. (I was close to making a french fry cake) But instead, I went a slightly different route and made cakes out of thing that I know she loves and can eat. Jalapeños because she is obsessed. Strawberries cause she likes her some fruit and are in season and I think, go with everything. Avocado frosting because she loves avocado and cornmeal because it makes the cakes a tad less sweet and a little more hearty. I also used GF flour cause she is GF.
Wow, I am the best sister. And here are a few more reasons why..
I went to the party (I am not a big party person.. But I did have fun and her friends were cool)
I changed into a clean outfit for her party (I really didn’t want to)
I stayed out past my 6 (I made it until 7.. what!!!)
I make her food
I am awesome (I think so anyway)
So yeah. The cupcakes. The Nurse lady totally got down with these. I am pretty sure that I heard the words, amazing and oh my good, while they were being noshed on. The day after, the nurse lady told me that they were the talk of the party (bullshit, but thanks)
Whatever, I was just glad she liked them.
The stuff. For the cupcakes; cornmeal and some pre blended gluten free flour. Sugar, salt, baking powder and baking soda. Soy milk (use whatever milk you want) oil, apple cider vinegar, strawberries and a couple jalapeños . For the icing; an avocado, a lemon, and some powdered sugar.
This is not a hard batter to work, no need for a mixer or to cream anything, it can all be done with a wooden spoon.
First, preheat the oven.
Then trim and tiny dice the strawberries, remove seeds and tiny dice the jalapeños and toss it all into a bowl. Sprinkle with a bit of sugar.
In a large mixing bowl, whisk together the flour, cornmeal, baking soda and powder, salt and sugar. Then add in the rest of the stuff. Stir together until combined.Now fold in the chopped berries and jalapeños and scoop batter into a well greased (or lined) cupcake tin.
Stick into oven to bake…
Check cakes after 20 minutes and remove from oven when they are golden brown and a tester comes out clean when poked.
Remove from pan and place on a wire rake to cool.
While the cakes are a coolin, add avocado to a blender with the zest of half a lemon and the juice of that half of lemon and blend smooth. Add in the sugar and blend.
The icing should be thick, but spreadable. Using your judgement and you taste buds, add more sugar if the icing seems to thin or lemon juice if it seems to dry.
And once the cakes are cooled, spread with icing and top with sliced strawberries.
Your welcome Nurse Shannon!
Happy Friday!!!
-C
Jalapeño Strawberry Cornmeal Cupcakes with Avocado Frosting
makes 24 cupcakes
1 1/2 cup gluten-free flour blend (if you don’t need or want it gluten-free, just use all-purpose flour)
1 1/2 cups cornmeal
3/4 cup white sugar
1 teaspoon salt
2 teaspoons baking soda
2 teaspoons baking powder
1 tablespoon apple cider vinegar
2 cups nut or plant milk
1/2 cup oil
1 1/2 cups diced fresh strawberries
2 jalapeños
For the frosting
1 whole avocado
1/2 lemon (zest and juice)
2-2 1/2 cups powdered sugar
Pre heat oven to 350
Wash, trim and dice strawberries into little pieces and toss into a bowl. Remove stem and seeds from jalepenos and dice into small pieces.. add to bowl. Sprinkle with a little sugar.
In a large bowl, combine flour, cornmeal, baking soda, powder, salt, and sugar and whisk together. Now add in the oil, milk, and vinegar and mix together with a wood spoon until combined. Lastly, fold in the strawberries and jalapeños.
Scoop mixture into well greased (or lined) cupcake tin and stick into oven. Bake for about 20-25 minutes, or until cakes are gold brown and a tester comes out clean. Remove from oven, remove form tin, and sick on a wire rack to cool.
While the cakes are cooling, take the avocado, sugar, and the zest and juice of half a lemon and blend with your choice of blending drive until smooth. The icing should be thick enough to If the icing is to runny, add more sugar, or to thick, a little more lemon juice.
Now Ice cupcakes and top with sliced strawberries.
Eat for breakfast, lunch, dinner or dessert.
No utensils required, just some teeth.
Guess what guys ….I got myself a sick vintage waffle/ griddle iron. I couldn’t be more thrilled!!! I found this thing at the local recycled goods store the other day, along with a very beautiful old white pyrex mixing bowl. It was one of my best thrift store scores! (Checking out the inventory and the condition of all the old things that day, I would say an old lady had just died and all her perfectly keep, mint condition kitchen stuff had just been donated. But it’s cool, cause I get the feeling that she was at least 90, with a big loving family, and was happy until the day she died. And I am sure she would be pleased that I have taken over the waffle maker. Thanks old lady!)
And now I am pretty sure that everything I make for the next week will be cooked on said waffle/griddle. I am serious, I already have a list of things to try and cook on it; cookies, biscuits, granola bars, potatoes, fruit, some type of pasta situations…. the list of possibilities is endless and I bet that at least 1/2 of these things will be totally awesome and amazing.
But first thing first. I need to make dinner.
So waffles for dinner!!
Note. These waffles are completely 100% fantastic for any meal you want to make them for. They consist of nothing more then beans, a shit ton of veggies, and just a bit of cornmeal. But don’t let that fool you because they are super packed full of so much flavor, have a really soft tender inside, with a nice crispy outside and are so super pretty. They are wonderful! The stuff. First, we got a big old pile of shredded up veggies which include; carrot, beet, sweet potato, onion, parsnip, celeriac, and a little bit of kale. A we got a bowl of rinsed and strained white beans, a little bit of cornmeal and salt, pepper, and garlic powder.
The makings of something amazing!Before you do anything. get your waffle iron out and preheat it.
While thats going on, take you beans, add 3/4 cup water and puree until smooth with whatever blending device want to like to use. (I used my hand blender…less to clean)Now collect all the shredded veggies and dump into a big bowl with the bean puree, the spices and the cornmeal. Mix until combined. The batter should be thick, but not dry. If its seems to wet, add more corn meal, or too dry, add a little more water.
Note how my batter turned a magical pink… I love beets, they make everything pretty! And check out that bowl!When your waffle iron is preheated, oil it if needed (if your not sure, add a little oil just to really make sure your waffles don’t stick) and take appropriate size spoonfuls of the batter and stick on iron. Close it and wait…..My iron has a little light that turns on when the waffles are done cooking, so I waited patiently (ok iI did open it a few time) until light tuned on and removed the perfectly cooked waffles.
Did I mention how awesome my new/old vintage iron is?
SO AWESOME!!
I made a little gaucamole and gave the mister and little bowl of plain Greek yogurt with lemon juice, but feel free to top, drizzle, or dump whatever you want onto these beauties…
Happy waffle Wednesday!!!
-C
Veggie Bean Wonder Waffles
Makes 8-10 waffles (in my iron) feeds 2-3 peeps
1 small carrot shredded
1 small parsnip shredded
1/2 a small celeriac root
1 small beet shredded
2 kale leaves chopped into tiny bits
1/2 an onion, shredded
1/2 a small sweet potato shredded
1/2 cup cornmeal
2 cups(or 1 can) cooked, rinsed and strained white beans
2 teaspoons garlic powder
teaspoon each salt and pepper
oil for iron(if needed)
Note on veggies… I used what I had in the fridge and shredded, it came to about 3 cups. If you don’t have these specific veggies or only want to use a few.. go for it. Just make sure to have 3 cups of whatever veggies you use.
Take you beans and blend them up with whatever device you would like to use. Once creamy, add to a bowl with the rest of the ingredients. Stir until combined.
Once the waffle iron is preheated, oil it( if needed) and place the recommended amount of batter right on it there. Close and cook until golden brown and waffly.
Serve on a plate with topping of your choice, A few suggestions.. Guacamole, salsa, hummus, mustard, greek yogurt… anything that tastes good to you.
Eat as breakfast, lunch or dinner…
Fork into face
A couple of days ago, during a grocery store porous, I stumbles upon a produce item that I have not seen sold in stores before, Broccoli leaf. And I was kind of surprised to see that they were selling bunches of the leaf, organic, at 2 bucks a bunch. I was very excited ! But wait.. You can eat broccoli leaves? Heck yes you can! Broccoli leaves are fantastic. They taste kind of like broccoli, have a hearty texture like a collard, and can be used raw or cooked just like any other green. Its just one more super yummy green to add to your repertoire. So when I bring home something that I find to be a good score, like a bunch of broccoli leaves, I feel like I have to share it with the mister. (I am so nice) And this dish was how I shared them…. Tossed into a bowl of garlic raging pasta. The stuff…. A bunch of broccoli leaves, lots of garlic, pasta, olive oil, salt and a lemon. Pretty simple right? Fist off, get your water boiling for the pasta. Once its ready, drop a pinch of salt into the water and stick pasta in for the amount of time recommend by pasta box people. While the pasta is boiling, mince up the garlic (I used my garlic press) into a skillet and add in the oil. Stick on a burner on medium for a few minutes, stirring around to make sure the garlic doesn’t stick and burn. Once you start to smell the garlic, turn heat onto low, chop up the broccoli leaves (stems and all) and stir around until wilted and add in the juice of half a the lemon.When the pasta is cooked, remove a few tablespoons of starchy water and strain the noodles. Add water and pasta right into the skillet with the other stuff. Toss around, taste, season with salt and pepper. Go ahead and add some chopped tomato and or parmesan cheese if you want. And serve your amazingly amazing pasta. And make sure that you are ok with really smelly garlic breath…Casue it’s going to happen. Keep it good! -C
2 servings of your favorite pasta (spaghetti, penne, vegan, gluten free…..)
8 or so fresh garlic cloves
1/4 cup olive oil
salt and pepper
lemon (optional)
parmesan cheese (optional)
Start by bringing a pot of water to a boil with a pinch of salt. Add in pasta and cook per instructions on box. While pasta is cooking, mined garlic and add to a skillet with the oil. Place on a burner on medium heat and cook and stir until the garlic becomes fragrant. Chop the broccoli leaves (stems and all) into bit sized pieces and add to the garlic oil and toss around to wilt the leaves. Squeeze in some lemon juice. Once the pasta is done cooking, remove a few tablespoons of the starchy water and strain the pasta. Add the water and the noodles to the skillet, toss to evenly coat the pasta and call it down. Serve in a bowl or on a plate, topped with freshly chopped tomatoes and parmesan cheese if you so shall please and another little squeeze of lemon juice if you like. Watch your mouth.. it will be breathing out garlic like whoa.
First things first… This is the BEST SOUP EVER! And yes, soup is for summer too.
I make a lot of soup, especially in the summer. It’s one of the best ways to use up an extra large bounty of any kind of veggie. And with me, I am that person that everyone know will take any or all of the extra veggies that come out of their gardens. I have been handed down bags of fresh produce, loving picked by some old man from his backyard garden who then gives it to his grand daughter, who then gives ti to a friend, which then gives it to a sister, then gives it to me. I think I end up with all the extra veggies in the county (keep them coming) And around these parts, the zucchini are starting to come in and I have already gathered a mound of beautiful green zucchinis on the eating table. It’s kind of fantastic I am more then happy to take all of your extra zucchini, even the kind of big ones… cause I can make just about anything out of zucchini. And I will for sure eat it all.
With that said, you might not want to give me ALL of your zucchini because you are going to want to make this soup.It’s smooth and creamy (thanks to all the zucchini) but still has a nice chunkiness from the lentils. And the spice is nice, even on a warm day. Plus, this is one of those soups that tastes just as good cool as it does hot..
I was serious when I said that this was the best soup ever, becauce it is. (for now)
So make the soup,then give me your extra zucchinis…. if you have any left after this.
The stuff. Lots of chopped up zucchini along with a chopped up carrot and an onion. Curry powder, salt and pepper, and some oh so sweet little red lentils.
Grab a large pot and toss all of the chopped up veggies, a good handful of curry powder, salt, pepper and a cup or so of water, right on in. Give it a stir and place on medium heat with a lid and let the veggies cook down until nice and soft.
Once all the veggies are tender, remove from heat and add in enough water to completely sumerege the veggies.
And now bust out the blender, or hand blender and blend the veggies as smooth as you like, adding more water if needed to get the soup moving. Here is a good tie to taste and season it with a bit more of whatever you need.
Now dump in the lentils into the soup along with another couple cups of water for good measure.(don’t worry if it seems watery.. the lentils will suck up the water) Stir, bring back to a boil, then turn heat down to low and stick the lid back on. Let that simmer until the lentils are cooked.
And maybe you want to be a little fancy… add a few thinly sliced zucchini to the pot, you know, for a tasty garnish.
Scooped into bowls, with the garnish and lots of cracked pepper.
Now go for it.
And watch out, I though I made enough for the mr. and I to eat for a few lunches, but we ended up eating almost all of it in one sitting and then I ended up eating the little bit left for a mid afternoon snack (I was amazing cold too!). But it’s cool, I up making it again today.. So f*ing good.
Have the most fantastic day!
-C
2 -3 zucchinis ( I used one really big one)
1 large carrot
1 medium yellow onion
1 uncooked cup red lentils
2 -3 teaspoons curry powder*
salt and pepper
water
*Use a pre blended powder, or make your own. I use a combination of equal(ish) parts cumin, cardamon, coriander, turmeric, cayenne, and ground mustard. And I tend to go heavy on the cumin and turmeric… But do whatever you like.
Chop up the veggies and toss into a big pot with the curry powder,a good pinch of salt and pepper, and about a cup of water. Stick on burner on medium heat and cover. Cook for about 8 minutes, making sure that the water never full evaporates (just add more if needed ) and conitunue to cook the veggies until they are all soft and tender. Remove from heat completely submerge the veggies with water. Now either with a hand blender, or a regular blender, puree the veggies until smooth . Place puree back into pot (or leave in pot) and add in the red lentils and another 2 cups water. Bring the soup back to a boil then turn heat down to low, cover and let the lentils cook through completely. The soup is done when the lentils are cooked through and you are ready to eat. And if you think that soup is to thick, add more water, or to thin, cook down fa little longer.
Scoop soup into bowls or cups, add a few thinly sliced pieces of zucchini on top with lots of freshly ground pepper (if you want) and enjoy with s smile and maybe a spoon.
I probabaly have already told you, but August is for sure my favorite month of the year (well,one of my favorites)
There is bounties of bounties of fresh, sweet and colorful, oh so juicy, crispy crisp, just so f ing amazing, produce exploding all over the place. I have probably gained like 75 thousand pounds in the past month due to all of the fruits and veggies that I have been consuming. I am starting to consider it a full time job just to keep up with the eating.
Another reason why I love August so much is becauuse the days are still nice and warm, but the nights are starting to cool which means I get to make so much soup!!!!!.
This soup is the freshest freshy soup yet. Everything is from the farm and or the garden (except the salt pepper, vinegar and oil), some picked within hours of me making this.
. I am a lucky/spolied veggie brat.
Anyways. This soup. The fresh tomato base gives it a sweet, slightly acidic kick. So super creamy due to the lovely earthy stocks of the chard. Slightly spicy and earthy from the arugula* and chard green green. This soup… it just tastes so fresh and clean, yet hearty and satisfying. A perfect soup for a mid August night, eating outside, watching the sun slide behind the mountains and the temperature dropping just enough that you might want a light sweater. Or you can just eat it from the pot in the kitchen while watching TV. It’s good eating anyway you want.
*Here in America, it’s called arugula. Else where , it’s called rocket. I wish we all called it rocket, although I do like the name arugula, but for like my first born child or maybe a pet goldfish. Anyway, rocket is arugula, or vice versa.
Soup time!.
The stuff. Some big fresh tomatoes, a few stalks of chard, and a few handfuls of arugaula (aka rocket). A couple carrots, an onion, some garlic, salt and pepper and a bit of olive oil.. Oh, and I added some balsamic vinegar, which for some reason didn’t make it into the picture (sorry vinegar)
Start by removing the chard leaves from the stalks. Set aside leave with the arugula. Chop up the carrot, chard stems, onion and garlic and toss into a big pot with a drizzle of olive oil, a splash of water, and a sprinkle of salt and pepper. Stir around and stick o nthe stove on medium heat for about 10 minutes until the veggies start to soften up.
Now chop up the tomatoes into chunks and toss those right into the pot with the other stuff. Add in a few cups water and a few glugs of balazmic vinegar. Bring everything to a boil and then turn heat to medium low and place a lid on pot and let cook at medium heat for another 20 ish minutes, or until the tomatoes are falling apart.
Now that everything is all cooked up, blend it up.
And now take the chard leaves and the aruglula and chop into little pieces….into the pot they go.
Mix it all up.. and take the blender to the soup again….if you want a smaller sized bite.
Soup Into bowls..Then into mouth.
Happy August!!
And hey hey hey.. Have the best weekend!
-C
4-5 large fresh tomatoes
4 large stalks of rainbow chard
2-3 big handfuls of arugula
1 medium onion
1 large or 2 small carrots
4-5 garlic cloves
2-3glugs (about 2 tablespoons) balsamic vinegar
3 cups water
olive oil
salt and pepper
To start, remove stalks of chard from leaves and chop stalks, onion, carrot and garlic into chunks and place int a big pot with a drizzle of olive oil, a splash or water, and spinkle of salt and pepper. Place on stove on medium low heat sand cooke the veggies down until starting to soften and garlic is becoming fragrant. While that cooking, remove core from tomatoes and dice them up. Toss into pot with the cooked down veggies with the vinegar and water. Place a lid on the pot and let cook for about 20-25 minutes or until the tomatoes are falling apart.
When cooked, using with a hand blender or a normal blender, blend the soup until smooth. (if using blender, pour back into pot)
Now take the arugula and chard leaves and chop them into wee little picese and mix into soup. If you want to, blend the greens into the soup.. but not until smooth, unless thats what you want. Cook for another 5 minutes. Taste and season with more salt and pepper to taste.
Ladle into bowl and serve with lots of fresh cracked pepper, maybe a little balsamic drizzle or even some mustard (I at left overs with mustard and it rocked my world)
My contribution to last nights dinner at my sisters…. Freshy fresh veggies spring rolls.I had about 30 minutes between work and getting over to my sisters house to throw something together so it needed to be something fast, easy, and something I could make without going to the store. She was making the main course (some teriyaki situation and rice) so I was doing up the veggies.
I had just bought a package of spring roll wrappers…. Bingo! The perfect and logical choice. I grab the wrappers, a variety of veggies and after spending 12 of my 30 minutes trying to scrub the oil based paint off of my face and hands, I still managed to completely prepare, construct, and take pictures of these lovely tasty spring rolls. and get over to my sisters in time for dinner.
Impressed?
Damn right!
The stuff. Carrot, beet, asparagus, red cabbage, and kohlrabi, which all (except asparagus, which I just cut into thirds) got cut into matchstick sized pieces with my mandoiln. Then there are the rice spring roll wrappers that we need to make the veggies into rolls. Also a bit of red wine vinegar to drizzle onto the veggies for a little extra zing. And lastly, soy, fresh ginger, and a couple cloves of garlic for a spicy salty dipping sauce.Start by having everything set out and ready to assemble. Fill a large shallow dish or baking sheet with really warm water. Working with one at a time,place a rice wrapper into water and let sit for about 10 seconds or until the paper starts to soften. Remove from water and place on a damp surface (just splash a little water on the counter) Take a little bit of everything and and place on the lower middle part of the paper. Fold in the sides first, then tuck and roll the wrapper as tightly as you can without ripping the wrapper.
Repeat until you have used up all you veggies.For the dipping sauce. Finely grate ginger and garlic and add to soy sauce. Stir… and it’s done.Freshy, pretty and fantastically delicious. And for real, took about 8 minutes to make. (I even had enough time to wash the dishes before we left!)
I am so awesome!
Hump Day Pow!!!!!
-C
Fresh Veggies Spring Rolls
Makes 8-10 but can easily be increased or decreased to desired amount
8-1o rice spring roll papers
Splash of Red wine or rice vinegar
1/4 cup soy or tamari sauce
2 cloves of garlic
teaspoon freshly grated ginger
1 medium carrot
1 medium beet
1/4 head of purple cabbage
10 thin fresh asparagus
1 small kohlrabi
Note… I used the veggies that I had in the fridge at the moment. If you have a bunch of veggies but not these particular ones, use what you have. Pretty much all veggies taste good inside a spring roll!
Gather your veggies and prep by either using a mandolin, a grater, or some sick knife skills, and julienne, shred, or slice you veggies into thin match sticks. Once all the veggies are prepared, sprinkle a little vinegar over the top.
For the rolls…Grab a large shallow vessel (a rimmed baking sheet works great) and add in warm water. Working one at a time, place the wrapper into the water for about 10 seconds or until the wrapper starts to soften. Remove and spread onto a clean, damp work surface. Gather a bit of each veggie that you are adding and place towards the bottom middle of the wrapper. Now fold the sides in over the pile of veggies. Then with the side closest to you, tuck and roll wrapper away from you, trying to keep it tight, but not to tight that it rips.. (Hopefully that makes since.) Place finished rolls onto a damp surface to keep from sticking and if not serving right away, drape with a damp towel or paper towel to keep from drying out.
For the soy ginger dipping sauce. Add grated ginger, minced garlic, and soy into a bowl and mix together. Serve with spring rolls.
Eat one, two, or a plateful. It’s nice to share but not a necessity.
And that’s how I know that this is a winner. As an awesome aunt, when I have any of my nieces or nephews, I feel the need to make something special for dinner, something that the kiddos might not get very often, but also keep it on he healthy side. I have 2 littles for the night which gives me the perfect opportunity for a trash food recipe. You know trash food, things like boxed mac and cheese, beefaroni in a can, or, in this case, sloppy joes.
Sloppy yes, trashy, not so much. These are made with beans and bulgur. No meat.
And I figured it is nice enough out that I can make the kiddos some messy food and then just bring them out back and hose them off… I mean, why not right?
The stuff… We start with onion and green pepper, chopped into pieces. Black beans, bulgur, can crushed tomatoes. Chili powder, garlic powder, a bit o apple cider vinegar (which I forgot to picture) ,and some salt and pepper. Oh and cheese if you want… Plus a bun of some sort is necessary. Toss the chopped onion and peppers into a deep skillet or pot with a drizzle of oil. Cook on medium heat until tender and toss in the spices. Give a stir. Add in the beans, bulgur, and tomato, a splash of vinegar. Stir it all up, cover, and let simmer for about 15 minutes, or until the bulgur has absorbed the liquid and is nice and tender.
If you are a bun toaster… toast while waiting. If not, just get the buns ready And Then dump a good heaping pile right onto a bun. Add some cheese, or not..and eat with wild abandonment, making sure to get as much on your face as you get in you mouth.
Fantastic Friday!! Live it up.
-C
Black Bean and Bulgur Sloppy Joes
2 cups or 1 can cooked black beans
1 16 oz can crushed tomatoes
1/2 cup bulgur
1/2 cup water
1 small onion
1 green pepper
1 teaspoon garlic powder
1 teaspoon chili powder
salt and pepper
a splash of apple cider vinegar
olive oil
4-6 burger or bulky buns
cheese (optional)
Dice the onion and the pepper and toss with a drizzle of olive oil into a large skillet. Sauté on medium heat until veggies become tender. Add in the spices, stir in and let cook for a minutes, then add in the beans, the tomato,water and the bugler. Cover skillet and let simmer until bugler becomes soft.
When the slop is ready, either toasted or not, scoop a generous portions onto buns. If so inclined, add some cheese.
Eat with hands… Sloppy is good.
Before we left for the weekend, I was was trying my hardest to empty the fridge out of all food with the intention of leaning it empty so I could leave it open to defrost while were were gone. Unfortunately I was not able to make it happen. What I did make happen was emptying it almost completely so that when we got home, we had pretty much no food in the house, except for a few things that probably should be eaten. Plus one of the last things that I want to do after sitting in a car for 6 hours is go to the grocery store, or anywhere for that matter, so I was determined to make with what wet had in the fridge:
Carrots
half of a gigantic kohlrabi
soy milk
iced tea
bananas that needed to be frozen
strawberries
Perfect! A few carrots and half of a gigantic kohlrabi.. plus at the hotel we were staying at, there were fruit bowls in he lobby full apples. Every time I went past the apples (which was a lot) I grab one or two, so I have a few apples (I actually have a lot of apples now). All the things I need for a super awesome salad slaw. Apples with their nice sweet crispiness and kohlrabi with its cabbagey, crunchy earthiness, tossed together with some vinegar, some toasted walnuts and some carrots, I mean, so freaking good. And to make it a bit more of a meal, I made some lentils to go with it. But the best part was there was no need to leave the house!!
The stuff… A huge hunk of a bigger then my head kohlrabi (or 2 normal bulbs). A carrot, an apple, toasted walnuts, red wine vinegar, and some salt.
Pretty simple stuff going on here. Just peel and julienne the kohlrabi, carrot and apple. (no need to peel the carrot or apple unless you want too) and stick it all into a bowl. I used my mandolin, which is one of my favorite kitchen tools ever, but if you don’t have one, a box grater works too.Sprinkle with salt and a good glug glug of red wine vinegar. Chop up the walnuts (some big chunks and some very small pieces makes for good eating), toss it all together and, well that’s it. But wait…. let it sit for a few minutes before serving to really let the flavors draw out.And there we have it. Super fast, full of flavors and crunchy texture. A salad slaw after my own heart.
Serve it as it or add to a bed of greens, rice, or lentils… and make sure to save at least as little… cause its an awesome little pre-bed snack.
Happy Week!!
-C
Kohlrabi Apple Walnut Slaw
2 medium sized Kohlrabis
1 medium apple
1 small carrot
1/2 cup toasted walnuts
red wine vinegar
salt
In a large bowl, julienne kohlrabi (after peeled) apple and carrot. Sprinkle with salt, add in vinegar. Rough chop walnuts and toss the whole bit together. Let sit for at least 10 minutes, if not longer before serving. (A great salad to make ahead of time)
Eat as is, or toss onto a bed of greens, plate of rice or a bowl of lentils.
Any left overs only end up tasting better the next day.
Last week pineapples were on sale everywhere……So I bought 5. Don’t judge
And I bet I am not the only one that got overly excited at $1.50 pineapple and bough themselves a few. We will just call ourselves opportunists. Now we have plenty of pineapples and don’t have to pay the $4 a piece prices. (Justification)
But if you don’t have a pineapple laying around, you must go get one. (Maybe if your lucky, there might still be some sales going on) because you must make this salad. I am on a mission to make everyone I know eat it because, for lake of a better way to say it…….It will rock your world.
Dill and pineapple are a serious match made in heaven. Pineapple, with its sweet, tangy, citrusness and dill with it’s super fresh earthiness. Mixed together with a few other helpers to create a fresh, clean, chunky, tangy, over the top, flavor. I could stop right there, but toss in a handful of lentils, some creamy avocado and a bed of kale…It’s like the best spring time, celebration on you tongue, happiness in you tummy, kind of salad.
A salad that will make you smile. (and maybe buy 5 pineapples)
Stuff for the goodness. We got the kale, some avocado because all salads should have avocado and some cooked lentils because, well, all salads should have lentils (or beans or nuts.. so you could totally something else) Then a few sprigs of fresh dill, a clove of garlic, red wine vinegar, salt and a bowl of chunked up pineapple. The pineapple, dill, garlic, red wine vinegar, a splash of water and a pinch of salt get blended in a blender or whatever blending device you use. Go as smooth or chunky as you like, I recommend going smooth, but leaving a little chunk, like half blended.
The prep is done, now compile. Kale in bowl, top with lentils,. Toss on avocado chunks, and, last but not least, the blended pineapple dill mixture.So good……So so good.
Happy Friday!!
-C
So Good Pineapple Dill Kale Salad
Serves Two
3 cups washed and chopped Kale
1/2 a avocado, diced
1 cup fresh pineapple chunks
1-2 springs fresh dill
1 tablespoon Red Wine Vinegar
Salt
1/2 cup cooked lentils (or any bean or nut will do)
Note. No fresh dill? You can use dried, just sub in 1 teaspoon for the fresh and after blending with the pineapple, let sit a little longer to really let the flavors meld together.
Place pineapple, dill, pinch of salt, vinegar and garlic into a blender or whatever you own that blends and blend stuff together, leaving it a little chunky. Let sit for 5-10 minutes.
Kale goes into a bowl and add the lentils and diced avocado. Pour the blended pineapple on. Toss around.
Now eat.
I love mustard, and when I say love, I mean LOVE. I eat it on anything and everything. And not just small quaintites, I buy jumbo sized containers of the stuff because I go through it so fast. Over the past few years I even started taking down others with my mustard eating obsession. Sisters, brothers, even some of the littles are now mustard eating feens. One of my little nieces is now just as bad as me. I don’t think I have seen her eat a single meal without a side of mustard. Her favorite snack, clementines and mustard, although sometimes she skips the clementines and just goes in with her fingers. Oh so good. I think that child could possible be mine. And yes, it’s mostly the yellow grocery store variety of mustard being consumed, but yellow mustard is just the tip of the ice berg. There is a whole world of flavors, textures and colors when it comes to the humble mustard seed. Whole grain mustard, to me, is one of the best and easiest to adapt to any persons specific taste. You can make it plan or add in just about any spice, vinegar, even a little sweetness that you might like. One of my favorite variations of this mustard is to skip the vinegar and use picked jalapeño juice. Aah, my mouth is watering just thinking about it.
So if you are anything of a mustard connoisseur, you really must, at least once, make your own batch.(It’s so easy!) And you will love it and share it with all your friends and they will think you are a bad ass for making your own mustard and your life will just be so great. All because you are now a mustard maker. Yes.
Yellow mustard seeds, brown mustard seeds, apple cider vinegar and salt. The most basic ingredients.
Note- If you want, add in a pinch of any spice that you want.. Chili flakes, granulated garlic, turmeric…. And you can use the vinegar of your choice. I like apple cider because its mellow with a slight sweetness but white or sherry or any vinegar would be great. Even left over picked juice is fantastic too.
In a large jar, combine the mustard seed , twice as much vinegar and a pinch of salt. Cover and let sit for on the counter overnight until the seeds have soften and look almost like caviar.
Now blend those seeds. You might want to add another splash or two of vinegar to help blend and to thin out a bit. Chose how creamy or seeded you like you mustard. I like to make it creamy but seedy so I blend it half way to creamy.
Taste and add another pinch of salt if its needed and……..
You have got mustard! Make sure you have a good snack ready to eat with it.. My go to is carrots. I could eat this all day long.
Enjoy and have a great Tuesday full of mustard and stuff!
-C
Whole Grain Mustard
1/4 Cup Brown Mustard Seeds
1/4 Cup Brown Mustard Seeds
1 Cup Apple Cider Vinegar
1 Teaspoon Salt
Optional..A pinch of Garlic Graduals, Red Pepper Flakes, Curry Powder (Anything you want)
Combine all ingredients into a large jar that has at least a few extras inches for the seed to expand. Leave on counter for 8-12 hours.
Once seeds are nice and soft and have expanded, either eat as is (Mustard seed caviar) or blend the seeds to desired consistency (I like it half smooth, half seedy) Add a pinch more or salt and another splash or two of vinegar to help blend.
Refrigerate and use on anything and everytihng.
I am so happy its Friday, but like whoa, this week has flown by so fast. I think I need to make a pie to slow things down a bit.. What Kind of pie am I making? We will get to that, but first we must make a killer pie crust, one to hold of the goodness to come.
Crusty Stuff. Flour, a stick of frozen butter (or a stick of frozen Earth Balance, which I have used and it turns out much the same) a bit of sugar, some salt, ice water, and apple cider vinegar*.
Whats with the vinegar you ask? Well first off, don’t worry about tasting it, you won’t. Secondly, I add it because it helps keep gluten from forming in the flour, which in turns makes the pie crust more flakey and less doughy. If the though of vinegar really bothers you, you can use lemon juice or even leave it out.
The flour, salt, ans sugar are mixed together into a bowl. Then with a box grater or hand grater with big hole, grate the frozen butter directly into the flour, stopping every few tablespoons to toss around in the flour. (DO this or you will end up with a big pile of shredded butter that is starting to melt back together) Also, hold the butter with the wrapper to keep from warming the butter with your hand.
Once the whole stick is shredded, take a fork and just toss the chunks around a bit more just to evenly distribute. Now add in vinegar and water. Toss with fork until the mixture starts to come together. If you think that dough seems way to dry, add in one more tablespoon of ice water.Dump the dough onto a lightly flour surface and kind of squish, smoosh dough into a pile. The dough is all clumpy and weird looking, Well thats what it is support to look like, so your good. Once the dough is gathered into a ball, place onto a piece of wax paper and wrap. Now is the most satisfying part..Smoosh the wrapped dough into a disk but applying pressure. Aaahh, kind of looked like pie crust. Now Stick it in the fridge for a least a hour (Don’t skip this or your crust will be blah)
Out of the fridge and awaiting a roll and a filling.
Weekend plans for a pie are set!
Have lots of good times!
-C
Pie Crust
Notes… You can for sure make this pie crust vegan by replacing the butter for a stick of Earth Balance. Also, this is the stuff for a single pie crust but I usually habra bit left over to make a few little cutouts for the top of the pie or pie scrap cookies.
To make this a double pie crust, just double everything up.
1 1/4 cups all-purpose flour
1 tablespoons granulated sugar
1/2 teaspoon salt
1/2 cup unsalted butter (or Earth Balace), cold or frozen
1/4 cup ice water
1 tablespoon apple cider vinegar
In a large bow, whisk together the flour, salt, and sugar. Place grater in bowl and with the biggest grate hole, grate the frozen or cold butter directly into the flour mixture, stopping ever few tablespoons to toss around in the flour so you don’t end up with a big pile of grated butter. With a fork, toss around a bit until the butter is evenly disrupted in the flour being careful NOT to work the butter into the flour. Add in the vinegar and water and mix as little as possible with a fork until the mixture starts to come together. The mixture will seem kind of dry and almost like it is falling apart, but thats what you want. If dough is really too dry, add in another tablespoon of ice water. Dump mixture onto a lightly floured surface and squish together to form a ball, handling as little as possible. Place on a piece of wax paper and wrap. Give it a good squish to flatten out a bit and place back into fridgerater for a least one hour, if not longer.
And then you have crust
Crust can be frozen.. just wrap in plastic wrap and place into a freezer bag.
When something goes on sale at the grocery store, I tend to buy it. Being that it is Valentines Day this week, all the stores are having specials on all sorts of sexy things… and strawberries are one of them. Now I am not a huge fan of buying produce that is terribly out of season, but I can’t help myself…a good deal is a good deal and the strawberries were a super good deal. I was just going to make some sweet ass strawberry jam or maybe a lovely strawberry cake with them (and I probably still will), but these strawberries are actually super juicy and full of flavor, and it’s always nice to eat some full flavor freshy strawberries… especially soaked in balsamic vinegar. And yeah, I think that this salad is pretty sexy, so it makes for a perfect Valentines day dish.
A handful of ingredients and 5 minutes will get you to a fantastic salad experience.
A bowl of baby spinach, a few chopped up strawberries*, half a sliced avocado and a small handful of toasted almonds.. Oh, and don’t forget the balsamic vinegar….
*Note.. Strawberries are kind of heart shaped already so if you want, reserve a few slices to fancy up you salad presentation, but chop up the rest into smaller pieces.
Pour the vinegar on the strawberries and let sit for at least 5 minutes. (the longer the strawberries can sit with the vinegar, the better)
Pile it on.. thinly slice avocado.. rough chopped toasted almonds… It’s pretty much as easy as it can get.And last but not least, toss on the balsamic soaked strawberries and drizzle the remaining vinegar. (if you made hearts, place on top to make pretty) Sprinkle with a pitch of salt and pepper and pow! Fancy, sexy, delicious salad.
Not to shabby for 5 minutes and a handful of ingredients. Anyone (don’t feed to a person with nut allergies) would be so syked to be fed a salad like this… You yourself should be pretty excited to eat a salad like this. Heck, I am excited to eat a salad like this!
A love salad for everyone and everyday!
YAY for Thursday and Happy meal planning!!!!
-C
♥ Balsamic Strawberries on Spinach Almond Avocado Salad ♥
Ingredients for 1 large or 2 small salads
3-4 ripe strawberries
handful of roasted almonds (slivers or whole)
1/2 avocado
2 tablespoons Balsamic Vinegar
3 cups baby spinach
Pinch of salt and pepper
Dice strawberries into small pieces (reserve a few whole slices for heart shapes if you want) and toss in a small bowl with the balsamic vinegar. Let sit for at least 5 minutes. Rinse and dry spinach. Place in a bowl(s) and top with thinly sliced avocado, chopped almonds and balsamic soaked strawberries. Drizzle the residual vinegar on top and sprinkle with a pinch of salt and pepper.
This past weekend, the mr, the pup, and I grabbed our stuff, chucked it into the back of the car and took of to the wood.
We ended up in Waterbury, at Little River State Park. Campsite 77 (the last one they had available!!) And from that we think, the best spot in the park.
First things first, set up camp. which involved the mr. popping up the tent and me making coffee and setting up the table.. Just cause we are in the woods doesn’t mean we can’t have a fruit bowl, right.
Then we spend the afternoon kicking around.. Into the woods we went. This place had so many hiking trails, we just let the pup lead the wayHe usually knows where he is going.
After a long afternoon of hiking and romping, we make our way back to our outdoor home for food. Dinner consisted of potato and sweet potato, squash and onions, kale, salsa and beans. It couldn’t have been any better. We did forget plates, but no matter, we managed.
Of course we needed to take an after dinner hike to the river and swim the pup. (We think he might be part fish)
He spent about an hour fetching stick and making sure that he couldn’t possibly smell any worse.
Playing with my camera and sticks. Then off to the tent for the three of us. (holy hell did the dog smell like shit)
Another morning hike and some time spent just hanging on the river. The mr fished, the pup swam and I collected rocks.
And then we went home, washed off the filth, and assed out…Then Washer got sick, but that’s a whole other story.
Camping is the best. I could live in a tent all year long. (not really all year long.. I would surely freeze to death)
So if you are thinking of camping, I highly recommend going to Little River State Park.
My contribution to last nights dinner at my sisters…. Freshy fresh veggies spring rolls.I had about 30 minutes between work and getting over to my sisters house to throw something together so it needed to be something fast, easy, and something I could make without going to the store. She was making the main course (some teriyaki situation and rice) so I was doing up the veggies.
I had just bought a package of spring roll wrappers…. Bingo! The perfect and logical choice. I grab the wrappers, a variety of veggies and after spending 12 of my 30 minutes trying to scrub the oil based paint off of my face and hands, I still managed to completely prepare, construct, and take pictures of these lovely tasty spring rolls. and get over to my sisters in time for dinner.
Impressed?
Damn right!
The stuff. Carrot, beet, asparagus, red cabbage, and kohlrabi, which all (except asparagus, which I just cut into thirds) got cut into matchstick sized pieces with my mandoiln. Then there are the rice spring roll wrappers that we need to make the veggies into rolls. Also a bit of red wine vinegar to drizzle onto the veggies for a little extra zing. And lastly, soy, fresh ginger, and a couple cloves of garlic for a spicy salty dipping sauce.Start by having everything set out and ready to assemble. Fill a large shallow dish or baking sheet with really warm water. Working with one at a time,place a rice wrapper into water and let sit for about 10 seconds or until the paper starts to soften. Remove from water and place on a damp surface (just splash a little water on the counter) Take a little bit of everything and and place on the lower middle part of the paper. Fold in the sides first, then tuck and roll the wrapper as tightly as you can without ripping the wrapper.
Repeat until you have used up all you veggies.For the dipping sauce. Finely grate ginger and garlic and add to soy sauce. Stir… and it’s done.Freshy, pretty and fantastically delicious. And for real, took about 8 minutes to make. (I even had enough time to wash the dishes before we left!)
I am so awesome!
Hump Day Pow!!!!!
-C
Fresh Veggies Spring Rolls
Makes 8-10 but can easily be increased or decreased to desired amount
8-1o rice spring roll papers
Splash of Red wine or rice vinegar
1/4 cup soy or tamari sauce
2 cloves of garlic
teaspoon freshly grated ginger
1 medium carrot
1 medium beet
1/4 head of purple cabbage
10 thin fresh asparagus
1 small kohlrabi
Note… I used the veggies that I had in the fridge at the moment. If you have a bunch of veggies but not these particular ones, use what you have. Pretty much all veggies taste good inside a spring roll!
Gather your veggies and prep by either using a mandolin, a grater, or some sick knife skills, and julienne, shred, or slice you veggies into thin match sticks. Once all the veggies are prepared, sprinkle a little vinegar over the top.
For the rolls…Grab a large shallow vessel (a rimmed baking sheet works great) and add in warm water. Working one at a time, place the wrapper into the water for about 10 seconds or until the wrapper starts to soften. Remove and spread onto a clean, damp work surface. Gather a bit of each veggie that you are adding and place towards the bottom middle of the wrapper. Now fold the sides in over the pile of veggies. Then with the side closest to you, tuck and roll wrapper away from you, trying to keep it tight, but not to tight that it rips.. (Hopefully that makes since.) Place finished rolls onto a damp surface to keep from sticking and if not serving right away, drape with a damp towel or paper towel to keep from drying out.
For the soy ginger dipping sauce. Add grated ginger, minced garlic, and soy into a bowl and mix together. Serve with spring rolls.
Eat one, two, or a plateful. It’s nice to share but not a necessity.
You ever make dish, completely on the fly, just to use something up (I have a lot of ripe tomatoes) with no real expectation, just because… Then have it be one of the best freaking things that you have ever made? This salad is one of those things.. maybe not the best thing I have ever made, but definitely the best salad I have ever made…. this week.
A salad compiled of all things amazing, taking just a few minutes to make and is the perfect balance of uber fresh with baby spinach, raw kale, and crunchy quick pickled onions. Then adding a touch of warmth with the sweet and juicy seared tomatoes and big chunks of creamy avocado.
I mean, for reals. ……Best Salad Ever !!!! (this week)
Now let’s do this.
The Stuff. A big bowl of baby spinach and chopped up kale, a few sliced up roma tomatoes, some super thinly sliced red onion, half an avocado, red wine vinegar and salt and pepper. Before you do anything, place the sliced onions into bowl, sprinkle with a pinch of salt and add a few glugs of the red wine vinegar. You want the onions to sit in the vinegar for at least 5 minutes on the counter cause the longer they sit the more crispy pickly they get. (after eating onions like this, you will never want to eat them any other way) Lightly oil a skillet and preheat to a medium heat. Once the skillet is hot, sprinkle the tomato slices with salt and pepper and place tomatoes right on in, snugly, but not overlapping. Let cook for about 3-4 minutes, or until the bottoms start to brown. Flip and cook other side for another few minutes.Once the tomatoes are seared on both sides, remove them gently from skillet and toss them on top of the bowl of greens.
Take the pickled onions and toss those right on top, with any of the residual vinegar, add dice and scoop the half of avocado and toss that on in as well.And now eat the best salad ever (this week).
Make the day good!
-C
Skillet Seared Tomato and Quick Pickled Onion Salad
Serves 2 as a side, 1 for a hungry eater
2 large or 3 smaller roma tomatoes
1/2 of a red onion
2-3 tablespoons red wine vinegar
1 1/2 cups baby spinach
1 1/2 cups chopped kale
salt pepper
1/2 a ripe avocado
olive oil (to grease pan)
Thinly slice red onion and place in a bowl. Add vinegar into a and sprinkle with salt. Let sit on counter for at least 5 minutes, if not longer,
Slice tomatoes into 1/2 inch thick rounds and sprinkle with a pitch or salt and pepper. Lightly oil a skillet and preheat it on medium heat. Once the skillet is preheated, stick the tomatoes on it (watch out for splattering tomato juice) Cook first side for about 3 minutes or until the bottom has browned, then flip and do the same for other side.
One tomatoes are seared, place directly onto the greens. Now dump the pickled onions and residual vinegar on top. And dice up avocado and add that on top too.
Now eat your salad, fork or fingers…
And I know, ba-daaaamn. So good.
I figured now is a good time to get this recipe out there before we get to far into spring and summer recipes because there is going to be a lot of banana ice cream filled recipe coming and I figured its a good idea to have the basic banana ice cream recipe ready for people to refer too. And because I made so much fantastic naner ice cream, I also made a cookies and cream naner ice cream for my sisters and the mister.
Comments that I got from my sisters and the mister when I made them this ice cream
-Sister one.”I give this my sister seal of approval.. It’s so good. The first dessert you have made that I liked! (not including all the other desserts that you have made that I liked)”
-Sister two- “Wow.. it looks like ice cream and feels like ice cream and tastes like ice cream.. You should make me this ice cream!” (I was confused too because I was pretty sure I just made her some)
-The mister- “I am so excited for my new fly fishing pole!”
Ok, so the naner ice cream isn’t new to the mister and he IS very much excited for his new fly fish pole. So excited that he forgot to tell me how amazing that I am and to thank me for making him a big bowl of yumminess. (It’s ok, I forgive him)
And yes, this is probably one of the easiest, most delicious, healthy and amazing frozen dessert that you will ever eat. You will probably find yourself buying mass amounts of bananas and stocking the freezer until things just start falling out. (which is also ok because it’s only bananas and you can’t have too many frozen bananas)
The stuff you need for this ice cream…. Nice and ripe bananas, peeled and then frozen* That’s it.
To make it, place frozen bananas into food processor and hit the on button. Process the crap out of the namers until nice and silky smooth.
*Note, the smaller the frozen chunks are , the faster and maybe a little easier for the blender to blend the naners into ice cream. So if you think of it, chop bananas into pieces before freezing or even after.
After all blended and smooth, either eat right away or scoop ice cream into a freezer safe container and stick in freezer. That’s the banana ice cream… And it is amazing and so so so so so addictive. I make a batch, think I am only going to eat a scoop, then find myself eating half of what I have made, but it’s ok cause it’s only bananas.
Now for the cookies and cream banana ice cream..One batch of banana ice cream, either freshly made, still in food processor or made ahead and placed in a food processor and given a good pulse to smooth it up.
Add cookies in, crushing a bit beforehand and pulse till combined. Now you have cookies and cream naner ice cream…. and everybody is happy.
Scoop into a cup, a bowl, a freezer safe container, or directly into your mouth. Be careful…. You can still get brain freeze from eating naner ice cream too fast!
Keep it real hump day drum bum!
-C
Basic Banana Ice Cream
Makes one batch. Good for 3-4 servings
4-5 ripe bananas peeled and frozen
Peel bananas and stick in a freezer bag or container and freeze. When bananas are completely frozen, break into pieces and stick into a food processor or blender and puree until silky smooth.
Eat right away or scoop into a freezer safe container for later.
Cookies and Cream Banana Ice Cream
1 batch banana ice cream
5-10 (depending on your cookie need) cream filled cookies like oreos or Trader Joe’s Joe Joe’s (These are gluten free)
In a food processor, blend banana ice cream with cookies.
Eat right away, with a utensil of choice in a container of choice.
Bowl licking is acceptable.
Before we left for the weekend, I was was trying my hardest to empty the fridge out of all food with the intention of leaning it empty so I could leave it open to defrost while were were gone. Unfortunately I was not able to make it happen. What I did make happen was emptying it almost completely so that when we got home, we had pretty much no food in the house, except for a few things that probably should be eaten. Plus one of the last things that I want to do after sitting in a car for 6 hours is go to the grocery store, or anywhere for that matter, so I was determined to make with what wet had in the fridge:
Carrots
half of a gigantic kohlrabi
soy milk
iced tea
bananas that needed to be frozen
strawberries
Perfect! A few carrots and half of a gigantic kohlrabi.. plus at the hotel we were staying at, there were fruit bowls in he lobby full apples. Every time I went past the apples (which was a lot) I grab one or two, so I have a few apples (I actually have a lot of apples now). All the things I need for a super awesome salad slaw. Apples with their nice sweet crispiness and kohlrabi with its cabbagey, crunchy earthiness, tossed together with some vinegar, some toasted walnuts and some carrots, I mean, so freaking good. And to make it a bit more of a meal, I made some lentils to go with it. But the best part was there was no need to leave the house!!
The stuff… A huge hunk of a bigger then my head kohlrabi (or 2 normal bulbs). A carrot, an apple, toasted walnuts, red wine vinegar, and some salt.
Pretty simple stuff going on here. Just peel and julienne the kohlrabi, carrot and apple. (no need to peel the carrot or apple unless you want too) and stick it all into a bowl. I used my mandolin, which is one of my favorite kitchen tools ever, but if you don’t have one, a box grater works too.Sprinkle with salt and a good glug glug of red wine vinegar. Chop up the walnuts (some big chunks and some very small pieces makes for good eating), toss it all together and, well that’s it. But wait…. let it sit for a few minutes before serving to really let the flavors draw out.And there we have it. Super fast, full of flavors and crunchy texture. A salad slaw after my own heart.
Serve it as it or add to a bed of greens, rice, or lentils… and make sure to save at least as little… cause its an awesome little pre-bed snack.
Happy Week!!
-C
Kohlrabi Apple Walnut Slaw
2 medium sized Kohlrabis
1 medium apple
1 small carrot
1/2 cup toasted walnuts
red wine vinegar
salt
In a large bowl, julienne kohlrabi (after peeled) apple and carrot. Sprinkle with salt, add in vinegar. Rough chop walnuts and toss the whole bit together. Let sit for at least 10 minutes, if not longer before serving. (A great salad to make ahead of time)
Eat as is, or toss onto a bed of greens, plate of rice or a bowl of lentils.
Any left overs only end up tasting better the next day.
I can’t stop eating these. They are like little balls of crack and I am an addict.
Frozen peanut butter grapes… I mean, I just can’t stop.
So you say you have never frozen your grapes? Well you should. It’s the only way I like to eat them anymore. I was never a huge grape fan, but one day long ago, I discovered the wonder that is the frozen grape and it is amazing, Now whenever grapes are on sale at the grocery store, I buy way to many and end up filling our tiny little freezer with jars and bowls of grapes. Then whenever the mister goes to grab the bag of frozen peas for his sore back or knees, there is almost always a frozen grape avalanche. Why I don’t put a lid on those containers is even a mystery to me. Oh, now I remember.. I want easy access.Oopen the freezer, grab a few grapes, and go on my way… not having a lid to take off makes the process a little easier.
Then one day, the frozen grape game turned into something else, something a little more decadent and even more addicting. Where it came from, I do not know. Maybe it’s some subconscious throwback to a childhood full of peanut butter and grape jelly sandwiches, or maybe it’s just that fact that I think peanut butter can pretty much go with anything. But no matter why, I started dipping those frozen grapes into peanut butter and never looked back. And now when I have grapes, it’s all I want to eat.
I am warning you now, once you start making these, watch out, because before you know it, you will develop a frozen grape addiction too. And littles.. they are as easily addicted to these as well. I have seen kids that hate grapes go totally bonkers for these. Just so you know.
The stuff you will need. Washed and drained fresh grapes (green or red. I usually use red but the green were half the price and the red ones didn’t taste very grapie*) Creamy peanut butter, skewers, and a little bit of cinnamon or cocoa powder (optional)
*Note. When you are the store, try before you buy. You know what I mean, eat a few while shopping aground. I say this because not all grape are created equal. Some taste way better than others. I have bought grapes before that didn’t taste like anything or that have really tough skins, and those just piss me off, so eating a few will guarantee that your money is being well spent and that the grapes won’t disappoint you.
Ok, so now let’s make these bad boys.
Simple simple. Two grapes per skewer (or toothpick) Lay on a wax paper covered dish or pan and stick them in the freezer until frozen. When the grapes are frozen, melt peanut butter. Take a big glob and stick in a tall skinny cup or bowl and stick in the microwave or heat in a sauce pan and then transfer to a tall skinny vessel. Take frozen skewed grapes and, one skewer at a time, dip in the peanut butter. Cover with as much or as little of the peanut butter as you want and place on wax paper. If you are feeling feisty, add a sprinkle or cinnamon or even a dash of cocoa powder. Or, this may seem a little crazy, but garlic powder is so F*ing good.(it’s worth at least giving it a try) When all grapes are dipped, place back into freezer for another 10 minutes or so to let the peanut butter set up a bit.
Whenever your ready… Eat. And be so happy. And always keep a back stock of frozen grapes in the freezer. They are the best.
Keep it realz.
-C
Peanut Butter Freezer Grapes
the quantity is up to you, but I recommend making a shit ton!
Creamy Peanut butter (I use organic creamy from Trader Joes, or natural skippy)
Green or Red Grapes
Cinnamon and or cocoa powder (Optional)
Toothpicks or skewers
Wash grapes and skewer 2 grapes onto a stick. Place on a flat surface and stick into the freezer until frozen, which usually takes about an hour.
Once grapes are frozen, stick a big glob of peanut butter into a tall skinny vessel (Like a juice cup or a 4 oz ball jar) and warm to a liquid constancy in the microwave (about 30-45 seconds) or if you don’t have a microwave, stick in a sauce pan, warm on stove, and pour into a glass (what I do)
Remove frozen grapes from freezer and dip into melted peanut butter. Place on a wax paper line tray or pan and sprinkle with cinnamon and or cocoa powder, or not, or a few (whatever you want) and stick back into freezer for another 10 minutes.
Eat as many as you want… Make so many because you will become addicted!
This week was good. Two days in a row the front door was open, the window was open and the heater was off, which pretty much made me that happiest person in the world. My spring cleaning brain has kicked in and I want to clean everything (even the walls). I even spent a good part of an afternoon moving and rearranging furniture. (The house ended up basically the same as when I started) And one of the best parts of the week….most of the snow melted! I am getting super hyped to start raking, cleaning, planting and weeding and and just getting really dirty! Oh how I love the spring!
Here are a few internet things from the week
– Ancient Grains are new again About time!
– This article about the chemistry of cookies is a good one….
– Oooohh pretty. String art
-How to Do Fishtail or Herringbone Braids Step by Step I need to start doing something with my hair besides a really sloppy pony tail that I don’t take out for days on end.
-I think I want to make this Honeycomb shelves.
And some real life happy Oh Intervale Community Farm..I love you. I picked up my farm share and was especially pumped for another gigantic kohlrabi and some locally grown, locally milled wheat flour.
The trees, they are a budding
The perfect ripeness, destined for naner ice-cream!
My sister and I took this little for a sled ride through the wood where there was snow (but it was 45 degrees!) The hike ended up with me pulling her through a field of mud. It was fantastic.
One year ago today. Dinner with my favorite people.
Hope your weeks was awesome and warm..Spring is just about here to stay!
Have a great week!
-C
Oh do I love a good Sunday. The picture above was taken last Sunday and what a glorious day that was. The mister and I took the pup hiking and it was the most spectacular of days. Sunny, 30 degrees and no wind..I could’t have asked for better weather.
The rest of the week turned out alright. The weather went back to hell again and I was a little frantic and super busy, but all in all, good. I accomplished some things that needed to be done and got to spend time with just about everyone in my family. The highlight was when my sister slept over and we finally watched the Fault in our Stars while eating lots of food, cuddled together on the couch. (movie was good, but book was better. Books are always better) We then woke up early the next day and we (the mister too) journeyed across state lines to the closest Target where we purchased some hand soap, 2 seltzer waters and 2 jars of baby food. (I needed the jars) On our way out, the lady experienced her first ever taco from the taco bell in the food court before heading back to Vt. We spent the car ride singing terrible pop songs and eating the babyhood (Blueberries and sweet potato, and yes, they are tasty) We then came back tom my house, listened to more awesome music while she did her homework and I played on the computer and made dinner. It was the best.
Heres a few of this weeks happy bits from the internet.
– I will be making these wire baskets this week. I need storage and I love a good wire basket.
-I have been ending up on this website every night..Making plans
-I need this shirt!!! Feel free to buy it for me!
-Throw Back Song!… And yes, I was sure I was going to be Mrs. Zac Hanson when I was 11.
-My sister sent me this link, Wool and the Gang. So cool.
-These pictures made me laugh. I end up with veggies like this all the time.
And here are a few pictures of my real life happy…..
Playing on the frozen lake. It was so freaking cold and windy, but we just had to do it!
Beach stairs. Hopefully soon they will be a little less icy and maybe even lead to some sand and not waist high drifts of snow.
Two of my favorite people in the world.
And I made brunch with 2 more of my favorites.
My little brothers (can I say little if they are bigger then me?) came over and we all had dinner together while listening to music from when they were born. Nothing like a few 17 year olds to make a person feel old.
Blooming daffodils. I love to watch my flowers open up, it’s just as good as the flower itself.
Have the best first week of March ever!!!
-C
Another week in the Siberian Express (and another catchy name for weather) The lake is completely frozen over and the snow piles are getting bigger then ever… We are in the dead of the winter, which means it an only get better from here.
Yes cold, but not a bad week. I have been getting our stuff together to start the ever daunting task of filing our taxes (blaaahhhhh), and the lovely mister has spent his week pretty much dealing with everyone’s frozen pipes (poor guy), but we have managed to fit in a little fun. Dinner with sisters. A day with a little that included a lunch date of clementines and mustard. We even went to a high school play that my littlest sister was in. (She was so freaking awesome!) Plus, this week I have really noticed the longer amounts of daylight happening. (I can’t wait for daylight savings) I can feel it in my inner most parts of myself..that its going to be spring soon!!! I just need to keep from freezing to death for a few more weeks.
Here is some fun internet stuff I have found this week.
Ever wonder how mushrooms grow? Take a look inside a mushroom house.
These Stuffed pets are pretty funny. If I were to bring home a stuffed animal that looked like the trash dog, he would almost certainly love it for about a week, but the moment he feels like he is not getting the adequate amount of attention, would stand in front of me and slowly tear it apart. (because that’s what he does)
I want to make this Marbled paper… But am going to wait until I can do it outside, so maybe in like a few months
And a few bits from the real world
This little is rocking out to some sweet tunes….We started out listening to Beck and ended up listening to Elmo. I guess that happens sometimes.
Can I buy then all? I am a plant hoarder… and can never get enough. I took this picture, walked away to contemplate about weather or not to buy the purple one, went back and someone else had grabbed it. Bummer,…So instead I bought some fresh daffodils, YAY!
Romanesco. A cross between cauliflower, broccoli, cabbage, brussels sprouts, and a space ship. Pretty Pretty!
It took this guy about 5 minutes to cross over this bridge. The stick in this mouth was too long and would get stuck between the two railings. It was some funny shit.
Of things to come!!!
Have a fantastically lovely week..It’s the last one of February!
-C
WOO WHOA!! MARDI GRAS! I wish I was down in New Orleans today celebrating… and soaking up some warmth and sunshine, catching beads, maybe even taking my shirt off(?!!?)
No, I keep my shirt on today because I am not like that, and also, I would die of hypothermia. Today I wear a shirt, underneath 5 other shirts ad sweaters. Because today is just another day of -20 below here in Vermont.
To keep me from going completely crazy, I am thinking of warm weather and I am thinking of New Orleans (love that place!) and the humongo celebration that’s been going on there for the past week. Everyone partying out in the streets. Big floats and beads all around. I might be feeling a little jealous, (more of the weather then the partying) but thats ok, I have TV to watch and a warm comforter to wrap myself up in. And maybe I should have done a post of fried donuts or of some type of alcohol party drink to celebrate the day, but I really just wanted to make something warm and spicy, so I went with some dank cajun beans. And also I wanted to sing…. “Beans Beans the musical fruit, the more you eat the more you toot!!” hehe
But for real, these beans are sooooo f-ing tasty and super versatile. You can serve the spicy beans with the rice or just eat just the beans. You could do the beans and add to a bed of kale (me) or add cheese, guacamole and a few corn tortillas to the mix (the mister). Simple to make, super tasty and full of flavor! And pretty freaking heathy to boot! This dish gets an A+!
This dish is so full of flavor but so simple to make. We start with presoaked black beans drained and rinsed. Cajun seasoning (which is basically 1 part onion powder, thyme, oregano, and 2 parts paprika, garlic powder, cayenne power, and salt and pepper) Sliced onion and jalapeno, and a few tablespoons of tomato paste. Oh, and the rice.
Beans are in a pot filled with water unit beans are completely sumerged. Add in the onion, jalapeño, tomato paste and cajun seasoning. Bring to a boil then cover with a lid and simmer for about 45 minutes….. After about a half hour, start up the rice. Water in pot with rice, bring to a boil, cover and simmer for 15-20 minutes.
The rice is done and fluffed with at fork. The beans are cooked with just the tiniest bit of bite, bathing in a thick spicy tomatoey sauce. The chunks of onion and jalapeño have broken down and are hiding in every bite…. Oh so good!
Now get ready for the bowl!!! Bringing a little spice and nice to this crazy cold winter day or any fun festivities you may have planned.
Have a Fantastic Day.. Stay Warm or if you already are.. lucky you!
-C
Cajun Black Beans and Rice
Ingredients
1 1/2 cups dried black beans* soaked for at least 4 hours or overnight..Rinse and strained
2 tablespoons tomato paste
2 tablespoons Cajun seasoning
salt and pepper
1 Jalapeño
1 small yellow onion
1 tomato (I used a large roma)
1 1/2 cup of dried rice plus 3 cups water
*If you want to use canned beans, go for it…Just sub in 2 cans rinsed and strained black beans and only add a cup of water to the beans. Pre sauté the onion and the jalapeño before adding to the beans and only simmer the beans for about 15 minutes.
Place you soaked beans into a pot and fill with water until the beans are completely summered. Slice the jalapeño and onion and add to the pot along with the tomato paste and the cajun seasoning. Bring to a boil then place a lid on it and turn heat down to low. Let simmer for about 45 minutes or until the beans are completely cooked.
When the beans are about half way done, add rice to water and bring to a boil. Once boiling, place a lid on pot and turn heat down to simmer and cook for about 15 minutes or until all water is absorbed and rice is tender. Fluff with a fork.
To sever. place a scoop of two of rice to a bowl and top with a scoop of two of beans.… Top with diced tomatoes and scallions… (The mister added shredded pepper jack to his and thought it was excellent)


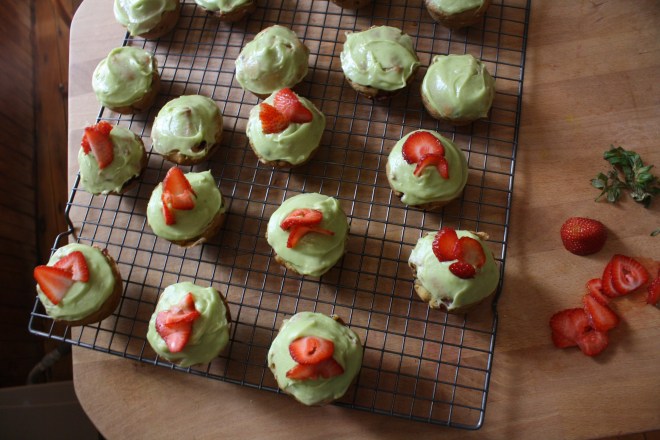


 A couple of days ago, during a grocery store porous, I stumbles upon a produce item that I have not seen sold in stores before, Broccoli leaf. And I was kind of surprised to see that they were selling bunches of the leaf, organic, at 2 bucks a bunch. I was very excited ! But wait.. You can eat broccoli leaves? Heck yes you can! Broccoli leaves are fantastic. They taste kind of like broccoli, have a hearty texture like a collard, and can be used raw or cooked just like any other green. Its just one more super yummy green to add to your repertoire. So when I bring home something that I find to be a good score, like a bunch of broccoli leaves, I feel like I have to share it with the mister. (I am so nice) And this dish was how I shared them…. Tossed into a bowl of garlic raging pasta.
  The stuff…. A bunch of broccoli leaves, lots of garlic, pasta, olive oil, salt and a lemon. Pretty simple right?
  Fist off, get your water boiling for the pasta. Once its ready, drop a pinch of salt into the water and stick pasta in for the amount of time recommend by pasta box people. While the pasta is boiling, mince up the garlic (I used my garlic press) into a skillet and add in the oil. Stick on a burner on medium for a few minutes, stirring around to make sure the garlic doesn’t stick and burn.
 Once you start to smell the garlic, turn heat onto low, chop up the broccoli leaves (stems and all) and stir around until wilted and add in the juice of half a the lemon.When the pasta is cooked, remove a few tablespoons of starchy water and strain the noodles. Add water and pasta right into the skillet with the other stuff. Toss around, taste, season with salt and pepper. Go ahead and add some chopped tomato and or parmesan cheese if you want.
  And serve your amazingly amazing pasta. And make sure that you are ok with really smelly garlic breath…Casue it’s going to happen. Keep it good! -C
 And that’s how I know that this is a winner.
  As an awesome aunt, when I have any of my nieces or nephews, I feel the need to make something special for dinner, something that the kiddos might not get very often, but also keep it on he healthy side. I have 2 littles for the night which gives me the perfect opportunity for a trash food recipe. You know trash food, things like boxed mac and cheese, beefaroni in a can, or, in this case, sloppy joes.
 The stuff… We start with onion and green pepper, chopped into pieces. Black beans, bulgur, can crushed tomatoes. Chili powder, garlic powder, a bit o apple cider vinegar (which I forgot to picture) ,and some salt and pepper. Oh and cheese if you want… Plus a bun of some sort is necessary.
 Toss the chopped onion and peppers into a deep skillet or pot with a drizzle of oil. Cook on medium heat until tender and toss in the spices. Give a stir. Add in the beans, bulgur, and tomato, a splash of vinegar. Stir it all up, cover, and let simmer for about 15 minutes, or until the bulgur has absorbed the liquid and is nice and tender.
 And Then dump a good heaping pile right onto a bun. Add some cheese, or not..and eat with wild abandonment, making sure to get as much on your face as you get in you mouth.
  Before we left for the weekend, I was was trying my hardest to empty the fridge out of all food with the intention of leaning it empty so I could leave it open to defrost while were were gone. Unfortunately I was not able to make it happen. What I did make happen was emptying it almost completely so that when we got home, we had pretty much no food in the house, except for a few things that probably should be eaten. Plus one of the last things that I want to do after sitting in a car for 6 hours is go to the grocery store, or anywhere for that matter, so I was determined to make with what wet had in the fridge:
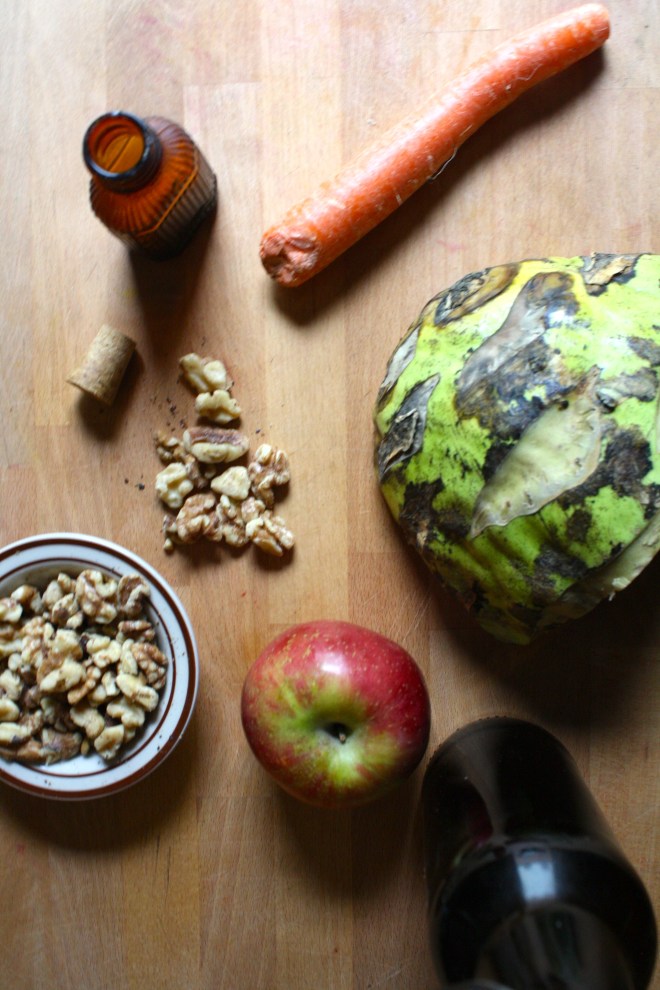
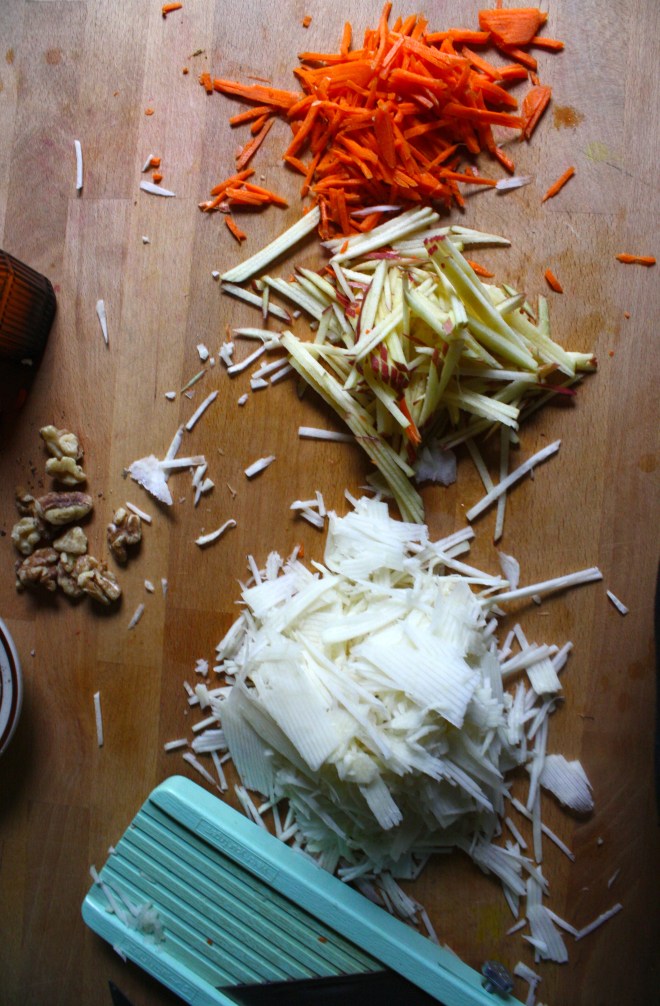 The stuff… A huge hunk of a bigger then my head kohlrabi (or 2 normal bulbs). A carrot, an apple, toasted walnuts, red wine vinegar, and some salt.
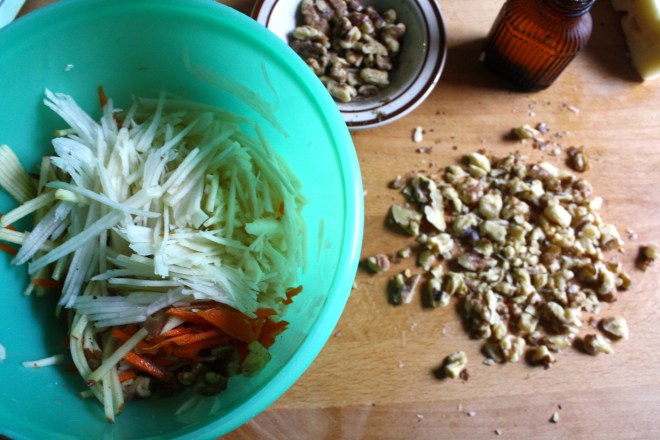 Sprinkle with salt and a good glug glug of red wine vinegar. Chop up the walnuts (some big chunks and some very small pieces makes for good eating), toss it all together and, well that’s it. But wait…. let it sit for a few minutes before serving to really let the flavors draw out.
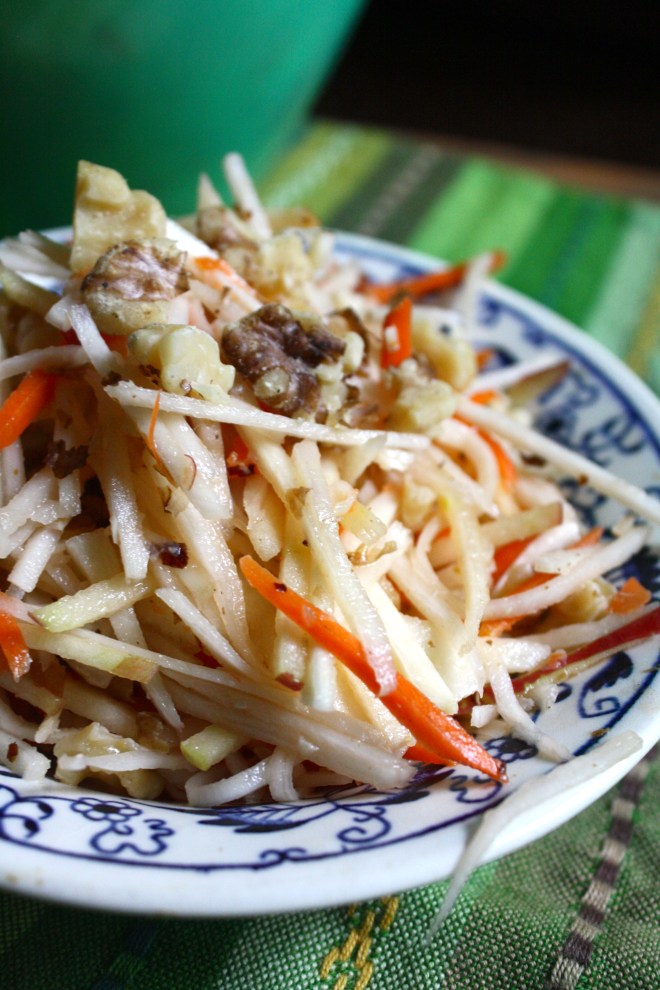 And there we have it. Super fast, full of flavors and crunchy texture. A salad slaw after my own heart.
 Last week pineapples were on sale everywhere……So I bought 5. Don’t judge
  Stuff for the goodness. We got the kale, some avocado because all salads should have avocado and some cooked lentils because, well, all salads should have lentils (or beans or nuts.. so you could totally something else) Then a few sprigs of fresh dill, a clove of garlic, red wine vinegar, salt and a bowl of chunked up pineapple.
  The pineapple, dill, garlic, red wine vinegar, a splash of water and a pinch of salt get blended in a blender or whatever blending device you use. Go as smooth or chunky as you like, I recommend going smooth, but leaving a little chunk, like half blended.
 So good……So so good.
 I love mustard, and when I say love, I mean LOVE. I eat it on anything and everything. And not just small quaintites, I buy jumbo sized containers of the stuff because I go through it so fast. Over the past few years I even started taking down others with my mustard eating obsession. Sisters, brothers, even some of the littles are now mustard eating feens. One of my little nieces is now just as bad as me. I don’t think I have seen her eat a single meal without a side of mustard. Her favorite snack, clementines and mustard, although sometimes she skips the clementines and just goes in with her fingers. Oh so good. I think that child could possible be mine. And yes, it’s mostly the yellow grocery store variety of mustard being consumed, but yellow mustard is just the tip of the ice berg. There is a whole world of flavors, textures and colors when it comes to the humble mustard seed. Whole grain mustard, to me, is one of the best and easiest to adapt to any persons specific taste. You can make it plan or add in just about any spice, vinegar, even a little sweetness that you might like. One of my favorite variations of this mustard is to skip the vinegar and use picked jalapeño juice. Aah, my mouth is watering just thinking about it.
 Yellow mustard seeds, brown mustard seeds, apple cider vinegar and salt. The most basic ingredients.
 In a large jar, combine the mustard seed , twice as much vinegar and a pinch of salt. Cover and let sit for on the counter overnight until the seeds have soften and look almost like caviar.
  Now blend those seeds. You might want to add another splash or two of vinegar to help blend and to thin out a bit. Chose how creamy or seeded you like you mustard. I like to make it creamy but seedy so I blend it half way to creamy.
 You have got mustard! Make sure you have a good snack ready to eat with it.. My go to is carrots. I could eat this all day long.
 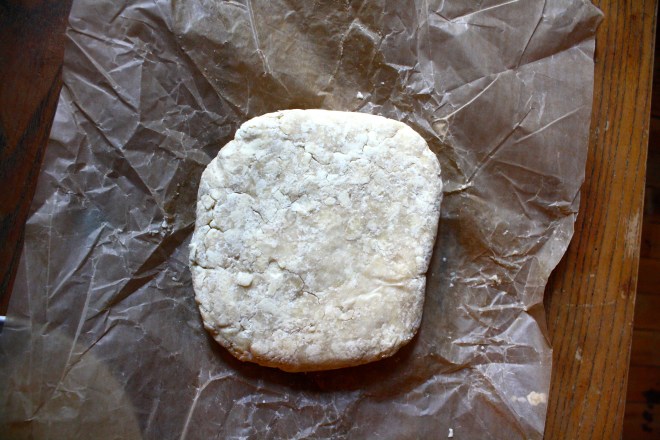 I am so happy its Friday, but like whoa, this week has flown by so fast. I think I need to make a pie to slow things down a bit.. What Kind of pie am I making? We will get to that, but first we must make a killer pie crust, one to hold of the goodness to come.
 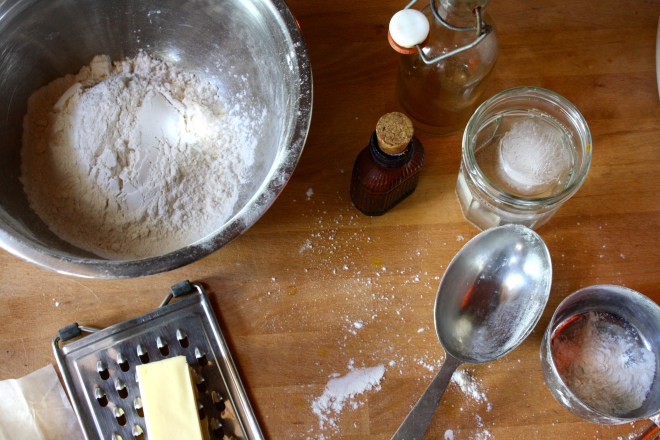 Crusty Stuff. Flour, a stick of frozen butter (or a stick of frozen Earth Balance, which I have used and it turns out much the same) a bit of sugar, some salt, ice water, and apple cider vinegar*.
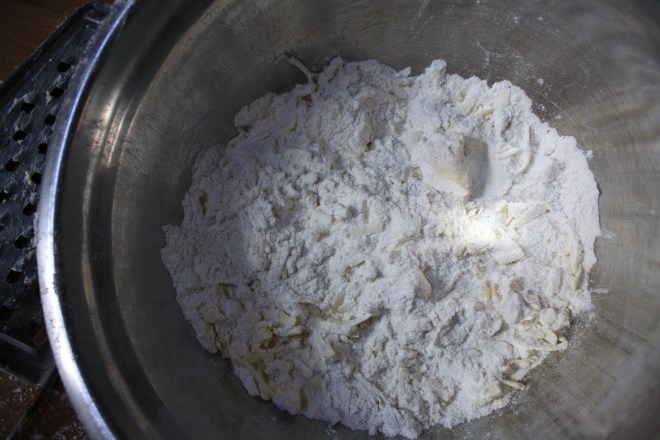
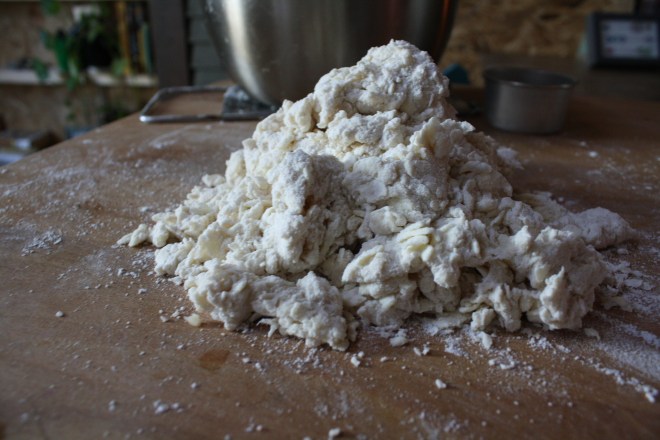 Dump the dough onto a lightly flour surface and kind of squish, smoosh dough into a pile. The dough is all clumpy and weird looking, Well thats what it is support to look like, so your good.
 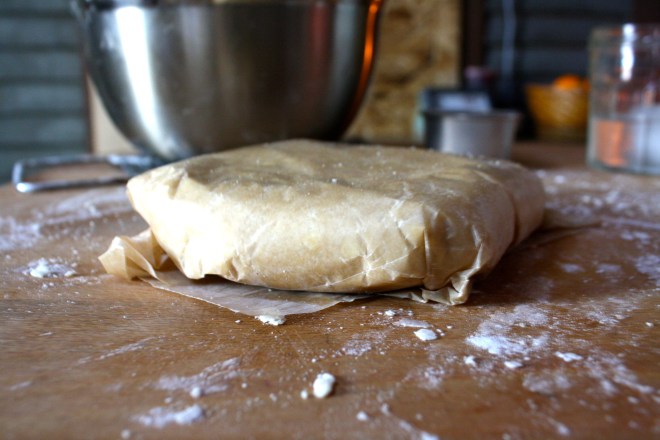 Once the dough is gathered into a ball, place onto a piece of wax paper and wrap. Now is the most satisfying part..Smoosh the wrapped dough into a disk but applying pressure. Aaahh, kind of looked like pie crust. Now Stick it in the fridge for a least a hour (Don’t skip this or your crust will be blah)
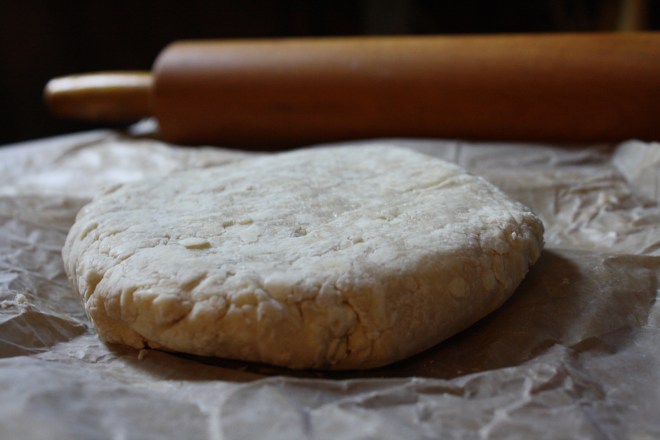
 When something goes on sale at the grocery store, I tend to buy it. Being that it is Valentines Day this week, all the stores are having specials on all sorts of sexy things… and strawberries are one of them. Now I am not a huge fan of buying produce that is terribly out of season, but I can’t help myself…a good deal is a good deal and the strawberries were a super good deal. I was just going to make some sweet ass strawberry jam or maybe a lovely strawberry cake with them (and I probably still will), but these strawberries are actually super juicy and full of flavor, and it’s always nice to eat some full flavor freshy strawberries… especially soaked in balsamic vinegar. And yeah, I think that this salad is pretty sexy, so it makes for a perfect Valentines day dish.
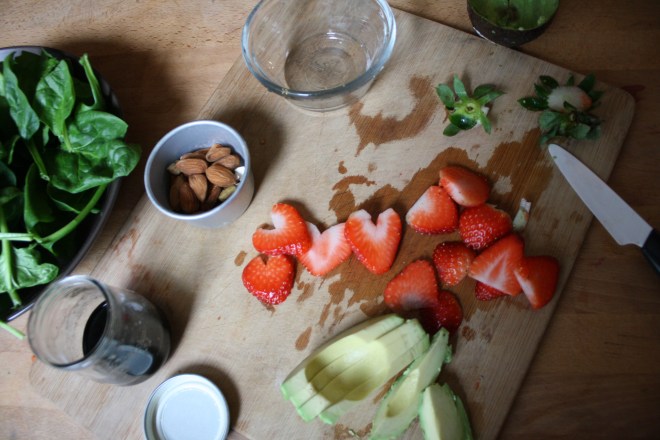 A handful of ingredients and 5 minutes will get you to a fantastic salad experience.
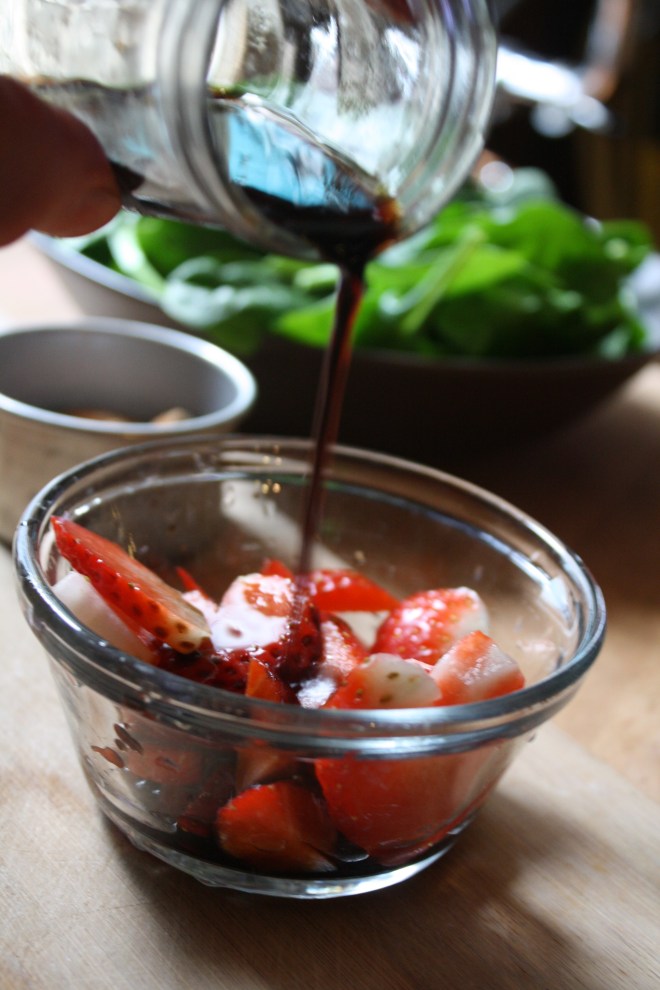 Pour the vinegar on the strawberries and let sit for at least 5 minutes. (the longer the strawberries can sit with the vinegar, the better)
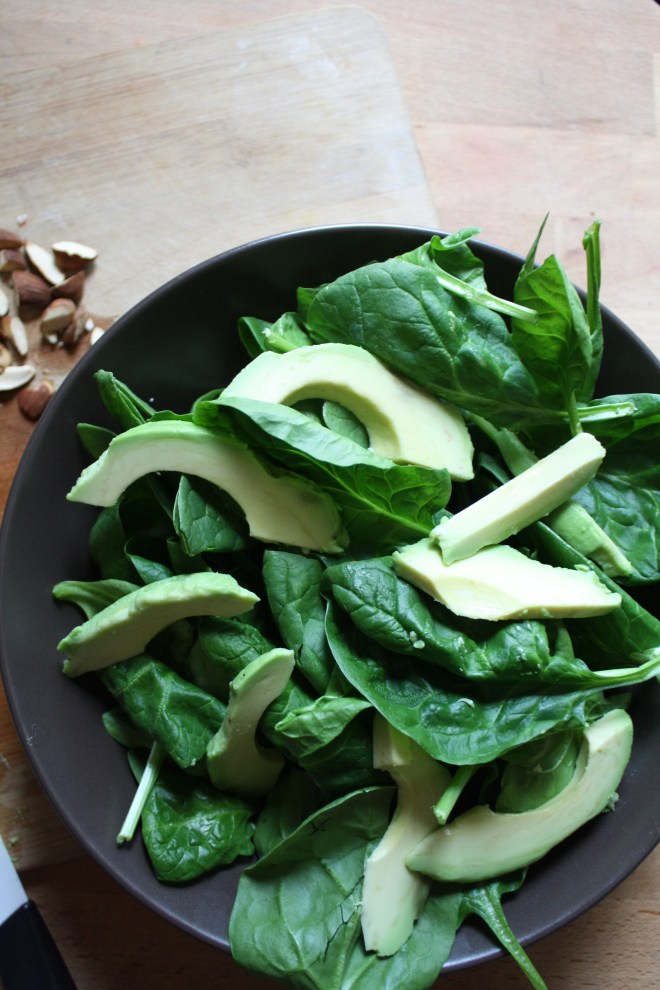
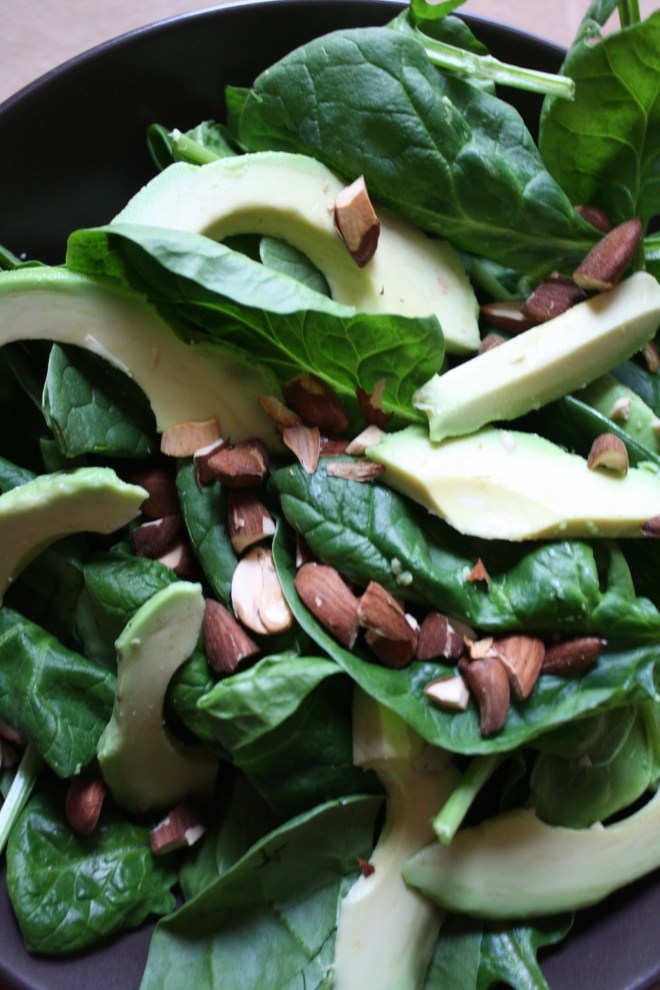 Pile it on.. thinly slice avocado.. rough chopped toasted almonds… It’s pretty much as easy as it can get.
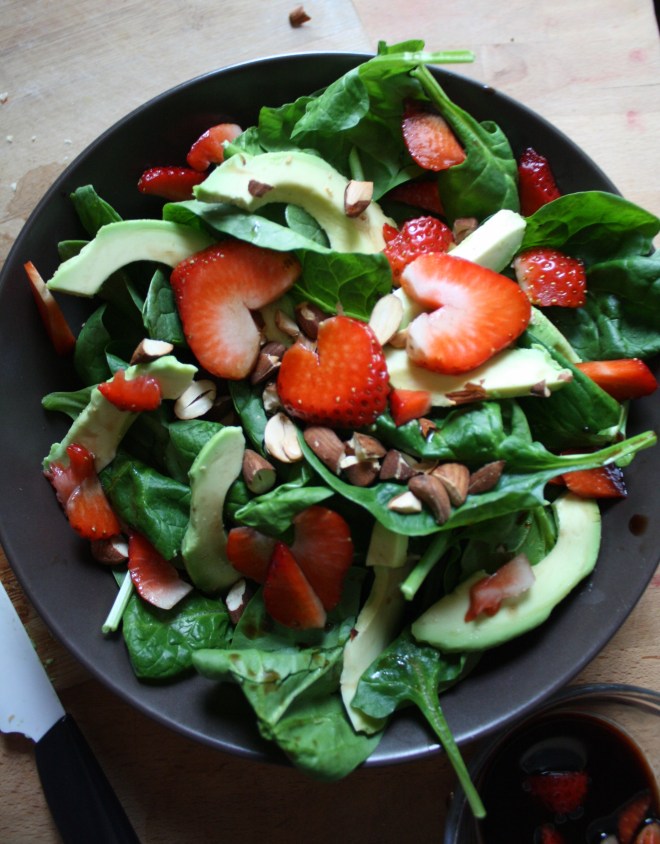 And last but not least, toss on the balsamic soaked strawberries and drizzle the remaining vinegar. (if you made hearts, place on top to make pretty) Sprinkle with a pitch of salt and pepper and pow! Fancy, sexy, delicious salad.


 I figured now is a good time to get this recipe out there before we get to far into spring and summer recipes because there is going to be a lot of banana ice cream filled recipe coming and I figured its a good idea to have the basic banana ice cream recipe ready for people to refer too. And because I made so much fantastic naner ice cream, I also made a cookies and cream naner ice cream for my sisters and the mister.
 The stuff you need for this ice cream…. Nice and ripe bananas, peeled and then frozen* That’s it.
 After all blended and smooth, either eat right away or scoop ice cream into a freezer safe container and stick in freezer. That’s the banana ice cream… And it is amazing and so so so so so addictive. I make a batch, think I am only going to eat a scoop, then find myself eating half of what I have made, but it’s ok cause it’s only bananas.
  One batch of banana ice cream, either freshly made, still in food processor or made ahead and placed in a food processor and given a good pulse to smooth it up.
 Now you have cookies and cream naner ice cream…. and everybody is happy.
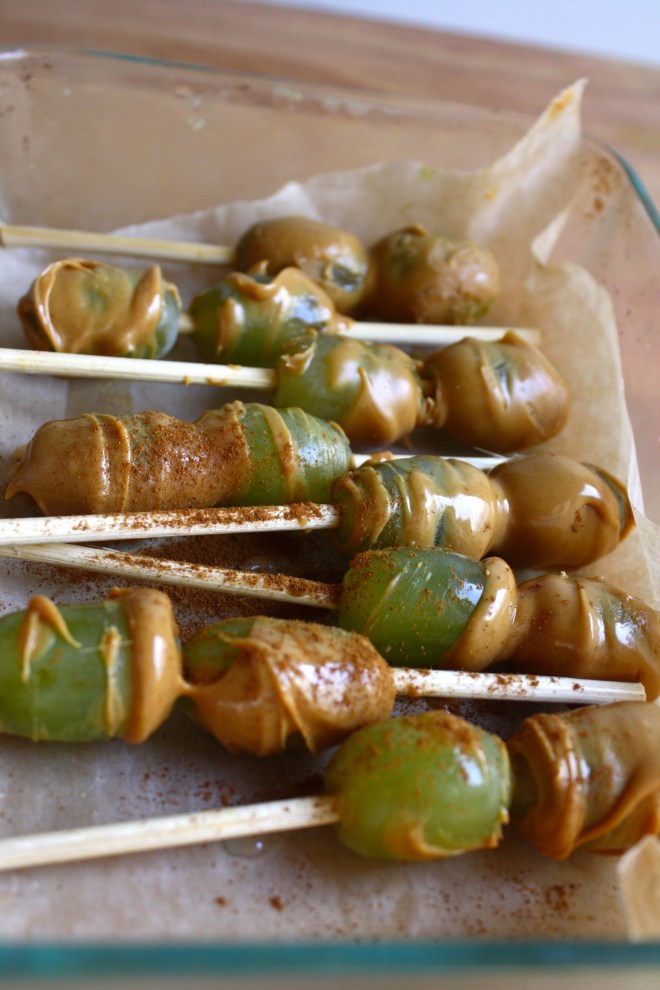 I can’t stop eating these. They are like little balls of crack and I am an addict.
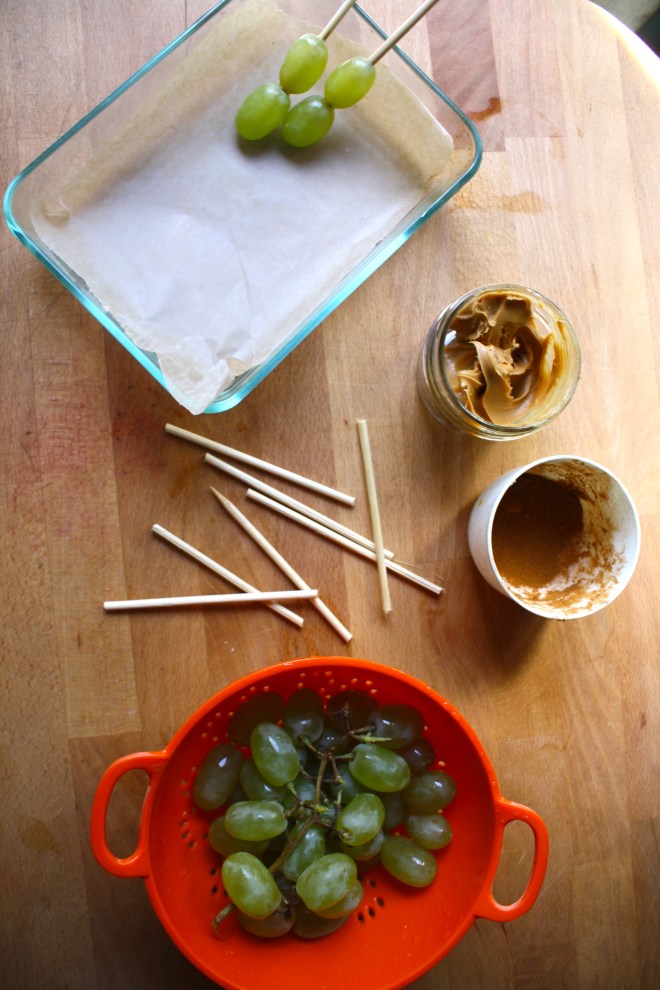 The stuff you will need. Washed and drained fresh grapes (green or red. I usually use red but the green were half the price and the red ones didn’t taste very grapie*) Creamy peanut butter, skewers, and a little bit of cinnamon or cocoa powder (optional)
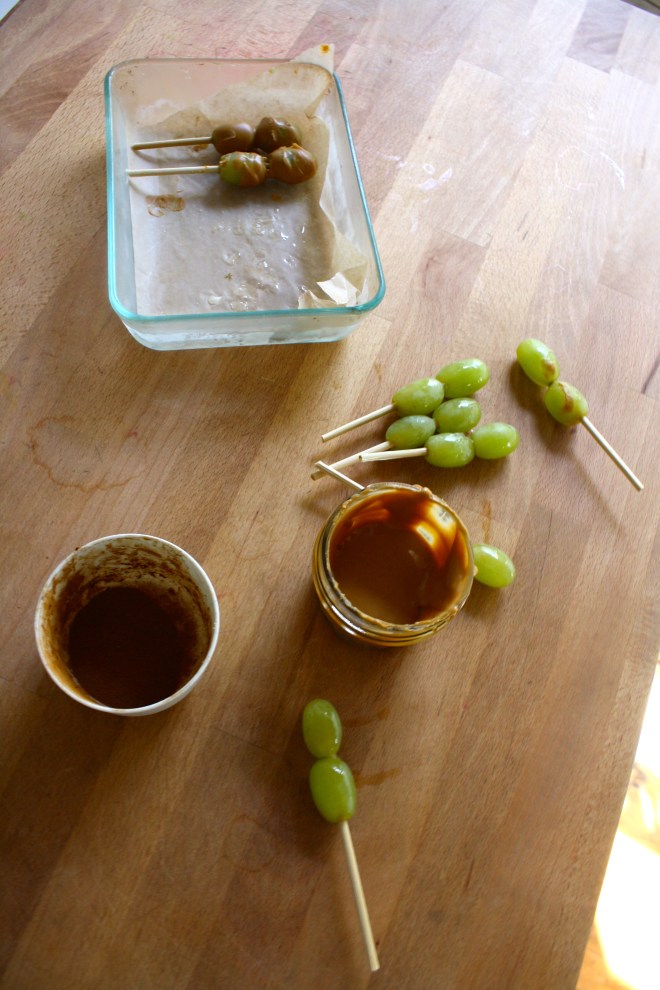 When the grapes are frozen, melt peanut butter. Take a big glob and stick in a tall skinny cup or bowl and stick in the microwave or heat in a sauce pan and then transfer to a tall skinny vessel. Take frozen skewed grapes and, one skewer at a time, dip in the peanut butter. Cover with as much or as little of the peanut butter as you want and place on wax paper. If you are feeling feisty, add a sprinkle or cinnamon or even a dash of cocoa powder. Or, this may seem a little crazy, but garlic powder is so F*ing good.(it’s worth at least giving it a try) When all grapes are dipped, place back into freezer for another 10 minutes or so to let the peanut butter set up a bit.
 Whenever your ready… Eat. And be so happy. And always keep a back stock of frozen grapes in the freezer. They are the best.
 This week was good. Two days in a row the front door was open, the window was open and the heater was off, which pretty much made me that happiest person in the world. My spring cleaning brain has kicked in and I want to clean everything (even the walls). I even spent a good part of an afternoon moving and rearranging furniture. (The house ended up basically the same as when I started) And one of the best parts of the week….most of the snow melted! I am getting super hyped to start raking, cleaning, planting and weeding and and just getting really dirty! Oh how I love the spring!
 Oh Intervale Community Farm..I love you. I picked up my farm share and was especially pumped for another gigantic kohlrabi and some locally grown, locally milled wheat flour.
 The trees, they are a budding
 The perfect ripeness, destined for naner ice-cream!
 My sister and I took this little for a sled ride through the wood where there was snow (but it was 45 degrees!) The hike ended up with me pulling her through a field of mud. It was fantastic.
  One year ago today. Dinner with my favorite people.
  Oh do I love a good Sunday. The picture above was taken last Sunday and what a glorious day that was. The mister and I took the pup hiking and it was the most spectacular of days. Sunny, 30 degrees and no wind..I could’t have asked for better weather.
  Playing on the frozen lake. It was so freaking cold and windy, but we just had to do it!
 Two of my favorite people in the world.
 And I made brunch with 2 more of my favorites.
 My little brothers (can I say little if they are bigger then me?) came over and we all had dinner together while listening to music from when they were born. Nothing like a few 17 year olds to make a person feel old.
 Blooming daffodils. I love to watch my flowers open up, it’s just as good as the flower itself.
  Another week in the Siberian Express (and another catchy name for weather) The lake is completely frozen over and the snow piles are getting bigger then ever… We are in the dead of the winter, which means it an only get better from here.
 This little is rocking out to some sweet tunes….We started out listening to Beck and ended up listening to Elmo. I guess that happens sometimes.
  Can I buy then all? I am a plant hoarder… and can never get enough. I took this picture, walked away to contemplate about weather or not to buy the purple one, went back and someone else had grabbed it. Bummer,…So instead I bought some fresh daffodils, YAY!
 Romanesco. A cross between cauliflower, broccoli, cabbage, brussels sprouts, and a space ship. Pretty Pretty!
 Of things to come!!!
 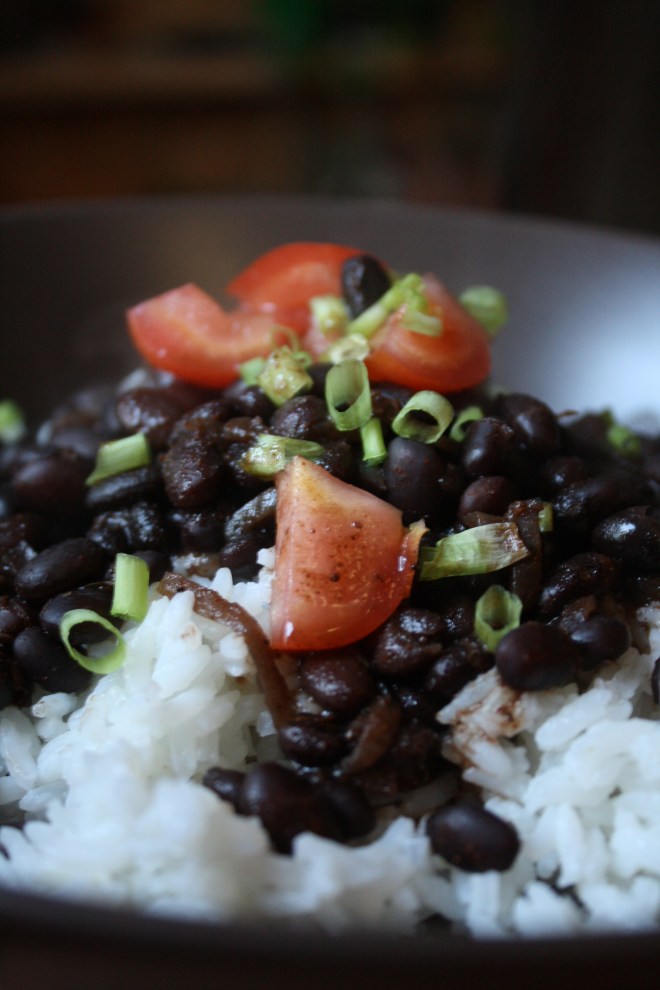 WOO WHOA!! MARDI GRAS! I wish I was down in New Orleans today celebrating… and soaking up some warmth and sunshine, catching beads, maybe even taking my shirt off(?!!?)
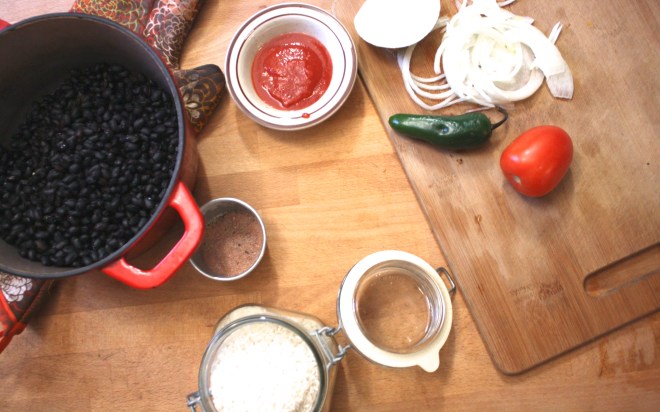
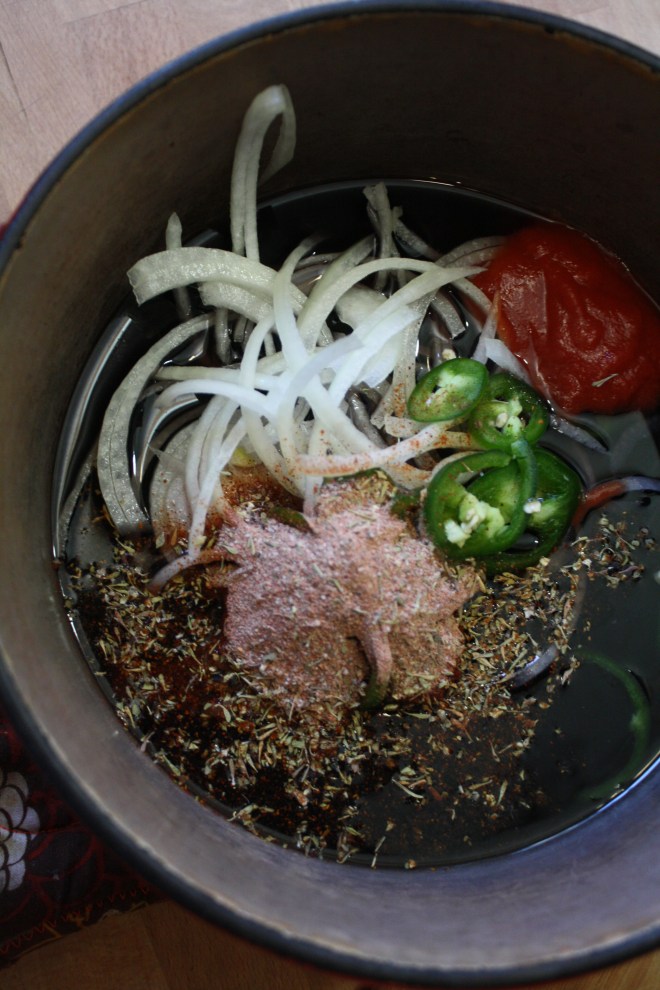
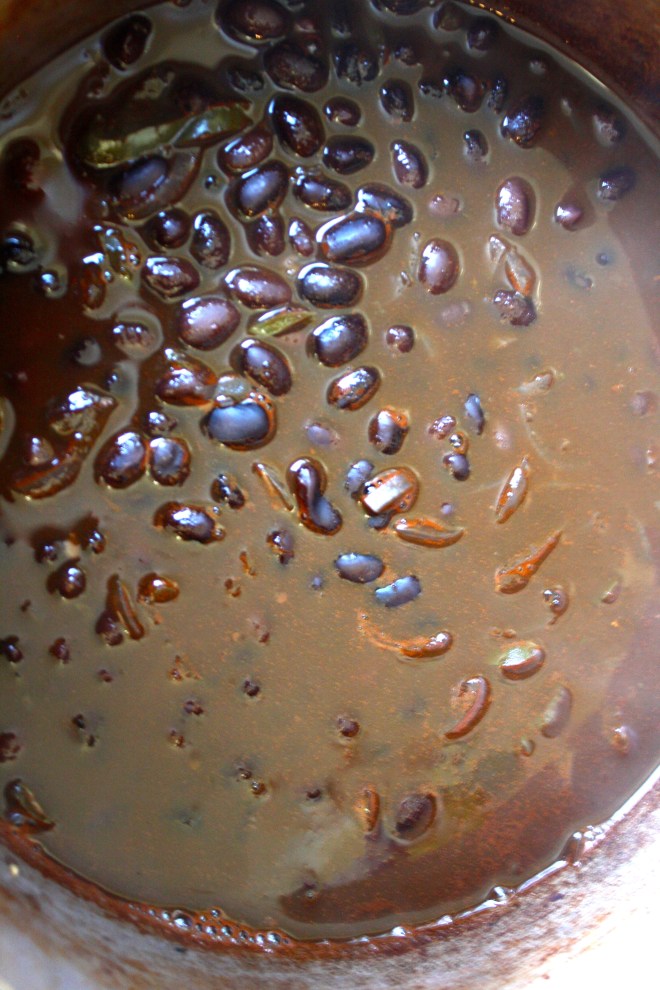 Beans are in a pot filled with water unit beans are completely sumerged. Add in the onion, jalapeño, tomato paste and cajun seasoning. Bring to a boil then cover with a lid and simmer for about 45 minutes….. After about a half hour, start up the rice. Water in pot with rice, bring to a boil, cover and simmer for 15-20 minutes.
  The rice is done and fluffed with at fork. The beans are cooked with just the tiniest bit of bite, bathing in a thick spicy tomatoey sauce. The chunks of onion and jalapeño have broken down and are hiding in every bite…. Oh so good!
 Bringing a little spice and nice to this crazy cold winter day or any fun festivities you may have planned.
THE LOVELY CRAZY
September 19, 2015 by maximios • Blog
Pesto is one of those things that I am constantly making, and not just the kind most people think of with basil and nuts, I pesto everything..peppers, greens, carrots, squash. And yea, I used this post to make a pesto pasta dish, but pesto has so many other fantastic uses. Like as a sandwich or wrap spread or a dip for veggies and crackers. I have used it as a soup base, a pizza sauce, on roasted potatoes and marinated tofu with pestos. It can also be thinned down and used as a salad dressing. See, so many uses.
And this pea pesto is no exception. It has such a great light, almost fruity, super bright taste. I mean, it’s peas so it taste just like peas but somehow even better. It really works in my mouth. I could eat a bowl of this stuff and be happy.
Whatever you plan on using it for, make the pesto. You will be thanking me later.
Oh my, so green, so good. I first made it without cheese and scooped a little out for me. It was perfect. Like the most brilliant bright pea flavor ever. It made me happy. After I added in the cheese, the mister said it tasted even better…. so cheese or not, it’s going to be good! The pesto is made, and it only took about 2 seconds, now boil up the pasta. If you were a thinker, you could start the pasta and make the pesto while its boiling. (I wasn’t being a thinker) I used bow ties cause they are super cute, but use whatever pasta you’re feeling. Shells or the ones that look like little brains would be good options.
Once the pasta is cooked, strain, reserving about 1/4 cup of the water. Add that bit of water back to the pot, add in the pesto, give a stir and dump pasta back into the pot. Toss in a handful of peas, maybe sprinkle some cheese and give it a good crack of some pepper.
Oh you want to thank me for this…
Hey, not a problem….not a problem at all.
-C
Spring Pea Pesto and Bow Ties
Makes enough pesto to coat a pound of cooked pasta and have some left over for sandwiches or to spread on crackers.
Place peas, (remove a handful and set aside to toss into the pasta) garlic, the juice of the lemon, olive oil and the parmesan (if you are using) into a food processor. Blend until smooth. Taste and salt as needed.
Pasta… Boil per instructions on box. Strain pastas but save about a 1/4 cup of starchy water. Toss pasta, starchy water and pesto together, adding in the handful or more of the whole peas. Sprinkle with more parmesan and or cracked pepper ,if wanted, and serve in big bowls.
Use a fork. Eat, smile and be happy.
Guacamole is amazing… anything avocado is amazing…this guacamole is amazing. White bean guacamole is amazing. And not that we really care, but this guac is half the fat then straight up guacamole. Plus it’s packed full of protein making it a kind of super duper, must eat all of it, kind of dip. And sweet potato anything will make me happy. Making queso dip with sweet potato and cauliflower is probably one of my best food combos so far. (after eating a butt load, I felt like I was a genius and made an amazing discovery) Again, not that we need it to be, but this is also a fat-free, vegan, gluten-free, super healthy, packed full of B12, fiber and nutrients, dip for all kind of dip.…. just another reason why you cannot feel bad when you finish off half a batch before you get a chance to stick it in a serving bowl. (I might have done that)
Here is what you need for a good time:
−These tortilla chips ….Check.
−Some Chopped Veggies (I want the veggies)…..Check
−Cauliflower Sweet Potato Queso.…Check.
−White Bean Guacamole…Check.
You are now ready for it. It being this party, that party, the Super Bowl, or a Wednesday afternoon.
To the left we have the makings for the cauliflower sweet potato queso.. Steamed cauliflower, a baked sweet potato, nutritional yeast, garlic, and chopped up red onion, red bell pepper and jalapeño. To make all you need to do it take the chopped peppers, onion, and garlic and sauté for a few minutes just to slightly soften and bring out flavors. While that’s going on, take the steamed cauliflower and sweet potato(skin off..but eat it, or save it for soup or feed it to the dog) and puree together with a blender or food processor. Add in nutritional yeast, about a tablespoon or two of hot water and, salt and pepper to taste. Blend for about 5 minutes until super creamy smooth. Add in sautéed stuff and pulse just enough to incorporated the veggies but not complete blend in. Stick in a bowl.
To the right we have white bean guacamole stuff. Two cups (or one can) rinsed white beans, one ripe avocado, a lime, a few cloves of garlic,(I also added a bit of garlic powered…I like my garlic) and some chopped up red onion and tomato. Place beans, garlic, avocado and lime juice in a blender or food processor and blend until smooth. Add salt to taste and toss in the chopped tomato and onion. Blend for sec to mix that in…Stick in a bowl
So there , dips for those sweet ass chips or whatever you want to dip or them spread them on.
And he guys…It’s FRIDAY! Have a fantastic day!
-C
White Bean Guacamole
Finley chop onion and tomato. Set aside. Place the beans, avocado, garlic, garlic powder, 1 teaspoon salt and the juice from one lime into a blender or food processor and blend until smooth. Add a splash of water if needed to help keep things moving. Taste and add more salt if needed. When smooth, add the onion and tomato and pulse a few times to mix in. Scoop into a serving dish and finish with a squeeze of lime and a bit of chopped onion and tomato.
Cauliflower Sweet Potato Queso
Finely dice the red pepper, jalapeño, onion and garlic and sauté in a skillet for a few minutes until slightly soften and fragrant. Take the pre-cooked cauliflower, sweet potato (skin removed), and nutritional yeast and place in a blender or food processor. Blend for about 5 minutes until creamy and smooth. Add in a tablespoon of water to keep things moving. When completely smooth, add in sautéed veggies and pulse a few times to combine. Scoop into a serving dish. If your feeling it, top with scallions and cracked pepper.
Serve dips with chips, veggies or anything you want. Also make great spreads for sandwiches and crackers too!