
THE LOVELY CRAZY
Holy shit is it hot out. My brain is all fizzy, my hair is all frizzy, and my over all being is just blah. I am not a fan of super hot weather (as some of you may know) and am getting more pissy as the days go by and I continue to be a sweaty mess. I don’t want to feel like a big wet slob, I want to feel fresh and clean and wear clothes that are not drenched in sweat. I know, bitch, bitch, bitch, but seriously. Even the world around me is wilting, and in the nice, colorful fall foliage kind of way. It’s all crispy and brown. The garden is barely holding on, the flowers are shriveling in the ground, and a few plants are just plan dead. It’s just too hot.
I think that only plus side of this past week of hot crap weather are these popsicles that I made. They were actually suppose to be a treat for the littles, but guess what, me and the mr ate them and didn’t share, and no, I feel zero bad about it. They were so good, so refreshing, so cold(if only for a minute) and just so needed. A few minute reprieve from being miserably hot. And bonus, a great use of all the watermelon and tomatoes that I have taking over the countertops (I have so much watermelon and tomatoes)
And really, these probably (better freaking be) the last batch of popsicles for the summer so I think I am going to make another batch today, eat them, savor the flavors of summer, and move on from there.
. Maybe I’ll even share them this time.
The stuff. Some watermelon*, a tomato, a handful of basil, and a lime.
*My watermelon had seeds, but you can use seedless. I also removed the green skin, but kept on as much rind as I could, although this particulate melon had very little white rind.
Dump the melon, tomato (cut in a few pieces, the juice of the lime and the basil into a blender. If your melon has seed, don’t worry about removing them.
The stuff all blended up.
. This step is more necessary if you melon is seeded, straining the mixture pretty much caught most of the seed chunks. You can skip this if your melon is seedless.
Now pour the juice into your molds and stick into freezer to freeze.
After about 2 ish hours, remove and stick the sticks into the semi harder pops.
And a few more hours later……Frozen goodness.
And pop one of those suckers out of the mold and savor every frozen delicious bite.
Happy Tuesday… DON’T MELT!
-C
Make six 3.5 oz popsicles
- 1 ish cup watermelon (green skin removed.. rind is good)
- 1 large ripe tomato (about a cups worth)
- a few sprigs of basil
- Juice of 1 lime
Place all ingredients into blender and blend until smooth. Strain mixture through a fine strainer into a bowl or jar and pour into popsicle molds.
Place in freezer for a few hours. About 2-3 hours in the freezer, take them out and stick in sticks (or fallow you popsicle molds instructions) Place back into freezer
Once completely frozen, remove from molds and eat with your mouth.
FRIDAY YEAH YEAH!!!!
And for your Friday, I made these awesome little raw/ vegan/ gluten free cookies.
Now wait a minute. Don’t let all the labels of what is not in these cookies scare you away. Just focus on all the stuff that these cookies are made of. Almonds, Cashews, Coconut, Cocoa, Oatmeal. They are cookies made with lots of good yummy stuff that just happened to be enjoyed by those with specific food diets as well as those who eat anything. A cookie for all! See, don’t they sound excellent? Yes, yes they do. And they are good. So, so, good. Even the mr. is into them. And he is far from being raw/vegan/ gluten free.
And because these cookies are made with all sorts of good for you stuff (lots of proteins, good healthy fats, and complex carbs) you can pretty much feel zero percent guilt eating them. They a are a no joke, healthy, energy packed cookies of goodness. A fantastic way to start the morning, eat with lunch, as dessert, post work out, or eat as a late night snack. (Just don’t eat them all at once)
Now go for it!
The raw stuff. A cup of old fashion rolled oat that have been soaking in water for about an hour. Almonds(which I spent 20 minutes deshelling) cashews, dehydrated coconut flakes, some cocoa powder and a few medjool date. If your nuts are unsalted, add a pinch of salt too.
Dump everything into a food processor. BUT WAIT! Make sure to remove the pits from the dates)I have broken a blade in the past form a date pit)
Blend unit combined and a kind of rough dough is formed. It will be a little sticky. If it;s to sticky to handle, place into the fridge for a few minutes to set up.
Now take blobs of mixture and roll into balls
And you could totally leave them as balls… you can even play with your balls….
But I think they look nicer squished flat and topped with pieces of nuts and coconut. They look almost fancy, if I do say so myself.
Now have yourself a cookie, and place the rest in the fridge (they get harder and, if you can imagine, taste even better after a few hours of cold)
Freak Yeah FRIDAY! Do fu stuff!
-C
Makes 15 normal sized cookies (you can make more or less, depending on the ball size)
- 1 cups oat fashion oats soaked in 1 cup water for at least an hour (use gluten free oats if needed)
- 1/2 cup raw almonds
- 1/2 cup raw cashews
- 5-6 medjool dates
- 1/2 cup dehydrated flaked coconut
- 1/4 cup cocoa powder
- a pinch of salt (if your nuts are unsalted)
Add all the ingredients into a food processer and blend until the mixer forms a cohesive dough. It;s going to be a tad sticky, but if it seems to sticky to handle, refrigerate for a little bit so it’s easier to handle. (I have no problem handling right away)
Scoop and roll into balls and either leave them as is or squish them flat. Sprinkle with chopped nuts and coconut
Eat one or two right away, then stick the rest in fridge.
A ok to eat as breakfast, with lunch, at dinner, as as snack, a post workout protein, or when sitting on the couch and watching TV.
I am a mint lover, even when it grows at such a ferocious speed that it threatens the lives of all the plants near it. That just means that I have to be vilagent and harvest and use as much as I can.
This drink is a fantastic way to use up some of that mint. I have been making and drinking fresh, hot, mint tea almost ever night for the past few weeks, but this weekend was way to freaking hot to be doing hot tea. So using my little noggin, I figured I should just chill it and added some lime because mint and lime are oh so nice together. Now my favorite, and one of the most refreshing drinks after a long hot day.
And limes just happen to be on sale this week….
The stuff. A few stems of fresh mint, a couple juicy limes, and water. And if you want, a little sweetener of your choice. (I used a tiny bit of honey..not shown)
Start by placing the mint, leaves and stem, into a big pot. Take a wooden spoon and gently muddle the mint. Add in the water, making sure that all the mint is fully sumerged (stuff it down in the pot)
Now place pot on the stove and bring water to a boil. Once boiling, remove from heat and let sit for a few minutes.
After steeping for a few, pout tea into a big jug, straining out the mint leaves. Add any sweetener that you might like (just a little.. you can always add more later if you need it) and stick into fridge to cool, or just leave it on the counter if your want.
While you are waiting for the tea to cool, you might as well juice the limes (cause we need the lime juice)
After the tea is cool, add in the juice of the limes and mix/shake/stir around.
And thats it..
Serve in a cup with a few chunks of ice and a mint leaf garnish (not necessary but nice)
A nice tall glass of cold yumminess… Keeps one from melting completely in this crazy hot weather and keeps mint from killing everything around it.
Stay cool!
-C
- 4 full stems of fresh mint
- 6 cups water
- 2-3 limes (I used 2 1/2 which was almost a full cup of juice)
- sweetener to taste (a tablespoon of honey is nice)
Place mint, stems and all, into a large pot large pot. With a wooden spoon or sme type of blunt object, lightly muddle the plant. Pour water over mint and place pot on the stove. Bring water to a boil, then remove and let cool for a few minutes. Pour the mint tea into a big jar, straining out the mint leaves..(A half gallon ball jar works perfectly) If using a sweetener, add it to the tea while it is still warm.( little goes a long way… you can alway add a little more later!) Place mint tea into the fridge to cool. When the tea is cool, juice you limes and dump the juice into the tea and mix or shake.
It is now done and ready to serve. Pour over ice (thats in a cup) and serve with a fresh mint leaf (if your fancy)
Maybe you, like me, went a did a little strawberry picking this past weekend. And maybe you, like me, pick so so many that now you have an overload of the most perfect, if not slightly too ripe strawberries staring at you, waiting to be eaten or, at the very least, cooked into some magical cake, pie, cookie, or whatever. But lets face it, its Monday and maybe we do not exactly feel the need (or have the time) to make a cake, pie, cookie or whatever tonight. So that leaves us with a crap load of strawberries that need to be dealt with.
And sure, we can freeze them, but maybe you, like me, already have a freezer full of other stuff. And just because we don’t want to bake a cake, pie, cookies, or whatever tonight, doesn’t mean we don’t want something amazingly tasty and fantastic.
So that brings us to this super easy, oh so pretty, and ever so tasty way to move those strawberries….. Stick them in the oven and roast them. So simple and really truly amazing. When strawberries are roasted, they turn so tender and fall apart and release all of their juices that turn into a sweet syrup. They become almost jam like, but the flavors are way better, more complex. And there is no need for added sugar or any other stuff because the flavors and natural sweetness of the roasted strawberries stand on their own.
A few ways to which you might want to use roasted strawberries that will make your life better: Dump onto ice cream, yogurt, or make a strawberry shortcake or a strawberry fool. Scoop onto a green salad, mix into a bowl of quinoa, marinate some tofu, or add to roasted veggies. You can mix into muffin batter, into oatmeal, or add to a layer cake. They make a fantastic PB and J and the syrup in seltzer is a tasty drink. You can pretty much use them for anything. But MY favorite way to consume these…a bowl, a little spoon, and my mouth. Nothing else needed.
And if you didn’t happen to go strawberry picking this weekend. It’s cool, just pick some up from the closest farm stand near you. You can tell all your anyone thats asks that you picked them yourself. (not a lie, just a stretch cause you did, in fact, pick them up yourself)
Yea for Monday and for roasted strawberries! (Or at least yea for strawberries.)
All you need…A big (or small) bowl of strawberries.
Rinse those pretties and place them on a parchment lines baking sheet. (don’t skip parchment… these suckers get super thick and juicy.)
Here is the thing. These strawberries are picked from the lovely farm I get my CSA from.(How badass is it that we have a PYO part of the share). They are not like super market berries that are extra firm with dirty unappealing green tops. These little organic lovelys have tender little green tops…. I eat them. If you do not wish to eat the greens, just top the berry off before roasting.
So the berries, stick them in the oven at 450 degrees and roast them for about 35-45 minutes (depending on the size of your berries)
Pull them out when they start to get dark and slightly charred and the juice is thick and bubbly.
And scrap the berries, juice and all, right into a jar.
Eat with anything, everything and with nothing at all.
Happy Monday
-C
- strawberries of any quantity
Place strawberries, with or without tops (your preference) on a parchment lined baking sheet. Place in a 450 degree oven and roasted foe about 45 minutes or until the berries are soft, mushy, starting to charr and have lots of bubbly juice, . When done, remove from oven and let cooll for for about 5 minutes. Transfer berries, juice and all, into jar.
Eat right away or stick in fridge. Juices thicken up when cooled.
Keeps about a week in fridge, but I highly doubt it will last the night.

My contribution to last nights dinner at my sisters…. Freshy fresh veggies spring rolls.I had about 30 minutes between work and getting over to my sisters house to throw something together so it needed to be something fast, easy, and something I could make without going to the store. She was making the main course (some teriyaki situation and rice) so I was doing up the veggies.
I had just bought a package of spring roll wrappers…. Bingo! The perfect and logical choice. I grab the wrappers, a variety of veggies and after spending 12 of my 30 minutes trying to scrub the oil based paint off of my face and hands, I still managed to completely prepare, construct, and take pictures of these lovely tasty spring rolls. and get over to my sisters in time for dinner.
Impressed?
Damn right!


The stuff. Carrot, beet, asparagus, red cabbage, and kohlrabi, which all (except asparagus, which I just cut into thirds) got cut into matchstick sized pieces with my mandoiln. Then there are the rice spring roll wrappers that we need to make the veggies into rolls. Also a bit of red wine vinegar to drizzle onto the veggies for a little extra zing. And lastly, soy, fresh ginger, and a couple cloves of garlic for a spicy salty dipping sauce.Start by having everything set out and ready to assemble. Fill a large shallow dish or baking sheet with really warm water. Working with one at a time,place a rice wrapper into water and let sit for about 10 seconds or until the paper starts to soften. Remove from water and place on a damp surface (just splash a little water on the counter) Take a little bit of everything and and place on the lower middle part of the paper. Fold in the sides first, then tuck and roll the wrapper as tightly as you can without ripping the wrapper.


Repeat until you have used up all you veggies.For the dipping sauce. Finely grate ginger and garlic and add to soy sauce. Stir… and it’s done.Freshy, pretty and fantastically delicious. And for real, took about 8 minutes to make. (I even had enough time to wash the dishes before we left!)
I am so awesome!
Hump Day Pow!!!!!
-C
Fresh Veggies Spring Rolls
Makes 8-10 but can easily be increased or decreased to desired amount
- 8-1o rice spring roll papers
- Splash of Red wine or rice vinegar
- 1/4 cup soy or tamari sauce
- 2 cloves of garlic
- teaspoon freshly grated ginger
- 1 medium carrot
- 1 medium beet
- 1/4 head of purple cabbage
- 10 thin fresh asparagus
- 1 small kohlrabi
Note… I used the veggies that I had in the fridge at the moment. If you have a bunch of veggies but not these particular ones, use what you have. Pretty much all veggies taste good inside a spring roll!
Gather your veggies and prep by either using a mandolin, a grater, or some sick knife skills, and julienne, shred, or slice you veggies into thin match sticks. Once all the veggies are prepared, sprinkle a little vinegar over the top.
For the rolls…Grab a large shallow vessel (a rimmed baking sheet works great) and add in warm water. Working one at a time, place the wrapper into the water for about 10 seconds or until the wrapper starts to soften. Remove and spread onto a clean, damp work surface. Gather a bit of each veggie that you are adding and place towards the bottom middle of the wrapper. Now fold the sides in over the pile of veggies. Then with the side closest to you, tuck and roll wrapper away from you, trying to keep it tight, but not to tight that it rips.. (Hopefully that makes since.) Place finished rolls onto a damp surface to keep from sticking and if not serving right away, drape with a damp towel or paper towel to keep from drying out.
For the soy ginger dipping sauce. Add grated ginger, minced garlic, and soy into a bowl and mix together. Serve with spring rolls.
Eat one, two, or a plateful. It’s nice to share but not a necessity.
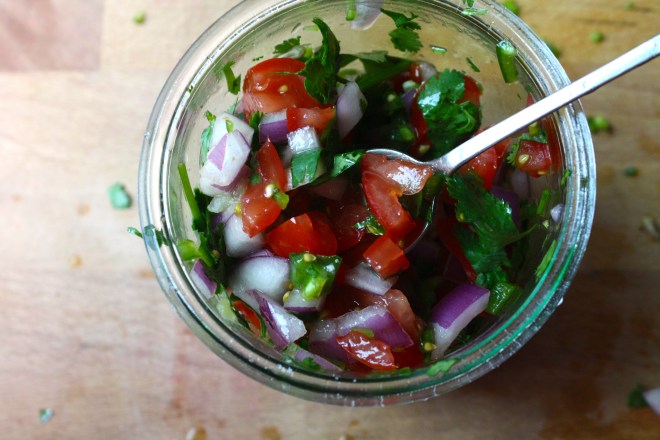 Happy Cinco de Mayo! And what better day to share my version of my oh so fantastic pico de gallo, or as I call it, super freshy salsa.
I love me some freshy salsa, It makes me oh so happy.
I make this stuff all the time, especially during the warmer months and tomato season. I usually make a batch right before a meal, just enough to eat right away, but sometimes I ‘ll make a big batched of it, thinking I’ll save some for the next day. It never makes it past the second day in the fridge because it’s just one of those things that when you see it, you want to eat it. Weird but true. And it’s totally ok to do so cause it’s basically eating a big bowl of healthy goodness, so eat on!
It takes no time to prepare, tastes super refreshing, goes on everything, and it’s just so freaking tasty. You can eat it with tacos and chips (the mister) or like me, I like to add it to everything; salads, popcorn, or directly in my mouth.
Make one batch, make 4, it doesn’t matter cause you will eat it all, and need to make more.
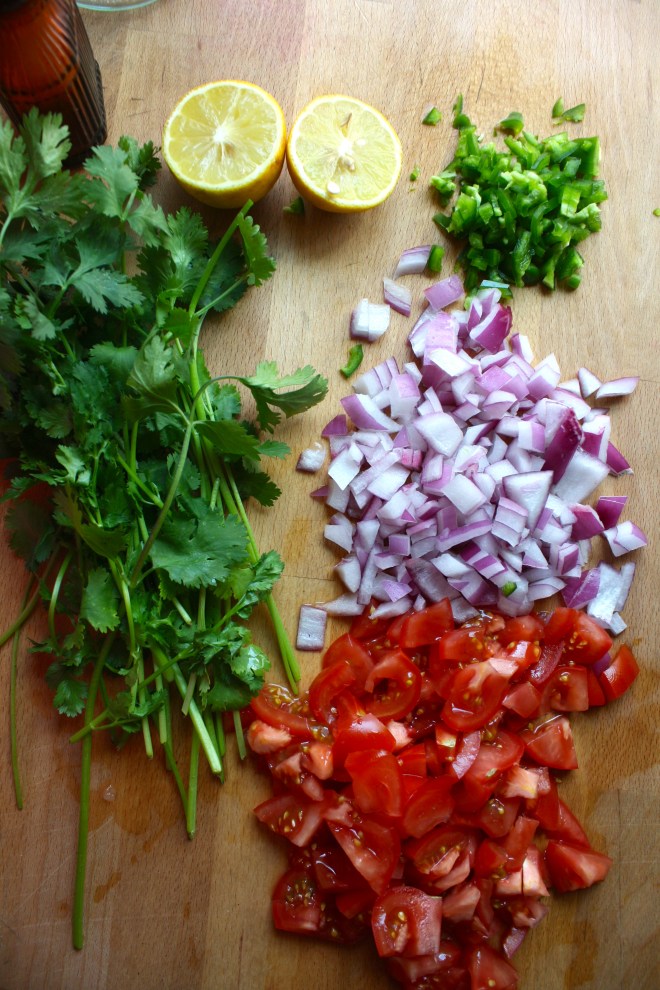 The stuff. Chopped Roma tomatoes, chopped red onion, a diced jalapeño, lemon, a bunch of cilantro, and salt.
Stick all the chopped stuff into a jar and add in the juice of the lemon. Roughly chop the cilantro and add that on in with a sprinkle of salt.
Mix it up….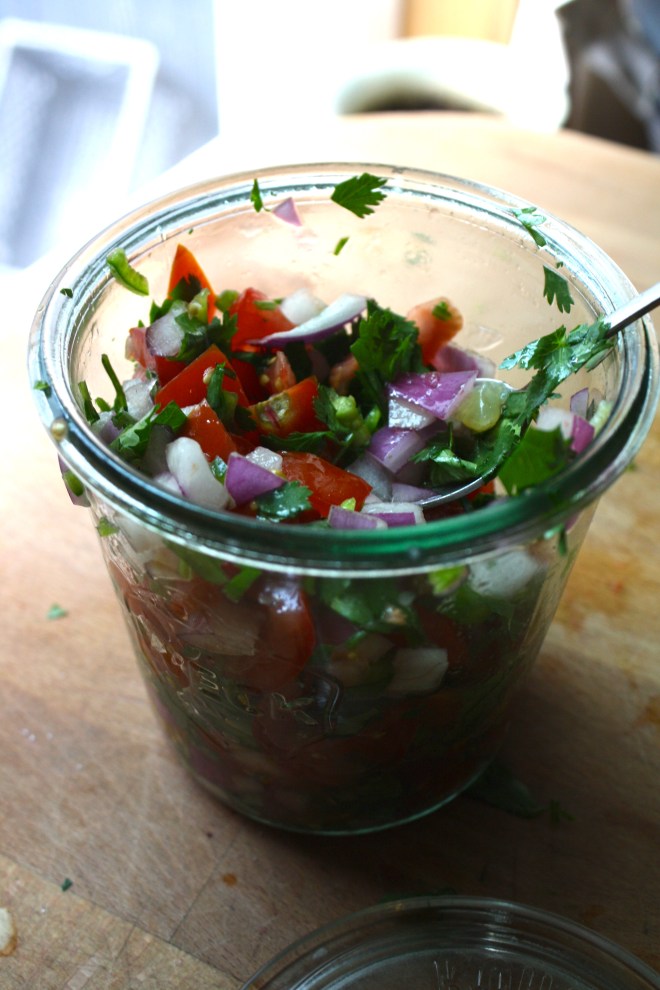 And thats it. Now eat… with something or without.
A spoon out of the jar is one of my favorite ways to go at it.
Happy Cinco de Mayo, Happy Tuesday!
-C
Pico de Gallo… Freshy Salsa
- 4-5 Roma Tomatoes
- 1 small red onion
- 1-2 jalapeños (Depending on heat preference)
- 1 lemon or lime
- salt
- 1 bunch of cilantro (don’t use it if you don’t like it)
Chop tomatoes and onion and toss into a bowl or jar. Cut seeds from jalapeño(s) and dice up into little bitty pieces and add that to the tomato and onion. Roughly chop the cilantro and toss that in as well with the juice of the lemon or lime. Sprinkle with salt. Stir, let sit for a minutes, taste and then add more salt if needed.
Eat right away or make ahead and store in the fridge until ready to use.
Goes great with corn chips, tacos, toss onto salads or eat as is standing in front of the fridge. If someone is judging you, they are stupid.
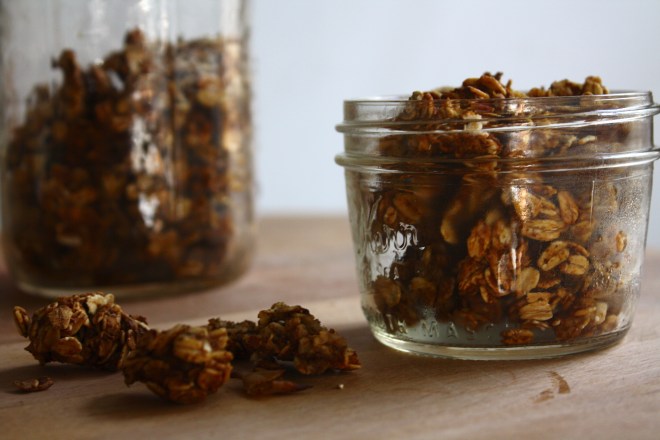 Chomp Chomp Chomp… The sound I make as I eat this freaking fantastic crunchy granola. You know it’s good when the person sitting next to you is annoyed by the sound of you face while eating. I eat a lot of crunchy stuff. And I am pretty sure I annoy the mister a lot.
Oh well, he will live, and he eats his fair share of annoying stuff too so we can just call it even.
So granola. I love it. I make a batch every few weeks or so, and I usually make it just for me. (I almost never make things just for me) I like to keep it simple but flavorful. A tad sweet, but not really, and crunchy, without the oily fried taste. I also like a variety of sizes, some big clusters and some small pieces.
This granola fits the bill perfectly. Made with 5 ingredients, no oil, and the perfect sweetness level. It’s one of my favorite flavors yet. And I know I said I made it just for me, but the mister really liked it too. (I can’t help sharing)
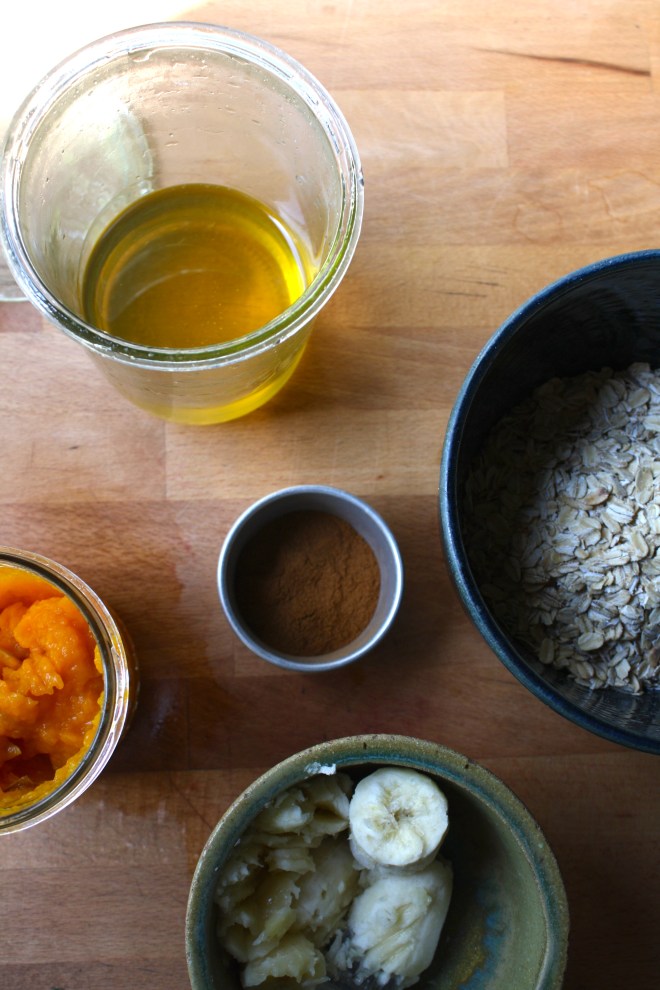 The simplest of stuff. 1 smashed banana, a cup of pureed butternut squash, Vietnamese cinnamon*, honey, and old fashion oats. (and a dash of salt, not shown)
*Note. I only ever use Vietnamese cinnamon because once I start using it, regular old cinnamon just won’t cut it anymore. It is a bit sweeter and a lot more spicy. If you don’t have it or don’t want to use it, use regular cinnamon and add in 1/2 a teaspoon of all spice.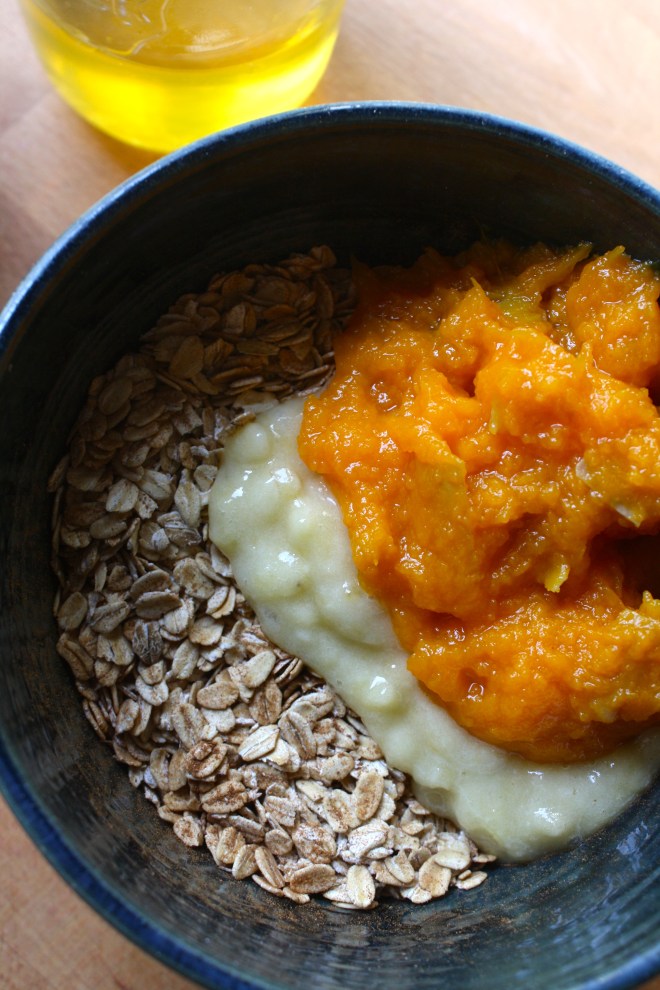 Toss the cinnamon and salt with the oats. Mix together the banana, squash and the sweetener and combine with the oats until full incorporated.
Another note. Because I made this granola for me and no body else, I actually omitted the honey (I think that banana abs squash make it sweet enough) But if I was making this for lets say, the mister, or a friend, I would use add a bit. The sweetness level and sweetener of choice is up to you, but 2-3 teaspoons of honey or maple syrup is usually sweet enough for people.
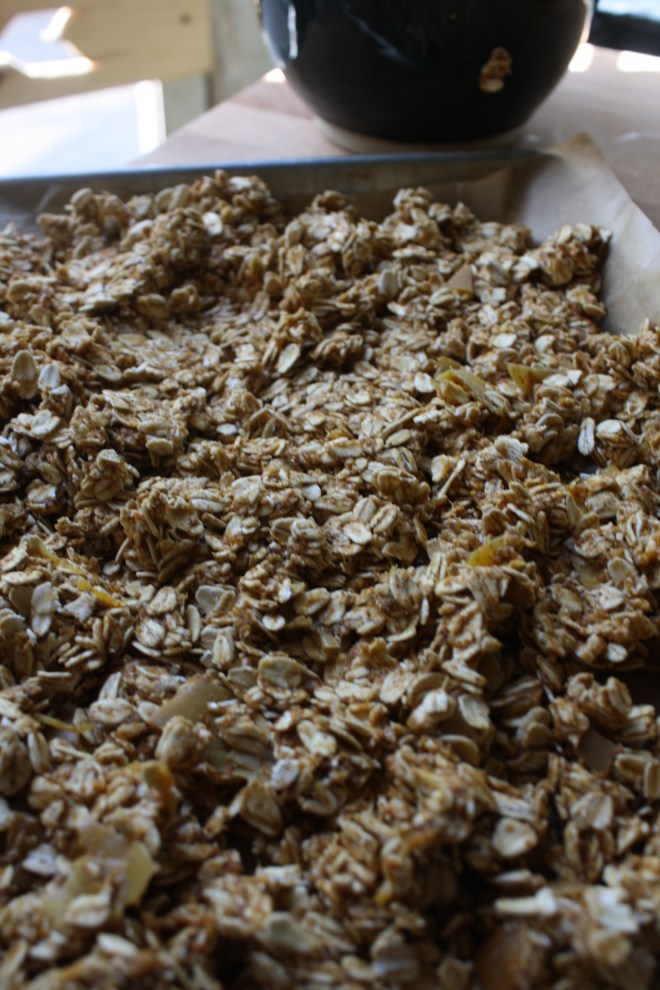 Dump the mixture on a parchment lined baking sheet and give it a little pat, you know, to settle all the bit and pieces together, all cozy and evenly spread out. Now stick into a preheated oven and after about 20 minutes, take out of oven and give the granola a toss, breaking apart any super big chunks or overly wet pieces. Put back into oven for another 20 minutes. (I like my granola super crispy crunchy so I cook it a little longer, like 30 more minutes)
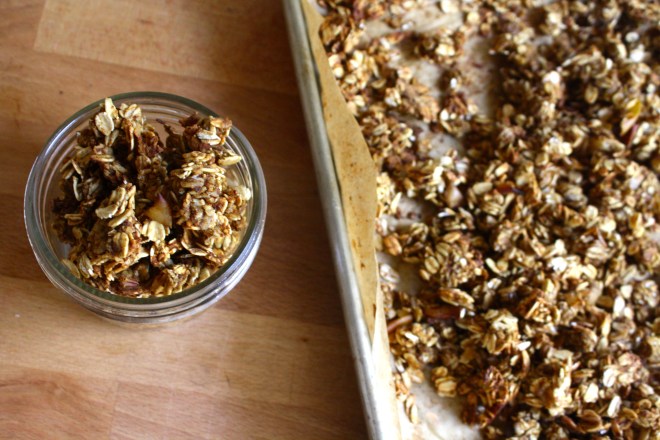 And when you are happy with the crunchiness of you granola, remove from oven and let cool, trying not to eat all of it while it sit’s on the counter looking all pretty and smelling like happiness.
Grab a bowl, stick the rest into a jar with a lid, hide it from others, and chomp chomp chomp away!
-C
Banana Butternut Granola
- 3 cups old fashion oats (use gluten free oats if needed)
- 1 ripe banana, mashed
- 1 cup butternut squash puree (can use canned)
- 2 tablespoons Vietnamese cinnamon (or 2 tablespoons regular cinnamon and 1/2 teaspoon of allspice)
- 1-3 tablespoon honey or sweetener of choice (use greater amount for sweeter)
- dash of salt
Preheat oven to 375
In a large bowl, mix together oats, cinnamon and salt. Mix the mashed banana, squash, and sweetener of choice together and combine with the oats. If the mixture seems really dry, add in a very small splash of water to loosen just enough to mix.
Dump mixture onto a parchment lined baking sheet and evenly disperse the mixture. Give it a kind of smoosh to compact the oats and to make sure all its all the same thickness on the pan.
Stick into oven for 20 minutes. Remove and give granola a little toss, maybe breaking apart any really big chunks (unless you like really big chunks) and put back into oven for another 20 minutes. (30 for a crunchier granola) Remove from oven and let cool on baking sheet before storing in an air tight container. If you find that it is not as crunchy as you would like or is a few days old and lost some of its crunchiness, just stick it back into the oven for a few minutes to re crunch.
Eat as is, as a cold cereal, dip in peanut butter, add to popcorn or whatever way you want to eat it. No utensil required.
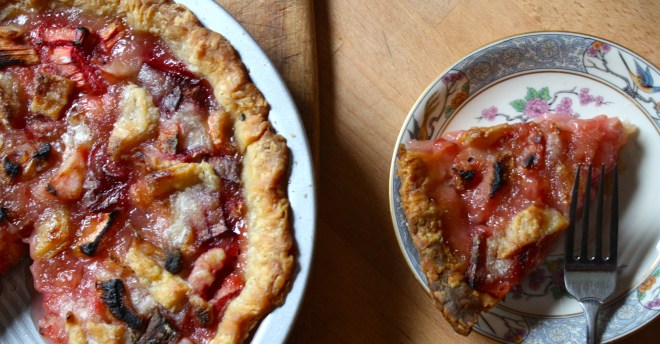
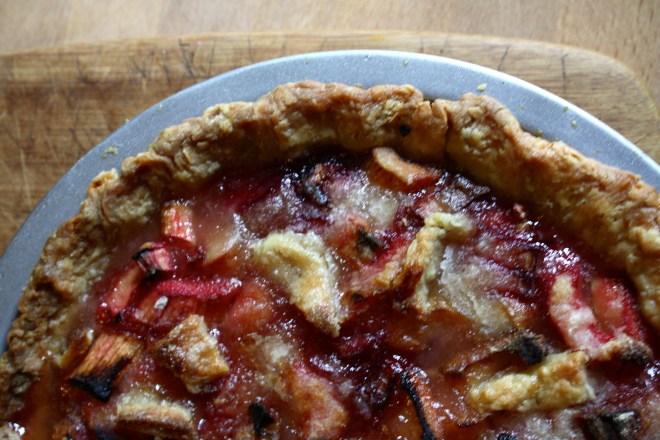 I swear I didn’t plan this, but today is officially Pi Day! Pi being the mathematical constant of the ratio of the circumference of a circle to its dimeter (did I say that right?) 3.1415…… And today’s date is 3.14.15. Whoa…I guess that means that this pie was meant to be.
But the real reason I made this pie was for a surprise treat for the mister. He left for a couple of days and me being the super assume lady love of his, thought it would be nice for him to come home to his favorite dessert.. plain old rhubarb pie.( I know, I be the best) And it didn’t hurt that when I went to the grocery store, there was a big old pile of fresh, gorgeous rhubarb staring me right in the face, and on sale to boot.
The funniest thing. Me and the mister have been together for a very long time (12+ years….we started dating in high school, so I am not that old!) and I have known that his favorite dessert is plain rhubarb pie for ever. Every time we have one of our food discussions about our favorite foods, (which happens more than it should and usually consists of me running my mouth and him grunting or nodding once in a while) rhubarb pie always comes up. He even talks about the old lady who used to make him rhubarb pie for mowing her lawn. And guess what… I have never once made him a plain rhubarb pie. Why? Honestly, I have no idea. Maybe I secretly think I was going to screw up his one favorite dessert, or maybe I never quit had enough rhubarb for a pie, or maybe I am really just an awful lady. But for whatever reason, it doesn’t matter anymore because I finally made him a plain rhubarb pie.
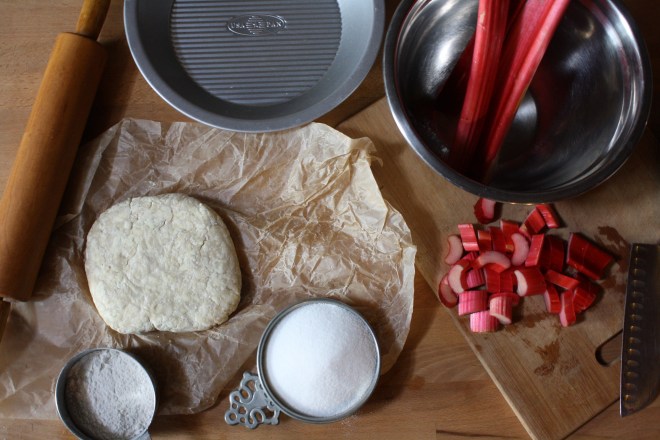 The stuff for the makings of pie… One single pie crust, flour, sugar and rhubarb. I mean, come on, this might be one of the simplest pies ever.
Note…The first thing the mister said to me when he saw the pie was. “Where is the top crust? My response what “Screw you ass face” but then chuckled. This pie would be great with a top crust, but I was thinking how pretty it would be without it. And honestly, I only made a single crust. What I am saying is.. make a double crust if you want a top.
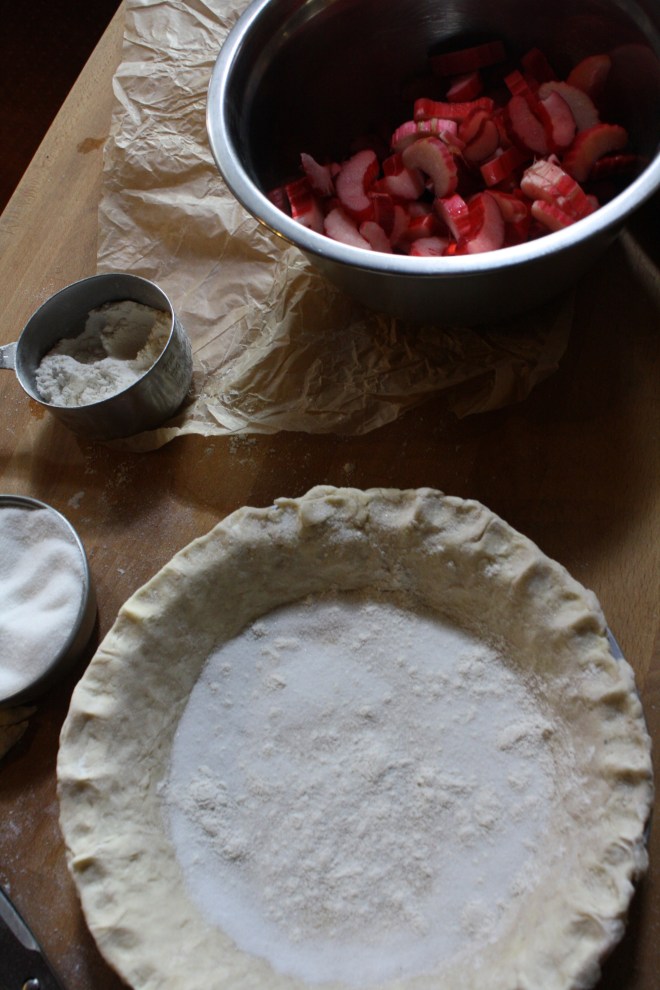
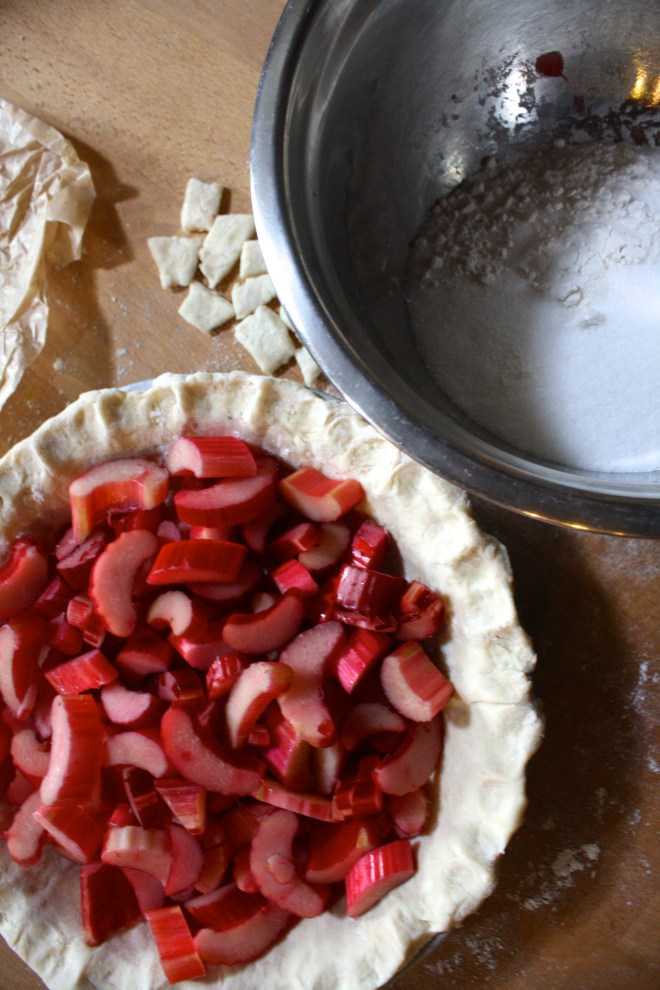 The chilled pie crust gets rolled out, placed into a pie plate, trimmed and made all pretty. The bottom is sprinkled with a 1/4 cup of sugar and stuck back into the fridge while the oven preheats to 350. Now is a good time to dice the rhubarb into inchish chunks. Once the oven is preheated, remove crust from fridge and add in the diced rhubarb.
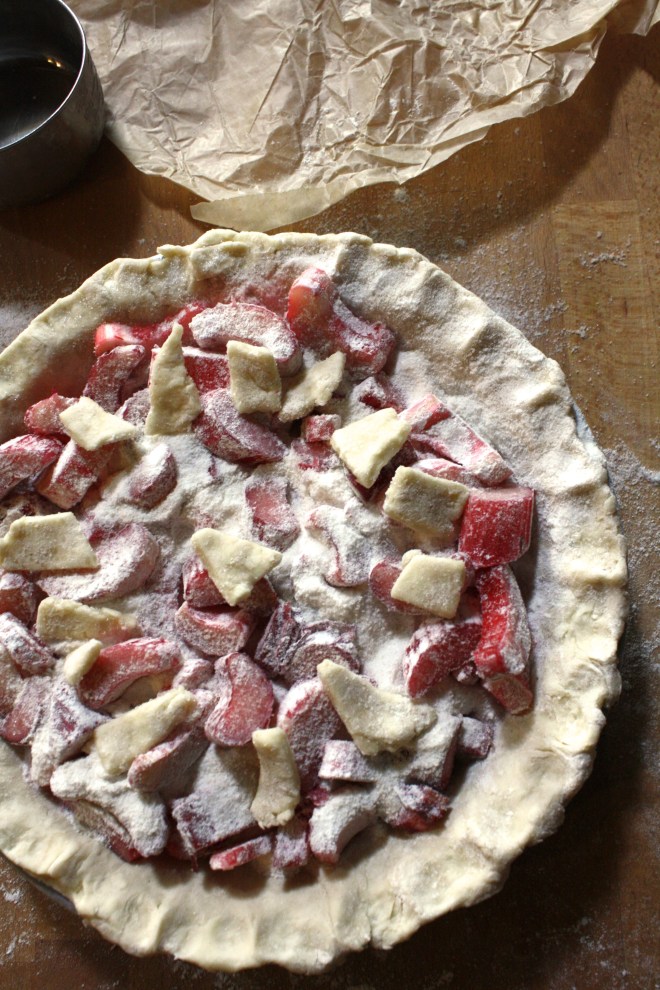
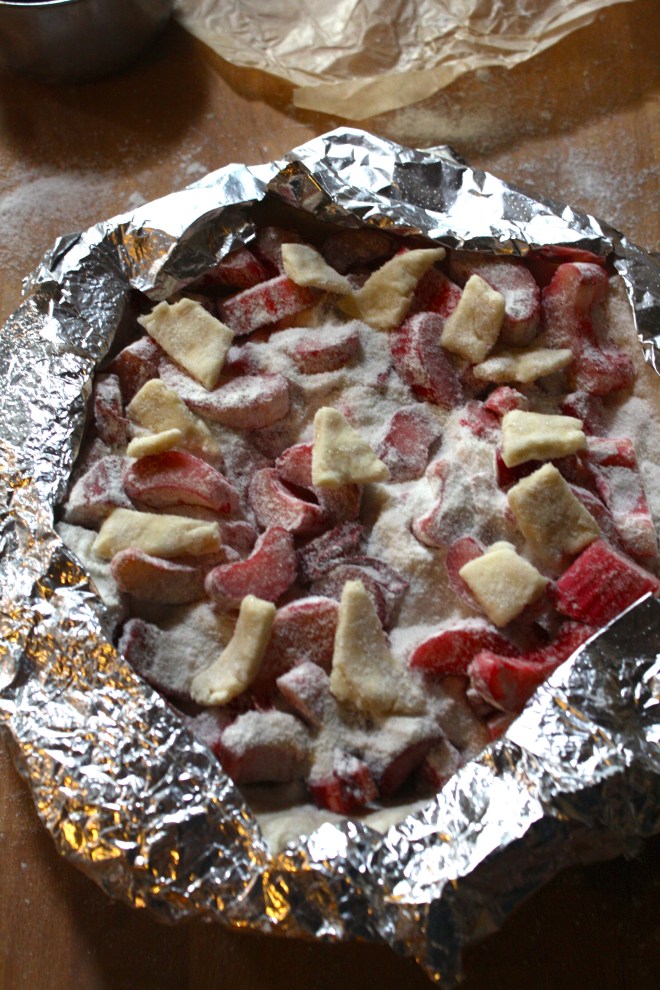 The remaining sugar and flour get mixed together in a bowl and dump on top of the rhubarb. Give it a tiny toss with you fingers just to get some of the mixture to sink down a little. (Don’t worry, the filling will be perfect when you do it like this) I also cut up the pie crust trimmings and placed on top… not necessary, but looks pretty and is a good use of the scraps.
Now cover the entire pie with tinfoil. Cut and x through the middle and fold foil back to expose the filling but keep the crust covered. (so much easier than trying to squish strips of foil together..you know what I am talking about)
And then the pie is ready to be baked.
In the oven for 5o minutes with the foil, then 10 or so minutes without to finish.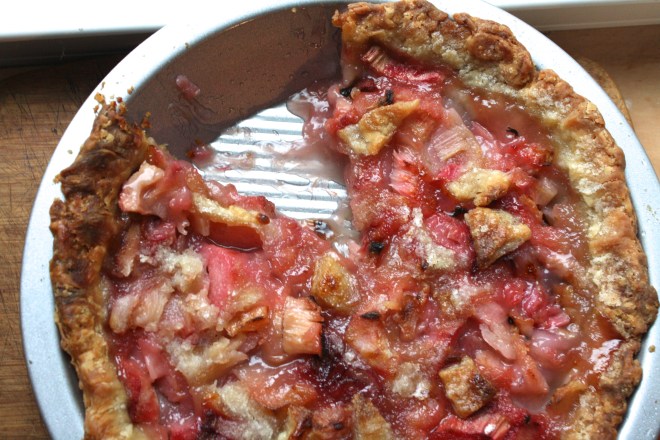 And then you take it from the oven and marvel at the beauty.
I am now truly the best super awesome lady love. I should get a freaking crown but would settle for a stand mixer or blender as a reward instead.
Important…..Let the pie cool completely (or just about) before cutting.The filling needs a bit of time to set.
Happy Saturday, Happy Weekend, Happy PI Pie Day!!!
-C
Rhubarb Pie
- Single Pie Crust.. Recipe here
- 4-5 large Rhubarb Stocks (4 cups chopped)
- 1 1/4 cups white sugar
- a hefty 1/3 cup flour
Make you pie crust.. and make sure it’s chilled!
Roll our pie crust and place in pie plate. Trim and make edge all nice and pretty. Add 1/4 cup of sugar to the bottom and stick back in the fridge to relax while you get the other stuff together.
Preheat oven to 350
Wash and dice rhubarb into inchish chunks. In a bowl, mix together 1 cup of sugar and the flour. Once the oven is preheated, remove crust from fridge and fill crust with the chopped up rhubarb. Now dump the sugar, flour mixture on top, slightly tossing it around with your fingers. Cover entire pie with tin foil and with a knife, cut an x through the middle of the foil. Fold foil back to expose the center of the pie, but keep the crust covered. Stick into oven. Bake for about an hour, removing the tin foil after about 50 minutes. Pie is done when the crust is golden brown and a fork or knife stuck into the middle of pie comes out with a thick jam like sauciness.
Let pie cool and set for a bit.
Slice. Serve on a plate with an eating utensil and maybe a scoop of vanilla bean ice cream. Lick plate clean.
 It’s Mother’s Day weekend which means that you and I and everyone out there should feel the slightest bit obligated to at least do a little something nice for your mom for the mere fact that you were borned. And really what better way to celebrate mom than with food… It really is the least that you can do. (I think mom’s also like flowers and cards and handmade pasta necklaces) My mom is defiantly about the food. (she has had her fair share or pasta necklaces) A many years back on Mother’s day, this sweet little girl (me) made her mother a special breakfast treat…blueberry scones. And ever since that day, for every freaking holiday, birthday, whatever day, my mother requests (demands) a batch of those scones. She is always saying that these are her favorite treat and that no one has ever made them as good as I do. (I guess that just reiterates that I am her number 1 child)
 The stuff. Flour, baking soda, baking powder and salt. A bit of sugar, vanilla, buttermilk, and butter (use vegan butter and nut milk if you want to make them vegan) And of course we need the blueberries which can be fresh or frozen. I usually use fresh, but the store I stopped at only had really big containers of fresh that were like $1000 dollars a piece and the organic frozen happen to be on super sale. So you know, the cheap in me won that battle.
  So into the bowl goes all the dry stuff; flour, baking powder and soda, salt, and the sugar. Give it a good whisk.
 Now dump the blueberries into the flour mixture. Toss them around to give them a coat of flour. Add in the buttermilk and vanilla and give a little mix until liquid is absorbed. We are trying to handle the dough as little as possible.
 Turn mixture onto counter. It’s very loose, but thats what it should look like.
  Very gently and with as little handling as possible, gather dough up, knead a few times till everything just comes together. Press dough into a disk that is roughly an inch thick…. and it doesn’t need to be perfect.
  Cut the disk into even sized pieces. Do 6 big, 8 normal, maybe even 10 smaller. Whatever size you like. (I did 8) Place the scones onto a baking sheet, using a spatula to transfer, and sprinkle the tops with a little bit of sugar. Into a preheated oven for about 20 minutes.
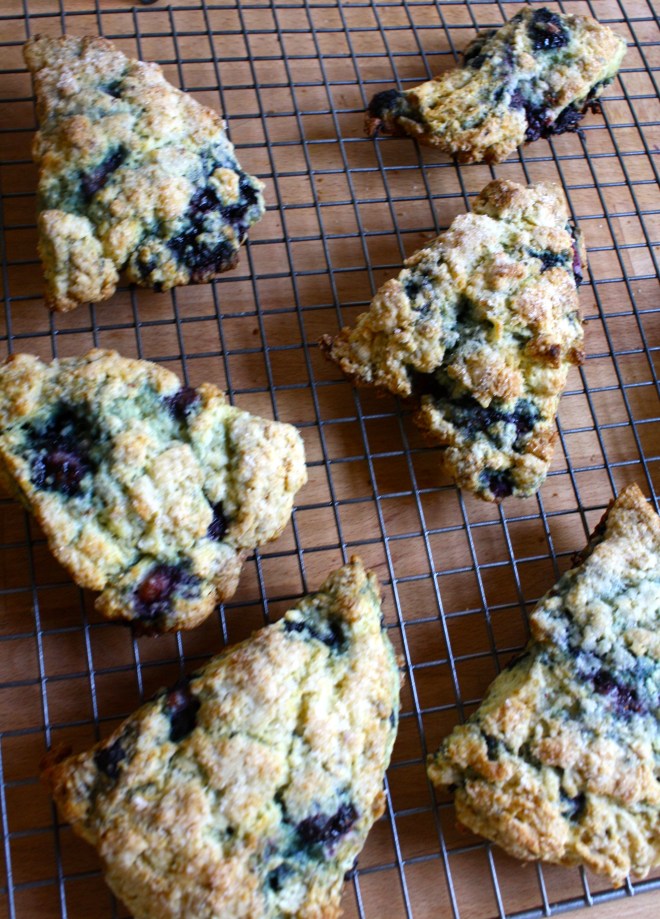 And when the scones look all nice and browned and a tester comes out clean. remove and either serve right away warm, preferably with huge cup of coffee or tea, or stick on a rack to cool before storing in air tight container.



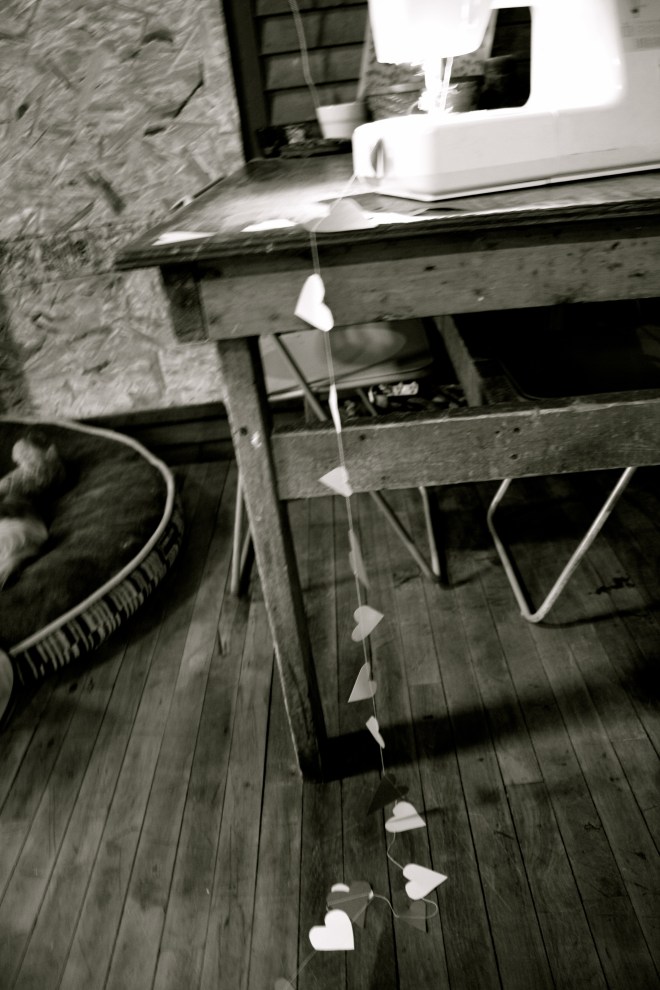

 Made from necessity, a seat near the door to sit and remove shoes, store winter stuff and doesn’t look like I threw a bunch of milk crates together..I threw them together and added a nice blanket, I’m classy like that. I do love a good milk crate…there has always been something so satisfying to me about a free plastic receptacle that has a world of uses. These three crates and some scrap wood have changed my entire living situation. The entryway of our 200 sq ft loft is now super functional, looks fantastic, and makes me happy. .All from a the scrape pile.
  It’s not what you think…we have a barn that is pretty much dedicated to scrap wood and some other building material that has come from buildings we have worked on. This picture does not do our scrap wood(and junk) pile any justice. It is pretty crazy, and drives me nuts. I don’t know how many times I have threatened a 30 yard dumpster, but you know what? When Nick or I are in need of some wood, we always find ourselves rummaging through the pile and can almost always find a piece of what we are looking for. The pile somehow always redeems itself, for that reason it still lives on(for now). Being that you as a sane person, you probably don’t have a barn full of scrap wood(and junk), so what you will need for this project is..
 Three milk crates..What I found was that there are some milk crates that are not the same size so make sure that you have three that are the same. These crates are 13x13x11.
 Measure and cut ply wood. The top and a bottom are the same measurements…Here comes some math…. three milk crates that are 13 inches long = 39 inches. One crate deep is 13 inches. . Cut two pieces 39.5 inches by 13 inches. (The extra 1/2 inch is so the crates can move in and out easier)
 Now measure and cut sides. Two pieces at 13×13.The crates are 11 inches high, but you need to add the extra 1.5 inches because of the thickness of the plywood. If your milk crates are a different height, use that measurement plus 1.5 inches.
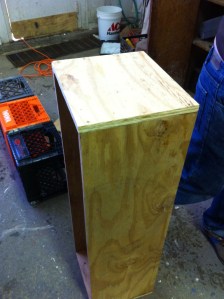
 I caught that piece of wood he is throwing at me. Ok, not really, but I could have. Here Nick is cutting four 10 inch pieces of 2×4 for the legs. We decided on 10 inch legs because we wanted a bench that was a little taller than the average chair, which is about 18 inches floor to seat. If you wanted to make the legs shorter or taller, by all means, I just wouldn’t go to much taller or you might not be able to sit conformably on it.
 After you have all your legs cut, mark out where you want to place them. We did a one inch recessed from the front and the side…but do whatever looks best to you. Mark where the legs go and place two screws into inch leg, screwing from the inside of the bench.
  And thats it… ..now you have the frame. Take a minute here to admire your handy wood working skills. If you are not into the raw wood look, this would be the time to paint it.
 With the crates inserted…Doesn’t it look magnificent! I choose these 3 crates for the colors and the patterns..I wish I has a grey crate that fit. That would have looked awesome.
 Test one……….the crate slides out perfectly and my mittens fit!!
 Now for the big test……….and it works!! My butt safely seated. My feet touch the ground and I can bend over and tie my shows… can’t get any better…
 But it did. The addition of a folded blanket as a cushion. I was going to make a cushion but found a really pretty blanket at the second-hand store that was perfect. It was 2 bucks and is actually way more practical than a cushion. I can wash this blanket, a hand-made cushion, I probably wouldn’t want to mess with that, plus a piece of foam alone cost like 25 bucks. The blanket was meant to be.

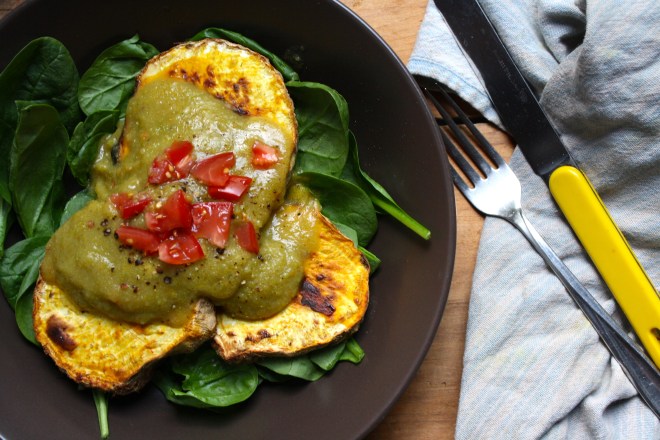 My winter farm share is coming to an end this week. One more pick and then a three week stretch until the summer share starts… WHAT AM I GOING TO DO!!! Stock up as much as I can is what.
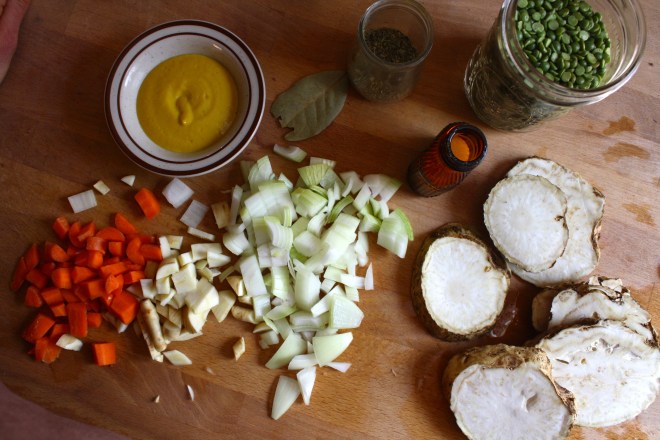 The stuff….For the split pea gravy we have a carrot, a parsnip and a large onion chopped into small chunks. Salt, thyme, a bay leaf and of course the split peas. Then there is the celeriac root* sliced into 1/2 inch thick rounds and some plain old yellow mustard .
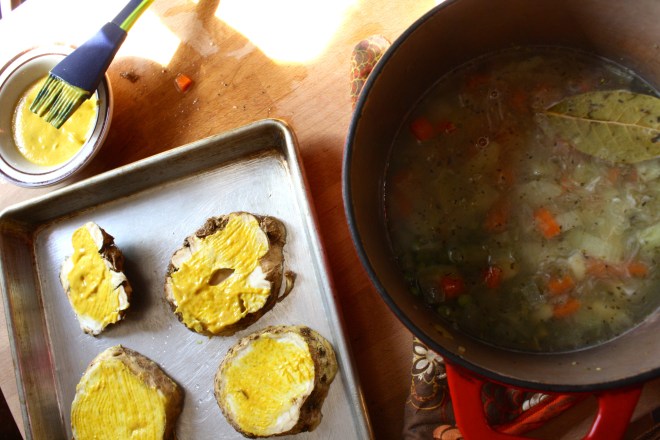 Toss the chopped parsnip, carrot, onion and the spices into a pot on medium heat and let veggies sweat a few minutes until tender. Add in the split peas and enough water to cover everything. Turn pot on high and bring to a boil, then cover and turn to low. Make sure to give the pot a good stir ever few minutes and add more water if needed
 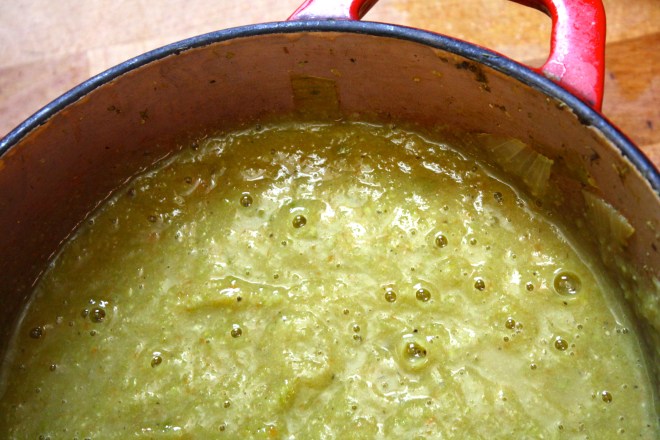 Once the peas have soften, remove the bay leaf and puree until smooth and oh so creamy. Taste and add more salt and pepper if needed. If you find that the gravy seems to thick, just add in more water until it’s the consistency that you want.
 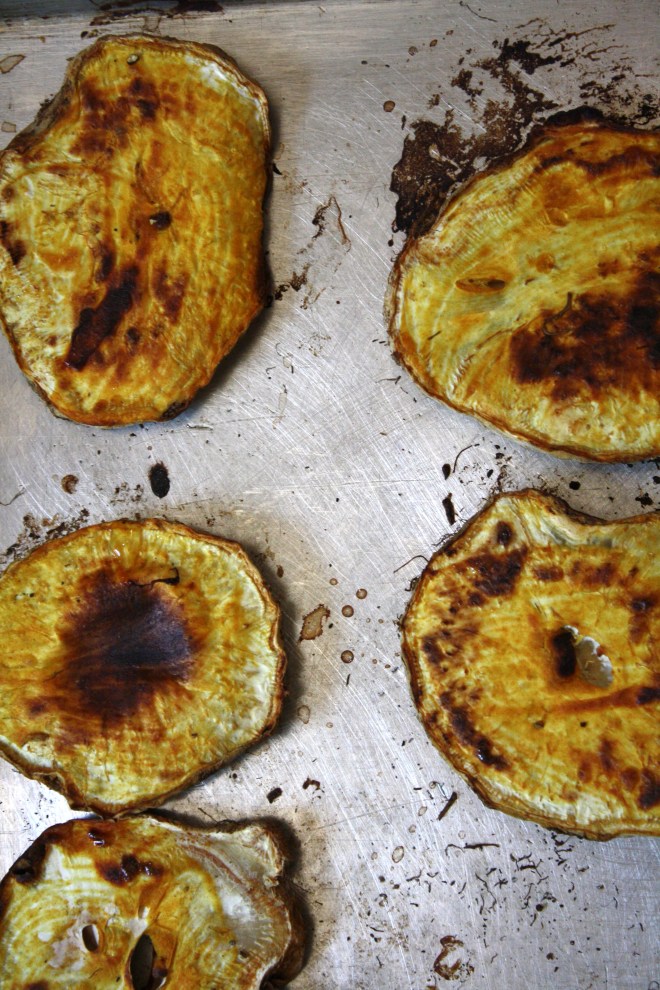 The gravy is made, the celeriac is roasted… now we are ready to eat!!
 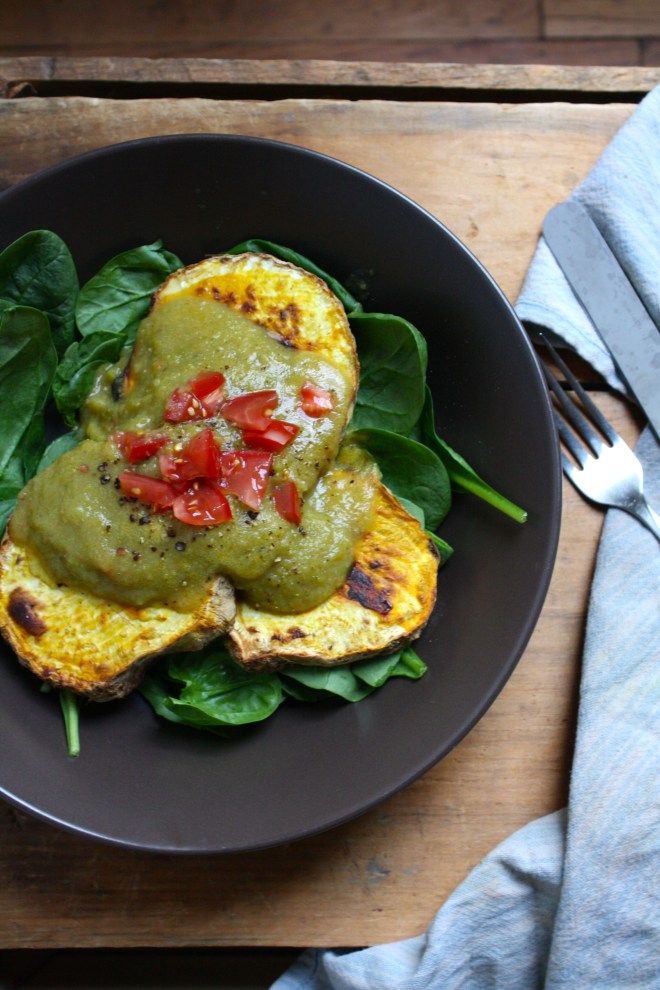 Stick the celeriac on a plate and dump good amount of that gravy right on top. Feel free to add a bed of spinach, or a grain or anything you want, because why not, and also some chopped tomatoes for a little acid and prettiness.
 I’ll let you know now, I am a make and eat soup all year long person. I can think of few things better then sitting outside, basking in the sun, hopefully with a light wind, a book in hand, enjoying a nice big cup of some good homemade soup. (Doesn’t that sound so freaking lovely?) This soup right here is perfect for just that. Parsnips are the best, kind of like a big white sweet, yet starchy carrots. And cooked together with a little bit of light and lemony thyme, rich earthy turmeric and a couple more chopped veggie….. you got yourself a nice thick and fragrant bowl of happiness that fills you up without weighing you down. It’s food you can eat that fills you up, leaves you feeling cozy, yet still wanting to hop on a bike or lace up the running shoes. Hearty without the feeling of all the heaviness.
 The stuff. Parsnips, carrots, onion and garlic. Thyme and turmeric, salt and pepper. the tinniest bit of oil and water (water not shown)
 Chop all the veggies and the garlic, drizzle a dutch oven or a pot with oil, toss in the veggies. Add the turmeric, the thyme, and 1/2 cup of water.
  Sweet sweating the veggies. Turn pot on medium and cook until the water completely cooks out. When the veggies start to brown and stick to the pot, deglaze with water. Give a good stir and keep cooking. Repeat the deglazing process until the veggies are super soft and ready to blend. (I did this 4 times.. it only took 10 minutes)
 Add enough water to cover the cooked veggies.
  And now blend the heck out of it.. Go as smooth or chunky as you want. I blended as smooth as I could get with this crappy immersion blender. (Blender on loan until I finally decide on, and buy a new one)
 And there you have it. Scoop into bowls, add lots of cracked black pepper, and go to town. I made enough to save a bowl for later… it didn’t last for later.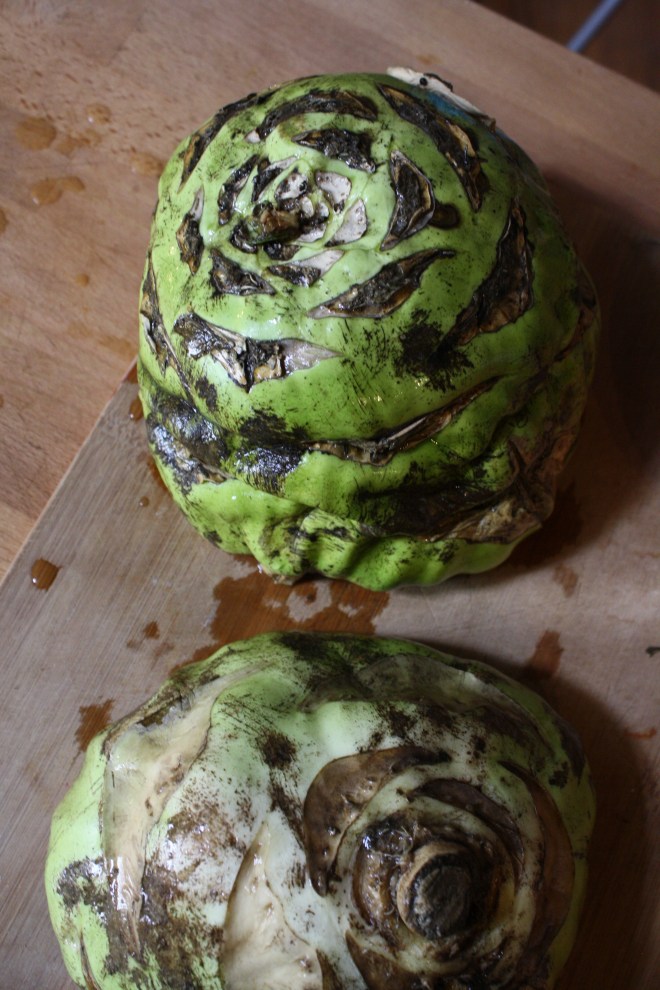
 I have never in my life seen, let alone received, a kohlrabi as big as the one I picked up from my farm share last week. It was, no joke, bigger then my head. (completely nuts) If I didn’t know the farm and the farmers of my CSA, I would have to question whether or not it was grown in radioactive sludge…(kind of like the dandelions in the Teenage Mutant Ninja Turtle movie from the 90’s)
 A gigantic kohlrabi cut in half ( I only used one of the halts) A whole yellow onion and 2 large carrots. I also added in 4 cloves or garlic
 All of those chopped veggies get thrown into a pot with two cups of water and a good sprinkle of salt and pepper. Cover and place on medium heat for about 20-25 minutes. (give a stir ever now and then) Keep cooking until the veggies are fork tender.
  Once the chunks are all cooked up, its time for the immersion blender. (or into a regular blender) Add in at least 3 cups of water, but more to thin out to your desired consistency and let it rip. Stop blending once the soup is nice and creamy. Taste and season with salt and pepper to taste. Leave on low heat to bring back to a good soup eating temperature.
 Now the soup is done.. and you can eat it just as it is, but you should really add in the asparagus. It is just so f*ing good. Just grab a few spears, dice them nice and small, and throw into the soup pot. Let it cook for another 5 minutes and wa la..
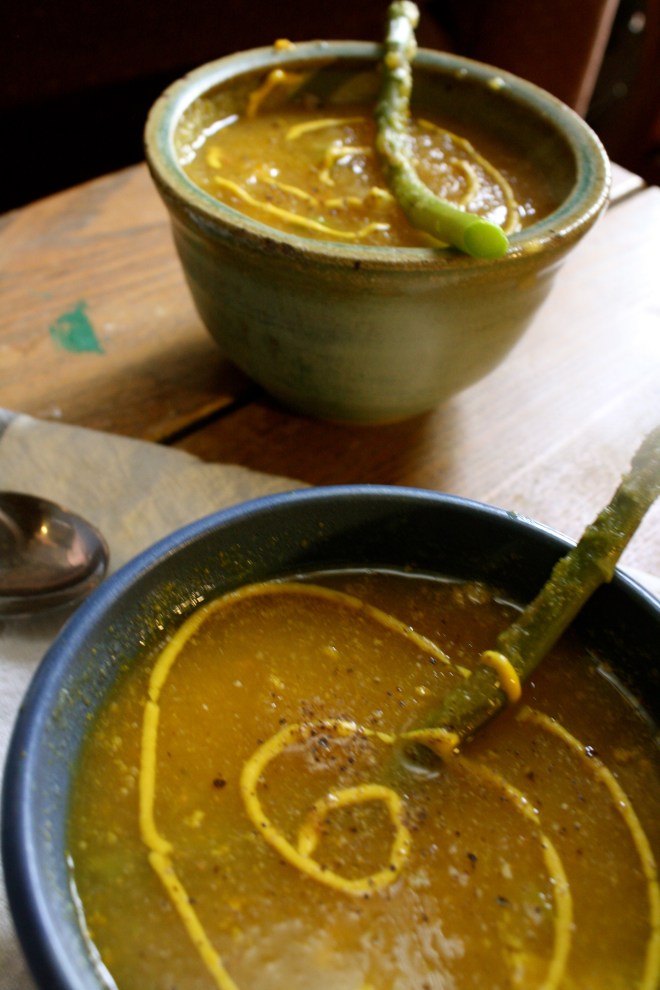
  Soup is done. Ladle into bowls and if you want a little fancy presentation, add a swirl of mustard (it’s so good) and a whole cooked asparagus spear.
 You ever have one of those days where its 9 am and your ready to call it a day? . Yesterday was one of those day for me. Its spring vacation around here (more like an arctic vacation) and I had volunteered my day to babysitting/ hanging out with 2 of my nephews, ages 11 and 13. (I know, I am the greatest sister). I had all of these great ideas and plans of things to do, but when it came down to it, they wanted to do nothing but play video games and not really listen to anything I said. I basically had to drag them outside to go for a walk we me and that’s all I could get them to do My great little nephews, I love them so much, but yesterday they had their minds set on being little monsters.
 What we have going here…… Chopped up onion, celery, and carrot in a pot. Stick that pot on the stove for a few minutes on medium heat to start the cooking process. While that happening get the other stuff ready. A big can of diced tomatoes, hot sauce, worcestershire sauce*, prepared horseradish*, celery salt, garlic powder, salt and pepper And last but not least a good squirt of yellow mustard. Now add it all to the pot and bring to a boil. Turn down to low and stick a lid on it.
 After about 20 minutes the veggies should be soft and the flavors should all have melded together. Taste soup as it is cooking and add any more spice that you want.
 I stopped when I got to a smooth consistency with the littlest bit of texture.
 And there it is…served with a stock of celery and a wedge of lemon (I forgot to add them to the pictures!) A bloody Mary to take the edge off any drag of a cold weather day. And best part.. left over soup is great served chilled with a shot of vodka to loosen this Mary up!


 I was cleaning my spice shelf (I feel like I do this like once a week) and found some poppy seeds hiding behind some jars. Accidental spice findings happened more often the then one might think in my house.. I like to buy tiny baggies of spices with good intentions of using them, but because of their tiny size, I often lose them or forget about them due to that tininess. But I usually find those tiny little bags, and when I find them, I try to use them right away..(I don’t like having old spices around and no, I will not toss it) And it just so happened that I has a lemon in need of using.. and it was getting close to dinner time. I could wait and make lemon poppy seed cake or muffins, or just start dinner. Then I was like, ” I’ll just make lemon poppy seed pasta.” And so I did. And of course it needed to have lots of garlic and some kind of vegetable to round out the dish, (I know tomatoes are fruit but you know what I mean)
  Start by tuning oven on to 400 degrees. Chopped tomatoes and sprinkle in oil and salt and stick in the oven. Do this first because the rest of the meal only takes about 10 minutes..So fast!!!
 The sauce is pretty much a basic roux…
 Once your pasta is cooked (cook however it says to on package), reserve about a 1/4 cup of pasta water and drain the rest. Add the pasta water and pasta the sauce. (the pasta water helps the sauce and noodles canooddle together)
 And its all mixed up just waiting to be served…and the roasted tomatoes!
 Scooped into a bowl with a scoop of the roasted tomatoes and some chopped chives, served with a couple wedges of lemon..just because.
 I usually base my meals on what I know I have for food in the house and what I know needs to be eaten. I was a little surprised when muling around in the freezer to find a block of extra firm tofu. (I don’t remember buying). Maybe a tofu fairy left it in there for me, or maybe it has been in there for years and I just am now stumbling upon it. Either way, I found it and it had to be eaten. So I cooked it up, and I cooked it up nice and good. Tofu is a pretty vertical food, being that its basically a flavorless block of protein. It can go sweet or savory, mashed, chopped or blended. Add fresh garlic, any type of sauce or even peanut butter. (the possibilities are quite endless) I was going for a dinner dish so I decided on a simple cubed tofu with lots of ginger and garlic (so good to ward of those winter sicko bugs out there) and baked it up nice and crispy with fresh bright green broccoli and soba noodle. Quick, easy, tasty and healthy.. I did it again. Thanks tofu fairy!
 This noodle dish is super easy to make and take only about a half hour. We start with extra firm tofu, a package of buckwheat soba noodle, a nice big broccoli crown, honey, fresh ginger, garlic and soy sauce. oil for pan and lime for a finish. Nothing fancy.
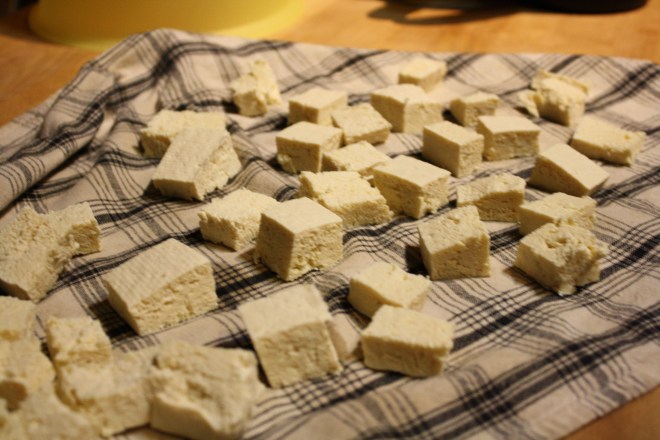 Dice the tofu into small cubes and place onto a clean dish towel and pat dry…It really helps the tofu suck in more flavor and become nice a and crispy.
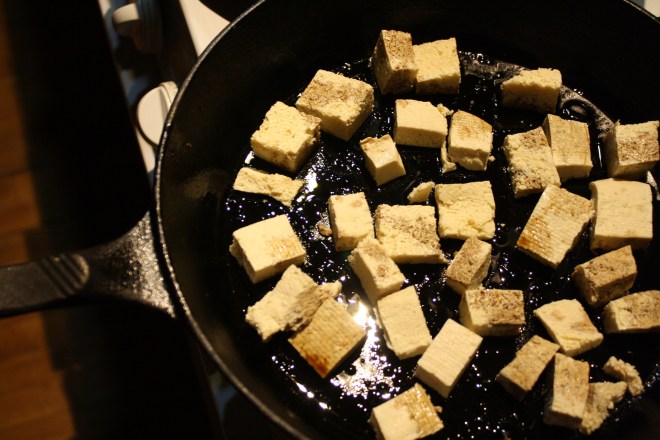 Tofu get moved into a lightly oiled skillet, ready to go into a hot oven. Why baked instead of sautéed on the stove? I find that the tofu keeps it shape and crisps up better when baked. But do whatever you want….. But just bake it.
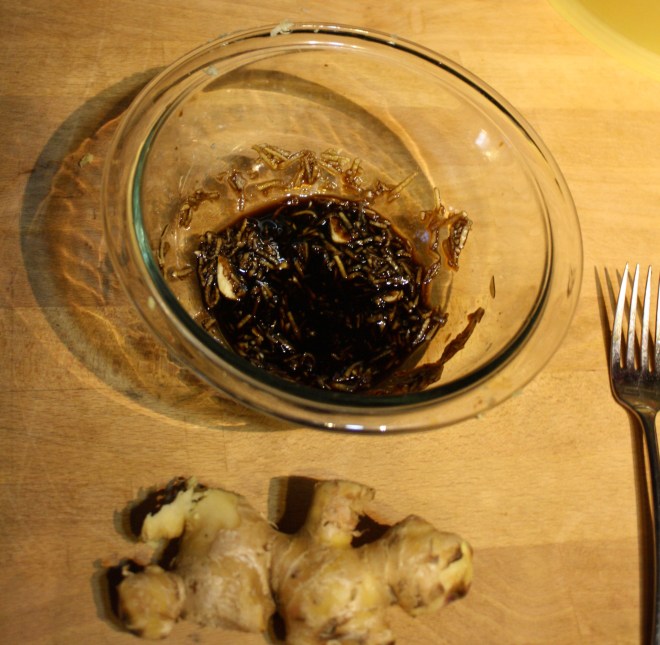 While the tofu is baking, make up the sauce. Grate about 2 tablespoons of fresh ginger and4 large cloves of garlic into a bowl. Whisk together with 2 tablespoons honey, 1/3 cup soy ( tamari or brags aminos works too) and 1/3 cup of warm water. Taste it, and if you think it needs more anything, add it. I actually used 6 cloves of garlic, but I really wanted a garlic packed sauce.
 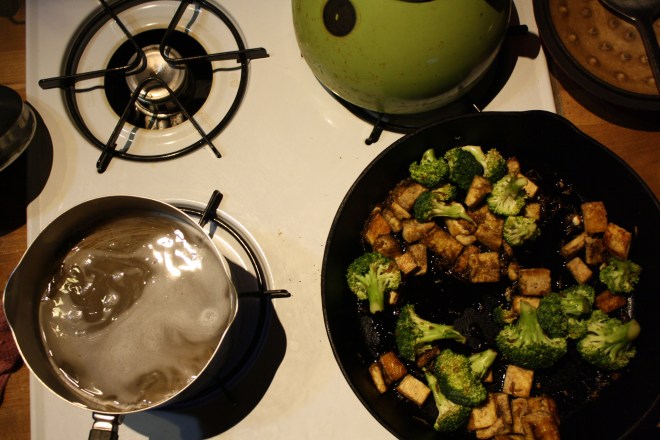 After 15 ish minutes, give tofu a flip, then after about 25 minutes, the tofu should be nearly done. Remove from the oven and toss in the chopped broccoli and 1/3 cup of the sauce. Its a little watery but thats what you want, it will cook down in the oven. Now stick the skillet goes back into the oven and boil the soba noodle.
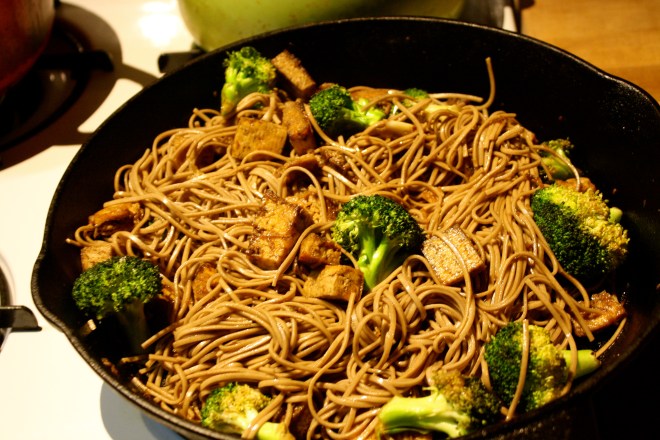 Another 10 minutes in the oven and the sauce starts to caramelize and the broccoli is cooked but still nice and crisp. Remove skillets from oven and toss in the cooked noodles and the rest of the dressing. Toss and toss and place on a plate, or a bowl, or if your into it, just eat out of the pan. (it happens)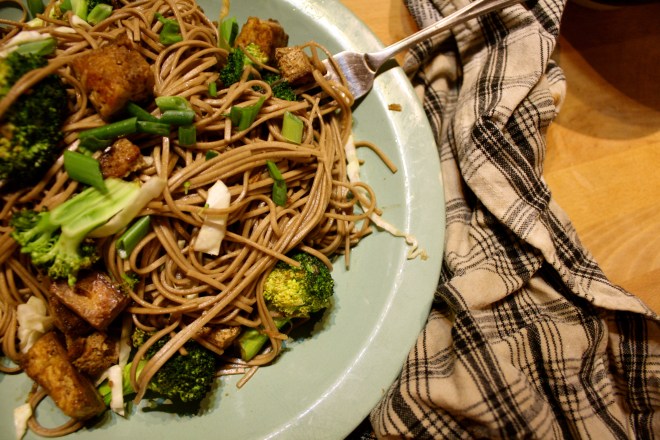
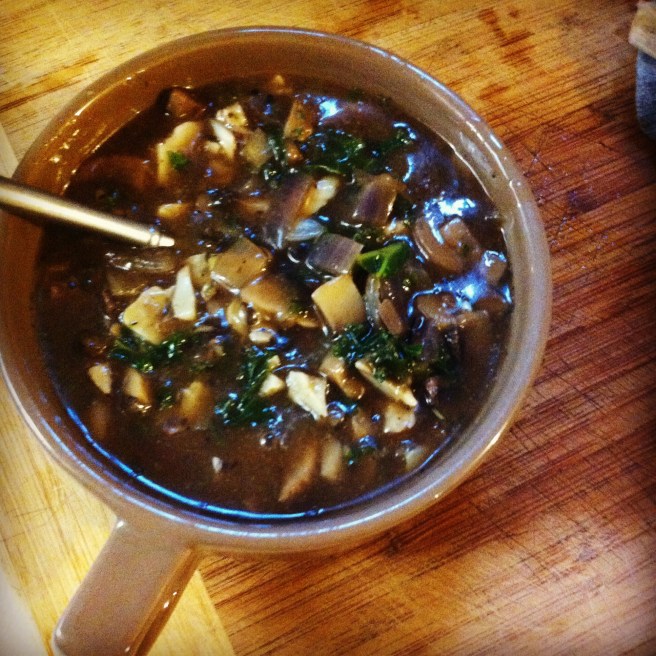 This year for Christmas my family decided to do a mid day brunch lunch thing. Everyone has their own little families that they do the morning with and then everyone goes their own ways that nigh(Nick and I do our own Christmas celebrating at night)…That leaves a chunk of mid day to hang, talk, play, exchange stockings and then usually someone gets a little pissed and yup, time to go. Its totally cool, we see each other too much anyway. So food wise, it was pretty basic. Eggs, hash browns, a ham, fruit and bagels… The hash browns were store bought, Me and nick did the eggs frittata style and the ham was just stuck in the oven….Not much to do. But then one of my lovely sisters requested gravy…..and so it was made. And a basic brunch was turned into a gravy laden food feast. And so you know, I am not a huge gravy fan, or I never really have the opportunity to eat gravy, its just not in my food rotation..until now. I was really impressed with myself on this one.
 We have white mushrooms, kale, red onion, garlic, soy, nutritional yeast(if you don’t have, no worries, you can get away with not using it), sage and thyme and corn starch…
 Dice up onion, mushroom and garlic… Into a pan on medium heat with a bit of olive oil…just to soften up
 Toss in the spices, nutritional yeast and the soy sauce and let meld together for a minute or 3
 Add 2 1/4 water and whisk in a tablespoon of corn starch….and let it simmer
 Once the gravy gets to that super nice consistency…add in finely chopped kale and let gravy simmer for another 5 minutes or so
 Transfer to a nice bowl or gravy boat, stick a ladle or big spoon and get to graying up all your food!!!!!
 Before we left for the weekend, I was was trying my hardest to empty the fridge out of all food with the intention of leaning it empty so I could leave it open to defrost while were were gone. Unfortunately I was not able to make it happen. What I did make happen was emptying it almost completely so that when we got home, we had pretty much no food in the house, except for a few things that probably should be eaten. Plus one of the last things that I want to do after sitting in a car for 6 hours is go to the grocery store, or anywhere for that matter, so I was determined to make with what wet had in the fridge: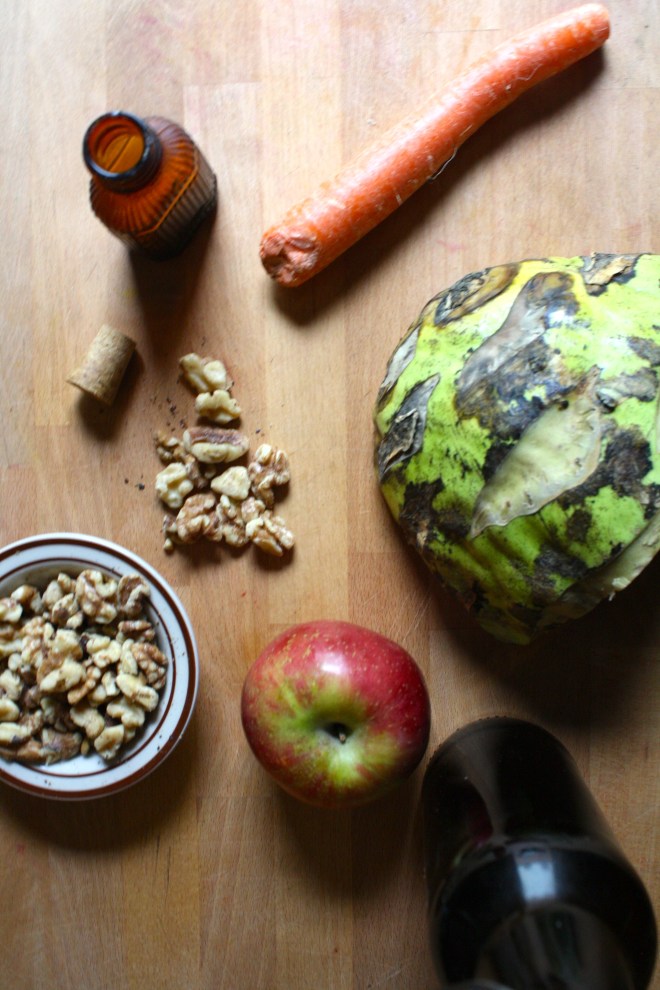
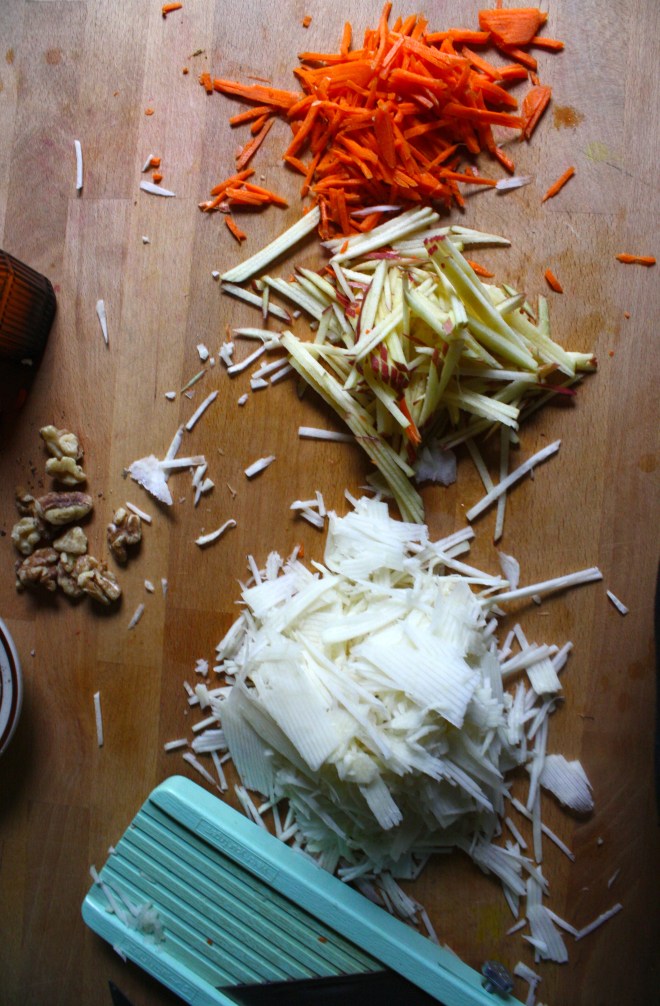 The stuff… A huge hunk of a bigger then my head kohlrabi (or 2 normal bulbs). A carrot, an apple, toasted walnuts, red wine vinegar, and some salt.
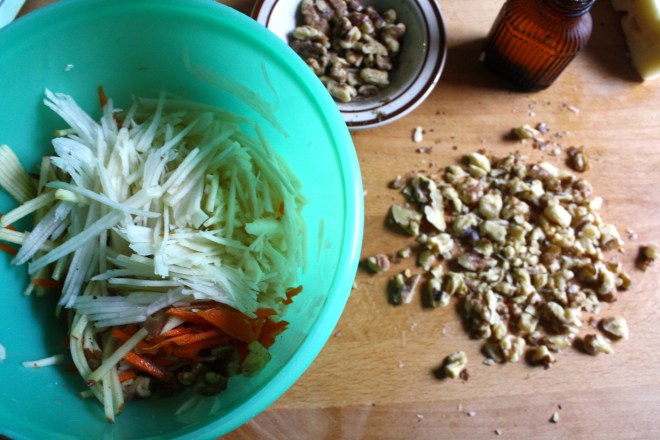 Sprinkle with salt and a good glug glug of red wine vinegar. Chop up the walnuts (some big chunks and some very small pieces makes for good eating), toss it all together and, well that’s it. But wait…. let it sit for a few minutes before serving to really let the flavors draw out.
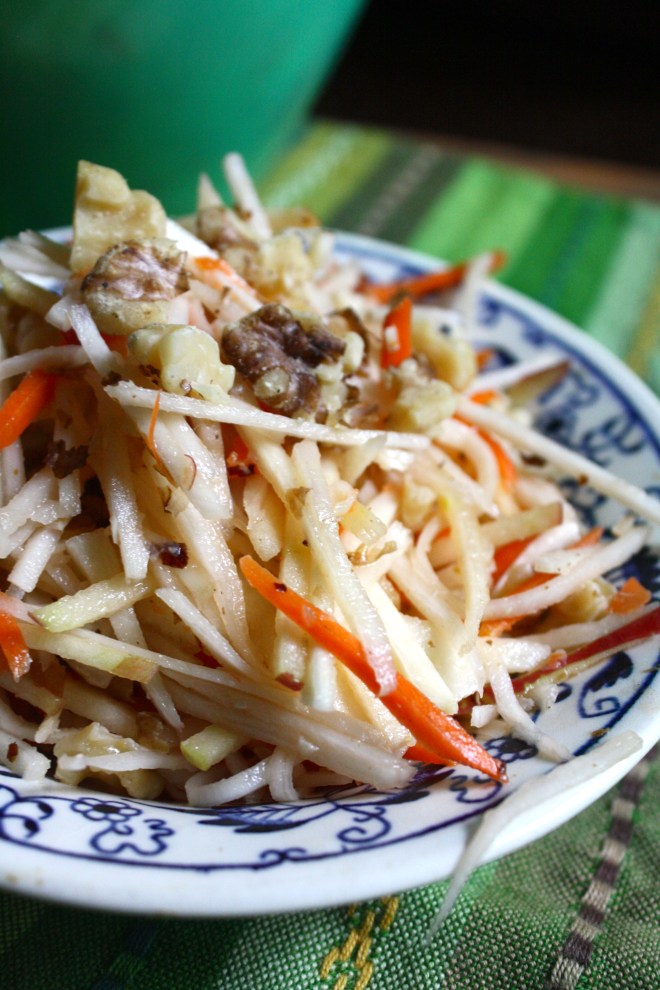 And there we have it. Super fast, full of flavors and crunchy texture. A salad slaw after my own heart.
 Spicy, crispy cauliflower… um yes please. I really like cauliflower. The mister loves it, or at least likes it better than any other vegetable. So when he asked for spicy cauliflower, well yea I am going to make it because I am so nice and really, could I say no to a veggie request? (I might have said no if it involved deep frying) Also, I found fresh cauliflower on sale! ($2.25) I don’t usually cook fresh cauliflower, but I figured at that price, it wouldn’t be bad to cook a head. (If I am cooking cauliflower, which I do a lot, I just use frozen….casue it be waaaay cheaper)
  The stuff. Cauliflower, chopped and broken into pieces. Corn meal mixed with salt, pepper, onion and garlic powder, and because I made this for the mister, parmesan cheese. And in the green bowl, srirsachi and a little oil.
  The cauliflower gets a coat of the hot sauce and then tossed around in the corn meal mixture. Handling as little as possible, place coated pieces on a lightly oiled baking sheet and stick those suckers in the oven for about a half hour, taking them out and flipping half way.
 And take them out of the oven when pieces tuned golden brown, stik them on a plate, and serve immediately.
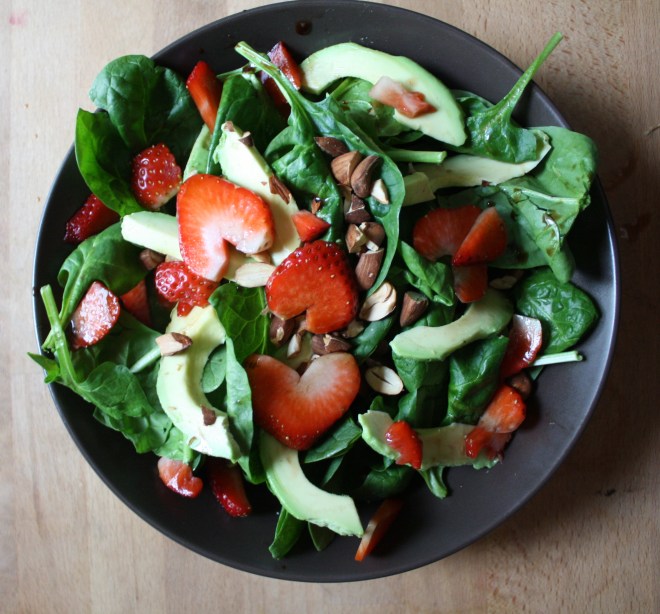 When something goes on sale at the grocery store, I tend to buy it. Being that it is Valentines Day this week, all the stores are having specials on all sorts of sexy things… and strawberries are one of them. Now I am not a huge fan of buying produce that is terribly out of season, but I can’t help myself…a good deal is a good deal and the strawberries were a super good deal. I was just going to make some sweet ass strawberry jam or maybe a lovely strawberry cake with them (and I probably still will), but these strawberries are actually super juicy and full of flavor, and it’s always nice to eat some full flavor freshy strawberries… especially soaked in balsamic vinegar. And yeah, I think that this salad is pretty sexy, so it makes for a perfect Valentines day dish.
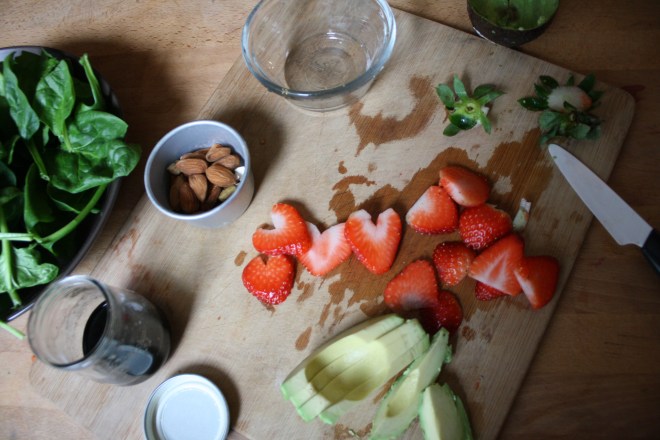 A handful of ingredients and 5 minutes will get you to a fantastic salad experience.
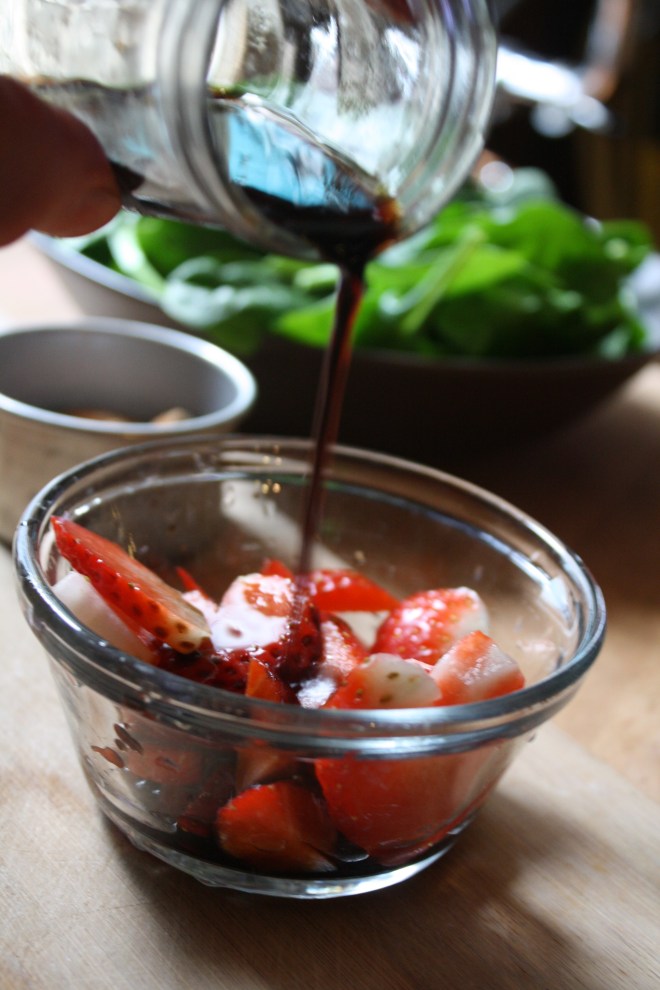 Pour the vinegar on the strawberries and let sit for at least 5 minutes. (the longer the strawberries can sit with the vinegar, the better)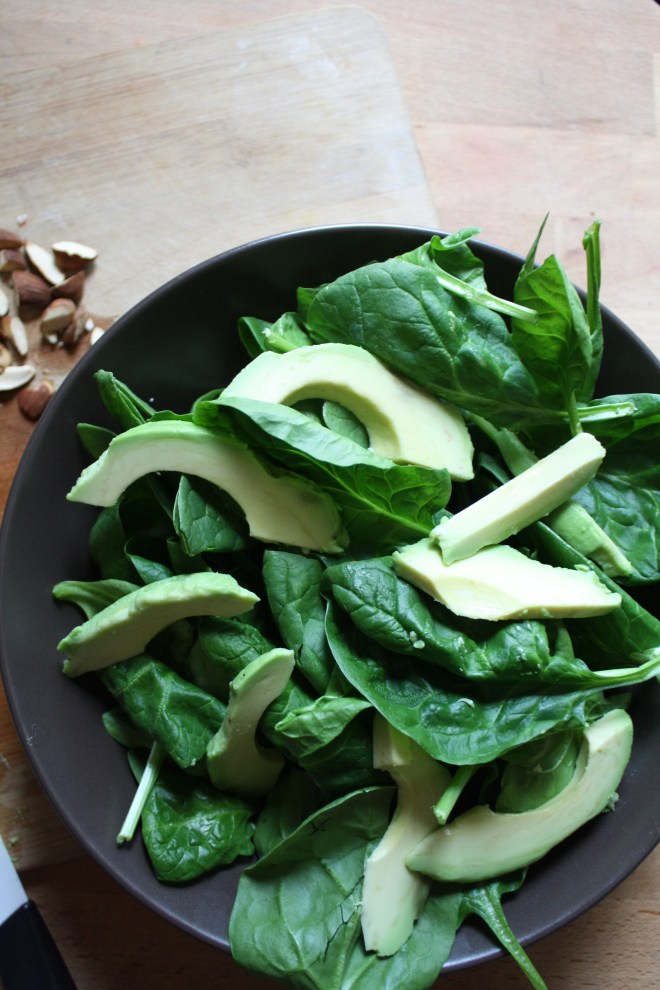
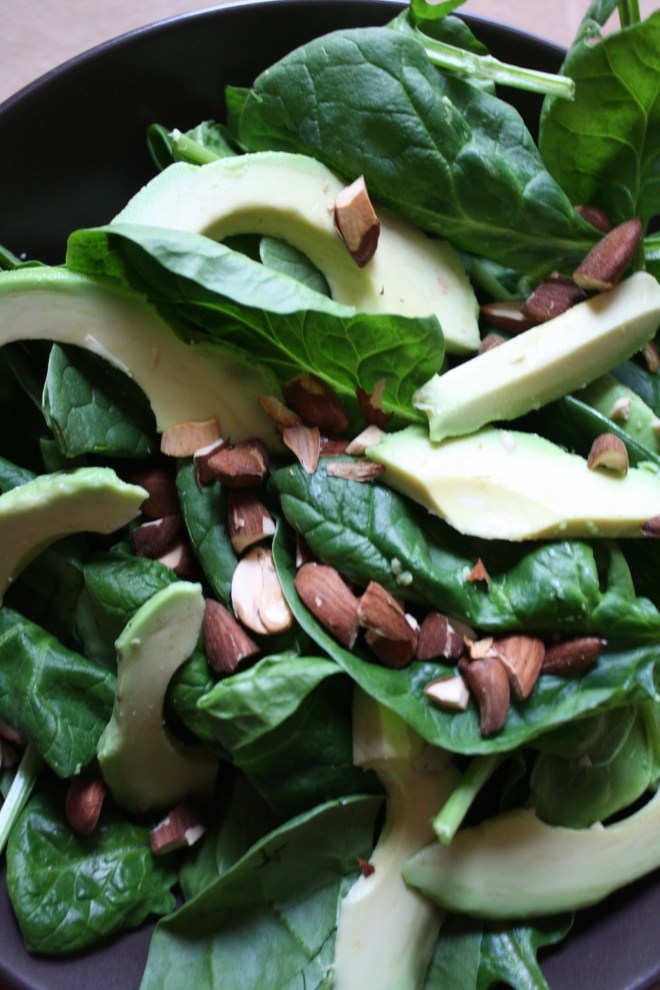 Pile it on.. thinly slice avocado.. rough chopped toasted almonds… It’s pretty much as easy as it can get.
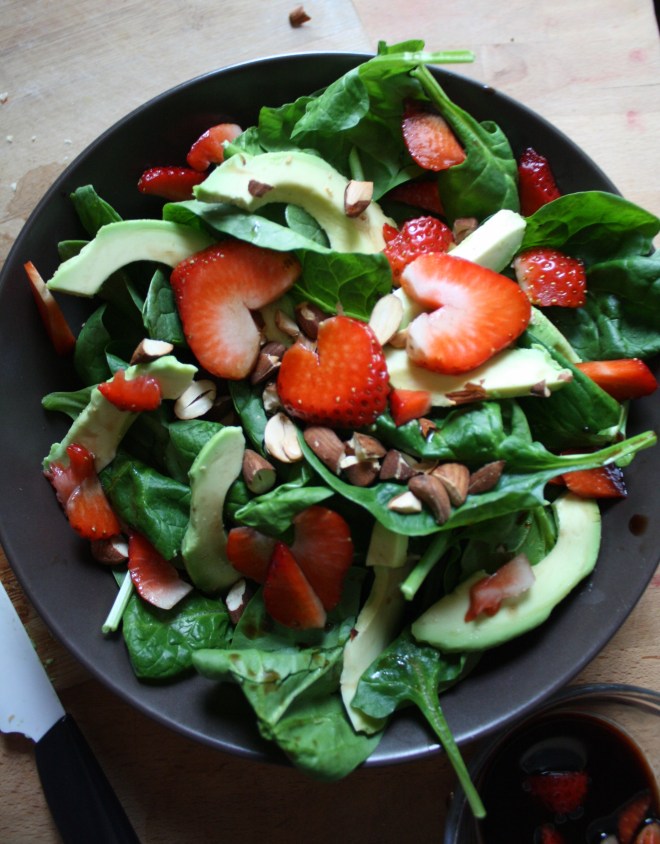 And last but not least, toss on the balsamic soaked strawberries and drizzle the remaining vinegar. (if you made hearts, place on top to make pretty) Sprinkle with a pitch of salt and pepper and pow! Fancy, sexy, delicious salad.
 The bounty of spring is upon us. Asparagus is everywhere and I have been embracing it.. smelly pee and all. And along with all my spring veggies and smells, I have grabbing for more springy spices. I go through seasonal spice kicks, like cinnamon and ginger in the fall, curries and chills in the winter. And for spring, I am big on sumac. If you haven’t heard of it or tasted it, it kind of taste like a tangy salty lemon..without actually having any salt. And its a really pretty, a bright red, almost purple color. I use it on a lot of things, especially veggies and bean dishes, sometimes as a lemon replacer, but mostly to add another level of tangy flavor. It’s fantastic, really great for all those springy time dishes. Nice and bright!
 The stuff of the stuff. Quinoa and asparagus for the base. Sumac, lemon, garlic, onion, salt and pepper and a little splash of oil for the dressing.
 Start by making the dressing. You want to have it sit for at least 10 minutes. It will be perfect by the time the quinoa is done. Mince the garlic, dice the onion and juice the lemon. Stick it all into a jar with the sumac, a pinch of salt and pepper and about a teaspoons worth of olive oil. Stick a lid on the jar and shake shake shake. and let it sit.
 When the quinoa is simmering, cook up the asparagus. Add a drizzle of oil, to a pan and a few splashes of water. Place trimmed and chopped asparagus to pan and sprinkle with salt. Cook on medium heat for about 8 minutes, or until cooked but still has a nice crunch to it. Take off heat and add the dressing to pan. Let it sit and marinate for a few minutes.
 When the quinoa is tender, fluff with a fork and add to the skillet with the asparagus and dressing. Toss around to make sure all the quinoa gets dressed. Take a taste.. does it need a little salt and pepper? Add a pinch if it does.
 Pile into a bowl, add a bit of cracked pepper.. and eat.
THE LOVELY CRAZY
September 19, 2015 by maximios • Blog
And I bet I am not the only one that got overly excited at $1.50 pineapple and bough themselves a few. We will just call ourselves opportunists. Now we have plenty of pineapples and don’t have to pay the $4 a piece prices. (Justification)
But if you don’t have a pineapple laying around, you must go get one. (Maybe if your lucky, there might still be some sales going on) because you must make this salad. I am on a mission to make everyone I know eat it because, for lake of a better way to say it…….It will rock your world.
Dill and pineapple are a serious match made in heaven. Pineapple, with its sweet, tangy, citrusness and dill with it’s super fresh earthiness. Mixed together with a few other helpers to create a fresh, clean, chunky, tangy, over the top, flavor. I could stop right there, but toss in a handful of lentils, some creamy avocado and a bed of kale…It’s like the best spring time, celebration on you tongue, happiness in you tummy, kind of salad.
A salad that will make you smile. (and maybe buy 5 pineapples)
The prep is done, now compile. Kale in bowl, top with lentils,. Toss on avocado chunks, and, last but not least, the blended pineapple dill mixture. So good……So so good.
Happy Friday!!
-C
So Good Pineapple Dill Kale Salad
Serves Two
Note. No fresh dill? You can use dried, just sub in 1 teaspoon for the fresh and after blending with the pineapple, let sit a little longer to really let the flavors meld together.
Place pineapple, dill, pinch of salt, vinegar and garlic into a blender or whatever you own that blends and blend stuff together, leaving it a little chunky. Let sit for 5-10 minutes.
Kale goes into a bowl and add the lentils and diced avocado. Pour the blended pineapple on. Toss around.
Now eat.
So anyways, This particular pizza was inspired by a small batch of kohlrabi and red cabbage sauerkraut I made, plus a block of swiss cheese that I found hidden in the back if the fridge. I guess it was meant to be. The mister was much into this concoction… like I will be making this again and maybe again after that. Its kind of like a reuben, but without the corn beef, which you could totally add if you wanted, or the mayo and ketchup dressing, which you could swap in instead of the mustard sauce. You can even make it vegan if you use vegan cheese. Do what ever you need to do here cause hey, its your pizza to eat.
HAPPY WEEKEND!!!!
-C
Kind of a Reuben Sauerkraut and Swiss Pizza
This is the stuff you will need..adjust the amounts to you liking
Preheat oven to 450
Roll out the pizza dough to desired thickness and place on skillet or baking sheet. Smear with mustard, then layer the sauerkraut then cheese, and sprinkle with caraway seeds. Place into oven to cook for about 15 minutes. Pizza is done when dough s cooked and cheese is all nice and bubbly.
Remove from oven, let cool for a minute, cut into slices, and eat.
A few things I will bring in my hole:
But before I leave for my hole in the ground, I made these little cake bites to get my people through the weekend. Sweet little lemony bites of rich dense cake dipped into bittersweet chocolate. (I am just so nice) They have all the pleasure or cake without the need of a fork and are much easier to give away then a big slice of cake. Plus, they are fun to make. My little sister helped and did most of the chocolate dipping. Then she and another little used their mouths to clean up the chocolate mess. It was an afternoon of chocolate all over the kitchen fun day.
So make some bites to have and to share. Or if you, like me, are digging a hole to hide in, make a batch of bites to bring with you. That’s the beauty of cake covered in a harden chocolate shell, they travel really well. Simple lemon cake stuff. Flour, baking powder and salt whisked together, Sugar and soft butter in a bowl. An egg, some vanilla, milk, and of course, the lemon.
To make the batter, cream the soften butter with the sugar until light and fluffy. Zest lemon(1 big or 2 small) into bowl with the juice of the lemon(s), the vanilla and the egg. Beat until combined. Now beat in the dry and then the milk. Keep beating for another minute until all mixed. Batter should be light and fluffy.
Batter goes into a greased and floured 9×13 baking sheet and stuck into a 375 degree oven for about 30 minutes (You can use a 9×9 baking pan. Just bake fir another 10 minutes and you will end up with thicker bites). Remove from oven and let cool for a few minutes and flip to remove cake from baking sheet. Cut cake into small pieces (I cut 4×6 to get 24 bites) and place bake into sheet and into freezer (I stuck mine outside, it was -2 degrees ) for at least 2 hours.
Oh what a lovely sister I have.. Look at her dunk….. like a boss! Fully coated and placed on a rack for the chocolate to harden. I ended up sticking the rack in the freezer for 10 minutes…They harder really fast in there.
And now you have some it, bites of cake covered in chocolate. 1 bite, 2 bites…5 bites. Eat however many you want because its Friday and because there small little bites and just because you can.
Now if you need me, I’ll be in my hole.
-C
Chocolate Lemon Cake Bite
Add butter and sugar to a large bowl and beat on medium unit light and fluffy. Ass in vanilla egg, the zest of the lemon and the juice of the lemon. Beat to incorporate. Now beat in the dry and lastly the milk.
Grease and flour either a 9×9 pan or a 9×13 baking sheet. dump batter in and smooth out. Stick in oven and bake for about 3o minutes or until a toothpick stuck into the middle comes out clean. Remove and let cool for a few minutes on a wire rack. Flip cake to remove from pan. Cut cake into bit sized pieces, 4×6 is a good size, and place back on baking sheet and stick into freezer for at least 2 hours.
When cake bites are as good as frozen, get the chocolate ready. Take the chocolate and the coconut oil and either melt in a double boiler or the microwave. Mix until smooth and make sure to full incorporate the oil. Now remove the cake bites from the freezer and dip each bite into chocolate, trying to full coat all sides. Stick onto a wire rack or a parchment lined pan to harden. They can be stuck back into the freezer to harden faster.
Once chocolate has harden, your good to go!