My contribution to last nights dinner at my sisters…. Freshy fresh veggies spring rolls.I had about 30 minutes between work and getting over to my sisters house to throw something together so it needed to be something fast, easy, and something I could make without going to the store. She was making the main course (some teriyaki situation and rice) so I was doing up the veggies.
I had just bought a package of spring roll wrappers…. Bingo! The perfect and logical choice. I grab the wrappers, a variety of veggies and after spending 12 of my 30 minutes trying to scrub the oil based paint off of my face and hands, I still managed to completely prepare, construct, and take pictures of these lovely tasty spring rolls. and get over to my sisters in time for dinner.
Impressed?
Damn right!
The stuff. Carrot, beet, asparagus, red cabbage, and kohlrabi, which all (except asparagus, which I just cut into thirds) got cut into matchstick sized pieces with my mandoiln. Then there are the rice spring roll wrappers that we need to make the veggies into rolls. Also a bit of red wine vinegar to drizzle onto the veggies for a little extra zing. And lastly, soy, fresh ginger, and a couple cloves of garlic for a spicy salty dipping sauce.Start by having everything set out and ready to assemble. Fill a large shallow dish or baking sheet with really warm water. Working with one at a time,place a rice wrapper into water and let sit for about 10 seconds or until the paper starts to soften. Remove from water and place on a damp surface (just splash a little water on the counter) Take a little bit of everything and and place on the lower middle part of the paper. Fold in the sides first, then tuck and roll the wrapper as tightly as you can without ripping the wrapper.
Repeat until you have used up all you veggies.For the dipping sauce. Finely grate ginger and garlic and add to soy sauce. Stir… and it’s done.Freshy, pretty and fantastically delicious. And for real, took about 8 minutes to make. (I even had enough time to wash the dishes before we left!)
I am so awesome!
Hump Day Pow!!!!!
-C
Fresh Veggies Spring Rolls
Makes 8-10 but can easily be increased or decreased to desired amount
8-1o rice spring roll papers
Splash of Red wine or rice vinegar
1/4 cup soy or tamari sauce
2 cloves of garlic
teaspoon freshly grated ginger
1 medium carrot
1 medium beet
1/4 head of purple cabbage
10 thin fresh asparagus
1 small kohlrabi
Note… I used the veggies that I had in the fridge at the moment. If you have a bunch of veggies but not these particular ones, use what you have. Pretty much all veggies taste good inside a spring roll!
Gather your veggies and prep by either using a mandolin, a grater, or some sick knife skills, and julienne, shred, or slice you veggies into thin match sticks. Once all the veggies are prepared, sprinkle a little vinegar over the top.
For the rolls…Grab a large shallow vessel (a rimmed baking sheet works great) and add in warm water. Working one at a time, place the wrapper into the water for about 10 seconds or until the wrapper starts to soften. Remove and spread onto a clean, damp work surface. Gather a bit of each veggie that you are adding and place towards the bottom middle of the wrapper. Now fold the sides in over the pile of veggies. Then with the side closest to you, tuck and roll wrapper away from you, trying to keep it tight, but not to tight that it rips.. (Hopefully that makes since.) Place finished rolls onto a damp surface to keep from sticking and if not serving right away, drape with a damp towel or paper towel to keep from drying out.
For the soy ginger dipping sauce. Add grated ginger, minced garlic, and soy into a bowl and mix together. Serve with spring rolls.
Eat one, two, or a plateful. It’s nice to share but not a necessity.
This little guy asked me to make him some popsicles, and of course I said yes because, well look at him.
So we made a date. A popsicle and playground date to be exact.
For these particular pops, I decided to use watermelon, mainly because I had just broken into one and once I open a melon, I have a race with myself as to how fast I can consume the in entire thing. ( It’s a sick form of watermelon gluttony) But also because the little was really really excited to hear that I could in fact make watermelon popsicles. And the other stuff I added because I had it and it all tastes really good together.
I made the popsicles the day before so they would be ready for our date. He came over, we ate lunch,(peanut butter sandwich and carrot sticks) wondered around the neighborhood with the pup, and made a quick stop at the playground. (we only managed a couple runs on the slide before it was too hot and our sweat had us sticking to the slide and it was more of a painful scoot then a glide) We then made our way home and rewarded ourselves for a walk well done with these amazing, super refreshing, and healthy frozen treats that I made just for us. While we were eating the popsicles, our conversation turned to food. We talked about all the different varieties of popsicle that we could make, and how we could eat them for breakfast, lunch or dinner because they are made of only good things and are really healthy (he is really trying to eat healthy) It was the perfect ending to a fantastic afternoon with a five year old, or any human for that matter…
I would have a popsicle date with this kid every day
The Stuff. Fresh seedless watermelon (make sure to have lots on hand cause you are going to be eating it as you make these), a fresh lime, a handful of blueberries and a sprig of fresh mint. And don’t forget a mold of some kind that form the liquid into a popsicle (if you don’t have a mold, little paper cups work too)
Remove watermelon from rind and cut into small chunks. Juice the lime and add that, the watermelon chunks, the mint and the blueberries to a blender or vessel if using a hand blender) and blend everything until smooth.
Look at how pretty that is. And so tasty…. I am not going to lie and say that I didn’t make a little extra to drink, cause I did.
Now pour the puree into your molds to the fill line (follow the instructions that your molds give you) and place into the freezer.
And yes Shannon, these are in fact, your popsicle molds. Don’t worry, I’ll bring them back soon. (I am thinking some type of booze infused situation)
Once the freezer has done its job freezing… pop those suckers out.. (I let the mold sit on the counter for a few minutes so the popsicle pops out clean)
And heres to the best popsicle date ever!
Happy Summer! Happy Tuesday!
-C
A big chunk of seedless Watermelon (aboutt 11/2 cups)
1/2 ish cup of blueberries (fresh or frozen)
Juice of 1 lime
a few fresh mint leaves
note. The popsicle mold that I used only needed 2 cups of popsicle juice. If you have a larger mold, just use more of everything to get the amount you need
Remove rind from watermelon and add to a blender with the lime juice, mint and blueberries. Blend until eveytthing is pureed and mixed all together. Pour liquid into popsicle molds and stick in freezer for at least 4 hours.
When ready to eat…, pop those suckers out of there molds and EAT!
How awesome will you be when you bring the most freaking amazing tortilla chips to the party this weekend? You will be like..”what, it ain’t no thang.. I am just good like that” Yes, yes you are.
And yes, I am assuming that you will be making these awesome chippers to share at a Super Bowl part this weekend. I say this because even as I sit here writing this (with the TV on) there has been nothing but football talk…deflated balls, hot wings, half time shows and commercials. It’s almost as big as Christmas. Got to get the decorations, the special game day food and your football jerseys. It’s crazy and all over the place. So that’s why I am assuming you are making these for the game. But if you not going to be participating in any football parties.. by all means, make these chips for yourself anyways. Celebrate you day! Have a non football watching party. Or just make these whenever. Jalapeño Lime chips for everyday!
Note: You can make these chips without the jalaeno and or the lime if you need or want to. You can also stop after the first step and have some dank corn totillas for tacos ands stuff..But definitely make the chips… worth it for sure!
All the stuff.. Masa harina, hot water, salt, a lime and a jalapeño. Zest lime and place half the zest into a glass bowl with oil and either sit on warm oven or microwave for 30 seconds to infuse. Puree the jalapeño with a cup of hot water and add the puree and half the zest of a lime, plus salt, to the masa harina. Mix it all up with another 1/2 cup of water or enough to make the dough resemble play dough… You can add more water or masa if you dough is to wet or dry.
Knead dough a few times just to make sure it’s completely uniformed and divide into 12-14 equal pieces. Place balls on a plate and cover with a wet paper towl to keep from drying out.
I do not own a tortilla press so I used what I had… wax paper, a wooded cutting board and brunt force. I took each ball and place it between the two pieces of the waxed paper, placed the cutting board on top, and with all my might and body weight, pressed down to smoosh. It works like a charm.
My cast iron skillet is big enough to cook 2 -3 at a time, but doing one at a time is cool too. Preheat the skillet to medium heat. Cook each tortilla for about 2-3 minutes ( or until starting to brown) on each side. Half way there to chips!!!
With my fingers ( you can using a basting brush for sure), I rubbed a little of the lime oil all over both sides of each tortilla. Stacked a few high, then sliced those tortillas into triangle shapes. If you want to go crazy, you could cut them into strips or even use a cookie cutter and do some fun shapes… but triangle are easy, classic, and practical. A good shape for dipping!
Placed all nice and cozy on a baking sheet. trying not to overlap. Into a 400 degree oven for about 20 minutes to complete the chip making process.. After about 15 minutes, check for doneness. When nice a crispy, remove from oven, squeeze lime juice all over and sprinkle with salt. I then stuck them back in the oven for a few more minutes just to dry the lime..
After cooling down, take those chips and stick them in a bowl.
Eat a few, but wait and save them for the party. Or better yet, make a few batches. Bring a batch, eat a batch. (Its ok, you are allowed)
Eat with some salsa, maybe some of this guacamole, or just as they are…Anyway is the right way as long as you are eating!
Have fun making these and have fun getting read for the party this weekend (Super Bowl or not!)
-C
Jalapeño Lime Tortilla Chips
Makes 12-14 tortillas.. then made into a medium bowl of tortilla chips.
Ingredients
2 cups masa harina
1 1/2 to 1 3/4 cups hot water
1 teaspoon salt
1 lime (juice and zest)
1 large or 2 small jalapeños
2 tablespoons olive oil
salt
To start, zest lime and add 1/2 of the zest to bowl with the oil. Place oil on warm spot on stove to let the oil infuse the limeness.
Take jalapeno and puree with 1 cup of hot water. In a large bowl, add puree and remaining lime zest to the masa harina and mix, adding an additional 1/2 to 1 cup of hot water until the dough resembles play dough, not to soft, but not to dry and completely incorporated
Divide dough into 12-14 balls and place on a plate under a wet paper towel to keep dough from drying out.
One at a time, take a dough ball and place between two pieces of wax or parchment paper. Place either a plate or cutting board on top and press down as hard as you can (you could even stand on it). Remove flatten tortilla from paper and place in medium hot skillet. Cook each tortilla for 2-3 minutes on each side.
When all tortillas have been made, lightly rub lime oil on all over both sides. Stack a few on top of each other and cut into triangles. Place pieces on a baking sheets (I used 2) and bake at 400 for 15- 20 minutes or until lightly browned and crunchy. When chips are done, remove from oven, squeeze or sprinkle lime juice on chips and sprinkle with salt. Stick back into oven for another 2 or so minutes to re-crisp from the lime juice.
Remove and let cool completely, then dump into a bowl
Enjoy!
I have been meaning do a post on seltzer and syrups for a while now and this one is perfect… Everyone around me has been getting sick and I am trying my hardest to not get anything.
Citrus and ginger…. Two of my favorite things, combined into one super refreshing, light and crisp, thirst quenching drink. Tasty and packed full of vitamin C from the citrus and blood warming, tummy healing ginger. Its kind of a feel better elixir, a good for you drink, a sparkler pop. A drink everyone can get into (the mister even liked it), And it has no added sugars or nasty coloring, it can’t get much better.
Feeling Happy, feeling crappy, or just plain feeling, this drink is a good for it all.
I made the ginger date simple syrup ahead of time.. All I did what chop 2 1/2 tablespoons fresh ginger and about 3 tablespoons pitted dates and added to a pot with a cup of water. Simmered the stuff until the dates were mostly dissolved, about 15 minutes, took off the heat and pureed it. I let it steep for another 5 minutes and strained….no biggy. This is a milder sweet simple syrup. If you like sweeter add more dates or even add a bit of honey… Do what tastes the best to you.
Juice the lime and blood orange…..so much pretty!
I ended up with about 12 tablespoons of juice from a the lime and the orange.. If you need or want to, juice an additional orange and lime.
Add 2-3 tablespoons of the fresh juice per 12oz glass and add about 2-3 tablespoons of the ginger date syrup…(adjust amounts to you taste) Top off with cold plain seltzer water and maybe an ice-cube or two. ( I would have if I had thought to make ice)
So lovely…. so nice. I really got into these flavors. This drink has the ability to make you feel warm and cozy while being cold and fresh. It makes me happy.
Double thumbs up here!
Stay un-sick!
-C
Blood Orange Ginger Lime Sparkler Pop
Ingredients
2 1/2 tablespoons fresh chopped ginger
3 tablespoons chopped dates (more if you want sweeter)
1 cup water
1 lime
1 blood orange
Plain Seltzer water
Ice (optional)
For the ginger date syrup
In a small pot on low heat, add chopped dates and ginger to a cup of water. Simmer until dates have mostly dissolved, about 15 minutes. remove from heat and puree with either a blender to a hand emulsifier. Let steep for another 5 minutes and strain, reserving the pulp (add it to soup or salad dressing). Let completely cool.
To assemble drink, juice blood orange, and lime. Add about 3 tablespoons of the ginger syrup and 2-3 tablespoons of the citrus juice per 12 0z cup. Top with plain seltzer water, give it a light swirl with a spoon or straw and add ice cube if you want. Now have at it!
Whenever me and the mister get invited / show up for dinner at someone’s house, I like to bring at least one thing to contribute to the meal. First, because I am nice like that. Secondly, because I get to make food for other people besides Nick and get new feedback on recipes. (Sometimes I think he tells me things taste amazing when they might not) And thirdly, its nice to mess up someone else’s kitchen besides my own. So last night we went to my sisters and I made a salad. A very easy and virtually mess free salad…….I still made a mess (I cleaned it up myself!)
The salad I made was a light, crisp, and citrusy thing of beauty. Not exactly what one would think to eat on a freezing my face off cold day, but hey, you can’t help what the body craves. Plus, if you make it for. lets say, a sister that is making french fries and hamburgers for dinner..then a light and citusy salad is just what you need. Feedback from the mouths that ate it….Fanstastic combo! Best Salad ever! Never going to eat anything else! Ok, not so dramatic, but this was a winner. And for real, this salad takes about five seconds to compile and all the ingredients are really accessible right now so really, why not?
Nice crisp kale. Thinly slices red onion for a nice bite. Orange for that sweet citrusy and juicy smack and avocado to add a perfect creamy finish. Lime to make it perfect. Start with the base layer of kale… then first goes the sliced onion. (Make sure it’s thinly sliced or else it will be to overpowering) Add thinly sliced oranges…oh boy, your half way there!!!
Top with thinly sliced avocado, a sprinkle of salt and drizzle with lime juice. I also served with an extra wedge of lime, there is never too much lime.
Now you can stand back, take a picture, send to all your friends and make them jealous of you fantastically pretty and oh so delicious salad. They will ask, “What is that amazing looking dish you are eating?” Your response will be..”Check out the blog..the lovely crazy…and make it yourself! ” (yes, I am shamelessly plugging myself here)
Anyway, enjoy the day and try to keep warm!
-C
Citrus Avocado Salad (Makes 2)
Ingredients
A few good handfuls of kale leaves
1 orange
1 avocado
1 lime
1/2 a red onion
Remove tough stems from kale and chop leaves into small month sized pieces. Thinly slice onion, peel and thinly slice orange and cut avocado into…yup you got it, thin slices.
Kale into bowls, top with onion, orange and avocado. Top with the juice of half a lime…Add a sprinkle of salt.
Me well, I need to can, pickle and eat as much zucchini as I can. And it’s not just zucchini anymore… we are getting into cucumbers too…AAAHHH I know I have said this a few times in the past weeks, but man, I have so manning freaking zucchinis.. and the more I eat, the more I end up with… It’s getting pretty crazy here!
So anyway, yesterday my dad came back to VT, WOO HOO! and I was his first stop on his rotating dinner schedule. (cause I am his favorite child. I think..maybe) I made zucchini noodles for dinner (I have made them every night for the past week) and I wanted to make him dessert, I have all sorts of pretty fruit that I wanted to make and prepare, but I also had little time and honestly, little desire to move all that much (it was so f ing hot!) I already had out the shredder and a bowl, and the zucchini was just sitting there, in the basket taunting me with it’s gigantic green whaleness. So I figured I’d just make a zucchini cake, or better yet, cause my dad really likes chocolate, a chocolate zucchini cake.
This cake is tender and moist, almost like a cakey brownie, so it does not require any frosting which is nice when your dead tired and it’s so hot that any frosting would probably just melt off anyway. (although you could totally frost it up) It makes a great dessert, but I would not hesitate to serve this for breakfast either because, 1. It has a lot of zucchini in it which automatically justifies eating it whenever, 2. also made with whole wheat, and 3. it’s totally ok to eat chocolate cake for breakfast. I mean people eat donuts for breakfast and that shit is usually fried.
Yeah, this is for sure a dessert/breakfast cake.
The stuff for cake…. Regular all purpose flour, white whole wheat flour, and cocoa powder. Some sugar, salt, baking soda and oil. A little vanilla extact and a splash of coffee. And of course, shredded zucchinn
Dump the sugar, salt and baking soda into flour, whisk together, then mix in the oil, vanilla and the coffee. Now add in the shredded zucchini, but right before adding it in, give it a squeeze to remove a little bit of the liquid.
Mix until combined.
And pour batter into a well oiled pan
Feeling fancy? I was so I peeled the green skin from a zucchini and make a little starburst on top
And into the oven to bake…
And it comes out looking so fancy. Let cake cool for a few minutes and carefully flip from pan.
Note. It might not be the best idea to test your cake with a blunt chop stick.. I did and it made the middle sink in a little. No big deal, but next time I will use a fork.
Cooled and removed from pan. Now all you need to do now is eat cake.. I think that’s something you can handle.
Happy Friday!!!!
-C
1 cup white whole wheat (can use regular whole wheat or all all purpose)
1 cup all purpose flour
1 cup sugar
1/2 cup cocoa powder
2 teaspoons vanilla extract
1/2 cup oil (veggie, canola, sufflower)
1 teaspoons baking soda
1 teaspoon salt
2 cups of shredded zucchini
2 tablespoons of coffee
Preheat oven to 350
In a large bowl, whisk together the flours, salt, baking soda, cocoa powder, salt and sugar. Then add in the oil, vanilla and coffee. Add in the zucchini, but right before, give it a squeeze to remove some of the liquid. (don’t got crazy, just get a little liquid out). Mix until incorporated.
Oil a 9 inch cake pan and pour in the batter. If you want, use zucchini skin to make a pretty design on top (completely optional), and place into preheated oven.
Bake for about 45-50 minutes, or until a tester stabbed in the middle comes out clean.
Remove from oven and let cool in pan for at least 5 minutes the gently invert pan to remove cake and place on a rack to cool.
Serve as soon as you want..
Place in mouth, chew, and swallow…..Smile!!!
First day of Spring!! Well kind of I guess. I think it actually starts at like 6:20 tonight, when the temperature is going to dip back done to 10.(Spring my ass) I don’t know about you people out there but here in Vermont, we are really hanging on to winter. I have to keep telling myself…” It will be warmer soon and you’ll be looking forward to this weather in a few months.. so stop bitching!” I give myself good pep talks.
Anyway, last week at the farm share pick up, there was a nice little surprise. We got a few pounds of some sweet locally grown and milled whole wheat flour. There was a little sign with the information about the wheat and where it came from, but in my haste of gathering all of my other veggies, I failed to take notes and forgot the name of the farm that it came from. But I do know that my farm traded some celeriac for the wheat. I was really excited because I am really into the idea of using locally grown grains and I don’t know, it just made me really happy, especially because it was a trade. Food framing and local sharing is stuff that makes me happy.
I wanted to make something to kind of showcase the hearty, nutty flavor of the wheat and I also wanted to make something that my mister would eat for breakfast. Well what better way to do that then with muffins! Banana coconut whole wheat (that just happen to be vegan) Hearty, fruity, and smells like the word lovely and the color yellow. A few to eat and a few to share. Hanging at home, running away or getting ready for a day of spring cleaning….This is a great weekend to make muffins!
The stuff… Light, nutty local whole wheat flour, ripe oh ripe bananas and coconut flakes are the stars in this muffin… But we need the other stuff too. Brown sugar, vanilla, coconut oil and a chia egg. Baking powder, baking soda, and last but not least, salt.
Yup, that sounds about right The salt, baking soda, and baking powder are whisked together. The banana and all the rest of the stuff are mixed up… Then mix the wet mixture into the dry. Stir until combined and then add in the coconut flakes,Scoop mixture into 12 lined muffin cups… A scoop like mine works very nicely. Don’t have one, well I recommend you get yourself one. Until then, use a spoon. Something I always do when baking any muffin is sprinkle the tops of each muffin with a bit of sugar or brown sugar. It melts and caramelizes and adds a sweet little crunch to the tops.
Now stick the muffins into the oven. Remove from oven when they look like this, nice and golden brown. Also good idea to check with a tester stuck into the middle. When it comes out clean, they are done.12 happy little muffins cooling on a rack, waiting to be eaten with you mouth.
Doesn’t the sight of pretty food make you happy, like sing a song happy? Muffins, whoa yah!! Friday yah yah!! Spring…What, Yah!! Yah…Yah Yah!!!
Terrible I know, but at least you were spared hearing my actual voice.
Have a great weekend. Do lots of springy stuff!
-C
2 Cups Whole Wheat Flour
4 Ripe bananas
1 Teaspoon Baking Soda
1/2 Teaspoon Baking Powder
1 teaspoon Salt
1 teaspoon Vanilla Extract
3/4 Cup Brown Sugar
1/3 cup melted Coconut Oil
1 Tablespoon Chia Seeds + 3 Tablespoons warm water
1/2 Cup Unsweetened Coconut Flakes
Preheat oven to 350
In a small bowl, mix 3 tablespoons warm water to the chia seeds and let sit for at least 5 minutes (10 is better) In a large bowl, peel and mash the bananas until they turn into a kind of chunky soupy puree. Add in brown sugar, chia seed mixture, vanilla extract, and the melted coconut oil (make sure it’s melted or it won’t incorporate into the mixture) Mix together. In another bowl, whisk together the flour, baking soda, baking powder and salt. Mix the wet mixture with the dry until combined then mix in the coconut flakes.
Line a 12 cup muffin tin and fill each cup about 3/4 the way up with batter. Sprinkle each muffin with brown sugar and place in oven on center rack. Bake for 25-30 minutes or until the tops 0f the muffins are golden brown and a tester inserted into the middle comes out clean.
Remove muffins from tin and let cool.
Serve as is or maybe with a smudge of coconut butter, or anything you want really.
No need for fork, just use you mouth.
There is irish soda bread in your future. I can see it. A nice hardy hunk slathered in butter and honey, crumbs all over the place. So all you have to do know is make it.
I remember reading somewhere (I wish I could remember where) that irish soda bread is just four ingredients, flour, sea salt, baking soda and buttermilk and adding anything else would make it a cake. So when I decided to make irish soda bread, thats all I used. ( I made it with some wheat flour) What you end up with is a highly dense, super fragrant, soft, chewy bread with a crunchy crust. Definitely not a cake.
Note….You can for sure add in a bit of sweetener or even little fat to make it richer and softer, but then it wouldn’t be bread (or so that’s what I read) There are tons of other recipes out there that have other stuff in them. This is just a really simple basic recipe.
White whole wheat flour and all purpose flour mixed together. Salt baking soda and buttermilk. That’s it.All the dry whisked together and in goes the buttermilk. Mix together until dough starts to form then dump onto a floured surface. Handling dough as little as possible, knead into ball.
Place on a baking sheet and dust with flour. Take a sharp knife and cut an X through the top about 1/2 inch deep.
Stick in into the oven for 50 ish minutes, or unit la tester stuck into the middle comes out clean and there is kind of a hollow thunk when tapped on.
And now you have a very pretty, dense hunk of irish soda bread.
Cut and serve with butter and honey (thats how the mister likes it) or whatever you want to eat it with.
-C
Irish Soda Bread
1 cup all purpose flour
1 cup white whole wheat flour (or you can use all purpose)
1 teaspoon baking soda
1 teaspoon salt
1 cup buttermilk (or your choice if milk plus a tablespoon lemon juice)
Preheat oven to 375
In a large bowl, whisk together flours, baking soda and salt. Mix in buttermilk until the dough starts to come together. If the dough seems to dry, add another splash or two of milk. Dump out dough onto a floured surface and shape into a ball. transfer onto a baking sheet, dust with flour and cut a x about 1/2 inch into the top. Stick into oven for 50 minutes until a toothpick comes out clean and the bread makes a hollow sound when tapped.
Let cool enough to handle.
Cut into and serve with a smear of whatever you want
Best eaten within a day or two
HORRAY, its Saturday!!! I don’t care that I have a bunch of laundry and house work to do, bills to pay, a mangy dog to groom… I get to do it all at home with the music blasting,(maybe some holiday tunes) a lot of coffee, in my comfy sweats and the oven on. Weekends are always a mixed bag of crazy for me but I can usually count on being at home for a chunk of the morning or afternoons and that’s when I jump at the chance to make me some yeasted bread. Give me a couple of hours, my list of chores and watch me go.. I can mix and knead,, set aside to rise and hit up cleaning that toilet. Go back and knead, divided and rise again, then go fold all the laundry. Stick the bread in the oven and watch out, I am mopping the floors. I am nothing if not a fantastic multitasked, much like these rolls. You can serve them as a side for dinner , use them as a sandwich roll, or eat them as the star with a dab of butter and a drizzle of honey. The possibilities are endless. This particular recipe is fantastic for may reasons…. Its pretty simple, not to many ingredients and is made with whole wheat flour. If you don’t want 16 rolls, you can make the dough, bake half and freeze the rest. You could even bake into loaves of bread instead.Yeah, sounds good right? Go ahead, you know you want to. Just do it!I always gather the ingredients.. I have learned over the years that if I have all my stuff out and measured in front of me, I will almost never forget something and that I make less of a mess. It also helps that I find it pretty. So, flours and salt are whisked together. The yeast and honey in a bowl waiting to be proofed. The butter in need of more melting and an egg.. Pretty. Honey and yeast mixed with a cup of warm water. BE CAREFUL with the temperature of the water.. If its to hot, the yeast will kill the yeast and you will have to start over again, but I trust you won’t do that.Now that the yeast is active, mix in melted butter and egg. (Make sure the butter is not hot, warm is ok) Add wet ingredients to the dry and mix.
I have a super awesome dough mixer , it helps to mix and not completely stick like it does to a wooden spoon. Dont have one? Use a wooden spoon, it works the same with a little more stickiness..You have a stand mixer? Well fancy you. No I am not jealous,(maybe a little). I like using my hands when making bread, but you? Go ahead, use your mixer, its cool with me. So mix you dough, you want the dough wet and sticky but still able to roll into a ball. If you need to, add a pinch more of flour, just enough to help form a ball. When ball is formed, drizzle oil and rub all over and place in bowl with a damp towel. Let sit somplace warm to rise for about an 45 minutes or unit dough has doubled in size. A good warm spot..Try the top of the fridge, thats my rising spot.
Once it has doubled, roll out onto a nicely floured surface and..my favorite part, punch it down and knead for a few minutes…. This dough doesn’t need a lot of kneading, just enough to reform ball and get some air out. Now divide and place into well buttered pans. I used two 9 inch cake pans, but a 13 X 9 pan or baking dish would work or loaf pans if you want loaves. Just make sure to really butter the pans.
Little ball of dough turned into big balls of dough. (Yeast is so cool!).Into the oven they go. Right before I baked them I gave the tops a little milk wash, just for color. Do it if you want, you could even do an egg wash, but it’s really not necessary. Oh boy… Fresh from the oven…Take a bit of butter and melt over the top….So lovely! Who wouldn’t want to just tear these beauties apart?
Now eat.. Eat with jam, eat with cheese, eat with peanut butter or with a bit of honey. Or, eat as is…..Just eat it and enjoy you labor of love and the satisfaction that you just made those delicious rolls that you are eating.
Honey Wheat Pull-apart Rolls.
Ingredients
1 cup all-purpose flour
1 3/4 white whole wheat flour
2 tablespoons honey
4 tablespoons melted butter
teaspoon salt
2 1/4 teaspoon yeast
1 egg
1 cup warm water
2 tablespoons butter(to rub over baked rolls)
Makes 16 good-sized rolls
In a large bowl whisk together both flours and salt.
In a smaller bowl add warm water, yeast and honey. Stir and let sit for 5 – 10 minutes or until the yeast has grown and is foamy. Meanwhile, melt butter and let sit for 5 minutes. When the yeast has proofed, whisk together with butter and egg. Add to dry ingredients.
With a dough spoon , wooden spoon, stand mixer or your fist, mix (or knead) until the dough comes together and begins to form into a ball. You want the dough to be wet and sticky but add a pinch or two of flour if its to wet and not forming a ball.
Coat dough with a little oil and place back into large bowl. Cover with a towel and place in a warm place(The top of the fridge is great) Let rise for 45 minutes or until the dough has doubled in size.
When dough has doubled, dump dough onto a well floured surface, flour up you hand and punch down the dough and knead for a few minutes. Divided dough 16 even balls. Now is a good time to preheat oven to 400 degrees.
Place in greased pans ( 8 in each) and cove with plastic and let rise for another 20-30 minutes or until dough has doubled and filling out the pans. When the second rise is done, place in oven and bake for 25 minutes or until a nice light brown. If you want a darker crust, right before baking, lightly brush the tops of rolls with butter. As soon as the rolls are removed from the oven take the remaining 2 tablespoons of butter( one tablespoon for each pan) and melt over top of rolls
Note..If you want to freeze any rolls, place in a pan after fist rise and stick in freezer until frozen Transfer to a airtight bag. When you want to use, simply pop out of freezer and let sit for about and hour. Bake as directed above.
And for your Friday, I made these awesome little raw/ vegan/ gluten free cookies.
Now wait a minute. Don’t let all the labels of what is not in these cookies scare you away. Just focus on all the stuff that these cookies are made of. Almonds, Cashews, Coconut, Cocoa, Oatmeal. They are cookies made with lots of good yummy stuff that just happened to be enjoyed by those with specific food diets as well as those who eat anything. A cookie for all! See, don’t they sound excellent? Yes, yes they do. And they are good. So, so, good. Even the mr. is into them. And he is far from being raw/vegan/ gluten free.
And because these cookies are made with all sorts of good for you stuff (lots of proteins, good healthy fats, and complex carbs) you can pretty much feel zero percent guilt eating them. They a are a no joke, healthy, energy packed cookies of goodness. A fantastic way to start the morning, eat with lunch, as dessert, post work out, or eat as a late night snack. (Just don’t eat them all at once)
Now go for it!
The raw stuff. A cup of old fashion rolled oat that have been soaking in water for about an hour. Almonds(which I spent 20 minutes deshelling) cashews, dehydrated coconut flakes, some cocoa powder and a few medjool date. If your nuts are unsalted, add a pinch of salt too.
Dump everything into a food processor. BUT WAIT! Make sure to remove the pits from the dates)I have broken a blade in the past form a date pit)
Blend unit combined and a kind of rough dough is formed. It will be a little sticky. If it;s to sticky to handle, place into the fridge for a few minutes to set up.
Now take blobs of mixture and roll into balls
And you could totally leave them as balls… you can even play with your balls….
But I think they look nicer squished flat and topped with pieces of nuts and coconut. They look almost fancy, if I do say so myself.
Now have yourself a cookie, and place the rest in the fridge (they get harder and, if you can imagine, taste even better after a few hours of cold)
Freak Yeah FRIDAY! Do fu stuff!
-C
Makes 15 normal sized cookies (you can make more or less, depending on the ball size)
1 cups oat fashion oats soaked in 1 cup water for at least an hour (use gluten free oats if needed)
1/2 cup raw almonds
1/2 cup raw cashews
5-6 medjool dates
1/2 cup dehydrated flaked coconut
1/4 cup cocoa powder
a pinch of salt (if your nuts are unsalted)
Add all the ingredients into a food processer and blend until the mixer forms a cohesive dough. It;s going to be a tad sticky, but if it seems to sticky to handle, refrigerate for a little bit so it’s easier to handle. (I have no problem handling right away)
Scoop and roll into balls and either leave them as is or squish them flat. Sprinkle with chopped nuts and coconut
Eat one or two right away, then stick the rest in fridge.
A ok to eat as breakfast, with lunch, at dinner, as as snack, a post workout protein, or when sitting on the couch and watching TV.
The past week was freaking gross hot, like sweaty, smelly, I want to live in the Costco walk in freezer hot. But today, well today was the most lovely day. A cool dry 70 with a nice breeze and sunshine. Then around dinnertime, a little bit of rain, followed by a rainbow. It was the most fantastic perfect weather.This is why I love living in Vermont. We get weather.
.Last night, dinner was all about trying to make some more room in the fridge for the farm share pick up tonight and to make something that I didn’t have to really watch. (the mr and I were moving the beehive to the roof of the house so I wanted to make something that I could leave on the stove and not have to babysit (just stir every now and then). With the weather being so freaking amazing, with a cool crispness in the air, I was craving something a little more on the warm and comfy side. And what do you know, the stuff I had left in the fridge (there is still a basket of zucchini on the table) was what was needed for a big pot of stewed summer ratatouille with lentils. It was everthing that I ever could need and want for a meal. Full of the best veggies and lentils, easy to make, nothing fancy to do. Just stick stuff into a pot and cook until done.
Cooler, light long sleeve, kind of weather. Enough rain where I didn’t have to water the garden, the most perfect pot of the best ratatouille shared with the mr. and a feeling of accomplishment and excitement (bees on the roof!).
The perfect night.
The stuff. Zucchini, yellow summer squash, eggplant, onion, tomatoes and lentils. And we have some fresh basil, fresh oregano, balsamic vinegar, olive oil, and some salt and pepper.
To get this party started, chop up the onion and toss it into a big heavy pot with a little olive oil and a sprinkle of salt. Stick on the stove on medium heat.
While the onions are cooking, mince up the garlic and chop up all the other veggie into medium sized chunks.
When the onions start to become translucent and smell fantastic, add in all the veggies and garlic. Give it a big stir and place back on the stove to cook for a few minutes to let the veggies release some of their liquid.
Then add in the lentils along with a equal amount of water and top with a lid.
After about 30 minutes, the lentils should be near done and the veggies tender, the tomatoes pretty much dissolved. Now chop up the basil and oregano and toss it in along with a few swigs of the balsamic vinegar. Give it a stir and keep on cooking for another 10ish more minutes or until the lentils are nice and tender.
Scoop onto bowl then into mouth. If you like, finish off with a bit more fresh basil or,ike the mr, top with parmesan cheese.
Have a fantastic day! So close to the weekend!!
-C
Makes 2-3 big servings (if serving with pastas or rice, its more like 4-5 servings)
1 medium zucchini
1 medium yellow summer squash
i medium onion
1 small eggplant
3-4 cloves garlic
1 cup dried lentils
1/2 cup water
3 medium to large tomatoes
handful fresh basil leaves
a few glugs of balsamic vinegar
couple sprigs of fresh oregano
olive oil
salt and pepper
Drizzle a little olive oil into a large pot. Dice up the onion and place on medium heat and cook for a few minutes. Mince up the garlic and chop up the remaining veggies into medium sized pieces. Once the onion is cooke a bit and strting to smell oh so nice, toss the veggies and garlic into the pot. Mix, sprinkle with salt and pepper and place a lid on it. Cook for a few minutes to draw out a bit of liquid from the veggies. Now add in the lentils and the water. Stick the lid back on and let cook for about 30 minutes on medium low heat or until the lentils are starting to soften.
When the lentils are mostly soft, but still have a bit of biet, dice the fresh herbs and toss into pot with a few swings of balsamic vinegar. Stir and cook for another 8-10 minutes or until the lentils are full cooked.
Remove from heat and ladle into bowls..
Serve with rice, pasta, bread, a big old pile of fresh greens, or just as it is.
Eats fantastic right aways, or cold late at night standing in front of the fridge..
The mr. calls them the beached whales of the garden. One day you have these nice little green gems growing in the garden. You see them from a distance and think, “Oh look at those squash, those are oh so lovely” and then you look away. Maybe you leave and let them grow for a day or two. Then when you come back to look, they have turned into humongous squash that, in fact, look like giant green beached whales.
We have been eating a lot of those beached whale these past few weeks..
Take yesterday for example. I made zucchini bread, zucchini relish, zucchini pickles and these here zucchini noodles. And that was before I went to the garden and picked 4 more. And today is farm share pick up which means I’ll be receiving at least another 8-12 squash. And did I mention that there are currently 6 large zucchini sitting on my table.
My new life motto as of lately is ….When life gives you zucchini.. just eat the shit out of them.
These noodles are by far, one of the easiest, and most delicious ways to use up a butt load of zucchini. And you can do it every day. I know people that eat pasta like 5 time a week so I don’t think it’s that weird to be eating zucchini noodles every night. The mr. well he is eating them like a champ. For a guy that really likes his pasta, he really likes when I make these noodle. And as he said last night, “who wouldn’t like a bowl of carb free noodles that taste amazing and you can eat as much as you want and not feel like car?”. My responses was,” maybe some asshole? I don’t know”
So yeah, zucchini noodles is where its at.
The stuff. 2 big zucchinis, a large tomato, a few cloves of garlic, a lemon (or just some lemon juice) and a handful of fresh basil. Also grab a little olive oil and the and salt and pepper.
Firstly, turn you squash into noodles. Do it anyway you like.. I used my mandolin slicer to cut “spaghetti” but you can use a julienne slicer, a noodle maker, or even a box grater. Once made, set noodles aside.
Now chop tomato into chunks and mince garlic. Add to a large skillet with a drizzle of olive oil. Place on medium heat, mix around and cook for a few minutes unit garlic becomes fragrant and the tomatoes are soften.
Now add in the noodles. Just toss right into the pan with the galic and tomatoes. Add a splash of water, the juice of the lemon and salt and pepper. Keep heat on medium and mix noodles around until slightly soft (or cooked to you liking)
Once your happy with the doneness, remove from heat.
Roughly chop or tear the basil into smallish pieces and toss into noodles.
And noodles be done. Now to eating.. and be sure to eat as much as you can, its only zucchini.
Have a good today!
-C
2 medium to large medium zucchinis
a handful of fresh basil
1 large tomato or 2 handfuls of cherry tomatoes
3-4 cloves of garlic
1 lemon
salt and pepper
olive oil
Take zucchini and either with a veggie noodle maker, a juillene peeler, or madoline, a box grater, or just some sweets knife skills, make the noodles and set aside. Mince garlic and chop the tomatoes into chunks add to a large skillet with a drizzle of olive oil and place on medium heat and cook until the tomatoes are soft and the garlic is fragrant.Once that’s cooked, place the noodles into the skillet with about 1/4 cup water and the nice of the lemon. Season to taste with salt and pepper. Mix noodles around and cook until slightly tender (cook longer for a more well done noodle) Remove from heat. Chop or rip up your basil and toss into the noodles and mix around.
And now it’s time.
Place in bowls and fill you mouth hole.
This time of year, there are so many reasons for popsicles, but I think that main reason is that I don’t want to willingly turn on the oven for any amount of time. It’s just to f-ing hot.
Lately, it’s been hot. And humid. And gross. Just way too hot to make anything in the oven. So when I grabbed the rhubarb out of the fridge, knowing that if I didn’t use it soon it would go bad, I immediately thought to make pie. Then I was like,” hell no, not going to happen. I need to freeze this shit”. And freeze it I did..into the greatest, slightly sweet, slightly tart, bright pink popsicles of happiness. They are really the perfect little frozen treat. Not overly sweet and sticky, have a lot a fresh clean flavor, and takes the edge off of the super summer heat and humidity, even if only for a few minutes.
I love popsicles.
But sadly this is probably the last rhubarb for the season (Or maybe the second to last..I think I saw some for sale at the coop a few days ago)
So get it while you can and make these popsicles!
The stuff. Rhubarb, a lime and a little bit of honey (or any sweetener you like). Plus you are going to need some water, but I bet you have some of that on hand.
Chop the rhubarb into inch chunks and toss into a big pot with the water. Stick on the stove and bring to a boil then turn heat to low and let simmer.
Once the rhubarb is so soft that it falls apart, remove from heat and let cool for a few minutes.
With a fine mesh stainer, strain juice into a large jar or bowl.
Now you have the juice for the popsicles and the left over rhubarb stuff is the rhubarb butter.
Place the rhubarb butter into a jar, adding a little honey(or whatever) if you want and eat with anything and everything ( I’ve been adding it to the mr’s yogurt and just eating it with a spoon)
And now add the juice of the lime to the rhubarb juice and add a little honey or whatever sweetness to taste.
And add the rhubarb juice to your popsicle molds and stick in the freezer with sticks tops or wait two hours and add wooden sticks.
When frozen, run the mold under a little hot water and pop those suckers out.
A two for one deal here. And timed perfectly. You have the rhubarb butter to eat while you wait for the popsicles to freeze. So smart
Happy Tuesday.. Keep it cool!
-C
makes 6 4oz popsicles and about a cup of jam
3 cups chopped rhubarb
2 1/2 cups water
1 lime
Anywhere from 4 tablespoons honey (2 for popsicles and 2 for jam)
Chop the rhubarb into inch ish chunks and stick into a big pot with water. Turn on high heat and bring to a boil. Once boiling, turn heat to low and simmer until the rhubarb is so soft its falling apart. Remove from heat and let cool for a few minutes. Take a big jug or bowl with a fine mesh strainer,strain the liquid from the solids. You can use a wooden spoon to stir around to help get the juice flowing. Place remaining solids into a jar and add as little or as much or as little honey (any sweetener you like) and give it a stir. Thats your jam
Now for the popsicles. Add the juice of the lime and a tablespoon or two of honey (or whatever sweeteners you like) and mix around. Pour into popsicle molds and stick into freezer.Know your mold.. if you need to insert a stick, do so after about 2 hours.
When pops are frozen, remove from mold and eat your heart out.
I figured now is a good time to get this recipe out there before we get to far into spring and summer recipes because there is going to be a lot of banana ice cream filled recipe coming and I figured its a good idea to have the basic banana ice cream recipe ready for people to refer too. And because I made so much fantastic naner ice cream, I also made a cookies and cream naner ice cream for my sisters and the mister.
Comments that I got from my sisters and the mister when I made them this ice cream
-Sister one.”I give this my sister seal of approval.. It’s so good. The first dessert you have made that I liked! (not including all the other desserts that you have made that I liked)”
-Sister two- “Wow.. it looks like ice cream and feels like ice cream and tastes like ice cream.. You should make me this ice cream!” (I was confused too because I was pretty sure I just made her some)
-The mister- “I am so excited for my new fly fishing pole!”
Ok, so the naner ice cream isn’t new to the mister and he IS very much excited for his new fly fish pole. So excited that he forgot to tell me how amazing that I am and to thank me for making him a big bowl of yumminess. (It’s ok, I forgive him)
And yes, this is probably one of the easiest, most delicious, healthy and amazing frozen dessert that you will ever eat. You will probably find yourself buying mass amounts of bananas and stocking the freezer until things just start falling out. (which is also ok because it’s only bananas and you can’t have too many frozen bananas)
The stuff you need for this ice cream…. Nice and ripe bananas, peeled and then frozen* That’s it.
To make it, place frozen bananas into food processor and hit the on button. Process the crap out of the namers until nice and silky smooth.
*Note, the smaller the frozen chunks are , the faster and maybe a little easier for the blender to blend the naners into ice cream. So if you think of it, chop bananas into pieces before freezing or even after.
After all blended and smooth, either eat right away or scoop ice cream into a freezer safe container and stick in freezer. That’s the banana ice cream… And it is amazing and so so so so so addictive. I make a batch, think I am only going to eat a scoop, then find myself eating half of what I have made, but it’s ok cause it’s only bananas.
Now for the cookies and cream banana ice cream..One batch of banana ice cream, either freshly made, still in food processor or made ahead and placed in a food processor and given a good pulse to smooth it up.
Add cookies in, crushing a bit beforehand and pulse till combined. Now you have cookies and cream naner ice cream…. and everybody is happy.
Scoop into a cup, a bowl, a freezer safe container, or directly into your mouth. Be careful…. You can still get brain freeze from eating naner ice cream too fast!
Keep it real hump day drum bum!
-C
Basic Banana Ice Cream
Makes one batch. Good for 3-4 servings
4-5 ripe bananas peeled and frozen
Peel bananas and stick in a freezer bag or container and freeze. When bananas are completely frozen, break into pieces and stick into a food processor or blender and puree until silky smooth.
Eat right away or scoop into a freezer safe container for later.
Cookies and Cream Banana Ice Cream
1 batch banana ice cream
5-10 (depending on your cookie need) cream filled cookies like oreos or Trader Joe’s Joe Joe’s (These are gluten free)
In a food processor, blend banana ice cream with cookies.
Eat right away, with a utensil of choice in a container of choice.
I probabaly have already told you, but August is for sure my favorite month of the year (well,one of my favorites)
There is bounties of bounties of fresh, sweet and colorful, oh so juicy, crispy crisp, just so f ing amazing, produce exploding all over the place. I have probably gained like 75 thousand pounds in the past month due to all of the fruits and veggies that I have been consuming. I am starting to consider it a full time job just to keep up with the eating.
Another reason why I love August so much is becauuse the days are still nice and warm, but the nights are starting to cool which means I get to make so much soup!!!!!.
This soup is the freshest freshy soup yet. Everything is from the farm and or the garden (except the salt pepper, vinegar and oil), some picked within hours of me making this.
. I am a lucky/spolied veggie brat.
Anyways. This soup. The fresh tomato base gives it a sweet, slightly acidic kick. So super creamy due to the lovely earthy stocks of the chard. Slightly spicy and earthy from the arugula* and chard green green. This soup… it just tastes so fresh and clean, yet hearty and satisfying. A perfect soup for a mid August night, eating outside, watching the sun slide behind the mountains and the temperature dropping just enough that you might want a light sweater. Or you can just eat it from the pot in the kitchen while watching TV. It’s good eating anyway you want.
*Here in America, it’s called arugula. Else where , it’s called rocket. I wish we all called it rocket, although I do like the name arugula, but for like my first born child or maybe a pet goldfish. Anyway, rocket is arugula, or vice versa.
Soup time!.
The stuff. Some big fresh tomatoes, a few stalks of chard, and a few handfuls of arugaula (aka rocket). A couple carrots, an onion, some garlic, salt and pepper and a bit of olive oil.. Oh, and I added some balsamic vinegar, which for some reason didn’t make it into the picture (sorry vinegar)
Start by removing the chard leaves from the stalks. Set aside leave with the arugula. Chop up the carrot, chard stems, onion and garlic and toss into a big pot with a drizzle of olive oil, a splash of water, and a sprinkle of salt and pepper. Stir around and stick o nthe stove on medium heat for about 10 minutes until the veggies start to soften up.
Now chop up the tomatoes into chunks and toss those right into the pot with the other stuff. Add in a few cups water and a few glugs of balazmic vinegar. Bring everything to a boil and then turn heat to medium low and place a lid on pot and let cook at medium heat for another 20 ish minutes, or until the tomatoes are falling apart.
Now that everything is all cooked up, blend it up.
And now take the chard leaves and the aruglula and chop into little pieces….into the pot they go.
Mix it all up.. and take the blender to the soup again….if you want a smaller sized bite.
Soup Into bowls..Then into mouth.
Happy August!!
And hey hey hey.. Have the best weekend!
-C
4-5 large fresh tomatoes
4 large stalks of rainbow chard
2-3 big handfuls of arugula
1 medium onion
1 large or 2 small carrots
4-5 garlic cloves
2-3glugs (about 2 tablespoons) balsamic vinegar
3 cups water
olive oil
salt and pepper
To start, remove stalks of chard from leaves and chop stalks, onion, carrot and garlic into chunks and place int a big pot with a drizzle of olive oil, a splash or water, and spinkle of salt and pepper. Place on stove on medium low heat sand cooke the veggies down until starting to soften and garlic is becoming fragrant. While that cooking, remove core from tomatoes and dice them up. Toss into pot with the cooked down veggies with the vinegar and water. Place a lid on the pot and let cook for about 20-25 minutes or until the tomatoes are falling apart.
When cooked, using with a hand blender or a normal blender, blend the soup until smooth. (if using blender, pour back into pot)
Now take the arugula and chard leaves and chop them into wee little picese and mix into soup. If you want to, blend the greens into the soup.. but not until smooth, unless thats what you want. Cook for another 5 minutes. Taste and season with more salt and pepper to taste.
Ladle into bowl and serve with lots of fresh cracked pepper, maybe a little balsamic drizzle or even some mustard (I at left overs with mustard and it rocked my world)
spoons work eel las eating utencils.
I am a year round maker and consumer of soup.
With that being said, the nature of my soups change seasonally. My summertime soups are usually on the lighter side, made with the fresh bounty of the season, and spiced more on the light and floral side, opposed to the really deep and warm spices that I use all winter long,
This corn chowder is made just right. It had the perfect balance of hearty and creamy from the potatoes and use of pureed onion cream, but still light and refreshing from the sweet fresh corn and the lemony fresh thyme. It is for sure a great summertime soup (chowder) Even the Mr. was even really into it, and he claims he doesn’t like corn. (I say bullshit to that.. he eats corn all the time)
Now to chowder!
The Stuff. Some super fresh corn on the cob, a couple onions, a few chopped up potatoes and a chopped up carrot. Then we have a little oil, a lemon, dried thyme and salt and pepper.
To start, take an onion, chop it up, and toss into a large heavy pot with a little olive oil and a sprinkle of salt. Stick pot on stove on medium heat and cook until onions are soft and traslutcent. When the onions are done, remove and add to a blender or bowl. (if using a hand blender) Add in the juice of the lemon and blend it all up until nice a smooth.
You have now made a nice creamy cream that will help make the final product more, well more creamy without the use of cream (lets say cream on more time !) .Set aside.
When the pot is empty again, add in the rest of the stuff, including the cobs of the corn, (they hold a butt load of flavor) the dried thyme, and salt and pepper. Place on stove and add enough water to completely submerge the veggies. Keep pot on a medium heat, add a lid, and stir ever once in a while. Cook until the potatoes are nice and tender. (when the potatoes are done, so is everything else)
Now that everything is all cooked up, remove the cobs and stir in the onion puree.
Now with a hand blender, blend up until the chowder is thick and smooth, but still nice and chunky. (If you are working with a blender, just remove about half of the soup and blend up, then dump back in) The optimal chunkiness is up to you , so blend, check the chunk, then blend a little more if needed. If you feel that the soup is to thick, add in a little more water, or to thin, just cook down o little longer.
Once you like the constituency,season to taste with salt and pepper and place pot back on a simmer until you are ready to serve.
And thats how we make corn chowder
It tastes best serves in the daintiest of the cups, sprinkled heavily with cracked pepper, and with a side of some cracker situation (Saltines would be best, but sometime there are only triscits in the house)
Summertime is for chowder!
HAPPY Humpday Wednesday!!!
-C
Makes a pot big enough for 4-6 nice decent sized servings
2 fresh ears of corn
3 medium (tennis ball sized) red or white potatoes
2 white or yellow onions
1 carrot
Juice of a lemon
1 tablespoon olive oil
1 1/2 tablespoons dried thyme
salt and pepper
To start, peel and dice one whole onion and toss into pot with olive oil and stick on medium heat. Cook onions until translucent and fragrant. Remove from pot and add cooked onions and the lemon juice to a blender and puree until smooth and set aside.
While you are cooking down the onions, dice up the carrot and onion, remove the corn kernels from the cob, and chop up the potatoes. Once you have removed the first batch of onions, toss in corn, onions, carrot, potatoes, and the dried thyme. Stir around in the pot on medium heat for a few minutes just to warm up the spices. Add the cobs into the pot and fill with enough water to cover the stuff in the pot. Place back on medium heat with a lid and cook for another 20ish minutes, or until potatoes are super tender and almost falling apart.
Remove cobs from pot and add in the onion puree. Now either remove about half the soup and place in the bender and blend up til smooth, or use a hand blender and blend up chowder until you get your desired chunkiness. If you think the chowder seems to thick, add in more water, or to thin, just cook down a little longer on the stove.
When ready to eat, ladle chowder into a cup or bowl and add lots of fresh cracked pepper.
Serve with a cracker and a spoon to eat it with.
Guess what guys ….I got myself a sick vintage waffle/ griddle iron. I couldn’t be more thrilled!!! I found this thing at the local recycled goods store the other day, along with a very beautiful old white pyrex mixing bowl. It was one of my best thrift store scores! (Checking out the inventory and the condition of all the old things that day, I would say an old lady had just died and all her perfectly keep, mint condition kitchen stuff had just been donated. But it’s cool, cause I get the feeling that she was at least 90, with a big loving family, and was happy until the day she died. And I am sure she would be pleased that I have taken over the waffle maker. Thanks old lady!)
And now I am pretty sure that everything I make for the next week will be cooked on said waffle/griddle. I am serious, I already have a list of things to try and cook on it; cookies, biscuits, granola bars, potatoes, fruit, some type of pasta situations…. the list of possibilities is endless and I bet that at least 1/2 of these things will be totally awesome and amazing.
But first thing first. I need to make dinner.
So waffles for dinner!!
Note. These waffles are completely 100% fantastic for any meal you want to make them for. They consist of nothing more then beans, a shit ton of veggies, and just a bit of cornmeal. But don’t let that fool you because they are super packed full of so much flavor, have a really soft tender inside, with a nice crispy outside and are so super pretty. They are wonderful! The stuff. First, we got a big old pile of shredded up veggies which include; carrot, beet, sweet potato, onion, parsnip, celeriac, and a little bit of kale. A we got a bowl of rinsed and strained white beans, a little bit of cornmeal and salt, pepper, and garlic powder.
The makings of something amazing!Before you do anything. get your waffle iron out and preheat it.
While thats going on, take you beans, add 3/4 cup water and puree until smooth with whatever blending device want to like to use. (I used my hand blender…less to clean)Now collect all the shredded veggies and dump into a big bowl with the bean puree, the spices and the cornmeal. Mix until combined. The batter should be thick, but not dry. If its seems to wet, add more corn meal, or too dry, add a little more water.
Note how my batter turned a magical pink… I love beets, they make everything pretty! And check out that bowl!When your waffle iron is preheated, oil it if needed (if your not sure, add a little oil just to really make sure your waffles don’t stick) and take appropriate size spoonfuls of the batter and stick on iron. Close it and wait…..My iron has a little light that turns on when the waffles are done cooking, so I waited patiently (ok iI did open it a few time) until light tuned on and removed the perfectly cooked waffles.
Did I mention how awesome my new/old vintage iron is?
SO AWESOME!!
I made a little gaucamole and gave the mister and little bowl of plain Greek yogurt with lemon juice, but feel free to top, drizzle, or dump whatever you want onto these beauties…
Happy waffle Wednesday!!!
-C
Veggie Bean Wonder Waffles
Makes 8-10 waffles (in my iron) feeds 2-3 peeps
1 small carrot shredded
1 small parsnip shredded
1/2 a small celeriac root
1 small beet shredded
2 kale leaves chopped into tiny bits
1/2 an onion, shredded
1/2 a small sweet potato shredded
1/2 cup cornmeal
2 cups(or 1 can) cooked, rinsed and strained white beans
2 teaspoons garlic powder
teaspoon each salt and pepper
oil for iron(if needed)
Note on veggies… I used what I had in the fridge and shredded, it came to about 3 cups. If you don’t have these specific veggies or only want to use a few.. go for it. Just make sure to have 3 cups of whatever veggies you use.
Take you beans and blend them up with whatever device you would like to use. Once creamy, add to a bowl with the rest of the ingredients. Stir until combined.
Once the waffle iron is preheated, oil it( if needed) and place the recommended amount of batter right on it there. Close and cook until golden brown and waffly.
Serve on a plate with topping of your choice, A few suggestions.. Guacamole, salsa, hummus, mustard, greek yogurt… anything that tastes good to you.
Eat as breakfast, lunch or dinner…
Fork into face
You ever make dish, completely on the fly, just to use something up (I have a lot of ripe tomatoes) with no real expectation, just because… Then have it be one of the best freaking things that you have ever made? This salad is one of those things.. maybe not the best thing I have ever made, but definitely the best salad I have ever made…. this week.
A salad compiled of all things amazing, taking just a few minutes to make and is the perfect balance of uber fresh with baby spinach, raw kale, and crunchy quick pickled onions. Then adding a touch of warmth with the sweet and juicy seared tomatoes and big chunks of creamy avocado.
I mean, for reals. ……Best Salad Ever !!!! (this week)
Now let’s do this.
The Stuff. A big bowl of baby spinach and chopped up kale, a few sliced up roma tomatoes, some super thinly sliced red onion, half an avocado, red wine vinegar and salt and pepper. Before you do anything, place the sliced onions into bowl, sprinkle with a pinch of salt and add a few glugs of the red wine vinegar. You want the onions to sit in the vinegar for at least 5 minutes on the counter cause the longer they sit the more crispy pickly they get. (after eating onions like this, you will never want to eat them any other way) Lightly oil a skillet and preheat to a medium heat. Once the skillet is hot, sprinkle the tomato slices with salt and pepper and place tomatoes right on in, snugly, but not overlapping. Let cook for about 3-4 minutes, or until the bottoms start to brown. Flip and cook other side for another few minutes.Once the tomatoes are seared on both sides, remove them gently from skillet and toss them on top of the bowl of greens.
Take the pickled onions and toss those right on top, with any of the residual vinegar, add dice and scoop the half of avocado and toss that on in as well.And now eat the best salad ever (this week).
Make the day good!
-C
Skillet Seared Tomato and Quick Pickled Onion Salad
Serves 2 as a side, 1 for a hungry eater
2 large or 3 smaller roma tomatoes
1/2 of a red onion
2-3 tablespoons red wine vinegar
1 1/2 cups baby spinach
1 1/2 cups chopped kale
salt pepper
1/2 a ripe avocado
olive oil (to grease pan)
Thinly slice red onion and place in a bowl. Add vinegar into a and sprinkle with salt. Let sit on counter for at least 5 minutes, if not longer,
Slice tomatoes into 1/2 inch thick rounds and sprinkle with a pitch or salt and pepper. Lightly oil a skillet and preheat it on medium heat. Once the skillet is preheated, stick the tomatoes on it (watch out for splattering tomato juice) Cook first side for about 3 minutes or until the bottom has browned, then flip and do the same for other side.
One tomatoes are seared, place directly onto the greens. Now dump the pickled onions and residual vinegar on top. And dice up avocado and add that on top too.
Now eat your salad, fork or fingers…
And I know, ba-daaaamn. So good.
My contribution to last nights dinner at my sisters…. Freshy fresh veggies spring rolls.I had about 30 minutes between work and getting over to my sisters house to throw something together so it needed to be something fast, easy, and something I could make without going to the store. She was making the main course (some teriyaki situation and rice) so I was doing up the veggies.
I had just bought a package of spring roll wrappers…. Bingo! The perfect and logical choice. I grab the wrappers, a variety of veggies and after spending 12 of my 30 minutes trying to scrub the oil based paint off of my face and hands, I still managed to completely prepare, construct, and take pictures of these lovely tasty spring rolls. and get over to my sisters in time for dinner.
Impressed?
Damn right!
The stuff. Carrot, beet, asparagus, red cabbage, and kohlrabi, which all (except asparagus, which I just cut into thirds) got cut into matchstick sized pieces with my mandoiln. Then there are the rice spring roll wrappers that we need to make the veggies into rolls. Also a bit of red wine vinegar to drizzle onto the veggies for a little extra zing. And lastly, soy, fresh ginger, and a couple cloves of garlic for a spicy salty dipping sauce.Start by having everything set out and ready to assemble. Fill a large shallow dish or baking sheet with really warm water. Working with one at a time,place a rice wrapper into water and let sit for about 10 seconds or until the paper starts to soften. Remove from water and place on a damp surface (just splash a little water on the counter) Take a little bit of everything and and place on the lower middle part of the paper. Fold in the sides first, then tuck and roll the wrapper as tightly as you can without ripping the wrapper.
Repeat until you have used up all you veggies.For the dipping sauce. Finely grate ginger and garlic and add to soy sauce. Stir… and it’s done.Freshy, pretty and fantastically delicious. And for real, took about 8 minutes to make. (I even had enough time to wash the dishes before we left!)
I am so awesome!
Hump Day Pow!!!!!
-C
Fresh Veggies Spring Rolls
Makes 8-10 but can easily be increased or decreased to desired amount
8-1o rice spring roll papers
Splash of Red wine or rice vinegar
1/4 cup soy or tamari sauce
2 cloves of garlic
teaspoon freshly grated ginger
1 medium carrot
1 medium beet
1/4 head of purple cabbage
10 thin fresh asparagus
1 small kohlrabi
Note… I used the veggies that I had in the fridge at the moment. If you have a bunch of veggies but not these particular ones, use what you have. Pretty much all veggies taste good inside a spring roll!
Gather your veggies and prep by either using a mandolin, a grater, or some sick knife skills, and julienne, shred, or slice you veggies into thin match sticks. Once all the veggies are prepared, sprinkle a little vinegar over the top.
For the rolls…Grab a large shallow vessel (a rimmed baking sheet works great) and add in warm water. Working one at a time, place the wrapper into the water for about 10 seconds or until the wrapper starts to soften. Remove and spread onto a clean, damp work surface. Gather a bit of each veggie that you are adding and place towards the bottom middle of the wrapper. Now fold the sides in over the pile of veggies. Then with the side closest to you, tuck and roll wrapper away from you, trying to keep it tight, but not to tight that it rips.. (Hopefully that makes since.) Place finished rolls onto a damp surface to keep from sticking and if not serving right away, drape with a damp towel or paper towel to keep from drying out.
For the soy ginger dipping sauce. Add grated ginger, minced garlic, and soy into a bowl and mix together. Serve with spring rolls.
Eat one, two, or a plateful. It’s nice to share but not a necessity.
My winter farm share is coming to an end this week. One more pick and then a three week stretch until the summer share starts… WHAT AM I GOING TO DO!!! Stock up as much as I can is what.
I have been strategic about the roots and veggies that I have chosen to bring home the past few weeks.(My farm lets you pick what you want) I know what I can buy at the store, things like carrots and potatoes, so I have been passing those up, but the roots like beets and celeriac… I have been bringing home baskets of those and hoarding them in the fridge and basement in preparation for the laps in farm fresh food and knowing that if I want to by these at the store it s going to coast me a million dollars a pound. (a for real million dollars)
Yup, lots of roots around here, especially celeriac root which is fantastic. I am kind of obsessed with celeriac, with its fibrous, knobby exterior, soft but almost meaty texture inside, and a flavor that is close to celery but so much better. I don’t know why it has taken me so long to do a posting featuring this amazing root vegetable (I eat it almost every day)
So here, an amazingly tasty, hearty but not heavy, celeriac recipe. Perfect for spring and the change into summer…. Mustard roasted celeriac with an fanatic split peas gravy that will have you licking you bowl clean.
The stuff….For the split pea gravy we have a carrot, a parsnip and a large onion chopped into small chunks. Salt, thyme, a bay leaf and of course the split peas. Then there is the celeriac root* sliced into 1/2 inch thick rounds and some plain old yellow mustard .
*Note. I don’t peel my celeriac root. I really enjoy the fibrous exterior but realize that some don’t(The mister does not like it) so peel it if you want.
Toss the chopped parsnip, carrot, onion and the spices into a pot on medium heat and let veggies sweat a few minutes until tender. Add in the split peas and enough water to cover everything. Turn pot on high and bring to a boil, then cover and turn to low. Make sure to give the pot a good stir ever few minutes and add more water if needed
While the gravy is cooking, take the celeriac rounds and brush each side with yellow mustard, sprinkle with pepper, and place on a baking sheet. Stick into the oven to roast for about 25 minutes, flipping the rounds after about 10 minutes.
Once the peas have soften, remove the bay leaf and puree until smooth and oh so creamy. Taste and add more salt and pepper if needed. If you find that the gravy seems to thick, just add in more water until it’s the consistency that you want. The gravy is made, the celeriac is roasted… now we are ready to eat!! Stick the celeriac on a plate and dump good amount of that gravy right on top. Feel free to add a bed of spinach, or a grain or anything you want, because why not, and also some chopped tomatoes for a little acid and prettiness.
Serve with the fanciest knife and fork you can find. Extra yellow mustard and sriracha sauce are great condiments to have close by.
Happy Tuesday!
-C
Mustard Roasted Celeriac with Split Pea Gravy
2 medium celeriac roots
6 tablespoons mustard
1 large carrot
1 medium parsnip
1 large yellow onion
2/3 cup split peas
2-3 cups water
1 bay leaf
2 teaspoons thyme or italian spice mix
salt and pepper
spinach (optional)
diced tomatoes(optional)
Preheat oven to 400 degrees
Small dice the carrot, parsnip and onion and throw into a large pot. Spinkle with salt and pepper, add in the thyme and bay leaf and add a splash of water. Stick on stove on medium heat and stir. Let cook until the veggies become soft and fragrant. Now add in the split peas and 2 cups of water. Bring to a boil then cover and turn heat down to medium low. Let cook until the split peas become tender (about 25 minutes) string on occasion and adding more water if the peas are not completely summered while cooking.
Once the peas are tender, let cool for a few minutes, remove bay leaf, and either dump into a blender or blend with an immersion blender until nice and creamy. If gravy seems to thick, add in more water.
Scrub or peel celeriac roots and slice them into 1/2 inch think rounds. Place on a baking sheet and brush mustard on both sides and spindle with pepper. Stick into oven for about 10 minutes, flip, then back into the oven for another 15 or so minutes, or unit the celeriac is tender.
When the celeriac is done remove from oven and stick a few rounds on a bed of spinach (or not, or any kind of grain or green you like) Top with a hearty helping of the gravy and toss on some chopped up tomatoes.
Eat with at knife and fork like a fancy person.
Yesterday I spent the entire day (ok maybe not the entire day), but a the better part of the afternoon defrosting my freezer. Sure, I do the occasional chip chop here and there, just enough from around the freezer door so it will close, but ever few months I notice that everything in the fridge is not staying cold and that the freezer is not freezing stuff. Thats when I know its for real time to defrost. So a few days ago when I noticed my bananas were turing to liquid in the freezer, I knew it what I had to do….Completely empty the fridge and melt/hack away the 2-4 inches of ice build up that accumulated. It is such a freaking pain in the ass.So on this defrosting day, I took all the stuff from the freezer, stuck it in a cooler, and the rest of the stuff, which is basically all veggies, I just tossed on the table. As I am hacking away with a metal spatual, a wooden spoon, and a constant rotation of pots of boiling water, I was thinking about dinner. I figured I might as well just eat up as much of the veggies as I could, you know, so I didn’t have to put them back in the fridge. And also, I was getting pretty annoyed because this particular defrosting session was taking way longer the anticipated, which made making dinner seem like another pain in the ass. I figured I might as well just eat everything that is already out on the table, which pretty much narrowed down the “whats for dinner” conversations because it was already all over the place. And so dinner was a humongo salad for me, and for the mister, I made him a monster of a veggie sandwich. (my salad was exactly the same stuff as the sandwich, minus the bagel) Easy, fast, super duper yummy, pretty and piled so high with tons of veggies that the fridge is pretty much empty now.
Look at the is beast. I don’t call it a monster sandwich for nothing.
The stuff included in this monster veggie sandwich..
Romaine lettuce, tomato, avocado for there is not real sandwich without them. Thinly sliced radishes, cucumber,a and onion for nice crispy crunch. Shredded beets, carrots, and purple cabbage to give more crunch and a bit of sweetness. Then of course there needs to be something pickled, so I used banana peppers cause they are the SHIT!! And lastly some hummus for a nice creamy finish (plus a bit of protein) and yellow mustard because mustard on everything is just right. Heres to a mountain if goodness that is no longer in the fridge! Served with a another mountain of roasted parsnips and carrots (more stuff from the fridge) and a tall glass of iced tea.
Lucky that today is farm share pick up cause the fridge is pretty much on empty.
Yea it’s Thursday!!!!
-C
A Monster Veggie Sandwich
Note. This is just a guide.. Feel free to use whatever veggies you fancy.
Either a bagel, 2 slices of bread, or a big chunk of baguette (use a gluten free bread if you want or need too)
Hummus- Homemade or store bought
Mustard
Something pickled like pickles, banana peppers , jalapeños or all three
Lettuce, spinach or some kind of leafy green
Tomato
Avocado
Onion
Radishes
Cucumber
Shredded Carrots
Shredded Beets
Shredded Cabbage
To assemble. Ready your bread.. Toast if you want, and stick it on a plate
On either side, smear the hummus and the mustard.
Pick a side, start to stack by evenly disrupting veggies on top of veggies. Place the second piece of bread on top and giving a little smooth to keep it together.
And go at it. Cut in half or don’t. Have a napkin or a long sleeve ready to wipe your face.
It’s been a long, packed, but very fantastic week. Everyday has been full of work, chores, family, and trying to get in a least one good bike ride or walk in. I made a list of a few important points to mention from the past week.
Spring is real, not an imagined season in my head. (HOORAY!!!!).
Banana ice cream is everyones favorite snack
Planting things from seed and watching them grow is magic
Riding a bike with kinda flat tires really sucks
The little people in my family are the best most fantastic humans
Don’t tell a 2 year that ants will bite her or you will end up caring that child around everywhere because she is afraid to walk outside (Anyone know good therapist for a 2 year old?)
Anyways, I am hoping to take it easy today, catch up on my coffee consumption, do a bit of gardening, reading, bike riding, all without pressure or expectations. Everyone should have a day for no expectations.
Some fun internet stuff from the week.
-I need an RV or camper. THE BRAVE // vintage rv renovation inspiration
-Who cares if not everyone is pleased, I would be if my lunch bags looked like this. These Parents Make Lovely Lunch Bag Art. Not Everyone Is Pleased
-So lovely. Urban Jewelry: New Lace Street Art by NeSpoon
-Alternative energy Woo Hoo! Tesla’s Powerwall Home Battery Wants to Make Fossil Fuels Obsolete
-I am really excited to make this… I have a feeling that I will be incorporating it into many of my recipes. ChefSteps’ Genius Roasted Onion Cream
-Another house that I could get down with.
And a few pictures….
The mister and the worlds biggest crayon, which is made of scraps of blue crayons from all over the world. I could totally use a big ass crayon like this.The coolest most badass 95 year old lady that I know (I know a few), Grammy Stem. And the little, getting a lift. (I could have used a lift too!)Brothers. The guy in the green is my Dad.Aftre dinner ice cream break.The sky has been on point all week longAnd made myself some veggie chips. The colors alone are delicious.
Every year, the second weekend in August, the Stem family , siblings, cousins, even my 94 year old grandmother makes the trip from Easton PA, come together at, what we call, “the cabin.” (It’s more a house, but it started out as a cabin) . Its a little crazy, but such a good fun time.
This cabin, oh this place is magic. The air, the tree’s the streams, the mountains, and of course the people. It’s all the things that I love about life. Some of my earliest memories are from this place. Hanging out with my siblings, running around the meadow or through the woods. Playing in the swinging holes. My grandfather pulling taffy or making orange juice box houses with my grandmother. The giant rocking chair that my uncle made and all of us kids used to play on. So many camp fires and s mores. There are just so many memories because it’s been a part of my life, my whole life. It’s one of my favorite places in the world.
A little background on the place (what I can remember) Sometime in the late 70’s, my uncle and my grandparents bought a big chunk of land on the side of a mountain in the middle of nowhere Vt. After doing some clearing of trees, they went to building a cabin. (my aunt, grandmother, and dad helped a bit too). It was amazing, but quaint. A 2 story situation with a kitchen living area and one door to get in and out. At some point my grandparent ended up selling their share to my uncle and he took over the entry of the place. Over the years my uncle, (who is a carpenter, furniture designer,design professor, and all out crazy amazing person), continured to work on the place. He has added on a kitchen, a second floor bathroom, new this, and that, but never has it once felt like a patchworker pieced together place. And now the place is more like a amazing craftsman home, with just the right touches of cabin, but with two running toilets, a beautiful kitchen, electricity and running water ( There is even internet access, which sucks, but still).It is a little gem nestled on a side of a tiny mountain in one the most beautiful places.
So an awesome cabin in the woods with a bunch of crazy, but awesome people= Stem family reunion.
I am not complaining at the least bit, but man, so,so,so many tomatoes. Everyday more and more are ripe and ready for the picking, some even starting to fall off the plants.
If you were to come to my house, you will notice that I have bowls and baskets all over the place, just full of not just cherry tomatoes, but big baskets of the most beautiful heirloom tomatoes this girl has ever seen. It’s actually causing me a little anxiety. I cannot bare to think of one single tomato going bad. I and am on a mission to eat as many of the heirloom ones as I can ever day. But that still leaves all the sweet little cherry tomatoes, which I do still snack on, (and try and make the mr snack on too) but am having a had time keeping up with eating all of those on top of the other kinds. But again, not a complaint, cause one can never really have too many tomatoes.
So instead of just continuing to make sauces and soups, (I have yet to do a tomato canning day, which is in need of happing asap) I figured I would give the mr a break and make him something a little different. A big tomato slab tart. And a tart needs some type of cream, so fresh corn and avocado cream happened as well.
Lovely looking, yummy, and pretty easy to make. Uses a good amount of tomatoes (I was fooled.. I used two pints for this tart, went to garden afterword, got 4 more pints) and is perfect for a lunch situation or a light dinner. Add some greens, maybe some cheese (the mr and his cheese) and you are sitting pretty and ready to go.
Lets get tarting!
The stuff… For the tart we have flour, slat, a little vinegar, icy cold water, frozen olive oil* and a big bowl of cherry tomatoes. For the avocado and corn cream, well we gots an avocado, a cooked cob of corn,a few cloves of garlic (I forgot in the picture) and a lemon. Salt and pepper for everything.
*Note. I recently read on the food 52 website that freezing the olive oil for crust makes the oil distribute more like butter and makes the dough super flaky and crispy, which it indeed did. I will forever freeze oil for oil crusts, Thanks food 52 for being so smart.
Start by making the dough. Whisk together the flour and salt, then dump in the frozen olive oil. Using a fork or a pastry cutter and working as quick as you can, cut the oil into the dough.
When the mixture resembles a course crumb, add in vinegar and mix with fork, then add in water, one tablespoon at a time, until the dough starts to comes together. Dump mixture out onto a floured surface and form into ball. Wrap in plastic and stick in the fridge for at least an hour or even over night.
Chilled dough placed on a lightly floured surface, ready to roll.
You know what to do here.. roll it out and stick it in a baking sheet or, if you don’t have a small baking sheet, use a large casserole dish. You could use a pie plate, but you might have a little extra dough (pie dough cookies?)
And dump in the tomatoes. Don’t forget to remove the little green tops if they have them. Drizzle with a little olive oil, season with salt and pepper. and into the oven it goes.
While the tart is baking, make the cream. Scoop fruit of avocado, the corn off the cob, a clove or two of garlic, juice of lemon, and salt to taste, into a blender (or bowl if using a immersion blender) and blend until smooth. Taste and ass more swooning if needed. and if you want the cream a little thinner, add in a slash of water.
Cream oh creamy goodness. (So great on tart, but also makes a great dip, toast spread, salad topper, or eaten straight with a spoon.)
The tart has been baking and after about an 45 minutes, it should be done. Remove from oven when the tomatoes have all bursted and are starting to caramelize and the crust is cooked through and golden brown,
Let cool for a few minutes. I
You got you tart, the cream, and if you are in into it, a nice serving of some freshy greens to some extra heft and color…SOmething on the more bitter side like kale or young chard pairs very well with the sweetness of the tomatoes.
A big slab on greens with cream on slab.
The mr added a little cheese to his… if your a cheese person.(he sure likes his cheese)
Pretty food.. Food so good!
Happy Humpty hump!
-C
For the Tart
2 pints of any variety cherry tomatoes. A variety look nice
1 3/4 cups all purpose flour
1/2 cup olive oil (frozen ahead of time)
1 teaspoon salt for crust
1 tablespoon apple cider vinegar
3-4 tablespoons ice water
salt and pepper
9×11 baking pan*
For the Corn Avocado Cream
1 cooked and cooled cob of corn
1 avocado
1 lemon
salt
2 cloves of garlic
*Note. I used a 9×11 baking sheet, but if you don’t have one, you can use a big glass casserole dish. Or you could even use a pie plate, but you will end up with a little extra dough and you might not need all the tomatoes.
Start by making your dough. Whisk together the flour and salt. Cut in the frozen olive oil into flour with either a pastry cutter or a big fork until it has a crumbly texture. Add in the apple cider vinegar and a tablespoon of water at a time until dough starts to come together.(about 3-4)
Dump out onto a surface and fomr into a disk. Wrap with plastic and stick in the fridge for at least an hour or overnight.
Preheat oven to 375
Get your chilled dough and, on a lightly floured surface,roll out into a rectangle roughly the size of your baking sheet. Place in sheet pan and make it look pretty. You can use your fingers to lightly press the dough into pan Dump in your cherry tomatoes. If you want, once the tomatoes are in, slightly fold the edges towards the tomatoes and away form the side of the pan. Sprinkle with salt and pepper and the finest drizzle of olive oil. Stick into the oven for about 45-55 minutes. The Pie is done when the tomatoes have popped and starting to brown and caramelize and the crust is golden brown.
While the pie is baking, remove corn from cob. Add to a blender with the avocado, garlic and and the juice of the lemon. Puree until smooth. Season with salt and pepper to taste.
To serve, slice big slabs of tart and spoon on big globs of the avocado corn cream. If your into it, a bed of fresh greens is very much nice.
Shovel into face.
My contribution to last nights dinner at my sisters…. Freshy fresh veggies spring rolls.I had about 30 minutes between work and getting over to my sisters house to throw something together so it needed to be something fast, easy, and something I could make without going to the store. She was making the main course (some teriyaki situation and rice) so I was doing up the veggies.
I had just bought a package of spring roll wrappers…. Bingo! The perfect and logical choice. I grab the wrappers, a variety of veggies and after spending 12 of my 30 minutes trying to scrub the oil based paint off of my face and hands, I still managed to completely prepare, construct, and take pictures of these lovely tasty spring rolls. and get over to my sisters in time for dinner.
Impressed?
Damn right!
The stuff. Carrot, beet, asparagus, red cabbage, and kohlrabi, which all (except asparagus, which I just cut into thirds) got cut into matchstick sized pieces with my mandoiln. Then there are the rice spring roll wrappers that we need to make the veggies into rolls. Also a bit of red wine vinegar to drizzle onto the veggies for a little extra zing. And lastly, soy, fresh ginger, and a couple cloves of garlic for a spicy salty dipping sauce.Start by having everything set out and ready to assemble. Fill a large shallow dish or baking sheet with really warm water. Working with one at a time,place a rice wrapper into water and let sit for about 10 seconds or until the paper starts to soften. Remove from water and place on a damp surface (just splash a little water on the counter) Take a little bit of everything and and place on the lower middle part of the paper. Fold in the sides first, then tuck and roll the wrapper as tightly as you can without ripping the wrapper.
Repeat until you have used up all you veggies.For the dipping sauce. Finely grate ginger and garlic and add to soy sauce. Stir… and it’s done.Freshy, pretty and fantastically delicious. And for real, took about 8 minutes to make. (I even had enough time to wash the dishes before we left!)
I am so awesome!
Hump Day Pow!!!!!
-C
Fresh Veggies Spring Rolls
Makes 8-10 but can easily be increased or decreased to desired amount
8-1o rice spring roll papers
Splash of Red wine or rice vinegar
1/4 cup soy or tamari sauce
2 cloves of garlic
teaspoon freshly grated ginger
1 medium carrot
1 medium beet
1/4 head of purple cabbage
10 thin fresh asparagus
1 small kohlrabi
Note… I used the veggies that I had in the fridge at the moment. If you have a bunch of veggies but not these particular ones, use what you have. Pretty much all veggies taste good inside a spring roll!
Gather your veggies and prep by either using a mandolin, a grater, or some sick knife skills, and julienne, shred, or slice you veggies into thin match sticks. Once all the veggies are prepared, sprinkle a little vinegar over the top.
For the rolls…Grab a large shallow vessel (a rimmed baking sheet works great) and add in warm water. Working one at a time, place the wrapper into the water for about 10 seconds or until the wrapper starts to soften. Remove and spread onto a clean, damp work surface. Gather a bit of each veggie that you are adding and place towards the bottom middle of the wrapper. Now fold the sides in over the pile of veggies. Then with the side closest to you, tuck and roll wrapper away from you, trying to keep it tight, but not to tight that it rips.. (Hopefully that makes since.) Place finished rolls onto a damp surface to keep from sticking and if not serving right away, drape with a damp towel or paper towel to keep from drying out.
For the soy ginger dipping sauce. Add grated ginger, minced garlic, and soy into a bowl and mix together. Serve with spring rolls.
Eat one, two, or a plateful. It’s nice to share but not a necessity.
Before we left for the weekend, I was was trying my hardest to empty the fridge out of all food with the intention of leaning it empty so I could leave it open to defrost while were were gone. Unfortunately I was not able to make it happen. What I did make happen was emptying it almost completely so that when we got home, we had pretty much no food in the house, except for a few things that probably should be eaten. Plus one of the last things that I want to do after sitting in a car for 6 hours is go to the grocery store, or anywhere for that matter, so I was determined to make with what wet had in the fridge:
Carrots
half of a gigantic kohlrabi
soy milk
iced tea
bananas that needed to be frozen
strawberries
Perfect! A few carrots and half of a gigantic kohlrabi.. plus at the hotel we were staying at, there were fruit bowls in he lobby full apples. Every time I went past the apples (which was a lot) I grab one or two, so I have a few apples (I actually have a lot of apples now). All the things I need for a super awesome salad slaw. Apples with their nice sweet crispiness and kohlrabi with its cabbagey, crunchy earthiness, tossed together with some vinegar, some toasted walnuts and some carrots, I mean, so freaking good. And to make it a bit more of a meal, I made some lentils to go with it. But the best part was there was no need to leave the house!!
The stuff… A huge hunk of a bigger then my head kohlrabi (or 2 normal bulbs). A carrot, an apple, toasted walnuts, red wine vinegar, and some salt.
Pretty simple stuff going on here. Just peel and julienne the kohlrabi, carrot and apple. (no need to peel the carrot or apple unless you want too) and stick it all into a bowl. I used my mandolin, which is one of my favorite kitchen tools ever, but if you don’t have one, a box grater works too.Sprinkle with salt and a good glug glug of red wine vinegar. Chop up the walnuts (some big chunks and some very small pieces makes for good eating), toss it all together and, well that’s it. But wait…. let it sit for a few minutes before serving to really let the flavors draw out.And there we have it. Super fast, full of flavors and crunchy texture. A salad slaw after my own heart.
Serve it as it or add to a bed of greens, rice, or lentils… and make sure to save at least as little… cause its an awesome little pre-bed snack.
Happy Week!!
-C
Kohlrabi Apple Walnut Slaw
2 medium sized Kohlrabis
1 medium apple
1 small carrot
1/2 cup toasted walnuts
red wine vinegar
salt
In a large bowl, julienne kohlrabi (after peeled) apple and carrot. Sprinkle with salt, add in vinegar. Rough chop walnuts and toss the whole bit together. Let sit for at least 10 minutes, if not longer before serving. (A great salad to make ahead of time)
Eat as is, or toss onto a bed of greens, plate of rice or a bowl of lentils.
Any left overs only end up tasting better the next day.
Last week pineapples were on sale everywhere……So I bought 5. Don’t judge
And I bet I am not the only one that got overly excited at $1.50 pineapple and bough themselves a few. We will just call ourselves opportunists. Now we have plenty of pineapples and don’t have to pay the $4 a piece prices. (Justification)
But if you don’t have a pineapple laying around, you must go get one. (Maybe if your lucky, there might still be some sales going on) because you must make this salad. I am on a mission to make everyone I know eat it because, for lake of a better way to say it…….It will rock your world.
Dill and pineapple are a serious match made in heaven. Pineapple, with its sweet, tangy, citrusness and dill with it’s super fresh earthiness. Mixed together with a few other helpers to create a fresh, clean, chunky, tangy, over the top, flavor. I could stop right there, but toss in a handful of lentils, some creamy avocado and a bed of kale…It’s like the best spring time, celebration on you tongue, happiness in you tummy, kind of salad.
A salad that will make you smile. (and maybe buy 5 pineapples)
Stuff for the goodness. We got the kale, some avocado because all salads should have avocado and some cooked lentils because, well, all salads should have lentils (or beans or nuts.. so you could totally something else) Then a few sprigs of fresh dill, a clove of garlic, red wine vinegar, salt and a bowl of chunked up pineapple. The pineapple, dill, garlic, red wine vinegar, a splash of water and a pinch of salt get blended in a blender or whatever blending device you use. Go as smooth or chunky as you like, I recommend going smooth, but leaving a little chunk, like half blended.
The prep is done, now compile. Kale in bowl, top with lentils,. Toss on avocado chunks, and, last but not least, the blended pineapple dill mixture.So good……So so good.
Happy Friday!!
-C
So Good Pineapple Dill Kale Salad
Serves Two
3 cups washed and chopped Kale
1/2 a avocado, diced
1 cup fresh pineapple chunks
1-2 springs fresh dill
1 tablespoon Red Wine Vinegar
Salt
1/2 cup cooked lentils (or any bean or nut will do)
Note. No fresh dill? You can use dried, just sub in 1 teaspoon for the fresh and after blending with the pineapple, let sit a little longer to really let the flavors meld together.
Place pineapple, dill, pinch of salt, vinegar and garlic into a blender or whatever you own that blends and blend stuff together, leaving it a little chunky. Let sit for 5-10 minutes.
Kale goes into a bowl and add the lentils and diced avocado. Pour the blended pineapple on. Toss around.
Now eat.
When something goes on sale at the grocery store, I tend to buy it. Being that it is Valentines Day this week, all the stores are having specials on all sorts of sexy things… and strawberries are one of them. Now I am not a huge fan of buying produce that is terribly out of season, but I can’t help myself…a good deal is a good deal and the strawberries were a super good deal. I was just going to make some sweet ass strawberry jam or maybe a lovely strawberry cake with them (and I probably still will), but these strawberries are actually super juicy and full of flavor, and it’s always nice to eat some full flavor freshy strawberries… especially soaked in balsamic vinegar. And yeah, I think that this salad is pretty sexy, so it makes for a perfect Valentines day dish.
A handful of ingredients and 5 minutes will get you to a fantastic salad experience.
A bowl of baby spinach, a few chopped up strawberries*, half a sliced avocado and a small handful of toasted almonds.. Oh, and don’t forget the balsamic vinegar….
*Note.. Strawberries are kind of heart shaped already so if you want, reserve a few slices to fancy up you salad presentation, but chop up the rest into smaller pieces.
Pour the vinegar on the strawberries and let sit for at least 5 minutes. (the longer the strawberries can sit with the vinegar, the better)
Pile it on.. thinly slice avocado.. rough chopped toasted almonds… It’s pretty much as easy as it can get.And last but not least, toss on the balsamic soaked strawberries and drizzle the remaining vinegar. (if you made hearts, place on top to make pretty) Sprinkle with a pitch of salt and pepper and pow! Fancy, sexy, delicious salad.
Not to shabby for 5 minutes and a handful of ingredients. Anyone (don’t feed to a person with nut allergies) would be so syked to be fed a salad like this… You yourself should be pretty excited to eat a salad like this. Heck, I am excited to eat a salad like this!
A love salad for everyone and everyday!
YAY for Thursday and Happy meal planning!!!!
-C
♥ Balsamic Strawberries on Spinach Almond Avocado Salad ♥
Ingredients for 1 large or 2 small salads
3-4 ripe strawberries
handful of roasted almonds (slivers or whole)
1/2 avocado
2 tablespoons Balsamic Vinegar
3 cups baby spinach
Pinch of salt and pepper
Dice strawberries into small pieces (reserve a few whole slices for heart shapes if you want) and toss in a small bowl with the balsamic vinegar. Let sit for at least 5 minutes. Rinse and dry spinach. Place in a bowl(s) and top with thinly sliced avocado, chopped almonds and balsamic soaked strawberries. Drizzle the residual vinegar on top and sprinkle with a pinch of salt and pepper.
Eat with a fork
I was cleaning my spice shelf (I feel like I do this like once a week) and found some poppy seeds hiding behind some jars. Accidental spice findings happened more often the then one might think in my house.. I like to buy tiny baggies of spices with good intentions of using them, but because of their tiny size, I often lose them or forget about them due to that tininess. But I usually find those tiny little bags, and when I find them, I try to use them right away..(I don’t like having old spices around and no, I will not toss it) And it just so happened that I has a lemon in need of using.. and it was getting close to dinner time. I could wait and make lemon poppy seed cake or muffins, or just start dinner. Then I was like, ” I’ll just make lemon poppy seed pasta.” And so I did. And of course it needed to have lots of garlic and some kind of vegetable to round out the dish, (I know tomatoes are fruit but you know what I mean)
And the mister….He loved it. And I am sure you will too. How can you go wrong with lemon, garlic and poppy seeds all creamy and fragrant? You really can’t, Pus this recipe is so easily adaptable. It can be vegan and or gluten free..whatever you want it to be.
So if you are looking for a fast, delicious, and impressive looking dinner… look no further. You gots one right here!
Start by tuning oven on to 400 degrees. Chopped tomatoes and sprinkle in oil and salt and stick in the oven. Do this first because the rest of the meal only takes about 10 minutes..So fast!!!
Choose your pasta and get a pot of water boiling and start on the sauce.. which includes, olive oil, lots of garlic, flour, milk(any kind you use), lemon zest a little lemon juice, poppy seeds, salt and pepper.
The sauce is pretty much a basic roux…
Crush the garlic and stick into pot with the oil. Let simmer for a few minutes until you can smell the garlic, which smells like heaven. Whisk in the flour and then gradually whisk in the milk. Keep on low heat and continuously whisk until sauce has thickened and doesn’t run off a spoon. Add in lemon zest, the poppy seeds, and the salt and pepper. Mix it all up and turn off heat.
Once your pasta is cooked (cook however it says to on package), reserve about a 1/4 cup of pasta water and drain the rest. Add the pasta water and pasta the sauce. (the pasta water helps the sauce and noodles canooddle together)
And its all mixed up just waiting to be served…and the roasted tomatoes!
Scooped into a bowl with a scoop of the roasted tomatoes and some chopped chives, served with a couple wedges of lemon..just because.
And dinner is done…. and it took all of 15 minutes.
Thank me later.
-C
Lemon Garlic Poppyseed Pasta with roasted tomatoes
3 cups pasta (whatever you want..so it can be gluten free too)
3 tablespoons olive oil
3 tablespoons flour (use corn or arrowroot starch for gluten free)
2 cups milk (cow, hemp, soy…any kind you use)
6 cloves garlic
Zest of 1 lemon
1 tablespoon poppy seeds
2 roma tomatoes (optional but really good)
salt and pepper
Start by chopping tomatoes and placing them in a skillet or baking sheet, sprinkled in salt and a little bit of olive oil, and stick into a 400 degree oven
Bring a large pot of water to a boil add you pasta…cook to the boxes instructions.
While pastas is boiling, crush garlic and add to a pot with the olive oil. Heat on medium low heat until the garlic is fragrant and slightly brown. Now whisk in flour and then whisk in milk. Continue to whisk until sauce thickens to where it doesn’t run of a spoon. Add in the zest of 1 lemon, the poppy seeds and salt and pepper to taste. When pasta is done (should be around the same time the sauce is done) reserve about a 1/4 cup of pasta water and drain the pasta from the rest. Add water and pasta to the sauce and mix together.
Remove roasted tomatoes from the oven. Scoop pasta into bowls and top with a scoop of the tomatoes. (you can mix into pasta, but it will turn the sauce red and the tomatoes will fall apart)
Serve with a wedge of lemon and bring food to face!
I made a pie dough a little while ago with the intention of making a cherry pie…but I ate all the cherries . (I do that a lot… eat all of something that I was intending to use for something else)
And then I think about that saying.. The road to hell is paved in good intentions.
.Well I guess I am going to hell.
So no cherries, but I have a crap load of summer squash (and it’s only the beginning) and a few peaches that are in need of some eating. And what’s that, a container of ricotta in the fridge from lasagna a couple weeks back…. Meant to be and not in hell yet!
Sure, I could have made one single crust galette, sweet or savory, and thrown it to the masses for consumption, but I figured that I might as well just hit two birds with one stone. A dinner and a dessert, all at once, and call it a victory in time management and putting a dent in the pile of squash on the table. (don’t be fooled, I love excess amounts of squash.. It’s like the printer paper of the veggie world.. can be used for everything!) And bonus, only one set of dishes! I mean come on, this is so good, easy and just really pretty. I know, I know….. so smart.
Anyway, here, take a look, get inspired and make some pretty dinsert (dinner and dessert) galettes.
The stuff. For the base, we need one single crust pie dough (that’s going to be for two smaller galettes) and some ricotta cheese. The savory galette has summer squash, salt, pepper, lemon ( the zest) and a couple tomatoes. The sweet needs honey, a peach, and a few strawberries.
And if you want, change up your toppings. Pretty much any fruit or veggie combo would work. And spice up the ricotta if you wan. Garlic, fresh thyme, cinnamon… whatever will make you happy.
First things first. Roll ourt dough. You could cut the dough in half and roll two separate disks, but I just rolled out one big rectangle shape.
And onto the baking sheet and into the fridge to rest.
While the dough is chillin, take half of the ricotta and whip it up with some honey and thinly slice up your fruit.
Take the other half of the ricotta and add a bit os lemon zest, a sprinkle of salt and pepper, and mix that up. And thinly slice up the squashes and dice up the tomatoes.
Two crusts(or one cut in half. Smear the honey ricotta on one side, savory on the other, leaving a boarder so you can fold the dough over.
Now pile the fruits on the honey ricotta, veggies on the savory, and fold the uncheesed part of the crust over. just enough to keep everything from falling out. Sprinkle salt and pepper on the veggies.
Stick into a preheated oven and bake until the crust is cooked all nice and golden brown and crispy.
While the galettes are baking, toss the chunks of tomatoes into a skillet with a splash of oil, salt and pepper and stick it into the oven too. Just bake until the tomatoes are nice and soft. You can stick in the oven right away and let the tomatoes cool, or towards the end of the bake time so that you can eat them warm… these tomatoes are good hot or cold.
all baked up, removed from the oven, looking oh so pretty.
Pile the roasted tomatoes onto the savory tart. And if you got it, a bit of chopped freshy fresh basil
And drizzle a little bit more honey on the sweet.
And serve… Is it savory first or do you go sweet?
How about a pice of both. Dnner and dessert.. all on one plate!
Happy Tuesday!
Ba Bye!
-C
-Makes 2 small or one large galettes
a single pie crust (recipe here.. or use whatever dough you like)
1 cup of ricotta cheese
For the savory
2 cups thinly sliced green and yellow summer squash*
2 roma tomatoes
salt and pepper
teaspoon lemon zest
a few fresh basil leaves
olive oil
For the Sweet
2-3 tablesppons honey
1 peach thinly sliced*
3-4 strawberries thibky sliced*
*Note. Feeling like blueberry apricot or maybe potatoes and peas? Swap out any fruit and veggie (and spice) combination you want. The possibilities are endless! And if you want to do just one big galette, go for it.
Roll out pie dough in either 2 separate disks or one large rectange cut in half and.place on baking sheet and stick in fridge. While dough is resting, divide the ricotta into separate bowls. Add the salt, pepper and lemon zest to one, and the honey to the other. Using a fork, whip them up.
Preheat oven to 400 degrees
When the oven is preheated, grab the crust from fridge and smear the ricotta fillings evenly on the middle of each crust, leaving about an inch and a half boarder. Layer on the toppings, (sweet on honey, savory on lemon pepper.. or whatever floats your boat) and fold border over the edges of the filling. Place in oven and bake for about 35-40 minutes or until the crusts are nice and crispy and golden brown.
While those are baking, dice up the tomatoes and toss into a oven safe skillet with a little drizzle of oil and sprinkle of salt. Stick that into the oven for about 10 minutes or until the tomatoes are nice and soft. You can do this right away, or towards the end of the bake time of the galettes… roasted tomatoes are great warm or cold.
When the galettes are done baking, remove from oven and let sit for at least 5 minutes before serving. Top the savory galette with the roasted tomatoes and chopped fresh basil. Drizzle a little more honey on the one with the fruit .
Serve one, then the other, or both at the same time!
Eats good hot, warm, or cold. Utensils not required
I have been meaning to make this jam for a while now. I’ll buy a bunch of jalapeños, then slowly, before I get to cooking them down, end up eating them all. But not today, and the rewards are great, Fresh jalapeño jam. So much potential for the greatest of things (I am thinking mango jalapeño sorbet… no, I am making jalapeño mango sorbet) And if you, like me are a jalapeño fan, this is going to make your life amazing. You will find yourself jamming up everything, or maybe just eating it with a spoon.
Whatever you want to do with it, just make it.
Honey and jalapeños.. All you need, well a little salt and water too, but that’s it.
What you need to do is remove the stems,, most of the ribs and half of the seeds removed. (You could remove all or none of the seeds depending on you heat preference) Chop the peppers into small chunks, toss into a pot, sprinkle with a bit of salt, add in a splash of water. Place the pot on medium heat. Top it with a lid, and give the peppers a good stir every few minutes. While the peppers are cooking, you want to make sure the bottom isn’t sticking and buringin. If that starts to happen, just turn the heat down a bit and add in a little splash more of water.
After about 20 minutes, the peppers are fully cooked and falling apart. The liquid is cooked down and the peppers are starting to caramelize on the bottom of the pan. When that happened, remove the pot from heat.
Now you can either blend the peppers, mash the peppers with a fork, or leave it chunky. Thats a choice Ill leave to you. ( I like to blend, but keep some chunks)
And drizzle in a bit o honey. As little or as much as you like.
And scoop into a jar. Eat the jam on anything you want. (I found myself eating it with a spoon)
Keep it Real!
-C
Makes about 1 1/2 cups of jam
10 large jalapeño peppers
a pinch of salt
About 1 tablespoon of honey, but add more if you like (And if you want to keep it vegan, use agave or sugar)
Wash, remove ribs and most seeds (the more seeds you leave the hotter it will be) and dice jalapenos into small chunks. Place in a pot with a few splashes of water and a sprinkle of salt. Turn on medium heat and cover, stirring every few minutes. If the peppers seem to be sticking o the pot and burning, turn heat down and add another splash of water. After about 20 minutes, the peppers should be really tender and falling apart. The liquid should be completely cooked out and the peppers will start to caramelized at the bottom of the pot. When that starts to happen, remove from heat. Now either mash with a fork, blend with a hand blender, or leave superr chunky. Drizzle in honey (or sweetener) and stir.
Eat right away or stick in a jar and store in the fridge for up to a week (It won’t last that long)
Happy Cinco de Mayo! And what better day to share my version of my oh so fantastic pico de gallo, or as I call it, super freshy salsa.
I love me some freshy salsa, It makes me oh so happy.
I make this stuff all the time, especially during the warmer months and tomato season. I usually make a batch right before a meal, just enough to eat right away, but sometimes I ‘ll make a big batched of it, thinking I’ll save some for the next day. It never makes it past the second day in the fridge because it’s just one of those things that when you see it, you want to eat it. Weird but true. And it’s totally ok to do so cause it’s basically eating a big bowl of healthy goodness, so eat on!
It takes no time to prepare, tastes super refreshing, goes on everything, and it’s just so freaking tasty. You can eat it with tacos and chips (the mister) or like me, I like to add it to everything; salads, popcorn, or directly in my mouth.
Make one batch, make 4, it doesn’t matter cause you will eat it all, and need to make more.
The stuff. Chopped Roma tomatoes, chopped red onion, a diced jalapeño, lemon, a bunch of cilantro, and salt.
Stick all the chopped stuff into a jar and add in the juice of the lemon. Roughly chop the cilantro and add that on in with a sprinkle of salt.
Mix it up….And thats it. Now eat… with something or without.
A spoon out of the jar is one of my favorite ways to go at it.
Happy Cinco de Mayo, Happy Tuesday!
-C
Pico de Gallo… Freshy Salsa
4-5 Roma Tomatoes
1 small red onion
1-2 jalapeños (Depending on heat preference)
1 lemon or lime
salt
1 bunch of cilantro (don’t use it if you don’t like it)
Chop tomatoes and onion and toss into a bowl or jar. Cut seeds from jalapeño(s) and dice up into little bitty pieces and add that to the tomato and onion. Roughly chop the cilantro and toss that in as well with the juice of the lemon or lime. Sprinkle with salt. Stir, let sit for a minutes, taste and then add more salt if needed.
Eat right away or make ahead and store in the fridge until ready to use.
Goes great with corn chips, tacos, toss onto salads or eat as is standing in front of the fridge. If someone is judging you, they are stupid.
WOO WHOA!! MARDI GRAS! I wish I was down in New Orleans today celebrating… and soaking up some warmth and sunshine, catching beads, maybe even taking my shirt off(?!!?)
No, I keep my shirt on today because I am not like that, and also, I would die of hypothermia. Today I wear a shirt, underneath 5 other shirts ad sweaters. Because today is just another day of -20 below here in Vermont.
To keep me from going completely crazy, I am thinking of warm weather and I am thinking of New Orleans (love that place!) and the humongo celebration that’s been going on there for the past week. Everyone partying out in the streets. Big floats and beads all around. I might be feeling a little jealous, (more of the weather then the partying) but thats ok, I have TV to watch and a warm comforter to wrap myself up in. And maybe I should have done a post of fried donuts or of some type of alcohol party drink to celebrate the day, but I really just wanted to make something warm and spicy, so I went with some dank cajun beans. And also I wanted to sing…. “Beans Beans the musical fruit, the more you eat the more you toot!!” hehe
But for real, these beans are sooooo f-ing tasty and super versatile. You can serve the spicy beans with the rice or just eat just the beans. You could do the beans and add to a bed of kale (me) or add cheese, guacamole and a few corn tortillas to the mix (the mister). Simple to make, super tasty and full of flavor! And pretty freaking heathy to boot! This dish gets an A+!
This dish is so full of flavor but so simple to make. We start with presoaked black beans drained and rinsed. Cajun seasoning (which is basically 1 part onion powder, thyme, oregano, and 2 parts paprika, garlic powder, cayenne power, and salt and pepper) Sliced onion and jalapeno, and a few tablespoons of tomato paste. Oh, and the rice.
Beans are in a pot filled with water unit beans are completely sumerged. Add in the onion, jalapeño, tomato paste and cajun seasoning. Bring to a boil then cover with a lid and simmer for about 45 minutes….. After about a half hour, start up the rice. Water in pot with rice, bring to a boil, cover and simmer for 15-20 minutes.
The rice is done and fluffed with at fork. The beans are cooked with just the tiniest bit of bite, bathing in a thick spicy tomatoey sauce. The chunks of onion and jalapeño have broken down and are hiding in every bite…. Oh so good!
Now get ready for the bowl!!! Bringing a little spice and nice to this crazy cold winter day or any fun festivities you may have planned.
Have a Fantastic Day.. Stay Warm or if you already are.. lucky you!
-C
Cajun Black Beans and Rice
Ingredients
1 1/2 cups dried black beans* soaked for at least 4 hours or overnight..Rinse and strained
2 tablespoons tomato paste
2 tablespoons Cajun seasoning
salt and pepper
1 Jalapeño
1 small yellow onion
1 tomato (I used a large roma)
1 1/2 cup of dried rice plus 3 cups water
*If you want to use canned beans, go for it…Just sub in 2 cans rinsed and strained black beans and only add a cup of water to the beans. Pre sauté the onion and the jalapeño before adding to the beans and only simmer the beans for about 15 minutes.
Place you soaked beans into a pot and fill with water until the beans are completely summered. Slice the jalapeño and onion and add to the pot along with the tomato paste and the cajun seasoning. Bring to a boil then place a lid on it and turn heat down to low. Let simmer for about 45 minutes or until the beans are completely cooked.
When the beans are about half way done, add rice to water and bring to a boil. Once boiling, place a lid on pot and turn heat down to simmer and cook for about 15 minutes or until all water is absorbed and rice is tender. Fluff with a fork.
To sever. place a scoop of two of rice to a bowl and top with a scoop of two of beans.… Top with diced tomatoes and scallions… (The mister added shredded pepper jack to his and thought it was excellent)
Eat with a fork or spoon.
I was informed yesterday that if I was going to make tortilla chips, that I better make some sweet ass dips to go with them. I kind of agree… tortilla chips need dip… or better yet, two dips. Queso and guacamole. It’s what needed to be done, and so I did it.
Guacamole is amazing… anything avocado is amazing…this guacamole is amazing. White bean guacamole is amazing. And not that we really care, but this guac is half the fat then straight up guacamole. Plus it’s packed full of protein making it a kind of super duper, must eat all of it, kind of dip. And sweet potato anything will make me happy. Making queso dip with sweet potato and cauliflower is probably one of my best food combos so far. (after eating a butt load, I felt like I was a genius and made an amazing discovery) Again, not that we need it to be, but this is also a fat-free, vegan, gluten-free, super healthy, packed full of B12, fiber and nutrients, dip for all kind of dip.…. just another reason why you cannot feel bad when you finish off half a batch before you get a chance to stick it in a serving bowl. (I might have done that)
Here is what you need for a good time:
−These tortilla chips ….Check.
−Some Chopped Veggies (I want the veggies)…..Check
−Cauliflower Sweet Potato Queso.…Check.
−White Bean Guacamole…Check.
You are now ready for it. It being this party, that party, the Super Bowl, or a Wednesday afternoon.
To the left we have the makings for the cauliflower sweet potato queso.. Steamed cauliflower, a baked sweet potato, nutritional yeast, garlic, and chopped up red onion, red bell pepper and jalapeño. To make all you need to do it take the chopped peppers, onion, and garlic and sauté for a few minutes just to slightly soften and bring out flavors. While that’s going on, take the steamed cauliflower and sweet potato(skin off..but eat it, or save it for soup or feed it to the dog) and puree together with a blender or food processor. Add in nutritional yeast, about a tablespoon or two of hot water and, salt and pepper to taste. Blend for about 5 minutes until super creamy smooth. Add in sautéed stuff and pulse just enough to incorporated the veggies but not complete blend in. Stick in a bowl.
To the right we have white bean guacamole stuff. Two cups (or one can) rinsed white beans, one ripe avocado, a lime, a few cloves of garlic,(I also added a bit of garlic powered…I like my garlic) and some chopped up red onion and tomato. Place beans, garlic, avocado and lime juice in a blender or food processor and blend until smooth. Add salt to taste and toss in the chopped tomato and onion. Blend for sec to mix that in…Stick in a bowl
Perfect…
To think that both of these dips took about 10 minutes total to make. (I had pre baked the cauliflower and sweet potato) And for real, I would spend much more time if I had too because both of these dips are so freaking good, I definitely will be making these on the regular.
So there , dips for those sweet ass chips or whatever you want to dip or them spread them on.
And he guys…It’s FRIDAY! Have a fantastic day!
-C
White Bean Guacamole
2 cups white beans (or 1 can) rinsed and drained
1 ripe avocado
3 cloves garlic
1 lime
1/4 small red onion
1 small tomato
1-2 teaspoons salt
Finley chop onion and tomato. Set aside. Place the beans, avocado, garlic, garlic powder, 1 teaspoon salt and the juice from one lime into a blender or food processor and blend until smooth. Add a splash of water if needed to help keep things moving. Taste and add more salt if needed. When smooth, add the onion and tomato and pulse a few times to mix in. Scoop into a serving dish and finish with a squeeze of lime and a bit of chopped onion and tomato.
Cauliflower Sweet Potato Queso
1 1/2 cups pre cooked steamed or roasted cauliflower
1 medium pre baked sweet potato
1/2 cup nutritional yeast
1-2 tablespoons hot water
1/2 a small red pepper
1/4 small red onion
1 jalapeño
3 cloves garlic
salt and pepper
Finely dice the red pepper, jalapeño, onion and garlic and sauté in a skillet for a few minutes until slightly soften and fragrant. Take the pre-cooked cauliflower, sweet potato (skin removed), and nutritional yeast and place in a blender or food processor. Blend for about 5 minutes until creamy and smooth. Add in a tablespoon of water to keep things moving. When completely smooth, add in sautéed veggies and pulse a few times to combine. Scoop into a serving dish. If your feeling it, top with scallions and cracked pepper.
Serve dips with chips, veggies or anything you want. Also make great spreads for sandwiches and crackers too!
How awesome will you be when you bring the most freaking amazing tortilla chips to the party this weekend? You will be like..”what, it ain’t no thang.. I am just good like that” Yes, yes you are.
And yes, I am assuming that you will be making these awesome chippers to share at a Super Bowl part this weekend. I say this because even as I sit here writing this (with the TV on) there has been nothing but football talk…deflated balls, hot wings, half time shows and commercials. It’s almost as big as Christmas. Got to get the decorations, the special game day food and your football jerseys. It’s crazy and all over the place. So that’s why I am assuming you are making these for the game. But if you not going to be participating in any football parties.. by all means, make these chips for yourself anyways. Celebrate you day! Have a non football watching party. Or just make these whenever. Jalapeño Lime chips for everyday!
Note: You can make these chips without the jalaeno and or the lime if you need or want to. You can also stop after the first step and have some dank corn totillas for tacos ands stuff..But definitely make the chips… worth it for sure!
All the stuff.. Masa harina, hot water, salt, a lime and a jalapeño. Zest lime and place half the zest into a glass bowl with oil and either sit on warm oven or microwave for 30 seconds to infuse. Puree the jalapeño with a cup of hot water and add the puree and half the zest of a lime, plus salt, to the masa harina. Mix it all up with another 1/2 cup of water or enough to make the dough resemble play dough… You can add more water or masa if you dough is to wet or dry.
Knead dough a few times just to make sure it’s completely uniformed and divide into 12-14 equal pieces. Place balls on a plate and cover with a wet paper towl to keep from drying out.
I do not own a tortilla press so I used what I had… wax paper, a wooded cutting board and brunt force. I took each ball and place it between the two pieces of the waxed paper, placed the cutting board on top, and with all my might and body weight, pressed down to smoosh. It works like a charm.
My cast iron skillet is big enough to cook 2 -3 at a time, but doing one at a time is cool too. Preheat the skillet to medium heat. Cook each tortilla for about 2-3 minutes ( or until starting to brown) on each side. Half way there to chips!!!
With my fingers ( you can using a basting brush for sure), I rubbed a little of the lime oil all over both sides of each tortilla. Stacked a few high, then sliced those tortillas into triangle shapes. If you want to go crazy, you could cut them into strips or even use a cookie cutter and do some fun shapes… but triangle are easy, classic, and practical. A good shape for dipping!
Placed all nice and cozy on a baking sheet. trying not to overlap. Into a 400 degree oven for about 20 minutes to complete the chip making process.. After about 15 minutes, check for doneness. When nice a crispy, remove from oven, squeeze lime juice all over and sprinkle with salt. I then stuck them back in the oven for a few more minutes just to dry the lime..
After cooling down, take those chips and stick them in a bowl.
Eat a few, but wait and save them for the party. Or better yet, make a few batches. Bring a batch, eat a batch. (Its ok, you are allowed)
Eat with some salsa, maybe some of this guacamole, or just as they are…Anyway is the right way as long as you are eating!
Have fun making these and have fun getting read for the party this weekend (Super Bowl or not!)
-C
Jalapeño Lime Tortilla Chips
Makes 12-14 tortillas.. then made into a medium bowl of tortilla chips.
Ingredients
2 cups masa harina
1 1/2 to 1 3/4 cups hot water
1 teaspoon salt
1 lime (juice and zest)
1 large or 2 small jalapeños
2 tablespoons olive oil
salt
To start, zest lime and add 1/2 of the zest to bowl with the oil. Place oil on warm spot on stove to let the oil infuse the limeness.
Take jalapeno and puree with 1 cup of hot water. In a large bowl, add puree and remaining lime zest to the masa harina and mix, adding an additional 1/2 to 1 cup of hot water until the dough resembles play dough, not to soft, but not to dry and completely incorporated
Divide dough into 12-14 balls and place on a plate under a wet paper towel to keep dough from drying out.
One at a time, take a dough ball and place between two pieces of wax or parchment paper. Place either a plate or cutting board on top and press down as hard as you can (you could even stand on it). Remove flatten tortilla from paper and place in medium hot skillet. Cook each tortilla for 2-3 minutes on each side.
When all tortillas have been made, lightly rub lime oil on all over both sides. Stack a few on top of each other and cut into triangles. Place pieces on a baking sheets (I used 2) and bake at 400 for 15- 20 minutes or until lightly browned and crunchy. When chips are done, remove from oven, squeeze or sprinkle lime juice on chips and sprinkle with salt. Stick back into oven for another 2 or so minutes to re-crisp from the lime juice.
Remove and let cool completely, then dump into a bowl

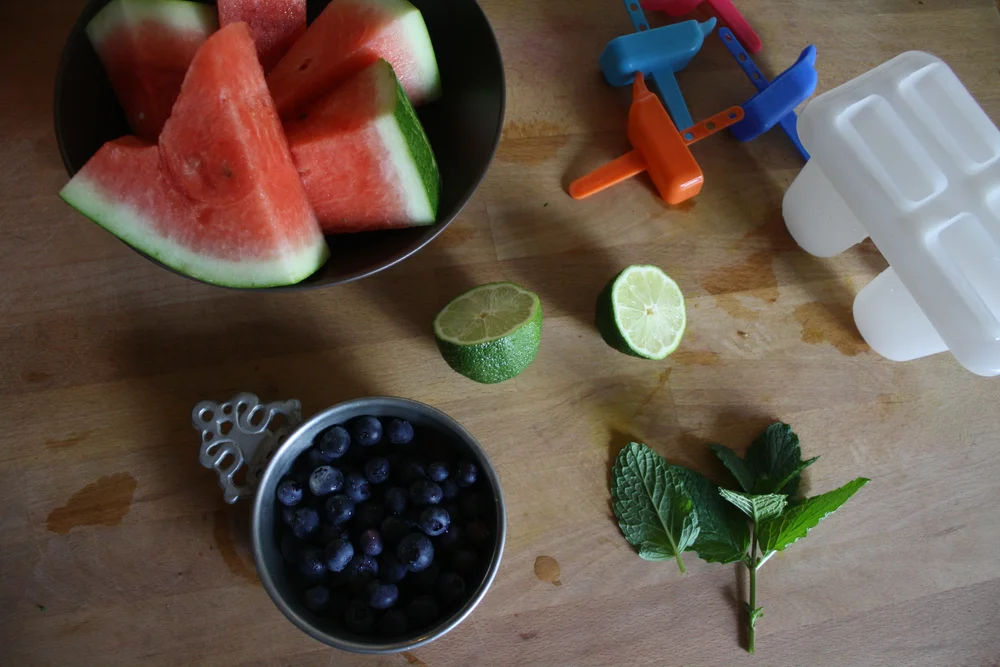
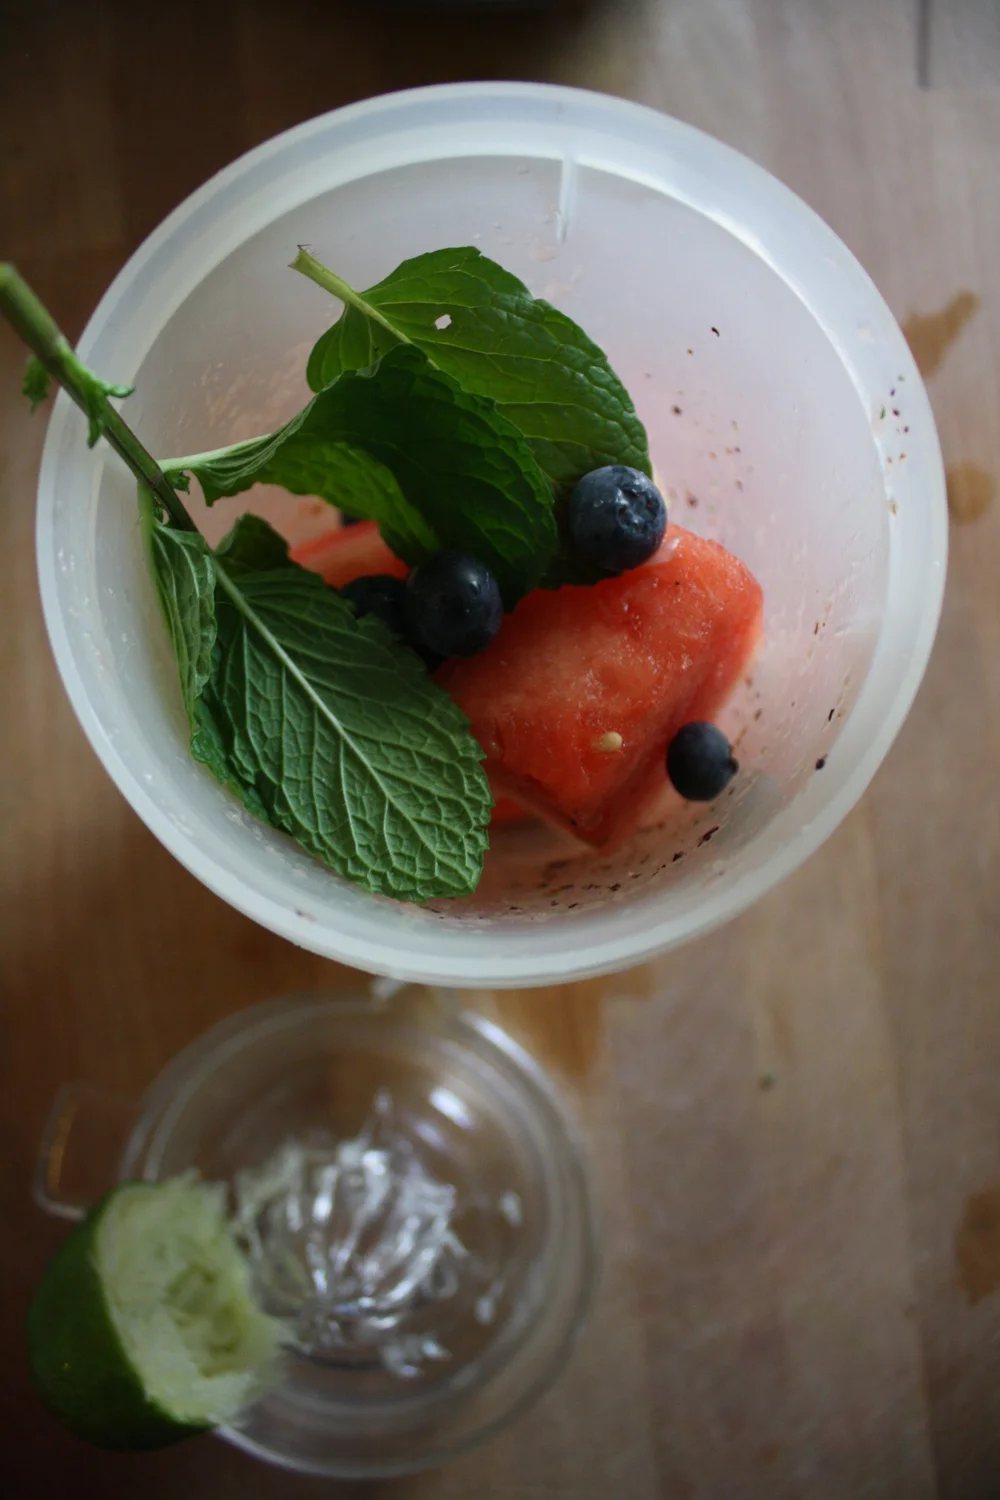
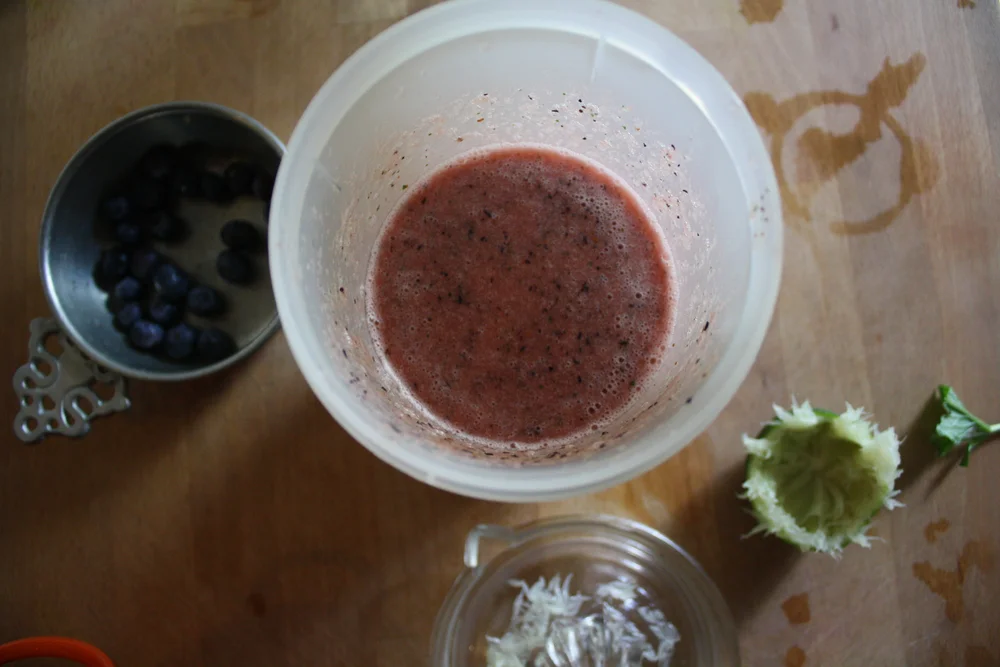
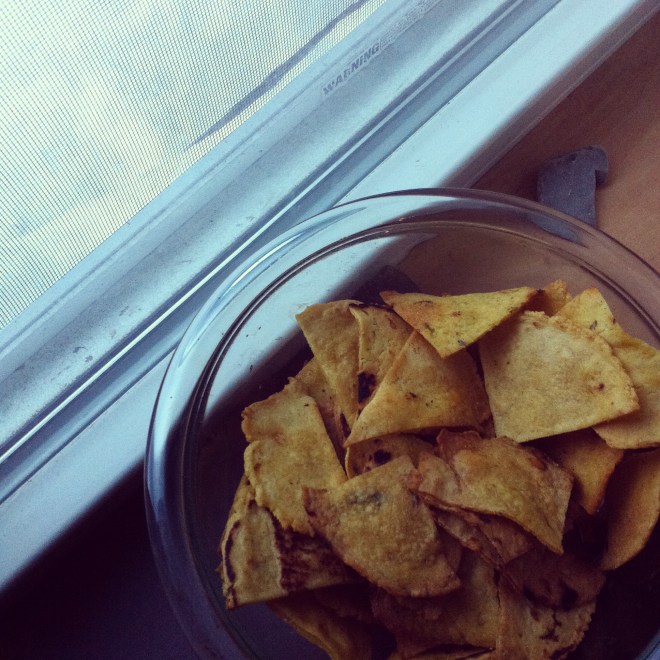 How awesome will you be when you bring the most freaking amazing tortilla chips to the party this weekend? You will be like..”what, it ain’t no thang.. I am just good like that” Yes, yes you are.
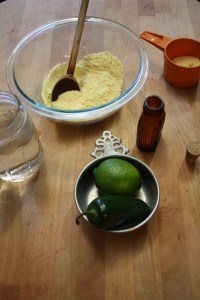
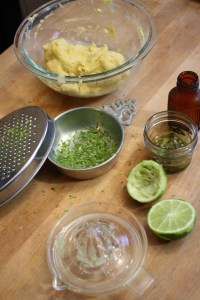
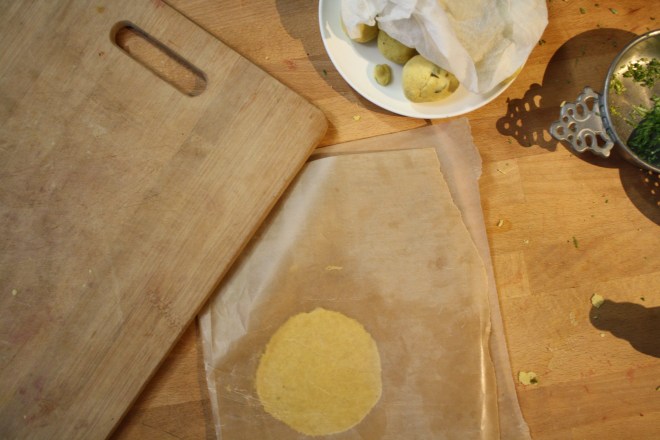 Knead dough a few times just to make sure it’s completely uniformed and divide into 12-14 equal pieces. Place balls on a plate and cover with a wet paper towl to keep from drying out.
 My cast iron skillet is big enough to cook 2 -3 at a time, but doing one at a time is cool too. Preheat the skillet to medium heat. Cook each tortilla for about 2-3 minutes ( or until starting to brown) on each side.
 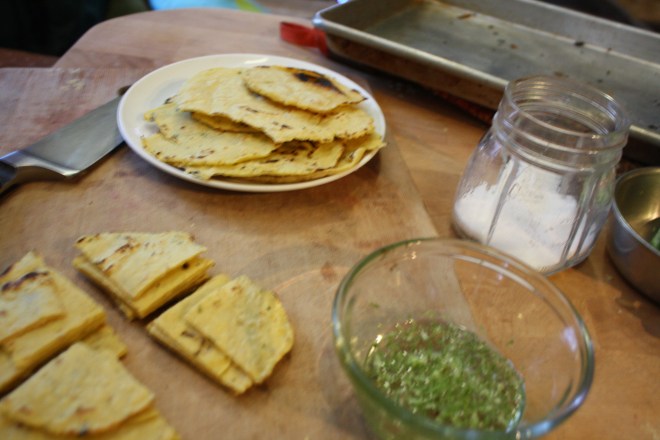 Half way there to chips!!!
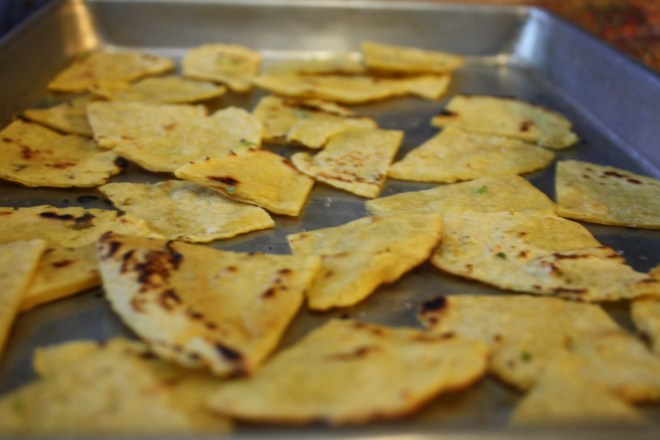 Placed all nice and cozy on a baking sheet. trying not to overlap. Into a 400 degree oven for about 20 minutes to complete the chip making process.. After about 15 minutes, check for doneness. When nice a crispy, remove from oven, squeeze lime juice all over and sprinkle with salt. I then stuck them back in the oven for a few more minutes just to dry the lime..
 After cooling down, take those chips and stick them in a bowl.

 I have been meaning do a post on seltzer and syrups for a while now and this one is perfect… Everyone around me has been getting sick and I am trying my hardest to not get anything.


 So lovely…. so nice. I really got into these flavors. This drink has the ability to make you feel warm and cozy while being cold and fresh. It makes me happy.
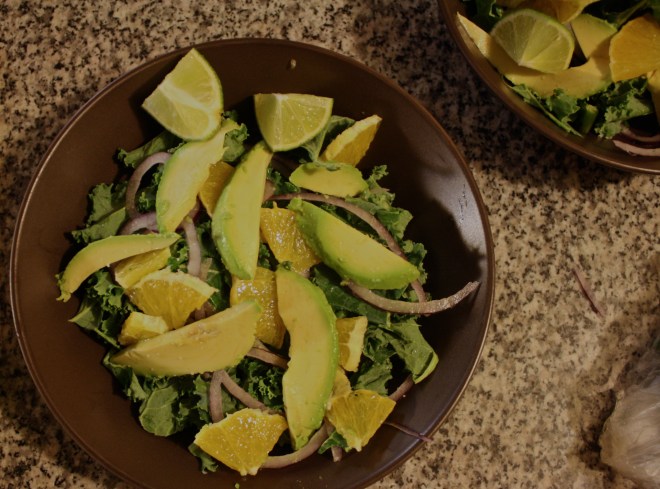 Whenever me and the mister get invited / show up for dinner at someone’s house, I like to bring at least one thing to contribute to the meal. First, because I am nice like that. Secondly, because I get to make food for other people besides Nick and get new feedback on recipes. (Sometimes I think he tells me things taste amazing when they might not) And thirdly, its nice to mess up someone else’s kitchen besides my own. So last night we went to my sisters and I made a salad. A very easy and virtually mess free salad…….I still made a mess (I cleaned it up myself!)
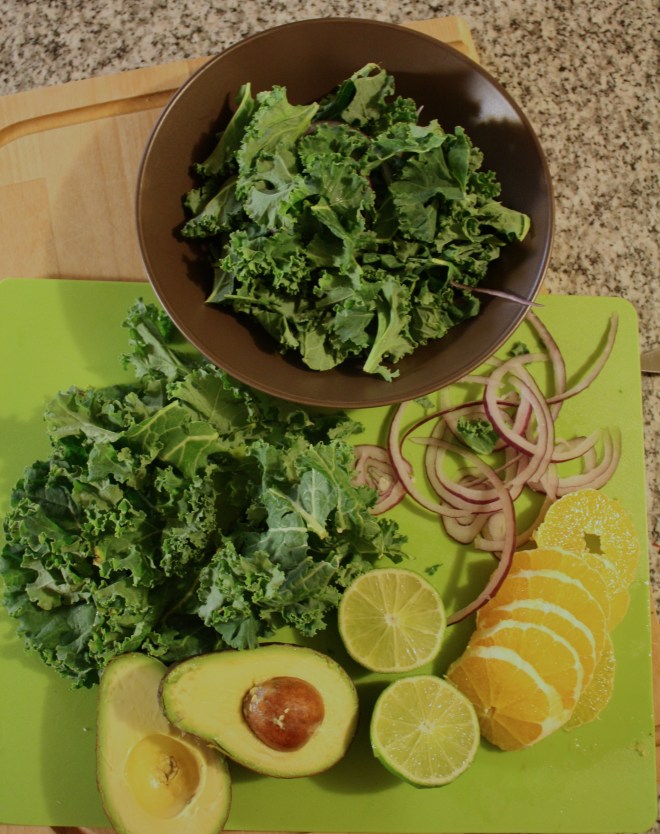
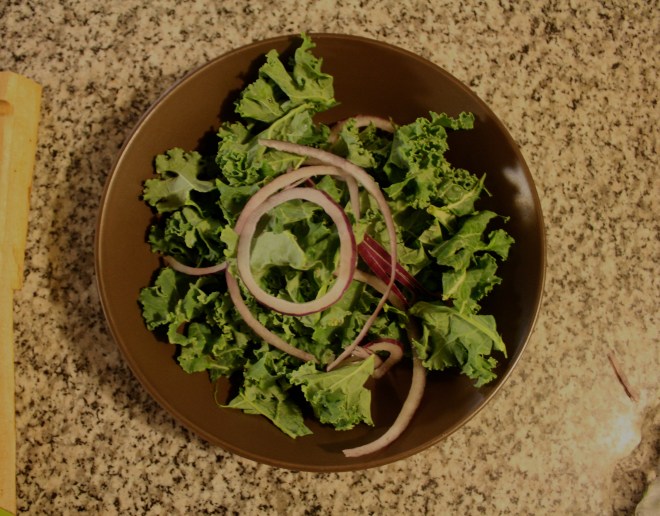 Start with the base layer of kale… then first goes the sliced onion. (Make sure it’s thinly sliced or else it will be to overpowering)
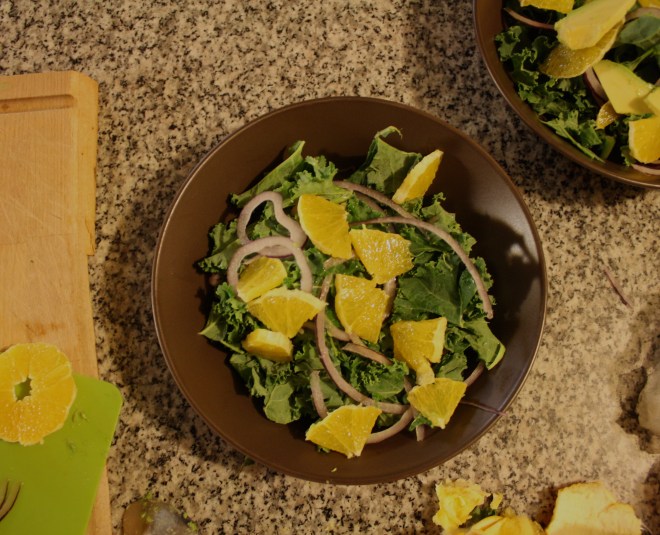 Add thinly sliced oranges…oh boy, your half way there!!!
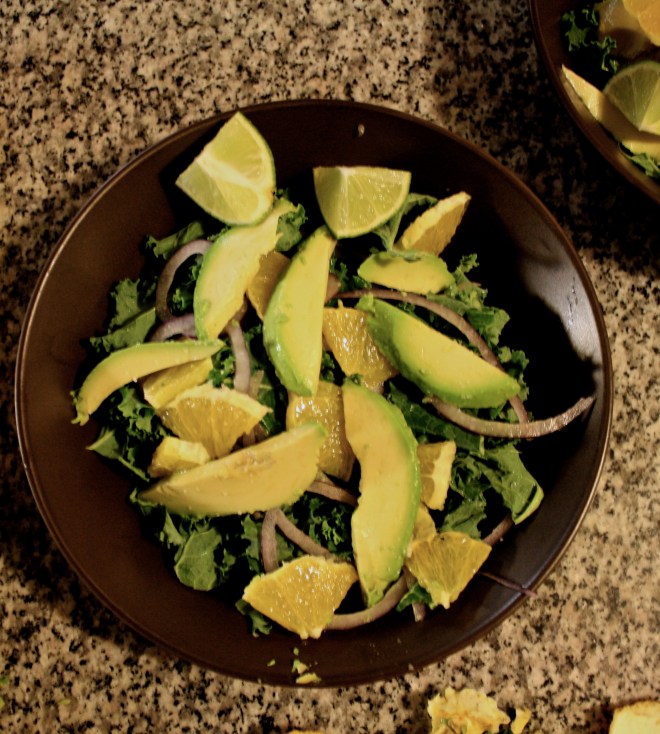 Top with thinly sliced avocado, a sprinkle of salt and drizzle with lime juice. I also served with an extra wedge of lime, there is never too much lime.
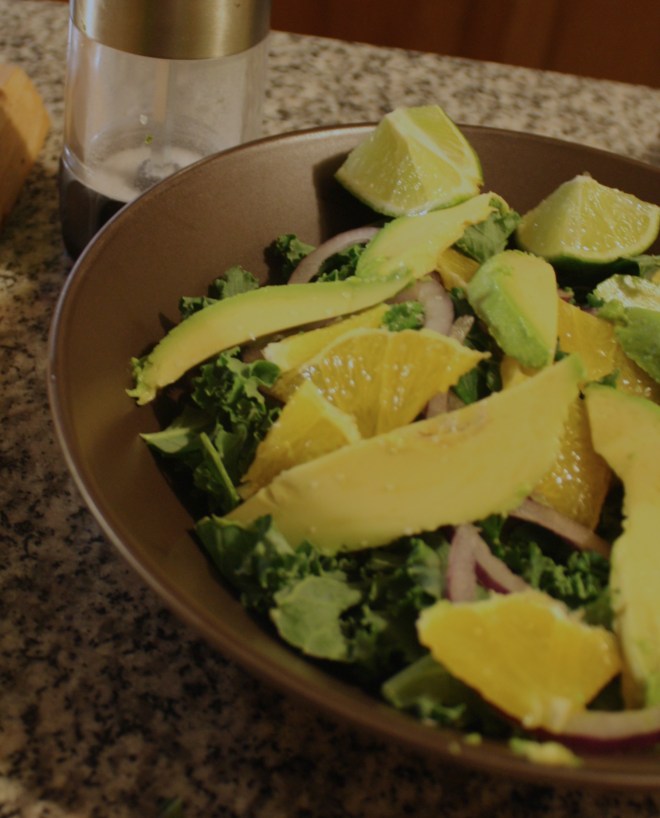


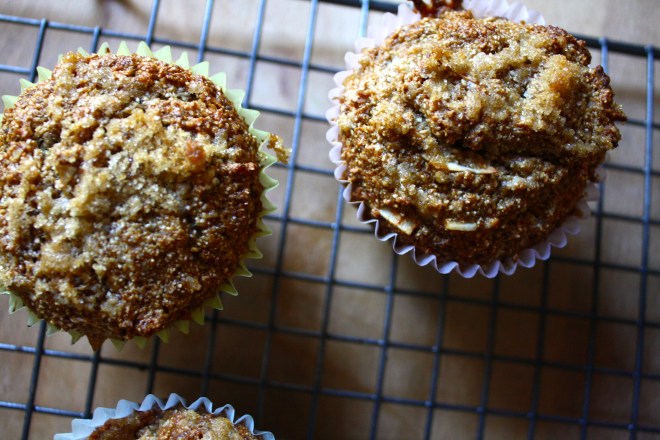
 There is irish soda bread in your future. I can see it. A nice hardy hunk slathered in butter and honey, crumbs all over the place. So all you have to do know is make it.
  White whole wheat flour and all purpose flour mixed together. Salt baking soda and buttermilk. That’s it.
 All the dry whisked together and in goes the buttermilk. Mix together until dough starts to form then dump onto a floured surface. Handling dough as little as possible, knead into ball.
 Place on a baking sheet and dust with flour. Take a sharp knife and cut an X through the top about 1/2 inch deep.
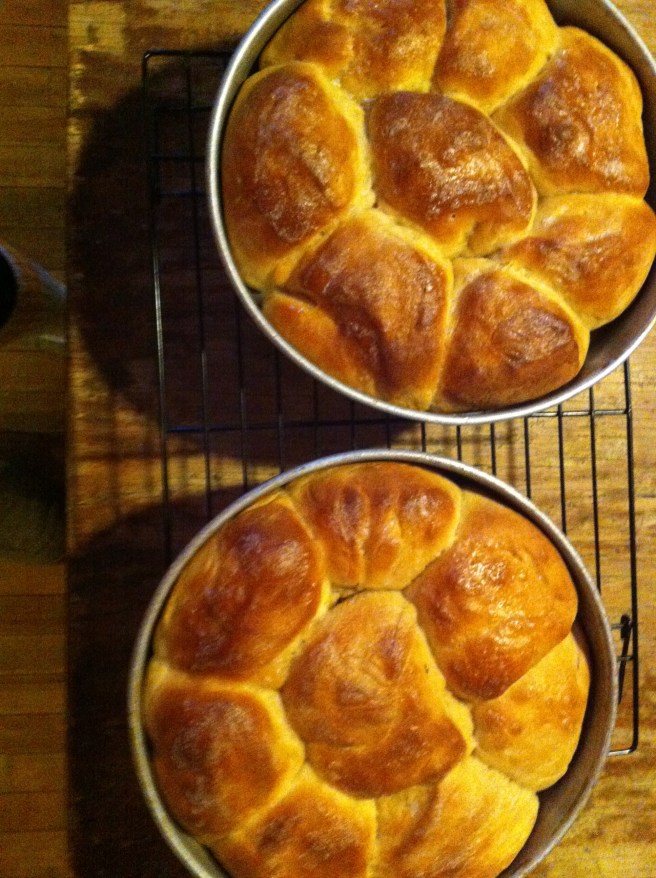 HORRAY, its Saturday!!! I don’t care that I have a bunch of laundry and house work to do, bills to pay, a mangy dog to groom… I get to do it all at home with the music blasting,(maybe some holiday tunes) a lot of coffee, in my comfy sweats and the oven on. Weekends are always a mixed bag of crazy for me but I can usually count on being at home for a chunk of the morning or afternoons and that’s when I jump at the chance to make me some yeasted bread. Give me a couple of hours, my list of chores and watch me go.. I can mix and knead,, set aside to rise and hit up cleaning that toilet. Go back and knead, divided and rise again, then go fold all the laundry. Stick the bread in the oven and watch out, I am mopping the floors. I am nothing if not a fantastic multitasked, much like these rolls. You can serve them as a side for dinner , use them as a sandwich roll, or eat them as the star with a dab of butter and a drizzle of honey. The possibilities are endless. This particular recipe is fantastic for may reasons…. Its pretty simple, not to many ingredients and is made with whole wheat flour. If you don’t want 16 rolls, you can make the dough, bake half and freeze the rest. You could even bake into loaves of bread instead.Yeah, sounds good right? Go ahead, you know you want to. Just do it!
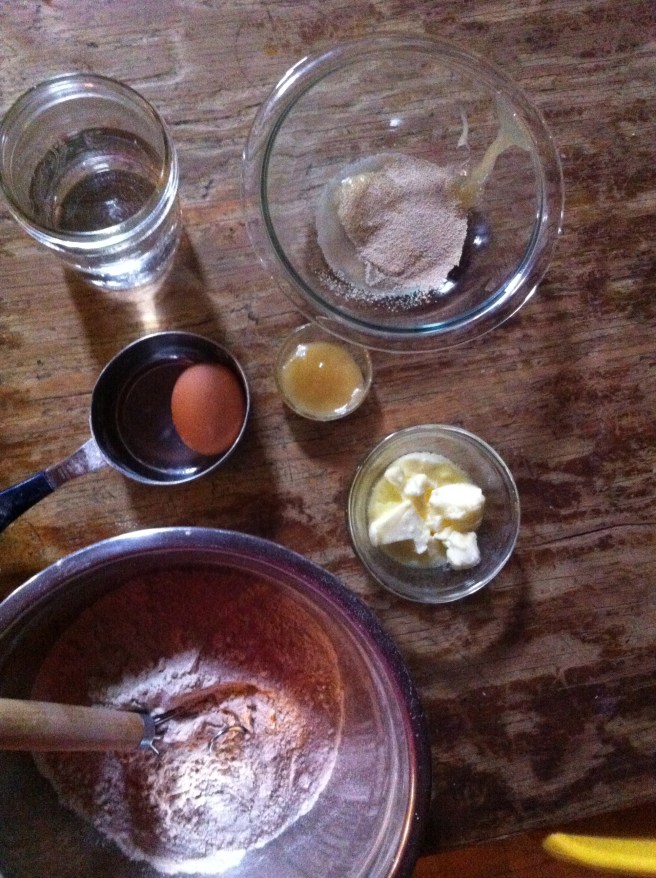 I always gather the ingredients.. I have learned over the years that if I have all my stuff out and measured in front of me, I will almost never forget something and that I make less of a mess. It also helps that I find it pretty. So, flours and salt are whisked together. The yeast and honey in a bowl waiting to be proofed. The butter in need of more melting and an egg.. Pretty.
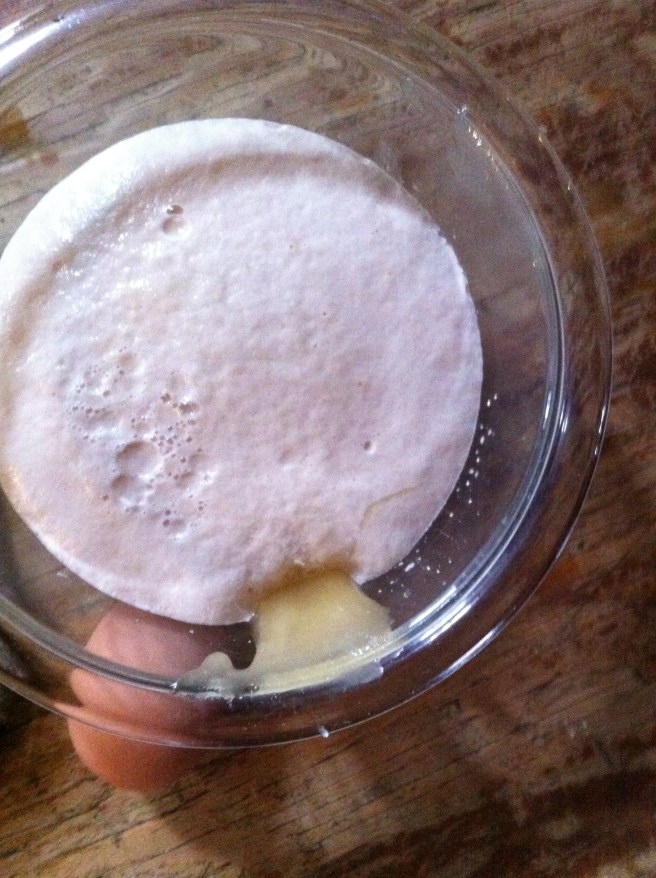 Honey and yeast mixed with a cup of warm water. BE CAREFUL with the temperature of the water.. If its to hot, the yeast will kill the yeast and you will have to start over again, but I trust you won’t do that.
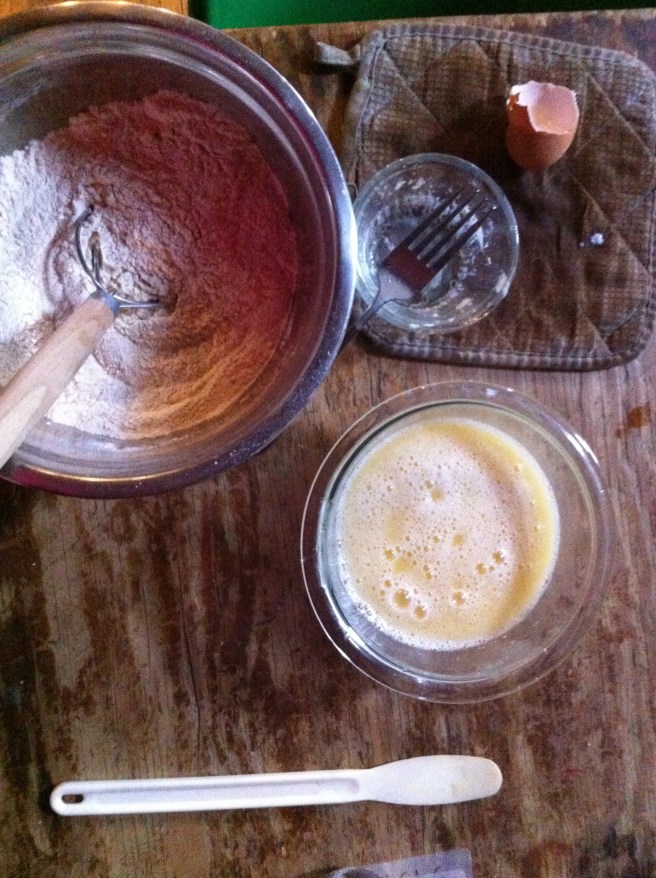 Now that the yeast is active, mix in melted butter and egg. (Make sure the butter is not hot, warm is ok) Add wet ingredients to the dry and mix.
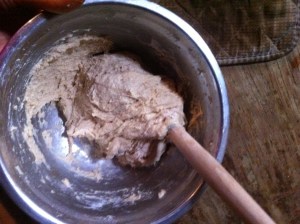
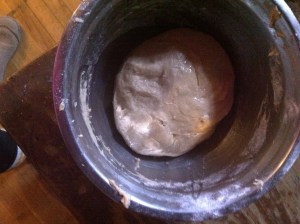
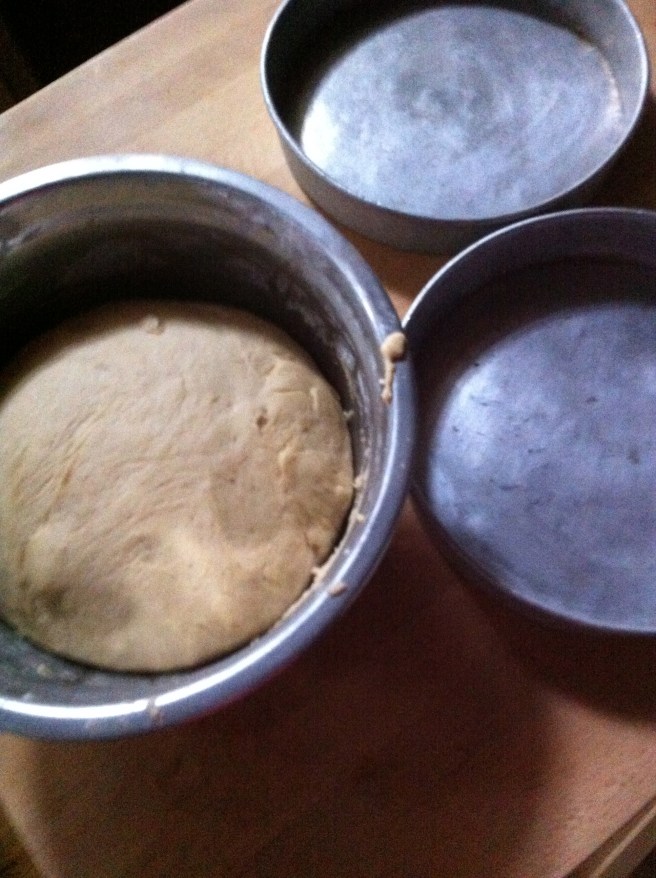
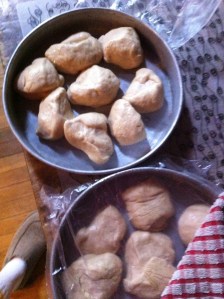
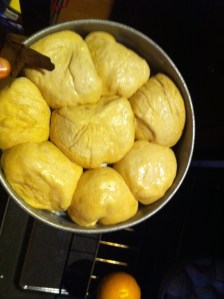 Little ball of dough turned into big balls of dough. (Yeast is so cool!).Into the oven they go. Right before I baked them I gave the tops a little milk wash, just for color. Do it if you want, you could even do an egg wash, but it’s really not necessary.
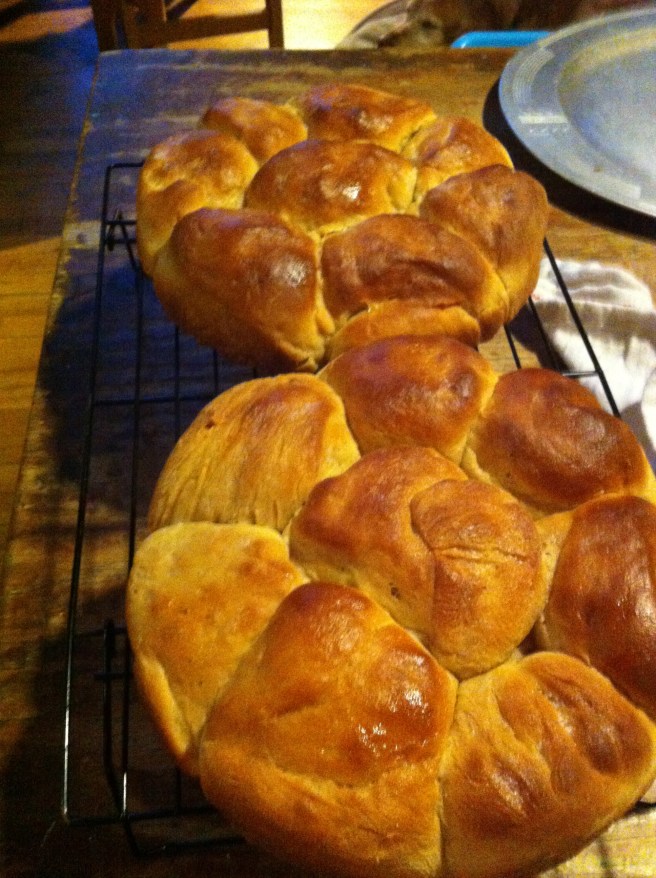 So lovely! Who wouldn’t want to just tear these beauties apart?

 I figured now is a good time to get this recipe out there before we get to far into spring and summer recipes because there is going to be a lot of banana ice cream filled recipe coming and I figured its a good idea to have the basic banana ice cream recipe ready for people to refer too. And because I made so much fantastic naner ice cream, I also made a cookies and cream naner ice cream for my sisters and the mister.
 The stuff you need for this ice cream…. Nice and ripe bananas, peeled and then frozen* That’s it.
 After all blended and smooth, either eat right away or scoop ice cream into a freezer safe container and stick in freezer. That’s the banana ice cream… And it is amazing and so so so so so addictive. I make a batch, think I am only going to eat a scoop, then find myself eating half of what I have made, but it’s ok cause it’s only bananas.
  One batch of banana ice cream, either freshly made, still in food processor or made ahead and placed in a food processor and given a good pulse to smooth it up.
 Now you have cookies and cream naner ice cream…. and everybody is happy.


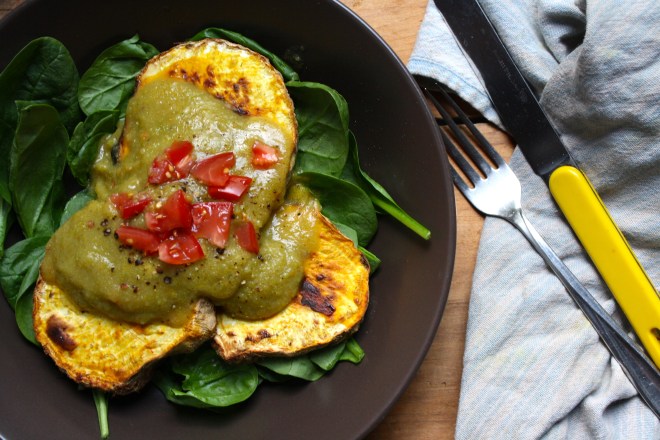 My winter farm share is coming to an end this week. One more pick and then a three week stretch until the summer share starts… WHAT AM I GOING TO DO!!! Stock up as much as I can is what.
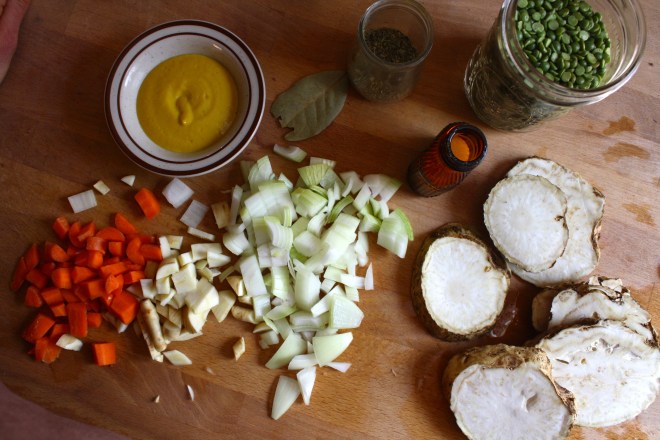 The stuff….For the split pea gravy we have a carrot, a parsnip and a large onion chopped into small chunks. Salt, thyme, a bay leaf and of course the split peas. Then there is the celeriac root* sliced into 1/2 inch thick rounds and some plain old yellow mustard .
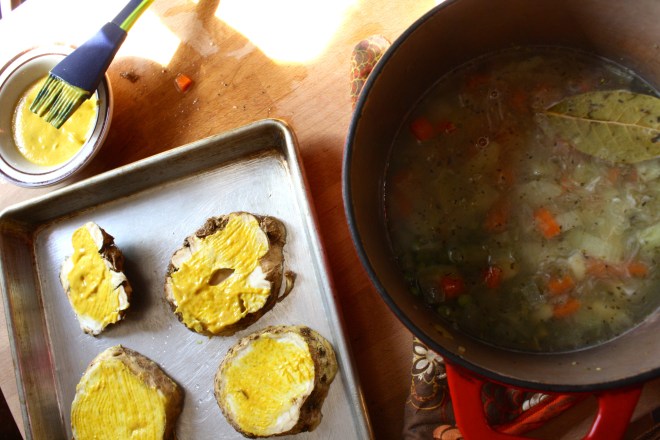 Toss the chopped parsnip, carrot, onion and the spices into a pot on medium heat and let veggies sweat a few minutes until tender. Add in the split peas and enough water to cover everything. Turn pot on high and bring to a boil, then cover and turn to low. Make sure to give the pot a good stir ever few minutes and add more water if needed
 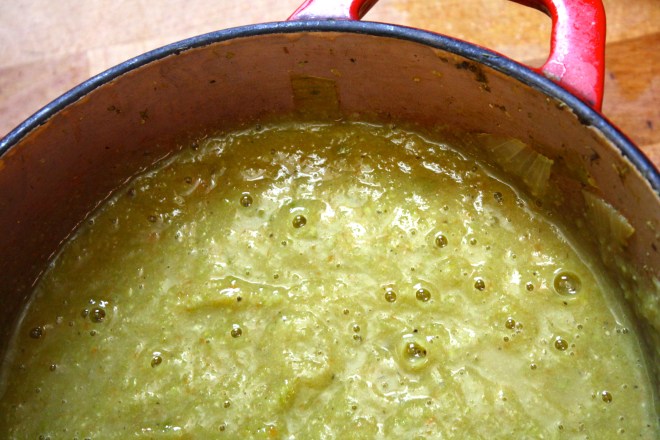 Once the peas have soften, remove the bay leaf and puree until smooth and oh so creamy. Taste and add more salt and pepper if needed. If you find that the gravy seems to thick, just add in more water until it’s the consistency that you want.
 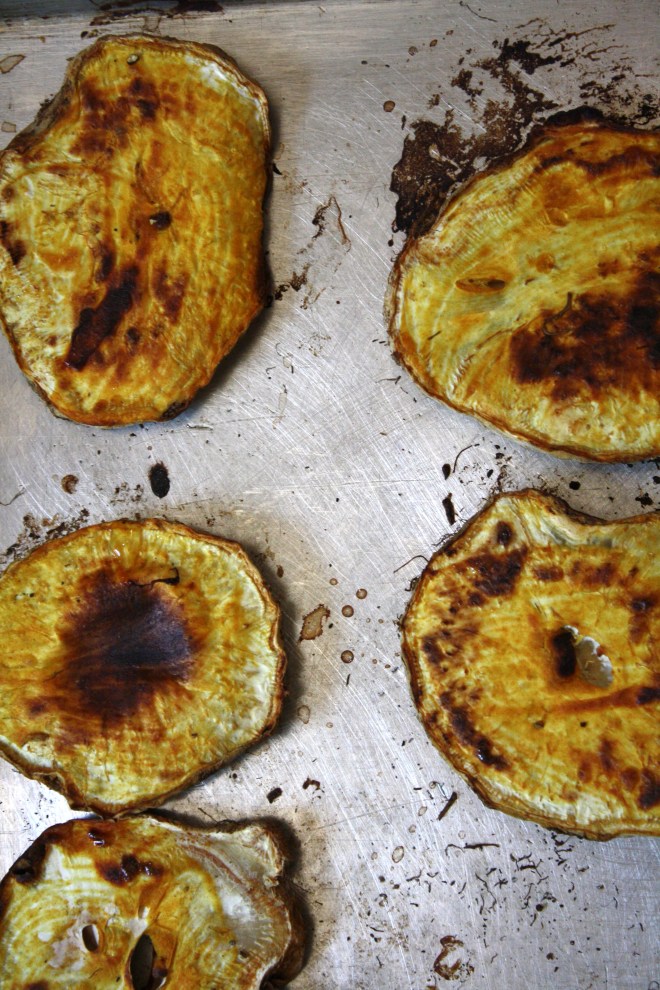 The gravy is made, the celeriac is roasted… now we are ready to eat!!
 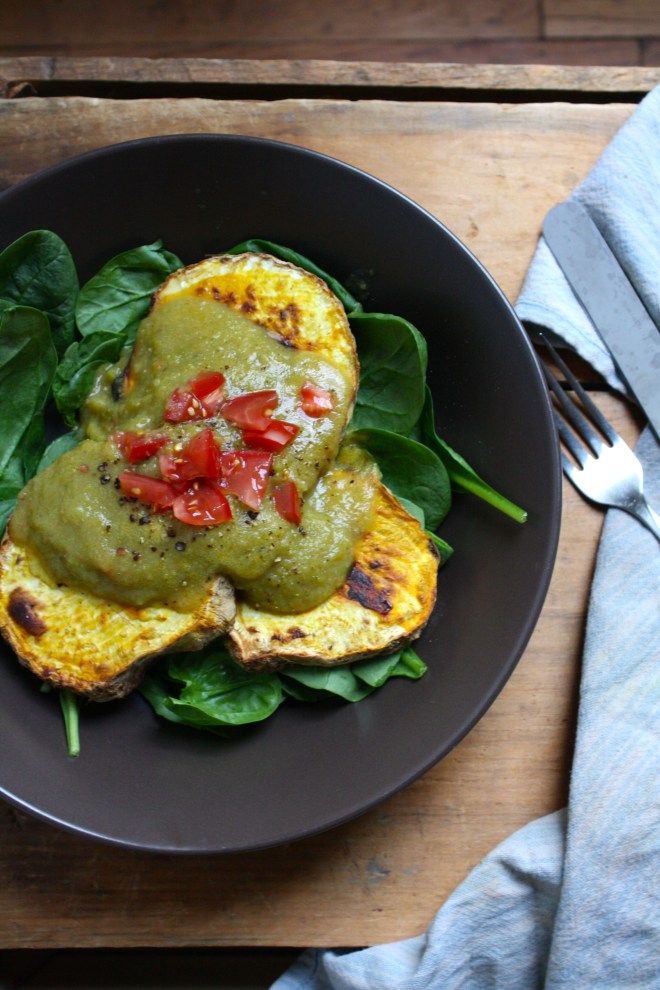 Stick the celeriac on a plate and dump good amount of that gravy right on top. Feel free to add a bed of spinach, or a grain or anything you want, because why not, and also some chopped tomatoes for a little acid and prettiness.


 It’s been a long, packed, but very fantastic week. Everyday has been full of work, chores, family, and trying to get in a least one good bike ride or walk in. I made a list of a few important points to mention from the past week.
 The mister and the worlds biggest crayon, which is made of scraps of blue crayons from all over the world. I could totally use a big ass crayon like this.
 The coolest most badass 95 year old lady that I know (I know a few), Grammy Stem. And the little, getting a lift. (I could have used a lift too!)
 Brothers. The guy in the green is my Dad.
 Aftre dinner ice cream break.
 The sky has been on point all week long
 And made myself some veggie chips. The colors alone are delicious.
 Before we left for the weekend, I was was trying my hardest to empty the fridge out of all food with the intention of leaning it empty so I could leave it open to defrost while were were gone. Unfortunately I was not able to make it happen. What I did make happen was emptying it almost completely so that when we got home, we had pretty much no food in the house, except for a few things that probably should be eaten. Plus one of the last things that I want to do after sitting in a car for 6 hours is go to the grocery store, or anywhere for that matter, so I was determined to make with what wet had in the fridge:
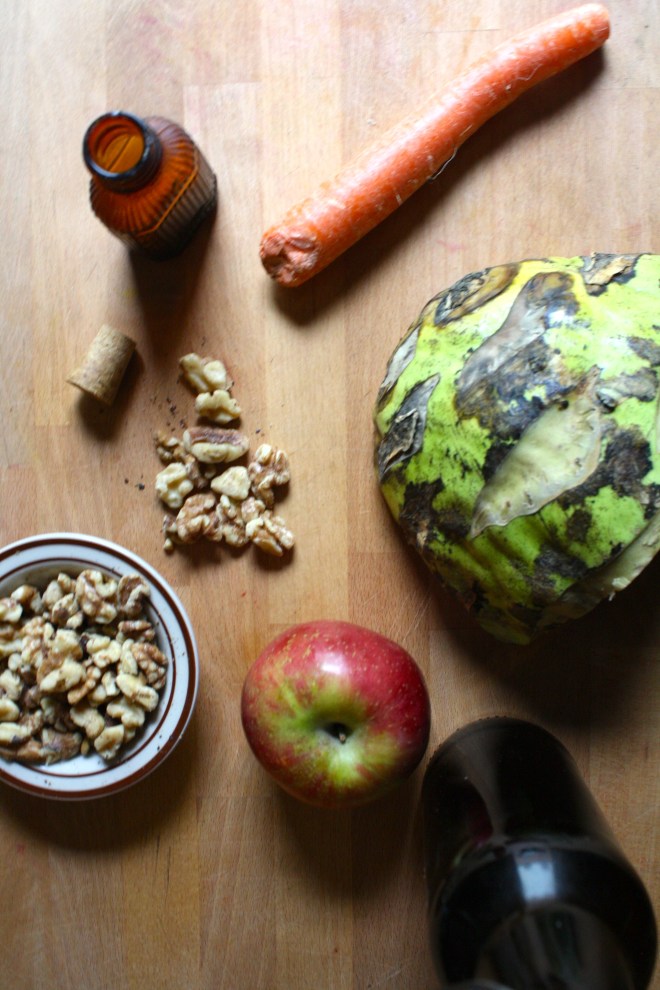
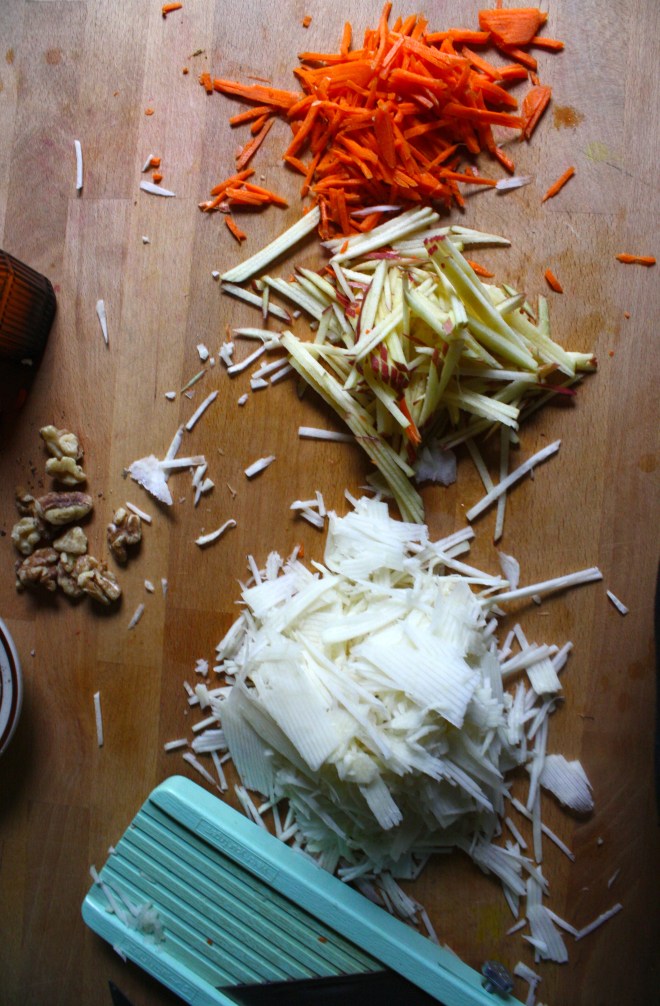 The stuff… A huge hunk of a bigger then my head kohlrabi (or 2 normal bulbs). A carrot, an apple, toasted walnuts, red wine vinegar, and some salt.
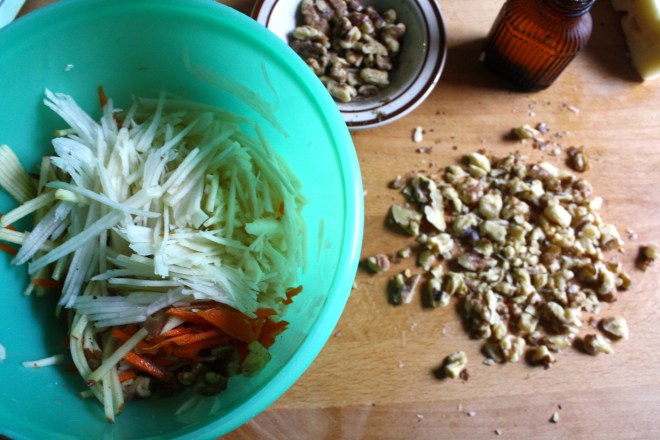 Sprinkle with salt and a good glug glug of red wine vinegar. Chop up the walnuts (some big chunks and some very small pieces makes for good eating), toss it all together and, well that’s it. But wait…. let it sit for a few minutes before serving to really let the flavors draw out.
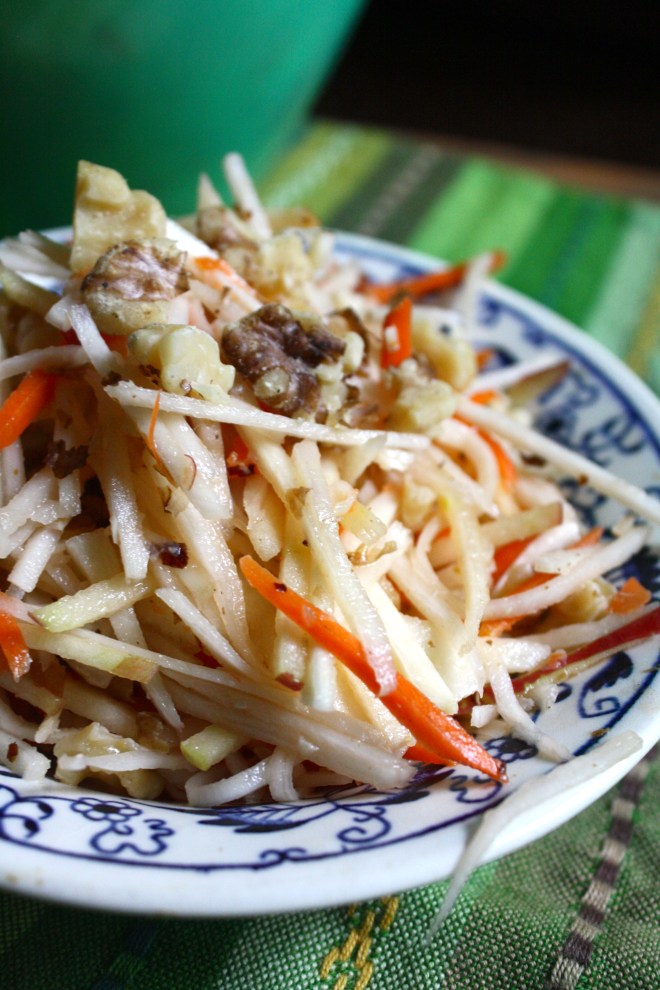 And there we have it. Super fast, full of flavors and crunchy texture. A salad slaw after my own heart.
 Last week pineapples were on sale everywhere……So I bought 5. Don’t judge
  Stuff for the goodness. We got the kale, some avocado because all salads should have avocado and some cooked lentils because, well, all salads should have lentils (or beans or nuts.. so you could totally something else) Then a few sprigs of fresh dill, a clove of garlic, red wine vinegar, salt and a bowl of chunked up pineapple.
  The pineapple, dill, garlic, red wine vinegar, a splash of water and a pinch of salt get blended in a blender or whatever blending device you use. Go as smooth or chunky as you like, I recommend going smooth, but leaving a little chunk, like half blended.
 So good……So so good.
 When something goes on sale at the grocery store, I tend to buy it. Being that it is Valentines Day this week, all the stores are having specials on all sorts of sexy things… and strawberries are one of them. Now I am not a huge fan of buying produce that is terribly out of season, but I can’t help myself…a good deal is a good deal and the strawberries were a super good deal. I was just going to make some sweet ass strawberry jam or maybe a lovely strawberry cake with them (and I probably still will), but these strawberries are actually super juicy and full of flavor, and it’s always nice to eat some full flavor freshy strawberries… especially soaked in balsamic vinegar. And yeah, I think that this salad is pretty sexy, so it makes for a perfect Valentines day dish.
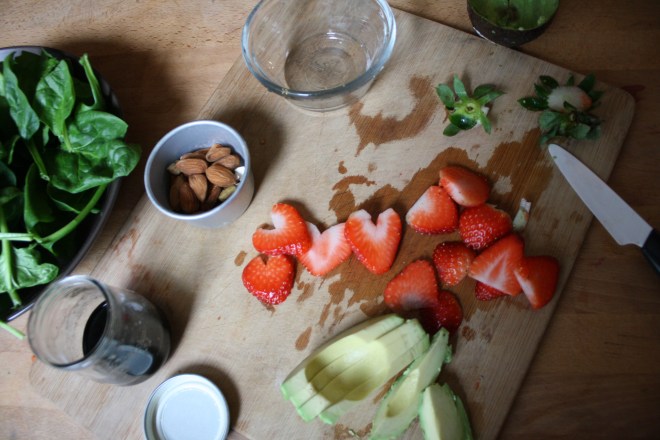 A handful of ingredients and 5 minutes will get you to a fantastic salad experience.
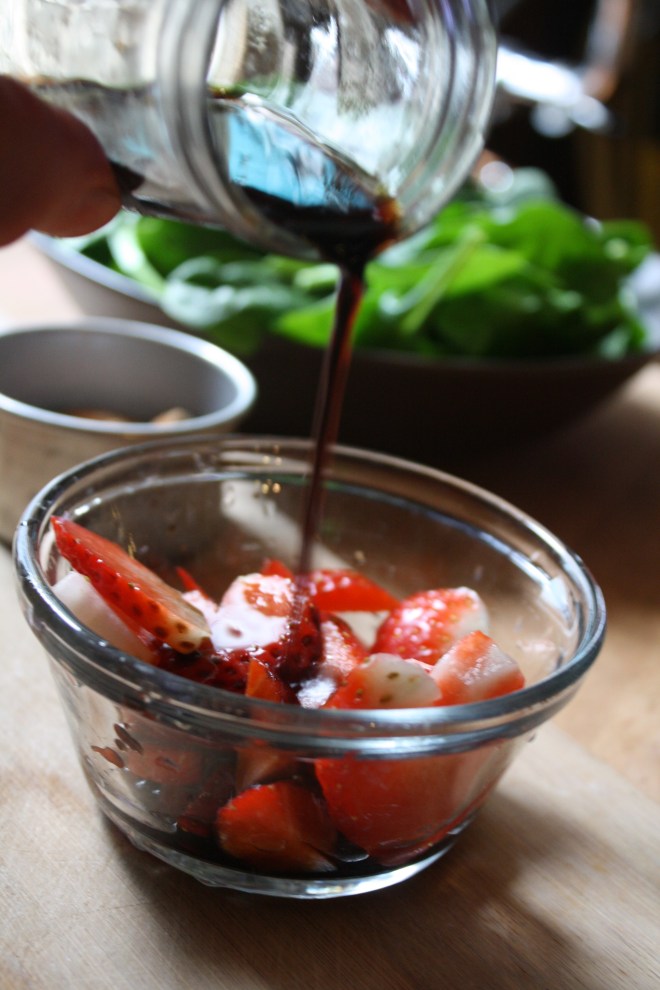 Pour the vinegar on the strawberries and let sit for at least 5 minutes. (the longer the strawberries can sit with the vinegar, the better)
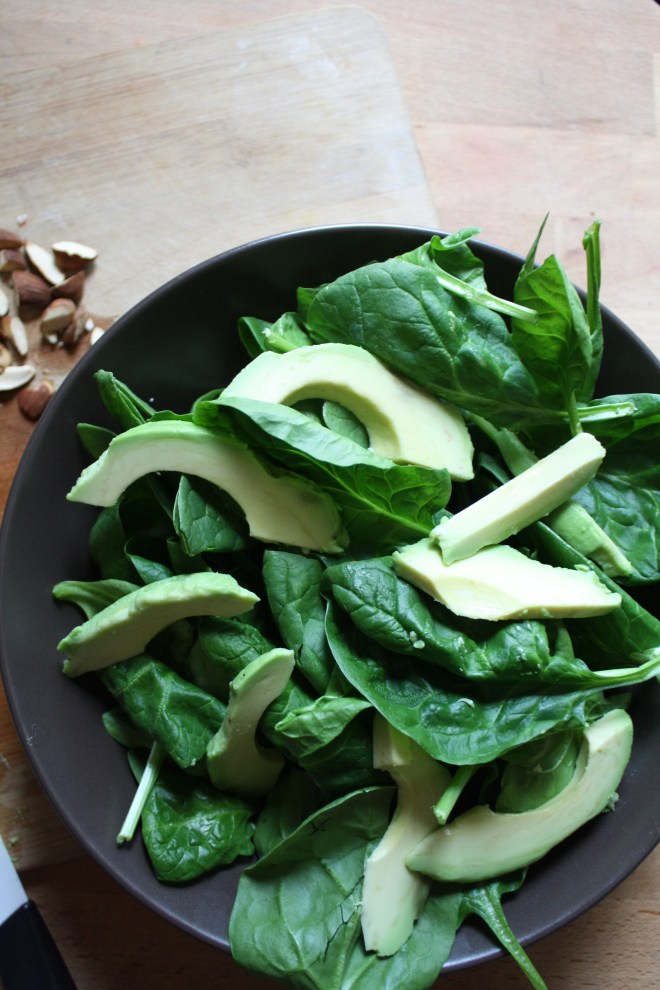
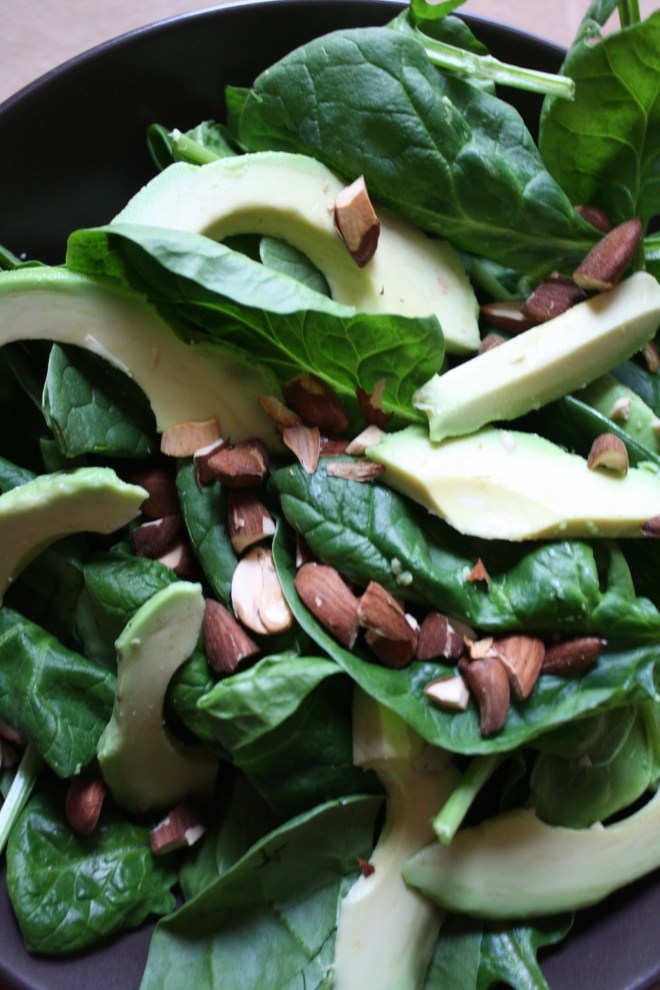 Pile it on.. thinly slice avocado.. rough chopped toasted almonds… It’s pretty much as easy as it can get.
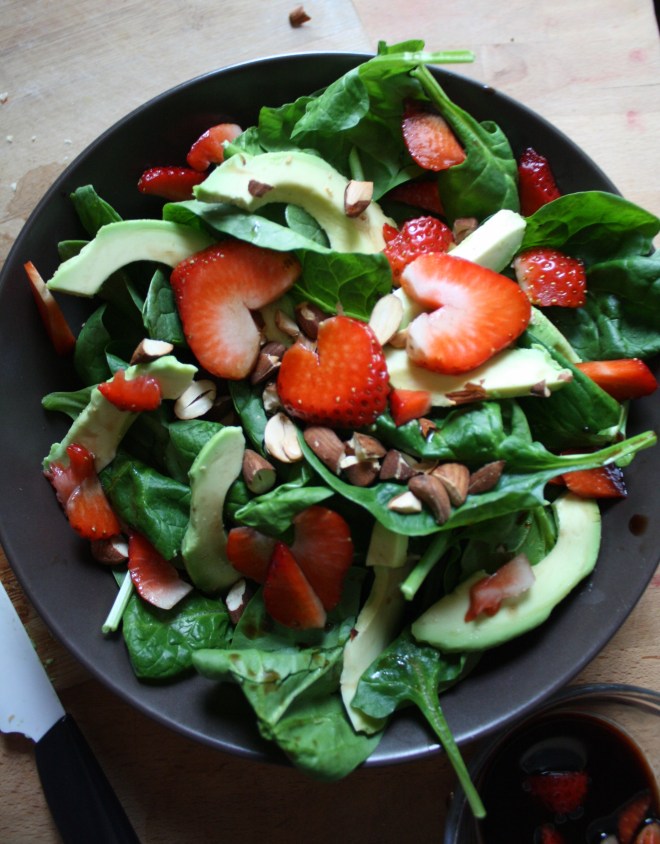 And last but not least, toss on the balsamic soaked strawberries and drizzle the remaining vinegar. (if you made hearts, place on top to make pretty) Sprinkle with a pitch of salt and pepper and pow! Fancy, sexy, delicious salad.
 I was cleaning my spice shelf (I feel like I do this like once a week) and found some poppy seeds hiding behind some jars. Accidental spice findings happened more often the then one might think in my house.. I like to buy tiny baggies of spices with good intentions of using them, but because of their tiny size, I often lose them or forget about them due to that tininess. But I usually find those tiny little bags, and when I find them, I try to use them right away..(I don’t like having old spices around and no, I will not toss it) And it just so happened that I has a lemon in need of using.. and it was getting close to dinner time. I could wait and make lemon poppy seed cake or muffins, or just start dinner. Then I was like, ” I’ll just make lemon poppy seed pasta.” And so I did. And of course it needed to have lots of garlic and some kind of vegetable to round out the dish, (I know tomatoes are fruit but you know what I mean)
  Start by tuning oven on to 400 degrees. Chopped tomatoes and sprinkle in oil and salt and stick in the oven. Do this first because the rest of the meal only takes about 10 minutes..So fast!!!
 The sauce is pretty much a basic roux…
 Once your pasta is cooked (cook however it says to on package), reserve about a 1/4 cup of pasta water and drain the rest. Add the pasta water and pasta the sauce. (the pasta water helps the sauce and noodles canooddle together)
 And its all mixed up just waiting to be served…and the roasted tomatoes!
 Scooped into a bowl with a scoop of the roasted tomatoes and some chopped chives, served with a couple wedges of lemon..just because.
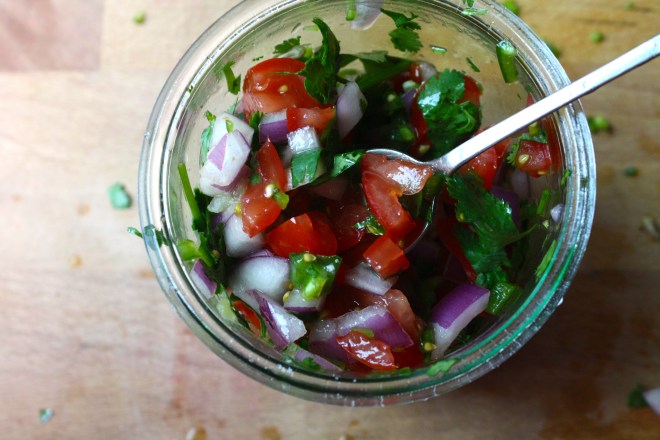 Happy Cinco de Mayo! And what better day to share my version of my oh so fantastic pico de gallo, or as I call it, super freshy salsa.
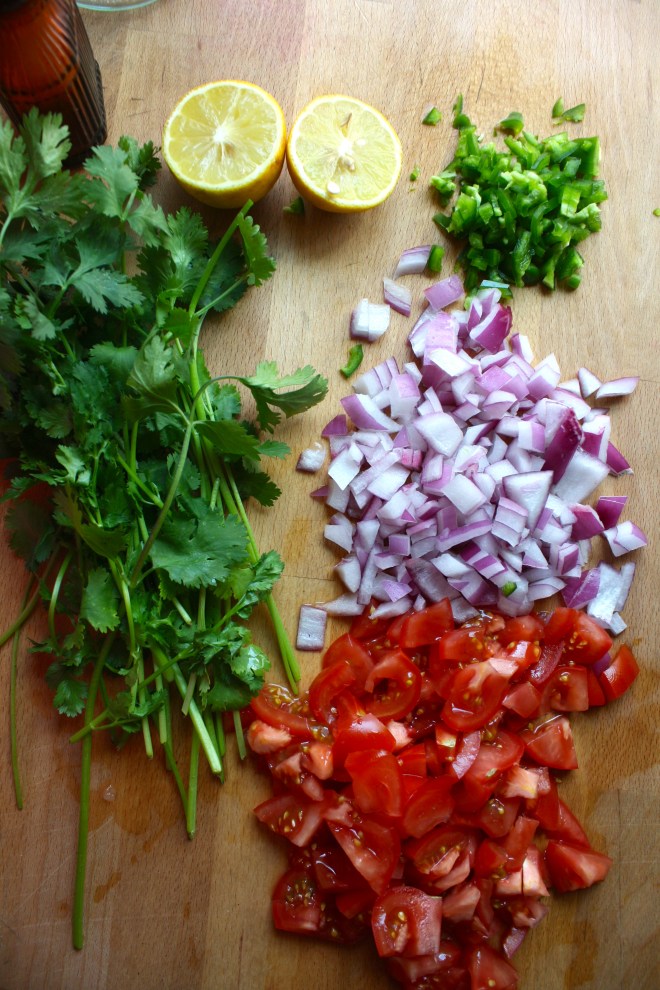 The stuff. Chopped Roma tomatoes, chopped red onion, a diced jalapeño, lemon, a bunch of cilantro, and salt.
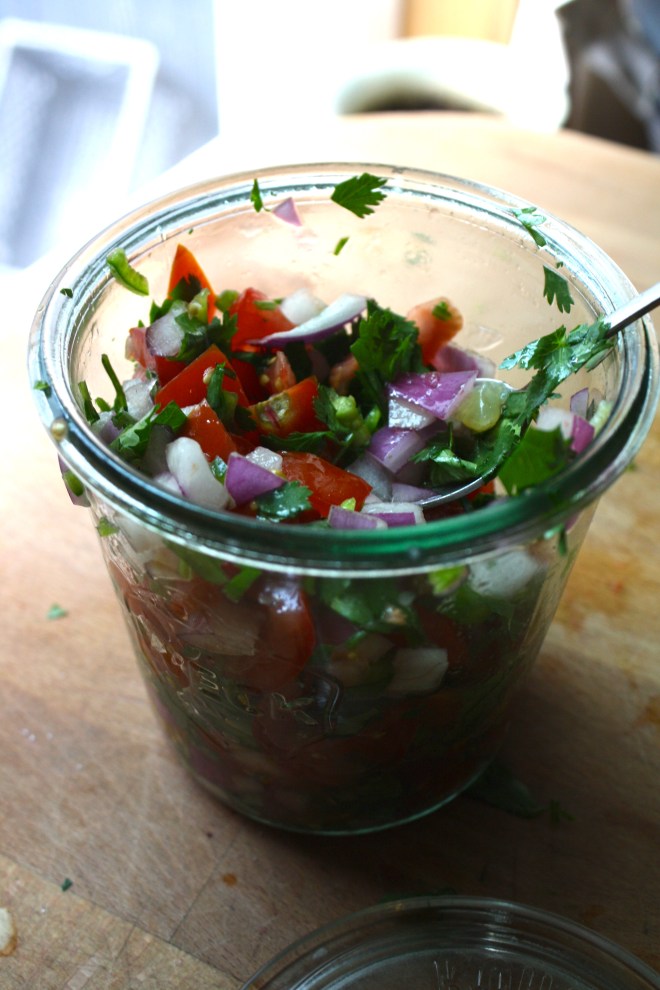 And thats it. Now eat… with something or without.
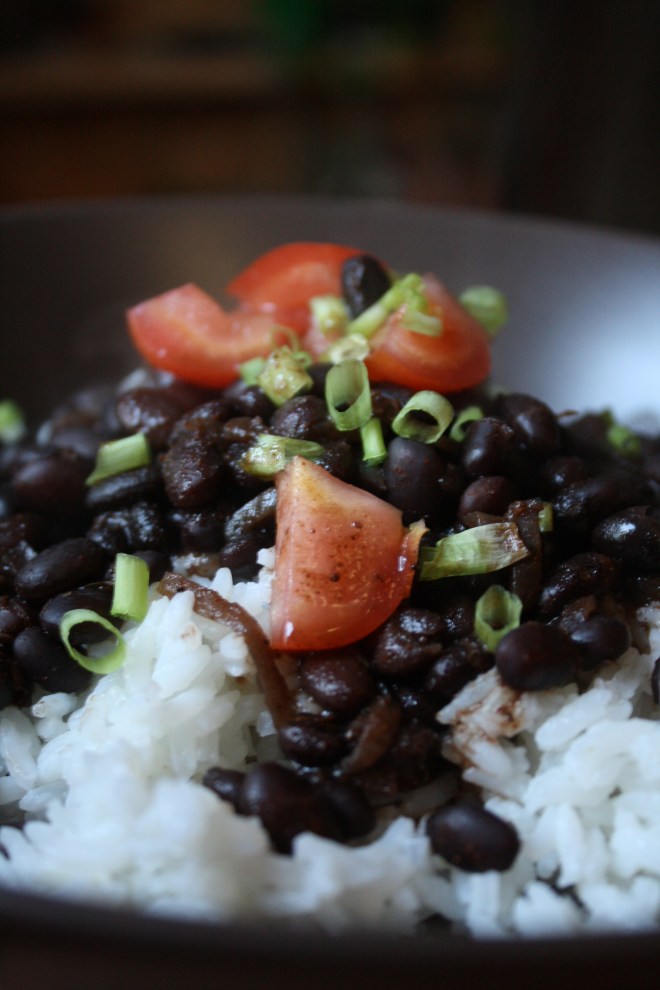 WOO WHOA!! MARDI GRAS! I wish I was down in New Orleans today celebrating… and soaking up some warmth and sunshine, catching beads, maybe even taking my shirt off(?!!?)
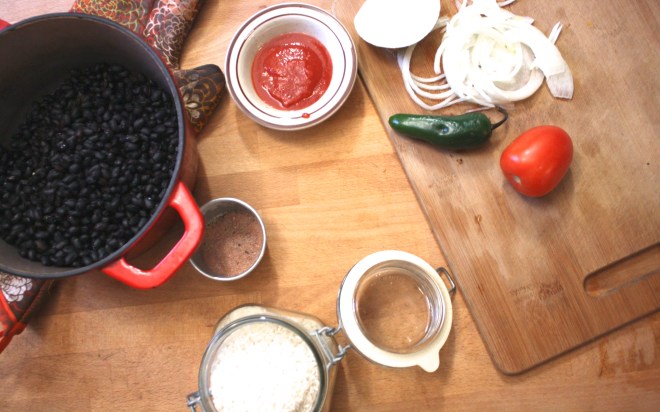
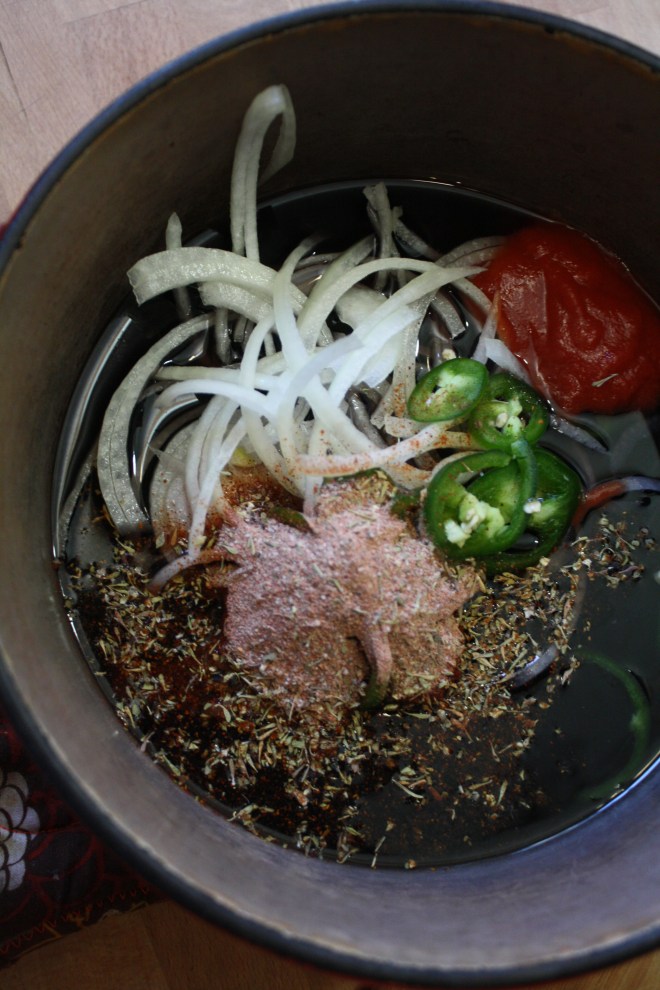
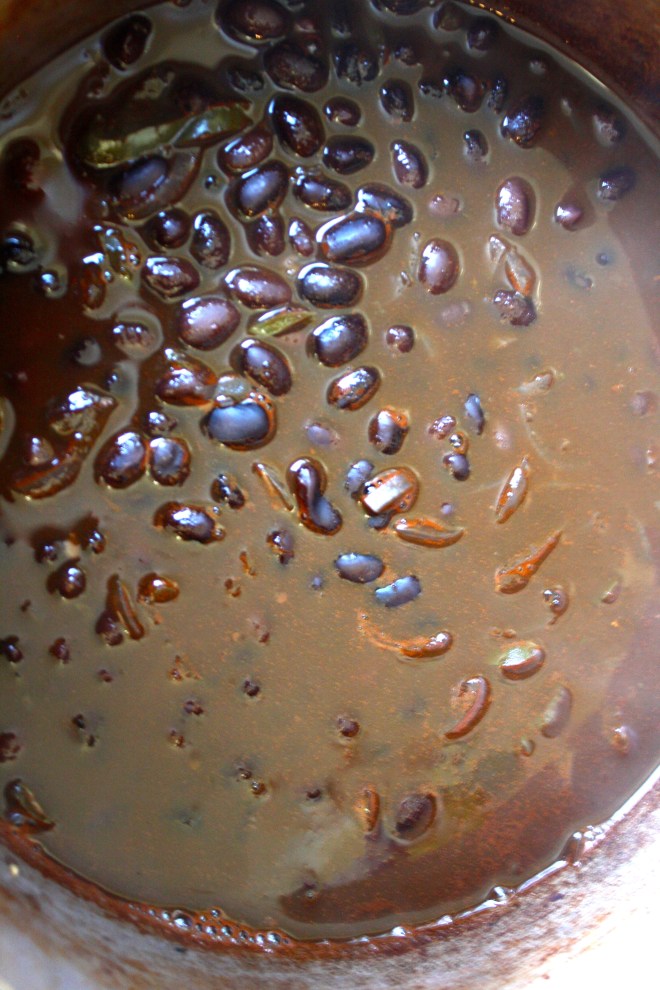 Beans are in a pot filled with water unit beans are completely sumerged. Add in the onion, jalapeño, tomato paste and cajun seasoning. Bring to a boil then cover with a lid and simmer for about 45 minutes….. After about a half hour, start up the rice. Water in pot with rice, bring to a boil, cover and simmer for 15-20 minutes.
  The rice is done and fluffed with at fork. The beans are cooked with just the tiniest bit of bite, bathing in a thick spicy tomatoey sauce. The chunks of onion and jalapeño have broken down and are hiding in every bite…. Oh so good!
 Bringing a little spice and nice to this crazy cold winter day or any fun festivities you may have planned.
  I was informed yesterday that if I was going to make tortilla chips, that I better make some sweet ass dips to go with them. I kind of agree… tortilla chips need dip… or better yet, two dips. Queso and guacamole. It’s what needed to be done, and so I did it.

 Perfect…
 To think that both of these dips took about 10 minutes total to make. (I had pre baked the cauliflower and sweet potato) And for real, I would spend much more time if I had too because both of these dips are so freaking good, I definitely will be making these on the regular.
THE LOVELY CRAZY
September 19, 2015 by maximios • Blog
My contribution to last nights dinner at my sisters…. Freshy fresh veggies spring rolls.I had about 30 minutes between work and getting over to my sisters house to throw something together so it needed to be something fast, easy, and something I could make without going to the store. She was making the main course (some teriyaki situation and rice) so I was doing up the veggies.
I had just bought a package of spring roll wrappers…. Bingo! The perfect and logical choice. I grab the wrappers, a variety of veggies and after spending 12 of my 30 minutes trying to scrub the oil based paint off of my face and hands, I still managed to completely prepare, construct, and take pictures of these lovely tasty spring rolls. and get over to my sisters in time for dinner.
Impressed?
Damn right!
The stuff. Carrot, beet, asparagus, red cabbage, and kohlrabi, which all (except asparagus, which I just cut into thirds) got cut into matchstick sized pieces with my mandoiln. Then there are the rice spring roll wrappers that we need to make the veggies into rolls. Also a bit of red wine vinegar to drizzle onto the veggies for a little extra zing. And lastly, soy, fresh ginger, and a couple cloves of garlic for a spicy salty dipping sauce.Start by having everything set out and ready to assemble. Fill a large shallow dish or baking sheet with really warm water. Working with one at a time,place a rice wrapper into water and let sit for about 10 seconds or until the paper starts to soften. Remove from water and place on a damp surface (just splash a little water on the counter) Take a little bit of everything and and place on the lower middle part of the paper. Fold in the sides first, then tuck and roll the wrapper as tightly as you can without ripping the wrapper.
Repeat until you have used up all you veggies.For the dipping sauce. Finely grate ginger and garlic and add to soy sauce. Stir… and it’s done.Freshy, pretty and fantastically delicious. And for real, took about 8 minutes to make. (I even had enough time to wash the dishes before we left!)
I am so awesome!
Hump Day Pow!!!!!
-C
Fresh Veggies Spring Rolls
Makes 8-10 but can easily be increased or decreased to desired amount
Note… I used the veggies that I had in the fridge at the moment. If you have a bunch of veggies but not these particular ones, use what you have. Pretty much all veggies taste good inside a spring roll!
Gather your veggies and prep by either using a mandolin, a grater, or some sick knife skills, and julienne, shred, or slice you veggies into thin match sticks. Once all the veggies are prepared, sprinkle a little vinegar over the top.
For the rolls…Grab a large shallow vessel (a rimmed baking sheet works great) and add in warm water. Working one at a time, place the wrapper into the water for about 10 seconds or until the wrapper starts to soften. Remove and spread onto a clean, damp work surface. Gather a bit of each veggie that you are adding and place towards the bottom middle of the wrapper. Now fold the sides in over the pile of veggies. Then with the side closest to you, tuck and roll wrapper away from you, trying to keep it tight, but not to tight that it rips.. (Hopefully that makes since.) Place finished rolls onto a damp surface to keep from sticking and if not serving right away, drape with a damp towel or paper towel to keep from drying out.
For the soy ginger dipping sauce. Add grated ginger, minced garlic, and soy into a bowl and mix together. Serve with spring rolls.
Eat one, two, or a plateful. It’s nice to share but not a necessity.