alz-il.net
  • Home
  • Blog
  • YouTube
  • TikTok
  • Instagram
RSS

THE LOVELY CRAZY

January 26, 2020 by maximios • Blog

A couple of days ago, during a grocery store porous, I stumbles upon a produce item that I have not seen sold in stores before, Broccoli leaf. And I was kind of surprised  to see that they were selling bunches of the leaf,  organic,  at 2 bucks a bunch. I was very excited ! But wait.. You can eat broccoli leaves? Heck yes you can! Broccoli leaves  are fantastic. They taste kind of like broccoli, have a hearty texture like a collard, and can be used raw or cooked just like any other green. Its just one more super yummy green to add to your repertoire.  So when I bring home something that I find to be a good score, like a bunch of broccoli leaves, I feel like I have to share it with the mister. (I am so nice) And this dish was how I shared them…. Tossed into a bowl of garlic raging pasta. The stuff…. A bunch of broccoli leaves, lots of garlic, pasta, olive oil, salt and a lemon. Pretty simple right? Fist off, get your water boiling for the pasta. Once its ready, drop a pinch of salt into the water and stick pasta in for the amount of time recommend by pasta box people. While the pasta is boiling, mince up the garlic (I used my garlic press) into a skillet and add in the oil.  Stick on a burner on medium for a few minutes, stirring around to make sure the garlic doesn’t stick and burn.      Once you start to smell the garlic, turn heat onto low, chop up the broccoli leaves (stems and all)  and stir around until wilted and add in the juice of half a the lemon.When the pasta is cooked, remove a few tablespoons of starchy water and  strain the noodles. Add water and pasta right into the skillet with the other stuff.  Toss around, taste, season with salt and pepper.  Go ahead and add some chopped tomato and or parmesan cheese if you want.  And serve your amazingly amazing pasta.  And make sure that you are ok with really smelly garlic breath…Casue it’s going to happen. Keep it good! -C

Broccoli Leaf and Garlic Noodles

  • 1 bunch fresh broccoli leaves (about 3 cups chopped)
  • 2 servings of your favorite pasta (spaghetti, penne, vegan, gluten free…..)
  • 8 or so fresh garlic cloves
  • 1/4 cup olive oil
  • salt and pepper
  • lemon (optional)
  • parmesan cheese (optional)

Start by bringing a pot of water to a boil with a pinch of salt. Add in pasta and cook per instructions on box. While pasta is cooking, mined garlic and add to a skillet with the oil. Place on a burner on medium heat and cook and stir until the garlic becomes fragrant. Chop the broccoli leaves (stems and all) into bit sized pieces and add to the garlic oil and toss around to wilt the leaves. Squeeze in some lemon juice. Once the pasta is done cooking, remove a few tablespoons of the starchy water and strain the pasta. Add the water and the noodles to the skillet, toss to evenly coat the pasta and call it down. Serve in a bowl or on a plate, topped with freshly chopped tomatoes and parmesan cheese if you so shall please and another little squeeze of lemon juice if you like. Watch your mouth.. it will be breathing out garlic like whoa. 

THE LOVELY CRAZY

January 26, 2020 by maximios • Blog

Let%u2019s talk about how soup is the perfect food. It can be light and fresh, hearty and deep, chunky or smooth. You can eat it with a spoon, or somtime a fork if warranted, or just drink it from a mug. It%u2019s usually a one pot meal, a small pot for one, a big pot for many. Make a pot of soup and eat some now and save some for later. It freezes amazingly well. Got a few extra sad carrots and wilted greens? Toss them into a pot with whatever you have on hand, maybe those veggies scraps and you got yourself a meal. Want something more filling, just add in some grains. Feeling sick, warm soup will make it all better. Feeling fresh and springy, well soup is there for you too. Seriously soup, you can do anything. If I could, I would marry you. %u2665%ufe0f

This soup is one of this velvety smooth, light but rich, delicious beyond delicious soups. A fresh spring time soup. Not to hearty or heavily spiced. Super rich and creamy and flavorful. Bright ass green which makes it amazing in itself, but then with a nice tangy sumac tahini swirl on top, well it is just about the most perfect soup. I made to share, which I did, (and everyone licked their bowls clean) but then hoarded the little bit left over and ate it cold for a late afternoon snack. That is another thing about soup, you can eat is cold and it is still amazing.

Tasty and delicious, and nutritious. This soup does it all.

To the soup!

The stuff. Peas, chopped broccoli, and chopped cauliflower which are all frozen and slightly thawed. You can totally use fresh here too, but I just so happen to have it frozen so you might as well save the fresh stuff for fresh eating. Also have a big yellow onion, a few cloves garlic, some tahini, a lemon, sumac, and salt and pepper. You need water which I did not picture here.

A pot, some water and a roughly chopped onion and the garlic start off this soup. Bring the pot to a boil, then turn to medium and let the onion and garlic cook until very tender. I have been making a lot of soups starting with this step lately. Boiling the onion and garlic until tender and fragrant really make for a super flavorful and clean soup base. Or soup in itself.

Now add in the broccoli and cauliflower to the pot and cook until tender.

Mid soup cooking time is a good time to make the sumac tahini sauce for the swirl. Basics here, just mix the tahini, the sumac, a pinch of salt and pepper, the juice of the lemon and a tablespoon of warm water together until smooth.

Last but not least, the peas. Add them in and they just need a few minutes to cook through.
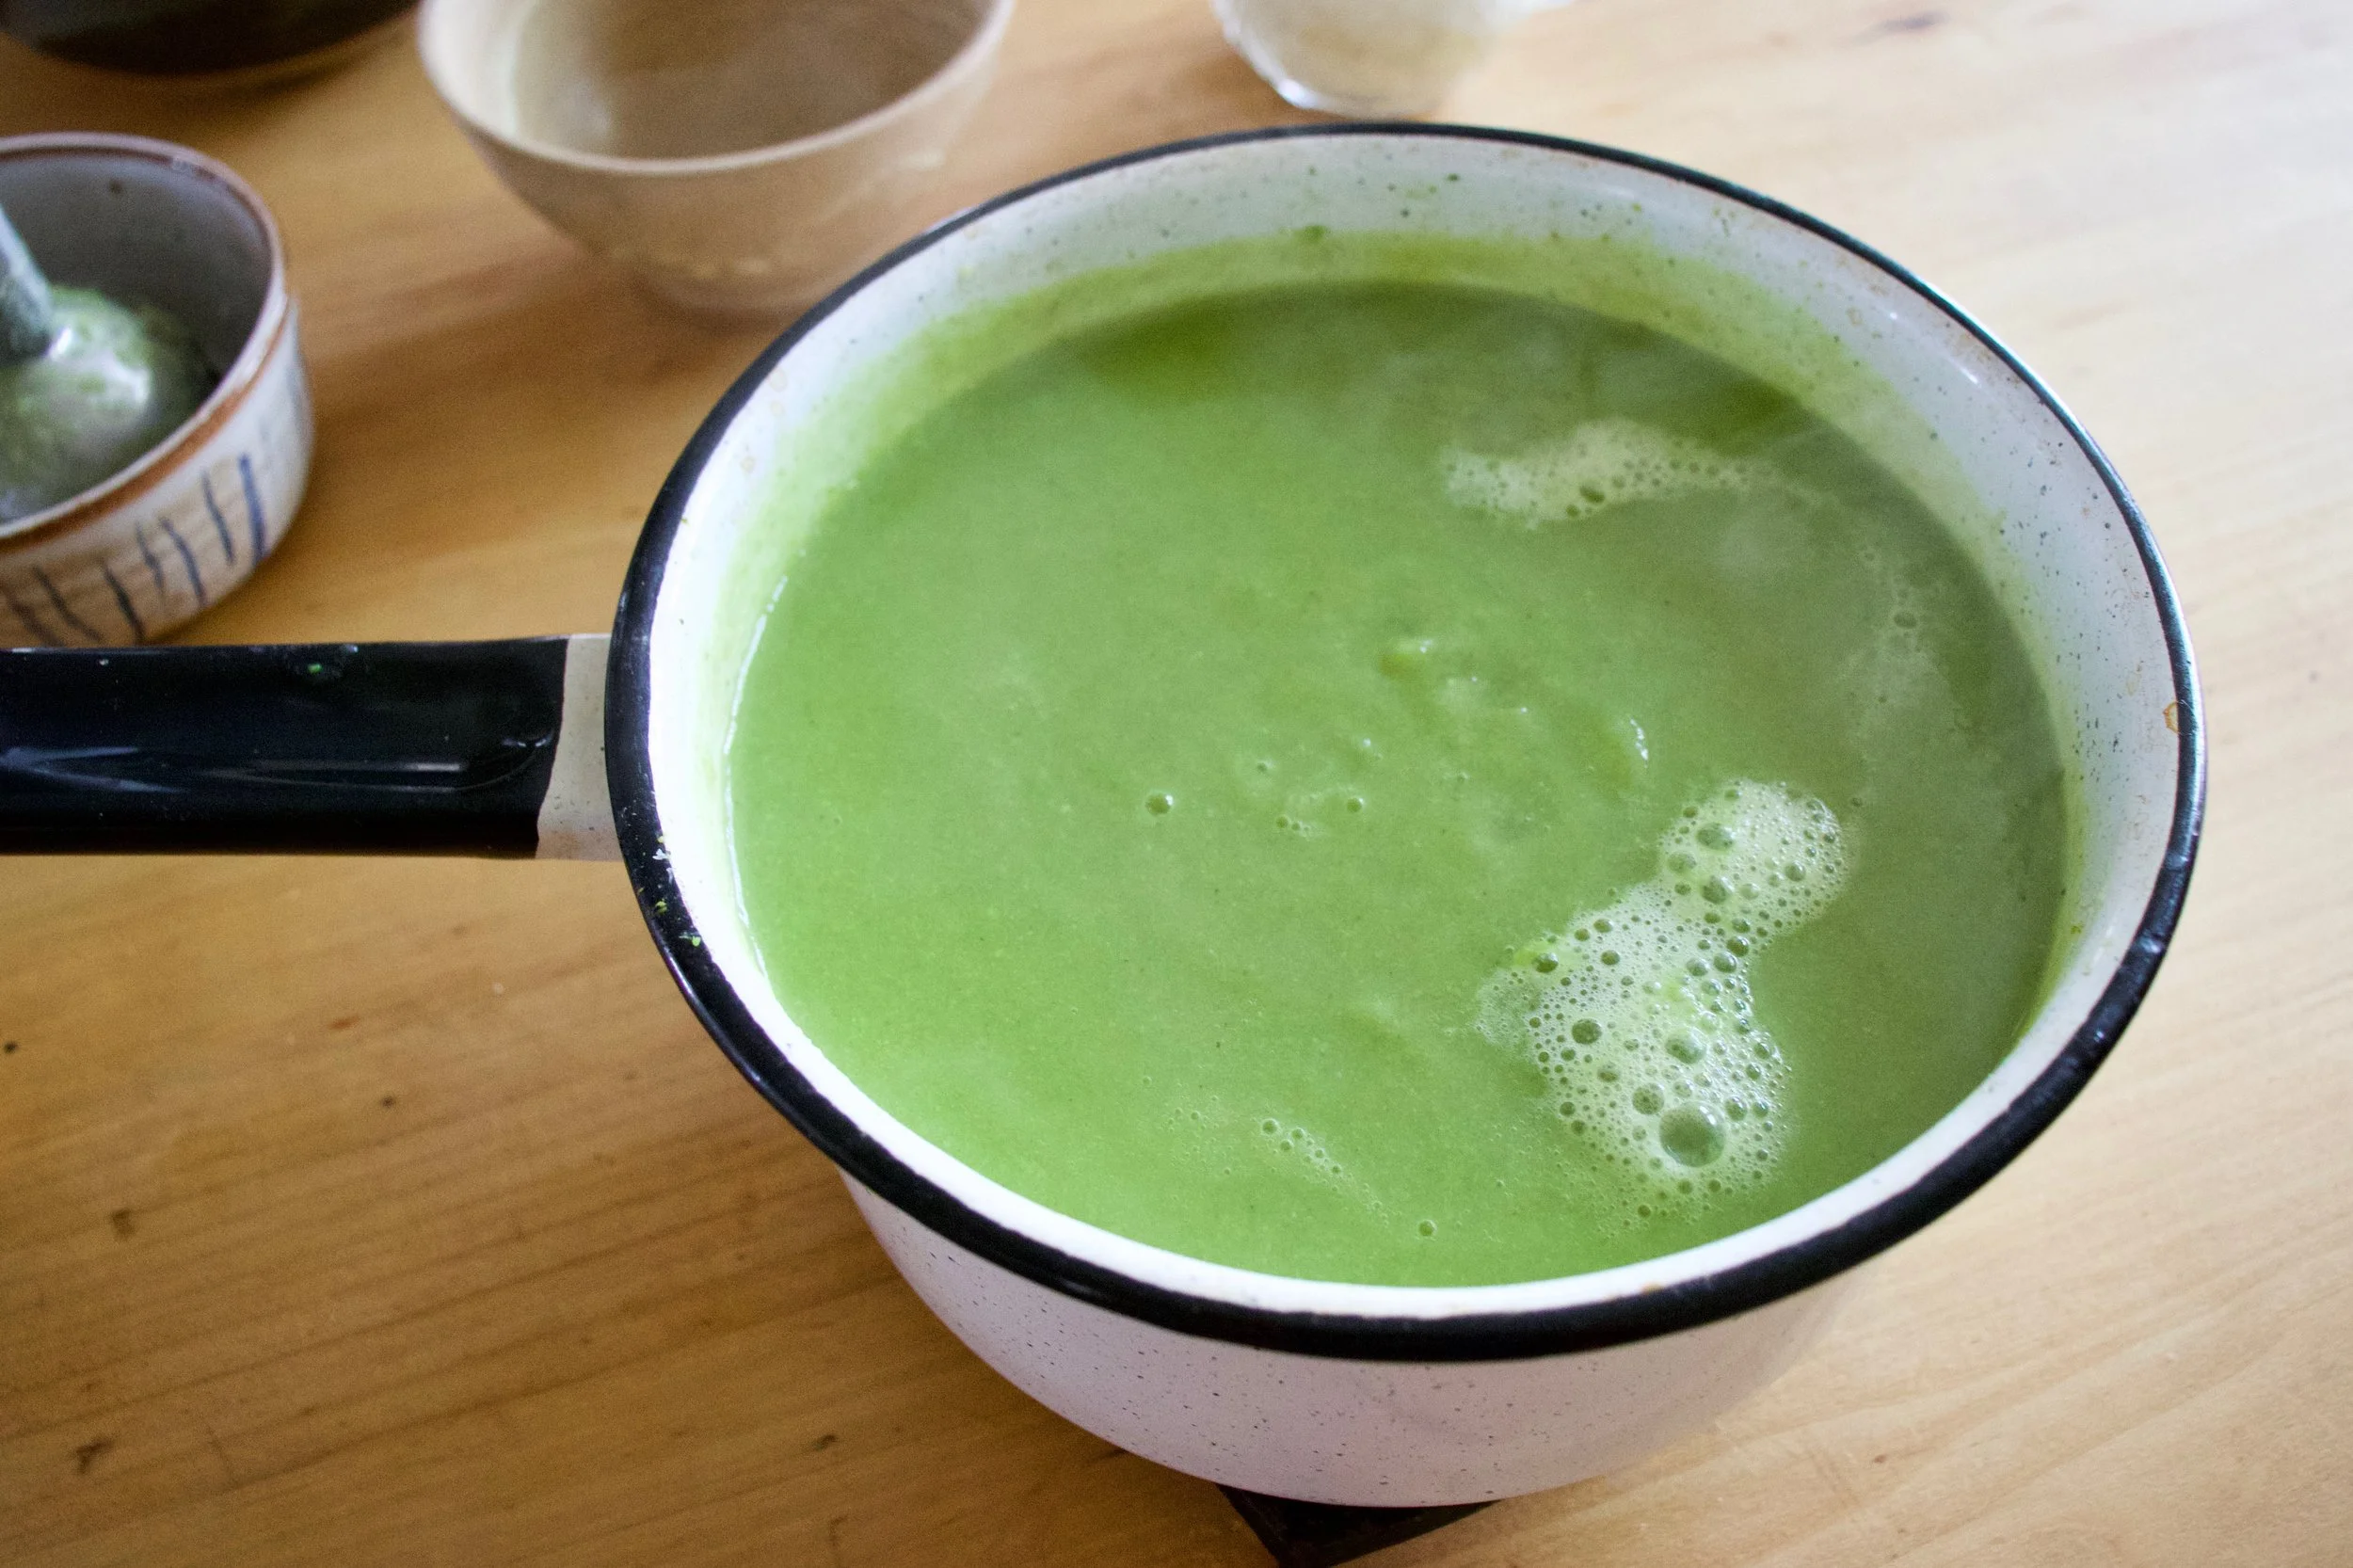
And then it all gets blended to become this green creamy goodness.
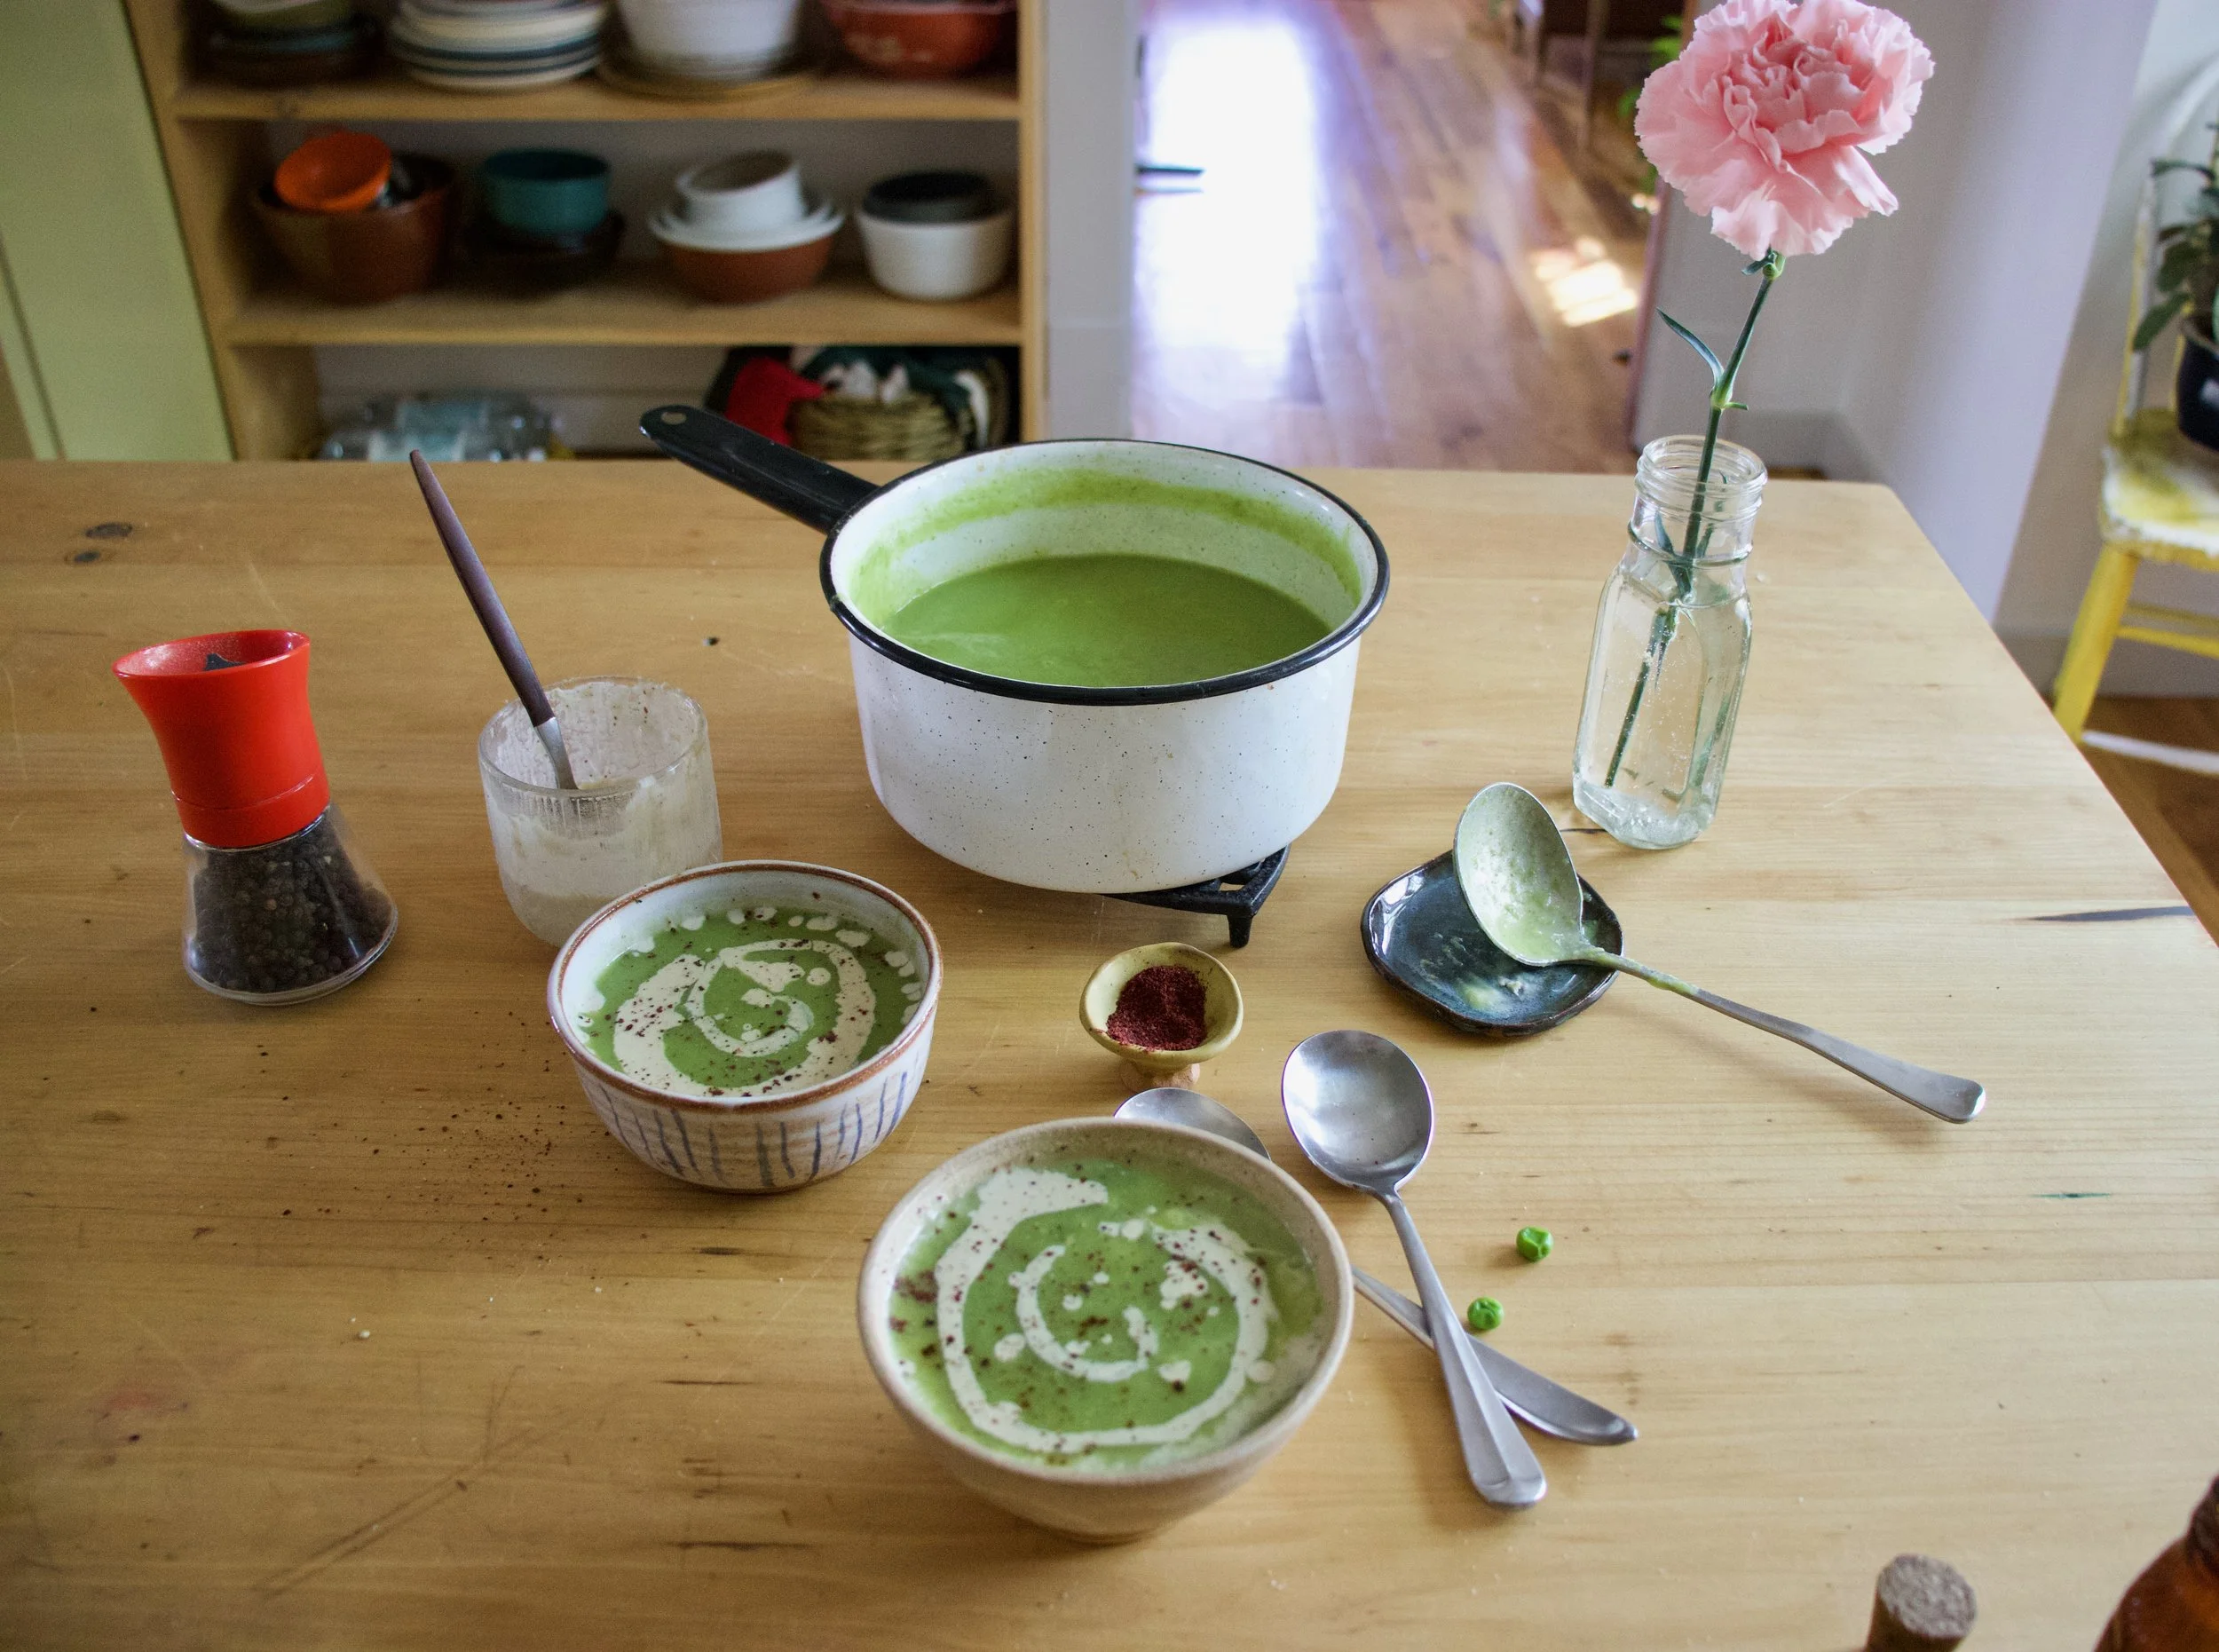
Ladle into bowls, grab the sumac tahini sauce and swirl it on in. A tablespoon or so is good. And don%u2019t forget a little more pepper and another pinch of sumac for good measure.
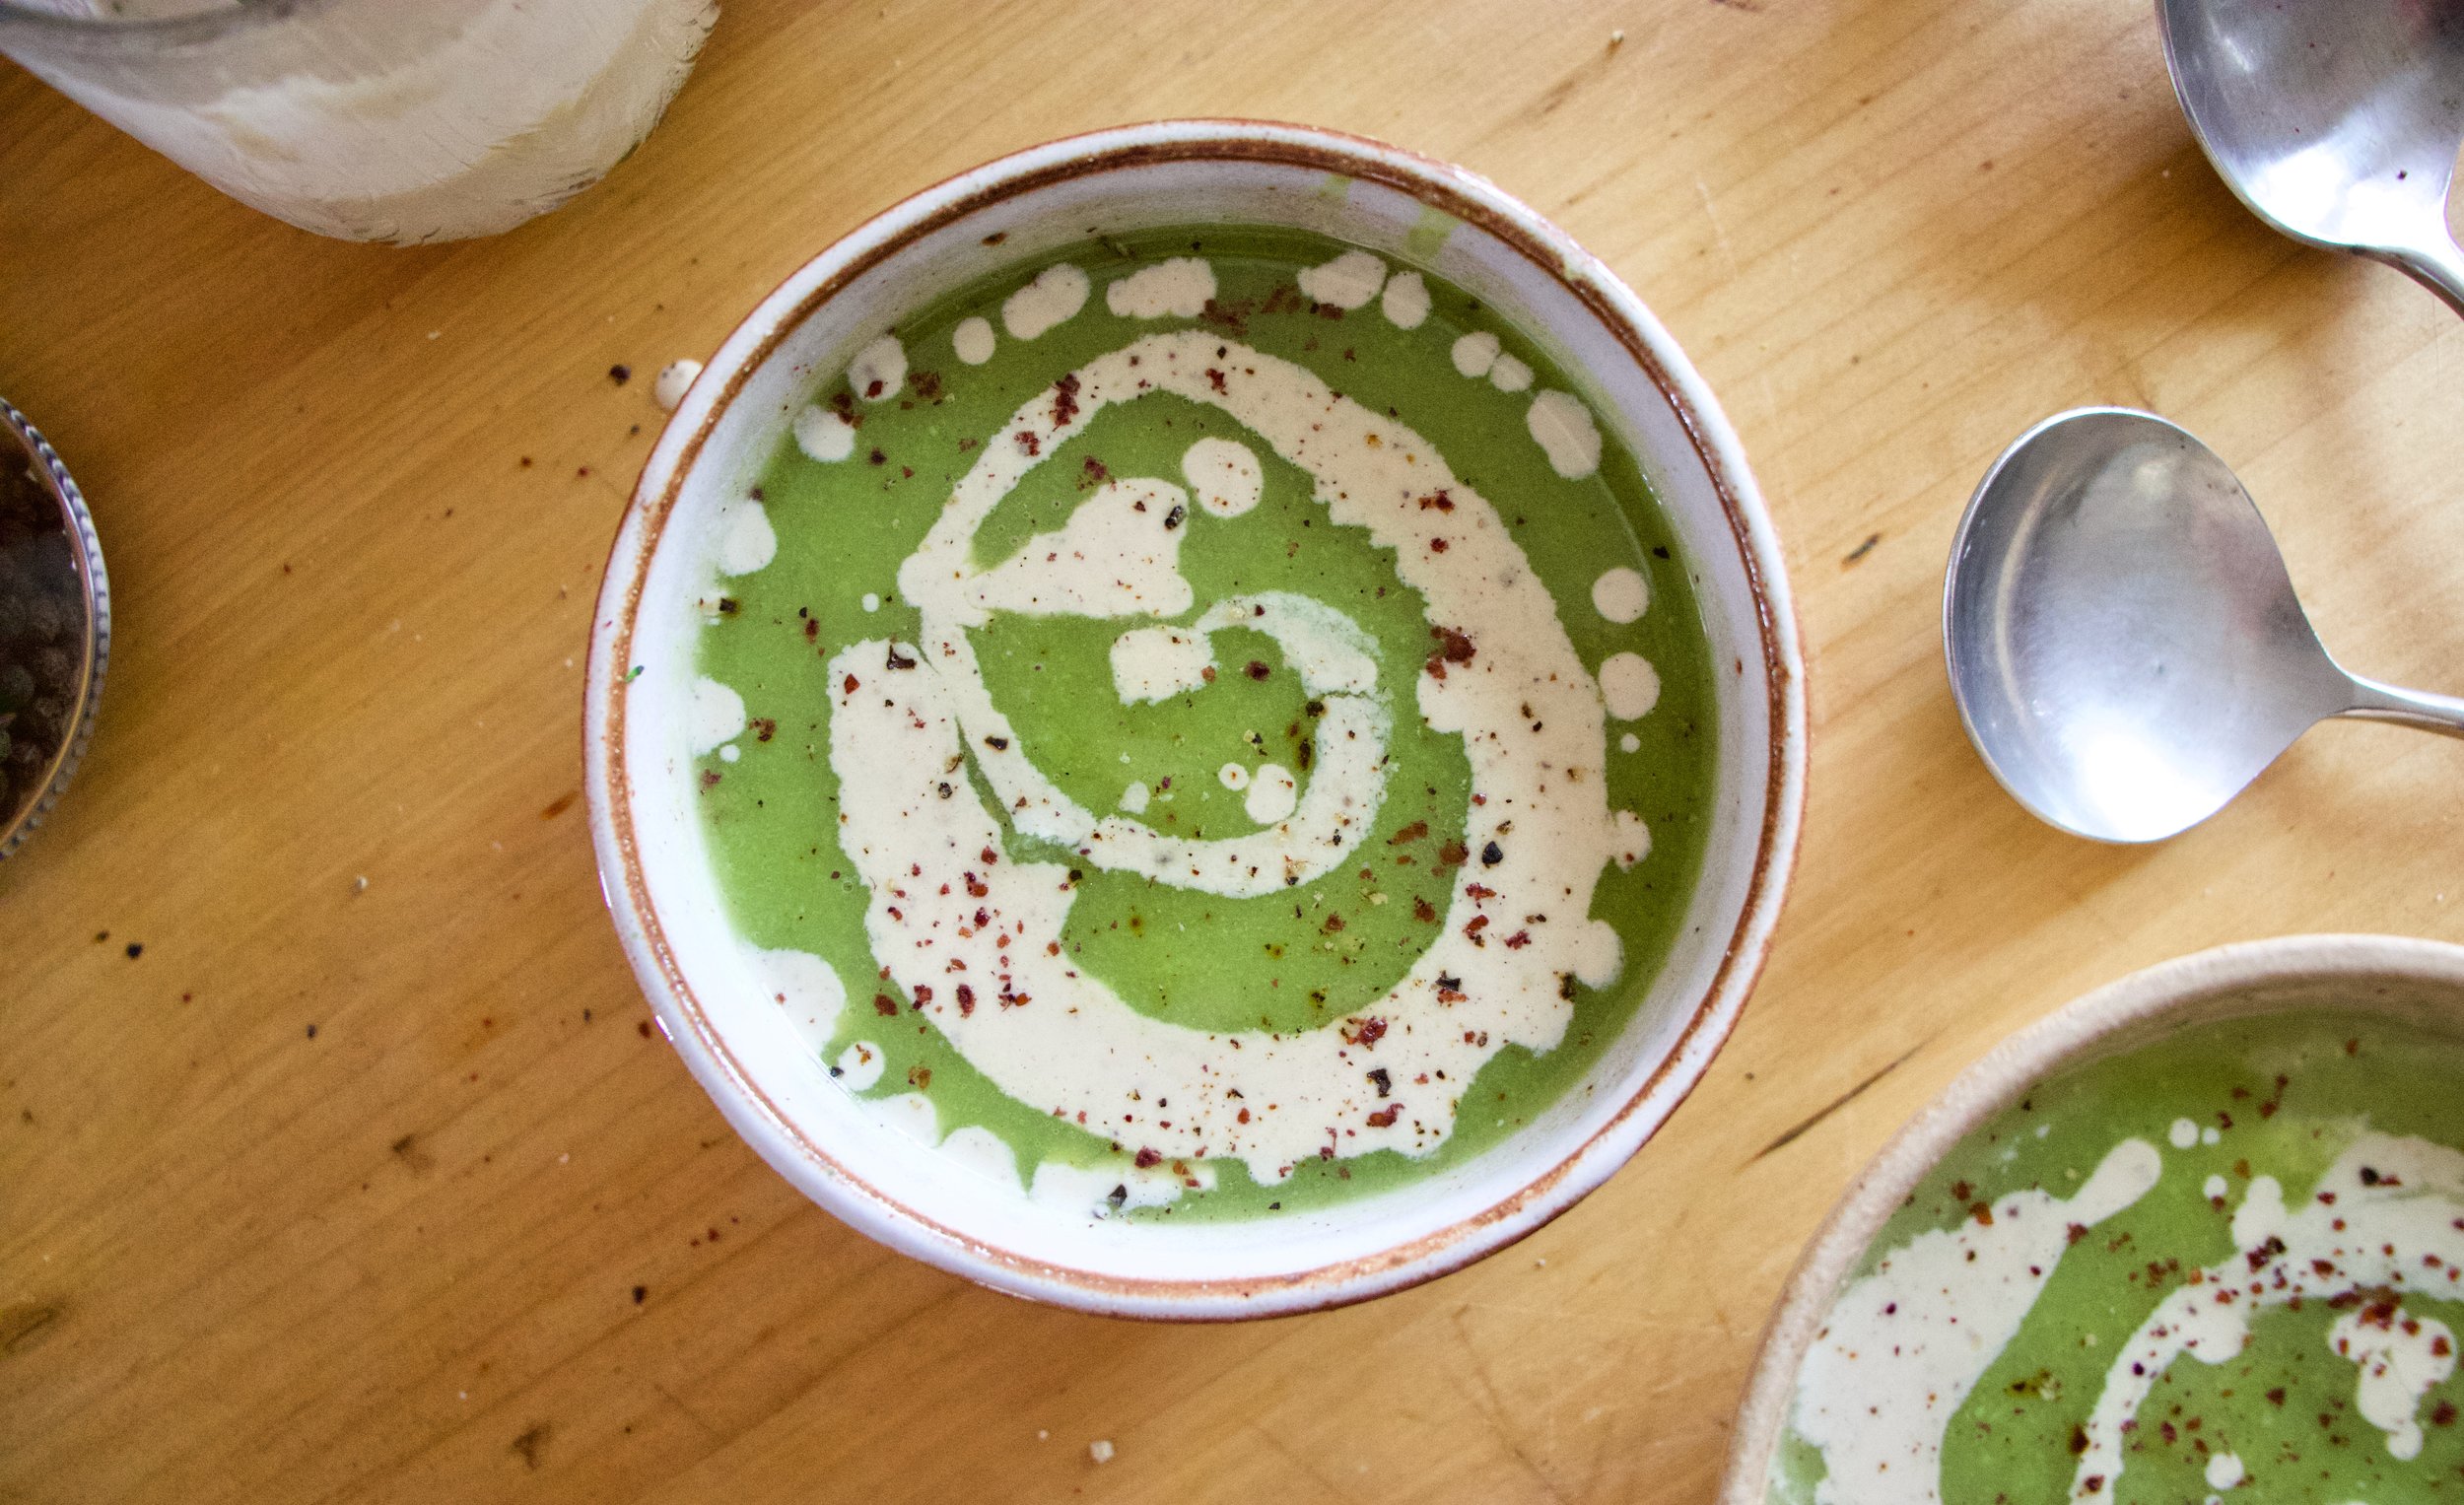
Just appreciate for a moment. That is one good looking bowl of soup. And it taste even better then it looks.

-C

Makes about 4 serving

  • 1 1/2 cups fresh or frozen peas

  • 1 1/2 cup chopped fresh or frozen cauliflower

  • 1 1/2 cup chopped fresh or frozen broccoli

  • 1 large onion

  • 3-4 cloves garlic

  • 4-5 cups water

  • Salt and pepper

  • 1 teaspoon sumac

  • 2 tablespoons tahini

  • 2-4 tablespoons warm water

Start by removing the papery skin from the onion and chop into a few big chunks. Remove the skin from garlic too. Place into pot with 4 cups water. Turn heat on high and bring to a boil then turn heat to medium and let onion are garlic cook until tender which should take about 15-20 minutes

Once the onion is cooked, add in the broccoli and cauliflower. Turn heat back to high and bring to a boil again then turn back down to medium heat. Keep cooking until tender (another 15 minutes or so) then add in the peas. Keep on heat until peas are cooked through then remove the pot from heat and either transfer to a blender or use a immusrian blender to blend the soup until smooth. Add a little more water if needed to get to the right consistency to blend right. Or if you want a thinner soup.

For the tahini sumac swirl just mix the tahini and sumac together along with the juice of the lemon, two tablespoon warm water and a pinch of salt. Mix together until smooth. If the mixture is to thick, add another tablespoon of water.

To serve. Ladle or pour soup into bowls and drizzle and swirl the tahini sumac on top. Sprinkle with pepper and a pinch more sumac and you are good to go.

Pineapples have been on sale all week long. I think it’s because Easter and I guess people need pineapples for Easter for some reason. Does Pineapple have anything to do with bunnies or Jesus? I think not. Pretty sure it has something to do with cake or ham or some shit, but I honestly don’t care because I just like the fact that I can buy a few (like 3)%u00a0pineapples without breaking the bank.%u00a0(I think I am going to buy 3 more for the dehydrator) Plus it is always good to have a pineapple or 3 on the counter at home. You never know when you are going to need one.%u00a0So lets give a shout out to the Easter bunny and %u00a0Jesus. Thanks for the cheap pineapples.%u00a0%u00a0HA!

So now you are have those pineapples, you are going want to eat them. And maybe you don’t want to eat them with cake or ham or some shit. You are going to want to eat it the best way…In a stir fry.%u00a0

This is by far one of my favorite stir fry combinations. Pineapple does amazing things when cooked a bit, especially with soy, broccoli,%u00a0and tofu. This dish definitely let’s pineapple reach it’s full pineapple potential. It is so good that tI think I might even prefer my pineapple cooked along with savory stuff. It is just so right and seriously so freaking good. The mr even get excited for it and he is not the excitable kind of guy.%u00a0Plus it’s fast (especially if you have already cut up your pineapple) and easy because stir fry and that’s what stir fries are. Fast and easy, just like……….(insert your favorite fast and easy person and then chuckle)

And don’t try to use canned pineapple because no.%u00a0%u00a0Just get the fresh one,even if it’s not on sale.%u00a0It’s a must.%u00a0

The stuff. A pineapple (you are only going to need 1/3 of this, but you can never have too much fresh pineapple on hand), a big head of broccoli, a little cabbage, and some firm tofu. %u00a0Also need some soy, a few cloves of garlic, a little fresh ginger, a bit of oil, and pepper.%u00a0

Dice up the tofu into cubes and place on a clean dish towel to absorb some moisture.%u00a0

Grab the fresh pineapple. Cut it up the way you do, but the easiest way %u00a0for me is to cut in half the cut that half into fourths then cut the skin away. You are going to have a lot of extra pineapple so snack as you need too. I always eat like half of what I am cutting up and end up with pineapple gut. SO maybe watch yourself.%u00a0%u00a0

Pour some soy into a cup and mince the garlic and ginger.%u00a0

Garlic, ginger, soy. Looking good.

Cut up about 2ish (or more if you want) pineapple into small mouth sized pieces. Break Broccoli head into small florets and shredded the cabbage.%u00a0

Tofu into a lightly oiled hot skillet with a splash of soy, cooked until a nice crisp brown on all sides.%u00a0%u00a0Once it is cooked, remove from pan and set aside.

It’s the broccolis turn. Add in the florets and a splash of water to start cooking down for a few minutes, it need the head start.%u00a0

Once the broccoli turns bright green and is slightly less raw, add in the pineapple and cook until the broccoli is slightly tender and the pineapple starts to caramalize which will take about 5-7 minutes.%u00a0

Add the tofu back in along with the shredded cabbage and dump the soy ginger garlic mixture all over.. Keep cooking and stirring around until everything is hot and the liquid has mostly been absorbed.%u00a0

That’s some stir fry ladies and gentlemen.%u00a0

You might want some rice to accompany your stir fry so think about it and have it ready. Other then that, it’s food to face time.%u00a0

Enjoy the best stir fry ever.%u00a0

Bye.

-C

serves 2

  • 1/3 of a fresh pineapple (about 2 cups cubed)
  • 1/2 %u00a0block firm tofu
  • a large head of broccoli (about 2 1/2-3 cups of florets)
  • 1/4 head of red or green cabbage (about a cup shredded)
  • 2-3 cloves garlic
  • 3 tablespoons soy or tamari
  • 1 tablespoon freshly grated ginger
  • pepper
  • Cooked rice to serve with (Optional)

Cube tofu into 1 inch pieces and either place on a dry towel to absorb the moisture or place the tofu into the microwave and heat for 2 minutes. When you take it out of the microwave there will be a lot of liquid…pour it off and pat the tofu dry.%u00a0

Cube fresh pineapple into similar sized pieces and break broccoli into small florets. Shred cabbage.%u00a0

Mince garlic and add to a bowl or jar with the grated ginger and soy sauce.%u00a0

Place a large skillet on the stove an medium heat. Drizzle in a little olive oil. Once oil is hot, place the tofu in with a splash of soy, cooking until all sides are a nice dark browned. Remove the tofu from pan and add the in the broccoli. Add a splash of water and cook for 5 minutes. Then add in the pineapple and cook for another 5-7 minutes or until the pineapple starts to caramelize and the broccoli os no longer raw.%u00a0%u00a0Add the tofu back in along with the shredded cabbage and pour the soy garlic ginger mixture all over. Sprinkle with pepper to taste.%u00a0Cook for another 5 minutes or until the liquid has cooked down.%u00a0

Serve with rice or quinoa and extra soy if needed.

A couple of days ago, during a grocery store porous, I stumbles upon a produce item that I have not seen sold in stores before, Broccoli leaf. And I%u00a0was kind of surprised %u00a0to see that they were selling bunches of the leaf, %u00a0organic, %u00a0at 2 bucks a bunch.%u00a0I was very excited ! But wait.. You can eat broccoli leaves? Heck yes you can! Broccoli leaves %u00a0are fantastic. They taste kind of like broccoli, have a hearty texture like a collard, and can be used raw or cooked just like any other green. Its just one more super yummy green to add to your repertoire.%u00a0 So when I bring home something that I find to be a good score, like a bunch of broccoli leaves, I feel like I have to share it with the mister. (I am so nice) And this dish was how I shared them%u2026. Tossed into a bowl of garlic raging pasta. The stuff%u2026. A bunch of broccoli leaves, lots of garlic, pasta, olive oil, salt and a lemon. Pretty simple right? Fist off, get your water boiling for the pasta. Once its ready, drop a pinch of salt into the water and stick pasta in for the amount of time recommend by pasta box people. While the pasta is boiling, mince up the garlic (I used my garlic press) into a skillet and add in the oil. %u00a0Stick on a burner on medium for a few minutes, stirring around to make sure the garlic doesn’t stick and burn.%u00a0 %u00a0 %u00a0%u00a0Once you start to smell the garlic, turn heat onto low, chop up the broccoli leaves (stems and all) %u00a0and stir around until wilted and add in the juice of half a the lemon.When the pasta is cooked, remove a few tablespoons of starchy water and %u00a0strain the noodles. Add water and pasta right into the skillet with the other stuff. %u00a0Toss around, taste, season with salt and pepper.%u00a0 Go ahead and add some chopped tomato and or parmesan cheese if you want. %u00a0And serve your amazingly amazing pasta. %u00a0And make sure that you are ok with really smelly garlic breath%u2026Casue it’s going to happen. Keep it good! -C

Broccoli Leaf and Garlic Noodles

  • 1 bunch fresh broccoli leaves (about 3 cups chopped)
  • 2 servings of your favorite pasta (spaghetti, penne, vegan, gluten free%u2026..)
  • 8 or so fresh garlic cloves
  • 1/4 cup olive oil
  • salt and%u00a0pepper
  • lemon (optional)
  • parmesan cheese (optional)

Start by bringing a pot of water to a boil with a pinch of salt. Add in pasta and cook per instructions on box. While pasta is cooking, mined garlic and add to a skillet with the oil. Place on a burner on medium heat and cook and stir until the garlic becomes fragrant. Chop the broccoli leaves (stems and all) into bit sized pieces and add to the garlic oil and toss around to wilt the leaves. Squeeze in some lemon juice. Once the pasta is done cooking, remove a few tablespoons of the starchy water and strain the pasta. Add the water and the noodles to the skillet, toss to evenly coat the pasta and call it down. Serve in a bowl or on a plate, topped with freshly chopped tomatoes and parmesan cheese if you so shall please and another little squeeze of lemon juice if you like. Watch your mouth.. it will be breathing out garlic like whoa.%u00a0

Happy Friday!

A simple post for the simplest of soups.%u00a0Minimal ingredients, no fuss, fast to make but can be left all day to simmer%u2026%u2026. And oh so very very good.%u00a0

This has been one of my go to soups this winter. Warming, hardy, comforting%u2026.every kind of soft cozy feeling that I need when I can’t leave my house because it’s so cold out that all I want to do is sit on the couch wrapped up in a blanket, with a book, and eat hot soup. (That’s the my plan for the weekend) But it’s also good for any type of weekend activities you might have%u2026 it’t kind of the perfect soup.

The%u00a0Stuff. A%u00a0medium sized butternut squash, seeded and diced (no need to peel, but go for it if you want) About a pound of broccoli, (fresh or frozen) and a few shallots. Salt, pepper and a few cups of water.%u00a0

Note.. I didn’t add any spices to this batch because I really love the flavor without anything. With that being said, I have made this same soup with sage, rosemary, turmeric, even curry. Almost any flavor works in this soup.%u00a0

%u00a0 %u00a0%u00a0The chopped squash and broccoli go into a big pot with about 2-3 cups of water. Add about a tablespoon of salt and pepper. Lid up the pot and place on medium low heat for about a half hour, or unitl squash and broccoli is%u00a0fork tender. Now blend together with either a emulsion stick blender or place in a blender for 3-5 minutes until completely smooth. Add enough water to keep things moving. Add more water if you want a thinner soup, less for a thicker soup. Season with more salt and pepper to taste. Once blended, place back in pot on simmer until ready to serve.%u00a0

When the soup is simmering, thinly slice the shallots and toss into a pan. Saut%u00e9 until soft and fragrant.%u00a0

%u00a0Finish off with a drizzle of balsamic vinegar and top with the %u00a0saut%u00e9ed shallots.

Soup and a spoon. So simple, so good.

Have a great weekend%u2026..Try and stay warm!

-C

Butternut Broccoli Soup

The Stuff%u00a0

  • 1 medium butternut squash%u00a0
  • 1 pound of broccoli (crown and stem and can use frozen)
  • 4 shallots
  • Balsamic Vinegar
  • salt and pepper

Split squash in half, remove seeds, and dice into chunks. %u00a0Place in big pot. Chop up broccoli and add to pot. (or just add frozen chopped broccoli) Add water until stuff is about half way summered. Place a lid on the pot and cook on medium low heat for about 30 minutes or %u00a0until squash and broccoli are fork tender. Blend together with either a stick blender or place in a blender. Add enough water to keep things moving. Add more water if you want a thinner soup, less for a thicker soup. Add more salt and pepper to taste. Once blended, place back in pot on simmer until ready to serve.%u00a0

When the soup is on simmer, thinly slice the shallots and place in a pan to sautee until soft and fragrant. %u00a0

To serve, ladle soup into bowl, drizzle with balsamic vinegar, and top with saut%u00e9ed shallot.

Eat with a spoon

I usually base my meals on what I know I have for food in the house and what I know needs to be eaten.%u00a0I was a little surprised when muling around in the freezer to find a block of extra firm tofu. (I don’t remember buying). Maybe a tofu fairy left it in there for me, or maybe it has been in there for years and I just am now stumbling upon it. Either way, I found it and it had to be eaten. So I cooked it up, and I cooked it up nice and good. Tofu is a pretty vertical food, being that its basically a flavorless block of protein. It can go sweet or savory, mashed, chopped or blended. Add fresh garlic, any type of sauce %u00a0or even %u00a0peanut butter. (the possibilities are quite endless) %u00a0I was going for a dinner dish so I decided on a simple cubed tofu with lots of ginger and garlic (so good to ward of those winter sicko bugs out there) and baked it up nice and%u00a0crispy with fresh bright green broccoli and soba noodle. %u00a0Quick, easy, tasty and healthy.. I did it again. %u00a0Thanks tofu fairy!

%u00a0%u00a0This noodle dish is super easy to make and take only about a half hour. We start with extra firm tofu, a package of buckwheat soba noodle, a nice big broccoli crown, honey, fresh ginger, garlic and soy sauce. oil for pan and lime for a finish. %u00a0Nothing fancy.%u00a0Dice the tofu into small cubes and place onto a clean dish towel and pat dry%u2026It really helps the tofu suck in more flavor and become nice a and crispy.

%u00a0Tofu get moved into a lightly oiled skillet, %u00a0ready to go into a hot oven. Why baked instead of saut%u00e9ed on the stove? I find that the tofu keeps it shape and crisps up better when baked. But do whatever you want%u2026.. But just bake it.

While the tofu is baking, make up the sauce. Grate about 2 tablespoons of fresh ginger and4 large cloves of garlic into a bowl. Whisk together with 2 tablespoons honey, 1/3 cup %u00a0soy ( tamari or brags aminos works too) and 1/3 cup of warm water. %u00a0Taste it, and if you think it needs more anything, add it. I actually used 6 cloves of garlic, but I really wanted a garlic packed sauce. %u00a0 %u00a0

Oh and start a pot of water to boil noodles in.

%u00a0After 15 ish minutes, give tofu a flip, then after about 25 minutes, the tofu should be nearly done. Remove from the oven and toss in the chopped broccoli and 1/3 cup of the sauce. Its a little watery but thats what you want, it will cook down in the oven. Now stick the skillet goes back into the oven and boil the soba noodle.

%u00a0%u00a0%u00a0Another 10 minutes in the oven and the sauce starts to caramelize and the broccoli is cooked but still nice and crisp. %u00a0Remove skillets from oven and toss in the cooked noodles and the rest of the dressing. Toss and toss and place on a plate, or a bowl, or if your into it, just eat out of the pan. (it happens)

I added a small handful of fresh shopped cabbage to add a bit more crunchy bite. %u00a0I also added a squeeze of lime juice on top for a nice acidic finish. Lemon works and even a slash of vinegar would be nice, but plain is good too. What ever you do, just EAT!%u00a0

A quicky yummy, noodley dinner! %u00a0And leave a little extra for left overs because these noodles are fantastic cold%u2026 think lunch, or a later that night fridge snack.%u00a0

keep it in the reals!

-C

Ginger Soy Tofu and Broccoli Soba Noodles

Ingredients

  • 1 package of extra firm tofu
  • 1 package Soba noodle%u00a0
  • 1 large crown of fresh Broccoli
  • 2 tablespoons grated fresh ginger
  • 3-4 cloves garlic
  • 1/3 cup low sodium soy sauce
  • 1/3 cup water
  • 2 tablespoons honey (or brown sugar for vegan)
  • Lime wedges(Optional)
  • Chopped cabbage(optional)
  • coconut or oil for skillet

Preheat oven to 425

Remove tofu from package, cut into cubes and lay on a clean dish towel and pat dry.%u00a0

Tofu goes into a oiled skillet and placed in oven for 25 minutes. Give tofu a flip after about 15 minutes. While tofu is baking, make the dressing, chop the broccoli and boil water for soba noodles.

For dressing, grate fresh ginger and garlic into a bowl. Whisk together with soy, water and honey (or brown sugar).

When water is at a boil, add soba noodle and cook until done ( about 6-8 minutes..Follow instructions of package)

When tofu has baked for 20 minutes, remove skillet, toss in chopped broccoli and 1/2 cup of soy ginger dressing Return skillet to oven for another 10 minutes or until dressing just starts to caramelize. %u00a0Remove for oven and toss in cooked soba noodles and the rest of dressing. If you want a little more veggie bit, add in some fresh chopped cabbage. Plate and serve with a wedge of lime or lemon or even a sprinkle of red wine vinegar.

Now EAT!

THE LOVELY CRAZY

January 26, 2020 by maximios • Blog

Potatoes in tomatoes. It just has a nice ring to it. And to tell the truth, that is the only reason I made this dish, because it sounds good.

Ok, not really the only reason, but it was the start, that and I have been sitting on some potatoes for a little while and it was time for them to be eaten. Enter in the tomatoes. I figures cooking the potatoes in tomatoes is alike to a ketchup and french fry situation. Not completely the same, but you get the idea. Add in chickpeas for good measure and onion because I wanted to and that is that. Nothing fussy, one pot, easy, hearty, and good.

Also not hurting anyone that these potatoes take a little while to bake. I could have made this dish in a way that made them cook faster (like parboil the potatoes) but I wanted the heat from the oven. It has been pretty freaking dang cold out so I liked having the heat, it adds another dimension to the term comfort food (as in me being comfortable hanging out next a hot oven).

Anyway, nothing too fancy, just all around tasty dish. It is just what you need to bake and eat on any given cold winter day. And it sounds nice too. Just say it aloud. Potatoes in Tomatoes. Right? Now you see, it had to be done.

To the potatoes in tomatoes!

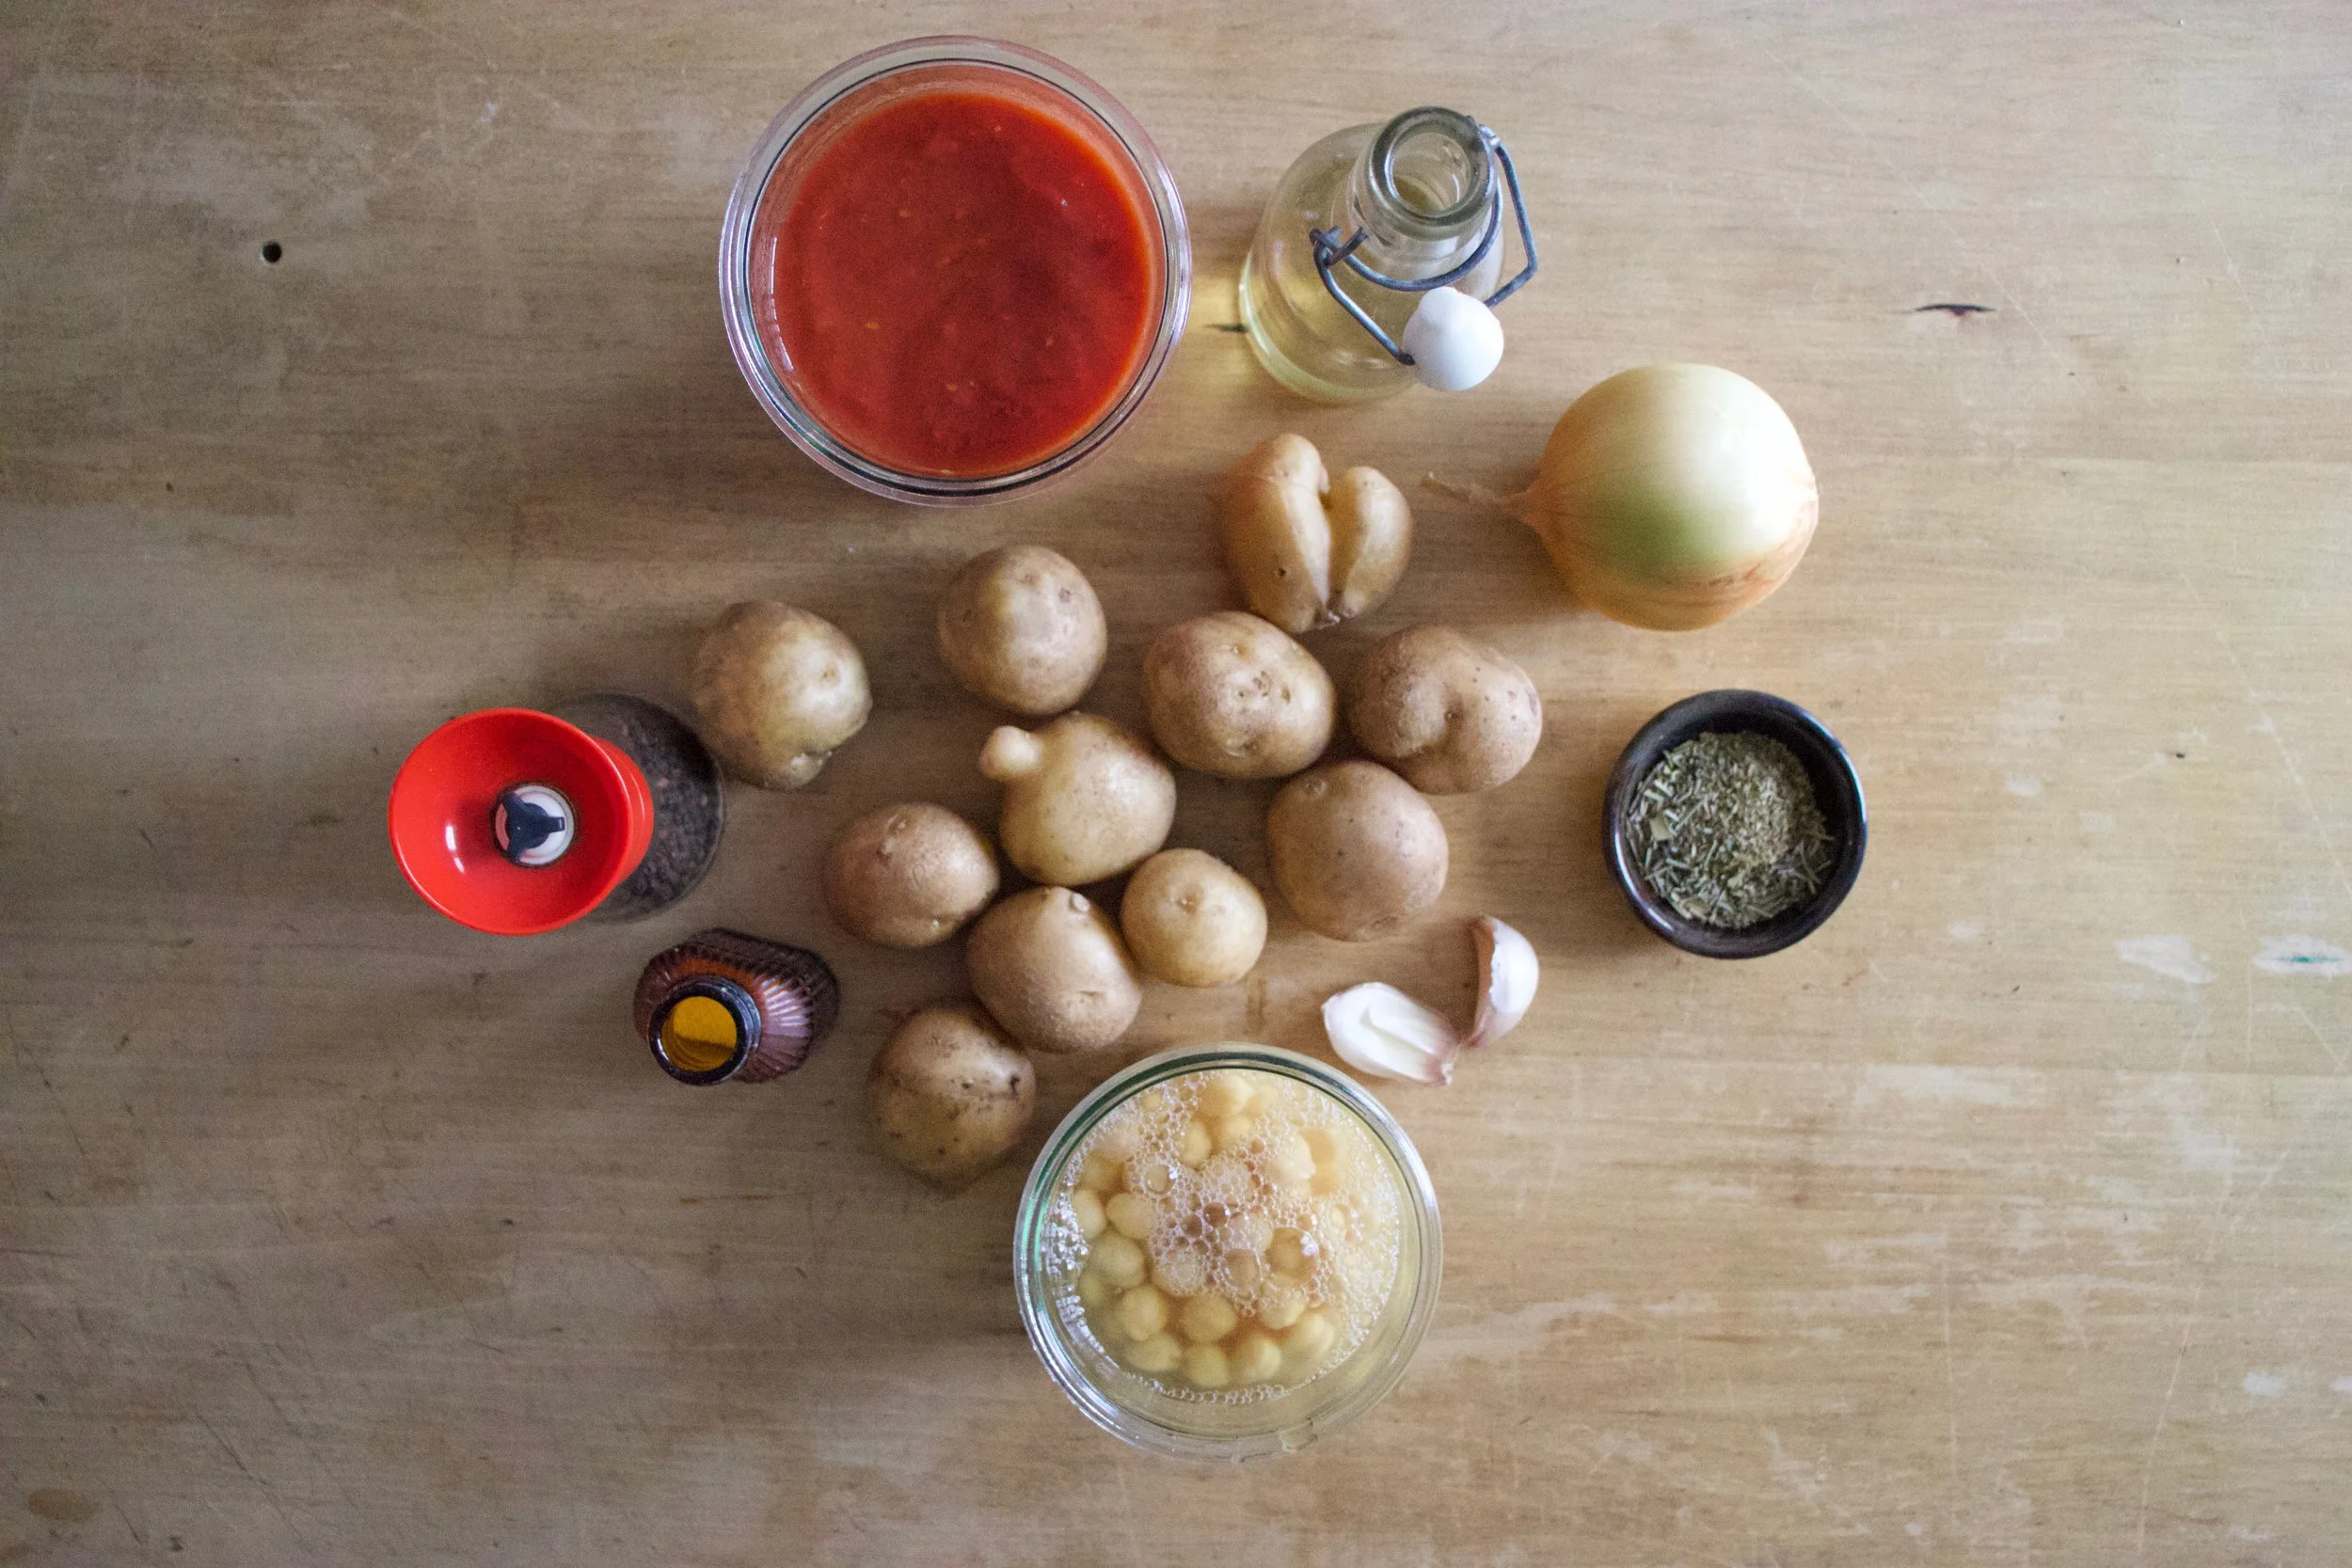
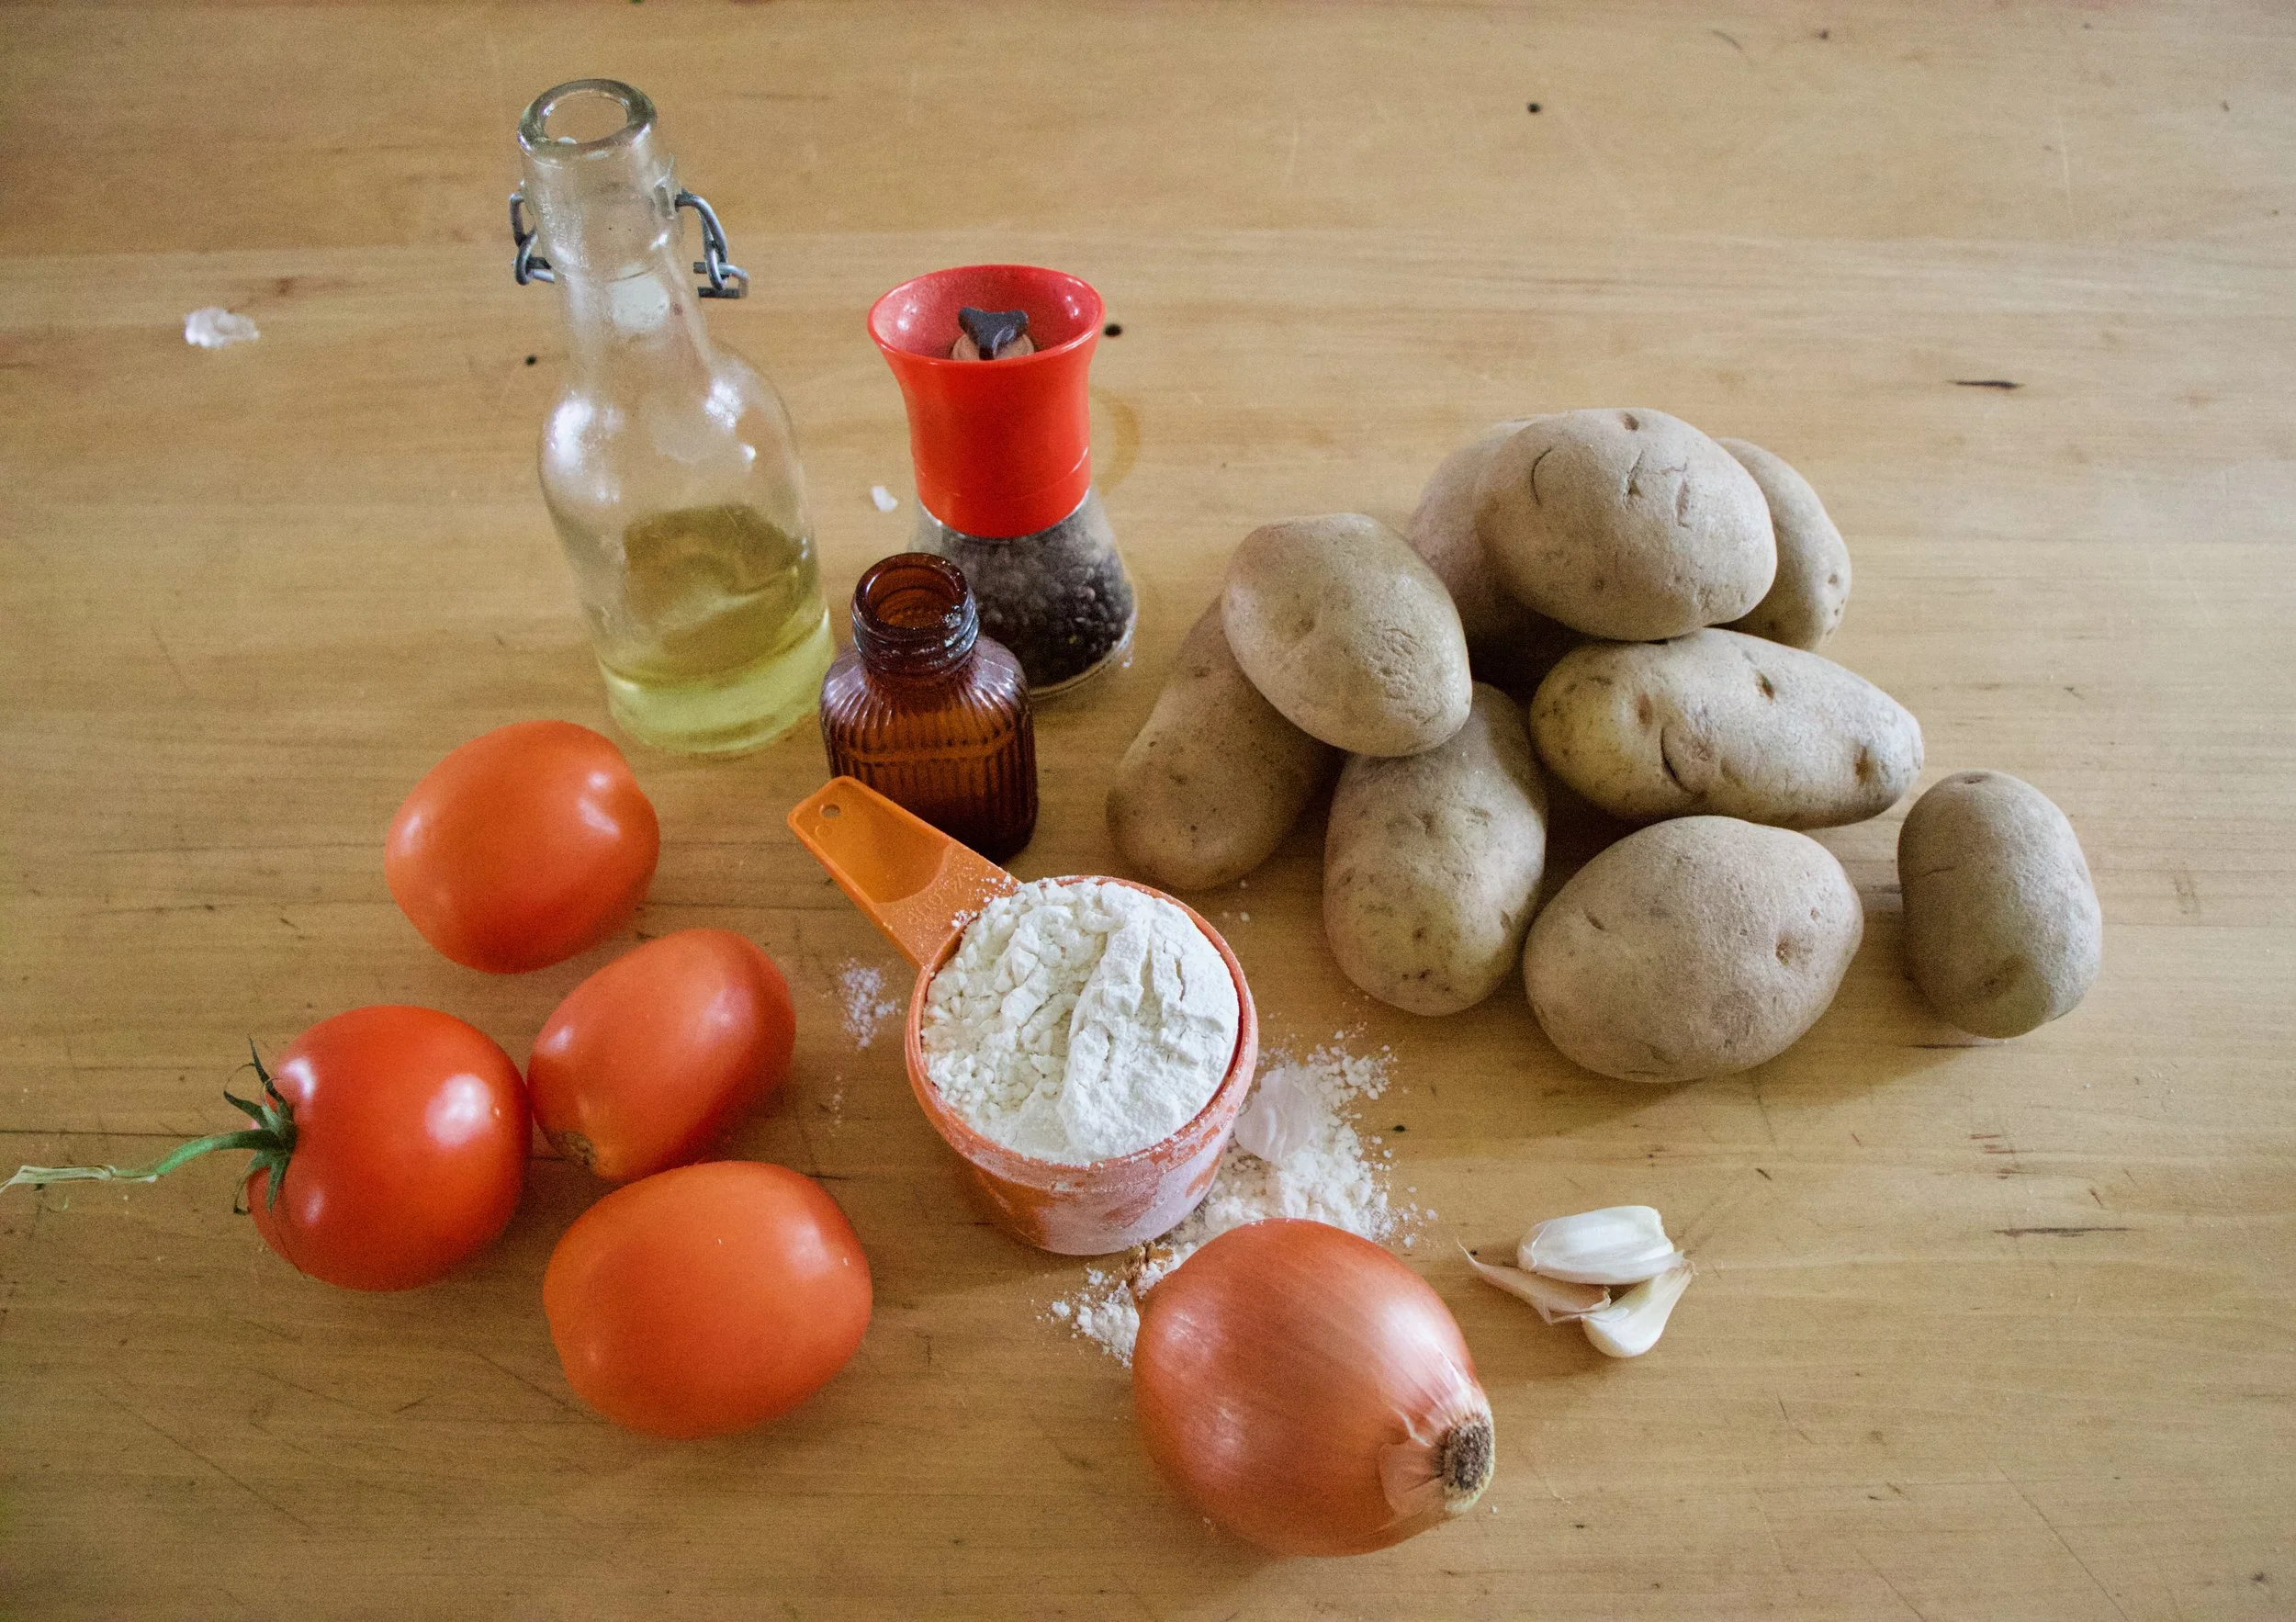
The stuff. Potatoes, crushed tomatoes, cooked chick peas, an onion, a few cloves garlic, Italian seasoning, salt and pepper and a bit of olive oil.

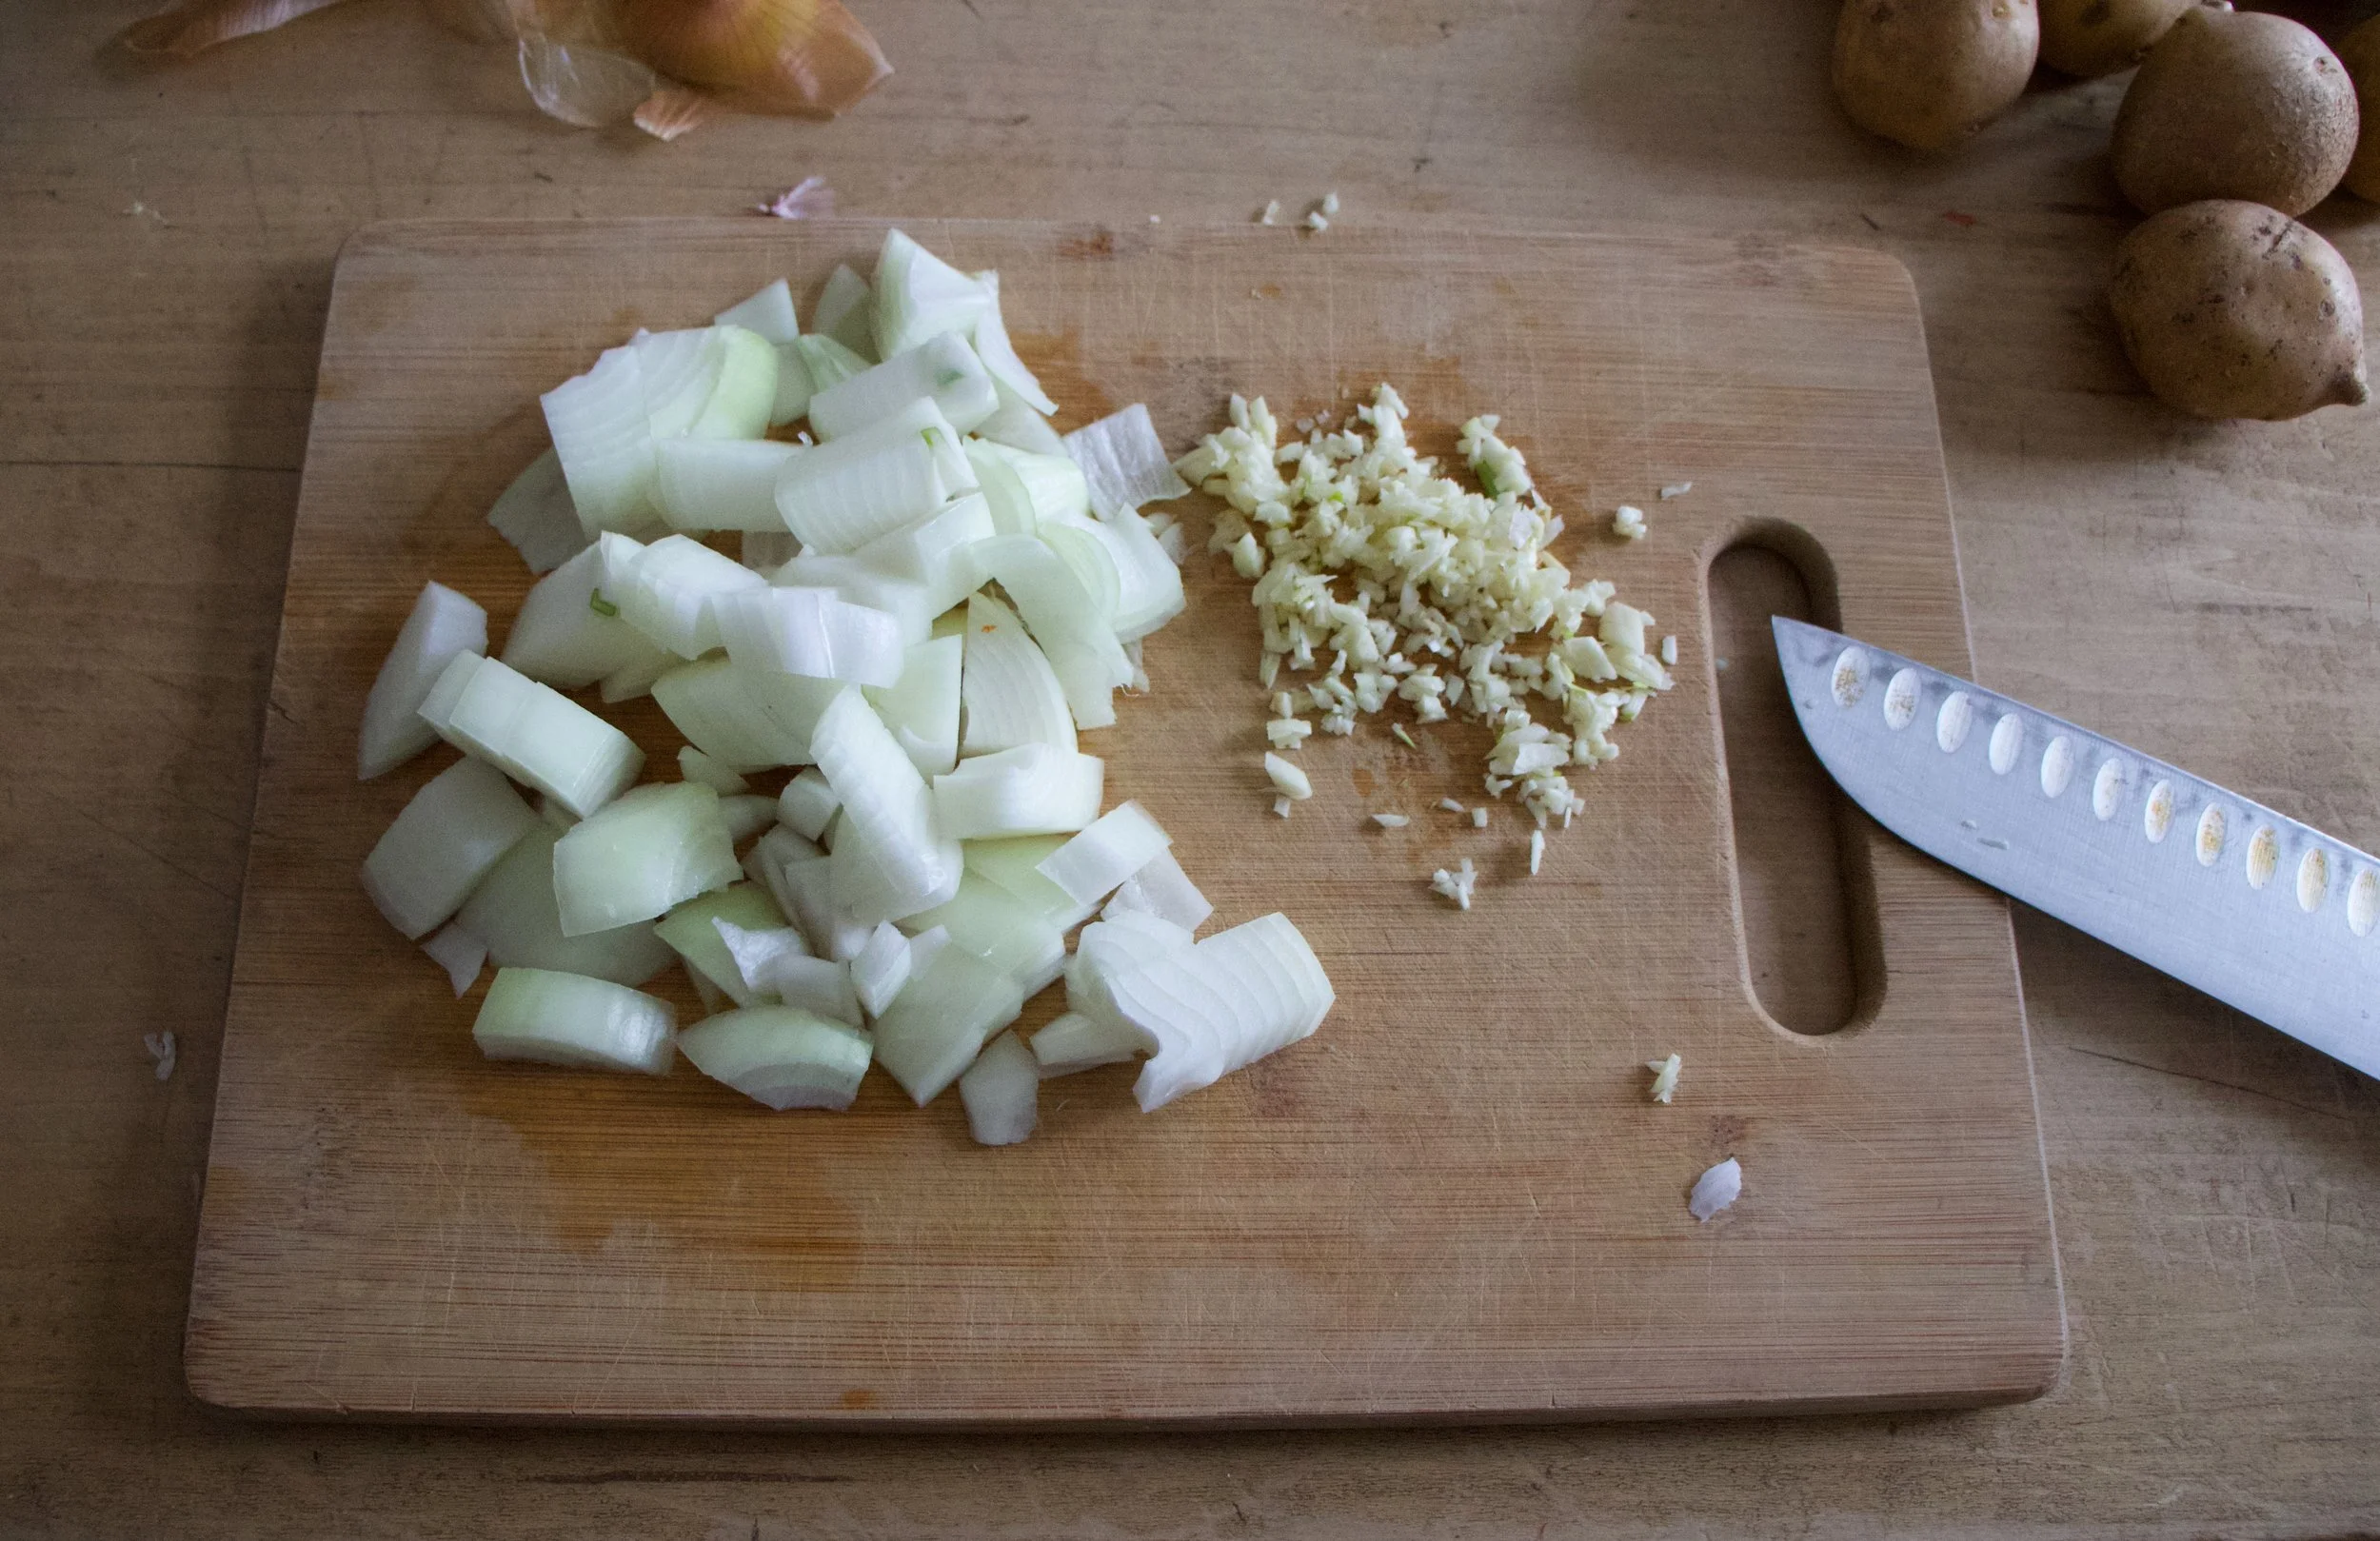
Start by chopping the onion and mincing the garlic.

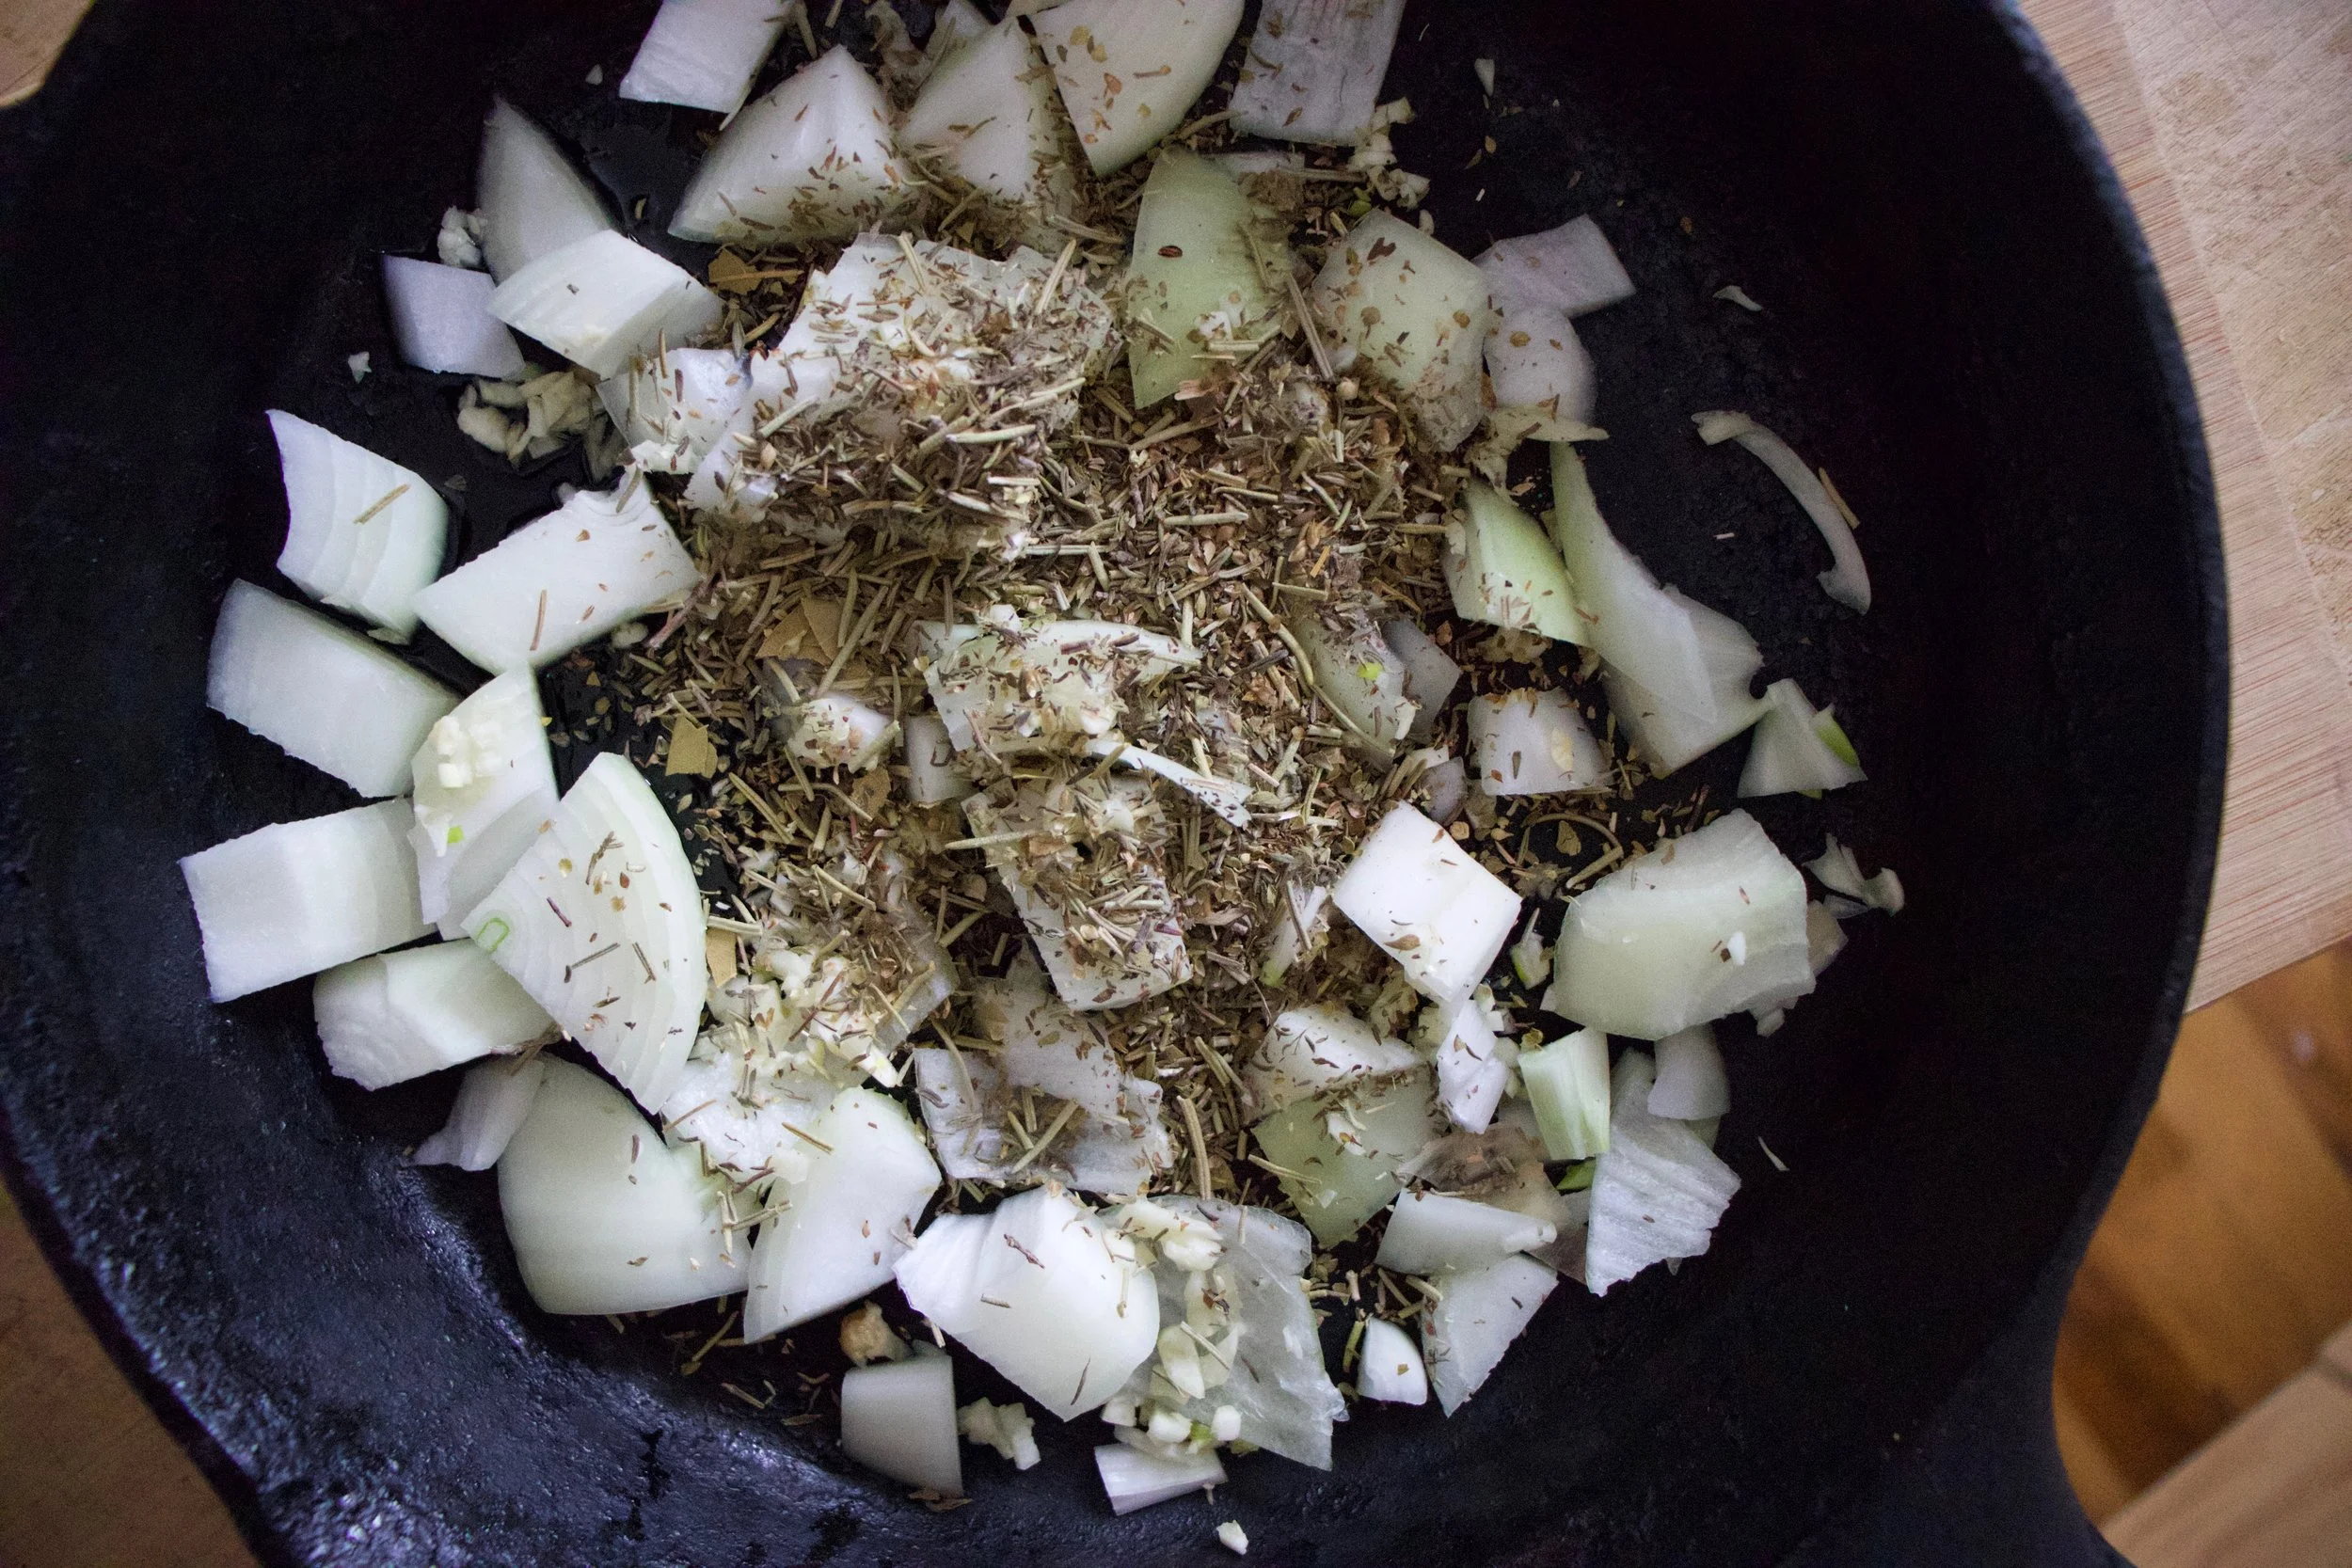
Get it all into a cast iron pan or oven safe skillet with a little olive oil. Add the spices and give it some heat on the stove top while you cut potatoes.

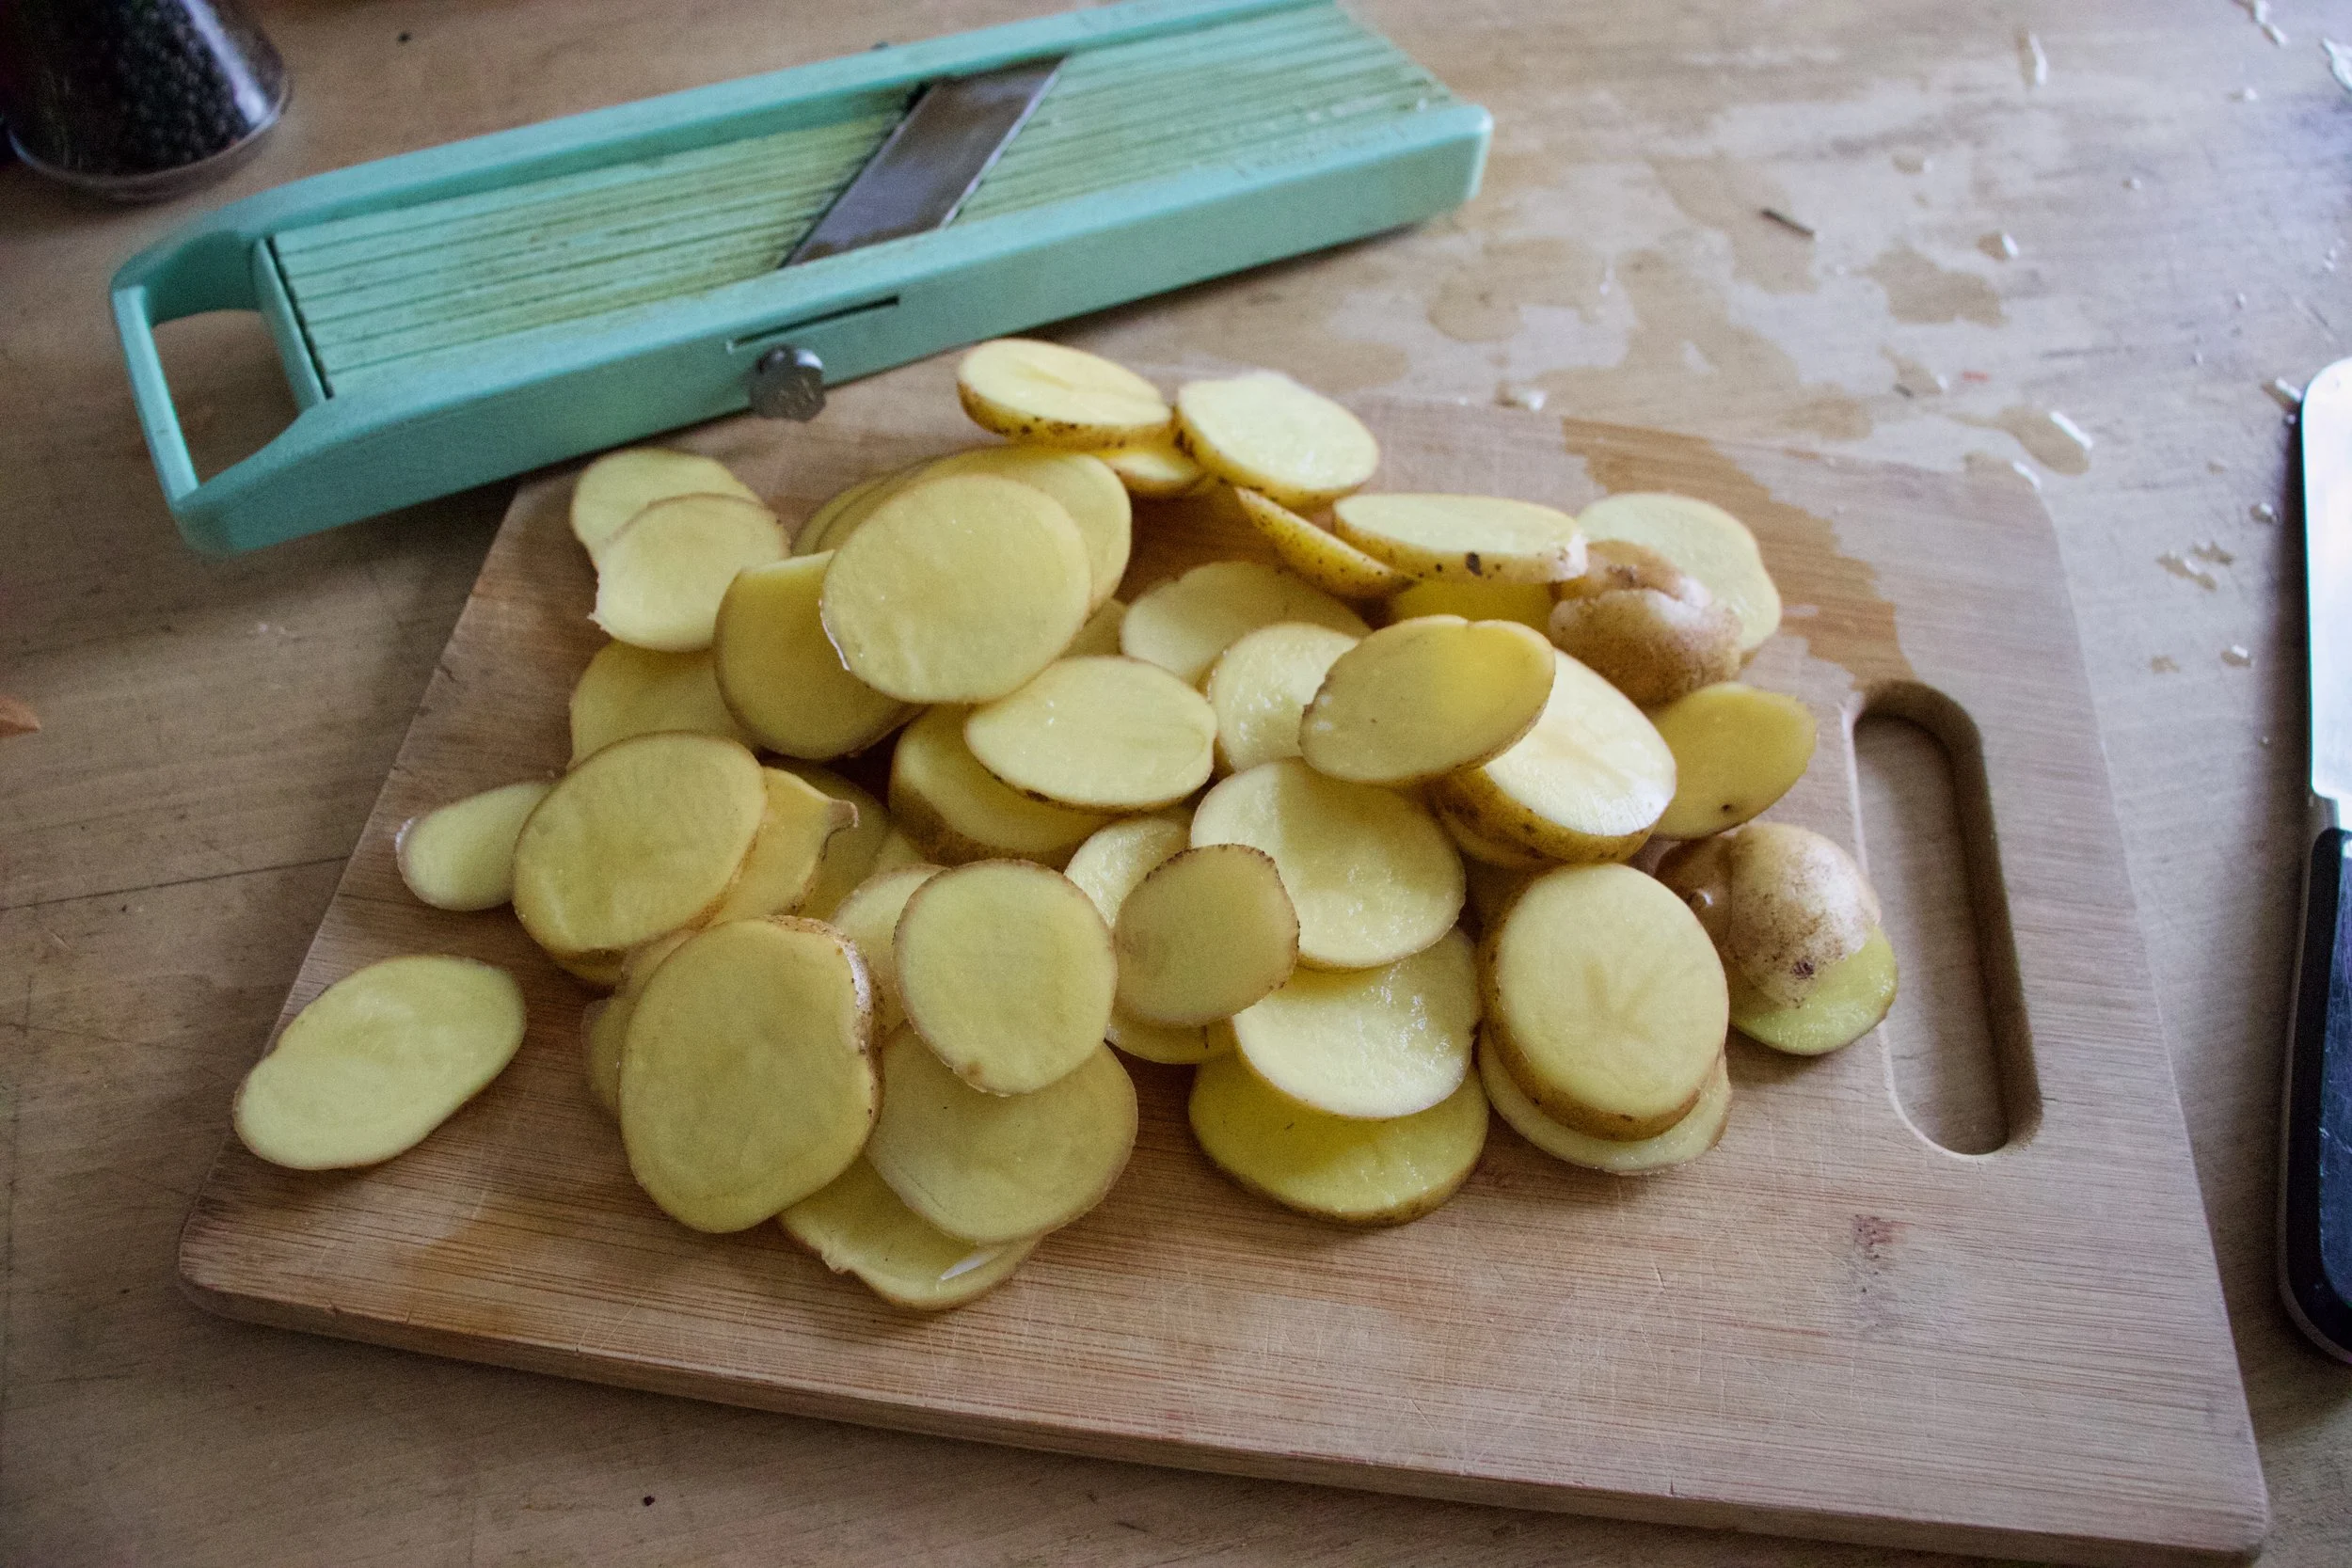
Now cut those potatoes nice and thin. A mandolin works wonders but a knife will do just as well, just try to keep the thickness all the same.

Potatoes are cut and onion mixture has sweated a bit so now you add in the chick peas (with liquid) and half the crushed tomatoes. Stir it all up.

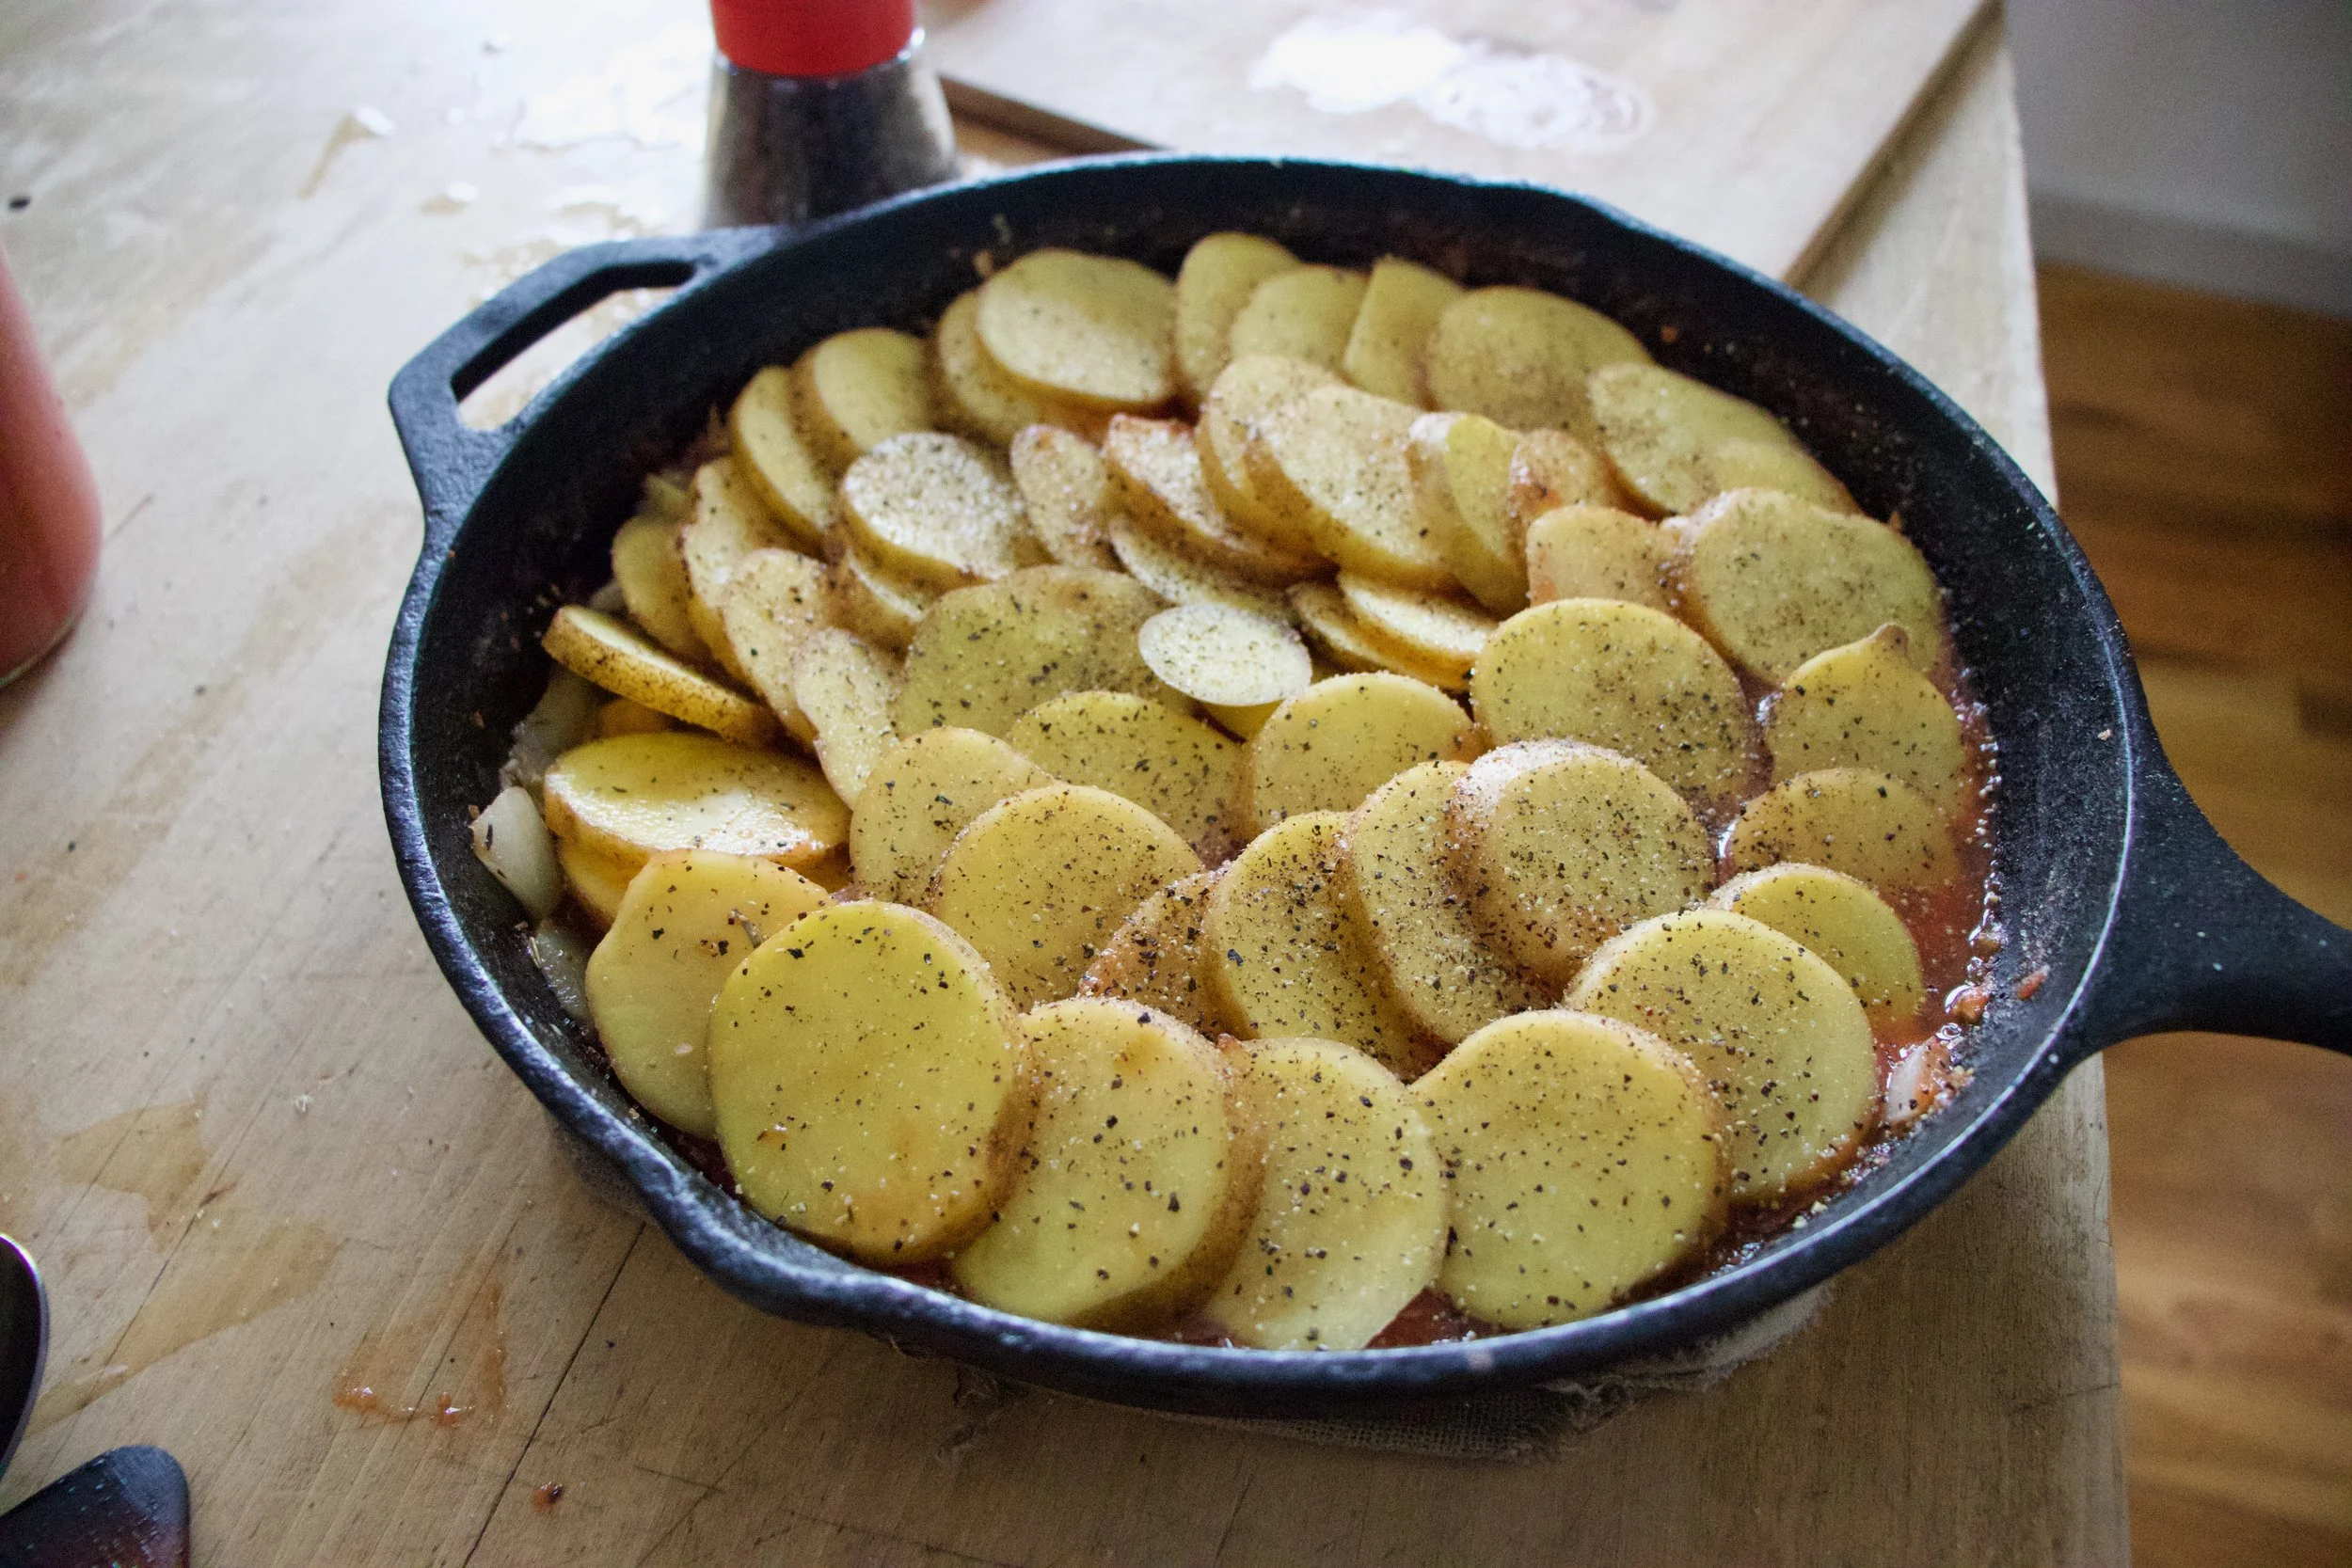
Layer on potatoes, drizzle with a tiny bit of olive oil and give them some salt and pepper love.

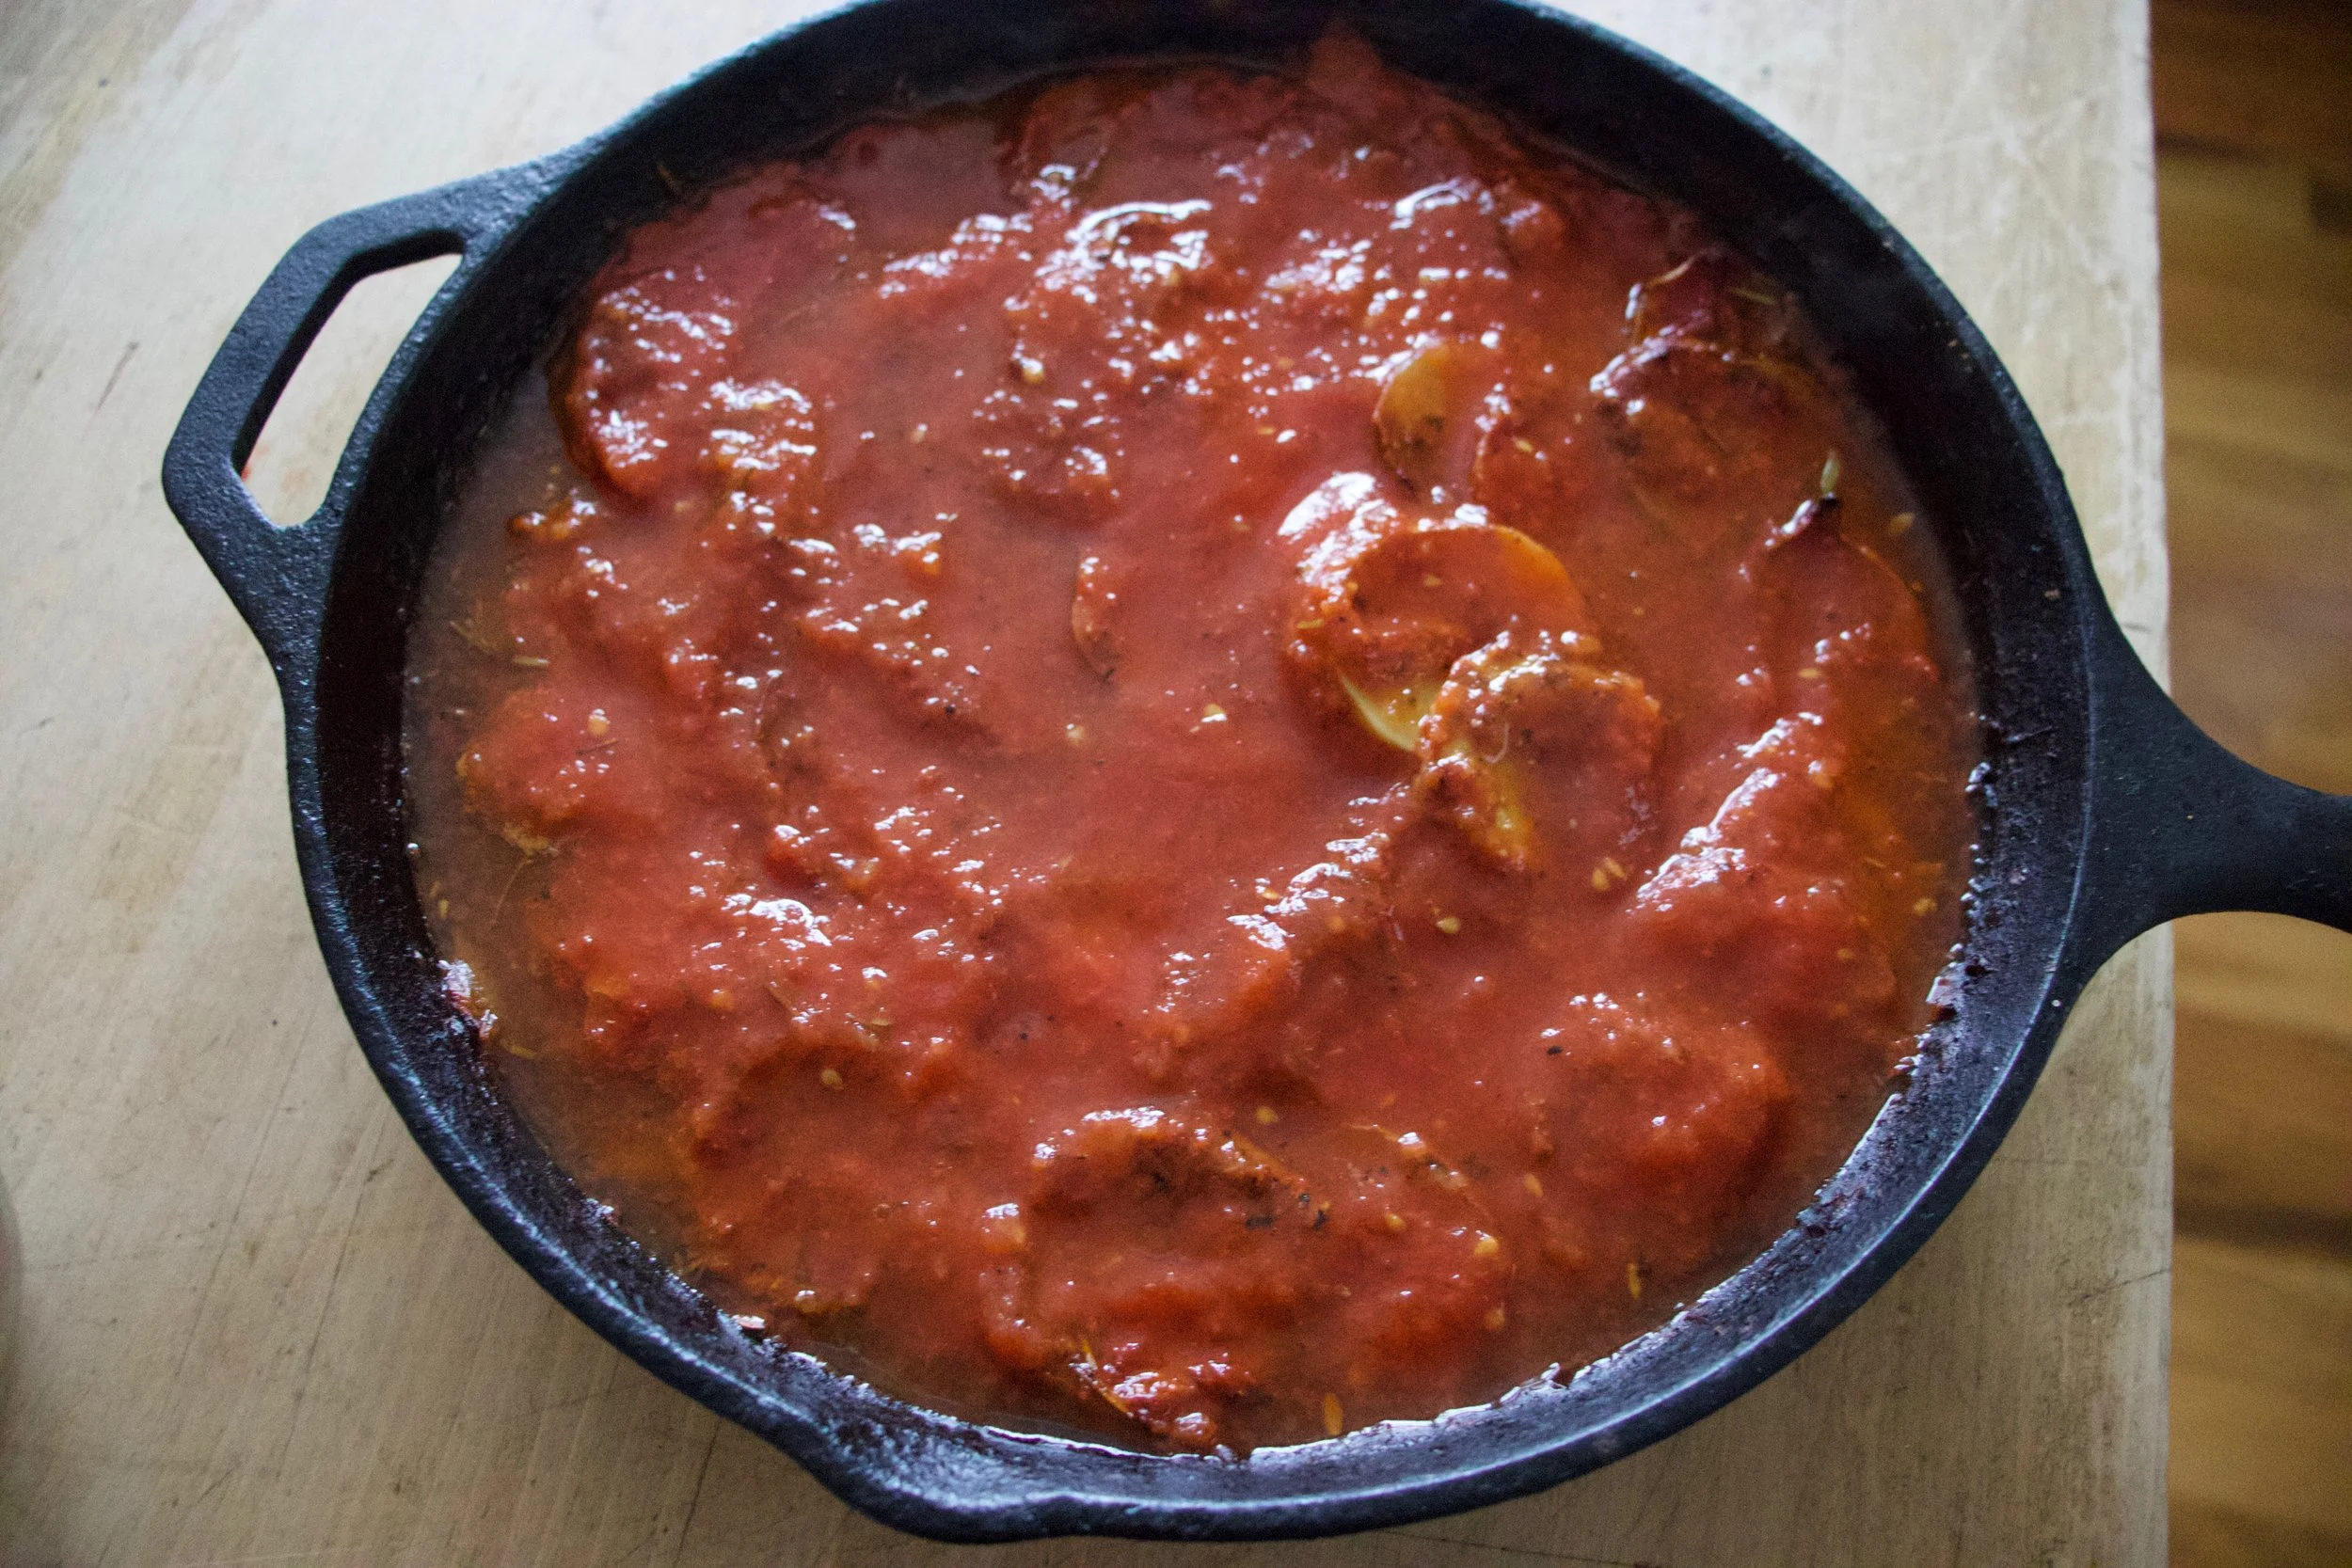
Dump the rest of the tomatoes on top then add in water, enough that all the potatoes are completely submerged.

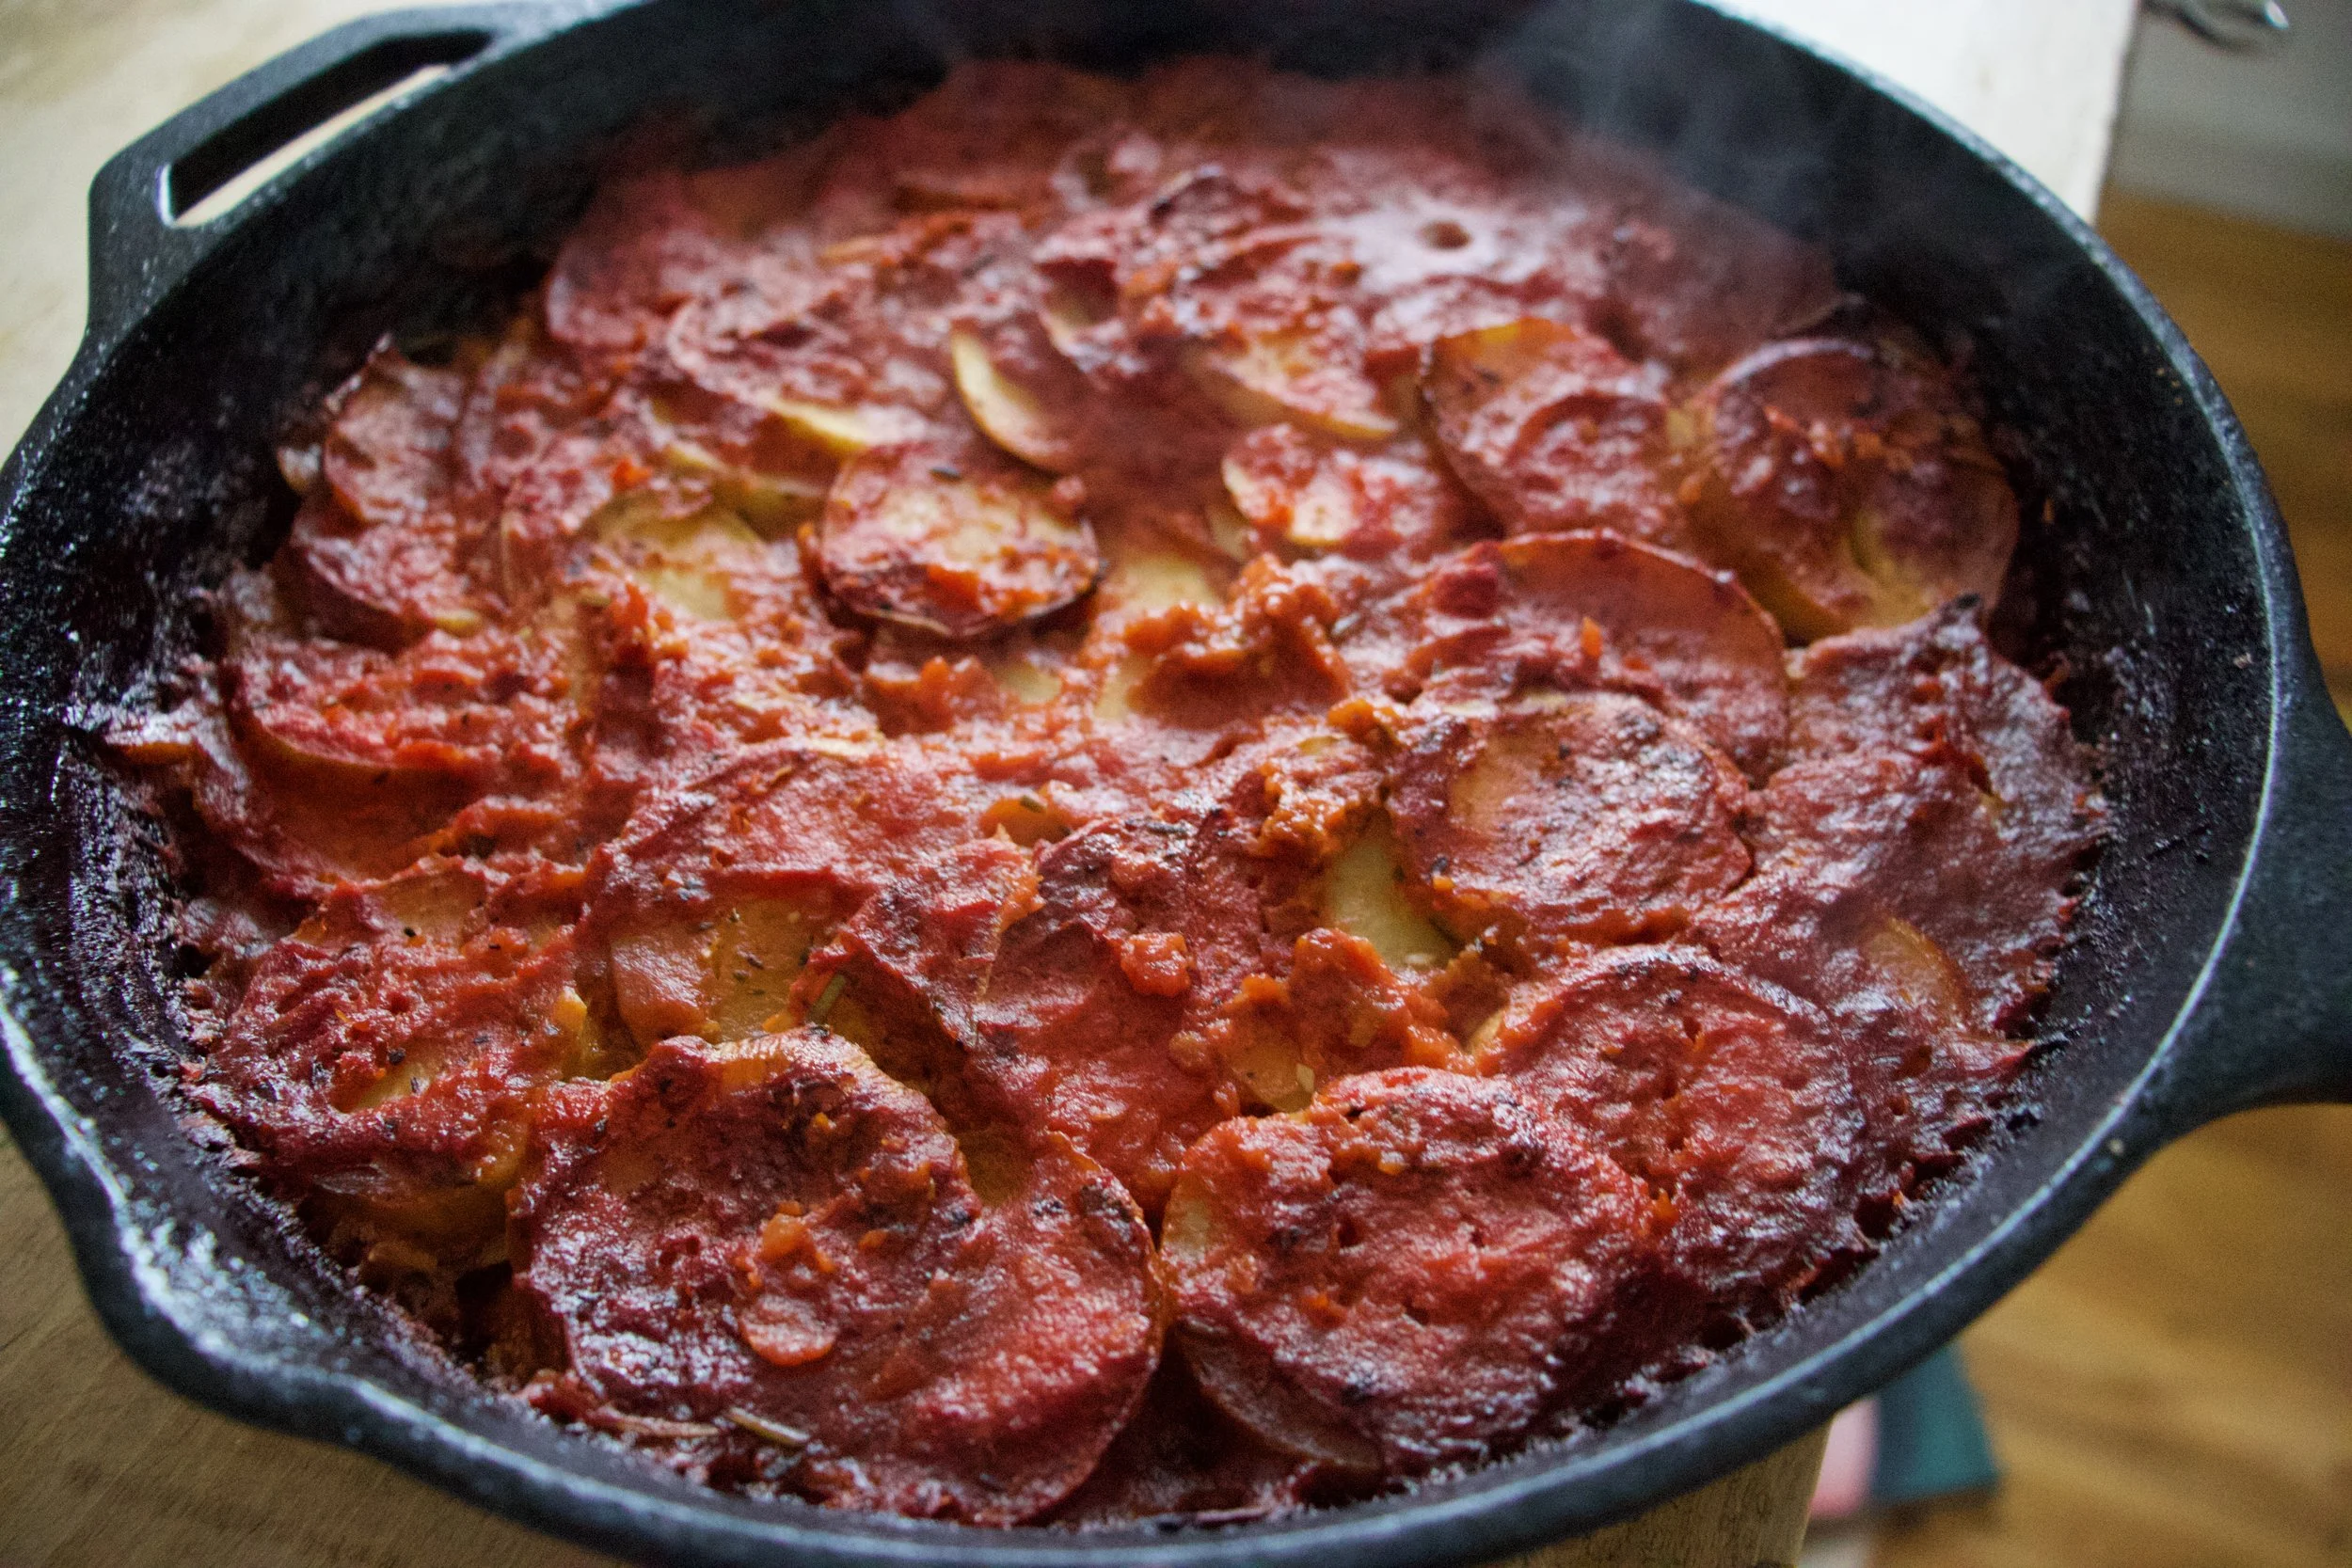
Now into the oven they go.

Doesn%u2019t that just look all fantastic? I mean really really , A+ good, no? If you are feeling extra crispy, you could even stick the skillet under the broiler for a few minutes right before you pull it out.

And that is that. Potatoes in tomatoes with chick peas and onions. A simple but very satisfying dish to keep your cold belly full of warm goodness.

Be well.

-C

  • About a pound or so of white or red potatoes

  • 3 cups (or a 28oz can) crushed tomatoes

  • 2 cups (or a 16 oz can) cooked chickpeas in liquid

  • 1 large onion

  • 2-3 close garlic

  • 2 tablespoons Italian seasoning

  • 2-3 cups water

  • olive oil

  • salt and pepper

Preheat oven to 400

Grab onion and dice into small pieces. Mince the garlic. Grab a medium sized oven safe skillet and toss the onion and garlic in with a tablespoon or so of olive oil and the seasoning. Place on medium heat and cook for a few minutes until the the onion is slightly cooked and fragrant. Remove from heat. Mix in the chick peas with liquid and half of the crushed tomatoes.

Rinse potatoes and slice into 1/4 inch thick rounds. Place tomatoes into the skillet, layering any way you want. Drizzle the top with like a teaspoon olive oil then sprinkle the tomatoes with salt and pepper. Spread the rest of the crushed tomatoes over the potatoes then pour the water in. If the potatoes are not completely submerged in water, add more until they are. Cover the skillet with a lid or tin foil.

Place skillet in oven and bake 40ish minutes then remove lid or foil and bake for another 25-30 minutes or until potatoes are fork tender and slightly crispy on the edges. Depending on the type of patotoes you use,(like a really firm and waxy yellow potato) you might need to add more water to the skillet and cook for longer. If that is the case, just pour more water over until the potatoes are submerged again and keep baking until cooked.

For extra crispy, when potatoes are done, place skillet under broiler for a few minutes until crisp to your liking.

Pull from oven, let cool a minutes or two then dig in.

Whatever you do, do not turn on your oven this weekend! But I guess if you have air conditioning and don’t mind cranking it… well then go for it. And can I come stay with you?

But for the rest of us doing this weekend without the old A.C., we need to feed ourselves, feed ourselves without any fire because 100 degrees is no joke and any added heat from anything will likey tip us over the edge. I am already so close to that edge and it’s a long way down..(Just ask the mr, he could tell you a thing or two about heat and me.. not good)

Enter hummus and veggies.

You can’t really go wrong with a good hummus and veggies meal situation and sometimes it’s all that can be right. I for one could eat bowls and bowls of hummus, and sometime do, so this is not a stretch for me. Especially this hummus. I knew I would like it, but man, was (was because I ate it all) it freaking delicious. The sunflower seeds really did it for me, gave it a little something extra, like a freshness that is still creamy and earthy, but is not quite, I don’t know, dark as tahini? %u00a0It’s kind of hard to explain without having you taste it (so make it and you tell me)%u00a0%u00a0Don’t get me wrong, I love tahini, but sometimes you just %u00a0got to mix it up. (Plus sunflowers seeds are dirt cheap. Tahini is not nearly as cheap so bonus there too.)%u00a0%u00a0Maybe its because the sunflower seeds bring the sunshine to your mouth. A sun filled mouth of pureed seeds and beans.%u00a0 Yup, that’s what it is.

So here ya go, a no heat meal (or snack or spread).%u00a0We got this.

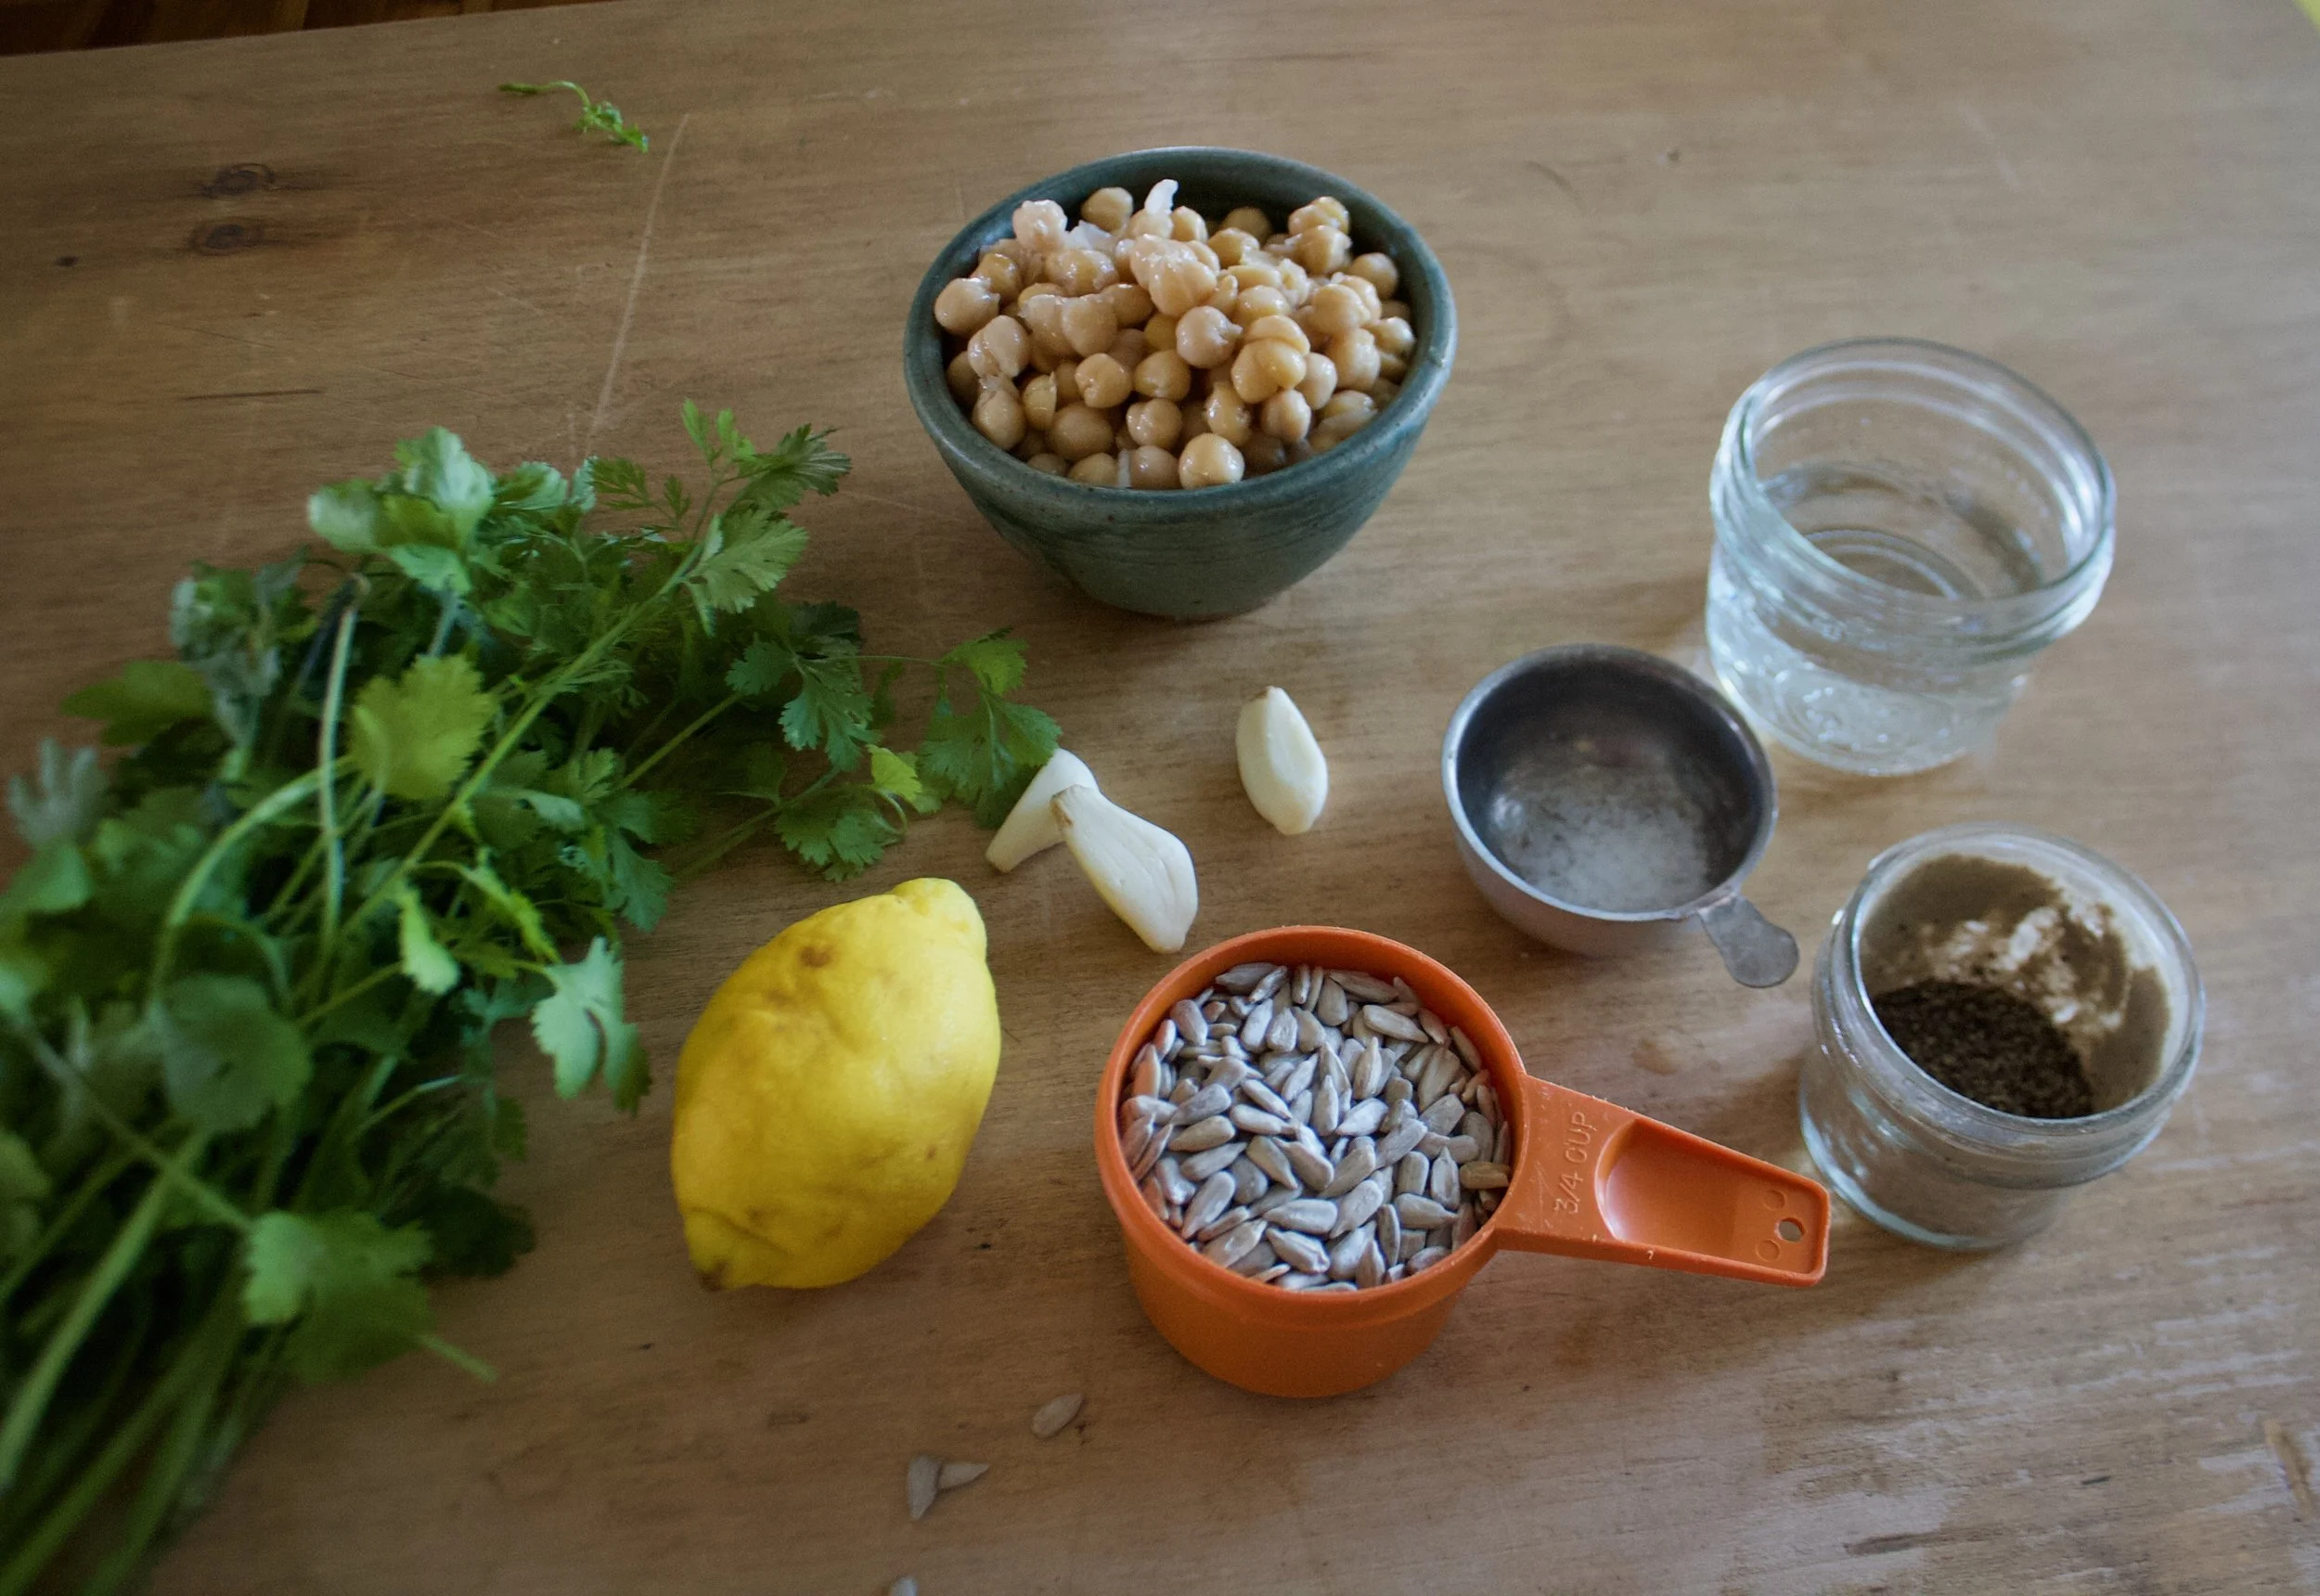
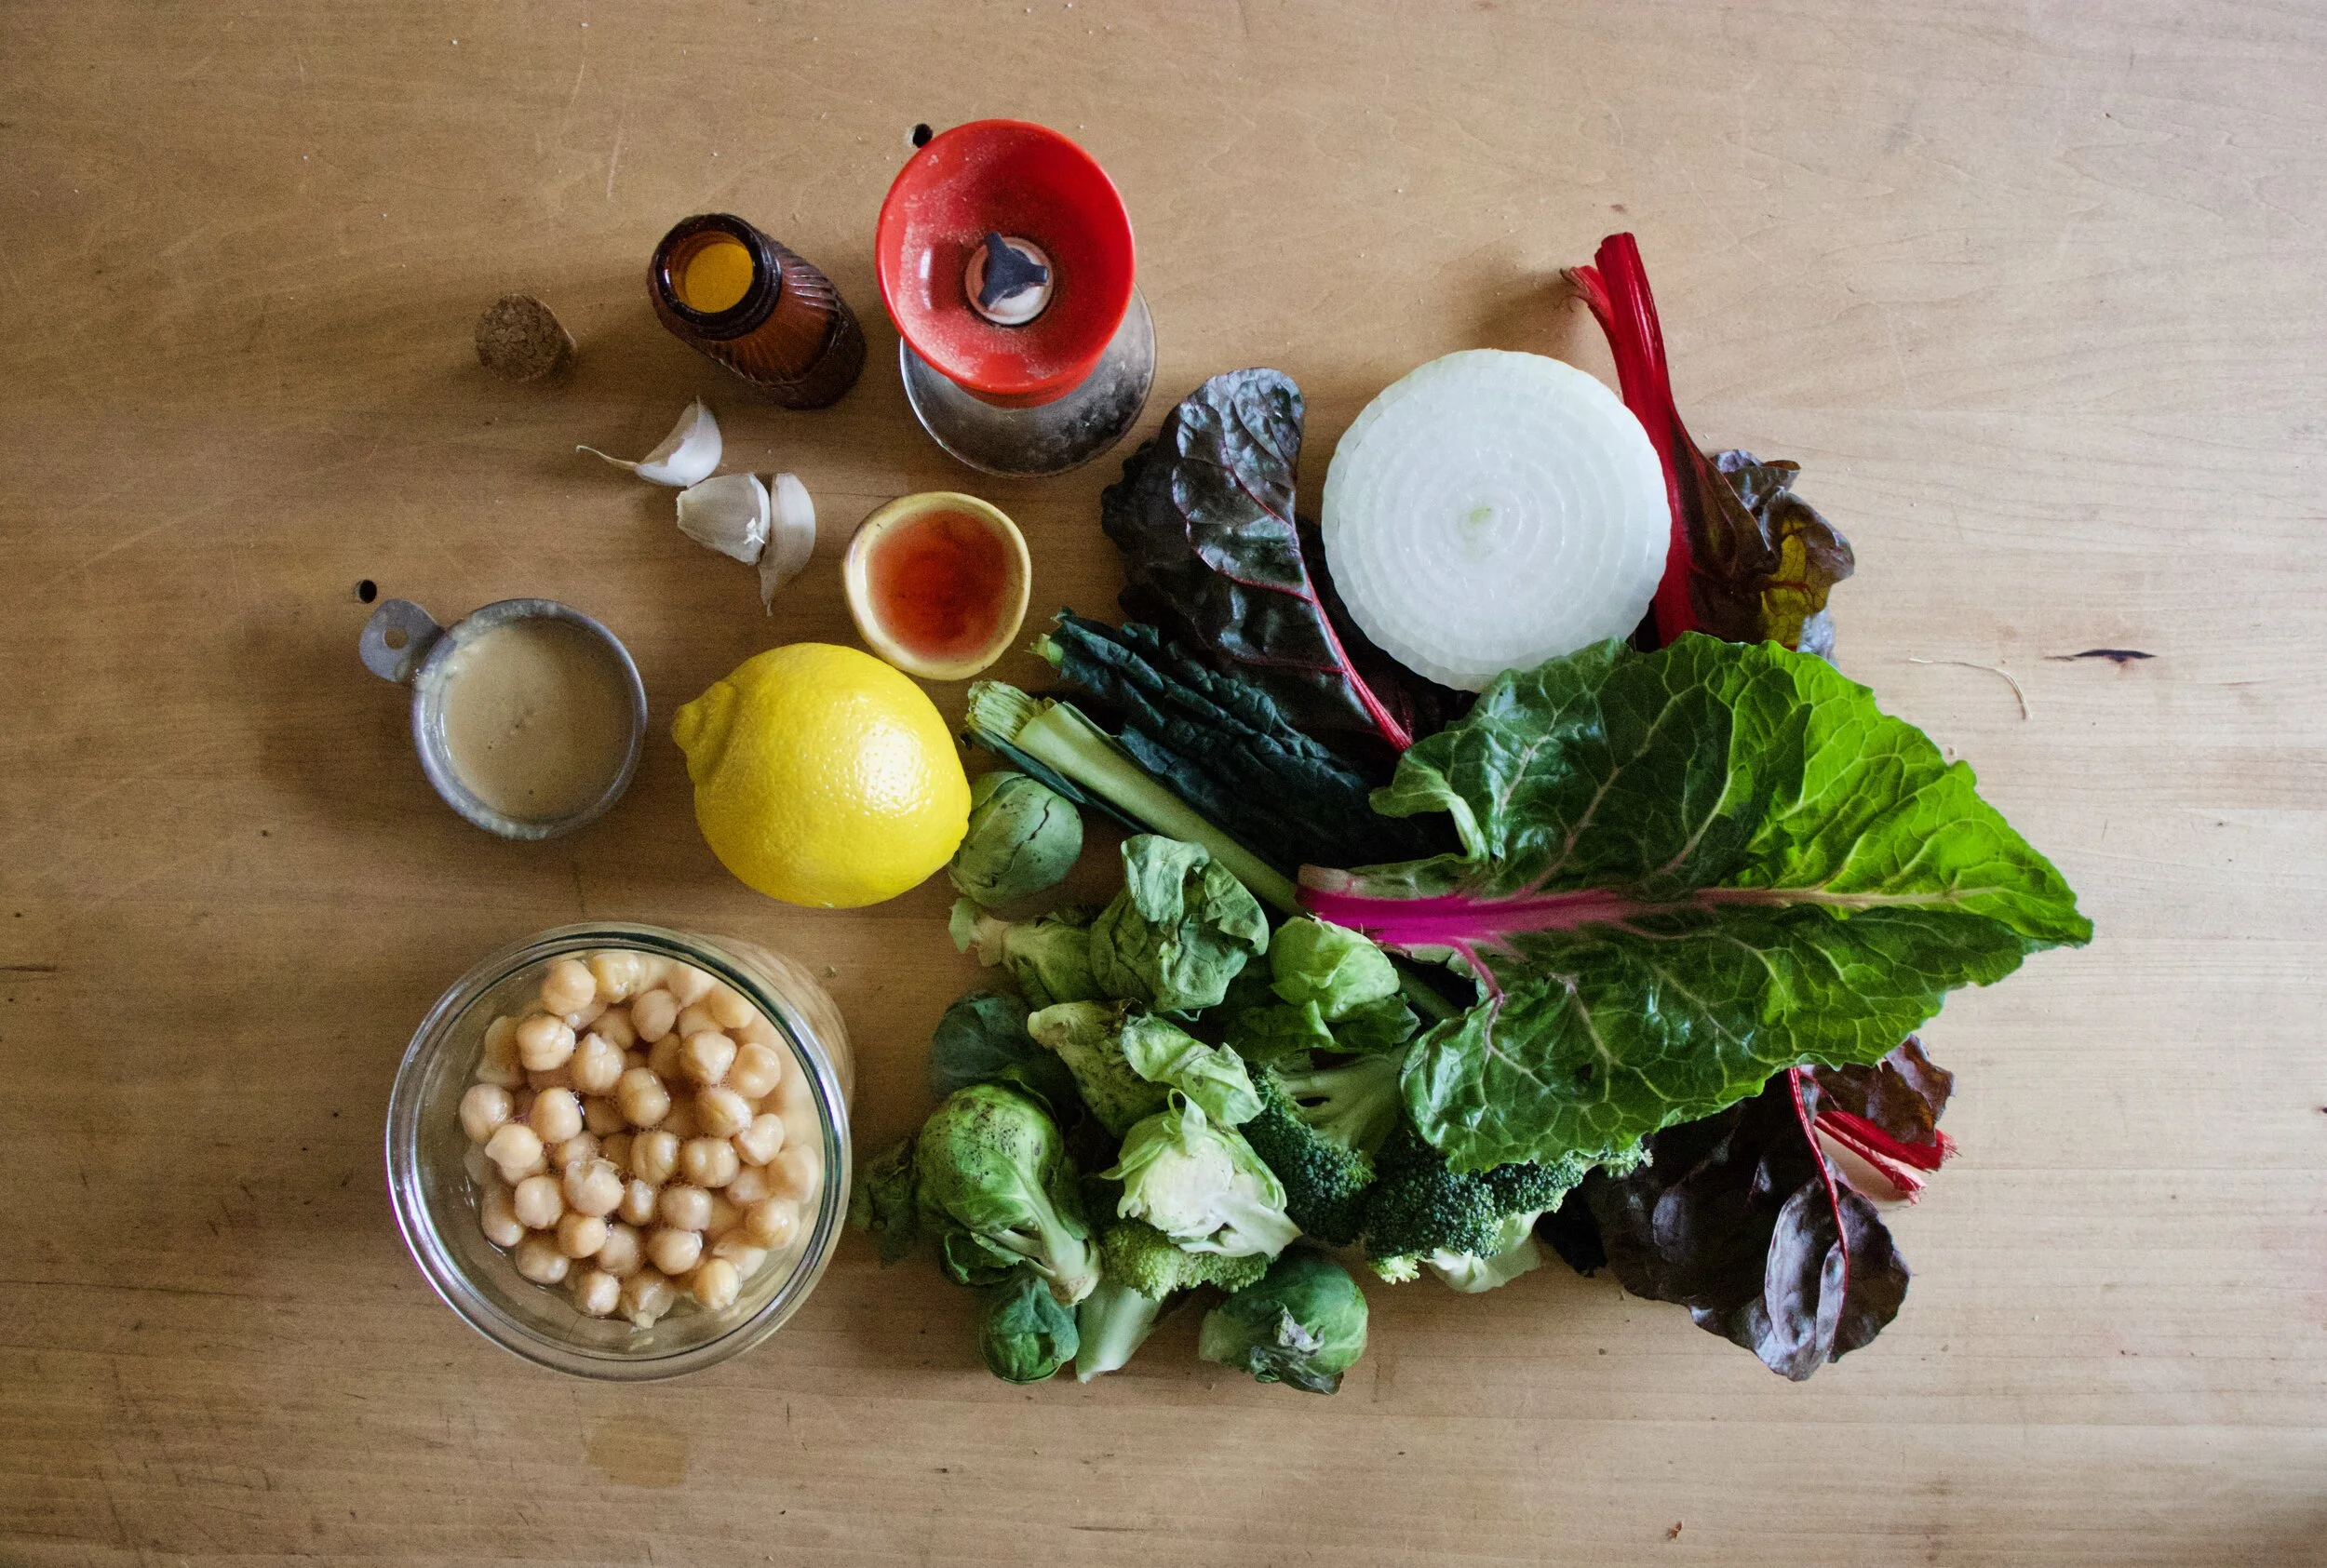
The stuff. %u00a0Cooked chickpeas (no need to cook your own, canned is a okay), sunflower seeds, a lemon, a few cloves of garlic, salt, pepper, a little water, and some herby green like parsley or cilantro.%u00a0

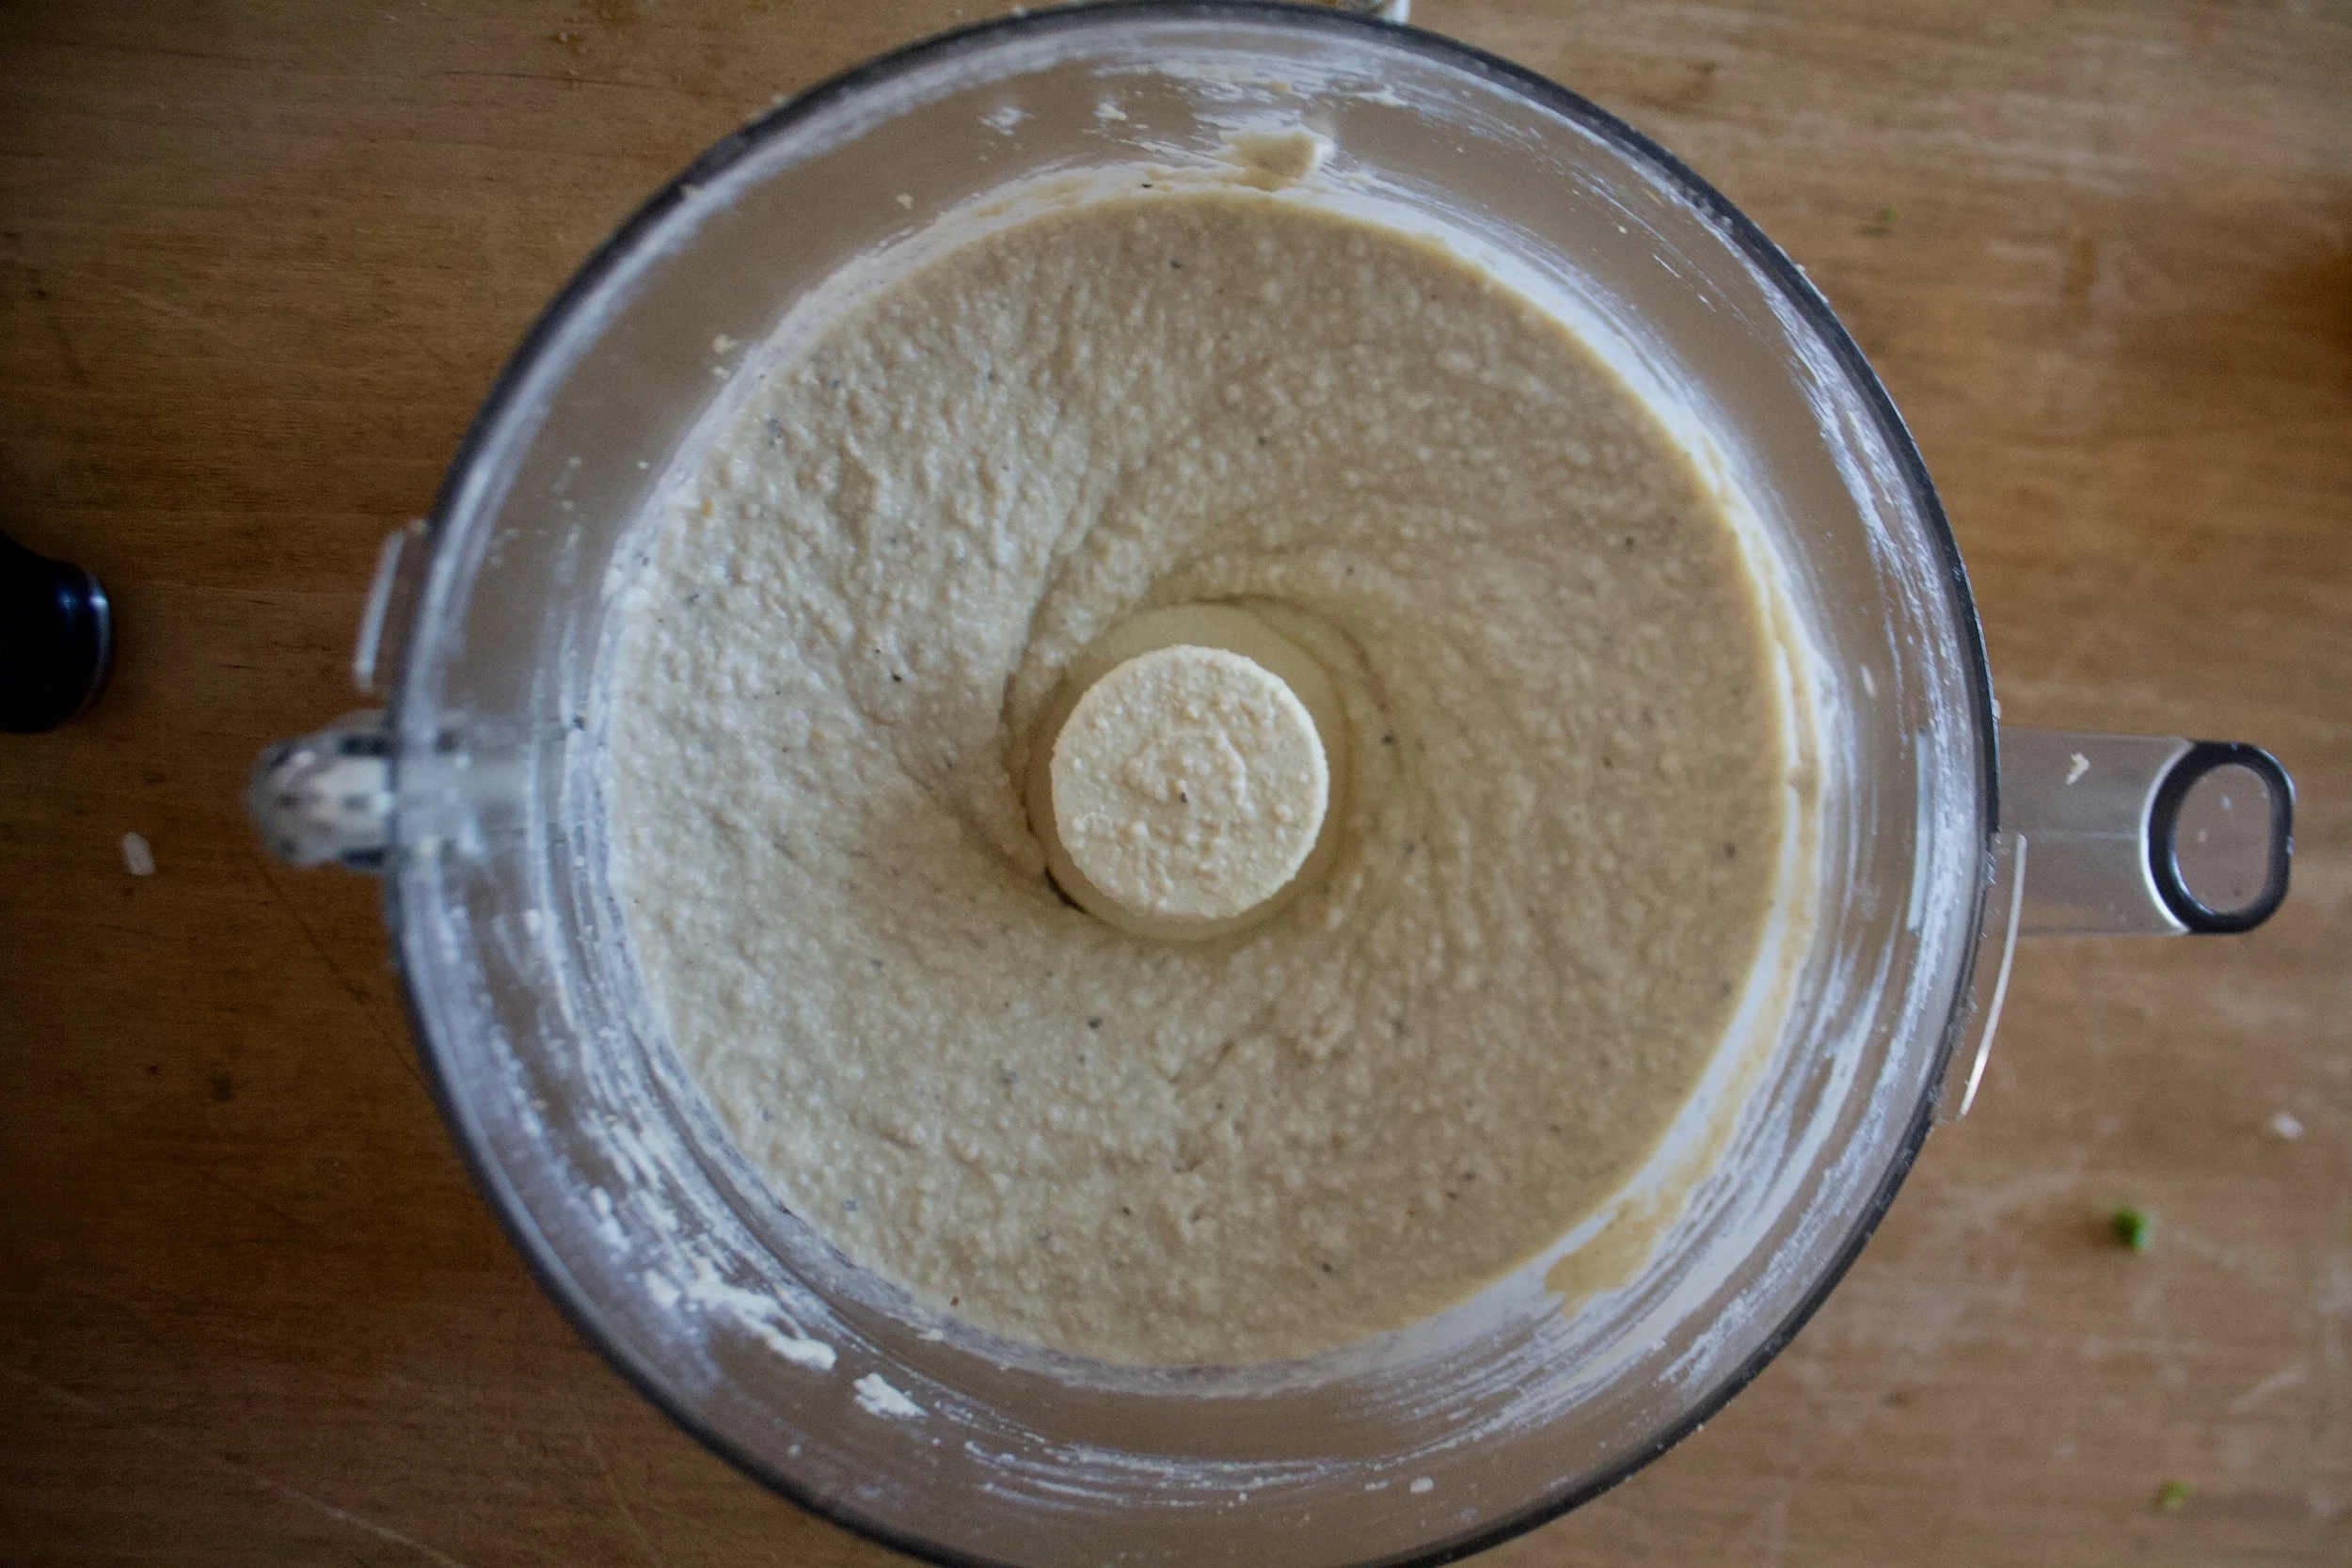
Hummus is pretty basic, it’s just stuff blended up, but because we are starting with raw sunflower seeds, we need to really bend the shit out of them until they turn into a paste, so do that, which is going to a take about 8-10 minutes. Then once its pasty, add in the garlic and the juice of the lemon and blend until its all smooth.

Could almost stop here at this point. Sunflower seed goodness all emulsified. Taste it, it is so good.

Now add in the chickpeas and a pinch of salt and pepper.

Blended until smooth with a little drizzle of water to give just the right consistency. %u00a0And that’s it.

Pile a bowl full enough that you can call it dinner them top with a good amount of fresh herbs. Serve with chopped up fresh veggies or whatever you like and we are good to go.

Creamy, dreamy sunflower hummus, no heat required!%u00a0

Stay not melted!

-C

Makes about 2 3/4 cups

  • 2 1/2 cups cooked chickpeas (or one can) drained
  • 3/4 cup raw (can use toasted)unshelled sunflower seeds
  • l juicy lemon
  • 2-3 cloves garlic
  • 1-2 tablespoons ice water
  • salt and pepper
  • handful fresh herbs like parsley,cilantro and or dill (optional)%u00a0

Place the sunflower seeds in food processor and turn on until seeds turn into a paste, which will take about 8-10 minutes. After every few minutes, scrap the sides down to make sure it all gets blended. Once the seeds reach paste consistency,%u00a0add in the juice of the lemon and the garlic. Blend until smooth. Last off, add in the chickpeas and a pinch or salt and pepper and blend until smooth, adding %u00a0in a tablespoon or two of water to get the hummus to the consistency of your liking. Once blended taste and check for seasoning (add more salt and or pepper if needed)%u00a0

When the hummus is done, scrape into bowl(s), and top with lots of fresh herbs and a sprinkle more of sunflower seeds. Now eat it. Eat with veggies, with bread, with pretzels, or with a spoon (or finger). Do what you need to do.

%u00a0Any left over, if there is any, can be store in the fridge for 2-3 days.%u00a0

%u00a0It’s Friday!!! And what does that mean? Pizza Pizza!!!!But not just Fridays%u2026pizza happens more times then not in our house%u2026It’s the misters favorite food and for real, he could eat it everyday, all day.%u2026He is kind of made of the stuff. As for me, well I don’t mind making it for him because it’s easy. And because I am making it, it doesn’t have 8 million calories, 9 million grams of fat and have 10 million milligrams of sodium like takeout of frozen. %u00a0My pizzas are for the most part pretty freaking heathy. It really depends on how its topped. Like take this one.. Homemade pesto, good quaility cheese, (you can use vegan or low fat)%u00a0chickpeas and tomatoes. Not to shabby. And really, it isn’t any more complicated then calling the take-out place or unwrapping the frozen plastic disk from the box. All you need is some good dough (I guess you could use store bought) and some good quality toppings%u2026 and you’re there%u2026Pizza in your face.

For this pizza I used the skillet cooking method. This crust is one of %u00a0the misters favorites. It is a basic pizza dough but cooked on the stove in a skillet. It’s almost like a pita bread, but not. And I like to make it this way because its really fast (once the dough is made) and I can even make up a few crusts to have on hand for later.

Fast, healthy, and tasty%u2026..Why not eat pizza every day?%u00a0

Not too many ingredients here. 3 cups of all purpose flour or 2 cups all purpose and 1 cup white whole wheat. A teaspoon salt, a teaspoon honey (use sugar if vegan), yeast and warm water%u2026%u00a0

Start with the dough. %u00a0Add honey or sugar to yeast and warm water and let sit to active, which should take about 5 minutes.

%u00a0Mix together the salt and flour(s) and add the foamy yeast mixture. Mix until it all comes together and dump out onto a floured surface. (if the dough seems to dry add a splash of water..if way to wet, add a little flour) Give the dough a good 2-3 minute knead session, adding flour as needed to keep the dough from sticking. Form a nice ball, place back into bowl and drizzle with oil. Cover bowl with a towel and stick in warm place to rise for about an hour or until it has doubled in size.

When dough has doubled, dump back onto a floured surface and divide into 4 equal sized balls (or as many balls at whatever size you want)

Now you have a few choices here. You can either cook up all the dough now if you need it, or freeze dough balls for future use. If you think you are going to make pizza again within the next few days, it can be refrigerated, or you could also blind bake the dough and freeze or fridragerate that and have pre baked crusts all ready to go. So many options%u2026 just do whatever works for you.%u00a0

To make the dough in a skillet, oil the bottom of a 15 inch skillet, turn burner on to high and let preheat until the oil is sizzling. Roll dough out to roughly the size of the skillet and when it has preheated, place dough on in there and let cook for about 3-5 minutes, or until the dough starts to bubble and the bottom has started to brown. Turn burner down to medium and flip. Cook this side for another 3-5 minutes.

If you want oven crust, just roll out and place on a baking sheet and bake with topping on at 475 degrees for about 20 minutes

Now the crust is ready for the toppings!!

Preheat the oven to 450 degrees.%u00a0

Smear the pesto (for this pie, I used the last of my homemade pesto from last summer%u2026sad face) Mince garlic and distribute evenly on top of that. Then do the cheese, followed by the tomato slices and chick peas. Sprinkle with a bit of salt, cracked pepper and some parmesan cheese.%u00a0

Stick into oven for 10 or so minutes or until the chesse is nice and bubbly and the crust os crispy and brown.

And that is pizza. A super duper, yummy, healthy, not too fatty or overly salty%u2026 %u00a0can be eaten breakfast lunch or dinner time, pretty, satisfying, pizza. %u00a0

Make it for yourself, for you lover, for a friend. Make it in the shape of a heart or an elephant. Give you kid(s) a ball of dough and have them make their own%u2026 I know%u2026 such a good idea.%u00a0

Everyday, all day.. Happy Friday and Happy Pizza

Stay warm!

-C

For the dough ..Makes about four 10 inch pizza doughs or three 12 -14 inch doughs. This is also the same recipe I use for all of my pizzas (skillet and oven)

  • 3 cups of all purpose flour or %u00a02 cups all purpose and 1 cup white whole wheat
  • 2 1/4 teaspoons of yeast or 1 packet
  • 1 teaspoon of honey or sugar
  • 1 teaspoon salt
  • 1 1/2 cups warm water

The Pizza Toppings (for a 15 inch crust..adjust amounts to your need or liking)

  • 1/4 cup of pesto
  • 1 large %u00a0roma tomato thinly sliced
  • a few cloves of garlic minced
  • 1/1 cup of prepare chick peas.. rinsed and drained
  • 1/2- 3/4 cup of cheddar cheese (or any kind you like..use vegan cheese if you want too)
  • salt, pepper, and parmeasan (optional) to sprinkle on top

To start, place honey, yeast and water into a jar or bowl and let sit to active until mixture starts to foam. Mix together flour and salt into a large bowl and add in yeast mixture. Stir until combined and dump onto a well floured surface. Knead dough for a a few minutes and form into a ball. Place back into bowl, drizzle with oil and top with a towel. Place somewhere warm to rise for an hour, or until dough has doubled in size.

When dough is done rising, dump back onto floured surface and divide into 4-8 equal sized balls.( 4 balls make %u00a015 inch pizza%u2026 8 balls are good for individual size pizzas) Place whatever dough you are not going to use into a closable plastic bag and either stick in fridge(if using within a few days) or freeze for future use.

Place skillet on high heat on stove and drizzle with oil. Also, preheat oven to 450 degrees. Roll out you dough and when the skillet is has gotten really hot, place dough right on in. Let cook for about 3-5 minutes or unit the cough has started to form bubbles and the bottom has started to brown. Turn heat down to low and cook other side for another 3-5 minutes or until browned.%u00a0

Now pizzafy it.. Add on the toppings. Smear with pesto, add minced garlic, then evenly sprinkle cheese. Top with the chick peas and the sliced tomatoes. A sprinkle of salt and pepper and a dusting of grated parmesan%u2026%u2026Right into the oven for about 10 minutes to melt it all together%u2026..

Pizza Pizza!!!

I am such a sucker for the reduced price produce at the grocery store. I save at least half of the original price for stuff that might look a little weird or have a brown spot or something. Sometimes I can’t believe what ends up on in the bin, stuff that I wouldn’t consider reduced bin material, but hey, if they want to stick it in there, then I will be more than happy to buy it.A couple days ago I found some good looking roma tomatoes in that said reduced produce bin..the skins the tiniest bit wrinkled (like I could care less), least hen 50 cents a pound. Um, yea, I bought those and put them to good use.%u00a0

Tomatoes roasted until they fell apart with a few other chunks of stuff, then piled onto a base of spinach and couscous. %u00a0This meal cost me pennies and was stupid easy and fast to make. And pretty to boot. Perfect for a quick healthy meal on a busy day or maybe for those people looking for a tasty, not too completed dinner to make for %u00a0a special someone for Valentines day? Or make just for yourself%u2026its pretty much the perfectly dish. Anyone can get into it. And if you don’t happen to have a grocery store with a reduced produce bin full of tomatoes%u2026it’s cool, you’ll just have to pay full price for the perfect ones.

So simple. A little olive oil in pan. Chunk the tomatoes and throw in pan with the chopped onion, carrot, cauliflower, garlic and chick peas. Drizzle a bit more oil and top with salt and pepper. Give it all a toss and stick into oven. That’s that. Just leave it in there until everything is so nice and soft and falling apart.

One of the best things about couscous is that%u00a0you don’t even need to dirty a pot or a bowl to make it, %u00a0just add dried couscous to the bowl you are going to eat out of with a cup of boiling water and a pinch of salt. %u00a0(I added the spinach with the water too) After about 8 minutes, the couscous absorbs all the water and you just fluff it up with a fork. Easy, freaking Peasy!!!%u00a0Out of the oven and piled on%u2026..

I mean, if this isn’t one classy looking meal, then I don’t know what is.

Sprinkle with a little parmesan or nutritional yeast if you want and step back and admire. And now eat it to you face.

And barely any dishes to wash. No big mess to clean up. %u00a0I could get used to that.%u00a0

-C%u00a0

Serves 2

  • 3/4 cup Couscous
  • 1 cup boiling water
  • Handful of chopped spinach
  • 4-5 roma tomatoes chopped
  • 1 medium carrot diced
  • Half of an onion diced
  • Cup or so of cauliflower (fresh or frozen)
  • Cup of prepared chick peas
  • 4 or 5 cloves garlic minced
  • Olive oil to drizzle
  • Salt and pepper

Preheat oven to 400

Place onion, carrot, cauliflower,tomatoes, chick peas and garlic into a large skillet. Drizzle with olive oil, sprinkle with salt and pepper, and give everything a light toss. Stick into oven for 35-40 minutes until tomatoes are falling apart and everything is nice and roasted.

In a medium bowl, (or serving bowl) add cup of boiling water to dry couscous and spinach. Sprinkle with salt and cover. Let sit for at about 8 minutes, or until the couscous had fully absorbed all the water. Fluff with a fork and top with roasted tomato stuff.

Top with parmesan or nutritional yeast if you are into it.

Enjoy!

What a way to start the day, with a mouth full of c words%u2026%u2026.Caraway, cauliflower, chick peas and cabbage%u2026What did you think I meant?

This week has been nippy, no, its been chilly%u2026..nah, it’s been freaking freezing! Yeah, freezing cold. When I woke up this morning to walk the pup, it was 5 degrees. So needless to say, when it gets this cold, I like to keep inside. Tying not to be a complete lazy bones, I went to town on my spices%u2026 refilling jars with all the little baggies scattering the kitchen, screwing on lids, and wiping down the shelves. Not a bad accomplishment for a day. While cleaning I came upon a little bag or caraway seeds, %u00a0Not enough to warrant a jar on the wall, but defiantly enough for one dish. %u00a0

When I think of the bright, somewhat sweet and peppery caraway, I think cabbage.(anything cabbage and I am sold) A big pan cabbage, added cauliflower for the mister,(his favorite) creamy chick peas because we need %u00a0protein and they be tasty, and of course mustard, because everything tastes better with mustard.(I’ll let you in on a little secret.I eat a lot of mustard, I am kind of obsessed. Mustards of all kind; grainy, homemade, dijon%u2026but usually just plan old yellow. And I eat it on everything.. but my go to is French’s yellow mustard and carrots%u2026don’t judge) A warm, bright and filling dish, perfect for a freezing cold evening stuck inside. You can eat it as main dish or add a pile of quinoa or wild rice, or even a big plate of greens. What ever say you eat it, you and your stomach will be happy.(If your worries about cabbage bloat..don’t be. Cooking cabbage helps breaks down the enzymes that create gas, plus caraway has anti bloating properties%u2026WIN!)%u00a0

Cabbage, cauliflower,(fresh of frozen%u2026.I used frozen in this recipe) pre-cooked or canned chick peas, caraway seeds, yellow mustard, and salt..(I added pepper too)

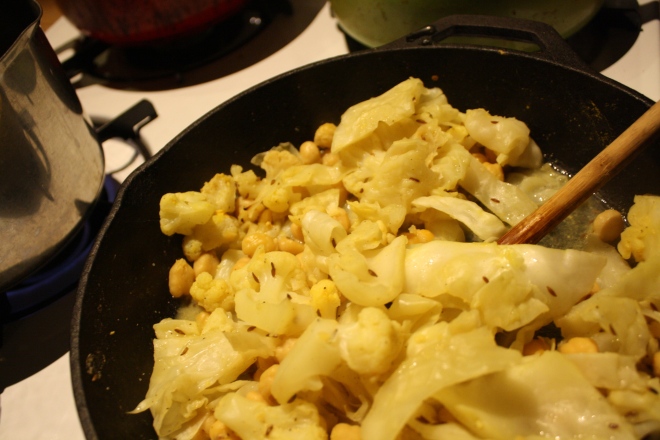
Chop the cabbage and toss into a lightly oiled pan with the rest of the stuff. Heat pan with everything but water %u00a0for a couple of minutes.. to warm the caraway and give everything a cooking head start, then add the water. Stick a lid on it and let simmer.%u00a0After about 15 minutes, give it a stir or two and do a taste test. At this point, it’s up to you%u2026how cooked you want the veggies? I kept mine cooking for another 10 minutes. I also added another 1/2 cup of water. Not enough water and the pan will burn, a little extra water is good, it creates a yummy broth.

When you are happy with the flavor and doneness, eat it. I made myself a %u00a0bowl with a heap of pickled beets(holy yes!). I am sorry if you don’t have any pickled beets, but the dish is still amazing without them. %u00a0Fresh ground pepper really does the trick too!

So there you go, make it tonight, it will make you warm,smart and happy

-C

serves 2-3

  • 1/2 small head of green cabbage(about 2 cups chopped)
  • 2 cups cauliflower(fresh or frozen)
  • 1 cup cooked chick peas
  • 1 1/2 -2 cups water
  • 1 tablespoon caraway seed
  • 2 tablespoons yellow mustard
  • salt and pepper to taste

Lightly oil a medium sized skillet and add all ingredients except water. Heat for a few minutes to warm up veggie and caraway seeds then add a 1 1/2 cups of water. Keep on medium heat with a lid and stir on occasion If water evaporates completely out, add another 1/2 cup. %u00a0Dish is done when veggies are tender.. about 20 minutes%u2026.but whenever tastes best to you!

%u00a0Happy Hanukkah!!! Today is the first day of the %u00a0festival of lights and I wanted to send a little love towards those who celebrate it.

I am not going to lie, I don’t know much about Hanukkah but I do know that its customary to eat fried foods during the holiday. The oil represents the miracle of the oil that burned for eight days ands.nights when it should have lasted for only one night. That’s a cool reason to celebrate.. So a lot of food eaten during the holiday is fried, therefore I must fry, and what better than potato latkes.

I don’t usually fry anything. But again, I don’t think I used as much oil with these as I could have..just enough to cook and not stick. Hey, it’s the holidays and this oil had meaning so it’s completely a ok to eat a little fried, just make sure to eat lots of good healthy stuff too!

I didn’t actually use all the potatoes in the picture, but I wish I did. There was the perfect amount for dinner for two people, but I wanted to make a few extra for left overs%u2026.there were none. Oh well.%u00a0I did a matchstick dice for the apples.. I didn’t want the apples to be to chunky%u00a0and I didn’t want them to turn into sauce so the match stick worked well. After I diced the apples, I squeezed a little lemon over the top to keep the apple from turning brown.

I start grating the potatoes and onion, and whoa! %u00a0Imagine my surprise when %u00a0one of the potatoes was purple%u2026 I got pretty excited.The color is so beautiful. and made the latkes look so nice%u2026It was meant to be.Super squeeze the juices out of the grated potato and onion. If you don’t get most of the liquid out, the potato won’t crisp up and will fall apart and be and it will be gross. So SQUEEZE!%u00a0Add in the egg, cornstarch, salt and pepper and mix it on up. Did I mention that I was making these for the mister and the GF sister..No flour, just cornstarch. I think they might have come out even better without the flour%u2026so yeah, these babies are gluten-free.

Your mixture is going to start to get a little watery again. Its cool, just squeeze it out with your hands and smash into patties.Enough oil to cover the bottom of the pan on medium heat. Test the oil to make sure its hot enough before sticking the latke n the pan. To test, sprinkle water in pan, if it sizzles, its ready.Working in batches, %u00a0fry each latke on each side for around 5 minutes..you don’t want to cook to fast or the inside of the latkes will be raw. I always do a tester and feed it to nick. He’s my guinea pig%u2026.He said they were awesome..%u00a0With every batch made, stick on a wire rack and keep in the oven to stay warm. The rack keeps the bottom from getting soggy on the pan… so use it. %u00a0%u00a0 Roasted apples are the BOMB!!! %u00a0Its like eating apple sauce sticks or little bites of heaven(A bit dramatic, but these are so good) I roasted mine for 20 minutes, until they were nice and soft but not completely failing apart. If you are into it, add a touch of cinnamon%u2026I did’t this time, but you bet %u00a0I am going to be making myself a big ol bowl of roasted apples this week, and yes, I will top with cinnamon.%u00a0A %u00a0bowl of apple slaw, sour cream and lemon wedges%u2026.I put the latkes on a nice little pile of greens. A very good idea. %u00a0A dinner worth celebrating! I also served the latkes with roasted chickpeas and cailflower%u2026for more of a meal%u2026( Mini recipe%u2026 Cauilfower and chick peas drizzled in olive oil, %u00a0tossed in salt pepper and garlic, roasted 30 minutes and topped with lemon) A little added veggie and protein%u2026.I am looking out for you people.

There we have it%u2026my variation on a traditional food. Enjoy your fried pancakes of potato and onion, they are a food worth a celebration.

HAPPY HANUKKAH!

Potato Latkes with Roasted Apple Slaw

Ingredients

  • 3 medium potatoes
  • half of a small onion
  • 2 eggs
  • 2 tablespoons corn starch
  • vegetable oil
  • salt and pepper
  • 2 medium apples
  • sour cream(optional)

Wash and cut %u00a0apples into match sticks%u2026 Place on a parchment lined baking sheet and stick in oven. Let roast for 15-20 minutes or until the apple is nice and soft. Remove and set aside.

In a large bowl, grate the potatoes and the onion. Transfer the mixture into a clean towel and squeeze the crap out of it to remove as much liquid as possible. Return to bowl and add the two eggs, corn starch and salt and pepper. In a large skillet on medium heat, drizzle enough oil to completely cover the bottom..Work in batches and after each batch, add a bit more oil to cover the pan.%u00a0Once the oil is hot place squashed latkes %u00a0into oil. Fry each side until crispy and brown, about 3-5 minutes. When fully cooked, place on a wire rack in the oven to stay warm and crisp. %u00a0When ready to serve, top with roasted apples and a dollop of sour cream. %u00a0You can serve the latkes on top a bed of greens..Its a good way to make the pancakes more meal like.

Enjoy

Sunday Happy — The Lovely Crazy

January 26, 2020 by maximios • Blog

These guys know how to pose for the camera, no? Haha. Goobers.

Definitely a hell of a week. Good fo us here in our little home bubble, but crazy as shit elsewhere. I want to run screaming and crying when I think about what has been happening around the country, to those kids to those families, and  just that overall state of things. Not good, not good at all. . AAAAGGGGHHHH!!!!! I think we humans just need to be better, some more then others, some way way way more then others.  I just need to say that. 

We kicked our week off with super humid and hot weather which of course was right when I needed to turn the oven on to make cookies for the party, Barbs graduation party. I hesitated for a moment, thinking it wasn’t with it.  but I made them and they were the best cookie ever, and Barb ate them all and way happy. Good deed done. After all the sweat, we got the cookies to the party, right after the mr took Judah to get his hair cut and after they got caught in the rain, and managed to have ourselves a good time (there was AC) Yeah sure it was a BBQ and it was raining, but that didn’t stop everyone from showing up, eating a shit ton of crap, and playing with fire, or more like sparklers,  butand they were not used as directed.

After a hot Monday party day, the rest of the week just seems quick and easy. We did some work as usual, but also were able to get in some good stuff.  In between cutting hole in attics ceilings  and crawling on roofs, the mr has been working hard on the tree house.  Spending his nights out in the tree, sawing and hammering away 20 feet high in the tree. (he says it is not 20 feet high, I beg to differ.) As for me, I am currently in the middle of like 10 different projects right now and it’s getting to the point where I can’t fall asleep because my mind is full of pulling handles, carving wood, and mixing paint colors. And on top of all the projects I am in the middle of, the garden is getting to that point where it is flourishing and growing and I am needed out there to weed, harvest, and replant. I am eating my weight in lettuces from the garden. Then as soon as I am stuffed as much as possible, I go to pick up farm share and get even more greens. Honestly, it just makes me happy. I think I might be a rabbit.  

And then it was officially Summer!. The mr and I decided to take the first day of summer and do a few summer things. We tossed the kayaks into the truck and spend the morning on the clear, crisp water where we saw a bold eagle rip a fish from the water and I kept running into a blue heron. After  that we came home and popped our heads into the bee hive and gave them more room to grow. Then Meg and So stopped by to eat their lunch and help me plant some lettuce, and we spent the rest of the day outside doing outside things. If summer days were always like that, I would never complain. 

Friday night the littles came back over for dinner and scooter riding. I bouched a batch of pizza dough (I forgot to make dough until last minute so I tried to get it to rise in the microwave (I saw it on GBBO). I forgot to turn the level down and ended up with a thick brick of dough), but was lucky enough to have just enough sourdough left into fridge to feed the masses.  Crisis adverted.  The littles ate all my  the rest of my food (all the cucumber, beans, andpeas at the very least, they stayed away from my lettuce) and all the popsicle and left me with demands of cupcake making and sleep overs. Those littles know what they want. And we are suckers because  we usually do whatever they want. 

Yesterday I spent half the day working at the studio, washing clay off of the walls and mixing  glazes . After that I came home, cleaned the crap out of my house, and kind of passed out. I think all the everything from the week kind of caught up with me. 

That leaves me with today. It is suppose to rain later so I guess it is an early bike ride to the gym then its all about the book I am reading, and the hunk of wood and hulk of clay that are calling my name. I wish I could read and do other things at the same time. Maybe it’s time to get down with audio books? Or podcasts. I should have the mr show me how to do that.

Some of the lighter things that I checked out on the internet this week. I’ll spare you any of the heartbreaking articles… I just can’t.

-I gave Emersion the nickname Koko because he looks and acts like a little gorilla. Koko the Gorilla’s Most Iconic Moments RIP Koko the gorilla.

–Suck Less. This can apply to many things, but the article is about straws.. And yes, we should suck a lot less. 

-Plants are amazing, ans can be dangerous. (I think they are getting sick of humans) Just What We Need — a Pretty New Plant Trying to Blind Us and especially is you live in Vt. Beware The Poison Parsnip: Health Officials Warn Of Common Roadside Plant. It might look pretty, but don’t touch it, it will leave you with something nasty.

–Stop Putting Bananas in Your Fruit. Just stop doing it because seriously, it gets fucking gross.

-Super fucked. Some Rivers Are So Drug-Polluted, Their Eels Get High on Cocaine

-These are pretty badass. Vibrant Paper Fruits and Vegetables by Ann Wood Look Good Enough to Eat

–Here’s the Truth — Once and for All — About Those Misting Systems at the Grocery Store. I hate the misters but understand them 

–How Pots and Pans Turned Us Into Creative Cooks. Imagine not having a pot of pan to cook in. That would suck.

–This house in Maine. Swoon.

And pictures from the week.

THE LOVELY CRAZY

January 26, 2020 by maximios • Blog

I have been on a severe citrus kick lately. Oranges, limes, lemons, kumquats. I want it all and have been eating it all. A lot of it all. Espeically the oranges which are just so good right now. We have been going through bags of them faster then ever and I am not mad about it.

Which then brings us to chili. Chili is one of the things that I make on a very regular bases. It%u2019s beans, veggies, tomatoes, and a ton of spices. Easy as can be, most people like it, and I never get sick of it. I mean, how could you get sick of it, it is so good! Anyway. Chili, its great but have you ever added orange to it? Oh man is it amazing. Bright and acidic and sweet. The whole pot of chili just radiates more goodness, more intensity, more, moreness. (I know that doesn%u2019t make sense but you get it.) It%u2019s a whole new level of chili and I don%u2019t if there will ever be a time when I don%u2019t add orange to my chili again. Well at least during citrus season.

But enough about all that, what you really want is to just start making this orange black bean chili so you can eat it. I hear you, so I%u2019ll let you at it.

To the chili!

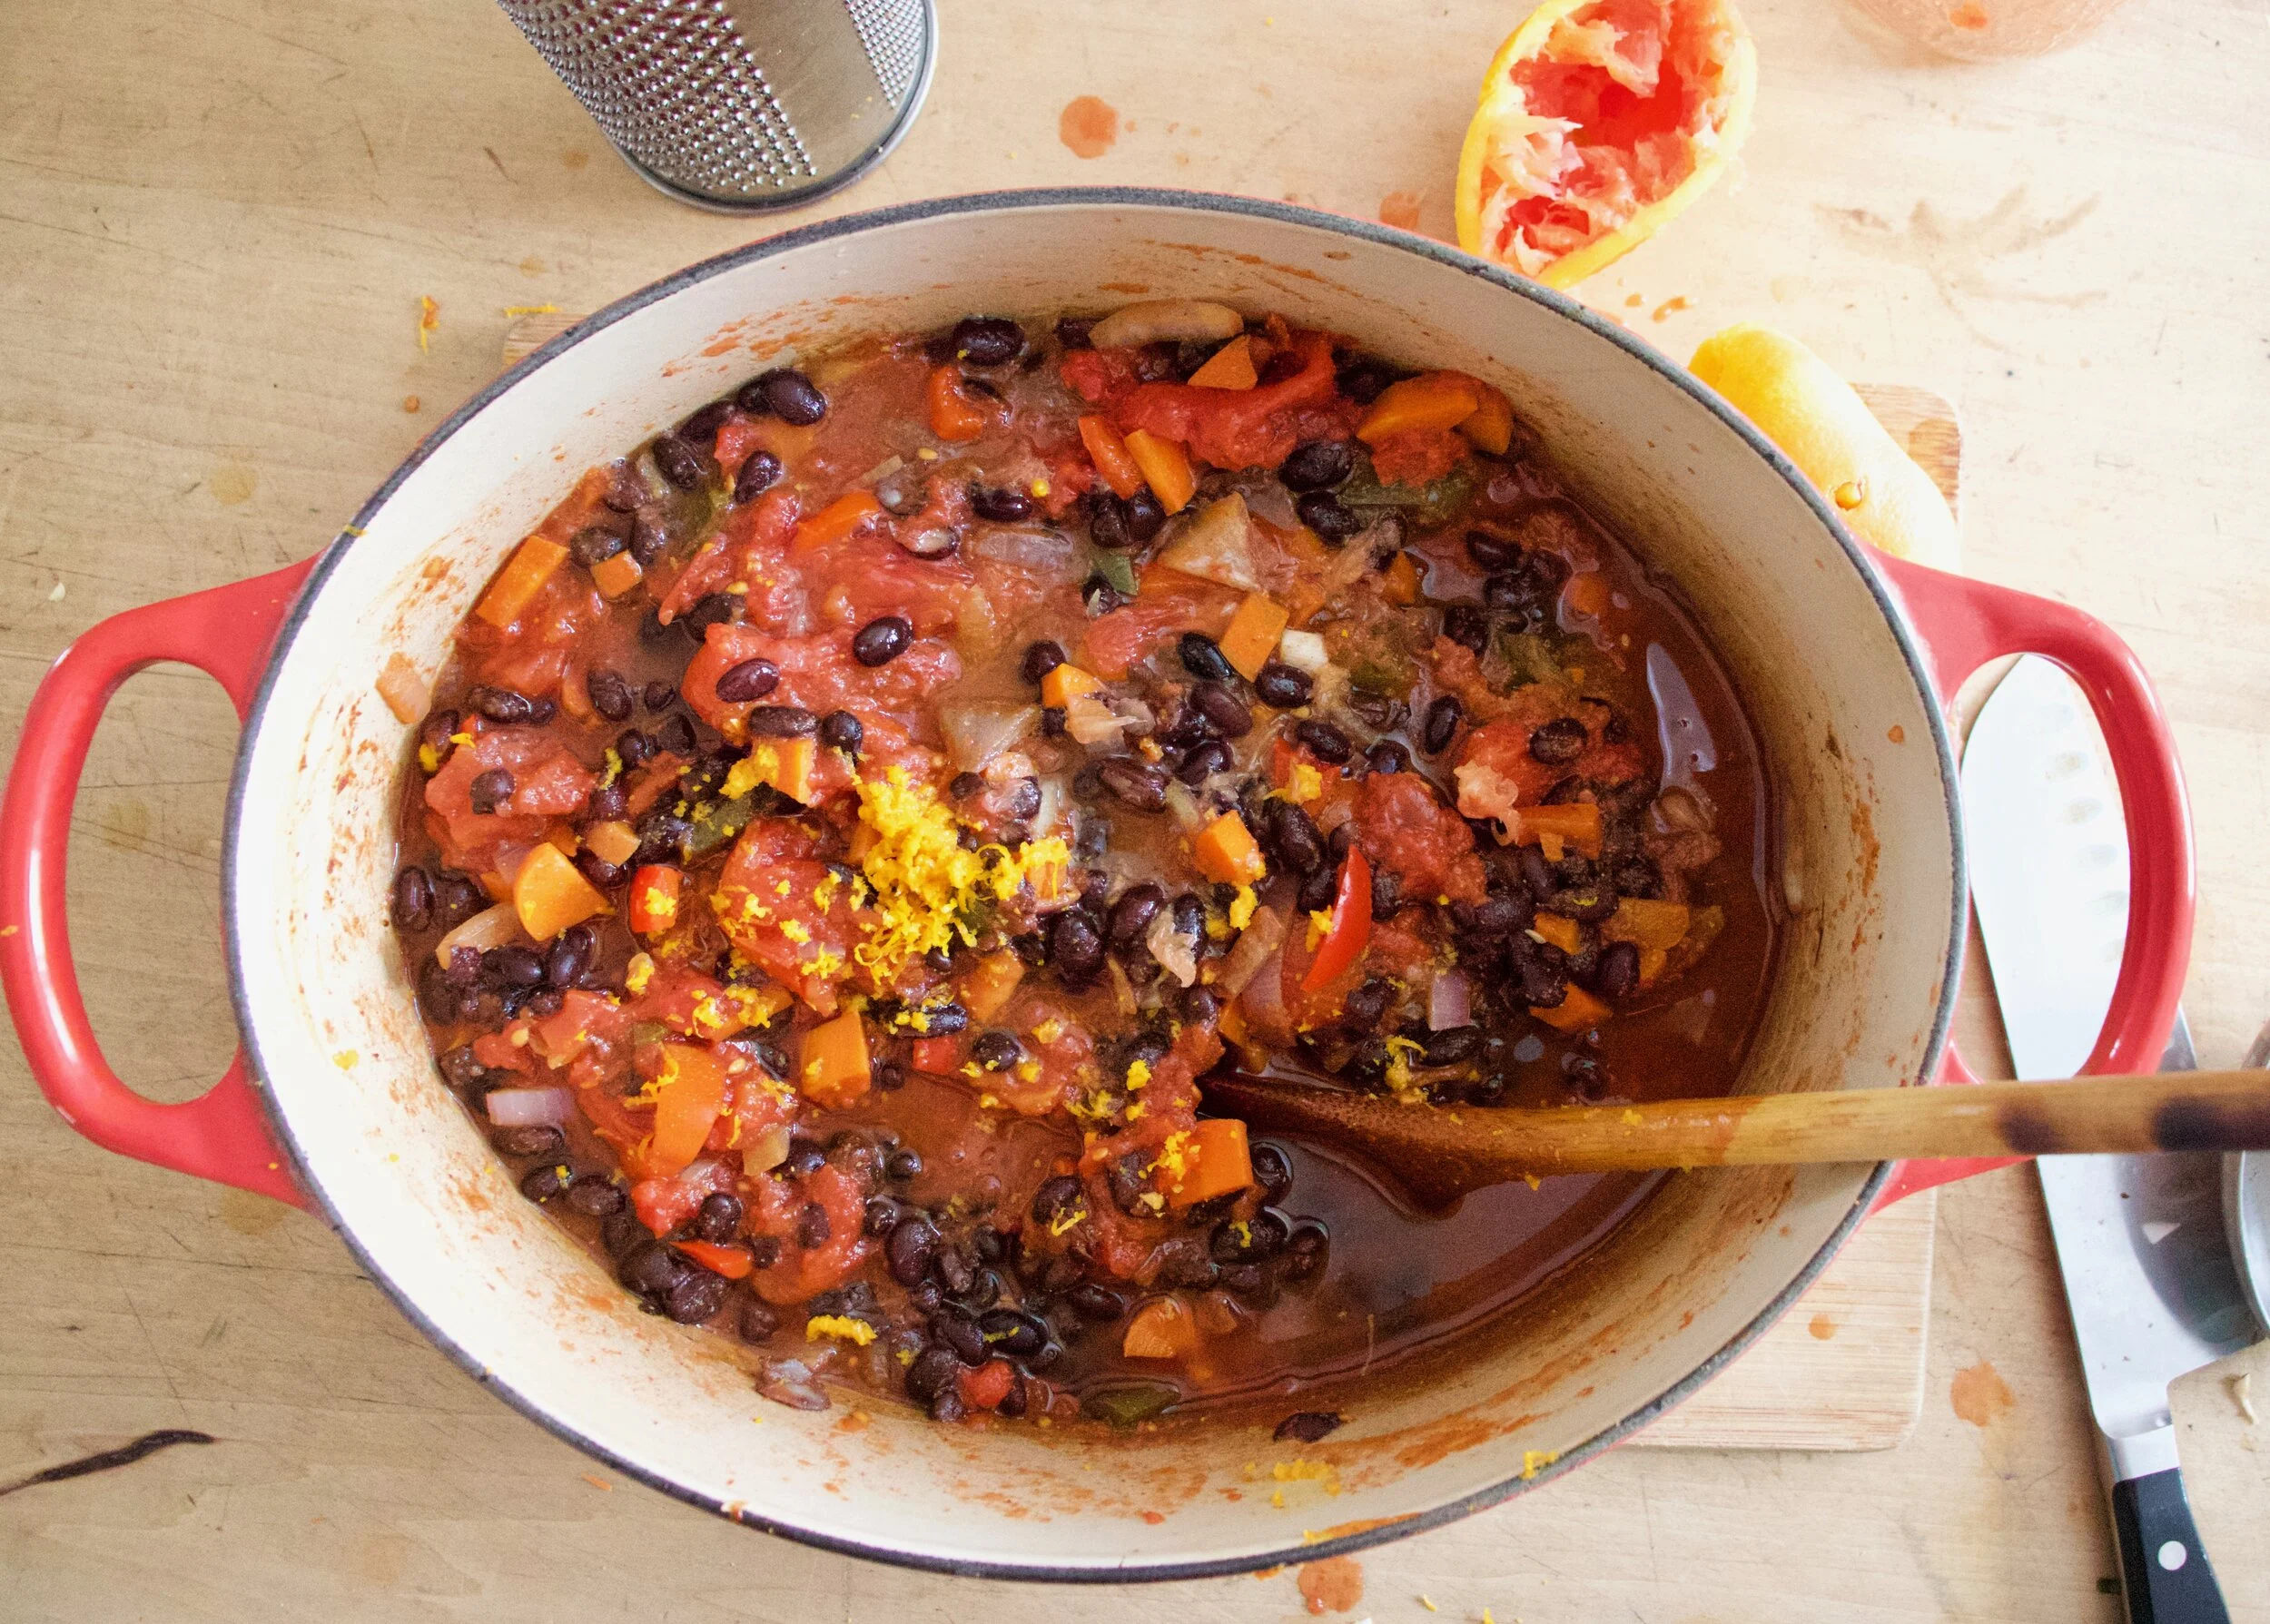
The stuff. Oranges, black beans, crushed tomatoes, an onion, a couple carrots, a pepper, and jalape%u00f1os. Also lots of cumin, chili powder, ground ginger, garlic powder, and salt and pepper.

Small dice up the pepper, onion, carrots, and jalape%u00f1os. Don%u2019t want it super spicy, don%u2019t add the jalape%u00f1os.

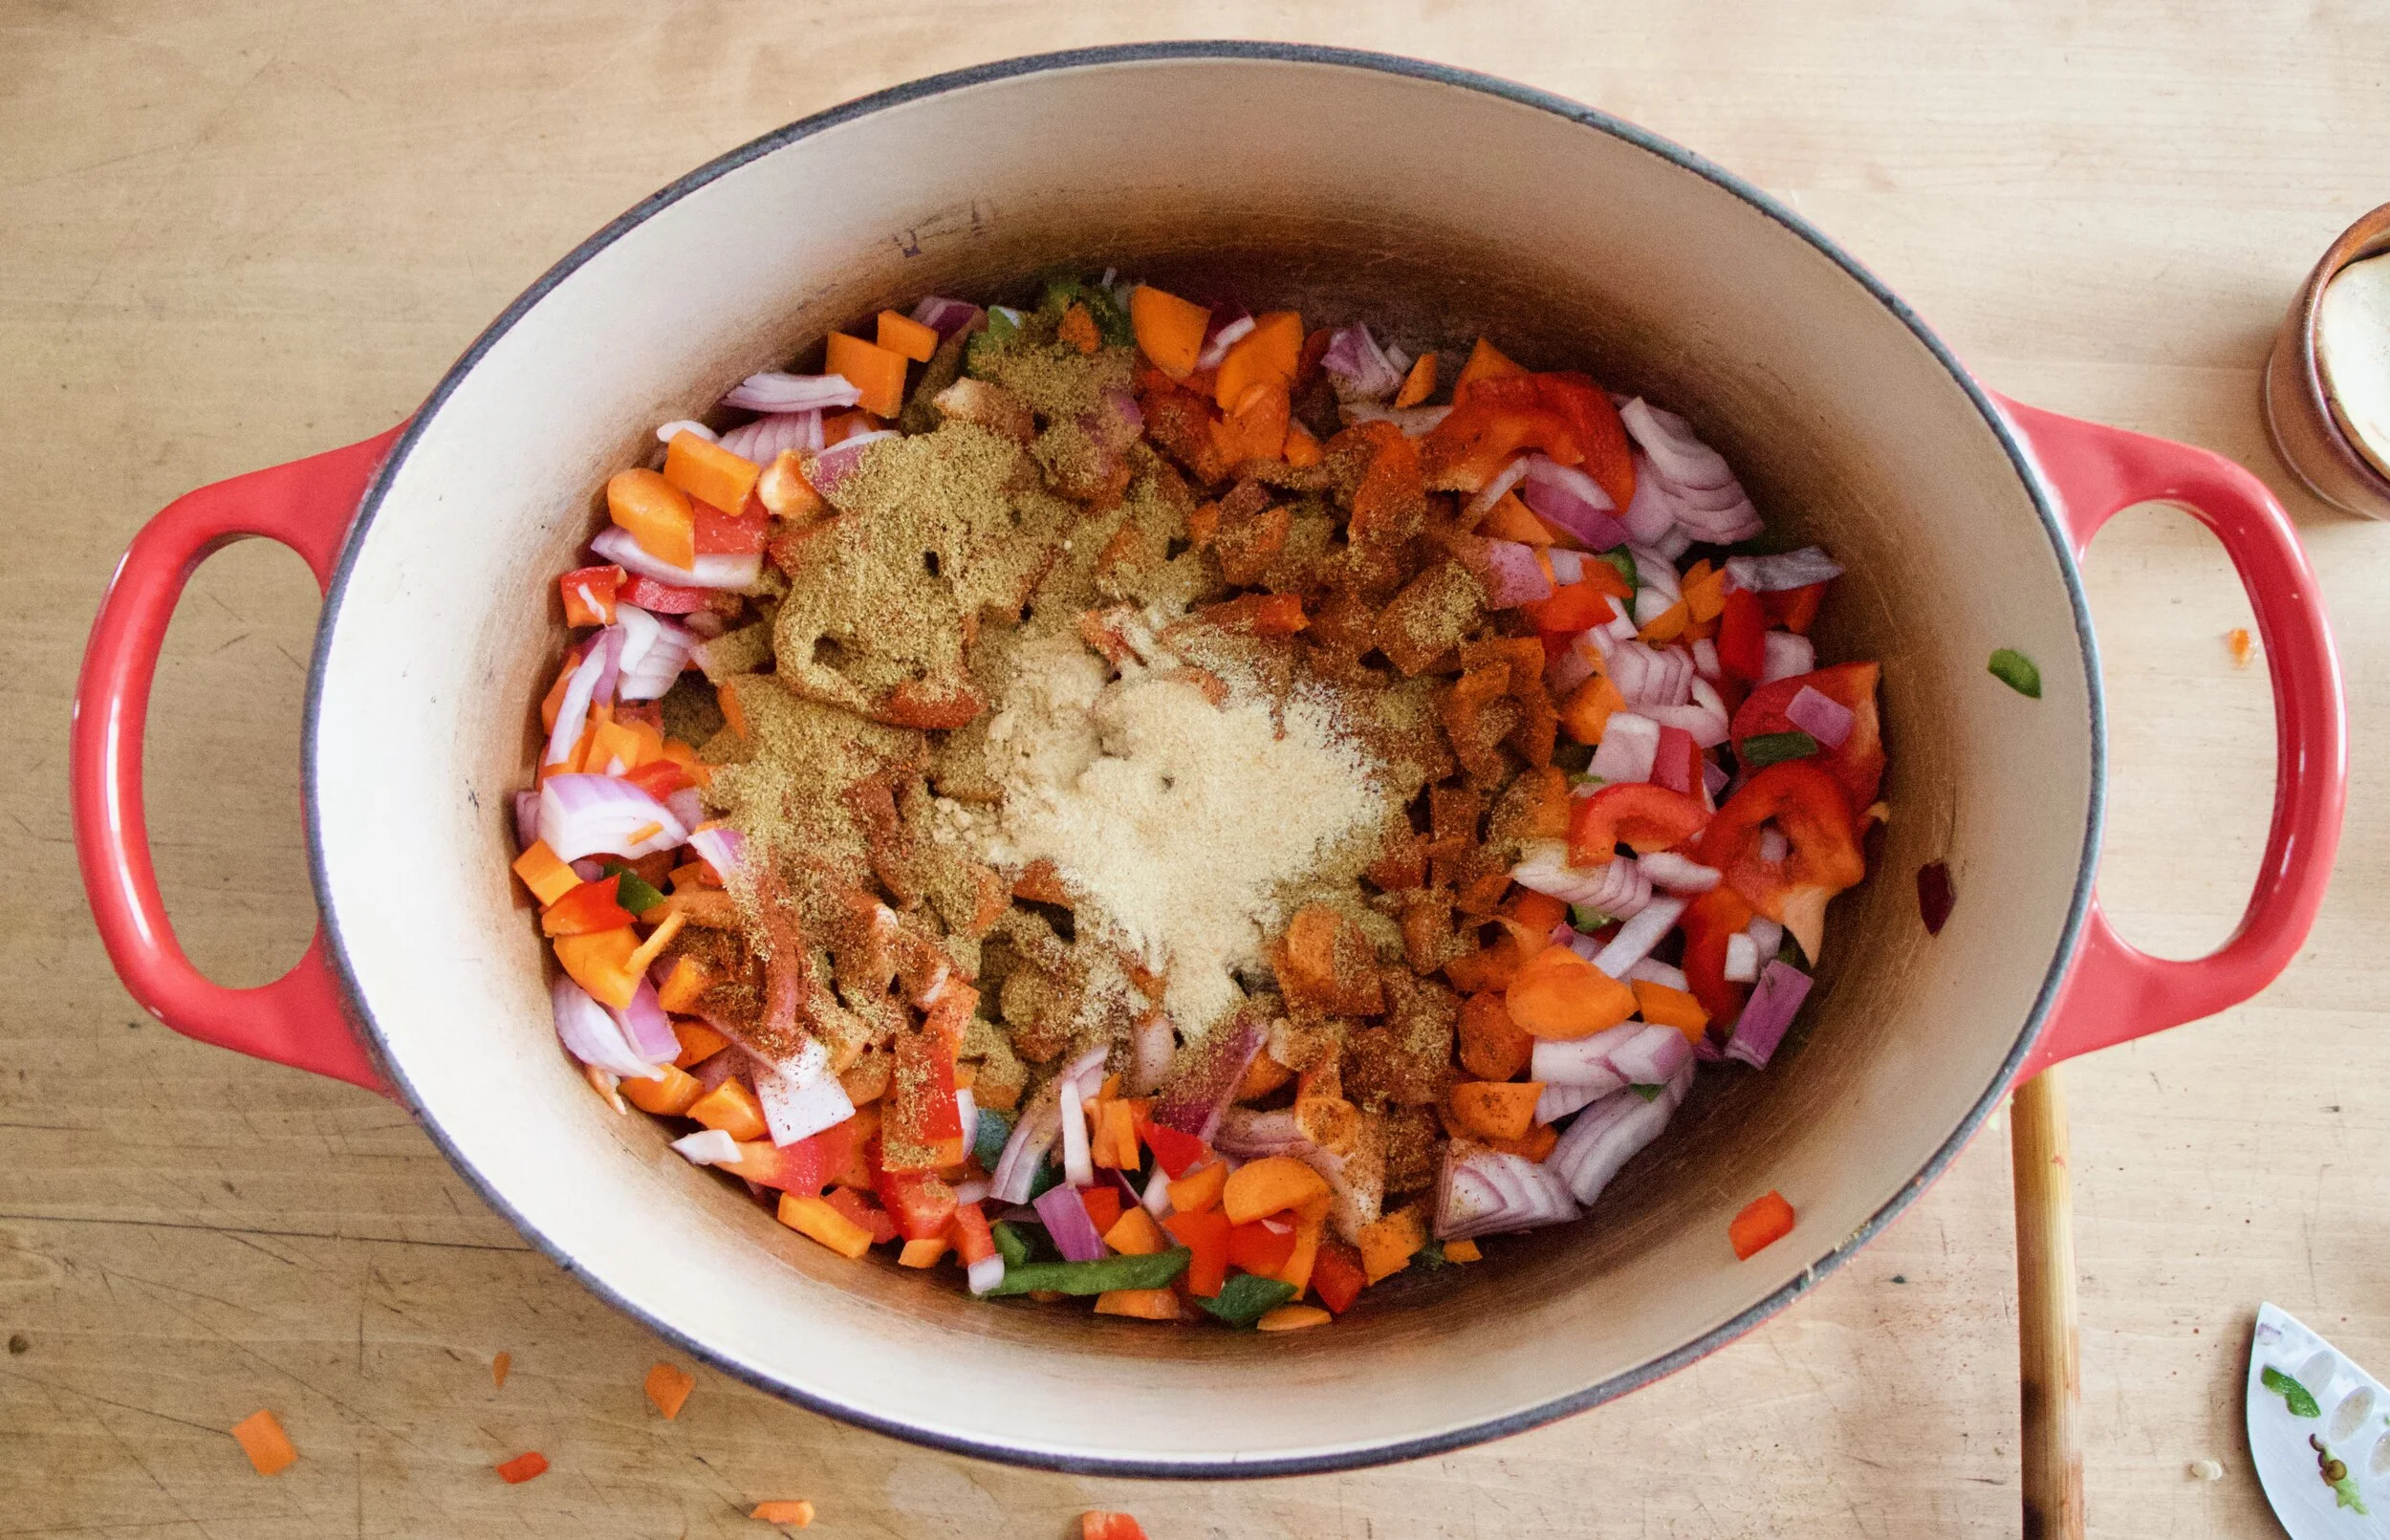
All that stuff gets tossed into a big pot along with all the spices, some salt and pepper, and a little water too. Place on stove to start cooking down the veggies.

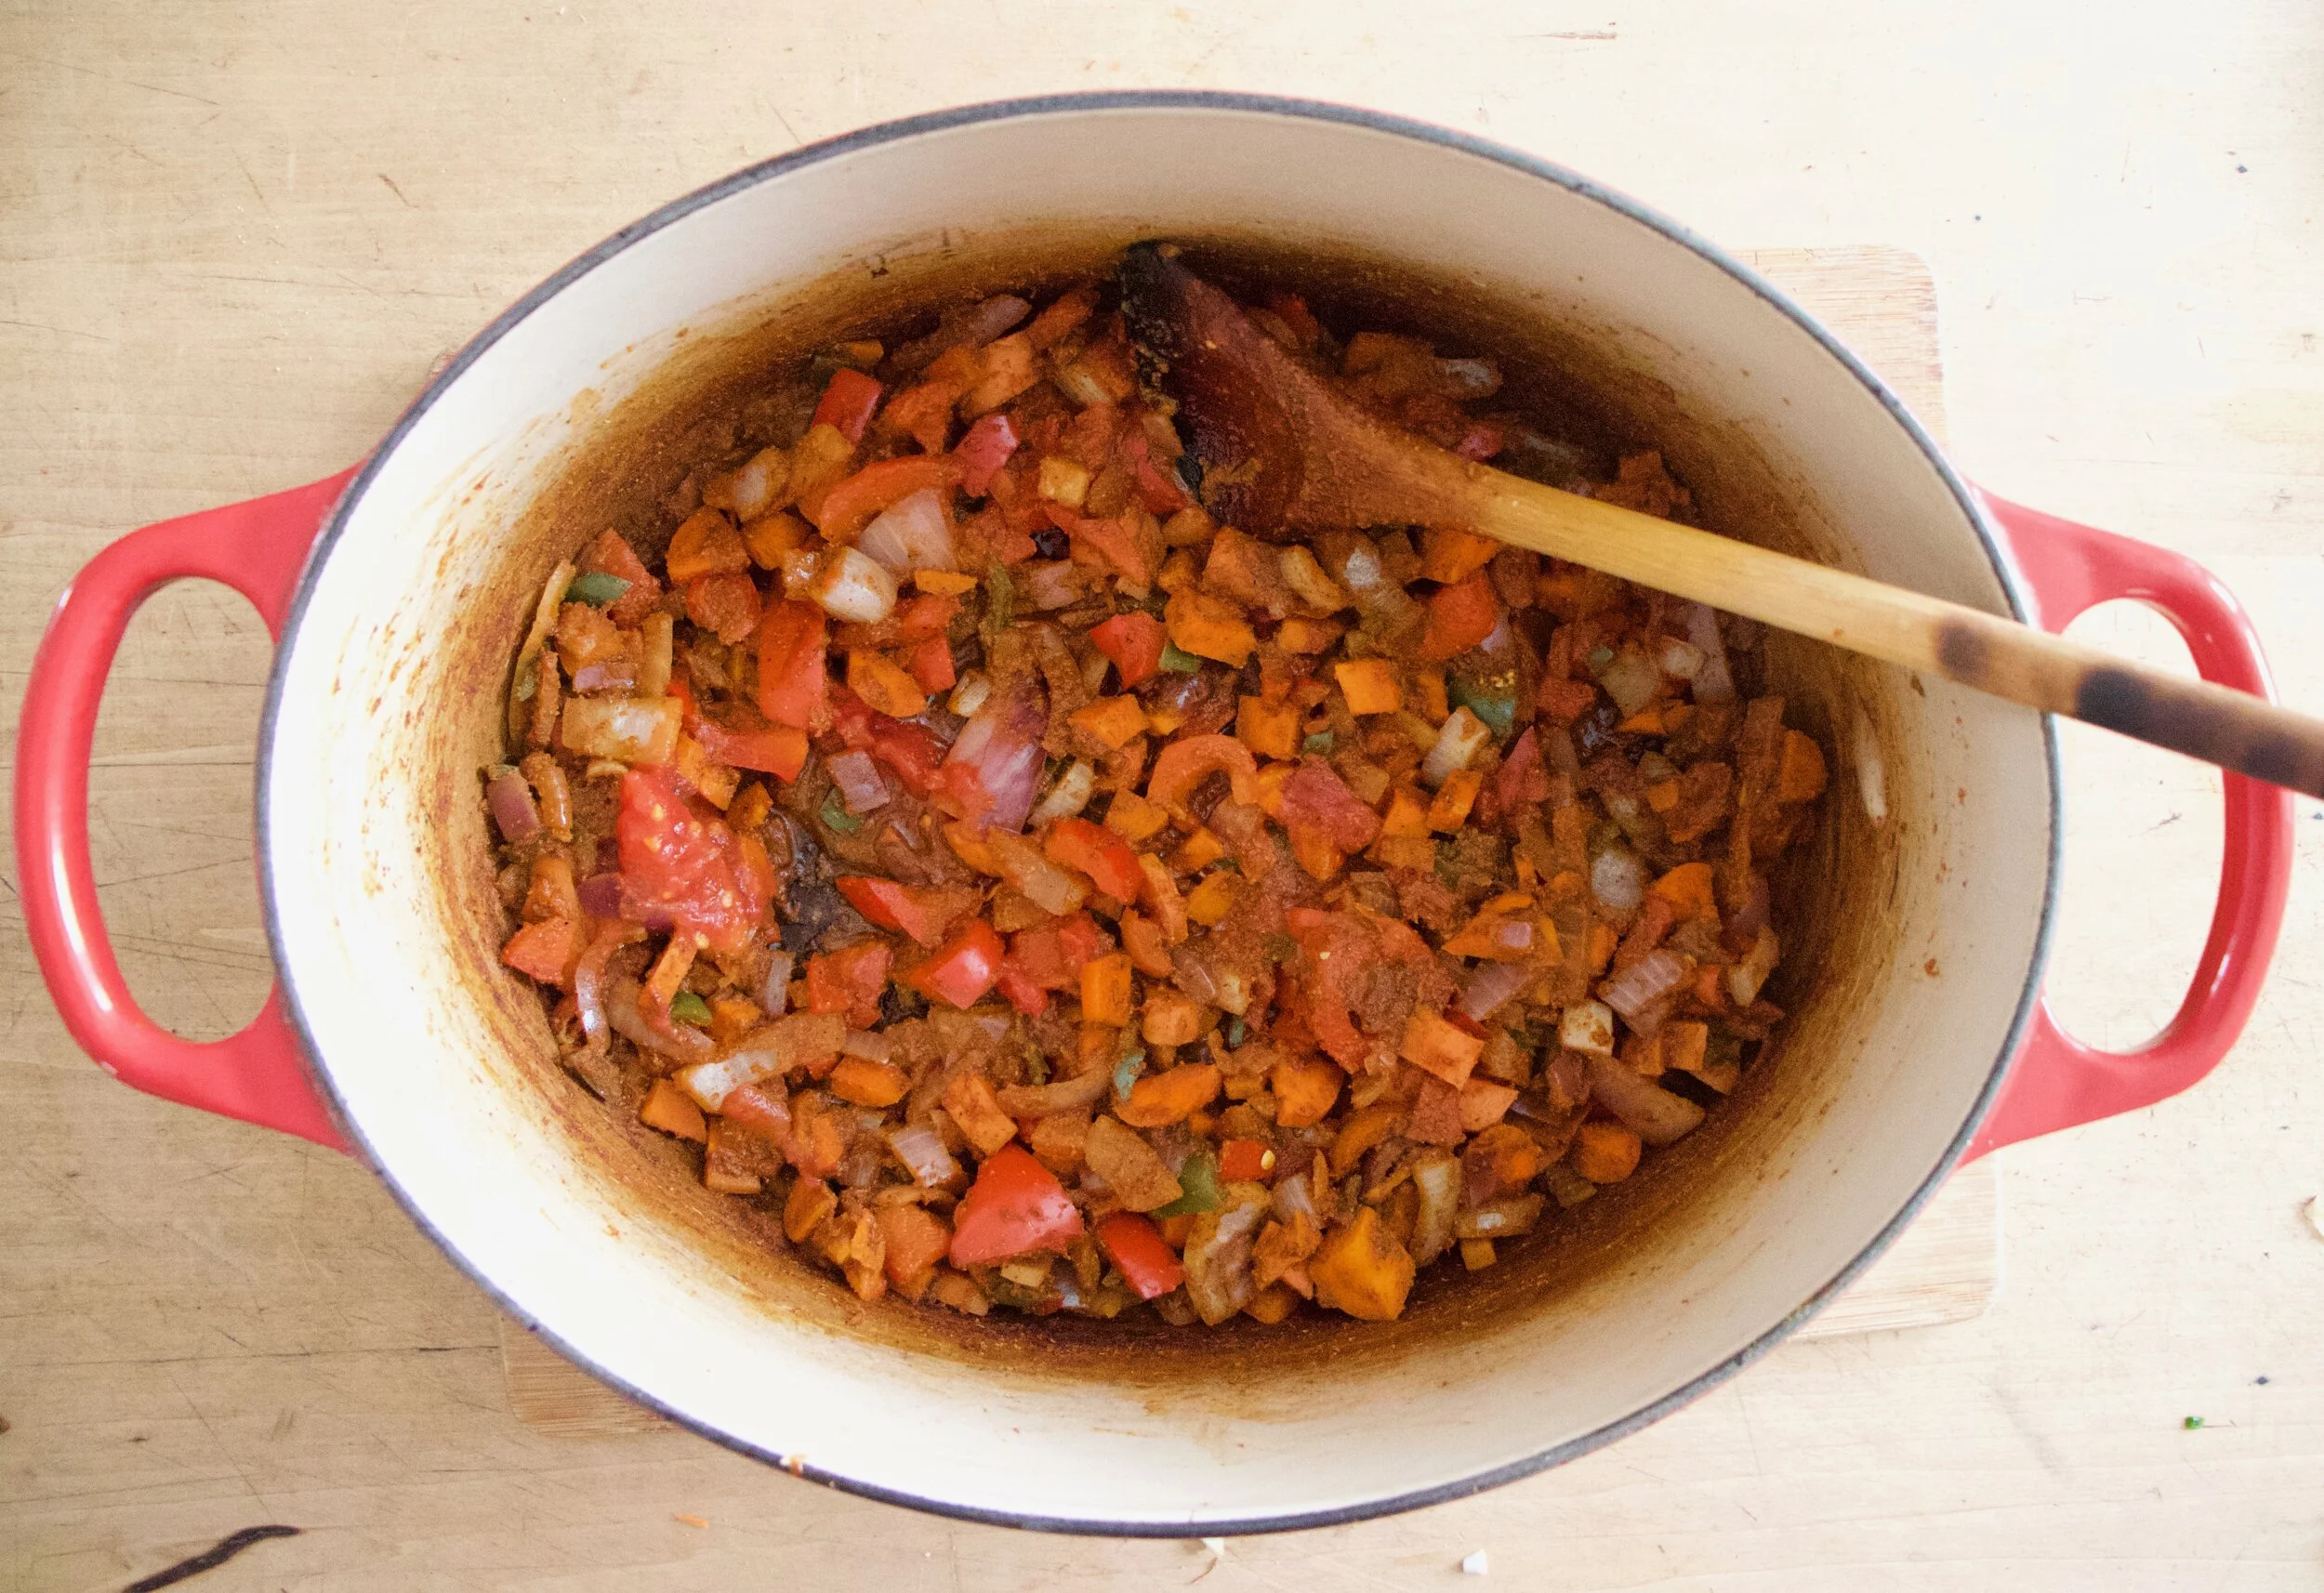
Slightly tender and smells amazing.

Now add in the beans, the tomatoes, and the zest and juice of an orange. Mix it all up, set it back on stove and keep on cooking,

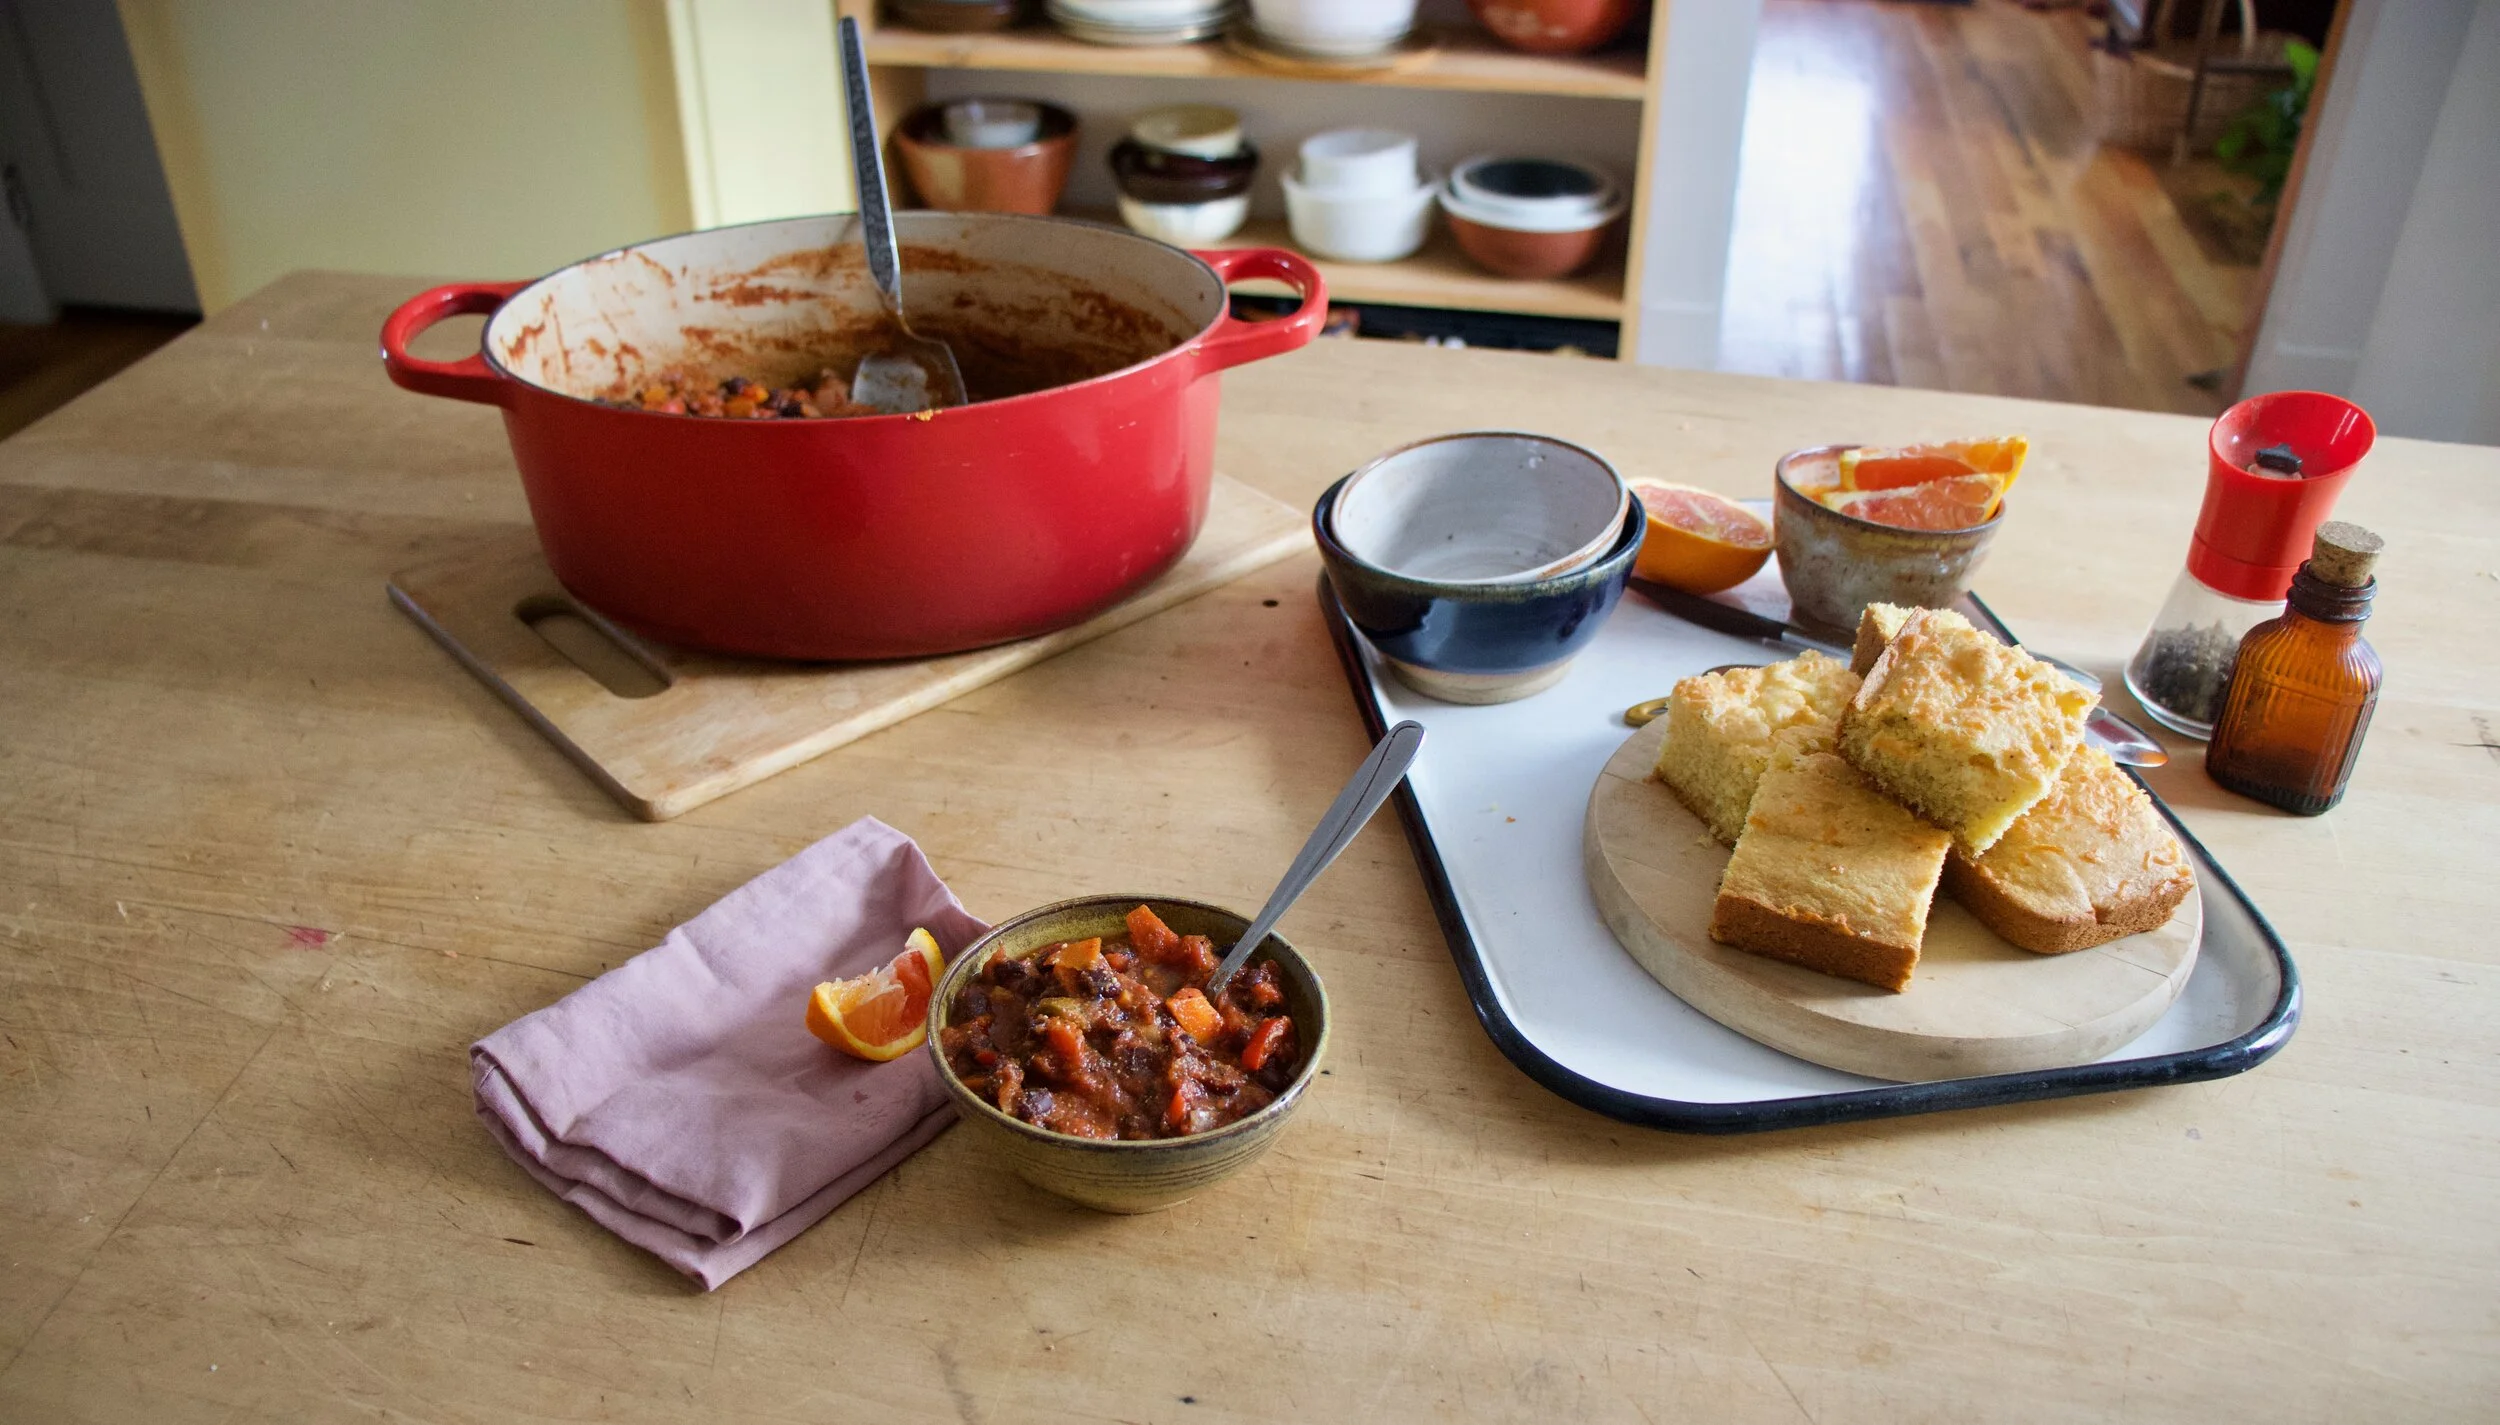
Now eat your chili, with extra orange slices to squeeze all over it of course. And maybe you want to serve it with some corn bread? That is entirely up to you, but who would be made about it?

-C

Serves 4-6 people

  • 1 pound cooked black beans drained (about 5 cups or 3 cans)

  • 5 cups crushed tomatoes (or 2 28oz cans)

  • 2 oranges (navel or cara cara work)

  • 2 carrots

  • 1 large onion

  • 1 bell pepper

  • 2 jalapenos (optional)

  • 2 heaping tablespoons cumin

  • 2 tablespoon chili powder

  • 2 teaspoons garlic powder

  • 2 teaspoons ground ginger

  • salt and pepper

Start by chopping up the veggies. Small dice the carrot, the onion and the pepper. If using jalape%u00f1o, dice that into small little bits too. And remove seeds for less heat or leave them if you like it. Once that is all cut up, dump it all into a large heavy bottom pot along with the cumin, chili powder, garlic and ginger powder, and about a teaspoon or so each of salt and pepper. Add about 1/2 cup water, mix it all up, and place the pot on stove on medium heat and start to cook the veggies and spices until they begin to smell fragrant and are ever so slightly tender, which should take 5-10 minutes.

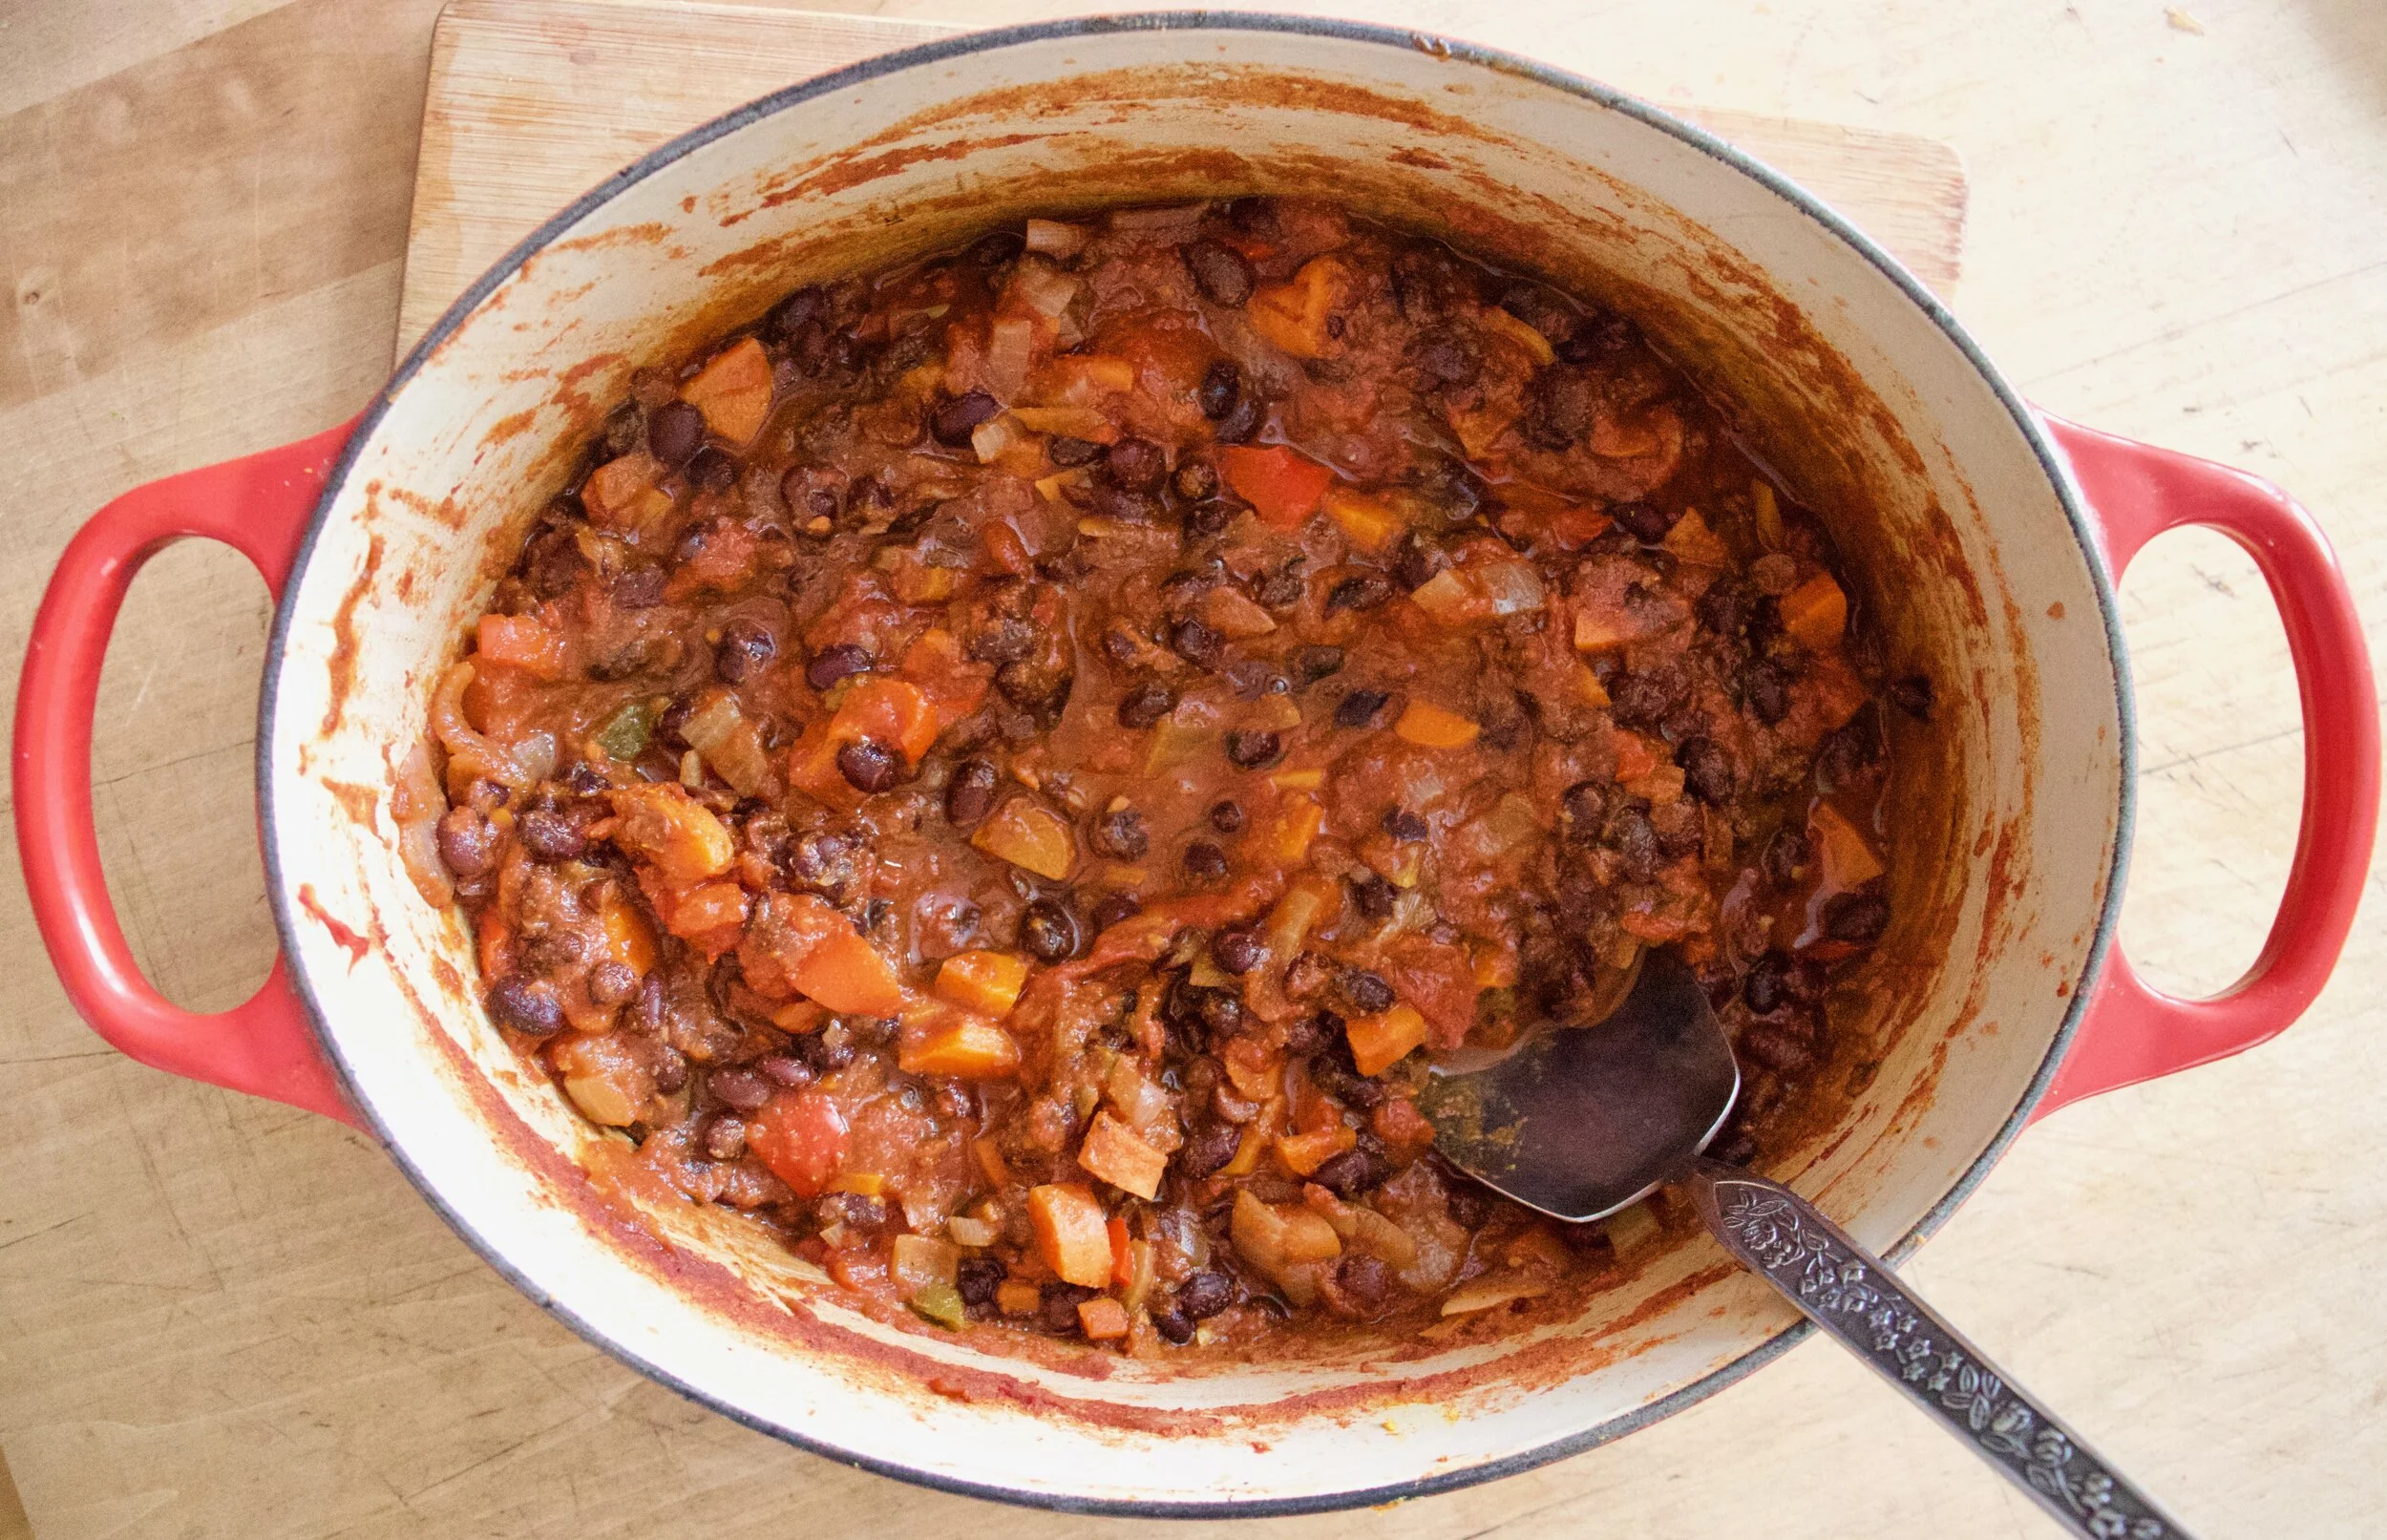
Now add in the beans, the tomatoes, and the zest and juice of one orange. Mix together and keep cooking on medium heat, partially lidded, for about 45 minutes to an hour, stirring once in a while, until the chili has thicken and tastes good to you.

Once done, season to taste with more salt and pepper and either stir the juice of the second orange into the whole pot or serve with slices of orange to squeeze on top.

Eat. Store any left overs in fridge. Tastes delicious cold too.

Mid week, I was doing a little pantry cleaning/ inventorying of what I had and needed when I came upon not one, not two, or even three. No, six. SIX, jars of jam. And there are 2 that are already opened in the fridge. I don%u2019t know why, but knowing that there was that much jam in the house made me a little uneasy. Six unopened jars is about 3 jars past my comfort zone. Sure there are so many things you can do with a jar of jam (jelly, preserves, and marmalade included) and now that I am thinking about it, is one of the reasons why I bought a few jars a while back. Then there was Christmas and I think we got at least two jars as gifts so it%u2019s not all my fault, but still, that is just too many jars of jam. Right there I needed to get rid of at least one jar. So muffins. Jam muffins, with poppyseed crust because it%u2019s pretty and nobody ever complains about poppy seeds, or at least they don%u2019t until after they eat them and have poppy seeds stuck in their teeth all day. But that is just our mouths way of saving a little for later, am I right? HA

Anyway, a quick and simple muffin recipe for all of you people out there that might have a jar or two too many of jam in the fridge or pantry%u00a0(I used apricot but any flavor(s) would work) and could use yourself a tasty little muffin situation. I mean who doesn%u2019t want a tasty muffin?

To the muffins.

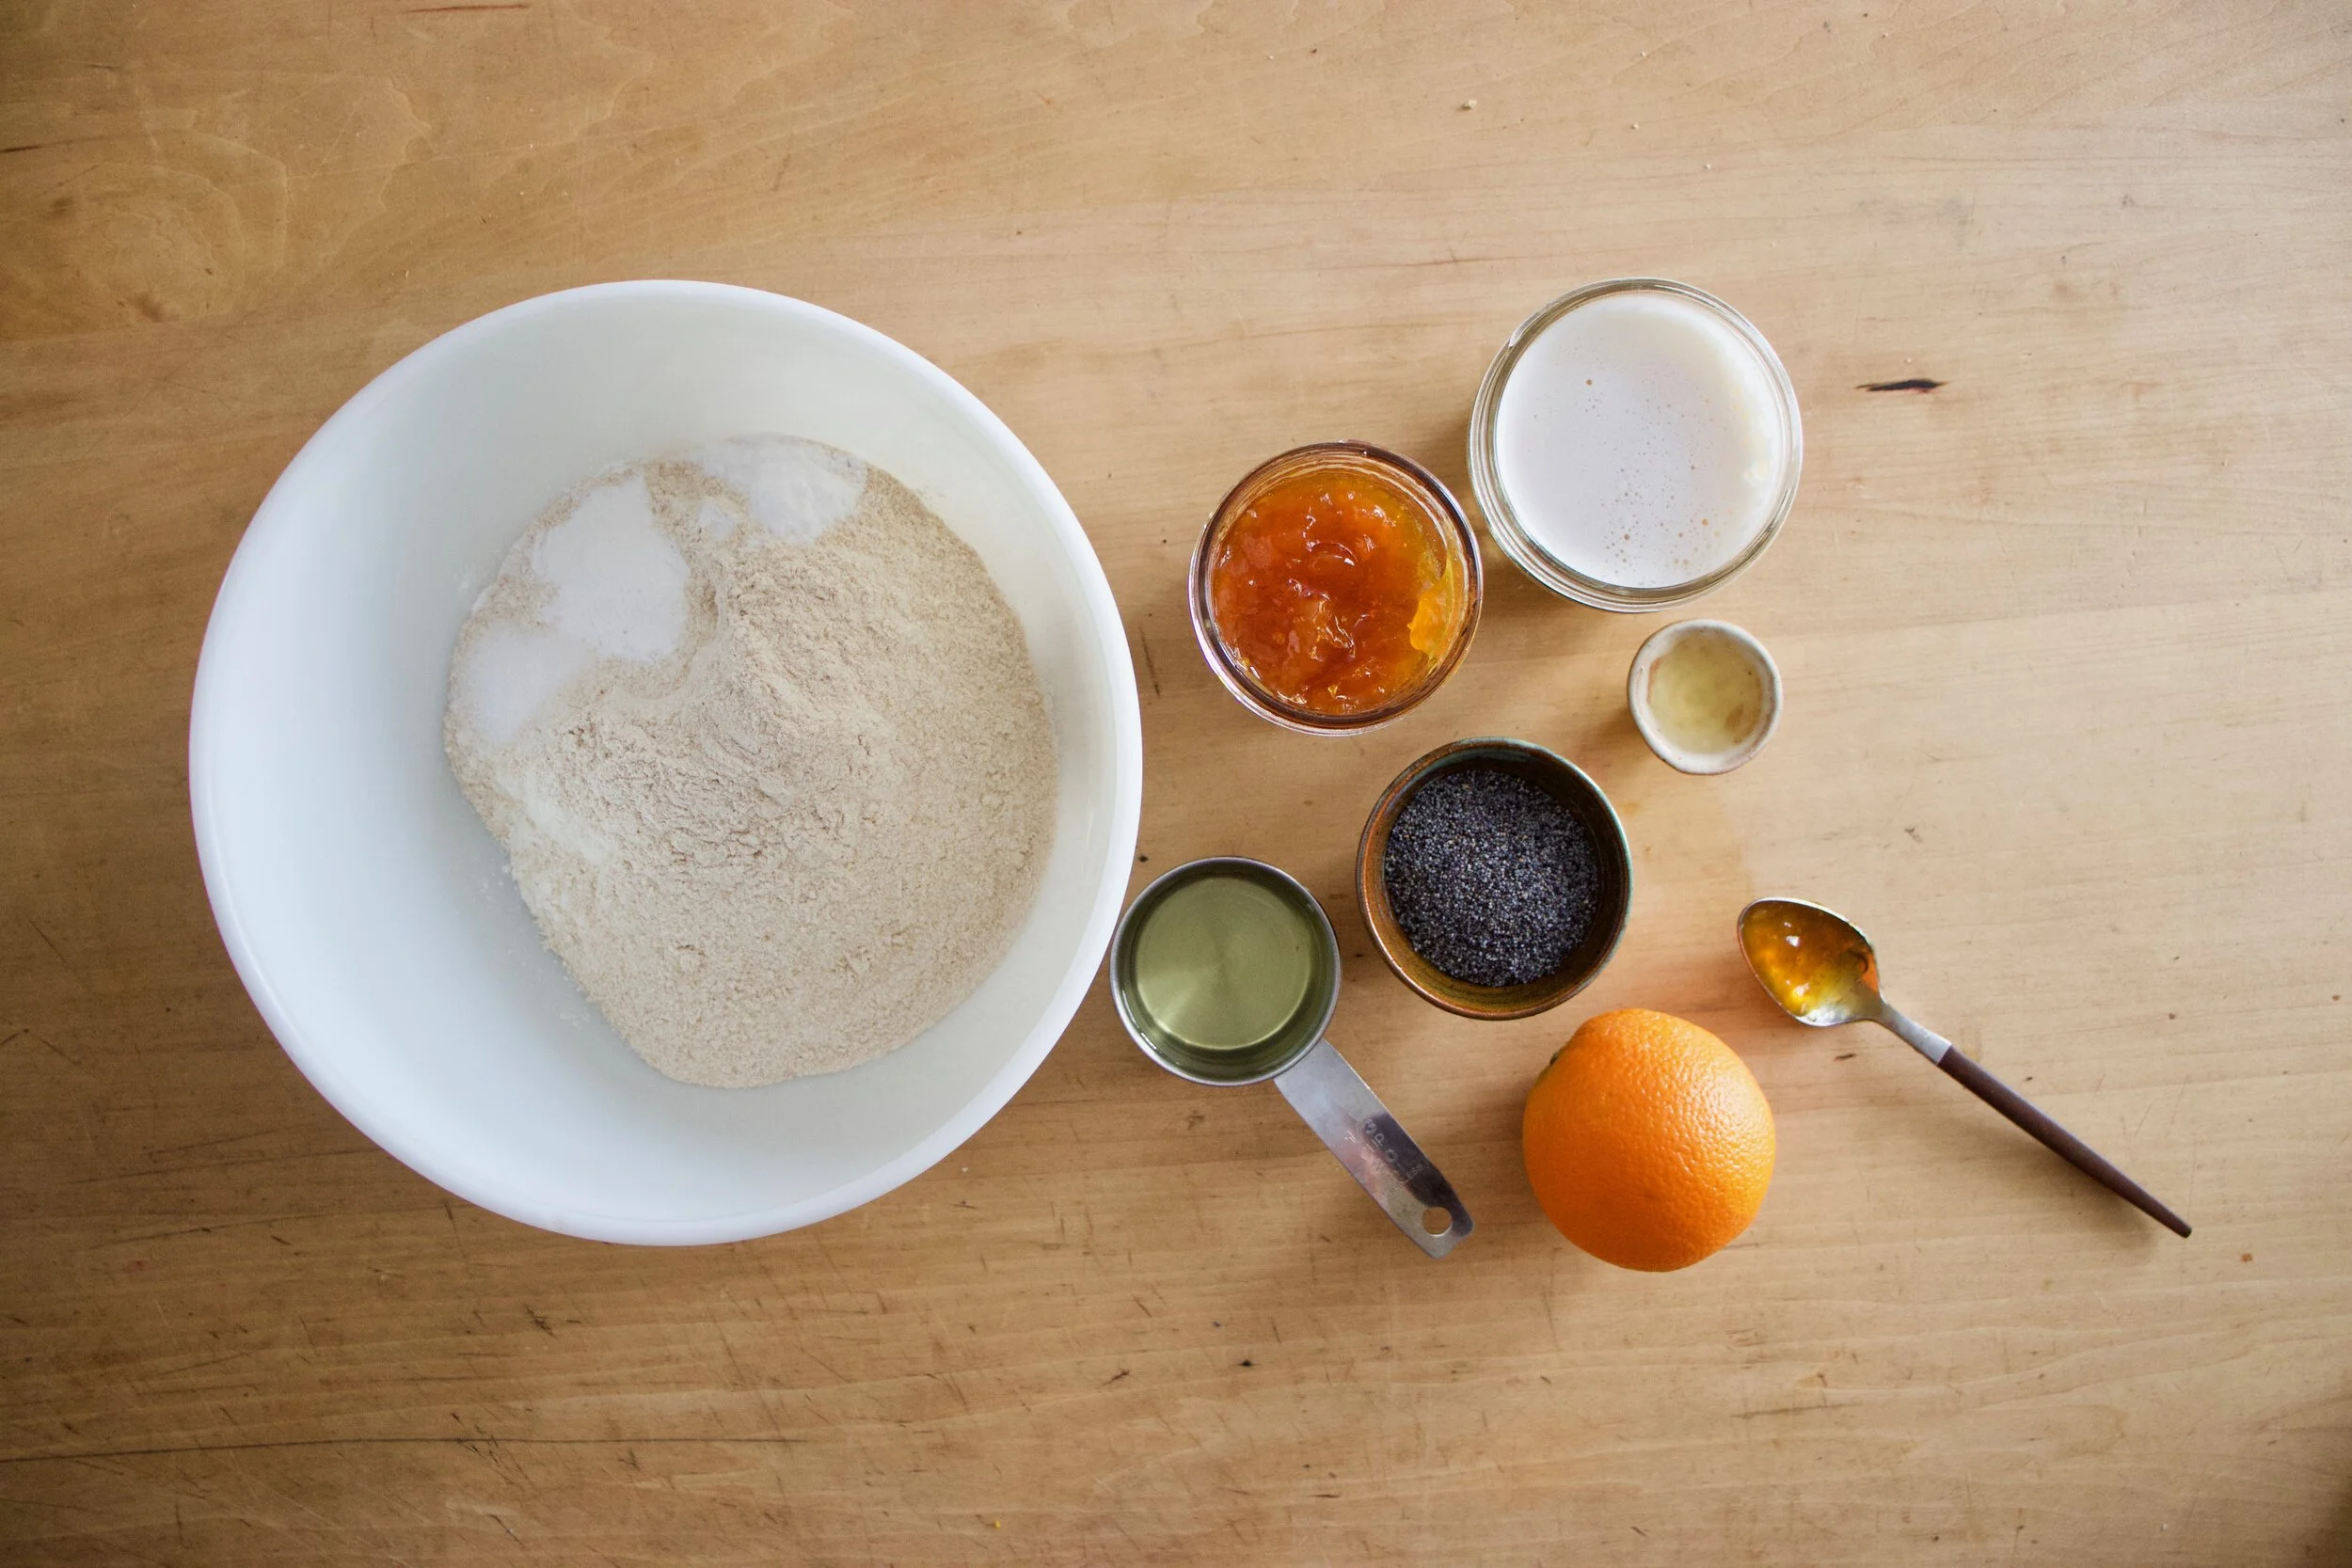
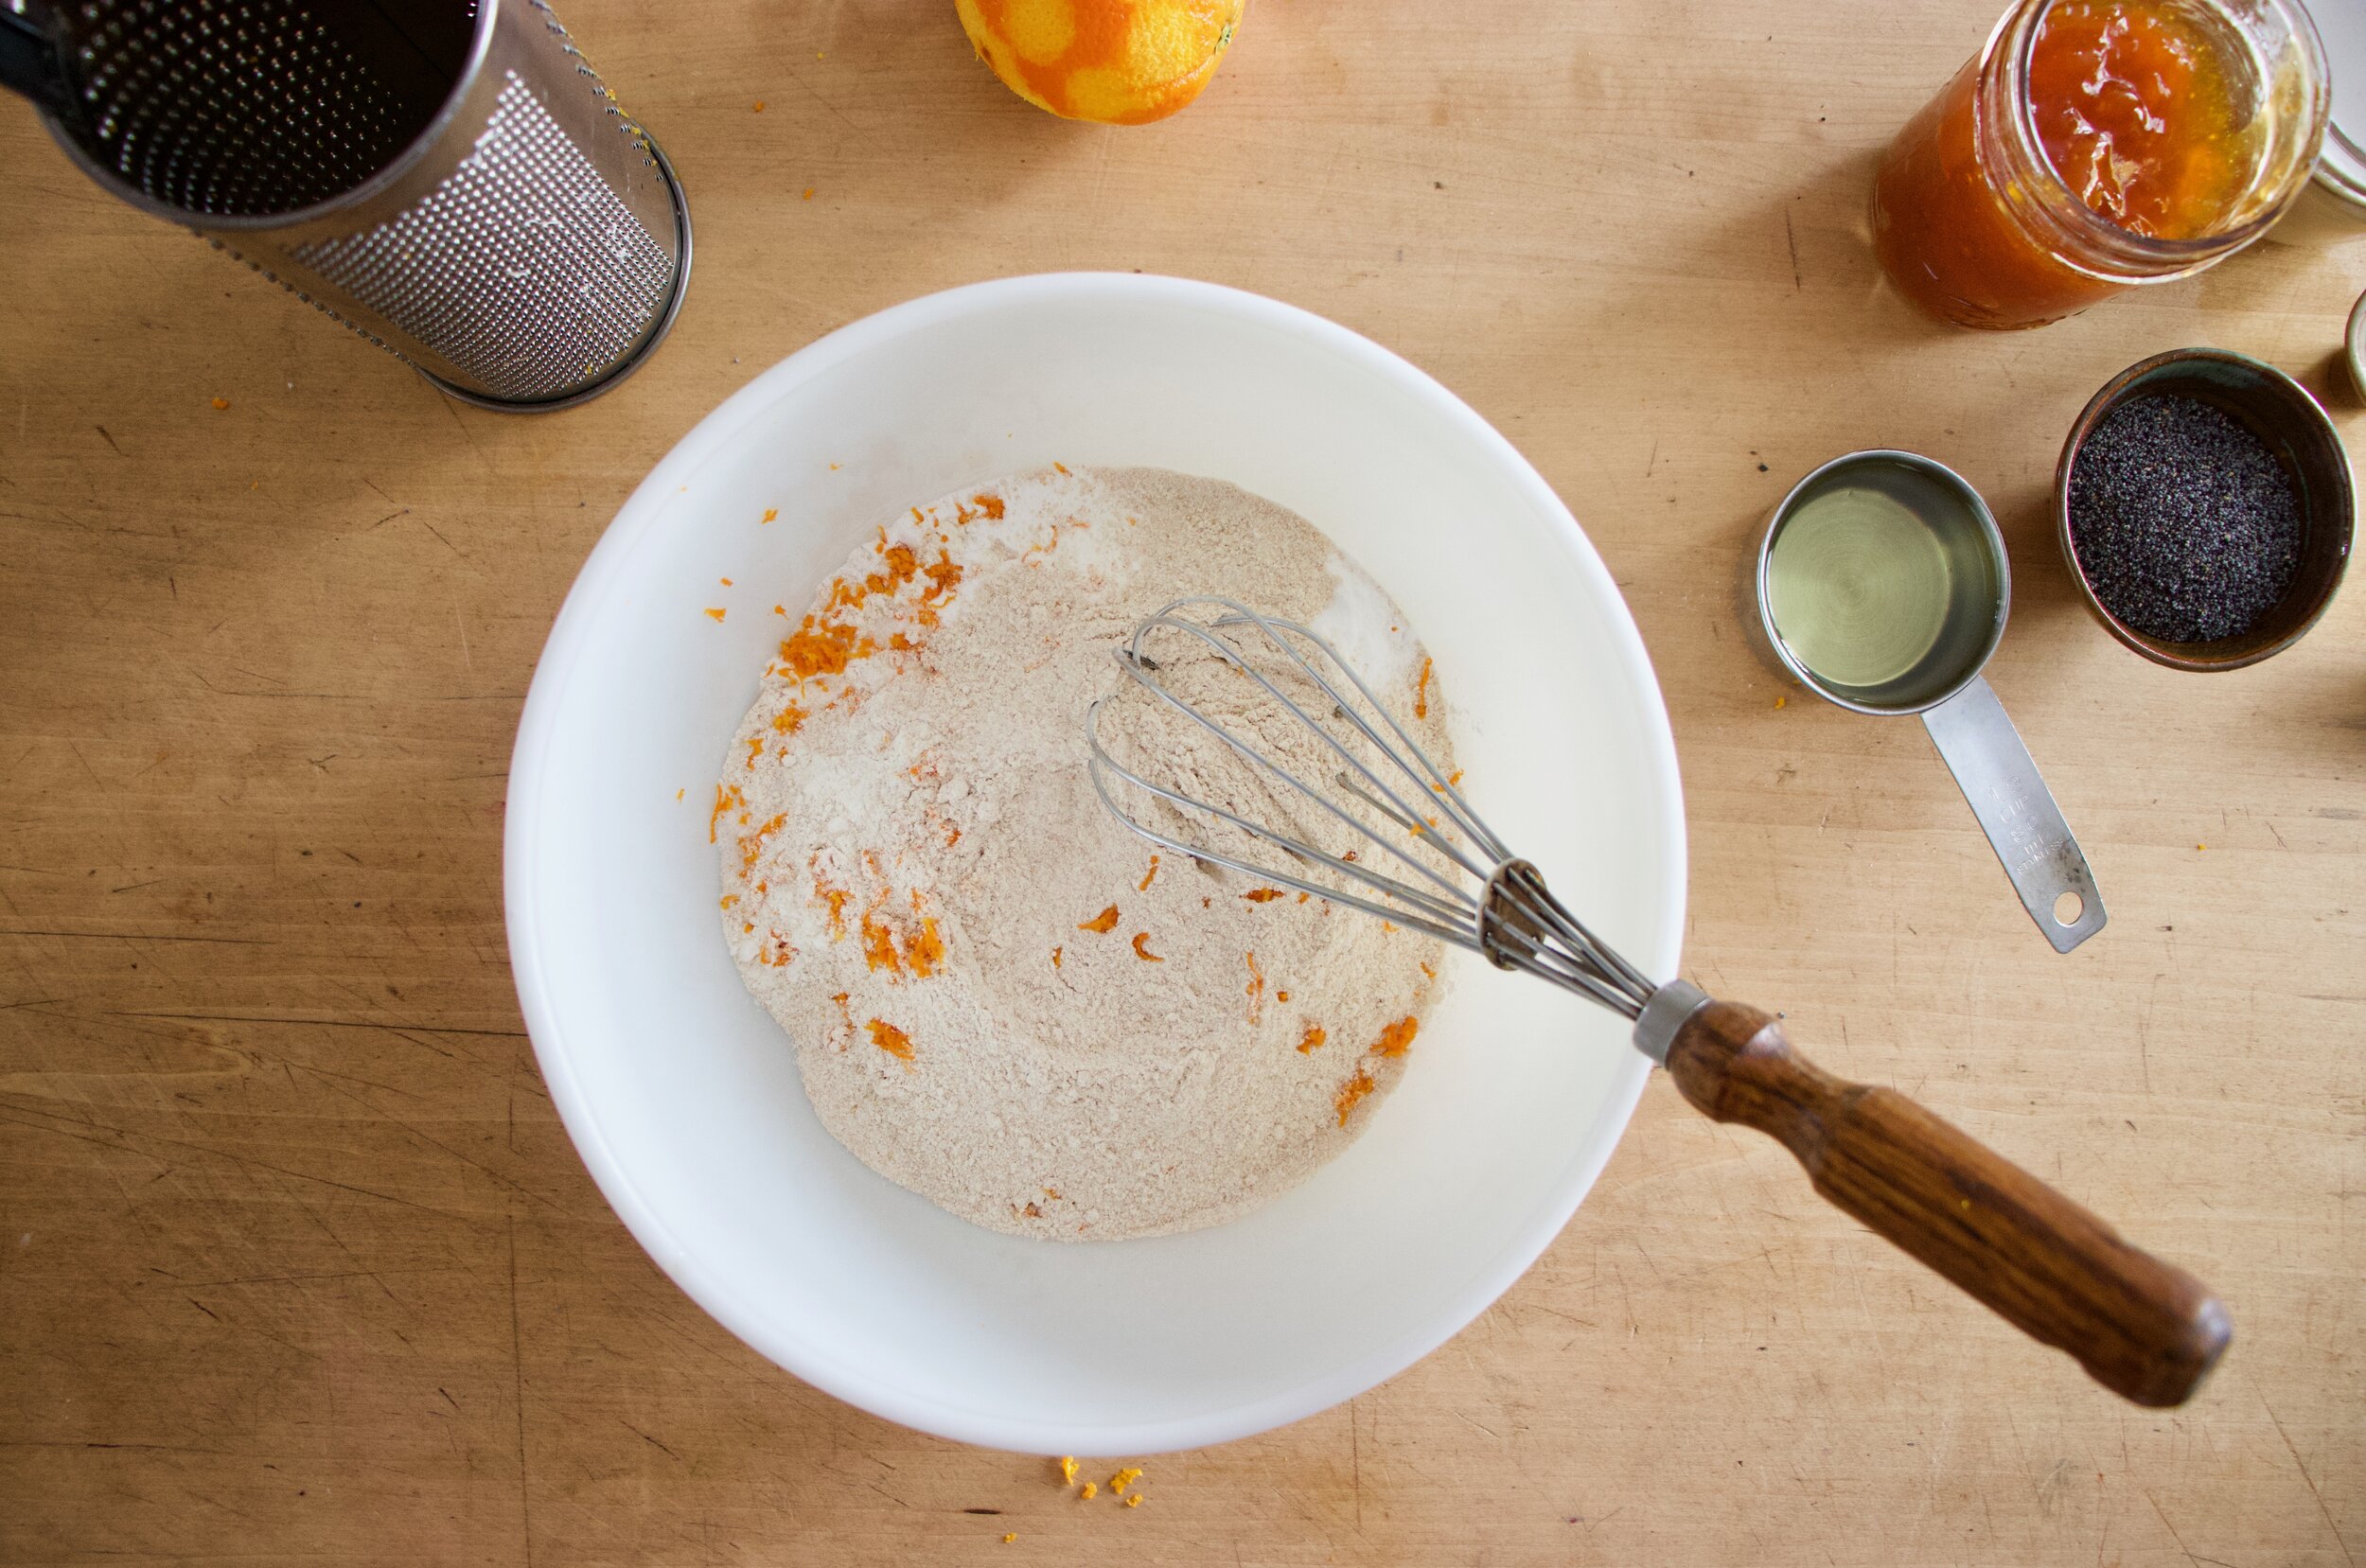
The stuff. In the bowl is white and white whole wheat flour, baking powder and soda, and salt. Also have apricot jam, oil, almond milk, apple cider vinegar, and orange, and some poppy seeds.

Grab a zester and zest the orange into the bowl with all the dry stuff. Whisk to combine.

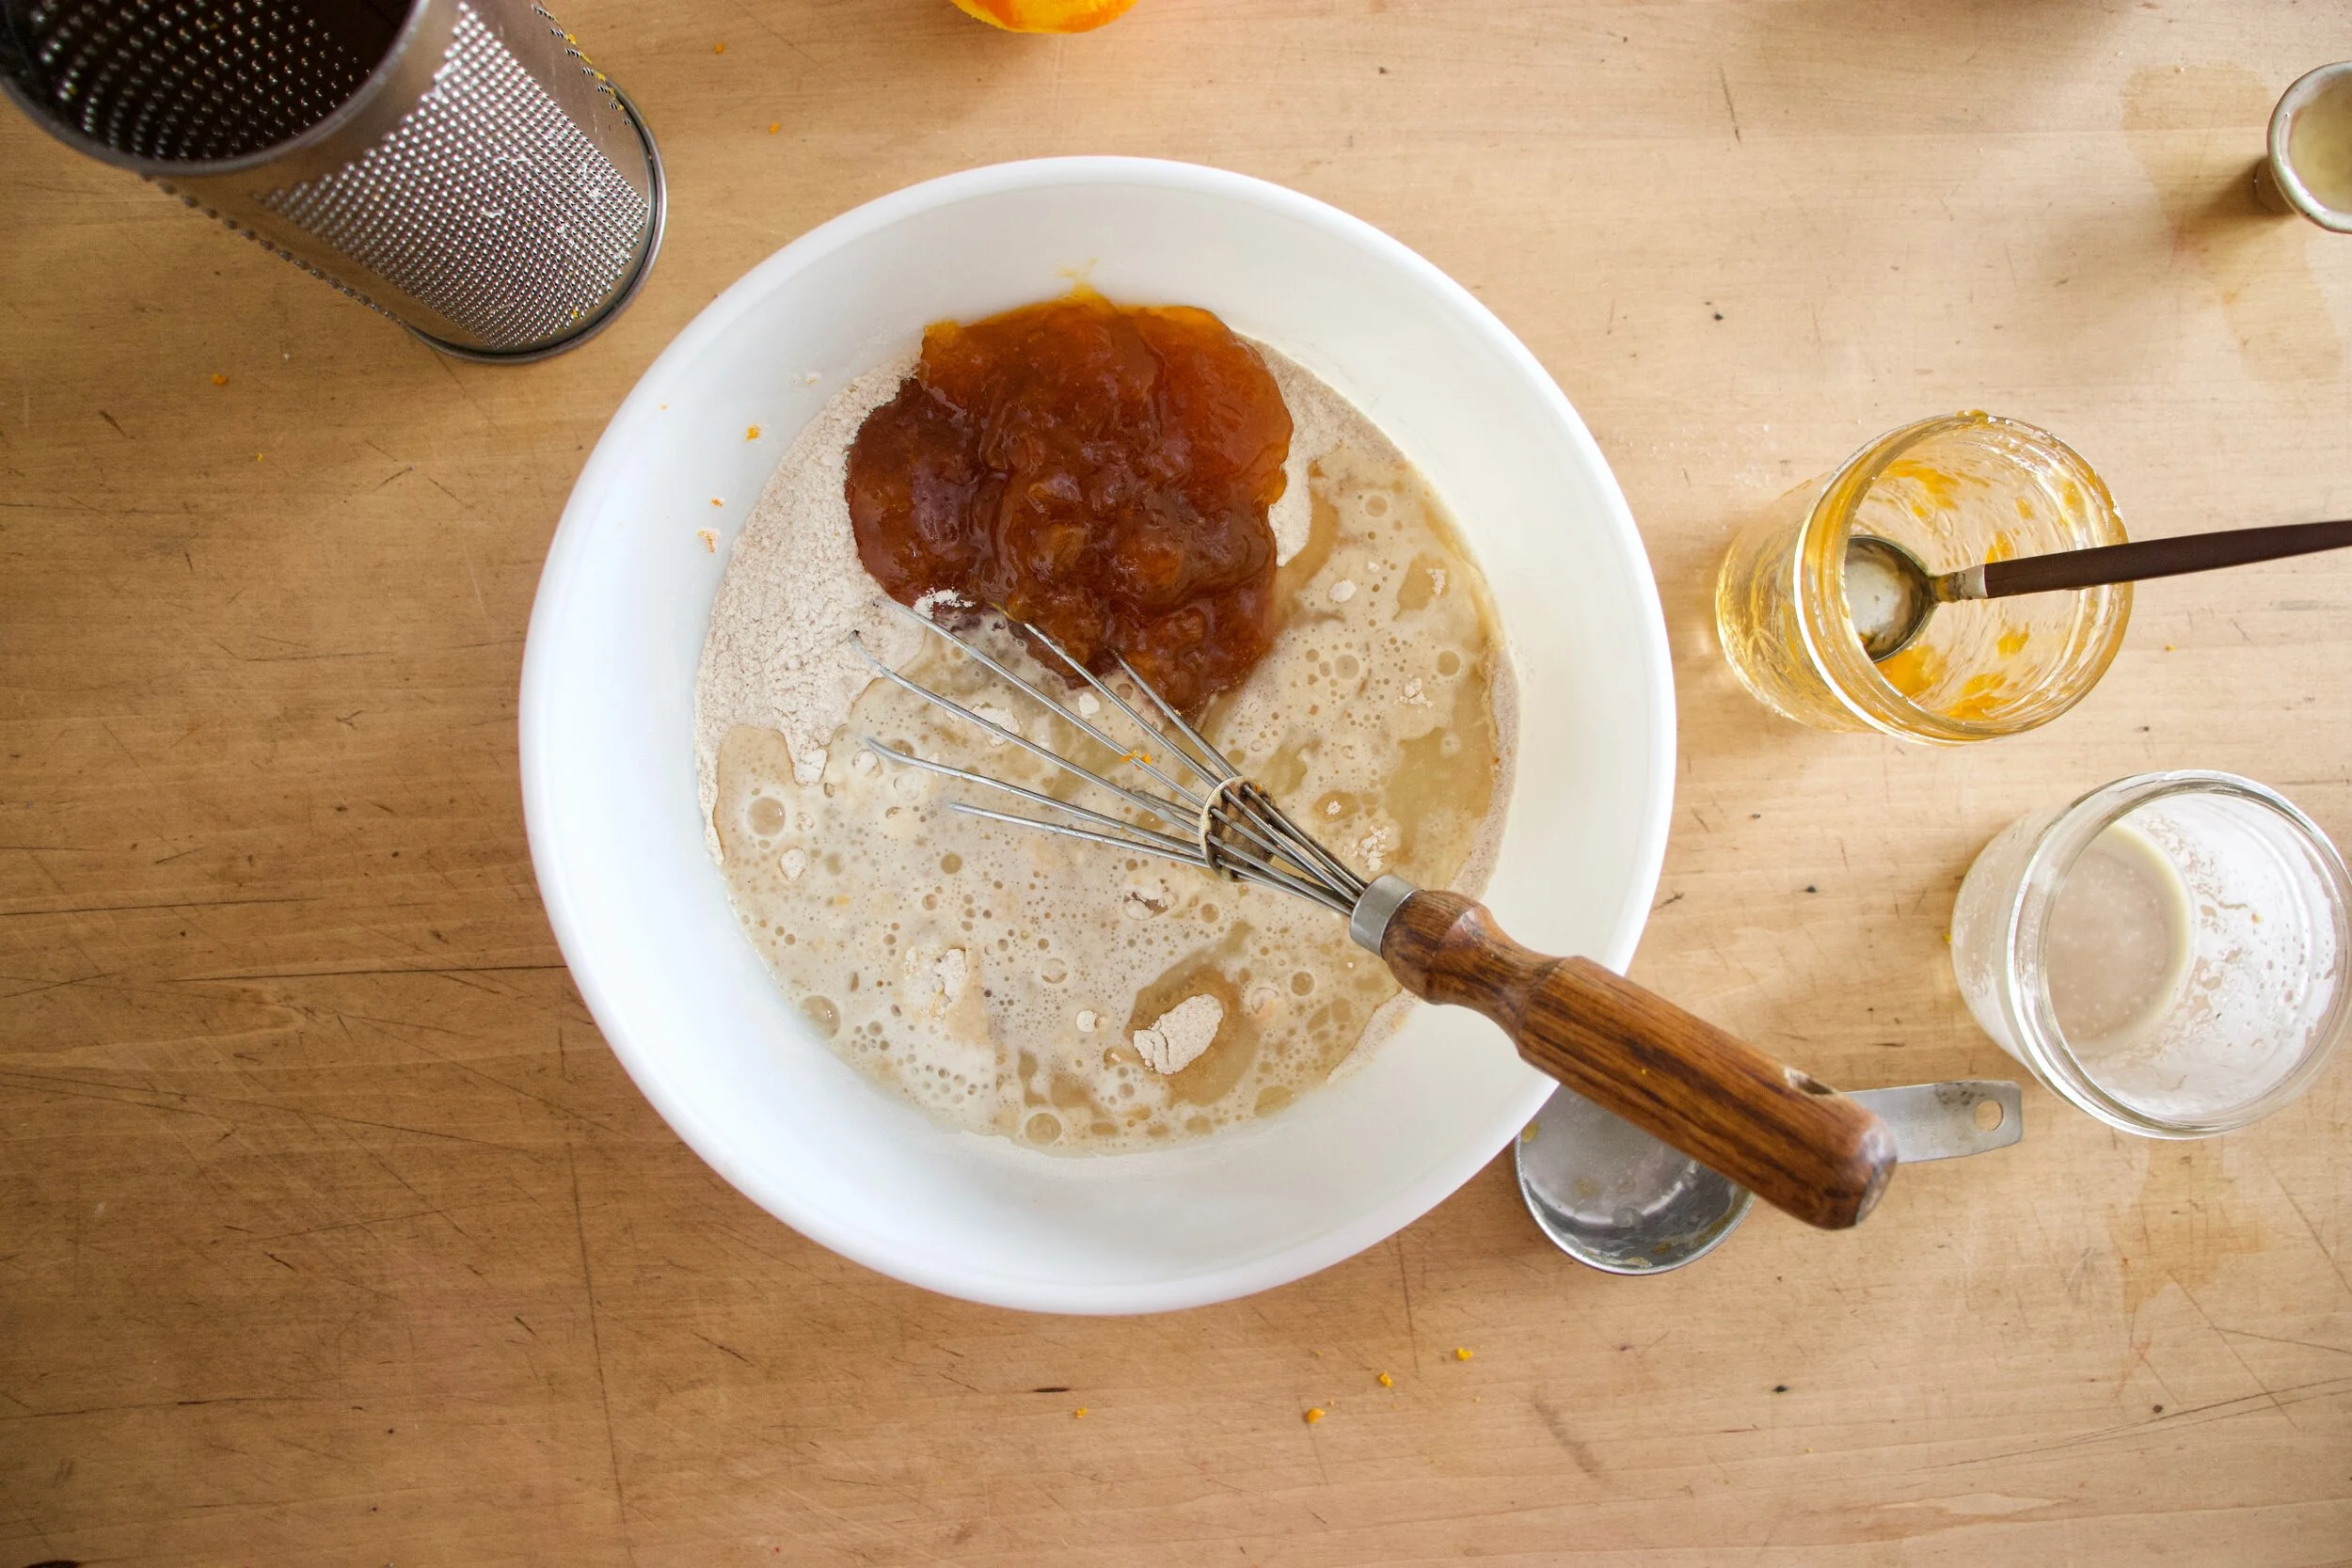
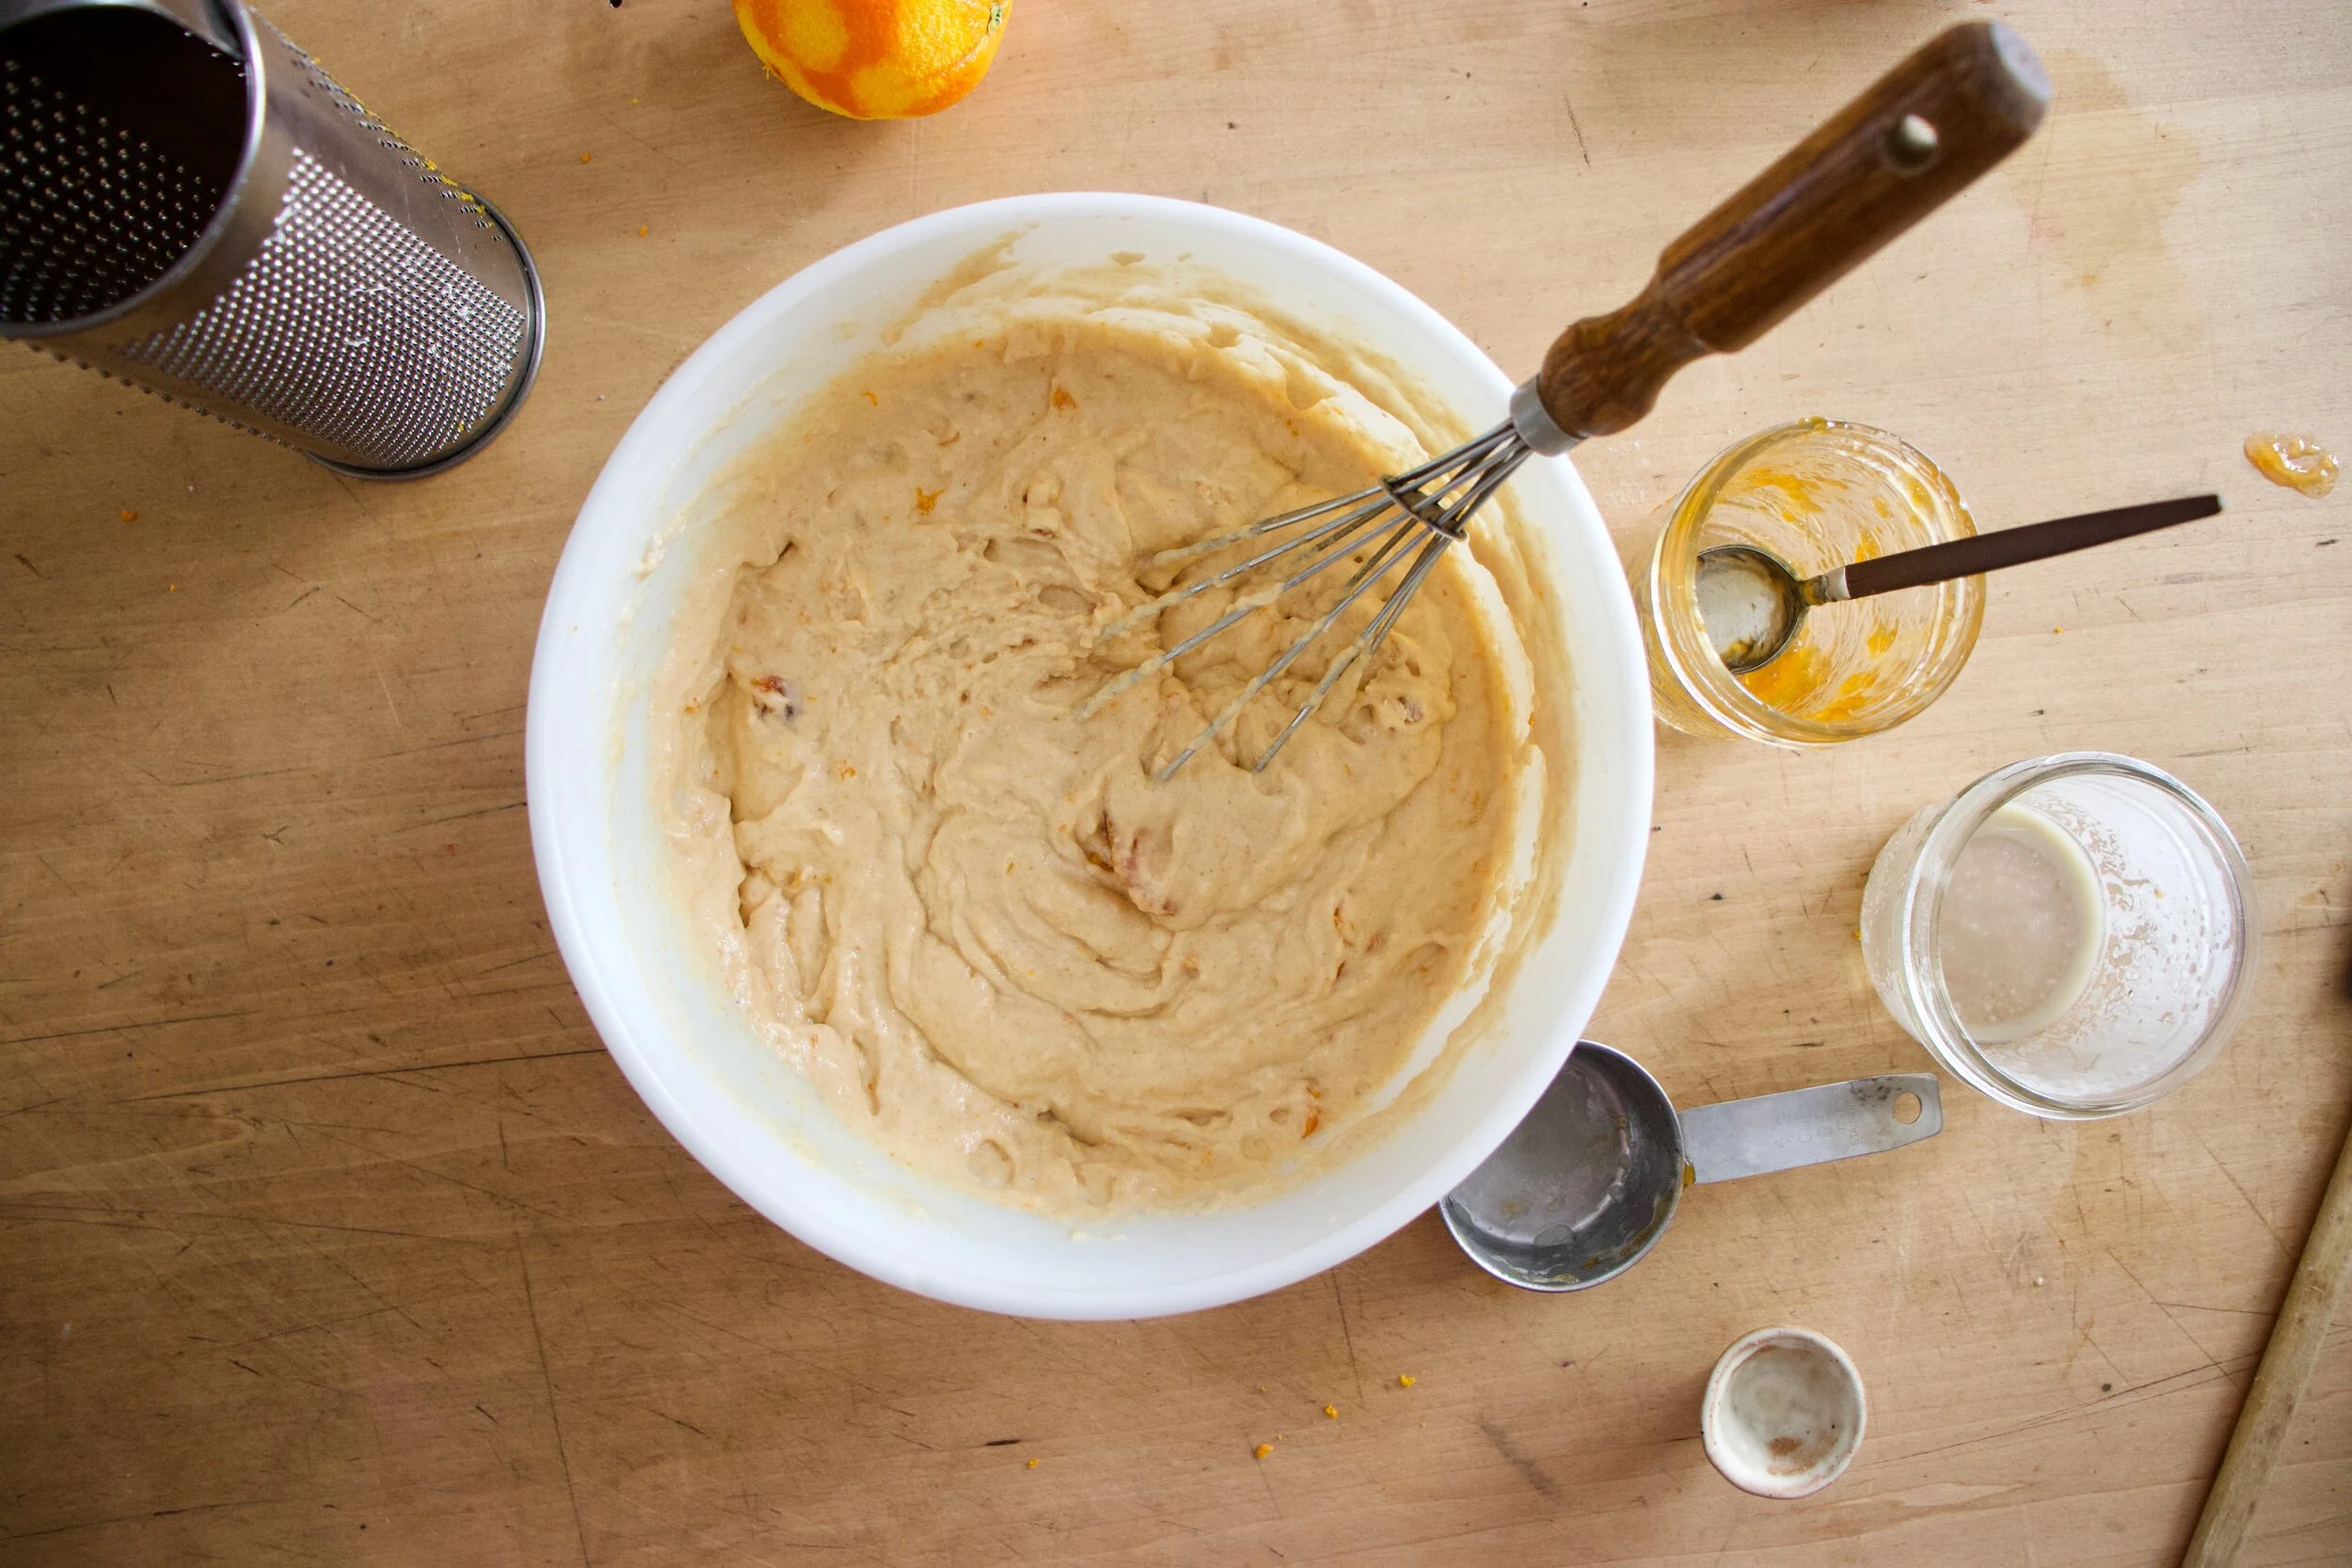
Jam, oil, milk, and vinegar. All on top of dry. Whisk that up until just combined. No over mixing. You will get tough (not in a good way) muffins.

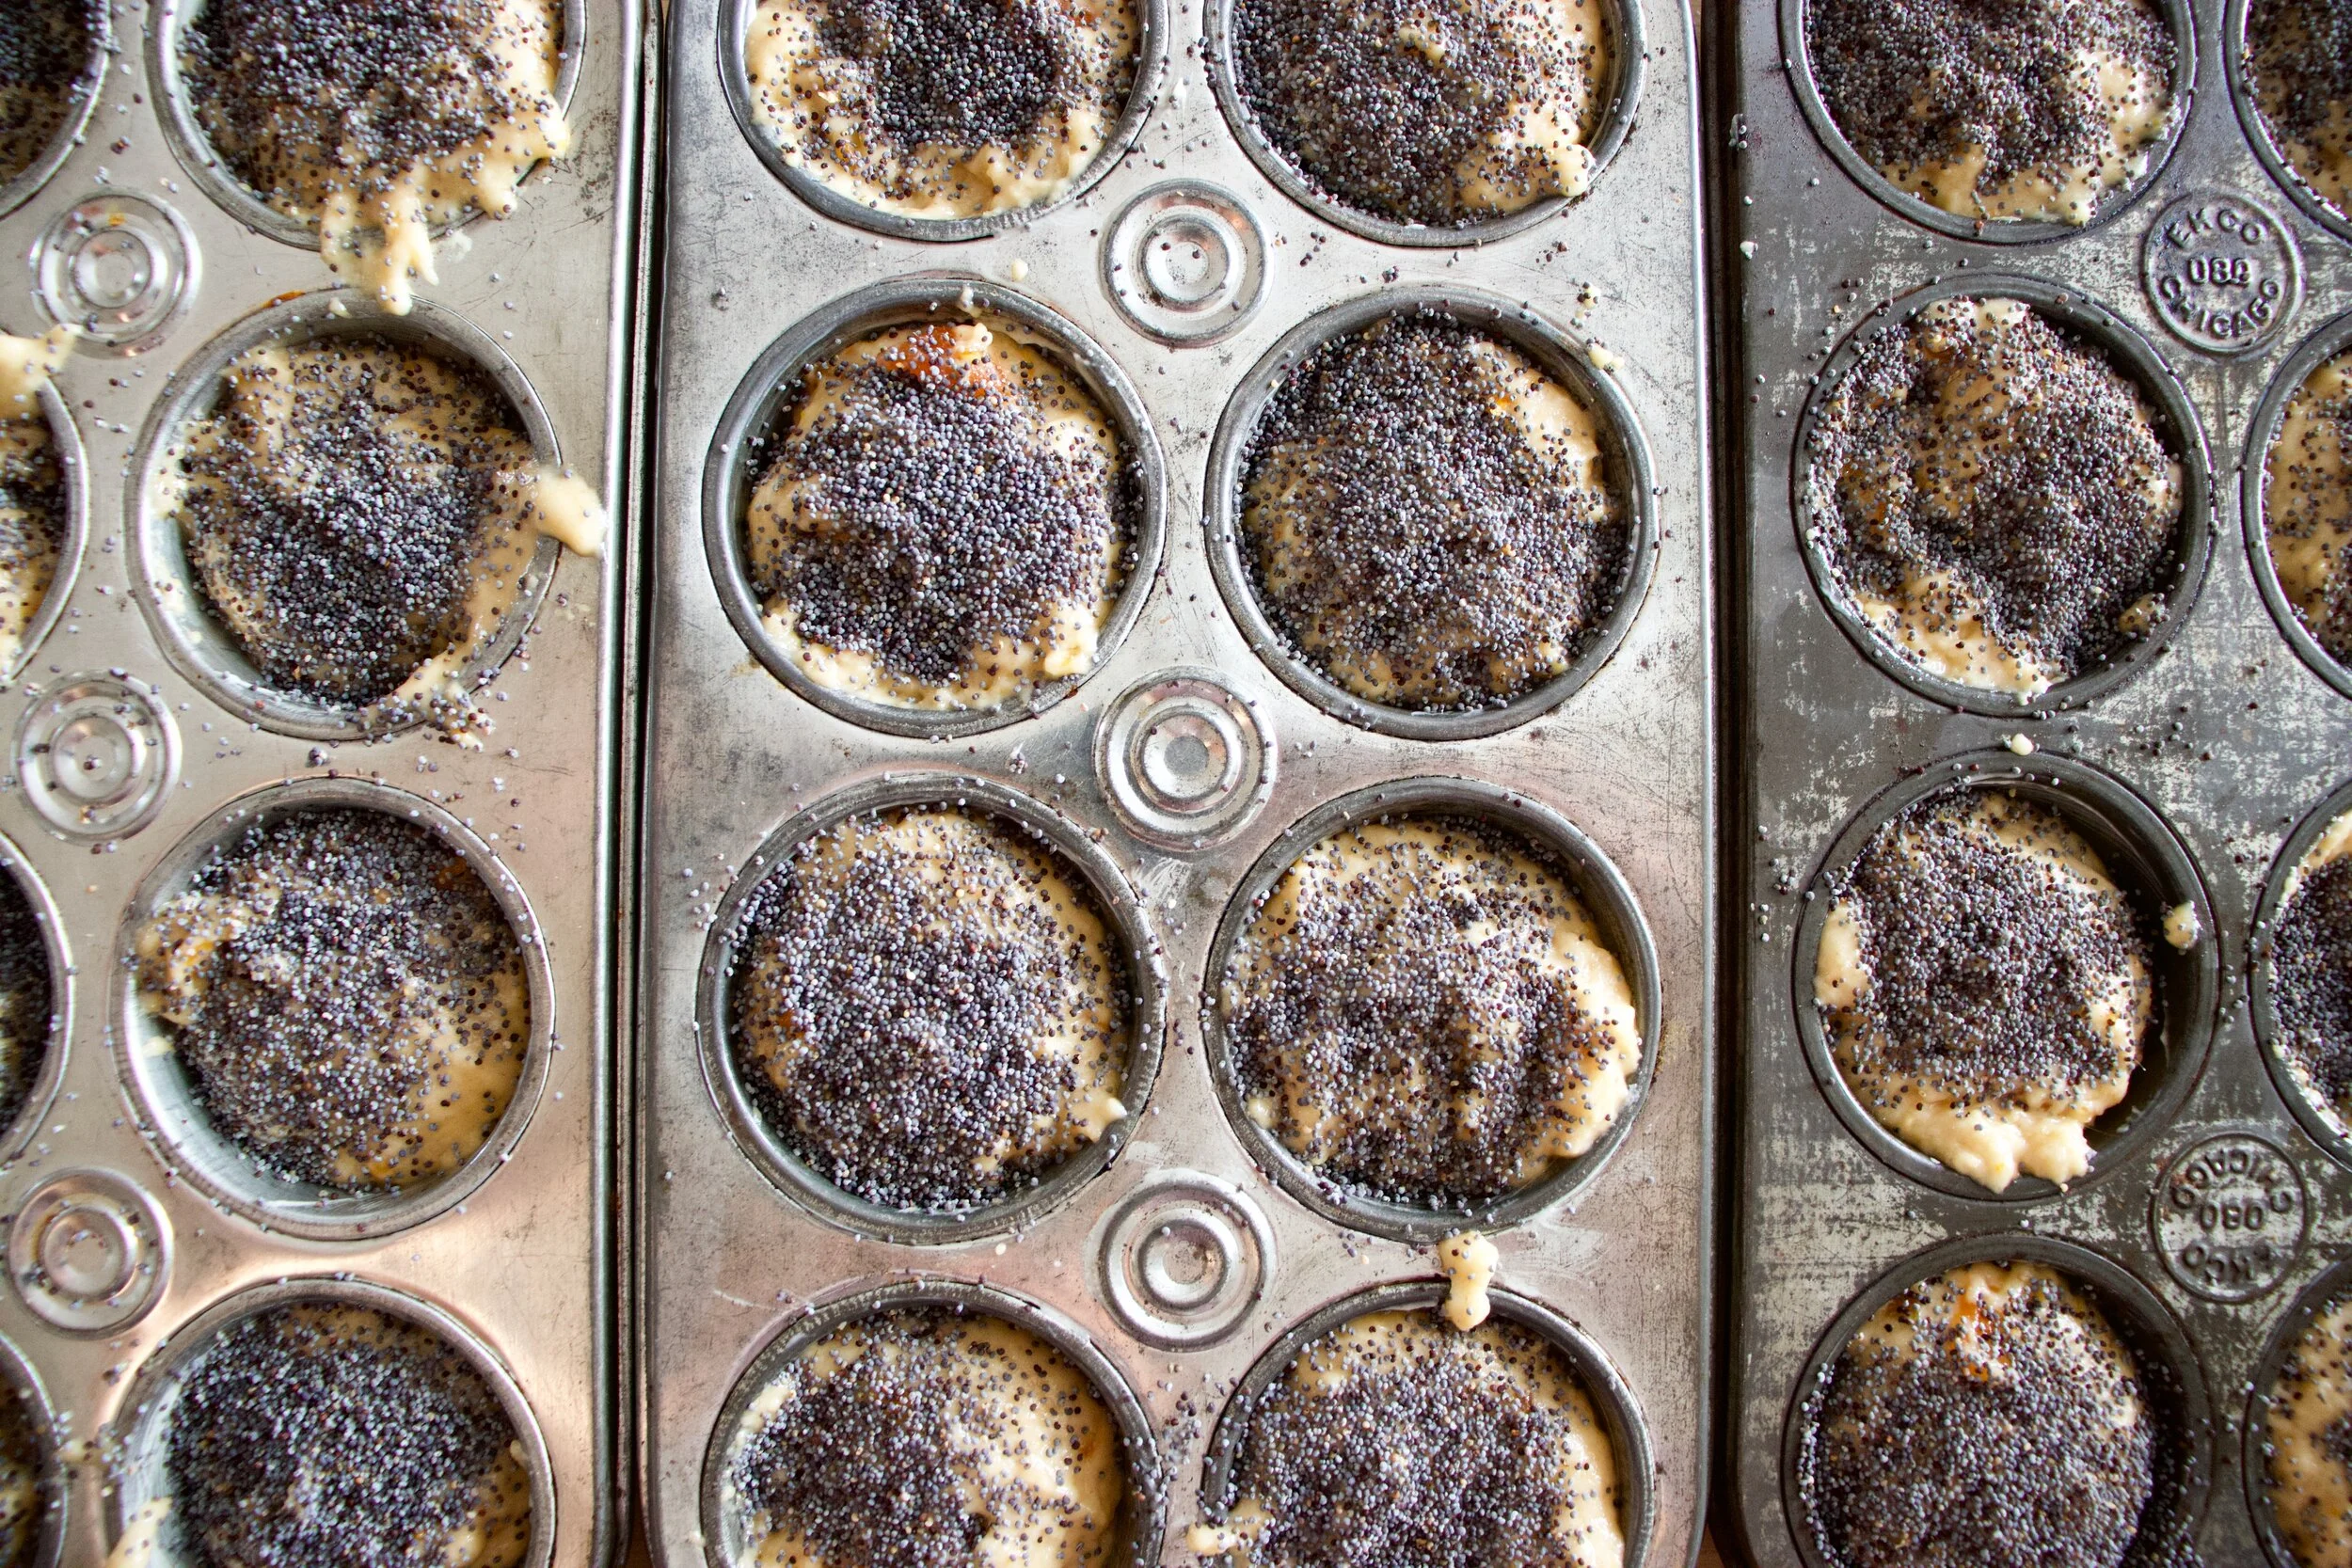
Scoop into well greased muffins tins then cover the tops with poppy seeds.

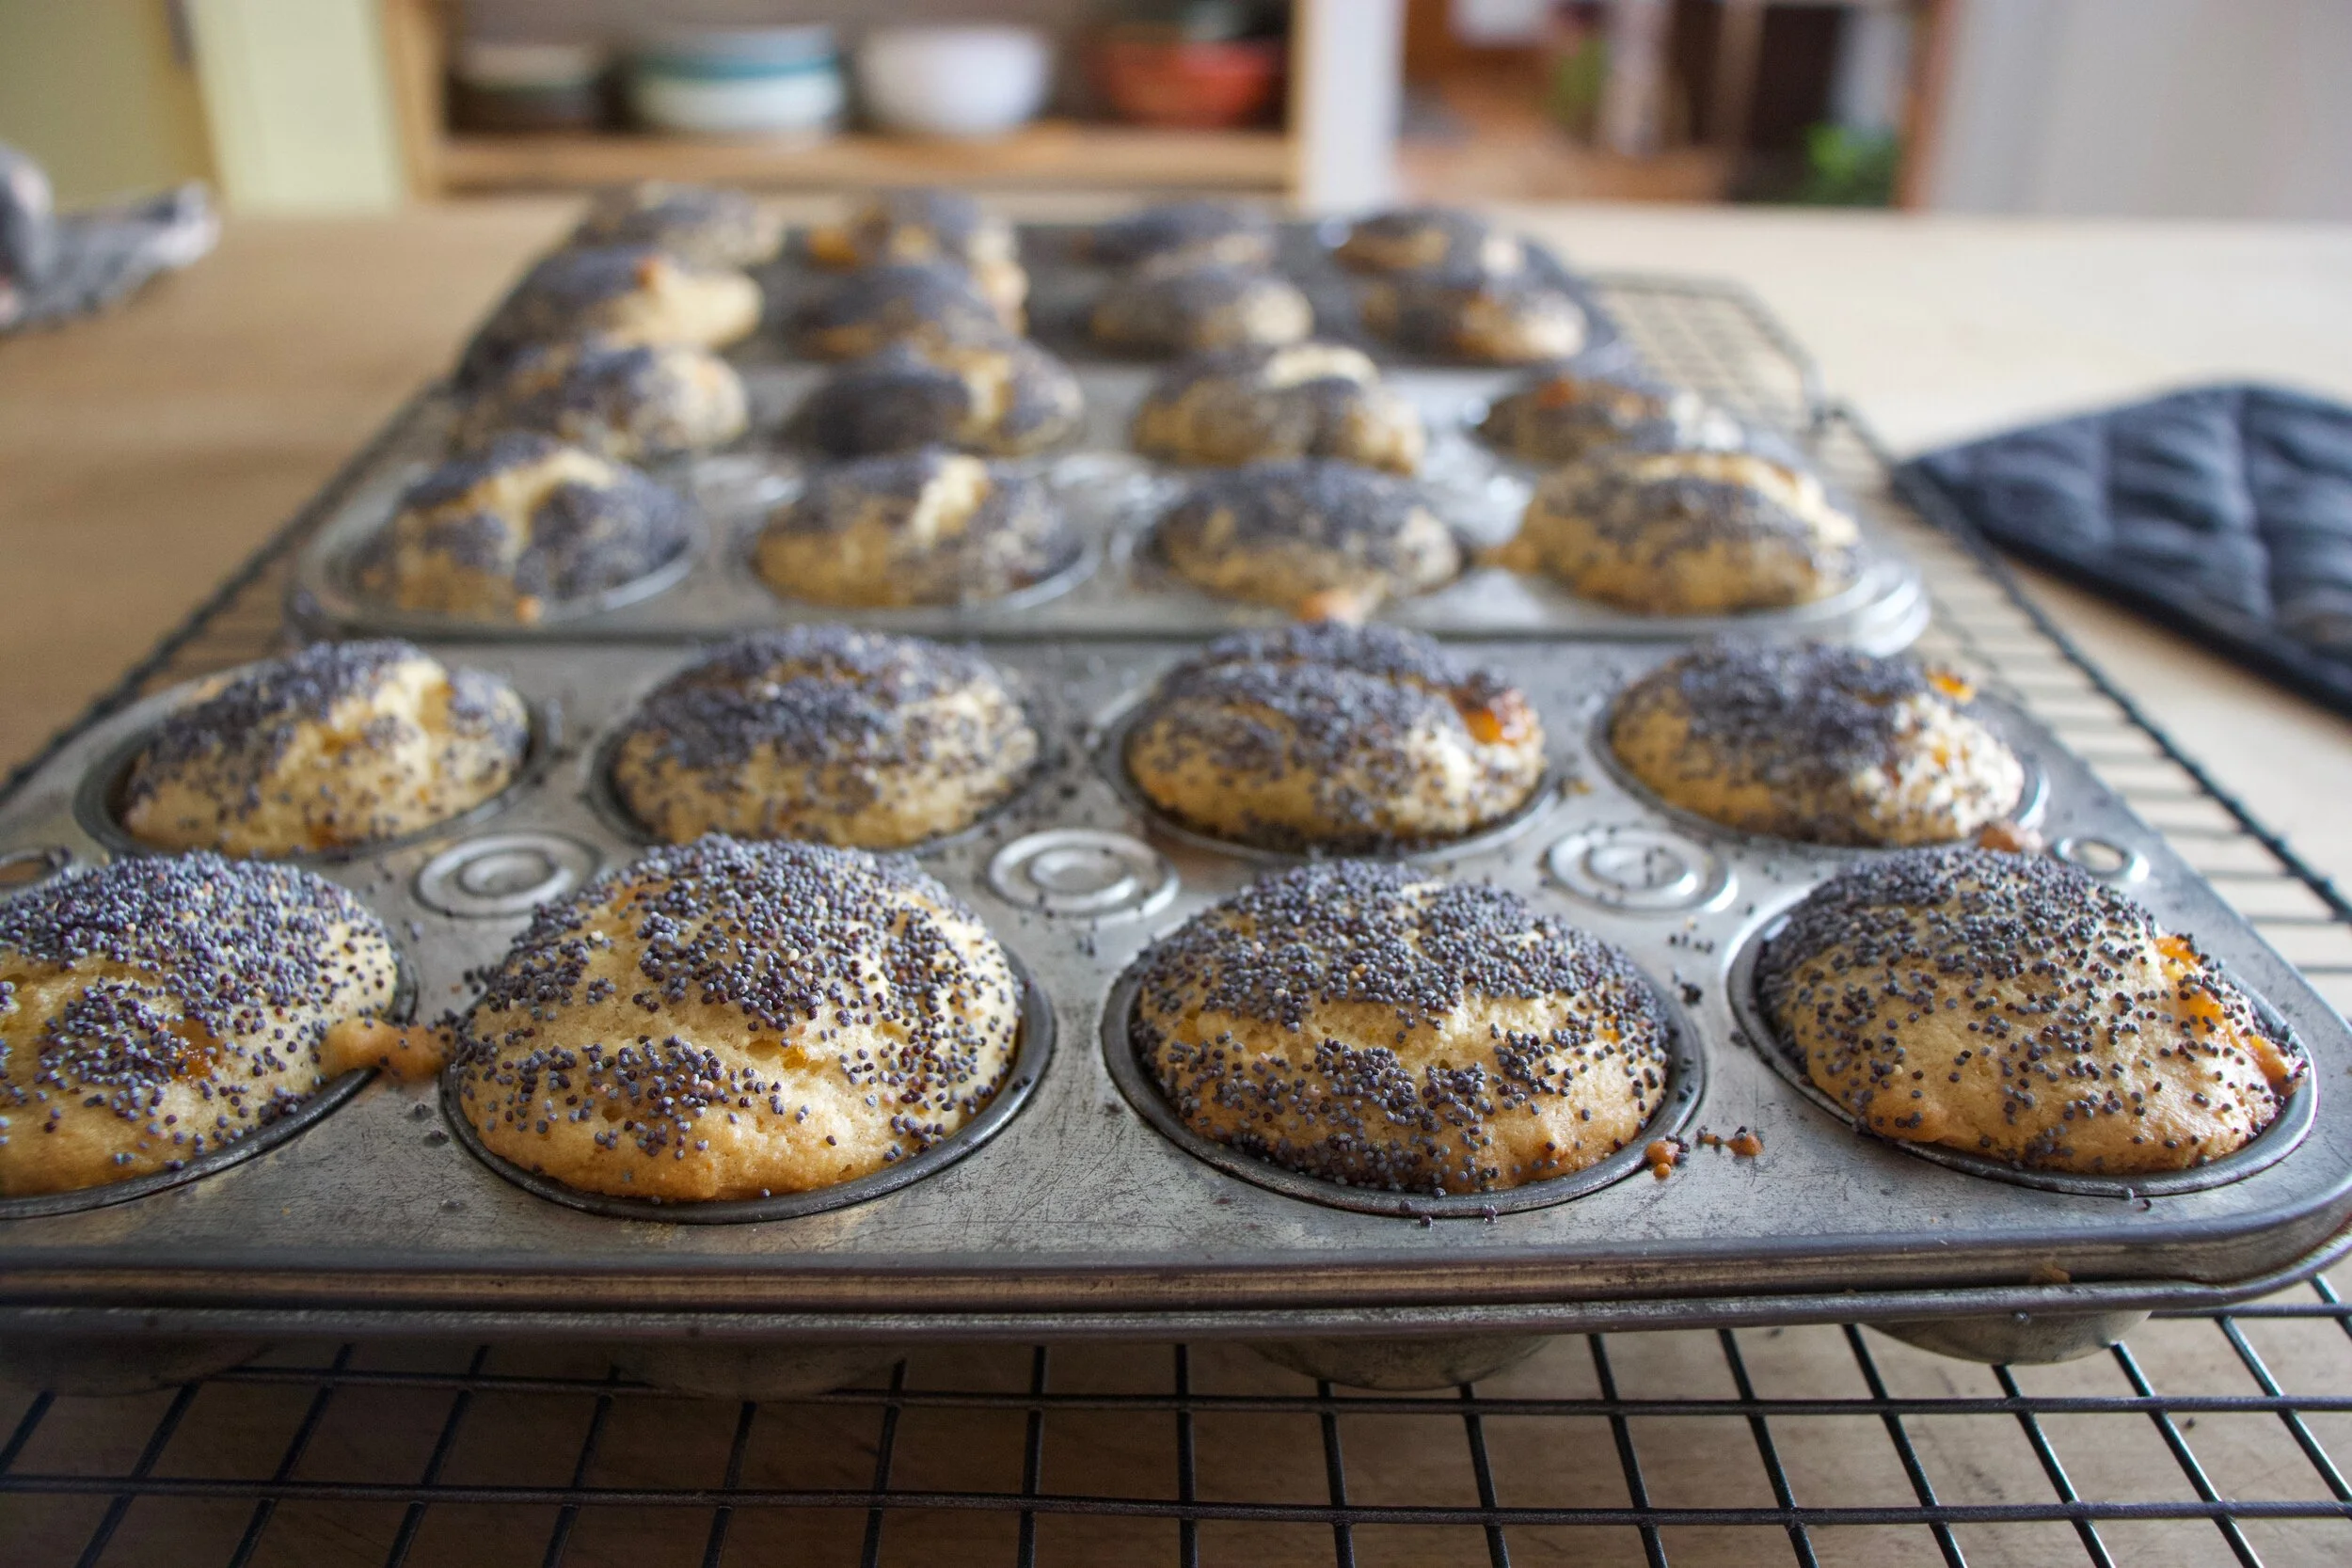
And out of the oven, looking all pretty like.

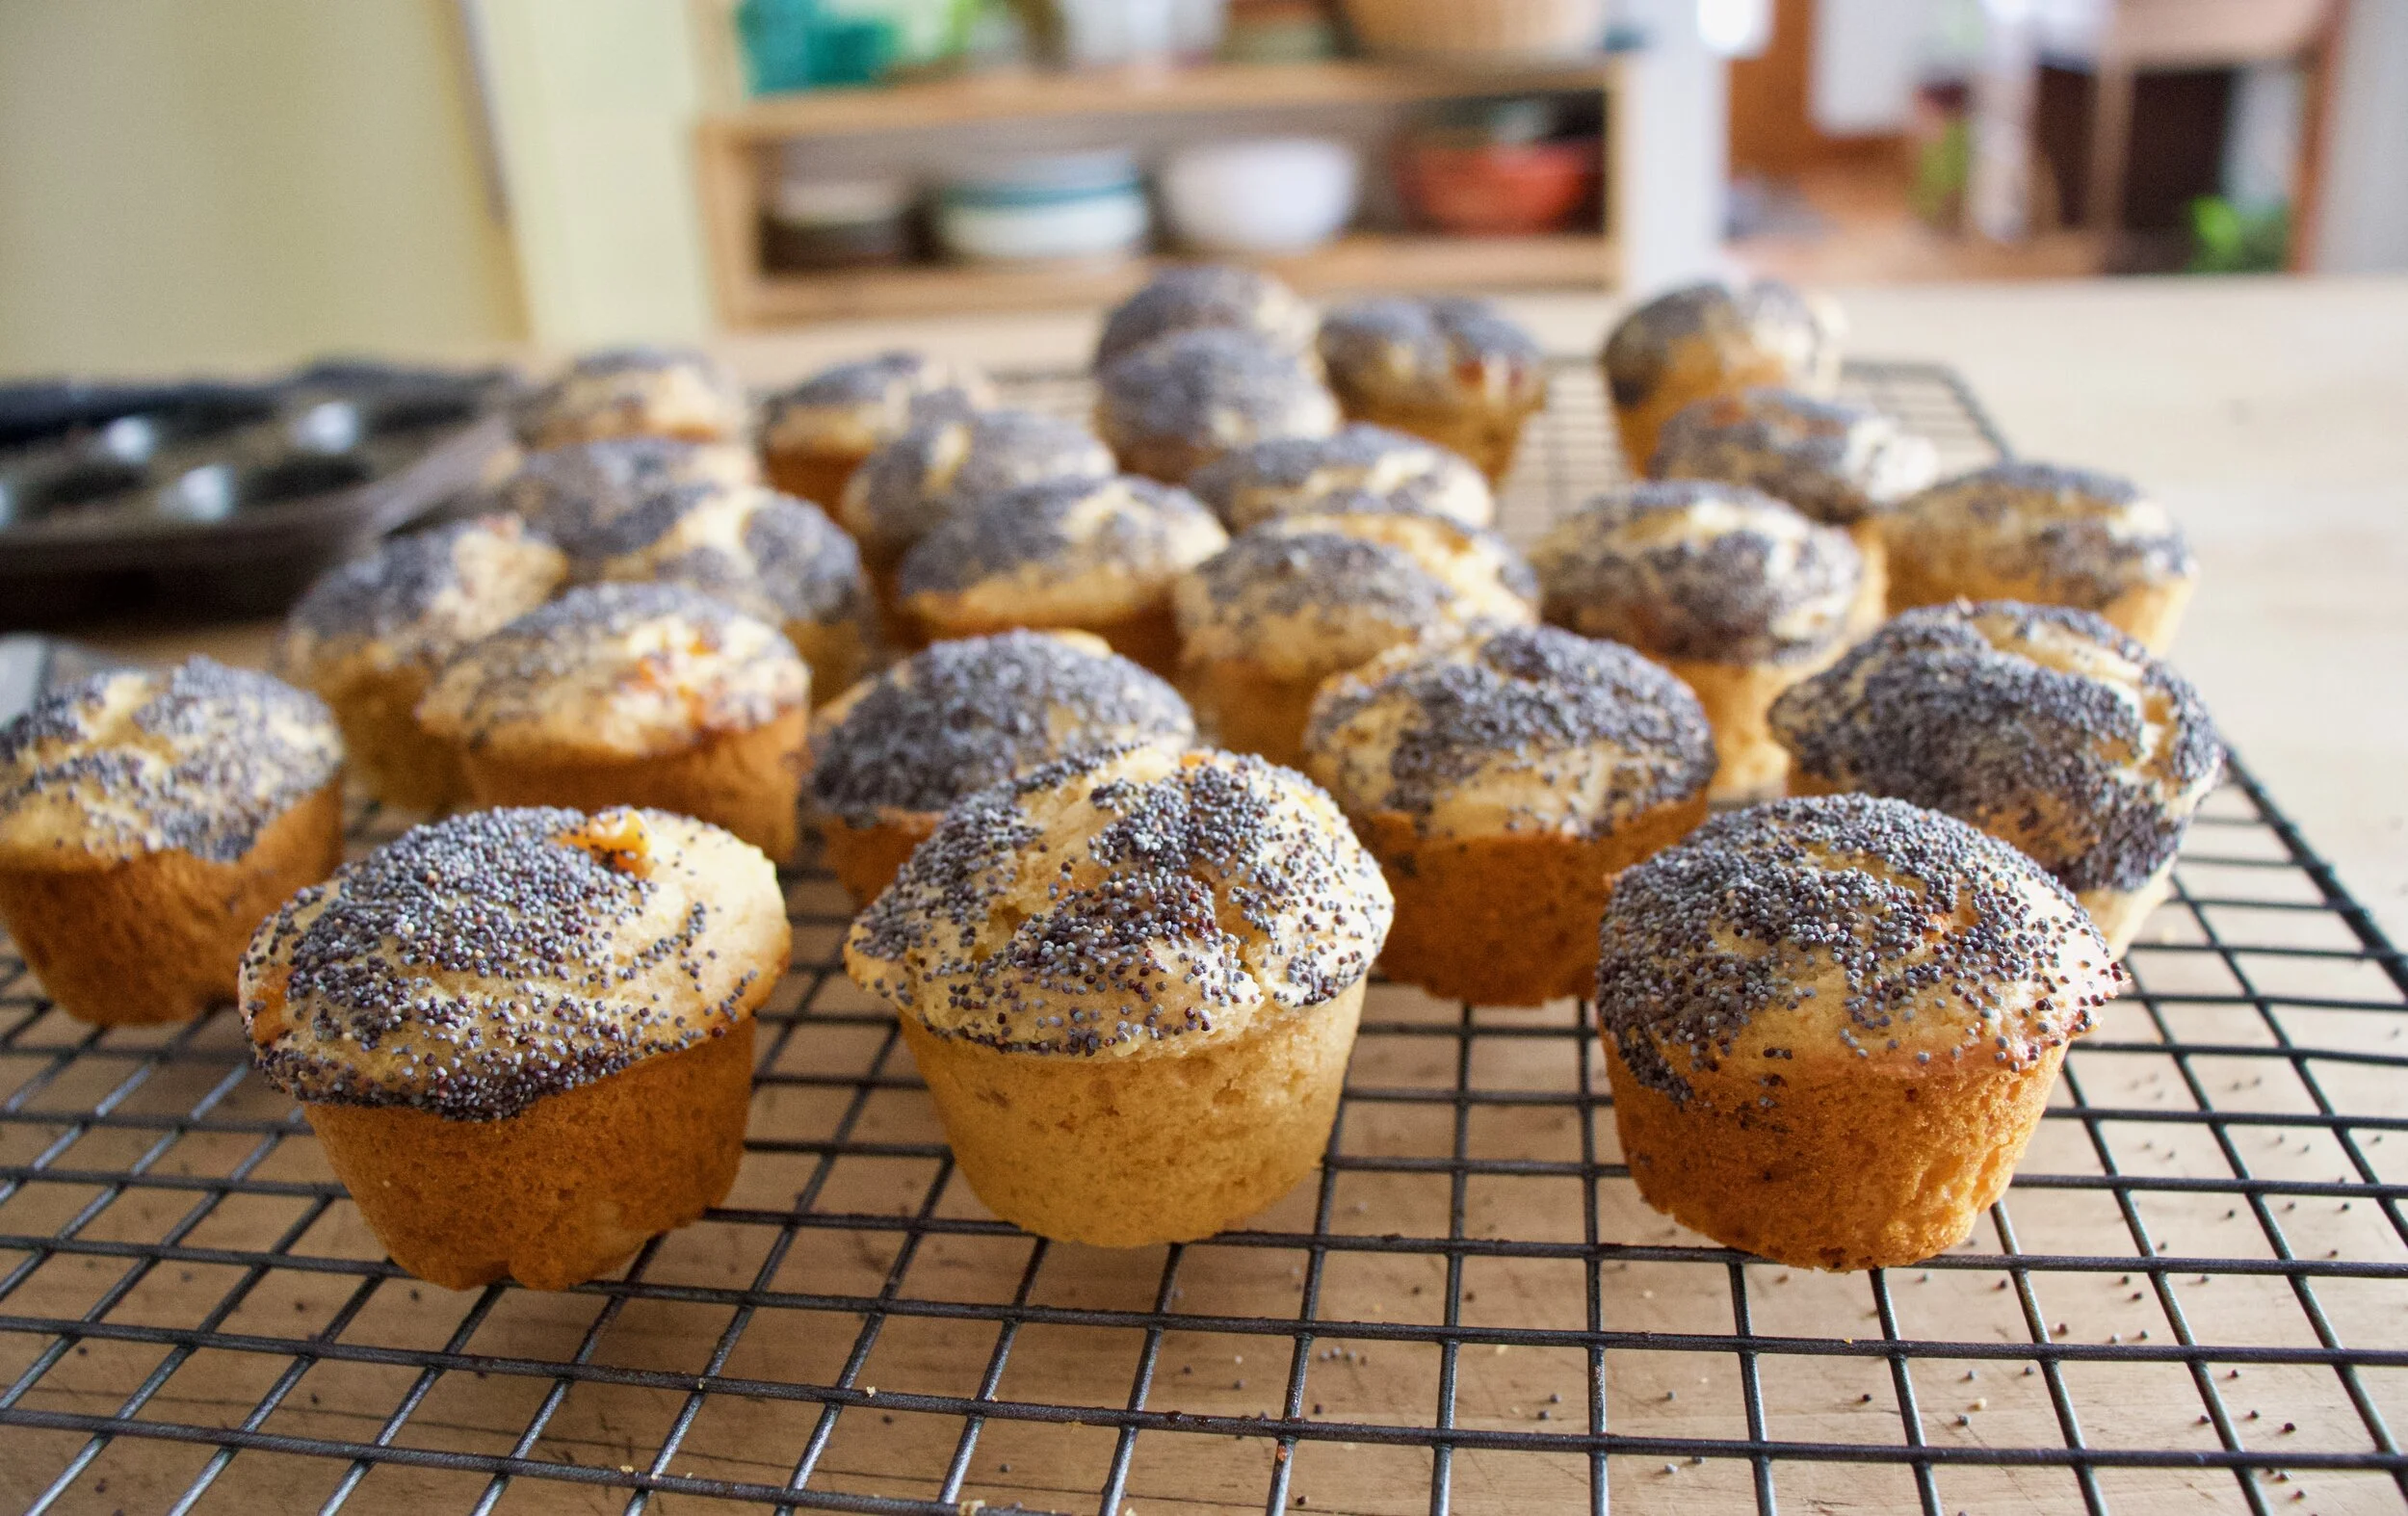
Pop those muffins out of the tins and cool on a wire rack for a bit. And by all means, don%u2019t wait until they are completely cool.

Now eat you a warm muffin and if they are mini, grab a few. You can%u2019t just eat one mini muffin, that is just crazy.

-C

Make 12 normal size muffins or 24 mini muffins

  • 1 cup all purpose flour

  • 1 1/4 cups white whole wheat flour

  • 2 teaspoon baking powder

  • 1/2 teaspoon baking soda

  • 1/2 teaspoon salt

  • 1 cup plant milk

  • 1/3 cup neutral oil

  • 1 tablespoon apple cider vinegar

  • zest of an orange

  • 1 heaping cup apricot jam or preserves (can sub in any flavor you like)

  • 1/3 cup poppy seeds

Preheat oven to 350

In a large bowl whisk together the flours, salt, baking powder and soda, and the zest of the orange. Add in the oil, milk, jam, and vinegar and whisk until just incorporated. Scoop batter into well grease muffin pans (12 regular or 24 mini) then cover the tops with poppy seeds. Pop into hot oven and bake until risen and a tester comes out clean when one is poked. For mini muffins, check after 13 minutes, for normal muffins, after 16 minutes.

Once baked, remove from oven and pop out of pans when cool enough to handle. Place on a wire rack to cool completely or just start eating them warm.

Store left over muffins in an airtight container for 3-4 days at room temperature. They also freeze well.

A couple of days ago, during a grocery store porous, I stumbles upon a produce item that I have not seen sold in stores before, Broccoli leaf. And I%u00a0was kind of surprised %u00a0to see that they were selling bunches of the leaf, %u00a0organic, %u00a0at 2 bucks a bunch.%u00a0I was very excited ! But wait.. You can eat broccoli leaves? Heck yes you can! Broccoli leaves %u00a0are fantastic. They taste kind of like broccoli, have a hearty texture like a collard, and can be used raw or cooked just like any other green. Its just one more super yummy green to add to your repertoire.%u00a0 So when I bring home something that I find to be a good score, like a bunch of broccoli leaves, I feel like I have to share it with the mister. (I am so nice) And this dish was how I shared them%u2026. Tossed into a bowl of garlic raging pasta. The stuff%u2026. A bunch of broccoli leaves, lots of garlic, pasta, olive oil, salt and a lemon. Pretty simple right? Fist off, get your water boiling for the pasta. Once its ready, drop a pinch of salt into the water and stick pasta in for the amount of time recommend by pasta box people. While the pasta is boiling, mince up the garlic (I used my garlic press) into a skillet and add in the oil. %u00a0Stick on a burner on medium for a few minutes, stirring around to make sure the garlic doesn’t stick and burn.%u00a0 %u00a0 %u00a0%u00a0Once you start to smell the garlic, turn heat onto low, chop up the broccoli leaves (stems and all) %u00a0and stir around until wilted and add in the juice of half a the lemon.When the pasta is cooked, remove a few tablespoons of starchy water and %u00a0strain the noodles. Add water and pasta right into the skillet with the other stuff. %u00a0Toss around, taste, season with salt and pepper.%u00a0 Go ahead and add some chopped tomato and or parmesan cheese if you want. %u00a0And serve your amazingly amazing pasta. %u00a0And make sure that you are ok with really smelly garlic breath%u2026Casue it’s going to happen. Keep it good! -C

Broccoli Leaf and Garlic Noodles

  • 1 bunch fresh broccoli leaves (about 3 cups chopped)
  • 2 servings of your favorite pasta (spaghetti, penne, vegan, gluten free%u2026..)
  • 8 or so fresh garlic cloves
  • 1/4 cup olive oil
  • salt and%u00a0pepper
  • lemon (optional)
  • parmesan cheese (optional)

Start by bringing a pot of water to a boil with a pinch of salt. Add in pasta and cook per instructions on box. While pasta is cooking, mined garlic and add to a skillet with the oil. Place on a burner on medium heat and cook and stir until the garlic becomes fragrant. Chop the broccoli leaves (stems and all) into bit sized pieces and add to the garlic oil and toss around to wilt the leaves. Squeeze in some lemon juice. Once the pasta is done cooking, remove a few tablespoons of the starchy water and strain the pasta. Add the water and the noodles to the skillet, toss to evenly coat the pasta and call it down. Serve in a bowl or on a plate, topped with freshly chopped tomatoes and parmesan cheese if you so shall please and another little squeeze of lemon juice if you like. Watch your mouth.. it will be breathing out garlic like whoa.%u00a0

I was informed yesterday that if I was going to make tortilla chips, that I better make some sweet ass dips to go with them. %u00a0I kind of agree%u2026 tortilla chips need dip%u2026 or better yet, two dips. Queso and guacamole. It’s what needed to be done, and so I did it.

Guacamole is amazing%u2026 anything avocado is amazing%u2026this guacamole is amazing. White bean guacamole is amazing. And not that we really care, but this guac is half the fat then straight up guacamole. %u00a0Plus it’s packed full of protein making it a kind of super duper, must eat all of it, kind of dip. %u00a0And sweet potato anything will make me happy. %u00a0Making queso dip with sweet potato and cauliflower is probably one of my best food combos so far. (after eating a butt load, I felt like I was a genius and made an amazing discovery) Again, not that we need it to be, but this is also a fat-free, vegan, gluten-free, super healthy, packed full of B12,%u00a0%u00a0fiber and nutrients, dip for all kind of dip.%u2026. just another reason why you cannot feel bad when you finish off half a batch before you get a chance to stick it in a serving bowl. (I might have done that)

%u00a0Here is what you need for a good time:

%u2212These tortilla chips%u00a0%u2026.Check.

%u2212Some %u00a0Chopped Veggies (I want the veggies)%u2026..Check

%u2212Cauliflower Sweet Potato Queso.%u2026Check.

%u2212White Bean Guacamole%u2026Check.%u00a0

You are now ready for it. It being this party, that party, the Super Bowl, or a Wednesday afternoon. %u00a0

%u00a0%u00a0 %u00a0 %u00a0%u00a0

To the left we have the makings for the cauliflower sweet potato queso.. Steamed cauliflower, a baked sweet potato, nutritional yeast, garlic, and chopped up red onion, red bell pepper and jalape%u00f1o. To make all you need to do it take the chopped peppers, onion, and garlic and saut%u00e9 for a few minutes just to slightly soften and bring out flavors. While that’s going on, take the steamed cauliflower and sweet potato(skin off..but eat it, or save it for soup or feed it to the dog) and puree together with a blender or food processor. Add in nutritional yeast, about a tablespoon or two of hot water and, salt and pepper to taste. Blend for about 5 minutes until super creamy smooth. Add in saut%u00e9ed stuff and pulse just enough to incorporated the veggies but not complete blend in. %u00a0Stick in a bowl.

To the right we have white bean guacamole stuff. %u00a0Two cups (or one can) rinsed white beans, one ripe avocado, a lime, a few cloves of garlic,(I also added a bit of garlic powered%u2026I like my garlic) and some chopped up red onion and tomato. %u00a0Place beans, garlic, avocado and lime juice in a blender or food processor and blend until smooth. Add salt to taste and toss in the chopped tomato and onion. Blend for sec to mix that in%u2026Stick in a bowl%u00a0

Perfect…

To think that both of these dips took about 10 minutes total to make. (I had pre baked the cauliflower and sweet potato) %u00a0And for real, I would spend much more time if I had too because both of these dips are so freaking good, I%u00a0definitely will be making these on the regular.

So there , dips for those sweet ass chips or whatever you want to dip or them spread them on.%u00a0

And he guys%u2026It’s FRIDAY! Have a fantastic day!

-C

White Bean Guacamole%u00a0

  • 2 cups white beans (or 1 can) rinsed and drained
  • 1 ripe avocado
  • 3 cloves garlic
  • 1 lime
  • 1/4 %u00a0small red onion
  • 1 small tomato
  • 1-2 teaspoons salt

Finley chop onion and tomato. Set aside. Place the beans, avocado, garlic, garlic powder, 1 teaspoon salt and the juice from one lime into a blender or food processor and blend until smooth. Add a splash of water if needed to help keep things moving. Taste and add more salt if needed. When smooth, add %u00a0the onion and tomato and pulse a few times to mix in. Scoop into a serving dish and finish with a squeeze of lime and a bit of chopped onion and tomato.%u00a0

Cauliflower Sweet Potato Queso

  • 1 1/2 cups pre cooked steamed or roasted cauliflower
  • 1 medium pre baked sweet potato
  • 1/2 cup nutritional yeast
  • 1-2 tablespoons hot water
  • 1/2 a small red pepper
  • 1/4 small red onion
  • 1 jalape%u00f1o
  • 3 cloves garlic
  • salt and pepper

Finely dice the red pepper, jalape%u00f1o, onion and garlic and saut%u00e9 in a skillet for a few minutes until slightly soften and fragrant. Take the pre-cooked cauliflower, sweet potato (skin removed), and nutritional yeast and place in a blender or food processor. Blend for about 5 minutes until creamy and smooth. Add in a tablespoon %u00a0of water %u00a0to keep things moving. When completely smooth, add in saut%u00e9ed veggies and pulse a few times to combine. Scoop into a serving dish. If your feeling it, %u00a0top with scallions and cracked pepper.

Serve dips with chips, veggies or anything you want. Also make great spreads for sandwiches and crackers too!

THE LOVELY CRAZY

January 26, 2020 by maximios • Blog

Besides begin a coffee addict, I am also a super big tea drinker. At least 1, if not like 3 cups a day. And when I say cups, I mean a 32oz ball jar of steaming hot water with a tea bag of some sort in it. And sure, I will use the same bag twice or leave in an old bag and add a new bag. Or with loose leaf, I%u2019ll end up just eventually swallowing it all. What can I tell ya. That%u2019s my truth. %ud83e%udd37%ud83c%udffb%u200d%u2640%ufe0f

Anyway, tea. I have a shit ton. Bags and loose leaf, but sometimes what I would call “conventional tea flavors%u201d do not sing my fancy. That is when I will dig around in my spice jars and pull stuff out to make or add to a tea.

Fenugreek. A seed. A great tasting seed. I usually use it in my chilis and curry dishes, but lately, I have also been brewing it up with (and without) fresh ginger to drink because it is fantastic. Ginger of course is spicy and earthy, but fenugreek, while also being really earthy, also has a sweetness to it and tastes kind of like real maple syrup. Now doesn%u2019t that sound great? That%u2019s because it is great.

So if you are feeling a little something different and tasty and maybe just so happened to have some fenugreek in the old spice cabinet, give this tea a try. A perfect for and cosy drink for cold winter afternoon.

To the tea!

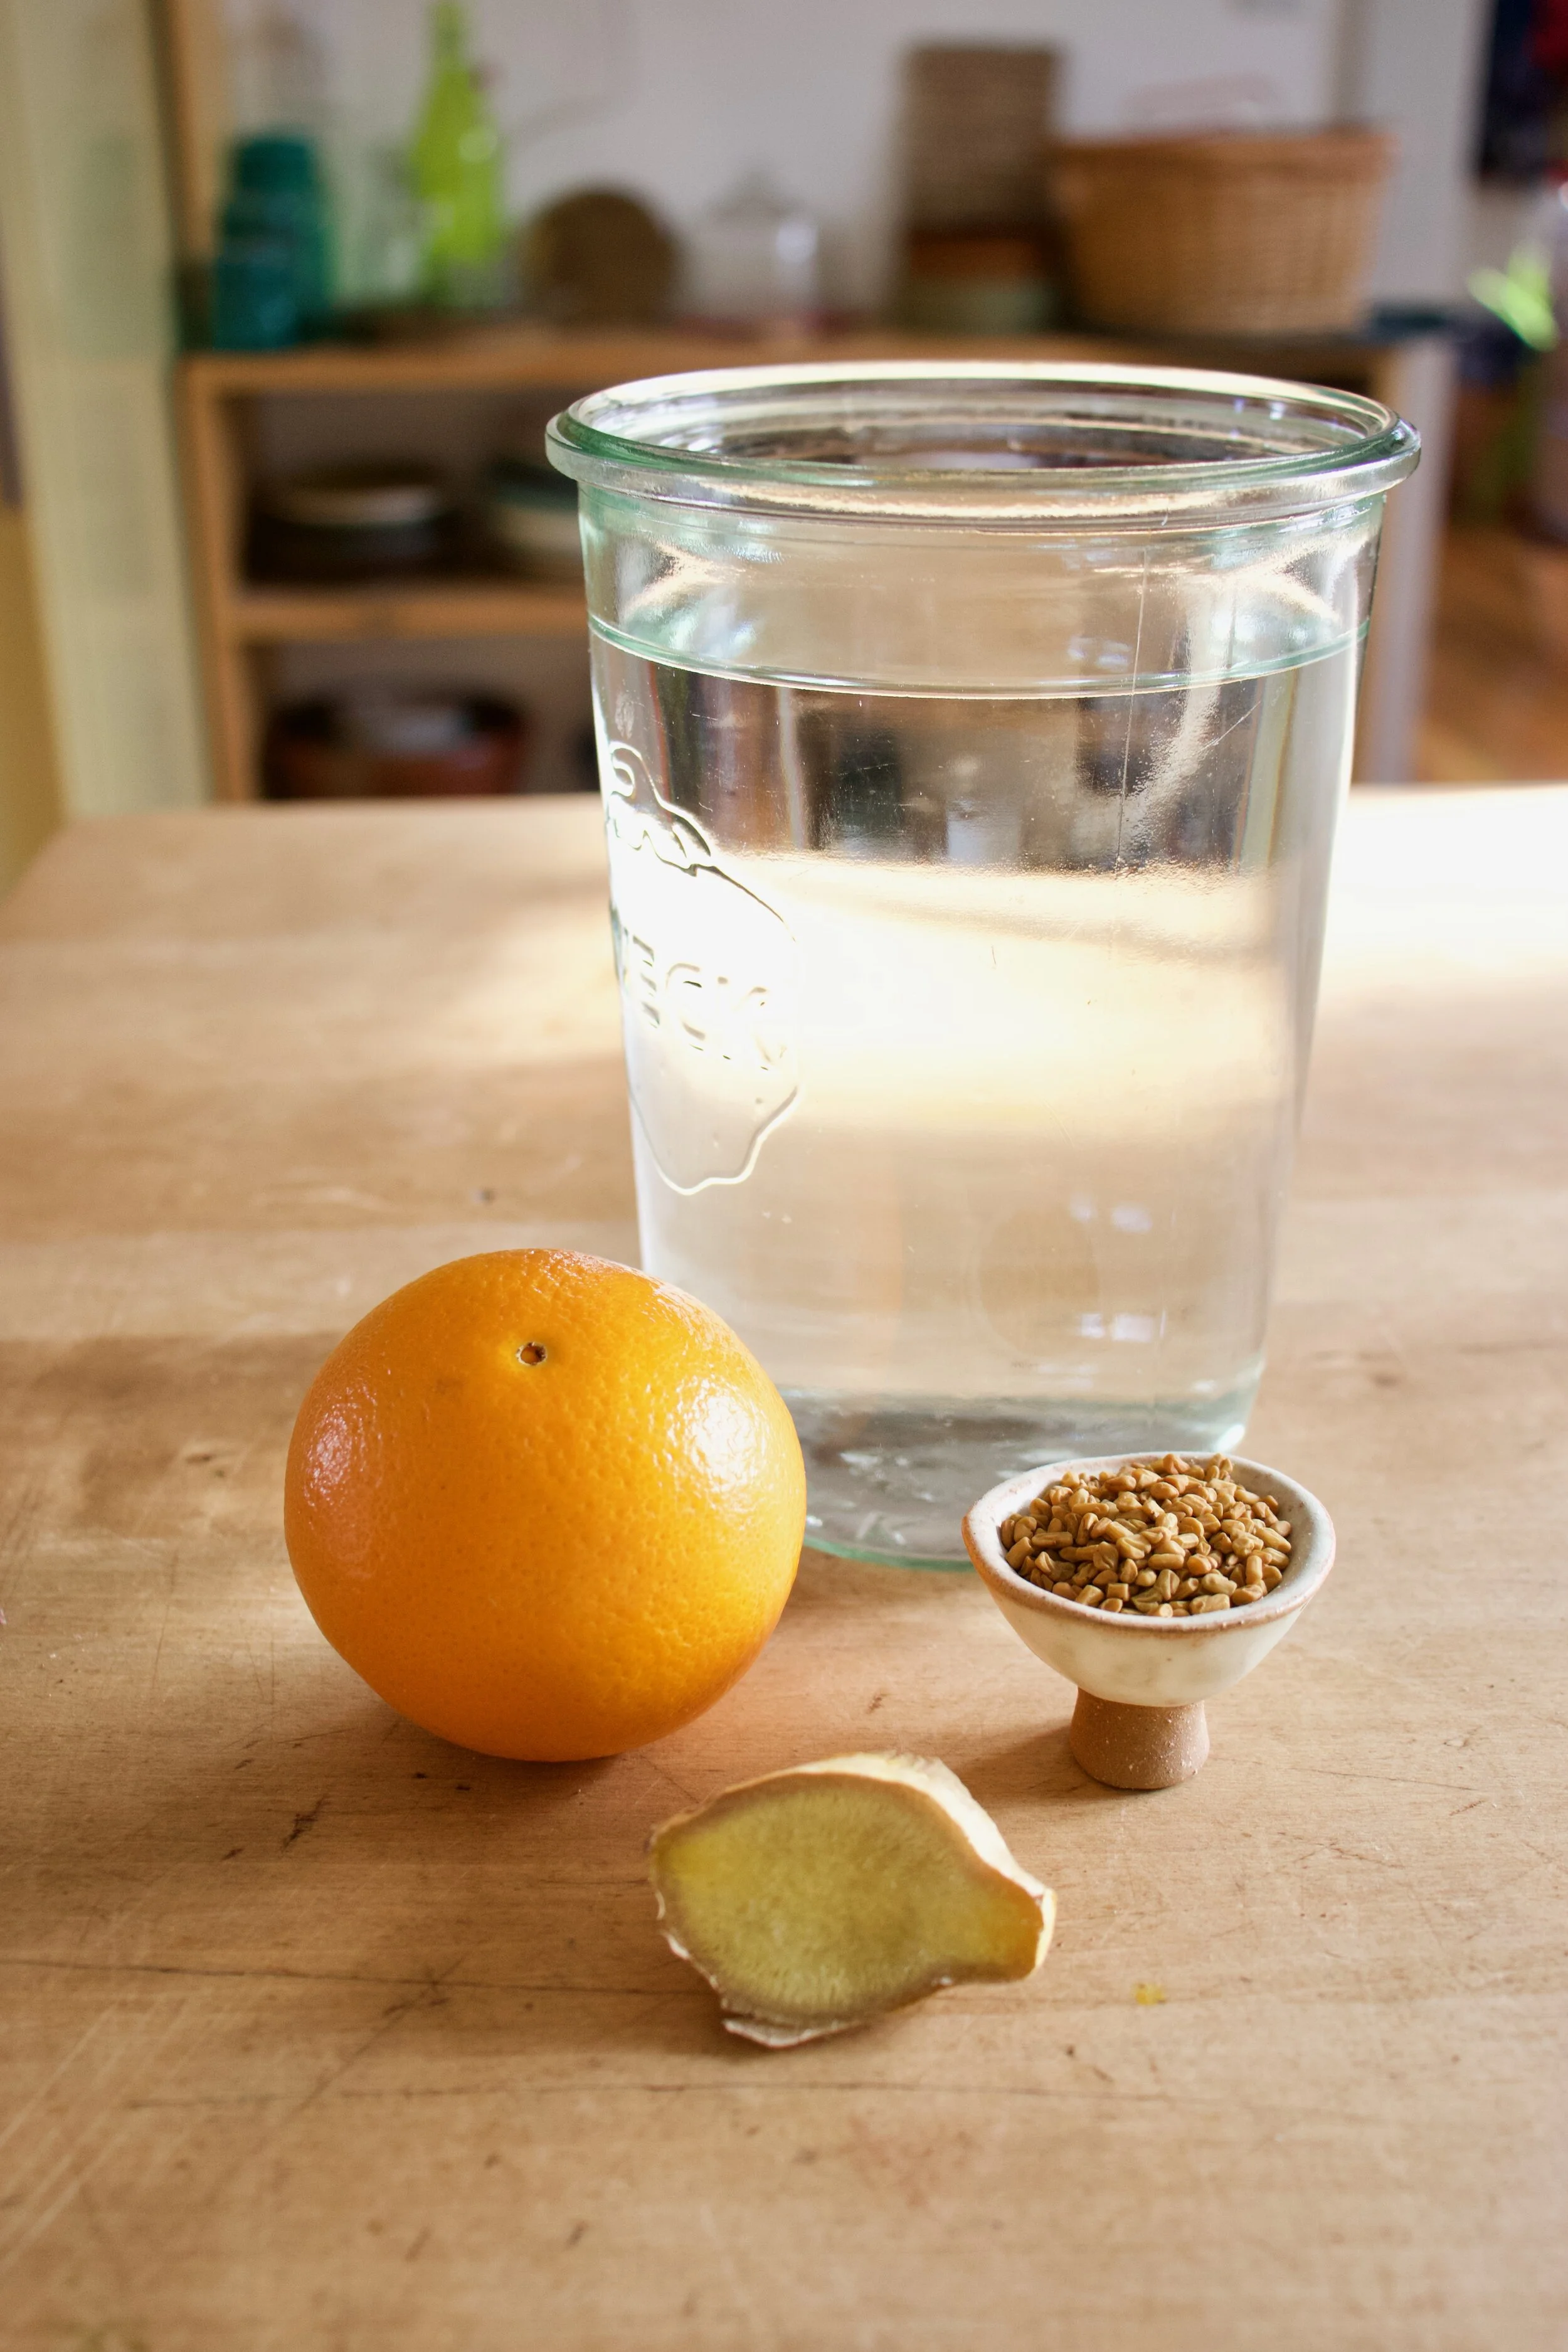
The stuff. Water, fenugreek, fresh ginger, and an orange.

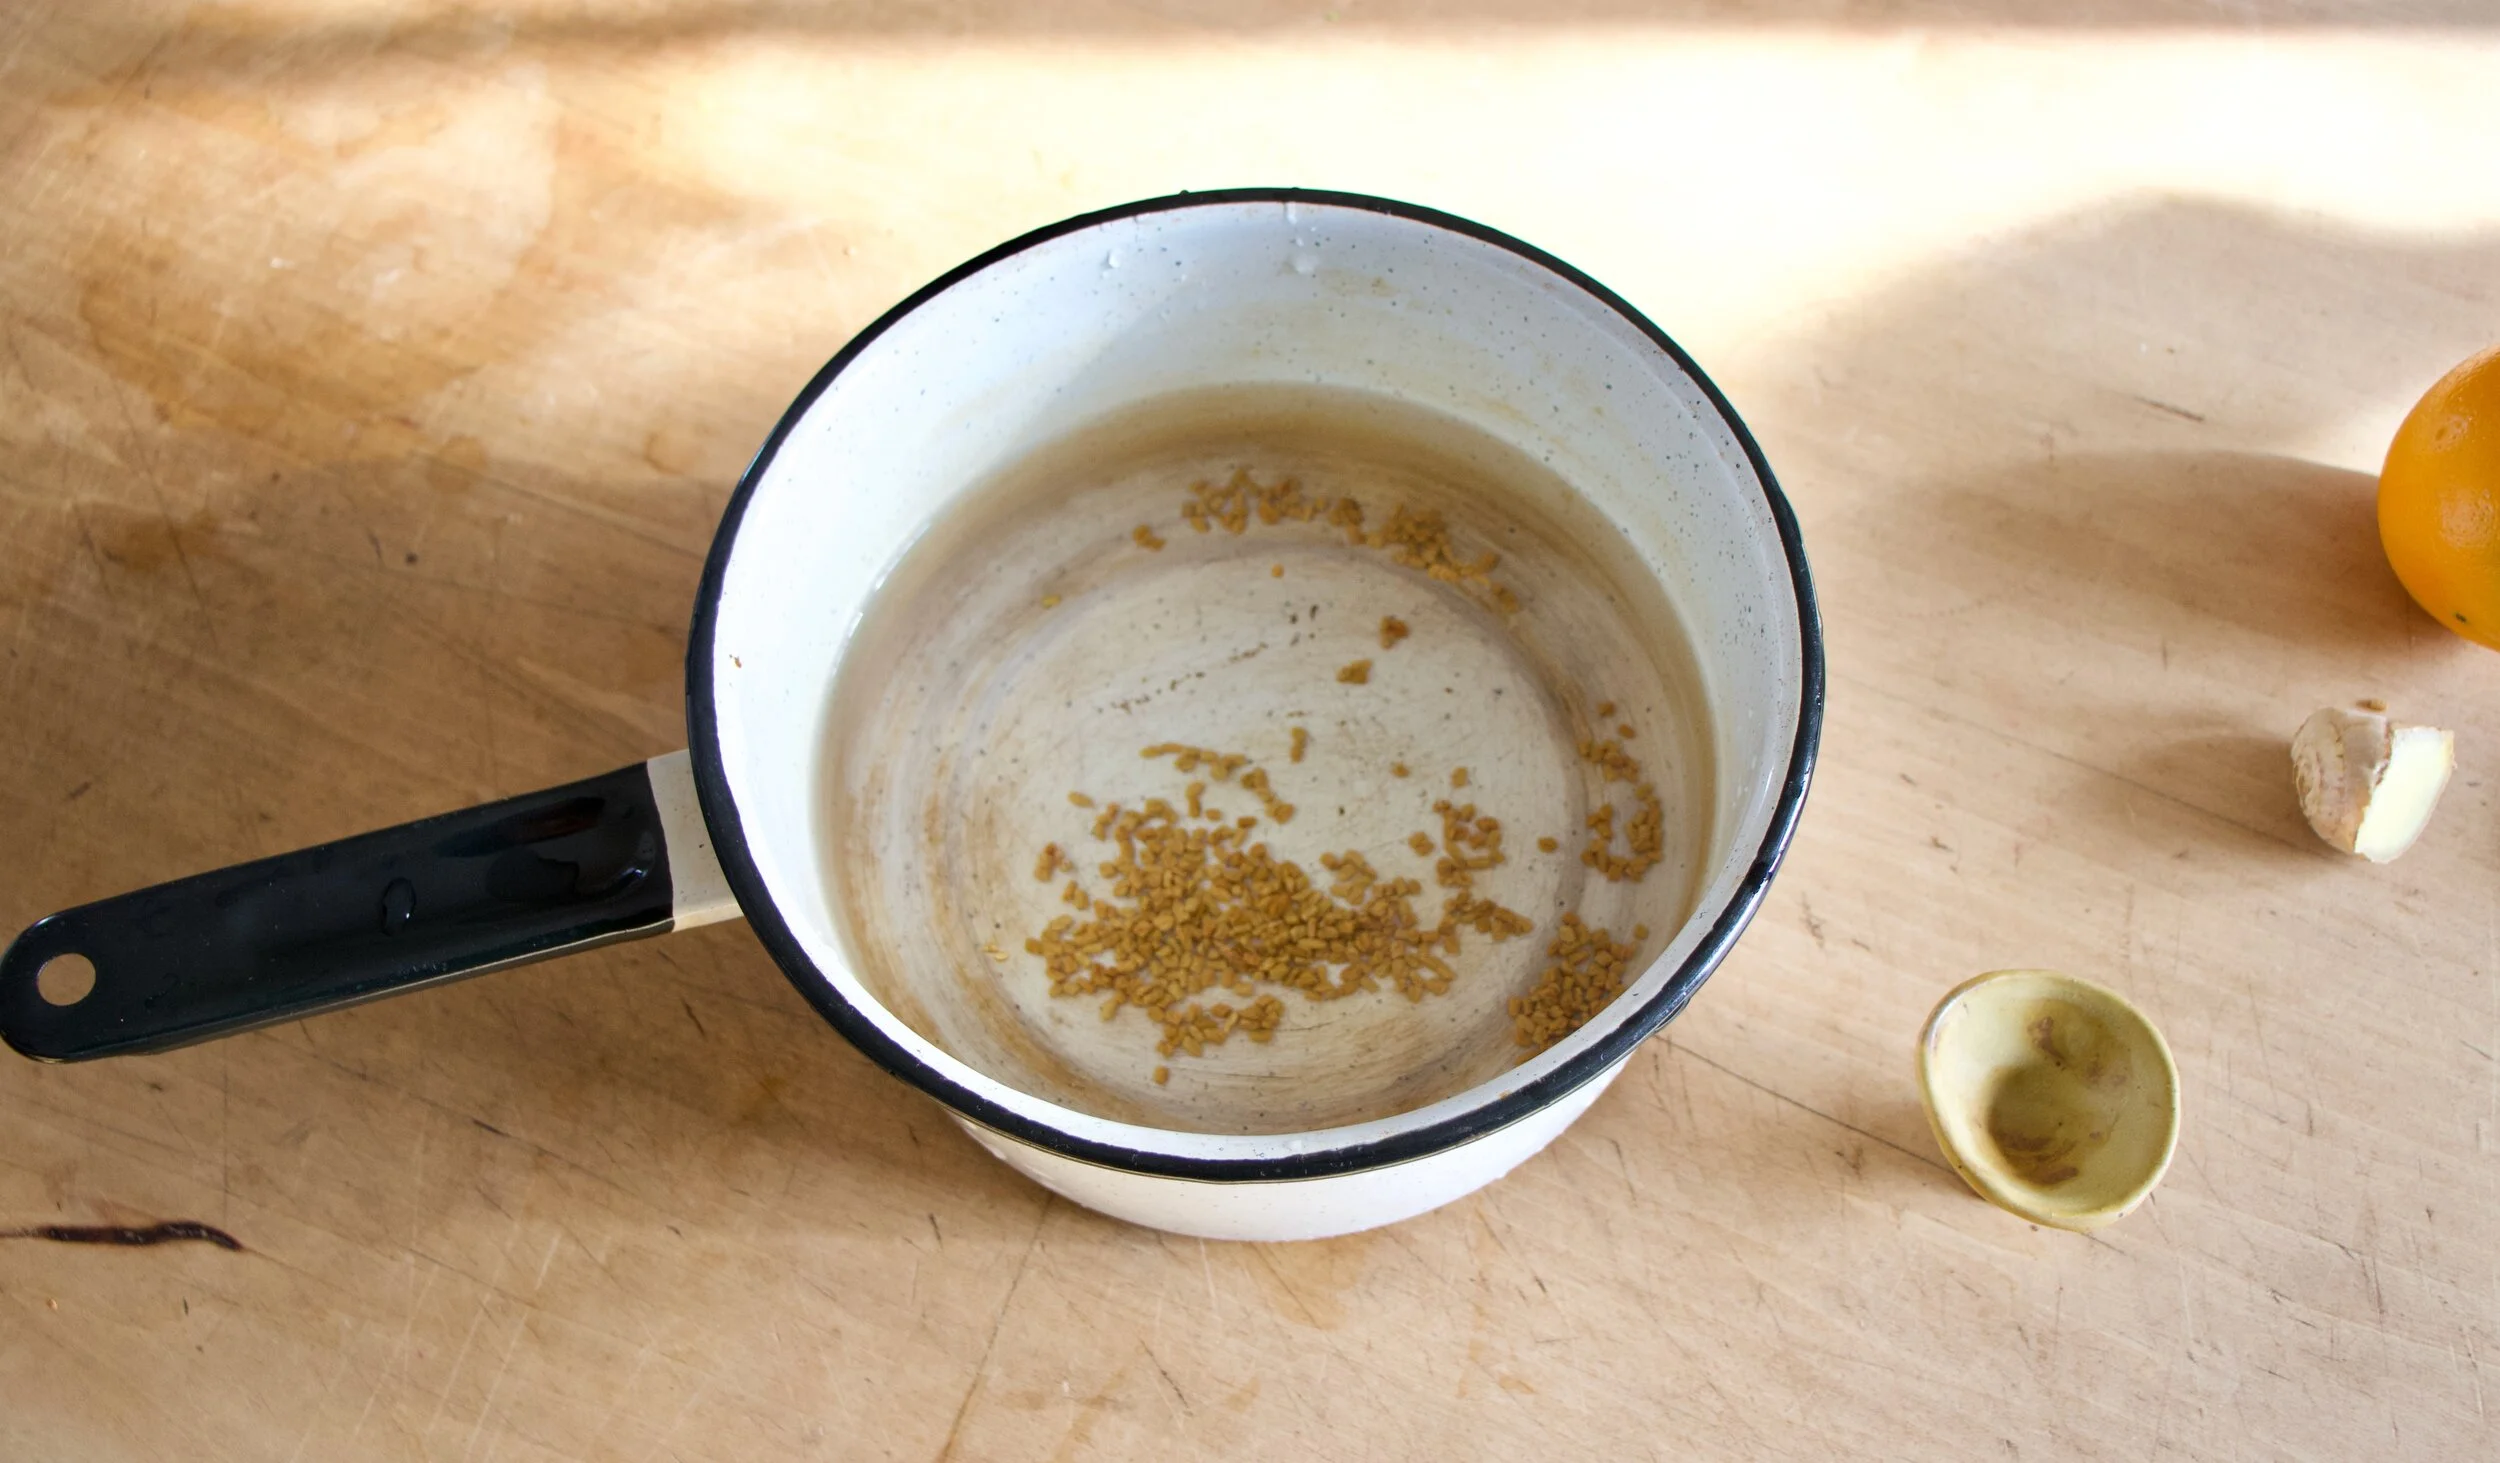
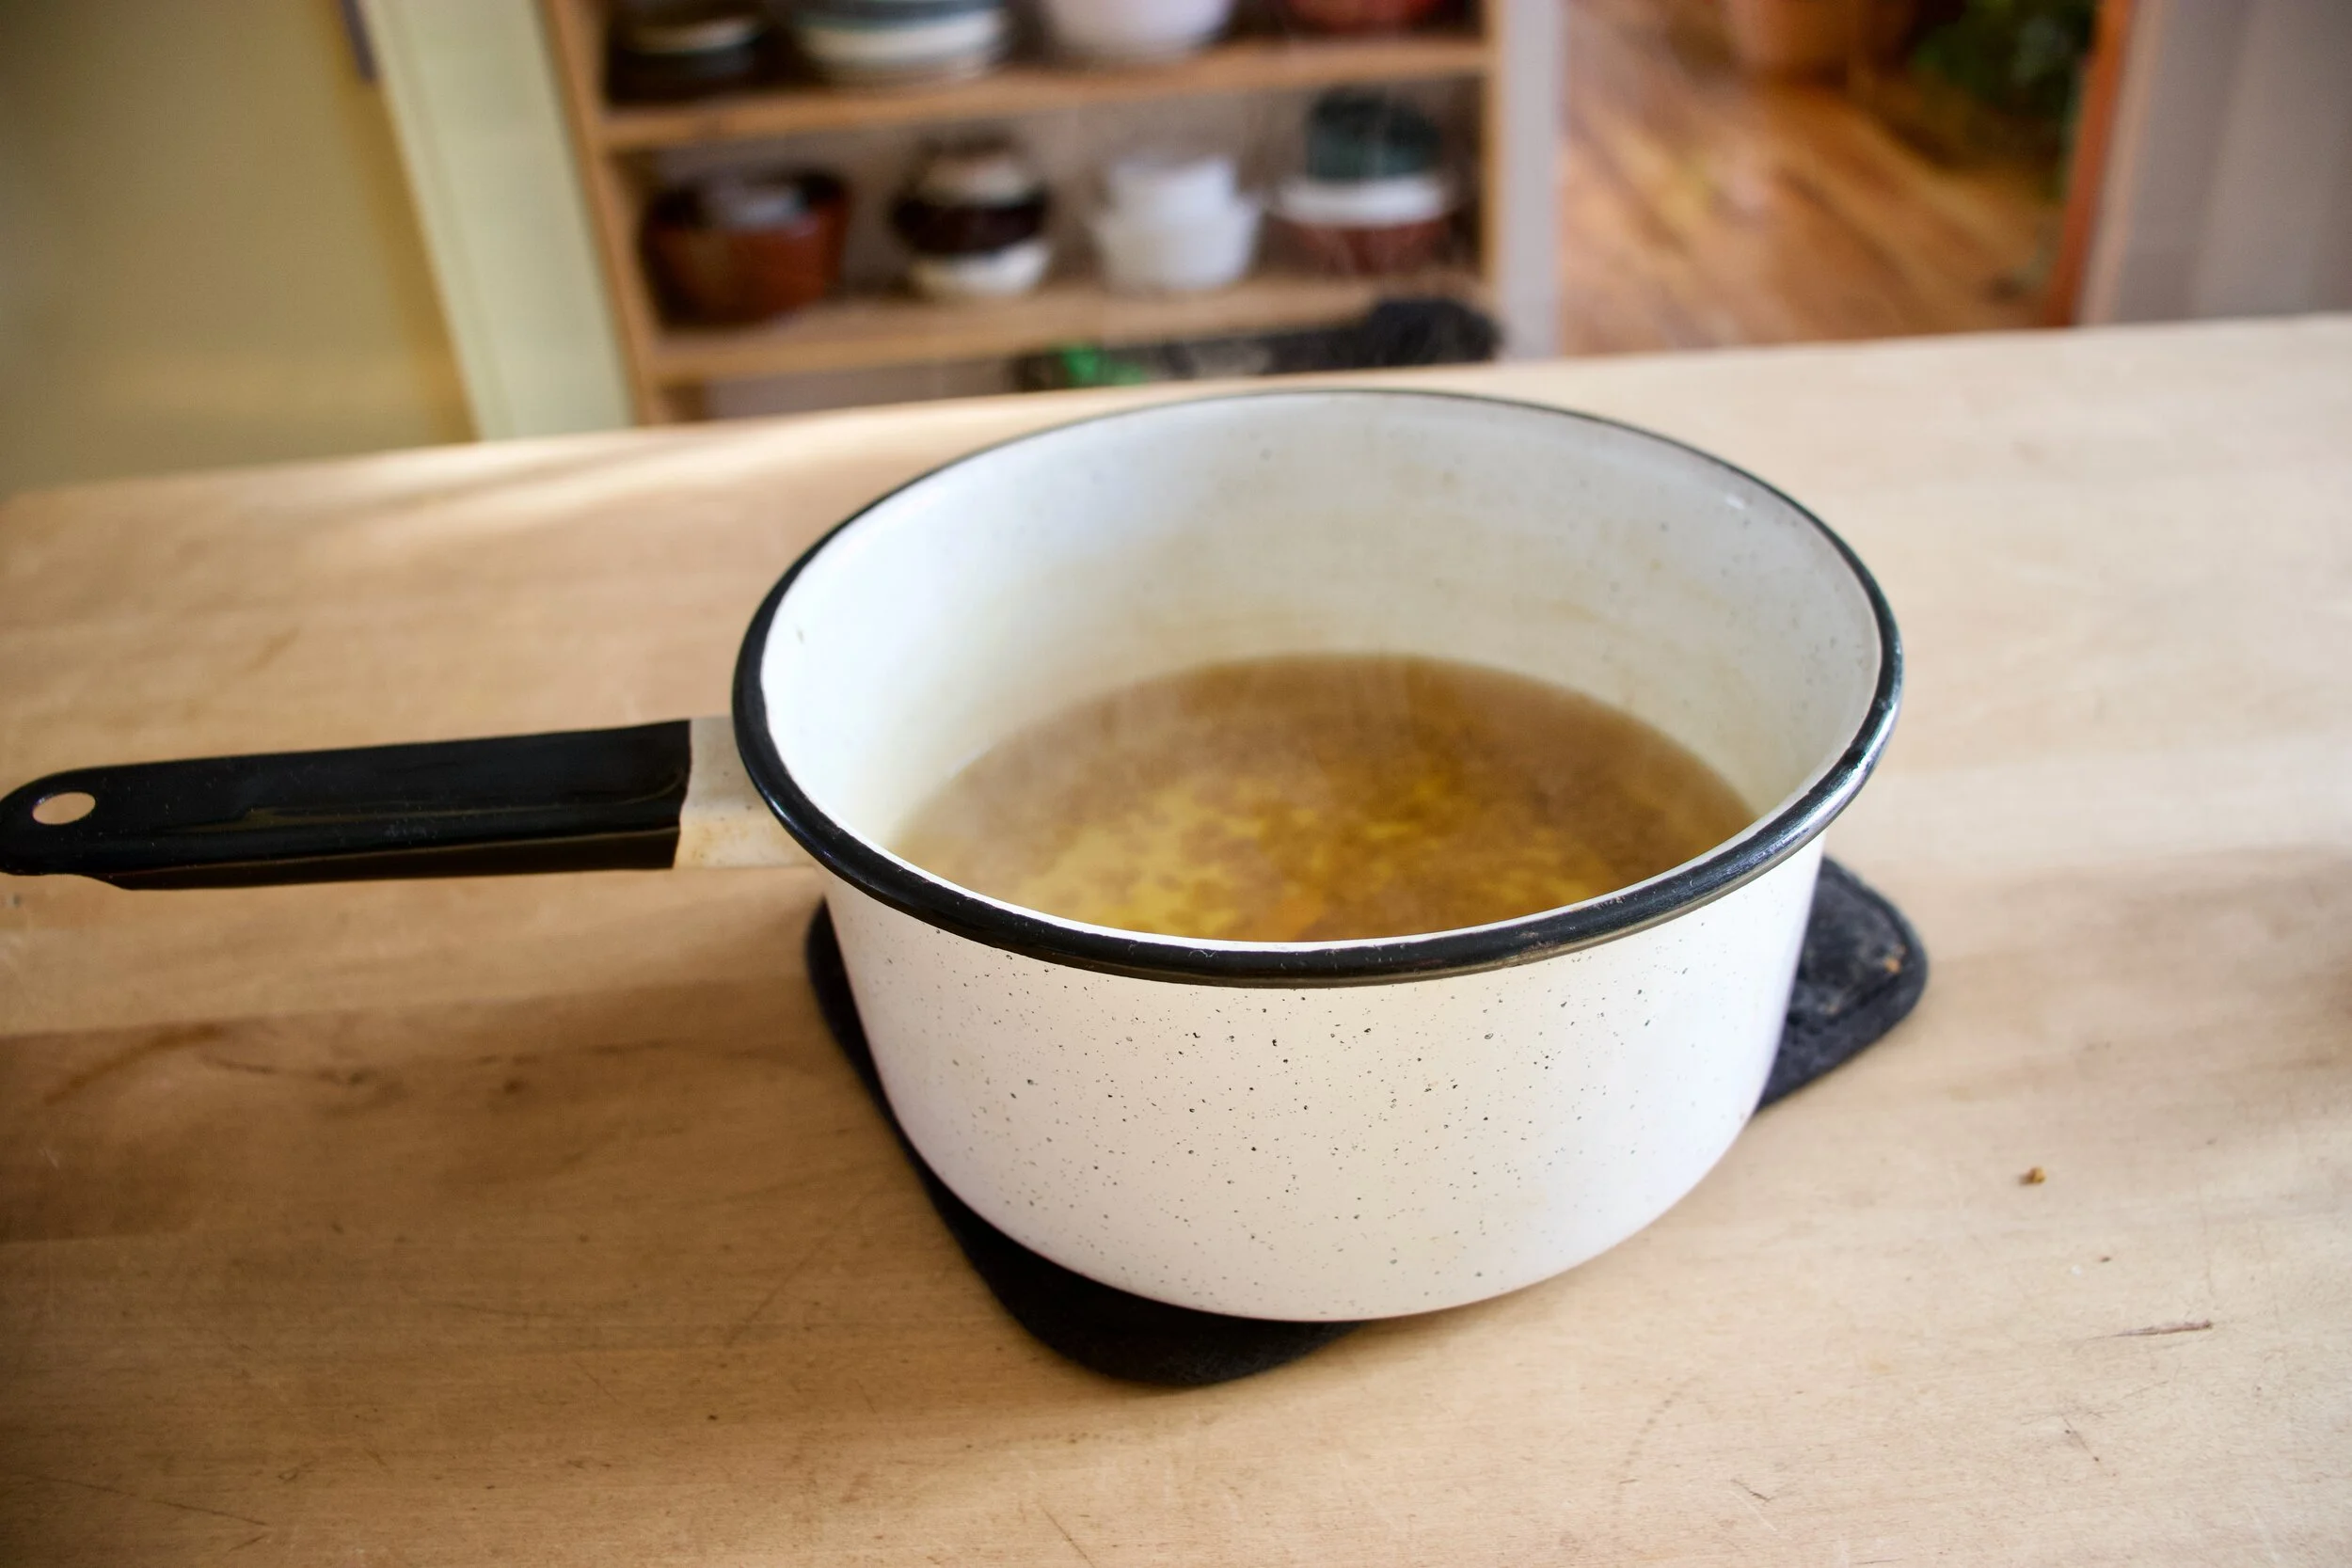
Dump water into a pot and add in fenugreek seeds. Place on the stove and bring to a boil, then turn the heat to low and simmer.

Cut up the fresh ginger into small chunks and take a few ribbons of peel from the orange.

After the fenugreek has had a 5 minute head start in the water, add in the ginger and orange and keep simmering for another 5 to 10 minutes. (longer time for stronger tea)

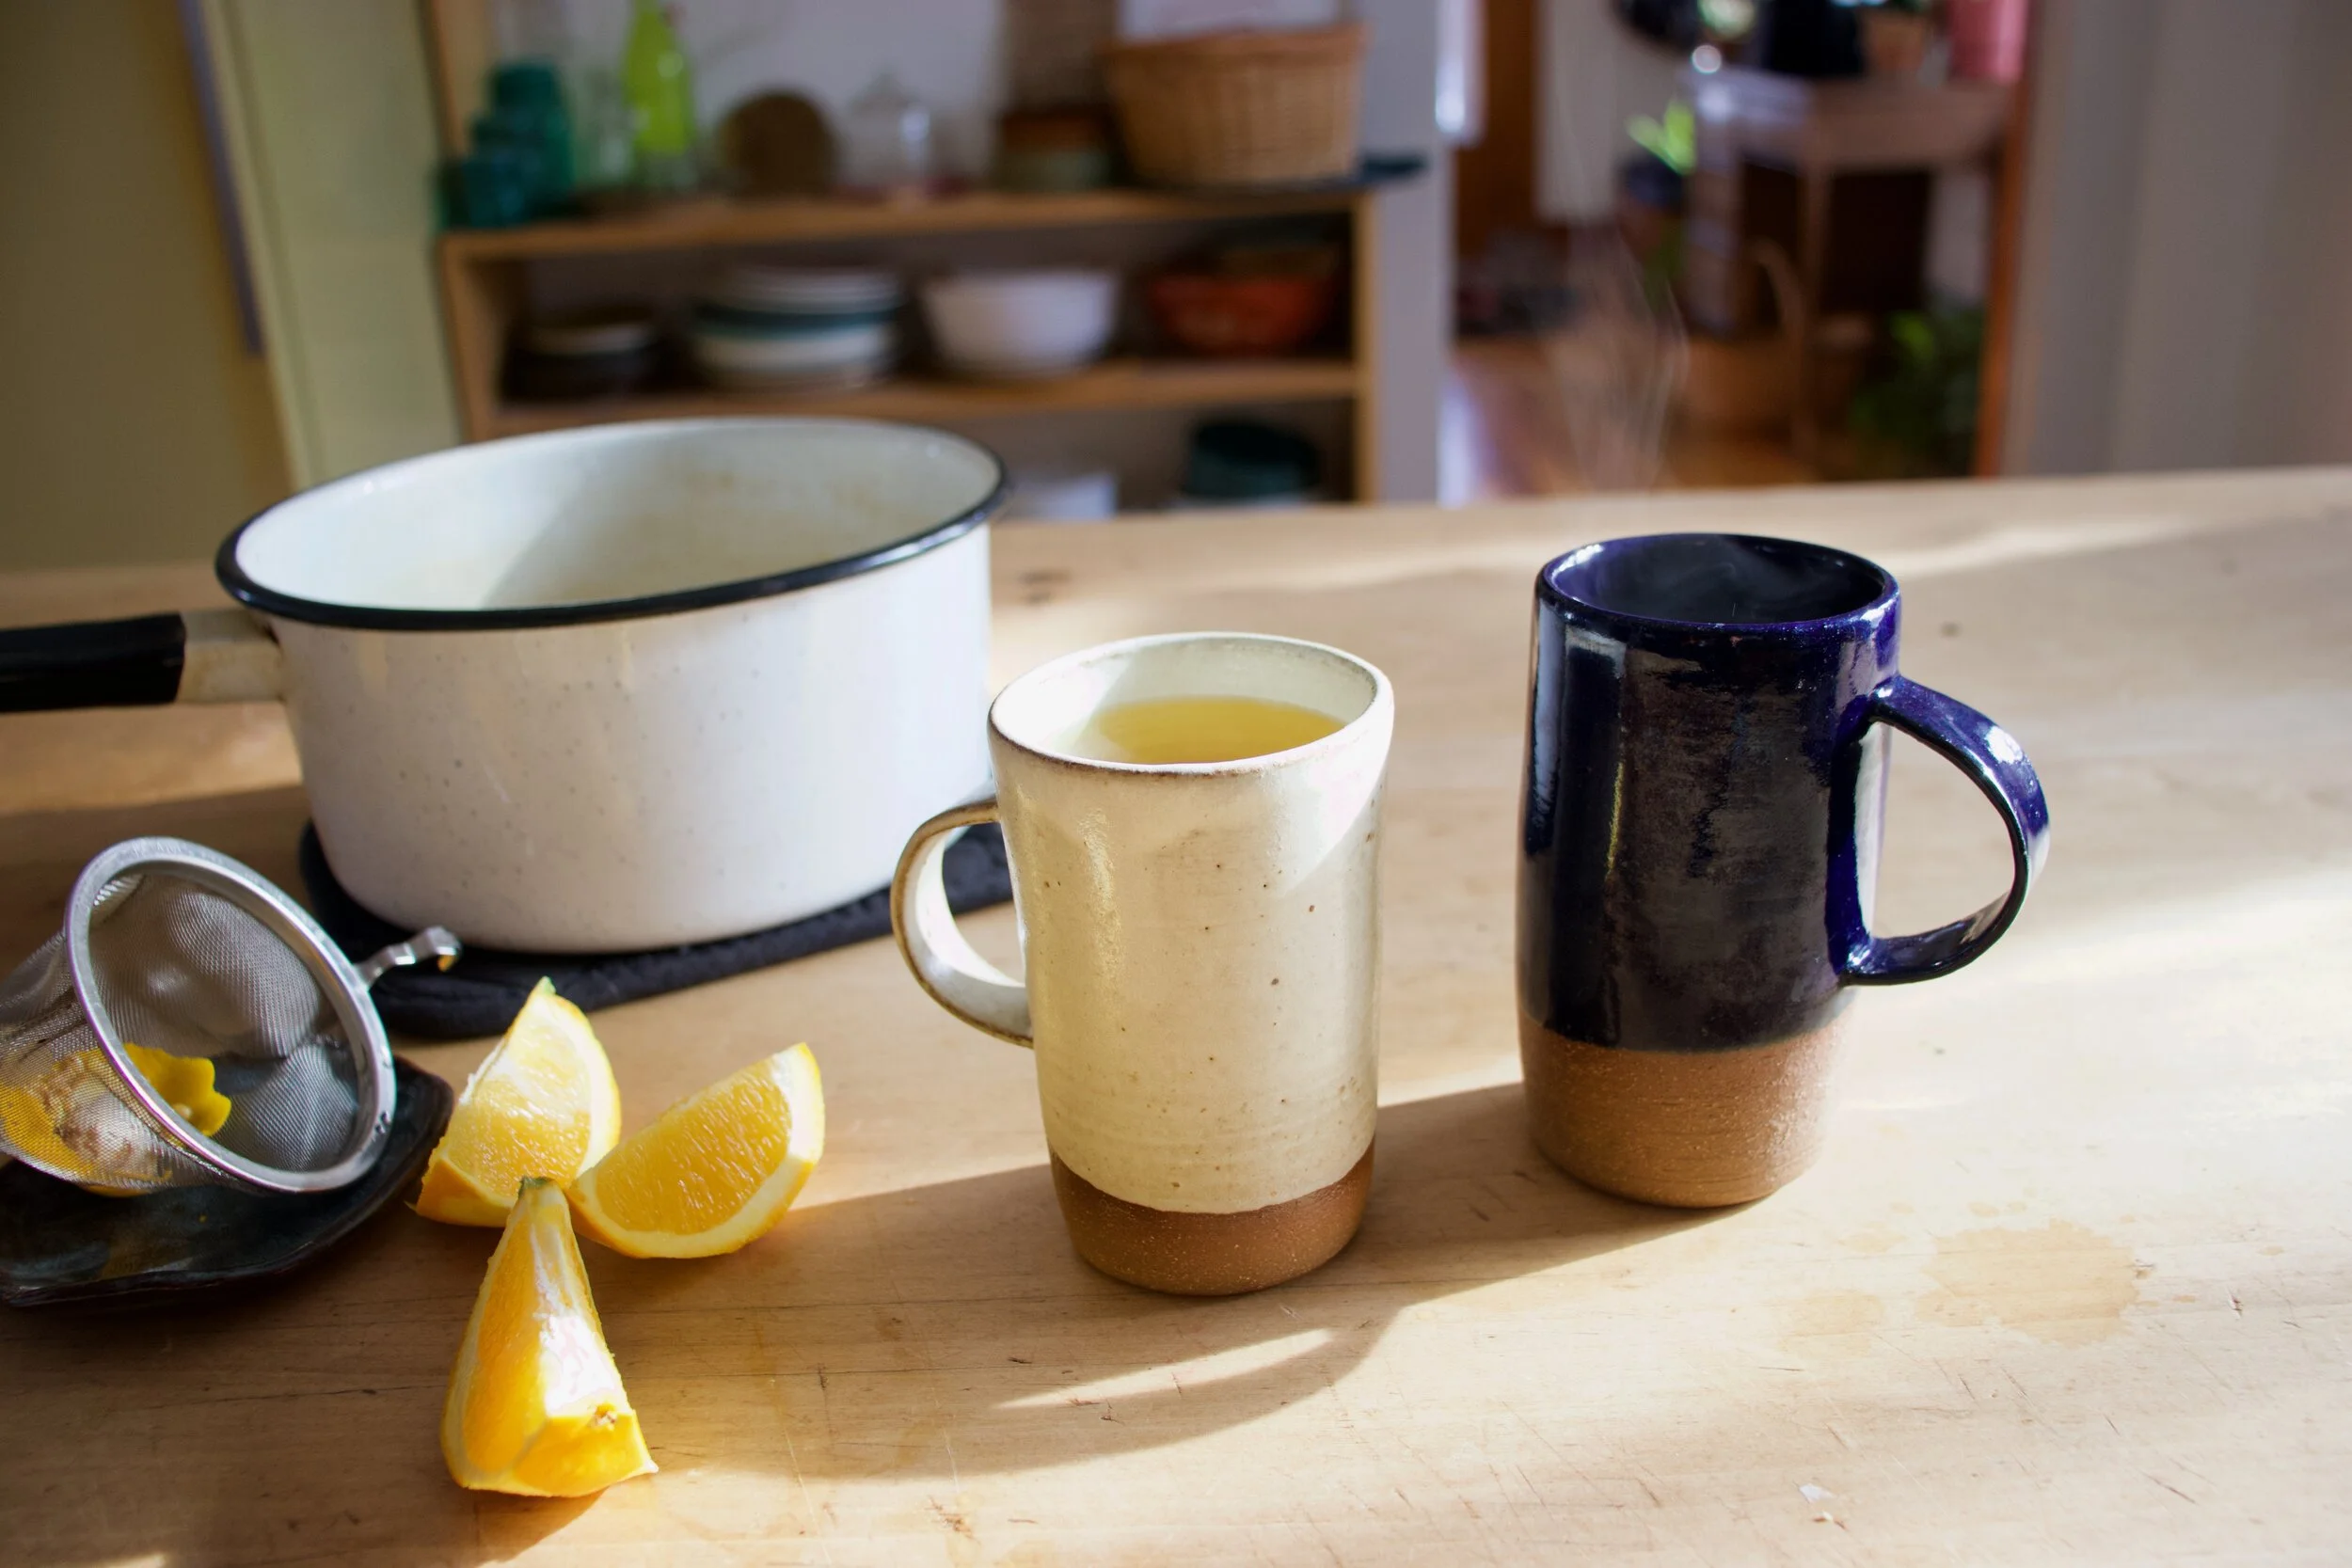
Strain the tea into cups, squeeze in a little fresh orange juice, and go curl up o the couch.

It%u2019s tea time.

-C

makes 2 cups of tea

  • 2 teaspoons fenugreek seeds

  • 1 inch chunk of fresh ginger

  • an orange (optional)

  • 4 cups water

Place water and fenugreek seeds in a pot and place on stove. Bring to a boil then turn heat down to simmer for about 5 minutes. Cut up ginger into small chunks and peel a few ribbons of orange zest and place into pot. Continue to simmer for another 5-10 minutes (longer for stronger tea). When you are ready to drink, strain into cups, squeeze in a little fresh orange juice, and drink.

Mid week, I was doing a little pantry cleaning/ inventorying of what I had and needed when I came upon not one, not two, or even three. No, six. SIX, jars of jam. And there are 2 that are already opened in the fridge. I don%u2019t know why, but knowing that there was that much jam in the house made me a little uneasy. Six unopened jars is about 3 jars past my comfort zone. Sure there are so many things you can do with a jar of jam (jelly, preserves, and marmalade included) and now that I am thinking about it, is one of the reasons why I bought a few jars a while back. Then there was Christmas and I think we got at least two jars as gifts so it%u2019s not all my fault, but still, that is just too many jars of jam. Right there I needed to get rid of at least one jar. So muffins. Jam muffins, with poppyseed crust because it%u2019s pretty and nobody ever complains about poppy seeds, or at least they don%u2019t until after they eat them and have poppy seeds stuck in their teeth all day. But that is just our mouths way of saving a little for later, am I right? HA

Anyway, a quick and simple muffin recipe for all of you people out there that might have a jar or two too many of jam in the fridge or pantry%u00a0(I used apricot but any flavor(s) would work) and could use yourself a tasty little muffin situation. I mean who doesn%u2019t want a tasty muffin?

To the muffins.

The stuff. In the bowl is white and white whole wheat flour, baking powder and soda, and salt. Also have apricot jam, oil, almond milk, apple cider vinegar, and orange, and some poppy seeds.

Grab a zester and zest the orange into the bowl with all the dry stuff. Whisk to combine.

Jam, oil, milk, and vinegar. All on top of dry. Whisk that up until just combined. No over mixing. You will get tough (not in a good way) muffins.

Scoop into well greased muffins tins then cover the tops with poppy seeds.

And out of the oven, looking all pretty like.

Pop those muffins out of the tins and cool on a wire rack for a bit. And by all means, don%u2019t wait until they are completely cool.

Now eat you a warm muffin and if they are mini, grab a few. You can%u2019t just eat one mini muffin, that is just crazy.

-C

Make 12 normal size muffins or 24 mini muffins

  • 1 cup all purpose flour

  • 1 1/4 cups white whole wheat flour

  • 2 teaspoon baking powder

  • 1/2 teaspoon baking soda

  • 1/2 teaspoon salt

  • 1 cup plant milk

  • 1/3 cup neutral oil

  • 1 tablespoon apple cider vinegar

  • zest of an orange

  • 1 heaping cup apricot jam or preserves (can sub in any flavor you like)

  • 1/3 cup poppy seeds

Preheat oven to 350

In a large bowl whisk together the flours, salt, baking powder and soda, and the zest of the orange. Add in the oil, milk, jam, and vinegar and whisk until just incorporated. Scoop batter into well grease muffin pans (12 regular or 24 mini) then cover the tops with poppy seeds. Pop into hot oven and bake until risen and a tester comes out clean when one is poked. For mini muffins, check after 13 minutes, for normal muffins, after 16 minutes.

Once baked, remove from oven and pop out of pans when cool enough to handle. Place on a wire rack to cool completely or just start eating them warm.

Store left over muffins in an airtight container for 3-4 days at room temperature. They also freeze well.

I eat so much hummus. Everyday, all day. Homemade, store bought. If there is hummus, I will be consuming it. But the thing is, I usually don%u2019t eat more then a little at a time. (A little being like 1/2 a cup). And sure, sometimes that is just fine and enough, but other times, what I really want to do is garb a spoon and a bag of carrots and eat it all. And then I do.

But there is that little voice in the back of my head telling me that if someone where to catch me eating mounds of hummus, they would liken my eating behavior to that of someone eating a jar of mustard (Not going to lie, it happens sometimes) or of a bottle of ketchup (but I don%u2019t eat ketchup) and that have a problem and shouldn%u2019t being eating it like that. Because hummus, for some reason, has been put into the condiment category. It%u2019s treated like a dip or a spread and that is fine and dandy to eat it as such, but hummus is so much more. It can, and should be treated more like a main component to a dish. So let us step outside of that box and eat it how we really want to eat it.

Hummus by the bowlful. I know right! It just makes so much sense to me. And now to you too. We need to stop stopping ourselves from just a scoop or two because really, that is just not enough. Nope, this is for real. A bowl, full of hummus, topped with roasted veggies because that is just more deliciousness. And we get to eat it all.

Life can be pretty great sometime, you know. HA

Now to the bowl of hummus!

The stuff. We got chickpeas, tahini, a lemon, red wine vinegar, garlic, salt and pepper. And Veggies. Brussel Sprouts, broccoli, onion, Swiss chard, and kale.

Chop up the broccoli, the onion and half or quarter the Brussel sprouts. And separately, chop up the kale and chard.

Toss the chopped Brussels, broccoli and onion into a baking sheet or oven safe skillet and season with salt and pepper. IF you want to toss in a little oil, go for it. Then pop the veggies into a hot oven to roast away.

Once the veggies are just about done to your liking, grab the chopped kale and chard and off to the veggies. Toss and roast for a few more minutes.

Hummus. Chickpeas with liquid, garlic, tahini, juice of lemon, and blend. Creamy smooth and delicious.

Dump that hummus into bowls.

And top with roasted veggies.

Would you look at that. Now all you need to to is dig in. Serve with extra lemon and black pepper. Grab your utensil of choice and eat.

-C

makes 2 servings if eating as a meal

  • 3 cups cooked chickpeas in liquid

  • A lemon

  • 1 tablespoon red wine vinegar

  • 2-3 cloves garlic

  • 1/4 cup tahini

  • salt and pepper

  • 10 or so Brussel sprouts

  • A small head of broccoli

  • A small onion

  • 5-6 kale and or Swiss chard leaves

Note. Use whatever veggies you want. Fresh or already prepared. All and any leftovers would be great.

Preheat oven to 450.

Cut Brussel sprouts in half, chop the onion into small pieces, and cut up the broccoli and toss onto a baking sheet or an oven safe skillet. Sprinkle with a little salt and pepper and stick into the oven to roast for about 20 ish minutes or until nice and roasted. Feel free to toss the veggies in a little oil if you want. Chop up the kale and chard into smaller pieces. Once veggies are just a few minutes from being cooked to you liking, remove from oven, and toss in the greens. Cook for another 5 or so minutes until those are nice and wilted. Remove veggies from oven.

While veggies are roasting, make hummus. Place chick peas with liquid, the juice of the lemon, vinegar, garlic, and tahini into a food processor. Blend until smooth and creamy. Taste and season with salt and pepper to your liking. Dump into a bowls.

And when you have hummus make and veggies roasted, its time to compile. Dump the hummus into 2 bowls. Dump half of the roasted veggies into each bowl.. Squeeze more lemon juice onto both then grab a fork.

Eat. And yes, lick bowl clean. No shame.

Let us talk about how winter squash is like one of the best foods ever. Seriously. Hardy, creamy, rich, and full of the nutty, sweet flavors of all the good things. How anyone says they don%u2019t like winter squash is beyond me. I sometimes even feel like I put myself in danger of exploding when I am around enough cooked squash. I can eat and eat it until it%u2019s gone, which is fine if it%u2019s a serving or two, but when you roast up a 10 pound butternut, well, that is when the danger is real. I am getting better at holding back, but man, sometimes I just can’t (or don%u2019t want to?) help myself. ( You might also wonder why I cook 10 pounds of squash at a time. It%u2019s because I will eat it all in a few days and I might as well cook a bunch at once, for efficiency sake.)

Now the delicata squah. If you haven%u2019t had it before, stop what you are doing and go get one. You need to try it because it is amazing. Sweet, nutty, creamy. So good! And another good thing is that they are not giant, so you can buy one and eat the whole thing and not worry about overeating until you can%u2019t move, unless that is the goal. In that case, just buy a bunch. HA.

Anyway, it%u2019s getting to that time of year where salad is still great, it is just great warm. And with winter squash. Don%u2019t you agree? So we cook up the squash, grab the kale and make one heck of a salad to eat all to your face. Because that is what will happen. You will make it , taste it, and not want to share it. It is too good to share. (Yes salads can be too good to share, so if you are planning on feeding others, plan accordingly)

To the salad!

The stuff. Kale, a delicata squash, red onion, some balsamic vinegar, a touch of maple, spicy brown mustard, a handful of toasted seeds, and salt and pepper.

Start with the squash. Cut it in half and scoop seeds from booth sides (these seeds are great roasted). After deseeded, cut both pieces into 1/4-1/2 inch thick rounds. And NO!!!!, do not peel the skin.

Grab the onion and cut into 1/4 inch rounds too.

Place the squash on a very lightly oiled baking sheet so the pieces are not overlapping each other. Then toss on the onion which is fine if it overlaps. Sprinkle with a pinch of salt and lots of cracked pepper and pop into a hot oven.

In the meantime, mix the dressing situation together. Mustard, maple, and balsamic in a jar, mix and done.

Chop the kale too. Into mouth sized pieces.

Once squash is cooked all nice and tender, remove pan from oven. Take all the kale and toss on top then take the dressing and drizzle it all over the kale. Pop the pan back into the oven for a minutes or two, just until the kale starts to ever so slightly wilt.

Pull the pan back out and give it a good toss.

Dump it all into a big bowl, toss in the toasted seeds, and call it. Now grab a fork and start eating.

-C

Can be a main dish for 1 or a side for a few

  • 1 delicata squash

  • 1 bunch of kale (around 3/4 pound)

  • 1 smallish red onion

  • 3 tablespoons balsamic vinegar

  • 1 -2 teaspoons maple syrup (more for a slightly sweeter, maple-y flavor)

  • 2 tablespoons brown or dijon mustard

  • 1/4 cup toasted seeds of choice (I used pumpkin and sunflower)

Preheat oven to 400

Cut delicata squash in half and scoop out all the seeds (you can save seeds to toast up later if you want), then slice the squash into 1/4 – 1/2 inch thick rounds. Grab onion and cut into thin slices. Take onion and squash and place them onto a very lightly oiled baking sheet and sprinkle with salt and pepper. Don%u2019t let the squash overlap, but it is fine for the onion to overlap the squash and itself. Pop the pan into the oven and bake until the squash starts to brown and is fork tender, which should take about 10-15 minutes.

In the meantime, chop kale into small mouth sized pieces and set aside. And mix the balsamic, mustard, and maple together to create the dressing.

Once the squash and onions are cooked, toss the kale onto the pan and drizzle the whole thing with the balsamic mixture. Toss it all around and pop pan back into oven for another minute or two, just to let kale get a touch wilted.

Remove pan from oven, dump everything from pan onto a plate, and toss in the toasted seeds.

Grab a fork. Eat.

It is exactly that time of year. Apples galore, cool days in need of a little extra warm, meaning a warm oven is welcome, if not needed. It%u2019s the best time of year, or at least one of them.

And so I bake bread. Sometimes just a roll, and sometime a loaf, almost everyday. I love bread baking because, well just because. Plus it%u2019s what people want to eat and will always eat because I guess bread=love. Makes sense to me.

This bread was made from a small dip in the 2 gallons of applesauce I made the night before. (We had sooooo many apples). The mr isn%u2019t the biggest fan of applesauce, says he would rather eat a fresh apple. I kind of get it, but dude, warm, chunky, slightly cinnamon-y applesauce%u2026 I mean, that is happiness right there. Right? Anyway, I am trying not to eat all the applesauce to my face by myself at once (it has been a challenge) and plus I needed to make the mr some bread, so I figured what the hell. I%u2019ll just use applesauce as my liquid in the bread. And so I did and that is that and now that mr really like applesacue (when it is baked into bread)

This bread is a basic sandwich type bread. The apple taste is there but not overwhelming so it can be used for sandwiches of all kinds, toast, just eating with a smear od something, or not. Just a overall good loaf of bread with a little extra from the apple. And braided because I was feeling classy. It%u2019s amazing what at little braiding of bread dough can do for your self esteem. Made me feel like I was the coolest person in the world. Haha!

Now to the bread.

The stuff. A few apples, regular all purpose and white whole wheat flour, salt, applesauce, maple syrup, yeast, and warm water.

Applesauce, shredded apple, maple, yeast, and a little water get mix up and let to sit for a few minutes to activate yeast. Then the salt gets mixed in, along with all the flour. Stir until dough forms. Dough should be slightly sticky, ut not wet. IF wet, add a handful more flour. To dry, add more water.

Dump the dough onto a floured surface, cover your hands in flour, and knead dough for about 5 or so minutes, adding more flour as needed to keep dough from sticking, until the dough is a nice and cohesive texture.

Nice looking dough. Now roll dough into a ball.

Place dough in a clean wet or oiled bowl and cover with a damp cloth for one to one and a half hours or until dough doubles in size.

Dump dough onto floured surface.

Cut dough into 3 equal pieces and roll out into long longs.

Braid logs together. You can stop here bake it this way or%u2026

After placing it on a parchment lined baking sheet, tuck the ends of the braids underneath each other and make it like this. Either way. And once you have the dough on the baking sheet, brush a little water or plant milk on top and let dough rest for 15 minutes of so while the oven preheats.

Before oven and after oven. Classy, right?

Then for shin and soft crust, rub warm loaf with some plant butter.

And for the hard part. Let it cool before slicing it. Ok sure, a little warm is fine, but wait at least 20 minutes (an hour would be best) and then eat you some bread.

Eat you some bread. That%u2019s a t-shirt right there.

Happy Fall friends!

-C

makes pretty one loaf

  • 2 cups all purpose flour

  • 1 1/2 cups white whole wheat flour plus more for kneading

  • 1 cup unsweetened room temperature applesauce

  • 1 large or 2 small apples ( about 2/3 cup shredded apple)

  • 1/4- 1/2 cup warm water

  • 1 tablespoon maple syrup or honey

  • 2 teaspoons active yeast

  • 1 teaspoon salt

  • 1 tablespoon or so plant milk or water

  • 1 tablespoon plant based butter (optional for rubbing on finished bread)

Grab the apples and shred them until you have 2/3 cup shredded apple. In a large bowl, mix together the applesauce, shredded apples, yeast, 1/4 cup warm water, and sweetener.and let yeast activate for a few minutes. Add in salt, the all purpose flour and the 1 1/2 cups white wheat flour. Stir together until dough forms. The dough should be a little bit sticky so if the dough seems to dry, add in 1/4 cup more warm water. If it seems really wet, add in a handful more flour.

Dump dough out onto a well floured surface and knead for about 5 minutes adding a little bit of flour to the counter as needed to prevent it from sticking. Once dough is cohesive in texture, roll into a ball and place into a clean wet or oiled bowl. Cover with a damp towel and allow the dough to double in size. Should take between an hour and an hour and a half.

Once dough doubles in size preheat oven to 400

Dump risen dough back onto a well flour counter. Cut the dough into 3 equal sizes and roll each piece into long logs about 20 inches or so long. Place each roll next to each other and braid. Grab a baking sheet and line with a piece of parchment paper. Sprinkle with a bit of flour and place braided dough onto sheet, either as a braid or if you want, like I did, wrap the braid around itself into a rounded braid situation. Tuck ends into each other and under the loaf. Brush the top gently with a little plant milk or water and let rest for about another 15 minutes or so.

After the rest, place dough into preheated oven. Bake for 35-45 minutes (Less if left long braid, more if wrapped braid) or until the top is a deep golden brown and when tapped on the bottom, it sounds hollow. Also can use an insta read thermometer and check temperature. You want it to reach 190 degrees.

Once bread is baked, remove from oven. If you want the top to stay a little crispy, don%u2019t do anything but let it cool. For a softer, shinny crust, rub the top while it is still warm with some plant based butter.

Let bread cool completely before cutting.

Then eat it like you would eat bread. Any and every way.

Store cooled loaf in a airtight bag on counter for 2-3 days but if not eating that fast, slice and place into freezer. That way you can pull out individual pieces and toast as you want.

There are a million things you can, and should, do with tomatoes. Salsa is one of those things. Especially with the super fresh and ripe summertime tomatoes that may or may not be overflowing every empty surface of your kitchen (my current predicament). And peaches. Now is the time friends to eat your peaches. In season and oh so tasty. Do it now before it%u2019s too late and those oh so deliciously ripe and sweet peaches are gone and all that is left are mealy, gross, supermarket fakes. Only eat in season peaches. That is a life lesson everyone should know.

This salsa is perfect. Super fresh, sweet and slightly spicy, with a hint of tangy goodness and just, you, really freaking perfect. A salsa that hits all the right notes with out being overly anything and underly nothing if you know what I mean. All the tastes of summertime. A darn good salsa. Darn good.

This salsa also makes me a winner at the game I am playing with myself called %u201cGet the mr to eat tomatoes and like it”%u201c. The game started when he told me he was sick of tomatoes and he didn’t want to eat anymore. I made the salsa (which also made me a winner in the other game I play called %u201cGet the mr to eat fruit in his savory dishes%u201d, because he also tells me how much he hates fruit in savory), he tried the salsa, raved about the salsa, and then went and ate the rest of the salsa with his rice and beans. .

I win again! Haha

Anyway, super fast, super fresh, super super. A great way to use up a any of your shit load of tomatoes you might have laying around and to get in a few more of those summertime peaches before they are gone again for the year.

Now to the salsa.

The stuff. Cherry tomatoes, peaches, an onion, a jalape%u00f1o, a lime, a bunch of cilantro, salt and pepper, and a little vinegar.

Start by cutting up the tomatoes into quarters. Do this carefully or else you will have tomatoes rolling around everywhere. Place chopped tomatoes into a bowl.

Then dice up those peaches into small little pieces and toss into bowl with tomatoes.

Onion gets diced up too and placed into bowl.

Jalapeno, seeds removed, diced up nice and small. Get it into the bowl.

And cilantro. Give it a rough chop and into the bowl it goes.

A sprinkle of salt, lots of pepper (to taste of course), the juice of the lime, and a splash of vinegar. Mix it all up and there you have it.

Into a jar (or you can just keep it in the bowl if you want), and it%u2019s ready for eating. Chips, tacos, to top a salad%u2026 This salsa does it all. Heck, just eat it with a spoon. There is absolutely nothing wrong with that.

-C

Makes about 32 oz of the good stuff

  • 1 overflowing pint cherry tomatoes (red, yellow, sun gold or a mix of any)

  • 2 ripe but firm peaches

  • 1 bunch cilantro

  • 1-2 jalape%u00f1os (depending on how hot you want it)

  • 1 small red or white onion

  • a lime

  • salt and pepper

  • splash red or white wine vinegar

Grab the tomatoes and carefully, so they don%u2019t roll away, cut each one into quarters. Place in a big bowl. Cut peaches in half, remove pit, and dice the flesh into very small little piece and toss into bowl. Now onion, dice that into small little pieces, along with the jalape%u00f1o and toss into bowl. Cilantro gets a rough chop then into the bowl it goes. Now sprinkle in a little salt and lots of black pepper. Add the juice of the lime and a splash of the vinegar and toss it all around. Let sit for a few minutes, taste, then season with more salt and pepper if needed. Can add more vinegar for more acid if needed too.

This salsa only gets better with a little age so you can definitely make it a day or two ahead of time.

Store in a bowl to serve or a jar for longer storage. Use within a 4-5 days of making it.

Let%u2019s talk about how soup is the perfect food. It can be light and fresh, hearty and deep, chunky or smooth. You can eat it with a spoon, or somtime a fork if warranted, or just drink it from a mug. It%u2019s usually a one pot meal, a small pot for one, a big pot for many. Make a pot of soup and eat some now and save some for later. It freezes amazingly well. Got a few extra sad carrots and wilted greens? Toss them into a pot with whatever you have on hand, maybe those veggies scraps and you got yourself a meal. Want something more filling, just add in some grains. Feeling sick, warm soup will make it all better. Feeling fresh and springy, well soup is there for you too. Seriously soup, you can do anything. If I could, I would marry you. %u2665%ufe0f

This soup is one of this velvety smooth, light but rich, delicious beyond delicious soups. A fresh spring time soup. Not to hearty or heavily spiced. Super rich and creamy and flavorful. Bright ass green which makes it amazing in itself, but then with a nice tangy sumac tahini swirl on top, well it is just about the most perfect soup. I made to share, which I did, (and everyone licked their bowls clean) but then hoarded the little bit left over and ate it cold for a late afternoon snack. That is another thing about soup, you can eat is cold and it is still amazing.

Tasty and delicious, and nutritious. This soup does it all.

To the soup!

The stuff. Peas, chopped broccoli, and chopped cauliflower which are all frozen and slightly thawed. You can totally use fresh here too, but I just so happen to have it frozen so you might as well save the fresh stuff for fresh eating. Also have a big yellow onion, a few cloves garlic, some tahini, a lemon, sumac, and salt and pepper. You need water which I did not picture here.

A pot, some water and a roughly chopped onion and the garlic start off this soup. Bring the pot to a boil, then turn to medium and let the onion and garlic cook until very tender. I have been making a lot of soups starting with this step lately. Boiling the onion and garlic until tender and fragrant really make for a super flavorful and clean soup base. Or soup in itself.

Now add in the broccoli and cauliflower to the pot and cook until tender.

Mid soup cooking time is a good time to make the sumac tahini sauce for the swirl. Basics here, just mix the tahini, the sumac, a pinch of salt and pepper, the juice of the lemon and a tablespoon of warm water together until smooth.

Last but not least, the peas. Add them in and they just need a few minutes to cook through.

And then it all gets blended to become this green creamy goodness.

Ladle into bowls, grab the sumac tahini sauce and swirl it on in. A tablespoon or so is good. And don%u2019t forget a little more pepper and another pinch of sumac for good measure.

Just appreciate for a moment. That is one good looking bowl of soup. And it taste even better then it looks.

-C

Makes about 4 serving

  • 1 1/2 cups fresh or frozen peas

  • 1 1/2 cup chopped fresh or frozen cauliflower

  • 1 1/2 cup chopped fresh or frozen broccoli

  • 1 large onion

  • 3-4 cloves garlic

  • 4-5 cups water

  • Salt and pepper

  • 1 teaspoon sumac

  • 2 tablespoons tahini

  • 2-4 tablespoons warm water

Start by removing the papery skin from the onion and chop into a few big chunks. Remove the skin from garlic too. Place into pot with 4 cups water. Turn heat on high and bring to a boil then turn heat to medium and let onion are garlic cook until tender which should take about 15-20 minutes

Once the onion is cooked, add in the broccoli and cauliflower. Turn heat back to high and bring to a boil again then turn back down to medium heat. Keep cooking until tender (another 15 minutes or so) then add in the peas. Keep on heat until peas are cooked through then remove the pot from heat and either transfer to a blender or use a immusrian blender to blend the soup until smooth. Add a little more water if needed to get to the right consistency to blend right. Or if you want a thinner soup.

For the tahini sumac swirl just mix the tahini and sumac together along with the juice of the lemon, two tablespoon warm water and a pinch of salt. Mix together until smooth. If the mixture is to thick, add another tablespoon of water.

To serve. Ladle or pour soup into bowls and drizzle and swirl the tahini sumac on top. Sprinkle with pepper and a pinch more sumac and you are good to go.

It%u2019s a smoothie. And no, we have never really been smoothie people in this house, but what can I say, sometimes smoothies happen, especially when you have about 20 ripe bananas in the fruit bowl with no room in the freezer and no need for 7 loafs of banana bread.

So I smoothied. And I like it (a lot).

This is a smoothie of simplicity. Nothing fancy. Simplest of simple. Straight to the point. And all sorts of good.

You might think, does this simple smoothie you speak of taste very good? Yes, yes indeed it does. It is all sorts of fantastic. Basically if you like creamy, nutty, oaty, bananery things, you will like this. And it%u2019s a perfect breakfast, snack, dessert, or just wanting a little treat like thing that is not garbage food. A smoothie of all smoothies with the most basic ingredients. And takes about 15 seconds to whip up. Can%u2019t complain about that.

To the smoothie goodness!

The stuff. A ripe banana, some old fashion rolled oats, a pinch of salt, water, and a smidge of maple syrup if you want it.

Everything goes into blender.

And blended until smooth. Hence the word smoothie.

Pour it into a cup (or if you are feeling primal, drink it straight from the blender%u2026 it%u2019s totally cool)

And done.

A banana oat smoothie.

Let the good time roll!

-C

makes 1 smoothie

  • 1 very ripe banana

  • 1/3 cup raw old fashion oats

  • 1 1/2 cups water

  • pinch of salt

  • a tablespoon or two of any sweetener you like (optional)

  • a pinch of cinnamon (optional)

Place everything into a blender and blend until smooth. Pour into a cup, sprinkle with cinnamon if you wish, and drink right away.

THE LOVELY CRAZY

January 26, 2020 by maximios • Blog

A couple of days ago, during a grocery store porous, I stumbles upon a produce item that I have not seen sold in stores before, Broccoli leaf. And I was kind of surprised  to see that they were selling bunches of the leaf,  organic,  at 2 bucks a bunch. I was very excited ! But wait.. You can eat broccoli leaves? Heck yes you can! Broccoli leaves  are fantastic. They taste kind of like broccoli, have a hearty texture like a collard, and can be used raw or cooked just like any other green. Its just one more super yummy green to add to your repertoire.  So when I bring home something that I find to be a good score, like a bunch of broccoli leaves, I feel like I have to share it with the mister. (I am so nice) And this dish was how I shared them…. Tossed into a bowl of garlic raging pasta. The stuff…. A bunch of broccoli leaves, lots of garlic, pasta, olive oil, salt and a lemon. Pretty simple right? Fist off, get your water boiling for the pasta. Once its ready, drop a pinch of salt into the water and stick pasta in for the amount of time recommend by pasta box people. While the pasta is boiling, mince up the garlic (I used my garlic press) into a skillet and add in the oil.  Stick on a burner on medium for a few minutes, stirring around to make sure the garlic doesn’t stick and burn.      Once you start to smell the garlic, turn heat onto low, chop up the broccoli leaves (stems and all)  and stir around until wilted and add in the juice of half a the lemon.When the pasta is cooked, remove a few tablespoons of starchy water and  strain the noodles. Add water and pasta right into the skillet with the other stuff.  Toss around, taste, season with salt and pepper.  Go ahead and add some chopped tomato and or parmesan cheese if you want.  And serve your amazingly amazing pasta.  And make sure that you are ok with really smelly garlic breath…Casue it’s going to happen. Keep it good! -C

Broccoli Leaf and Garlic Noodles

  • 1 bunch fresh broccoli leaves (about 3 cups chopped)
  • 2 servings of your favorite pasta (spaghetti, penne, vegan, gluten free…..)
  • 8 or so fresh garlic cloves
  • 1/4 cup olive oil
  • salt and pepper
  • lemon (optional)
  • parmesan cheese (optional)

Start by bringing a pot of water to a boil with a pinch of salt. Add in pasta and cook per instructions on box. While pasta is cooking, mined garlic and add to a skillet with the oil. Place on a burner on medium heat and cook and stir until the garlic becomes fragrant. Chop the broccoli leaves (stems and all) into bit sized pieces and add to the garlic oil and toss around to wilt the leaves. Squeeze in some lemon juice. Once the pasta is done cooking, remove a few tablespoons of the starchy water and strain the pasta. Add the water and the noodles to the skillet, toss to evenly coat the pasta and call it down. Serve in a bowl or on a plate, topped with freshly chopped tomatoes and parmesan cheese if you so shall please and another little squeeze of lemon juice if you like. Watch your mouth.. it will be breathing out garlic like whoa. 

THE LOVELY CRAZY

January 26, 2020 by maximios • Blog

Salad season is here. Green salads, fruit salads, potato salads, and grain salads. All the salads and we are not mad about it.

This is a good grain salad using millet, which I am sightly surprised to hear that a lot of people have never had. Millet is kind of like quinoa, but not. I cooks fluffy and looks kind of the same, and is gluten free like quinoa. I think the biggest difference is that millet is slightly softer and tastes a bit more nutty. It also is really good at absorbing liquid flavors.

But who are we to compare. The main thing is that it is nutritious and delicious so we will eat it.

Back to the salad. This is one of those grain salads that is good cooked and served warm but only gets better with a little age (like an hour or a day) in the fridge. Served hot or cold or room tempature, and is hearty enough to be meal like but is also a fantastic addition as a side to any of you meal plans. Like maybe a BBQ? Whatever the occasion, or non occasion, this is just a really good grain salad situation and I think you will be pleased, smiling all smiles while eating it.

To the millet salad.

The stuff. Millet, a couple handful of greens, a few mushrooms, an onion, dijon mustard, a little maple syrup, red wine vinegar, a lemon, a couple cloves or garlic, some toasted sunflower seeds, and salt and pepper.

Start by giving the millet a little toast, just enough to really up the nutty flavor and make it that much more yummy. It only takes a few minutes in a skillet on medium heat. Not an entirely necessary step, but you should do it.

Toasted millet goes into pot with water. Bring pot to a boil and then turn to the lowest simmer and cover.

While millet is cooking, get to the mushrooms and onions. Chop the onion thin and small and the mushrooms thin and small as well. Place them into the skillet with a drizzle of oil and place on medium heat. Mix around every now and then and cook until the mushrooms and onions are soft and a nice golden brown.

And make the vinaigrette. Minced garlic, mustard, vinegar, the juice of the lemon, and maple syrup get put into one place.

Mixed and now all is one.

Millet. Cooked and fluffed and ready to go.

Cooked mushrooms and onions go into the pot, along with the greens, the sunflower seed, and the vinaigrette. This step can be right away or you can wait a little while for things to cool as to not wilt the greens. Up tp you.

Mixed with love and hunger.

Even if you are making it ahead of time, just do yourself a favor. Grab a bowl, grab a fork, and get down on it.

-C

Seves 4-6

  • 3/4 cup uncooked millet

  • 2 cups water

  • 1 sweet onion

  • 3-4 big button mushrooms

  • Large handful or two of bitter greens like arugula, spinach or a mixture.

  • 2 tablespoon brown or dijon mustard

  • 2 tablespoon red wine vinegar

  • 1 teaspoon maple syrup

  • 2 cloves garlic

  • salt and pepper

  • handful toasted sunflower seeds

To start, toast millet. Dump the uncooked millet into a pan and place on a medium heat tt for about 5 minutes or until you start hearing the millet crackle.This gives the millet a slightly more nutty flavor but you can skip this step if you don%u2019t care.

Dump millet and water into medium pot. Place on high heat until water starts to boil then tun heat down to simmer and over. After about 15 or 20 minutes, when most of the water is gone, turn pot completely off. Let sit, covered for another 10ish minutes then take a fork and fluff it.

While the millet is cooking, cook the veggies. Grab the onion and slice it up into thin pieces. Clean off the mushrooms and chop them into small thin pieces too. Place the chopped stuff into the skillet with a drizzle of olive oil and a pinch of salt and place on a medium heat. Stir occasionally and cook for about 15 minutes or until the onion and mushroom are a nice dark, golden brown.

And make the mustard vinaigrette. Mince garlic and place into a jar or bowl with the vinegar, the mustard, the maple, and the juice of the lemon. Mix and set aside.

Once the millet is cooked, the mushrooms and onions are cooked, and the vinaigrette is made, all you have left to do is mix everything together. You can do this while things are slightly warm which will wilt the greens a bit, o let them cool so the greens stay fresh. Up to you. (I like the greens fresh)

Finally, dump cooked mushrooms and onions into pot with cooked millet. Add in the greens and sunflower seeds and drizzle the vinegertte all over. Toss around until fully mixed. Sprinkle with lots of fresh cracked pepper.

Then eat. Or place in a container to bring to the BBQ.

Whatever you do, do not turn on your oven this weekend! But I guess if you have air conditioning and don’t mind cranking it… well then go for it. And can I come stay with you?

But for the rest of us doing this weekend without the old A.C., we need to feed ourselves, feed ourselves without any fire because 100 degrees is no joke and any added heat from anything will likey tip us over the edge. I am already so close to that edge and it’s a long way down..(Just ask the mr, he could tell you a thing or two about heat and me.. not good)

Enter hummus and veggies.

You can’t really go wrong with a good hummus and veggies meal situation and sometimes it’s all that can be right. I for one could eat bowls and bowls of hummus, and sometime do, so this is not a stretch for me. Especially this hummus. I knew I would like it, but man, was (was because I ate it all) it freaking delicious. The sunflower seeds really did it for me, gave it a little something extra, like a freshness that is still creamy and earthy, but is not quite, I don’t know, dark as tahini? %u00a0It’s kind of hard to explain without having you taste it (so make it and you tell me)%u00a0%u00a0Don’t get me wrong, I love tahini, but sometimes you just %u00a0got to mix it up. (Plus sunflowers seeds are dirt cheap. Tahini is not nearly as cheap so bonus there too.)%u00a0%u00a0Maybe its because the sunflower seeds bring the sunshine to your mouth. A sun filled mouth of pureed seeds and beans.%u00a0 Yup, that’s what it is.

So here ya go, a no heat meal (or snack or spread).%u00a0We got this.

The stuff. %u00a0Cooked chickpeas (no need to cook your own, canned is a okay), sunflower seeds, a lemon, a few cloves of garlic, salt, pepper, a little water, and some herby green like parsley or cilantro.%u00a0

Hummus is pretty basic, it’s just stuff blended up, but because we are starting with raw sunflower seeds, we need to really bend the shit out of them until they turn into a paste, so do that, which is going to a take about 8-10 minutes. Then once its pasty, add in the garlic and the juice of the lemon and blend until its all smooth.

Could almost stop here at this point. Sunflower seed goodness all emulsified. Taste it, it is so good.

Now add in the chickpeas and a pinch of salt and pepper.

Blended until smooth with a little drizzle of water to give just the right consistency. %u00a0And that’s it.

Pile a bowl full enough that you can call it dinner them top with a good amount of fresh herbs. Serve with chopped up fresh veggies or whatever you like and we are good to go.

Creamy, dreamy sunflower hummus, no heat required!%u00a0

Stay not melted!

-C

Makes about 2 3/4 cups

  • 2 1/2 cups cooked chickpeas (or one can) drained
  • 3/4 cup raw (can use toasted)unshelled sunflower seeds
  • l juicy lemon
  • 2-3 cloves garlic
  • 1-2 tablespoons ice water
  • salt and pepper
  • handful fresh herbs like parsley,cilantro and or dill (optional)%u00a0

Place the sunflower seeds in food processor and turn on until seeds turn into a paste, which will take about 8-10 minutes. After every few minutes, scrap the sides down to make sure it all gets blended. Once the seeds reach paste consistency,%u00a0add in the juice of the lemon and the garlic. Blend until smooth. Last off, add in the chickpeas and a pinch or salt and pepper and blend until smooth, adding %u00a0in a tablespoon or two of water to get the hummus to the consistency of your liking. Once blended taste and check for seasoning (add more salt and or pepper if needed)%u00a0

When the hummus is done, scrape into bowl(s), and top with lots of fresh herbs and a sprinkle more of sunflower seeds. Now eat it. Eat with veggies, with bread, with pretzels, or with a spoon (or finger). Do what you need to do.

%u00a0Any left over, if there is any, can be store in the fridge for 2-3 days.%u00a0

THE LOVELY CRAZY

January 26, 2020 by maximios • Blog

Farm share started last week (HOORAY!!!!) but always, at the beginning when things are still getting on growing, we are only getting a few things. Lot of greens which I will never get enough of, and lots of potatoes. Also, I made the mistake of buying a very large bag of potatoes last week right before farm share and now I am basically swimming in potatoes. And so the story goes%u2026.

So what do you do with a shit ton of potatoes? Yeah, I thought potato cannon to but then I realized that I would have to use my potatoes and sure I have a lot, but I am not wasting them on that. So gnocchi they became. Gnocchi. Basically a boiled french fry or a mashed potato meat ball. Or maybe more like a ravioli. Whatever they are, they are loved by potato loving people and are fun to make. I mean, when do you ever get to use the ricer? ( Don%u2019t worry, you can make gnocchi without a ricer.)

To the gnocchi.

The stuff. Potatoes, flour, an onion, some tomatoes, a few cloves of garlic, salt, pepper, and olive oil.

Note. Make sure to use russet potatoes because they make the lightest, fluffiest gnocchi. You could probably use Yukon gold, but any hard wax potato just won%u2019t do.

First step is to make baked potatoes. Place potatoes in oven, directly on rack, and bake for 30-45 minutes until nice and soft and tender. Just like you would when you eat it as a baked potato. Once cooked cut them in half and let them cool off for a few minutes.

Once potatoes are cool enough to handle, scoop all the flesh out of skins. Keep skins for soup or a snack for later.

And the fun part. Flour the counter then rice the potatoes. You can also do this with a food mill or even grate the potato with a box grater. Once all riced, cover with flour and start to fold and mix the potato into the flour gently until the dough starts to come together. If the dough seems really sticky and wet, add in a tablespoon or two of flour, to dry and crumbly, add in a tablespoon or two of water. The goal is a nice fluffy dough that hold it shape but is not overly dense.

Cut off a potion of the dough, roll it into a rope about an inch thick, then cut into inch long pieces.

To cook gnocchi. Bring a big pot of water to a boil and carefully drop in a handful of gnocchi into the water. They are gonna sink, but after a minute or two they start to float. Once floating, remove them from the pot with a slotted spoon and place them on a lightly oiled baking sheet. Repeat until all the gnocchi are cooked.

Cooked and ready%u2026 Ready for what? For anything you want but these are going into a tomato and onion situation.

Mince garlic and dice tomatoes and place into skillet with a good pinch of salt and a splash of olive oil. Place on stove and cook until slightly tender. Dice up tomatoes into small chunks and add to skillet along with a cup of water (if you have gnocchi water, use that) Turn heat up and cook until mixture start to bubble, then turn heat down to low and cook until the tomatoes are mushy.

And then drop in gnocchi. Keep on heat until the gnocchi are warmed completely all the way through.

Sprinkle of salt, lots of pepper, and something green if you want to be fancy.

And then you eat them.

-C

Makes 3-4 servings

  • 2.5 pounds russet potatoes

  • 2/3 cup of all purpose flour

  • 1 large onion

  • 3-4 tomatoes

  • few cloves garlic

  • salt and pepper

  • olive oil

  • water

Place potatoes directly into oven on one of the oven racks and bake on 450 degrees until soft and tender. Should take about 1/2 hour to 45 minutes, depending on size of potatoes.

Once cooked, remove from oven carefully, cut in half, carefully, and let cool for a about 10 minutes, just so you can handle the potatoes without burning yourself. In the mean time, get a large pot, fill it with water, and set it on the stove to boil.

When the potatoes are not to hot to touch, grab them and with a spoon, scoop out all the potato flesh from the skin (keep skin for a snack or for soup). Lightly flour the counter and start ricing the potatoes directly onto the counter. (You can also use a food mill or a box grater if you don%u2019t have ricer). Once all potato is rices, cover with floor and gently fold potato over into flour, over and over, even using a knife, to kind of cut the potato into the flour, until it all mostly comes together. Be careful to not overwork the dough or else it will become dense make the gnocchi chewy. If the dough seems is sticky, add in a few more tablespoons of flour, to dry and seems crumbly, add a few tablespoons warm water.

Once you have the dough, make sure the water on the stove is still there and has not evaporated and is at a gentle boil. Cut dough in thirds then roll out a portion into a rope about an inch thick. Cut the rope into inch long pieces. Repeat with the rest of dough.

When all the gnocchi are made, grab a rimed baking sheet, coat with oil, and place close by the boil water.

Now to cook them. Drop a handful of gnocchi into water carefully. They will sink. Watch and after about a minute or two, they will start to float. Once floating, take a slotted spoon and take them out of water. Place them on the greased baking sheet. Repeat until all the gnocchi are cooked. (when done cooking, save a cup of the cooking water)

After the gnocchi is cooked, you can do whatever you want with it, like eat it right away with salt and pepper or whatever, but to make the quick tomatoes onion situation, dice up the onion and mince the garlic. Place into a skillet with a drizzle of olive oil and a pinch of salt and place on stove and start to cook. Dice up the tomatoes and once the onion is tender, add in the dice tomatoes and about a cup of the gnocchi cooking water. Turn the heat up until the water is bubbling then reduce to low and cook until the tomatoes are mushy and tender. Once cooked, add in the gnocchi, toss them around, and cook until the gnocchi are fully warmed through.

And then eat it. Maybe a little more salt if needed, definitely lots of pepper, and whatever else you want.

Dinner for when you have maybe too many (although I never think I have too many… just sometime I end up with a lot at once and that it can get a little chaotic)%u00a0 squash and tomatoes,%u00a0which may be bound to happen this time of year.

Nothing fancy, and is quick and easy,%u00a0filling, and full of all those summertime things that need to be eaten before they are gone and we are back to eating beets and potatoes for months at a time.%u00a0

Savor all of the good stuff the summer is giving us.%u00a0

The stuff. A couple of squashed ( I used a crookneck and a patty pan), cherry tomatoes, an onion, some spaghetti, salt and pepper, and olive oil.%u00a0

Preheat the oven and chop up your squash and onion. Not tiny pieces, but not really bug chinches either.

Toss all that chopped stuff into a skillet along with the cherry tomatoes. Drizzle it all with olive oil, sprinkle with salt and pepper, then stick it into the hot oven.%u00a0

While the stuff is roasting, cook up the pasta, but cook it a little al dente, it will cook a bit more once mixed with the veggies.

Roasted and ready for noodles.

Add the cooked spaghetti to the skillet, along along with about 1/2 of cup of the pasta water (it helps bind the flavors all together). Toss it all around and %u00a0then let it chill in the hot skillet for a minute or two then taste it. So good right? And if you need to, season with more salt and pepper, and drizzle with more oil if needed.%u00a0

That is all you need to do, besides you know, sticking it into a bowl, getting all the good big chunks, and eating it.

-C

  • 2 small summer squash (I used a crook neck and a patty pan… but whatever kind you have on hand works)
  • 1 mild onion (vidalia or walla walls)
  • 1 pint cherry %u00a0tomatoes
  • 2-3 %u00a0tablespoons olive oil
  • salt and pepper%u00a0
  • 1/2 pound spaghetti and water to boil it in

Preheat the oven to 425.

Chop up squashes into inch-ish sized chunks then chop the onion into medium sized slices and toss into a large oven safe skillet. Add in the tomatoes and drizzle the whole lot with olive oil and sprinkle with salt and pepper and toss around to make sure everything is evenly coasted. Place in oven and roast for 30-40 minutes or until the squash and tomatoes are nice and soft and ready to eat.%u00a0

While the stuff is roasting, boil the pasta per the instructions on the box, but cook it a little al dente (still with a bite to it). Drain the pasta when done, reserving a cup full of the starchy pasta water.

When the pasta is done and the veggies are roasted, dump the pasta into the skillet along with 1/2 a cup of the starchy pasta water. Mix around and let sit for a minute or two. Sprinkle with more salt and pepper and drizzle a tiny more olive oil on top (optional).%u00a0

Serve and eat.%u00a0

Basil goes extremely well with this dish, if you just so happen to have some.

Had some littles over for dinner halloween dinner the other night %u00a0and I made them some mac n’ cheese.

Kinda, cause it wasn’t really cheese. Let me explain.%u00a0

These particular littles are tough. Getting them to eat things that are not pizza, hot dogs,%u00a0or some other crap is not always easy.(although they will always eat carrots)%u00a0So whenever they come over, I try to feed them a healthier version of something that I know that they like, %u00a0like tofu dogs or homemade whole wheat pizzas. So this night, I though I would give my vegan mac and cheese and try.%u00a0%u00a0I mean,what kid doesn’t like it? But what kind is the question. If you ask them, its got to be boxed Kraft mac and cheese.%u00a0I knew when I was making it that there was a great chance that I might have to make peanut butter banana sandwiches as well, but whatever These little littles need to stop being such picky crappy eaters and yeah. Even if that means I make them eat what why don’t like or that on the ride home I tell them that any pizza that is not home made will probably end up killing them)%u00a0So I try, and sometimes it works.%u00a0

So I made it, no cheese in sight and served it up.%u00a0The verdict…. The mr, he loved it. My sister (she came too) she was into it as well. One little ate almost an entire bowl, and the other, well he spit it out,%u00a0but he is more a hot dog guy then a mac and cheese guy so his opinion doesn’t count. So to conclude,%u00a0yes, this is a fantasic mac and cheese that just happened to be cheese less,%u00a0%u00a0full of veggies, and damn tasty!

And serving suggestion DON”T LET THE LITTLE KNOW IT”S NOT REAL CHEESE!!! They don’t need to know

To the mac!

The stuff. A small butternut squash, a potato, an onion, and a carrot. Also needed is nutritional yeast (the cheeze), garlic powder, olive oil, salt and pepper, and some water. And pasta.. don’t forget the pasta.%u00a0

Start with the onion and carrot in a big pot with some oil. Stick that on the stove and turn on the heat, and when that’s going, chop up the butternut sqauh and the potato and toss that into the pot too. Let the stuff cook for just a few minutes.

Pour in water (enough o submerge all the veggies) %u00a0and add in the garlic powder and some salt and pepper. Bring the water to a boil then turn heat down to medium and stick a lid on the pot.

Now is a good time to boil up your pasta situation (cook it the way the package says too)

When it’s done, strain it. And if it happens that it is done a little before the sauce, it’s cool, just drizzle it with a little oil so that the noodles don’t all stick together and set aside.

Back to the sauce. Once the pot of veggies is all tender and falling apart, take it off the stove.

And blend the crap out of it with your blending method of choice (a hand o a regular blender)

Oh, and mix in the nutrioanl yeast (can add it in at the blending stage%u2026 I just forgot too) and season with any more salt and pepper if needed.

Grap the cooked noodles,%u00a0dump them into the sauce and give a good mix.

Scoop into food eating vessels,(handled coffee mugs are great for the littles.. and cute)%u00a0Maybe sprinkle on some chopped green stuff(my people enjoyed the addition of chopped up kale) and serve right away!

Now you can eat all the mac n cheeze.%u00a0

Happy Thursday!

-C

Serve 6 or so people

  • 1 lb macaroni noodles (any kind you like. vegan, gluten free, whole wheat)%u00a0
  • half a small butternut squash (about 2 1/2 ish cups chopped)
  • 1 medium white potato
  • 1 medium yellow onion
  • 1 large carrot
  • 1/3 cup nutritional yeast
  • 1 tablespoon garlic powder
  • salt and pepper to taste
  • olive oil
  • water

Chop up the onion and the carrot and stick into a large heavy bottom pot with a splash or two of olive oil and stick on the stove on medium heat.%u00a0While that’s %u00a0going on, chop up the butternut and potato into reasonable small chunks and toss that into the pot with the other stuff. Add in the garlic powder, season well with salt and pepper, and add enough water to full submerge the contents of the pot. Bring the water to a boil then reduce heat to medium and stick a cover on the pot.

While the veggies are boiling, boil the pasta up, slightly al denta (follow what the pasta people on the package tells you to do)

Once all the veggies in the pot are super tender, even falling apart (about 20 minutes) remove pot from heat and using your blending method of choice (hand or normal blender)%u00a0%u00a0blend everything together until smooth and creamy and then add in the nutritional yeast. Taste and if you think it needs it, add more salt and %u00a0pepper.%u00a0If you find that the sauce seems to thick, add in a splash or two of water.. to thin, stick back on stove and cook long to reduce.%u00a0

So you got you cooked pasta and you sauce. Mix it all together. And wa la%u2026 Mac N’ Cheeze

serve right away and eat it all. But any left overs can be refrigerated. Tastes great %u00a0the next day warmed in a skillet with a little oil.%u00a0

A couple of days ago, during a grocery store porous, I stumbles upon a produce item that I have not seen sold in stores before, Broccoli leaf. And I%u00a0was kind of surprised %u00a0to see that they were selling bunches of the leaf, %u00a0organic, %u00a0at 2 bucks a bunch.%u00a0I was very excited ! But wait.. You can eat broccoli leaves? Heck yes you can! Broccoli leaves %u00a0are fantastic. They taste kind of like broccoli, have a hearty texture like a collard, and can be used raw or cooked just like any other green. Its just one more super yummy green to add to your repertoire.%u00a0 So when I bring home something that I find to be a good score, like a bunch of broccoli leaves, I feel like I have to share it with the mister. (I am so nice) And this dish was how I shared them%u2026. Tossed into a bowl of garlic raging pasta. The stuff%u2026. A bunch of broccoli leaves, lots of garlic, pasta, olive oil, salt and a lemon. Pretty simple right? Fist off, get your water boiling for the pasta. Once its ready, drop a pinch of salt into the water and stick pasta in for the amount of time recommend by pasta box people. While the pasta is boiling, mince up the garlic (I used my garlic press) into a skillet and add in the oil. %u00a0Stick on a burner on medium for a few minutes, stirring around to make sure the garlic doesn’t stick and burn.%u00a0 %u00a0 %u00a0%u00a0Once you start to smell the garlic, turn heat onto low, chop up the broccoli leaves (stems and all) %u00a0and stir around until wilted and add in the juice of half a the lemon.When the pasta is cooked, remove a few tablespoons of starchy water and %u00a0strain the noodles. Add water and pasta right into the skillet with the other stuff. %u00a0Toss around, taste, season with salt and pepper.%u00a0 Go ahead and add some chopped tomato and or parmesan cheese if you want. %u00a0And serve your amazingly amazing pasta. %u00a0And make sure that you are ok with really smelly garlic breath%u2026Casue it’s going to happen. Keep it good! -C

Broccoli Leaf and Garlic Noodles

  • 1 bunch fresh broccoli leaves (about 3 cups chopped)
  • 2 servings of your favorite pasta (spaghetti, penne, vegan, gluten free%u2026..)
  • 8 or so fresh garlic cloves
  • 1/4 cup olive oil
  • salt and%u00a0pepper
  • lemon (optional)
  • parmesan cheese (optional)

Start by bringing a pot of water to a boil with a pinch of salt. Add in pasta and cook per instructions on box. While pasta is cooking, mined garlic and add to a skillet with the oil. Place on a burner on medium heat and cook and stir until the garlic becomes fragrant. Chop the broccoli leaves (stems and all) into bit sized pieces and add to the garlic oil and toss around to wilt the leaves. Squeeze in some lemon juice. Once the pasta is done cooking, remove a few tablespoons of the starchy water and strain the pasta. Add the water and the noodles to the skillet, toss to evenly coat the pasta and call it down. Serve in a bowl or on a plate, topped with freshly chopped tomatoes and parmesan cheese if you so shall please and another little squeeze of lemon juice if you like. Watch your mouth.. it will be breathing out garlic like whoa.%u00a0

Peas scream spring to me. The bright green color with that nice bright fresh taste%u2026.. kind of like a fresh spring day. Ah spring, so lovely, so nice, so hasn’t made its way here yet. So I guess I am left to eat my spring.%u00a0And what better way to highlight those lovely spring tastes? A fantastic pesto my friends, and it can be made lickidy split.

Pesto is one of those things that I am constantly making, and not just the kind most people think of with basil and nuts, I pesto everything..peppers, greens, carrots, squash. %u00a0And yea, I used this post to make a pesto pasta dish, but pesto has so many other fantastic uses. Like as a sandwich or wrap spread or a dip for veggies and crackers. I have used it as a soup base, a pizza sauce, on roasted potatoes and marinated tofu with pestos. It can also be thinned down and used as a salad dressing. See, so many uses.%u00a0

And this pea pesto is no exception. It has such a great light, almost fruity, super bright taste. I mean, it’s peas so it taste just like peas but somehow even better. It really works in my mouth. I could eat a bowl of this stuff and be happy.%u00a0

Whatever you plan on using it for, make the pesto. You will be thanking me later.%u00a0

Pesto Stuff. We got the peas, garlic, lemon, oil, cheese if you please, and salt. %u00a0Take a handful of peas and set aside for later. Juice the lemon and take that and the rest of the stuff and stick in%u00a0a food processor and puree until smooth.%u00a0

Oh my, so green, so good. %u00a0I first made it without cheese and %u00a0scooped a little out for me. It was perfect. Like the most brilliant bright pea flavor ever. It made me happy. After I added in the cheese, the mister said it tasted even better%u2026. so cheese or not, it’s going to be good!The%u00a0pesto is made, and it only took about 2 seconds, now boil up the pasta. %u00a0If you were a thinker, you could start the pasta and make the pesto while its boiling. (I wasn’t being a thinker) I used bow ties cause they are super cute, but use whatever pasta you’re feeling. Shells or the ones that look like little brains would be good options.

Once the pasta is cooked, strain, reserving about 1/4 cup of the water. Add that bit of water back to the pot, add in the pesto, give a stir and dump pasta back into the pot. Toss in a handful of peas, maybe sprinkle some cheese and give it a good crack of some pepper.

Into a bowl and served with a fork to eat it with. %u00a0A super green fresh springy meal of happiness. And all under 15 minutes in the kitchen.

Oh you want to thank me for this…

Hey, not a problem%u2026.not a problem at all.

-C

Spring Pea Pesto and Bow Ties

Makes enough pesto to coat a pound of cooked pasta and have some left over for sandwiches or to spread on crackers.

  • 1 lb. fresh or frozen peas (thawed if frozen)
  • 1 lemon
  • 4-5 cloves garlic
  • 2 ish tablespoons of olive oil
  • 1/4 cup parmesan, really or vegan (optional)
  • salt
  • 1 lb (an average box) of bow tie pasta (use any whole wheat, vegan, gluten free variety)

Place peas, (remove a handful and set aside to toss into the pasta) garlic, the juice of the lemon, olive oil and the parmesan (if you are using) into a food processor. Blend until smooth. Taste and salt as needed.

Pasta%u2026 Boil per instructions on box. Strain pastas but save about a 1/4 cup of starchy water. Toss pasta, starchy water and pesto together, adding in the handful or more of the whole peas. Sprinkle with more parmesan and or cracked pepper ,if wanted, and serve in big bowls.%u00a0

Use a fork. Eat, smile and be happy.%u00a0

Last night I had my sister and her kiddos come over for dinner. Nothing fancy, nothing to complicated, %u00a0just something %u00a0fast and something that I knew the littles would eat. %u00a0Spaghetti and meatballs, except replace meatballs were bean balls So they came, we played, did a little drawing and had a bit of first grad gossip. Then came %u00a0dinner time %u00a0when I was told by one little that she was not going to eat.. She had pasta for lunch. Well I made her sit anyway and she mainly just ate carrots (I was ok with that) Then the other little was all into his pasta and bean balls, 1 down, 3 more to go, when the mister let slip that the meatballs were not really meat. He ate around the remaining balls, said he didn’t want them anymore. And my sister, well she doesn’t eat anything that is not pizza.

Good thing a neighbor stopped by while we were eating. He had a few of the balls and told me that they were amazing. I needed someone to tell me that. %u00a0

So yeah, the littles were not overly enthused with the ball, but the Mister the Neighbor, and I thought that they were awesome and delicious. Maybe next time I will make sure that %u00a0pasta was not lunch and tell Nick to keep his mouth shut and stop talking about balls at the dinner table.

I feel like I don’t need to tell you how to boil pasta or heat up the sauce, so I left that portion of the recipe out. I have faith that you are capable in doing that part without my instruction.

The bean ball stuff. Chickpeas (soaked and cooked or canned), sweet potato, carrot, onion, and some chick pea flour. Dried garlic, basil and oregano. Salt and pepper and a little bit of olive oil.%u00a0Small chop all the veggies and toss them and the dry spices into a skillet with a drizzle or two of olive oil. Stick on medium %u00a0heat and add about 1/4 cup of water to pan. Top with %u00a0slid and let veggies cook down until soft and fragrant.

Add the cooked veggies to a food processor or blender with %u00a0the rinsed and drained chickpeas. The mixture gets pulsed until combined, %u00a0keeping a little bit of chunkiness. %u00a0Now go warhead and taste %u00a0the mixture. Add another pinch or two of salt , pepper or any of the spices that you think it need. %u00a0Dump the mixture into a bowl and mix in the chickpea flour than stink the mixture into the fridge for a least a 1/2 hour. Cooling to off is really important to forming the balls. If you don’t, it’s much harder to keep mixture from falling apart and sticking to your hands.

After the mixture has had time to cool and set, start rolling the mixture into balls roughly the size of ping pong balls. In a shallow bowl, add a few tablespoons of the chickpea flour with a pinch of salt, pepper and garlic powder. Take each ball and roll in flour and place each ball on a well oiled baking sheet. When the balls are all rolled, stick into the oven and bake away for about 30-40 minutes, flipping balls after about 20. %u00a0After you flip the balls, get the pasta ready so its finished about the same time the balls are done.You pasta and sauce is cooked and the balls are all crispy and oh so nice.

Serve balls over pasta with sauce and eat with a fork.

Your day is now complete.. balls and all.

Happy Weekend!

-C

Spaghetti and Bean Balls

makes about 20 balls

  • 4 Cups (or 2 cans) Cooked, Rinsed and Drained ChickPeas
  • 1 Small Sweet Potato
  • 1 Small Onion
  • 1 Carrot
  • 1/4 Cup Chickpea Flour plus extra to roll balls in
  • 1 Heaping Teaspoon Basil
  • 1 Heaping Teaspoon Oregano
  • 1 Heaping Teaspoon Garlic Powder
  • Olive or Vegetable Oil
  • Salt and Pepper
  • Your choice of Spaghetti (Use Vegan and or Gluten Free if needed) %u00a0Prepared as package recommends
  • Marinara or Pasta Sauce of your choice

Preheat Oven to 425 degrees

Small dice the carrot, onion and sweet potato and toss into a skillet on medium high heat with a splash of oil. Add in the dry spices and add in about a quarter cup of water. stir and cover the skillet with a lid and let the veggies cook down until the water has evaporated and the veggies are tender.%u00a0

Add rinsed and drained chickpeas to a food processor with the cooked veggie mixture. Pulse together until the mixture is combined and slightly smooth, but still with a little bit of texture left.Place bean mixture in a bowl %u00a0and mix in the 1/4 cup of chickpea flour. and stick in the fridge for a least a 1/2 hour to cool. (Mixture can be made a day ahead if you want)

Once the mixture has time to cool and set up , remove from fridge and with a light head, roll mixture into ping-pong sized balls. In a separate shallow dish add a bit of chickpea flour with a pinch of salt and pepper. Roll each ball in the flour mixture and place balls on a well oiled baking sheet. Once balls ae made, stick into the oven and bake for about 30-40 minutes, flipping after about 20 minutes. The balls are done when the outsides are once and golden brown and crispy. After about 30 minutes, get to cooking your pasta and mariana sauce.

Once the pasta and sauce is done, plate it and toss on some of those awesome bean balls!

Bean balls also make fantastic bean ball sandwiches or bean balls on a toothpick.%u00a0

HOORAY FOR SPRING!!!!!!!

Yesterday The mister and I went for a walk, a long walk. I was wearing a sweater, a light jacket and I %u00a0left the mittens and hat at home. There was sunshine, huge puddles and mud. Birds were chirping. It was amazing.

After our nice long walk, we got home and I needed to start dinner. It was a little later than I usually so I wanted fast and easy %u00a0I usually always have pesto in my fridge (I had to make some, but it only takes 5 minutes)%u00a0because when it’s in there, I can whip up a big awesome meal in the time it takes to boil some pasta or quinoa or smear on toast or toss with potatoes. It really can be used on everything and can be made out of just about anything. Kale and walnuts are just one of so many fantastic combos. And frozen ravioli is always in the freezer too. I %u00a0used just plain cheese, but use whatever kind you like.

Together, pesto and ravioli, well that’s a quick, easy, and tasty meal, perfect for a spring evening, %u00a0And yea, there will be left over pesto from this recipe%u2026 just stick it in the fridge or freezer%u2026.you will be glad you have it.

%u00a0 %u00a0%u00a0%u00a0 %u00a0Pesto stuff. Kale, walnuts, parmesan cheese(nutritional yeast to keep it vegan), garlic, lemon, olive oil, and salt and pepper.

A few little pre steps before the blending.. Toast the walnuts. Just toss onto a dry skillet and stick on medium heat for about 5 minutes or until they start to become n%u00e9e and fragrant. Remove from skillet and add in a bit of water. Add in chopped or ripped kale and cover to let the kale tenderize, but only for about 2 minutes. (you want the kale to still be crispy and fresh tasting) %u00a0Drain water and add kale, garlic, toasted walnuts, cheese %u00a0and the juice of the lemon into a food processor. Turn on and slowly add in olive oil until you get to a nice paste, adding more oil to get to your desired consistency. Oh and don’t forget to salt and pepper to taste!

%u00a0Straight up frozen ravioli goes onto an oiled baking sheet.(make sure that non are overlapping) Place into an oven at 400 degrees for about 15-18 minutes, flipping after 10. If you want to add mushroom and a few more walnuts, just toss them onto the ravioli when you are flipping over the ravioli.%u00a0

When the ravioli is nice and brown and crispy, remove from oven and dump the ravioli and the mushrooms into a bowl. Add a big old scoop of the freshly made pesto and toss around.%u00a0

Look at this%u2026 fresh, crunchy, light and happy. Kinda like a spring day.

I am the best lady, making the mister a pretty yummy dinner.%u00a0

Have a great Tuesday!

-C

Kale Pesto and Baked Ravioli

  • 4-5 cups chopped Kale
  • 1/2 cup Parmesan Cheese ( Nutritional Yeast %u00a0to make it vegan)
  • 1/2 cup Walnuts
  • 1/4-1/2 cup Olive Oil
  • 4-5 Cloves Garlic
  • 1 Lemon
  • Salt and Pepper
  • 1 bag of frozen ravioli(use vegan or gluten-free if you want)
  • 3-4 mushrooms

Note..There will be plenty of left over pesto%u2026 Just fridge or freeze it

Place walnuts in a skillet and toast on medium heat for about 3-5 minutes or until the nuts become fragrant. In the same skillet, add enough water %u00a0to cover bottom and add in all the kale. Place a lid on it and let kale wilt on medium heat for about a minutes or 2, Take off heat. Add walnuts. garlic, cheese, salt and pepper, and juice of lemon to a food processor. Blend. Now add in the kale and blend, slowly adding olive oil until a thick paste forms. You can add as much oil as you want to make it as thick or thin as you like.

Preheat oven to 400

Place frozen ravioli on an oiled baking sheet, making sure none are overlapping. Place into oven for about 15-18 minutes, removing after 8 minutes to flip. When you take the ravioli out to flip, slice up the mushrooms and grab a few more walnuts and toss onto baking sheet with the ravioli. %u00a0When the ravioli’s%u00a0are nicely browned and toasty, remove (mushrooms and walnuts too) and place into bowl. Add a big scoop of pesto and toss to mix.

Serve and eat.. fork is optional.

Note..Add a thin layer to the top of any left over pesto to keep it fresh and from turning black%u00a0

I was cleaning my spice shelf (I feel like I do this like once a week) and found some poppy seeds hiding behind some jars. Accidental spice findings happened more often the then one might think in my house.. I like to buy tiny baggies of spices with good intentions of using them, but because of their tiny size, I often lose them or forget about them due to that %u00a0tininess. But I usually find those tiny little bags, and when I find them, I try to use them right away..(I don’t like having old spices around and no, I will not toss it)%u00a0And it just so happened that I has a lemon in need of using.. and it was getting close to dinner time. I could wait and make lemon poppy seed cake or muffins, or just start dinner. %u00a0 Then I was like, ” I’ll %u00a0just make lemon poppy seed pasta.” And so I did. And of course it needed to have lots of garlic and some kind of vegetable to round out the dish, (I know tomatoes are fruit but you know what I mean) %u00a0

And the mister%u2026.He loved it. And I am sure you will too. How can you go wrong with lemon, garlic and poppy seeds all creamy and fragrant? You really can’t, %u00a0Pus this recipe is so easily adaptable. It can be vegan and or gluten free..whatever you want it to be.%u00a0

So if you are looking for a %u00a0fast, delicious, and impressive looking dinner%u2026 look no further. You gots one right here!

Start by tuning oven on to 400 degrees. Chopped tomatoes %u00a0and sprinkle in oil and salt and stick in the oven. Do this first because the rest of the meal only takes about 10 minutes..So fast!!!

Choose your pasta and get a pot of water boiling and start on the sauce.. which includes, olive oil, lots of garlic, flour, milk(any kind you use), lemon zest a little lemon juice, poppy seeds, salt and pepper.%u00a0

The sauce is pretty much a basic roux%u2026

Crush the garlic and stick into pot with the oil. Let simmer for a few minutes until you can smell the garlic, which smells like heaven. Whisk in the flour and then gradually whisk in the milk. Keep on low heat and continuously whisk until sauce has thickened and doesn’t run off a spoon. Add in lemon zest, the poppy seeds, and the salt and pepper. Mix it all up and turn off heat.

Once your pasta is cooked (cook however it says to on package), reserve about a 1/4 cup of pasta water and drain the rest. Add the pasta water and pasta the sauce. (the pasta water helps the sauce and noodles canooddle together)

And its all mixed up just waiting to be served%u2026and the roasted tomatoes!

Scooped into a bowl with a scoop of the roasted tomatoes and some chopped chives, %u00a0served with a couple wedges of lemon..just because.

And dinner is done%u2026. %u00a0and it took all of 15 minutes.%u00a0

Thank me later.

-C

Lemon Garlic Poppyseed Pasta with roasted tomatoes

  • 3 cups pasta (whatever you want..so it can be gluten free too)%u00a0
  • 3 tablespoons olive oil
  • 3 tablespoons flour (use corn or arrowroot starch for gluten free)
  • 2 cups milk (cow, hemp, soy%u2026any kind you use)
  • 6 cloves garlic
  • Zest of 1 lemon
  • 1 tablespoon poppy seeds
  • 2 roma tomatoes (optional but really good)
  • salt and pepper

Start by chopping tomatoes %u00a0and placing them in a skillet or baking sheet, sprinkled in salt and a little bit of olive oil, and stick into a 400 degree oven

Bring a large pot of water to a boil add you pasta%u2026cook to the boxes instructions.

While pastas is boiling, crush garlic and add to a pot with the olive oil. Heat on medium low heat until the garlic is fragrant and slightly brown. Now whisk in flour and then whisk in milk. Continue to whisk until sauce thickens to where it doesn’t run of a spoon. Add in the zest of 1 lemon, the poppy seeds and salt and pepper to taste. When pasta is done (should be around the same time the sauce is done) reserve about a 1/4 cup of pasta water and drain the pasta from the rest. Add water and pasta to the sauce and mix together.

Remove roasted tomatoes from the oven. Scoop pasta into bowls and top with a scoop of the tomatoes. (you can mix into pasta, but it will turn the sauce red and the tomatoes will fall apart)

Serve with a wedge of lemon and bring food to face!

ENJOY!

THE LOVELY CRAZY

January 26, 2020 by maximios • Blog

A couple of days ago, during a grocery store porous, I stumbles upon a produce item that I have not seen sold in stores before, Broccoli leaf. And I was kind of surprised  to see that they were selling bunches of the leaf,  organic,  at 2 bucks a bunch. I was very excited ! But wait.. You can eat broccoli leaves? Heck yes you can! Broccoli leaves  are fantastic. They taste kind of like broccoli, have a hearty texture like a collard, and can be used raw or cooked just like any other green. Its just one more super yummy green to add to your repertoire.  So when I bring home something that I find to be a good score, like a bunch of broccoli leaves, I feel like I have to share it with the mister. (I am so nice) And this dish was how I shared them…. Tossed into a bowl of garlic raging pasta. The stuff…. A bunch of broccoli leaves, lots of garlic, pasta, olive oil, salt and a lemon. Pretty simple right? Fist off, get your water boiling for the pasta. Once its ready, drop a pinch of salt into the water and stick pasta in for the amount of time recommend by pasta box people. While the pasta is boiling, mince up the garlic (I used my garlic press) into a skillet and add in the oil.  Stick on a burner on medium for a few minutes, stirring around to make sure the garlic doesn’t stick and burn.      Once you start to smell the garlic, turn heat onto low, chop up the broccoli leaves (stems and all)  and stir around until wilted and add in the juice of half a the lemon.When the pasta is cooked, remove a few tablespoons of starchy water and  strain the noodles. Add water and pasta right into the skillet with the other stuff.  Toss around, taste, season with salt and pepper.  Go ahead and add some chopped tomato and or parmesan cheese if you want.  And serve your amazingly amazing pasta.  And make sure that you are ok with really smelly garlic breath…Casue it’s going to happen. Keep it good! -C

Broccoli Leaf and Garlic Noodles

  • 1 bunch fresh broccoli leaves (about 3 cups chopped)
  • 2 servings of your favorite pasta (spaghetti, penne, vegan, gluten free…..)
  • 8 or so fresh garlic cloves
  • 1/4 cup olive oil
  • salt and pepper
  • lemon (optional)
  • parmesan cheese (optional)

Start by bringing a pot of water to a boil with a pinch of salt. Add in pasta and cook per instructions on box. While pasta is cooking, mined garlic and add to a skillet with the oil. Place on a burner on medium heat and cook and stir until the garlic becomes fragrant. Chop the broccoli leaves (stems and all) into bit sized pieces and add to the garlic oil and toss around to wilt the leaves. Squeeze in some lemon juice. Once the pasta is done cooking, remove a few tablespoons of the starchy water and strain the pasta. Add the water and the noodles to the skillet, toss to evenly coat the pasta and call it down. Serve in a bowl or on a plate, topped with freshly chopped tomatoes and parmesan cheese if you so shall please and another little squeeze of lemon juice if you like. Watch your mouth.. it will be breathing out garlic like whoa. 

«‹ 26 27 28 29›»

Recent Posts

  • 1xBet APK 2026 — un fichier, une source étape par étape
  • Support en français — canaux et horaires
  • Cresus Casino : catalogue de jeux, moyens de paiement et fonctionnement en France
  • 1xBet Mobile: Why the File Matters More Than the Button
  • 1xBet APK : comprendre avant l’installation

A nemzetközi sportfogadó oldalak jellemzően magasabb szorzókkal dolgoznak, mint a hazai piac szereplői.

Denne guide til casino uden rofus i 2026 – spil uden dansk licens forklarer regler, muligheder og risici ved udenlandske platforme.

Et casino med hurtige udbetalinger kan forbedre spiloplevelsen ved at sikre hurtig adgang til dine gevinster.

Vores guide til spillesider uden om rofus hjælper dig med at navigere blandt internationale casinoer.

We ranked the top online casino Malaysia platforms on withdrawal times, not on marketing claims.

Registration takes a few minutes, and this sg online casino guide walks through verification and the first deposit step by step.

A hazai fórumokon rengeteg tippet találhatsz arról, hogyan működik a casino befizetés nélküli bónusz aktiválása promóciós kódokkal.

Flere spillere vælger en velkomstbonus uden indbetaling for at prøve casinoet gratis.

@lonelyplanet
STUDIO ESCAPE Creative Getaways Quiet stays and bright worktables for a weekend reset. See Places
MAKER ROUTE World Nomads Travel-ready planning and practical coverage for makers. Read Tips