alz-il.net
  • Home
  • Blog
  • YouTube
  • TikTok
  • Instagram
RSS

THE LOVELY CRAZY

January 10, 2020 by maximios • Blog

The other day the mister and I started reminiscing about some of our earliest memories of what our parents fed us or what they used to eat when we were growing up. One of the dishes that we both remember eating was the classic creamed beef on toast, or as my mom use to call it, shit on a shingle.   Yup, shit on a shingle. (who ever started calling creamed meat on toast is a freaking genius) I think that as a kid, I liked  the dish just for the mer fact that I could say the word shit and get away with it.  I think my mom liked it for few reasons; she could make a big butt load of it really fast, for a crap load of kids, on the super cheap. And I think that she just really like it.  

Shit on a shingle is one of those foods that I like to call “trash food”, you know stuff like beefaroni or pork and beans. Stuff that we all loved as little kids but might think twice about feeding to anyone now. ( I’ll still feed nick a can of beefaroni.. he likes it) As a throwback to our earliest food memories, (also a lack of food in the house and wanted to make something fast, easy, and cheap.. thanks mom!) I made the mister my rendition of the classic. Creamy Lentils and Mushrooms on toast. Not quite as trashy as creamed beef (lentils, mushrooms and onions are not trashy) but you get the same reminiscing feeling. I guess I could call it something like “stuff on a shingle” or lumps on a shingle”, but what kid (or adult)  would want to eat that. Let’s just stick with shit, it makes it more awesome to eat it.

The shit….. A few mushrooms, a bit of onion, cooked lentils, flour, milk, oil, salt and pepper, and garlic powder. And the shingles.. 2 pieces of thick white country bread. Slice the mushrooms and the onion and toss into a skillet with a drizzle of oil. Cook on medium heat until browned and fragrant..Remove from pan.In the empty pan still on medium heat, add in the olive oil and the flour. Whisky constantly, slowly add in the milk. Keep whisking until sauce thickens. Remove from heat. Add in  salt, pepper, and garlic powder.Add the mushrooms and the lentils into the sauce and give it a good mix. Oh, and don’t forget to  toast up the bread. Now dump that shit all over those shingles! Oh the memories.

If you need to, make it classy by serving it with a cloth napkin and a nice fork and knife. But eat it however you need to. (As kids we like dirty hands and no fork, preferably with a big tall glass of overly sweetened red flavored kool-aid)

Enjoy this fantastic Spring weekend!

-C

 Shit on s Shingle (Creamy Lentils and Mushrooms on Toast)

One serving

  • 1 cup cooked lentils
  • 2- 3 mushrooms
  • 1/2 small onion
  • 1 cup milk (cow, nut, plant… whatever you want)
  • 1 tablespoon olive oil
  • 1 tablespoon flour
  • 1 teaspoon garlic powder
  • salt and pepper
  • 2 pieces of nice thick but soft white sandwich bread

Slice the mushroom and onion and toss into a pan or skillet with a drizzle of oil. Cook on medium heat until brown and fragrant than dump onto a plate. In same skillet, add the oil and the flour and mix with a whisk while slowly adding in the milk. Keep whisking until sauce starts to thicken. Turn heat to simmer and add in the cooked lentils and the sautéd mushrooms and onions. Push down the bread in the toaster.. and when it pops up, dump the shill over it.

THE LOVELY CRAZY

January 9, 2020 by maximios • Blog

Had some littles over for dinner halloween dinner the other night %u00a0and I made them some mac n’ cheese.

Kinda, cause it wasn’t really cheese. Let me explain.%u00a0

These particular littles are tough. Getting them to eat things that are not pizza, hot dogs,%u00a0or some other crap is not always easy.(although they will always eat carrots)%u00a0So whenever they come over, I try to feed them a healthier version of something that I know that they like, %u00a0like tofu dogs or homemade whole wheat pizzas. So this night, I though I would give my vegan mac and cheese and try.%u00a0%u00a0I mean,what kid doesn’t like it? But what kind is the question. If you ask them, its got to be boxed Kraft mac and cheese.%u00a0I knew when I was making it that there was a great chance that I might have to make peanut butter banana sandwiches as well, but whatever These little littles need to stop being such picky crappy eaters and yeah. Even if that means I make them eat what why don’t like or that on the ride home I tell them that any pizza that is not home made will probably end up killing them)%u00a0So I try, and sometimes it works.%u00a0

So I made it, no cheese in sight and served it up.%u00a0The verdict…. The mr, he loved it. My sister (she came too) she was into it as well. One little ate almost an entire bowl, and the other, well he spit it out,%u00a0but he is more a hot dog guy then a mac and cheese guy so his opinion doesn’t count. So to conclude,%u00a0yes, this is a fantasic mac and cheese that just happened to be cheese less,%u00a0%u00a0full of veggies, and damn tasty!

And serving suggestion DON”T LET THE LITTLE KNOW IT”S NOT REAL CHEESE!!! They don’t need to know

To the mac!
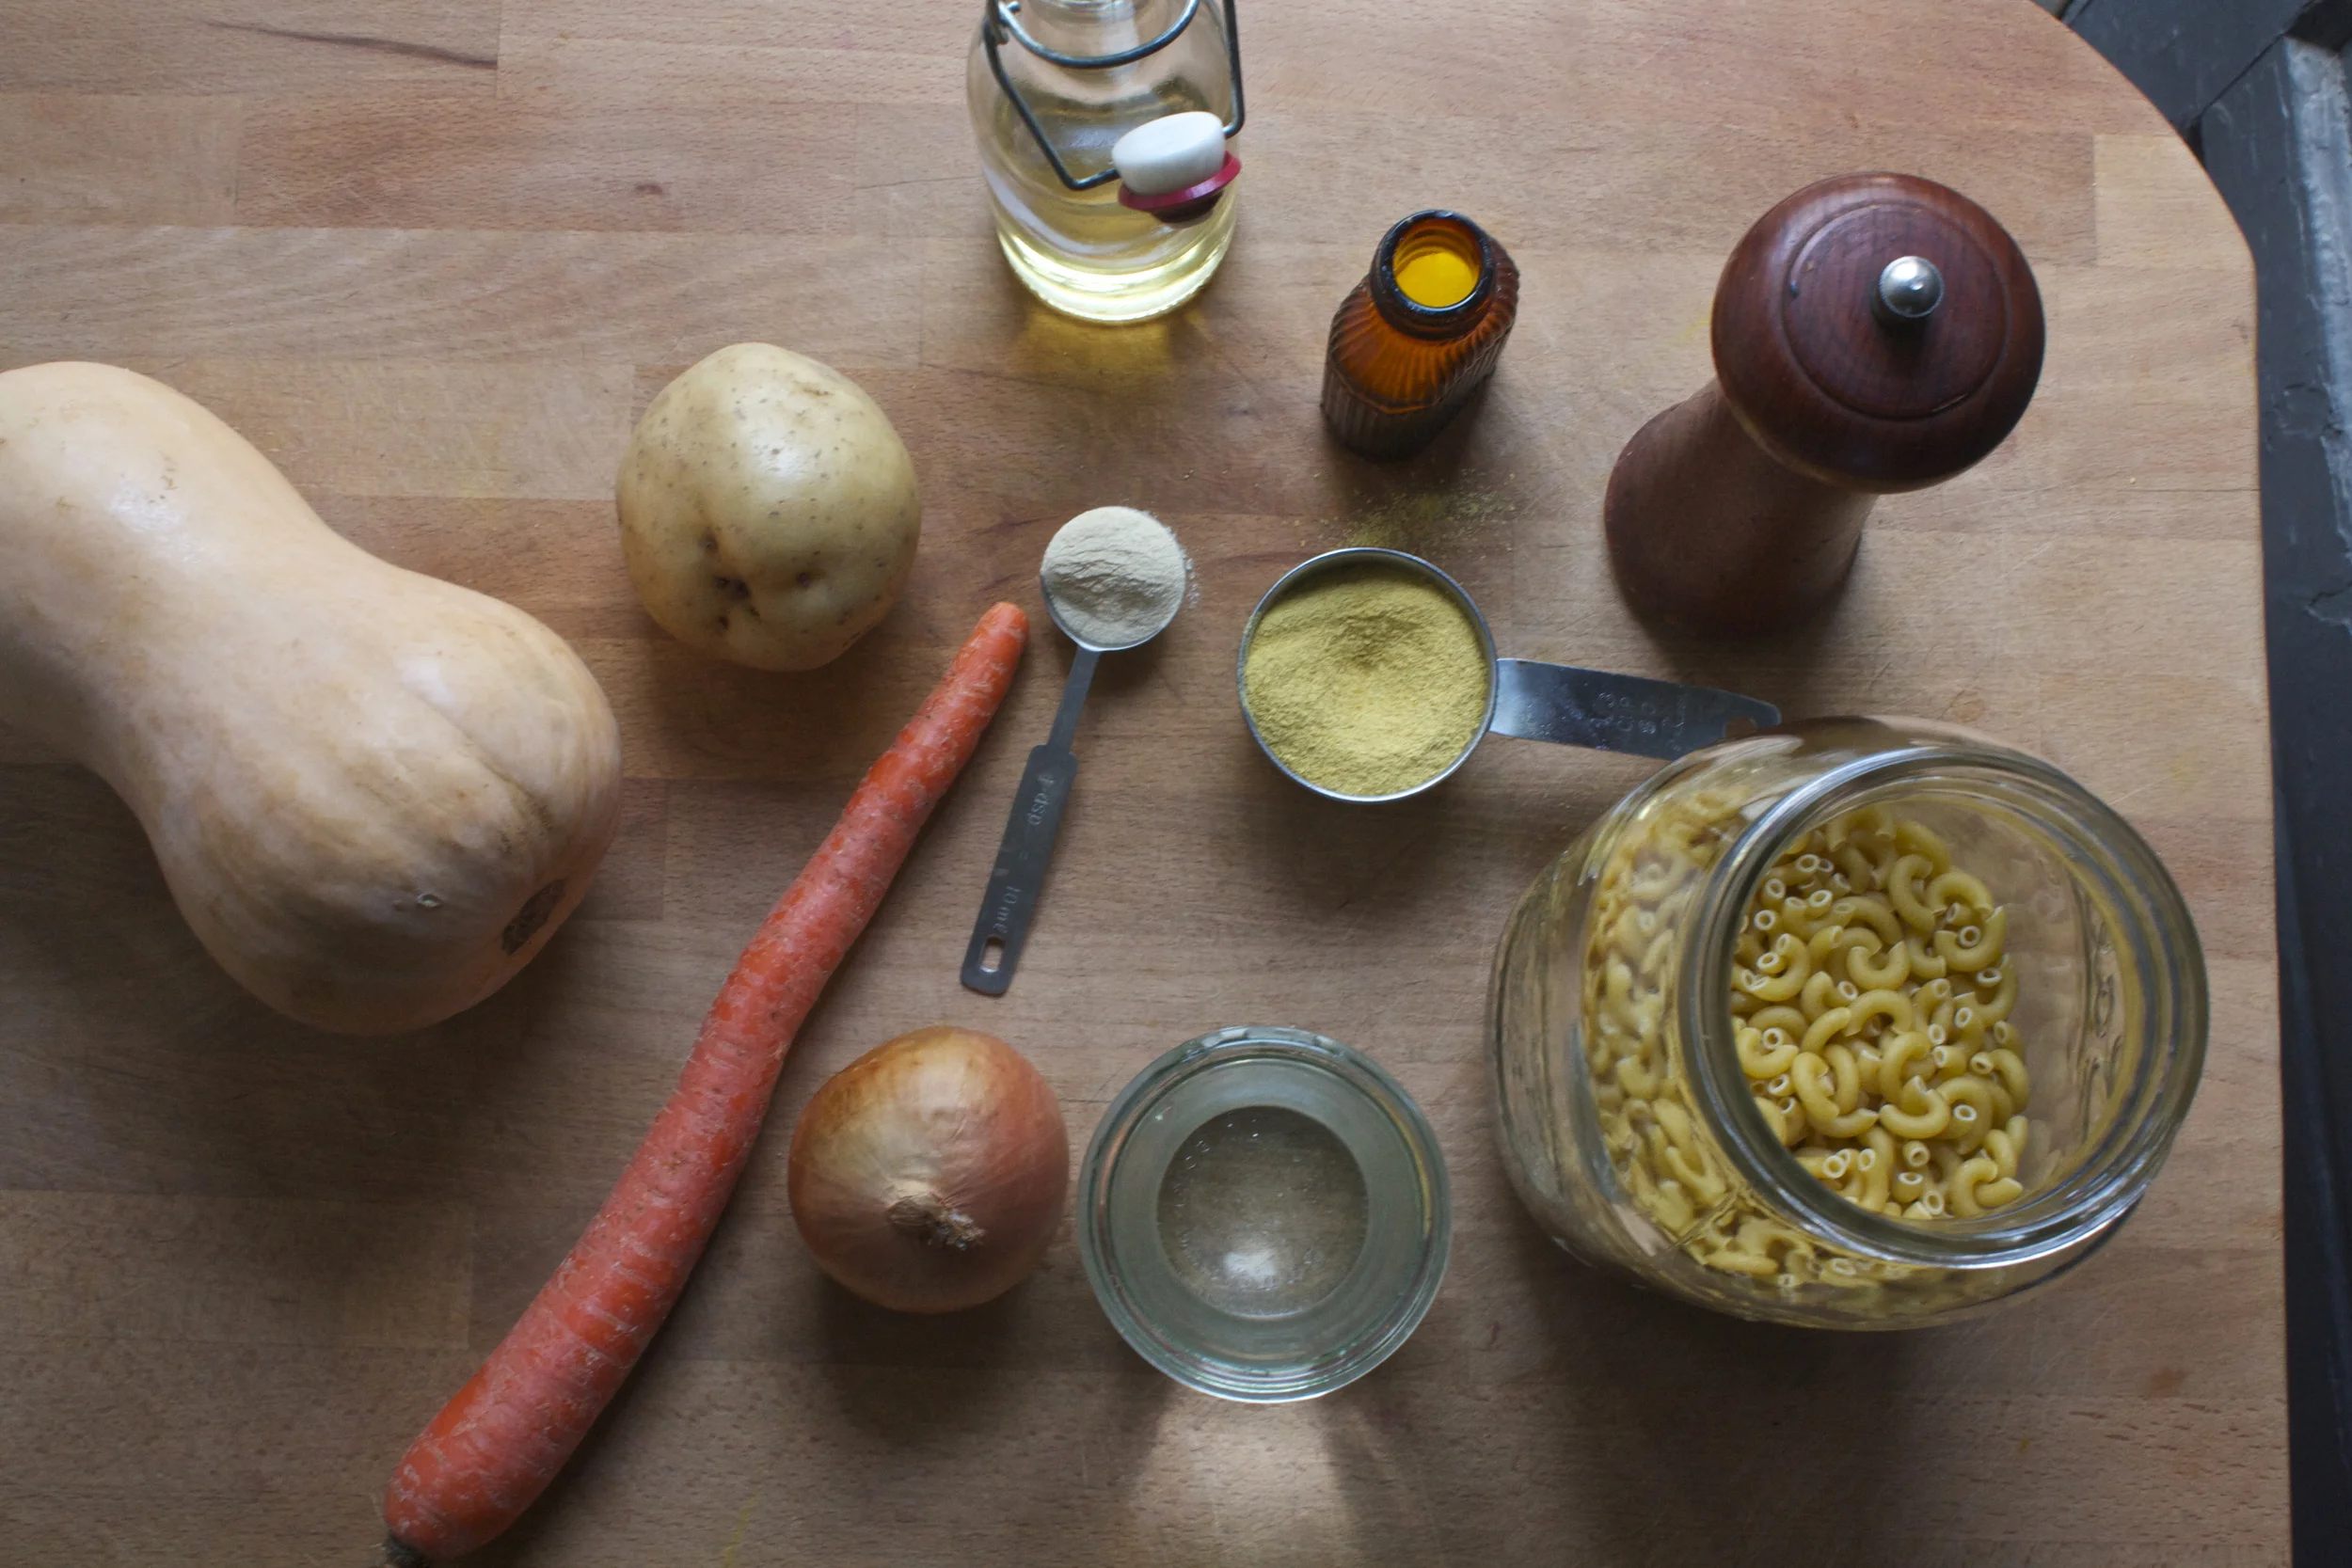
The stuff. A small butternut squash, a potato, an onion, and a carrot. Also needed is nutritional yeast (the cheeze), garlic powder, olive oil, salt and pepper, and some water. And pasta.. don’t forget the pasta.%u00a0

Start with the onion and carrot in a big pot with some oil. Stick that on the stove and turn on the heat, and when that’s going, chop up the butternut sqauh and the potato and toss that into the pot too. Let the stuff cook for just a few minutes.

Pour in water (enough o submerge all the veggies) %u00a0and add in the garlic powder and some salt and pepper. Bring the water to a boil then turn heat down to medium and stick a lid on the pot.

Now is a good time to boil up your pasta situation (cook it the way the package says too)

When it’s done, strain it. And if it happens that it is done a little before the sauce, it’s cool, just drizzle it with a little oil so that the noodles don’t all stick together and set aside.
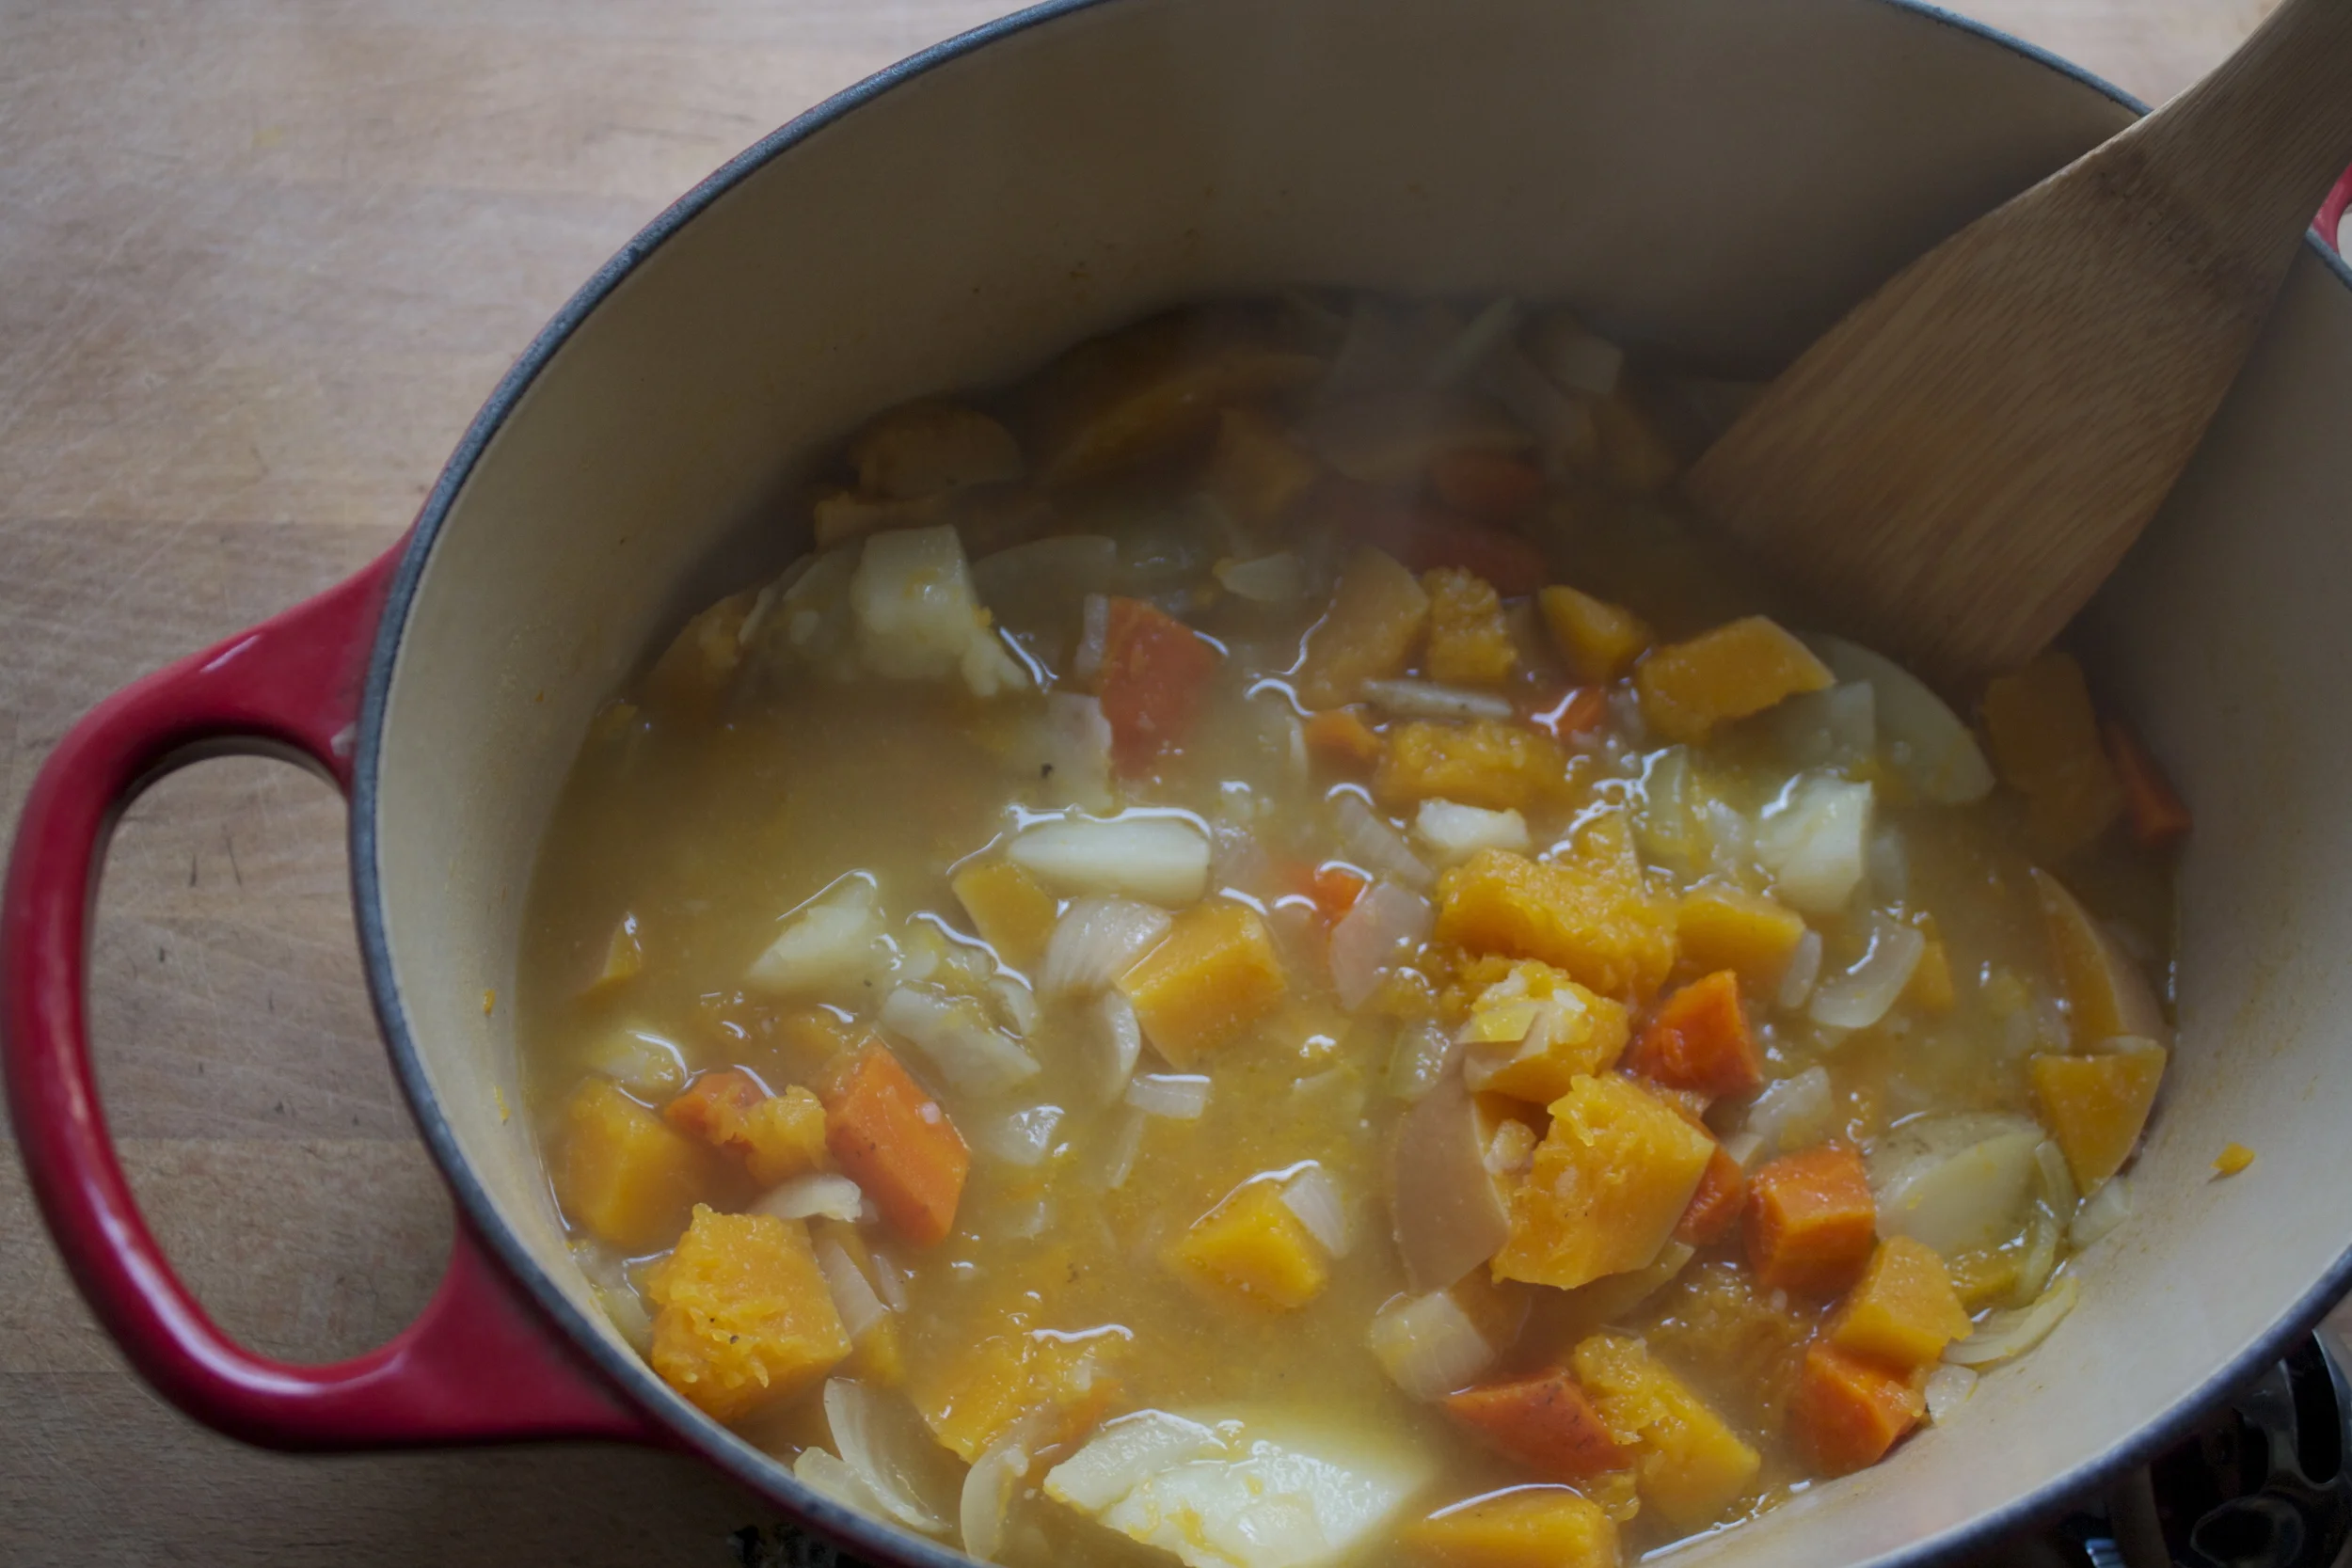
Back to the sauce. Once the pot of veggies is all tender and falling apart, take it off the stove.
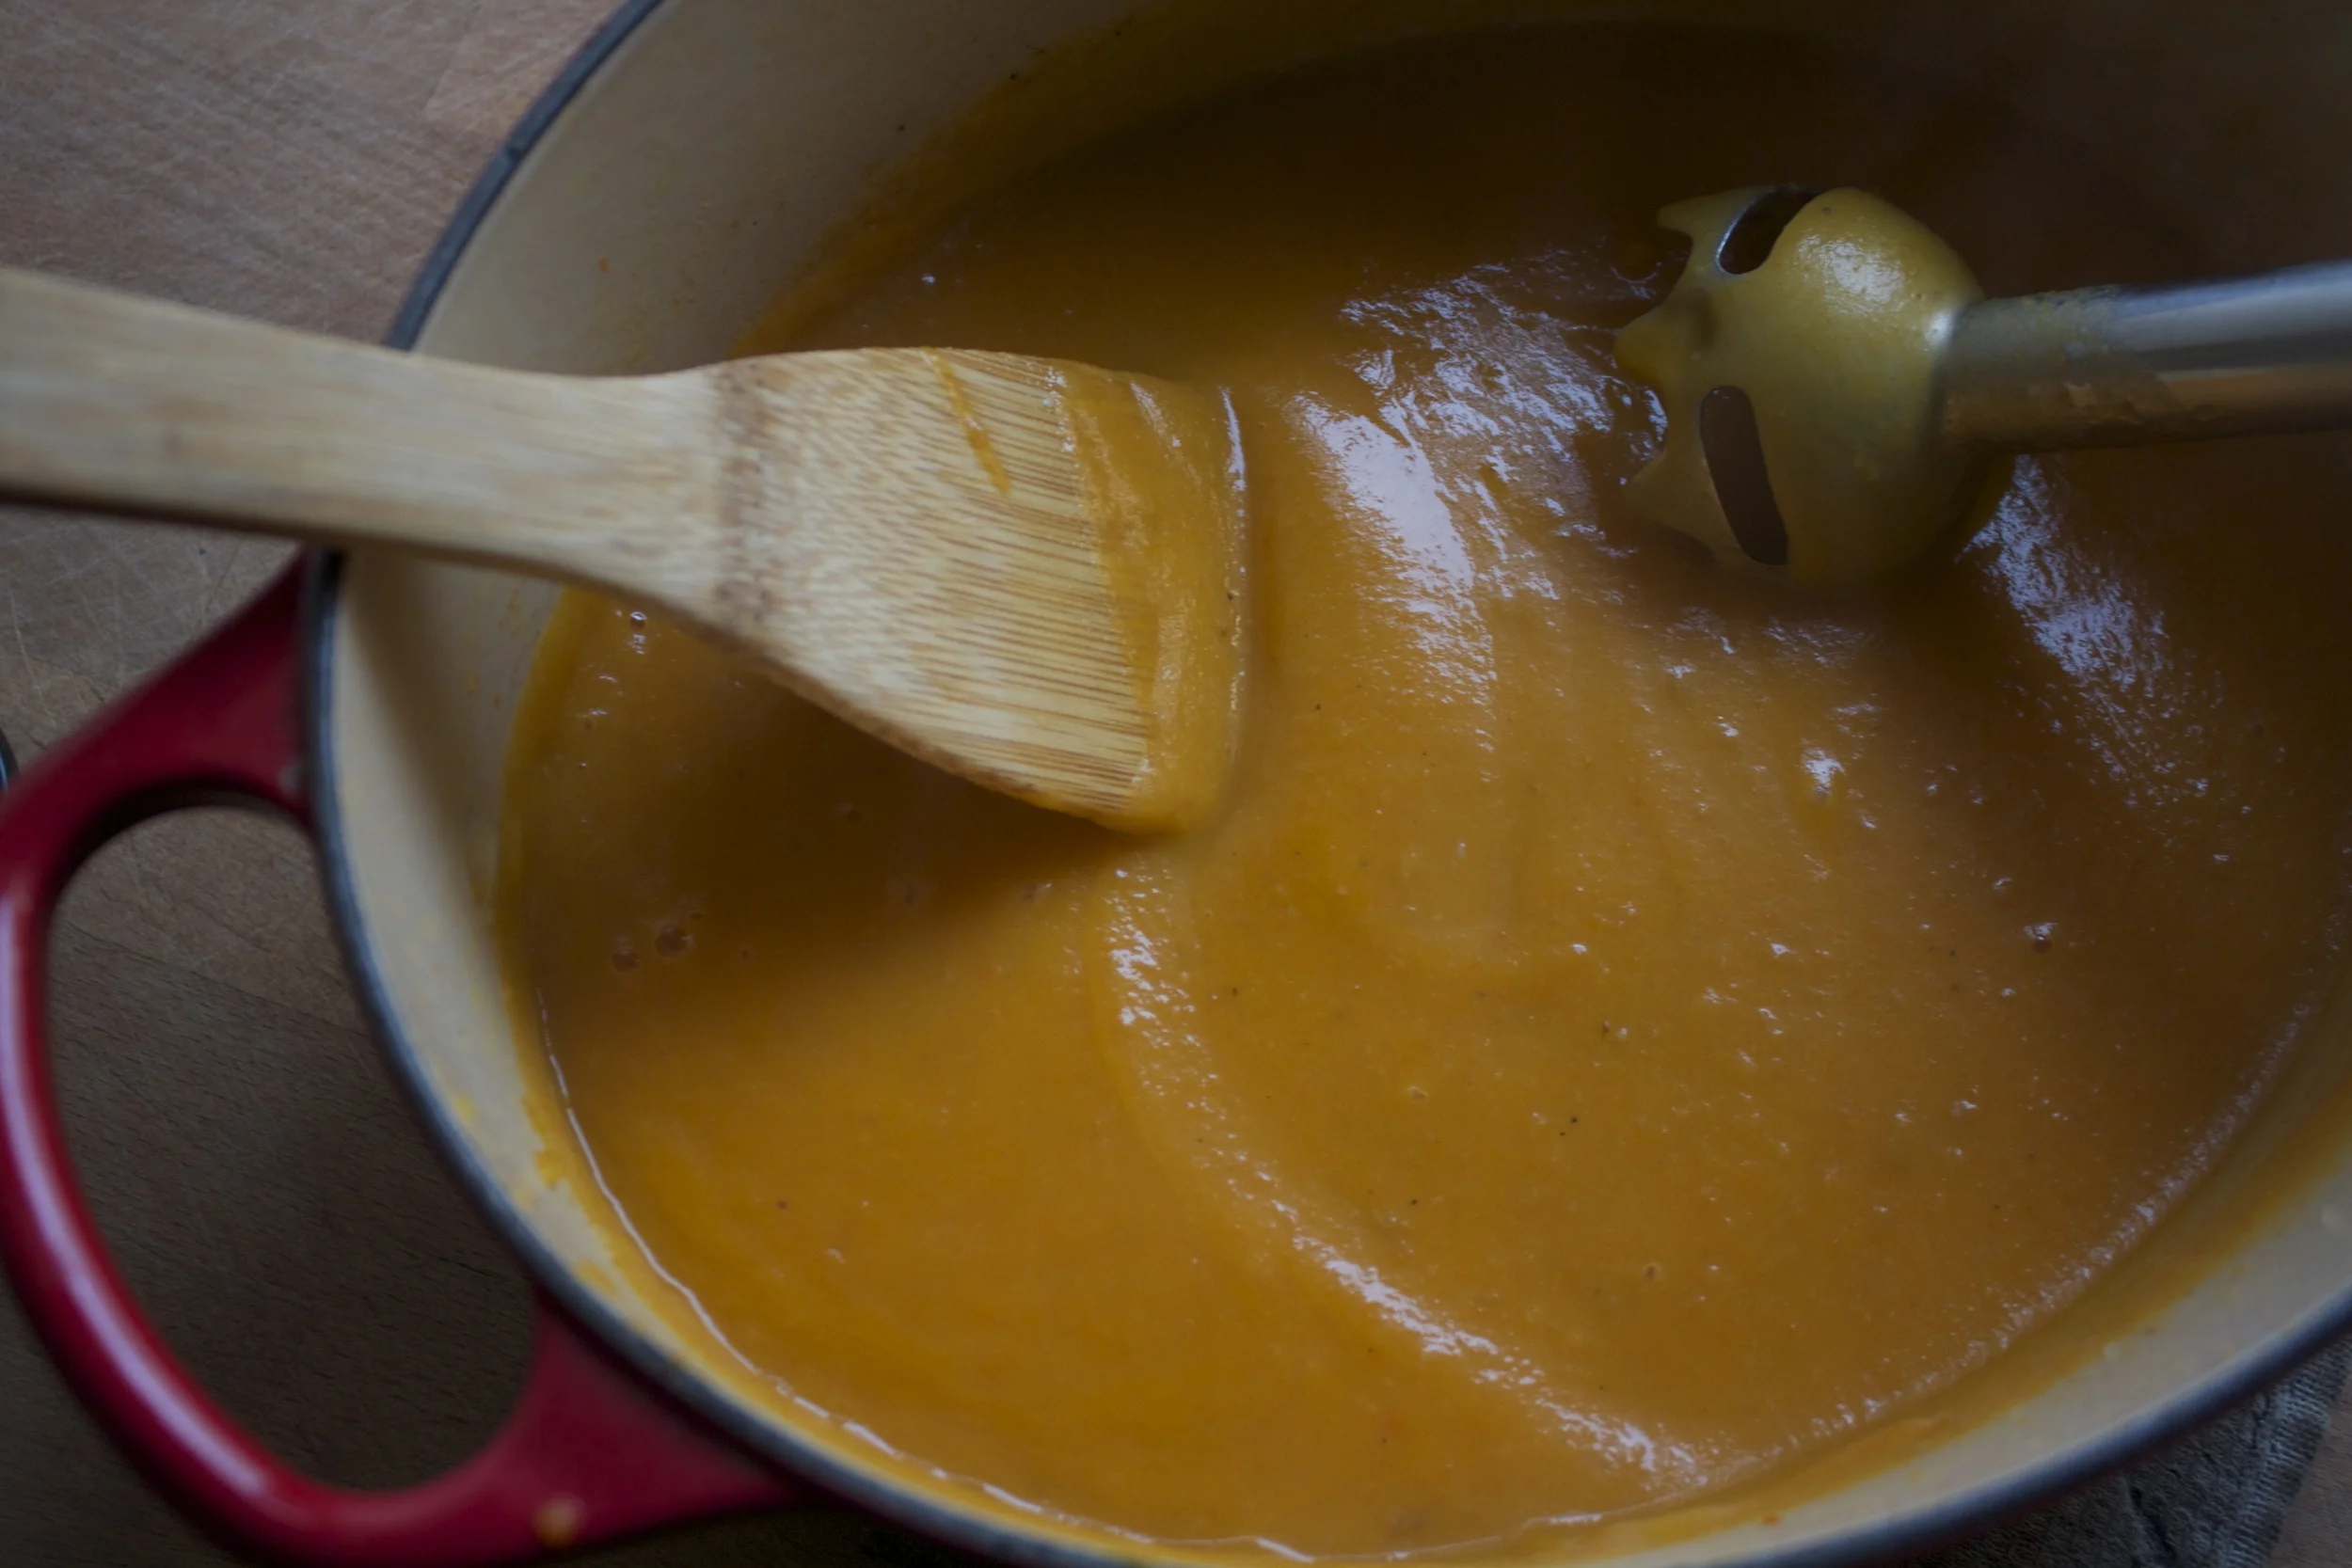
And blend the crap out of it with your blending method of choice (a hand o a regular blender)
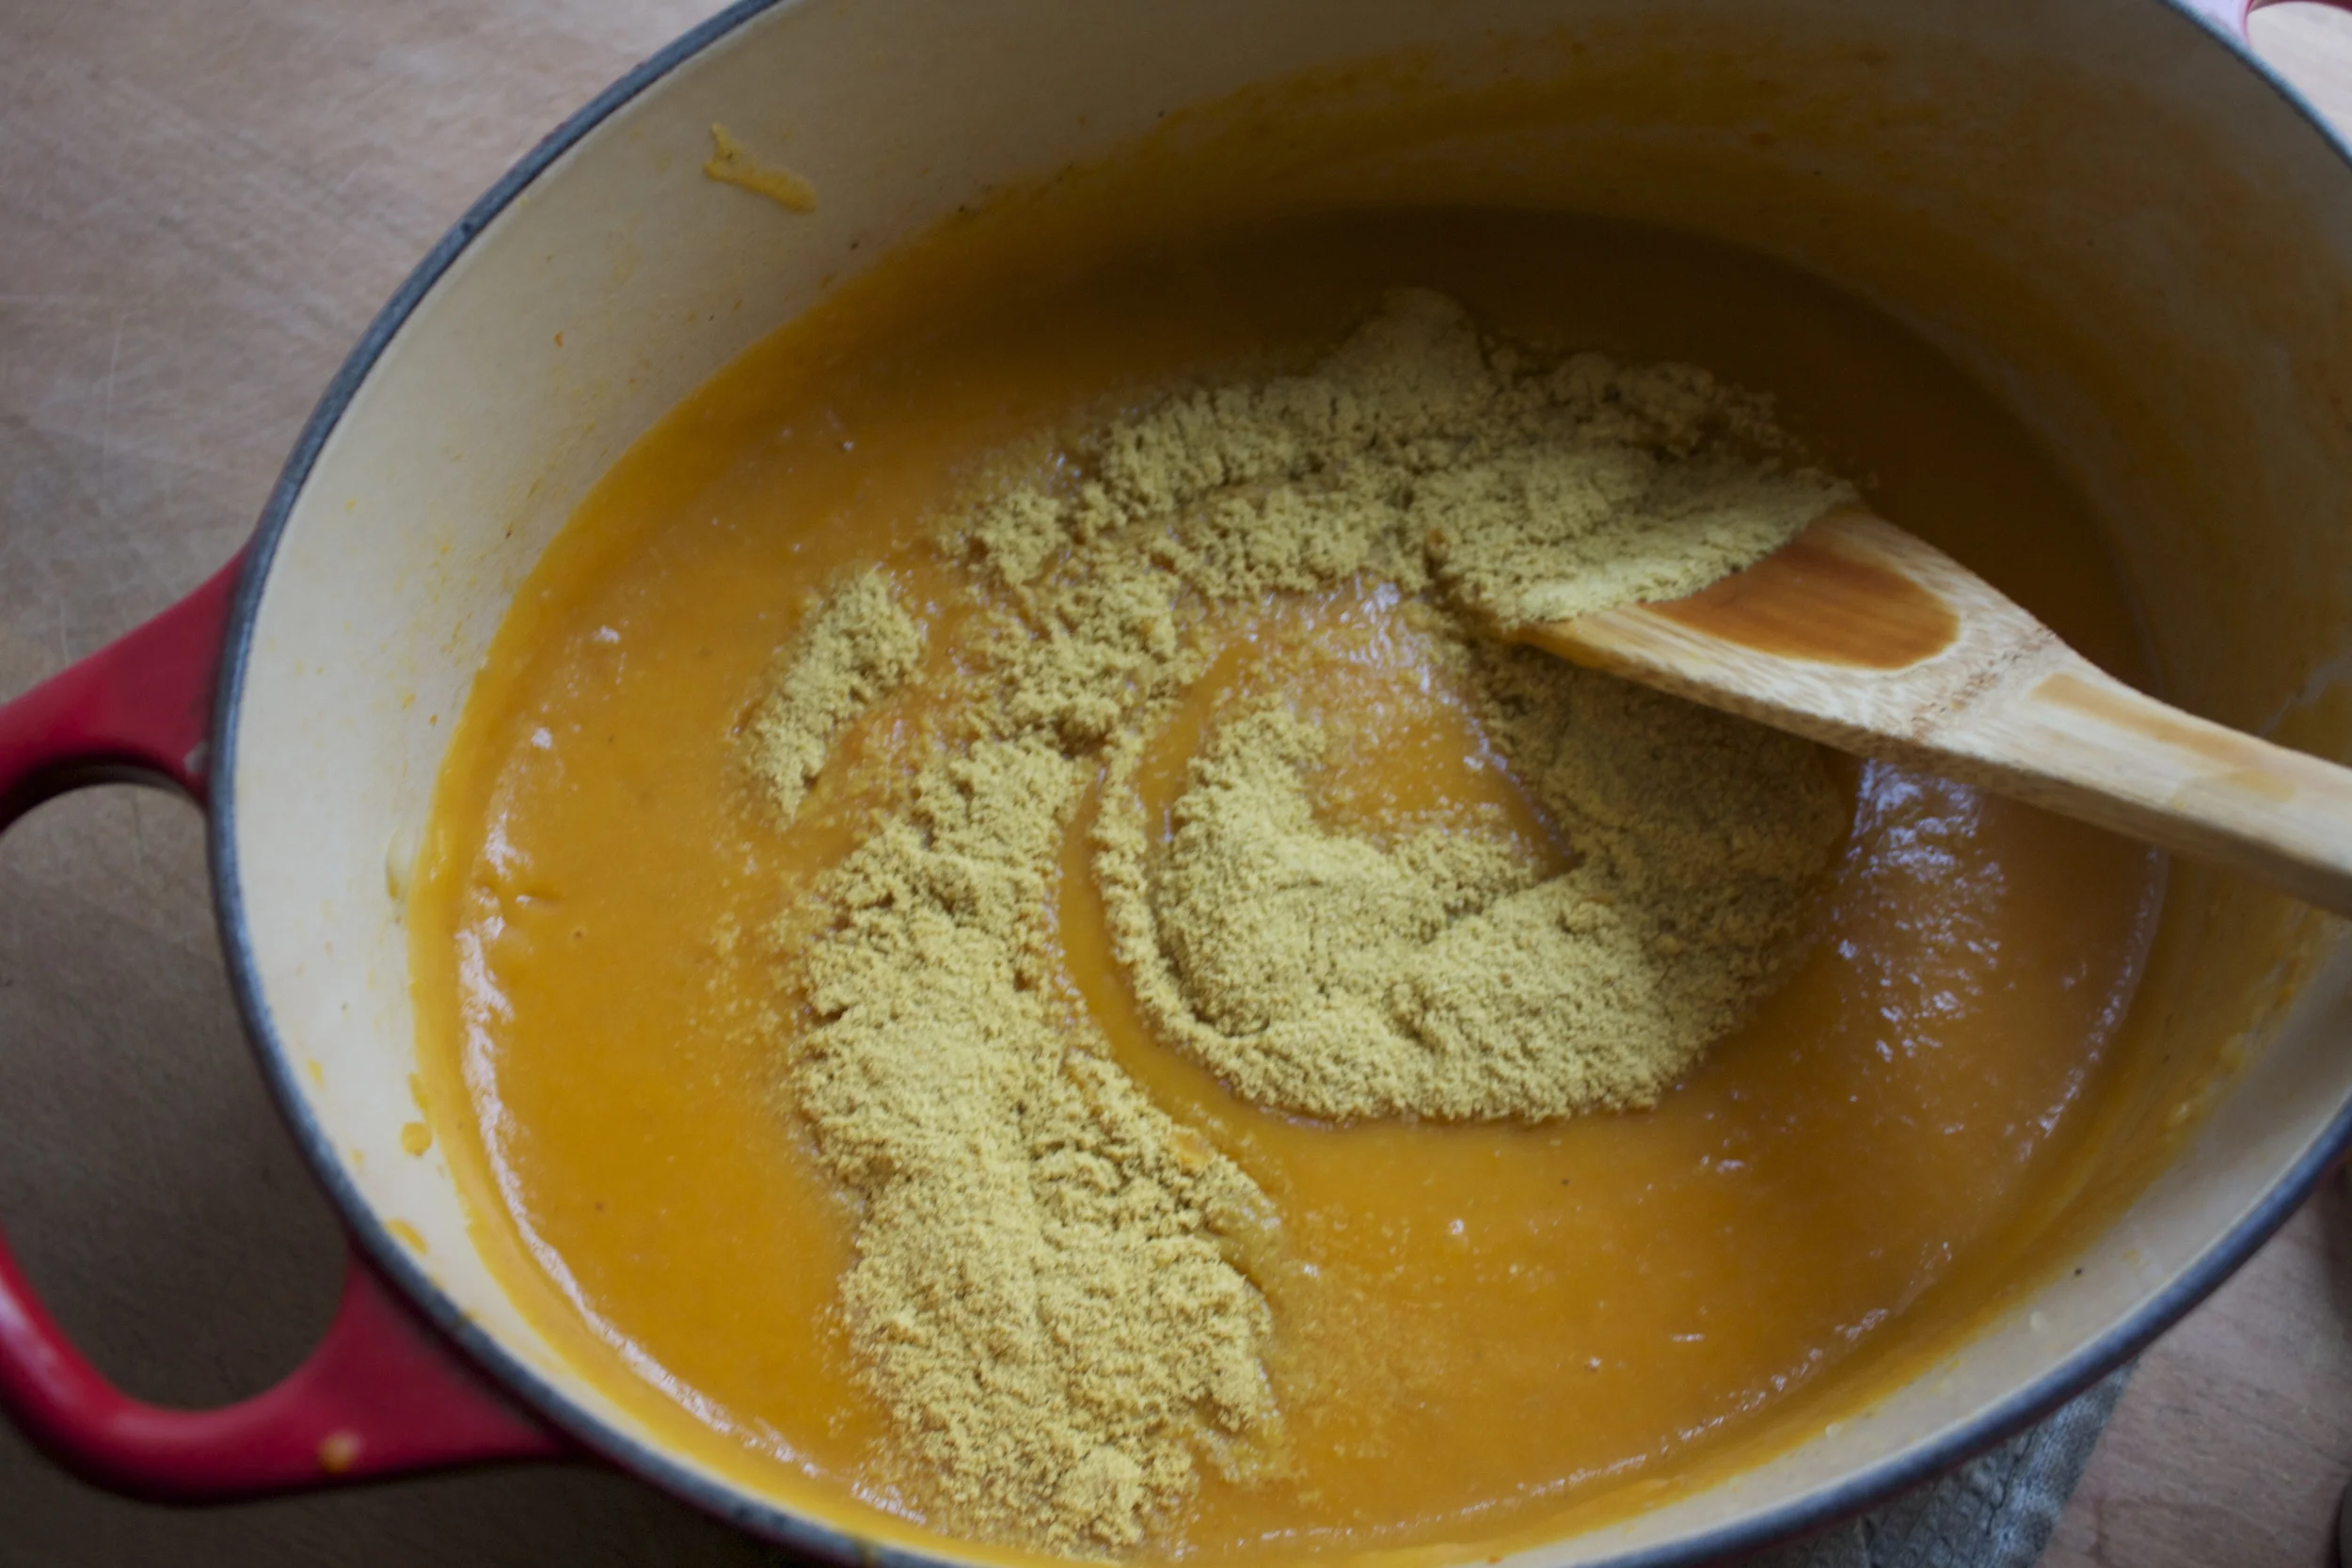
Oh, and mix in the nutrioanl yeast (can add it in at the blending stage%u2026 I just forgot too) and season with any more salt and pepper if needed.
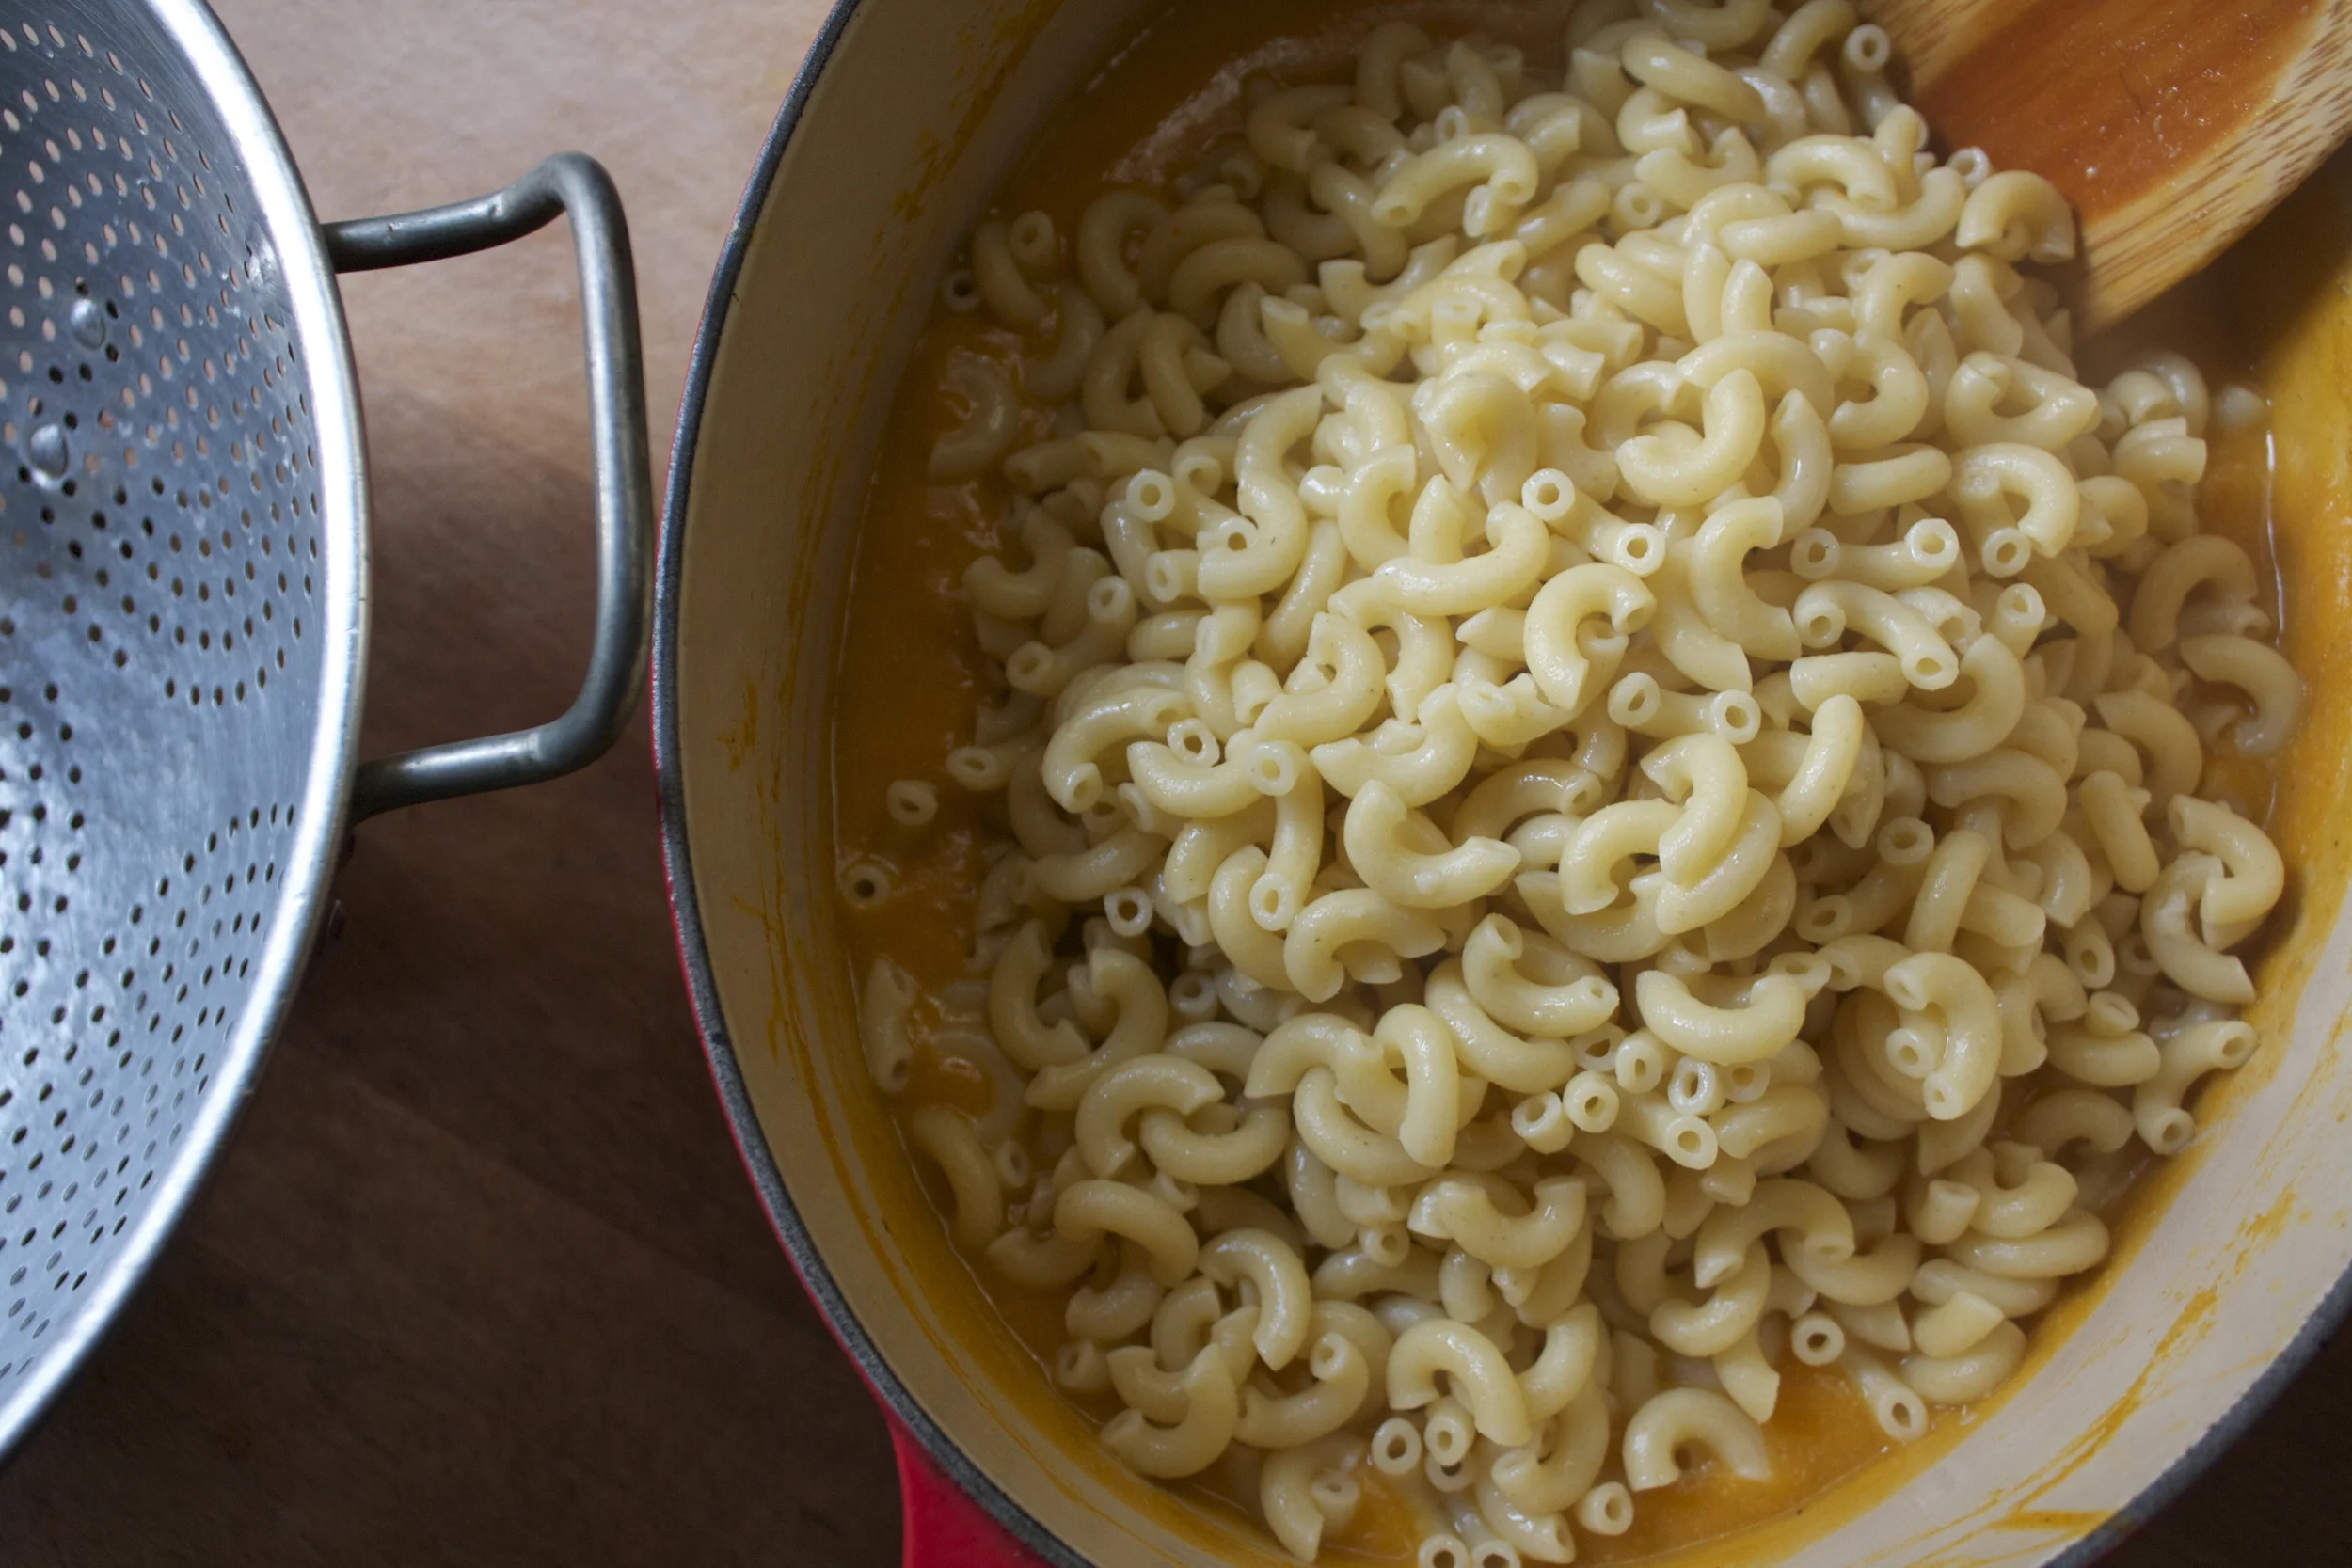
Grap the cooked noodles,%u00a0dump them into the sauce and give a good mix.
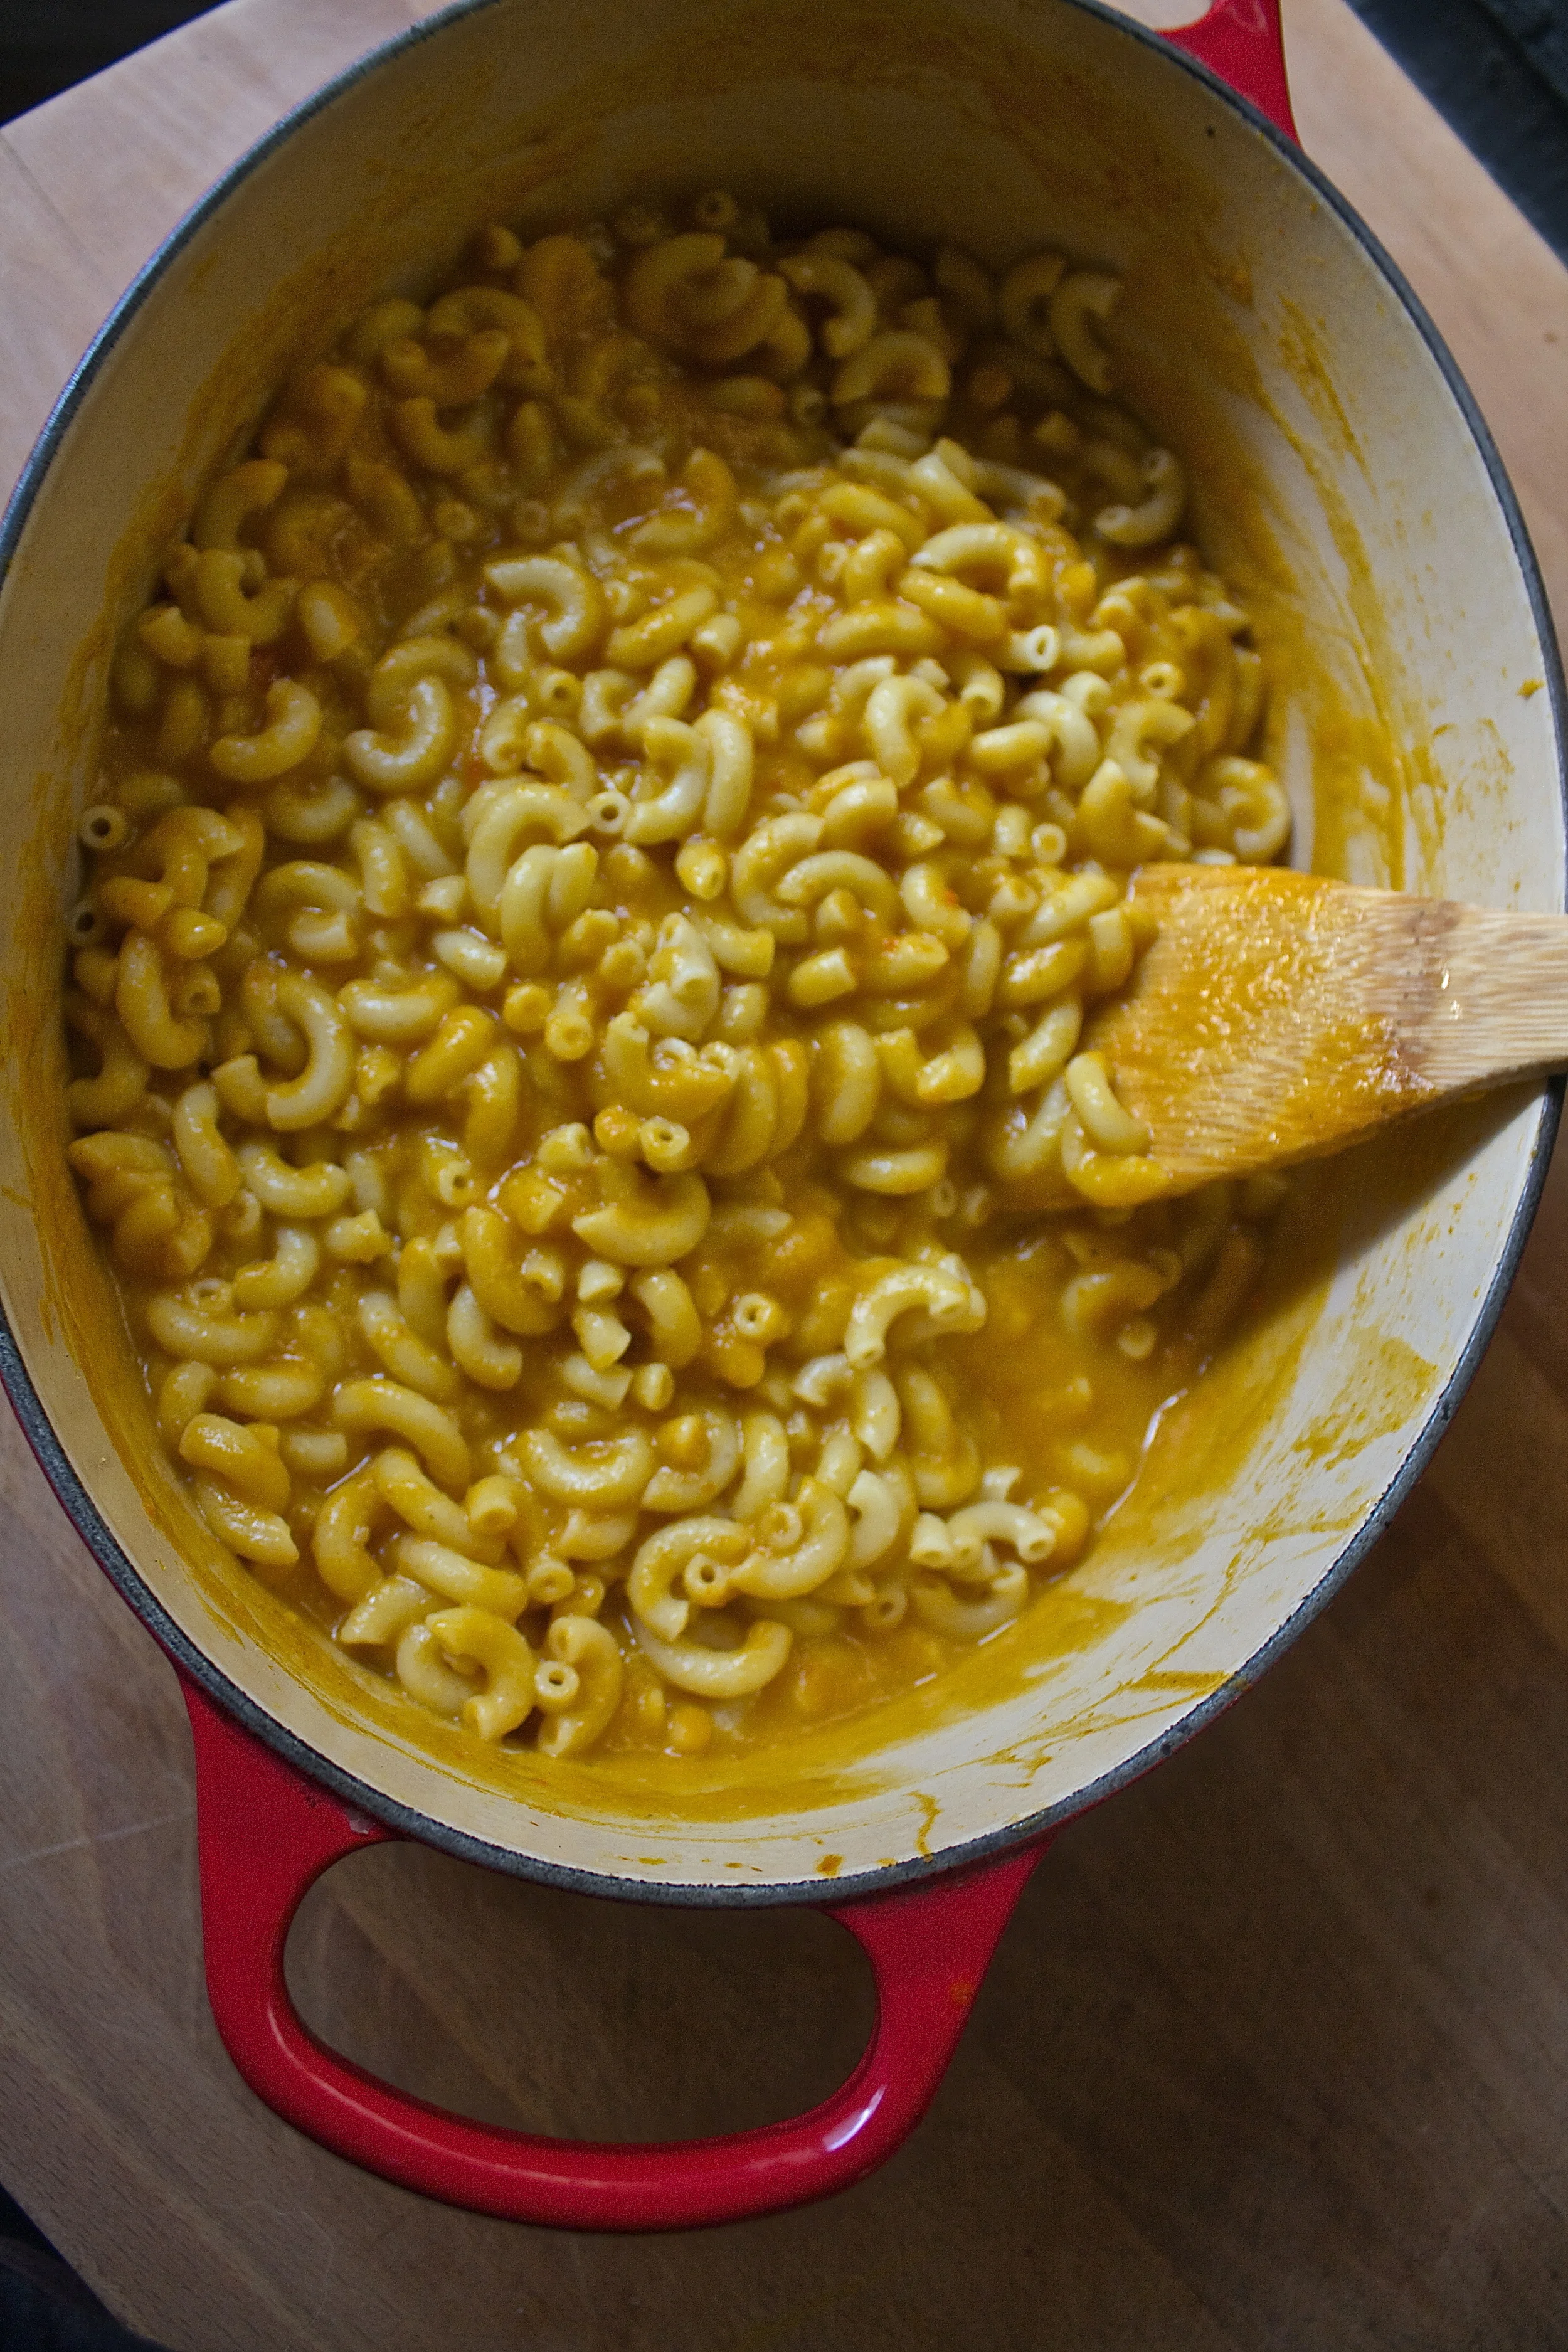
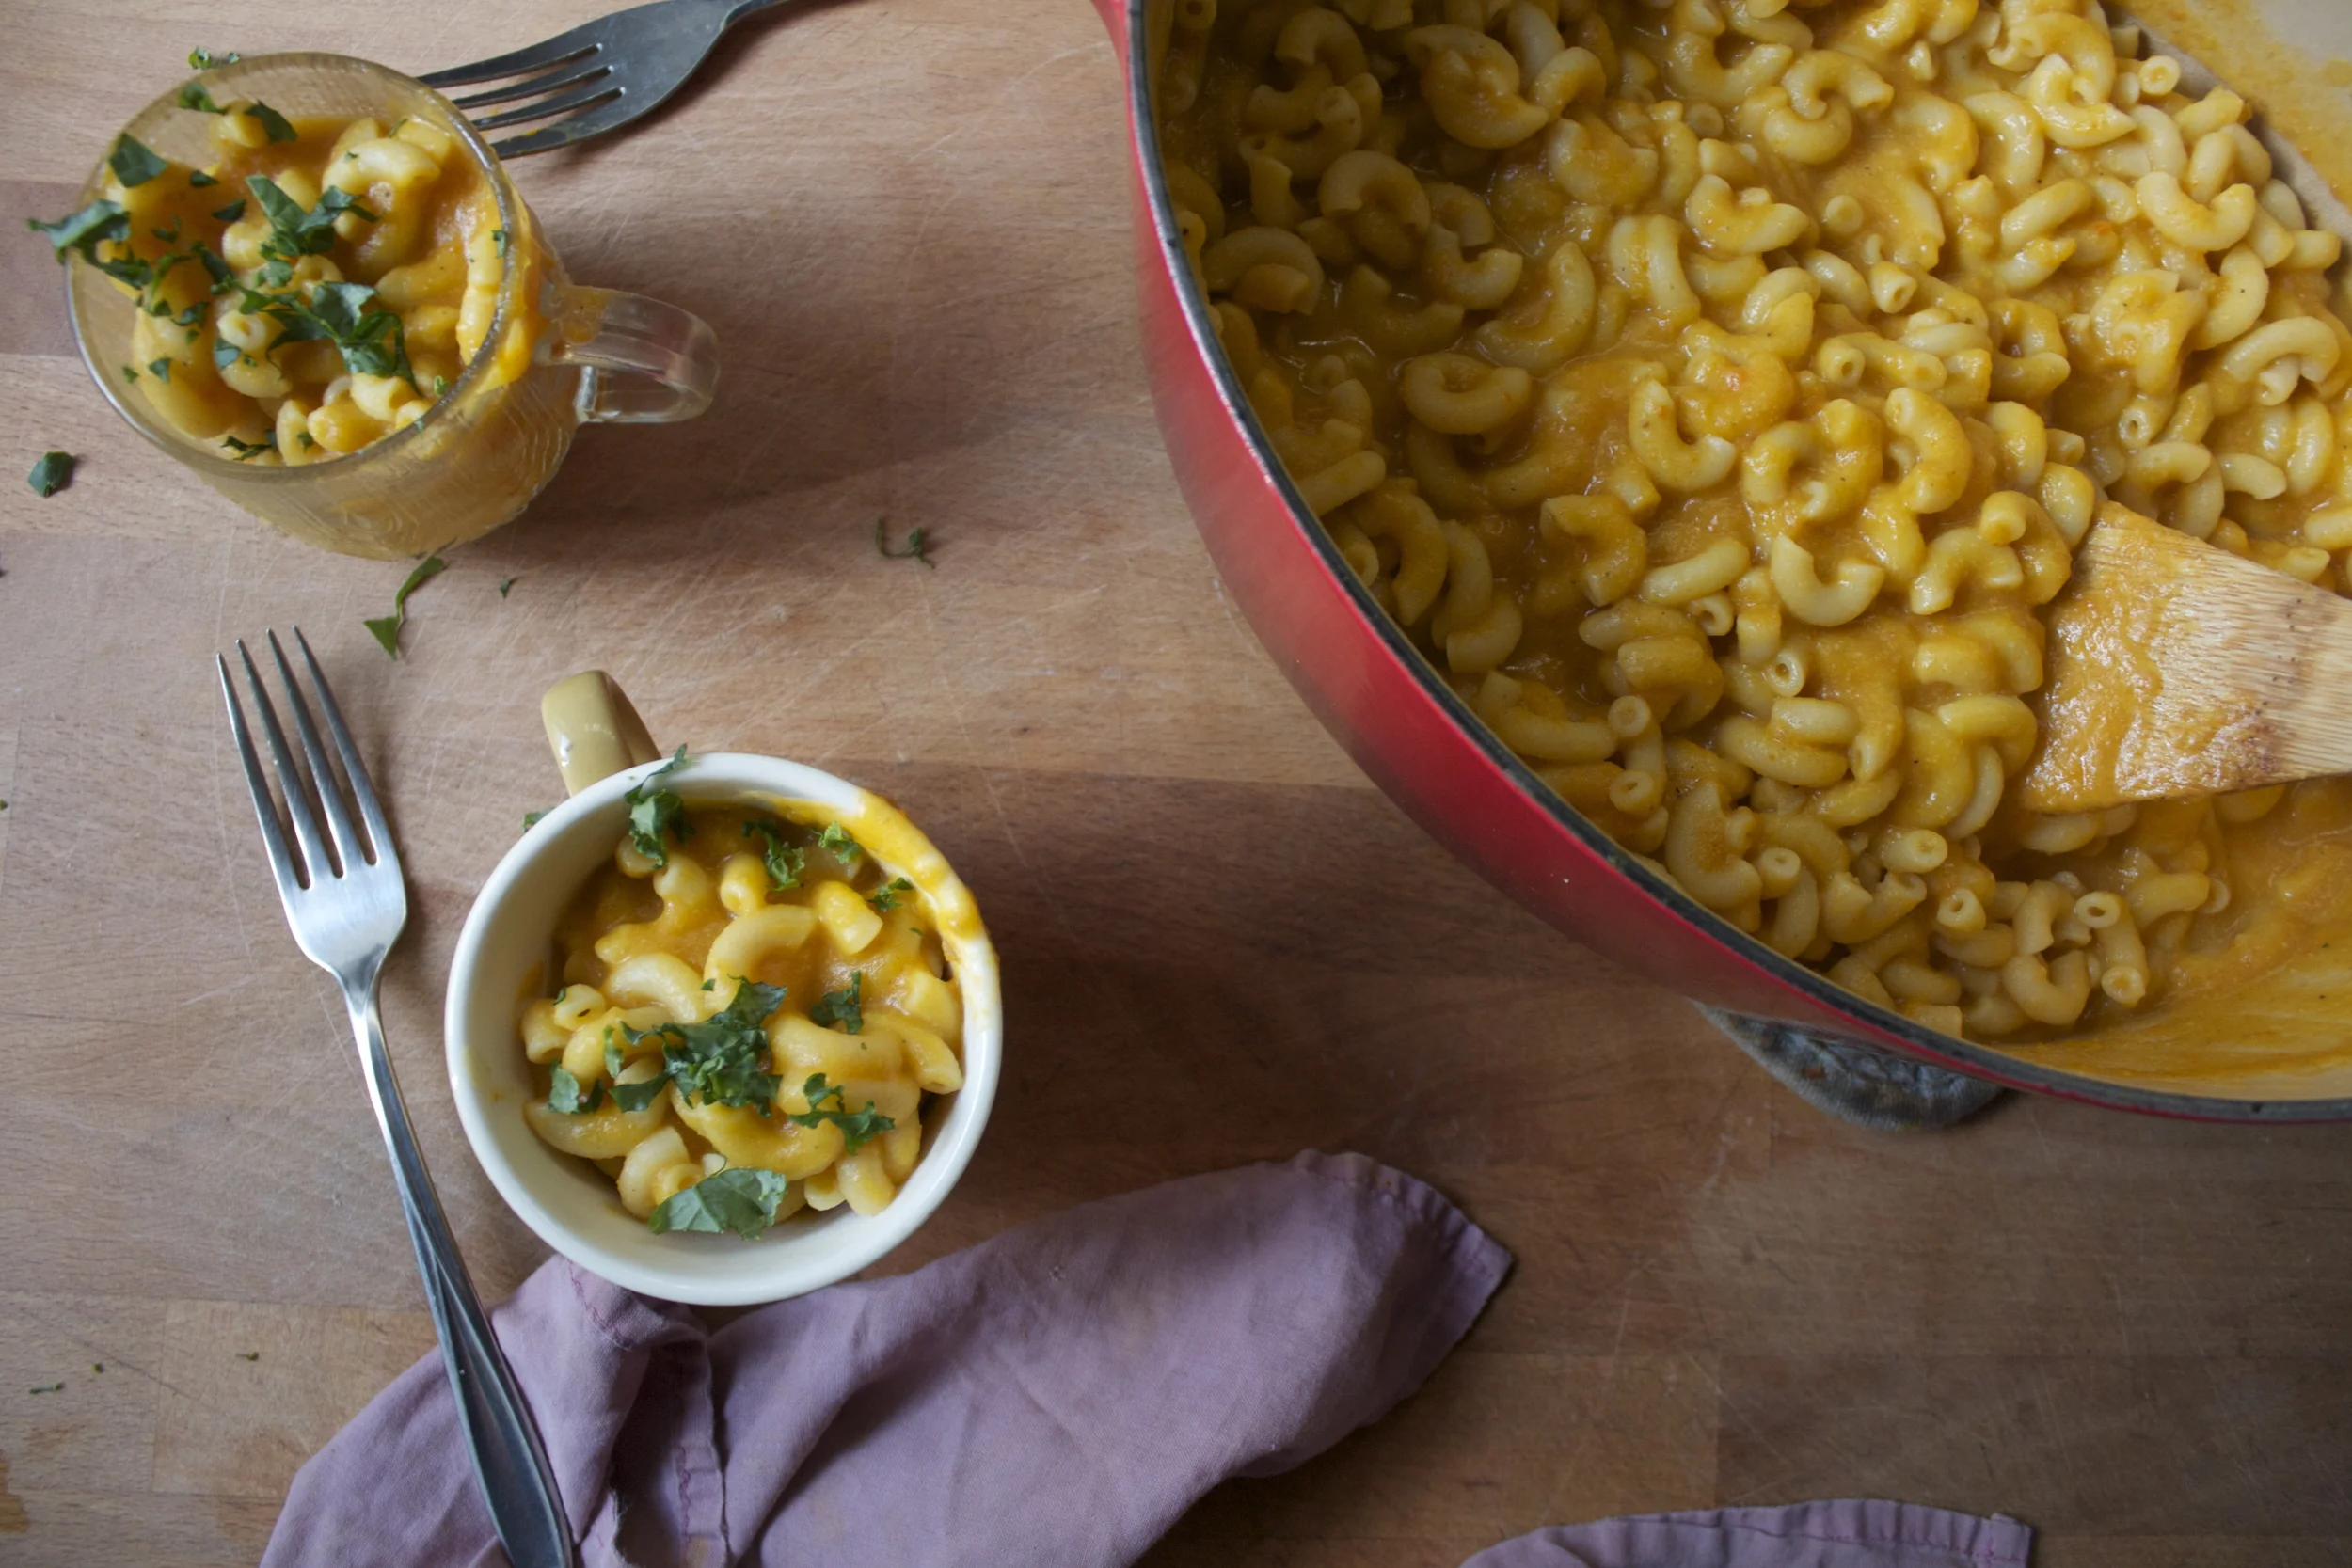
Scoop into food eating vessels,(handled coffee mugs are great for the littles.. and cute)%u00a0Maybe sprinkle on some chopped green stuff(my people enjoyed the addition of chopped up kale) and serve right away!

Now you can eat all the mac n cheeze.%u00a0

Happy Thursday!

-C

Serve 6 or so people

  • 1 lb macaroni noodles (any kind you like. vegan, gluten free, whole wheat)%u00a0
  • half a small butternut squash (about 2 1/2 ish cups chopped)
  • 1 medium white potato
  • 1 medium yellow onion
  • 1 large carrot
  • 1/3 cup nutritional yeast
  • 1 tablespoon garlic powder
  • salt and pepper to taste
  • olive oil
  • water

Chop up the onion and the carrot and stick into a large heavy bottom pot with a splash or two of olive oil and stick on the stove on medium heat.%u00a0While that’s %u00a0going on, chop up the butternut and potato into reasonable small chunks and toss that into the pot with the other stuff. Add in the garlic powder, season well with salt and pepper, and add enough water to full submerge the contents of the pot. Bring the water to a boil then reduce heat to medium and stick a cover on the pot.

While the veggies are boiling, boil the pasta up, slightly al denta (follow what the pasta people on the package tells you to do)

Once all the veggies in the pot are super tender, even falling apart (about 20 minutes) remove pot from heat and using your blending method of choice (hand or normal blender)%u00a0%u00a0blend everything together until smooth and creamy and then add in the nutritional yeast. Taste and if you think it needs it, add more salt and %u00a0pepper.%u00a0If you find that the sauce seems to thick, add in a splash or two of water.. to thin, stick back on stove and cook long to reduce.%u00a0

So you got you cooked pasta and you sauce. Mix it all together. And wa la%u2026 Mac N’ Cheeze

serve right away and eat it all. But any left overs can be refrigerated. Tastes great %u00a0the next day warmed in a skillet with a little oil.%u00a0

Fall is all up in here!. The air is so nice and crisp and the leaves are changing to the prettiest colors.%u00a0I gots my pumpkins, an abundance of apples and squashes (our table is forverver overflowing with some type of squash) and am wearing all of my favorite sweaters.%u00a0

I am a happy lady here!

And this happy lady just wants to sit on her butt and knit.

But first, dinner. And my thought are. “What to do that doesn’t include doing much of anything (especially dishes) and maybe even has the oven on for a little extra warmth?” See here, I am a thinker. I knew I %u00a0had a single pie dough in the freezer (you should always have a pie dough in the freezer), a table full of the loveliest produce. So this happened. And the mr ate it, and he was all like “Whoa”.%u00a0 And I was like,”yeah dude, I know.”

A Ssuper fall galette.. and I still had time for my knitting and my butt.%u00a0

Like Whoa!
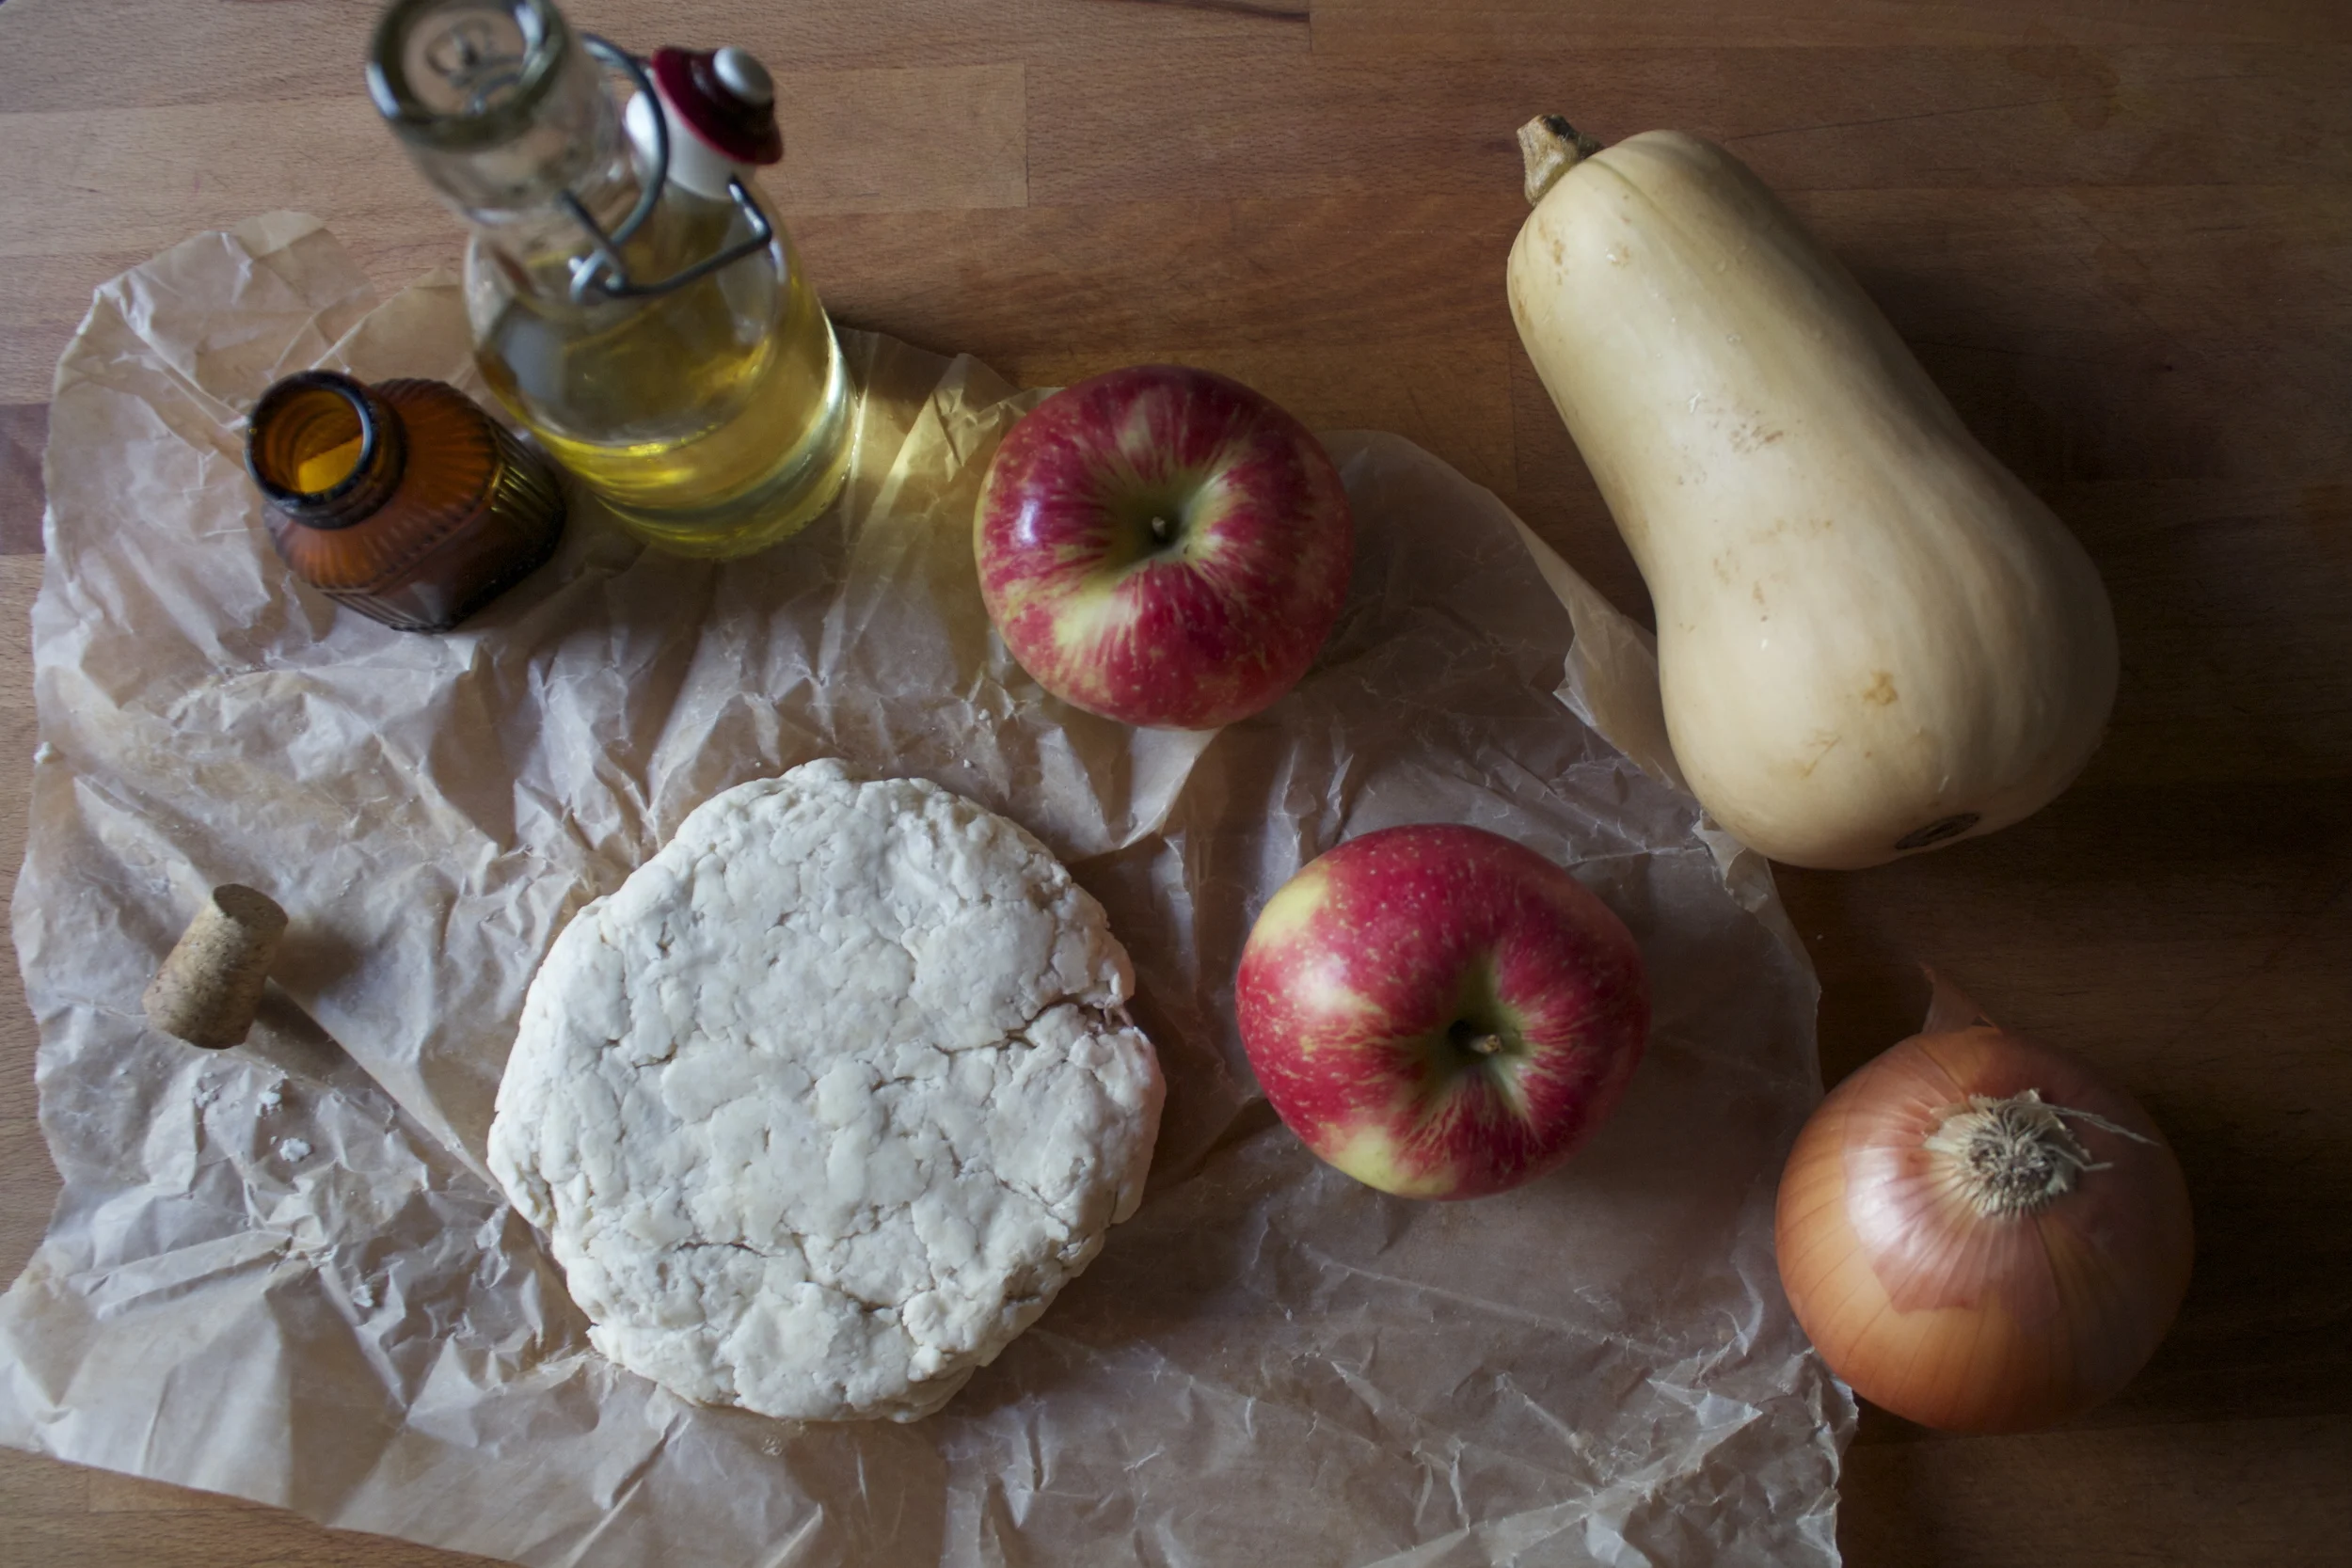
The stuff. A single crust pie dough, a butternut squash, an onion, and a honey crisp apple.(there are 2 shown, but I only needed on1)%u00a0%u00a0Also going to need a tiny bit if olive oil and a pinch of salt
Preheat oven to 375.

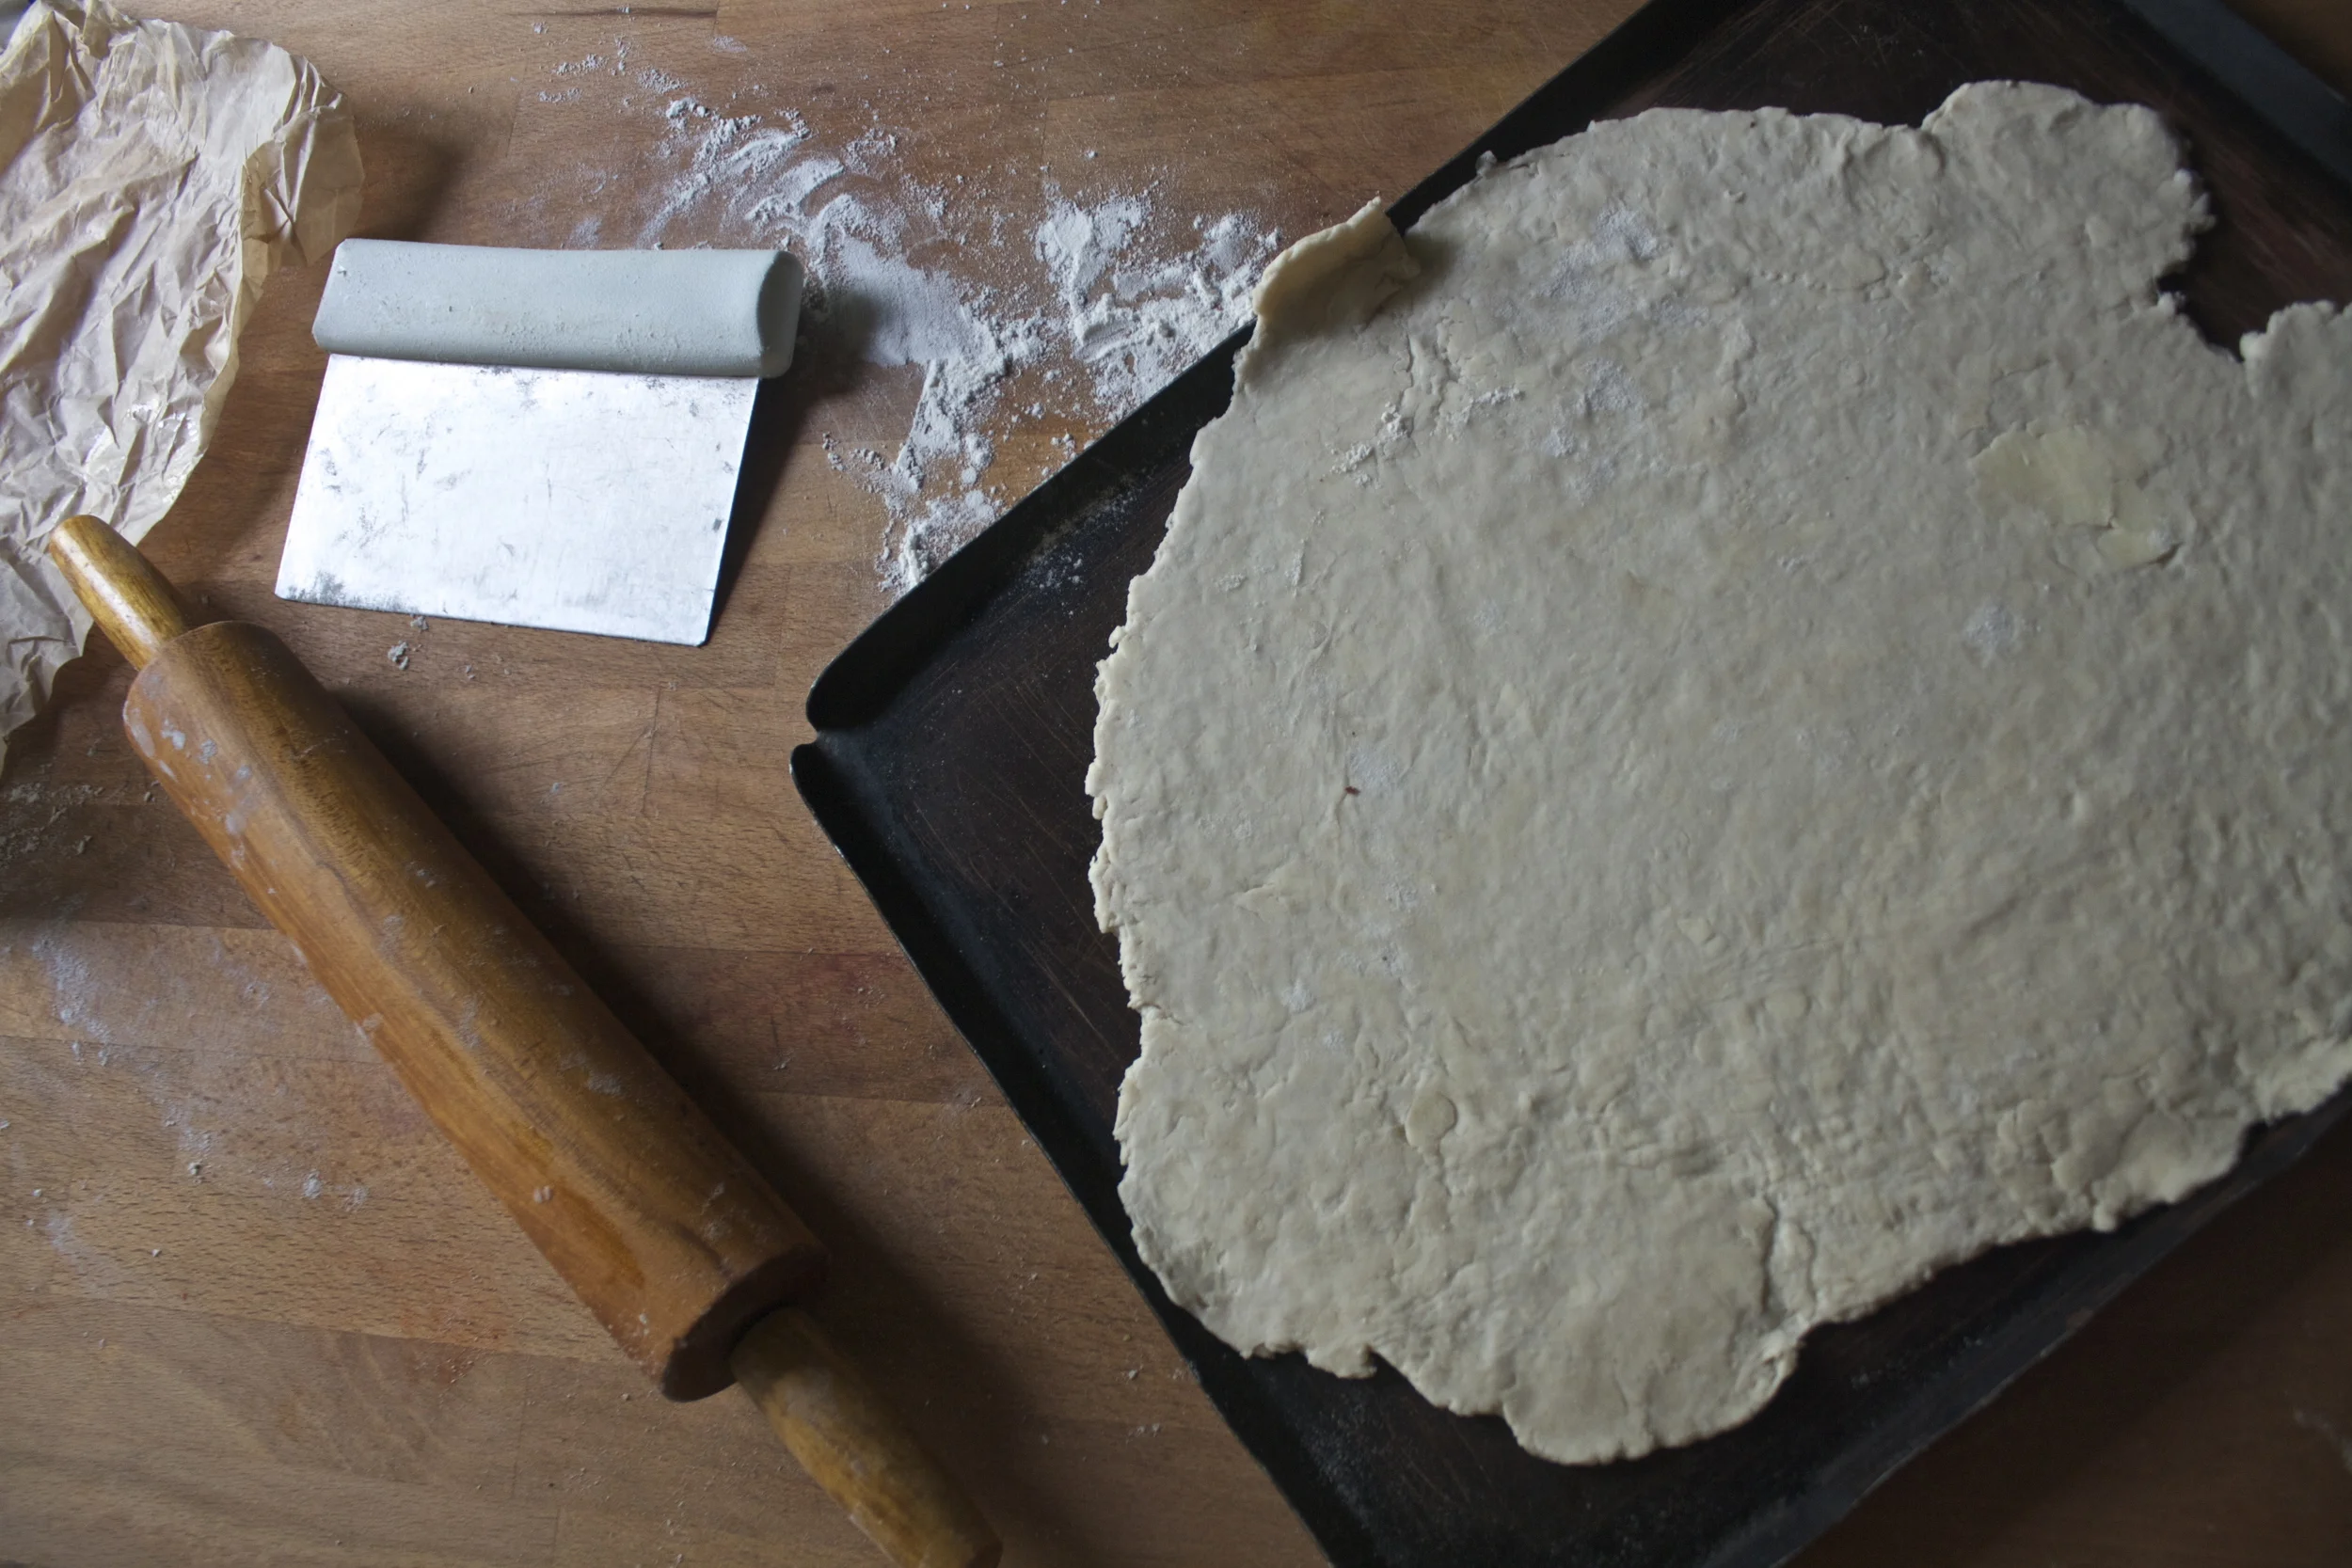
Roll your chilled dough out %u00a0on a lightly floured surface and place onto a large baking sheet. Stick it in the fridge to rest for a few minutes.
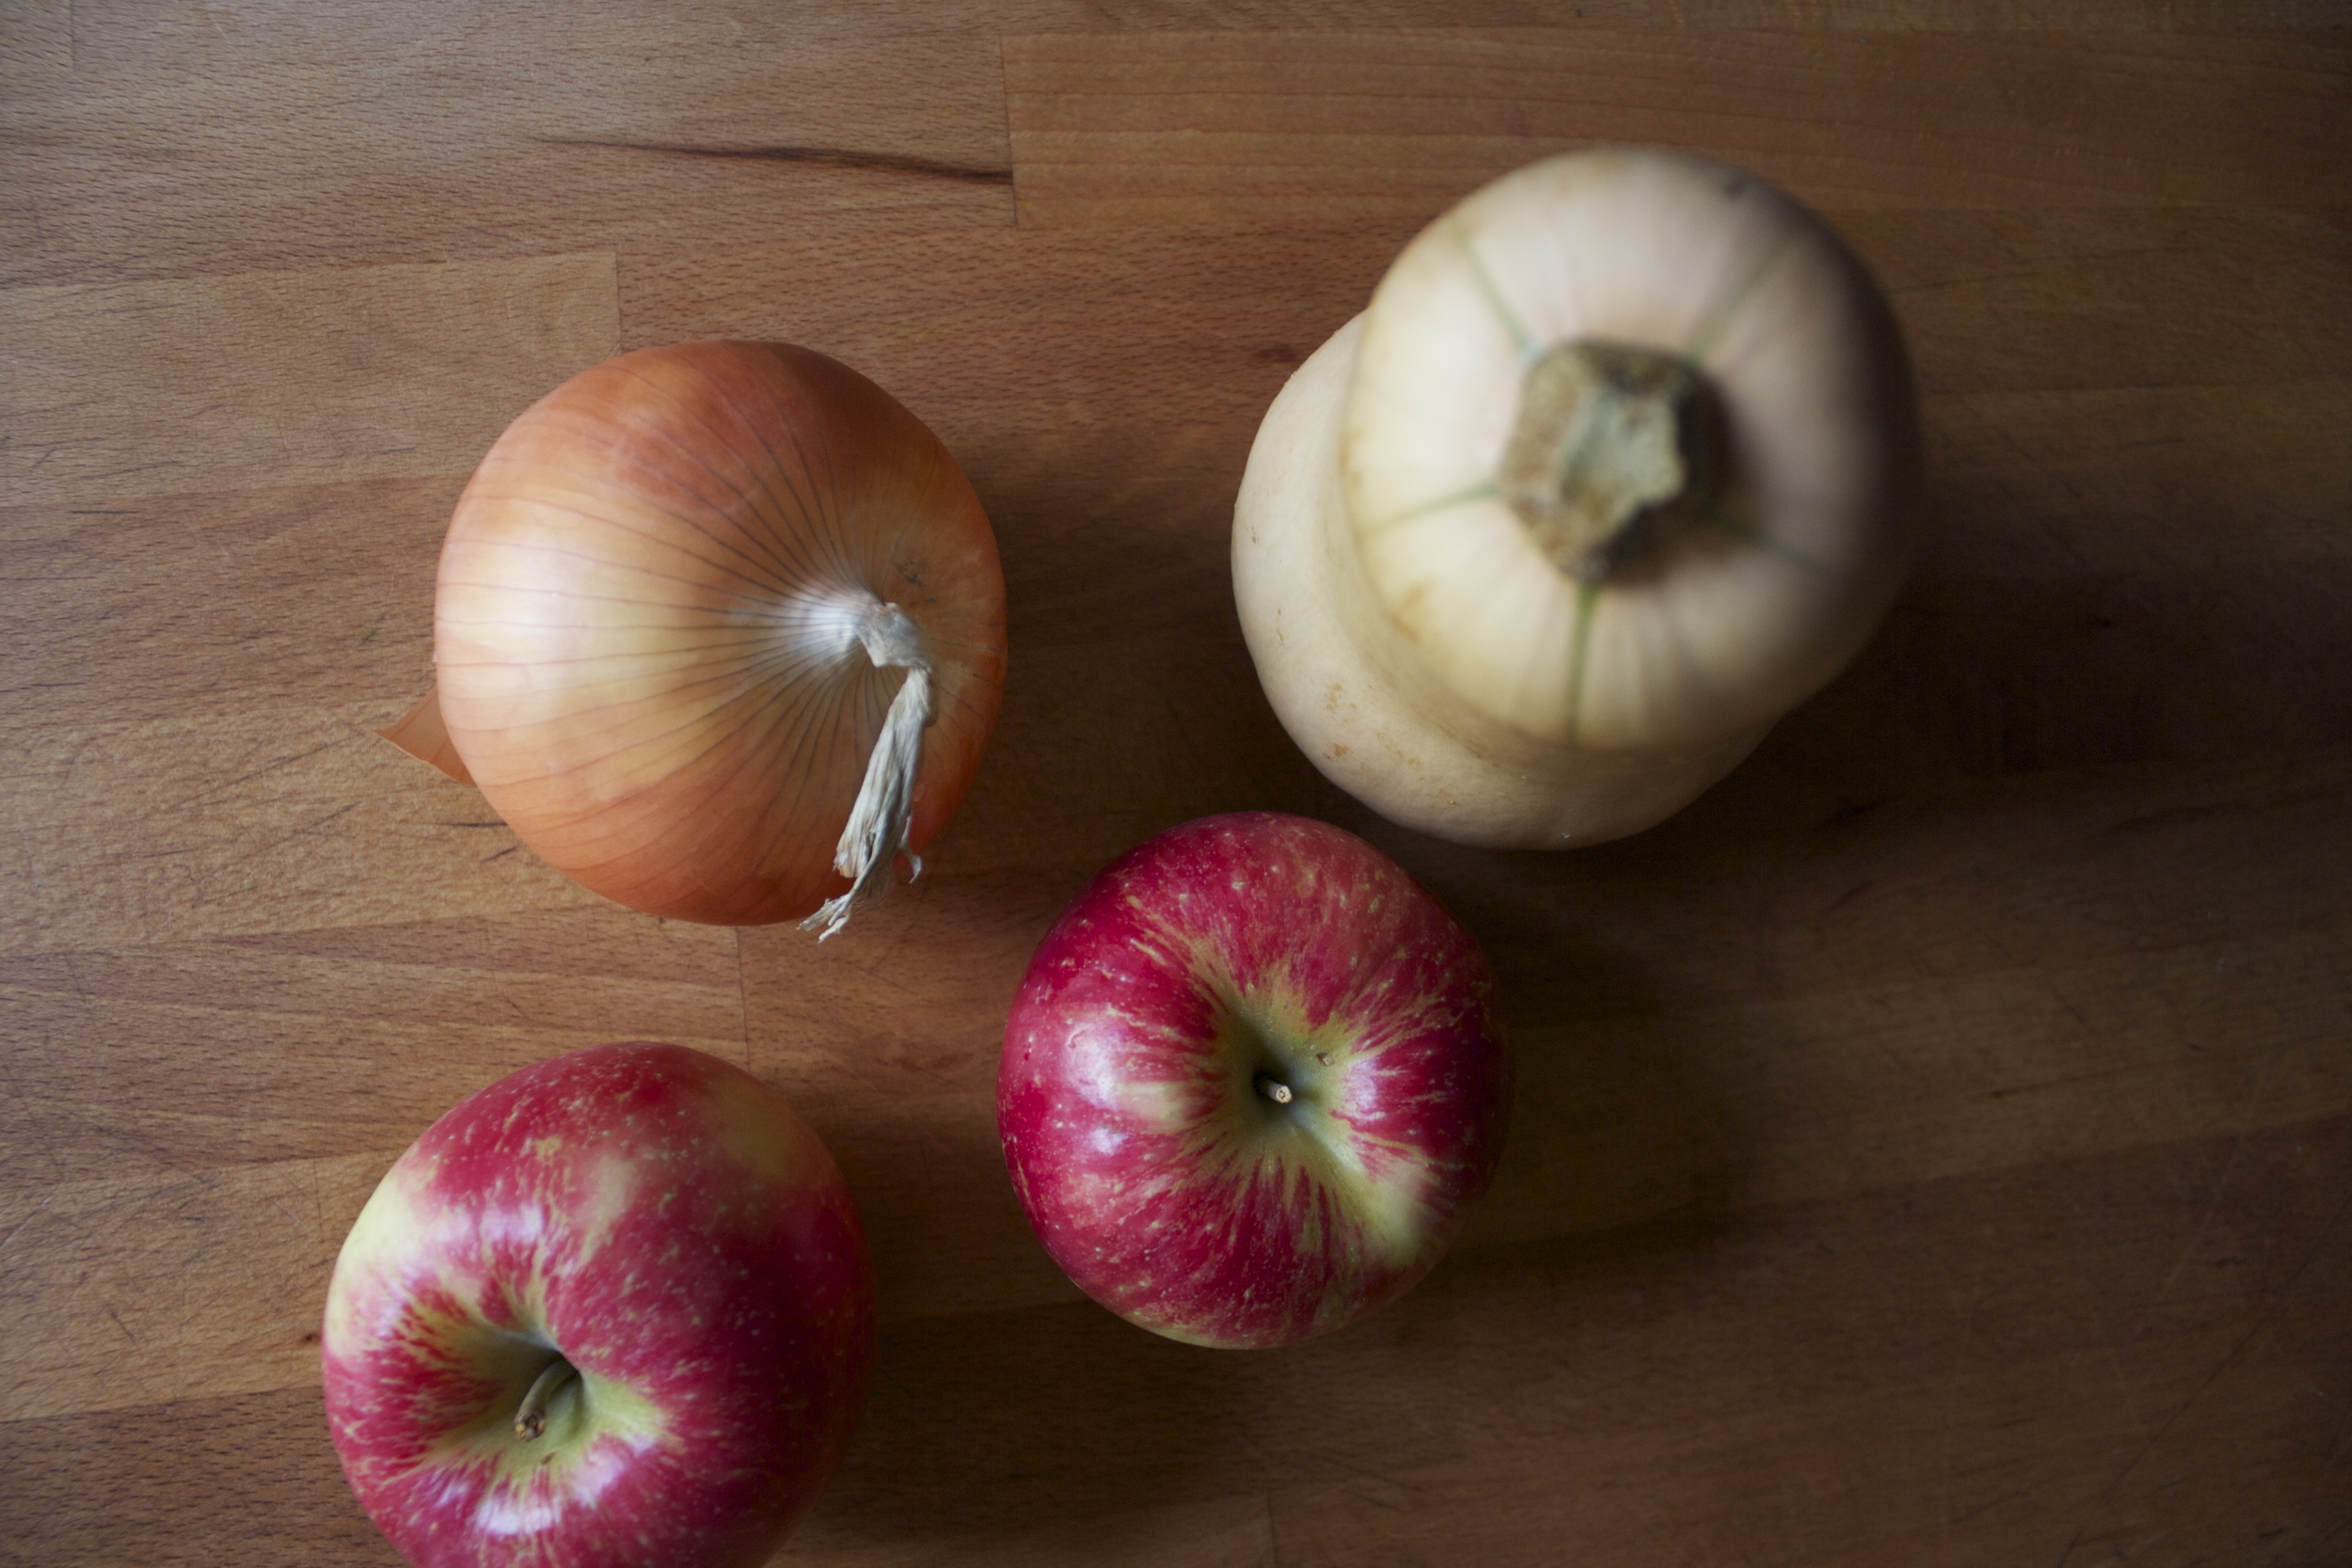
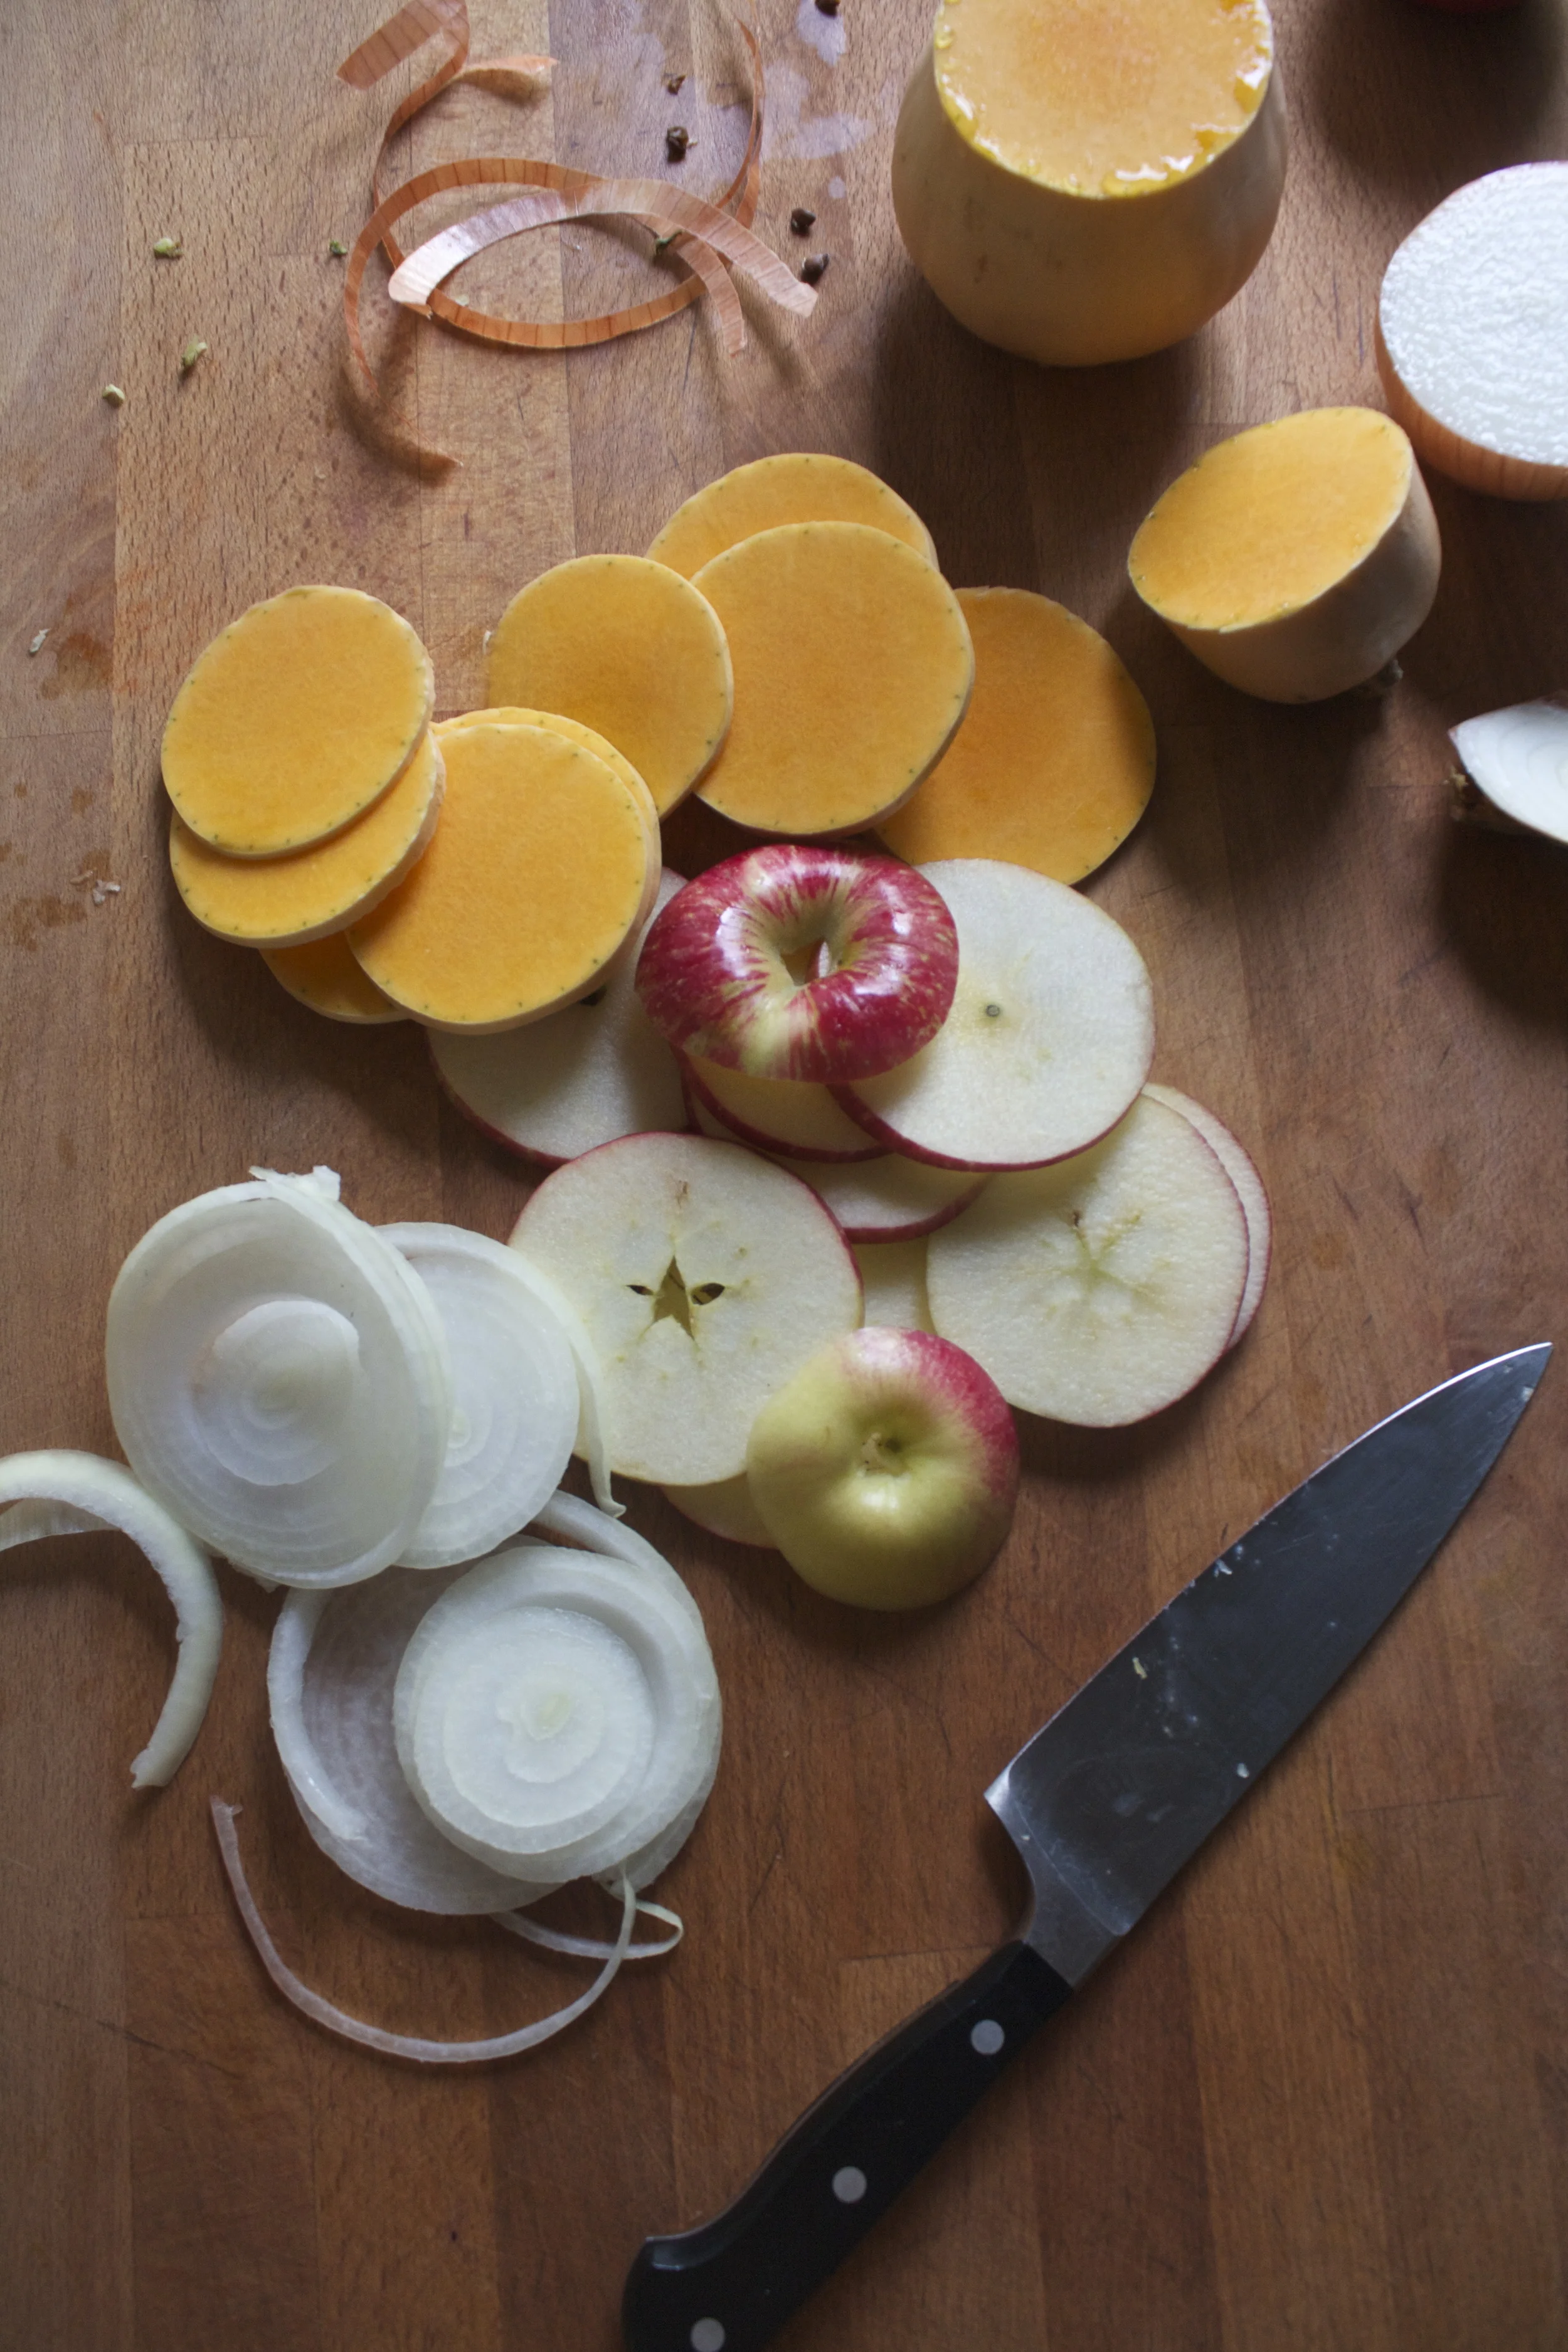
And slice them up into 1/4 inch-ish thick srounds.

Time to compile%u2026 A layer of overlapping squash. (Make sure to leave inch-ish boarder)%u00a0%u00a0Then a layer of the apples, and lastly the onion, which I think looks so pretty as ringlets, but you could keep in rounds if you wanted.%u00a0
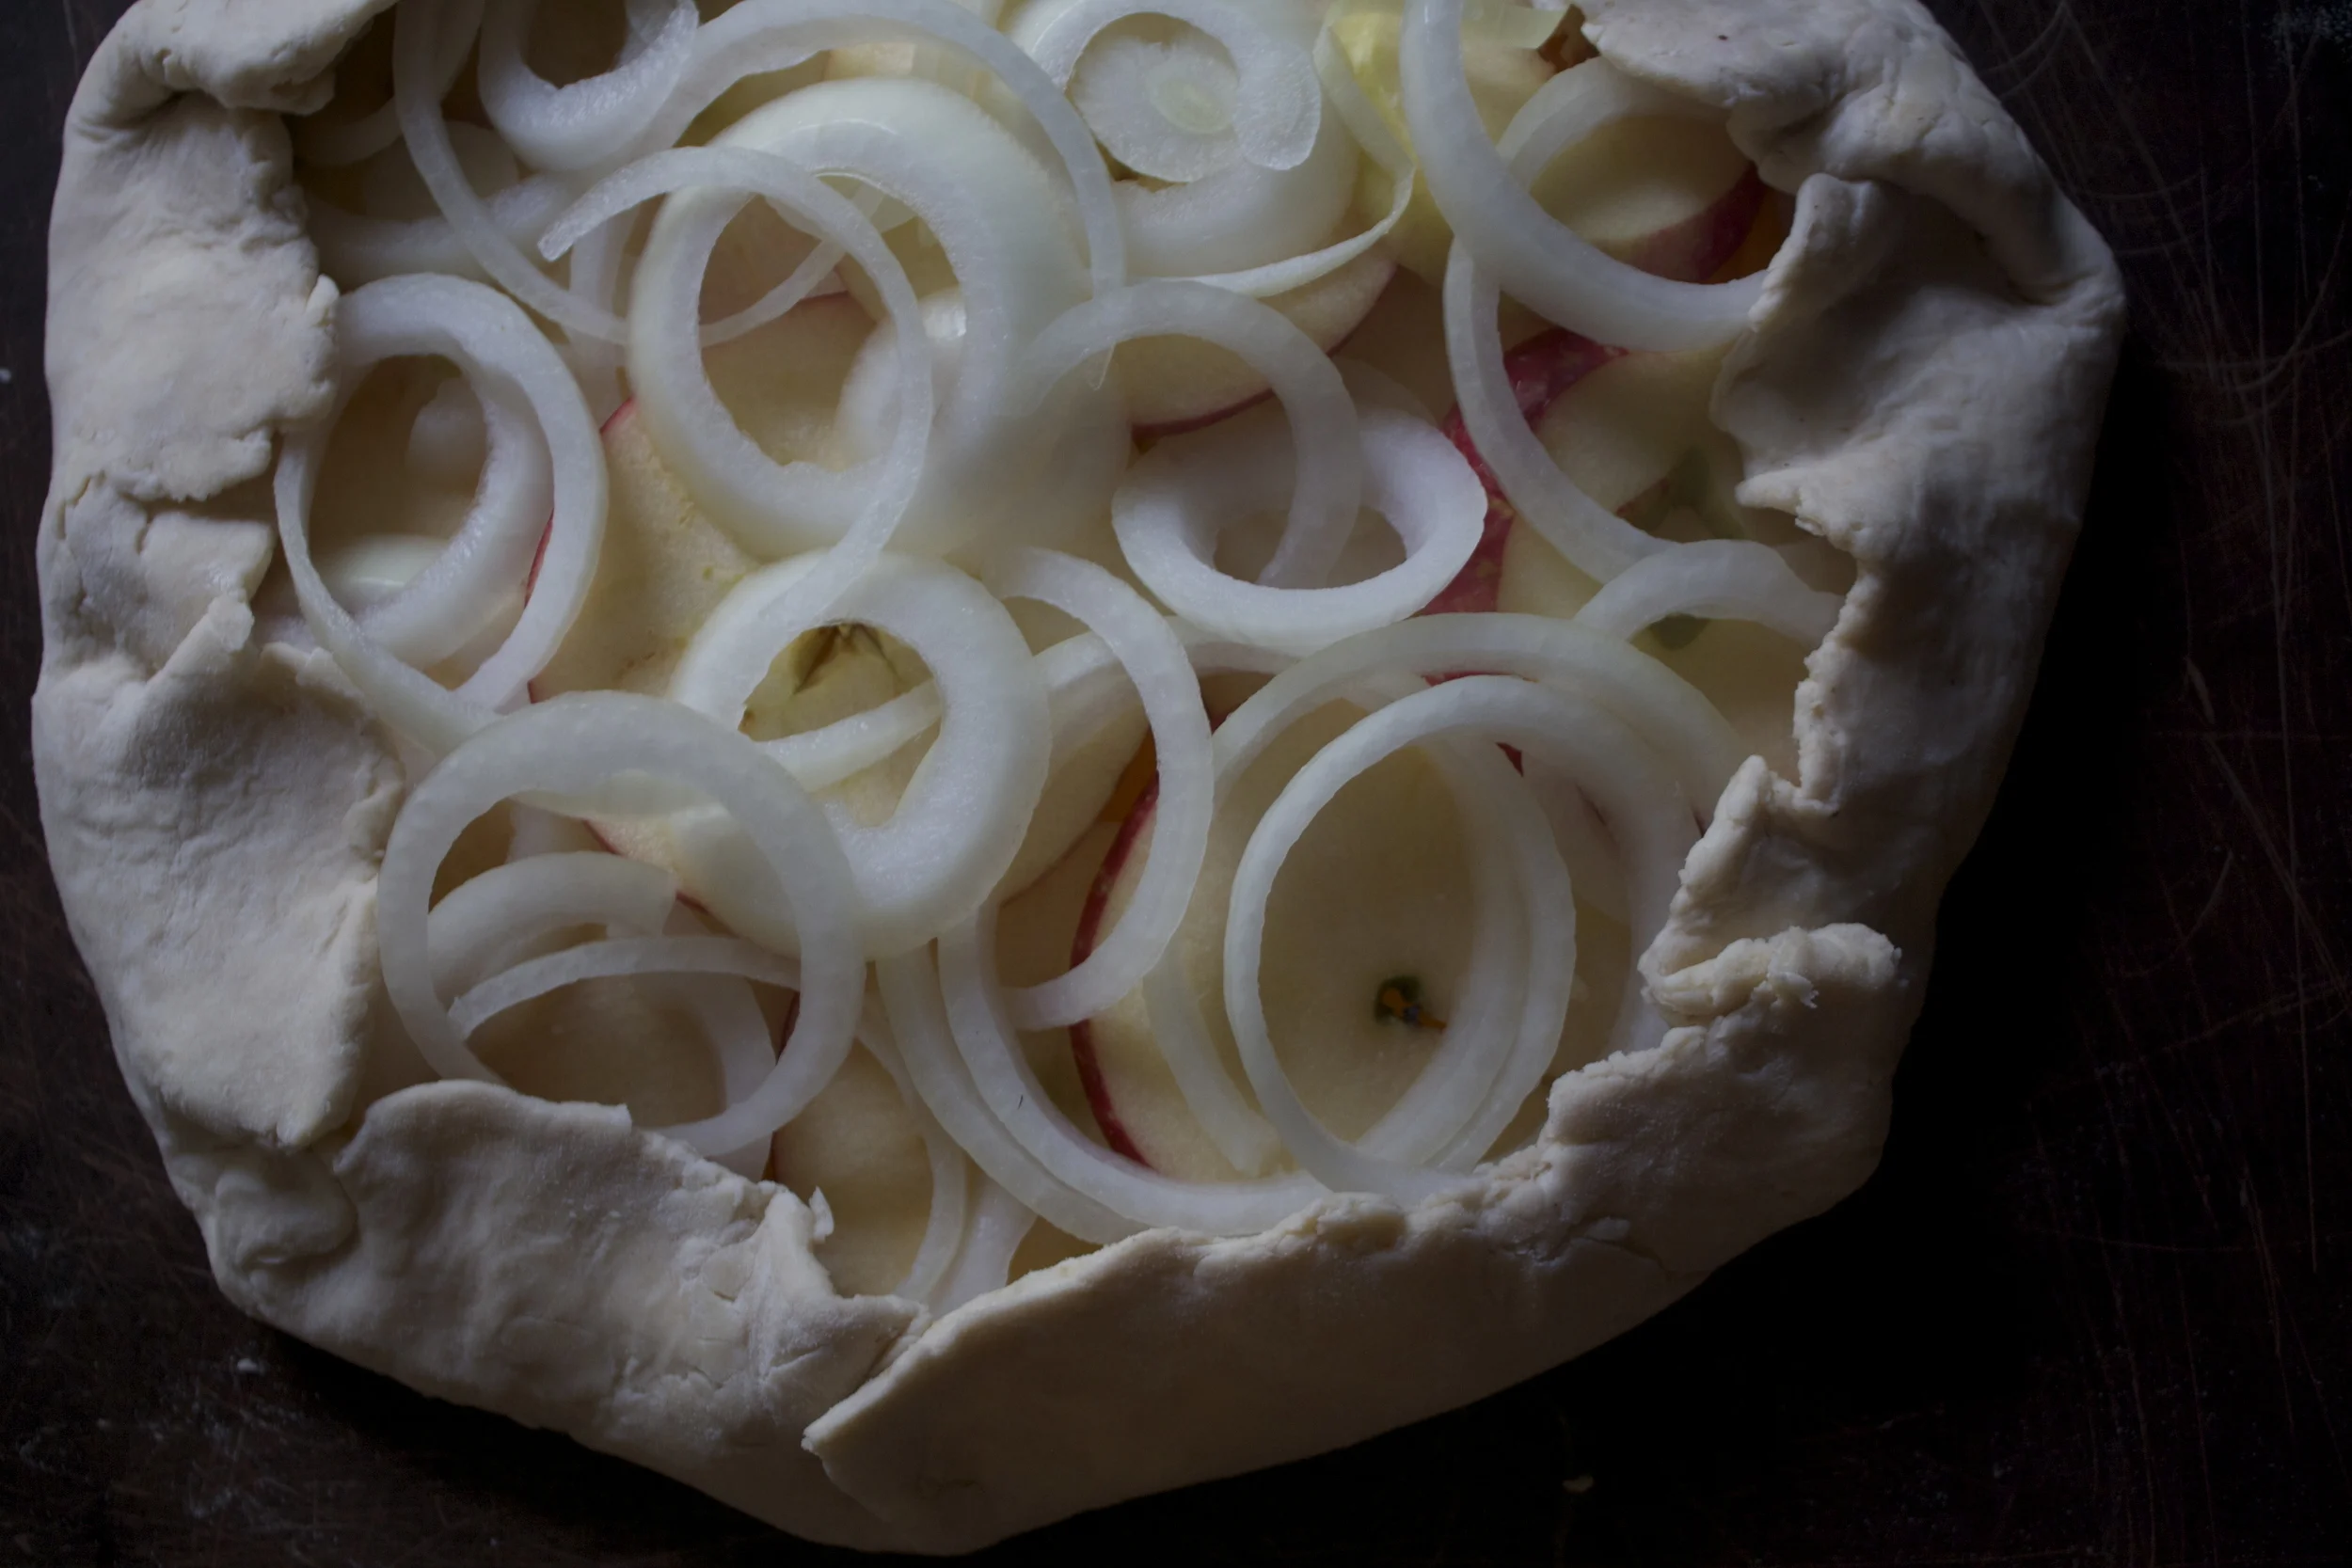
Fold the sides and pinching dough to keep it secure. Drizzle the top, and the crust, with a tiny bit of olive oil and sprinkle with a picnh of salt.

Now into the oven it goes!
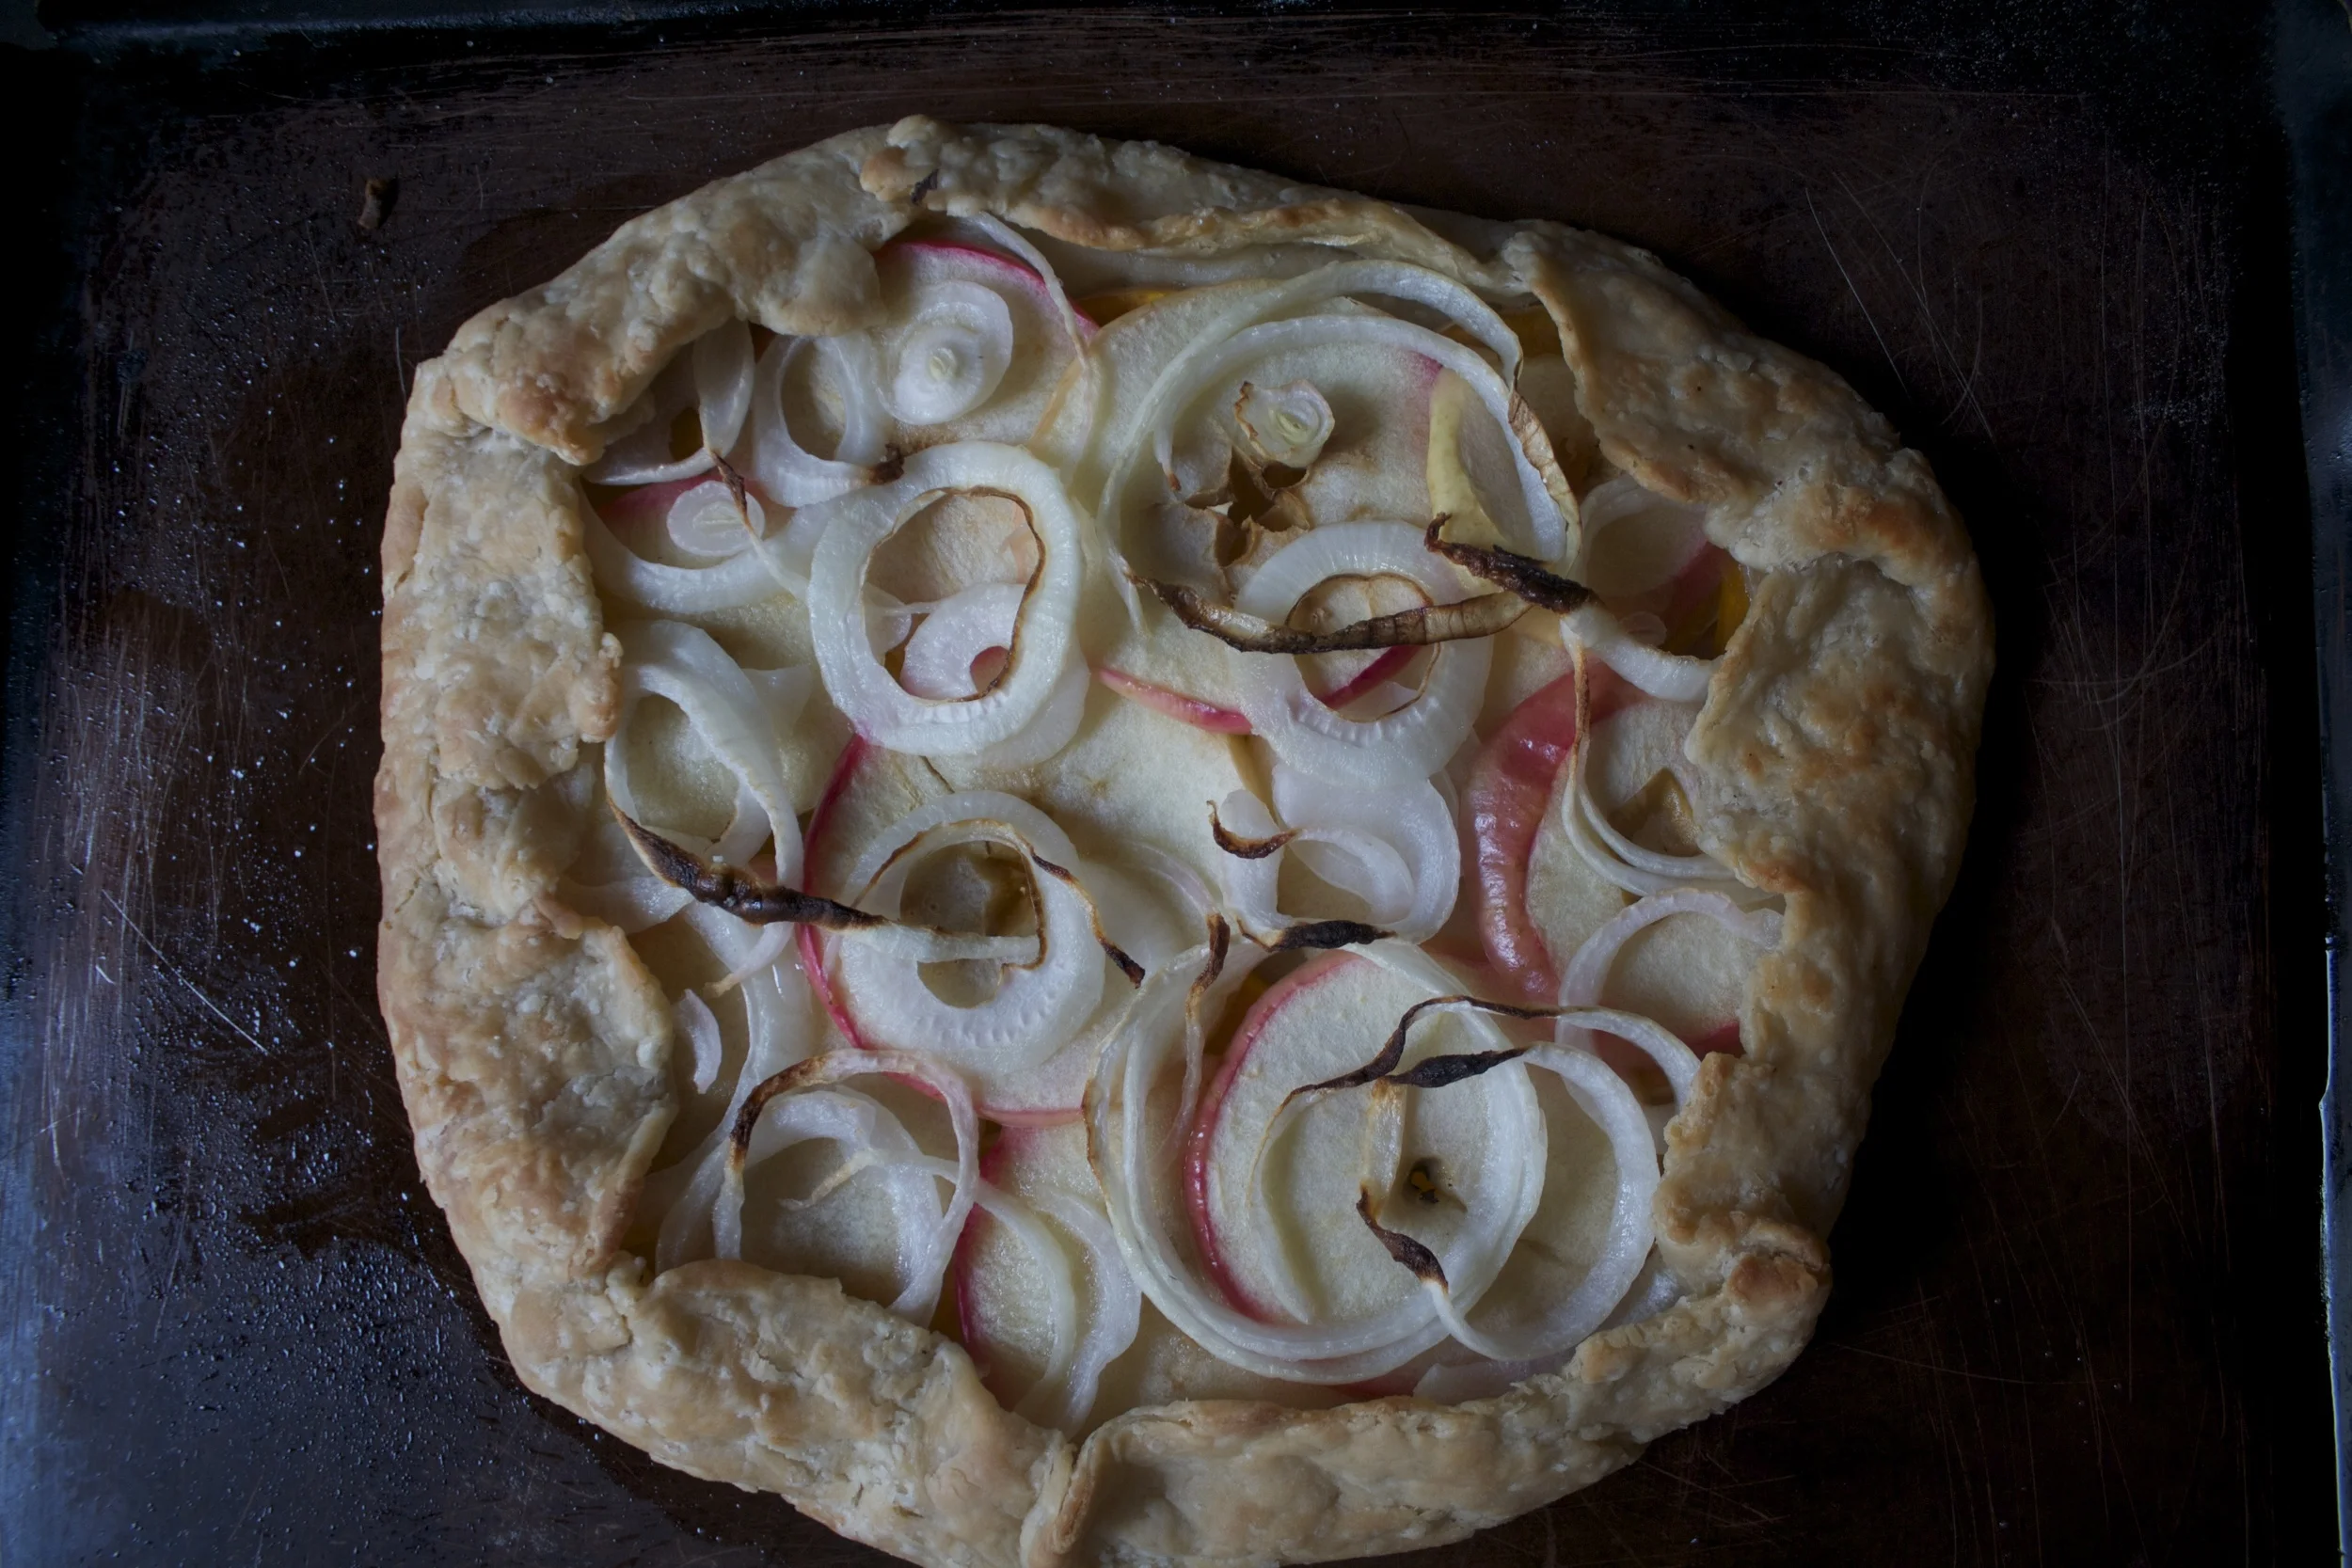
And %u00a0after about 45 minutes when the dust is perfectly golden and the stuff inside is nice and tender. Remove (turn off the oven) and let cool
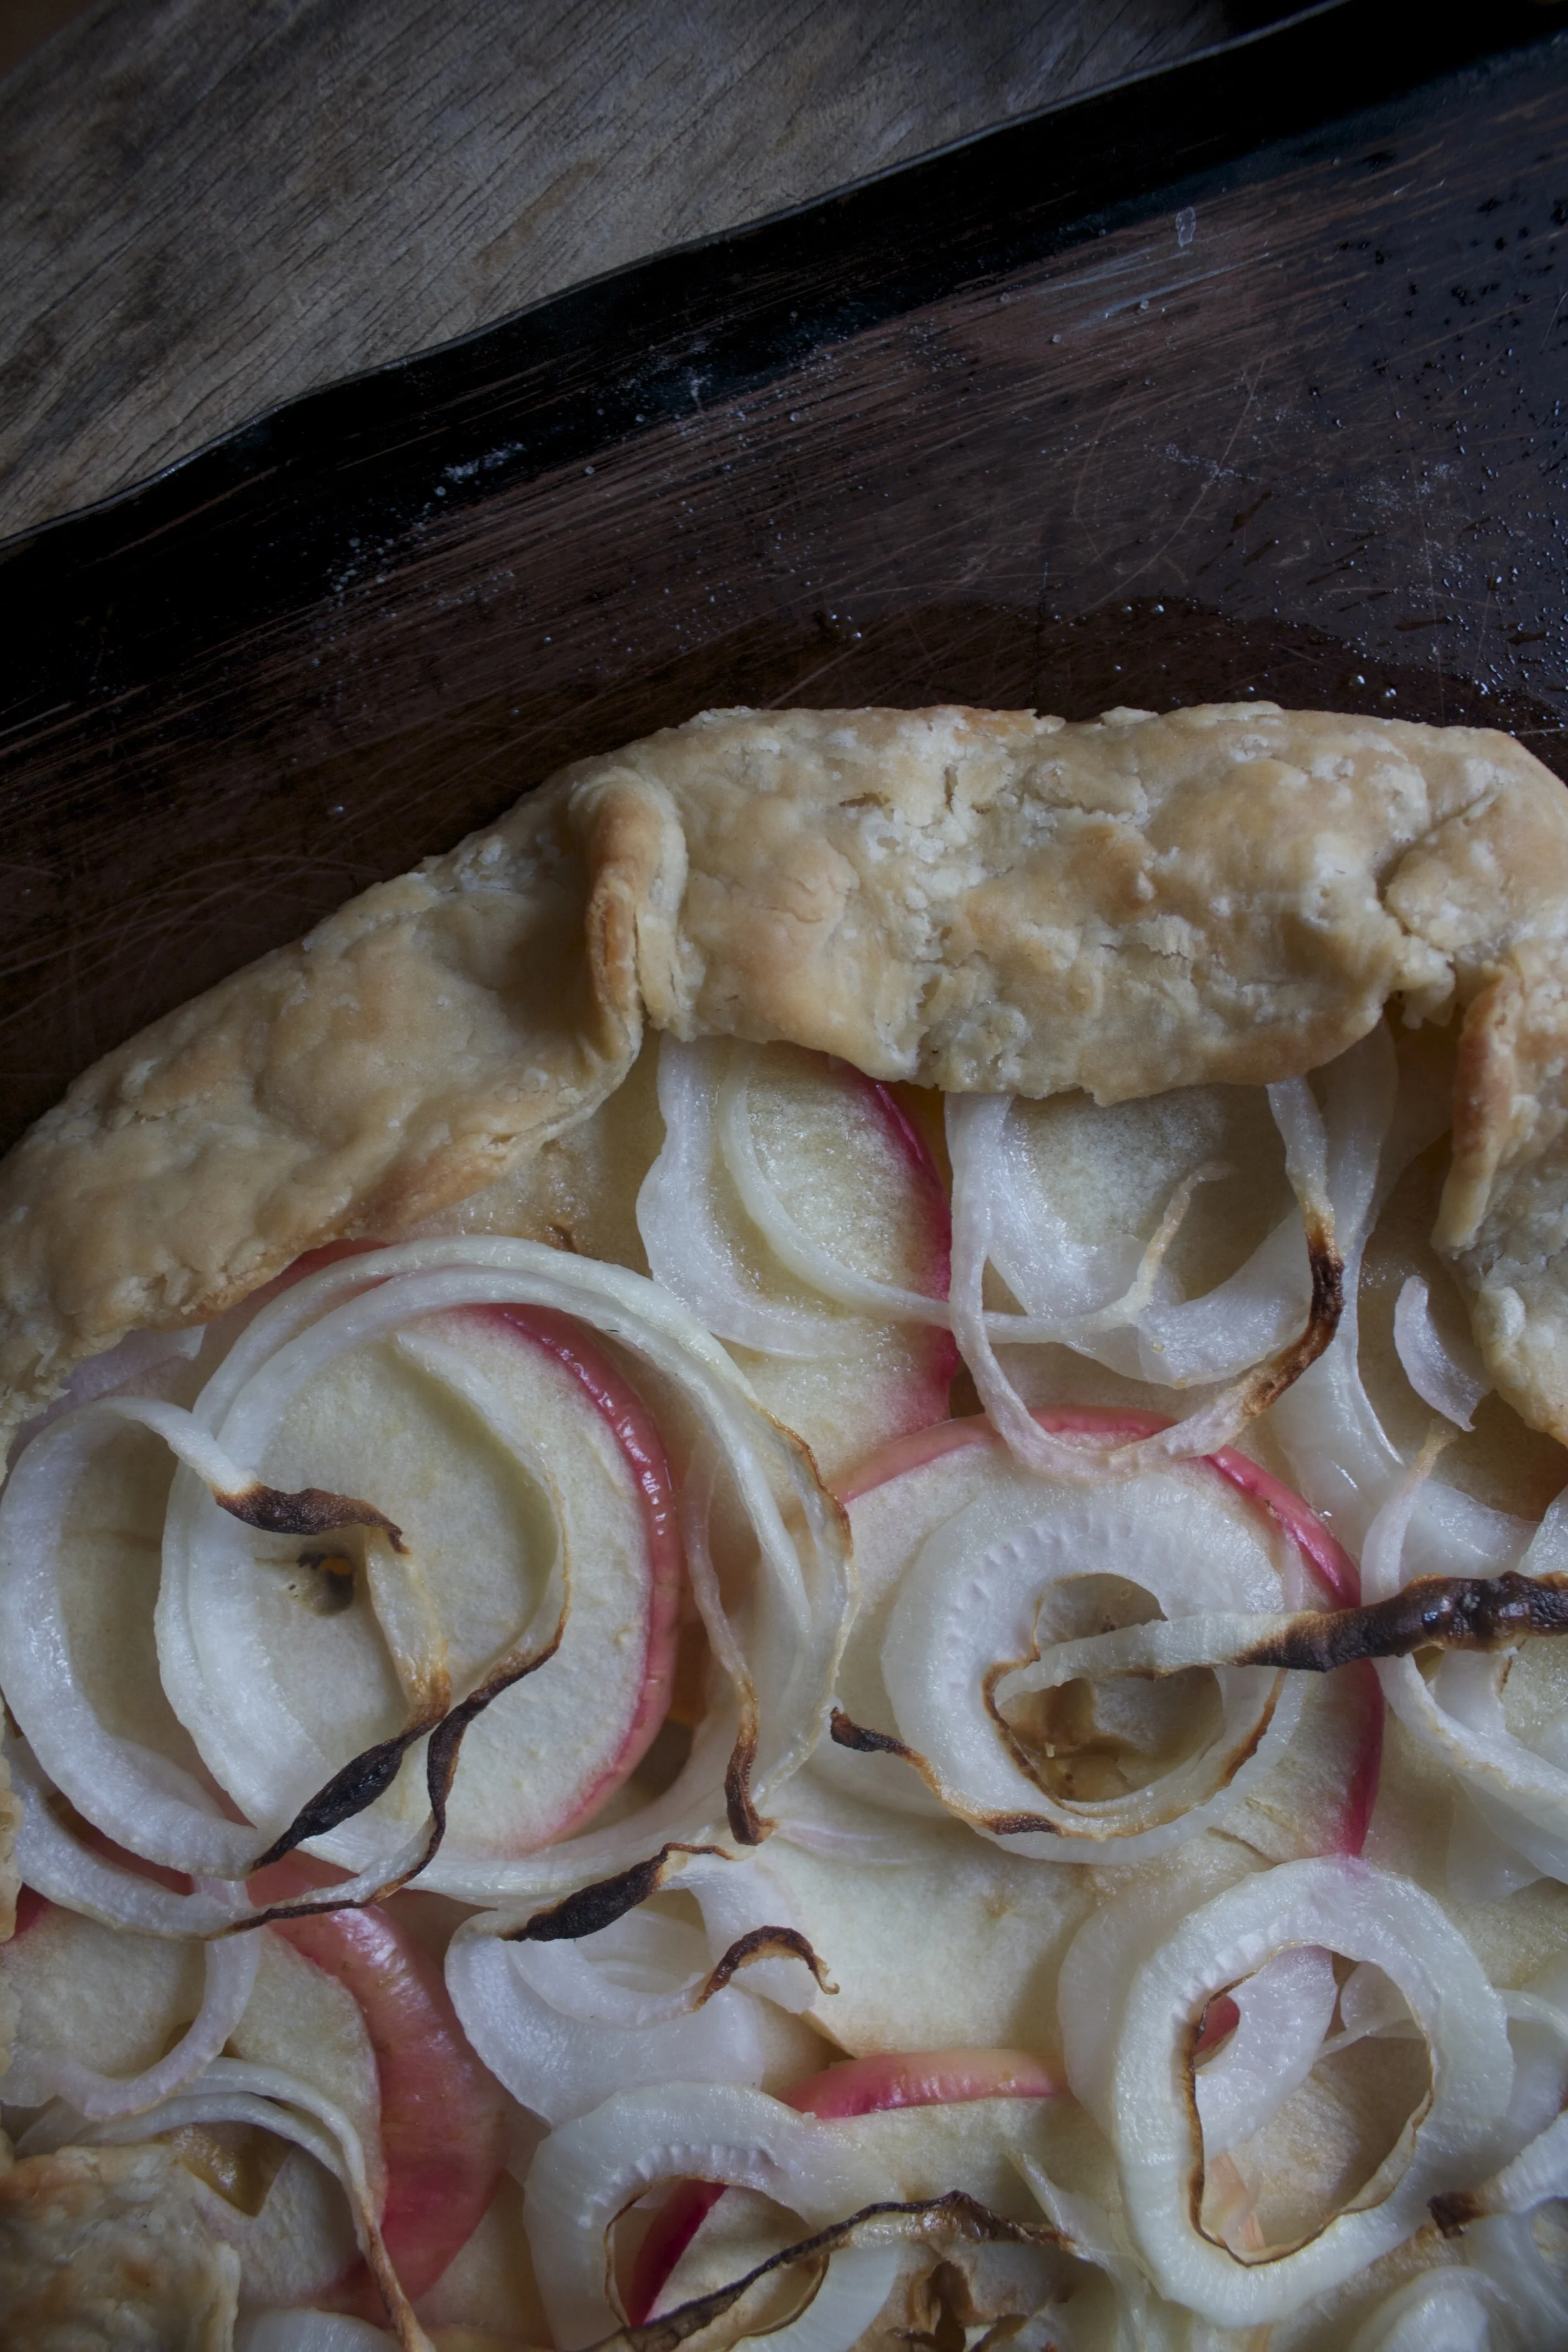
And there you have it.. A ode to fall in flavors and colors..

Have a great day%u2026 Eat lots of fall food!

-C

  • 1 single pie dough (recipe here)
  • 1 small butternut squash
  • 1 medium sweet onion
  • 1 large honey crisp apple
  • olive oil
  • salt

Preheat oven to 375.

Roll out chilled pie dough %u00a0on a lightly floured surface to about a 12-14 inch round (ish) and place on a large baking sheet and stick in the fridge.

Grab the squash and cut the neck off the bottom.%u00a0Save the bottom for later (maybe soup?)%u00a0and slice up the neck into 1/4 inch thick rounds. %u00a0Now take the onion and apple and slice those into 1/4 inch thick rounds too. (the seeds and the stem will just fall our.. but if they don’t, just poke them out with a knife)

Grab the dough from fridge and start to layer. First a layer of squash, leaving around an 1.5 inch boarder. You want the pieces to overlap,but don’t double layer. Next the apples go on top of the squash, again overlapping. Finally the onion. I liked the look of the individual ringlets%u2026 but you can do thick rounds if you want.%u00a0Fold over the sides of the dough, pinching it in wherever it needs to be pinch until all the stuff is snug. Drizzle with a tiny bit of olive oil %u00a0and rub a little oil on the outside crust as well. Sprinkle with a pinch of salt and stick into oven.

Bake for about 45 minutes or until crust is a nice light golden brown and the stuff inside is tender.

Remove, let cool for a few minutes and eat your heart out.

I know that it it spring, but I still have a winter farm share for another month and will be cooking and eating roots and squash until the summer share starts in early June. And I am good with that cause I love me some root veggies and butternut squash.%u00a0 But, yes, it is spring and my body isn’t craving the super hearty, rich foods that it was just a few short weeks ago (more like last week) When the temperatures first start to go up, I usually want my food to not feel as heavy or my spices to be quite at warming (I am still all over curries and hot hot hot sauces in the summer). It’s like I have said before, I tend to change up my spices with the seasons. %u00a0

So to give a lighter feel to a heartier squash, I busted out one of my favorite spices, the oh so lovely tarragon. It has a sweet, light, fruity and floral taste that pairs beautifully with the squash and onions. It give the dish a nice spring like flavor that will leave you feeling satisfied without wanting to move directly onto the couch and hide under a blanket. This is a eat and ride you bike kind of dish ( you don’t actually have to go for a bike ride if you don’t want to)

Note. If I had a grill, I would definitely cook this dish on it. As of now, I don’t own one so I am left to cook on the stove. But by all means, if you have a grill, do it up!

Half of a medium sized butternut squash (or use a whole one.. I had a half in the fridge that was waiting to be cooked) %u00a0and one whole onion (two if you use a whole squash) %u00a0Apple cider vinegar, olive oil, salt , pepper, garlic powder, and, last but not least, the oh so fragrant and tasty, tarragon.%u00a0

Chop the onion %u00a0and the squash into big chunks. If you don’t like the skin of the squash, you can peel it, but I like it so I don’t peel. Drizzle olive oil in a pan or a baking sheet, toss the veggies in and add the garlic powder, tarragon, salt and pepper and a few splashes of apple cider vinegar. Toss around. Stick into oven at 425 degrees for about 30-40 minutes.%u00a0When the squash is tender and the onions are cooked, remove from oven.%u00a0%u00a0

I am pretty sure you can figure out the rest.

Happy day!

-C

Tarragon Butternut and Onions

  • Half of Medium Butternut Squash
  • 1 Large Onion
  • 1 Tablespoon Dried Tarragon (use fresh if you have it.. 2 tablespoons)
  • 2 Tablespoons Apple Cider Vinegar
  • 1 Teaspoon Garlic Powder
  • Salt ans Pepper
  • Olive Oil

Chop squash and onions into similar size pieces. Toss in a skillet or on a oiled baking sheet and add the rest of the ingredients. Toss around and place into a 425 degree oven for about 30-40 minutes or until squash is fork tender. %u00a0

Remove from oven and eat.

%u00a0Make as a side dish or add to a salad. Eat as a light lunch, or a midnight snack%u2026 eat it however you want.

Happy Friday!

A simple post for the simplest of soups.%u00a0Minimal ingredients, no fuss, fast to make but can be left all day to simmer%u2026%u2026. And oh so very very good.%u00a0

This has been one of my go to soups this winter. Warming, hardy, comforting%u2026.every kind of soft cozy feeling that I need when I can’t leave my house because it’s so cold out that all I want to do is sit on the couch wrapped up in a blanket, with a book, and eat hot soup. (That’s the my plan for the weekend) But it’s also good for any type of weekend activities you might have%u2026 it’t kind of the perfect soup.

The%u00a0Stuff. A%u00a0medium sized butternut squash, seeded and diced (no need to peel, but go for it if you want) About a pound of broccoli, (fresh or frozen) and a few shallots. Salt, pepper and a few cups of water.%u00a0

Note.. I didn’t add any spices to this batch because I really love the flavor without anything. With that being said, I have made this same soup with sage, rosemary, turmeric, even curry. Almost any flavor works in this soup.%u00a0

%u00a0 %u00a0%u00a0The chopped squash and broccoli go into a big pot with about 2-3 cups of water. Add about a tablespoon of salt and pepper. Lid up the pot and place on medium low heat for about a half hour, or unitl squash and broccoli is%u00a0fork tender. Now blend together with either a emulsion stick blender or place in a blender for 3-5 minutes until completely smooth. Add enough water to keep things moving. Add more water if you want a thinner soup, less for a thicker soup. Season with more salt and pepper to taste. Once blended, place back in pot on simmer until ready to serve.%u00a0

When the soup is simmering, thinly slice the shallots and toss into a pan. Saut%u00e9 until soft and fragrant.%u00a0

%u00a0Finish off with a drizzle of balsamic vinegar and top with the %u00a0saut%u00e9ed shallots.

Soup and a spoon. So simple, so good.

Have a great weekend%u2026..Try and stay warm!

-C

Butternut Broccoli Soup

The Stuff%u00a0

  • 1 medium butternut squash%u00a0
  • 1 pound of broccoli (crown and stem and can use frozen)
  • 4 shallots
  • Balsamic Vinegar
  • salt and pepper

Split squash in half, remove seeds, and dice into chunks. %u00a0Place in big pot. Chop up broccoli and add to pot. (or just add frozen chopped broccoli) Add water until stuff is about half way summered. Place a lid on the pot and cook on medium low heat for about 30 minutes or %u00a0until squash and broccoli are fork tender. Blend together with either a stick blender or place in a blender. Add enough water to keep things moving. Add more water if you want a thinner soup, less for a thicker soup. Add more salt and pepper to taste. Once blended, place back in pot on simmer until ready to serve.%u00a0

When the soup is on simmer, thinly slice the shallots and place in a pan to sautee until soft and fragrant. %u00a0

To serve, ladle soup into bowl, drizzle with balsamic vinegar, and top with saut%u00e9ed shallot.

Eat with a spoon

Lets kick the weekend off right, with a nice warm and hardy salad. Not a frilly little salad, but a salad that fills you up and leaves you feeling warm and cozy. %u00a0 A salad with a lot of squash! So here’s the thing, I eat a lot of winter squash, maybe 4 plus a week. Because I eat so many, I store a good amount in a cold storage area outside of the little warm living space we call home. Last week we had a drastic temperature change and %u00a0a good few of the my butternut and spaghetti squash froze.. then started to de-thaw. Not good. That was the second bad food experience of the day%u2026.. Earlier that day I had bought about 2 dozen super ripe bananas that I had been planing on freezing and what not. There were four bunches and each bunch was wrapped in plastic and were in a bag that I left near the back door. The thought crossed my mind, but I hastily brushed it away. Washer won’t eat those%u2026.. Well guess what? The shit ate half of my freaking bananas%u2026plastic and all. Needless to say, I was kind of pissed already so finding my squash on the way out really set me off. I was not about to let more food go to waste.(or be eaten by the dog) I went into rescue mode..Chop chop and dice%u2026boil, roast and steam%u2026and eat eat eat%u2026. and eat. I have been eating butternut for breakfast, lunch and dinner for the past week and that’s ok with me cause man it does taste oh so tasty. But for some people in my life, eating mashed squash out of a jar all day long does not hold the same appeal so I have been sneaking it in where ere I can. %u00a0

So some of that diced squash tuned into this lovely warm salad. Even the mister liked it and he is not a fan of warm salads(he says he is not, but I think he actually is, as long as I don’t call them “salads”) Any who%u2026This salad hits all the marks%u2026. Fantastically filling, super delicious, fast and healthy. %u00a0Check, check, and check! I am so good.%u00a0

Easy peasy%u2026.

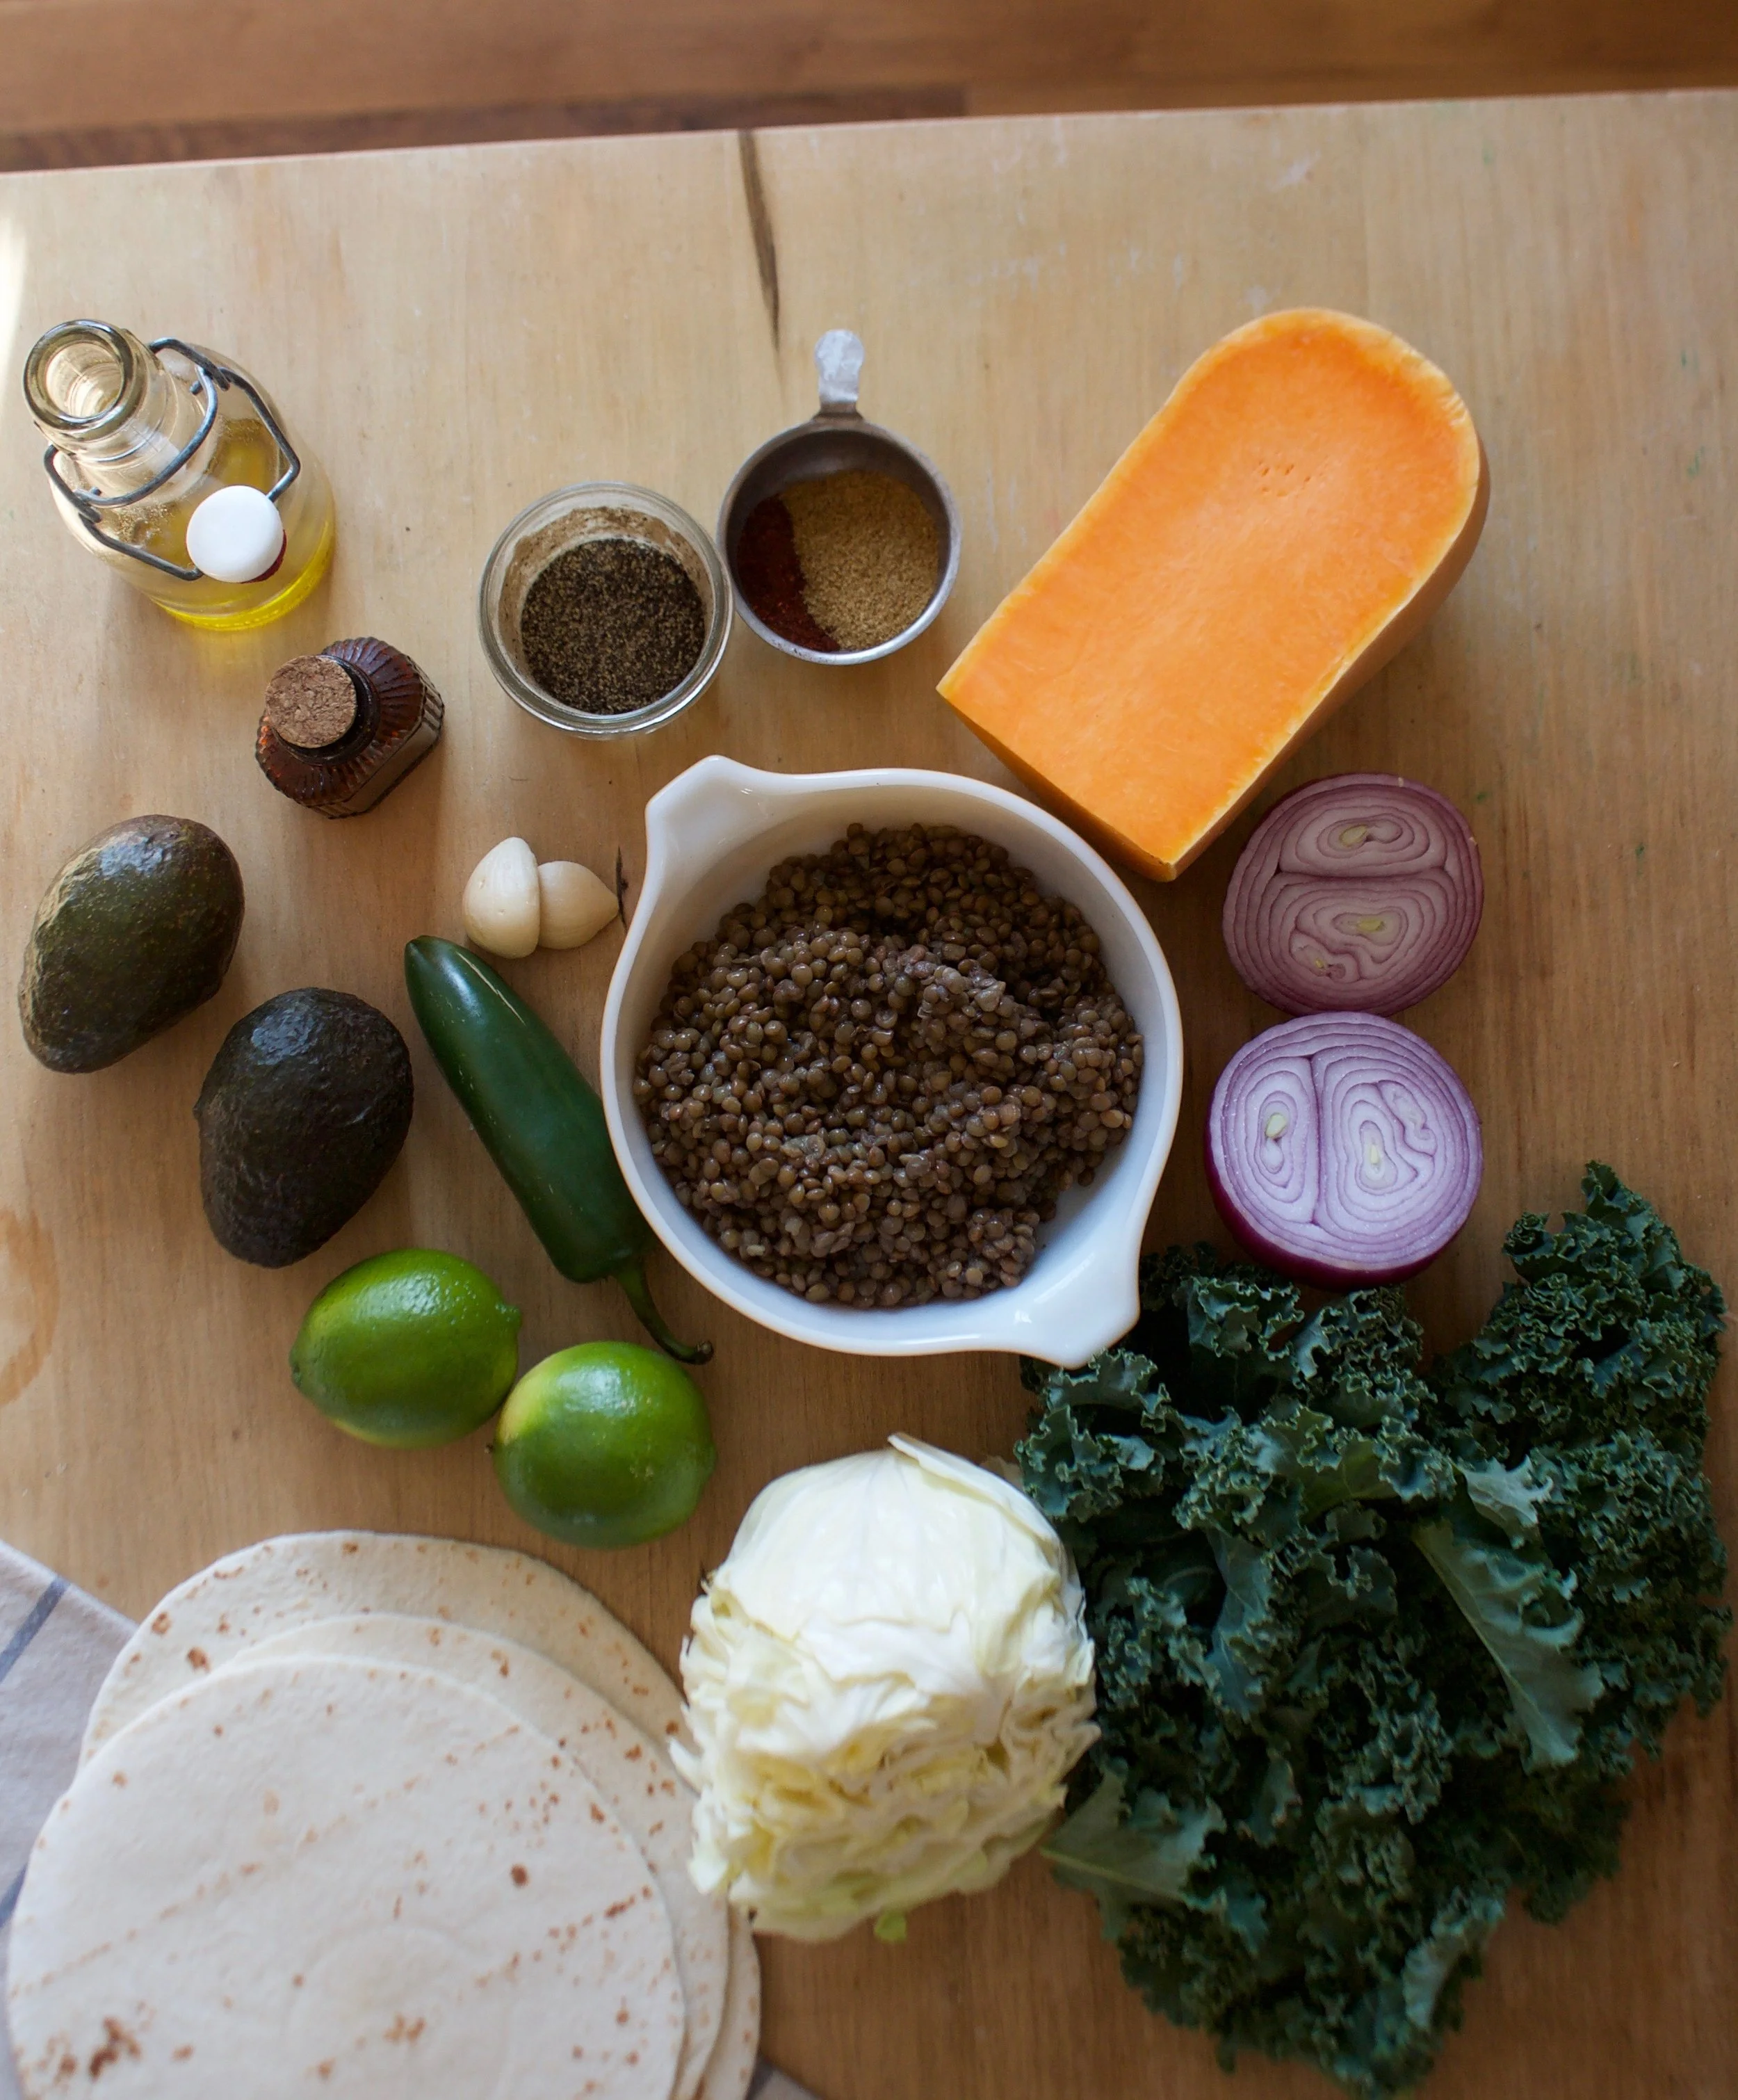
Diced butternut squash, half a vilalia onion, %u00a0prepared lentils and a bunch of kale%u2026 Nothin else.(salt and pepper, but they don’t count)

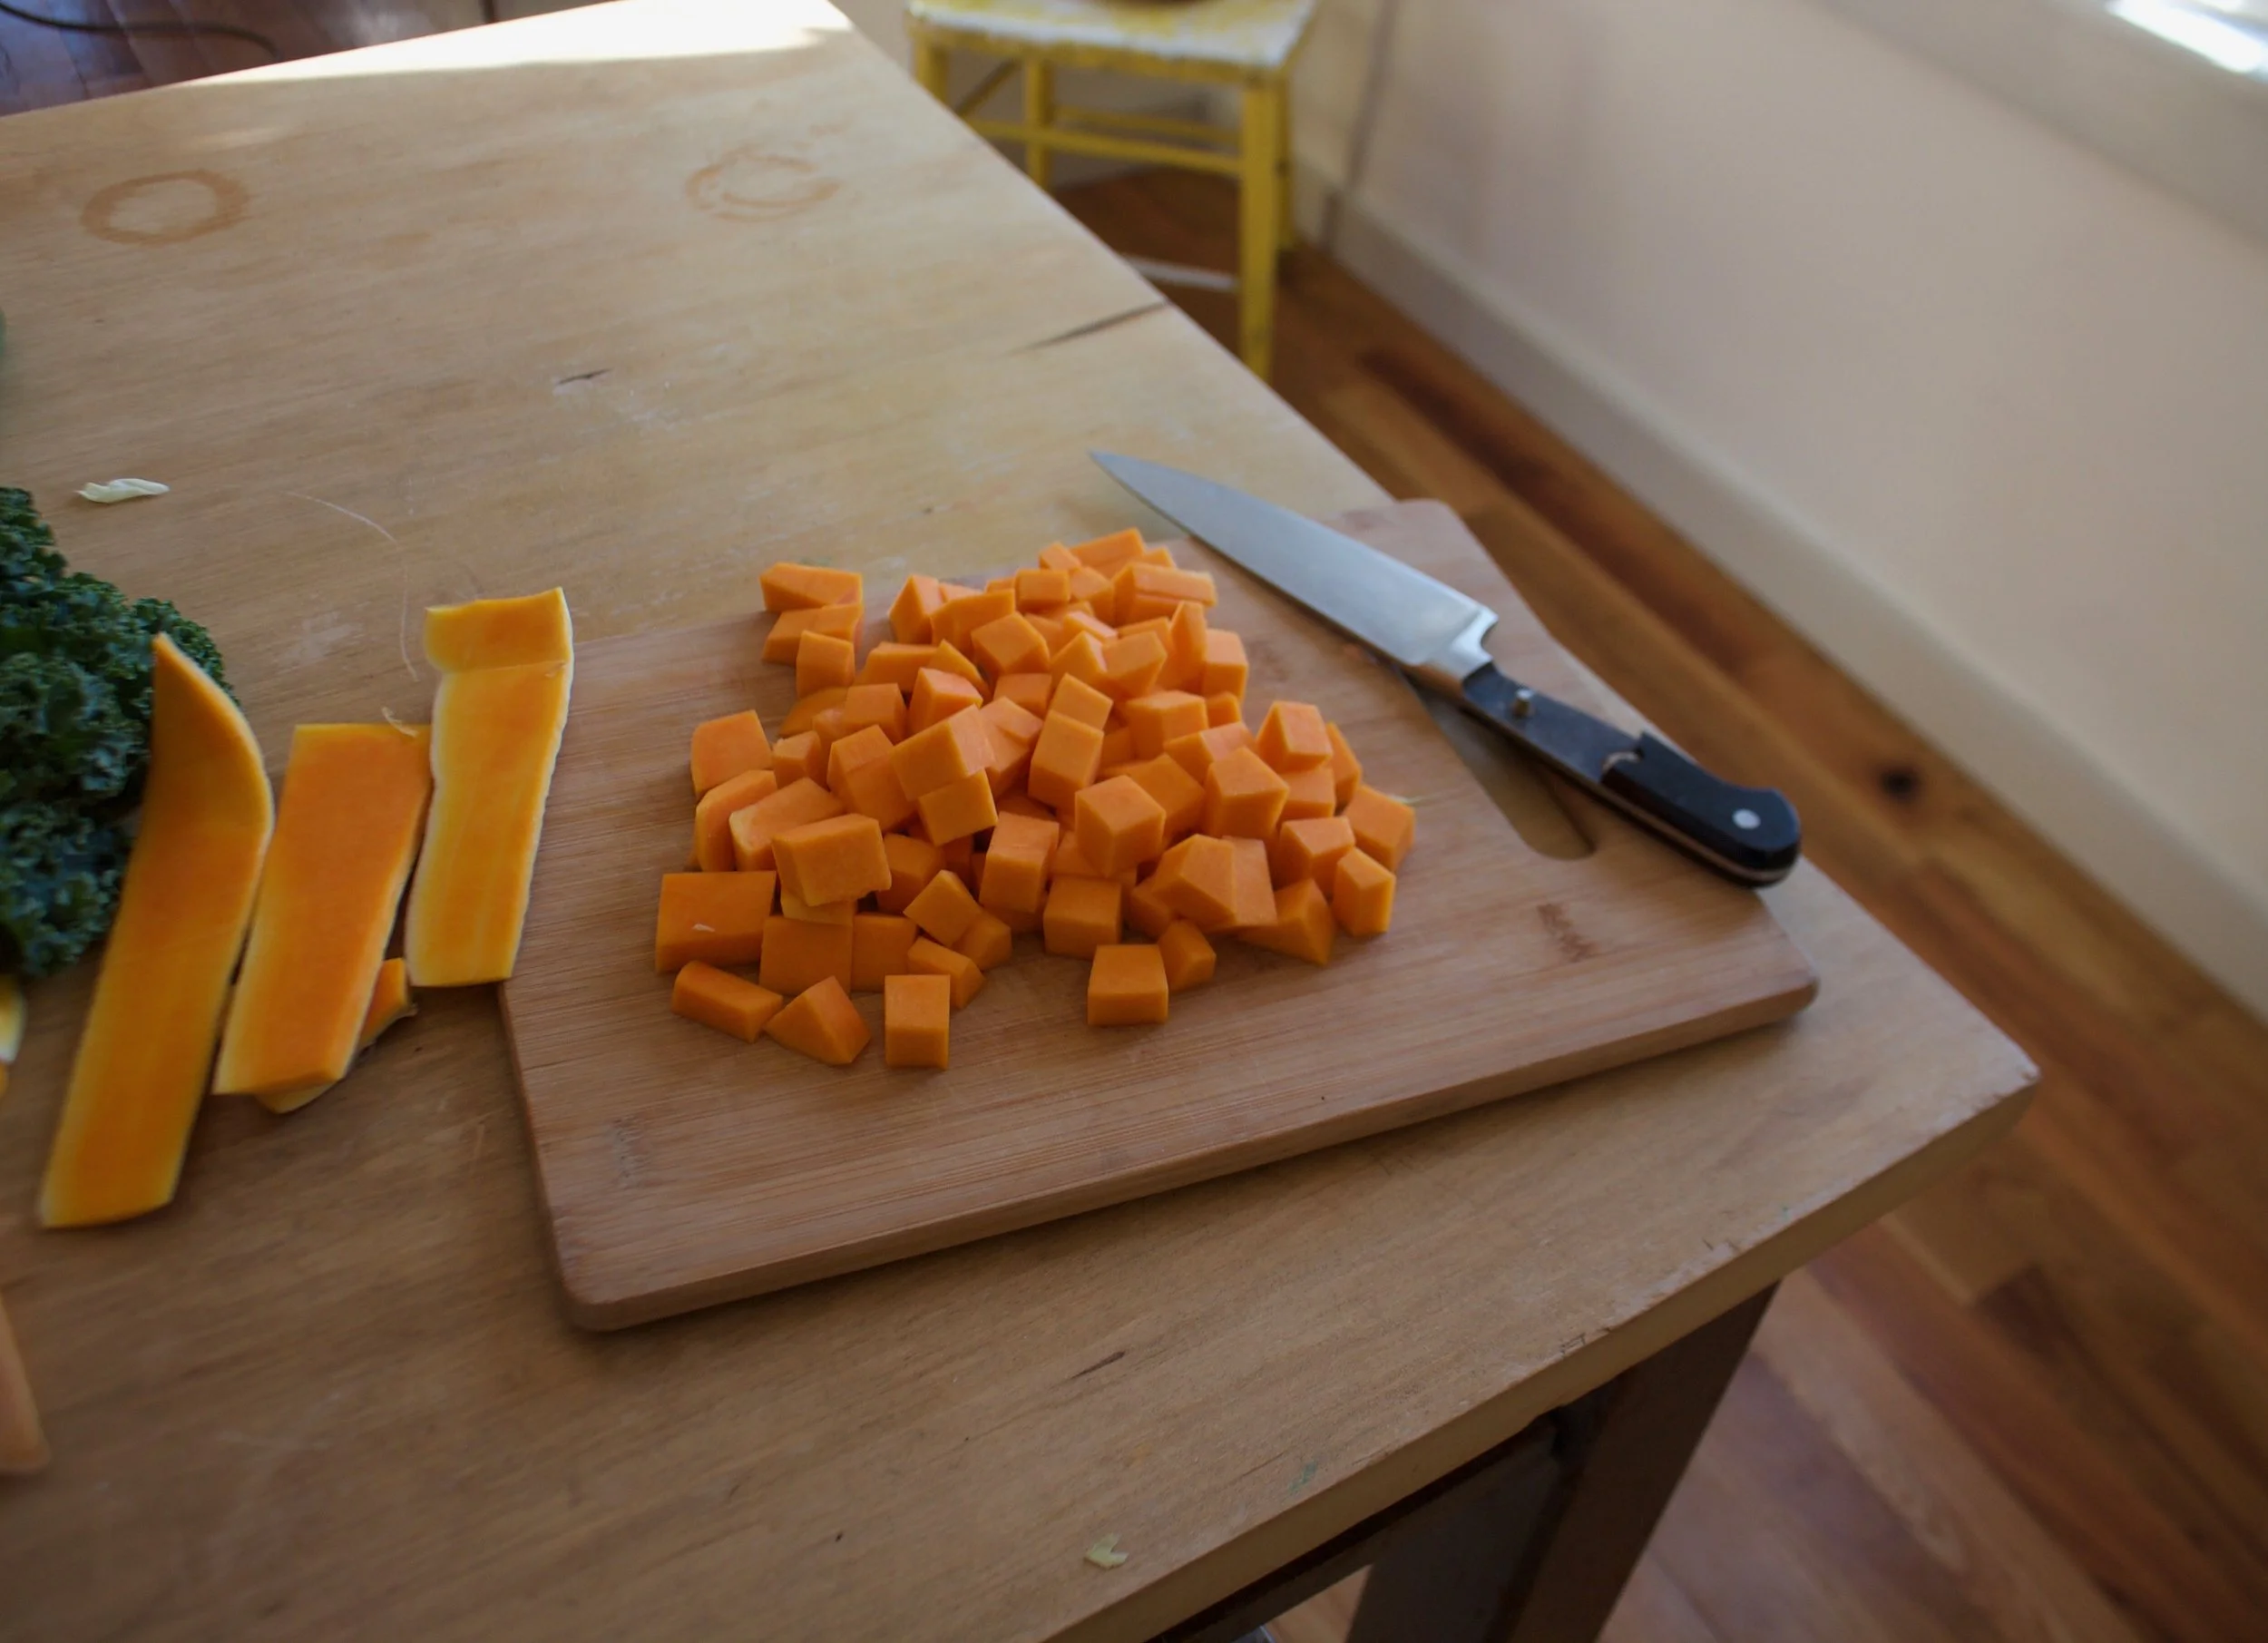
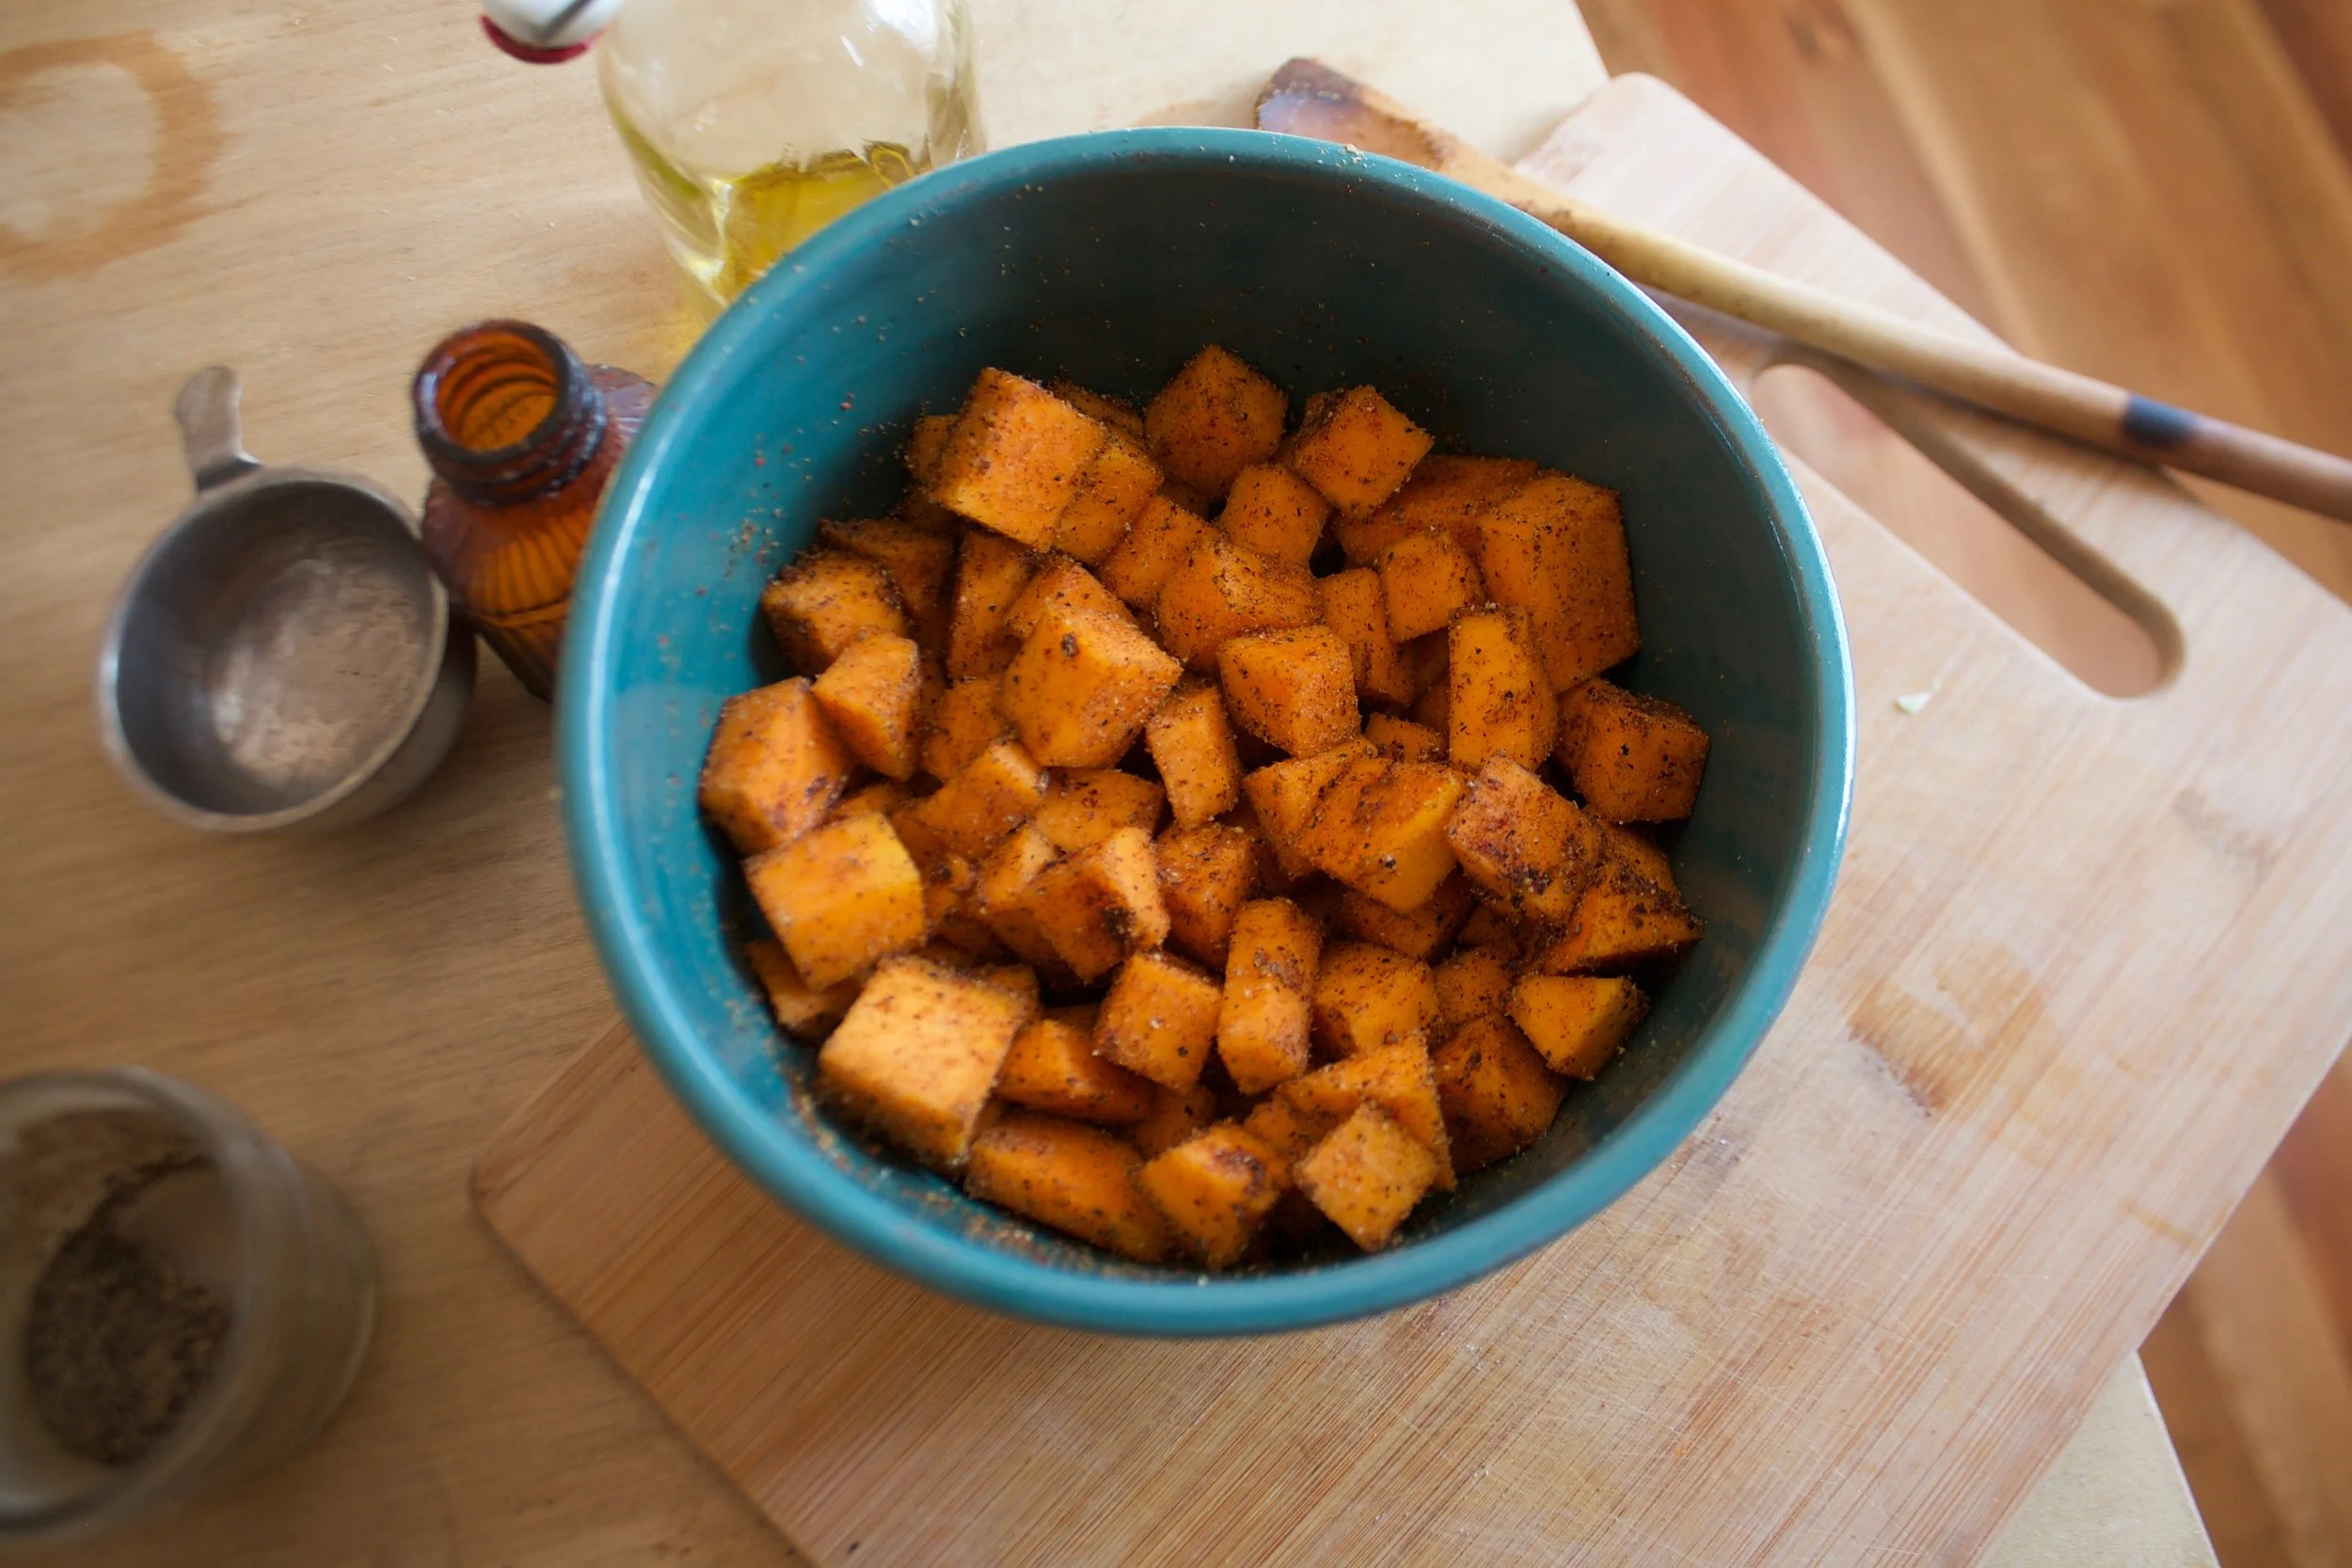
Diced butternut and a mediumly sliced onion..(mediumly is a new cooking term) Spritz a bit of oil in a pan and toss the squash and onion in there and sprinkle with salt and pepper. Shove into the hot oven and roast until squash and onion are tender and tasty.

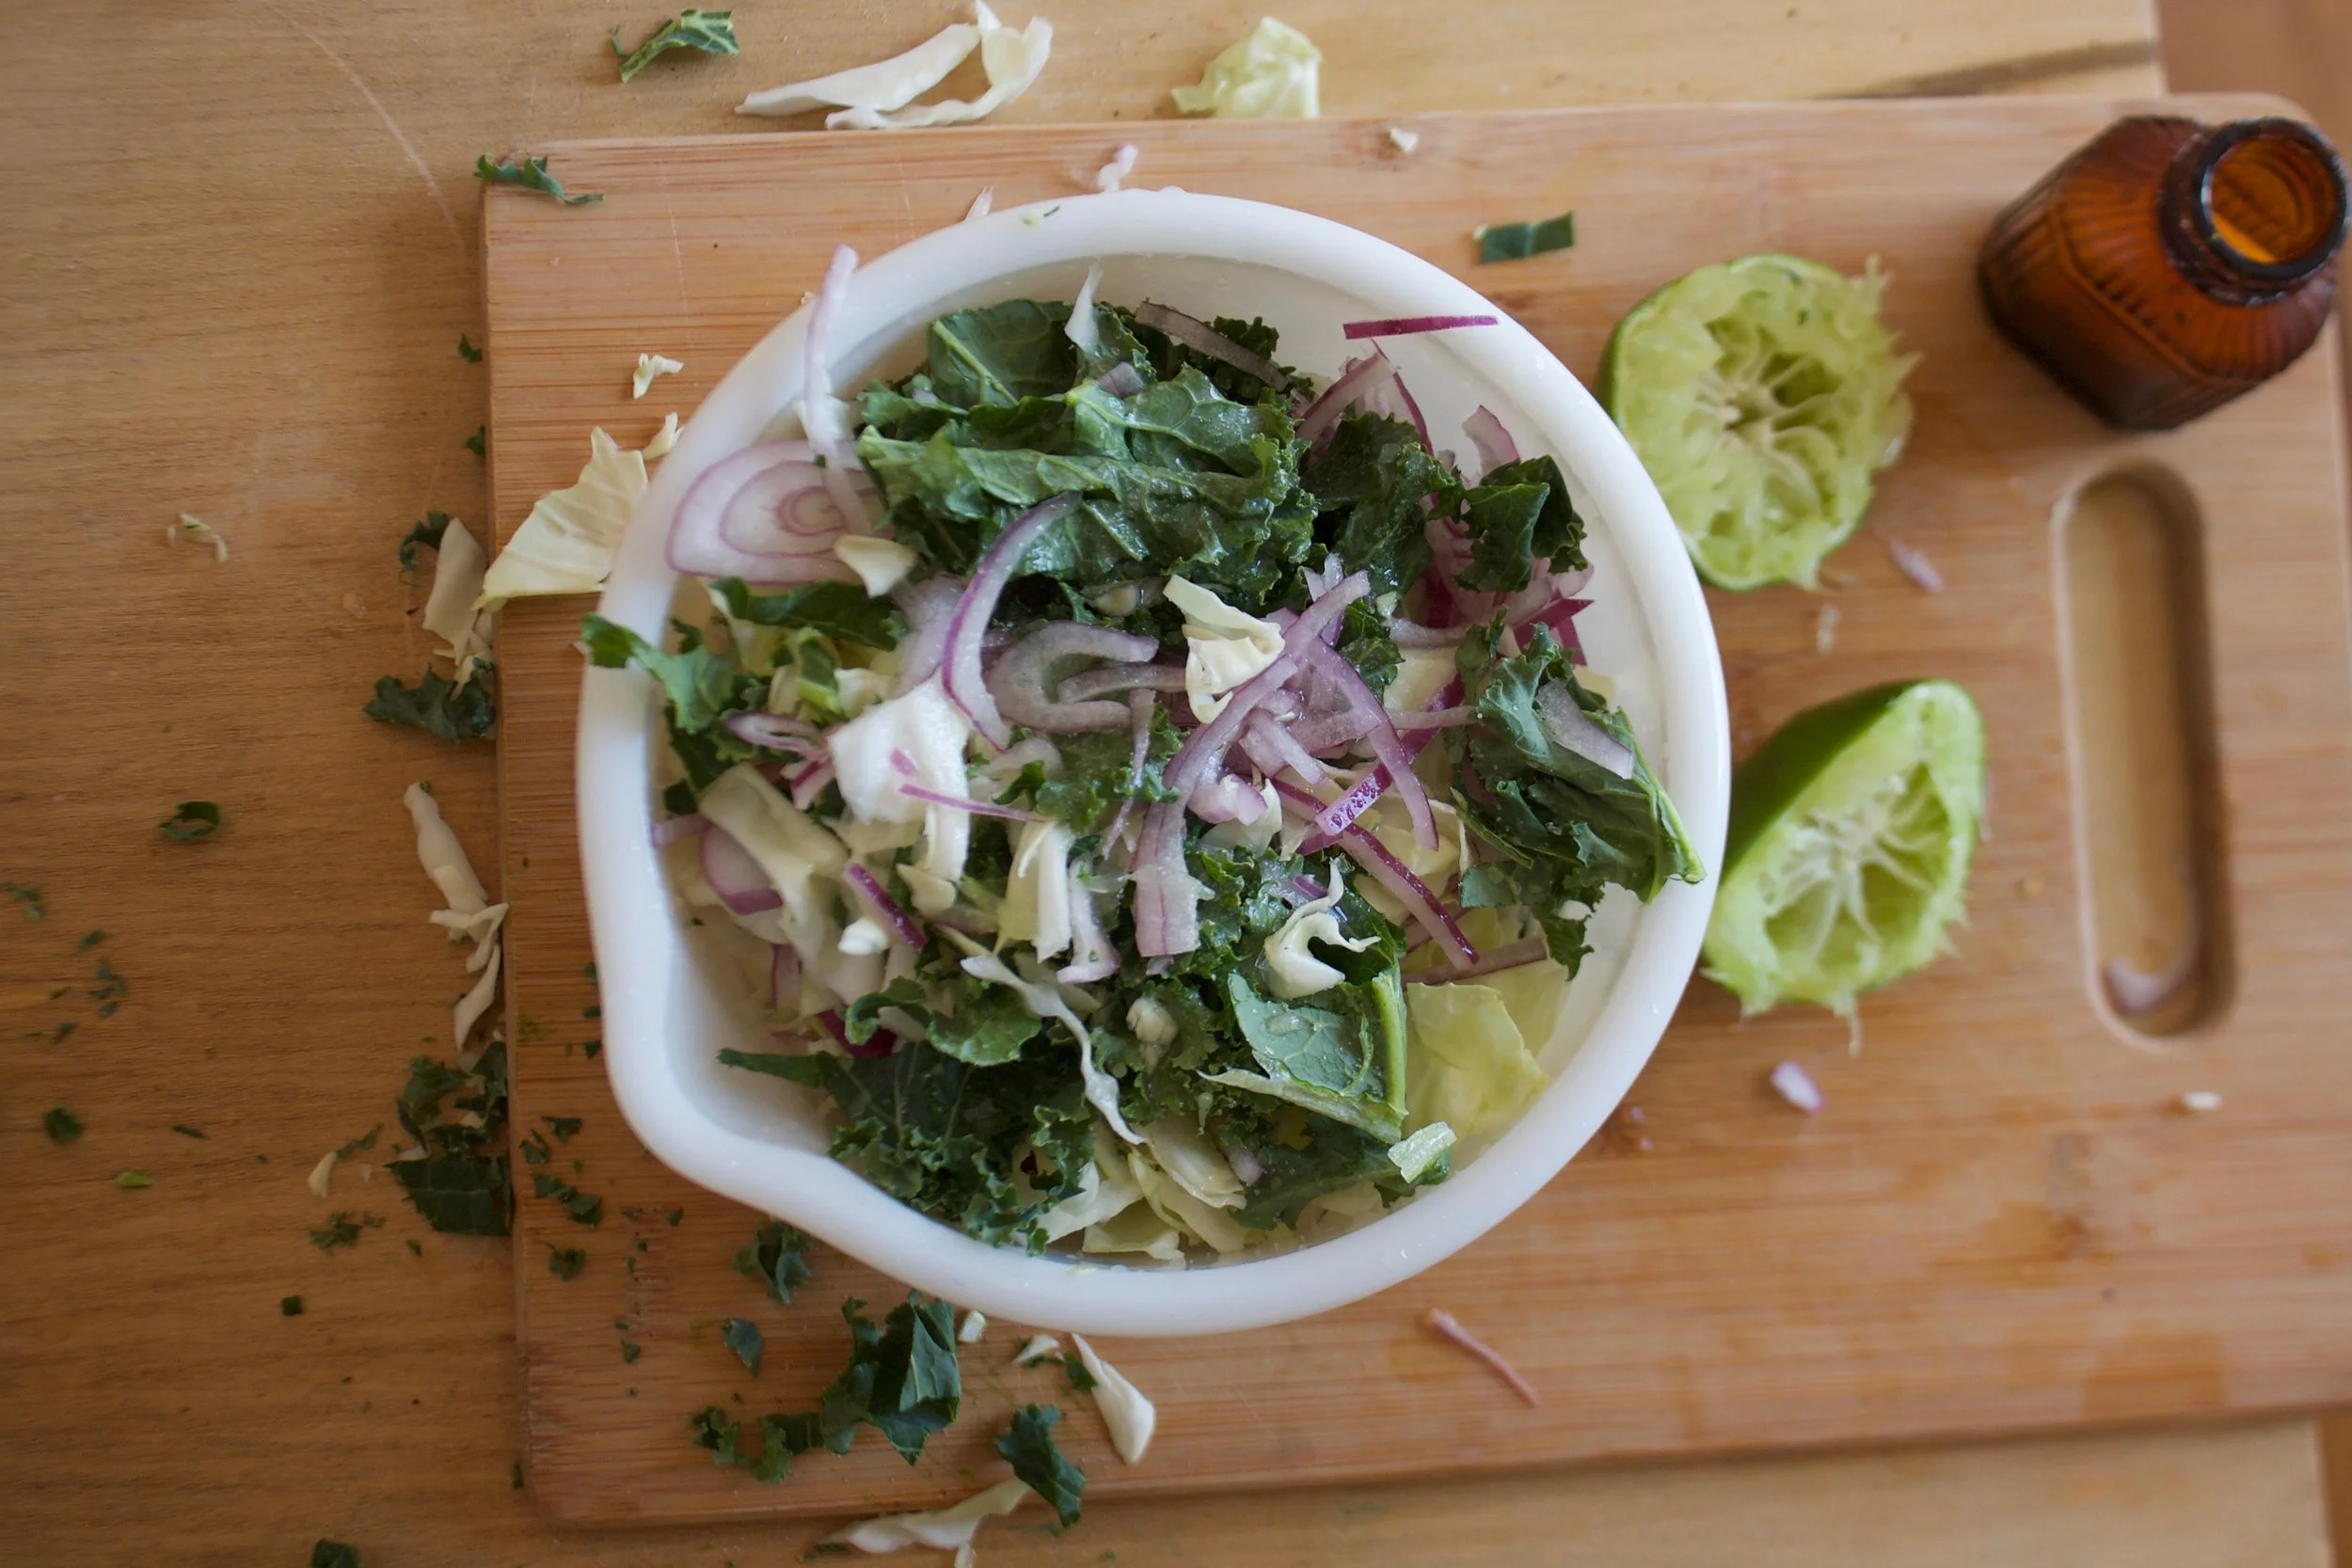
Remove the pan from the oven and toss in finely chopped kale and a big scoop of lentil%u2026 Mix it up and let the sit in hot pan for a few minutes%u2026it will make the kale get soft and warm.

Plate it and eat eat%u2026 I drizzled a little balsamic vinegar on mine%u2026Nick like his straight up. Do what you will cause either way, it’s going to be awesome!!!!

Hooray for Friday and for winter squash!!!!

-C

Warm Winter Salad

Ingredients (This made one good sized salad%u2026and exact measurements were not used so feel free to add greater or lesser amounts of any of the ingredients)

  • 1 1/2 cup Diced Butternut squash
  • 1/2 Vidalia Onion(or any variety you like)
  • 3-4 large Kale leaves
  • 1/2 cup Precooked Lentils
  • salt and pepper to taste
  • Balsamic Vinegar%u00a0
  • drizzle of oil for pan

In a 425 degree oven, %u00a0place diced squash and sliced onions in a slightly oiled pan, sprinkle with salt and pepper, and roast for about 20 minutes until tender. Remove pan from oven and toss in chopped kale and lentils and let sit in hot pan for a few minutes%u2026 Plate and drizzle with balsamic vinegar.
THE LOVELY CRAZY

January 9, 2020 by maximios • Blog

The thing with having an abundance of squash in the house, and having the abundance keep growing (we get a lot of squashes at farm share) is that I need to cook just about every meal with said abundance, which I am totally on happy to do. I welcome all the squash. I am excited about all the squash. I could eat al the squash all day, everyday. And I do. But that is me. The mr and the others the I sometimes cook for, they are not as squash crazy as me and get sick of plain old roasted squash so I am trying to change it up and make new and interesting things out of the squash so no one gets bored with it.

Yes, I know stuffing an acorn squash is hardly a new idea, but this squash is not stuffed with the usual rice and stuff, it stuffed with lots of black beans and cumin and chili powder spiced cauliflower (and a few other things). The combination of all the flavors with the acorn squash really hit all the right spots for a tasty, not boring squash meal. It is a brilliant combination of flavors that even the not so keen on squash person will love.

That is my opinion of course but it will be your opinion too after you make and eat these. We will brilliant together.

To the stuffed squash.

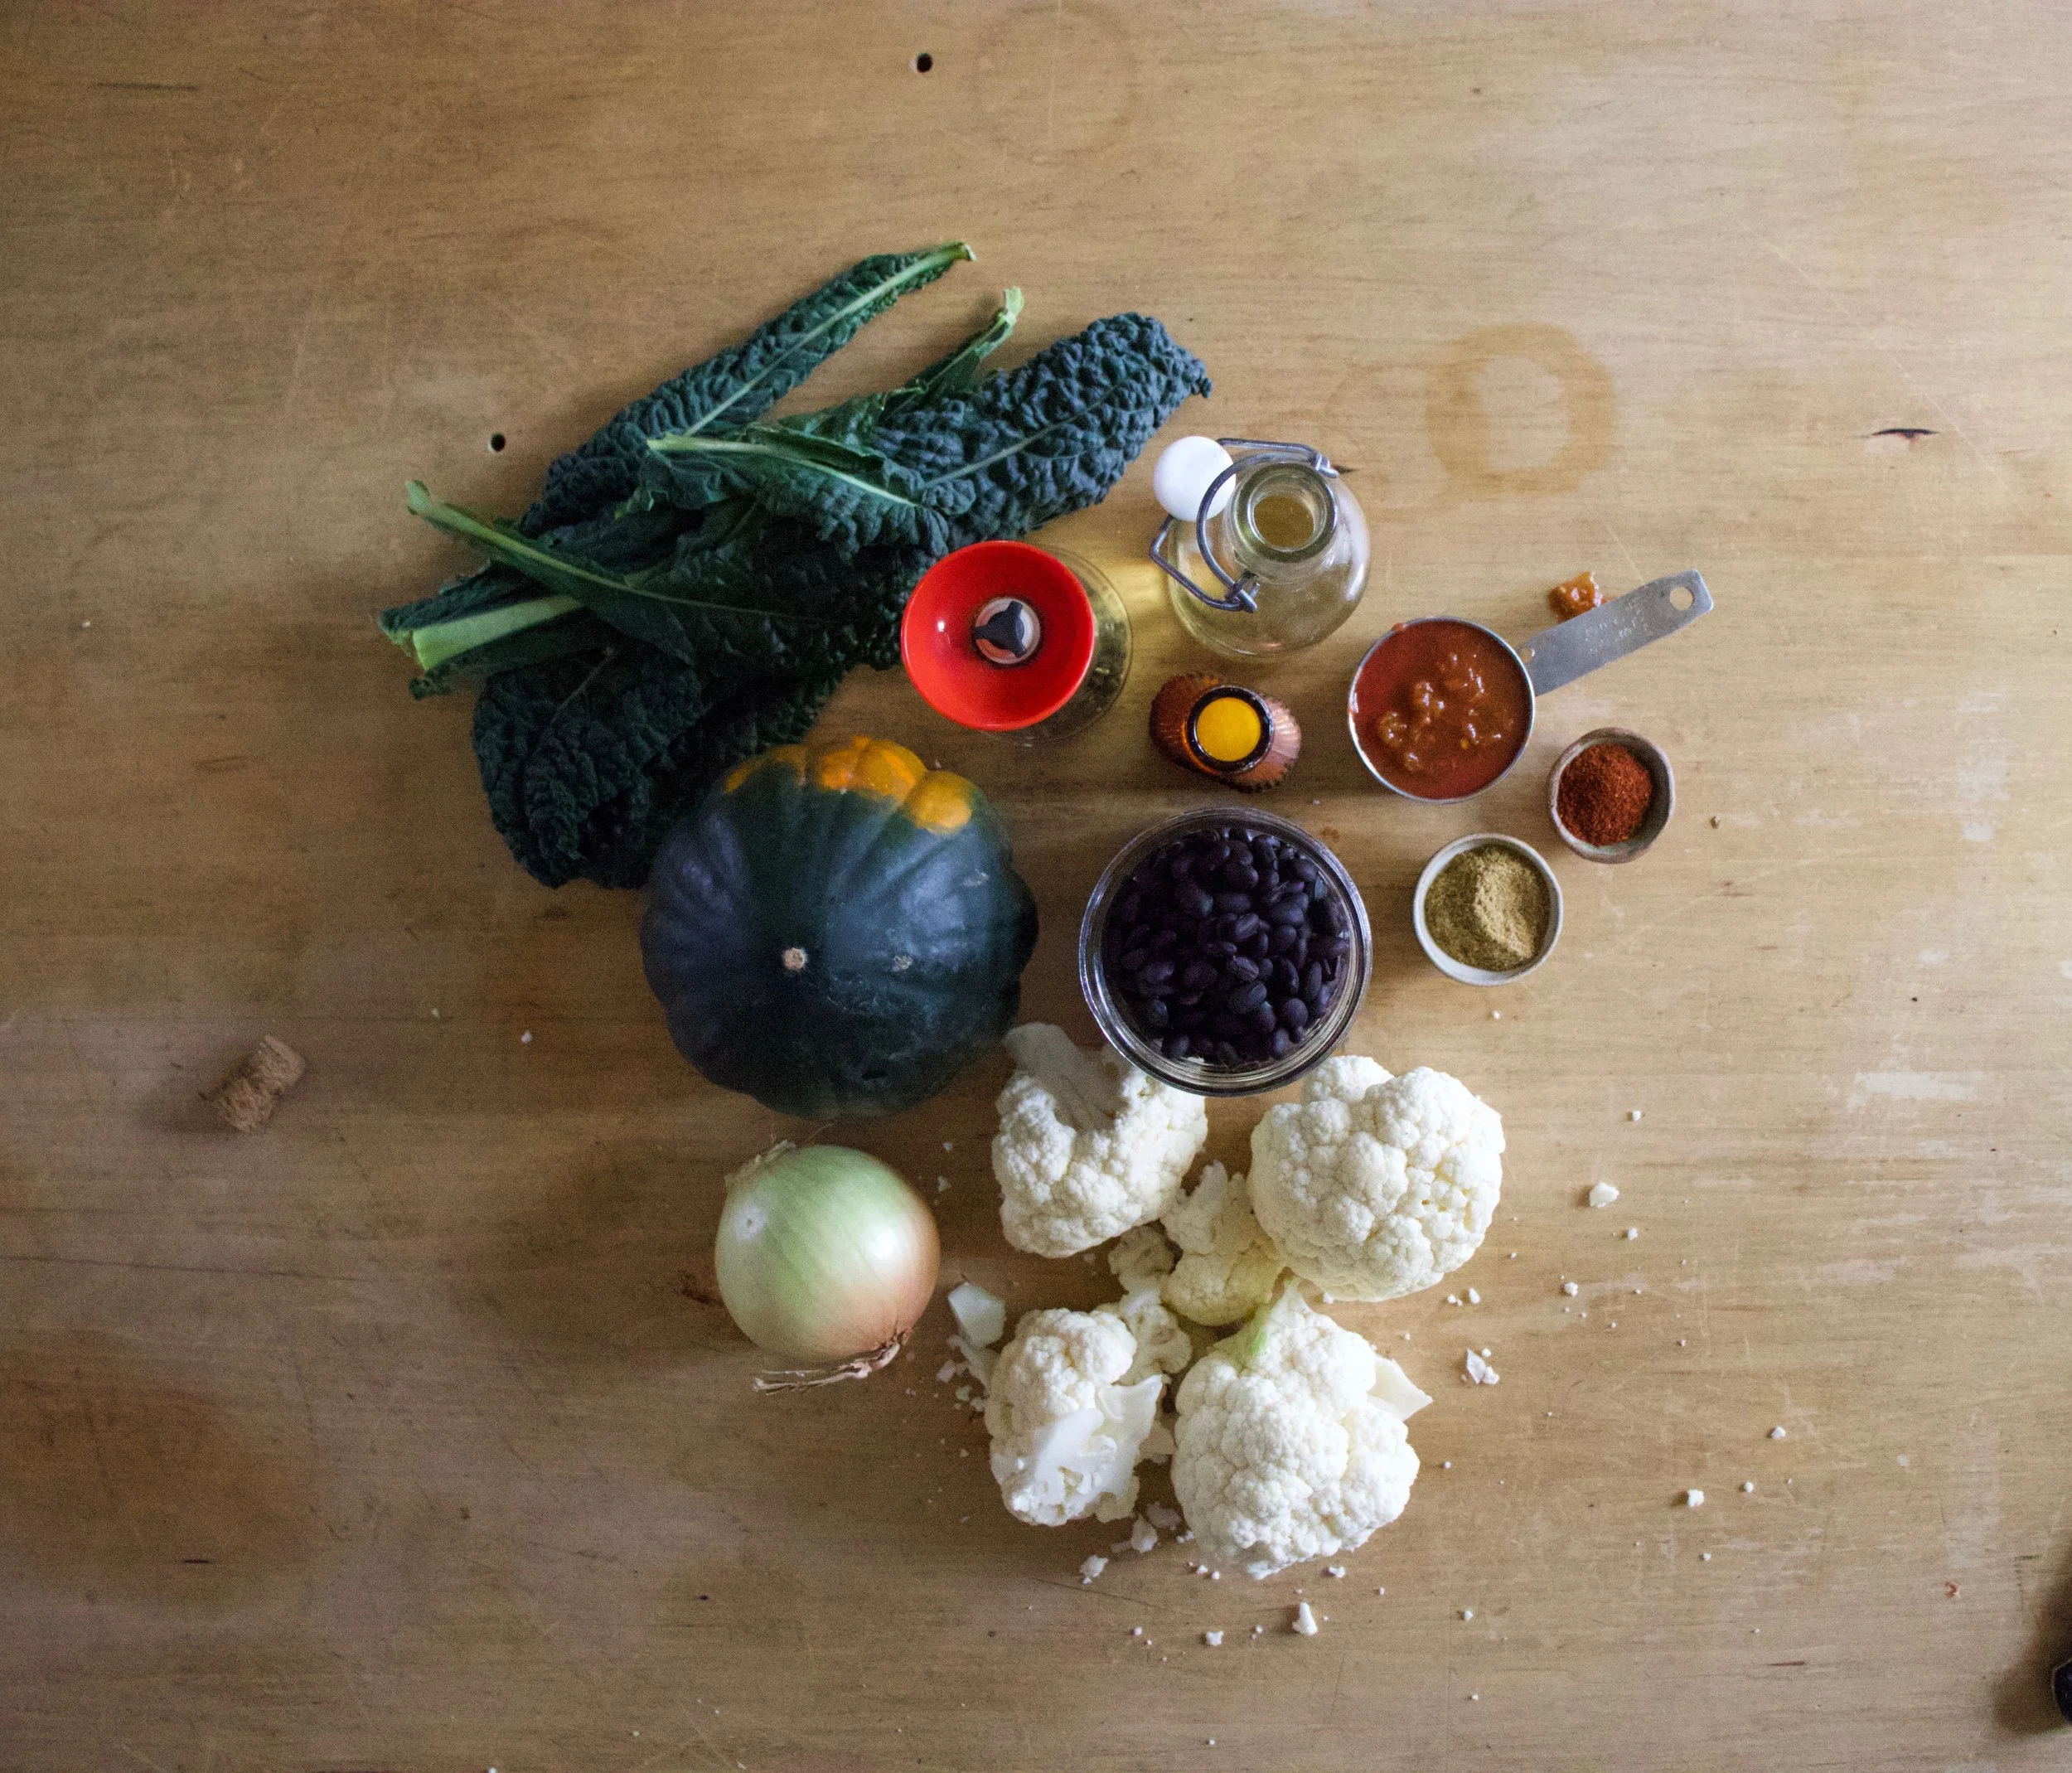
The stuff. An acorn squash, some cauliflower, cooked black beans, an onion, and a few kale leaves. Also need some cumin, chili powder, salt and pepper. salsa, and olive oil.

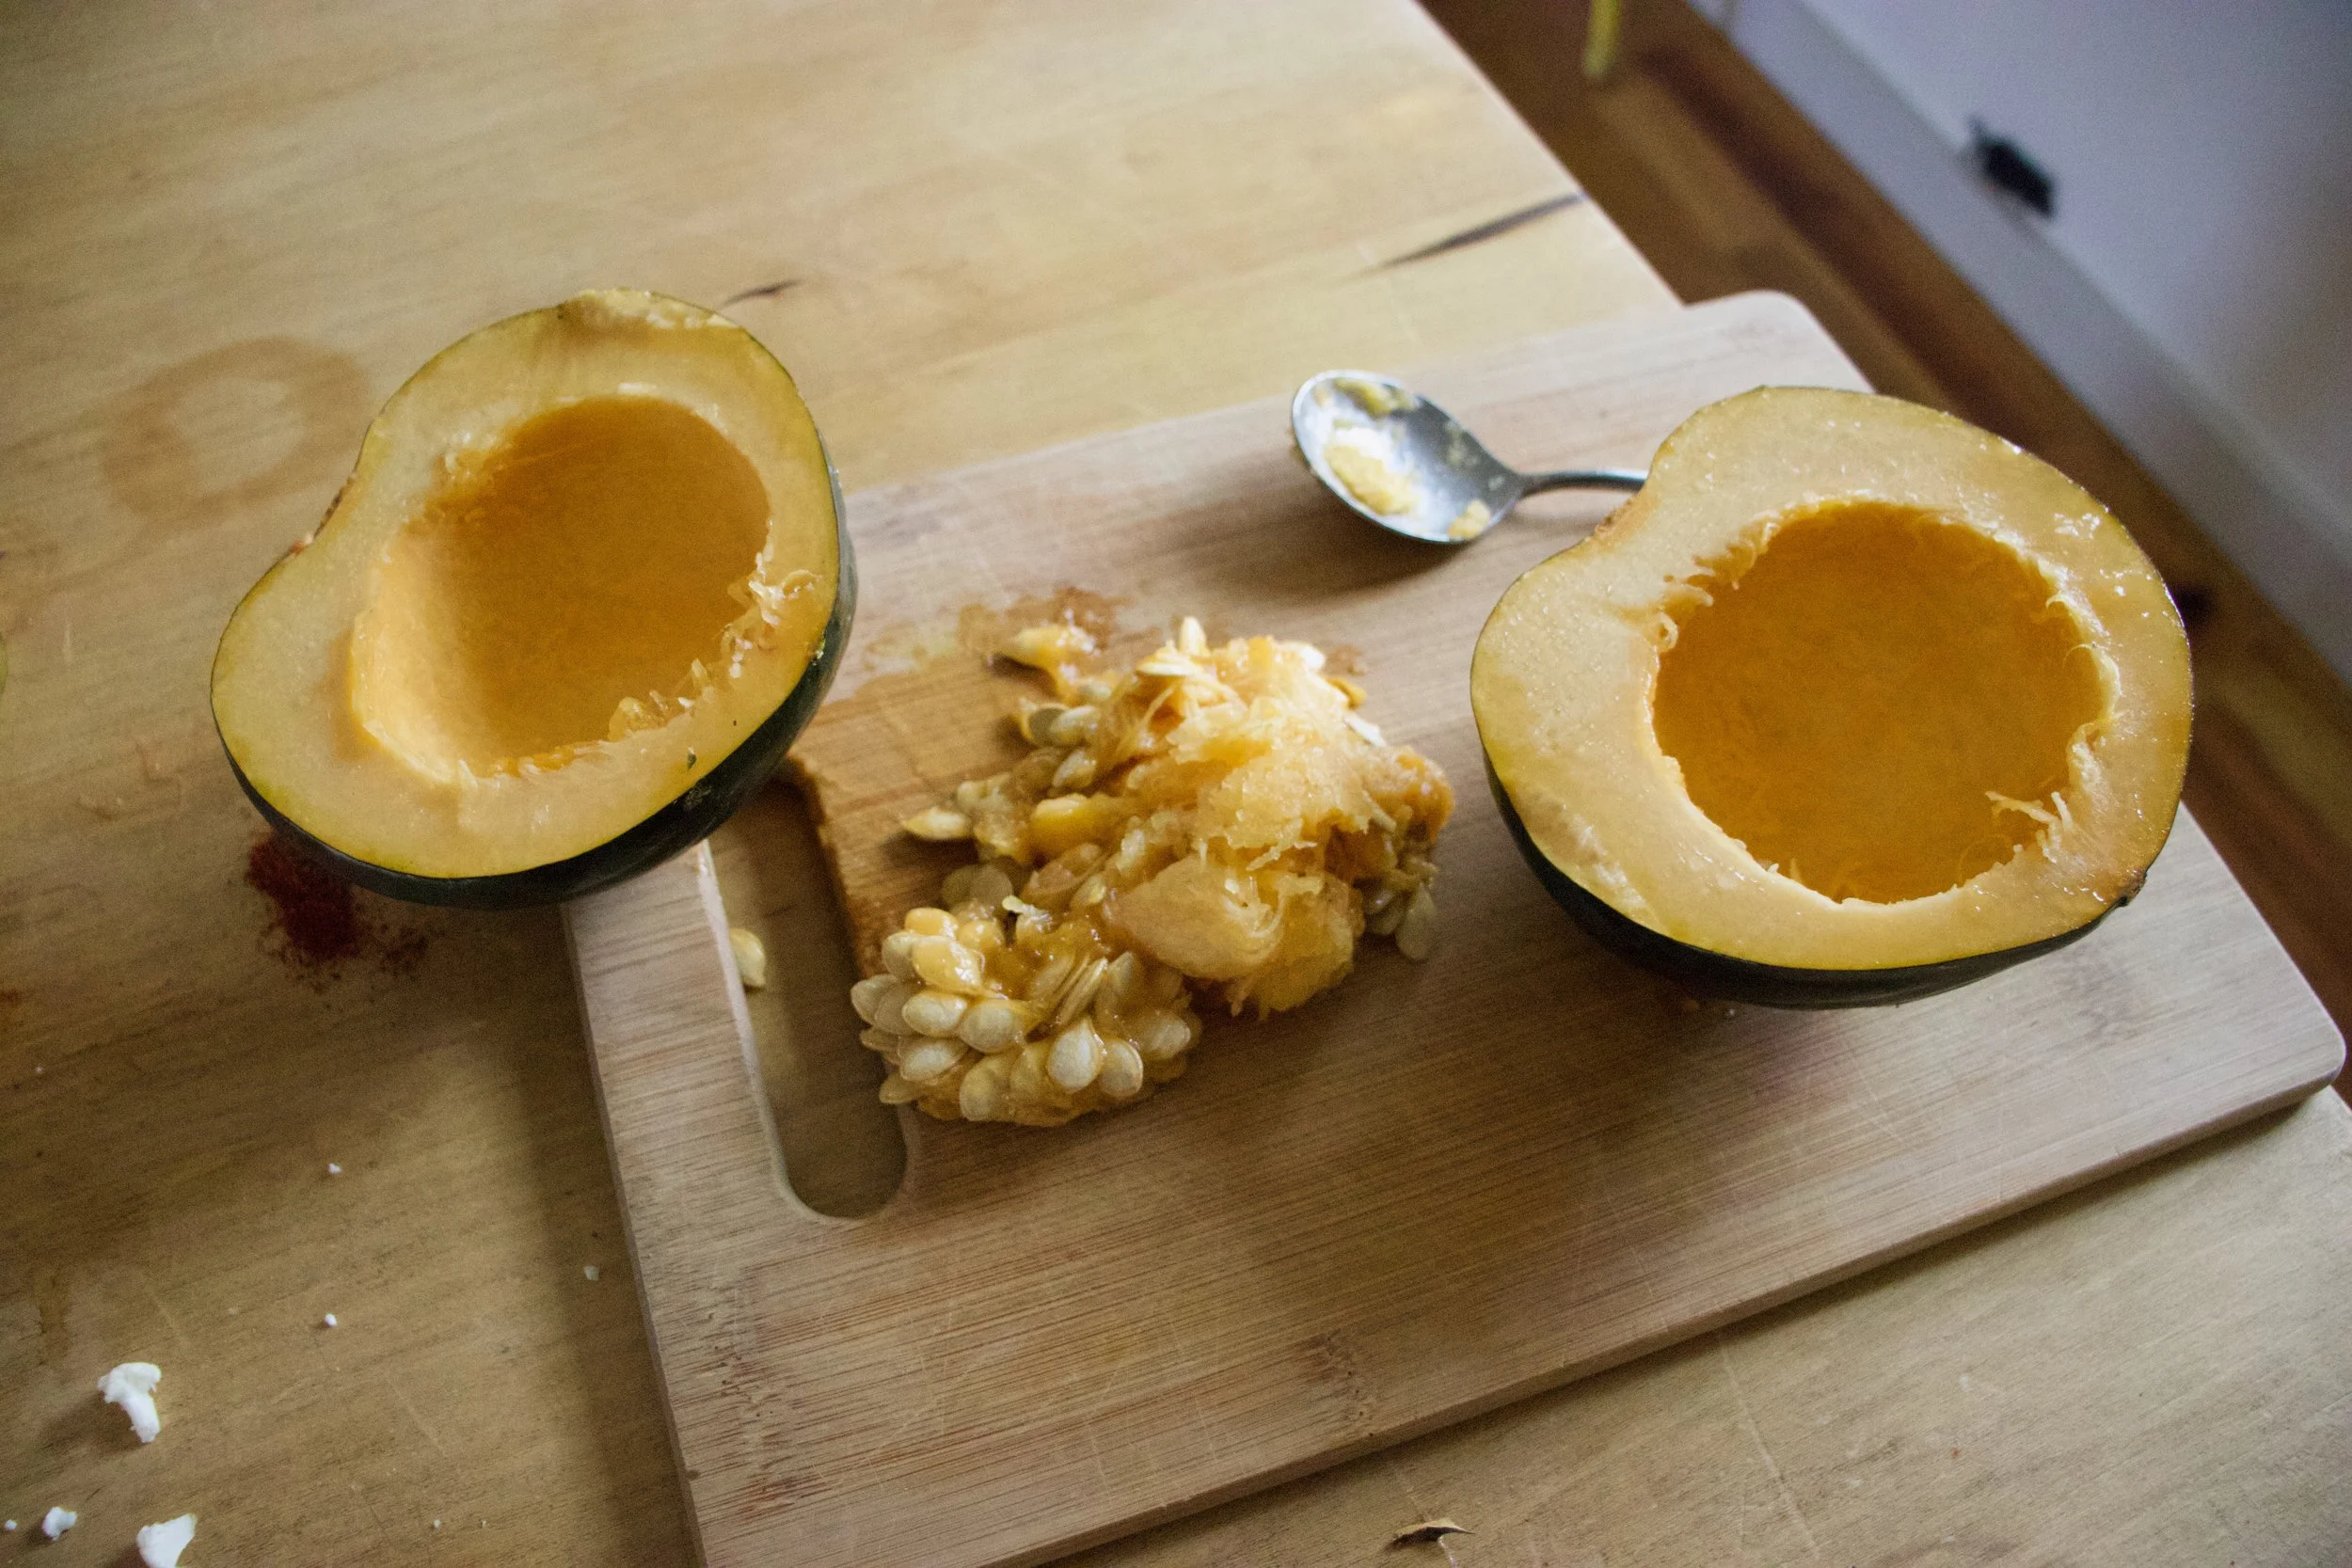
Start by cutting the squash in half and scooping out all the seeds.

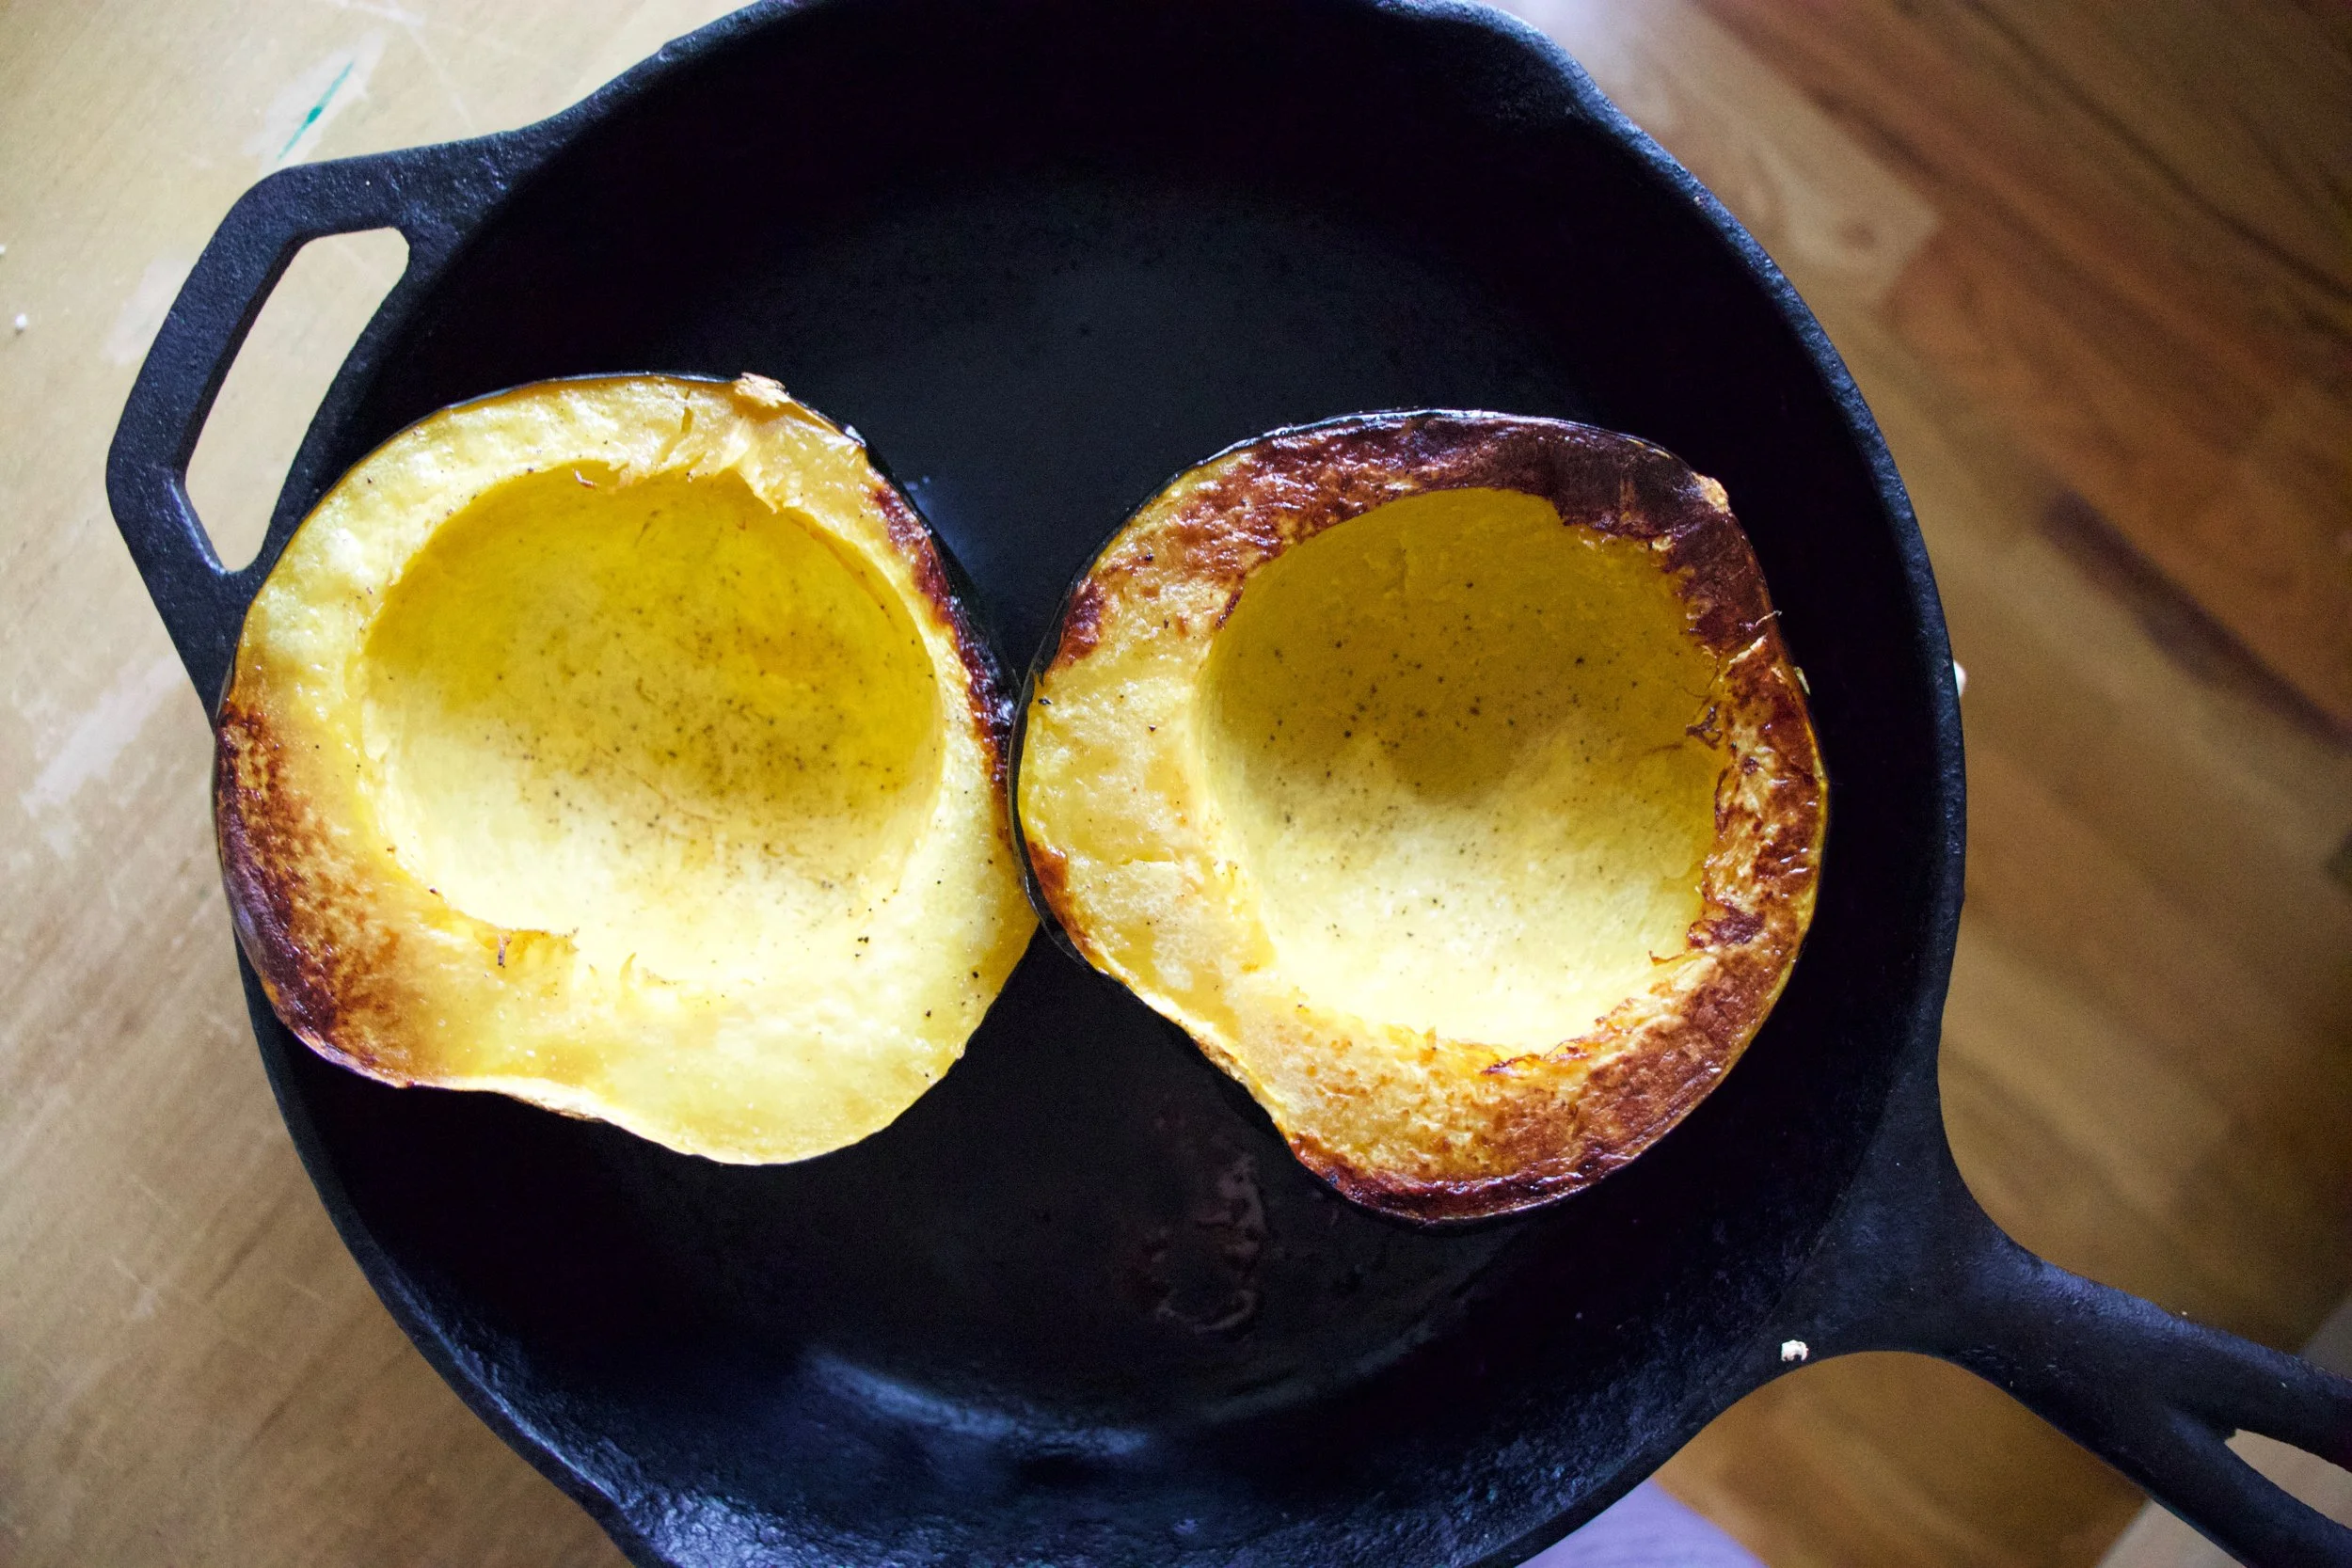
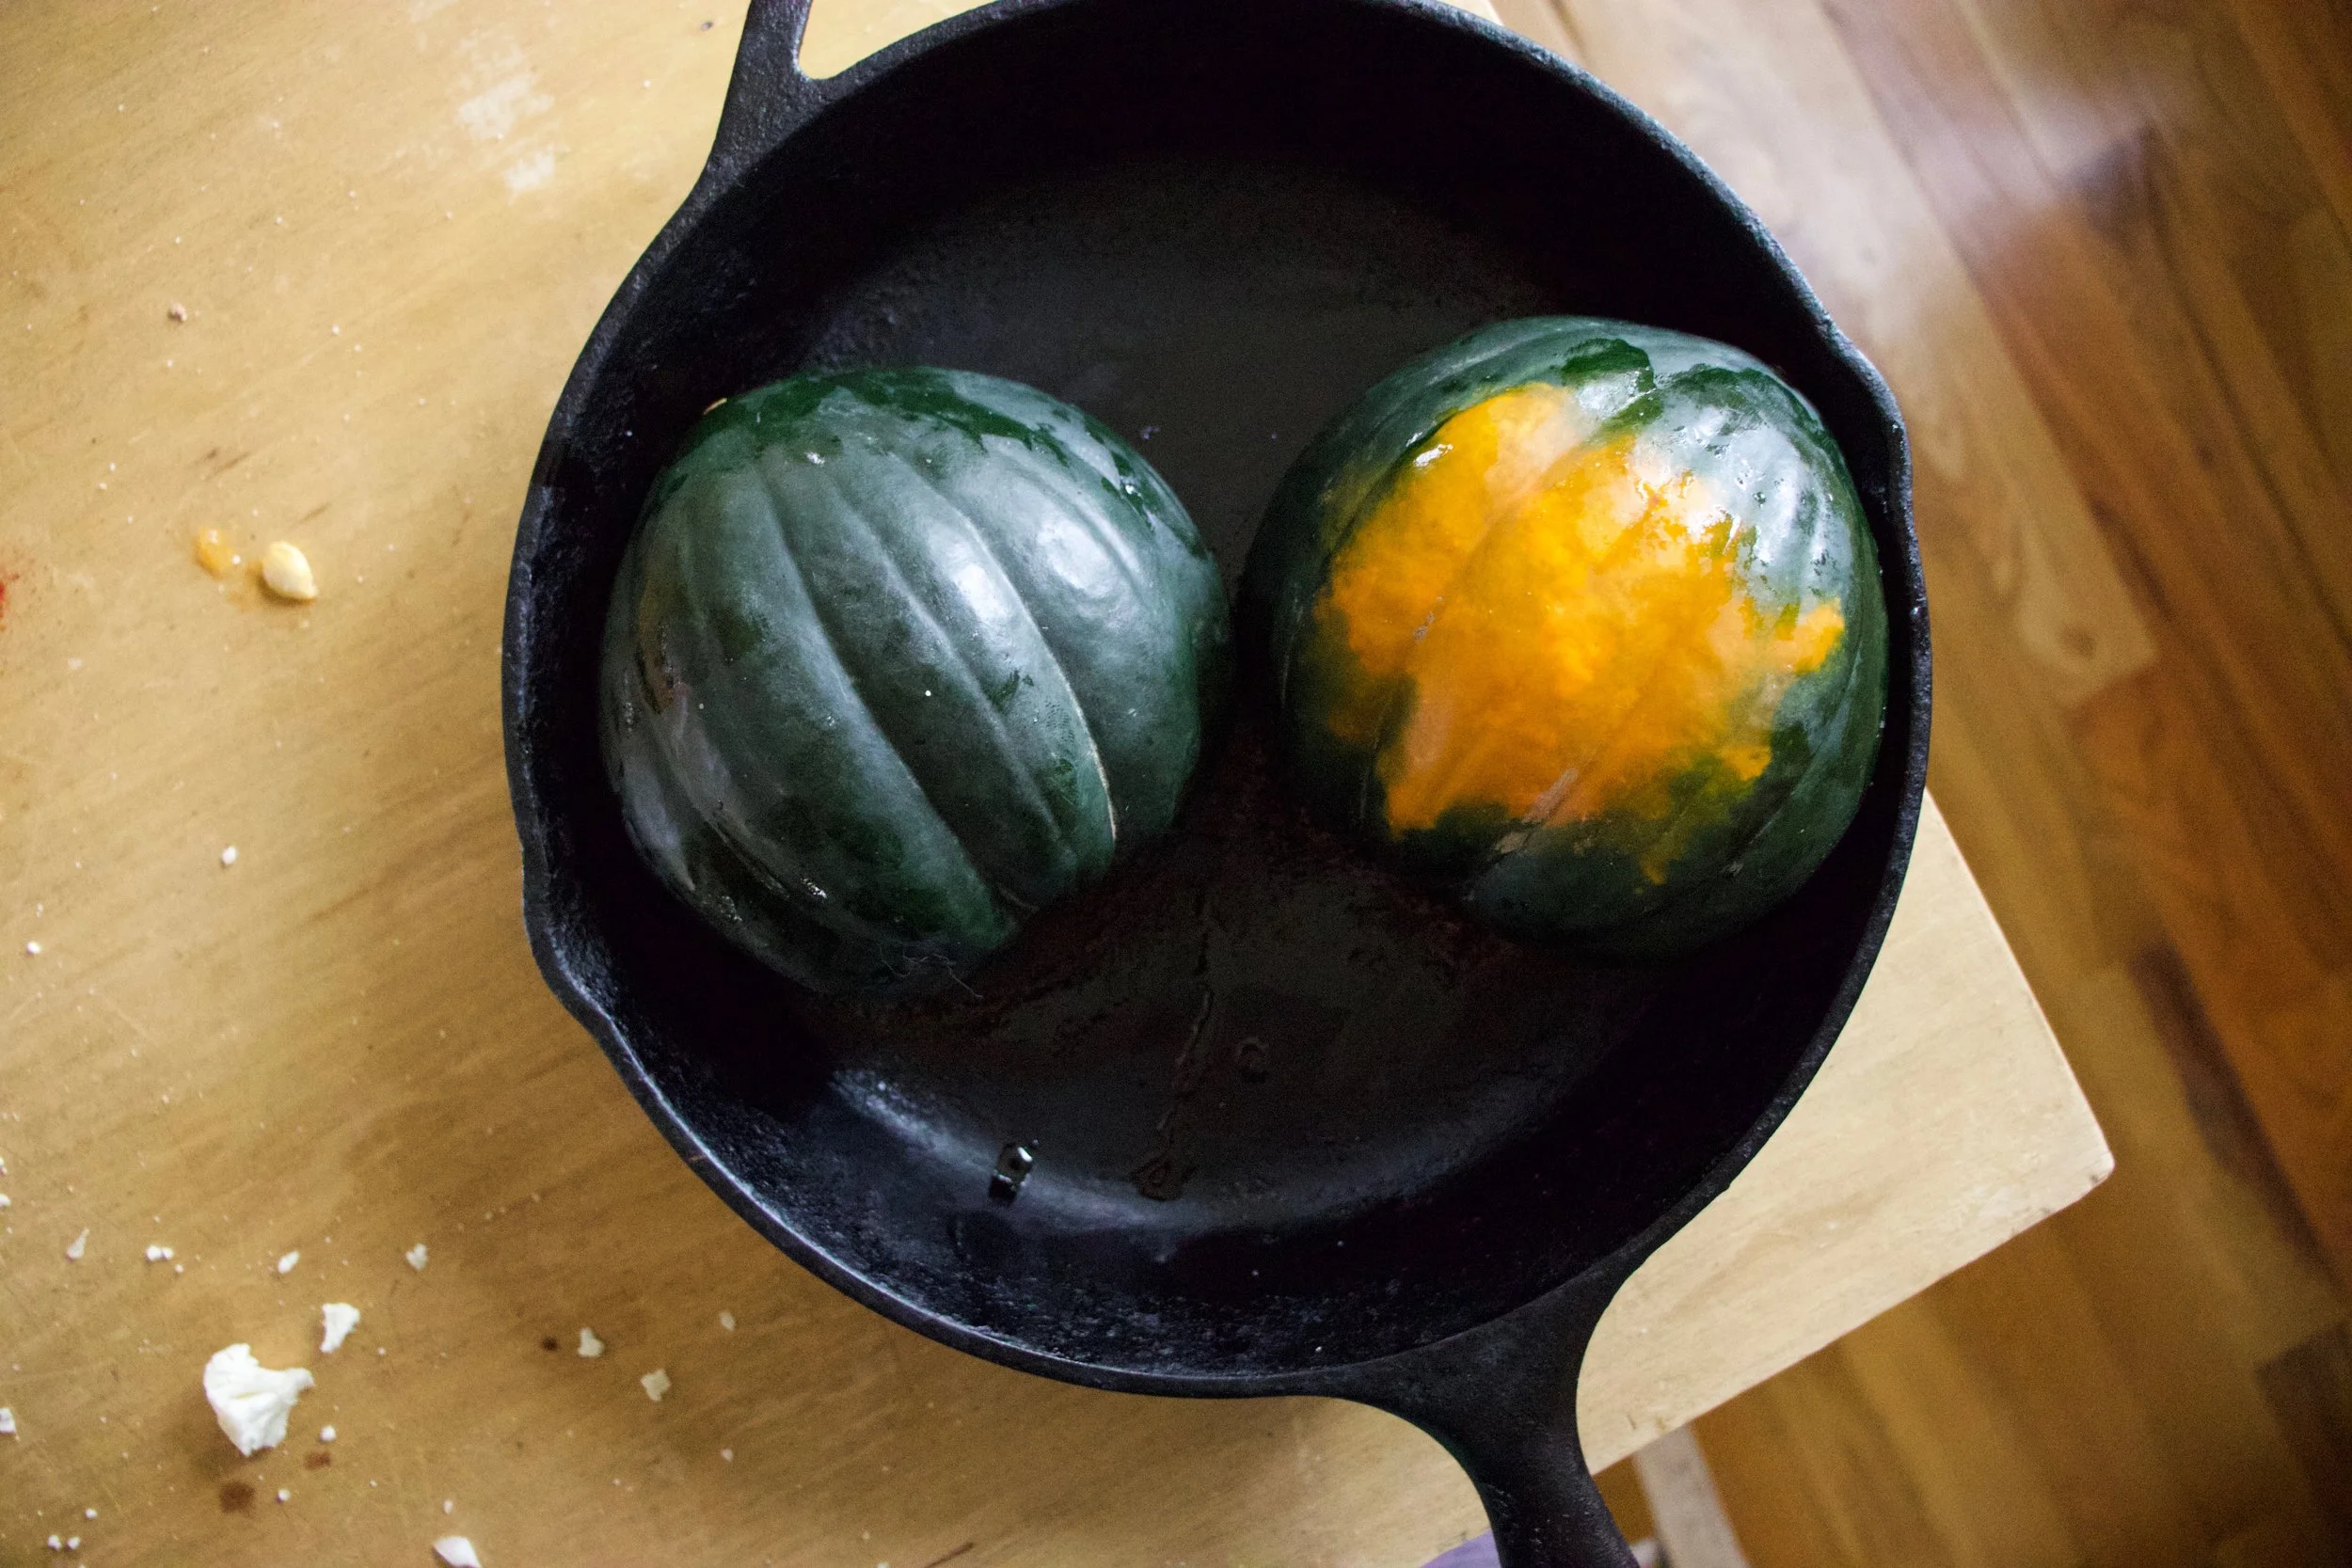
Place the squash open side down on a baking sheet or in a skillet lightly oiled and then stick into a hot oven to roast.

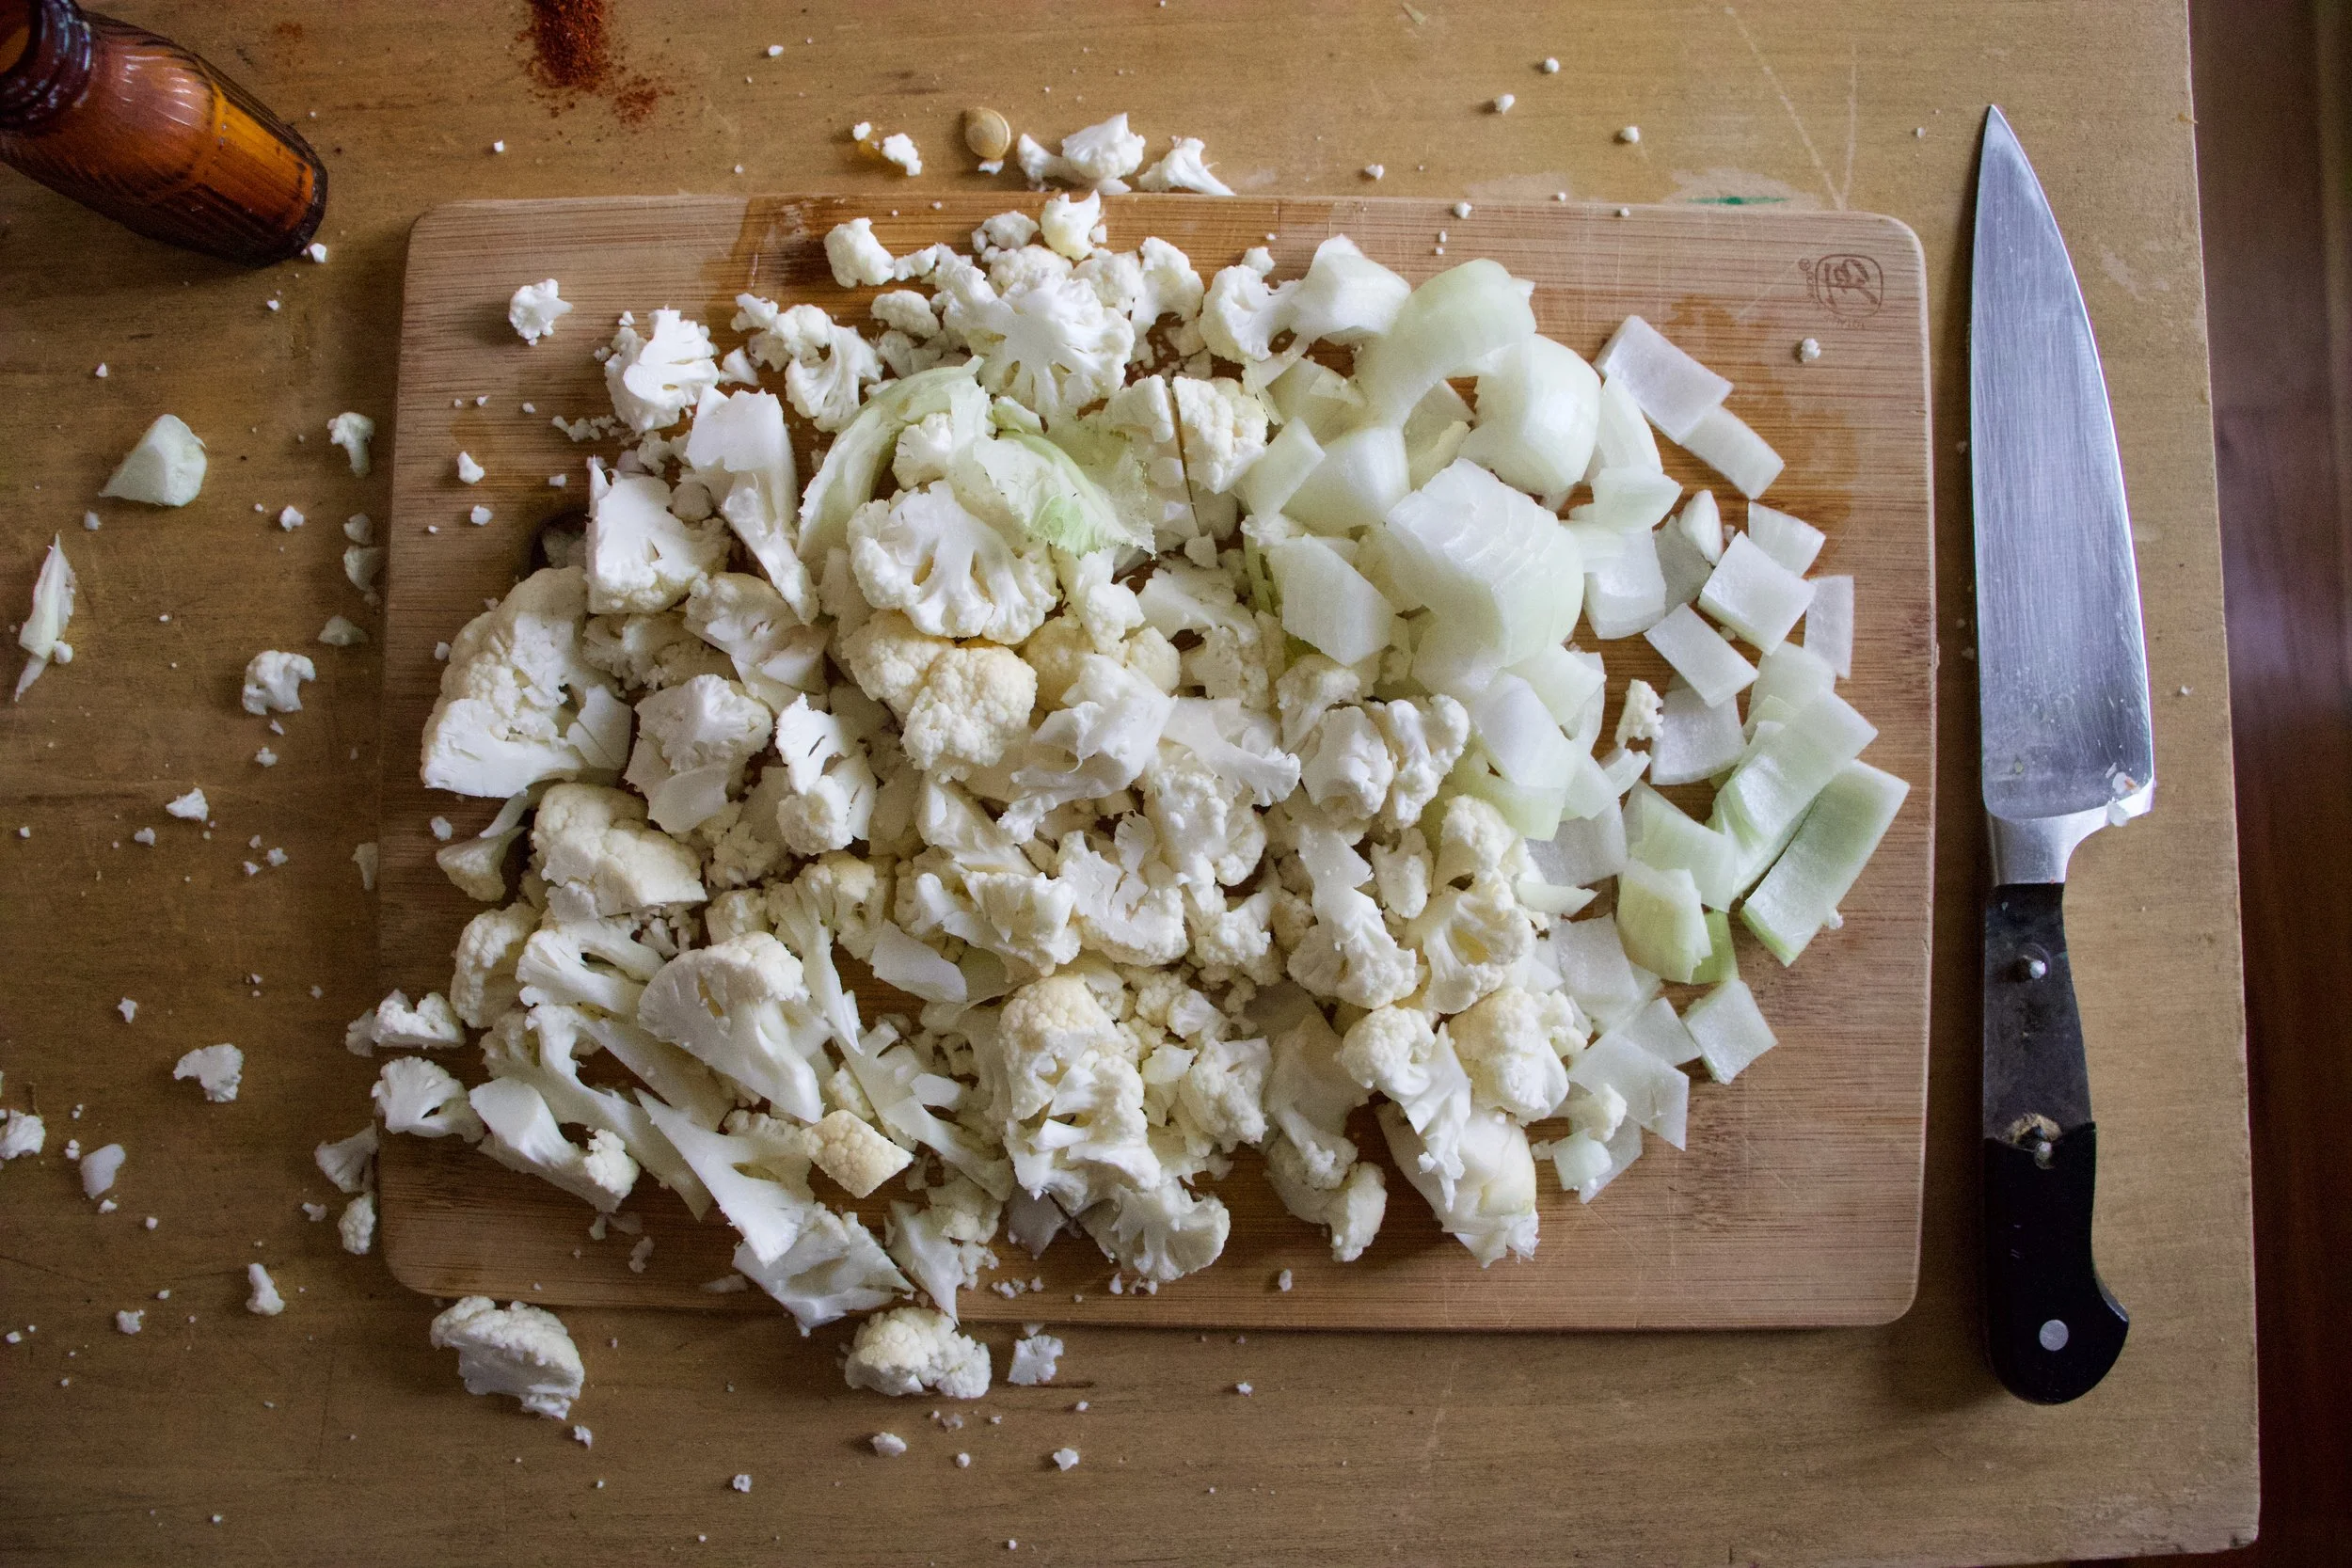
After the squash goes in, dice up the onion and cauliflower into small little pieces.

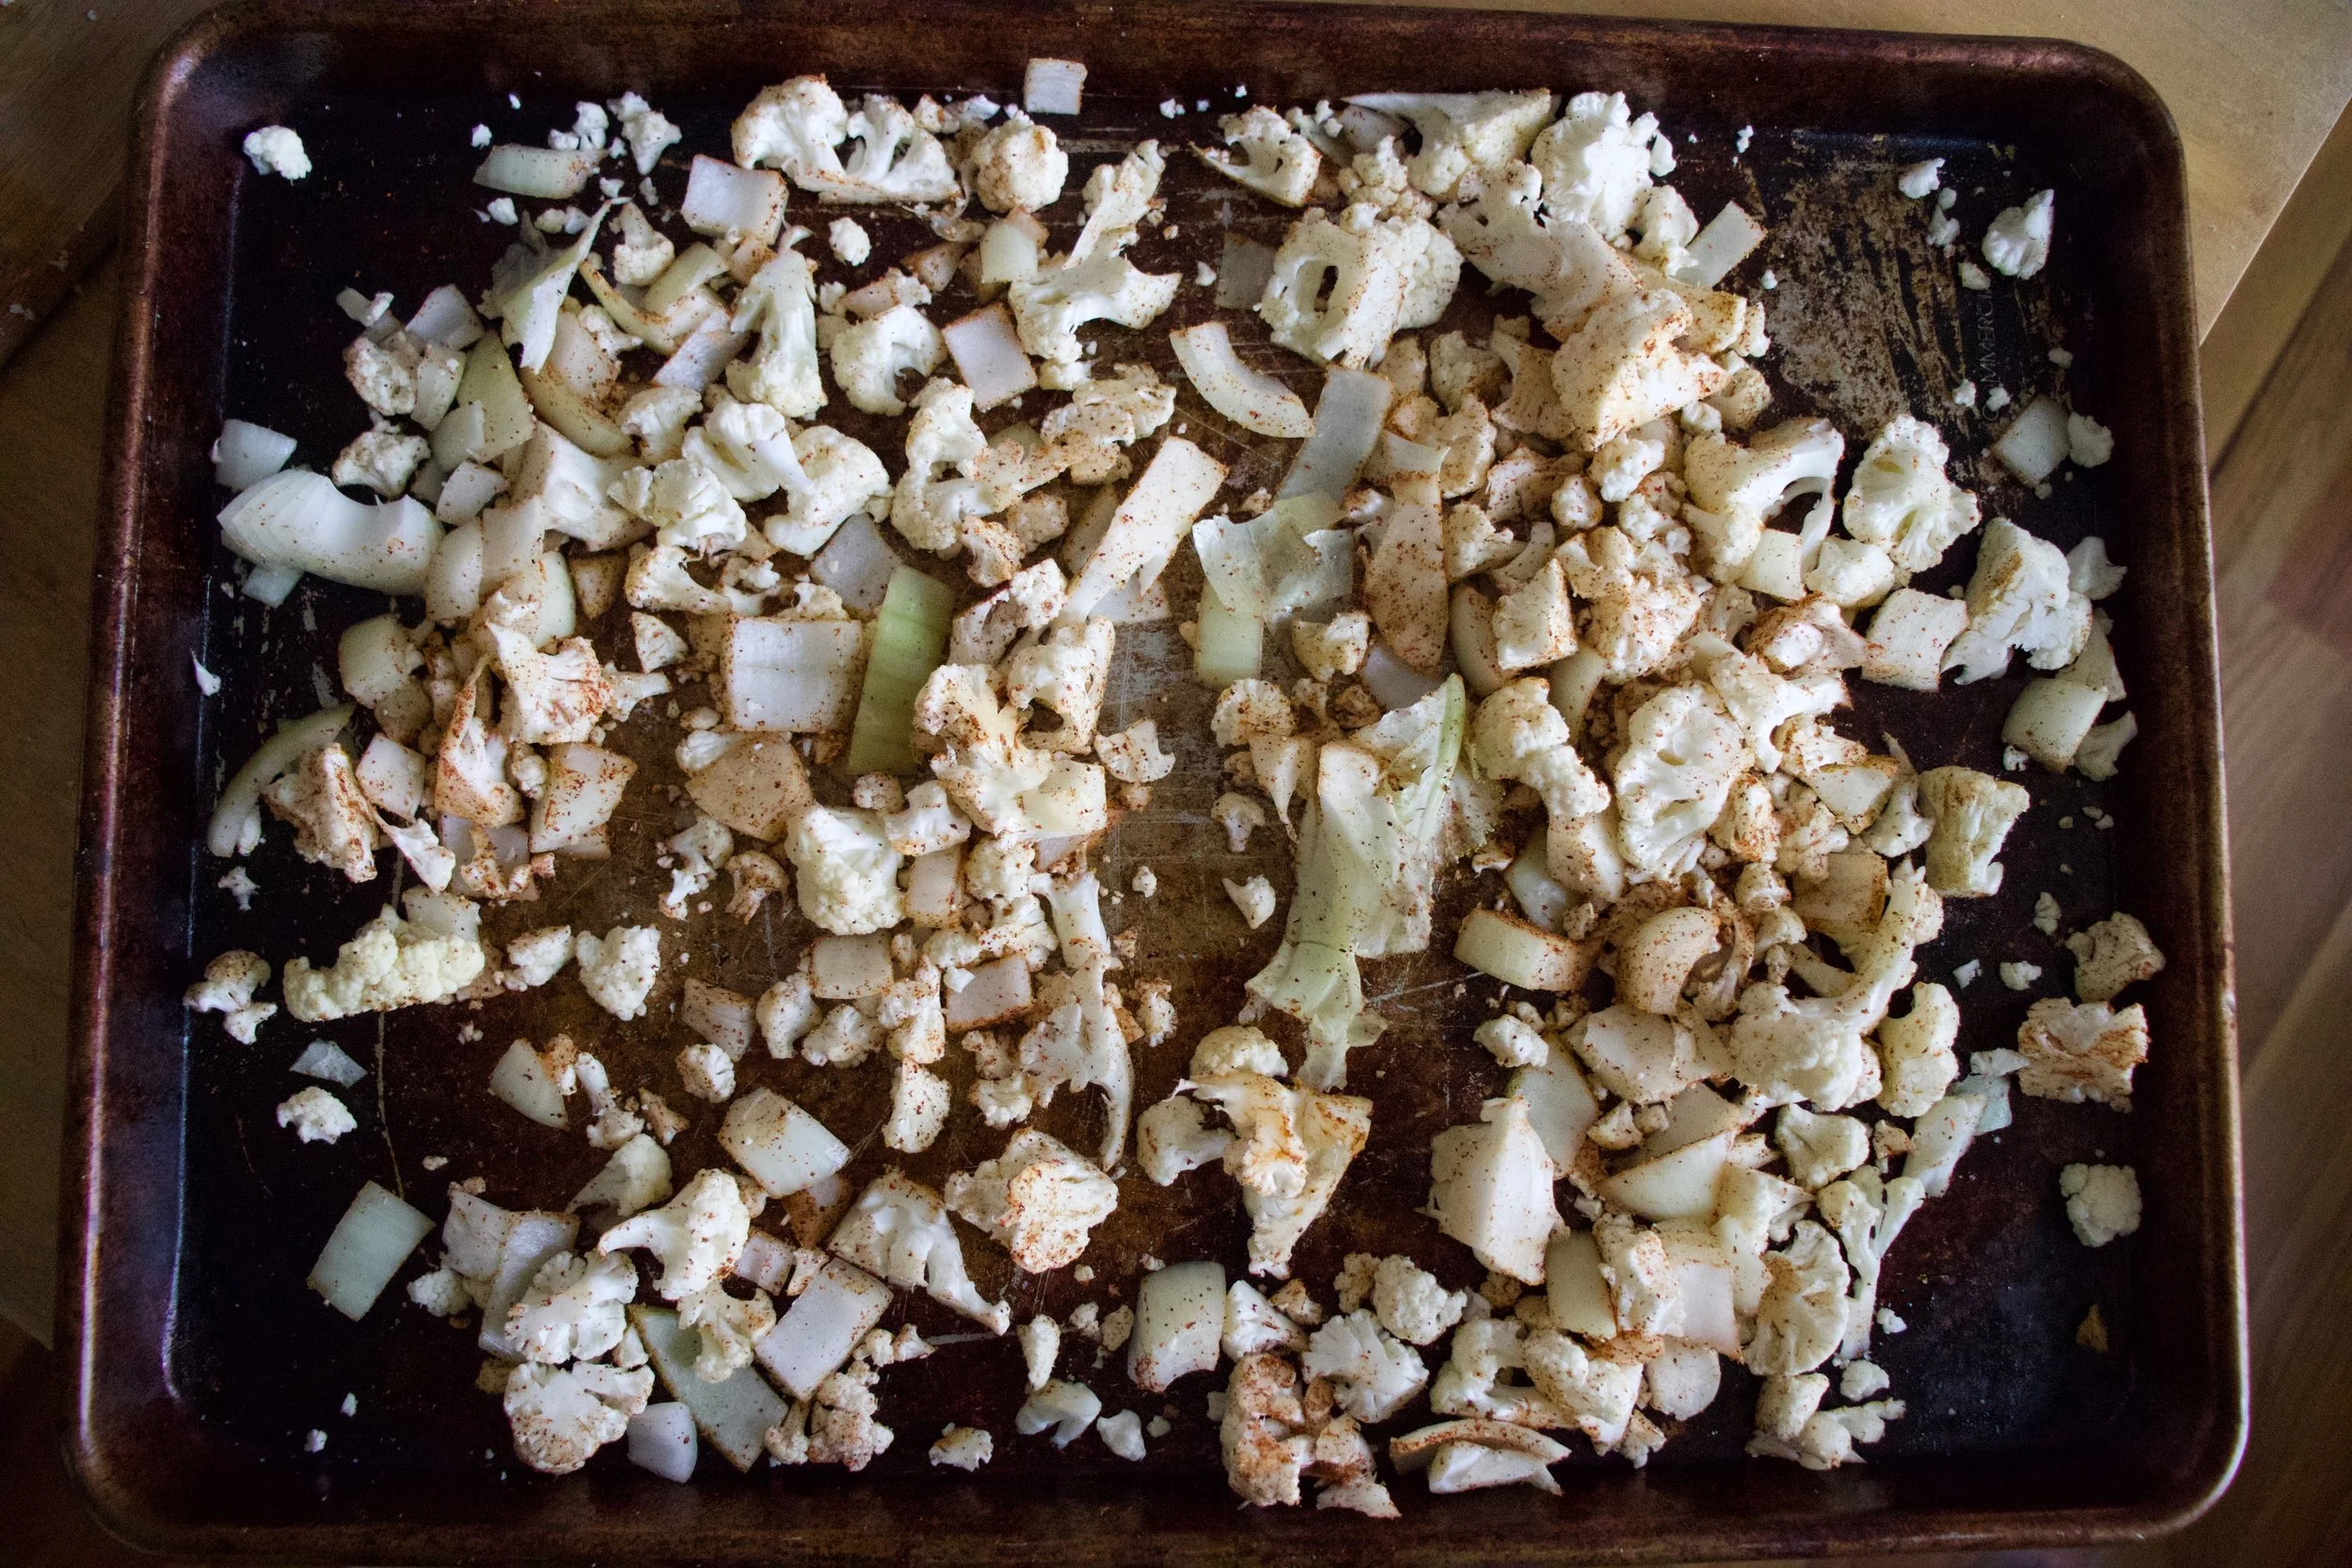
Place the chopped stuff onto a baking sheet. Drizzle with olive oil and toss with the cumin, chili powder, salt, and pepper. Get that into the oven too.

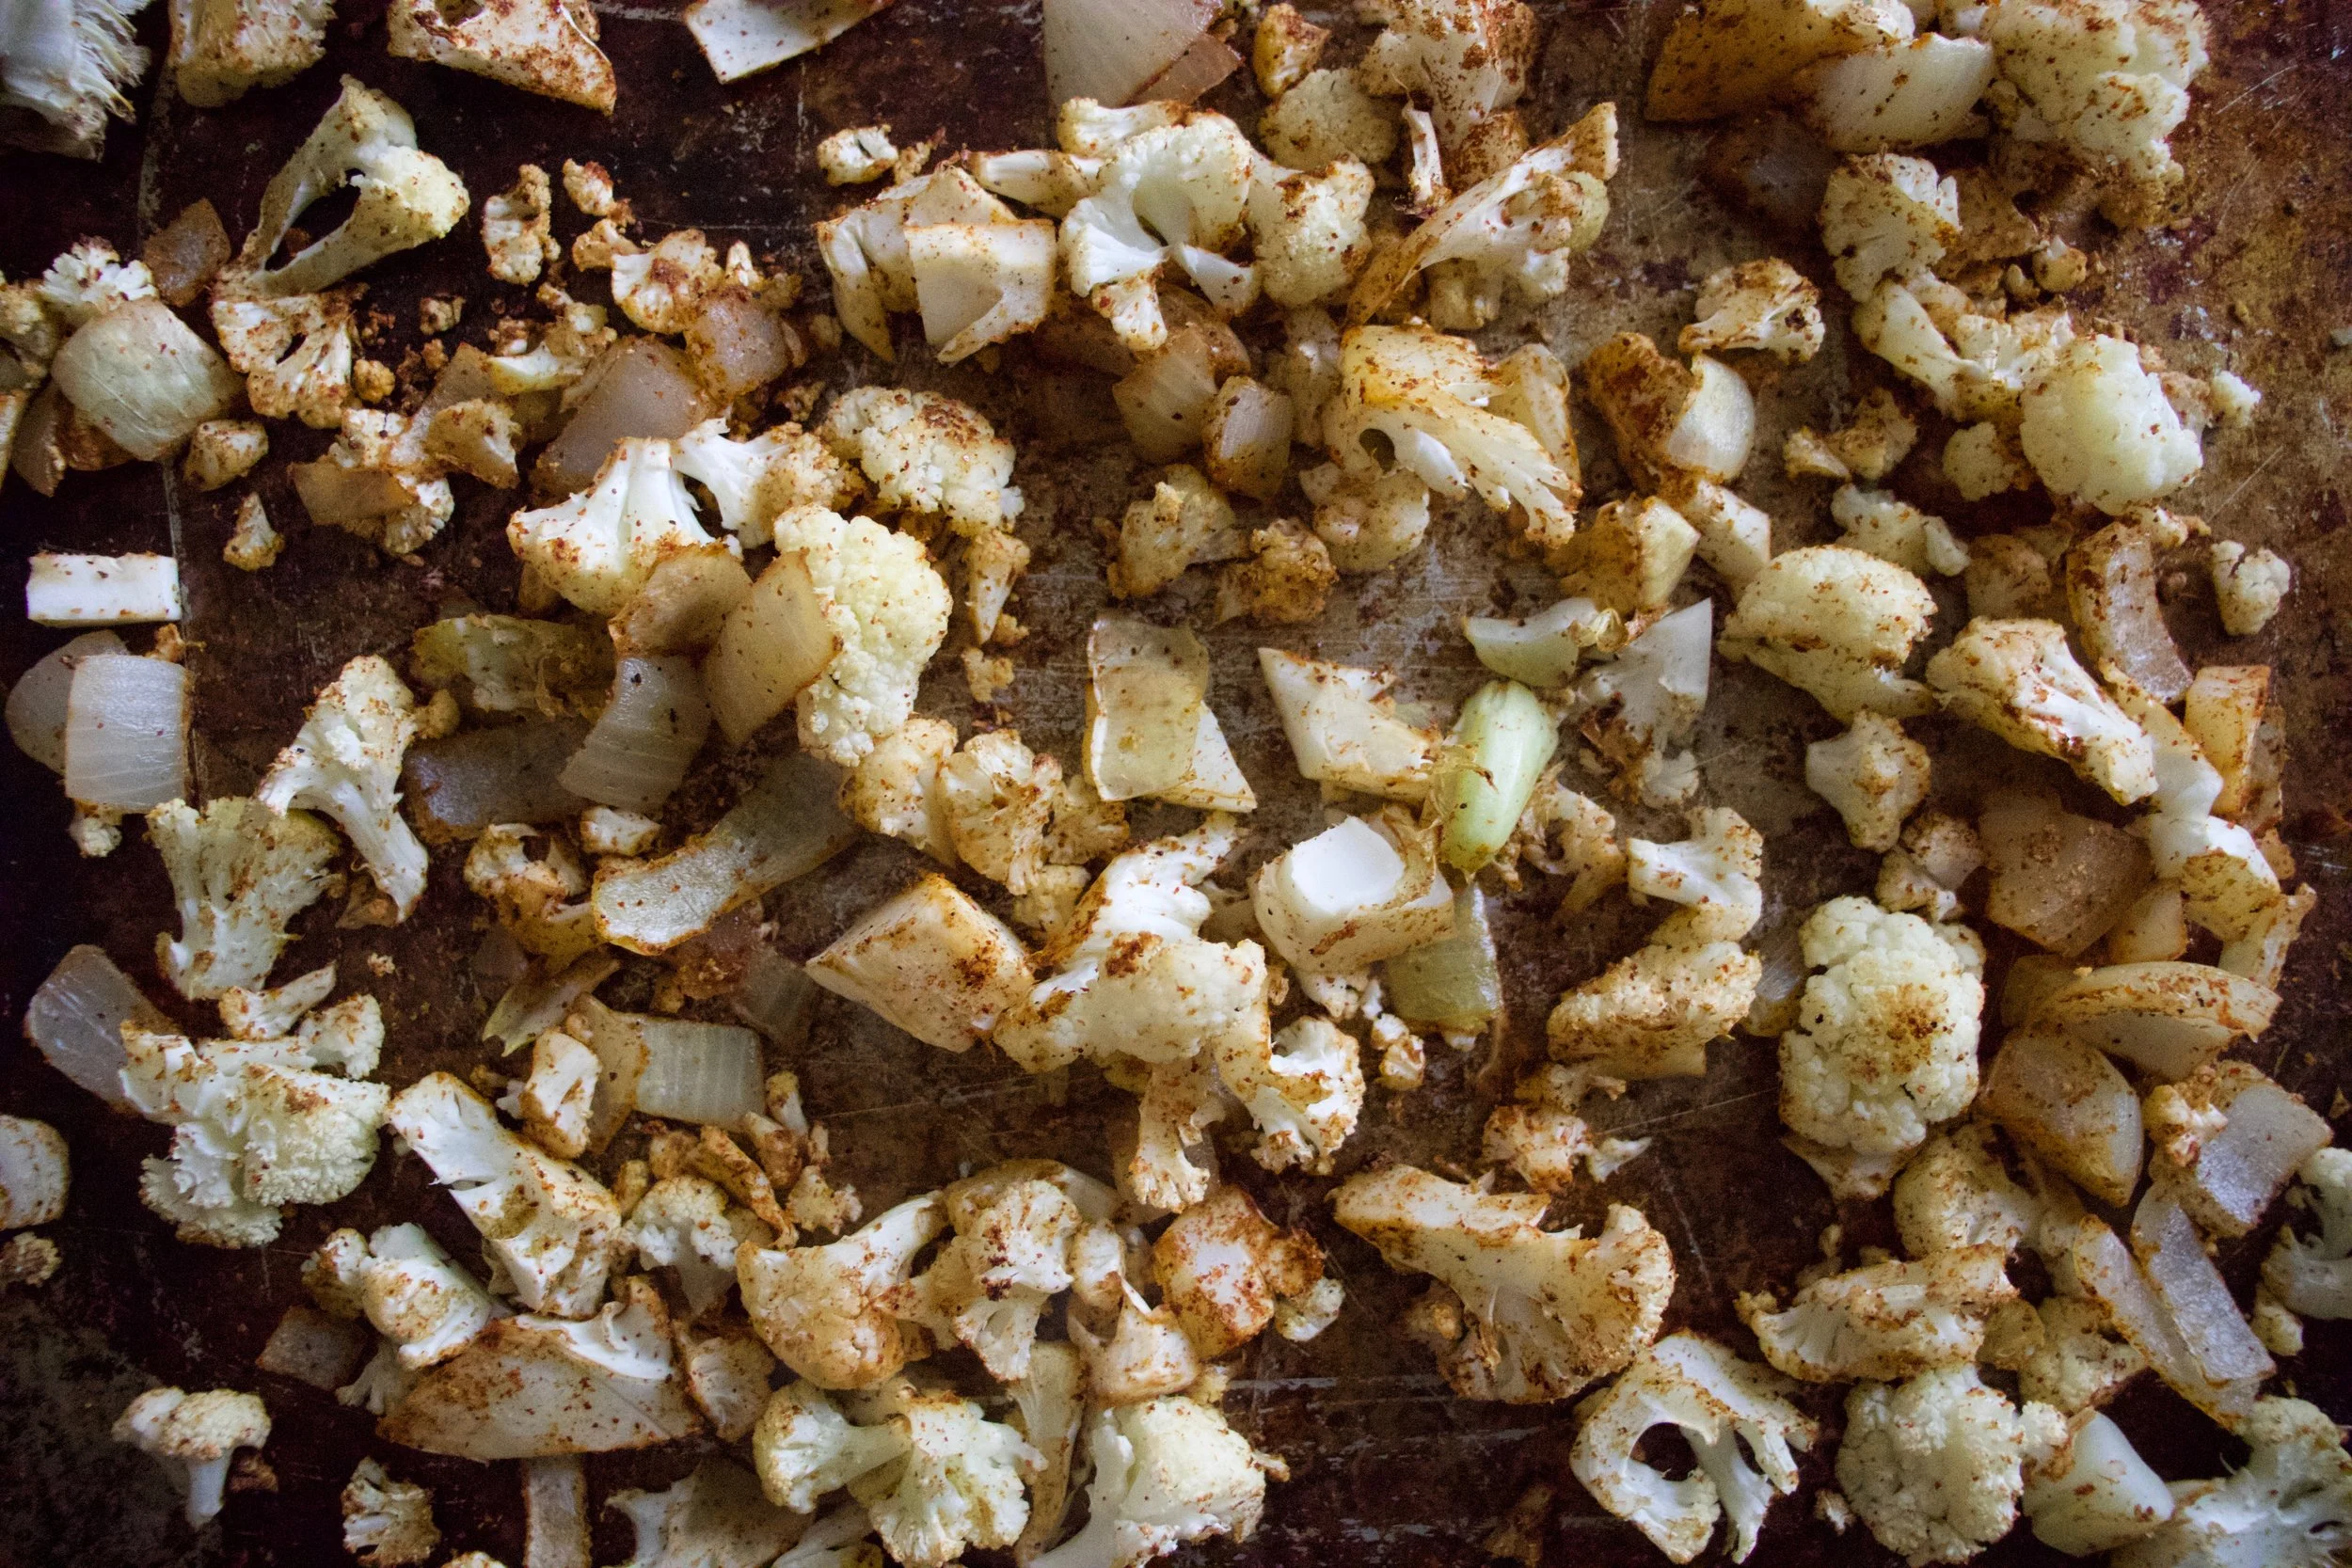
Roasted, and ready. Stop, do not eat it all, but you might want too, it is so freaking good.

And once this guy in fork tender, its ready as well.

Scoop out a bit of the cooked squash from each side making the well bigger. More room to stuff.

Get everything together. Chop the kale, grab a bowl.

The black beans, salsa, scooped out cooked squash go into bowl. Add in the roasted cauliflower and onion and the chopped kale and mix.

Now stuff each side. Get as much in as you can, mound it as high as you can and place back into oven to bake for a little bit longer.

Cooked and slightly crispy in all the right ways.

These stuffed suckers are everything we all wanted and didn%u2019t know we needed. Fantastic, and all the more when serves with extra salsa, sliced avocado, and a wedge of lime.

Go get at it.

Bye!

-C

Makes 2 stuffed halves. This recipe is very easy to fiddle with and can easily be double or tripled.

  • 1 medium sized acorn squash

  • 1 1/2 cups cooked black beans

  • 1/4 head of cauliflower (about 2 cups chopped before roasting)

  • a small onion

  • a few kale leaves

  • 1/4 cup thick and chunky salsa

  • 2 teaspoons cumin

  • 1 teaspoon chili pepper

  • salt and pepper

  • olive oil

  • Avocado, lime, extra salsa (optional)

Preheat oven to 400

Slice acorn squash in half and scoop out all the seeds. (seeds can be roasted). Place both halves cut side down on a lightly oiled baking sheet or oven safe skillet and place in oven to roast for about 30-35 minutes or until the squash is fork tender.

Once squash is in oven, dice the onion and cauliflower into small pieces and place on a baking sheet. Drizzle with olive oil and toss together with the cumin, chili powder, salt, and pepper. Place into oven along with the squash. Roast for 15-20 minutes or until the cauliflower is lightly browned and tender.

When the cauliflower is roasted and squash is cooked, get all the rest of the ingredients ready. Dice up the kale . Take each side of squash and scoop out about an inch more of cooked squash, leaving a good sized well. Place cooked squash into a bowl and kind of mash it up. Add in the beans, the salsa, the kale, and the roasted cauliflower and onions. Season with salt and pepper and mix it all up. Take filling and fill the squashes, stuffing as much as you can in and mounding it on top. Place the halves back onto baking sheet or skillet and place back into oven for 10-15 minutes until nice and browned and slightly crispy on top. Pull from oven and serve. Although not necessary, extra salsa, avocado, a lime are much appreciated.

You know how I have been saying that I have so so many winter squashes that they are taking over my house? (the other night the mr and I counted while eating dinner.. there were 29 at the time) Well, not that I think I cannot eat them all myself, but I want to share and I think I found a way to share them that people (especially the mr) will really like%u2026 Squash noodles of course!

Honestly, I am always more then happy to just eat a squash pretty much as untouched as possible. All I do is stick one (any variety) in the oven on a rack and bake it till its soft then eat it. And it’s like crack.. I can’t get enough. If I was not a stronger person, I would probably eat an entire squash in once sitting, then still want more. (It’s happened) But that’s me. Most of the peps that I make food for are not as squash happy as I am and are not into just squash mush.%u00a0

So last night I noodled some butternut for the mr. And win.. he really liked them,%u00a0%u00a0even with a shit ton of caramelized onions. (I loved the onions, he has never been a huge onion fan but still really like them) %u00a0Ever since zucchini season has been over, I have been trying to find that new meal that I can whip up in a short amount of time, that the mr really likes, and can be made with the abundance of the season. I don’t know why I didn’t do this sooner. And sure, this particular dish takes a little time to make cause of the onions, which are so worth it, but on a regular old night, I can just toss some garlic, olive oil and a handful of fresh herbs into a pot and it will take like 15 minutes. to make.I am a genius (I am sure that noodling is not an original idea, but whatever, original to me)

Anyway.. squash noodles are now a thing for us, and I am sure will be a thing everywhere soon so you should jump in the band wagon now and get to making some too!%u00a0.

The stuff. A butternut squash, a few onions, and a handful of fresh sage. . Also need some garlic, wine vinegar, olive oil, salt and pepper and some water (water not in picture)

Slice up all the onions as thin as you can, mince up the garlic,%u00a0and stick it all into a big pot with a drizzle of olive oil, a sprinkle of salt and pepper and a small splash of water. Stick the pot on the stove on medium heat until the onions start to cook and smell all yummy oniony and maybe a few are sticking to the bottom of the pot. Grab the vinegar and give the onions a good splash, stirring %u00a0around, making sure no onions are stuck on the bottom. Now turn heat to low and cover the pot. Let the onions cook for a while (about a 1/2 hour) giving them a stir ever now and then.

And once the onions are all super soft and starting to caramelize,%u00a0add in the sage (but mince it first).%u00a0Keep the pot on low heat without the lid.

While the sage and onions are melding together,%u00a0turn the squash into some noodles. Do it by the means that you use. I have a mandolin that does the trick, but use your spiralizer, noodler maker, or even a knife and a little bit of patience. Just make sure all you noodles, however made, are all the same thickness to it all cooks at the same time. %u00a0So yeah, cut the bottom part of the squash off and use the neck%u2026 and save the rest for soup tomorrow.

Note%u2026 I did not peel the squash cause I like to eat the skin. If you want, peel it, but really, even if you don’t like the skin, you will not notice it in the noodles.%u00a0

After the sage has had a few %u00a0minutes with the onions, and now that the noodles are made, it’s time to add in a few splashes of vinegar and about a cup of water to the pot. So do that and give it all a good stir.

Now dump in the noodles, stir once more, and turn %u00a0the pot to medium heat and stick the lid back on it. Let cook down on medium heat for about 15 minutes, or unlit the noodles are tender and cooked, but not mushy.%u00a0

Like so.%u00a0

Now all you have to do is eat it.

Place a big pile into a pretty bowl, a fresh tiny little sage leave as garnish, and serve with a clean cloth napkin and a clean fork to eat with..%u00a0Or better yet, just eat it out of the pot with the wooden spoon %u00a0that may or may not have fallen on the floor. (my preferred method of eating)

Have a fantastic Day!

-C

Make 2 Servings%u00a0

  • 1 butternut squash (or the solid, neck part of a squab)
  • 4 medium sized sweet onion
  • 4-5 cloves of garlic
  • handful of fresh sage leaves
  • 1- 1 1/2 cups water
  • 2-3 splashes of red or white wine vinegar
  • olive oil
  • salt and pepper to taste%u00a0

Take onions and slice them as thinly as you can and mince up the garlic.%u00a0Place into o big pot with a drizzle of olive oil, a splash of water and a sprinkle of salt. Stick on stove on medium high heat and stir onions until they start to give off a sweet onion smell and are starting to stick to the pot. Add in a splash of vinegar to deglaze pot, give it all a stir, and turn heat to low. Cover with a lid and continue to cook, string now and again, until onions reduce in volume by about half, are all tender,%u00a0almost falling apart and are starting to brown a bit. (takes about 30- 40 minutes ) When onions are at this point, tiny chop the fresh sage and mix into the onion.%u00a0

Now grab you squash and turn in into noodles.(%u00a0I cut the bottom part off (for soup tomorrow) and use the neck of the squash).%u00a0You can do this by using a mandolin, a noodler, or even a knife. Any way works, just make sure the noodles are all the same thickness (mine were about 1/4 inch thick)%u00a0so they cook at the same time. %u00a0Noodle about 5- 6 handfuls or cups of noodles.%u00a0

Now right before you add the noodles to the pot, add in a few more splashes of vinegar. another pitch or two of salt and pepper, and a cup of water, Mix that all %u00a0around then add in the noodles. Give those a mix then turn heat to medium and place the lid back on the pot, checking and string every few minutes until the noodles are tender(but not falling apart) and the water has pretty much evaporated. (about 15 minutes) %u00a0If you notice the water is gone and the noodles still need more cooking, add in another 1/2 cup of water.

And when you are happy with the tenderness of the noodles. remove pot from heat, taste and season with more salt and pepper if needed,%u00a0%u00a0and get to eating!!!!!

Had some littles over for dinner halloween dinner the other night %u00a0and I made them some mac n’ cheese.

Kinda, cause it wasn’t really cheese. Let me explain.%u00a0

These particular littles are tough. Getting them to eat things that are not pizza, hot dogs,%u00a0or some other crap is not always easy.(although they will always eat carrots)%u00a0So whenever they come over, I try to feed them a healthier version of something that I know that they like, %u00a0like tofu dogs or homemade whole wheat pizzas. So this night, I though I would give my vegan mac and cheese and try.%u00a0%u00a0I mean,what kid doesn’t like it? But what kind is the question. If you ask them, its got to be boxed Kraft mac and cheese.%u00a0I knew when I was making it that there was a great chance that I might have to make peanut butter banana sandwiches as well, but whatever These little littles need to stop being such picky crappy eaters and yeah. Even if that means I make them eat what why don’t like or that on the ride home I tell them that any pizza that is not home made will probably end up killing them)%u00a0So I try, and sometimes it works.%u00a0

So I made it, no cheese in sight and served it up.%u00a0The verdict…. The mr, he loved it. My sister (she came too) she was into it as well. One little ate almost an entire bowl, and the other, well he spit it out,%u00a0but he is more a hot dog guy then a mac and cheese guy so his opinion doesn’t count. So to conclude,%u00a0yes, this is a fantasic mac and cheese that just happened to be cheese less,%u00a0%u00a0full of veggies, and damn tasty!

And serving suggestion DON”T LET THE LITTLE KNOW IT”S NOT REAL CHEESE!!! They don’t need to know

To the mac!

The stuff. A small butternut squash, a potato, an onion, and a carrot. Also needed is nutritional yeast (the cheeze), garlic powder, olive oil, salt and pepper, and some water. And pasta.. don’t forget the pasta.%u00a0

Start with the onion and carrot in a big pot with some oil. Stick that on the stove and turn on the heat, and when that’s going, chop up the butternut sqauh and the potato and toss that into the pot too. Let the stuff cook for just a few minutes.

Pour in water (enough o submerge all the veggies) %u00a0and add in the garlic powder and some salt and pepper. Bring the water to a boil then turn heat down to medium and stick a lid on the pot.

Now is a good time to boil up your pasta situation (cook it the way the package says too)

When it’s done, strain it. And if it happens that it is done a little before the sauce, it’s cool, just drizzle it with a little oil so that the noodles don’t all stick together and set aside.

Back to the sauce. Once the pot of veggies is all tender and falling apart, take it off the stove.

And blend the crap out of it with your blending method of choice (a hand o a regular blender)

Oh, and mix in the nutrioanl yeast (can add it in at the blending stage%u2026 I just forgot too) and season with any more salt and pepper if needed.

Grap the cooked noodles,%u00a0dump them into the sauce and give a good mix.

Scoop into food eating vessels,(handled coffee mugs are great for the littles.. and cute)%u00a0Maybe sprinkle on some chopped green stuff(my people enjoyed the addition of chopped up kale) and serve right away!

Now you can eat all the mac n cheeze.%u00a0

Happy Thursday!

-C

Serve 6 or so people

  • 1 lb macaroni noodles (any kind you like. vegan, gluten free, whole wheat)%u00a0
  • half a small butternut squash (about 2 1/2 ish cups chopped)
  • 1 medium white potato
  • 1 medium yellow onion
  • 1 large carrot
  • 1/3 cup nutritional yeast
  • 1 tablespoon garlic powder
  • salt and pepper to taste
  • olive oil
  • water

Chop up the onion and the carrot and stick into a large heavy bottom pot with a splash or two of olive oil and stick on the stove on medium heat.%u00a0While that’s %u00a0going on, chop up the butternut and potato into reasonable small chunks and toss that into the pot with the other stuff. Add in the garlic powder, season well with salt and pepper, and add enough water to full submerge the contents of the pot. Bring the water to a boil then reduce heat to medium and stick a cover on the pot.

While the veggies are boiling, boil the pasta up, slightly al denta (follow what the pasta people on the package tells you to do)

Once all the veggies in the pot are super tender, even falling apart (about 20 minutes) remove pot from heat and using your blending method of choice (hand or normal blender)%u00a0%u00a0blend everything together until smooth and creamy and then add in the nutritional yeast. Taste and if you think it needs it, add more salt and %u00a0pepper.%u00a0If you find that the sauce seems to thick, add in a splash or two of water.. to thin, stick back on stove and cook long to reduce.%u00a0

So you got you cooked pasta and you sauce. Mix it all together. And wa la%u2026 Mac N’ Cheeze

serve right away and eat it all. But any left overs can be refrigerated. Tastes great %u00a0the next day warmed in a skillet with a little oil.%u00a0

I have so so so many winter squash. It’s getting kind of out of hand. The mr is even making me a couple of wall shelves specifically for the squash so we can get our table back (it is currently covered in squash and tomatoes).%u00a0I hoard them and I can’t exactly tell you why. I think there is a part of me that is afraid that sometime durning the winter I am going to ran out of squash and am going to be forced to eat, I don’t know, other food. And there also the part of me that knows that I will eat it all and why the hell not hoard them.. they are so pretty and lovely and%u2026..well because I can!%u00a0When I sit here and think about it, %u00a0there is no real logical reason for me to have so many, especially sense I will be doing a winter farm share and we get squash at each pick up all winter long.%u00a0

Hum%u2026.Things to think about..Oh well. I’ll just call it a little werido quork of mine%u2026 squash hoarder, which is much better then a trash hoarder or a “stupid shit I found on the side of the road” %u00a0hoarder (that would be the mr.. but I don’t judge).

So yeah, %u00a0I might need a squash intervention, or I can just make everyone around me happy by baking them sweet ass squash treats. I have shared and I always like to share my squash loot (see, another resin to have so many)%u00a0but I found that most of the people in my life do not have the same kind of hunger for savory cooked squash.(weirdos) But you know what they do like? Cake Everyone will eat cake.

And for this cake I used delicata. It is really sweet,(I think all on its own it taste like a sweet dessert)%u00a0so tasty, and easy to cook, The perfect squash for a cake. Add in the warm fall spices and you got yourself a winner. And bonus.. if you have heard that there is a canned pumpkin shortage this year and are are worried about you pumpkin fix. Stop. You don’t need canned pumpkin. Just make your own puree and make it with all the squashes, especially delicata.%u00a0

Now go bake a cake.. I will probably make another one this weekend while I start on eating/baking with the sweet dumplings and buttercups that are piled on the fridge (seriously.. I have squash EVERYWHERE!)

The stuff. In the big white bowl there is white whole wheat pastry flour, baking soda and powder, salt, cinnamon and nutmeg. Then we have some brown sugar, oil, water with some vinegar and a already baked delicata squash. Also going to need another uncooked squash, earth balance and a little more brown sugar for the upside down part.

First off, grab yourself 10-12 inch skillet, preferably one that you have not just cooked garlic in.%u00a0

Slice up the uncooked delicata into 1/2 inch slices and remove the seeds (to roast later)

Stick the earth balance and the lesser amount of brown sugar into the skillet and place it on low heat, just to melt the butter and sugar down to form a sauce.

Now layer the squash rounds in the sauce. Fill in the skillet as much as you can. (%u00a0any left over can be for %u00a0cooked for lunch)

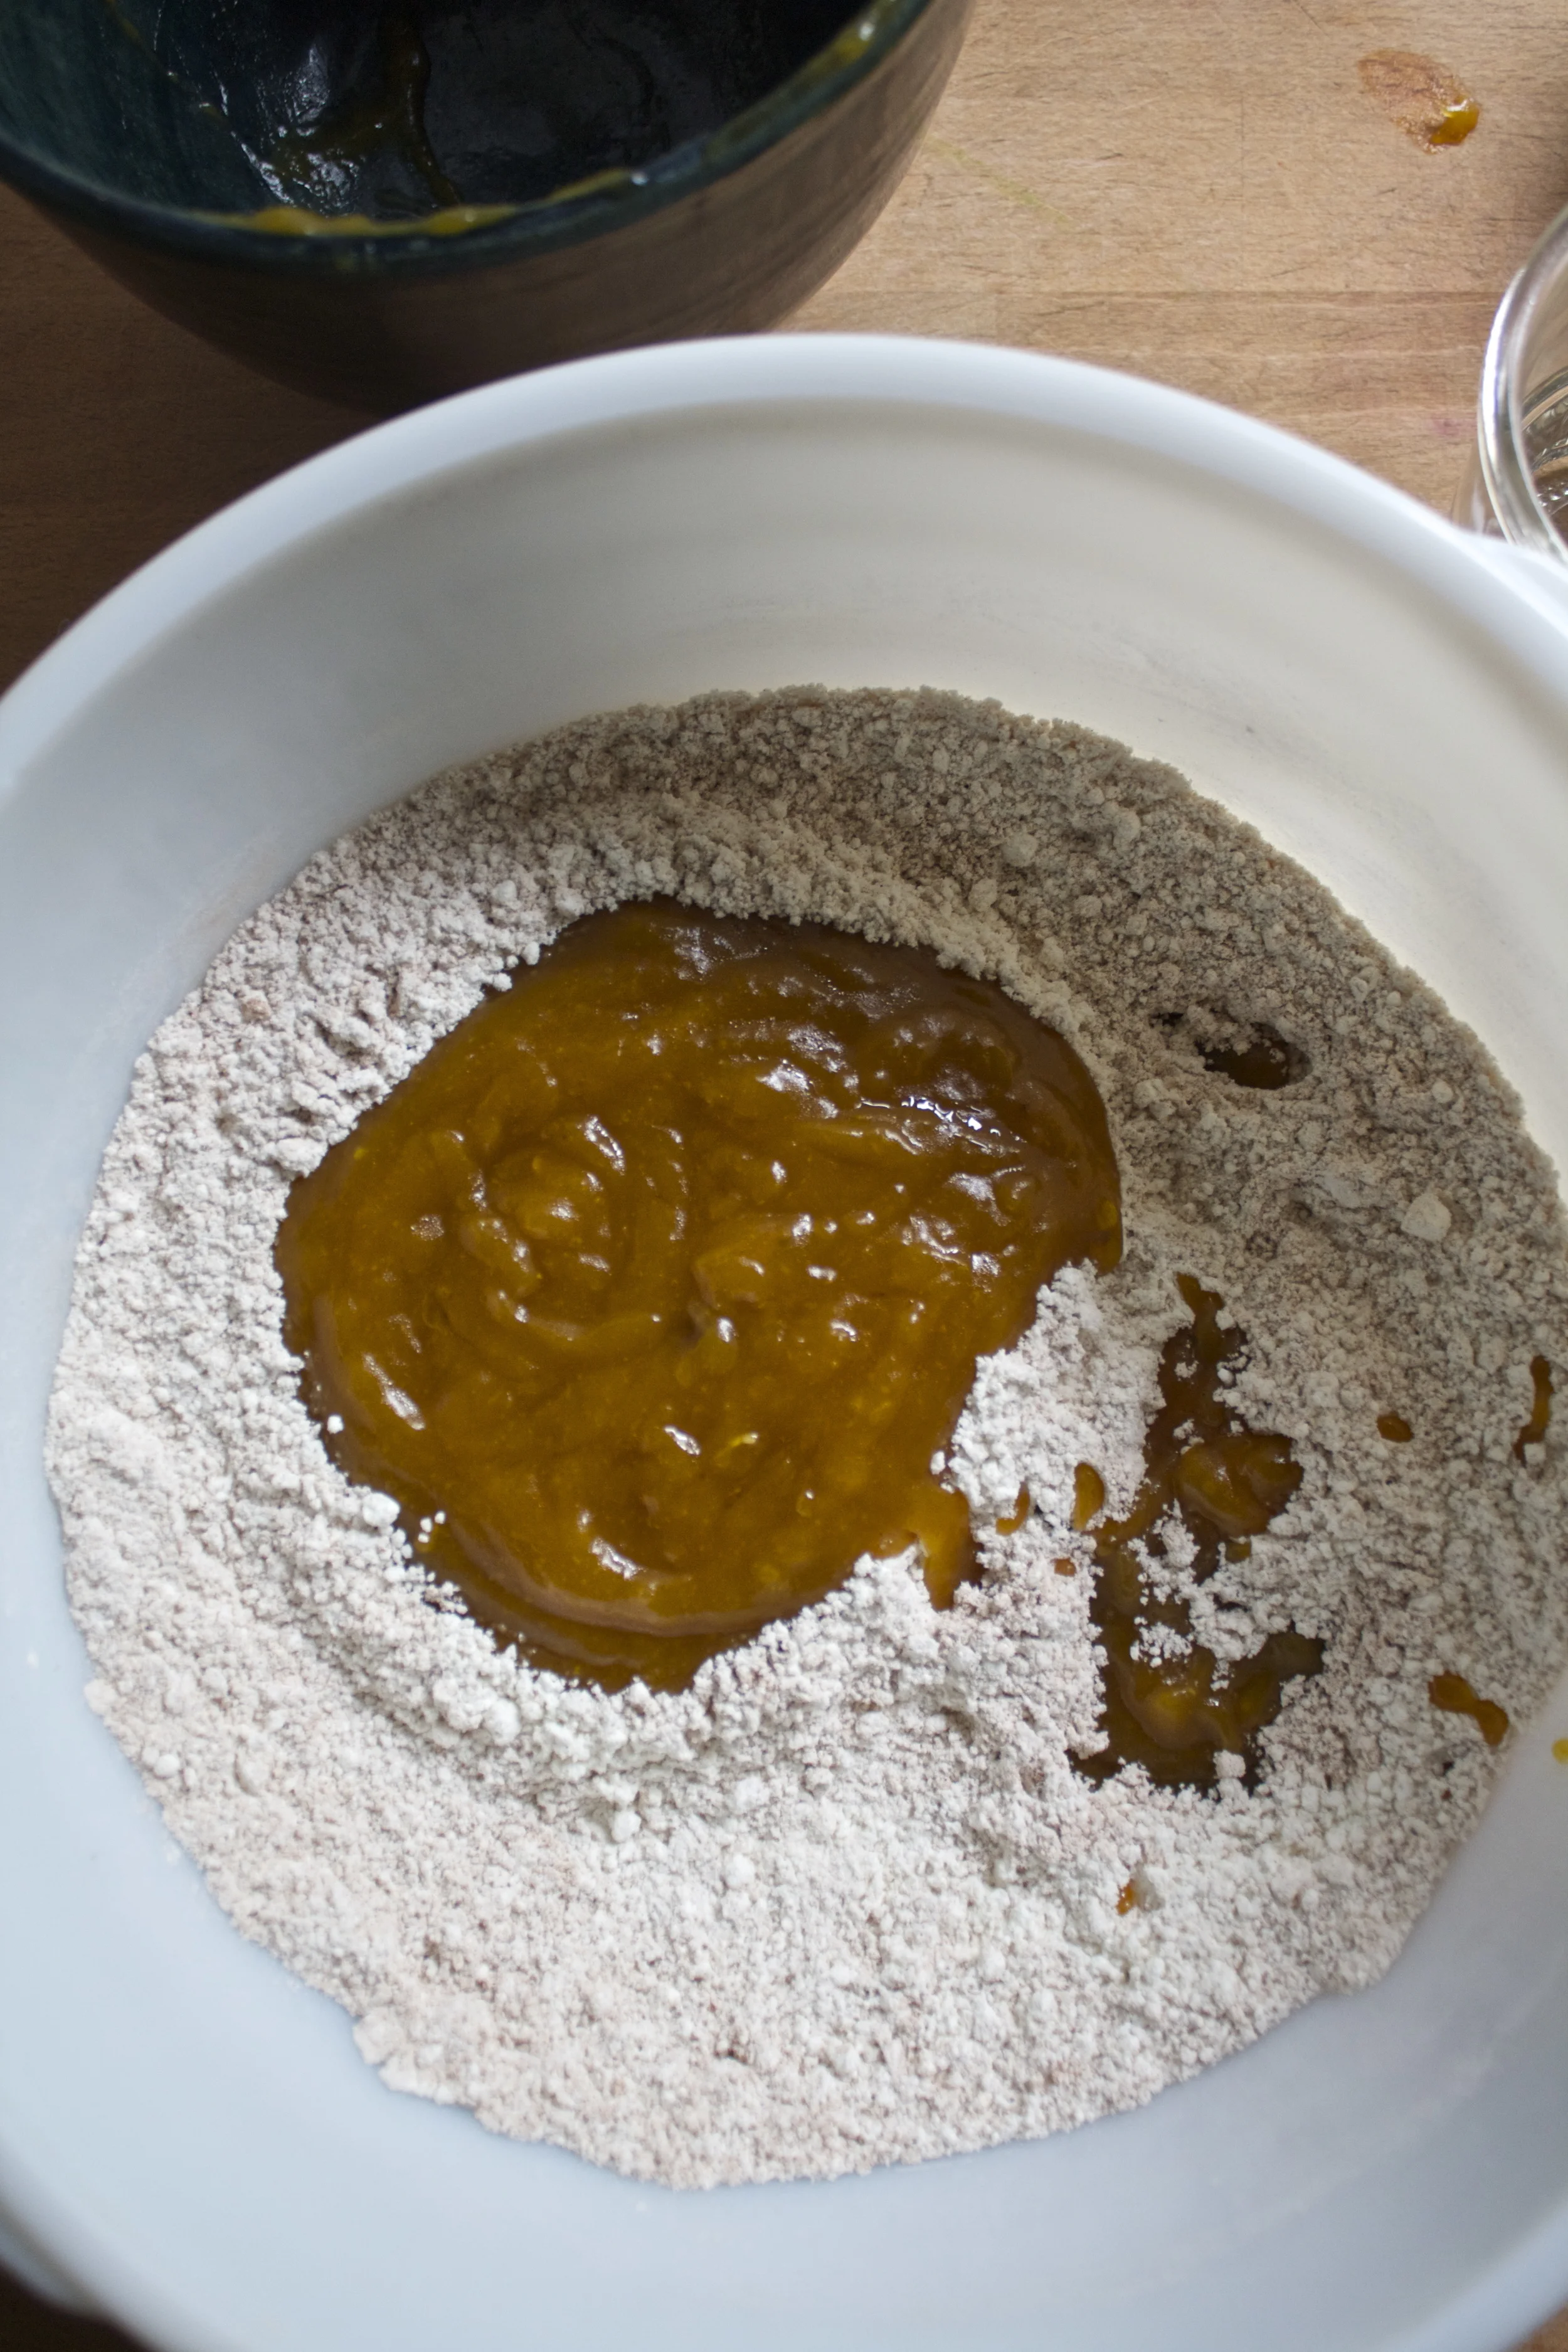
The already baked delicata squash (minus the seed and skin.. save the seeds to roast, skin you eat right away) goes into a bowl with the brown sugar and oil. Mix it all together until combined.%u00a0

Note.. My squash was still warm when I mixed it with the sugar and oil. which really helped the sugar resolve and for the mixture to be smooth. If you squash is cold,%u00a0warm it up a bit..

Whisk together all the dry and dump in the squash mixture and mix.

And slowly pour in the water/ vinegar mixture and mix until just incorporated.

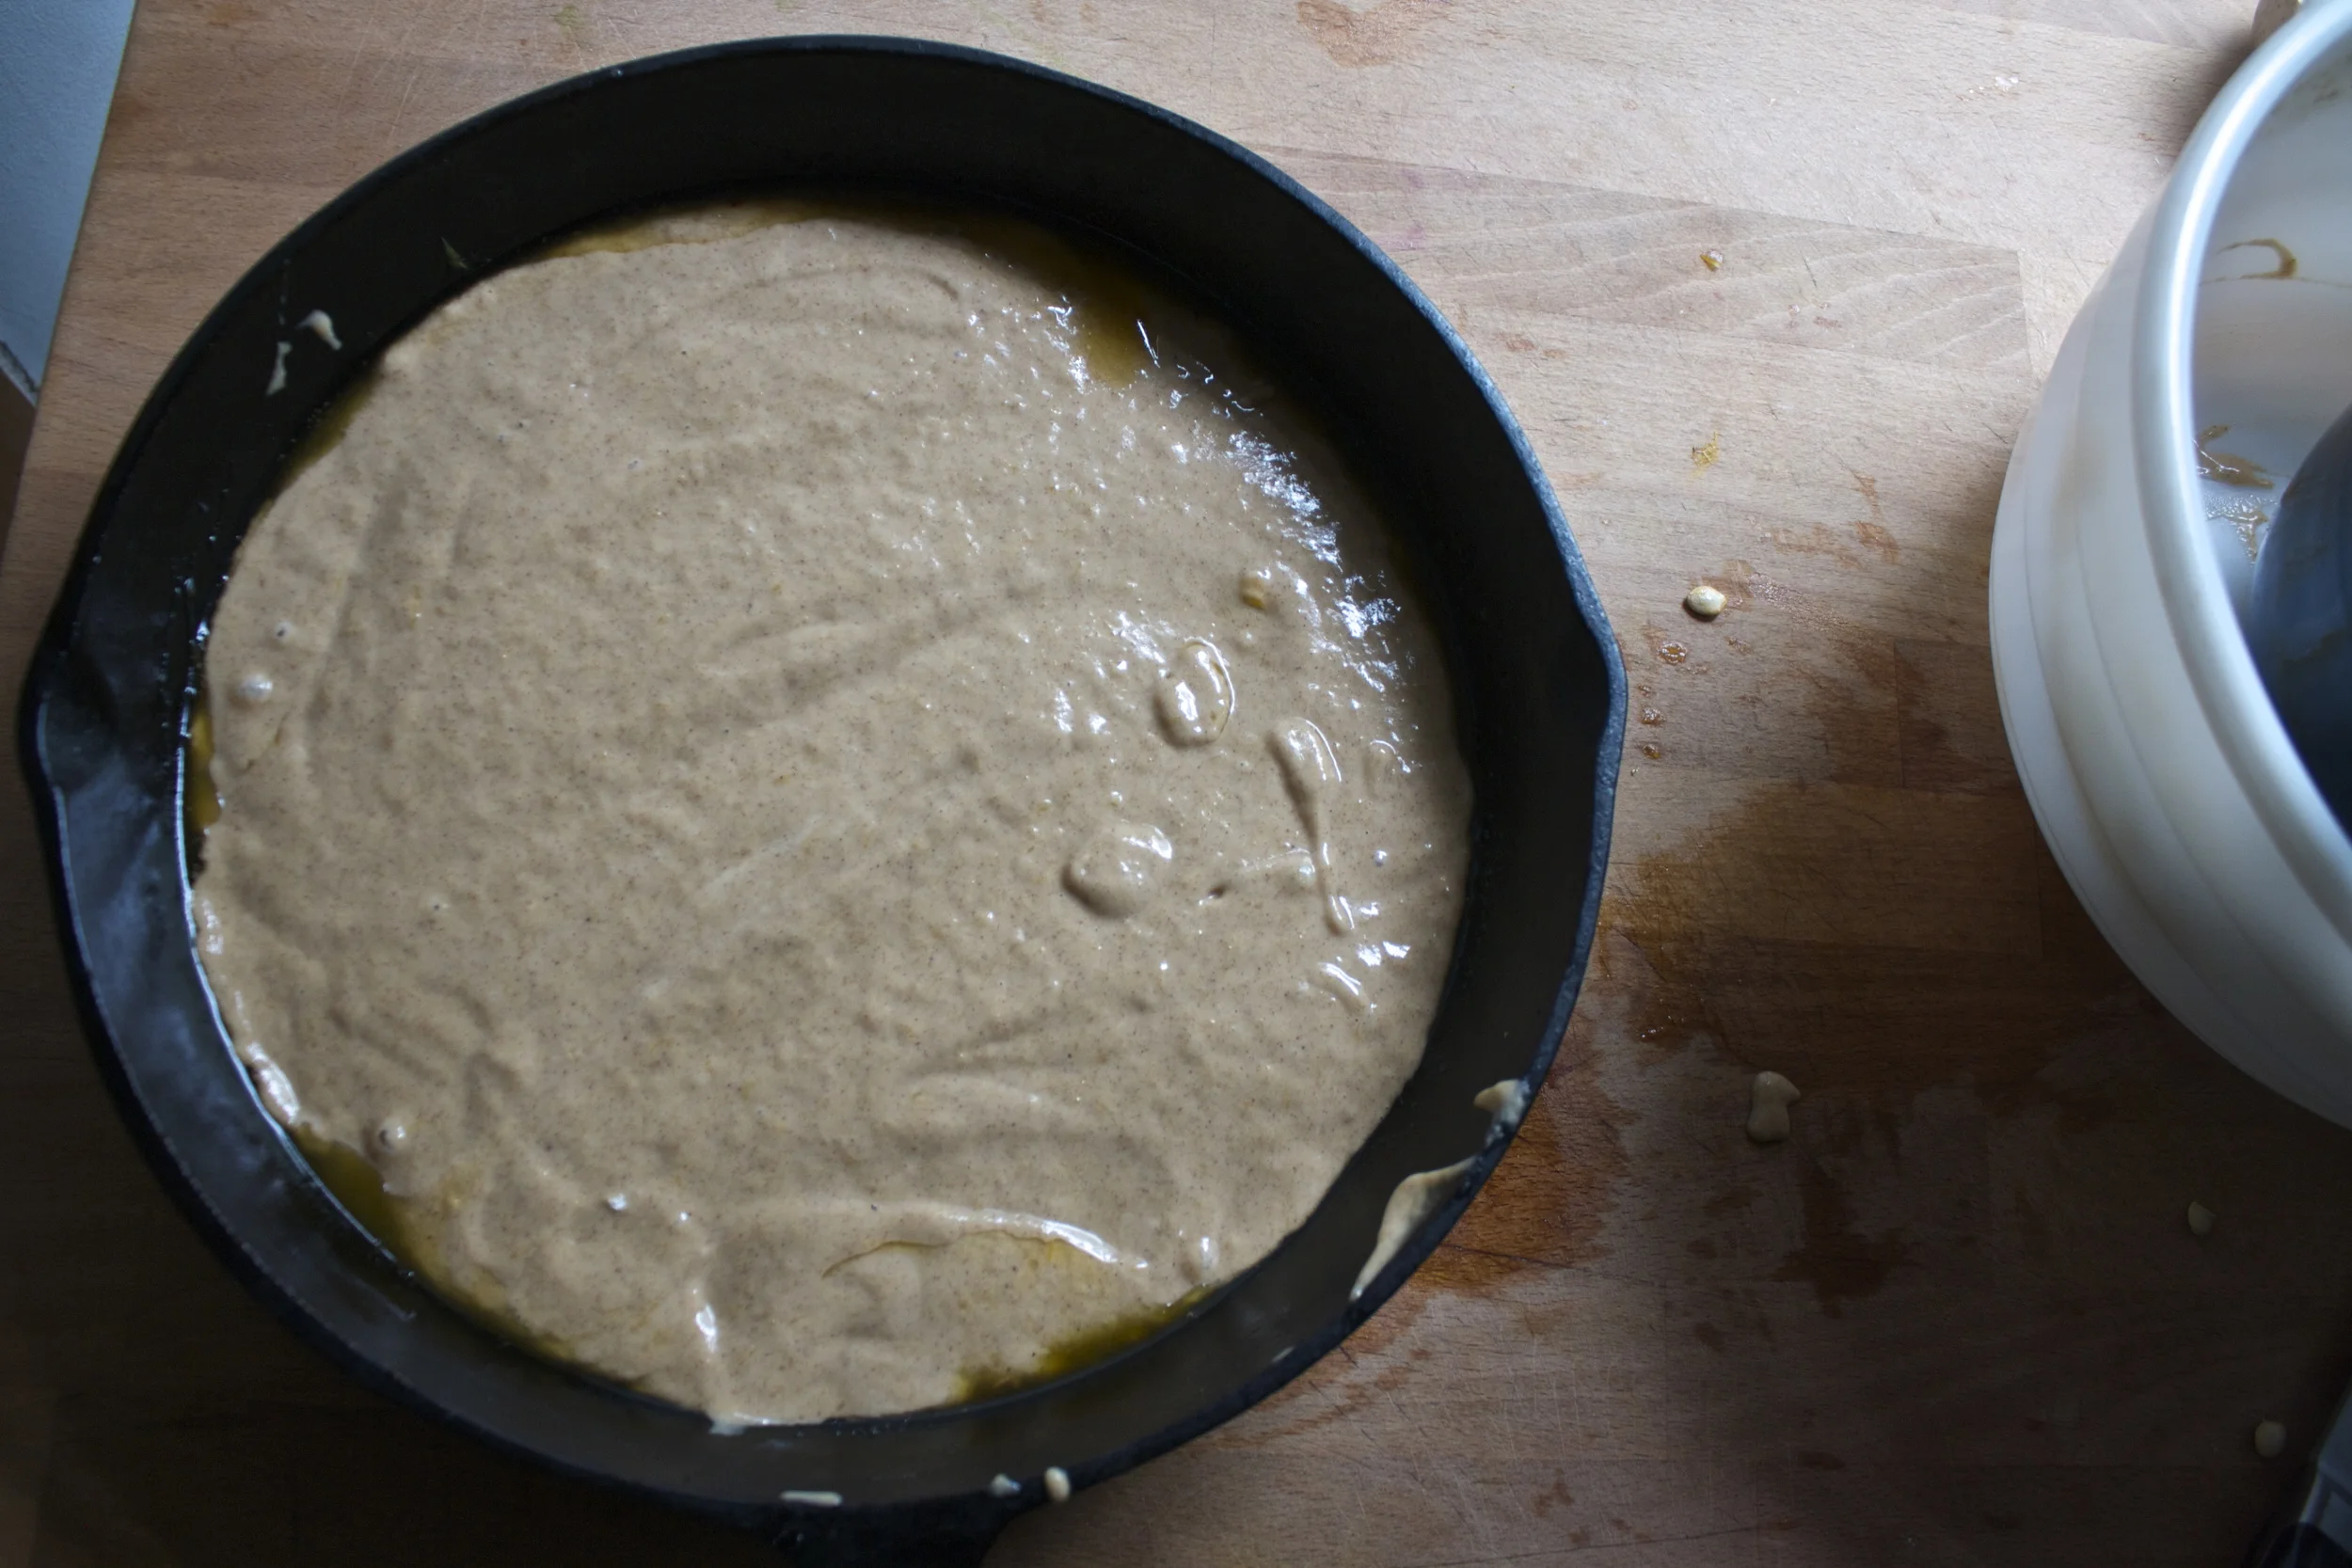
Now slowly pour batter over the delicata in the skillet.

And into the oven it goes!

After 45-50 minutes, the cake should be browned and beautiful and a tester should come out clean when stuck in the middle. Remove the cake and place on cooling rack for about 8-10 minutes to cool. Don’t get to excited and do it to soon or else the caramelization on the bottom will still be too liquid and completely soak into cake. Giving it a few minutes will let it cool enough to set up and stick to the top%u2026.so just wait!

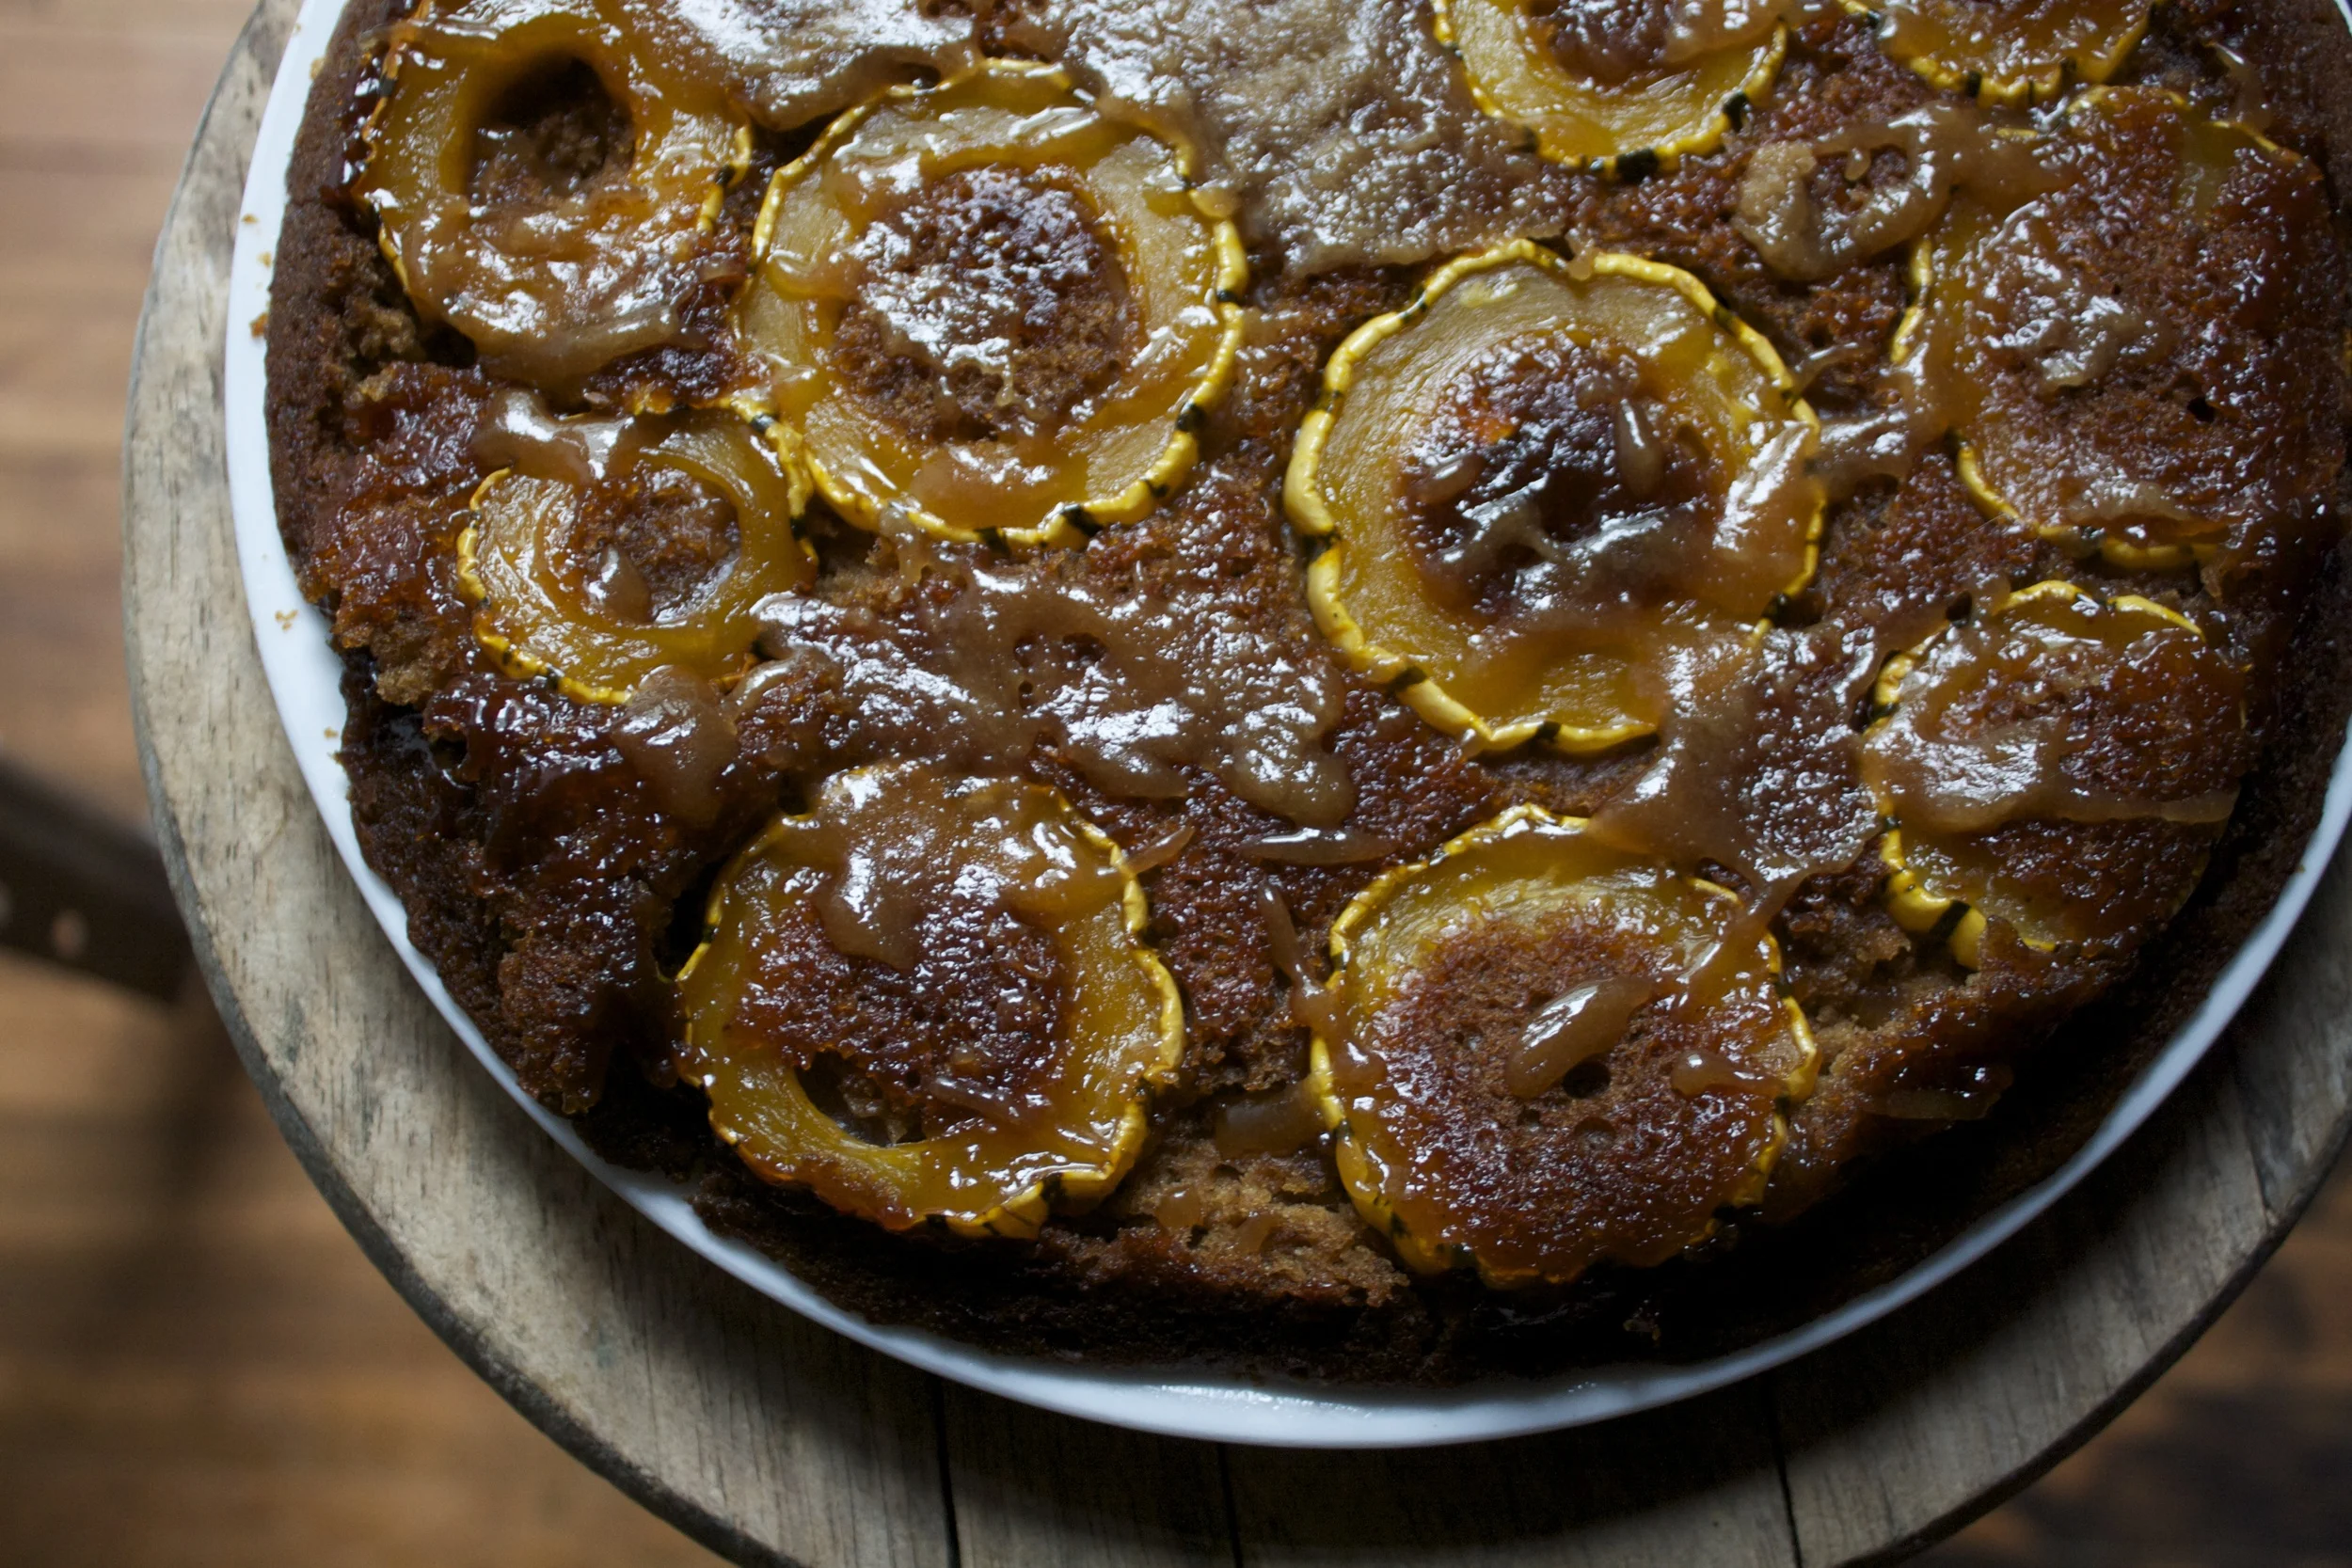
And for the best and scary part%u2026flip the skillet onto a plate or cutting board and be amazed. oh, but right before you do, run a spatula or knife around the edge to make sure the cake is loose.

It really should have no problem coming out of the skillet, but if any of the squash sticks (one piece of mine did) just scrap it out and place it back on the cake%u2026 no one will notice)

Now time for a slice%u2026 or maybe two!

And for reals, go get yourself lots of squash, even if it’s just to make cakes with!

Have a fantastic weekend!

-C

Makes a 12 inch skillet cake (can be made in a can pan)

For the cake

  • 1 3/4 cup white whole wheat pastry flour (can use white pastry, wheat pastry, or all purpose)
  • 3/4 cup brown sugar
  • 1 cup warm delicata squash puree*
  • 1 teaspoon baking soda
  • 1 teaspoon baking powder
  • 1/3 cup mild flavored oil (canola or veggie)
  • 1 cup water%u00a0
  • 1 tablespoon apple cider vineagr
  • 1 teaspoon salt
  • 2 teaspoons cinnamon
  • 1/2 teaspoon nutmeg%u00a0

For the upside down part

  • 1/4 cup of brown sugar
  • 3 tablespoons earth balance]
  • 1 small uncooked delicata squash%u00a0

*Note.. To make delicata puree, simply stick the whole squash into the oven and roast until fork tender. Remove and let cool enough to handle. Cut in half, scoop to the seeds and scoop the flesh into a bowl%u2026.thats it. Oh, save seeds to roast and eat the skin as a snack (skin is my favorite part and the seeds are almost better then pumpkin!)

Preheat oven to 350 degrees.%u00a0

Grab yourself a 10-12 inch clean cast iron skillet (maybe don’t cook garlic in it before you make this cake). Stick the earth balance and the brown sugar in it and place on low heat until the butter and sugar melt together and form a sauce. Remove pan from heat. Take the raw delicata squash and slice it into 1/2 inch rounds. Remove the seeds(save for roasting) and place the rounds into the bottom of the skillet, fitting in as many as you can, without overlapping. Set aside and make cake batter.

In a large bowl, whisk together the flour, salt, baking soda and powder and the cinnamon and nutmeg. In a separate bowl, combine the cooked warm squashwith the oil and the brown sugar. (if you squash puree is cold, warm it up. It mixes better warm)%u00a0Mix until completely combined. Dump wet into dry and whack together then slowly pour in water/ vinegar mixture and whack until everything is full incorporated.%u00a0

Pour cake batter over the stuff in the skillet and place into the oven. Bake for 45-50 minutes , until a nice golden brown and tester in middle comes out clean. Remove and place on a cooling rack or ontop of the oven to cool for 8-10 minutes. Once %u00a0cooled, take a plate, cooling rack, or cutting board that is a least a little bigger therm the skillet, place it ontop pif the killet, and flip. The cake should drop right out%u2026. if anything sticks in the skillet, trust scrap it off and stick it back on the cake.

Now the cake is ready to eat.. so grab a knife, cut a slice and do it.

Chomp Chomp Chomp%u2026 The sound I make as I eat this freaking fantastic crunchy granola. You know it’s good when the person sitting next to you is annoyed by the sound of you face while eating.%u00a0 I eat a lot of crunchy stuff. And I am pretty sure I annoy the mister a lot.%u00a0

Oh well, he will live, and he eats his fair share of annoying stuff too so we can just call it even.

So granola. I love it. I make a batch every few weeks or so, and I usually make it just for me. (I almost never make things just for me) I like to keep it simple but flavorful. A tad sweet, but not really, and crunchy, without the oily fried taste. I also like a variety of sizes, some big clusters and some small pieces.%u00a0

This granola fits the bill perfectly. Made with 5 ingredients, no oil, and the perfect sweetness level. %u00a0It’s one of my favorite flavors yet. And I know I said I made it just for me, but the mister really liked it too. (I can’t help sharing)

The simplest of stuff. 1 smashed banana, a cup of pureed butternut squash, Vietnamese cinnamon*, honey, and old fashion oats. (and a dash of salt, not shown)

*Note. I only ever use Vietnamese cinnamon because once I start using it, regular old cinnamon just won’t %u00a0cut it anymore. It is a bit sweeter and a lot more spicy. If you don’t have it or don’t want to use it, use regular cinnamon and add in 1/2 a teaspoon of all spice.Toss the cinnamon and salt with the oats. Mix together the banana, squash and the sweetener and combine with the oats until full incorporated.%u00a0

Another note. Because I made this granola for me and no body else, I actually omitted the honey (I think that banana abs squash make it sweet enough) But if I was making this for lets say, the mister, or a friend, I would use add a bit. The sweetness level and sweetener of choice is up to you, but 2-3 teaspoons of honey or maple syrup is usually sweet enough for %u00a0people.

Dump the mixture on a parchment lined baking sheet and give it a little pat, you know, to settle all the bit and pieces together, all cozy and evenly spread out. Now stick into a preheated oven and after about 20 minutes, take out of oven and give the granola a toss, breaking apart any super big chunks or overly wet pieces. Put back into oven for another 20 minutes. (I like my granola super crispy crunchy so I cook it a little longer, like 30 more minutes)And when you are happy with the crunchiness of you granola, remove from oven and let cool, trying not to eat all of it while it sit’s on the counter looking all pretty and smelling like happiness.%u00a0

Grab a bowl, stick the rest into a jar with a lid, hide it from others, and chomp chomp chomp away!

-C

Banana Butternut Granola

  • 3 cups old fashion oats (use gluten free oats if needed)
  • 1 ripe banana, mashed%u00a0
  • 1 cup butternut squash puree (can use canned)
  • 2 tablespoons Vietnamese cinnamon (or 2 tablespoons regular cinnamon and 1/2 teaspoon of allspice)
  • 1-3 tablespoon honey or sweetener of choice (use greater amount for sweeter)
  • dash of salt

Preheat oven to 375

In a large bowl, mix together oats, cinnamon and salt. Mix the mashed banana, squash, and sweetener of choice together and combine with the oats. If the mixture%u00a0seems really dry, add in a very small splash of water to loosen just enough to mix.

Dump mixture onto a parchment lined baking sheet and evenly disperse the mixture. Give it a kind of smoosh to compact the oats and to make sure all its all the same thickness on the pan.

Stick into oven for 20 minutes. Remove and give granola a little toss, maybe breaking apart any really big chunks (unless you like really big chunks) and put back into oven for another 20 minutes. (30 for a crunchier granola) Remove from oven and let cool on %u00a0baking sheet before storing in an air%u00a0tight container. If you find that it is not as crunchy as you would like or is a few days old and lost some of its crunchiness, just stick it back into the oven for a few minutes to re crunch.

Eat as is, as a cold cereal, %u00a0dip in peanut butter, add to popcorn or whatever way you want to eat it. No utensil required.

I know that it it spring, but I still have a winter farm share for another month and will be cooking and eating roots and squash until the summer share starts in early June. And I am good with that cause I love me some root veggies and butternut squash.%u00a0 But, yes, it is spring and my body isn’t craving the super hearty, rich foods that it was just a few short weeks ago (more like last week) When the temperatures first start to go up, I usually want my food to not feel as heavy or my spices to be quite at warming (I am still all over curries and hot hot hot sauces in the summer). It’s like I have said before, I tend to change up my spices with the seasons. %u00a0

So to give a lighter feel to a heartier squash, I busted out one of my favorite spices, the oh so lovely tarragon. It has a sweet, light, fruity and floral taste that pairs beautifully with the squash and onions. It give the dish a nice spring like flavor that will leave you feeling satisfied without wanting to move directly onto the couch and hide under a blanket. This is a eat and ride you bike kind of dish ( you don’t actually have to go for a bike ride if you don’t want to)

Note. If I had a grill, I would definitely cook this dish on it. As of now, I don’t own one so I am left to cook on the stove. But by all means, if you have a grill, do it up!

Half of a medium sized butternut squash (or use a whole one.. I had a half in the fridge that was waiting to be cooked) %u00a0and one whole onion (two if you use a whole squash) %u00a0Apple cider vinegar, olive oil, salt , pepper, garlic powder, and, last but not least, the oh so fragrant and tasty, tarragon.%u00a0

Chop the onion %u00a0and the squash into big chunks. If you don’t like the skin of the squash, you can peel it, but I like it so I don’t peel. Drizzle olive oil in a pan or a baking sheet, toss the veggies in and add the garlic powder, tarragon, salt and pepper and a few splashes of apple cider vinegar. Toss around. Stick into oven at 425 degrees for about 30-40 minutes.%u00a0When the squash is tender and the onions are cooked, remove from oven.%u00a0%u00a0

I am pretty sure you can figure out the rest.

Happy day!

-C

Tarragon Butternut and Onions

  • Half of Medium Butternut Squash
  • 1 Large Onion
  • 1 Tablespoon Dried Tarragon (use fresh if you have it.. 2 tablespoons)
  • 2 Tablespoons Apple Cider Vinegar
  • 1 Teaspoon Garlic Powder
  • Salt ans Pepper
  • Olive Oil

Chop squash and onions into similar size pieces. Toss in a skillet or on a oiled baking sheet and add the rest of the ingredients. Toss around and place into a 425 degree oven for about 30-40 minutes or until squash is fork tender. %u00a0

Remove from oven and eat.

%u00a0Make as a side dish or add to a salad. Eat as a light lunch, or a midnight snack%u2026 eat it however you want.

Lets kick the weekend off right, with a nice warm and hardy salad. Not a frilly little salad, but a salad that fills you up and leaves you feeling warm and cozy. %u00a0 A salad with a lot of squash! So here’s the thing, I eat a lot of winter squash, maybe 4 plus a week. Because I eat so many, I store a good amount in a cold storage area outside of the little warm living space we call home. Last week we had a drastic temperature change and %u00a0a good few of the my butternut and spaghetti squash froze.. then started to de-thaw. Not good. That was the second bad food experience of the day%u2026.. Earlier that day I had bought about 2 dozen super ripe bananas that I had been planing on freezing and what not. There were four bunches and each bunch was wrapped in plastic and were in a bag that I left near the back door. The thought crossed my mind, but I hastily brushed it away. Washer won’t eat those%u2026.. Well guess what? The shit ate half of my freaking bananas%u2026plastic and all. Needless to say, I was kind of pissed already so finding my squash on the way out really set me off. I was not about to let more food go to waste.(or be eaten by the dog) I went into rescue mode..Chop chop and dice%u2026boil, roast and steam%u2026and eat eat eat%u2026. and eat. I have been eating butternut for breakfast, lunch and dinner for the past week and that’s ok with me cause man it does taste oh so tasty. But for some people in my life, eating mashed squash out of a jar all day long does not hold the same appeal so I have been sneaking it in where ere I can. %u00a0

So some of that diced squash tuned into this lovely warm salad. Even the mister liked it and he is not a fan of warm salads(he says he is not, but I think he actually is, as long as I don’t call them “salads”) Any who%u2026This salad hits all the marks%u2026. Fantastically filling, super delicious, fast and healthy. %u00a0Check, check, and check! I am so good.%u00a0

Easy peasy%u2026.

Diced butternut squash, half a vilalia onion, %u00a0prepared lentils and a bunch of kale%u2026 Nothin else.(salt and pepper, but they don’t count)

Diced butternut and a mediumly sliced onion..(mediumly is a new cooking term) Spritz a bit of oil in a pan and toss the squash and onion in there and sprinkle with salt and pepper. Shove into the hot oven and roast until squash and onion are tender and tasty.

Remove the pan from the oven and toss in finely chopped kale and a big scoop of lentil%u2026 Mix it up and let the sit in hot pan for a few minutes%u2026it will make the kale get soft and warm.

Plate it and eat eat%u2026 I drizzled a little balsamic vinegar on mine%u2026Nick like his straight up. Do what you will cause either way, it’s going to be awesome!!!!

Hooray for Friday and for winter squash!!!!

-C

Warm Winter Salad

Ingredients (This made one good sized salad%u2026and exact measurements were not used so feel free to add greater or lesser amounts of any of the ingredients)

  • 1 1/2 cup Diced Butternut squash
  • 1/2 Vidalia Onion(or any variety you like)
  • 3-4 large Kale leaves
  • 1/2 cup Precooked Lentils
  • salt and pepper to taste
  • Balsamic Vinegar%u00a0
  • drizzle of oil for pan

In a 425 degree oven, %u00a0place diced squash and sliced onions in a slightly oiled pan, sprinkle with salt and pepper, and roast for about 20 minutes until tender. Remove pan from oven and toss in chopped kale and lentils and let sit in hot pan for a few minutes%u2026 Plate and drizzle with balsamic vinegar.
I eat a lot of winter squash. I go through 3-4 a week. And with all the squash comes the seeds. I know most people roast their pumpkin seeds but forget about the squash seeds. They are equally amazing and should not be forgotten. What I do is I scoop the seeds into a container that I %u00a0keep in the fridge. When I have collected a few squashes worth, I boil them to help remove the fleshy parts, then give them a quick rinse. Toss in olive oil and salt and get on to roasting!

The perfect snack! You can add these to anything from salads to soups, or grind them into pie dough(its going to happen) If you are feeling like a change of pace, you can add some more flavor by adding spices. Cumin, garlic powder, maybe cinnamon and sugar%u2026.. The possibilities are endless.

Ingredients

  • Between 1/2 and 1 cup seeds
  • 1 teaspoon olive oil
  • salt to taste

Preheat oven to 350 degrees.

Place seeds in a pot of water and bring to a boil. After a few minutes at a rolling boil, strain seeds. Most of the goo should have come lose. Give seeds a quick rinse

In bowl, toss together seeds, olive oil and salt. If using the greater amount of seeds, add a bit more oil.. Evenly spread seeds on a baking sheet or cast iron pan and pace in oven. Cook until toasted, about 10 to 12 minutes.

THE LOVELY CRAZY

January 9, 2020 by maximios • Blog

I know that it it spring, but I still have a winter farm share for another month and will be cooking and eating roots and squash until the summer share starts in early June. And I am good with that cause I love me some root veggies and butternut squash.  But, yes, it is spring and my body isn’t craving the super hearty, rich foods that it was just a few short weeks ago (more like last week) When the temperatures first start to go up, I usually want my food to not feel as heavy or my spices to be quite at warming (I am still all over curries and hot hot hot sauces in the summer). It’s like I have said before, I tend to change up my spices with the seasons.  

So to give a lighter feel to a heartier squash, I busted out one of my favorite spices, the oh so lovely tarragon. It has a sweet, light, fruity and floral taste that pairs beautifully with the squash and onions. It give the dish a nice spring like flavor that will leave you feeling satisfied without wanting to move directly onto the couch and hide under a blanket. This is a eat and ride you bike kind of dish ( you don’t actually have to go for a bike ride if you don’t want to)

Note. If I had a grill, I would definitely cook this dish on it. As of now, I don’t own one so I am left to cook on the stove. But by all means, if you have a grill, do it up!

Half of a medium sized butternut squash (or use a whole one.. I had a half in the fridge that was waiting to be cooked)  and one whole onion (two if you use a whole squash)  Apple cider vinegar, olive oil, salt , pepper, garlic powder, and, last but not least, the oh so fragrant and tasty, tarragon. 

Chop the onion  and the squash into big chunks. If you don’t like the skin of the squash, you can peel it, but I like it so I don’t peel. Drizzle olive oil in a pan or a baking sheet, toss the veggies in and add the garlic powder, tarragon, salt and pepper and a few splashes of apple cider vinegar. Toss around. Stick into oven at 425 degrees for about 30-40 minutes. When the squash is tender and the onions are cooked, remove from oven.  

I am pretty sure you can figure out the rest.

Happy day!

-C

Tarragon Butternut and Onions

  • Half of Medium Butternut Squash
  • 1 Large Onion
  • 1 Tablespoon Dried Tarragon (use fresh if you have it.. 2 tablespoons)
  • 2 Tablespoons Apple Cider Vinegar
  • 1 Teaspoon Garlic Powder
  • Salt ans Pepper
  • Olive Oil

Chop squash and onions into similar size pieces. Toss in a skillet or on a oiled baking sheet and add the rest of the ingredients. Toss around and place into a 425 degree oven for about 30-40 minutes or until squash is fork tender.  

Remove from oven and eat.

 Make as a side dish or add to a salad. Eat as a light lunch, or a midnight snack… eat it however you want.

THE LOVELY CRAZY

January 9, 2020 by maximios • Blog

I know that it it spring, but I still have a winter farm share for another month and will be cooking and eating roots and squash until the summer share starts in early June. And I am good with that cause I love me some root veggies and butternut squash.  But, yes, it is spring and my body isn’t craving the super hearty, rich foods that it was just a few short weeks ago (more like last week) When the temperatures first start to go up, I usually want my food to not feel as heavy or my spices to be quite at warming (I am still all over curries and hot hot hot sauces in the summer). It’s like I have said before, I tend to change up my spices with the seasons.  

So to give a lighter feel to a heartier squash, I busted out one of my favorite spices, the oh so lovely tarragon. It has a sweet, light, fruity and floral taste that pairs beautifully with the squash and onions. It give the dish a nice spring like flavor that will leave you feeling satisfied without wanting to move directly onto the couch and hide under a blanket. This is a eat and ride you bike kind of dish ( you don’t actually have to go for a bike ride if you don’t want to)

Note. If I had a grill, I would definitely cook this dish on it. As of now, I don’t own one so I am left to cook on the stove. But by all means, if you have a grill, do it up!

Half of a medium sized butternut squash (or use a whole one.. I had a half in the fridge that was waiting to be cooked)  and one whole onion (two if you use a whole squash)  Apple cider vinegar, olive oil, salt , pepper, garlic powder, and, last but not least, the oh so fragrant and tasty, tarragon. 

Chop the onion  and the squash into big chunks. If you don’t like the skin of the squash, you can peel it, but I like it so I don’t peel. Drizzle olive oil in a pan or a baking sheet, toss the veggies in and add the garlic powder, tarragon, salt and pepper and a few splashes of apple cider vinegar. Toss around. Stick into oven at 425 degrees for about 30-40 minutes. When the squash is tender and the onions are cooked, remove from oven.  

I am pretty sure you can figure out the rest.

Happy day!

-C

Tarragon Butternut and Onions

  • Half of Medium Butternut Squash
  • 1 Large Onion
  • 1 Tablespoon Dried Tarragon (use fresh if you have it.. 2 tablespoons)
  • 2 Tablespoons Apple Cider Vinegar
  • 1 Teaspoon Garlic Powder
  • Salt ans Pepper
  • Olive Oil

Chop squash and onions into similar size pieces. Toss in a skillet or on a oiled baking sheet and add the rest of the ingredients. Toss around and place into a 425 degree oven for about 30-40 minutes or until squash is fork tender.  

Remove from oven and eat.

 Make as a side dish or add to a salad. Eat as a light lunch, or a midnight snack… eat it however you want.

THE LOVELY CRAZY

January 9, 2020 by maximios • Blog

I know that it it spring, but I still have a winter farm share for another month and will be cooking and eating roots and squash until the summer share starts in early June. And I am good with that cause I love me some root veggies and butternut squash.  But, yes, it is spring and my body isn’t craving the super hearty, rich foods that it was just a few short weeks ago (more like last week) When the temperatures first start to go up, I usually want my food to not feel as heavy or my spices to be quite at warming (I am still all over curries and hot hot hot sauces in the summer). It’s like I have said before, I tend to change up my spices with the seasons.  

So to give a lighter feel to a heartier squash, I busted out one of my favorite spices, the oh so lovely tarragon. It has a sweet, light, fruity and floral taste that pairs beautifully with the squash and onions. It give the dish a nice spring like flavor that will leave you feeling satisfied without wanting to move directly onto the couch and hide under a blanket. This is a eat and ride you bike kind of dish ( you don’t actually have to go for a bike ride if you don’t want to)

Note. If I had a grill, I would definitely cook this dish on it. As of now, I don’t own one so I am left to cook on the stove. But by all means, if you have a grill, do it up!

Half of a medium sized butternut squash (or use a whole one.. I had a half in the fridge that was waiting to be cooked)  and one whole onion (two if you use a whole squash)  Apple cider vinegar, olive oil, salt , pepper, garlic powder, and, last but not least, the oh so fragrant and tasty, tarragon. 

Chop the onion  and the squash into big chunks. If you don’t like the skin of the squash, you can peel it, but I like it so I don’t peel. Drizzle olive oil in a pan or a baking sheet, toss the veggies in and add the garlic powder, tarragon, salt and pepper and a few splashes of apple cider vinegar. Toss around. Stick into oven at 425 degrees for about 30-40 minutes. When the squash is tender and the onions are cooked, remove from oven.  

I am pretty sure you can figure out the rest.

Happy day!

-C

Tarragon Butternut and Onions

  • Half of Medium Butternut Squash
  • 1 Large Onion
  • 1 Tablespoon Dried Tarragon (use fresh if you have it.. 2 tablespoons)
  • 2 Tablespoons Apple Cider Vinegar
  • 1 Teaspoon Garlic Powder
  • Salt ans Pepper
  • Olive Oil

Chop squash and onions into similar size pieces. Toss in a skillet or on a oiled baking sheet and add the rest of the ingredients. Toss around and place into a 425 degree oven for about 30-40 minutes or until squash is fork tender.  

Remove from oven and eat.

 Make as a side dish or add to a salad. Eat as a light lunch, or a midnight snack… eat it however you want.

     I love mustard, and when I say love, I mean LOVE. I eat it on anything and everything. And not just small quaintites, I buy jumbo sized containers of the stuff because I go through it so fast.  Over the past few years I even  started taking down others with my mustard eating obsession. Sisters, brothers, even some of the littles are now mustard eating feens.  One of my little nieces is now just as bad as me. I don’t think I have seen her eat a single meal without a side of mustard. Her favorite snack, clementines and mustard,  although sometimes she skips the clementines and just goes in with her fingers. Oh so good. I think that child could possible be mine.  And yes, it’s mostly the yellow grocery store variety of mustard being consumed, but yellow mustard is just the tip of the ice berg. There is a whole world of flavors, textures and colors when it comes to the humble mustard seed. Whole grain mustard, to me, is one of the best and easiest to adapt to any persons specific taste. You can make it plan or add in just about any spice, vinegar, even a little sweetness that you might like. One of my favorite variations of this mustard is to skip the vinegar and use picked jalapeño juice. Aah, my mouth is watering just thinking about it.

So if you are anything of a mustard connoisseur, you really must, at least once, make your own batch.(It’s so easy!) And you will love it and share it with all your friends and they will think you are a bad ass for making your own mustard and your life will just be so great. All because you are now a mustard maker.  Yes. 

Yellow mustard seeds, brown mustard seeds, apple cider vinegar and salt. The most basic ingredients.

Note- If you want, add in a pinch of any spice that you want.. Chili flakes, granulated garlic, turmeric…. And you can use the vinegar of your choice. I like apple cider because its mellow with a slight sweetness but white or sherry or any vinegar would be great. Even left over picked juice is fantastic too.

    In a large jar, combine the mustard seed , twice as much vinegar and a pinch of salt. Cover and let sit for on the counter overnight until the seeds have soften and look almost like caviar. 

Now blend those seeds. You might want to add another splash or two of vinegar to help  blend and to thin out a bit. Chose how creamy or seeded you like you mustard. I like to make it creamy but seedy so I blend it half way to creamy.

Taste and add another pinch of salt if its needed and……..

You have got mustard! Make sure you have a good snack ready to eat with it.. My go to is carrots. I could eat this all day long.  

Enjoy and have a great Tuesday full of mustard and stuff!

-C

Whole Grain Mustard

  • 1/4 Cup Brown Mustard Seeds
  • 1/4 Cup Brown Mustard Seeds
  • 1 Cup Apple Cider Vinegar
  • 1 Teaspoon Salt
  • Optional..A pinch of  Garlic Graduals, Red Pepper Flakes, Curry Powder (Anything you want) 

Combine all ingredients into a large jar that has at least a few extras inches for the seed to expand.  Leave on counter for 8-12 hours.

Once seeds are nice and soft and have expanded, either eat as is (Mustard seed caviar) or blend the seeds to desired consistency (I like it half smooth, half seedy) Add a pinch more or salt and another splash or two of vinegar to help blend.

Refrigerate and use on anything and everytihng.

THE LOVELY CRAZY

January 9, 2020 by maximios • Blog

I have very strong feelings for heart shaped baked goods. I think that everything, all year round, should be heart shaped. How lovely would that be? It would be ever so lovely, or I would think so anyway. And yes, ok, I was thinking about Valentines Day when I made these cupcakes but don%u2019t let that be the only reason you make a cupcake, cake, or any other baked good into the shape of a heart or pink for that matter.. Hearts are just so sweet and cute and dare I say cuddly? (Can you cuddle baked goods? Let me know if you have and do. We should talk about that). And pink is just a fantastic color, especially when it is the color of the flavor. Purple-y pink equals a taste like berry so all just makes sense.

Anyways. Cupcakes. Made with nutty almond meal to taste all nutty, frosted with blackberry and clementine frosting which is a pairing that all party and non party people will love. A down right deeelightful combination that will, no matter your circumstance in life, make you smile. Because lets get this clear, these cupcakes might look all lovey dovey and Valentines Day-e and are very much a perfect Valentines Day treat, but also can be an everyday, run of the milll, straight up any day, all day cupcakes. Valentines Day does not own the heart or pink.

These cupcakes are for you to love and you don%u2019t need to worry if they love you back. That would be weird.

Slightly off topic thought. How awesome would it be if someone made a cute little teddy bear that when you squeezed it it would scream %u201cWHAT THE HELL! GET OFF ME!%u201d Hahahaha. That would be amazing.

To the cupcakes!

The stuff. Flour, almond meal, baking soda, baking powder, salt, sugar, soy milk, oil, vanilla extract, and apple cider vinegar. Also some blackberry jam, powdered sugar, some vegan butter, and a clementine.

In a big bowl, whisk together the granulated sugar, flour, almond meal, salt, baking powder, and baking soda.

Add in the oil, vanilla, milk, and apple cider vinegar. Mix until fully incorporated.

And that is some mixed batter.

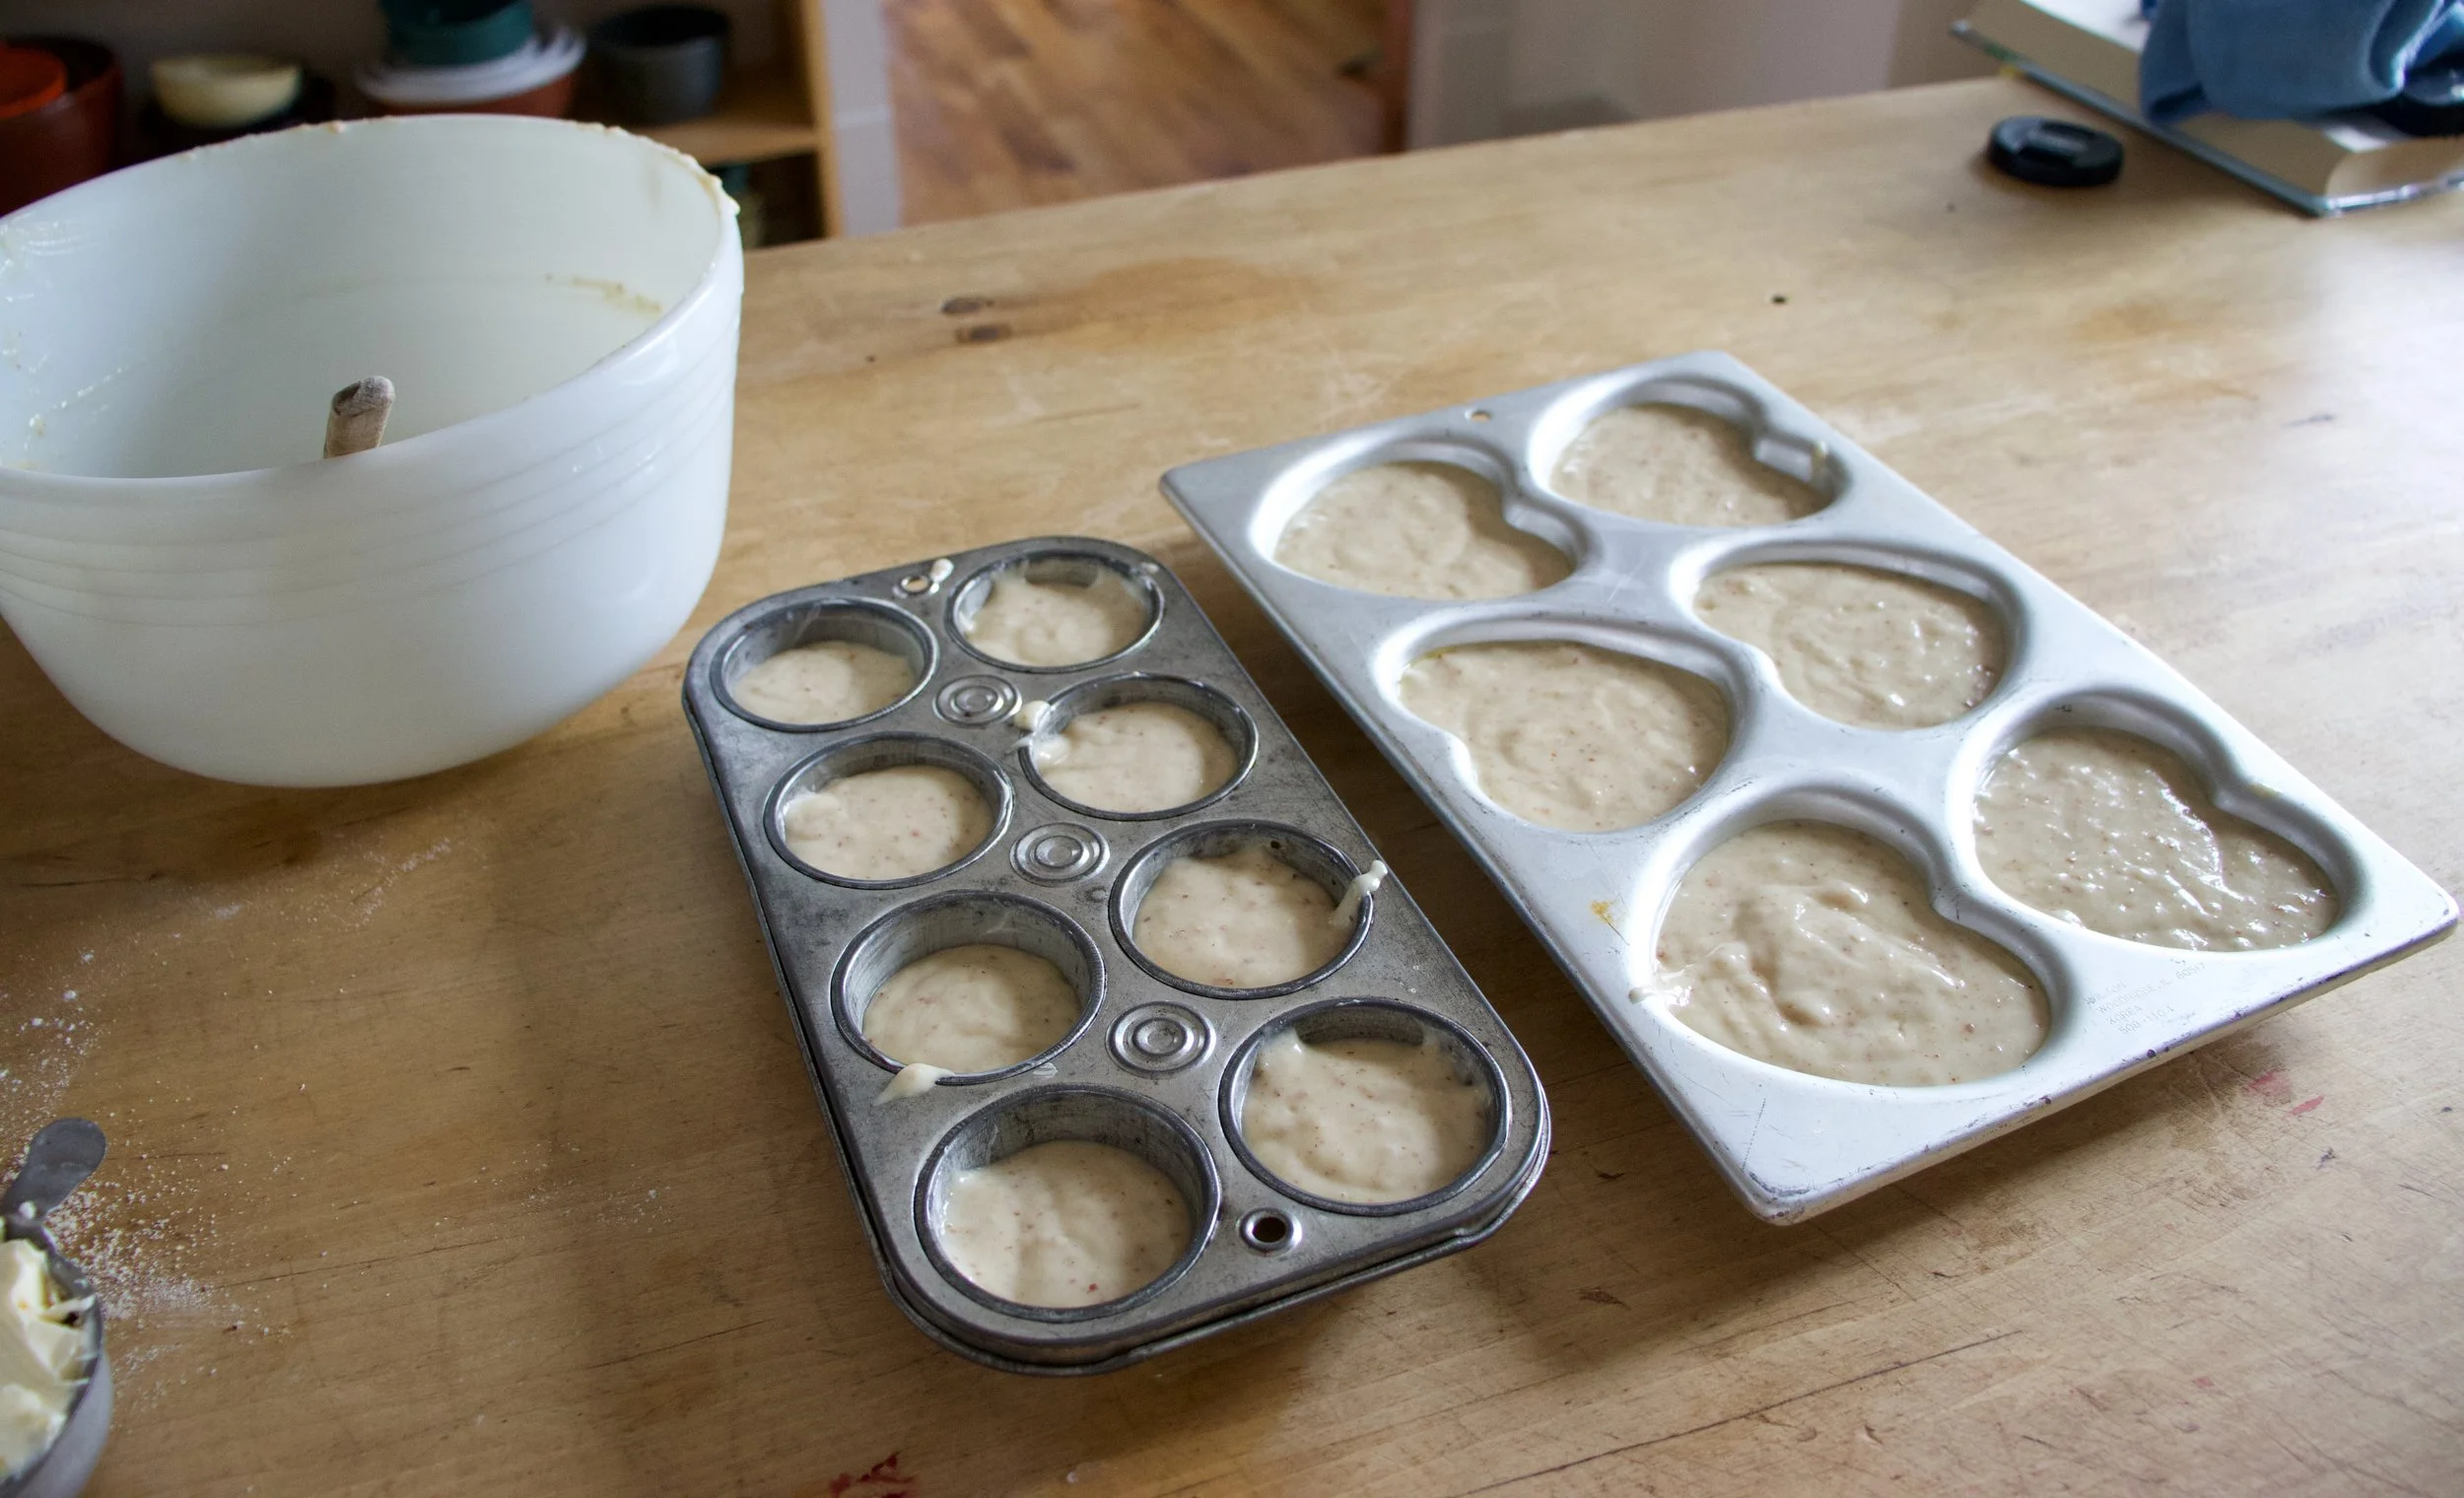
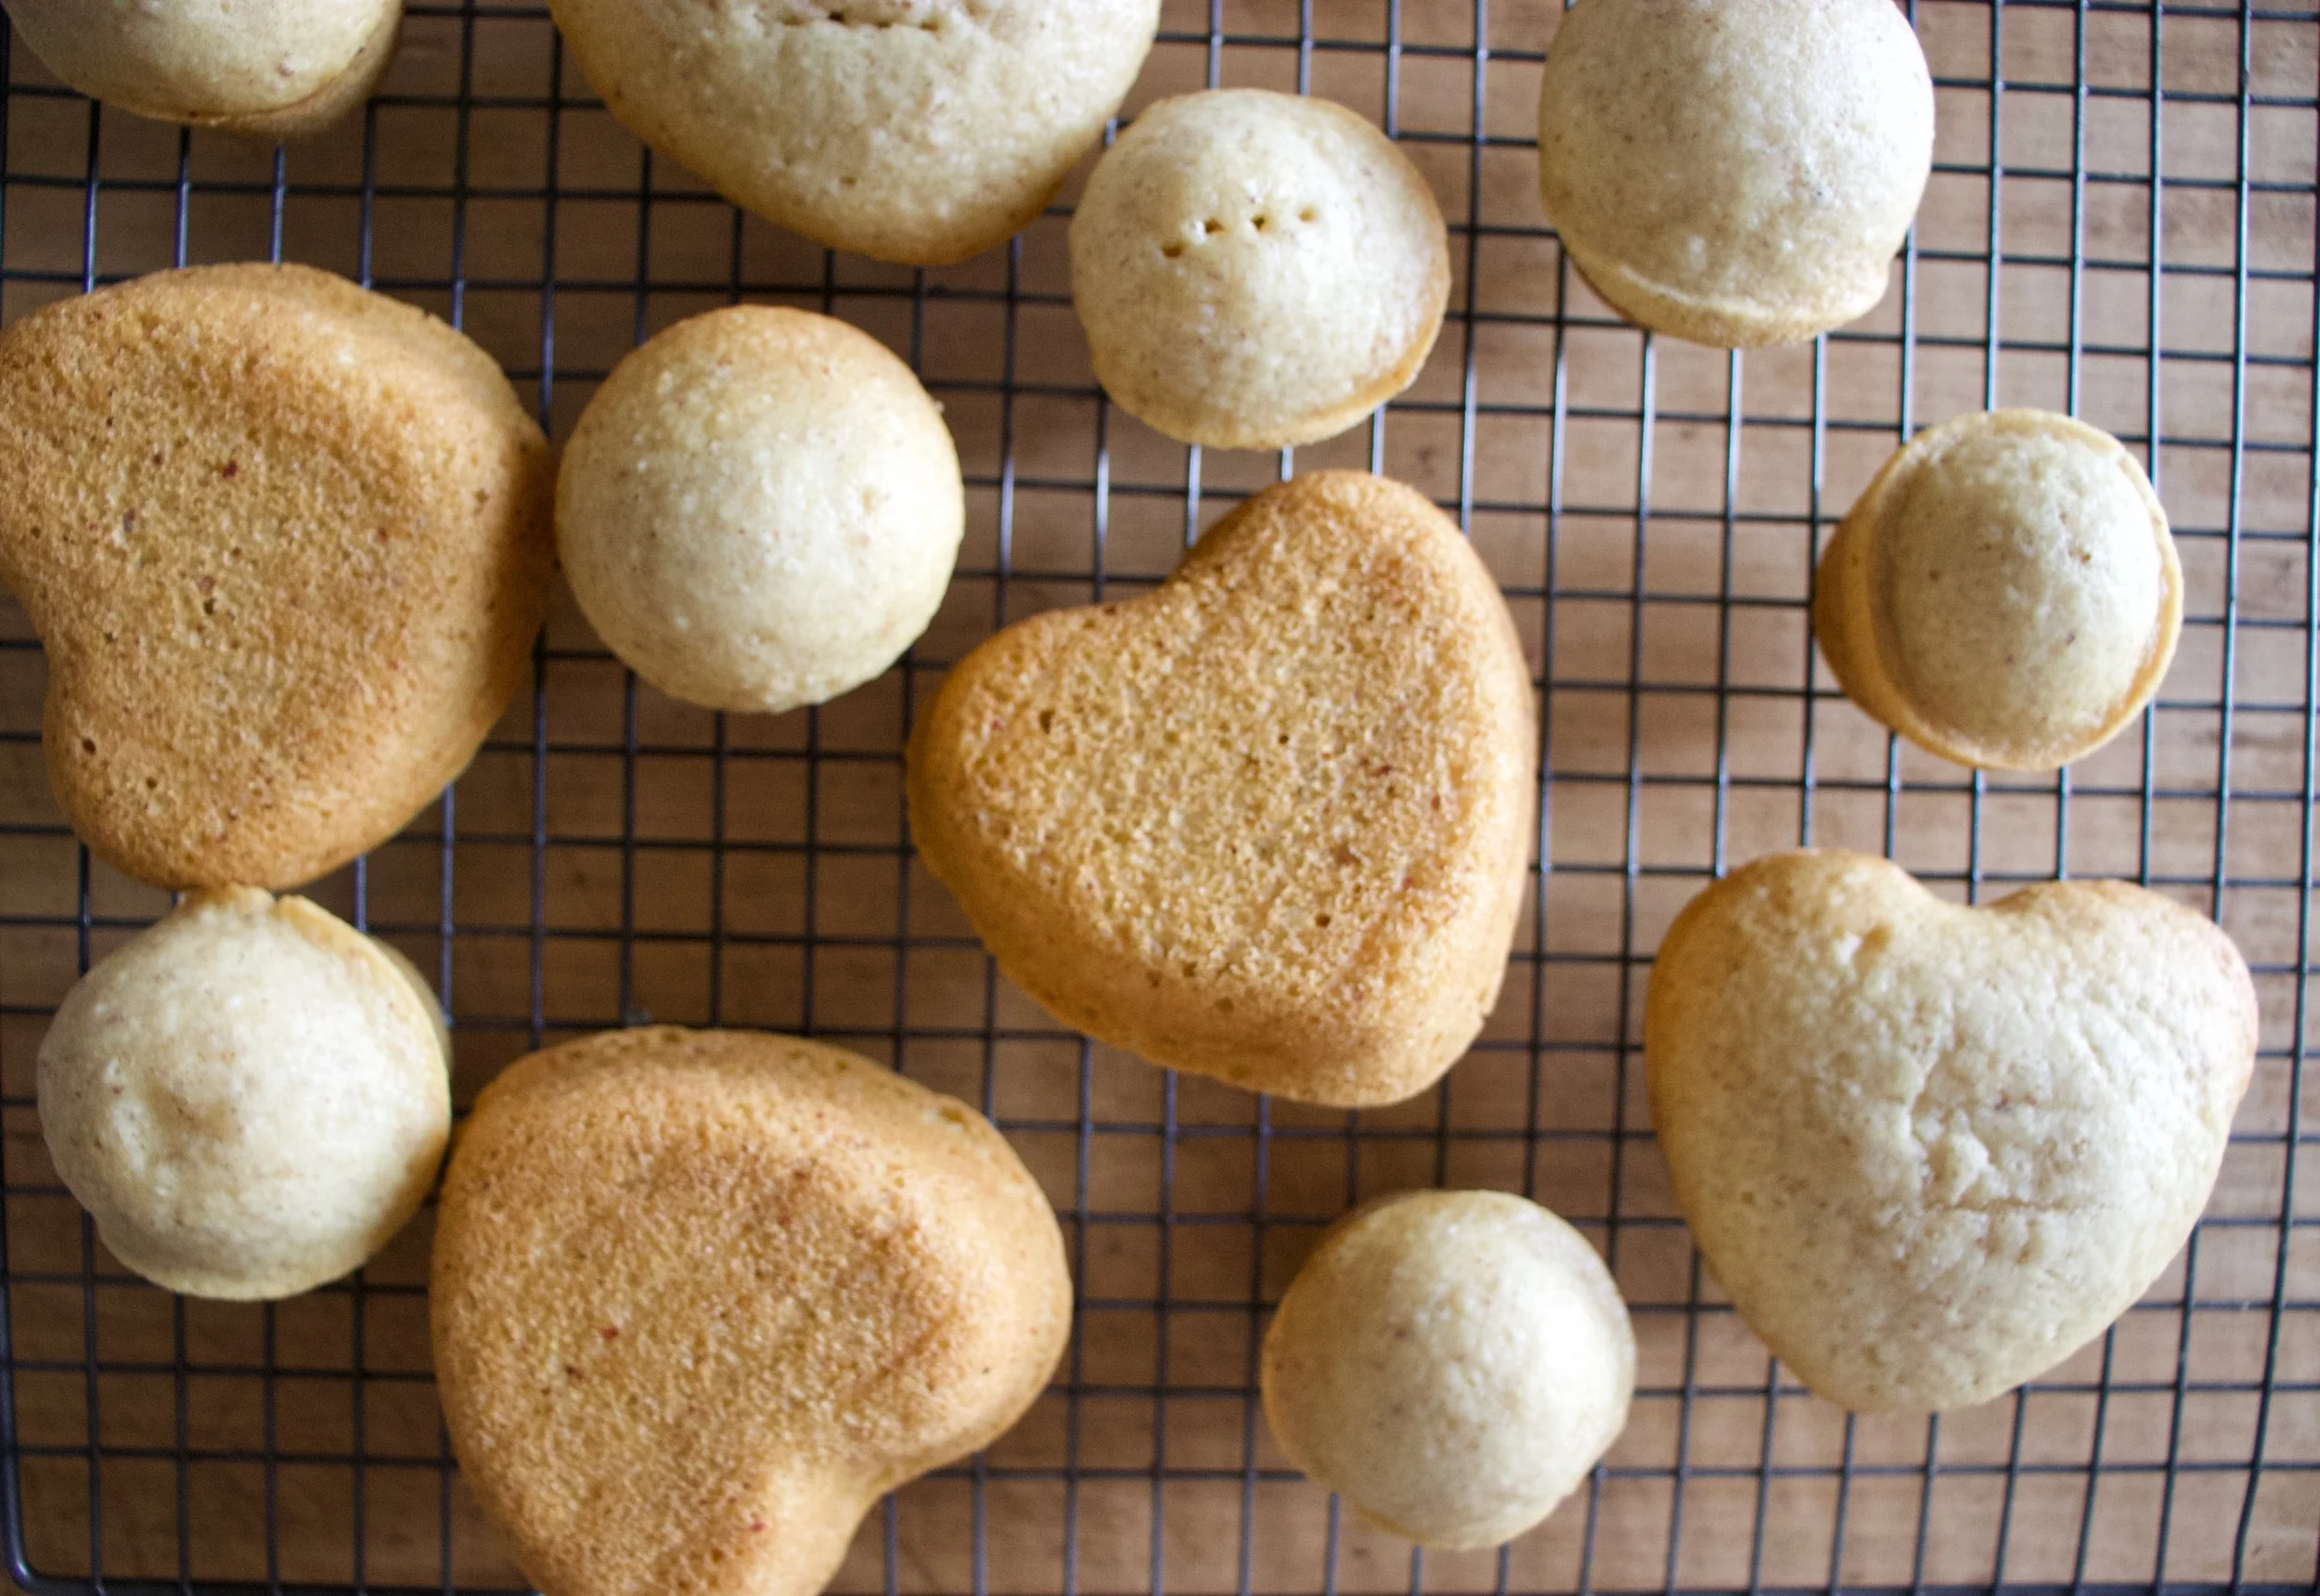
Scoop the batter into well greased muffin tins. I used to different shapes and sizes because I wanted too. You can do the same, just be aware different sizes will cook at different times.

And into the hot oven they go.

Baked, popped out of the tins, and cooling to cool.

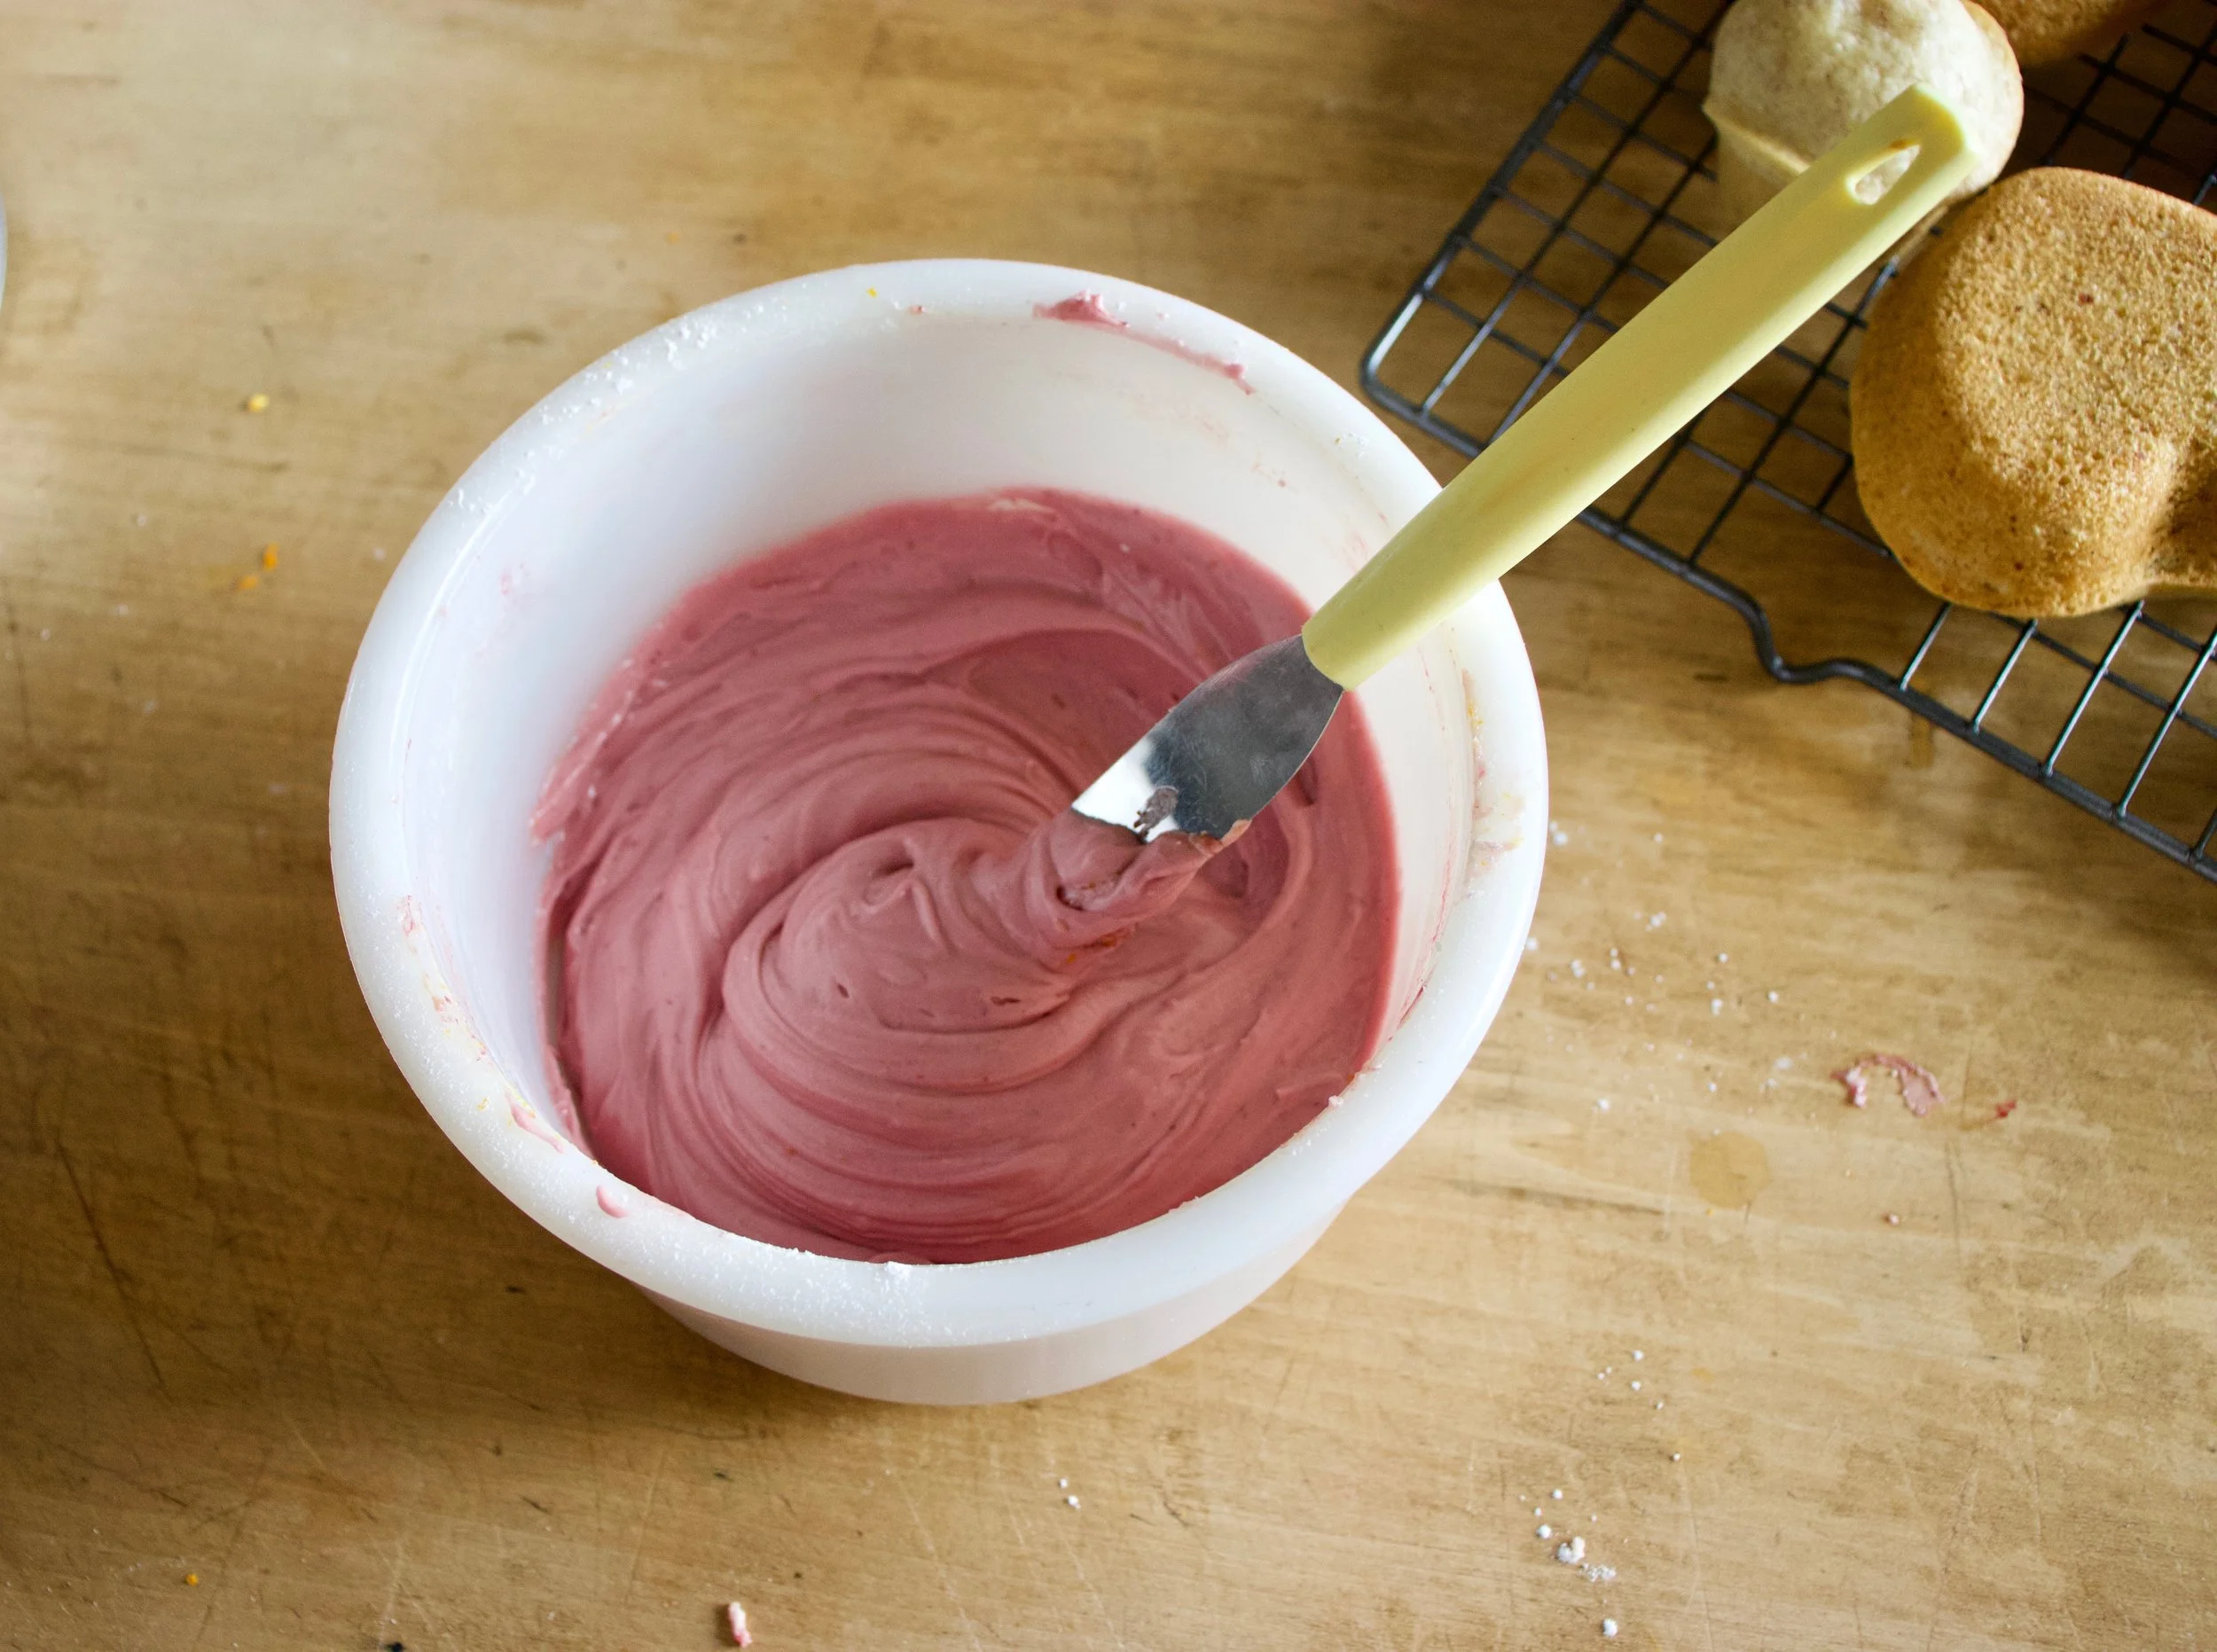
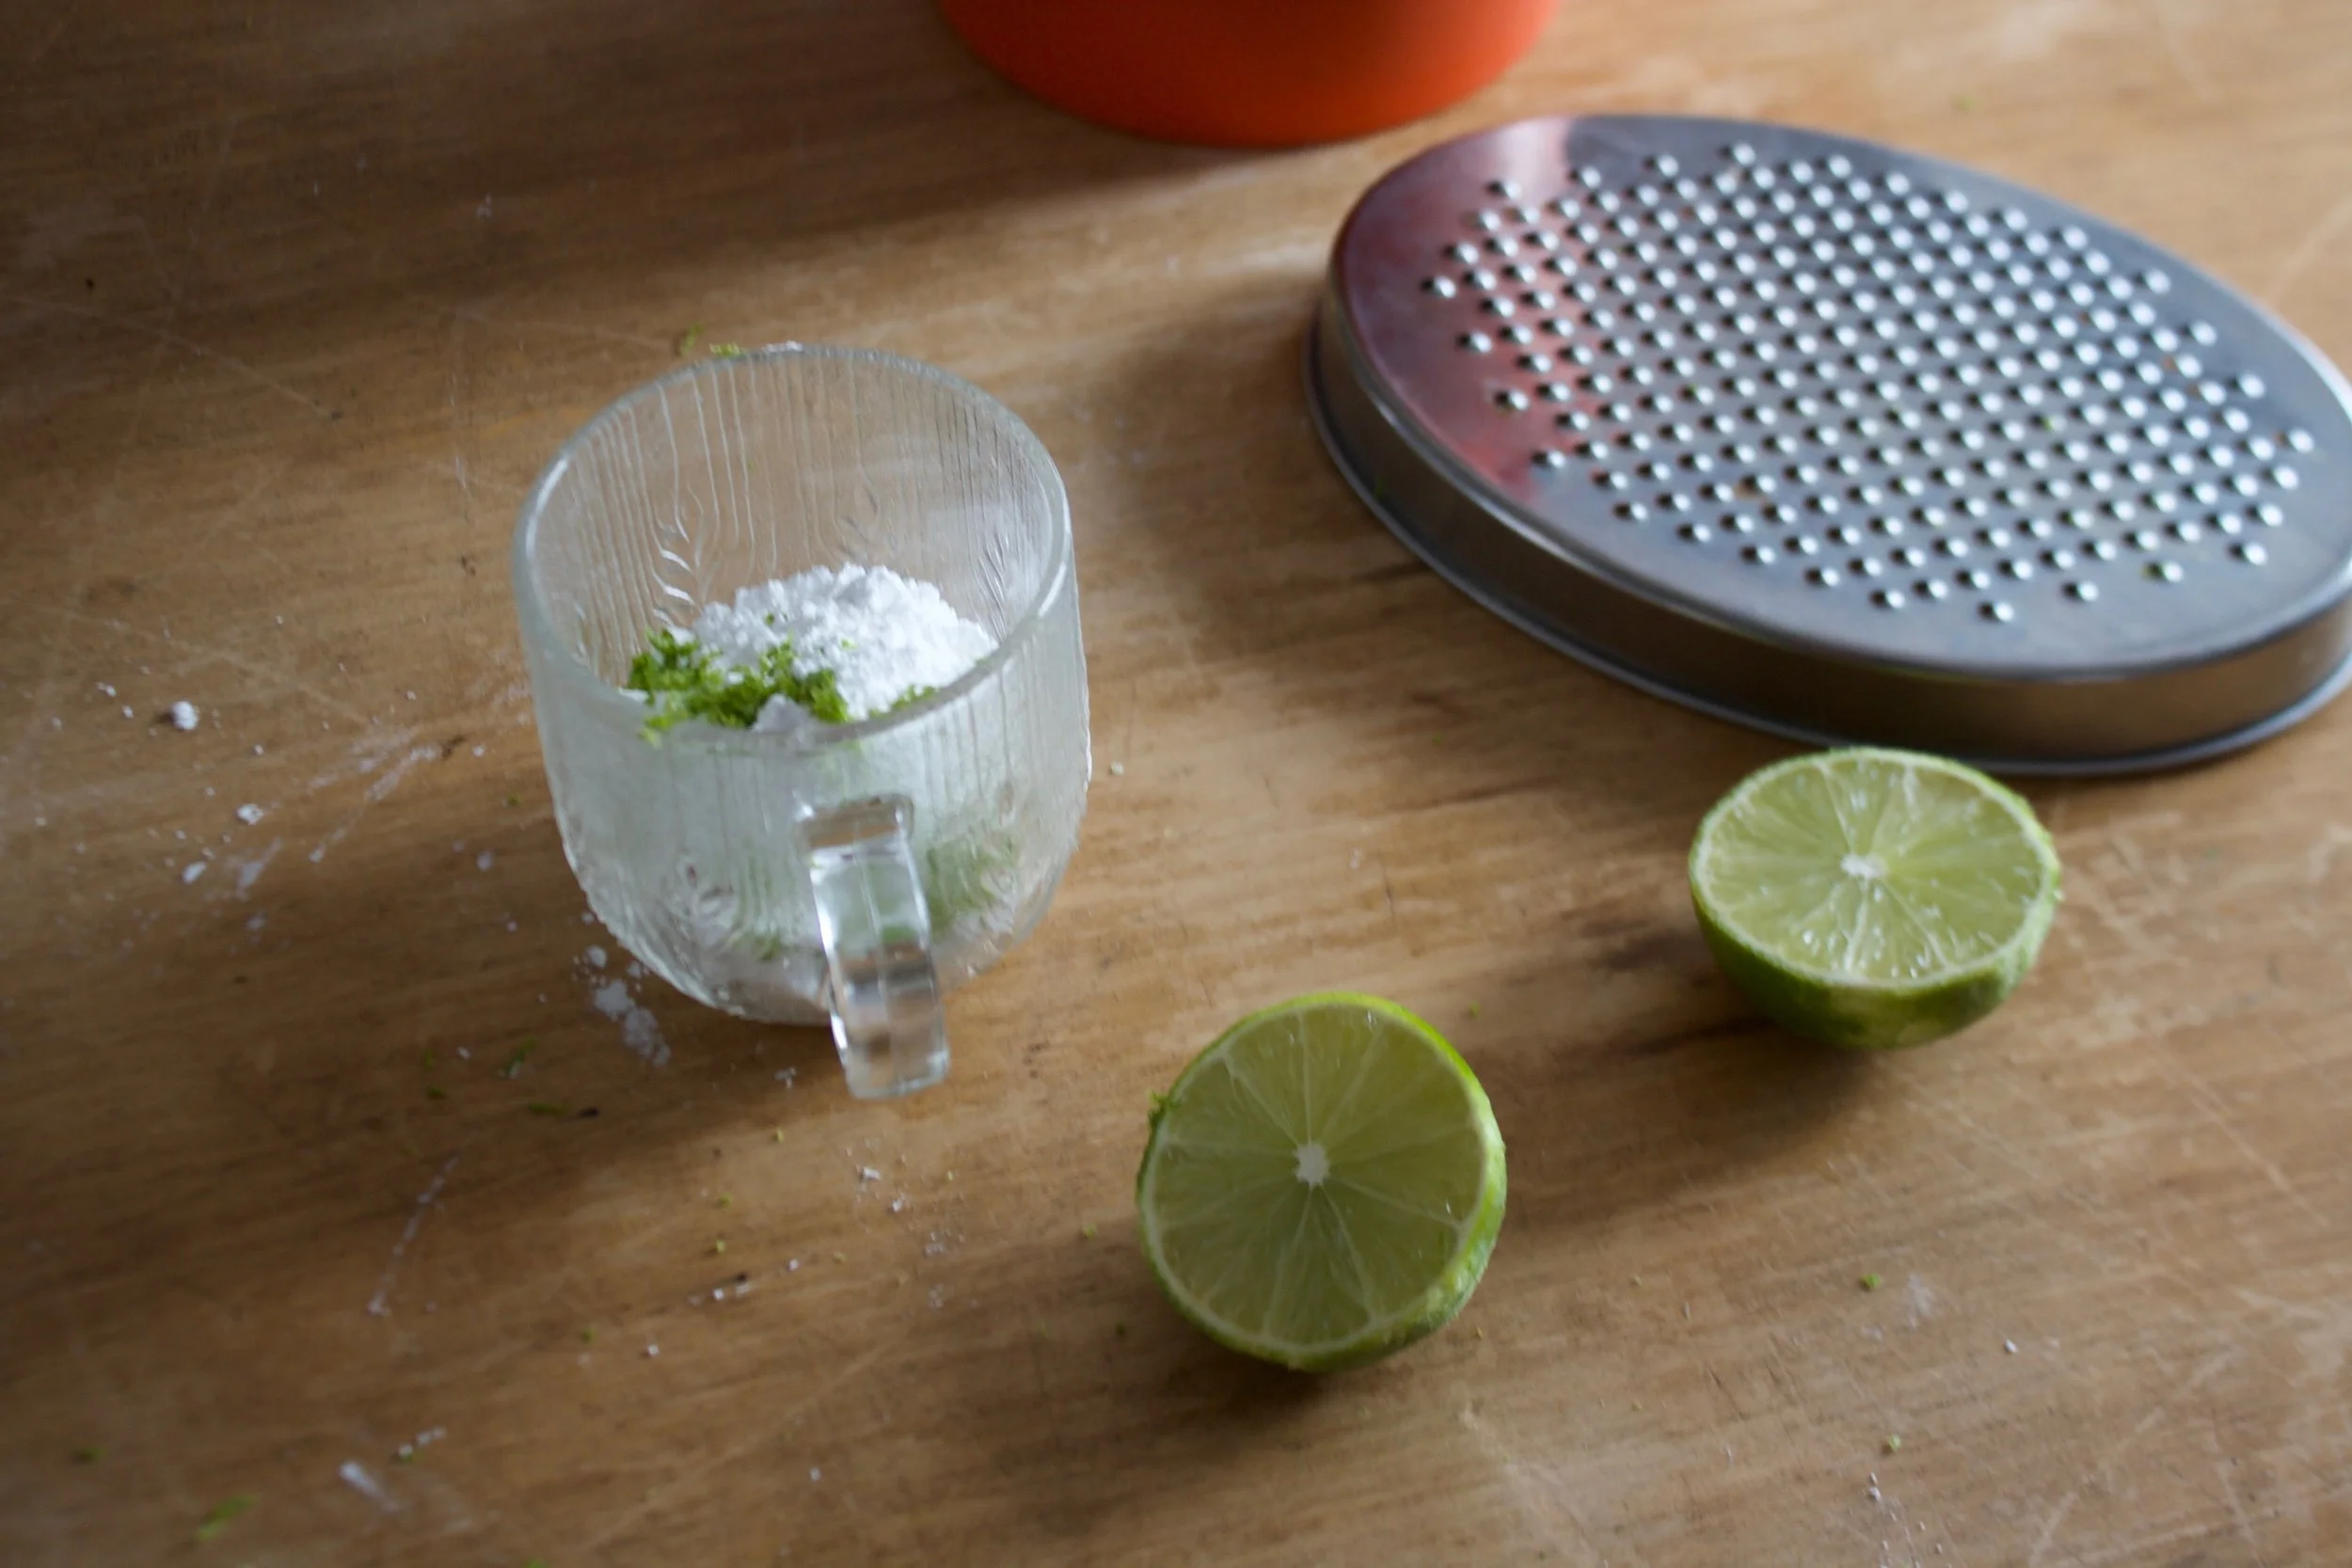
Frosting time. Butter, clementine zest, and jam mixed together makes for the prettiest color.

Add in the powdered sugar and juice of the clementine and beat with a beater.

Pretty pink frosting. All natural.

And now that the cupcakes are cooled (you must wait until they are completely cooled) get them frosted.

And of course, adding sprinkles will only make them that much better.

And now you got the cupcakes which makes it cupcake time.

Look at that smile. Thats a smile just for cupcakes, not at all because I told him too.

Happy happy.

-C

Makes 12-16 cupcakes (depending on size)

  • 1 1/2 cups all purpose flour

  • 1/2 cup almond meal

  • 1/3 cup neutral oil

  • 1 1/4 cup almond milk

  • 3/4 cup white sugar

  • 1 teaspoon baking soda

  • 1 teaspoon baking powder

  • 1 tablespoon apple cider vinegar

  • 1/2 teaspoon salt

  • 1 teaspoon vanilla or almond extract

  • For the frosting

  • 3 tablespoons blackberry jam or preserves with or without seeds

  • 2- 2 1/2 cups powdered sugar

  • 4 tablespoon vegan butter

  • 1 clementine (zest and some juice)

Preheat oven to 350.

In a large bowl whisk together the flours, salt, baking soda and powder and sugar until fully combines. In a separate bowl mix together the oil, milk, vinegar, and vanilla. Pour into the dry and mix, by hand, until full incorporated. Scoop batter into well greased muffin tins (heart or other shape up to you) and place into oven for 13-18 minutes (shorter time for smaller cupcakes, longer for larger sized) or until lightly browned and a tester stuck into a cake comes out clean. Pull from oven when done and pop from tin. Place on a wire rack to cool.

While cakes are cooling, make frosting. Beat together the butter, zest of the clementine, and jam. Add in the sugar and the juice and beat until fully incorporated. If the consistency is to thin, add a little more sugar, to thick, more clementine juice or if out of juice, a splash of milk.

Once cupcakes are full cooled, frost, add sprinkle if you would like, and then the only thing left to do is eat them.

Eat cupcakes, store left overs in an air tight container in the fridge for up to a week.

Welcome fall, I have been waiting for you. Now please stay.

We started last week %u00a0with a picnic lunch at the state house then driving to the middle of the woods and checking out a piece of land then made our way over to our campsite. Went for a nice long hike, the mr did a little fishing, and I saw more amazing mushrooms then I was able to take pictures of. Then back to the camp site we went. I always bring along a book that I am pretty into for camping (because that is what one does while camping) but this time I grabbed a new book from the library right before we left. And well shit, was I ever so surprised that is was more or a less a smutty graphic romance novel and so because I am not really into that crap, I was bookless and felt kind of lost. Goof. But it really wasn’t so bad, the mr kept me company and I found an old newspaper to use as my morning reading so there was that. %u00a0And I went and returned that book when we got home and got some books that were not so smutty.

Then we had %u00a0dinner at Sha na na’s with Paul, Barb, and my Mom. I made a salad with lots and lots of corn in it. Huge hit that Paul has requested that I make him that exact salad for his birthday that is in like 5 months, because I guess I can’t make him a salad any time before that? Ha. My family.. weirdos.%u00a0

And then I went and done it. %u00a0I dropped the fucking blender on my big toe and it pretty much ruined my life. (but not really)%u00a0%u00a0My toe swelled up turned a nice shade of bright red and the nail, slowly but surely, turned completely black, and I was barely able to walk for like 2 days. It was tough goings for a while %u00a0there and I almost performed my own medical treatment involving a lighter and a paperclip but the mr was not having it and in the end, my nail just started falling off anyways so you know, not so bad anymore. And that is enough about my gross toe.

Mid week was the same as usual. This is that, work, me hobbling around and listening to way way way too much %u00a0of the supreme court hearings on NPR, which just made me mad but I did it anyway. There was farm share, so many garden tomatoes, cooking all those garden tomatoes, freezing and eating all the garden tomatoes.%u00a0My garden is getting to that point where I am starting to rip stuff out. I was going to do a fall planing but the little fuck of a rabbit that is living somewhere close keeps eating everything so I am just going to call it for the season. No more new plants, I’ll just get all my kale at the farm. But that rabbit, he needs to get his shit together and find a new place to live next year cause I am getting sick of his attitude. I yell at him but he just keeps come back and taking what he wants. Not cool rabbit, not cool.%u00a0%u00a0

%u00a0And after 2 years of research and saving money, I finally got a new camera!!! My old one finally is dead so I needed to do it.%u00a0I have barely used the new one, only for a couple hours because I am scared I am going to break it (haha, but really) or cover it in bread dough (which will eventually happen). Annnnnd we finally got a new tent! I am very much excited about that. We even named her (yes, it is a she tent)%u00a0Marigold because thats the color she is. %u00a0A new camera and a new tent, all in one week. That was very mentally draining.%u00a0%u00a0I’ll %u00a0still buy groceries and toilet paper, but thats as much I can handle for a good long while.%u00a0

Littles came over for dinner on Friday. Miley started field hockey so we had the just the boys for a while. The mr ands Judah played soccer (Judah won) while me and Coco sat in lawn chairs with a giant bowl of cantaloupe. Every time one of the boys scored a goal he would get up and walk the bowl over to them for a snack score. It was pretty freaking amazingly cute. Then when Miley got home, I made pizza (in the shape of a W for Judah be cause he was a WINNER) and was some how conned into letting the mr and Miley go to the store and come back with 3 apples and a giant bag of sour patch kids. I ate an apple, they all ate candy.%u00a0

Woke up early yesterday morning and I was cold. YES, COLD! And it was amazing and I was so excited because I wasn’t hot. I threw on a sweater,%u00a0socks, and a hat and the mr and I went on to paint the outside of one of our houses for a good part of the day. Then home I went to scrub the paint off my body, run to Costco to get the Judah his new glasses ans a hot dog, then back home to scrub clean the house. (if you haven’t caught on by now, Saturday evenings are my “clean the shit out of the house” days) %u00a0L

Today we are off for more land exploring and camping adventure. I am so excited, first to see some more land %u00a0because maybe some of this land will be what we are looking for and might be our land! And secondly because camping in cooler weather is the best. We can actually sit near the fire, want to sit near the fire, without sweating our asses off. %u00a0I got my knitting, a book (a good book), and tea bags galore. An extra blanket, the long underwear and socks,%u00a0and even a pair of mittens and a hat are packed. It is going to be fantastic.%u00a0

%u00a0Time I invested in internet looking

– Plastic is terrible and this is where it is all going.%u00a0%u00a0THE GREAT PACIFIC GARBAGE PATCH%u00a0%u00a0which leads us to %u00a0Scientists get ready to begin Great Pacific Garbage Patch cleanup.

–SO lets all try to use a hell of a lot less plastic, yea?.%u00a0%u00a06 Doable Ways People Are Going Plastic-Free

–What are the smartest animals in the world and how do we know?%u00a0We know cause we be smat too. %u00a0

-Have you ever seen a praying mantis? I have ans they are pretty crazy.%u00a0It’s Praying Mantis Mating Season: Here’s What You Need To Know

-Pink and green swoon.%u00a0A COLORFUL HOME WITH HEART.

–This Start-Up Will Get Rid of All Your Ex’s Sh*t For You%u00a0SO I guess no more trashcan fires full of clothing and pictures?

-Wouldn’t to be nice to not be aware, but better yet, just not to be stressed at all..%u00a0Can You Be Blissfully Unaware of Your Own Stress?

–Can You Eat Something That Has Freezer Burn? Here’s What the USDA Says.

–Why are Americans obsessed with front lawns?%u00a0Good question.

And of course pictures from the week.

I have had a shit ton of rhubarb in the freezer all winter and the other day I just needed it gone so I made a big old batch of rhubarb jam. I was actually saving the rhubarb to make the mr a pie for his birthday, but that was like 2 months ago and he ended up with ice cream sandwiches and that is why the rhubarb was still there. Oops. But now we have rhubarb jam. And I think I was feeling a little guilty about not making the pie so I, like the nicest girlfriend in the entire universe (self proclaimed yes, but so so true), used that jam to make little hand pies. And in the shape of hearts no less because hearts are amazing and it doesn’t hurt that it is Valentine Day next week.%u00a0%u00a0

%u00a0Valentines Day. What does that even mean? I think the primary meaning of Valentines Day is that all things should be in the shape of hearts. The rest is to be determined by however you may feel about the day. Whether you hate it or love it, (we love it, It’s an excuse to take the day off and cover the house in hearts) you get to make the day yours. Just make sure that whatever you do, you make it with hearts. And with pie.%u00a0

These heart pies make for great little additions to hand made Valentines day cards ( I see maybe for a kids class), are great for breakfast because they are basically just like heart shaped pop tarts,%u00a0or even for an evening of bindge watching Netflix with a loved one or by yourself. It’s pie my friends. Eat it whenever, and with whomever you want.

Also, hearts are not just for Valentines Day. And pie sure the hell isn’t either. They both just happen to work for the occasion.%u00a0

The stuff. Basically just pie crust things. Flour, a little sugar, salt, coconut oil, and ice water. Then you need jam. Jam or perseveres of any flavor(s)%u00a0%u00a0you like. I used grape and rhubarb and %u00a0had raspberry here, but I didn’t use it because I didn’t want to open it.%u00a0

Make the crust. Flour gets mixed with the salt and sugar %u00a0and the the coconut oil gets cut in until it %u00a0looks all crumbly.

The water is added %u00a0in tablespoons until a shaggy from forms.

Dump the dough onto the counter to gather all together and rest for a bit. Or if you like, wrap in plastic and refrigerate %u00a0for up to a day or two.

After the dough got a good rest, roll it out and cut your hearts out. (Not your actual heart. Please and thank you)

Half of the hearts get a dollop of jam

Then each heart gets a top and crimped together with a fork. Poke a little hole into the tops to allow for steam to escape then all of the hearts get stuck into the fridge (or place on the back porch) to get nice and cold for a bit.

%u00a0After the chill, off they go into the hot oven to bake and be.

Look at these cuties. A little jam overflow, but all is good.%u00a0

I decided last minute that they needed a little something. Powdered sugar, lime zest, and lime juice. The easiest of glazes. You could do lemon, or vanilla, or almond, or even melt a little chocolate and drizzle that on. Next time I will do chocolate because because.%u00a0

Drizzle that glaze all over.%u00a0

There you have it. The cutest little hand pies ever .

Share if you like, or just eat them all. They are your hearts so do what you will.%u00a0

-C

makes 18 %u00a0three inch pies

  • 2 1/4 cup flour
  • 1 teaspoon salr
  • 1 tablespoon sugar
  • 8 tablespoons ice water
  • 3/4 cup solid coconut oil
  • about 1 1/4 cups of some sweet ass jam (any kind you have)
  • 1 cup powdered sugar
  • 1 lemon or lime%u00a0

Combine the flour, salt and sugar in a large bowl. add coconut oil in large chunks then with a pastry cutter or a fork (I used a fork) cut the oil into the flour until the flour looks crumbly and there are lots of tiny little chunks of coconut oil throughout the mixture. Add in 5 of the tablespoons ice water, toss around, then add in another 3. Mix around until the dough starts to come together when squished. If it still seems too dry, add in a tablespoon or 2 more water. (I always end up using a little more in the winter months) You want the dough to just be able to come together. Dump dough onto counter and press and smoosh dough into a ball. Let dough sit for 1/2 hour or wrap in plastic and place in fridge and using within the next day or two.%u00a0

After the dough has had some time to sit, flour the counter and roll it out to about 1/2 inch thick. Take a cookie cutter ( I used a 3 inch at the widest part heart cookie cutter) and cut out the hearts (or whatever shape you want) Make sure you have 2 cutouts for each hand pie. After you have cut out as many as you can, gather dough into a ball and roll out again. Repeat until dough it gone.%u00a0

To assemble.

Place a tablespoon of jam into the middle of half of the cut out hearts . Gently place the remaining heart cut outs on top of those.%u00a0. Take a fork and press the edges together and then with the fork or a knife, pierce of cut a small slit into the tops to allow the steam to escape while baking. I did this directly on the baking sheet but found out after it was easier to do on the counter and then move it to the baking sheet. Do what ever it easier for you. Once they are all assembled and on the baking sheet,%u00a0refrigerate for 15 minutes.%u00a0

Preheat oven to 350

After the time in the fridge, remove and place directly into the hot oven. Bake for 20-25 minutes or until the bottoms are a nice %u00a0%u00a0golden brown. The tops will be slightly pale so check the bottoms.%u00a0

Remove and let cool on the baking sheet.%u00a0

While they are cooing, make the glaze. Zest the lime and juice the lime and combine with the sugar. If it is too runny, add a little more sugar, too dry, add in a splash of water. Once the pies are cooled,%u00a0drizzle each one with icing.

Now you have a bunch of cute little heart shaped hand pies and you should probably eat one (or a few)

I know that it it spring, but I still have a winter farm share for another month and will be cooking and eating roots and squash until the summer share starts in early June. And I am good with that cause I love me some root veggies and butternut squash.%u00a0 But, yes, it is spring and my body isn’t craving the super hearty, rich foods that it was just a few short weeks ago (more like last week) When the temperatures first start to go up, I usually want my food to not feel as heavy or my spices to be quite at warming (I am still all over curries and hot hot hot sauces in the summer). It’s like I have said before, I tend to change up my spices with the seasons. %u00a0

So to give a lighter feel to a heartier squash, I busted out one of my favorite spices, the oh so lovely tarragon. It has a sweet, light, fruity and floral taste that pairs beautifully with the squash and onions. It give the dish a nice spring like flavor that will leave you feeling satisfied without wanting to move directly onto the couch and hide under a blanket. This is a eat and ride you bike kind of dish ( you don’t actually have to go for a bike ride if you don’t want to)

Note. If I had a grill, I would definitely cook this dish on it. As of now, I don’t own one so I am left to cook on the stove. But by all means, if you have a grill, do it up!

Half of a medium sized butternut squash (or use a whole one.. I had a half in the fridge that was waiting to be cooked) %u00a0and one whole onion (two if you use a whole squash) %u00a0Apple cider vinegar, olive oil, salt , pepper, garlic powder, and, last but not least, the oh so fragrant and tasty, tarragon.%u00a0

Chop the onion %u00a0and the squash into big chunks. If you don’t like the skin of the squash, you can peel it, but I like it so I don’t peel. Drizzle olive oil in a pan or a baking sheet, toss the veggies in and add the garlic powder, tarragon, salt and pepper and a few splashes of apple cider vinegar. Toss around. Stick into oven at 425 degrees for about 30-40 minutes.%u00a0When the squash is tender and the onions are cooked, remove from oven.%u00a0%u00a0

I am pretty sure you can figure out the rest.

Happy day!

-C

Tarragon Butternut and Onions

  • Half of Medium Butternut Squash
  • 1 Large Onion
  • 1 Tablespoon Dried Tarragon (use fresh if you have it.. 2 tablespoons)
  • 2 Tablespoons Apple Cider Vinegar
  • 1 Teaspoon Garlic Powder
  • Salt ans Pepper
  • Olive Oil

Chop squash and onions into similar size pieces. Toss in a skillet or on a oiled baking sheet and add the rest of the ingredients. Toss around and place into a 425 degree oven for about 30-40 minutes or until squash is fork tender. %u00a0

Remove from oven and eat.

%u00a0Make as a side dish or add to a salad. Eat as a light lunch, or a midnight snack%u2026 eat it however you want.

Another week in the Siberian Express (and another catchy name for weather) %u00a0The lake is completely frozen over and the snow piles are getting bigger then ever%u2026 We are in the dead of the winter, which means it an only get better from here.

Yes cold, but not a bad week. I have been getting our stuff together to start the ever daunting task of filing our taxes (blaaahhhhh), and the lovely mister has spent his week pretty much dealing with everyone’s frozen pipes (poor guy), but we have managed to fit in a little fun. Dinner with sisters. A day with a little that included a lunch date of clementines and mustard. We even went to a high school play that my littlest sister was in. (She was so freaking awesome!) Plus, this week I have really noticed the longer amounts of daylight happening. (I can’t wait for daylight savings) %u00a0I can feel it in my inner most parts of myself..that its going to be spring soon!!! I just need to keep from freezing to death for a few more weeks.

Here is some fun internet stuff %u00a0I have found this week.

  • Ever wonder how mushrooms grow? Take a look inside a mushroom house.
  • These%u00a0Stuffed pets%u00a0are pretty funny. If I were to bring home a stuffed animal that looked like the trash dog, he would almost certainly love it for about a week, but the moment he feels like he is not getting the adequate amount of attention, would stand in front of me and slowly tear it apart. (because that’s what he does)
  • I want to make this Marbled paper%u2026 But am going to wait until I can do it outside, so maybe in like a few months

And a few bits from the real world

This little is rocking out to some sweet tunes%u2026.We started out listening to Beck and ended up listening to Elmo. I guess that happens sometimes.%u00a0

Can I buy then all? I am a plant hoarder%u2026 and can never get enough. I took this picture, walked away to contemplate about weather or not to buy the purple one, went back and someone else had grabbed it. Bummer,%u2026So instead I bought some fresh daffodils, YAY!

%u00a0Romanesco. A cross between cauliflower, broccoli, cabbage, brussels sprouts, and a space ship. %u00a0Pretty Pretty!

It took this guy about 5 minutes to cross over this bridge. The stick in this mouth was too long and would get stuck between the two railings. It %u00a0was some funny shit.%u00a0

Of things to come!!!%u00a0

Have a fantastically lovely week..It’s the last one of February!%u00a0

-C

Weird week. I feel like I have been so busy, but can’t quite figure out with what. I guess winter can do that to you, you know, when leaving the house kind of feels like a chore. Yup, it’s mid February when its cold, windy, snowy, and kind of mah. But it’s cool cause I feel like it’s all down hill from now. Soon we will be looking at an extra hour of daylight and hopefully some above freezing temps! (I think we have had a record amount of days below freezing here in VT) No, I am not complaining, just looking forward to getting out of hibernation.

Anyway, here is some internet stuff I have found fun and interesting this week

And some life stuff from the week…It was farm share week and yes, that’s a kohlrabi bulb. And no,%u00a0I%u00a0have never in my life seen a kohlrabi as big as this one. It is for real bigger then my head. %u00a0If I didn’t know my farm was organic, I would think that they were growing these in toxic sludge. Wondering what I am going to do with it? Come back this week and see.

Oh my love%u2026 A few days ago I had my super comfy warm rag wool mittens stolen from me at the gym. I know, I was so pissed, but hopefully whom ever stole them is getting good use out of them. Anyway, to my Valentines Day surprise, the mister got me a new pair and sewed a heart into the palm of one. So freaking cute right!

%u00a0I like to take a look back at old pictures when I am feeling the crazy.. This one makes me think of summer and our honey bees. (That’s the mister digging into the top bar hive)

%u00a0The blue sky! And oh man am I craving some traveling. I think this was taken somewhere is Colorado. I want to go back.

Well that’s about it. Hopefully where ever you are, you are warm and staying out of crazy. Just wait, a few more weeks we will have more daylight and I bet even some above freezing temperatures because it has to happen, right?

Have a great week!

-C

When something goes on sale at the grocery store, I tend to buy it. Being that it is Valentines Day this week, all the stores are having specials on all sorts of sexy things%u2026 and strawberries are one of them.%u00a0 Now I am not a huge fan of buying produce that is terribly out of season, but I can’t help myself%u2026a good deal is a good deal and the strawberries were a super good deal. I was just going to make some sweet ass strawberry jam or maybe a lovely strawberry cake with them (and I probably still will), but these strawberries are actually super juicy and full of flavor, and it’s always nice to eat some full flavor freshy strawberries%u2026 especially soaked in balsamic vinegar. %u00a0And yeah, %u00a0I think that this salad is pretty sexy, so it makes for a perfect Valentines day dish.
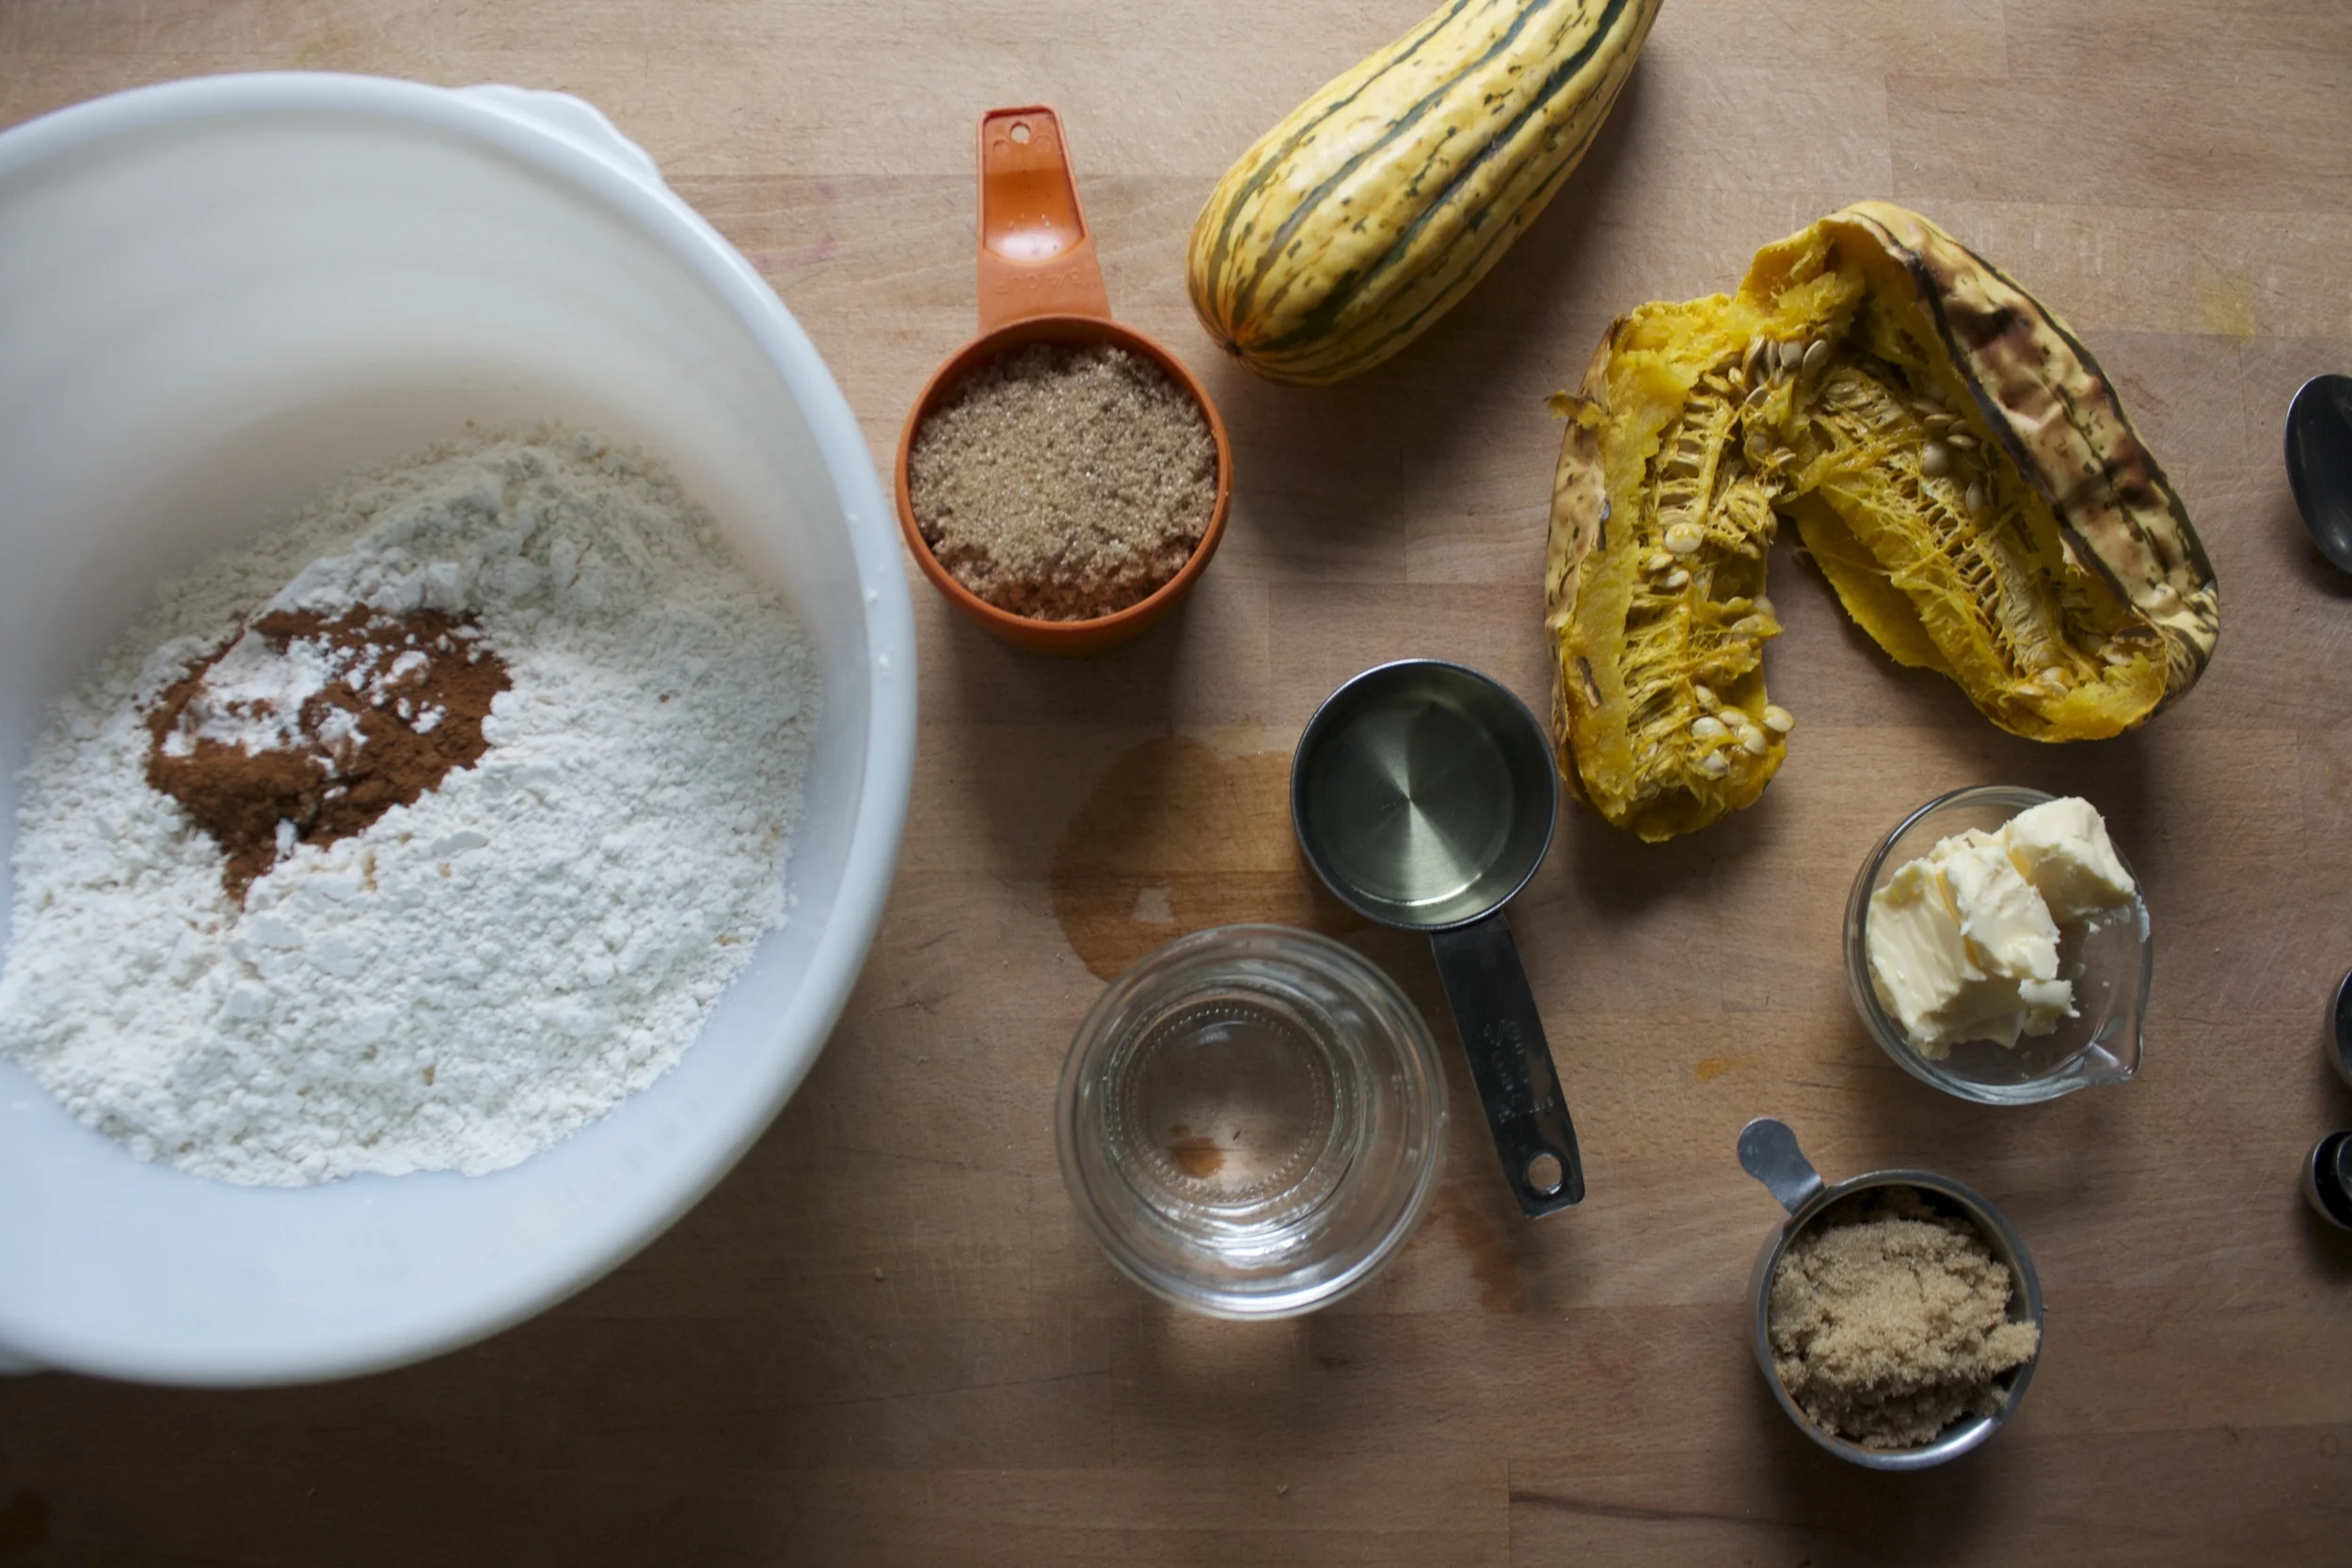
A handful of ingredients and 5 minutes will get you to a fantastic salad experience.

A bowl of %u00a0baby spinach, a few chopped up strawberries*, %u00a0half a sliced avocado and a small handful of toasted almonds.. Oh, and don’t forget the balsamic vinegar%u2026.%u00a0

*Note.. Strawberries are kind of heart shaped already so if you want, reserve a few slices to fancy up you salad presentation, but chop up the rest into smaller pieces.

Pour the vinegar on the strawberries and let sit for at least 5 minutes. (the longer the strawberries can sit with the vinegar, the better)

%u00a0Pile it on.. %u00a0thinly slice avocado.. rough chopped toasted almonds%u2026 It’s pretty much as easy as it can get.And last but not least, toss on the balsamic soaked strawberries and drizzle the remaining vinegar. (if you made hearts, place on top to make pretty) Sprinkle with a pitch of salt and pepper and pow! Fancy, sexy, delicious salad.

Not to shabby for %u00a05 minutes and a handful of ingredients. %u00a0Anyone (don’t feed to a person with nut allergies) would be so syked to be fed a salad like this%u2026 You yourself should be pretty excited to eat a salad like this. Heck, I am excited to eat a salad like this!

A love salad for everyone and everyday!

YAY for Thursday and Happy meal planning!!!!%u00a0

-C

%u2665 Balsamic%u00a0Strawberries on Spinach Almond Avocado Salad%u00a0%u2665

Ingredients for 1 large or 2 small salads

  • 3-4 ripe strawberries
  • handful of roasted almonds (slivers or whole)
  • 1/2 avocado
  • 2 tablespoons Balsamic Vinegar%u00a0
  • 3 cups baby spinach
  • Pinch of salt and pepper%u00a0

Dice strawberries into small pieces (reserve a few whole slices for heart shapes if you want) and toss in a small bowl %u00a0with the balsamic vinegar. Let sit for at least 5 minutes. Rinse and dry spinach. Place in a bowl(s) and top with thinly sliced avocado, chopped almonds and balsamic soaked strawberries. Drizzle the residual vinegar on top and sprinkle with a pinch of salt and pepper.%u00a0
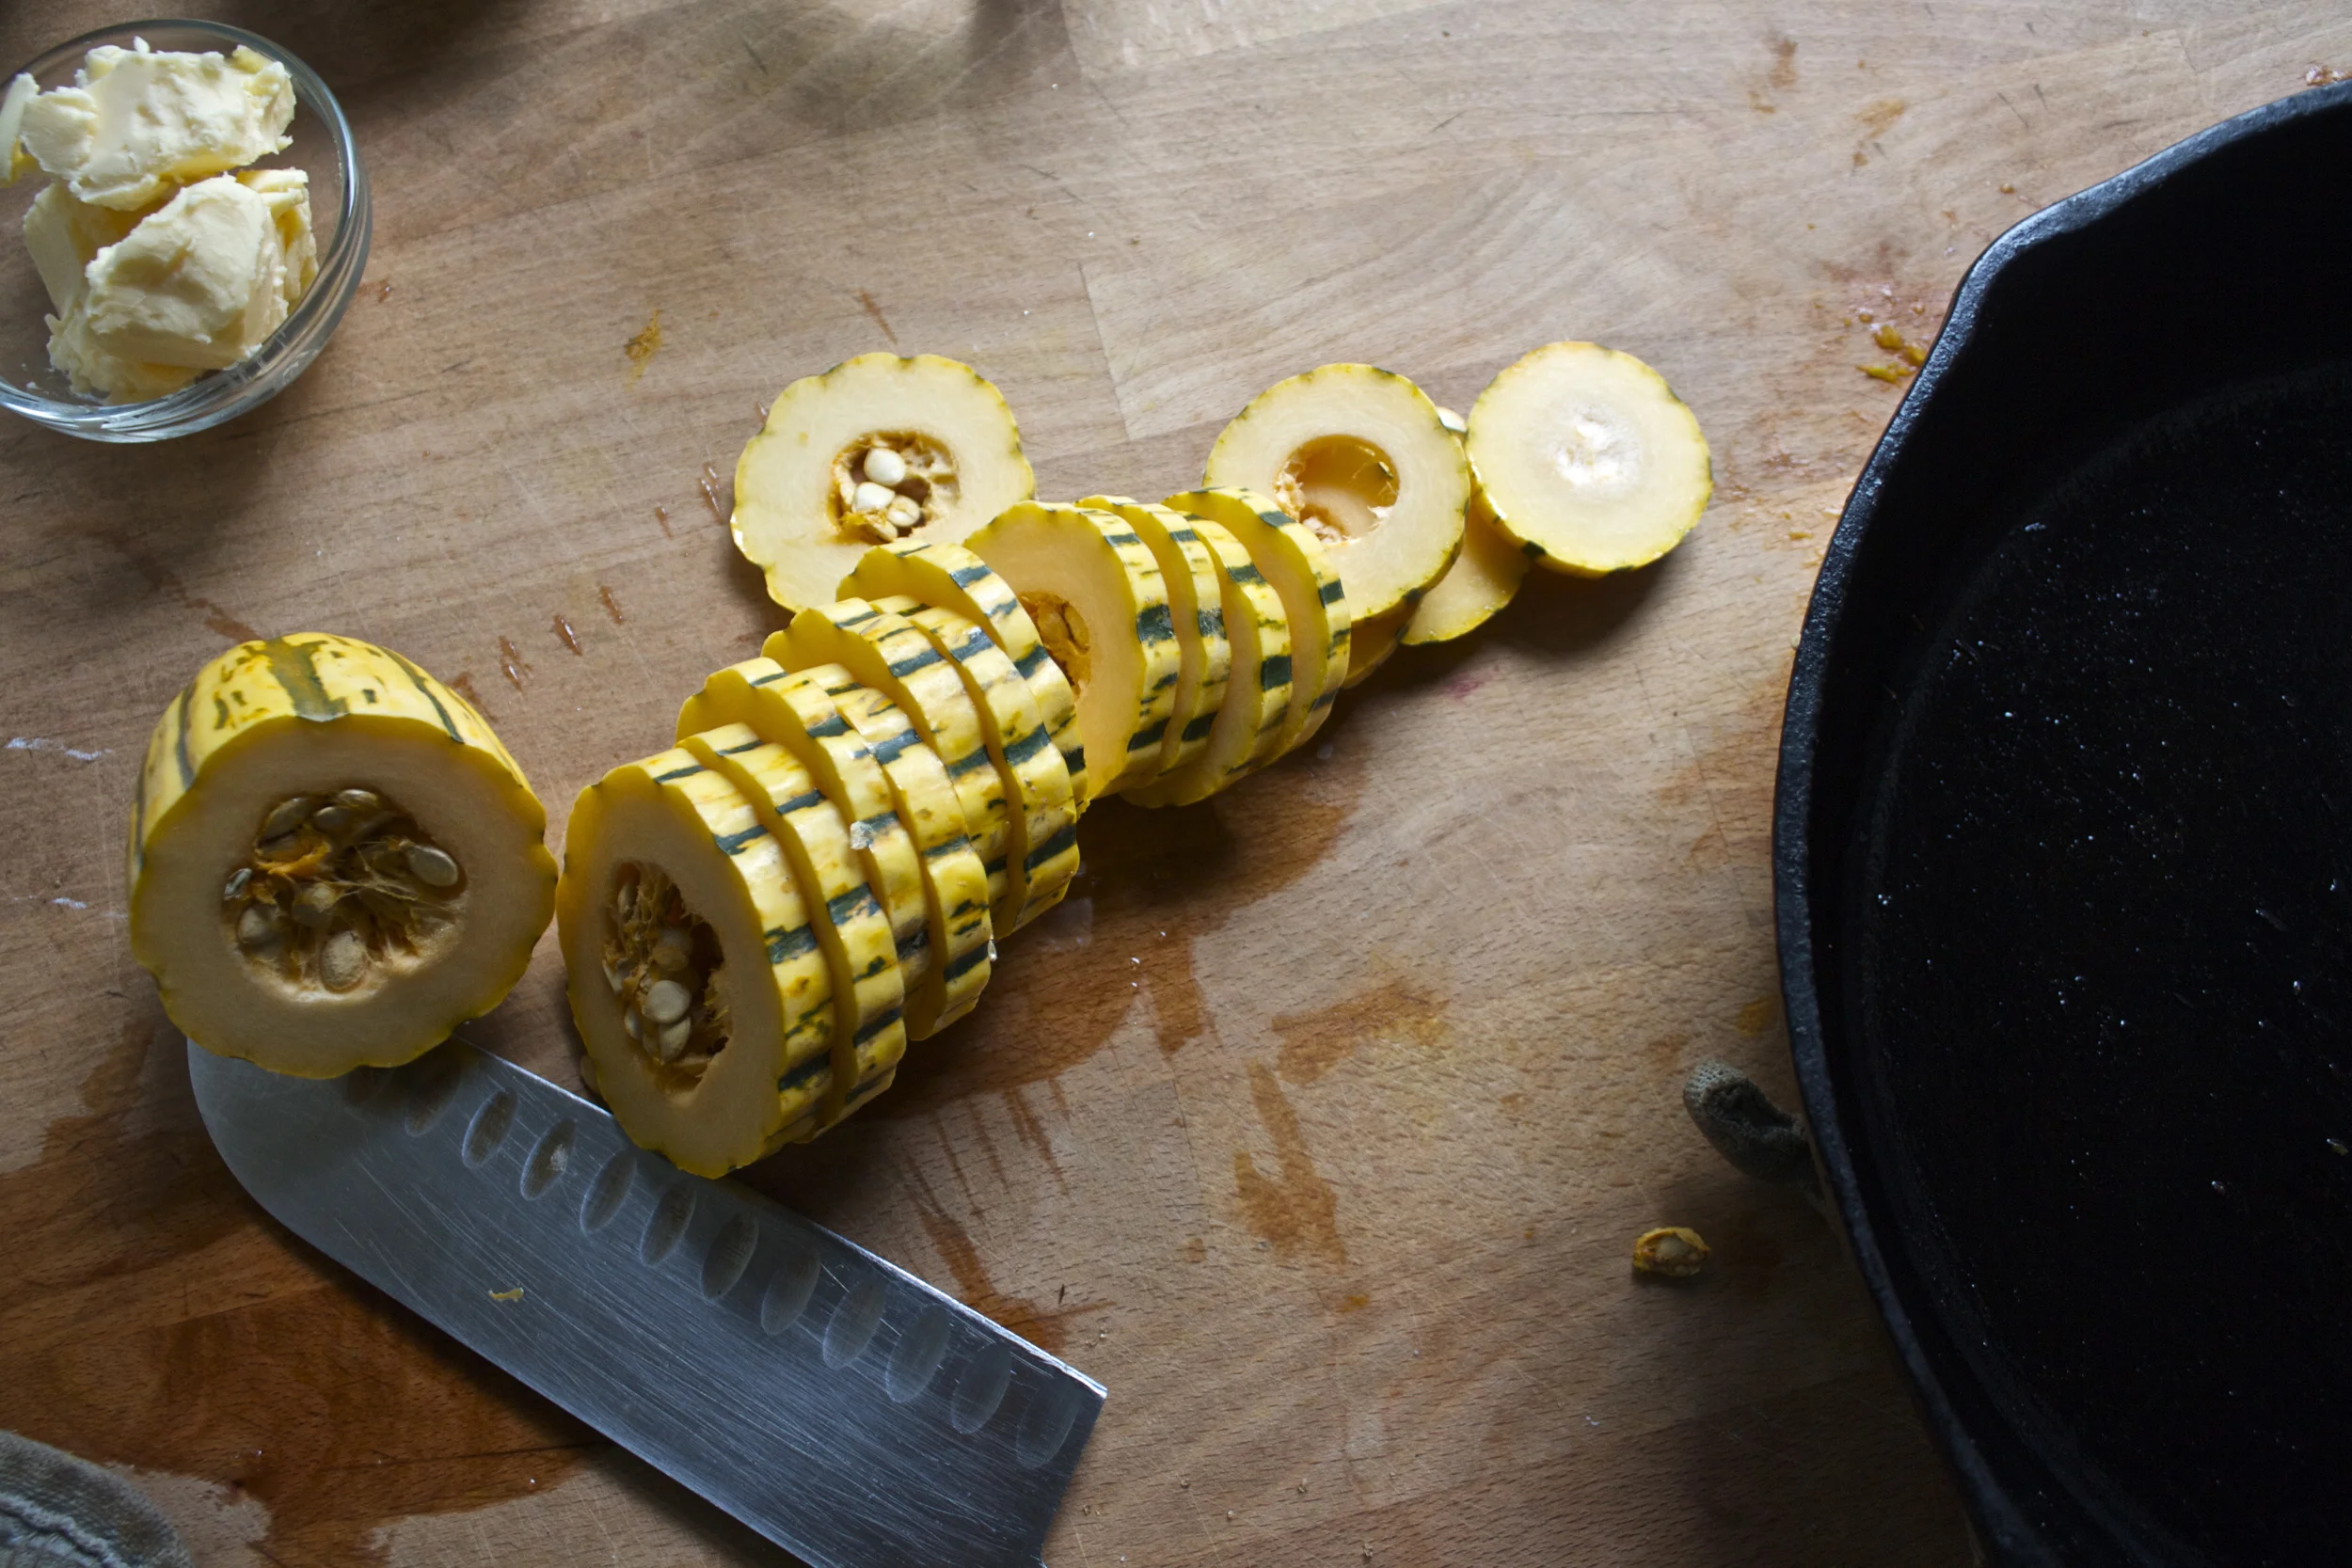
Eat with a fork

This weekend I made a stand of paper hearts that live all around the house. An early Valentines for my mister. We don’t do fancy dinners, %u00a0store bought cards or gifts%u2026.. Handmade and pretty is what we do.

These hearts hang from the ceiling and toss pretty heart shadows on the walls%u2026..and make both of us smile.%u00a0

%u00a0 The making of stringed paper hearts is so very simple. What you need is..

  • One or more different colors of card stock paper
  • scissors
  • A sewing machine with thread..(can be hand sewn for sure)

To start, cut out a bunch of hearts, as many as you want. You can free form cut them (that’s what I did) or you can either make a template and rouse %u00a0a cookie cutter or something and trace, if you want perfect uniform hearts.%u00a0

Decide on a color pattern (I did red, pink, white, brown, repeat) or random is nice too.

Start sewing the hearts. (I used a scrap to get started..and use the scrap piece for tacking to the ceiling). You can either sew hearts close together or leave an inch or two in between each. One trick I have learned when sewing strands of paper is to give a little tension to the strand as you are sewing%u2026it helps keep the machine from jamming up.

You are done when all the hearts are sewn%u2026 And hang them up or, if you want to save them for a surprise for Valentines day, wrap strand around a piece of cardboard. %u00a0Leave up for a day, for a week, or like us, all year long.

Hearts everywhere%u2026so simple, so pretty, so much love!

-C

THE LOVELY CRAZY

January 9, 2020 by maximios • Blog

I know that it it spring, but I still have a winter farm share for another month and will be cooking and eating roots and squash until the summer share starts in early June. And I am good with that cause I love me some root veggies and butternut squash.  But, yes, it is spring and my body isn’t craving the super hearty, rich foods that it was just a few short weeks ago (more like last week) When the temperatures first start to go up, I usually want my food to not feel as heavy or my spices to be quite at warming (I am still all over curries and hot hot hot sauces in the summer). It’s like I have said before, I tend to change up my spices with the seasons.  

So to give a lighter feel to a heartier squash, I busted out one of my favorite spices, the oh so lovely tarragon. It has a sweet, light, fruity and floral taste that pairs beautifully with the squash and onions. It give the dish a nice spring like flavor that will leave you feeling satisfied without wanting to move directly onto the couch and hide under a blanket. This is a eat and ride you bike kind of dish ( you don’t actually have to go for a bike ride if you don’t want to)

Note. If I had a grill, I would definitely cook this dish on it. As of now, I don’t own one so I am left to cook on the stove. But by all means, if you have a grill, do it up!

Half of a medium sized butternut squash (or use a whole one.. I had a half in the fridge that was waiting to be cooked)  and one whole onion (two if you use a whole squash)  Apple cider vinegar, olive oil, salt , pepper, garlic powder, and, last but not least, the oh so fragrant and tasty, tarragon. 

Chop the onion  and the squash into big chunks. If you don’t like the skin of the squash, you can peel it, but I like it so I don’t peel. Drizzle olive oil in a pan or a baking sheet, toss the veggies in and add the garlic powder, tarragon, salt and pepper and a few splashes of apple cider vinegar. Toss around. Stick into oven at 425 degrees for about 30-40 minutes. When the squash is tender and the onions are cooked, remove from oven.  
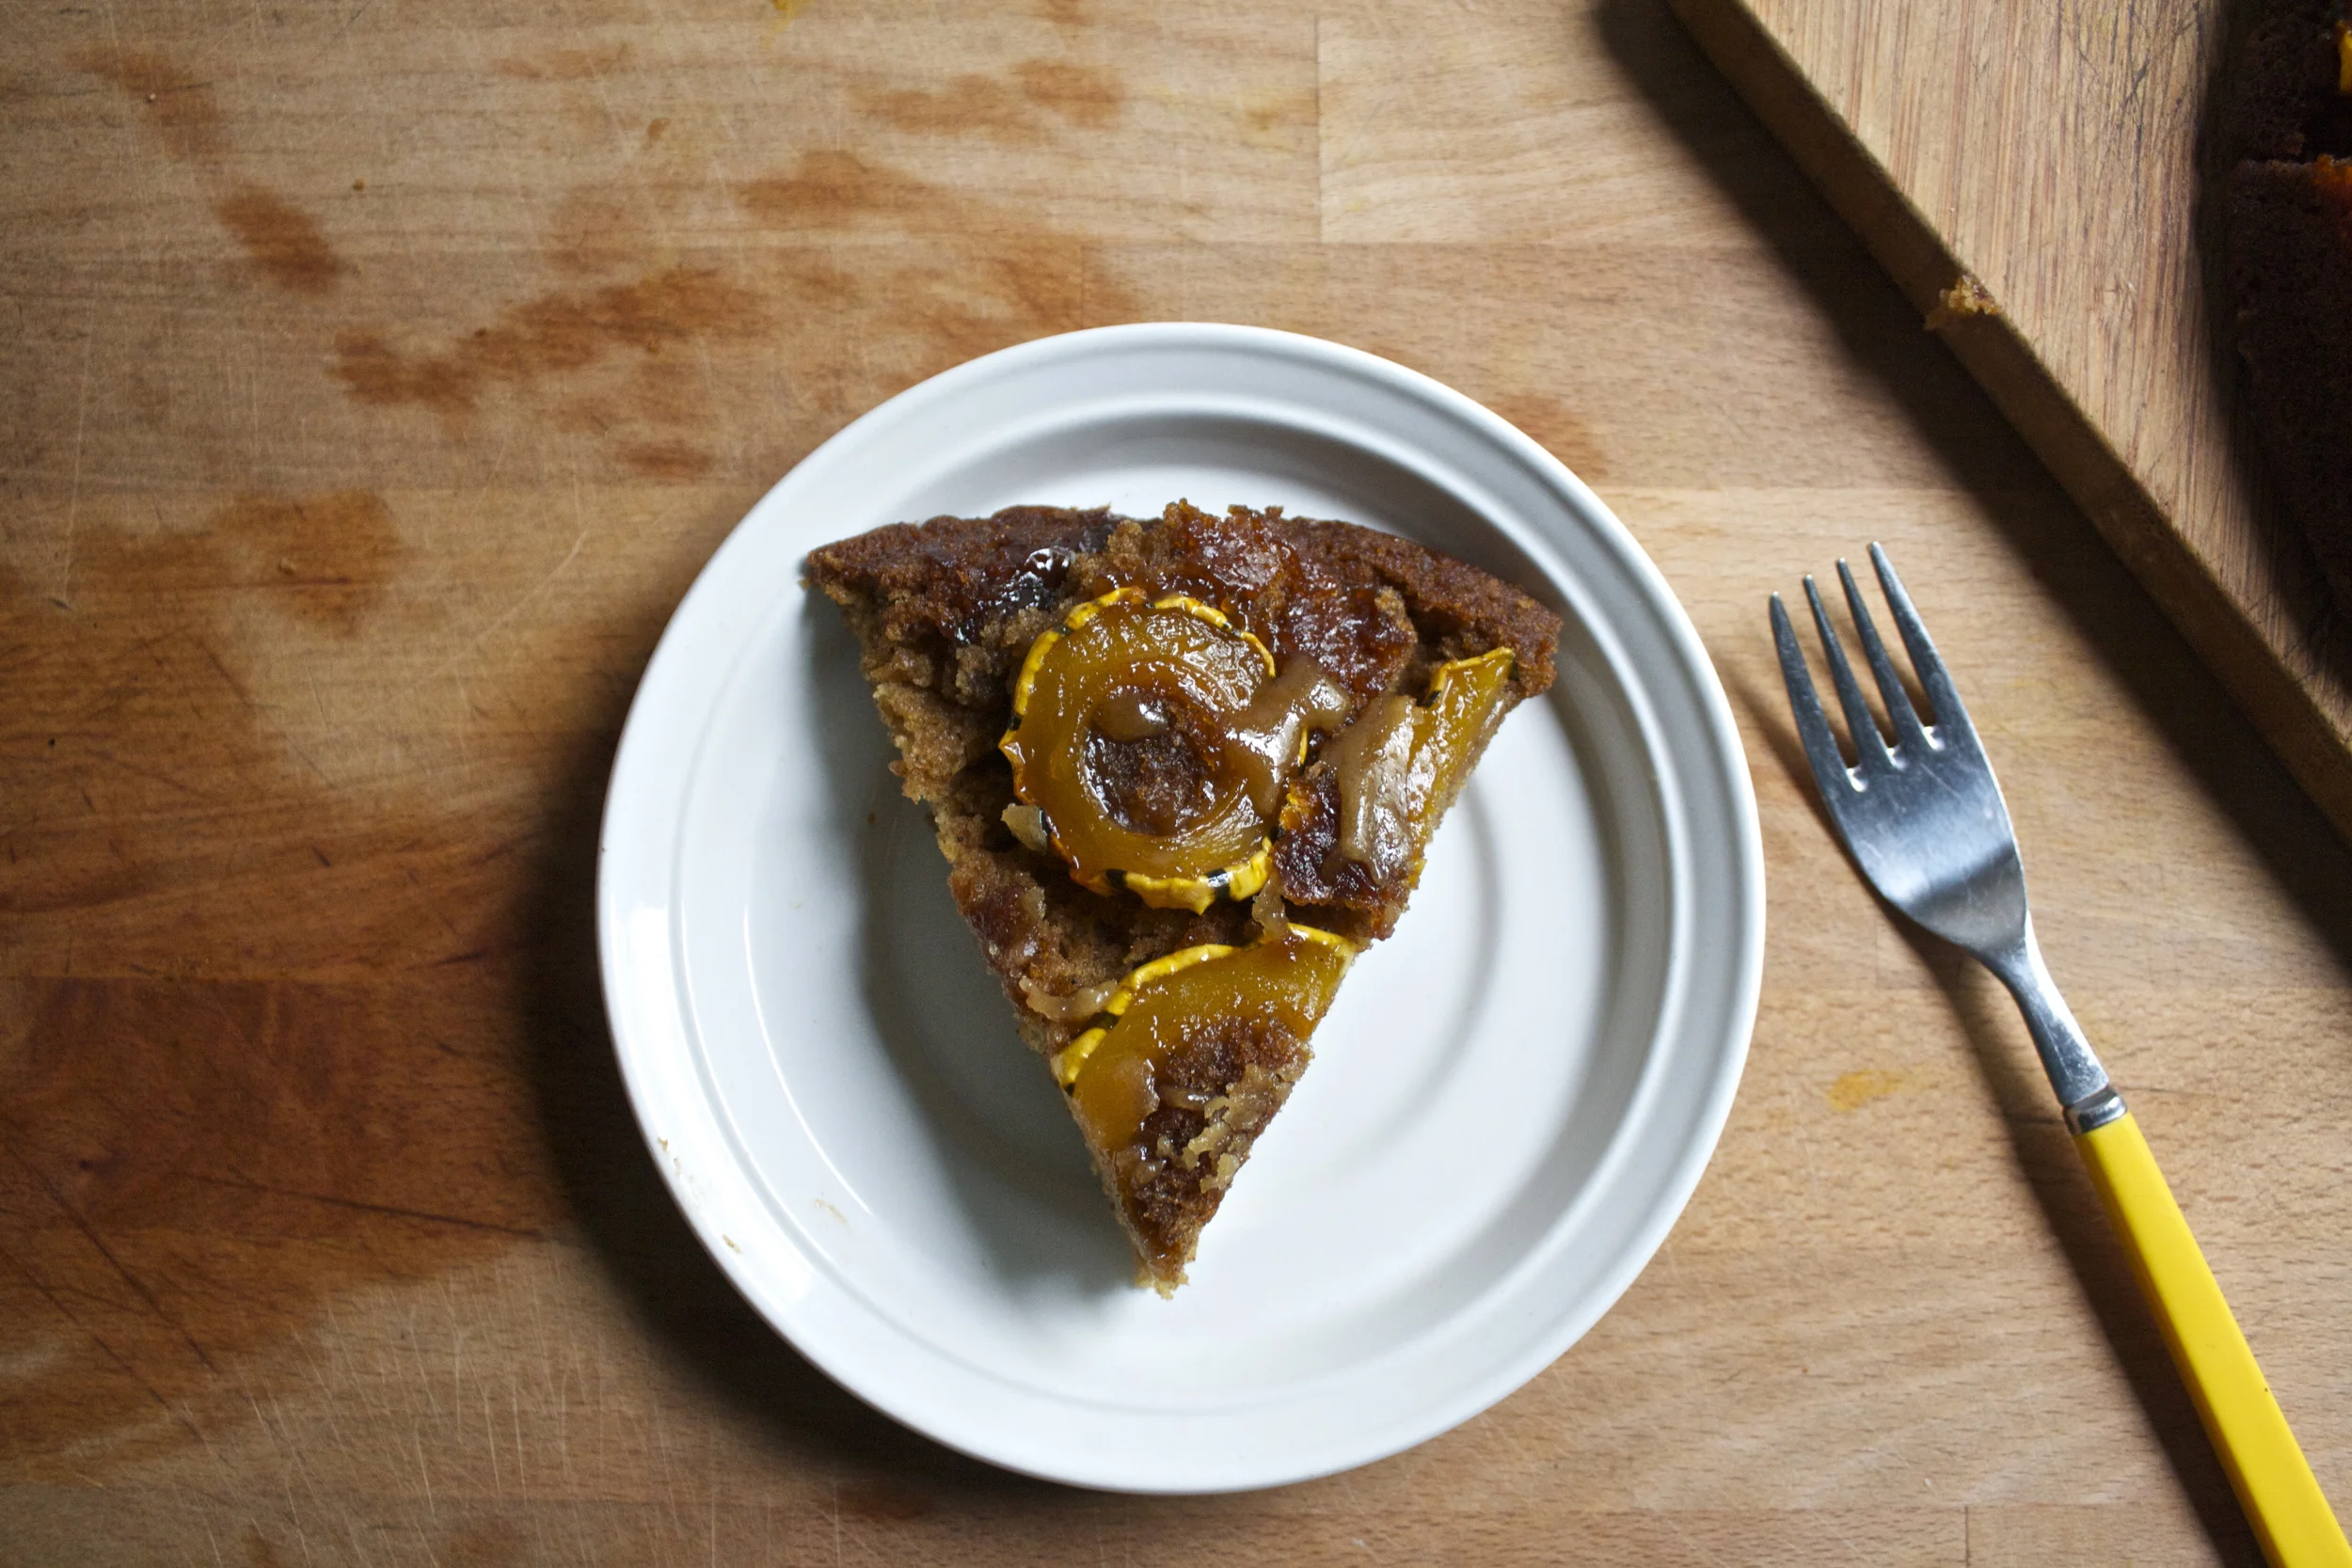
I am pretty sure you can figure out the rest.

Happy day!

-C

Tarragon Butternut and Onions

  • Half of Medium Butternut Squash
  • 1 Large Onion
  • 1 Tablespoon Dried Tarragon (use fresh if you have it.. 2 tablespoons)
  • 2 Tablespoons Apple Cider Vinegar
  • 1 Teaspoon Garlic Powder
  • Salt ans Pepper
  • Olive Oil

Chop squash and onions into similar size pieces. Toss in a skillet or on a oiled baking sheet and add the rest of the ingredients. Toss around and place into a 425 degree oven for about 30-40 minutes or until squash is fork tender.  

Remove from oven and eat.

 Make as a side dish or add to a salad. Eat as a light lunch, or a midnight snack… eat it however you want.

THE LOVELY CRAZY

January 9, 2020 by maximios • Blog

What do you think about at 5 o%u2019clock in the morning? Wait, are you awake at 5? Well I am and yes, I know that most people are not and think I am crazy for waking up so early, but it is and I do and whatever. Anyway, it%u2019s 5 o’clock and I am at the gym (yes, I wake up at 5 AND go to the gym) and me and my gym friend start talking about food (as usual) and what we were going to do with our Brussels sprouts that we got from the farm (I got her to join my CSA!). That is what I am usual thinking at 5. Food, and how to prepare it. And as the sprout conversation commerced, this is what materialized in my head. Crisp, crunchy fresh Brussels spouts, shredded up and tossed in a warm tangy cranberry sauce. My mouth was salivating and as usual, I left the gym hungry.

So I came home, drank all my coffee and then proceeded to make the sprout dish for lunch and let me tell you, this sprout slaw is amazing. Tangy and crunchy and all Brussels sprouty. It has a hardy salad feel without being heavy. It is a slaw that really get me, you know. (I actually don%u2019t know.)

Anyway, you should really get on the eating this Brussels sprouts slaw (or any Brussels sprouts dish) train now, before they go out of season and you end up buying kind of not great sprouts from the market that don%u2019t taste as good. Bad Brussels sprouts suck.

To the cranberry Brussels sprout slaw.

The stuff. Fresh Brussels sprouts, cranberries (fresh or frozen), some onion, balsamic vinegar, a little maple, dried cranberries and toasted walnuts, and salt and pepper.

Start with onion. Grab it and dice it nice and small.

Dump the onion into a skillet with a little pinch of salt and a splash of water and cook for a few minutes, just unit they are not raw anymore. Then add in the cranberries and 1/2 cup water. Cook on a low heat until the cranberries all pop and the sauce starts to thicken.

While cranberries are cooking, shred up the sprouts. Thin as you can get them.

Cranberries are now a thick and chunky sauce and oh so delicious. Add in the vinegar and maple here and give it a good stir and a taste test too. If it is too tart for your liking, add more maple. Think you might need a bit more vinegar, well splash it on it.

Now toss those shredded spouts it.

Stir it around. Season with salt and pepper and there it is.

Scoop into a bowl. Top with dried cranberries and walnuts and grab a fork.

This is good.

-C

serves 3-4 as a side or one person who wants to eat it all to themselves

  • 1 1/2 cups fresh or frozen cranberries

  • 1/2 a pound Brussels sprouts ( around 3 1/2- 4 cups shredded)

  • 1 small or 1/2 a large onion

  • 3 tablespoons balsamic vinegar

  • 1 tablespoon maple syrup (or more to taste)

  • salt and pepper

  • 1/2 -3/4 cup water

  • small handful dried cranberries (optional)

  • smal handfuls toasted walnuts (optional)

Start with dicing the onion up into small pieces. Place in a skillet with a small pinch of salt and a good splash of water and place on medium heat. Cook for a few minutes or until the water has evaporated and the onions are not raw. Add in the cranberries and 1/2 cup water. Keep on low heat and cook until the cranberries pop and start to thicken. If the cranberries are not cooked all the way and the water has evaporated out, just add another 1/2 cup.

While cranberries are cooking, shredded the Brussels sprouts, as thin as you can. A mandolin is great for this but a knife works too.

Once the cranberries have cooked down to a saucey consistency add in the vinegar and maple and stir around. Remove from heat and carefully taste the sauce. If you think it needs more maple or vinegar, add in another tablespoon until it tastes good to you. Dump in the shredded sprouts and mix. Season with salt and pepper to taste.

And then it%u2019s done. You can dump it all into a bowl and sprinkle the dried cranberries and walnuts on top, or leave it in the skillet and do the same. Me,I scooped half into a bowl for pictures sake and ate the rest right out of the skillet. I then licked the skillet clean with my finger. Then ate the bowl full. SO good.

There are a million things you can, and should, do with tomatoes. Salsa is one of those things. Especially with the super fresh and ripe summertime tomatoes that may or may not be overflowing every empty surface of your kitchen (my current predicament). And peaches. Now is the time friends to eat your peaches. In season and oh so tasty. Do it now before it%u2019s too late and those oh so deliciously ripe and sweet peaches are gone and all that is left are mealy, gross, supermarket fakes. Only eat in season peaches. That is a life lesson everyone should know.

This salsa is perfect. Super fresh, sweet and slightly spicy, with a hint of tangy goodness and just, you, really freaking perfect. A salsa that hits all the right notes with out being overly anything and underly nothing if you know what I mean. All the tastes of summertime. A darn good salsa. Darn good.

This salsa also makes me a winner at the game I am playing with myself called %u201cGet the mr to eat tomatoes and like it”%u201c. The game started when he told me he was sick of tomatoes and he didn’t want to eat anymore. I made the salsa (which also made me a winner in the other game I play called %u201cGet the mr to eat fruit in his savory dishes%u201d, because he also tells me how much he hates fruit in savory), he tried the salsa, raved about the salsa, and then went and ate the rest of the salsa with his rice and beans. .

I win again! Haha

Anyway, super fast, super fresh, super super. A great way to use up a any of your shit load of tomatoes you might have laying around and to get in a few more of those summertime peaches before they are gone again for the year.

Now to the salsa.

The stuff. Cherry tomatoes, peaches, an onion, a jalape%u00f1o, a lime, a bunch of cilantro, salt and pepper, and a little vinegar.

Start by cutting up the tomatoes into quarters. Do this carefully or else you will have tomatoes rolling around everywhere. Place chopped tomatoes into a bowl.

Then dice up those peaches into small little pieces and toss into bowl with tomatoes.

Onion gets diced up too and placed into bowl.

Jalapeno, seeds removed, diced up nice and small. Get it into the bowl.

And cilantro. Give it a rough chop and into the bowl it goes.

A sprinkle of salt, lots of pepper (to taste of course), the juice of the lime, and a splash of vinegar. Mix it all up and there you have it.

Into a jar (or you can just keep it in the bowl if you want), and it%u2019s ready for eating. Chips, tacos, to top a salad%u2026 This salsa does it all. Heck, just eat it with a spoon. There is absolutely nothing wrong with that.

-C

Makes about 32 oz of the good stuff

  • 1 overflowing pint cherry tomatoes (red, yellow, sun gold or a mix of any)

  • 2 ripe but firm peaches

  • 1 bunch cilantro

  • 1-2 jalape%u00f1os (depending on how hot you want it)

  • 1 small red or white onion

  • a lime

  • salt and pepper

  • splash red or white wine vinegar

Grab the tomatoes and carefully, so they don%u2019t roll away, cut each one into quarters. Place in a big bowl. Cut peaches in half, remove pit, and dice the flesh into very small little piece and toss into bowl. Now onion, dice that into small little pieces, along with the jalape%u00f1o and toss into bowl. Cilantro gets a rough chop then into the bowl it goes. Now sprinkle in a little salt and lots of black pepper. Add the juice of the lime and a splash of the vinegar and toss it all around. Let sit for a few minutes, taste, then season with more salt and pepper if needed. Can add more vinegar for more acid if needed too.

This salsa only gets better with a little age so you can definitely make it a day or two ahead of time.

Store in a bowl to serve or a jar for longer storage. Use within a 4-5 days of making it.

Have I told you how amazing my farmshare is? I am sure I have, but if I haven%u2019t lately, well let me just tell you, it is. All summer long we (the members) get to pick a bunch of fresh herbs every week. Basil, scallions, dill, parsely, and cilantro. Planted every few weeks to keep us in the herbs all summer long. And every few weeks there is a herb free for all. Pick unlimited amounts of whatever herb is plentiful. Last week it was unlimited parsley. Yeah there was unlimited basil and that was nice too, but the parsley, the underrated, overlooked herb. That was what I wanted and I picked the shit out of it.

Parsley. No I is not just a green sprig that garnishes your plate at a restaurant. It is a great spicy, fresh, clean tasting herb that plays so well with everything. I really think parsley can, and should, make it%u2019s way into almost any dish. It adds a touch more brightness to any spice blend. And there is just something about munching on some fresh parsley, it just works for me. Parsley is good friends. No. Parsley is great.

So now we match said parsley with another bright herb, mint, and blend it up into a pesto. Magic on the tongue. And a no brainer for pesto is pasta, although this pesto would make a great spread or smothered on grilled veggies or scooped into soup.

A summery pesto pasta salad dish situation. Perfect for all the times that you are hungry and need food.

To the pesto pasta salad!

The stuff. Parsley. mint, a few scallions, toasted almonds, garlic, a lemon, nutritional yeast, salt and pepper, and olive oil. Also pasta, a cucumber, and a big handful of cherry tomatoes.

First for pesto. Start by pulsing the almonds in a food processor until they become a nice crumb. Remove about 1/4 cup and set aside.

Grab the herbs and scallions and remove any really wooden stems (keep the more tender ones) and rip the herbs into smaller pieces.

All the parsley, mint, and scallions now go into food processor with almonds, along with the garlic, nutritional yeast, the juice of the lemon, and a pinch of salt and some crack pepper. Pulse the food processor and stream in the olive oil until everything comes together. You might need to stop and scrape the sides a few times.

Now you need pasta. Cook it to the directions on the package you got it from. Cook it all the way through then when you strain it, rinse it with a little cool water.

Chop up the cucumber into small chunks and half or quarter the cherry tomatoes.

And to put it all together. Pasta goes in a bowl. Add in the pesto. If the pesto seems a little on the thick side and not easily mixes, add in a little warm water to thin it out a bit.

Add the cucumber and tomatoes.

Mix some more, sprinkle on lots of the crumbled almonds you set aside, maybe a few more springs of parsley and a few more leaves of mint for good measure and call it done.

Be ready to eat cause this salad is ready to be eaten.

-C

Makes a pound of pasta

  • 2 cups packed parsley (Curly or flat. I used curly)

  • 1 cup packed mint

  • a few scallions if you have them

  • 3/4 cup roasted almonds

  • 3 cloves garlic

  • a lemon

  • 1/4 cup nutritional yeast

  • 1/2- 3/4 cup olive oil

  • salt and pepper

  • 1 pound bow tie pasta

  • Big handful cherry tomatoes

  • a tender skinned cucumber

Note. This recipe makes a big batch of pesto and big pasta salad. You can totally make the all the pesto and only use half and only boil half of the pasta. Just stored left over pesto in a jar in the fridge for about week or so or stick it in the freezer for a few months. And you can use it for all sorts of great things like sandwiches, salads, as a dip%u2026 whatever you want.

To make the pesto. Place almonds in food processor and pulse until crumbly then remove about a 1/4 cup and set aside. Add in the garlic and pulse a few times. Then grab the parsley, mint, and scallions. Remove any tough stems and rip the herbs into smaller pieces. Add them to food processor along with the nutritional yeast, the juice of the lemon, and a good pinch or two of salt and lots of pepper. Pulse while slowly adding in the olive oil. Stop, scrap sides, then pulse until smooth. Taste and add more salt if needed.

Half or quarter cherry tomatoes and cut cucumber into small chunks

Cook the pasta. Big pot of boil water with a pinch pf salt. Cook until fully cooked, then drain. Give it a quick rinse of cool water. Dump the pasta into a big bowl.

To make the pasta salad. Scoop pesto into bowl with the pasta and mix it until all the pasta is evenly coated. If pesto is really thick, just add a little warm water to thin it out. Add in the cut up tomatoes and cucumber, mix, then top with the reserves ground up almonds and a handful more of chopped fresh mint and parsley.

Eat.

Left overs should be stored in fridge for a a few days. Left over pesto a week or so and or in the freezer for a few months.

It is getting oh so much nicer out yeah? Springing and such, well kind of. Still a wee bit chillier then it should be around here but still, it is spring and I am taking it.

And with the spring, I feel the itch, the itch to spend all of my free time outside. Out doing things that are not inside because I spent the last 7 long months inside way too much. I needed to be outside as much as possible and as it gets even nicer and warmer and garden temperature-able, I am basically going to be living outside.

Bring in sesame noodles. Super fast, super easy, super duper in every way. Make a big old batch and eat now, eat later, eat hot or eat cold. Everyone loves them, they love you, etc. etc%u2026 A perfect meal to have in rotation when you know that you are not going to have or want to spend much time cooking in the kitchen because you will be outside playing in the dirt and soaking up the sun. And think about all the picnics and BBQ%u2019s to come. These suckers are fantastic to have at any outdoor eating event. They are even peanut free so you can safely bring them to potlucks and such and don%u2019t have to worry about accidentally kill a peanut allergy person. And you can make them gluten free as well if you sub in your favorite gluten free pasta. These noodles, I am telling you. They are a winner in every way.

So with out further ado, the noodles!

The stuff. Spaghetti noodles, tahini, a few cloves of garlic, some toasted sesame oil, soy sauce, red wine vinegar, honey (used whatever sweetener you like), red pepper flakes, tasted sesame seeds some cabbage, half a red onion and a carrot.

Get pasta cooking. Boil water, drop noodles in, you know the drill. Cook as long as the the noodles need cooking, just make sure to not over cook them cause soggy noodles are nasty.

Chop, shred and julienne the cabage, onion and carrot. Nice and thin.

Mince the heck out of the garlic. Or use a garlic press if you want.

Now make the sauce. Add the minced garlic, along with the soy, sesame oil, vinegar, sweetener, and chili flakes to the bowl with the tahini. Mix, mix, mix until it is all incorporated and not lumpy. And that is that.

Noodles should be done by now so strain them out.

Add the prepared veggies to a big bowl.

Add in the cooked noodles

Cover with sauce and toss all around until all the noodles are coated and delicious. Sprinkle with sesame seeds and a pinch or so more of pepper flakes.

And then it is time. Eating time.

Happy spring!

-C

serves 3-6

  • 3/4 lb (3/4 of a package) of your favorite spaghetti noodles (or linguine or similar noodle)

  • 2 tablespoons toasted sesame oil

  • 1/4 cup soy (low sodium if you have it and gluten free tamari if needed)

  • 3 tablespoons red wine vinegar

  • 3 tablespoons tahini

  • 2-4 teaspoons red chili flakes

  • 1-2 teaspoons sweetener of choice (maple, honey, or brown sugar)

  • 4-5 cloves garlic

  • 1-2 tablespoons toasted sesame seeds

  • about a 1/4 head of cabbage

  • a carrot

  • small red onion

Bring a pot of water to a boiling cook the noodles as directed on package. You want them al dente, cooked all the way, but barely. No soggy noodles. (unless you like them soggy)

In the mean time, shred the cabbage, julienne the carrot (or shred it) and slice the onion so very thinly. Place into a large bowl. Now mince garlic and place into a bowl along with the soy, sweetener, vinegar, tahini, sesame oil and a teaspoon or two (more for spicier) of chili flakes and whisk until completely incorporated. Taste and adjust if needed. Add more tahini for more body, more sweetener if needed or more hot pepper flakes for more spice.

Once noodles are cooked, drain and place into large bowl along with the shredded and julienned veggies. Pour in the sauce and toss it all around until all the noodles are covered. Sprinkle in the toasted sesame seeds and a small pinch more of the red pepper flakes.

Eat. Eat warm, room temp, or cold. They are delicious any way.

Any left overs just stick in fridge. Can be reheated or not. Also, you can make the sauce and the noodles a few day ahead of time of when you want to have the dish Just mix the sauce with the noodles when you are about to serve them%u2026 So simple!

Nothing here but a mere craving, the fact that I had a fresh head of cauliflower, and I really wanted tahini. TA DA. I made exactly what I wanted and it was so so sooooo good. Maple Cumin is one of those super A+++ taste pairings and anything roasted cover in tahini is basically going to be a win so I had no fear when making this dish that it was going to be anything but fanatic.

And of course I was right. It was so freaking good, like now I am going to make it again and again because I don%u2019t want make cauliflower any other way ever or at least until I get sick of it or of roasted vegetables. But that probably won%u2019t happen for a while.

So if you like cauliflower and tahini and amazingness, here, make this.

To the cauliflower

The stuff. A head of cauliflower, tahini, maple syrup, cumin powder, red wine vinegar, salt and pepper, and olive oil.

Break or cu the head of cauliflower up into florets and toss with a little oil, the maple and cumin, and a little salt and pepper.

Scatter on a baking sheet and stuff it into a hot oven.

Meanwhile mix tahini with vinegar, salt and pepper, and enough warm water to thin out.

Roasted all nice and crisp and delightful.

And now you gather up all that cauliflower and cover with all the tahini you want. Grab a bowl, or just eat off baking sheet, and get to it.

And there is no shame in eating a whole head of cauliflower because hey, its cauliflower.

-C

Makes a meal for one or a side for a few

  • a head of cauliflower

  • 3 teaspoons cumin

  • 2 tablespoons maple syrup

  • olive oil

  • 3 tablespoons tahini

  • 2 tablespoons red wine vinegar

  • 2-3 tablespoons warm water

  • salt and pepper

Preheat oven to 450

Break or cut the cauliflower into medium sized florets. Place in a bowl and drizzle with a teaspoon or so olive oil and toss around. Drizzle in maple, add in the cumin, and a pinch of salt and pepper. Toss until coated then dump the cauliflower onto a baking sheet. Place in hot oven for 25-30 minutes or until roasted to your liking.

While that%u2019s roasting, mix up the tahini, vinegar, and a pinch of salt and pepper. Add in warm water until the mixture is a drizzlable consistency.

Once cauliflower is out of oven, cover with tahini.

Now eat.

There will be no left overs so don%u2019t worry about it.

Potatoes in tomatoes. It just has a nice ring to it. And to tell the truth, that is the only reason I made this dish, because it sounds good.

Ok, not really the only reason, but it was the start, that and I have been sitting on some potatoes for a little while and it was time for them to be eaten. Enter in the tomatoes. I figures cooking the potatoes in tomatoes is alike to a ketchup and french fry situation. Not completely the same, but you get the idea. Add in chickpeas for good measure and onion because I wanted to and that is that. Nothing fussy, one pot, easy, hearty, and good.

Also not hurting anyone that these potatoes take a little while to bake. I could have made this dish in a way that made them cook faster (like parboil the potatoes) but I wanted the heat from the oven. It has been pretty freaking dang cold out so I liked having the heat, it adds another dimension to the term comfort food (as in me being comfortable hanging out next a hot oven).

Anyway, nothing too fancy, just all around tasty dish. It is just what you need to bake and eat on any given cold winter day. And it sounds nice too. Just say it aloud. Potatoes in Tomatoes. Right? Now you see, it had to be done.

To the potatoes in tomatoes!

The stuff. Potatoes, crushed tomatoes, cooked chick peas, an onion, a few cloves garlic, Italian seasoning, salt and pepper and a bit of olive oil.

Start by chopping the onion and mincing the garlic.

Get it all into a cast iron pan or oven safe skillet with a little olive oil. Add the spices and give it some heat on the stove top while you cut potatoes.

Now cut those potatoes nice and thin. A mandolin works wonders but a knife will do just as well, just try to keep the thickness all the same.

Potatoes are cut and onion mixture has sweated a bit so now you add in the chick peas (with liquid) and half the crushed tomatoes. Stir it all up.

Layer on potatoes, drizzle with a tiny bit of olive oil and give them some salt and pepper love.

Dump the rest of the tomatoes on top then add in water, enough that all the potatoes are completely submerged.

Now into the oven they go.

Doesn%u2019t that just look all fantastic? I mean really really , A+ good, no? If you are feeling extra crispy, you could even stick the skillet under the broiler for a few minutes right before you pull it out.

And that is that. Potatoes in tomatoes with chick peas and onions. A simple but very satisfying dish to keep your cold belly full of warm goodness.

Be well.

-C

  • About a pound or so of white or red potatoes

  • 3 cups (or a 28oz can) crushed tomatoes

  • 2 cups (or a 16 oz can) cooked chickpeas in liquid

  • 1 large onion

  • 2-3 close garlic

  • 2 tablespoons Italian seasoning

  • 2-3 cups water

  • olive oil

  • salt and pepper

Preheat oven to 400

Grab onion and dice into small pieces. Mince the garlic. Grab a medium sized oven safe skillet and toss the onion and garlic in with a tablespoon or so of olive oil and the seasoning. Place on medium heat and cook for a few minutes until the the onion is slightly cooked and fragrant. Remove from heat. Mix in the chick peas with liquid and half of the crushed tomatoes.

Rinse potatoes and slice into 1/4 inch thick rounds. Place tomatoes into the skillet, layering any way you want. Drizzle the top with like a teaspoon olive oil then sprinkle the tomatoes with salt and pepper. Spread the rest of the crushed tomatoes over the potatoes then pour the water in. If the potatoes are not completely submerged in water, add more until they are. Cover the skillet with a lid or tin foil.

Place skillet in oven and bake 40ish minutes then remove lid or foil and bake for another 25-30 minutes or until potatoes are fork tender and slightly crispy on the edges. Depending on the type of patotoes you use,(like a really firm and waxy yellow potato) you might need to add more water to the skillet and cook for longer. If that is the case, just pour more water over until the potatoes are submerged again and keep baking until cooked.

For extra crispy, when potatoes are done, place skillet under broiler for a few minutes until crisp to your liking.

Pull from oven, let cool a minutes or two then dig in.

I made baked beans last week for a side to dinner with the mr and Barb. They ate them all. I didn%u2019t get more then a spoonful. I was sad for me, but also was like %u201cShit, if I had known you guys were bean fiends, I would be making baked beans like all the time.%u201d

And maybe not all the time, but I made them again this week. And again, they ate a lot, but I got me some this time, and I will probably make them again next week too because they will be perfect for Thanksgiving. See, homemade baked beans are a thing of beauty. Sure you can buy them in a can and be just fine, but these baked beans, well these are waaaayyyy way better. These baked beans are soft (not canned bean soft) and tomatoey and a little spicy with a tang. Not sickly sweet, (not sugar added) and not too salty.. They are just about perfect. You can eat them on their own, toss them into salads or wraps, stick on some toast, serve as as side, or just eat them cold straight from a jar from the fridge right before bed. (your loved one will thank you for that). Plus they are baked in the oven and I love me a good warm oven on a cold day. And the obvious, but all the protein and all around goodness. A great dish to serve if ever you need to feed people like me who don%u2019t eat meat. It%u2019s a win win win win.

Baked beans in all their glory. No cans in sight.

The stuff. White beans that were soaked overnight, strained then added back to a pot with 6 cups of water. Also have crushed tomatoes. an onion, a few cloves of garlic, chili powder, mustard powder, apple cider vinegar, and some salt and pepper.

First step is to start boiling you beans. But while that is happening, mince garlic and chop the onion into really small pieces.

Toss the onion and garlic in a pan and cook on medium low until soften and fragrant.

Cooked beans. All you need to do to cook them is place the pot with soaked beans and water on high, bring to a boil, then turn heat to a medium. Let beans cook until tender. It should take about an hour and a half.

Beans are cooked and the garlic and onion are soften so now all you do is combine everything together. Don%u2019t drain the beans, just toss in the tomatoes, the vinegar, the spices, and a few pinches of pepper and a pinch of salt. Stir in all together,

Looks like soup right? This is right before you stick it into the oven.

Now look at that, oven baked beans. The best part%u2026 The crispy sides. ALL MINE!

Not much left to do but eat them. Straight up with a hunk of bread. That is a good way to start anyway.

Enjoy your beans!

-C

Makes a big pot of beans

  • 1 pound (2 cups) white beans soaked in water for at least 8 hours (I used great northern but navy would be good too)

  • 6 cups water or veggie stock

  • 3 cups (or a 28 oz can) crushed tomatoes

  • 1 onion

  • 3 cloves garlic

  • 1 1/2 tablespoons chili pepper

  • 1 tablespoon mustard powder

  • 1/3 cup apple cider vinegar

  • salt and pepper

Strain soaked beans and place them into large oven safe dutch oven almond with the water and stick on the stove. Bring the beans to a boil then reduce heat to medium and cook util the beans are tender. Should take about 1 1/2 hours.

Sometime while the beans are cooking, mince garlic and chop the onion into very small pieces. Place in a skillet and cook on medium until the onion and garlic are soften and fragrant. Remove from heat and set aside until beans are cooked

Preheat oven to 425

One beans are tender, dump in the cooked garlic and onion, the tomatoes, the spices, the vinegar, and a good pinch of salt and pepper. Stir it all together and place into the oven. Bake for about 2 hours, staring about ever 30 minutes, until the bean sauce is nice and thick. If at any point you think they have gotten to dry, just add more water. Pull the beans out of oven once you are happy with the sauce consistency. Taste and season with more salt and pepper if needed.

And then eat them. As a meal, as a side, or as a snack. Beans are good anytime.

Any leftovers should be stored in the fridge. Beans can be reheated very easily on the stove top. Just place the pot back on stove, stir in a little water and cook til hot.

Beans are also fantastic eaten cold from the fridge.

I feel like this salad is kind of a summery salad, or better yet, a salad that highlights all the best of what summer has to bring. All the fresh tender dill that is still growing (but not for long) , all the brightly colored and amazing veggies that are being harvested and are nearing the end (bye fresh cucumbers.) This salad might just be my little last hurrah of summer cooking before it is all root veggies and dried herbs and hot and hearty food. And not going to lie and say that I am sad to see summer go because I am so so ready for it to be over, but I will miss all the fresh fresh produce. And I will especially miss all the fresh dill because fresh dill is seriously the best.

Eat up what is left of summer now before it%u2019s too late!

The stuff. Quinoa, a bunch of dill, a cucumber, a pepper, an onion, and some cherry tomatoes. Also a clove of garlic, some salt and pepper, and red wine vinegar.

Mince the garlic, chop the onion, mince the pepper and the cucumber, half the tomatoes, and last but noblest, rough chop the dill.

All that goodness goes into. big bow, along with a sprinkle of salt and pepper, and the vinegar Tossed around and left to meld.

Uncooked quinoa with water turns to cooked quinoa

Quinoa meets the bowl of veggies

And after a good mix, viola!

You got yourself a yummers fresh dill and veggie quinoa salad.

-C

serves 3-5 as a side or 2 as a meal

  • 1 cup uncooked quinoa

  • 2 cups water

  • I bunch fresh dill (like a 1/3 cup chopped%u2026 But use as much as you want)

  • 1/2 a small red onion

  • 1 clove garlic

  • 1 small Persian cucumer

  • 1/2 of a sweet red or yellow pepper

  • handful or two of cherry tomatoes

  • 4 tablespoons red wine vinegar

  • salt and pepper to taste

Start by cooking the quinoa. Place the water and the uncooked quinoa into a medium sized pot. Place on high heat until sorts to boil, then reduce heat to a simmer and place lid on the pot. Let cook for about 15 minutes, checking at 10 minutes, to see if all the water has absorbed. When it has, remove from heat and let sit for a few more minutes then fluff with a fork.

While the quinoa id cooking, mince the garlic and chop all the veggies into small little pieces. Place into a big bowl. Chop up the fresh dill and toss into bowl too, along with the vinegar and a good sprinkle of salt and pepper. Mix it all around and let sit on the counter for a little so the veggies get nice and vinegary. Once quinoa is cooked and fluffed, dump into the bowl and mix around. Season with more salt and pepper if needed. Eat warm or refrigerate and eat cold. It%u2019s defiantly one of those salads that taste great right away but tastes even better the next day.

THE LOVELY CRAZY

January 9, 2020 by maximios • Blog

Roasted veggies of any kind can get this girl in trouble. Place a sheet pan meant for many full of roasted veggies and watch out, I will probably eat them all. I can%u2019t stop, won%u2019t stop and you know what, I am not sorry, especially if its roasted brussel sprouts and squash.l I am grabbing at every last bit, especially all the really crispy, almost burnt pieces. Burnt food is one of my favorite flavors.

This dish is pretty basic, but also not. A slightly overlooked grain, spelt, makes for a hearty backdrop to the magic of roasted sprouts and squash, covered with a sunflower butter sauce which is a nice spin on a traditional peanut sauce. It%u2019s pretty easy to make and pretty to look at as well. A nice hearty and warming meal for all of those cold winter nights. And it%u2019s not going to make you feel heavy or gross, like if you sat and ate an entire lasagna. No, you will feel full and fantastic and ready for a cookie (it is the holidays after all).

The ingredients in this dish are mainly inspired by the half eaten jar of sunflower butter a friend of mine gave me at the gym, plus the fact that I have been getting a few stocks of brussel sprouts each week at farm share so we are eating them at ever meal, (plus I LOVE brussel sprouts) and me trying to use up all of the grains and such in the pantry before restocking anything more or new. A dish of convenience sure, but also a damn delicious one at that. With this being said, if you had a different grain you wanted to use, or an abundance of some other veggies that you have or prefer, well go ahead and use them. You do you my friend.

And really, I was thinking of you when I made this dish. Sometimes at this time of year people tend to forget to eat, or tend to eat on the not so healthy side. This grain bowl situation is just what your body is in need of. Simple delicious nourishment.

The stuff. Spelt that has been soaking in water for a while, half a butternut squash, brussel sprouts, a red onion. Also sunflower butter, a few cloves garlic, a lime, soy sauce, a touch of maple, salt and pepper, and olive oil.

The spelt will probably take the longest so get it on the stove. Strain away the soaking water and place into with fresh water. Bring to boil then reduce heat to a simmer. Place a lid on pot ans let it go.

Next, get to the veggies. Halve the big sprouts (small ones can stay whole) chop onion into chunks and cube the squash.

A drizzle of oil, a sprinkle of salt and pepper, and a good toss around and it ready for the oven.

Meanwhile, make the sunflower butter sauce. Its pretty basic. The sunflower butter, minced garlic, soy, maple, and juice of the lime all into a vessel that can hold it. Add a couple tablespoons of warm water to thin it out and done. Sunflower butter sauce. Easy Peasy.

After about an hour, your slept should be cooked (that sounds aggressive to me) Tender and chewy and just right.

The veggies should be roasted and done too. Crisp as you like ( I actually like mine even darker, but the mr does not so I went a light roast this time)

And it%u2019s all ready for you to eat.

Roasted butternut squash and brussel sprouts on a warm bed of spelt covered in sunflower butter sauce. Living the good life here.

Take care of yourself this week, and always for that matter. Eat some good food. Your body will be happy for it.

Bye.

-C

Serves 2-3

  • 1 cup spelt berries (soaked in water overnight if you remember)

  • 3 cups water

  • about 1/2 of a butternut squash

  • about a pound of Brussel sprouts

  • a medium red onion

  • 1/4 cup sunflower seed butter (unsalted and unsweetened)

  • 2 tablespoons liquid amionos or soy

  • 1 teaspoon maple or honey

  • 1 lime

  • 2 cloves garlic

  • salt and pepper

  • olive oil

Preheat oven to 425

Place soaked spelt berries in a pot with water and a pinch of salt. Bring a boil then reduce heat, place a lid on pot and simmer for 45 minutes to an hour or until spelt berries are tender and all the water has been absorbed.

While spelt is cooking, cut sprouts in half (unless they are very small), cube the butternut into pieces about an inch big, and chop the onion up into chunks. Place all that you just chopped onto a baking sheet, drizzle with a teaspoon or two of olive oil and toss around. Sprinkle the veggies with a pinch or so of salt and pepper and pop into the hot oven. Roast for 40-45 minutes or until roasted to your desired doneness. (I like things a lot darker then the mr so I would leave my veggies in for closer to an hour)

For the sunflower butter sauce. Mince garlic and place into bowl or cup with the sunflower butter. Add in the maple, soy, and the juice of the lime. Mix together and add in a 2 tablespoons of warm water to thin out. Add more water if needed to get to a thick but pourable consistency.

Once the spelt is cooked, the veggies are roasted and the sauce is made, well you can assemble and eat. Spelt in a bowl, toss on some roasted veggies, and cover in the sauce. And then you eat it.

There are just some things in life that are always right, like puppies, rainbows, human decency,%u00a0or the smell of %u00a0springtime flowers. And tacos. Tacos are always right. Seriously, have you ever meet someone that doesn’t enjoy a taco of some sort, of some variety? Everyone has a taco, that is a fact. (Even if you skip the tortilla and go straight for all the fillings like me.)

And if you are like me, lentils and butternut squash are always right too. So are all the veggies and %u00a0the avocado.%u00a0Together all this goodness makes for one amazingly fantastical, very right taco.%u00a0

We all need a little bit rightness in our lives right now. Why not start with dinner.%u00a0

The stuff. You got to get lenitls, butternut squash, cumin, chili pepper, salt and pepper, and olive oil. Also kale,%u00a0red onion, cabbage, avocados, a jalape%u00f1o,%u00a0limes, and garlic. And you need something to stick it all in, so flour or corn tortillas.%u00a0

Start with making the veggie slaw. Basic here, just chop up the kale, onion, and cabbage into small thin pieces.

All that veggie goodness goes right into a bowl with a sprinkle of salt and the juice of a lime. Give it a good toss to coast it all and set aside to do it’s magic. The longer it sits, the better it gets.

Now to roast the squash. %u00a0Dice it into small mouth sized pieces. I usually don’t peel, but most people do and the mr has been avoiding he peel when he eats the squash so I peeled it (and roasted it and ate it myself)%u00a0

Toss the squash in a drizzle of olive oil and the cumin and chili powder and a little salt and pepper.%u00a0

Raw squash goes into a preheated skillet (or baking sheet) and roasted until browned and tender.%u00a0

Squash meets lentils and it is good. So so good.%u00a0

And don’t forget the jalape%u00f1o mousse.%u00a0. Dice the jalapeo and the garlic and toss into a blender (or jar to use an emulsion blender) with the avocado, juice of a lime, a sprinkle of salt, %u00a0and a little bit of water.

A pillowy cloud of green goodness.%u00a0

You got all the stuff,%u00a0you know what to do.

Fact. Tacos = happiness.%u00a0Now get on it.%u00a0

-C

make about 6 tacos%u00a0

  • 1 1/2 cups cooked french lentils
  • 1/2 of a small butternut squash (about 3 cups cubed)
  • 1 tablespoon cumin
  • 1 teaspoon chili powder%u00a0
  • salt and pepper
  • olive oil
  • 2-3 large kale leaves
  • 1/4 head of cabbage
  • small red onion
  • 2 limes
  • 1 large or 2 tiny avocados%u00a0
  • 2-4 tablespoons water cup
  • 1 jalapeno
  • 2 cloves garlic
  • 6 small %u00a0flour or corn tortillas%u00a0

Grab the kale, cabbage, and red onion and thinly slice and dice into small pieces. Place into bowl, sprinkle with 1/2 teaspoon salt and add in the juice of a lime. Give it all a good mix around and set aside.%u00a0

Preheat oven to 450. %u00a0Place your cast iron skillet or baking sheet in oven while preheating.

Take squash, peel the skin off (if you want) and cut into cubes about an inch big. Place in a bowl and toss with a little olive oil and the cumin and chili powder. Sprinkle a little salt and pepper in and toss it all around. When the oven is preheated, carefully remove the pan and dump the squash in it. Evenly disperse the squash then place the pan back into the oven and roast squash until browned and tender, which takes about 25 minutes.%u00a0

When the squash is done, remove and dump into a big bowl along with the lentils.

While the squash is roasting you can go ahead and make the avocado mousse. Scoop avocado fruit into a bowl %u00a0or blender and add in the jalape%u00f1o (seeds and ribs removed) and the garlic. Add in the juice of a lime and 2 tablespoons water. Blend until smooth. Add in more water to thin out to desired consitancey.%u00a0

Now you have everything ready to taco. Grab your tortillas and heat them up if want and start to pile it all on. Lentil squash mixture, a good handful of the veggie slaw, topped with a dollop or two of the avocado mousse. Now you got yourself a taco and it’s ready for your face.%u00a0

You know how I have been saying that I have so so many winter squashes that they are taking over my house? (the other night the mr and I counted while eating dinner.. there were 29 at the time) Well, not that I think I cannot eat them all myself, but I want to share and I think I found a way to share them that people (especially the mr) will really like%u2026 Squash noodles of course!

Honestly, I am always more then happy to just eat a squash pretty much as untouched as possible. All I do is stick one (any variety) in the oven on a rack and bake it till its soft then eat it. And it’s like crack.. I can’t get enough. If I was not a stronger person, I would probably eat an entire squash in once sitting, then still want more. (It’s happened) But that’s me. Most of the peps that I make food for are not as squash happy as I am and are not into just squash mush.%u00a0

So last night I noodled some butternut for the mr. And win.. he really liked them,%u00a0%u00a0even with a shit ton of caramelized onions. (I loved the onions, he has never been a huge onion fan but still really like them) %u00a0Ever since zucchini season has been over, I have been trying to find that new meal that I can whip up in a short amount of time, that the mr really likes, and can be made with the abundance of the season. I don’t know why I didn’t do this sooner. And sure, this particular dish takes a little time to make cause of the onions, which are so worth it, but on a regular old night, I can just toss some garlic, olive oil and a handful of fresh herbs into a pot and it will take like 15 minutes. to make.I am a genius (I am sure that noodling is not an original idea, but whatever, original to me)

Anyway.. squash noodles are now a thing for us, and I am sure will be a thing everywhere soon so you should jump in the band wagon now and get to making some too!%u00a0.

The stuff. A butternut squash, a few onions, and a handful of fresh sage. . Also need some garlic, wine vinegar, olive oil, salt and pepper and some water (water not in picture)

Slice up all the onions as thin as you can, mince up the garlic,%u00a0and stick it all into a big pot with a drizzle of olive oil, a sprinkle of salt and pepper and a small splash of water. Stick the pot on the stove on medium heat until the onions start to cook and smell all yummy oniony and maybe a few are sticking to the bottom of the pot. Grab the vinegar and give the onions a good splash, stirring %u00a0around, making sure no onions are stuck on the bottom. Now turn heat to low and cover the pot. Let the onions cook for a while (about a 1/2 hour) giving them a stir ever now and then.

And once the onions are all super soft and starting to caramelize,%u00a0add in the sage (but mince it first).%u00a0Keep the pot on low heat without the lid.

While the sage and onions are melding together,%u00a0turn the squash into some noodles. Do it by the means that you use. I have a mandolin that does the trick, but use your spiralizer, noodler maker, or even a knife and a little bit of patience. Just make sure all you noodles, however made, are all the same thickness to it all cooks at the same time. %u00a0So yeah, cut the bottom part of the squash off and use the neck%u2026 and save the rest for soup tomorrow.

Note%u2026 I did not peel the squash cause I like to eat the skin. If you want, peel it, but really, even if you don’t like the skin, you will not notice it in the noodles.%u00a0

After the sage has had a few %u00a0minutes with the onions, and now that the noodles are made, it’s time to add in a few splashes of vinegar and about a cup of water to the pot. So do that and give it all a good stir.

Now dump in the noodles, stir once more, and turn %u00a0the pot to medium heat and stick the lid back on it. Let cook down on medium heat for about 15 minutes, or unlit the noodles are tender and cooked, but not mushy.%u00a0

Like so.%u00a0

Now all you have to do is eat it.

Place a big pile into a pretty bowl, a fresh tiny little sage leave as garnish, and serve with a clean cloth napkin and a clean fork to eat with..%u00a0Or better yet, just eat it out of the pot with the wooden spoon %u00a0that may or may not have fallen on the floor. (my preferred method of eating)

Have a fantastic Day!

-C

Make 2 Servings%u00a0

  • 1 butternut squash (or the solid, neck part of a squab)
  • 4 medium sized sweet onion
  • 4-5 cloves of garlic
  • handful of fresh sage leaves
  • 1- 1 1/2 cups water
  • 2-3 splashes of red or white wine vinegar
  • olive oil
  • salt and pepper to taste%u00a0

Take onions and slice them as thinly as you can and mince up the garlic.%u00a0Place into o big pot with a drizzle of olive oil, a splash of water and a sprinkle of salt. Stick on stove on medium high heat and stir onions until they start to give off a sweet onion smell and are starting to stick to the pot. Add in a splash of vinegar to deglaze pot, give it all a stir, and turn heat to low. Cover with a lid and continue to cook, string now and again, until onions reduce in volume by about half, are all tender,%u00a0almost falling apart and are starting to brown a bit. (takes about 30- 40 minutes ) When onions are at this point, tiny chop the fresh sage and mix into the onion.%u00a0

Now grab you squash and turn in into noodles.(%u00a0I cut the bottom part off (for soup tomorrow) and use the neck of the squash).%u00a0You can do this by using a mandolin, a noodler, or even a knife. Any way works, just make sure the noodles are all the same thickness (mine were about 1/4 inch thick)%u00a0so they cook at the same time. %u00a0Noodle about 5- 6 handfuls or cups of noodles.%u00a0

Now right before you add the noodles to the pot, add in a few more splashes of vinegar. another pitch or two of salt and pepper, and a cup of water, Mix that all %u00a0around then add in the noodles. Give those a mix then turn heat to medium and place the lid back on the pot, checking and string every few minutes until the noodles are tender(but not falling apart) and the water has pretty much evaporated. (about 15 minutes) %u00a0If you notice the water is gone and the noodles still need more cooking, add in another 1/2 cup of water.

And when you are happy with the tenderness of the noodles. remove pot from heat, taste and season with more salt and pepper if needed,%u00a0%u00a0and get to eating!!!!!

Chomp Chomp Chomp%u2026 The sound I make as I eat this freaking fantastic crunchy granola. You know it’s good when the person sitting next to you is annoyed by the sound of you face while eating.%u00a0 I eat a lot of crunchy stuff. And I am pretty sure I annoy the mister a lot.%u00a0

Oh well, he will live, and he eats his fair share of annoying stuff too so we can just call it even.

So granola. I love it. I make a batch every few weeks or so, and I usually make it just for me. (I almost never make things just for me) I like to keep it simple but flavorful. A tad sweet, but not really, and crunchy, without the oily fried taste. I also like a variety of sizes, some big clusters and some small pieces.%u00a0

This granola fits the bill perfectly. Made with 5 ingredients, no oil, and the perfect sweetness level. %u00a0It’s one of my favorite flavors yet. And I know I said I made it just for me, but the mister really liked it too. (I can’t help sharing)

The simplest of stuff. 1 smashed banana, a cup of pureed butternut squash, Vietnamese cinnamon*, honey, and old fashion oats. (and a dash of salt, not shown)

*Note. I only ever use Vietnamese cinnamon because once I start using it, regular old cinnamon just won’t %u00a0cut it anymore. It is a bit sweeter and a lot more spicy. If you don’t have it or don’t want to use it, use regular cinnamon and add in 1/2 a teaspoon of all spice.Toss the cinnamon and salt with the oats. Mix together the banana, squash and the sweetener and combine with the oats until full incorporated.%u00a0

Another note. Because I made this granola for me and no body else, I actually omitted the honey (I think that banana abs squash make it sweet enough) But if I was making this for lets say, the mister, or a friend, I would use add a bit. The sweetness level and sweetener of choice is up to you, but 2-3 teaspoons of honey or maple syrup is usually sweet enough for %u00a0people.

Dump the mixture on a parchment lined baking sheet and give it a little pat, you know, to settle all the bit and pieces together, all cozy and evenly spread out. Now stick into a preheated oven and after about 20 minutes, take out of oven and give the granola a toss, breaking apart any super big chunks or overly wet pieces. Put back into oven for another 20 minutes. (I like my granola super crispy crunchy so I cook it a little longer, like 30 more minutes)And when you are happy with the crunchiness of you granola, remove from oven and let cool, trying not to eat all of it while it sit’s on the counter looking all pretty and smelling like happiness.%u00a0

Grab a bowl, stick the rest into a jar with a lid, hide it from others, and chomp chomp chomp away!

-C

Banana Butternut Granola

  • 3 cups old fashion oats (use gluten free oats if needed)
  • 1 ripe banana, mashed%u00a0
  • 1 cup butternut squash puree (can use canned)
  • 2 tablespoons Vietnamese cinnamon (or 2 tablespoons regular cinnamon and 1/2 teaspoon of allspice)
  • 1-3 tablespoon honey or sweetener of choice (use greater amount for sweeter)
  • dash of salt

Preheat oven to 375

In a large bowl, mix together oats, cinnamon and salt. Mix the mashed banana, squash, and sweetener of choice together and combine with the oats. If the mixture%u00a0seems really dry, add in a very small splash of water to loosen just enough to mix.

Dump mixture onto a parchment lined baking sheet and evenly disperse the mixture. Give it a kind of smoosh to compact the oats and to make sure all its all the same thickness on the pan.

Stick into oven for 20 minutes. Remove and give granola a little toss, maybe breaking apart any really big chunks (unless you like really big chunks) and put back into oven for another 20 minutes. (30 for a crunchier granola) Remove from oven and let cool on %u00a0baking sheet before storing in an air%u00a0tight container. If you find that it is not as crunchy as you would like or is a few days old and lost some of its crunchiness, just stick it back into the oven for a few minutes to re crunch.

Eat as is, as a cold cereal, %u00a0dip in peanut butter, add to popcorn or whatever way you want to eat it. No utensil required.

I know that it it spring, but I still have a winter farm share for another month and will be cooking and eating roots and squash until the summer share starts in early June. And I am good with that cause I love me some root veggies and butternut squash.%u00a0 But, yes, it is spring and my body isn’t craving the super hearty, rich foods that it was just a few short weeks ago (more like last week) When the temperatures first start to go up, I usually want my food to not feel as heavy or my spices to be quite at warming (I am still all over curries and hot hot hot sauces in the summer). It’s like I have said before, I tend to change up my spices with the seasons. %u00a0

So to give a lighter feel to a heartier squash, I busted out one of my favorite spices, the oh so lovely tarragon. It has a sweet, light, fruity and floral taste that pairs beautifully with the squash and onions. It give the dish a nice spring like flavor that will leave you feeling satisfied without wanting to move directly onto the couch and hide under a blanket. This is a eat and ride you bike kind of dish ( you don’t actually have to go for a bike ride if you don’t want to)

Note. If I had a grill, I would definitely cook this dish on it. As of now, I don’t own one so I am left to cook on the stove. But by all means, if you have a grill, do it up!

Half of a medium sized butternut squash (or use a whole one.. I had a half in the fridge that was waiting to be cooked) %u00a0and one whole onion (two if you use a whole squash) %u00a0Apple cider vinegar, olive oil, salt , pepper, garlic powder, and, last but not least, the oh so fragrant and tasty, tarragon.%u00a0

Chop the onion %u00a0and the squash into big chunks. If you don’t like the skin of the squash, you can peel it, but I like it so I don’t peel. Drizzle olive oil in a pan or a baking sheet, toss the veggies in and add the garlic powder, tarragon, salt and pepper and a few splashes of apple cider vinegar. Toss around. Stick into oven at 425 degrees for about 30-40 minutes.%u00a0When the squash is tender and the onions are cooked, remove from oven.%u00a0%u00a0

I am pretty sure you can figure out the rest.

Happy day!

-C

Tarragon Butternut and Onions

  • Half of Medium Butternut Squash
  • 1 Large Onion
  • 1 Tablespoon Dried Tarragon (use fresh if you have it.. 2 tablespoons)
  • 2 Tablespoons Apple Cider Vinegar
  • 1 Teaspoon Garlic Powder
  • Salt ans Pepper
  • Olive Oil

Chop squash and onions into similar size pieces. Toss in a skillet or on a oiled baking sheet and add the rest of the ingredients. Toss around and place into a 425 degree oven for about 30-40 minutes or until squash is fork tender. %u00a0

Remove from oven and eat.

%u00a0Make as a side dish or add to a salad. Eat as a light lunch, or a midnight snack%u2026 eat it however you want.

For the past few days I have heard more complaining then happy. The biggest complaint%u2026tummy issues. %u00a0A week of gorging on heavy, rich, and indulgent foods is finally catching up with people, turning them into grump asses. I can handle a little grump, %u00a0but its time to get get out of that funk and take care and stop bitching. May I make a suggestion? Eat this%u2026 You will be happy. %u00a0Your body will feel clean and nurised. Your tummy will get back on track. %u00a0 It what I call satisfaction This salad is a complete meal .Chopped and shredded veggies atop a small heap of quinoa, tossed on a handful of lentils and topped with a dollop of lime avocado%u2026 Thats it and it is good. For the sake of picture-taking, I made a plate look all nice and pretty, with layers of %u00a0colors, but to be honest with you, I rather toss into a big bowl, grab a moderately large-sized fork and %u00a0food to face%u2026 and it’s just as pretty.(the bowl of food is pretty, not food on my face) Quick note: the vegetables that I used here %u00a0are what I had at home. If you don’t have one or two of these specific veggies, don’t worry about it. Sub in something else, like pepper or spinach., Still have extra brussel sprouts, green beans or asparagus from thanksgiving? Go ahead and use those. If there is a specific veggie you know your stomach doesn’t tolerate well, then maybe avoid using it. This is a happy feel good salad!A pile of vegetables is always a good start to any meal, especially these veggies.. All but the avocado came from my farm share. This is one %u00a0local organic meal of love.

Green Kale, purple cabbage, beets, red onion, carrots%u2026I did a little shredding and some grating. I like to have different sized and textures in a salad.

Oh whats this? Diced butternut squash(from farm) sprinkle with salt and pepper waiting to be roasted. I am a huge believer in squash on salads%u2026especially in a cold Vermont winter. A little bit of heartiness can really go along way.%u00a0Quinoa.. 1 part quinoa to 2 parts water..Bring to a boil and let simmer until light and fluffy. When I make quinoa, I always make more than is going to be eaten, its great to have pre made for any meal. %u00a0Quinoa goes with everything, even a sprinkle of cinnamon and diced up apple for a nice breakfast or snack.%u00a0I was making this for dinner for my mister who sometimes doesn’t tolerate so many super raw veggies. So what I did and I recommend doing if you are worried about to many raw veggies at once, is to give them a really quick vinegar braise. I throw the veggie in a pan and drizzled red wine vinegar(you can use any vinegar you like) . Stuck a top on it and stuck it on the burner for a few minutes until the vinegar was gone. It just barely softens the veggies and %u00a0helps infuse the vinegar.Also a little easier for some to digest. Me, I like to eat it completely raw.%u00a0Barely steamed kale, just enough to soften it. Again. raw is awesome too. Half a lime, half an avocado and a clove or two of garlic… guacamole%u2026Call it what you will.

Salad contstruction%u2026 Quinoa. Kale. Cabbage, onion and beets. %u00a0Butternut squash. Carrots. Lentils and a nice sized scoop of avocado. But like I said, Bowl%u2026,fork%u2026.. face. Tastes just as good. A super salad, full of flavor and healthy stuff, A salad that will %u00a0fill you up, leave you feeling full, %u00a0not gross. and is quite the looker if you ask me.

Super Salad

  • 1/4 cup Quinoa
  • 1/4 roasted Butternut squash
  • 2-3 large Kale leaves
  • 1/2 cup shredded Red Cabbage
  • 1/4 %u00a0grated Beet
  • 1/8 cup sliced Red onion
  • 1/4 cup grated Carrot
  • 1/4 prepared lentils
  • 1/4 of an Avocado
  • 1/2 a lime
  • garlic
  • vinegar
  • salt and pepper

This is the list of stuff that is in this salad. This is not a recipe that need to be exact.. Use more of something you like, omit whatever you don’t. Just keep it simple and delicious. Dice up butternut into small pieces, place on baking sheet and roast till tender. %u00a0Add quinoa to water, bring to boil, then turn down to simmer %u00a0tip light ad fluffy. If you want steamed kale, stick kale in pot with a i/2 inch water and lid, and place on high for about 2 minutes, just until kale ha soften. The squash is roasting,(the smaller the pieces, the faster it goes) %u00a0quinoa is cooking and kale is soften,. Now grate or chop you veggies. Want them less than raw, place in pan with a bit of vinegar or just water and stick a lid on it. Medium heat for a few minutes, or until the veggies are slightly soften.. Dont over cook, you still want the veggies to have a bite and keep the good for you stuff. %u00a0Take avocado, chopped garlic and half lime and mash together. %u00a0Now everything is prepared and ready..Place strategically in a bowl or plate, quinoa, kale, squab, cabbage,beets, onion, carrots, lentils, avocado, drizzle with straight up vinegar.%u2026%u2026..Or just throw it all together. Fork to FACE!!!
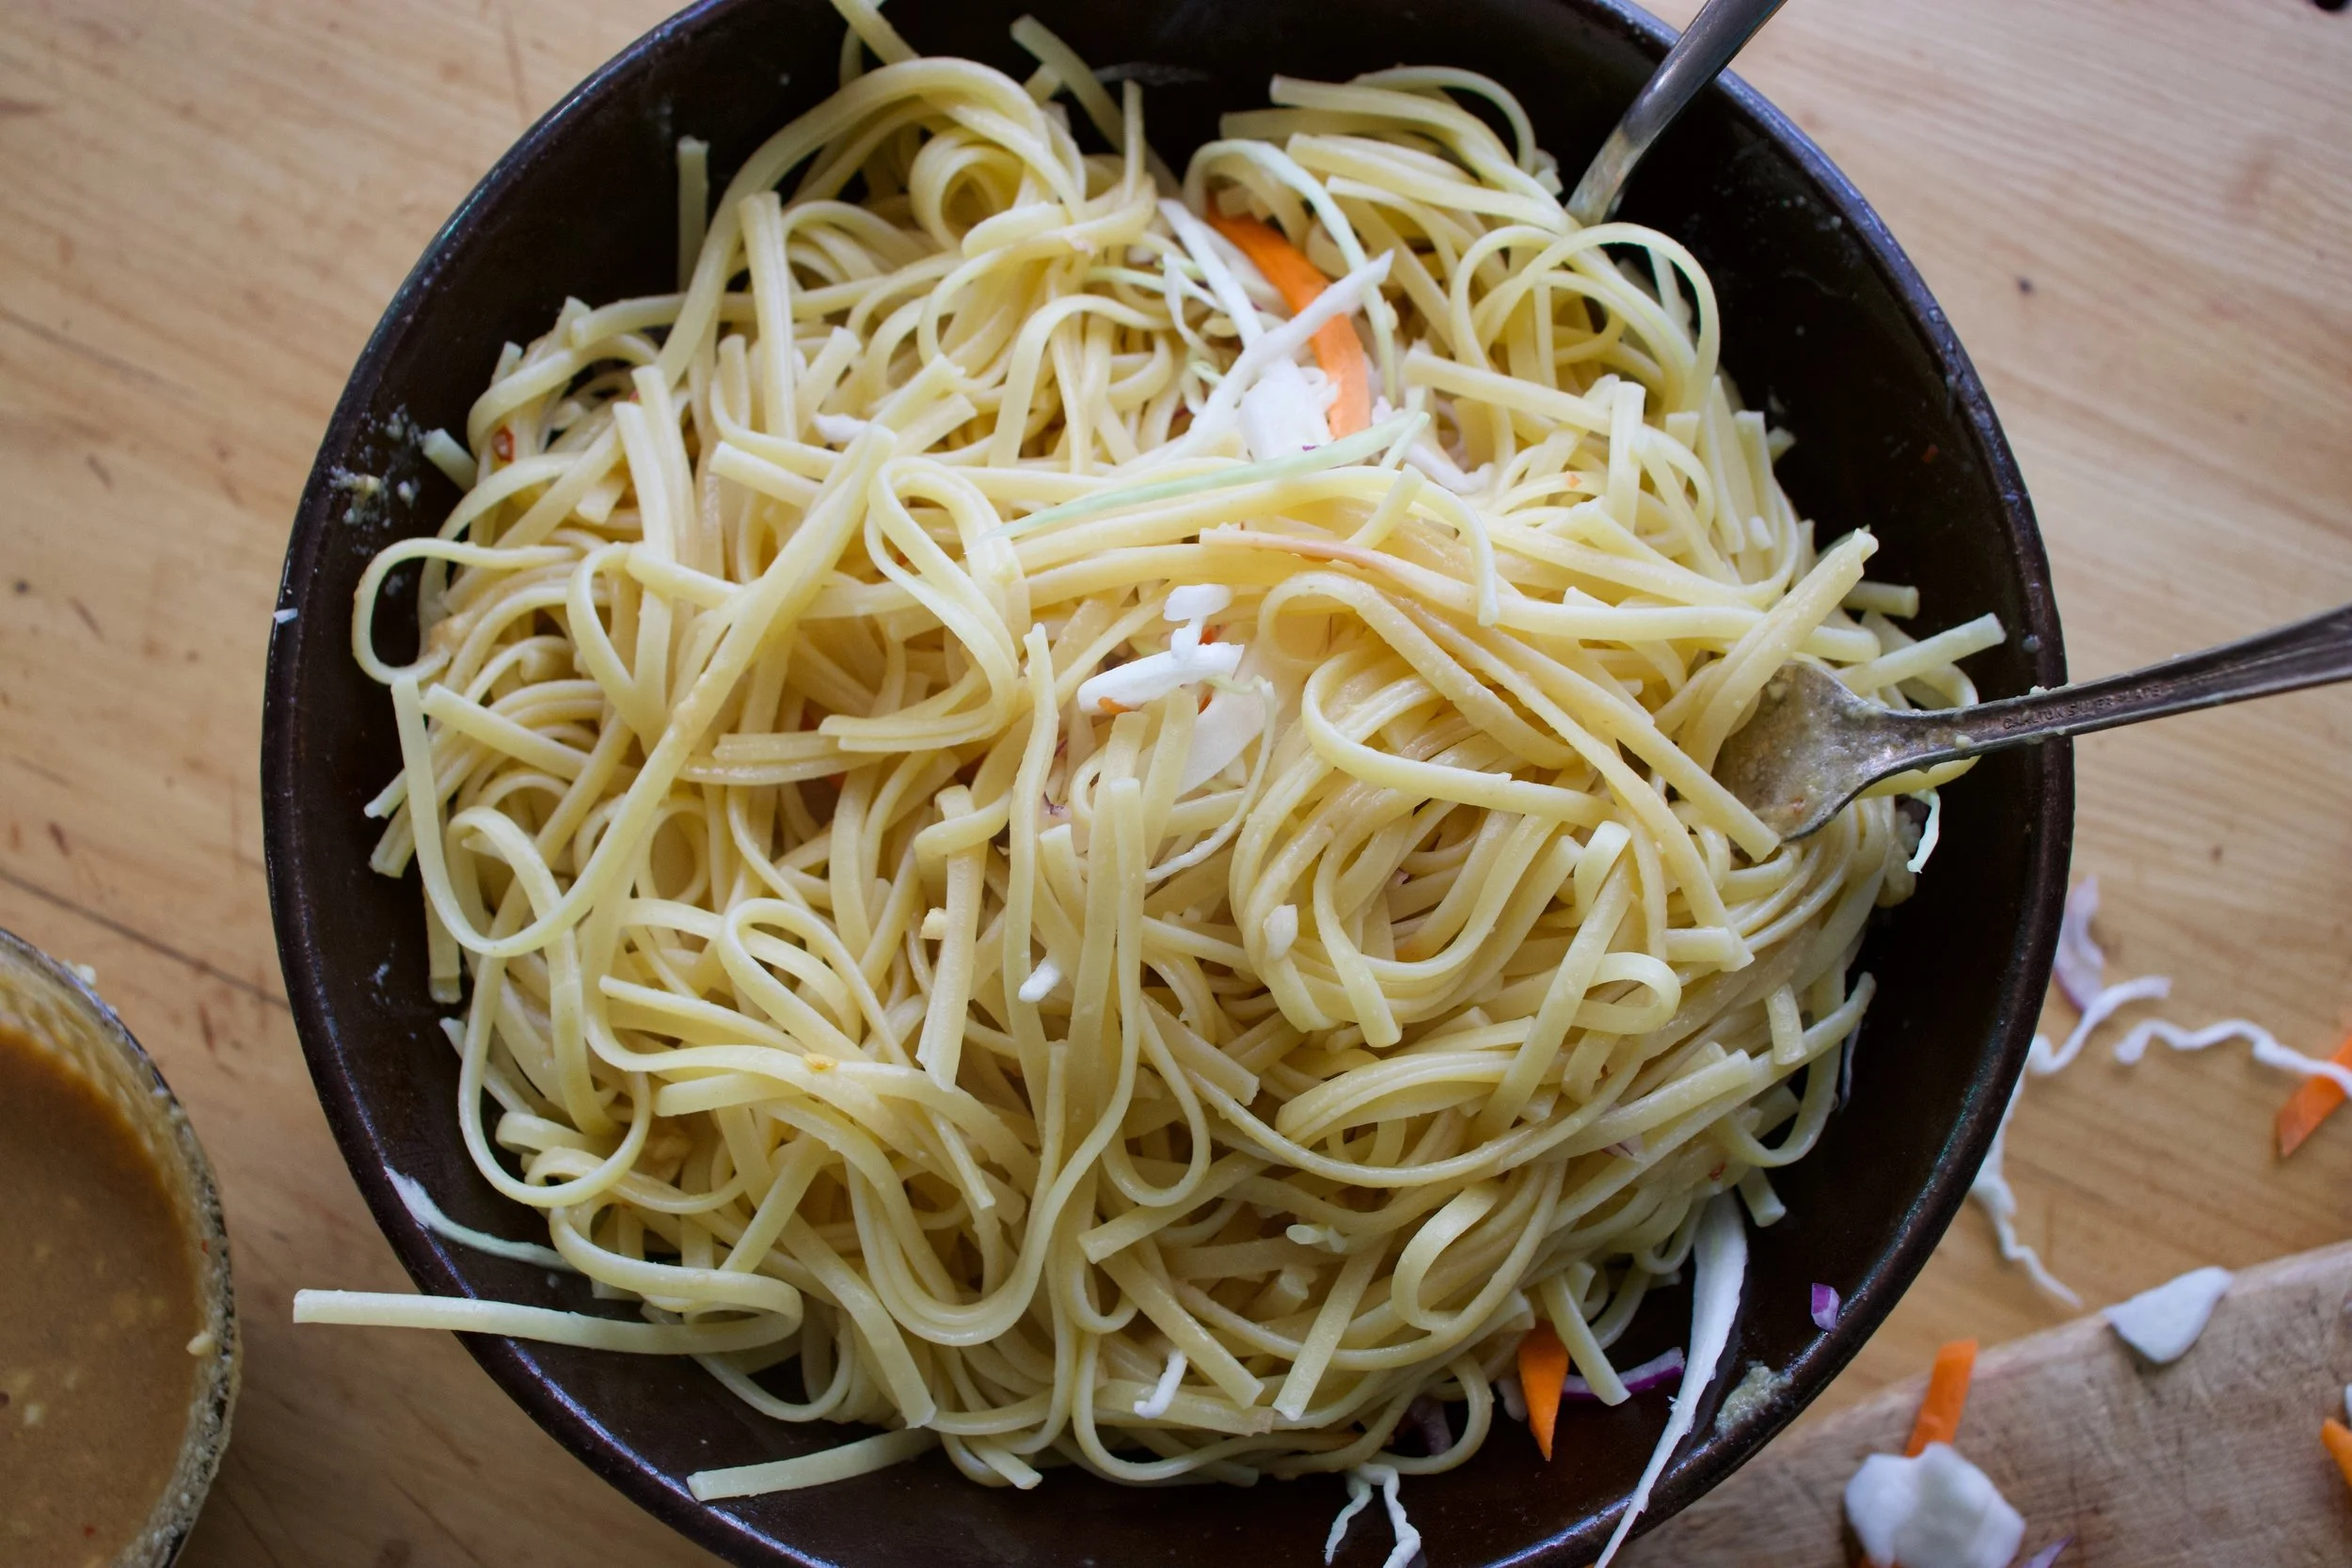
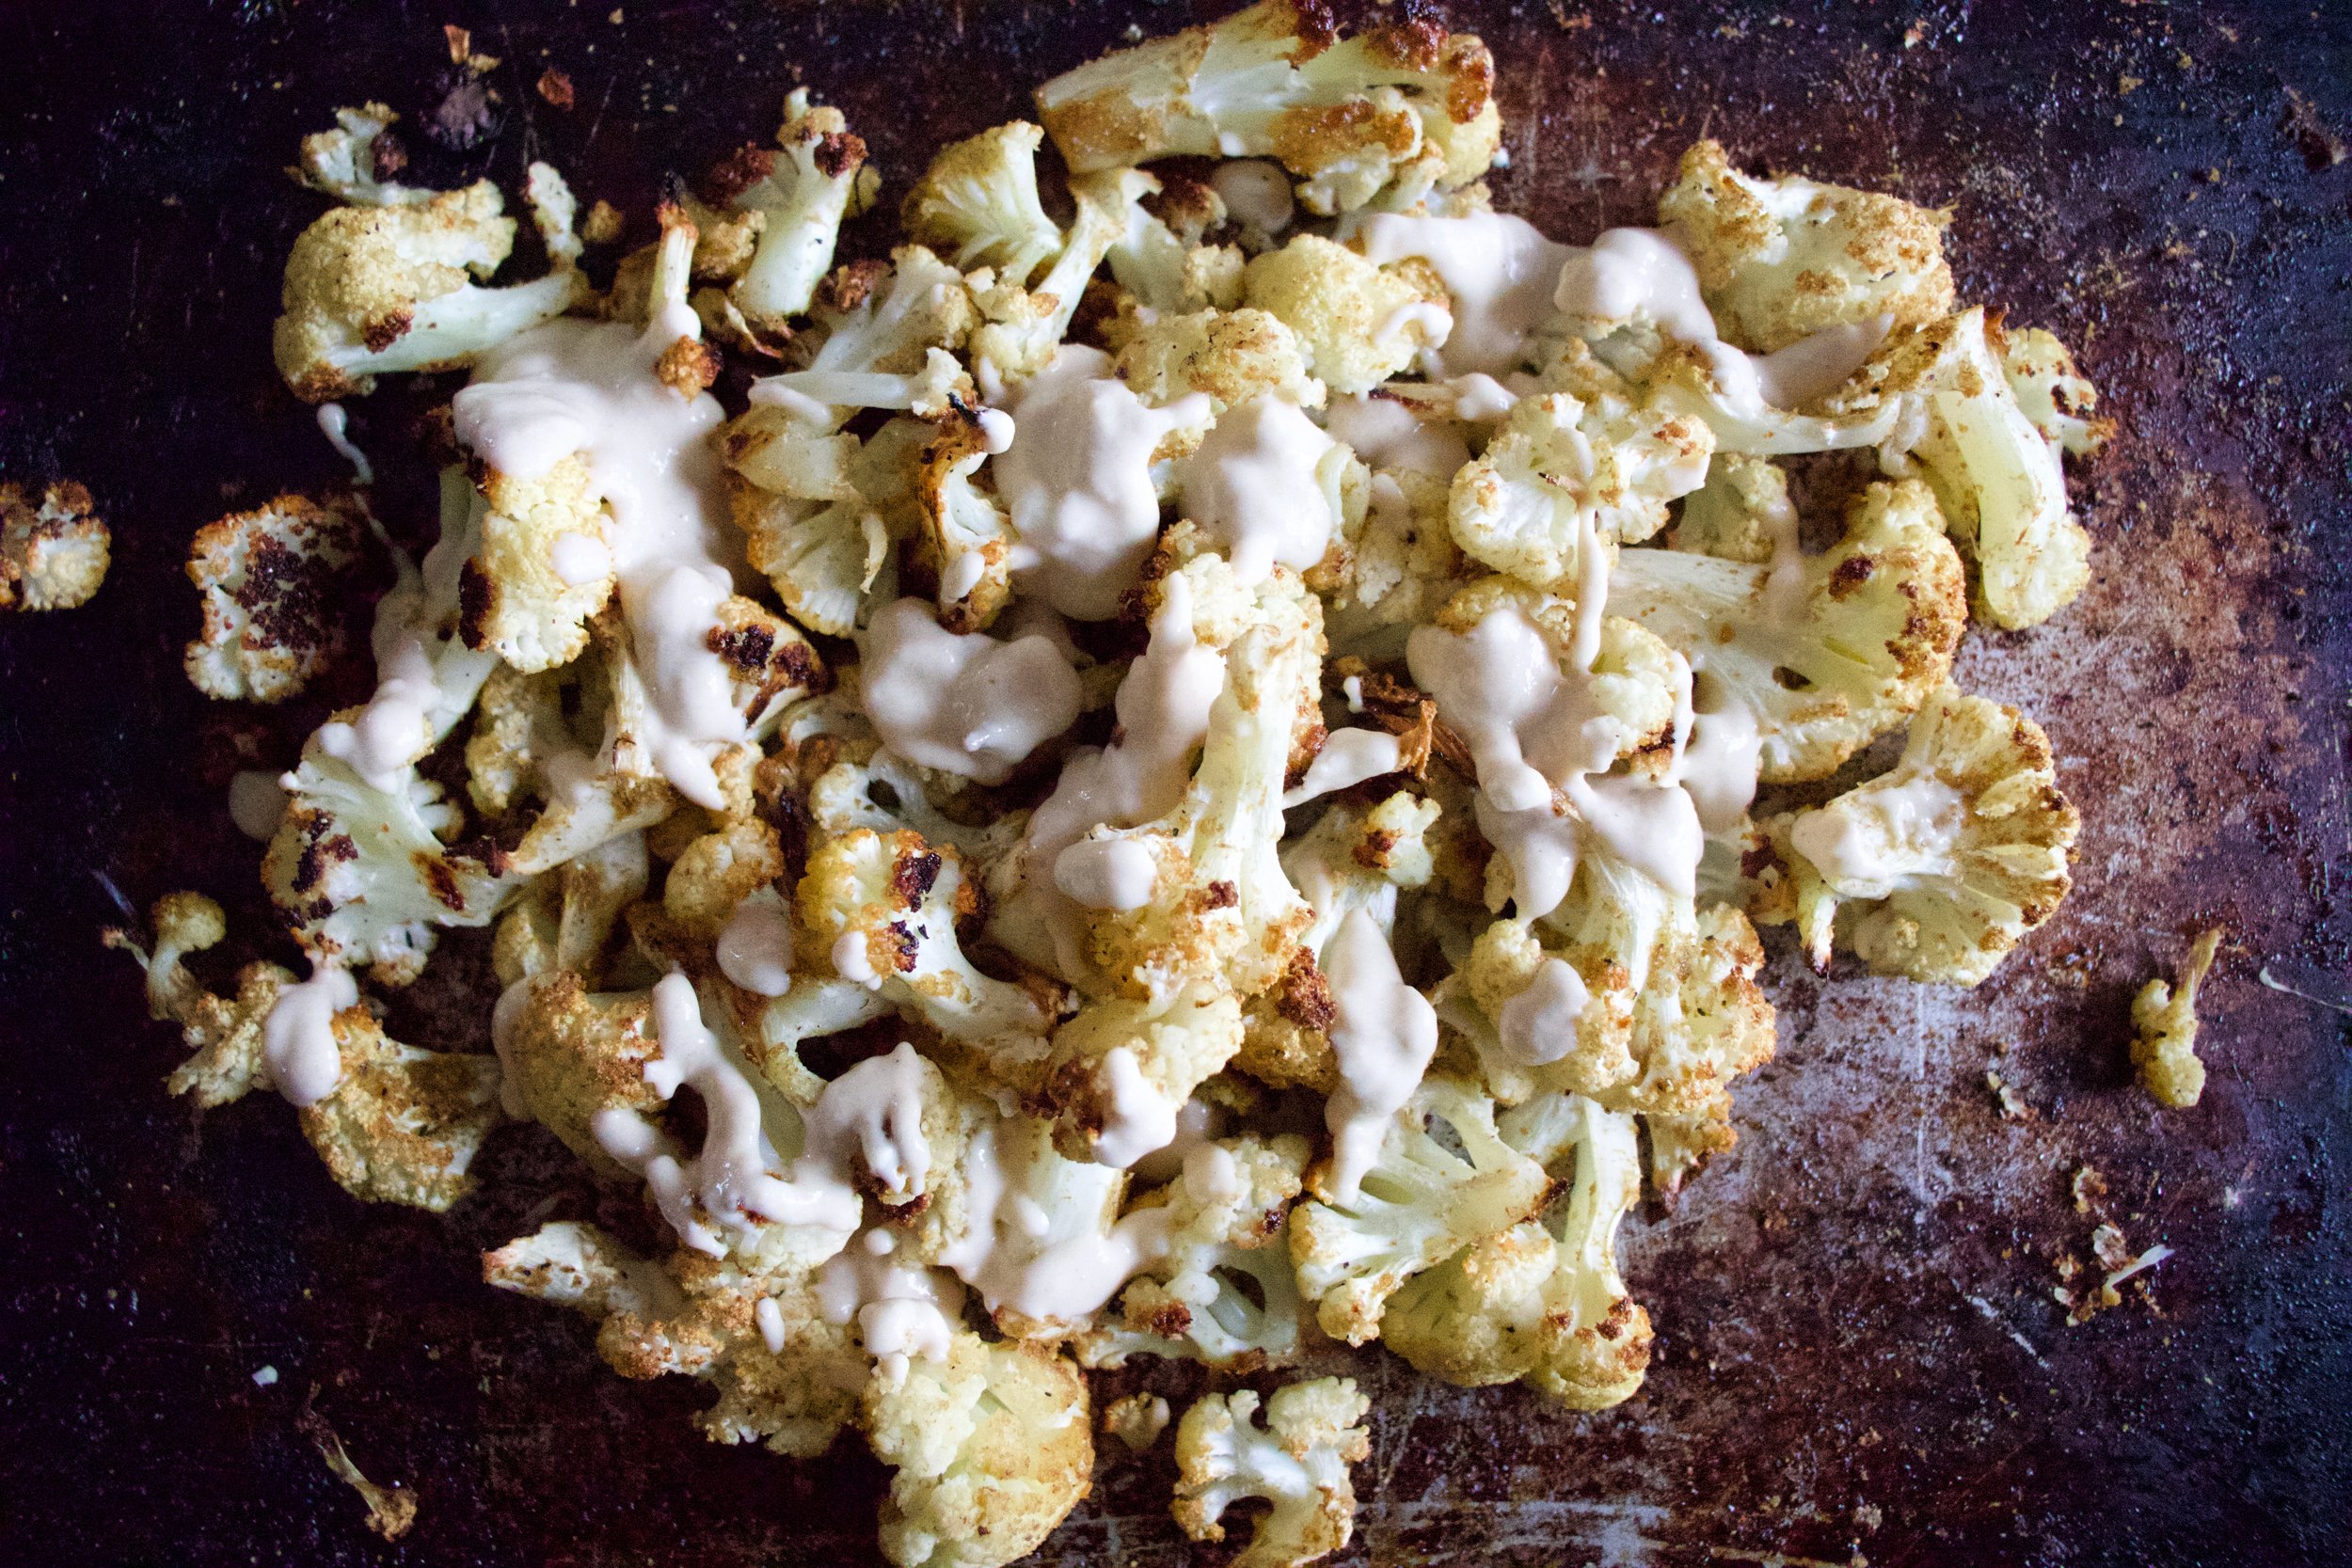
«‹ 32 33 34 35›»

Recent Posts

  • Safety Practices for Exploring Free OnlyFans Pages
  • 1xBet APK 2026 — un fichier, une source étape par étape
  • Support en français — canaux et horaires
  • Cresus Casino : catalogue de jeux, moyens de paiement et fonctionnement en France
  • 1xBet Mobile: Why the File Matters More Than the Button

A nemzetközi sportfogadó oldalak jellemzően magasabb szorzókkal dolgoznak, mint a hazai piac szereplői.

Denne guide til casino uden rofus i 2026 – spil uden dansk licens forklarer regler, muligheder og risici ved udenlandske platforme.

Et casino med hurtige udbetalinger kan forbedre spiloplevelsen ved at sikre hurtig adgang til dine gevinster.

Vores guide til spillesider uden om rofus hjælper dig med at navigere blandt internationale casinoer.

We ranked the top online casino Malaysia platforms on withdrawal times, not on marketing claims.

Registration takes a few minutes, and this sg online casino guide walks through verification and the first deposit step by step.

A hazai fórumokon rengeteg tippet találhatsz arról, hogyan működik a casino befizetés nélküli bónusz aktiválása promóciós kódokkal.

@lonelyplanet
STUDIO ESCAPE Creative Getaways Quiet stays and bright worktables for a weekend reset. See Places
MAKER ROUTE World Nomads Travel-ready planning and practical coverage for makers. Read Tips