
THE LOVELY CRAZY
It%u2019s not too late to get in a little end of the year baking. It is actually the perfect time to bake. All the holiday hub bub is still going on so there is usually still people all around still willing and able to eat your offerings (if you were so inclined to share), the days just feel more slow and of need of warmth and lovely smells. Plus we need something to do while while waiting for New Years, because we are just all sitting around waiting for that ball to drop, right? HAHAHA. No.
Anyway, I have been wanting to make some version of a boiled clementine cake for a while now. I love that fact the the whole clementine goes into the cake, that there is no peeling or zesting or juicing. It is just boil the clems for a little while to get the bitterness out and you are good to go. And it doesn%u2019t hurt that right now is citrus season so I have a humngo bowl of clementines, plus a shit load of other oranges and other citrus to go through so the thought of tossing a good few clementines into a cake, well it was just what needed to be done.
And the family is coming over to eat and trash my house so I needed another dessert besides the half eaten ice cream cake left in the freezer from Camereon%u2019s birthday/Christmas. So I baked that they will eat. And there we go. Win win.
Now to the clementine cake.

The stuff. Flour, baking powder and soda, salt, sugar, oil, cinnamon, vinegar, clementines, and powdered sugar.
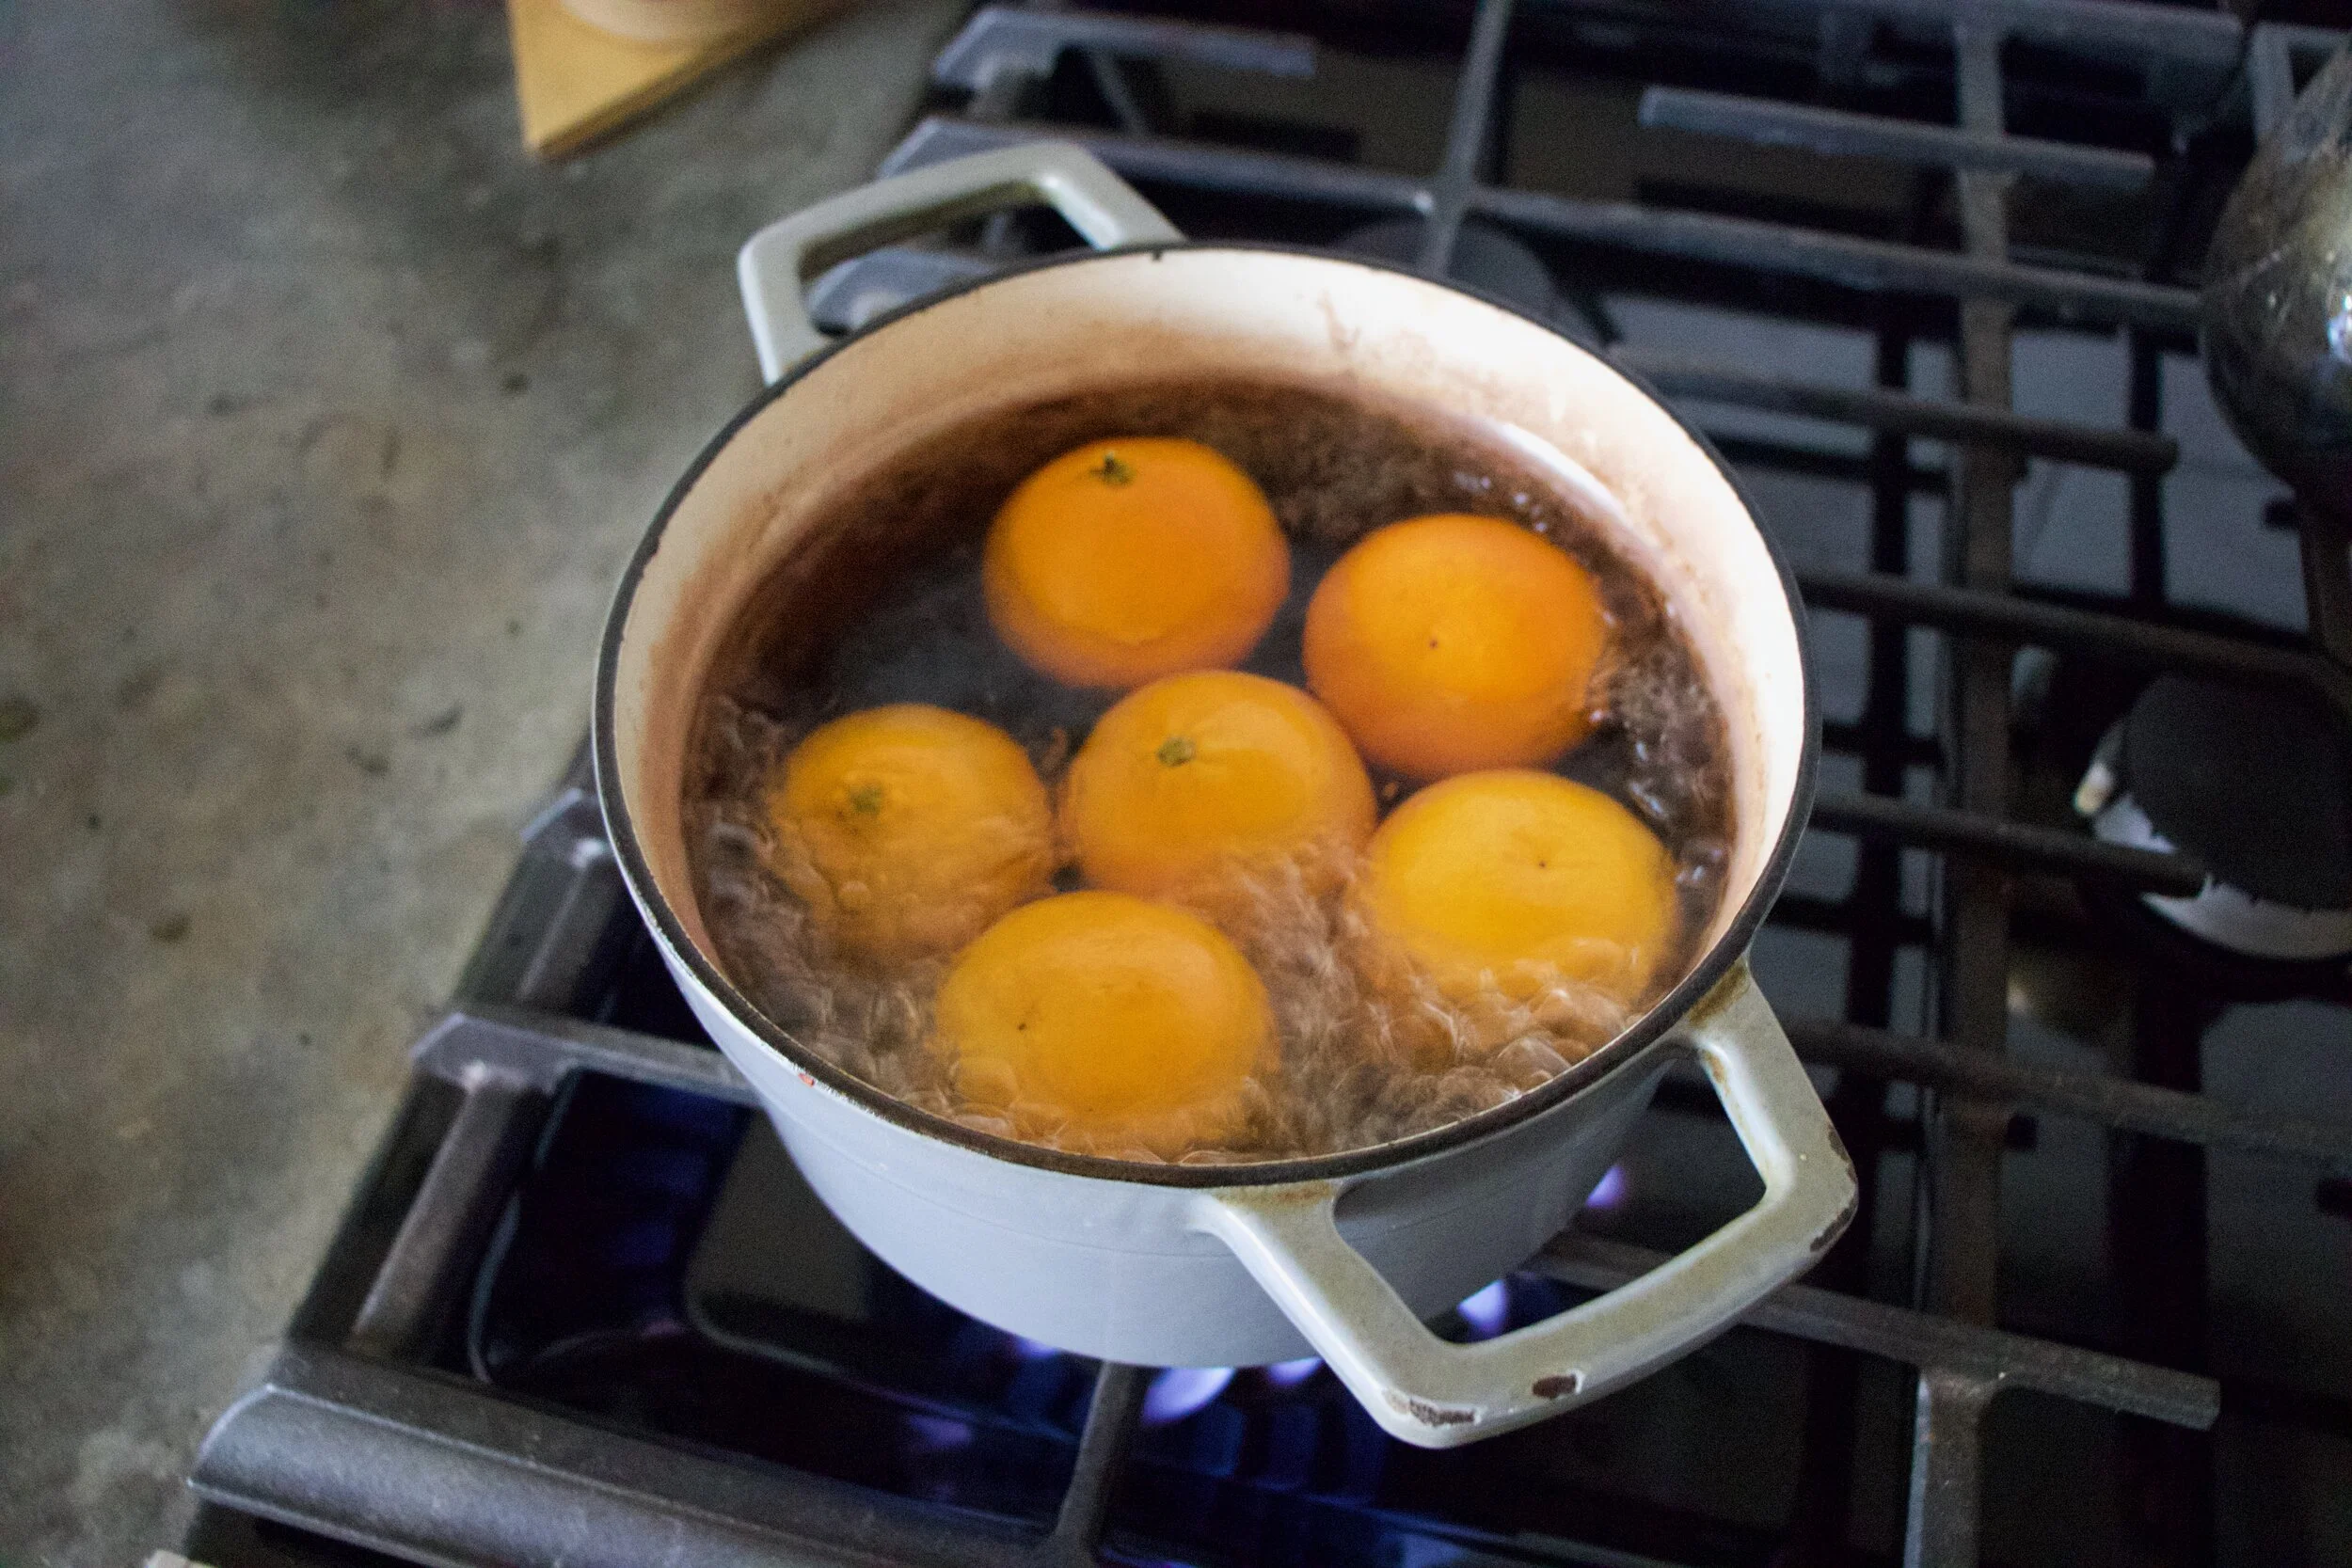
First you need to boil the clementines. Big pot, fill with water, place clems inside, bring to a boil, then simmer for 2 hours. Seems like a long time but just do it while you are making and drinking coffee or doing laundry or whatever. You don%u2019t need to keep an eye on them, other then to check that the water hasn%u2019t evaporated, and it smells so nice.

After the 2 hours are up, remove clementines from water and let cool enough to handle. Cut in half. If there are giant seeds, remove them.
Place the clementines into blender and blend until silky smooth.
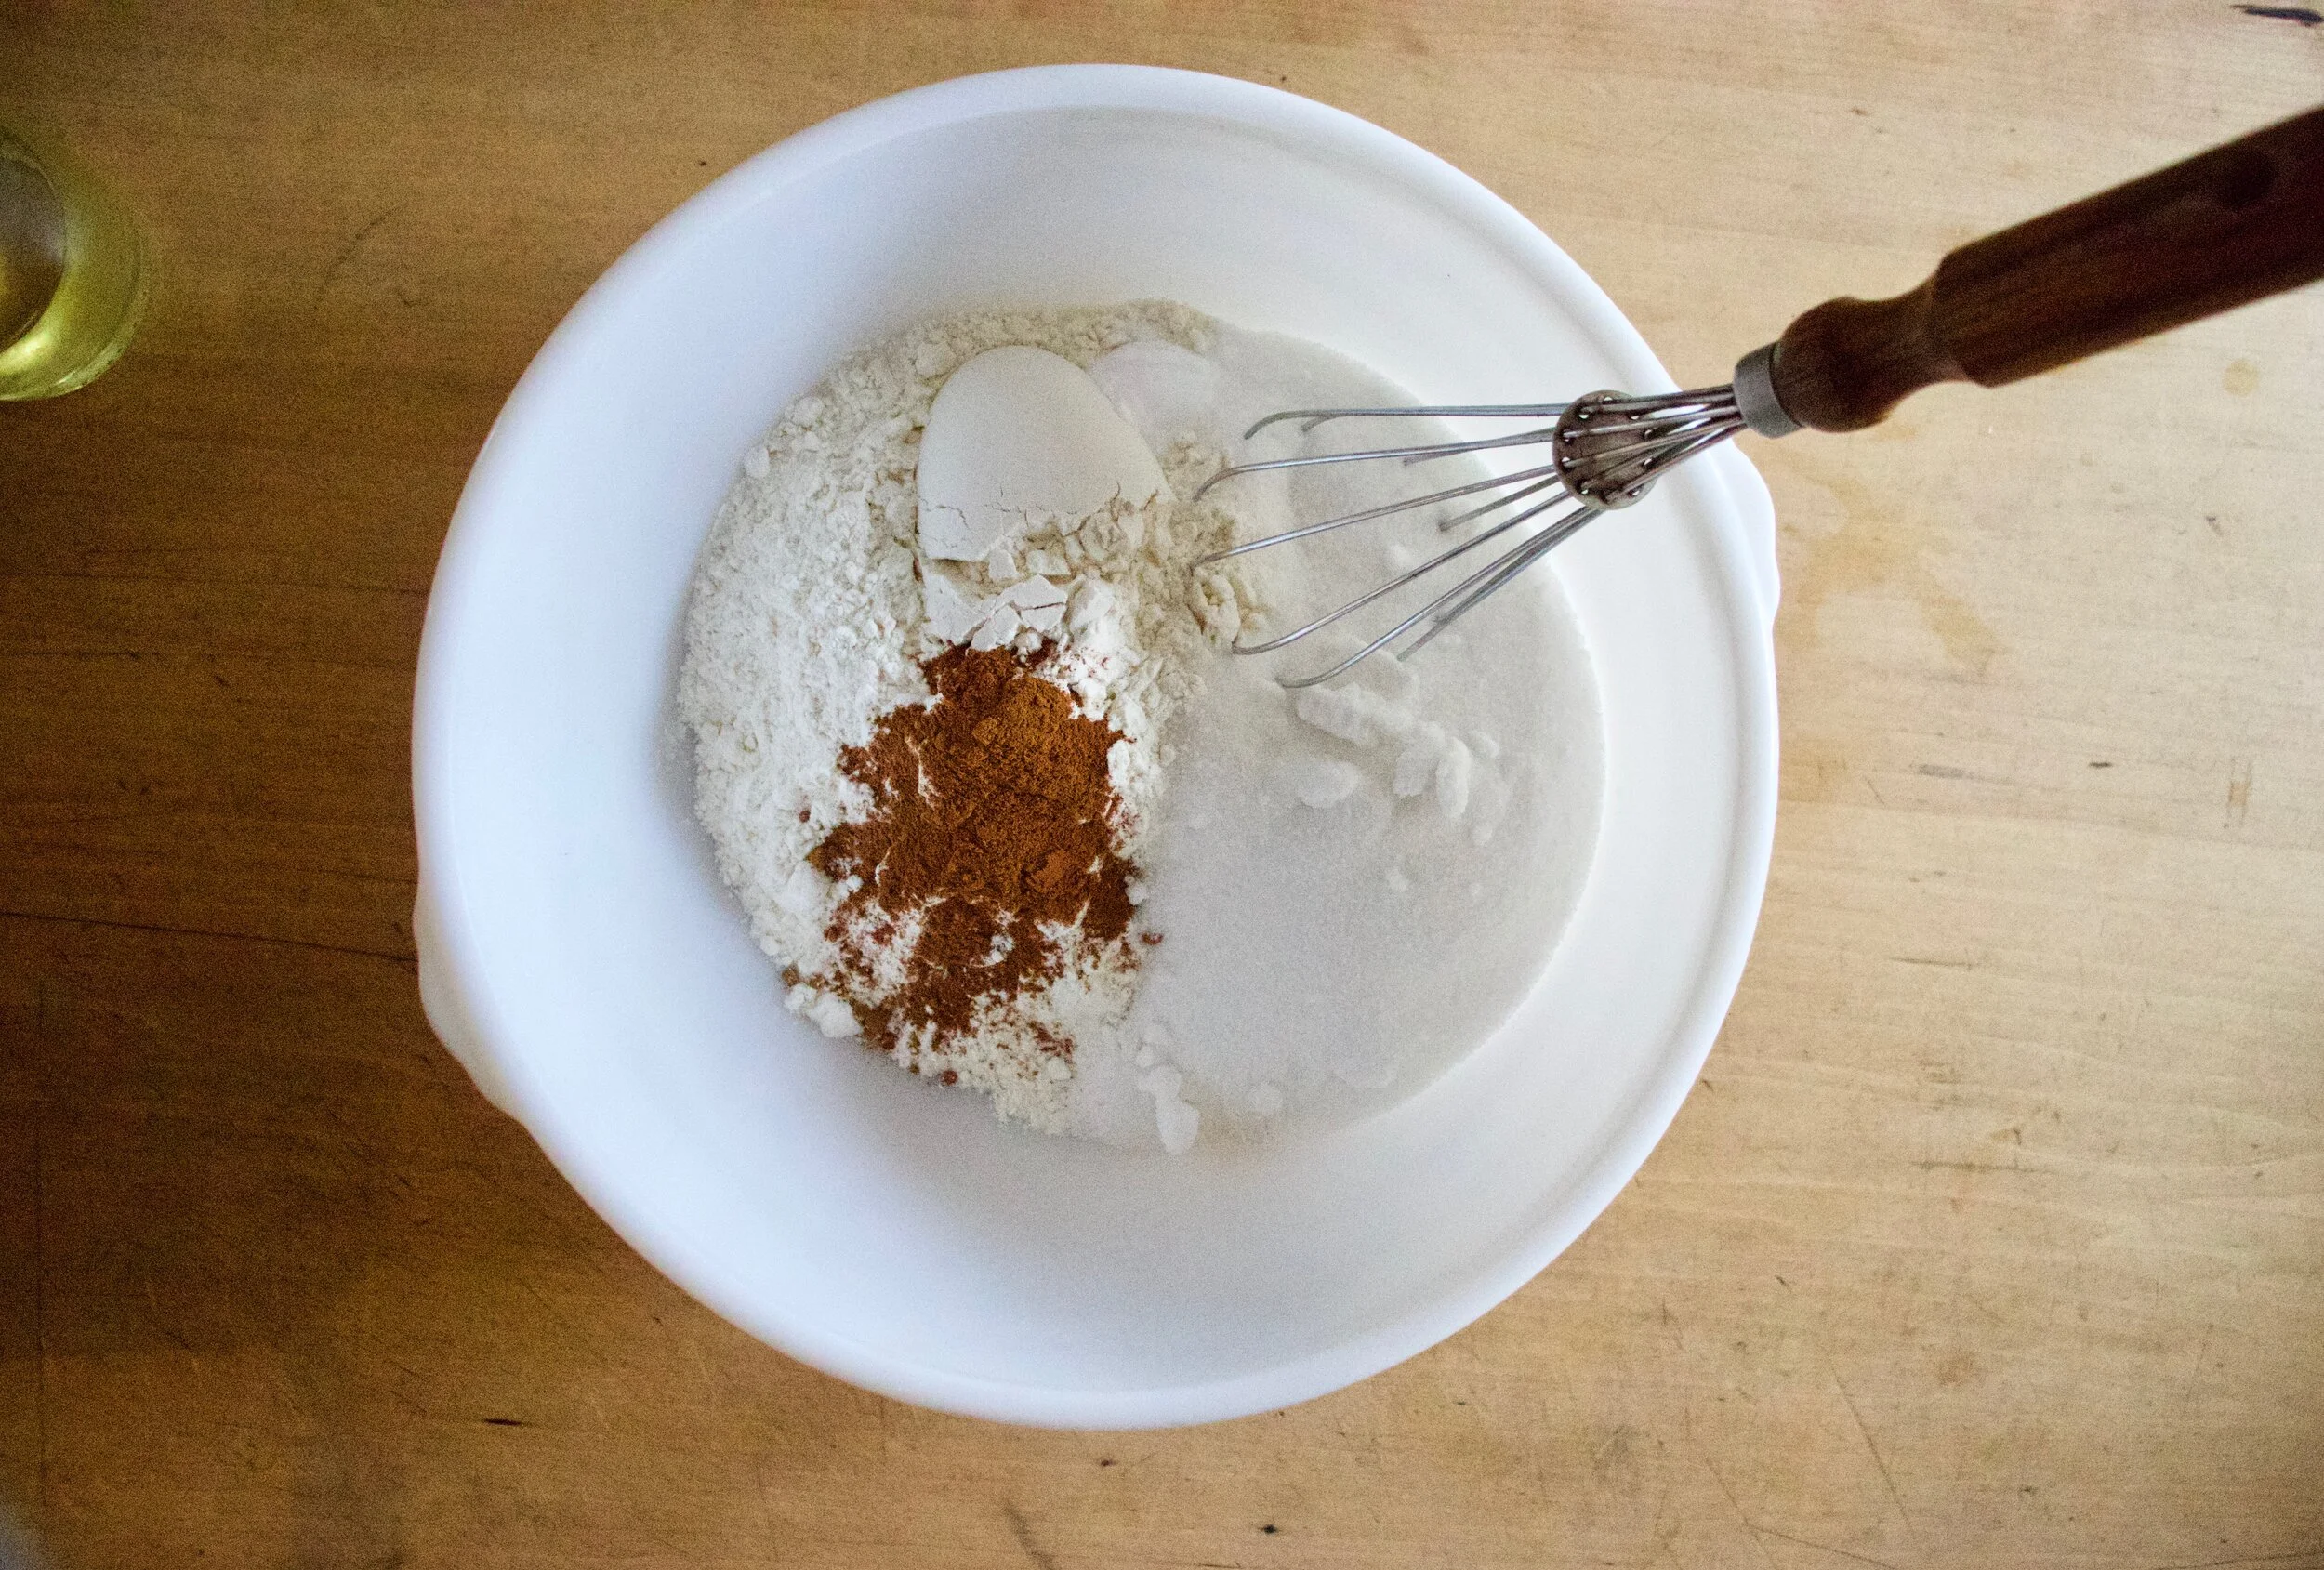
Now the other stuff. Flour, sugar, salt, baking powder and soda, and cinnamon. All into big bowl.
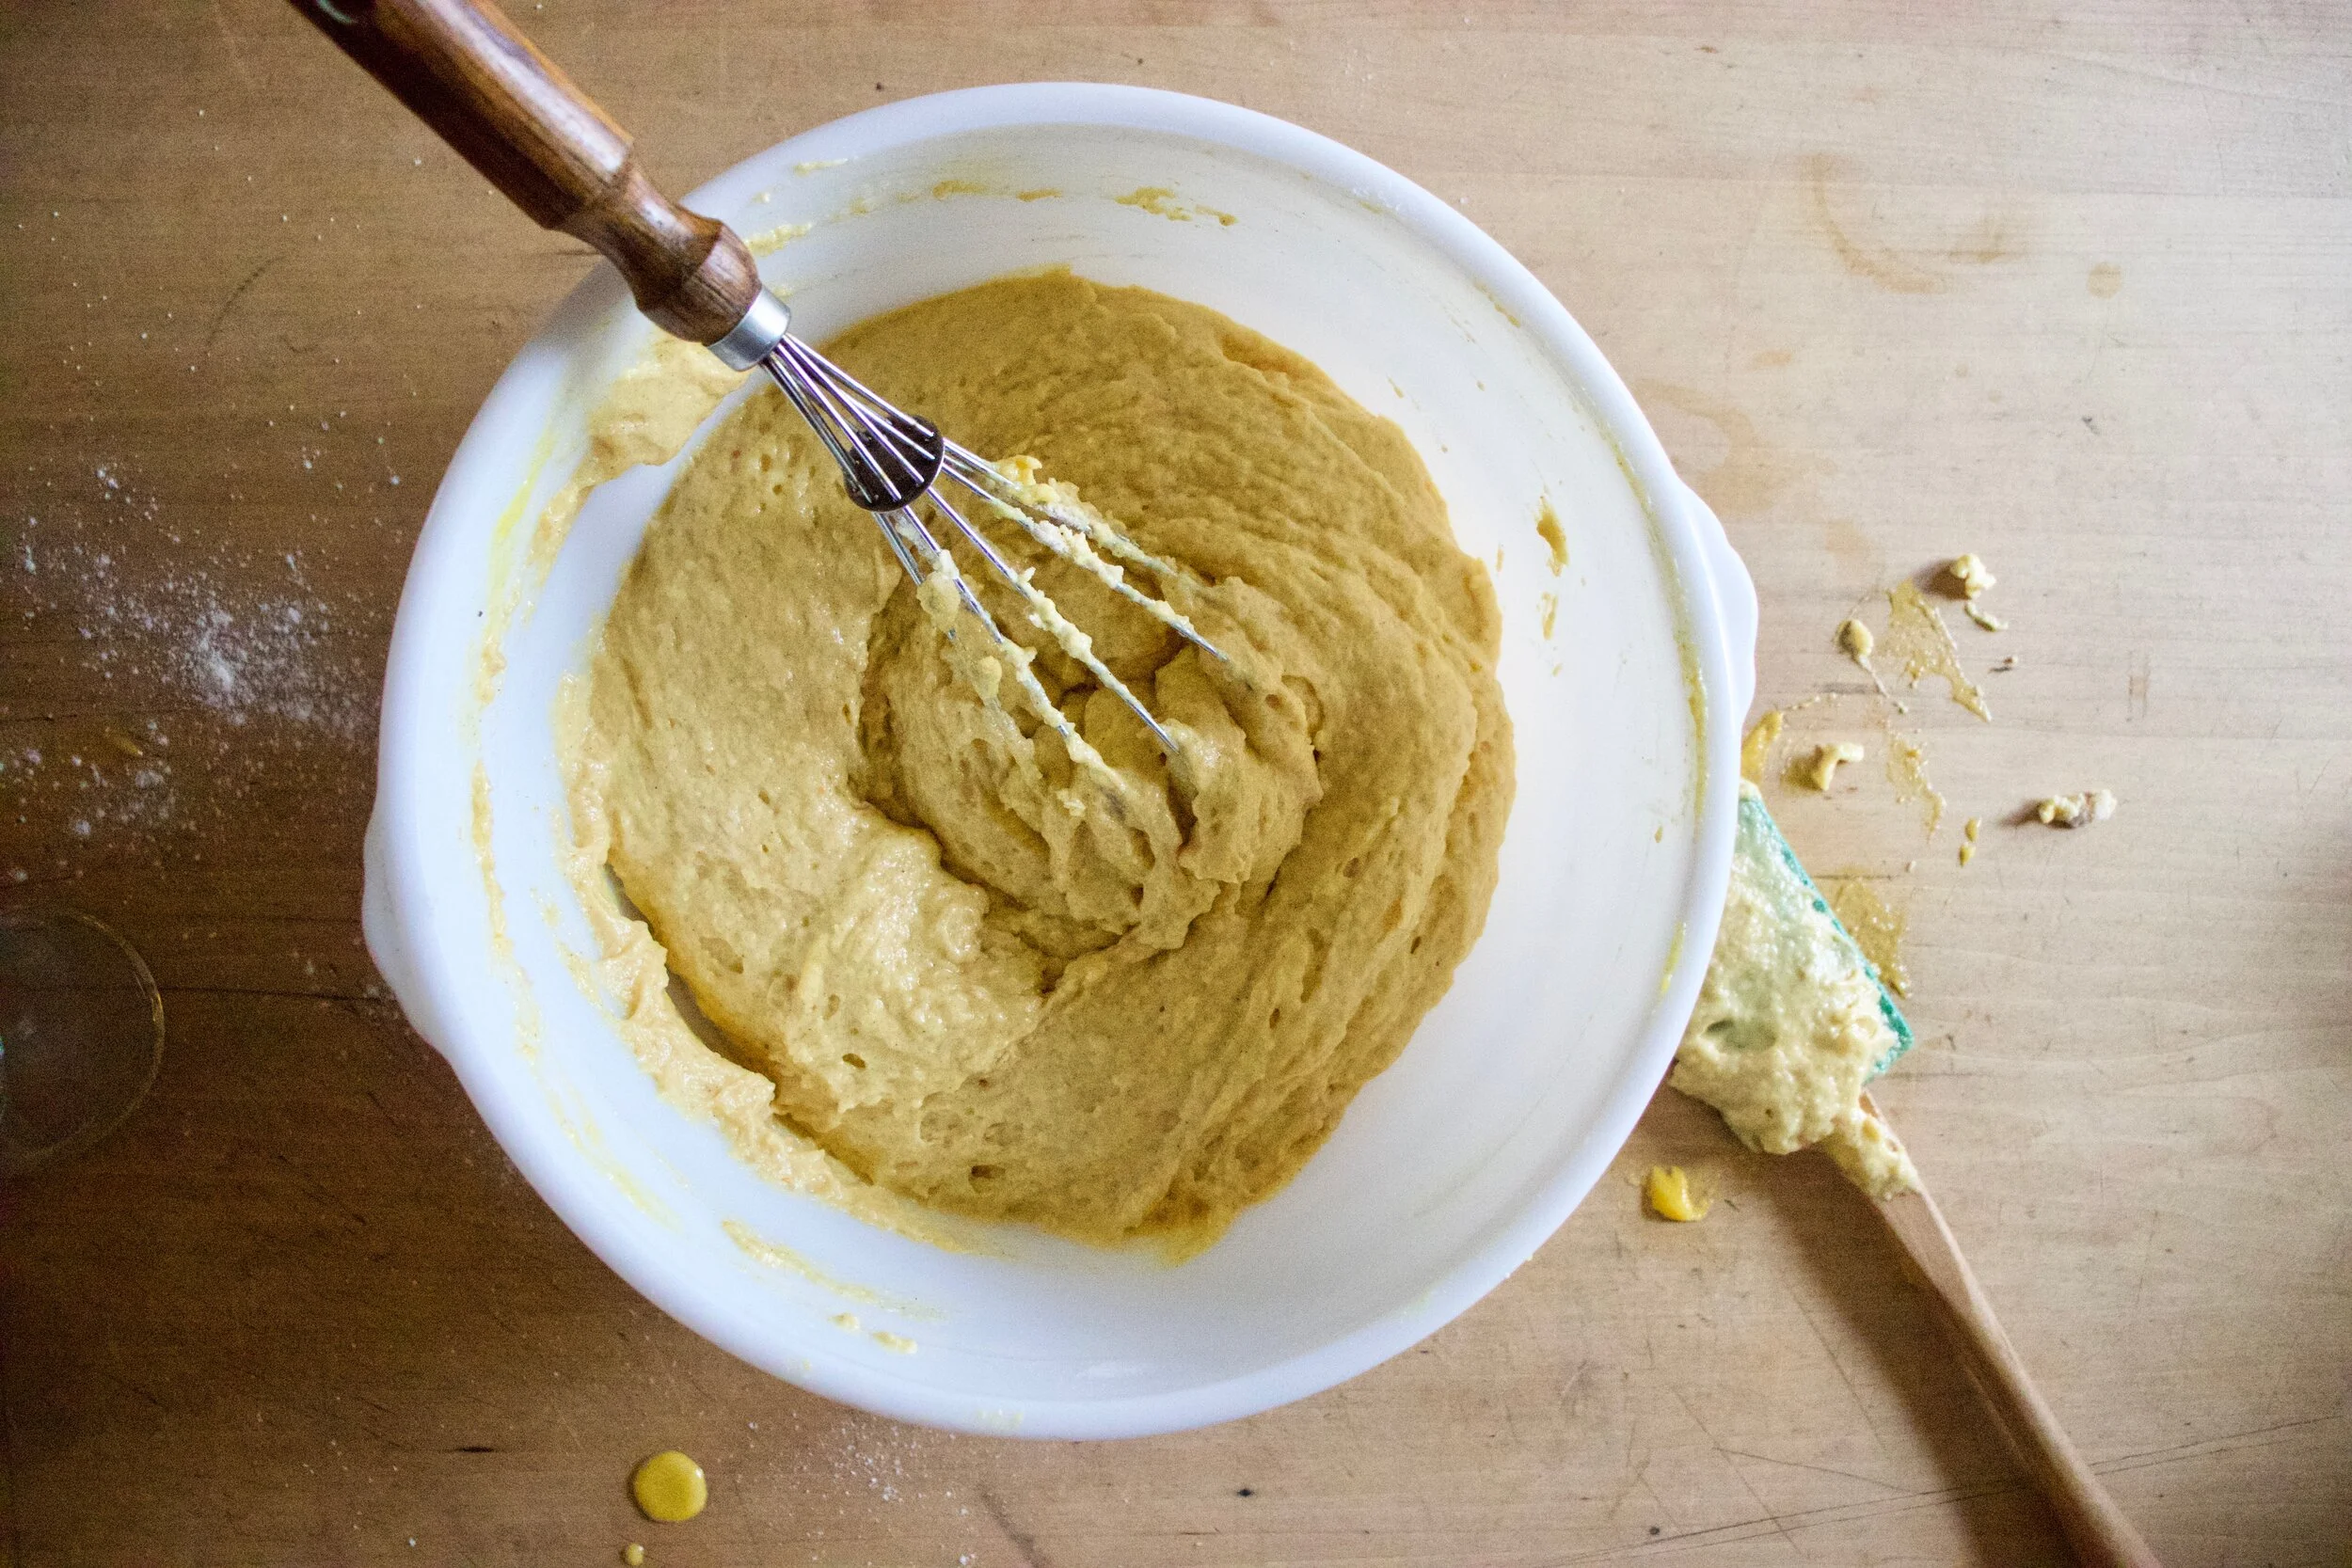
Whisk together until incorporated then add in the clementine puree, the oil, and the vinegar. Whisk together until it becomes a uniform batter.
Scoop batter into a very well greased bundt cake pan and bake, 50-60 minutes, until tester comes out clean.
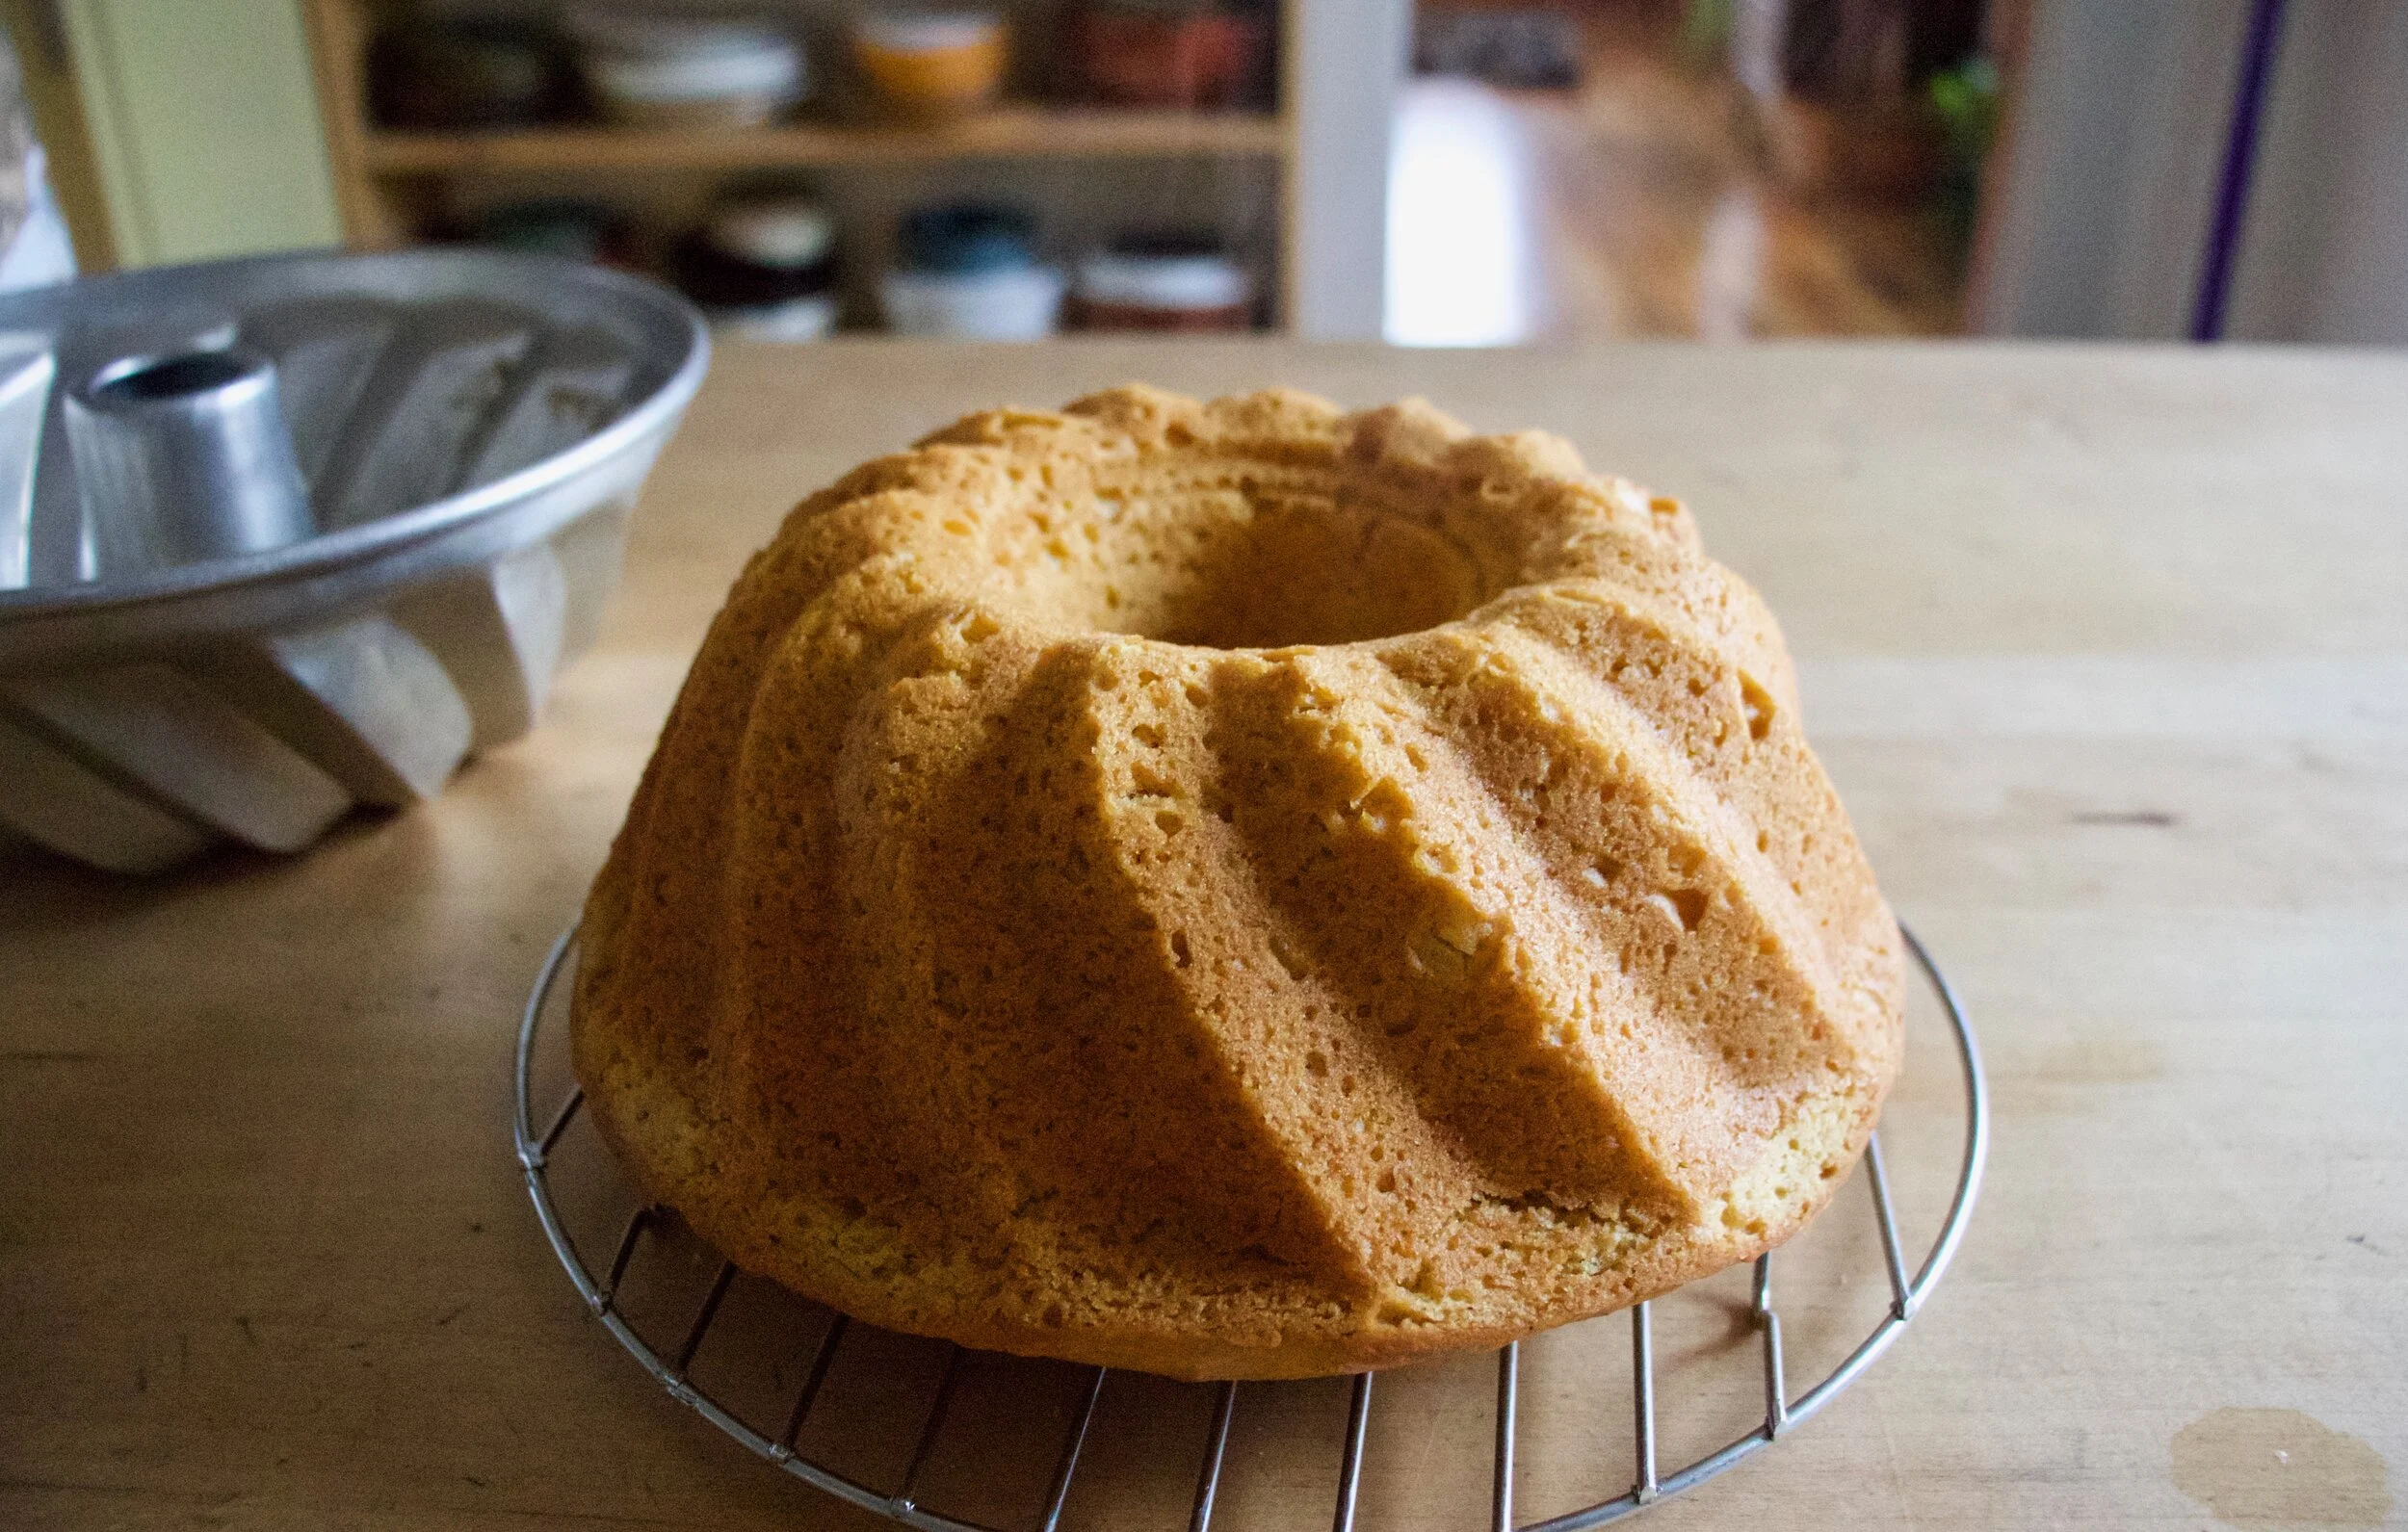
The big revel%u2026. And it went perfect! Now time to let this sucker cool a bit on a wire rack.
While the cake is cooling, make a simple glaze. Just powdered sugar and fresh (not boiled) clementine juice. Mixed unit glaze consistency.

Once the cake is pretty much cooled, pour on the glaze.

And now it is cake time.
-C
Makes one bundt cake
-
2 1/4 cups all pupose flour
-
1 cup white sugar
-
1/2 teaspoon salt
-
1 teaspoon baking powder
-
1 teaspoon baking soda
-
1 tablespoon vinegar
-
1/2 cup any neutral oil
-
1 teaspoon cinnamon
-
6 clementines (you need 2 cups pureed)
For the glaze
-
1 cup powdered sugar
-
1 clementine
To start, place 6 clementines into large pot and fill with water. Place on stove and bring water to a rapid boil then reduce heat and continue to simmer clementines for about 2 hours.
Once clementines are cooked, cut in half and check and discard any large seeds. Place the clementines into a blended and blend until smooth. Should have about 2 cups puree. If you are short on volume, add water to make up the difference.
Preheat oven to 350
Grab a large bowl. Dump the flour, baking powder and soda, salt, cinnamon, and sugar and whisk together until completely incorporated. Now add in the clementine puree along with the oil and the vinegar. Mix until completely incorporated. Scoop batter into a well greased burnt pan (at least 10 cup capacity) then place into oven on middle rack and bake for 50-60 minutes until a tester (or a fork) stuck in to the deepest part of the cake comes out clean.
Once baked, remove cake from oven and allow to cool for a few minutes in pan, then flip the cake out of pan, gently of course, and hope you greased it well enough for it to just pop out. Once removed from pan, allow to cool on a wire rack.
While cake is cooling, make the glaze. Powered sugar into a bowl along with the juice of a clementine. Mix together. If the glaze is to thick, add more juice (or water), to thin, a little more powdered sugar until you reach your desired consistency (pourable but not runny is good) and once cake is cooled, pour glaze all over.
And then eat cake.
I love December, basically because it is a month long excuse to always be baking cookies. And listen to Christmas music. And have a lovely big ass tree in the house covered in lights and dried fruit. Plus snow if we are really lucky. December. It%u2019s a good month.
And we are getting to that time when now most of us have serious cookie making on the brain. I bet if you ask 5 people what they are planning on doing in the next few days leading up to Christmas, at least 3 of them will tell you they are making cookies because really, that is what you should be doing. That is if you like to bake. If not, then by all means, skip cookie baking.
Now what cookies to bake? Well you got to have chocolate chip, and peanut butter. Plus some no bakes and sugar cookies, but also, I think, some type of gingerbread.
These cookies are the gingerbread something. I added cardamon because I think cardamom is delicious and think everyone will think so too, And lemon because lemon goes with cardamom and ginger and lemon cardamon ginger just has a nice ring to it. Then crinkle because I didn%u2019t really want to roll out dough and cut out shapes (I was being lazy), but I wanted pretty and I am really Into the crinkle look.
These cookies were a huge hit. Not crispy like a snap, but not cakey or overly soft. A nice chew and deep in flavor. The mr was basically smuggling these cookies all day before I had a chance to really hide them and he is not a typical gingerbread lover but he told me that these cookies might just be the best cookies he has ever had. So yeah, I guess this is now my new winner gingerbread cookie recipe.
And no joke, these are probably the best smelling cookies I have ever made. I wanted to bottle up the smell and wear it on me like a teenage boy wears a new bottle of axe. Seriously, I kept sniffing my sweater all day long just to get a good hit of the smell. So good!
Now to the cookies!
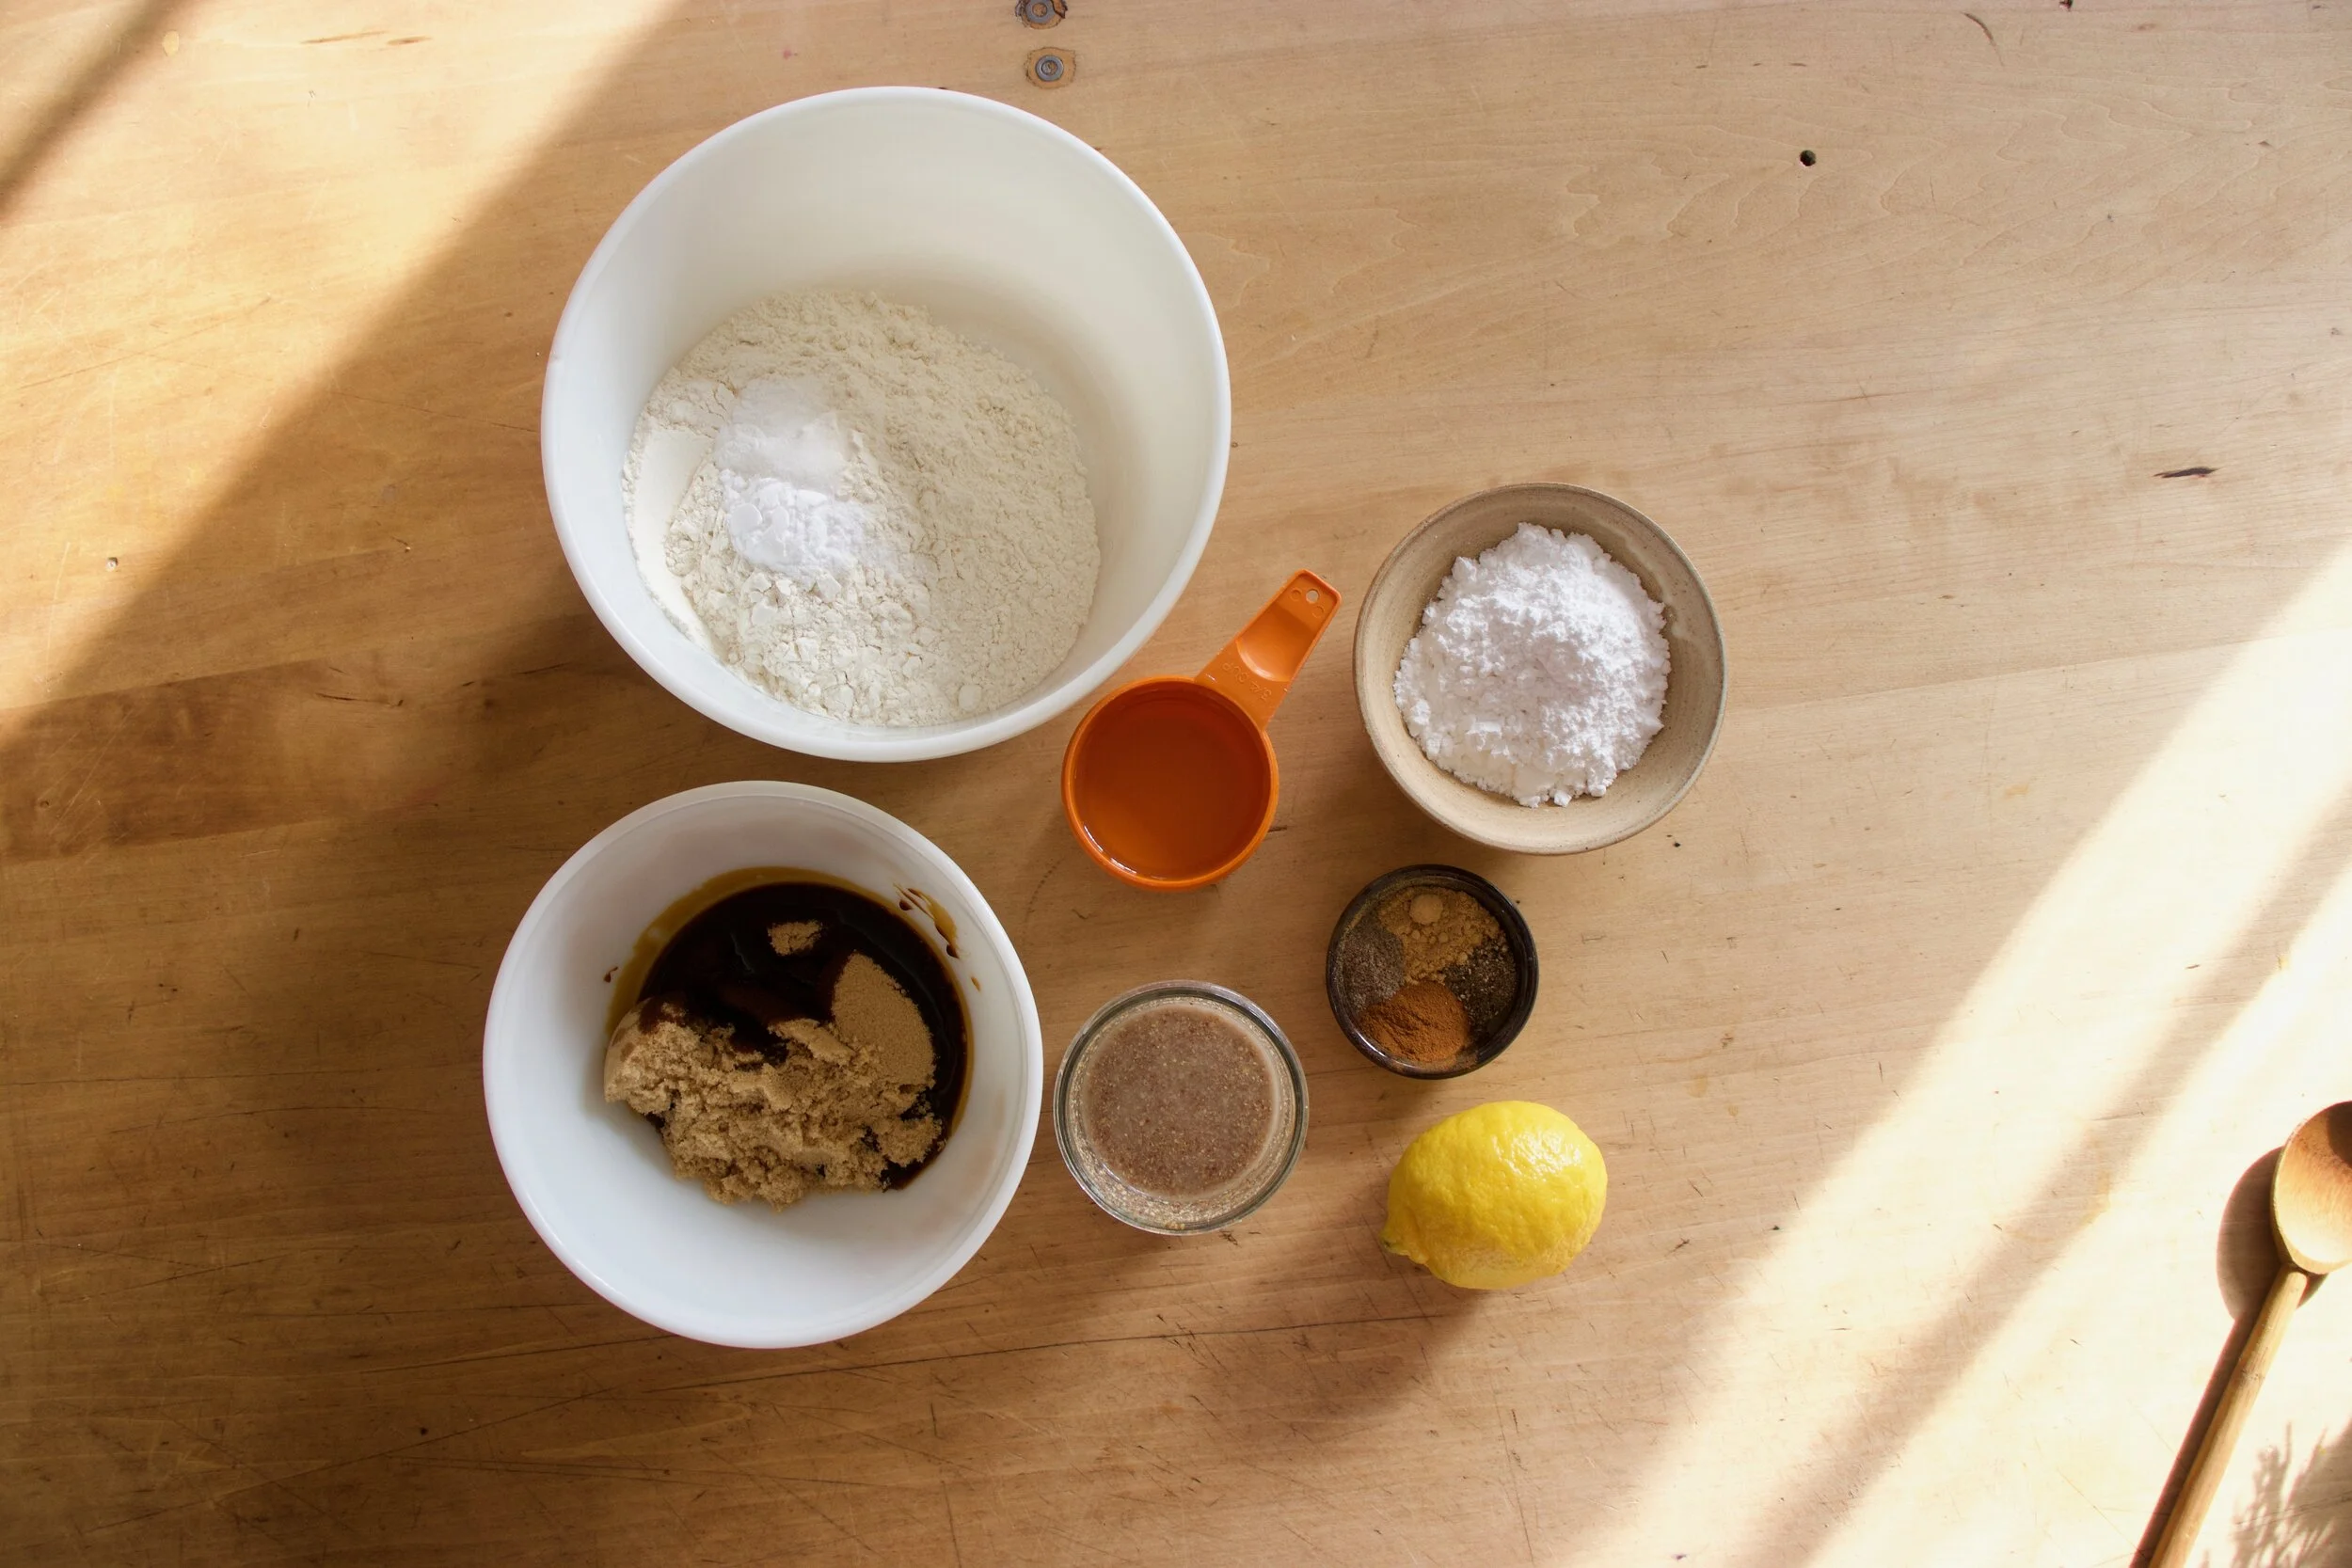
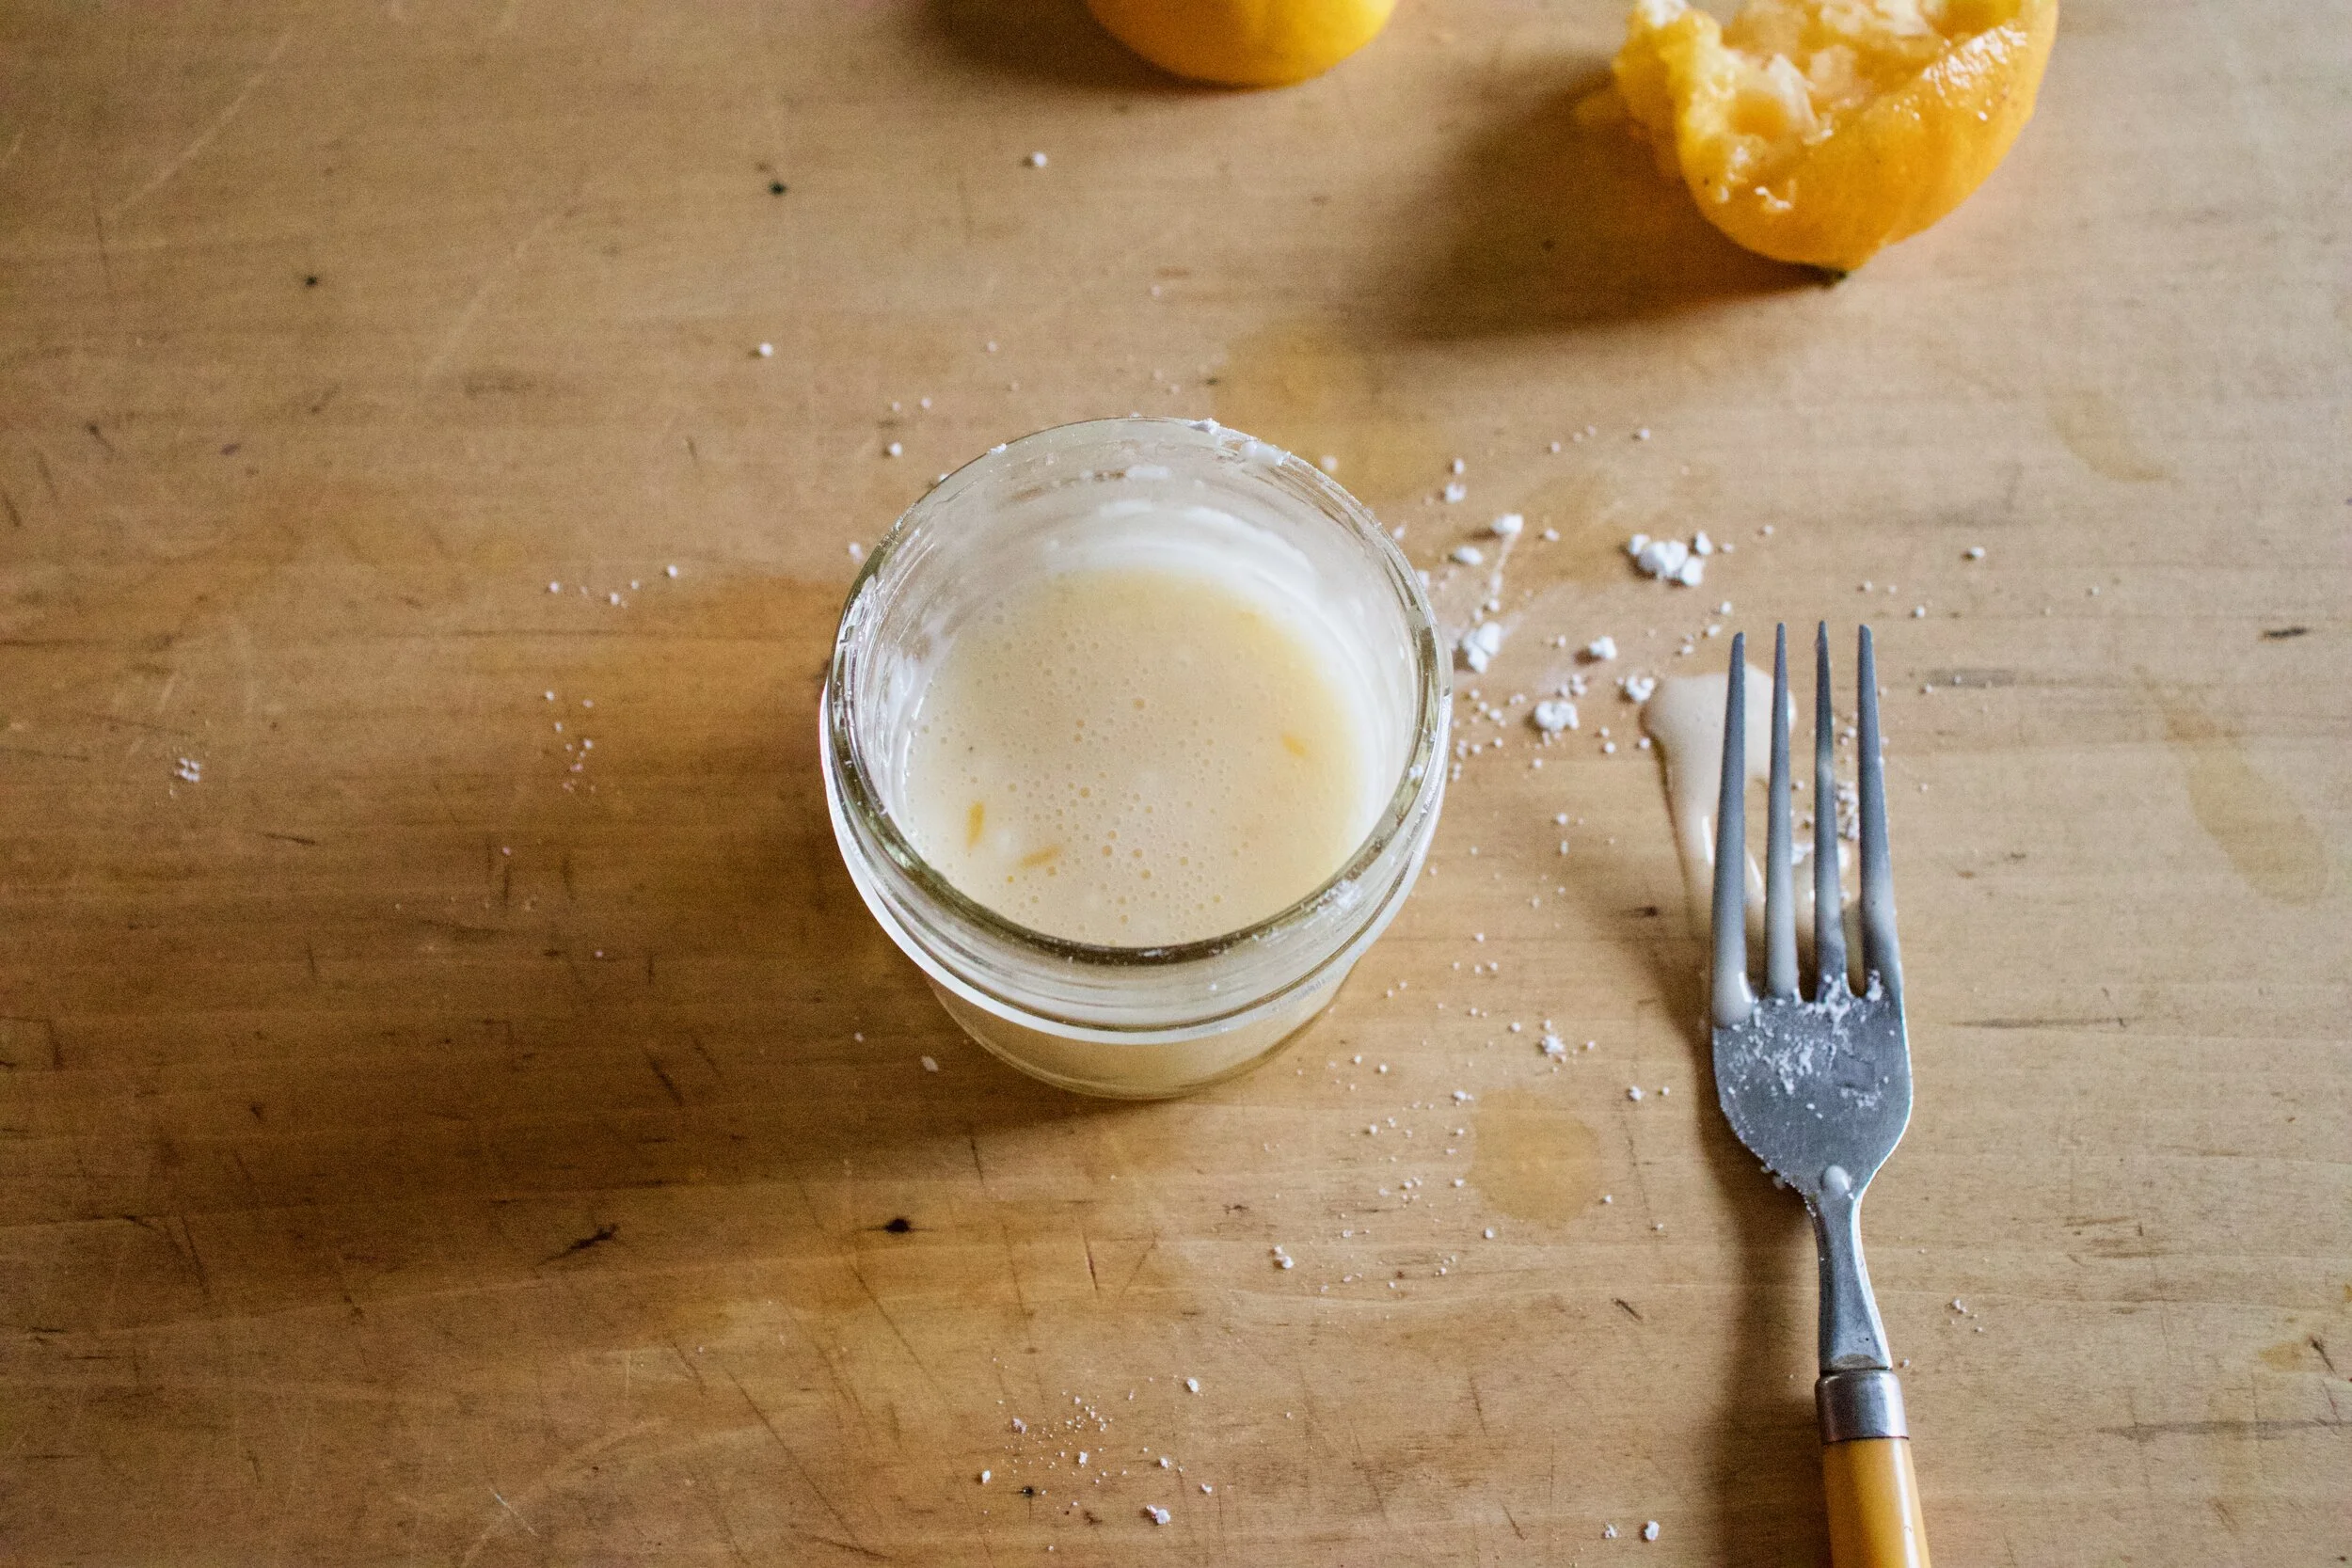
The stuff. In one bowl there is flour, salt, and baking soda and powder. The other bowl is brown sugar and molasses. There there is a couple flax eggs, some oil, a lemon for it%u2019s zest, and spices of ginger, cardamon, cinnamon, and black pepper. Also powdered sugar to roll and crinkle these cookies.
Wet stuff. Sugar, molasses, flax eggs, and oil. Mix until combined.
Dry stuff. Flour, baking soda and powder, salt, and the spices. Add in the lemon zest too and whisk to combine.
Wet into dry. Grab a wooden spoon and mix until a cohesive dough forms. And yes you can give up the spoon after a minute and use your hands to complete the mixing%u2026 I did.
After dough is mixed and uniform, pop the bowl into the fridge for a little while to give he dough some time to rest. Half an hour is good and you could even leave it for a day if you wanted to, just cover it if you do.
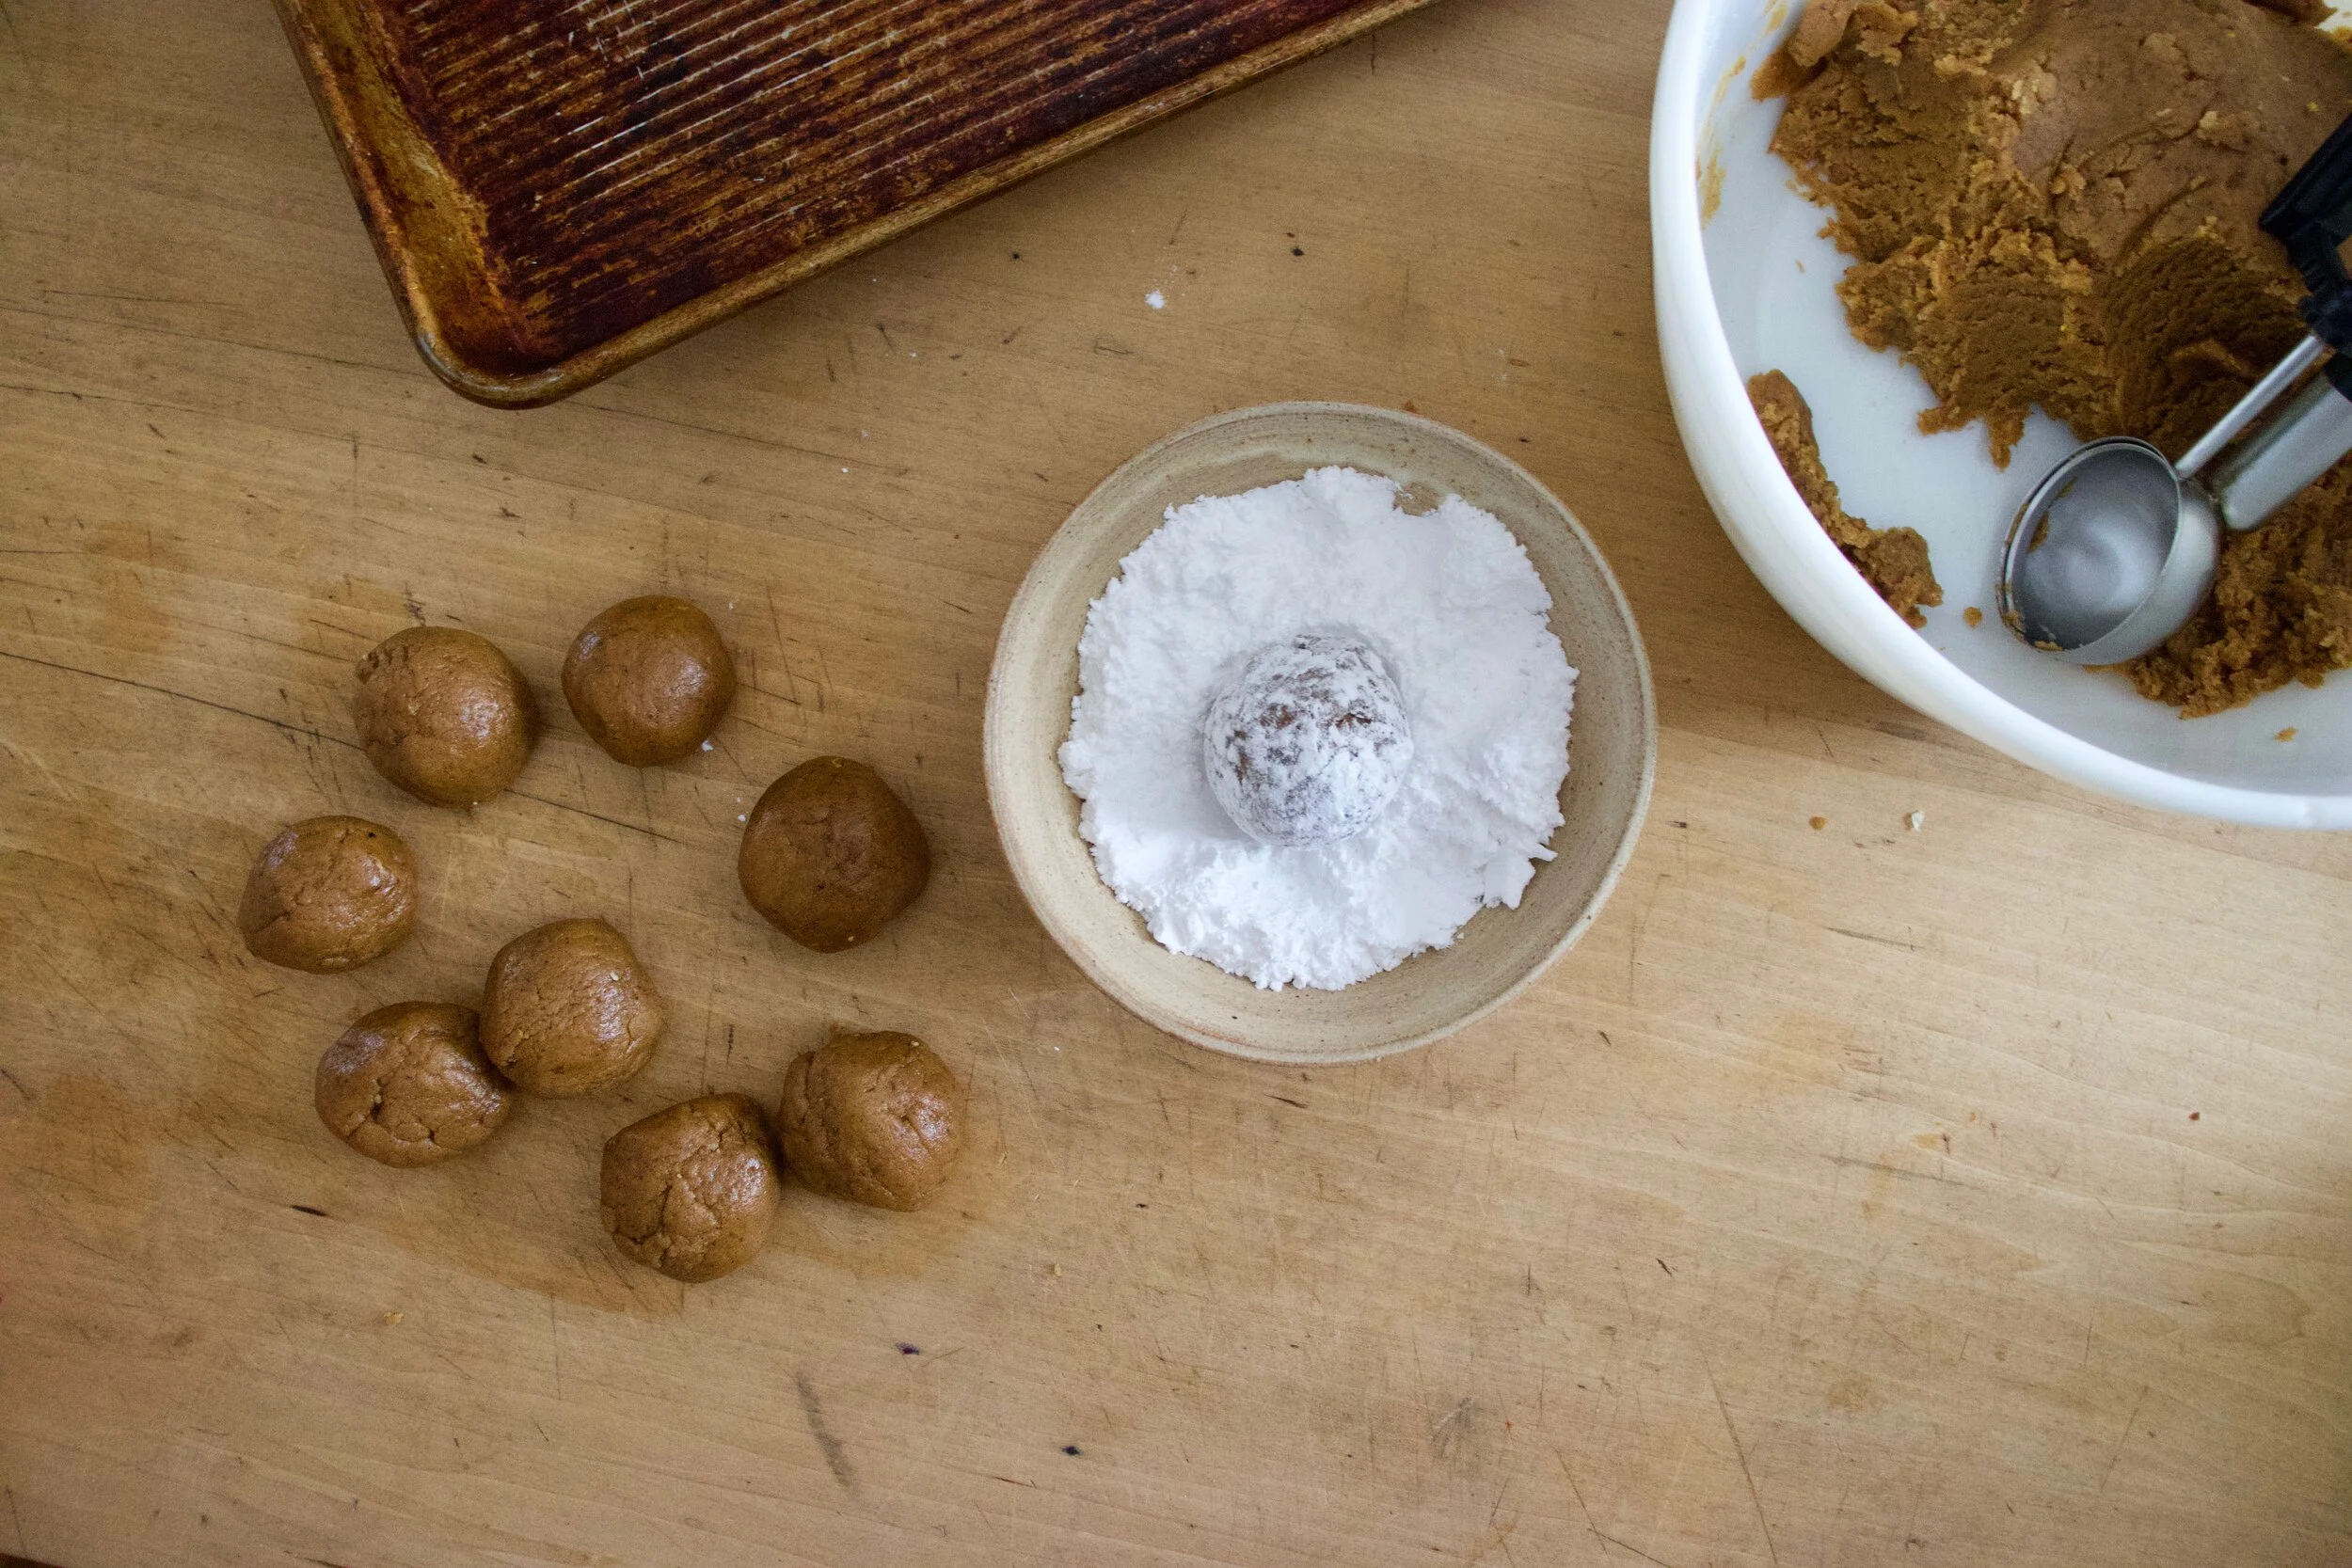
And when the dough has had it%u2019s time, scoop, roll into balls, ans roll around and completely coat in powdered sugar.
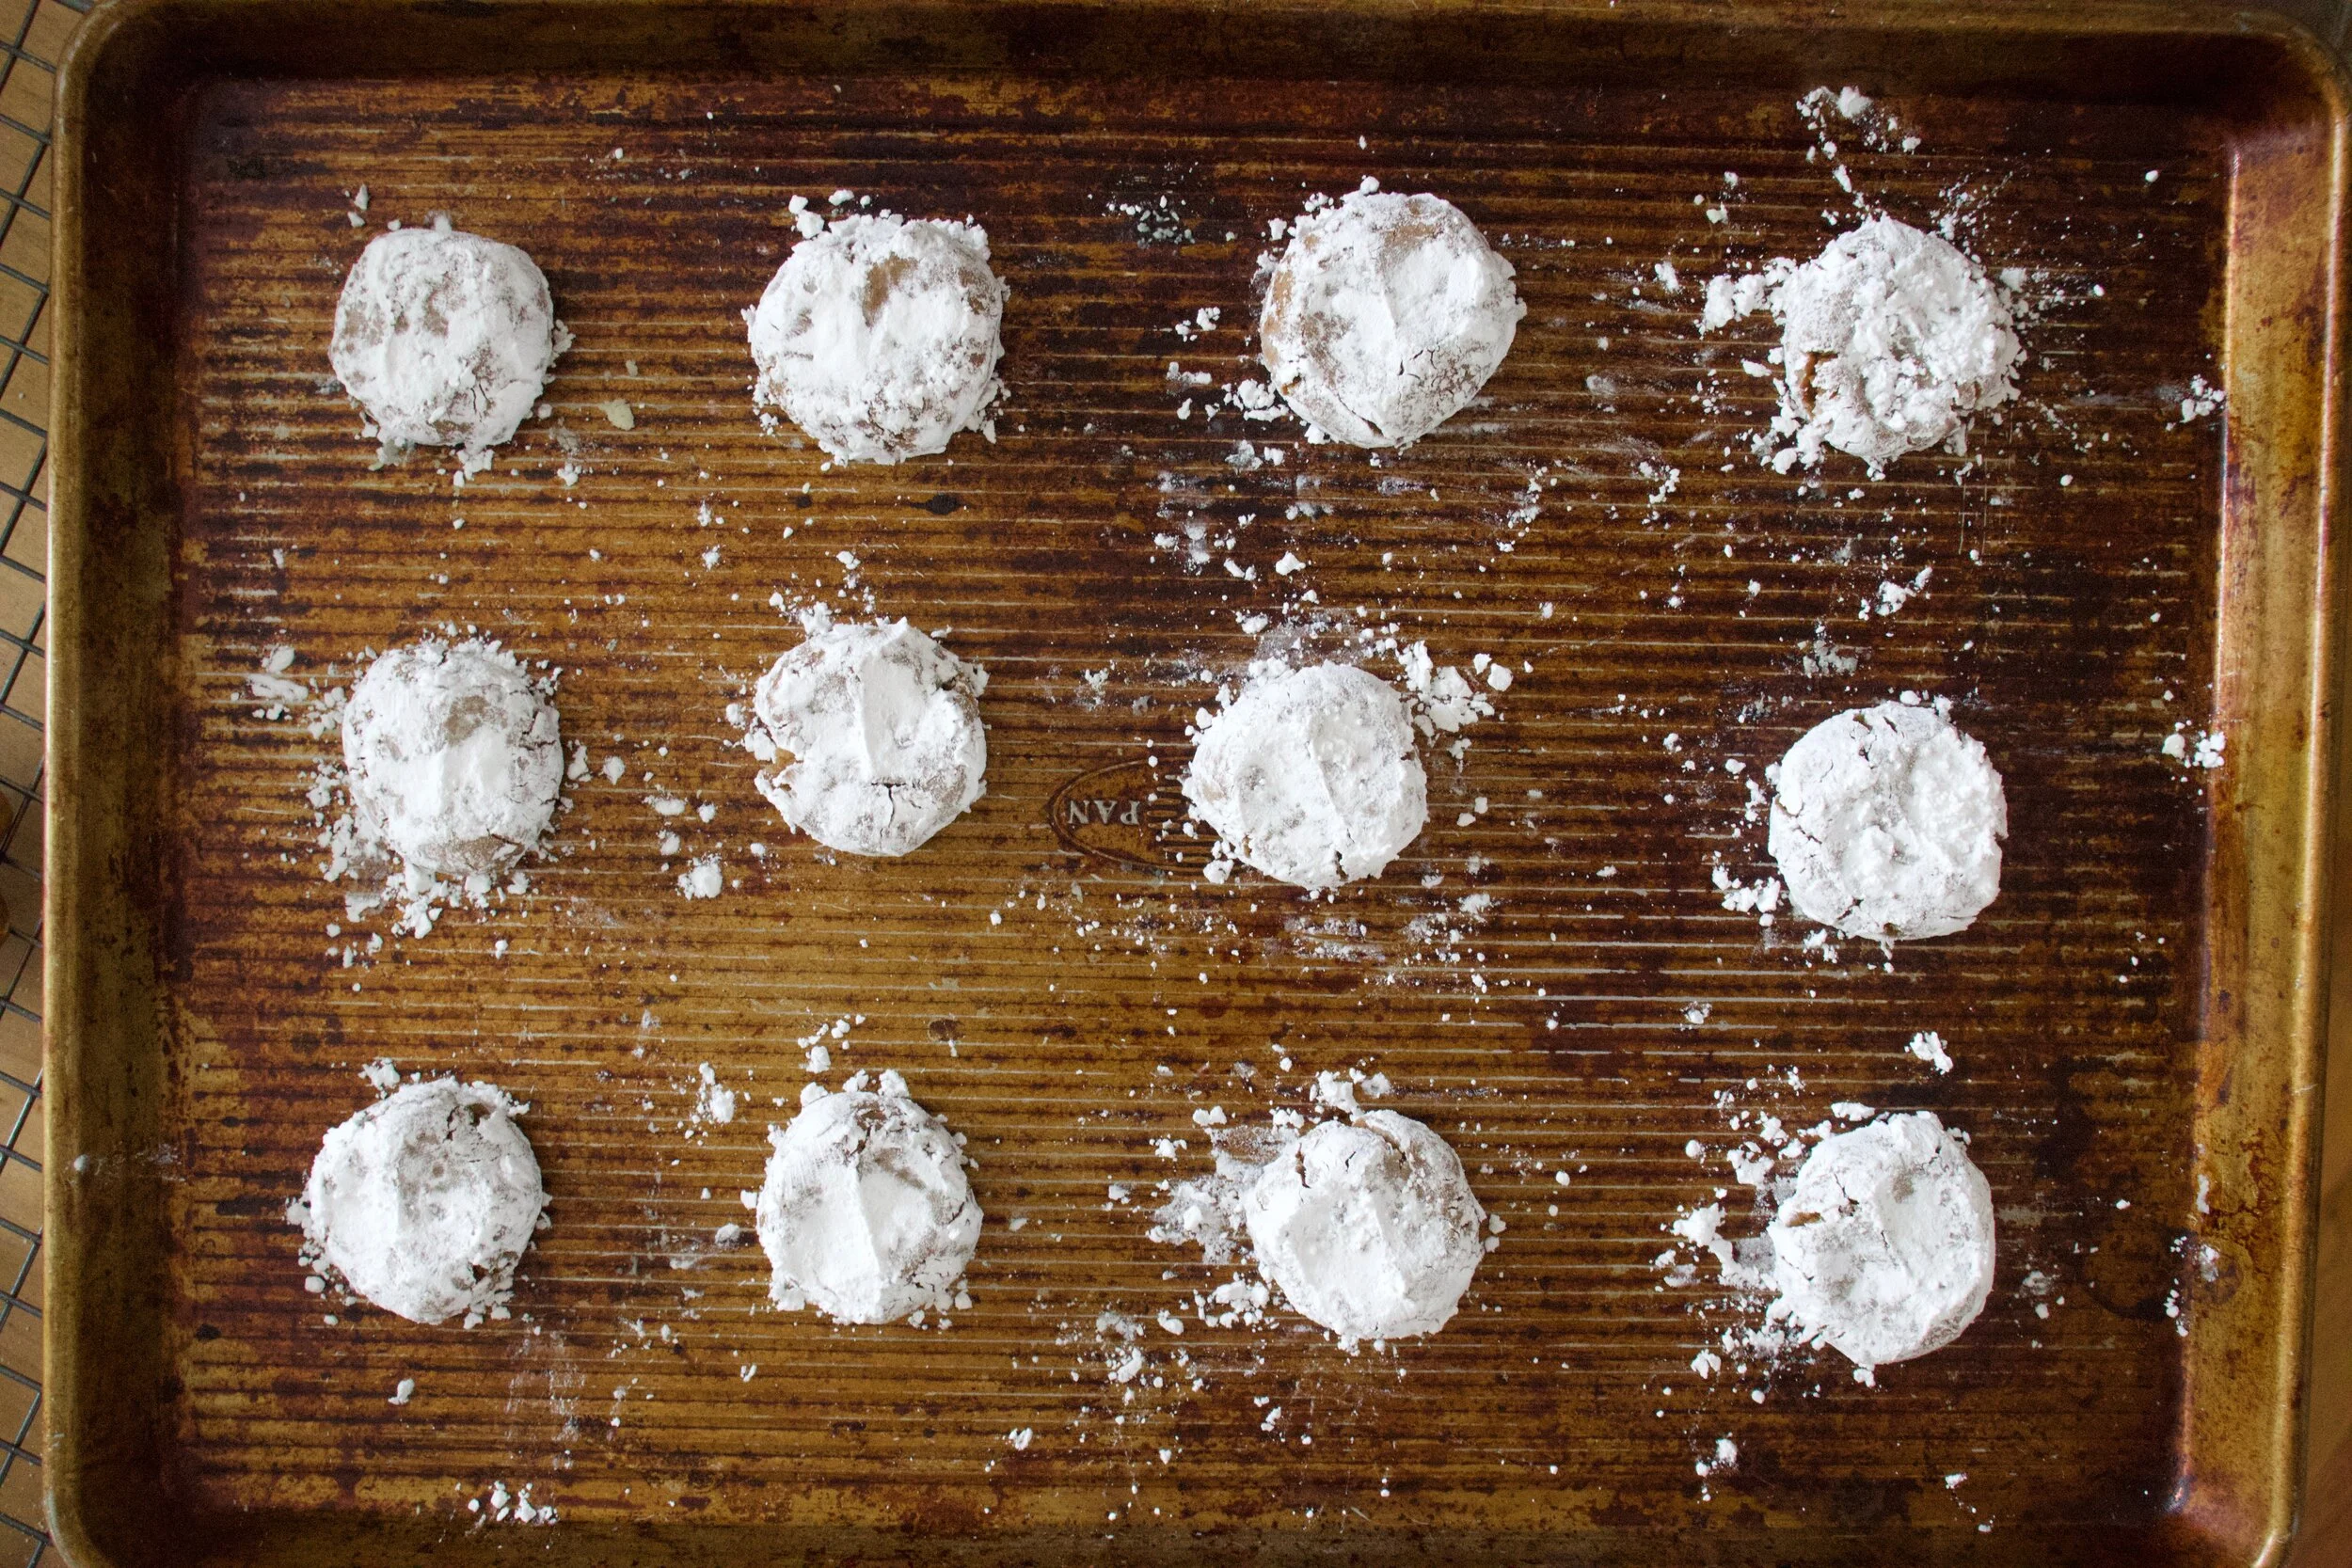
Sugars balls of dough. Now pop them into the oven.
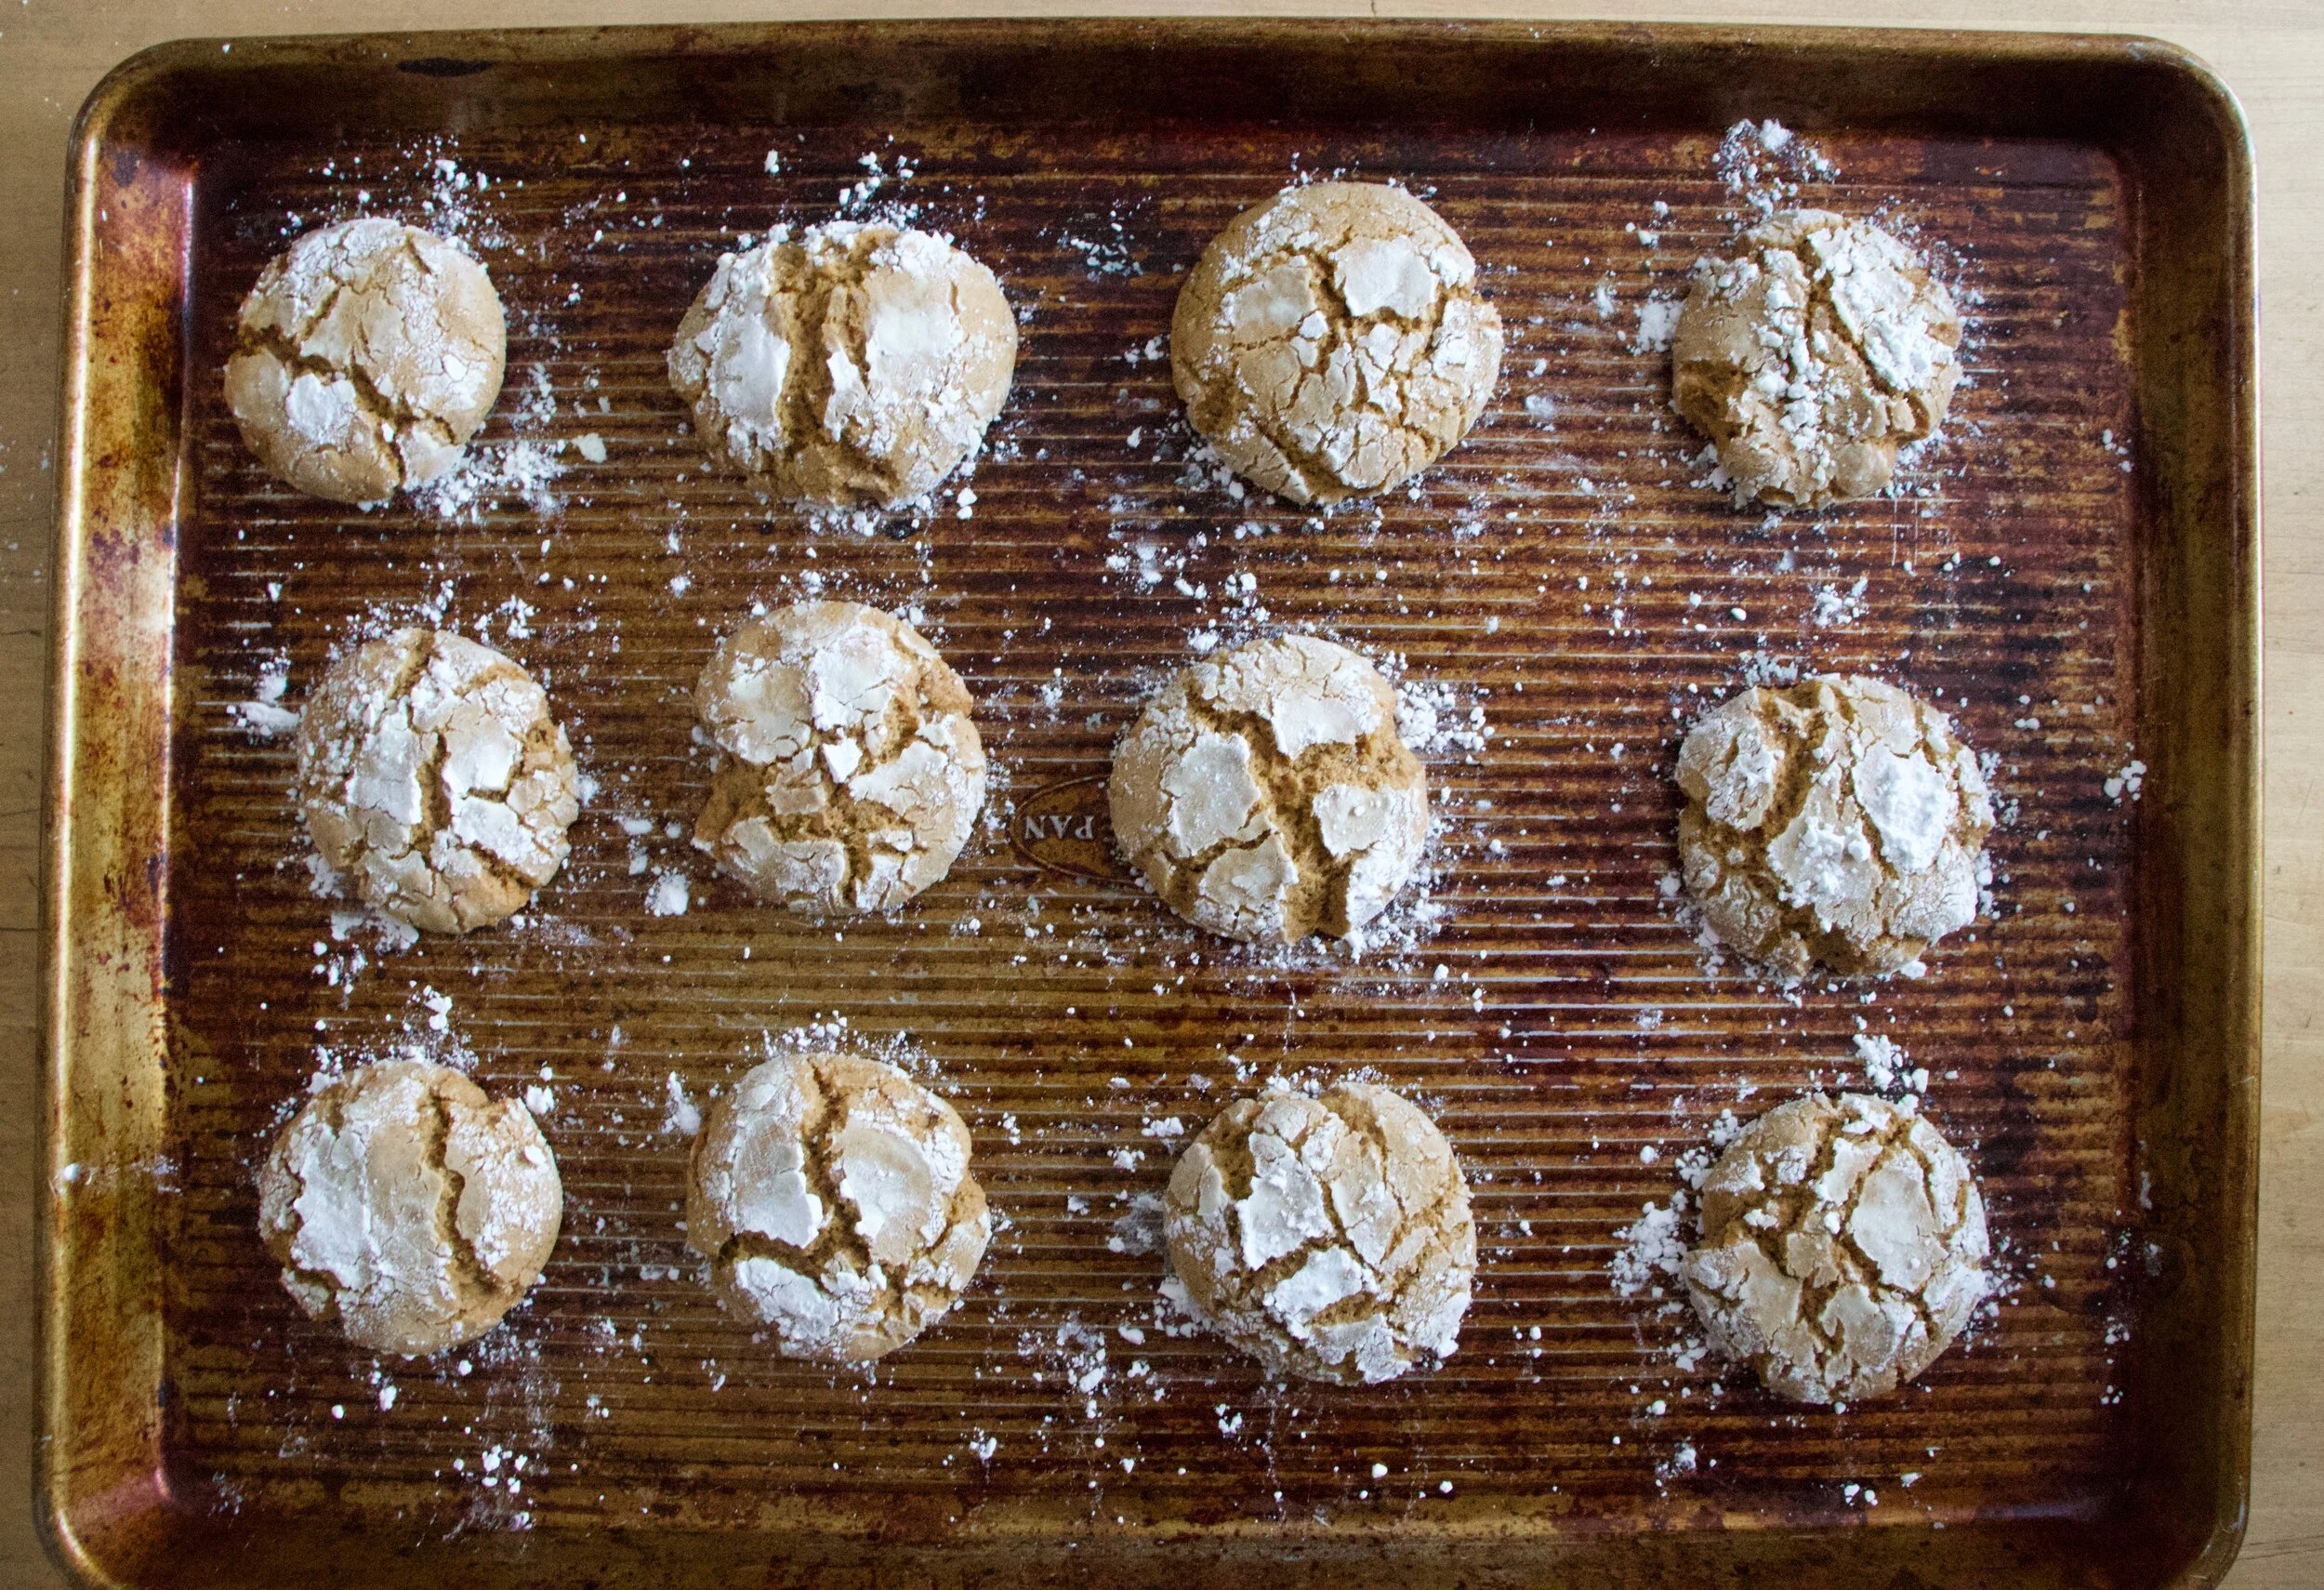
TA DA! Baked and all crinkly.
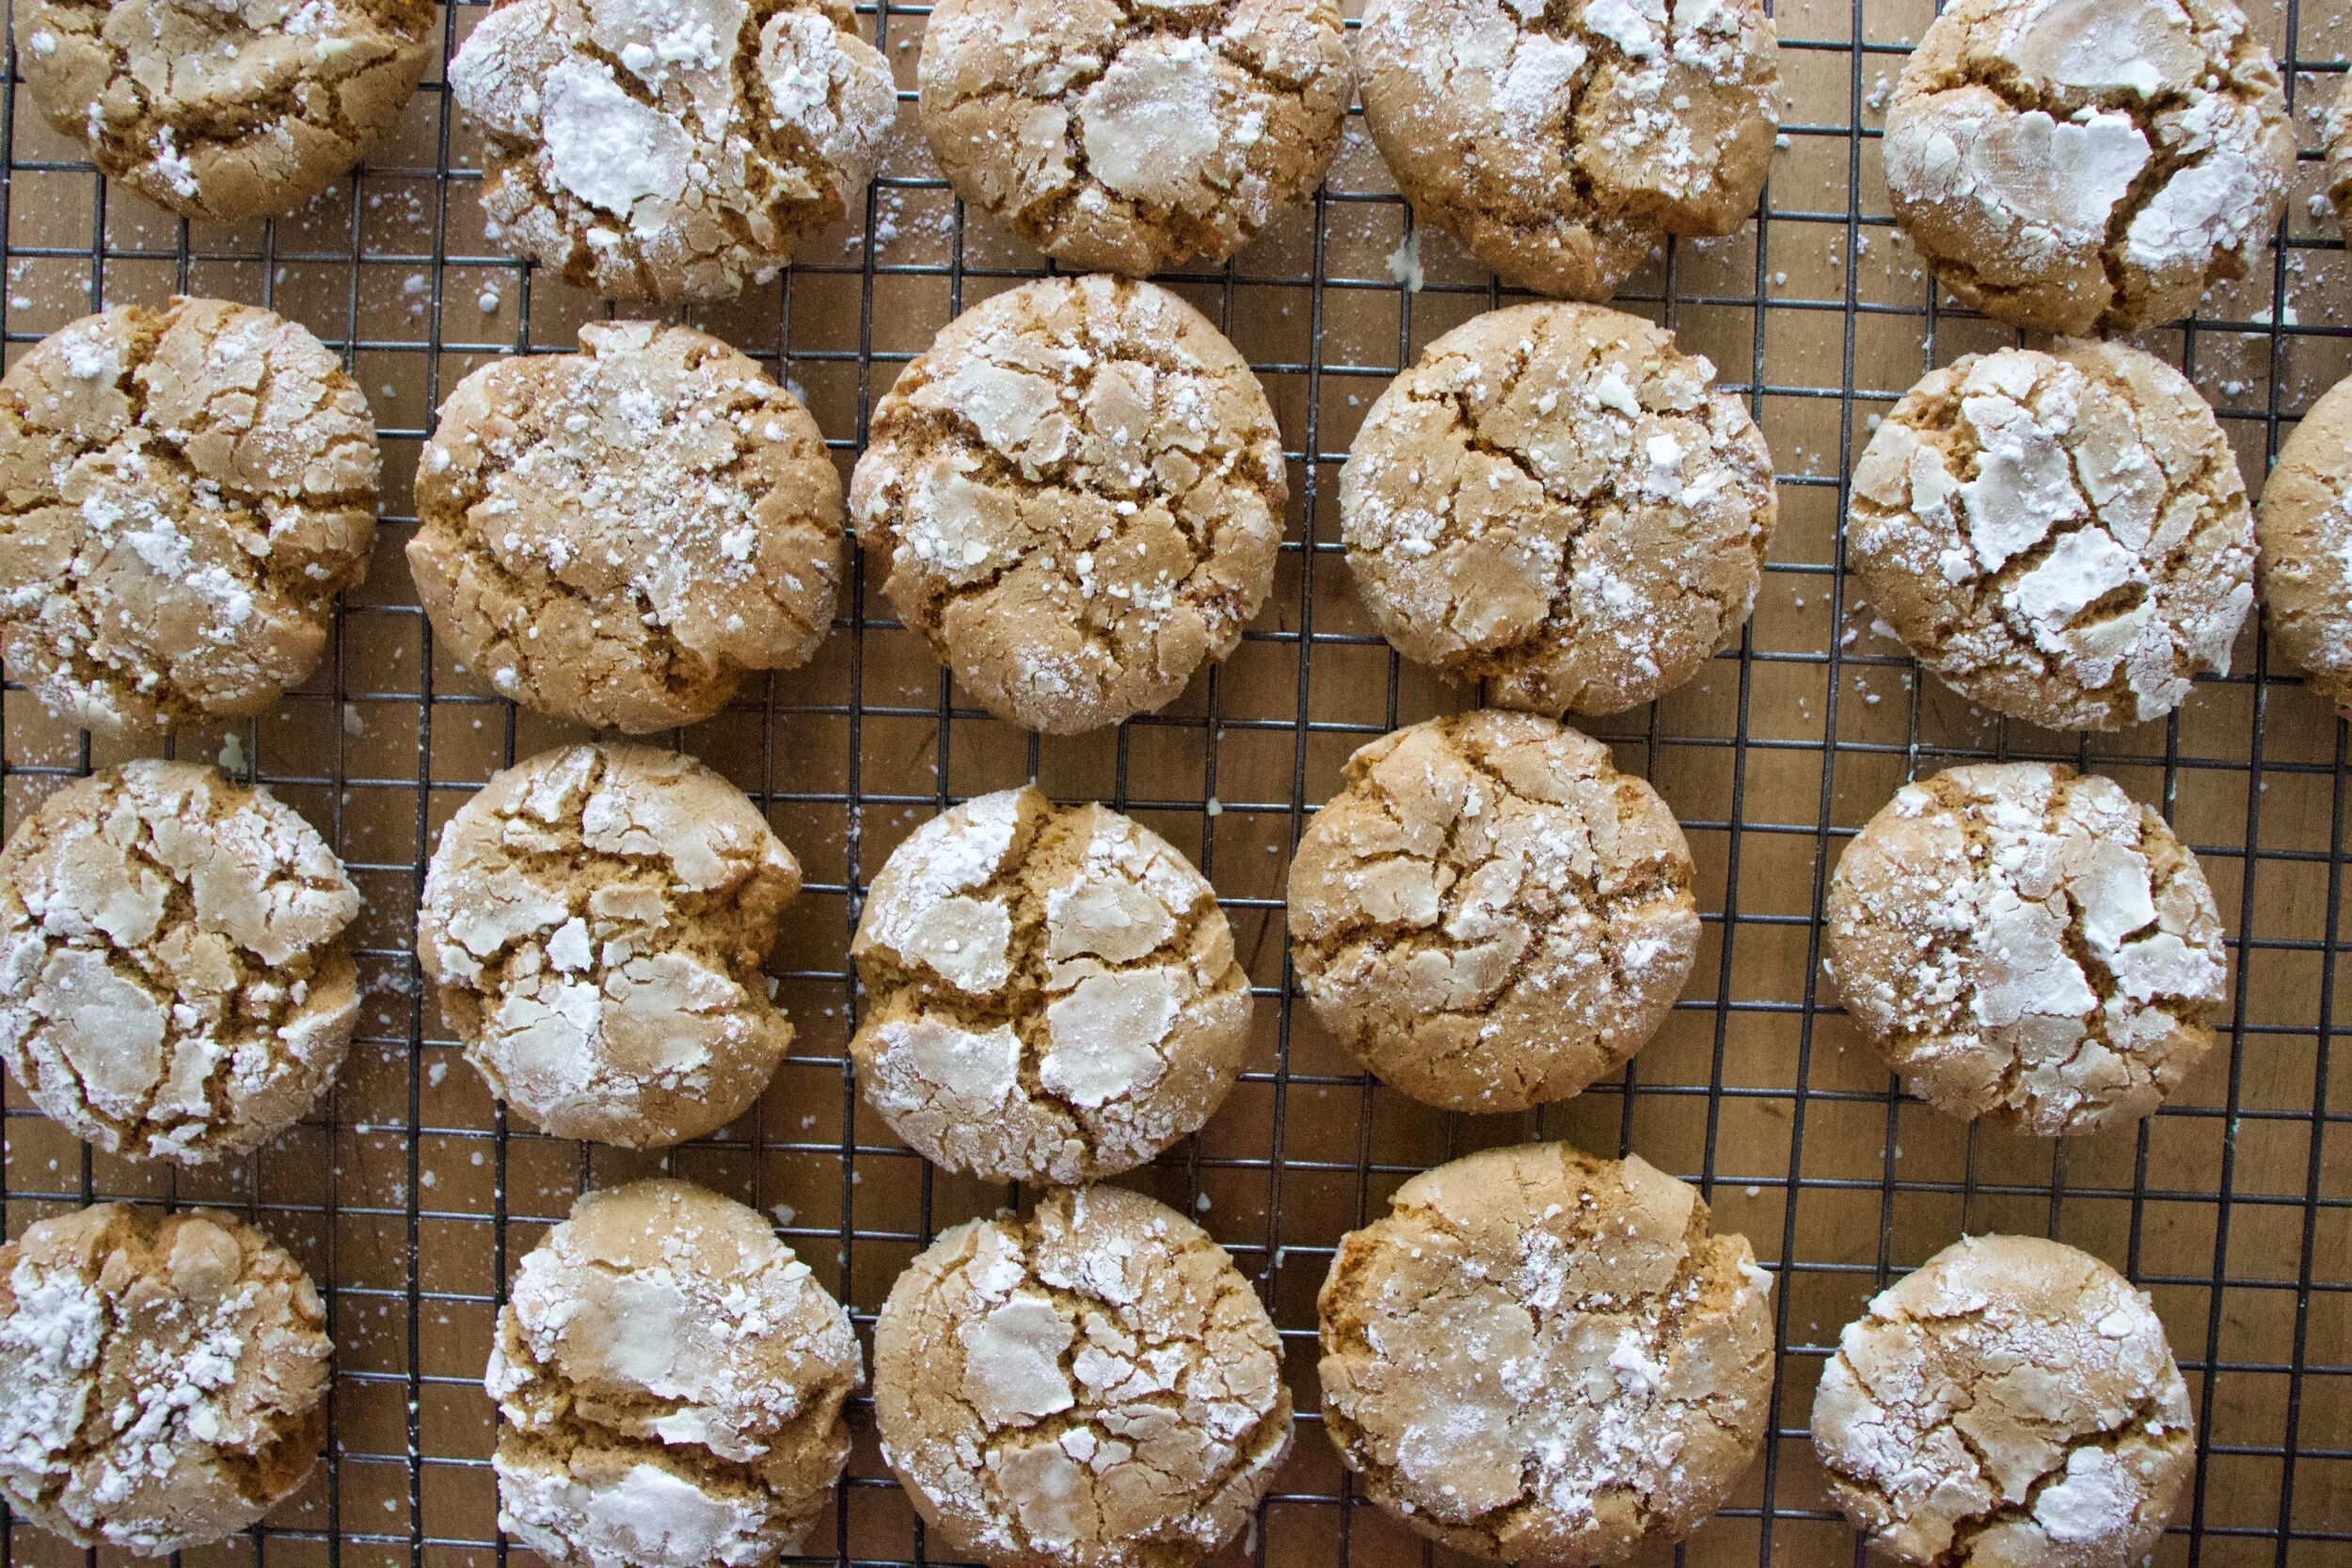
Let the cookies cool on a wire rack because that%u2019s how all cookie cool. And smell that delicious oh so lovely smell. It really is amazing, no?

Then onto a serving plate and now you have cookies for your mouth face.
Happiest happys of all the days to come! Now go eat cookies!
-C
makes around 2 dozen cookies
-
2 1/2 cups all purpose flour
-
1 teaspoon baking soda
-
1/2 teaspoon baking powder
-
1/2 teaspoon salt
-
1 tablespoon ground ginger
-
3/4 teaspoon ground cardamom
-
2 teaspoon cinnamon
-
1 teaspoon pepper
-
zest of a lemon (about 2 teaspoons)
-
3/4 cup brown sugar
-
1/4 cup molasses
-
2/3 cup neutral oil (I used canola)
-
2 flax eggs (6 tablespoon warm water mixed with 2 tablespoon ground flax seed)
-
1/2 -3/4 cup powdered sugar
To start, grab a bowl and mix together the brown sugar, molasses, oil, and flax seed eggs until completely combines. In another large bowl, whisk together the flour, all the spices (ginger, cardamon, cinnamon,and pepper), baking powder and soda, and salt. Pour the wet mixture into the bowl with the dry and mix together until a cohesive dough forms. Place dough in fridge for about a 1/2 hour to up to a day to let dough rest for a bit. If you are going to keep in the fridge for a while, just cover it up.
When ready to bake, preheat oven to 350 and measure out powdered sugar into a bowl
Remove dough from fridge and using a scoop or just eyeballing it, scoop about 2 tablespoons worth of dough. With each scoop, roll the dough into a ball and place into the bowl of the powdered sugar and roll around unit completely coated. Place ball on a baking sheet, giving it a little pat down, NOT squishing it down, just a little indent. And don%u2019t overcrowd balls, give them a little space.
When your baking sheet full, place Into hot oven and bake for 12-13 minutes or until the cookies have puffed and flattened out a bit, are golden brown on the bottoms, and the tops are all crinkly and lovely. Once cooked all the way, remove from oven and transfer cookies onto a wire rack to cool.
Then eat a warm one. Heck, eat 2 warm ones, then do what you will with the rest.
Store cooled cookies in an air tight container at room temp for 3-4 days. They can also be frozen for long term storage but why do you need to store your cookies? Jest eat them.
Peaches are here. YAY!!! Peaches are for sure one of those fleeting fruits, one that once in season, you need to eat as many fresh as you can because once they are out of season, they are not good. Not good at all. And me being me, I see peaches, I buy a shit load, and now I have a fridge drawer full. Not complaining in the slightest, but peaches cannot sit around all summer waiting to be eaten. So if you are going to buy a shit load, know what you are going to do with them all.
My peaches, well they haven%u2019t had to wait long. I have been eating at least a peach a day and%u2026 I made these bars with a few. Sharing my peaches, thats what I do. HA.
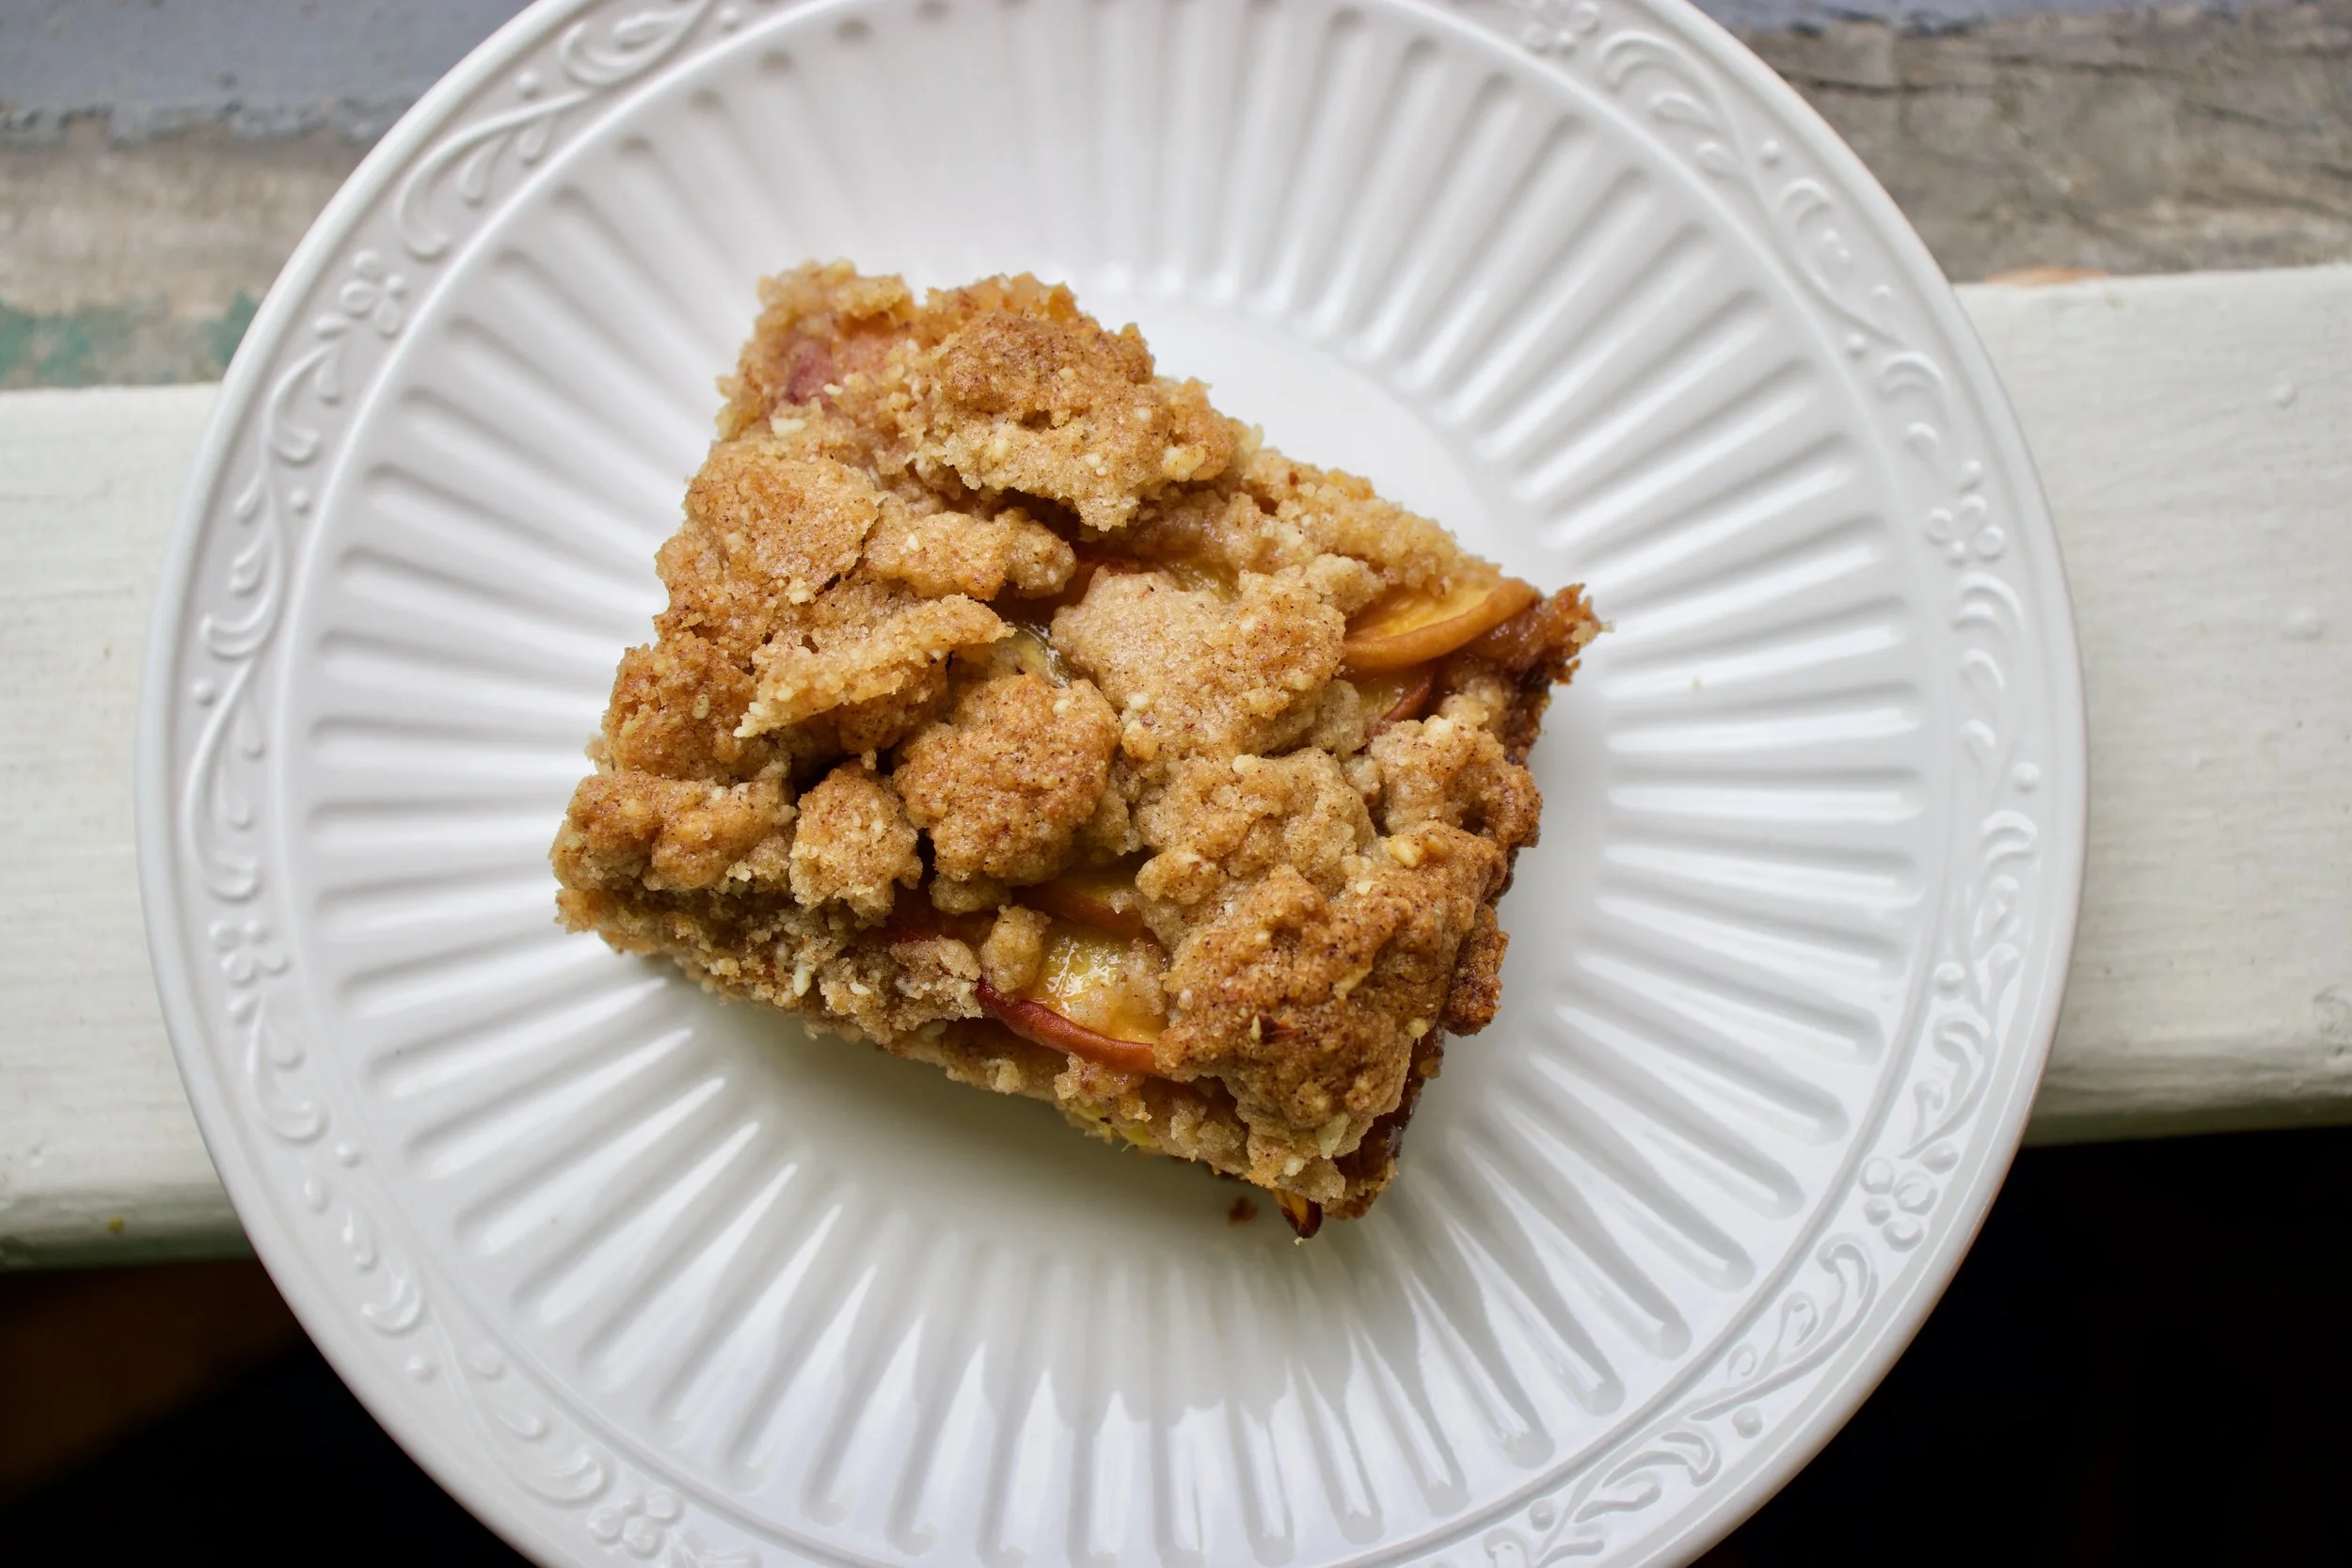
These almond peach shortbread bars. Fantastic A+ on all fronts. Easy to make, not a whole heck of a lot of ingredients, make the house smell amazing, and really kick off the peach, summer vibe thing that goes on around here.
‘%u201cMillions of peaches, peaches for me. Millions of Peaches, peaches for free%u201d %ud83c%udfb6 (Peaches by The Presidents of the United States of America. If you have%u2019t head the song, look it up. I don%u2019t think I can even look at a peach without hearing the song in my head.)
Now to the peach almond shortbread bars!
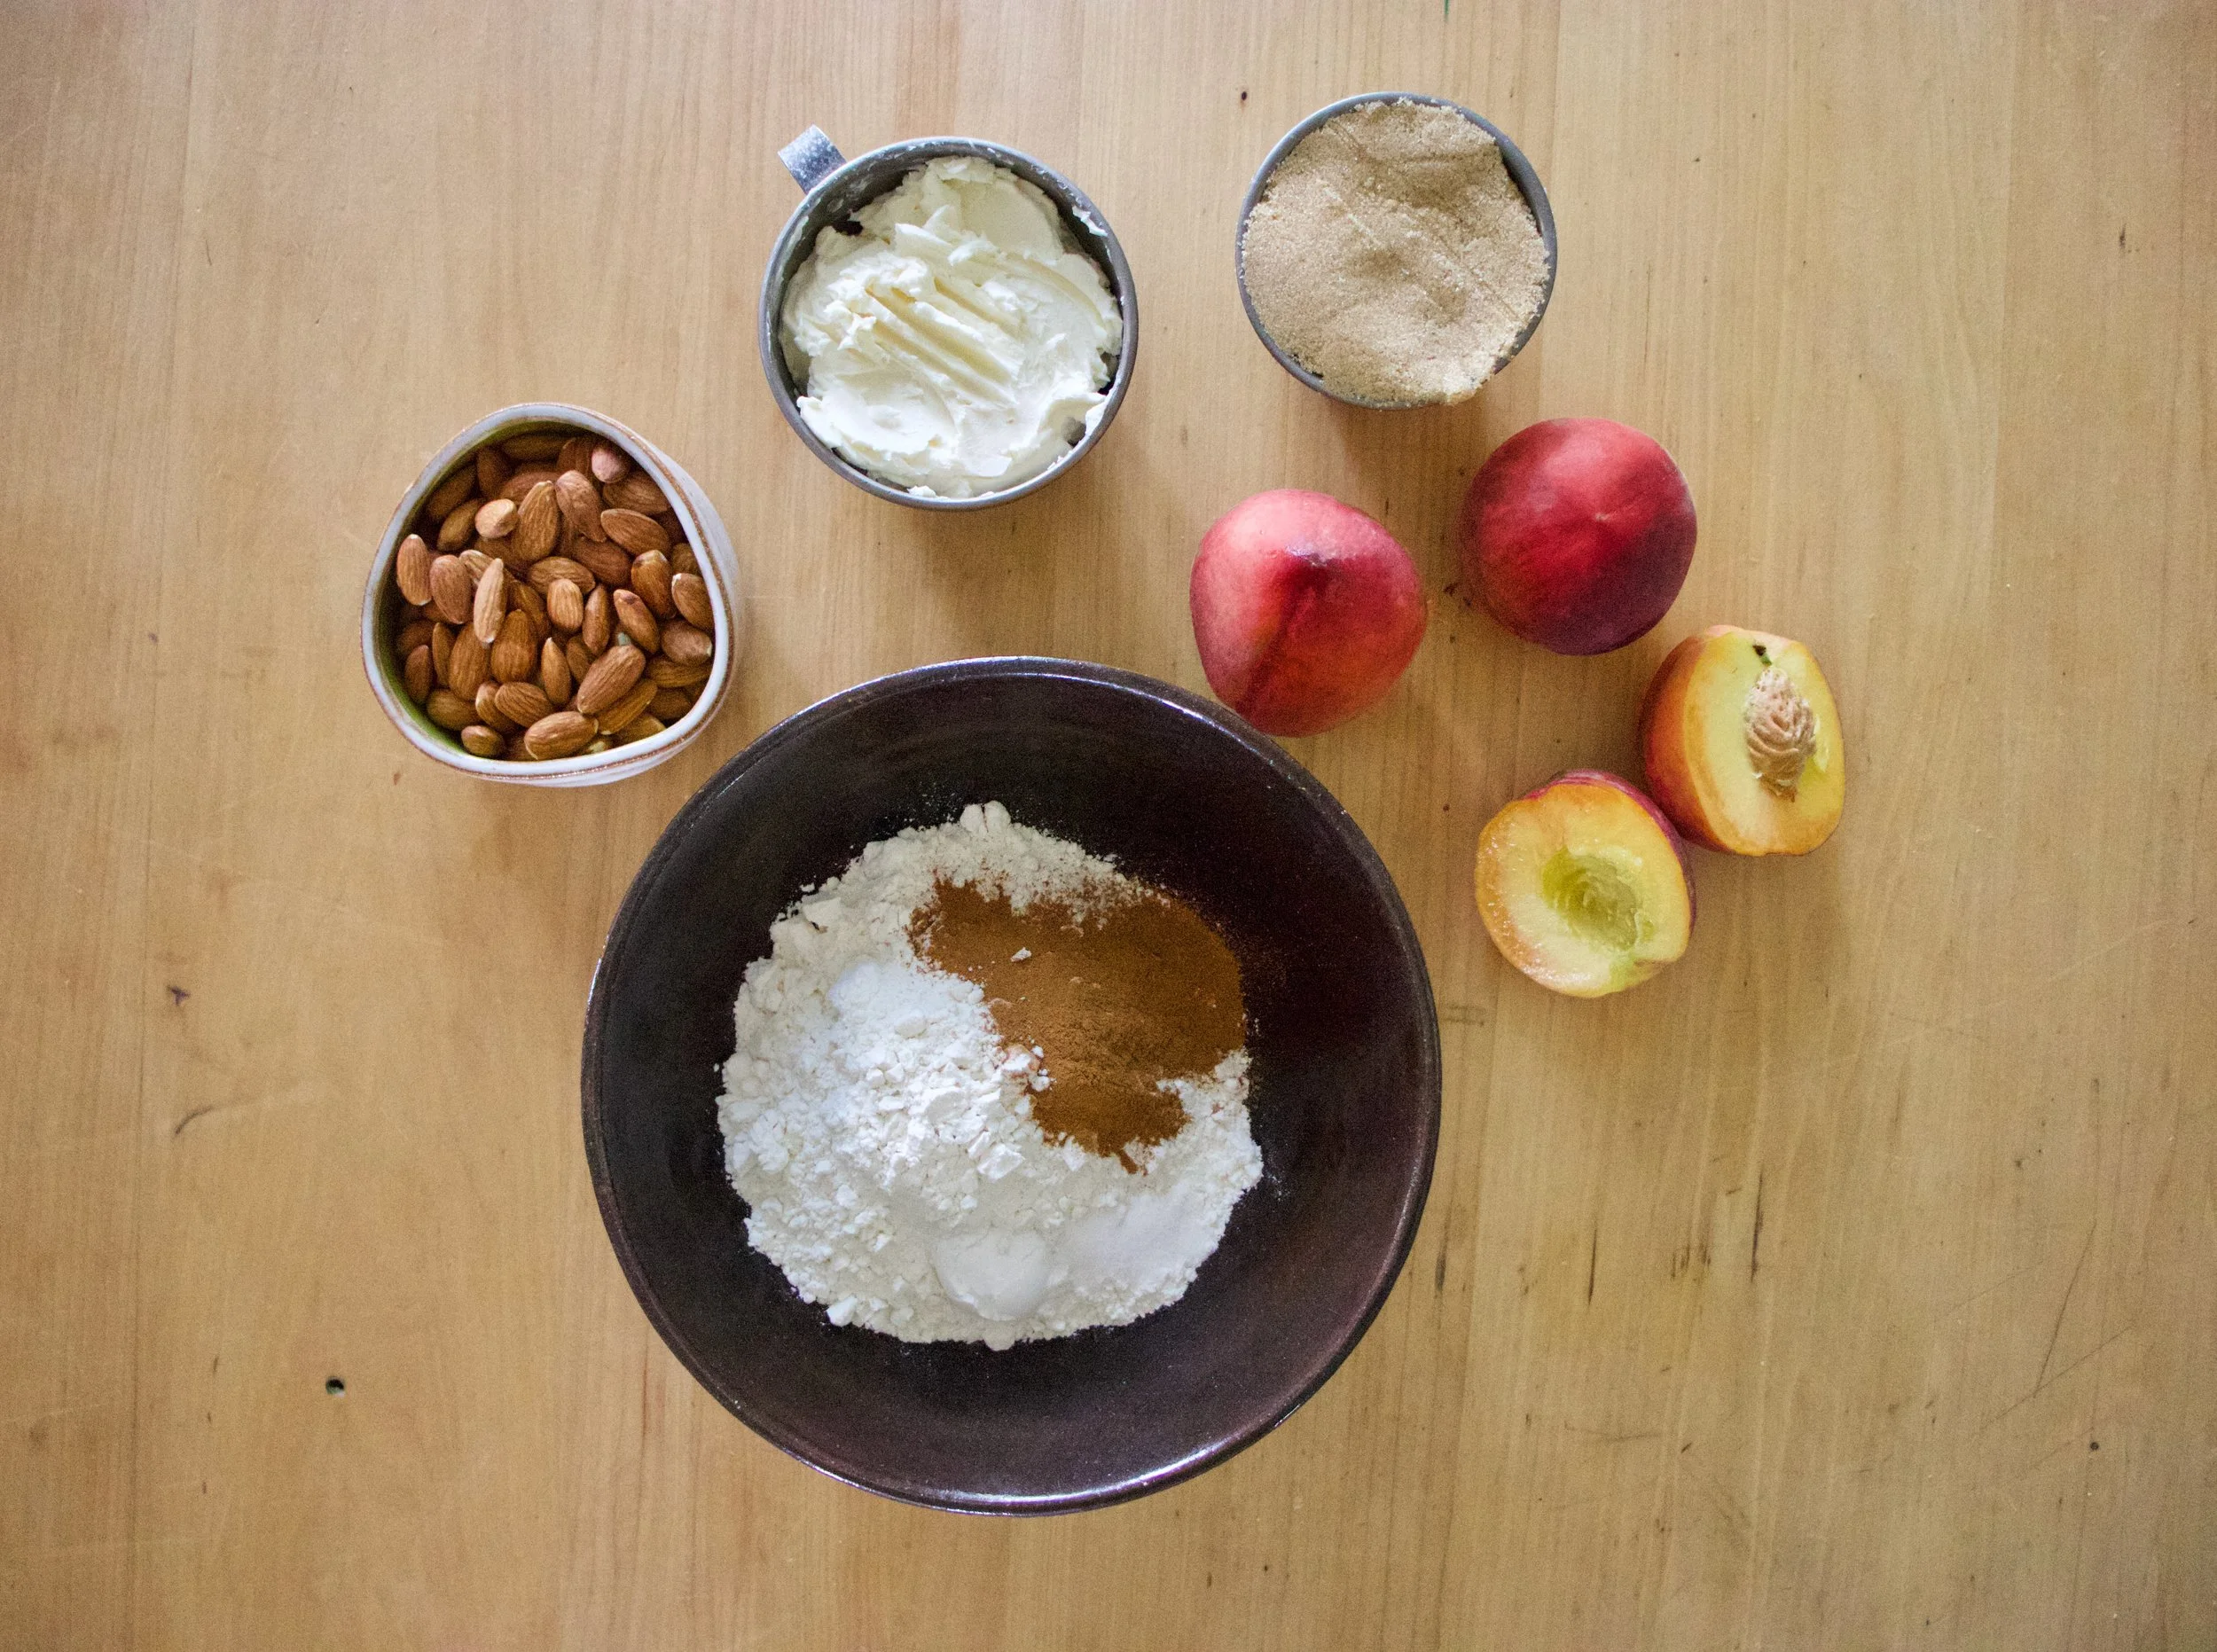
The stuff. Peaches, almonds, vegan butter, brown sugar, flour, cinnamon, salt, and baking powder.
Easy peasy. Almonds go in to food processor first. Blend and pulse for a minute or two until they turn into a medium fine almond meal. (Don%u2019t over blend or you will end up with almond butter.) When almonds are ground, add in the flour, baking powder, salt, cinnamon, and sugar. Pulse until combined. Then add in the butter in chunks and pulse until dough just starts to come together.


Half the dough goes into a 9×9 baking pan. Smooshed evenly all over the bottom poke it with a fork. Then it just needs to go into the oven to bake. 15-18 minutes or so, just until it starts to brown a bit.
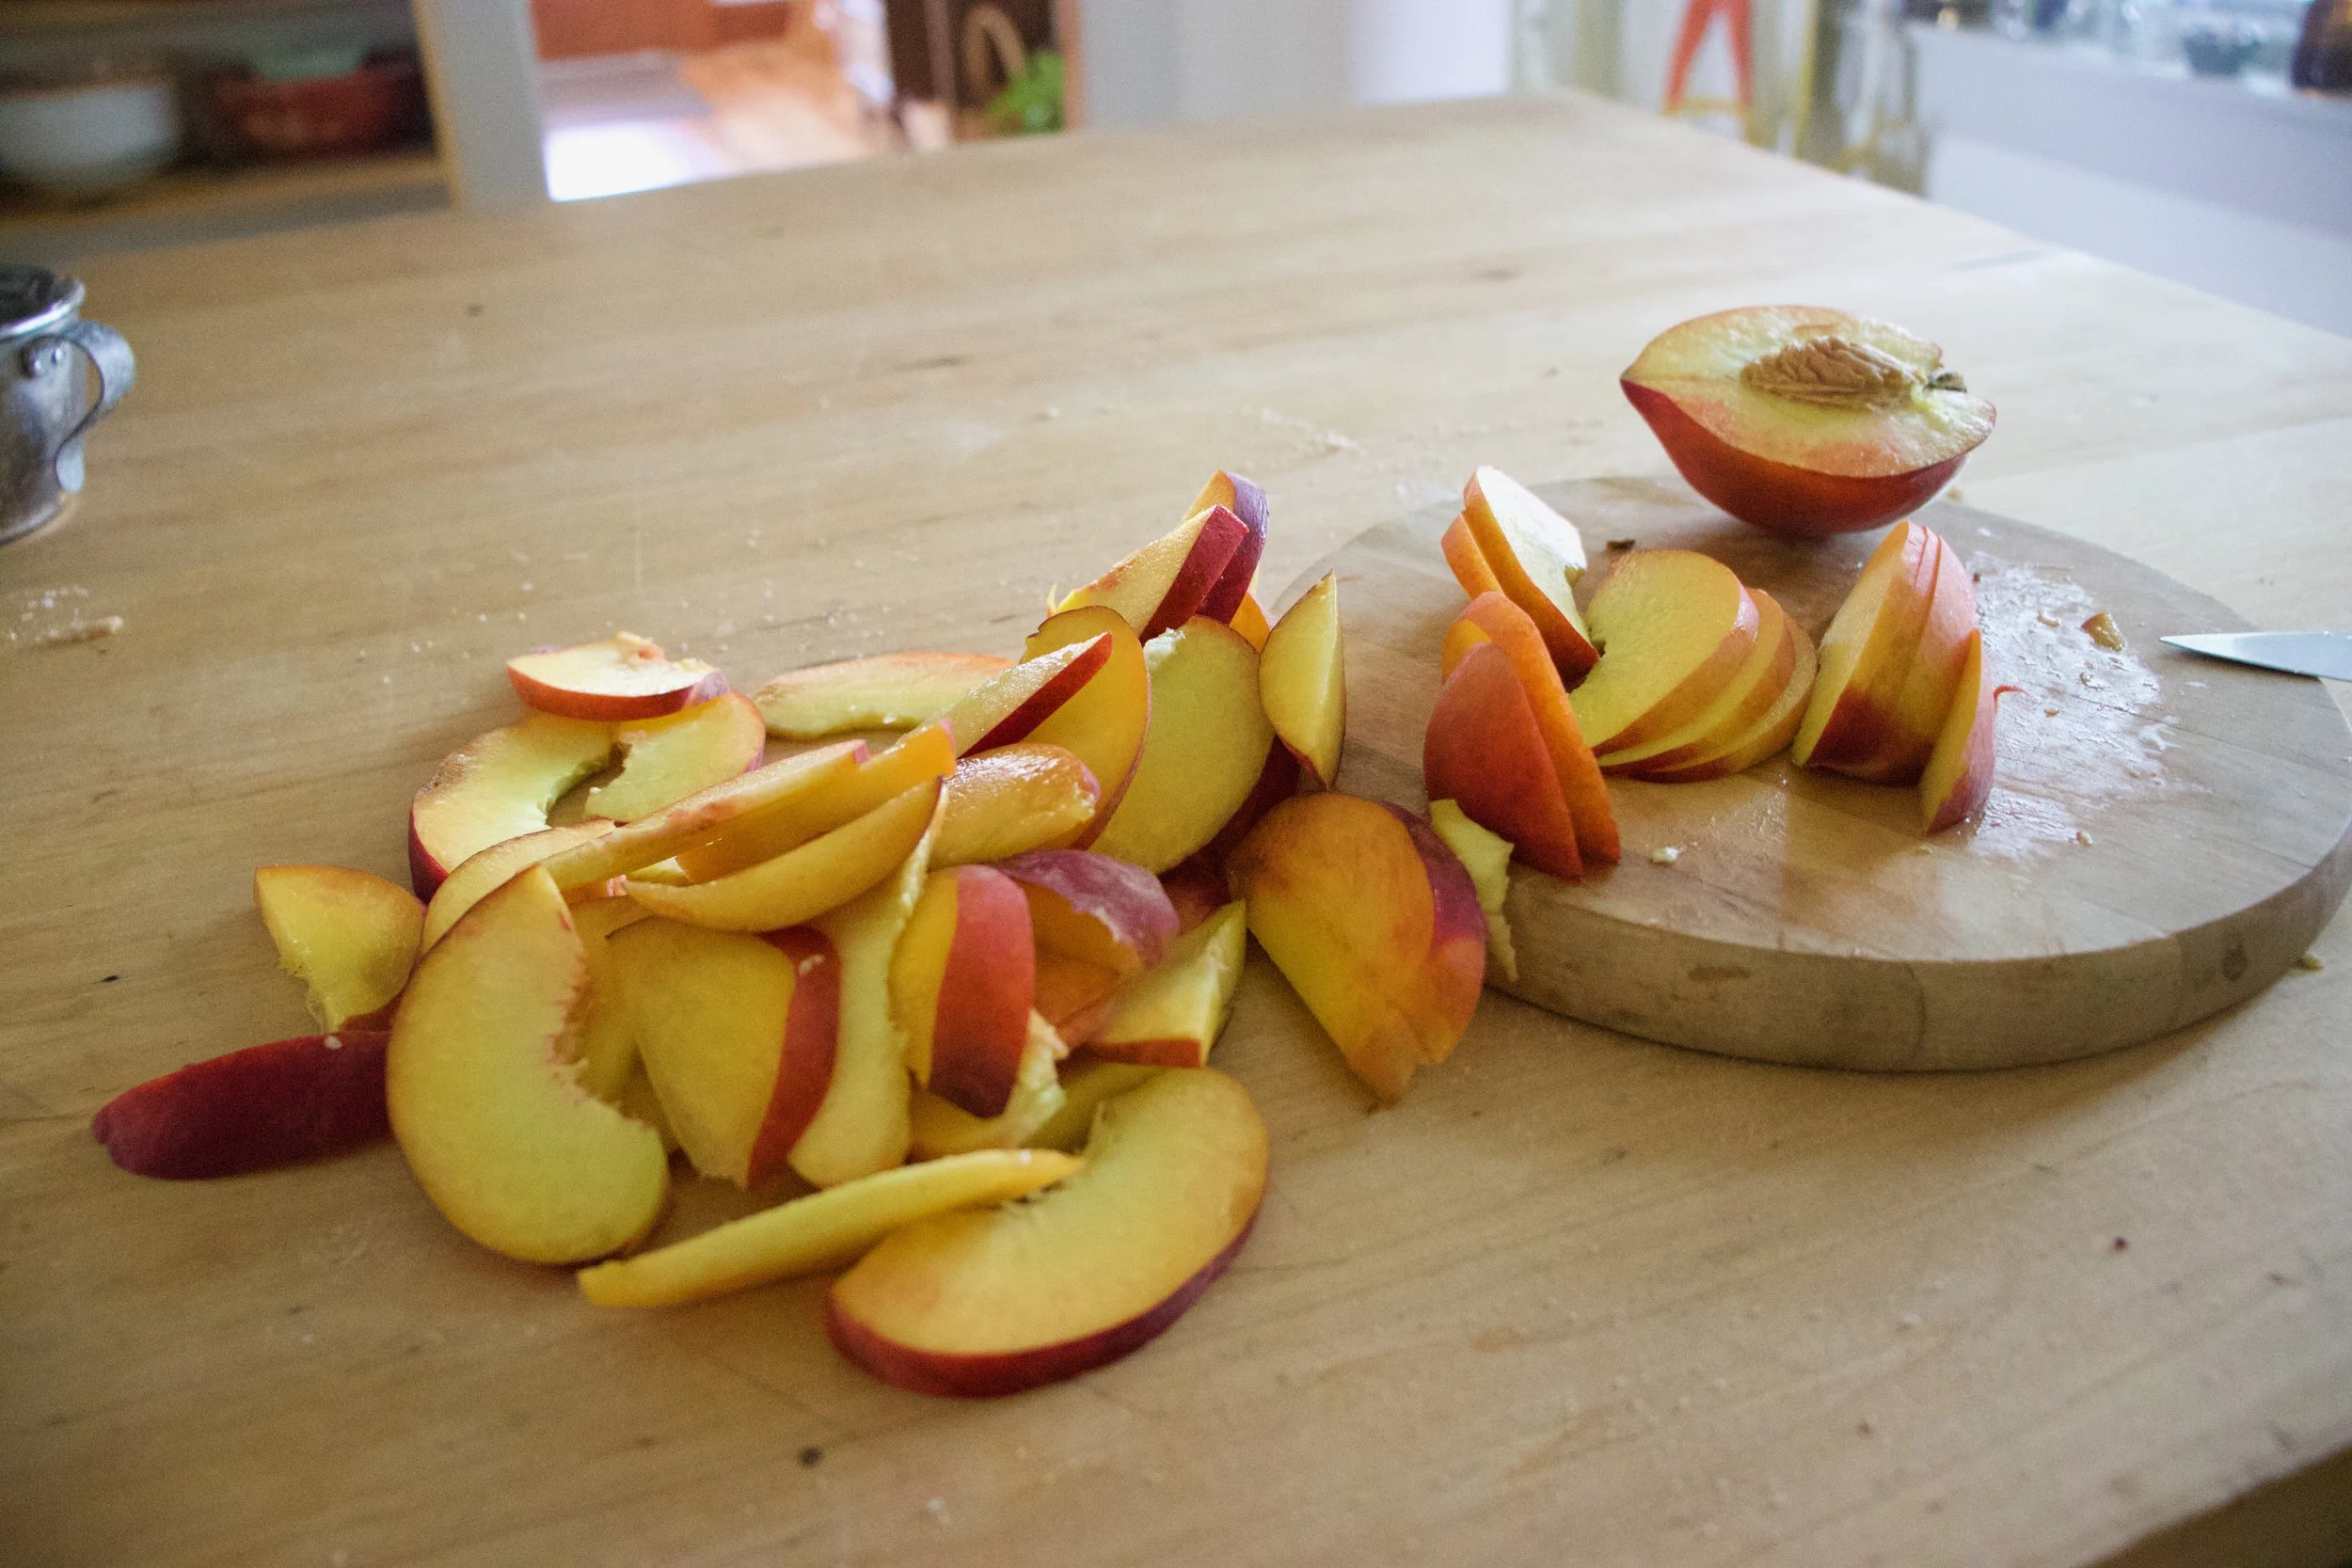
Peaches need to be cut so cut them up. !/2 inch thick slices, after the pits be removed of course.
Blinded baked bottom. Looks good yeah? Let it cool for a few minutes and then it gets peaches. Three rows, all over lapping and nestled together.

The top gets the remaining half of dough and is now it%u2019s ready for the oven. Another 40-ish minutes or so to really seal the deal.

Taken from the oven when golden brown, cooled, cut up, and placed on a pretty plate because pretty is nice.
I am pretty sure you figured out what to do next%u2026. EAT IT!
-C
makes a 9×9 pan which can be cut Into the sizes of your choice
-
1 cup vegan butter
-
1 cup packed brown sugar
-
2 cup cup all purpose flour
-
1 cups raw almonds
-
1 teaspoon baking powder
-
1 teaspoon salt
-
3 large firm peaches
-
1 heaping teaspoon cinnamon
Preheat oven 350
Place almonds into a food processor and pulse and blend until a fine meal has formed. It should take only a minute or two and stop half way and scrape the edges and sides do the almonds don%u2019t start to form a paste. Add in the flour, salt, baking powder, cinnamon,and sugar and pulse until combined. Add in the vegan butter in a few chunks and pulse until the mixture turns into a crumbly dough. Stop pulsing and dump mixture into big bowl.
Take half of the mixture and place into a 9×9 baking pan. Evenly distribute and press the dough into the bottom. Take a fork and poke the dough all over then place the pan in the oven. Bake for 15-17 minutes or until the dough just starts to lighly brown. Remove from oven.
While the bottom crust is cooling off for a few minutes, slice peaches into 1/2 inch slices. Obviously make sure to remove pit.
Now take your half baked crust and layer peaches evenly on top. It is easies to start at the top, make three rows across and then layer the peaches down (like in the picture above). Once peaches are layered, grab the remaining half of dough and evenly distribute on top. Place back into oven and bake for another 40-45 minutes or until the crumble on top is a nice deep golden brown.
Remove from oven, let coo completely (or as completely as you can) cut into pieces, and then you eat it.
Left over pieces should be placed in an airtight container in the fridge for up to 5 days. They freeze well individually wrapped too.
blind back for about 15 minutes of until the crust is starting to brown around the edges
bake for another 30 minutes

I have a bag of coconut flour that I need to use up so I have made coconut snack cake a few times the past couple weeks. Once with orange instead of lime. Once I added chocolate chips. This time I stepped it up made a little glaze action, toasted a little coconut for some extra coconutiness and took these here pictures and wrote down the recipe. Just. For. You.
Not that I don%u2019t know already that my snack cake creation is good, but I guess it was just super A+++. I threw this one together right before the mr and I headed down to PA to hang with my dad. As soon as he (and sister and nephews) started in on it, well the responses were more then average. My dad even snuck a piece off and hid it for later. They really, really, really were into it. Wanted me to make another right then and there. Normally I would but my dad doesn%u2019t keep coconut flour on hand and I don%u2019t make it a habit to travel with any myself. (I might have to change that.) Next time he will know to stock the coconut flour.
I didn%u2019t realize my people were such coconut people. Good thing for them that I like coconut people. As a matter of fact, I consider myself a coconut person. And coconut is not code for awesome, but I am that too. HA
Anyway enough about me. Coconut snack cake is what you want to know about. It is soft and dense. Moist, not overly sweet. Lots of lime and coconut flavor and is just perfect for snack time. Eat it with a fork on a plate with coffee or tea or grab an piece and eat it walking down the street while thinking about green leaves and warmer weather. Or wherever and whenever. If you make it then it%u2019s up to you when and where you eat it. That only seems fair.
Now to the snack cake of your coconut lime dreams.

The stuff. Gonna need all purpose flour, coconut flour, salt, baking soda, baking powder, a couple flax eggs, some warmed coconut oil, plant milk, brown sugar, vanilla extra, apple sider vinegar, a couple lime, some powdered sugar, and some lightly toasted shredded coconut.
Grab a big bowl. Add in the brown sugar, flax eggs, warmed coconut oil, apple cider vinegar, and vanilla. Mix it all up until evenly incorporated.

Dump in the flours, baking soda and powder, and salt. Zest in lime, squeeze in lime juice and start to mix. Add in the milk as you are mixing.

Cake batter mixed and done. Now to bake it.
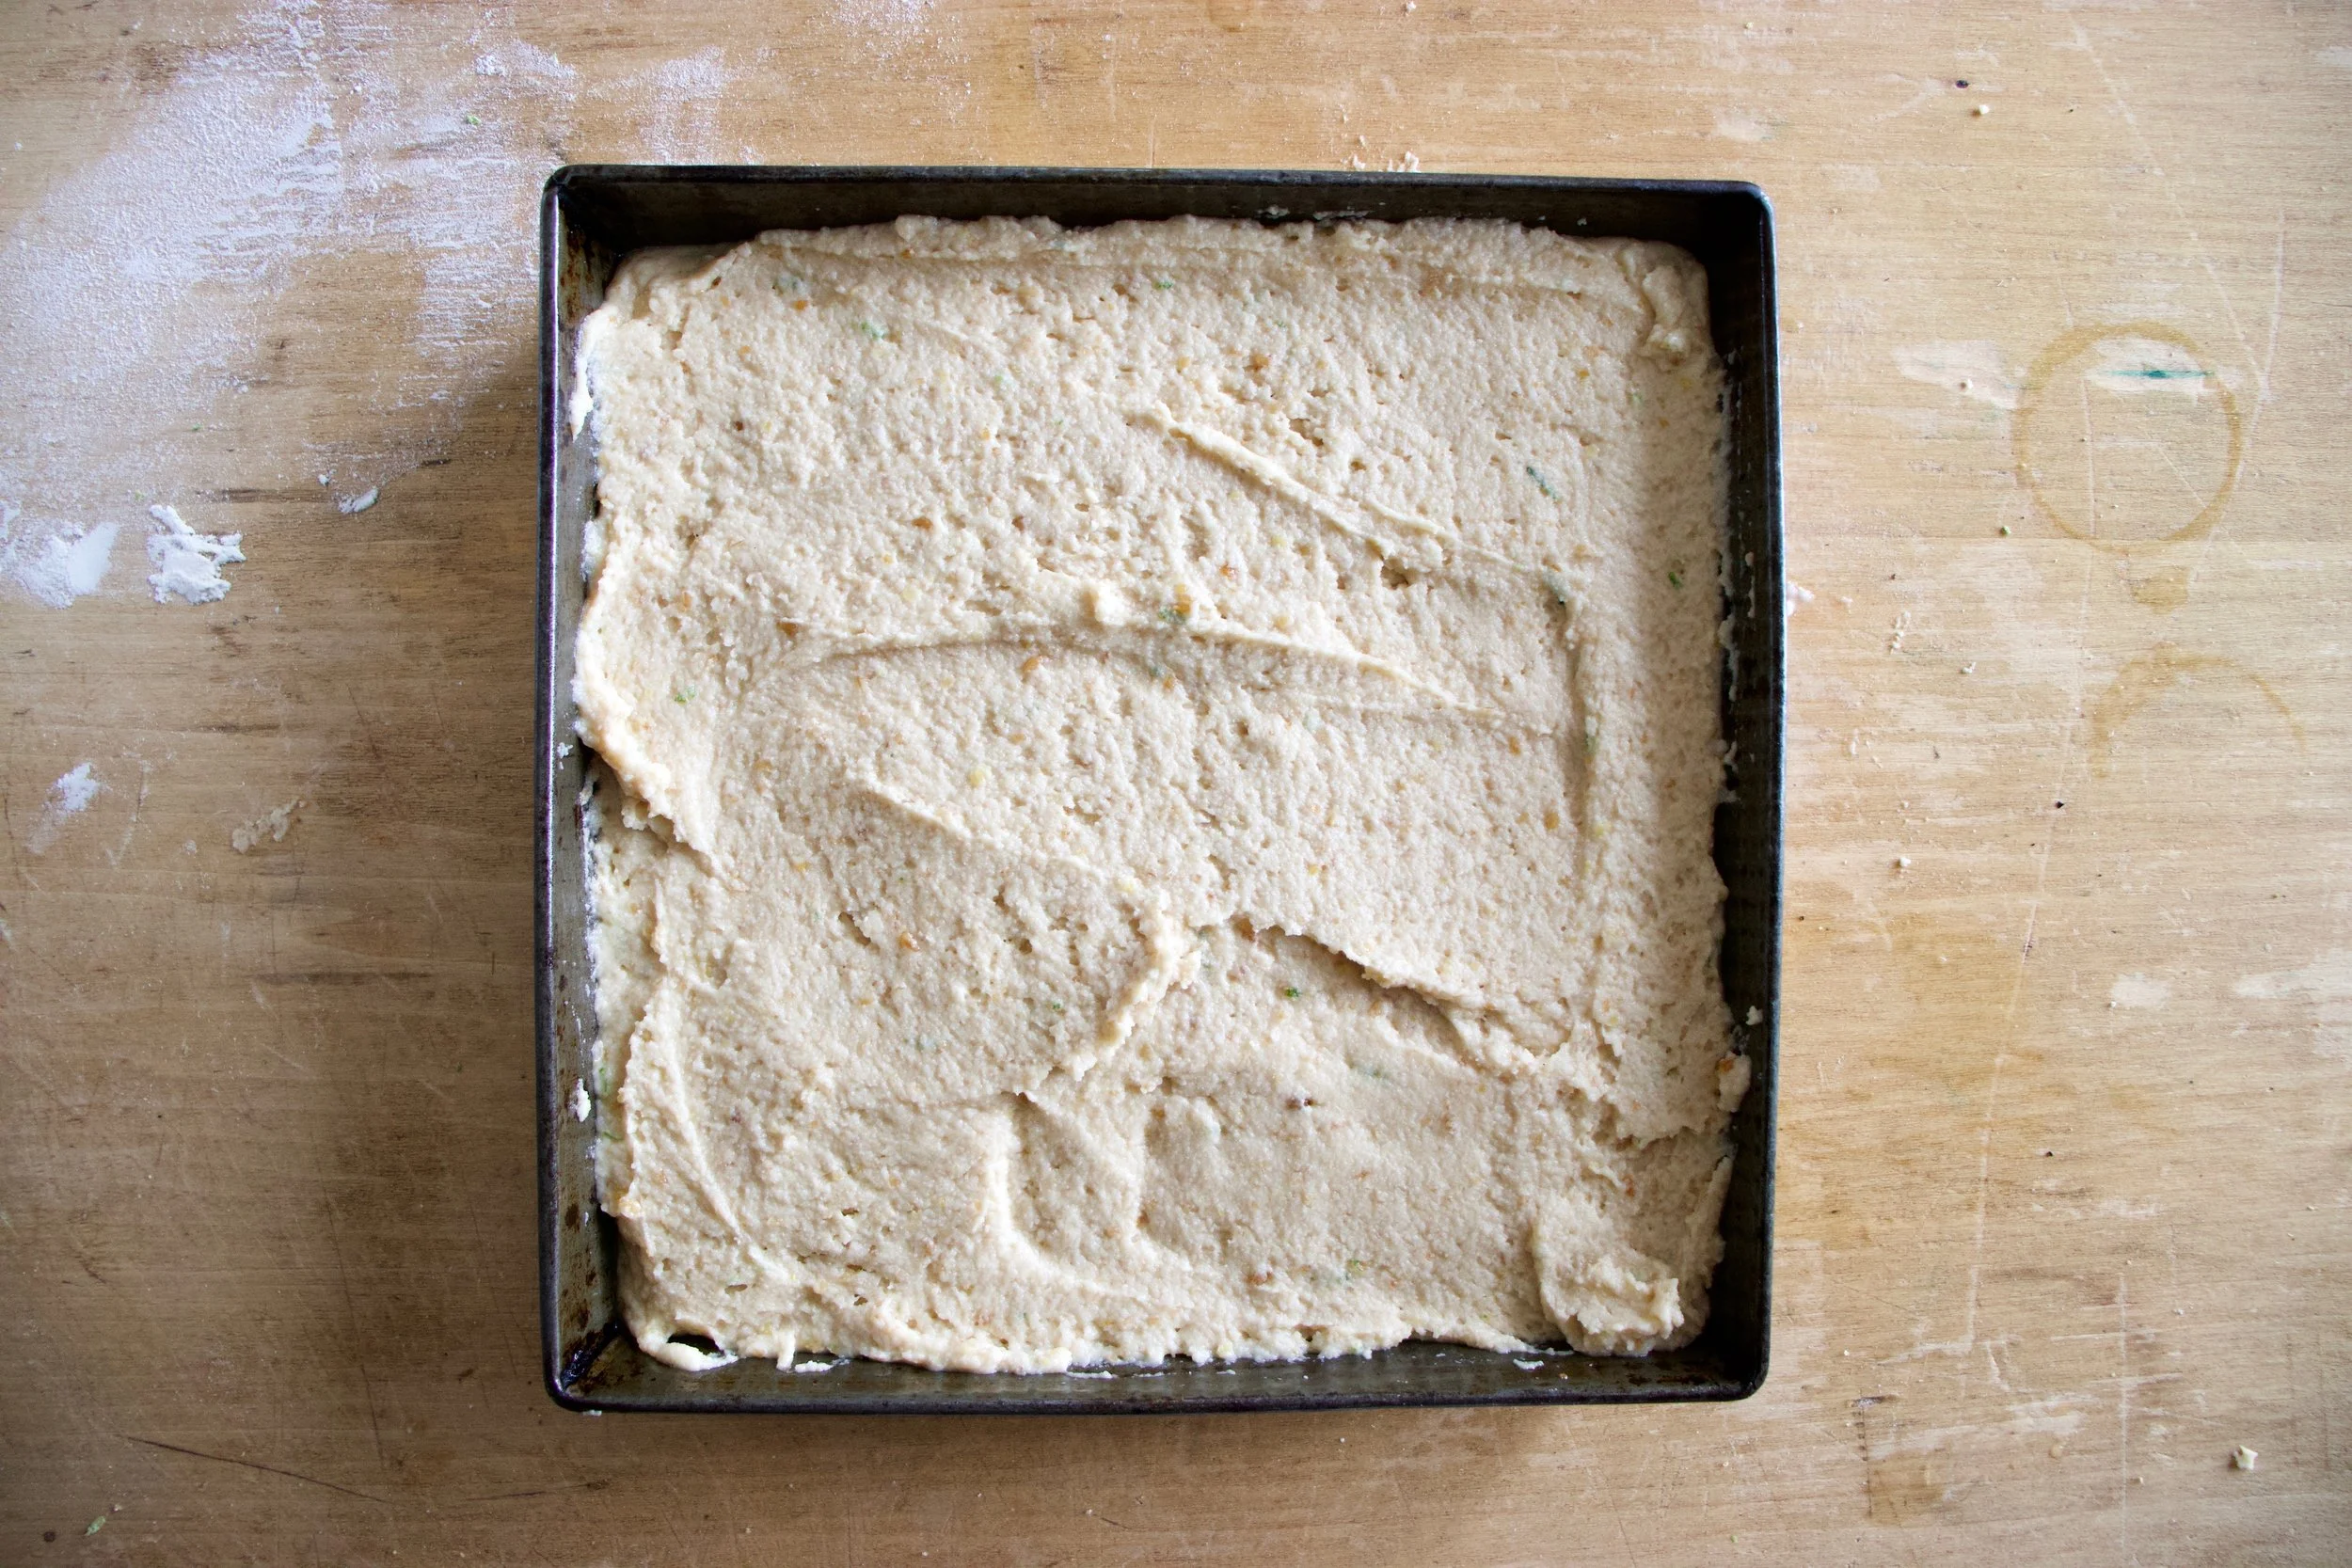
Dump the cake batter into a well greased baking pan and level it off with a spoon or spatula.
Now it%u2019s oven time to bake into a great and well cake.
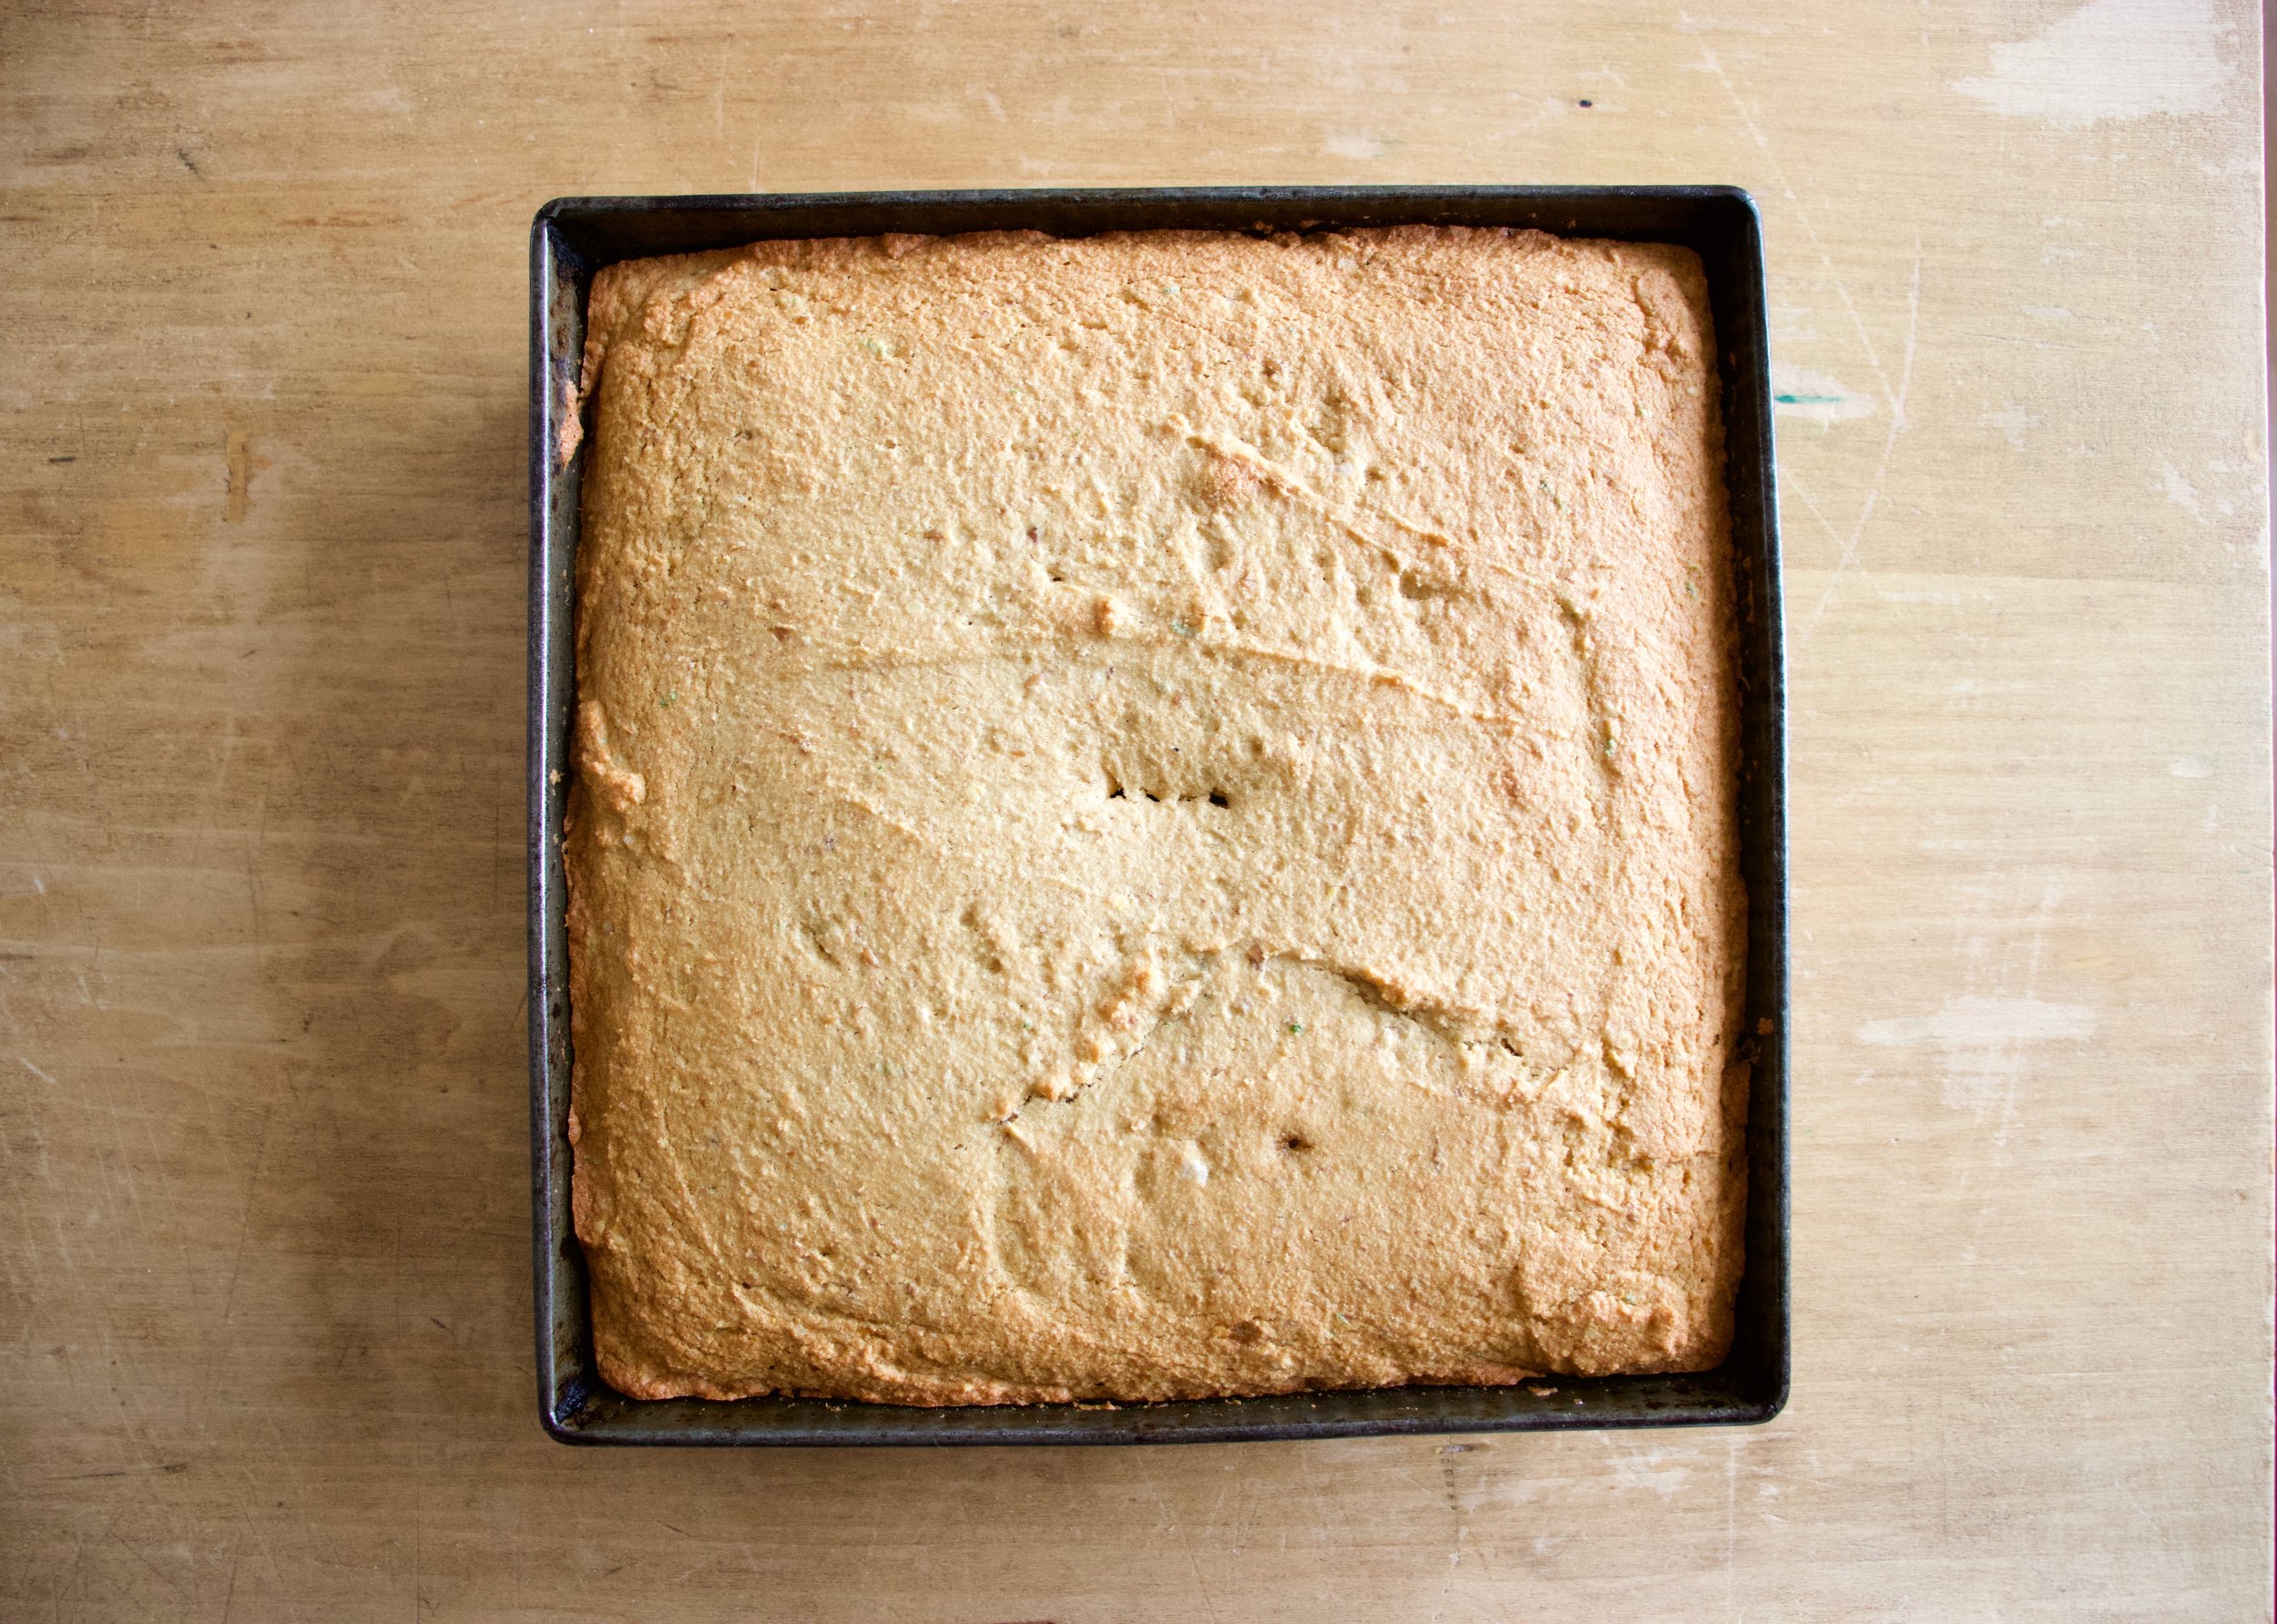
A cake out of the oven, great and well. Golden brown and smells of all the goodness that a coconut cake could possible smell.
While cake is cooling, which it should be now, make the glaze. Powdered sugar, lime zest, and lime juice. Mix until it%u2019s glazy.

Pour the glaze all over cooled cake.

Don%u2019t forget the shredded coconut. Get it on before the glaze starts to set.
And then it%u2019s just the matter of cutting cake%u2026%u2026.

You know once you cut it, that means snack time right? Coconut lime snack cake for all of your coconut time, lime time, hungry snack time needs.
Keep it good.
-C
Makes a 9×9 cake
-
1 1/2 cups all purpose flour
-
1/2 cup coconut flour
-
3/4 packed cup brown sugar
-
1 teaspoon salt
-
1 teaspoon baking soda
-
1 teaspoon baking powder
-
1/2 cup coconut oil (warmed to liquid)
-
1 1/4 cup plant milk (I used almond)
-
2 flax eggs (2 tablespoons ground flax seeds with 1/2 cup warm water)
-
1 teaspoon vanilla
-
1 tablespoon apple cider vinegar
-
A lime
-
For the glaze
-
3/4 cup powdered sugar
-
a lime
-
1/4 cup or so toasted shredded coconut to sprinkle on top (optional)
Preheat oven to 350
In a large bowl, mix together the bbrown sugar, flax eggs, warmed coconut oil, vanilla, and apple cider vinegar until completely incorporated. Next dump in the flour, coconut flour, salt, baking soda and baking powder. Zest the lime into bowl. Start mixing, adding in the juice of the lime and the plant milk. Mix it all together until completely incorporated.
Dump mixture into a well greases 9×9 baking pan and level off with a spoon or spatula. Place into oven and bake for 30-35 minutes or until golden brown and a tester stuck into the middle of cake comes out clean.
Once baked, remove from oven, let cool in pan for a few minutes then carefully remove cake from pan and let cool on a wire rack.
While cake is cooling, make the glaze. Just zest other lime into powered sugar then add the juice (or as much juice as you needed) of the lime until a pourable glaze forms. If your lime is not particularly juicy enough and the glaze is still really thin, just add a splash of water to thin out as needed.
And when cake is completely cooled, pour glaze all over cake and cover with toasted coconut flakes.
Now cut. And eat.
Store left over cake in a air tight container for 3-4 days. Individual pieces freeze well for all your future snacking needs.

I have very strong feelings for heart shaped baked goods. I think that everything, all year round, should be heart shaped. How lovely would that be? It would be ever so lovely, or I would think so anyway. And yes, ok, I was thinking about Valentines Day when I made these cupcakes but don%u2019t let that be the only reason you make a cupcake, cake, or any other baked good into the shape of a heart or pink for that matter.. Hearts are just so sweet and cute and dare I say cuddly? (Can you cuddle baked goods? Let me know if you have and do. We should talk about that). And pink is just a fantastic color, especially when it is the color of the flavor. Purple-y pink equals a taste like berry so all just makes sense.
Anyways. Cupcakes. Made with nutty almond meal to taste all nutty, frosted with blackberry and clementine frosting which is a pairing that all party and non party people will love. A down right deeelightful combination that will, no matter your circumstance in life, make you smile. Because lets get this clear, these cupcakes might look all lovey dovey and Valentines Day-e and are very much a perfect Valentines Day treat, but also can be an everyday, run of the milll, straight up any day, all day cupcakes. Valentines Day does not own the heart or pink.
These cupcakes are for you to love and you don%u2019t need to worry if they love you back. That would be weird.
Slightly off topic thought. How awesome would it be if someone made a cute little teddy bear that when you squeezed it it would scream %u201cWHAT THE HELL! GET OFF ME!%u201d Hahahaha. That would be amazing.
To the cupcakes!

The stuff. Flour, almond meal, baking soda, baking powder, salt, sugar, soy milk, oil, vanilla extract, and apple cider vinegar. Also some blackberry jam, powdered sugar, some vegan butter, and a clementine.

In a big bowl, whisk together the granulated sugar, flour, almond meal, salt, baking powder, and baking soda.

Add in the oil, vanilla, milk, and apple cider vinegar. Mix until fully incorporated.

And that is some mixed batter.
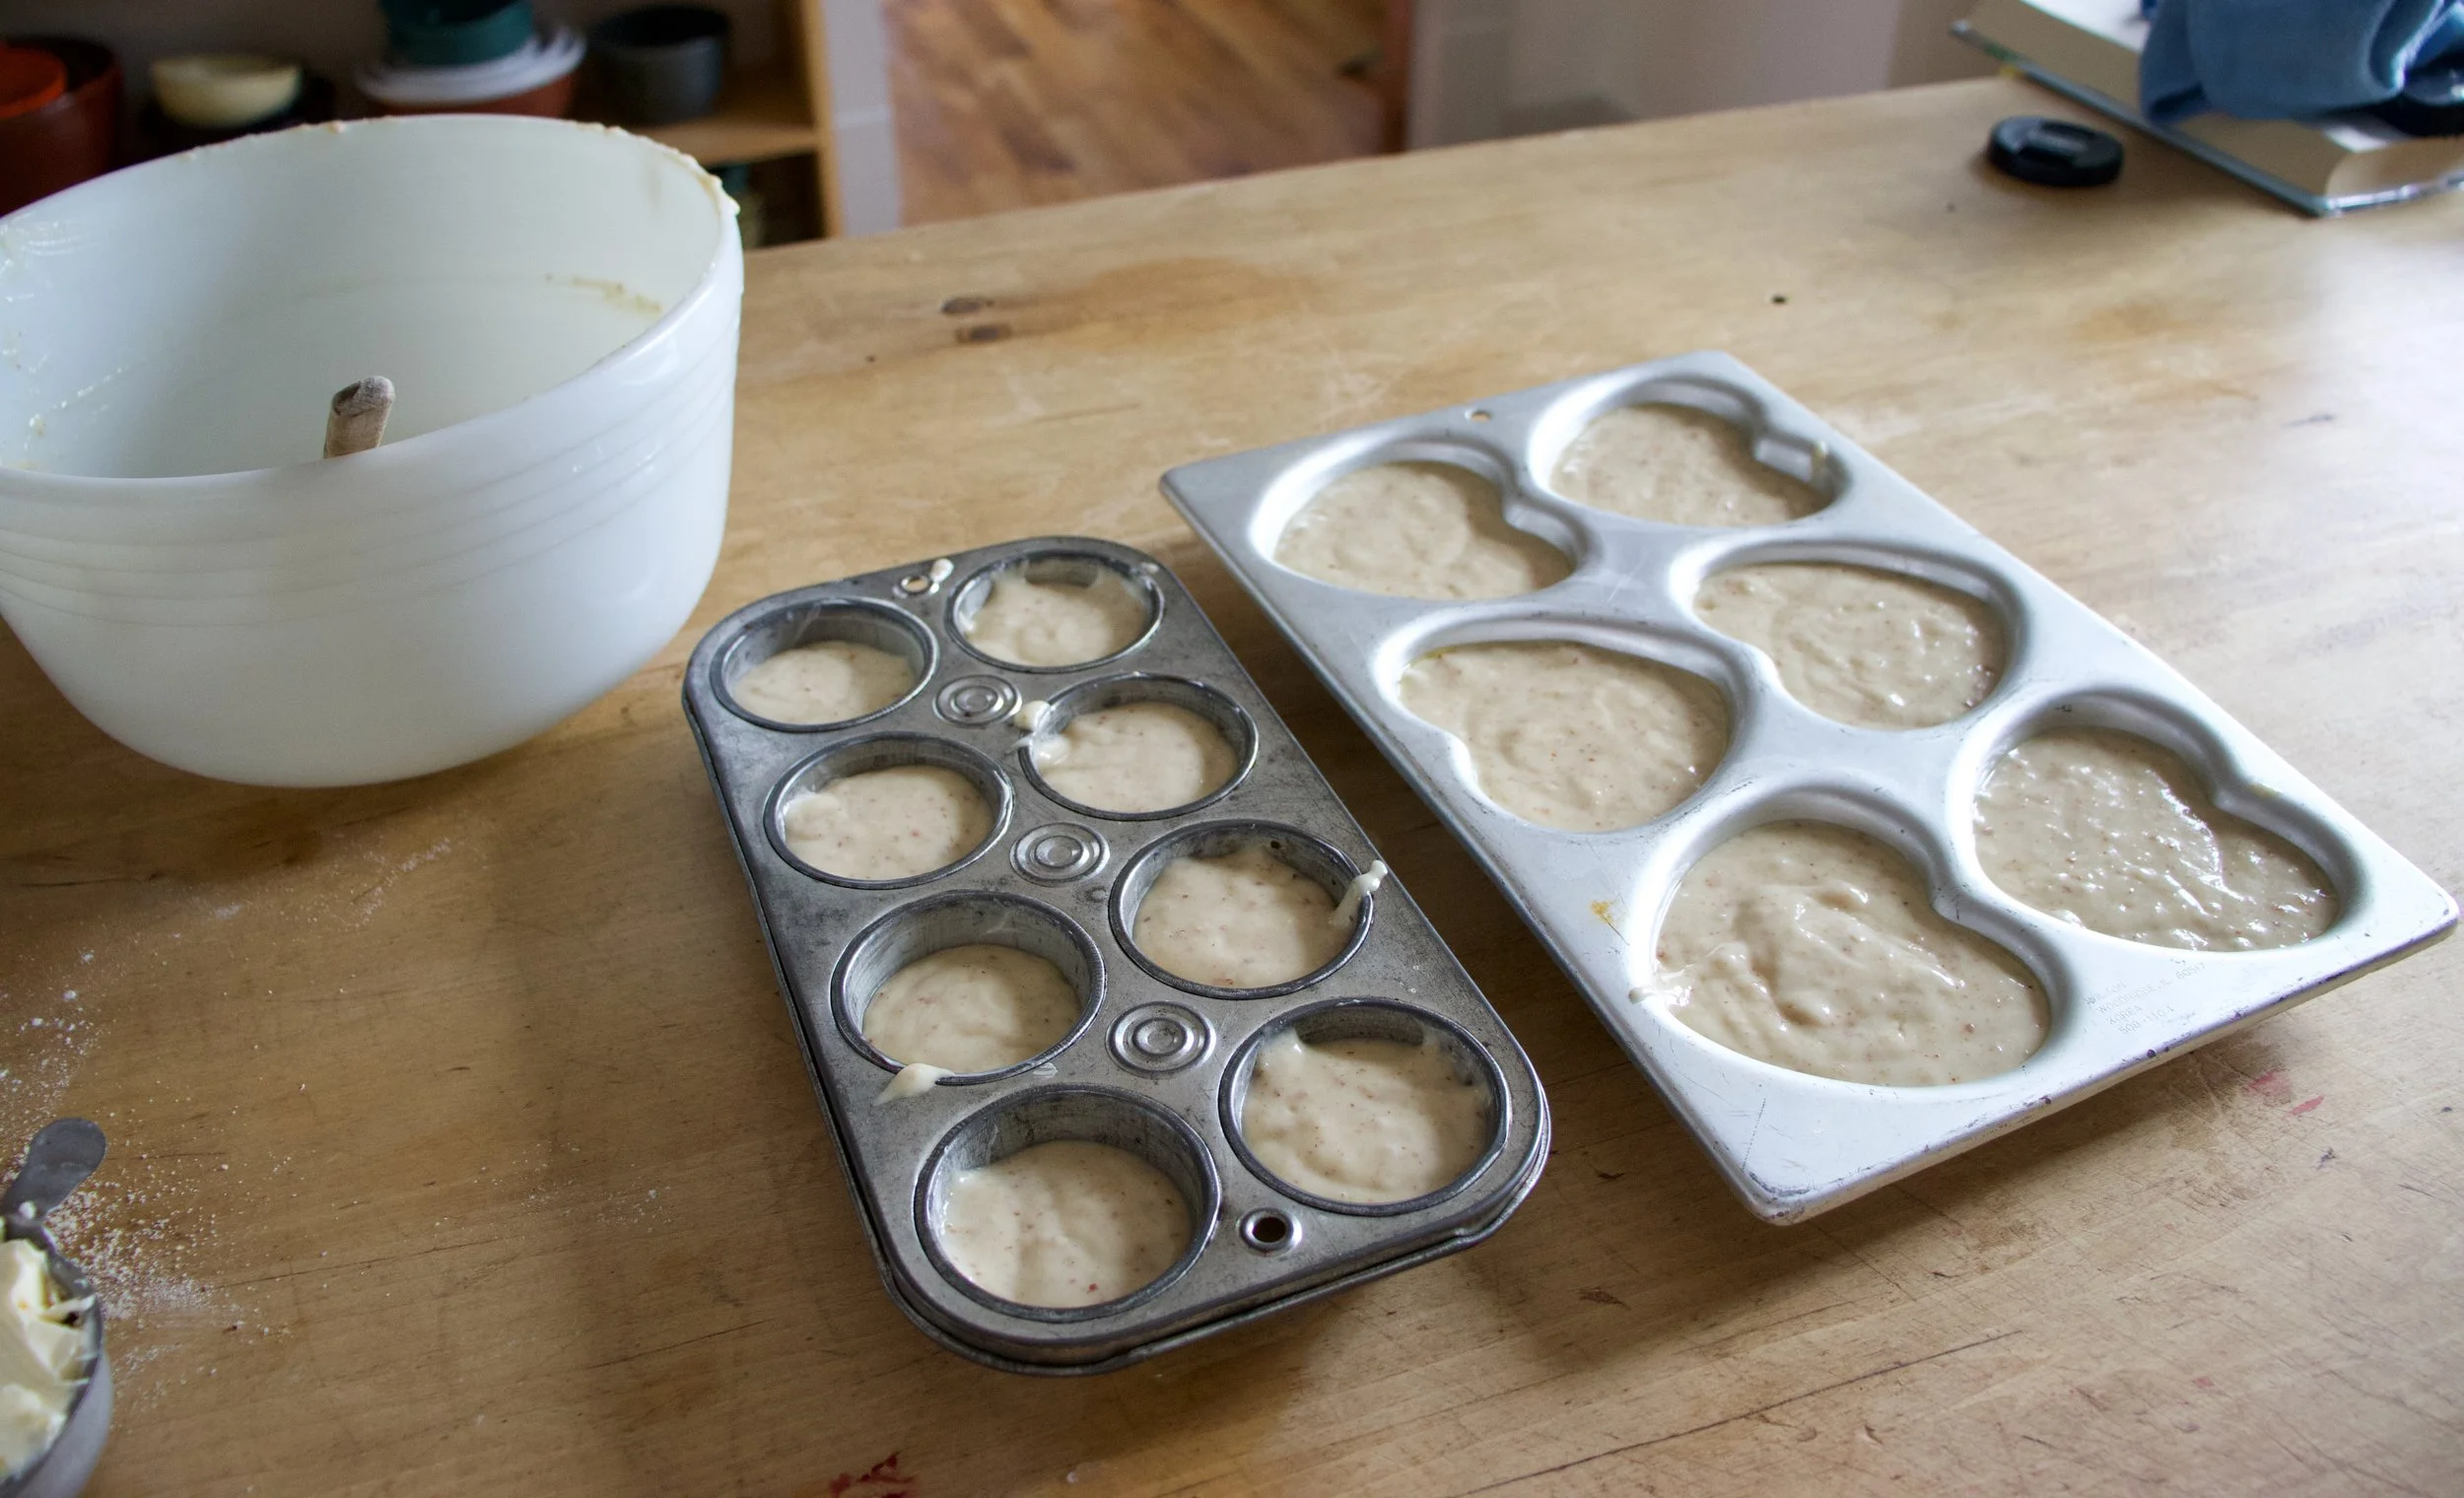
Scoop the batter into well greased muffin tins. I used to different shapes and sizes because I wanted too. You can do the same, just be aware different sizes will cook at different times.
And into the hot oven they go.
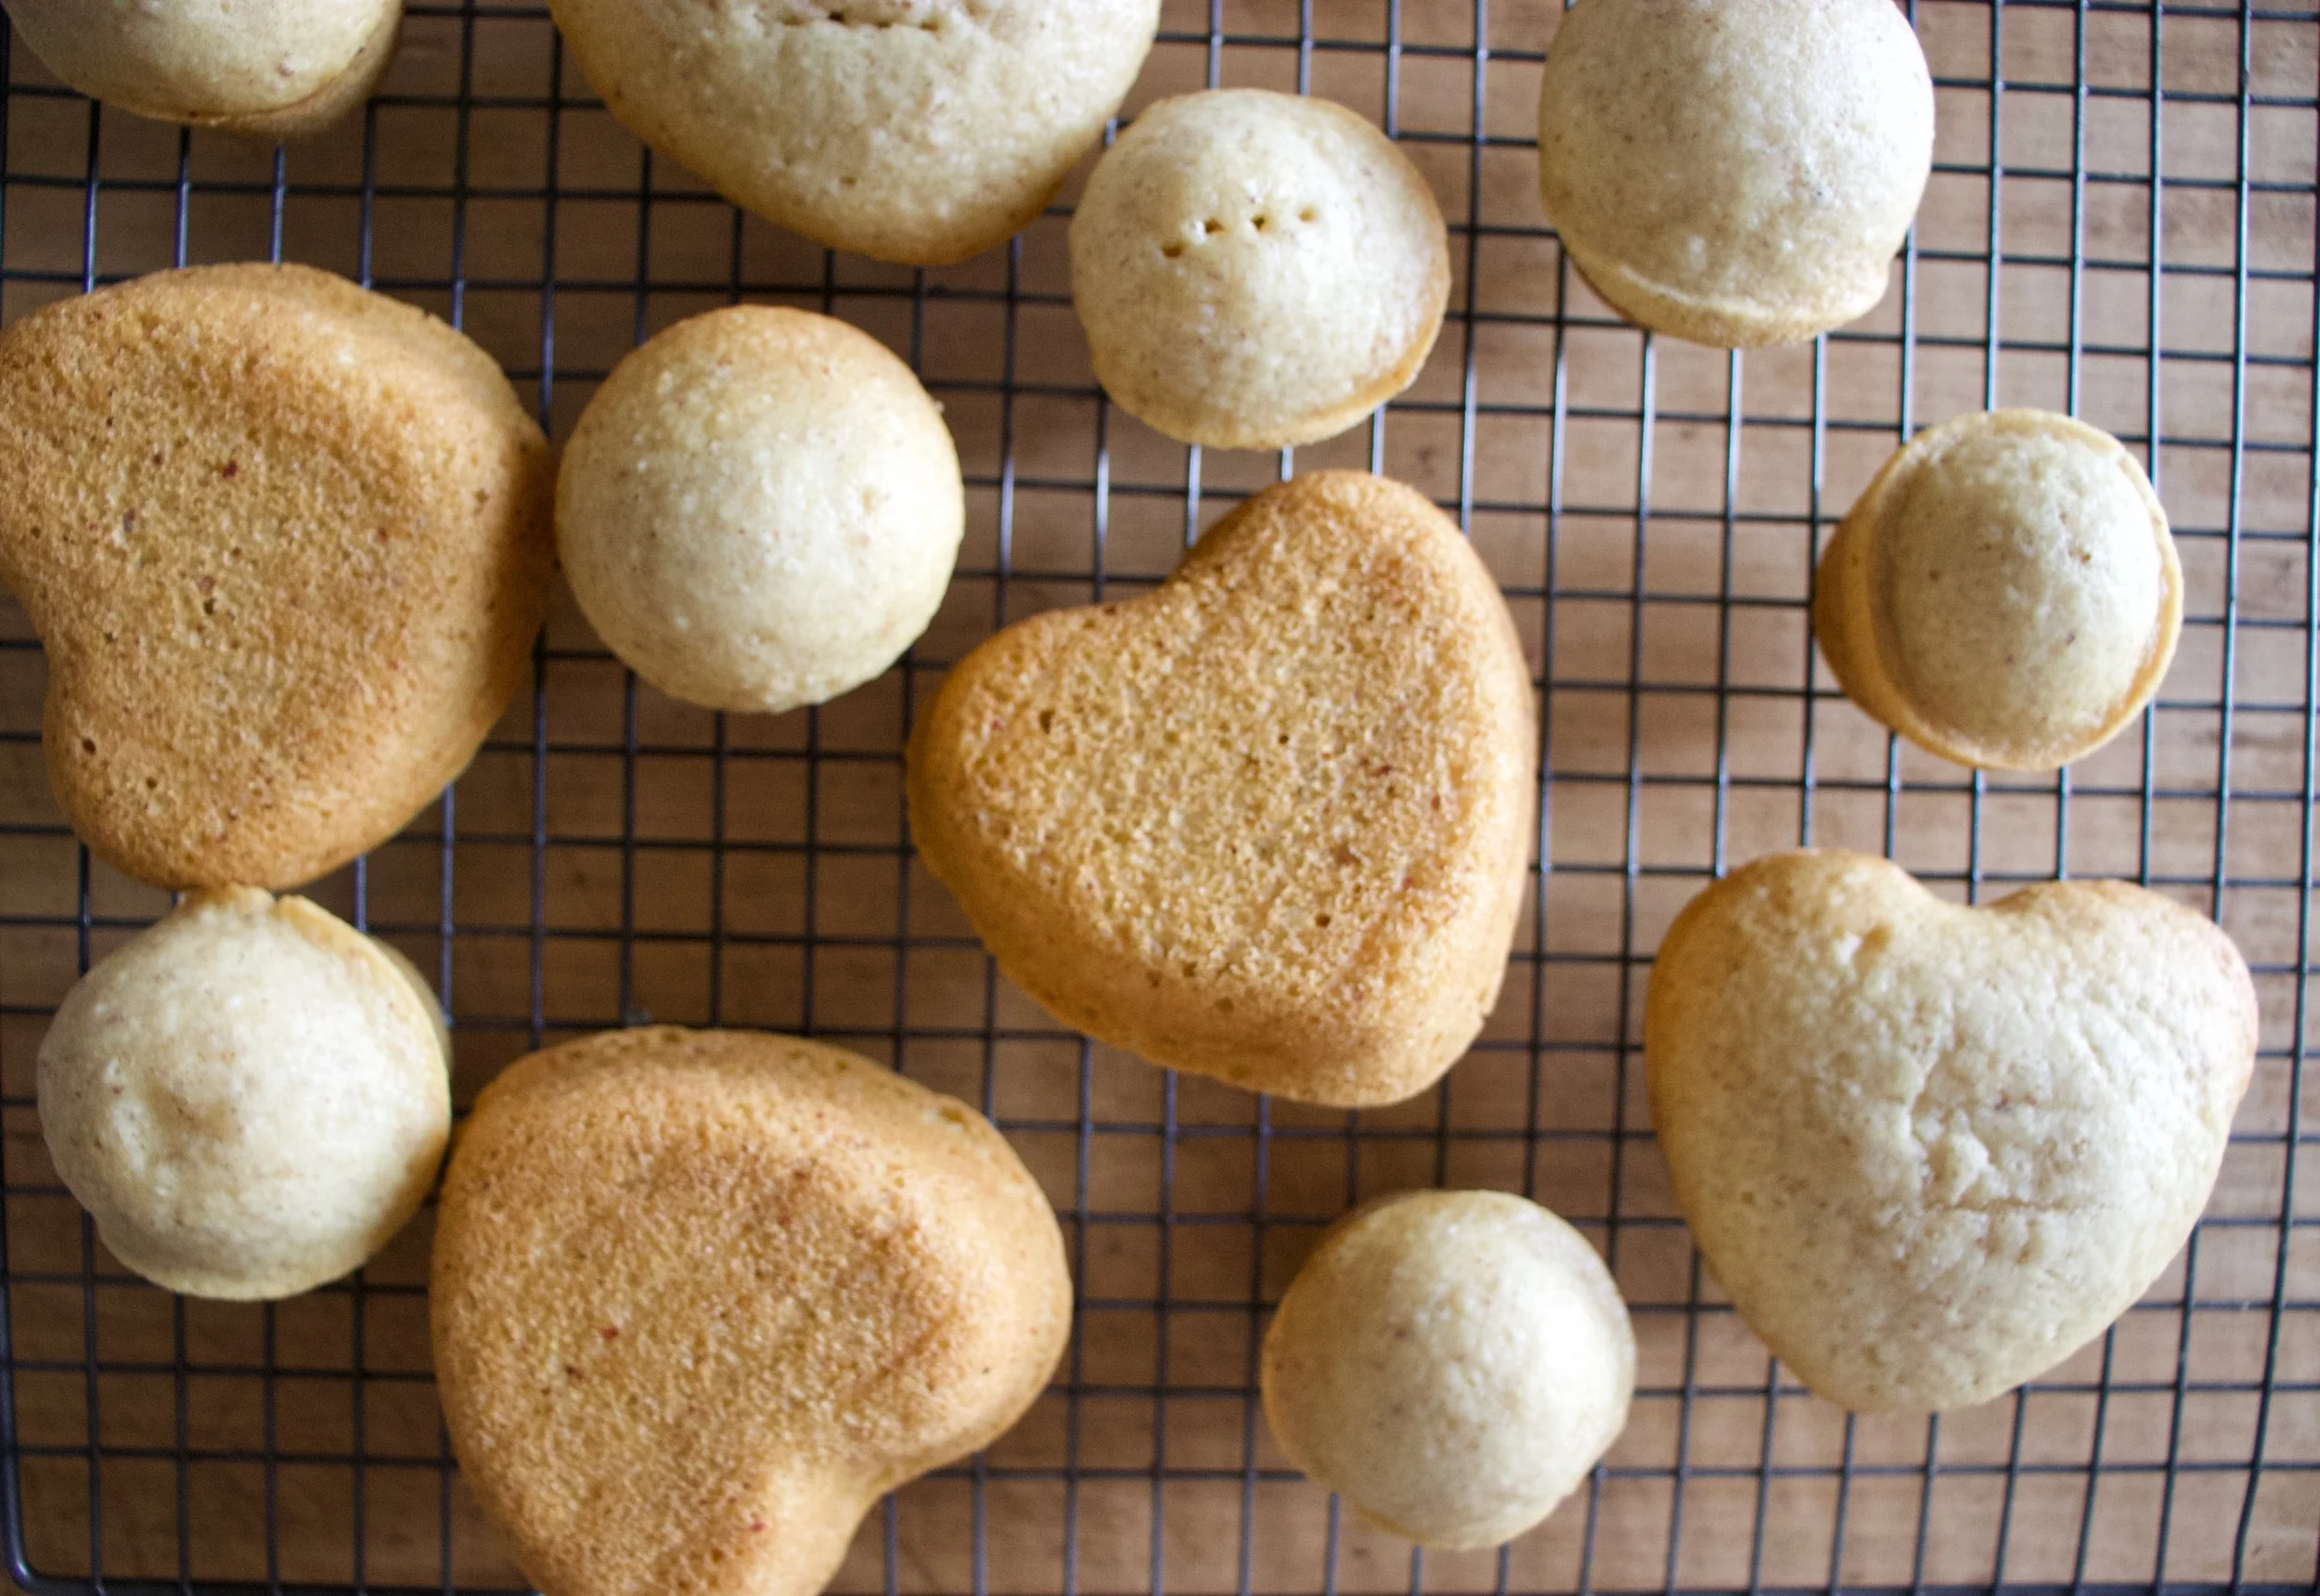
Baked, popped out of the tins, and cooling to cool.
Frosting time. Butter, clementine zest, and jam mixed together makes for the prettiest color.

Add in the powdered sugar and juice of the clementine and beat with a beater.
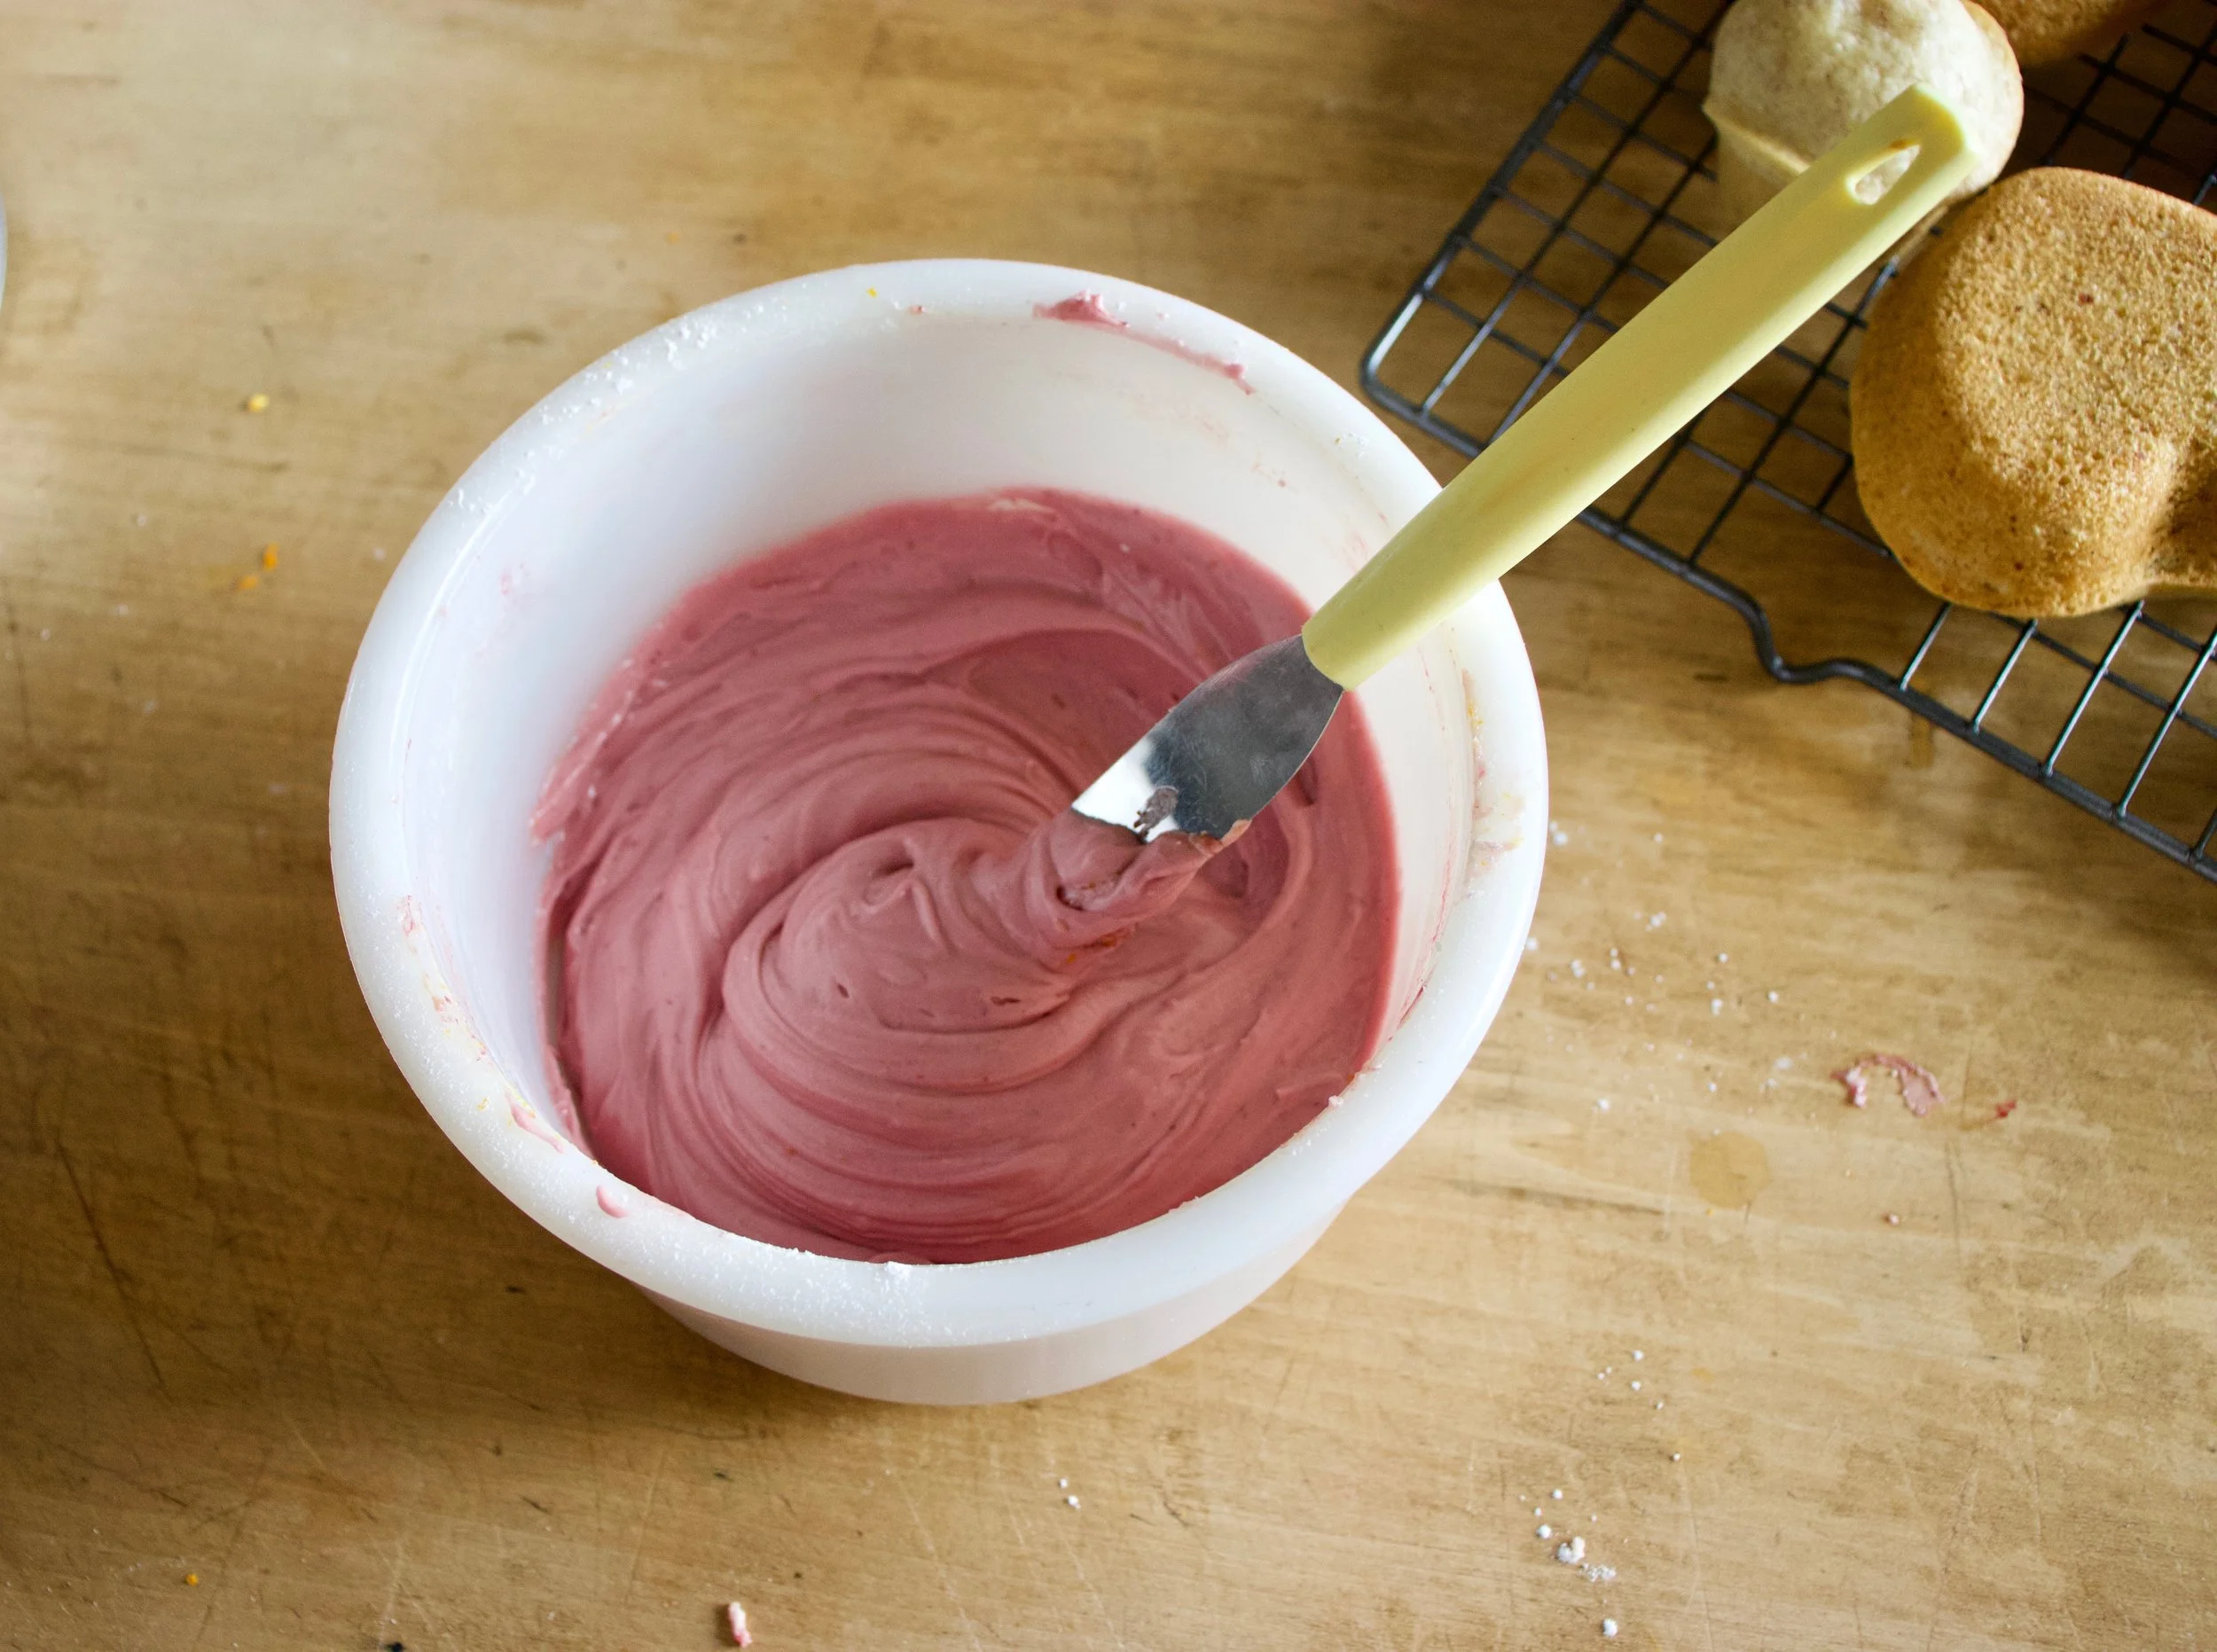
Pretty pink frosting. All natural.

And now that the cupcakes are cooled (you must wait until they are completely cooled) get them frosted.

And of course, adding sprinkles will only make them that much better.

And now you got the cupcakes which makes it cupcake time.
Look at that smile. Thats a smile just for cupcakes, not at all because I told him too.
Happy happy.
-C
Makes 12-16 cupcakes (depending on size)
-
1 1/2 cups all purpose flour
-
1/2 cup almond meal
-
1/3 cup neutral oil
-
1 1/4 cup almond milk
-
3/4 cup white sugar
-
1 teaspoon baking soda
-
1 teaspoon baking powder
-
1 tablespoon apple cider vinegar
-
1/2 teaspoon salt
-
1 teaspoon vanilla or almond extract
-
For the frosting
-
3 tablespoons blackberry jam or preserves with or without seeds
-
2- 2 1/2 cups powdered sugar
-
4 tablespoon vegan butter
-
1 clementine (zest and some juice)
Preheat oven to 350.
In a large bowl whisk together the flours, salt, baking soda and powder and sugar until fully combines. In a separate bowl mix together the oil, milk, vinegar, and vanilla. Pour into the dry and mix, by hand, until full incorporated. Scoop batter into well greased muffin tins (heart or other shape up to you) and place into oven for 13-18 minutes (shorter time for smaller cupcakes, longer for larger sized) or until lightly browned and a tester stuck into a cake comes out clean. Pull from oven when done and pop from tin. Place on a wire rack to cool.
While cakes are cooling, make frosting. Beat together the butter, zest of the clementine, and jam. Add in the sugar and the juice and beat until fully incorporated. If the consistency is to thin, add a little more sugar, to thick, more clementine juice or if out of juice, a splash of milk.
Once cupcakes are full cooled, frost, add sprinkle if you would like, and then the only thing left to do is eat them.
Eat cupcakes, store left overs in an air tight container in the fridge for up to a week.
This treat is a long time coming, like almost a years time%u2026Let me explain.%u00a0
One of the littles had requested a dessert of some type of almond pear situation for his birthday%u2026..last year. Of course I said yes, no problem, for your birthday, you got it. But I never got it. I actually completely forgot. Then a few months later, I remebemered, felt like a big D-bag and told %u00a0myself I still had to make something for the guy%u2026 and I forgot again.%u00a0Next time I remembered, I had just bought a bunch of pears and that was it. Make the kid something you bitch (is what I told myself) but heres the thing, I figured he forgot too and those pears were mighty tasty.(I know I am horrible)%u00a0
So just last week I was at the store, meandering through the produce, and noticed that local pears were on sale. This was it.%u00a0I knew it had to be done. I bought a large quantity (enough to bake with and eat) and got to making that little his birthday treat request. I went with bars.. nothing to sweet, nothing to crazy, lot and lots of almond and pear flavors. Perfect for breakfast or an afternoon snack, and made even better by the fact that they were made for him, and it isn’t even his birthday.
So I made them, and brought them to his house, waited for him to get off the bus from school, and handed him his long awaited pear almond treat. He was so happy, it made me feel like shit.(I so should have made him something a year ago)%u00a0%u00a0But oh well,%u00a0%u00a0he got them right? And this way is much more a surprise then if I had actually made them when I said that I would. An unexpected, not your birthday, birthday treat!
Right here guys%u2026Still the Best Aunt EVER!
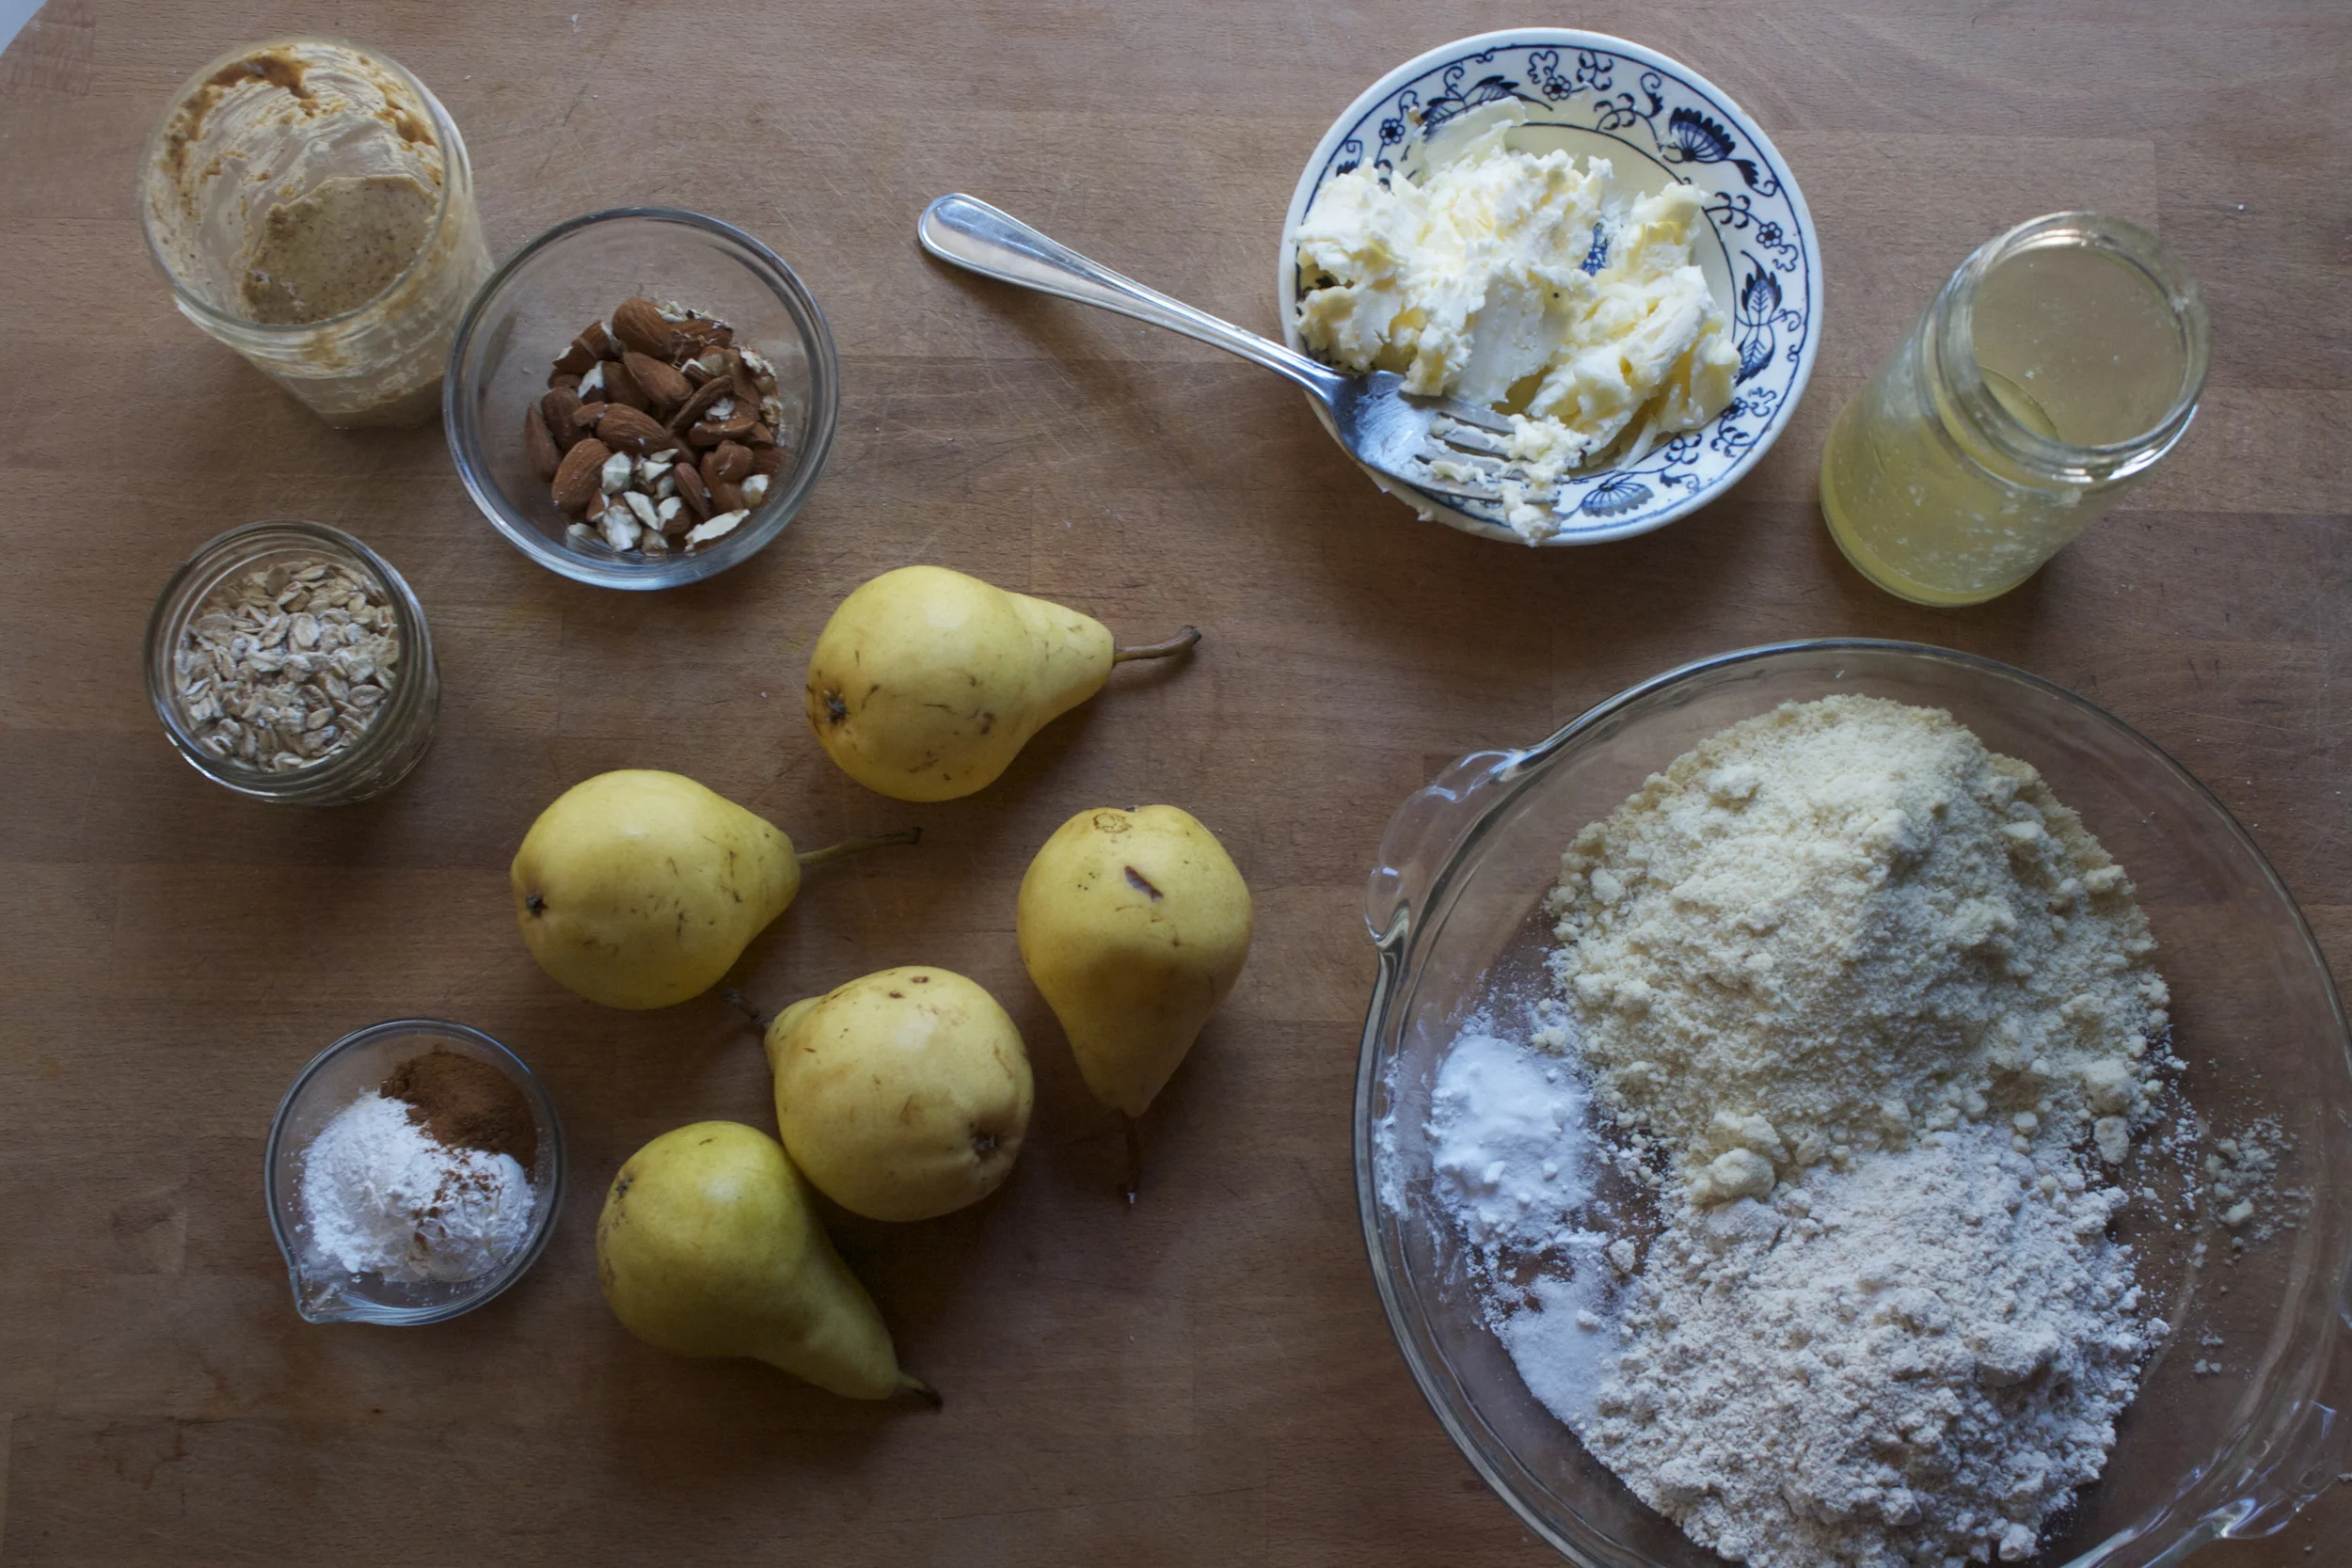
The stuff. Alond flour, oat flour, baking soda ,salt, earth balance and a little honey. We also need some rolled oaths almond butter and almonds. And of course we need pears, with a little corn starch and a smidge of cinnamon.

Nice ripe pears get thinly sliced, seeds and stems removed.

Tossed into a bowl with the starch and cinnamon and set aside.%u00a0
The oat and almond flour gets mixed together with the salt and the baking soda, then mix together with the earth balance and honey until it turns into a dough.( I used my hands to mix it together%u2026it worked better then a fork)
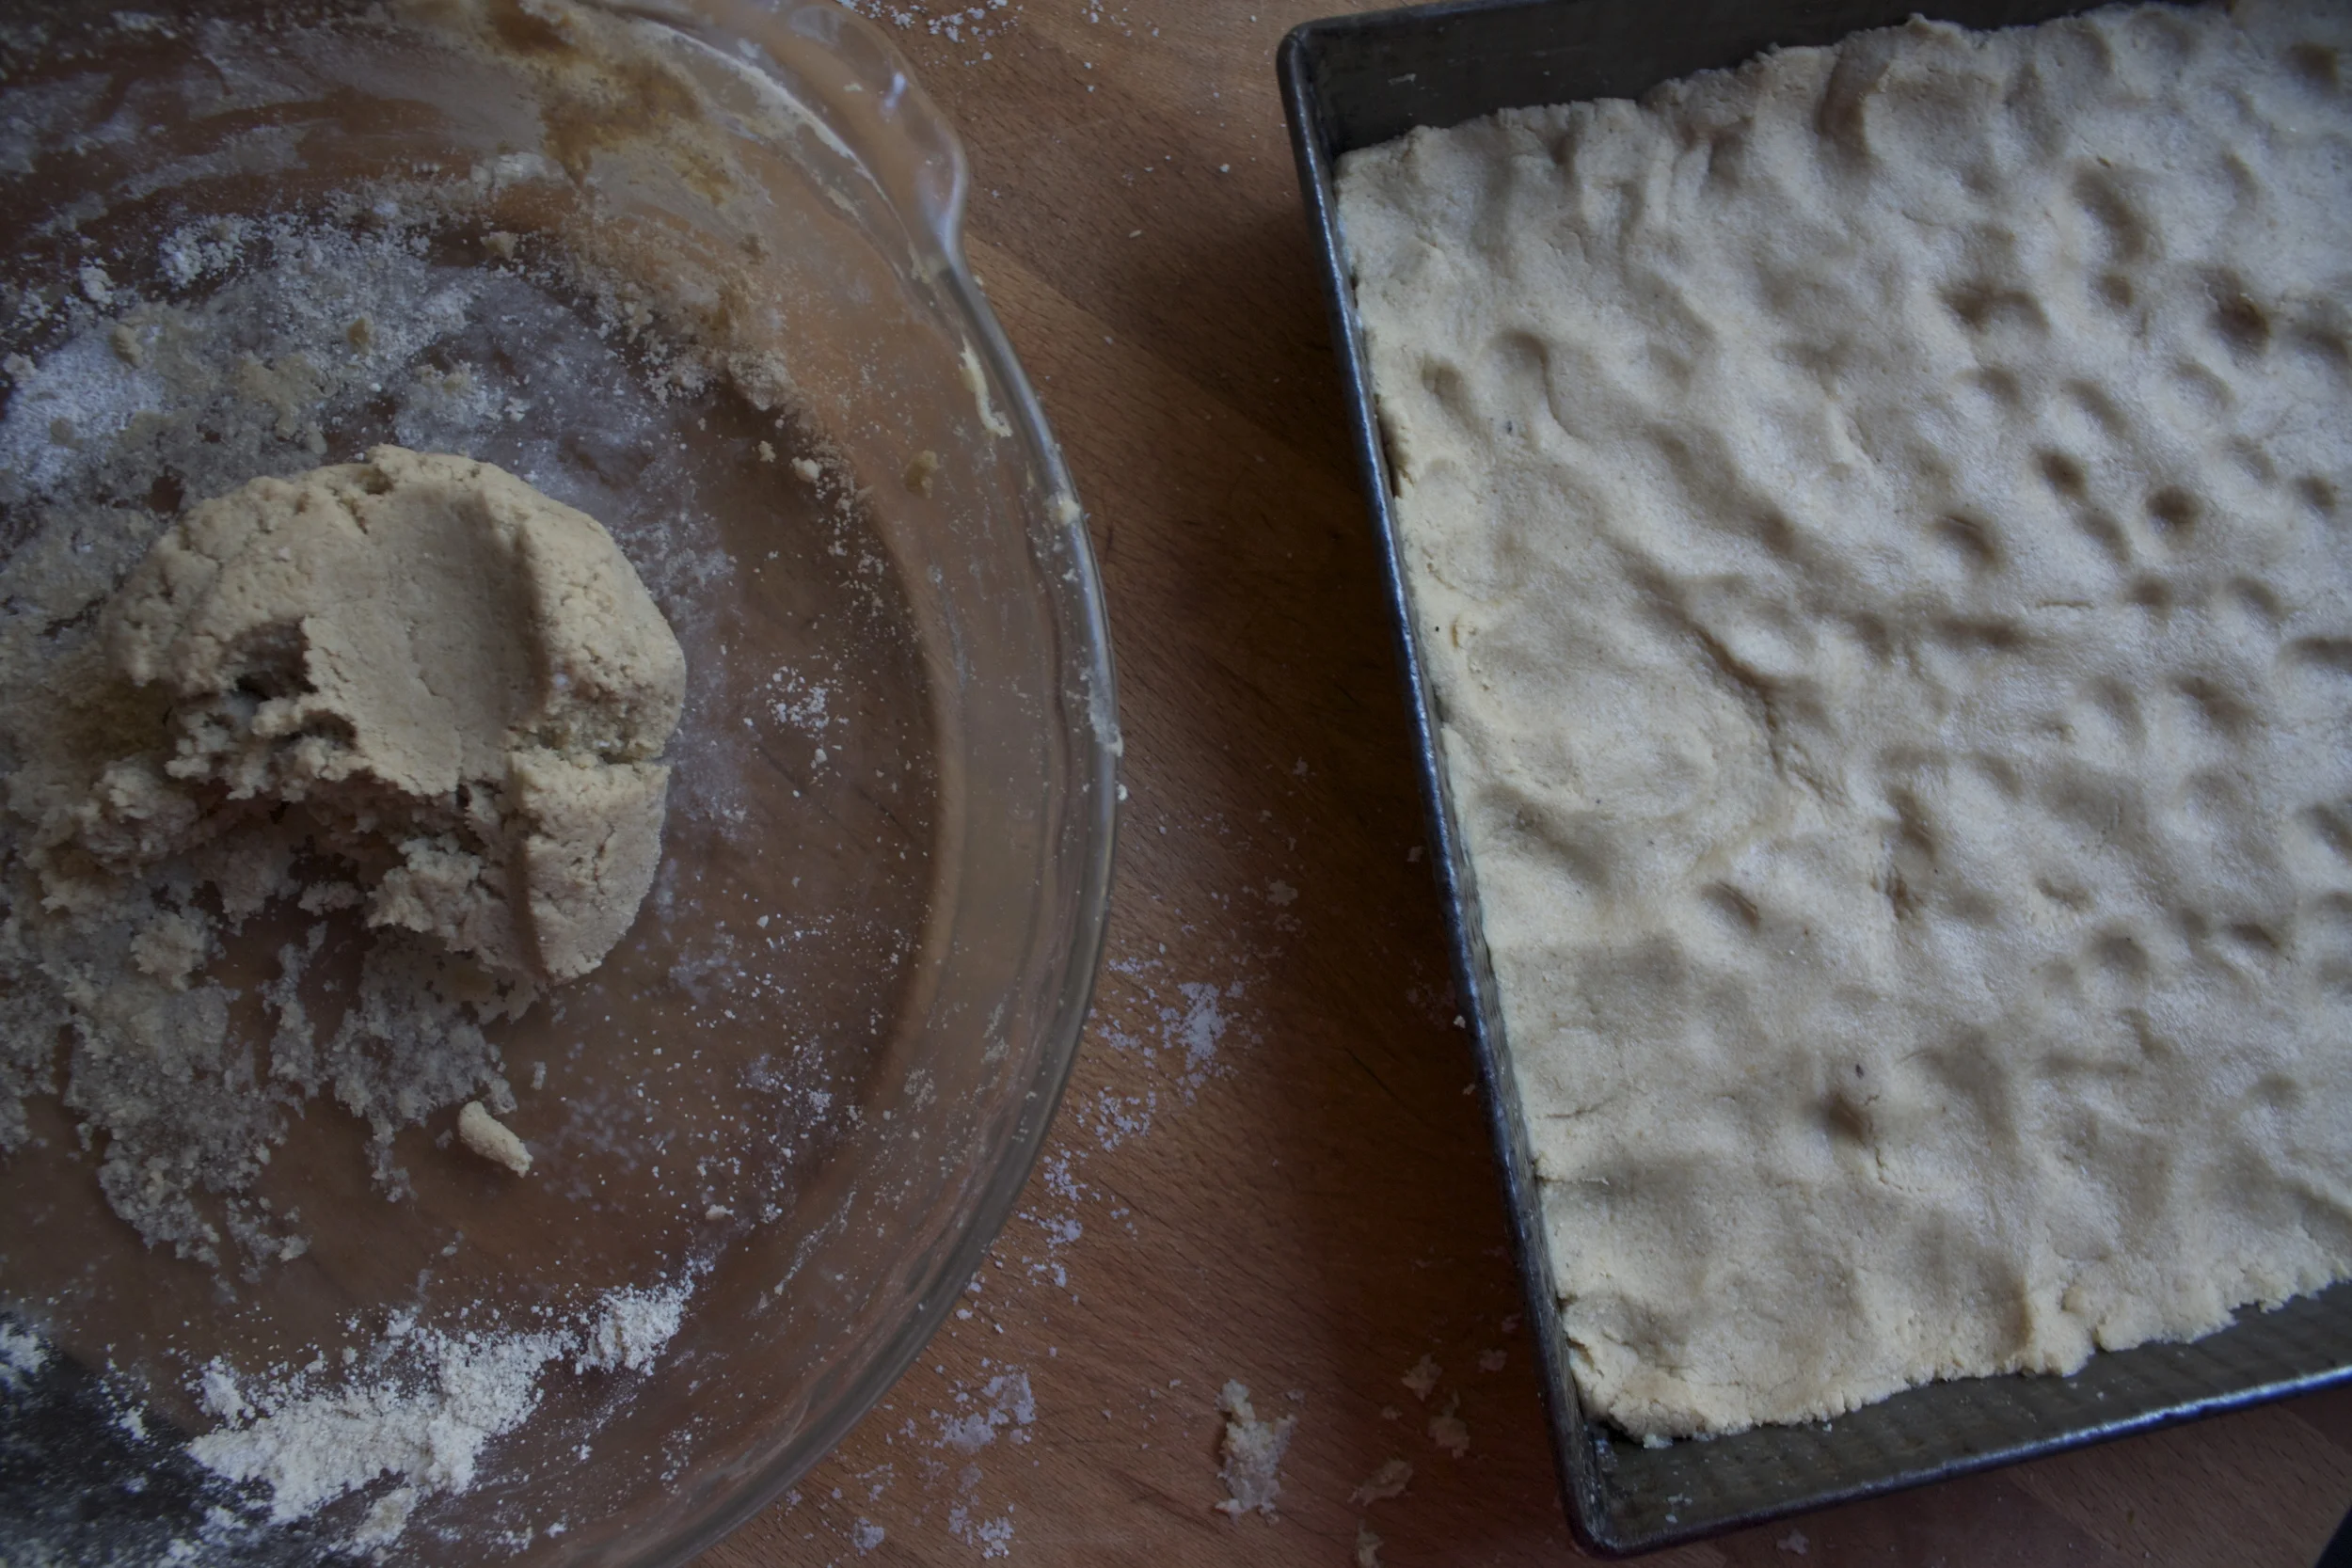
Break off about a 1/4 of the dough and stick back in bowl. Take the rest and evenly press into the bottom of a 9×9 baking pan.
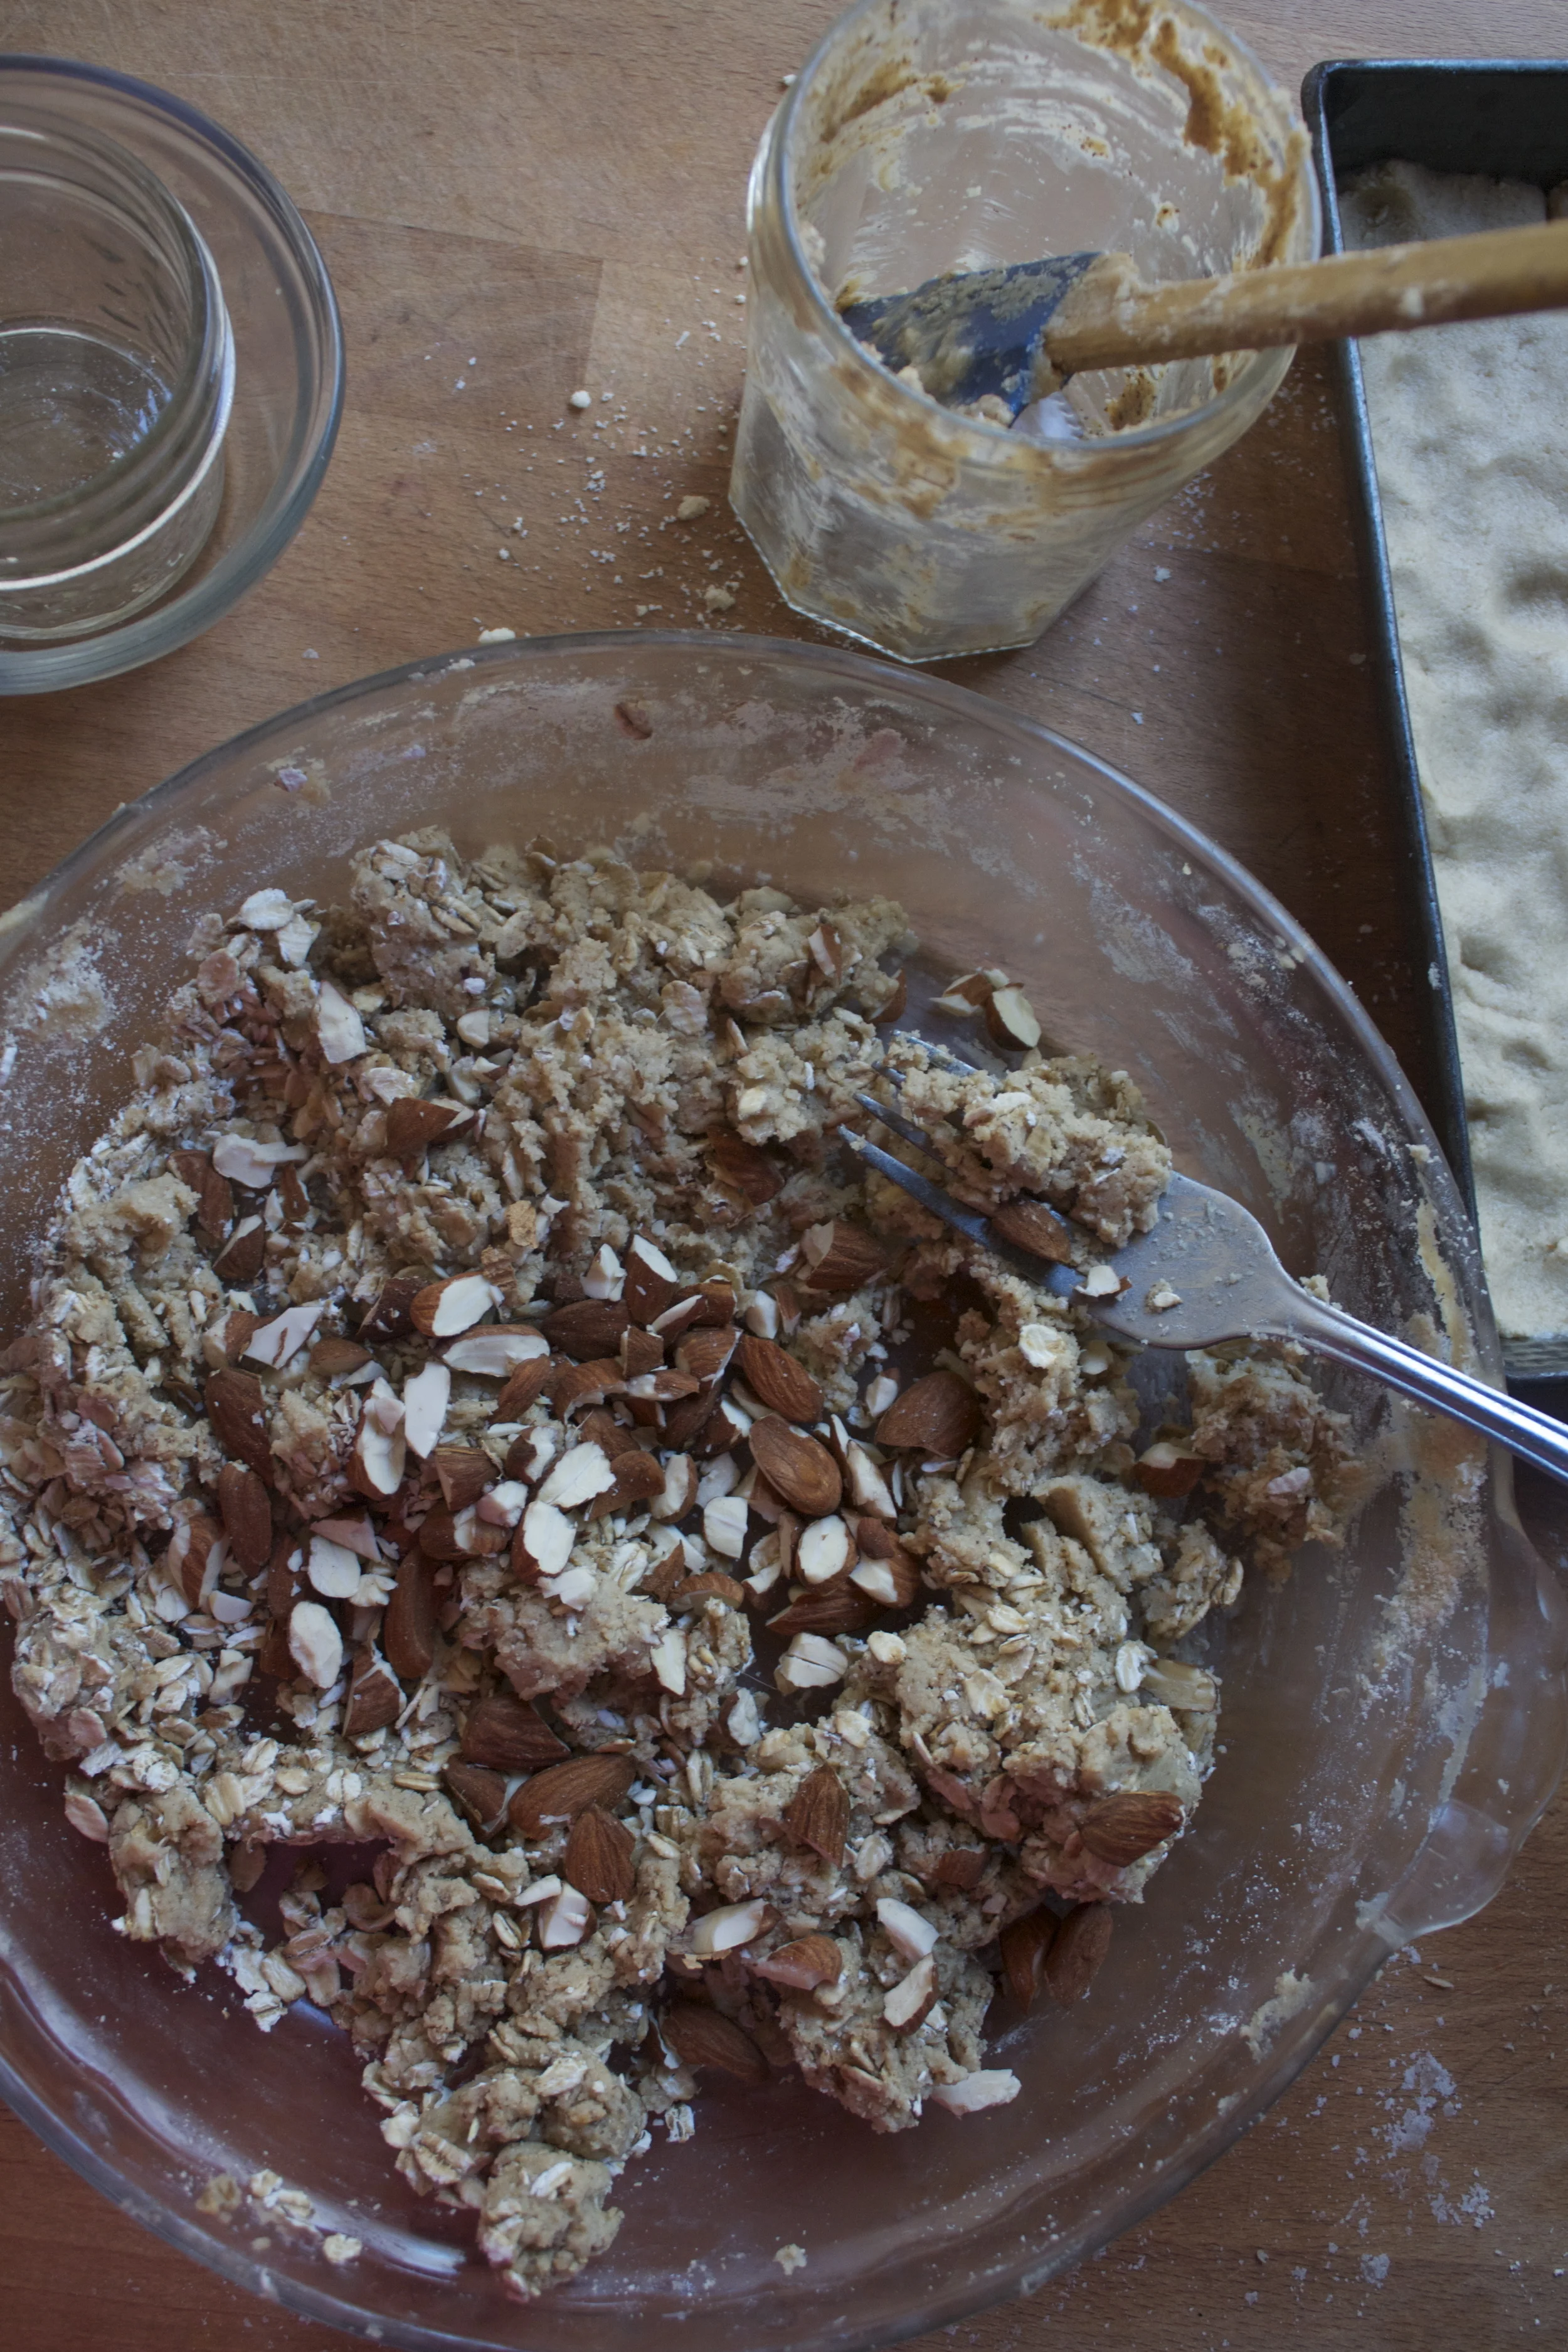
Take the remaing dough and mix in the almonds, oats, and almond butter to form the crumble.

Dump the pears on the crust, making sure the are level and pretty evenly layered.
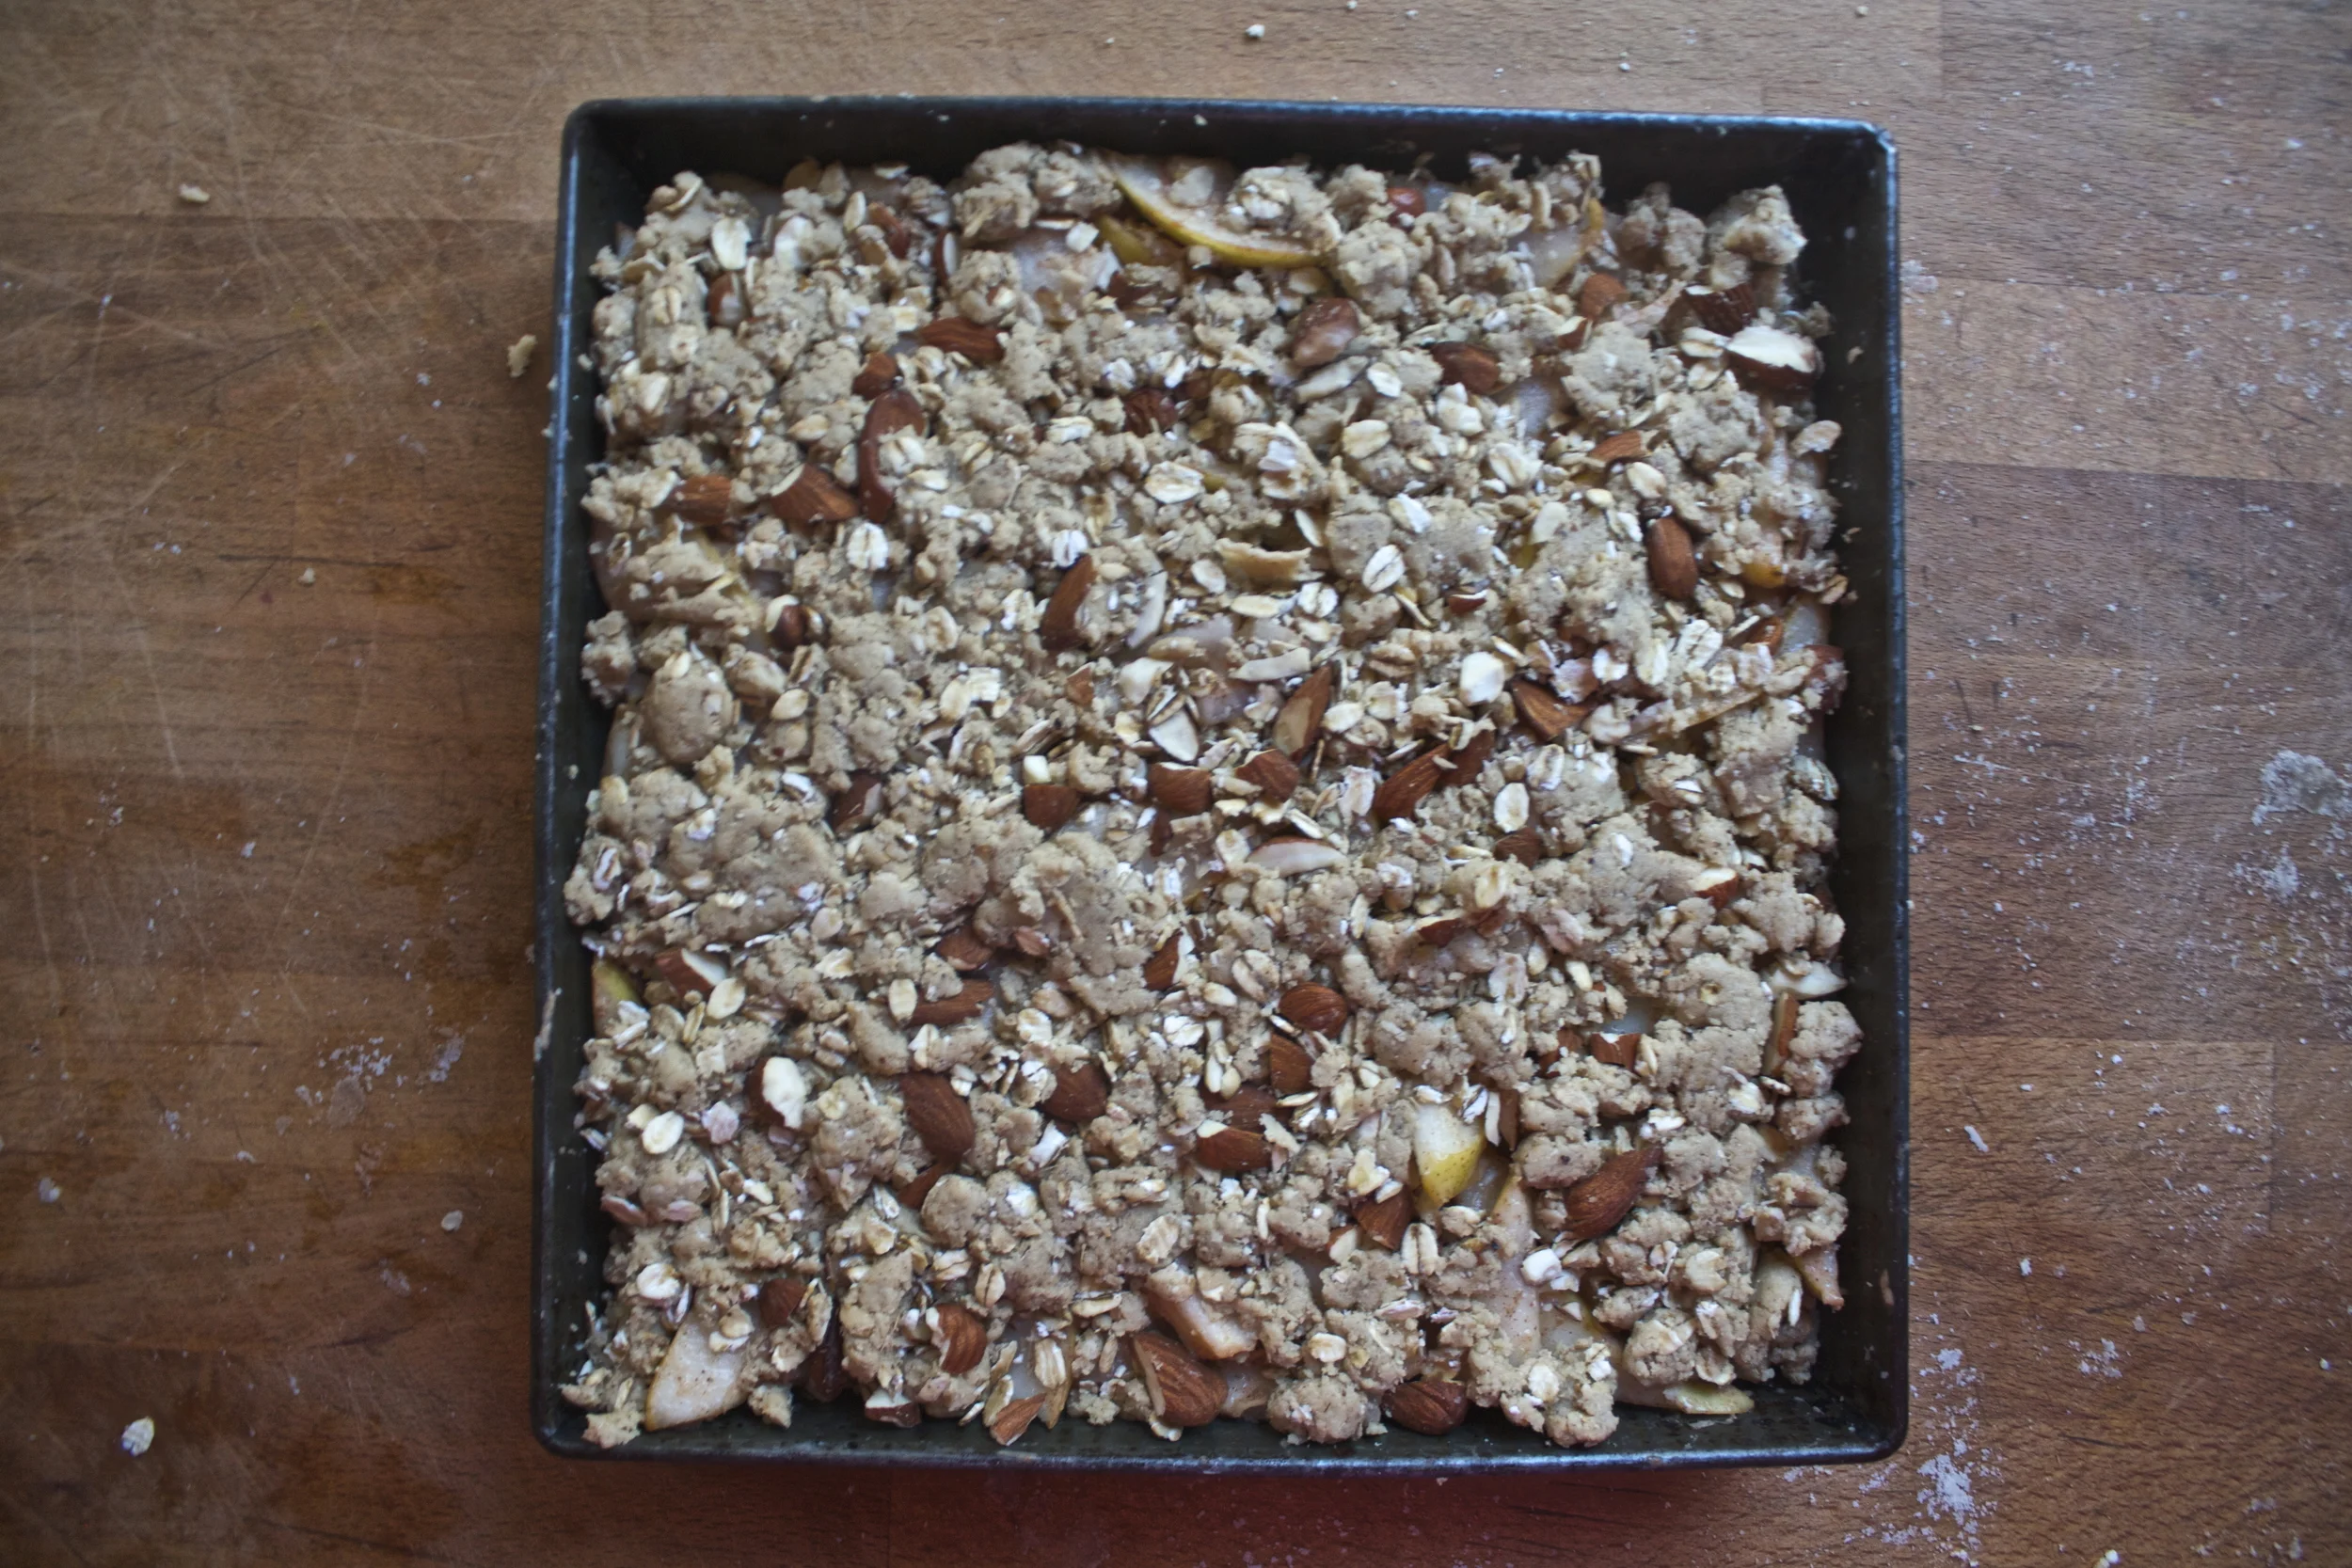
And crumble the crumble on top.
Give it a little press to compact the crumble and into the oven it goes!

When all browned and crispy and nice, remove from oven and let cool. Cut into squares and go for it.
Look at that, so much goodness.Go ME!%u00a0
Happy Wednesday people!
-C
For the crust and crumble
- 1 1/2 cup oat flour
- 1 1/2 cup almond %u00a0flour
- 1 teaspoon baking soda
- 1 teaspoon salt
- 1/4 cup honey
- 1/2 cup earth balance (can use butter)
- 1/4 cup almond butter
- 1/2 cup oats
- 1/4 cup almonds
For the pear filling
- 4-5 ripe pears
- 2 tablespoons corn or arrowroot starch
- 1 teaspoon cinnamon
Preheat oven to 350
In a large bowl, mix together the almond and oat flour, baking soda, and salt. Add in the earth balance and honey and mix together until a dough forms (I find using my hands to work swell). Roll dough into a blob and tear about 1/4 of the dough away and set back into bowl. Press the remaining dough into he bottom of a 9X9 inch baking pan. With the remaining dough, mix the rolled oats, the almond butter and the chopped almonds and set aside again.
Now slice up your pears %u00a0into 1/4 inch thick slices (remove seeds and stems)%u00a0and toss into a bowl with the cinnamon and starch. Take pears and layer ontop of the crust, trying to keep the pears evenly distributed. And dump and distribute the crumble topping all over the pears. Gie the whole thing a few pats to compress the crumble a bit.
Stick into the oven and bake for about 45 minutes, or until the crumble topping is all nice and brown and crispy.%u00a0
Remove from the oven, let cool and cut into squares.%u00a0
Great as breakfast lunch snack or dinner. Eat with you hands and lick crumbs off plate.%u00a0

Don’t let the fact that these rich, fudgy, soft, oh so yummy brownies that %u00a0have beans in them scare you away, it just means that you can eat more, you know, like half a pan, and not think twice about it. (I think that is perfectly acceptable)%u00a0And the carob. Well one of the things I always do for my birthday is to buy a new ingredient of some sort that I wouldn’t normally buy because it’s either too expensive or is hard to find. Carob is neither too expensive or hard to find, but I couldn’t find the really expensive stuff that I was looking for so I grabbed a bag of carob powder. %u00a0If you have never tried carob, it’s a must. It’s kind of like chocolate, but more fruity, sweet, not bitter, and caffeine free, while still %u00a0containing %u00a0all the good health benefits as chocolate. %u00a0It’s really good%u2026..you will like it. (You can use cocoa instead, but then you are going to miss out on the awesomeness of carob and be left with a plain old normal black bean brownie)
I was also thinking that these would make for a fantastic Super Bowl party snack, you know, brownies and protein.. Sounds like a football type of food right. ( I know nothing of football, but I do know about food parties%u2026.brownies are good for food parties)%u00a0
Anyways, super fast, super simple, super easy. Make these and feel awesome. %u00a0And maybe don’t tell people that you made them with beans, they don’t need to know, all they will think is that they are eating something good. %u00a0

One bowl. Beans, oil, oats, baking powder carob and vanilla.%u00a0I used an emulsion blender but a blender or a food processor does the same%u2026..blend together until fully incorporated, smooth and creamy with little speckles of oats. It’s so simple and barely a mess to be made.
Into a greases pan and %u00a0into the oven for 25- 30 minutes%u2026. Out of the oven when a toothpick comes out clean

Let cool for at least 10 minutes (ok, maybe 5) and cut into squares of %u00a0any size you like.

Stacked on parchment%u2026.oh so pretty

Ready to go%u2026.. To share or to hoard.%u00a0
Excellent for so many reasons. They are tasty, gluten-free,%u00a0vegan, full of proteins and when consumed, make people happy. My little nephew who is so so picky and doesn’t like anything even really liked these so right there I knew this recipes was a winner. %u00a0
Enjoy your brownies!%u00a0
-C
- 2 cups cooked black beans (1 can)
- 3/4 carob powder
- 1/2 cup sugar%u00a0
- 3/4 cup gluten-free quick oats or rolled oats
- 1/2 cup coconut oil
- 1 teaspoon vanilla
- 1 teaspoon baking power
Preheat oven to 375
Place all ingredients in either a food processor, blender, or a large bowl for a hand blender and blend together until %u00a0stuff is fully incorporated and smooth. Transfer into a well greases 9×9 baking pan and stick in over for 25-30 minutes or until a toothpick %u00a0stuck in the middle comes out clean.%u00a0
Let cool for some %u00a0minutes, cut into squares and serve!


 FA LA LA LA LA….. LA LA LA LA….Happy eve of Christmas! What better way to celebrate the holidays than with the sweet and spicy flavor of ginger…in donut form! There is nothing better.
 I am really excited to finally share a donut recipe with you all. I haven’t made a batch yet that hasn’t won a round of applause or at least a super double thumbs up. If you haven’t made donuts yet, bookmark this recipe and make it priority for your next baking adventure
 The spiced mixed in to the dry….I used fresh and powered ginger but if you don’t have any fresh.. just add more powdered…but fresh adds that extra bit of gingery spiciness.
 The wet ingredients all mix together. Molasses first, then the butter, vanilla, and the brown sugar, mix that then add the egg and the milk last.(avoid adding egg and melted butter together so it doesnt scramble) Mix wet mixture with the dry until fully incorporated and smooth.
 Out of the oven and turned onto a cooling rack…This beauties smell so very nice.
 While the donuts are cooling, prepare the icing. Mix 1/4 cup of cream cheese with 1/2 cup of sifted powdered sugar. Half of a lemons worth of juice with a teaspoon of lemon zest and mix… add a splash or two of milk to get the desired consistency(this is a cream cheese glaze, it won’t harden like a sugar glaze)
 When the donuts are full cooled, dip into glaze….
 Just look at these. And for real, they really don’t take much time. You could totally whip these up in less than 30 minutes.. just make sure to have someone else do all the dishes!!!


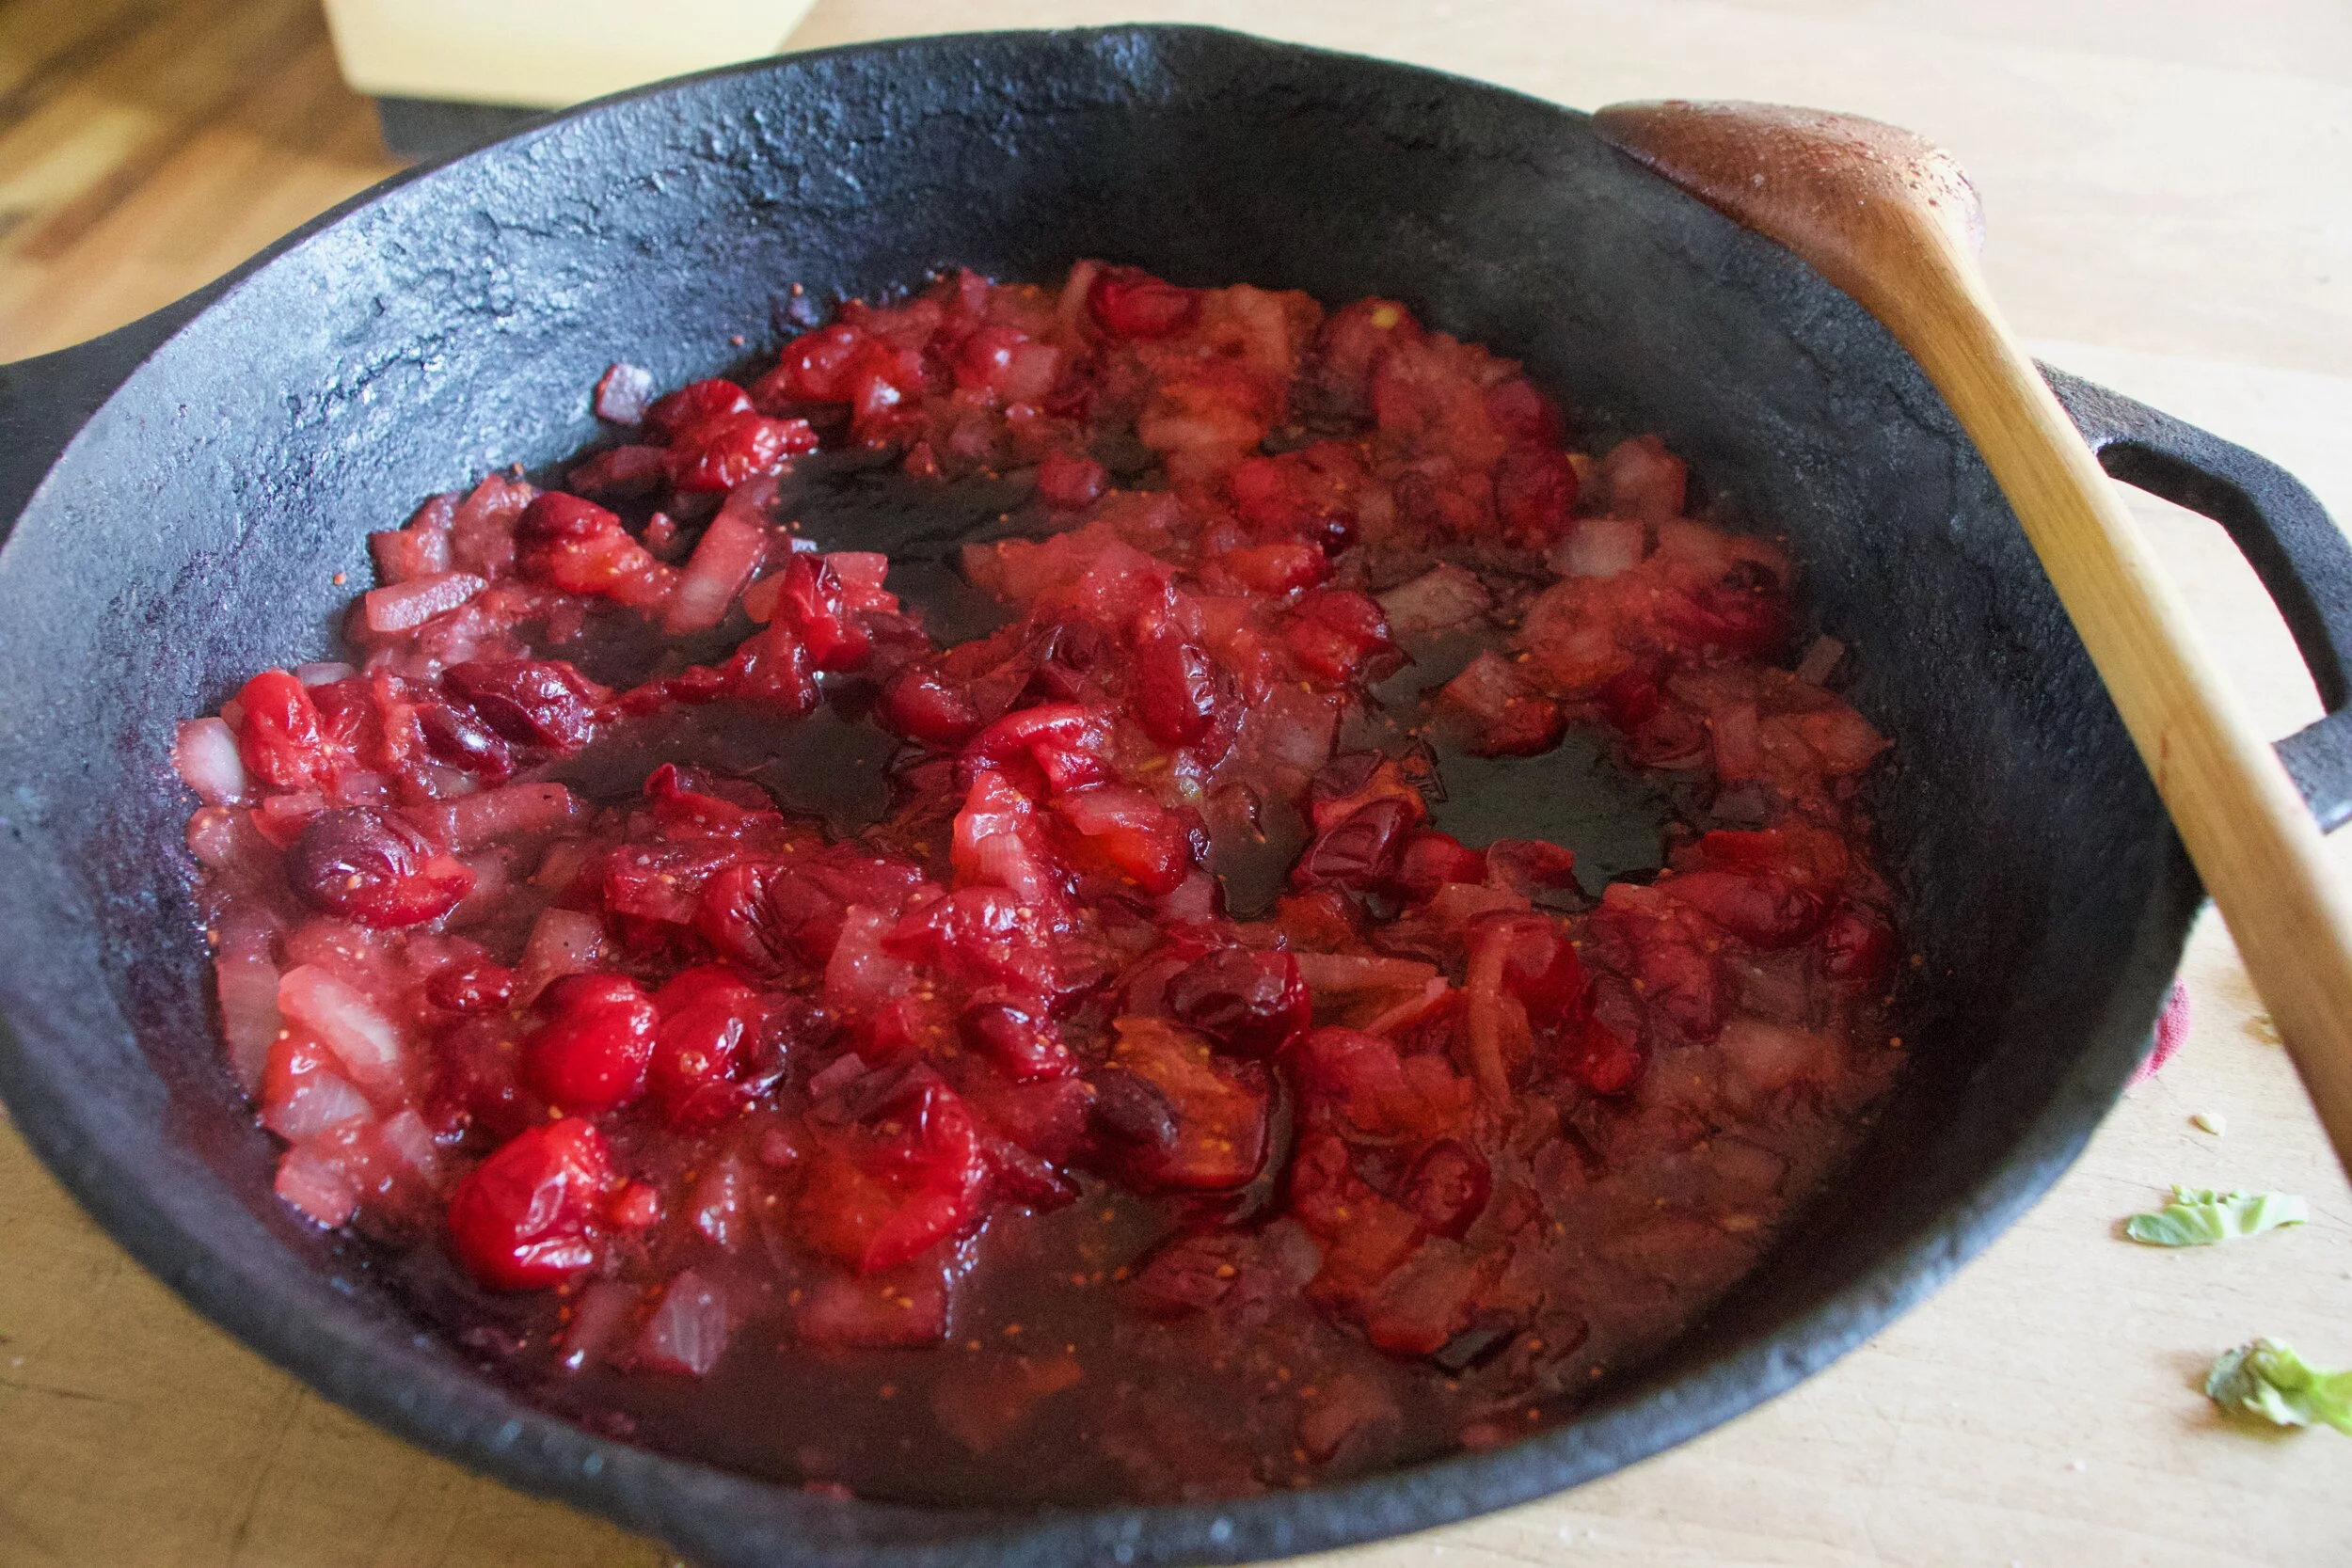
 WHAT! Is it really almost Thanksgiving? Got you dessert plan yet?%u00a0Thanksgiving%u00a0doesn’t have to be all pies, pies, pies%u2026 a cookie can be the perfect ending to any holiday meal. Don’t get me wrong, pie is awesome! %u00a0I love to make pies, but whenever I show up to Thanksgiving dinner with the family, there are always maybe one or five too many. Yeah my mom thinks we all will eat 2 pies a piece This cookie is the perfect holiday combination. It says, yeah I am classy with my white chocolate chips. Cranberries are a nice seasonal flavor, and those pistachios.. this lady really went all out. %u00a0WIth this cookie, you lose the formalities of pie. You don’t have to feel the pressure of eating piece after piece of pie. %u00a0Eating cookies is a little easier. Grab a cookie and go for a walk. Have a piece of pie and chat for a while. Need %u00a0little something.. well maybe another cookie. Watching a family movie after all the clean up and dishes are done? Why yes, a cookie is a no hassle movie snack. Bonus…Left overs are easily stored in tins or plastic baggies and there is no, Hey, where’s my freaking pie plate?
 So simple and so elegant. This combonation is the perfect balance of the sweet white chocolate, the tart cranberries, and the crunchy yum of the pistachio.
 I don’t own a stand mixer%u2026 I know, it’s really sad, but I do have several littles who have lots of energy and are easily swayed to mix mix mix%u2026Just give them the spoon and tell them they can lick it %u00a0clean when they are done%u2026.. And so goes the sugar, butter, and vanilla..creamed together by the arms of babes. Makes the cookies taste better.
 In goes the dry%u2026These ladies%u00a0knows how to stir!
 This guy got lucky. He got to stir in the goodies. I gave him his own bowl of chocolate for his skills. It’s important to pay the help.
 So there you have it, a lovely cookie to share.


THE LOVELY CRAZY
December 29, 2019 by maximios • Blog
I don%u2019t think I can ever eat potatoes any other way ever again.
It started with me, doing my weekly pantry cleaning, you know, when I wipe down ever surface, count all the beans and lentils in the jars to make sure I am not running low, and inspect every squash for soft spots. I was just going about my thing when I looked over at my waffle iron. Poor, sad, underused. And it hit me. When was the last time I waffled anything? I remember how excited I was when I found it a few years back at a thrift store. Such a cutie little iron. When I brought it home, I used it a bunch of times for maybe a week or two. And then it was put away and I think I have busted it out like 3 times in the past 2 years. So not cool.
I also noticed I had a shit load of potatoes left from thanksgiving.
And there I had it, a reason to use the waffle iron and a way to use up the potatoes. And now, now I am a potato on the waffle iron addict, which is weird because I am not a overly potatoy person in general. But now with this new waffled hash brown thing, well I might just be eating potatoes all day, every day. (At least until I get sick of them or I run out of potatoes.) They come out soft and fluffy inside, super crispy in ever little nook and cranny, outside. Evenly, perfectly cooked. It%u2019s hard to explain, but they are just, ugh, so good, especially dipped in mustard for a fantastic hash brown snack. (Yes mustard, no not ketchup. Let me do me, you do you.) Or smothered in refried black beans topped with salsa and avocado (that was the dinner version). These hash browns. Just make some and you will see.
And no matter what happens with my hash brown phase, I will be damned if I ever let the waffle iron go so long without use. It deserves better then that.
To the best hash browns EVER!
The stuff. Potatoes, salt and pepper, and a little oil.
Shred potatoes. Simple, easy.
Place the shredded potatoes into a clean dish towel (avoid paper towels because paper towels are the devil) and squeeze as much of the liquid out as you can.
Dump the squeezed out shredded taters back into the bowl and sprinkle with salt and pepper and mix it around.
Oil your hot iron and pile on the potatoes. Then close it and press it down. It%u2019s a bit dependent on your iron how long they will need to cook fully, mine took about 9 minutes on high. But maybe just stand close by and check yours after 7ish minutes but expect maybe 10 or so.
Deep golden brown and crispy all over.
I mean, really look. Every surface browned and crispy. It is freaking perfection!
And then like any good waffled food, you plate it, and eat it. Me, with horseradish mustard and a big stupid smile.
Thank you waffle iron. You done good.
-C
makes 2-3 servings
2-3 small to medium sized starchy potatoes (Russet or Yukon Gold)
couple teaspoons olive oil
teaspoon each of salt and pepper
Preheat your waffle iron to high
Shred potatoes on a box grater. Once shredded, gather in a clean kitchen towel and squeeze as much of the liquid as you can from the potatoes. Place potatoes back into bowl and add in about a teaspoon of each salt and pepper and mix around.
Open iron and brush with oil. Place shredded potatoes on the iron, kind of pack together, and close. If it locks, lock it shut, if it doesn%u2019t push it down. And let cook, for about 10 minutes, checking after 7ish (you iron might have more power the mine does). Once the potatoes are a deep golden crispy brown, remove from iron.
Then eat. Any way you want. Plain, with mustard or ketchup. Next to some scramble something or another. Piled high with some black beans and salsa. Whatever. Just eat them and be happy for the waffle iron.
When your sister drops off 50 lbs of beets, on top of the 50 lbs that you have to harvest that are growing in your garden, what do you do?
Well chips of course.
Yeah, chips. That%u2019s right. When I got home from camping on Monday and there was a humongous pile of beets sitting next to my front door, I am not going to lie, I was a little shocked. I mean there wasn’t just a few little ones. These beets were freaking huge, like the size of my arm, and so many. But pretty much right after my initial shock I knew what needed to be done. First, eat a few roasted, second, roast extra to freeze for later, and lastly, make a few bunches of chips.
Have you ever had beet chip? They are amazing. Crispy, crunchy, tasty as all heck. If you like beets, even in the slightest, you will love these. If you hate beets, well maybe don%u2019t? Either way, beet chips are the best chip. Wha’t%u2019s not to love? Pink, and chippy. Sweet, and salty. And then you add the fact that making beets into chips is a good way to get your veggies in and that you can eat a whole bowl full and feel zero guilt because you are just eating beets. Plus making beets into chips is a good way to use up any extra beets you might have laying around or that have been dropped off at your front door.
These chips, once they are made, will not last long. So when you do make them, know you will probably be making them again soon there after. Me, I have still have to harvest all my garden beets so beet chips are happening again soon. Real soon (like this afternoon!)
To the beets!
The stuff. Beets (these are Formanova beets but any variety works) salt and pepper ,and oil.
Grab baking sheets, oil, and salt and pepper. You can either dump the oil directly onto the pile of sliced beets and really toss to make sure each one has been coasted or do what I did which was I drizzled oil into my hands and rubbed each sliced beet between my oiled hands before placing on the sheet.
After you get them on there, single layered with no overlapping, sprinkle tops with a pinch of salt and pepper.
On the way into the oven.
After the oven. Baked for about 18 minutes. You really have to watch after the first 13 or so minutes to make sure you catch them at the perfect time. Crispy, but not burnt.
A side by side shot. Crazy shrinking will happen!
Oh man, so delicious. And so pretty!.
Let the chips cool before eating, you know, so you don%u2019t burn your tongue. Plus they crisp up a wee bit more.
Once cooled, pile them into bowl, and then eat them. And eat them all. They are only beets after all. And you won%u2019t be able to stop yourself anyway. Ha
-C
Makes enough for an evening of chip eating for 1-2 people
2 Large beets (think softball sized)
a tablespoon or two of oil (I used grape seed but really any would work)
salt and pepper
Note. Making these without cutting with a mandolin will be a pain in the ass. It can be done, but if you have a mandolin, use it.
Preheat oven to 350
With a mandolin, slice the beets about 1/15 inch thick. (No need to peel the beets unless you want to.) Once beets are all sliced, either drizzle them all with a tablespoon or so of oil and toss until all are coated. OR what I did and found worked really well was drizzled oil into my hands and rubbed each beet between my oiled hands as I was placing them on the baking sheets. Either way.
Now place oiled beets, single layered, without overlapping, on baking sheets. Sprinkle with a pinch of salt and pepper and place into oven. Bake for about 13 minutes without worrying then start to check every minute or so until the beets are a deep golden brown and crispy ,which will be between 15-20 minutes. Also, even though you cut them all the exact same thickness, some might crisp up faster so you should remove done chips as they happen. Once they are done, place on a rack to cool. And then do another batch. And not, they do crisp up a tiny bit more as they cool.
Once chips are cool and crisp, eat.
Store uneaten (how did you not eat them all?) chips in an air tight container. If you notice that they turned a bit chew, just place them back into oven while preheating oven to 300 then turn oven off and let sit in there for a few minutes.
It%u2019s hot out and we are thirsty. Water is good, water is great, but sometimes a little somethin%u2019 somethin%u2019 is called for, for you know, being that we need to deal with it being so freaking hot out. and sticky and gross. (BLAH. This past week we have had some temperatures it had make me crankers.)
Anyway, what is more refreshing then cucumber? Not much. And so we blend up cucumber, add some mint and lime juice and stick it into a glass with ice and bubbles. What can be more refreshing then that? Plus look at how pretty it is. Bright ass green. A true summertime drink.
To the Spritzer!
The stuff. A thin skinned cucumber, a lime, a spring of mint, club soda, and if you want, a little simple syrup.
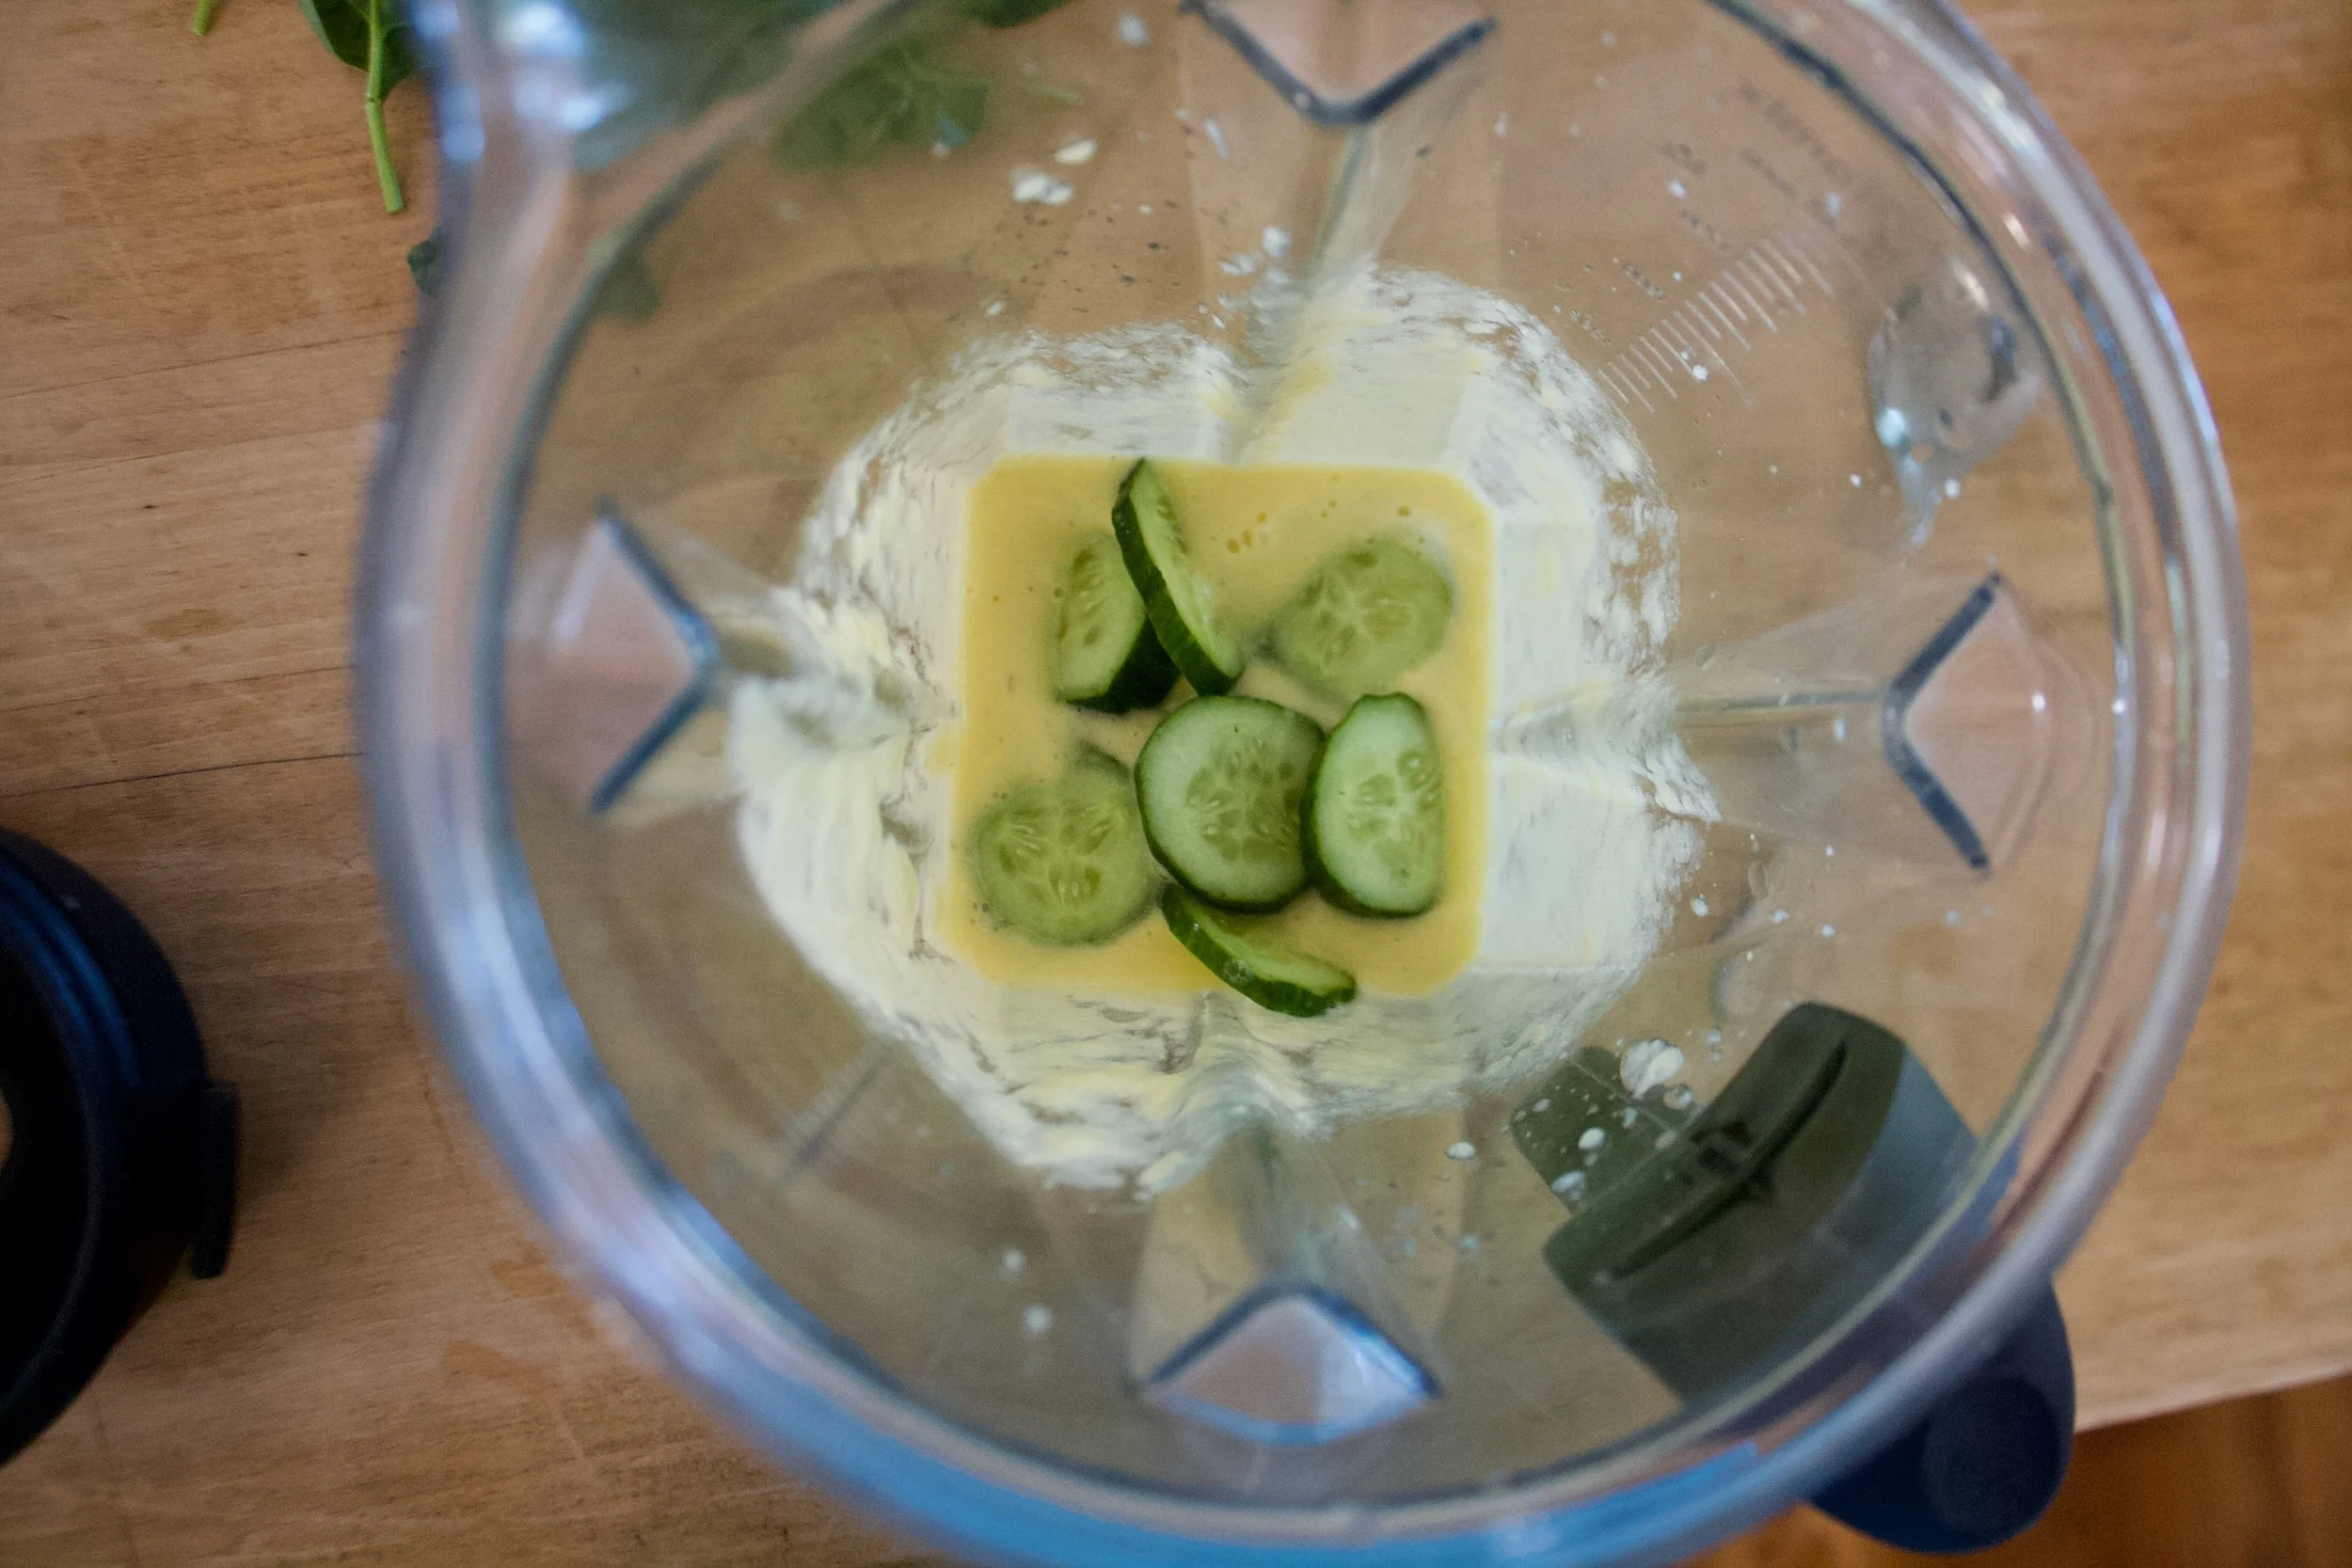
Chunk up the cucumber and into the blender it goes with the juice of the lime and a couple mint leaves.
Grab a couple glasses, add in some ice, and fill each glass half way with the cucumber juice. (mix in liquid sweetener in now if you want it.)
Top off with club soda, a mint leaf and a few slices of cucumber and you are golden cool and fancy free.
Stay cool%u2026..as a cucumber.. HAHA!
Makes 2 or 3 drinks
1 cucumber (thin skinned and 6-8 inches long)
a lime
a few mint leaves
club soda or plain seltzer
1-2 teaspoons liquid sweetener (optional)
Take cucumber and place into blender along with the juice of the lime and a couple mint leaves. Blend until smooth. Grab a couple glass, fill each with ice, then fill each glasses half way with cucumber mixture. Add in any liquid sweetener if using and stir. (I recommend trying without sweetness, that is that way I like it, and then add sweetener if you need it.) Top glasses off with club soda. Garnish with sliced cucumber, lime wedges, and or mint leaves if you want.
Drink away.
Yes you read that right. Corn. In a popsicle.
What?
No it is not weird or gross or anything. I wouldn’t do that to you. These popsicles are down right deeee-lightful. Rich and creamy and sweet. Both the creamy coconut and the toasted coconut pair perfectly with the sweet corn flavor. They truly are delicious and I think that if you give them a try, you will think so too. And really, now that it is like almost summer, who doesn’t have a little extra corn laying around. So you might as well just make a batch.
And then you will thank me for introducing you to the goodness that is a toasted coconut and corn popsicle. Heck, the mr even ate one and he (still, after I have proven him wrong on a many occasions) says he hates corn. So if a corn hater likes these, imagine what a corn lover will think. HAHA. Corn lover.
To the popsicles!
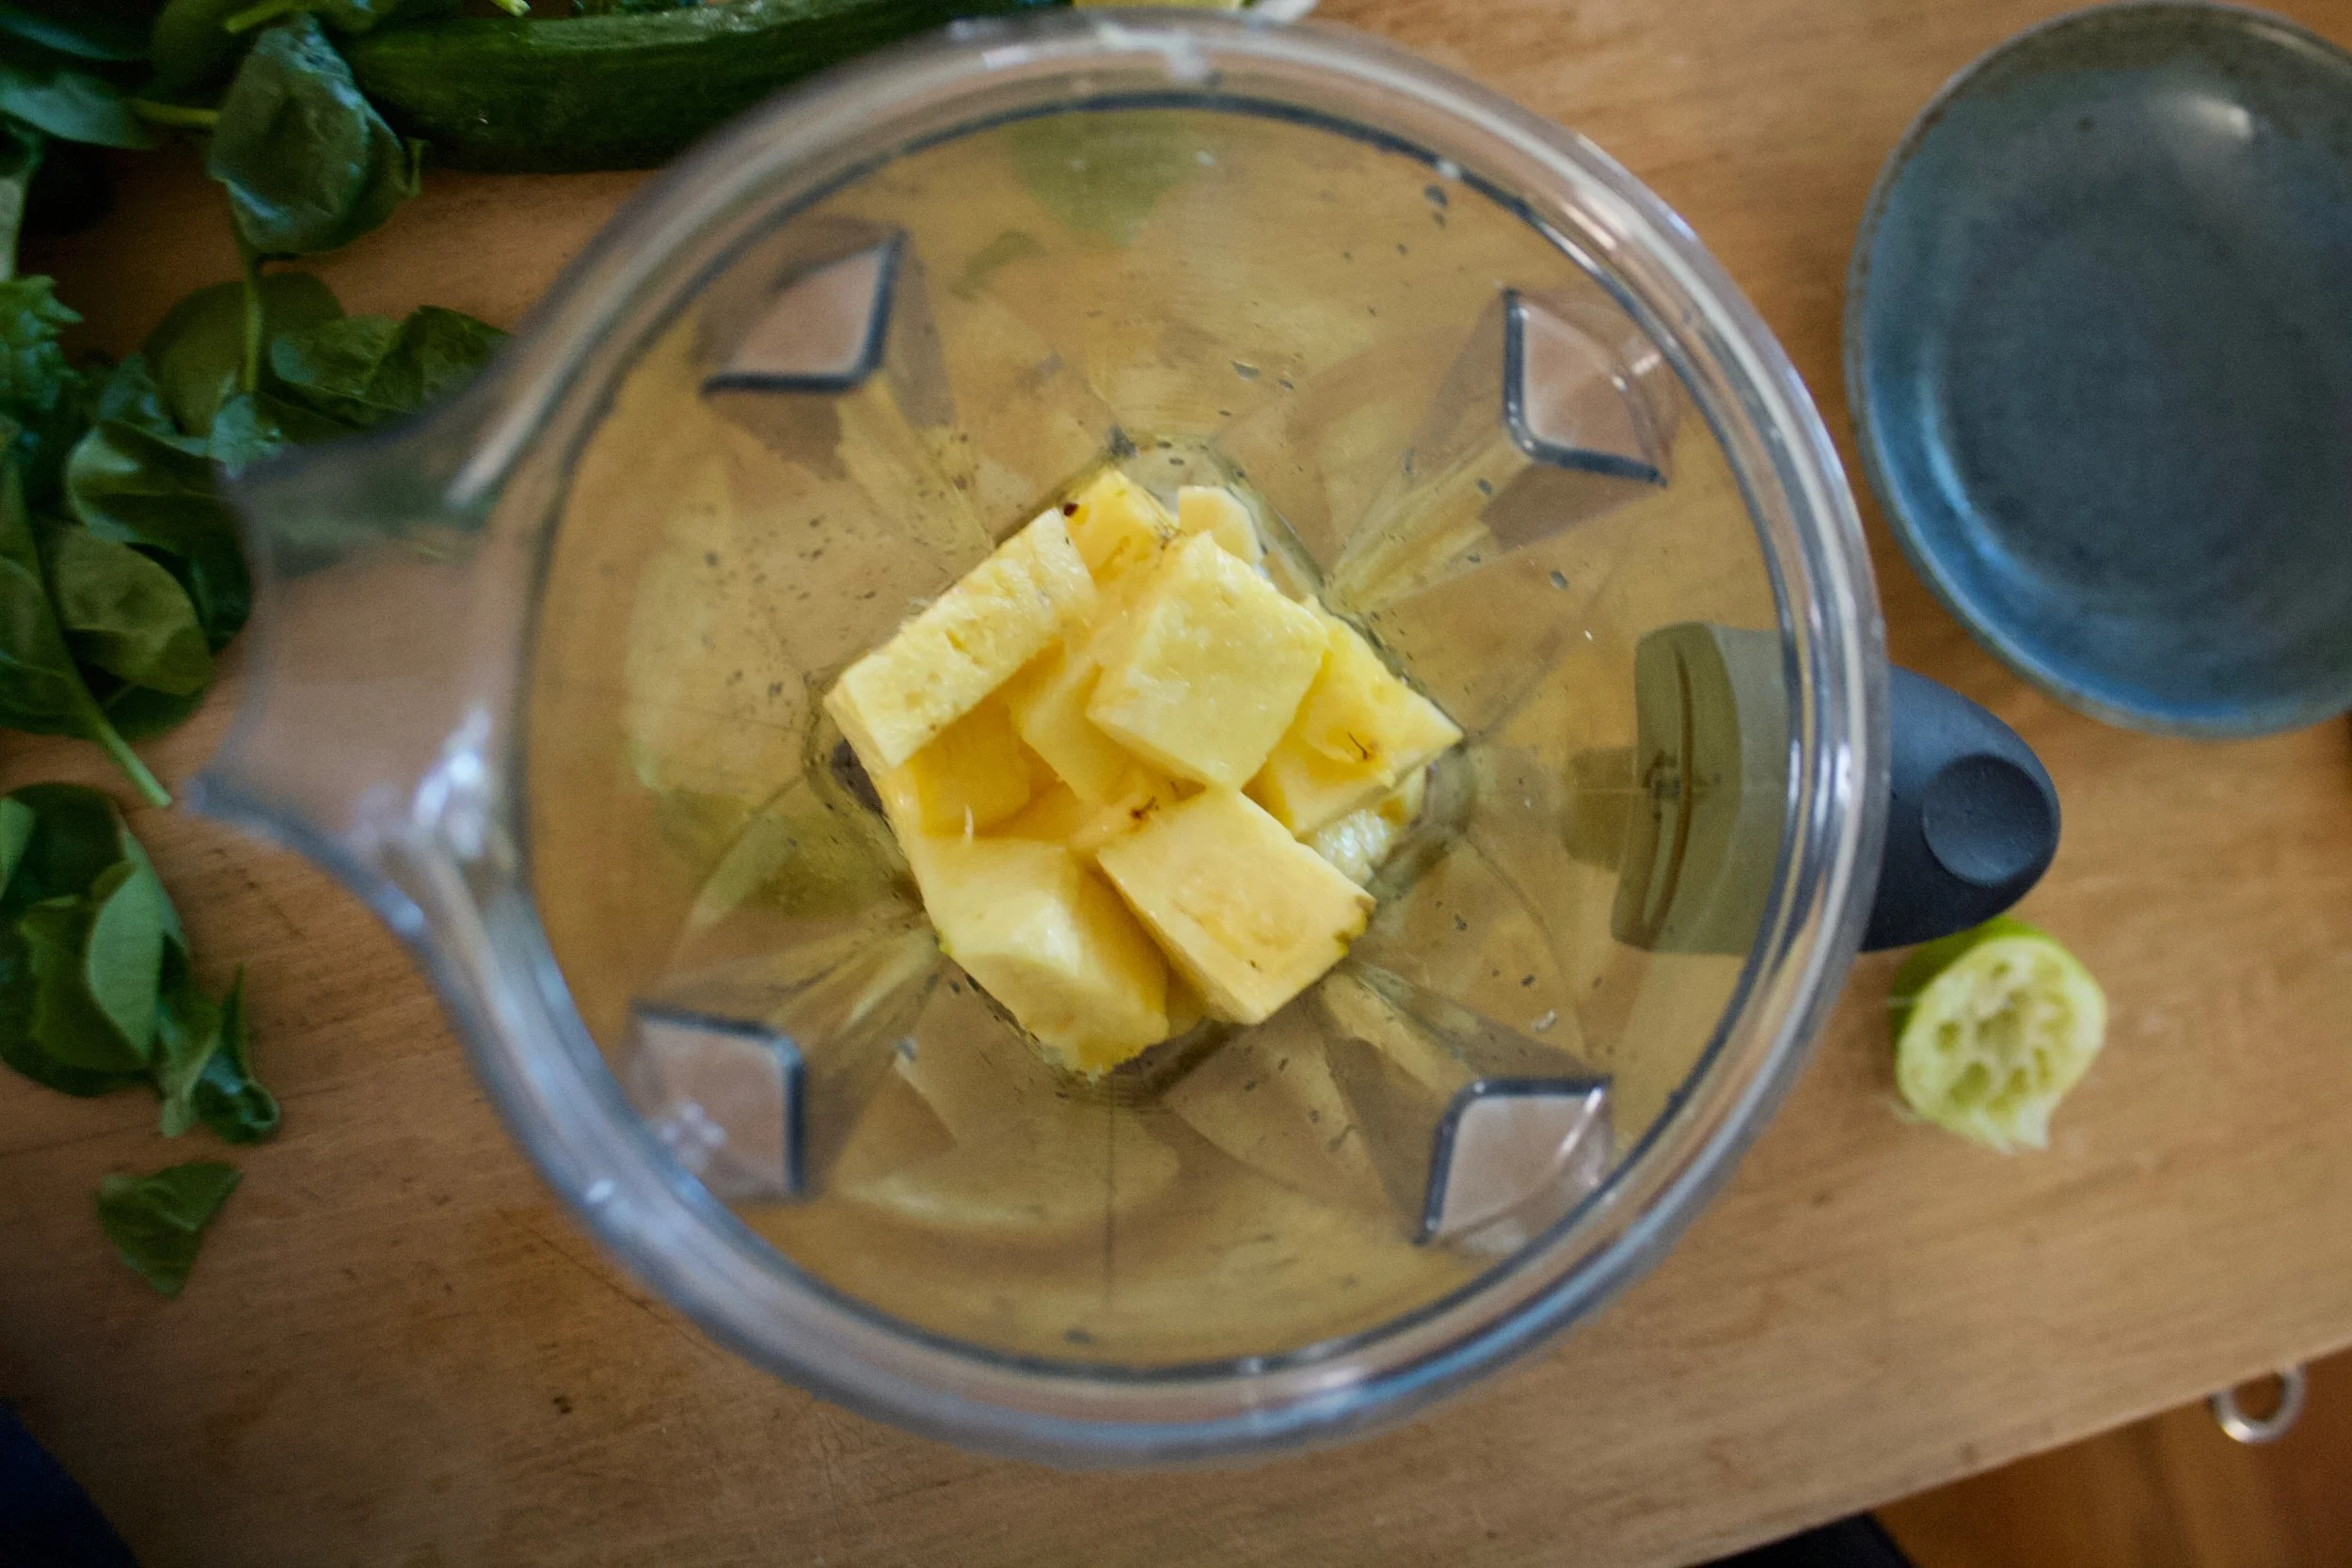
The stuff. Corn, full fat coconut milk, shredded coconut, and maple syrup.
First, remove corn from cob and place on a baking sheet. Bake in oven for 10-ish minutes until corn is cooked and all nice and sweet.
And don%u2019t forget to toast the coconut. A few minutes in the oven is all it needs.
Now to blend. Corn and coconut milk go in first to blend until nice and smooth. Then add in the maple and coconut and blend until just combined. That will leave a little coconut texture. If you want it smooth, well just blend until completely smooth. Do what feels right to you.
Thick, rich and creamy popsicle mixture.
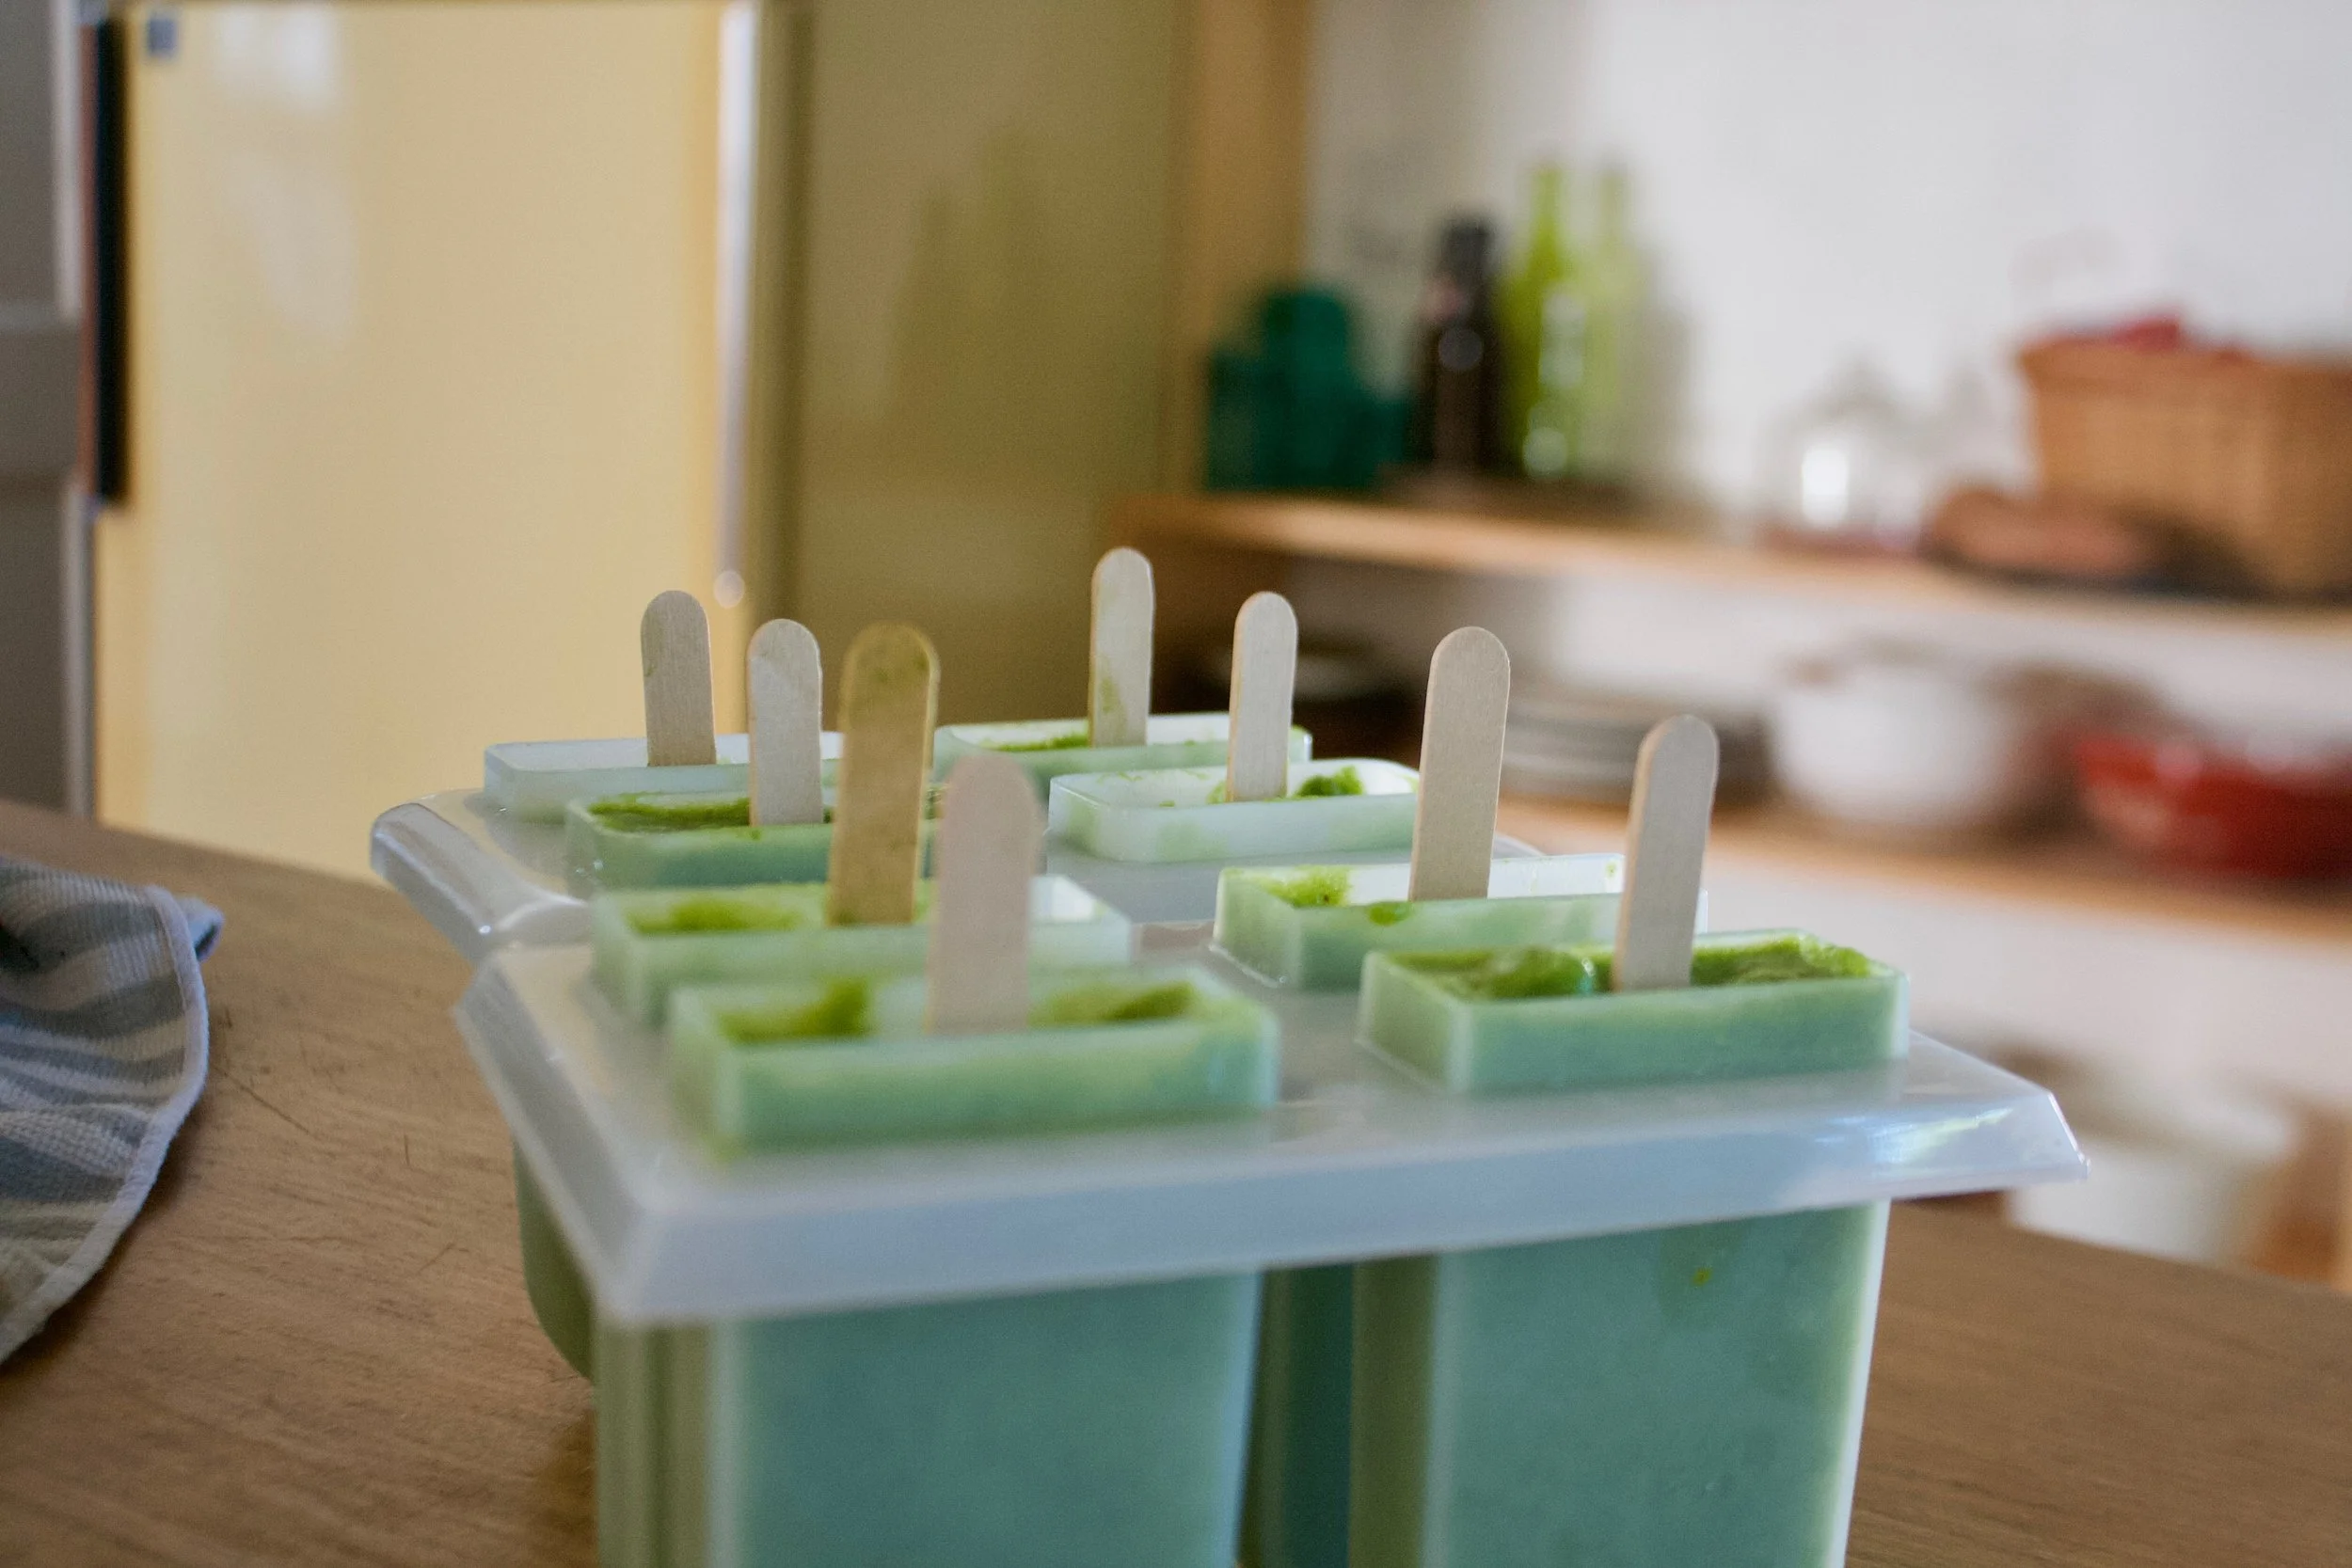
Now pour it into the molds and stick into the freezer. You could probably stick the sticks in now or wait a little while for the mixture to set a bit, but just don%u2019t forget to get sticks in those popsicles before they completely freeze. That would suck.
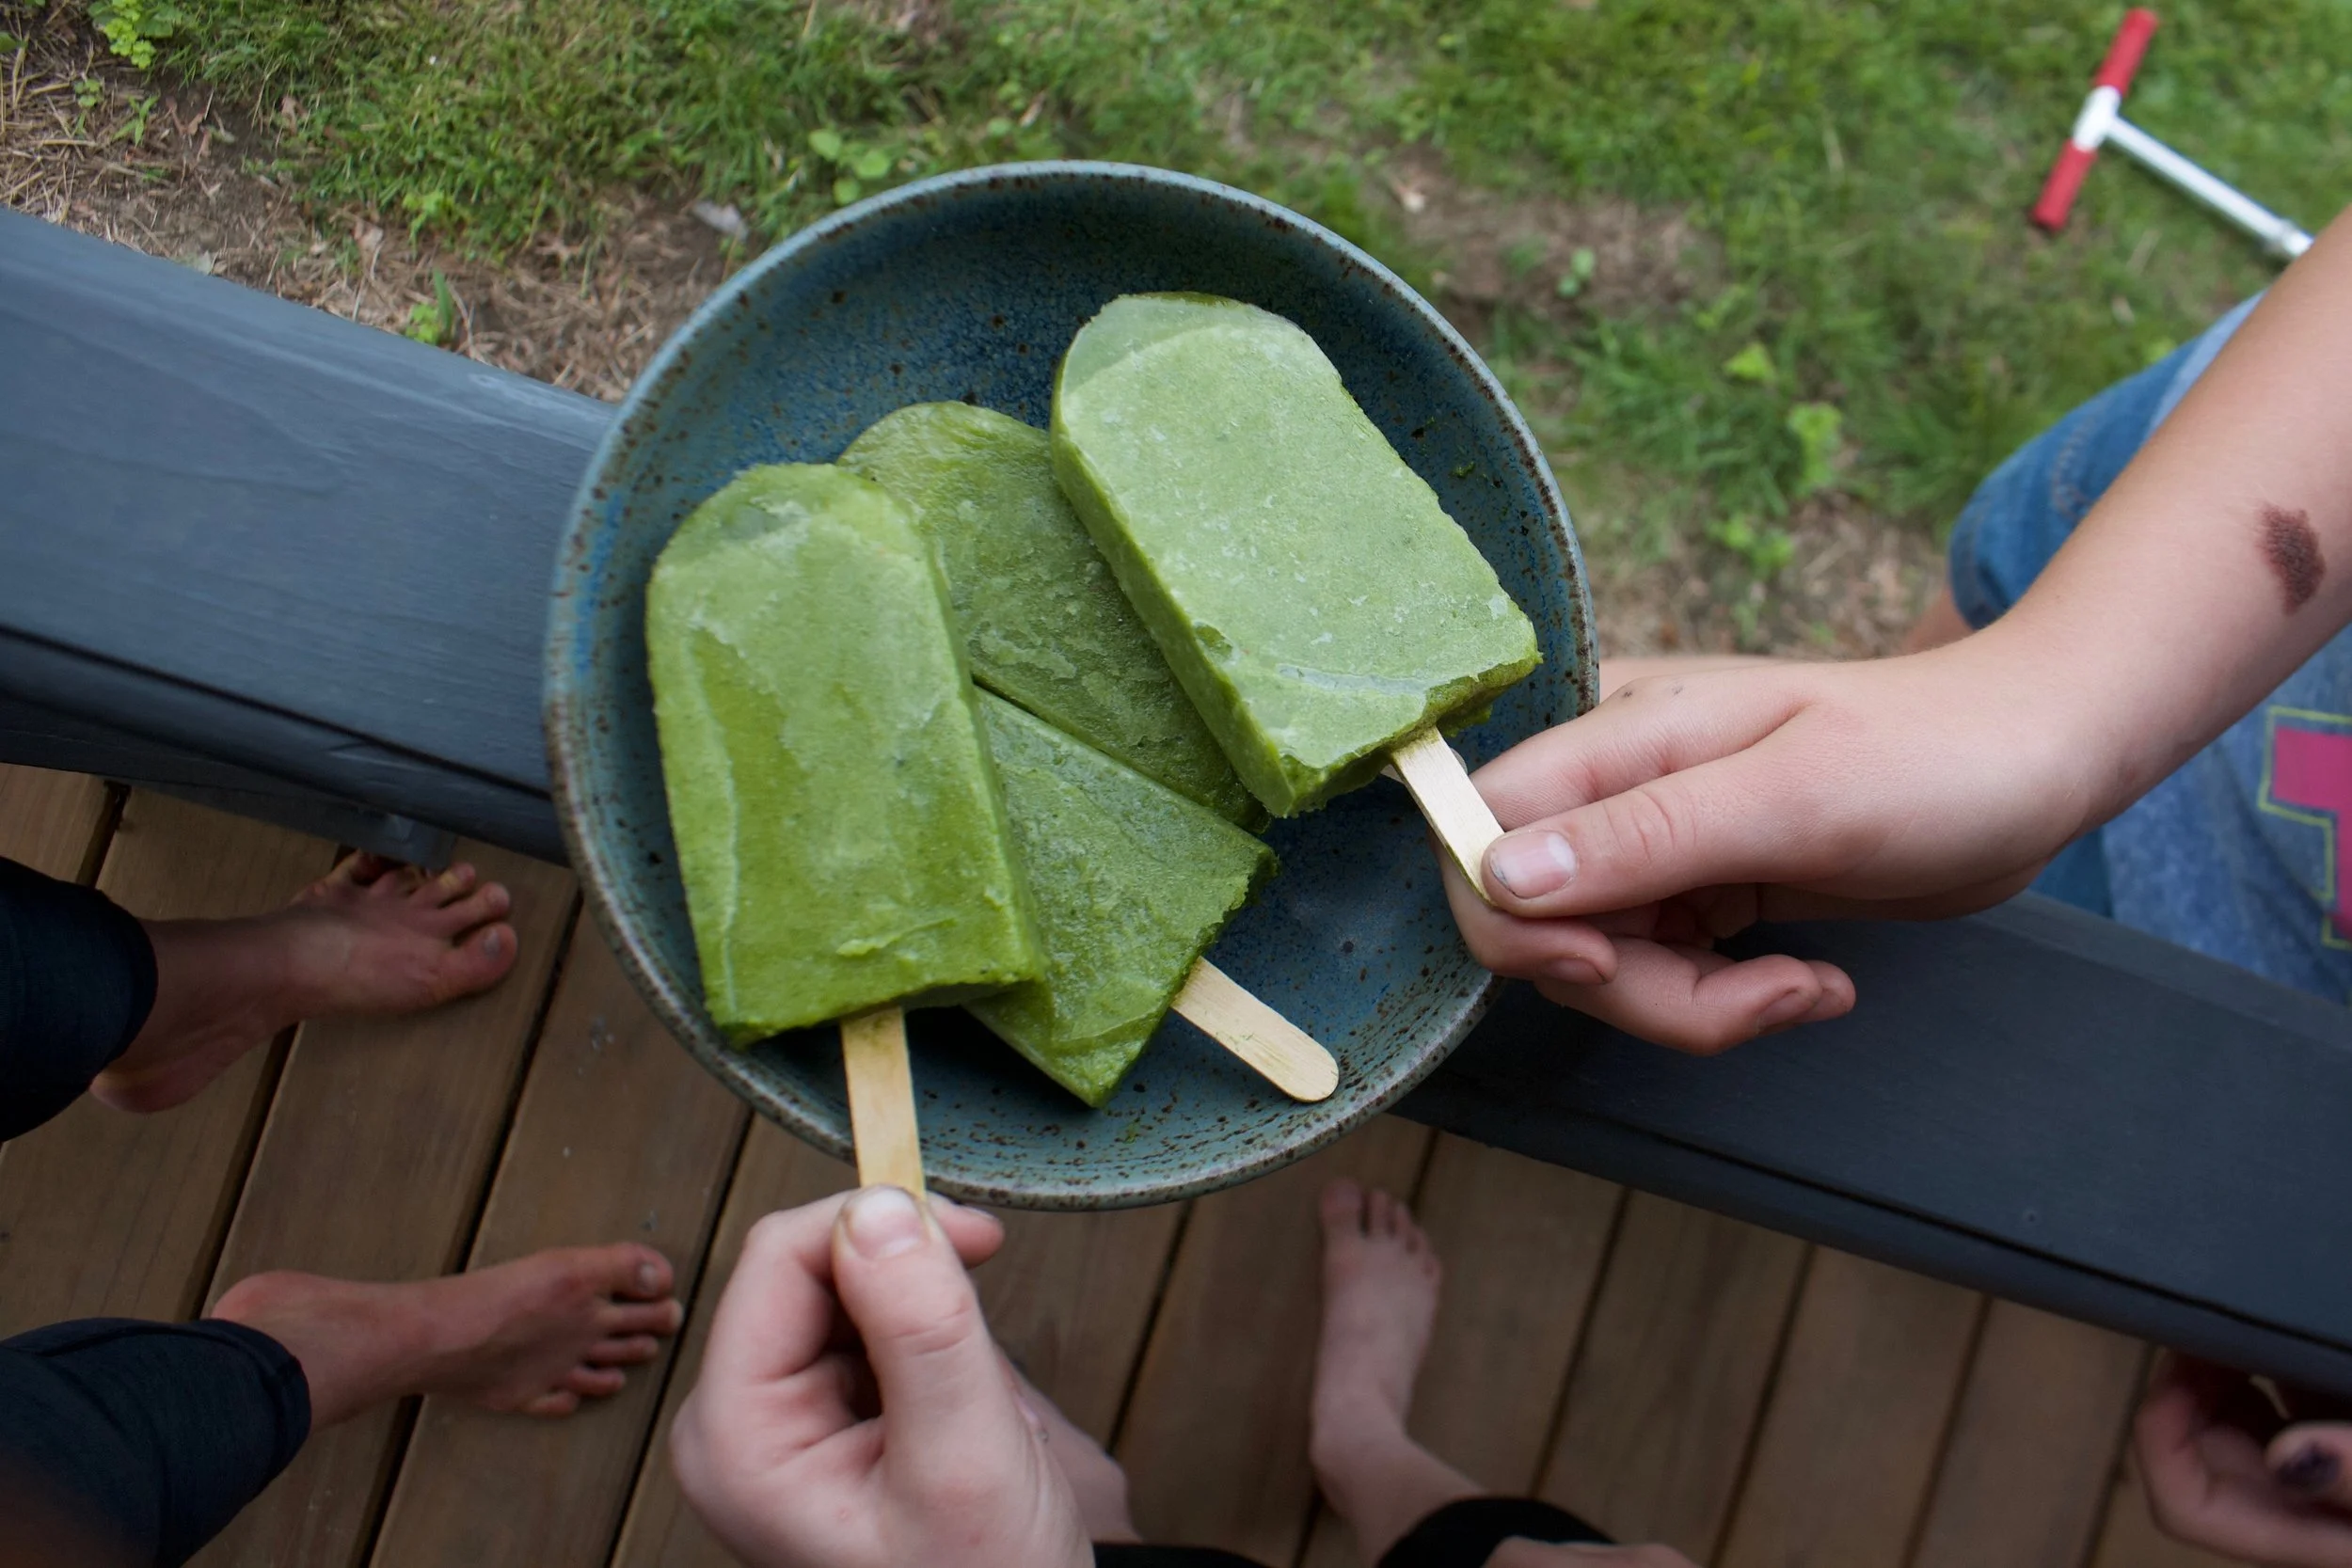
Pop those lovelies out of the molds and there you go.
The anticipation is over. Eat a popsicle
-C
makes 4 average sized popsicles
2 ears corn (about a cup of corn kernels)
1 cup full fat coconut milk (the canned stuff)
1/4 cup shredded unsweetened coconut
2- 4 tablespoons maple syrup
Note. If you have left over cooked corn, just use that. You don%u2019t need to recook it so skip the cooking corn step.
Preheat oven to 400
Remove corn kernels from cob and place on a baking sheet pretty evenly. Pop into the oven for 10 minutes of so or until the corn is cooked through and nice and sweet.
Remove corn and dump it into blender and set aside to cool for a few minutes. Place the coconut onto the baking sheet and pop into the oven for 3-4 minutes to just lightly toast. When the coconut is toasted, remove from oven.
Grab the blender with the corn and pot in the coconut milk. Blend until smooth. Add in the maple (start with 2 tablespoons and work your way up to the sweetness you like) and the toasted coconut. Blend quickly just to combine for a slightly more textures popsicle or blend completely smooth if you would rather a smoother popsicle.
Pour mixture into popsicles molds and place into freezer. After the mixture sets up (about an hour) pop sticks into molds. Continue to freeze until completely frozen. Usually 4-6 hours.
And then when it is popsicle time, remove popsicles from molds and eat them.
I am obsessed. For real. That might seem like a strong statement for a feeling about a food, but right now, it is truth. I spend more time then I want to admit thinking and drooling over Socca, which is, to those who do not know, the most basic chickpea flour pancake-y bread thing. Chickpea flour, water and salt. Cooked fast under the broiler in a screaming hot skillet. That is it. And it is amazing. Depending on how you make it, it can be creamy and soft or more cracker like with some crisp crunch to it. Either way, it is just so freaking good. Of course, what I am dreaming about regarding it is not just plan basic socca (which I have made 3 times in the past 3 days) but different flavored soccas (I have experimented with lot of seasoning, and they are all A+) with all sorts of different topping and using it in all sorts of different ways. But for now, I wanted to keep basic so we all know how good simplicity is. We will go from here.
There is no stopping me. There is no stopping the socca.
Now to my new favorite food, the socca.
Chickpea flour, salt and water. That is it. Mix it all up.
Batter all smooth and now in need of a rest. Half an hour or up to a day of rest is good.
Now to cook the socca. You need to use something oven safe like cast iron. The trick here is to preheat the skillet while you are preheating the oven. Crank oven to 450 with the skillet in oven and once the oven reaches temp, turn oven over to a high broil. Let the skillet get really hot for another minute or two then remove skillet from oven (carefully!!!) and give it a splash of oil. Don%u2019t preheat the skillet with oil in it or else it will start to smoke and get gross.
Now that you got a nice hot and oiled skillet, grab the rested batter and pour half of it in. Tilt skillet around to coat bottom then stick skillet back into oven under broiler and cook for 4-8minutes. ( It depends on your broilers strength and your preference for blisters)
Out from the broiler. Cooked and slightly blistered. I went easy on this one. The next one got a few more blisters.
2 soccas, one a little thicker then the other. One a little more blistered then the other. Both in my belly.
So many Soccas to come.
So. many. Soccas.
-C
makes two 10 inch soccas
1 cup chickpea flour
1 cup room temperature water
1/2 teaspoon salt
olive oil for pan
Mix chickpea flour, salt and water together into a bowl until smooth. Let mixture rest for at least half an hour or up to a day.
When ready to make the socca, preheat oven to 450 with a 10 inch oven safe skillet (I used cast iron but any oven safe dish would work) in oven.
Once oven reaches temp, turn oven over to broil and place skillet under it for a minute to really heat the skillet. Carefully, with oven mitts, remove hot skillet from oven and brush or pour a smidge of oil into the hot skillet to coat bottom. Pour in half the batter and tilt around until bottom is coated then place skillet back into oven under broiler and cook for 4 -8 minutes or until the socca starts to blister. (it kind of depends on your broiler so keep a close eye on it) Remove from oven and slip socca onto cutting board. Sprinkle with salt and pepper. Drizzle with olive oil if you like. Then all you do is cut and eat.
Left over socca can be stored in fridge and reheated in oven or toaster.
Note. IF you want a slightly thicker socca, use a 8 inch skillet. For a thiner, more cracker like socca, pour in 1/3 of the batter at a time (you will end up with 3 instead of 2)
It%u2019s a smoothie. And no, we have never really been smoothie people in this house, but what can I say, sometimes smoothies happen, especially when you have about 20 ripe bananas in the fruit bowl with no room in the freezer and no need for 7 loafs of banana bread.
So I smoothied. And I like it (a lot).
This is a smoothie of simplicity. Nothing fancy. Simplest of simple. Straight to the point. And all sorts of good.
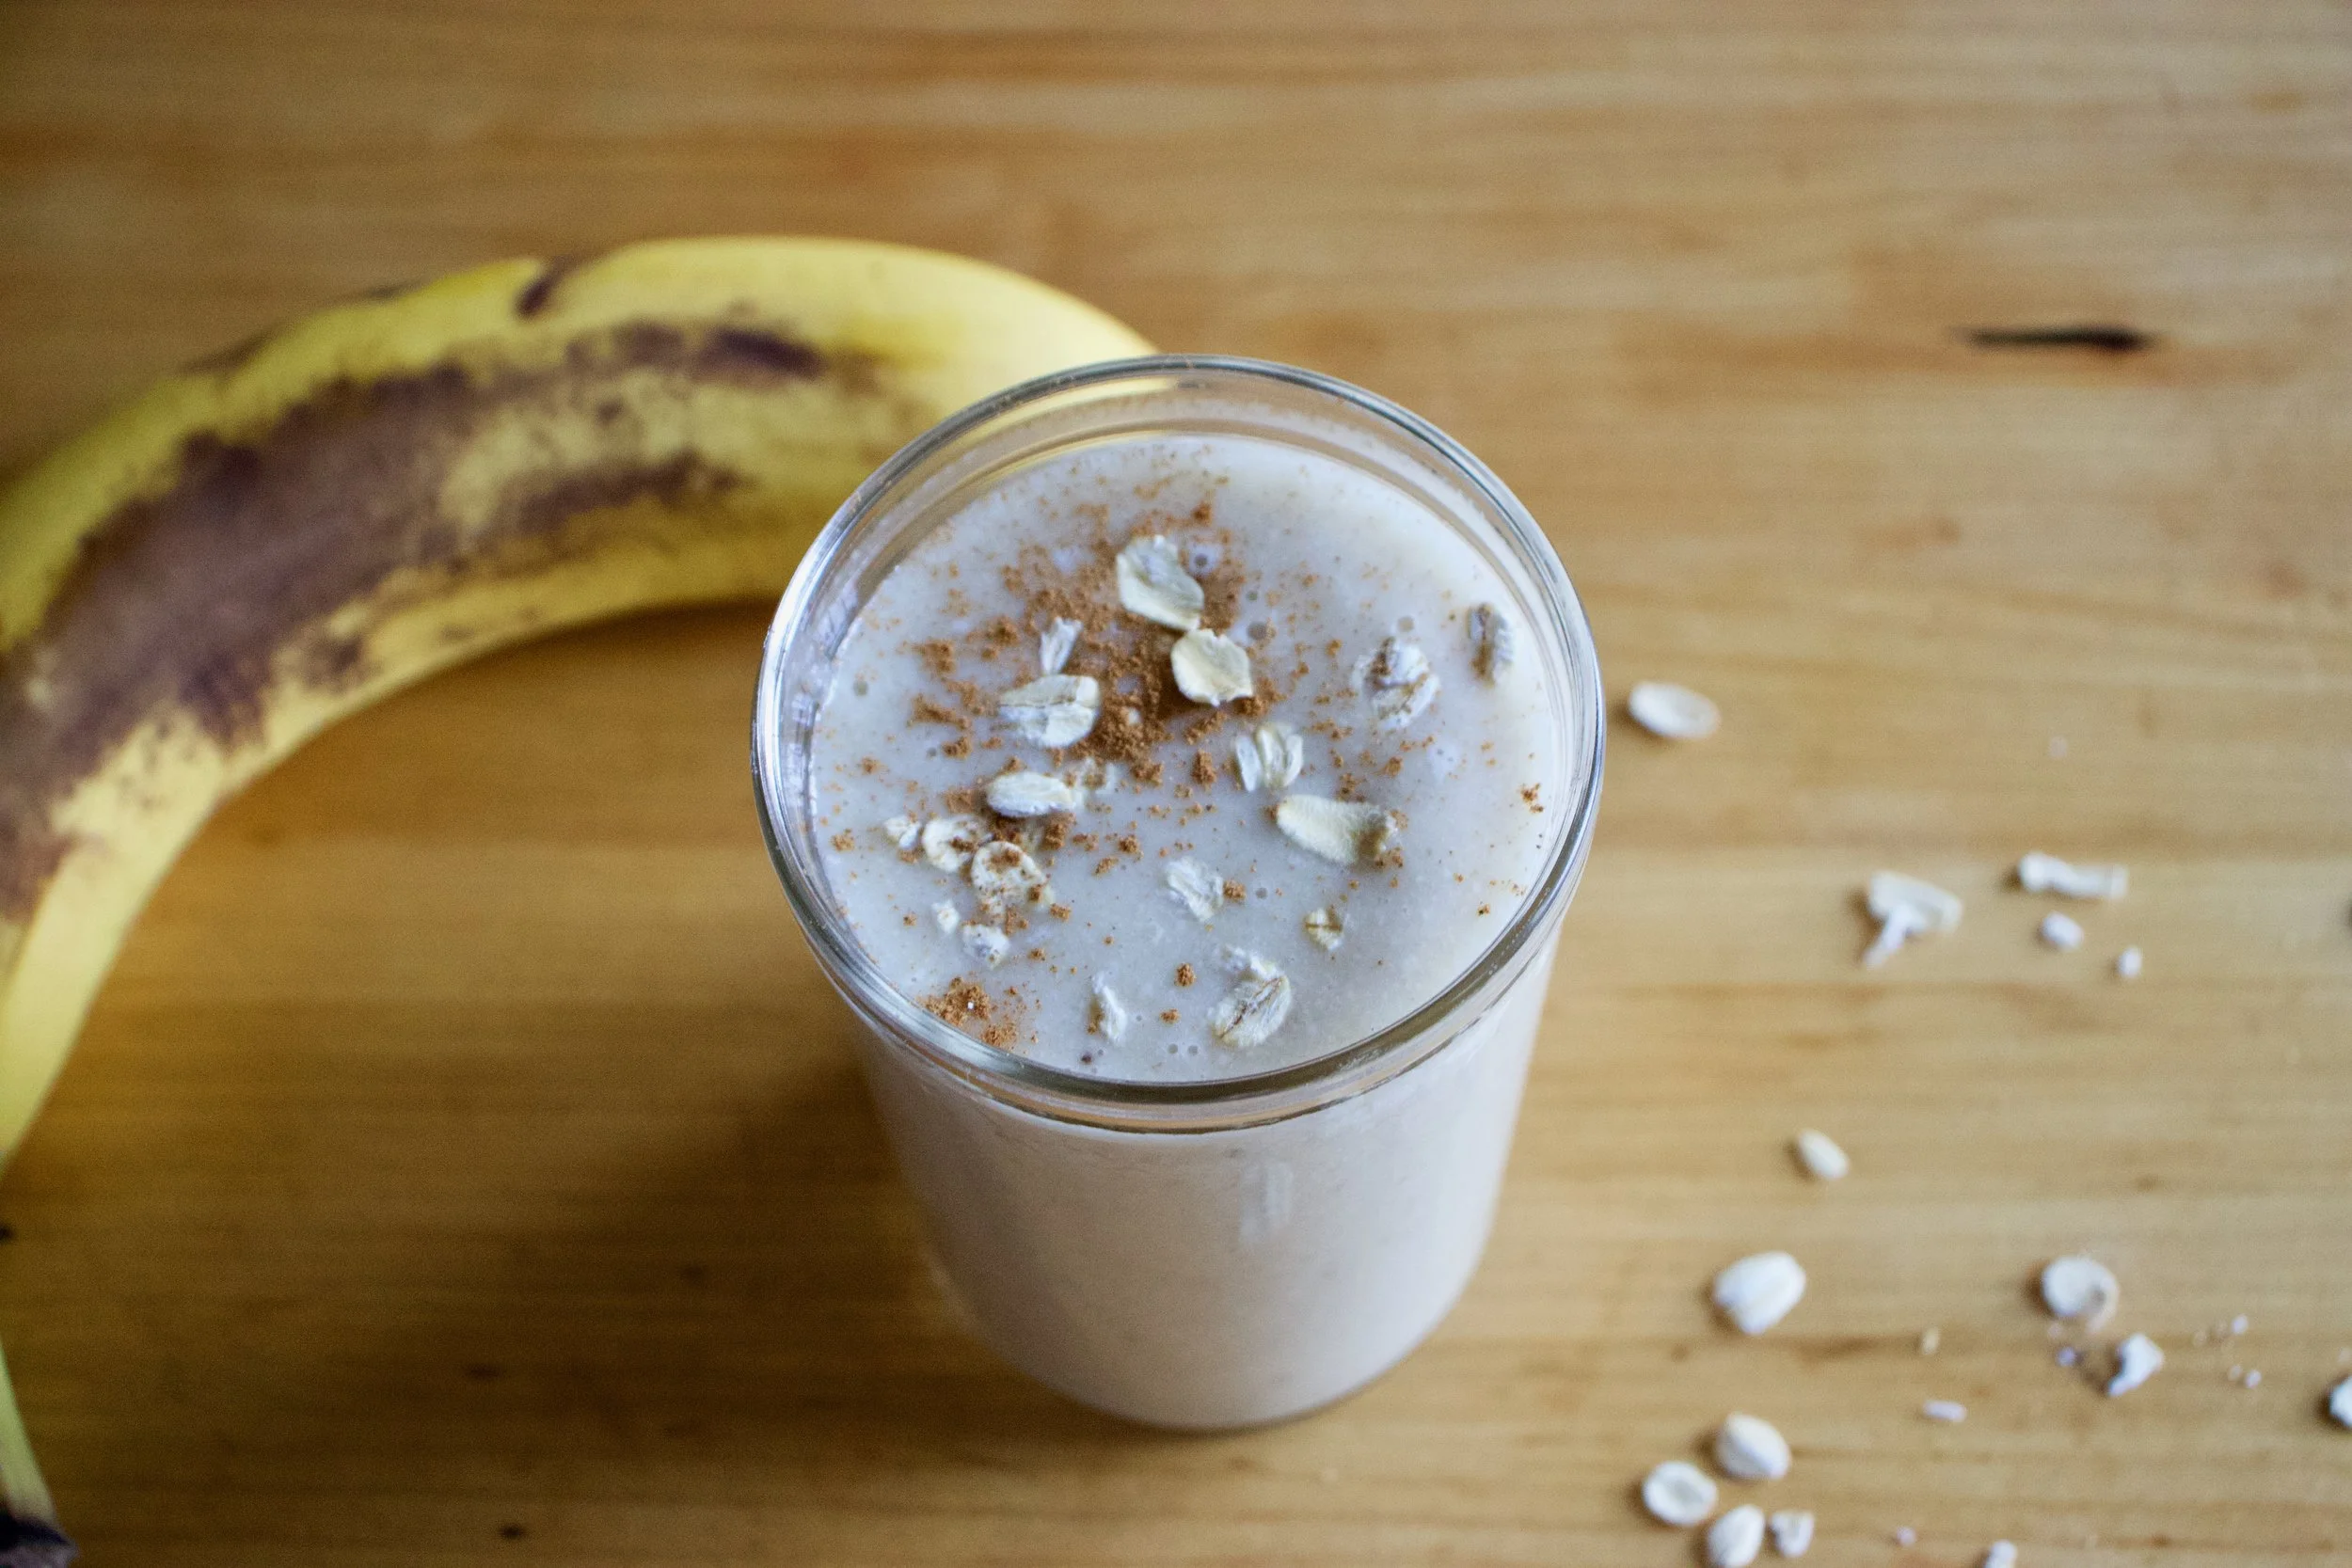
You might think, does this simple smoothie you speak of taste very good? Yes, yes indeed it does. It is all sorts of fantastic. Basically if you like creamy, nutty, oaty, bananery things, you will like this. And it%u2019s a perfect breakfast, snack, dessert, or just wanting a little treat like thing that is not garbage food. A smoothie of all smoothies with the most basic ingredients. And takes about 15 seconds to whip up. Can%u2019t complain about that.
To the smoothie goodness!
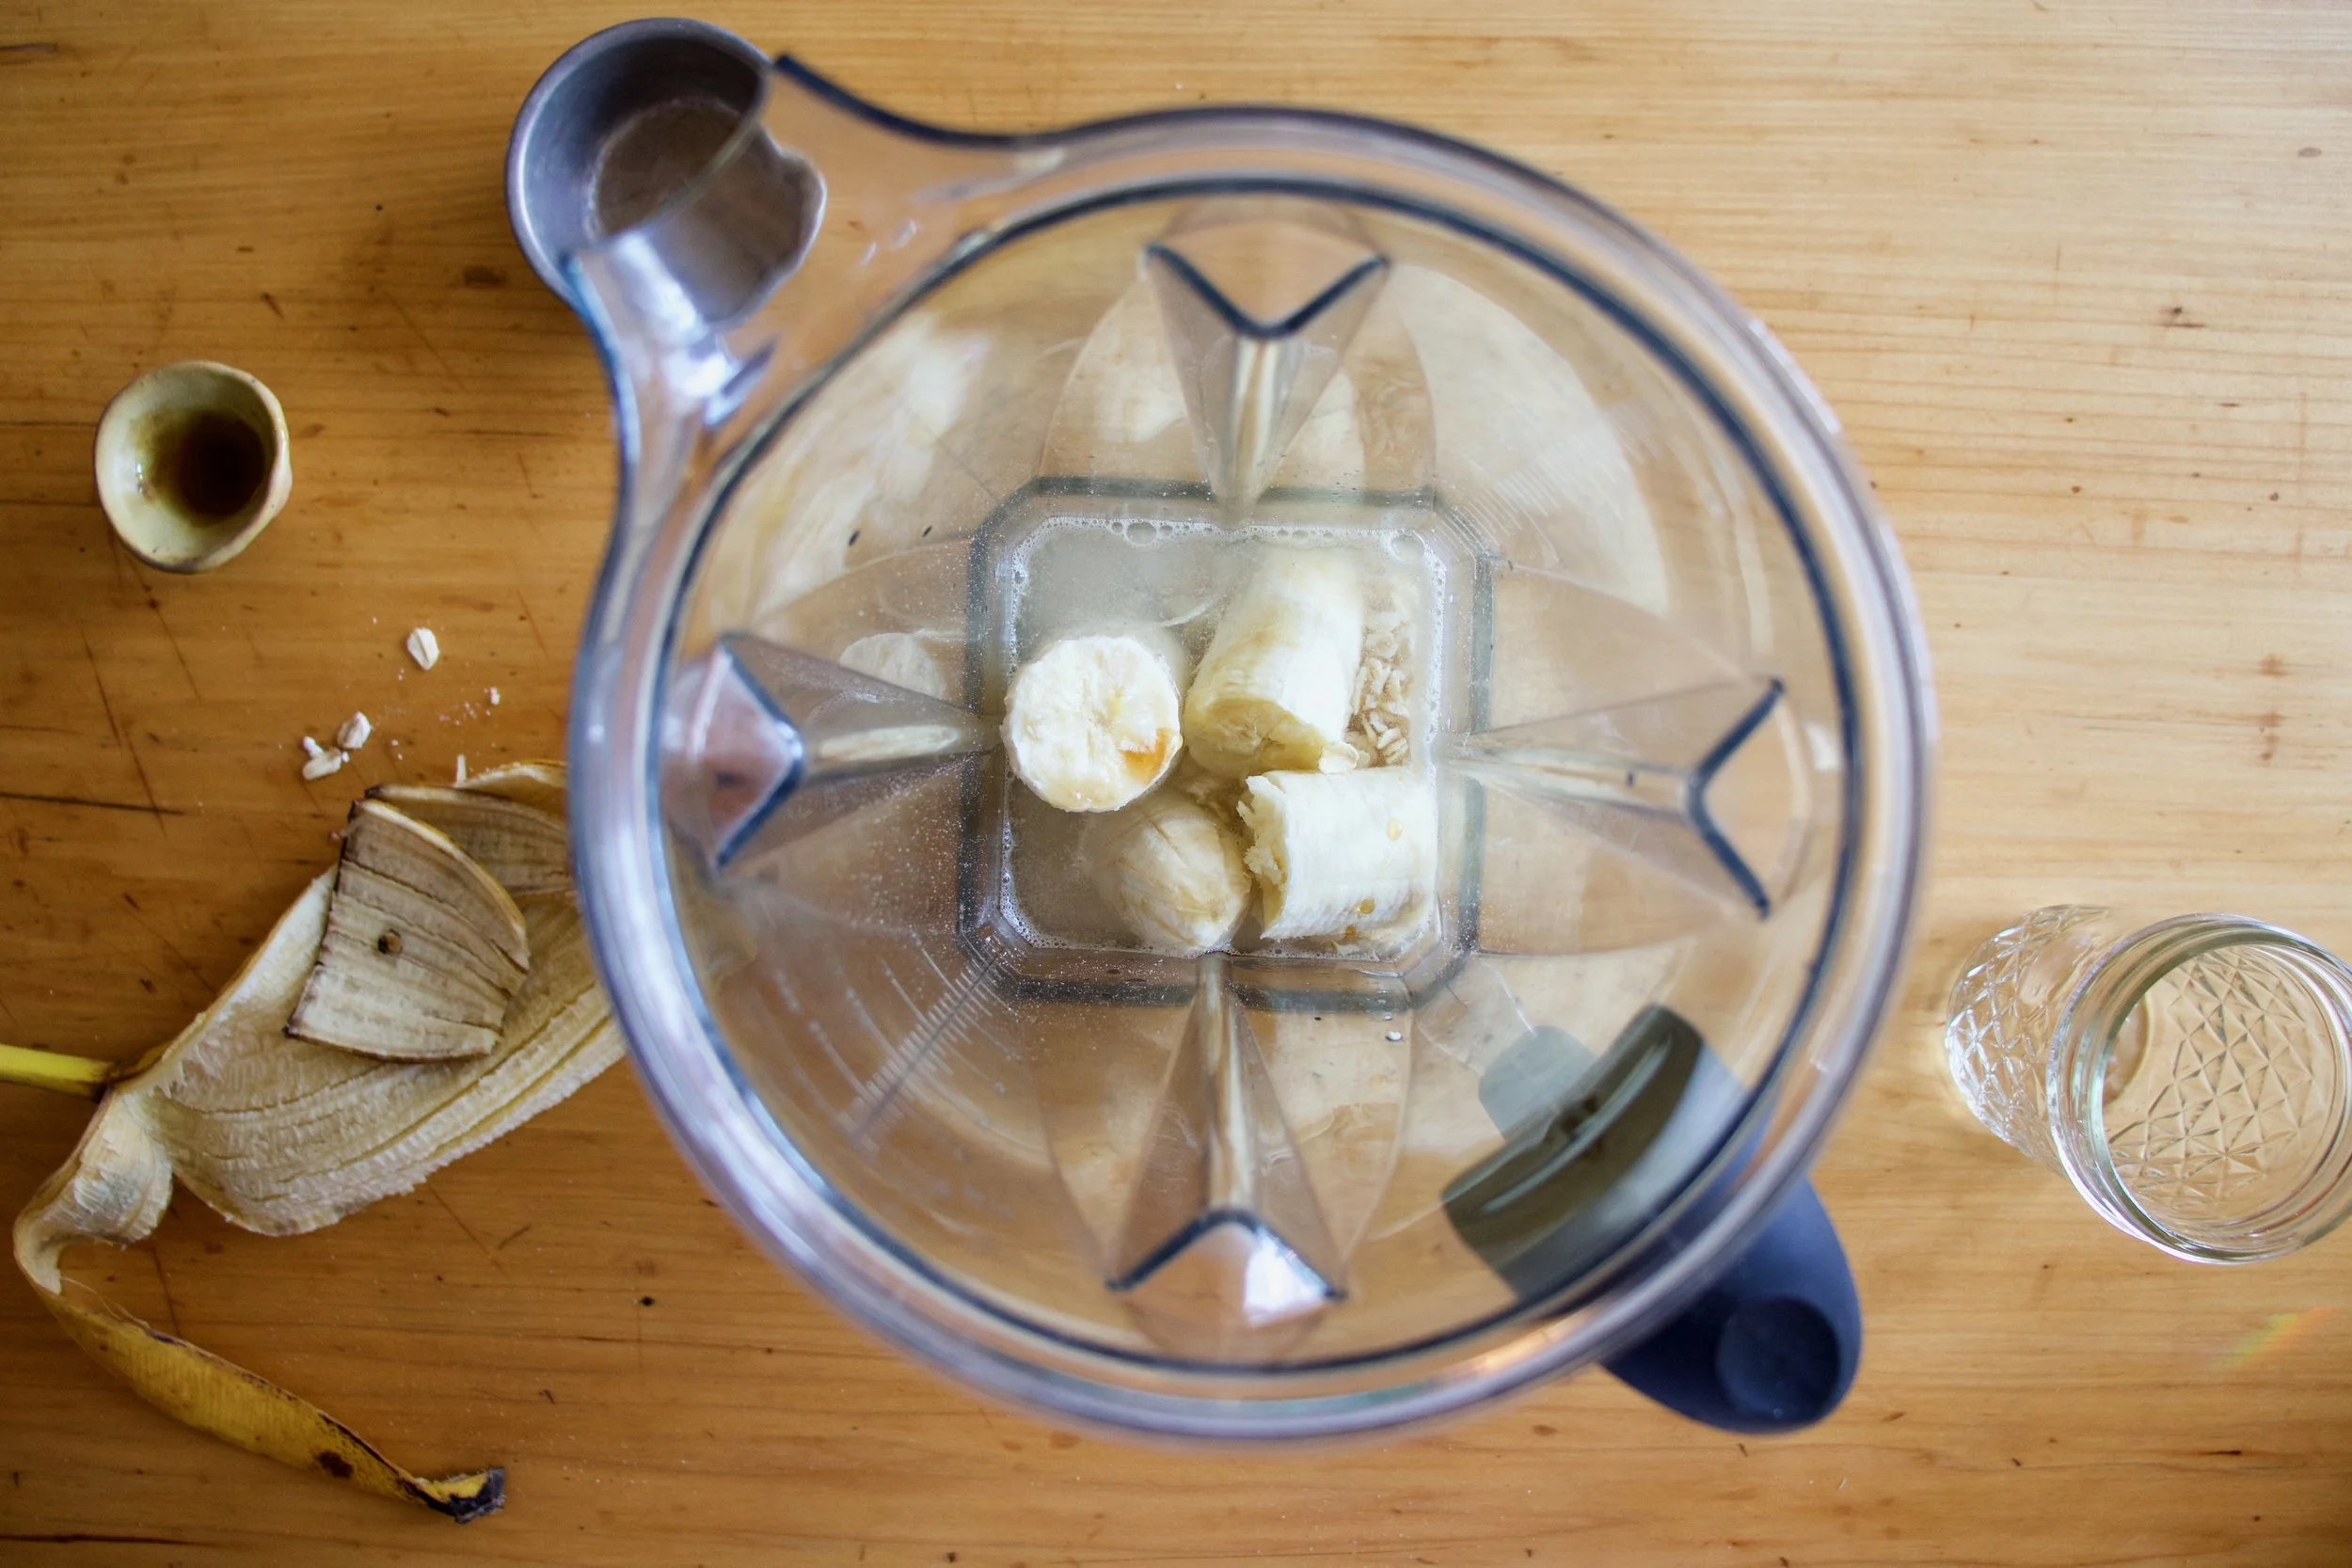
The stuff. A ripe banana, some old fashion rolled oats, a pinch of salt, water, and a smidge of maple syrup if you want it.
Everything goes into blender.
And blended until smooth. Hence the word smoothie.
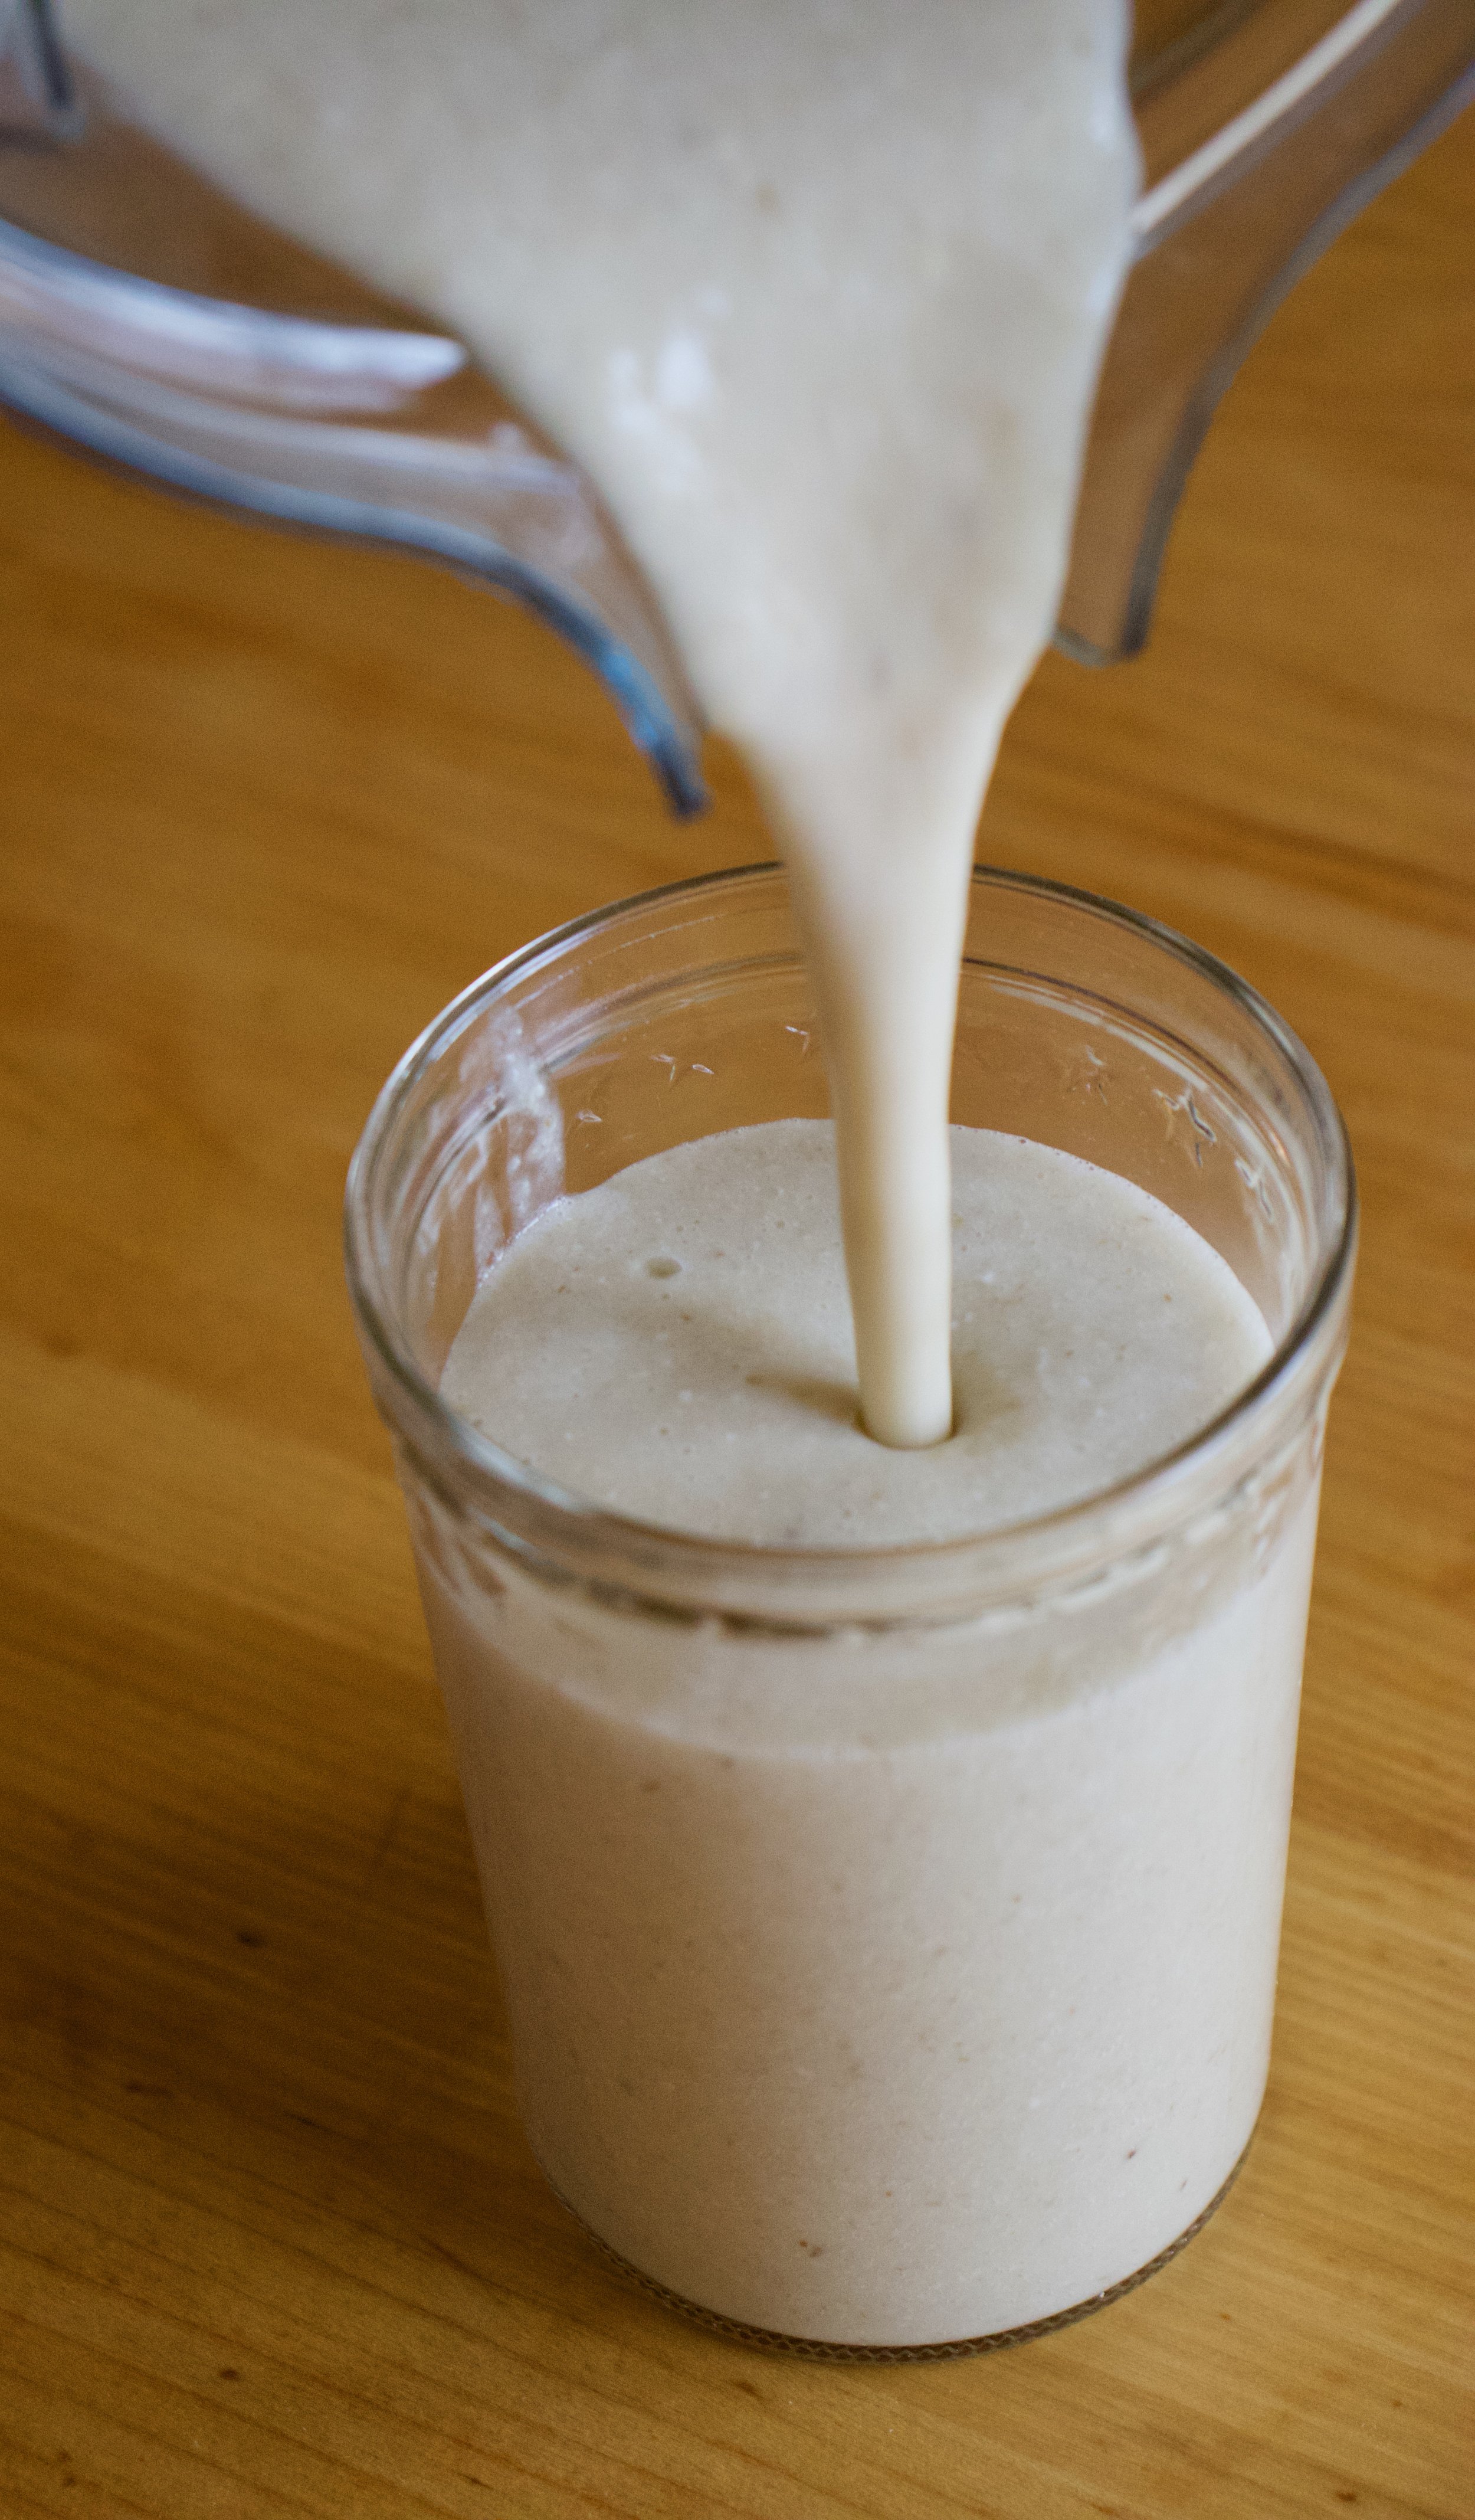
Pour it into a cup (or if you are feeling primal, drink it straight from the blender%u2026 it%u2019s totally cool)
And done.
A banana oat smoothie.
Let the good time roll!
-C
makes 1 smoothie
1 very ripe banana
1/3 cup raw old fashion oats
1 1/2 cups water
pinch of salt
a tablespoon or two of any sweetener you like (optional)
a pinch of cinnamon (optional)
Place everything into a blender and blend until smooth. Pour into a cup, sprinkle with cinnamon if you wish, and drink right away.
It’s melon season!%u00a0The past few farm shares have included at least 2,, if not 4, watermelons and cantaloupes… Can you imagine. eating 4 watermelons a week? That’s a tall order, even for someone like me who could probably eat a whole watermelon in one sitting, it’s just doing it 4 times a week might be a problem. %u00a0It’s a whole lot of melon and not enough stomach, you know what I mean?%u00a0
So what do I do with so much melon? Well first off, whenever anyone comes over I try to get them to %u00a0eat as much of it as they can, which helps a great deal. Secondly, I cut it up and freeze some. But here is the thing, I love eating chunks of frozen cantaloupe, but frozen watermelon,%u00a0never been my favorite so I usually just pass on sticking in the freezer, until now.
There is something magical that happens when you stick the frozen watermelon and cantaloupe together into a blender and making it into a slushy. It’s like eating a ray of sunshine or maybe even a rainbow, just really satisfying and juicy, and sweet but not overly sweet, and just really freaking good. Especially with all the stupid hot and humid weather we have had lately, these slushies have really been hitting the spot. %u00a0Even the mr who says he dislikes watermelon was all into these melon slushies. (he likes things that he says he doesn’t like all the time. I am pretty sure he is taste confused) Like %u00a0he was really into them. Usually I have to prompt him to tell me how something tastes, but not the slushy, he told me right away how good it was. I was like, I know dude, I just drank 2 of them myself. And I could have drank 2 more but I was trying to not get tot far ahead of myself. Moderation is key, plus I didn’t;t have any more of the melons frozen. Time to restock the freezer.%u00a0
Go make yourself a slushy, it’s juicy deliciousness will make you happy.%u00a0
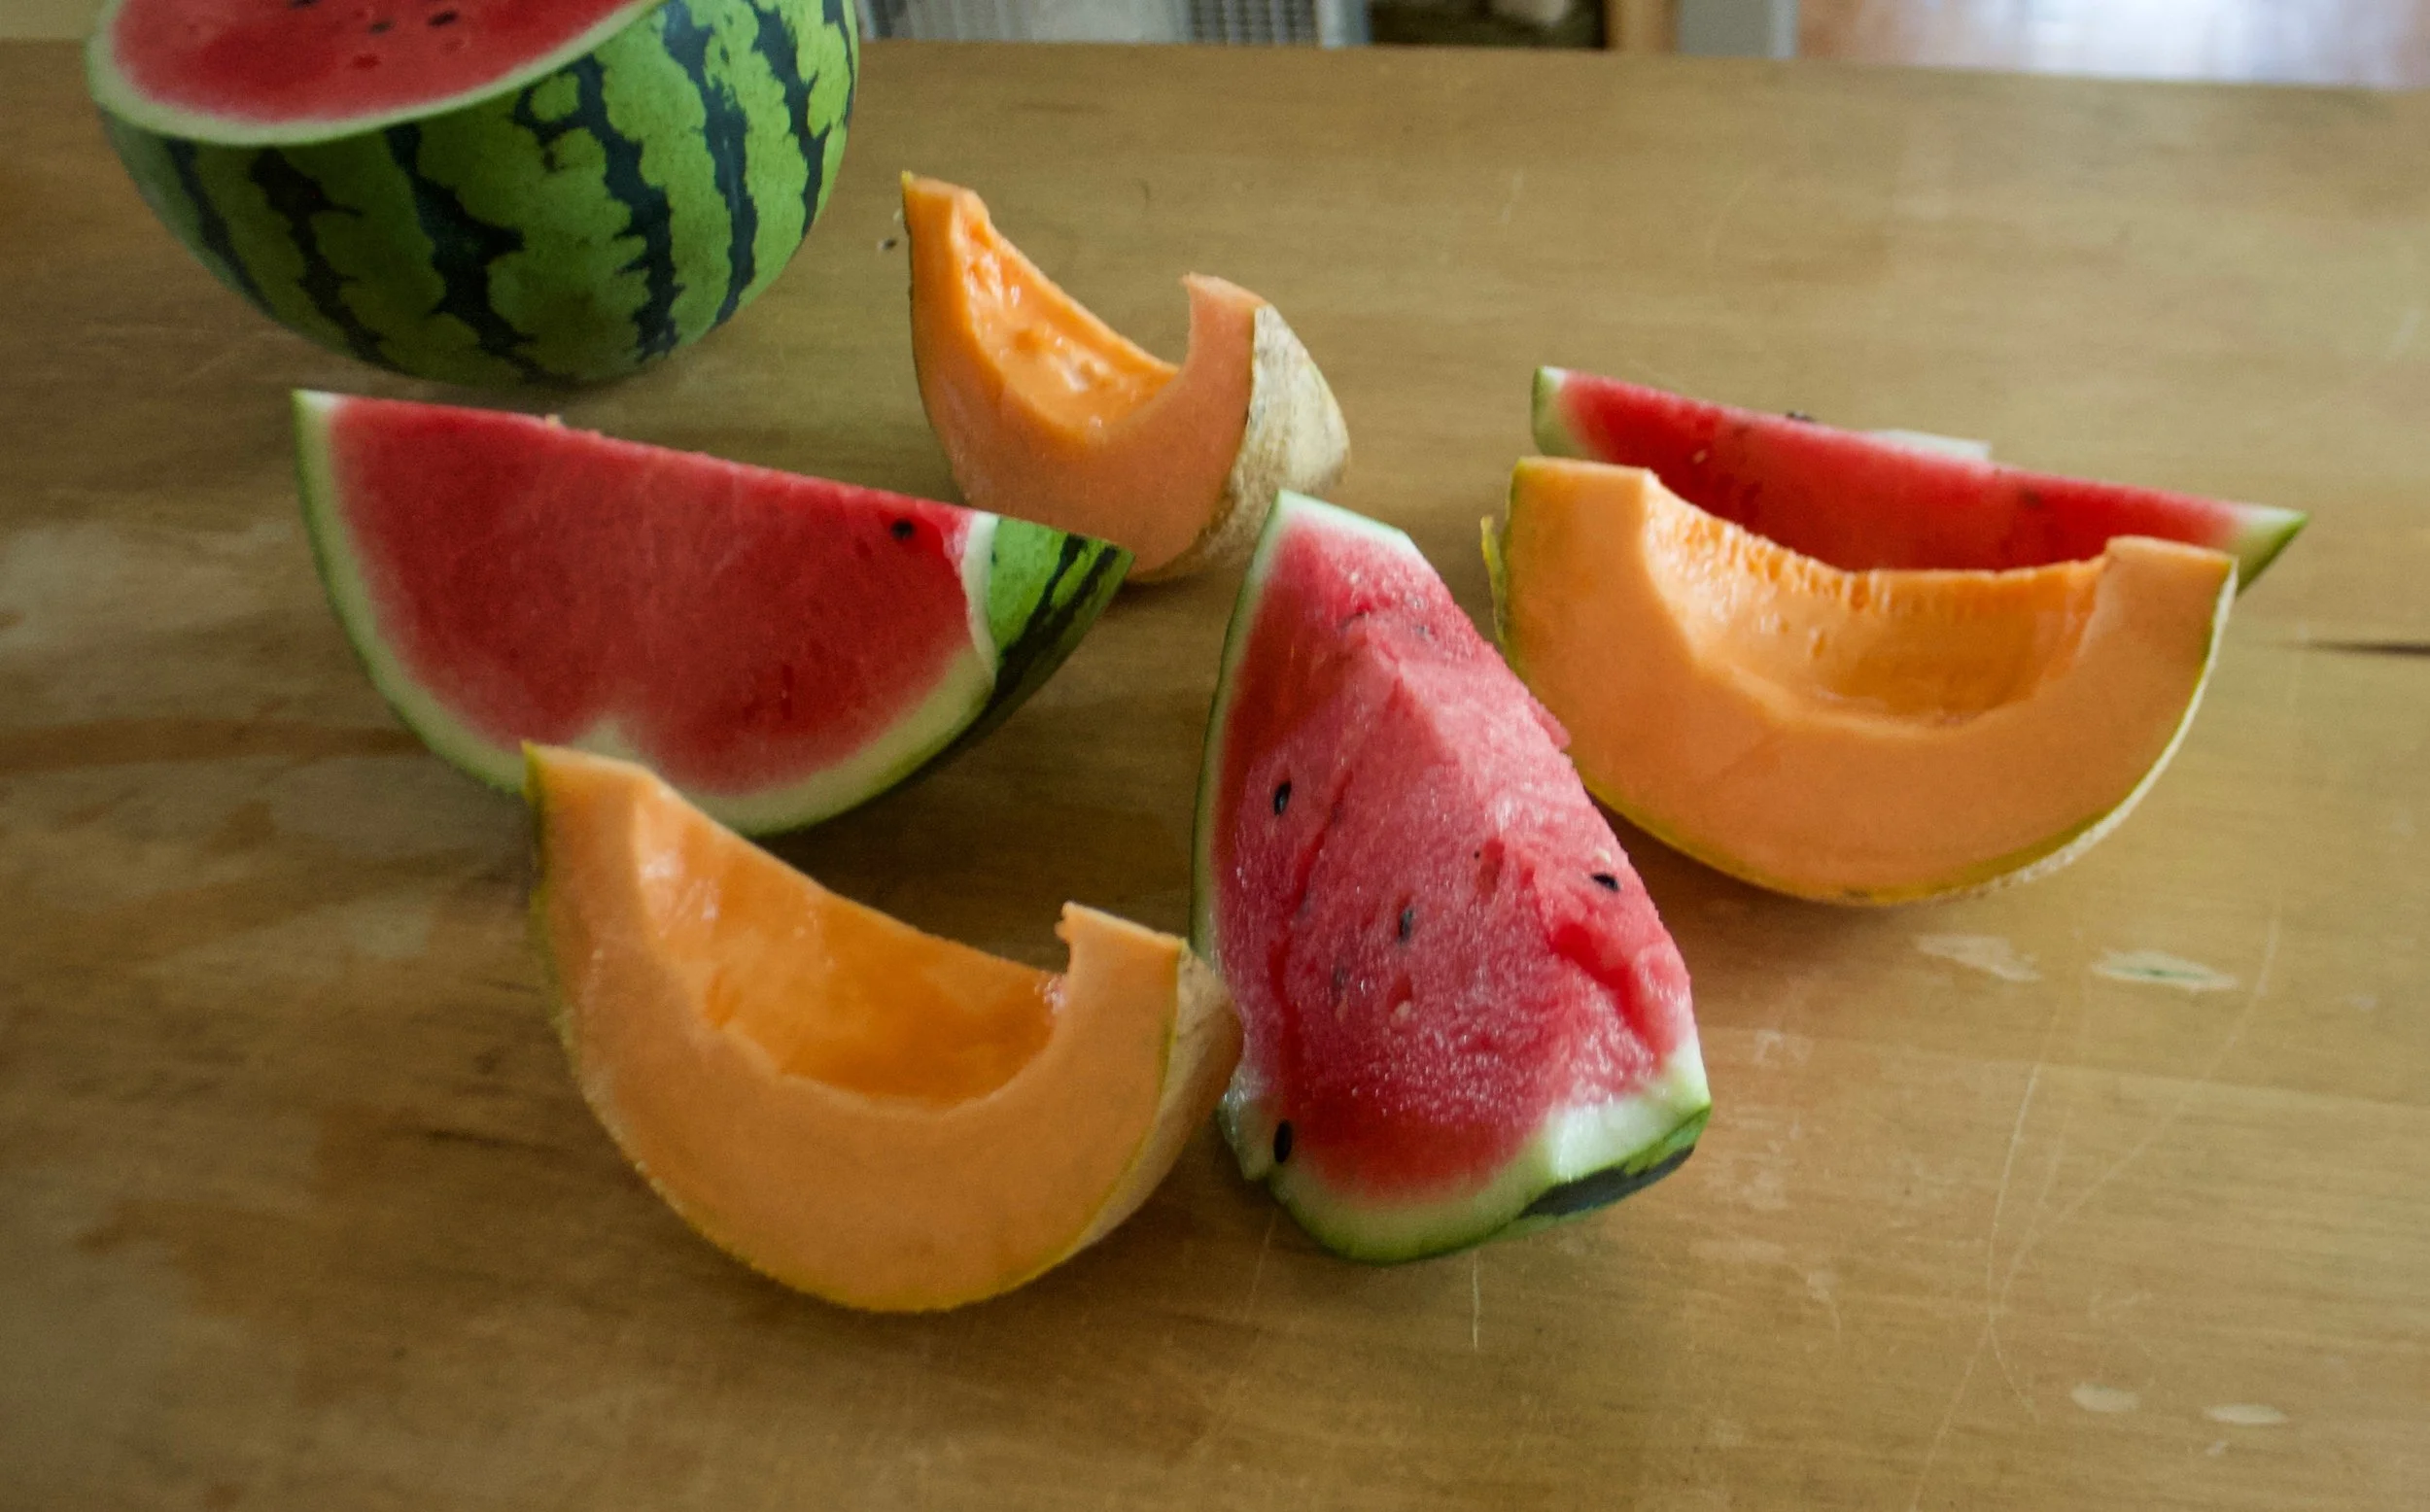
The stuff. Watermelon and cantaloupe. There should be a lime in there too but it must have rolled away….%u00a0
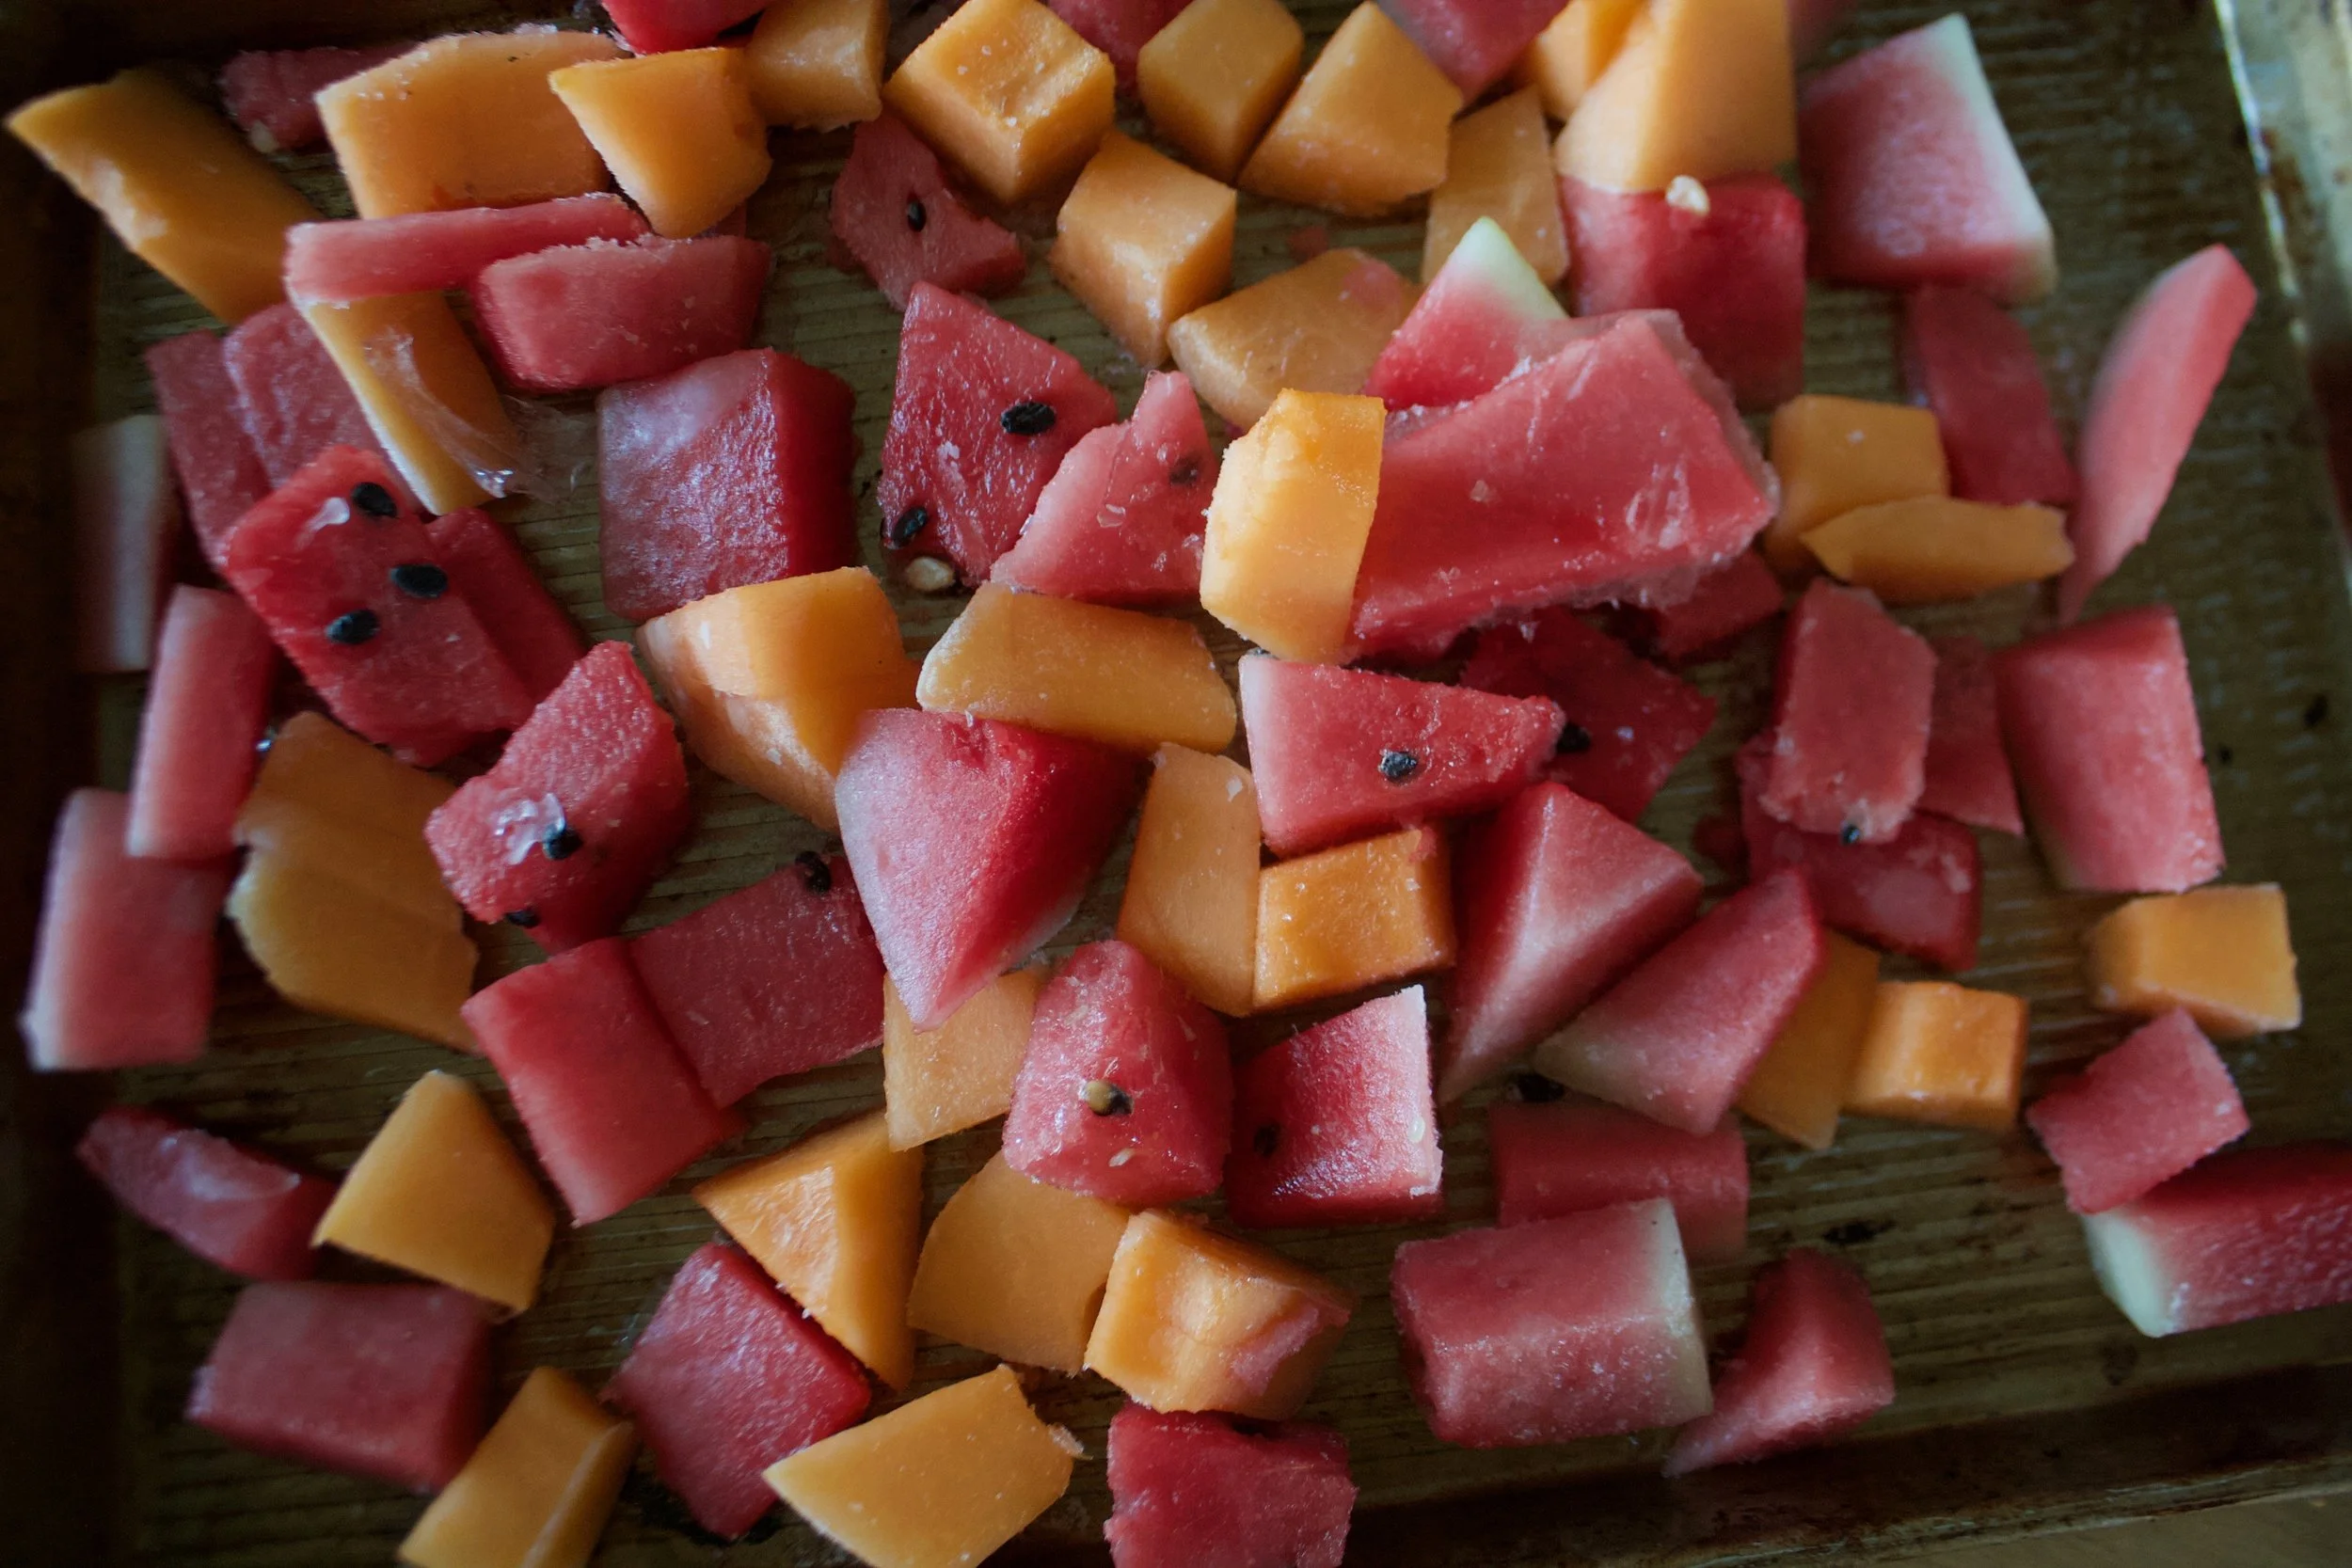
Chop some of each of the melon up, remove the rinds, and place on a big baking sheet and stick into the freezer until frozen. You can do as little as 2 cups %u00a0of each or as much as a whole melon, it’s up to you. (I suggest freezing extra)
Frozen melon. And now you can slushy.
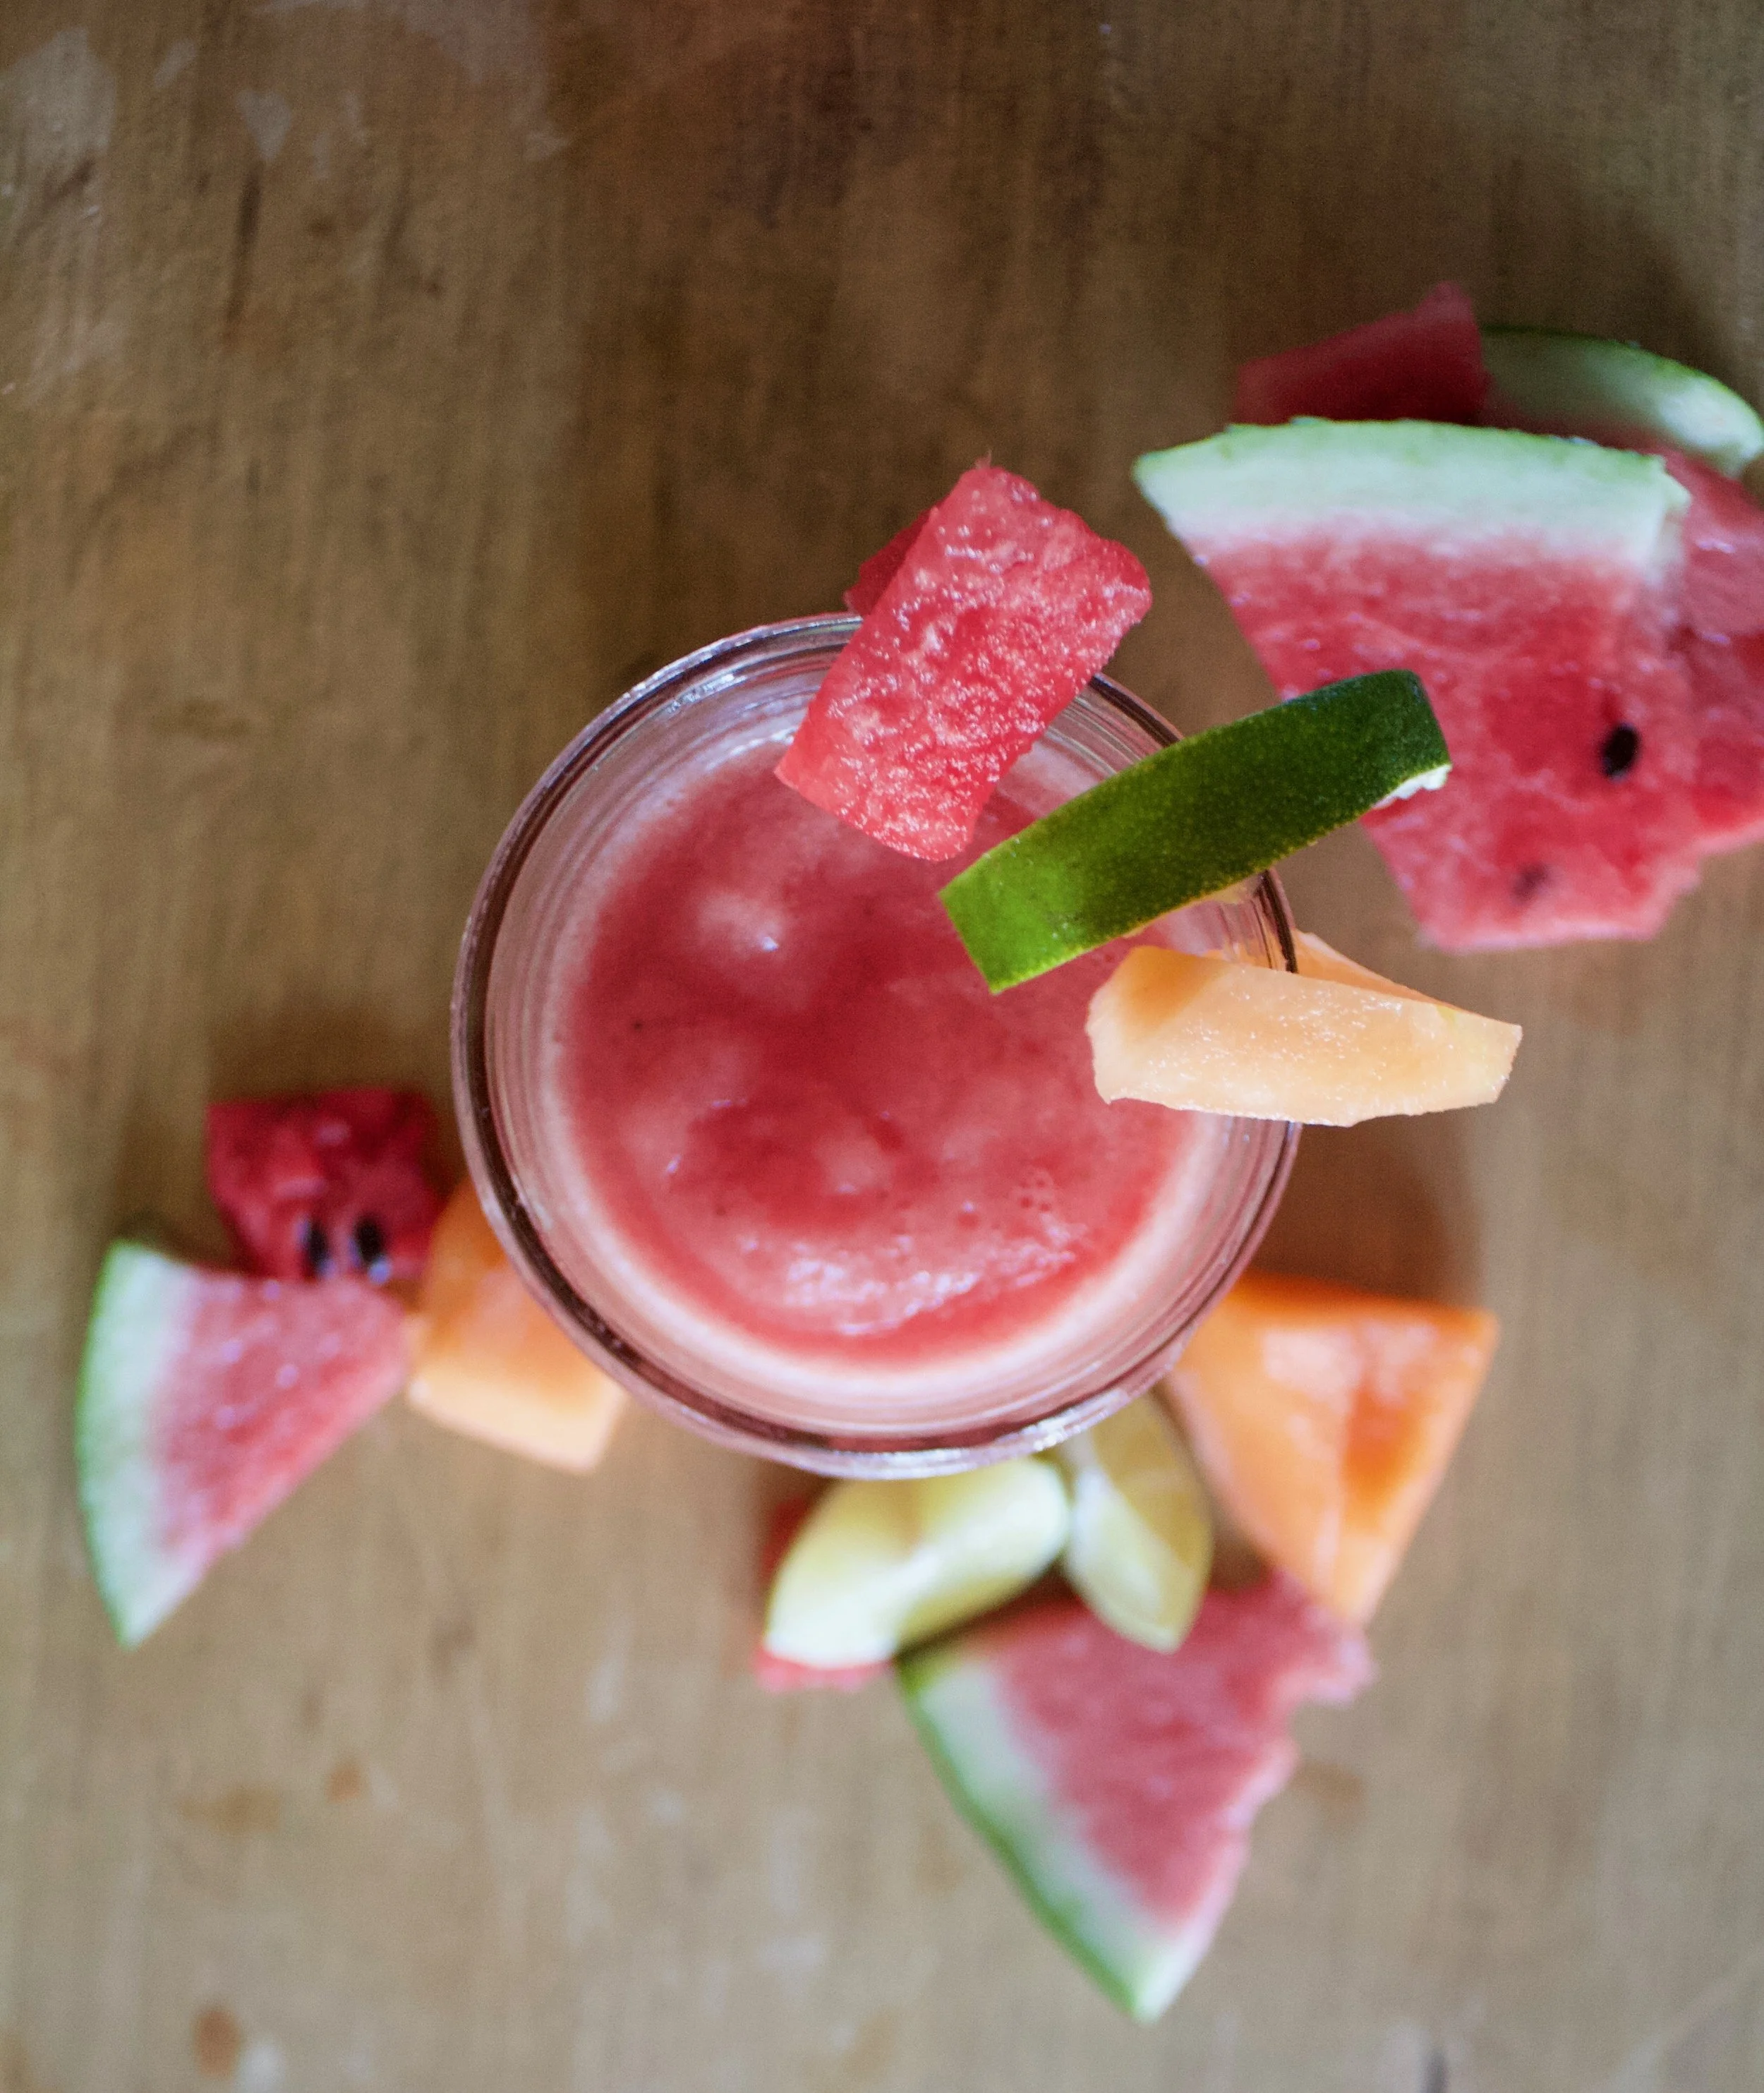
Equal parts watermelon and cantaloupe go into blender, along with the juice of half (or more to taste)%u00a0a lime and you are probably going to need to add about 1/2 a cup of water, to help the blender blend it all together. %u00a0And that’s it. You blend until it’s all slushy.
Pour into cups, garnish with a lime and/or little chunks of melon and you are good as golden.%u00a0
From now on, or until summer is over and I run out of melon, I will be keeping the freezer stocked, especially because I know that the next few weeks are suppose to be stupid hot again.%u00a0
Waterloupe slushies. Summertime goodness.%u00a0
-C
Note. The amounts above are for two%u00a0 2 cup slushies. You can, and should,%u00a0freeze a crap load more melon for future slushies. %u00a0Also, no one would fault you for maybe adding a little nip of some clear alcohol to this slushy situation to make it more of an adult drink……
Cut up a watermelon and a cantalopjue. Eat some and reserve at least 2 cups of each. Remove the rinds from the melons and cut into cubes. Place melon on a baking sheet and stick into the freezer until frozen.%u00a0
Once frozen,%u00a0place equal parts frozen watermelon and cantaloupe into the blender with the juice of a lime. Turn blender on. Slowly add in water until the blender can handle blending the frozen fruit. Blend until smooth. Pour into cups, garnish if you want with more melon and lime, then get to drinking.%u00a0
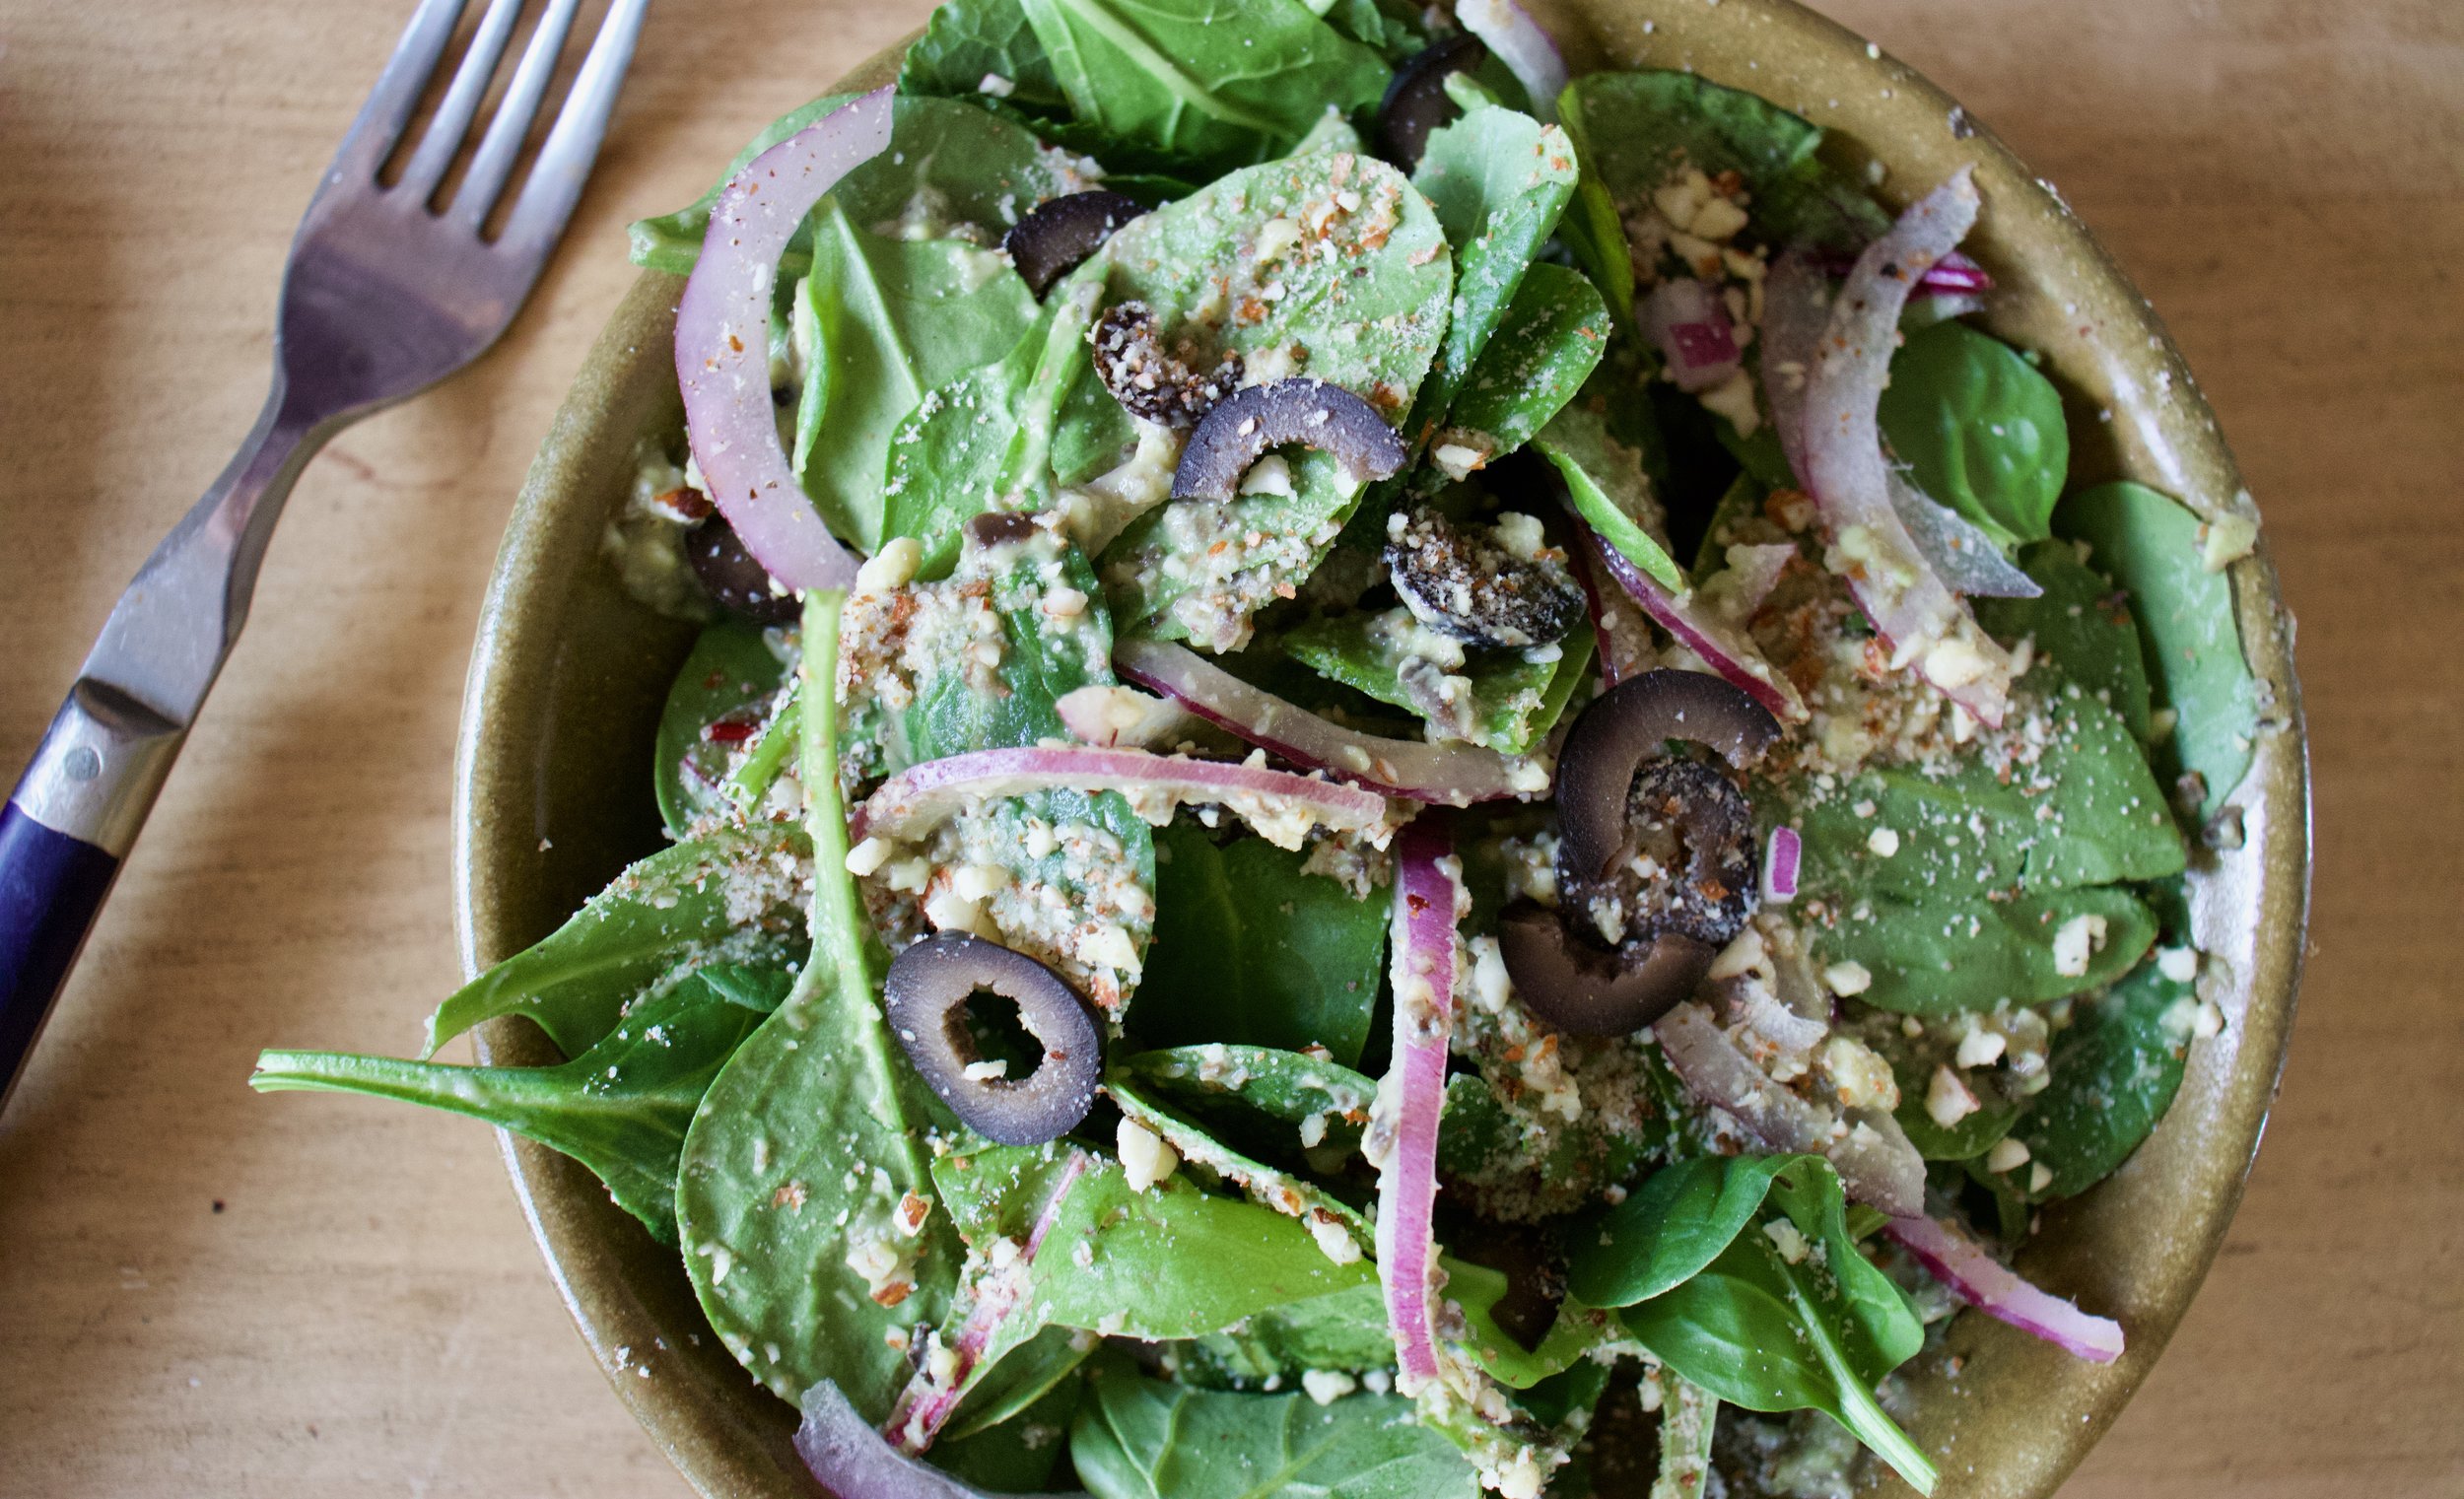
I picked up the first summer farm share this week. (Whoo Hoo!!)%u00a0In it included lettuce, spinach, kale, cilantro, and potatoes. A heavy on the greens,%u00a0start to the season, but I am never going complain when it’s heavy on the greens. I could eat greens, any greens, by the bucket full (and basically do).%u00a0And there was pyo cilantro, which I wasn’t expecting for a least a week or two so that was just fantastic because oh how I have missed fresh herbs.%u00a0
So greens went directly to my stomach without a chance, but the potatoes and cilantro I left so I could make something to share with the mr. Roasted potatoes because that’s my favorite way to eat a tater and covered in lots and lots of cilantro because yes, and when you eat cilantro, you must eat a lot of it. Lime juice for good measure and you got yourself a dank little potato dish if I do say so myself.%u00a0
The stuff. Potatoes, cilantro, limes (you probably only need one), garlic, olive oil, and salt and pepper.
After washing your potatoes, dice them into mouth sized pieces and place them into a pot of cold water%u00a0
Dice potatoes go into pot and need a little boil. If you have a pinch of salt to toss into the water, well you should do that.
After boiling for a few minutes, give the poe test, if you can kind of pierce a potato with a fork, they are done.%u00a0%u00a0You don’t want to completely cook the potatoes, you just want them juuuust barely fork tender.. Once they get there,%u00a0strain them.
Let the potatoes drain for a minutes or two to make sure all the water is gone. In the mean time, mince up the garlic.
Add the garlic with a big pinch of salt and pepper and a glug glug of olive oil back to the pot (you could use a new bowl, but why dirty another dish?)
Add in the drained potatoes and toss around until they are all evenly coated.
Dump potatoes onto a baking sheet (if you think of it, preheat the oven with the baking sheet in it… just make sure to be careful when handling hot pans)
Into the oven those taters go to roast and be great.
And sometime between putting the potatoes in the oven and taking them out, chop up the cilantro.
Once potatoes are all nice and golden roasted, remove from oven and drizzle and toss the juice of the lime all over. Place the potatoes back into the oven for a few minutes to let them crisp up again.
And then you toss all that chopped cilantro all over those potatoes.
And then eat them. Maybe serve with salsa and whipped avocado because that is what I did and I did good.
-C
Serves 2-4 peoples
Preheat oven to 425 with the baking sheet preheating in the oven as well.
Wash potatoes well and chop into pieces about an inch or so big and place in a big pot of cold water. Once you got all the potatoes in the pot, add a pinch of table salt and bring the potatoes to a boil. Cook for 5-8 minutes or until the potatoes are just barely fork tender.. don’t over boil them. Drain potatoes.
In either the empty pot (less dishes) or a bowl, combine 2 tablespoon oil with the garlic, a good pinch or two of pepper, and same with salt. Mix around then add in the potatoes. Toss to coat and if you feel that you might need little more oil, drizzle in a bit more.%u00a0
Dump coated potatoes onto a %u00a0preheated baking sheet and place in oven for about 40-50 minutes, giving the potatoes a good stir after 30. You want the potatoes to be a nice roasted brown. Once roasted, pull potatoes from oven and squeeze the juice of the lime all over the potatoes. Toss and place the potatoes back into the oven for a few minutes just to crisp up a bit. While the potatoes are crisping up,%u00a0chop the cilantro. After the few minutes, pull the potatoes back out and toss with the cilantro. Season with more salt and pepper if needed and then just eat them. I like to serve with salsa and some avocado situation, but ketchup or naked works too.
%u00a0