alz-il.net
  • Home
  • Blog
  • YouTube
  • TikTok
  • Instagram
RSS

THE LOVELY CRAZY

November 29, 2019 by maximios • Blog

What%u2019s up with dinner rolls? Do people eat them all year round, like on a Tuesday in the middle of March or maybe a nice blue sky sunny day in July? Is that a weird question? But seriously, think about it. Dinner rolls, at least in my world of people, are pretty much only eaten in and around Thanksgiving and Christmas. Huh. Kind of strange seeing that dinner rolls are bread which everyone eats all the time and are basically made specifically for dinner (although can and should be eaten for breakfast and lunch as well) which most people eat. Every. Single. Day. Well, whatever the reason, it%u2019s weird. So yes, I am making these here dinner rolls now at the traditional holiday time but I think as of now, I am going to start making them all the time. It%u2019s going to be my new thing. Fourth of July dinner rolls. Yup.

And so yes, we need dinner rolls right now for the holiday food feasts and these dinner rolls are the perfect accompaniment to any and all dinners. They are nice and fluffy and all dinner roll like, just as any good roll should be, but also slightly more nutty and soft and healthy because oats and wheat flour and homemade which is always the best.

And if you are like, hell yes I am a dinner roll person and hell no I am sticking to store bought cause that is that and how it%u2019s done, well hey, no judgment here. I made these for my people for our family Thanksgiving, (which is happening today at my house. There are going be so many people) and I know that everyone will love and be happy to eat them, but I too also bought some of those super white, take and bake ones that I know if I don%u2019t have on the table next to these gorgeous and amazing rolls, that I will probably get punched in the face. So we will have both. And then at dinner I can bask in the glory of all the comments about how much better my rolls are then the store bought ones. (Secretly why I am having both. Fishing for compliments. HAHA!)

Now to those soft and fluffy dinner rolls!

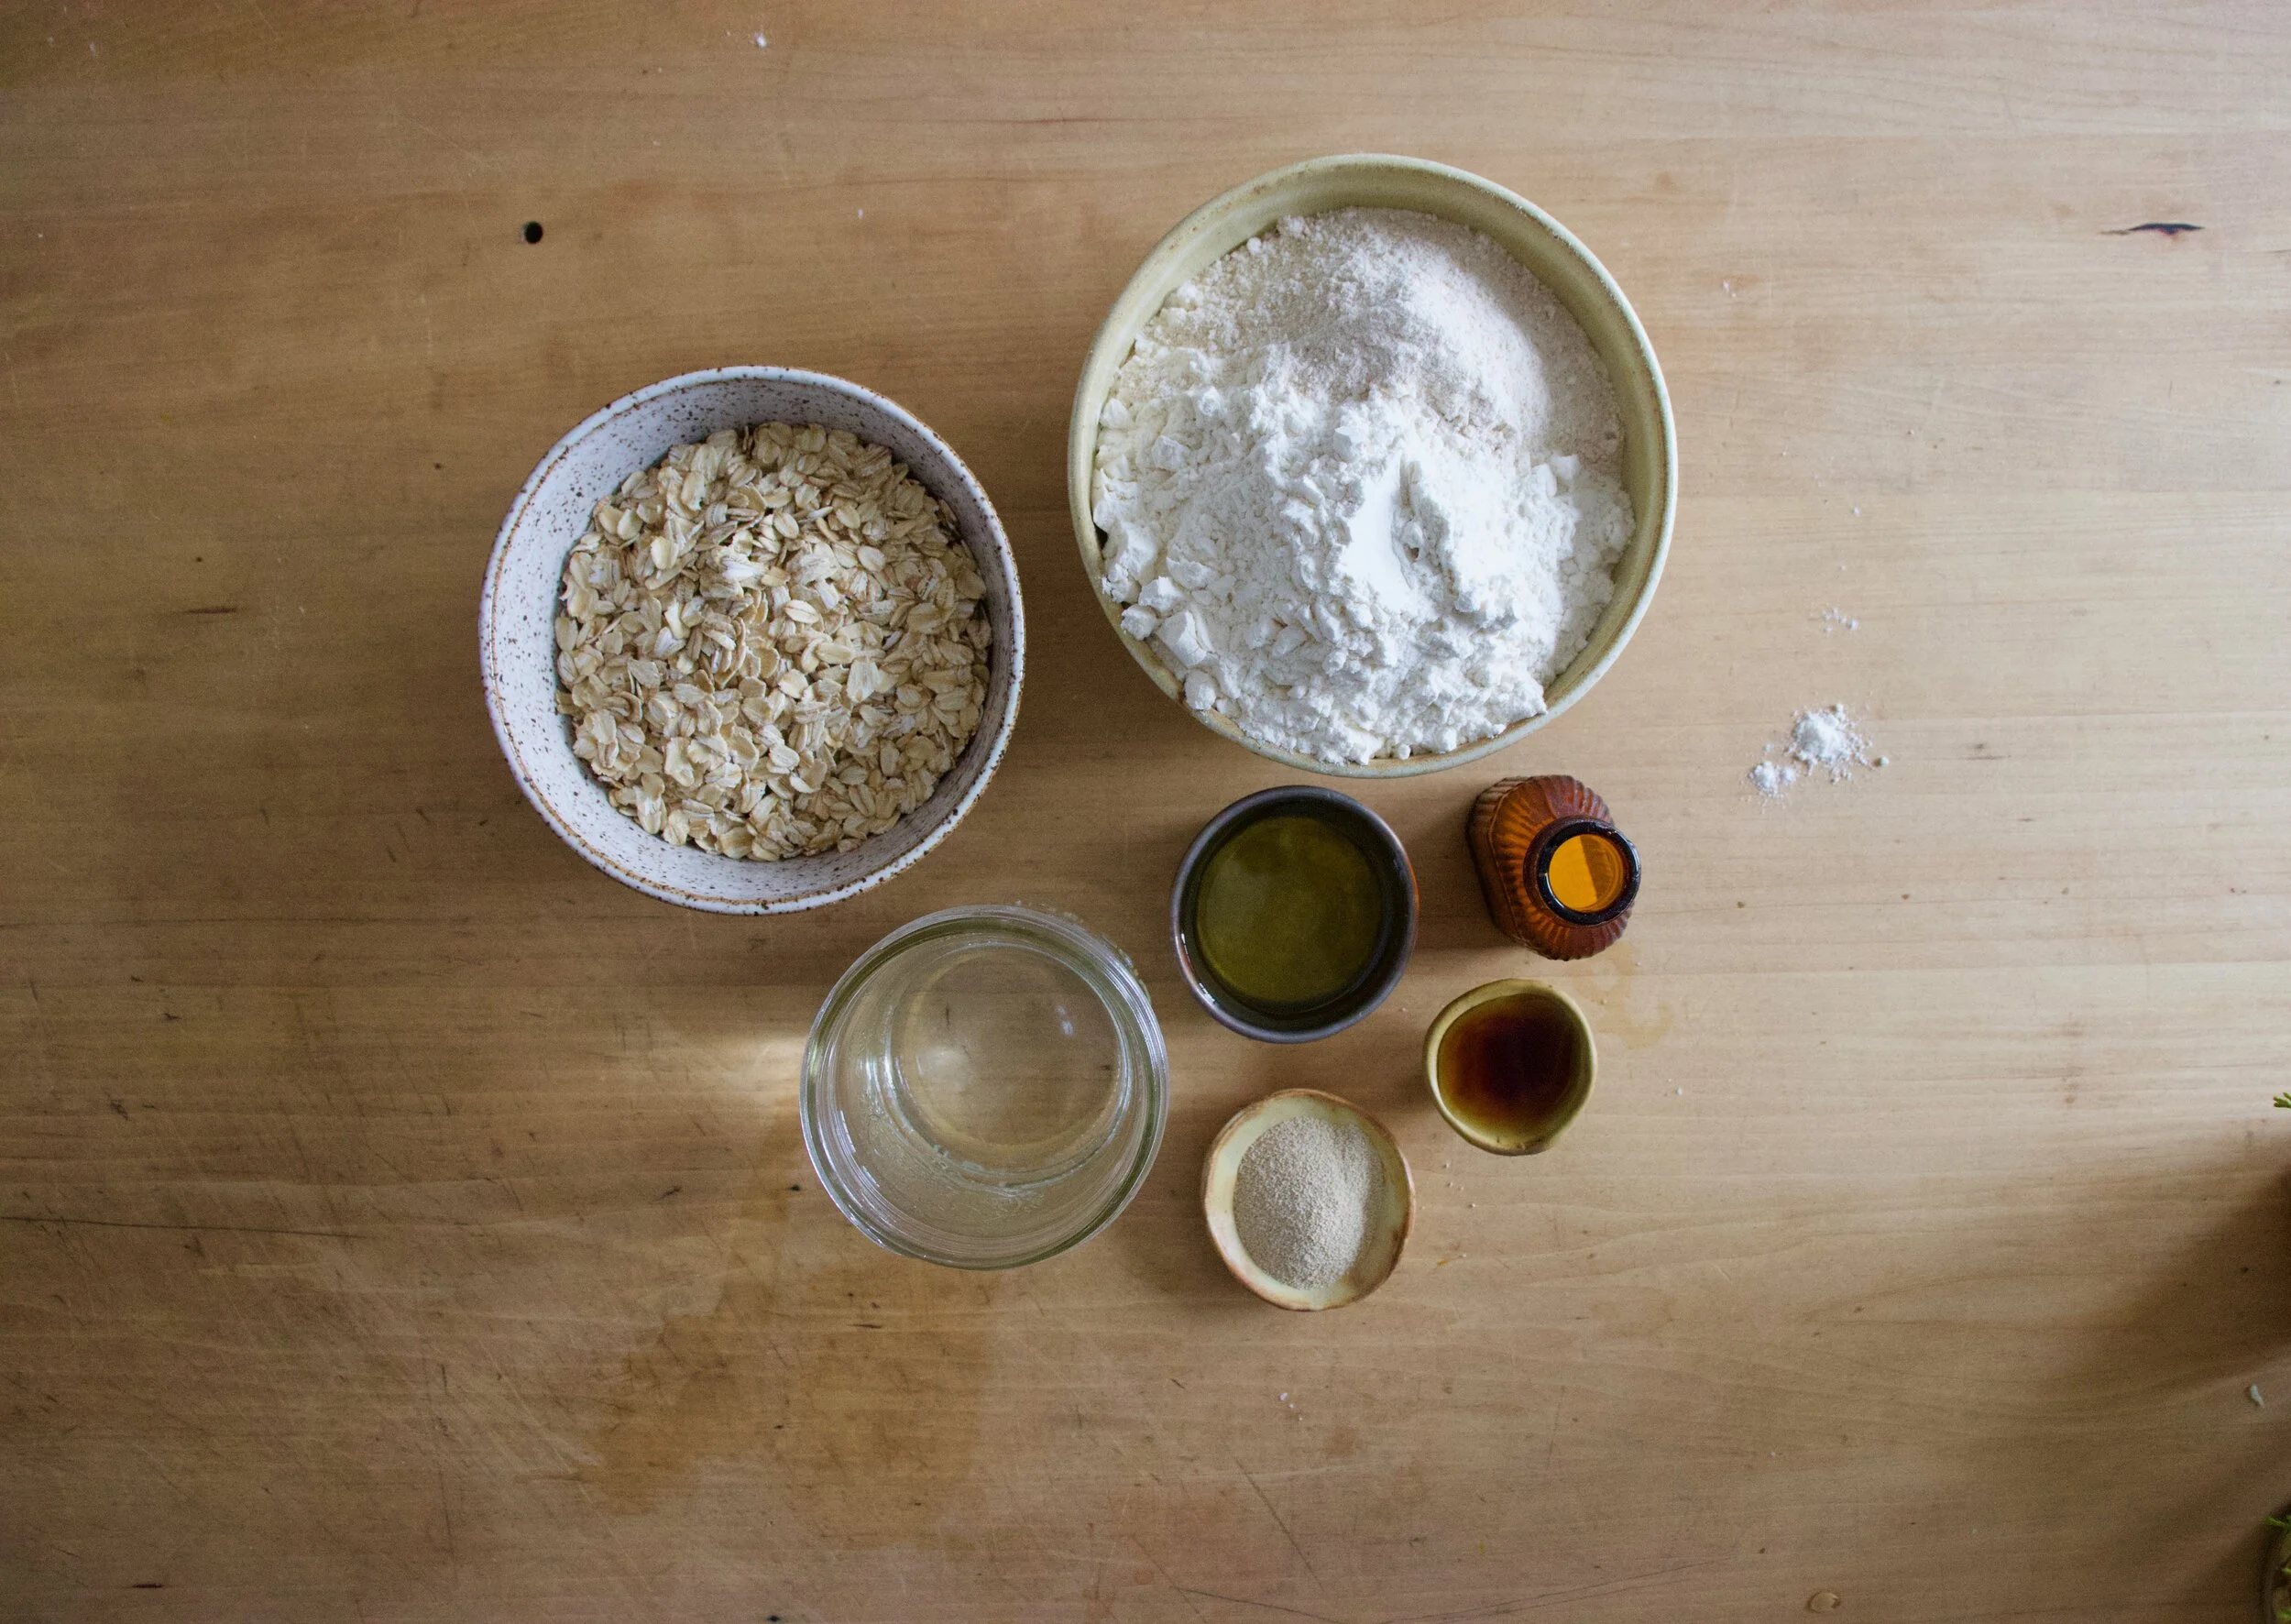
The stuff. Old fashion oats, all purpose and white whole wheat flour, yeast, oil, water (hot and room temperature), maple syrup, and salt.

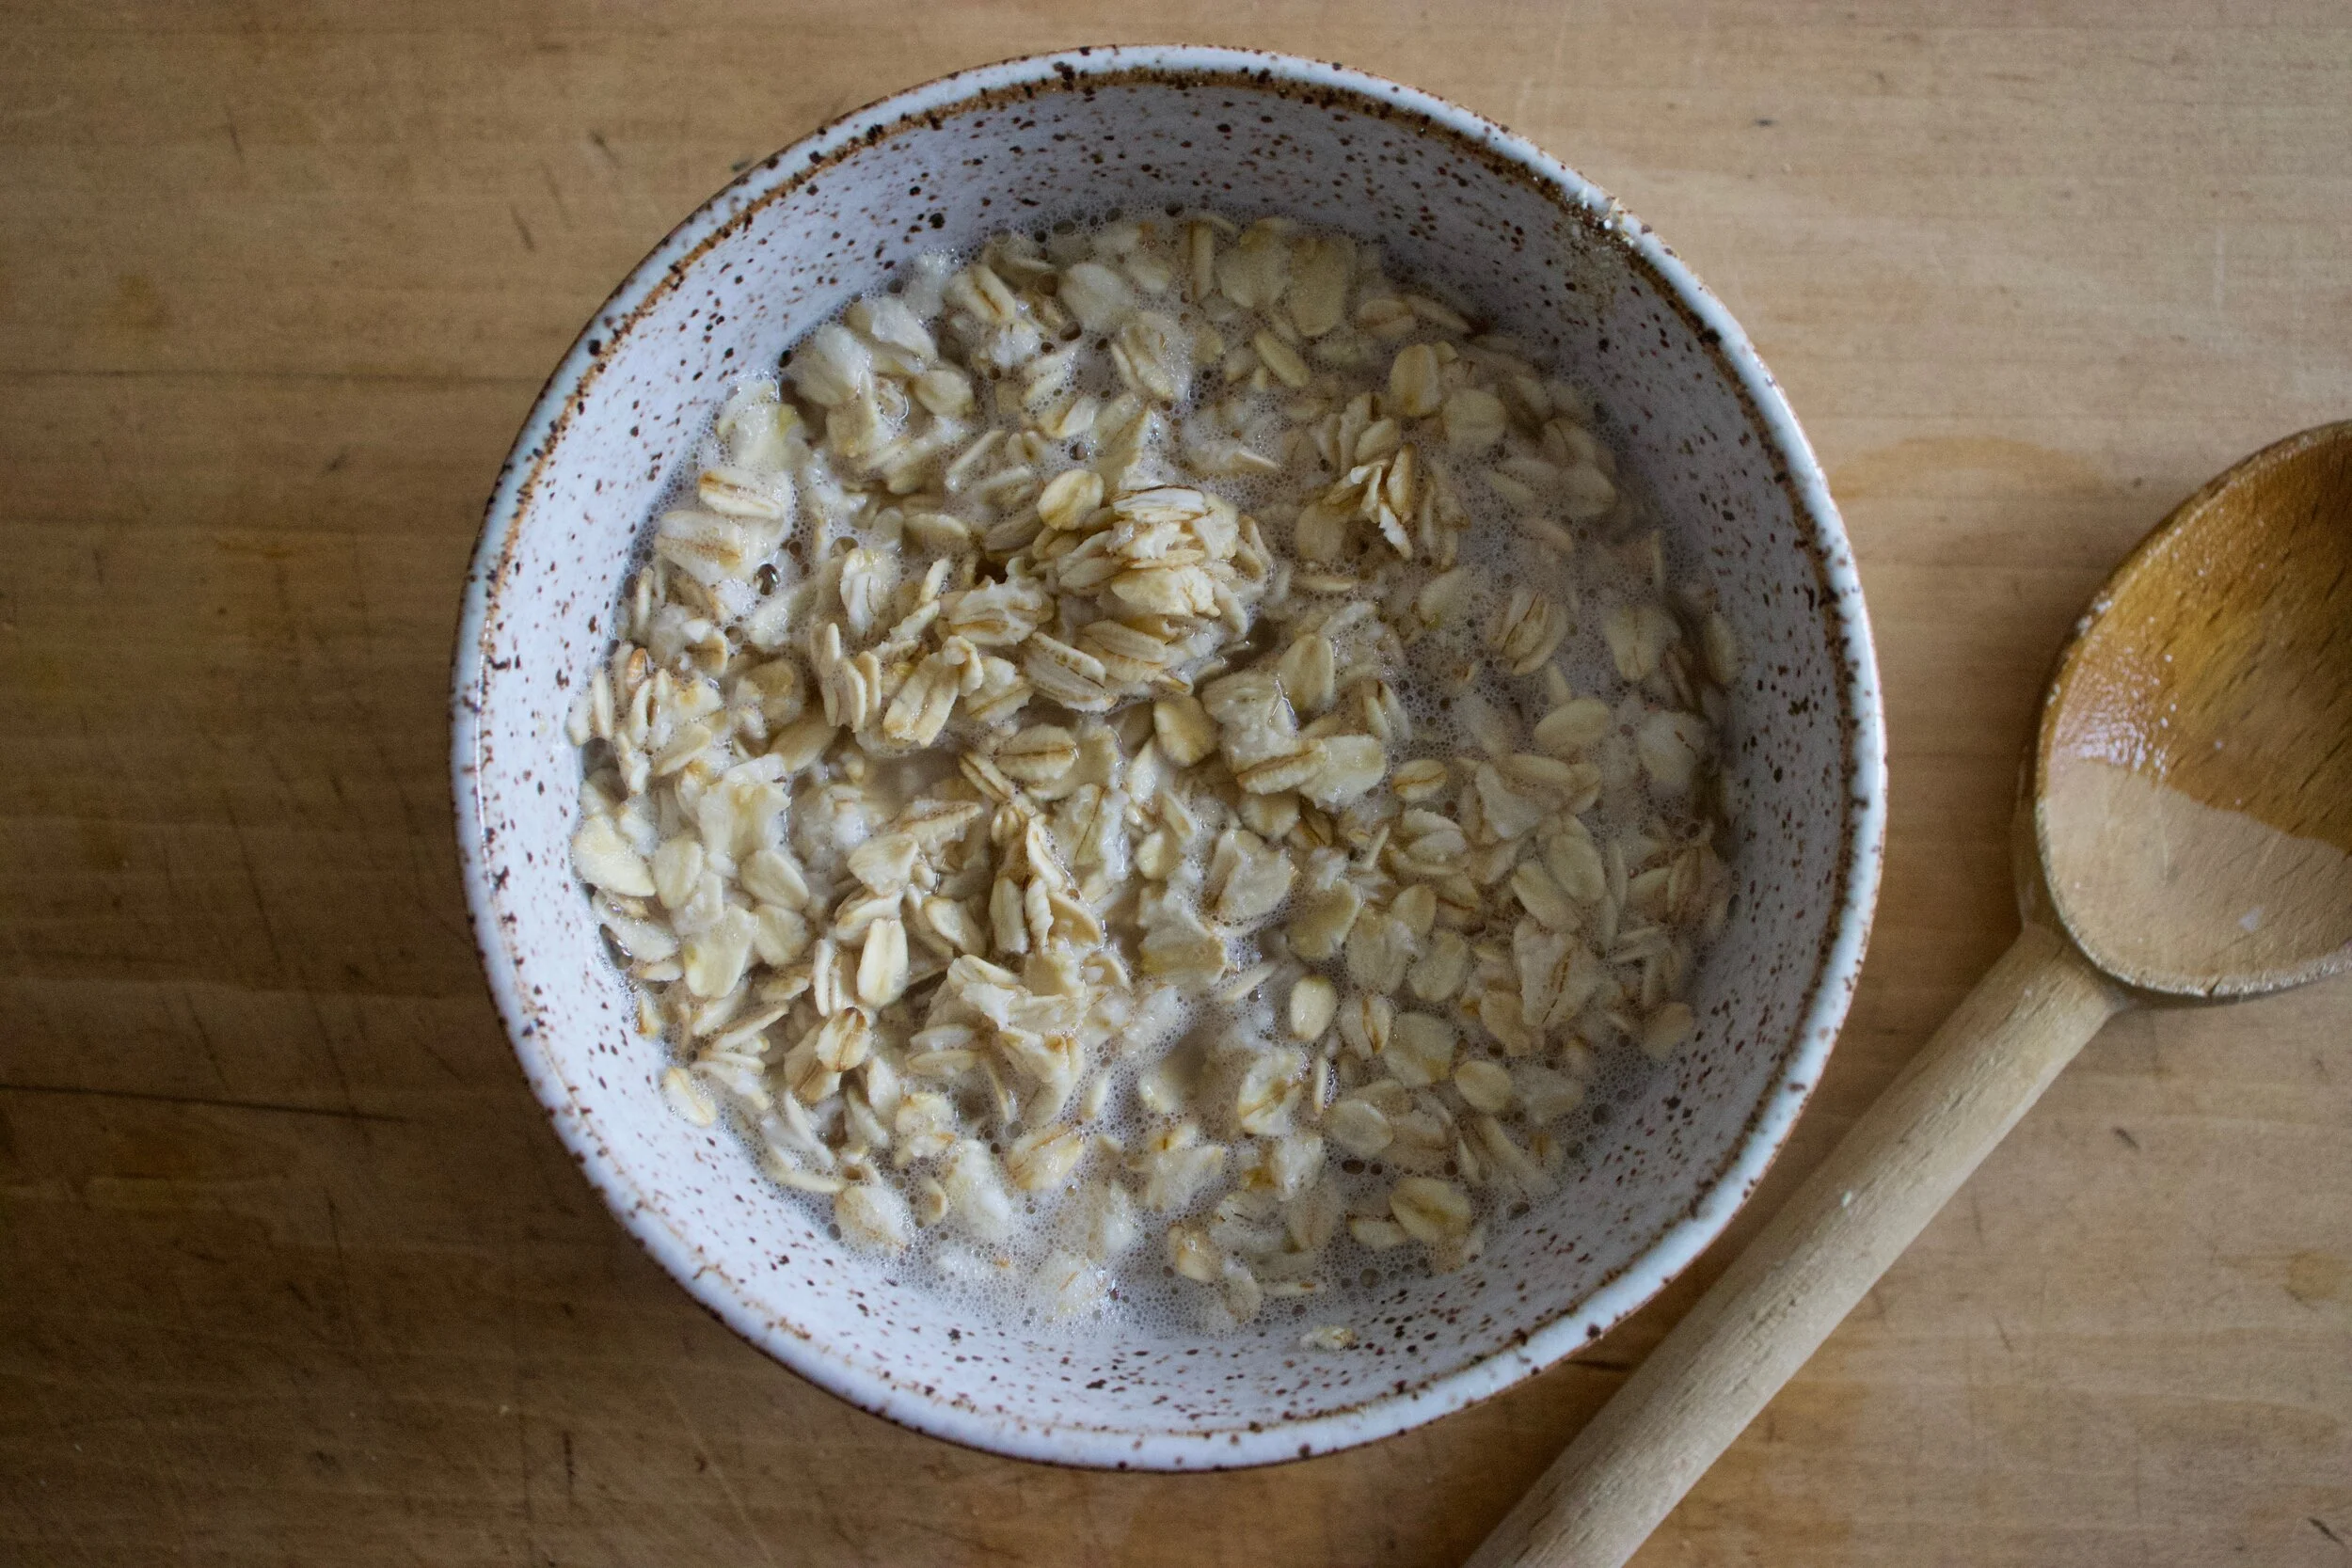
First, take the boiling water and pour it over the oats. Mix them and let them soak and cool for 10 or so minutes.

While oats are soaking, add the room temp water to a big bowl with the yeast. Once the oats are soft and cooled off a bit, add them to the yeast mixture along with the oil, and maple. Mix together. The add the flours and mix until combined.

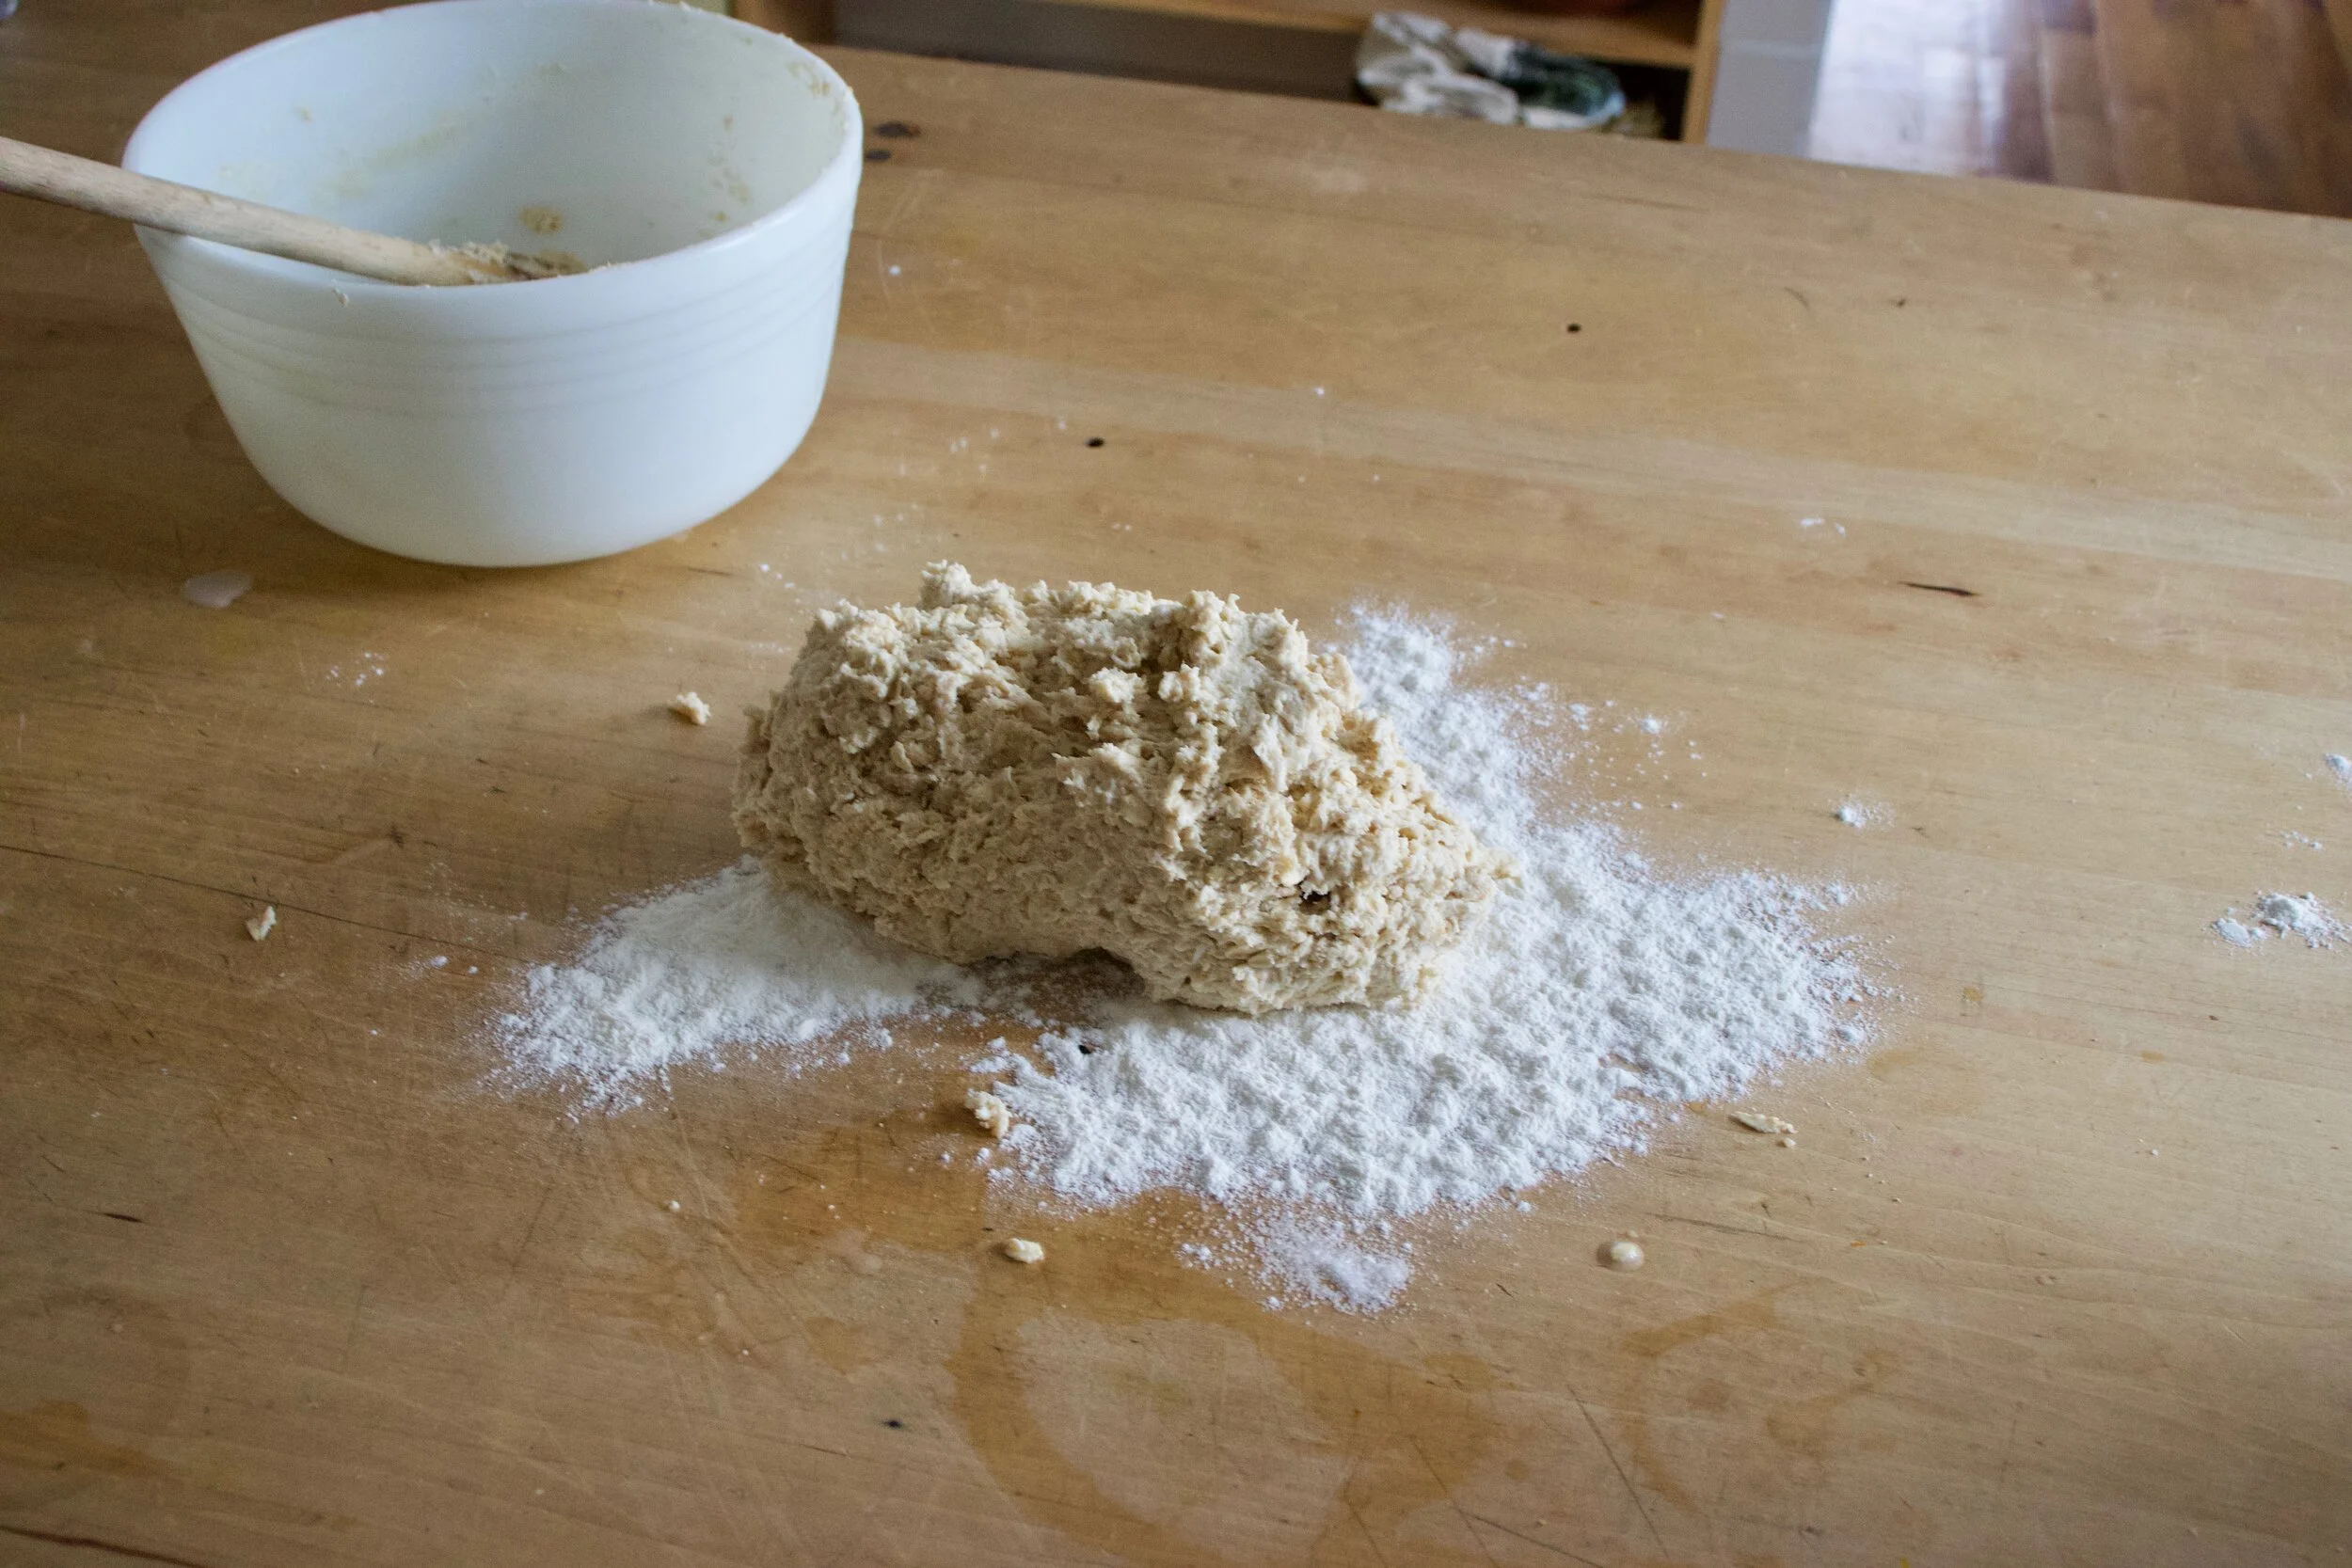
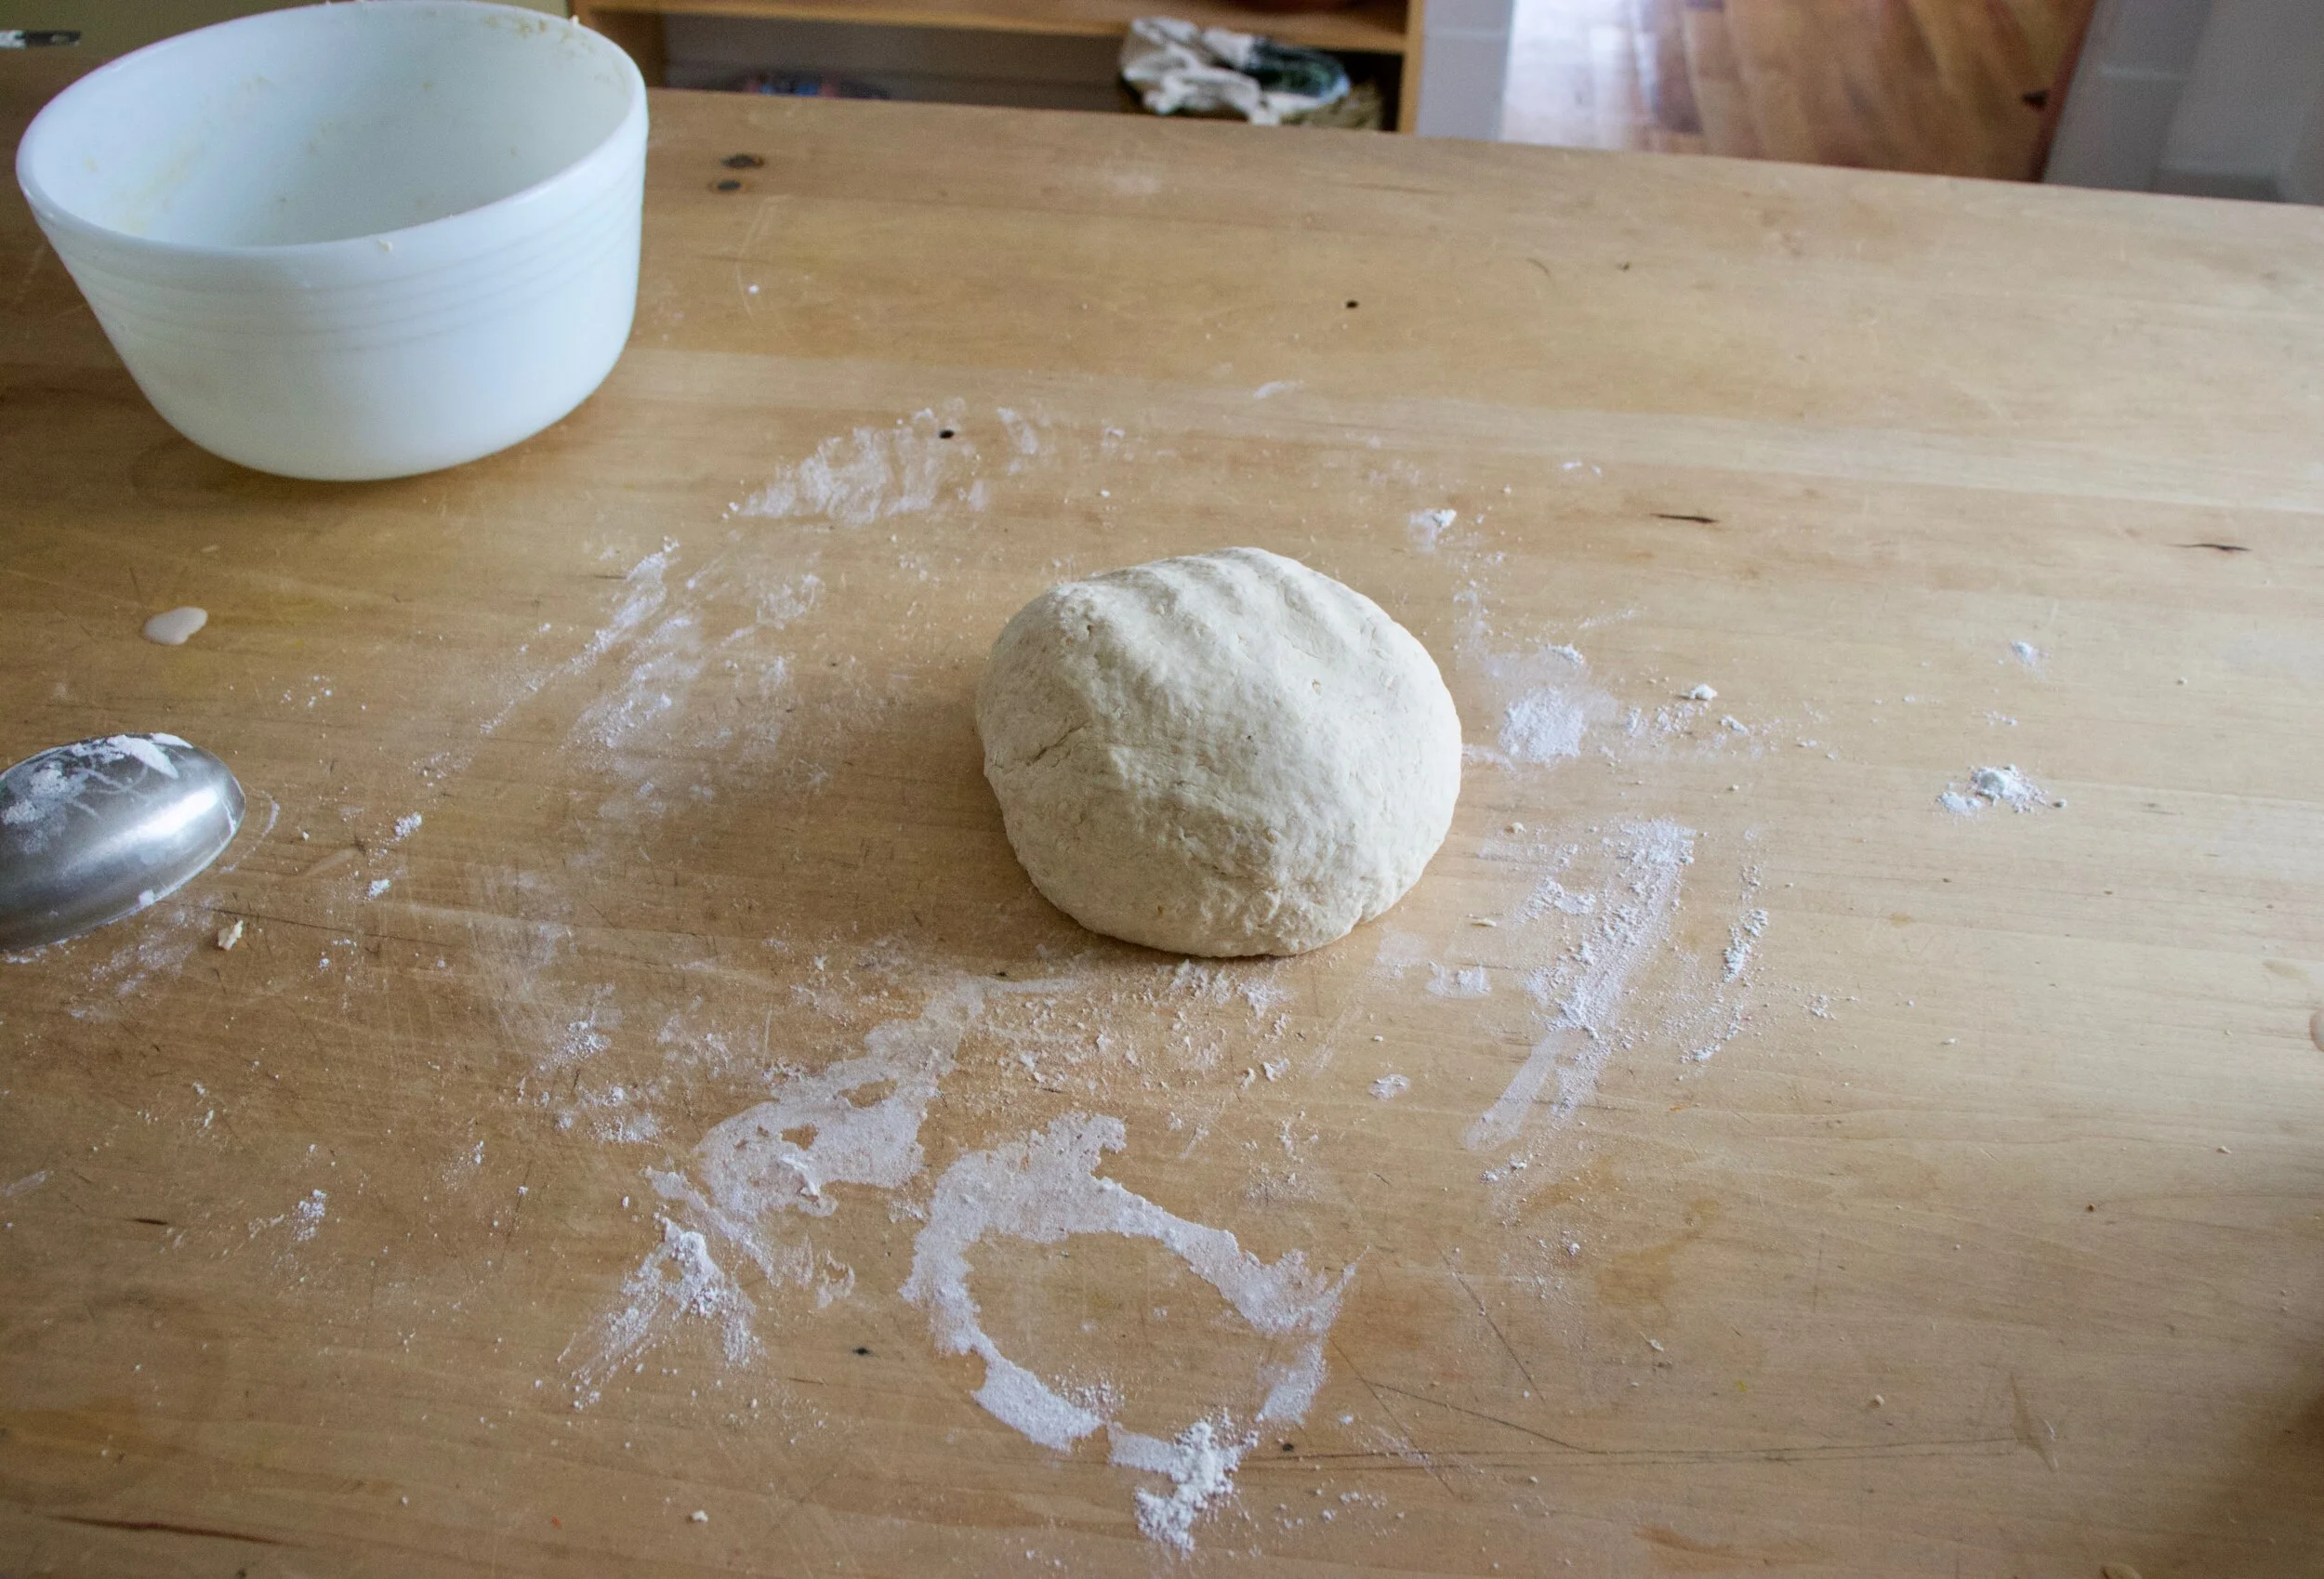
Dump dough onto a floured surface and knead for about 3-5 minutes, adding a little more four as needed to keep from being to sticky, but don%u2019t over flour. The dough is and should be a little tacky.

Soft and supple. Kneaded and ready.

Place the dough back into the bowl and cover with a damp towel. Leave alone and let rise for about an hour or until it doubles in size.

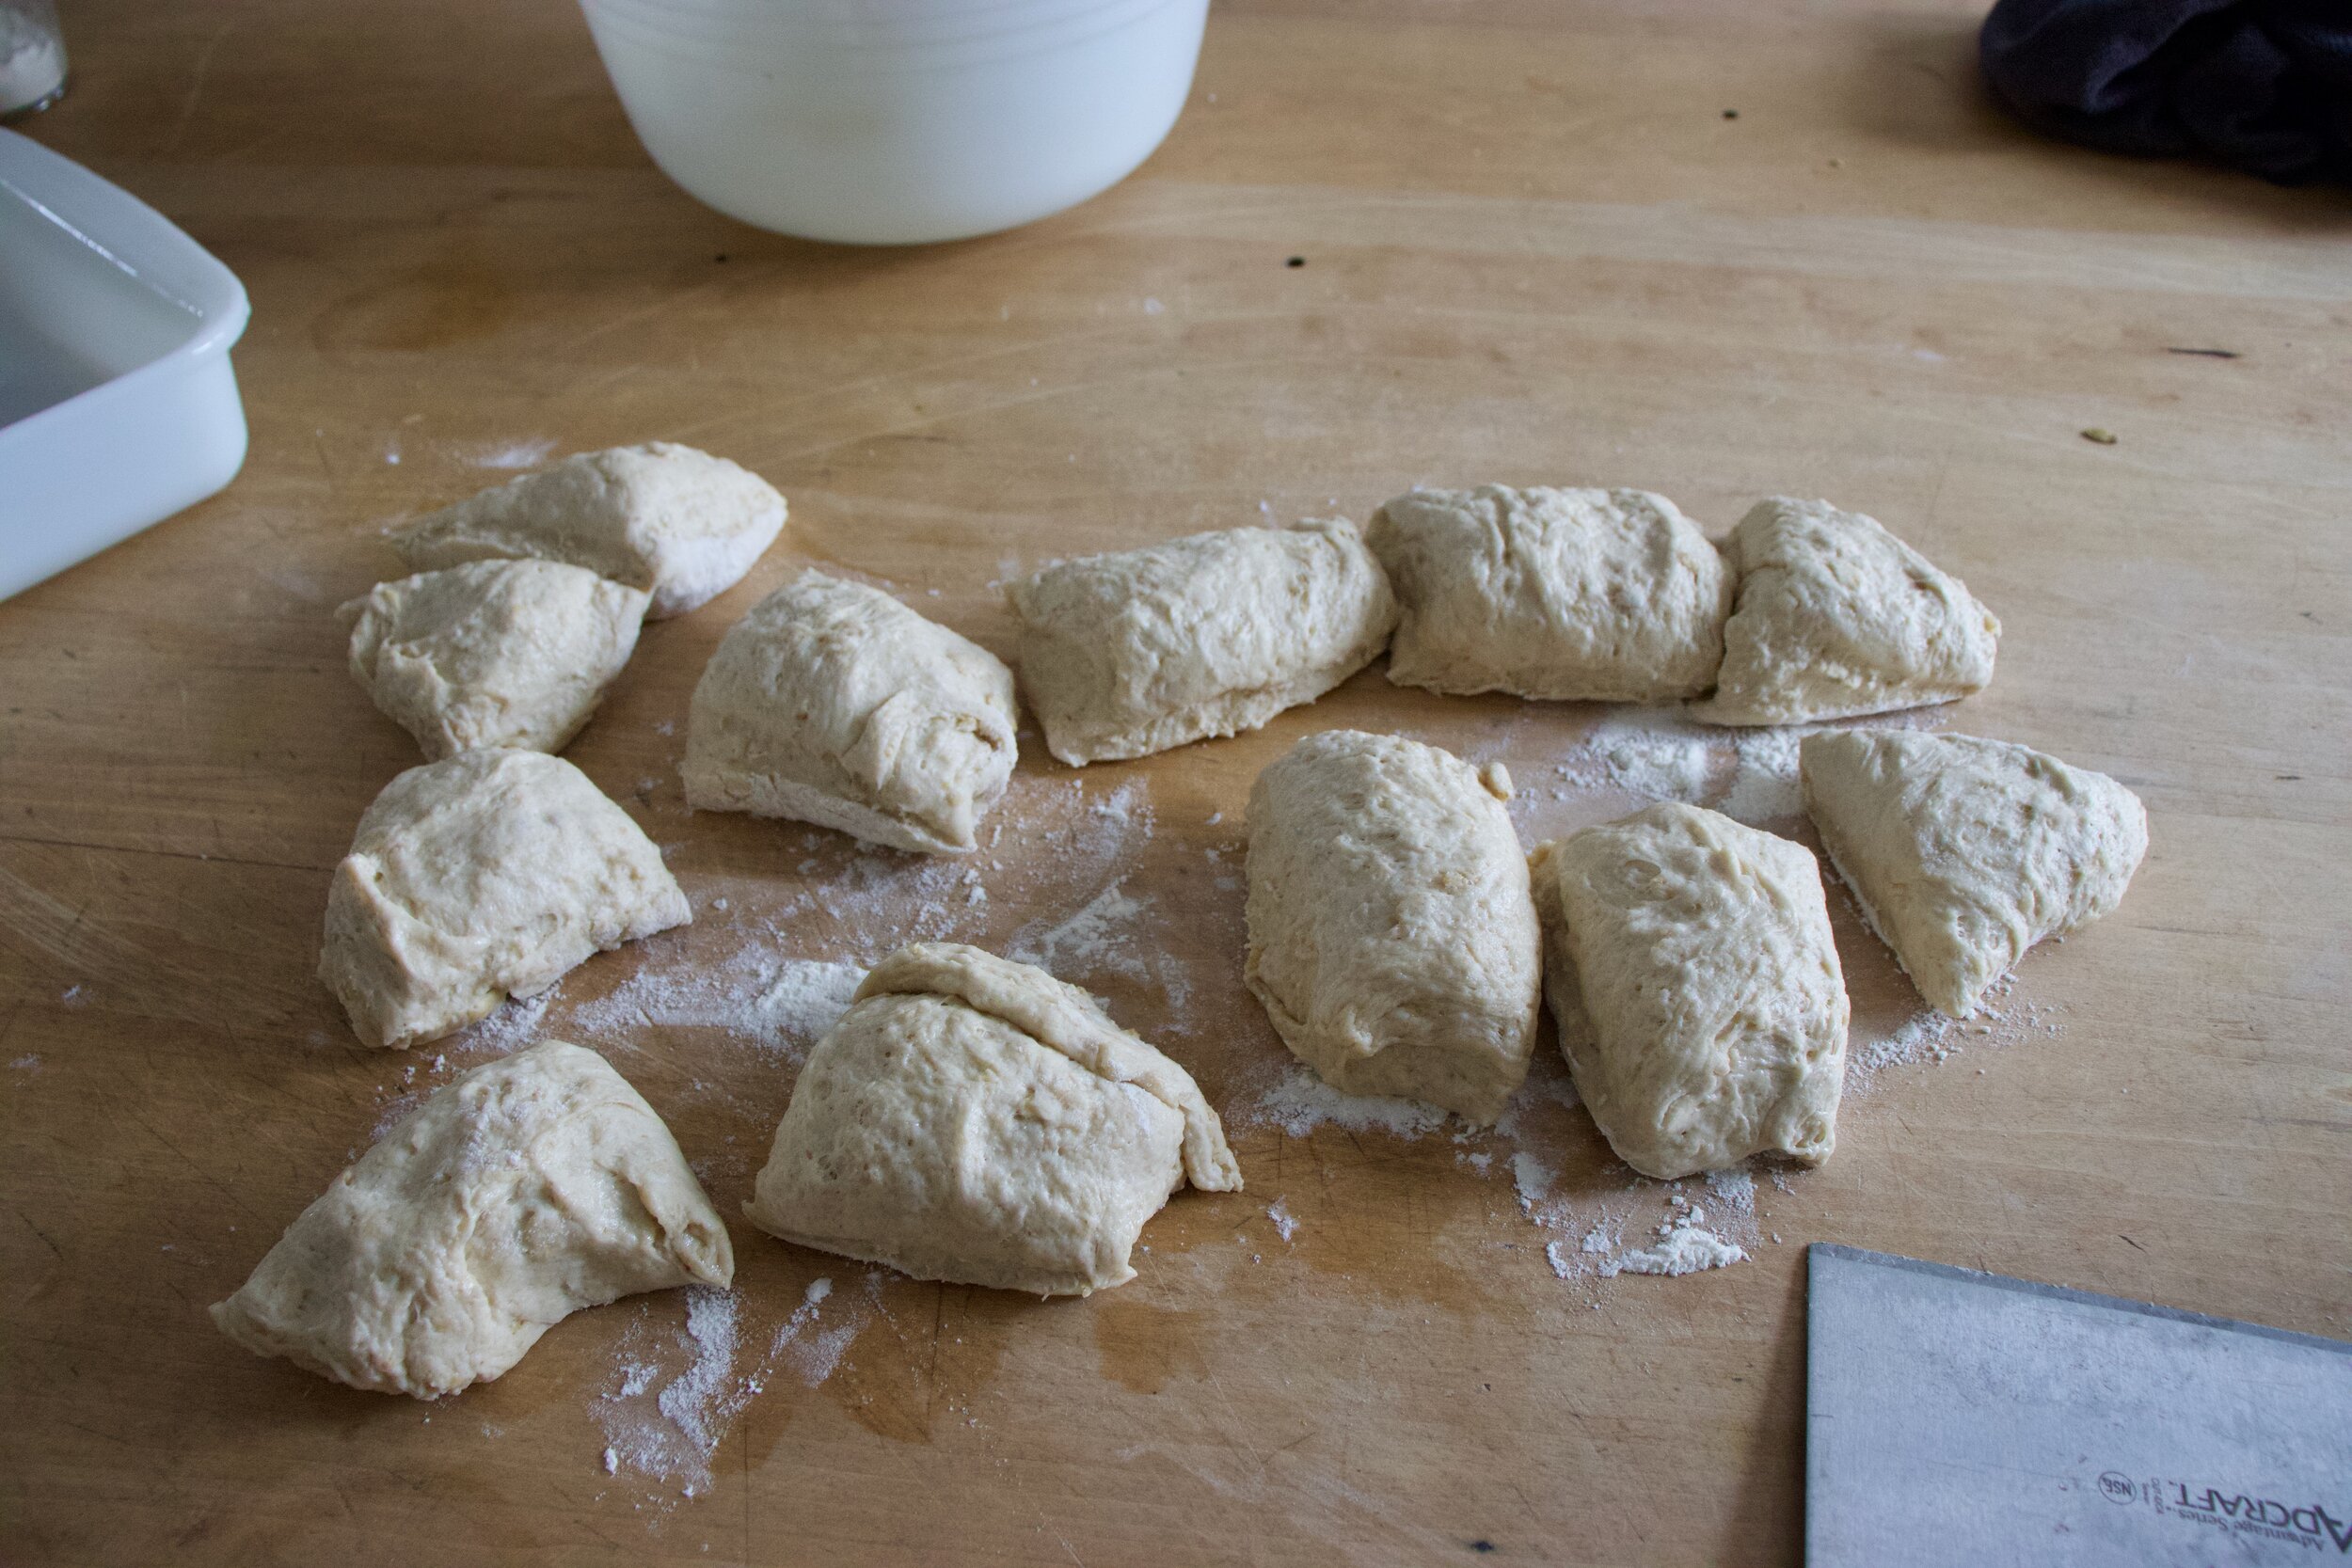
Once the dough doubles, dump out onto a lightly floured surface and cut into 12-16 equal sized pieces .

Roll each roll into a roll shape and place them in a lightly greased baking dish. Cover for another 15-20 minutes to let rest and rise a little more.

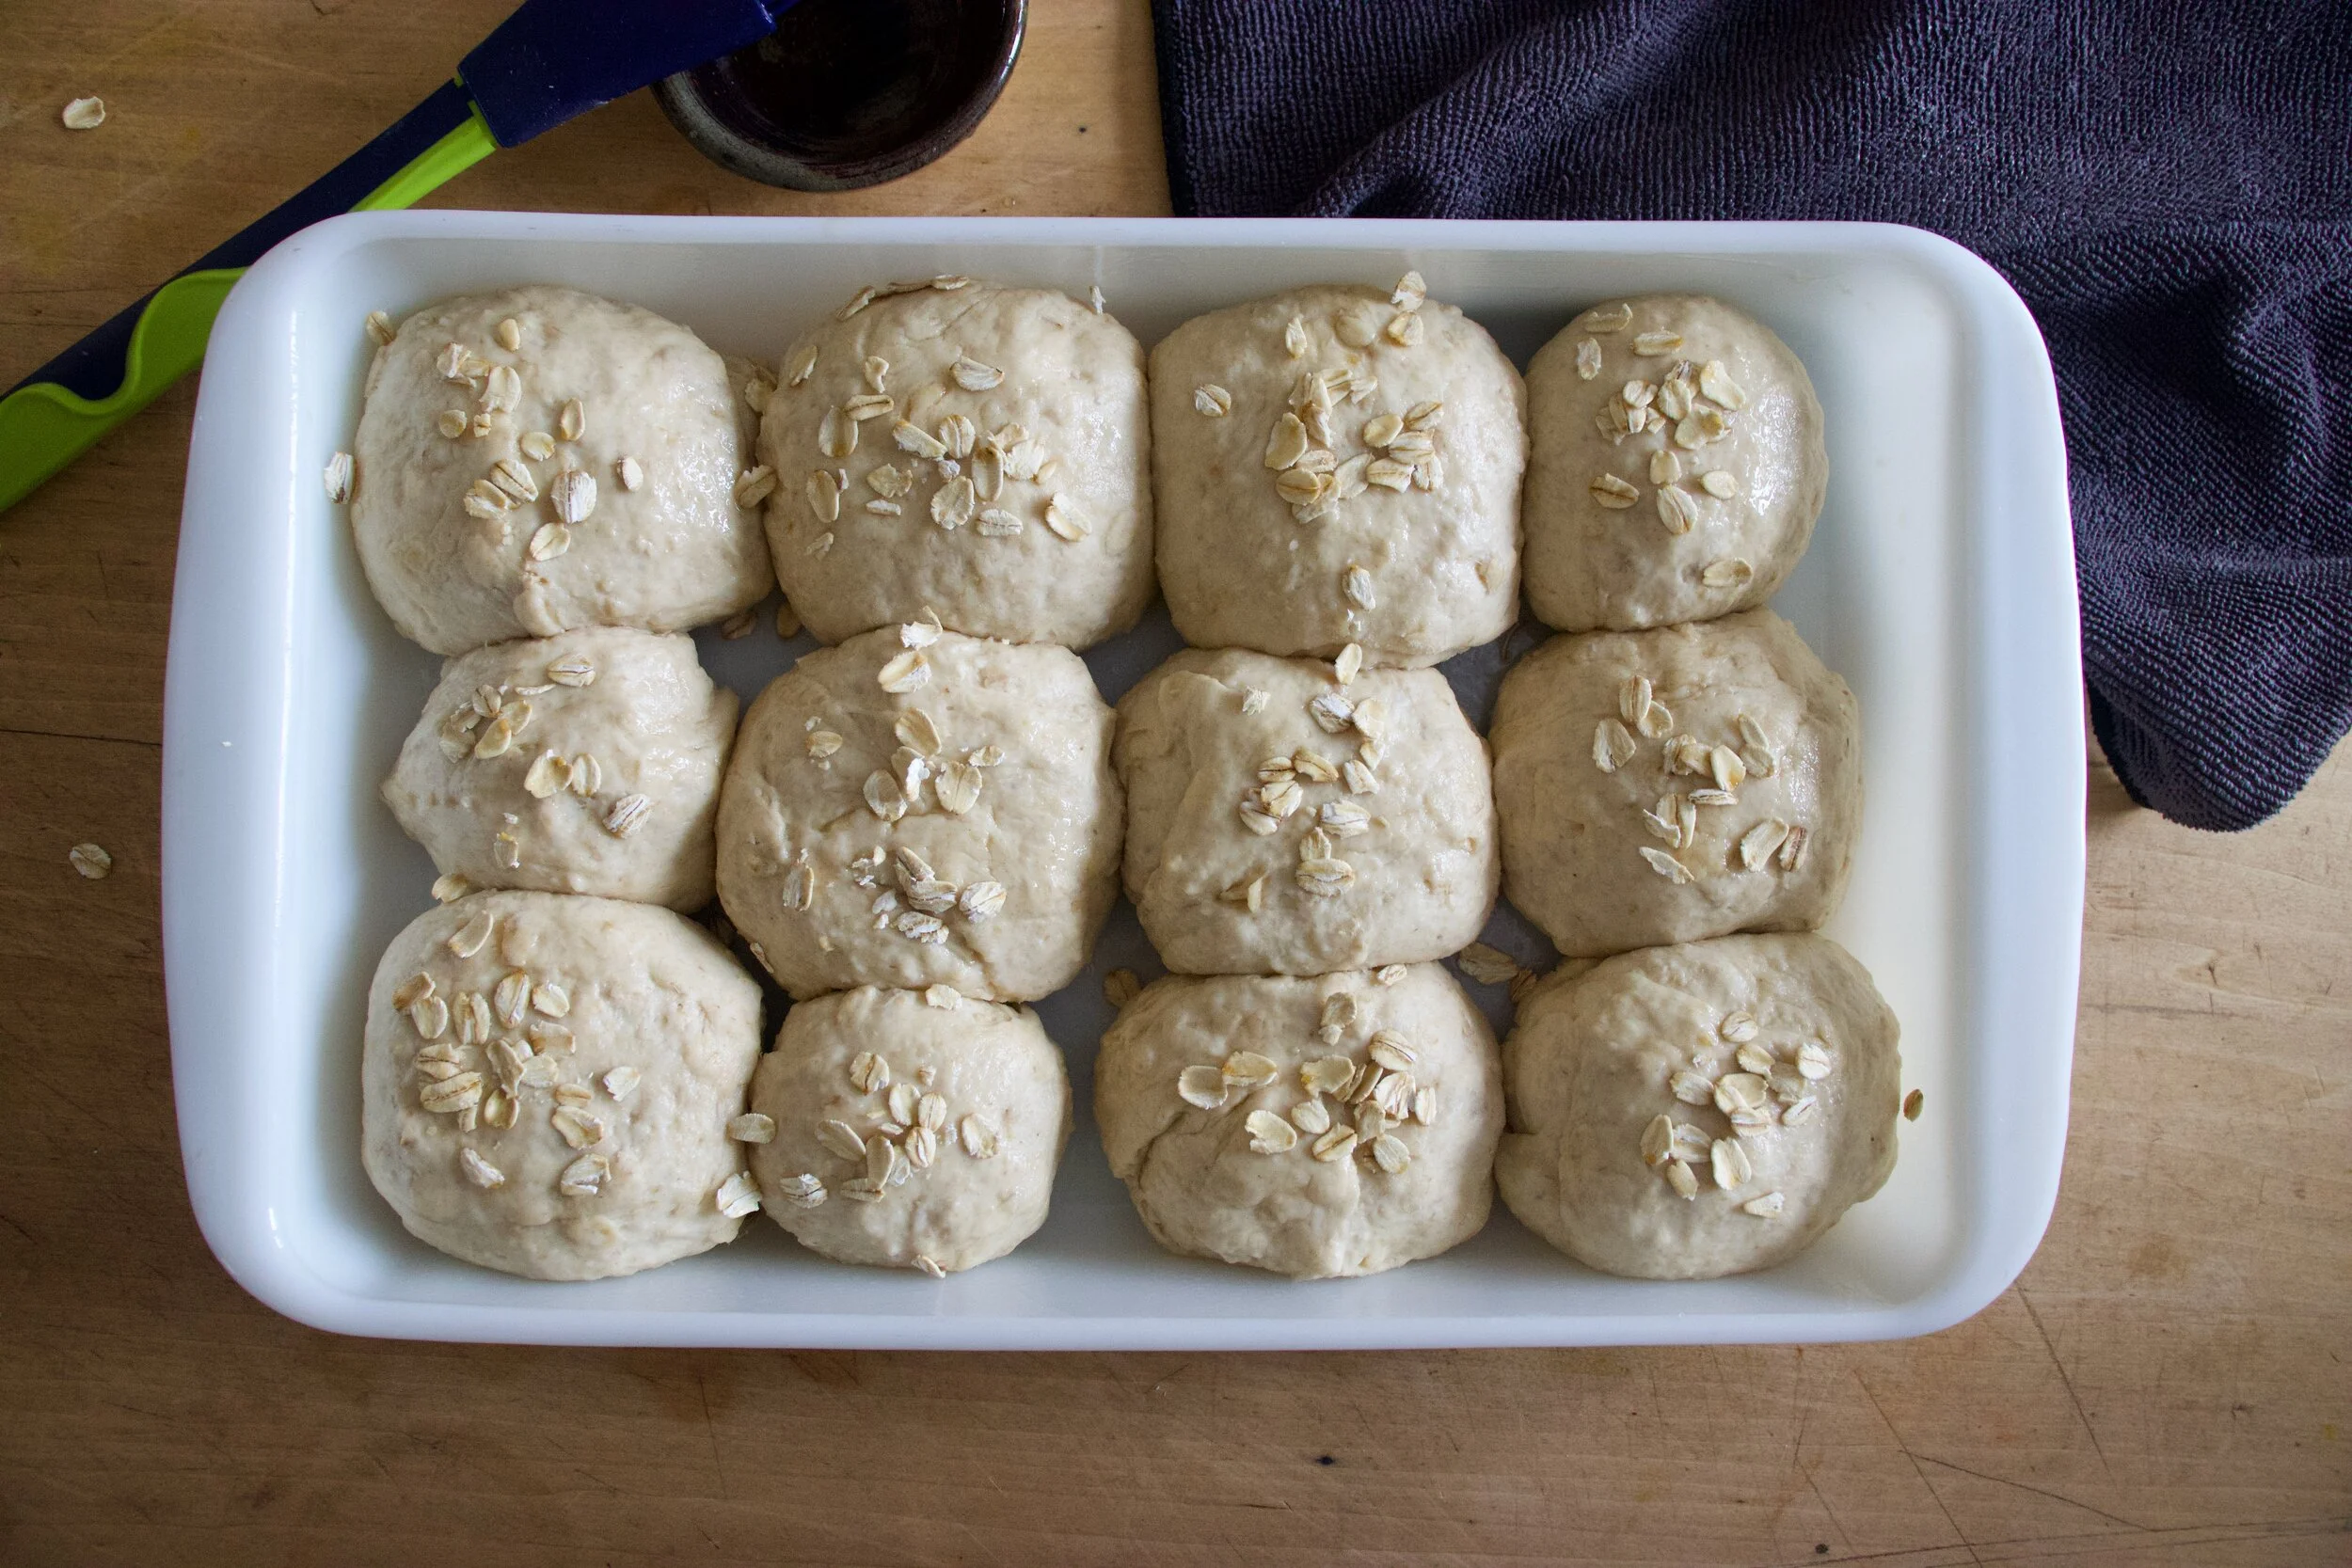
Rolls risen again, just a little plumper. And now right before you place them in the oven, brush tops with a maple/water mixture and sprinkle with a few oats. To look pretty. And into the oven they go, 30ish minutes, until nice and golden brown.

Baked to golden dinner roll perfection.

And there you have it. Soft and fluffy dinner rolls. Warm out of the oven, looking and smelling like all the good things that you want and need.

And can, and should, be made now and all year round.

-C

makes 12-16 rolls

  • 1 1/2 cups old fashion oats

  • 2 cups all purpose flour plus more for kneading

  • 1 1/2 cups white whole wheat flour

  • 2 cups boiling water

  • 1 cup room tempature water plus 2 tablespoons for brushing tops

  • 2 teaspoons salt

  • 2 tablespoons maple or honey

  • 2 teaspoons yeast

  • 1/4 cup neutral oil

In a bowl, mix oats with boil water and let sit and soak for about 10 minutes. In the meantime, in a large bowl, mix the room temp water with the yeast and 1 tablespoon of maple and mix. Once oats have soaked and cooled to a point that they are not super hot, but still just warm, mix them in with the yeast mixture. Add the salt and oil and mix then and both the white and white wheat flour. Mix until combined. The dough is going to be sticky, but that how is should be. Dump the dough onto a lightly floured surface and knead for 3-5 minutes, adding a little flour as needed to keep from sticking too much, until dough is nice and uniformed in texture. Place dough back into big bowl (after you clean it out and lily oil it) and cover with a damp towel. Place somewhere warm for about an hour until it doubles in size.

Once dough has doubled, dump out onto a lightly floured surface and with a knife of dough cutter, cut into 12- 16 equal sized pieces. Roll each piece into a ball, pinching any ends together and place them into a 9×13 inch baking pan. Once all pieces are in, over and let rest for another 15 minutes.

While dough is resting again, preheat oven to 350.

After the dough has rested, and right before you place them in the oven, mix 1tablespoon of maple with about 2 tablespoons warm water and brush the tops of the rolls. Sprinkle with a handful of oats and then place them into the oven to bake. 30-35 minutes, until they are a nice golden brown.

Once baked remove from oven and let cool to a reasonable temperature and serve.

These can certainly be made a few days ahead of time of eating. Just remove baked rolls from pan and let cool completely then place the into an airtight bag. To reheat, just place on a baking sheet and stick in a hot oven until warm.

THE LOVELY CRAZY

November 29, 2019 by maximios • Blog

If you are a falafel fan, as I am, then this one is for you. Carrot ginger falafel. Oh yes. Warm and spicy and carroty and all the things that are good, packed into a chickpea ball of mouth sized proportions. When I thought of it it sounded good, When I made it and ate it, it was everything and more I could have asked for in a freaking fantastic falafel. As for the tahini cabbage slaw, I might just be making it in my house every dang day. Super easy, super tasty, goes with the falafel like whoa but is just as good eaten on it%u2019s own. Eaten together the pair make every inch of mouth space happy. A happy mouth space, what more can you ask for?

To the falafel!
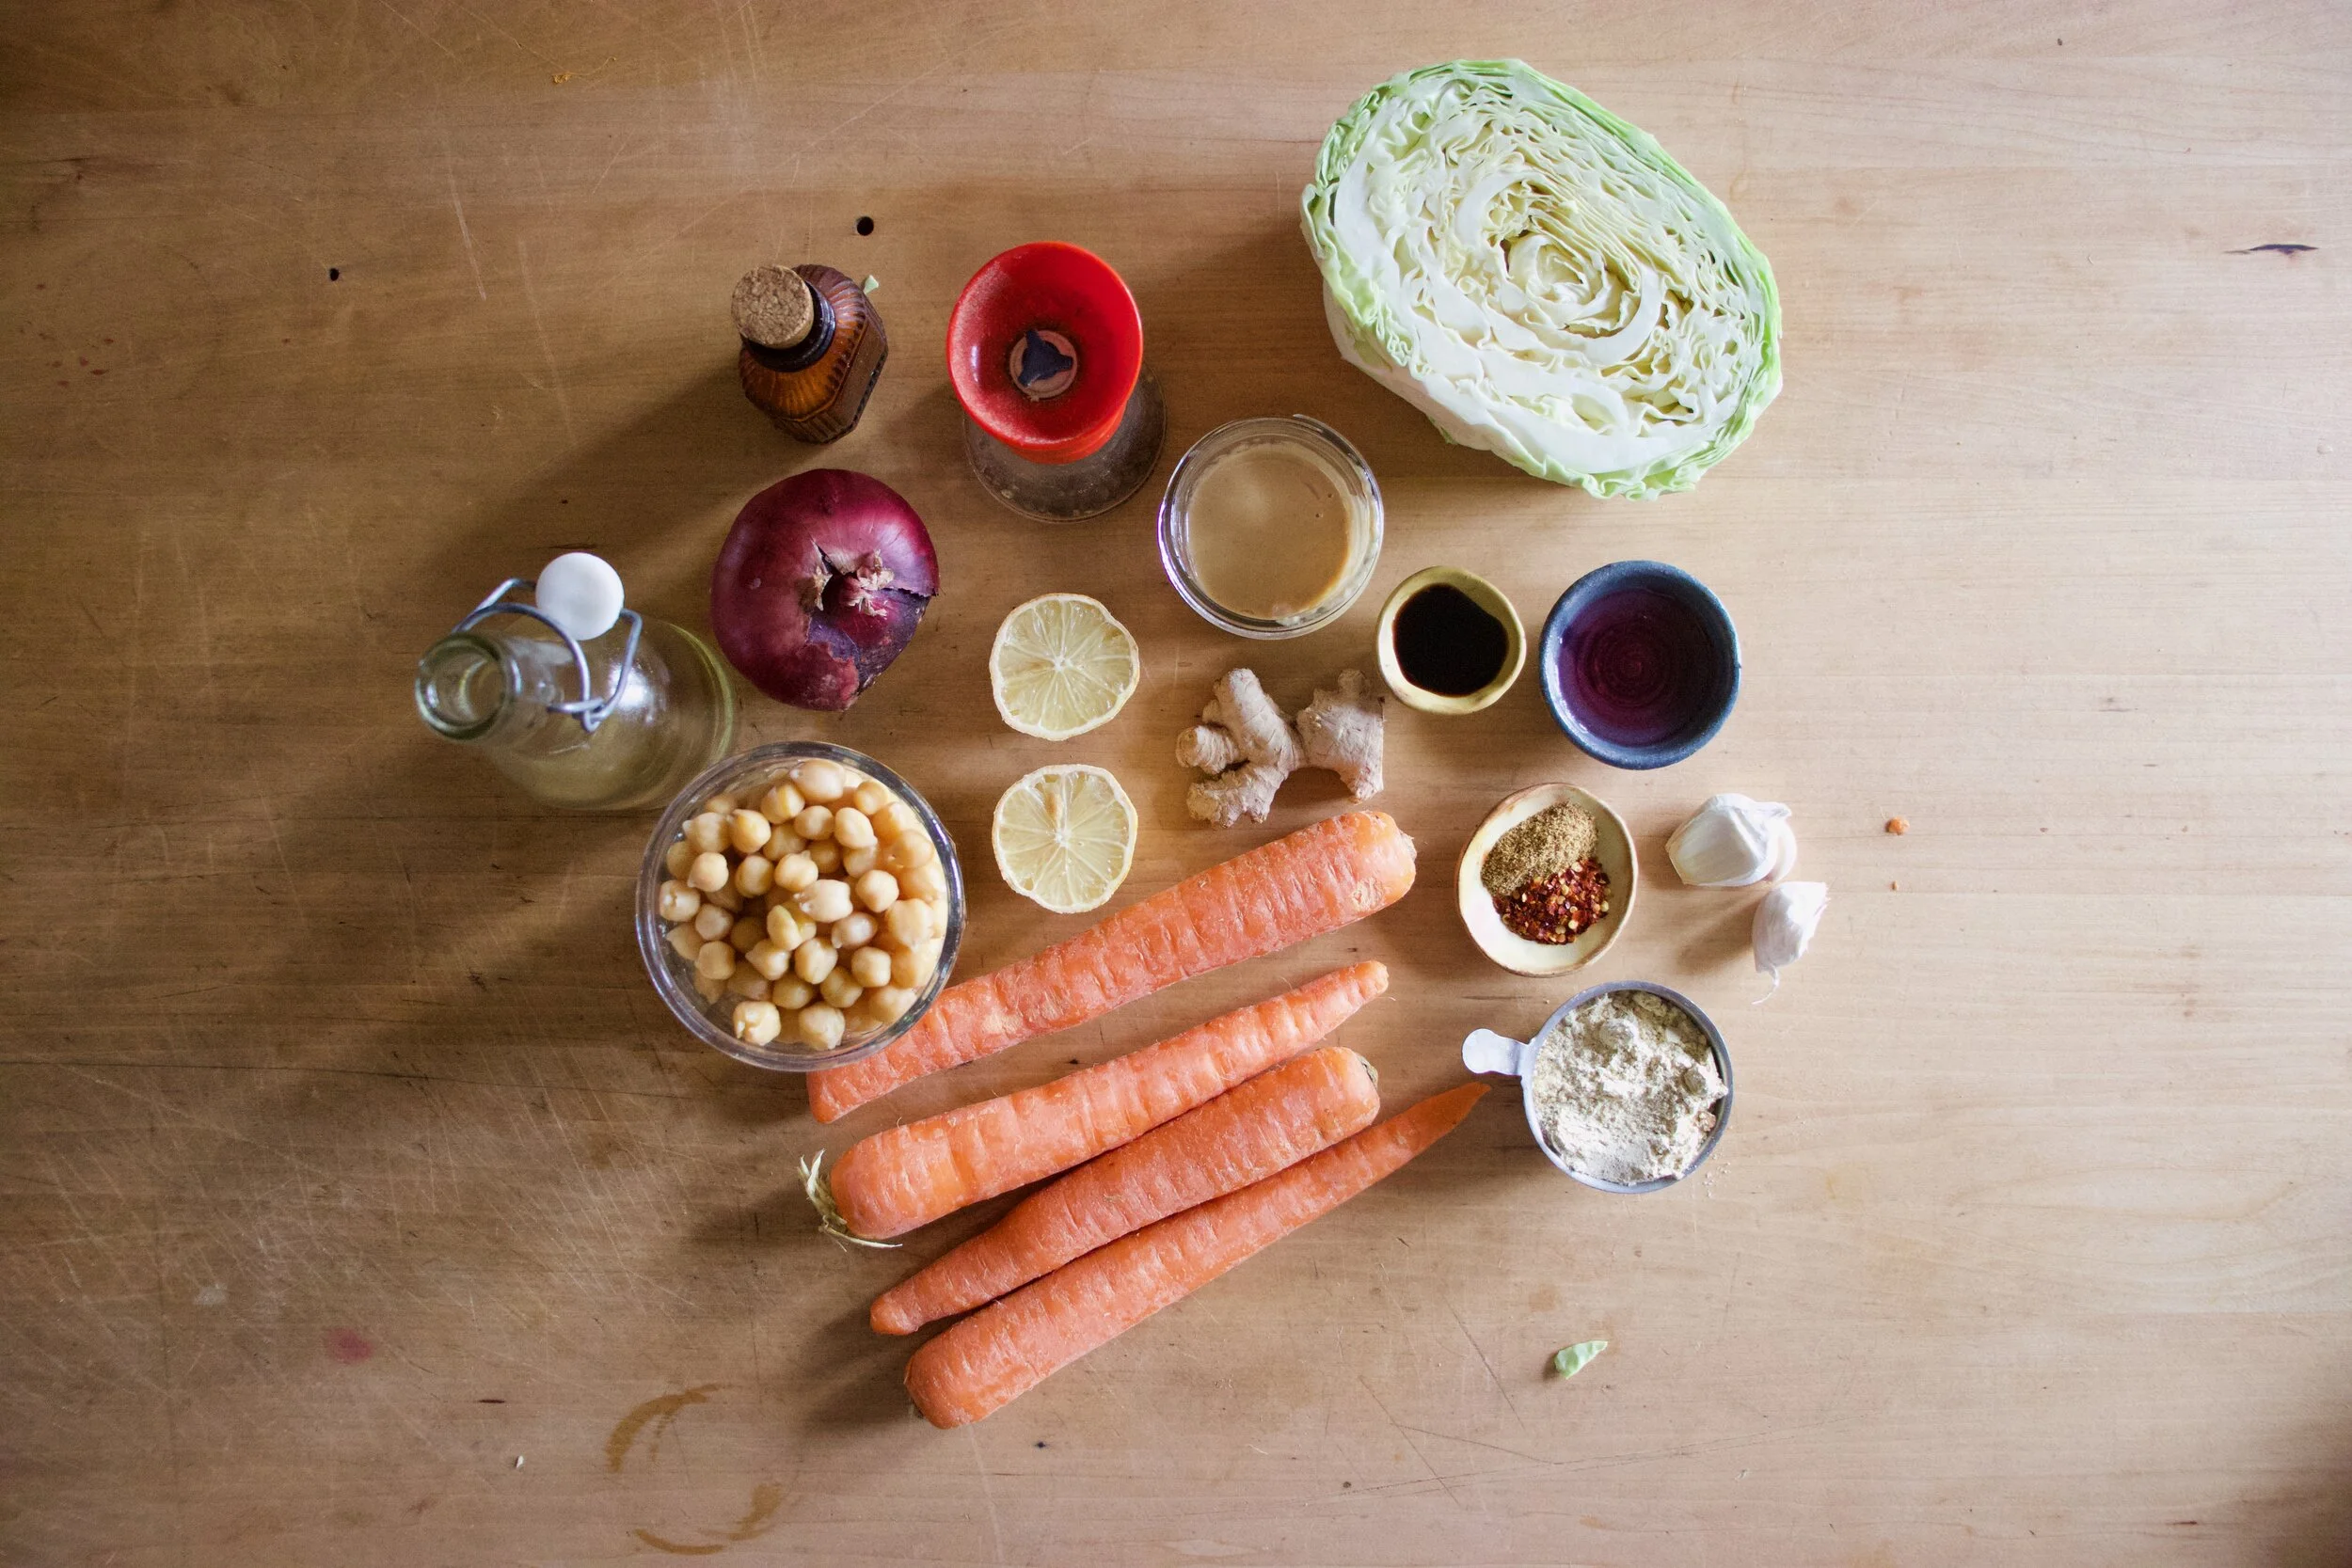
The stuff. Cooked chickpeas, carrots, a piece of fresh ginger, tahini, soy sauce, cabbage, an onion, a few cloves of garlic, red wine vinegar, some cumin and red pepper flakes, a lemon, chickpea flour, salt and pepper, and oil.

Start off by chopping the carrots into small pieces. Then cut half of the onion into small pieces. Rough chop the garlic and the ginger as well. No need to peel ginger unless you really want to.
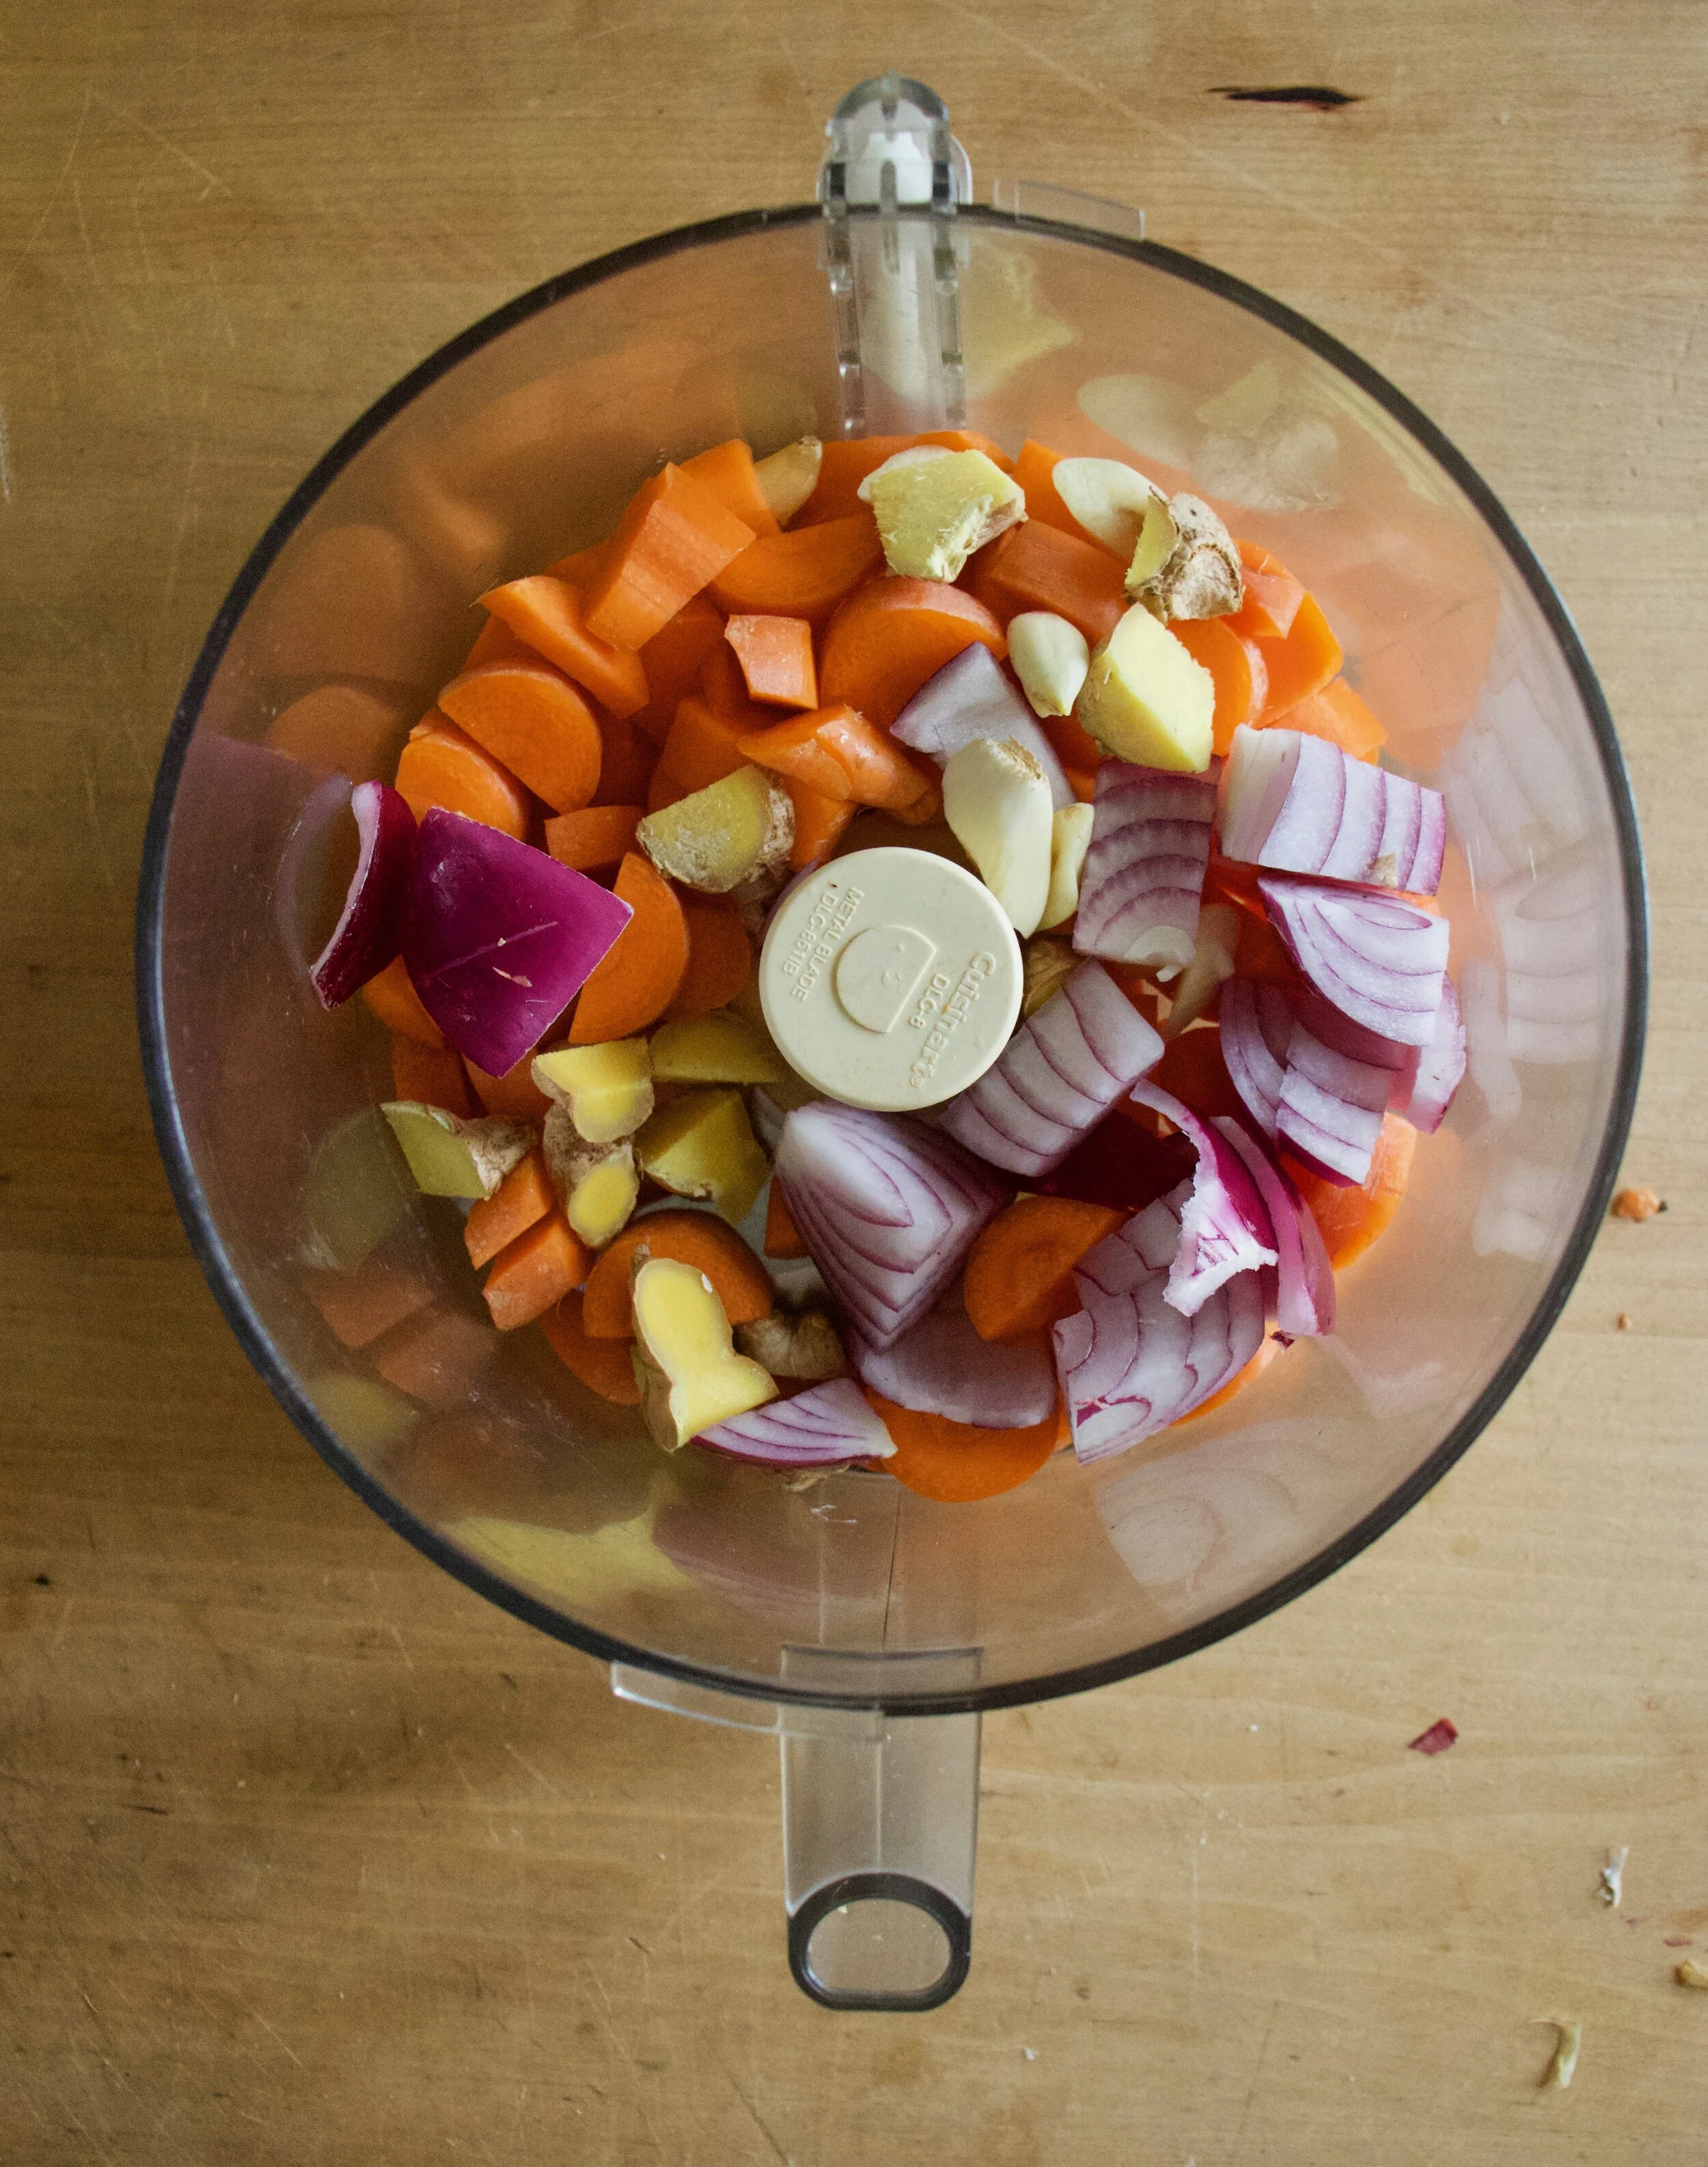
Place it all into food processor and pulse until a small crumble.
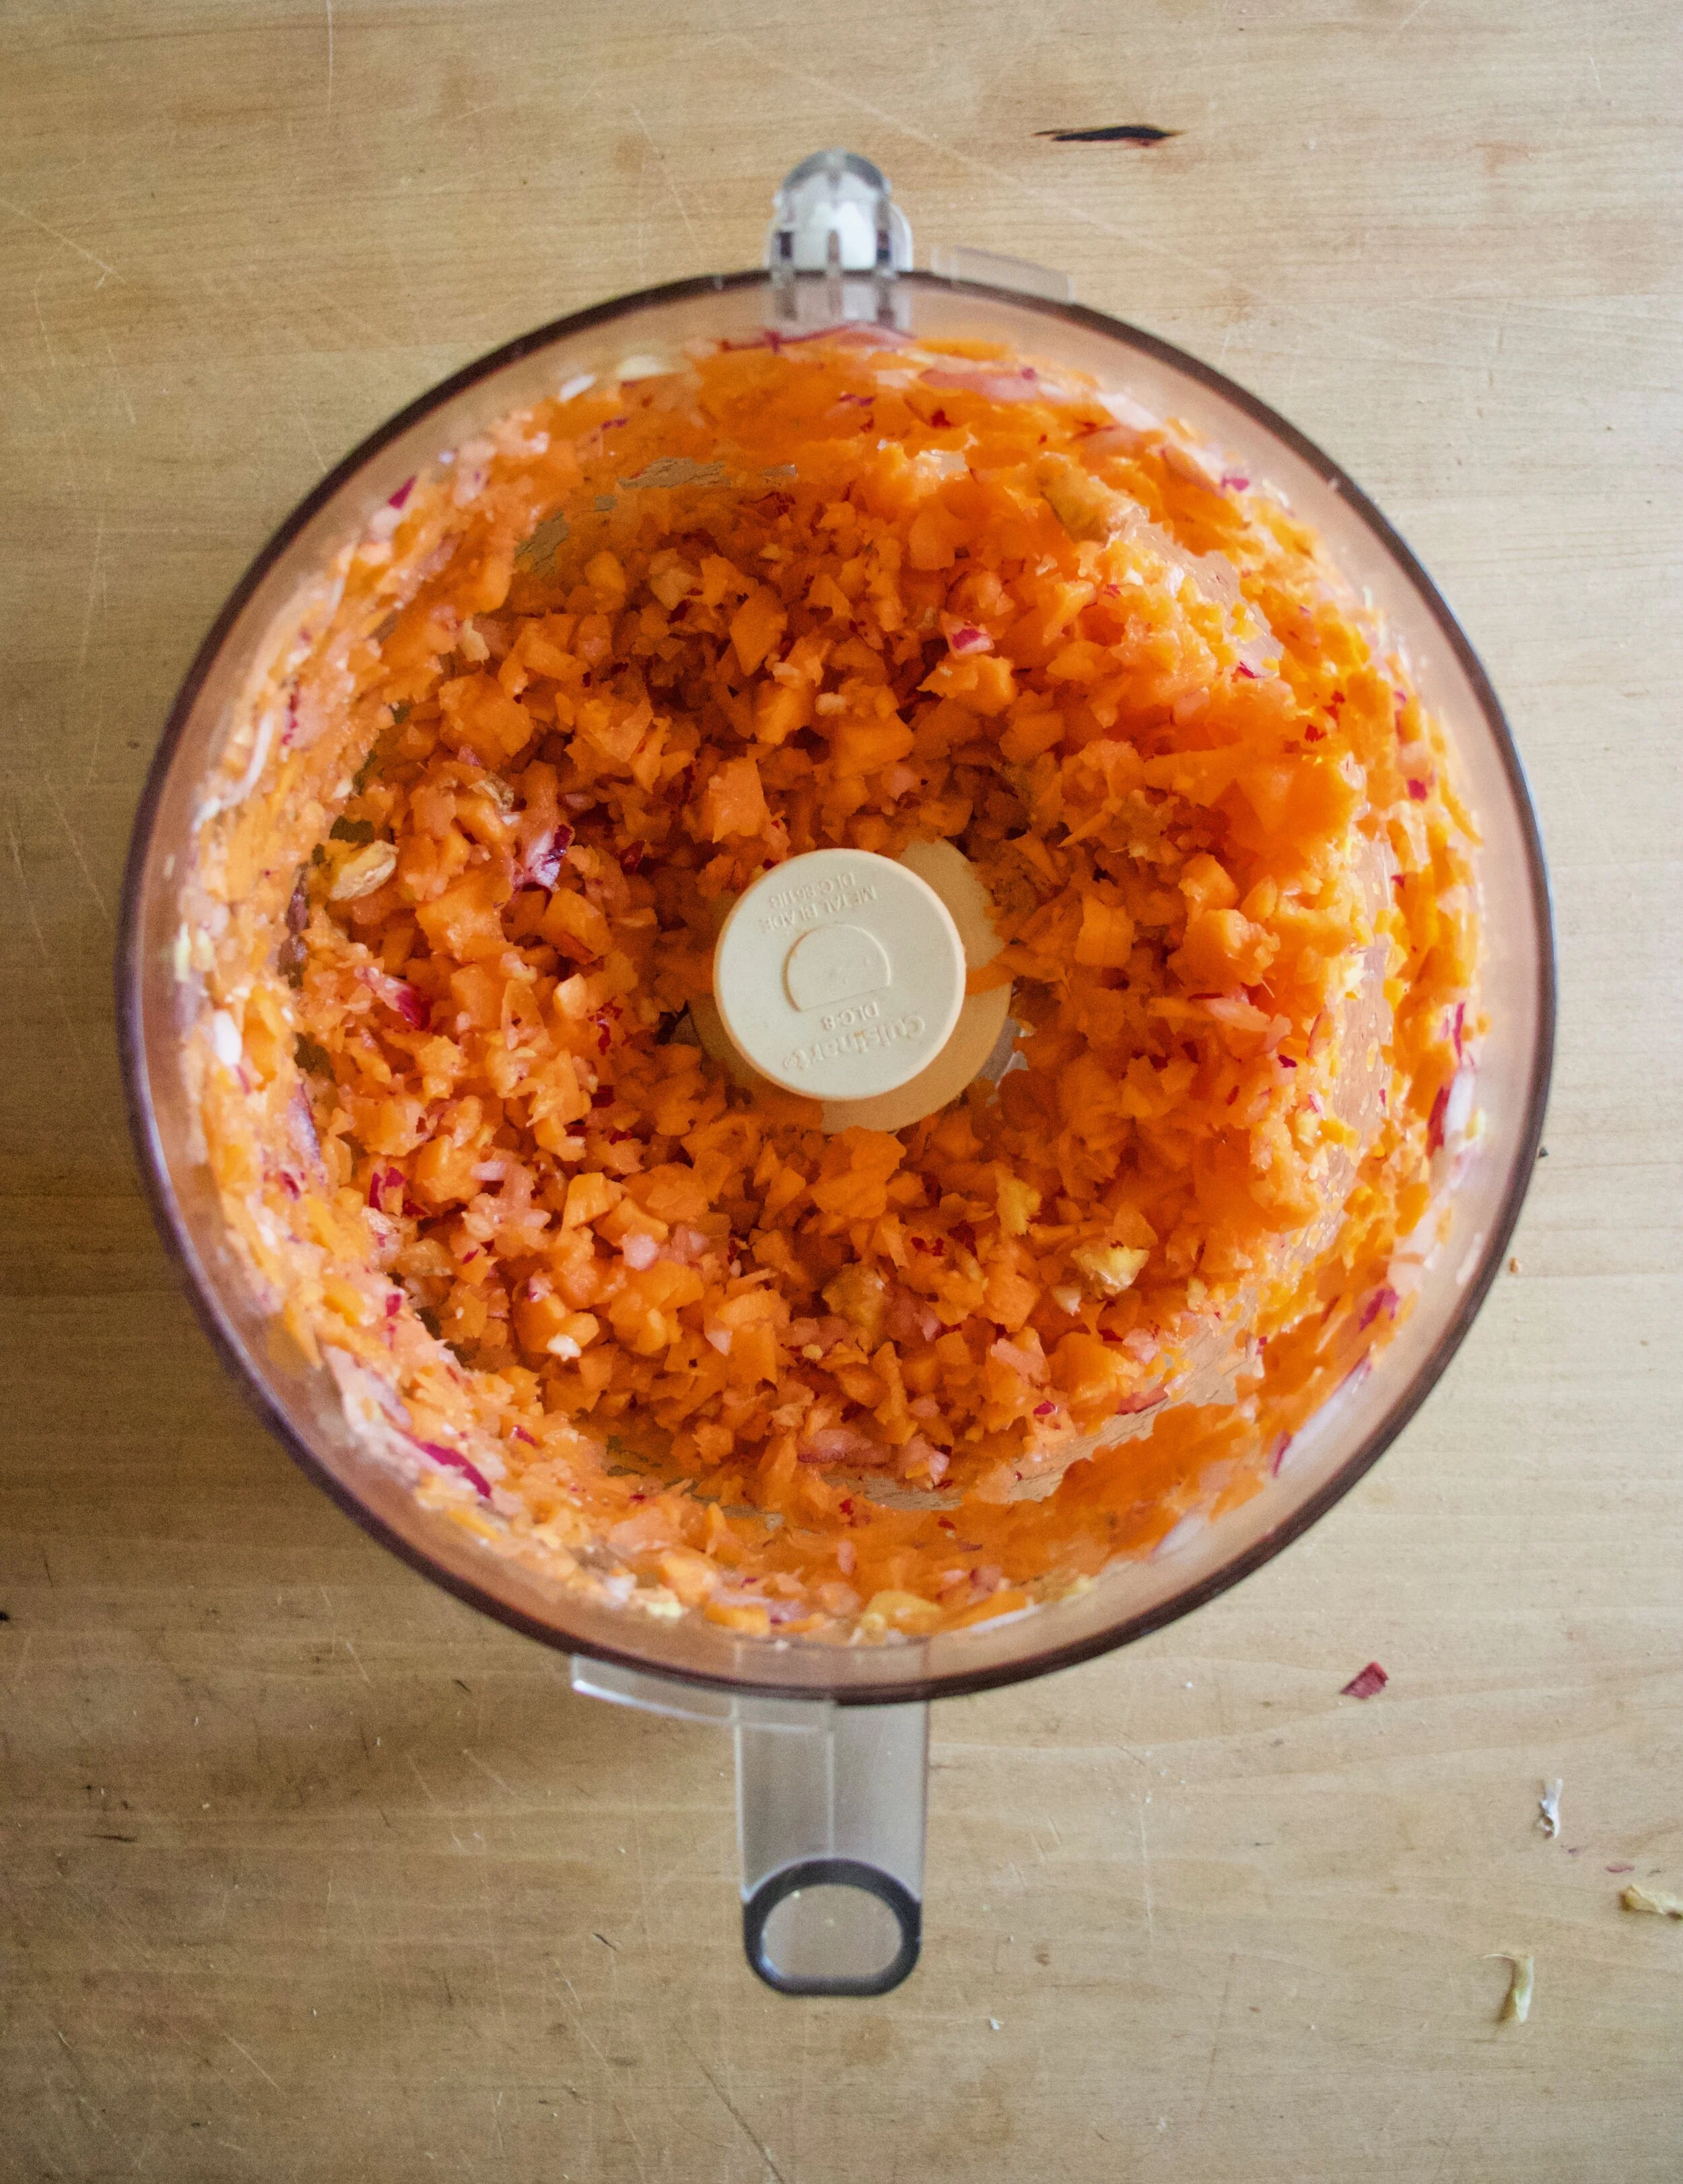
Carrot onion garlic ginger mixture.

Dump mixture into a skillet with a splash of water. Add in the cumin, chili flakes, and a good pinch of salt and pepper and cook on the stove for 5-8 minutes until the crumble softens and becomes fragrant.
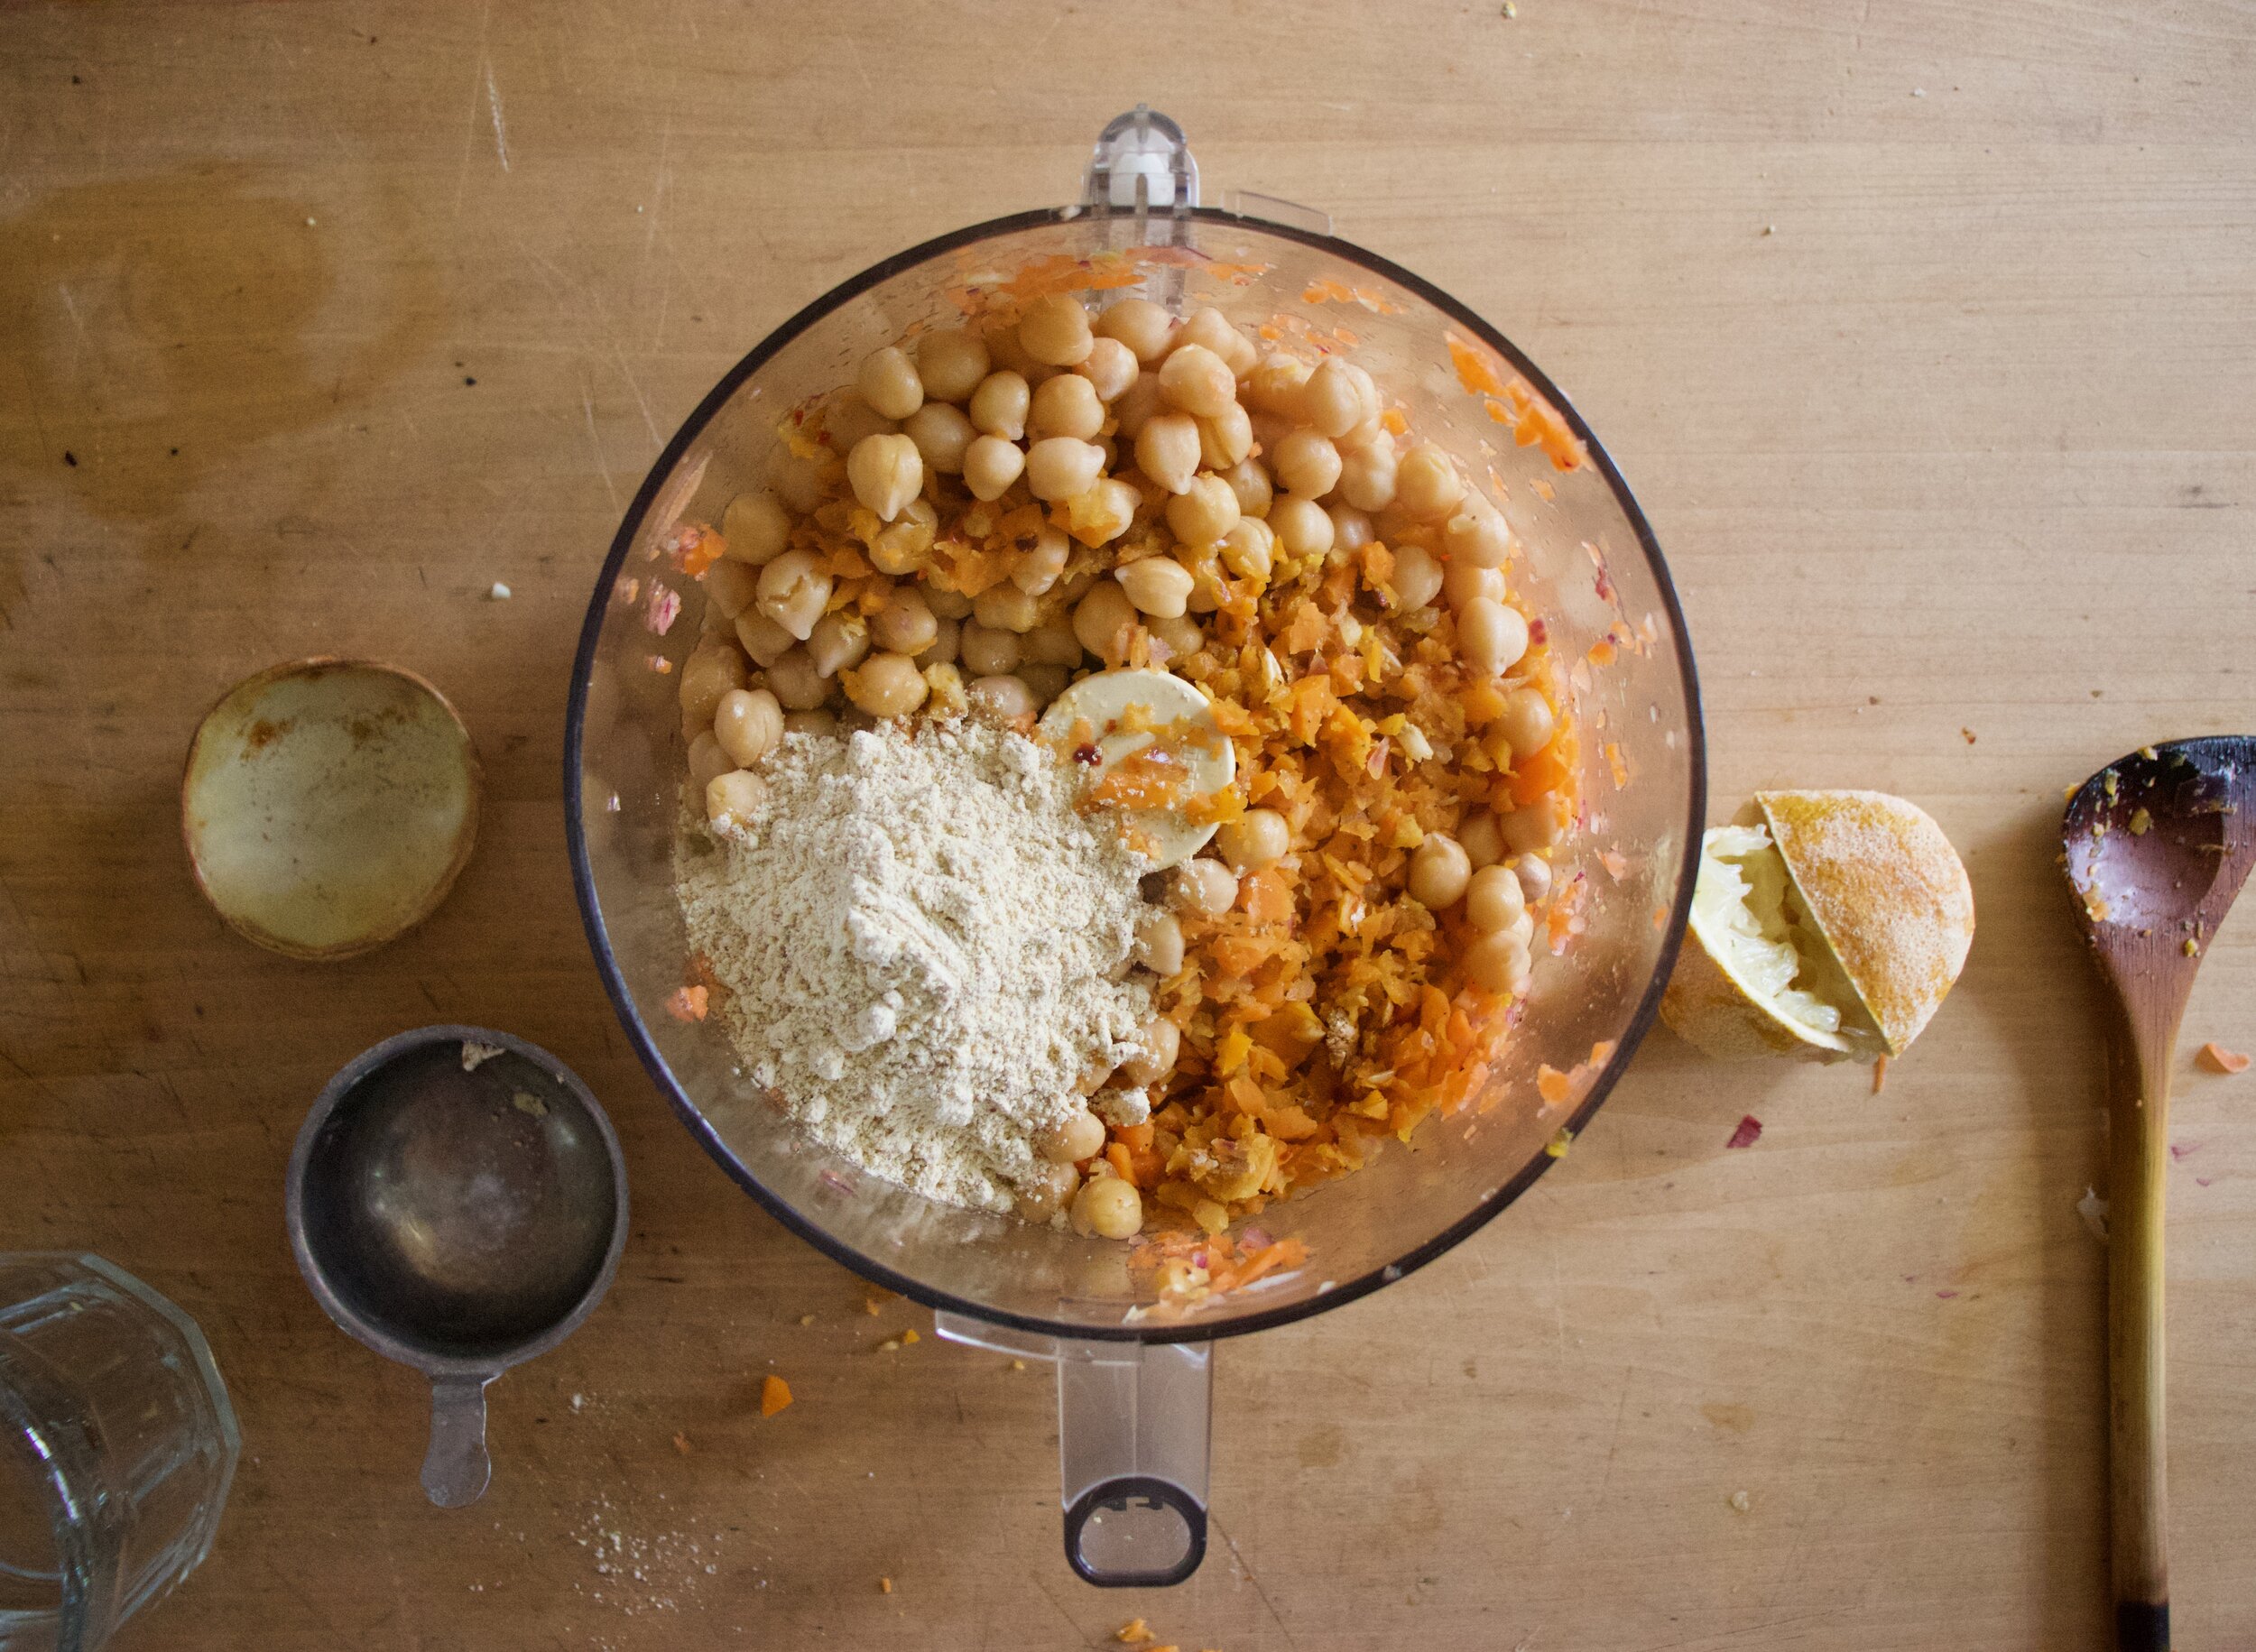
Dump carrot ginger mixture back into food processor along with the chickpeas, chickpea flour, and the juice of the lemon. Puree until smooth.
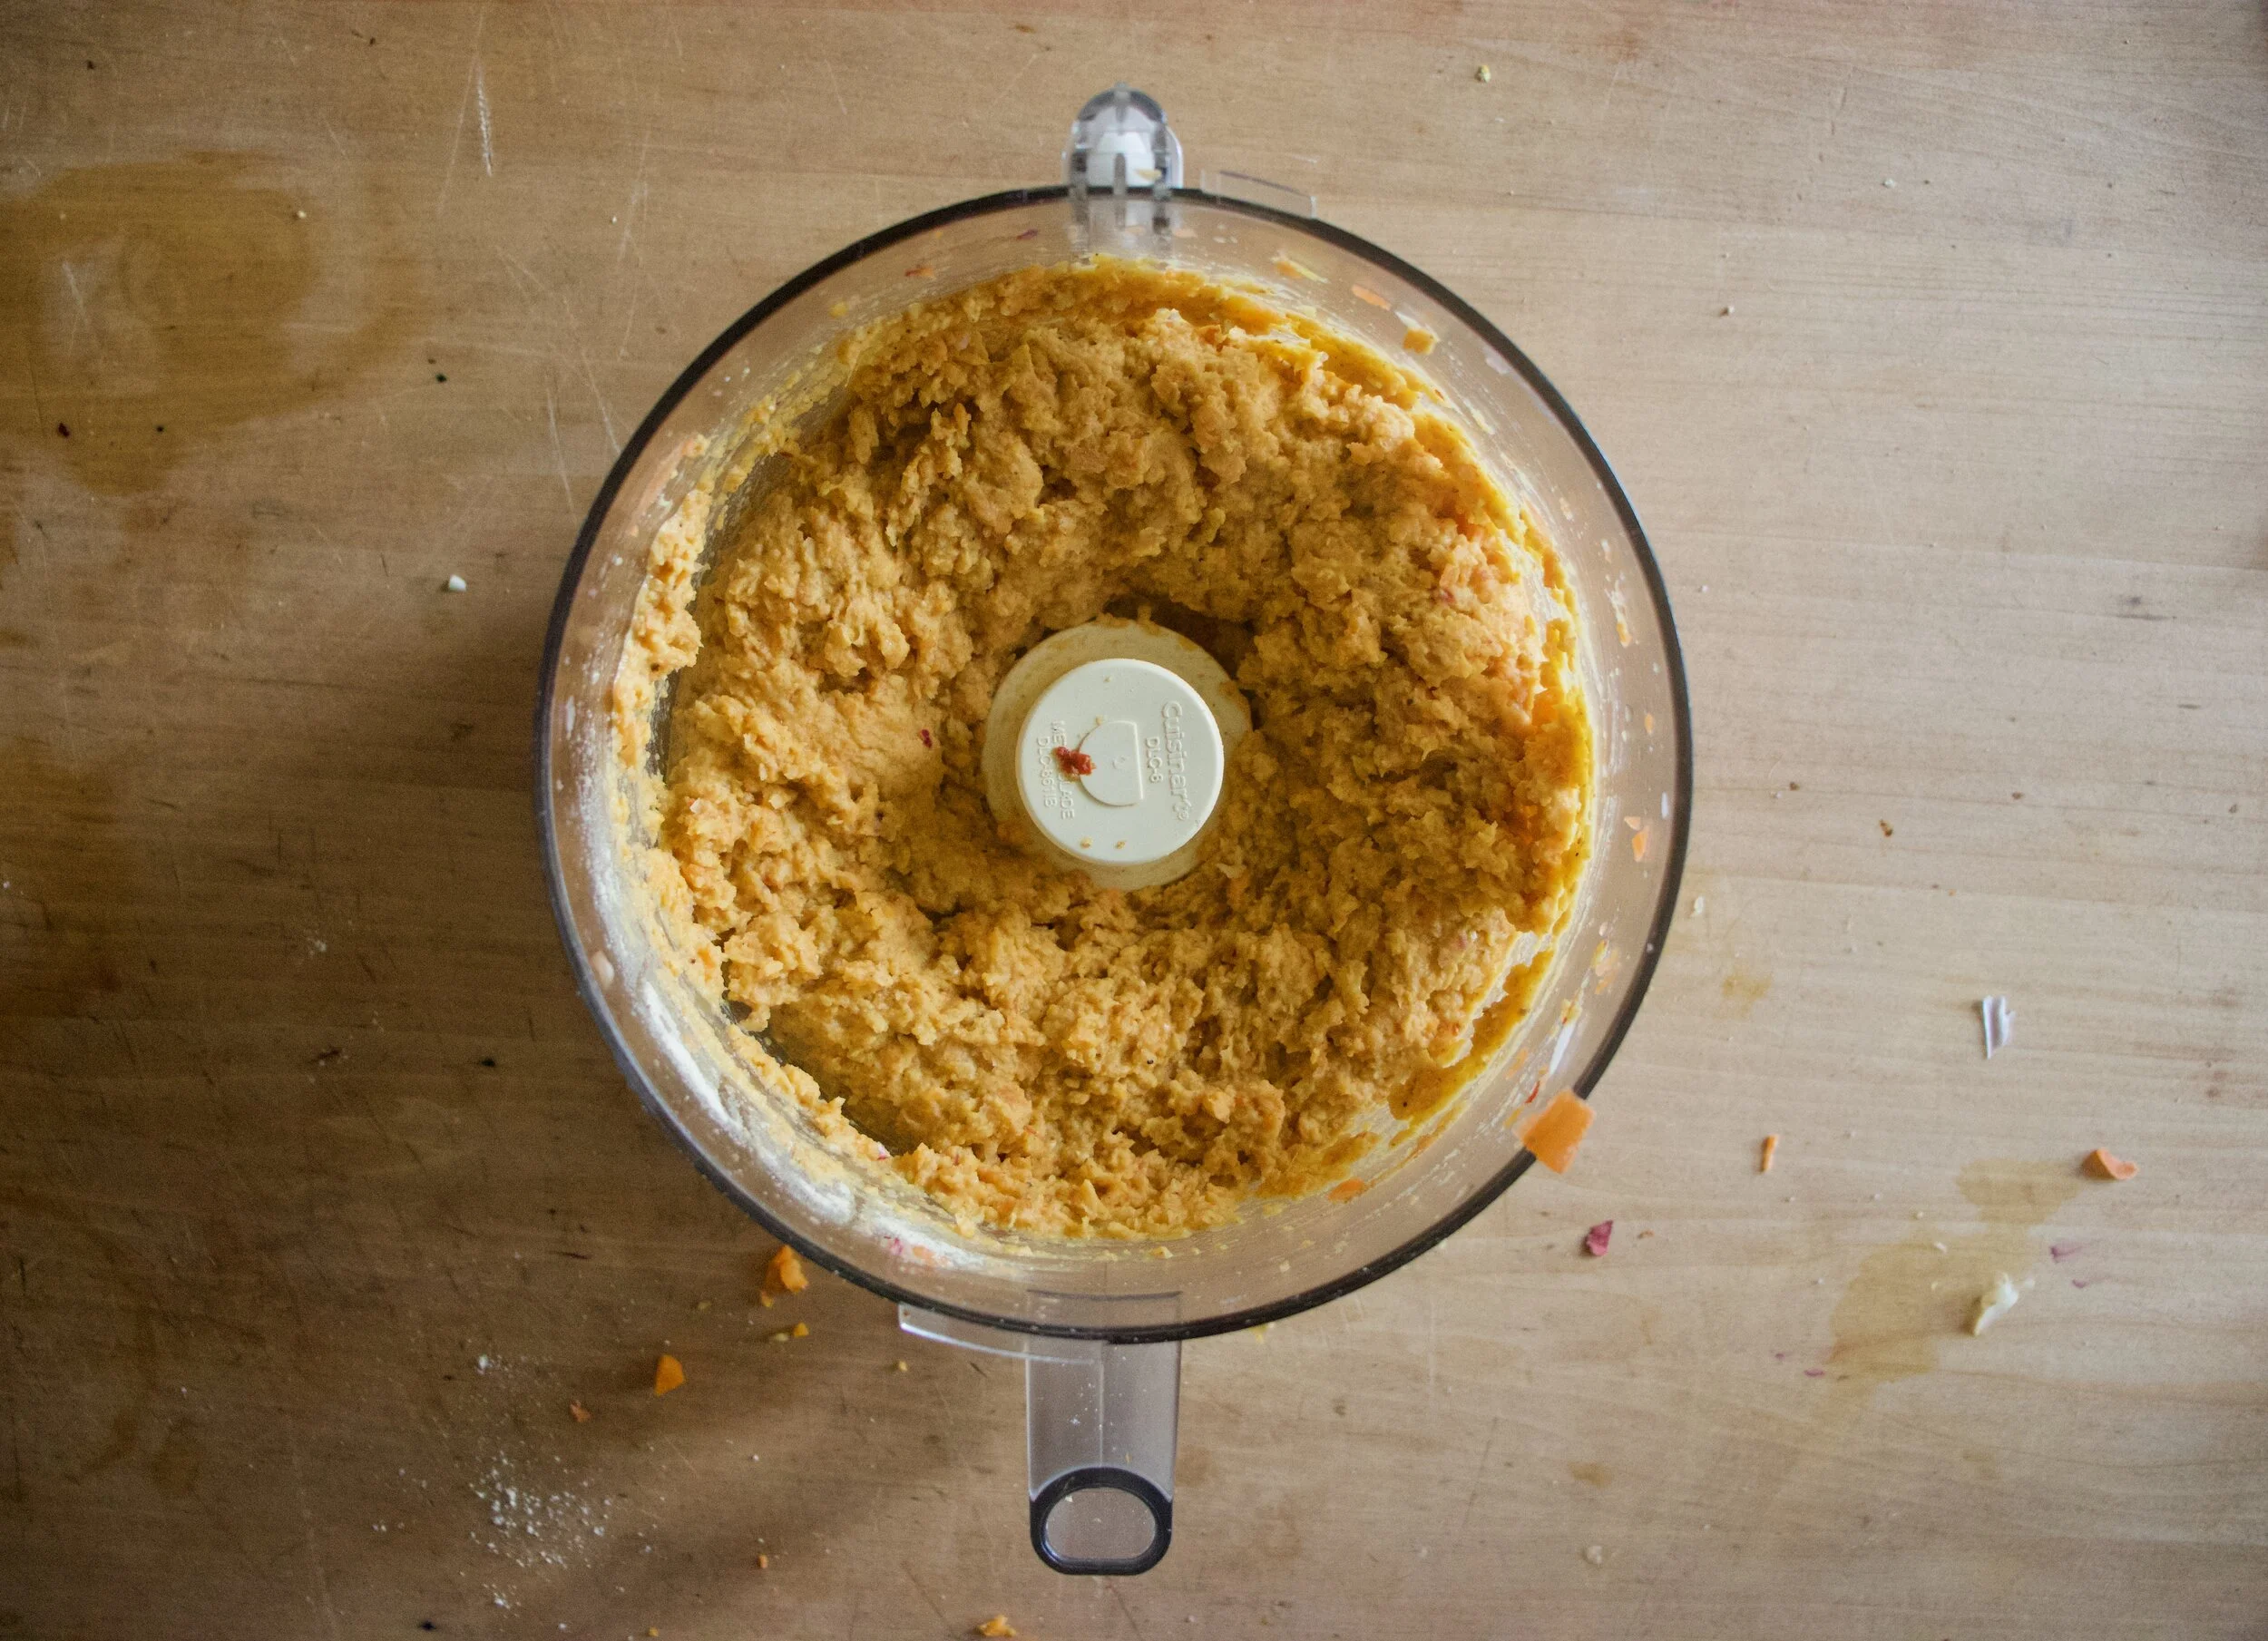
Carrot ginger falafel mixture. Now stick it in the fridge. For a little while to a day, just to let it set up a bit.
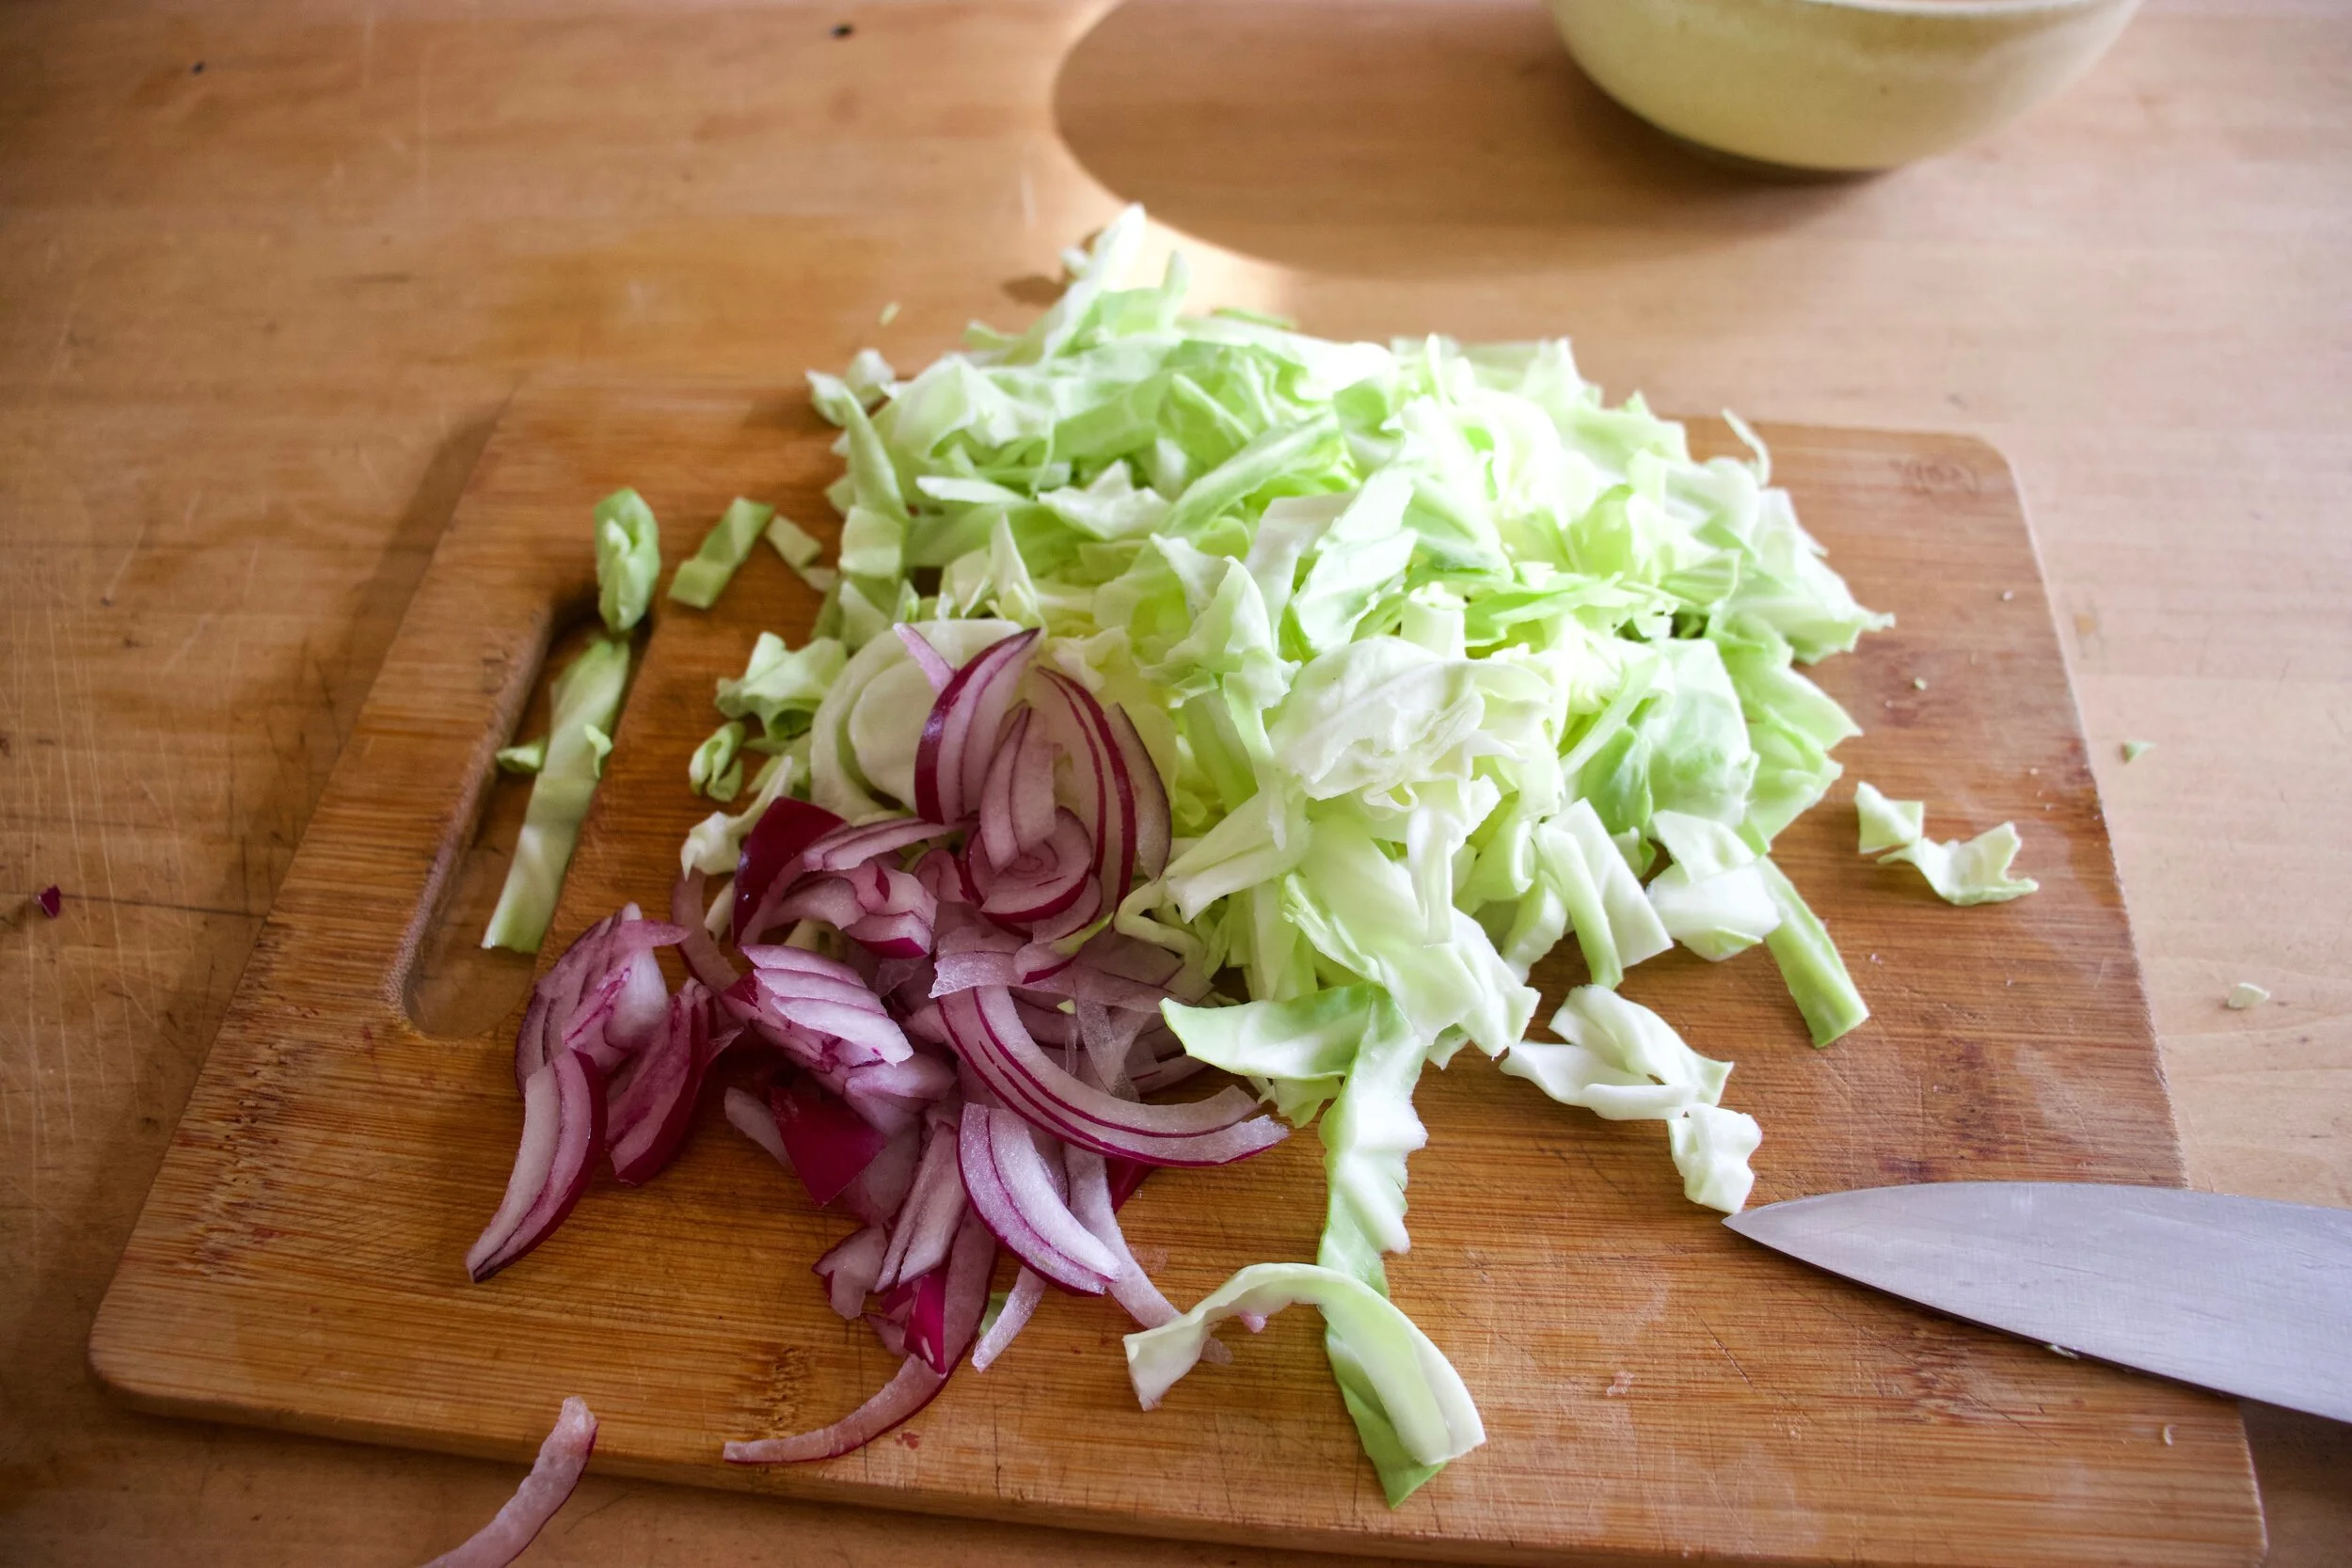
And in the mean time you can make the slaw. Shred cabbage and cut up onion all nice and thin.

Dump tahini, soy, vinegar, and a few tablespoons warm water into bowl and mix until creamy and good.
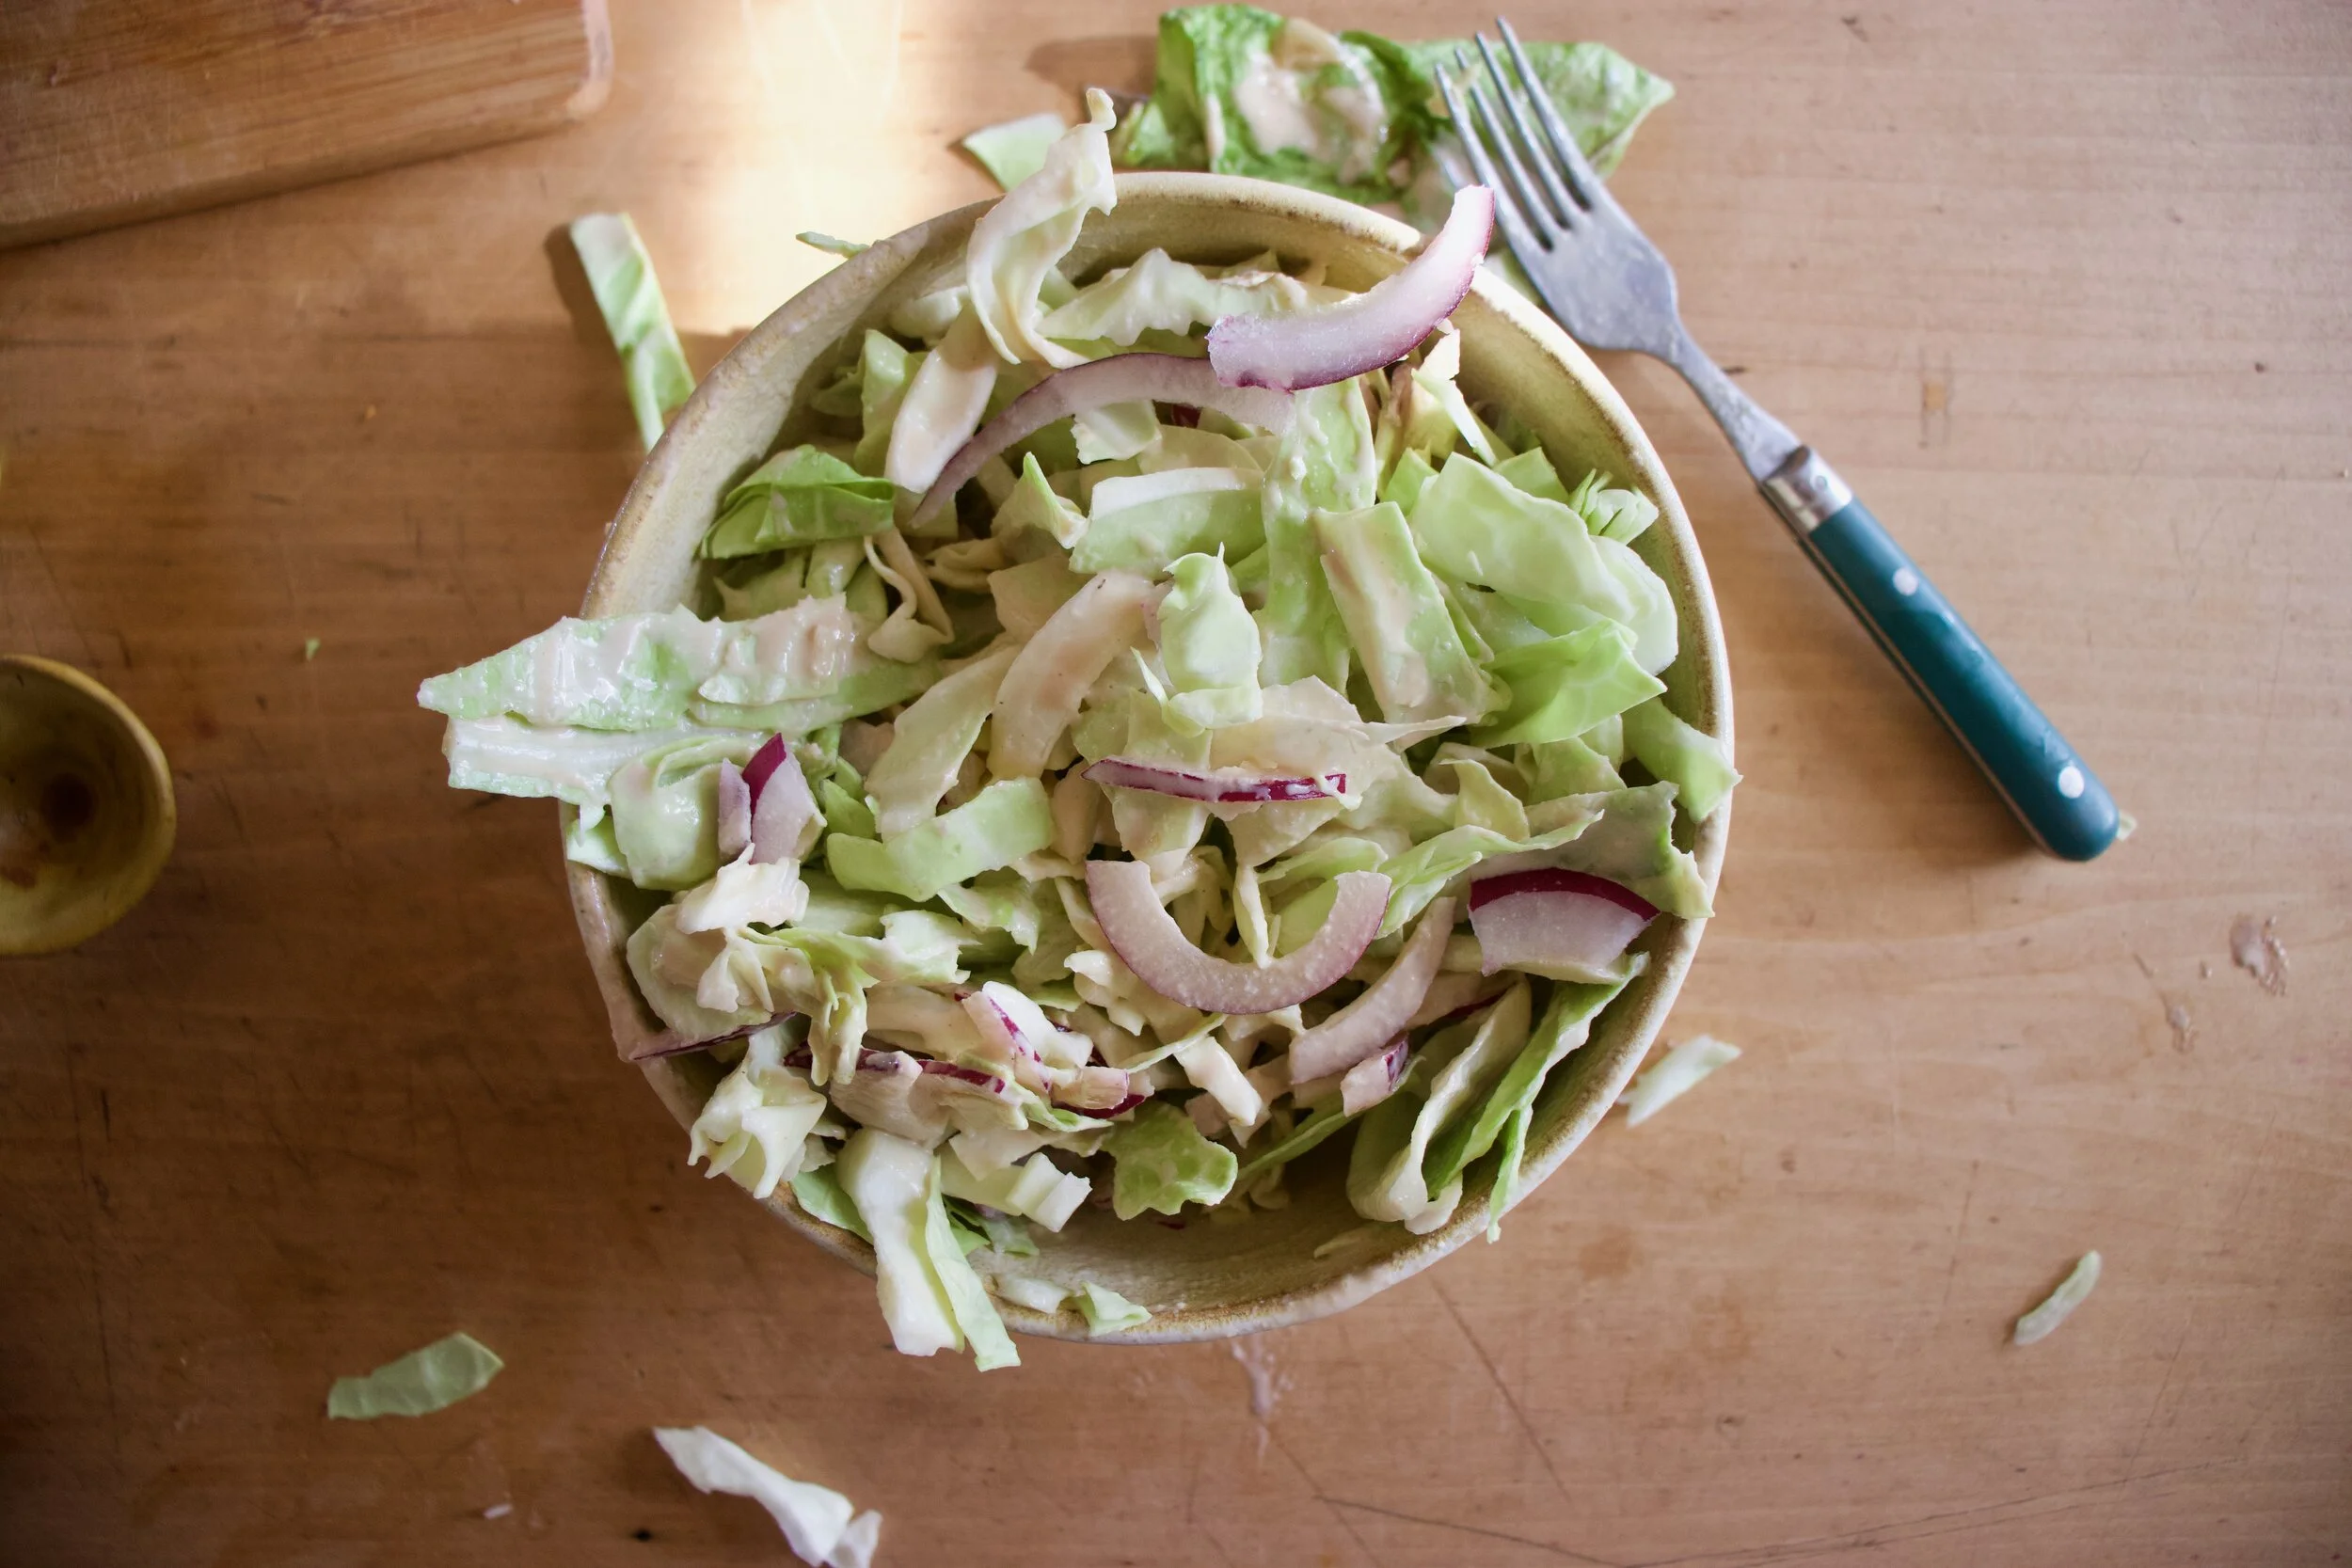
Toss in that cabbage and onion. Now you have tahini cabbage slaw.

Now to cook falafel. Grab the batter, scoop into balls then smoosh into disks. Place in a light oiled skillet and brown each side a nice golden brown.

After browning, place on a baking sheet. Once all the falafel has been browned, place the baking sheet into the oven to finish up cooking. 20 minutes or so and you got yourself falafel.

Then eat it. Falafel topped with tahini cabbage slaw. That is how it%u2019s done, with or without wraps or pitas or whatever your want. Just as it is. Falafel, cabbage slaw, into mouth.

Good things friend.

-C

serves 3-4 people or makes 14-16 falafel balls

  • For the falafel

  • 2 cups cooked chickpeas drained

  • 3-4 carrots (around 2 cups diced)

  • 1/2 of a red onion

  • 2 inches fresh ginger

  • 2-3 cloves garlic

  • 1 teaspoon cumin

  • 1/2 teaspoon chili flakes

  • 1/3 cup chickpea flour (can sub in oat flour if needed)

  • juice of a small lemon

  • salt and pepper

  • For Tahini Cabbage Slaw

  • 1/2 head red or green cabbage (about 3 cups shredded)

  • 1/2 of a red onion

  • 3 tablespoon tahini

  • 1 tablespoon soy or liquid aminos

  • 2 tablespoon red wine vinegar

  • a few tablespoons warm water

Grab carrots and red onion. Chop carrots into small chunks and cut onion in half. Cut one half into chunks. Place in food processor. Take the ginger and cut into small chunks (you don%u2019t need to peel it) and peel and slice garlic and cut into small pieces. Add that to the food processor. Pulse the mixture into a very small crumble then dump the mixture into a skillet with a splash of water. Add in the cumin, chili flakes, and a good pinch of salt and lots of pepper, and place on medium heat and cook for 5-8 minutes until soft and fragrant. Once cooked, scoop back into food processor along with the chickpeas, chickpea flour, and the juice of the lemon. Turn on and and puree until smooth, stopping when needed to scrap down the side. Then either dump mixture into a bowl or leave in the container you processed it in and place in fridge for 1/2 hour to a day.

When ready to cook, preheat oven to 400.

After letting the dough sit for a bit, remove from fridge. Grab skillet and lightly oil it and place on medium heat. Take a cookie scoop or just a spoon and scoop balls of falafel into your hand and roll them around so they are packed together. Smoosh then balls a little into disks and place into hot skillet. Let cook until bottom is golden brown then gently flip and cook the other side until browned. Place cooked falafel on a baking sheet. Once you have browned all the falafel, place into oven to bake for about 20 minutes or until the falafel has firmed up to your liking.

To make the tahini cabbage slaw. Shred cabbage and cut the remaining half of red onion into thin pieces. Place tahini, soy, vinegar, and 2 tablespoons warm water into a big bowl. Mix together until light and creamy. If the mixture seems to thick, add another tablespoon of warm water. When happy with consistency, add in the cabbage and onion and toss around until everything is coated.

Now when the slaw is made, the falafel is cooked, you eat it. Serve with warm pita or wraps or a bed of greens or nothing. Just slaw on top of falafel. And FYI, this whole shebang can be eaten hot or cold or anywhere in between.

Bread is probably, no, definitely one of my upmost favorite things to bake. There is just something so gratifying about the whole process of mixing ingredients, kneading, watching it rise, shaping, then baking. It calms me and make me a better person. Seriously.

And this might sound sad, but this week when my Dad told me that my grandmother died, well I went home and made bread because that is what felt right to do. It gave my mind and hands a good something to do far a little while. Plus I ended up with a loaf of bread to feed people with. I also like to feed people when I am feeling sad.

I chose to use cinnamon and cardamom because of the smells. They are just delightful and happy smells. And swirls are happy so a happy swirl of happy smells in a loaf of bread that I was making to share that was (and did) make people happy. (See, bread baking is making me so nice because I am sharing it) It was just the right thing to do.

So if you are in need of a little happy pick me up, may I suggest making some bread? It might make you feel a little better, or at least get your mind off of things for a bit. And you will have bread so there is that too. It%u2019s a win win.

Now to the bread, which you can also make when you are happy. Or bored, or hungry, although it takes some time so if you are starting off hungry, you will be starving by the time it is done. Maybe eat a snack will you are making it%u2026..
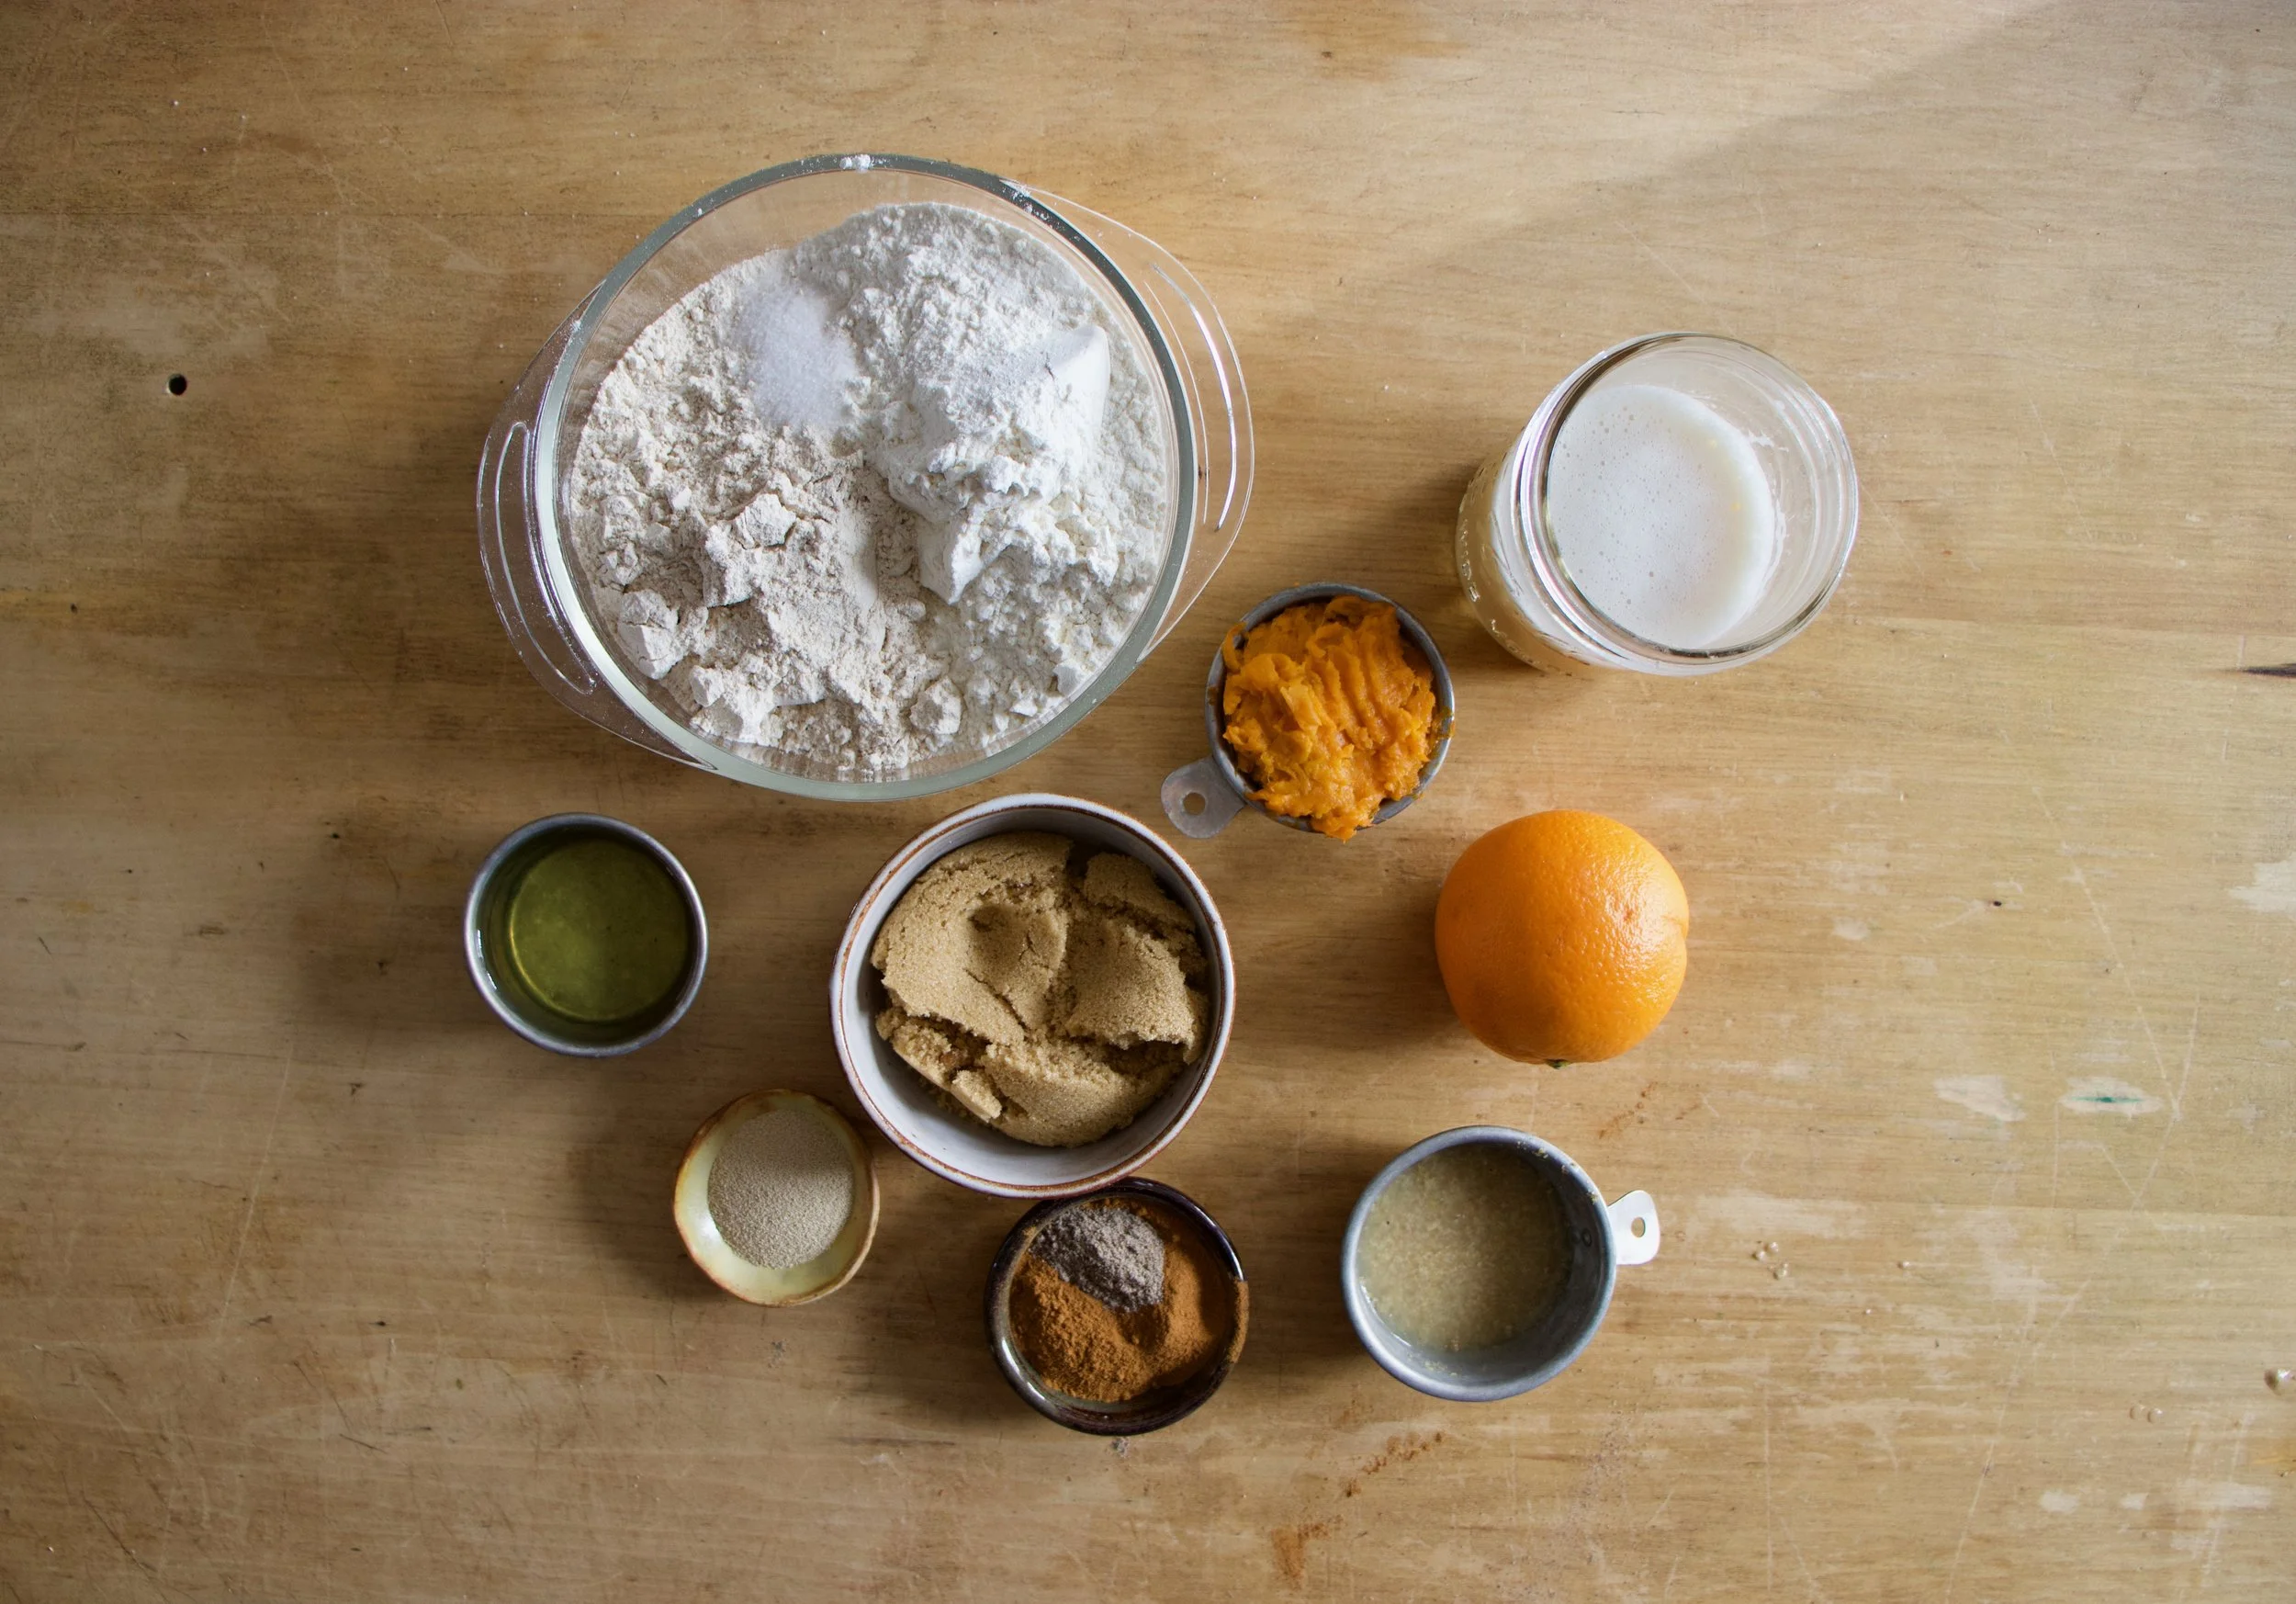
The stuff. White and whole wheat flour, salt, sweet potato puree, soy milk, yeast, brown sugar, oil, cinnamon, cardamom, some flax seeds, and an orange.

In a big bow, mix together the yeast, warm milk, sweet potato puree, a little sugar, and oil. Let it sit for a minute to active yeast.

Flours and salt get a good mix to be mixed.

Then dry gets dumped into the yeast mixture along with the zest of the orange.

Mix it until a dough forms then dump it out onto a lightly floured surface.
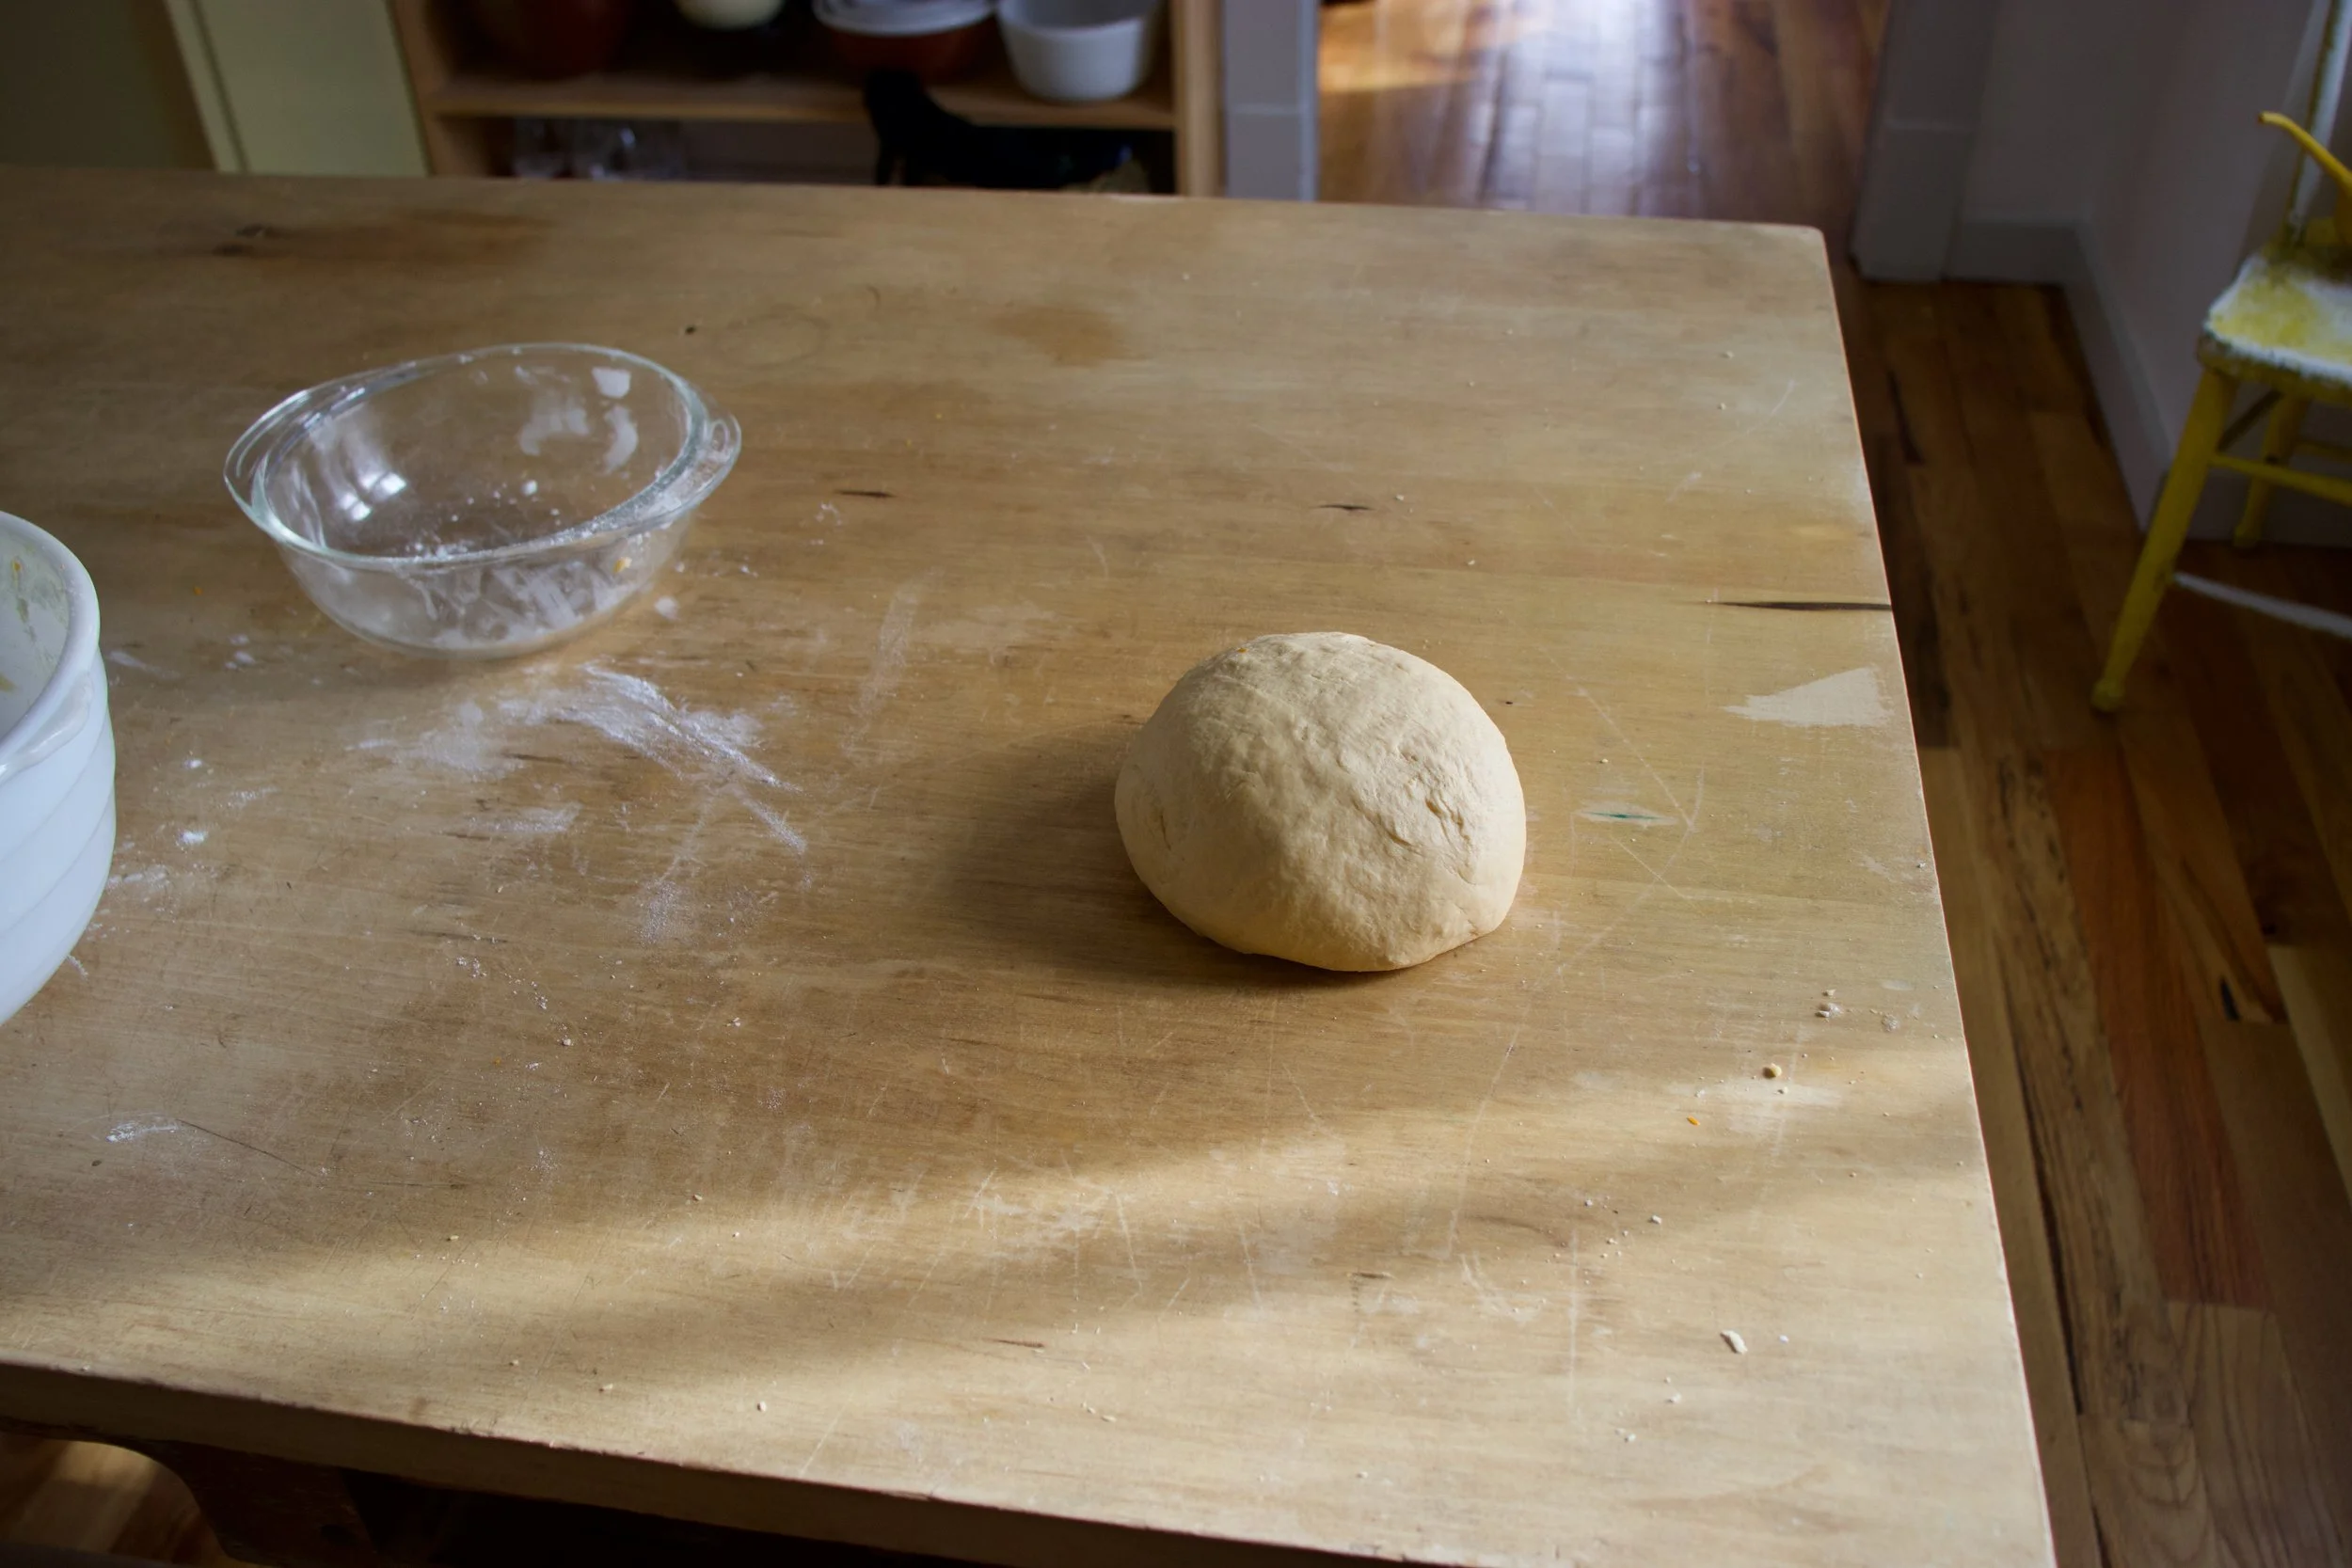
Knead dough for about 6-8 minutes or until supple, uniform, and smooth.

Place dough into a well oiled bowl and cover. Let rise for about and hour or so or until it doubles in size (could take a little longer then a hour)

Place risen dough back out onto a lightly floured surface.
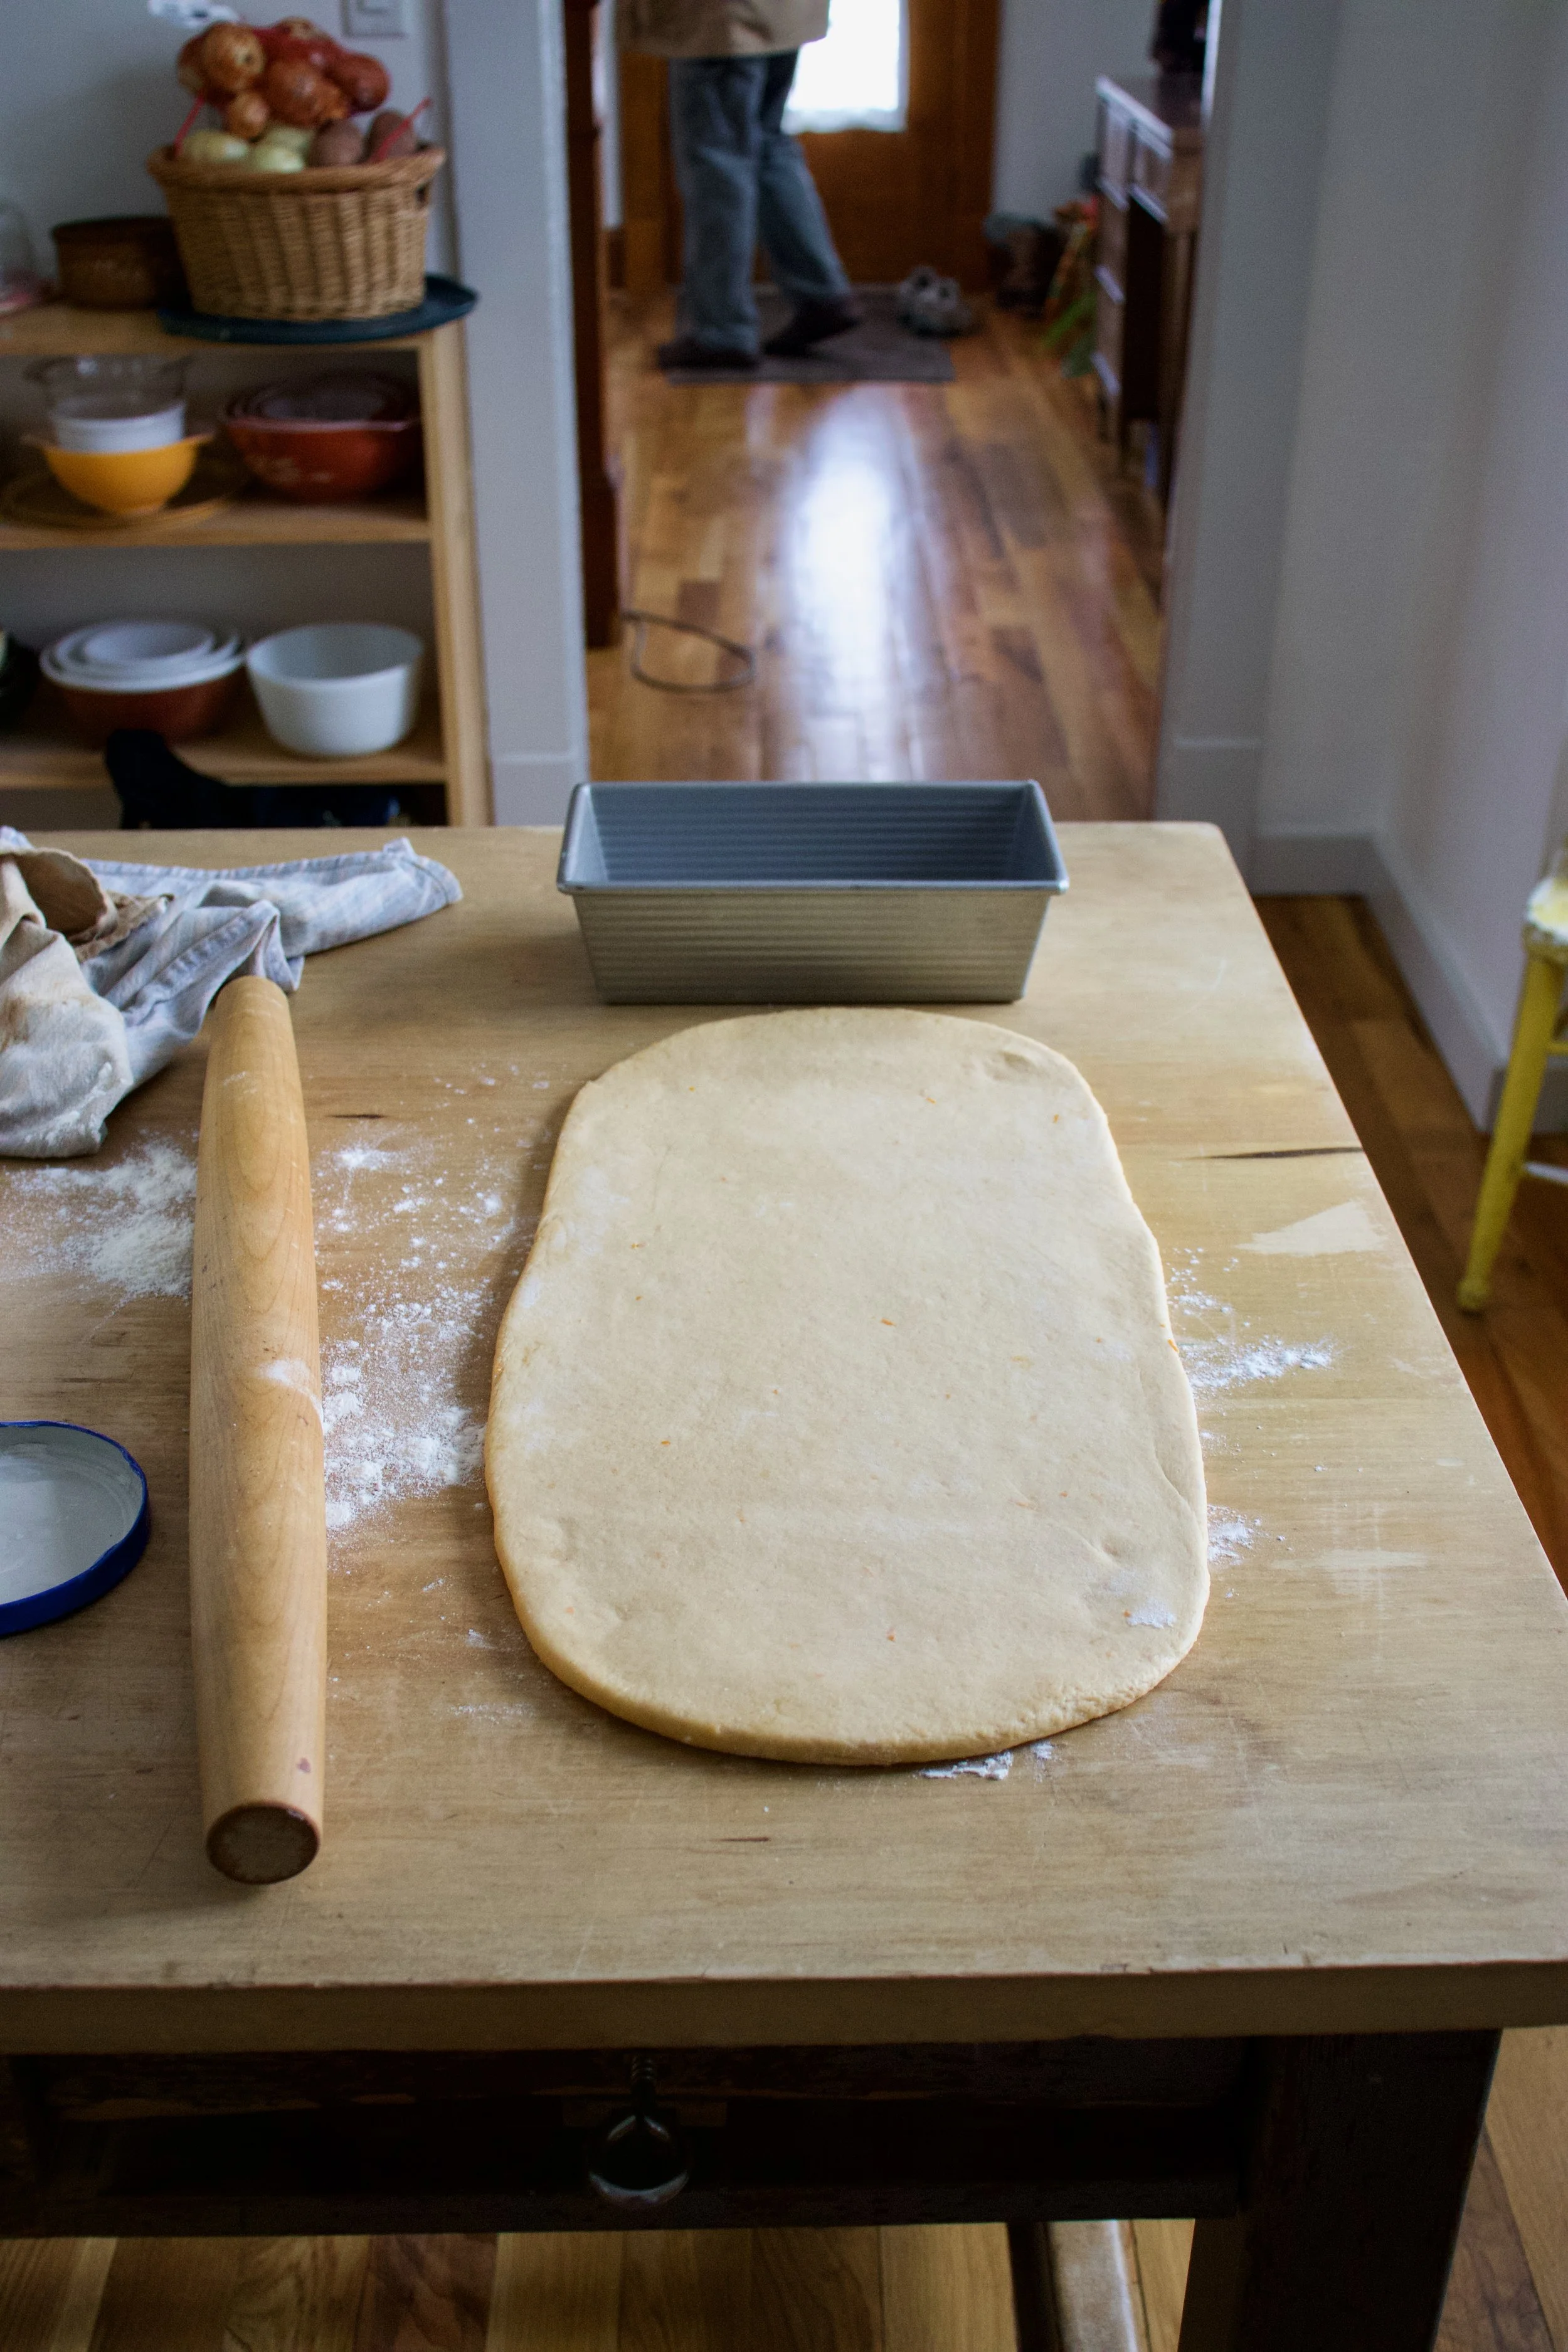
Roll it out about 2 feet long and as wide as a bread pan.

Don%u2019t forget mix up your brown sugar with the cinnamon and cardamom.
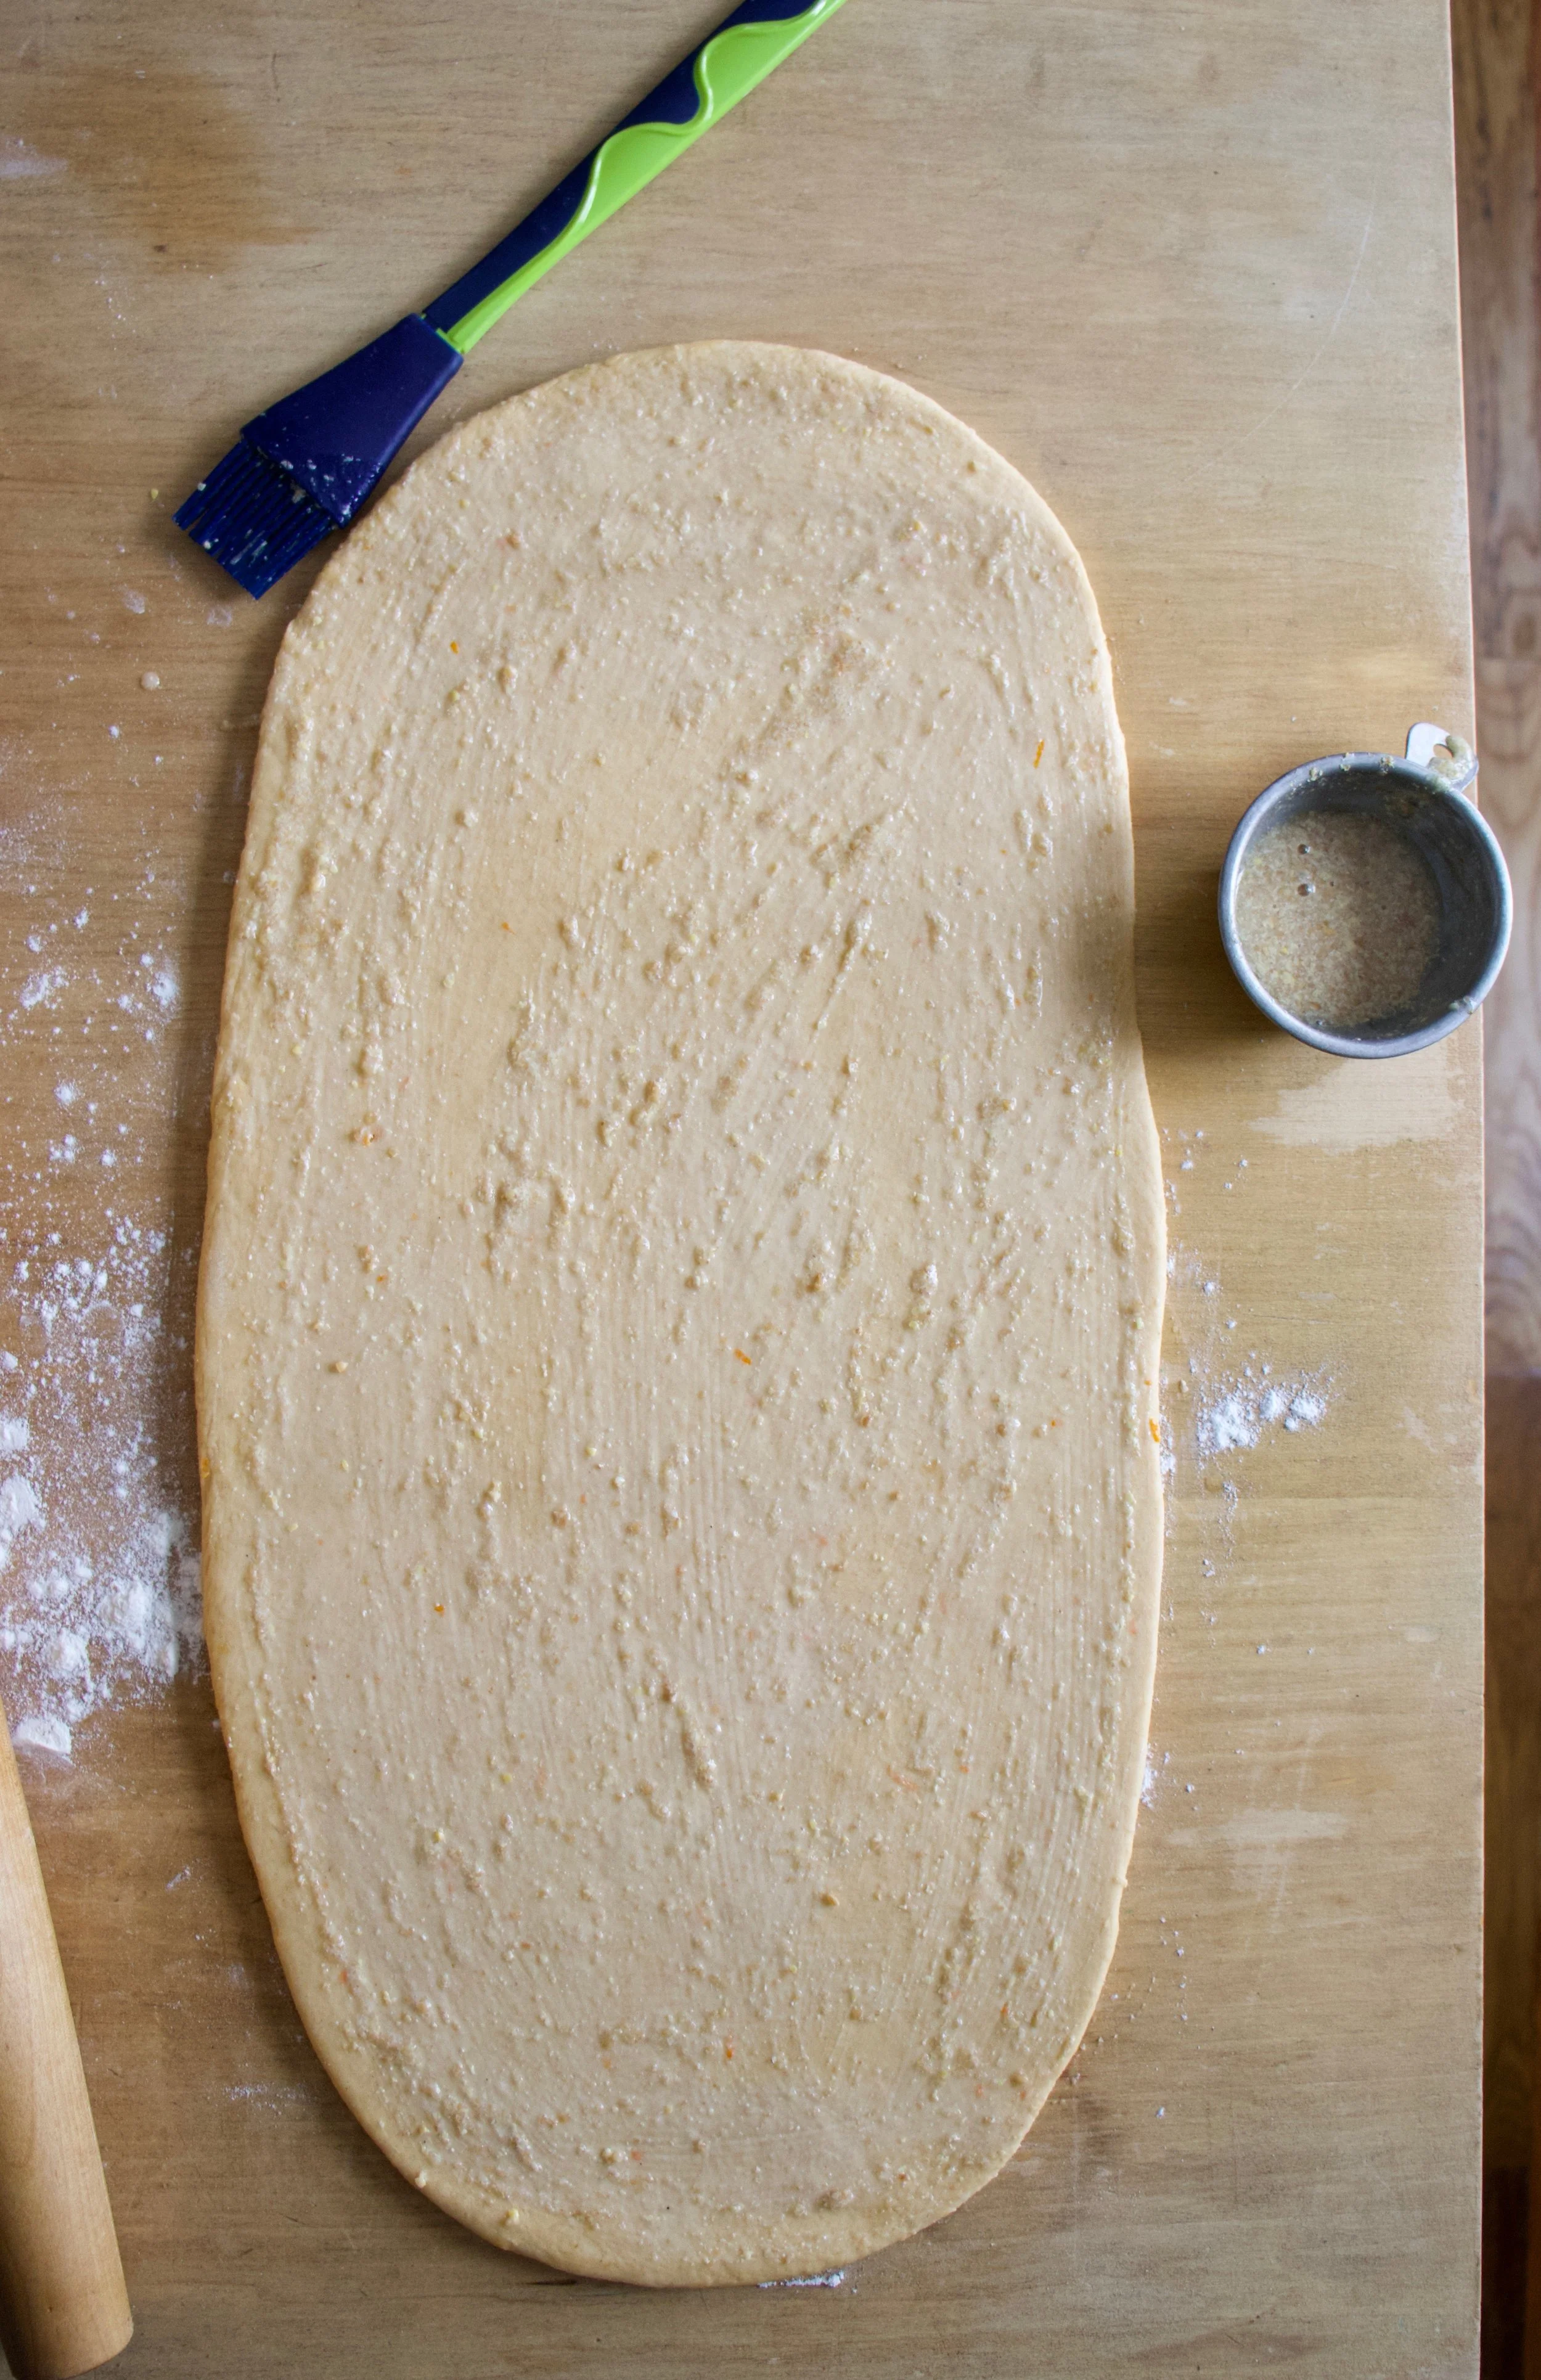
Brush rolled out dough with the flax mixture. This will help the cinnamon cardamon sugar stick.

And evenly distribute the mixture all over the dough.
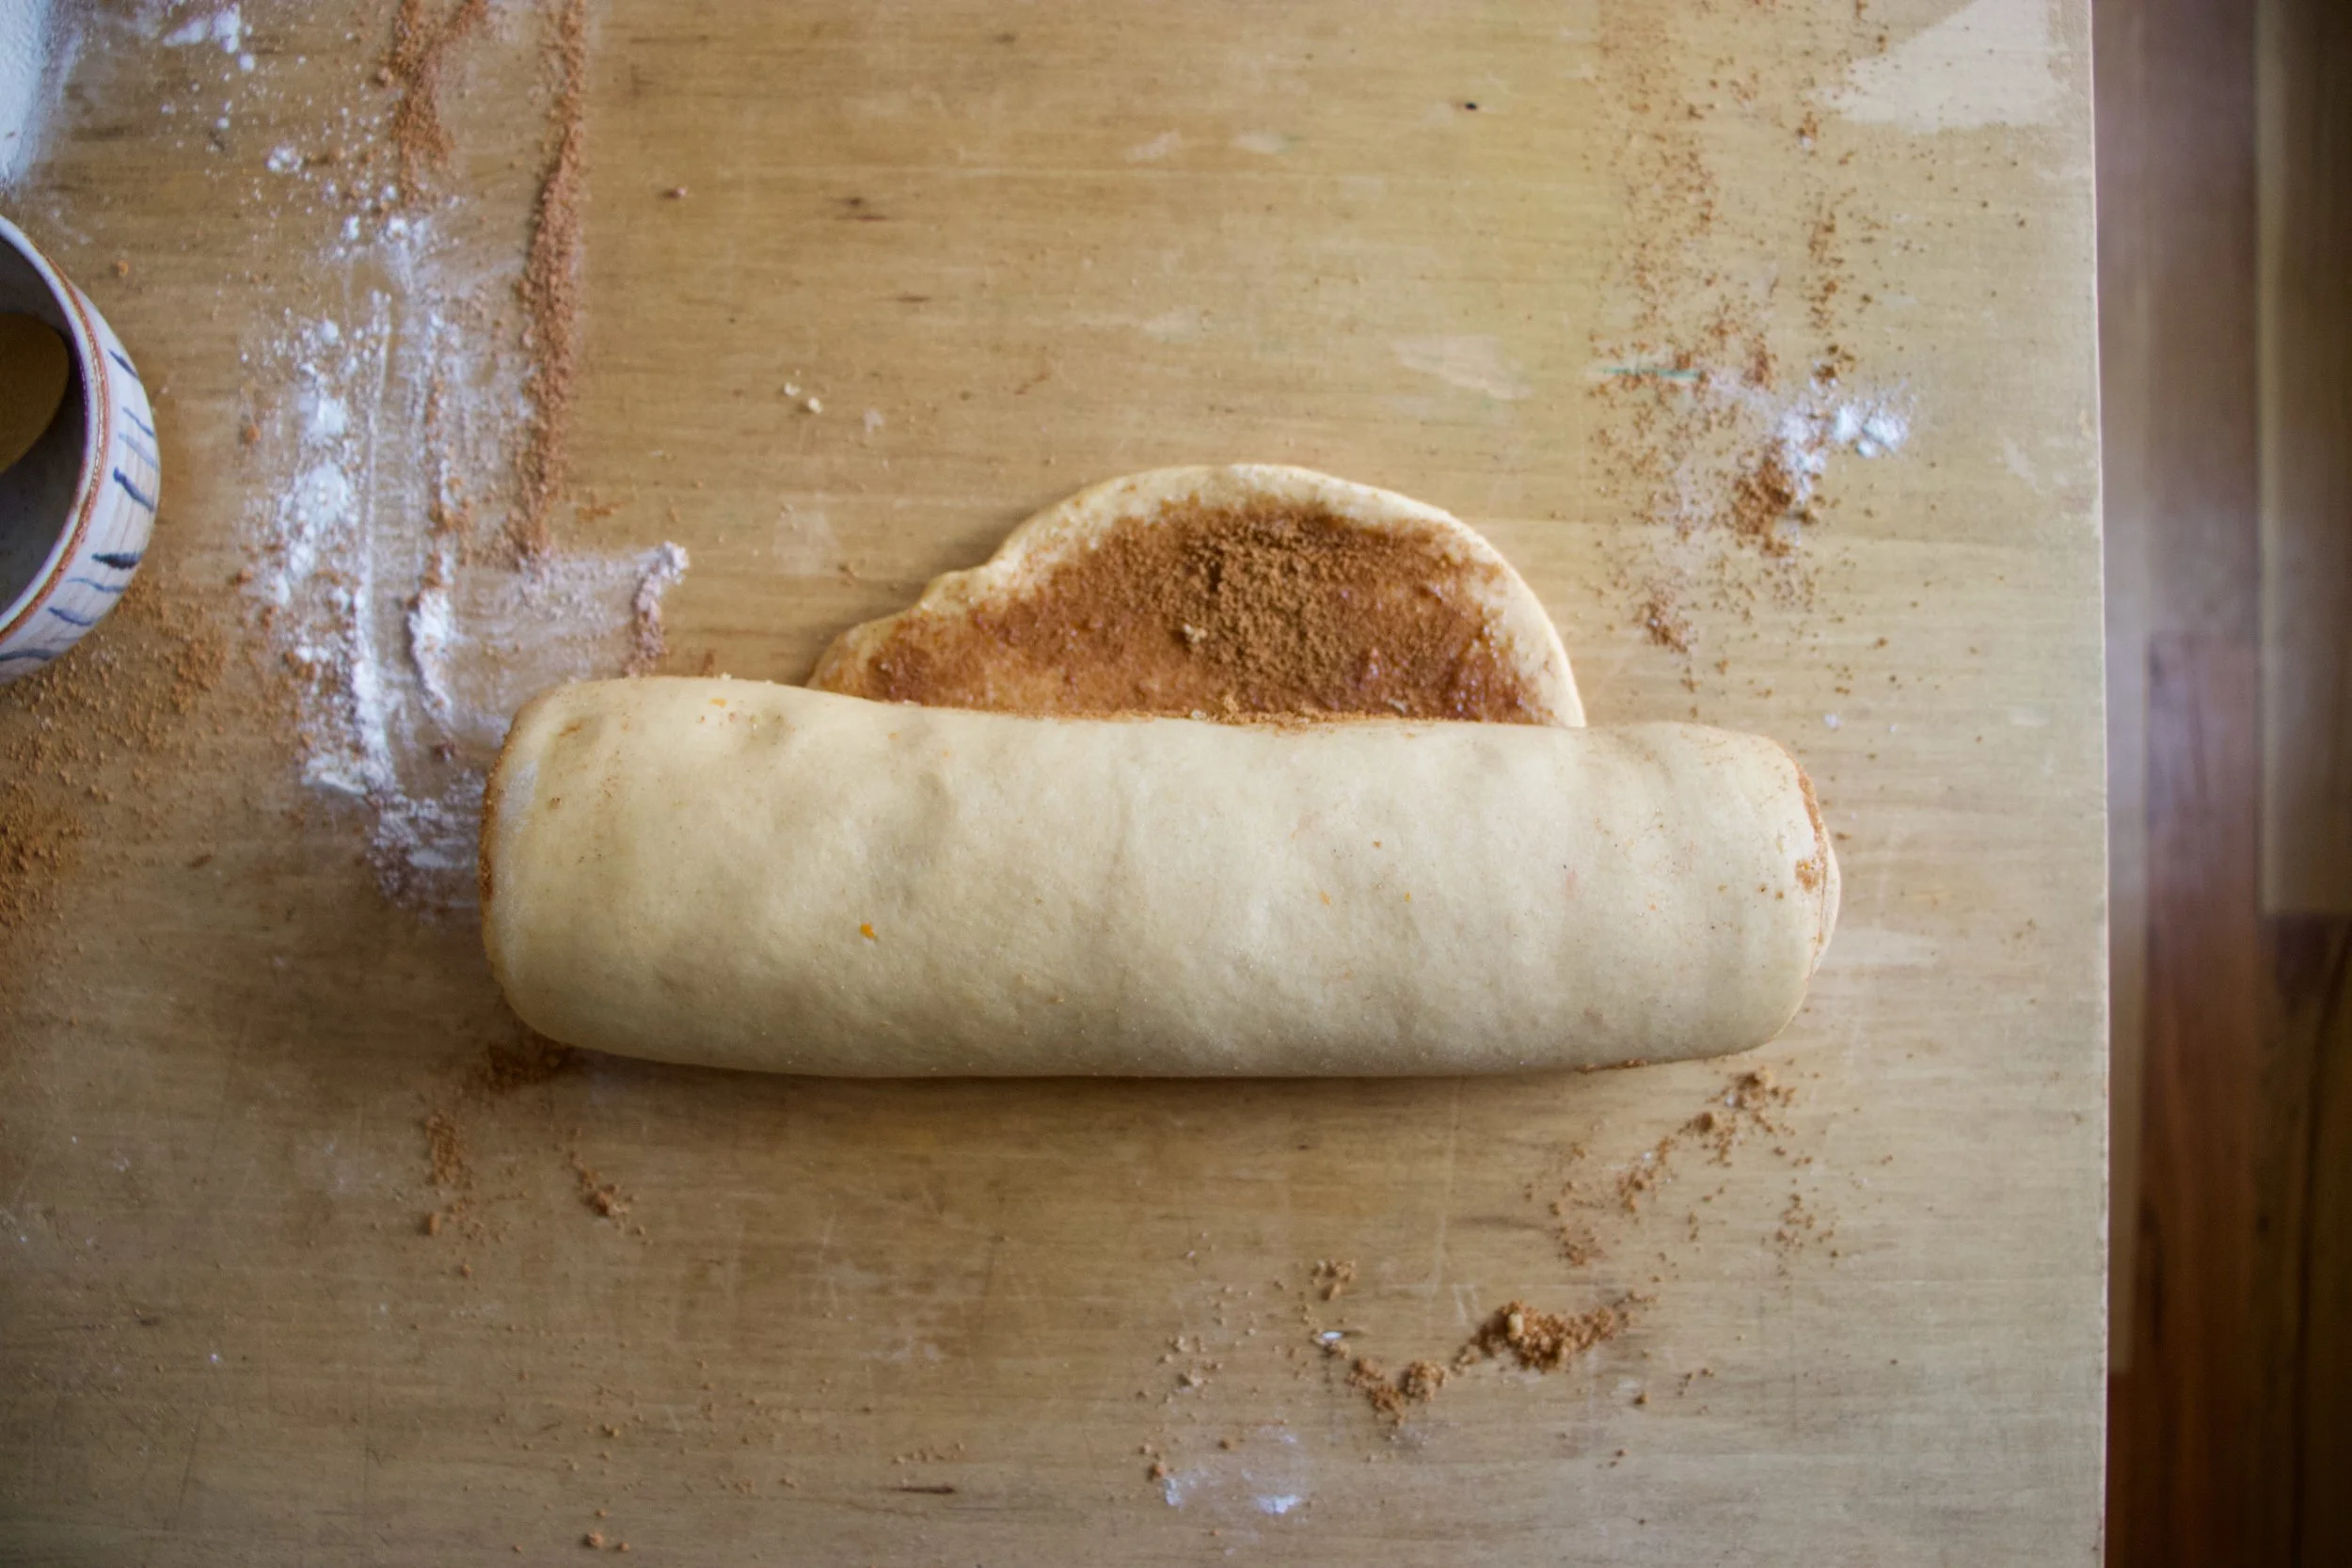
Roll it up nice and tight and once it%u2019s all rolled, pinch then end to the rest of the dough.

Gently place the rolled dough, pinched side down, into a well greased bread pan. Cover in a plastic bag for about another hour or until the dough has risen a good amount and is doming over the rim of the pan. Now preheat the oven.

Once the bread is sufficiently risen, place into hot oven and bake for 40-45 minutes.
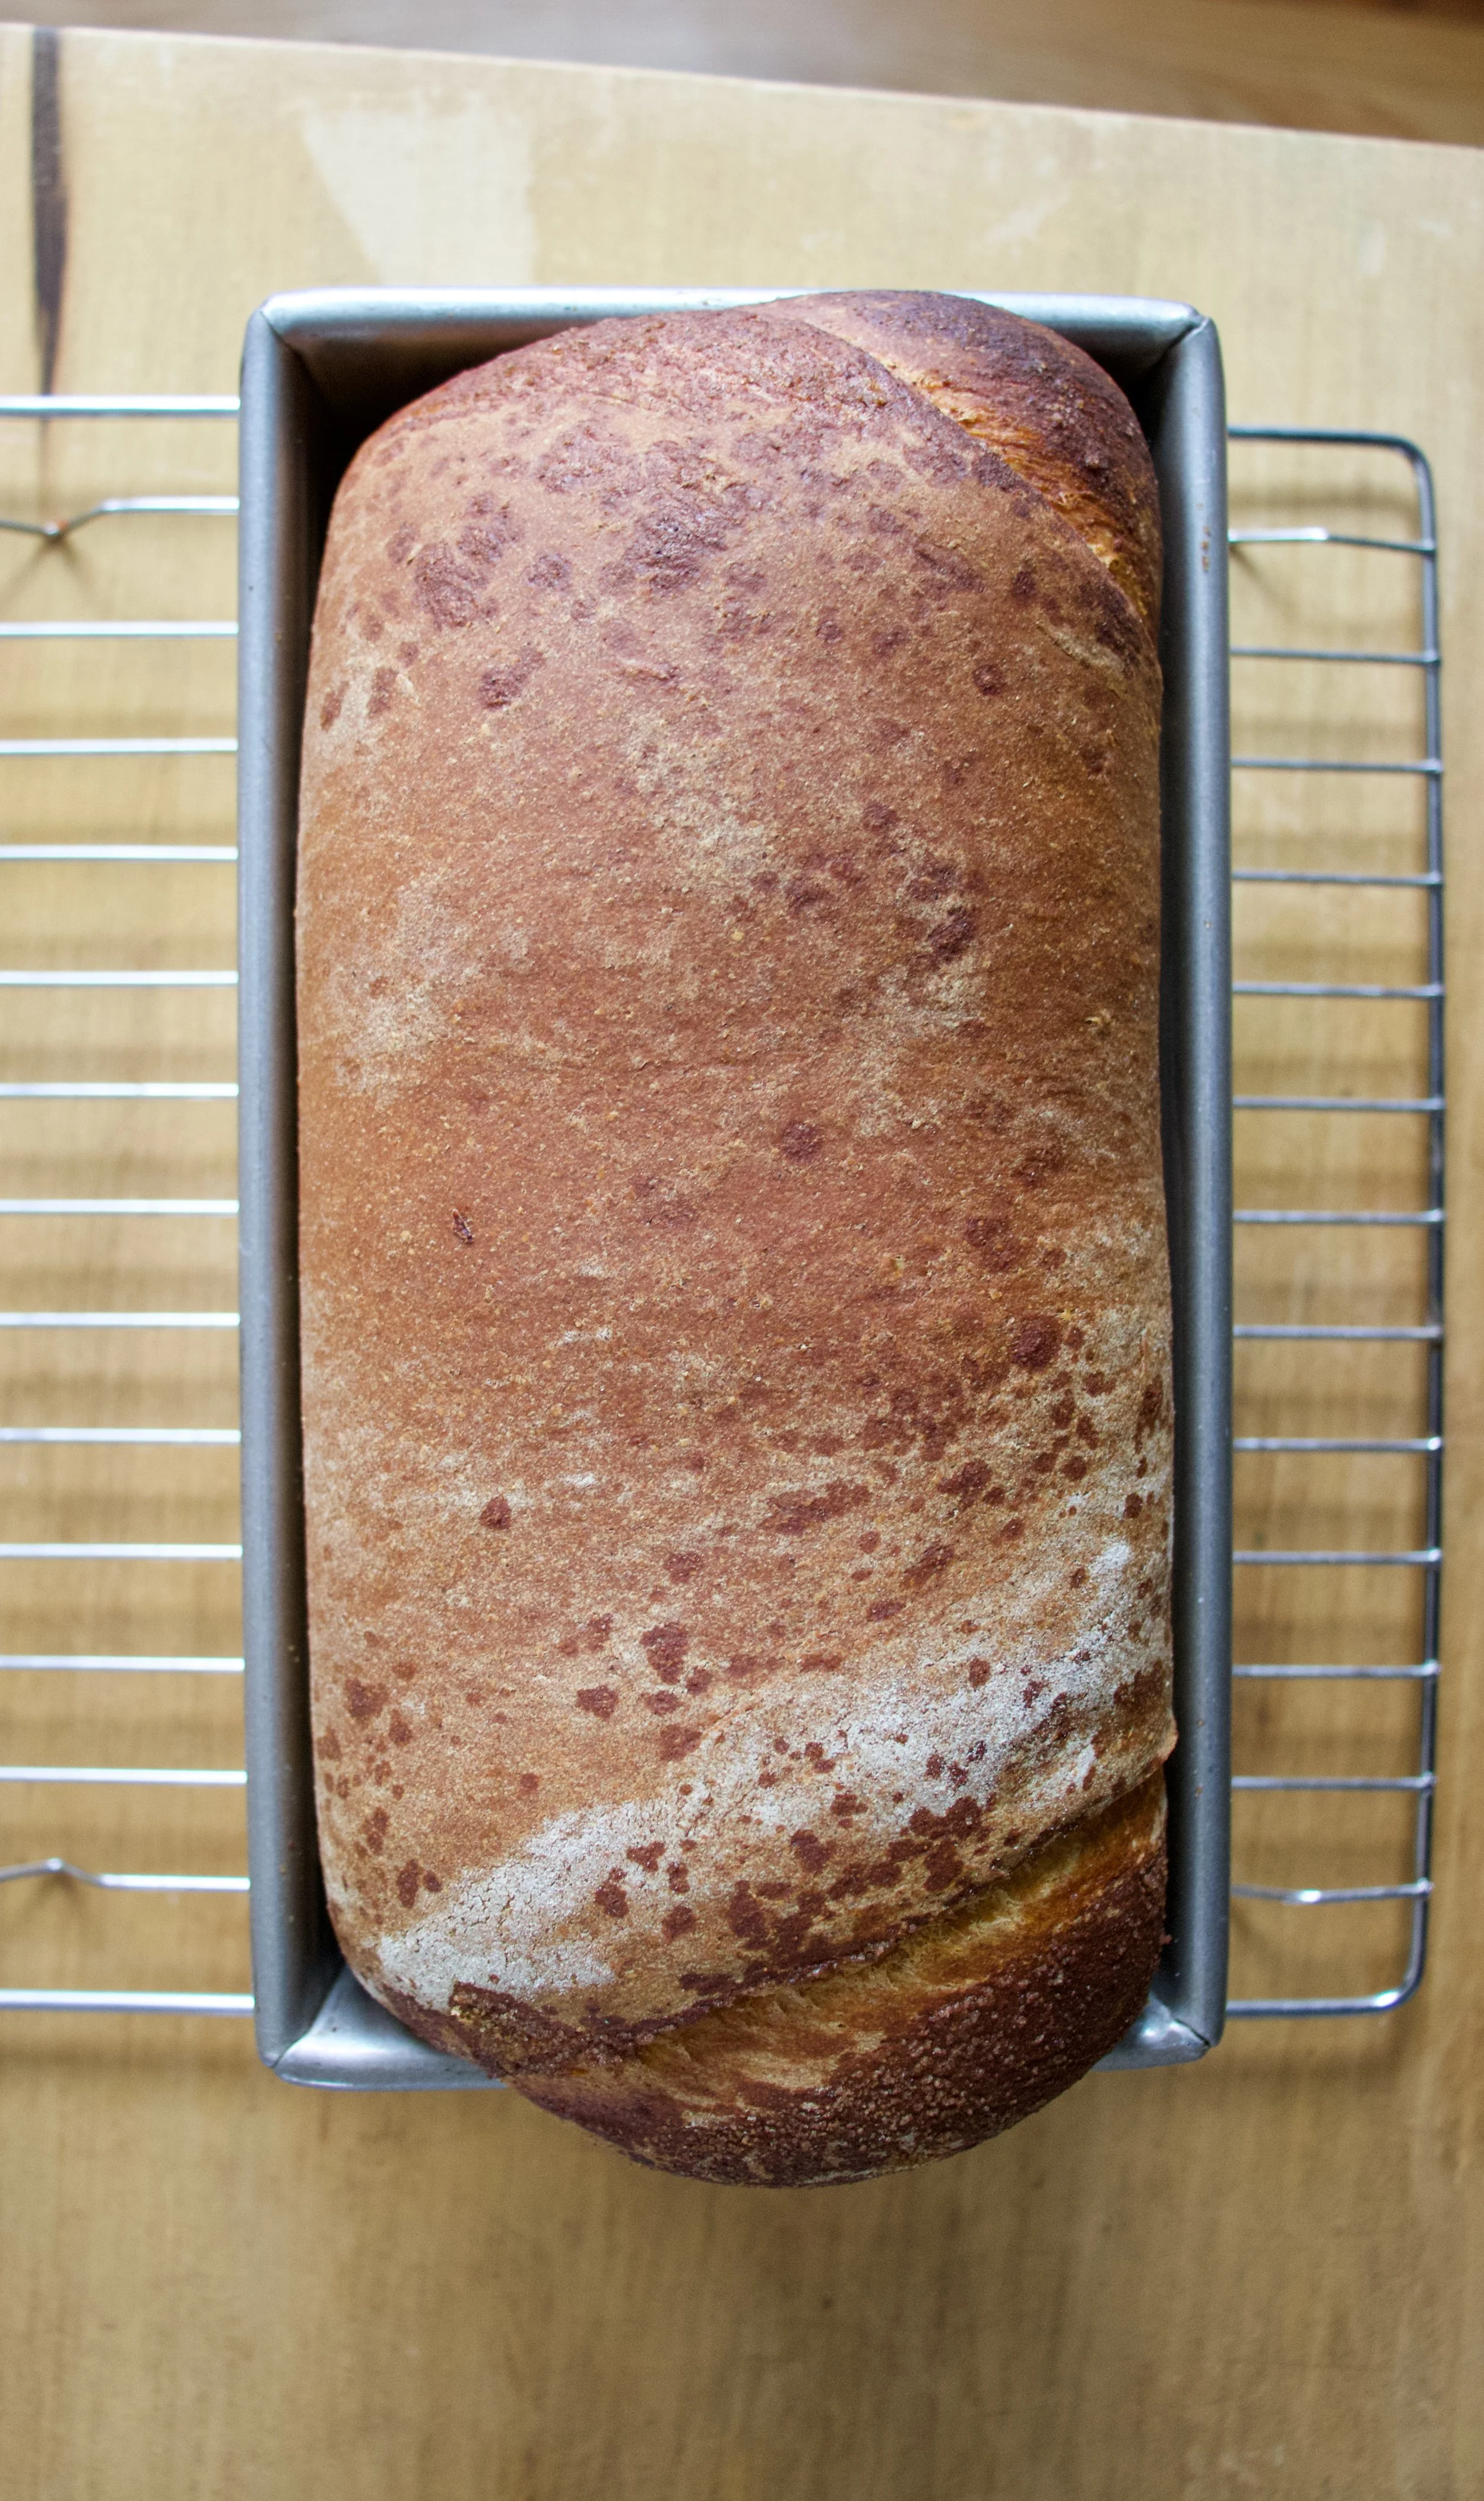
Now the hard part. Get it out of the bread pan and get it cooling off. You cannot cut into it until it cools or you will smoosh the swirl and make it gummy. Just wait, at least a half hour. For real. Wait. You can do it!
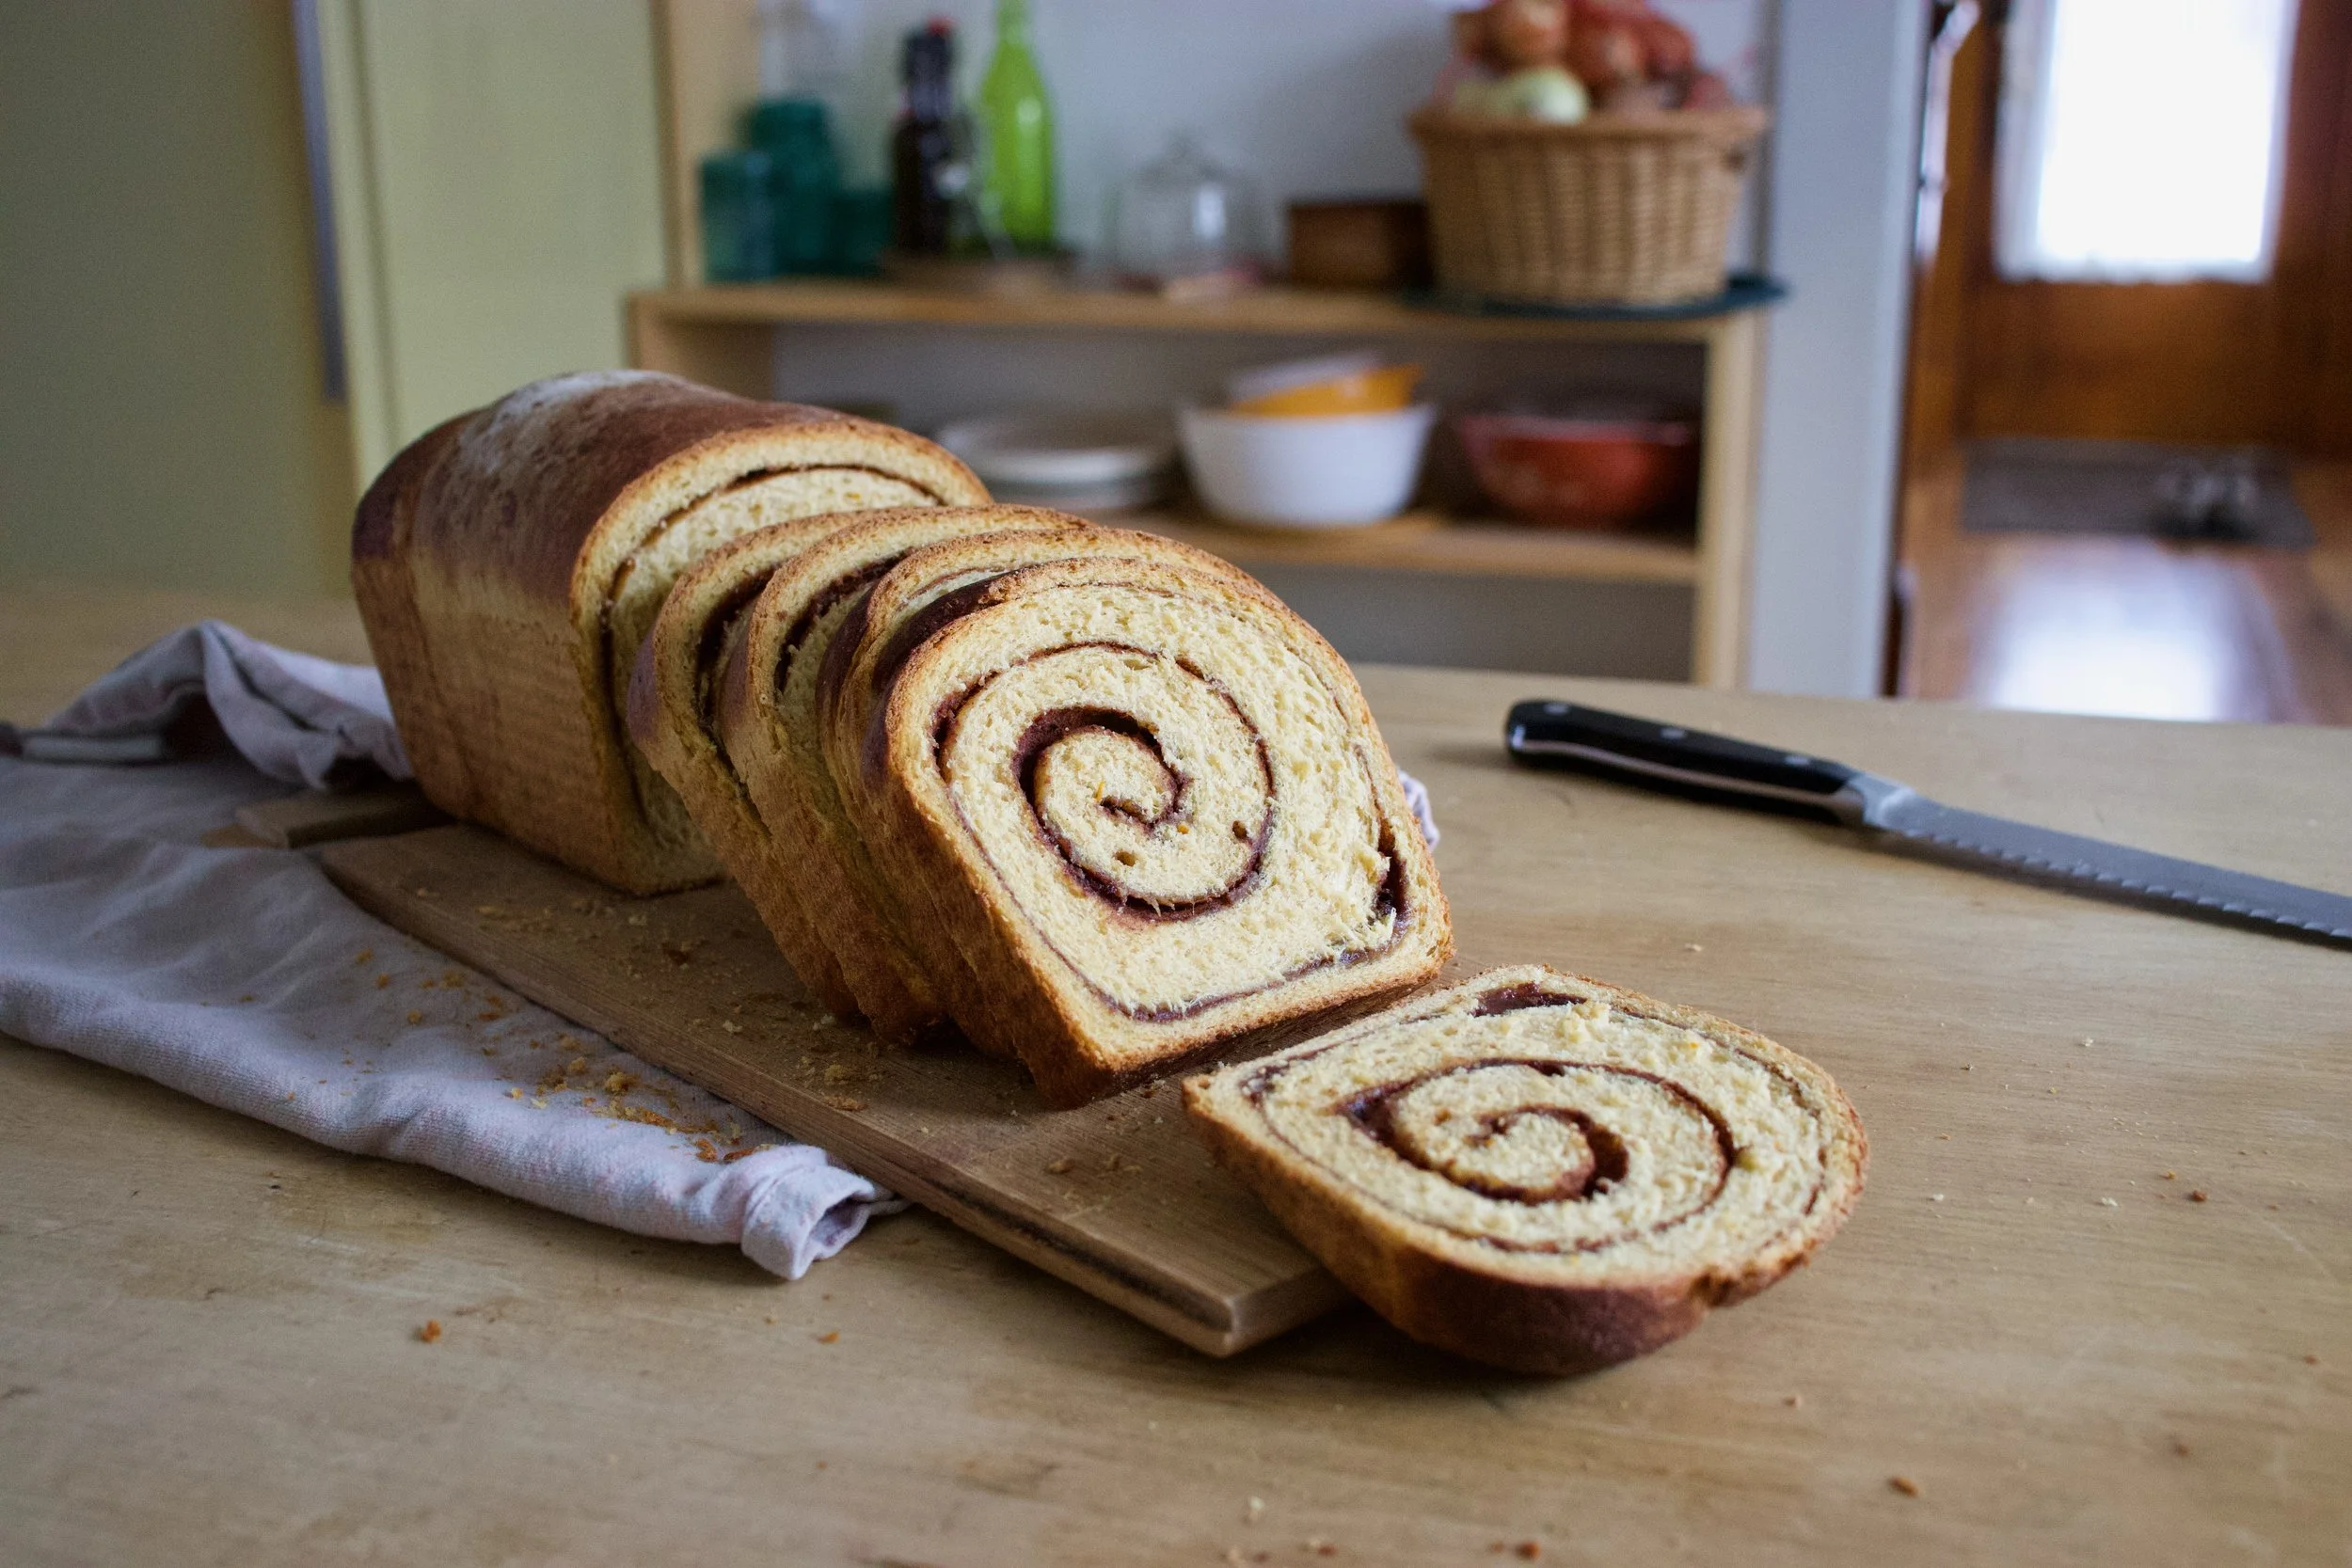
And when the bread cools and the wait it over, slice and be amazed. A thing of beauty that smells of greatness.

Bread is so great. Great great great! Especially a swirl bread. I mean. Look at that.

Happy day to you.

-C

Makes 1 loaf

  • 2 cups all purpose flour

  • 1 cup white whole wheat flour

  • 1/3 cup sweet potato puree

  • 1 cup soy milk

  • 2 teaspoons (or one packet) yeast

  • 3 tablespoons neutral oil like canola

  • 2 tablespoon light brown sugar

  • 1 teaspoon salt

  • Zest of 1 orange

  • For the cinnamon cardamom filling

  • 1/2 cup light brown sugar

  • 2 tablespoon cinnamon (I used Vietnamese Cinnamon which is a little spicier and sweeter)

  • 1/2 teaspoon ground cardamom

  • 2 teaspoons ground flax mixed with 4 teaspoons warm water

Start by grabbing a big bowl. Mix together the yeast, the 2 tablespoons brown sugar, warm milk, sweet potato puree, and oil. Let sit for a minute to active yeast. In a separate bowl mix together the flours and salt. Dump the dry mixture into the wet. Zest the zest of an orange into bowl and mix it all together until it forms a dough. Dump the dough onto a lightly floured surface and knead for 5-8 minutes or until the dough gets supple and shinny and uniform. Place dough into a well oiled bowl and cover for about an hour or until doubled in size.

Once dough has doubled, dump out onto a well floured surface and roll out to as wide as a bread pan and roughly 24 inched long. After you have rolled it out brush the flax and water mixture all over surface . Combine the brown sugar with the cinnamon and cardamom and evenly distribute the mixture all over flaxed dough. And for the fun part. Careful roll the dough into a log. Roll it tightly so the bread doesn’tt end up with big gaps after it bakes. Once rolled, pinch the rolled end and place the log rolled side down into a well greased bread pan. Place dough into a a plastic bag with plenty of space for dough to rise. Let sit for about another hour or until the dough has risen a little bit above the rim of baking pan.

Preheat oven to 375

When dough has risen, place on middle rack in hot oven and bake for 40-45ish minutes or until bread is a deep golden brown and when you give it a tap, it sounds slightly hollow. Also check it with a intsant read thermometer. Get it to 190.

When it done baking, pull from oven and remove from pan. Place on a wire rack and let completely cool. Seriously, you got to let it cool for at least 1/2 and hour, but longer is better!

When it%u2019s cooled, cut into slices. Eat as you wish.

Uneaten bread stores well for a day or two in a airtight plastic bag but if you don%u2019t eat it that fast, cut into slices and freeze. That way you can just pop a piece out and stick it into toaster. Smart.

The thing with having an abundance of squash in the house, and having the abundance keep growing (we get a lot of squashes at farm share) is that I need to cook just about every meal with said abundance, which I am totally on happy to do. I welcome all the squash. I am excited about all the squash. I could eat al the squash all day, everyday. And I do. But that is me. The mr and the others the I sometimes cook for, they are not as squash crazy as me and get sick of plain old roasted squash so I am trying to change it up and make new and interesting things out of the squash so no one gets bored with it.

Yes, I know stuffing an acorn squash is hardly a new idea, but this squash is not stuffed with the usual rice and stuff, it stuffed with lots of black beans and cumin and chili powder spiced cauliflower (and a few other things). The combination of all the flavors with the acorn squash really hit all the right spots for a tasty, not boring squash meal. It is a brilliant combination of flavors that even the not so keen on squash person will love.

That is my opinion of course but it will be your opinion too after you make and eat these. We will brilliant together.

To the stuffed squash.
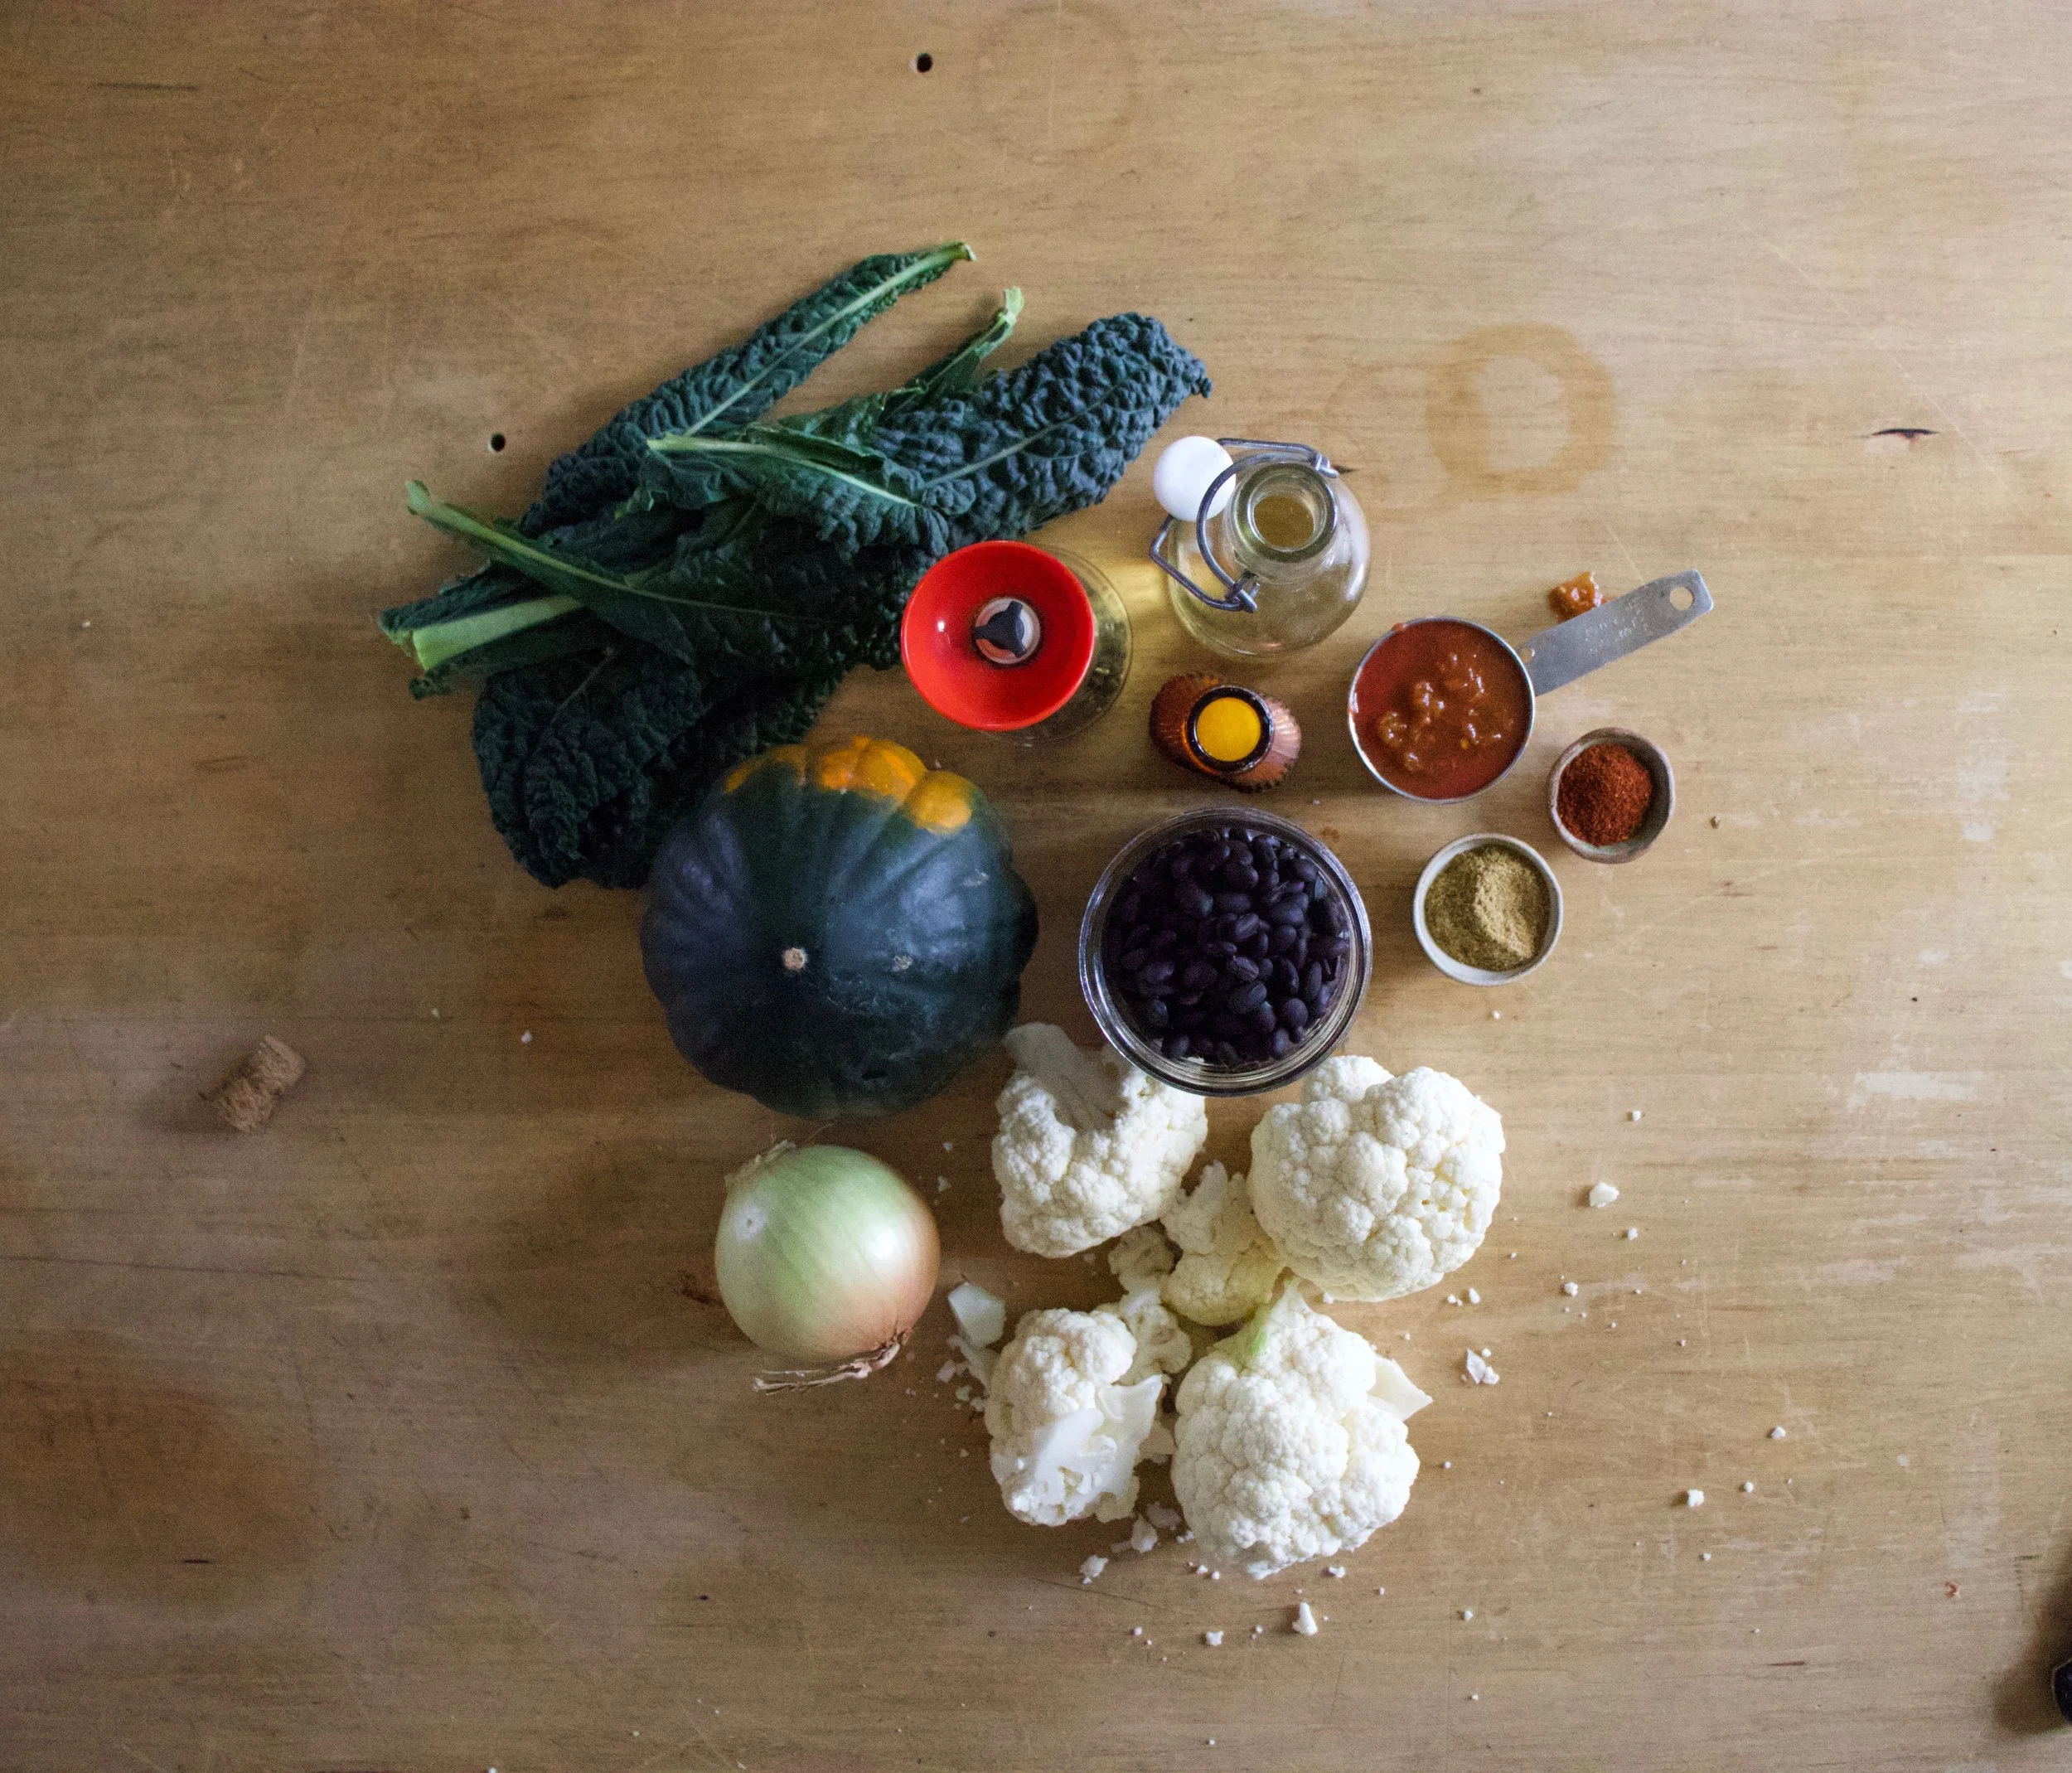
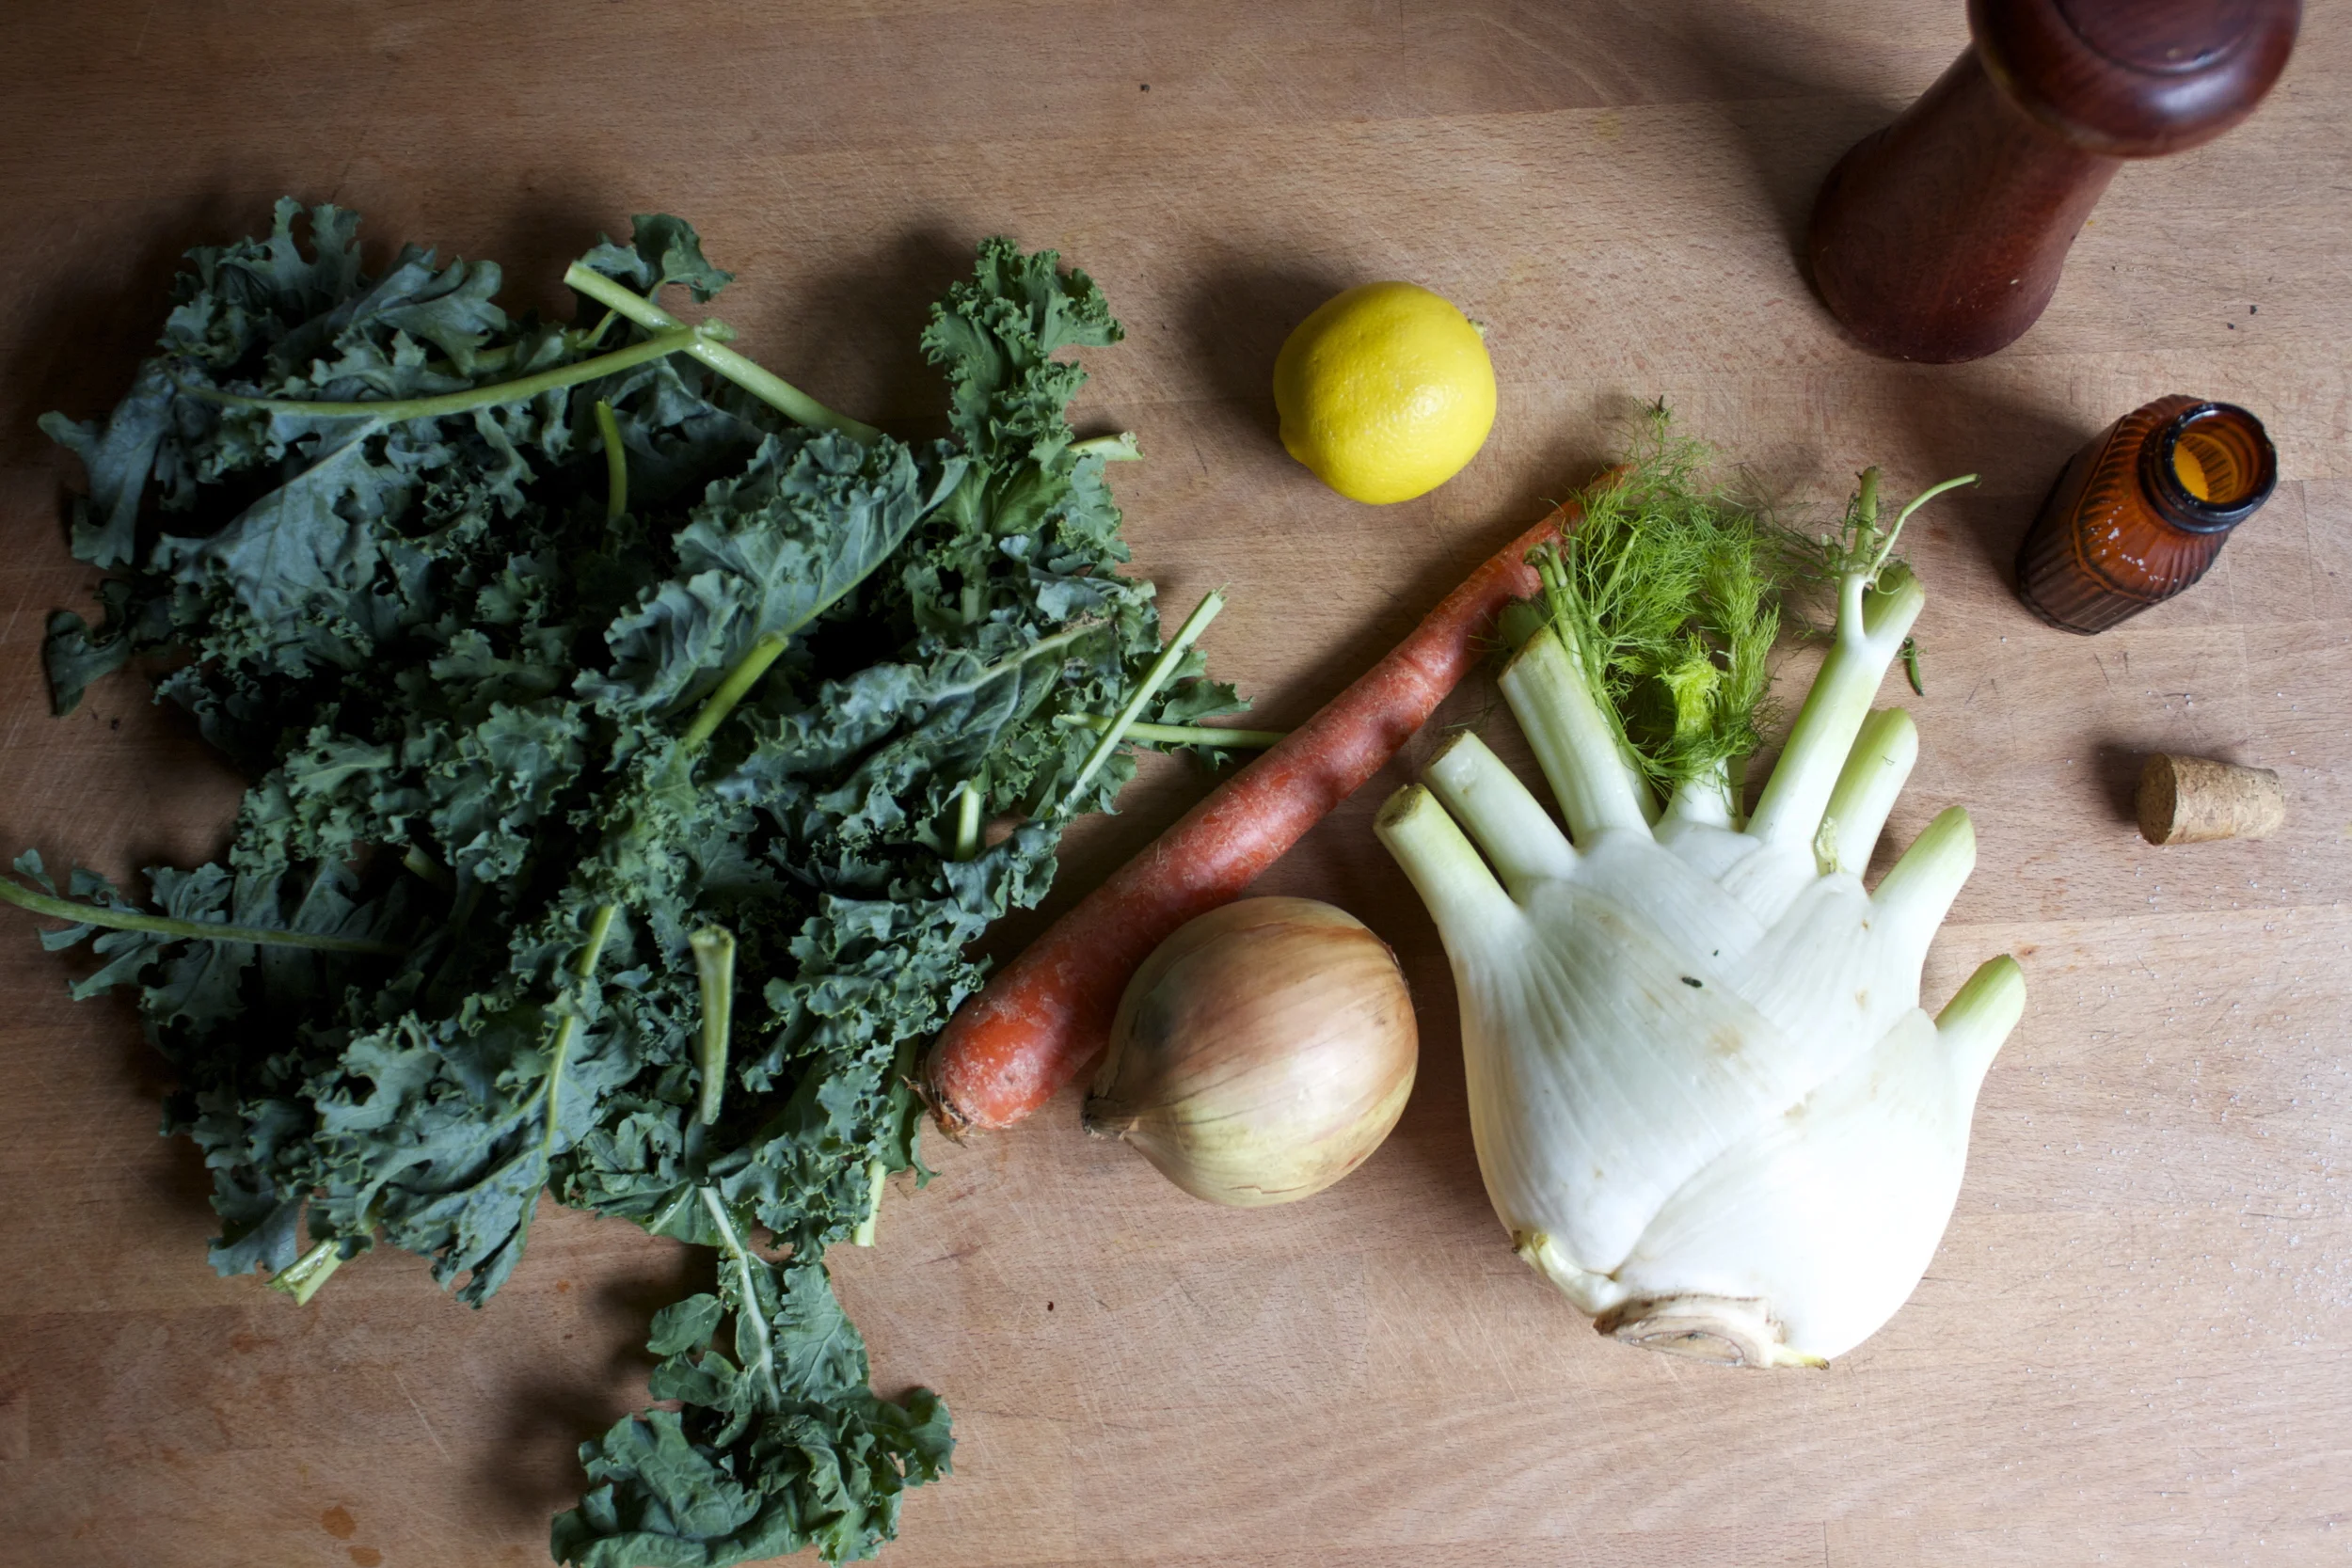
The stuff. An acorn squash, some cauliflower, cooked black beans, an onion, and a few kale leaves. Also need some cumin, chili powder, salt and pepper. salsa, and olive oil.
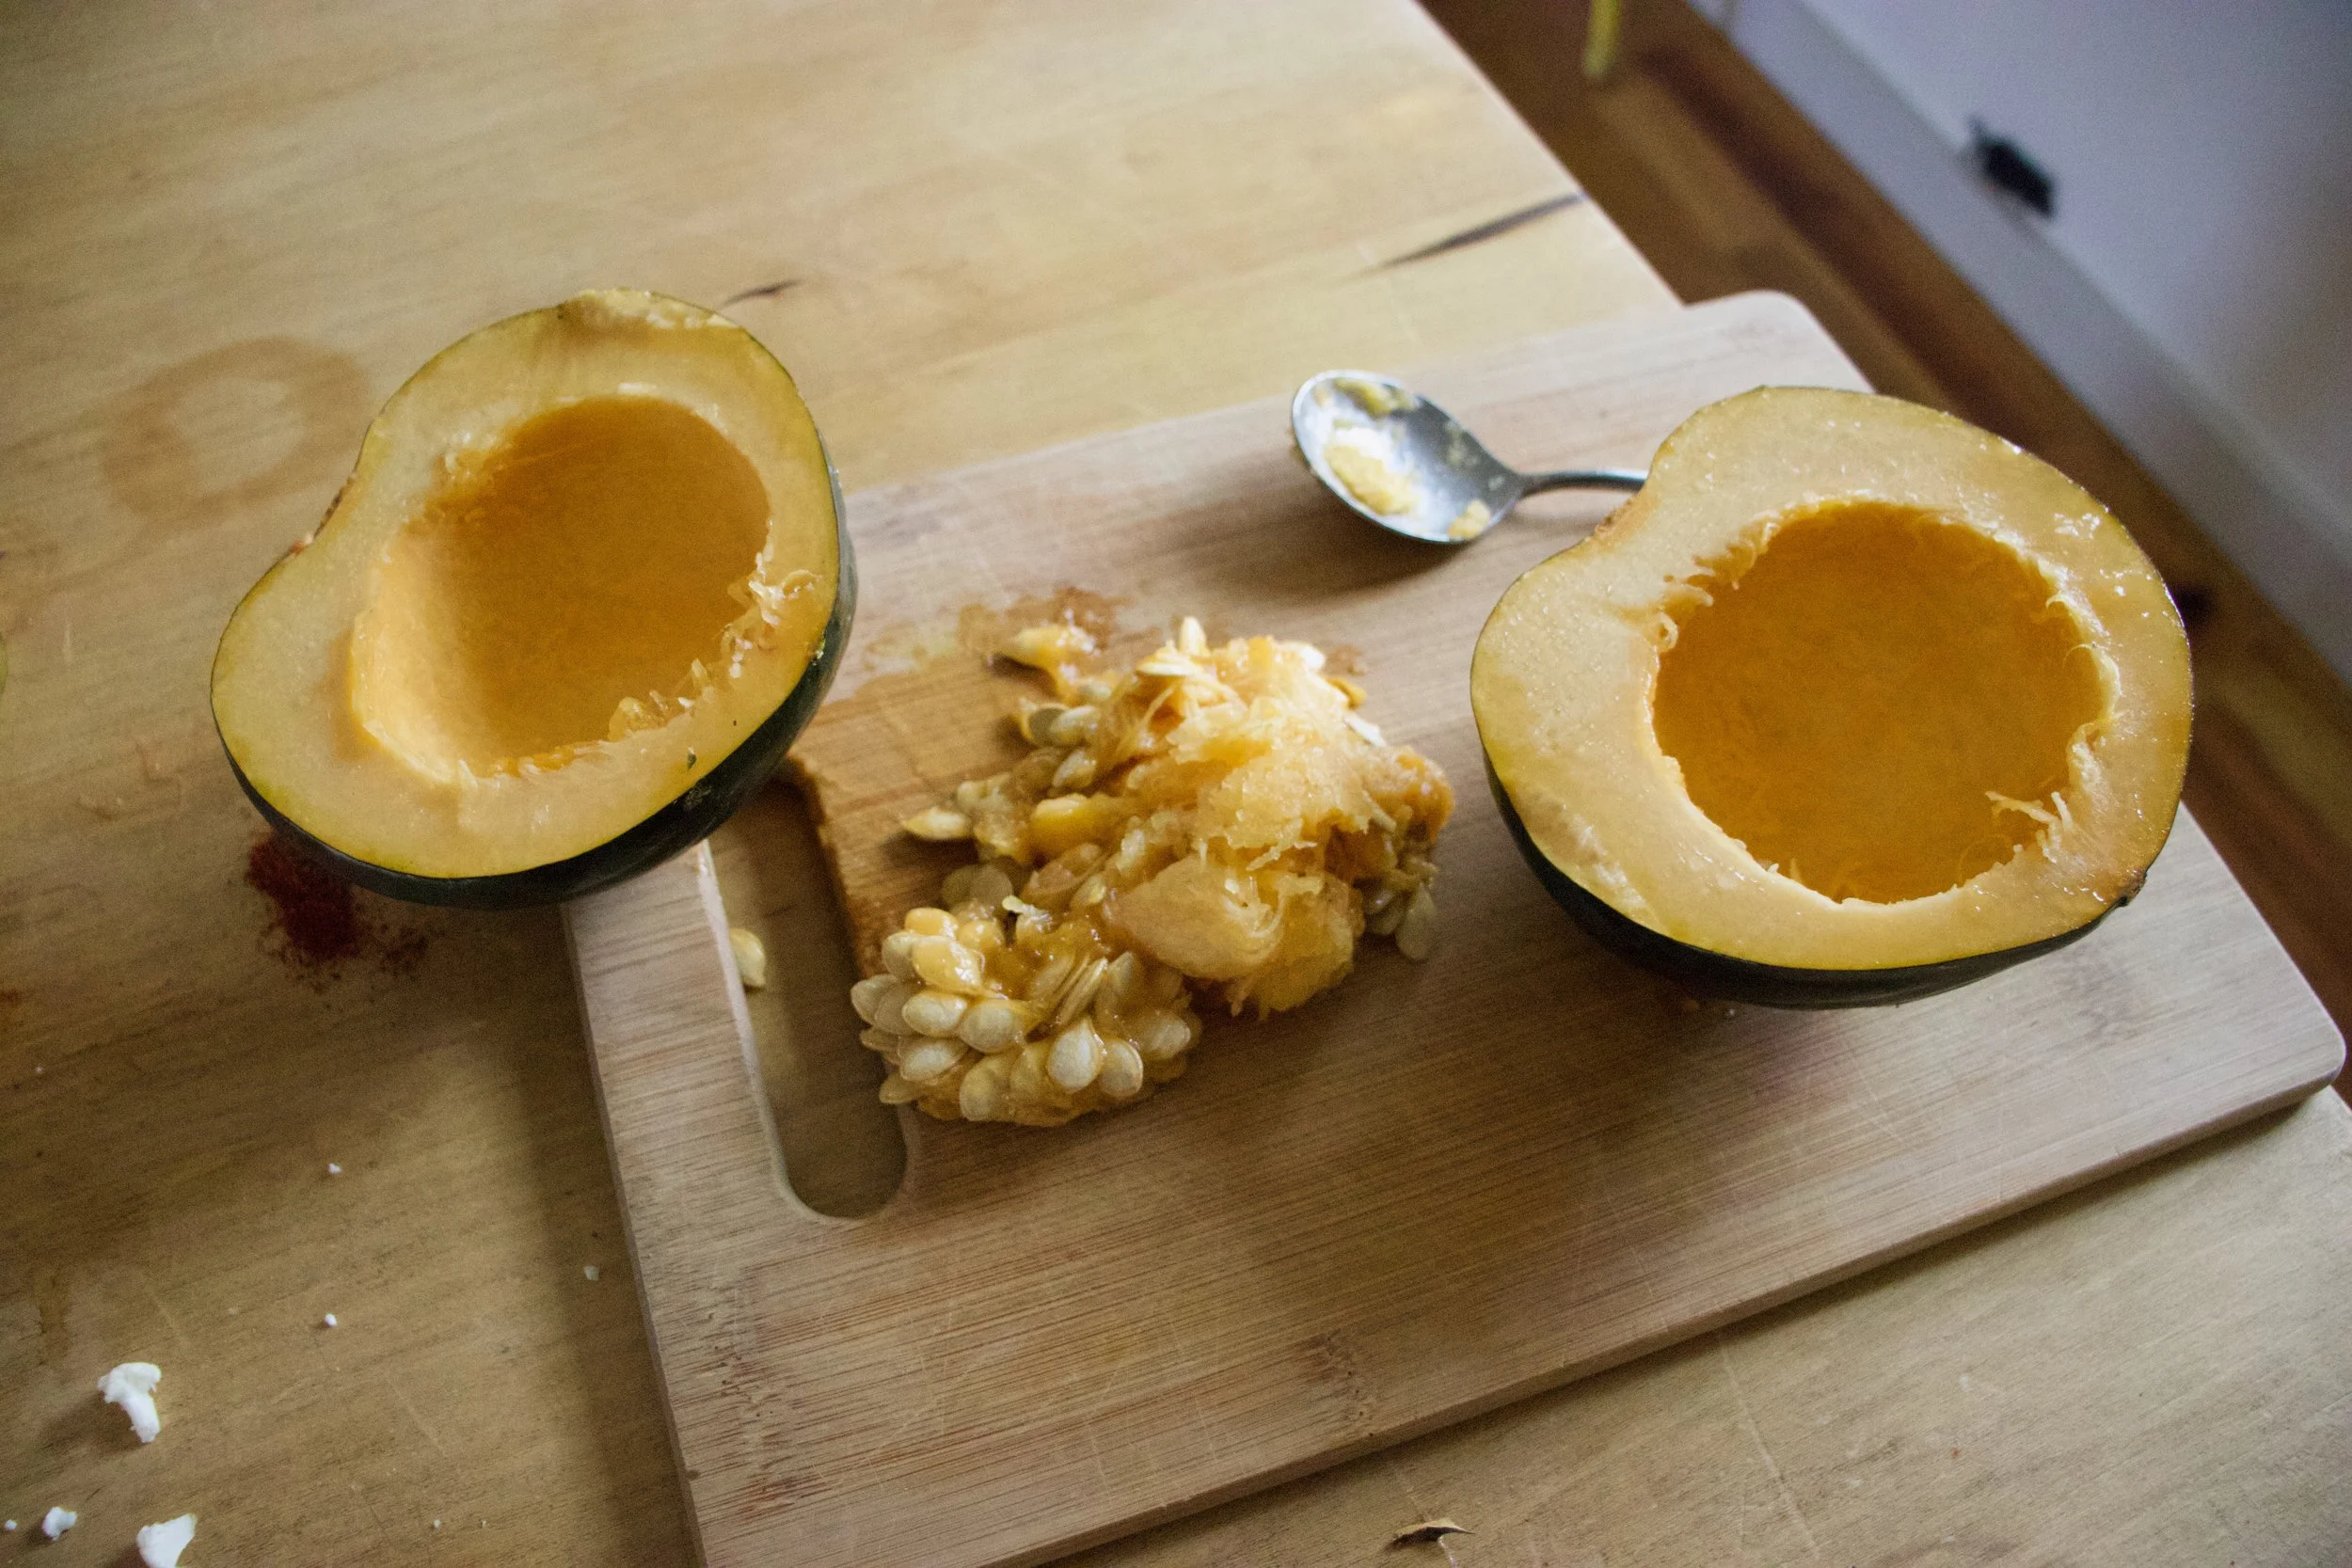
Start by cutting the squash in half and scooping out all the seeds.
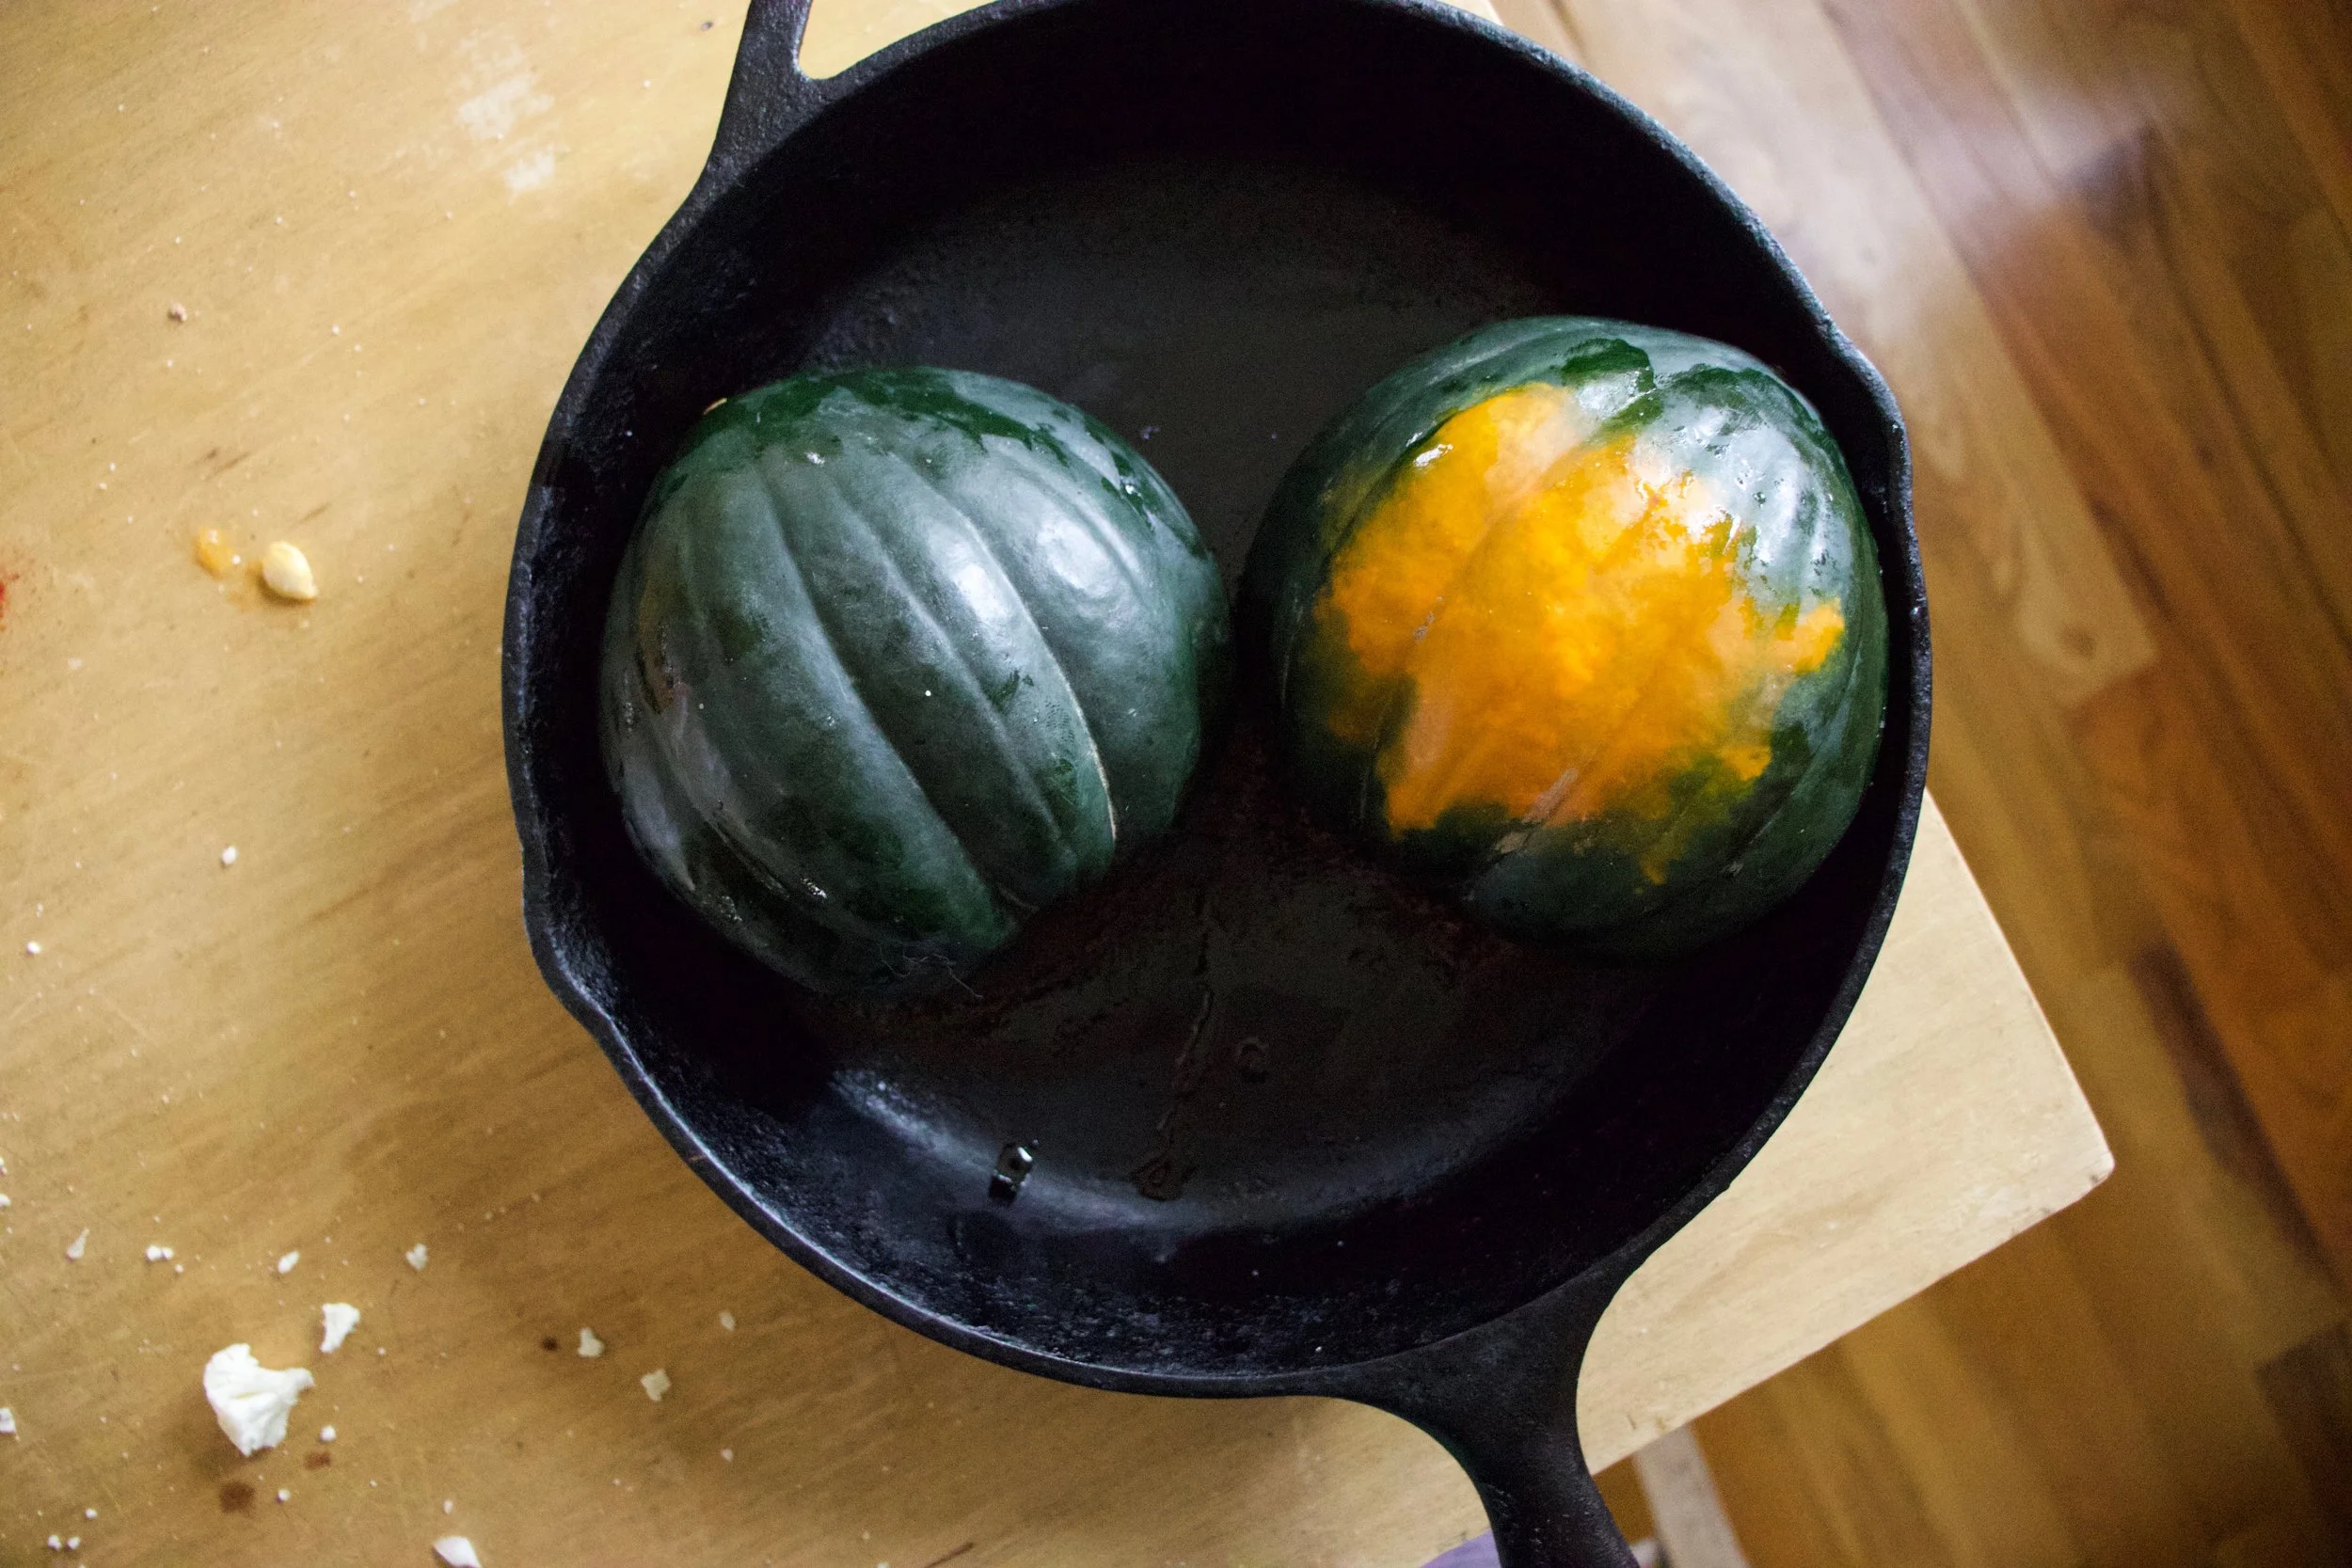
Place the squash open side down on a baking sheet or in a skillet lightly oiled and then stick into a hot oven to roast.
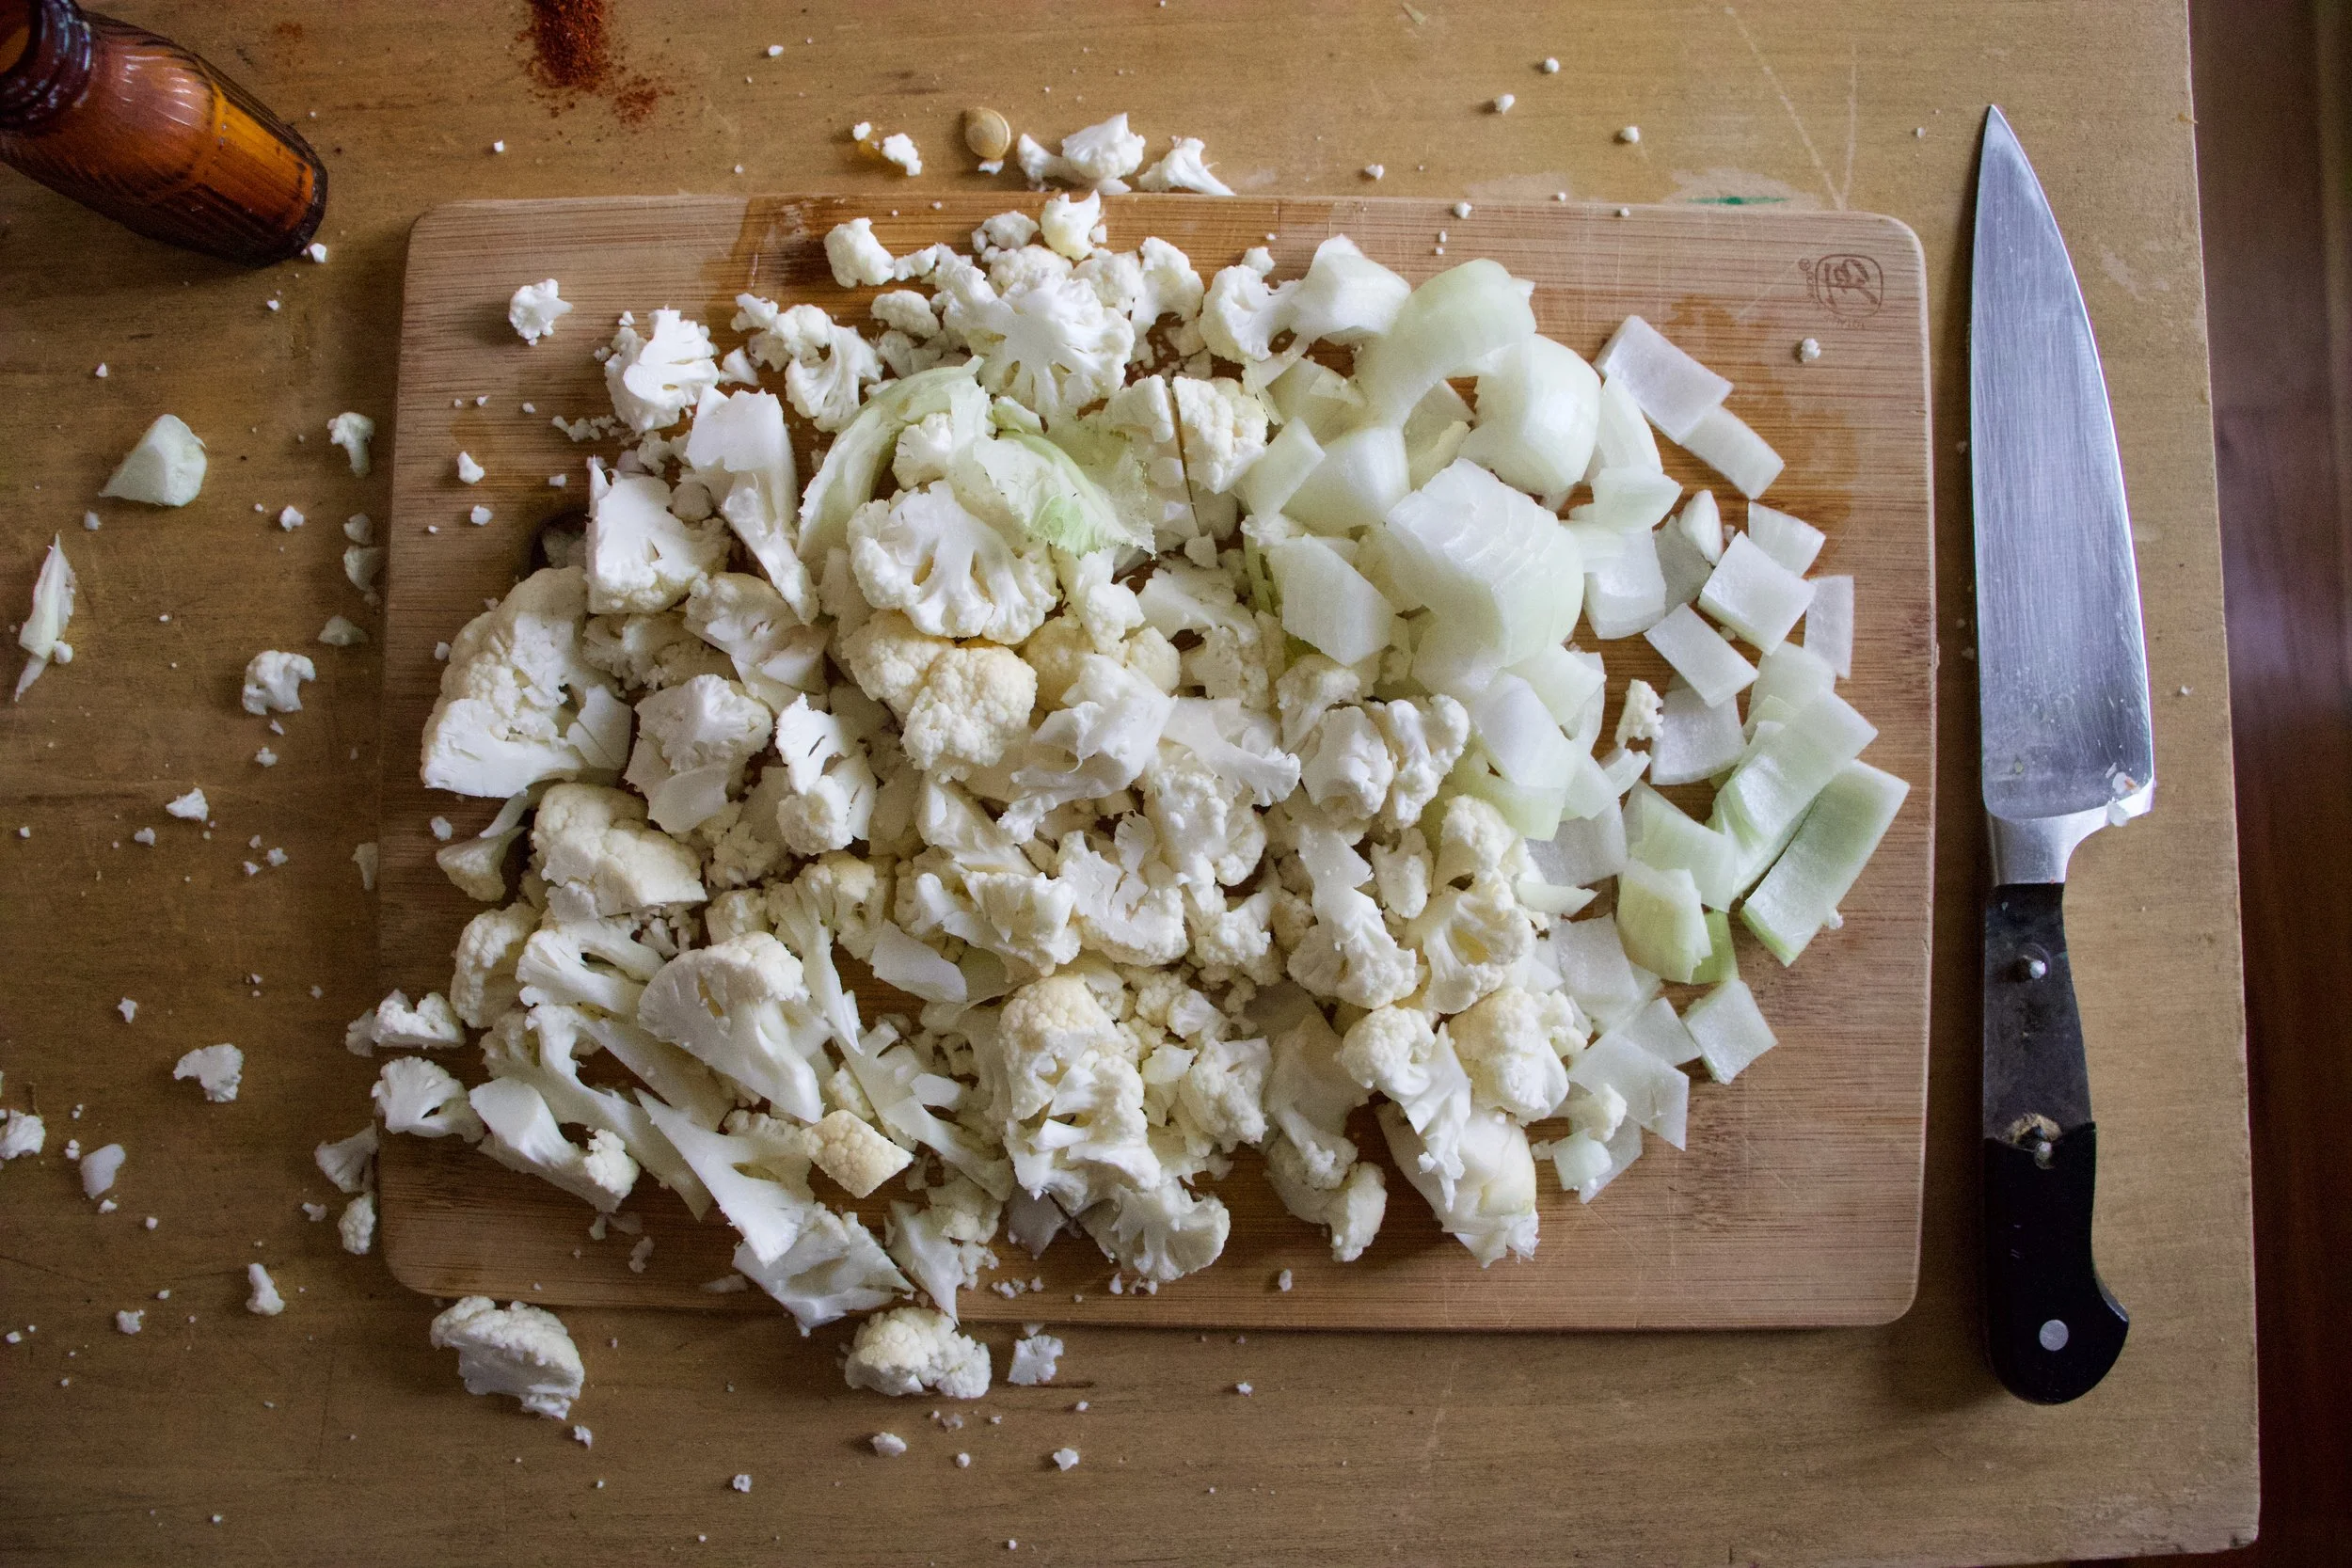
After the squash goes in, dice up the onion and cauliflower into small little pieces.
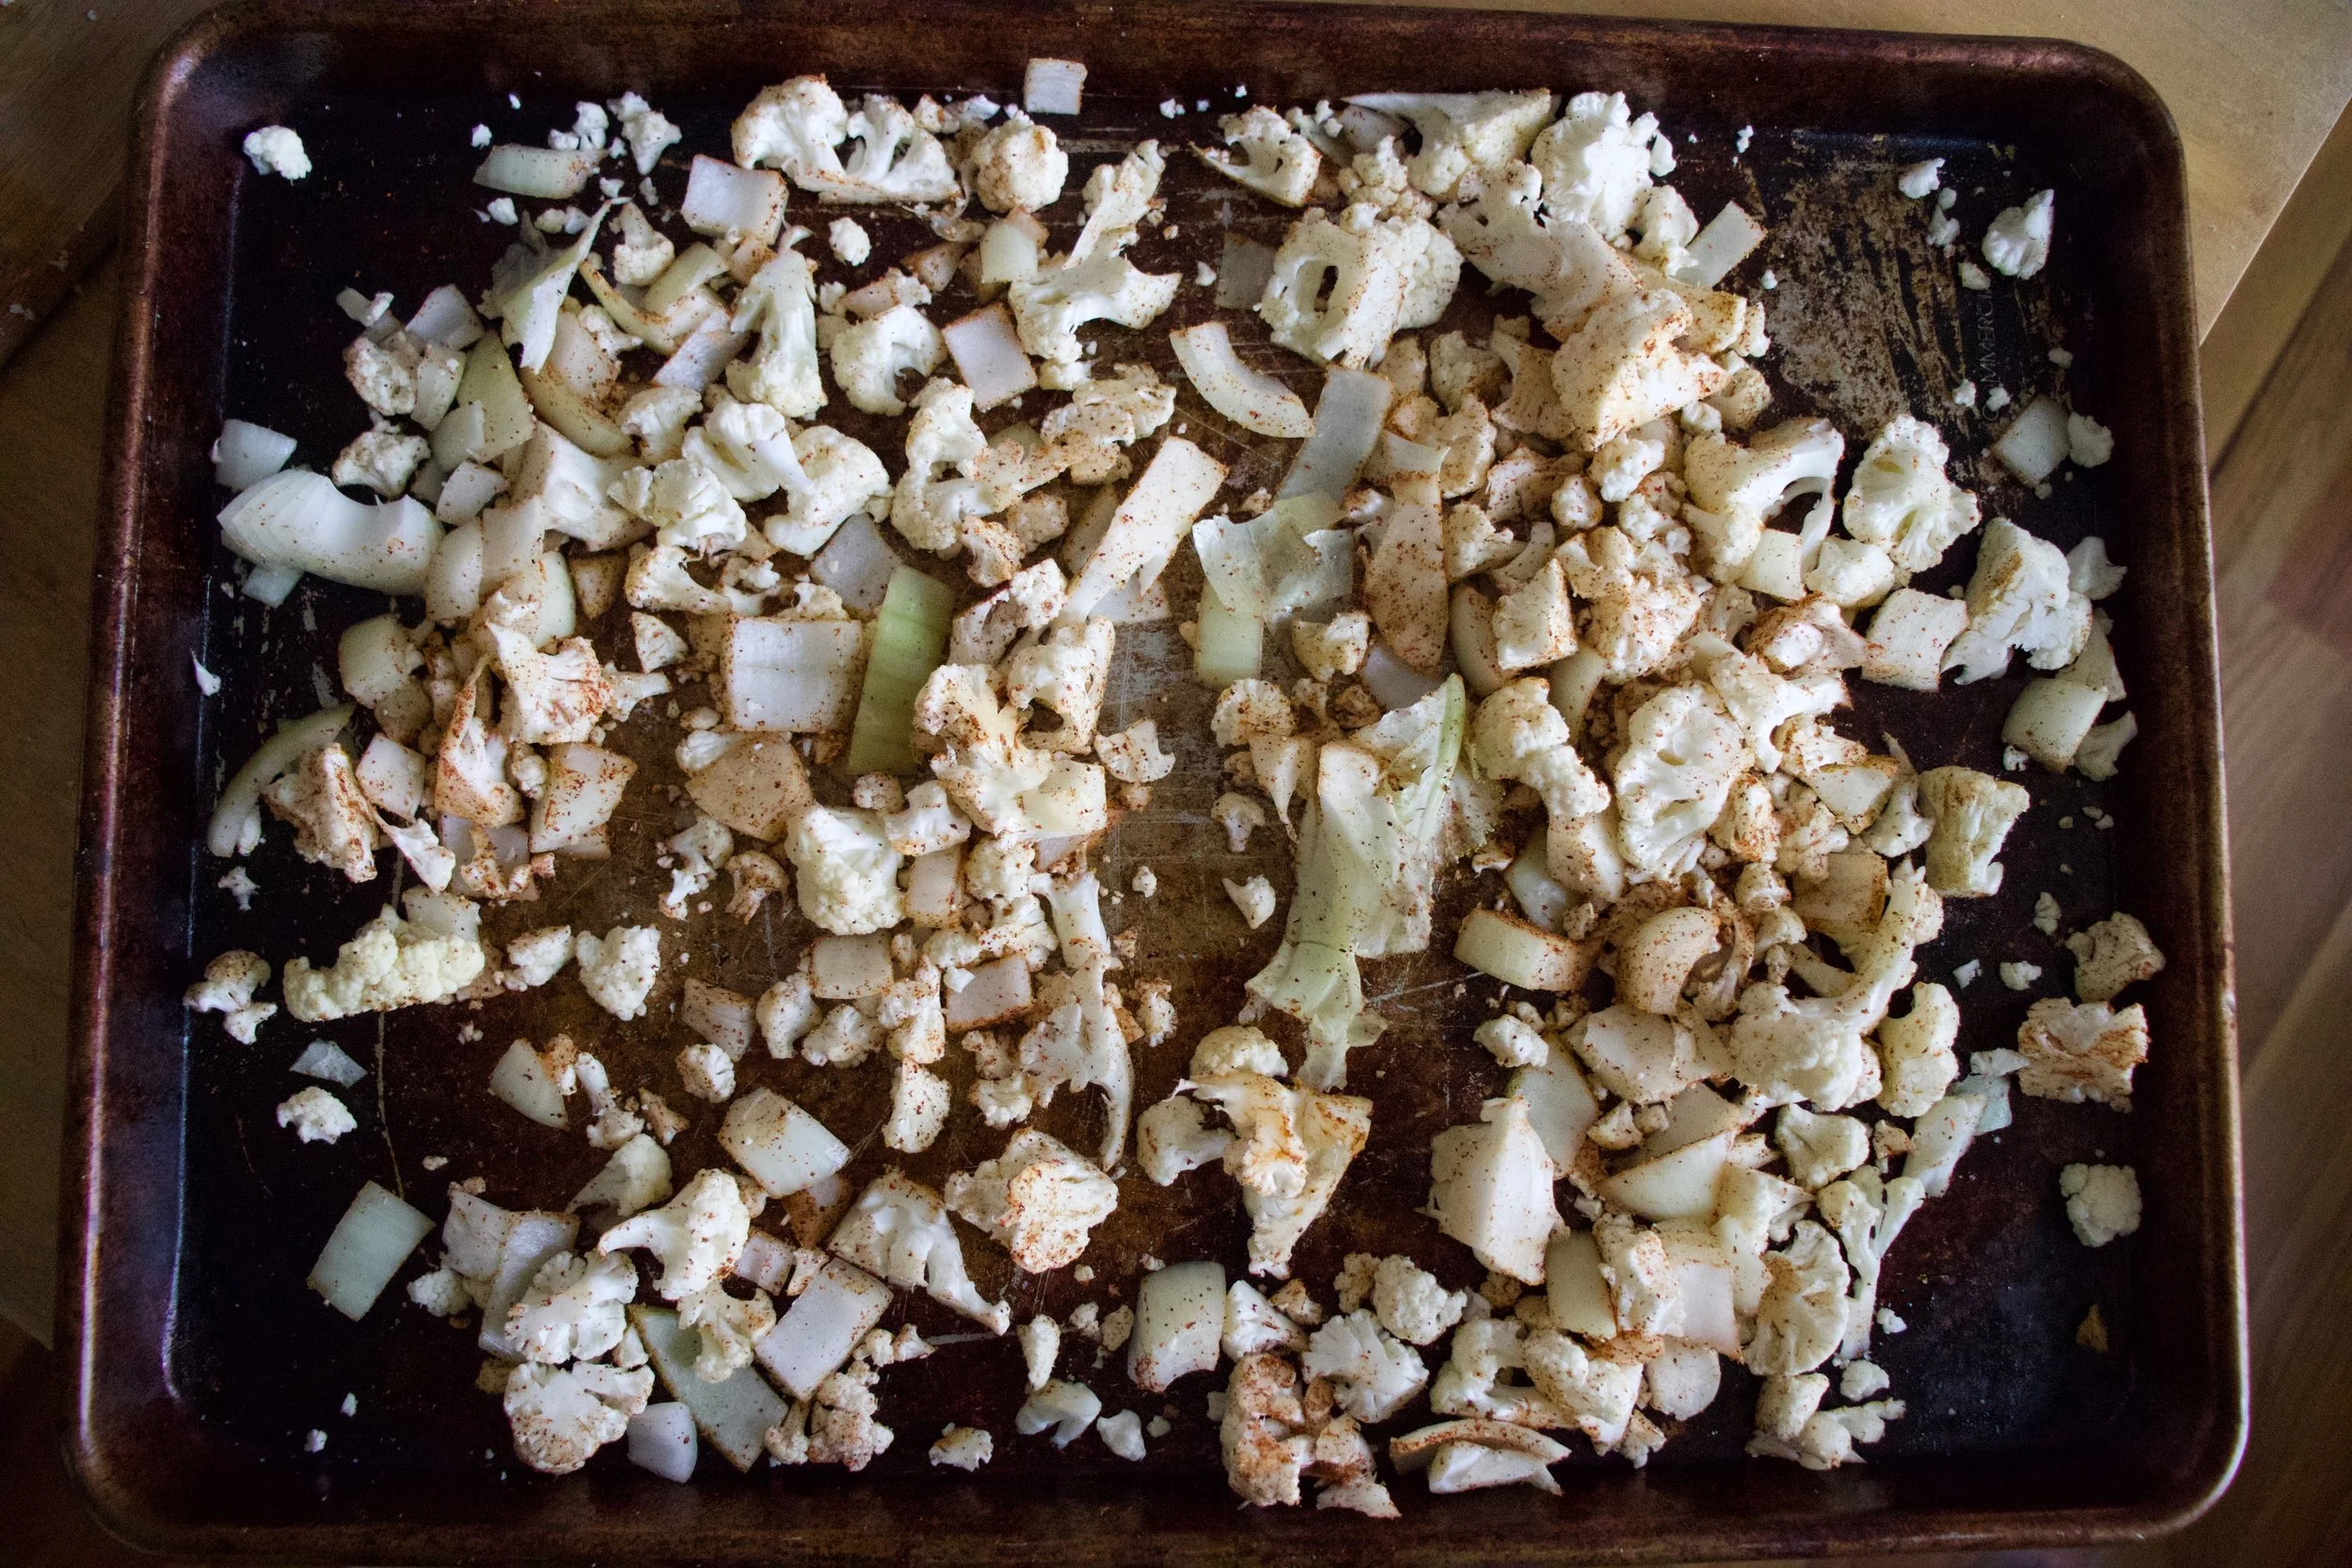
Place the chopped stuff onto a baking sheet. Drizzle with olive oil and toss with the cumin, chili powder, salt, and pepper. Get that into the oven too.
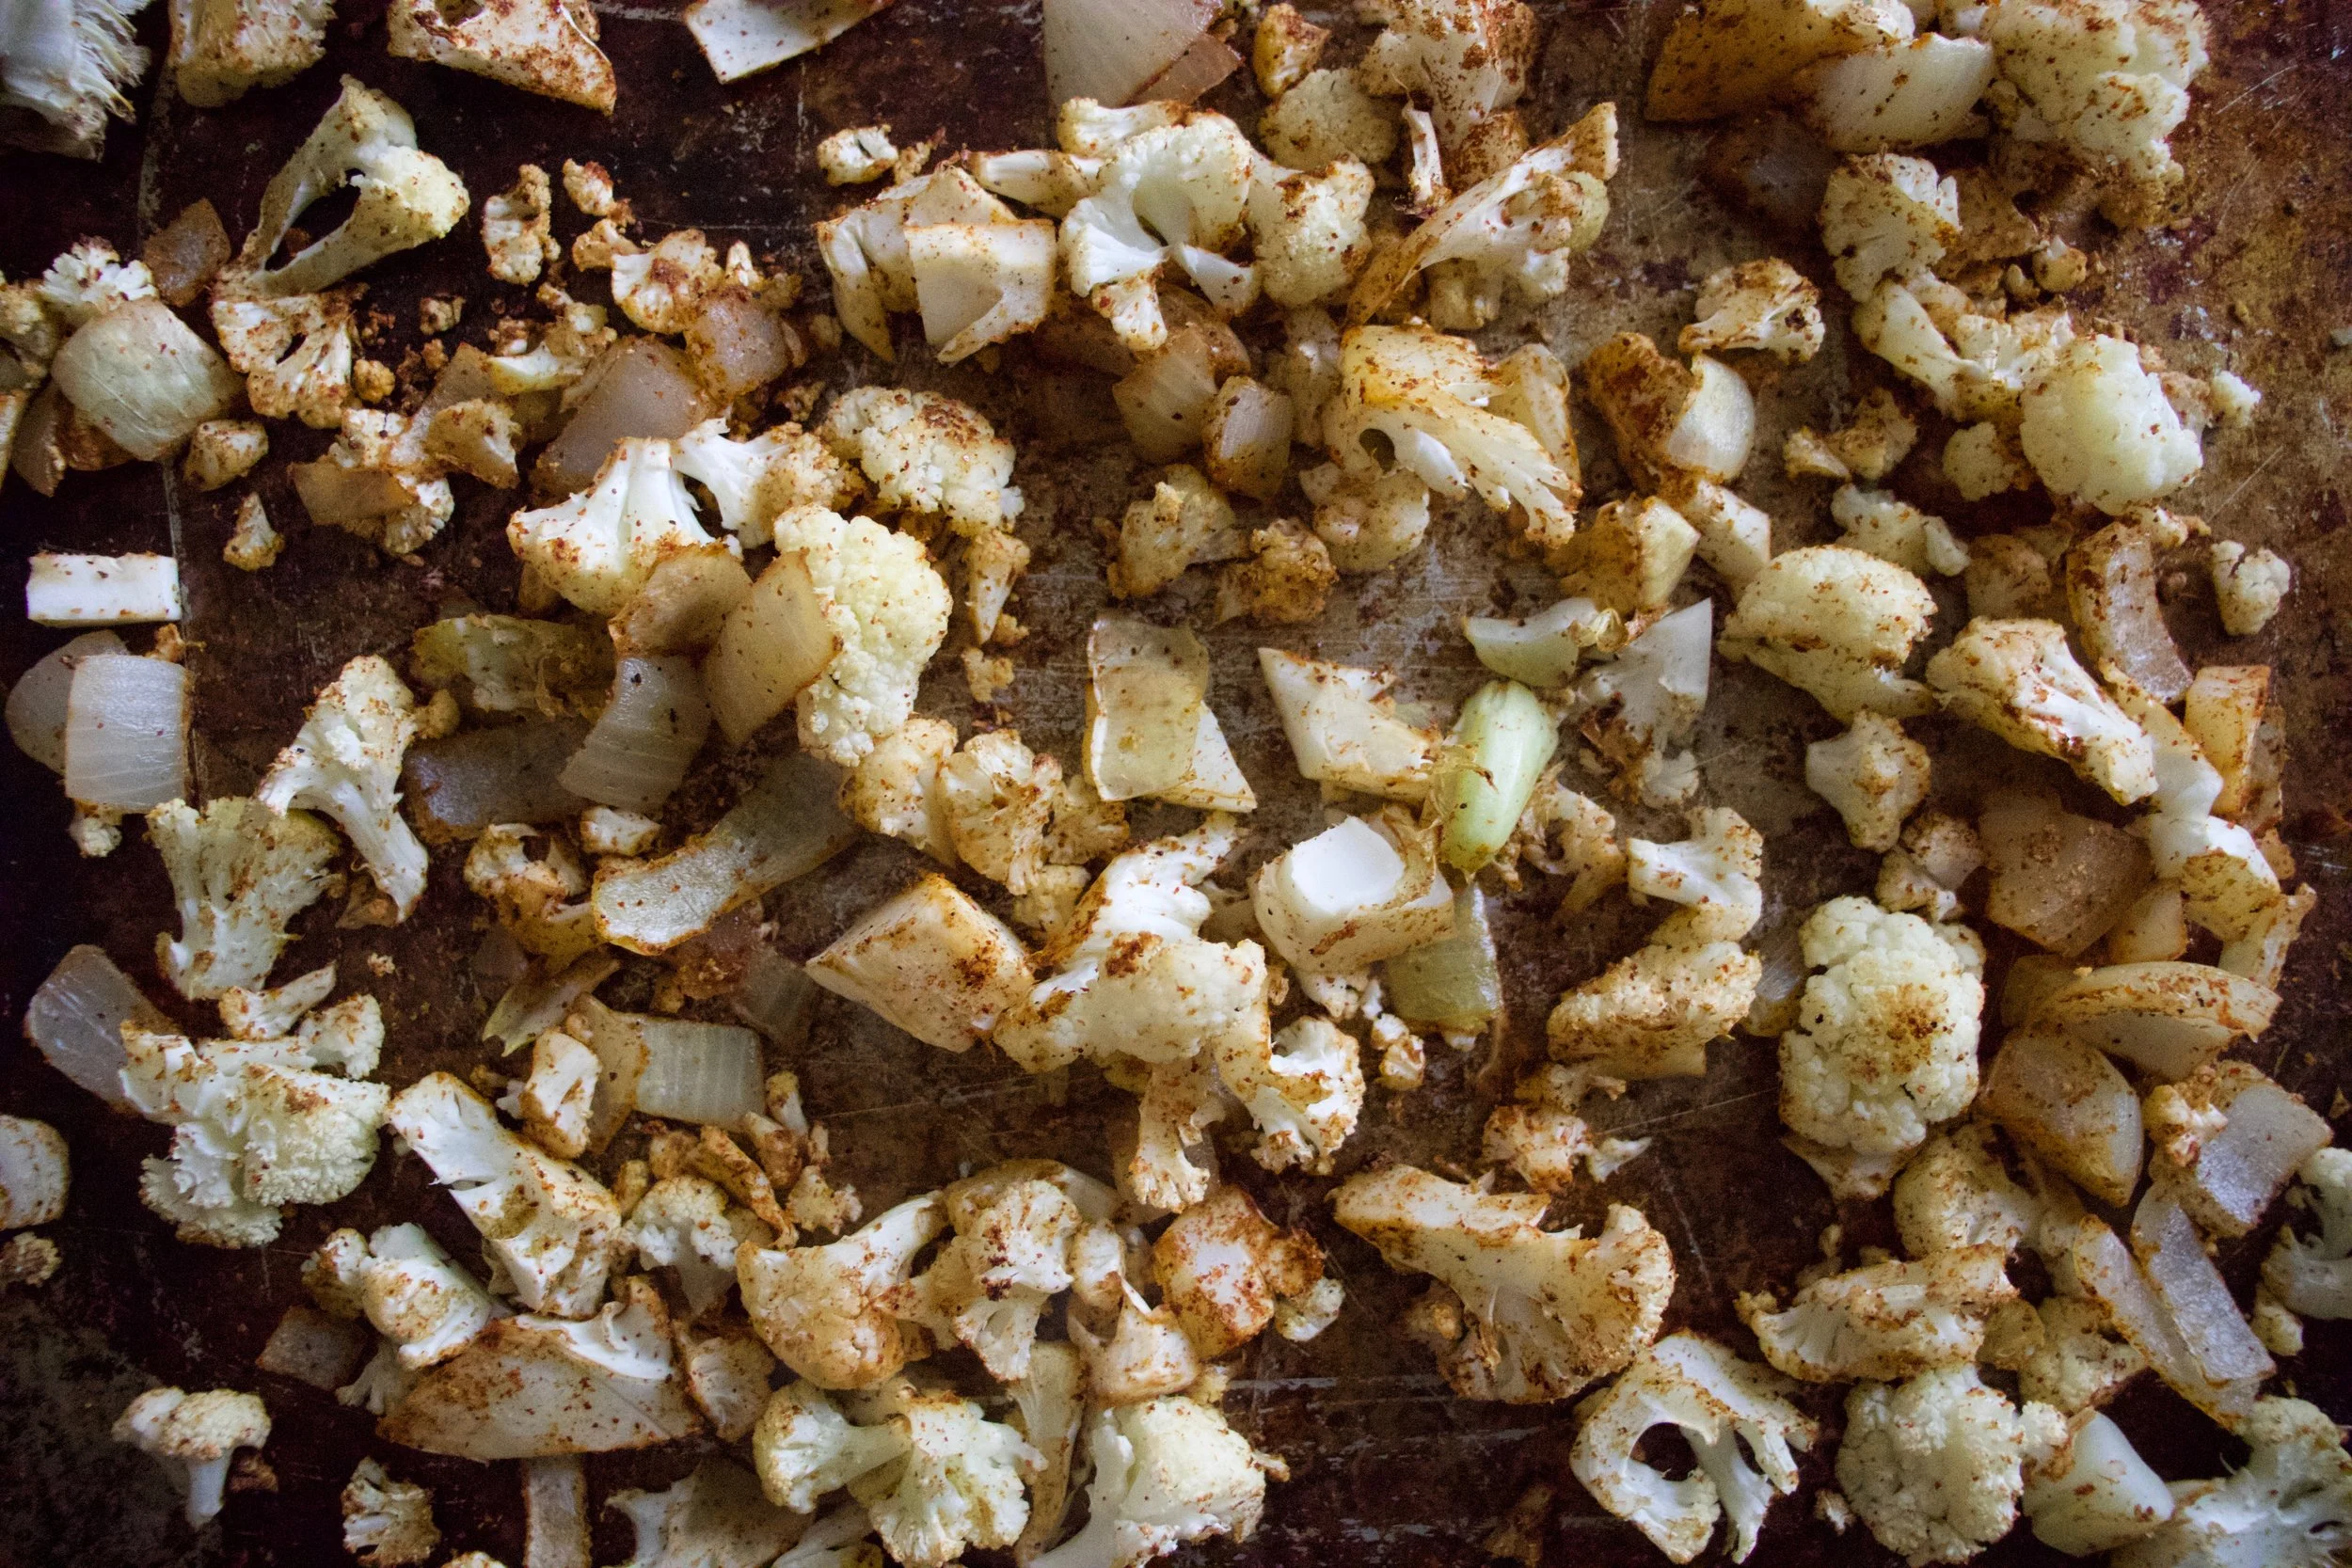
Roasted, and ready. Stop, do not eat it all, but you might want too, it is so freaking good.
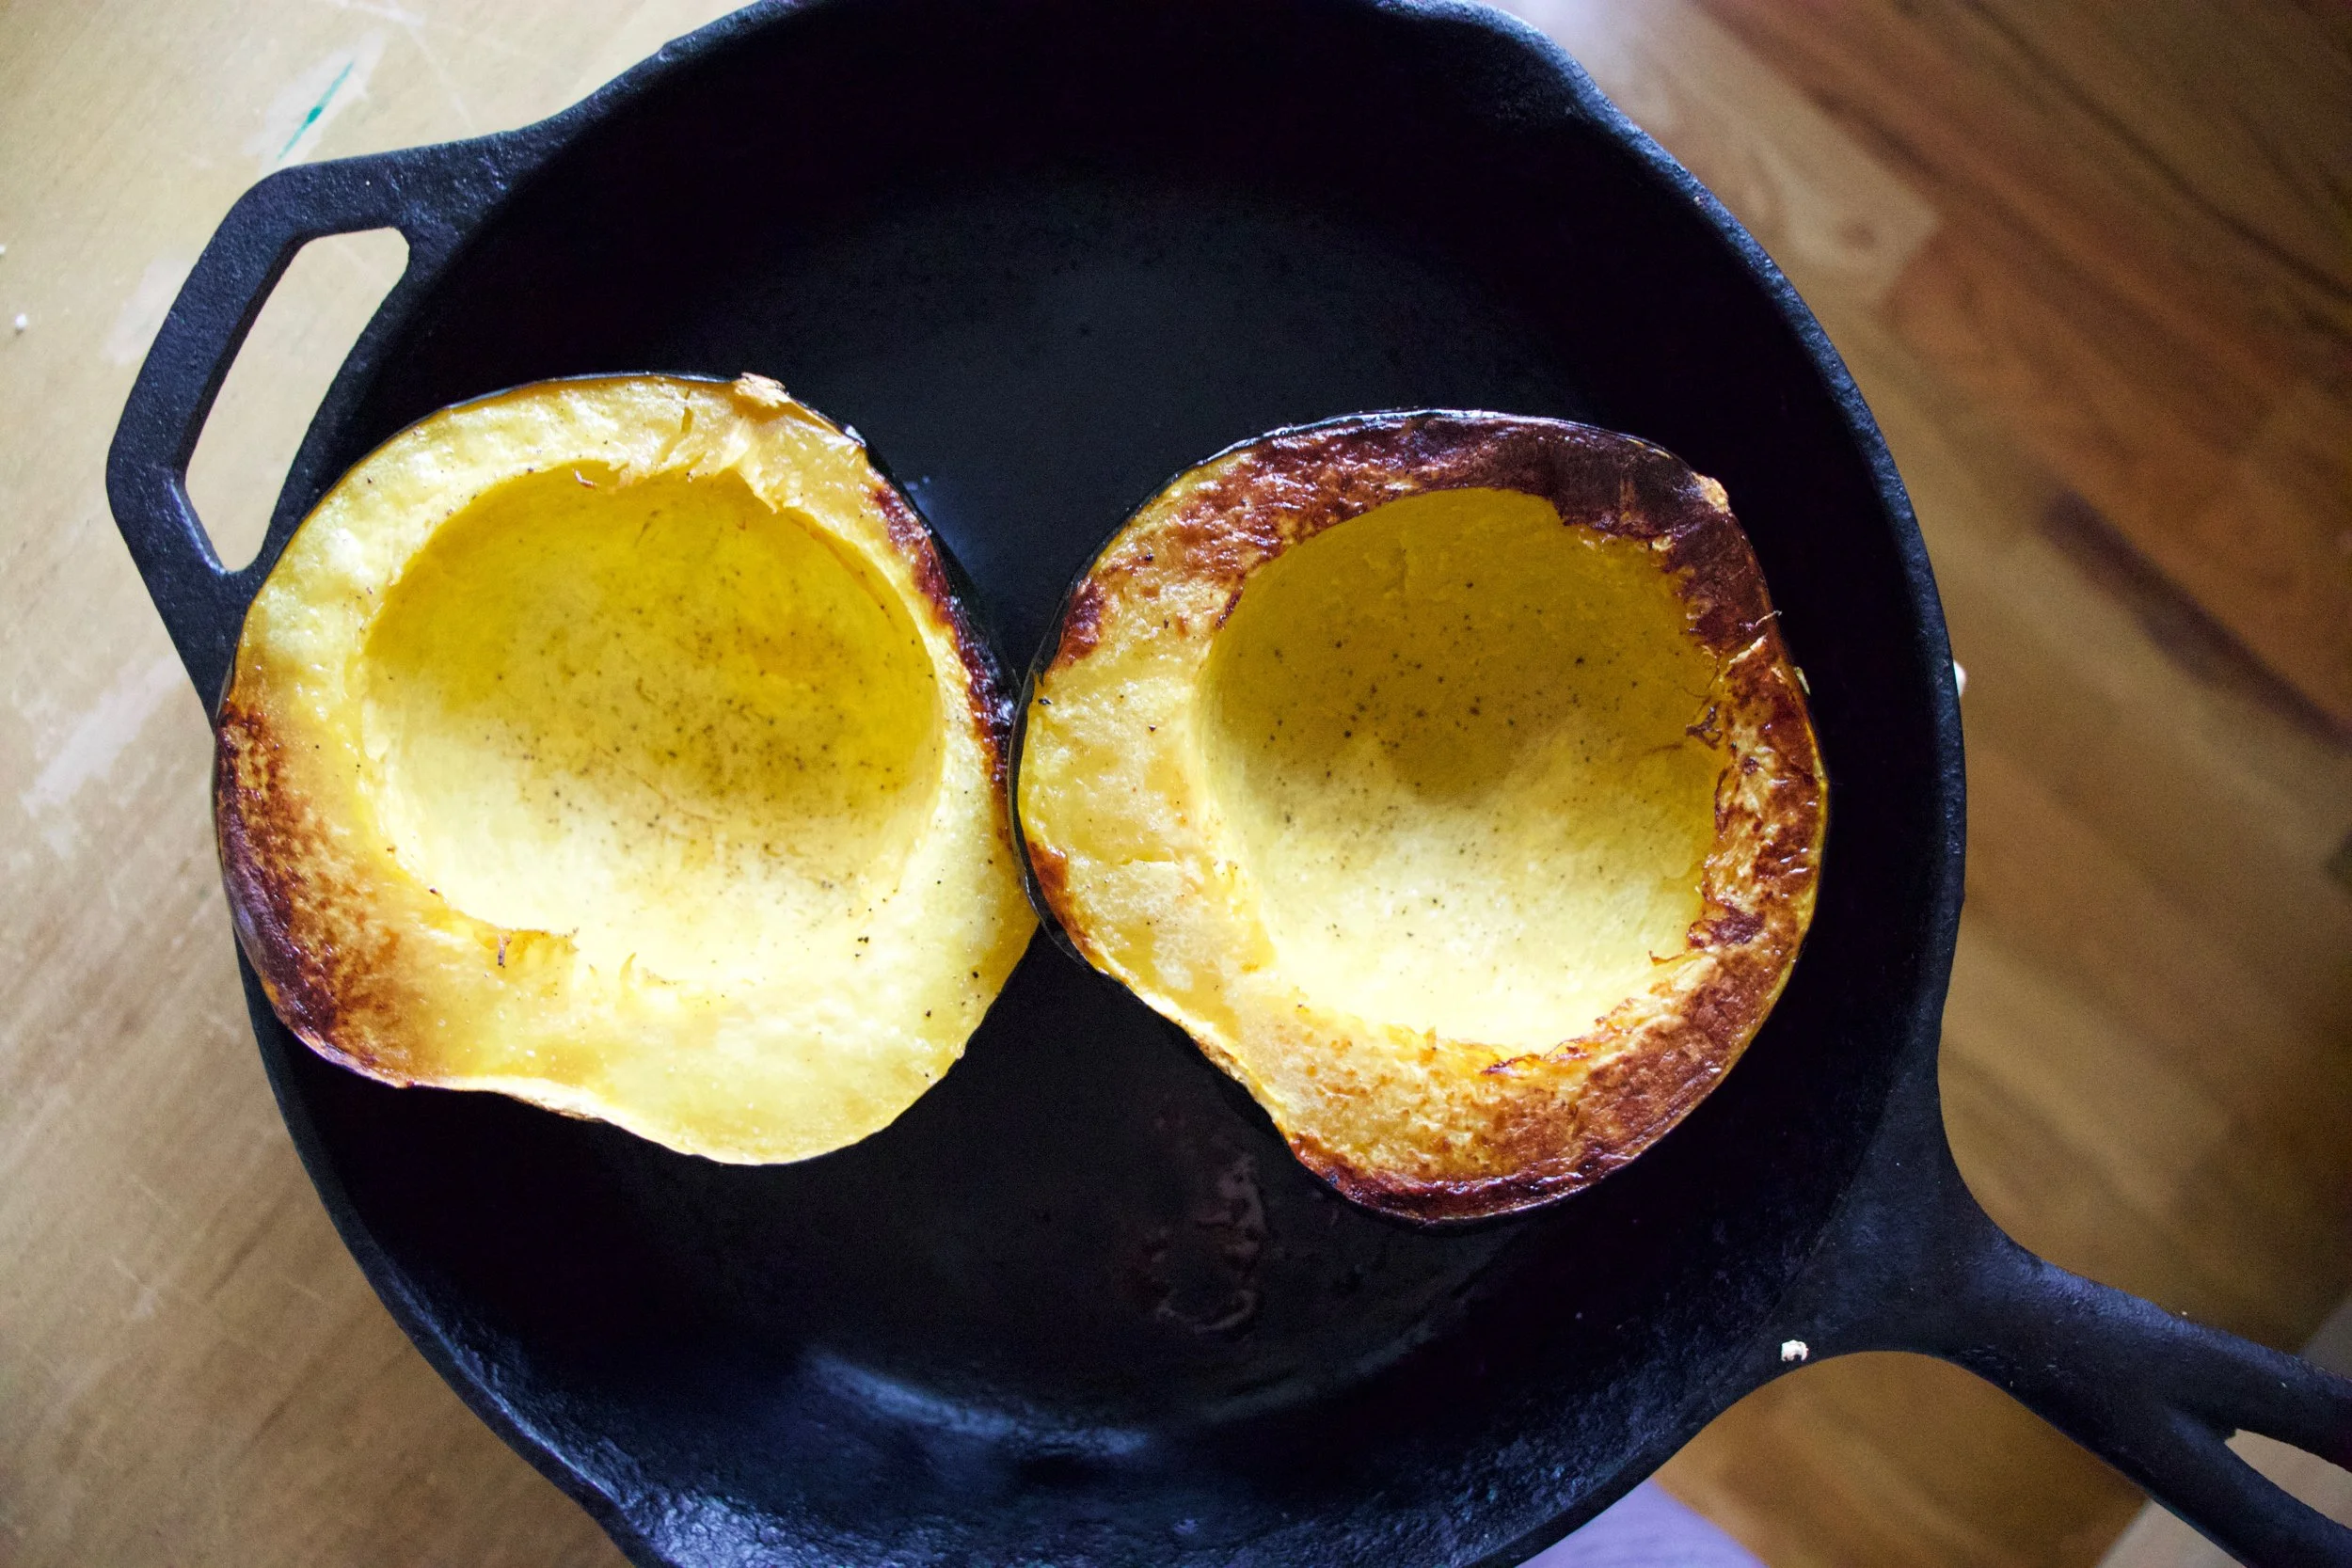
And once this guy in fork tender, its ready as well.

Scoop out a bit of the cooked squash from each side making the well bigger. More room to stuff.

Get everything together. Chop the kale, grab a bowl.

The black beans, salsa, scooped out cooked squash go into bowl. Add in the roasted cauliflower and onion and the chopped kale and mix.

Now stuff each side. Get as much in as you can, mound it as high as you can and place back into oven to bake for a little bit longer.

Cooked and slightly crispy in all the right ways.

These stuffed suckers are everything we all wanted and didn%u2019t know we needed. Fantastic, and all the more when serves with extra salsa, sliced avocado, and a wedge of lime.

Go get at it.

Bye!

-C

Makes 2 stuffed halves. This recipe is very easy to fiddle with and can easily be double or tripled.

  • 1 medium sized acorn squash

  • 1 1/2 cups cooked black beans

  • 1/4 head of cauliflower (about 2 cups chopped before roasting)

  • a small onion

  • a few kale leaves

  • 1/4 cup thick and chunky salsa

  • 2 teaspoons cumin

  • 1 teaspoon chili pepper

  • salt and pepper

  • olive oil

  • Avocado, lime, extra salsa (optional)

Preheat oven to 400

Slice acorn squash in half and scoop out all the seeds. (seeds can be roasted). Place both halves cut side down on a lightly oiled baking sheet or oven safe skillet and place in oven to roast for about 30-35 minutes or until the squash is fork tender.

Once squash is in oven, dice the onion and cauliflower into small pieces and place on a baking sheet. Drizzle with olive oil and toss together with the cumin, chili powder, salt, and pepper. Place into oven along with the squash. Roast for 15-20 minutes or until the cauliflower is lightly browned and tender.

When the cauliflower is roasted and squash is cooked, get all the rest of the ingredients ready. Dice up the kale . Take each side of squash and scoop out about an inch more of cooked squash, leaving a good sized well. Place cooked squash into a bowl and kind of mash it up. Add in the beans, the salsa, the kale, and the roasted cauliflower and onions. Season with salt and pepper and mix it all up. Take filling and fill the squashes, stuffing as much as you can in and mounding it on top. Place the halves back onto baking sheet or skillet and place back into oven for 10-15 minutes until nice and browned and slightly crispy on top. Pull from oven and serve. Although not necessary, extra salsa, avocado, a lime are much appreciated.
For the longest time now, I have been drinking a little turmeric with a little lemon first thing in the morning. It started as a medicinal drink, but quickly became a tasty habit. I have some stupid weird circulation condition called raynaud’s where changes in temp turn my fingers and toes into icicles. And for me, the worst time of the year for this condition is the spring (but spring is still my favorite). All the up and down of temperature and the wet cold damp weather is my trigger, not to forget to mention that those temp swings can get a girl sick. (I can’t get sick!!)

So way back when I started to drink for my health and the feeling in my fingers. Turmeric, ginger, and cinnamon , all super warming spices that help greatly with blood circulation, not to mention a whole bunch of other good things. (I could tell you and go on and on, but you can just look it up yourself) Ever since I started drinking and eating lots of these spices, my raynauds has gotten soooo sooo soooo much better. I still get cold finger and toes, but no where as severe and the way less often.

Now a few weeks ago the mr started making himself an afternoon turmeric tea. He read something on the internet about how it’s the best anti-inflammatory and good for achy joints. (Sure dude, listen to the internet and not me) Being a big guy doing construction and such, he gets really achy joints and there is only so much arnica and frozen peas a guy can do. So now he drinks this and I think he is starting to notice a difference. (less time with the frozen peas) And since he is making himself tea every afternoon, I started to make a spicy tea for myself in the afternoons too. I figured that a little extra goodness to ward off the chills and any larking illness is only a plus. It’s our after lunch treat that tastes good, is warm and soothing and is doing the body all sorts of good.

Spicy turmeric tea. You will get addicted and feel like awesomeness.
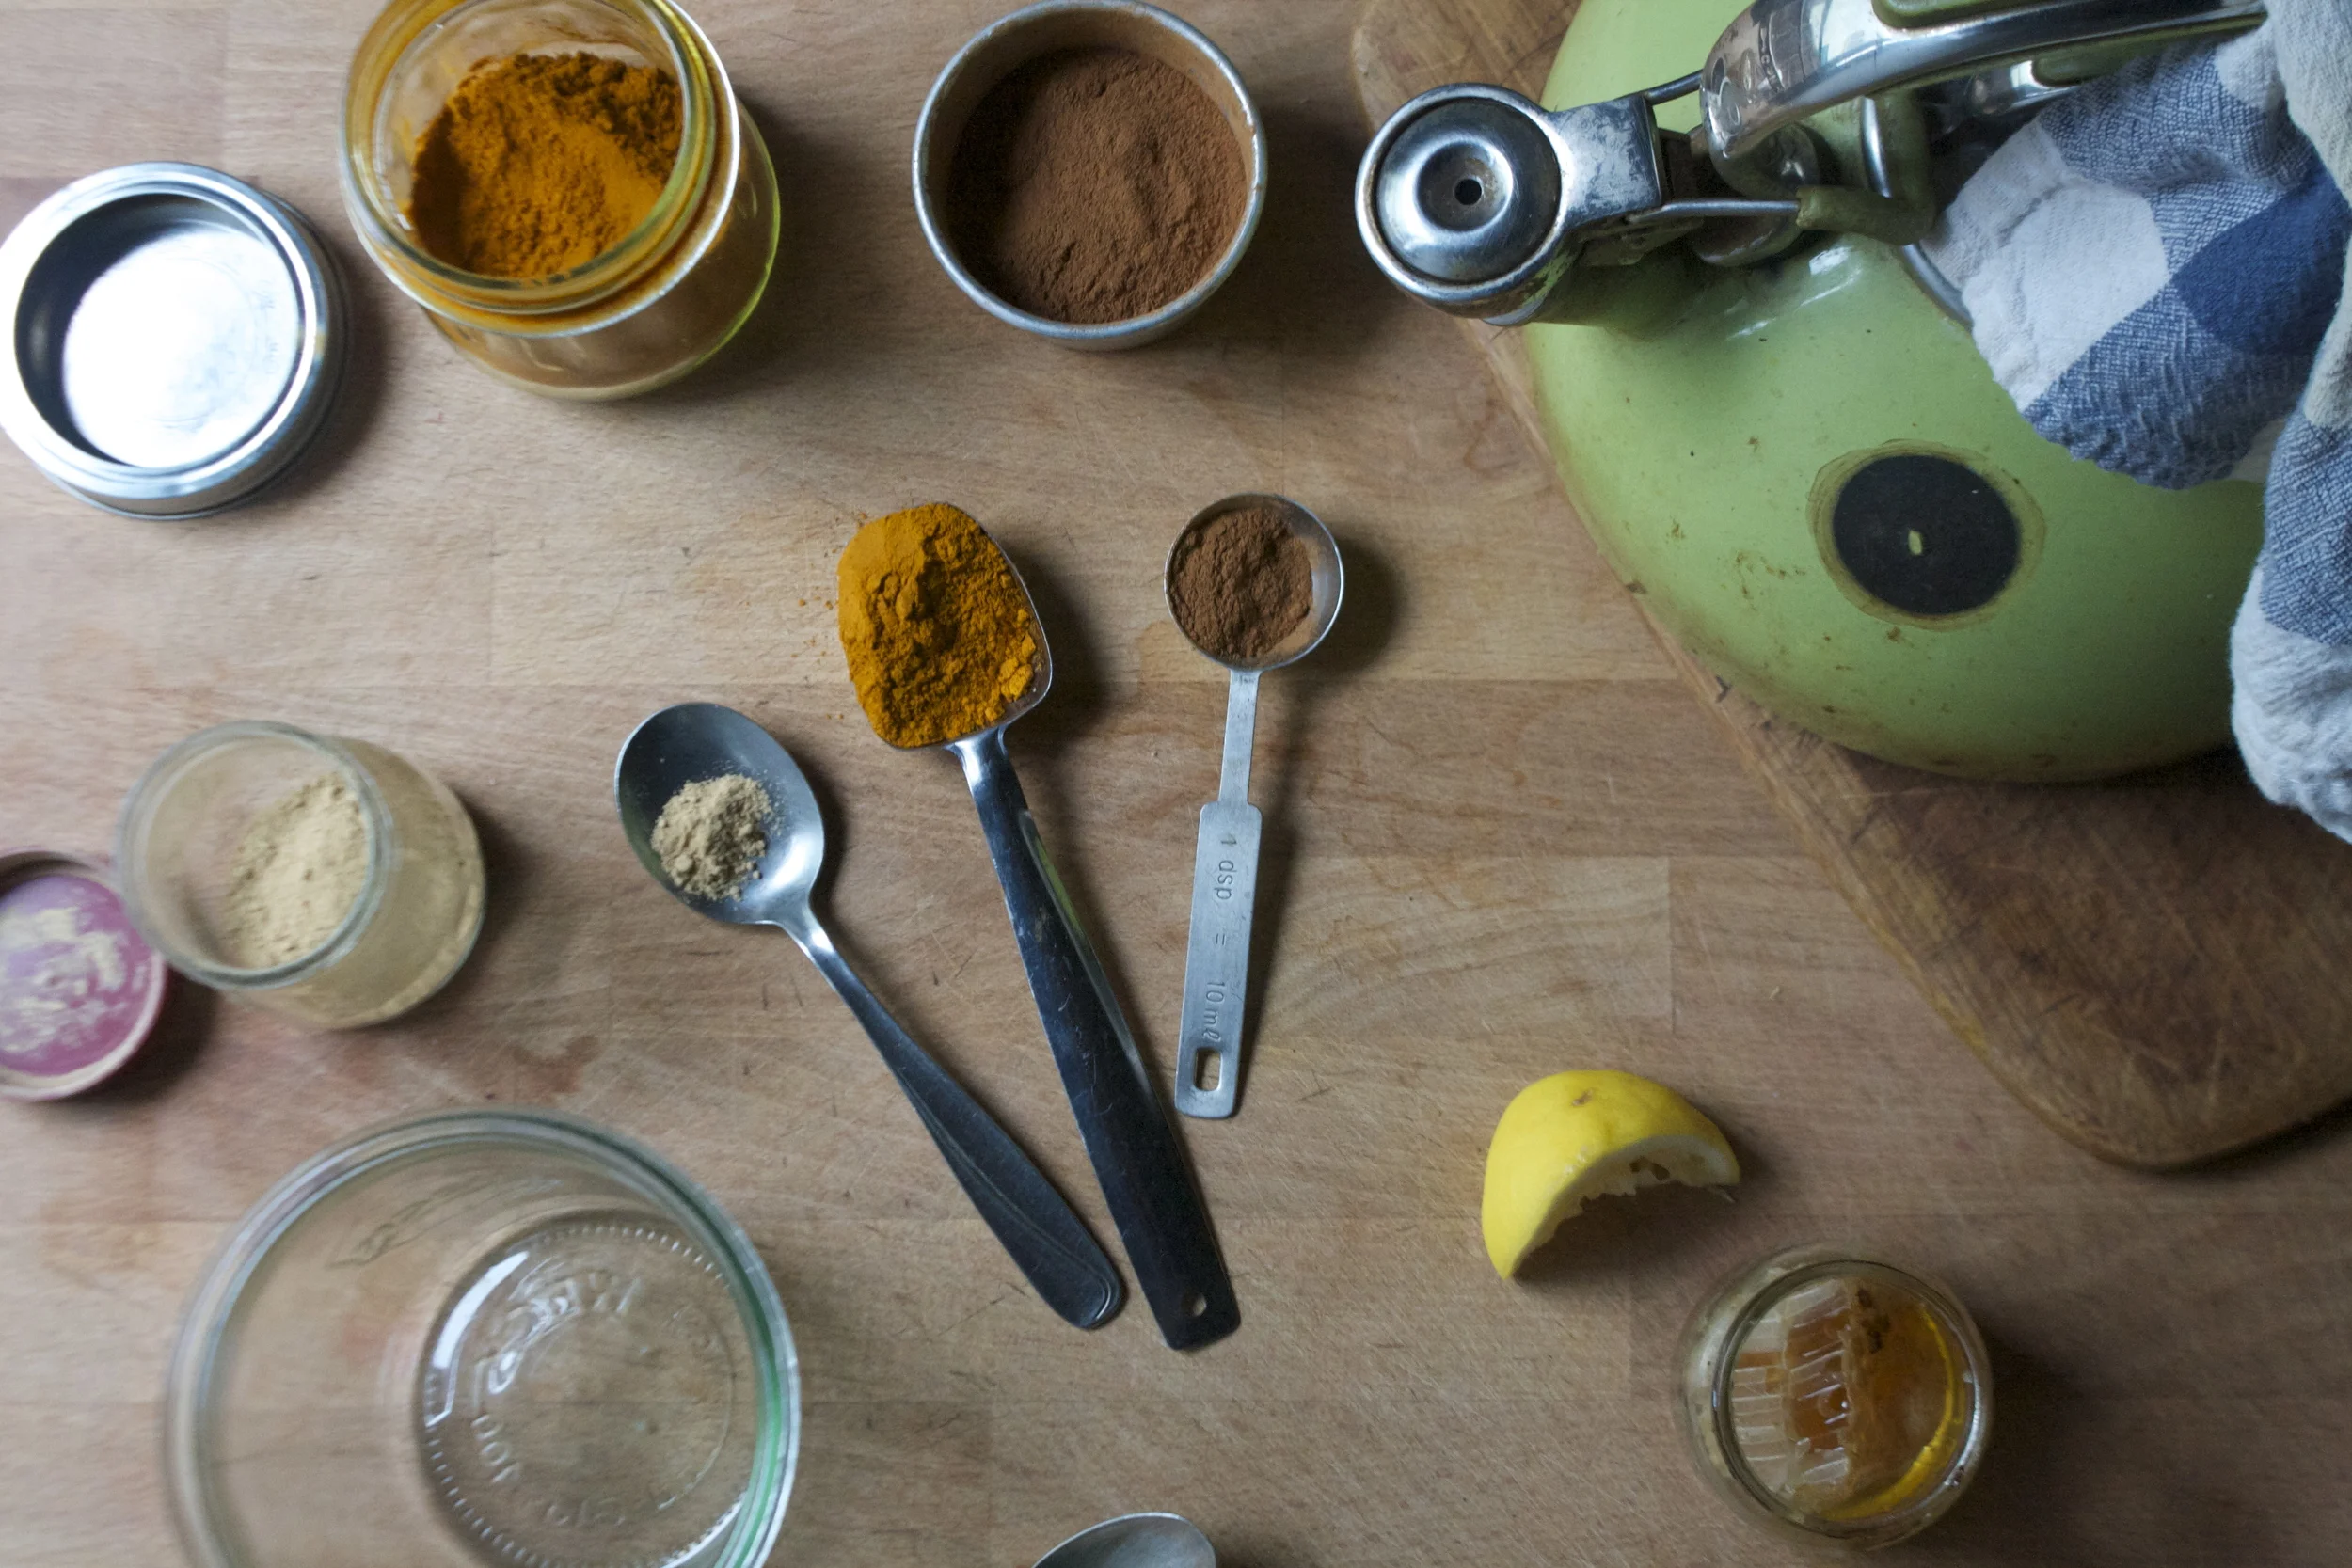
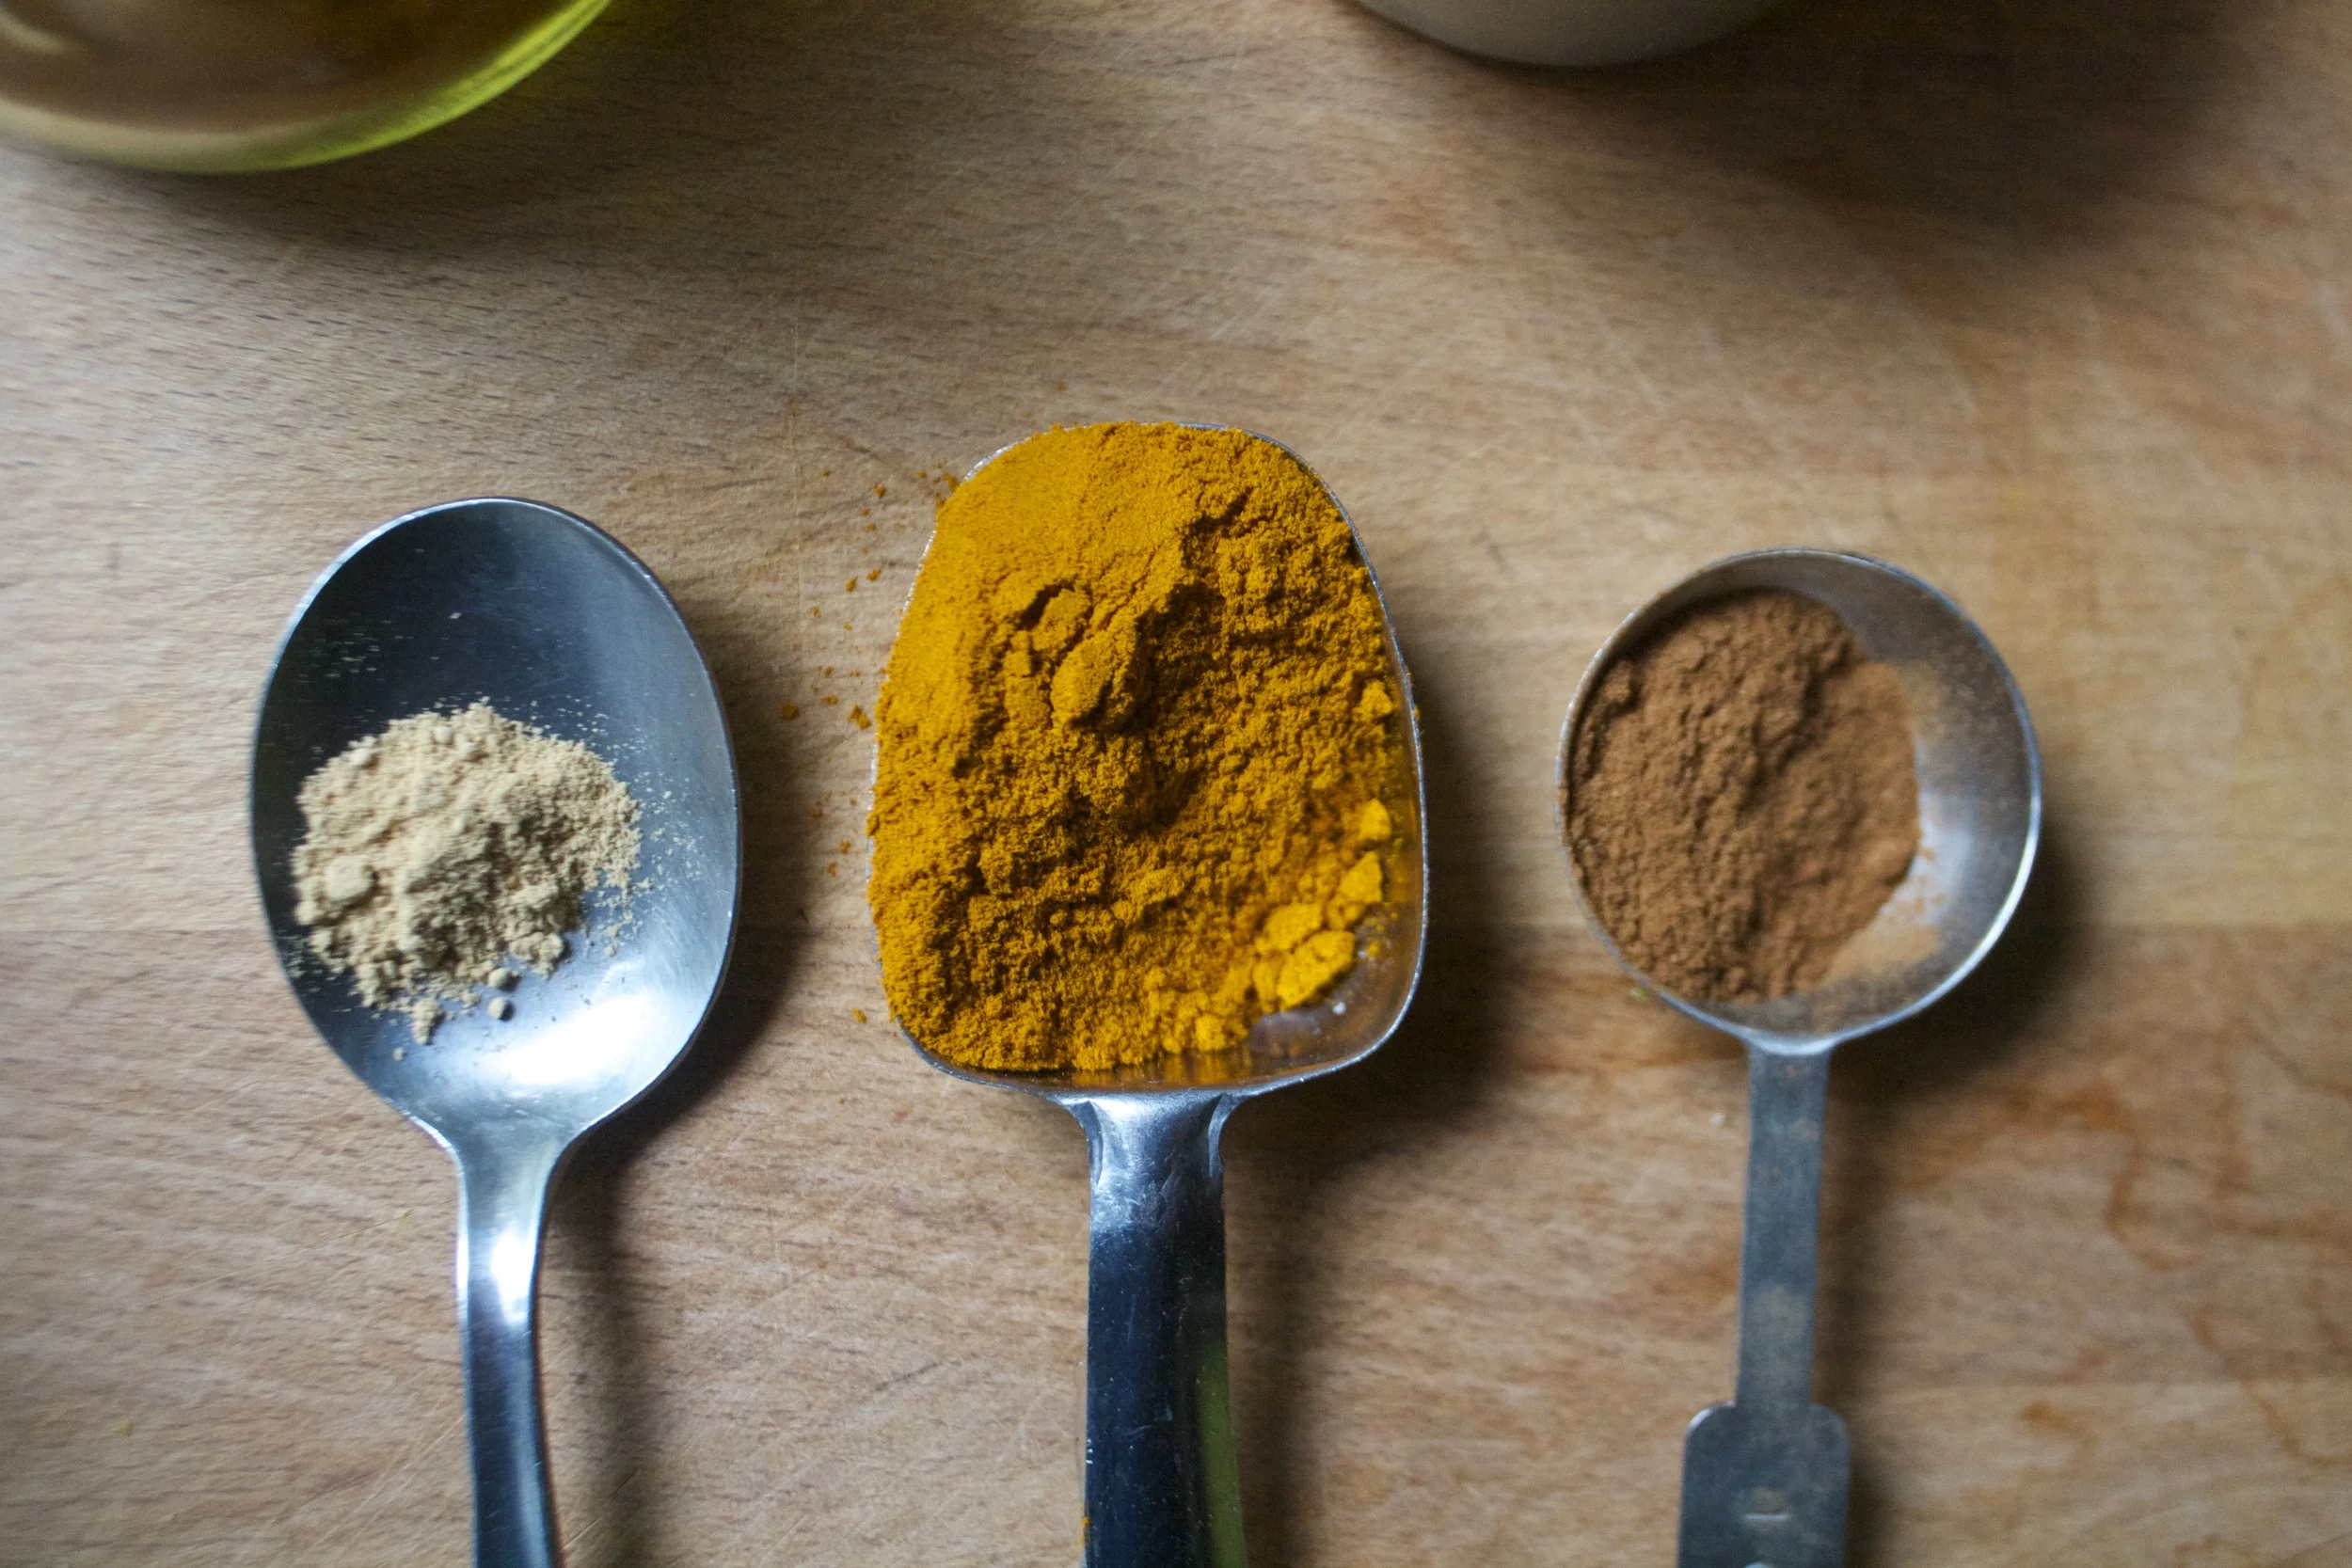
The stuff. Ground turmeric, ground ginger, saigon cinnamon and hot water. Additional yums with a little lemon and some honey if you like it sweet or have a scratchy throat.
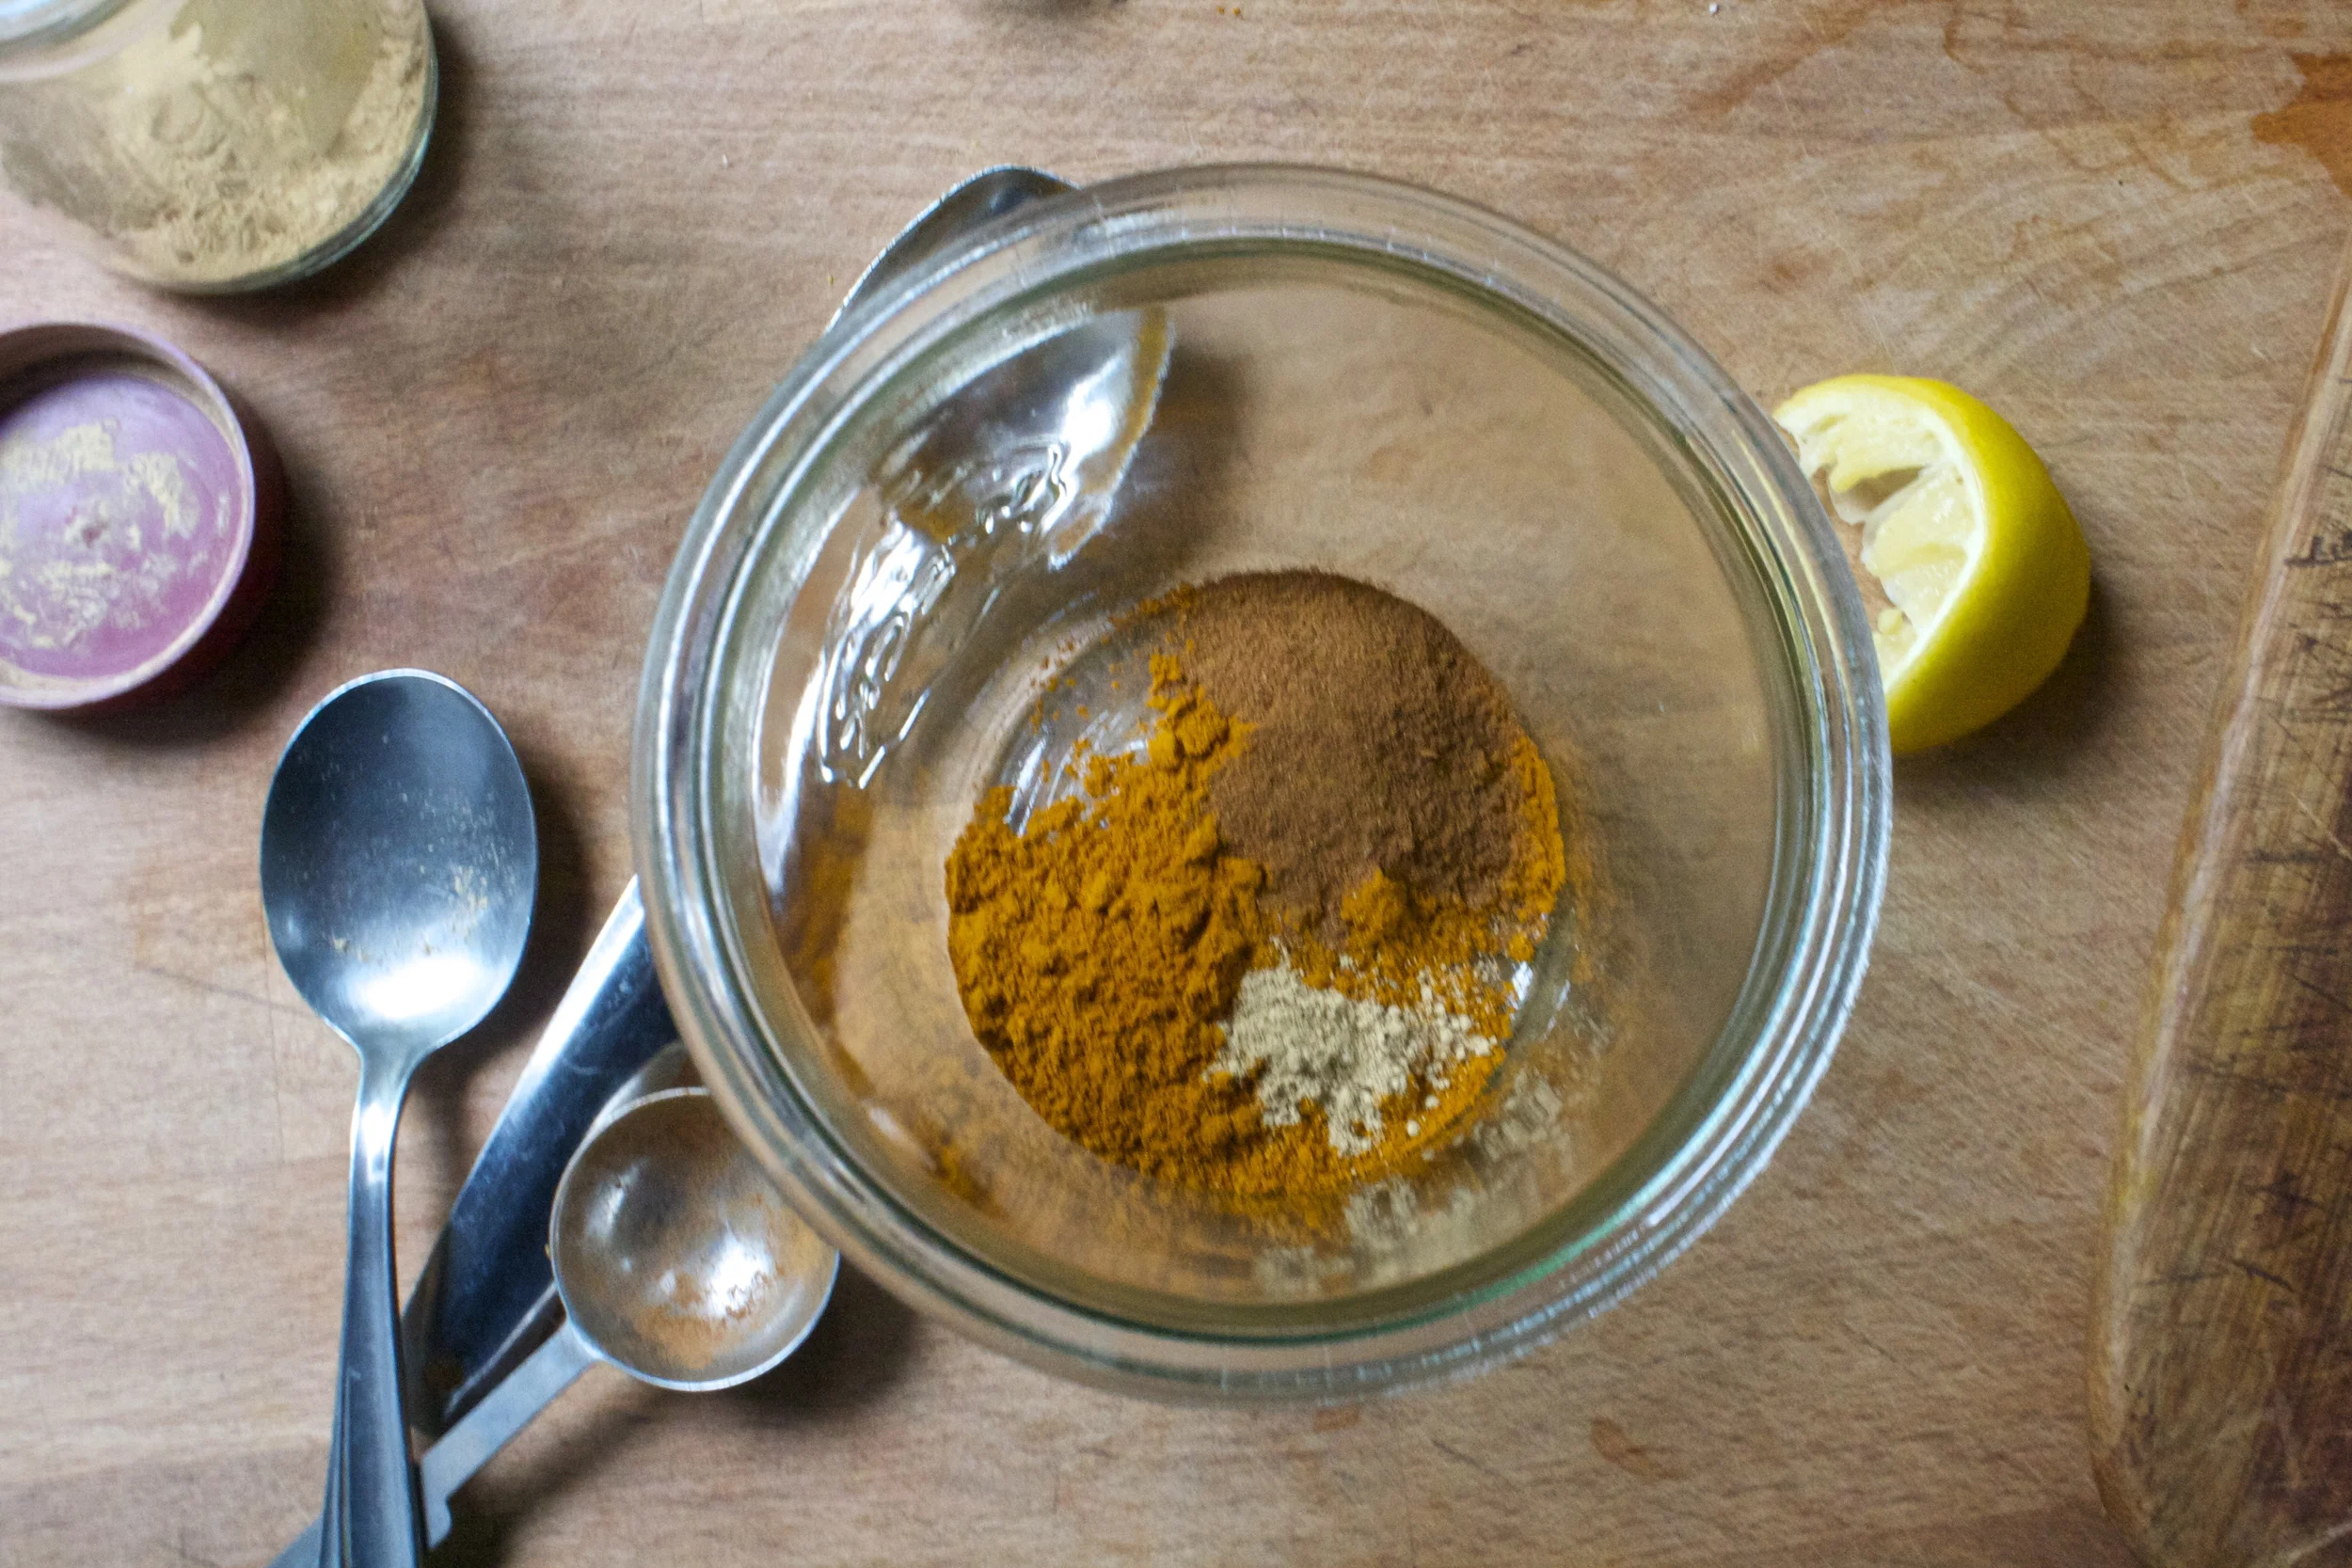
Spices into a drinking vessel (I like a big jar)
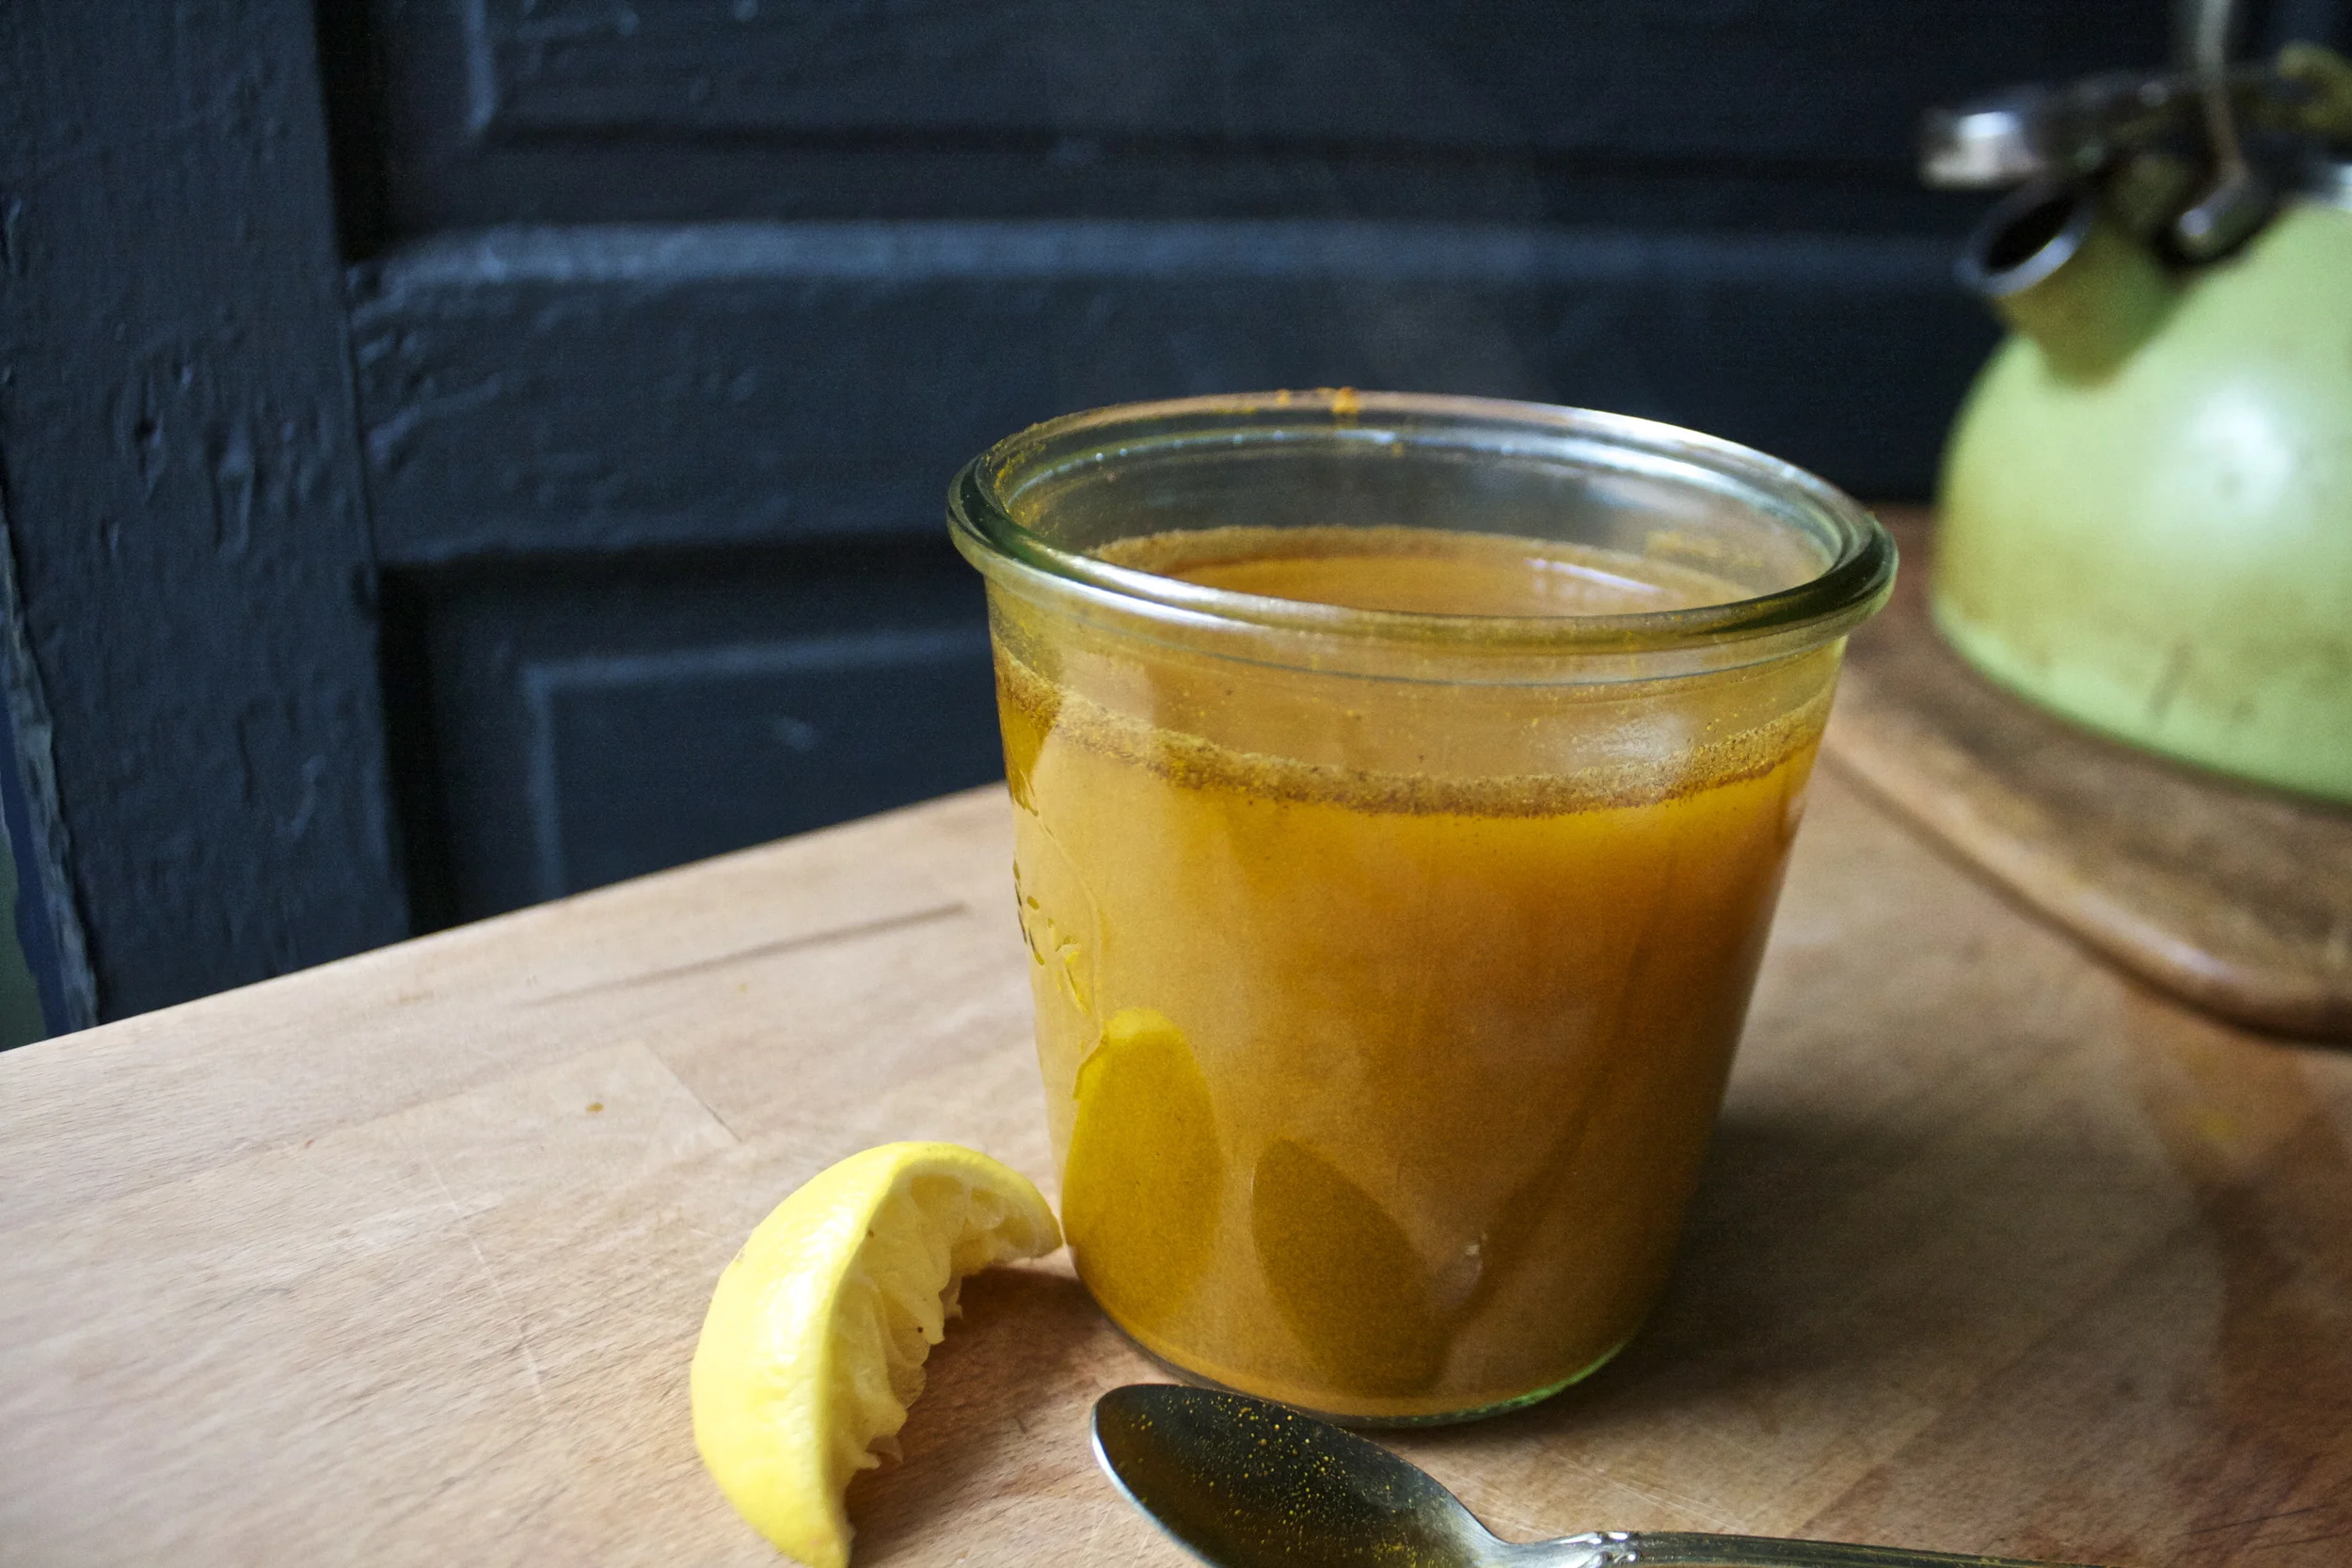
And in goes the hot water. Give it a good stir and a squeeze of lemon (and sweeten if your gonna)
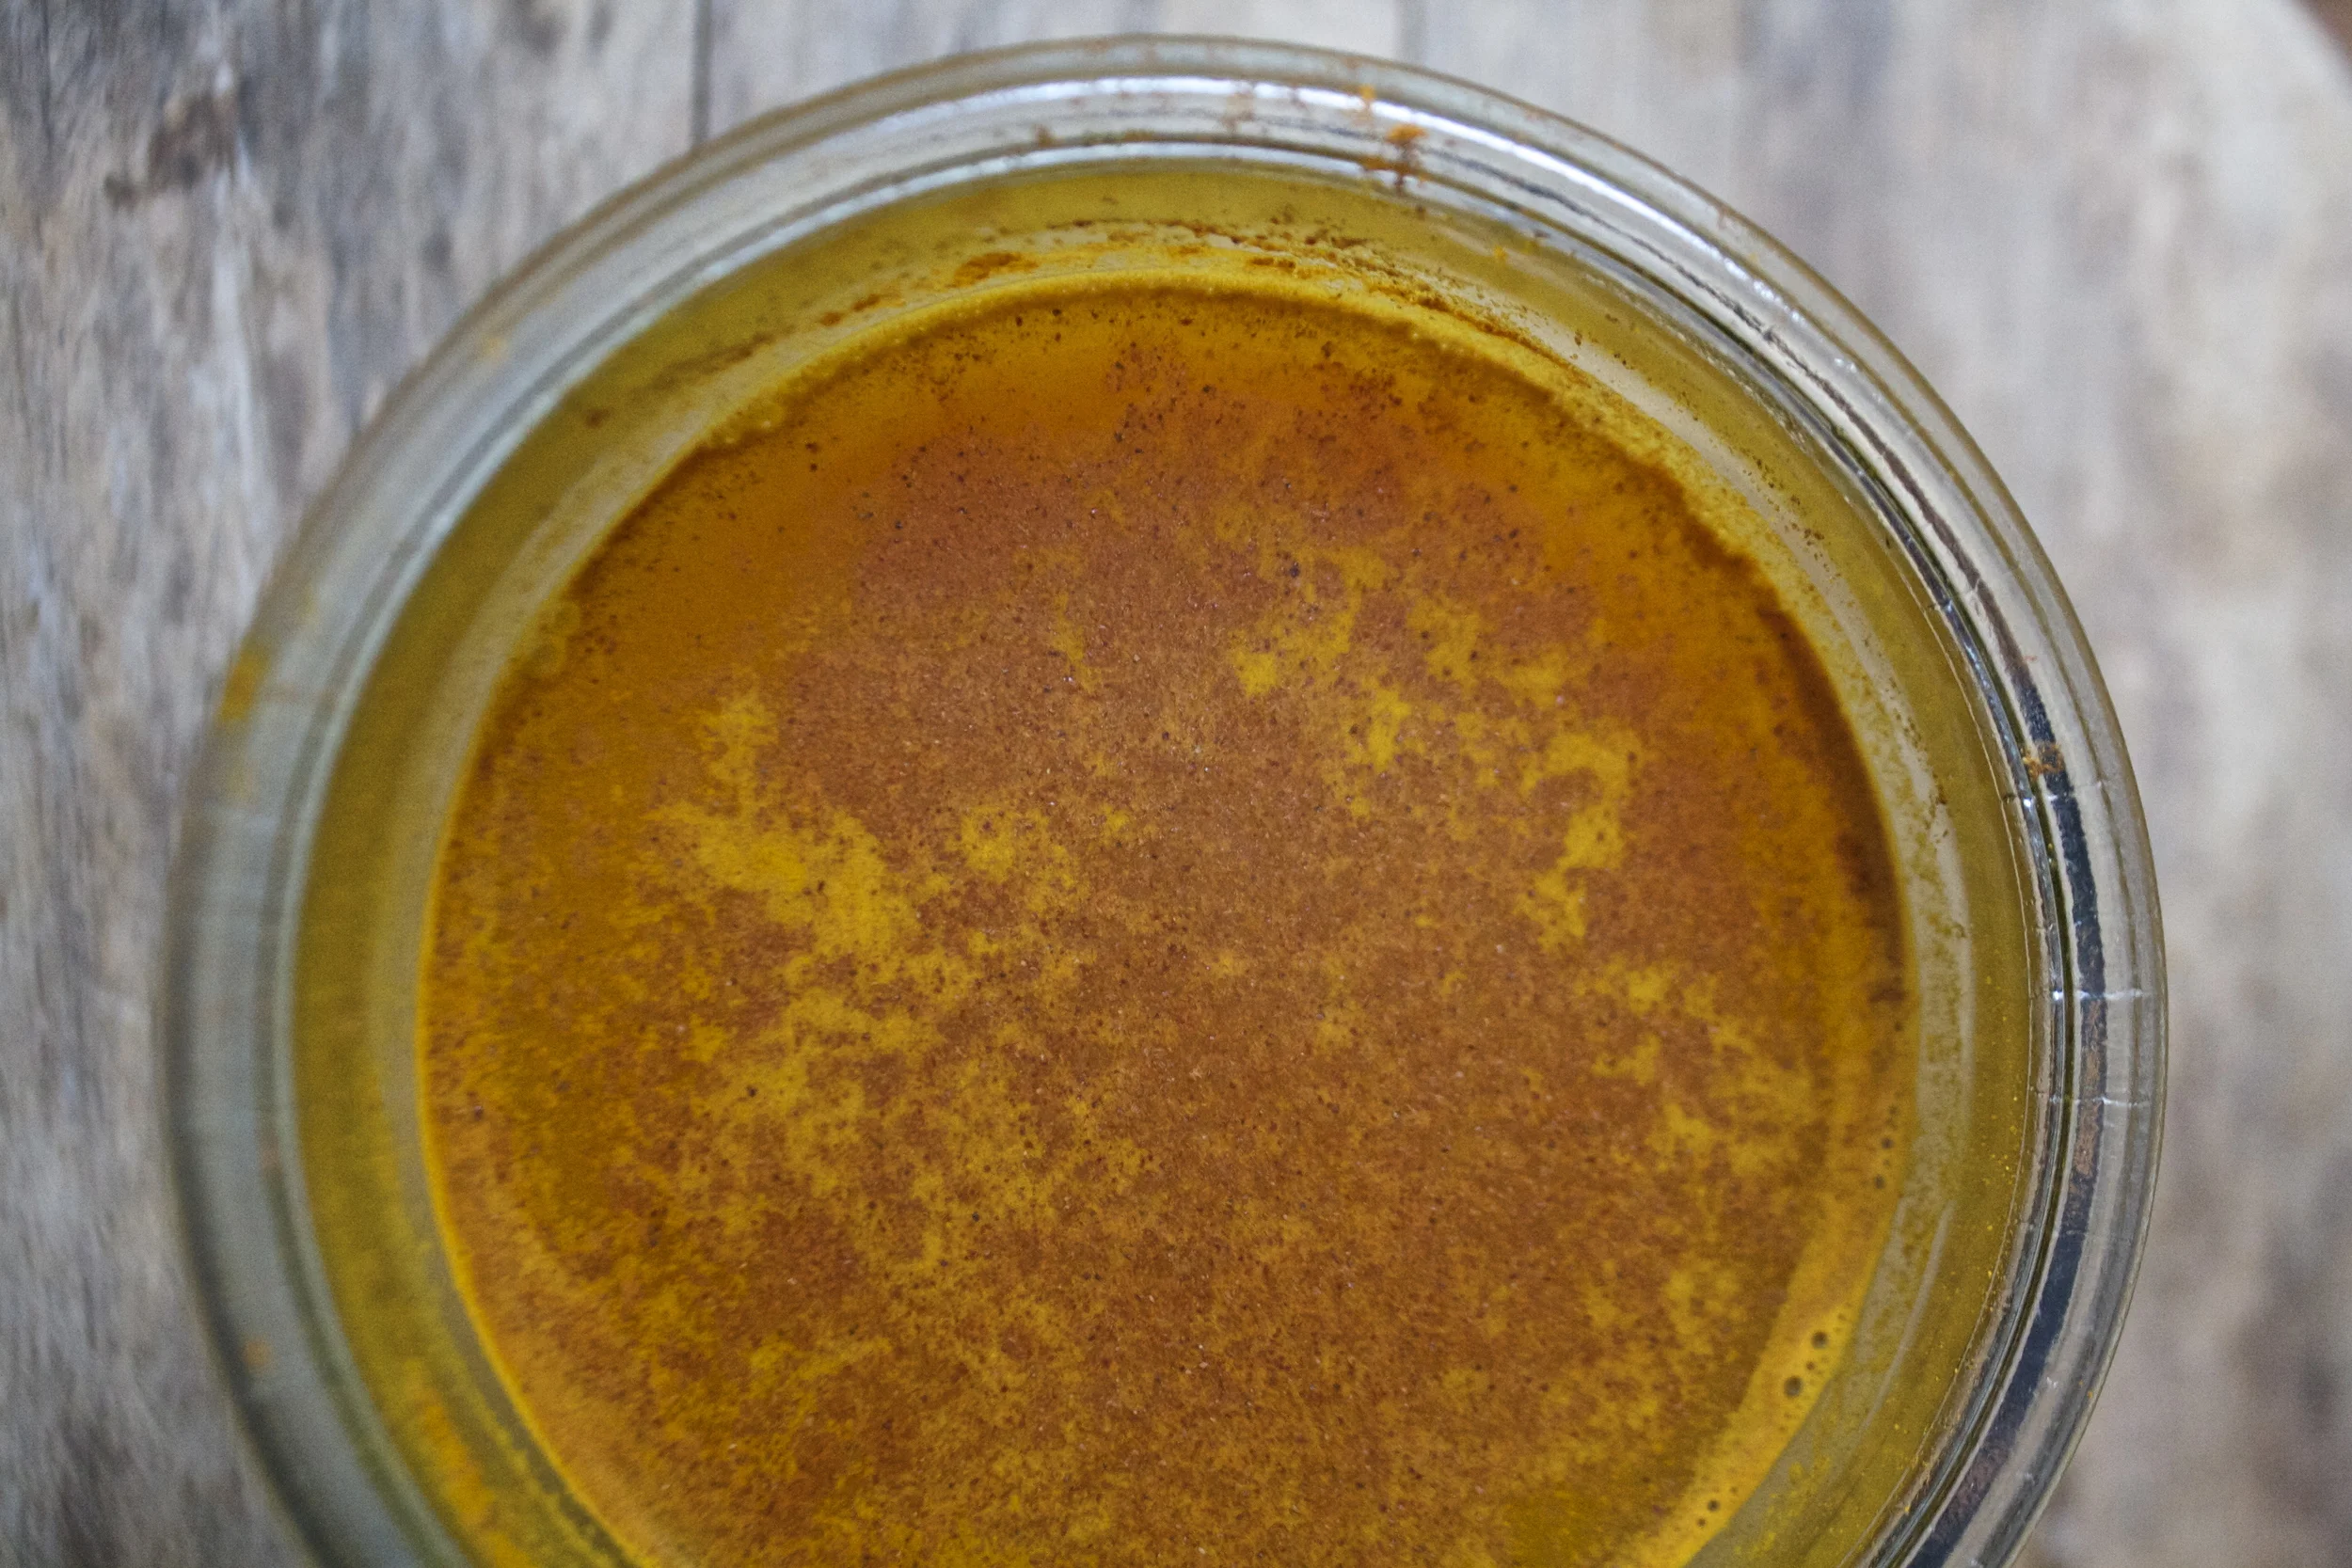
And watch it swirl. A drink that keeps this girl happy and healthy.

Something great to look forward.

-C

  • 1 tablespoon ground turmeric
  • 1 teaspoon ground saigon cinnamon (can use regular, but it’s not as spicy sweet)
  • 1/2 teaspoon ground ginger
  • 1 1/2- 2 cups hot water (not quite boiling)
  • honey to taste (I only use if my throat is sore)
  • lemon juice (optional)

Note… My measurements are just guidelines. You might like a little less turmeric or more ginger so make this drink any way that tastes best for you.

Grab yourself a big mug or jar, add in the spices and hot water, honey if you want it and a squeeze of lemon juice if using. Stir with a spoon and drink. Keep spoon handy to give it a good stir every now and then

%u00a0 %u00a0

Because I love beets, I love celeriac and I love to pickle things%u2026. And I love hearts. And Valentines Day is just around the corner so I though it appropriate to share these little darlings with you because even if you are not a%u00a0fan of pickled beets or celeriac, you have to admit that these are just the cutest pickles you have ever seen. I have made a batch, sitting in the fridge, awaiting some sweet little dinner date that me and the mister will have come Valentines day. Or not, we might just eat them all before hand%u2026 because everyday is like Valentines day for us! (blah, barf, but awe, we are so cute!)

This is my basic pickling recipe%u2026.I figured you will want to pickle everything and anything once you realize (if you haven’t already) how amazing pickled everything is! And how easy it is to do it yourself.

My Pickling method%u2026…

  1. Choose the jar that the pickles will live in
  2. Prepare and pack the stuff %u00a0that is going to be pickled into the jar%u2026 leave about and inch of head space
  3. Fill the jar to the top with a half water and half vinegar solution (I usually use apple cider vinegar because I think it adds a bit of sweetness.. I don’t like to pickle with sugar)
  4. If going for a crispy pickle (like green%u00a0beans or crunchy carrots)%u2026. strain liquid into a pot with a teaspoon of salt per cup of liquid and any spices* that you want to use%u00a0and bring to a boil%u00a0%u00a0Add back to jar
  5. If going for a more tender pickle (like beets or celeriac), dump the liquid and the veggies into a pot with a teaspoon of salt per cup of liquid and any spices* you want to use. Bring to a boil for a few minutes, then remove and replace back into jar.
  6. Place lid and stick in fridge for at least a day%u2026.(I alway cheat and end up taking a bite within the first few hours) The flavor only gets better after being in the fridge for a couple of days.

*You can spice your pickles anyway you see fit%u2026. I%u00a0like to use peppercorns, garlic, mustard seeds, celery seeds red pepper flakes. Or for a little sweeter and more fragrant pickle, cinnamon stick, cardamom pods or star anise%u2026the possibilities are endless.

Pickles are usually good for about a month, but I have never been able to keep them that long!

A little about these specific pickles%u2026…

I used one medium celeriac root, and 2 small beets. Sliced about a 1/4 inch thick and then used a cookie cutter to make the hearts. %u00a0The chosen vinegar was%u00a0apple cider, and yeah ,you must pickle both the inner and outer hearts%u2026.don’t waste the outer heart! And the spices I used were black mustard seed and peppercorns.%u00a0

And they be amazing!!!!

Have a Fantastic Weekend!! Hopefully full of %u00a0warm weather, fluffy clouds, and lots of pickles!

-C

%u00a0 %u00a0%u00a0%u00a0

What a way to start the day, with a mouth full of c words%u2026%u2026.Caraway, cauliflower, chick peas and cabbage%u2026What did you think I meant?

This week has been nippy, no, its been chilly%u2026..nah, it’s been freaking freezing! Yeah, freezing cold. When I woke up this morning to walk the pup, it was 5 degrees. So needless to say, when it gets this cold, I like to keep inside. Tying not to be a complete lazy bones, I went to town on my spices%u2026 refilling jars with all the little baggies scattering the kitchen, screwing on lids, and wiping down the shelves. Not a bad accomplishment for a day. While cleaning I came upon a little bag or caraway seeds, %u00a0Not enough to warrant a jar on the wall, but defiantly enough for one dish. %u00a0

When I think of the bright, somewhat sweet and peppery caraway, I think cabbage.(anything cabbage and I am sold) A big pan cabbage, added cauliflower for the mister,(his favorite) creamy chick peas because we need %u00a0protein and they be tasty, and of course mustard, because everything tastes better with mustard.(I’ll let you in on a little secret.I eat a lot of mustard, I am kind of obsessed. Mustards of all kind; grainy, homemade, dijon%u2026but usually just plan old yellow. And I eat it on everything.. but my go to is French’s yellow mustard and carrots%u2026don’t judge) A warm, bright and filling dish, perfect for a freezing cold evening stuck inside. You can eat it as main dish or add a pile of quinoa or wild rice, or even a big plate of greens. What ever say you eat it, you and your stomach will be happy.(If your worries about cabbage bloat..don’t be. Cooking cabbage helps breaks down the enzymes that create gas, plus caraway has anti bloating properties%u2026WIN!)%u00a0

Cabbage, cauliflower,(fresh of frozen%u2026.I used frozen in this recipe) pre-cooked or canned chick peas, caraway seeds, yellow mustard, and salt..(I added pepper too)

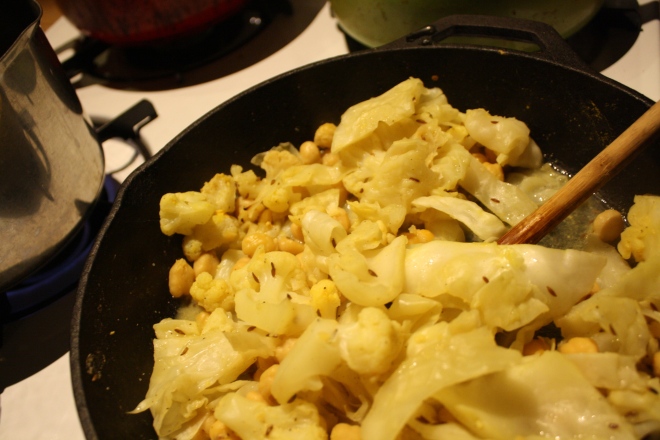
Chop the cabbage and toss into a lightly oiled pan with the rest of the stuff. Heat pan with everything but water %u00a0for a couple of minutes.. to warm the caraway and give everything a cooking head start, then add the water. Stick a lid on it and let simmer.%u00a0After about 15 minutes, give it a stir or two and do a taste test. At this point, it’s up to you%u2026how cooked you want the veggies? I kept mine cooking for another 10 minutes. I also added another 1/2 cup of water. Not enough water and the pan will burn, a little extra water is good, it creates a yummy broth.

When you are happy with the flavor and doneness, eat it. I made myself a %u00a0bowl with a heap of pickled beets(holy yes!). I am sorry if you don’t have any pickled beets, but the dish is still amazing without them. %u00a0Fresh ground pepper really does the trick too!

So there you go, make it tonight, it will make you warm,smart and happy

-C

serves 2-3

  • 1/2 small head of green cabbage(about 2 cups chopped)
  • 2 cups cauliflower(fresh or frozen)
  • 1 cup cooked chick peas
  • 1 1/2 -2 cups water
  • 1 tablespoon caraway seed
  • 2 tablespoons yellow mustard
  • salt and pepper to taste

Lightly oil a medium sized skillet and add all ingredients except water. Heat for a few minutes to warm up veggie and caraway seeds then add a 1 1/2 cups of water. Keep on medium heat with a lid and stir on occasion If water evaporates completely out, add another 1/2 cup. %u00a0Dish is done when veggies are tender.. about 20 minutes%u2026.but whenever tastes best to you!

THE LOVELY CRAZY

November 29, 2019 by maximios • Blog

Just the other day I was at the gym talking to someone when all of a sudden, she coughed into my face, like full fledge hacking. This and then she continued to tell me that she has been sick for like weeks and blah blah blah. After that all I was thinking was, Oh Fuck, she just gave me her ick%u2026.GET AWAY FAST!!!!

So it%u2019s that time of year. Everyone all sick and shit. And that means getting my stash of stuff made, my feel better, don%u2019t get sick stuff. The tonics and elixirs and hocus pocus things that I use all year long, but mostly during the winter months when everyone starts getting sick.

One of the things I make is fire cider. First off, let me tell you I am no doctor, just in case you thought I might be. But I l am a strong believer in food as medicine. So the fire cider is a heath tonic of sorts, made with all sorts of yummy and highly potent things like fresh grated horseradish, hot peppers, garlic, and so forth. All things that are good for your health in many ways, but also taste really good. And let me tell you, if you are into the healing powers or not, a swing of this infused cider tonic will surely open up your sinus cavity like whoa.

And now before you get super excited about going and making yourself this fantastic health tonic/salad dressing/drink mixer, and thinking it will be ready and done as soon as you do a little grating, well hold up. You can throw it together super fast, but it does take a good 4-6 weeks of chilling and infusing before you really want to get into it. But don%u2019t let that stop you, it is 100% worth all the waiting. And wouldn%u2019t you know, the holidays are about 4-6 weeks away and I was just thinking after I made a batch for myself how I should make another big batch and give away in little jars for Christmas this year. Now there is a good idea. (Might not be a doctor, but I sure am a smarty pants%u2026HAHAHA)

Now to the Fire cider!

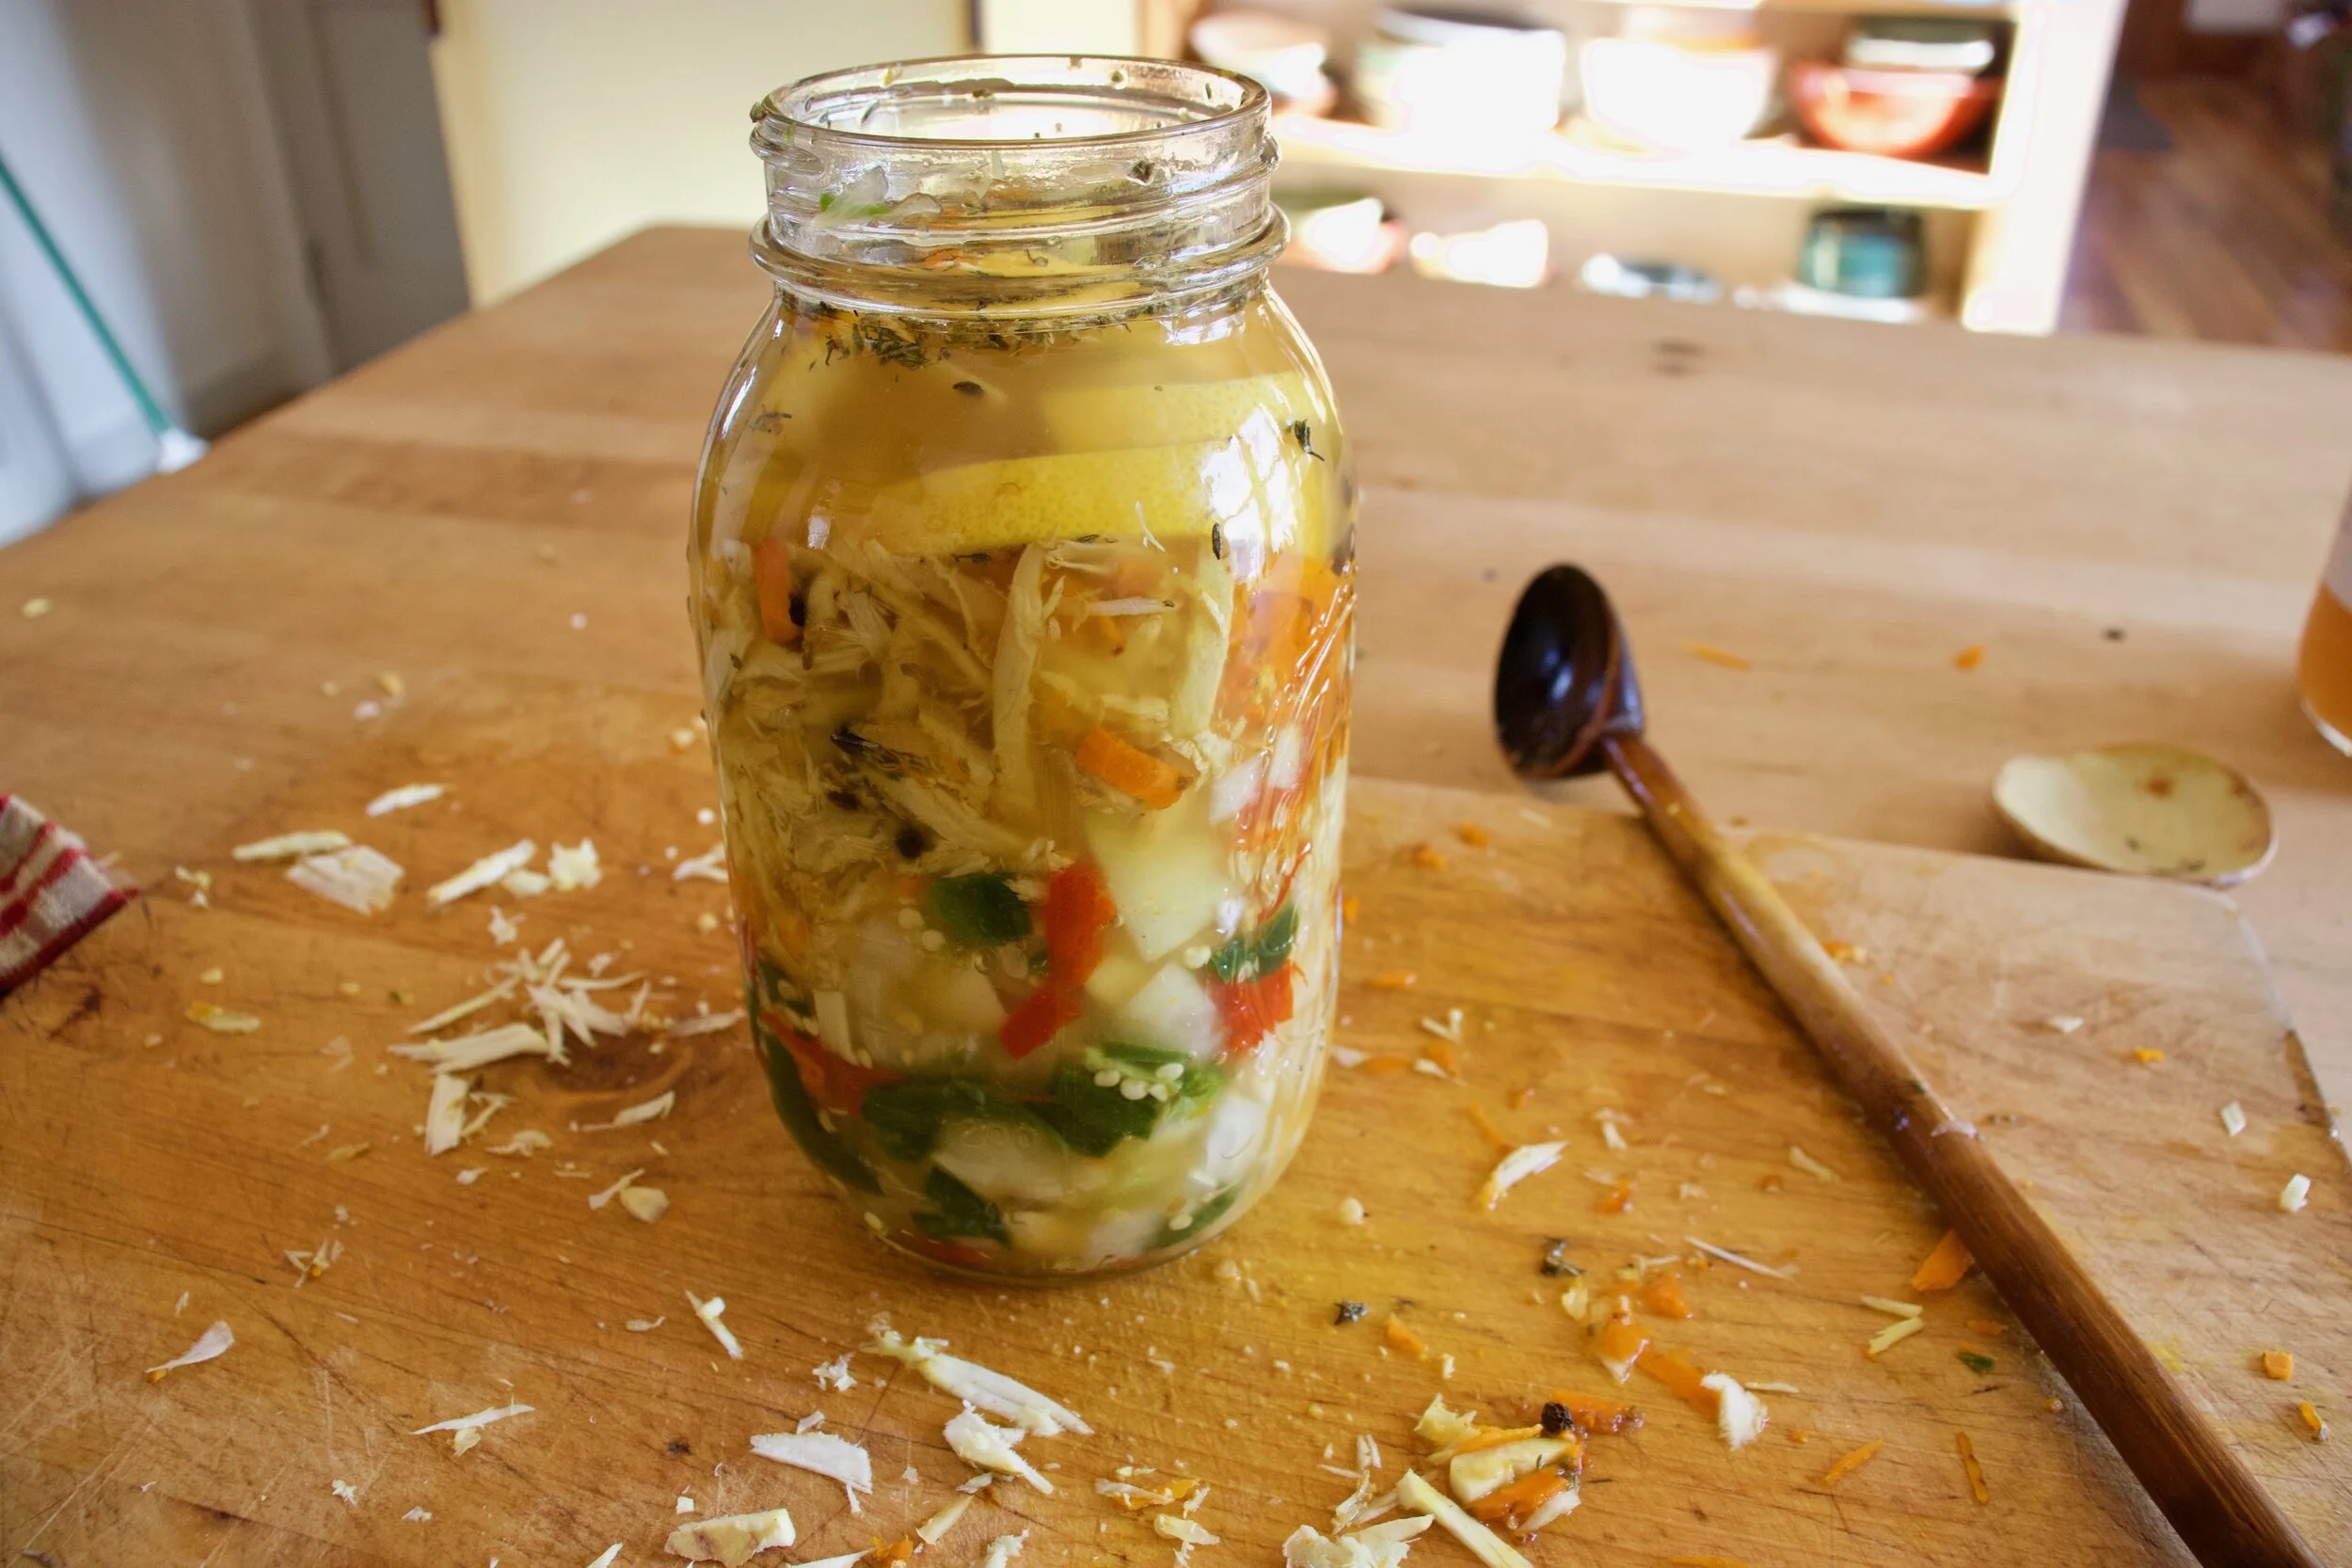
Garlic, onion and hot peppers, chopped into bits. Place it all into a clean 32oz jar.

Grated horseradish, turmeric, and ginger. Into jar it goes. And watch out, freshly grated horseradish can be a little intense.

Sliced lemon. Into said jar along with thyme, oregano, and peppercorns.

Packed and filled with raw apple cider vinegar.

Now a lid and some time in a cool dark place and you got yourself some liquid gold.

Remember, I am not a doctor so yeah, but this cider helps me feel better when I need it to and I think you will find it will help you too. And it tastes freaking awesome on food so theres that!

-C

makes 16-20 oz

  • 1/3 cup fresh grated horseradish

  • 1/4 cup fresh grated ginger root

  • 1/4 cup fresh grated tumeric

  • 1 chopped onion

  • 3-5 heads of garlic chopped

  • 2%u20144 hot peppers (depending on the type you use and the heat level you want) chopped

  • 1 lemon sliced

  • 1 teaspoon peppercorns

  • 1 teaspoon oregano

  • 1 teaspoon thyme

  • Raw apple Cider Vinegar

  • Honey or maple syrup (optional)

Note. Feel free to change the amounts of all of the ingredients. Want to use less horseradish, then do so. No hot peppers, then don%u2019t add them. Leave out the oregano and thyme and add dill or rosemary. You can be creative with your own flavors.

Now to make fire cider.

Place all ingredients besides vinegar into a 32 oz jar. Pack down with a wooden spoon then fill jar with apple cider vinegar.(Make sure all the stuff is submerged in the vinegar.) Place a lid on jar. If using a metal lid, line top with wax paper first or just use a plastic lid if you have one. Place jar in a cool dark place for 4-6 weeks, giving it a shake every day.

After at least 4 weeks, remove lid of the jar, strain the liquid from the solids through a fine mesh strainer or cheesecloth, squeezing out as much as the liquid as you can. You can discard the solids or make something tasty with them (saut%u00e9ed with potatoes?). Then taste the liquid. Add sweetener if you want, maybe a few tablespoons to start and go from there.

And thats it. Store the cider a lidded jar in a cool dark place. Or in the fridge if you want it cold.

To use, just take a swig when feeling crappy, stuffy, cold, or just want a tasty little pick me up. Or use as condiment on food, like in a salad or wherever.

Enjoy!

THE LOVELY CRAZY

November 29, 2019 by maximios • Blog

Let us talk about how winter squash is like one of the best foods ever. Seriously. Hardy, creamy, rich, and full of the nutty, sweet flavors of all the good things. How anyone says they don%u2019t like winter squash is beyond me. I sometimes even feel like I put myself in danger of exploding when I am around enough cooked squash. I can eat and eat it until it%u2019s gone, which is fine if it%u2019s a serving or two, but when you roast up a 10 pound butternut, well, that is when the danger is real. I am getting better at holding back, but man, sometimes I just can’t (or don%u2019t want to?) help myself. ( You might also wonder why I cook 10 pounds of squash at a time. It%u2019s because I will eat it all in a few days and I might as well cook a bunch at once, for efficiency sake.)

Now the delicata squah. If you haven%u2019t had it before, stop what you are doing and go get one. You need to try it because it is amazing. Sweet, nutty, creamy. So good! And another good thing is that they are not giant, so you can buy one and eat the whole thing and not worry about overeating until you can%u2019t move, unless that is the goal. In that case, just buy a bunch. HA.

Anyway, it%u2019s getting to that time of year where salad is still great, it is just great warm. And with winter squash. Don%u2019t you agree? So we cook up the squash, grab the kale and make one heck of a salad to eat all to your face. Because that is what will happen. You will make it , taste it, and not want to share it. It is too good to share. (Yes salads can be too good to share, so if you are planning on feeding others, plan accordingly)

To the salad!

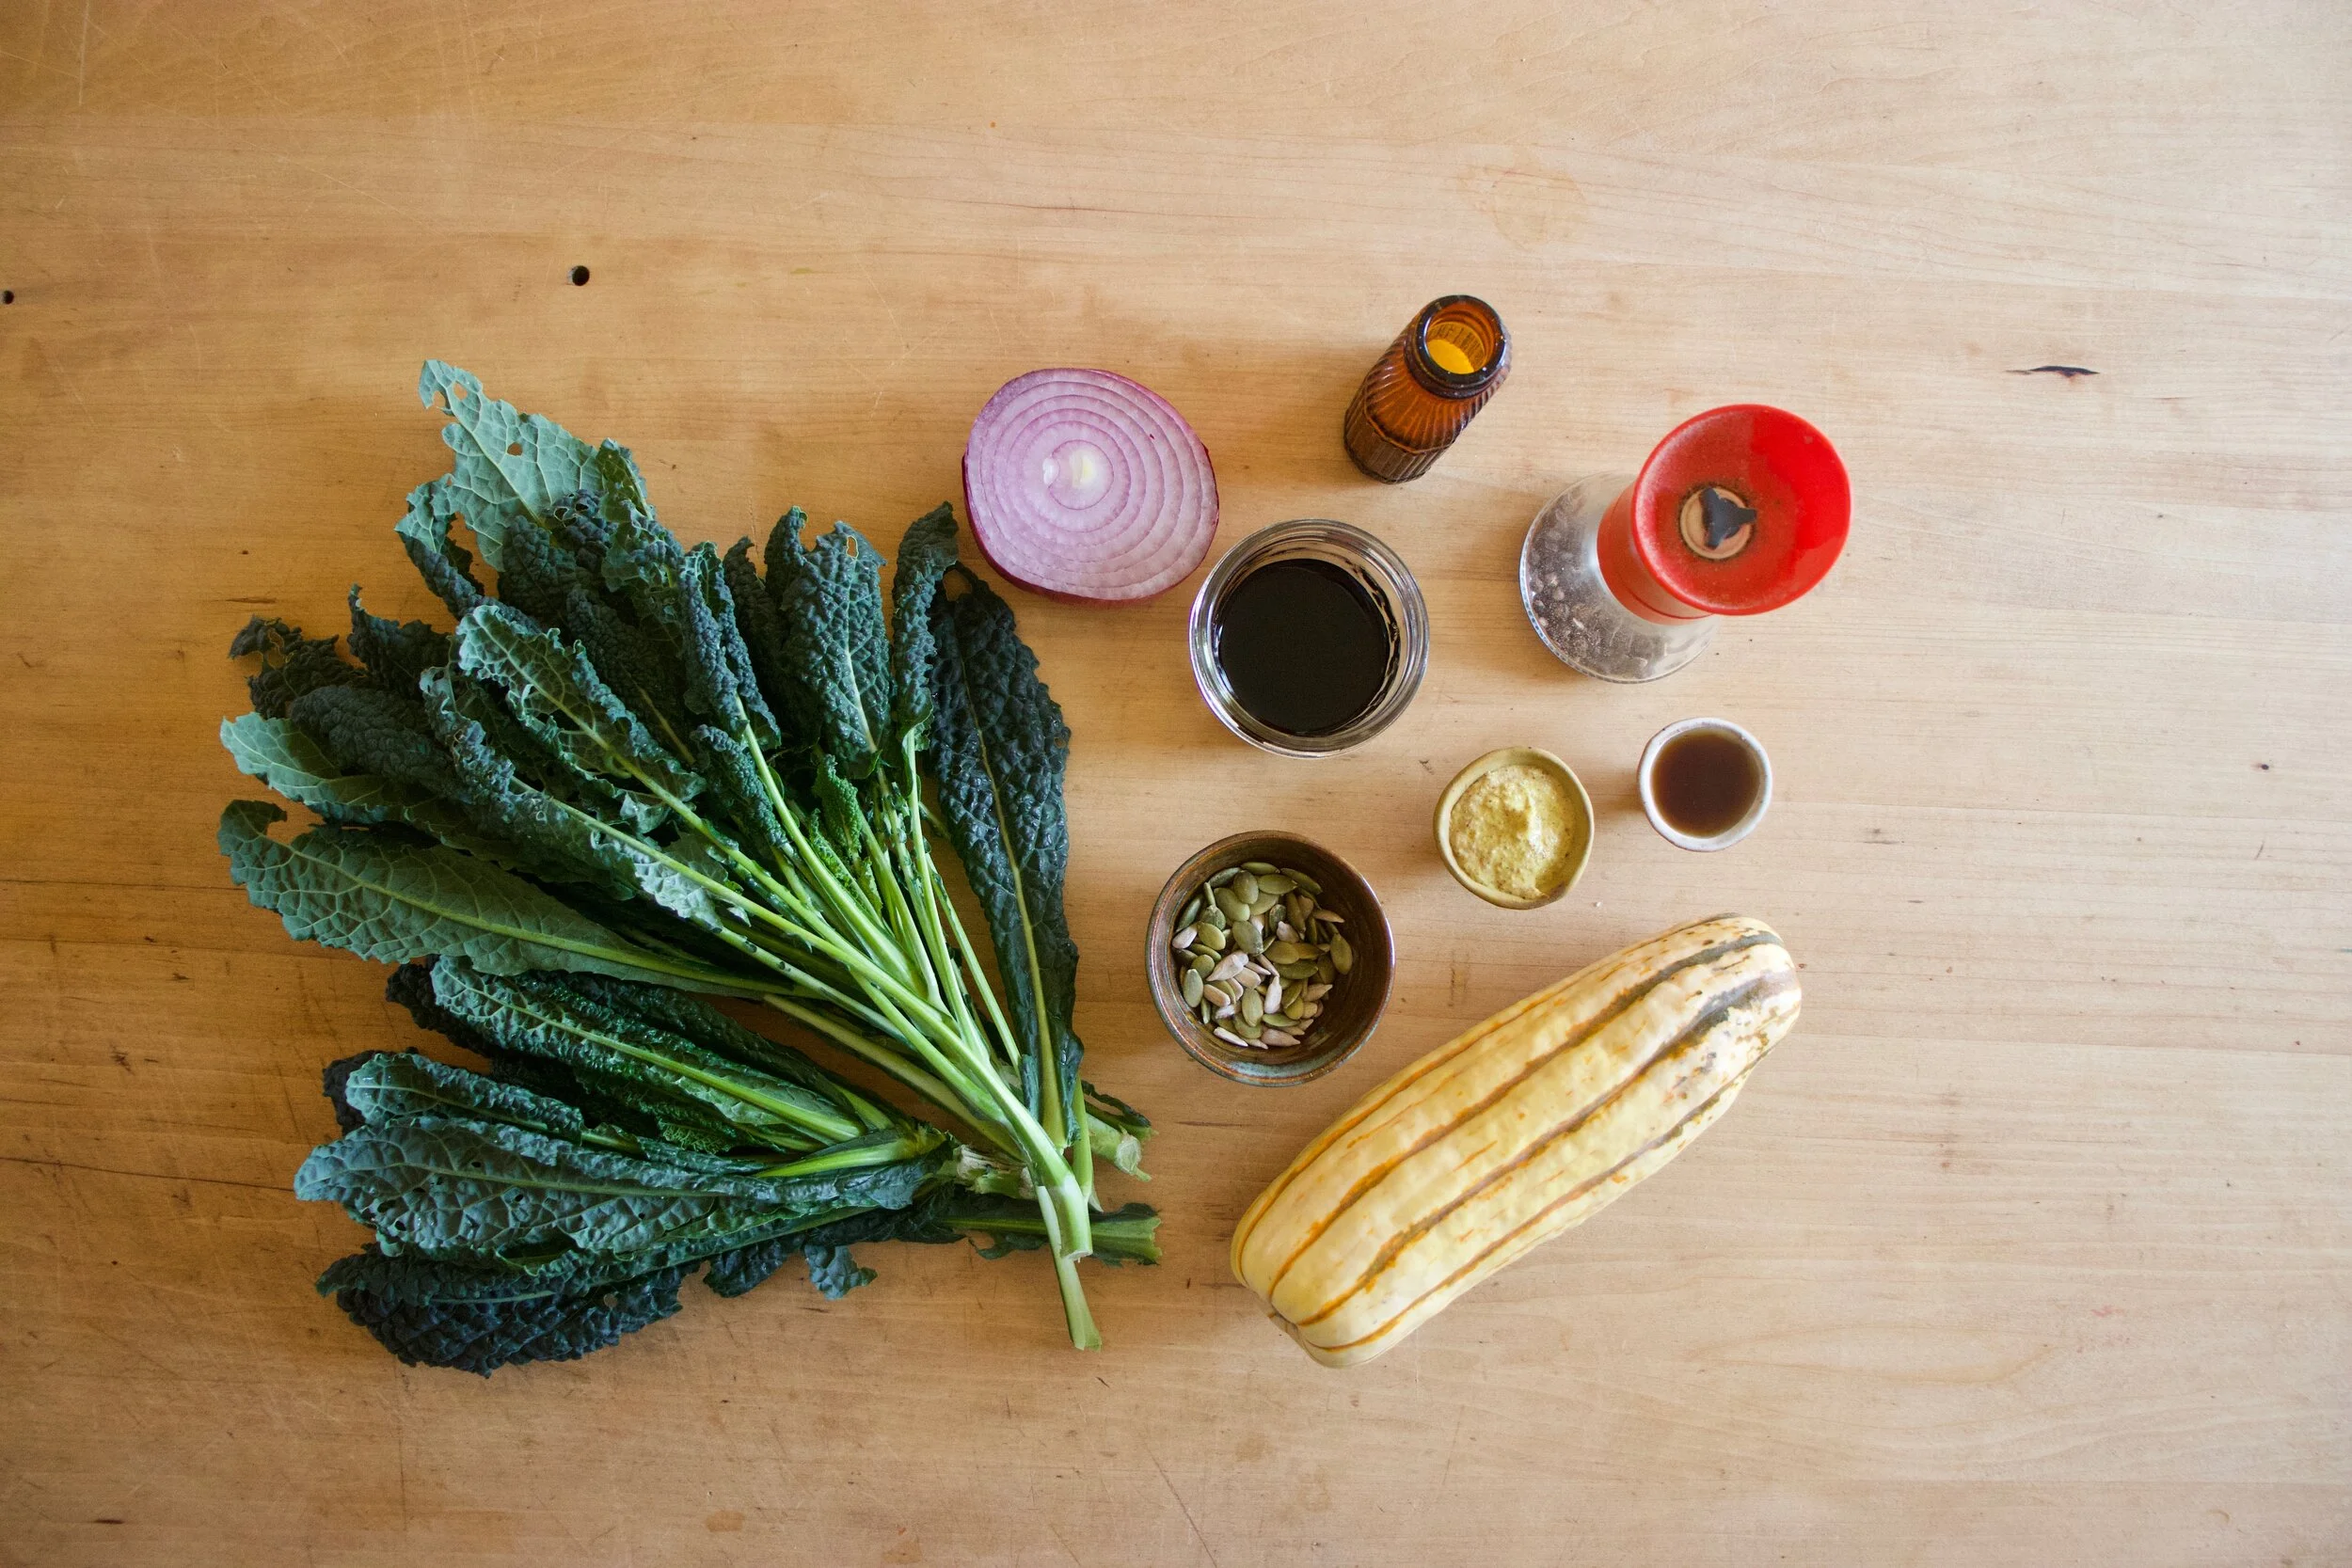
The stuff. Kale, a delicata squash, red onion, some balsamic vinegar, a touch of maple, spicy brown mustard, a handful of toasted seeds, and salt and pepper.

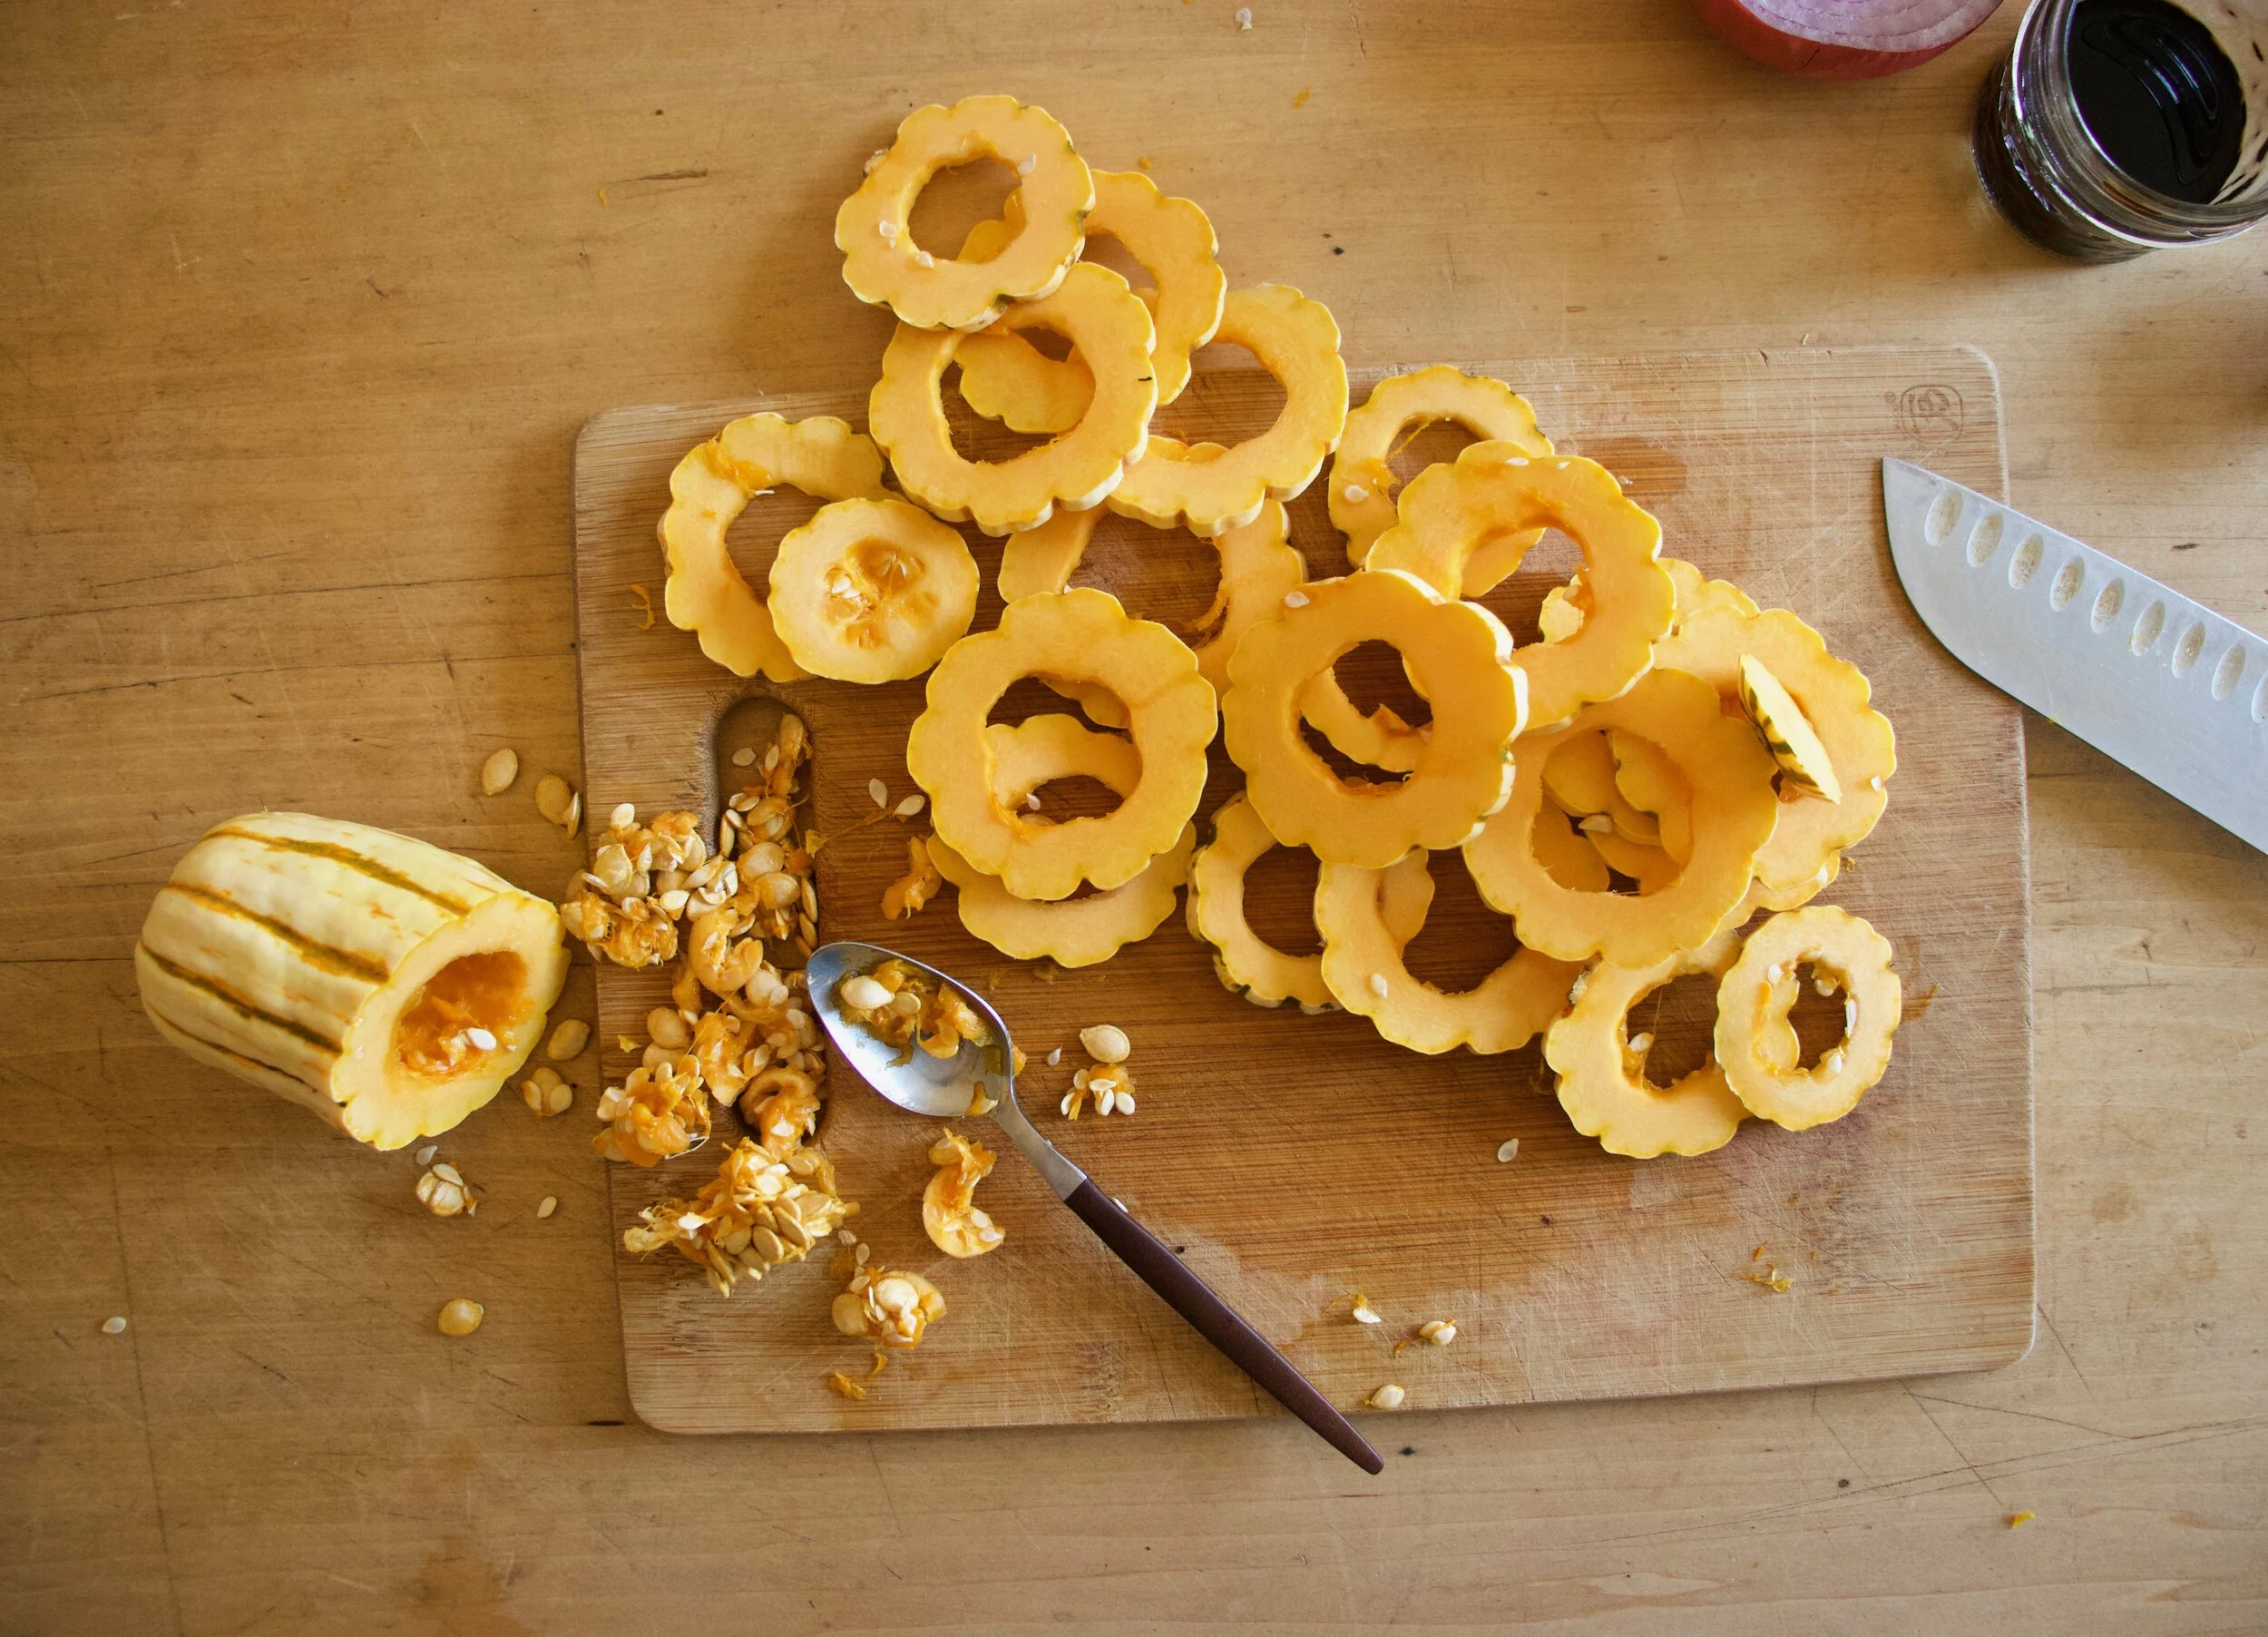
Start with the squash. Cut it in half and scoop seeds from booth sides (these seeds are great roasted). After deseeded, cut both pieces into 1/4-1/2 inch thick rounds. And NO!!!!, do not peel the skin.

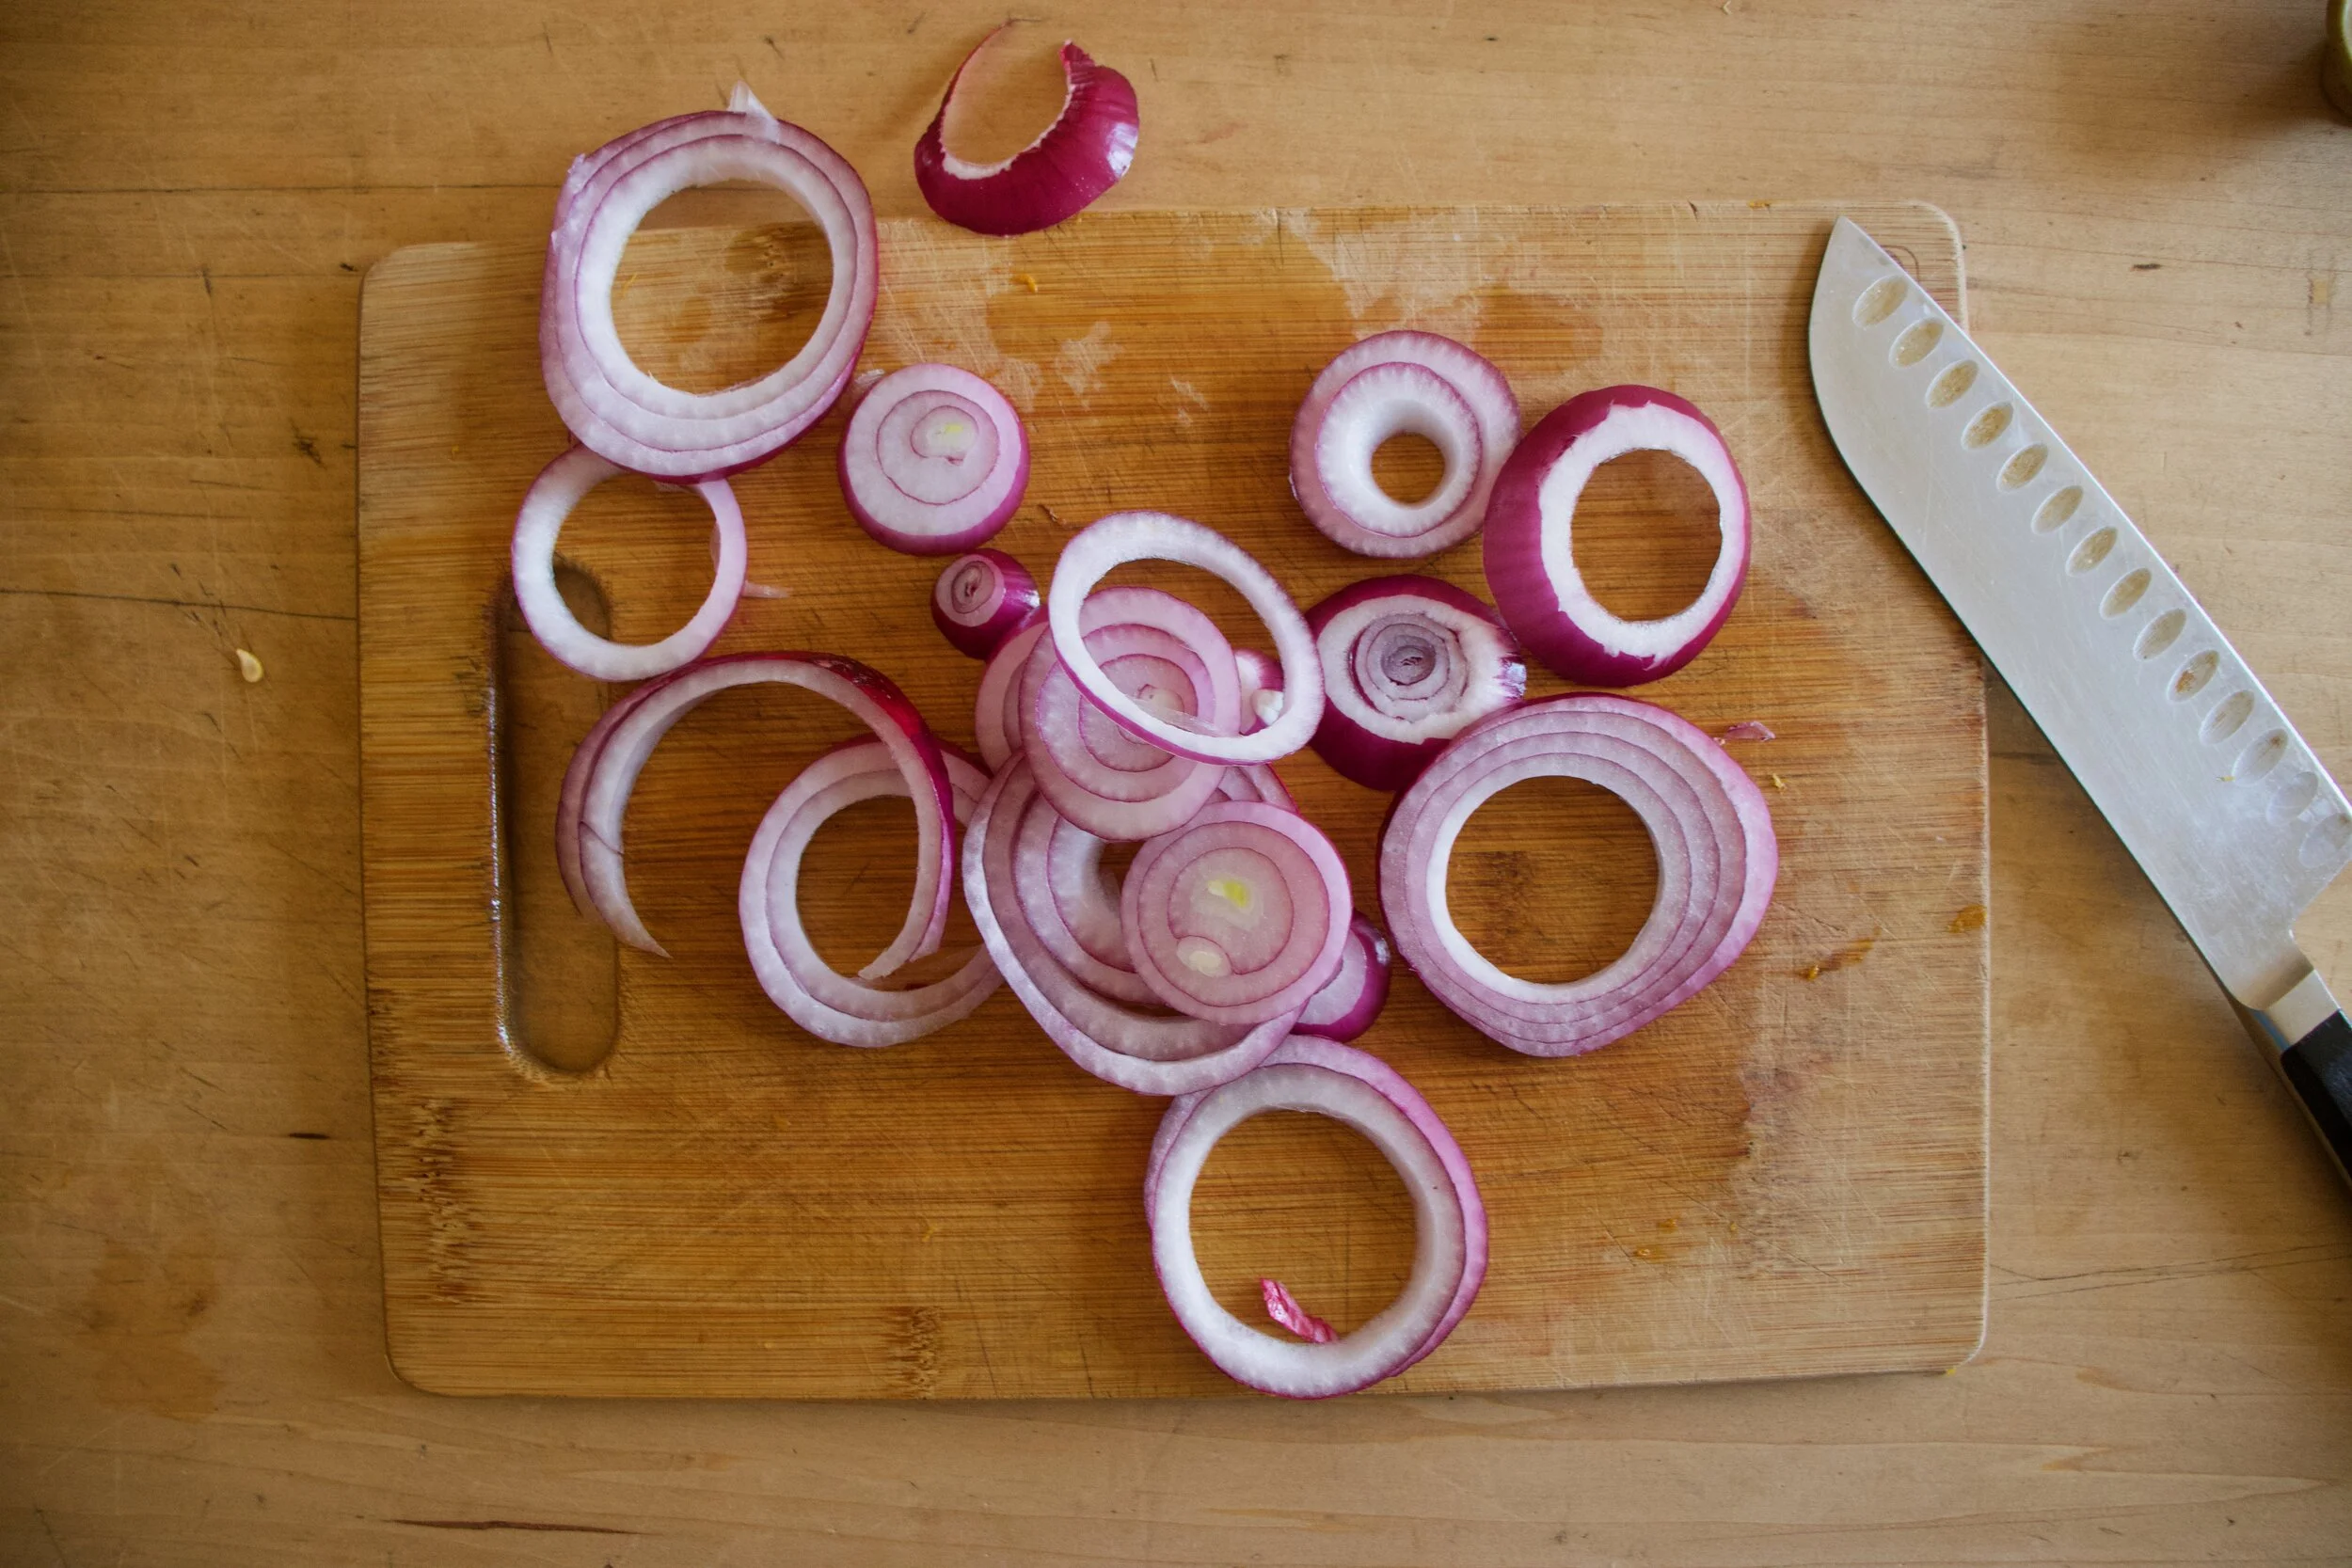
Grab the onion and cut into 1/4 inch rounds too.

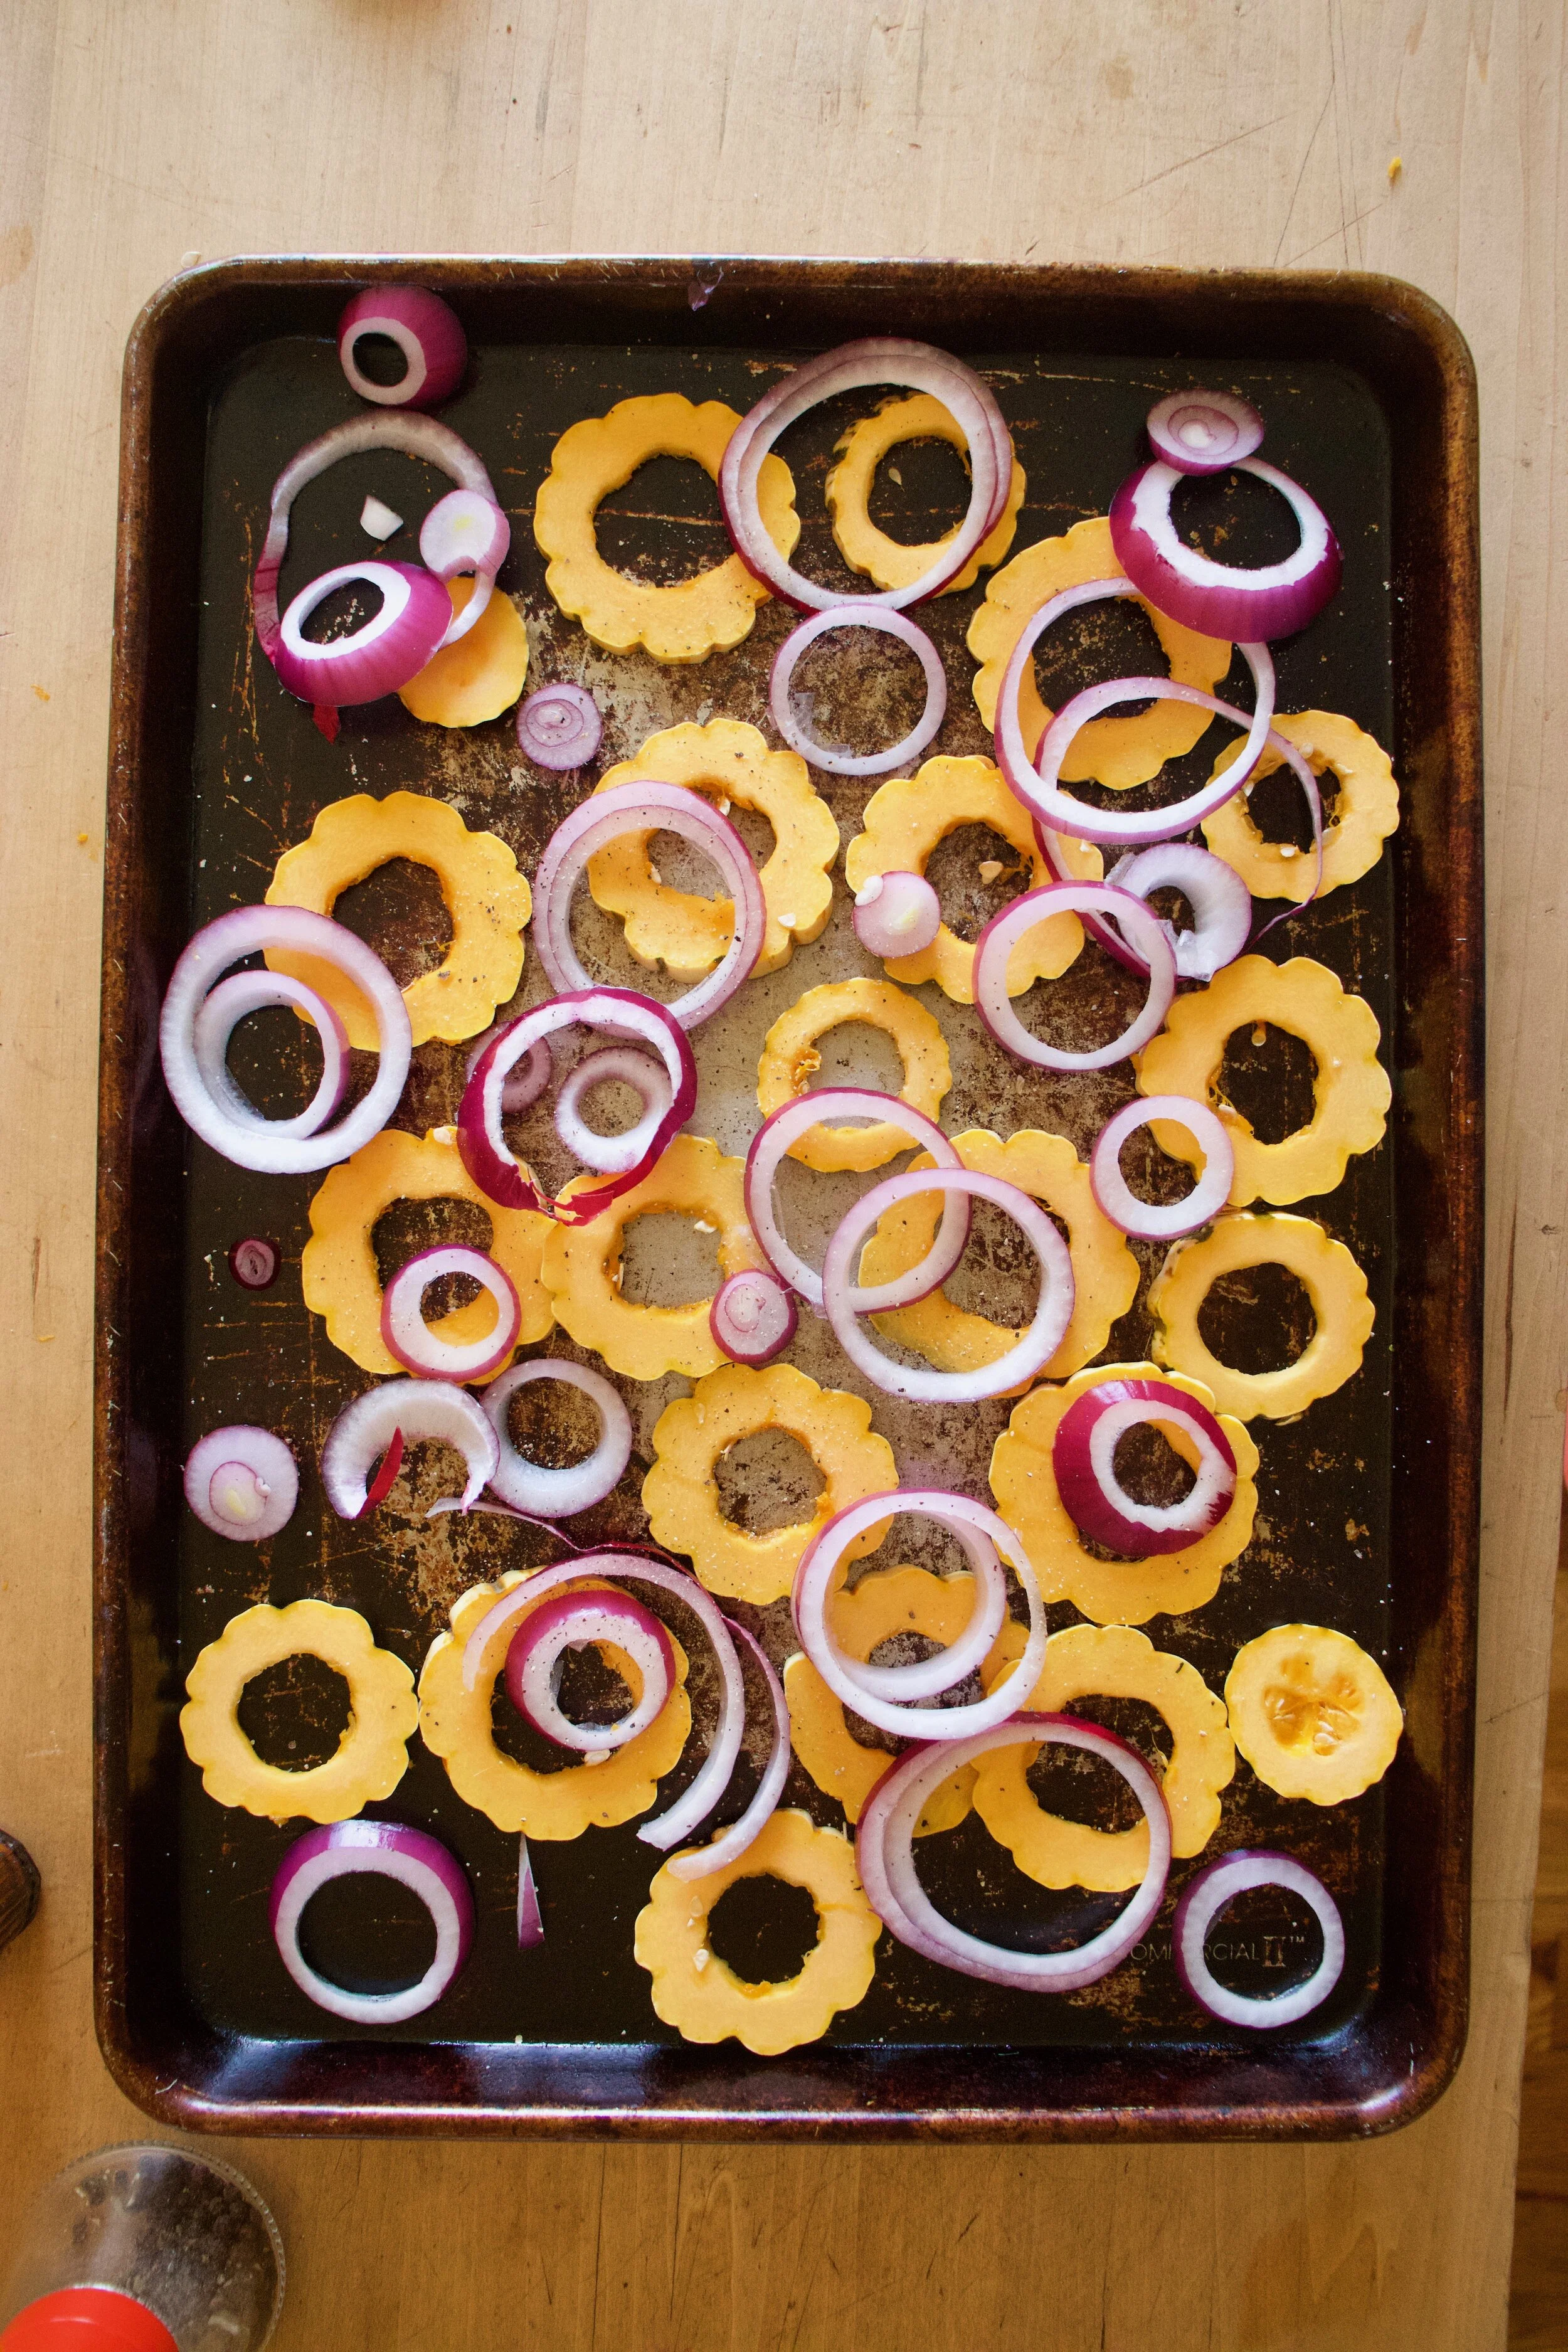
Place the squash on a very lightly oiled baking sheet so the pieces are not overlapping each other. Then toss on the onion which is fine if it overlaps. Sprinkle with a pinch of salt and lots of cracked pepper and pop into a hot oven.

In the meantime, mix the dressing situation together. Mustard, maple, and balsamic in a jar, mix and done.

Chop the kale too. Into mouth sized pieces.

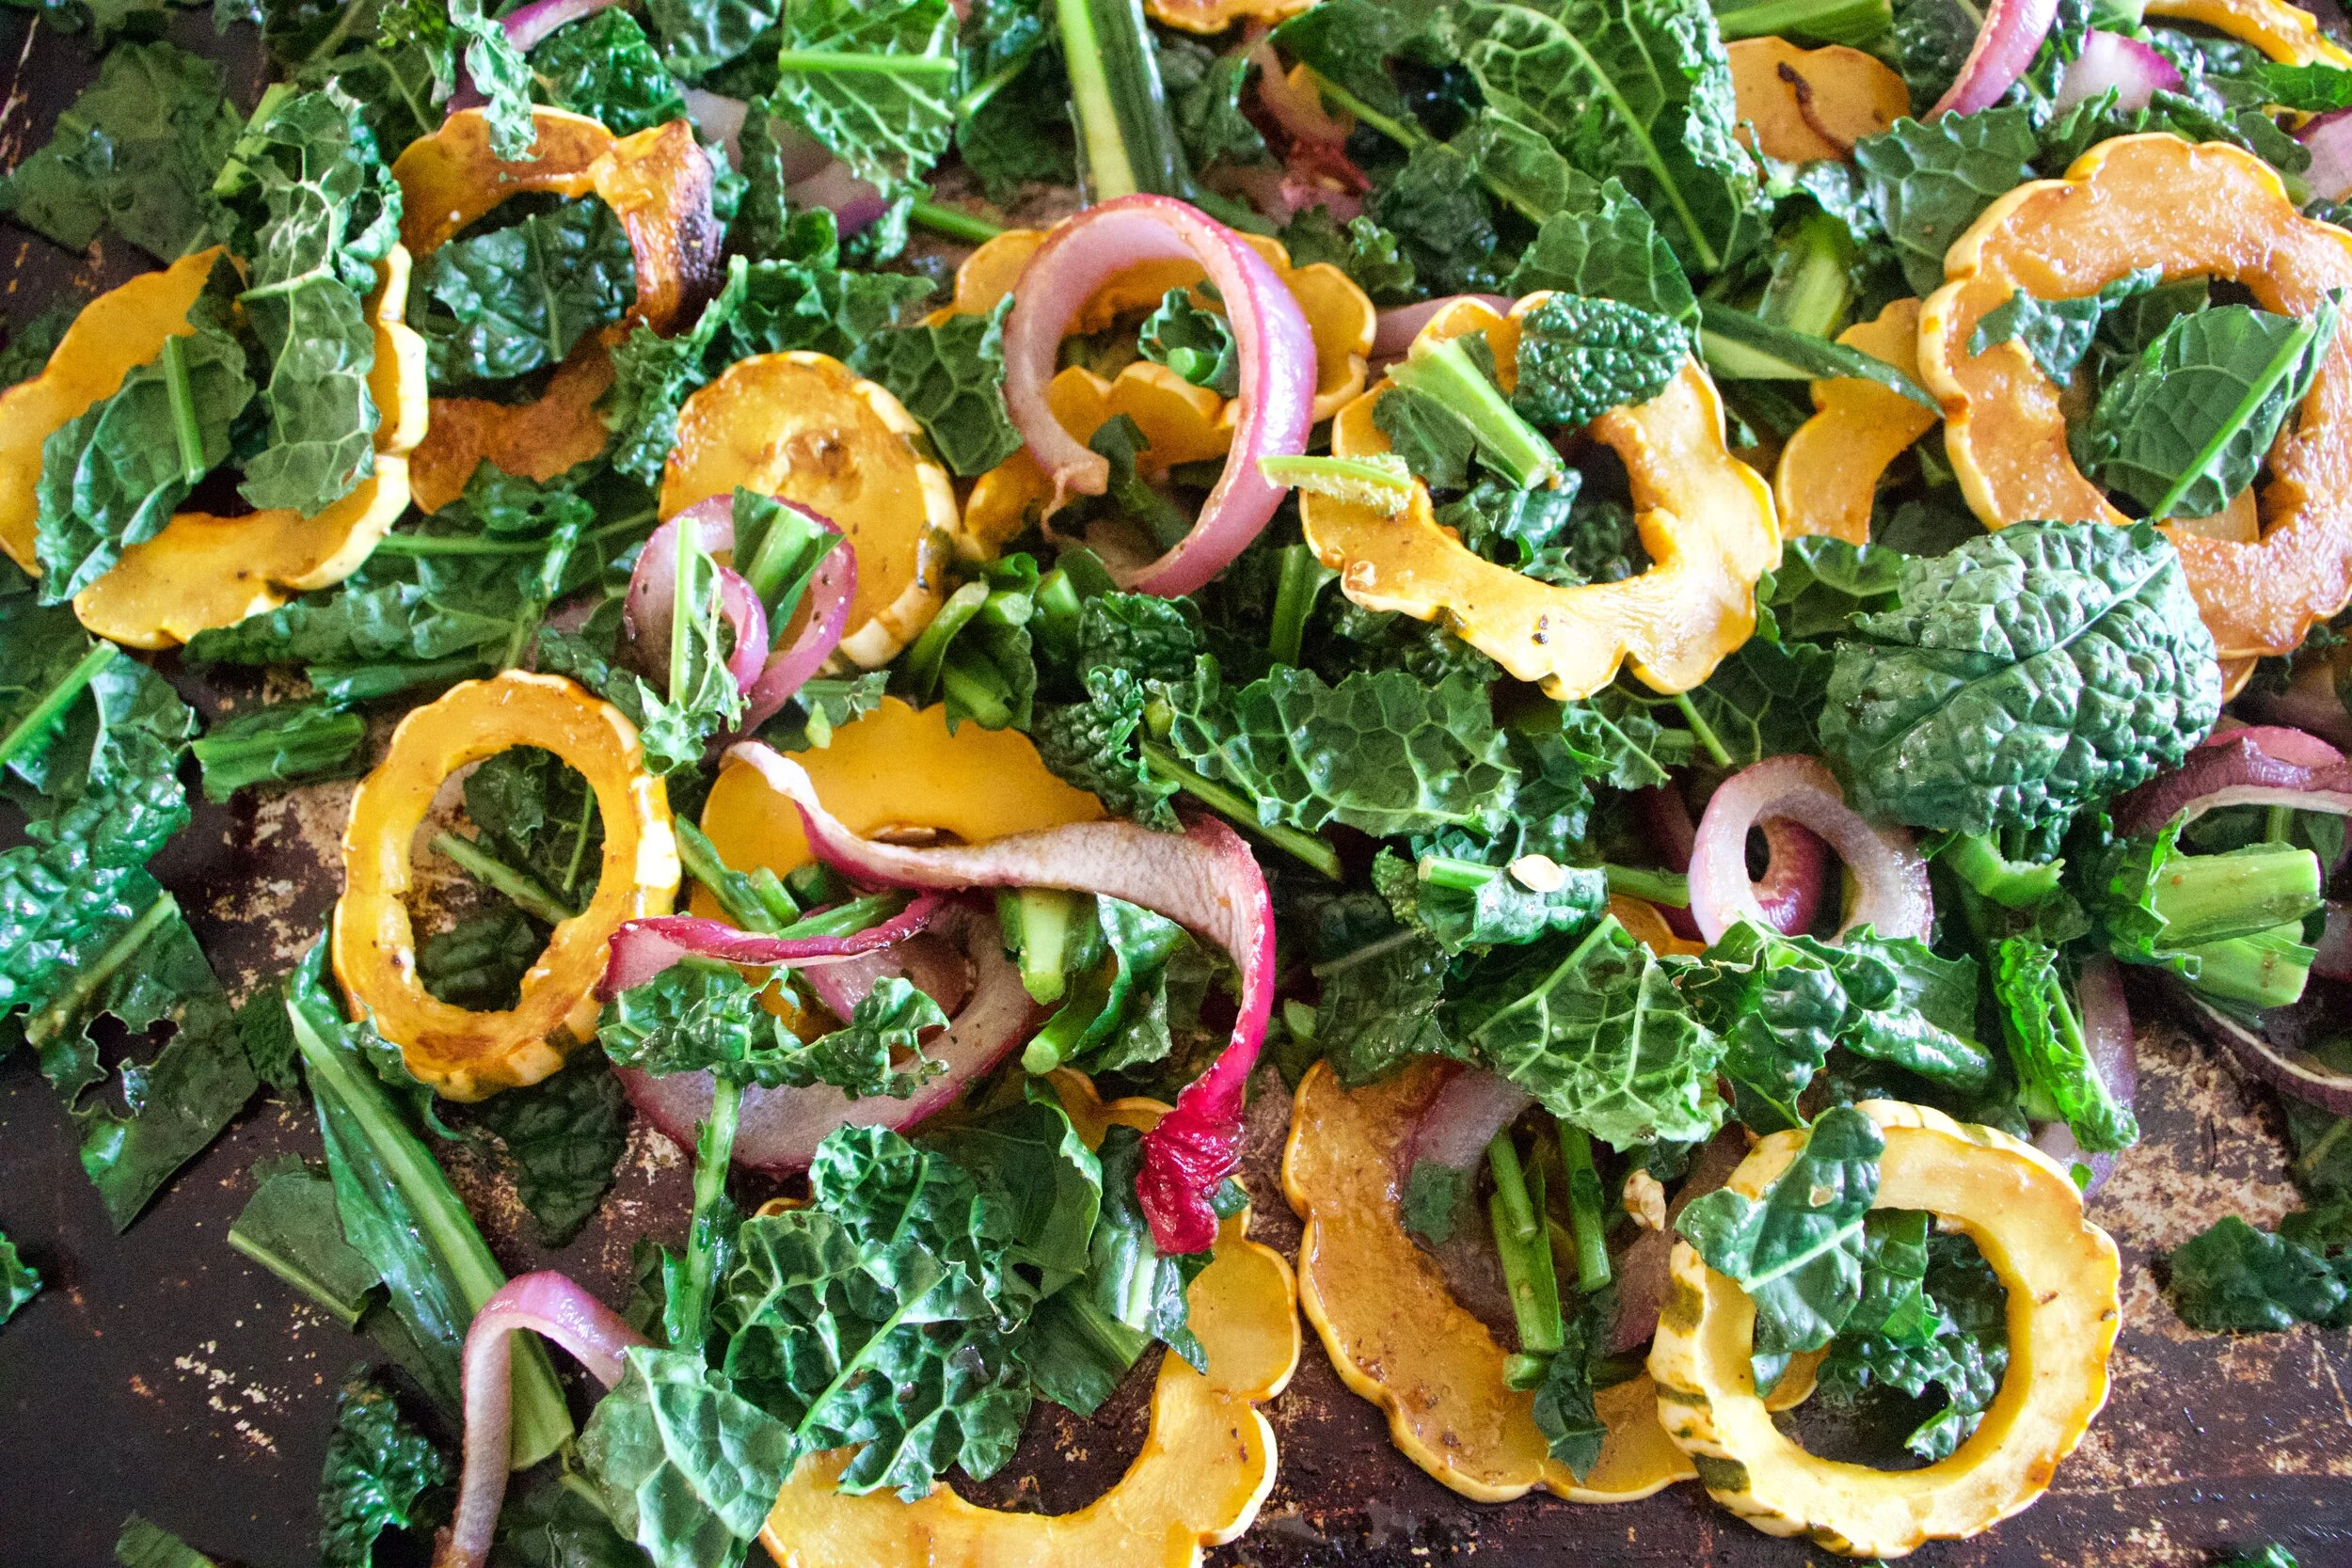
Once squash is cooked all nice and tender, remove pan from oven. Take all the kale and toss on top then take the dressing and drizzle it all over the kale. Pop the pan back into the oven for a minutes or two, just until the kale starts to ever so slightly wilt.

Pull the pan back out and give it a good toss.

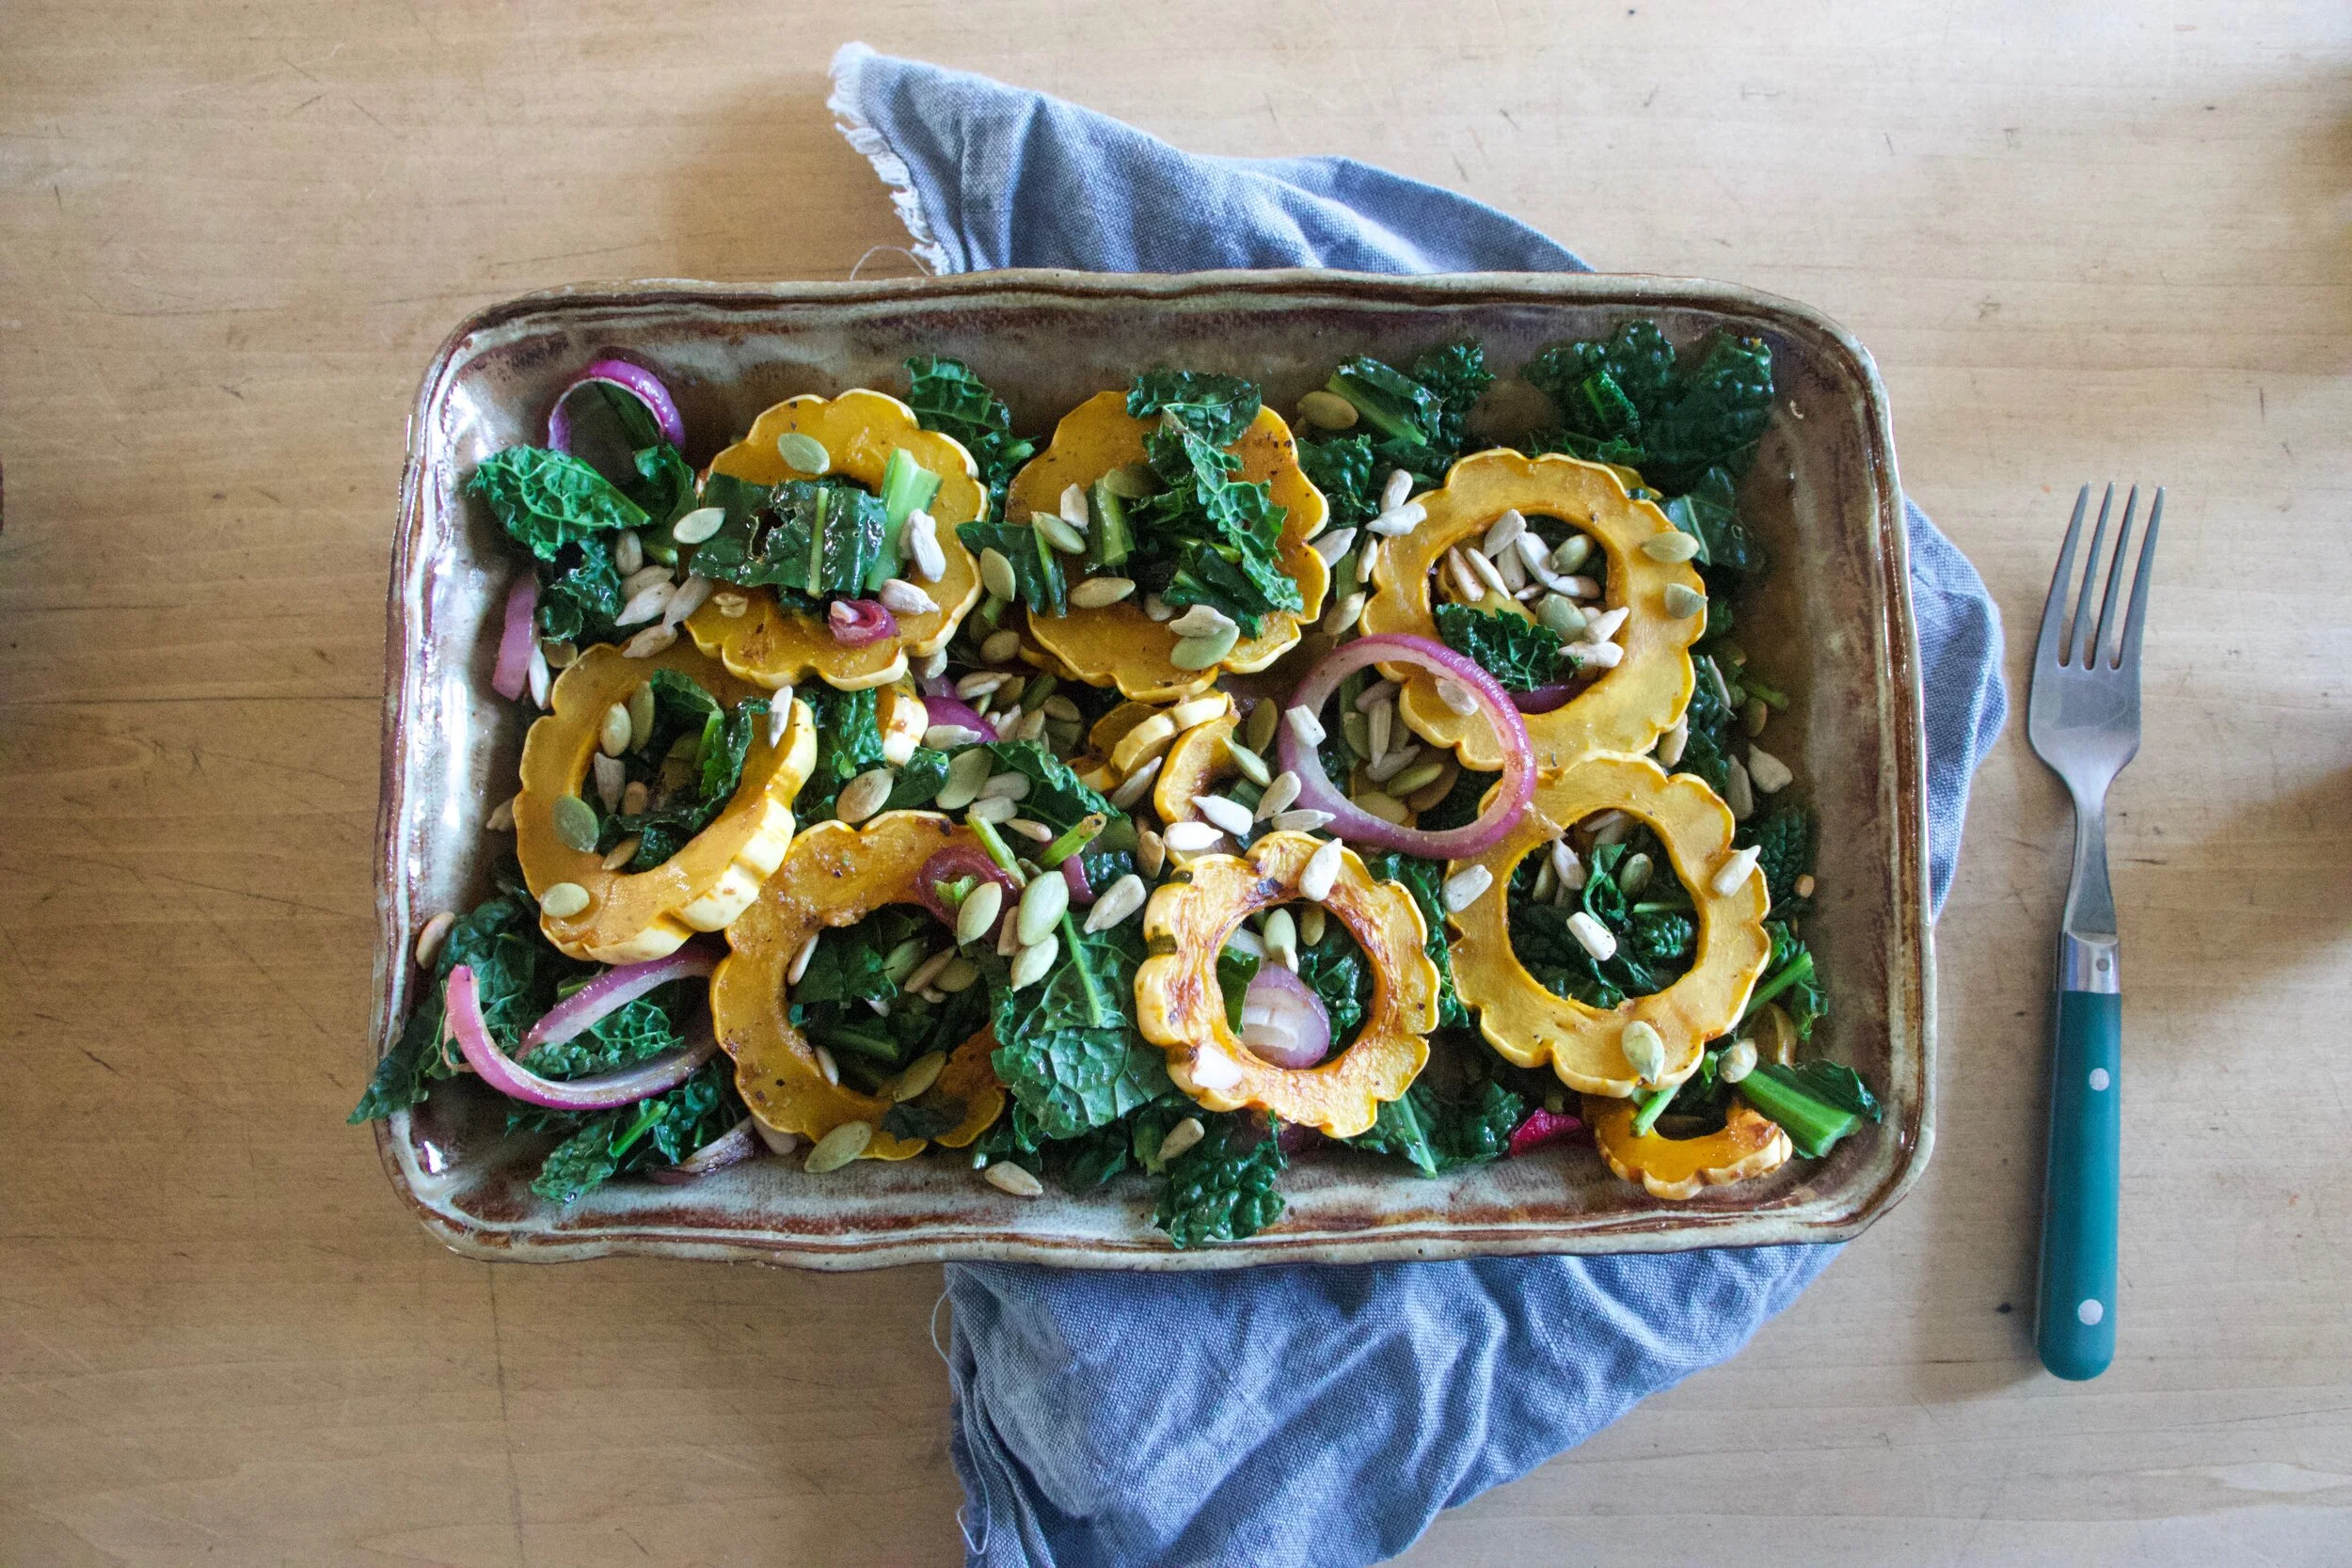
Dump it all into a big bowl, toss in the toasted seeds, and call it. Now grab a fork and start eating.

-C

Can be a main dish for 1 or a side for a few

  • 1 delicata squash

  • 1 bunch of kale (around 3/4 pound)

  • 1 smallish red onion

  • 3 tablespoons balsamic vinegar

  • 1 -2 teaspoons maple syrup (more for a slightly sweeter, maple-y flavor)

  • 2 tablespoons brown or dijon mustard

  • 1/4 cup toasted seeds of choice (I used pumpkin and sunflower)

Preheat oven to 400

Cut delicata squash in half and scoop out all the seeds (you can save seeds to toast up later if you want), then slice the squash into 1/4 – 1/2 inch thick rounds. Grab onion and cut into thin slices. Take onion and squash and place them onto a very lightly oiled baking sheet and sprinkle with salt and pepper. Don%u2019t let the squash overlap, but it is fine for the onion to overlap the squash and itself. Pop the pan into the oven and bake until the squash starts to brown and is fork tender, which should take about 10-15 minutes.

In the meantime, chop kale into small mouth sized pieces and set aside. And mix the balsamic, mustard, and maple together to create the dressing.

Once the squash and onions are cooked, toss the kale onto the pan and drizzle the whole thing with the balsamic mixture. Toss it all around and pop pan back into oven for another minute or two, just to let kale get a touch wilted.

Remove pan from oven, dump everything from pan onto a plate, and toss in the toasted seeds.

Grab a fork. Eat.

THE LOVELY CRAZY

November 29, 2019 by maximios • Blog

What%u2019s up with dinner rolls? Do people eat them all year round, like on a Tuesday in the middle of March or maybe a nice blue sky sunny day in July? Is that a weird question? But seriously, think about it. Dinner rolls, at least in my world of people, are pretty much only eaten in and around Thanksgiving and Christmas. Huh. Kind of strange seeing that dinner rolls are bread which everyone eats all the time and are basically made specifically for dinner (although can and should be eaten for breakfast and lunch as well) which most people eat. Every. Single. Day. Well, whatever the reason, it%u2019s weird. So yes, I am making these here dinner rolls now at the traditional holiday time but I think as of now, I am going to start making them all the time. It%u2019s going to be my new thing. Fourth of July dinner rolls. Yup.

And so yes, we need dinner rolls right now for the holiday food feasts and these dinner rolls are the perfect accompaniment to any and all dinners. They are nice and fluffy and all dinner roll like, just as any good roll should be, but also slightly more nutty and soft and healthy because oats and wheat flour and homemade which is always the best.

And if you are like, hell yes I am a dinner roll person and hell no I am sticking to store bought cause that is that and how it%u2019s done, well hey, no judgment here. I made these for my people for our family Thanksgiving, (which is happening today at my house. There are going be so many people) and I know that everyone will love and be happy to eat them, but I too also bought some of those super white, take and bake ones that I know if I don%u2019t have on the table next to these gorgeous and amazing rolls, that I will probably get punched in the face. So we will have both. And then at dinner I can bask in the glory of all the comments about how much better my rolls are then the store bought ones. (Secretly why I am having both. Fishing for compliments. HAHA!)

Now to those soft and fluffy dinner rolls!

The stuff. Old fashion oats, all purpose and white whole wheat flour, yeast, oil, water (hot and room temperature), maple syrup, and salt.

First, take the boiling water and pour it over the oats. Mix them and let them soak and cool for 10 or so minutes.

While oats are soaking, add the room temp water to a big bowl with the yeast. Once the oats are soft and cooled off a bit, add them to the yeast mixture along with the oil, and maple. Mix together. The add the flours and mix until combined.

Dump dough onto a floured surface and knead for about 3-5 minutes, adding a little more four as needed to keep from being to sticky, but don%u2019t over flour. The dough is and should be a little tacky.

Soft and supple. Kneaded and ready.

Place the dough back into the bowl and cover with a damp towel. Leave alone and let rise for about an hour or until it doubles in size.

Once the dough doubles, dump out onto a lightly floured surface and cut into 12-16 equal sized pieces .

Roll each roll into a roll shape and place them in a lightly greased baking dish. Cover for another 15-20 minutes to let rest and rise a little more.

Rolls risen again, just a little plumper. And now right before you place them in the oven, brush tops with a maple/water mixture and sprinkle with a few oats. To look pretty. And into the oven they go, 30ish minutes, until nice and golden brown.

Baked to golden dinner roll perfection.

And there you have it. Soft and fluffy dinner rolls. Warm out of the oven, looking and smelling like all the good things that you want and need.

And can, and should, be made now and all year round.

-C

makes 12-16 rolls

  • 1 1/2 cups old fashion oats

  • 2 cups all purpose flour plus more for kneading

  • 1 1/2 cups white whole wheat flour

  • 2 cups boiling water

  • 1 cup room tempature water plus 2 tablespoons for brushing tops

  • 2 teaspoons salt

  • 2 tablespoons maple or honey

  • 2 teaspoons yeast

  • 1/4 cup neutral oil

In a bowl, mix oats with boil water and let sit and soak for about 10 minutes. In the meantime, in a large bowl, mix the room temp water with the yeast and 1 tablespoon of maple and mix. Once oats have soaked and cooled to a point that they are not super hot, but still just warm, mix them in with the yeast mixture. Add the salt and oil and mix then and both the white and white wheat flour. Mix until combined. The dough is going to be sticky, but that how is should be. Dump the dough onto a lightly floured surface and knead for 3-5 minutes, adding a little flour as needed to keep from sticking too much, until dough is nice and uniformed in texture. Place dough back into big bowl (after you clean it out and lily oil it) and cover with a damp towel. Place somewhere warm for about an hour until it doubles in size.

Once dough has doubled, dump out onto a lightly floured surface and with a knife of dough cutter, cut into 12- 16 equal sized pieces. Roll each piece into a ball, pinching any ends together and place them into a 9×13 inch baking pan. Once all pieces are in, over and let rest for another 15 minutes.

While dough is resting again, preheat oven to 350.

After the dough has rested, and right before you place them in the oven, mix 1tablespoon of maple with about 2 tablespoons warm water and brush the tops of the rolls. Sprinkle with a handful of oats and then place them into the oven to bake. 30-35 minutes, until they are a nice golden brown.

Once baked remove from oven and let cool to a reasonable temperature and serve.

These can certainly be made a few days ahead of time of eating. Just remove baked rolls from pan and let cool completely then place the into an airtight bag. To reheat, just place on a baking sheet and stick in a hot oven until warm.

THE LOVELY CRAZY

November 29, 2019 by maximios • Blog

Are you aware that it is the last week of November? I know right. Every year this happens but seriously, it’s just flying by so fast.

The mr and I did the norms for the week. Went for a amazing hike in nice snow. We worked on work, the mr made paper, I cut up the paper. I spent some time with clay, works the studio, organized some stuff and watched it snow and loved every bit of it. Then it rained and got kind of sad that all the snow melted.☹️ We picked up farm share, had dinner with my mom and Paul, hung out with the littles for a bit, and fed Barb some soup. Nothing terribly exciting, besides feeding Barb. She makes every exciting.

And then we get to Saturday. Family thanksgiving plus is was Erin’s birthday. (Happy Birthday Beotch!) Always crazy, what with every one of my family members together in my house, eating food, and hopped up on booze and sugar. The day started early with me running away to the gym to get in some sane time, then one last stop at the grocery store before heading home to finish baking and getting all the food ready. Barb came over early to help cut up veggies but really, for her and the mr to make fun of me and gossip like little old ladies. So food got prepare, then I cooked it all. (Minus the main which mom made. She made a crazy chicken thing, cooked in her oven, and brought it over. No meat gets cooked in my house.) And then the family descended on the house, hungry and crazy. Food got served/ thrown all over and for a few short minutes, everyone was sitting down all at once together. But that lasted 2 seconds, and the kids went off and I ran back to the kitchen while everyone was eating to straighten up a bit and because I don’t need to see people dropping chicken bits all over. I just let them eat in peace while I hid for a few minutes in the pantry and snacked on roast Brussel sprouts, carrots and mustard.

After everyone ate, we all ran around the house, picked secret Santa names, had a massive dance party in the kitchen and did dessert and birthday cake. Erins birthday yes, but Coco got to blow out the candles. So cute, that little loving the candles and all but I am going to be watching out for him. I think he might turn into a little pyromaniac. HAHAHA. But for real. Dinner ended with everyone leaving except Barb, Megan,and So. We picked up a little but basically just sat in the pantry eating raw Brussel sprouts from the stock, with mustard of course, and talking about boys. Then they left too and the mr and I were left alone to assess the damages.

The house. Oh my, oh my. It is a FUCKING DISATSER! I know I tell you all that I spend a good chunk of time every weekend cleaning…Well this time, today, all Sunday, I’m a be cleaning. Cleaning the cake and ice cream and cookies crumbles all over. Cleaning up the dinner rolls behind the couch, all the ripped paper, smashed potates, food and drinks particles. Chicken bits, which everyone was super awesome about and tried not to get anywhere, are everywhere. All. Over. The house. Then the kitchen. Every single piece of silverware and then some plus at least 40 plates and bowls are waiting for cleaning. Not to mention the the pots and pans. The compost is overflowing. The recycling is a mess, and I have at least 2 laundry loads of rags and napkins and dirty towels to do. The fridge looks like a freaking bomb blew up in it with tons of half lidded containers precariously stacked on top of each other, waiting for just the right movement of the neighboring jar or the movement of the hot sauce to have it all come crashing down. Aye ya ya. But all worth it because I love my family and we had a blast. I just need to remember next time I am at one of their houses to like pee on their toilet seat or mash some frosting into their couch cushions, you know, to be fair and all.

Anyway, so today I clean and maybe try to hang up some Christmas decorations? The mr is off to do very nice things for people that might not appreciate it, but do it he is going to do (he is too good a person). Hopefully by the time he comes home later tonight, I will be done cleaning, he will be done helping for a good long while, and we can eat soup and maybe watch a movie together. Or more realistically, he watches a movie while I read and probably fall asleep on the couch. Real life.

Reads I read from the internet this week.

-A long but good read. RuPaul: The Philosopher Queen. who doesn’t love RuPsul?

-I just pulled out a nice tablecloth, covered in stains mind you, but maybe i’ll be able to get some of them out now. A Cheat Sheet to Get Rid of Every Type of Holiday Stain. Or not. I don’t think I care enough. HA

-This is so appealing to me especially since the mr loves his heavy comforter and I just want a light blanket with the window thrown open in 20 degree weather. The Scandinavian Sleep Secret: Mine and Yours Duvets. HE is always covering me up at night.

–The best health foods? Soup, garlic and cake. Food is healing, and if cake makes you feel better, well then cake it be.

-These cakes remind me of my 5ht grade volcano science project. I made it out of cake and whipped cream. It was awesome. Antarctic Research Takes The Cake In These Science-Inspired Confections

–Vegan man sues Burger King claiming meatless burger is cooked on same grill as meat. This is one reason I do not eat out. Oe of the last times I did eat out, there were egg shells in my scamp bled vegan tofu dish….. So yeah.

-Who doesn’t love a good TV tray? A Brief History of the TV Tray

-HAve you ever raised a adolescent dog… It is crazy to say the least. Animal adolescence is filled with teen drama and peer pressure

-So there is this ti look forward to. Cockroaches Are Evolving And in the Future They can Become Impossible To Kill

–A Brief and Buttery History of Libby’s Pumpkin Pie Recipe. The pie of my childhood.

And pictures from the week.

Sunday Happy — The Lovely Crazy

November 29, 2019 by maximios • Blog

The heat is officially on in the house because well, it got kind of freezing out and also because we got some snow! So awesome and unexpected. Sure, it was only an inch and came at the exact wrong time making for a very sketchy driving situation, and also it froze all the chard in the garden I had left (I harvested it and just tossed it in the freezer for soups), but whatever. I was, and am just so happy to see it. I really do love this time of year, even if everyone else hates it.

The week started off slow. The extra hour was welcomed but also really kind of screwed with my body clock. I have been getting better throughout the week, but the first few days we changed the clock, I was waking up at like 3 am. Yes, I was going to bed at like 630, but when your tired, your tired. Anyway, besides being a little groggy, it was the usual as usual. Work stuff, getting ready for winter weather, dealing with the dealings. We had lunch with Megan, a spaghetti dinner with Judah, and I picked up the first winter farm share of the season. Lots of roots, greens, Brussels sprout, and peppers. All the best food a lady could ask for. I am also feeling like a queen with my new, permanent, gold crown in my mouth. And now I am officially sick of going to the dentist. Going to try really hard to not have to go back ever again, or at least 6 months when I am due for a clean.

Oh, and lets not forget how I busted out the new toilet brushes. Who doesn%u2019t love a fresh toilet brush? Highlight of the week. HA.

Today the mr and don%u2019t have much in the way of plans besides getting the winter tires thrown on the car and getting out of town for the afternoon for a hike. So I am going to the gym and dropping off the library books this morning, we will then deal with the car, and then off we will go, heading out to conquer a mountain. Or a small trail. I am fine with either. Just as long as we are outside.

Links from the internet for your reading and browsing enjoyment.

–Why You Should Find Time to Be Alone With Yourself. Alone time is the best. I cannot stress how important alone time for me is%u2026 I NEED IT!

-I didi%u2019t know how awesome and strong ginkgo trees were. Consider the ginkgo. These ancient trees survived the atomic bomb in Hiroshima.

-First, how is Emma Watson turning 30? Second, Yes lady. Did Emma Watson Just Coin the Next %u201cConscious Uncoupling%u201d?

-Why haven%u2019t I don%u2019t this yet? The Tangy-Sweet Pickled Fruit I Put on Absolutely%u00a0Everything

–Very Generous People Are Way Happier (and Have More Friend)

-Looking for new shoes is the worst. But I found some that are not exactly winter friendly, but maybe I can make them work? Teva%u00a0Voya Infinity Sandals. OR these appropriate footwear. I love them but jeez, I am not paying that much for a shoe.

-Give me roots, all the roots. Root, root, root for rutabaga, turnips and those other unappreciated vegetables

-This is me! %u2018It%u2019s cool to be cold%u2019: Confessions of frigid-weather fanatics

–The Cookie Sculptor. I think I need to spend more time sculpting cookies.

–Scrubbing Your House Of Bacteria Could Clear The Way For Fungus. I am a clean freak, but I don%u2019t use any chemicals whatsoever. Vinegar, water, vacuum. How that keeps the bad fungus away.

And pictures from the week.

Fire Cider — The Lovely Crazy

November 29, 2019 by maximios • Blog

Just the other day I was at the gym talking to someone when all of a sudden, she coughed into my face, like full fledge hacking. This and then she continued to tell me that she has been sick for like weeks and blah blah blah. After that all I was thinking was, Oh Fuck, she just gave me her ick%u2026.GET AWAY FAST!!!!

So it%u2019s that time of year. Everyone all sick and shit. And that means getting my stash of stuff made, my feel better, don%u2019t get sick stuff. The tonics and elixirs and hocus pocus things that I use all year long, but mostly during the winter months when everyone starts getting sick.

One of the things I make is fire cider. First off, let me tell you I am no doctor, just in case you thought I might be. But I l am a strong believer in food as medicine. So the fire cider is a heath tonic of sorts, made with all sorts of yummy and highly potent things like fresh grated horseradish, hot peppers, garlic, and so forth. All things that are good for your health in many ways, but also taste really good. And let me tell you, if you are into the healing powers or not, a swing of this infused cider tonic will surely open up your sinus cavity like whoa.

And now before you get super excited about going and making yourself this fantastic health tonic/salad dressing/drink mixer, and thinking it will be ready and done as soon as you do a little grating, well hold up. You can throw it together super fast, but it does take a good 4-6 weeks of chilling and infusing before you really want to get into it. But don%u2019t let that stop you, it is 100% worth all the waiting. And wouldn%u2019t you know, the holidays are about 4-6 weeks away and I was just thinking after I made a batch for myself how I should make another big batch and give away in little jars for Christmas this year. Now there is a good idea. (Might not be a doctor, but I sure am a smarty pants%u2026HAHAHA)

Now to the Fire cider!

Garlic, onion and hot peppers, chopped into bits. Place it all into a clean 32oz jar.

Grated horseradish, turmeric, and ginger. Into jar it goes. And watch out, freshly grated horseradish can be a little intense.

Sliced lemon. Into said jar along with thyme, oregano, and peppercorns.

Packed and filled with raw apple cider vinegar.

Now a lid and some time in a cool dark place and you got yourself some liquid gold.

Remember, I am not a doctor so yeah, but this cider helps me feel better when I need it to and I think you will find it will help you too. And it tastes freaking awesome on food so theres that!

-C

makes 16-20 oz

  • 1/3 cup fresh grated horseradish

  • 1/4 cup fresh grated ginger root

  • 1/4 cup fresh grated tumeric

  • 1 chopped onion

  • 3-5 heads of garlic chopped

  • 2%u20144 hot peppers (depending on the type you use and the heat level you want) chopped

  • 1 lemon sliced

  • 1 teaspoon peppercorns

  • 1 teaspoon oregano

  • 1 teaspoon thyme

  • Raw apple Cider Vinegar

  • Honey or maple syrup (optional)

Note. Feel free to change the amounts of all of the ingredients. Want to use less horseradish, then do so. No hot peppers, then don%u2019t add them. Leave out the oregano and thyme and add dill or rosemary. You can be creative with your own flavors.

Now to make fire cider.

Place all ingredients besides vinegar into a 32 oz jar. Pack down with a wooden spoon then fill jar with apple cider vinegar.(Make sure all the stuff is submerged in the vinegar.) Place a lid on jar. If using a metal lid, line top with wax paper first or just use a plastic lid if you have one. Place jar in a cool dark place for 4-6 weeks, giving it a shake every day.

After at least 4 weeks, remove lid of the jar, strain the liquid from the solids through a fine mesh strainer or cheesecloth, squeezing out as much as the liquid as you can. You can discard the solids or make something tasty with them (saut%u00e9ed with potatoes?). Then taste the liquid. Add sweetener if you want, maybe a few tablespoons to start and go from there.

And thats it. Store the cider a lidded jar in a cool dark place. Or in the fridge if you want it cold.

To use, just take a swig when feeling crappy, stuffy, cold, or just want a tasty little pick me up. Or use as condiment on food, like in a salad or wherever.

Enjoy!

THE LOVELY CRAZY

November 29, 2019 by maximios • Blog

Just the other day I was at the gym talking to someone when all of a sudden, she coughed into my face, like full fledge hacking. This and then she continued to tell me that she has been sick for like weeks and blah blah blah. After that all I was thinking was, Oh Fuck, she just gave me her ick%u2026.GET AWAY FAST!!!!

So it%u2019s that time of year. Everyone all sick and shit. And that means getting my stash of stuff made, my feel better, don%u2019t get sick stuff. The tonics and elixirs and hocus pocus things that I use all year long, but mostly during the winter months when everyone starts getting sick.

One of the things I make is fire cider. First off, let me tell you I am no doctor, just in case you thought I might be. But I l am a strong believer in food as medicine. So the fire cider is a heath tonic of sorts, made with all sorts of yummy and highly potent things like fresh grated horseradish, hot peppers, garlic, and so forth. All things that are good for your health in many ways, but also taste really good. And let me tell you, if you are into the healing powers or not, a swing of this infused cider tonic will surely open up your sinus cavity like whoa.

And now before you get super excited about going and making yourself this fantastic health tonic/salad dressing/drink mixer, and thinking it will be ready and done as soon as you do a little grating, well hold up. You can throw it together super fast, but it does take a good 4-6 weeks of chilling and infusing before you really want to get into it. But don%u2019t let that stop you, it is 100% worth all the waiting. And wouldn%u2019t you know, the holidays are about 4-6 weeks away and I was just thinking after I made a batch for myself how I should make another big batch and give away in little jars for Christmas this year. Now there is a good idea. (Might not be a doctor, but I sure am a smarty pants%u2026HAHAHA)

Now to the Fire cider!

Garlic, onion and hot peppers, chopped into bits. Place it all into a clean 32oz jar.

Grated horseradish, turmeric, and ginger. Into jar it goes. And watch out, freshly grated horseradish can be a little intense.

Sliced lemon. Into said jar along with thyme, oregano, and peppercorns.

Packed and filled with raw apple cider vinegar.

Now a lid and some time in a cool dark place and you got yourself some liquid gold.

Remember, I am not a doctor so yeah, but this cider helps me feel better when I need it to and I think you will find it will help you too. And it tastes freaking awesome on food so theres that!

-C

makes 16-20 oz

  • 1/3 cup fresh grated horseradish

  • 1/4 cup fresh grated ginger root

  • 1/4 cup fresh grated tumeric

  • 1 chopped onion

  • 3-5 heads of garlic chopped

  • 2%u20144 hot peppers (depending on the type you use and the heat level you want) chopped

  • 1 lemon sliced

  • 1 teaspoon peppercorns

  • 1 teaspoon oregano

  • 1 teaspoon thyme

  • Raw apple Cider Vinegar

  • Honey or maple syrup (optional)

Note. Feel free to change the amounts of all of the ingredients. Want to use less horseradish, then do so. No hot peppers, then don%u2019t add them. Leave out the oregano and thyme and add dill or rosemary. You can be creative with your own flavors.

Now to make fire cider.

Place all ingredients besides vinegar into a 32 oz jar. Pack down with a wooden spoon then fill jar with apple cider vinegar.(Make sure all the stuff is submerged in the vinegar.) Place a lid on jar. If using a metal lid, line top with wax paper first or just use a plastic lid if you have one. Place jar in a cool dark place for 4-6 weeks, giving it a shake every day.

After at least 4 weeks, remove lid of the jar, strain the liquid from the solids through a fine mesh strainer or cheesecloth, squeezing out as much as the liquid as you can. You can discard the solids or make something tasty with them (saut%u00e9ed with potatoes?). Then taste the liquid. Add sweetener if you want, maybe a few tablespoons to start and go from there.

And thats it. Store the cider a lidded jar in a cool dark place. Or in the fridge if you want it cold.

To use, just take a swig when feeling crappy, stuffy, cold, or just want a tasty little pick me up. Or use as condiment on food, like in a salad or wherever.

Enjoy!

Have you heard of switchel? A lot of people haven’t so don’t feel bad if you don’t know what the hell I am talking about (like my computer. It keeps auto correcting switchel to switched). So switchel. It’s basically a drink made from water and apple cider vinegar. But wait, don’t grimace and click away, it’s also has fresh ginger, lime, and maple syrup mixed in and is really really really freaking refreshing and tasty and just really good. I guess it was even used back I the day as a sort of sports drink, like Gatorade because it has all sorts of electrolytes and anti-inflammatory properties from the ginger.%u00a0%u00a0Plus apple cider vinegar has got all sorted or health benefits,%u00a0so it’s a tasty treat with benefits. Who doesn’t love the benefits?%u00a0

You can drink the switchel %u00a0straight up hot or cold, add it to seltzer for a bubbly soda like drink or even %u00a0mix some cocktails with it. I enjoy a nice cold glass when I am feeling thirsty but what I usually do it fill up half a %u00a0jar with boiling water, then fill the rest of the jar up with the cold switchel. It’s a nice tangy, spicy,%u00a0refreshing and warming drink that I look forward to every day. I even got the littles to try it.%u00a0%u00a0One thought it to be nasty (can’t win them all), but the other one really liked it too, so you know it’s not just me that thinks it good.%u00a0

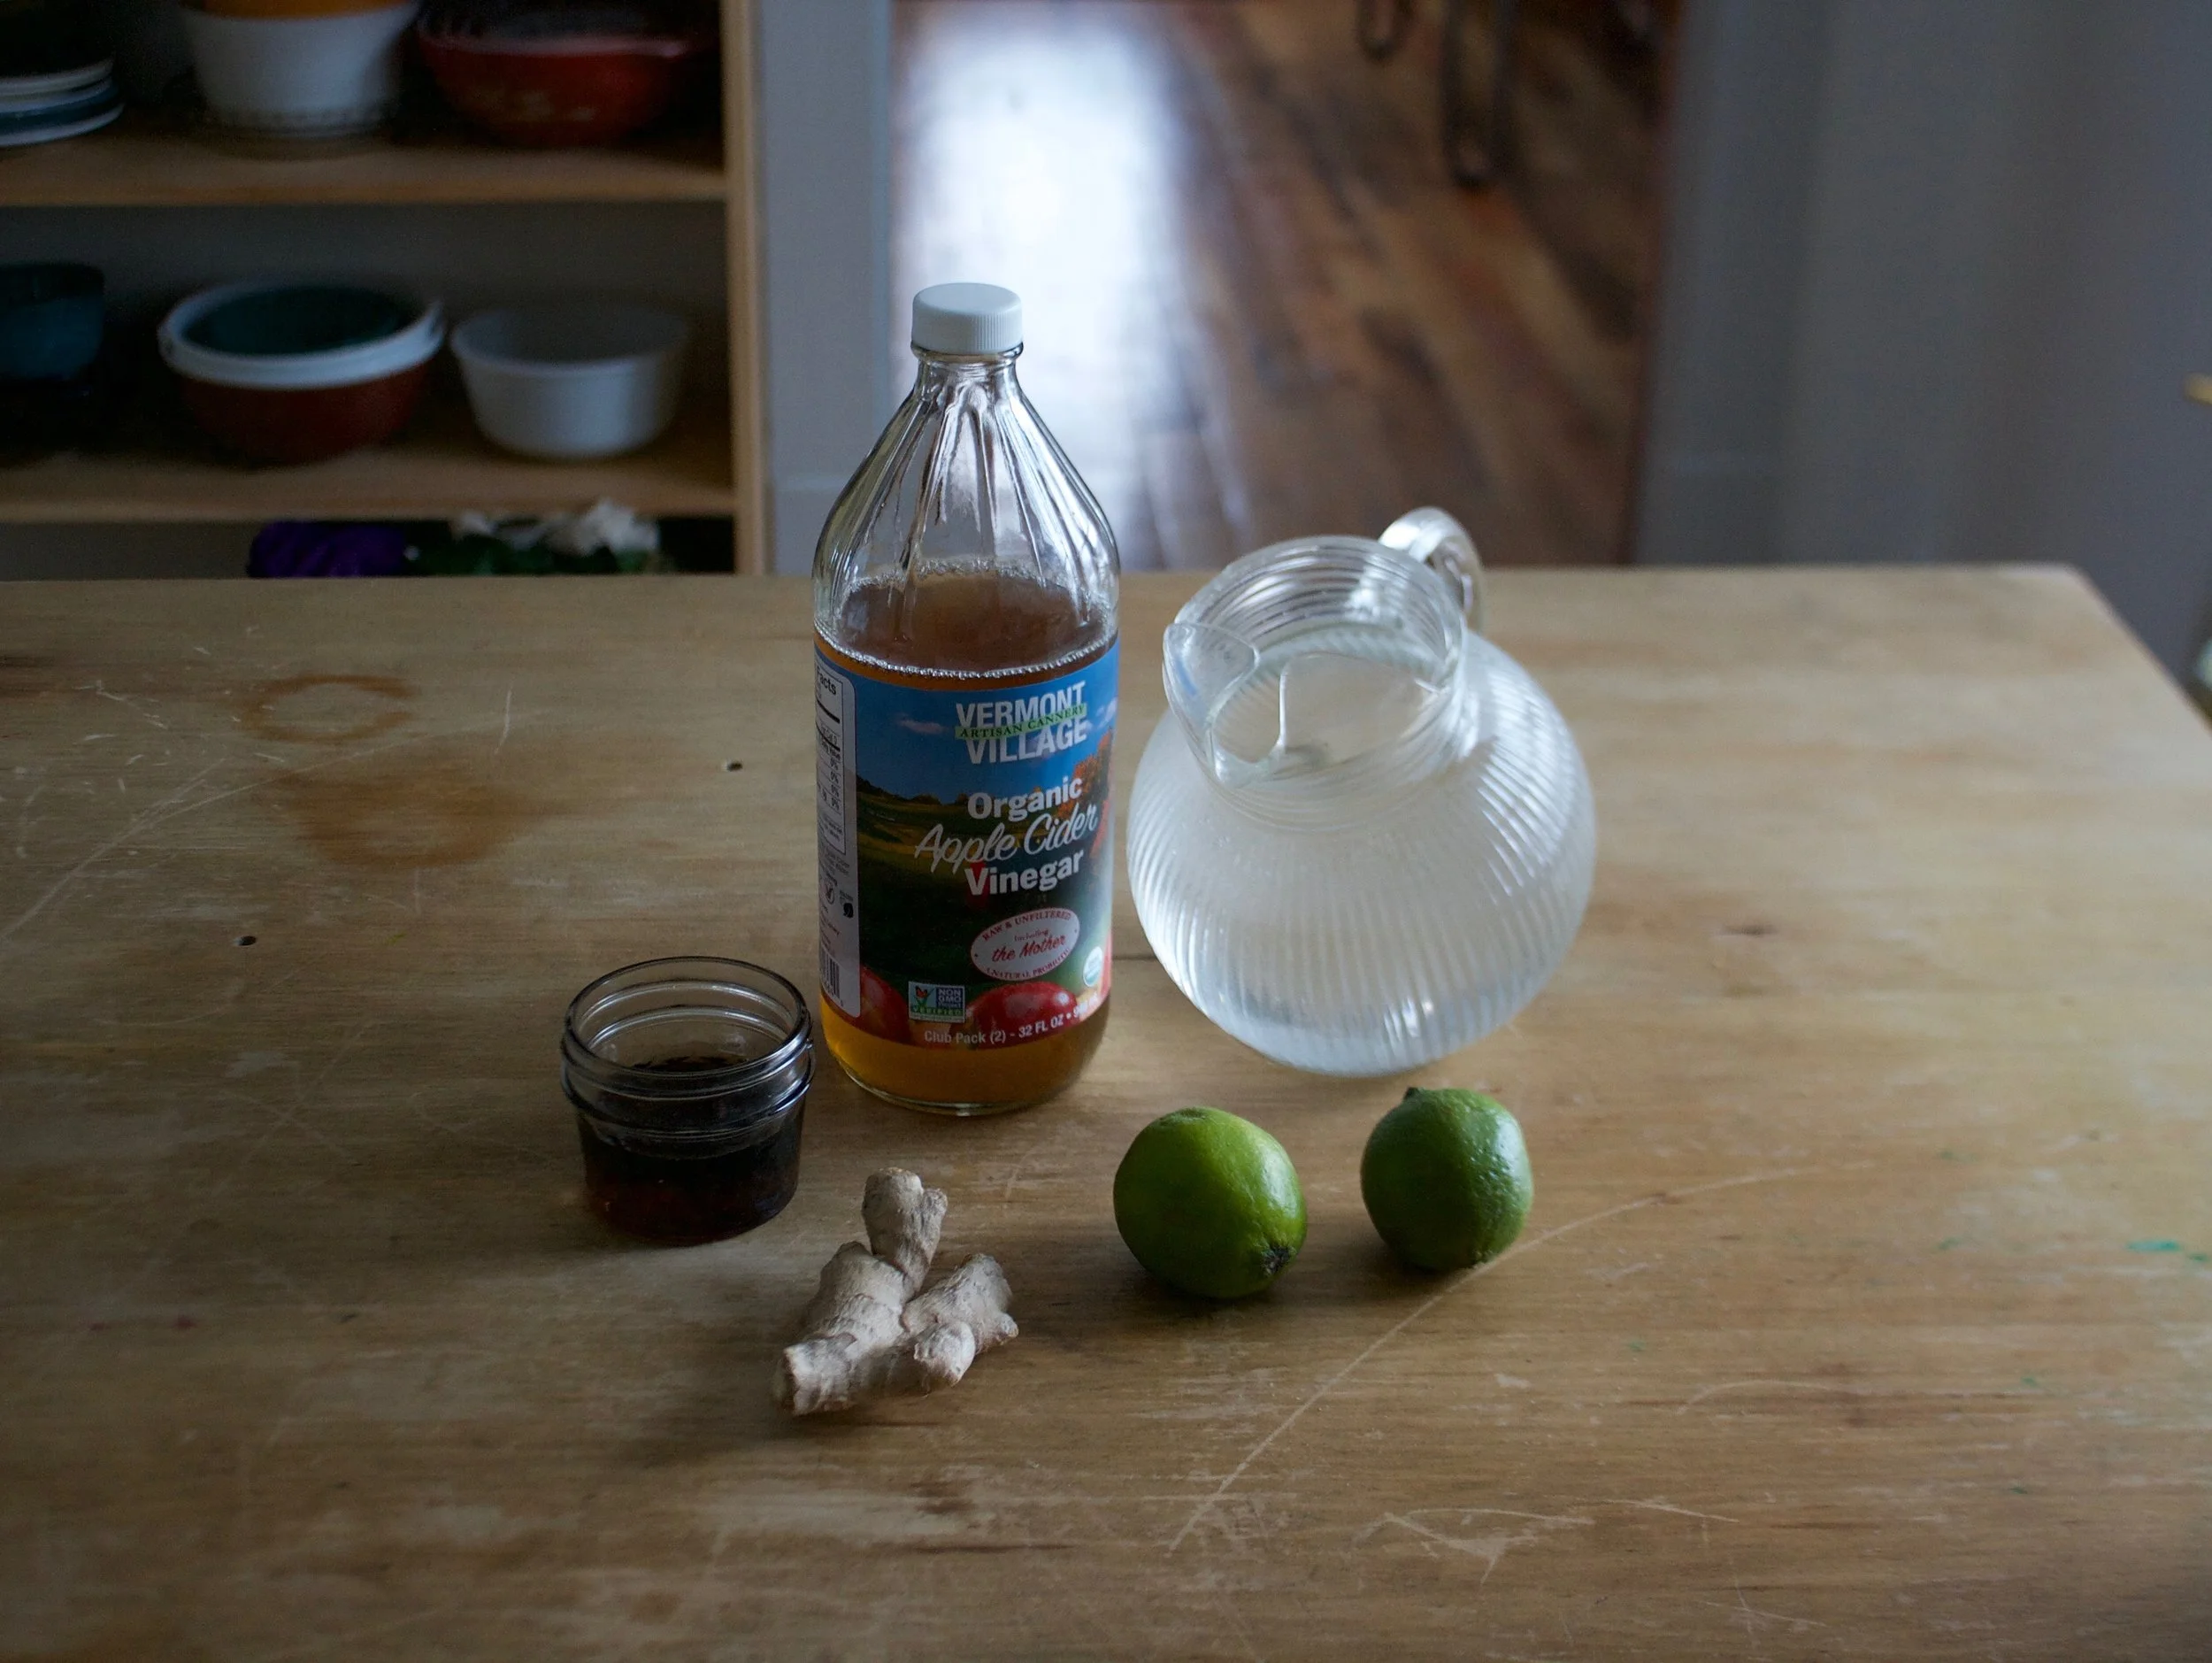
The stuff. Apple cider vinegar (the good stuff that is raw and has the mother), fresh ginger, limes, maple syrup, and water.%u00a0

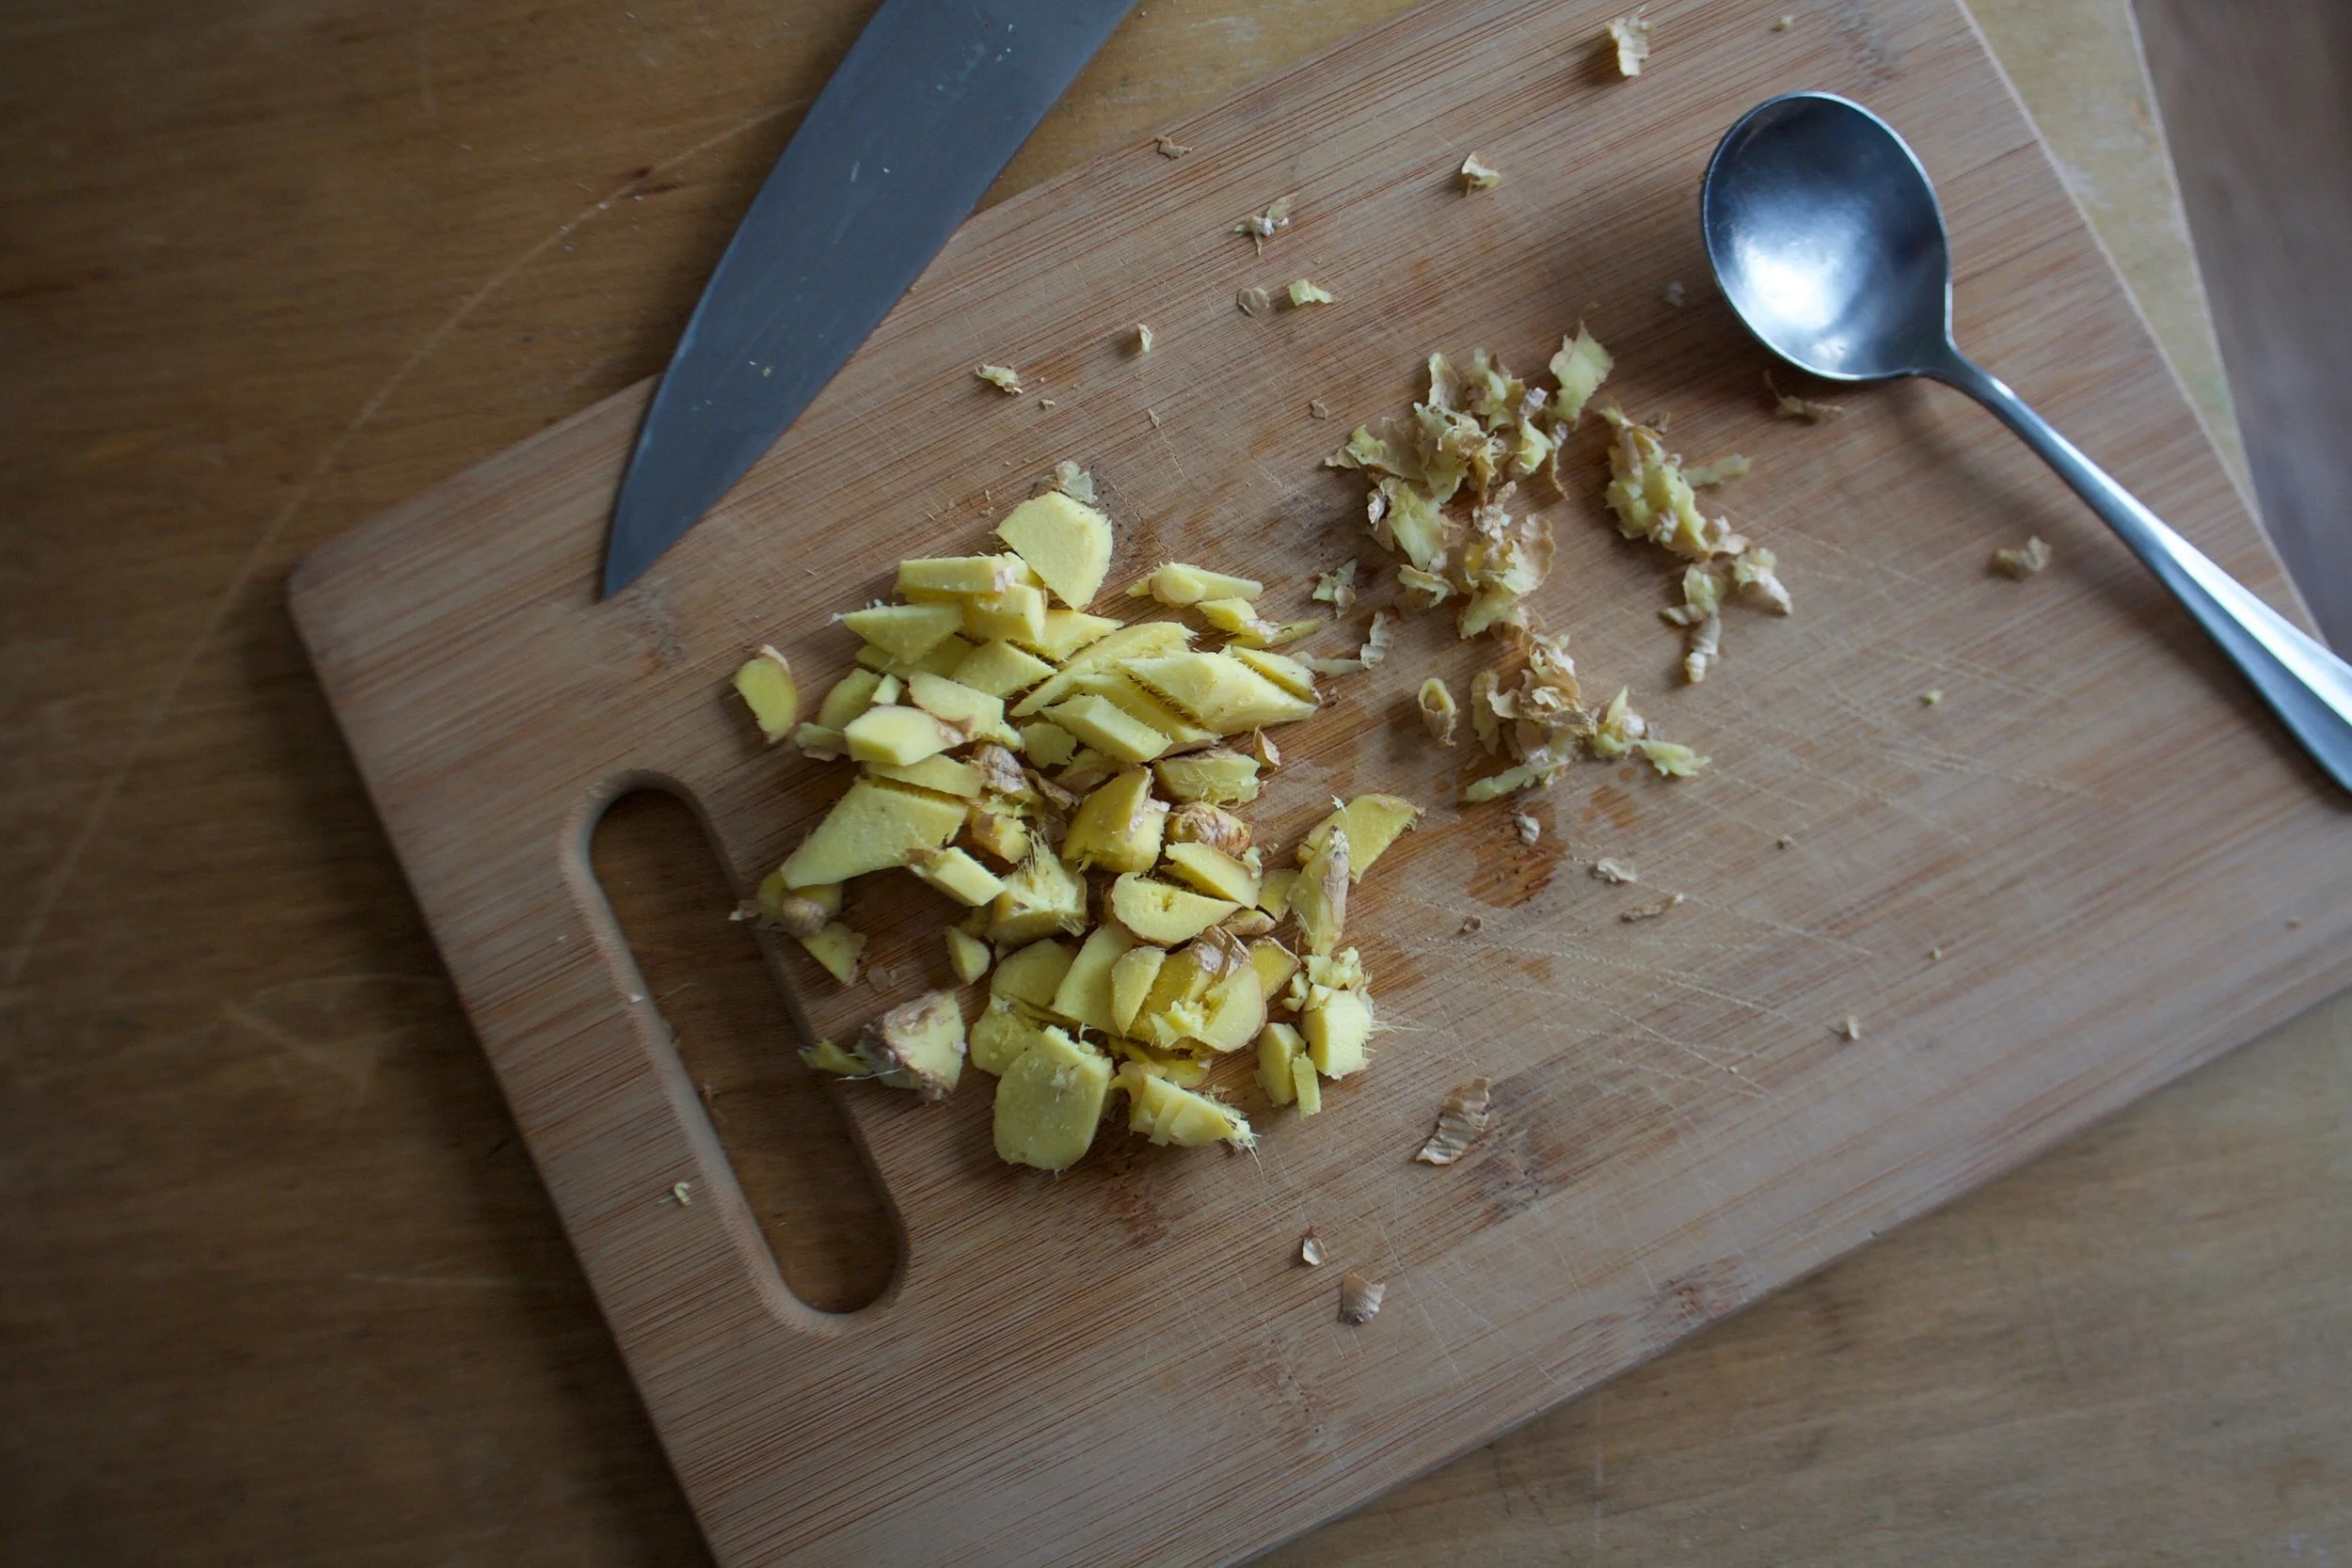
Fresh ginger is the best. Give it a little peel with a spoon, just to maximize gingerness exposure then chop into small pieces.%u00a0

Ginger and water goes into big pot. Bring it to a boil then turn down to a high simmer for 10-15 minutes to really get the ginger infused into that water.%u00a0

After it’s cooled a bit, strain the now ginger water into a pitcher or a big jar.

Add in the vinegar, the juice of the limes and a bit maple syrup. Start off with a little maple, you can alway add more later if needed.%u00a0

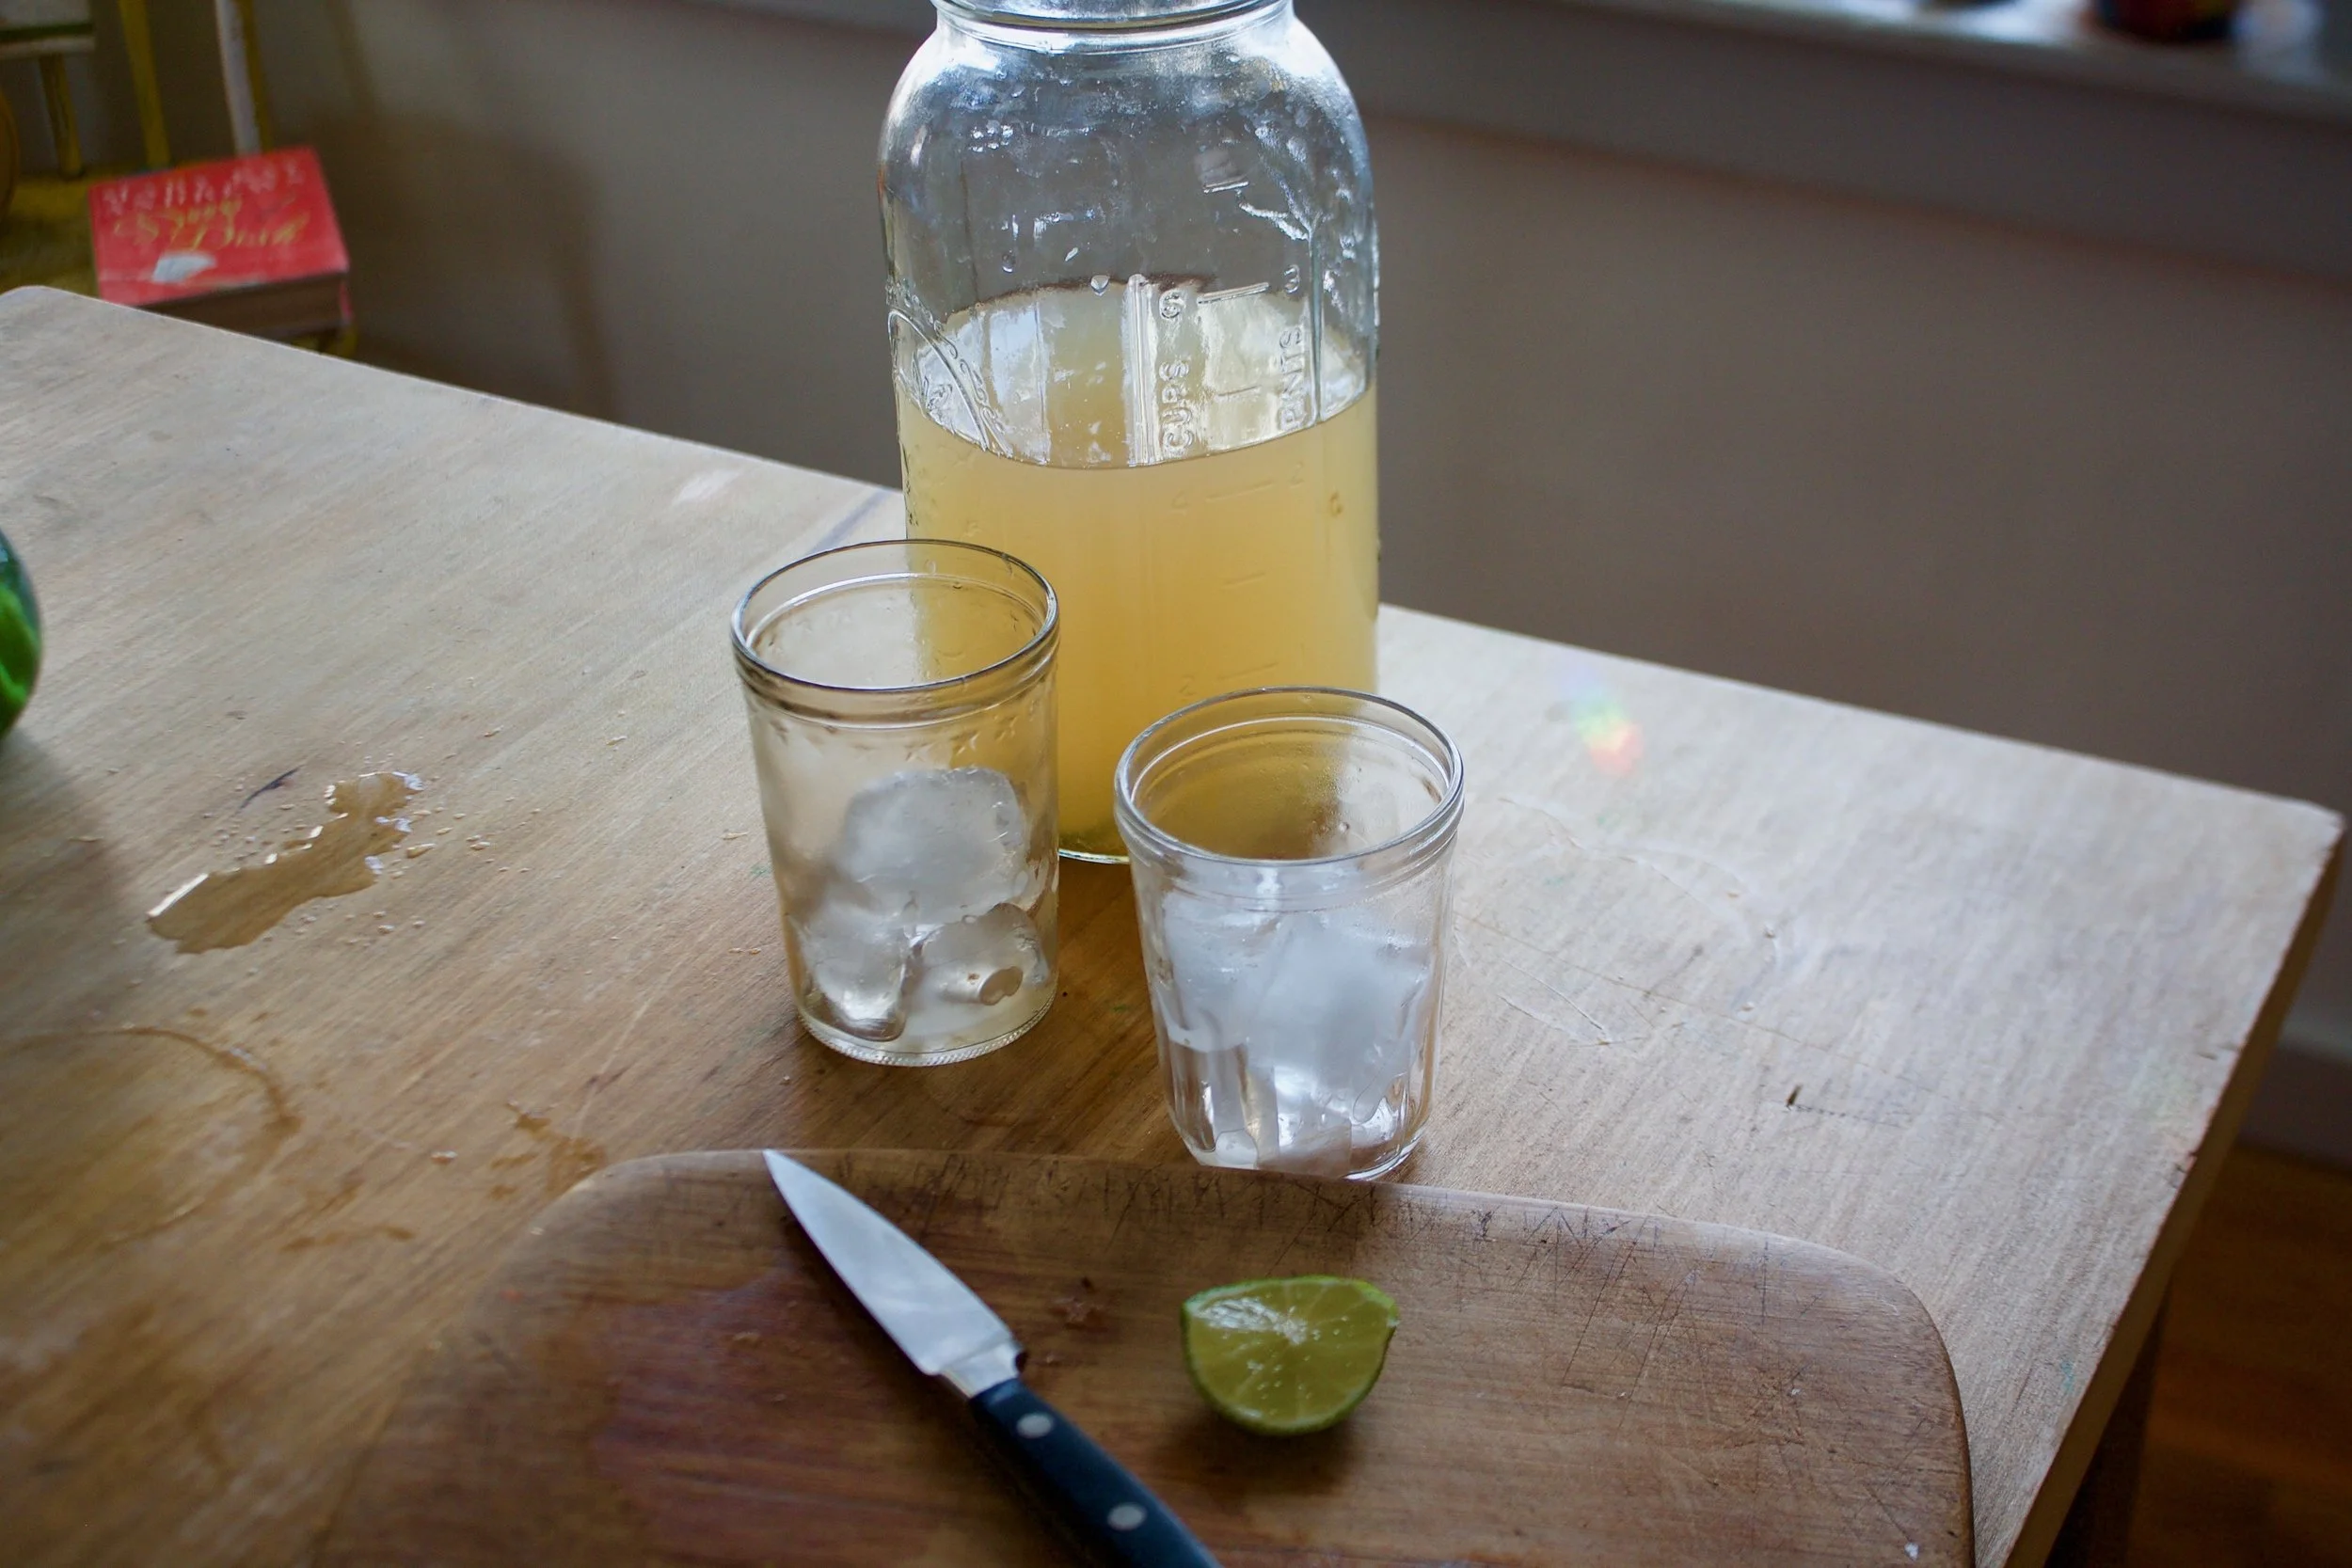
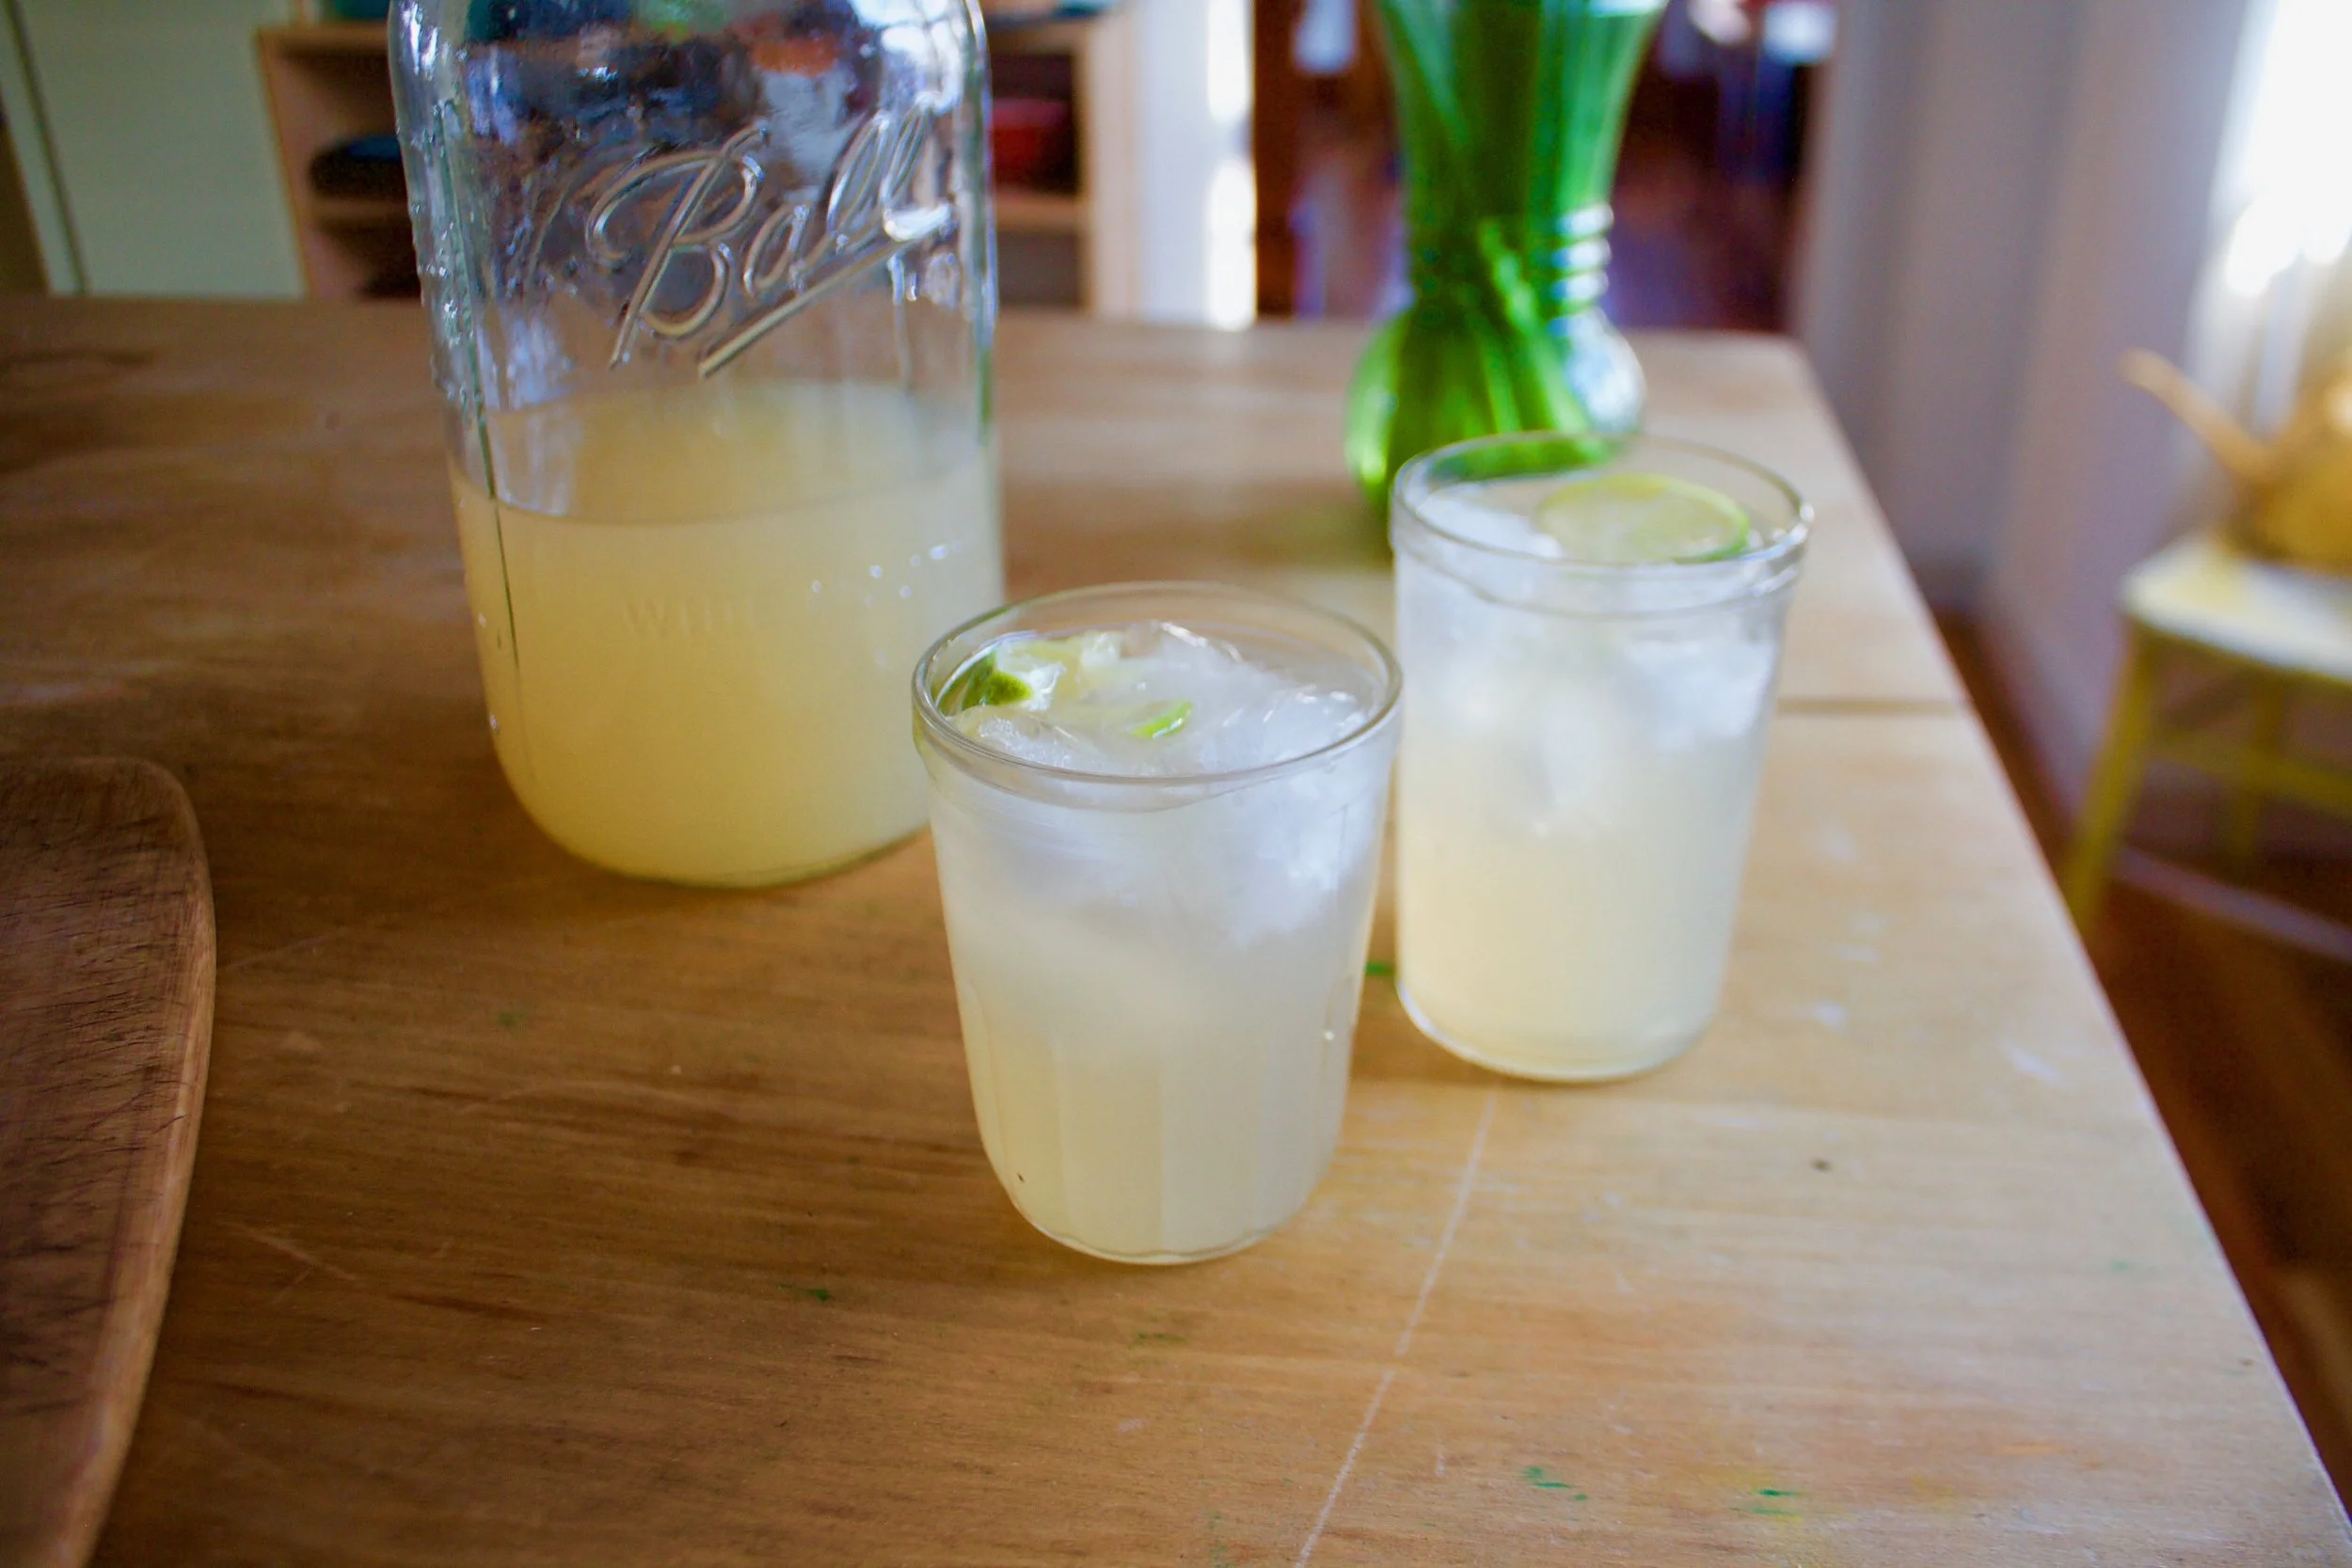
After the switchel has some time in the fridge to cool (at least 2 hours, but I like it best when it’s sat overnight) grab a glass ,some ice cubes, and a slice of lime. It’s go time.%u00a0

A drink to you my friends

-C

Makes bout 6%u00a0 cups%u00a0

  • 1/2 cup raw apple cider vinegar (with the mother. Braggs is a popular option)%u00a0
  • 5-6 inch piece of fresh ginger%u00a0
  • 2 limes
  • 5 1/2 cups water
  • 1-4 tablespoons maple syrup%u00a0

With a spoon, gently peel ginger . Not perfectly, just get some of the skin off. Chop it into small pieces and place it into a large pot with the water. Bring to a boil then let simmer for 10-15 minutes. Strain ginger water int a large pitcher or jar.

Add in the apple cider vieager, the juice of the limes, and a tablespoon or two of maple syrup. Give it a good stir then place in the fridge until cold (about two hours but overnight is best)%u00a0

When it’s cold, give it a good stir again, taste, and if it needs more maple, add it in. And then it’s ready.

You can drink it on ice, maybe add some seltzer to it, or mix it into some fancy cocktail. It can also be reheated for a nice spicy warming treat.%u00a0

For the longest time now, I have been drinking a little turmeric with a little lemon first thing in the morning. It started as a medicinal drink, but quickly became a tasty habit. I have some stupid weird circulation condition called raynaud’s where changes in temp turn my fingers and toes into icicles. And for me, the worst time of the year for this condition is the spring (but spring is still my favorite). All the up and down of temperature and the wet cold damp weather is my trigger, not to forget to mention that those temp swings can get a girl sick. (I can’t get sick!!)

So way back when I started to drink for my health and the feeling in my fingers. Turmeric, ginger, and cinnamon , all super warming spices that help greatly with blood circulation, not to mention a whole bunch of other good things. (I could tell you and go on and on, but you can just look it up yourself) Ever since I started drinking and eating lots of these spices, my raynauds has gotten soooo sooo soooo much better. I still get cold finger and toes, but no where as severe and the way less often.

Now a few weeks ago the mr started making himself an afternoon turmeric tea. He read something on the internet about how it’s the best anti-inflammatory and good for achy joints. (Sure dude, listen to the internet and not me) Being a big guy doing construction and such, he gets really achy joints and there is only so much arnica and frozen peas a guy can do. So now he drinks this and I think he is starting to notice a difference. (less time with the frozen peas) And since he is making himself tea every afternoon, I started to make a spicy tea for myself in the afternoons too. I figured that a little extra goodness to ward off the chills and any larking illness is only a plus. It’s our after lunch treat that tastes good, is warm and soothing and is doing the body all sorts of good.

Spicy turmeric tea. You will get addicted and feel like awesomeness.

The stuff. Ground turmeric, ground ginger, saigon cinnamon and hot water. Additional yums with a little lemon and some honey if you like it sweet or have a scratchy throat.

Spices into a drinking vessel (I like a big jar)

And in goes the hot water. Give it a good stir and a squeeze of lemon (and sweeten if your gonna)

And watch it swirl. A drink that keeps this girl happy and healthy.

Something great to look forward.

-C

  • 1 tablespoon ground turmeric
  • 1 teaspoon ground saigon cinnamon (can use regular, but it’s not as spicy sweet)
  • 1/2 teaspoon ground ginger
  • 1 1/2- 2 cups hot water (not quite boiling)
  • honey to taste (I only use if my throat is sore)
  • lemon juice (optional)

Note… My measurements are just guidelines. You might like a little less turmeric or more ginger so make this drink any way that tastes best for you.

Grab yourself a big mug or jar, add in the spices and hot water, honey if you want it and a squeeze of lemon juice if using. Stir with a spoon and drink. Keep spoon handy to give it a good stir every now and then

THE LOVELY CRAZY

November 29, 2019 by maximios • Blog

Let us talk about how winter squash is like one of the best foods ever. Seriously. Hardy, creamy, rich, and full of the nutty, sweet flavors of all the good things. How anyone says they don%u2019t like winter squash is beyond me. I sometimes even feel like I put myself in danger of exploding when I am around enough cooked squash. I can eat and eat it until it%u2019s gone, which is fine if it%u2019s a serving or two, but when you roast up a 10 pound butternut, well, that is when the danger is real. I am getting better at holding back, but man, sometimes I just can’t (or don%u2019t want to?) help myself. ( You might also wonder why I cook 10 pounds of squash at a time. It%u2019s because I will eat it all in a few days and I might as well cook a bunch at once, for efficiency sake.)

Now the delicata squah. If you haven%u2019t had it before, stop what you are doing and go get one. You need to try it because it is amazing. Sweet, nutty, creamy. So good! And another good thing is that they are not giant, so you can buy one and eat the whole thing and not worry about overeating until you can%u2019t move, unless that is the goal. In that case, just buy a bunch. HA.

Anyway, it%u2019s getting to that time of year where salad is still great, it is just great warm. And with winter squash. Don%u2019t you agree? So we cook up the squash, grab the kale and make one heck of a salad to eat all to your face. Because that is what will happen. You will make it , taste it, and not want to share it. It is too good to share. (Yes salads can be too good to share, so if you are planning on feeding others, plan accordingly)

To the salad!

The stuff. Kale, a delicata squash, red onion, some balsamic vinegar, a touch of maple, spicy brown mustard, a handful of toasted seeds, and salt and pepper.

Start with the squash. Cut it in half and scoop seeds from booth sides (these seeds are great roasted). After deseeded, cut both pieces into 1/4-1/2 inch thick rounds. And NO!!!!, do not peel the skin.

Grab the onion and cut into 1/4 inch rounds too.

Place the squash on a very lightly oiled baking sheet so the pieces are not overlapping each other. Then toss on the onion which is fine if it overlaps. Sprinkle with a pinch of salt and lots of cracked pepper and pop into a hot oven.

In the meantime, mix the dressing situation together. Mustard, maple, and balsamic in a jar, mix and done.

Chop the kale too. Into mouth sized pieces.

Once squash is cooked all nice and tender, remove pan from oven. Take all the kale and toss on top then take the dressing and drizzle it all over the kale. Pop the pan back into the oven for a minutes or two, just until the kale starts to ever so slightly wilt.

Pull the pan back out and give it a good toss.

Dump it all into a big bowl, toss in the toasted seeds, and call it. Now grab a fork and start eating.

-C

Can be a main dish for 1 or a side for a few

  • 1 delicata squash

  • 1 bunch of kale (around 3/4 pound)

  • 1 smallish red onion

  • 3 tablespoons balsamic vinegar

  • 1 -2 teaspoons maple syrup (more for a slightly sweeter, maple-y flavor)

  • 2 tablespoons brown or dijon mustard

  • 1/4 cup toasted seeds of choice (I used pumpkin and sunflower)

Preheat oven to 400

Cut delicata squash in half and scoop out all the seeds (you can save seeds to toast up later if you want), then slice the squash into 1/4 – 1/2 inch thick rounds. Grab onion and cut into thin slices. Take onion and squash and place them onto a very lightly oiled baking sheet and sprinkle with salt and pepper. Don%u2019t let the squash overlap, but it is fine for the onion to overlap the squash and itself. Pop the pan into the oven and bake until the squash starts to brown and is fork tender, which should take about 10-15 minutes.

In the meantime, chop kale into small mouth sized pieces and set aside. And mix the balsamic, mustard, and maple together to create the dressing.

Once the squash and onions are cooked, toss the kale onto the pan and drizzle the whole thing with the balsamic mixture. Toss it all around and pop pan back into oven for another minute or two, just to let kale get a touch wilted.

Remove pan from oven, dump everything from pan onto a plate, and toss in the toasted seeds.

Grab a fork. Eat.

Fall is all up in here!. The air is so nice and crisp and the leaves are changing to the prettiest colors.%u00a0I gots my pumpkins, an abundance of apples and squashes (our table is forverver overflowing with some type of squash) and am wearing all of my favorite sweaters.%u00a0

I am a happy lady here!

And this happy lady just wants to sit on her butt and knit.

But first, dinner. And my thought are. “What to do that doesn’t include doing much of anything (especially dishes) and maybe even has the oven on for a little extra warmth?” See here, I am a thinker. I knew I %u00a0had a single pie dough in the freezer (you should always have a pie dough in the freezer), a table full of the loveliest produce. So this happened. And the mr ate it, and he was all like “Whoa”.%u00a0 And I was like,”yeah dude, I know.”

A Ssuper fall galette.. and I still had time for my knitting and my butt.%u00a0

Like Whoa!

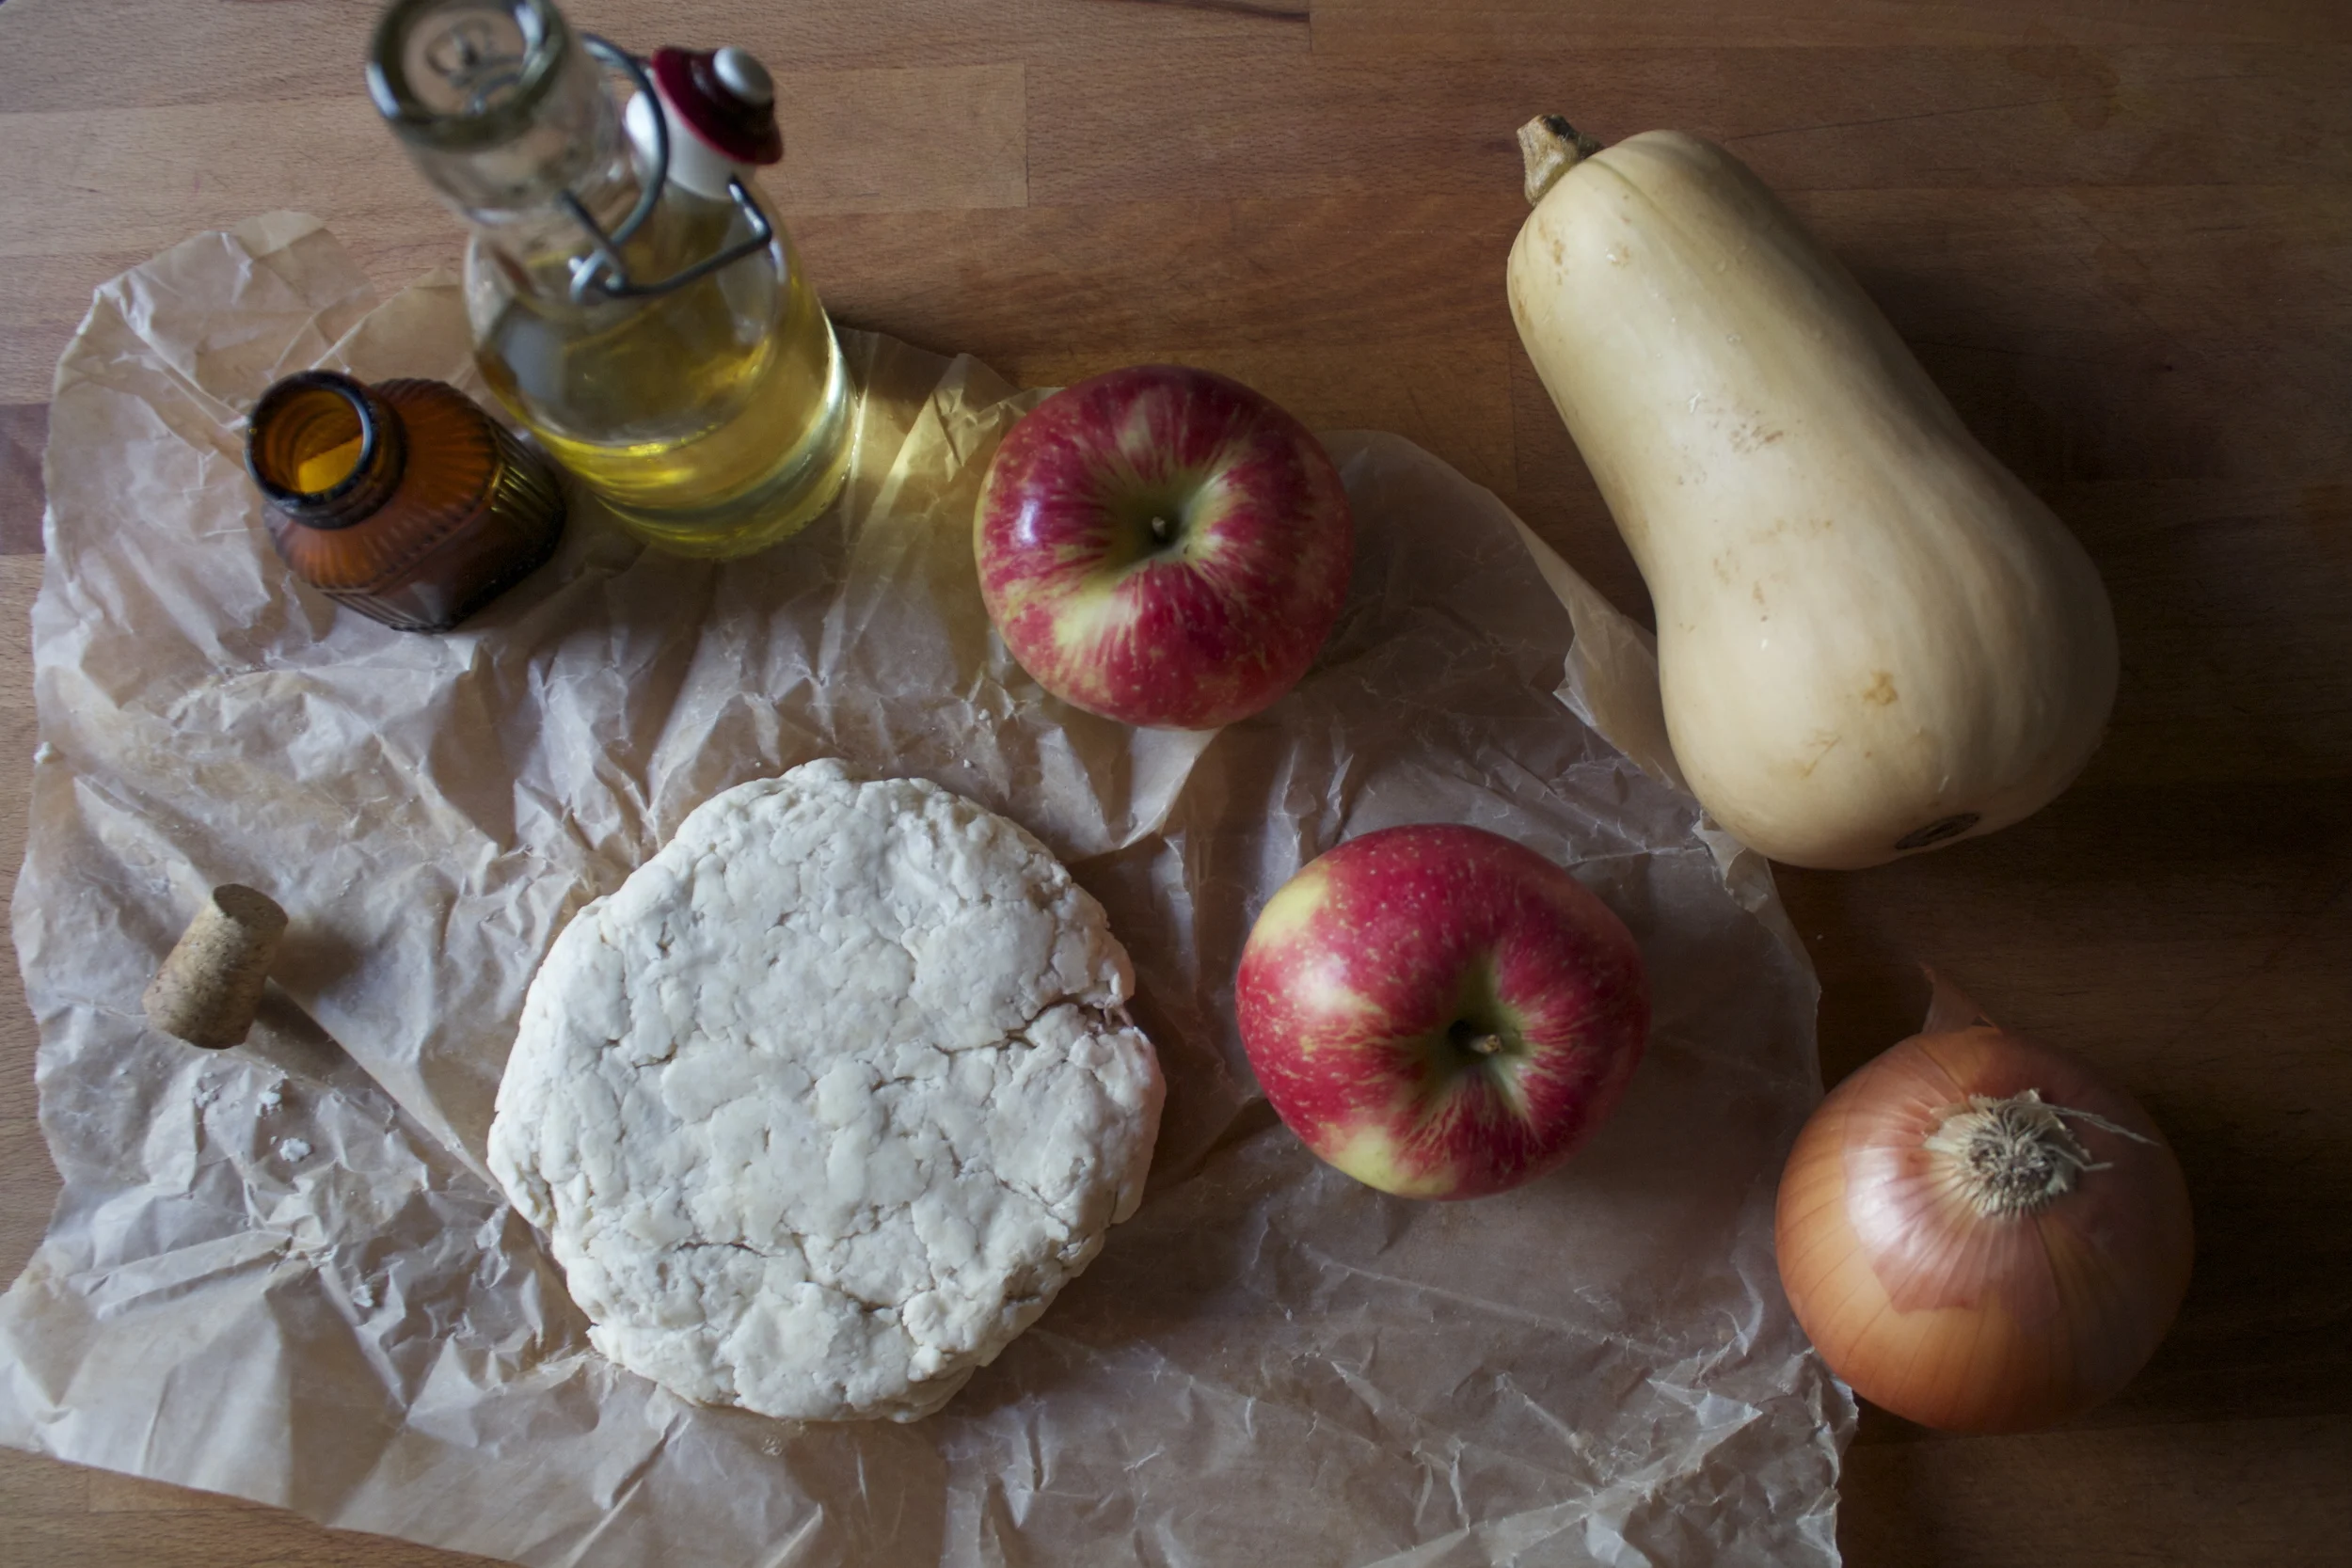
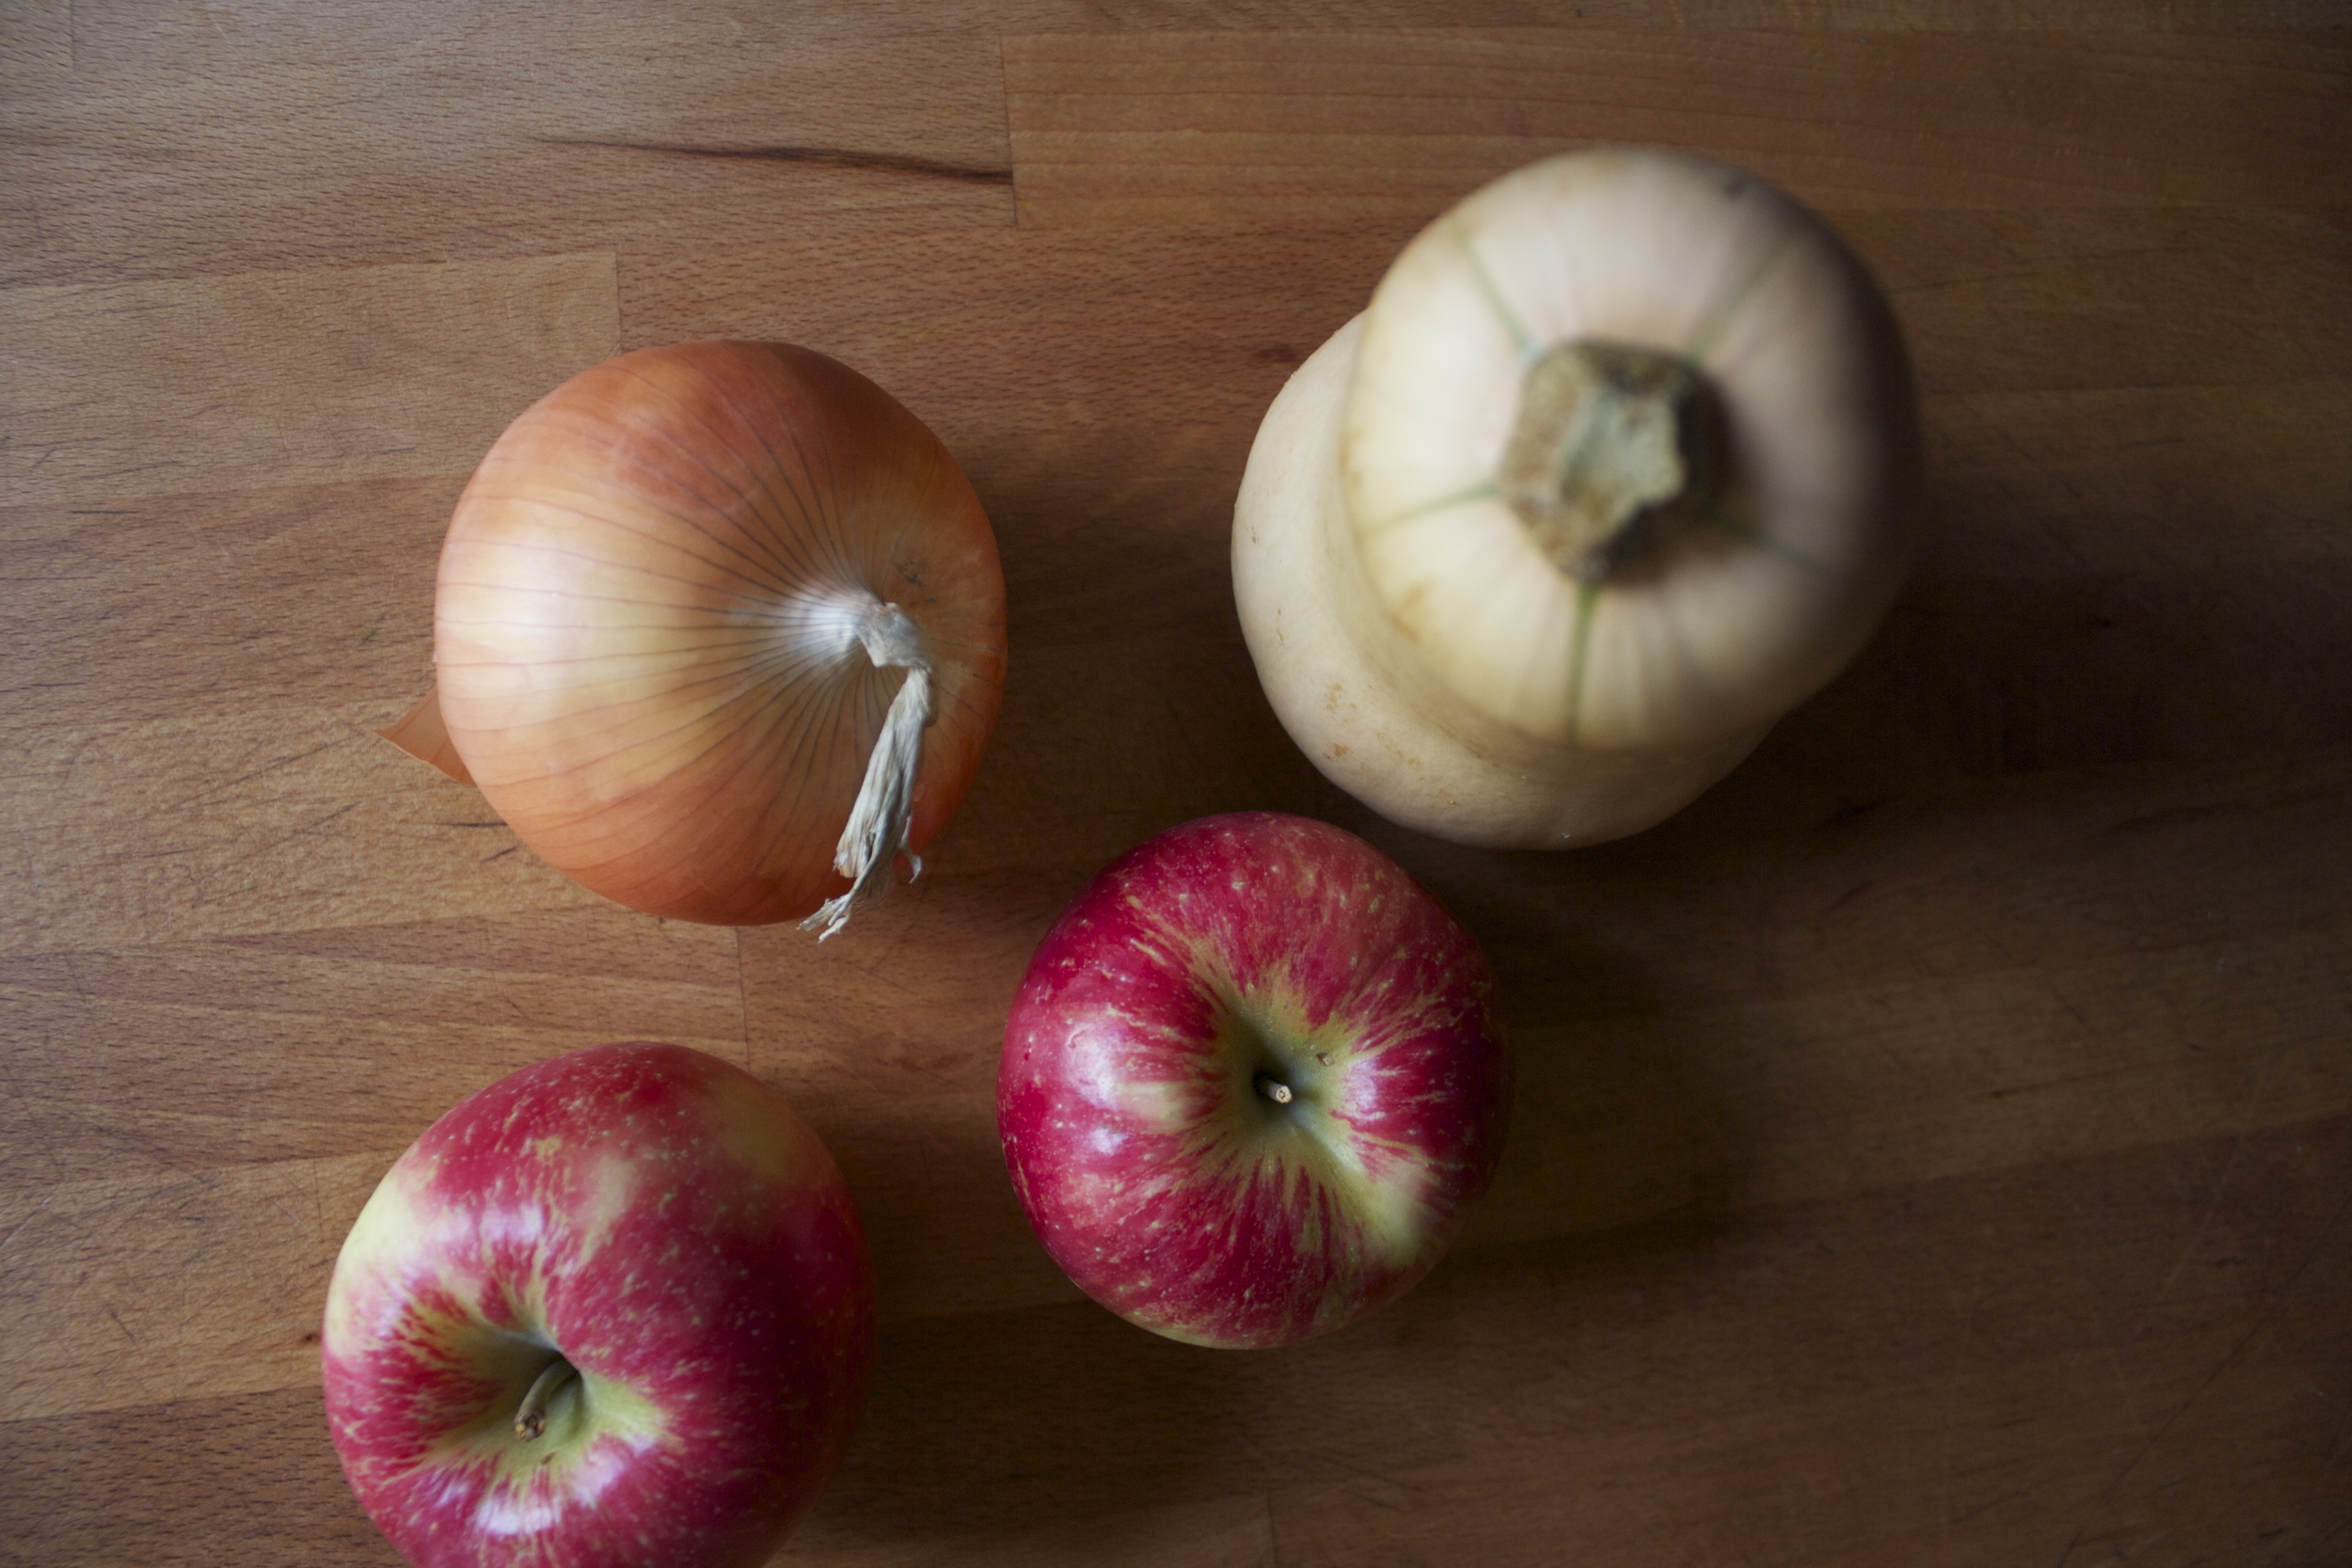
The stuff. A single crust pie dough, a butternut squash, an onion, and a honey crisp apple.(there are 2 shown, but I only needed on1)%u00a0%u00a0Also going to need a tiny bit if olive oil and a pinch of salt

Preheat oven to 375.

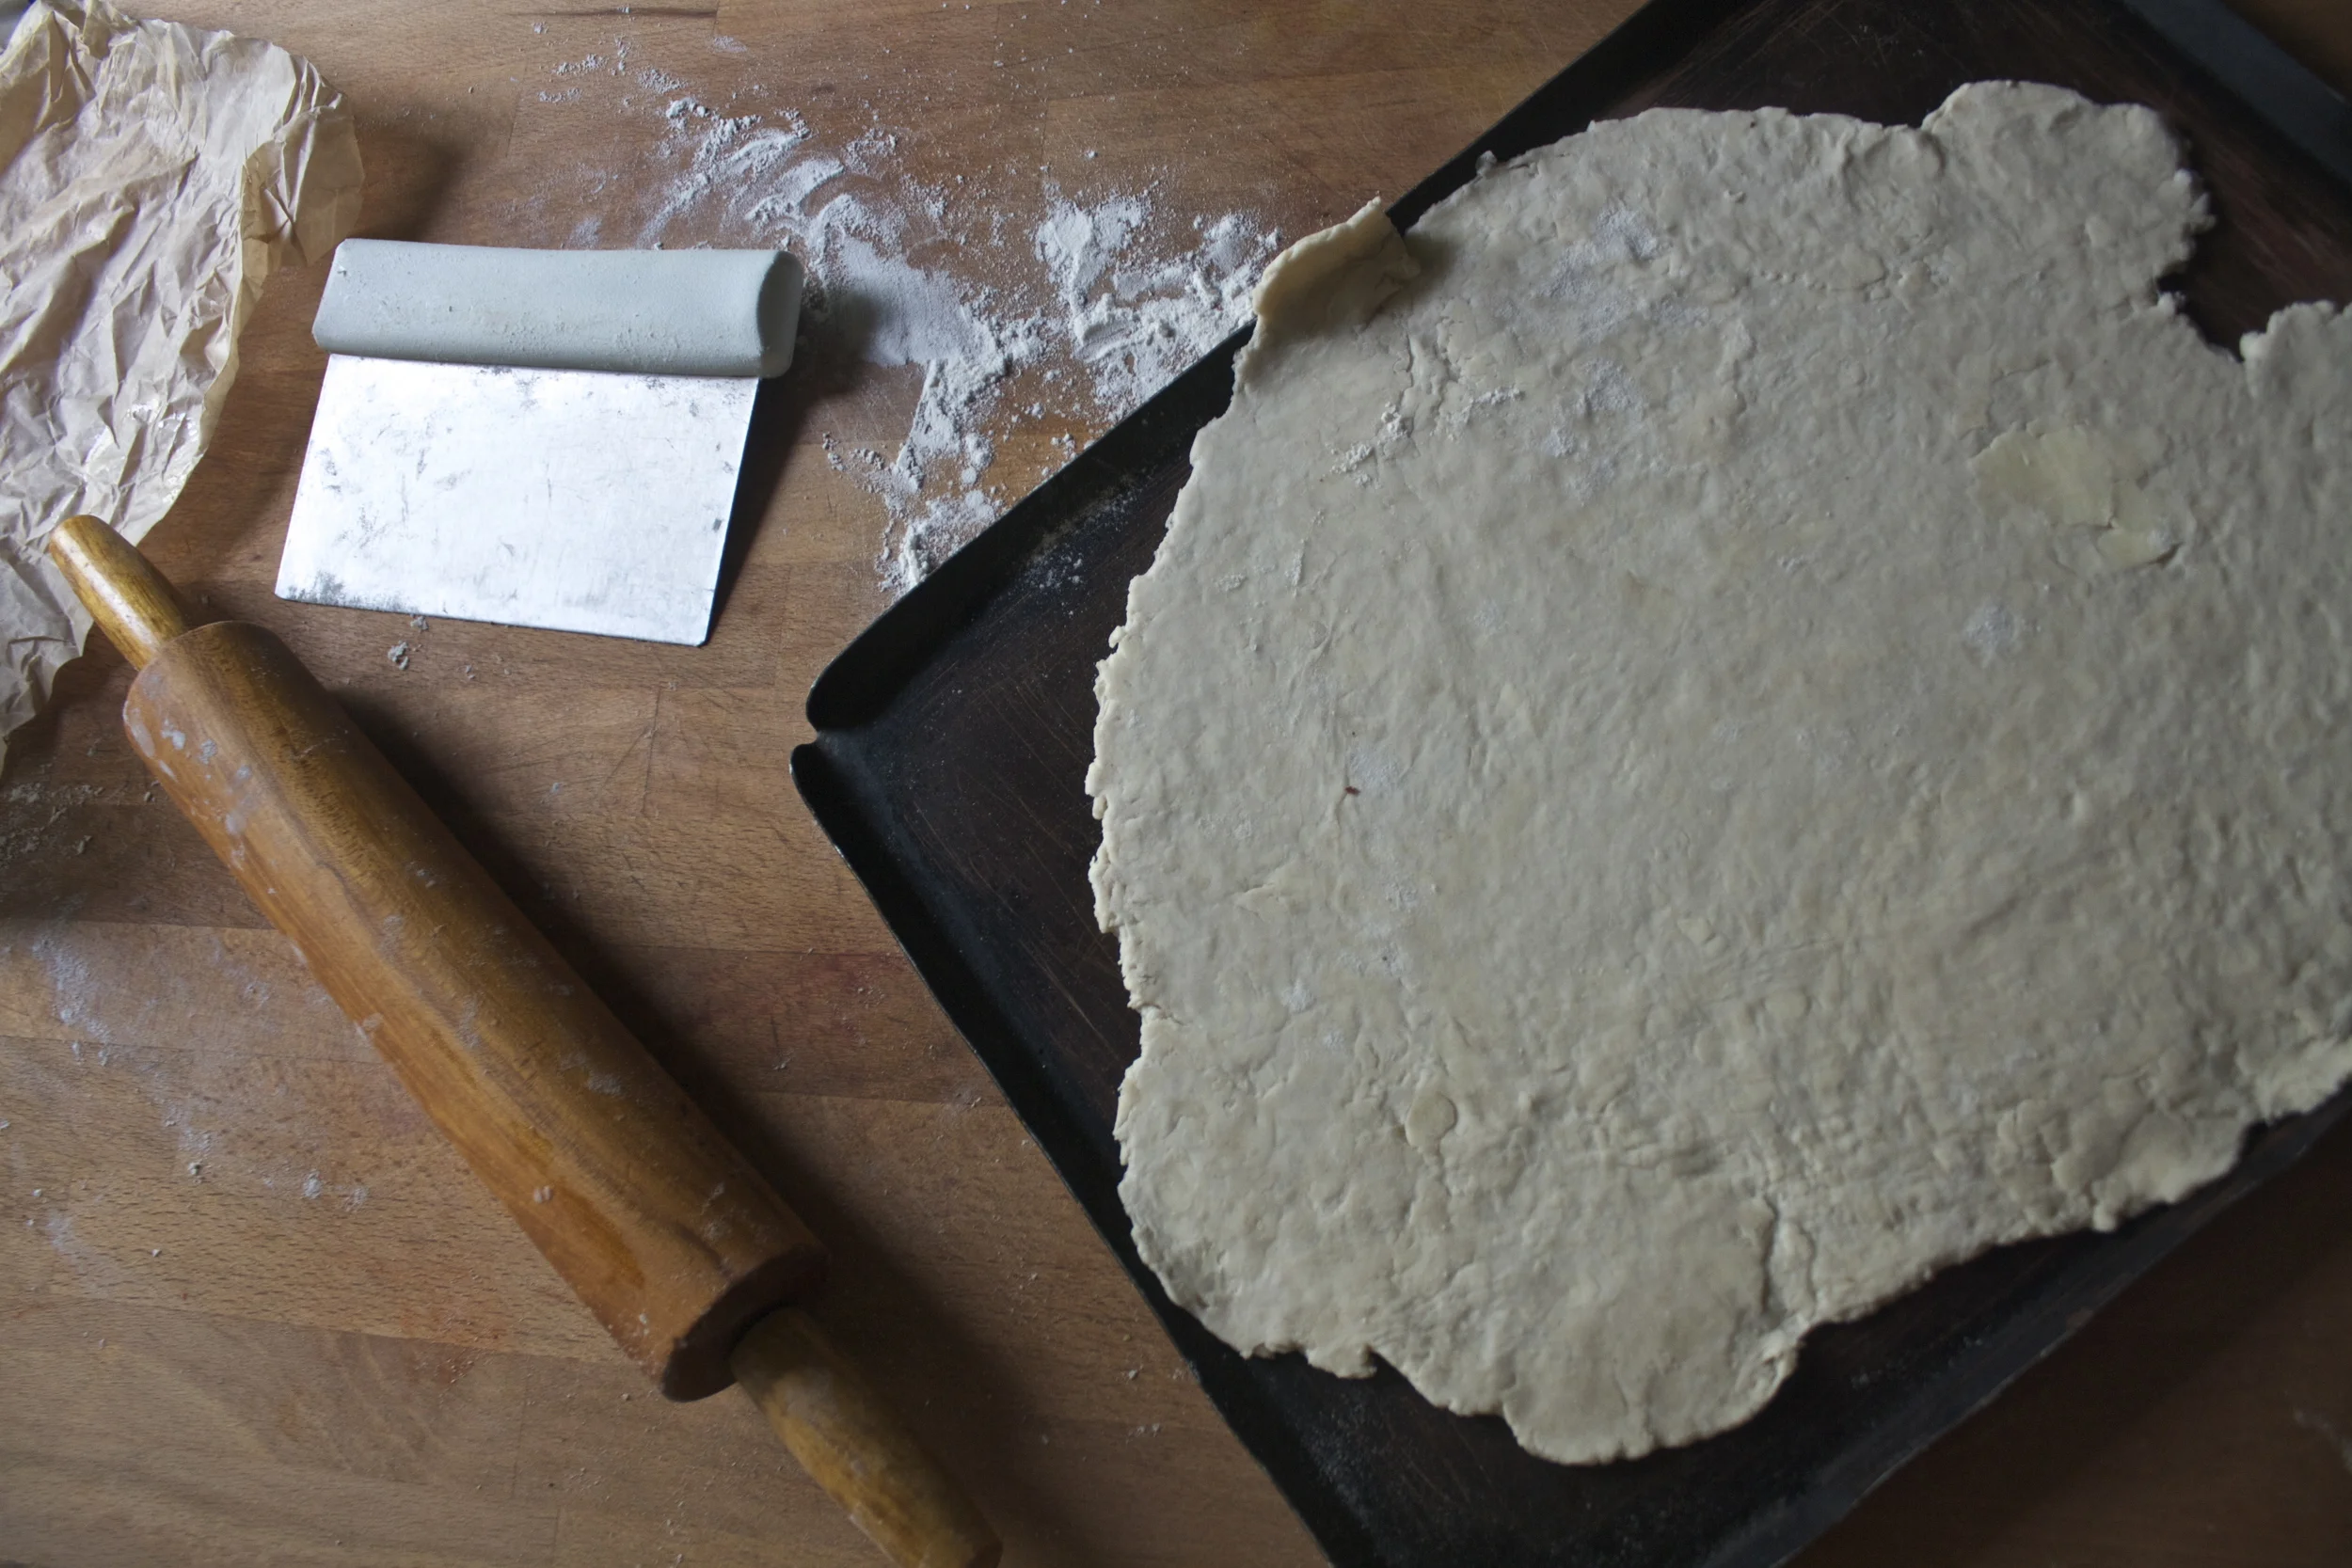
Roll your chilled dough out %u00a0on a lightly floured surface and place onto a large baking sheet. Stick it in the fridge to rest for a few minutes.

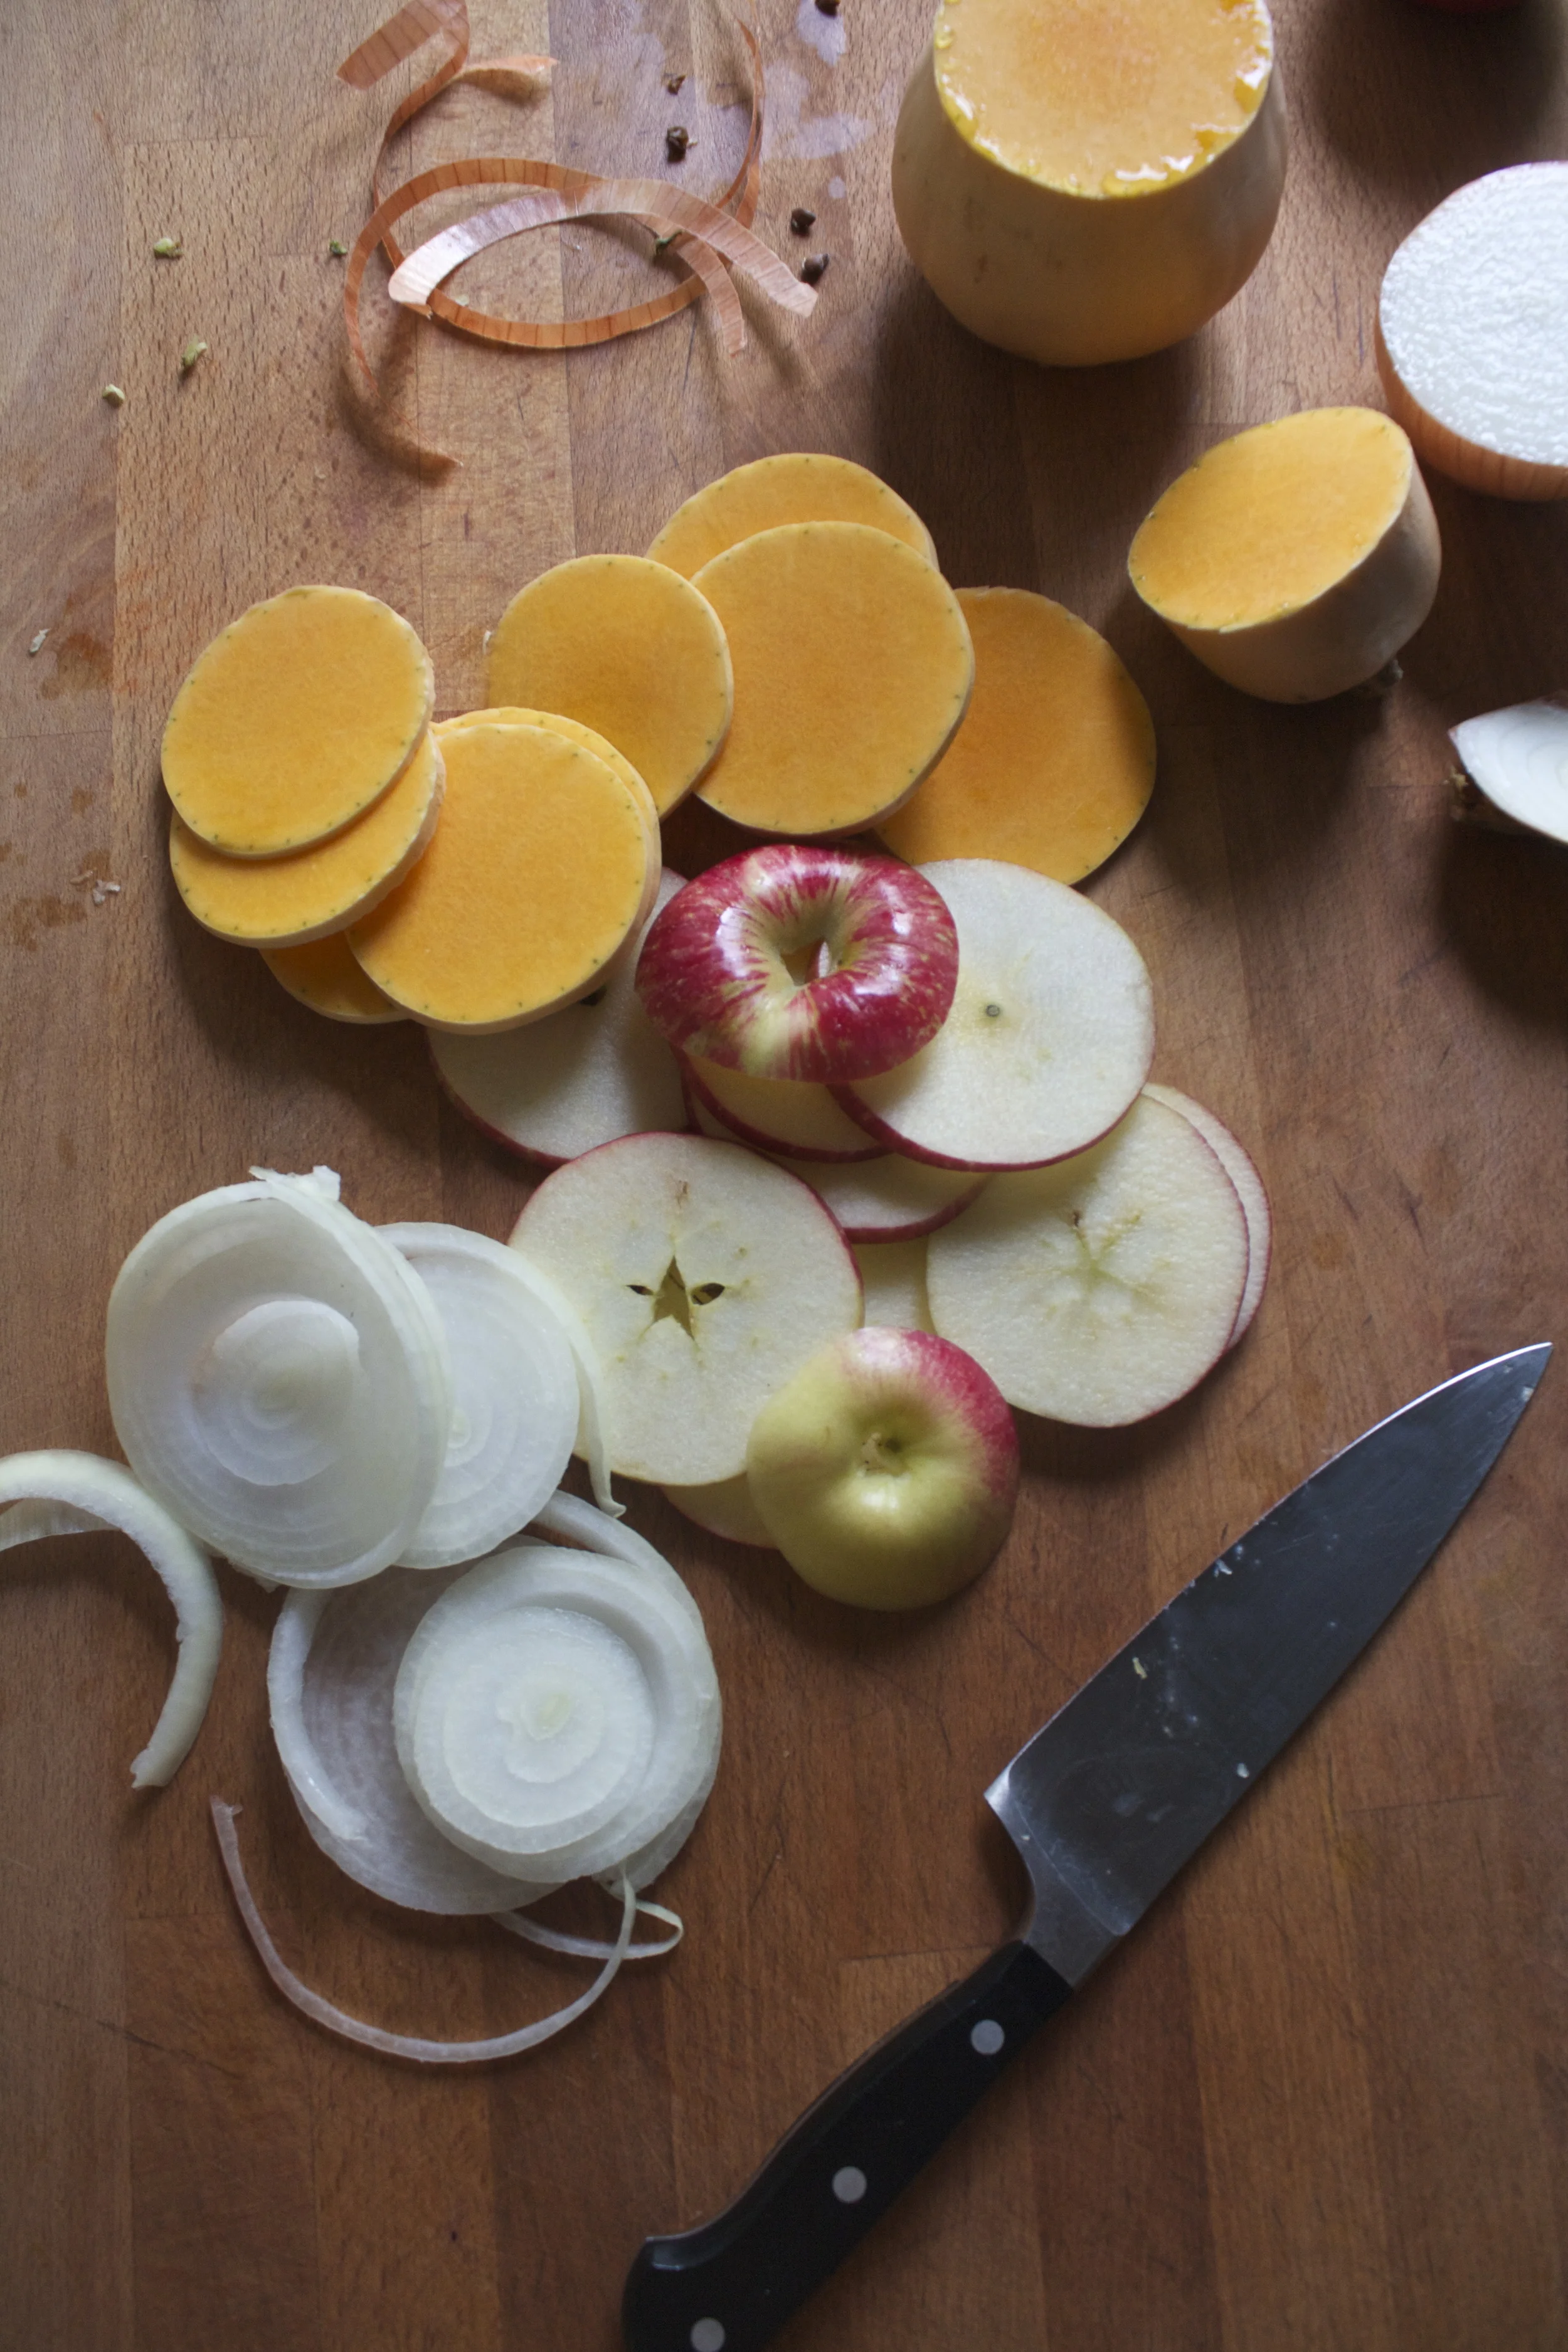
And slice them up into 1/4 inch-ish thick srounds.

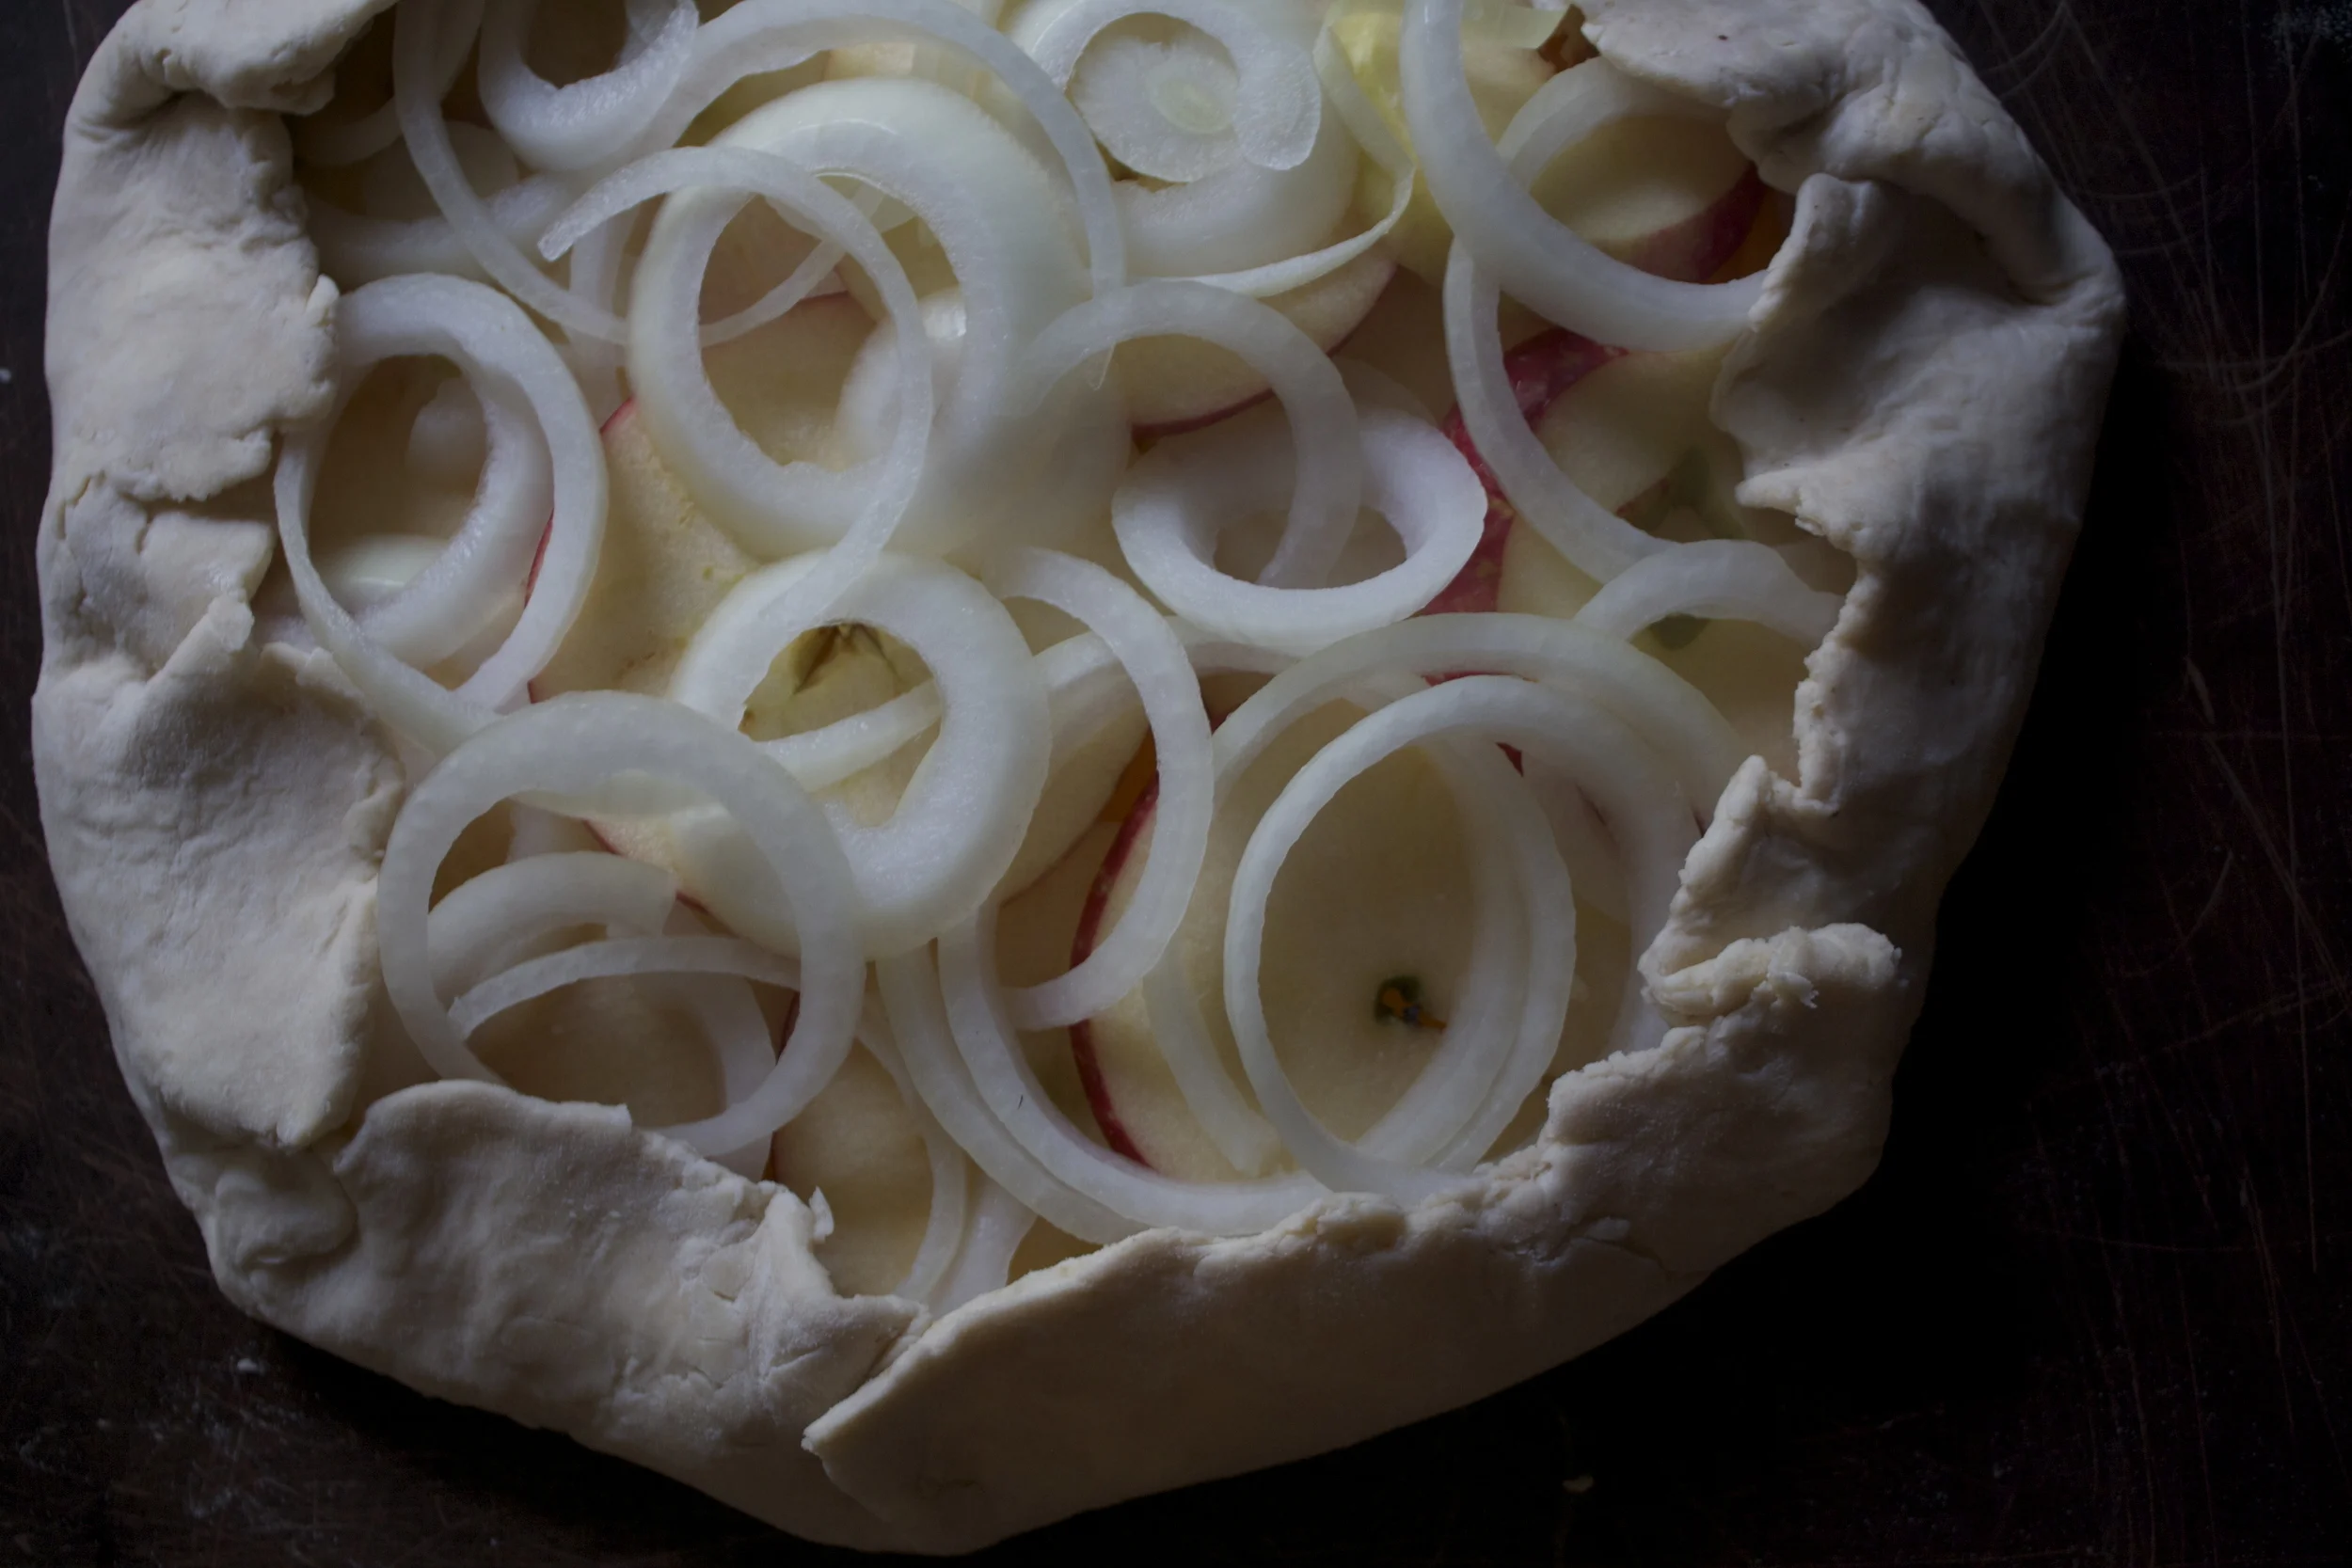
Time to compile%u2026 A layer of overlapping squash. (Make sure to leave inch-ish boarder)%u00a0%u00a0Then a layer of the apples, and lastly the onion, which I think looks so pretty as ringlets, but you could keep in rounds if you wanted.%u00a0

Fold the sides and pinching dough to keep it secure. Drizzle the top, and the crust, with a tiny bit of olive oil and sprinkle with a picnh of salt.

Now into the oven it goes!

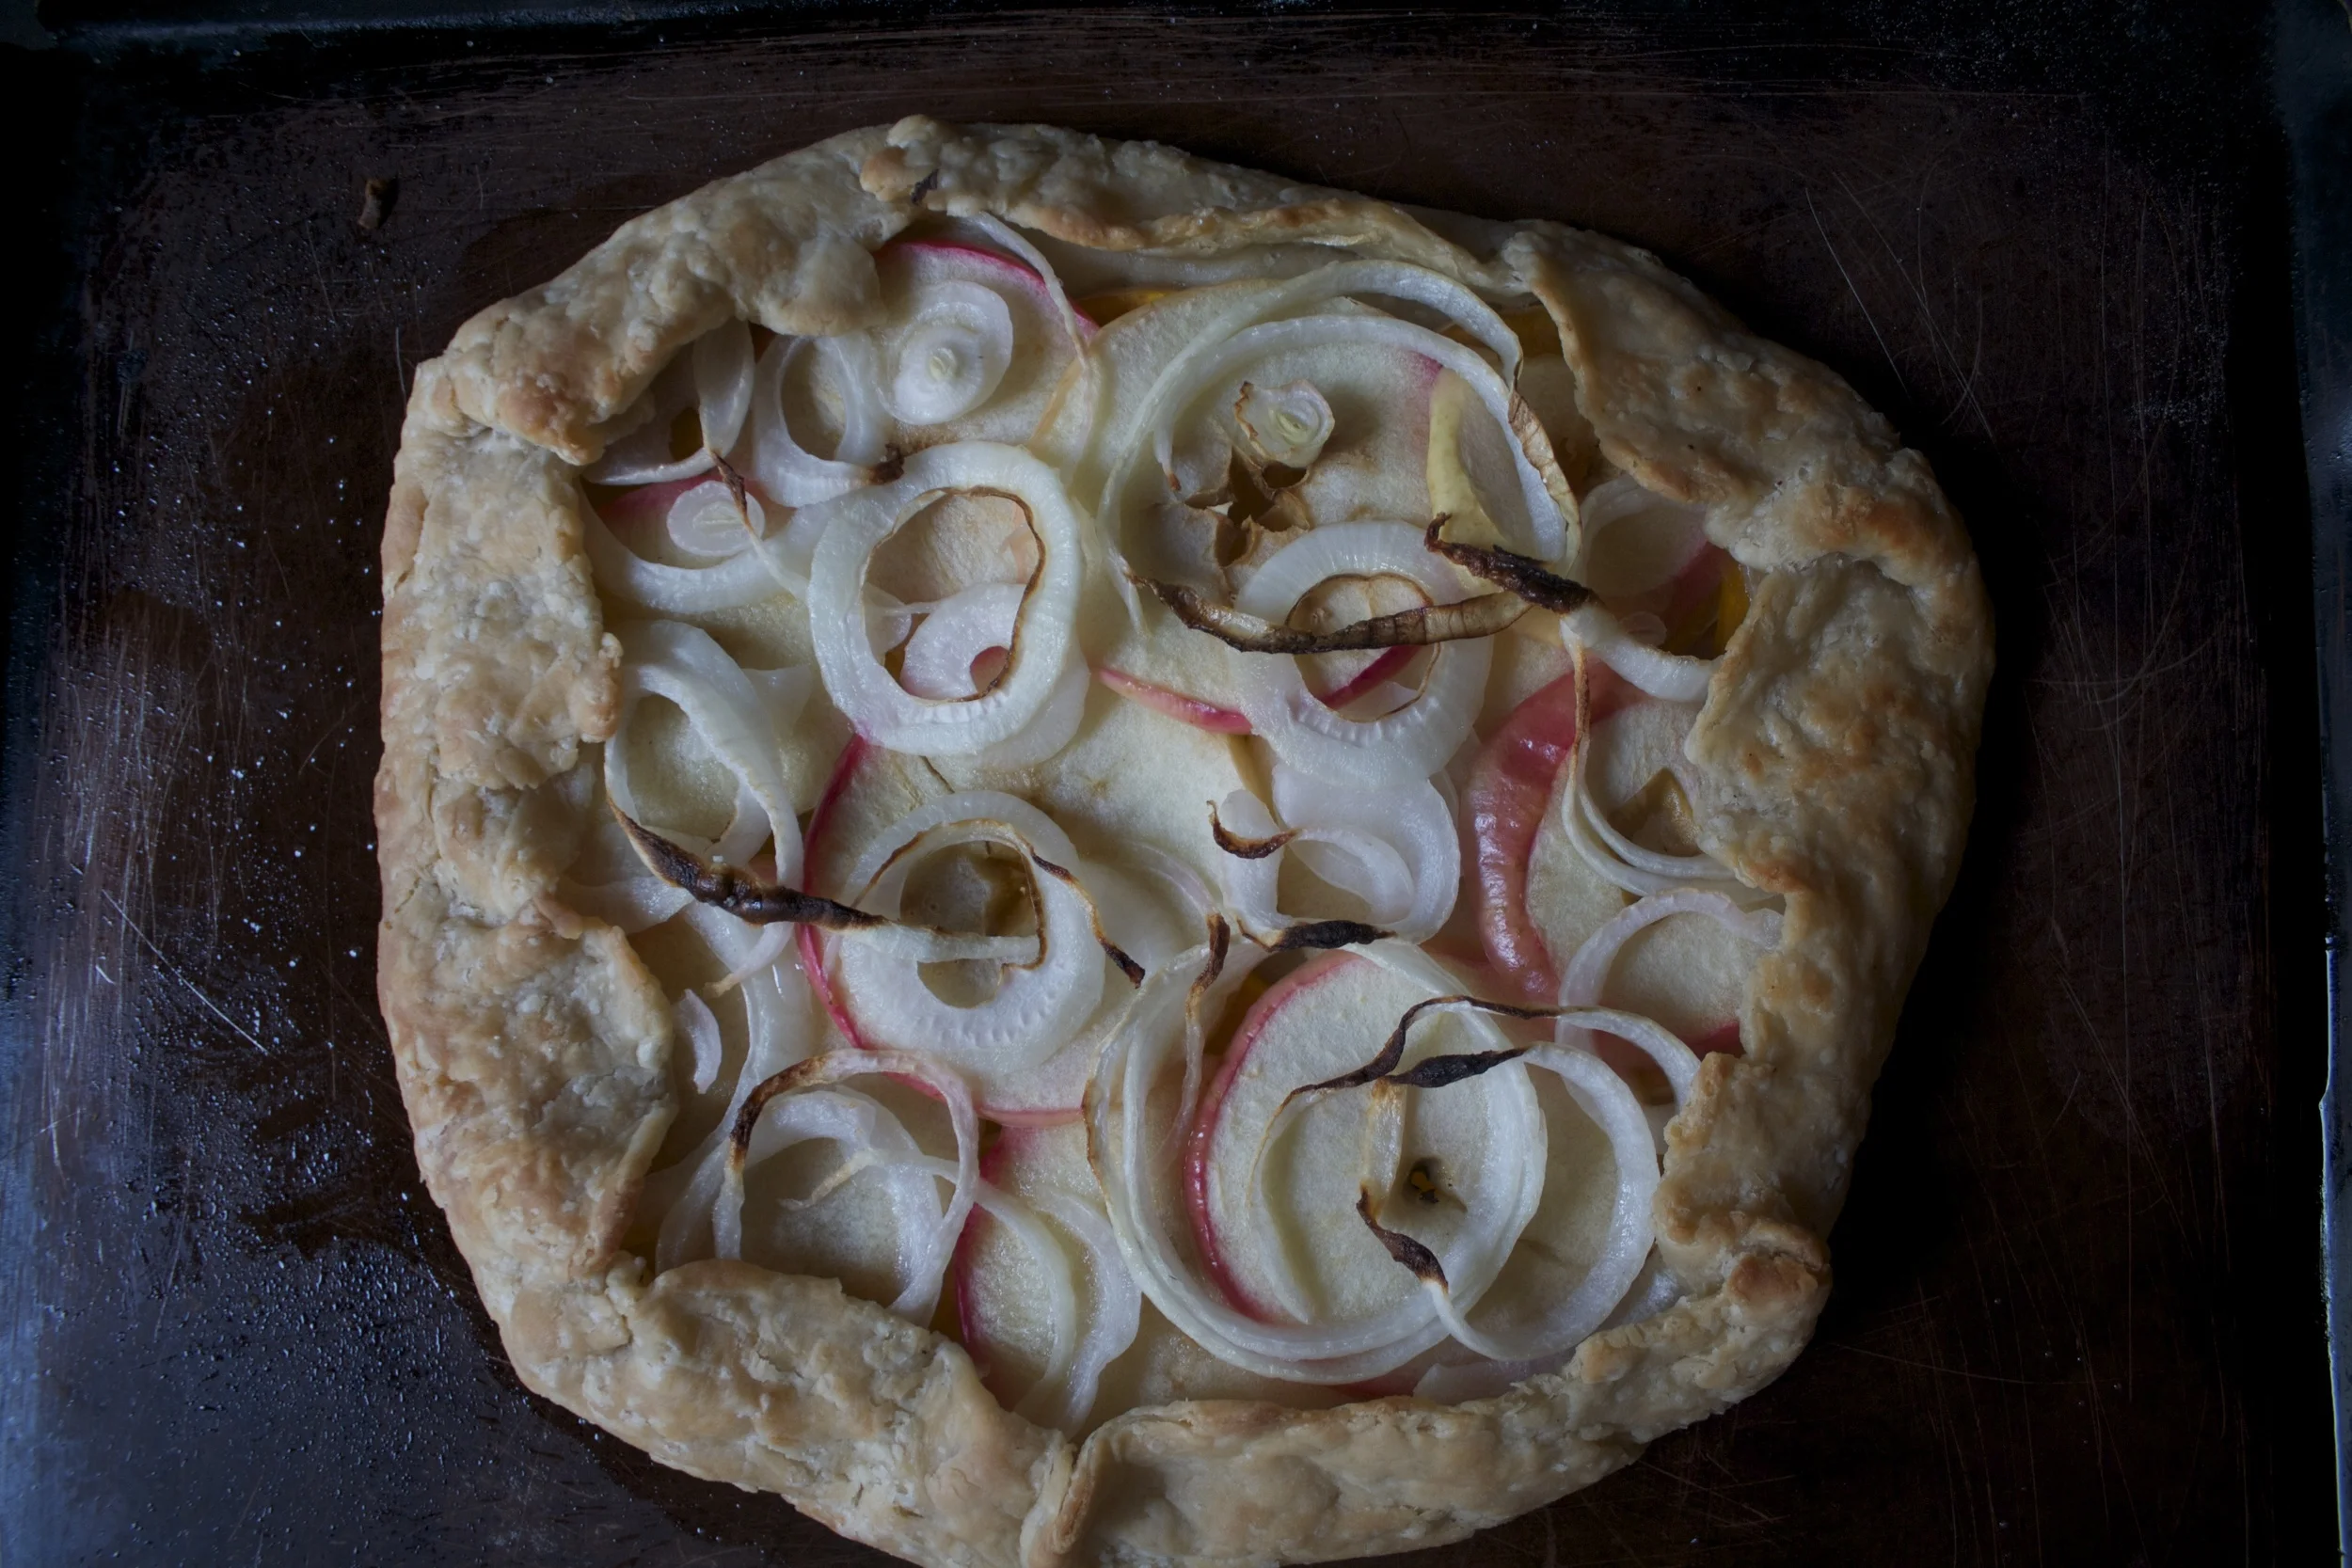
And %u00a0after about 45 minutes when the dust is perfectly golden and the stuff inside is nice and tender. Remove (turn off the oven) and let cool

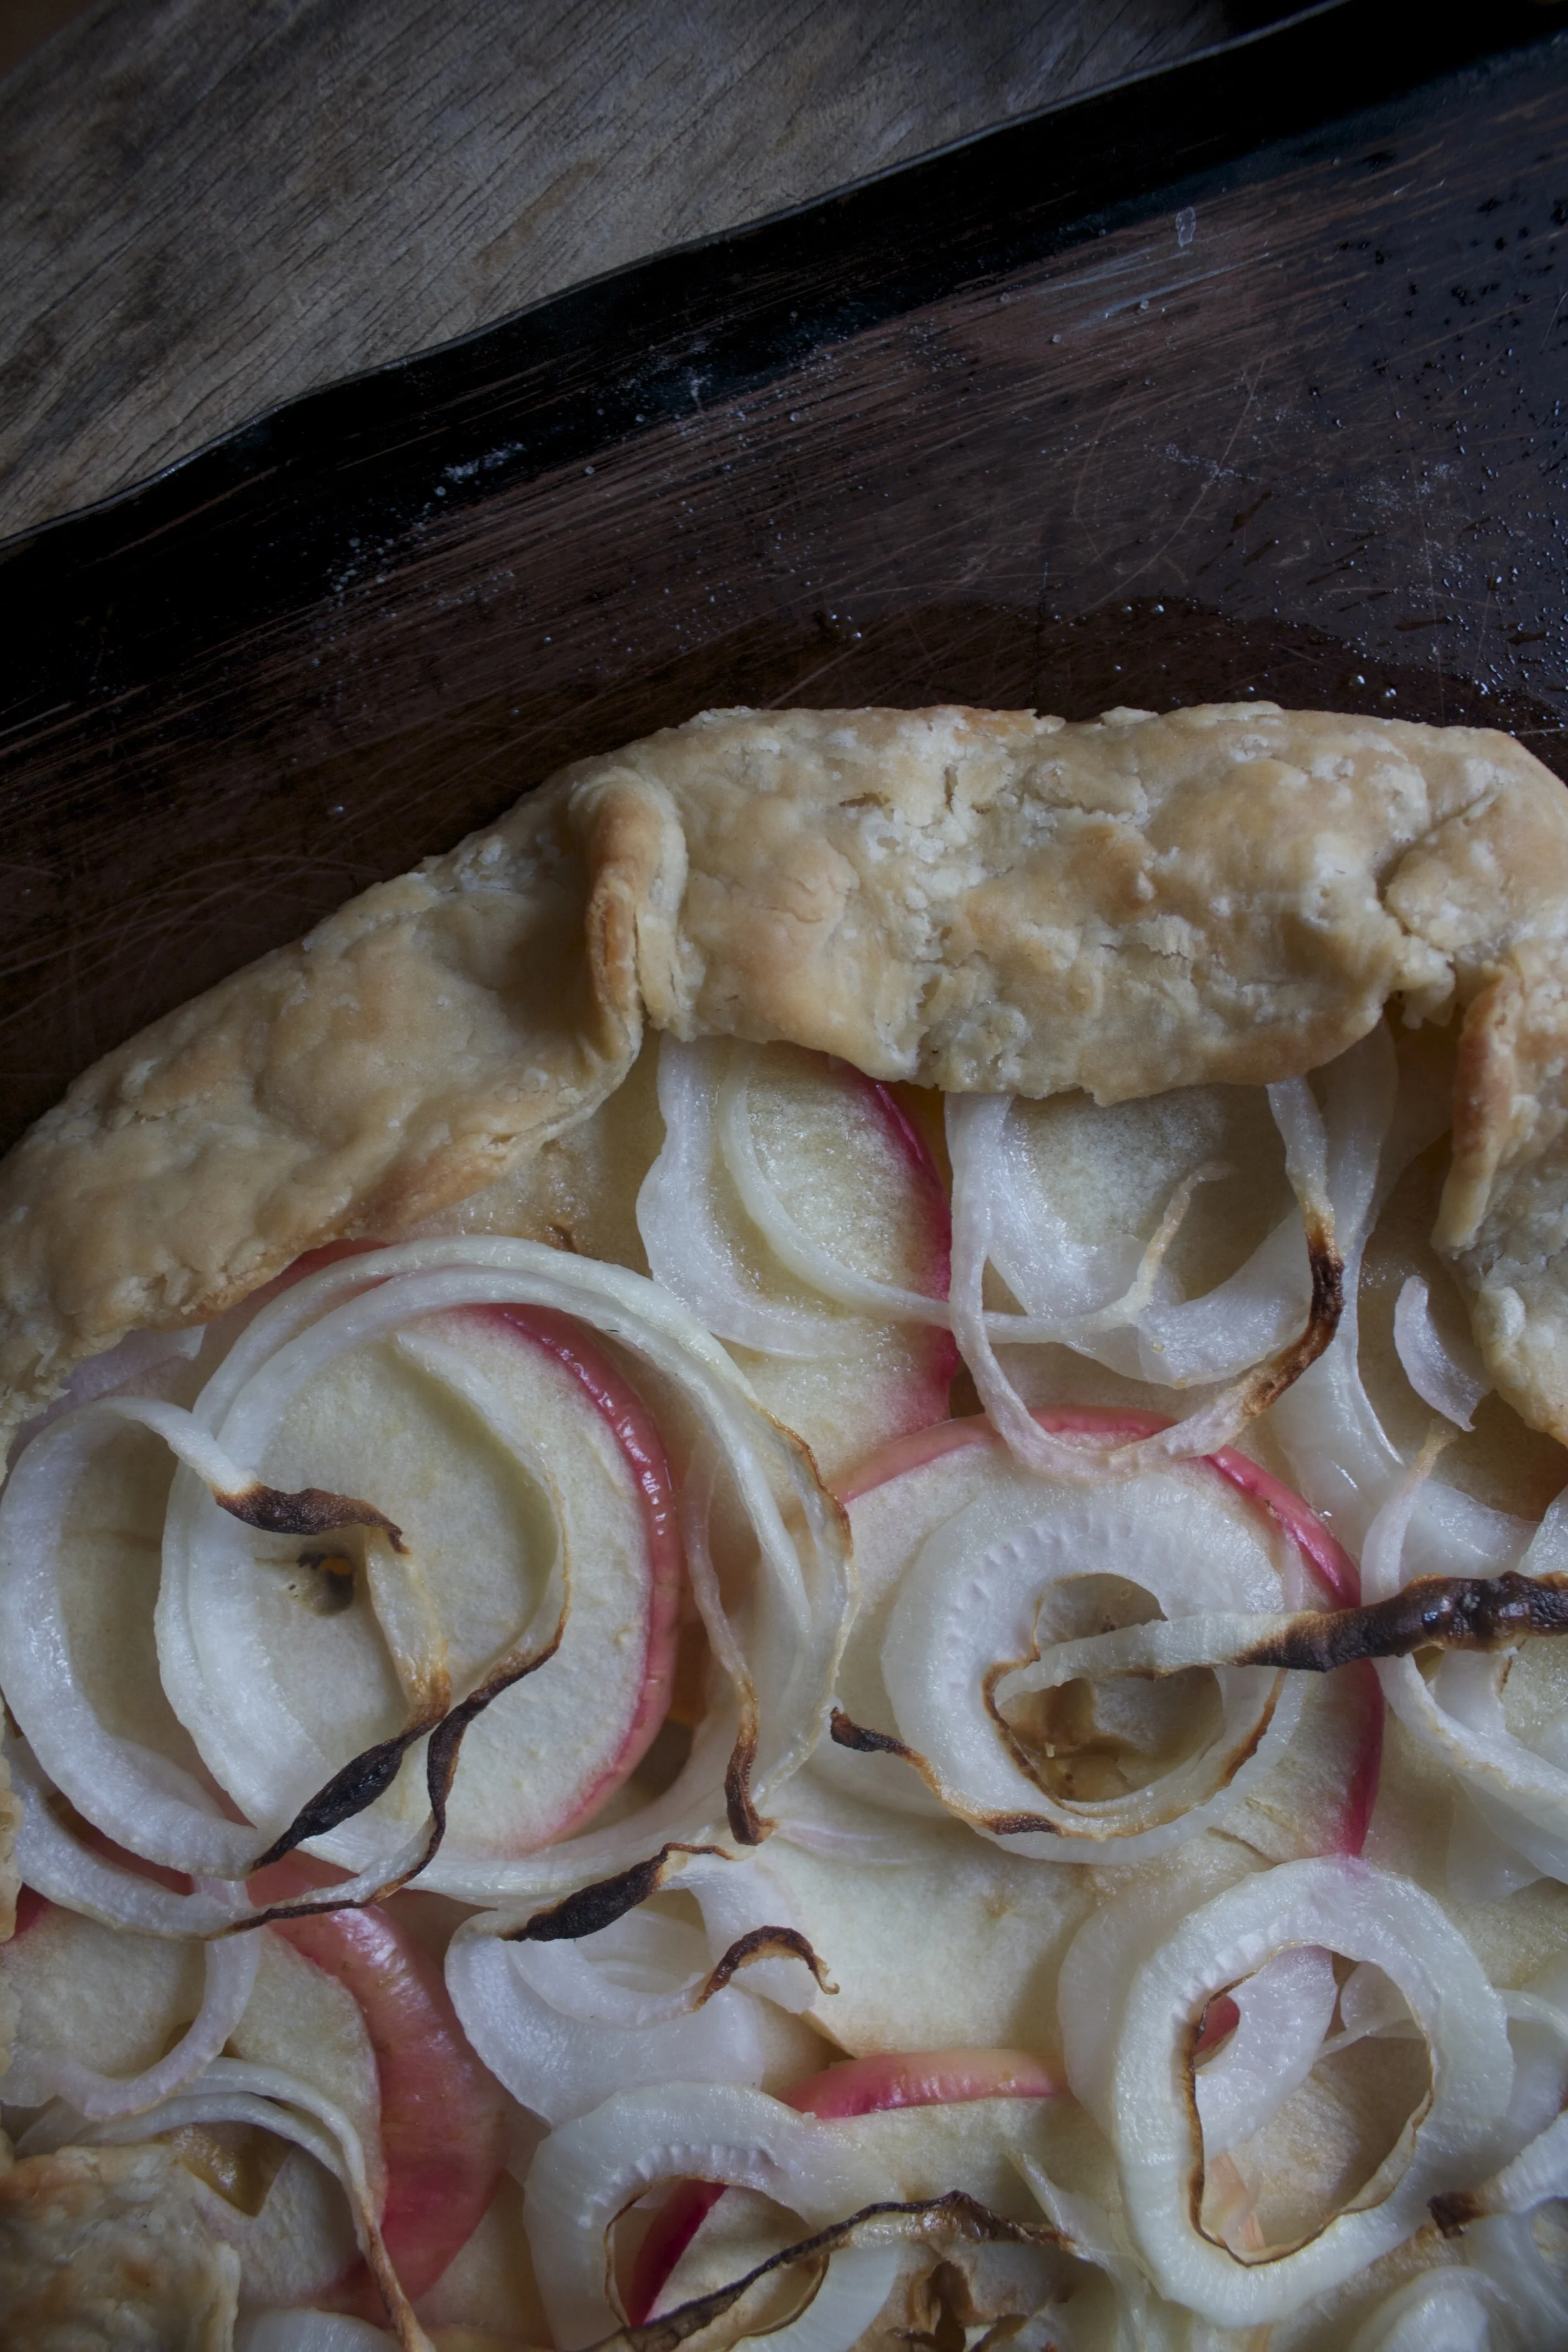
And there you have it.. A ode to fall in flavors and colors..

Have a great day%u2026 Eat lots of fall food!

-C

  • 1 single pie dough (recipe here)
  • 1 small butternut squash
  • 1 medium sweet onion
  • 1 large honey crisp apple
  • olive oil
  • salt

Preheat oven to 375.

Roll out chilled pie dough %u00a0on a lightly floured surface to about a 12-14 inch round (ish) and place on a large baking sheet and stick in the fridge.

Grab the squash and cut the neck off the bottom.%u00a0Save the bottom for later (maybe soup?)%u00a0and slice up the neck into 1/4 inch thick rounds. %u00a0Now take the onion and apple and slice those into 1/4 inch thick rounds too. (the seeds and the stem will just fall our.. but if they don’t, just poke them out with a knife)

Grab the dough from fridge and start to layer. First a layer of squash, leaving around an 1.5 inch boarder. You want the pieces to overlap,but don’t double layer. Next the apples go on top of the squash, again overlapping. Finally the onion. I liked the look of the individual ringlets%u2026 but you can do thick rounds if you want.%u00a0Fold over the sides of the dough, pinching it in wherever it needs to be pinch until all the stuff is snug. Drizzle with a tiny bit of olive oil %u00a0and rub a little oil on the outside crust as well. Sprinkle with a pinch of salt and stick into oven.

Bake for about 45 minutes or until crust is a nice light golden brown and the stuff inside is tender.

Remove, let cool for a few minutes and eat your heart out.

As I sit here writing this, mind you typing is not a terribly labor intestive activity, I am drip drip dripping sweat%u2026 It’s just not right.

%u00a0And today will be as hot as shit fuck. But its support to get so much better tomorrow. So that’s it, not more complaining. Everything is all good.

Now lets talk about this salad. This is such a fresh, clean, and full flavor salad made of just a few simple ingredients,%u00a0the star being the fennel.%u00a0%u00a0Almost licorice-y and sweet, yet still has a crisp earthiness, it pairs so well with onion and kale and dressed with just lemon juice.%u00a0Simple, easy, and very much satisfying. Kind of the perfect salad to make when you don’t want to make anything because the world is a sauna and nothing hurts you soul more then to think of turning on the oven.(full disclosure.%u00a0Stove burn does go on for a few minutes.. but only a few)

Maybe you have never had fennel or think you don’t like it, Well if you haven’t had it, you must, and if you think you don’t like it, you should try it again.%u00a0Up until recently, I kind of discarded fennel as a mah veggie. I didn’t hate it, but I never really cared for it, and I definitely did not seek it out. But this past year, for some odd reason (I blame/thank old age) I have really gotten into the yummy bulb. I have even gone out of my way to find it.%u00a0%u00a0And last week I was much excited when I went to farm share pick up and found that there was crate of fennel.%u00a0Woo HOO!%u00a0

Sweet fennel+hot weather and no desire to move = Fennel onion carrot salad

The stuff. A bulb of fennel (this was a big one so I use half of it),a medium onion , a big carrot, a bunch of kale, salt, pepper, a little olive oil and a lemon (I ended up using 2 smallish lemons)

Take you fennel and either with a mandolin or a knife, thinly slice the bulb. Do the same with the onion.

Toss the sliced fennel and onion into a lightly oiled skillet and sprinkle with a dash of salt. Place on medium low heat and cook jjust until the veggies are soften and starting to brown.

Chop the kale into pieces small enough to fit into your mouth and julienne or shred the carrot.

Compile the stuff. Juice the lemon.%u00a0Kale into a bowl, dump most tot the lemon juice on that and sprinkle with salt and mix around (I used my hands).%u00a0Dump the saut%u00e9ed fennel onion onto of that and top with the carrot and the rest of the juice.%u00a0

TA DA! Now that’s some pretty.

And toss it all around. I like to add a few thinly slices of raw fennel and lots of fresh cracked pepper.

Share with a friend. Or not. (a not for me)

Happy hump de dump day. Stay cool friends!

-C

Makes a big salad for one, or a few smaller sized side salads.%u00a0

  • 1 small or half of a large bulb of fennel
  • i medium white or hello onion
  • 1 large carrot
  • a bunch of kale (like 3-4 cups chopped)
  • 1 large juicy lemon (or two small lemons)

With either a mandolin or using a knife, slice up the fennel and onion super thin. Toss into a lightly oiled skillet, sprinkle with salt,%u00a0and stick on the stove on medium low heat. Stir and let cook down for 5-8 minutes or until the fennel and onion have soften and are starting to brown.

While thats cooking, chop up the kale into small pieces and julienne or shred the carrot.%u00a0

Place kale into bowl, juice the lemon and drizzle most of the juice all over the kale and give it a good mix. Dump on the cooked fennel onion and top with the carrots and a the rest of the lemon juice.. Sprinkle with salt and pepper to taste and give it a good toss. Top with a few fresh shaving of fennel.

Share with a friend, or eat it all to your self.

And now the cucumbers are growing shit crazy.

Every time I open the fridge, at least one (if not a few) come falling out from all the places that I have managed to squeeze%u00a0them in.%u00a0(the egg tray in the door is not a safe place for cucumbers) This is a slight problem, but a problem that I%u00a0kind of like having.

This past weekend I had planned on doing a bunch of pickling and canning. Like a whole day of music blasting,%u00a0dancing around the kitchen in a cute little apron with%u00a0wooden spoon in hand, (pretending its a microphone)%u00a0canning%u00a0all sorts of fruits and veggies that a piling up in massive amounts%u00a0for the winter months.%u00a0

That didn’t happen, and%u00a0I still%u00a0have a million cucumbers and not a whole heck of a lot of time this week to inact%u00a0my canning day day dream.

My simple solution. Cut um%u00a0up,%u00a0stick in a bowl with a%u00a0some fresh dill, a lithe%u00a0vinegar%u00a0and leave them on the counter%u2026.. %u00a0And watch as they disappear. It’s crazy. I find%u00a0if you leave a bowl of cut up anything on the counter, anyone that walks by will stop and eat a few pieces (if not the whole bowl) It’s a scientific fact (no not really, but maybe)

As for my blissful canning day. It will be happening soon. But until then, this is the way to go with those all those%u00a0cucks. (this works fantastic%u00a0will zucchinis too!)

The stuff. Cucumbers, onion, fresh dill, salt, pepper, and red wine vinegar.

Slice up the cucumber and onion and toss into a bowl. Spinkle with salt, pepper, and lots of fresh chopped up dill. Splash in the vinegar and toss it all around.

Let it sit on the counter for at least 2 minutes, but the longer they sit, the more pickley they taste.

And eat. %u00a0Leave on%u00a0the counter until they are all gone..which%u00a0won’t take too%u00a0long.

Enjoy the Tuesday!

-C

  • 2-3 medium to large%u00a0cucumbers
  • 1 medium %u00a0sweet%u00a0onion
  • a bunch of fresh dill
  • salt and pepper (fresh cracked is best)
  • red wine vinegar

Slice cucumber and onion into thin slices. and stick in a big bowl. Sprinkle with salt. pepper,%u00a0chopped up dill. Pour%u00a0on a few glugs of vinegar. Toss around, taste and adjust seasoning if needed and let sit on the counter for a few minute%u2026 or as long as you want*.

Eat all day long or until they are gone.

IF there are still cucumbers left over after 2 hours and you are worried about leaving food out all day %u00a0(I don’t worry, but that’s me), stick in the fridge until you ar ready to eat them.

Guess what guys %u2026.I got myself a sick vintage waffle/ griddle iron. I couldn’t be more thrilled!!!%u00a0I found this thing at the local recycled goods store the other day, along with a very beautiful old white pyrex mixing bowl. It was one of my best thrift store scores! (Checking out the inventory and the condition of all the old things that day, I would say an old lady had just died and all her perfectly keep, mint condition kitchen stuff had just been donated. %u00a0But it’s cool, cause I get the feeling that she was at least 90, with a big loving family, and was happy until the day she died. And I am sure she would be pleased that I have taken over the waffle maker. Thanks old lady!)

%u00a0And now I am pretty sure that %u00a0everything I make for the next week will be cooked on said waffle/griddle. I am serious, I already have a list of things to try and cook on it; cookies, biscuits, granola bars, potatoes, fruit, some type of pasta situations%u2026. the list of possibilities is endless and I bet that at least 1/2 of these things will be totally awesome and amazing.

But first thing first. I need to make dinner.

So waffles for dinner!!%u00a0

Note. These waffles are completely 100% fantastic for any meal you want to make them for. They consist of nothing more then beans, a shit ton of veggies, and just a bit of cornmeal. But don’t let that fool you because they are super packed full of so much flavor, have a really soft tender inside, with a nice crispy outside and are so super pretty. They are wonderful!%u00a0The stuff. First, we got a big old pile of shredded up veggies which include; carrot, beet, sweet potato, onion, parsnip, celeriac, and a little bit of kale. %u00a0A we got a bowl of rinsed and strained white beans, a little bit of cornmeal and salt, pepper, and garlic powder.%u00a0

The makings of something amazing!Before you do anything. get your waffle iron out and preheat it.%u00a0

While thats going on, take you beans, %u00a0add 3/4 cup water and puree until smooth with whatever blending device want to like to use. (I used my hand blender%u2026less to clean)Now collect all the shredded veggies and dump into a big bowl with the bean puree, the spices and the cornmeal. Mix until combined. The batter should be thick, but not dry. If its seems to wet, add more corn meal, or too dry, add a little more water.

Note how my batter turned a magical pink%u2026 I love beets, they make everything pretty! And check out that bowl!When your waffle iron is preheated, oil it if needed (if your not sure, add a little oil just to really make sure your waffles don’t stick) and take appropriate size spoonfuls of the batter and stick on iron. Close it and wait%u2026..My iron has a little light that turns on when the waffles are done cooking, so I waited patiently (ok iI did open it a few time) until light tuned on and removed the perfectly cooked waffles.

Did I mention how awesome my new/old vintage iron is?

SO AWESOME!!

I made a little gaucamole and gave the mister and little bowl of plain Greek yogurt with lemon juice, but feel free to top, drizzle, or dump whatever you want onto these beauties%u2026%u00a0

Happy waffle Wednesday!!!

-C

Veggie Bean Wonder Waffles

Makes 8-10 waffles (in my iron) feeds 2-3 peeps

  • 1 small carrot shredded
  • 1 small parsnip shredded
  • 1/2 a small celeriac root
  • 1 small beet shredded
  • 2 kale leaves chopped into tiny bits
  • 1/2 an onion, shredded
  • 1/2 a small sweet potato shredded
  • 1/2 cup cornmeal
  • 2 cups(or 1 can) cooked, rinsed and strained white beans
  • 2 teaspoons garlic powder
  • teaspoon each salt and pepper
  • oil for iron(if needed)

Note on veggies%u2026 I used what I had in the fridge and shredded, it came to about 3 cups. If you don’t have these specific veggies or only want to use a few.. go for it. Just make sure to have 3 cups of whatever veggies you use.

Take you beans and blend them up with whatever device you would like to use. Once creamy, add to a bowl with the rest of the ingredients. Stir until combined.

Once the waffle iron is preheated, oil it( if needed) and place the recommended amount of batter right on it there. Close and cook until golden brown and waffly.

Serve on a plate with topping of your choice, A few suggestions.. Guacamole, salsa, hummus, mustard, greek yogurt%u2026 anything that tastes good to you.

Eat as breakfast, lunch or dinner…

Fork into face

%u00a0%u00a0You ever make dish, completely on the fly, just to use something up (I have a lot of ripe tomatoes) with no real expectation, just because%u2026 Then have it be one of the best freaking things that you have ever made?%u00a0This salad is one of those things.. maybe not the best thing I have ever made, but definitely the best salad I have ever made%u2026. this week.

A salad compiled of all things amazing, taking just a few minutes to make and is the perfect balance of uber fresh with baby spinach, raw kale, and crunchy quick pickled onions. Then adding a touch of warmth with the sweet and juicy seared tomatoes and big chunks of creamy avocado.

I mean, for reals. %u2026…Best Salad Ever !!!! (this week)

Now let’s do this.

%u00a0The Stuff. A big bowl of baby spinach and chopped up kale, a few sliced up roma tomatoes, some super thinly sliced red onion, half an avocado, red wine vinegar and salt and pepper.%u00a0%u00a0Before you do anything, place the sliced onions into bowl, sprinkle with a pinch of salt and add a few glugs of the red wine vinegar. You want the onions to sit in the vinegar for at least 5 minutes on the counter cause the longer they sit the more crispy pickly they get. (after eating onions like this, you will never want to eat them any other way)%u00a0Lightly oil a skillet and preheat to a medium heat. Once the skillet is hot, sprinkle the tomato slices with salt and pepper and %u00a0place tomatoes right on in, snugly, but not overlapping. Let cook for about 3-4 minutes, or until the bottoms start to brown. Flip and cook other side for another few minutes.Once the tomatoes are seared on both sides, remove them gently from skillet and toss them on top of the bowl of greens.

Take the pickled onions and toss those right on top, with any of the residual vinegar, add dice and scoop the half of avocado and toss that on in as well.And now eat the best salad ever (this week).

Make the day good!

-C

Skillet Seared Tomato and Quick Pickled Onion Salad

Serves 2 as a side, 1 for a hungry eater

  • 2 large or 3 smaller roma tomatoes
  • 1/2 of a red onion
  • 2-3 tablespoons red wine vinegar
  • 1 1/2 cups baby spinach
  • 1 1/2 cups chopped kale
  • salt pepper
  • 1/2 a ripe avocado%u00a0
  • olive oil (to grease pan)

Thinly slice red onion and place in a bowl. %u00a0Add vinegar into a and sprinkle with salt. Let sit on counter for at least 5 minutes, if not longer,

Slice tomatoes into 1/2 inch thick rounds and sprinkle with a pitch or salt and pepper. %u00a0Lightly oil a skillet and preheat it on medium heat. Once the skillet is preheated, stick the tomatoes on it (watch out for splattering tomato juice) Cook first side for about 3 minutes or until the bottom has browned, then flip and do the same for other side.%u00a0

One tomatoes are seared, place directly onto the greens. Now dump the pickled onions and residual vinegar on top. And %u00a0dice up %u00a0avocado and add that on top too.%u00a0

Now eat your salad, fork or fingers%u2026 %u00a0

And I know, ba-daaaamn. So good.

My winter farm share is coming to an end this week. One more pick and then a three week stretch until the summer share starts%u2026 WHAT AM I GOING TO DO!!! Stock up as much as I can is what.

I have been strategic about the roots and veggies that I have chosen to bring home the past few weeks.(My farm lets you pick what you want) %u00a0I know what I can buy at the store, things like carrots and potatoes, so I have been passing those up, but the roots like beets and celeriac%u2026 I have been bringing home baskets of those and hoarding them in the fridge and basement in preparation for the laps in farm fresh food and knowing that if I want to by these at the store it s going to coast me a million dollars %u00a0a pound. (a for real million dollars)

Yup, lots of roots around here, especially celeriac root which is fantastic.%u00a0I am kind of obsessed with celeriac, with its fibrous, knobby exterior, soft but almost meaty texture inside, and a flavor that %u00a0is close to celery but so much better. %u00a0I don’t know why it has taken me so long to do a posting featuring this amazing root vegetable %u00a0(I eat it almost every day)

So here, an amazingly tasty, hearty but not heavy, celeriac recipe. %u00a0Perfect for spring and the change into summer%u2026. Mustard roasted celeriac with an fanatic split peas gravy that will have you licking you bowl clean.

%u00a0The stuff%u2026.For the split pea gravy we have a carrot, a parsnip and a large onion chopped into small chunks. %u00a0Salt, thyme, a bay leaf and of course the split peas. Then there is the celeriac root* sliced into 1/2 inch thick rounds and some plain old yellow mustard .

*Note. I don’t peel my celeriac root. I really enjoy the fibrous exterior but realize that some don’t(The mister does not like it) so peel it if you want.%u00a0

Toss the chopped parsnip, carrot, onion and the spices into a pot on medium heat and let veggies sweat a few minutes until tender. %u00a0Add in the split peas and enough water to cover everything. %u00a0Turn pot on high and bring to a boil, then cover and turn to low. Make sure to give the pot a good stir ever few minutes and add more water if needed%u00a0

While the gravy is cooking, %u00a0take the celeriac rounds and brush each side with yellow mustard, sprinkle with pepper, and place on a baking sheet. Stick into the oven to roast for about 25 minutes, flipping the rounds after about 10 minutes.

Once the peas have soften, remove the bay leaf and puree until smooth and oh so creamy. Taste and add more salt and pepper if needed. If you find that the gravy seems to thick, just add in more water until it’s the consistency that you want.%u00a0The gravy is made, the celeriac is roasted%u2026 now we are ready to eat!!%u00a0Stick the celeriac on a plate and dump good amount of that gravy right on top. Feel free to add a bed of spinach, or a grain or anything you want, because why not, and also some chopped tomatoes for a little acid and prettiness.

Serve with the fanciest knife and fork you can find. Extra yellow mustard and sriracha sauce are great condiments to have close by.

Happy Tuesday!

-C

Mustard Roasted Celeriac with Split Pea Gravy

  • 2 medium celeriac roots
  • 6 tablespoons mustard
  • 1 large carrot
  • 1 medium parsnip
  • 1 large yellow onion
  • 2/3 cup split peas
  • 2-3 cups water%u00a0
  • 1 bay leaf
  • 2 teaspoons thyme or italian spice mix
  • salt and pepper
  • spinach (optional)
  • diced tomatoes(optional)

Preheat oven to 400 degrees

Small dice the carrot, parsnip and onion and throw into a large pot. Spinkle with salt and pepper, add in the thyme and bay leaf and add a splash of water. Stick on stove on medium heat and stir. Let cook until the veggies become soft and fragrant. Now add in the split peas and 2 cups of water. Bring to a boil then cover and turn heat down to medium low. Let cook until the split peas become tender (about 25 minutes) string on occasion and adding more water if the peas are not completely summered while cooking.

Once the peas are tender, let cool for a few minutes, remove bay leaf, and either dump into a blender or blend with an immersion blender until nice and creamy. If gravy seems to thick, add in more water.%u00a0

Scrub or peel celeriac roots and slice them into 1/2 inch think rounds. Place on a baking sheet and brush mustard on both sides and spindle with pepper. Stick into oven for about 10 minutes, flip, then back into the oven for another 15 or so minutes, or unit the celeriac is tender.

When the celeriac is done remove from oven and %u00a0stick a few rounds on a bed of spinach (or not, or any kind of grain or green you like) Top with a hearty helping of the gravy and toss on some chopped up tomatoes.

Eat with at knife and fork like a fancy person.

Yesterday I spent the entire day (ok maybe not the entire day), but a the better part of the afternoon defrosting my freezer. Sure, I do the occasional chip chop here and there, just enough from around the freezer door so it will close, but ever few months I notice that everything in the fridge is not staying cold and that the freezer is not freezing stuff. Thats when I know its for real time to defrost. So a few days ago when I noticed my bananas were turing to liquid in the freezer, I knew it what I had to do%u2026.Completely empty the fridge %u00a0and melt/hack away the 2-4 inches of ice build up that accumulated. It is such a freaking pain in the ass.So on this defrosting day, I took all the stuff from the freezer, stuck it in a cooler, and the rest of the stuff, which is basically all veggies, I just tossed on the table.%u00a0As I am hacking away with a metal spatual, a wooden spoon, and a constant rotation of pots of boiling water, I was thinking about dinner. I figured I might as well just eat up as much of the veggies as I could, you know, so I didn’t have to put them back in the fridge. And also, I was getting pretty annoyed because this particular defrosting session was taking way longer the anticipated, which made making dinner seem like another pain in the ass. %u00a0I figured I might as well just eat everything that is already out on the table, which pretty much narrowed down the “whats for dinner” conversations because it was already all over the place. And so dinner was a humongo salad for me, and for the mister, I made him a monster of a veggie sandwich. (my salad was exactly the same stuff as the sandwich, minus the bagel) Easy, fast, super duper yummy, pretty and piled so high with tons of veggies that the fridge is pretty much empty now.%u00a0

Look at the is beast. I don’t call it a monster sandwich for nothing.

The stuff included in this monster veggie sandwich..

Romaine lettuce, tomato, avocado for there is not real sandwich without them. Thinly sliced radishes, cucumber,a and onion for nice crispy crunch. Shredded beets, carrots, and purple cabbage to give %u00a0more crunch and a bit of sweetness. Then of course there needs to be something pickled, so I used banana peppers cause they are the SHIT!! And lastly some hummus for a nice creamy finish (plus a bit of protein) and yellow mustard because mustard on everything is just right. %u00a0Heres to a mountain if goodness that is no longer in the fridge! Served with a another mountain of roasted parsnips and carrots (more stuff from the fridge) and a tall glass of iced tea.

Lucky that today is farm share pick up cause the fridge is pretty much on empty.%u00a0

Yea it’s Thursday!!!!

-C

A Monster Veggie Sandwich

Note. This is just a guide.. Feel free to use whatever veggies you fancy.%u00a0

  • Either a bagel, 2 slices of bread, or a big chunk of baguette (use a gluten free bread if you want or need too)
  • Hummus- Homemade or store bought
  • Mustard
  • Something pickled like pickles, banana peppers , jalape%u00f1os or all three%u00a0
  • Lettuce, spinach or some kind of leafy green
  • Tomato
  • Avocado
  • Onion
  • Radishes
  • Cucumber
  • Shredded Carrots
  • Shredded Beets
  • Shredded Cabbage

To assemble. Ready your bread.. Toast if you want, and stick it on a plate

On either side, smear the hummus and the mustard. %u00a0

Pick a side, start to stack by evenly disrupting veggies on top of veggies. Place the second piece of bread on top and %u00a0giving a little smooth to keep it together.

And go at it. Cut in half or don’t. Have a napkin or a long sleeve ready to wipe your face.

«‹ 51 52 53 54›»

Recent Posts

  • First-Time Subscriber Budget Trajectory on OnlyFans
  • Budget Stress Tests for Active OnlyFans Subscribers
  • Safety Practices for Exploring Free OnlyFans Pages
  • 1xBet APK 2026 — un fichier, une source étape par étape
  • Support en français — canaux et horaires

A nemzetközi sportfogadó oldalak jellemzően magasabb szorzókkal dolgoznak, mint a hazai piac szereplői.

Denne guide til casino uden rofus i 2026 – spil uden dansk licens forklarer regler, muligheder og risici ved udenlandske platforme.

Et casino med hurtige udbetalinger kan forbedre spiloplevelsen ved at sikre hurtig adgang til dine gevinster.

Vores guide til spillesider uden om rofus hjælper dig med at navigere blandt internationale casinoer.

We ranked the top online casino Malaysia platforms on withdrawal times, not on marketing claims.

Registration takes a few minutes, and this sg online casino guide walks through verification and the first deposit step by step.

A hazai fórumokon rengeteg tippet találhatsz arról, hogyan működik a casino befizetés nélküli bónusz aktiválása promóciós kódokkal.

@lonelyplanet
STUDIO ESCAPE Creative Getaways Quiet stays and bright worktables for a weekend reset. See Places
MAKER ROUTE World Nomads Travel-ready planning and practical coverage for makers. Read Tips