Easy quick dinners are no joke because sometimes life happens and then you are hungry, then hangry, %u00a0then maybe yelling and or tears start and nothing is ever going to be good again. And then you eat and everything is A OK, but that time between tears and food can be long, especially when you just can’t think so one should have a least a good 2 or 3 good dinners up there sleeve (besides pasta) that can be made quick and easily to avoid the fallout of food deprivation.%u00a0This bowl of goodness here is one of those. And sure some people might not always have a sweet potato,%u00a0tahini, or chickpeas is the house %u00a0(I ALWAYS have a sweet potato or some type of winter squash and tahini and chickpeas…%u00a0they are staples here)%u00a0but with a tiny it of foresight, you can make these things happen too. And then you will make it and realize that you must have these ingredients on hand at all times because yeah, a good go to meal that will prevent the tears.
Admittedly I have made this for the mr but he is not that into it. Says he is not a huge fan of sweet potatoes. (what the fuck is wrong with him?) But me, I eat is and I eat it all.. The sweet potato/chickpea/tahini combination is classic fantastic. This hash is sweet potato sweet, a little chickpea crunchy, salty, savory,%u00a0and creamy citrusy. %u00a0It’s all sorts of goodness. I tossed this hash on a big bed of kale (any sturdy green would be good) and only good things happen in my mouth. So the mr.%u00a0might not like it but I am starting to realize (after 15 years) that my taste is far superior to his. Haha. (but really) %u00a0Quick and easy (and healthy) and good. %u00a0Make it once and it will turn into on of your go to dinners, unless you don’t like sweet potatoes. In that case there is pasta.%u00a0
The stuff. Chick peas (I had just made a batch but if you don’t have any made already, grab a can) a sweet potato, an onion, a lemon, some tahini, and garlic Also some cumin and chili powder, olive oil, and salt and pepper.%u00a0
Preheat your oven and chop up the onion and sweet potato into mouth sized pieces.%u00a0
Toss the chopped stuff onto a baking sheet with the chickpeas.
Drizzle the whole shebang with olive oil and toss with cumin, chili powder, and salt and pepper. %u00a0
Into the oven it goes.
Half hour later it is all roasted and ready.
Oh quick, make this before the stuff is out of the oven. Tahini, minced garlic, a dash of salt, a bit of the liquid from the chickpeas and the juice of a lemon. Just stick it all in a cup or bowl and mix it around. Then it’s done.
Scoop the hash into a bowl (I like a large pile of greens underneath) and cover with the tahini sauce.%u00a0
Eat is all to your face.
-C
dinner for one, a side for two.%u00a0Very easily doubled or tripled.%u00a0
1 sweet potato
2 cups or 1 can cooked chickpeas drained but liquid reserved%u00a0
1 medium yellow onion
1 tablespoon cumin
1 teaspoon chili powder
salt and pepper
2-3 tablespoons olive oil
3 tablespoon tahini
1 lemon
1/4- 1/2 cup of aquafaba (chickpea liquid)
2-3 cloves garlic
Preheat oven to 425
Chop sweet potato and onion into mouth sized cubes and place on a baking sheet. Add the drained chickpeas and drizzle with olive oil and toss around. Sprinkle on the cumin, chili powder,%u00a0salt and pepper, and toss that around again. When the oven is preheated, slide the baking sheet on in.%u00a0
While the stuff is baking, mince the garlic and place it in a bowl with the tahini, the juice of a lemon, and a pinch or two of salt to taste. Add in 1/4 cup of aquafaba and mix it all around.%u00a0If to thick for your liking, add a little more of the aqaufaba until its a good consistency.%u00a0
Check the stuff in the oven after 20 minutes and give it a toss.%u00a0%u00a0Keep baking for another 5-10 minutes or until the sweet potato is cooked and starting to brown. Remove from oven and dump into a bowl (maybe on a bed of greens or rice) and drizzle all over with the tahini sauce.
How was your week? Are you in need of a good, causal, no expectations day? Me too, not that I have had a terrible week, it just wasn’t the greatest. My body is still recuperating from falling down the stairs (I am starting to wonder if I broke my thumb), and it’s been one of those weeks where a bunch of stupid little things have happened, like how I have set at least 3 dish towels and my last potholder on fire, or spending 1/2 hour on hold with the garbage company about paying the bill only to have the phone cut out.%u00a0And topper, this past farmshare pick up was the last one of the season.. BUMMER!%u00a0I could do a winter share, but the way our winter is planning out, I would end up missing most of it, so it doesn’t work.%u00a0I am coming to terms with it by knowing %u00a0I can just go to the weekly farmers market%u2026. so I am ok. Oh, and the weather.. WTF! Not exactly complaining, %u00a0(kinda not). but 70 in November is not ok. Sure I enjoyed not having to wear a coat or that we still haven’t turned our heat on, but to be honest, I want cold. I want to feel crisp and fresh. I want to snuggle in warm sweaters and blankets.%u00a0%u00a0And yes, I want snow!!! Bah!! But as any good Vermonter knows, blink and the weather will change. (I have been blinking a lot)
Today is going to be a %u00a0good reset day. I am going to do my chores early, get some food, maybe a trip the the library (I might have a few overdue books.. oops), make some new potholders, %u00a0and then sit on my butt (leaning to the right cause my left butt check still hurts), ice my hand, and rotate between reading and watching christmas movies (ones with lot of snow in them) for the rest of the day. And if I end up just doing one of those things, I’ll call it a success because again, today is all about no expectations.%u00a0
Interent stuff from the week.
-The Norwegian Secret to Enjoying a Long Winter%u2026. Good advice for those cranky winter people
–I love reading about apples.%u00a0Beyond the Honeycrisp Apple
-The Gum wall is being removed (old gum makes me gag)
Farm share started last week (HOORAY!!!!) but always, at the beginning when things are still getting on growing, we are only getting a few things. Lot of greens which I will never get enough of, and lots of potatoes. Also, I made the mistake of buying a very large bag of potatoes last week right before farm share and now I am basically swimming in potatoes. And so the story goes%u2026.
So what do you do with a shit ton of potatoes? Yeah, I thought potato cannon to but then I realized that I would have to use my potatoes and sure I have a lot, but I am not wasting them on that. So gnocchi they became. Gnocchi. Basically a boiled french fry or a mashed potato meat ball. Or maybe more like a ravioli. Whatever they are, they are loved by potato loving people and are fun to make. I mean, when do you ever get to use the ricer? ( Don%u2019t worry, you can make gnocchi without a ricer.)
To the gnocchi.
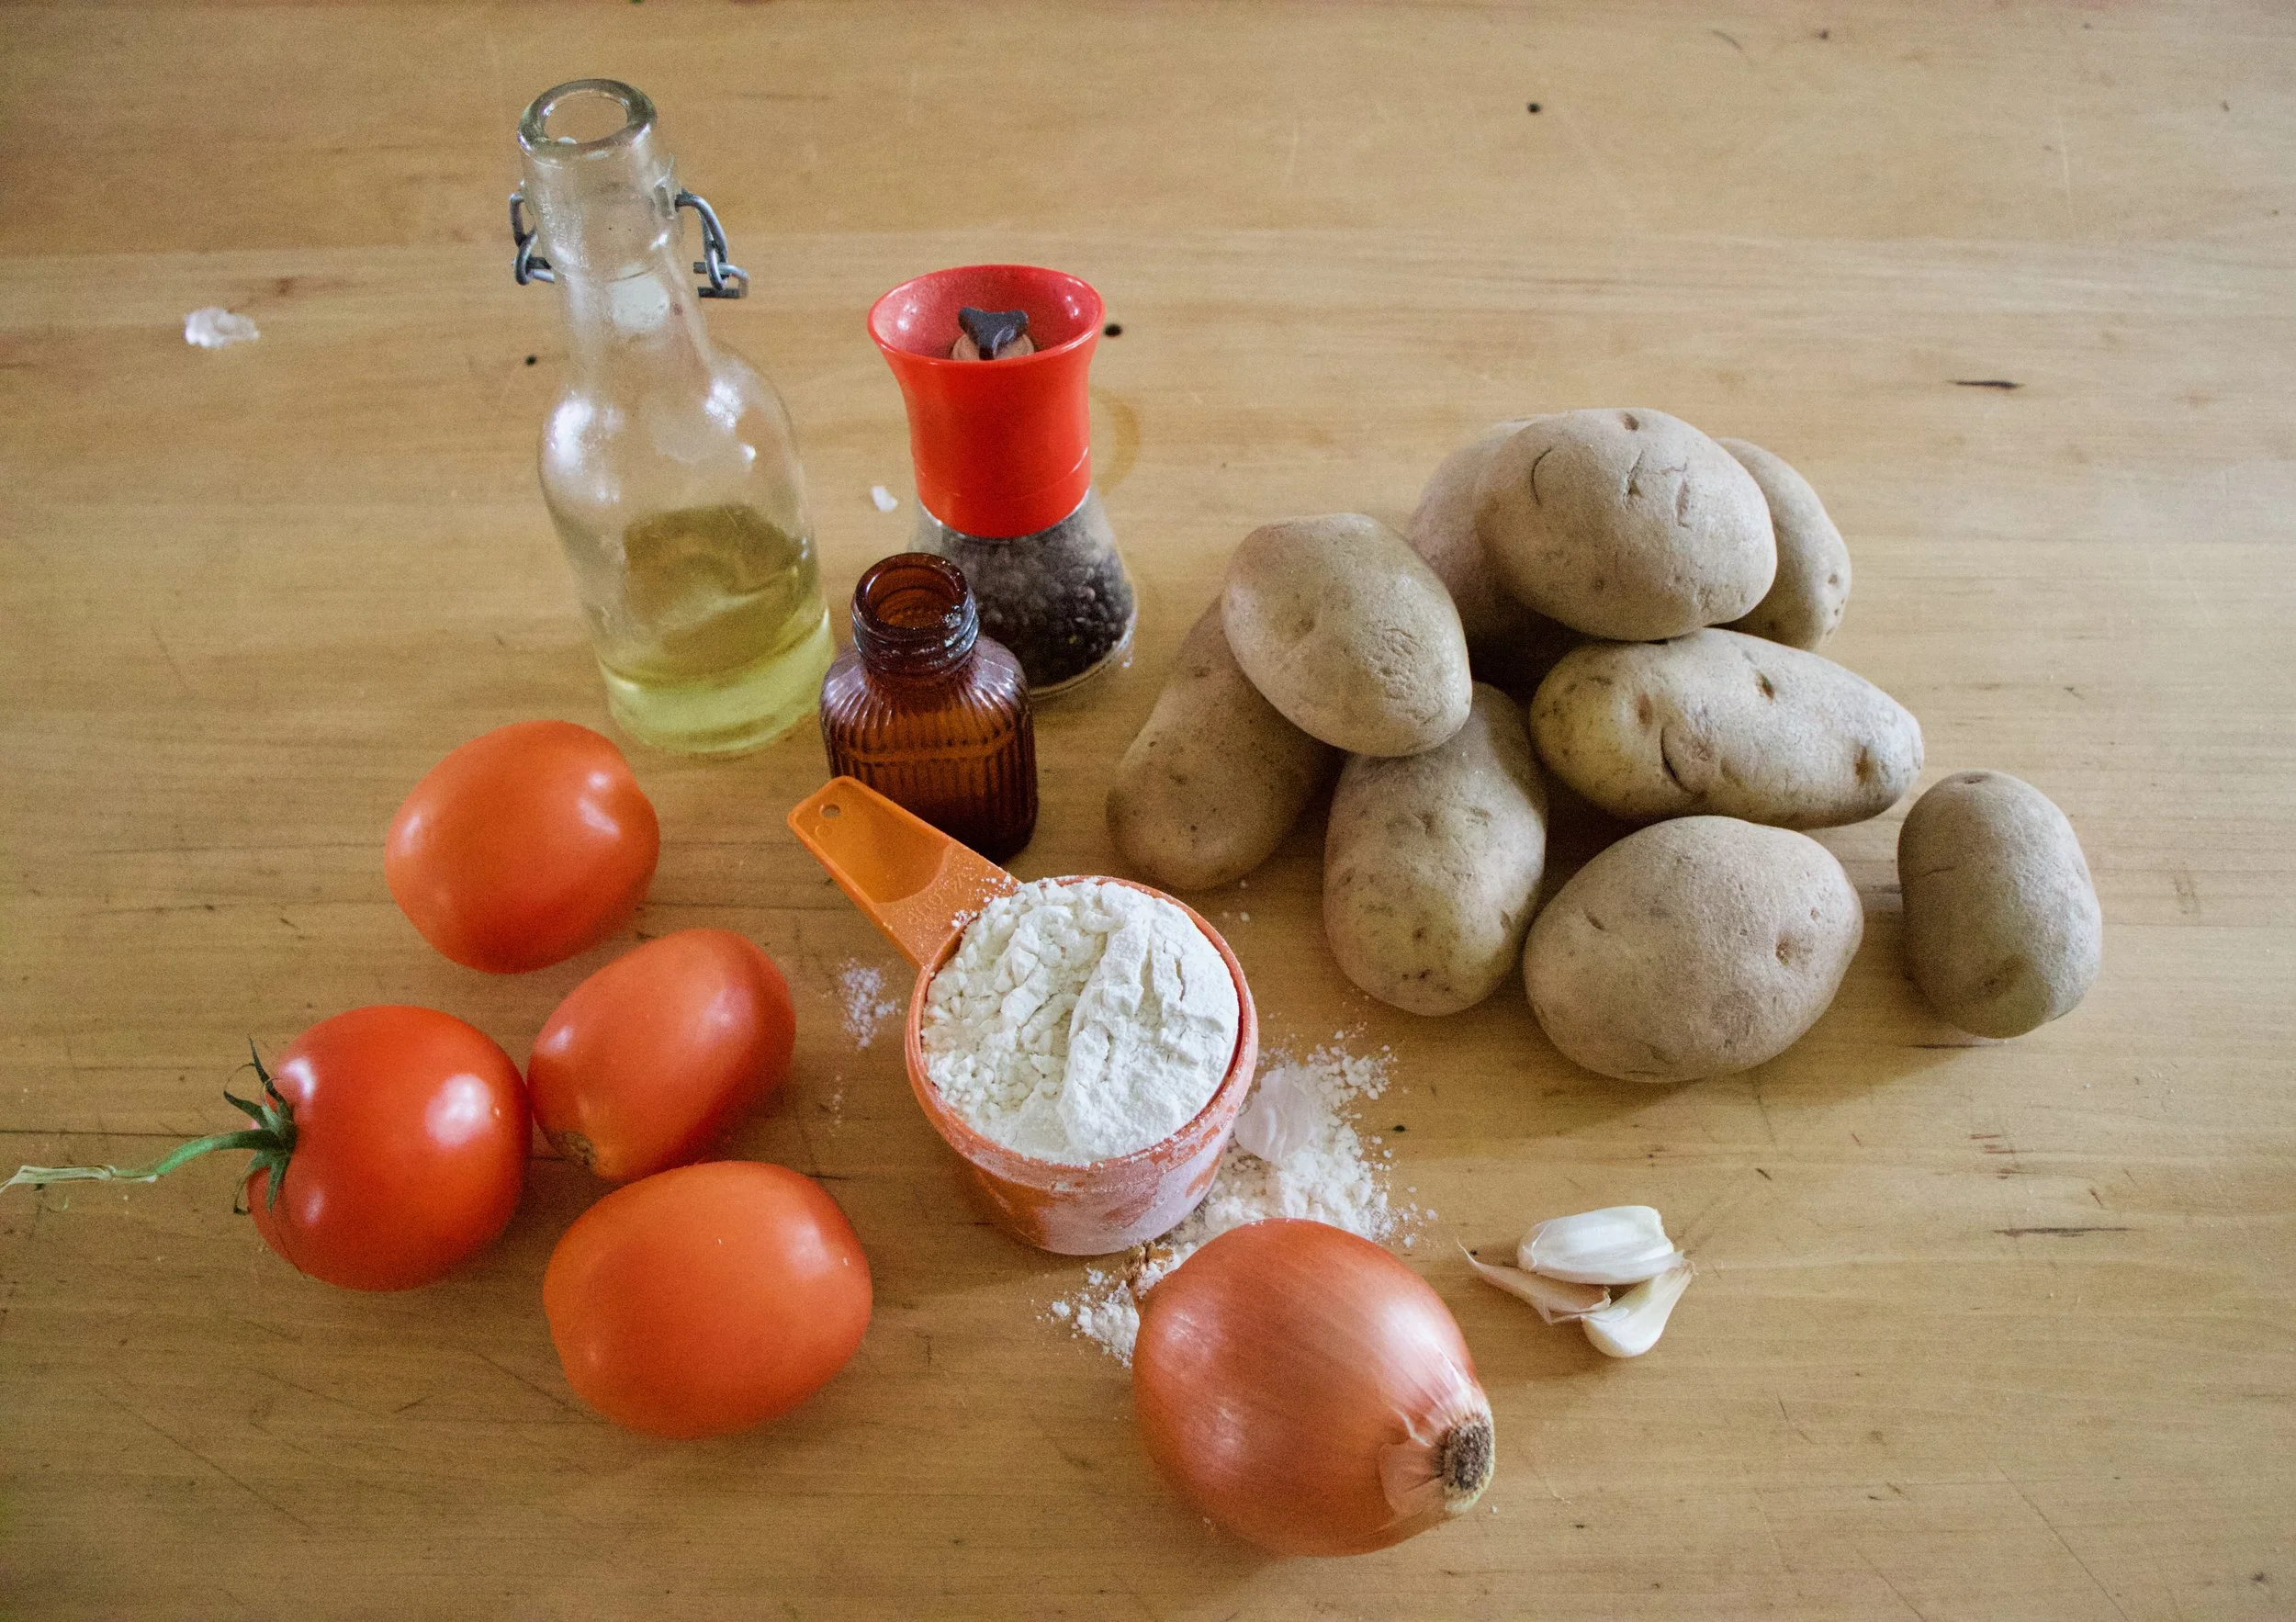
The stuff. Potatoes, flour, an onion, some tomatoes, a few cloves of garlic, salt, pepper, and olive oil.
Note. Make sure to use russet potatoes because they make the lightest, fluffiest gnocchi. You could probably use Yukon gold, but any hard wax potato just won%u2019t do.
First step is to make baked potatoes. Place potatoes in oven, directly on rack, and bake for 30-45 minutes until nice and soft and tender. Just like you would when you eat it as a baked potato. Once cooked cut them in half and let them cool off for a few minutes.
Once potatoes are cool enough to handle, scoop all the flesh out of skins. Keep skins for soup or a snack for later.
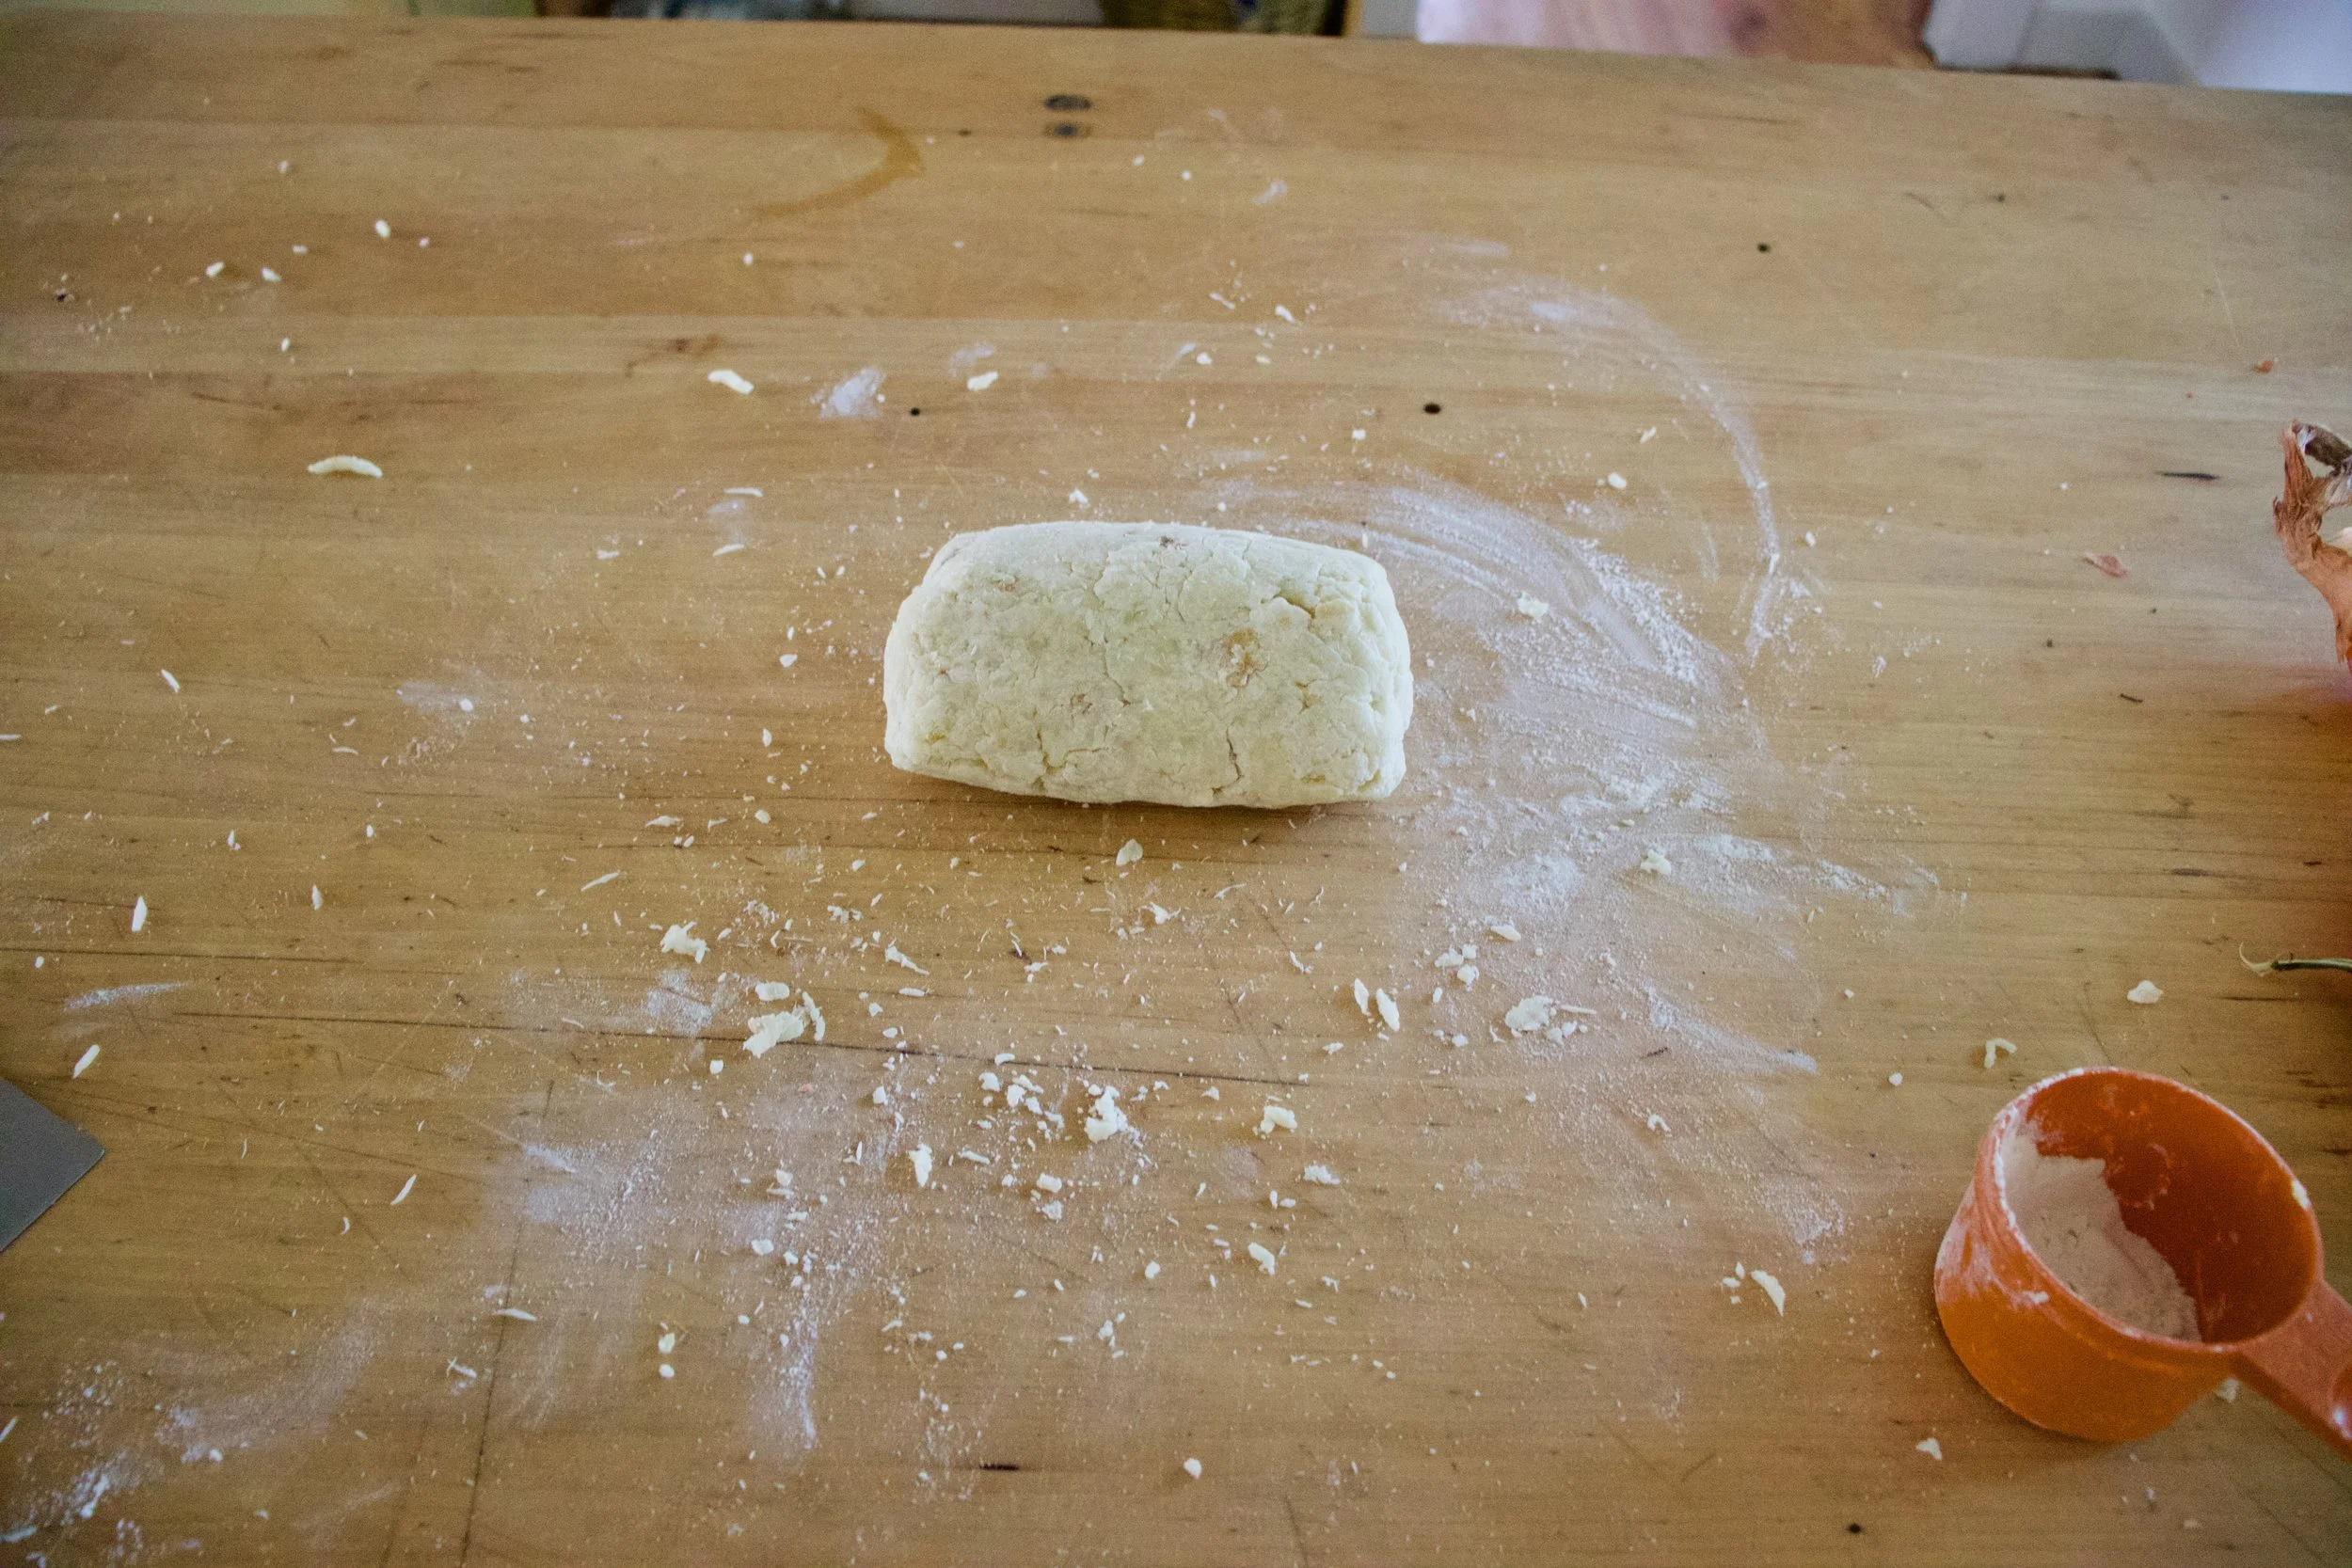
And the fun part. Flour the counter then rice the potatoes. You can also do this with a food mill or even grate the potato with a box grater. Once all riced, cover with flour and start to fold and mix the potato into the flour gently until the dough starts to come together. If the dough seems really sticky and wet, add in a tablespoon or two of flour, to dry and crumbly, add in a tablespoon or two of water. The goal is a nice fluffy dough that hold it shape but is not overly dense.
Cut off a potion of the dough, roll it into a rope about an inch thick, then cut into inch long pieces.
To cook gnocchi. Bring a big pot of water to a boil and carefully drop in a handful of gnocchi into the water. They are gonna sink, but after a minute or two they start to float. Once floating, remove them from the pot with a slotted spoon and place them on a lightly oiled baking sheet. Repeat until all the gnocchi are cooked.
Cooked and ready%u2026 Ready for what? For anything you want but these are going into a tomato and onion situation.
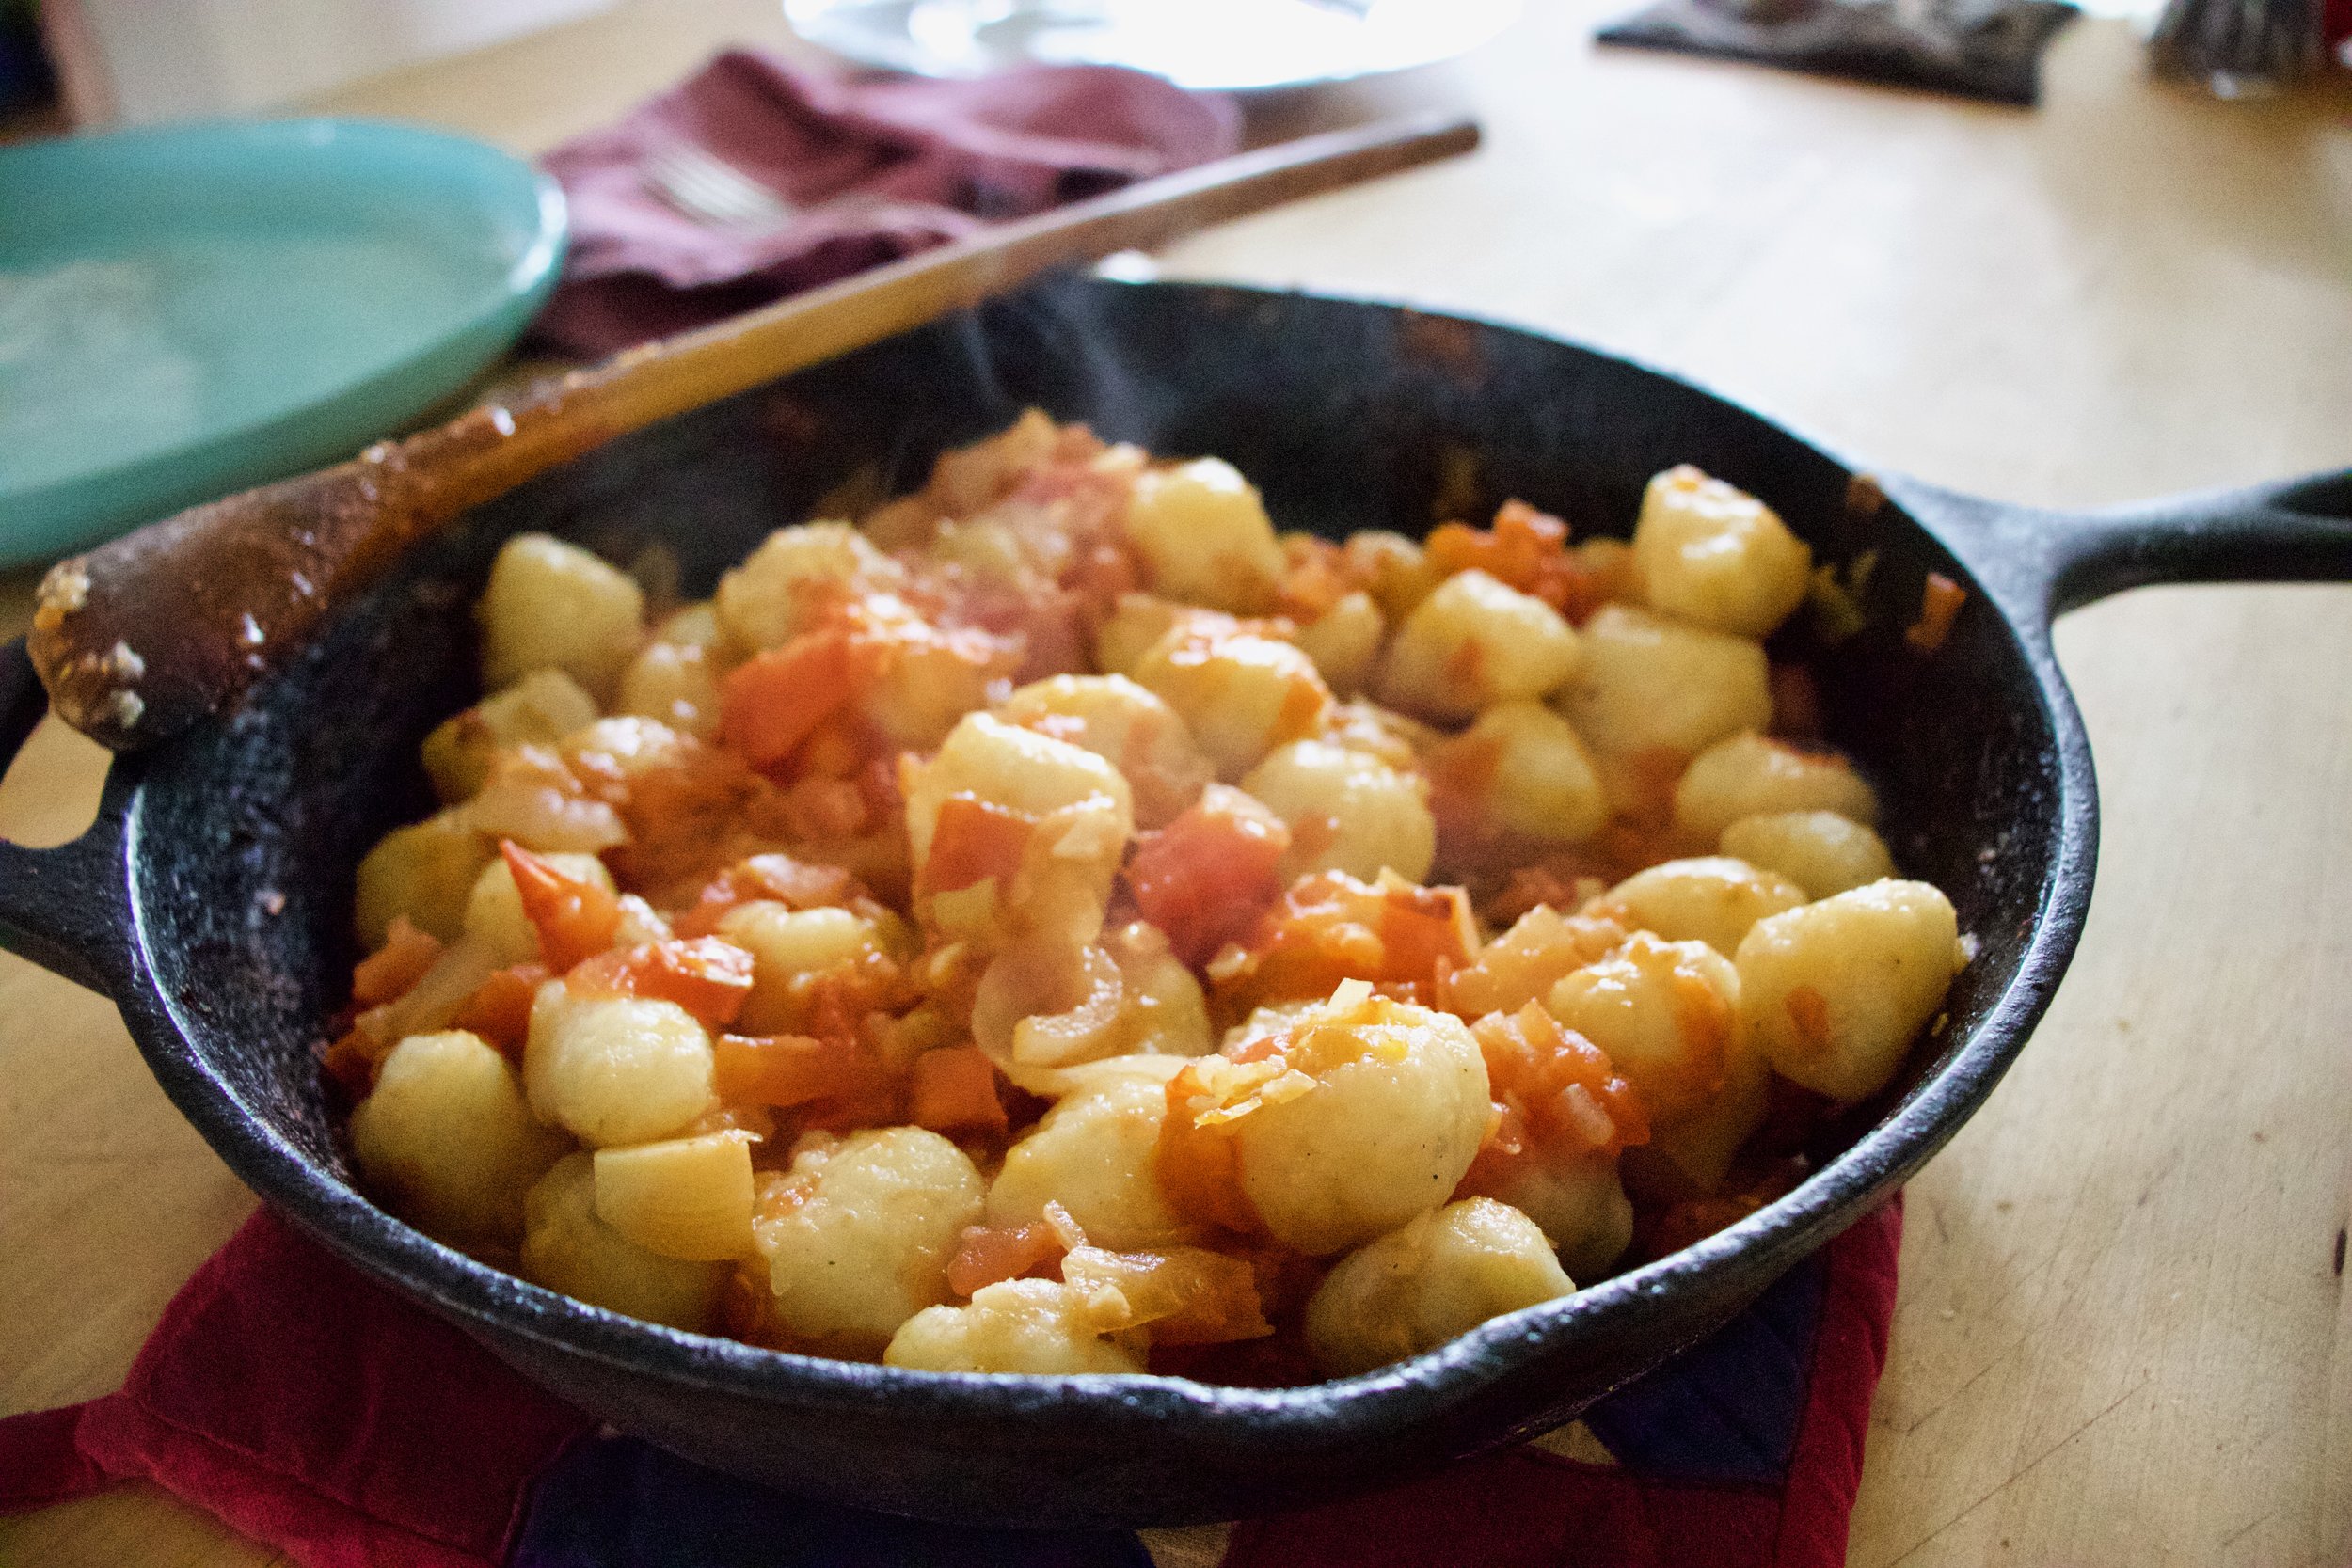
Mince garlic and dice tomatoes and place into skillet with a good pinch of salt and a splash of olive oil. Place on stove and cook until slightly tender. Dice up tomatoes into small chunks and add to skillet along with a cup of water (if you have gnocchi water, use that) Turn heat up and cook until mixture start to bubble, then turn heat down to low and cook until the tomatoes are mushy.
And then drop in gnocchi. Keep on heat until the gnocchi are warmed completely all the way through.
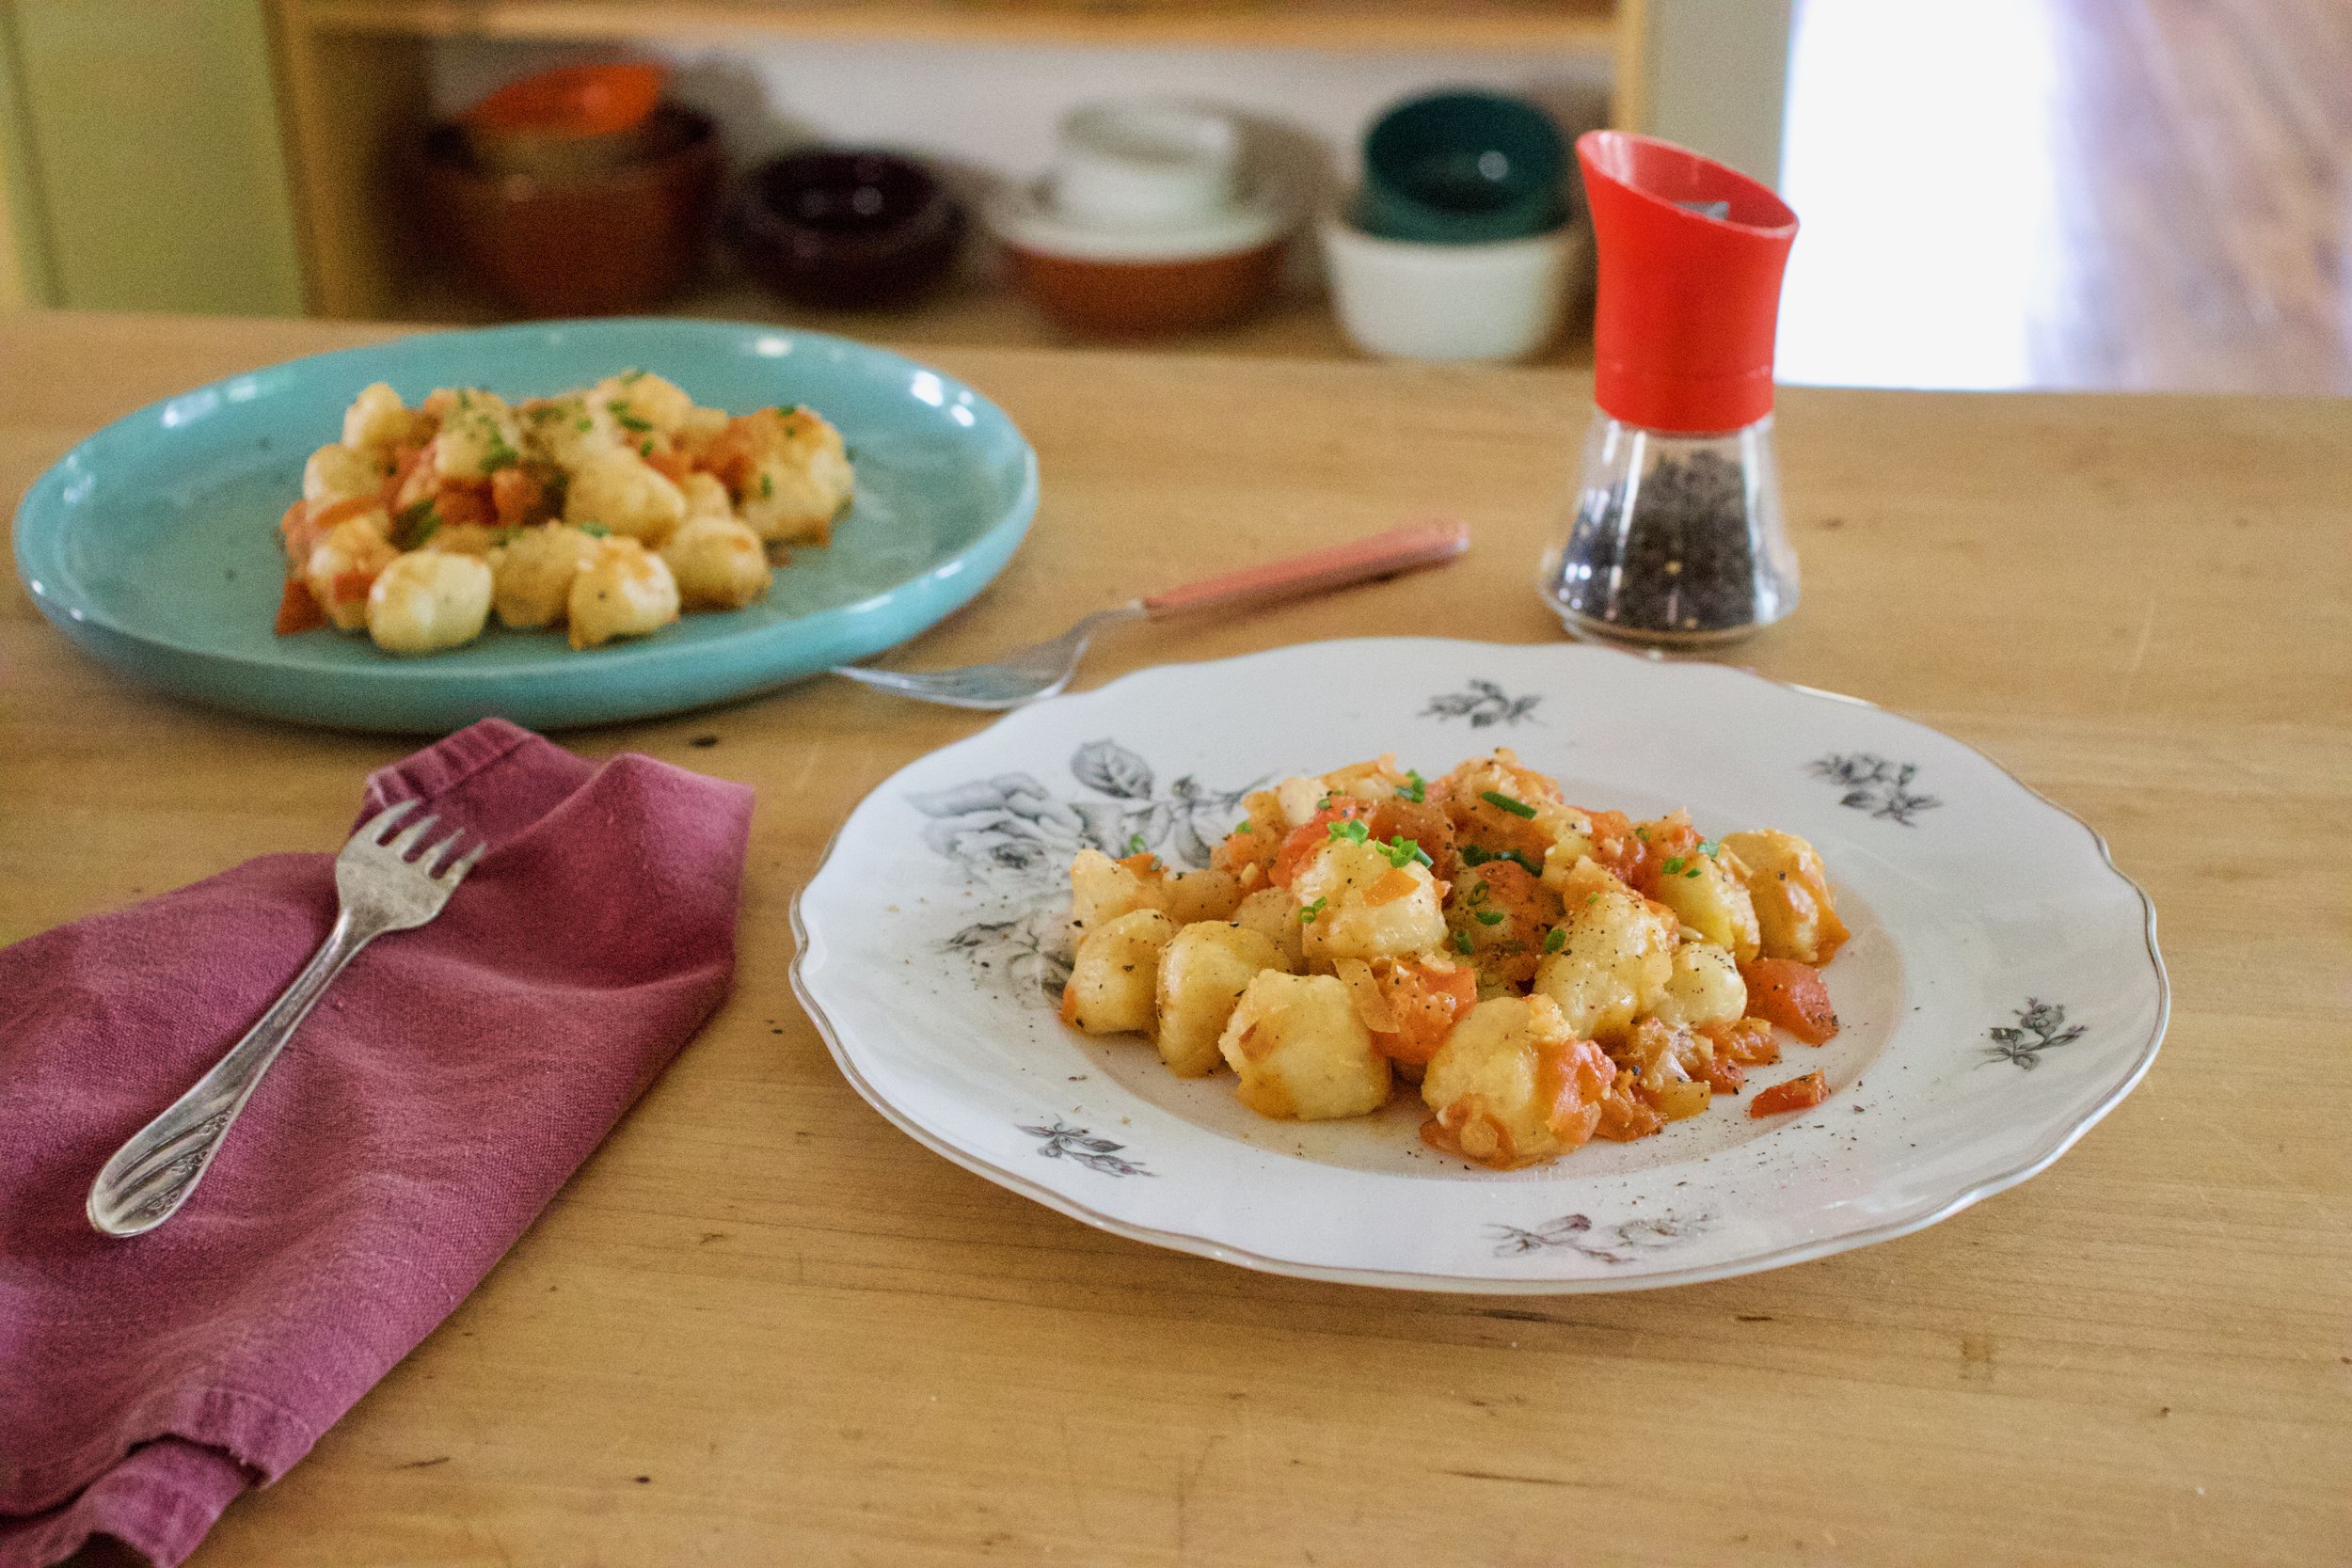
Sprinkle of salt, lots of pepper, and something green if you want to be fancy.
And then you eat them.
-C
Makes 3-4 servings
2.5 pounds russet potatoes
2/3 cup of all purpose flour
1 large onion
3-4 tomatoes
few cloves garlic
salt and pepper
olive oil
water
Place potatoes directly into oven on one of the oven racks and bake on 450 degrees until soft and tender. Should take about 1/2 hour to 45 minutes, depending on size of potatoes.
Once cooked, remove from oven carefully, cut in half, carefully, and let cool for a about 10 minutes, just so you can handle the potatoes without burning yourself. In the mean time, get a large pot, fill it with water, and set it on the stove to boil.
When the potatoes are not to hot to touch, grab them and with a spoon, scoop out all the potato flesh from the skin (keep skin for a snack or for soup). Lightly flour the counter and start ricing the potatoes directly onto the counter. (You can also use a food mill or a box grater if you don%u2019t have ricer). Once all potato is rices, cover with floor and gently fold potato over into flour, over and over, even using a knife, to kind of cut the potato into the flour, until it all mostly comes together. Be careful to not overwork the dough or else it will become dense make the gnocchi chewy. If the dough seems is sticky, add in a few more tablespoons of flour, to dry and seems crumbly, add a few tablespoons warm water.
Once you have the dough, make sure the water on the stove is still there and has not evaporated and is at a gentle boil. Cut dough in thirds then roll out a portion into a rope about an inch thick. Cut the rope into inch long pieces. Repeat with the rest of dough.
When all the gnocchi are made, grab a rimed baking sheet, coat with oil, and place close by the boil water.
Now to cook them. Drop a handful of gnocchi into water carefully. They will sink. Watch and after about a minute or two, they will start to float. Once floating, take a slotted spoon and take them out of water. Place them on the greased baking sheet. Repeat until all the gnocchi are cooked. (when done cooking, save a cup of the cooking water)
After the gnocchi is cooked, you can do whatever you want with it, like eat it right away with salt and pepper or whatever, but to make the quick tomatoes onion situation, dice up the onion and mince the garlic. Place into a skillet with a drizzle of olive oil and a pinch of salt and place on stove and start to cook. Dice up the tomatoes and once the onion is tender, add in the dice tomatoes and about a cup of the gnocchi cooking water. Turn the heat up until the water is bubbling then reduce to low and cook until the tomatoes are mushy and tender. Once cooked, add in the gnocchi, toss them around, and cook until the gnocchi are fully warmed through.
And then eat it. Maybe a little more salt if needed, definitely lots of pepper, and whatever else you want.
Oh do I love a good Sunday. The picture above was taken last Sunday and what a glorious day that was. The mister and I took the pup hiking and it was the most spectacular of days. Sunny, 30 degrees and no wind..I could’t have asked for better weather.
The rest of the week turned out alright. The weather went back to hell again and I was a little frantic and super busy, but all in all, good. I accomplished some things that needed to be done and got to spend time with just about everyone in my family. The highlight was when my sister slept over and we finally watched the Fault in our Stars while eating lots of food, cuddled together on the couch. (movie was good, but book was better. Books are always better) We then woke up early the next day and we (the mister too) journeyed across state lines to the closest Target where we purchased some hand soap, 2 seltzer waters and 2 jars of baby food. (I needed the jars) On our way out, the lady experienced her first ever taco from the taco bell in the food court before heading back to Vt. We spent the car ride singing terrible pop songs and eating the babyhood (Blueberries and sweet potato, and yes, they are tasty) We then came back tom my house, listened to more awesome music while she did her homework and I played on the computer and made dinner. It was the best.
Heres a few of this weeks happy bits from the internet.
– I will be making these wire baskets this week. I need storage and I love a good wire basket.
-I have been ending up on this website every night..Making plans
-I need this shirt!!! Feel free to buy it for me!
-Throw Back Song!… And yes, I was sure I was going to be Mrs. Zac Hanson when I was 11.
-My sister sent me this link, Wool and the Gang. So cool.
-These pictures made me laugh. I end up with veggies like this all the time.
And here are a few pictures of my real life happy…..
Playing on the frozen lake. It was so freaking cold and windy, but we just had to do it!
Beach stairs. Hopefully soon they will be a little less icy and maybe even lead to some sand and not waist high drifts of snow.
Two of my favorite people in the world.
And I made brunch with 2 more of my favorites.
My little brothers (can I say little if they are bigger then me?) came over and we all had dinner together while listening to music from when they were born. Nothing like a few 17 year olds to make a person feel old.
Blooming daffodils. I love to watch my flowers open up, it’s just as good as the flower itself.
I figured now is a good time to get this recipe out there before we get to far into spring and summer recipes because there is going to be a lot of banana ice cream filled recipe coming and I figured its a good idea to have the basic banana ice cream recipe ready for people to refer too. And because I made so much fantastic naner ice cream, I also made a cookies and cream naner ice cream for my sisters and the mister.
Comments that I got from my sisters and the mister when I made them this ice cream
-Sister one.”I give this my sister seal of approval.. It’s so good. The first dessert you have made that I liked! (not including all the other desserts that you have made that I liked)”
-Sister two- “Wow.. it looks like ice cream and feels like ice cream and tastes like ice cream.. You should make me this ice cream!” (I was confused too because I was pretty sure I just made her some)
-The mister- “I am so excited for my new fly fishing pole!”
Ok, so the naner ice cream isn’t new to the mister and he IS very much excited for his new fly fish pole. So excited that he forgot to tell me how amazing that I am and to thank me for making him a big bowl of yumminess. (It’s ok, I forgive him)
And yes, this is probably one of the easiest, most delicious, healthy and amazing frozen dessert that you will ever eat. You will probably find yourself buying mass amounts of bananas and stocking the freezer until things just start falling out. (which is also ok because it’s only bananas and you can’t have too many frozen bananas)
The stuff you need for this ice cream…. Nice and ripe bananas, peeled and then frozen* That’s it.
To make it, place frozen bananas into food processor and hit the on button. Process the crap out of the namers until nice and silky smooth.
*Note, the smaller the frozen chunks are , the faster and maybe a little easier for the blender to blend the naners into ice cream. So if you think of it, chop bananas into pieces before freezing or even after.
After all blended and smooth, either eat right away or scoop ice cream into a freezer safe container and stick in freezer. That’s the banana ice cream… And it is amazing and so so so so so addictive. I make a batch, think I am only going to eat a scoop, then find myself eating half of what I have made, but it’s ok cause it’s only bananas.
Now for the cookies and cream banana ice cream..One batch of banana ice cream, either freshly made, still in food processor or made ahead and placed in a food processor and given a good pulse to smooth it up.
Add cookies in, crushing a bit beforehand and pulse till combined. Now you have cookies and cream naner ice cream…. and everybody is happy.
Scoop into a cup, a bowl, a freezer safe container, or directly into your mouth. Be careful…. You can still get brain freeze from eating naner ice cream too fast!
Keep it real hump day drum bum!
-C
Basic Banana Ice Cream
Makes one batch. Good for 3-4 servings
4-5 ripe bananas peeled and frozen
Peel bananas and stick in a freezer bag or container and freeze. When bananas are completely frozen, break into pieces and stick into a food processor or blender and puree until silky smooth.
Eat right away or scoop into a freezer safe container for later.
Cookies and Cream Banana Ice Cream
1 batch banana ice cream
5-10 (depending on your cookie need) cream filled cookies like oreos or Trader Joe’s Joe Joe’s (These are gluten free)
In a food processor, blend banana ice cream with cookies.
Eat right away, with a utensil of choice in a container of choice.
Every now and then I make something for me. All for me. This is one of those dishes that was not destined to be shared with anyone. That I had no one else in mind to eat besides me. No worring about what anyone else with think. Just a simple little dish that I was craving and wanting.
So I made it and man, was it so freaking satisfying. Cooking for oneself is very much a gratifying experience.
Celeriac, or also know as celery root. Have you ever had it? If not, well duder, you need to. It is in my top 3 favorite vegetables and that is saying a lot. So anyway, celeriac, has a slight celery taste, but also kind of earthy and nutty. It pairs well with anything that a potato might, but also is amazing on it%u2019s own. Roasted, steamed, raw. Just really fantastic. And it is in season so get on it and go find yourself some.
And lentils. In my top 3 favorite foods. Made them crispy because pureed celeriac and crispy lentils just sounded right and I love me crispy things. Again, I was making this dish fo me so crispy was happening.
Together, the creamy, delicious pureed celeriac covered with a bunch of spiced, crispy lentil%u2026.Amazing. Eating it, I couldn%u2019t have been happier. I did myself one good with this one.
I might even have to make it to share someday.
Now to the celeriac and lentils!
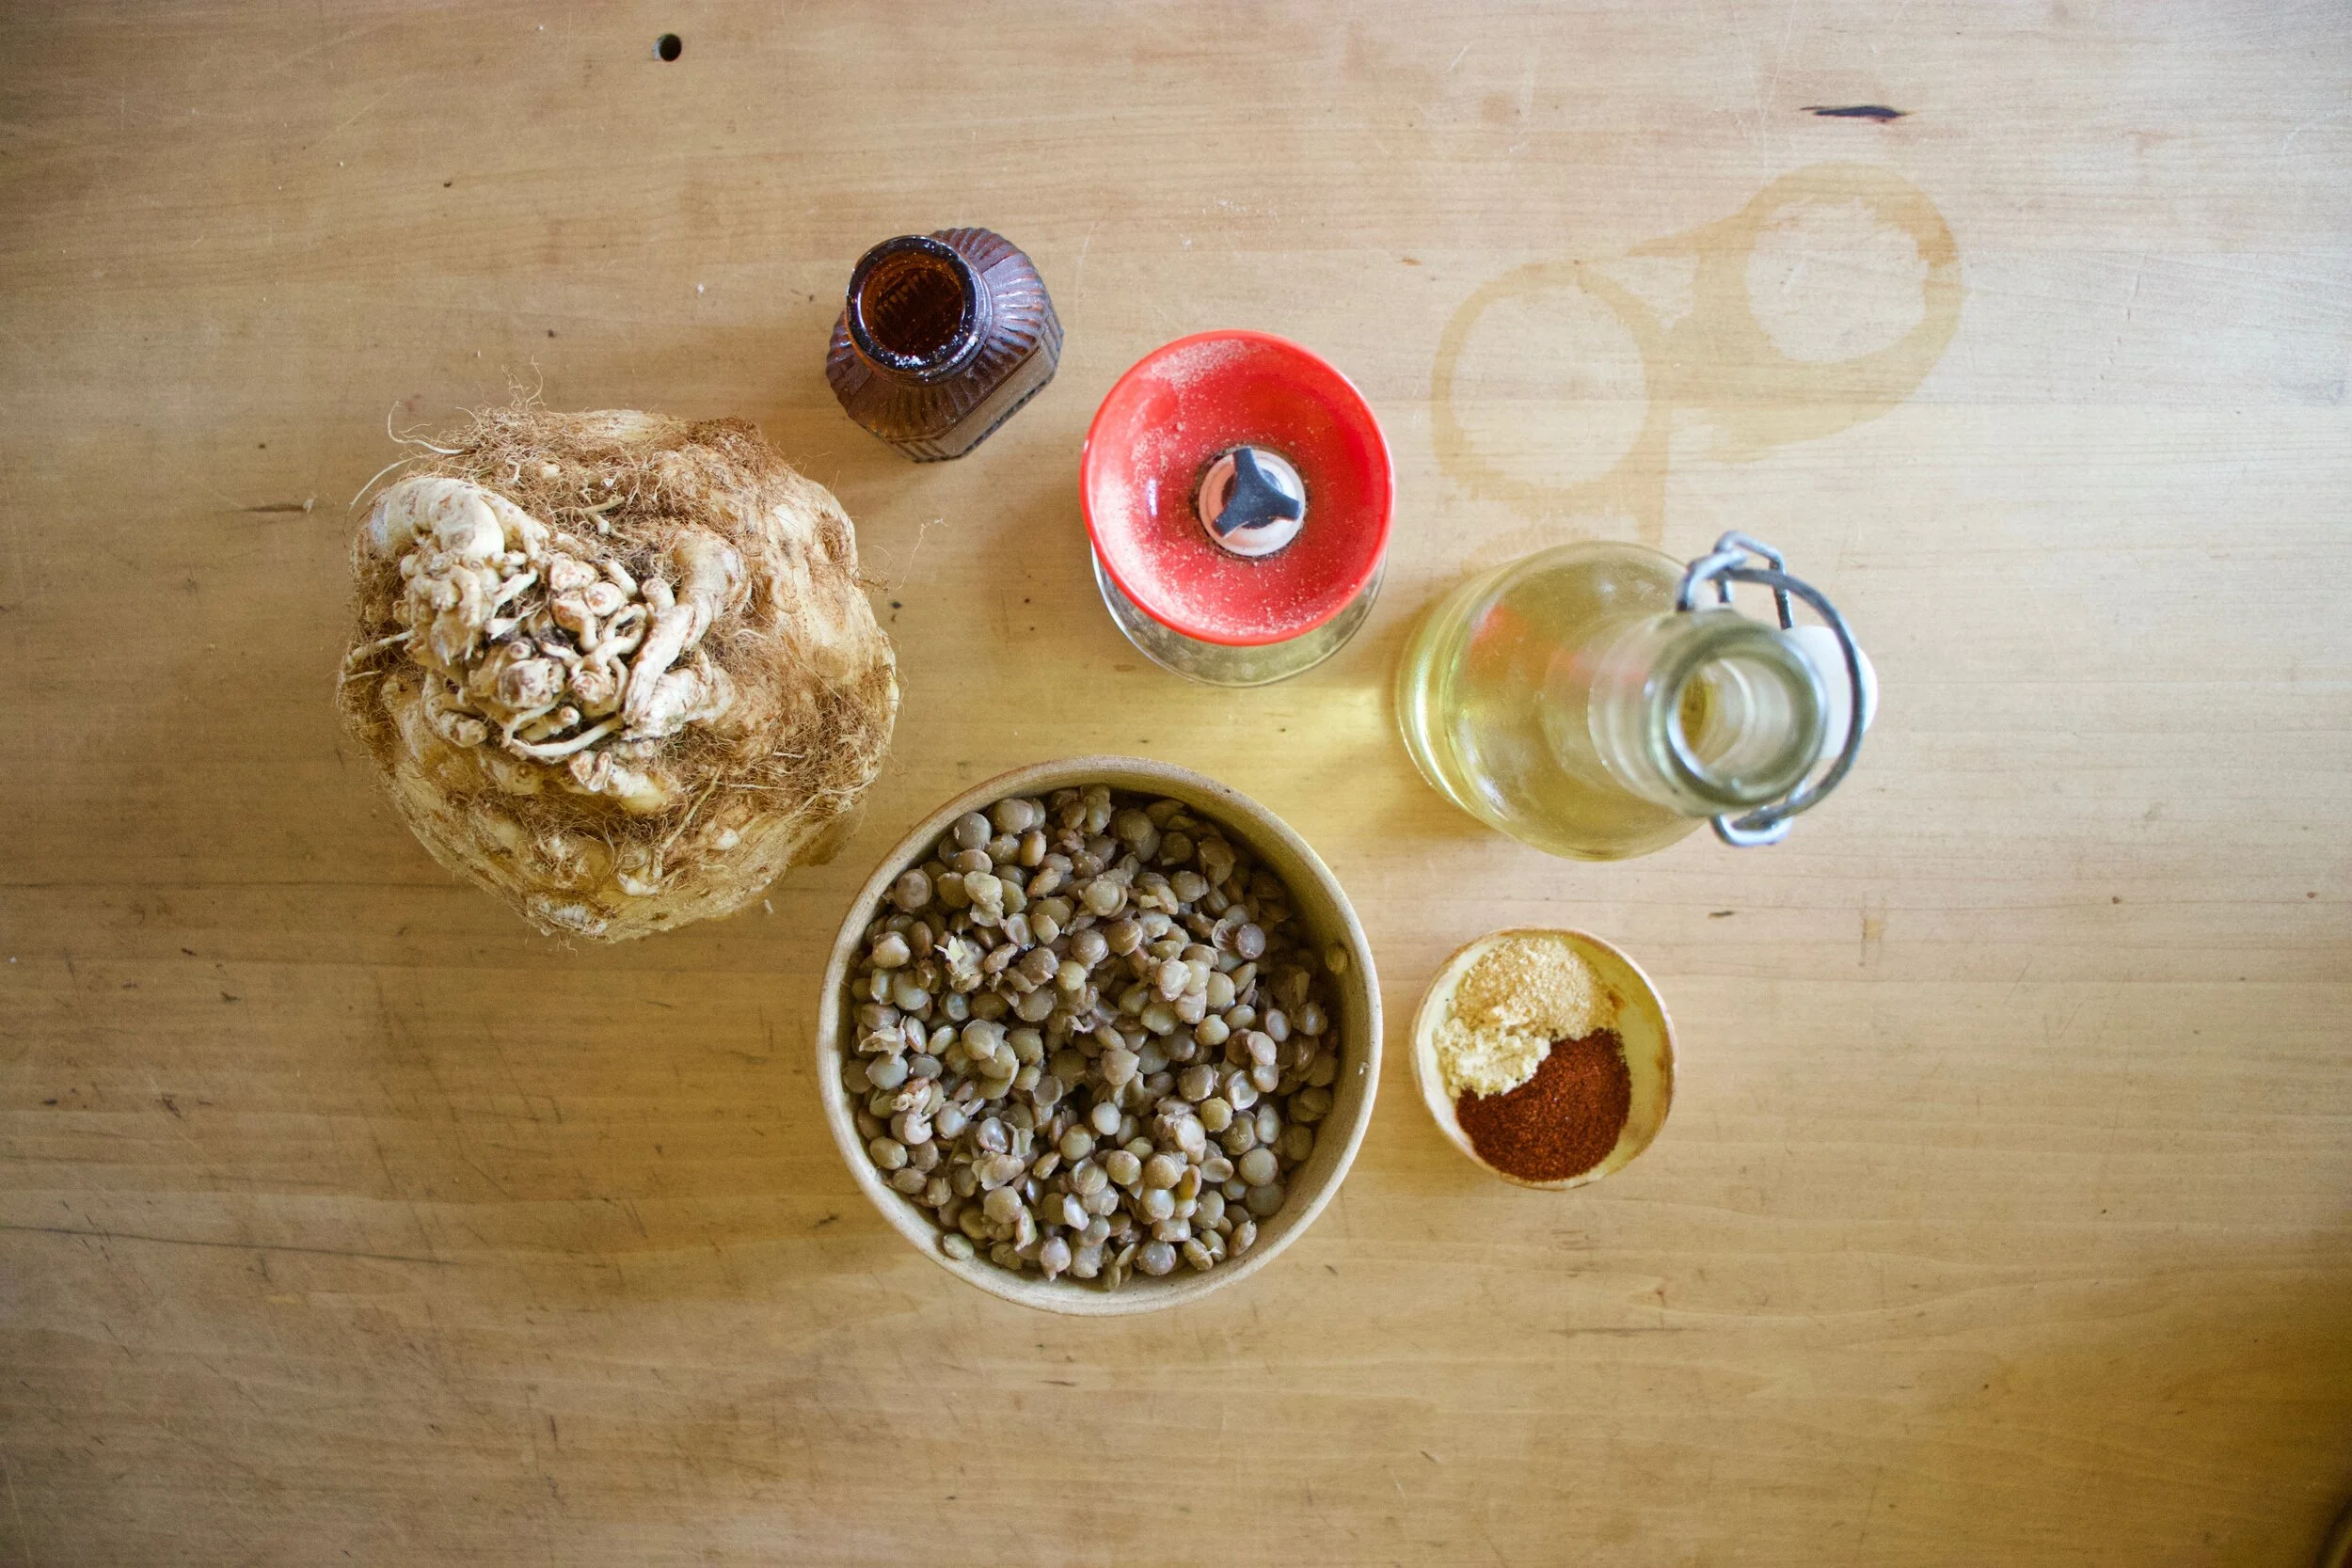
The stuff. A bulb of celeriac, some cooked lentils, salt and pepper, chili powder, garlic powder. mustard powder, and oil. (oil is optional)
The celeriac. Ok, so most people peel it. I actually get weird looks from people when I tell them I don’t , but let me do me, you know. So anyway. Peel it if you want, or not, just cut it up into chunks.
Place cut up celeriac into a pot and cover with water. Place on stove on medium heat and cook until fork tender.
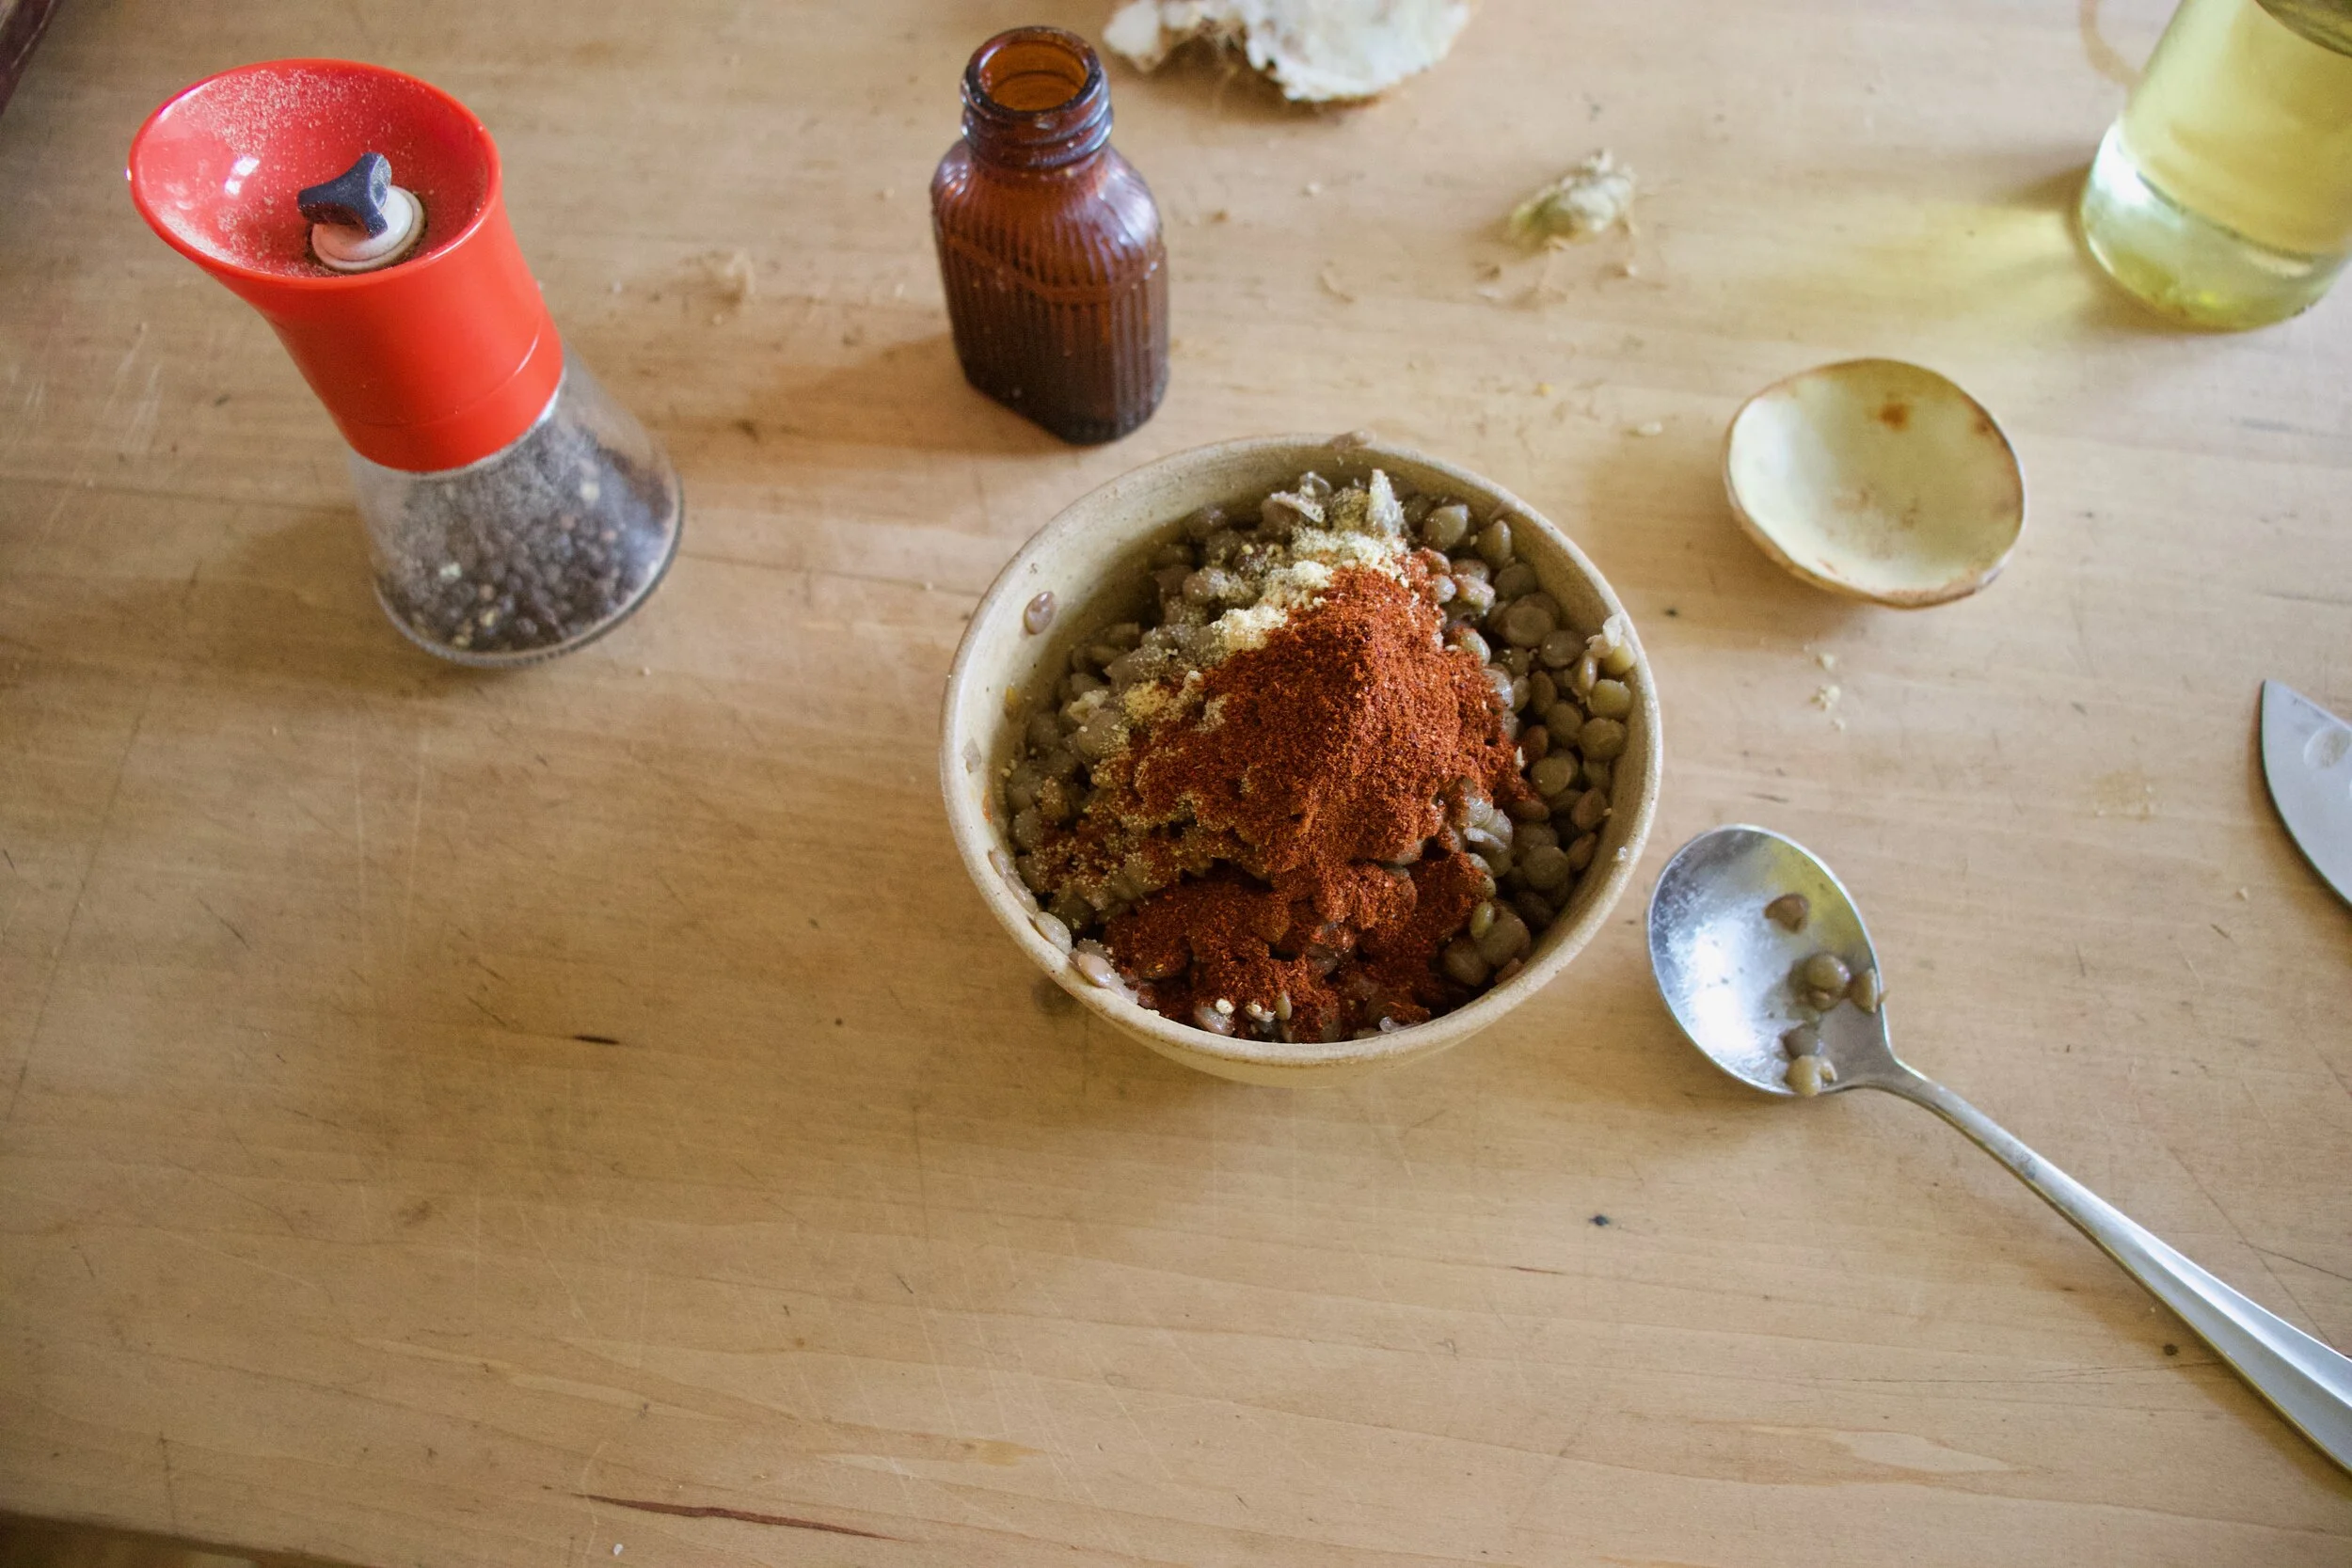
Lentils meet spices and get mix all together. Add a pinch of salt and lots of cracked pepper too.
Spread now spiced lentils onto a baking sheet, pop into oven, and bake until crispy. Easy peasy.
And to puree the celeriac. Strain any extra water into a cup. Season with a pinch of salt and pepper and grab the hand blender (or regular blender) and blend it, adding back in some of the strained water as needed, to get to a consistency that you like. Me, I liked it pretty smooth, but also with a little chunk. Heck, you could leave it really chunky or go all out completely smooth. Up to you. Also if you want a creamier texture, add in a teaspoon or so of the olive oil. That is a taste preference. I didn’t add oil this time, but I have before. It%u2019s good both ways.
And there you have it. Add the celeriac puree to a bowl, top with crispy lentils, and garnish with something green if you want.
Then eat it.
Not going to lie. After this picture was taken, I busted out the spicy mustard and covered everything with it. And it was amazing.
-C
serves 1 as a meal, or a few as a side dish
1 1/2 cups cooked green lentils
1 large celeriac bulb (soft ball sized)
1 teaspoon chili power
1/2 teaspoon ground mustard powder
1/2 teaspoon garlic powder
salt and pepper
olive oil (optional)
Grab celeriac and peel if you want, or just give it a really good wash. Cut into chunks and place into pot. Add enough water to just cover the celeriac and place on medium heat on the stove. Cook until fork tender.
In the mean time, mix all the spices and a good pinch of salt and lots of pepper together with the lentils. Dump them and spread them out onto a lightly oiled baking sheet. Place in oven and turn to 400 degrees (you can start cooking the lentils while the oven is preheating). Bake for about 20 minutes or until lentils are crispy.
Once the celeriac is tender, strain water into a cup and either with a hand blender or a regular blender, blend until smooth, adding in some of the poured off water as needed. You can puree as smoothly as you like or leave a few chunks.. Also, you might want to add in a teaspoon or so of olive oil for a slightly richer and creamier taste. Season to taste with salt and pepper.
Ehen the lentils are done, take them from oven. Place large amount (or all) of the celeriac puree to a bowl, cover with some (or all) of the crispy lentils and that is that. Eat away.
Serving suggestion%u2026. Mustard. Any kind. So good.
I am on a major swiss chard kick. Like I am eating it all day, every day. And I don%u2019t know if it the heat or what, but the other night I was laying in bed, super hot mind%u00a0you, and couldn’t keep my mind from racing. All I could think about was swiss chard and how much I love it and all the ways I want to eat it. Yeah, I know, but that is my brain so what can I do? Anyway, I finally fell asleep, and when I did it was dreams of chard and rainbows and all sorts of colorful things that I cannot remember anymore. I do know I woke up hungry. And with a plan for lunch.
I will just tell you now, this chard situation is sooooo good! And besides me being on a major chard kick, I am also on a ginger and cumin kick and an onion kick as well so it just made sense to make something with them all together. Tender and gingery cumin-y chard with crispy pickled onions. Seriously, is your mouth watering yet? I have made it twice in the past few day and I plan on making it a whole bunch more. So freaking good!
If you like chard, or don%u2019t know if you do (you probably do), this is a great way to enjoy it. You will not be disappointed.
Now to the chard.
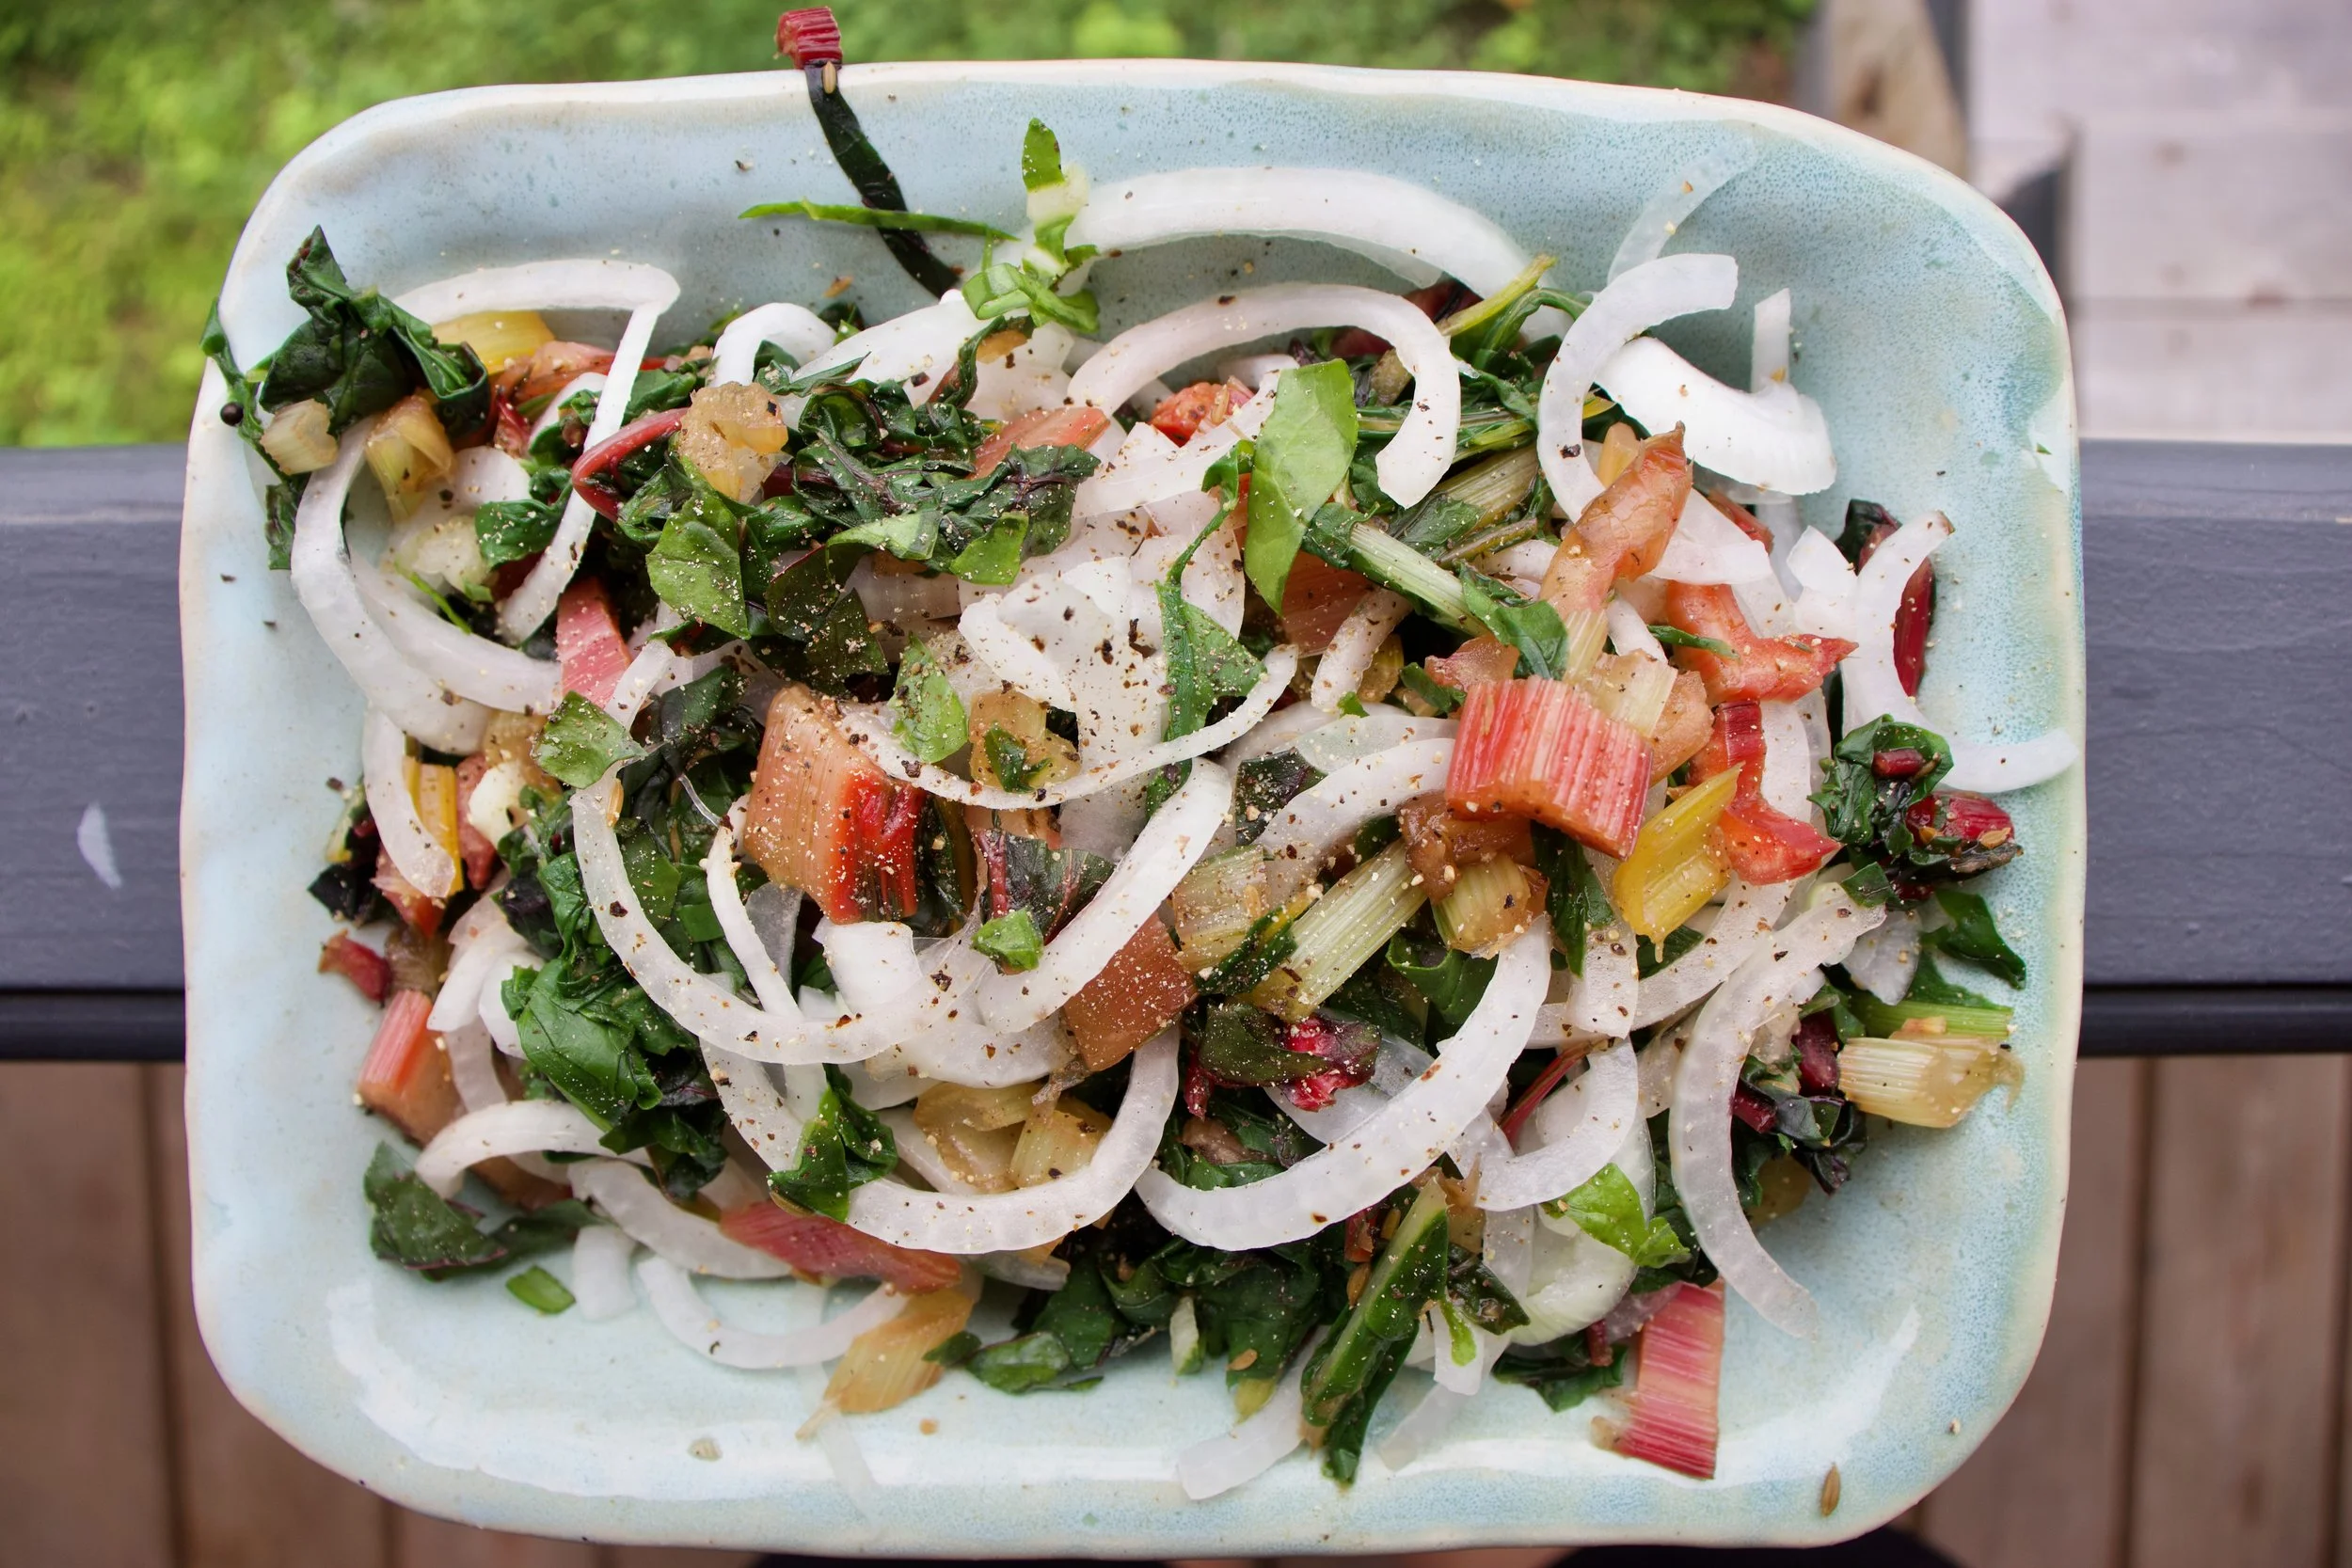
The stuff. A bunch of chard in a few different colors, a medium onion, a chunk of fresh ginger, cumin seeds, white wine vinegar, and salt and pepper.
First and the sooner the better, cut onion up into very thin pieces and place into a bowl with vinegar, a pinch of salt, and a splash of water. Toss onions around and let sit, for at least 20 minutes, or if you think of it and can make it happen, do it a few hours in advance. . The longer the onions sit in the vinegar the better.
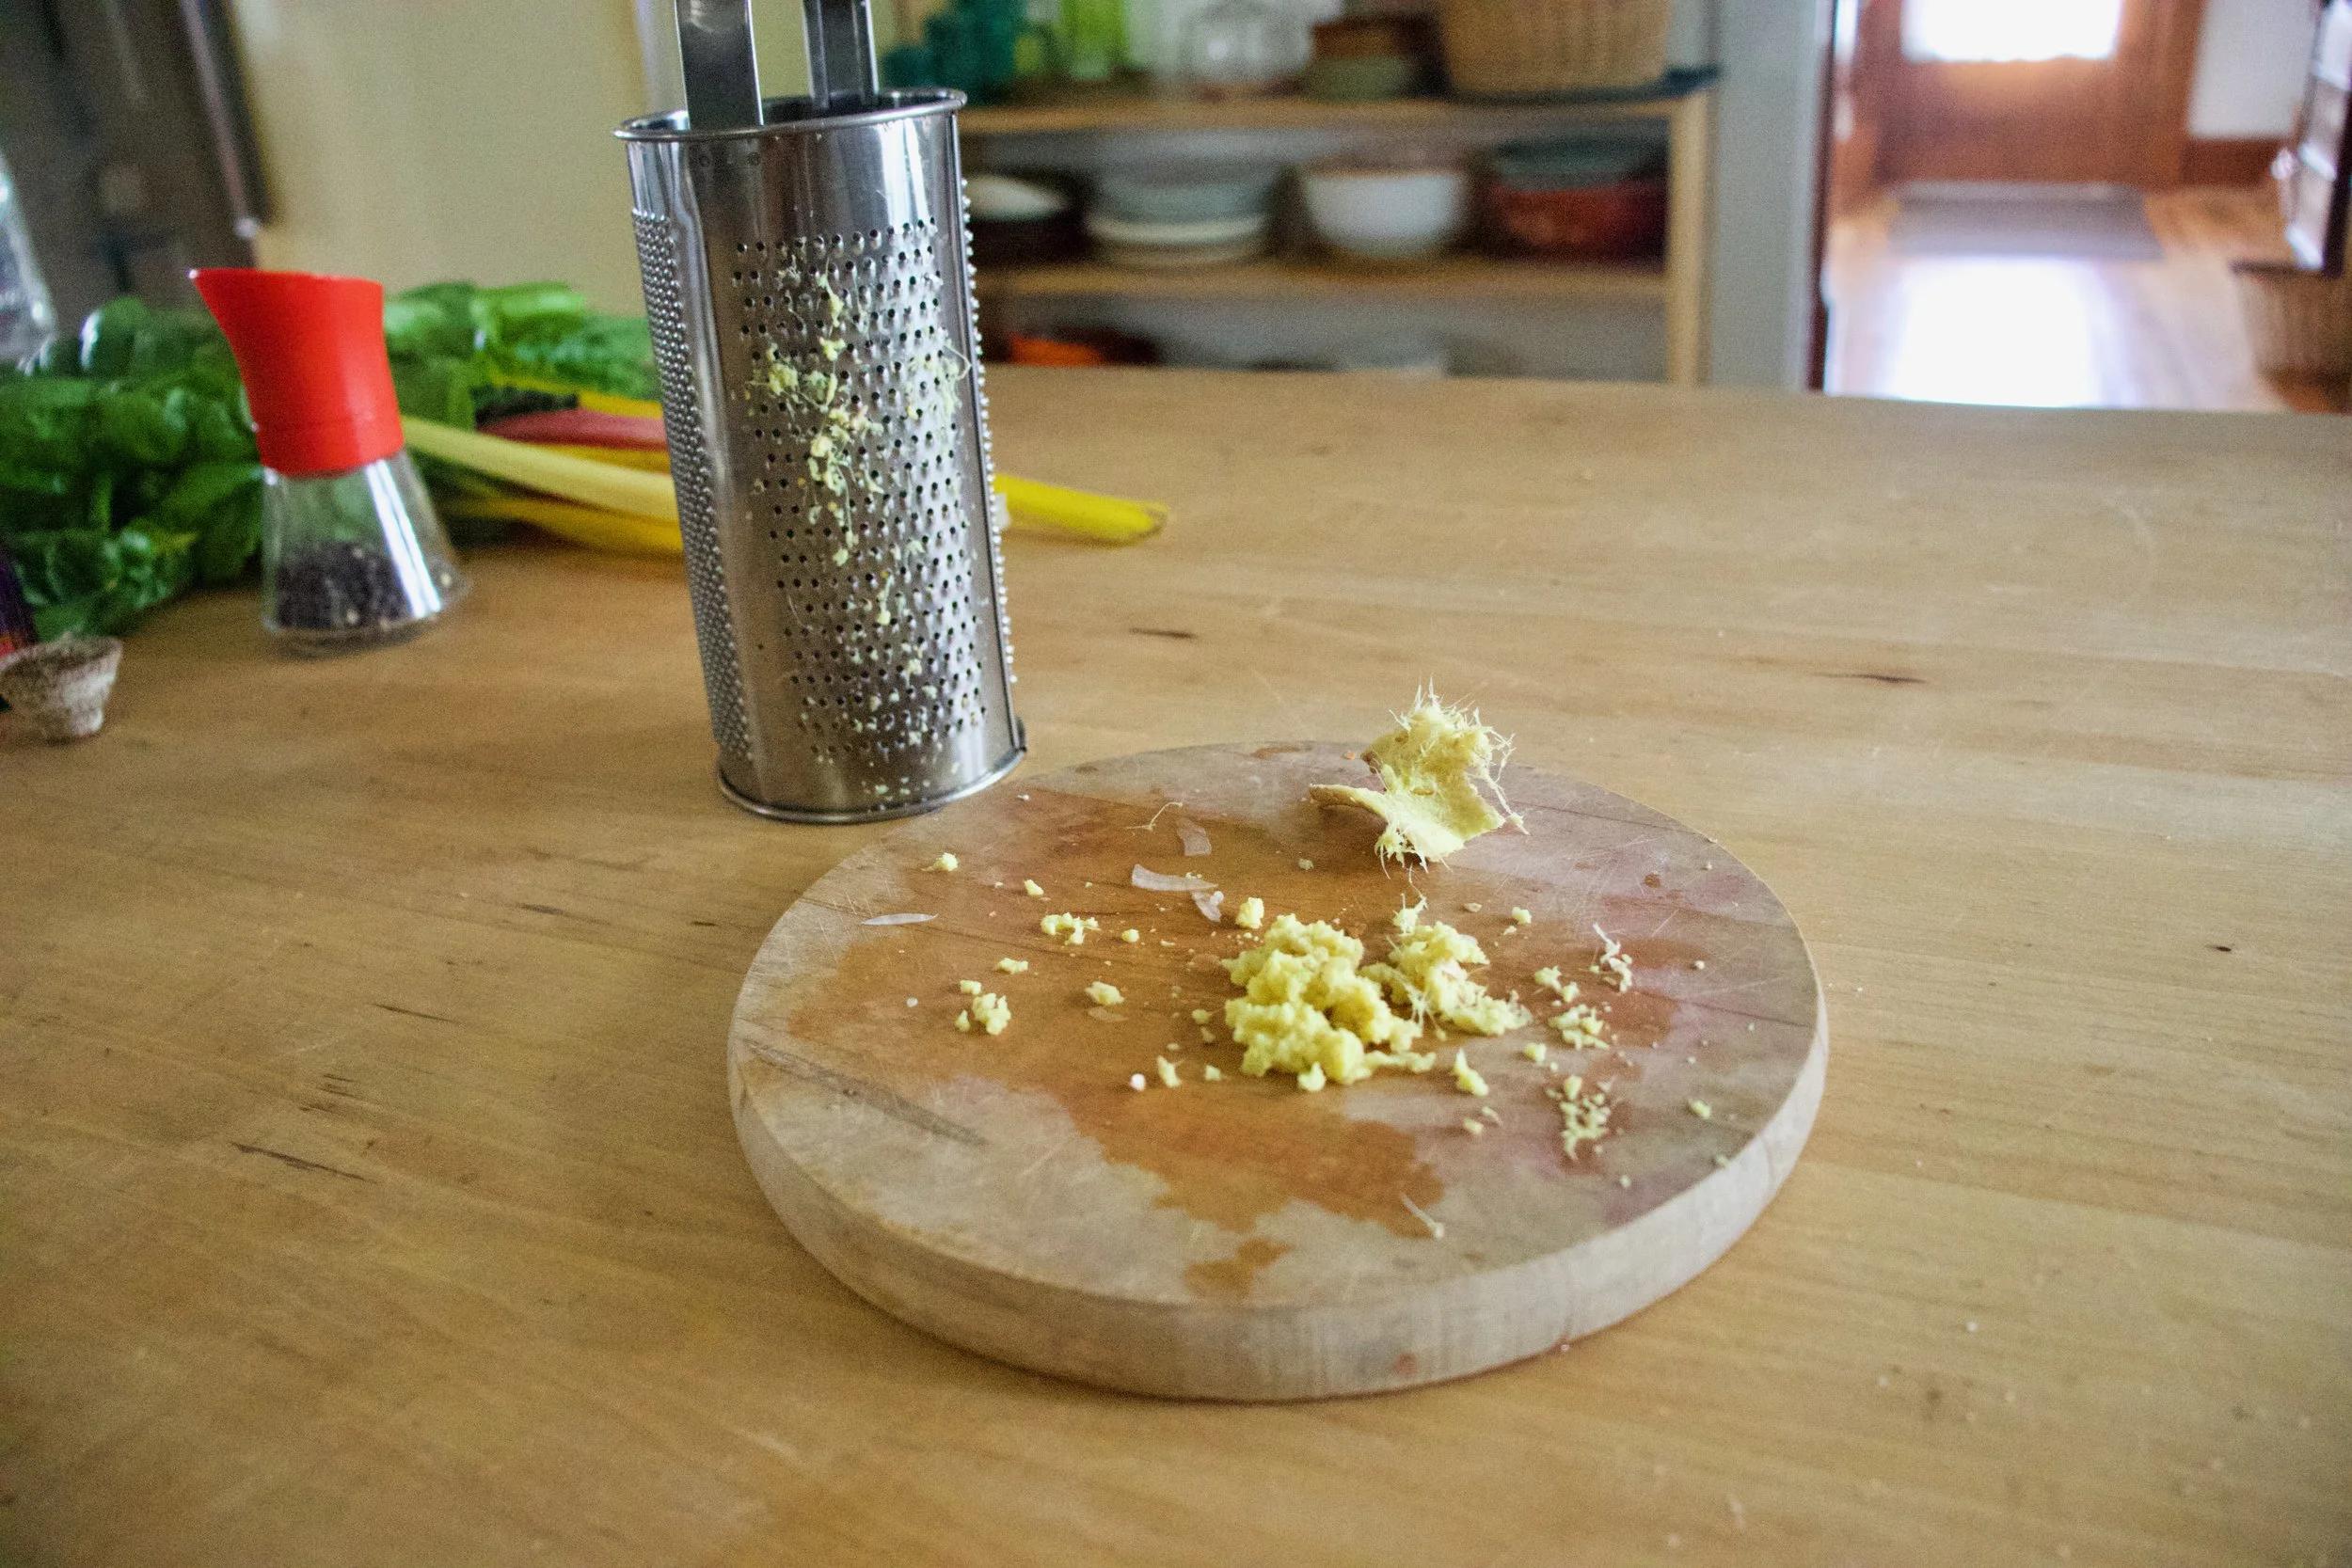
Ginger. If you haven%u2019t grated it yet, do that.
Remove the stems from the greens of the chard then chop the stems into small pieces.
Now here we go. First, before anything, place the cumin seeds into the dry skillet and place on medium heat to toast for a couple minutes, Then add in the grated ginger, the chard stems, a pinch of salt, and about 1/2 a cup of water. Stir around. Keep on medium heat and let cook until the chard stems start to become tender. If all the water evaporates out before they are done cooking, add a little more.
Now chop up the chard greens.
Greens go into the skillet with the stems and a little more water. Cook the greens down until all wilted and lovey and delicious.
Dump the cooked chard into a bowl or on a place and mix in all the pickled onions. Drizzle with a little of the left over vinegar from the onions.
All there is left to do now is add a lot of cracked pepper and grab a fork.
My dreams come true%u2026..Ha.
-C
Serves 1 as a meal or 3-4 as a side
I bunch (around a pound) Swiss chard Any color or a mixture of colors))
1 mediam onion (red or white)
about an inch or so fresh ginger (1 tablespoon grated)
1 tablespoon cumin seeds
1/3 cup white or red wine vinegar
salt and pepper
around 1 cup water
Grab the onion and slice it very thinly into rings or half rings. Place in a bowl and add the vinegar plus a pinch of salt and about 1/4 cup of water. Toss around and set aside for at least 20 minutes. If you think of it, do this a few hours before saut%u00e9ing the chard. The longer the onions sit in the vinegar, the better.
When you are ready to cook it, grab the chard and remove the stems from the greens. Cut the stems into small little pieces. Grab a big skillet and place on medium heat. Add in the cumin seeds and let toast for a few minutes and while that is happening, grate the ginger. Once cumin is toasted, add in the chard stems, the ginger, and about 1/2 cup of water. Keep on medium heat and cook until the stems are slightly tender. Should take 8 or so minutes. If the water completely evaporates before cooked, add in a little more.
And the greens. roll them up together and slice them into thin pieces. Add all the greens to the skillet with tender stems. Add in a splash more water if needed and a pinch of salt. Mix around and cook for another 4-5 minutes or until the greens are completely wilted. Remove from heat and dump the chard into a bowl or on a plate. Take the onions, remove from the liquid and mix together with the chard. Drizzle a tiny bit of the left over vinegar from he onions on top. Cover with cracked pepper.
Eat. Hot, room temperature, or cold. It fantastic any way.
Salad season is here. Green salads, fruit salads, potato salads, and grain salads. All the salads and we are not mad about it.
This is a good grain salad using millet, which I am sightly surprised to hear that a lot of people have never had. Millet is kind of like quinoa, but not. I cooks fluffy and looks kind of the same, and is gluten free like quinoa. I think the biggest difference is that millet is slightly softer and tastes a bit more nutty. It also is really good at absorbing liquid flavors.
But who are we to compare. The main thing is that it is nutritious and delicious so we will eat it.
Back to the salad. This is one of those grain salads that is good cooked and served warm but only gets better with a little age (like an hour or a day) in the fridge. Served hot or cold or room tempature, and is hearty enough to be meal like but is also a fantastic addition as a side to any of you meal plans. Like maybe a BBQ? Whatever the occasion, or non occasion, this is just a really good grain salad situation and I think you will be pleased, smiling all smiles while eating it.
To the millet salad.
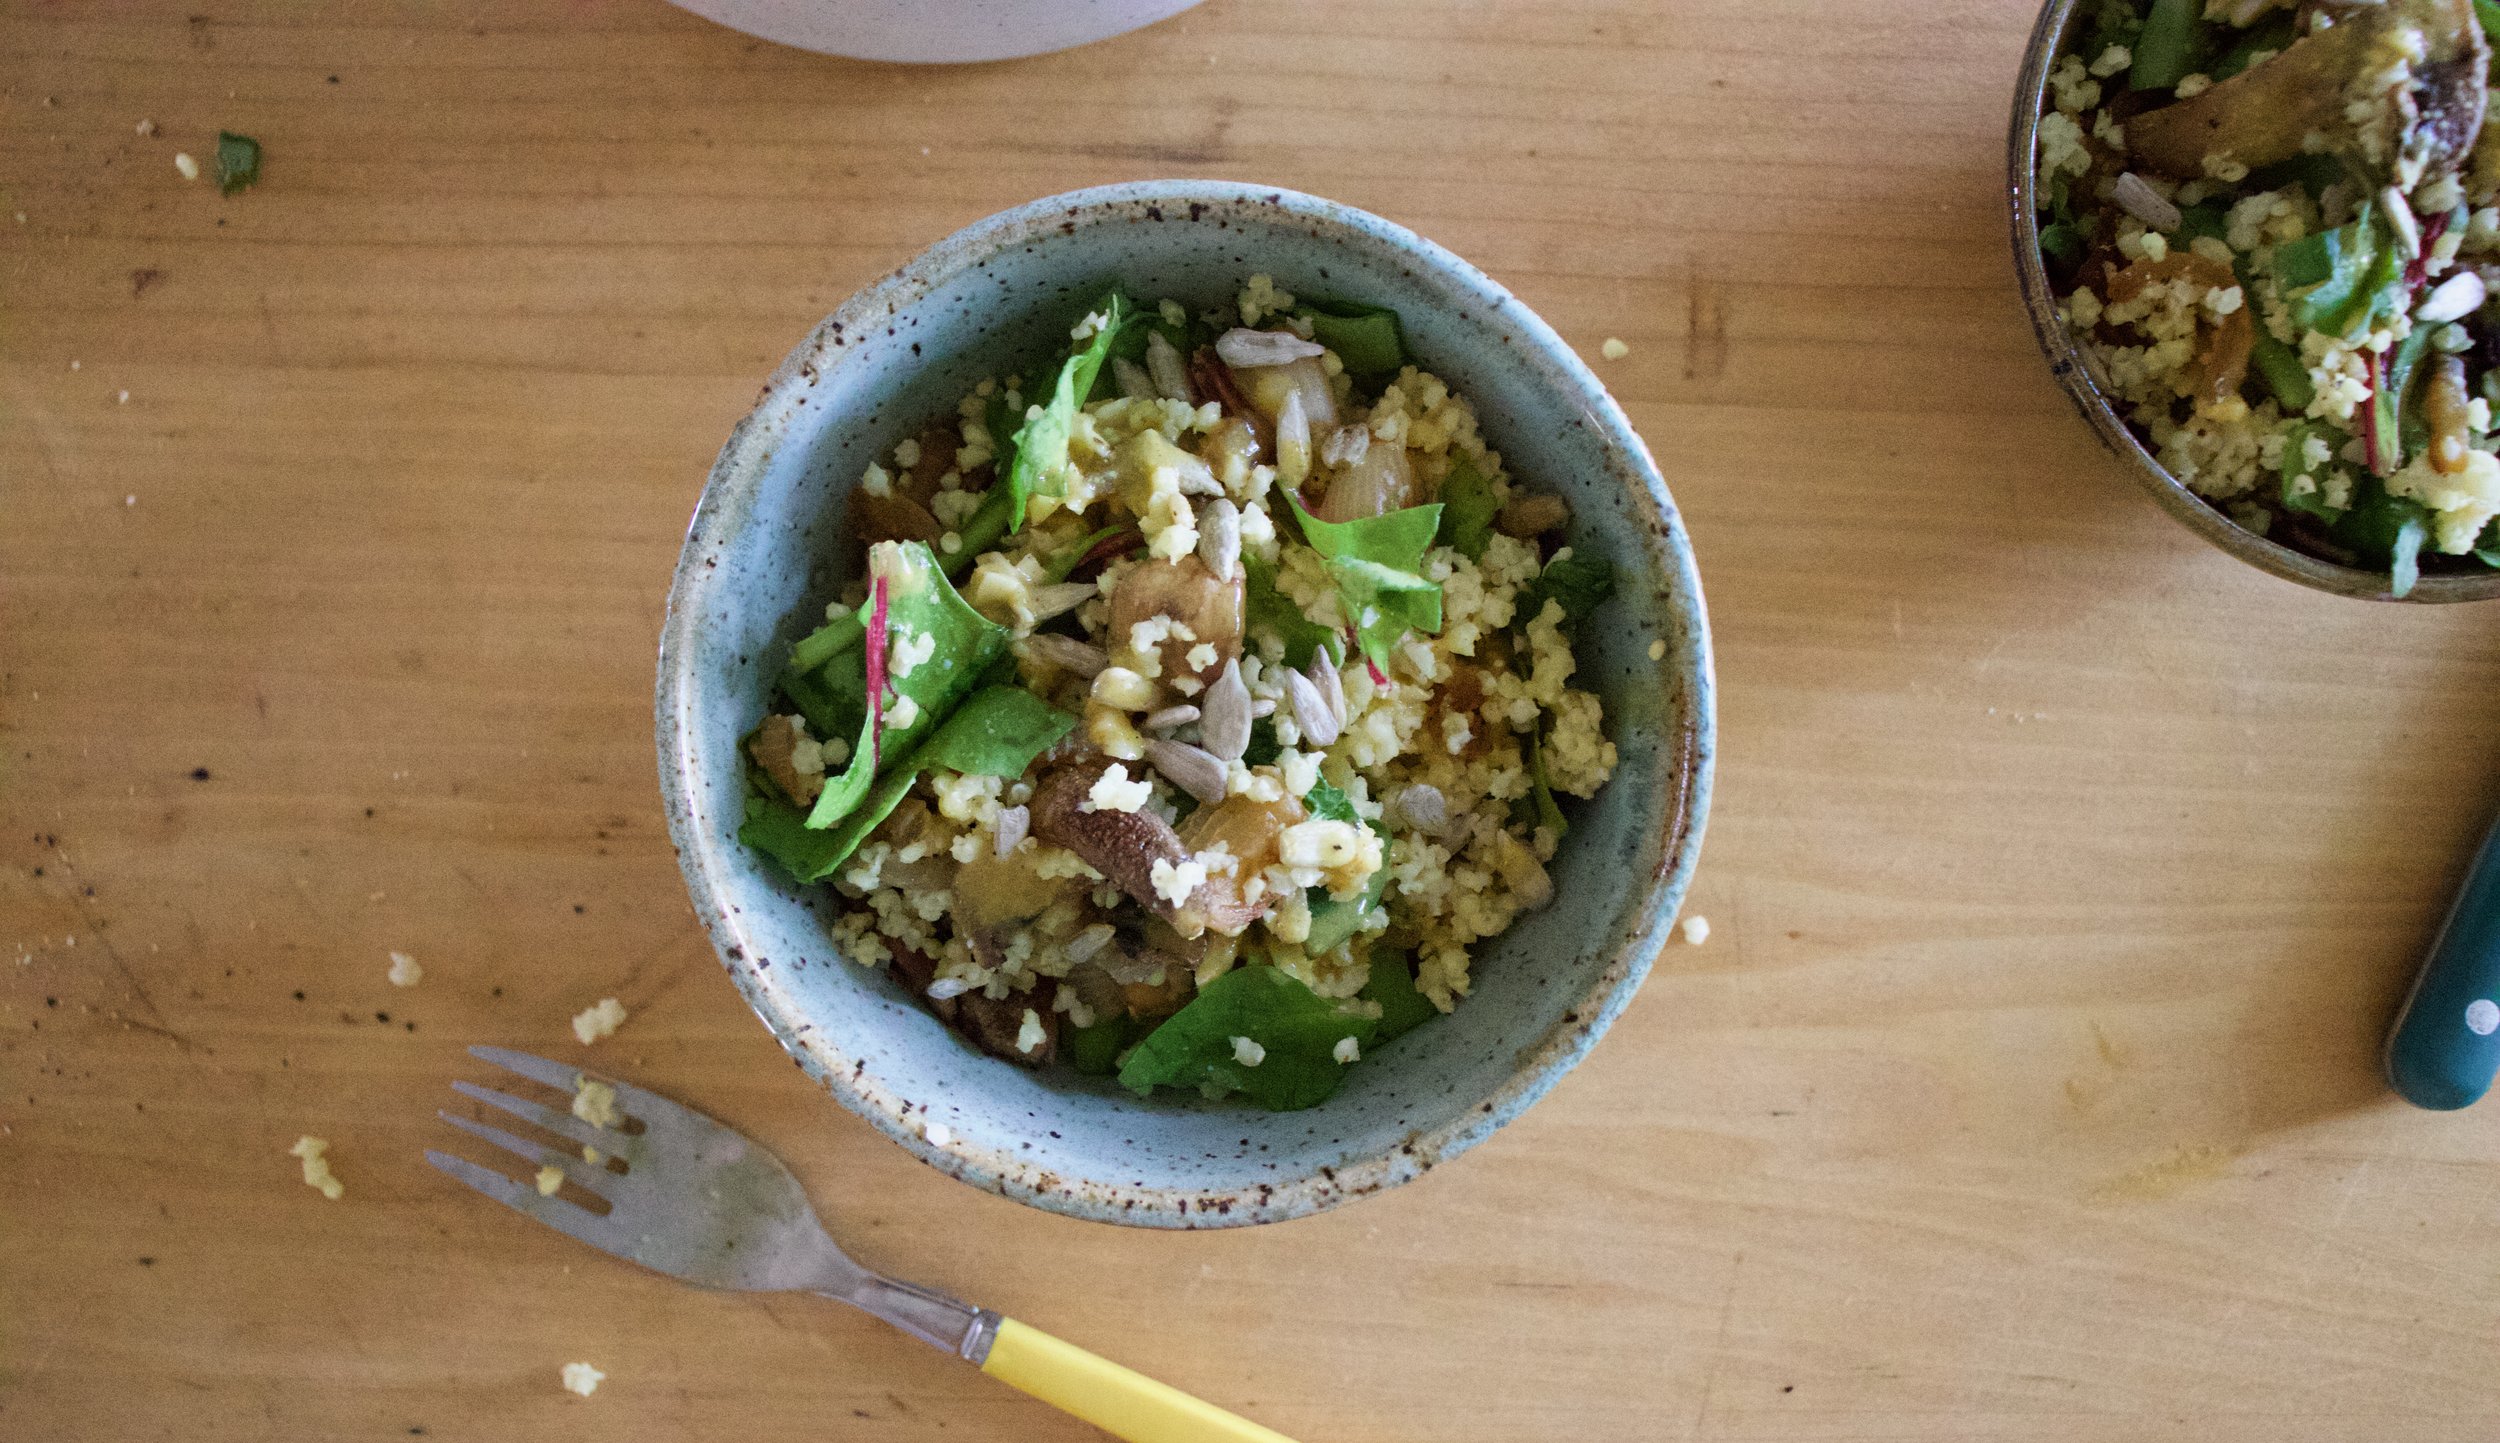
The stuff. Millet, a couple handful of greens, a few mushrooms, an onion, dijon mustard, a little maple syrup, red wine vinegar, a lemon, a couple cloves or garlic, some toasted sunflower seeds, and salt and pepper.
Start by giving the millet a little toast, just enough to really up the nutty flavor and make it that much more yummy. It only takes a few minutes in a skillet on medium heat. Not an entirely necessary step, but you should do it.
Toasted millet goes into pot with water. Bring pot to a boil and then turn to the lowest simmer and cover.
While millet is cooking, get to the mushrooms and onions. Chop the onion thin and small and the mushrooms thin and small as well. Place them into the skillet with a drizzle of oil and place on medium heat. Mix around every now and then and cook until the mushrooms and onions are soft and a nice golden brown.
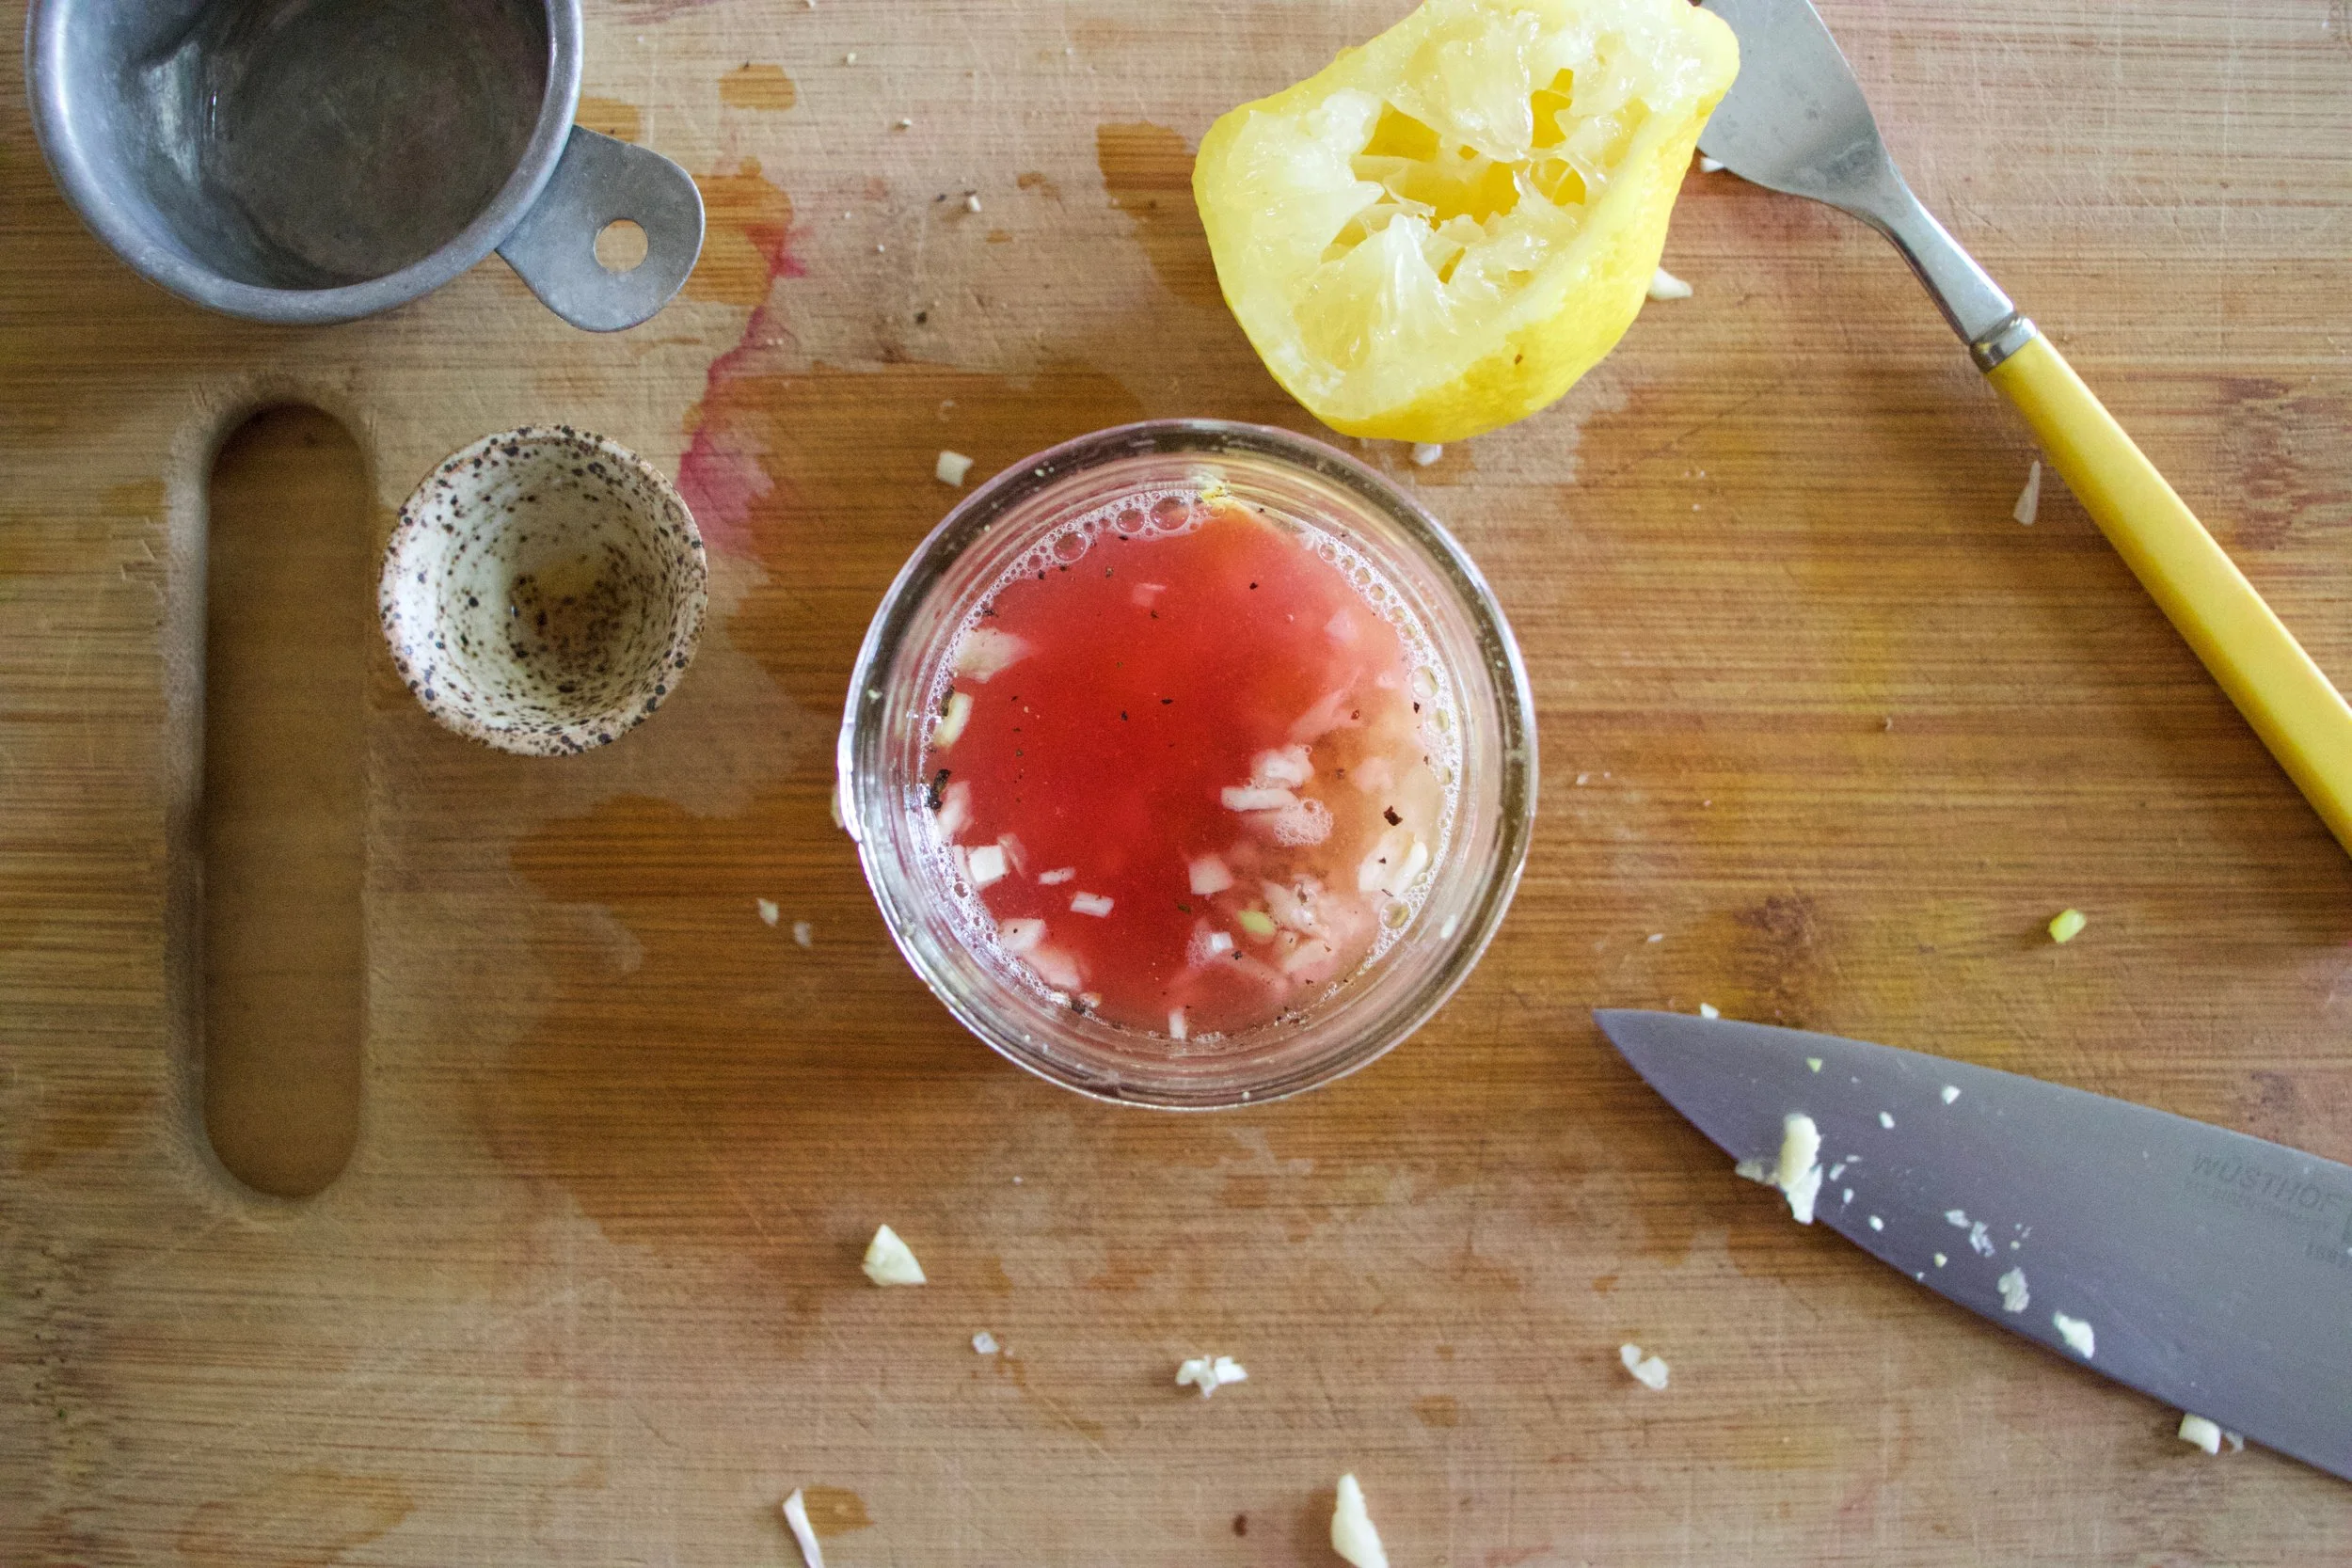
And make the vinaigrette. Minced garlic, mustard, vinegar, the juice of the lemon, and maple syrup get put into one place.
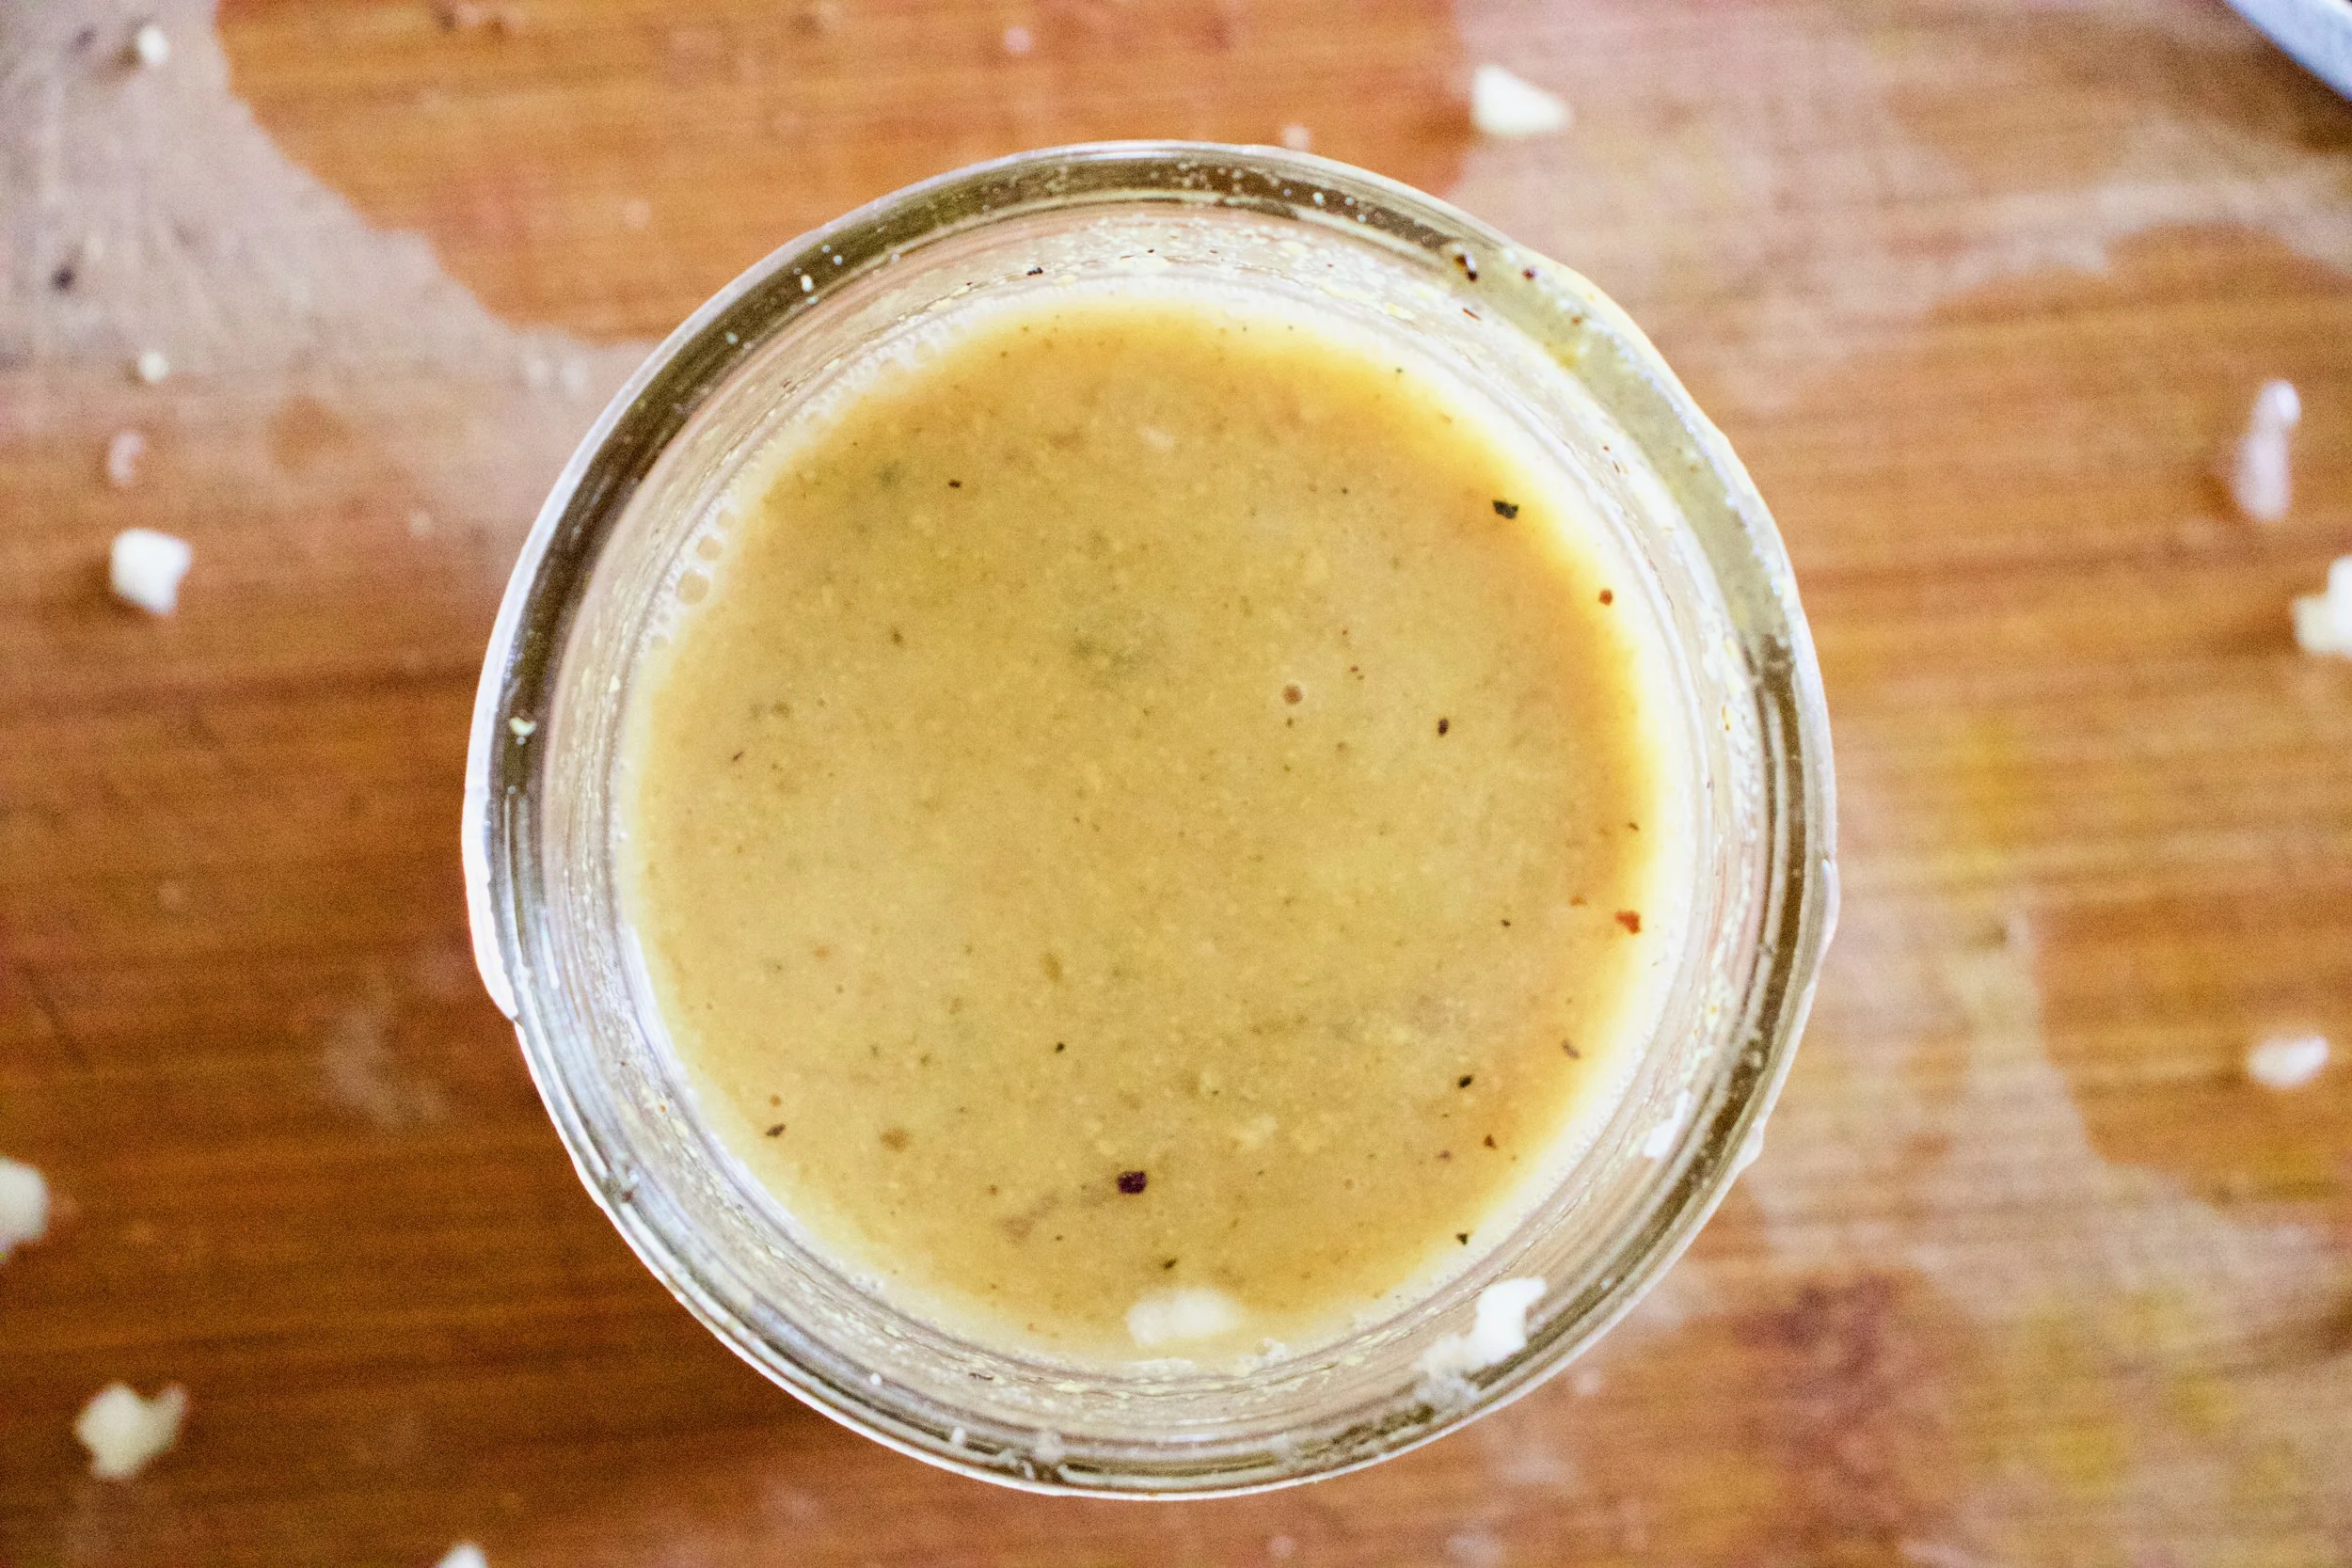
Mixed and now all is one.
Millet. Cooked and fluffed and ready to go.
Cooked mushrooms and onions go into the pot, along with the greens, the sunflower seed, and the vinaigrette. This step can be right away or you can wait a little while for things to cool as to not wilt the greens. Up tp you.
Mixed with love and hunger.
Even if you are making it ahead of time, just do yourself a favor. Grab a bowl, grab a fork, and get down on it.
-C
Seves 4-6
3/4 cup uncooked millet
2 cups water
1 sweet onion
3-4 big button mushrooms
Large handful or two of bitter greens like arugula, spinach or a mixture.
2 tablespoon brown or dijon mustard
2 tablespoon red wine vinegar
1 teaspoon maple syrup
2 cloves garlic
salt and pepper
handful toasted sunflower seeds
To start, toast millet. Dump the uncooked millet into a pan and place on a medium heat tt for about 5 minutes or until you start hearing the millet crackle.This gives the millet a slightly more nutty flavor but you can skip this step if you don%u2019t care.
Dump millet and water into medium pot. Place on high heat until water starts to boil then tun heat down to simmer and over. After about 15 or 20 minutes, when most of the water is gone, turn pot completely off. Let sit, covered for another 10ish minutes then take a fork and fluff it.
While the millet is cooking, cook the veggies. Grab the onion and slice it up into thin pieces. Clean off the mushrooms and chop them into small thin pieces too. Place the chopped stuff into the skillet with a drizzle of olive oil and a pinch of salt and place on a medium heat. Stir occasionally and cook for about 15 minutes or until the onion and mushroom are a nice dark, golden brown.
And make the mustard vinaigrette. Mince garlic and place into a jar or bowl with the vinegar, the mustard, the maple, and the juice of the lemon. Mix and set aside.
Once the millet is cooked, the mushrooms and onions are cooked, and the vinaigrette is made, all you have left to do is mix everything together. You can do this while things are slightly warm which will wilt the greens a bit, o let them cool so the greens stay fresh. Up to you. (I like the greens fresh)
Finally, dump cooked mushrooms and onions into pot with cooked millet. Add in the greens and sunflower seeds and drizzle the vinegertte all over. Toss around until fully mixed. Sprinkle with lots of fresh cracked pepper.
Then eat. Or place in a container to bring to the BBQ.
I am obsessed. For real. That might seem like a strong statement for a feeling about a food, but right now, it is truth. I spend more time then I want to admit thinking and drooling over Socca, which is, to those who do not know, the most basic chickpea flour pancake-y bread thing. Chickpea flour, water and salt. Cooked fast under the broiler in a screaming hot skillet. That is it. And it is amazing. Depending on how you make it, it can be creamy and soft or more cracker like with some crisp crunch to it. Either way, it is just so freaking good. Of course, what I am dreaming about regarding it is not just plan basic socca (which I have made 3 times in the past 3 days) but different flavored soccas (I have experimented with lot of seasoning, and they are all A+) with all sorts of different topping and using it in all sorts of different ways. But for now, I wanted to keep basic so we all know how good simplicity is. We will go from here.
There is no stopping me. There is no stopping the socca.
Now to my new favorite food, the socca.
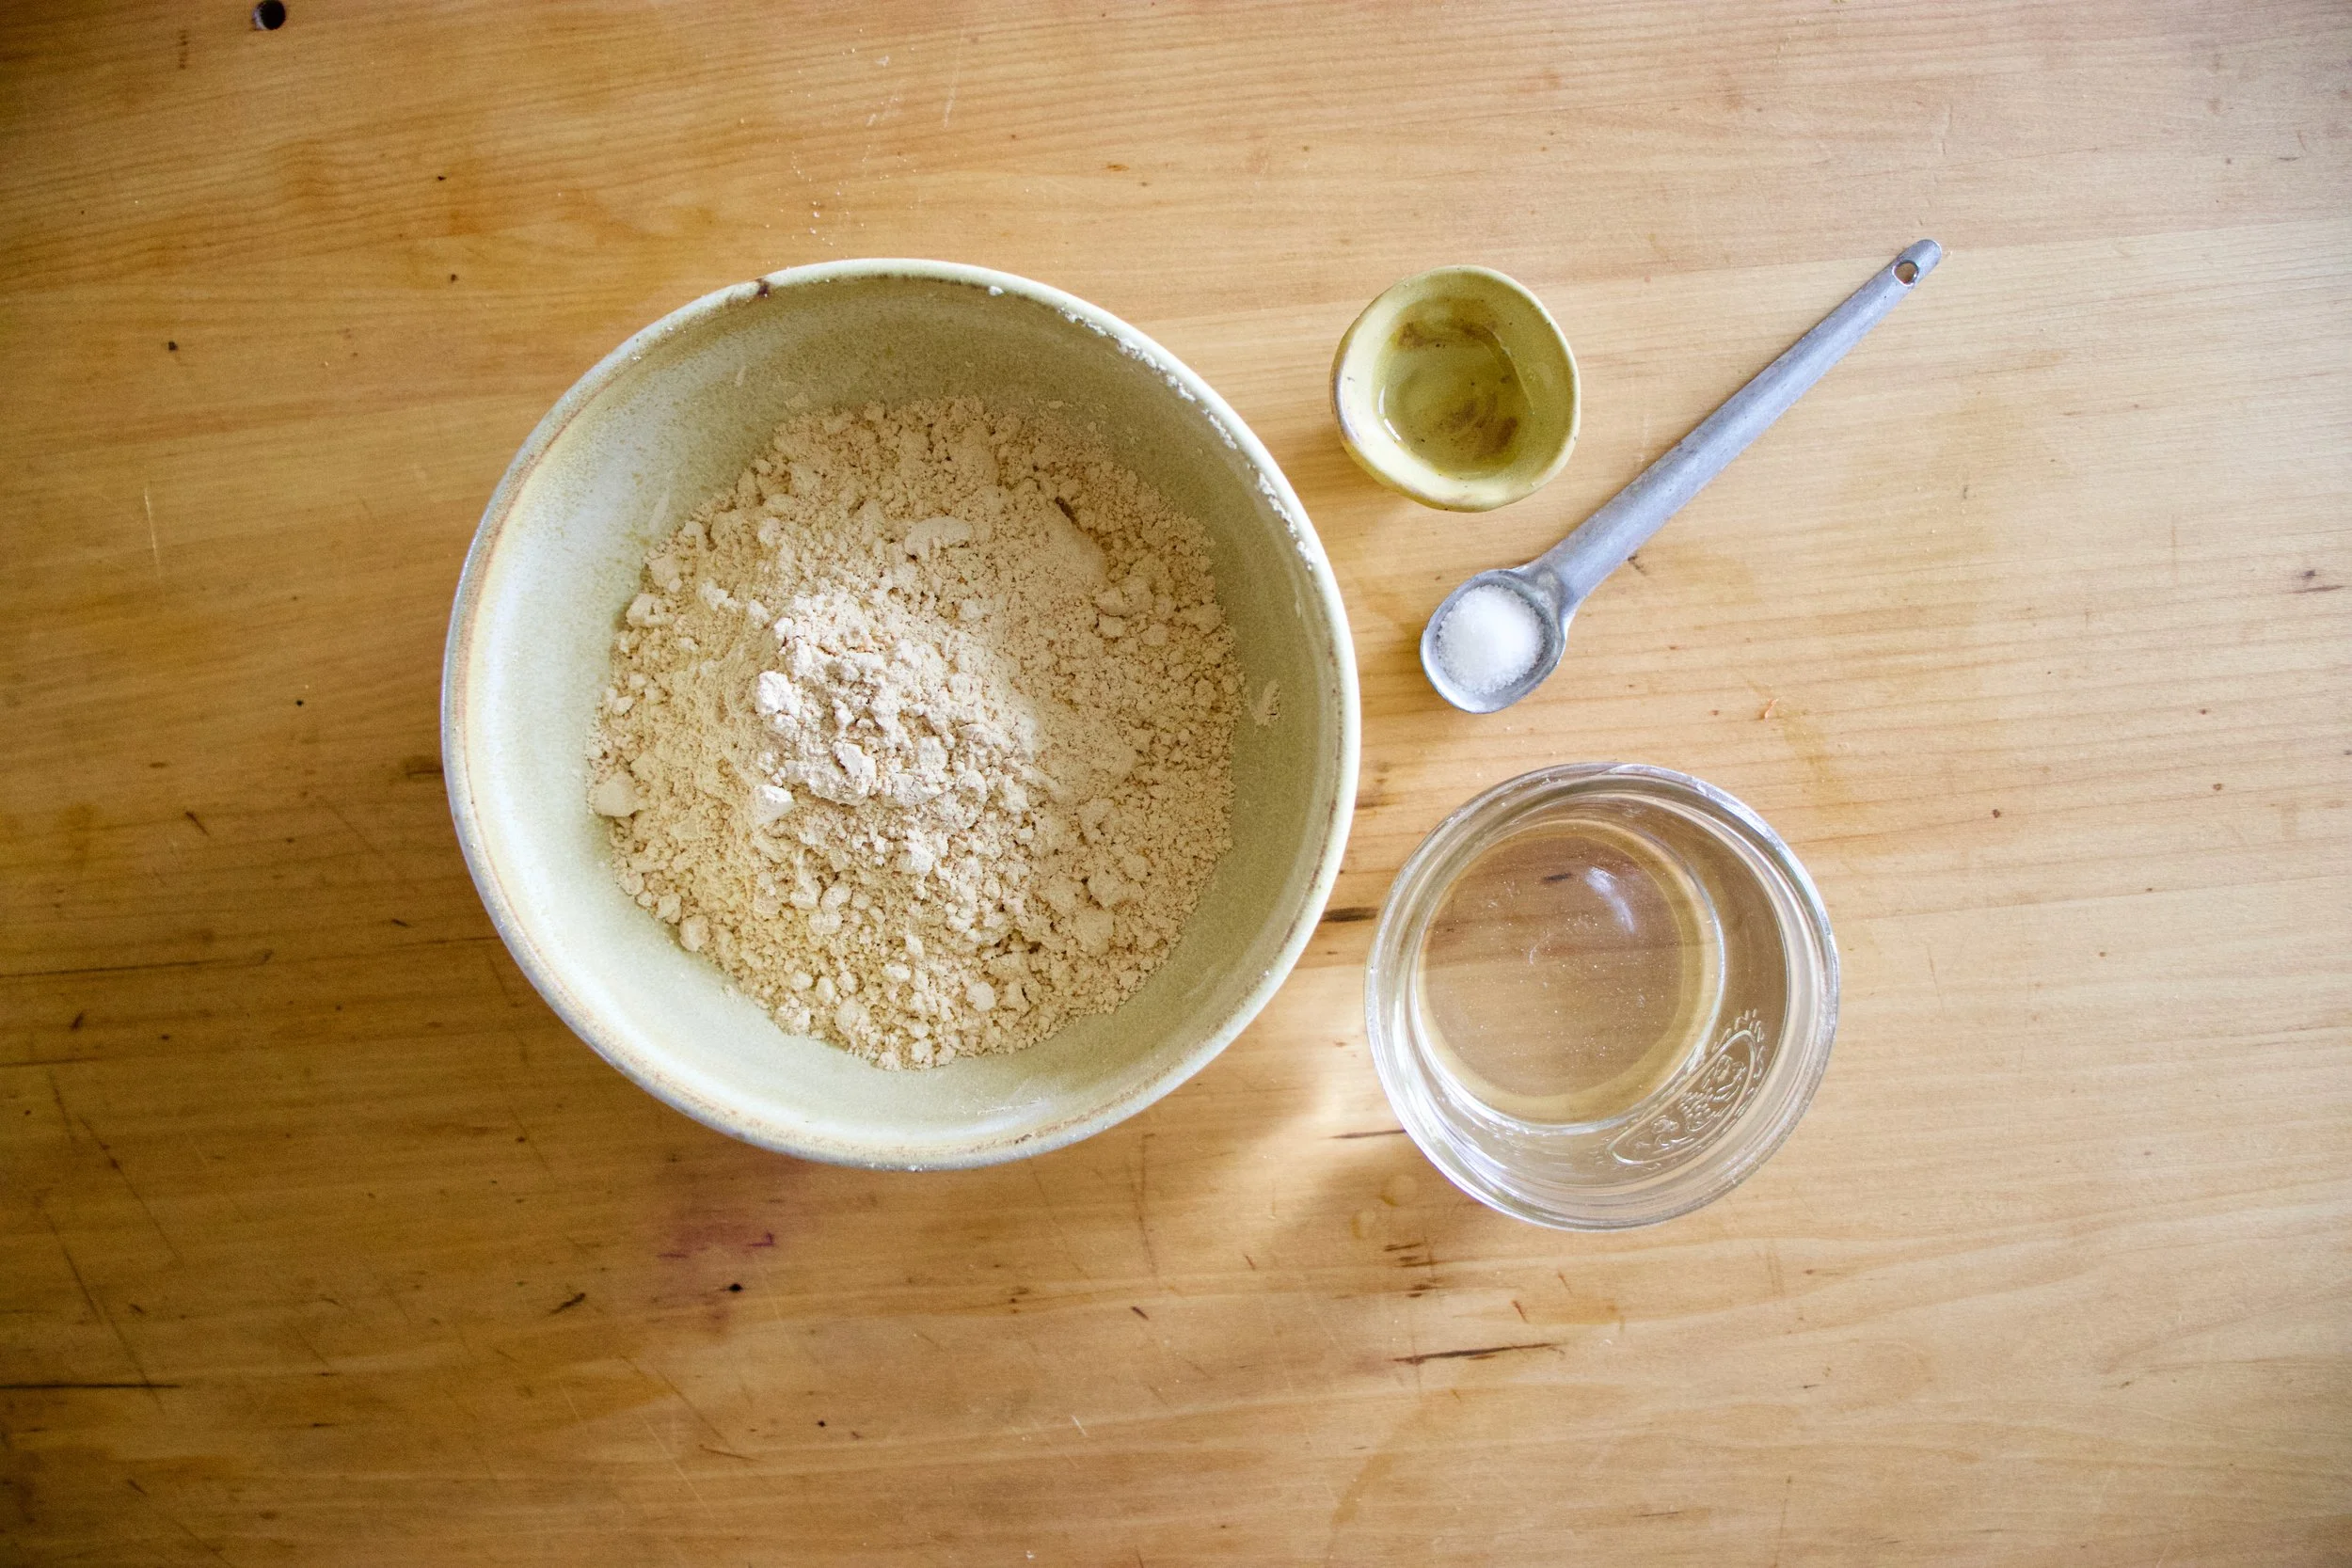
Chickpea flour, salt and water. That is it. Mix it all up.
Batter all smooth and now in need of a rest. Half an hour or up to a day of rest is good.
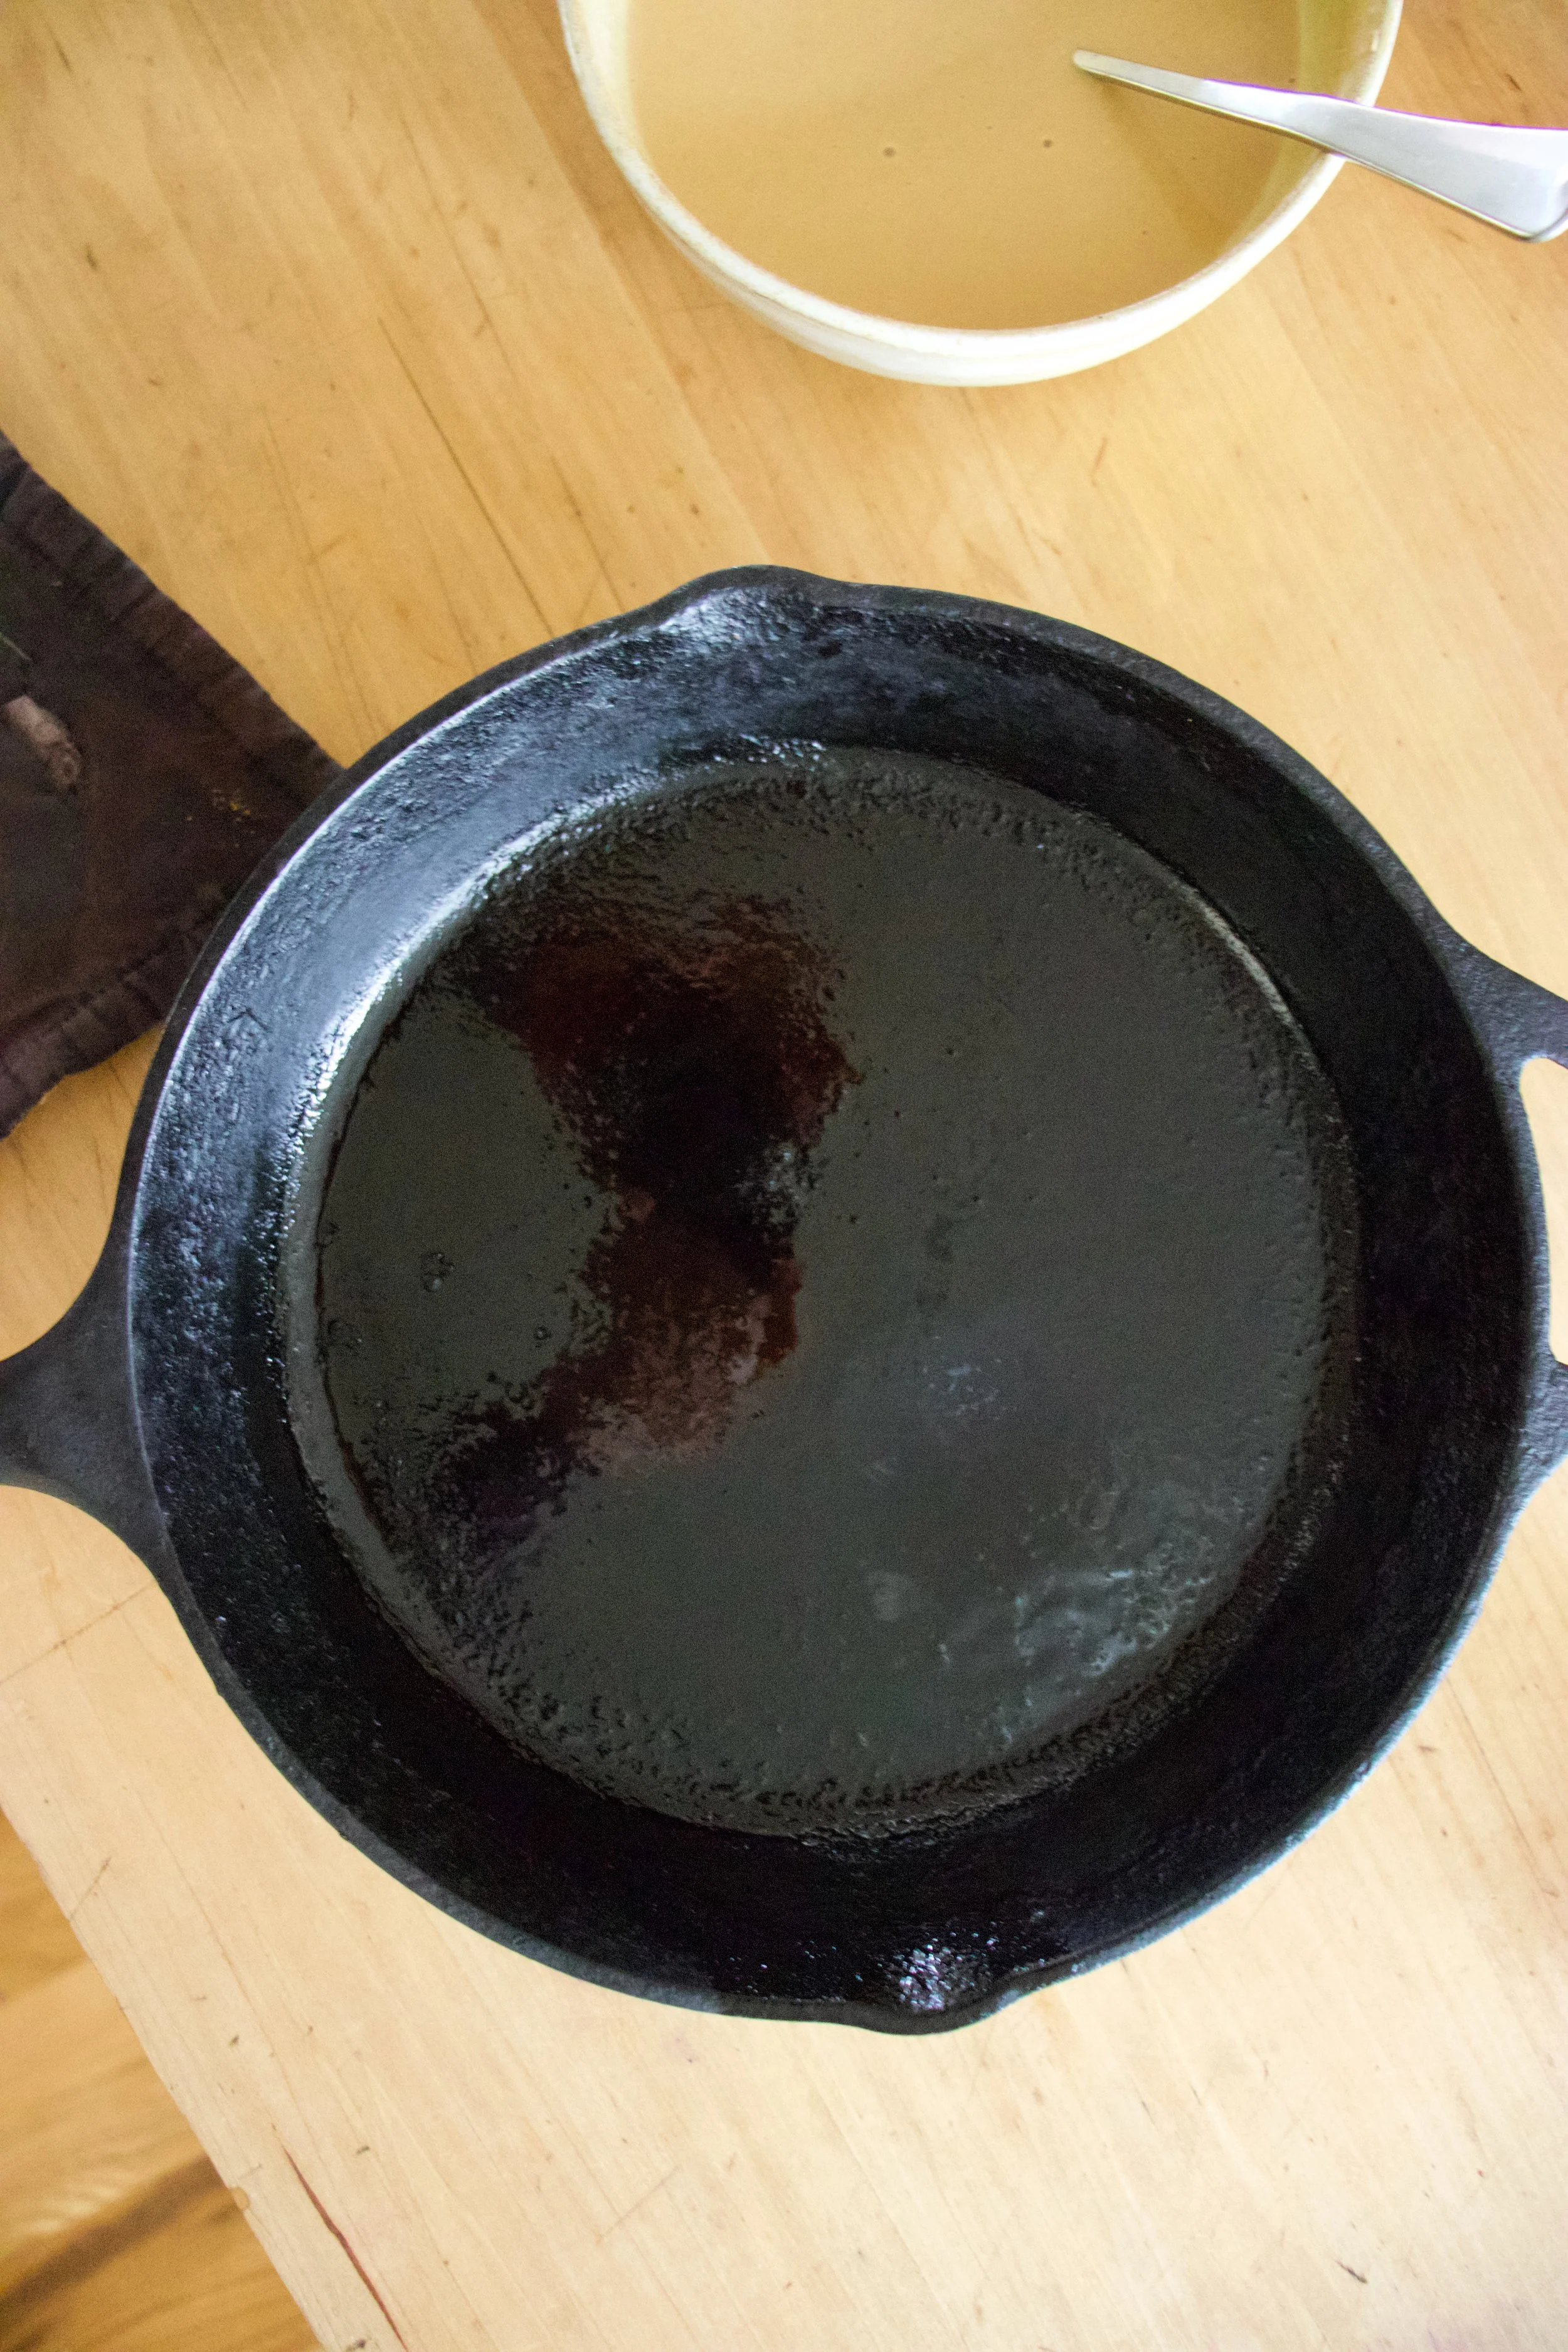
Now to cook the socca. You need to use something oven safe like cast iron. The trick here is to preheat the skillet while you are preheating the oven. Crank oven to 450 with the skillet in oven and once the oven reaches temp, turn oven over to a high broil. Let the skillet get really hot for another minute or two then remove skillet from oven (carefully!!!) and give it a splash of oil. Don%u2019t preheat the skillet with oil in it or else it will start to smoke and get gross.
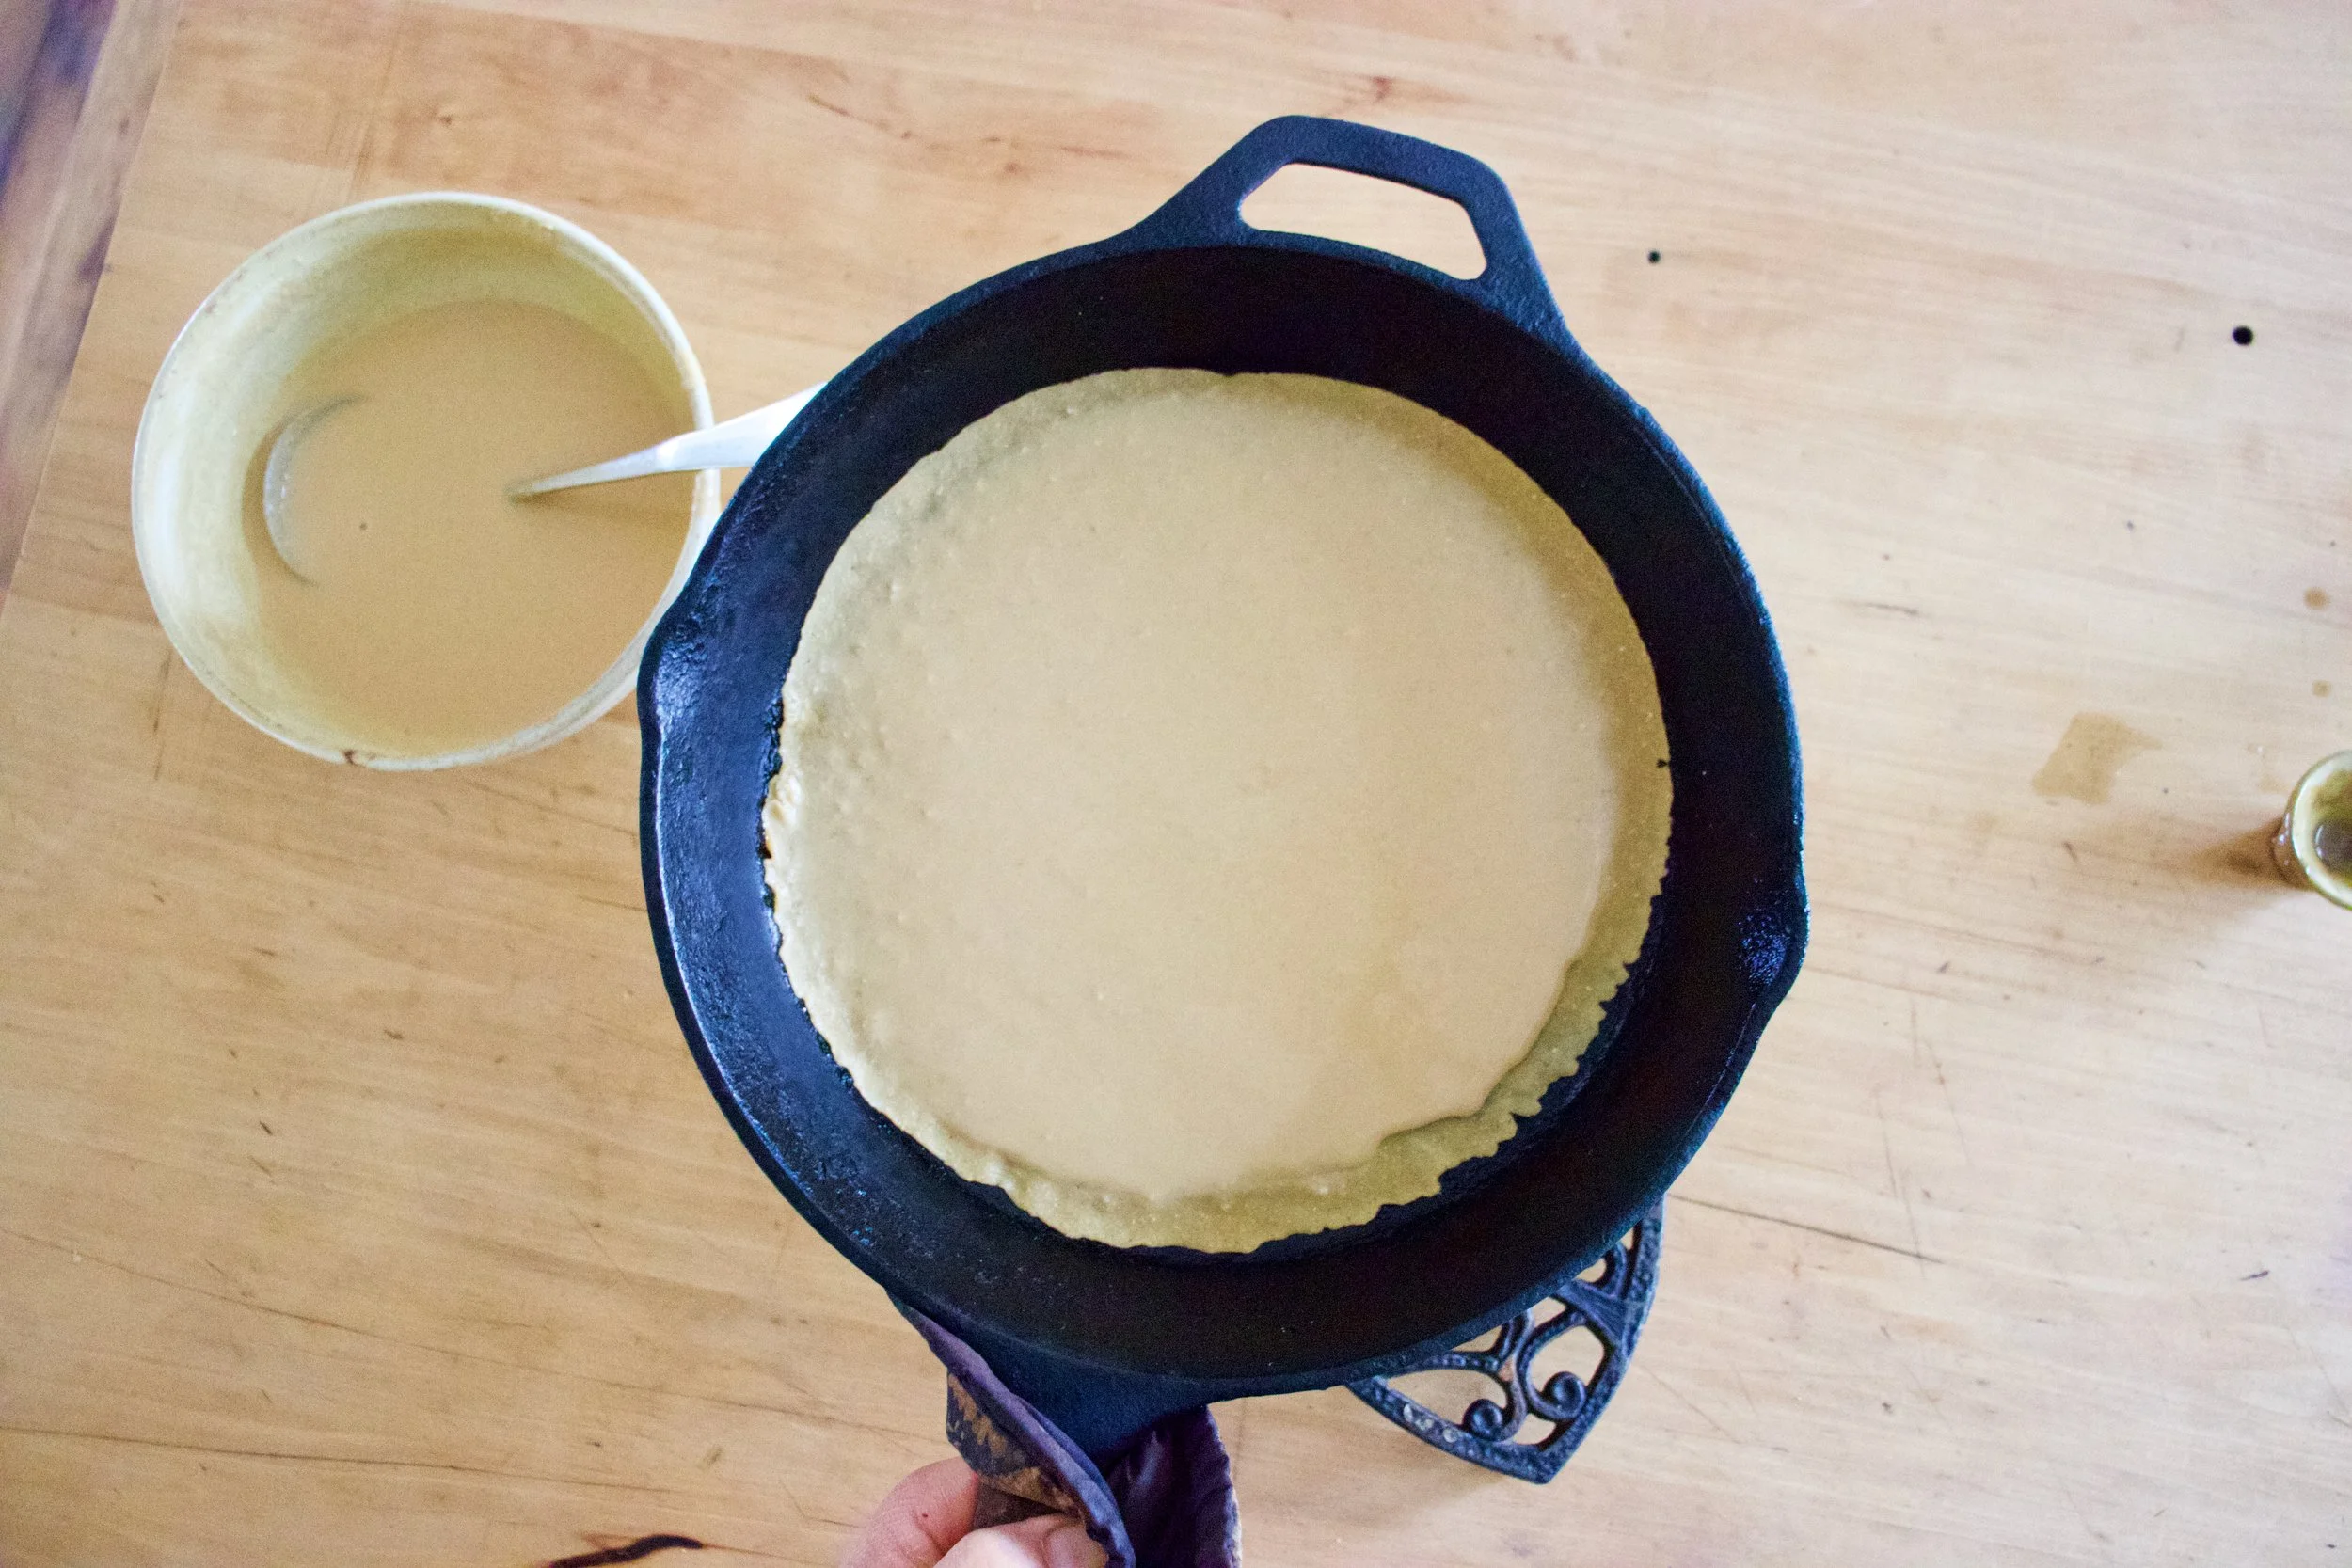
Now that you got a nice hot and oiled skillet, grab the rested batter and pour half of it in. Tilt skillet around to coat bottom then stick skillet back into oven under broiler and cook for 4-8minutes. ( It depends on your broilers strength and your preference for blisters)
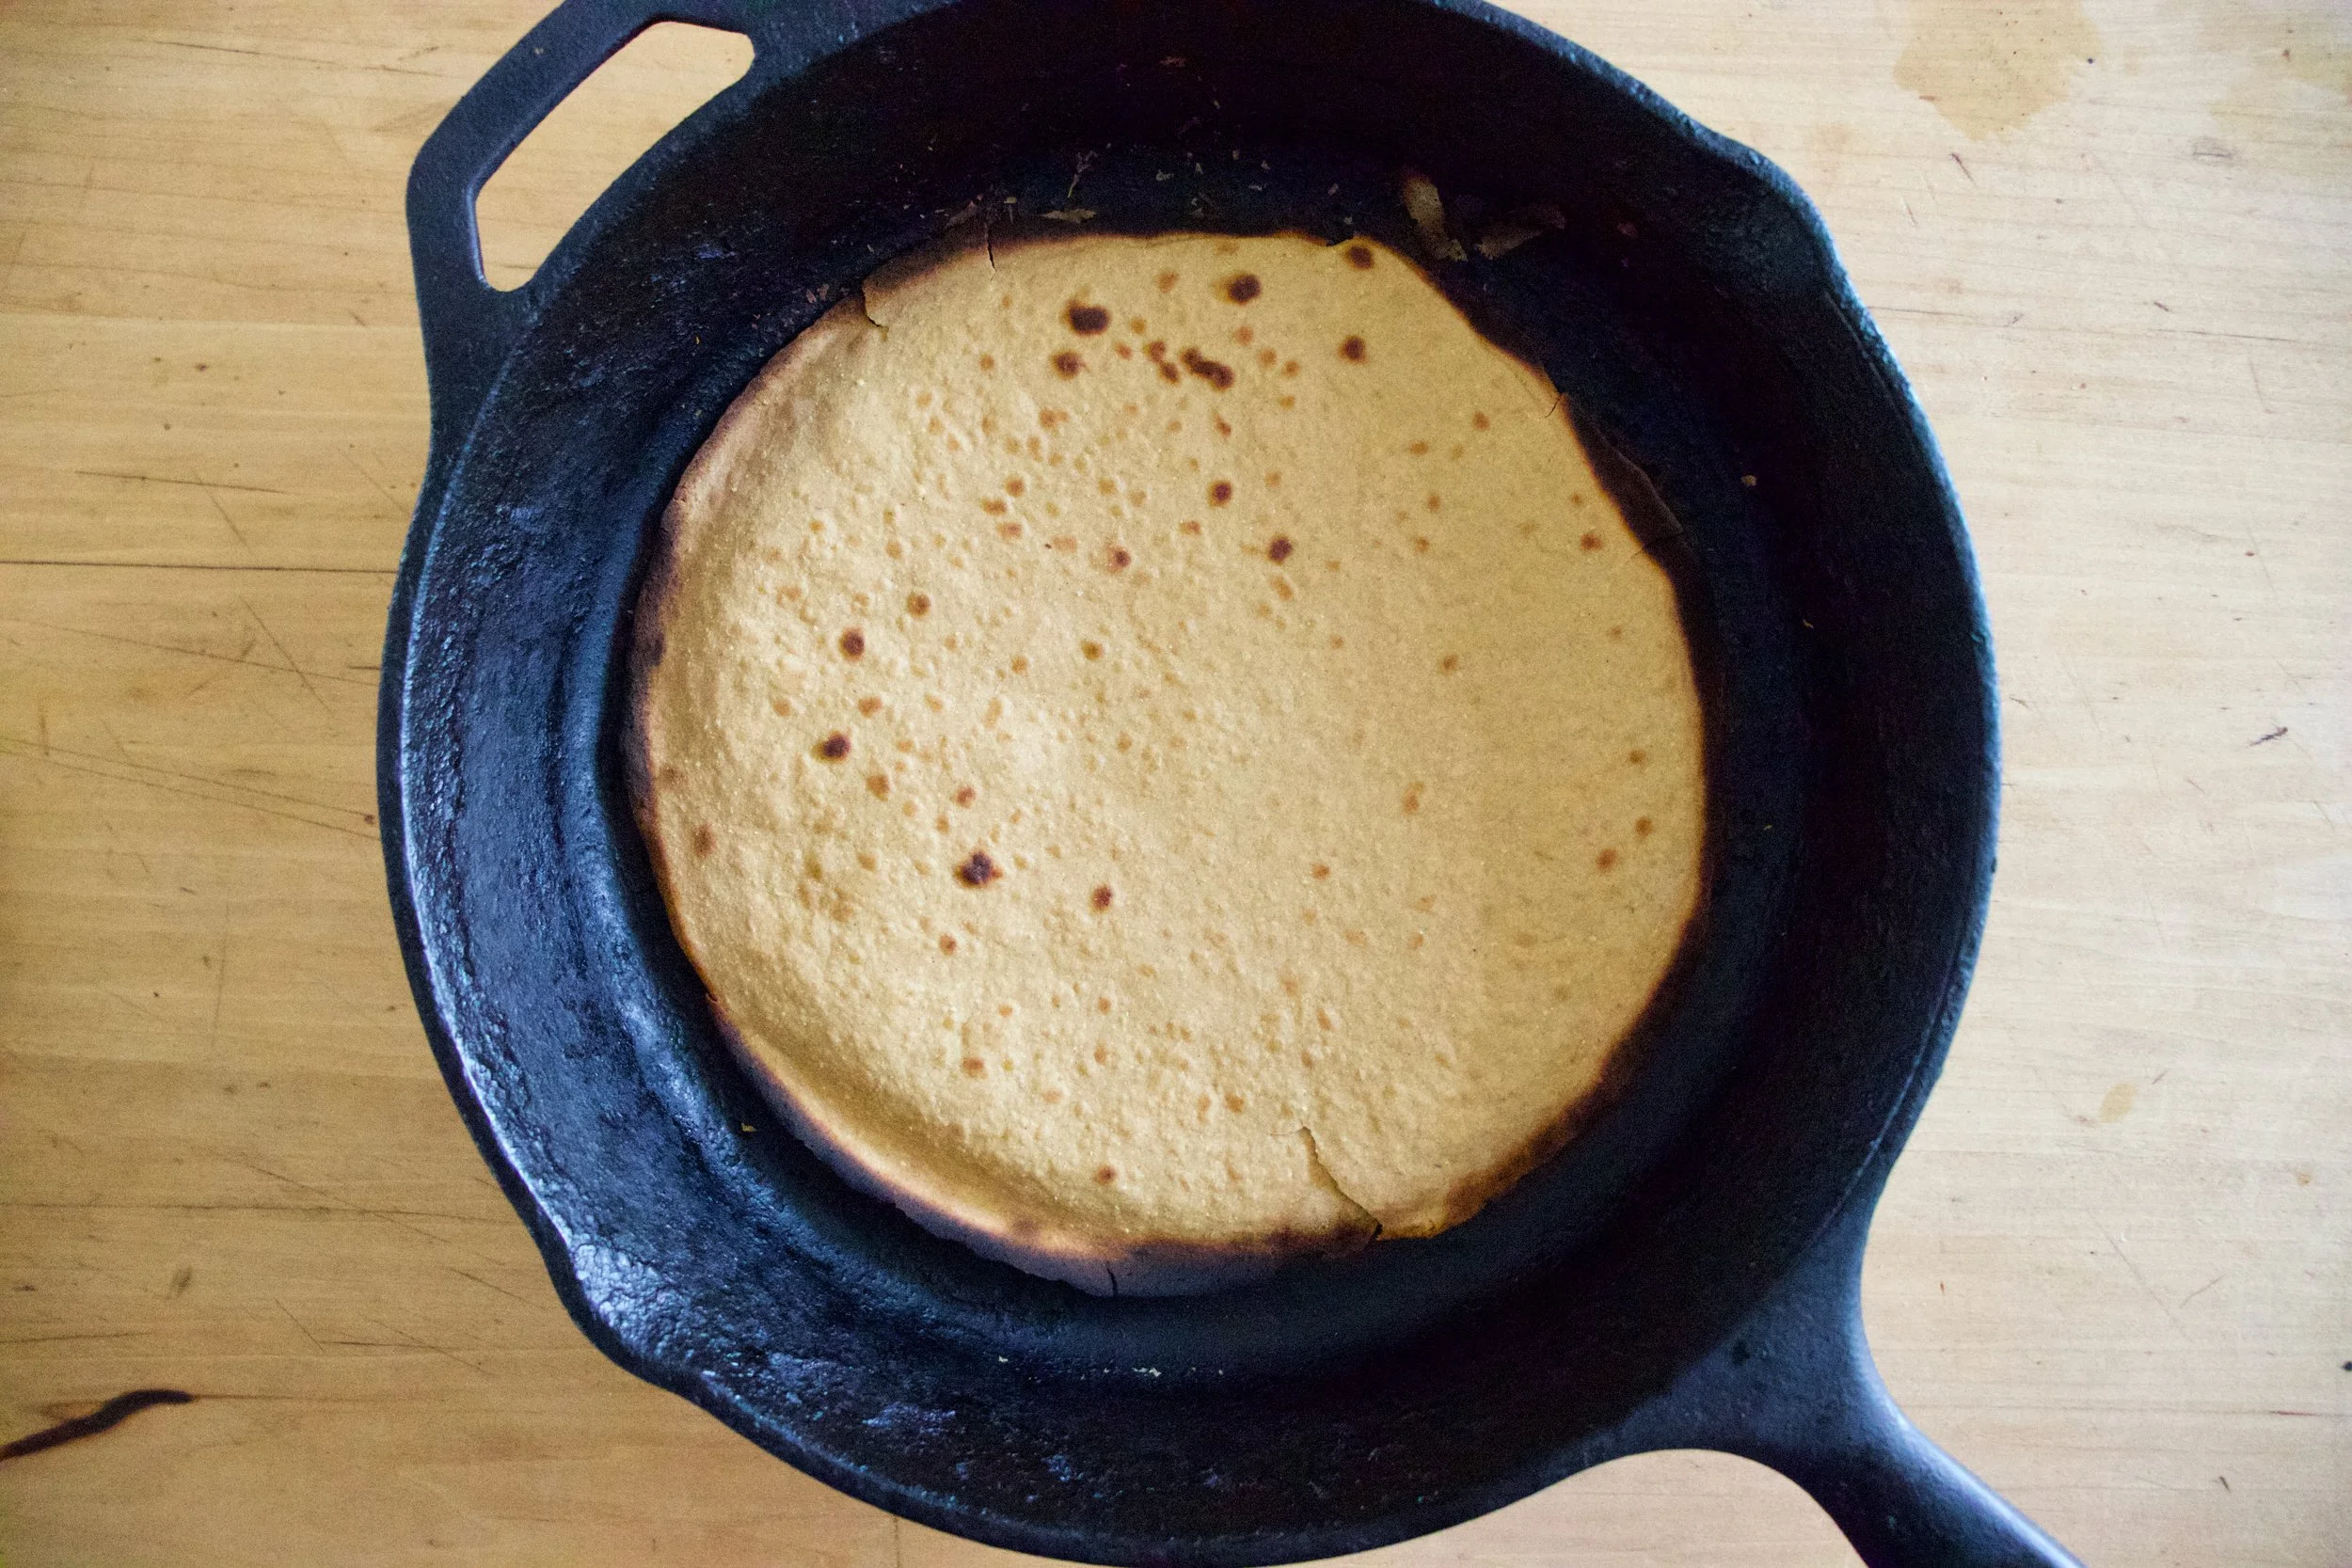
Out from the broiler. Cooked and slightly blistered. I went easy on this one. The next one got a few more blisters.
2 soccas, one a little thicker then the other. One a little more blistered then the other. Both in my belly.
So many Soccas to come.
So. many. Soccas.
-C
makes two 10 inch soccas
1 cup chickpea flour
1 cup room temperature water
1/2 teaspoon salt
olive oil for pan
Mix chickpea flour, salt and water together into a bowl until smooth. Let mixture rest for at least half an hour or up to a day.
When ready to make the socca, preheat oven to 450 with a 10 inch oven safe skillet (I used cast iron but any oven safe dish would work) in oven.
Once oven reaches temp, turn oven over to broil and place skillet under it for a minute to really heat the skillet. Carefully, with oven mitts, remove hot skillet from oven and brush or pour a smidge of oil into the hot skillet to coat bottom. Pour in half the batter and tilt around until bottom is coated then place skillet back into oven under broiler and cook for 4 -8 minutes or until the socca starts to blister. (it kind of depends on your broiler so keep a close eye on it) Remove from oven and slip socca onto cutting board. Sprinkle with salt and pepper. Drizzle with olive oil if you like. Then all you do is cut and eat.
Left over socca can be stored in fridge and reheated in oven or toaster.
Note. IF you want a slightly thicker socca, use a 8 inch skillet. For a thiner, more cracker like socca, pour in 1/3 of the batter at a time (you will end up with 3 instead of 2)
It is getting oh so much nicer out yeah? Springing and such, well kind of. Still a wee bit chillier then it should be around here but still, it is spring and I am taking it.
And with the spring, I feel the itch, the itch to spend all of my free time outside. Out doing things that are not inside because I spent the last 7 long months inside way too much. I needed to be outside as much as possible and as it gets even nicer and warmer and garden temperature-able, I am basically going to be living outside.
Bring in sesame noodles. Super fast, super easy, super duper in every way. Make a big old batch and eat now, eat later, eat hot or eat cold. Everyone loves them, they love you, etc. etc%u2026 A perfect meal to have in rotation when you know that you are not going to have or want to spend much time cooking in the kitchen because you will be outside playing in the dirt and soaking up the sun. And think about all the picnics and BBQ%u2019s to come. These suckers are fantastic to have at any outdoor eating event. They are even peanut free so you can safely bring them to potlucks and such and don%u2019t have to worry about accidentally kill a peanut allergy person. And you can make them gluten free as well if you sub in your favorite gluten free pasta. These noodles, I am telling you. They are a winner in every way.
So with out further ado, the noodles!
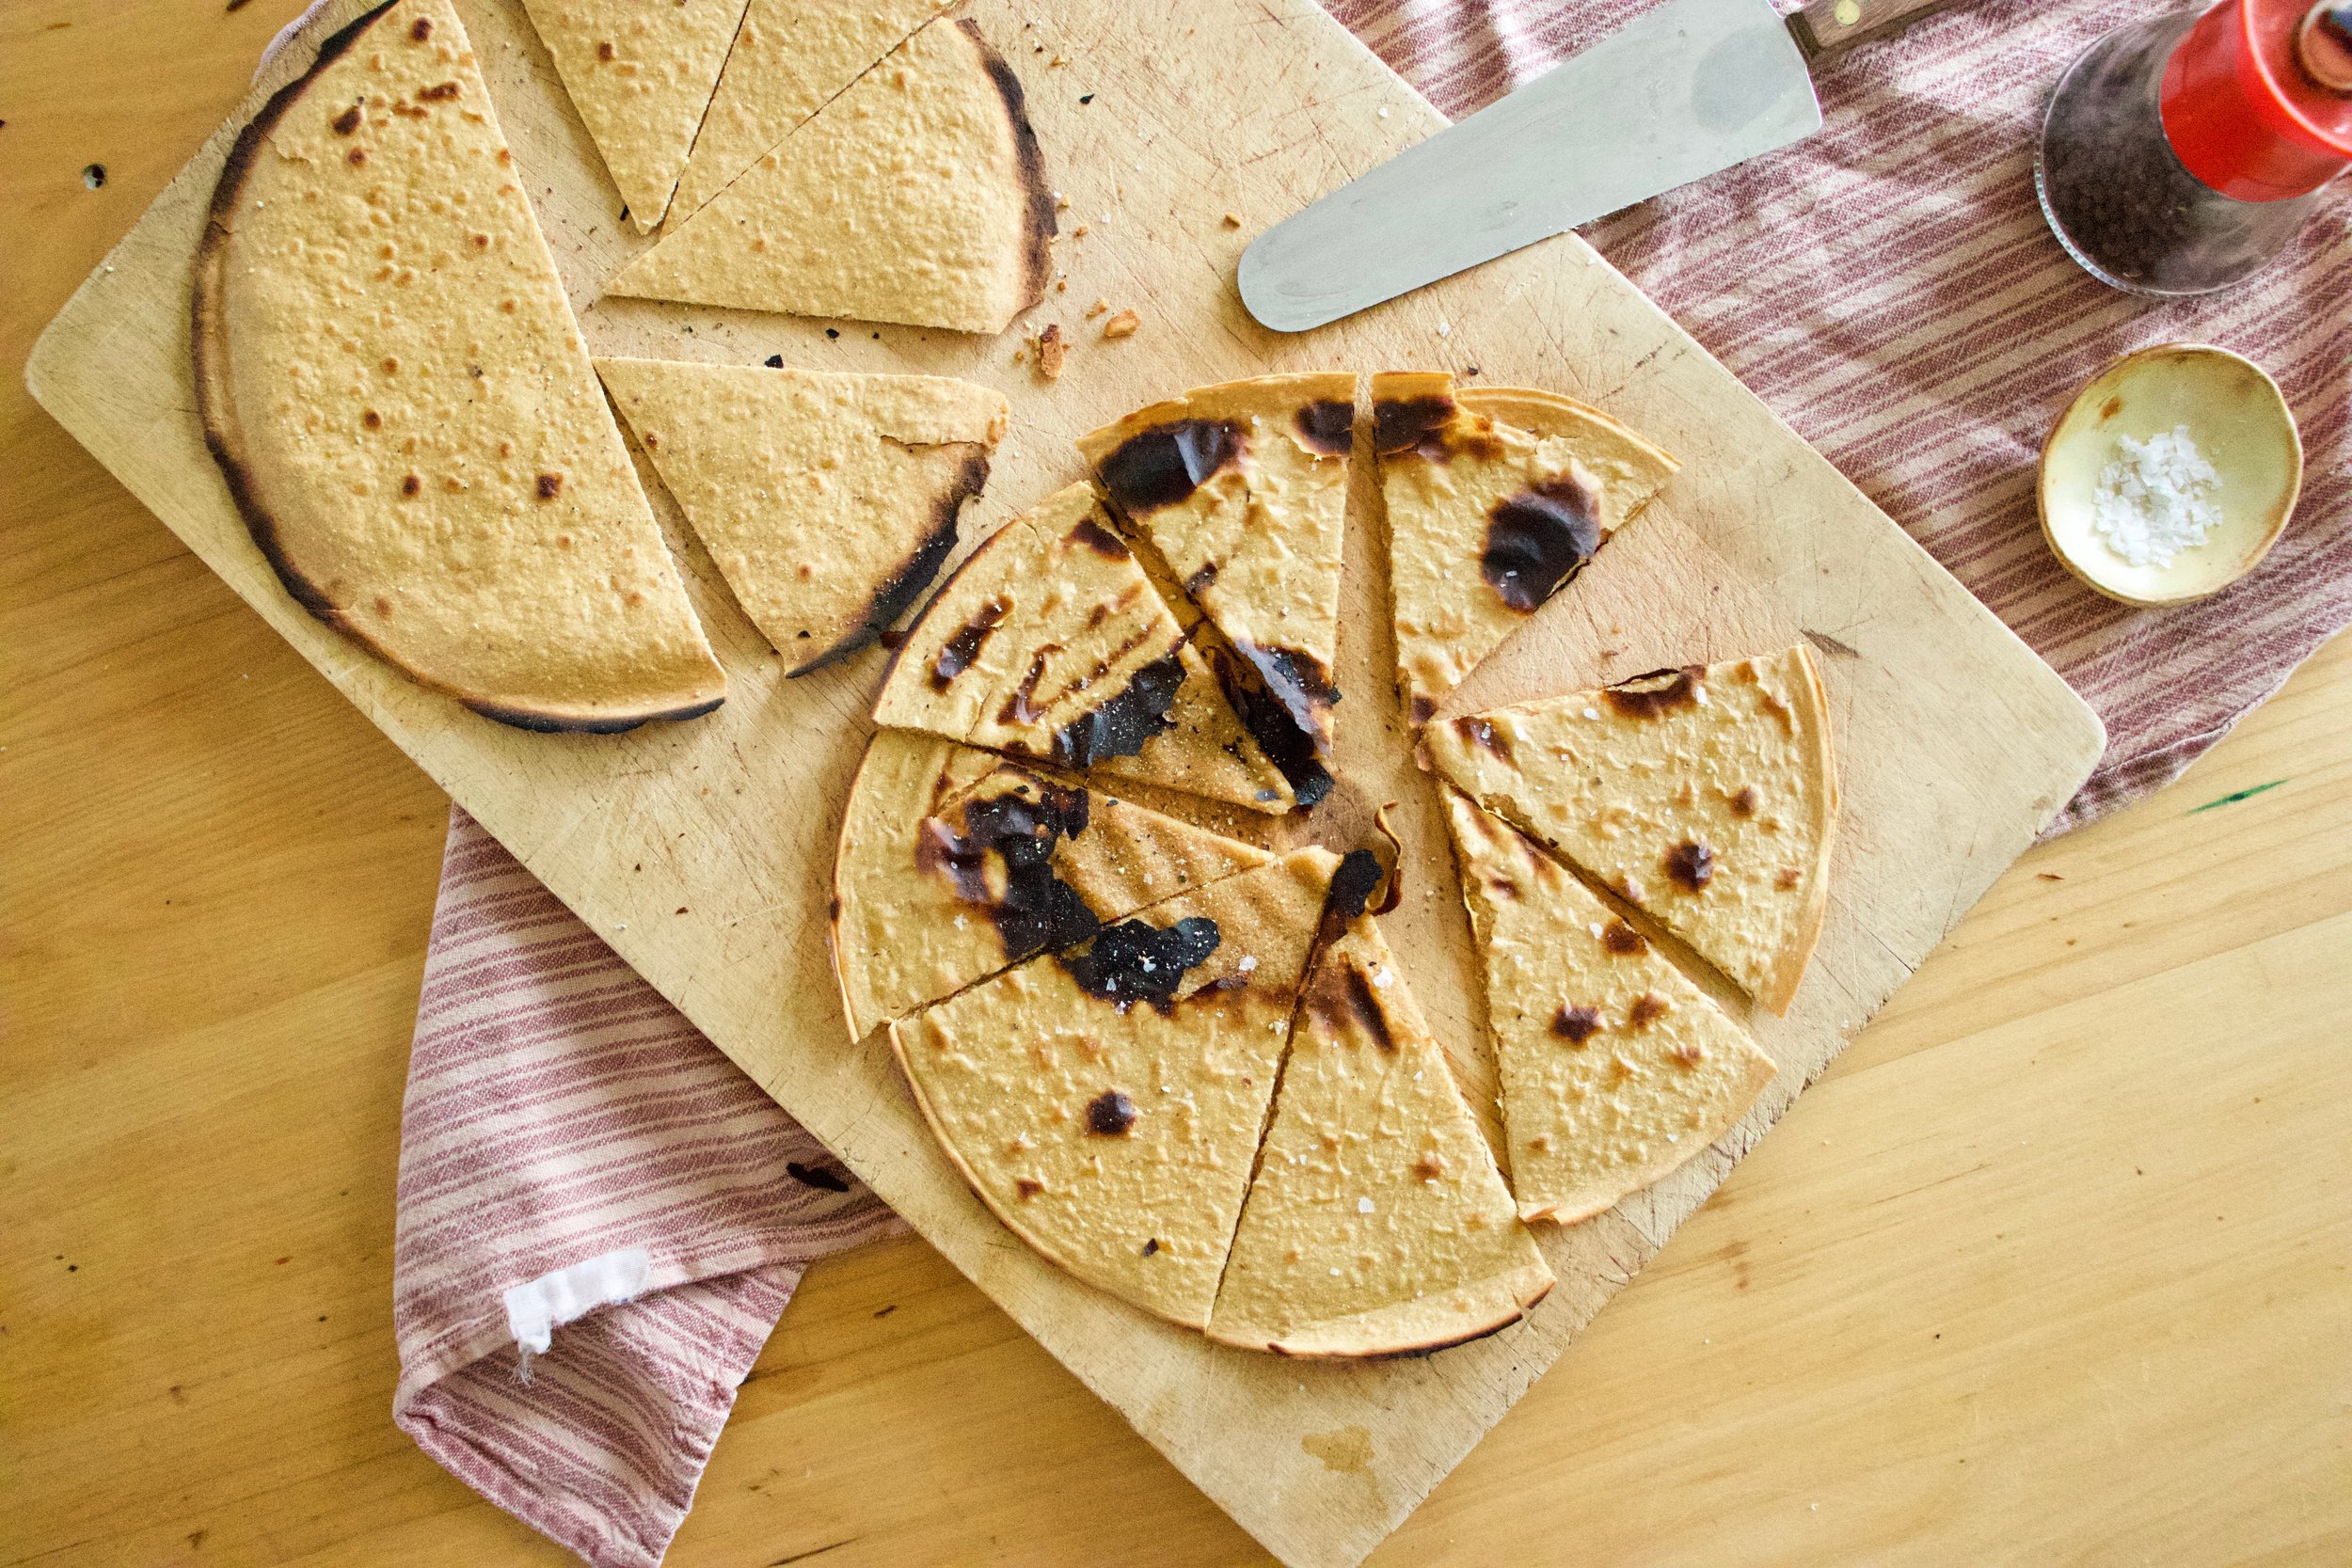
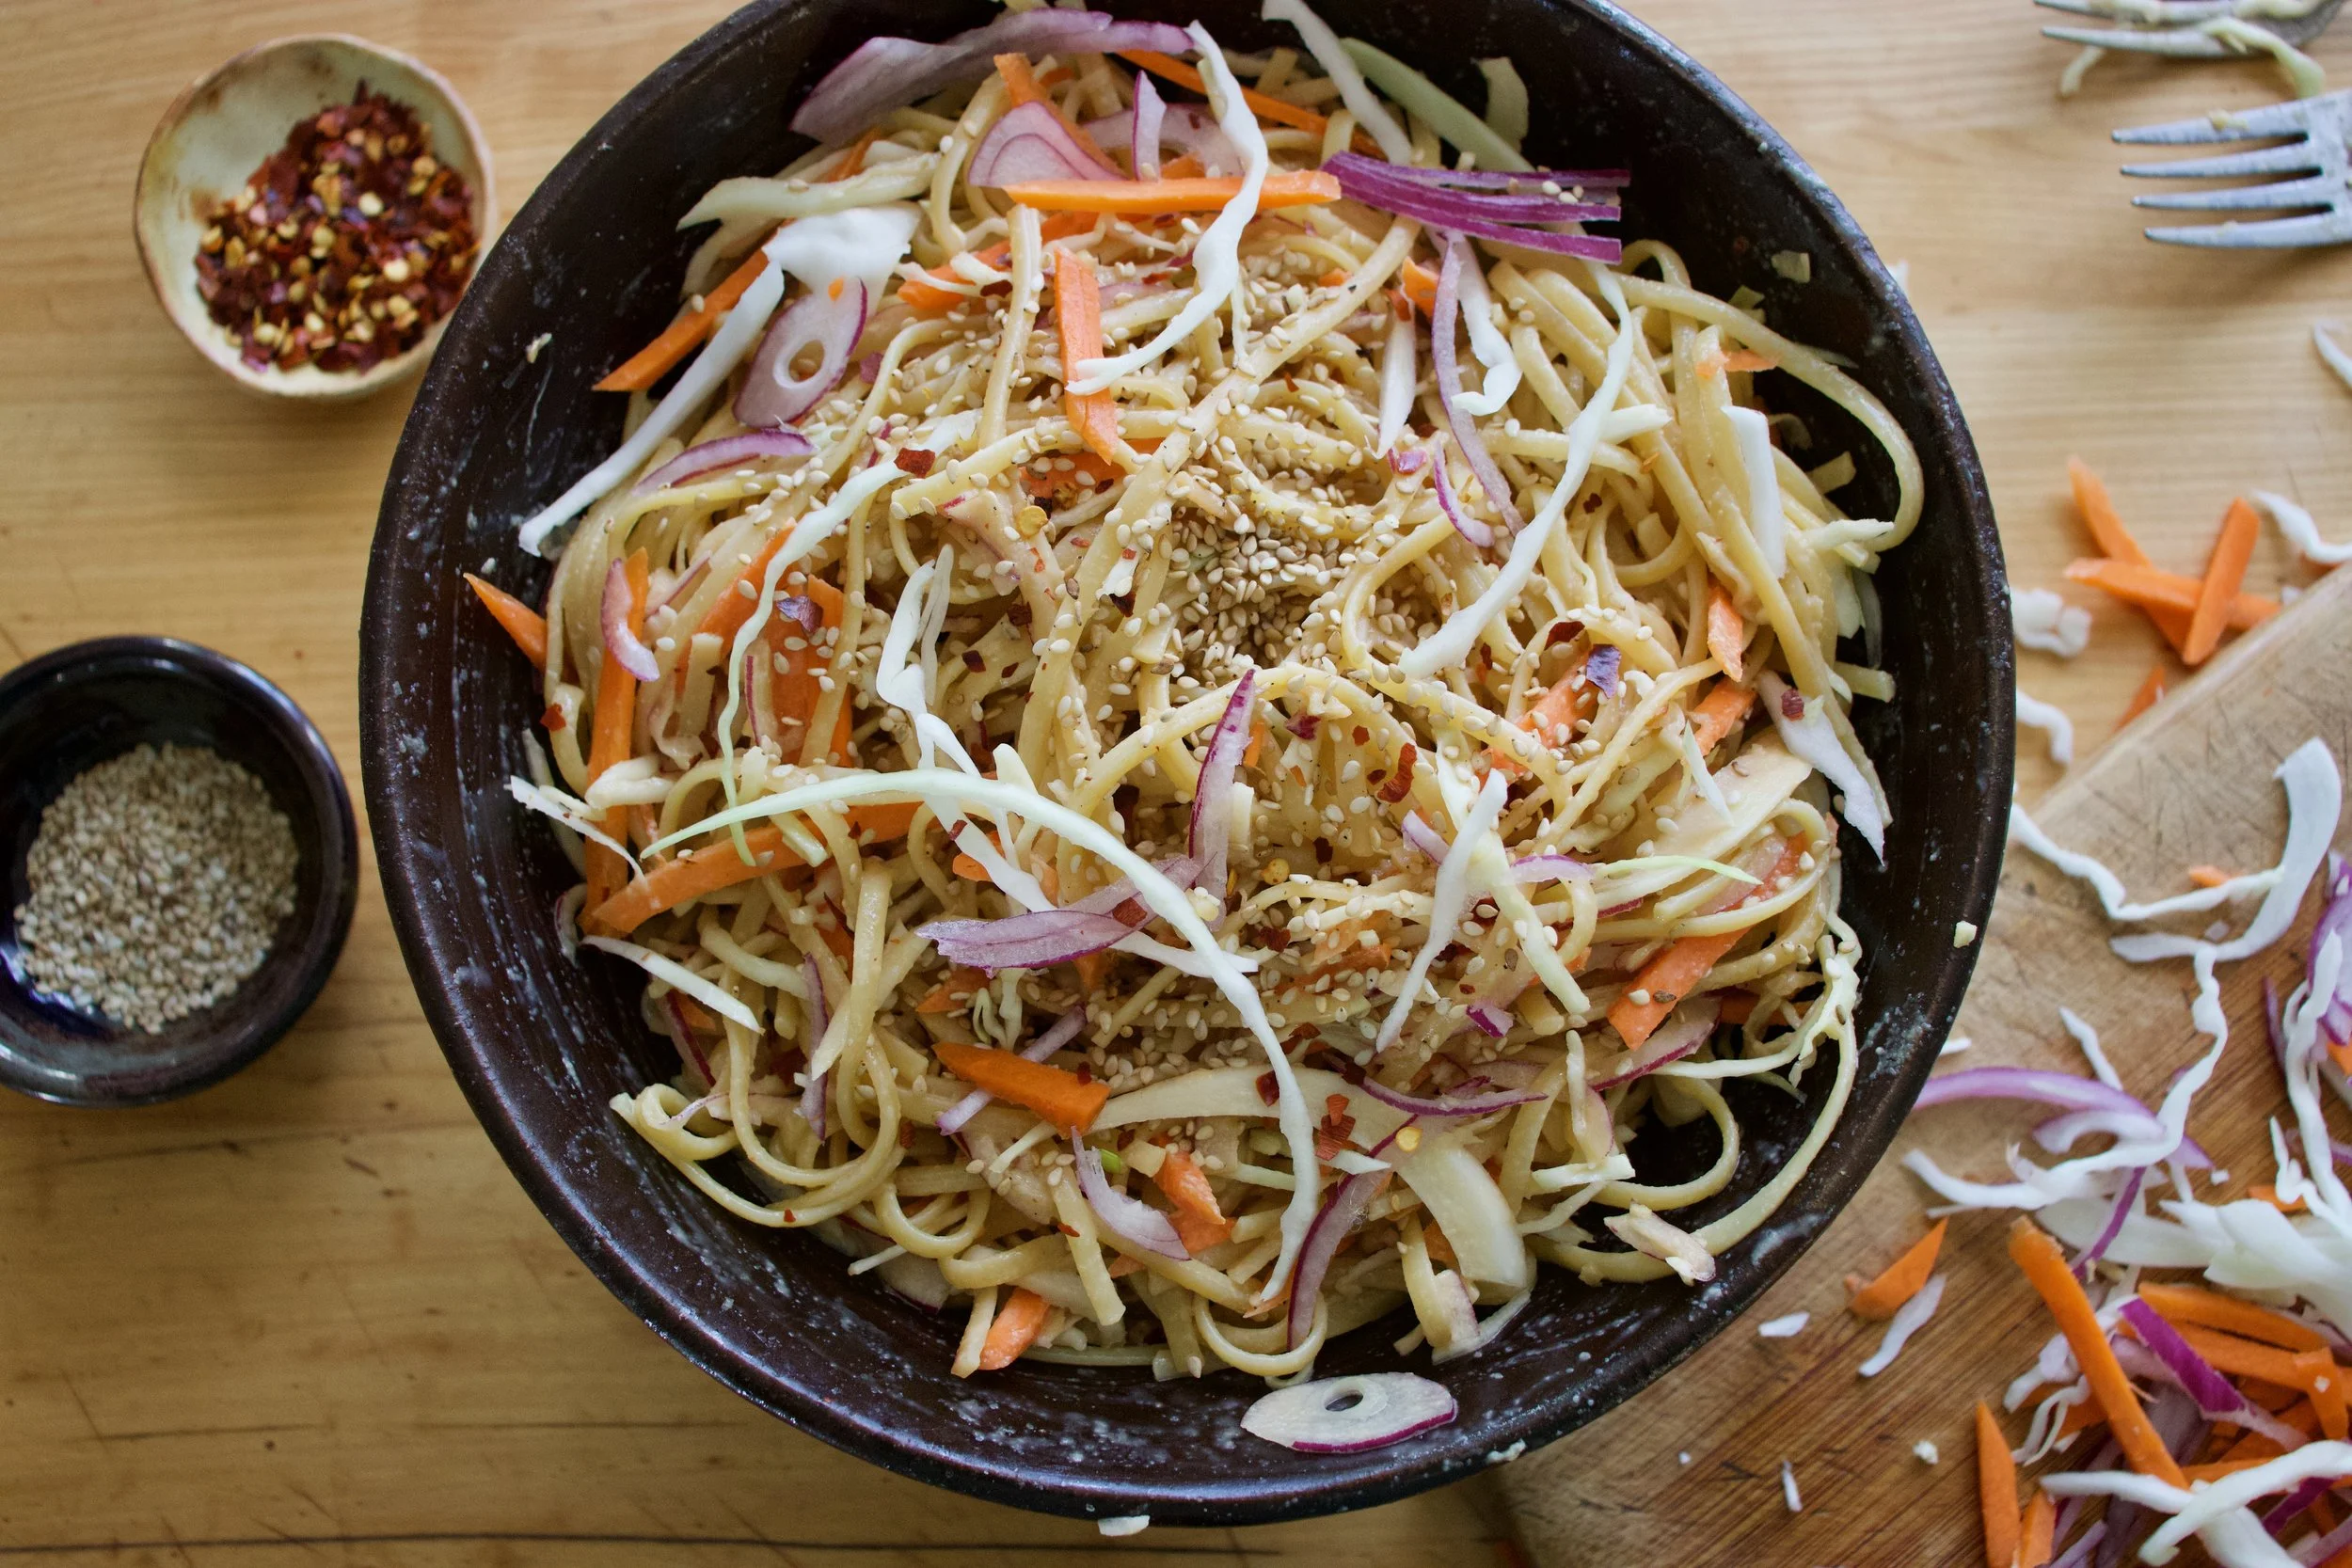
The stuff. Spaghetti noodles, tahini, a few cloves of garlic, some toasted sesame oil, soy sauce, red wine vinegar, honey (used whatever sweetener you like), red pepper flakes, tasted sesame seeds some cabbage, half a red onion and a carrot.
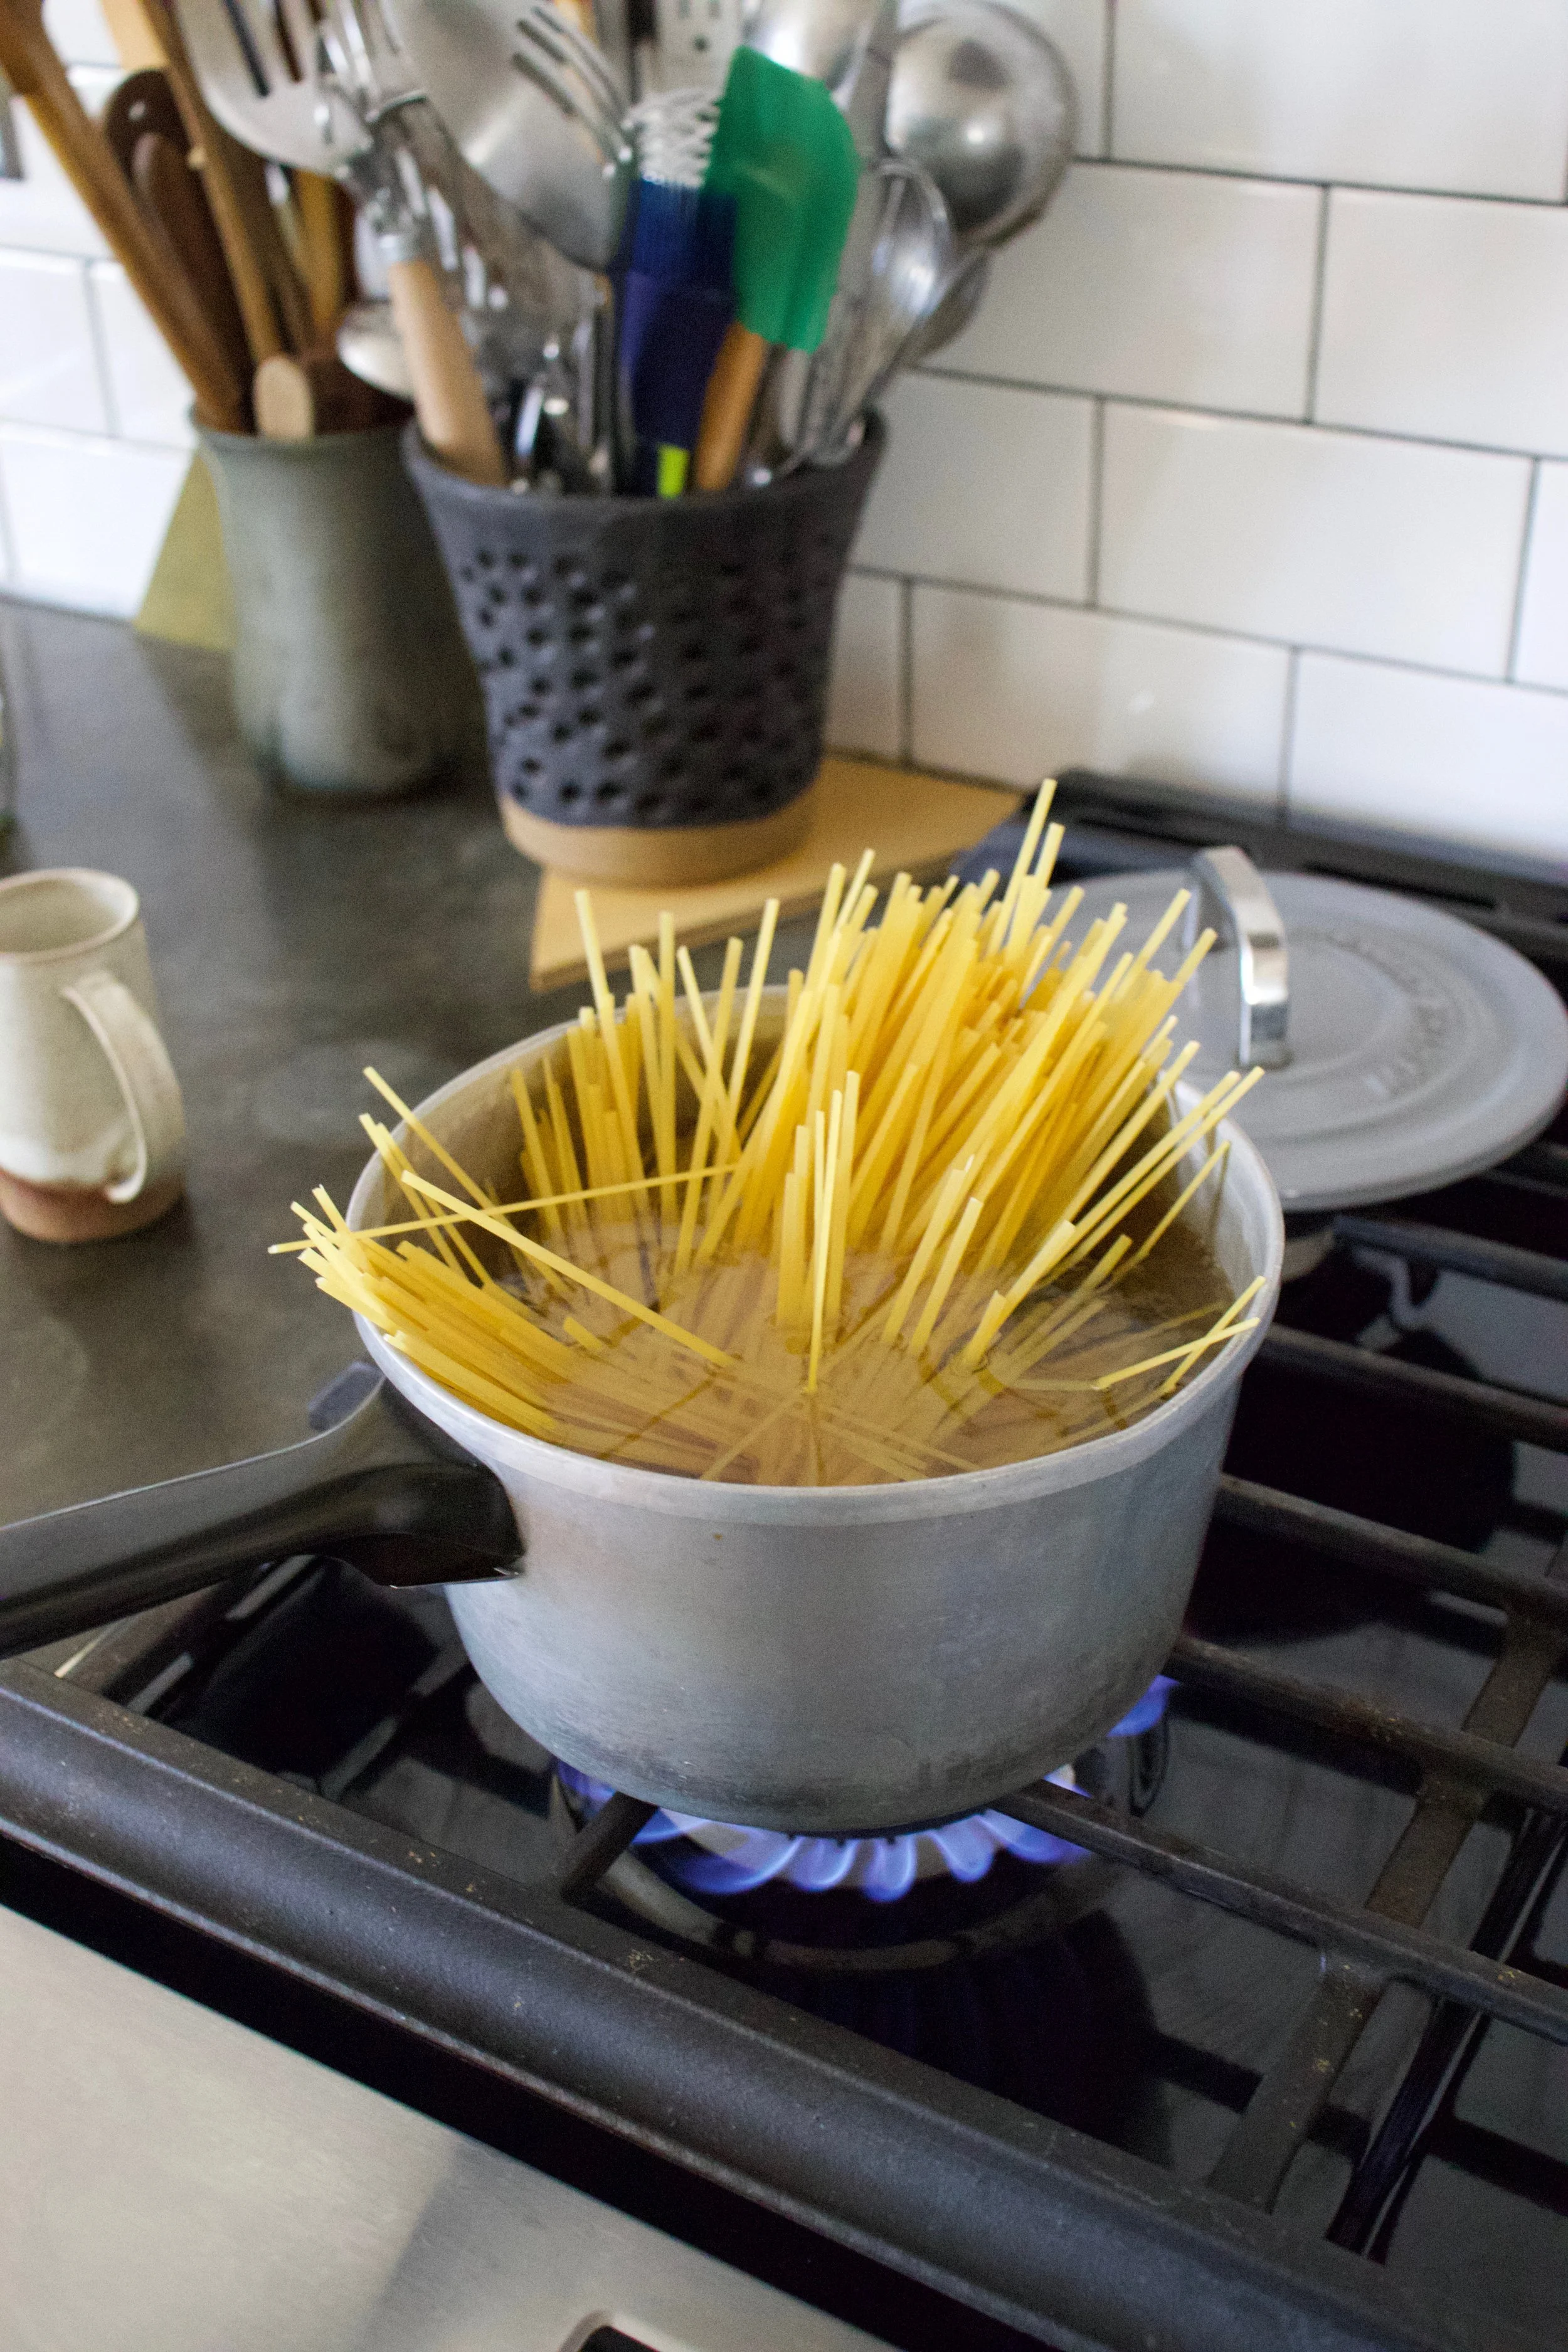
Get pasta cooking. Boil water, drop noodles in, you know the drill. Cook as long as the the noodles need cooking, just make sure to not over cook them cause soggy noodles are nasty.
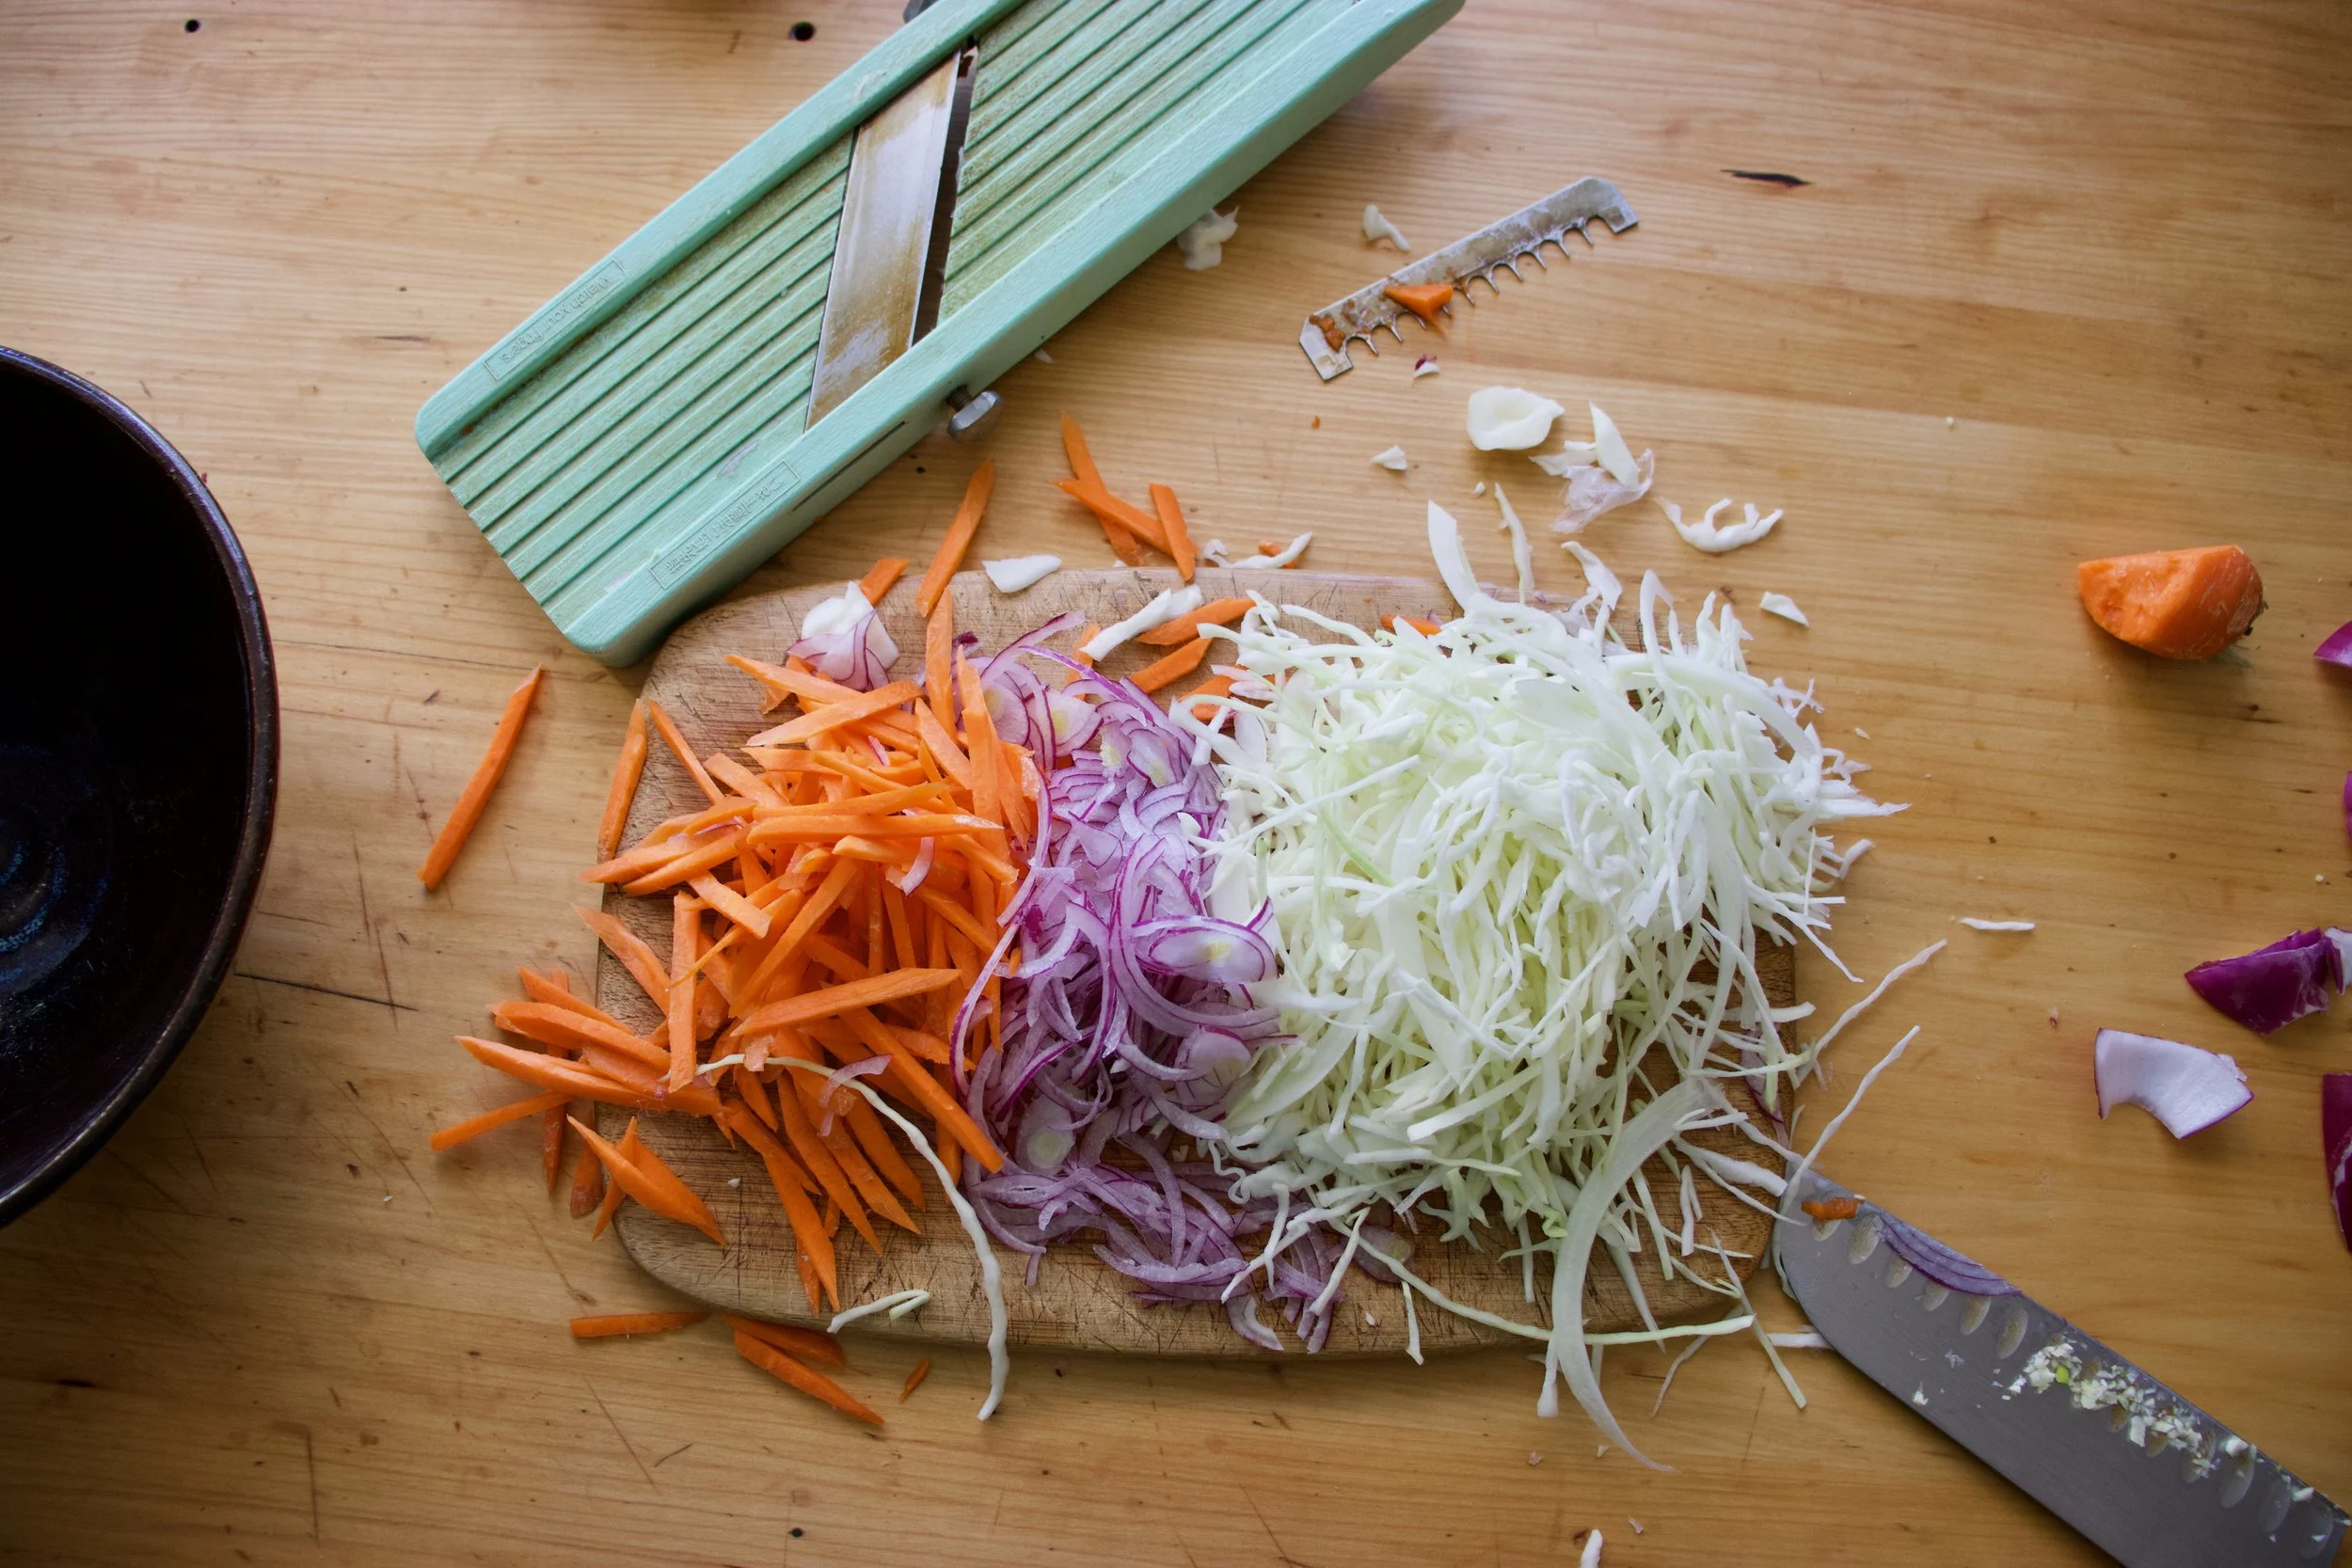
Chop, shred and julienne the cabage, onion and carrot. Nice and thin.
Mince the heck out of the garlic. Or use a garlic press if you want.
Now make the sauce. Add the minced garlic, along with the soy, sesame oil, vinegar, sweetener, and chili flakes to the bowl with the tahini. Mix, mix, mix until it is all incorporated and not lumpy. And that is that.
Noodles should be done by now so strain them out.
Add the prepared veggies to a big bowl.
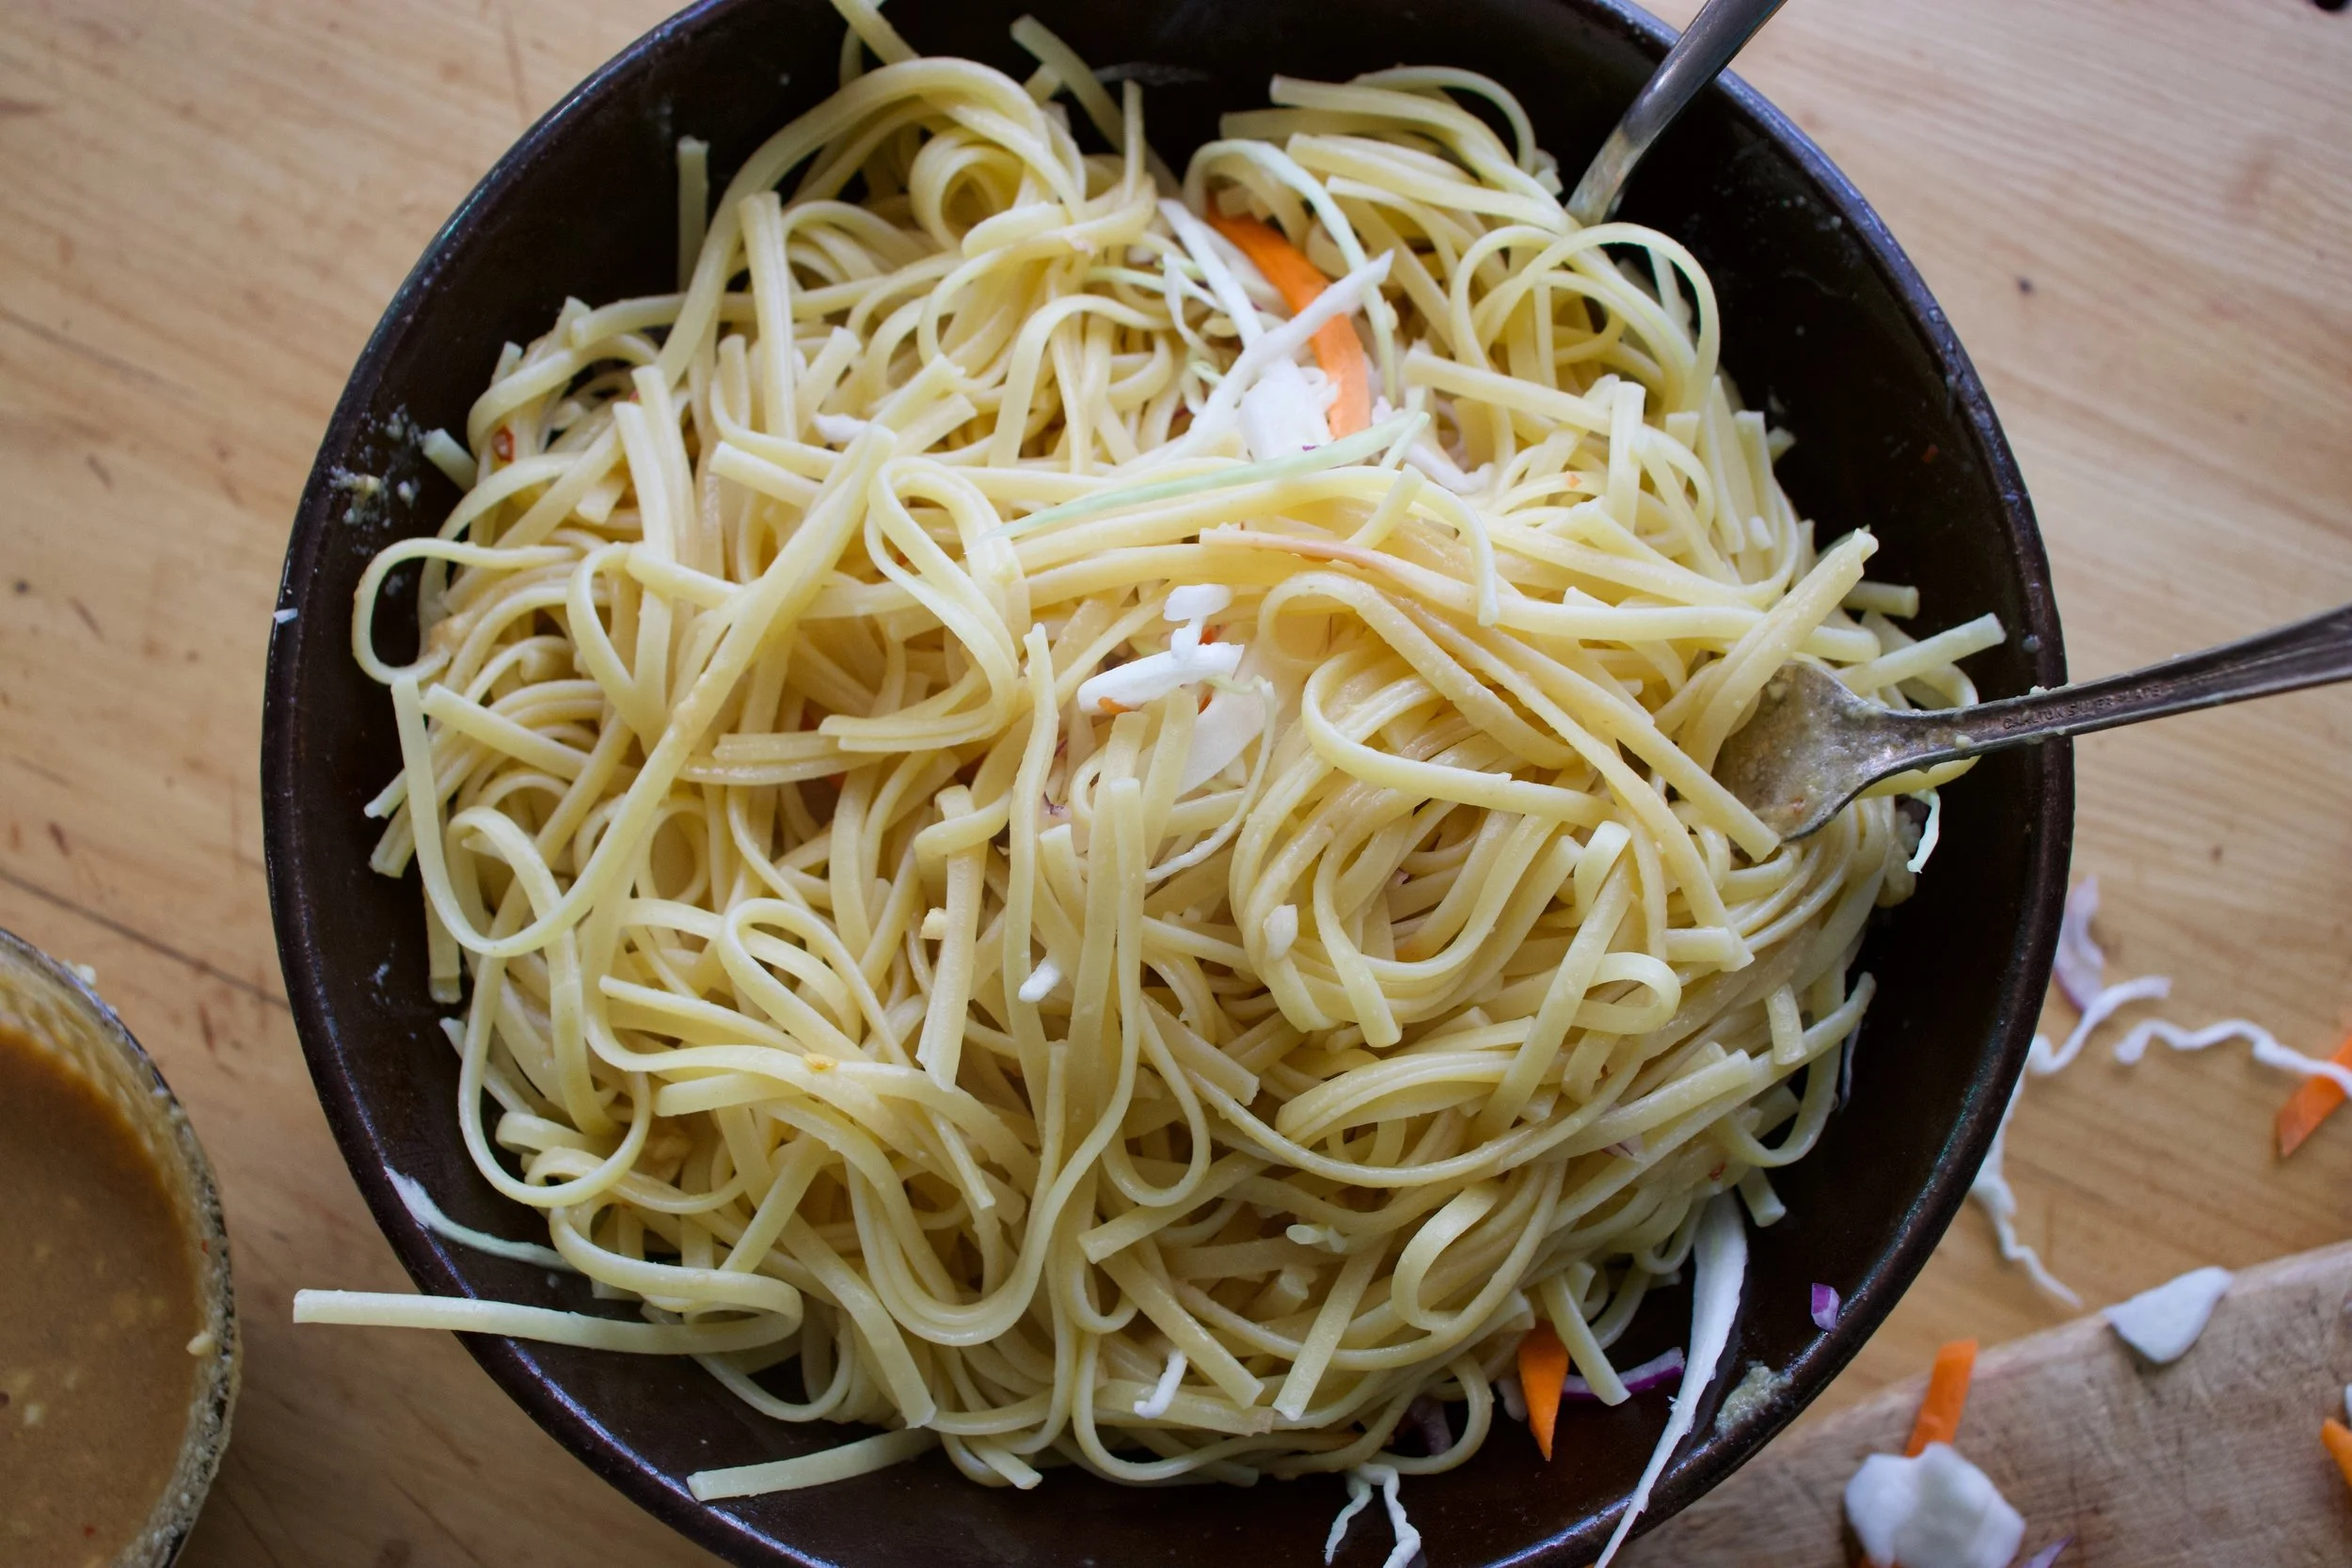
Add in the cooked noodles
Cover with sauce and toss all around until all the noodles are coated and delicious. Sprinkle with sesame seeds and a pinch or so more of pepper flakes.
And then it is time. Eating time.
Happy spring!
-C
serves 3-6
3/4 lb (3/4 of a package) of your favorite spaghetti noodles (or linguine or similar noodle)
2 tablespoons toasted sesame oil
1/4 cup soy (low sodium if you have it and gluten free tamari if needed)
3 tablespoons red wine vinegar
3 tablespoons tahini
2-4 teaspoons red chili flakes
1-2 teaspoons sweetener of choice (maple, honey, or brown sugar)
4-5 cloves garlic
1-2 tablespoons toasted sesame seeds
about a 1/4 head of cabbage
a carrot
small red onion
Bring a pot of water to a boiling cook the noodles as directed on package. You want them al dente, cooked all the way, but barely. No soggy noodles. (unless you like them soggy)
In the mean time, shred the cabbage, julienne the carrot (or shred it) and slice the onion so very thinly. Place into a large bowl. Now mince garlic and place into a bowl along with the soy, sweetener, vinegar, tahini, sesame oil and a teaspoon or two (more for spicier) of chili flakes and whisk until completely incorporated. Taste and adjust if needed. Add more tahini for more body, more sweetener if needed or more hot pepper flakes for more spice.
Once noodles are cooked, drain and place into large bowl along with the shredded and julienned veggies. Pour in the sauce and toss it all around until all the noodles are covered. Sprinkle in the toasted sesame seeds and a small pinch more of the red pepper flakes.
Eat. Eat warm, room temp, or cold. They are delicious any way.
Any left overs just stick in fridge. Can be reheated or not. Also, you can make the sauce and the noodles a few day ahead of time of when you want to have the dish Just mix the sauce with the noodles when you are about to serve them%u2026 So simple!
Nothing here but a mere craving, the fact that I had a fresh head of cauliflower, and I really wanted tahini. TA DA. I made exactly what I wanted and it was so so sooooo good. Maple Cumin is one of those super A+++ taste pairings and anything roasted cover in tahini is basically going to be a win so I had no fear when making this dish that it was going to be anything but fanatic.
And of course I was right. It was so freaking good, like now I am going to make it again and again because I don%u2019t want make cauliflower any other way ever or at least until I get sick of it or of roasted vegetables. But that probably won%u2019t happen for a while.
So if you like cauliflower and tahini and amazingness, here, make this.
To the cauliflower
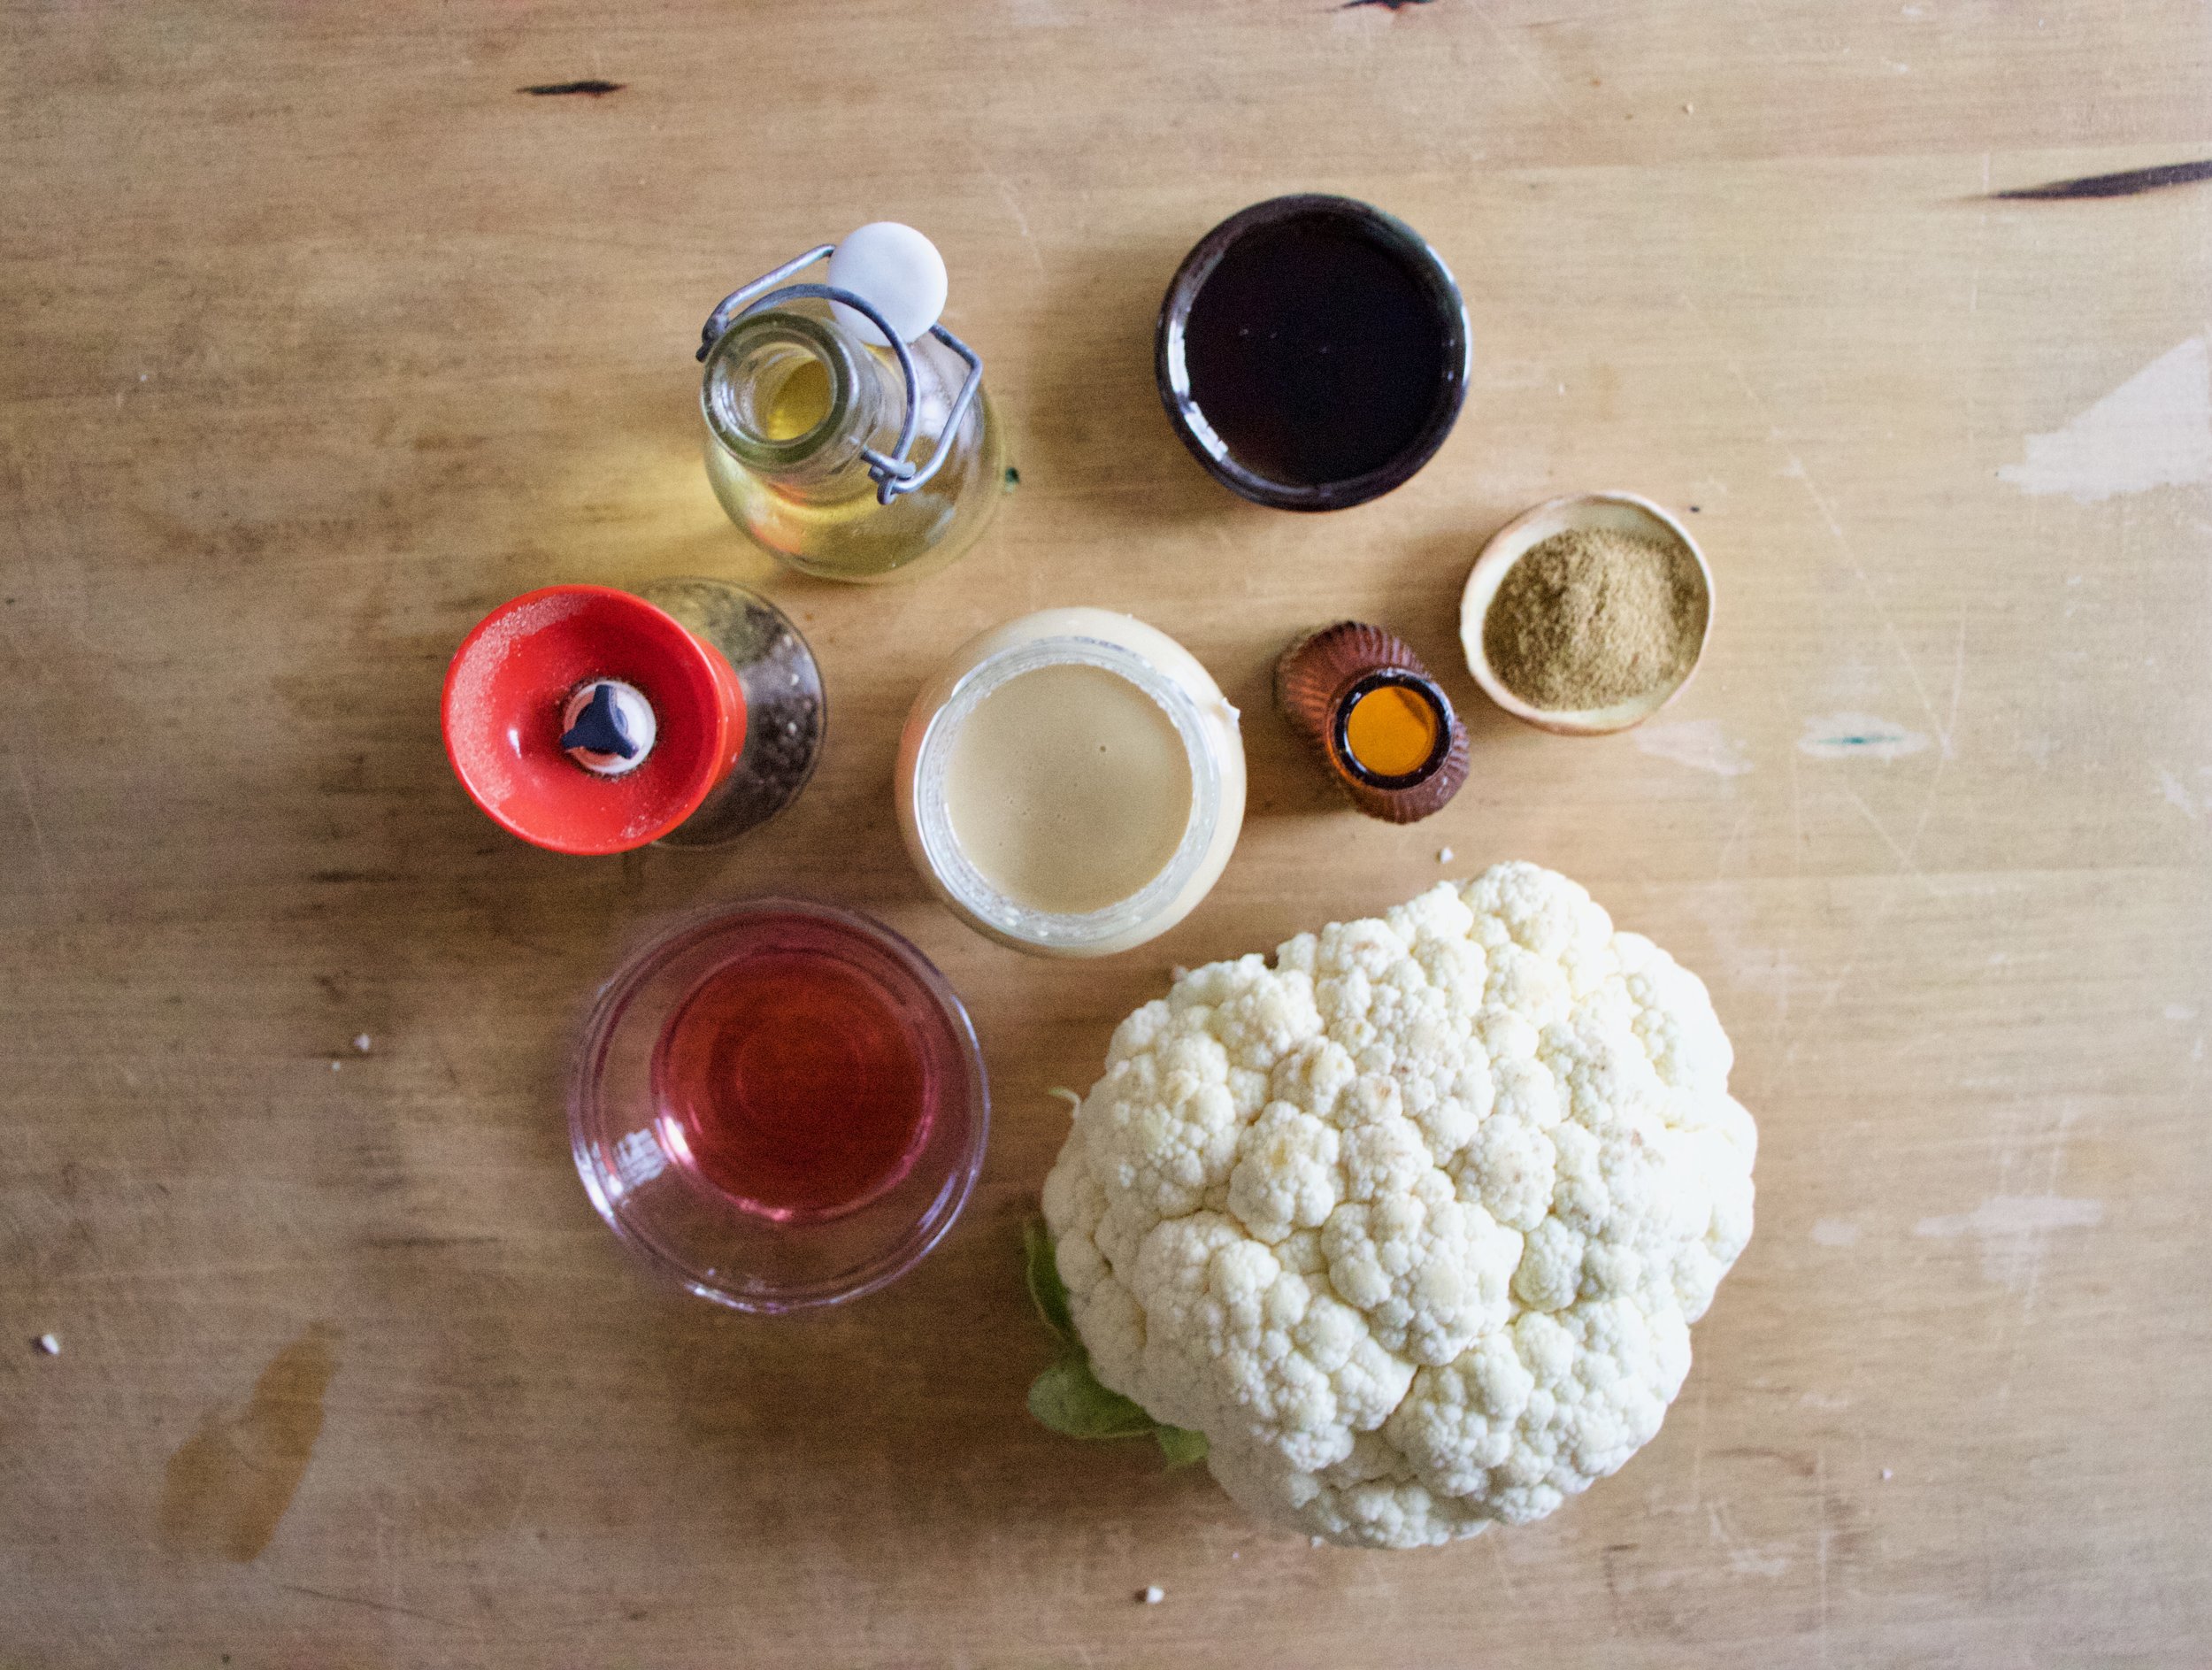
The stuff. A head of cauliflower, tahini, maple syrup, cumin powder, red wine vinegar, salt and pepper, and olive oil.
Break or cu the head of cauliflower up into florets and toss with a little oil, the maple and cumin, and a little salt and pepper.
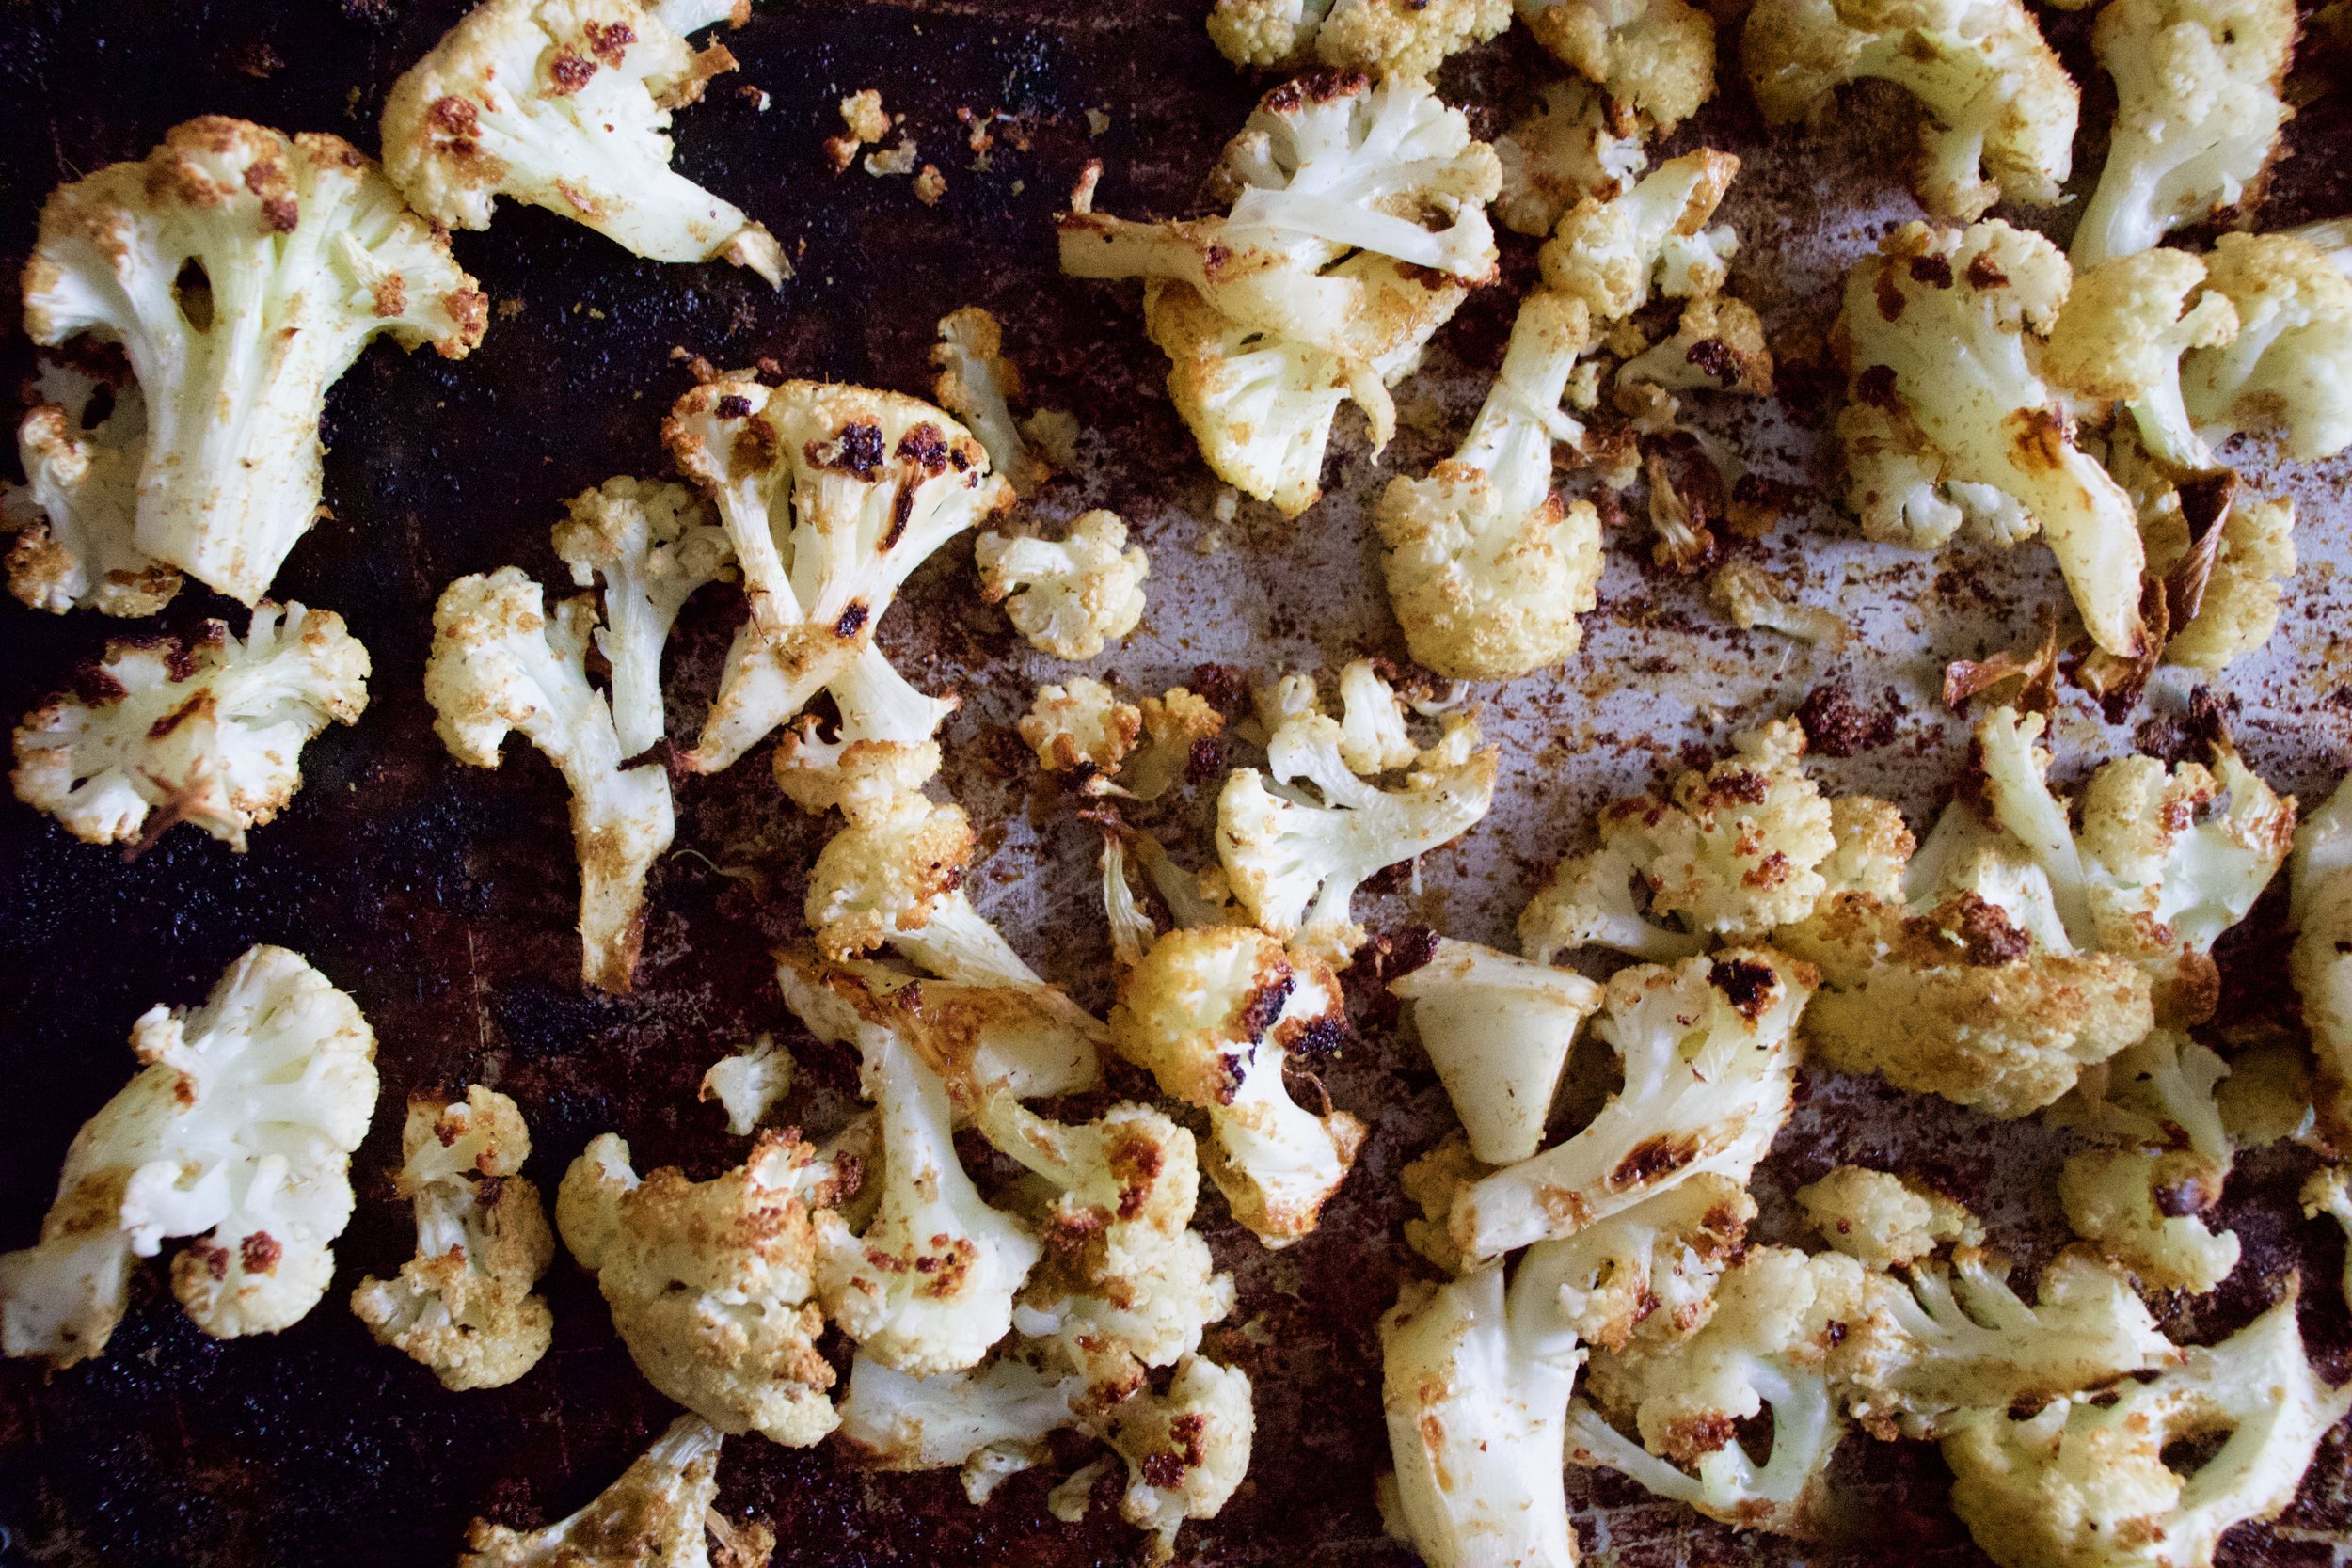
Scatter on a baking sheet and stuff it into a hot oven.
Meanwhile mix tahini with vinegar, salt and pepper, and enough warm water to thin out.
Roasted all nice and crisp and delightful.
And now you gather up all that cauliflower and cover with all the tahini you want. Grab a bowl, or just eat off baking sheet, and get to it.
And there is no shame in eating a whole head of cauliflower because hey, its cauliflower.
-C
Makes a meal for one or a side for a few
a head of cauliflower
3 teaspoons cumin
2 tablespoons maple syrup
olive oil
3 tablespoons tahini
2 tablespoons red wine vinegar
2-3 tablespoons warm water
salt and pepper
Preheat oven to 450
Break or cut the cauliflower into medium sized florets. Place in a bowl and drizzle with a teaspoon or so olive oil and toss around. Drizzle in maple, add in the cumin, and a pinch of salt and pepper. Toss until coated then dump the cauliflower onto a baking sheet. Place in hot oven for 25-30 minutes or until roasted to your liking.
While that%u2019s roasting, mix up the tahini, vinegar, and a pinch of salt and pepper. Add in warm water until the mixture is a drizzlable consistency.
Once cauliflower is out of oven, cover with tahini.
Now eat.
There will be no left overs so don%u2019t worry about it.
Potatoes in tomatoes. It just has a nice ring to it. And to tell the truth, that is the only reason I made this dish, because it sounds good.
Ok, not really the only reason, but it was the start, that and I have been sitting on some potatoes for a little while and it was time for them to be eaten. Enter in the tomatoes. I figures cooking the potatoes in tomatoes is alike to a ketchup and french fry situation. Not completely the same, but you get the idea. Add in chickpeas for good measure and onion because I wanted to and that is that. Nothing fussy, one pot, easy, hearty, and good.
Also not hurting anyone that these potatoes take a little while to bake. I could have made this dish in a way that made them cook faster (like parboil the potatoes) but I wanted the heat from the oven. It has been pretty freaking dang cold out so I liked having the heat, it adds another dimension to the term comfort food (as in me being comfortable hanging out next a hot oven).
Anyway, nothing too fancy, just all around tasty dish. It is just what you need to bake and eat on any given cold winter day. And it sounds nice too. Just say it aloud. Potatoes in Tomatoes. Right? Now you see, it had to be done.
To the potatoes in tomatoes!
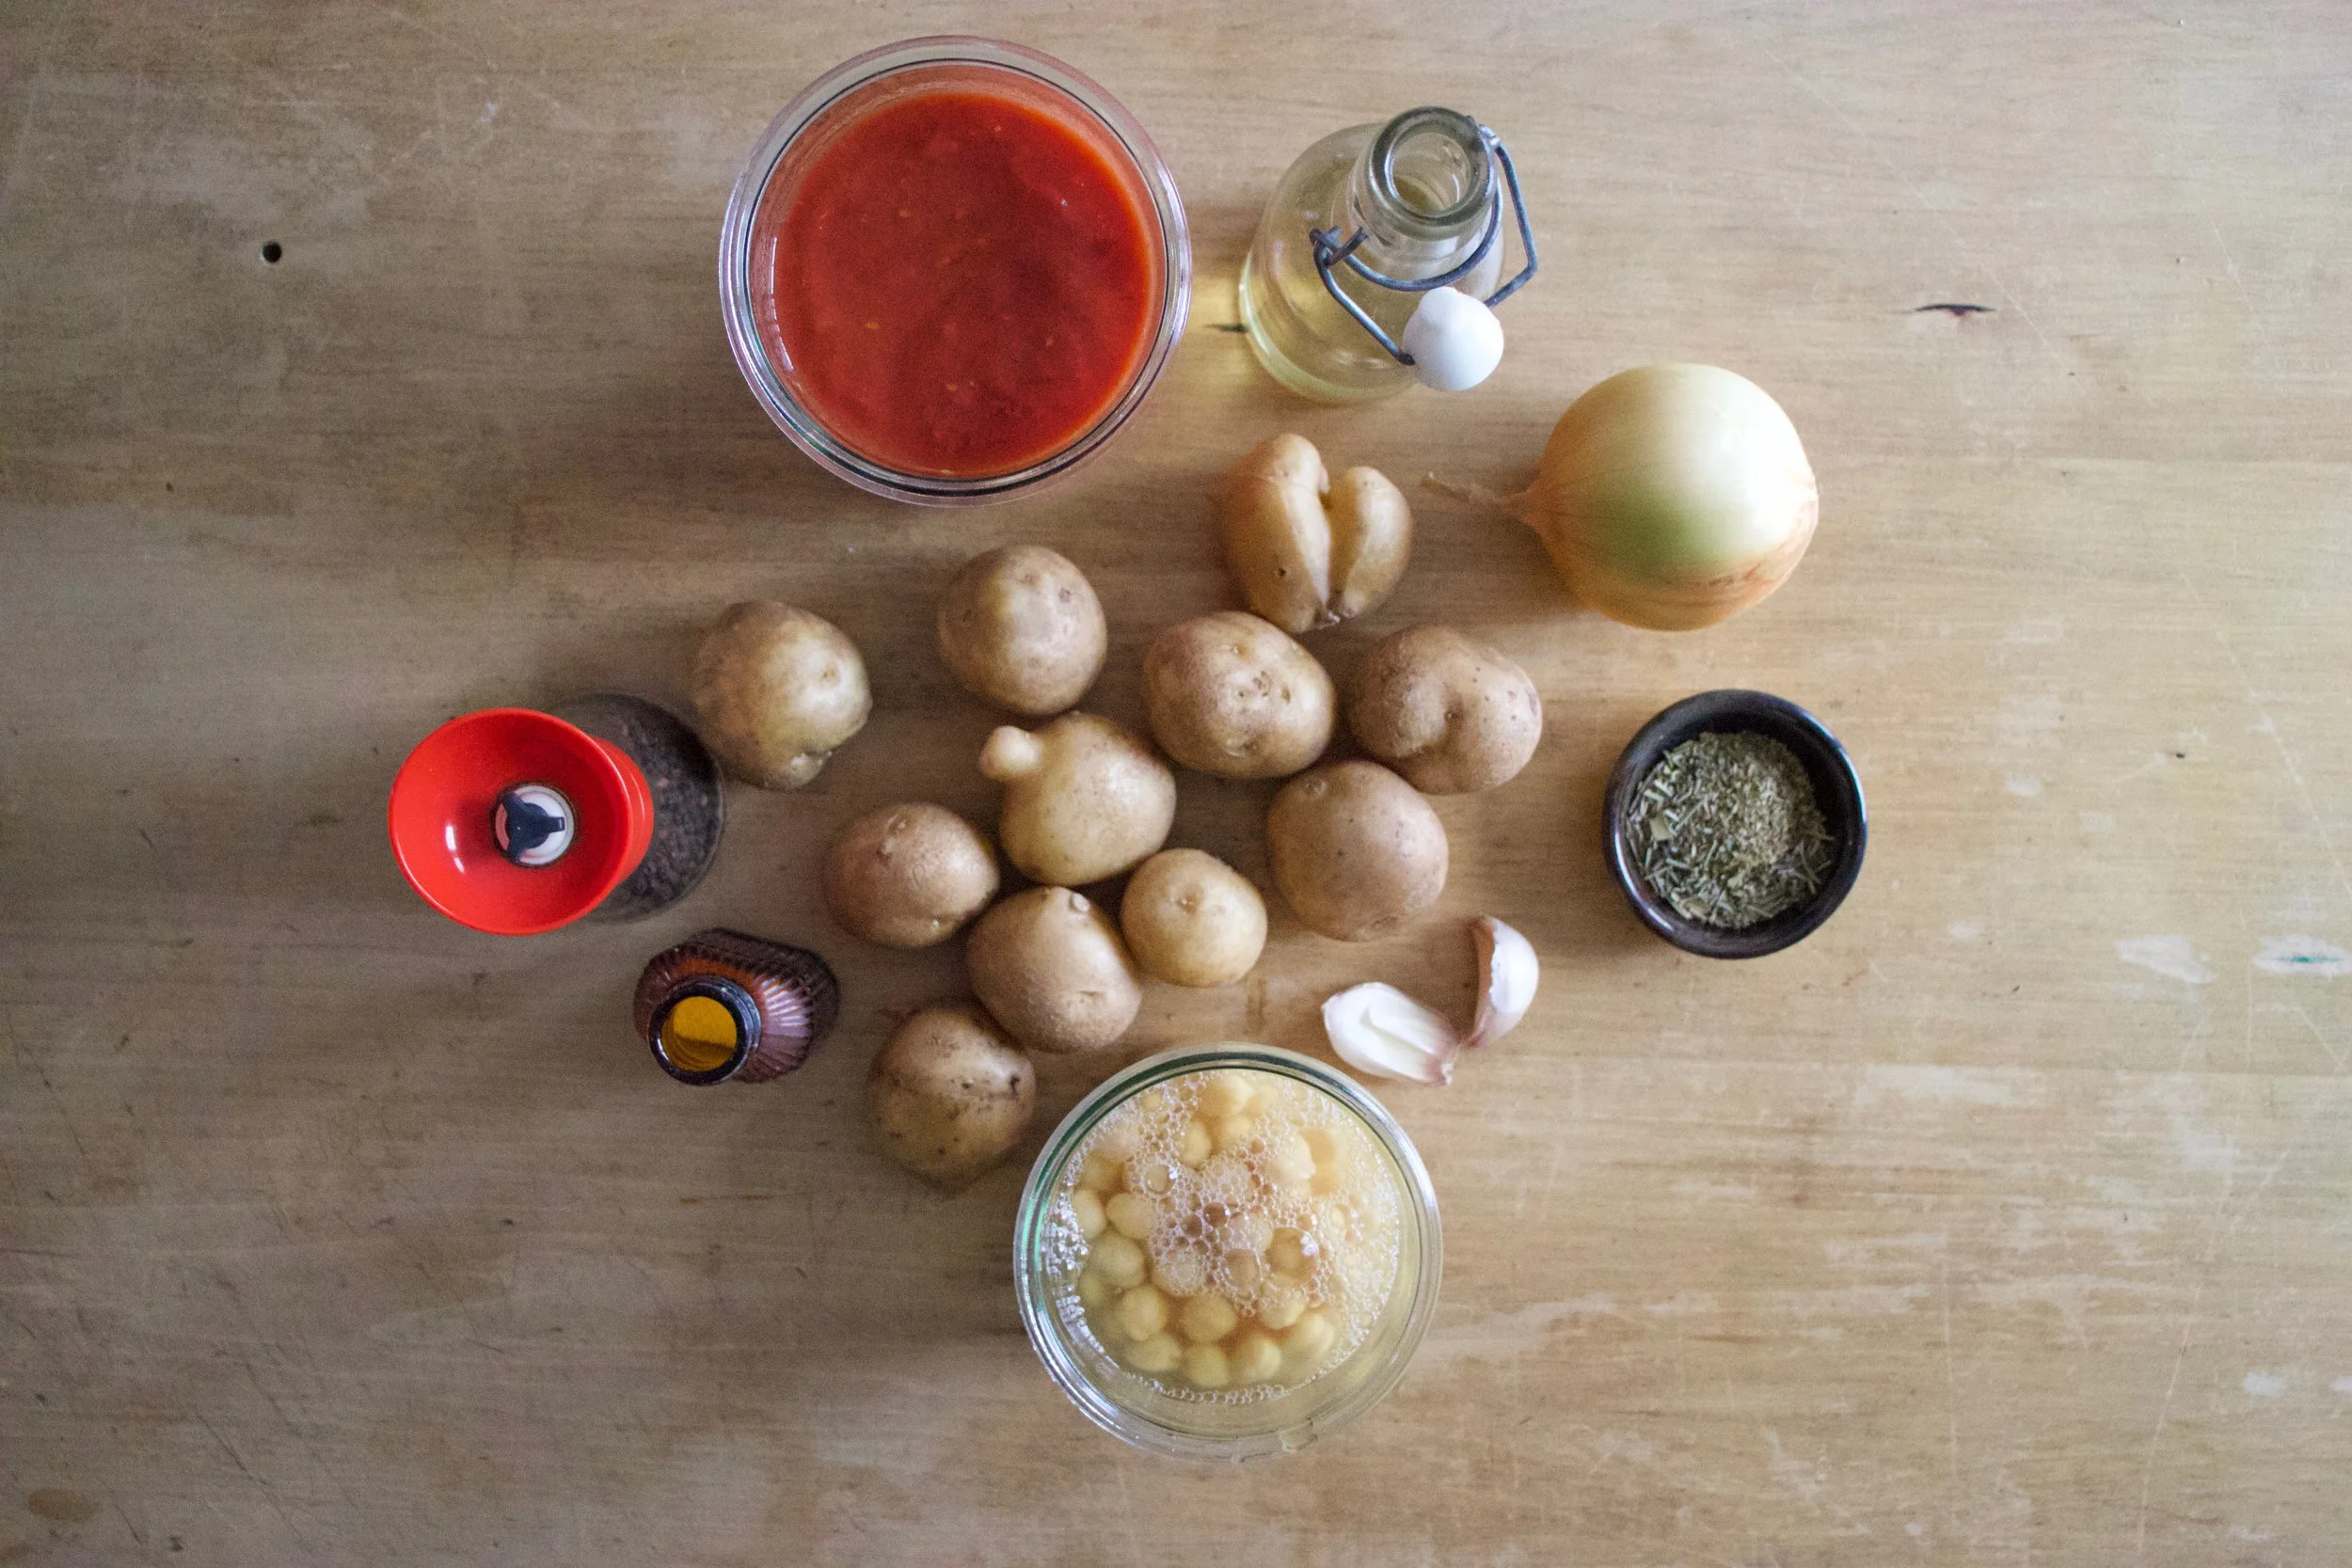
The stuff. Potatoes, crushed tomatoes, cooked chick peas, an onion, a few cloves garlic, Italian seasoning, salt and pepper and a bit of olive oil.
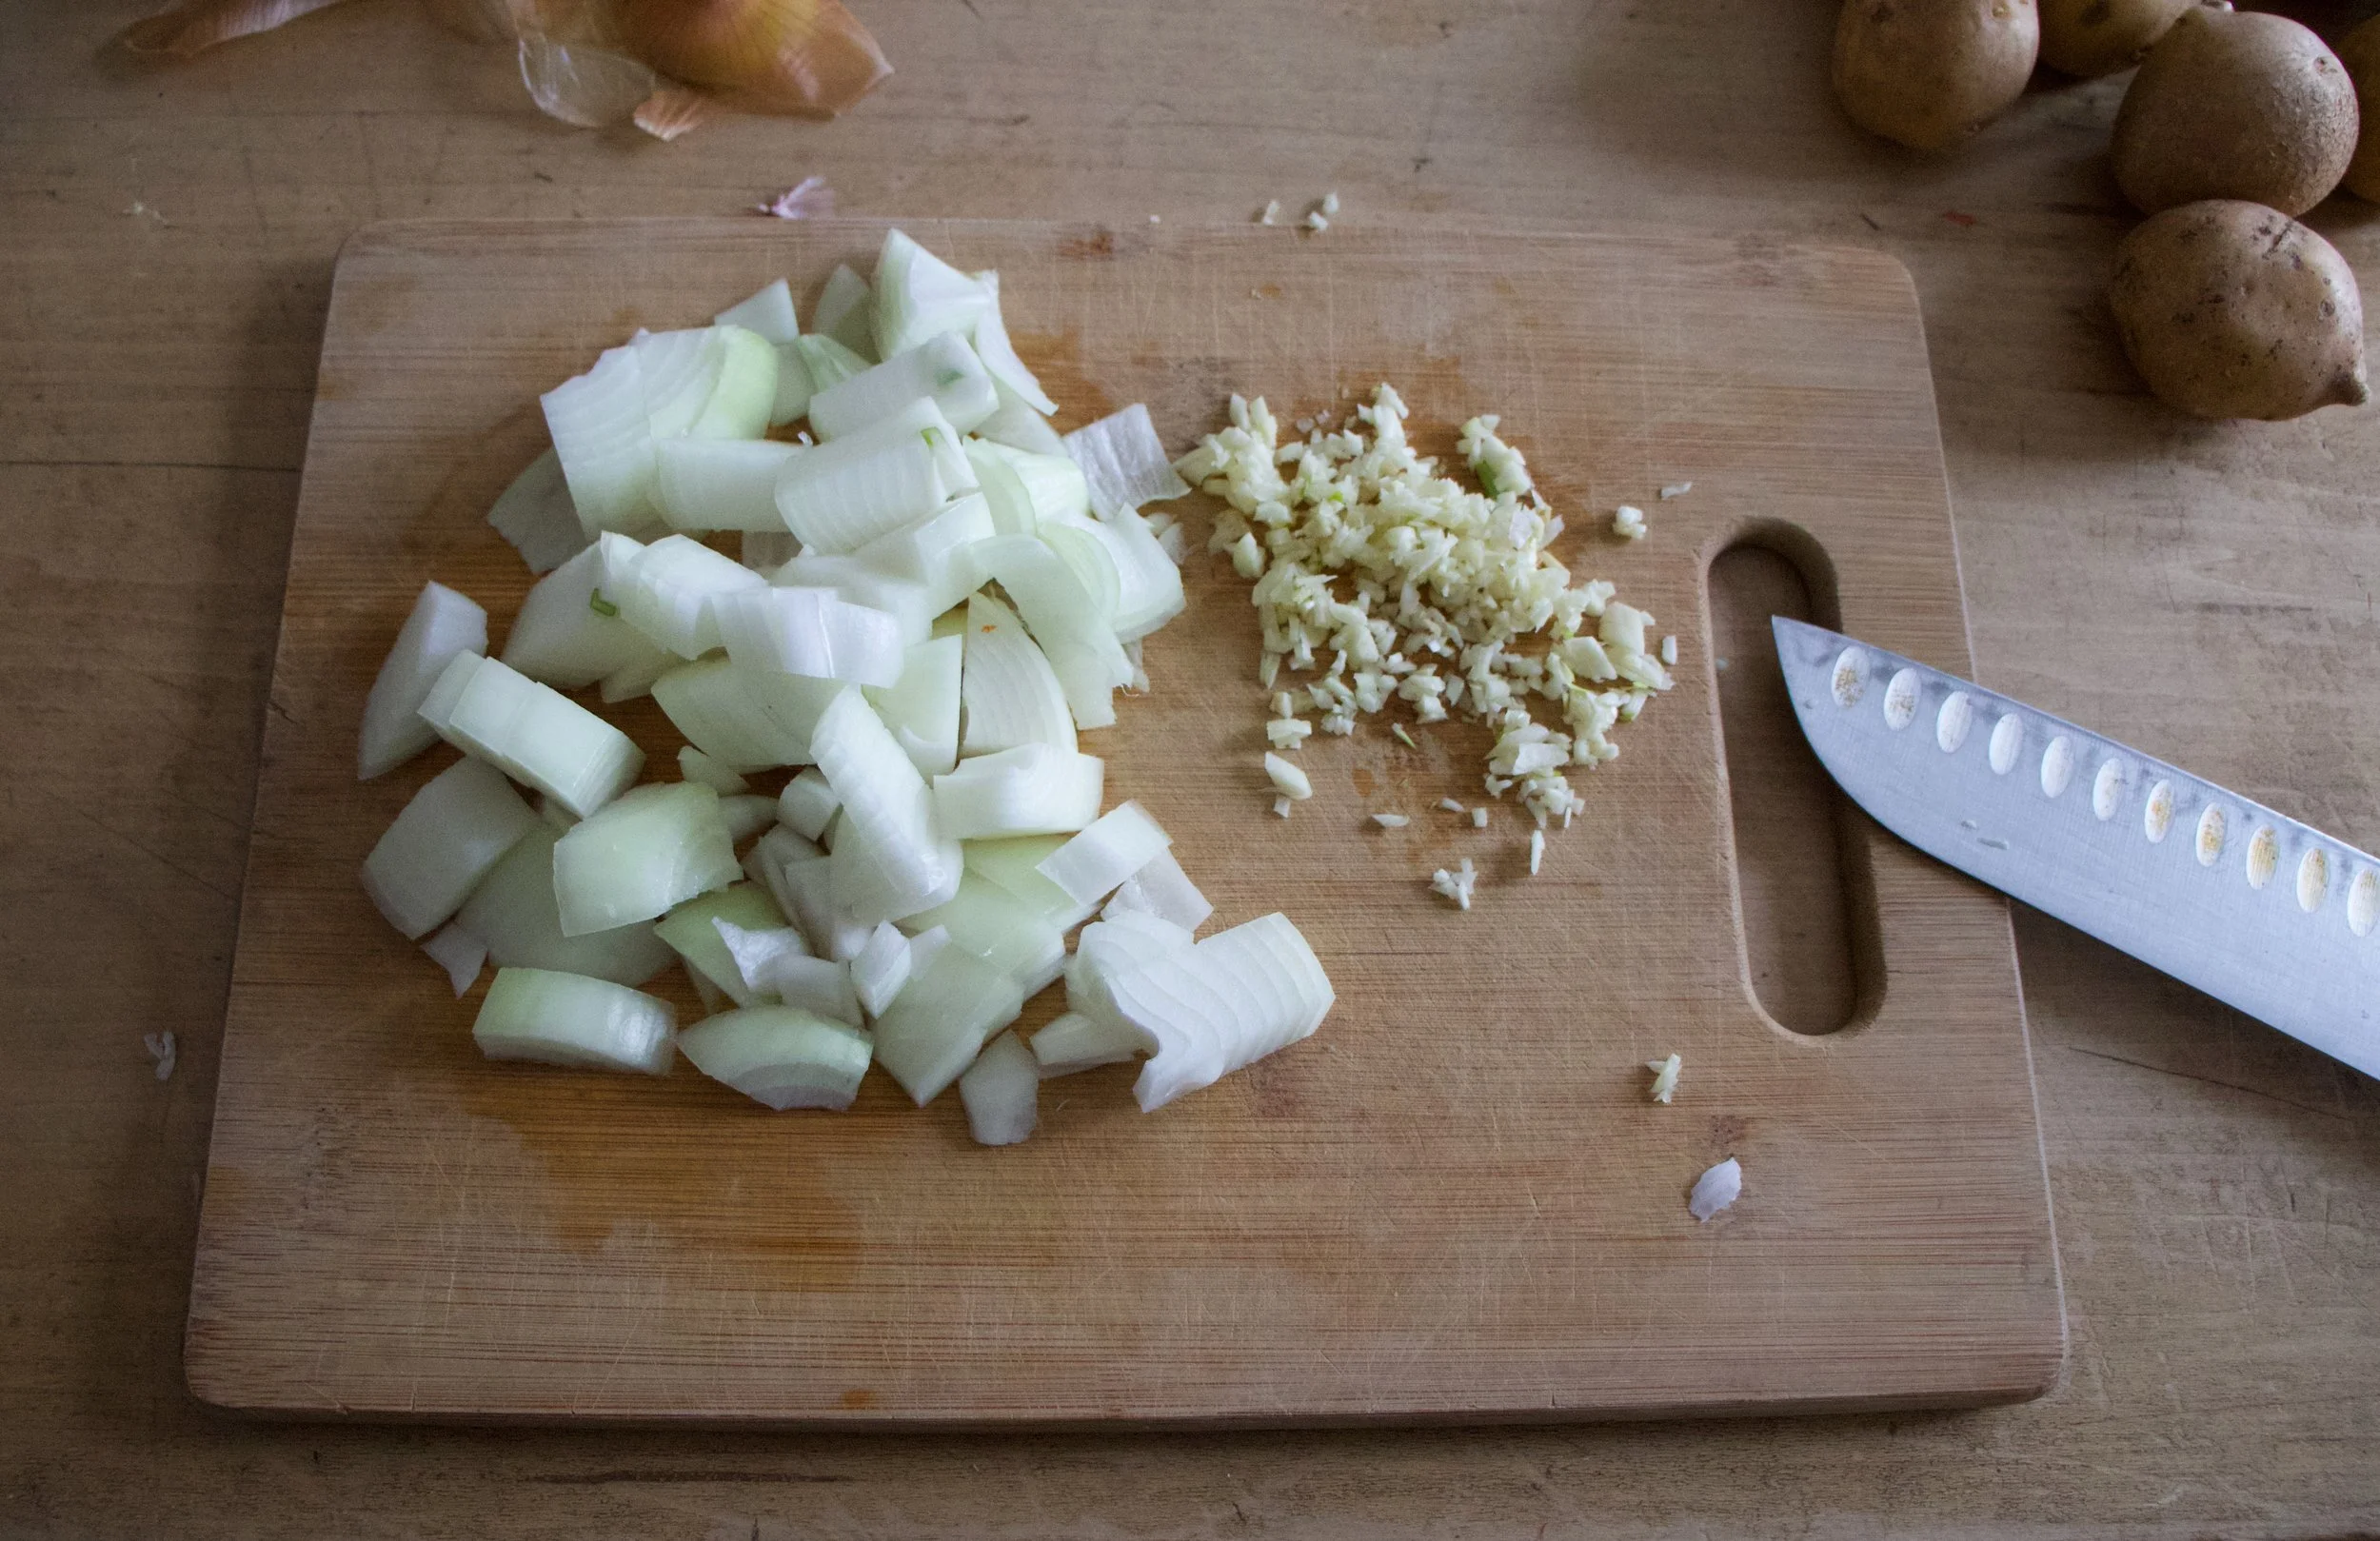
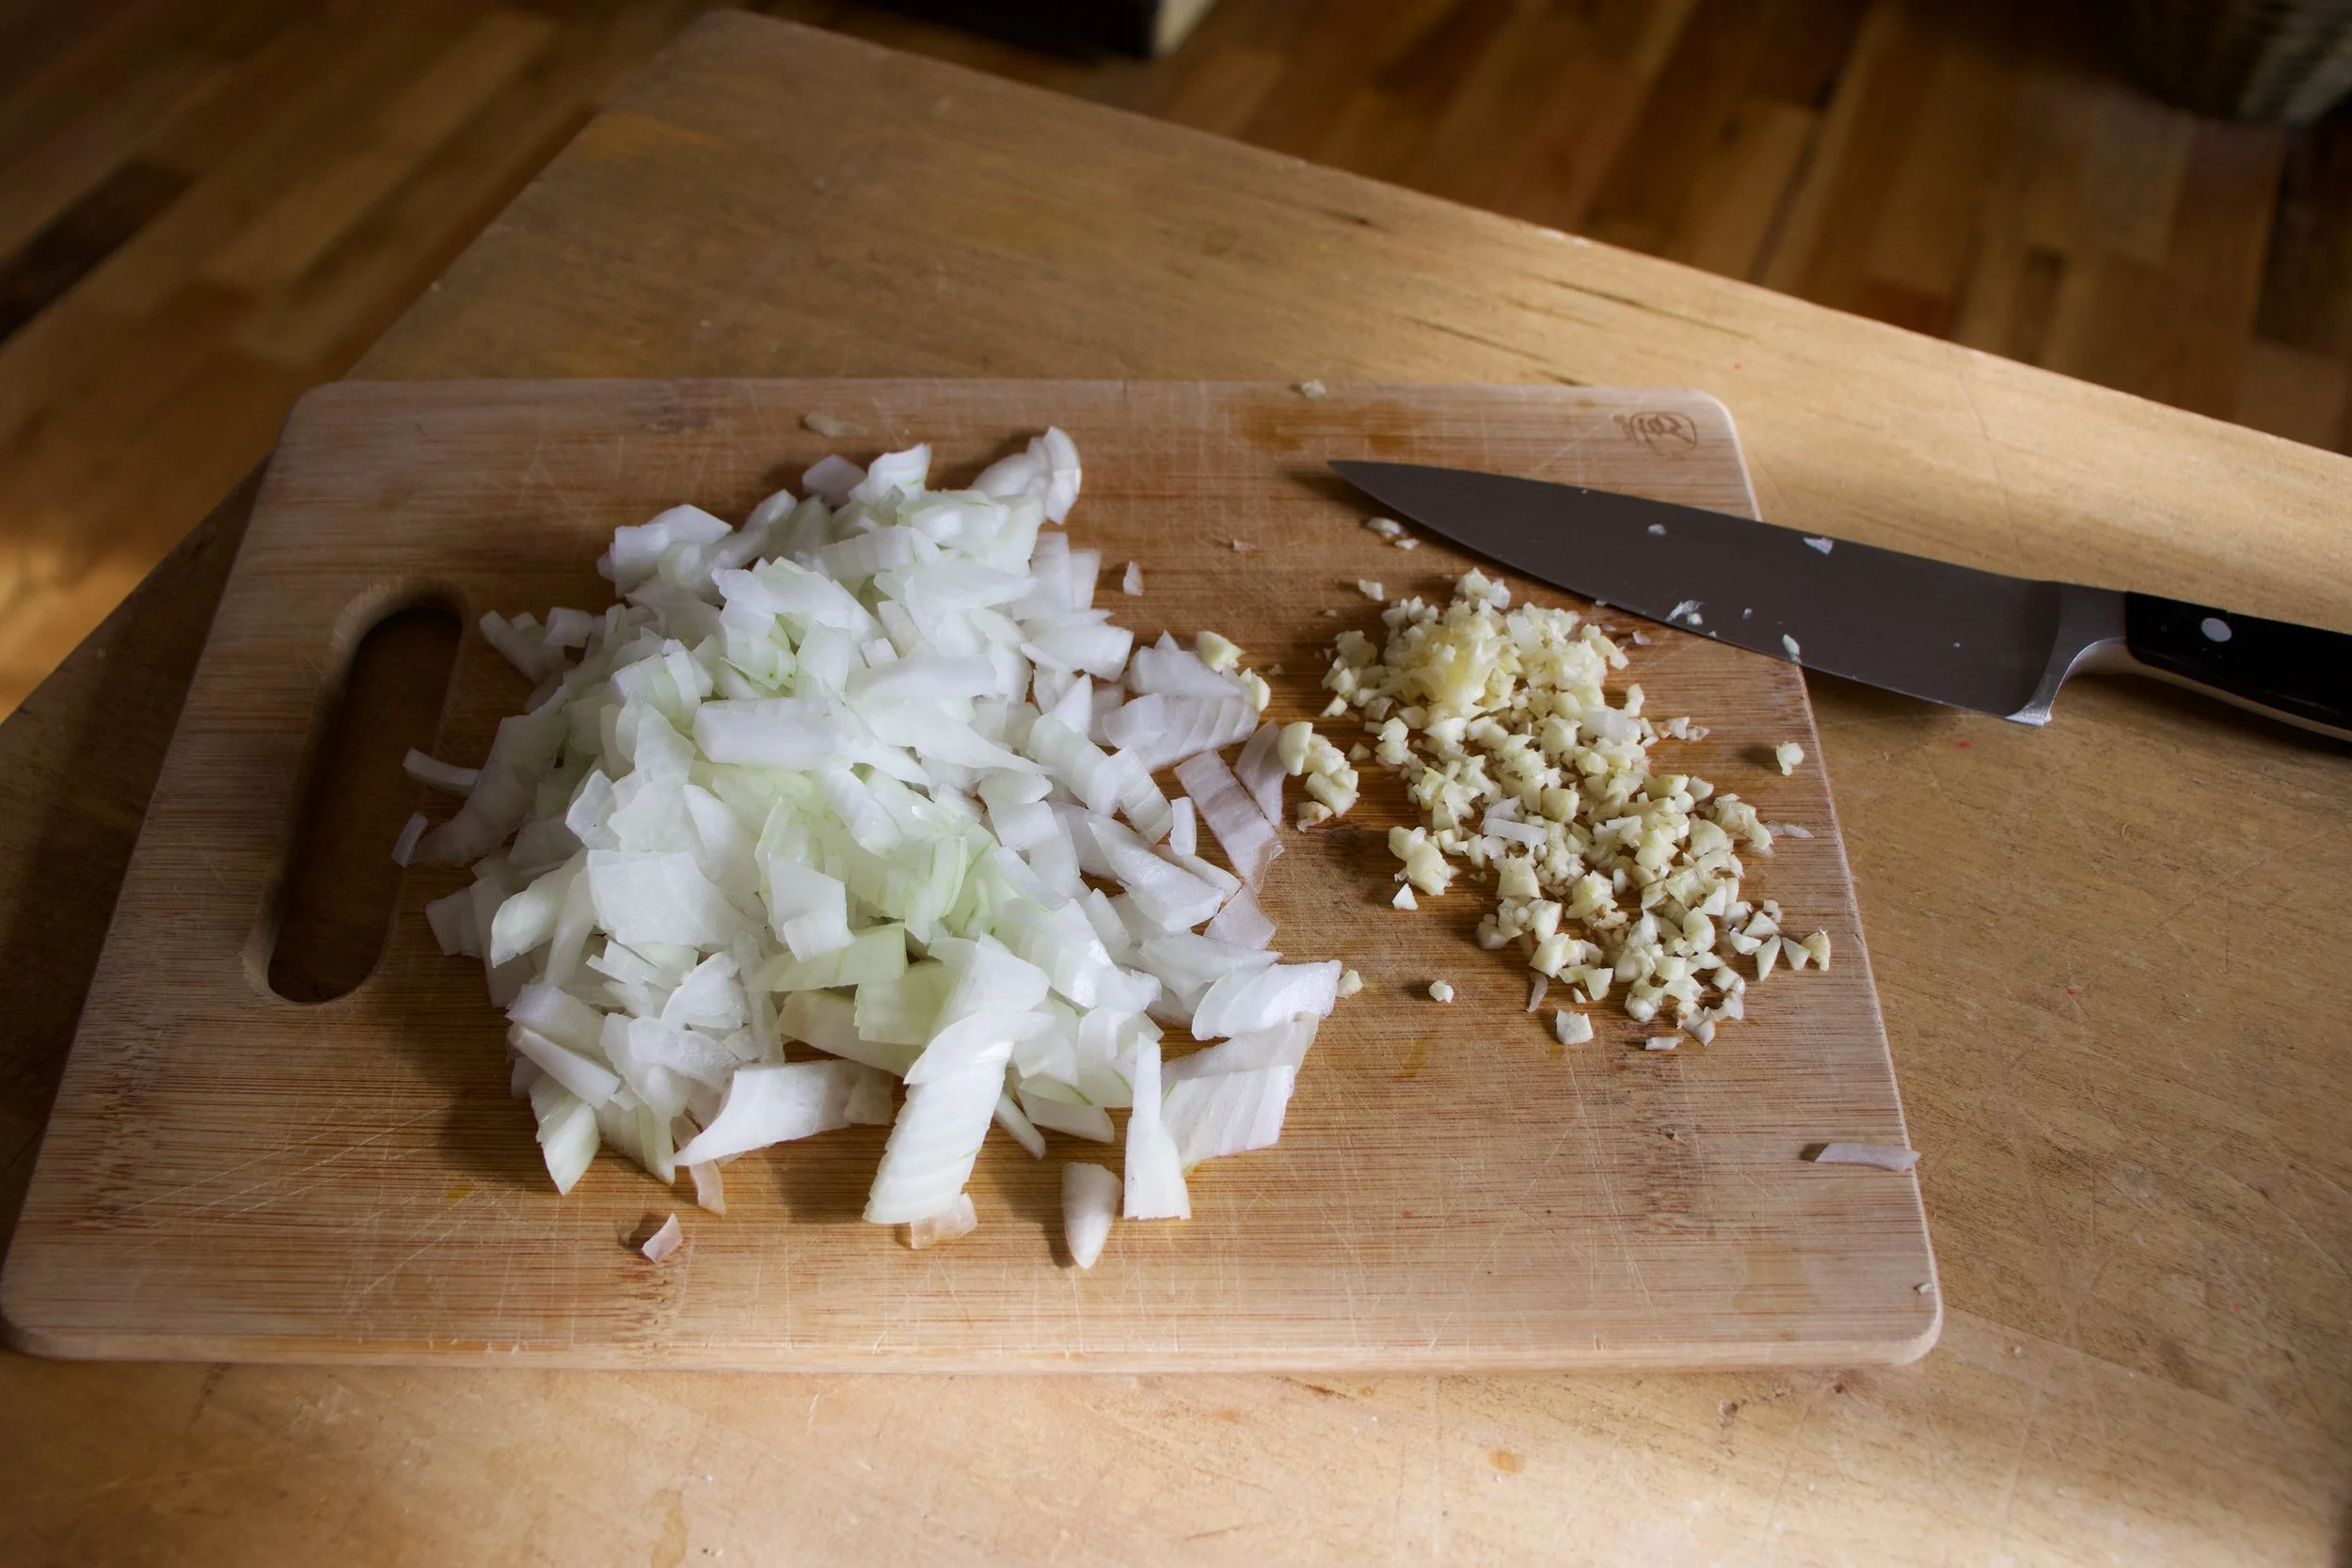
Start by chopping the onion and mincing the garlic.
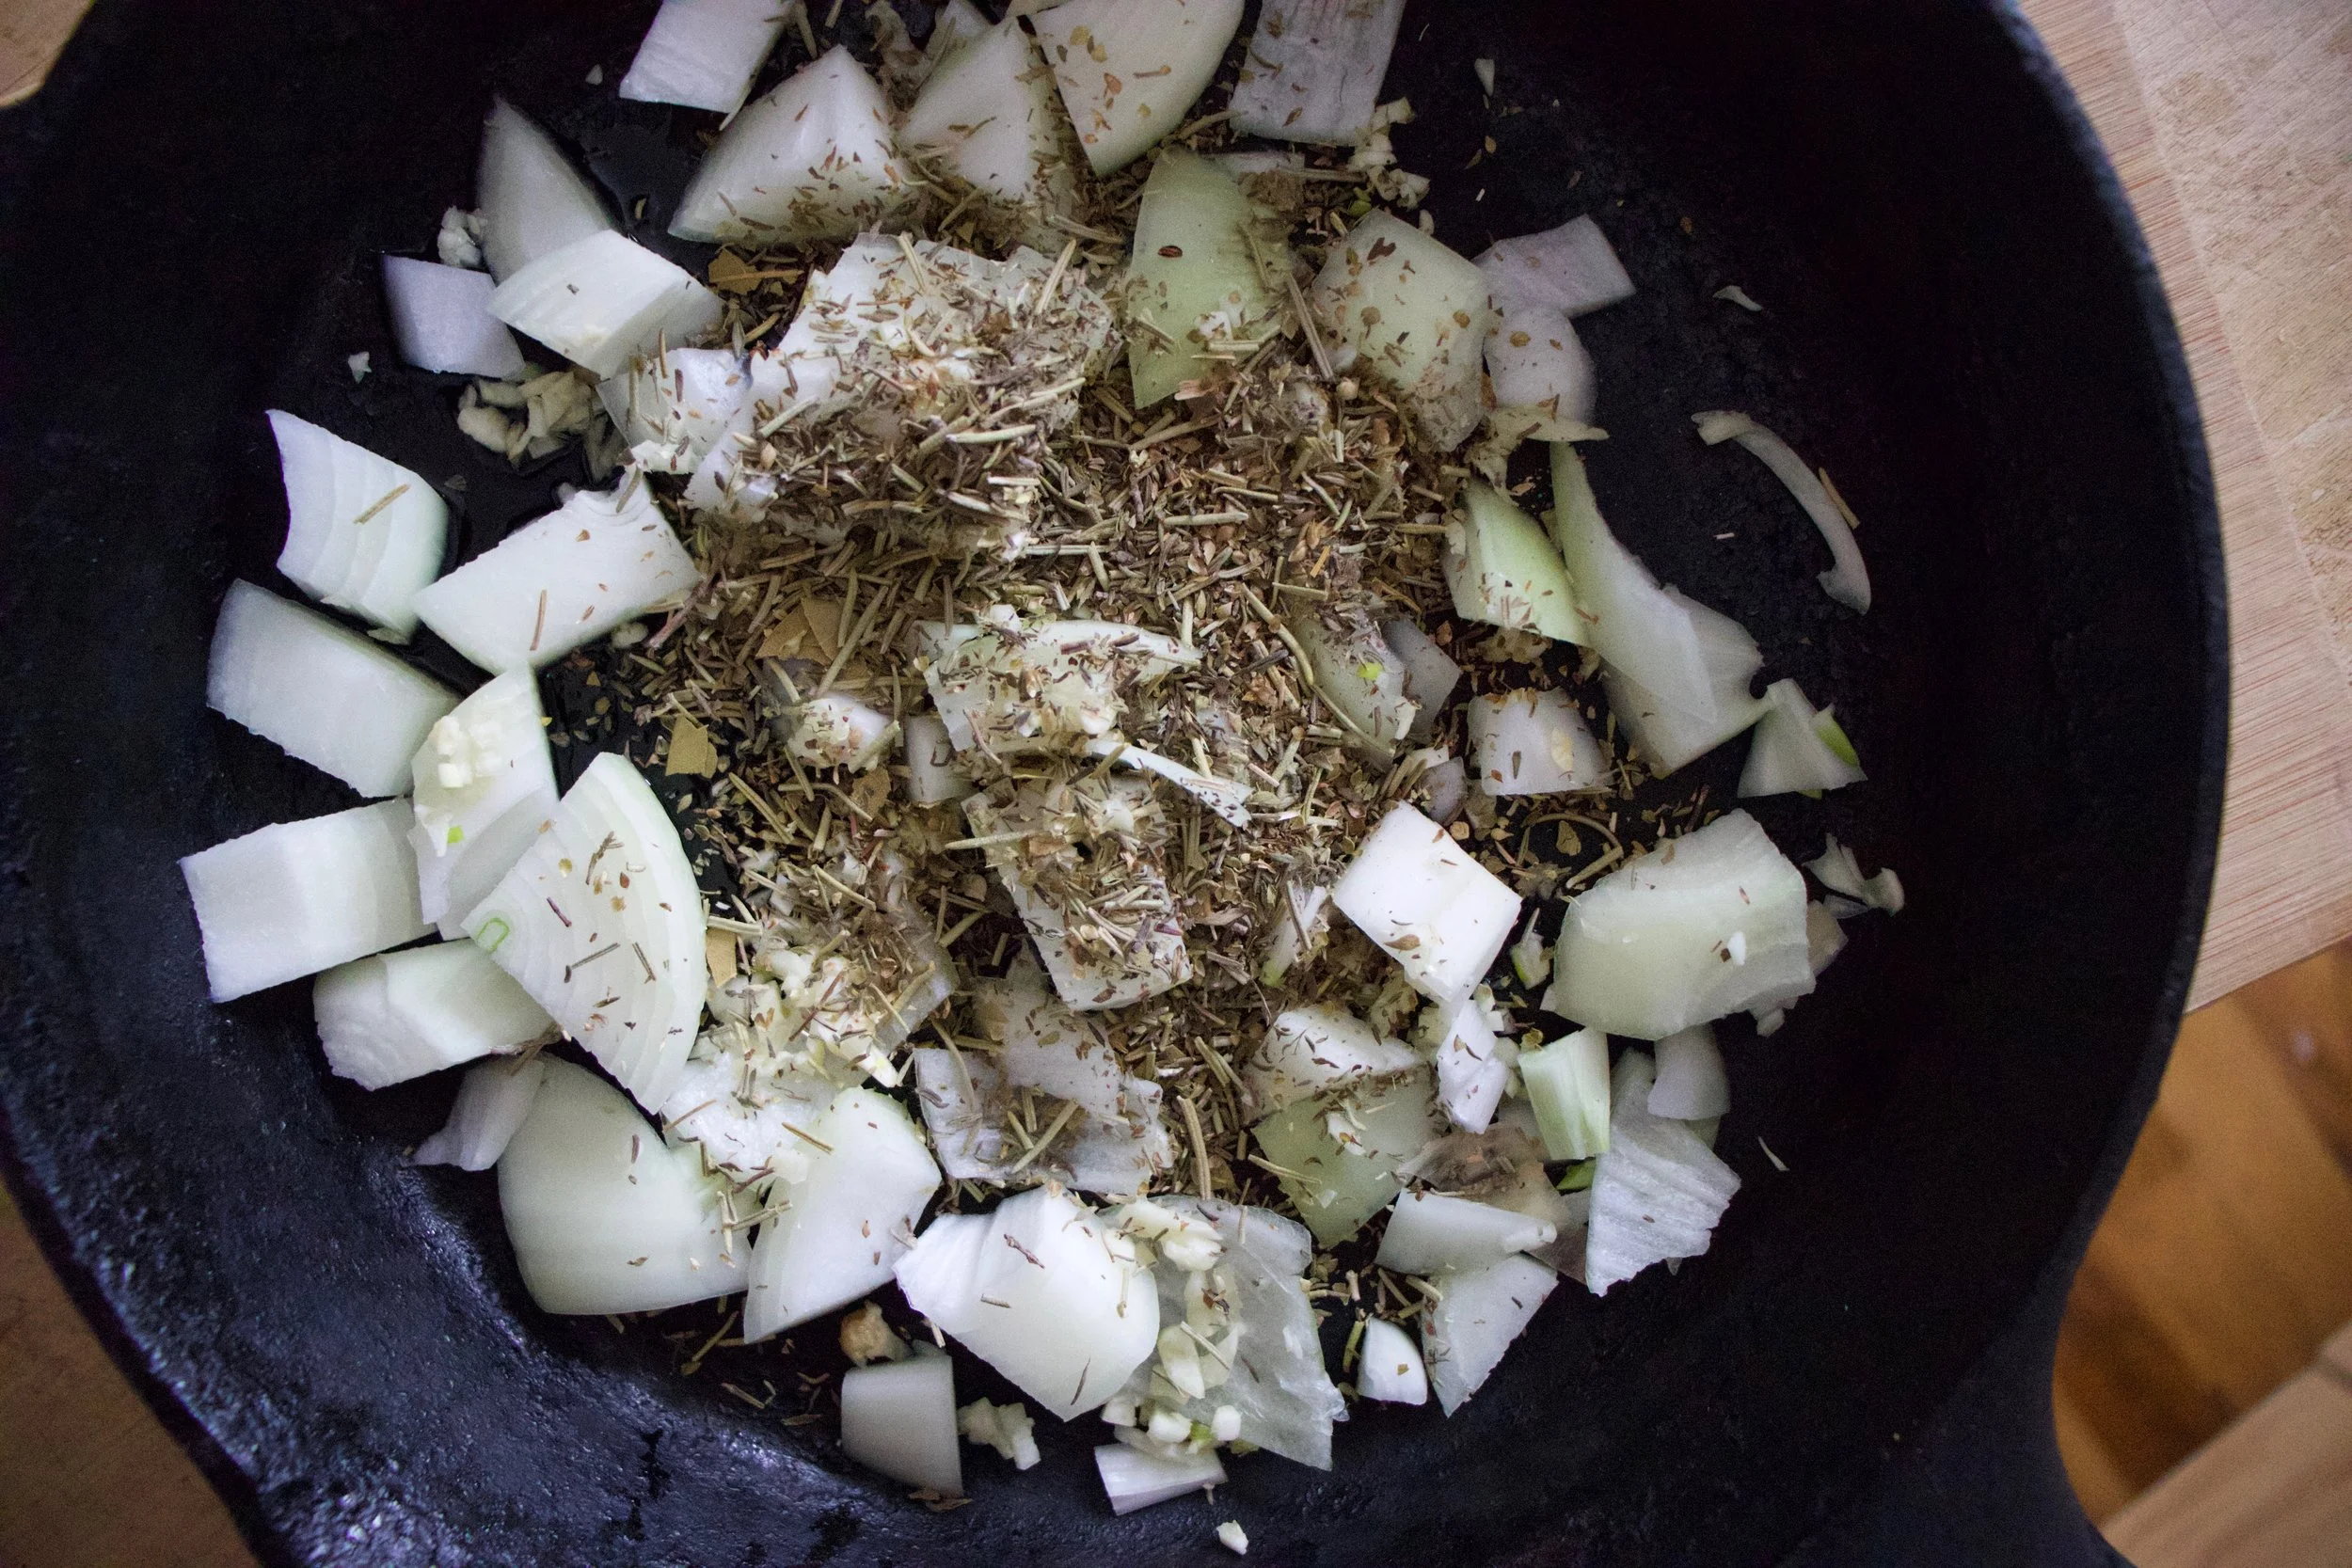
Get it all into a cast iron pan or oven safe skillet with a little olive oil. Add the spices and give it some heat on the stove top while you cut potatoes.
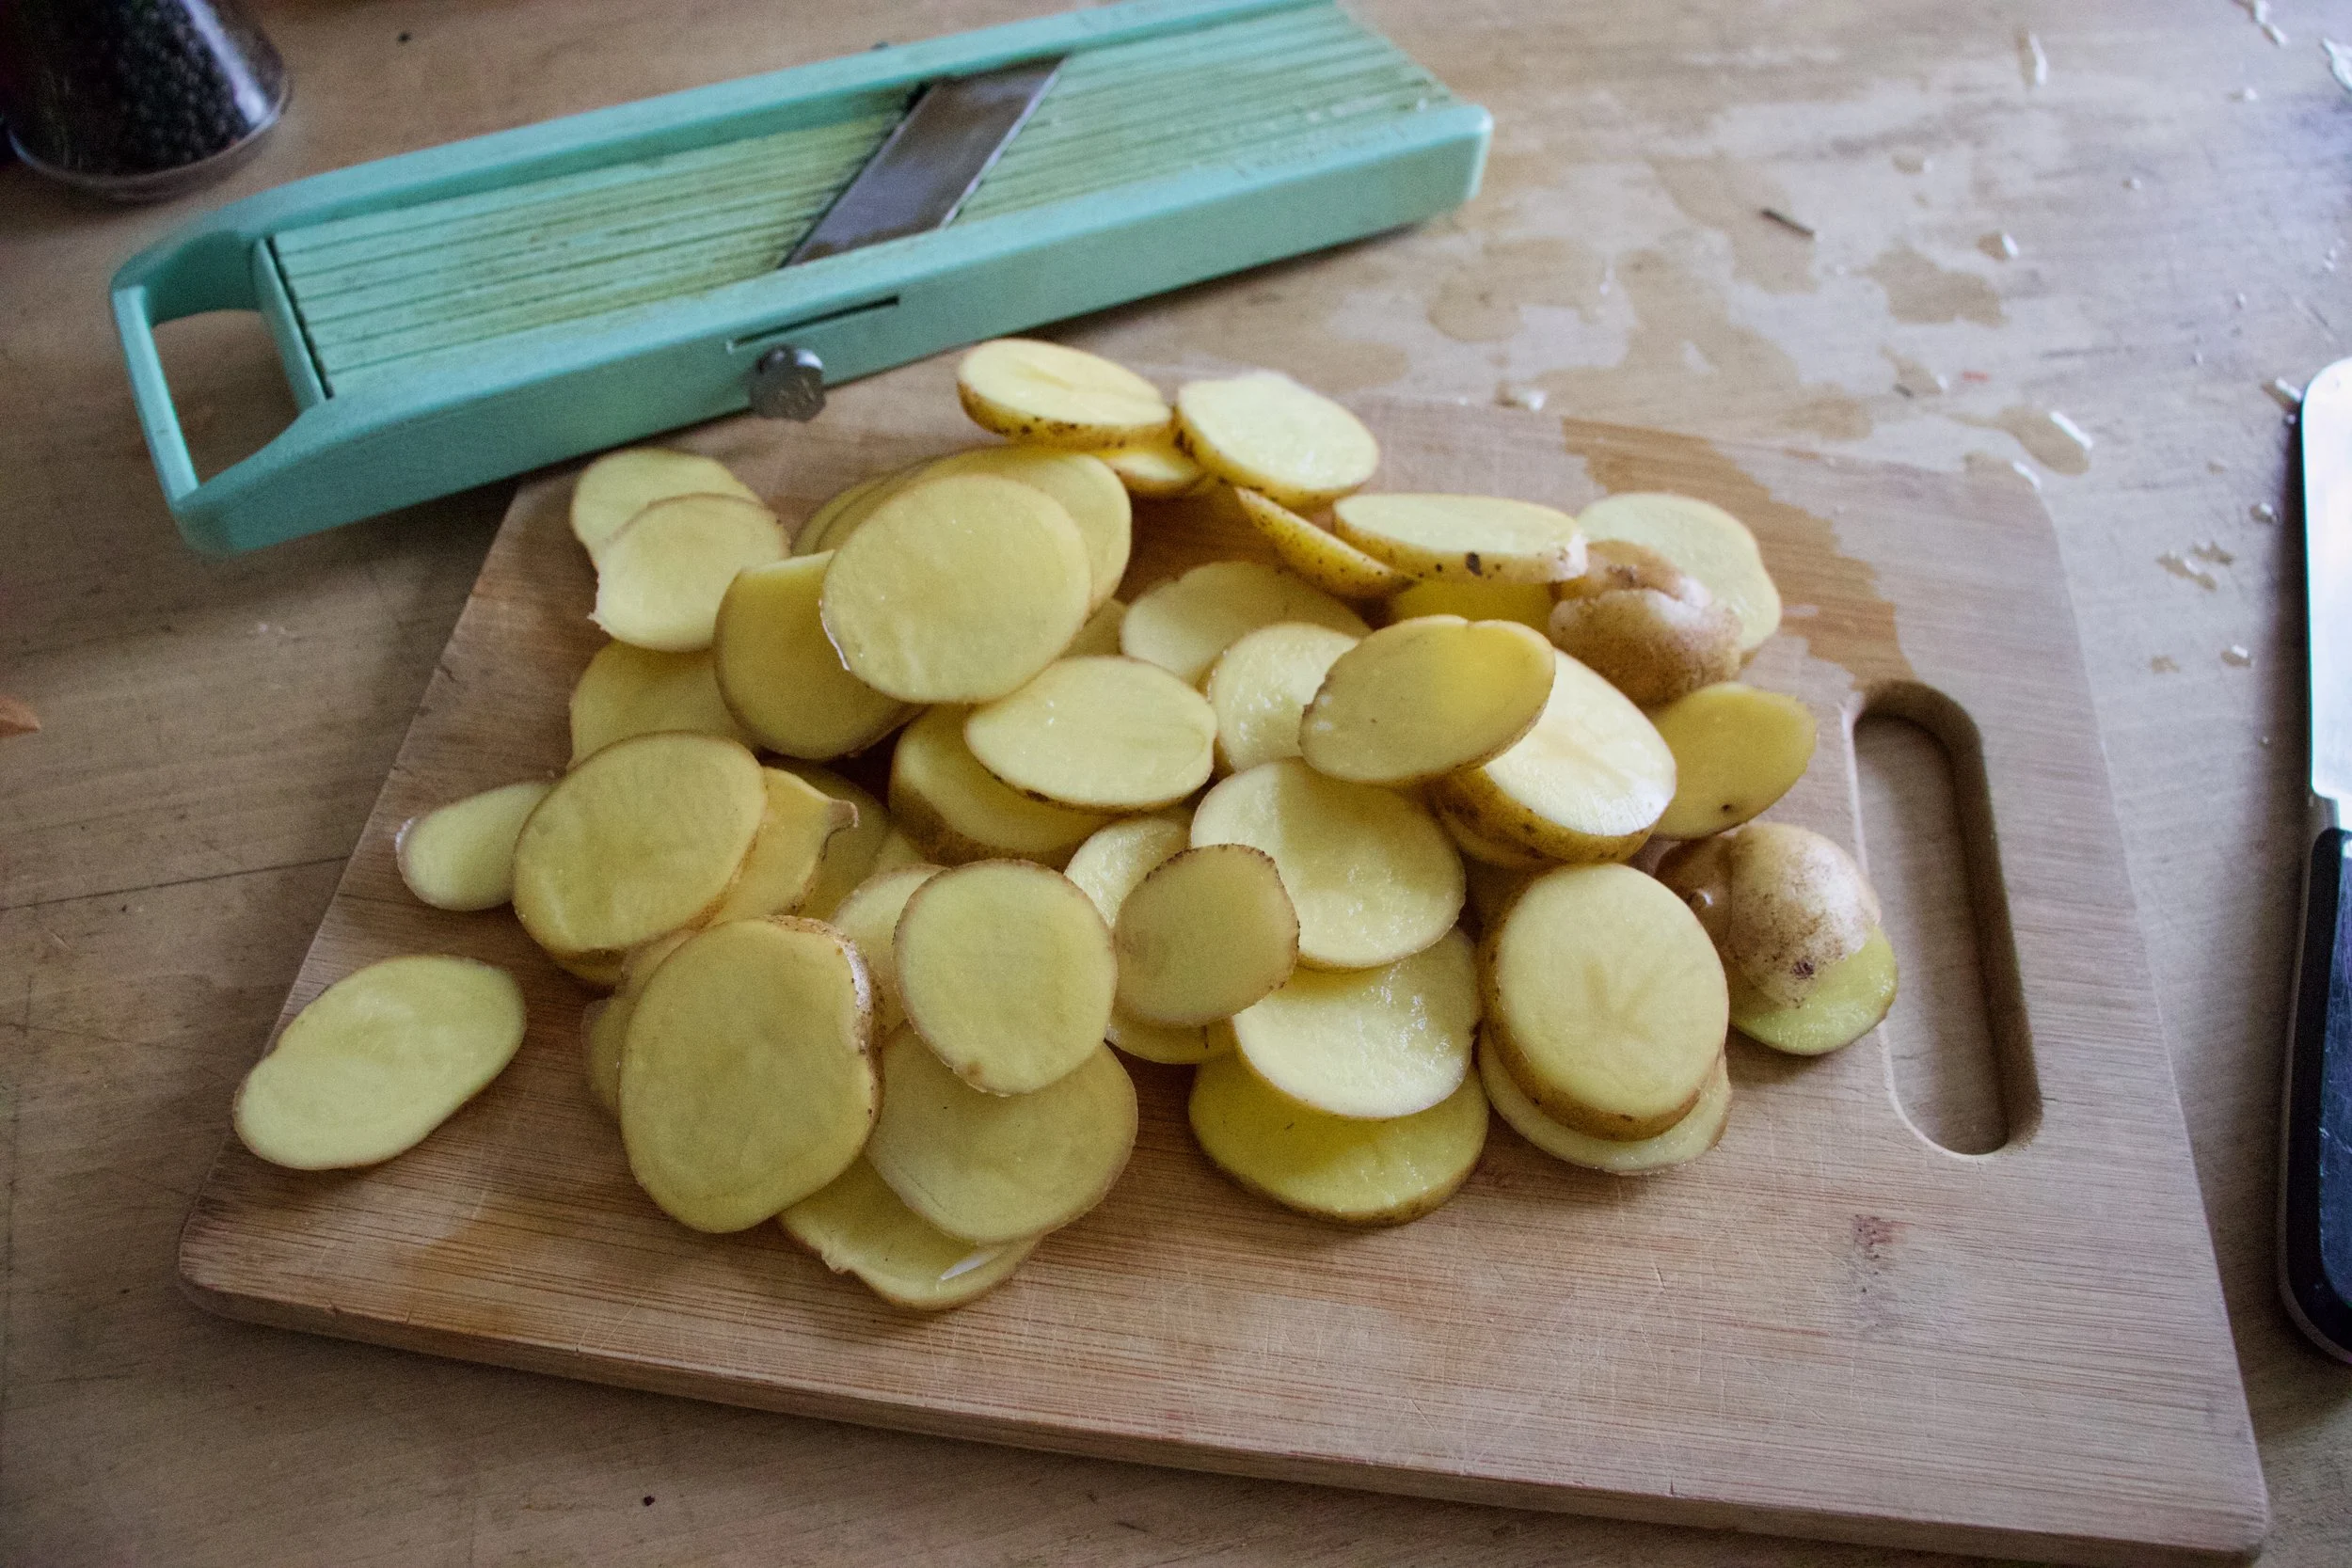
Now cut those potatoes nice and thin. A mandolin works wonders but a knife will do just as well, just try to keep the thickness all the same.
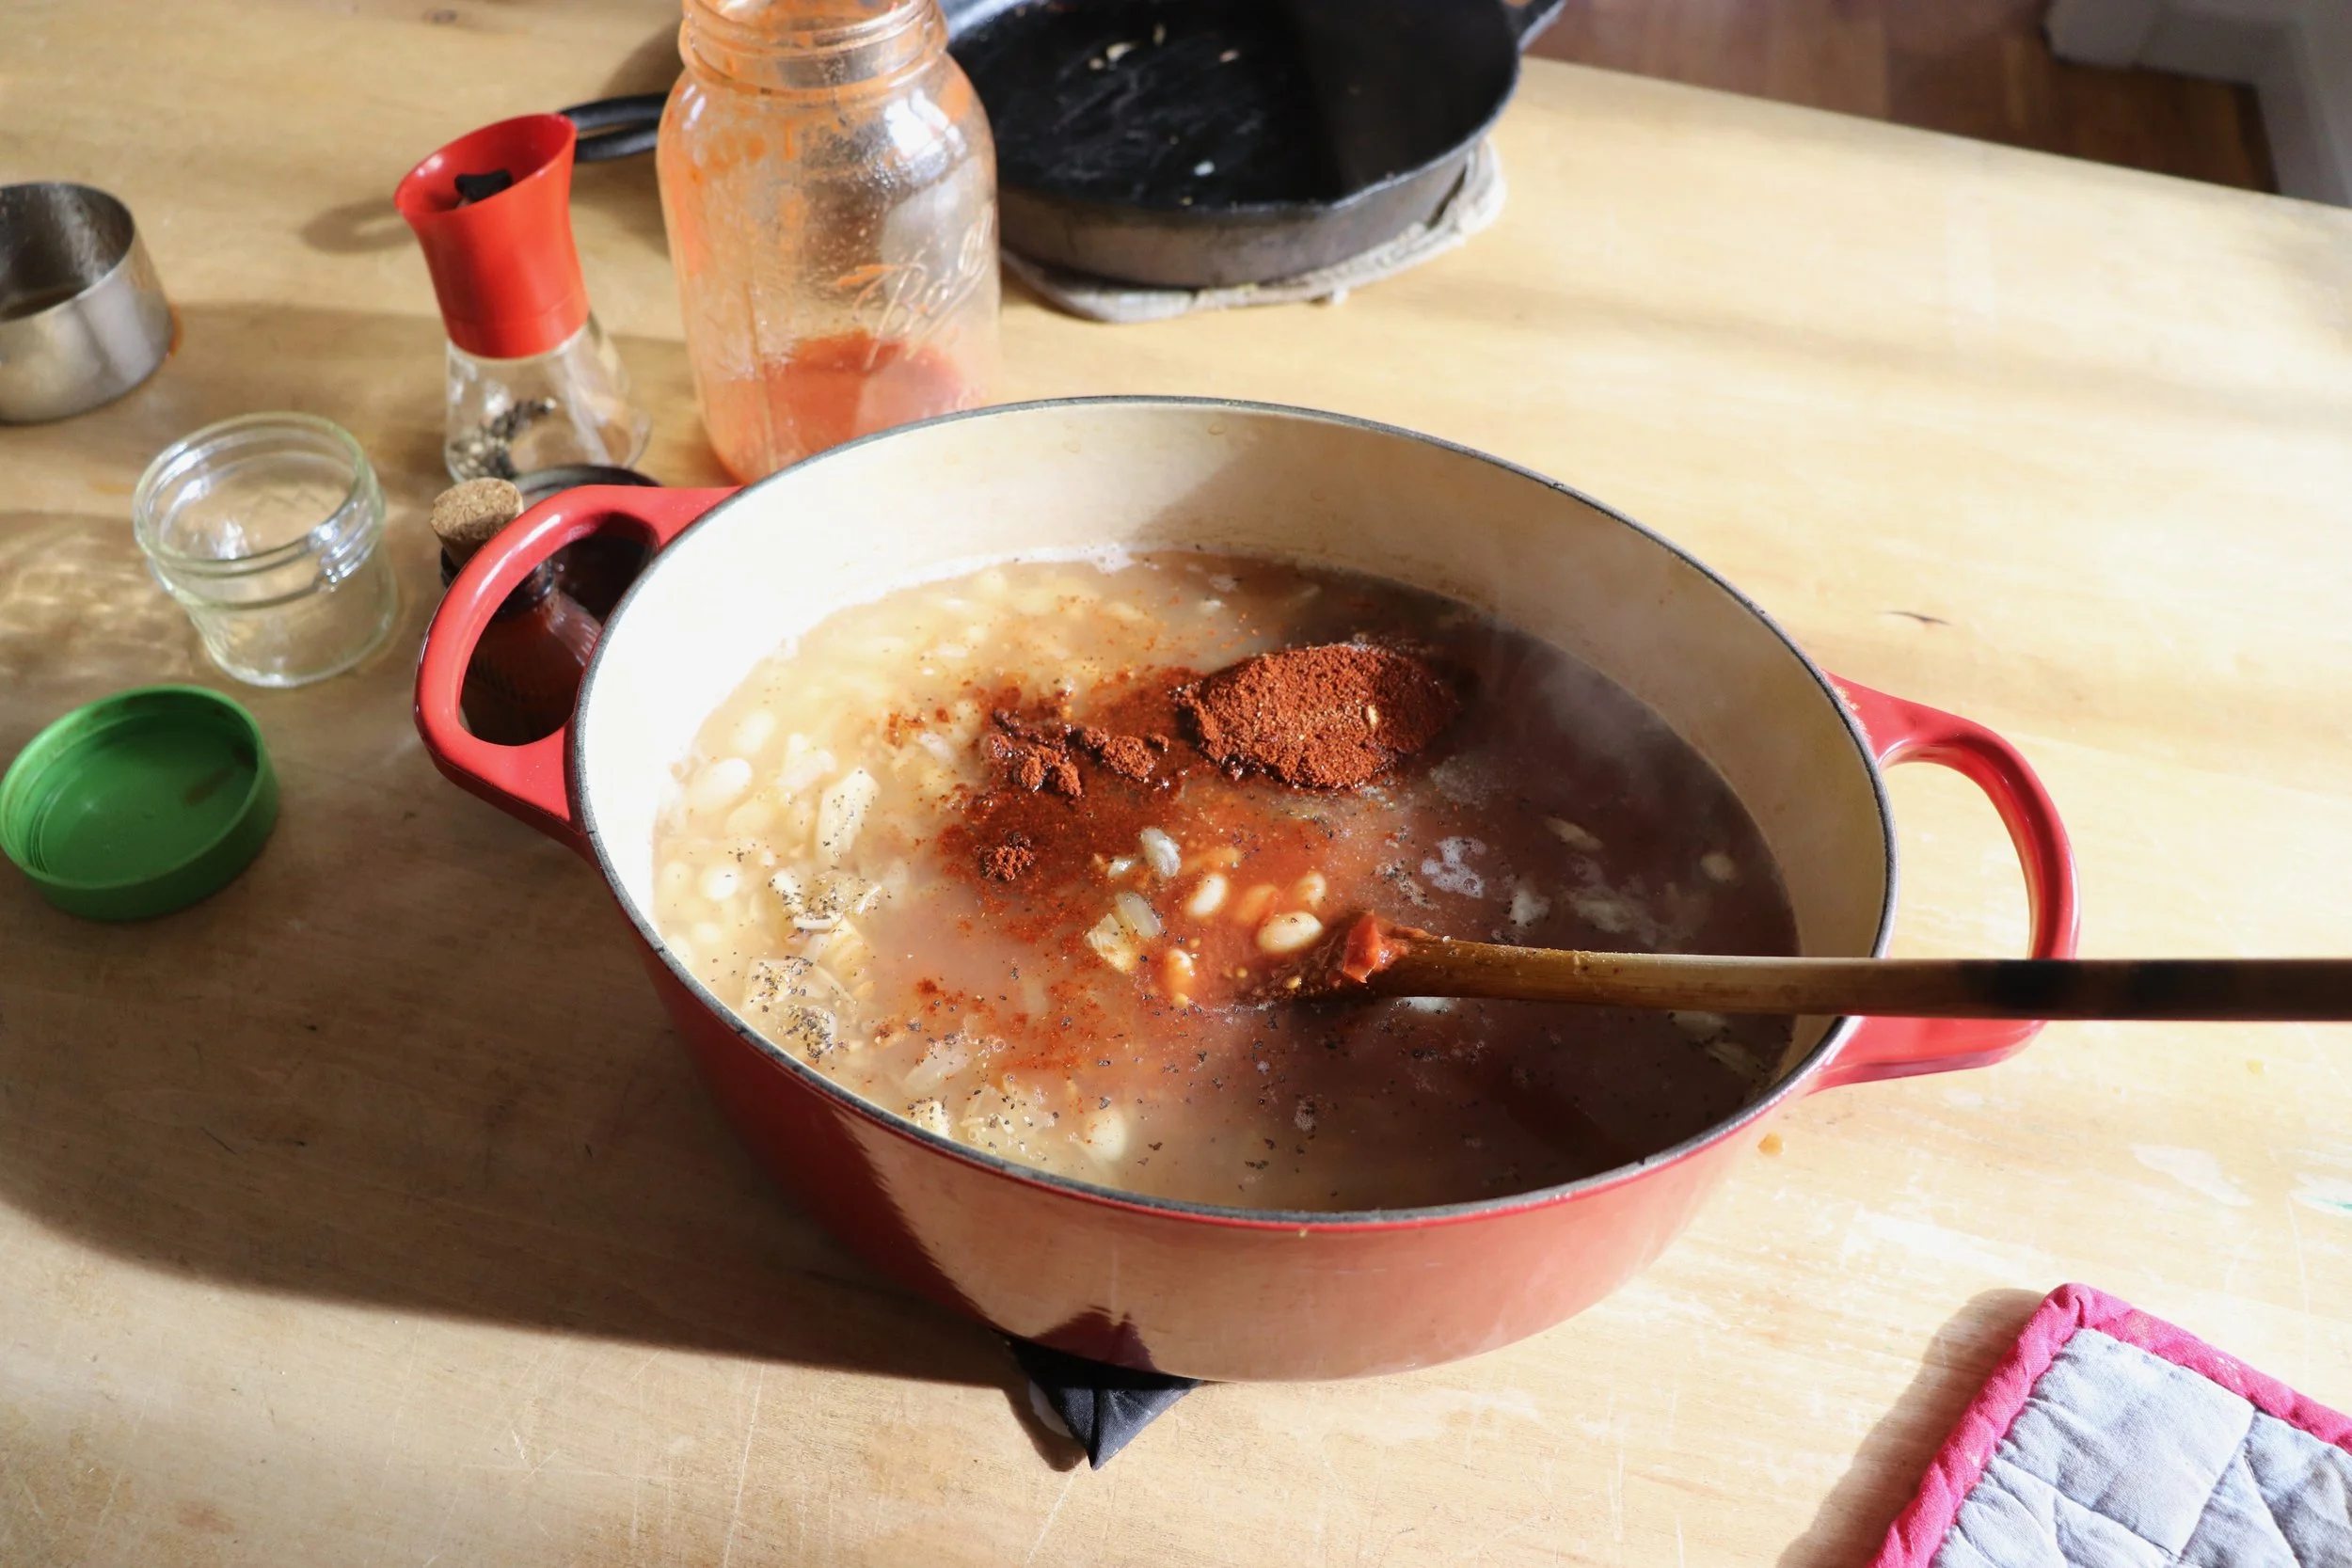
Potatoes are cut and onion mixture has sweated a bit so now you add in the chick peas (with liquid) and half the crushed tomatoes. Stir it all up.
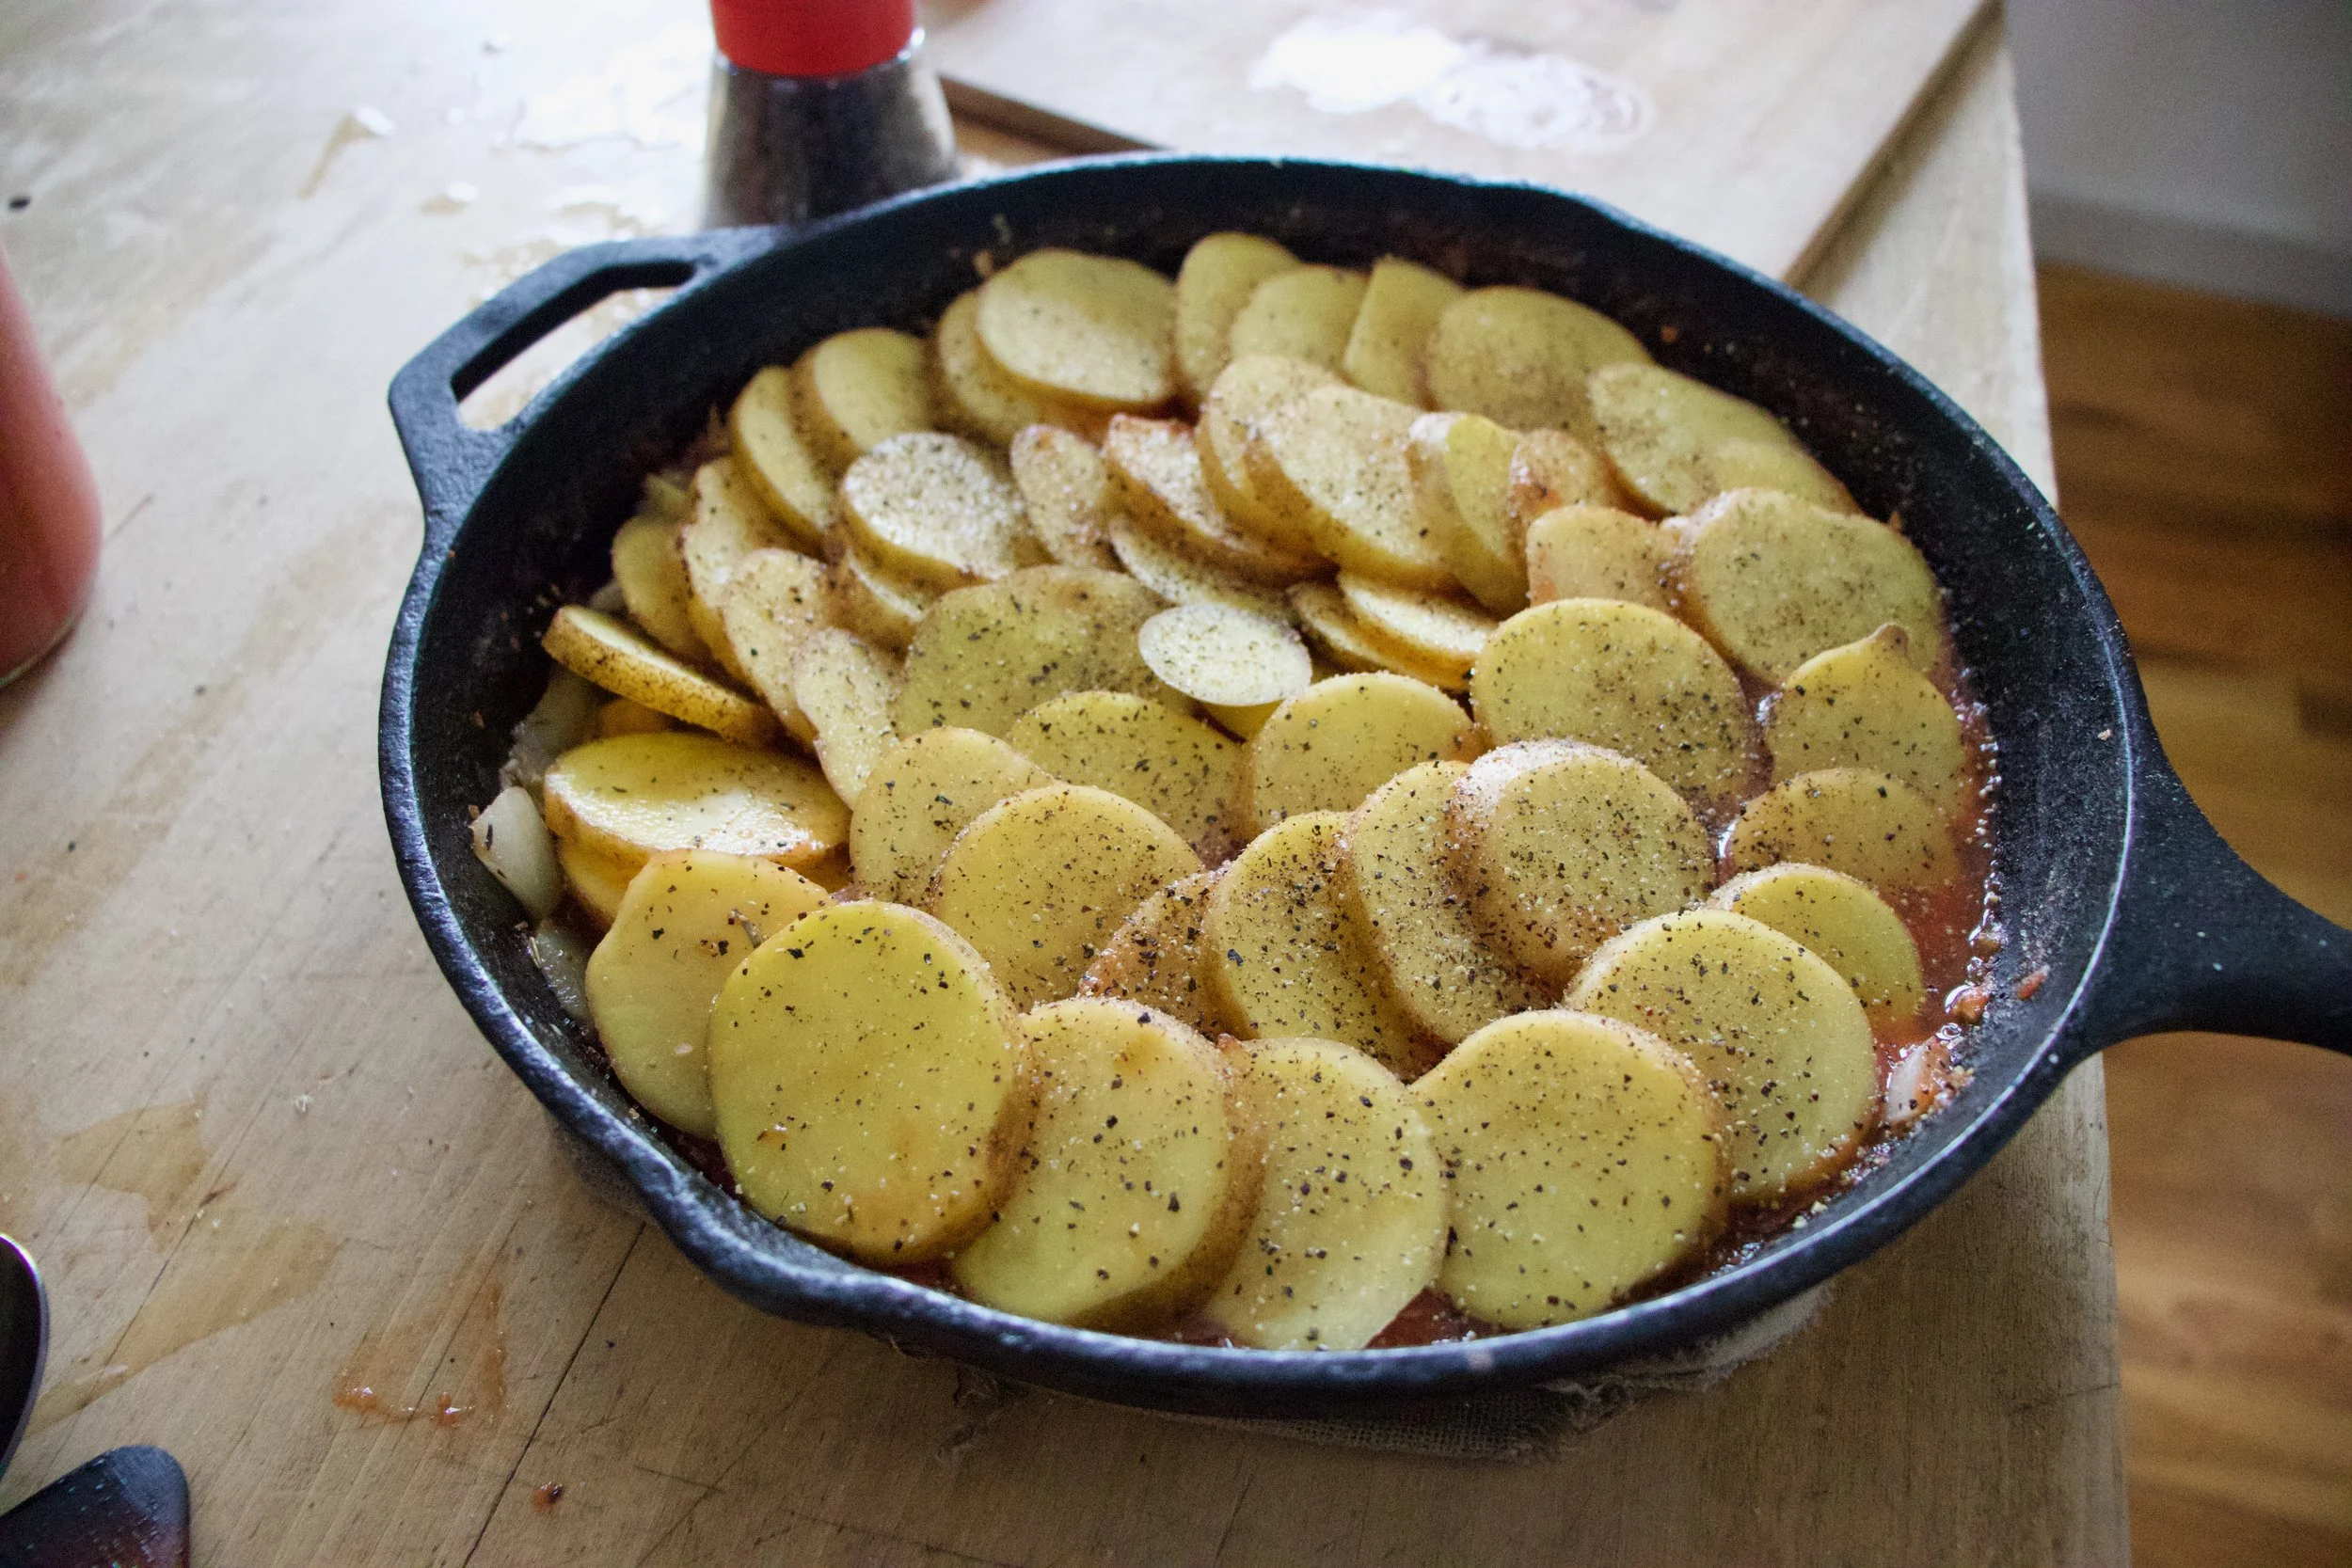
Layer on potatoes, drizzle with a tiny bit of olive oil and give them some salt and pepper love.
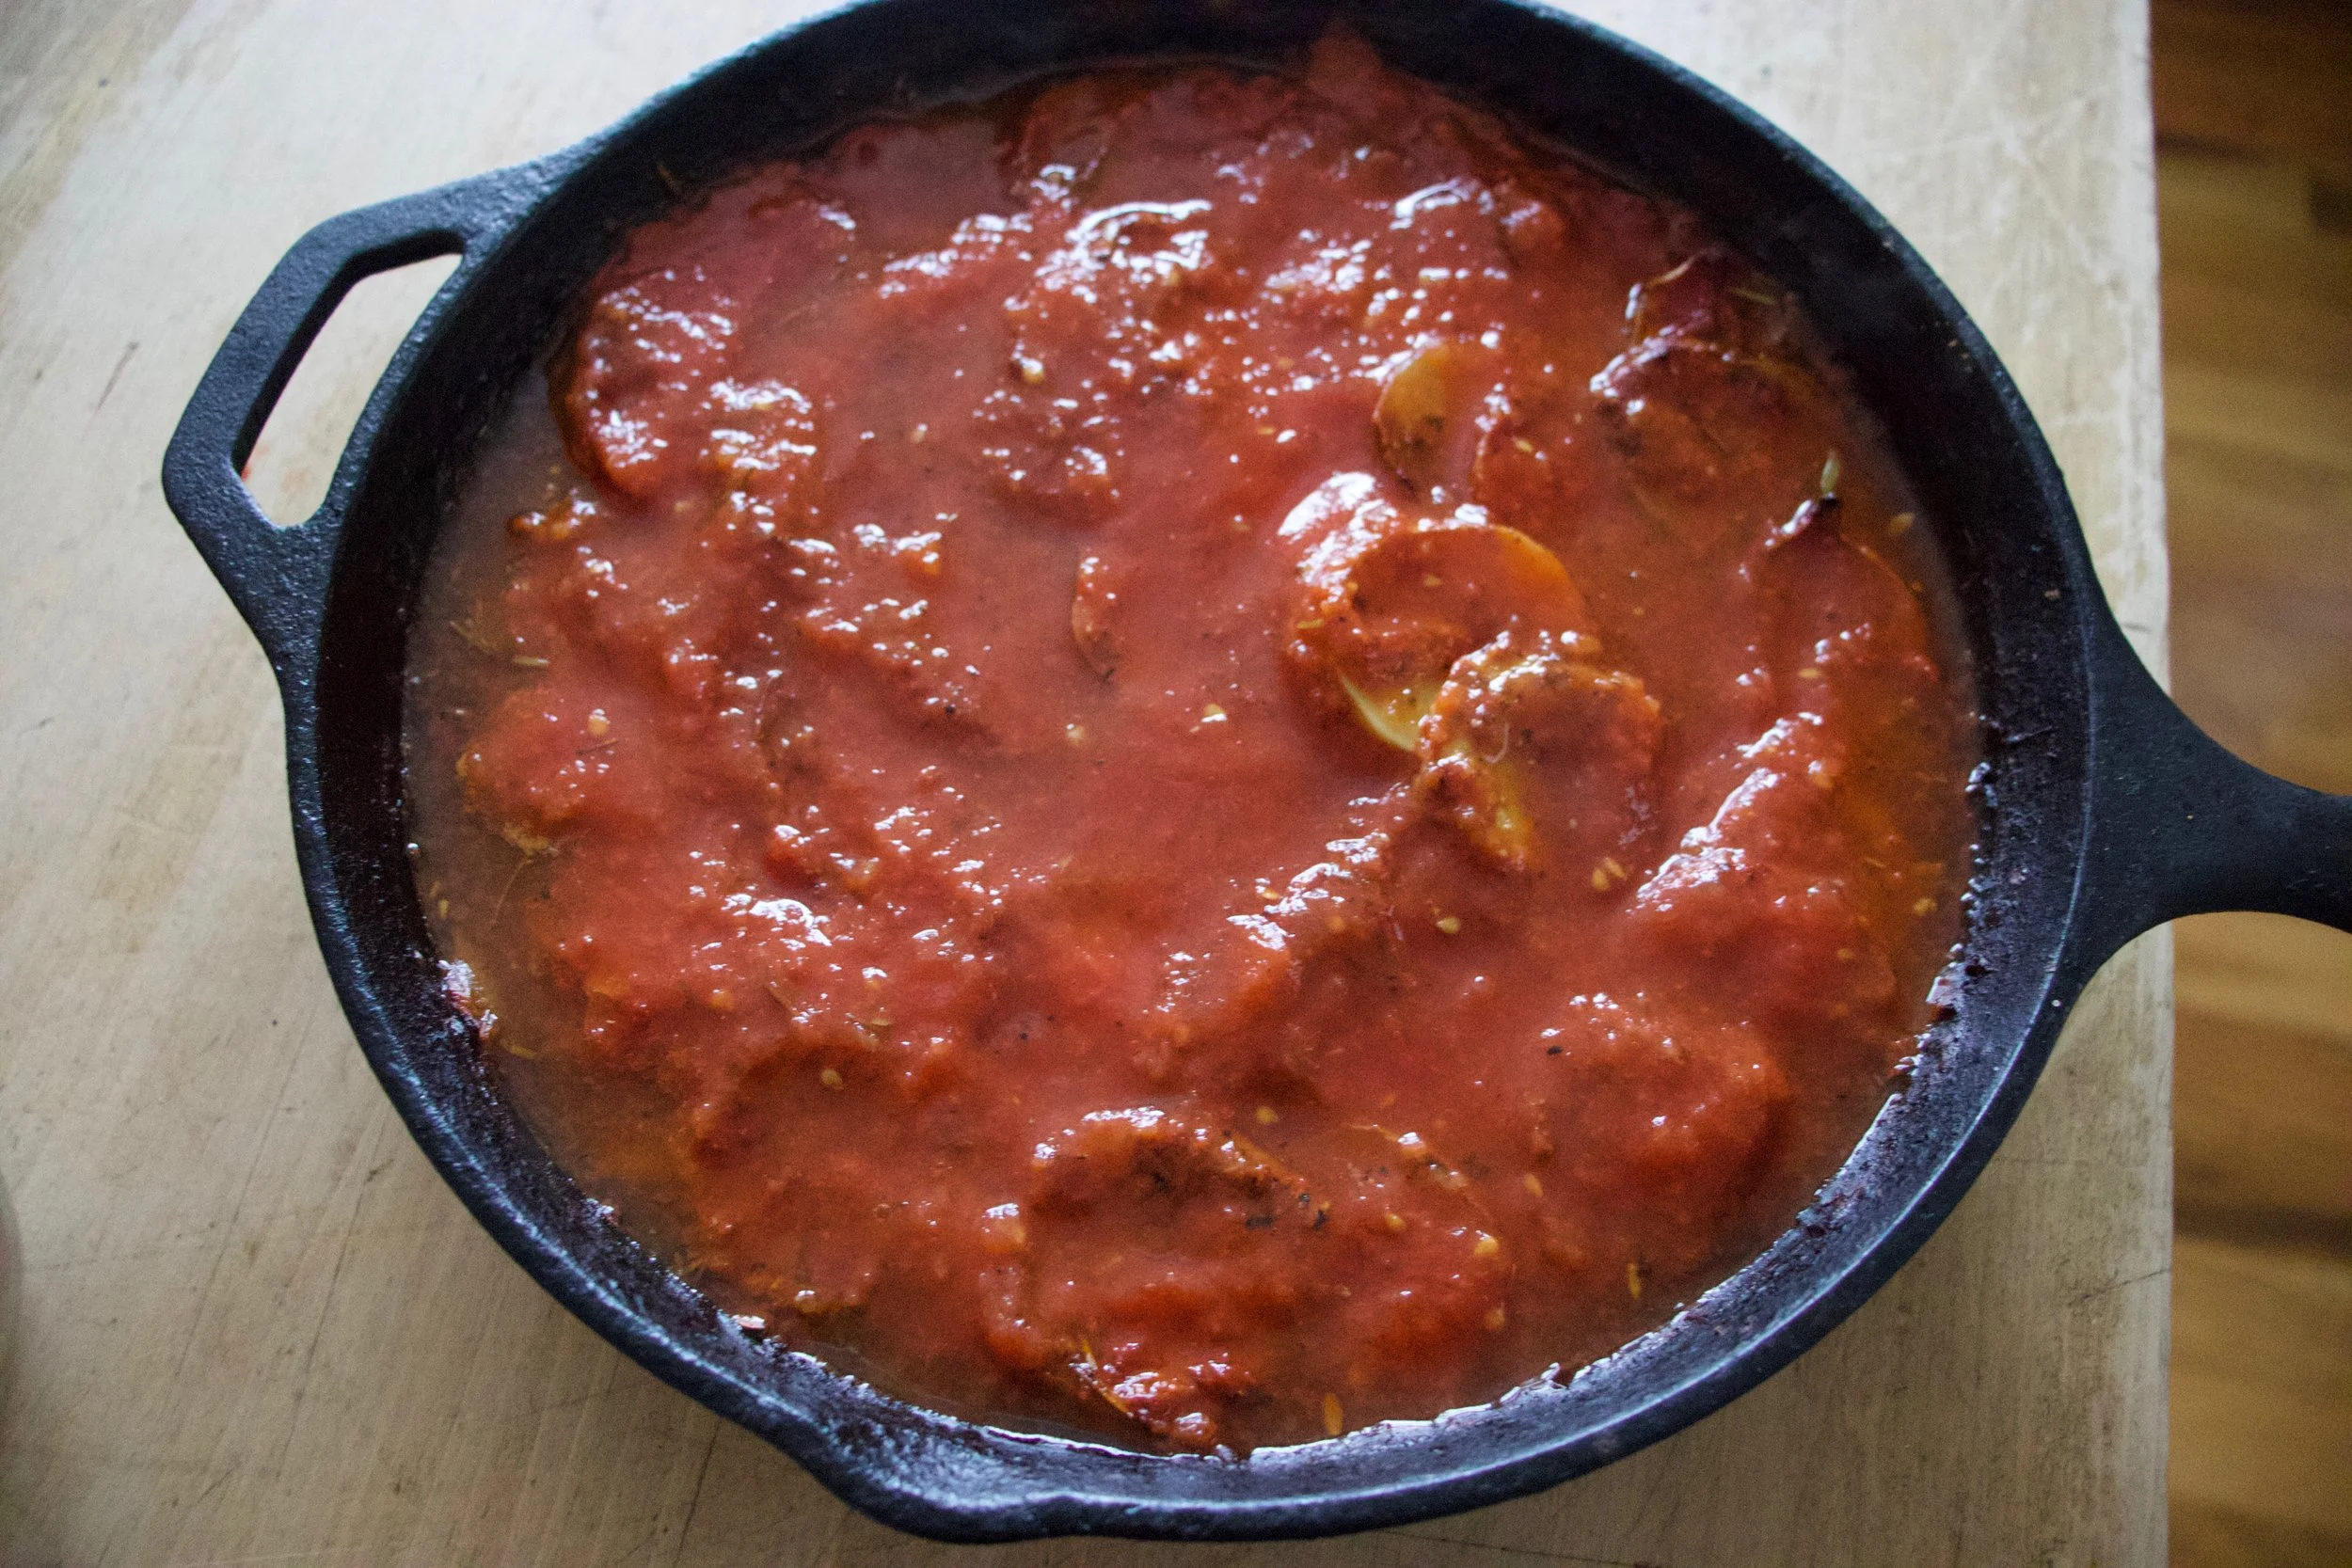
Dump the rest of the tomatoes on top then add in water, enough that all the potatoes are completely submerged.
Now into the oven they go.
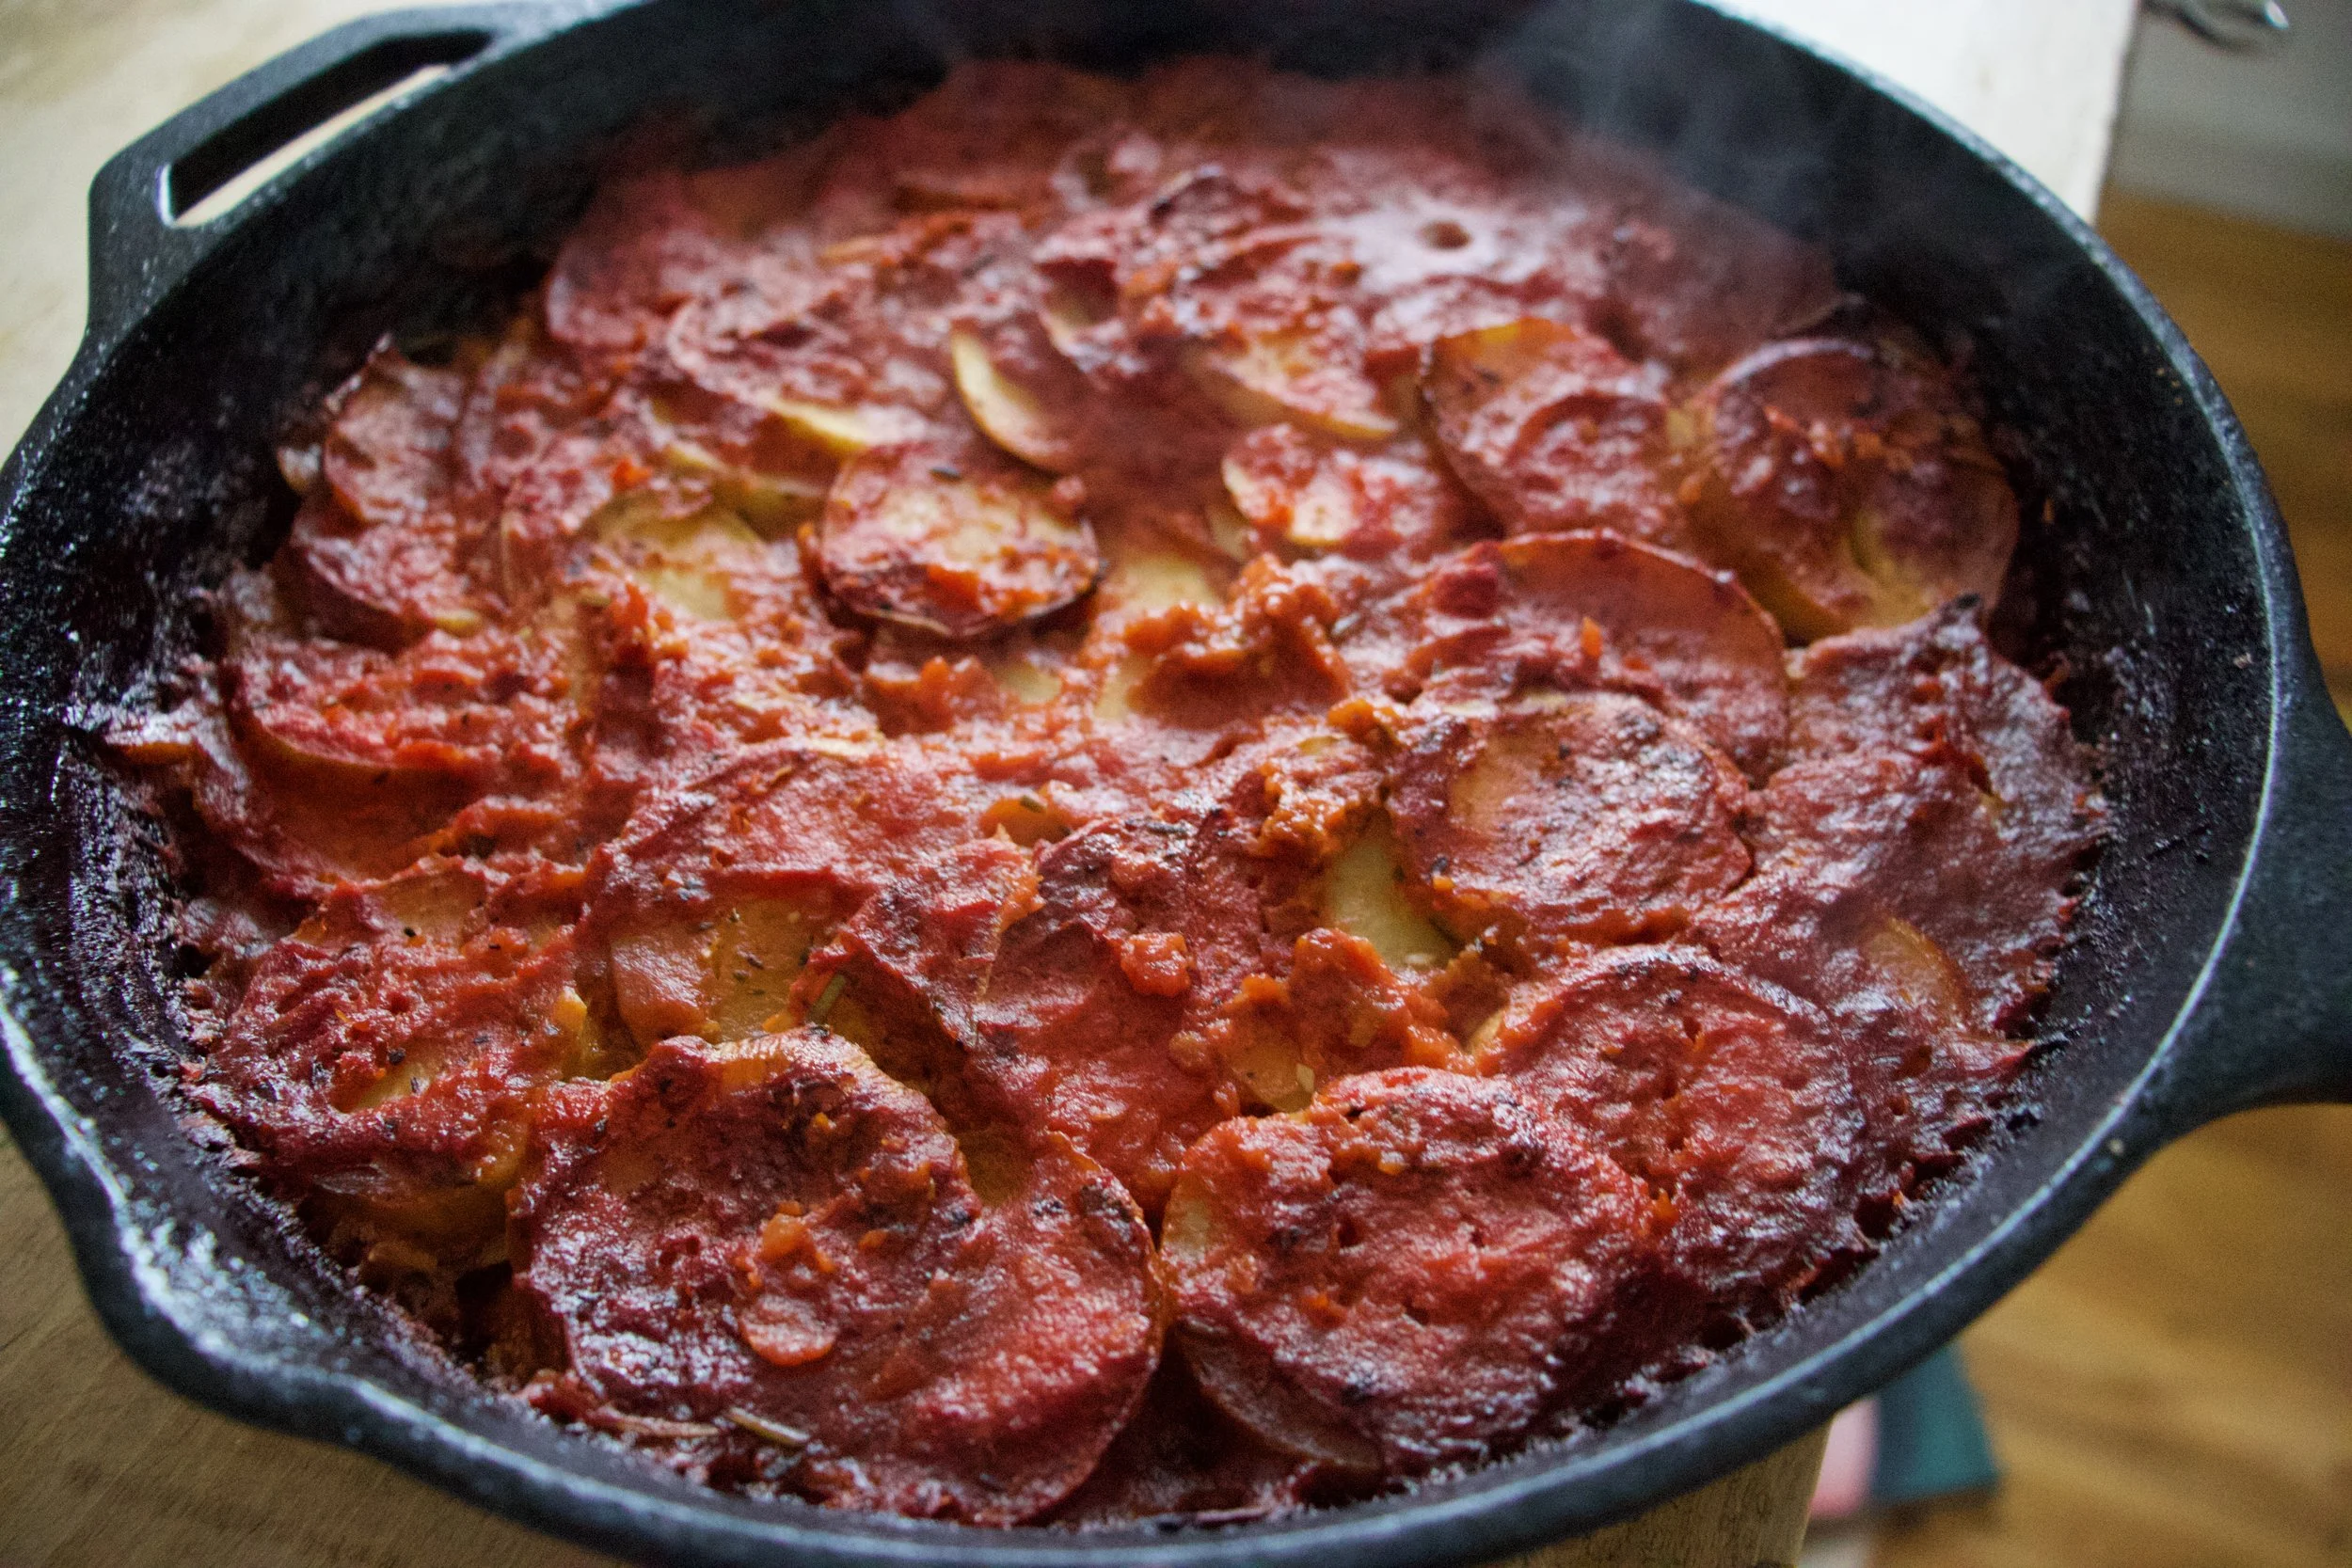
Doesn%u2019t that just look all fantastic? I mean really really , A+ good, no? If you are feeling extra crispy, you could even stick the skillet under the broiler for a few minutes right before you pull it out.
And that is that. Potatoes in tomatoes with chick peas and onions. A simple but very satisfying dish to keep your cold belly full of warm goodness.
Be well.
-C
About a pound or so of white or red potatoes
3 cups (or a 28oz can) crushed tomatoes
2 cups (or a 16 oz can) cooked chickpeas in liquid
1 large onion
2-3 close garlic
2 tablespoons Italian seasoning
2-3 cups water
olive oil
salt and pepper
Preheat oven to 400
Grab onion and dice into small pieces. Mince the garlic. Grab a medium sized oven safe skillet and toss the onion and garlic in with a tablespoon or so of olive oil and the seasoning. Place on medium heat and cook for a few minutes until the the onion is slightly cooked and fragrant. Remove from heat. Mix in the chick peas with liquid and half of the crushed tomatoes.
Rinse potatoes and slice into 1/4 inch thick rounds. Place tomatoes into the skillet, layering any way you want. Drizzle the top with like a teaspoon olive oil then sprinkle the tomatoes with salt and pepper. Spread the rest of the crushed tomatoes over the potatoes then pour the water in. If the potatoes are not completely submerged in water, add more until they are. Cover the skillet with a lid or tin foil.
Place skillet in oven and bake 40ish minutes then remove lid or foil and bake for another 25-30 minutes or until potatoes are fork tender and slightly crispy on the edges. Depending on the type of patotoes you use,(like a really firm and waxy yellow potato) you might need to add more water to the skillet and cook for longer. If that is the case, just pour more water over until the potatoes are submerged again and keep baking until cooked.
For extra crispy, when potatoes are done, place skillet under broiler for a few minutes until crisp to your liking.
Pull from oven, let cool a minutes or two then dig in.
I made baked beans last week for a side to dinner with the mr and Barb. They ate them all. I didn%u2019t get more then a spoonful. I was sad for me, but also was like %u201cShit, if I had known you guys were bean fiends, I would be making baked beans like all the time.%u201d
And maybe not all the time, but I made them again this week. And again, they ate a lot, but I got me some this time, and I will probably make them again next week too because they will be perfect for Thanksgiving. See, homemade baked beans are a thing of beauty. Sure you can buy them in a can and be just fine, but these baked beans, well these are waaaayyyy way better. These baked beans are soft (not canned bean soft) and tomatoey and a little spicy with a tang. Not sickly sweet, (not sugar added) and not too salty.. They are just about perfect. You can eat them on their own, toss them into salads or wraps, stick on some toast, serve as as side, or just eat them cold straight from a jar from the fridge right before bed. (your loved one will thank you for that). Plus they are baked in the oven and I love me a good warm oven on a cold day. And the obvious, but all the protein and all around goodness. A great dish to serve if ever you need to feed people like me who don%u2019t eat meat. It%u2019s a win win win win.
Baked beans in all their glory. No cans in sight.
The stuff. White beans that were soaked overnight, strained then added back to a pot with 6 cups of water. Also have crushed tomatoes. an onion, a few cloves of garlic, chili powder, mustard powder, apple cider vinegar, and some salt and pepper.
First step is to start boiling you beans. But while that is happening, mince garlic and chop the onion into really small pieces.
Toss the onion and garlic in a pan and cook on medium low until soften and fragrant.
Cooked beans. All you need to do to cook them is place the pot with soaked beans and water on high, bring to a boil, then turn heat to a medium. Let beans cook until tender. It should take about an hour and a half.
Beans are cooked and the garlic and onion are soften so now all you do is combine everything together. Don%u2019t drain the beans, just toss in the tomatoes, the vinegar, the spices, and a few pinches of pepper and a pinch of salt. Stir in all together,
Looks like soup right? This is right before you stick it into the oven.
Now look at that, oven baked beans. The best part%u2026 The crispy sides. ALL MINE!
Not much left to do but eat them. Straight up with a hunk of bread. That is a good way to start anyway.
Enjoy your beans!
-C
Makes a big pot of beans
1 pound (2 cups) white beans soaked in water for at least 8 hours (I used great northern but navy would be good too)
6 cups water or veggie stock
3 cups (or a 28 oz can) crushed tomatoes
1 onion
3 cloves garlic
1 1/2 tablespoons chili pepper
1 tablespoon mustard powder
1/3 cup apple cider vinegar
salt and pepper
Strain soaked beans and place them into large oven safe dutch oven almond with the water and stick on the stove. Bring the beans to a boil then reduce heat to medium and cook util the beans are tender. Should take about 1 1/2 hours.
Sometime while the beans are cooking, mince garlic and chop the onion into very small pieces. Place in a skillet and cook on medium until the onion and garlic are soften and fragrant. Remove from heat and set aside until beans are cooked
Preheat oven to 425
One beans are tender, dump in the cooked garlic and onion, the tomatoes, the spices, the vinegar, and a good pinch of salt and pepper. Stir it all together and place into the oven. Bake for about 2 hours, staring about ever 30 minutes, until the bean sauce is nice and thick. If at any point you think they have gotten to dry, just add more water. Pull the beans out of oven once you are happy with the sauce consistency. Taste and season with more salt and pepper if needed.
And then eat them. As a meal, as a side, or as a snack. Beans are good anytime.
Any leftovers should be stored in the fridge. Beans can be reheated very easily on the stove top. Just place the pot back on stove, stir in a little water and cook til hot.
Beans are also fantastic eaten cold from the fridge.
The radishes in my garden have gone from these tiny little wisps of green to a freaking jungle of greens with bright red bulbs bursting through the dirt. Ah, radishes., those little red balls of zesty crisp goodness that grow like crazy in the garden. They are no fuss, no joke, toss them seeds into the grown and bam, you get you some radishes. No matter how crappy of a gardener you might think you are, I bet you could grow you some radishes no problem.%u00a0
And with those radishes comes a butt load of greens, the greens that everyone seems to just toss away which is crazy because the greens are so good. They are tender and zippy and make for great eating. I usually just toss them into salads or whatever but I guess I went a little overboard with the planting of the radishes and I have so so so many radishes all ready to be pulled now with so so so many greens that need to be eaten. So pesto. Fresh early summer, tangy and bright green goodness. It is super tasty and great. Definitely anew favorite and a great way to use up your radish greens.%u00a0
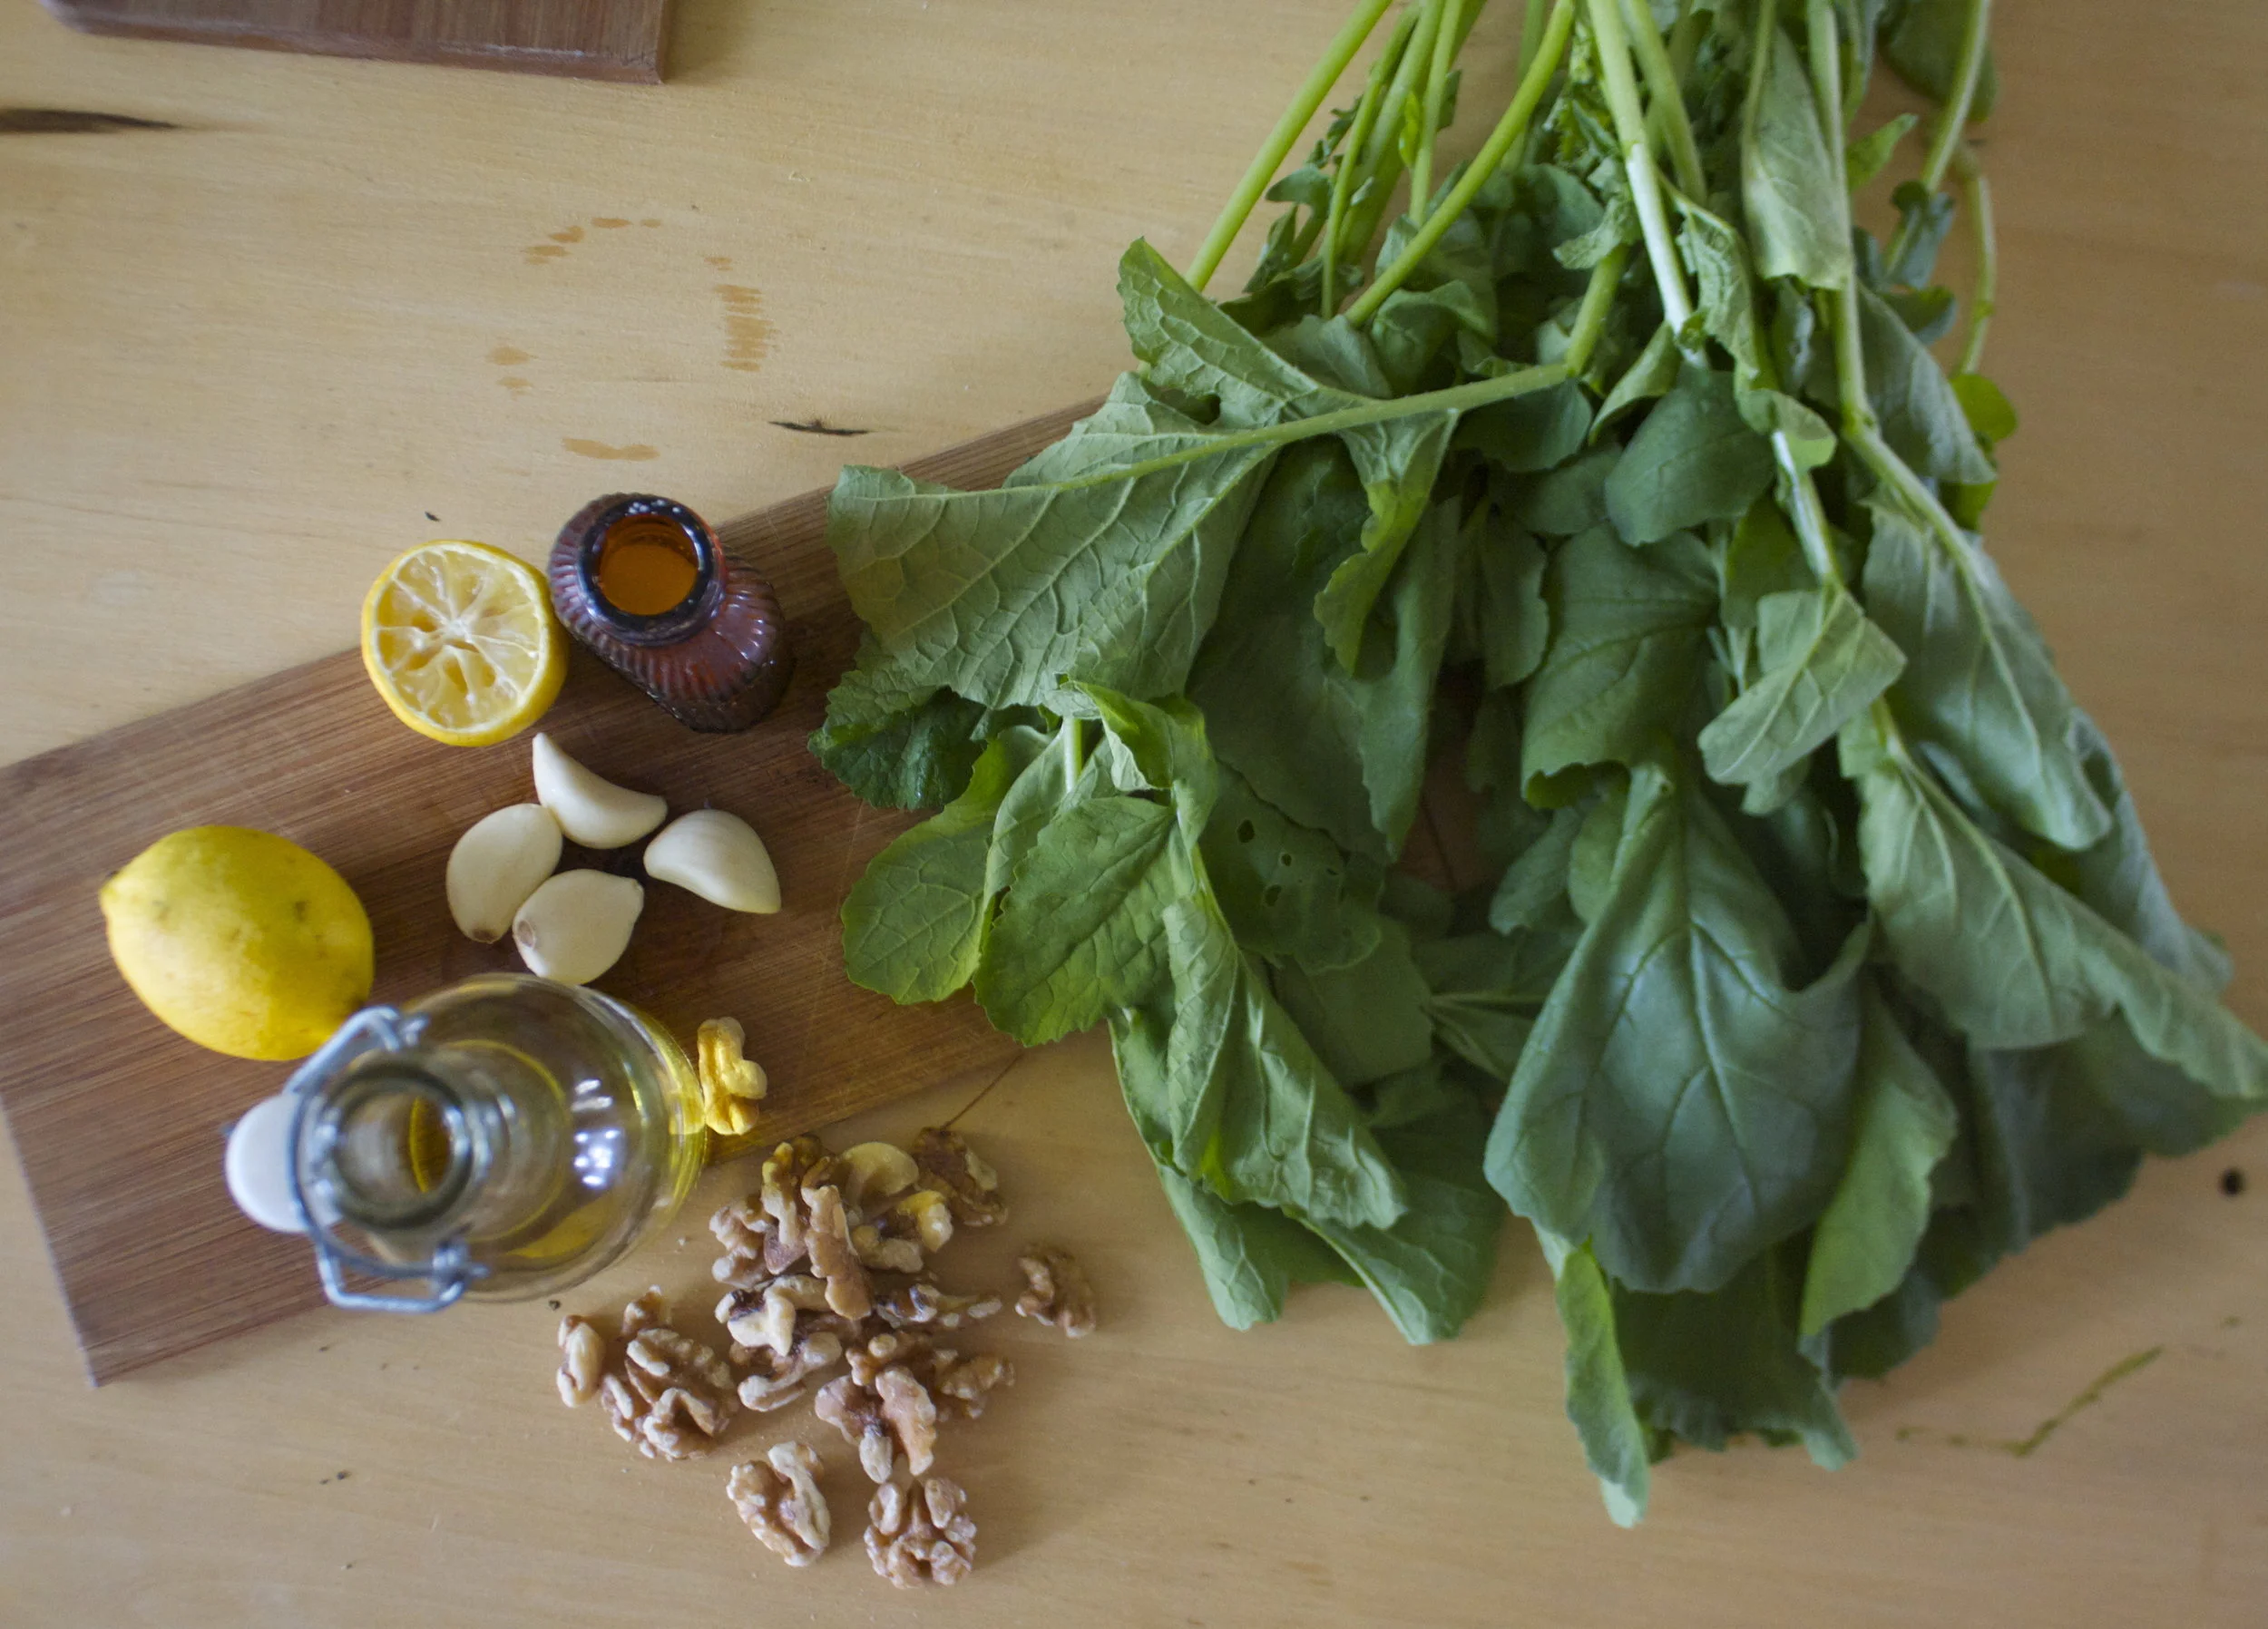
The stuff. Lemon, olive oil, garlic, walnuts, salt and pepper and a bunch of radish greens.
Pretty freaking simple here. Stick garlic, and walnuts into the bottom of the blender and give that a pulse or two.%u00a0 (I would have used my food processor but the new blade has yet to arrive). Add in all the greens, the juice of lemons, sprinkle with salt and pepper. Turn on low and stream in a oil. You might need to push down greens to get them into the blenders vortex.
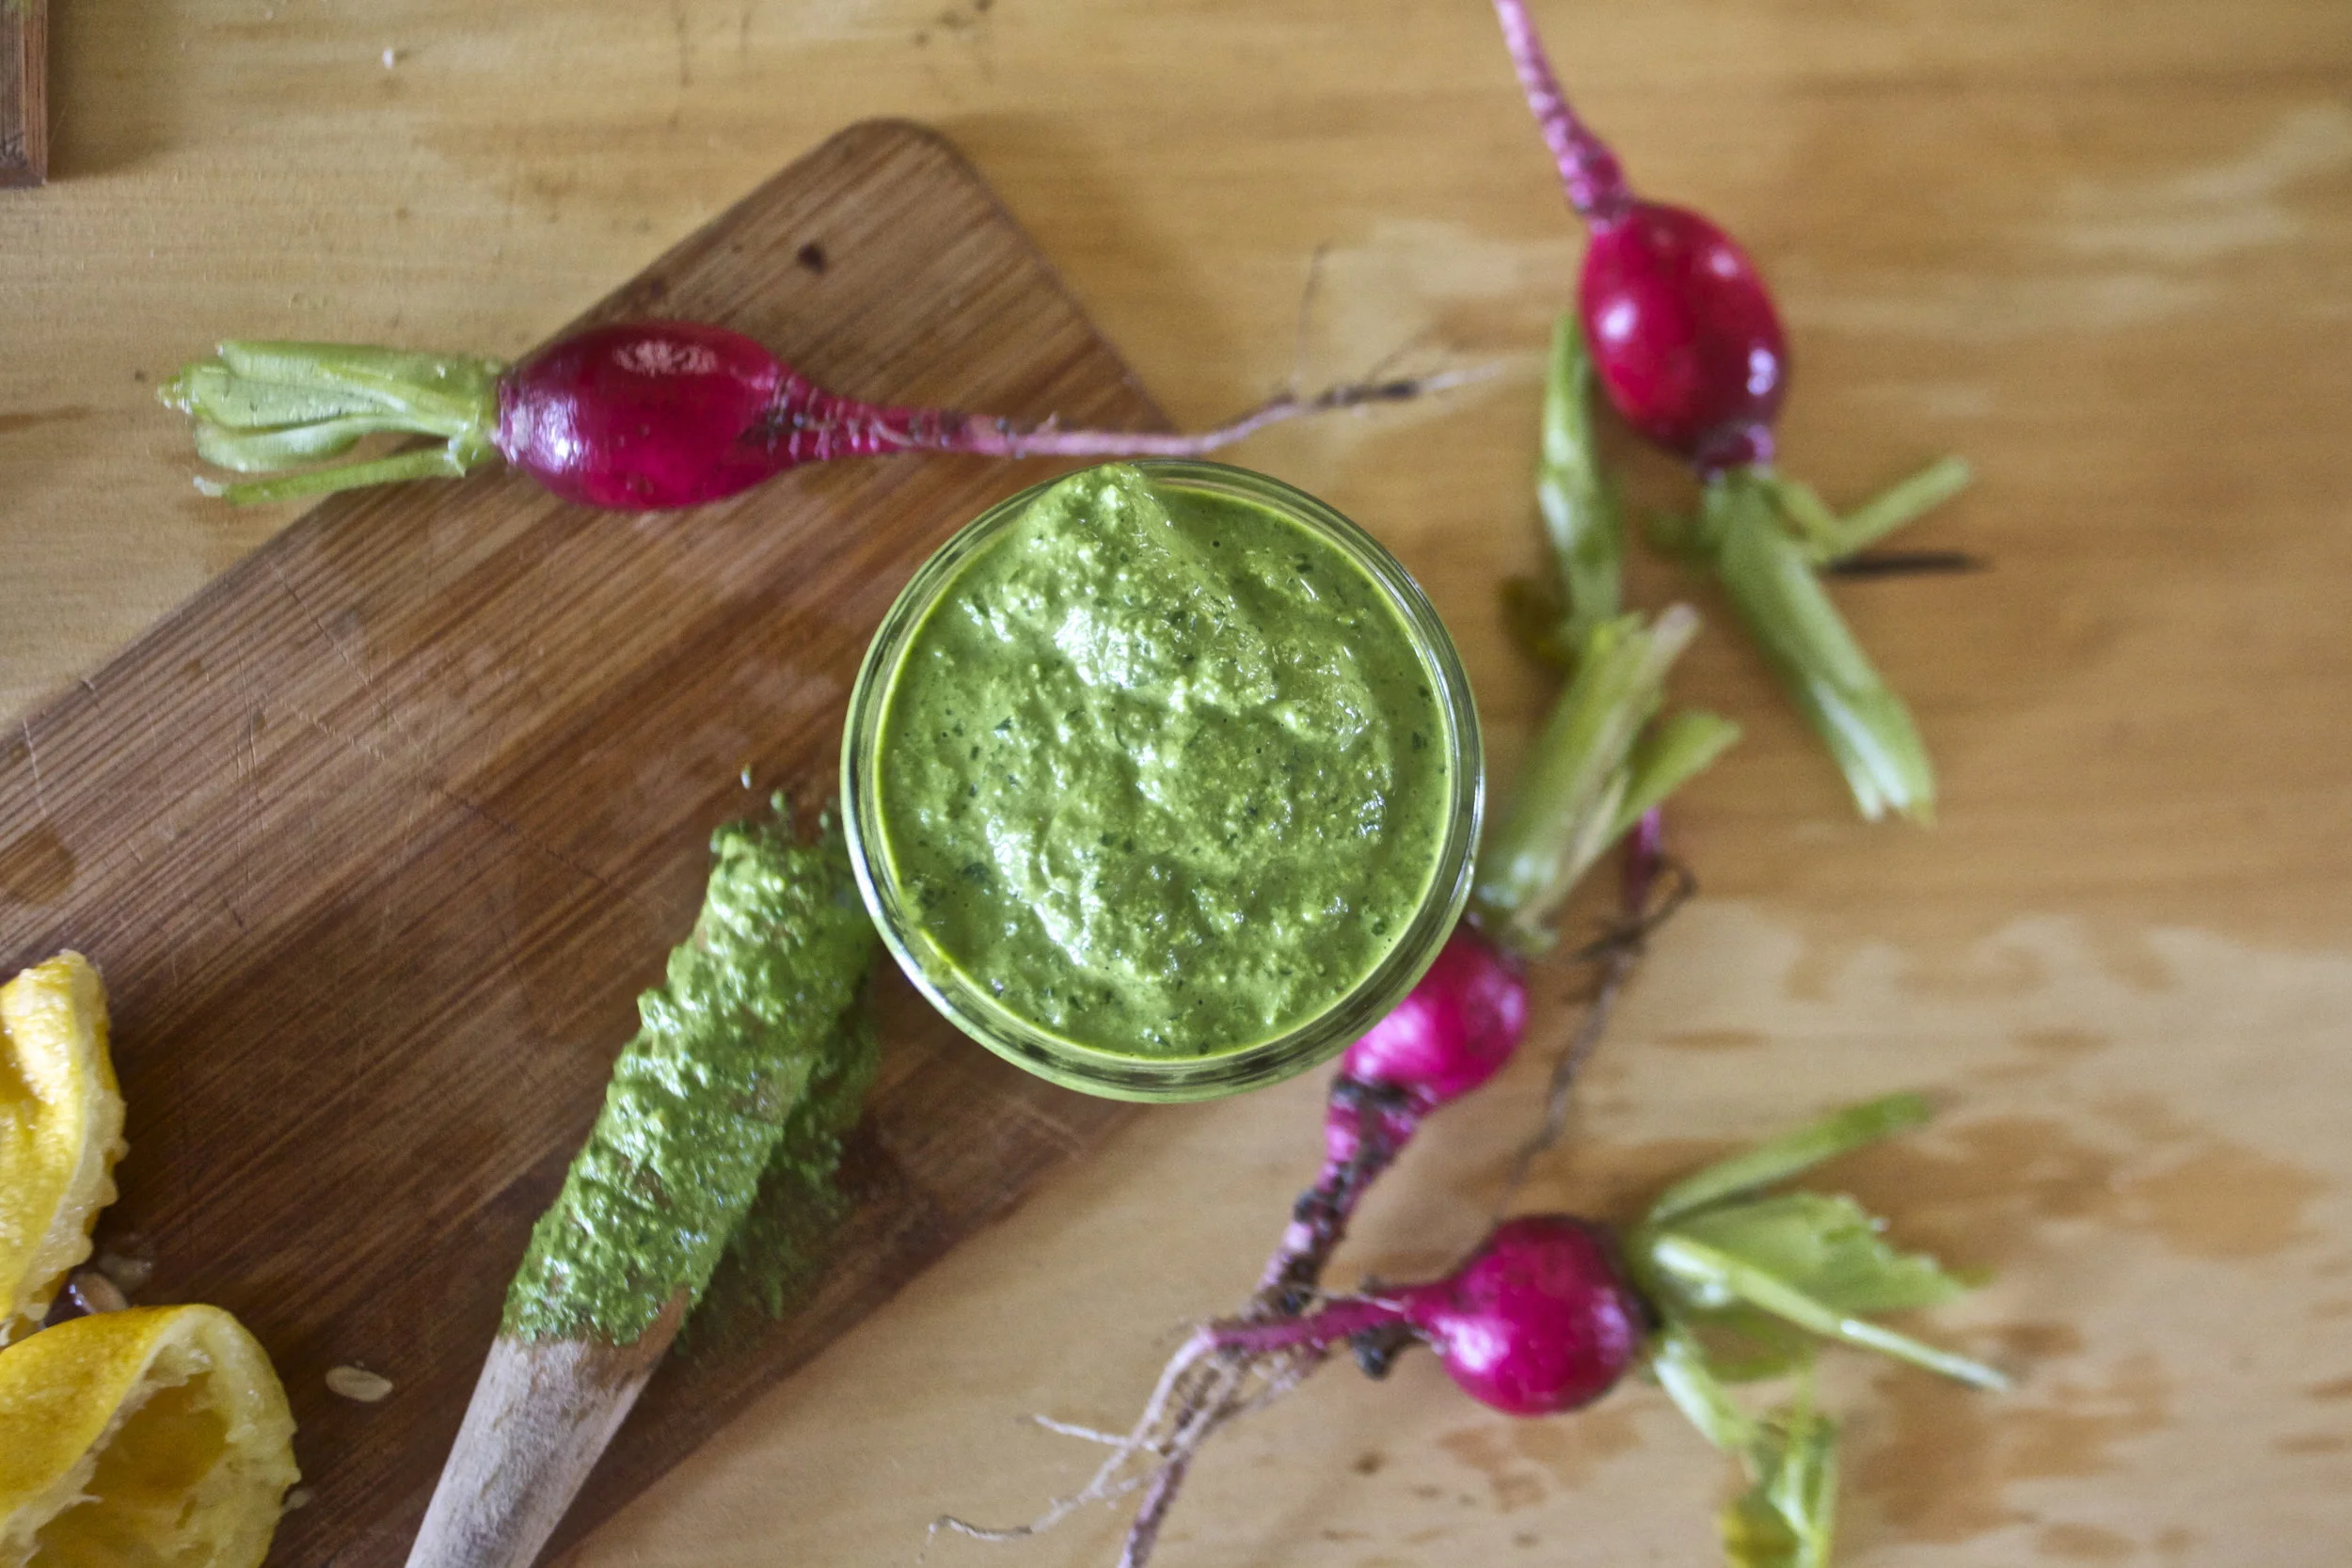
And once it’s all blended you have pesto.
Pour it into a jar and it’s ready to go.
Eat it any way you eat your pesto.
Enjoy
-C
Makes about 2 cups
4ish cups radish greens (I used the greens from about 10 radishes)
1-2 lemons
3/4 cup toasted walnuts
4 cloves garlic
about 1/2 cup olive oil
salt and pepper
Stick walnuts, garlic and the juice of the lemons into a food processor or blender. Give it a pulse or two. Add in a pinch of salt ans pepper then the greens. Turn on blender and stream in olive oil. You might need to stop a few times to push the greens down. Blend until combines. Taste and season with more salt and pepper to taste.
Pour finishes pesto into a jar. Eat with pasta, use as dip, smear on toast, dollop in soup. Eat it however you like.
Lasts for a week or two in fridge and freezes really well .
Have you heard of switchel? A lot of people haven’t so don’t feel bad if you don’t know what the hell I am talking about (like my computer. It keeps auto correcting switchel to switched). So switchel. It’s basically a drink made from water and apple cider vinegar. But wait, don’t grimace and click away, it’s also has fresh ginger, lime, and maple syrup mixed in and is really really really freaking refreshing and tasty and just really good. I guess it was even used back I the day as a sort of sports drink, like Gatorade because it has all sorts of electrolytes and anti-inflammatory properties from the ginger.%u00a0%u00a0Plus apple cider vinegar has got all sorted or health benefits,%u00a0so it’s a tasty treat with benefits. Who doesn’t love the benefits?%u00a0
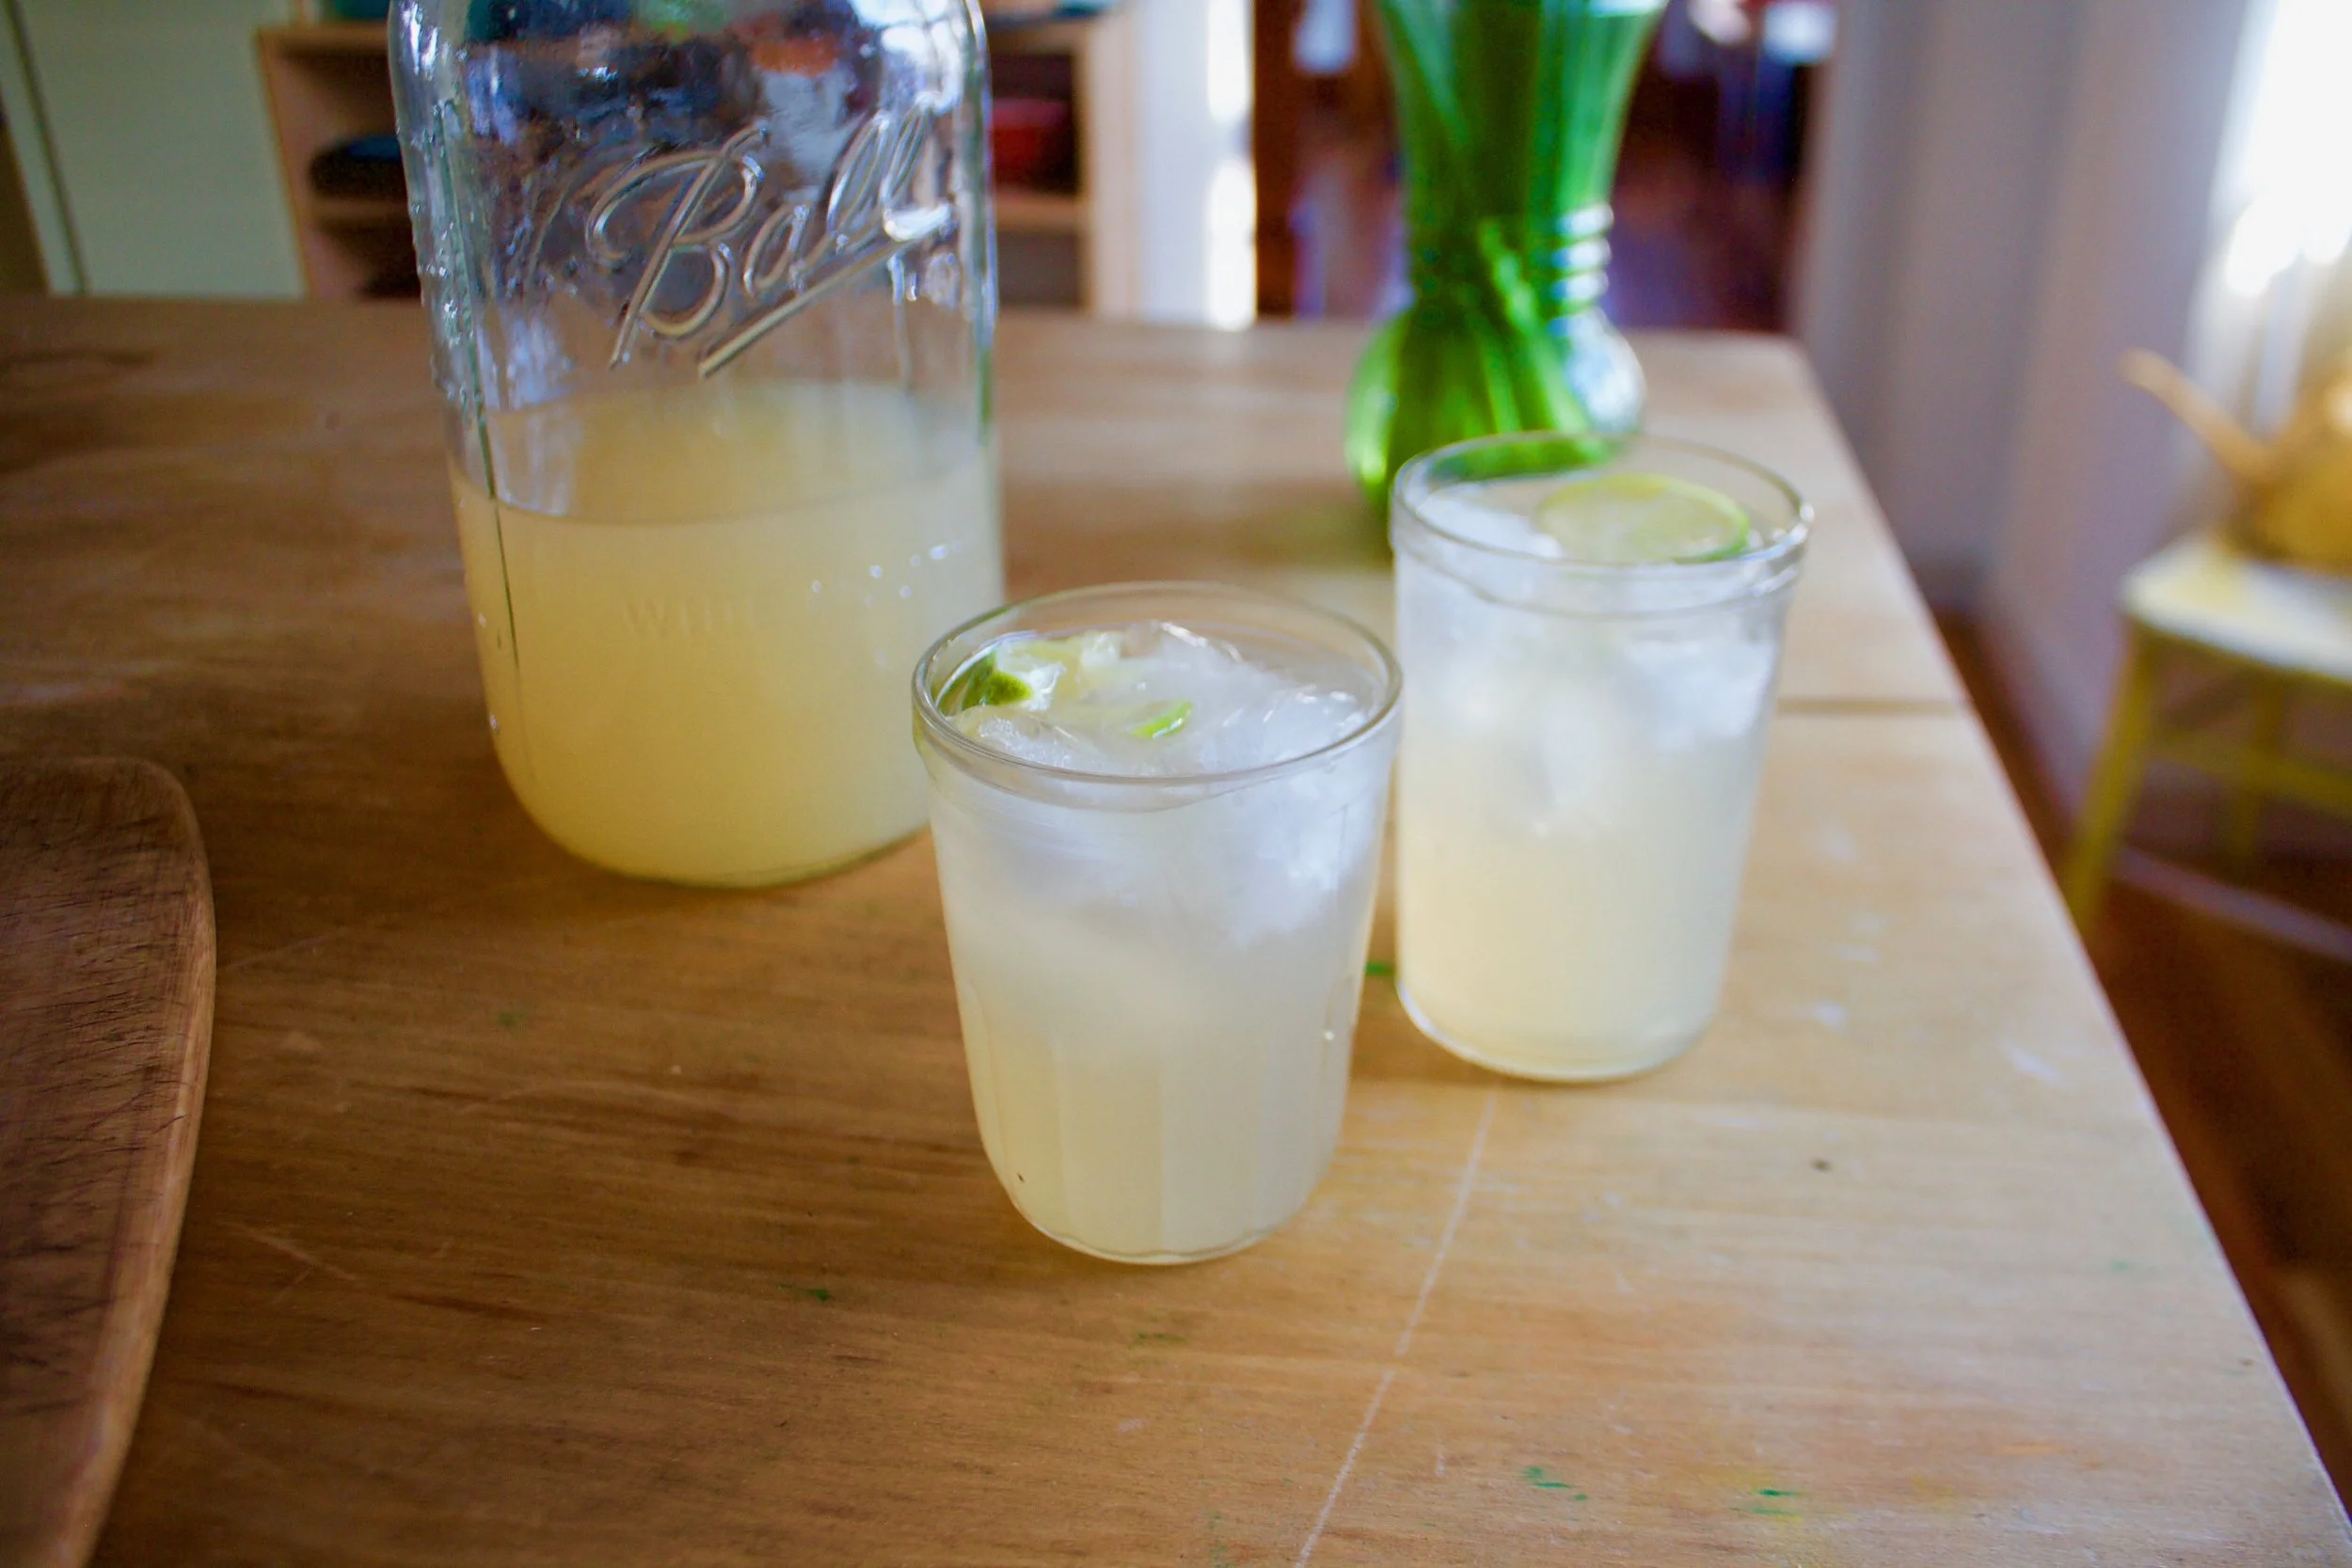
You can drink the switchel %u00a0straight up hot or cold, add it to seltzer for a bubbly soda like drink or even %u00a0mix some cocktails with it. I enjoy a nice cold glass when I am feeling thirsty but what I usually do it fill up half a %u00a0jar with boiling water, then fill the rest of the jar up with the cold switchel. It’s a nice tangy, spicy,%u00a0refreshing and warming drink that I look forward to every day. I even got the littles to try it.%u00a0%u00a0One thought it to be nasty (can’t win them all), but the other one really liked it too, so you know it’s not just me that thinks it good.%u00a0
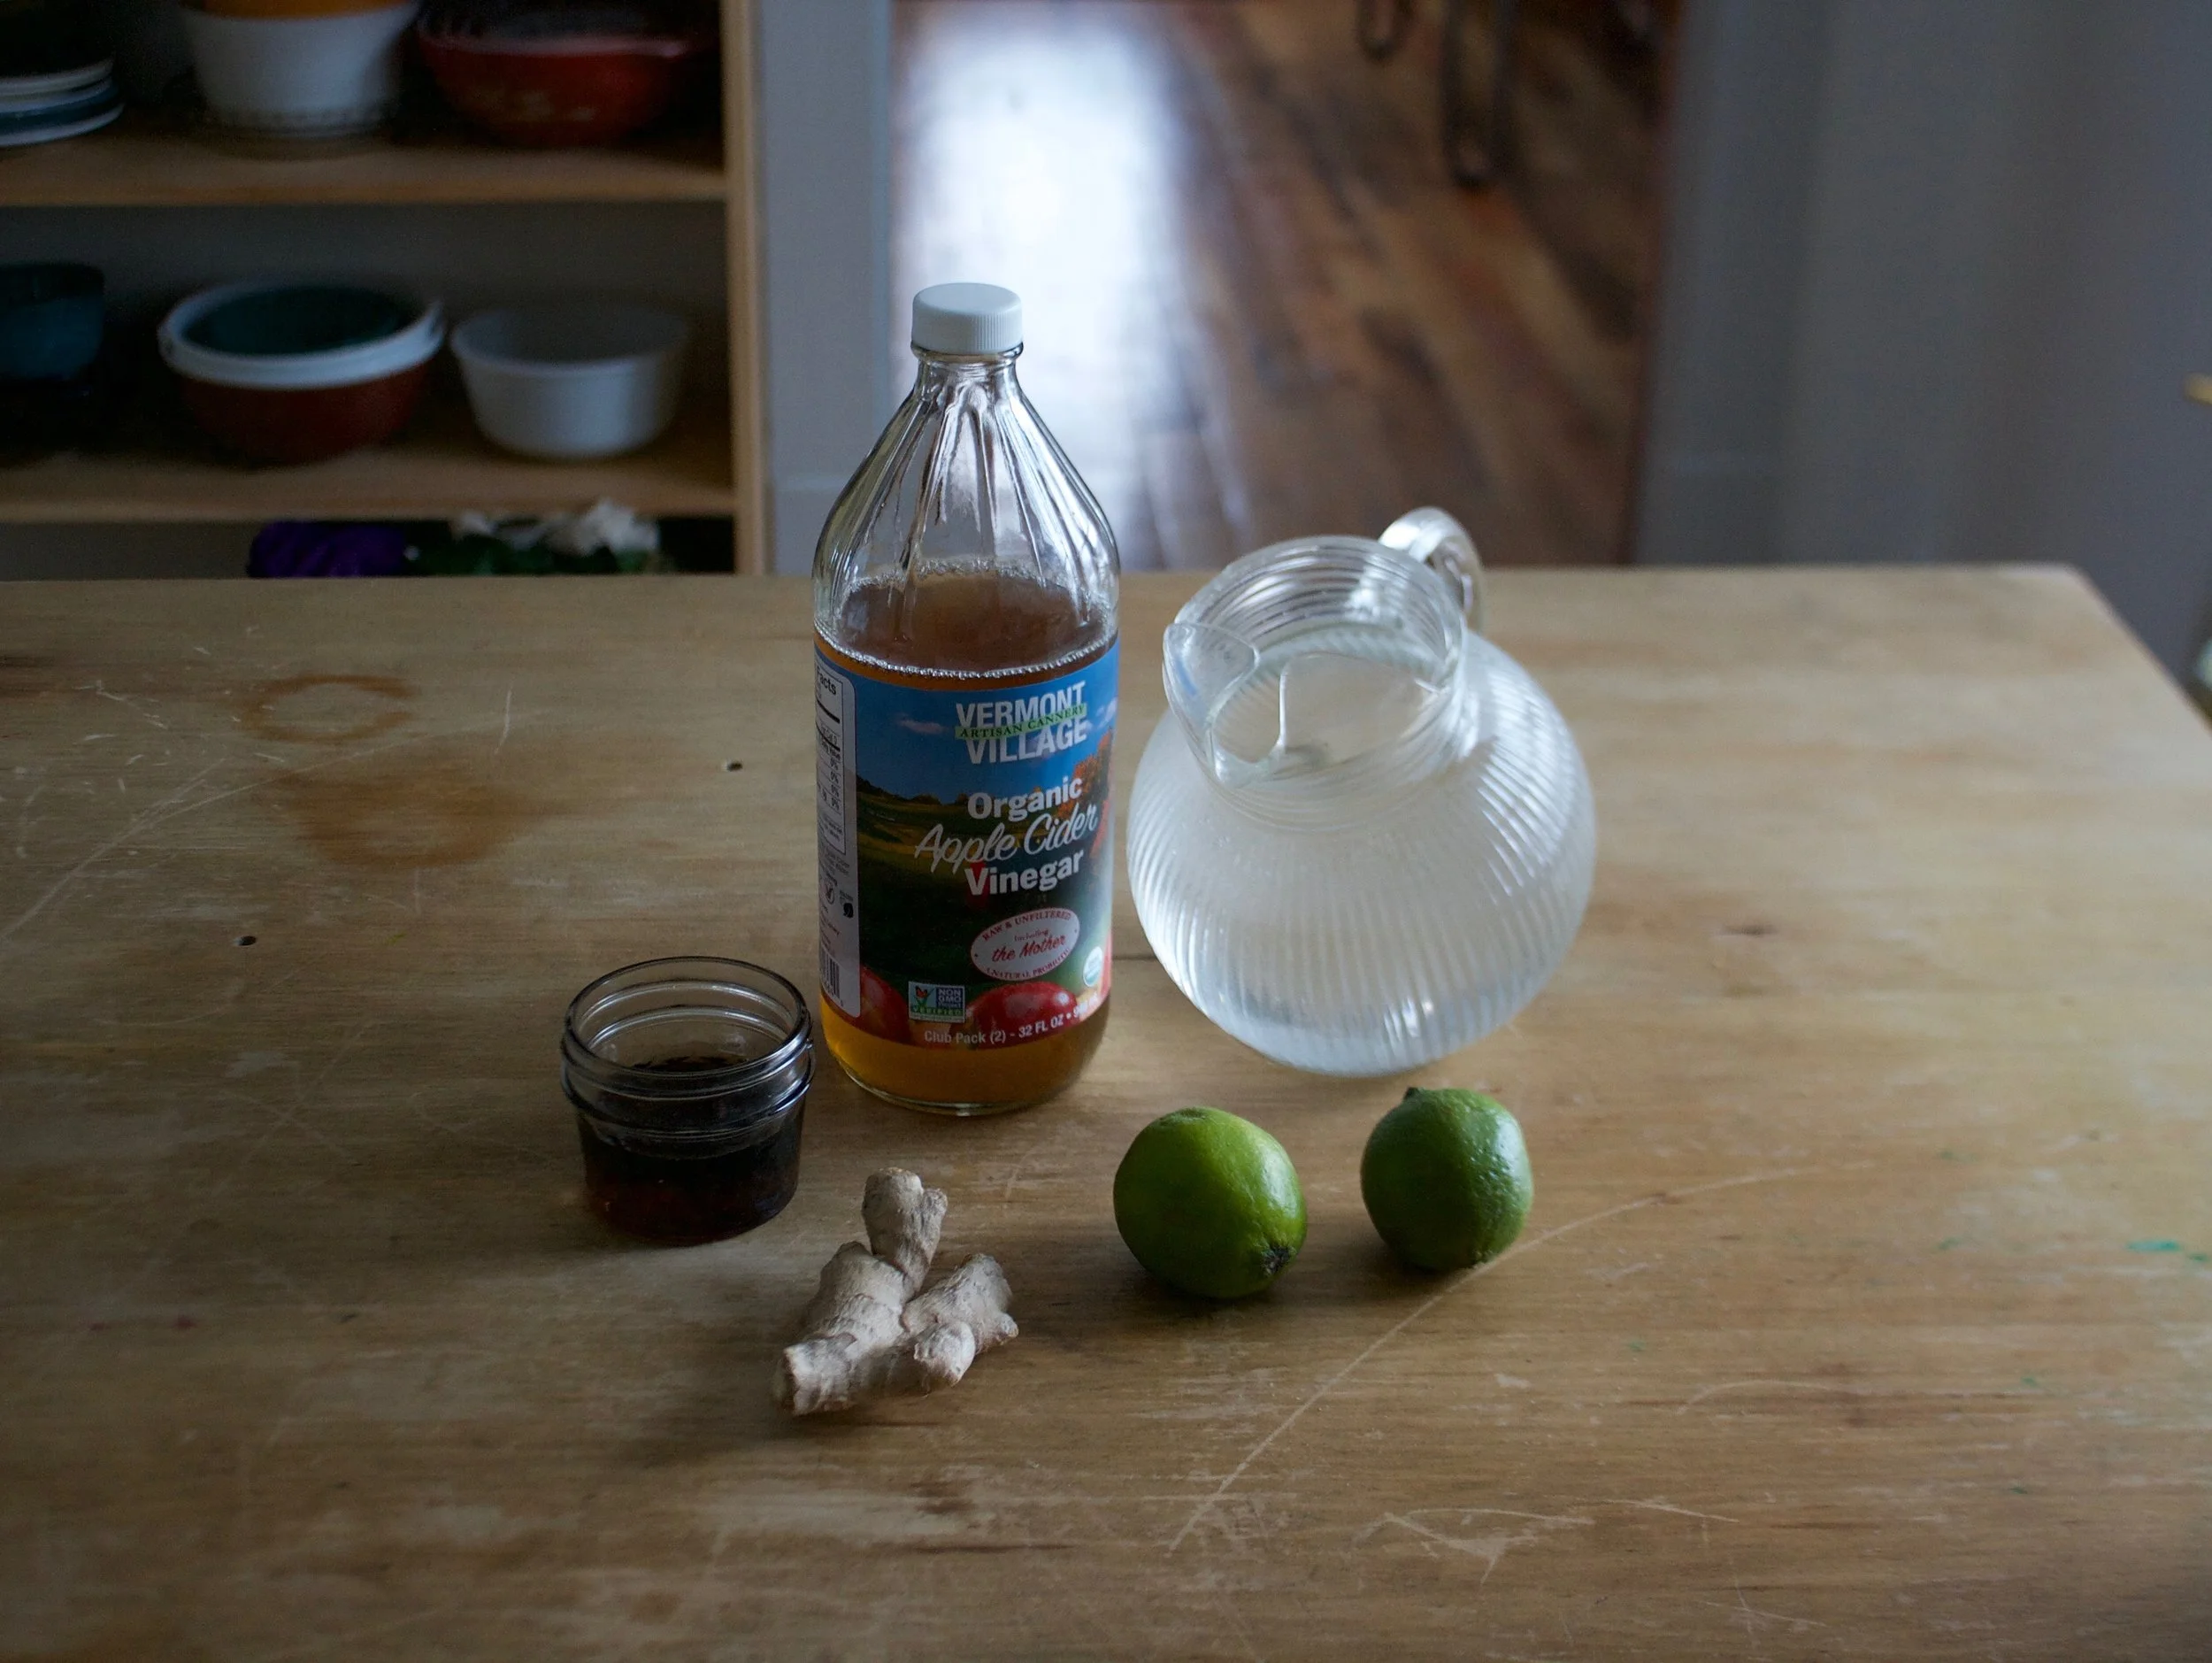
The stuff. Apple cider vinegar (the good stuff that is raw and has the mother), fresh ginger, limes, maple syrup, and water.%u00a0
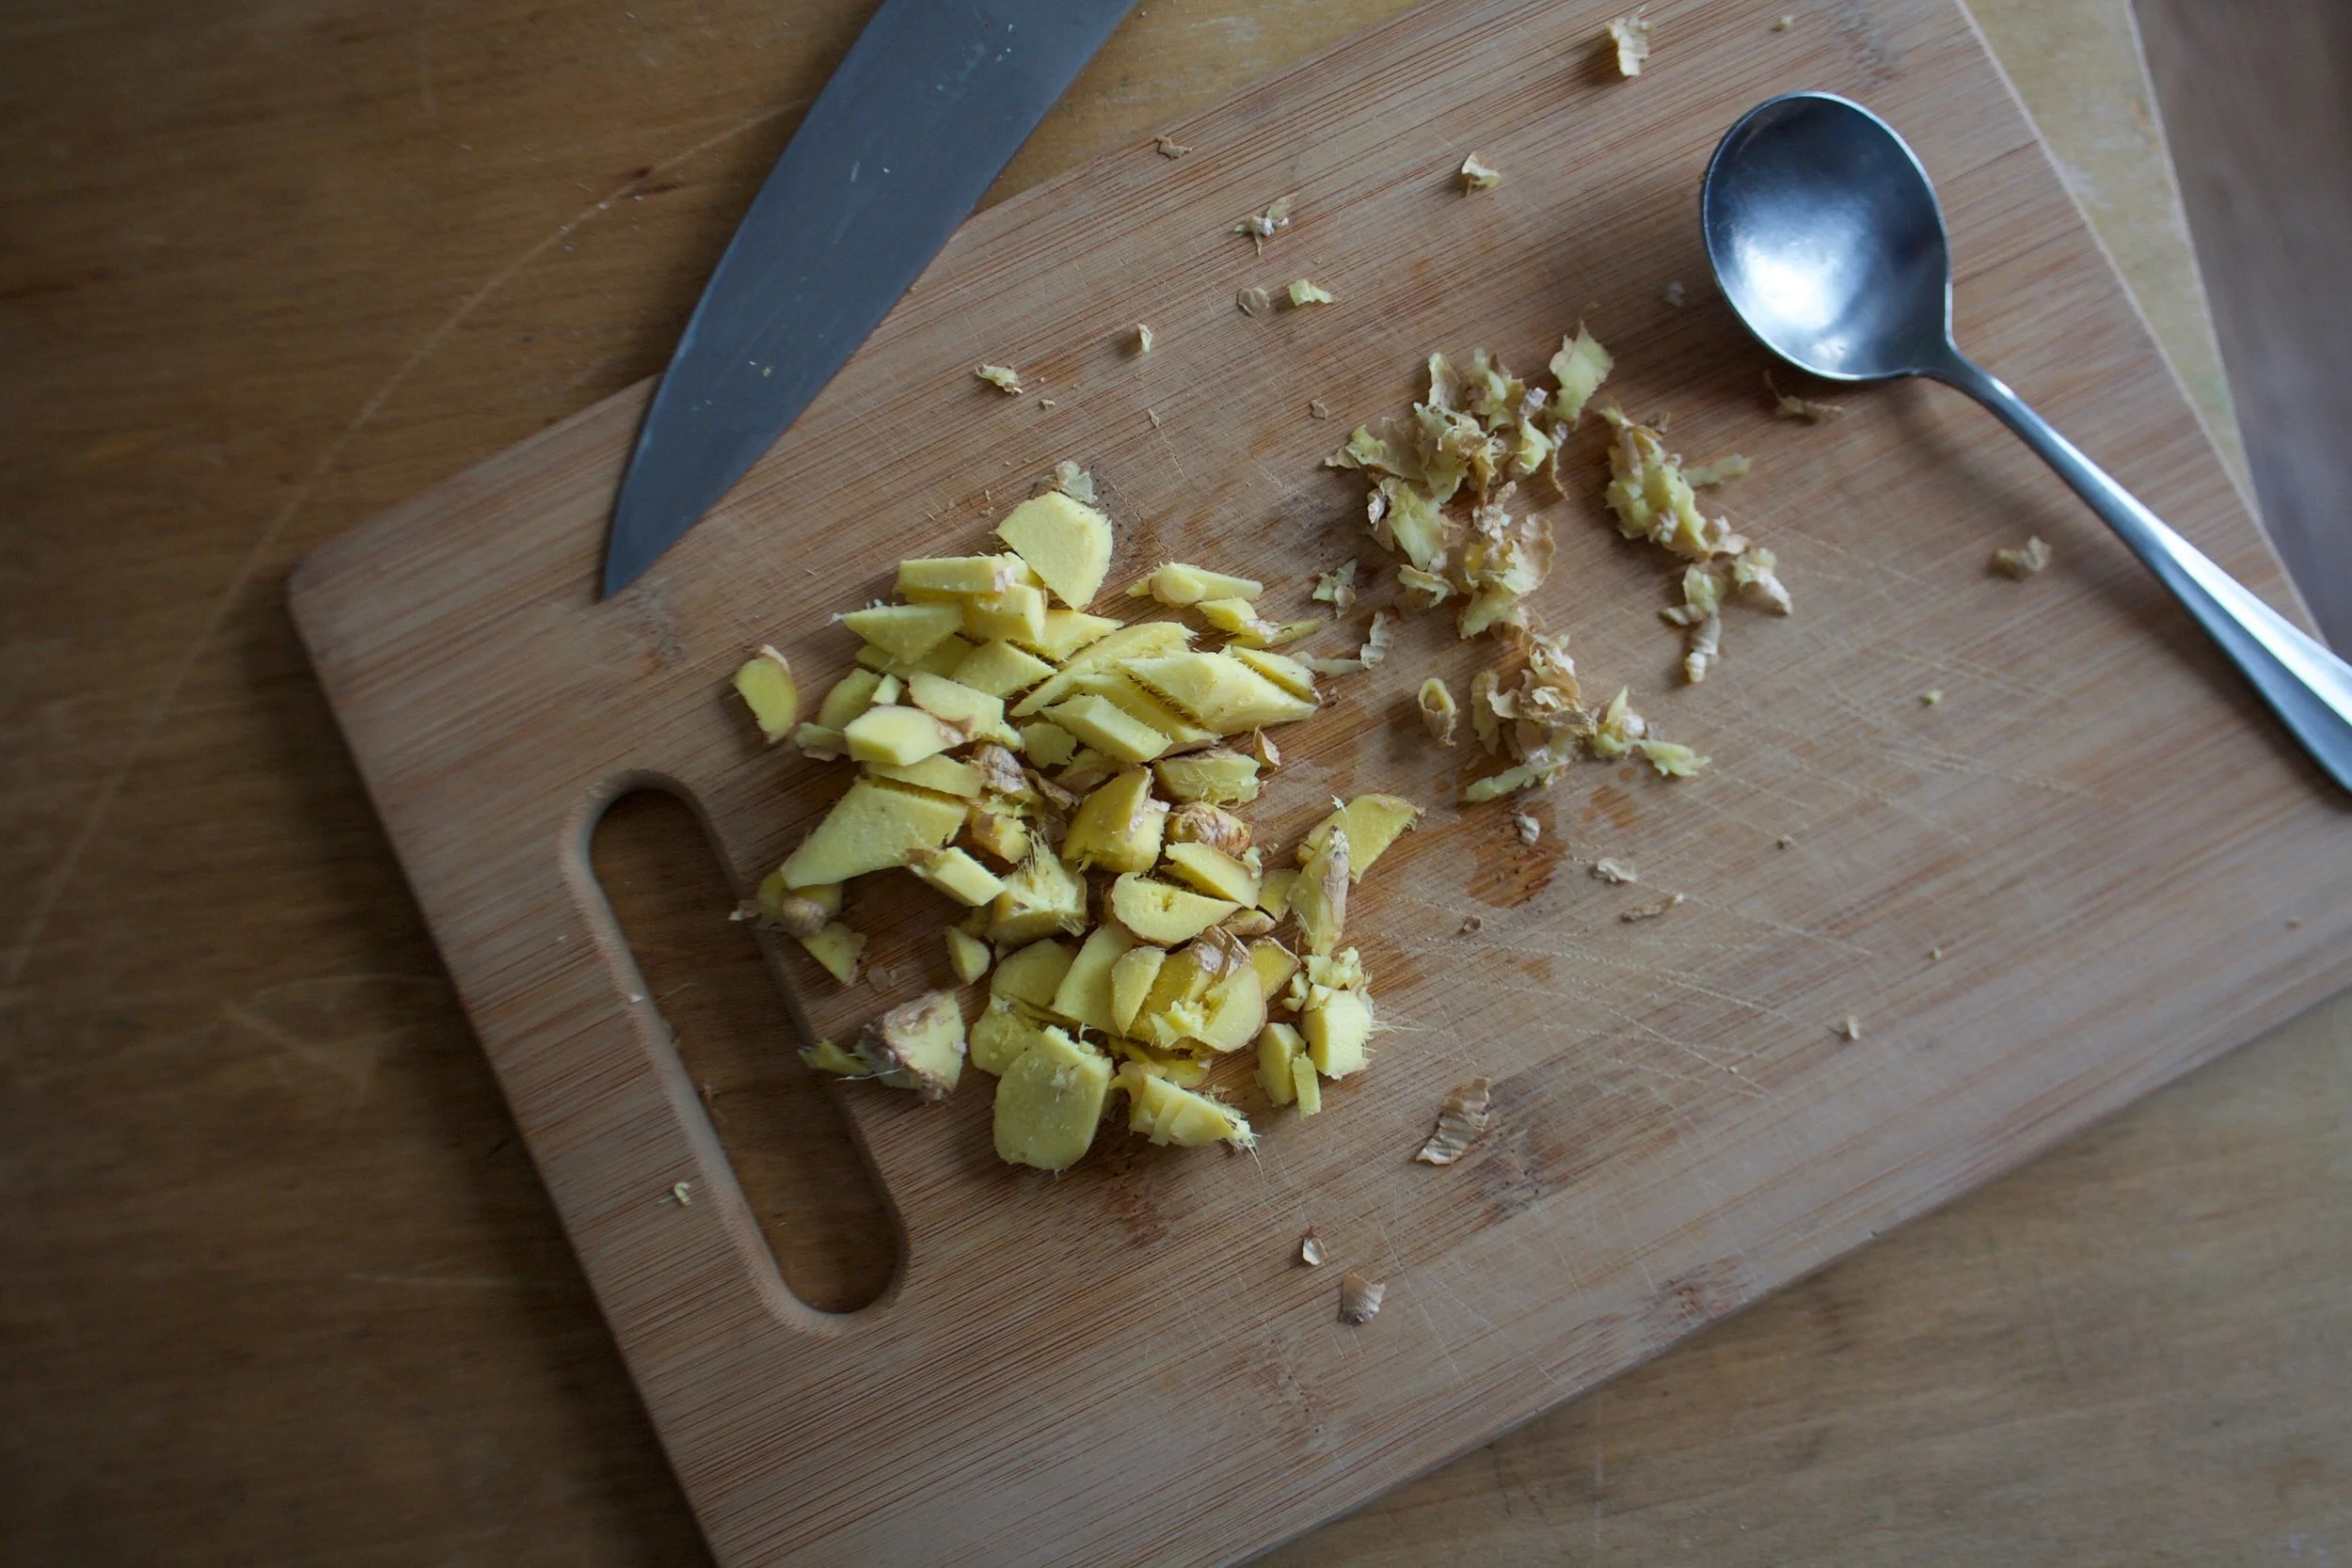
Fresh ginger is the best. Give it a little peel with a spoon, just to maximize gingerness exposure then chop into small pieces.%u00a0
Ginger and water goes into big pot. Bring it to a boil then turn down to a high simmer for 10-15 minutes to really get the ginger infused into that water.%u00a0
After it’s cooled a bit, strain the now ginger water into a pitcher or a big jar.
Add in the vinegar, the juice of the limes and a bit maple syrup. Start off with a little maple, you can alway add more later if needed.%u00a0
After the switchel has some time in the fridge to cool (at least 2 hours, but I like it best when it’s sat overnight) grab a glass ,some ice cubes, and a slice of lime. It’s go time.%u00a0
A drink to you my friends
-C
Makes bout 6%u00a0 cups%u00a0
1/2 cup raw apple cider vinegar (with the mother. Braggs is a popular option)%u00a0
5-6 inch piece of fresh ginger%u00a0
2 limes
5 1/2 cups water
1-4 tablespoons maple syrup%u00a0
With a spoon, gently peel ginger . Not perfectly, just get some of the skin off. Chop it into small pieces and place it into a large pot with the water. Bring to a boil then let simmer for 10-15 minutes. Strain ginger water int a large pitcher or jar.
Add in the apple cider vieager, the juice of the limes, and a tablespoon or two of maple syrup. Give it a good stir then place in the fridge until cold (about two hours but overnight is best)%u00a0
When it’s cold, give it a good stir again, taste, and if it needs more maple, add it in. And then it’s ready.
You can drink it on ice, maybe add some seltzer to it, or mix it into some fancy cocktail. It can also be reheated for a nice spicy warming treat.%u00a0
%u00a0The mr. calls them the beached whales of the garden. One day you have these nice little green gems growing in the garden. You see them from a distance and think, “Oh look at those squash, those are%u00a0%u00a0oh so lovely”%u00a0and then you look away. Maybe you leave and let them%u00a0grow for%u00a0a day or two. Then%u00a0when you come back to look, they%u00a0have%u00a0turned into %u00a0humongous squash that, in fact, look%u00a0like giant green beached whales.
We have been eating%u00a0a lot of those%u00a0beached whale these past few weeks..
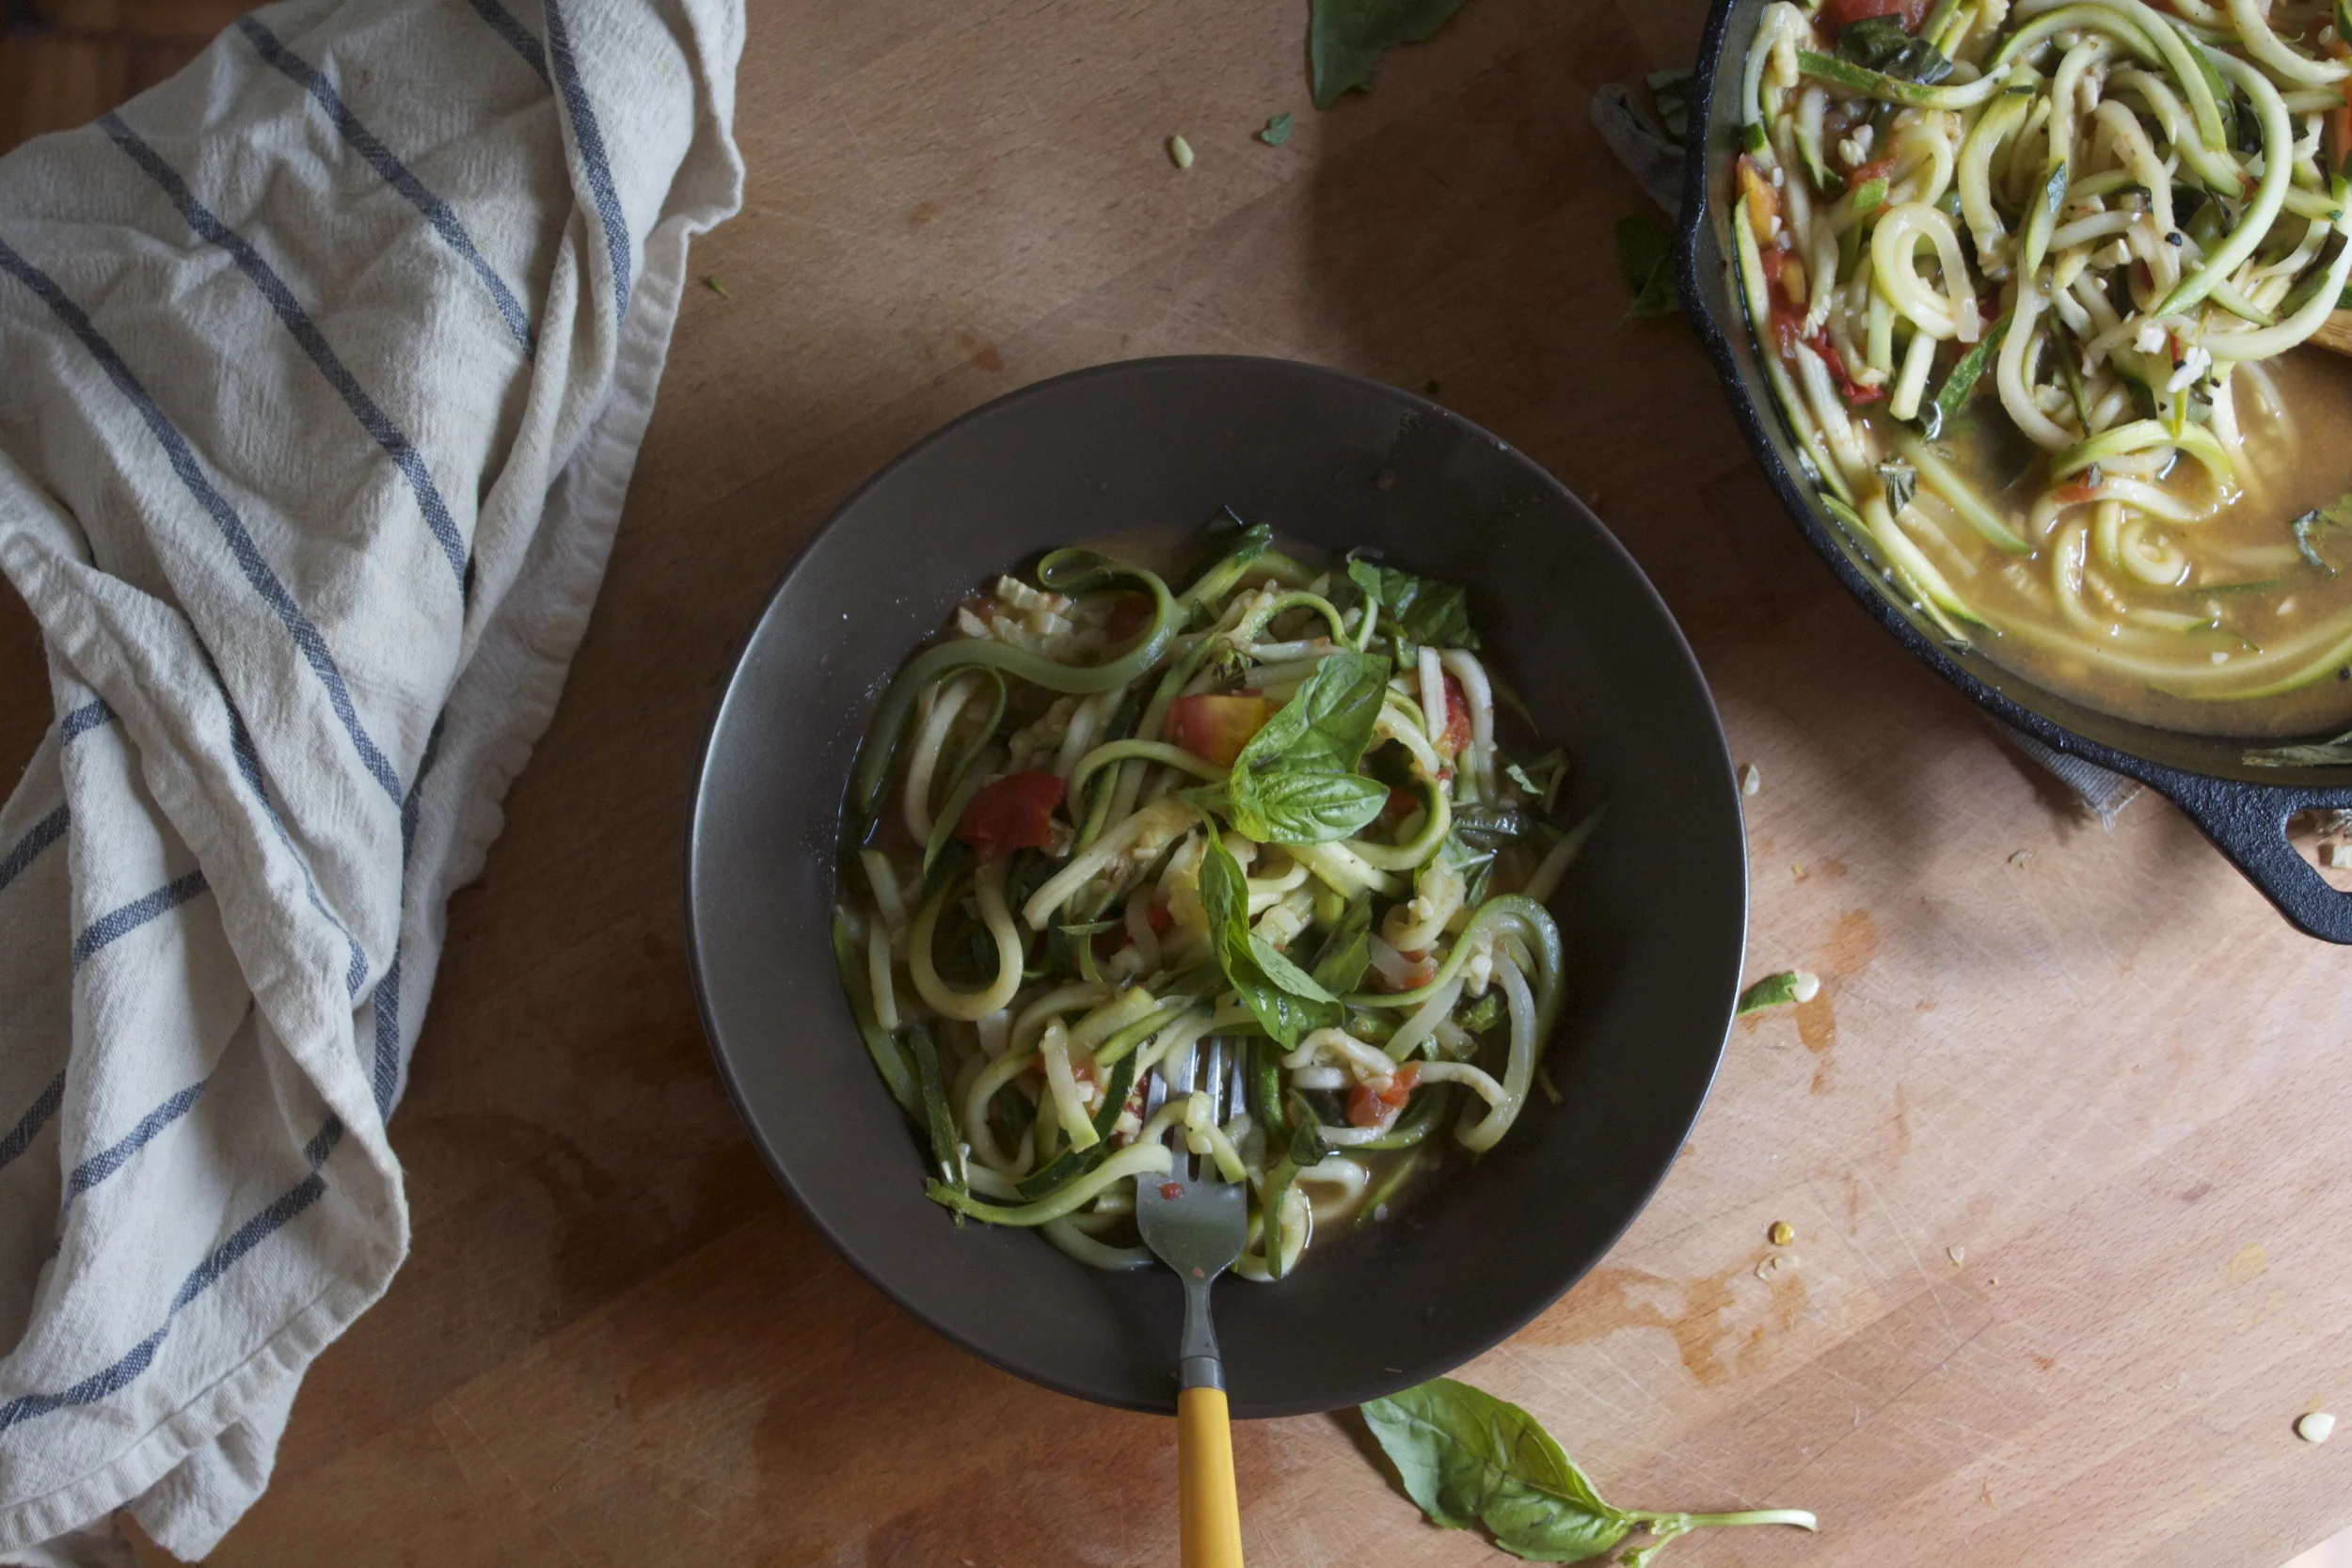
Take yesterday for example. I%u00a0%u00a0made zucchini bread, zucchini relish, zucchini pickles and these here zucchini noodles. And that was before I went to the garden and picked 4 more. And today is farm share pick up which%u00a0means I’ll be receiving at least another 8-12 squash.%u00a0And%u00a0did I mention that there are%u00a0currently%u00a06%u00a0large zucchini sitting on my table.
My new life motto as of lately is %u2026.When life gives you zucchini.. just eat the shit%u00a0out of them.
These noodles are%u00a0by far, one of the easiest, and most delicious%u00a0ways to use up a butt load of zucchini. And%u00a0you%u00a0can do it every day.%u00a0I know people that eat pasta like 5 time a week so I don’t think it’s that weird to be eating zucchini noodles every night. The mr. well%u00a0he is eating them like a champ. For a guy that really likes his pasta, he really likes when I make these noodle. And as he%u00a0said%u00a0last night, “who wouldn’t like a bowl of carb free noodles that taste amazing and you can eat as much as you want and not feel like car?”. My responses was,” maybe some asshole? I don’t know”
So%u00a0yeah, zucchini noodles is where its at.%u00a0
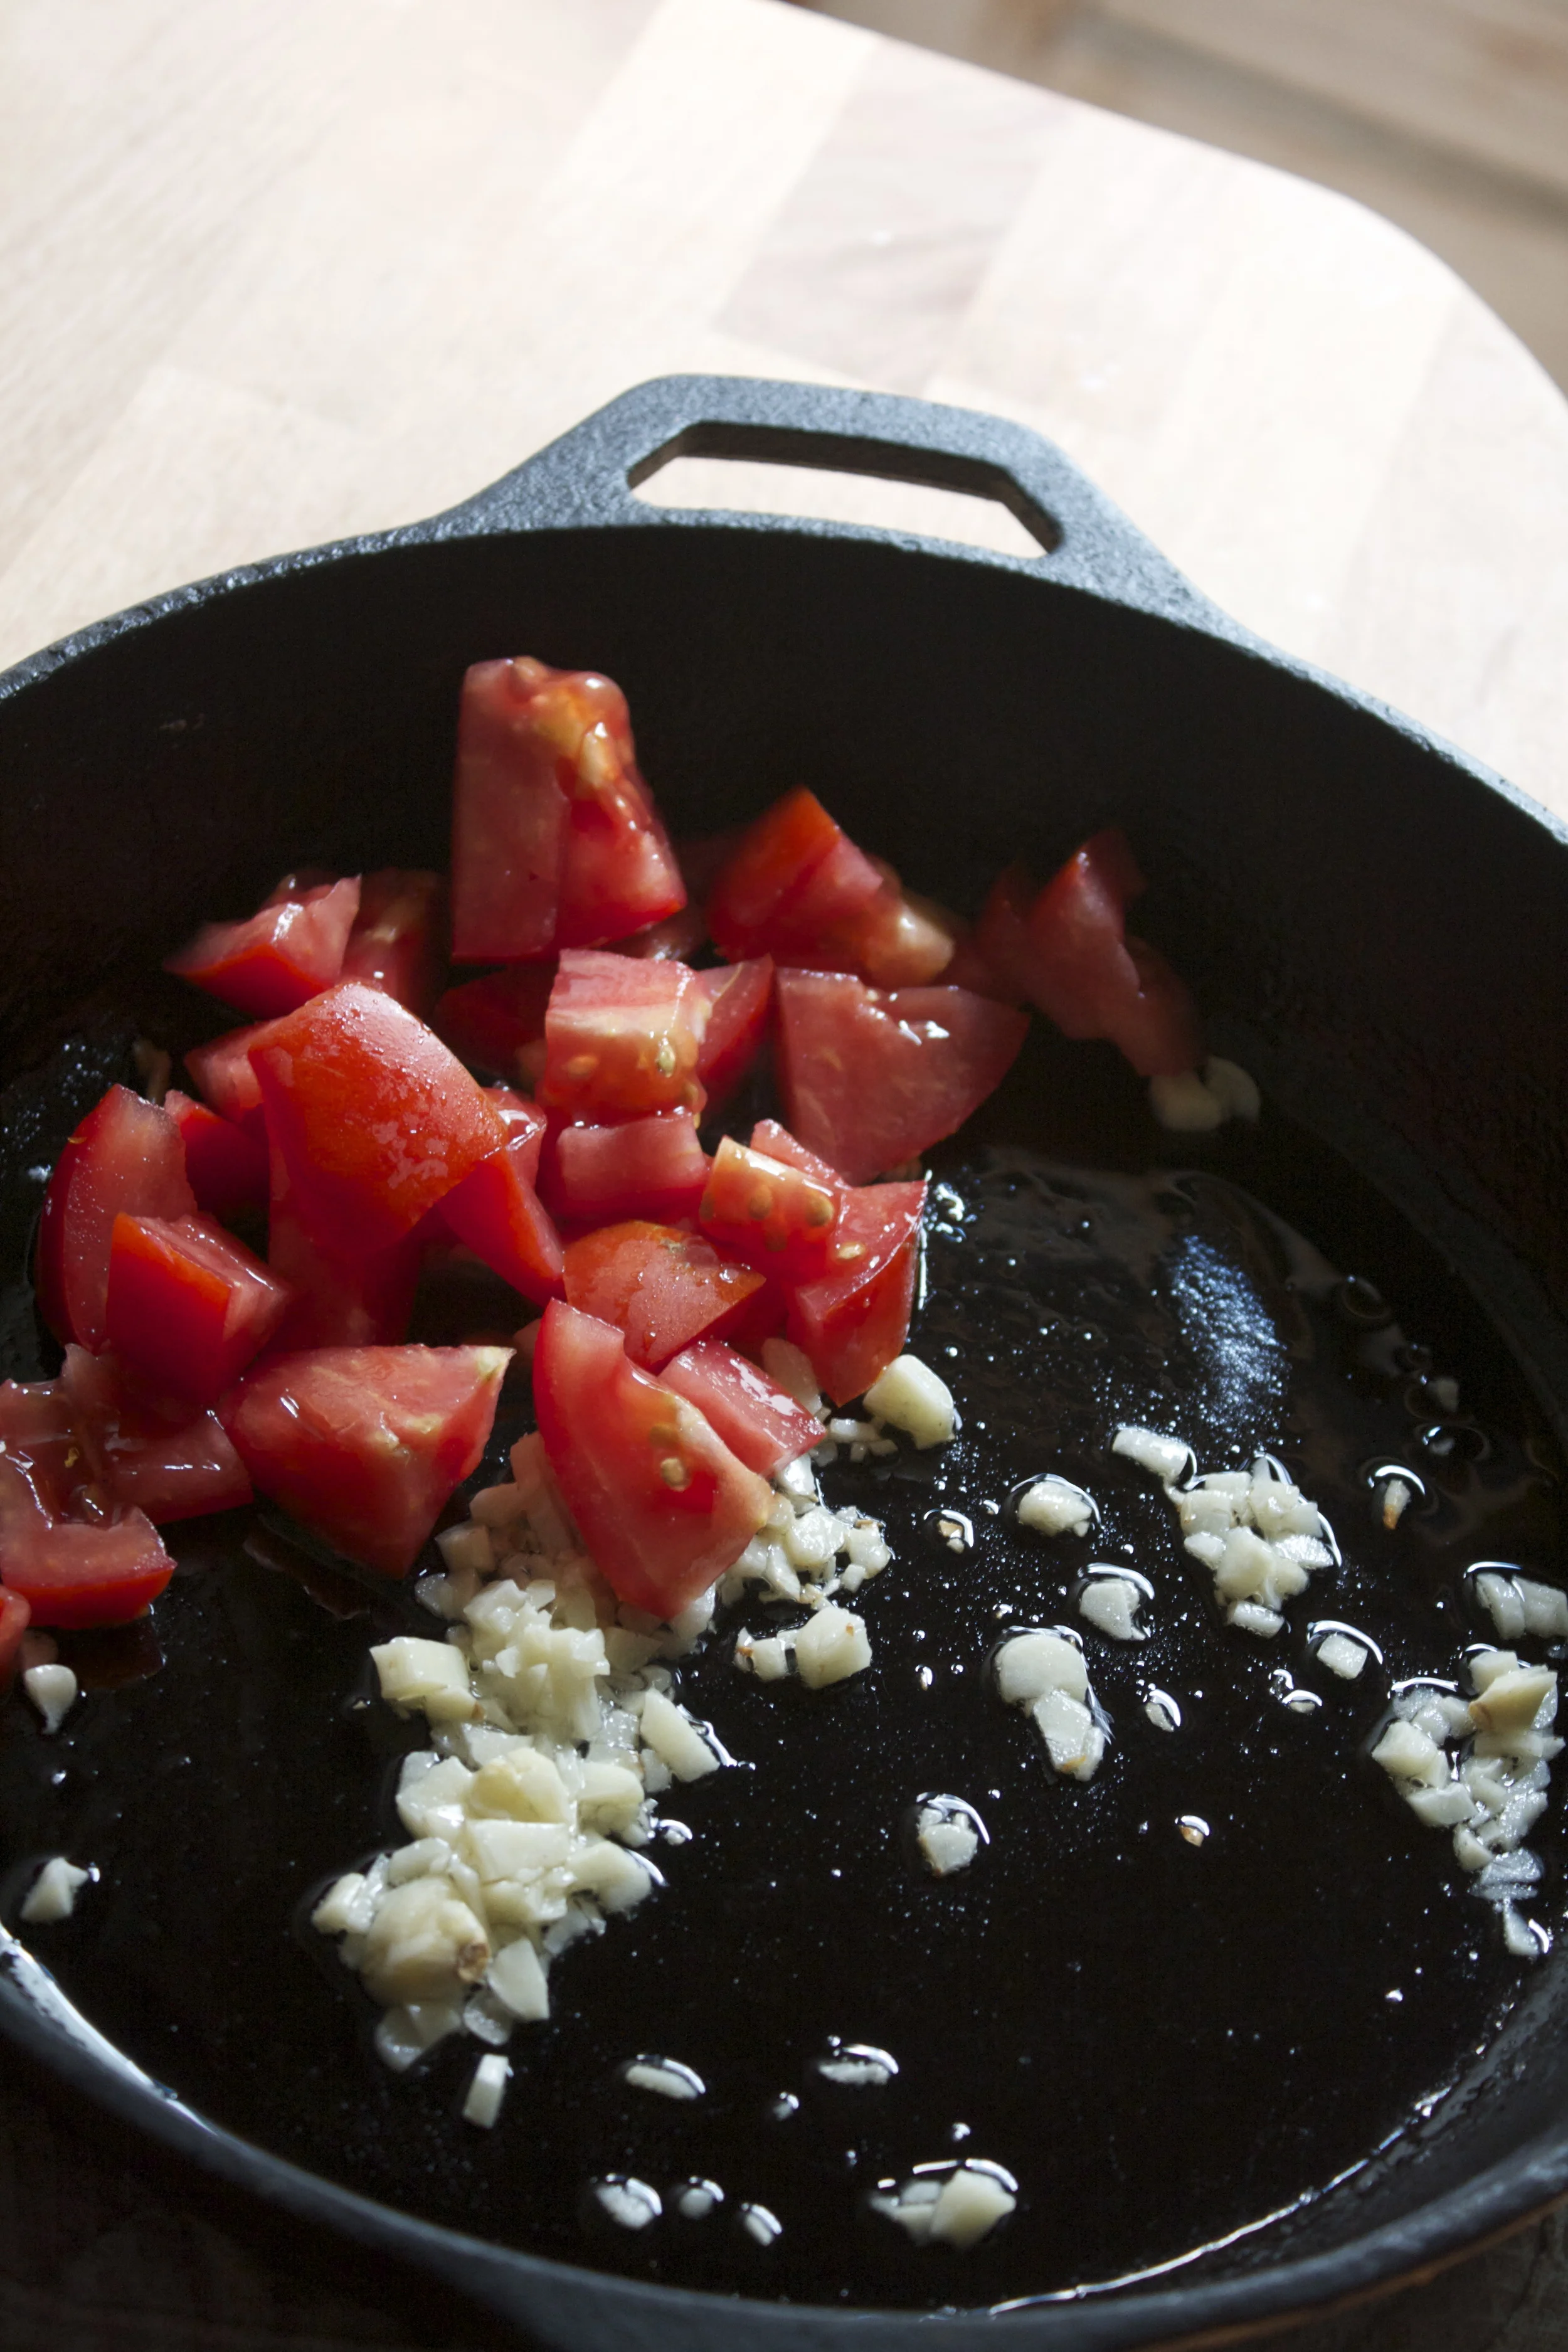
The stuff. 2%u00a0big%u00a0zucchinis, a%u00a0large tomato,%u00a0a%u00a0few cloves of garlic, a lemon (or just some lemon juice)%u00a0and a%u00a0handful of fresh basil. Also grab a little olive oil and the%u00a0and salt and pepper.%u00a0
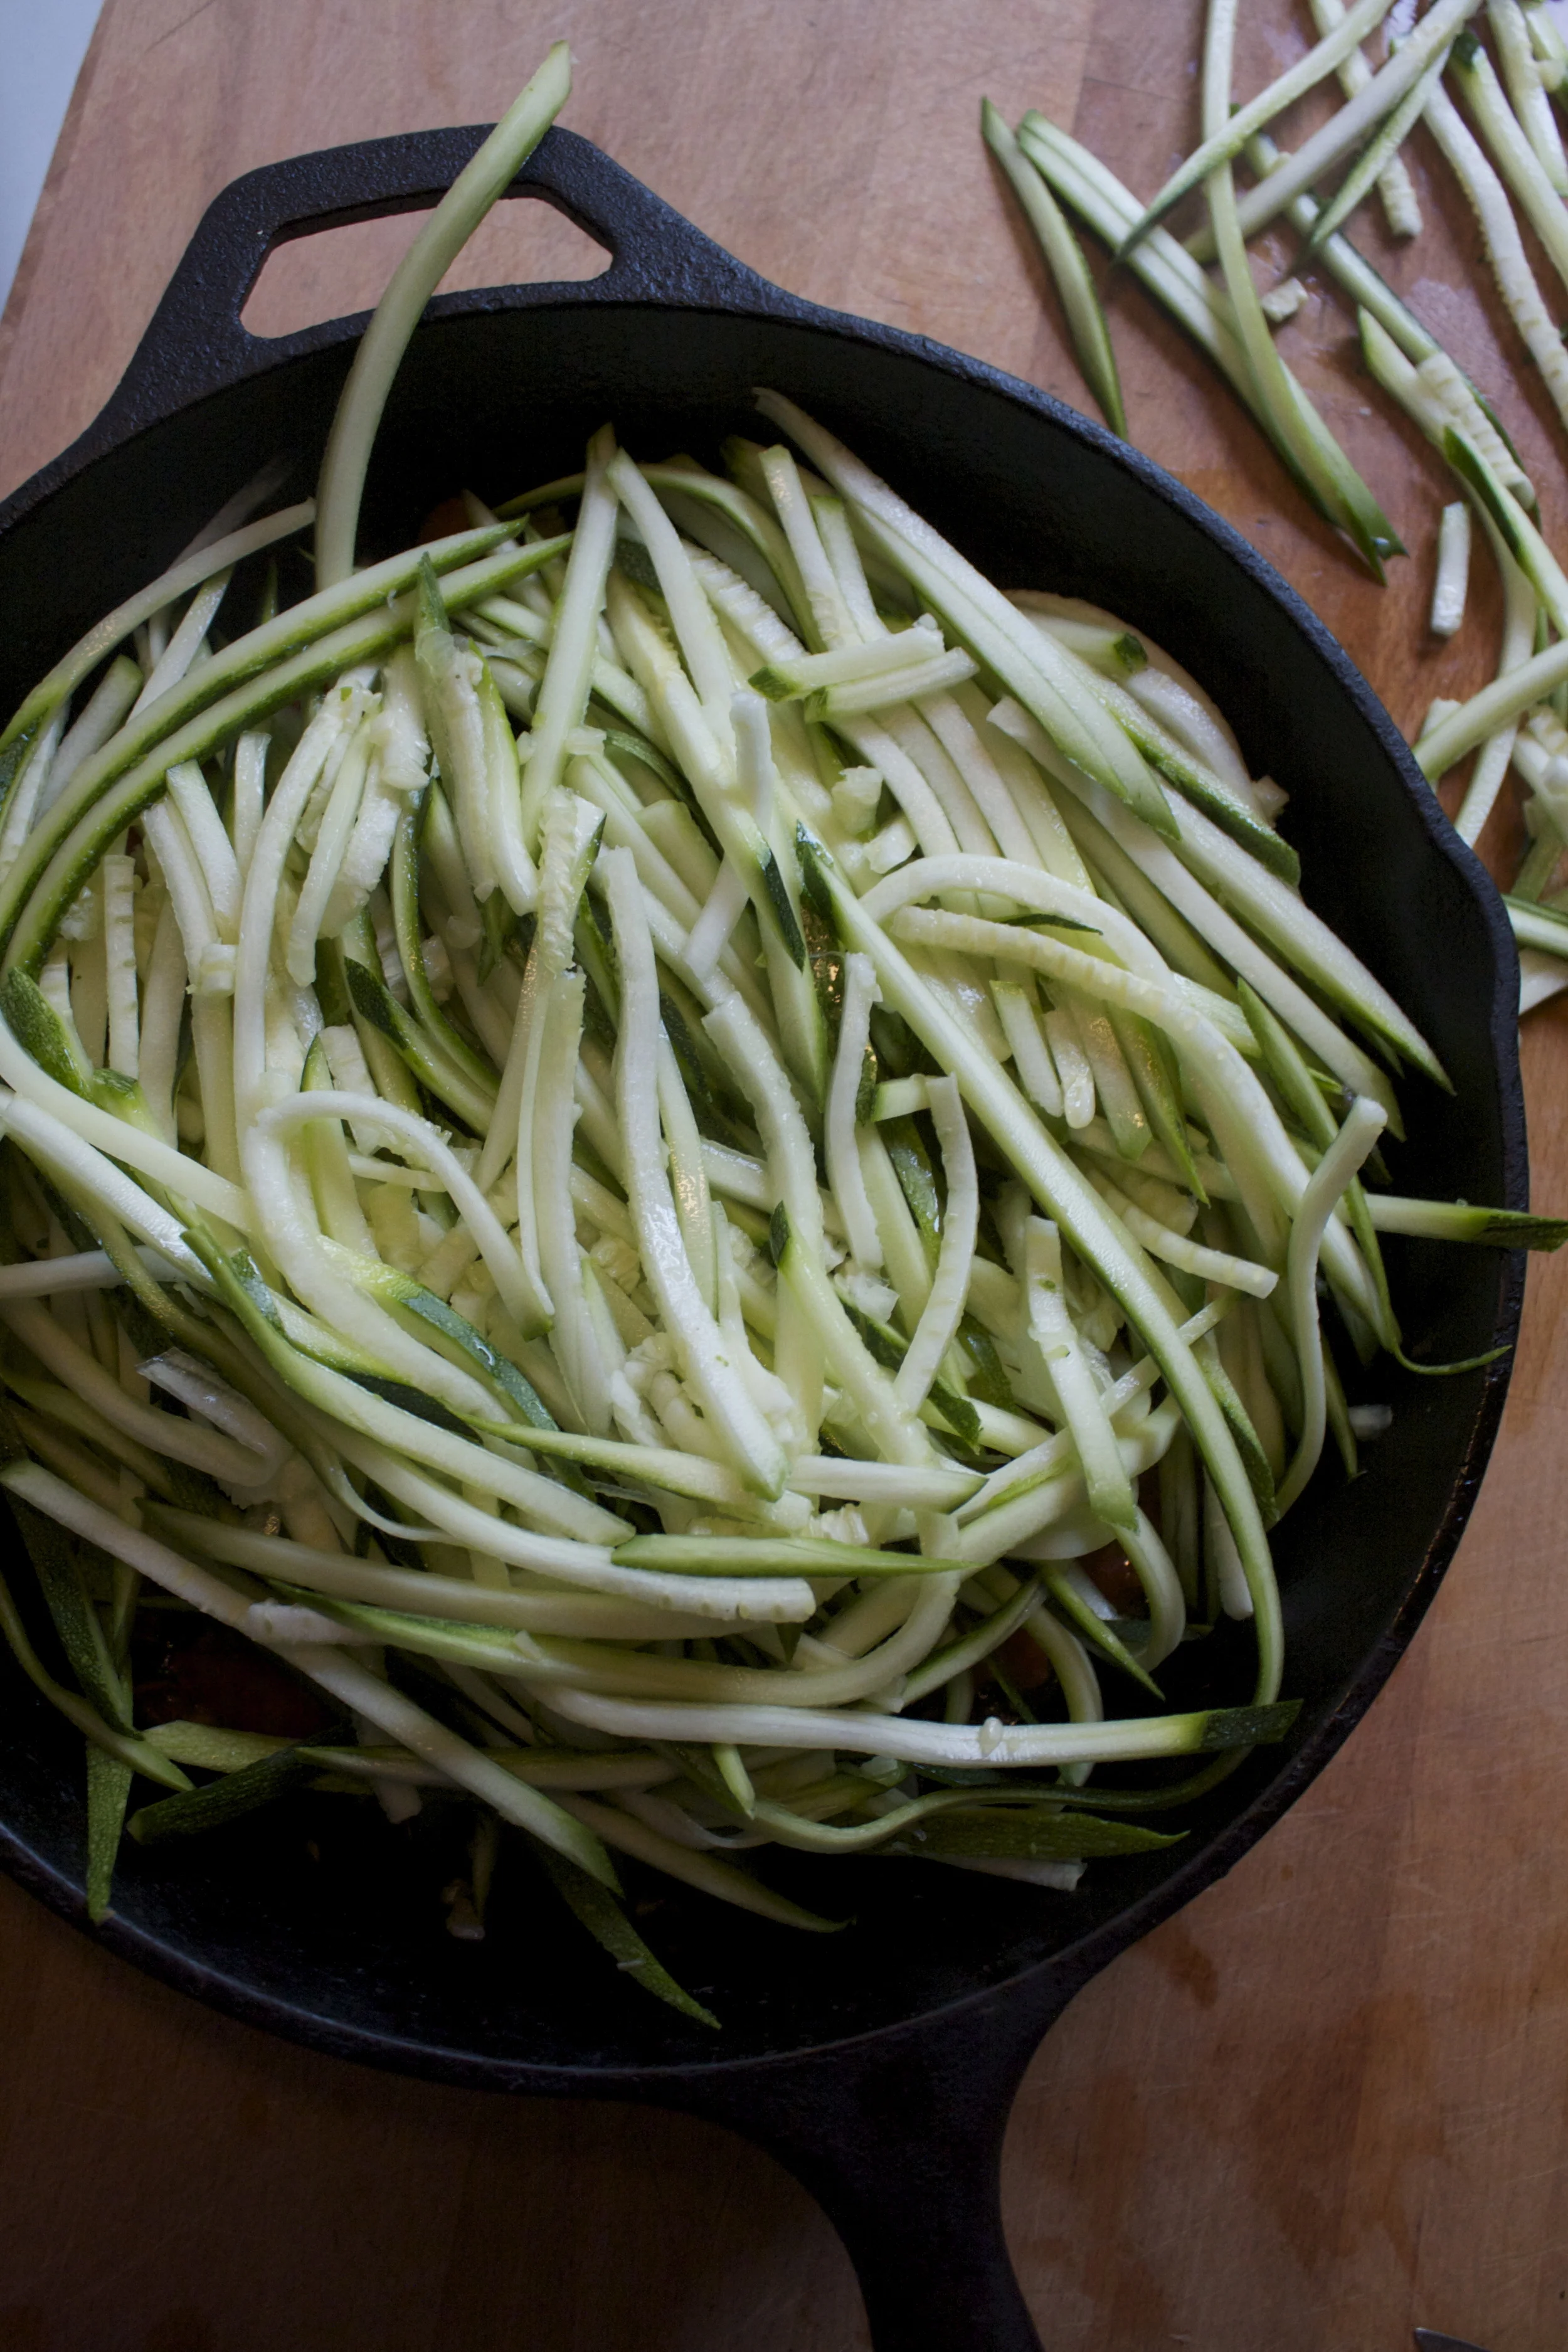
Firstly, turn you squash into noodles. Do it anyway you like.. I used my mandolin slicer to cut “spaghetti” but you can use a julienne slicer, a noodle maker, or even a box grater. Once made, set noodles aside.
Now chop tomato into chunks and%u00a0%u00a0mince garlic. Add to a%u00a0large skillet with a%u00a0drizzle%u00a0of olive oil. Place on medium heat, mix around and cook for a few minutes unit %u00a0garlic becomes fragrant and the tomatoes are soften.%u00a0
Now add in the noodles. %u00a0Just toss right%u00a0into the pan with the galic and tomatoes. Add a splash %u00a0of water, the juice of the lemon and salt and pepper. Keep heat on medium and mix noodles around until slightly soft (or cooked to you liking)
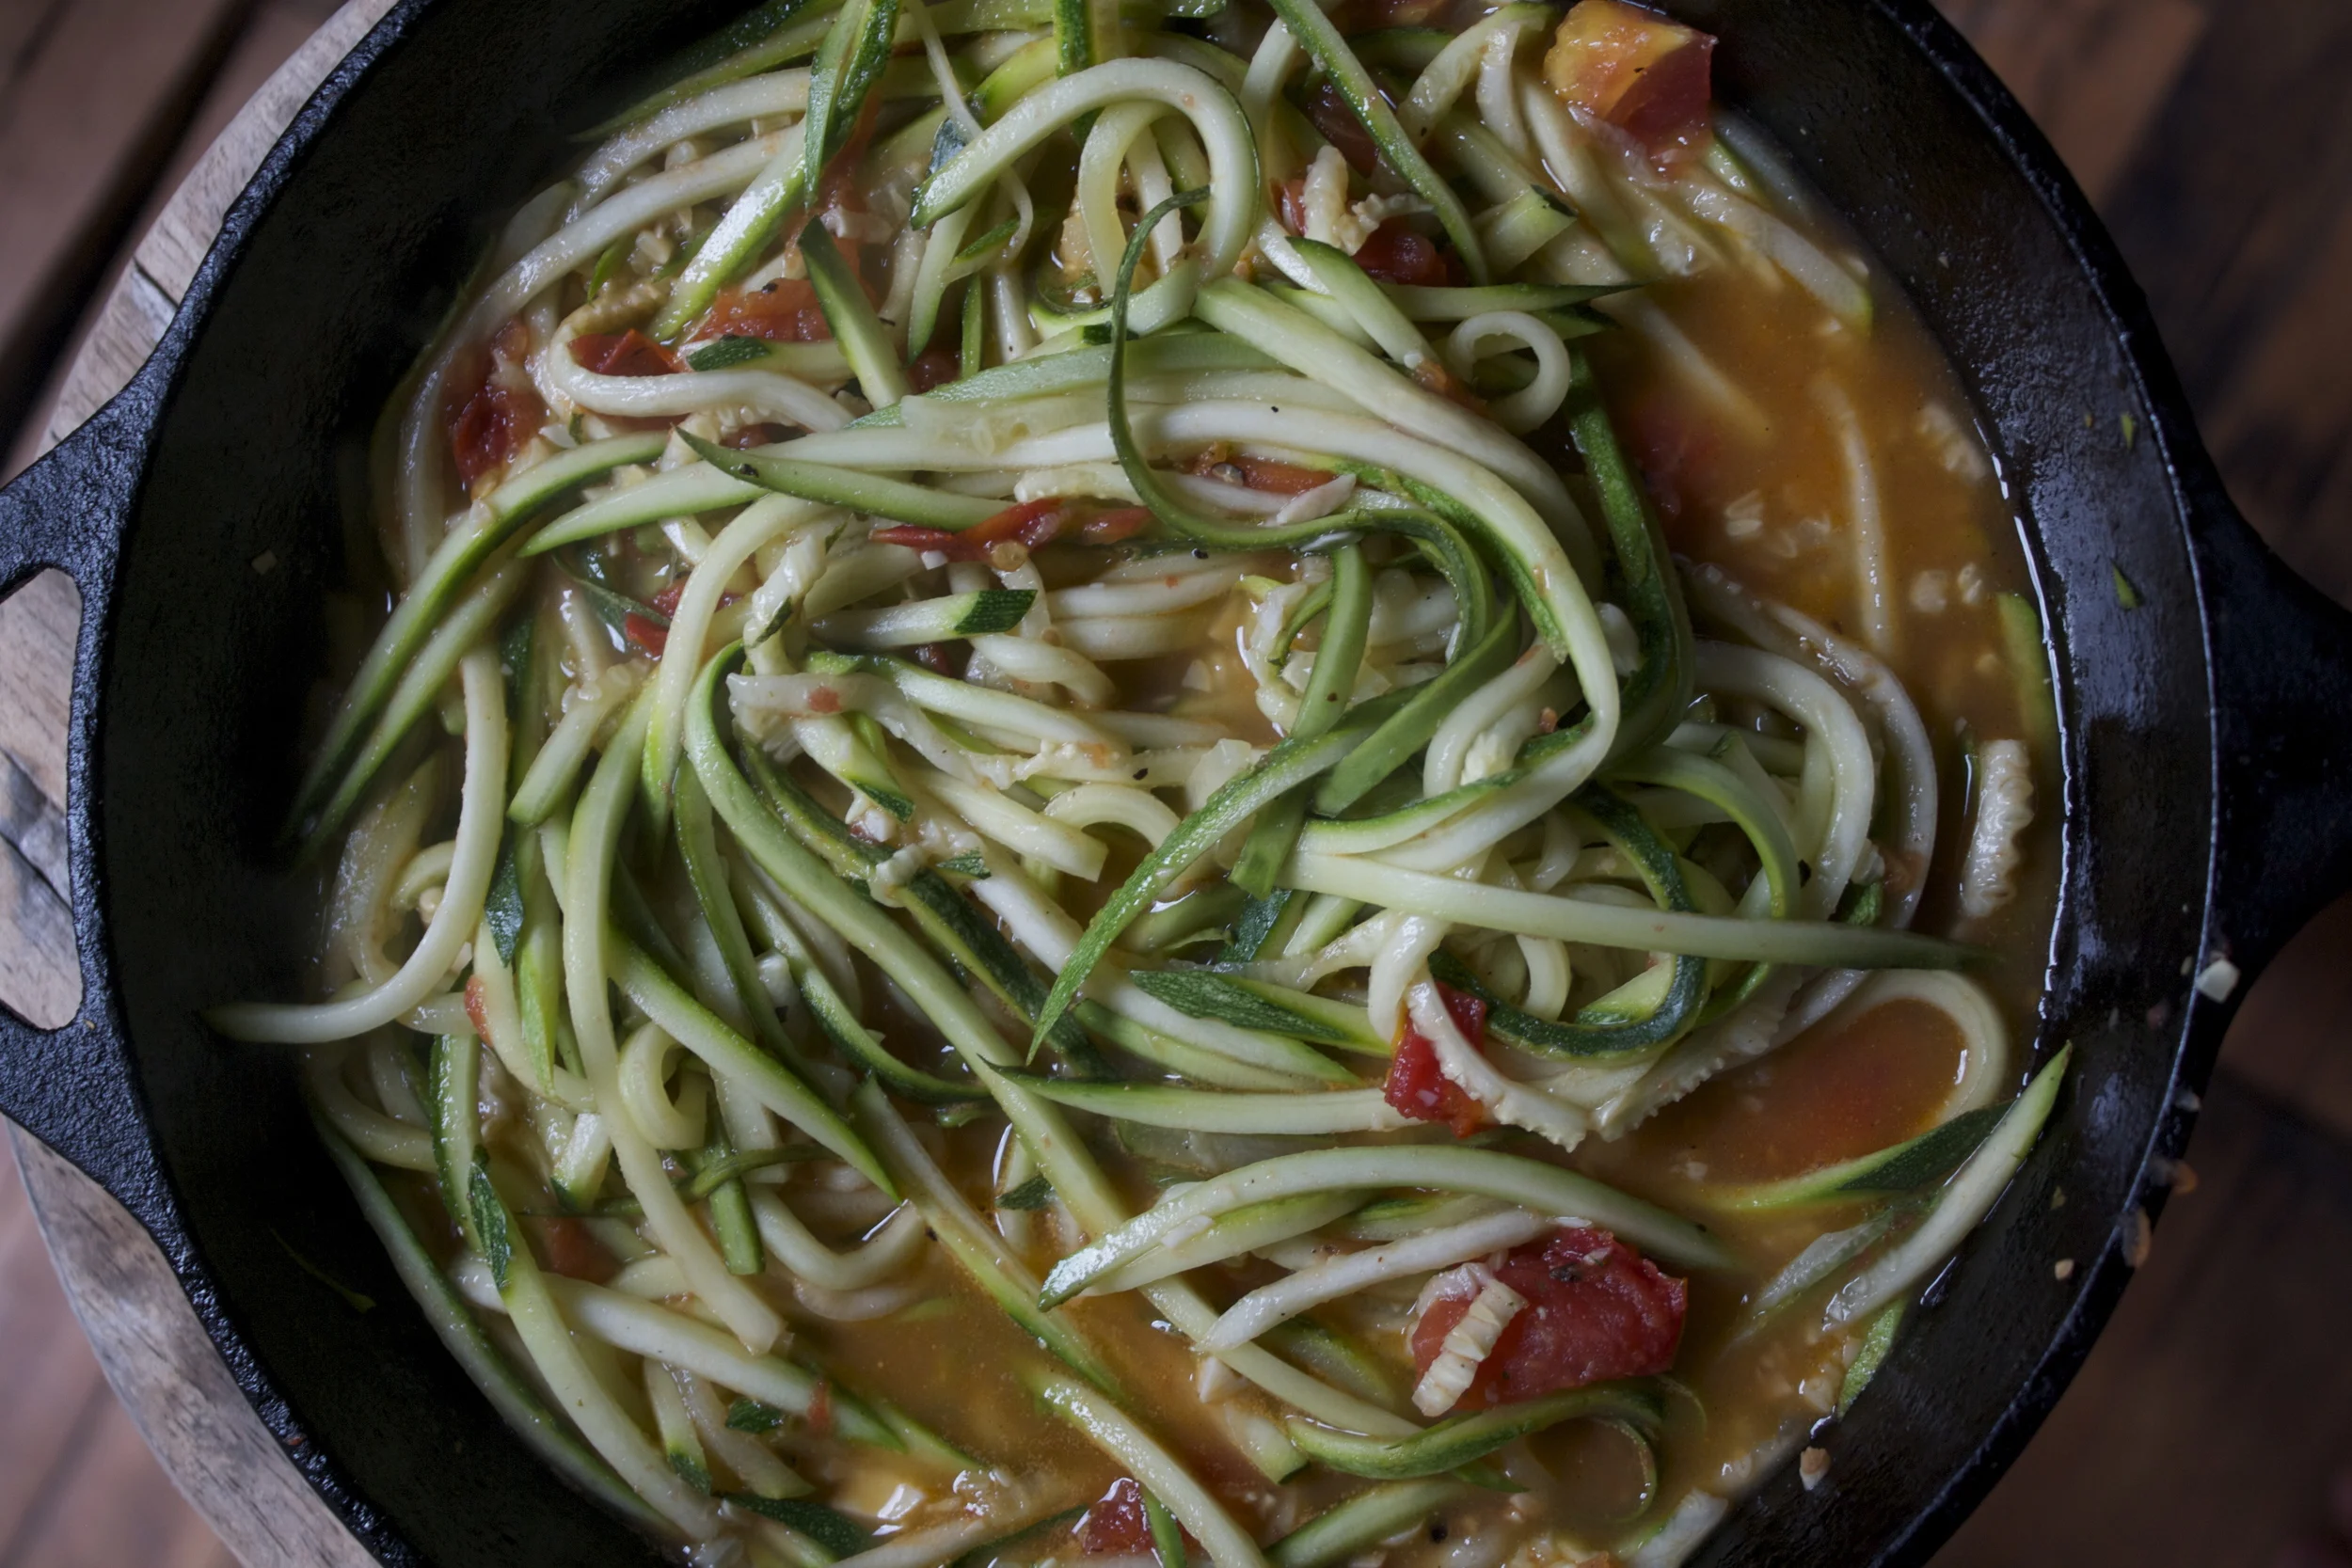
Once your happy with the doneness, remove from heat.
%u00a0Roughly chop or tear the basil into smallish pieces and toss into noodles.
And noodles be done. Now to eating.. and be sure to eat as much as you can, its only zucchini.
Have a good today!
-C
2 medium to large%u00a0medium zucchinis%u00a0
a handful of fresh basil
1 large tomato or%u00a02 handfuls of cherry tomatoes%u00a0
3-4 cloves of garlic
1 lemon
salt and%u00a0pepper
olive oil
Take zucchini and either with a veggie noodle maker, a juillene peeler, or madoline, %u00a0a box grater, or just some sweets knife skills,%u00a0make the noodles and set aside. Mince garlic and chop%u00a0the tomatoes into chunks add to a large skillet%u00a0with%u00a0a drizzle of olive oil and place on medium heat and cook until %u00a0the tomatoes are soft and the garlic is fragrant.Once that’s cooked,%u00a0place the noodles into the skillet with about 1/4 cup water and the nice of the lemon. Season to taste%u00a0%u00a0with salt and pepper. Mix noodles around and cook%u00a0until slightly tender (cook longer for a more well done noodle)%u00a0Remove from heat. Chop or rip%u00a0up your basil and toss into the noodles and mix around.
For the past few days I have heard more complaining then happy. The biggest complaint…tummy issues. A week of gorging on heavy, rich, and indulgent foods is finally catching up with people, turning them into grump asses. I can handle a little grump, but its time to get get out of that funk and take care and stop bitching. May I make a suggestion? Eat this… You will be happy. Your body will feel clean and nurised. Your tummy will get back on track. It what I call satisfaction This salad is a complete meal .Chopped and shredded veggies atop a small heap of quinoa, tossed on a handful of lentils and topped with a dollop of lime avocado… Thats it and it is good. For the sake of picture-taking, I made a plate look all nice and pretty, with layers of colors, but to be honest with you, I rather toss into a big bowl, grab a moderately large-sized fork and food to face… and it’s just as pretty.(the bowl of food is pretty, not food on my face) Quick note: the vegetables that I used here are what I had at home. If you don’t have one or two of these specific veggies, don’t worry about it. Sub in something else, like pepper or spinach., Still have extra brussel sprouts, green beans or asparagus from thanksgiving? Go ahead and use those. If there is a specific veggie you know your stomach doesn’t tolerate well, then maybe avoid using it. This is a happy feel good salad!A pile of vegetables is always a good start to any meal, especially these veggies.. All but the avocado came from my farm share. This is one local organic meal of love.
Green Kale, purple cabbage, beets, red onion, carrots…I did a little shredding and some grating. I like to have different sized and textures in a salad.
Oh whats this? Diced butternut squash(from farm) sprinkle with salt and pepper waiting to be roasted. I am a huge believer in squash on salads…especially in a cold Vermont winter. A little bit of heartiness can really go along way. Quinoa.. 1 part quinoa to 2 parts water..Bring to a boil and let simmer until light and fluffy. When I make quinoa, I always make more than is going to be eaten, its great to have pre made for any meal. Quinoa goes with everything, even a sprinkle of cinnamon and diced up apple for a nice breakfast or snack. I was making this for dinner for my mister who sometimes doesn’t tolerate so many super raw veggies. So what I did and I recommend doing if you are worried about to many raw veggies at once, is to give them a really quick vinegar braise. I throw the veggie in a pan and drizzled red wine vinegar(you can use any vinegar you like) . Stuck a top on it and stuck it on the burner for a few minutes until the vinegar was gone. It just barely softens the veggies and helps infuse the vinegar.Also a little easier for some to digest. Me, I like to eat it completely raw. Barely steamed kale, just enough to soften it. Again. raw is awesome too. Half a lime, half an avocado and a clove or two of garlic… guacamole…Call it what you will.
Salad contstruction… Quinoa. Kale. Cabbage, onion and beets. Butternut squash. Carrots. Lentils and a nice sized scoop of avocado. But like I said, Bowl…,fork….. face. Tastes just as good. A super salad, full of flavor and healthy stuff, A salad that will fill you up, leave you feeling full, not gross. and is quite the looker if you ask me.
Super Salad
1/4 cup Quinoa
1/4 roasted Butternut squash
2-3 large Kale leaves
1/2 cup shredded Red Cabbage
1/4 grated Beet
1/8 cup sliced Red onion
1/4 cup grated Carrot
1/4 prepared lentils
1/4 of an Avocado
1/2 a lime
garlic
vinegar
salt and pepper
This is the list of stuff that is in this salad. This is not a recipe that need to be exact.. Use more of something you like, omit whatever you don’t. Just keep it simple and delicious. Dice up butternut into small pieces, place on baking sheet and roast till tender. Add quinoa to water, bring to boil, then turn down to simmer tip light ad fluffy. If you want steamed kale, stick kale in pot with a i/2 inch water and lid, and place on high for about 2 minutes, just until kale ha soften. The squash is roasting,(the smaller the pieces, the faster it goes) quinoa is cooking and kale is soften,. Now grate or chop you veggies. Want them less than raw, place in pan with a bit of vinegar or just water and stick a lid on it. Medium heat for a few minutes, or until the veggies are slightly soften.. Dont over cook, you still want the veggies to have a bite and keep the good for you stuff. Take avocado, chopped garlic and half lime and mash together. Now everything is prepared and ready..Place strategically in a bowl or plate, quinoa, kale, squab, cabbage,beets, onion, carrots, lentils, avocado, drizzle with straight up vinegar.……..Or just throw it all together. Fork to FACE!!!


 Oh do I love a good Sunday. The picture above was taken last Sunday and what a glorious day that was. The mister and I took the pup hiking and it was the most spectacular of days. Sunny, 30 degrees and no wind..I could’t have asked for better weather.
  Playing on the frozen lake. It was so freaking cold and windy, but we just had to do it!
 Two of my favorite people in the world.
 And I made brunch with 2 more of my favorites.
 My little brothers (can I say little if they are bigger then me?) came over and we all had dinner together while listening to music from when they were born. Nothing like a few 17 year olds to make a person feel old.
 Blooming daffodils. I love to watch my flowers open up, it’s just as good as the flower itself.
 I figured now is a good time to get this recipe out there before we get to far into spring and summer recipes because there is going to be a lot of banana ice cream filled recipe coming and I figured its a good idea to have the basic banana ice cream recipe ready for people to refer too. And because I made so much fantastic naner ice cream, I also made a cookies and cream naner ice cream for my sisters and the mister.
 The stuff you need for this ice cream…. Nice and ripe bananas, peeled and then frozen* That’s it.
 After all blended and smooth, either eat right away or scoop ice cream into a freezer safe container and stick in freezer. That’s the banana ice cream… And it is amazing and so so so so so addictive. I make a batch, think I am only going to eat a scoop, then find myself eating half of what I have made, but it’s ok cause it’s only bananas.
  One batch of banana ice cream, either freshly made, still in food processor or made ahead and placed in a food processor and given a good pulse to smooth it up.
 Now you have cookies and cream naner ice cream…. and everybody is happy.
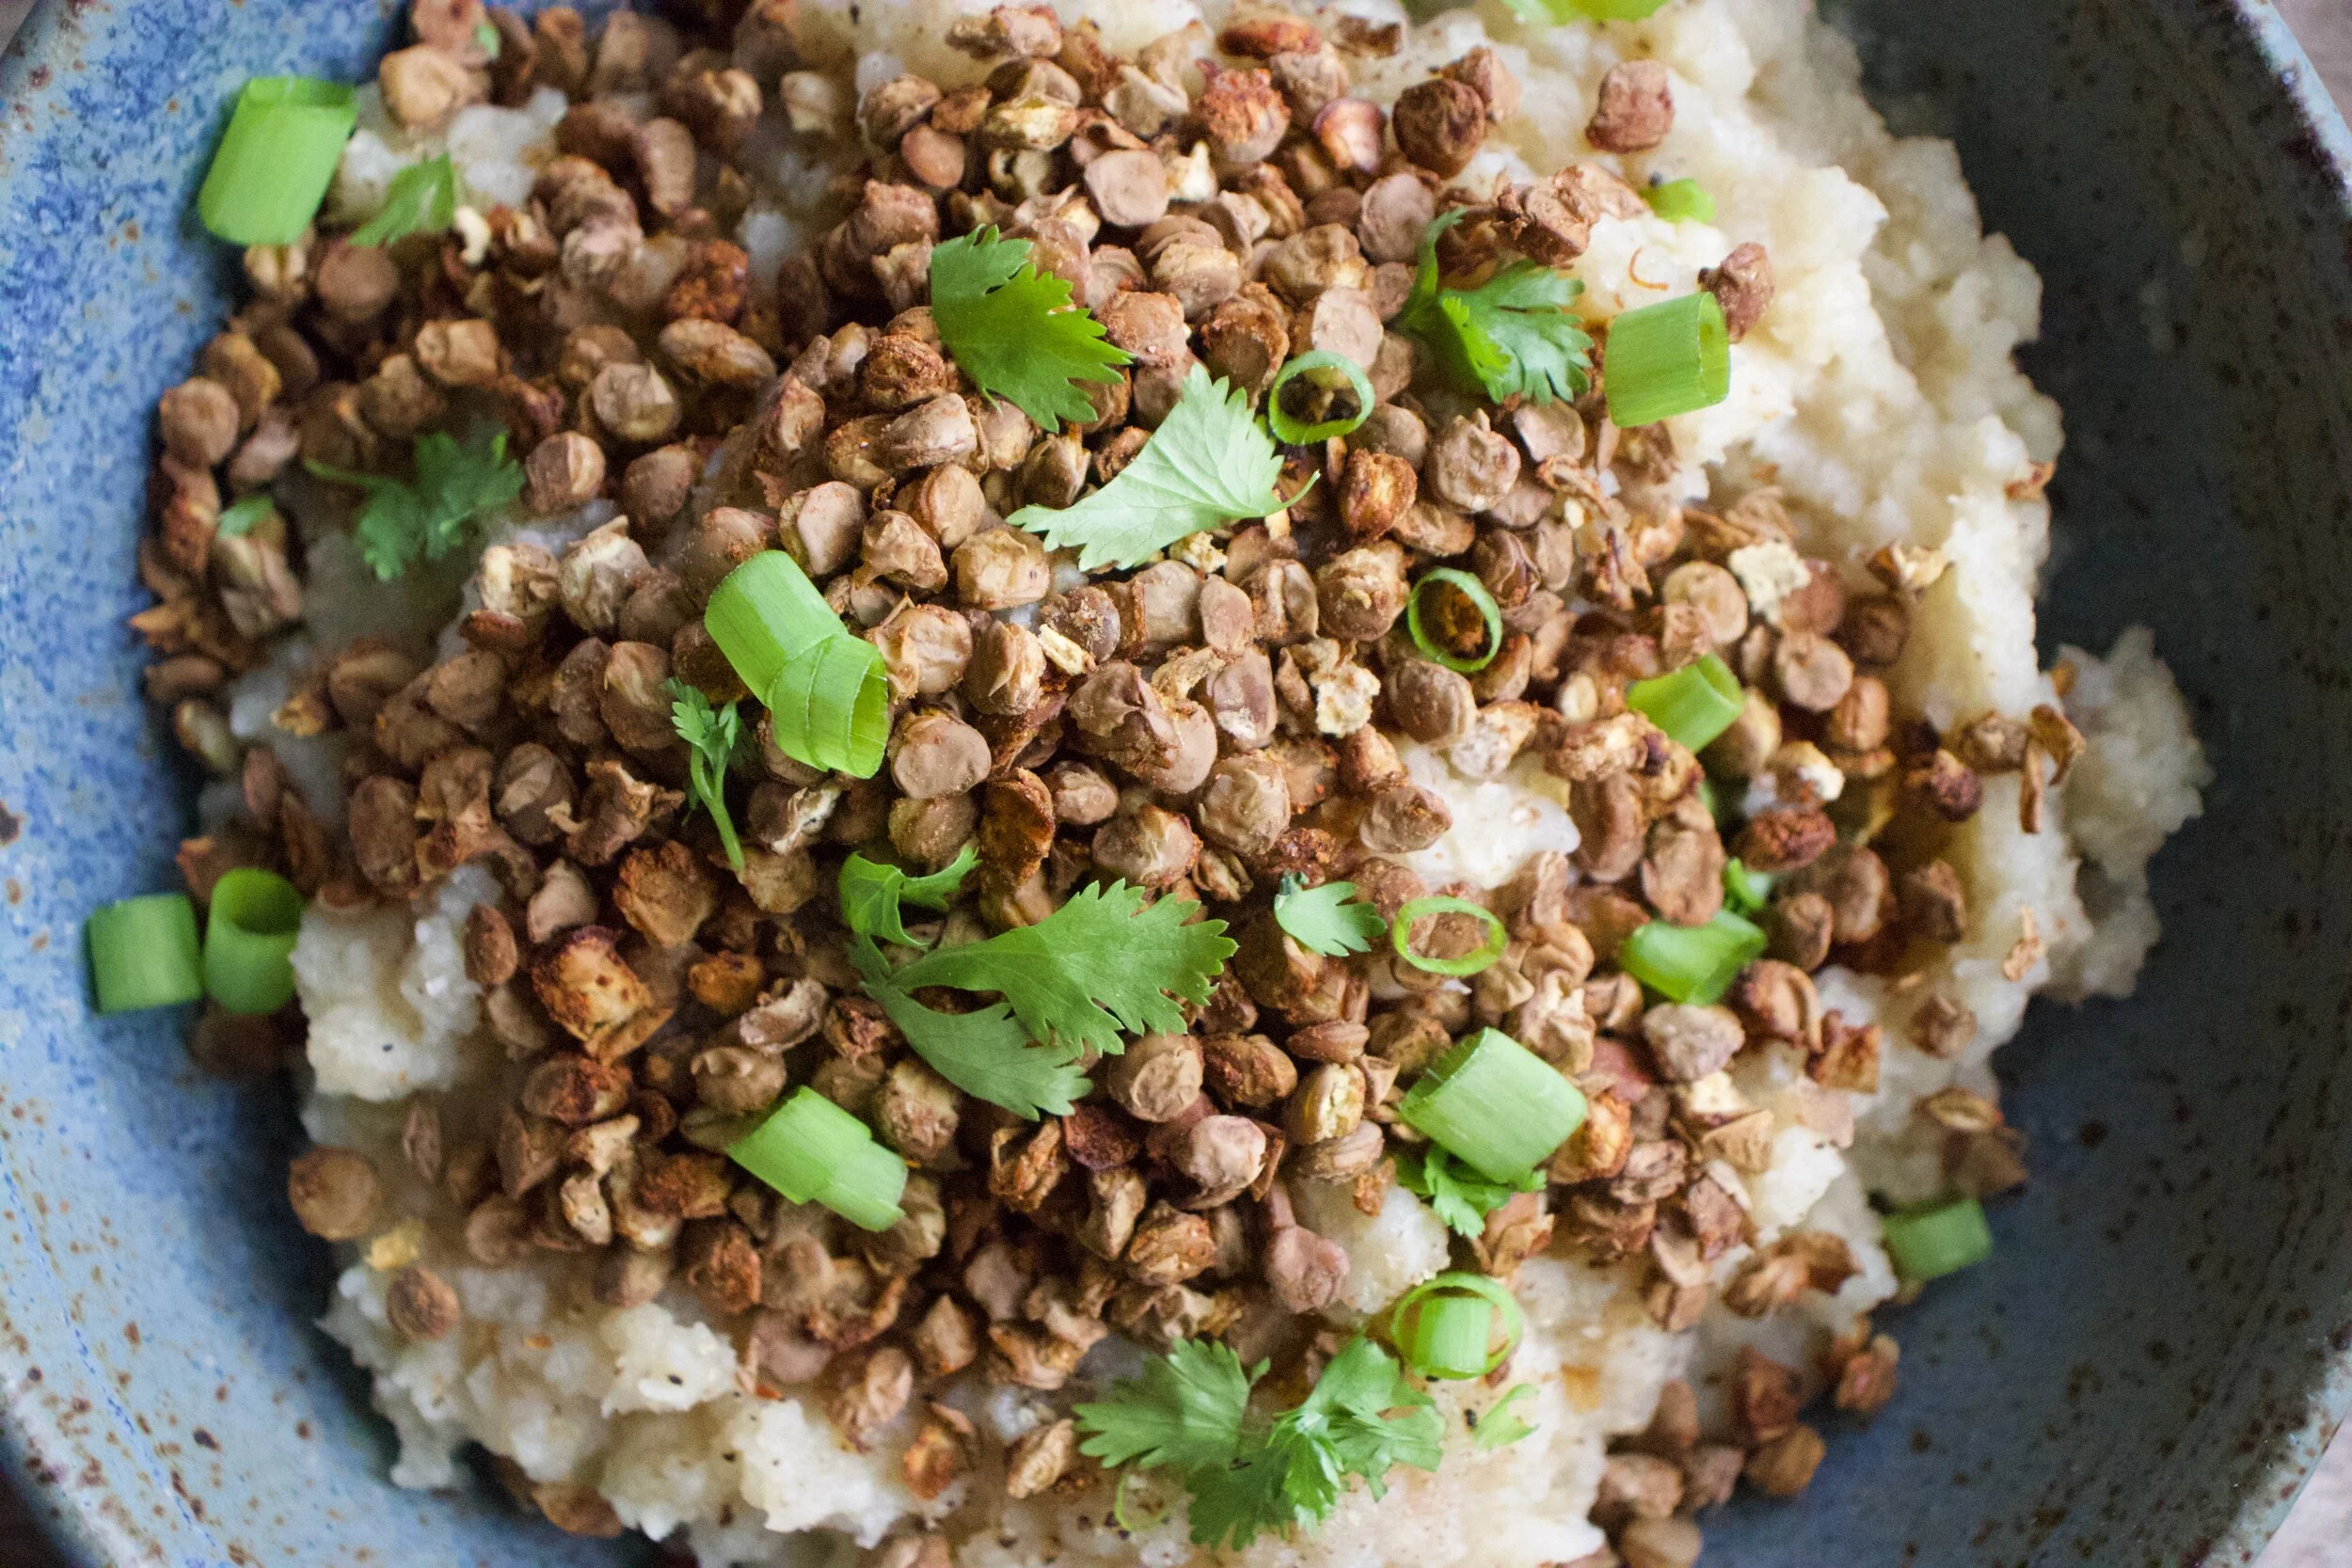


 For the past few days I have heard more complaining then happy. The biggest complaint…tummy issues. A week of gorging on heavy, rich, and indulgent foods is finally catching up with people, turning them into grump asses. I can handle a little grump, but its time to get get out of that funk and take care and stop bitching. May I make a suggestion? Eat this… You will be happy. Your body will feel clean and nurised. Your tummy will get back on track. It what I call satisfaction This salad is a complete meal .Chopped and shredded veggies atop a small heap of quinoa, tossed on a handful of lentils and topped with a dollop of lime avocado… Thats it and it is good. For the sake of picture-taking, I made a plate look all nice and pretty, with layers of colors, but to be honest with you, I rather toss into a big bowl, grab a moderately large-sized fork and food to face… and it’s just as pretty.(the bowl of food is pretty, not food on my face) Quick note: the vegetables that I used here are what I had at home. If you don’t have one or two of these specific veggies, don’t worry about it. Sub in something else, like pepper or spinach., Still have extra brussel sprouts, green beans or asparagus from thanksgiving? Go ahead and use those. If there is a specific veggie you know your stomach doesn’t tolerate well, then maybe avoid using it. This is a happy feel good salad!
 A pile of vegetables is always a good start to any meal, especially these veggies.. All but the avocado came from my farm share. This is one local organic meal of love.
 Green Kale, purple cabbage, beets, red onion, carrots…I did a little shredding and some grating. I like to have different sized and textures in a salad.
 Quinoa.. 1 part quinoa to 2 parts water..Bring to a boil and let simmer until light and fluffy. When I make quinoa, I always make more than is going to be eaten, its great to have pre made for any meal. Quinoa goes with everything, even a sprinkle of cinnamon and diced up apple for a nice breakfast or snack.
 Barely steamed kale, just enough to soften it. Again. raw is awesome too.
  Half a lime, half an avocado and a clove or two of garlic… guacamole…Call it what you will.
THE LOVELY CRAZY
October 18, 2019 by maximios • Blog
Easy quick dinners are no joke because sometimes life happens and then you are hungry, then hangry, %u00a0then maybe yelling and or tears start and nothing is ever going to be good again. And then you eat and everything is A OK, but that time between tears and food can be long, especially when you just can’t think so one should have a least a good 2 or 3 good dinners up there sleeve (besides pasta) that can be made quick and easily to avoid the fallout of food deprivation.%u00a0This bowl of goodness here is one of those. And sure some people might not always have a sweet potato,%u00a0tahini, or chickpeas is the house %u00a0(I ALWAYS have a sweet potato or some type of winter squash and tahini and chickpeas…%u00a0they are staples here)%u00a0but with a tiny it of foresight, you can make these things happen too. And then you will make it and realize that you must have these ingredients on hand at all times because yeah, a good go to meal that will prevent the tears.
Admittedly I have made this for the mr but he is not that into it. Says he is not a huge fan of sweet potatoes. (what the fuck is wrong with him?) But me, I eat is and I eat it all.. The sweet potato/chickpea/tahini combination is classic fantastic. This hash is sweet potato sweet, a little chickpea crunchy, salty, savory,%u00a0and creamy citrusy. %u00a0It’s all sorts of goodness. I tossed this hash on a big bed of kale (any sturdy green would be good) and only good things happen in my mouth. So the mr.%u00a0might not like it but I am starting to realize (after 15 years) that my taste is far superior to his. Haha. (but really) %u00a0Quick and easy (and healthy) and good. %u00a0Make it once and it will turn into on of your go to dinners, unless you don’t like sweet potatoes. In that case there is pasta.%u00a0
The stuff. Chick peas (I had just made a batch but if you don’t have any made already, grab a can) a sweet potato, an onion, a lemon, some tahini, and garlic Also some cumin and chili powder, olive oil, and salt and pepper.%u00a0
Preheat your oven and chop up the onion and sweet potato into mouth sized pieces.%u00a0
Toss the chopped stuff onto a baking sheet with the chickpeas.
Drizzle the whole shebang with olive oil and toss with cumin, chili powder, and salt and pepper. %u00a0
Into the oven it goes.
Half hour later it is all roasted and ready.
Oh quick, make this before the stuff is out of the oven. Tahini, minced garlic, a dash of salt, a bit of the liquid from the chickpeas and the juice of a lemon. Just stick it all in a cup or bowl and mix it around. Then it’s done.
Scoop the hash into a bowl (I like a large pile of greens underneath) and cover with the tahini sauce.%u00a0
Eat is all to your face.
-C
dinner for one, a side for two.%u00a0Very easily doubled or tripled.%u00a0
Preheat oven to 425
Chop sweet potato and onion into mouth sized cubes and place on a baking sheet. Add the drained chickpeas and drizzle with olive oil and toss around. Sprinkle on the cumin, chili powder,%u00a0salt and pepper, and toss that around again. When the oven is preheated, slide the baking sheet on in.%u00a0
While the stuff is baking, mince the garlic and place it in a bowl with the tahini, the juice of a lemon, and a pinch or two of salt to taste. Add in 1/4 cup of aquafaba and mix it all around.%u00a0If to thick for your liking, add a little more of the aqaufaba until its a good consistency.%u00a0
Check the stuff in the oven after 20 minutes and give it a toss.%u00a0%u00a0Keep baking for another 5-10 minutes or until the sweet potato is cooked and starting to brown. Remove from oven and dump into a bowl (maybe on a bed of greens or rice) and drizzle all over with the tahini sauce.
Eat