
Bits of Happy — The Lovely Crazy
What the …….! . Is it really Christmas this week? I don’t know where the time went. and I am feeling a bit of the holiday pressure. Every year I tell myself that I won’t give in…I have nothing to stress about. Guess what, I am just at tiny bit stressed..But thats cool. I might feel the pressure, I might feel a little agitated or like someone close to me is going to end up getting punched( sorry if its you). but I aways try to stop and take in the little stuff, take in the happy.. This is why I started my bits of happy post every week. It’s a way to wrap up the week and a way to remember how awesome my life is and the little things that make me happy. Wow.. maybe my next career move will be a motivational speaker. That or a window washer…. You get to look through windows without seeming like a creeper. And you know when you breathe on a window and use your finger to draw something, then it goes away but you can see it when later when there is more condensation? I would draw pictures and leave weird words on people’s windows……that would be amazing…..Anyways…….
 Sylus…the house dinosaur. He has been chillin under the christmas tree as of late. I think he is drinking the water cause it always seems empty..
 Catching the ice crystals before the sun melts them away.
 Early morning hike with my favorite people in the world…. and the trash dog. Yes, he has found some stink on the trail and is rolling around in it. Thats’ my pup.
 I finally finished this sweater! It came out so good! I made it to big so it actually is a sweater dress for now(which is amazing) and she will grow into it to wear as a sweater. I am pretty proud of myself for this one!
 A pizza, cookie, and christmas movie party!!!!! We watched the Polar Express and trashed my tiny house. Good times!
 A surprise purple potato.
 This Yule log.…I sent a pic to my Dad and he asked if it was a real piece of wood. That’s a success right? Or does it mean that my Dad needs to get his eyes checked? ‘
 We got to keep this one for a couple days this week. Do I need to explain why this make me happy?
 I mean…. for real…..she is too much. Sometime I think I don’t want to have my own kids cause I am afraid I might not love them as much as this little.
 I like to eat large quantities of green stuff……This stainer is full of lovely greens from my farm share. All for me! With shredded carrots, shredded roasted beets and a big scoop of lentils……Meal of my heart.
HAPPY HOLIDAYS AND HAVE A FANTASTIC WEEK!
P.S.. remember not to stress too much and try to find the happy and pretty in everyday. And don’t just eat a bunch of crap…eat some freaking veggies too! (See, I am motivational)
 Those are some for real chocolate chip cookies…….for real.
 As usual, I forgot an ingredient in the line up…the chocolate chips, oh and the pinch of salt.. But rest assure, even though not pictured, there are indeed chocolate chips in these cookies!

 When everything is mixed, add the dry ingredients and mix that until fully incorpaerterd….
 Now for the chocolate chips. I use only 1 1/2 cups of chocolate chips… You want just enough in each cookie, but don’t want to overwhelm it with too much chocolate. The cookie is as much of the star as the chocolate.
  See how may cookie sheet is nice and silver and clean? For a long time I used a very dirty and dark baking sheet. I would make cookies and they always seem to come out slightly burnt. Got myself a new baking sheet and……perfect cookies. If your baking sheet is dark, I would recommend using parchment paper.
 Lovely right…


 FA LA LA LA LA….. LA LA LA LA….Happy eve of Christmas! What better way to celebrate the holidays than with the sweet and spicy flavor of ginger…in donut form! There is nothing better.
 I am really excited to finally share a donut recipe with you all. I haven’t made a batch yet that hasn’t won a round of applause or at least a super double thumbs up. If you haven’t made donuts yet, bookmark this recipe and make it priority for your next baking adventure
 The spiced mixed in to the dry….I used fresh and powered ginger but if you don’t have any fresh.. just add more powdered…but fresh adds that extra bit of gingery spiciness.
 The wet ingredients all mix together. Molasses first, then the butter, vanilla, and the brown sugar, mix that then add the egg and the milk last.(avoid adding egg and melted butter together so it doesnt scramble) Mix wet mixture with the dry until fully incorporated and smooth.
 Out of the oven and turned onto a cooling rack…This beauties smell so very nice.
 While the donuts are cooling, prepare the icing. Mix 1/4 cup of cream cheese with 1/2 cup of sifted powdered sugar. Half of a lemons worth of juice with a teaspoon of lemon zest and mix… add a splash or two of milk to get the desired consistency(this is a cream cheese glaze, it won’t harden like a sugar glaze)
 When the donuts are full cooled, dip into glaze….
 Just look at these. And for real, they really don’t take much time. You could totally whip these up in less than 30 minutes.. just make sure to have someone else do all the dishes!!!
 This is an amazing book, full of pictures and information about 123 different varieties of apples….I am so excited to read it! My love got it for me for Christmas….So nice, so sweet.
  Its been a weird weather week..warm and gray.. This touch of blue really stood out.
 I found my favorite rag wool socks (Hooray!!!!).. and wore them all week.(don’t judge)
 Ice Skating!!! One of my nephews was born on Christmas so we always do a skating party at the ice rink on Christmas eve……….another of my favorite family traditions…Always a super blast. Here my sister and nick were giving this little her first ever skating lessons. All I can say is good thing she was wearing a helmet.
 Another gift from the mister…a weck juice jar……If you know me or are getting to know me, you will know that I am jar obsessed and weck jars are some of my favorite. I eat, drink, store everything in jars. This beauty is destined for tea and or coffee.
 I am not saying this because he is my lover, but Nick is an amazing artist. He has really gotten into using spray paint and has been doing some really awesome large scale images(nothing illegal…….yet!!) He did this whale a few days ago.. I am always blown away at he talent.
 Popcorn drizzled in melted peanut butter….. WHOA!!!!! I also like to add garlic salt and chunks of fresh apple. It is the best most fantastic movie snack ever………Maybe I’ll share with you sometime.
 An early morning walk with the pup to the waterfront…We watched the sun come up…I am so lucky to live in such a beautiful place.
 I needed something quick, something everyone would like and I needed it to come from food I had in the house……Pretzels, peanut butter and chocolate chips turned into little nutty nuggets. A last minute christmas treat. I have stumbled apron something that I am sure to make many more times to come. People were really into them and for real, so easy and took so little time to make.. Fast, happy, peanut butter and pretzels dipped in chocolate, I mean, do you know anyone that would say no to that? And just because I made them for Christmas does not mean that we cannot make these for any occasion, like New Years, maybe a birthday party or even laundry day. You can even make these as a fun afternoon activity with the kiddos.…Make them whenever you need a fun little treat! Note….This is one of those treats that is vegan, gluten-free (just get gluten-free pretzels) and doesn’t have a ton of sugar..Eveyone can eat them! Hooray!!!!!! (Maybe don’t feed them to a child with a peanut allergy)
 Simple as this….Half a bag of pretzel rods(any shape would work)… A big scoop of peanut butter and some chocolate chips…
 Pretzels go into the food processor and pulsed until a mostly fine crumbly crumble. Now in goes the big ol scoop of peanut butter. Pulse until mixture comes together
 Go ahead and take a bite……so good right?..Start turning the mixtures into small balls..think grape sized.
 Once the mixture is all rolled out, stick into the fridge or freezer for a little about a 1/2 hour to set up.
 Right before you take the balls out of the fridge…melt down the chocolate. Like my make shift double boiler? I know….jealous. If you have one, use it, but if not, a big pot with water and a smaller thin metal or a glass bowl works.. The pot or bowl should fit onto the big pot, but I was having a hard time and couldn’t find any of my bowls…..so i did what I could. Bring water to a boil then turn to simmer. Place chocolate in small bowl on big pot and stir until chocolate is melted, silky and smooth. Remove bowl from boiler and start to dip those balls! Reheat chocolate if needed but be careful to not get any water into chocolate or else it will seize up and you won’t be able to melt it anymore.
 Drop a few balls into the melted chocolate. I was doing 2-3 at a time. Take a spoon or spatula and gently roll or coat entire nugget. Remove and place on a parchment lined baking sheet.
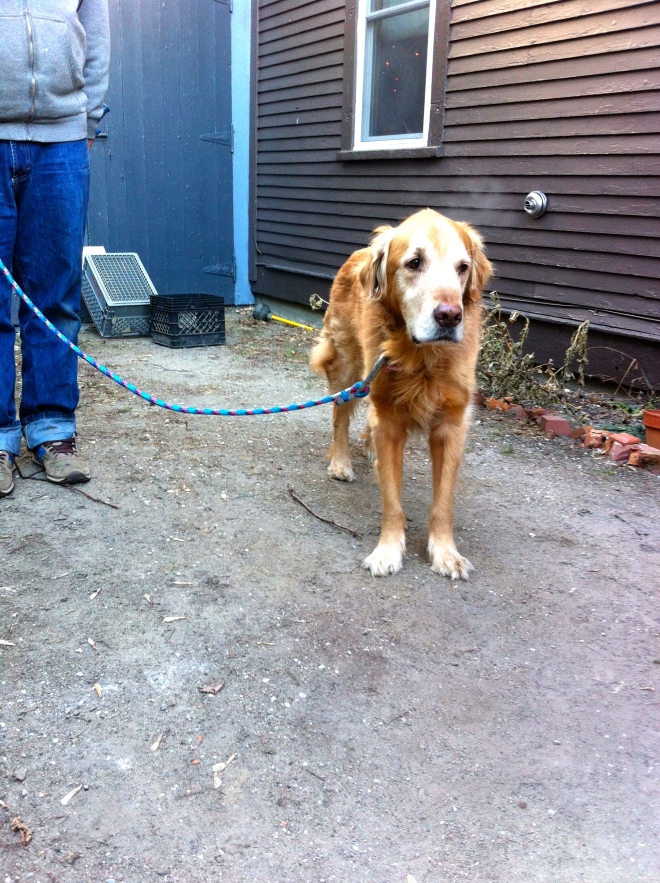 Look at that old man face…. how can anyone stay mad at him? (there was a recent incident involving bananas, you can read about it in the last post.)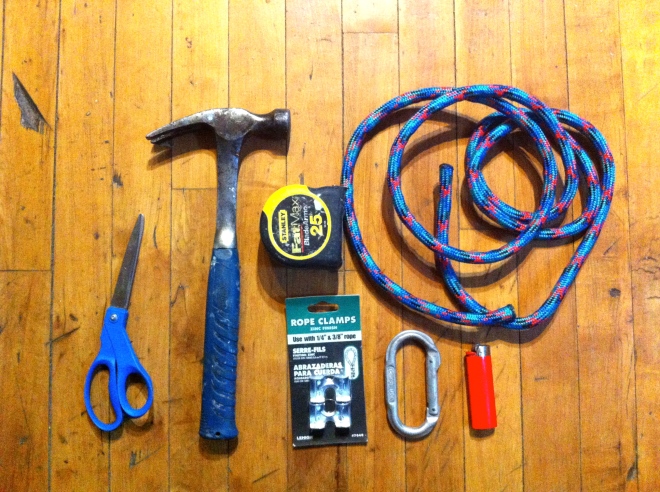
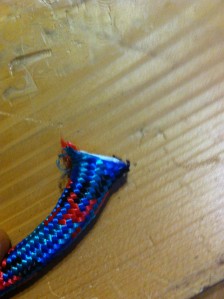
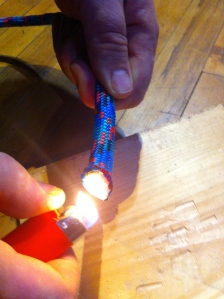

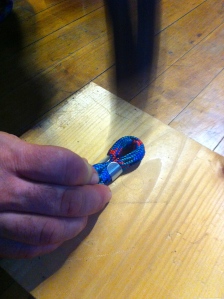

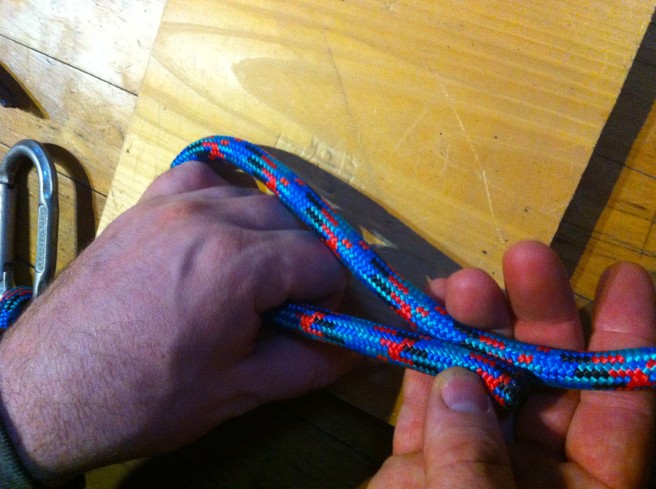 For the handle, make a large loop, whatever size that works for you, and do the same hammer clamp situation on the ends here.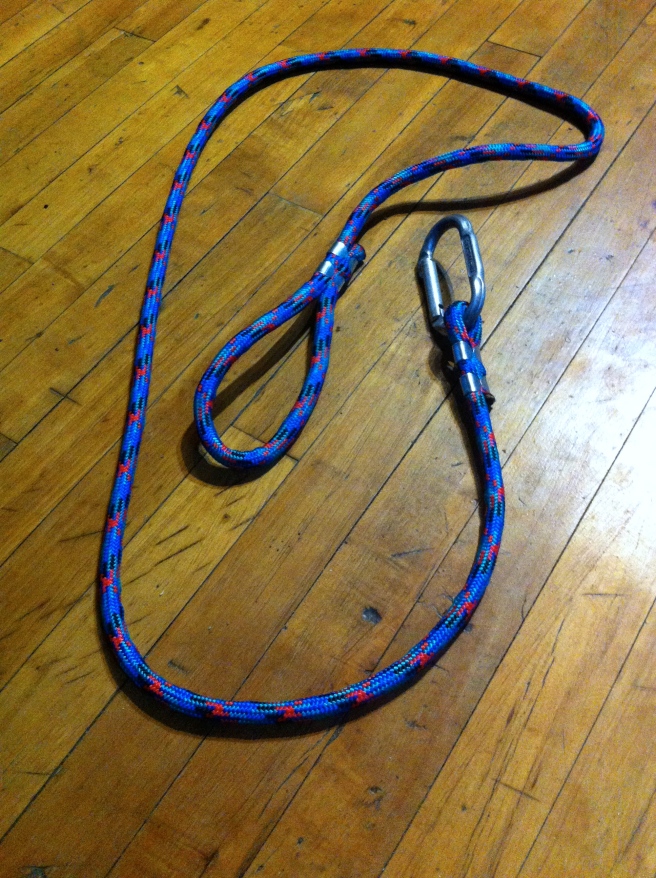
 New and old. Hopefully he won’t pee on this one for a while.
 Lets kick the weekend off right, with a nice warm and hardy salad. Not a frilly little salad, but a salad that fills you up and leaves you feeling warm and cozy. A salad with a lot of squash! So here’s the thing, I eat a lot of winter squash, maybe 4 plus a week. Because I eat so many, I store a good amount in a cold storage area outside of the little warm living space we call home. Last week we had a drastic temperature change and a good few of the my butternut and spaghetti squash froze.. then started to de-thaw. Not good. That was the second bad food experience of the day….. Earlier that day I had bought about 2 dozen super ripe bananas that I had been planing on freezing and what not. There were four bunches and each bunch was wrapped in plastic and were in a bag that I left near the back door. The thought crossed my mind, but I hastily brushed it away. Washer won’t eat those….. Well guess what? The shit ate half of my freaking bananas…plastic and all. Needless to say, I was kind of pissed already so finding my squash on the way out really set me off. I was not about to let more food go to waste.(or be eaten by the dog) I went into rescue mode..Chop chop and dice…boil, roast and steam…and eat eat eat…. and eat. I have been eating butternut for breakfast, lunch and dinner for the past week and that’s ok with me cause man it does taste oh so tasty. But for some people in my life, eating mashed squash out of a jar all day long does not hold the same appeal so I have been sneaking it in where ere I can.
  Easy peasy….
 Diced butternut and a mediumly sliced onion..(mediumly is a new cooking term) Spritz a bit of oil in a pan and toss the squash and onion in there and sprinkle with salt and pepper. Shove into the hot oven and roast until squash and onion are tender and tasty.

 Plate it and eat eat… I drizzled a little balsamic vinegar on mine…Nick like his straight up. Do what you will cause either way, it’s going to be awesome!!!!
 Holy crappers…2015….HAPPY NEW YEAR!!!! January 1st and people everywhere are making resolutions…. stop doing this or start doing that and blah blah blah.…Like right now, I am watching the news and the main theme of the morning is weight loss. I don’t want to hear it, I just wanted to know about the guy who robbed all the Walgreens in the area (I think I might know him) Anyway, I don’t think its a bad thing to want to make a change or two, I just don’t like the all of a sudden pressure and don’t want to be smacked in the face with it for the next few weeks or until we start thinking about the next holiday(think its Valentines Day). With all of that being said, yeah, there are a lot of things that I want to do this year, or maybe stop doing, but I am not going to try to change a bunch of things in one fail swoop. Instead I am going to take today(maybe even rest of the week) as a quite day and keep to myself. (trust me..I need it) I will most likely make a little list( I make list all year long) and try to remember to start keeping track of all my money transactions.(I never do). Little steps. But to be honest, today I am not trying to accomplish much other than cleaning the bathroom and maybe make a loaf of bread.
Bits of Happy — The Lovely Crazy
October 13, 2020 by maximios • Blog
First week of the New Year.. and I am ready to take this year and ride it like a bull.(I don’t know exactly what that mean, but it sounds right) I am not a new years resolution kind of gal, but I am a goal oriented person and this week I have been thinking a lot about my goals and wishes for life…. and I am on my way..Nothing is going to stop me!(unless I end up getting arrested, but that is not a goal) Anyway, as always, the mister and I spent a good chunk of time with the family. Everyone’s kids have had the past two weeks off and I think all of my sisters are about to kill a small child(possibly one of their own), so we tried to help out as much as we could.I mean, I am even happy that the kids all go back to school tomorrow. But it was a good week, we went to a bouncy castle birthday party (I didn’t get to bounce..so sad) and made balloon animals(well sort of. Nick knows how to do a few, I know how to make a snake and inappropriate jokes.) I got to bake a lot and test out a few new food recipes(tasty things to come!) Its been pretty freaking cold so we spent more time then usual indoors which meant I got to read a lot. We even cleaned out the basement and made it more human friendly..and didn’t kill each other doing it! All in all, not a bad start to the new year. Here are some happy highlights.
So yeah, the little bits.
Hope You all had a great week and are staying warm and cozy!
-C