I know that it it spring, but I still have a winter farm share for another month and will be cooking and eating roots and squash until the summer share starts in early June. And I am good with that cause I love me some root veggies and butternut squash. But, yes, it is spring and my body isn’t craving the super hearty, rich foods that it was just a few short weeks ago (more like last week) When the temperatures first start to go up, I usually want my food to not feel as heavy or my spices to be quite at warming (I am still all over curries and hot hot hot sauces in the summer). It’s like I have said before, I tend to change up my spices with the seasons.
So to give a lighter feel to a heartier squash, I busted out one of my favorite spices, the oh so lovely tarragon. It has a sweet, light, fruity and floral taste that pairs beautifully with the squash and onions. It give the dish a nice spring like flavor that will leave you feeling satisfied without wanting to move directly onto the couch and hide under a blanket. This is a eat and ride you bike kind of dish ( you don’t actually have to go for a bike ride if you don’t want to)
Note. If I had a grill, I would definitely cook this dish on it. As of now, I don’t own one so I am left to cook on the stove. But by all means, if you have a grill, do it up!
Half of a medium sized butternut squash (or use a whole one.. I had a half in the fridge that was waiting to be cooked) and one whole onion (two if you use a whole squash) Apple cider vinegar, olive oil, salt , pepper, garlic powder, and, last but not least, the oh so fragrant and tasty, tarragon.
Chop the onion and the squash into big chunks. If you don’t like the skin of the squash, you can peel it, but I like it so I don’t peel. Drizzle olive oil in a pan or a baking sheet, toss the veggies in and add the garlic powder, tarragon, salt and pepper and a few splashes of apple cider vinegar. Toss around. Stick into oven at 425 degrees for about 30-40 minutes. When the squash is tender and the onions are cooked, remove from oven.
I am pretty sure you can figure out the rest.
Happy day!
-C
Tarragon Butternut and Onions
Half of Medium Butternut Squash
1 Large Onion
1 Tablespoon Dried Tarragon (use fresh if you have it.. 2 tablespoons)
2 Tablespoons Apple Cider Vinegar
1 Teaspoon Garlic Powder
Salt ans Pepper
Olive Oil
Chop squash and onions into similar size pieces. Toss in a skillet or on a oiled baking sheet and add the rest of the ingredients. Toss around and place into a 425 degree oven for about 30-40 minutes or until squash is fork tender.
Remove from oven and eat.
Make as a side dish or add to a salad. Eat as a light lunch, or a midnight snack… eat it however you want.
Not only is it the first week of summer, it’s also popsicle week! Billy over at the sweet ass blog Wit and Vinegar hosts a little (actually quite large) bloggers party that share all sorts of fun and fantastic popsicle recipes and presents that list to the world. There are popsicle flavors up the wazoo…Pretty stinkin cool right.
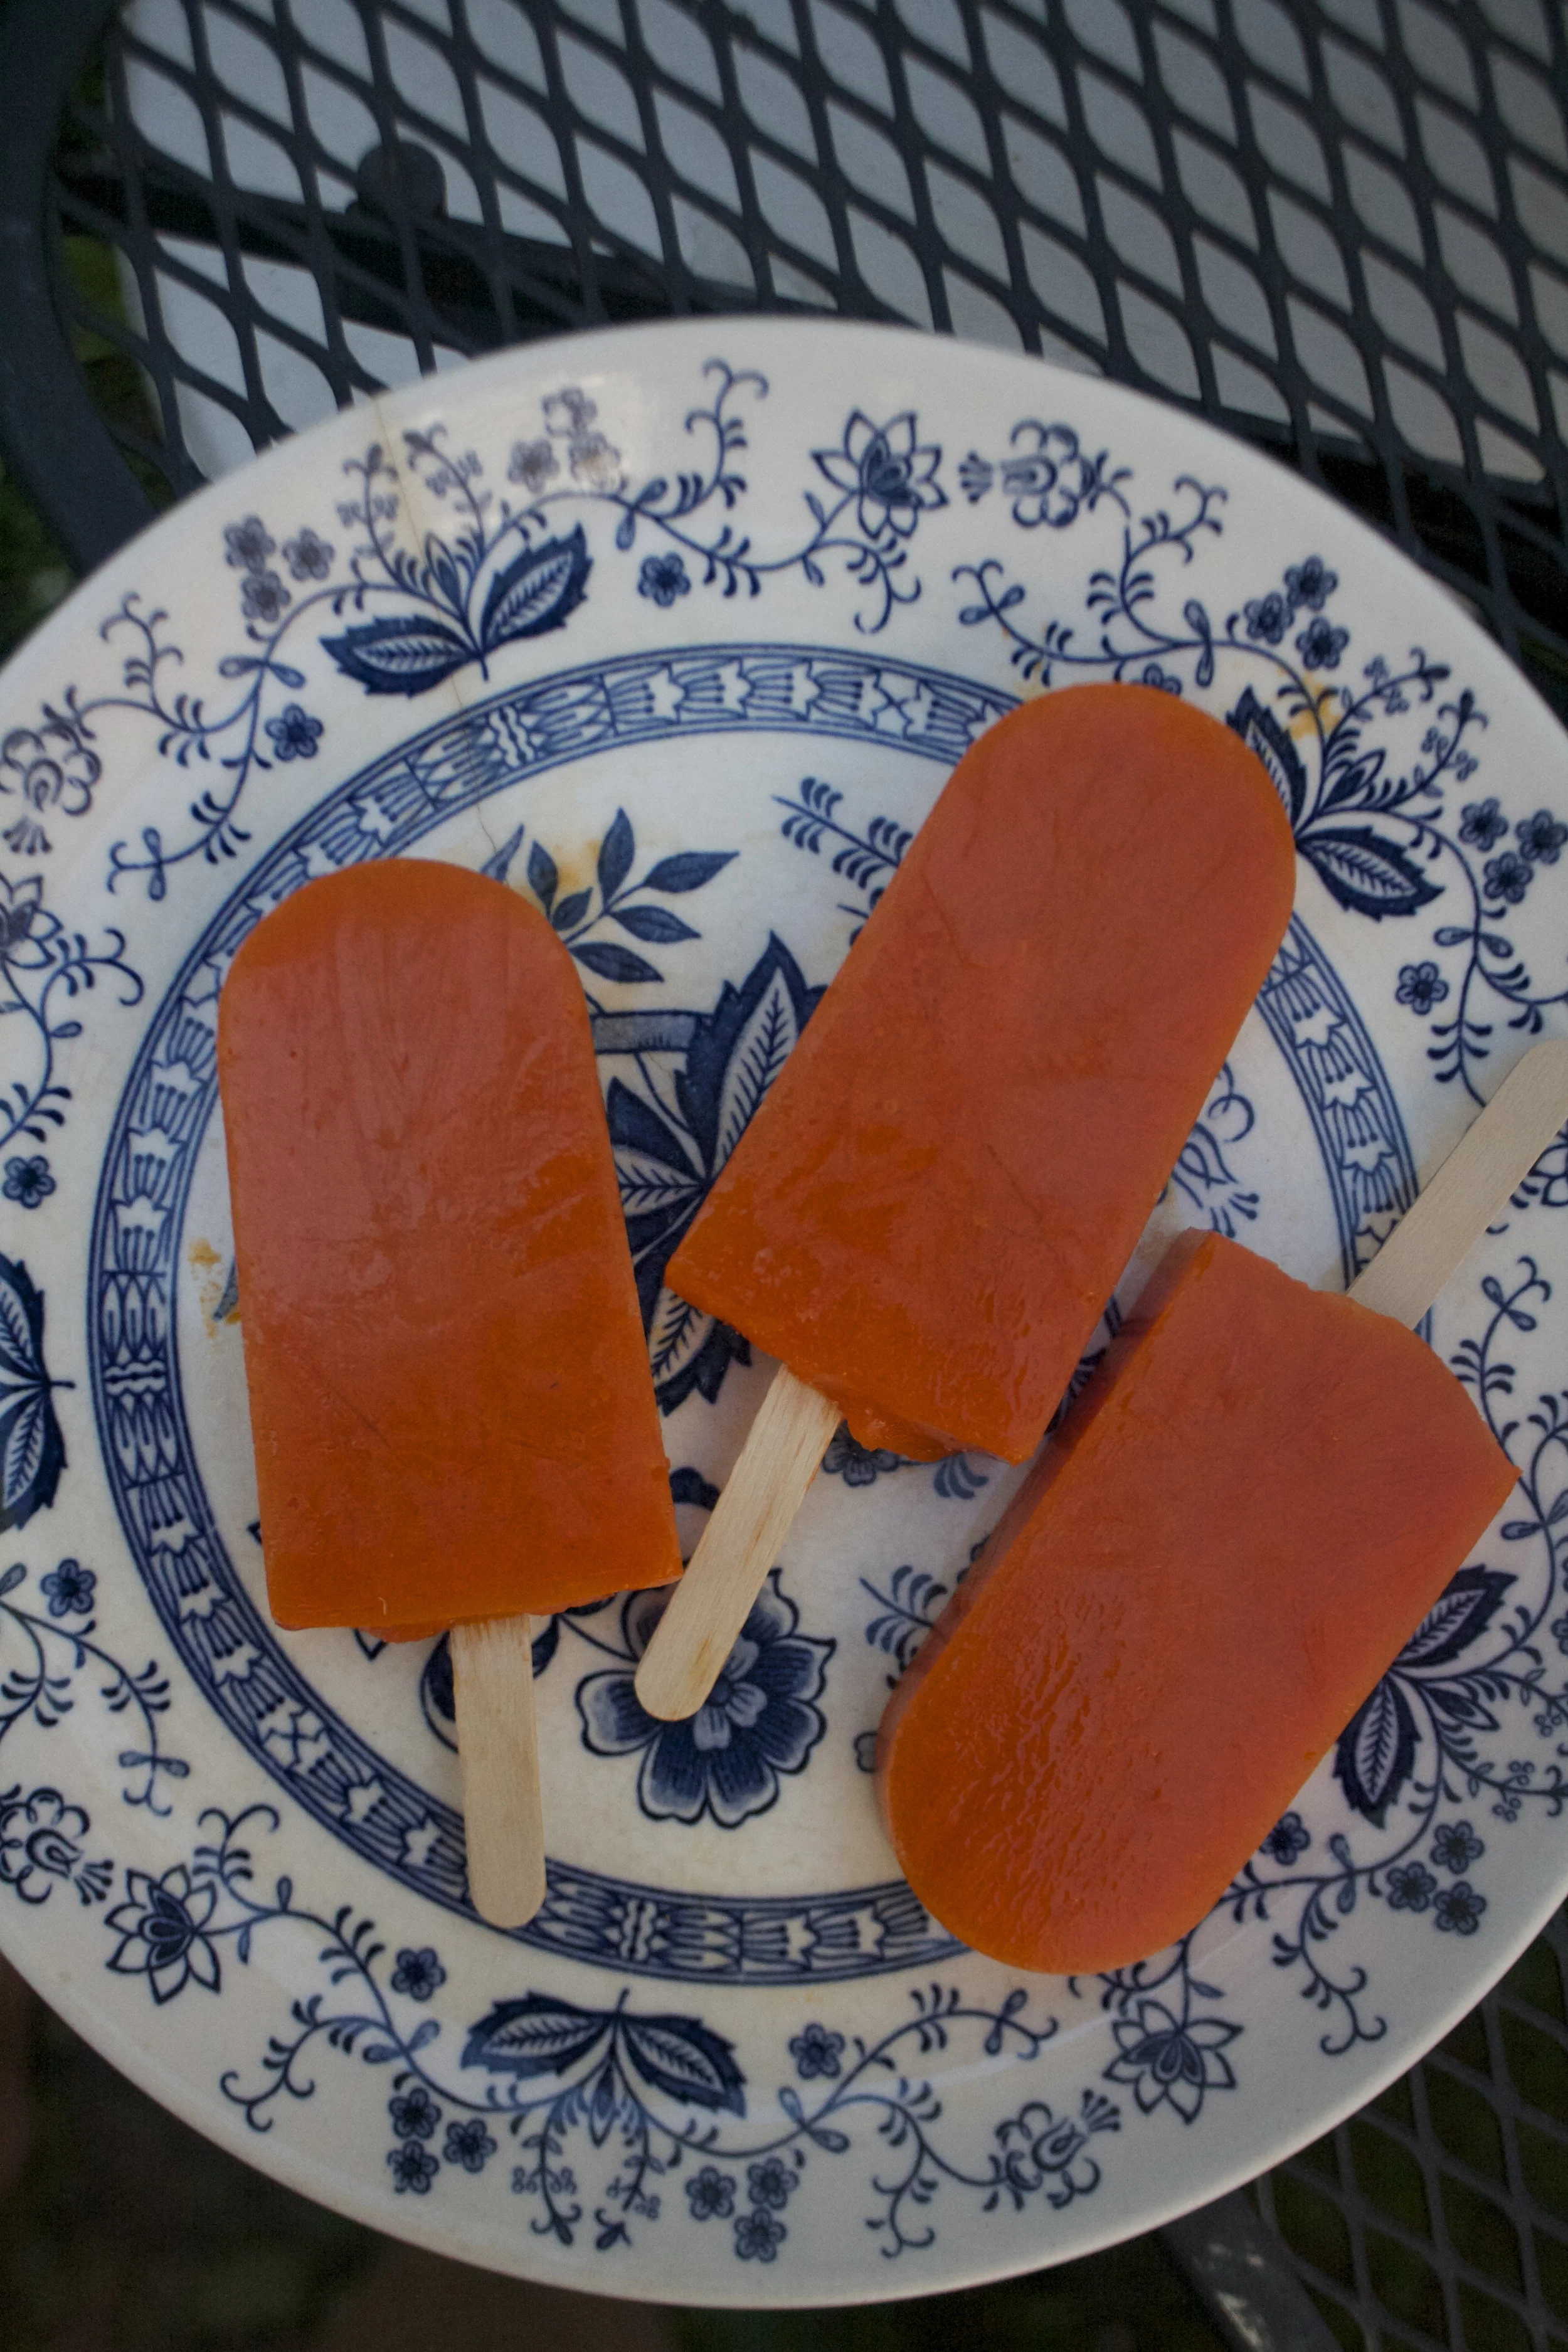
So my contribution to the world of popsicle eaters is one of my all time favorites (maybe the absolute best one yet).. Carrot Ginger Orange.
For those who know me, this flavor combination should come as no surprise. Carrots are my thing. I eat them all day, every day. Sure I eat a shit ton of other stuff, but always carrots. Carrots are in my breakfast,lunch, and dinner. If I need a snack, I grab a carrot. There is just something so satisfying not to mention so easy about carrots. Eaten alone, with mustard or hummus, or dipped in peanut butter of cinnamon..Carrots can do just about anything. I mean I eat so many carrots that no shit, my skin is a slight tint of orange (seriously for reals. Something about an abundance of carotene) Crazy I know, but what can I say. I really like carrots. %u00a0%u00a0%u00a0%u00a0%u00a0%u00a0%u00a0 (that’s what I say when people ask me why I am glowing orange)
So naturally the carrot made it’s way into my popscile mold. And now it’s for real. Carrots really can do anything.
Another win for carrots everywhere.
And popsicles.. Just in time for that hot as shit weekend we are about to have.
GO POPSICLES CO!
The stuff. Carrots, an orange, some fresh ginger, and some water. Simple simple and no, I didn’t forget the sweetener… these pops have no need (although if you want, go ahead and add a smidge or splash of something sweet)
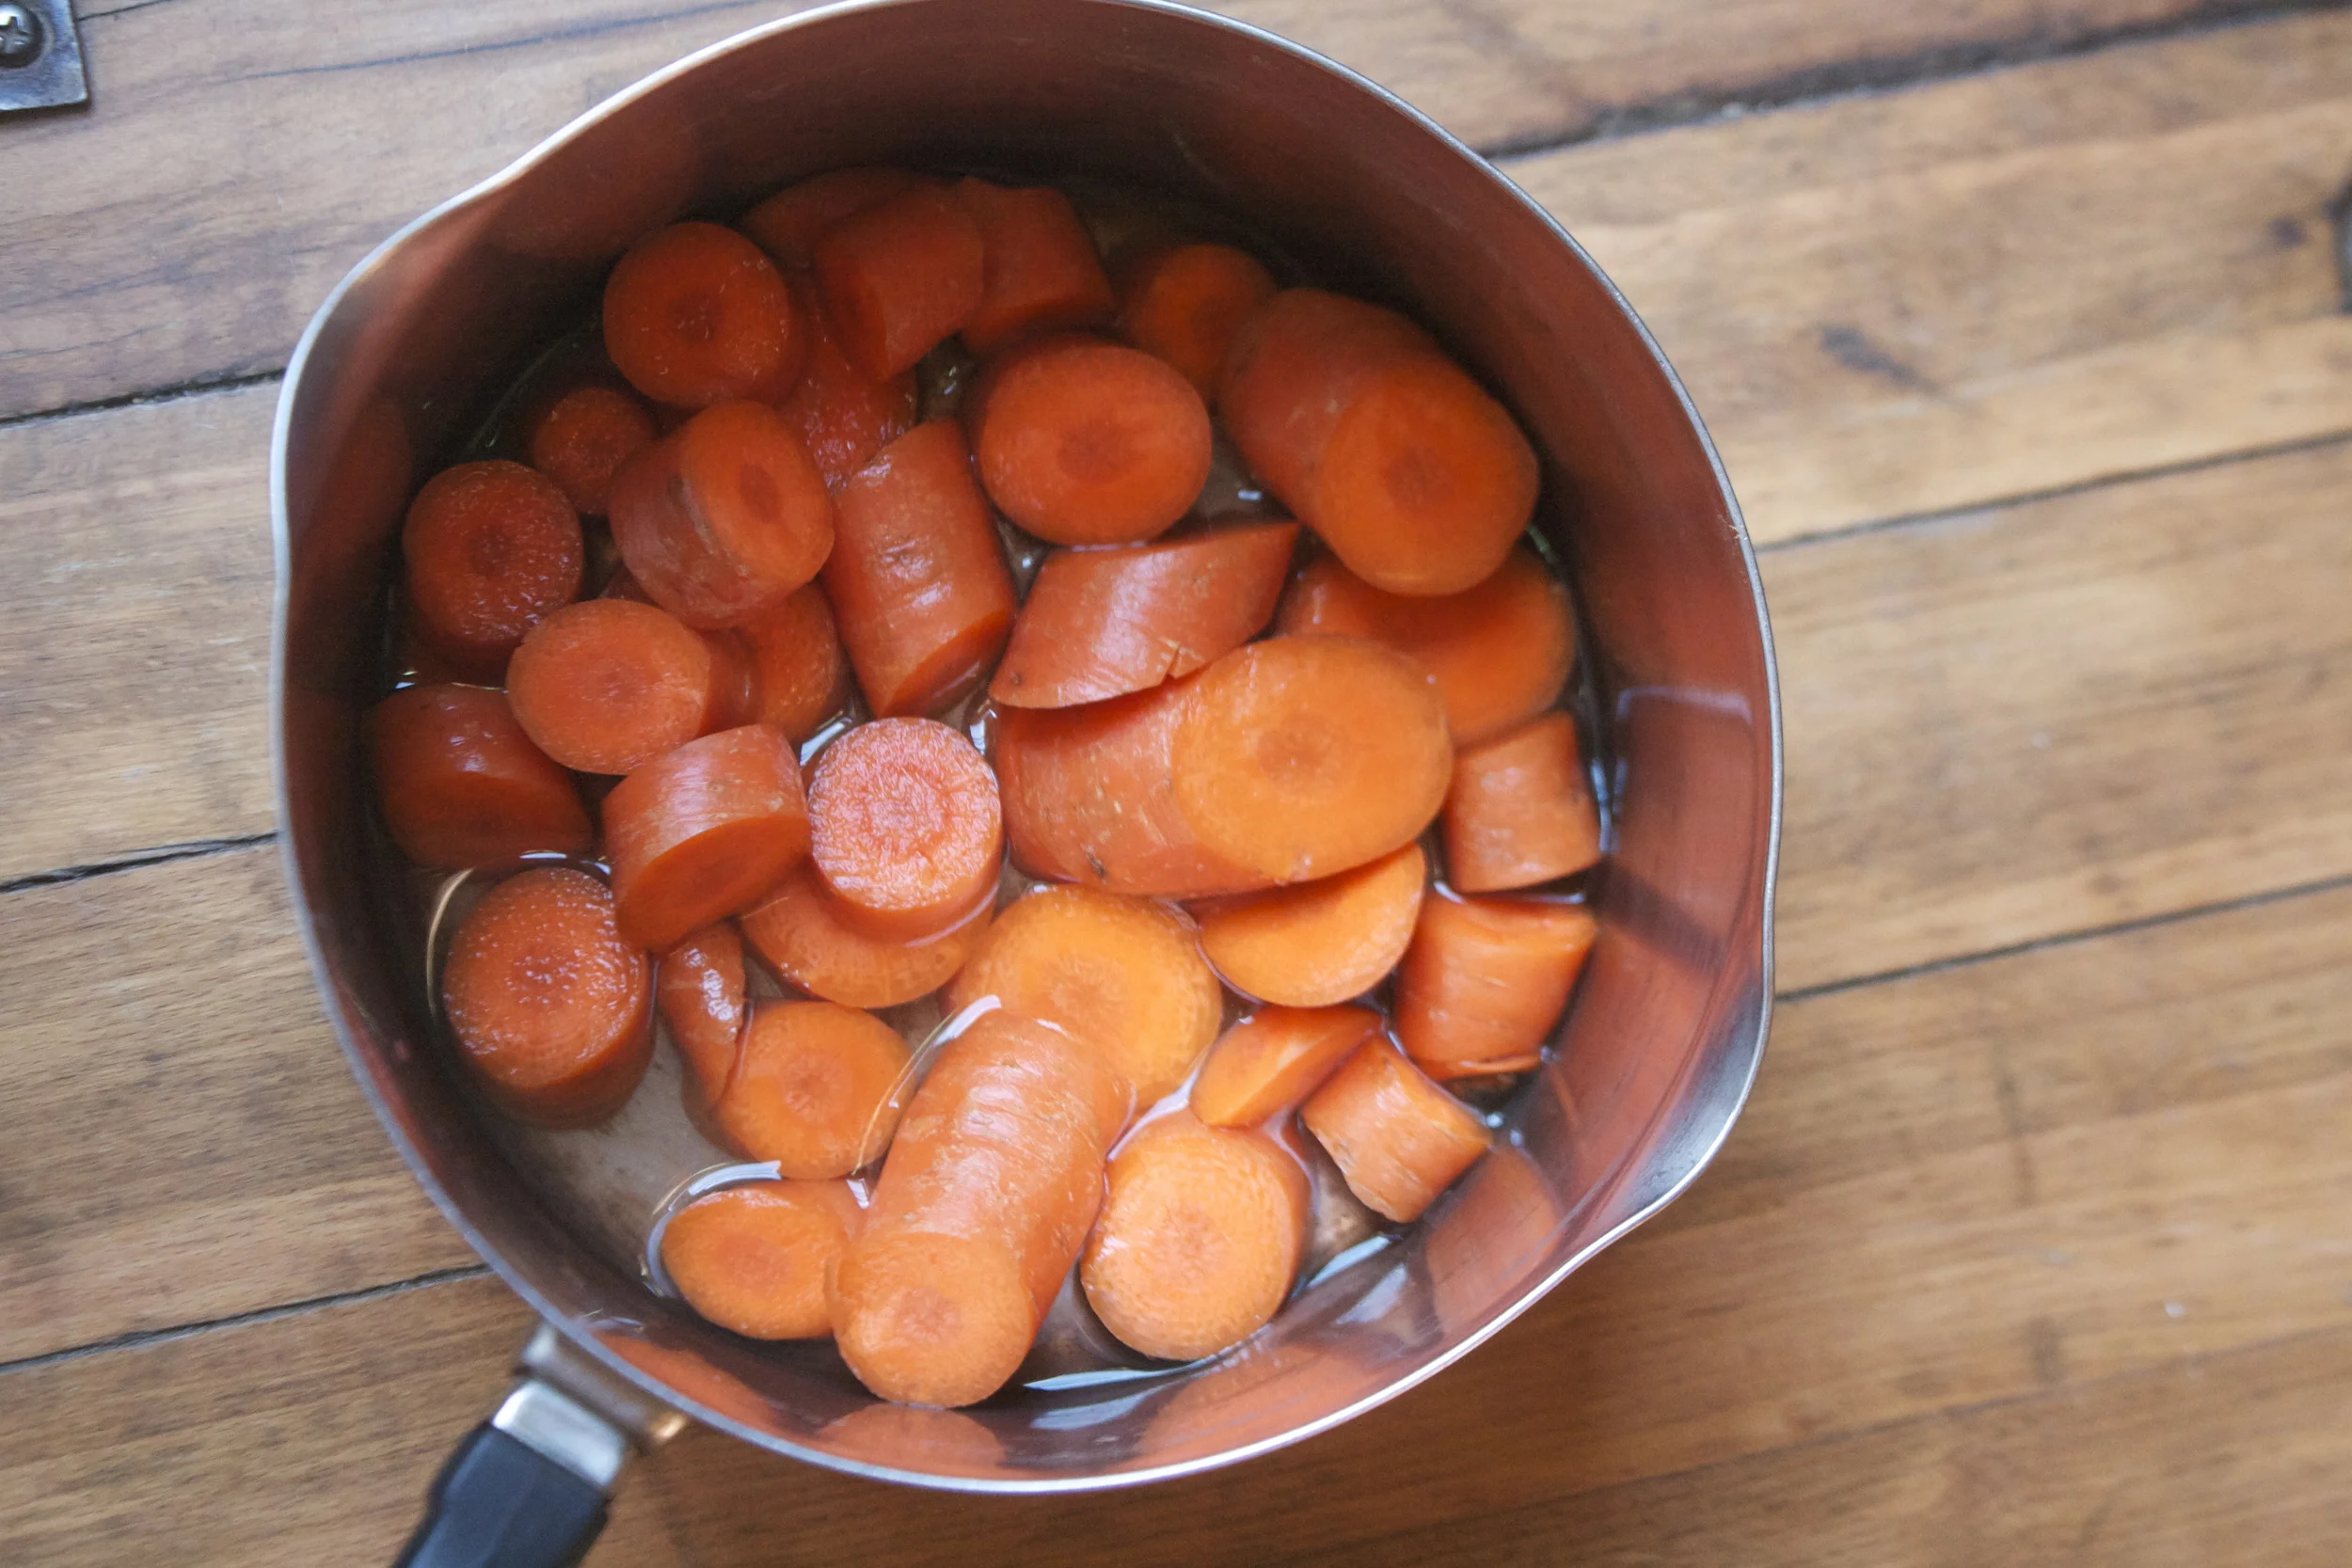
Start by chopping up the carrots and sticking them into a pot with some water. Not a lot, just enough that it almost cover the carrots, and stick that pot onto the stove, cover and cook on medium heat until tender. Make sure to check that the water doesn’t completely evaporate or you will have burnt carrots which taste just fine, but not as a sweet popsicle
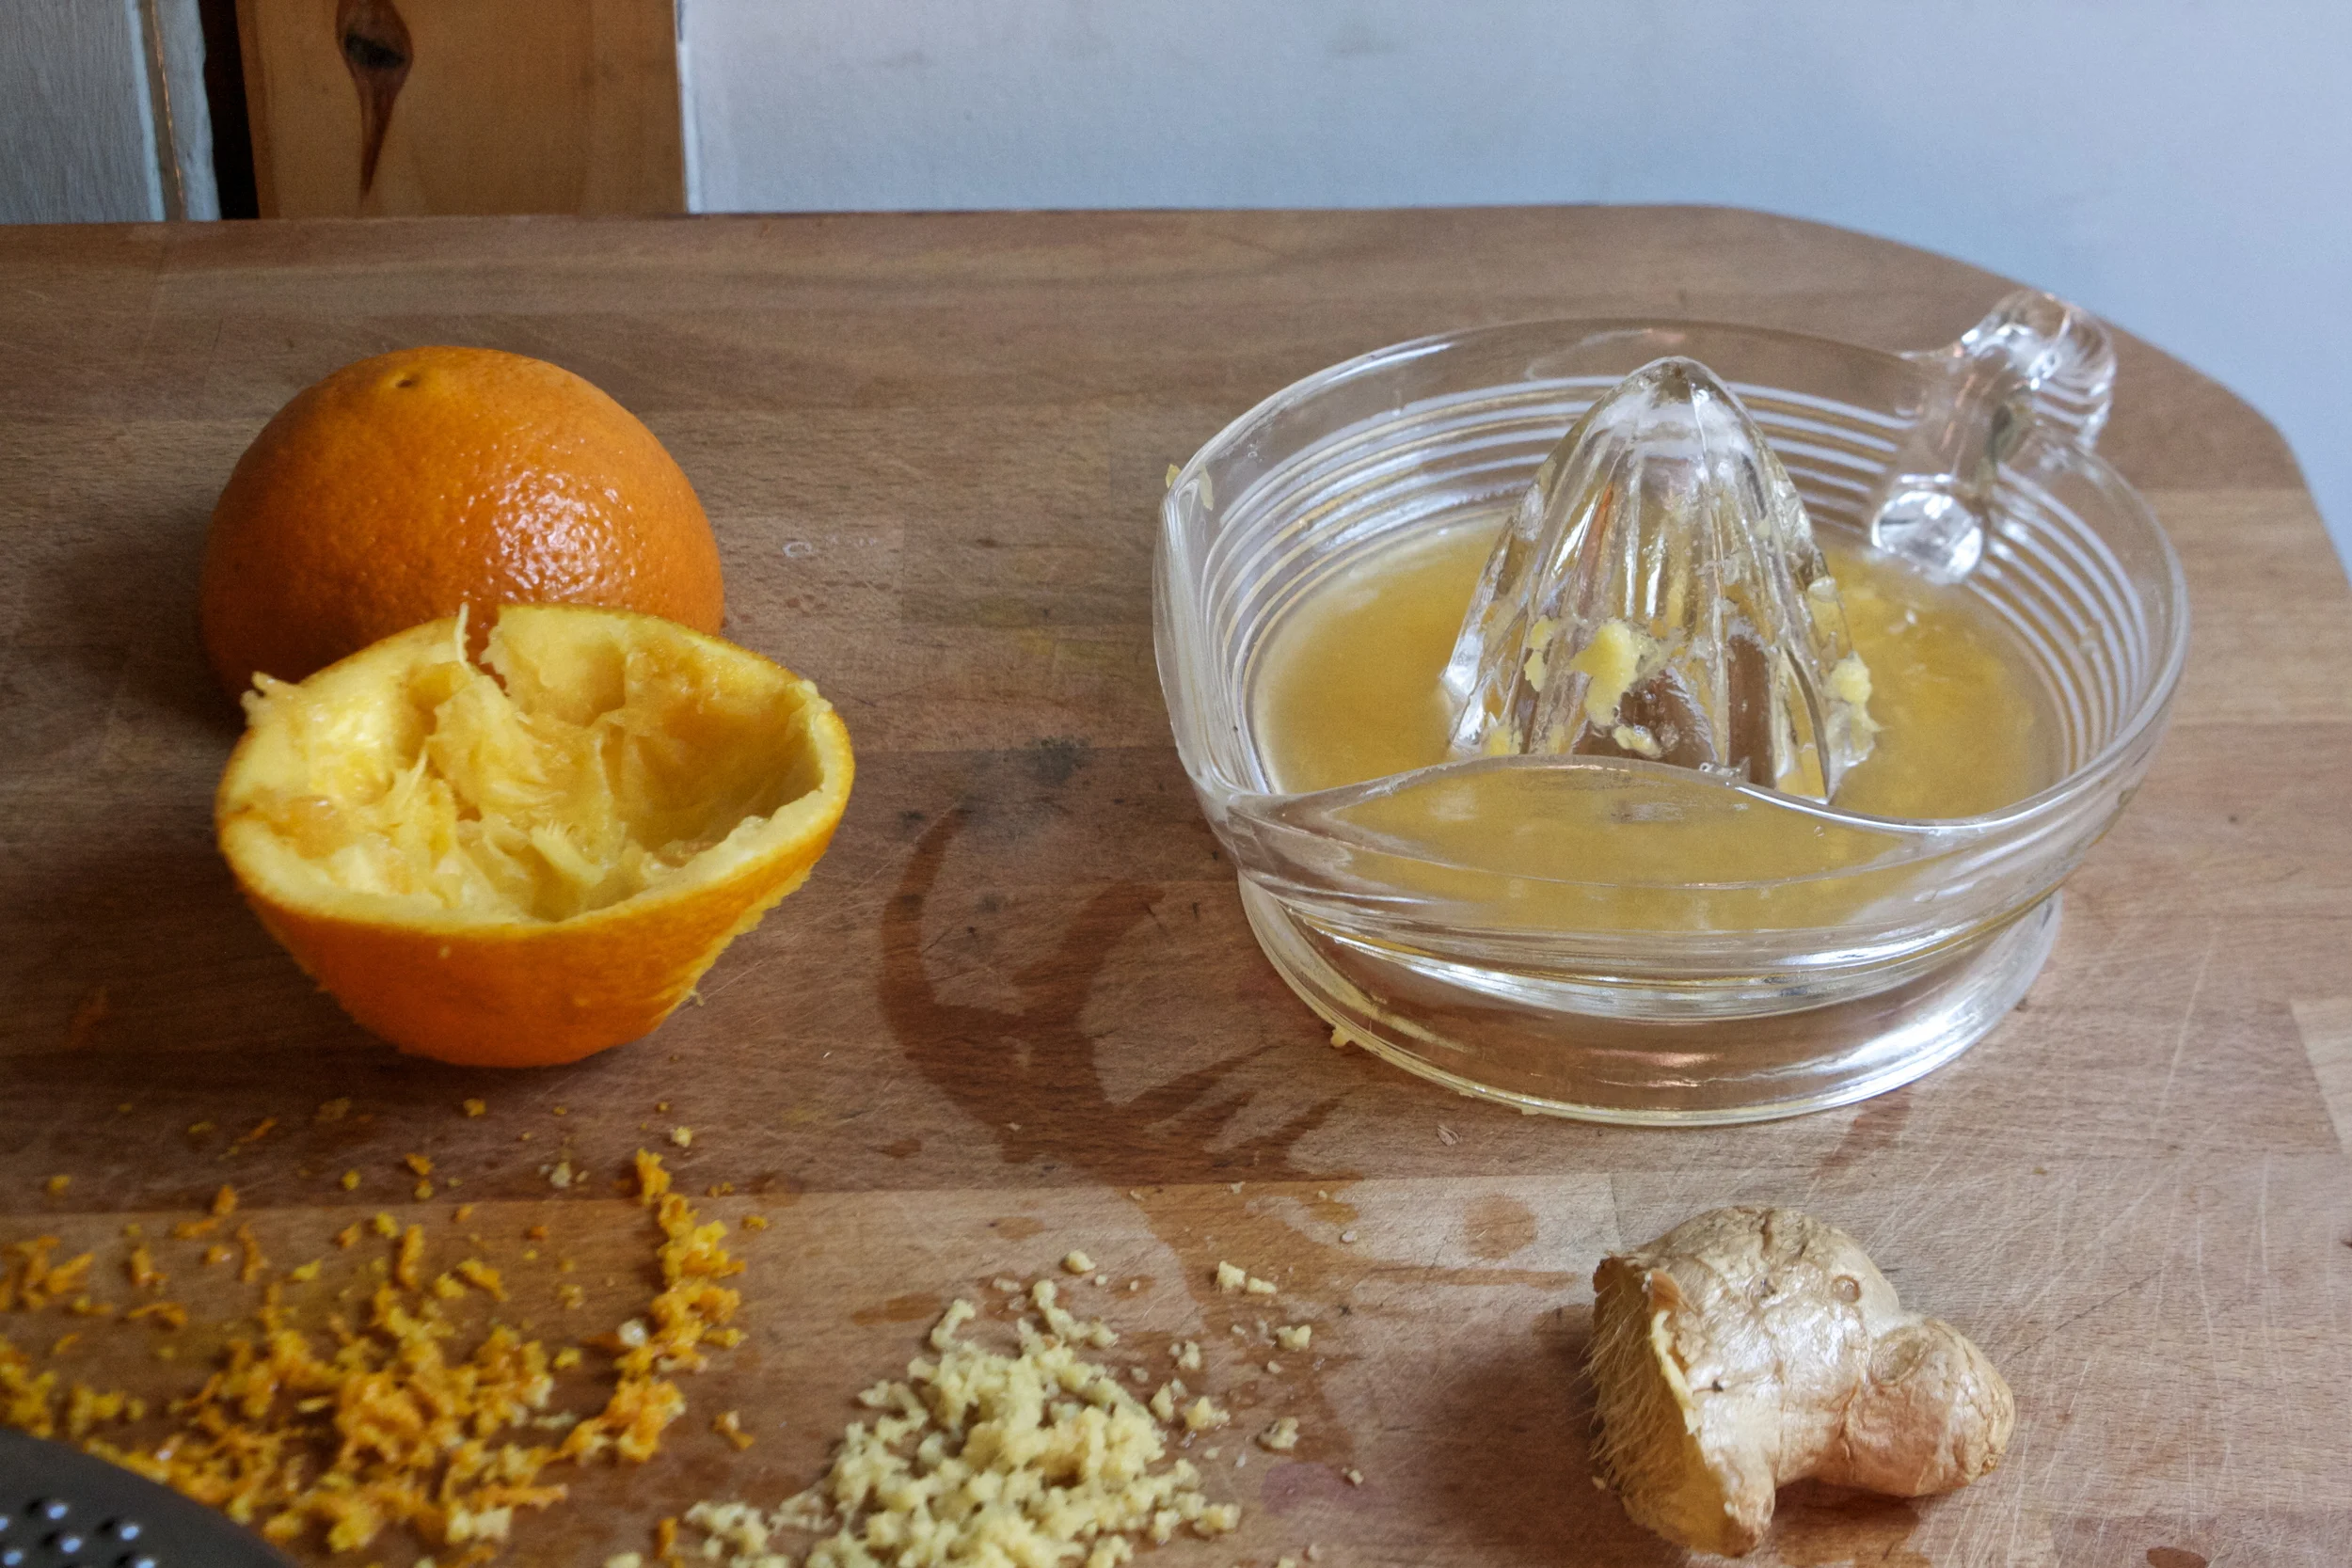
While the carrots are tenderizing, zest the orange then juice it and grate up some fresh ginger.
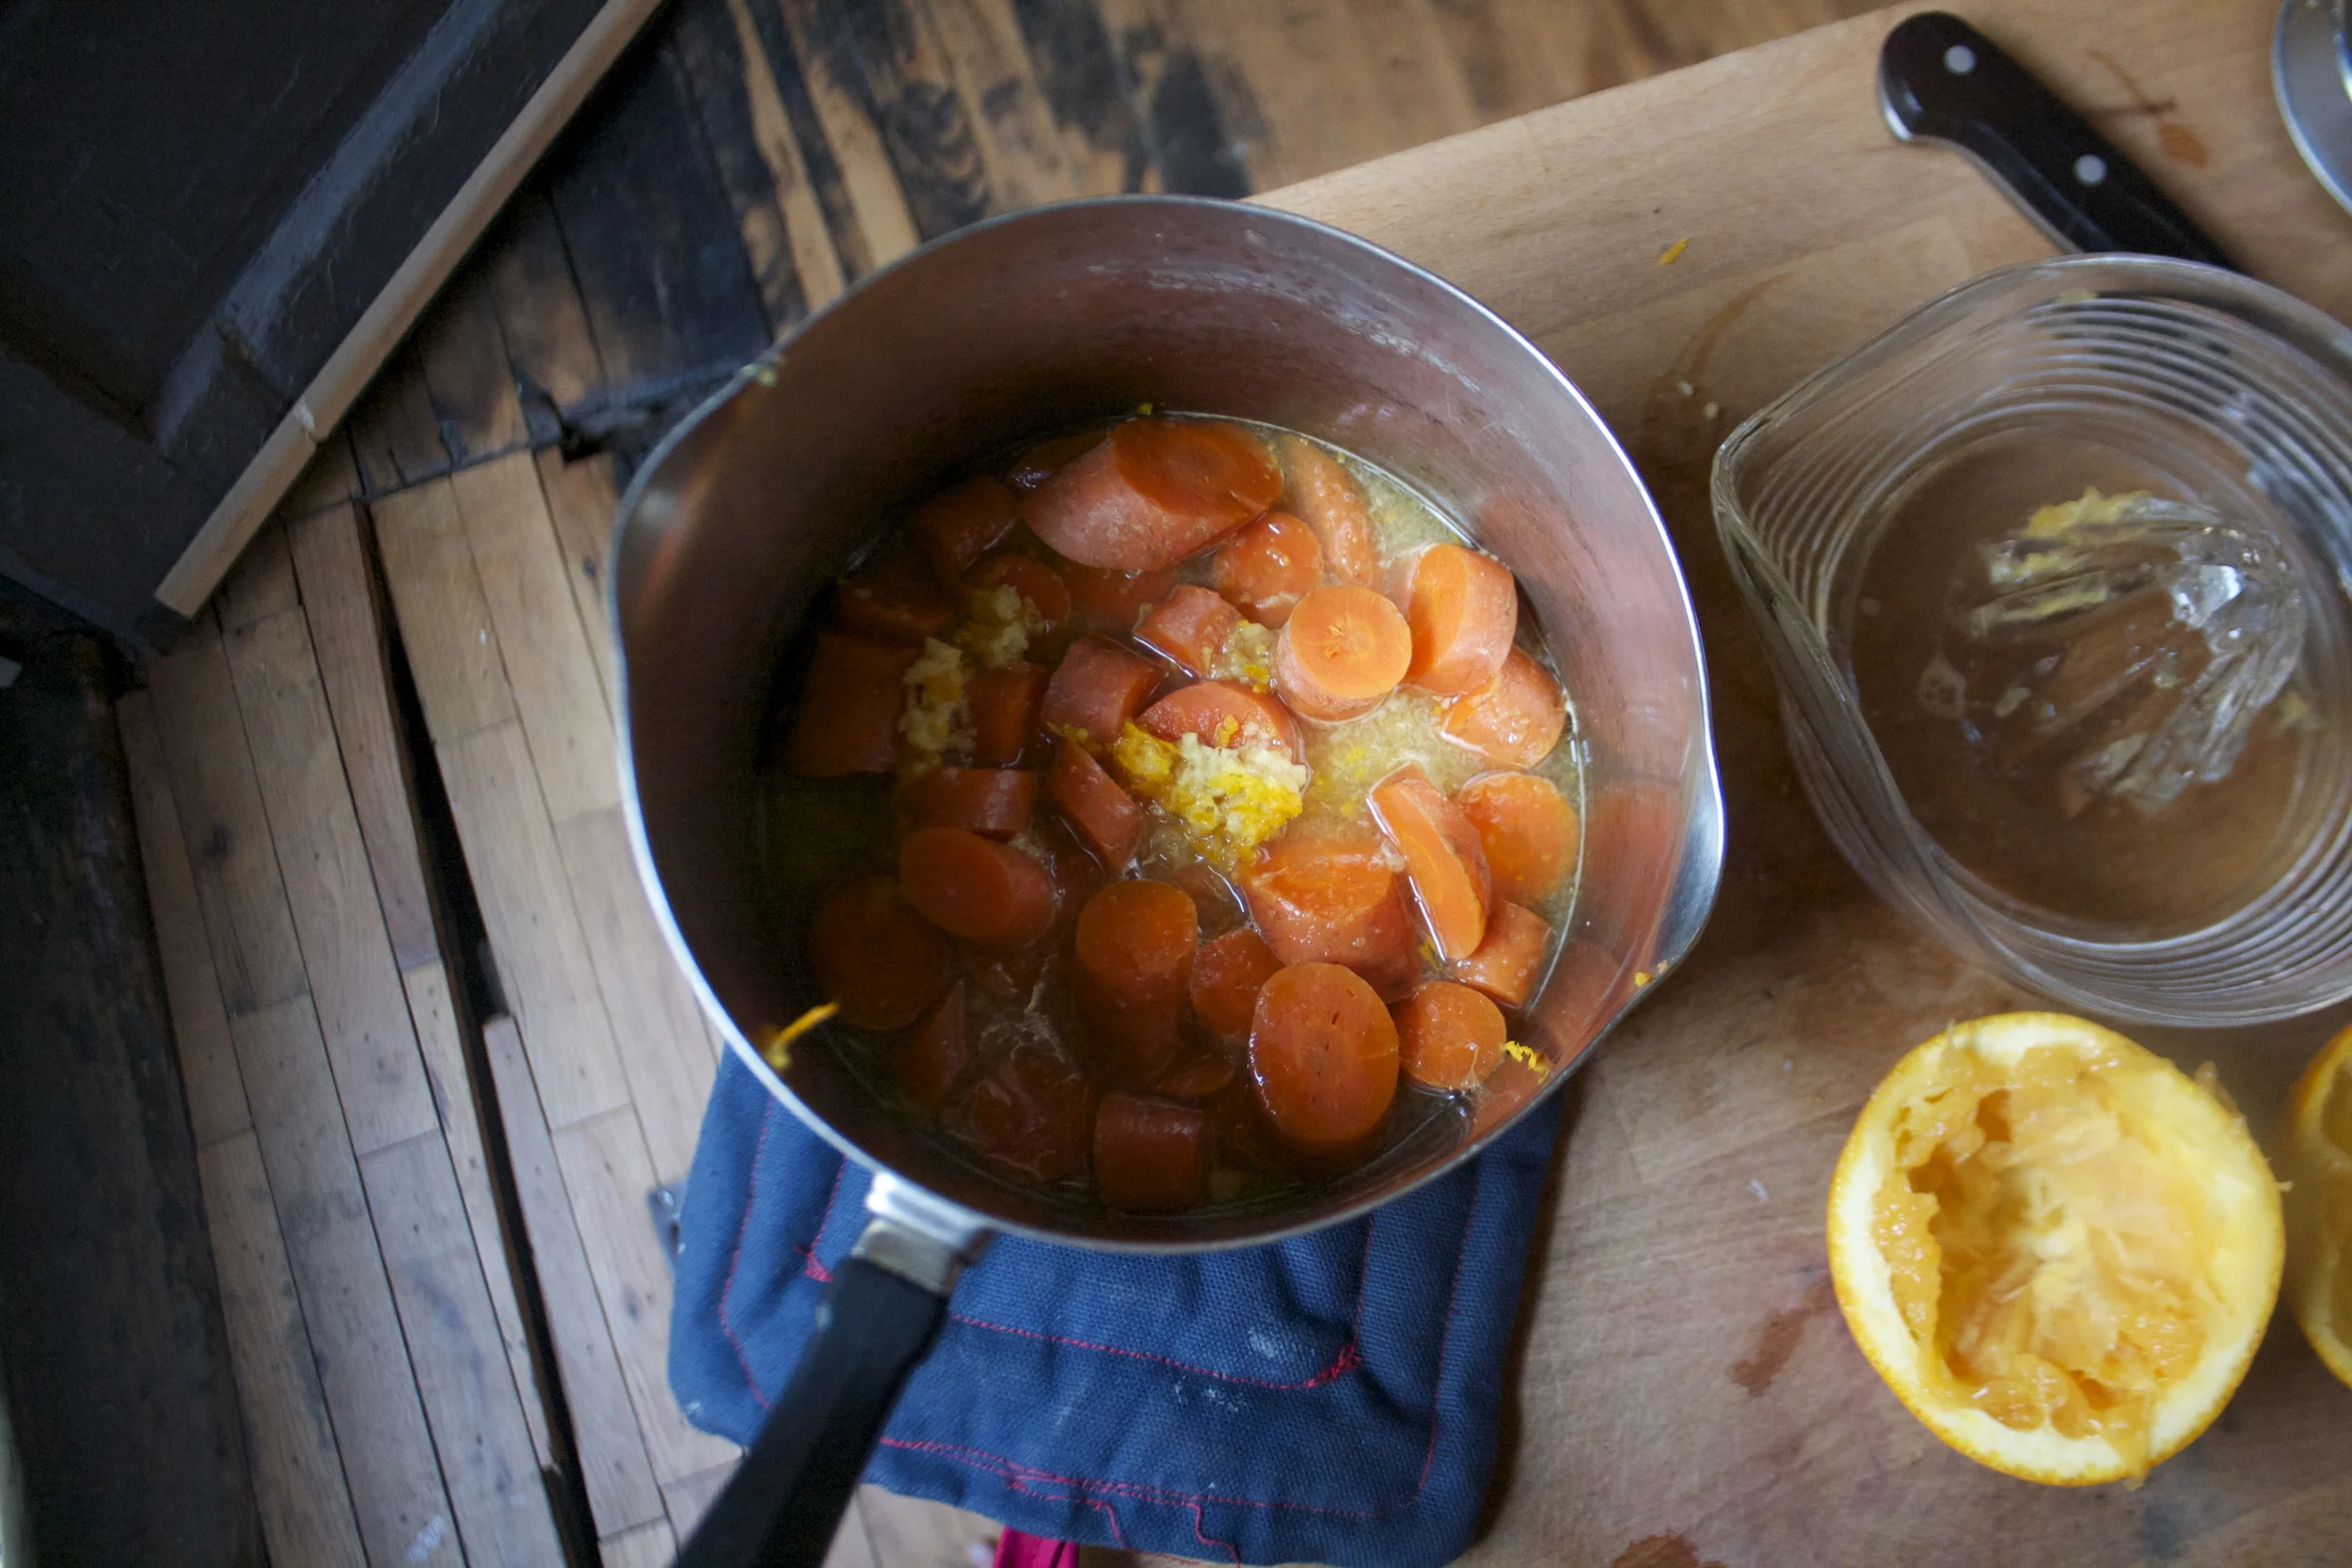
Once the carrots are fork tender, dump in the juice, the zest, and the ginger. Stick pot back on heat for just a few more minutes to meld the flavor together.
Dump the contents of the pot into the blender and blend blend blend until smooth.
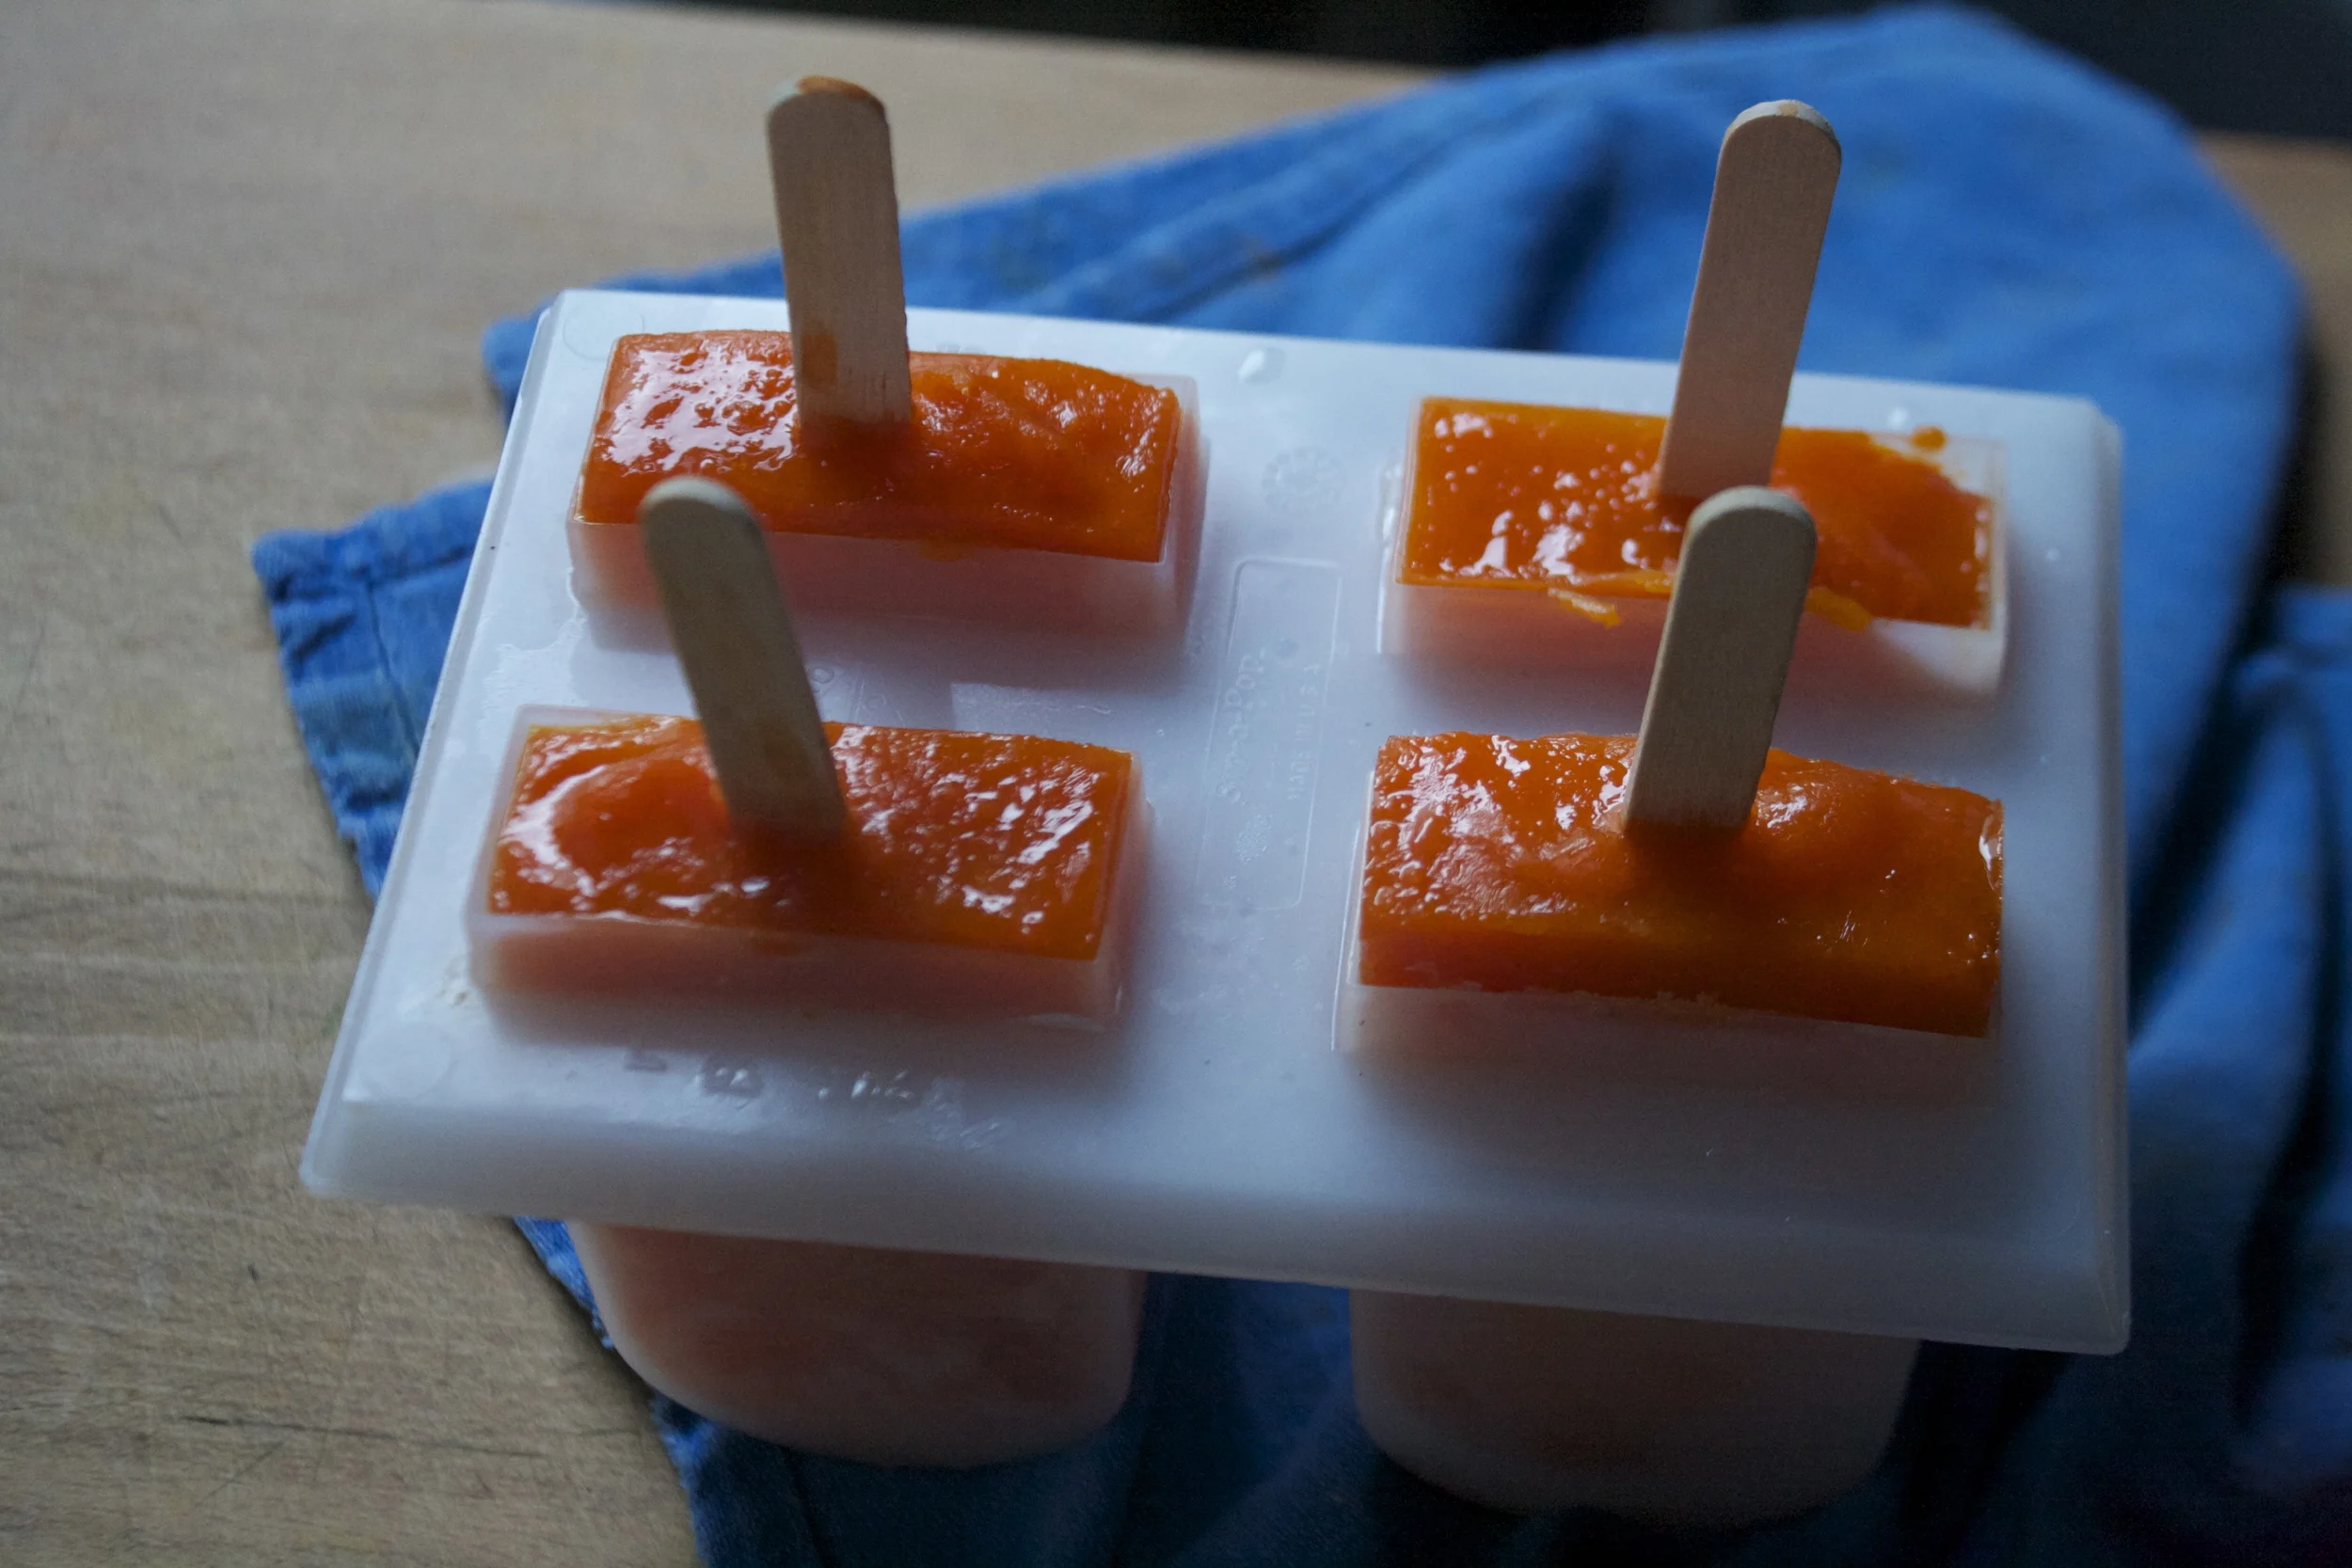
Grab your mold and pour blended mixture into it.. Because the mixture is thick, you don’t have to wait to stick the sticks in so go ahead and do that now.
And into the freezer they go!
Serious popsicle goodness right there.
Happy Popsicle Week. Go ahead and make them all!
-C
Makes about four or five 3.5 oz popsicles
3 medium sized carrots
1 orange (zest and juice)
1-2 teaspoons fresh ginger
water
Note. I did not use and sweetener and did not miss it but if you really think you need it, add a little bit of honey or sugar. But really, they are sweet enough so maybe give them a chance without it.
Start by chopping the carrots up into coins and stick them into a pot with enough water to just about cover the carrots. Stick on stove on medium heat and place a lid on the pot. Cook carrots until tender.
While that’s happening, zest and juice orange and grate up the fresh ginger. (I used 1 teaspoon of ginger at first, but after I blended it, I decided that I wanted a little more so I added another teaspoon)%u00a0 Once the carrots are soft, dump in all the juice, zest and ginger. keep on heat for a few more minutes to let the flavors all meld together.
%u00a0And now dump the pot of carrot goods into the blender and blend the crap out of it until smooth. (add in a splash or two of water if needed. Taste your puree and if you want more ginger, add it it.( can also decide now if you want any sweetener..
Now pour the mixture into you popsicle molds and follow the mold directions on how to use it (add popsicle sticks and stick it in the freezer)
Freeze until frozen.
Remove from freezer and let sit until pops slip from mold.
A couple of days ago, during a grocery store porous, I stumbles upon a produce item that I have not seen sold in stores before, Broccoli leaf. And I was kind of surprised to see that they were selling bunches of the leaf, organic, at 2 bucks a bunch. I was very excited ! But wait.. You can eat broccoli leaves? Heck yes you can! Broccoli leaves are fantastic. They taste kind of like broccoli, have a hearty texture like a collard, and can be used raw or cooked just like any other green. Its just one more super yummy green to add to your repertoire. So when I bring home something that I find to be a good score, like a bunch of broccoli leaves, I feel like I have to share it with the mister. (I am so nice) And this dish was how I shared them…. Tossed into a bowl of garlic raging pasta. The stuff…. A bunch of broccoli leaves, lots of garlic, pasta, olive oil, salt and a lemon. Pretty simple right? Fist off, get your water boiling for the pasta. Once its ready, drop a pinch of salt into the water and stick pasta in for the amount of time recommend by pasta box people. While the pasta is boiling, mince up the garlic (I used my garlic press) into a skillet and add in the oil. Stick on a burner on medium for a few minutes, stirring around to make sure the garlic doesn’t stick and burn. Once you start to smell the garlic, turn heat onto low, chop up the broccoli leaves (stems and all) and stir around until wilted and add in the juice of half a the lemon.When the pasta is cooked, remove a few tablespoons of starchy water and strain the noodles. Add water and pasta right into the skillet with the other stuff. Toss around, taste, season with salt and pepper. Go ahead and add some chopped tomato and or parmesan cheese if you want. And serve your amazingly amazing pasta. And make sure that you are ok with really smelly garlic breath…Casue it’s going to happen. Keep it good! -C
2 servings of your favorite pasta (spaghetti, penne, vegan, gluten free…..)
8 or so fresh garlic cloves
1/4 cup olive oil
salt and pepper
lemon (optional)
parmesan cheese (optional)
Start by bringing a pot of water to a boil with a pinch of salt. Add in pasta and cook per instructions on box. While pasta is cooking, mined garlic and add to a skillet with the oil. Place on a burner on medium heat and cook and stir until the garlic becomes fragrant. Chop the broccoli leaves (stems and all) into bit sized pieces and add to the garlic oil and toss around to wilt the leaves. Squeeze in some lemon juice. Once the pasta is done cooking, remove a few tablespoons of the starchy water and strain the pasta. Add the water and the noodles to the skillet, toss to evenly coat the pasta and call it down. Serve in a bowl or on a plate, topped with freshly chopped tomatoes and parmesan cheese if you so shall please and another little squeeze of lemon juice if you like. Watch your mouth.. it will be breathing out garlic like whoa.
Whatever you do, do not turn on your oven this weekend! But I guess if you have air conditioning and don’t mind cranking it… well then go for it. And can I come stay with you?
But for the rest of us doing this weekend without the old A.C., we need to feed ourselves, feed ourselves without any fire because 100 degrees is no joke and any added heat from anything will likey tip us over the edge. I am already so close to that edge and it’s a long way down..(Just ask the mr, he could tell you a thing or two about heat and me.. not good)
Enter hummus and veggies.
You can’t really go wrong with a good hummus and veggies meal situation and sometimes it’s all that can be right. I for one could eat bowls and bowls of hummus, and sometime do, so this is not a stretch for me. Especially this hummus. I knew I would like it, but man, was (was because I ate it all) it freaking delicious. The sunflower seeds really did it for me, gave it a little something extra, like a freshness that is still creamy and earthy, but is not quite, I don’t know, dark as tahini? %u00a0It’s kind of hard to explain without having you taste it (so make it and you tell me)%u00a0%u00a0Don’t get me wrong, I love tahini, but sometimes you just %u00a0got to mix it up. (Plus sunflowers seeds are dirt cheap. Tahini is not nearly as cheap so bonus there too.)%u00a0%u00a0Maybe its because the sunflower seeds bring the sunshine to your mouth. A sun filled mouth of pureed seeds and beans.%u00a0 Yup, that’s what it is.
So here ya go, a no heat meal (or snack or spread).%u00a0We got this.
The stuff. %u00a0Cooked chickpeas (no need to cook your own, canned is a okay), sunflower seeds, a lemon, a few cloves of garlic, salt, pepper, a little water, and some herby green like parsley or cilantro.%u00a0
Hummus is pretty basic, it’s just stuff blended up, but because we are starting with raw sunflower seeds, we need to really bend the shit out of them until they turn into a paste, so do that, which is going to a take about 8-10 minutes. Then once its pasty, add in the garlic and the juice of the lemon and blend until its all smooth.
Could almost stop here at this point. Sunflower seed goodness all emulsified. Taste it, it is so good.
Now add in the chickpeas and a pinch of salt and pepper.
Blended until smooth with a little drizzle of water to give just the right consistency. %u00a0And that’s it.
Pile a bowl full enough that you can call it dinner them top with a good amount of fresh herbs. Serve with chopped up fresh veggies or whatever you like and we are good to go.
Creamy, dreamy sunflower hummus, no heat required!%u00a0
Stay not melted!
-C
Makes about 2 3/4 cups
2 1/2 cups cooked chickpeas (or one can) drained
3/4 cup raw (can use toasted)unshelled sunflower seeds
l juicy lemon
2-3 cloves garlic
1-2 tablespoons ice water
salt and pepper
handful fresh herbs like parsley,cilantro and or dill (optional)%u00a0
Place the sunflower seeds in food processor and turn on until seeds turn into a paste, which will take about 8-10 minutes. After every few minutes, scrap the sides down to make sure it all gets blended. Once the seeds reach paste consistency,%u00a0add in the juice of the lemon and the garlic. Blend until smooth. Last off, add in the chickpeas and a pinch or salt and pepper and blend until smooth, adding %u00a0in a tablespoon or two of water to get the hummus to the consistency of your liking. Once blended taste and check for seasoning (add more salt and or pepper if needed)%u00a0
When the hummus is done, scrape into bowl(s), and top with lots of fresh herbs and a sprinkle more of sunflower seeds. Now eat it. Eat with veggies, with bread, with pretzels, or with a spoon (or finger). Do what you need to do.
%u00a0Any left over, if there is any, can be store in the fridge for 2-3 days.%u00a0
What do you think about at 5 o%u2019clock in the morning? Wait, are you awake at 5? Well I am and yes, I know that most people are not and think I am crazy for waking up so early, but it is and I do and whatever. Anyway, it%u2019s 5 o’clock and I am at the gym (yes, I wake up at 5 AND go to the gym) and me and my gym friend start talking about food (as usual) and what we were going to do with our Brussels sprouts that we got from the farm (I got her to join my CSA!). That is what I am usual thinking at 5. Food, and how to prepare it. And as the sprout conversation commerced, this is what materialized in my head. Crisp, crunchy fresh Brussels spouts, shredded up and tossed in a warm tangy cranberry sauce. My mouth was salivating and as usual, I left the gym hungry.
So I came home, drank all my coffee and then proceeded to make the sprout dish for lunch and let me tell you, this sprout slaw is amazing. Tangy and crunchy and all Brussels sprouty. It has a hardy salad feel without being heavy. It is a slaw that really get me, you know. (I actually don%u2019t know.)
Anyway, you should really get on the eating this Brussels sprouts slaw (or any Brussels sprouts dish) train now, before they go out of season and you end up buying kind of not great sprouts from the market that don%u2019t taste as good. Bad Brussels sprouts suck.
To the cranberry Brussels sprout slaw.
The stuff. Fresh Brussels sprouts, cranberries (fresh or frozen), some onion, balsamic vinegar, a little maple, dried cranberries and toasted walnuts, and salt and pepper.
Start with onion. Grab it and dice it nice and small.
Dump the onion into a skillet with a little pinch of salt and a splash of water and cook for a few minutes, just unit they are not raw anymore. Then add in the cranberries and 1/2 cup water. Cook on a low heat until the cranberries all pop and the sauce starts to thicken.
While cranberries are cooking, shred up the sprouts. Thin as you can get them.
Cranberries are now a thick and chunky sauce and oh so delicious. Add in the vinegar and maple here and give it a good stir and a taste test too. If it is too tart for your liking, add more maple. Think you might need a bit more vinegar, well splash it on it.
Now toss those shredded spouts it.
Stir it around. Season with salt and pepper and there it is.
Scoop into a bowl. Top with dried cranberries and walnuts and grab a fork.
This is good.
-C
serves 3-4 as a side or one person who wants to eat it all to themselves
1 1/2 cups fresh or frozen cranberries
1/2 a pound Brussels sprouts ( around 3 1/2- 4 cups shredded)
1 small or 1/2 a large onion
3 tablespoons balsamic vinegar
1 tablespoon maple syrup (or more to taste)
salt and pepper
1/2 -3/4 cup water
small handful dried cranberries (optional)
smal handfuls toasted walnuts (optional)
Start with dicing the onion up into small pieces. Place in a skillet with a small pinch of salt and a good splash of water and place on medium heat. Cook for a few minutes or until the water has evaporated and the onions are not raw. Add in the cranberries and 1/2 cup water. Keep on low heat and cook until the cranberries pop and start to thicken. If the cranberries are not cooked all the way and the water has evaporated out, just add another 1/2 cup.
While cranberries are cooking, shredded the Brussels sprouts, as thin as you can. A mandolin is great for this but a knife works too.
Once the cranberries have cooked down to a saucey consistency add in the vinegar and maple and stir around. Remove from heat and carefully taste the sauce. If you think it needs more maple or vinegar, add in another tablespoon until it tastes good to you. Dump in the shredded sprouts and mix. Season with salt and pepper to taste.
And then it%u2019s done. You can dump it all into a bowl and sprinkle the dried cranberries and walnuts on top, or leave it in the skillet and do the same. Me,I scooped half into a bowl for pictures sake and ate the rest right out of the skillet. I then licked the skillet clean with my finger. Then ate the bowl full. SO good.
I eat so much hummus. Everyday, all day. Homemade, store bought. If there is hummus, I will be consuming it. But the thing is, I usually don%u2019t eat more then a little at a time. (A little being like 1/2 a cup). And sure, sometimes that is just fine and enough, but other times, what I really want to do is garb a spoon and a bag of carrots and eat it all. And then I do.
But there is that little voice in the back of my head telling me that if someone where to catch me eating mounds of hummus, they would liken my eating behavior to that of someone eating a jar of mustard (Not going to lie, it happens sometimes) or of a bottle of ketchup (but I don%u2019t eat ketchup) and that have a problem and shouldn%u2019t being eating it like that. Because hummus, for some reason, has been put into the condiment category. It%u2019s treated like a dip or a spread and that is fine and dandy to eat it as such, but hummus is so much more. It can, and should be treated more like a main component to a dish. So let us step outside of that box and eat it how we really want to eat it.
Hummus by the bowlful. I know right! It just makes so much sense to me. And now to you too. We need to stop stopping ourselves from just a scoop or two because really, that is just not enough. Nope, this is for real. A bowl, full of hummus, topped with roasted veggies because that is just more deliciousness. And we get to eat it all.
Life can be pretty great sometime, you know. HA
Now to the bowl of hummus!
The stuff. We got chickpeas, tahini, a lemon, red wine vinegar, garlic, salt and pepper. And Veggies. Brussel Sprouts, broccoli, onion, Swiss chard, and kale.
Chop up the broccoli, the onion and half or quarter the Brussel sprouts. And separately, chop up the kale and chard.
Toss the chopped Brussels, broccoli and onion into a baking sheet or oven safe skillet and season with salt and pepper. IF you want to toss in a little oil, go for it. Then pop the veggies into a hot oven to roast away.
Once the veggies are just about done to your liking, grab the chopped kale and chard and off to the veggies. Toss and roast for a few more minutes.
Hummus. Chickpeas with liquid, garlic, tahini, juice of lemon, and blend. Creamy smooth and delicious.
Dump that hummus into bowls.
And top with roasted veggies.
Would you look at that. Now all you need to to is dig in. Serve with extra lemon and black pepper. Grab your utensil of choice and eat.
-C
makes 2 servings if eating as a meal
3 cups cooked chickpeas in liquid
A lemon
1 tablespoon red wine vinegar
2-3 cloves garlic
1/4 cup tahini
salt and pepper
10 or so Brussel sprouts
A small head of broccoli
A small onion
5-6 kale and or Swiss chard leaves
Note. Use whatever veggies you want. Fresh or already prepared. All and any leftovers would be great.
Preheat oven to 450.
Cut Brussel sprouts in half, chop the onion into small pieces, and cut up the broccoli and toss onto a baking sheet or an oven safe skillet. Sprinkle with a little salt and pepper and stick into the oven to roast for about 20 ish minutes or until nice and roasted. Feel free to toss the veggies in a little oil if you want. Chop up the kale and chard into smaller pieces. Once veggies are just a few minutes from being cooked to you liking, remove from oven, and toss in the greens. Cook for another 5 or so minutes until those are nice and wilted. Remove veggies from oven.
While veggies are roasting, make hummus. Place chick peas with liquid, the juice of the lemon, vinegar, garlic, and tahini into a food processor. Blend until smooth and creamy. Taste and season with salt and pepper to your liking. Dump into a bowls.
And when you have hummus make and veggies roasted, its time to compile. Dump the hummus into 2 bowls. Dump half of the roasted veggies into each bowl.. Squeeze more lemon juice onto both then grab a fork.
Eat. And yes, lick bowl clean. No shame.
If you are a falafel fan, as I am, then this one is for you. Carrot ginger falafel. Oh yes. Warm and spicy and carroty and all the things that are good, packed into a chickpea ball of mouth sized proportions. When I thought of it it sounded good, When I made it and ate it, it was everything and more I could have asked for in a freaking fantastic falafel. As for the tahini cabbage slaw, I might just be making it in my house every dang day. Super easy, super tasty, goes with the falafel like whoa but is just as good eaten on it%u2019s own. Eaten together the pair make every inch of mouth space happy. A happy mouth space, what more can you ask for?
To the falafel!
The stuff. Cooked chickpeas, carrots, a piece of fresh ginger, tahini, soy sauce, cabbage, an onion, a few cloves of garlic, red wine vinegar, some cumin and red pepper flakes, a lemon, chickpea flour, salt and pepper, and oil.
Start off by chopping the carrots into small pieces. Then cut half of the onion into small pieces. Rough chop the garlic and the ginger as well. No need to peel ginger unless you really want to.
Place it all into food processor and pulse until a small crumble.
Carrot onion garlic ginger mixture.
Dump mixture into a skillet with a splash of water. Add in the cumin, chili flakes, and a good pinch of salt and pepper and cook on the stove for 5-8 minutes until the crumble softens and becomes fragrant.
Dump carrot ginger mixture back into food processor along with the chickpeas, chickpea flour, and the juice of the lemon. Puree until smooth.
Carrot ginger falafel mixture. Now stick it in the fridge. For a little while to a day, just to let it set up a bit.
And in the mean time you can make the slaw. Shred cabbage and cut up onion all nice and thin.
Dump tahini, soy, vinegar, and a few tablespoons warm water into bowl and mix until creamy and good.
Toss in that cabbage and onion. Now you have tahini cabbage slaw.
Now to cook falafel. Grab the batter, scoop into balls then smoosh into disks. Place in a light oiled skillet and brown each side a nice golden brown.
After browning, place on a baking sheet. Once all the falafel has been browned, place the baking sheet into the oven to finish up cooking. 20 minutes or so and you got yourself falafel.
Then eat it. Falafel topped with tahini cabbage slaw. That is how it%u2019s done, with or without wraps or pitas or whatever your want. Just as it is. Falafel, cabbage slaw, into mouth.
Good things friend.
-C
serves 3-4 people or makes 14-16 falafel balls
For the falafel
2 cups cooked chickpeas drained
3-4 carrots (around 2 cups diced)
1/2 of a red onion
2 inches fresh ginger
2-3 cloves garlic
1 teaspoon cumin
1/2 teaspoon chili flakes
1/3 cup chickpea flour (can sub in oat flour if needed)
juice of a small lemon
salt and pepper
For Tahini Cabbage Slaw
1/2 head red or green cabbage (about 3 cups shredded)
1/2 of a red onion
3 tablespoon tahini
1 tablespoon soy or liquid aminos
2 tablespoon red wine vinegar
a few tablespoons warm water
Grab carrots and red onion. Chop carrots into small chunks and cut onion in half. Cut one half into chunks. Place in food processor. Take the ginger and cut into small chunks (you don%u2019t need to peel it) and peel and slice garlic and cut into small pieces. Add that to the food processor. Pulse the mixture into a very small crumble then dump the mixture into a skillet with a splash of water. Add in the cumin, chili flakes, and a good pinch of salt and lots of pepper, and place on medium heat and cook for 5-8 minutes until soft and fragrant. Once cooked, scoop back into food processor along with the chickpeas, chickpea flour, and the juice of the lemon. Turn on and and puree until smooth, stopping when needed to scrap down the side. Then either dump mixture into a bowl or leave in the container you processed it in and place in fridge for 1/2 hour to a day.
When ready to cook, preheat oven to 400.
After letting the dough sit for a bit, remove from fridge. Grab skillet and lightly oil it and place on medium heat. Take a cookie scoop or just a spoon and scoop balls of falafel into your hand and roll them around so they are packed together. Smoosh then balls a little into disks and place into hot skillet. Let cook until bottom is golden brown then gently flip and cook the other side until browned. Place cooked falafel on a baking sheet. Once you have browned all the falafel, place into oven to bake for about 20 minutes or until the falafel has firmed up to your liking.
To make the tahini cabbage slaw. Shred cabbage and cut the remaining half of red onion into thin pieces. Place tahini, soy, vinegar, and 2 tablespoons warm water into a big bowl. Mix together until light and creamy. If the mixture seems to thick, add another tablespoon of warm water. When happy with consistency, add in the cabbage and onion and toss around until everything is coated.
Now when the slaw is made, the falafel is cooked, you eat it. Serve with warm pita or wraps or a bed of greens or nothing. Just slaw on top of falafel. And FYI, this whole shebang can be eaten hot or cold or anywhere in between.
It%u2019s officially fall and officially fantastic. All of my sweaters are so happy to see me, and me them. So are the sweatpants and the socks. They are here for me to keep me all cozy and warm. Nothing like coming home on a cold dreary day and throwing on a big chunky sweater, a oversized pair of soft sweatpants, and thick wool socks. Add a cup of hot tea, a good book, and a lap blanket and heading out tp sit on the front porch and breathing in all that fresh fall air. So good. So freaking good.
Last Sunday camp was at Gifford State Park. Another Vermont gem. So pretty, so quite, the colors starting to show in the trees. We went for a nice hike into a forest of old growth trees, then launched out the kayaks on a nearby pond and paddles around for awhile. Back to the campsite for lentils and zucchini then the mr fired up some wood and we watched the sun set behind the golden trees. Laid under a sky full of the brightest stars and watching the trees whip around and listened to the wind blow hard and wild all night long. It was dang near perfect. And after the morning coffee making and tent taking down, off into the week we went.
Back in town we got back to it as per usual. The this and that of life. I made gallons of applesauce, fed Barb and went on a tea and pumpkin run (fall essentials). Went over to Moms for dinner and so the mr could fix her sink. I harvesting the last bits of summer from the garden then went to Costco to find a Christmas tree??? (They had them set up right next to the bathing suits and halloween candy. %ud83e%udd37%ud83c%udffb%u200d%u2640%ufe0f) We did some more stuff that needed doing. Looked at land in the wilds of Vermont (found a piece but there were offers on it already. So bummed) I worked the studio, picked up farm share, and I worried about the mr after he stabbed himself in the eye with a screwdriver and almost lost the eyeball. Then we had the boys sleep over Friday for Mileys birthday so she could have a sleep over with her friends at her house. We made pizza, went to the park, and all cuddled up in pile of blankets while they watched a weird cartoon something that I paid zero attention to and I read and kind of fell asleep. The next day after pancakes we dropped the off, the mr and I did the chores and then went back over for a little family party for the birthday lady. The mr made spaghetti, Miley and I decorated her cake, then they ate the pasta, then the cake, and then the mr and I peaced out to come home. Straight up, I was feeling way over stimulated from days of human interaction. So I pretty much passed the F out when we got home. I love my family but jeez can they make a lady tired.
Sunday for reals and I am feeling ready. Today is suppose to be another fantastic day, slightly on the chilly side maybe but not raining so that is good. We are heading out for one of the few camps we have left for the year. Zack Pond Woods. A little pond with a couple of undeveloped designated campsites. It is first come, first to use so we are super hoping that we get there and there will be a place available to set up for the night. If not, we might have to boogie over to a campground near by that we have already been too. But I am feeling like there might not be a ton of people trying to camp out on a Sunday night when it is suppose to get into the 30%u2019s overnight and maybe rain the morning. I am ok with all that, especially if that means other people aren%u2019t and leave us be. HA.
Anyway, hope you all are having a grand old weekend and taking in all the fall and focusing on eating all the apples and pumpkins. We know your priorities!
Links to things that I read and looked at n the internet this week.
-Today is National Coffee day!!!!! Everywhere You Can Get Free Coffee for National Coffee Day
–You%u2019ll Be Shocked by How Much Food Americans Waste Each%u00a0Year. Sadly, I was not shocked.
-Fall medicinal shopping list. These to make a syrup for cold and flu, and this for everything. Get it before you need it (and it%u2019s out of stock)
–Tree-Poaching Is On the Rise. What the fuckers. Also, so sad for trees and for the people.
-If telling people a little more gets them to recycle, well tell them what they want to hear! This simple tweak could drastically raise our pathetic recycling rates
–Vegans are more than what they do not eat. Hear Hear!!!!
-Did you know? Peanuts Aren’t Real Nuts (And More Essential Nut Info). Especially good to know when allergies are involved
–Is corn a fruit, a vegetable, or a grain? What were you thinking?
-IF you are going to smoke weed around people, you have to share it. No way around it unless you are an asshole. HA. How to politely smoke weed
–Why Millennials Are Suddenly So Obsessed With Houseplants. I grew up with a million house plants so thats one reason, but also I need real living things around me to feel good feels.
Pictures from the week
Summertime is in full swing. Hot ass days, garden fresh veggies, zucchinis as big as whales, and did I mention that hot ass heat? If you have been around here before, you know how well I handle the heat. (NOT WELL AT ALL!)
I think we are all hot these days. But really, lets just focus on the good things, like fresh summa veggies!
This sandwich is all about summertime and not having to turn on a single flame or heat source and takes all of 5 minutes to make. Zucchini because it is everywhere, beans for more substance and they are delicious, all mixed up in a creamy bean and tahini sauce. Super fast, fresh and oh so delicious. I made a big batch for sandwiches but also I was just eating it with a fork. It%u2019s a tasty one that will be on the summer rotation for sure for the next few months, or until the zucchini runs out and I dare to turn the oven on again. (Ok, I am being a whine ass. It%u2019s not THAT bad and I did turn the oven on, early morning, to bake bread. So yeah.) But for real. This is a great, super fast, throw together, fresh, light but filling, sandwich situation for any and all of your summertime eating needs. What more do we need? The mr said all he needed with the sandwich were chips. Chips and a nice cold drink.
Done sir. Done.
Now to the sandwich!
The stuff. White beans, a zucchini, and a fresh spring onion. Also some tahini, a lemon, a few cloves of garlic, a little vinegar and water, and salt and pepper. And to serve as a sandwich you need bread. lettuce, and tomato. Well you only need the bread, but you get what I am saying.
Fist off. Half the white beans go into blender or jar with the tahini, the juice of the lemon, garlic, vinegar and a splash of water. Blended unit nice and creamy smooth. And yes, it is basically hummus but whatever.
Julienne the zucchini and chop up the onion.
Note. You don%u2019t have a mandolin or done%u2019t want to julienne with a knife, well just chop the zucchini into small little chunks.
Bean, onion, and zucchini in a bowl. Add in the bean tahini mixture and mix. And ta da, all done. All of 5 minutes and no heat. Good for us.
Now here is the thing. This salad is ready to eat now. You can continue onto the sandwich path or just eat it like it is with a fork. What I really liked to do is scoop spoonfuls into lettuce cups with a slice of tomato and a squirt or mustard. So yes sandwich, but also whatever else you want it to be.
But as a sandwich%u2026. Bread. And lettuce and tomato and heck, whatever else you want to throw on there. (Again, mustard is A+)
Now stop. Sandwich time.
Stay cool!
-C
makes 3-4 sandwiches
1 medium sized zucchini
2 1/2 cups cooked and strained white beans (a can will do)
1 spring onion (or a small white or red onion)
3 tablespoons tahini
2-3 cloves minced garlic
1 lemon
1 tablespoon white or red wine vinegar
2-3 tablespoons warm water
salt and pepper
And to serve as a sandwich
bread or wrap of your choice
tomato slices
lettuce
anything else you want
Place half of the beans, tahini, garlic, juice of the lemon, and the vinegar into a jar and use a immersion blender or a regular blender and blend until creamy smooth. Add in a tablespoon at a time of water until the consistency is just slightly thinner then hummus.
Grab zucchini and using a mandolin or a knife and julienne it. (You can also just cut into small little cubes.) Dice the onion up into small pieces and toss with zucchini, onion, and the other half of beans into a big bowl. Dump the bean tahini mixture all over and veggies bean mixture and toss around. Add salt and pepper to taste.
To make it a sandwich%u2026 Place a scoop onto a bread situation, add some lettuce and tomato and whatever else you want, and eat it.
Spring is here for reals, I think. No, it is here, it has just been a bit raw and maybe a bit more rainy then it really needs to be, but whatever, it is spring and it is good. Things are greener by the day, the temperatures although not exactly warm are still inhabitable and without cause for winter jackets (although I have still been rocking the mittens) and spring veggies are popping up all over. Things are looking good.
So last week I made a pie crust with the intention to make a veggie pot pie and stuck it into the freezer. When the time came to make said pot pie, I forgot to take it out of the freezer so the crust was not meant to be for pot pie (it will probably end up as a rhubarb pie%u2026we shall see). Without pie crust, I wasn%u2019t exactly feeling like I should make a pot pie, but a tart, well yeah, sure. A crispy and chewy crackery crusted thing with almond ricotta a spring veggies because that is where the mind went and what the mr agreed sounded good. (When I make up recipes I just start taking about ingredient and preparations and wait til the mr says %u201cYea, that loud good. I%u2019ll eat that %u201c He usually will say it right away and for anything. Very easy to please or he just doesn%u2019t care%u2026hum? )
And so the tart was made and the tart was eaten in all entirety for dinner by the mr alone. Usually when he eats all of something it means it was one of the really good things. Or he is really really hungry. But he said it was a really good thing. I trust him because I agreed. I got in a few spoonfuls of the almond ricotta mixture and it is really freaking good if I do say so myself (I could eat bowls of almond ricotta all day long).
Anyway, heres to spring and all things that are green and good.
To the tart.
The stuff. Flours (white and white whole wheat), baking powder, and a little salt in the bowl. Water and olive oil, blanched almonds, a lemon, a clove of garlic, asparagus, peas, frozen and thawed spinach, a small red onion, and salt and pepper.
Start with making the crust. Mix the dry together then add in the oil and water to form a dough. Knead dough a minutes until the dough is uniform and place back in bowl and cover. Dough needs a few alone minutes to rest. I can relate to that.
While dough is resting, make the almond ricotta. Almonds, garlic, the juice of the lemon, and a bit of water go into blender. Add in a pinch of salt and pepper too.
Blend until creamy and smooth.
Dump in the spinach and blend, just until combined.
Scoop ricotta into a bowl and mix in the peas. And sure give it another taste but try not to eat it all.
Grab the onion and slice it all nice and thin.
And after the resting time, grab dough and roll it out. Try for a rectangular shape or as rectangular as you can get it, but nice and thin. Thiner is better.
Place rolled out dough onto a baking sheet and poke the bottom with lots of little hole. Take ricotta mixture and spread evenly all over crust, leaving a 1 1/2 border all the way around.
Then top with the asparagus and more onions.
Fold over the edges of the crust, sprinkle with a pinch of salt and pepper, and into the oven it goes to bake.
And then it is baked. And ready to eat (after a few minutes of cooling).
Nothing left but to cut it up and eat it.
Spring. Green. Food.
Things are good.
-C
Makes a 8×12(ish) tart
For the Crust
1/2 cup all purpose flour
1/2 cup white whole wheat (can sub for all purpose)
3 tablespoon oil
1/3 cup room temp water
1/4 teaspoon baking powder
1/2 teaspoon salt
For the Almond Ricotta and Veggies
1/2 cup blanched almonds
1/4- 1/3 cup warm water
1 lemon
1 clove garlic
1/2 teaspoon salt and pepper or more to taste
1/4 cup frozen and thawed spinach squeezed of liquid
9-10 spears of Asparagus
1/4 cup peas (fresh or frozen and thawed)
1 /2 red onion
First make the crust. Whisk together the flours, salt, and baking soda. Add in the oil and water and mix until a dough forms. Form dough into a ball and knead for minute or two on counter then place dough back into the bowl and cover. The dough needs to rest for 10-15 minutes.
While dough is resting, make the almond ricotta. Place almonds, garlic, and juice of lemon into a blender. Start blending and add in the lesser amount of water, adding a little more until the stuff all starts to blend. Blend on high for a minute or two until the mixture is nice and creamy. Season with salt and pepper, blend a second to mix then add in the squeezed out spinach. Blend until mix together then dump or scoop the mixture into a bowl and mix in the peas. Then thinly slice up the onion.
Preheat the oven to 450
After doughs little rest, lightly flour a counter and roll it out, thin as you can, in a rectangular shape. Try for at least 12in x 16in. The rectangle doesn%u2019t need to be perfect. Rough is good.
Place the rolled out crust onto a baking. Take a fork and dock the surface (poke holes into it to prevent air bubbles). Take the ricotta and pea mixture and spread evenly on crust, leaving about a 1 1/2 inch border all the way around. Add a layer of sliced red onion and then take asparagus (trim off woody ends) and either lay on whole or break in half and lay on. Add more onions on top. Fold the border of the crust over the top. Sprinkle the whole thing with pepper and place into the hot oven.
Bake for 22-25 minutes or until the crust becomes a nice golden brown. Remove and let cool a few minutes
And then cut up and eat. Right away or at room temperature. Or some now and some later. All up you you.
Store left over in fridge in air tight container for up to a few days. the crust will not be crispy but more chewy. Can stick it back in oven for a few minutes to crisp it up.
Do you ever wake up first thing in the morning with a craving, a maybe somewhat strange food craving? Lately I have been waking up and within an hour of being up, I start to think about olives. My mouth starts to water and it%u2019s like I can almost taste the salty, briny, fattiness in my mouth, which in itself is kind of weird, but for me is really really weird because up until very recently I completely hated olives. Now, well now I just want to eat them all. And first thing in the morning.
I don%u2019t pretend to understand such things. My brain is going to do what it%u2019s going do. Tell me I like olives, well all right then.
Another thing I am desperately craving is freshy fresh greens which makes complete since because I always crave greens. I am still pretty deep in root veggies and cooked things because winter and Vermont and all, but all I really really really want to eat are buckets of greens. Any kind will do, but the sweet tender baby ones%u2026. So good.
And so I combined my two cravings, greens and olives and hit those craving like POW! BAM! POOF? A salad so simple yet so amazing and mouth watering. I outdid myself here.
To the bestest, most amazingly perfect salad yet!
The stuff. A big ol%u2019 bowl of greens. Black pitted olives, half an avocado, a lemon, toasted almonds, a chunk of red onion, a couple cloves garlic, and pepper.
Almond crumbs. Exactly what it sounds like. Place almonds into a clean food prosessor and pulse until they are crumbs.
Dump the almonds into a bowl. Don%u2019t bother cleaning it out, you are about to use it again. Olives, avocado, garlic, and all the juice of the lemon now get a go in the food processor. Pulsed together into a creamy, kinda of chunky but mostly smooth, mixture of amazing. Add a few tablespoons of cold water if the mixture seems really thick, but other then that, you be done.
Very thinly slice up red onion and slice up a few extra olives.
All here, all ready to go. Just got to toss it together now.
Greens, some slices olives and onion tossed all together in a good amount of the olive avocado goodness then topped with a hardy helping of almond crumbs. Fresh pepper to finish it off.
I was barely able to stop myself from eating it all before snapping a few pictures.
All of my cravings come true%u2026
It%u2019s salad time!
-C
Makes enough dressing and crumbs to feed 2-4 people
1/2 of a ripe avocado
1 cup pitted black olives
1 lemon
2-3 tablespoons cold water
1-2 cloves garlic
1/4 cup toasted almonds
2-4 large handfuls of fresh greens (I used a mixture of baby spinach, baby chard, and baby kale. Spring mix or even chopped leaf lettuce would be grand as well)
about 1/2 a small red onion
pepper to taste
Place almonds in food processor and pulse until they are crumbly. Not to fine, a few big chunks are good.. Remove and set aside
Roughly chop the garlic and place in the food processor (no need to clean it out after the almonds). Add in the avocado and most of the olives (leave few behind to slice up). Add in the juice of the lemon. Pulse until mixture is combined but with little specks of olive left.or completely smooth if you wanted too. Scoop out into a container. You want it to be slightly loos so it will mix well with the greens. If the mixture seems really thick, add in a a few tablespoons of cold water to thin out.
Grab the onion and remaining olives and thinly slice.
Now to assemble salad. Place a handful of clean greens into a bowl. Toss a some onions and extra sliced olives into greens. Add as little or as much olive avocado dressing as desired then sprinkle as much or as little of the almond crumbs all over that. Top with freshly find pepper
Then eat it.
Nothing here but a mere craving, the fact that I had a fresh head of cauliflower, and I really wanted tahini. TA DA. I made exactly what I wanted and it was so so sooooo good. Maple Cumin is one of those super A+++ taste pairings and anything roasted cover in tahini is basically going to be a win so I had no fear when making this dish that it was going to be anything but fanatic.
And of course I was right. It was so freaking good, like now I am going to make it again and again because I don%u2019t want make cauliflower any other way ever or at least until I get sick of it or of roasted vegetables. But that probably won%u2019t happen for a while.
So if you like cauliflower and tahini and amazingness, here, make this.
To the cauliflower
The stuff. A head of cauliflower, tahini, maple syrup, cumin powder, red wine vinegar, salt and pepper, and olive oil.
Break or cu the head of cauliflower up into florets and toss with a little oil, the maple and cumin, and a little salt and pepper.
Scatter on a baking sheet and stuff it into a hot oven.
Meanwhile mix tahini with vinegar, salt and pepper, and enough warm water to thin out.
Roasted all nice and crisp and delightful.
And now you gather up all that cauliflower and cover with all the tahini you want. Grab a bowl, or just eat off baking sheet, and get to it.
And there is no shame in eating a whole head of cauliflower because hey, its cauliflower.
-C
Makes a meal for one or a side for a few
a head of cauliflower
3 teaspoons cumin
2 tablespoons maple syrup
olive oil
3 tablespoons tahini
2 tablespoons red wine vinegar
2-3 tablespoons warm water
salt and pepper
Preheat oven to 450
Break or cut the cauliflower into medium sized florets. Place in a bowl and drizzle with a teaspoon or so olive oil and toss around. Drizzle in maple, add in the cumin, and a pinch of salt and pepper. Toss until coated then dump the cauliflower onto a baking sheet. Place in hot oven for 25-30 minutes or until roasted to your liking.
While that%u2019s roasting, mix up the tahini, vinegar, and a pinch of salt and pepper. Add in warm water until the mixture is a drizzlable consistency.
Once cauliflower is out of oven, cover with tahini.
Now eat.
There will be no left overs so don%u2019t worry about it.
Salad season is here. Green salads, fruit salads, potato salads, and grain salads. All the salads and we are not mad about it.
This is a good grain salad using millet, which I am sightly surprised to hear that a lot of people have never had. Millet is kind of like quinoa, but not. I cooks fluffy and looks kind of the same, and is gluten free like quinoa. I think the biggest difference is that millet is slightly softer and tastes a bit more nutty. It also is really good at absorbing liquid flavors.
But who are we to compare. The main thing is that it is nutritious and delicious so we will eat it.
Back to the salad. This is one of those grain salads that is good cooked and served warm but only gets better with a little age (like an hour or a day) in the fridge. Served hot or cold or room tempature, and is hearty enough to be meal like but is also a fantastic addition as a side to any of you meal plans. Like maybe a BBQ? Whatever the occasion, or non occasion, this is just a really good grain salad situation and I think you will be pleased, smiling all smiles while eating it.
To the millet salad.
The stuff. Millet, a couple handful of greens, a few mushrooms, an onion, dijon mustard, a little maple syrup, red wine vinegar, a lemon, a couple cloves or garlic, some toasted sunflower seeds, and salt and pepper.
Start by giving the millet a little toast, just enough to really up the nutty flavor and make it that much more yummy. It only takes a few minutes in a skillet on medium heat. Not an entirely necessary step, but you should do it.
Toasted millet goes into pot with water. Bring pot to a boil and then turn to the lowest simmer and cover.
While millet is cooking, get to the mushrooms and onions. Chop the onion thin and small and the mushrooms thin and small as well. Place them into the skillet with a drizzle of oil and place on medium heat. Mix around every now and then and cook until the mushrooms and onions are soft and a nice golden brown.
And make the vinaigrette. Minced garlic, mustard, vinegar, the juice of the lemon, and maple syrup get put into one place.
Mixed and now all is one.
Millet. Cooked and fluffed and ready to go.
Cooked mushrooms and onions go into the pot, along with the greens, the sunflower seed, and the vinaigrette. This step can be right away or you can wait a little while for things to cool as to not wilt the greens. Up tp you.
Mixed with love and hunger.
Even if you are making it ahead of time, just do yourself a favor. Grab a bowl, grab a fork, and get down on it.
-C
Seves 4-6
3/4 cup uncooked millet
2 cups water
1 sweet onion
3-4 big button mushrooms
Large handful or two of bitter greens like arugula, spinach or a mixture.
2 tablespoon brown or dijon mustard
2 tablespoon red wine vinegar
1 teaspoon maple syrup
2 cloves garlic
salt and pepper
handful toasted sunflower seeds
To start, toast millet. Dump the uncooked millet into a pan and place on a medium heat tt for about 5 minutes or until you start hearing the millet crackle.This gives the millet a slightly more nutty flavor but you can skip this step if you don%u2019t care.
Dump millet and water into medium pot. Place on high heat until water starts to boil then tun heat down to simmer and over. After about 15 or 20 minutes, when most of the water is gone, turn pot completely off. Let sit, covered for another 10ish minutes then take a fork and fluff it.
While the millet is cooking, cook the veggies. Grab the onion and slice it up into thin pieces. Clean off the mushrooms and chop them into small thin pieces too. Place the chopped stuff into the skillet with a drizzle of olive oil and a pinch of salt and place on a medium heat. Stir occasionally and cook for about 15 minutes or until the onion and mushroom are a nice dark, golden brown.
And make the mustard vinaigrette. Mince garlic and place into a jar or bowl with the vinegar, the mustard, the maple, and the juice of the lemon. Mix and set aside.
Once the millet is cooked, the mushrooms and onions are cooked, and the vinaigrette is made, all you have left to do is mix everything together. You can do this while things are slightly warm which will wilt the greens a bit, o let them cool so the greens stay fresh. Up to you. (I like the greens fresh)
Finally, dump cooked mushrooms and onions into pot with cooked millet. Add in the greens and sunflower seeds and drizzle the vinegertte all over. Toss around until fully mixed. Sprinkle with lots of fresh cracked pepper.
Then eat. Or place in a container to bring to the BBQ.
%u00a0Cabbage is probably the number one eaten food in my house. It is not uncommon for us to go through a very large head a day. And I get that it may seem odd to you, but it’s true. We are cabbage people, so much so that we will probably turn into cabbage patch people. I can see it now.
One of the reasons that we eat so much cabbage is that it is so versatile.. Raw, steamed, roasted, the possibilities are a plenty, not to mention that cabbage is pretty dang cheap. And not to far around the corner it is St Patrick’s day when cabbage is basically given out for free. During this time I stock up, buy 100 lbs and ferment, roast, and peel my way through all of it. Is it sick that I am kind of excited about that ? (there are worse things to be excited about)
This cabbage dish is one of those dishes that can be eaten on it’s own, as a side, or as a condiment. Topped on a salad, stuffed into a sandwich, or shoveled into the mouth. You really can’t go wrong eating it anyway.
The stuff. Cabbage, onions, caraway seeds, salt and pepper, and some apple cider vinegar. (I accidentally grabbed the oil)
Shred up the cabbage and onions. Thin is good, but some bigger pieces are good too.
Into a big pot sprinkled with caraway, salt and pepper. A splash of water helps to get things started. Stickon a low heat topped with a lid.%u00a0 And just let it be for a while butgive it a stir ever 10-15 minutes or so.
About an hour it’s all cooked down and sweet and tasty as can be. A splash of vinegar finishes it off.
This batch was destined for the mr’s open faced cheese sandwich. I thought I made enough to pack some for lunch, but
I ended up just eating the left overs for a snack. I don’t know why I didn’t make more.%u00a0 Next batch I’ll make it a double.
Happy day to you.
-C
makes about 2 cups
1 small or 1/2 a large head of cabbage
2 yellow onions
2 teaspoons caraway seeds
1-2 tablespoons apple cider vinegar
olive oil for pot
salt and pepper
Thinly shred the cabbage and thinly slice the onions. Dump the now shredded cabbage and onion into a large dutch oven or heavy bottom pot that has a tiny drizzle of olive oil. Sprinkle with caraways seeds and about a teaspoon salt, a good splash or water then mix around. Place pot on a low heat and cover. Let cook down for about 45 minutes to an hour , stirringever 10 minutes or so, until the mixture has shrunk to about 1/3 it’s original size and is soft and tender. When just about done, mix in a tablespoon of the vinegar . Taste and season with more vinegar, salt and pepper if you like.
Eat as is or is or on salads, sandwiches or wraps.
The other day the mister and I started reminiscing about some of our earliest memories of what our parents fed us or what they used to eat when we were growing up. One of the dishes that we both remember eating was the classic creamed beef on toast, or as my mom use to call it, shit on a shingle. %u00a0 Yup, shit on a shingle. (who ever started calling creamed meat on toast is a freaking genius)%u00a0I think that as a kid, I liked %u00a0the dish just for the mer fact that I could say the word shit and get away with it. %u00a0I think my mom liked it for few reasons; she could make a big butt load of it really fast, for a crap load of kids, on the super cheap. And I think that she just really like it. %u00a0
Shit on a shingle is one of those foods that I like to call “trash food”, you know stuff like beefaroni or pork and beans. Stuff that we all loved as little kids but might think twice about feeding to anyone now. ( I’ll still feed nick a can of beefaroni.. he likes it)%u00a0As a throwback to our earliest food memories, (also a lack of food in the house and wanted to make something fast, easy, and cheap.. thanks mom!) I made the mister my rendition of the classic. Creamy Lentils and Mushrooms on toast. Not quite as trashy as creamed beef (lentils, mushrooms and onions are not trashy) but you get the same reminiscing feeling. I guess I could call it something like “stuff on a shingle” or lumps on a shingle”, but what kid (or adult) %u00a0would want to eat that. Let’s just stick with shit, it makes it more awesome to eat it.
The shit%u2026.. A few mushrooms, a bit of onion, cooked lentils, flour, milk, oil, salt and pepper, and garlic powder. And the shingles.. 2 pieces of thick white country bread.%u00a0Slice the mushrooms and the onion and toss into a skillet with a drizzle of oil. Cook on medium heat until browned and fragrant..Remove from pan.In the empty pan still on medium heat, add in the olive oil and the flour. Whisky constantly, slowly add in the milk. Keep whisking until sauce thickens. Remove from heat. Add in %u00a0salt, pepper, and garlic powder.Add the mushrooms and the lentils into the sauce and give it a good mix. Oh, and don’t forget to %u00a0toast up the bread. Now dump that shit all over those shingles! Oh the memories.
If you need to, make it classy by serving it with a cloth napkin and a nice fork and knife. But eat it however you need to. (As kids we like dirty hands and no fork, preferably with a big tall glass of overly sweetened red flavored kool-aid)
Enjoy this fantastic Spring weekend!
-C
%u00a0Shit on s Shingle (Creamy Lentils and Mushrooms on Toast)
One serving
1 cup cooked lentils
2- 3 mushrooms
1/2 small onion
1 cup milk (cow, nut, plant%u2026 whatever you want)
1 tablespoon olive oil
1 tablespoon flour
1 teaspoon garlic powder
salt and pepper
2 pieces of nice thick but soft white sandwich bread
Slice the mushroom and onion and toss into a pan or skillet with a drizzle of oil. Cook on medium heat until brown and fragrant than dump onto a plate. In same skillet, add the oil and the flour and mix with a whisk while slowly adding in the milk. Keep whisking until sauce starts to thicken. Turn heat to simmer and add in the cooked lentils and the saut%u00e9d mushrooms and onions. Push down the bread in the toaster.. and when it pops up, dump the shill over it.
I know that it it spring, but I still have a winter farm share for another month and will be cooking and eating roots and squash until the summer share starts in early June. And I am good with that cause I love me some root veggies and butternut squash.%u00a0 But, yes, it is spring and my body isn’t craving the super hearty, rich foods that it was just a few short weeks ago (more like last week) When the temperatures first start to go up, I usually want my food to not feel as heavy or my spices to be quite at warming (I am still all over curries and hot hot hot sauces in the summer). It’s like I have said before, I tend to change up my spices with the seasons. %u00a0
So to give a lighter feel to a heartier squash, I busted out one of my favorite spices, the oh so lovely tarragon. It has a sweet, light, fruity and floral taste that pairs beautifully with the squash and onions. It give the dish a nice spring like flavor that will leave you feeling satisfied without wanting to move directly onto the couch and hide under a blanket. This is a eat and ride you bike kind of dish ( you don’t actually have to go for a bike ride if you don’t want to)
Note. If I had a grill, I would definitely cook this dish on it. As of now, I don’t own one so I am left to cook on the stove. But by all means, if you have a grill, do it up!
Half of a medium sized butternut squash (or use a whole one.. I had a half in the fridge that was waiting to be cooked) %u00a0and one whole onion (two if you use a whole squash) %u00a0Apple cider vinegar, olive oil, salt , pepper, garlic powder, and, last but not least, the oh so fragrant and tasty, tarragon.%u00a0
Chop the onion %u00a0and the squash into big chunks. If you don’t like the skin of the squash, you can peel it, but I like it so I don’t peel. Drizzle olive oil in a pan or a baking sheet, toss the veggies in and add the garlic powder, tarragon, salt and pepper and a few splashes of apple cider vinegar. Toss around. Stick into oven at 425 degrees for about 30-40 minutes.%u00a0When the squash is tender and the onions are cooked, remove from oven.%u00a0%u00a0
I am pretty sure you can figure out the rest.
Happy day!
-C
Tarragon Butternut and Onions
Half of Medium Butternut Squash
1 Large Onion
1 Tablespoon Dried Tarragon (use fresh if you have it.. 2 tablespoons)
2 Tablespoons Apple Cider Vinegar
1 Teaspoon Garlic Powder
Salt ans Pepper
Olive Oil
Chop squash and onions into similar size pieces. Toss in a skillet or on a oiled baking sheet and add the rest of the ingredients. Toss around and place into a 425 degree oven for about 30-40 minutes or until squash is fork tender. %u00a0
Remove from oven and eat.
%u00a0Make as a side dish or add to a salad. Eat as a light lunch, or a midnight snack%u2026 eat it however you want.
Wowzers.. What was I thinking! I know, the same thing you are%u2026YES YES YES!!! Gluten free what now.. My lovely sister is on that ban wagon. She has been having”issues” lately(so many, it’s hard to pin point) and says she is feeling better without the gluten. Me being the lovely person that I am want to feed my poor sister, make her happy with food. %u00a0I HAD to prepare that lady a dinner and it had to be pizza cause I know how much she likes her pizza. So I brain storm. What would be a good gluten-free pizza crust? I could do the obvious and %u00a0get gluten-free flour, but to be honest, that’s some expensive stuff and I really didn’t feel like going to the store. I wanted to work with what I had in the house%u2026.and ah ha, there it is, %u00a0cornmeal.. With a little bit of water I can turn that into some polenta and a super gluten-free pizza crust.
So in walks polenta(if polenta could walk) What goes good with polenta? Caramelized onions, mushrooms and yes, my last delicate squash.(I am too nice) A nice base of marinara sauce and a bit of parmesan cheese mixed into the crust and sprinkled on top%u2026..a complete work of genius that I was proud to serve to the gluten free lady.
Note. I have to make this clear, just because this pizza is gluten-free doesn’t mean that a person that is not gluten-free cannot eat this. Anyone and Everyone should eat this pizza.
%u00a0There really isn’t a whole lot of ingredients to this pizza%u2026 Cornmeal for the polenta. Marinara sauce%u2026.I used jarred marinara because it was a little easier and we don’t always need to make things from scratch%u2026Lots of onions(2 finely sliced), handful of %u00a0sliced mushrooms, thinly sliced squash and parmesan cheese. Most of the prep takes place at the same time, but that’s good, we can multi task, just have everything pre chopped and ready to go. First thing first, start the polenta
There are so many different ratios and directions on how to prepare polenta, so if you feel like your way is better, I trust you. What I did for this crust was 1 cup cornmeal to about 2 1/4 cups water. The main thing is the finished product. You want a pasty paste that is spreadable but not overly watery.
Bring the water to a boil and constantly whisk while gradually pouring in the cornmeal. After a minute to two, it should be pretty well incorporated and there shouldn’t be to many lumps. Turn the heat down to simmer and stir a lot %u00a0until the polenta starts to pull away for the sides of the pot. Really scrap the bottom of the pot so it doesn’t burn. Once its done, add in a 1/4 cup of parmesan( if you want to keep it vegan, just don’t add it) and salt and pepper.
%u00a0 %u00a0%u00a0 %u00a0 %u00a0 %u00a0%u00a0On a well oiled baking sheet or pizza sheet..spread the polenta into the shape of your desire. I went with a somewhat circular shape, but now that I think of it, I wish I had been more creative, like maybe a triangle or even the shape of a bus%u2026.Yeah, a bus shaped pizza would have been cool.
This crust needs to be pre baked so stick it in the oven.It should take about 20ish minutes.
%u00a0%u00a0 %u00a0 %u00a0 %u00a0 %u00a0 %u00a0You can do this pre crust or at the same time, but roast your sliced squash. Place single layers squash on an oiled pan, salt and pepper, then into the oven. It should take 10 minutes on each side.
%u00a0 %u00a0 %u00a0
You got the crust in, the squash in, now we need to caramelize the onions. You may be thinking that 2 onions is a lot, and it kind of is, but you want a lot. A tiny bit of oil into a skillet and all the onions. medium low heat with a lid, string on occasion. When the onions start to caramelize, add the mushrooms and cook until onions are nice and soft and the mushrooms are no longer raw. %u00a0By the time you done with this task%u2026everything should be ready%u2026.time to assemble!
%u00a0 %u00a0%u00a0
First marinara%u2026then the roasted squash.
%u00a0%u00a0 %u00a0 %u00a0I Sprinkle a layer of parmesan cheese and pile on those onions and mushrooms,. Sprinkle with a little more cheese. %u00a0( use vegan cheese or no cheese if you want it vegan) Back into the %u00a0oven for another 15 minutes to give everything some time to crisp and melt. %u00a0Remove from oven and appreciate%u2026That is one good looking pizza. I took %u00a0a long spatial and run under the crust just to make sure if wasn’t stuck. I also found that if you let it %u00a0cool for a few minutes before serving, the polenta gets a little stiffer and easier to handle, but not necessary.
Its time to eat! %u00a0 And I know that it was a success. This is my gauge for how good it was%u2026I stopped by the next day to drop a xmas tree stand off to her(again, look at how nice I am) and she was eating lunch%u2026the left over pizza. That might not seem like anything to you but to me%u2026 She doesn’t eat leftovers. Sure, she will stick them in the fridge, but that’s where they stay until she tosses into the garbage. The pizza was leftover good%u2026.That is good!
Polenta Delicata Caramelized Onions and Mushroom Pizza
Ingredients
1 cup polenta (Cornmeal)
1 tablespoon olive oil, plus more for the pan
2 %u00a01/4 cup water
1/2 cup grated Parmesan(omit if making vegan)
%u00a01/2 of Marinara sauce
1 small delicata squash
2 medium onions
8-10 mushrooms
2 gloves garlic
Directions
Pre heat oven to 425
In a medium saucepan, bring 2%u00bc cups water to a boil. Whisking constantly, slowly add the cornmeal while constantly whisking. Once full incorporated, turn to low and stir for a few minutes until the polenta starts to thicken and pull away from the sides. Stir in 1/4 cup of parmesan (if using). Salt and pepper to taste. Genously oil a pizza sheet to a cookie sheet and spread the polenta mixture %u00a0about a 1/2 thick. Place into oven and bake for 20-25 minutes or until crust is a nice golden brown.
While the crust is cooking, place thinly sliced squash on an oiled baking sheet and sprinkle with salt and pepper. Place in oven at the same time as crust, flipping squash after 10 minutes. Cook until fork tender, about 20 minutes.
While the crust and squash is baking, caramelize the onions. In a large skillet with a bit of oil. toss in onions and a little salt. %u00a0Cook on medium low heat with a %u00a0lid, giving them a good stir every now and then. Once onions are nicely cooked down, toss in the mushrooms. Continue to cook unit mushrooms are no longer raw.
Remove crust %u00a0and squash from oven and let cool for a minute. Now just pile stuff on. Spread %u00a0marinara sauce evenly around crust. Add squash and top with cheese. Dump the onions and mushroom on top and sprinkle with a bit more cheese.(Again, use vegan or no cheese to keep it vegan) Place back into oven for another 20 minutes.
Remove and let cool for a few minutes%u2026%u2026%u2026..and then eat eat eat!!!
A good side dish for this pizza%u2026a nice light arugula salad. Hey, you could even just toss some greens right on top of this pie, that would be fantastic too!
Soup. No joke (although people make jokes about me), is eaten in my house, at lunch and sometime even at dinner. Every. Single. Day. There is just no going wrong with a big pot or veggies, spices, sometimes beans, sometime not. I make it in big batches, in small batches. Sometimes it%u2019s more a bisque, or a chili or a stew, or just a really really spicy broth. Whatever I have in the fridge or freezer, the stuff that might not be great eaten fresh, sad spinach%u2026. It all turns in soup.
Does that make me some kind of weird soup freak? Maybe, but I am ok with that. And to those who see me walking down the street and yell silly things about me having to get home to eat my soup (it happens more then you know) well, you know you are just jealous and secretly wish you were eating soup with my too. So %ud83d%ude1d.
Are you a soup person too? I mean, who isn%u2019t, especially right now that is is fall time and it%u2019s getting chilly and darker out and all we want to do is hibernate. Definitely a soup time if there was ever a specific time for soup. And this soup, made even more hardy and comforting with the addition on dumplings. I actually made it specifically for the mr because, well just because I love him and thought he would enjoy it. And well, he loved it because dumplings of course. Light and slightly chewy, soup thickening dumplings with hot and comforting soup. A perfect end to a day of him working outside in the cold.
So soup. Make it. Dumplings. Add those too. You will be a winner with food, and in life.
To the soup and dumplings!
The stuff. A few stalks of Swiss chard, a couple carrots and a few potatoes. An onion, dried navy beans, some cherry tomatoes. Then there is flour, with salt and baking powder, a little oil, plant based milk, and salt and pepper.
Veggie chopping time. Dice the potatoes, the onion, the carrots, and the stalks of the chard into small mouth sized pieces. Cut the cherry tomatoes in half and the chard leaves into small ribbons. Set the tomatoes and greens aside.
Dump the carrots, onion, chard stalks, and potatoes into a very large pot, add all the spices, a good pinch of salt, lots of black pepper, and a few splashed of water. Cook on medium high heat for 5-7 minutes to just kind of sweat the veggies a bit.
Add in beans and water. Bring pot to a boil then reduce heat to medium and let cook for about an hour. Just give it a stir once in a while.
After an hour check the beans. If they seem close to being done (almost squish in between fingers), then add in the tomatoes, the chard greens, and a few more cup of water. Keep on heat and start the dumpling batter.
Dumpling batter. Mix together the dry ingredients then add in the wet. Mix until combined.
Soup. All nice and looking just about done. The vegges are soft and tender, the beans are cooked. Check and season for salt now then get ready to drop dumplings.
Drop the dumplings. Tablespoons of batter go right into the soup. Thencook, with a lid slightly covering pot, for about 15 minutes.
Look at that. Soup with soft, fluffy, dumpling ready for consumption.
Now all you have to do it serve it up and eat it up.
Soup all day. Every day. Dumplings too!
-C
makes 4-6 servings
For the soup
1/2 cup dried small white beans
1 large onion
2 carrots
2 small red potatoes
3 Swiss chard leaves and stalks
handful of cherry tomatoes (about a cup or so)
1 teaspoon garlic powder
1 teaspoon dill
1 teaspoon thyme
1 teaspoon ginger
1 teaspoon marjoram
1 teaspoon ground mustard
1/2 teaspoon sage
1/2 red pepper flakes
12 cups water
salt and pepper to taste
For dumplings
1 cup all purpose flour
1 tablespoons oil
1 teaspoon baking powder
1/2 teaspoon salt
1 teaspoon black pepper
1/2 cup warm water or plant based milk
Couple quick notes. I use water but if you really want, use veggie stalk. I find stalk overpowers soup and makes it taste salty, even when it is low sodium. Plus water is there and free but again, use stalk if you want. Also, you can use just about any veggie that you like so if you want to replace chard with celery and spinach or throw some red peppers into the soup, go for it.
Start by small dicing the potatoes, the onion, the carrots, and the stalks of the chard. Dump it all into a large pot, along with all the spices and a good pinch of salt and pepper, and place on the stove on medium high heat with about 1/2 cup water and cook for a few minutes. Cut the cherry tomatoes in half and cut the chard leaves into small ribbons. Set aside.
Once the veggies and spices have had a few minutes on the stove, add in the dried beans and 10 cups of water. Bring the pot to a boil then reduce to a medium heat. Cook for about an hour, giving it a stir once in a while. After an hour, check beans for doneness but removing one or two and pinching between fingers. . They should be close to done by now. If they are still really heard, cook for another 20 minutes, if almost cooked through, toss in the tomatoes, the chard greens and the other 2 cups of water. Keep cooking.
In the meantime, make dumpling dough. Mix the dry together then add in the oil and milk. Mix until just combined. Set aside.
Once the soup is done (the veggies are all soft and tender, the beans are cooked through which should take a total of 1 1/2 hours), it%u2019s time to dumpling. Turn the soup up to a medium high heat and carefully drop tablespoons of the dumpling batter right into the soup. The batter will float. Once all the dumplings are in, half cover the pot and let the dumpling cook for 15 minutes or until the dumplings are big, light. and fluffy.
Remove pot from heat and serve and eat right away. Big bowls, Big spoons. Pinch more of salt if needed. Lots of pepper.
Let%u2019s talk about how soup is the perfect food. It can be light and fresh, hearty and deep, chunky or smooth. You can eat it with a spoon, or somtime a fork if warranted, or just drink it from a mug. It%u2019s usually a one pot meal, a small pot for one, a big pot for many. Make a pot of soup and eat some now and save some for later. It freezes amazingly well. Got a few extra sad carrots and wilted greens? Toss them into a pot with whatever you have on hand, maybe those veggies scraps and you got yourself a meal. Want something more filling, just add in some grains. Feeling sick, warm soup will make it all better. Feeling fresh and springy, well soup is there for you too. Seriously soup, you can do anything. If I could, I would marry you. %u2665%ufe0f
This soup is one of this velvety smooth, light but rich, delicious beyond delicious soups. A fresh spring time soup. Not to hearty or heavily spiced. Super rich and creamy and flavorful. Bright ass green which makes it amazing in itself, but then with a nice tangy sumac tahini swirl on top, well it is just about the most perfect soup. I made to share, which I did, (and everyone licked their bowls clean) but then hoarded the little bit left over and ate it cold for a late afternoon snack. That is another thing about soup, you can eat is cold and it is still amazing.
Tasty and delicious, and nutritious. This soup does it all.
To the soup!
The stuff. Peas, chopped broccoli, and chopped cauliflower which are all frozen and slightly thawed. You can totally use fresh here too, but I just so happen to have it frozen so you might as well save the fresh stuff for fresh eating. Also have a big yellow onion, a few cloves garlic, some tahini, a lemon, sumac, and salt and pepper. You need water which I did not picture here.
A pot, some water and a roughly chopped onion and the garlic start off this soup. Bring the pot to a boil, then turn to medium and let the onion and garlic cook until very tender. I have been making a lot of soups starting with this step lately. Boiling the onion and garlic until tender and fragrant really make for a super flavorful and clean soup base. Or soup in itself.
Now add in the broccoli and cauliflower to the pot and cook until tender.
Mid soup cooking time is a good time to make the sumac tahini sauce for the swirl. Basics here, just mix the tahini, the sumac, a pinch of salt and pepper, the juice of the lemon and a tablespoon of warm water together until smooth.
Last but not least, the peas. Add them in and they just need a few minutes to cook through.
And then it all gets blended to become this green creamy goodness.
Ladle into bowls, grab the sumac tahini sauce and swirl it on in. A tablespoon or so is good. And don%u2019t forget a little more pepper and another pinch of sumac for good measure.
Just appreciate for a moment. That is one good looking bowl of soup. And it taste even better then it looks.
-C
Makes about 4 serving
1 1/2 cups fresh or frozen peas
1 1/2 cup chopped fresh or frozen cauliflower
1 1/2 cup chopped fresh or frozen broccoli
1 large onion
3-4 cloves garlic
4-5 cups water
Salt and pepper
1 teaspoon sumac
2 tablespoons tahini
2-4 tablespoons warm water
Start by removing the papery skin from the onion and chop into a few big chunks. Remove the skin from garlic too. Place into pot with 4 cups water. Turn heat on high and bring to a boil then turn heat to medium and let onion are garlic cook until tender which should take about 15-20 minutes
Once the onion is cooked, add in the broccoli and cauliflower. Turn heat back to high and bring to a boil again then turn back down to medium heat. Keep cooking until tender (another 15 minutes or so) then add in the peas. Keep on heat until peas are cooked through then remove the pot from heat and either transfer to a blender or use a immusrian blender to blend the soup until smooth. Add a little more water if needed to get to the right consistency to blend right. Or if you want a thinner soup.
For the tahini sumac swirl just mix the tahini and sumac together along with the juice of the lemon, two tablespoon warm water and a pinch of salt. Mix together until smooth. If the mixture is to thick, add another tablespoon of water.
To serve. Ladle or pour soup into bowls and drizzle and swirl the tahini sumac on top. Sprinkle with pepper and a pinch more sumac and you are good to go.
It is getting oh so much nicer out yeah? Springing and such, well kind of. Still a wee bit chillier then it should be around here but still, it is spring and I am taking it.
And with the spring, I feel the itch, the itch to spend all of my free time outside. Out doing things that are not inside because I spent the last 7 long months inside way too much. I needed to be outside as much as possible and as it gets even nicer and warmer and garden temperature-able, I am basically going to be living outside.
Bring in sesame noodles. Super fast, super easy, super duper in every way. Make a big old batch and eat now, eat later, eat hot or eat cold. Everyone loves them, they love you, etc. etc%u2026 A perfect meal to have in rotation when you know that you are not going to have or want to spend much time cooking in the kitchen because you will be outside playing in the dirt and soaking up the sun. And think about all the picnics and BBQ%u2019s to come. These suckers are fantastic to have at any outdoor eating event. They are even peanut free so you can safely bring them to potlucks and such and don%u2019t have to worry about accidentally kill a peanut allergy person. And you can make them gluten free as well if you sub in your favorite gluten free pasta. These noodles, I am telling you. They are a winner in every way.
So with out further ado, the noodles!
The stuff. Spaghetti noodles, tahini, a few cloves of garlic, some toasted sesame oil, soy sauce, red wine vinegar, honey (used whatever sweetener you like), red pepper flakes, tasted sesame seeds some cabbage, half a red onion and a carrot.
Get pasta cooking. Boil water, drop noodles in, you know the drill. Cook as long as the the noodles need cooking, just make sure to not over cook them cause soggy noodles are nasty.
Chop, shred and julienne the cabage, onion and carrot. Nice and thin.
Mince the heck out of the garlic. Or use a garlic press if you want.
Now make the sauce. Add the minced garlic, along with the soy, sesame oil, vinegar, sweetener, and chili flakes to the bowl with the tahini. Mix, mix, mix until it is all incorporated and not lumpy. And that is that.
Noodles should be done by now so strain them out.
Add the prepared veggies to a big bowl.
Add in the cooked noodles
Cover with sauce and toss all around until all the noodles are coated and delicious. Sprinkle with sesame seeds and a pinch or so more of pepper flakes.
And then it is time. Eating time.
Happy spring!
-C
serves 3-6
3/4 lb (3/4 of a package) of your favorite spaghetti noodles (or linguine or similar noodle)
2 tablespoons toasted sesame oil
1/4 cup soy (low sodium if you have it and gluten free tamari if needed)
3 tablespoons red wine vinegar
3 tablespoons tahini
2-4 teaspoons red chili flakes
1-2 teaspoons sweetener of choice (maple, honey, or brown sugar)
4-5 cloves garlic
1-2 tablespoons toasted sesame seeds
about a 1/4 head of cabbage
a carrot
small red onion
Bring a pot of water to a boiling cook the noodles as directed on package. You want them al dente, cooked all the way, but barely. No soggy noodles. (unless you like them soggy)
In the mean time, shred the cabbage, julienne the carrot (or shred it) and slice the onion so very thinly. Place into a large bowl. Now mince garlic and place into a bowl along with the soy, sweetener, vinegar, tahini, sesame oil and a teaspoon or two (more for spicier) of chili flakes and whisk until completely incorporated. Taste and adjust if needed. Add more tahini for more body, more sweetener if needed or more hot pepper flakes for more spice.
Once noodles are cooked, drain and place into large bowl along with the shredded and julienned veggies. Pour in the sauce and toss it all around until all the noodles are covered. Sprinkle in the toasted sesame seeds and a small pinch more of the red pepper flakes.
Eat. Eat warm, room temp, or cold. They are delicious any way.
Any left overs just stick in fridge. Can be reheated or not. Also, you can make the sauce and the noodles a few day ahead of time of when you want to have the dish Just mix the sauce with the noodles when you are about to serve them%u2026 So simple!
I’ve gone on a complete split pea binge. I have been making it (or reheating it if I have left overs) every day for the last two weeks, no joke. (This lady needs her protein) I get home, grab what ever veggies I see first in the fridge, a few jars of some spices, the giant jar of dried peas, and make quick work of lunch. Chop chop, dump, splash, stir. I am a soup (stews and bisques too) master. Soup for lunch. Right in all ways and just needs to happen.
Sometimes I’ll make soup and it’s just good soup.%u00a0 Sometimes it will end up being really good .This soup, well this soup is really freaking awesome and is my new go to for split peas. Thick and creamy, mildly sweet from the parsnips and ginger, but mellow at the same time. Add a little or a lot of pepper (lots of pepper here) and you got yourself perfection.
Soup that warms you up from the inside out and leaves you happy and full.
Split pea for life!
The stuff. Dried split peas, parsnips, a carrot, and onion, some Italian seasoning, ground ginger, bay leaves, and salt and pepper. Also need water.
Chop the veggies. Smaller chunks are good, but don’t worry to much, it’s all getting blended up anyway.
Now toss all those veggies into a big heavy bottom pot and mix in all the spices. Stick o stove with a splash of water and turn up the heat to give the veggies and spices a few minutes alone to active all the goodness.
Once the smell hits you nose and the veggies look like they need some water, dump in the split peas and add enough water to completely cover everything plus a few extra inches. Bring the pot to a boil then turn down to low, stick a lid on pot, and let cook. Check an stir every 10 minutes or so. If it starts to look dry, add in another few cups of water.
Peas are soft, veggies are cooked and now soup is almost ready to go.
Just blend it until smooth. Take liberty hear and smooth it as much or as little as you like. Also if you want to thin it out, just add more water. Want to thicken it up, just cook for a little while longer. ( spit pea is so easy).
And that is it.
You know what to do from here.
Soup time!
Stay warm and have a great weekend.
-C
makes a large pot of soup that will feed 4-6
1 pound dried split peas
1 medium yellow onion
1 large carrot
1 pound (about 4-5) parsnips
2 tablespoons Italian seasoning*
2 teaspoons ground ginger
2 bay leaves
salt and pepper
water
*Note. Italian seasoning is pretty basic and you probably have it, but if not you can make your own by mixing equal parts thyme, oregano, basil, and rosemary.
Start by rough chopping all the veggies and placing them in a large heavy bottom pot. Mix in the spices and bay leaves. Stick on the stove with a splash of water and cook for a few minutes to let the spices ans veggies heat up and smell all nice. Add in peas and enough water to completely cover everything in the pot plus a few inches. Bring to a boil, them turn heat to low, cover pot, and let cook for about 1/2 hour-45 minutes, checking and stir ever 10 minutes. If the soup seems to get too dry, just add in a few extra cups of water.
Once the veggies and peas are soft, turn heat off and using the blending device of your choice, blend until smooth. Season with salt and pepper to taste and eat hot but watch your tongue.
A few weeks ago the mr and I were standing at the check out line at the grocery store when up behind us comes Shannon (sister of mine) which was really weird because I was just saying how I felt like I was going to see her there. (Sister ESP) Of course we just started talking and stopped paying attention. (handed over the bags and wallets to the mr) She was telling me about the party she was going to and the salad she was really excited to go home and make for that party. (like as excited I as I get when I talk about salad, but maybe she was more excited about the party, hard to tell)%u00a0 The lady cashier rang us through while the mr was kind enough to bag and pay, then rang Shannon through, which the mr was also kind enough to bag and pay(using her card). We chatted a bit more, walked our separate ways and moseyed on home. When we got there, I started putting our groceries away and there it was, a bag of Shannon’s groceries, the stuff for the salad she was going to make for her party. Oops. So the mr called her up and told her, was willing to drive all the way back to her house right then and there in the snow to bring it to her no problem, but she just laughed and said no. She would just make something else. All she wanted was for us to eat it, or better yet, make the salad she was going to make and then eat it.%u00a0 And that is what I did, or at least I think I did. I used the cabbage, limes, and broccoli that she bought, some black beans I had,%u00a0 chopped and tossed and ate. Not sure if it is exactly what she as describing, but it’s good.
Thanks Shannon for the bag of groceries, sorry we stole it. I owe you a salad.
The stuff. Some red cabbage, a broccoli crown, black beans (rinsed ans drained) a lime, and salt.
Cabbage gets shredded and broccoli gets chopped into small little pieces.
Chopped veggies, beans, lime juice and salt go into a big bowl.
Tossed. Now it may look done, but what this salad really needs is time to let the lime juice do it’s work. Let the salad sit for at least 30 minutes, but heck, if you make this a few hours, if not even a day ahead, well it’s only going to taste that much better.
And after the wait, eat it.
This salad makes for a great light Lunch or a pre-dinner (the small meal you eat before dinner, that’s a thing right?)
Enjoy your weekend.
-C
serves 4-6
2 cups cooked or 1 can of black beans, rinsed and drained
Half of a small head of red cabbage
1 large broccoli crown
1 or 2 juicy limes
a good pinch of salt
Finely shred the cabbage and small chop the broccoli. (stem and all) Dump the veggies into a bowl and sprinkle with salt. Mix in the drained black beans and toss with the juice of the lime. Let sit for at least 30 minutes. This salad taste good just made but only gets better with time, like if you can make it a few hours, if not a day ahead, go for it. When you are ready to eat. well eat it.%u00a0 Add more salt if needed, more lime juice if you want, maybe a pinch or two of pepper.
This is what I am talking about. Winter has finally come with it’s snowy snow and super freezing cold temperatures. It just feels right, even if I freeze a little every time I leave the house to walk the dog. But that’s ok, it is suppose to happen.
And when it’s cold and snowy we are all suppose to eat lots of warm and hearty good things to warm us up in our insides. So we soup.. Soup all day, everyday, all winter long, especially in the case of feeling slightly ill (which I have been for the past week) Eating soup makes everything better.%u00a0 Soup soup soup.
Soup, what a weird word. Anyway.
This soup is amazingly easy to make and even easier to eat. Full of veggies, spices and lots of beans. A perfect meal to satisfy your frozen self. And bonus, not full of shit. It’s super healthy, protein packed and just plan ol good. Warm. hearty, healthy.. What more can you ask for? (you could ask for some crackers and I would probably give them to you)
Soup time!
The stuff. Navy beans, a sweet potato, and some chopped up kale. A couple carrots, an onion, a few cloves of garlic, a little olive oil and water.* And lets not forget some spices…. I used a couple bay leaves, some dried rosemary and thyme. Oh and there should be a lemon here.(I think it rolled off the counter)
*Note. Some people get all up and up about not using a stock in soup. This soup creates it’s own stock with all the veggies and spices and time spent simmering but if you want, go ahead and use stock.
Start by chopping up the carrots, the onion, and the garlic and tossing it all into a really big pot along with a drizzle of olive oil, some salt and pepper and the spices. Stick on the stove on medium high heat for a few minutes until the veggies start to brown.. This gives the veggies and spices a chance to develop more flavor.%u00a0
Now chop up the sweet potato into 1 inch chunks and toss that into the pot too.
And the dried beans and water go into as well. Get it all in there, give it a mix and stick the pot on high heat and bring to a boil, then bring the heat to low.%u00a0 Add a lid to the pot and let cook for a while,like an hour,%u00a0 stirring every now and then.
Once the beans in the soup are cooked to your preferred done-ness (I like mine on al dente) remove pot from heat.
Dump in the chopped up kale…
And that lemon that rolled away. I found it. So slice up lemon. Ladle a large amount of the soup into a pretty bowl and finish it off with some cracked pepper and a squeeze of lemon.
Soup! Now grab a big spoon, a cozy sweater or blanket (or snuggy) , and maybe some crackers or bread if you feel so inclined and eat. You will be filled with warmth and happiness.%u00a0
Have a great day.
-C
1 cup dried white bean (I used navy, but you could use any white bean you like)
1 large sweet potato
1 bunch of kale (about 5 cups chopped)
6-7 cups water (add 6 then another cup as its cooking if you think it needs it)
1onion
2 carrots
4-5 cloves of garlic
1 heaping tablespoon thyme or Italian seasoning
1 heaping tablespoon dried, chopped or ground rosemary
2 bay leaves
salt and pepper to taste
a lemon (optional but you want it)
Chop carrots, onion and garlic and stick them all into a large pot with a drizzle of olive oil, all the spices, and a pinch of salt and pepper.%u00a0 Stick on the stove and cook until the veggies start to brown. While veggies are cooking, cut sweet potato into 1 inch chunks and toss the potato into the pot along with the beans and the water. Bring to a boil then reduce the heat to low. Stick a lid on the pot and simmer fir about an hour or until the beans are cooked to you liking.
Once the beans are cooked through, dump in the chopped up kale, mix it around, then call it done.
Ladle into bowls, top with cracked pepper (and more salt if you want) and serve with a wedge of lemon.
Grab a spoon, eat the soup. Be happy.
Got some left over… Well yeah, soup for later! (will last in fridge for a few days, but freezes super well too)
I probabaly have already told you, but August is for sure my favorite month of the year (well,one of my favorites)
There is bounties of bounties of fresh, sweet and colorful, oh so juicy, crispy crisp, just so f ing %u00a0amazing, produce exploding all over the place. I have probably gained like 75 thousand pounds in the past month due to all of the fruits and veggies that I have been consuming. I am starting to consider it a full time job just to keep up with the eating.
%u00a0Another reason why I love August so much is becauuse the days are still nice and warm, but the nights are starting to cool which means I get to make so much soup!!!!!.%u00a0
This soup is the freshest freshy soup yet. Everything is from the farm and or the garden (except the salt pepper, vinegar and oil), some picked within hours of me making this.
. I am a lucky/spolied veggie brat.
Anyways. This soup. The fresh tomato base gives it a sweet, slightly acidic kick.%u00a0So super creamy due to the lovely earthy stocks of the chard. Slightly spicy and earthy from the arugula* and chard green green. This soup…%u00a0it just tastes so fresh and clean, yet hearty and satisfying. A perfect soup for a mid August night, eating outside, watching the sun slide behind the mountains and the temperature dropping just enough that you might want a light sweater. Or you can just eat it from the pot in the kitchen while watching TV. It’s good eating anyway you want.%u00a0
*Here in America, it’s called arugula.%u00a0%u00a0Else where , it’s %u00a0called rocket. I wish we all called it rocket, although I do like the name arugula, but for like my first born child or maybe a pet goldfish. Anyway, rocket is arugula,%u00a0%u00a0or vice versa.
Soup time!.
The stuff. Some big %u00a0fresh tomatoes, a few stalks of chard, and a few handfuls of arugaula (aka rocket). A couple carrots, an onion, some garlic, salt and pepper and a bit of olive oil.. Oh, and I added some balsamic vinegar, which for some reason didn’t make it into the picture (sorry vinegar)
Start by removing the chard leaves from the stalks. Set aside leave with the arugula. Chop up the carrot, chard stems, onion and garlic and toss into a big pot with a drizzle of olive oil, a splash of water,%u00a0and a sprinkle of salt and pepper. Stir around and stick o nthe stove on medium heat for about 10 minutes until the veggies start to soften up.
Now chop up the tomatoes into chunks and toss those right into the pot with the other stuff. Add in a few cups water and a few glugs of balazmic vinegar. Bring everything to a boil and then turn heat to medium low and place a lid on pot and let cook at medium heat for another 20 ish minutes, or until the tomatoes are falling apart.
Now that everything is all cooked up, blend it up.
And now take the chard leaves and the aruglula and chop into little pieces%u2026.into the pot they go.
Mix it all up.. and take the blender to the soup again%u2026.if you want a smaller sized bite.
To start, remove stalks of chard from leaves and chop stalks, onion, carrot and garlic into chunks and place int a big pot with a drizzle of olive oil, a splash or water,%u00a0and spinkle of salt and pepper. Place on stove on medium low heat sand cooke the veggies down until starting to soften and garlic is becoming fragrant. While that cooking, remove core from tomatoes and dice them up. Toss into pot with the cooked down veggies with the vinegar and water. Place a lid on the pot and let cook for about 20-25 minutes or until the tomatoes are falling apart.%u00a0
When cooked, using with a hand blender or a normal blender, blend the soup until smooth. (if using blender, pour back into pot)
Now take the arugula and chard leaves and chop them into wee little picese and mix into soup. If you want to, blend the greens into the soup.. but not until smooth, unless thats what you want.%u00a0%u00a0Cook for another 5 minutes. Taste and season with more salt and pepper to taste.
Ladle into bowl and serve with lots of fresh cracked pepper, maybe a little balsamic drizzle or even some mustard (I at left overs with mustard and it rocked my world)
spoons work eel las eating utencils.
I am a year round maker and consumer of soup.
With that being said, the nature of my soups change seasonally. My summertime soups are usually on the lighter side, made with the%u00a0fresh bounty of the season, and spiced more on the light and floral side, opposed to the really deep and warm spices%u00a0that I use all winter long,
This corn chowder is made just right. It had the perfect balance of hearty and creamy from the potatoes and use of pureed%u00a0onion cream, but%u00a0%u00a0still light and refreshing from the sweet fresh corn and the lemony fresh thyme. It is for sure%u00a0a great summertime soup (chowder) Even the%u00a0Mr.%u00a0was even really into it, and he claims he doesn’t like corn. (I say bullshit to that.. he eats corn all the time)
Now to chowder!
The Stuff. Some super fresh corn on the cob, a couple onions, a few chopped up potatoes and a chopped up carrot. Then we have a little oil, a lemon,%u00a0dried thyme and salt and pepper.%u00a0
To start, take an%u00a0onion, chop it up, and toss into%u00a0a large heavy pot with a little olive%u00a0oil and%u00a0a sprinkle of salt. Stick pot on stove on medium heat and cook until %u00a0onions are soft and traslutcent. When the onions are done, remove and%u00a0add to a blender or%u00a0bowl. (if using a hand blender)%u00a0Add in the juice of the lemon%u00a0and blend it all up until nice a smooth.%u00a0
You have now made a nice creamy cream that will help make the final product more, well more creamy without the use of cream (lets say cream on more time !)%u00a0.Set aside.
When the pot is empty again, add in the rest of the stuff, including the cobs of the corn, (they hold a butt load of flavor)%u00a0the dried thyme, and salt and pepper.%u00a0Place%u00a0on stove and add enough%u00a0water to completely%u00a0submerge the veggies. Keep pot on a medium heat, add a lid, and stir ever once in a while. Cook until the potatoes are nice and tender.%u00a0(when the potatoes%u00a0are done, so is everything else)
Now that everything is all cooked up, remove the cobs and stir in the onion puree.
Now with a hand blender, blend up until the chowder is thick and smooth, but still nice and chunky. (If you are working with a blender, just remove about half of the soup and blend up, then dump back in) The optimal chunkiness %u00a0is up to you , so %u00a0blend, check the chunk,%u00a0%u00a0then blend a little more if needed. If you feel that the soup is to thick, add in a little more water, or to thin, just cook down o little longer.
%u00a0Once you like the constituency,season to taste with salt and pepper and%u00a0place pot back on a simmer until you are ready to serve.%u00a0
And thats how we make%u00a0corn chowder
It tastes best serves in the daintiest of the cups, sprinkled heavily with cracked pepper, and with a side of some cracker situation (Saltines would be best, but sometime there are only triscits in the house)
Summertime is for chowder!
HAPPY Humpday Wednesday!!!
-C
Makes a pot big enough for 4-6 nice decent sized servings
2 fresh ears of corn
3 medium (tennis ball sized)%u00a0red or white potatoes
2 white or yellow onions
1 carrot
Juice of a lemon
1 tablespoon olive oil
1 1/2 %u00a0tablespoons dried thyme
salt and pepper
To start, peel%u00a0and dice one whole onion and toss into pot with olive oil and stick on medium heat. Cook onions until translucent and fragrant. Remove from pot and add cooked onions and the lemon juice to a blender and puree until smooth and set aside.
While you are cooking down the onions, dice up the carrot and onion, remove the corn kernels from the cob, and chop up the potatoes. Once you have removed the first batch of onions, toss in corn, onions, carrot, potatoes, and the dried thyme.%u00a0Stir around in the pot on medium heat for a few minutes just to warm up the spices. Add the cobs into the pot and fill with enough water to cover the stuff in the pot. Place back on medium heat with a lid and cook for another 20ish minutes, or until potatoes are super tender and almost falling apart.
Remove cobs from pot and add in the onion puree. Now either remove about half the soup and place in the bender and blend up til smooth, or use a hand blender and blend up chowder until you get your%u00a0desired chunkiness. If you think the chowder seems to thick, add in more water, or to thin, just cook down a little longer on the stove.
When ready to eat, ladle chowder into a cup or bowl and add lots of fresh cracked pepper.%u00a0
It rained a lot this week, and it was fantastic. I love summer rain. I love to play in rain, I love to watch the sky turn grey and big storm clouds roll through.. Add in a little thunder and lightning.. even better. I think the only issue with I%u00a0have when it rains is when it floods the basement. That and%u00a0wet dog.(Washer smells like something died when he is wet)
And%u00a0as usual, this week%u00a0we did, we went, we came back.%u00a0We took in a%u00a0little for a the weekend and had the greatest of times. Puddle splashing walks, waffles, carrots, and lot and lot of gardening. But now I am tired.%u00a0So today, like every Sunday,%u00a0I am going to try and take a little breather and catch up on my, “me time”. %u00a0And maybe I’ll get a nap in since last night I got almost zero sleep because the little and the Mr. were all cuddled up and I ended on the edge of the bed receiving a%u00a0pretty aggressive kick in the back every time I was about to nod off. (She is lucky I didn’t make her sleep in a laundry basket).
Anyway, here is some internet fun from the week.
-I think this is where I am meant to go to school.%u00a0Hogwarts Hops The Pond: Rowling Reveals U.S. Version Of Wizards’ School%u00a0 %u00a0
%u00a0-This %u00a0DIY HANGING PLANT LAMP%u00a0 is cool. I want to make it.%u00a0
-These %u00a0are cool.%u00a0Modern Minimalist Bird Houses from Twig & Timber
– This guy is amazing..%u00a0Monzter: Artist Hides Monster Murals Inside Abandoned Buildings In Berlin%u00a0
–%u00a0%u2018Chunky Knits%u2019 by Anna Mo.%u00a0I need%u2026.
-I love this headboard%u00a0
-This house%u2026 And check out the tubs next to the beds. Weird, but who am I to say
-12 OF THE BEST IN COFFEE BREWING TECHNOLOGY. Coffee stuff makes me happy.
And some pictures from the past week.%u00a0
I am a year round maker and consumer of soup.
With that being said, the nature of my soups change seasonally. My summertime soups are usually on the lighter side, made with the%u00a0fresh bounty of the season, and spiced more on the light and floral side, opposed to the really deep and warm spices%u00a0that I use all winter long,
This corn chowder is made just right. It had the perfect balance of hearty and creamy from the potatoes and use of pureed%u00a0onion cream, but%u00a0%u00a0still light and refreshing from the sweet fresh corn and the lemony fresh thyme. It is for sure%u00a0a great summertime soup (chowder) Even the%u00a0Mr.%u00a0was even really into it, and he claims he doesn’t like corn. (I say bullshit to that.. he eats corn all the time)
Now to chowder!
The Stuff. Some super fresh corn on the cob, a couple onions, a few chopped up potatoes and a chopped up carrot. Then we have a little oil, a lemon,%u00a0dried thyme and salt and pepper.%u00a0
To start, take an%u00a0onion, chop it up, and toss into%u00a0a large heavy pot with a little olive%u00a0oil and%u00a0a sprinkle of salt. Stick pot on stove on medium heat and cook until %u00a0onions are soft and traslutcent. When the onions are done, remove and%u00a0add to a blender or%u00a0bowl. (if using a hand blender)%u00a0Add in the juice of the lemon%u00a0and blend it all up until nice a smooth.%u00a0
You have now made a nice creamy cream that will help make the final product more, well more creamy without the use of cream (lets say cream on more time !)%u00a0.Set aside.
When the pot is empty again, add in the rest of the stuff, including the cobs of the corn, (they hold a butt load of flavor)%u00a0the dried thyme, and salt and pepper.%u00a0Place%u00a0on stove and add enough%u00a0water to completely%u00a0submerge the veggies. Keep pot on a medium heat, add a lid, and stir ever once in a while. Cook until the potatoes are nice and tender.%u00a0(when the potatoes%u00a0are done, so is everything else)
Now that everything is all cooked up, remove the cobs and stir in the onion puree.
Now with a hand blender, blend up until the chowder is thick and smooth, but still nice and chunky. (If you are working with a blender, just remove about half of the soup and blend up, then dump back in) The optimal chunkiness %u00a0is up to you , so %u00a0blend, check the chunk,%u00a0%u00a0then blend a little more if needed. If you feel that the soup is to thick, add in a little more water, or to thin, just cook down o little longer.
%u00a0Once you like the constituency,season to taste with salt and pepper and%u00a0place pot back on a simmer until you are ready to serve.%u00a0
And thats how we make%u00a0corn chowder
It tastes best serves in the daintiest of the cups, sprinkled heavily with cracked pepper, and with a side of some cracker situation (Saltines would be best, but sometime there are only triscits in the house)
Summertime is for chowder!
HAPPY Humpday Wednesday!!!
-C
Makes a pot big enough for 4-6 nice decent sized servings
2 fresh ears of corn
3 medium (tennis ball sized)%u00a0red or white potatoes
2 white or yellow onions
1 carrot
Juice of a lemon
1 tablespoon olive oil
1 1/2 %u00a0tablespoons dried thyme
salt and pepper
To start, peel%u00a0and dice one whole onion and toss into pot with olive oil and stick on medium heat. Cook onions until translucent and fragrant. Remove from pot and add cooked onions and the lemon juice to a blender and puree until smooth and set aside.
While you are cooking down the onions, dice up the carrot and onion, remove the corn kernels from the cob, and chop up the potatoes. Once you have removed the first batch of onions, toss in corn, onions, carrot, potatoes, and the dried thyme.%u00a0Stir around in the pot on medium heat for a few minutes just to warm up the spices. Add the cobs into the pot and fill with enough water to cover the stuff in the pot. Place back on medium heat with a lid and cook for another 20ish minutes, or until potatoes are super tender and almost falling apart.
Remove cobs from pot and add in the onion puree. Now either remove about half the soup and place in the bender and blend up til smooth, or use a hand blender and blend up chowder until you get your%u00a0desired chunkiness. If you think the chowder seems to thick, add in more water, or to thin, just cook down a little longer on the stove.
When ready to eat, ladle chowder into a cup or bowl and add lots of fresh cracked pepper.%u00a0
Serve with a cracker and a spoon to eat it with.
This little guy asked me to make him some%u00a0popsicles, and of course I said yes because, well look at him.%u00a0
So we made a date. A popsicle and playground date to be exact.
For these particular%u00a0pops, I decided to use watermelon, mainly because I had just broken into%u00a0one and once I open a melon, I have a race with myself as to how fast I can consume the in entire%u00a0thing. ( It’s a sick form of watermelon gluttony) But also because%u00a0the little was really really excited to hear that I%u00a0could in fact make%u00a0watermelon popsicles.%u00a0And the other stuff I added because I had it and it all tastes really good together.%u00a0
%u00a0I made the popsicles the day before %u00a0so they would be ready for our date.%u00a0%u00a0He came over, we ate lunch,(peanut butter sandwich and carrot sticks)%u00a0wondered around the neighborhood with the pup,%u00a0and made a quick stop at%u00a0the playground. (we only managed a couple runs on the%u00a0slide %u00a0before it was too hot and%u00a0our sweat had us sticking to the slide%u00a0and it was more of a painful scoot then a glide) We then%u00a0made our way home and rewarded ourselves for a walk well done%u00a0with these%u00a0amazing, super refreshing, and healthy frozen treats that I made just%u00a0for us. While we were eating the popsicles, our conversation turned to food. We talked about%u00a0all the different varieties of popsicle that we could make, and how we could eat them for breakfast, lunch or dinner because they are%u00a0made of only good things and are really healthy (he is really trying to eat healthy)%u00a0%u00a0It was the perfect ending to a fantastic afternoon with a five year old, or any human for that matter…
I would have a popsicle date with this kid every day
The Stuff. %u00a0Fresh seedless watermelon (make sure to have lots on hand cause you are going to be eating it as you make these), a fresh lime, a handful of blueberries and a sprig of fresh mint. And don’t forget%u00a0%u00a0a mold of some kind that form%u00a0the liquid into a popsicle (if you don’t have a mold, little paper cups work too)
Remove watermelon from rind and cut into small chunks. Juice the lime and add that, the watermelon chunks, the mint and the blueberries to a blender or vessel if using%u00a0a hand blender) and blend everything%u00a0until smooth.%u00a0
Look at how pretty that is.%u00a0%u00a0And so tasty%u2026.%u00a0I am not going to lie and say that I didn’t make a little%u00a0extra to drink, cause I did.
Now pour the puree into your molds to the fill line%u00a0(follow the%u00a0instructions that your molds give you) and place into the freezer.
And yes Shannon, these are in fact, your popsicle molds. Don’t worry, I’ll bring them back soon. (I am thinking some type of booze infused situation)
Once the freezer has done its job freezing%u2026 pop those suckers out.. (I let the mold sit on the counter for a few minutes so the popsicle pops out clean)
And heres to%u00a0the best popsicle date ever!
Happy Summer!%u00a0Happy Tuesday!
-C
A big chunk of seedless Watermelon (aboutt 11/2%u00a0cups)
1/2 ish cup of blueberries%u00a0(fresh or frozen)
Juice of 1 lime
a few fresh mint leaves
note. The popsicle mold that I used only needed 2 cups of popsicle juice. If you have a larger mold, just use%u00a0more of everything to get the amount you need
Remove rind from watermelon and add to a blender with the lime juice, mint and blueberries. Blend until eveytthing is pureed%u00a0and mixed all together. Pour liquid into popsicle molds and stick in freezer for at least 4 hours.
When ready to eat%u2026, pop those suckers out of there molds and%u00a0EAT!%u00a0
HEY HEY HEY!! HAPPY SUNDAY!!!
So what do you guys think of the new site? For reals, I would love to know cause I spent a shit ton of time making it%u00a0and it would be nice to know if you like of hate it or if there is some weird wonky thing going on that I have not noticed. The sight itself has pretty much the same content as the old one, but is a little cleaner and easier to get to. (I think) And yes, I am still fin tuning so there might be a slight little change here or there over the next few weeks, but other then that%u2026.. WOO HOO!!!!
So apart from spending my week rebuilding this site,(I think I might have spent 20 hours on changing around fonts alone) the mister and I%u00a0have been super busy busy with the rest of our life, a.k.a. crazy June apartment turnovers.%u00a0Toilets, trash, painting, cleaning%u2026%u00a0You know, fun landlord stuff. Its been hectic, as usual, but we got it done.. And on top of that stuff, %u00a0we had a%u00a0little or two at least 5 different times this%u00a0week, so needless to say, we are some freaking tired party people here and today this very sunday, we are going to take a break. I see a river, a picnic, and a book in my future., followed by naping and the drinking of lots of coffee.
Note to anyone with wants or needs from us today%u2026.Leave us alone! (hehe, not really, but really)
In the meantime, here are a few little bits from the internet I liked this week.
-I am all%u00a0about this!%u00a0Trader Joe’s Ex-President Opens Store With Aging Food And Cheap Meals%u00a0
-If you have a dog…At Vermont’s Dog Mountain, Comfort And Community For Pet Lovers%u00a0
-Glamorous Gold Kitchen Cabinets & Islands%u00a0 I am not sure, but I think I really love it, although would never want it in my own house.
-Another lovely home I could get down with %u00a0
-This Guy Crochets Hilarious Food Hats And Wears Them Himself.%u00a0Need I say more?
-I love this song. All the instruments. Awesome.%u00a0%u00a0Ben Folds And yMusic, ‘Capable Of Anything’
And some eye candy from recent park, garden and bike ride adventures.
A little credit to my little sister Barb, for snatching my camera and taking a few of these badass pictures (which ones, we are still disputing)
My oldest sister graduated from nursing school this past weekend (wahoo!) and the friends and family had a party for her. I made these cupcakes for the party.But really, I made them just for her.
See, she is not a lady big on sweets. When I asked her what kind of dessert she wanted me to make her, she said if I could make a cake out of french fries, well that would be great. (I was close to making a french fry cake) But instead, I went a slightly different route and made cakes out of thing that I know she loves and can eat. Jalape%u00f1os because she is obsessed. Strawberries cause she likes her some fruit and are in season and I think, go with everything. Avocado frosting because she loves avocado and cornmeal because it makes the cakes a tad less sweet and a little more hearty. I also used GF flour cause she is GF.%u00a0
%u00a0Wow, I am the best sister. And here are a few more reasons why..
I went to the party (I am not a big party person.. But I did have fun and her friends were cool)
I changed into a clean outfit for her party (I really didn’t want to)
I stayed out past my 6 (I made it until 7.. what!!!)
I make her food
I am awesome (I think so anyway)
So yeah. The cupcakes. The Nurse lady totally got down with these. I am pretty sure that I heard the words, amazing and oh my good, %u00a0while they were being noshed on. The day after, %u00a0the nurse lady told me that they were the talk of the party (bullshit, but thanks)
Whatever, I was just glad she liked them.
The stuff. For the cupcakes; cornmeal and some pre blended gluten free flour. Sugar, salt, baking powder and baking soda. Soy milk (use whatever milk you want) oil, apple cider vinegar, strawberries and a couple jalape%u00f1os . For the icing; an avocado, a lemon, and some powdered sugar.
This is not a%u00a0hard batter to work, no need for a mixer or to cream anything, it can all be done with a wooden spoon.
%u00a0First, preheat the oven.
Then trim and tiny dice the strawberries, remove seeds and tiny dice the jalape%u00f1os and toss it all into a bowl. Sprinkle with a bit of sugar.
In a large mixing bowl, whisk together the flour, cornmeal, baking soda and powder, salt and sugar. Then add in the rest of the stuff. Stir together until combined.Now fold in the chopped berries and jalape%u00f1os and scoop batter into a well greased (or lined) cupcake tin.
Stick into oven to bake%u2026
Check cakes after 20 minutes and remove from oven when they are golden brown and a tester comes out clean when poked.
Remove from pan and place on a wire rake to cool.%u00a0
While the cakes are a coolin, add avocado to a blender with the zest of half a lemon and the juice of that half of lemon and blend smooth. %u00a0Add in the sugar and blend. %u00a0
The icing should be thick, but spreadable. Using your judgement and you taste buds, add more sugar %u00a0if the icing seems to thin or lemon juice if it seems to dry.
And once the cakes are cooled, spread with icing and top with sliced strawberries.
Your welcome Nurse Shannon!
Happy Friday!!!
-C
Jalape%u00f1o Strawberry Cornmeal Cupcakes with Avocado Frosting
makes 24 cupcakes
1 1/2 cup gluten-free flour blend (if you don’t need or want it gluten-free, just use all-purpose flour)
1 1/2 cups cornmeal
3/4 cup white sugar
1 teaspoon salt
2 teaspoons baking soda
2 teaspoons baking powder
1 tablespoon apple cider vinegar
2 cups nut or plant milk
1/2 cup oil
1 1/2 cups diced fresh strawberries
2 jalape%u00f1os
For the frosting
1 whole avocado
1/2 lemon (zest and juice)
2-2 1/2 cups powdered sugar
Pre heat oven to 350
Wash, trim and dice strawberries into little pieces and toss into a bowl. Remove stem and seeds from jalepenos and dice into small pieces.. add to bowl. Sprinkle with a little sugar.
In a large bowl, combine flour, cornmeal, baking soda, powder, salt, and sugar and whisk together. Now add in the oil, milk, and vinegar and mix together with a wood spoon until combined. Lastly, fold in the strawberries and jalape%u00f1os.
Scoop mixture into well greased (or lined) cupcake tin and stick into oven. Bake for about 20-25 minutes, or until cakes are gold brown and a tester comes out clean. Remove from oven, remove form tin, and sick on a wire rack to cool.%u00a0
While the cakes are cooling, take the avocado, sugar, and the zest and juice of half a lemon and blend with your choice of blending drive until smooth. %u00a0The icing should be thick enough to If the icing is to runny, add more sugar, or to thick, a little more lemon juice.
Now Ice cupcakes and top with sliced strawberries.
Eat for breakfast, lunch, dinner or dessert.
No utensils required, just some teeth.%u00a0
A couple of days ago, during a grocery store porous, I stumbles upon a produce item that I have not seen sold in stores before, Broccoli leaf. And I%u00a0was kind of surprised %u00a0to see that they were selling bunches of the leaf, %u00a0organic, %u00a0at 2 bucks a bunch.%u00a0I was very excited ! But wait.. You can eat broccoli leaves? Heck yes you can! Broccoli leaves %u00a0are fantastic. They taste kind of like broccoli, have a hearty texture like a collard, and can be used raw or cooked just like any other green. Its just one more super yummy green to add to your repertoire.%u00a0 So when I bring home something that I find to be a good score, like a bunch of broccoli leaves, I feel like I have to share it with the mister. (I am so nice) And this dish was how I shared them%u2026. Tossed into a bowl of garlic raging pasta. The stuff%u2026. A bunch of broccoli leaves, lots of garlic, pasta, olive oil, salt and a lemon. Pretty simple right? Fist off, get your water boiling for the pasta. Once its ready, drop a pinch of salt into the water and stick pasta in for the amount of time recommend by pasta box people. While the pasta is boiling, mince up the garlic (I used my garlic press) into a skillet and add in the oil. %u00a0Stick on a burner on medium for a few minutes, stirring around to make sure the garlic doesn’t stick and burn.%u00a0 %u00a0 %u00a0%u00a0Once you start to smell the garlic, turn heat onto low, chop up the broccoli leaves (stems and all) %u00a0and stir around until wilted and add in the juice of half a the lemon.When the pasta is cooked, remove a few tablespoons of starchy water and %u00a0strain the noodles. Add water and pasta right into the skillet with the other stuff. %u00a0Toss around, taste, season with salt and pepper.%u00a0 Go ahead and add some chopped tomato and or parmesan cheese if you want. %u00a0And serve your amazingly amazing pasta. %u00a0And make sure that you are ok with really smelly garlic breath%u2026Casue it’s going to happen. Keep it good! -C
2 servings of your favorite pasta (spaghetti, penne, vegan, gluten free%u2026..)
8 or so fresh garlic cloves
1/4 cup olive oil
salt and%u00a0pepper
lemon (optional)
parmesan cheese (optional)
Start by bringing a pot of water to a boil with a pinch of salt. Add in pasta and cook per instructions on box. While pasta is cooking, mined garlic and add to a skillet with the oil. Place on a burner on medium heat and cook and stir until the garlic becomes fragrant. Chop the broccoli leaves (stems and all) into bit sized pieces and add to the garlic oil and toss around to wilt the leaves. Squeeze in some lemon juice. Once the pasta is done cooking, remove a few tablespoons of the starchy water and strain the pasta. Add the water and the noodles to the skillet, toss to evenly coat the pasta and call it down. Serve in a bowl or on a plate, topped with freshly chopped tomatoes and parmesan cheese if you so shall please and another little squeeze of lemon juice if you like. Watch your mouth.. it will be breathing out garlic like whoa.%u00a0
My contribution to last nights dinner at my sisters…. Freshy fresh veggies spring rolls.I had about 30 minutes between work and getting over to my sisters house to throw something together so it needed to be something fast, easy, and something I could make without going to the store. She was making the main course (some teriyaki situation and rice) so I was doing up the veggies.
I had just bought a package of spring roll wrappers%u2026. Bingo! The perfect and logical choice. I grab the wrappers, a variety of veggies and after spending 12 of my 30 minutes trying to scrub the oil based paint off of my face and hands, I still managed to completely prepare, construct, and take pictures of these lovely tasty spring rolls. and get over to my sisters in time for dinner.
Impressed? %u00a0
Damn right!
The stuff. Carrot, beet, asparagus, red cabbage, and kohlrabi, which all (except asparagus, which I just cut into thirds) got cut into matchstick sized pieces with my mandoiln. Then there are the rice spring roll wrappers that we need to make the veggies into rolls. Also a bit of red wine vinegar to drizzle onto the veggies for a little extra zing. And lastly, soy, fresh ginger, and a couple cloves of garlic for a spicy salty dipping sauce.Start by having everything set out and ready to assemble.%u00a0Fill a large shallow dish or baking sheet with really warm water. Working with one at a time,place a rice wrapper into water and let sit for about 10 seconds or until the paper starts to soften. Remove from water and place on a damp surface (just splash a little water on the counter) Take a little bit of everything and and place on the lower middle part of the paper. Fold in the sides first, then tuck and roll the wrapper as tightly as you can without ripping the wrapper.
Repeat until you have used up all you veggies.For the dipping sauce. Finely grate ginger and garlic and add to soy sauce. Stir%u2026 and it’s done.Freshy, pretty and fantastically delicious. And for real, took about 8 minutes to make. (I even had enough time to wash the dishes before we left!)
I am so awesome!
Hump Day Pow!!!!!
-C
Fresh Veggies Spring Rolls%u00a0
Makes 8-10 but can easily be increased or decreased to desired amount%u00a0
8-1o rice spring roll papers
Splash of Red wine or rice vinegar
1/4 cup soy or tamari sauce
2 cloves of garlic
teaspoon %u00a0freshly grated ginger
1 medium carrot
1 medium beet
1/4 head of purple cabbage
10 thin fresh asparagus
1 small kohlrabi
Note%u2026 I used the veggies that I had in the fridge at the moment. If you have a bunch of veggies but not these particular ones, use what you have. Pretty much all veggies taste good inside a spring roll!
Gather your veggies and prep by either using a mandolin, a grater, or some sick knife skills, and julienne, shred, or slice you veggies into thin match sticks. Once all the veggies are prepared, sprinkle a little vinegar over the top.
For the rolls…Grab a large shallow vessel %u00a0(a rimmed baking sheet works great) and add in warm water. Working %u00a0one at a time, place the wrapper into the water for about 10 seconds or until the wrapper starts to soften. Remove and spread onto a clean, damp work surface. Gather a bit of each veggie that you are adding and place towards the bottom %u00a0middle of the wrapper. Now fold the sides in over the pile of veggies. Then with the side closest to you, tuck and roll wrapper away from you, trying to keep it tight, but not to tight that it rips.. (Hopefully that makes since.) Place finished rolls onto a damp surface to keep from sticking and if not serving right away, drape with %u00a0a damp towel or paper towel to keep from drying out.
For the soy ginger dipping sauce. Add grated ginger, %u00a0minced garlic, and soy into a bowl and mix together. %u00a0Serve with spring rolls.%u00a0
Eat one, two, or a plateful. It’s nice to share but not a necessity.
My winter farm share is coming to an end this week. One more pick and then a three week stretch until the summer share starts%u2026 WHAT AM I GOING TO DO!!! Stock up as much as I can is what.
I have been strategic about the roots and veggies that I have chosen to bring home the past few weeks.(My farm lets you pick what you want) %u00a0I know what I can buy at the store, things like carrots and potatoes, so I have been passing those up, but the roots like beets and celeriac%u2026 I have been bringing home baskets of those and hoarding them in the fridge and basement in preparation for the laps in farm fresh food and knowing that if I want to by these at the store it s going to coast me a million dollars %u00a0a pound. (a for real million dollars)
Yup, lots of roots around here, especially celeriac root which is fantastic.%u00a0I am kind of obsessed with celeriac, with its fibrous, knobby exterior, soft but almost meaty texture inside, and a flavor that %u00a0is close to celery but so much better. %u00a0I don’t know why it has taken me so long to do a posting featuring this amazing root vegetable %u00a0(I eat it almost every day)
So here, an amazingly tasty, hearty but not heavy, celeriac recipe. %u00a0Perfect for spring and the change into summer%u2026. Mustard roasted celeriac with an fanatic split peas gravy that will have you licking you bowl clean.
%u00a0The stuff%u2026.For the split pea gravy we have a carrot, a parsnip and a large onion chopped into small chunks. %u00a0Salt, thyme, a bay leaf and of course the split peas. Then there is the celeriac root* sliced into 1/2 inch thick rounds and some plain old yellow mustard .
*Note. I don’t peel my celeriac root. I really enjoy the fibrous exterior but realize that some don’t(The mister does not like it) so peel it if you want.%u00a0
Toss the chopped parsnip, carrot, onion and the spices into a pot on medium heat and let veggies sweat a few minutes until tender. %u00a0Add in the split peas and enough water to cover everything. %u00a0Turn pot on high and bring to a boil, then cover and turn to low. Make sure to give the pot a good stir ever few minutes and add more water if needed%u00a0
While the gravy is cooking, %u00a0take the celeriac rounds and brush each side with yellow mustard, sprinkle with pepper, and place on a baking sheet. Stick into the oven to roast for about 25 minutes, flipping the rounds after about 10 minutes.
Once the peas have soften, remove the bay leaf and puree until smooth and oh so creamy. Taste and add more salt and pepper if needed. If you find that the gravy seems to thick, just add in more water until it’s the consistency that you want.%u00a0The gravy is made, the celeriac is roasted%u2026 now we are ready to eat!!%u00a0Stick the celeriac on a plate and dump good amount of that gravy right on top. Feel free to add a bed of spinach, or a grain or anything you want, because why not, and also some chopped tomatoes for a little acid and prettiness.
Serve with the fanciest knife and fork you can find. Extra yellow mustard and sriracha sauce are great condiments to have close by.
Happy Tuesday!
-C
Mustard Roasted Celeriac with Split Pea Gravy
2 medium celeriac roots
6 tablespoons mustard
1 large carrot
1 medium parsnip
1 large yellow onion
2/3 cup split peas
2-3 cups water%u00a0
1 bay leaf
2 teaspoons thyme or italian spice mix
salt and pepper
spinach (optional)
diced tomatoes(optional)
Preheat oven to 400 degrees
Small dice the carrot, parsnip and onion and throw into a large pot. Spinkle with salt and pepper, add in the thyme and bay leaf and add a splash of water. Stick on stove on medium heat and stir. Let cook until the veggies become soft and fragrant. Now add in the split peas and 2 cups of water. Bring to a boil then cover and turn heat down to medium low. Let cook until the split peas become tender (about 25 minutes) string on occasion and adding more water if the peas are not completely summered while cooking.
Once the peas are tender, let cool for a few minutes, remove bay leaf, and either dump into a blender or blend with an immersion blender until nice and creamy. If gravy seems to thick, add in more water.%u00a0
Scrub or peel celeriac roots and slice them into 1/2 inch think rounds. Place on a baking sheet and brush mustard on both sides and spindle with pepper. Stick into oven for about 10 minutes, flip, then back into the oven for another 15 or so minutes, or unit the celeriac is tender.
When the celeriac is done remove from oven and %u00a0stick a few rounds on a bed of spinach (or not, or any kind of grain or green you like) Top with a hearty helping of the gravy and toss on some chopped up tomatoes.
I eat so much hummus. Everyday, all day. Homemade, store bought. If there is hummus, I will be consuming it. But the thing is, I usually don%u2019t eat more then a little at a time. (A little being like 1/2 a cup). And sure, sometimes that is just fine and enough, but other times, what I really want to do is garb a spoon and a bag of carrots and eat it all. And then I do.
But there is that little voice in the back of my head telling me that if someone where to catch me eating mounds of hummus, they would liken my eating behavior to that of someone eating a jar of mustard (Not going to lie, it happens sometimes) or of a bottle of ketchup (but I don%u2019t eat ketchup) and that have a problem and shouldn%u2019t being eating it like that. Because hummus, for some reason, has been put into the condiment category. It%u2019s treated like a dip or a spread and that is fine and dandy to eat it as such, but hummus is so much more. It can, and should be treated more like a main component to a dish. So let us step outside of that box and eat it how we really want to eat it.
Hummus by the bowlful. I know right! It just makes so much sense to me. And now to you too. We need to stop stopping ourselves from just a scoop or two because really, that is just not enough. Nope, this is for real. A bowl, full of hummus, topped with roasted veggies because that is just more deliciousness. And we get to eat it all.
Life can be pretty great sometime, you know. HA
Now to the bowl of hummus!
The stuff. We got chickpeas, tahini, a lemon, red wine vinegar, garlic, salt and pepper. And Veggies. Brussel Sprouts, broccoli, onion, Swiss chard, and kale.
Chop up the broccoli, the onion and half or quarter the Brussel sprouts. And separately, chop up the kale and chard.
Toss the chopped Brussels, broccoli and onion into a baking sheet or oven safe skillet and season with salt and pepper. IF you want to toss in a little oil, go for it. Then pop the veggies into a hot oven to roast away.
Once the veggies are just about done to your liking, grab the chopped kale and chard and off to the veggies. Toss and roast for a few more minutes.
Hummus. Chickpeas with liquid, garlic, tahini, juice of lemon, and blend. Creamy smooth and delicious.
Dump that hummus into bowls.
And top with roasted veggies.
Would you look at that. Now all you need to to is dig in. Serve with extra lemon and black pepper. Grab your utensil of choice and eat.
-C
makes 2 servings if eating as a meal
3 cups cooked chickpeas in liquid
A lemon
1 tablespoon red wine vinegar
2-3 cloves garlic
1/4 cup tahini
salt and pepper
10 or so Brussel sprouts
A small head of broccoli
A small onion
5-6 kale and or Swiss chard leaves
Note. Use whatever veggies you want. Fresh or already prepared. All and any leftovers would be great.
Preheat oven to 450.
Cut Brussel sprouts in half, chop the onion into small pieces, and cut up the broccoli and toss onto a baking sheet or an oven safe skillet. Sprinkle with a little salt and pepper and stick into the oven to roast for about 20 ish minutes or until nice and roasted. Feel free to toss the veggies in a little oil if you want. Chop up the kale and chard into smaller pieces. Once veggies are just a few minutes from being cooked to you liking, remove from oven, and toss in the greens. Cook for another 5 or so minutes until those are nice and wilted. Remove veggies from oven.
While veggies are roasting, make hummus. Place chick peas with liquid, the juice of the lemon, vinegar, garlic, and tahini into a food processor. Blend until smooth and creamy. Taste and season with salt and pepper to your liking. Dump into a bowls.
And when you have hummus make and veggies roasted, its time to compile. Dump the hummus into 2 bowls. Dump half of the roasted veggies into each bowl.. Squeeze more lemon juice onto both then grab a fork.
Eat. And yes, lick bowl clean. No shame.
If you are a falafel fan, as I am, then this one is for you. Carrot ginger falafel. Oh yes. Warm and spicy and carroty and all the things that are good, packed into a chickpea ball of mouth sized proportions. When I thought of it it sounded good, When I made it and ate it, it was everything and more I could have asked for in a freaking fantastic falafel. As for the tahini cabbage slaw, I might just be making it in my house every dang day. Super easy, super tasty, goes with the falafel like whoa but is just as good eaten on it%u2019s own. Eaten together the pair make every inch of mouth space happy. A happy mouth space, what more can you ask for?
To the falafel!
The stuff. Cooked chickpeas, carrots, a piece of fresh ginger, tahini, soy sauce, cabbage, an onion, a few cloves of garlic, red wine vinegar, some cumin and red pepper flakes, a lemon, chickpea flour, salt and pepper, and oil.
Start off by chopping the carrots into small pieces. Then cut half of the onion into small pieces. Rough chop the garlic and the ginger as well. No need to peel ginger unless you really want to.
Place it all into food processor and pulse until a small crumble.
Carrot onion garlic ginger mixture.
Dump mixture into a skillet with a splash of water. Add in the cumin, chili flakes, and a good pinch of salt and pepper and cook on the stove for 5-8 minutes until the crumble softens and becomes fragrant.
Dump carrot ginger mixture back into food processor along with the chickpeas, chickpea flour, and the juice of the lemon. Puree until smooth.
Carrot ginger falafel mixture. Now stick it in the fridge. For a little while to a day, just to let it set up a bit.
And in the mean time you can make the slaw. Shred cabbage and cut up onion all nice and thin.
Dump tahini, soy, vinegar, and a few tablespoons warm water into bowl and mix until creamy and good.
Toss in that cabbage and onion. Now you have tahini cabbage slaw.
Now to cook falafel. Grab the batter, scoop into balls then smoosh into disks. Place in a light oiled skillet and brown each side a nice golden brown.
After browning, place on a baking sheet. Once all the falafel has been browned, place the baking sheet into the oven to finish up cooking. 20 minutes or so and you got yourself falafel.
Then eat it. Falafel topped with tahini cabbage slaw. That is how it%u2019s done, with or without wraps or pitas or whatever your want. Just as it is. Falafel, cabbage slaw, into mouth.
Good things friend.
-C
serves 3-4 people or makes 14-16 falafel balls
For the falafel
2 cups cooked chickpeas drained
3-4 carrots (around 2 cups diced)
1/2 of a red onion
2 inches fresh ginger
2-3 cloves garlic
1 teaspoon cumin
1/2 teaspoon chili flakes
1/3 cup chickpea flour (can sub in oat flour if needed)
juice of a small lemon
salt and pepper
For Tahini Cabbage Slaw
1/2 head red or green cabbage (about 3 cups shredded)
1/2 of a red onion
3 tablespoon tahini
1 tablespoon soy or liquid aminos
2 tablespoon red wine vinegar
a few tablespoons warm water
Grab carrots and red onion. Chop carrots into small chunks and cut onion in half. Cut one half into chunks. Place in food processor. Take the ginger and cut into small chunks (you don%u2019t need to peel it) and peel and slice garlic and cut into small pieces. Add that to the food processor. Pulse the mixture into a very small crumble then dump the mixture into a skillet with a splash of water. Add in the cumin, chili flakes, and a good pinch of salt and lots of pepper, and place on medium heat and cook for 5-8 minutes until soft and fragrant. Once cooked, scoop back into food processor along with the chickpeas, chickpea flour, and the juice of the lemon. Turn on and and puree until smooth, stopping when needed to scrap down the side. Then either dump mixture into a bowl or leave in the container you processed it in and place in fridge for 1/2 hour to a day.
When ready to cook, preheat oven to 400.
After letting the dough sit for a bit, remove from fridge. Grab skillet and lightly oil it and place on medium heat. Take a cookie scoop or just a spoon and scoop balls of falafel into your hand and roll them around so they are packed together. Smoosh then balls a little into disks and place into hot skillet. Let cook until bottom is golden brown then gently flip and cook the other side until browned. Place cooked falafel on a baking sheet. Once you have browned all the falafel, place into oven to bake for about 20 minutes or until the falafel has firmed up to your liking.
To make the tahini cabbage slaw. Shred cabbage and cut the remaining half of red onion into thin pieces. Place tahini, soy, vinegar, and 2 tablespoons warm water into a big bowl. Mix together until light and creamy. If the mixture seems to thick, add another tablespoon of warm water. When happy with consistency, add in the cabbage and onion and toss around until everything is coated.
Now when the slaw is made, the falafel is cooked, you eat it. Serve with warm pita or wraps or a bed of greens or nothing. Just slaw on top of falafel. And FYI, this whole shebang can be eaten hot or cold or anywhere in between.
It is spring yes? I know it is officially spring but around here it has been more or less still winter which is to be expected but is, at this point, no longer welcomed. I, as well as everyone else I talk to, are over it. Enough snow. enough of the hats and jackets. Just enough.
But the bright side of the chilly, cold weather is that we can and still want to turn the oven on and cook things. And because I turned the heat off a little prematurely, I am cold so I really want the oven on.
One skillet, a little chop action, a stir, some good time in the oven and there you go, food for your belly. Not a ton of dishes to do, steps to fallow, thoughts to think (other then eating thoughts). A good old, hearty, simple to toss together, spicy, delicious skillet of goodness. Prepare it fast, pop into warm oven, sit in kitchen drawing up plans for the spring veggie garden, and then eat yourself warm. What more can we ask for?
We can ask for spring weather because seriously. But other then that.
To the goodness of cajun lentils and rice!
The stuff. Lentils, brown rice, cajun seasoning, some crushed tomatoes, an onion, a carrot, a few cloves garlic, some cauliflower, water, oil, and salt and pepper.
First off, mince garlic and chop up the cauliflower, carrot, and onion into small pieces.
Toss it all into a good sized oven safe skillet with a splash of oil. Mix in the cajun seasoning too and stick o nth stove on medium heat for a few minutes.
Cook until fragrant and slightly tender. Taste it, it is good.
Dump in the lentils and rice. Then dump I the tomatoes and the water. Give it all a mix.
And after. All done. Now dinner.
Grab some green thing to chop and toss on for some color.
Now grab some bowls, a few forks, and get to eating.
-C
Serves 4-6
3/4 cup uncooked brown or white rice
3/4 cup dried green lentils
2 cups crushed tomatoes (preferably not salted)
2 1/4 cups water
3 tablespoons cajun seasoning (see note)
1 large carrot
1/4 head of cauliflower (about 2 cups chopped)
1 large yellow onion
2-3 cloves garlic
1 tablespoon olive oil
salt and pepper
Note. Store bought cajun seasoning usually contains salt and pepper so when seasoning, be aware of the amount of salt (if any) you choose to use.
Preheat oven to 350
Start by chopping the carrot, onion, and cauliflower into small pieces. Mince the garlic and toss it all into the skillet with the olive oil. Stir in the cajun seasoning and sprinkle in salt and pepper if it needs it. Place skillet on medium high heat and cook veggies until fragrant and slightly tender which should take about 5 minutes then remove from heat. Dump in the lentils, rice, water and tomatoes. Stir until mixed then either place a lid or foil over the top. Place into preheated oven for about an hour, removing the lid or foil after 40ish minutes and giving it a stir when you do. The bake is done when the rice and lentils are fully cooked, but if you are into a crispy top and crunchy sides, by all means, cook a little longer.
Remove from oven when fully cooked and you are happy with crispness. Let cool for a few minutes, toss on some chopped green something or another if you want, and serve it up.
Left overs store great in the fridge for a few day and freeze well too.
Potatoes in tomatoes. It just has a nice ring to it. And to tell the truth, that is the only reason I made this dish, because it sounds good.
Ok, not really the only reason, but it was the start, that and I have been sitting on some potatoes for a little while and it was time for them to be eaten. Enter in the tomatoes. I figures cooking the potatoes in tomatoes is alike to a ketchup and french fry situation. Not completely the same, but you get the idea. Add in chickpeas for good measure and onion because I wanted to and that is that. Nothing fussy, one pot, easy, hearty, and good.
Also not hurting anyone that these potatoes take a little while to bake. I could have made this dish in a way that made them cook faster (like parboil the potatoes) but I wanted the heat from the oven. It has been pretty freaking dang cold out so I liked having the heat, it adds another dimension to the term comfort food (as in me being comfortable hanging out next a hot oven).
Anyway, nothing too fancy, just all around tasty dish. It is just what you need to bake and eat on any given cold winter day. And it sounds nice too. Just say it aloud. Potatoes in Tomatoes. Right? Now you see, it had to be done.
To the potatoes in tomatoes!
The stuff. Potatoes, crushed tomatoes, cooked chick peas, an onion, a few cloves garlic, Italian seasoning, salt and pepper and a bit of olive oil.
Start by chopping the onion and mincing the garlic.
Get it all into a cast iron pan or oven safe skillet with a little olive oil. Add the spices and give it some heat on the stove top while you cut potatoes.
Now cut those potatoes nice and thin. A mandolin works wonders but a knife will do just as well, just try to keep the thickness all the same.
Potatoes are cut and onion mixture has sweated a bit so now you add in the chick peas (with liquid) and half the crushed tomatoes. Stir it all up.
Layer on potatoes, drizzle with a tiny bit of olive oil and give them some salt and pepper love.
Dump the rest of the tomatoes on top then add in water, enough that all the potatoes are completely submerged.
Now into the oven they go.
Doesn%u2019t that just look all fantastic? I mean really really , A+ good, no? If you are feeling extra crispy, you could even stick the skillet under the broiler for a few minutes right before you pull it out.
And that is that. Potatoes in tomatoes with chick peas and onions. A simple but very satisfying dish to keep your cold belly full of warm goodness.
Be well.
-C
About a pound or so of white or red potatoes
3 cups (or a 28oz can) crushed tomatoes
2 cups (or a 16 oz can) cooked chickpeas in liquid
1 large onion
2-3 close garlic
2 tablespoons Italian seasoning
2-3 cups water
olive oil
salt and pepper
Preheat oven to 400
Grab onion and dice into small pieces. Mince the garlic. Grab a medium sized oven safe skillet and toss the onion and garlic in with a tablespoon or so of olive oil and the seasoning. Place on medium heat and cook for a few minutes until the the onion is slightly cooked and fragrant. Remove from heat. Mix in the chick peas with liquid and half of the crushed tomatoes.
Rinse potatoes and slice into 1/4 inch thick rounds. Place tomatoes into the skillet, layering any way you want. Drizzle the top with like a teaspoon olive oil then sprinkle the tomatoes with salt and pepper. Spread the rest of the crushed tomatoes over the potatoes then pour the water in. If the potatoes are not completely submerged in water, add more until they are. Cover the skillet with a lid or tin foil.
Place skillet in oven and bake 40ish minutes then remove lid or foil and bake for another 25-30 minutes or until potatoes are fork tender and slightly crispy on the edges. Depending on the type of patotoes you use,(like a really firm and waxy yellow potato) you might need to add more water to the skillet and cook for longer. If that is the case, just pour more water over until the potatoes are submerged again and keep baking until cooked.
For extra crispy, when potatoes are done, place skillet under broiler for a few minutes until crisp to your liking.
Pull from oven, let cool a minutes or two then dig in.
I feel like this salad is kind of a summery salad, or better yet, a salad that highlights all the best of what summer has to bring. All the fresh tender dill that is still growing (but not for long) , all the brightly colored and amazing veggies that are being harvested and are nearing the end (bye fresh cucumbers.) This salad might just be my little last hurrah of summer cooking before it is all root veggies and dried herbs and hot and hearty food. And not going to lie and say that I am sad to see summer go because I am so so ready for it to be over, but I will miss all the fresh fresh produce. And I will especially miss all the fresh dill because fresh dill is seriously the best.
Eat up what is left of summer now before it%u2019s too late!
The stuff. Quinoa, a bunch of dill, a cucumber, a pepper, an onion, and some cherry tomatoes. Also a clove of garlic, some salt and pepper, and red wine vinegar.
Mince the garlic, chop the onion, mince the pepper and the cucumber, half the tomatoes, and last but noblest, rough chop the dill.
All that goodness goes into. big bow, along with a sprinkle of salt and pepper, and the vinegar Tossed around and left to meld.
Uncooked quinoa with water turns to cooked quinoa
Quinoa meets the bowl of veggies
And after a good mix, viola!
You got yourself a yummers fresh dill and veggie quinoa salad.
-C
serves 3-5 as a side or 2 as a meal
1 cup uncooked quinoa
2 cups water
I bunch fresh dill (like a 1/3 cup chopped%u2026 But use as much as you want)
1/2 a small red onion
1 clove garlic
1 small Persian cucumer
1/2 of a sweet red or yellow pepper
handful or two of cherry tomatoes
4 tablespoons red wine vinegar
salt and pepper to taste
Start by cooking the quinoa. Place the water and the uncooked quinoa into a medium sized pot. Place on high heat until sorts to boil, then reduce heat to a simmer and place lid on the pot. Let cook for about 15 minutes, checking at 10 minutes, to see if all the water has absorbed. When it has, remove from heat and let sit for a few more minutes then fluff with a fork.
While the quinoa id cooking, mince the garlic and chop all the veggies into small little pieces. Place into a big bowl. Chop up the fresh dill and toss into bowl too, along with the vinegar and a good sprinkle of salt and pepper. Mix it all around and let sit on the counter for a little so the veggies get nice and vinegary. Once quinoa is cooked and fluffed, dump into the bowl and mix around. Season with more salt and pepper if needed. Eat warm or refrigerate and eat cold. It%u2019s defiantly one of those salads that taste great right away but tastes even better the next day.
I am one of those people that hangs out for far to long in the grocery store, mostly in the bulk section, looking al all the types of rice, and grains, and beans, and seeds, admiring the variety and colors and also wishing I was one of those people that had an extra $25 to drop on a pound of pistachios.%u00a0%u00a0(Them were some pricey pistachios fo sho.) I take my time, peruse the bins, maybe take a little taste or two, %u00a0and go for what I need. And maybe if something is on sale, get a little of that too. Things that usually make the list are spices,%u00a0oats, beans, maybe rice or quinoa, flours, and seeds. Pumpkin seeds were on sale so those were the seeds of choice and I also got some barely because when I was starting at all the grains,%u00a0it dawned on me that I don’t know many people that eat barley, or even care about it, which is a shame because it is awesome. It might not be trendy like farro or freekeh, but it is just as good, and damn if it is not a hell of a lot cheaper.%u00a0
With the barley and pumpkins seed in hand, I had the start of a salad. So I grabbed some oats, a few spices, some beans and ran away from the builk section, past the nuts before things got bad and I either a) got kicked out for eating my weight in cashews and almonds,%u00a0pretending to just need a taste, or b) paid the $25 for a pound of pistachios that I might not eat because I would need to save them for something really special because they cost $25 a pound. Then I grabbed veggies, walked around the wellness section for good measure, did another lap around the store just in case I forgot something, then finally made my way out of the store only to realize when I got home that I forgot something. (I always forget something)%u00a0
But I had all I needed for a barley salad situation so things went well. This is a fantastic salad. It’s quick and easy and tasty and good. Barley, tahini, veggies and pumpkin seeds… It’s all you need for a just right dinner, or a fantastic side to any meal. Or as a snack at anytime. Bring it to a BBQ, a graduation party, or a pot luck. it will get eaten, and if by chance you end up with a little left over, bring it on home and eat it for breakfast. It will still be just as good.%u00a0%u00a0
The stuff. Pearled barley, tahini, pumpkin seeds and garlic. And some red wine vinegar, salt and pepper, kale, a carrot, some cauliflower, a lemon, a red onion, and a cucumber. (you are not going to need the full amount of all these veggies)%u00a0
First off, cook the barley. The barley and water go into a pot, brought to a boil, then left on low %u00a0to cook until tender. Once cooked, strain away excess water
While barley is cooking (or is cooked) chop up the veggies into mouth sized pieces. I used half the cucumber, half the onion, some of the cauliflower, all the kale, and all the carrot. It’s not an exact measurement, you just want a good amount to toss into the salad.%u00a0
Barley in bowl, topped with the veggies and pumpkin seeds…. The pretty before the mix. You don’t need to add it like this, I just did it cause it looks good.
And the tahini sauce. Mince garlic and add to a jar or bowl with the juice of the lemon, vinegar, a pinch of salt and pepper and give it a really good mix.
Creamy, zippy, oh so good.%u00a0
Drizzle and toss the dressing with the barley and veggies.
And that’s that. Now you are ready for eating.%u00a0
Enjoy wherever this salad takes you.%u00a0
-C
If eaten as a meal, serves 2-3. As a side dish, serves 6-8
1 cup pearl barley%u00a0
3 cups water
1/4 cup tahini%u00a0
1 large lemon%u00a0
3 tablespoons red wine vinegar
2 cloves garlic
salt and pepper
1/2 of a cucumber%u00a0
1 small carrot
2 large kale leaves
1/2 of a red onion
1 cup of cauliflower florets%u00a0
1/4 cup toasted pumpkin seeds
Note. The vegetable amount and type is more of a preference. You could use all cucumber and onion or add %u00a0broccoli and pepper, just make sure to have a least 3 good cups of some chopped up color.%u00a0
Place barley and water into a pot and bring to a boil. Turn heat down to low and continue to cook until barley is tender, but not mushy, which should take about 45 minutes. Once cooked, strain excess water.
While the barley is cooking, chop all the veggies into small mouth sized pieces.%u00a0%u00a0And make the tahini sauce. Mince garlic and place in a bowl or jar. Add in tahini, the juice of the lemon, and the vinegar. Mix well until smooth then season with salt and pepper to taste. %u00a0
When barley is cooked and drained, let cool for a few minutes then place in a big bowl. Add in all the veggies and the toasted pumpkin seeds, then drizzle with the tahini sauce and toss all around. Season with salt and pepper to taste..%u00a0
Now eat still warm, or later at room renature, or place in fridge for it to get cold. It can be a filling meal or a great side dish.%u00a0It’s good all ways, any way.
Another note. This salad is great for parties and BBQ’s and can be made a day or two ahead. If you do make ahead, hold off on mixing the pumpkin seeds and the tahini sauce with the rest of the salad until you are about to serve it.%u00a0
There is something about purple cabbage that makes me feel like I need to share it. It sounds weird , especially because I eat about a head of cabbage a day, but that is green cabbage. I barely buy purple cabbage because it cost twice as much and I really like green , but at farm share when you get to pick what color you want, I alway pick the purple. ( Side note. I used to call it red cabbage but have since stopped because it is very clearly purple and calling red just doesn’t make any sense)%u00a0
I also feel the need to do something a little more the chopping it up and eating it raw. So I make a little fancy. pretty, almond crunchy mustard type thing because that’s what I was feeling and I figure the mr would like it too. Note that I ended up using half a green and half %u00a0the purple because color is nice and also I ended up eating the other half of the purple before I could share it. But I caught myself before eating it all to may face and was proud of myself for thinking of others.%u00a0%u00a0
This dish is good, really really good.%u00a0. It has roasted cabbage which is alway great, but slathered with maple mustard and crunchy almonds.. it’s just freaking fantastic in all the ways. It also happens to be super easy to prepare and with minimal ingredients.%u00a0It makes for a great side dish, a main dish, and is great for sharing during the holidays that are just around the corner. Or if you are like me, not sharing and eating all afternoon long. (I did save some for the m for dinner because I am so nice)%u00a0
The stuff. Cabbage, red or green or a bit of both, stone ground mustard, maple syrup, almonds and pepper.
Easy peasy. Cut the cabbages about an 3/4 inch thick and lay them on a baking sheet. Pop it into the oven once it’s preheated.
While thats going on, mix some maple with the mustard and chop up the almonds.
After about 25 minutes, pull the cabbage out and flip them. Cover the top with maple mustard and sprinkle on the almonds. Stick the cabbage back into the oven and bake another 10-15 minutes, or until it’s roasted to your taste preference (I like it really roasted)%u00a0
Just look how pretty it is.%u00a0
Serves from a baking sheet but would look so lovely on a nice plater, you know, if you want to be extra classy.%u00a0
This cabbage situation is all of it.%u00a0
Have a great weekend and hope the Thanksgiving planning goes smoothly.%u00a0
-C
Makes about 6-8 slabs
1 head of cabbage (red or green or half of both)
1/4 cup stone ground mustard
2 tablespoon maple syrup%u00a0
1/3 cup raw almonds%u00a0
pepper to taste.%u00a0
Preheat oven to 425
Slice cabbage into thick slabs about 3/4 inch thick. Try to get them roughly the same thickness so they roast evenly. %u00a0Lay the cabbage on a baking sheet, not overlapping, and stick into the oven once it’s preheated. Bake for 25 minutes or until the bottoms of the cabbage are crispy.
While cabbage is roasting, mix mustard and maple %u00a0together and roughly chop the almonds. %u00a0
After %u00a0the 25 minutes, grab the cabbage from the oven and flip each piece. Cover the tops with the maple mustard and sprinkle on chopped almonds. Place back into the oven for another 10-15 minutes %u00a0and roast until the cabbage is as crispy as you like it.
Remove from oven, sprinkle with good pepper,%u00a0and serve. Extra maple muastd is welcomed to some. Any left over (but there won’t be any) is great eaten cold before bed %u00a0or tossed onto a salad for lunch the next day.%u00a0
Just about every morning I wake up at the ass crack of dawn (actually its still dark out) make coffee, do a few things, usually read a bit while eating my breakfast and drinking my third cup of coffee, and start a pot of soup for lunch. All before 7am when I yell up to the mr. to get his butt out of bed. %u00a0I love it and I look forward to the mornings of me time.
So soup. I like to start the soup early and let it cook for a while. I start the soup, bring it to a boil, and then stick it on simmer with a ton of water. And then I am off for the day. The deal is that I leave, but the mr. leaves about an hour after I do and he will turn the burners off. And he has been so good about it. Sometime I might shoot him a text to make sure the burners are off, but most of the time I just trust.
Well about a week or so ago, I made soup, went about my morning. Upon my return home, before I even walked down the driveway, I could smell the burning soup.
%u00a0I rushed in just in time. The house was not on fire! But the pot of split pea soup%u2026 it was about to be. The pot consisted of about %u00a0three-inches of thick, burnt to a black brick, soup and about an inch of super thick burnt but still slightly green pea goop on top.
Now don%u2019t judge me here, but that goop%u2026. I ate it. And it was so good. I know, I sound kind of gross, but whatever I don%u2019t care. That little bit of super thick burnt pea paste was some of the best burnt food that I have ever eaten.(I love burnt food)
So this casserole gets a bit of inspiration from that goop. No, it is not burnt to almost an inedible state, but it gets thick and a little crispy and is so so freaking good. This is one of those dishes that I will make and continue to eat even though I cannot possibly eat any more. It%u2019s that good.
As for leaving the stove on while I am gone.. That’s not really happening anymore.
The stuff. %u00a0Dried green split peas, some water, Italian spice blend as well as garlic and onion powder. Also salt and pepper, a bay leaf, carrots, an onion, a couple of potatoes, a chunk of cabbage, and a parsnip. All good, all of what I have in the fridge at the moment.%u00a0
Start by chopping up the onion and sticking it into a big heavy pot. Take all the spices and mix them together in a little bowl and dump half of them into the pot with the onion, the bay leaf and a splash of water. Place on medium heat and cook until the onions start to soften and the water has evaporated.%u00a0
After the onions have cooked a bit, add in the dried split peas and a bunch of water (split peas suck up water like crazy) Turn the heat up to high and bring the stuff to a boil then turn heat to a medium and place lid on pot. Let cook for a while, giving it a stir every now and then to make sure nothing is sticking and burning to the bottom of the pot
While the split peas are cooking, chop up all the veggies into mouth sized chunks and mix them together with the rest of the spices and toss them into a skillet or casserole dish.%u00a0
And the peas.. Once they are all falling apart, they are ready. %u00a0Now is also a good time to preheat oven.%u00a0
Dump the cooked split peas all over the veggie mixture and mix around a bit. Grab that last potato and slice really thin.
Top the veggies with the potato and sprinkle with salt and pepper.%u00a0
And into the oven it goes!
Bake until the veggies are all tender and the top is all crispy (about 35-40 minutes) and eel free to even stick under a broiler for an even crisper top.
Pull it from the oven when its ready and let it sit for a few minutes to set up a bit…
And scoop yourself a big helping and eat! All it needs is a fork (But mustard tastes so good with it too!)
Have a great Monday!
-C
serves 3-4
3/4 cup dried green split peas
3-1/2 cups water
2 tablespoons Italian spice blend
1 tablespoon garlic powder
1 tablespoon onion powder
1 bay leaf
salt and pepper to taste
1 yellow onion
%u00bc head of cabbage
3 %u00a0white potatoes
2-3 carrots
1 big parsnip
Note%u2026 I used the veggie that I had on hand. So say you don%u2019t like parsnips, don%u2019t use them or want to add celery, go for it. Just make sure to have at about 4-5 cups of chopped up veggies.
Take all the spices and mix them together. Dice onion into little pieces and stick into a big heavy bottom pot with half of the spice blend, the bay leaf, a few pinches of salt and pepper, and a splash of water. Stick on stove and cook for a few minutes until water evaporates and the onions are fragrant and starting to soften. Now dump in the dried peas and 3-1/2 cups water.%u00a0 Bring it to a boil, then reduce heat to medium and place a lid on the pot. Cook the peas, stirring occasionally, for about 45 minutes of until falling apart.
In the mean time, dice up the veggies (leave one potato to top with)into mouth sized chunks and stick them in either a casserole dish or a 12-inch oven safe skillet. Mix in the other half of the spice blend
Preheat oven to 375
Once the split peas are done, take the pot and dump into the chopped veggies and mix around. Take remaining potato and slice thinly. Top the casserole with thin slices of potato and sprinkle with salt and pepper. Stick that bad boy %u00a0into the oven.
Bake for about 45-50 minutes or until the potatoes are crispy and the peas have thickened.%u00a0
Remove from oven, let rest for a few minutes, and serve it on up!
Pot pies. I grew up on them. But not real pot pies, no, it was those little frozen, single serve, terribly terrible nasty things. Yup. All you needed to do was turn on the oven or better yet, open the microwave, poke a few holes in the frozen pie, and 10 minutes later, food. The ultimate in afterschool snacks. Oh those days. What the heck was I thinking? But my best or, most vivid memory of those pies was when I was like 10 and was stabbing one of those frozen pot pies with a very sharp knife (again, the directions stated to add a vent hole) that went threw said pie and right into the palm of my hand. I remember screaming, blood everywhere, and thinking I just cut my hand off. Luckly, it was just a big gash and the knife didn%u2019t go all the way threw my hand so that was good. And I think that was the last time I made a pot pie. Ha.
This pot pie is nothing like those pot pies. First off, it is not frozen which is good because you won%u2019t accidentally stab a hole into your and. Secondly, it is not nasty. And third, it is freaking awesome. There are other things that make them vastly different, but you get the idea. This pot pie is full of good veggies and tofu that are nicely spiced with a creamy oat sauce that is alll wrapped up in a easy hot water pastry crust. Everything and more a real pot pie should be. Sure, it is definitely not as quick and easy as opening a cardboard box, stabbing, and tossing the contents into the microwave but screw that, we are here for the good stuff.
To the pot pie!
The stuff. Tofu, an onion, a couple carrots and a couple mushrooms, some frozen pies, garlic, oats, spicy mustard, and spices. Also salt and pepper, oil, flour, and some boiling water.
Start with the tofu. Grab a skillet, add a dash of oil and set o the stove on median heat. Cut the tofu into small cubs and pat as much of the liquid out as you can. Place tofu into skillet, sprinkle with a little salt, and let cook.
Whle tofu is cooking, cut up veggies into small, not tiny, pieces. And mince the garlic too.
Remove tofu from skillet and place into a bowl. Add all the veggies you just cut up into the skillet along with the spices and another pinch of slat ans lots of pepper. Keep on heat and cook.
While veggies are cooking, place water and oats into blender and blend until smooth. Making oat milk to thicken the whole shebang.
Once the veggies start to soften just a bit, add the tofu back in and add the mustard too. Then dump in the oat mixture you just blend up. Mix it al up and cook for a until it just start to thicken.
Now add in frozen peas, mix, and remove from heat. Set aside. It%u2019s now time to make the crust.
FLour, hot oil, boil water and salt.
Add all the stuff together and mix until dough forms.
Dump hot dough onto counter and kneed for a minute of two. It shouldn%u2019t be too hot to handle, but if it is, just wait a minute.
Once kneaded and unicorn. cut 2/3 of dough off and roll out about 1/8 inch thick either on a piece of parchment or a splat mat. IT is way, way easier to deal with then trying to roll it directly on the counter.
Place rolled out dough into spring form pan. It is going to rip and tear but guess what, no big deal. Just mush and patch the holes. That is the beauty of hot water crust. Once crust is all nice and uniform and all in the pan, dump in the filling.
Place top on, seal it up, add some vent hole and make a few little hearts with any scraps you have (only if you want too!) Now into the oven this baby goes, about and hour, until a nice golden brown.
Done and beautiful and yeah, it sprang a little leak, but thats quite all right with me.
Remove he spring form. And probably do it on a pan. Any little leaks will well, leak out a bit. But again, it%u2019s all good.
And now all you heave to do is eat it.
A pot pie in all its glory!
-C
makes one 8 inch, 2 inch deep, pie
For the filling
1 medium sized yellow onion
a few white button mushrooms (about a 1/2 cup diced)
1/2 cup frozen peas
2 small carrots
1/2 block (8oz) firm tofu
1 teaspoon each thyme, dill, rosemary, and ground ginger
2-3 cloves garlic
2 heaping tablespoons spicy brown or dijon mustard
1/4 cup old fashion oats
1 1/2 cups water
salt and pepper
a splash of oil
For Hot Water Crust
1 3/4 cups flour
1/2 teaspoon salt
1/3 cup coconut oil,warmed
1/3 cup neutral oil,warmed
1/3 cup boiling water
Before you start cooking know that you need to make the filling first and can even make it ahead of time. The crust needs to be used right away so don%u2019t make that in advance!
Start with tofu. Cut into small 1/2 inch cubes then press as much liquid out as you can. Place a drop of oil into a large skillet and turn onto medium heat. Drop in cubed tofu and sprinkle with a pinch of salt. Cook until browned.
While tofu cooks, dice up carrots, onion, and mushrooms. Mince the garlic. Once the tofu is browned, dump it in a bowl then add the veggies and garlic to the skillet. Also add in all the spices and another good pinch of salt and lots of pepper. Stir and then cook until veggies are slightly tender.
While veggies cook, place the oats and 1 1/2 cups water into blender and blend until smooth.
And after the veggies are slightly soften, add the tofu back in, along with the mustard and the oat mixture. Stir it all around and keep on medium heat for another few minutes until the oat milk just starts to thicken. Add in the frozen peas, stir, then remove from heat. Give it a taste and season with more salt and pepper if needed.
Preheat oven to 375
Now for the crust. Place flour and salt in a big bowl and mix. Then add in warm oil (either heat on stove or in microwave) and boiling hot water. Mix unit it all comes together. Dump dough onto counter and knead for couple minutes until dough is uniform and smooth.
Cut 2/3 of the dough off and roll out in between parchment paper or on a splat mat to about 1/8 inch thick. Place into a spring form pan. It%u2019s going to fall apart a bit but that is ok, just mush and patch up all the rips and tears so there are no holes. This dough is like play dough, very easy to manipulate. Once bottom crust is in, dump in the filling. Take the remaining dough and roll out the same way you did bottom and place on top. Seal the bottom and top crust by pinching it together. You want to try and avoid any holes so the filling doesn%u2019t leak out. Once the crust is sealed, cut a little vent hole into the middle of the top then place pie into oven. Bake for an 60 -70 minutes or until crust is a nice golden brown.
Once baked, remove from oven and let cook for a few minutes. Then remove from pan by place pie on something like a bowl or cup that fits underneath the bottom of pan. Unlock the pan and slip ring down while the pie stays perched on cup. You can even pop the bottom of pan off if you feel like you can, but I say, why risk it. That is up to you. And sure, the pie might have sprung a little leak, but that is very much ok.
Now basically all you need to do is eat it so place pie on a big plate, grab a knife, and fork, and cut yourself a big ass piece of pot pie.
Leftovers store great in the fridge for a few days.
When your sister drops off 50 lbs of beets, on top of the 50 lbs that you have to harvest that are growing in your garden, what do you do?
Well chips of course.
Yeah, chips. That%u2019s right. When I got home from camping on Monday and there was a humongous pile of beets sitting next to my front door, I am not going to lie, I was a little shocked. I mean there wasn’t just a few little ones. These beets were freaking huge, like the size of my arm, and so many. But pretty much right after my initial shock I knew what needed to be done. First, eat a few roasted, second, roast extra to freeze for later, and lastly, make a few bunches of chips.
Have you ever had beet chip? They are amazing. Crispy, crunchy, tasty as all heck. If you like beets, even in the slightest, you will love these. If you hate beets, well maybe don%u2019t? Either way, beet chips are the best chip. Wha’t%u2019s not to love? Pink, and chippy. Sweet, and salty. And then you add the fact that making beets into chips is a good way to get your veggies in and that you can eat a whole bowl full and feel zero guilt because you are just eating beets. Plus making beets into chips is a good way to use up any extra beets you might have laying around or that have been dropped off at your front door.
These chips, once they are made, will not last long. So when you do make them, know you will probably be making them again soon there after. Me, I have still have to harvest all my garden beets so beet chips are happening again soon. Real soon (like this afternoon!)
To the beets!
The stuff. Beets (these are Formanova beets but any variety works) salt and pepper ,and oil.
Ok so you need to cut these bad boys reallllllly thin. Like 1/15th a inch. So, what I am saying is, use a mandolin. If you don%u2019t have one, a knife will do, but you are going to have a hard time getting them as thin as you need to and all of them consistent so baking is going to be a little more tricky so maybe you should just go borrow or invest in a mandolin.
Grab baking sheets, oil, and salt and pepper. You can either dump the oil directly onto the pile of sliced beets and really toss to make sure each one has been coasted or do what I did which was I drizzled oil into my hands and rubbed each sliced beet between my oiled hands before placing on the sheet.
After you get them on there, single layered with no overlapping, sprinkle tops with a pinch of salt and pepper.
On the way into the oven.
After the oven. Baked for about 18 minutes. You really have to watch after the first 13 or so minutes to make sure you catch them at the perfect time. Crispy, but not burnt.
A side by side shot. Crazy shrinking will happen!
Oh man, so delicious. And so pretty!.
Let the chips cool before eating, you know, so you don%u2019t burn your tongue. Plus they crisp up a wee bit more.
Once cooled, pile them into bowl, and then eat them. And eat them all. They are only beets after all. And you won%u2019t be able to stop yourself anyway. Ha
-C
Makes enough for an evening of chip eating for 1-2 people
2 Large beets (think softball sized)
a tablespoon or two of oil (I used grape seed but really any would work)
salt and pepper
Note. Making these without cutting with a mandolin will be a pain in the ass. It can be done, but if you have a mandolin, use it.
Preheat oven to 350
With a mandolin, slice the beets about 1/15 inch thick. (No need to peel the beets unless you want to.) Once beets are all sliced, either drizzle them all with a tablespoon or so of oil and toss until all are coated. OR what I did and found worked really well was drizzled oil into my hands and rubbed each beet between my oiled hands as I was placing them on the baking sheets. Either way.
Now place oiled beets, single layered, without overlapping, on baking sheets. Sprinkle with a pinch of salt and pepper and place into oven. Bake for about 13 minutes without worrying then start to check every minute or so until the beets are a deep golden brown and crispy ,which will be between 15-20 minutes. Also, even though you cut them all the exact same thickness, some might crisp up faster so you should remove done chips as they happen. Once they are done, place on a rack to cool. And then do another batch. And not, they do crisp up a tiny bit more as they cool.
Once chips are cool and crisp, eat.
Store uneaten (how did you not eat them all?) chips in an air tight container. If you notice that they turned a bit chew, just place them back into oven while preheating oven to 300 then turn oven off and let sit in there for a few minutes.
It is spring yes? I know it is officially spring but around here it has been more or less still winter which is to be expected but is, at this point, no longer welcomed. I, as well as everyone else I talk to, are over it. Enough snow. enough of the hats and jackets. Just enough.
But the bright side of the chilly, cold weather is that we can and still want to turn the oven on and cook things. And because I turned the heat off a little prematurely, I am cold so I really want the oven on.
One skillet, a little chop action, a stir, some good time in the oven and there you go, food for your belly. Not a ton of dishes to do, steps to fallow, thoughts to think (other then eating thoughts). A good old, hearty, simple to toss together, spicy, delicious skillet of goodness. Prepare it fast, pop into warm oven, sit in kitchen drawing up plans for the spring veggie garden, and then eat yourself warm. What more can we ask for?
We can ask for spring weather because seriously. But other then that.
To the goodness of cajun lentils and rice!
The stuff. Lentils, brown rice, cajun seasoning, some crushed tomatoes, an onion, a carrot, a few cloves garlic, some cauliflower, water, oil, and salt and pepper.
First off, mince garlic and chop up the cauliflower, carrot, and onion into small pieces.
Toss it all into a good sized oven safe skillet with a splash of oil. Mix in the cajun seasoning too and stick o nth stove on medium heat for a few minutes.
Cook until fragrant and slightly tender. Taste it, it is good.
Dump in the lentils and rice. Then dump I the tomatoes and the water. Give it all a mix.
And after. All done. Now dinner.
Grab some green thing to chop and toss on for some color.
Now grab some bowls, a few forks, and get to eating.
-C
Serves 4-6
3/4 cup uncooked brown or white rice
3/4 cup dried green lentils
2 cups crushed tomatoes (preferably not salted)
2 1/4 cups water
3 tablespoons cajun seasoning (see note)
1 large carrot
1/4 head of cauliflower (about 2 cups chopped)
1 large yellow onion
2-3 cloves garlic
1 tablespoon olive oil
salt and pepper
Note. Store bought cajun seasoning usually contains salt and pepper so when seasoning, be aware of the amount of salt (if any) you choose to use.
Preheat oven to 350
Start by chopping the carrot, onion, and cauliflower into small pieces. Mince the garlic and toss it all into the skillet with the olive oil. Stir in the cajun seasoning and sprinkle in salt and pepper if it needs it. Place skillet on medium high heat and cook veggies until fragrant and slightly tender which should take about 5 minutes then remove from heat. Dump in the lentils, rice, water and tomatoes. Stir until mixed then either place a lid or foil over the top. Place into preheated oven for about an hour, removing the lid or foil after 40ish minutes and giving it a stir when you do. The bake is done when the rice and lentils are fully cooked, but if you are into a crispy top and crunchy sides, by all means, cook a little longer.
Remove from oven when fully cooked and you are happy with crispness. Let cool for a few minutes, toss on some chopped green something or another if you want, and serve it up.
Left overs store great in the fridge for a few day and freeze well too.
I feel like this salad is kind of a summery salad, or better yet, a salad that highlights all the best of what summer has to bring. All the fresh tender dill that is still growing (but not for long) , all the brightly colored and amazing veggies that are being harvested and are nearing the end (bye fresh cucumbers.) This salad might just be my little last hurrah of summer cooking before it is all root veggies and dried herbs and hot and hearty food. And not going to lie and say that I am sad to see summer go because I am so so ready for it to be over, but I will miss all the fresh fresh produce. And I will especially miss all the fresh dill because fresh dill is seriously the best.
Eat up what is left of summer now before it%u2019s too late!
The stuff. Quinoa, a bunch of dill, a cucumber, a pepper, an onion, and some cherry tomatoes. Also a clove of garlic, some salt and pepper, and red wine vinegar.
Mince the garlic, chop the onion, mince the pepper and the cucumber, half the tomatoes, and last but noblest, rough chop the dill.
All that goodness goes into. big bow, along with a sprinkle of salt and pepper, and the vinegar Tossed around and left to meld.
Uncooked quinoa with water turns to cooked quinoa
Quinoa meets the bowl of veggies
And after a good mix, viola!
You got yourself a yummers fresh dill and veggie quinoa salad.
-C
serves 3-5 as a side or 2 as a meal
1 cup uncooked quinoa
2 cups water
I bunch fresh dill (like a 1/3 cup chopped%u2026 But use as much as you want)
1/2 a small red onion
1 clove garlic
1 small Persian cucumer
1/2 of a sweet red or yellow pepper
handful or two of cherry tomatoes
4 tablespoons red wine vinegar
salt and pepper to taste
Start by cooking the quinoa. Place the water and the uncooked quinoa into a medium sized pot. Place on high heat until sorts to boil, then reduce heat to a simmer and place lid on the pot. Let cook for about 15 minutes, checking at 10 minutes, to see if all the water has absorbed. When it has, remove from heat and let sit for a few more minutes then fluff with a fork.
While the quinoa id cooking, mince the garlic and chop all the veggies into small little pieces. Place into a big bowl. Chop up the fresh dill and toss into bowl too, along with the vinegar and a good sprinkle of salt and pepper. Mix it all around and let sit on the counter for a little so the veggies get nice and vinegary. Once quinoa is cooked and fluffed, dump into the bowl and mix around. Season with more salt and pepper if needed. Eat warm or refrigerate and eat cold. It%u2019s defiantly one of those salads that taste great right away but tastes even better the next day.
%u00a0Cabbage is probably the number one eaten food in my house. It is not uncommon for us to go through a very large head a day. And I get that it may seem odd to you, but it’s true. We are cabbage people, so much so that we will probably turn into cabbage patch people. I can see it now.
One of the reasons that we eat so much cabbage is that it is so versatile.. Raw, steamed, roasted, the possibilities are a plenty, not to mention that cabbage is pretty dang cheap. And not to far around the corner it is St Patrick’s day when cabbage is basically given out for free. During this time I stock up, buy 100 lbs and ferment, roast, and peel my way through all of it. Is it sick that I am kind of excited about that ? (there are worse things to be excited about)
This cabbage dish is one of those dishes that can be eaten on it’s own, as a side, or as a condiment. Topped on a salad, stuffed into a sandwich, or shoveled into the mouth. You really can’t go wrong eating it anyway.
The stuff. Cabbage, onions, caraway seeds, salt and pepper, and some apple cider vinegar. (I accidentally grabbed the oil)
Shred up the cabbage and onions. Thin is good, but some bigger pieces are good too.
Into a big pot sprinkled with caraway, salt and pepper. A splash of water helps to get things started. Stickon a low heat topped with a lid.%u00a0 And just let it be for a while butgive it a stir ever 10-15 minutes or so.
About an hour it’s all cooked down and sweet and tasty as can be. A splash of vinegar finishes it off.
This batch was destined for the mr’s open faced cheese sandwich. I thought I made enough to pack some for lunch, but
I ended up just eating the left overs for a snack. I don’t know why I didn’t make more.%u00a0 Next batch I’ll make it a double.
Happy day to you.
-C
makes about 2 cups
1 small or 1/2 a large head of cabbage
2 yellow onions
2 teaspoons caraway seeds
1-2 tablespoons apple cider vinegar
olive oil for pot
salt and pepper
Thinly shred the cabbage and thinly slice the onions. Dump the now shredded cabbage and onion into a large dutch oven or heavy bottom pot that has a tiny drizzle of olive oil. Sprinkle with caraways seeds and about a teaspoon salt, a good splash or water then mix around. Place pot on a low heat and cover. Let cook down for about 45 minutes to an hour , stirringever 10 minutes or so, until the mixture has shrunk to about 1/3 it’s original size and is soft and tender. When just about done, mix in a tablespoon of the vinegar . Taste and season with more vinegar, salt and pepper if you like.
Eat as is or is or on salads, sandwiches or wraps.
It’s strange to think that only a few years ago I was not a big eggplant fan. Before I started to experiment with cooking it myself, the only time I had ever really had it was when I was young and it was deep fried, like eggplant parm style. It just wasn’t for me.
So when I started doing my farm share 5years ago and were getting lots of eggplants, I knew I had to figure something out and try new ways of eating it. Well it turns out that I actually love eggplant, like a lot.%u00a0 I went eggplant crazy and for a while was eating a eggplant a day, either roasted or tuned into soup or cooked crispy into chips. And lots of baba ganoush, or what I think of as eggplant hummus (all the hummus stuff minus the chick peas). Smooth, creamy, rich and tangy. I have been know to make a batch and eat it all to my face in a sitting.( there is absolutely nothing wrong with that) It’s that good. And bonus. Being so super busy busy, this is just so dang fast and easy to make. 25 minutes and 20 of those minutes are the eggplant roasting, and you got yourself something tasty to eat. Plus if you have a few eggplant in the fridge that might have seen better days, turning them into the baba ganoush is a great way to go.
Baba ganoush, The name just says it all cause how could something called baba ganoush be anything other then awesome.
The stuff. A couple (or three) eggplants, a lemon, some tahini, garlic, olive oil and salt.
Eggplant get sliced in half and stuck onto a baking sheet to go into a super hot oven to roast. Some people oil it, I don’t, but you can if you want.
Brown and tender. Roasted to perfection.
Toss the roasted eggplant and the garlic into a blender. Add in the juice of the lemon, tahini, olive oil and a pinch of salt.
Blend.
So silky smooth. Taste and add any more tahini, salt, lemon that you want until it taste like it should taste to you.
And into a bowl it goes. Baba ganoush all up in your face. I highly enjoy a good dusting of some zataar on top, but even just a sprinkle of pepper, or sumac, sesame seeds or even thyme is nice. Or nothing, you don’t need anything.
A big bowl of baba served with some chippers (for the mr) and cut up veggies (for me!) I wanted to make pitas but just didn’t have the time. Oh well, next time.
Be careful, this stuff is addictive!
-C
Make about 2-1/2 cups
2 eggplants (or 3 smaller sized eggplant)
1 lemon
3-4 cloves garlic
3 tablespoons tahini ( more if you like)
1 tablespoon olive oil
salt
Zataar (optional)
Crank up the oven to 450
Slice eggplants in half and place on a cooking sheet and into the oven they go.
Bake for 25ish minutes, flipping over after 15 or so minutes, until the eggplant browned is nice and tender then remove from oven.%u00a0 Take the cooked eggplant and dump into a blender.(skin and all)%u00a0 Add in the juice of the lemon, the tahini, the olive oil, and a pinch of salt. Blend it all together until smooth. Taste and add more tahini and or salt if needed.( can even add more lemon too) Once you are happy with the taste, scoop into a bowl and serve with a good pinch of zataar seasoning (if your into it) and a butt load of veggies, pitas, chips or whatever you dip into you baba ganoush.
Do you have a gazillion tomatoes, like so many that they are practically coming out of your ears? Me too…. Me too. This year the tomatoes have been gang busters, a explosion of the sweetest and most delicious fruit and now I have tomatoes littered everywhere, tucked into all the corners and baskets all over the house. It’s getting kinda tomato crazy over here.
%u00a0I can only eat so many tomatoes a day before all I have eaten are tomatoes and I start to feel slightly sick. Same with the mr, he has been a tomato eating champ as well but I think he was getting a little bored with all the tomato salads that I have been making. So I thought I would try something new and make a tomato cake. I figured why the heck not, tomatoes are technically a fruit and fruit and cake are great together and yeah. So tomato cake is going to be fantastic. I also wanted to make something that the mr would eat for breakfast. I have been doing this new thing in the mornings for the mr. I have coffee ready, some breakfast food (its been zucchini bread for a while), and a little vase of fresh flowers that I pick on my morning walk, all set out on the counter for when he wakes up. I know, I am so great right. Really I do it cause I want him to eat something before working all morning and plus if I am all sweet in the morning, he can’t be an old man cranky pants (at least he tries not to be).%u00a0 Now for the next few days the tomato cake is breakfast cake and all is good.
Anyway, the cake come out great. Bright reddish orange, dense but fluffy and most, and smells so good. The mr tells me it’s amazingand I shared a chunk with some of my family and everyone (minus a little) where fans. I am for sure going to be making this again soon, although I have been toying with the idea of eggplant sweet bread (too far??) but I’ll get to that later.
Now for the tomato cake!
The stuff. Flour, baking soda, baking powder and salt (all in the bowl). Brown sugar, oil, vanilla, apple cider vinegar and a few nice and juicy tomatoes.
First off, remove the core from tomatoes and cut into some chunks. Stick the chunks into a blender and blend.
Fresh and smooth tomato puree.
Now just dump the rest of the liquid stuff into the blender now and give it a whirl to mix it all up.
And pour the blended wet into the dry and mix until incorporated.
Pretty pink batter goes in a well greases bundt pan. I had got brown sugar everywhere while I was measuring it out and decided to just toss it on the cake as not to waste it…doesn’t hurt.
And now the batter goes into a preheated oven to bake .
A bit of time later you have yourself a cake.
The scary part. Flip the pan and hope all that grease does it’s job and the cake pops out. Lucky me this one popped out like a champ.
One de-panned, let the cake cool for a bit before cutting into it.
And now all you have left to do it eat it, so eat it.
Have a great weekend. Eat lots of tomatoes and make lots of cake.
-C
Makes one bundt cake
2 -1/3 cup all purpose flour
1 teaspoon baking soda
1 -1/2 teaspoon powder
1/2 teaspoon salt
2-3 large tomatoes (2 -1/2 cups after blended)
1/2 cup brown sugar (for a tad sweeter, add another 1/4 cup)
1/2 cup of any neutral flavored oil
1 teaspoon vanilla
1 tablespoon apple cider vinegar
Preheat oven to 350
Start by whisking together all the dry ingredients into a big bowl. Take tomatoes, remove core, chop into chunks, and place into a blender. Blend tomatoes until a smooth and frothy puree. Now add in the sugar, oil, vanilla, and apple cider vinegar and blend until incorporated. Pour wet mixture into dry and stir until combined.
Pour the cake batter into a greased (and floured if you want. I find it helps to make sure all the nooks are greases) and stick into preheated oven. Bake for 45-50 minutes until it’s a dark reddish golden brown and a tester (I use a fork) comes out clean when stabbed.
Remove from oven and let cool for a minute or two then invert cake, give the pan a few tap taps and hope that it comes out all nice and clean. (don’t worry if a piece gets stuck, you can just dust the top with some powdered sugar)
Let cake cool and when ready, cut a slice and eat it up. I was told no glaze, but I was going to make a simple lemon glaze (lemon juice and powdered sugar) for the top. The mr said it was perfect, but glaze would have been pretty.%u00a0 So glaze it up if you want.
As a kid, my favorite holiday was Easter. Every year my parents would fill up brightly colored plastic baskets with handfuls of neon colored plastic “grass” and top it with all sorts of candy, coloring books, bubble, and sidewalk chalk. They were beautiful and amazing.%u00a0 It was like getting a basket of fun and a bunch of sugary candy to keep you going to have all that fun all day long. And the egg hunts. Plastic eggs full of candy hidden all over the house ans yard. We would all have our emptied out baskets running around full of excitement, ready to take out any sibling in our path just to be the one to get the next egg. We were ruthless and I am pretty sure every year someone would end up crying. Now, as an adult, I am not allowed to participate in the egg hunt. (but I still try to make my sibling cry)%u00a0 Nope, now I get to hide the eggs and sit back and watch the new generation of littles tripping each other and stealing eggs from one another. The carnage!
And also at Easter there is cake. Is there a rule that says you have to make carrot cake for Easter? I think there must be because it is when everyone and their moms busts this cake out. And everyone’s carrot cake it the best because they made it the right way, like with raisins or pineapple or walnuts. There are so many things that can be added to this cake that it’s a little overwhelming. So I made a carrot cake that was mainly about the carrots. Nothing added, no nuts raisins or coconut (although you could add i if you wanted) and it’s made into a pretty bundt cake, which in turn makes mine the best.
This here cake was destined for tomorrows Easter table. I made it with no nut produces cause the nephew has the deadly nut allergy. But when I went and made the date sauce, I kinda let that slip and used almond milk. Oops. So now I have a whole big carrot cake sitting on the counter with it’s destiny shattered. So sad, but I think its will survive cause the mris really into it and has already eaten a few pieces. I figure that because it’s a carrot cake, he can eat a few more. It’s almost like eating a vegetable….almost. And now I need to make a new cake to bring over or I might just stop at the store and buy some oreos on my way over tomorrow. The littles will like that.
The stuff. A bowl containing flour, salt, baking powder ans baking soda.%u00a0 Also need a few really big carrots, a bit of brown sugar, and ground up cinnamon and ginger. Coconut oil, soy milk, an orange (for it’s zest) and a little apple cider vinegar are going into this cake too.
Start by chopping up 2 of the biggest carrots and tossing the into a pot with about an inch of water. Stick the pot on the stove and cook until the carrots are nice and tender. Then blend those tender carrots up.
I had a hard time not eating all of the carrot puree, so maybe if you want, cook up a few extra carrots ans have yourself a pre-carrot cake carrot snack.
And while the carrot puree is still warm, add in the coconut oil and the sugar. Mix it until the oil is melted ans it’s one cohesive mixture.
And take that last carrot ans grate it up into the flour. Also add in the spices and the zest of the orange.
Note. I used a small holed grater so that the carrot shreds would be small and add texture to the cake but not make it too chunky. But use a normal grater..it’s all about your carrots chunk prefernce here.
Now dump the wet carrot mixture into the dry and start to mix
Adding in the soy and the vinegar to complete the batter.
And scooped that batter into a oiled bundt pan and get it into the (preheated) oven to bake.
After about an hour, the cake is ready, golden brown and smelling like any good carrot cake should. Remove from the oven and turn the cake out from the cake pan and stick on on a rack to cool. This cake is waiting for me to decide what, or if I want to frost, drizzle, or sauce it up….. I think it wants as little something.
Ok, I figured it out. Date sauce.
The stuff. Fresh medjool dates, almond milk and sea salt.
Date (pits removed) into the food processor along with the milk and a good pinch of sea salt.%u00a0 Blend until it turns into a nice smooth, fluffy sauce.
Take that sauce and spread it all over the cake. As much or as little as you want (you might have left over date sauce but its ok, you can just eat. It will last for about a week in the fridge and goes great with just about anything) Once fully sauced, sprinkle the cake with flaked sea salt.
Sliced, plated, and ready. It’s carrot cake time.
Have a great weekend, eat all your candy at once!
-C
Makes a bundt cake (but could be made into a 9×13 sheet cake)
2 1/2 cups flour
1 teaspoon baking soda
2 teaspoons baking powder
1 teaspoon salt
3/4 cup brown sugar
1/3 coconut cup oilany oil works)
1 tablespoon apple cider vinegar
3 large carrots (makes about 2 cups carrot puree and 1/2 cup of raw grated carrot)
1 heaping tablespoon cinnamon
1 teaspoon ginger
Salted Date Caramel
1 cup medjool dates (pitted)
1 cup almond milk (or any milk you want to use)
sea salt
Start by chopping up 2 of the biggest carrots and placing them into a pot with water about an inch of water. Stick on stove and bring to a boil then reduce to a simmer until the carrots are fork tender. When done, puree them with any means nessasary (hand blender, regular blender, food processor) Add the coconut oil and sugar to the warm carrot puree and mix until oil is melted.
Preheat oven to 350
In a large separate bowl, mix together the flour, baking soda and powder, salt, and the spices. Grate the smallest carrot in with the dry.
Take the wet carrot mixture and dump into the dry and mix, adding in the soy milk and the vinegar as you mix. Once everything is completely incorporated, pour mixture into a well oiled bundt pan and stick the cake into the preheated oven
While the cake is baking, make the date sauce. Just take the dates, remove pits if they have any and place in a food processor with a good pinch of sea salt and the almond milk. Pulse a few times, scrap down the sides, and keep blended, stopping to scrap sides if needed, until a nice thick smooth sauce is formed. If you want a thinner sauce, just add more milk til you get your desired consistency.
Now check cake. Once it’s golden brown and a tester comes out clean (between 50 minutes to an hour) remove from oven. Let cool for a few minutes in pan the then turn it over onto a wire rack to finish cooling off. Once the cake is cool, dump the date sauce all over it then sprinkle with another good few pinches of the sea salt.
And now eat it. This is a cake that needs no fork, but you can go ahead and use one if you must.
Tarragon Butternut Squash and Onions — The Lovely Crazy
July 4, 2020 by maximios • Blog
So to give a lighter feel to a heartier squash, I busted out one of my favorite spices, the oh so lovely tarragon. It has a sweet, light, fruity and floral taste that pairs beautifully with the squash and onions. It give the dish a nice spring like flavor that will leave you feeling satisfied without wanting to move directly onto the couch and hide under a blanket. This is a eat and ride you bike kind of dish ( you don’t actually have to go for a bike ride if you don’t want to)
Note. If I had a grill, I would definitely cook this dish on it. As of now, I don’t own one so I am left to cook on the stove. But by all means, if you have a grill, do it up!
I am pretty sure you can figure out the rest.
Happy day!
-C
Tarragon Butternut and Onions
Chop squash and onions into similar size pieces. Toss in a skillet or on a oiled baking sheet and add the rest of the ingredients. Toss around and place into a 425 degree oven for about 30-40 minutes or until squash is fork tender.
Remove from oven and eat.
Make as a side dish or add to a salad. Eat as a light lunch, or a midnight snack… eat it however you want.