Last week pineapples were on sale everywhere……So I bought 5. Don’t judge
And I bet I am not the only one that got overly excited at $1.50 pineapple and bough themselves a few. We will just call ourselves opportunists. Now we have plenty of pineapples and don’t have to pay the $4 a piece prices. (Justification)
But if you don’t have a pineapple laying around, you must go get one. (Maybe if your lucky, there might still be some sales going on) because you must make this salad. I am on a mission to make everyone I know eat it because, for lake of a better way to say it…….It will rock your world.
Dill and pineapple are a serious match made in heaven. Pineapple, with its sweet, tangy, citrusness and dill with it’s super fresh earthiness. Mixed together with a few other helpers to create a fresh, clean, chunky, tangy, over the top, flavor. I could stop right there, but toss in a handful of lentils, some creamy avocado and a bed of kale…It’s like the best spring time, celebration on you tongue, happiness in you tummy, kind of salad.
A salad that will make you smile. (and maybe buy 5 pineapples)
Stuff for the goodness. We got the kale, some avocado because all salads should have avocado and some cooked lentils because, well, all salads should have lentils (or beans or nuts.. so you could totally something else) Then a few sprigs of fresh dill, a clove of garlic, red wine vinegar, salt and a bowl of chunked up pineapple. The pineapple, dill, garlic, red wine vinegar, a splash of water and a pinch of salt get blended in a blender or whatever blending device you use. Go as smooth or chunky as you like, I recommend going smooth, but leaving a little chunk, like half blended.
The prep is done, now compile. Kale in bowl, top with lentils,. Toss on avocado chunks, and, last but not least, the blended pineapple dill mixture.So good……So so good.
Happy Friday!!
-C
So Good Pineapple Dill Kale Salad
Serves Two
3 cups washed and chopped Kale
1/2 a avocado, diced
1 cup fresh pineapple chunks
1-2 springs fresh dill
1 tablespoon Red Wine Vinegar
Salt
1/2 cup cooked lentils (or any bean or nut will do)
Note. No fresh dill? You can use dried, just sub in 1 teaspoon for the fresh and after blending with the pineapple, let sit a little longer to really let the flavors meld together.
Place pineapple, dill, pinch of salt, vinegar and garlic into a blender or whatever you own that blends and blend stuff together, leaving it a little chunky. Let sit for 5-10 minutes.
Kale goes into a bowl and add the lentils and diced avocado. Pour the blended pineapple on. Toss around.
Now eat.
TGIF!!!! For reals, because Monday-Thurday were monster days. And now that its friday, I can dig a hole and hide in it until it’s at least 30 degrees with some sunshine. (I might never get to come out.)
A few things I will bring in my hole:
food (lots of food and coffee, lots of coffee)
a soft blanket and pillow
a few books, preferably with pictures, on farming and gardening (think spring!)
the entire series of the Fresh Prince of Bel-air and a device to watch it on
toothpaste (I can use my finger to brush my teeth)
But before I leave for my hole in the ground, I made these little cake bites to get my people through the weekend. Sweet little lemony bites of rich dense cake dipped into bittersweet chocolate. (I am just so nice) They have all the pleasure or cake without the need of a fork and are much easier to give away then a big slice of cake. Plus, they are fun to make. My little sister helped and did most of the chocolate dipping. Then she and another little used their mouths to clean up the chocolate mess. It was an afternoon of chocolate all over the kitchen fun day.
So make some bites to have and to share. Or if you, like me, are digging a hole to hide in, make a batch of bites to bring with you. That’s the beauty of cake covered in a harden chocolate shell, they travel really well.Simple lemon cake stuff. Flour, baking powder and salt whisked together, Sugar and soft butter in a bowl. An egg, some vanilla, milk, and of course, the lemon.
To make the batter, cream the soften butter with the sugar until light and fluffy. Zest lemon(1 big or 2 small) into bowl with the juice of the lemon(s), the vanilla and the egg. Beat until combined. Now beat in the dry and then the milk. Keep beating for another minute until all mixed. Batter should be light and fluffy.
Batter goes into a greased and floured 9×13 baking sheet and stuck into a 375 degree oven for about 30 minutes (You can use a 9×9 baking pan. Just bake fir another 10 minutes and you will end up with thicker bites). Remove from oven and let cool for a few minutes and flip to remove cake from baking sheet. Cut cake into small pieces (I cut 4×6 to get 24 bites) and place bake into sheet and into freezer (I stuck mine outside, it was -2 degrees ) for at least 2 hours.
Frozen bites ready for the chocolate coating… Bittersweet chocolate chips and a little bit of coconut oil. Melted together all nice and shiny smooth.Now dip and slather those bites in the melted chocolate.
Oh what a lovely sister I have.. Look at her dunk….. like a boss!Fully coated and placed on a rack for the chocolate to harden. I ended up sticking the rack in the freezer for 10 minutes…They harder really fast in there.
And now you have some it, bites of cake covered in chocolate. 1 bite, 2 bites…5 bites. Eat however many you want because its Friday and because there small little bites and just because you can.
Now if you need me, I’ll be in my hole.
-C
Chocolate Lemon Cake Bite
1 1/2 cups all purpose flour
1 teaspoon baking powder
1 teaspoons salt
1 cup white sugar
1/2 cup (1 stick) soft butter
1 egg
1 teaspoon vanilla
1 cup milk
1 large or 2 small lemons
2 cups bittersweet chocolate chips
2 tablespoons coconut oil
Add butter and sugar to a large bowl and beat on medium unit light and fluffy. Ass in vanilla egg, the zest of the lemon and the juice of the lemon. Beat to incorporate. Now beat in the dry and lastly the milk.
Grease and flour either a 9×9 pan or a 9×13 baking sheet. dump batter in and smooth out. Stick in oven and bake for about 3o minutes or until a toothpick stuck into the middle comes out clean. Remove and let cool for a few minutes on a wire rack. Flip cake to remove from pan. Cut cake into bit sized pieces, 4×6 is a good size, and place back on baking sheet and stick into freezer for at least 2 hours.
When cake bites are as good as frozen, get the chocolate ready. Take the chocolate and the coconut oil and either melt in a double boiler or the microwave. Mix until smooth and make sure to full incorporate the oil. Now remove the cake bites from the freezer and dip each bite into chocolate, trying to full coat all sides. Stick onto a wire rack or a parchment lined pan to harden. They can be stuck back into the freezer to harden faster.
Once chocolate has harden, your good to go!
First off.. Happy Saturday and Happy Valantines Day!
Once again, it is so F-ing cold out and I don’t want to leave my house! And because of the cold we decided to forgoing the traditional V day hike(kinda sad) but instead are going to just hang at home and watch movies. (which is actually kind of nice because now I get to stay all frumpy and warm , hanging out in my baggy old sweats and oversized sweater (so sexy right?)
Anyways.. being all cozy usually entails something warm and yummy to drink. Neither of us are really big on hot chocolate, (plus we don’t have the stuff to make it) and sure we could crack open the fancy bottle of wine we bought for dinner (4.99 Trader Joes Special!!!!) or we can save that and I can whip up something a little spicy sweet.
Warm winter lemonade!! We are both big on lemon in everything and I just bought a bunch of sweet meyers lemons, so I think it’s meant to be.
Sweet, a little spicy, and warning….Perfect for a day of cuddling on the couch or for something to warm you after being outside. Great for anyone who wants a little something tasty that isn’t chocolate or booze, even good for those that might be feeling a little under the weather. Kids and adults alike…. this winter lemonade works for it all.
So whip some up and stay warm!
And have a fantastic day!!!
-C
Warm Winter Lemonade
Serves 2
1 Meyer lemon (can use regular lemon too)
3 cups water
2 tablespoon of honey (use sweetener of choice if vegan)
A few sprinkles of cinnamon(optional but recommended!)
Slice lemon and place into a pot with water, cover, and bring to a boil. Once boiling, remove from heat and let sit for a minute or two. Transfer to a blender (or use a emulsifier) and blend until frothy. Place a tablespoon of the honey or whatever sweeter into each cup. (add more if you like) Strain lemon mixture in equal amounts into mugs. Stir and sprinkle with cinnamon.
If you don’t want to use the blender method, you can juice 1 lemon, split into two mugs , add sweetener and top with hot water.. Don’t forget the cinnamon!
Whenever me and the mister get invited / show up for dinner at someone’s house, I like to bring at least one thing to contribute to the meal. First, because I am nice like that. Secondly, because I get to make food for other people besides Nick and get new feedback on recipes. (Sometimes I think he tells me things taste amazing when they might not) And thirdly, its nice to mess up someone else’s kitchen besides my own. So last night we went to my sisters and I made a salad. A very easy and virtually mess free salad…….I still made a mess (I cleaned it up myself!)
The salad I made was a light, crisp, and citrusy thing of beauty. Not exactly what one would think to eat on a freezing my face off cold day, but hey, you can’t help what the body craves. Plus, if you make it for. lets say, a sister that is making french fries and hamburgers for dinner..then a light and citusy salad is just what you need. Feedback from the mouths that ate it….Fanstastic combo! Best Salad ever! Never going to eat anything else! Ok, not so dramatic, but this was a winner. And for real, this salad takes about five seconds to compile and all the ingredients are really accessible right now so really, why not?
Nice crisp kale. Thinly slices red onion for a nice bite. Orange for that sweet citrusy and juicy smack and avocado to add a perfect creamy finish. Lime to make it perfect. Start with the base layer of kale… then first goes the sliced onion. (Make sure it’s thinly sliced or else it will be to overpowering) Add thinly sliced oranges…oh boy, your half way there!!!
Top with thinly sliced avocado, a sprinkle of salt and drizzle with lime juice. I also served with an extra wedge of lime, there is never too much lime.
Now you can stand back, take a picture, send to all your friends and make them jealous of you fantastically pretty and oh so delicious salad. They will ask, “What is that amazing looking dish you are eating?” Your response will be..”Check out the blog..the lovely crazy…and make it yourself! ” (yes, I am shamelessly plugging myself here)
Anyway, enjoy the day and try to keep warm!
-C
Citrus Avocado Salad (Makes 2)
Ingredients
A few good handfuls of kale leaves
1 orange
1 avocado
1 lime
1/2 a red onion
Remove tough stems from kale and chop leaves into small month sized pieces. Thinly slice onion, peel and thinly slice orange and cut avocado into…yup you got it, thin slices.
Kale into bowls, top with onion, orange and avocado. Top with the juice of half a lime…Add a sprinkle of salt.
Because sometimes you just need to think of yourself and what will make you happy. Eating this makes me happy.
This flavor situation just made so much sense. All three flavors on their own are fantastic, but combined into one super amazing frozen sorbet treat.. I mean, like WHOA! I was inspired by the 4 really ripe and juicy mangos I had waiting on the counter. I had also just made a batch of jalapeño jam and was thinking about how nicely jalapeños and mangos go together. And I happened to have a can of coconut cream on hand. My first idea was to do a savory dinner type thing, but after a day of heat and humity, all I wanted was something cold and easy. Ding ding… Lets freeze this shit and turn it into a sorbet.
Such a good idea.
The Stuff. Simple as can be. 2 mangos, peeled, diced and frozen. A can of coconut cream, and some jalepno jam.
Frozen mango is really easy to blend. Just stick into a blending device and add a little bit of water. Mix until a nice creamy puree is formed. And try not to eat it all right now.
Whip up the coconut cream. You don’t need to go to crazy and make it all fluffy, just whisk it for a minute or two just to loosen it up.
Time to scoop. First a few big dollops of the frozen mango puree. Try to work fast to prevent the mango from completely thawing out.
Next, scoop some of the coconut cream and drop a few scoops of jalapeño jam right on in there to. Add more mango, more coconut , and more jam until you container is full.
Note.. My sister had the idea of mixing he jalapeño jam into the mango puree. I think I might try that next time.
Take a knife and cut through the sorbet, first width wise, then length, then width. or whatever. You’re just trying to kind of marble and swirl the flavors together.
Once your done playing and swirling, into the freezer it goes….
Remove from freezer when completely frozen and do what you need to do. I flipped the pan and sliced into slabs on a cooking sheet, and me, the sister and the mr. took turns with the fork and ate it off the pan. We be so classy. But go ahead and use o plate or scoop it or maybe even eat directly from the container with a fork. No judgement here.
Eat so good!
-C
2 1/2 cups fresh mango (2 large mangos), peeled, diced and frozen. (Or just buy frozen mango)
1/2 cup water
1/2 can of cold coconut cream (I used Ttrader Joes.. It’s the best)
around 1/3 cup Jalapeño Jam.. more if you like (Here is the recipe for that )
Place frozen mango into a blending device, add about 1/3- 1/2 cup water and blend until a smooth puree. Open coconut cream, drain the liquid, and place half the cream into a bowl. Whisk until loose and slightly fluffy .
In a freezer safe container. scoop a few dollops of the mango puree, add in a few dollops if coconut cream and then a few dollops of the jalapeño jam. Keep adding dollops of the stuff until you use up all of the ingredients. Take a knife and run through thet sorbet length and width wise a few times to swirl the flavors. Place in freezer for at least 3 hours or until fully frozen
Remove and either scoop, slice, or eat directly from container.
Every year, the second weekend in August, the Stem family , siblings, cousins, even my 94 year old grandmother makes the trip from Easton PA, come together at, what we call, “the cabin.” (It’s more a house, but it started out as a cabin) . Its a little crazy, but such a good fun time.
This cabin, oh this place is magic. The air, the tree’s the streams, the mountains, and of course the people. It’s all the things that I love about life. Some of my earliest memories are from this place. Hanging out with my siblings, running around the meadow or through the woods. Playing in the swinging holes. My grandfather pulling taffy or making orange juice box houses with my grandmother. The giant rocking chair that my uncle made and all of us kids used to play on. So many camp fires and s mores. There are just so many memories because it’s been a part of my life, my whole life. It’s one of my favorite places in the world.
A little background on the place (what I can remember) Sometime in the late 70’s, my uncle and my grandparents bought a big chunk of land on the side of a mountain in the middle of nowhere Vt. After doing some clearing of trees, they went to building a cabin. (my aunt, grandmother, and dad helped a bit too). It was amazing, but quaint. A 2 story situation with a kitchen living area and one door to get in and out. At some point my grandparent ended up selling their share to my uncle and he took over the entry of the place. Over the years my uncle, (who is a carpenter, furniture designer,design professor, and all out crazy amazing person), continured to work on the place. He has added on a kitchen, a second floor bathroom, new this, and that, but never has it once felt like a patchworker pieced together place. And now the place is more like a amazing craftsman home, with just the right touches of cabin, but with two running toilets, a beautiful kitchen, electricity and running water ( There is even internet access, which sucks, but still).It is a little gem nestled on a side of a tiny mountain in one the most beautiful places.
So an awesome cabin in the woods with a bunch of crazy, but awesome people= Stem family reunion.
What a week. Was it summer where you are this week as well? I mean jeez, talk about one extreme to another. Oh well, at least the world has turned green, the winter stuff is completely out of sight and I found the box that contained all of my shorts and summery clothes (pants and long sleeves in 90 degrees is just gross) And honestly, it’s been great. In between work, chores and just plan old being busy, we have manage to get a few bike rides and long walks in. Plus all the veggie starts are doing great, the flowers are coming up everywhere and life just has a little bit more of a relaxed feeling. So what if my allergies are turning my face into big red puff or that the past few night have been so hot that the act of sitting has caused me to break a sweat. I’ll take it.
Oh and I can’t forget….
Happy Mother’s Day ladies!!!!
Here I give you a few thing from the internet this week …
– I didn’t believe they were paintings at first. Hyper-realistic Cactus Paintings that Bristle with Detail by Kwang-Ho Lee
-I’ll take any one of these The 5 Fanciest French Press Coffeemakers We Could Find
-Love love the floors in This house.
-Spending a bit of time making summer camping plans here…Vermont State Parks. I can’t wait to get the tent out!
-I think this should be happening everywhere. Recycled Drinking Water: Getting Past the Yuck Factor
– And there is this. ABC Brings Muppets Back To Prime Time As News Emerges About Fall Shows
And that, here are a few pictures from the week.
My boys. I long socks and sneakers… these guys know cool. Took the super cutie cuties out for an ice cream cone.Our first bike ride picnic down on the waterfront. I love bike ride picnics!So many succulents. I didn’t actually buy any because I need to stop being a plant whore.I have made a batch of this stuff evey day this week. I can’t stop eating it, it’s like eating summer. So good
Have a wonderful day and to all that it applies to…
Happy Moms Day!
-C
Happy Cinco de Mayo! And what better day to share my version of my oh so fantastic pico de gallo, or as I call it, super freshy salsa.
I love me some freshy salsa, It makes me oh so happy.
I make this stuff all the time, especially during the warmer months and tomato season. I usually make a batch right before a meal, just enough to eat right away, but sometimes I ‘ll make a big batched of it, thinking I’ll save some for the next day. It never makes it past the second day in the fridge because it’s just one of those things that when you see it, you want to eat it. Weird but true. And it’s totally ok to do so cause it’s basically eating a big bowl of healthy goodness, so eat on!
It takes no time to prepare, tastes super refreshing, goes on everything, and it’s just so freaking tasty. You can eat it with tacos and chips (the mister) or like me, I like to add it to everything; salads, popcorn, or directly in my mouth.
Make one batch, make 4, it doesn’t matter cause you will eat it all, and need to make more.
The stuff. Chopped Roma tomatoes, chopped red onion, a diced jalapeño, lemon, a bunch of cilantro, and salt.
Stick all the chopped stuff into a jar and add in the juice of the lemon. Roughly chop the cilantro and add that on in with a sprinkle of salt.
Mix it up….And thats it. Now eat… with something or without.
A spoon out of the jar is one of my favorite ways to go at it.
Happy Cinco de Mayo, Happy Tuesday!
-C
Pico de Gallo… Freshy Salsa
4-5 Roma Tomatoes
1 small red onion
1-2 jalapeños (Depending on heat preference)
1 lemon or lime
salt
1 bunch of cilantro (don’t use it if you don’t like it)
Chop tomatoes and onion and toss into a bowl or jar. Cut seeds from jalapeño(s) and dice up into little bitty pieces and add that to the tomato and onion. Roughly chop the cilantro and toss that in as well with the juice of the lemon or lime. Sprinkle with salt. Stir, let sit for a minutes, taste and then add more salt if needed.
Eat right away or make ahead and store in the fridge until ready to use.
Goes great with corn chips, tacos, toss onto salads or eat as is standing in front of the fridge. If someone is judging you, they are stupid.
Whenever my little sister comes over for dinner, I always end up making lentils in some form or another because she, like me, is awesome and loves a good lentil. It makes me so happy that she has such great taste in food and wants to eat what I make. It’s validation from a teenage girl which is the best kind of validation.
So last night when she came over after school for dinner and trash talk (she likes to verbally abuse Nick) we decided to make both of our favorites … Lentils AND sweet potatoes. How can you go wrong with that combo? Well I am telling you that you can’t. The rich creamy soft and slightly sweet sweet potato mixed up with the hearty, earthy, oh so fantastically tasty lentil. Add in a bit of kale and cheese if you wish and serve with salsa and guac… Whoa, it’s the best!!!
Such a great evening, I get to the cooking, the sister gets to the verbal abuse and the mister, begin the champ that he is, takes it and dishes it right back.
I am the greatest(coolest) sister.
Baked sweet potatoes, cooked lentils, chopped up kale and monetary jack cheese (Cheese is optional.. and make it vegan cheese if you want) And you don’t need then, but salsa and guacamole are the best toppings.. So you have them.
Cut the cooked potato in half lengthwise and scoop the flesh out into a bowl. With a fork, smooth the potato , sprinkle with salt and pepper and mix in lentils and kale.
Stuff the mixture back into the skins of the potato.
And add some cheese (The mister and the sister wanted lots of cheese, no cheese for me) and stick the potatoes into the oven and let bake for another 5 or so minutes or until the cheese is all melty or the top is nice and crispy.
Remove and plate… Serve with salsa and guacamole and maybe some corn chips.
I am the greatest sister
-C
Makes 2 serving
1 Large Sweet Potato
1 cup Prepared Lentils
1 cup Chopped Kale
1/2 cup Grated Monetary Jack Cheese (Vegan style or not)
Salsa (optional)
Guacamole(optional)
Place potato in oven at 400 degrees for 30-40 minutes or until soft a baked throughout.
While potato is baking, prepare lentils. 2 cups water to 1 cup lentils. Add water and lentil to pot, bring to a boil, add a sprinkle of salt, and reduce to simmer until lentils are tender.
When potato is cooked, remove potato and let cool for a few minutes. Cut in half lengthwise and scoop out most of the flesh out of the skins and place into a big bowl. WIth a fork, mash the potato a bit Add in the lentils and the kale, a sprinkle of salt and pepper, and mix to combine. Stuff the mixture back into the skins of the potatoes and top with cheese. (if using ) Place potatoes back into oven for 5-10 minutes until cheese is melty and bubbly or the top of the potato is a bit crispy. Remove from oven and serve on a plate with salsa and guacamole.
This past weekend, the mr and I were out and about in the sticks of Vermont and got an eyeful of this very familiar sight of corn fields forever. It’s just part of the landscape.. Blue sky, big lush mountains, little rives and big fields of corn. It is ever so lovely… and so telling. Tall high corn fields just means two things. 1.We will be eating lots of corn, and, 2. the summer is winding down. So soon we will be talking apples and root veggies, but until then, we will just eat the corn and revel in what I consider one of the best and most beautiful times of the year here in Vermont.
And after seeing all the corn (and we have been getting a bunch in the farmshare) I realized that I need to step up my corn game.
What better why to fancy up some corn then to fancy up the stuff people like to smother on it…. butter.
Whenever I think about butter, I think about my sister, the one that, as a little kid, used sneak to the kitchen and eat whole sticks of butter. This (to me) just seemed like a pretty gross option for a snack, but you know, whatever floats your boat I guess.
Bur after making making this coconut butter, I can see the draw, for I would sure love to eat the entire contents of a jar of this butter. (I have been eating a spoonful here and there)
Lime cilantro coconut butter.. Its my new thing…corn or not.
The stuff. We have some lovely, super fresh from the farm, corn on the cob. Then for the coconut butter we have , unsweetended coconut flakes, a lime, som ecilantro and salt.
Dump coconut flakes into a food processor. Turn to on and let it go.
After about 7 minutes… you coconut will start to clump together and look like this. And maybe you are like, “this shit isn’t going to happen”.. well be patent. Scrap the coconut off the sides and keep the processor going.. scraping down the sides whenever you need to.
And eventually, after another 8-10 minutes, it will turn into this.. a nice creamy buttery butter.
Now add in the zest of the lime, the lime juice, a pinch of salt, and cilantro into the butter. Turn processor back on until combined.
And you got yourself some freak yeah cilantro lime coconut butter… ready to smother your corn with.
This amount is good for 6-8 corn cobs… Any extra is excitlent on any veggies, bread, cake, or spoon.
And stick that butter in a jar.
I dare you not to eat a spoonful right now. (I licked the bowl down clean)
So I hope I am not being presumptuous when I think that you know how to cook corn. Or maybe you have a specific way you like to cook your corn. But just in case, husk corn and stick either in a pot and boil until cooked,(about 8-10 minutes) or like me, char on the grill, or under the broiler.
So cook some corn….And smother it with the butter.
And there you have it, some freak yeah amazing lime cilantro coconut butter smothered on some corn.
So good…..so good.
Have a great day!
-C
1 1/2 cups dried unsweetened coconut flakes
1 lime
1/2 bunch of fresh cilantro (about a 1/4 cup chopped)
salt
1 tablespoon coconut oil (optional)
freshly cooked corn on the cob
Note. Any extra butter is good on anything and everyhitng!!!
Place coconut into a food prosser and turn to on. Prosse until coconut start to stick to sides. Stop, scrap down bowl, then conuitne to process. Repet this until the coconut has turned into a creamy buttery goodness.
Add the juice, the zest, a pinch of salt, and the cilantro to the butter. Pulse until combined. If you want to add in a little coconut oil here to make it a little smoother, go for it.
Scoop into a jar. When your corn is hot and ready, smother butter all over.
And eat. There swill be stuff stuck in your teeth..Don’t worry about it. Think of it as a snack for later.
The past week was freaking gross hot, like sweaty, smelly, I want to live in the Costco walk in freezer hot. But today, well today was the most lovely day. A cool dry 70 with a nice breeze and sunshine. Then around dinnertime, a little bit of rain, followed by a rainbow. It was the most fantastic perfect weather.This is why I love living in Vermont. We get weather.
.Last night, dinner was all about trying to make some more room in the fridge for the farm share pick up tonight and to make something that I didn’t have to really watch. (the mr and I were moving the beehive to the roof of the house so I wanted to make something that I could leave on the stove and not have to babysit (just stir every now and then). With the weather being so freaking amazing, with a cool crispness in the air, I was craving something a little more on the warm and comfy side. And what do you know, the stuff I had left in the fridge (there is still a basket of zucchini on the table) was what was needed for a big pot of stewed summer ratatouille with lentils. It was everthing that I ever could need and want for a meal. Full of the best veggies and lentils, easy to make, nothing fancy to do. Just stick stuff into a pot and cook until done.
Cooler, light long sleeve, kind of weather. Enough rain where I didn’t have to water the garden, the most perfect pot of the best ratatouille shared with the mr. and a feeling of accomplishment and excitement (bees on the roof!).
The perfect night.
The stuff. Zucchini, yellow summer squash, eggplant, onion, tomatoes and lentils. And we have some fresh basil, fresh oregano, balsamic vinegar, olive oil, and some salt and pepper.
To get this party started, chop up the onion and toss it into a big heavy pot with a little olive oil and a sprinkle of salt. Stick on the stove on medium heat.
While the onions are cooking, mince up the garlic and chop up all the other veggie into medium sized chunks.
When the onions start to become translucent and smell fantastic, add in all the veggies and garlic. Give it a big stir and place back on the stove to cook for a few minutes to let the veggies release some of their liquid.
Then add in the lentils along with a equal amount of water and top with a lid.
After about 30 minutes, the lentils should be near done and the veggies tender, the tomatoes pretty much dissolved. Now chop up the basil and oregano and toss it in along with a few swigs of the balsamic vinegar. Give it a stir and keep on cooking for another 10ish more minutes or until the lentils are nice and tender.
Scoop onto bowl then into mouth. If you like, finish off with a bit more fresh basil or,ike the mr, top with parmesan cheese.
Have a fantastic day! So close to the weekend!!
-C
Makes 2-3 big servings (if serving with pastas or rice, its more like 4-5 servings)
1 medium zucchini
1 medium yellow summer squash
i medium onion
1 small eggplant
3-4 cloves garlic
1 cup dried lentils
1/2 cup water
3 medium to large tomatoes
handful fresh basil leaves
a few glugs of balsamic vinegar
couple sprigs of fresh oregano
olive oil
salt and pepper
Drizzle a little olive oil into a large pot. Dice up the onion and place on medium heat and cook for a few minutes. Mince up the garlic and chop up the remaining veggies into medium sized pieces. Once the onion is cooke a bit and strting to smell oh so nice, toss the veggies and garlic into the pot. Mix, sprinkle with salt and pepper and place a lid on it. Cook for a few minutes to draw out a bit of liquid from the veggies. Now add in the lentils and the water. Stick the lid back on and let cook for about 30 minutes on medium low heat or until the lentils are starting to soften.
When the lentils are mostly soft, but still have a bit of biet, dice the fresh herbs and toss into pot with a few swings of balsamic vinegar. Stir and cook for another 8-10 minutes or until the lentils are full cooked.
Remove from heat and ladle into bowls..
Serve with rice, pasta, bread, a big old pile of fresh greens, or just as it is.
Eats fantastic right aways, or cold late at night standing in front of the fridge..
Every year, the second weekend in August, the Stem family , siblings, cousins, even my 94 year old grandmother makes the trip from Easton PA, come together at, what we call, “the cabin.” (It’s more a house, but it started out as a cabin) . Its a little crazy, but such a good fun time.
This cabin, oh this place is magic. The air, the tree’s the streams, the mountains, and of course the people. It’s all the things that I love about life. Some of my earliest memories are from this place. Hanging out with my siblings, running around the meadow or through the woods. Playing in the swinging holes. My grandfather pulling taffy or making orange juice box houses with my grandmother. The giant rocking chair that my uncle made and all of us kids used to play on. So many camp fires and s mores. There are just so many memories because it’s been a part of my life, my whole life. It’s one of my favorite places in the world.
A little background on the place (what I can remember) Sometime in the late 70’s, my uncle and my grandparents bought a big chunk of land on the side of a mountain in the middle of nowhere Vt. After doing some clearing of trees, they went to building a cabin. (my aunt, grandmother, and dad helped a bit too). It was amazing, but quaint. A 2 story situation with a kitchen living area and one door to get in and out. At some point my grandparent ended up selling their share to my uncle and he took over the entry of the place. Over the years my uncle, (who is a carpenter, furniture designer,design professor, and all out crazy amazing person), continured to work on the place. He has added on a kitchen, a second floor bathroom, new this, and that, but never has it once felt like a patchworker pieced together place. And now the place is more like a amazing craftsman home, with just the right touches of cabin, but with two running toilets, a beautiful kitchen, electricity and running water ( There is even internet access, which sucks, but still).It is a little gem nestled on a side of a tiny mountain in one the most beautiful places.
So an awesome cabin in the woods with a bunch of crazy, but awesome people= Stem family reunion.
Here are some pictures of the shenanigans..
What a week. Was it summer where you are this week as well? I mean jeez, talk about one extreme to another. Oh well, at least the world has turned green, the winter stuff is completely out of sight and I found the box that contained all of my shorts and summery clothes (pants and long sleeves in 90 degrees is just gross) And honestly, it’s been great. In between work, chores and just plan old being busy, we have manage to get a few bike rides and long walks in. Plus all the veggie starts are doing great, the flowers are coming up everywhere and life just has a little bit more of a relaxed feeling. So what if my allergies are turning my face into big red puff or that the past few night have been so hot that the act of sitting has caused me to break a sweat. I’ll take it.
Oh and I can’t forget….
Happy Mother’s Day ladies!!!!
Here I give you a few thing from the internet this week …
– I didn’t believe they were paintings at first. Hyper-realistic Cactus Paintings that Bristle with Detail by Kwang-Ho Lee
-I’ll take any one of these The 5 Fanciest French Press Coffeemakers We Could Find
-Love love the floors in This house.
-Spending a bit of time making summer camping plans here…Vermont State Parks. I can’t wait to get the tent out!
-I think this should be happening everywhere. Recycled Drinking Water: Getting Past the Yuck Factor
– And there is this. ABC Brings Muppets Back To Prime Time As News Emerges About Fall Shows
And that, here are a few pictures from the week.
My boys. I long socks and sneakers… these guys know cool. Took the super cutie cuties out for an ice cream cone.Our first bike ride picnic down on the waterfront. I love bike ride picnics!So many succulents. I didn’t actually buy any because I need to stop being a plant whore.I have made a batch of this stuff evey day this week. I can’t stop eating it, it’s like eating summer. So good
Have a wonderful day and to all that it applies to…
Happy Moms Day!
-C
It’s been a long, packed, but very fantastic week. Everyday has been full of work, chores, family, and trying to get in a least one good bike ride or walk in. I made a list of a few important points to mention from the past week.
Spring is real, not an imagined season in my head. (HOORAY!!!!).
Banana ice cream is everyones favorite snack
Planting things from seed and watching them grow is magic
Riding a bike with kinda flat tires really sucks
The little people in my family are the best most fantastic humans
Don’t tell a 2 year that ants will bite her or you will end up caring that child around everywhere because she is afraid to walk outside (Anyone know good therapist for a 2 year old?)
Anyways, I am hoping to take it easy today, catch up on my coffee consumption, do a bit of gardening, reading, bike riding, all without pressure or expectations. Everyone should have a day for no expectations.
Some fun internet stuff from the week.
-I need an RV or camper. THE BRAVE // vintage rv renovation inspiration
-Who cares if not everyone is pleased, I would be if my lunch bags looked like this. These Parents Make Lovely Lunch Bag Art. Not Everyone Is Pleased
-So lovely. Urban Jewelry: New Lace Street Art by NeSpoon
-Alternative energy Woo Hoo! Tesla’s Powerwall Home Battery Wants to Make Fossil Fuels Obsolete
-I am really excited to make this… I have a feeling that I will be incorporating it into many of my recipes. ChefSteps’ Genius Roasted Onion Cream
-Another house that I could get down with.
And a few pictures….
The mister and the worlds biggest crayon, which is made of scraps of blue crayons from all over the world. I could totally use a big ass crayon like this.The coolest most badass 95 year old lady that I know (I know a few), Grammy Stem. And the little, getting a lift. (I could have used a lift too!)Brothers. The guy in the green is my Dad.Aftre dinner ice cream break.The sky has been on point all week longAnd made myself some veggie chips. The colors alone are delicious.
Have a great day!
-C.
And I am home. The mister and I woke up at 2:15 am Friday morning to drive to Easton PA and spend the weekend with family, going to the Crayola crayon factory, wondering a grave yard, and hearing some fantastic stories about my family from the mouth of my 95 year old grandmother. (I’ll show some pictures and tell you some stuff later this week) Than we drove back late last night… I don’t know how I am even awake right now…I am sooooo much tired! But that’s how I work I guess. The coffee is almost ready, calling my name, telling me its totally cool to drink it all.
I’ll leave you with a few little internet things I liked this week..
– I just love looking at other peoples homes. Treehouse in the city
– These puppies make me think of my little nephew., he is in love with bulldogs. 20+ Beautiful Bulldog Puppies That Will Melt Your Heart
-Holy Shit YES!!!! ‘Full House’ Reunion on Netflix Is Officially Happening
-How cool would to find one of these? New Urban Geodes on the Streets of L.A. by Paige Smith
-I don’t know if I would want to stick stuff on these shelves.These Wall Shelves are Dollhouses for Adults
– And if you need a push…On Your Mark, Get Set, Grow: A Guide To Speedy Vegetables
A few pictures from earlier in the week..
My forsythia bush in from of one of my houses… Always the first one to bloom. This is how washer sleeps in the warmer months.. All feet in the air. I ate it all and it was good. Two pretty ladiesVeggies Plants!!!!
So yeah, I am tired and happy and in need of a day to processing, lounge and drink tons of coffee.
Hope your weekend was fantastic and today brings all the whatever you want and more.
-C
Oh do I love a good Sunday. The picture above was taken last Sunday and what a glorious day that was. The mister and I took the pup hiking and it was the most spectacular of days. Sunny, 30 degrees and no wind..I could’t have asked for better weather.
The rest of the week turned out alright. The weather went back to hell again and I was a little frantic and super busy, but all in all, good. I accomplished some things that needed to be done and got to spend time with just about everyone in my family. The highlight was when my sister slept over and we finally watched the Fault in our Stars while eating lots of food, cuddled together on the couch. (movie was good, but book was better. Books are always better) We then woke up early the next day and we (the mister too) journeyed across state lines to the closest Target where we purchased some hand soap, 2 seltzer waters and 2 jars of baby food. (I needed the jars) On our way out, the lady experienced her first ever taco from the taco bell in the food court before heading back to Vt. We spent the car ride singing terrible pop songs and eating the babyhood (Blueberries and sweet potato, and yes, they are tasty) We then came back tom my house, listened to more awesome music while she did her homework and I played on the computer and made dinner. It was the best.
Heres a few of this weeks happy bits from the internet.
– I will be making these wire baskets this week. I need storage and I love a good wire basket.
-I have been ending up on this website every night..Making plans
-I need this shirt!!! Feel free to buy it for me!
-Throw Back Song!… And yes, I was sure I was going to be Mrs. Zac Hanson when I was 11.
-My sister sent me this link, Wool and the Gang. So cool.
-These pictures made me laugh. I end up with veggies like this all the time.
And here are a few pictures of my real life happy…..
Playing on the frozen lake. It was so freaking cold and windy, but we just had to do it!
Beach stairs. Hopefully soon they will be a little less icy and maybe even lead to some sand and not waist high drifts of snow.
Two of my favorite people in the world.
And I made brunch with 2 more of my favorites.
My little brothers (can I say little if they are bigger then me?) came over and we all had dinner together while listening to music from when they were born. Nothing like a few 17 year olds to make a person feel old.
Blooming daffodils. I love to watch my flowers open up, it’s just as good as the flower itself.
Have the best first week of March ever!!!
-C
Oh boy we made it! Ate our way through another Thanksgiving. I hope yours was a good as mine, lot of family and friends…an abundance of pies, and lot of warm lovely goodness.
So now what?? Is there a butt load of laundry waiting to be washed and the floors are in need of mopping after dropping that pie? Are you eagerly anticipating the departure of your quests, in-laws, or your own departure from your current digs? Or are you just plan looking forward to getting your house clean and life back to normal? (I hear that).Maybe you are the guest and are dreading the day after food and booze hangover and don’t want to be rude, but don’t want to get out of bed. Well you are in luck cause I have declared this day, the day after Thanksgiving, Left Over Friday!
I always feel the great build up to any major holiday, get to the day, have a wonderful time, then feel the crash. My house is messy. I have used all of my clean dish towels and every dish and pan is in the wrong place in the kitchen. .I really need a rug for the front door to collect snow.(my floor is nasty) and the refrigerator looks like a food bob went off inside. There is so much to do and I need a break. For those who spend the week(s) before thanksgiving gearing up, planning, and stressing out about producing this one great feast for this one day of the year, I am suggesting to you and myself that we take this day to let it all out. A day of decompression. Go head, let everyone eat leftover pie for breakfasts. Why not stay in your pjs all day reading and drinking coffee. Maybe like me, you feel like cleaning. Go for it, but why not slap on some sweet tunes and a hit that stack of dishes dancing with no expectations. If you don’t get to all those pots, well there is always tomorrow. Say you are a guest, then maybe you try not to be demanding of your host(s) but suggest a hike or even a movie. And if you want to go shopping, well that one is on you. If it makes happy to shop with a bunch of crazy people, then go to town. Whatever you do today, just remember to take it easy.Do what makes you feel good.. It’s ok to take a break, to let things be, to enjoy your friends and loved ones, but let them take care of themselves and you take care of you.
Now Saturday..well there is no excuse. We both know that leaving those pots any longer and they might not ever be right again. You might not want you littles eating pie for breakfast lunch and dinner for the third straight day. Maybe you should do the laundry so you’re not using your bath towels to dry the dishes. And anyway, its time to start planing for the next major holiday craziness. Hey, I know I am already excited! Today I might even dig out some Christmas decor…but with no pressure, just cause I want to!
Take care of yourself and enjoy today.. Left Over Friday!!!!!!
Just a few ideas for the Thanksgiving leftovers…….
Mashed potato pancakes..Add an egg and a 1/4 cup of flour for every cup of mashed potato. Season with salt and pepper
Cranberry sauce and rolls….Spread the cranberry sauce on a toasted roll
Squash Soup….Throw into a big pot with a little veggie stock or water, even a bit of curried powder would be nice
Roasted Veggie Salad….Toss veggies together with a touch of vinegar and add to a bed of green.
Smashed stuffing cheese sandwich.…2 cups of stuffing and 1 egg. Mix and separate into 2 balls. Smoosh them down and cook each side in a frying pan. When both sides are cooked through, place a bit of you choice or cheese on one smash and top with the other. Let melt.
Turkey wrap…add a scoop of hummus and stick into a wrap with some greens
Pie yogurt…..Mix a slice into a cup of plain yogurt
Sweet potatoes… Save them. I’ll give you an amazing recipe tomorrow for a Sweet potato Coconut custard. It will blow you mind!
Yesterday I spent the entire day (ok maybe not the entire day), but a the better part of the afternoon defrosting my freezer. Sure, I do the occasional chip chop here and there, just enough from around the freezer door so it will close, but ever few months I notice that everything in the fridge is not staying cold and that the freezer is not freezing stuff. Thats when I know its for real time to defrost. So a few days ago when I noticed my bananas were turing to liquid in the freezer, I knew it what I had to do….Completely empty the fridge and melt/hack away the 2-4 inches of ice build up that accumulated. It is such a freaking pain in the ass.So on this defrosting day, I took all the stuff from the freezer, stuck it in a cooler, and the rest of the stuff, which is basically all veggies, I just tossed on the table. As I am hacking away with a metal spatual, a wooden spoon, and a constant rotation of pots of boiling water, I was thinking about dinner. I figured I might as well just eat up as much of the veggies as I could, you know, so I didn’t have to put them back in the fridge. And also, I was getting pretty annoyed because this particular defrosting session was taking way longer the anticipated, which made making dinner seem like another pain in the ass. I figured I might as well just eat everything that is already out on the table, which pretty much narrowed down the “whats for dinner” conversations because it was already all over the place. And so dinner was a humongo salad for me, and for the mister, I made him a monster of a veggie sandwich. (my salad was exactly the same stuff as the sandwich, minus the bagel) Easy, fast, super duper yummy, pretty and piled so high with tons of veggies that the fridge is pretty much empty now.
Look at the is beast. I don’t call it a monster sandwich for nothing.
The stuff included in this monster veggie sandwich..
Romaine lettuce, tomato, avocado for there is not real sandwich without them. Thinly sliced radishes, cucumber,a and onion for nice crispy crunch. Shredded beets, carrots, and purple cabbage to give more crunch and a bit of sweetness. Then of course there needs to be something pickled, so I used banana peppers cause they are the SHIT!! And lastly some hummus for a nice creamy finish (plus a bit of protein) and yellow mustard because mustard on everything is just right. Heres to a mountain if goodness that is no longer in the fridge! Served with a another mountain of roasted parsnips and carrots (more stuff from the fridge) and a tall glass of iced tea.
Lucky that today is farm share pick up cause the fridge is pretty much on empty.
Yea it’s Thursday!!!!
-C
A Monster Veggie Sandwich
Note. This is just a guide.. Feel free to use whatever veggies you fancy.
Either a bagel, 2 slices of bread, or a big chunk of baguette (use a gluten free bread if you want or need too)
Hummus- Homemade or store bought
Mustard
Something pickled like pickles, banana peppers , jalapeños or all three
Lettuce, spinach or some kind of leafy green
Tomato
Avocado
Onion
Radishes
Cucumber
Shredded Carrots
Shredded Beets
Shredded Cabbage
To assemble. Ready your bread.. Toast if you want, and stick it on a plate
On either side, smear the hummus and the mustard.
Pick a side, start to stack by evenly disrupting veggies on top of veggies. Place the second piece of bread on top and giving a little smooth to keep it together.
And go at it. Cut in half or don’t. Have a napkin or a long sleeve ready to wipe your face.
I figured now is a good time to get this recipe out there before we get to far into spring and summer recipes because there is going to be a lot of banana ice cream filled recipe coming and I figured its a good idea to have the basic banana ice cream recipe ready for people to refer too. And because I made so much fantastic naner ice cream, I also made a cookies and cream naner ice cream for my sisters and the mister.
Comments that I got from my sisters and the mister when I made them this ice cream
-Sister one.”I give this my sister seal of approval.. It’s so good. The first dessert you have made that I liked! (not including all the other desserts that you have made that I liked)”
-Sister two- “Wow.. it looks like ice cream and feels like ice cream and tastes like ice cream.. You should make me this ice cream!” (I was confused too because I was pretty sure I just made her some)
-The mister- “I am so excited for my new fly fishing pole!”
Ok, so the naner ice cream isn’t new to the mister and he IS very much excited for his new fly fish pole. So excited that he forgot to tell me how amazing that I am and to thank me for making him a big bowl of yumminess. (It’s ok, I forgive him)
And yes, this is probably one of the easiest, most delicious, healthy and amazing frozen dessert that you will ever eat. You will probably find yourself buying mass amounts of bananas and stocking the freezer until things just start falling out. (which is also ok because it’s only bananas and you can’t have too many frozen bananas)
The stuff you need for this ice cream…. Nice and ripe bananas, peeled and then frozen* That’s it.
To make it, place frozen bananas into food processor and hit the on button. Process the crap out of the namers until nice and silky smooth.
*Note, the smaller the frozen chunks are , the faster and maybe a little easier for the blender to blend the naners into ice cream. So if you think of it, chop bananas into pieces before freezing or even after.
After all blended and smooth, either eat right away or scoop ice cream into a freezer safe container and stick in freezer. That’s the banana ice cream… And it is amazing and so so so so so addictive. I make a batch, think I am only going to eat a scoop, then find myself eating half of what I have made, but it’s ok cause it’s only bananas.
Now for the cookies and cream banana ice cream..One batch of banana ice cream, either freshly made, still in food processor or made ahead and placed in a food processor and given a good pulse to smooth it up.
Add cookies in, crushing a bit beforehand and pulse till combined. Now you have cookies and cream naner ice cream…. and everybody is happy.
Scoop into a cup, a bowl, a freezer safe container, or directly into your mouth. Be careful…. You can still get brain freeze from eating naner ice cream too fast!
Keep it real hump day drum bum!
-C
Basic Banana Ice Cream
Makes one batch. Good for 3-4 servings
4-5 ripe bananas peeled and frozen
Peel bananas and stick in a freezer bag or container and freeze. When bananas are completely frozen, break into pieces and stick into a food processor or blender and puree until silky smooth.
Eat right away or scoop into a freezer safe container for later.
Cookies and Cream Banana Ice Cream
1 batch banana ice cream
5-10 (depending on your cookie need) cream filled cookies like oreos or Trader Joe’s Joe Joe’s (These are gluten free)
In a food processor, blend banana ice cream with cookies.
Eat right away, with a utensil of choice in a container of choice.
Bowl licking is acceptable.
Chomp Chomp Chomp… The sound I make as I eat this freaking fantastic crunchy granola. You know it’s good when the person sitting next to you is annoyed by the sound of you face while eating. I eat a lot of crunchy stuff. And I am pretty sure I annoy the mister a lot.
Oh well, he will live, and he eats his fair share of annoying stuff too so we can just call it even.
So granola. I love it. I make a batch every few weeks or so, and I usually make it just for me. (I almost never make things just for me) I like to keep it simple but flavorful. A tad sweet, but not really, and crunchy, without the oily fried taste. I also like a variety of sizes, some big clusters and some small pieces.
This granola fits the bill perfectly. Made with 5 ingredients, no oil, and the perfect sweetness level. It’s one of my favorite flavors yet. And I know I said I made it just for me, but the mister really liked it too. (I can’t help sharing)
The simplest of stuff. 1 smashed banana, a cup of pureed butternut squash, Vietnamese cinnamon*, honey, and old fashion oats. (and a dash of salt, not shown)
*Note. I only ever use Vietnamese cinnamon because once I start using it, regular old cinnamon just won’t cut it anymore. It is a bit sweeter and a lot more spicy. If you don’t have it or don’t want to use it, use regular cinnamon and add in 1/2 a teaspoon of all spice.Toss the cinnamon and salt with the oats. Mix together the banana, squash and the sweetener and combine with the oats until full incorporated.
Another note. Because I made this granola for me and no body else, I actually omitted the honey (I think that banana abs squash make it sweet enough) But if I was making this for lets say, the mister, or a friend, I would use add a bit. The sweetness level and sweetener of choice is up to you, but 2-3 teaspoons of honey or maple syrup is usually sweet enough for people.
Dump the mixture on a parchment lined baking sheet and give it a little pat, you know, to settle all the bit and pieces together, all cozy and evenly spread out. Now stick into a preheated oven and after about 20 minutes, take out of oven and give the granola a toss, breaking apart any super big chunks or overly wet pieces. Put back into oven for another 20 minutes. (I like my granola super crispy crunchy so I cook it a little longer, like 30 more minutes)And when you are happy with the crunchiness of you granola, remove from oven and let cool, trying not to eat all of it while it sit’s on the counter looking all pretty and smelling like happiness.
Grab a bowl, stick the rest into a jar with a lid, hide it from others, and chomp chomp chomp away!
-C
Banana Butternut Granola
3 cups old fashion oats (use gluten free oats if needed)
1 ripe banana, mashed
1 cup butternut squash puree (can use canned)
2 tablespoons Vietnamese cinnamon (or 2 tablespoons regular cinnamon and 1/2 teaspoon of allspice)
1-3 tablespoon honey or sweetener of choice (use greater amount for sweeter)
dash of salt
Preheat oven to 375
In a large bowl, mix together oats, cinnamon and salt. Mix the mashed banana, squash, and sweetener of choice together and combine with the oats. If the mixture seems really dry, add in a very small splash of water to loosen just enough to mix.
Dump mixture onto a parchment lined baking sheet and evenly disperse the mixture. Give it a kind of smoosh to compact the oats and to make sure all its all the same thickness on the pan.
Stick into oven for 20 minutes. Remove and give granola a little toss, maybe breaking apart any really big chunks (unless you like really big chunks) and put back into oven for another 20 minutes. (30 for a crunchier granola) Remove from oven and let cool on baking sheet before storing in an air tight container. If you find that it is not as crunchy as you would like or is a few days old and lost some of its crunchiness, just stick it back into the oven for a few minutes to re crunch.
Eat as is, as a cold cereal, dip in peanut butter, add to popcorn or whatever way you want to eat it. No utensil required.
The other day the mister and I started reminiscing about some of our earliest memories of what our parents fed us or what they used to eat when we were growing up. One of the dishes that we both remember eating was the classic creamed beef on toast, or as my mom use to call it, shit on a shingle. Yup, shit on a shingle. (who ever started calling creamed meat on toast is a freaking genius) I think that as a kid, I liked the dish just for the mer fact that I could say the word shit and get away with it. I think my mom liked it for few reasons; she could make a big butt load of it really fast, for a crap load of kids, on the super cheap. And I think that she just really like it.
Shit on a shingle is one of those foods that I like to call “trash food”, you know stuff like beefaroni or pork and beans. Stuff that we all loved as little kids but might think twice about feeding to anyone now. ( I’ll still feed nick a can of beefaroni.. he likes it) As a throwback to our earliest food memories, (also a lack of food in the house and wanted to make something fast, easy, and cheap.. thanks mom!) I made the mister my rendition of the classic. Creamy Lentils and Mushrooms on toast. Not quite as trashy as creamed beef (lentils, mushrooms and onions are not trashy) but you get the same reminiscing feeling. I guess I could call it something like “stuff on a shingle” or lumps on a shingle”, but what kid (or adult) would want to eat that. Let’s just stick with shit, it makes it more awesome to eat it.
The shit….. A few mushrooms, a bit of onion, cooked lentils, flour, milk, oil, salt and pepper, and garlic powder. And the shingles.. 2 pieces of thick white country bread. Slice the mushrooms and the onion and toss into a skillet with a drizzle of oil. Cook on medium heat until browned and fragrant..Remove from pan.In the empty pan still on medium heat, add in the olive oil and the flour. Whisky constantly, slowly add in the milk. Keep whisking until sauce thickens. Remove from heat. Add in salt, pepper, and garlic powder.Add the mushrooms and the lentils into the sauce and give it a good mix. Oh, and don’t forget to toast up the bread. Now dump that shit all over those shingles! Oh the memories.
If you need to, make it classy by serving it with a cloth napkin and a nice fork and knife. But eat it however you need to. (As kids we like dirty hands and no fork, preferably with a big tall glass of overly sweetened red flavored kool-aid)
Enjoy this fantastic Spring weekend!
-C
Shit on s Shingle (Creamy Lentils and Mushrooms on Toast)
One serving
1 cup cooked lentils
2- 3 mushrooms
1/2 small onion
1 cup milk (cow, nut, plant… whatever you want)
1 tablespoon olive oil
1 tablespoon flour
1 teaspoon garlic powder
salt and pepper
2 pieces of nice thick but soft white sandwich bread
Slice the mushroom and onion and toss into a pan or skillet with a drizzle of oil. Cook on medium heat until brown and fragrant than dump onto a plate. In same skillet, add the oil and the flour and mix with a whisk while slowly adding in the milk. Keep whisking until sauce starts to thicken. Turn heat to simmer and add in the cooked lentils and the sautéd mushrooms and onions. Push down the bread in the toaster.. and when it pops up, dump the shill over it.
Last week pineapples were on sale everywhere……So I bought 5. Don’t judge
And I bet I am not the only one that got overly excited at $1.50 pineapple and bough themselves a few. We will just call ourselves opportunists. Now we have plenty of pineapples and don’t have to pay the $4 a piece prices. (Justification)
But if you don’t have a pineapple laying around, you must go get one. (Maybe if your lucky, there might still be some sales going on) because you must make this salad. I am on a mission to make everyone I know eat it because, for lake of a better way to say it…….It will rock your world.
Dill and pineapple are a serious match made in heaven. Pineapple, with its sweet, tangy, citrusness and dill with it’s super fresh earthiness. Mixed together with a few other helpers to create a fresh, clean, chunky, tangy, over the top, flavor. I could stop right there, but toss in a handful of lentils, some creamy avocado and a bed of kale…It’s like the best spring time, celebration on you tongue, happiness in you tummy, kind of salad.
A salad that will make you smile. (and maybe buy 5 pineapples)
Stuff for the goodness. We got the kale, some avocado because all salads should have avocado and some cooked lentils because, well, all salads should have lentils (or beans or nuts.. so you could totally something else) Then a few sprigs of fresh dill, a clove of garlic, red wine vinegar, salt and a bowl of chunked up pineapple. The pineapple, dill, garlic, red wine vinegar, a splash of water and a pinch of salt get blended in a blender or whatever blending device you use. Go as smooth or chunky as you like, I recommend going smooth, but leaving a little chunk, like half blended.
The prep is done, now compile. Kale in bowl, top with lentils,. Toss on avocado chunks, and, last but not least, the blended pineapple dill mixture.So good……So so good.
Happy Friday!!
-C
So Good Pineapple Dill Kale Salad
Serves Two
3 cups washed and chopped Kale
1/2 a avocado, diced
1 cup fresh pineapple chunks
1-2 springs fresh dill
1 tablespoon Red Wine Vinegar
Salt
1/2 cup cooked lentils (or any bean or nut will do)
Note. No fresh dill? You can use dried, just sub in 1 teaspoon for the fresh and after blending with the pineapple, let sit a little longer to really let the flavors meld together.
Place pineapple, dill, pinch of salt, vinegar and garlic into a blender or whatever you own that blends and blend stuff together, leaving it a little chunky. Let sit for 5-10 minutes.
Kale goes into a bowl and add the lentils and diced avocado. Pour the blended pineapple on. Toss around.
Now eat.
First day of Spring!! Well kind of I guess. I think it actually starts at like 6:20 tonight, when the temperature is going to dip back done to 10.(Spring my ass) I don’t know about you people out there but here in Vermont, we are really hanging on to winter. I have to keep telling myself…” It will be warmer soon and you’ll be looking forward to this weather in a few months.. so stop bitching!” I give myself good pep talks.
Anyway, last week at the farm share pick up, there was a nice little surprise. We got a few pounds of some sweet locally grown and milled whole wheat flour. There was a little sign with the information about the wheat and where it came from, but in my haste of gathering all of my other veggies, I failed to take notes and forgot the name of the farm that it came from. But I do know that my farm traded some celeriac for the wheat. I was really excited because I am really into the idea of using locally grown grains and I don’t know, it just made me really happy, especially because it was a trade. Food framing and local sharing is stuff that makes me happy.
I wanted to make something to kind of showcase the hearty, nutty flavor of the wheat and I also wanted to make something that my mister would eat for breakfast. Well what better way to do that then with muffins! Banana coconut whole wheat (that just happen to be vegan) Hearty, fruity, and smells like the word lovely and the color yellow. A few to eat and a few to share. Hanging at home, running away or getting ready for a day of spring cleaning….This is a great weekend to make muffins!
The stuff… Light, nutty local whole wheat flour, ripe oh ripe bananas and coconut flakes are the stars in this muffin… But we need the other stuff too. Brown sugar, vanilla, coconut oil and a chia egg. Baking powder, baking soda, and last but not least, salt.
Yup, that sounds about right The salt, baking soda, and baking powder are whisked together. The banana and all the rest of the stuff are mixed up… Then mix the wet mixture into the dry. Stir until combined and then add in the coconut flakes,Scoop mixture into 12 lined muffin cups… A scoop like mine works very nicely. Don’t have one, well I recommend you get yourself one. Until then, use a spoon. Something I always do when baking any muffin is sprinkle the tops of each muffin with a bit of sugar or brown sugar. It melts and caramelizes and adds a sweet little crunch to the tops.
Now stick the muffins into the oven. Remove from oven when they look like this, nice and golden brown. Also good idea to check with a tester stuck into the middle. When it comes out clean, they are done.12 happy little muffins cooling on a rack, waiting to be eaten with you mouth.
Doesn’t the sight of pretty food make you happy, like sing a song happy? Muffins, whoa yah!! Friday yah yah!! Spring…What, Yah!! Yah…Yah Yah!!!
Terrible I know, but at least you were spared hearing my actual voice.
Have a great weekend. Do lots of springy stuff!
-C
2 Cups Whole Wheat Flour
4 Ripe bananas
1 Teaspoon Baking Soda
1/2 Teaspoon Baking Powder
1 teaspoon Salt
1 teaspoon Vanilla Extract
3/4 Cup Brown Sugar
1/3 cup melted Coconut Oil
1 Tablespoon Chia Seeds + 3 Tablespoons warm water
1/2 Cup Unsweetened Coconut Flakes
Preheat oven to 350
In a small bowl, mix 3 tablespoons warm water to the chia seeds and let sit for at least 5 minutes (10 is better) In a large bowl, peel and mash the bananas until they turn into a kind of chunky soupy puree. Add in brown sugar, chia seed mixture, vanilla extract, and the melted coconut oil (make sure it’s melted or it won’t incorporate into the mixture) Mix together. In another bowl, whisk together the flour, baking soda, baking powder and salt. Mix the wet mixture with the dry until combined then mix in the coconut flakes.
Line a 12 cup muffin tin and fill each cup about 3/4 the way up with batter. Sprinkle each muffin with brown sugar and place in oven on center rack. Bake for 25-30 minutes or until the tops 0f the muffins are golden brown and a tester inserted into the middle comes out clean.
Remove muffins from tin and let cool.
Serve as is or maybe with a smudge of coconut butter, or anything you want really.
No need for fork, just use you mouth.
There is irish soda bread in your future. I can see it. A nice hardy hunk slathered in butter and honey, crumbs all over the place. So all you have to do know is make it.
I remember reading somewhere (I wish I could remember where) that irish soda bread is just four ingredients, flour, sea salt, baking soda and buttermilk and adding anything else would make it a cake. So when I decided to make irish soda bread, thats all I used. ( I made it with some wheat flour) What you end up with is a highly dense, super fragrant, soft, chewy bread with a crunchy crust. Definitely not a cake.
Note….You can for sure add in a bit of sweetener or even little fat to make it richer and softer, but then it wouldn’t be bread (or so that’s what I read) There are tons of other recipes out there that have other stuff in them. This is just a really simple basic recipe.
White whole wheat flour and all purpose flour mixed together. Salt baking soda and buttermilk. That’s it.All the dry whisked together and in goes the buttermilk. Mix together until dough starts to form then dump onto a floured surface. Handling dough as little as possible, knead into ball.
Place on a baking sheet and dust with flour. Take a sharp knife and cut an X through the top about 1/2 inch deep.
Stick in into the oven for 50 ish minutes, or unit la tester stuck into the middle comes out clean and there is kind of a hollow thunk when tapped on.
And now you have a very pretty, dense hunk of irish soda bread.
Cut and serve with butter and honey (thats how the mister likes it) or whatever you want to eat it with.
-C
Irish Soda Bread
1 cup all purpose flour
1 cup white whole wheat flour (or you can use all purpose)
1 teaspoon baking soda
1 teaspoon salt
1 cup buttermilk (or your choice if milk plus a tablespoon lemon juice)
Preheat oven to 375
In a large bowl, whisk together flours, baking soda and salt. Mix in buttermilk until the dough starts to come together. If the dough seems to dry, add another splash or two of milk. Dump out dough onto a floured surface and shape into a ball. transfer onto a baking sheet, dust with flour and cut a x about 1/2 inch into the top. Stick into oven for 50 minutes until a toothpick comes out clean and the bread makes a hollow sound when tapped.
Let cool enough to handle.
Cut into and serve with a smear of whatever you want
Best eaten within a day or two
TGIF!!!! For reals, because Monday-Thurday were monster days. And now that its friday, I can dig a hole and hide in it until it’s at least 30 degrees with some sunshine. (I might never get to come out.)
A few things I will bring in my hole:
food (lots of food and coffee, lots of coffee)
a soft blanket and pillow
a few books, preferably with pictures, on farming and gardening (think spring!)
the entire series of the Fresh Prince of Bel-air and a device to watch it on
toothpaste (I can use my finger to brush my teeth)
But before I leave for my hole in the ground, I made these little cake bites to get my people through the weekend. Sweet little lemony bites of rich dense cake dipped into bittersweet chocolate. (I am just so nice) They have all the pleasure or cake without the need of a fork and are much easier to give away then a big slice of cake. Plus, they are fun to make. My little sister helped and did most of the chocolate dipping. Then she and another little used their mouths to clean up the chocolate mess. It was an afternoon of chocolate all over the kitchen fun day.
So make some bites to have and to share. Or if you, like me, are digging a hole to hide in, make a batch of bites to bring with you. That’s the beauty of cake covered in a harden chocolate shell, they travel really well.Simple lemon cake stuff. Flour, baking powder and salt whisked together, Sugar and soft butter in a bowl. An egg, some vanilla, milk, and of course, the lemon.
To make the batter, cream the soften butter with the sugar until light and fluffy. Zest lemon(1 big or 2 small) into bowl with the juice of the lemon(s), the vanilla and the egg. Beat until combined. Now beat in the dry and then the milk. Keep beating for another minute until all mixed. Batter should be light and fluffy.
Batter goes into a greased and floured 9×13 baking sheet and stuck into a 375 degree oven for about 30 minutes (You can use a 9×9 baking pan. Just bake fir another 10 minutes and you will end up with thicker bites). Remove from oven and let cool for a few minutes and flip to remove cake from baking sheet. Cut cake into small pieces (I cut 4×6 to get 24 bites) and place bake into sheet and into freezer (I stuck mine outside, it was -2 degrees ) for at least 2 hours.
Frozen bites ready for the chocolate coating… Bittersweet chocolate chips and a little bit of coconut oil. Melted together all nice and shiny smooth.Now dip and slather those bites in the melted chocolate.
Oh what a lovely sister I have.. Look at her dunk….. like a boss!Fully coated and placed on a rack for the chocolate to harden. I ended up sticking the rack in the freezer for 10 minutes…They harder really fast in there.
And now you have some it, bites of cake covered in chocolate. 1 bite, 2 bites…5 bites. Eat however many you want because its Friday and because there small little bites and just because you can.
Now if you need me, I’ll be in my hole.
-C
Chocolate Lemon Cake Bite
1 1/2 cups all purpose flour
1 teaspoon baking powder
1 teaspoons salt
1 cup white sugar
1/2 cup (1 stick) soft butter
1 egg
1 teaspoon vanilla
1 cup milk
1 large or 2 small lemons
2 cups bittersweet chocolate chips
2 tablespoons coconut oil
Add butter and sugar to a large bowl and beat on medium unit light and fluffy. Ass in vanilla egg, the zest of the lemon and the juice of the lemon. Beat to incorporate. Now beat in the dry and lastly the milk.
Grease and flour either a 9×9 pan or a 9×13 baking sheet. dump batter in and smooth out. Stick in oven and bake for about 3o minutes or until a toothpick stuck into the middle comes out clean. Remove and let cool for a few minutes on a wire rack. Flip cake to remove from pan. Cut cake into bit sized pieces, 4×6 is a good size, and place back on baking sheet and stick into freezer for at least 2 hours.
When cake bites are as good as frozen, get the chocolate ready. Take the chocolate and the coconut oil and either melt in a double boiler or the microwave. Mix until smooth and make sure to full incorporate the oil. Now remove the cake bites from the freezer and dip each bite into chocolate, trying to full coat all sides. Stick onto a wire rack or a parchment lined pan to harden. They can be stuck back into the freezer to harden faster.
It’s Mother’s Day weekend which means that you and I and everyone out there should feel the slightest bit obligated to at least do a little something nice for your mom for the mere fact that you were borned. And really what better way to celebrate mom than with food… It really is the least that you can do. (I think mom’s also like flowers and cards and handmade pasta necklaces) My mom is defiantly about the food. (she has had her fair share or pasta necklaces) A many years back on Mother’s day, this sweet little girl (me) made her mother a special breakfast treat…blueberry scones. And ever since that day, for every freaking holiday, birthday, whatever day, my mother requests (demands) a batch of those scones. She is always saying that these are her favorite treat and that no one has ever made them as good as I do. (I guess that just reiterates that I am her number 1 child)
And for the last few months my mom has been up my butt, trying to get me to make her some. Not going to lie, I have been saying I’ll get her a batch, but for some reason, I haven’t gotten around to making them. So two birds here.. Make the scones and she gets off my back for a least a little while (a month.. maybe 2) and I give her a fantastic Mothers day gift that I know she will love.
So here they are , oh mother of mine. Blueberry scones!
The stuff. Flour, baking soda, baking powder and salt. A bit of sugar, vanilla, buttermilk, and butter (use vegan butter and nut milk if you want to make them vegan) And of course we need the blueberries which can be fresh or frozen. I usually use fresh, but the store I stopped at only had really big containers of fresh that were like $1000 dollars a piece and the organic frozen happen to be on super sale. So you know, the cheap in me won that battle. So into the bowl goes all the dry stuff; flour, baking powder and soda, salt, and the sugar. Give it a good whisk.
Now for my special trick for a perfectly distributed cold butter in a pastry. Freeze your butter and grate it!
With a large wholed grater, grate the frozen butter directly into the bowl with the dry, stoping a few times to toss the butter chunks around so you don’t end up with a huge pile of grated butter. When it’s all grated, gently toss around so the butter is evenly distributed. Now dump the blueberries into the flour mixture. Toss them around to give them a coat of flour. Add in the buttermilk and vanilla and give a little mix until liquid is absorbed. We are trying to handle the dough as little as possible.Turn mixture onto counter. It’s very loose, but thats what it should look like. Very gently and with as little handling as possible, gather dough up, knead a few times till everything just comes together. Press dough into a disk that is roughly an inch thick…. and it doesn’t need to be perfect. Cut the disk into even sized pieces. Do 6 big, 8 normal, maybe even 10 smaller. Whatever size you like. (I did 8) Place the scones onto a baking sheet, using a spatula to transfer, and sprinkle the tops with a little bit of sugar. Into a preheated oven for about 20 minutes.And when the scones look all nice and browned and a tester comes out clean. remove and either serve right away warm, preferably with huge cup of coffee or tea, or stick on a rack to cool before storing in air tight container.
Perfect to serve as a breakfast pastry, at brunch, or even as a dessert. A nice little treat for a special lady. (dudes can eat them too)
Happy Mothers Day Mom! Thanks for having me!
And Happy Weekend!!!
-C
Blueberry Scones
2 cups all purpose flour
1/3 cup sugar plus 2 tablespoons to sprinkle on top
1 teaspoon baking powder
1 teaspoon baking soda
1/2 teaspoon salt
1/2 cup (1 stick) unsalted butter frozen or really cold (use non dairy butter like Earth Balance for vegan)
1 cup blueberries (fresh or frozen)
1 teaspoon vanilla
3/4 cup buttermilk (use non dairy milk for vegan)
Preheat oven t0 400 degrees
In a large bowl, whisk together flour, baking soda, baking powder, sugar, and salt. Take the frozen butter and grate directly into flour mixture, tossing around to evenly disrupted. Add in blueberries and toss around till coated with flour, then lastly, add vanilla to buttermilk and mix into mixture until just barely coming together. Turn mixture out onto counter and with your hands, knead mixture a few times until it forms a solid dough. Shape into a disk and smoosh down until about an inch thick. Cut into 6-10 triangles and place on a non greases baking sheet and sprinkle tops with remaining sugar. Stick into oven and bake for 20 minutes or until tops start turning a golden brown and a tester in the middle of a scone comes out clean.
Remove from baking sheet and serve warm or let cool on a rack.
Mom gets first dibs, and if she is willing to share, eat one yourself with your face.
I swear I didn’t plan this, but today is officially Pi Day! Pi being the mathematical constant of the ratio of the circumference of a circle to its dimeter (did I say that right?) 3.1415…… And today’s date is 3.14.15. Whoa…I guess that means that this pie was meant to be.
But the real reason I made this pie was for a surprise treat for the mister. He left for a couple of days and me being the super assume lady love of his, thought it would be nice for him to come home to his favorite dessert.. plain old rhubarb pie.( I know, I be the best) And it didn’t hurt that when I went to the grocery store, there was a big old pile of fresh, gorgeous rhubarb staring me right in the face, and on sale to boot.
The funniest thing. Me and the mister have been together for a very long time (12+ years….we started dating in high school, so I am not that old!) and I have known that his favorite dessert is plain rhubarb pie for ever. Every time we have one of our food discussions about our favorite foods, (which happens more than it should and usually consists of me running my mouth and him grunting or nodding once in a while) rhubarb pie always comes up. He even talks about the old lady who used to make him rhubarb pie for mowing her lawn. And guess what… I have never once made him a plain rhubarb pie. Why? Honestly, I have no idea. Maybe I secretly think I was going to screw up his one favorite dessert, or maybe I never quit had enough rhubarb for a pie, or maybe I am really just an awful lady. But for whatever reason, it doesn’t matter anymore because I finally made him a plain rhubarb pie.
The stuff for the makings of pie… One single pie crust, flour, sugar and rhubarb. I mean, come on, this might be one of the simplest pies ever.
Note…The first thing the mister said to me when he saw the pie was. “Where is the top crust? My response what “Screw you ass face” but then chuckled. This pie would be great with a top crust, but I was thinking how pretty it would be without it. And honestly, I only made a single crust. What I am saying is.. make a double crust if you want a top.
The chilled pie crust gets rolled out, placed into a pie plate, trimmed and made all pretty. The bottom is sprinkled with a 1/4 cup of sugar and stuck back into the fridge while the oven preheats to 350. Now is a good time to dice the rhubarb into inchish chunks. Once the oven is preheated, remove crust from fridge and add in the diced rhubarb.
The remaining sugar and flour get mixed together in a bowl and dump on top of the rhubarb. Give it a tiny toss with you fingers just to get some of the mixture to sink down a little. (Don’t worry, the filling will be perfect when you do it like this) I also cut up the pie crust trimmings and placed on top… not necessary, but looks pretty and is a good use of the scraps.
Now cover the entire pie with tinfoil. Cut and x through the middle and fold foil back to expose the filling but keep the crust covered. (so much easier than trying to squish strips of foil together..you know what I am talking about)
And then the pie is ready to be baked.
In the oven for 5o minutes with the foil, then 10 or so minutes without to finish.And then you take it from the oven and marvel at the beauty.
I am now truly the best super awesome lady love. I should get a freaking crown but would settle for a stand mixer or blender as a reward instead.
Important…..Let the pie cool completely (or just about) before cutting.The filling needs a bit of time to set.
Happy Saturday, Happy Weekend, Happy PI Pie Day!!!
-C
Single Pie Crust.. Recipe here
4-5 large Rhubarb Stocks (4 cups chopped)
1 1/4 cups white sugar
a hefty 1/3 cup flour
Make you pie crust.. and make sure it’s chilled!
Roll our pie crust and place in pie plate. Trim and make edge all nice and pretty. Add 1/4 cup of sugar to the bottom and stick back in the fridge to relax while you get the other stuff together.
Preheat oven to 350
Wash and dice rhubarb into inchish chunks. In a bowl, mix together 1 cup of sugar and the flour. Once the oven is preheated, remove crust from fridge and fill crust with the chopped up rhubarb. Now dump the sugar, flour mixture on top, slightly tossing it around with your fingers. Cover entire pie with tin foil and with a knife, cut an x through the middle of the foil. Fold foil back to expose the center of the pie, but keep the crust covered. Stick into oven. Bake for about an hour, removing the tin foil after about 50 minutes. Pie is done when the crust is golden brown and a fork or knife stuck into the middle of pie comes out with a thick jam like sauciness.
Let pie cool and set for a bit.
Slice. Serve on a plate with an eating utensil and maybe a scoop of vanilla bean ice cream. Lick plate clean.


 What a week. Was it summer where you are this week as well? I mean jeez, talk about one extreme to another. Oh well, at least the world has turned green, the winter stuff is completely out of sight and I found the box that contained all of my shorts and summery clothes (pants and long sleeves in 90 degrees is just gross) And honestly, it’s been great. In between work, chores and just plan old being busy, we have manage to get a few bike rides and long walks in. Plus all the veggie starts are doing great, the flowers are coming up everywhere and life just has a little bit more of a relaxed feeling. So what if my allergies are turning my face into big red puff or that the past few night have been so hot that the act of sitting has caused me to break a sweat. I’ll take it.
 My boys. I long socks and sneakers… these guys know cool.
  Took the super cutie cuties out for an ice cream cone.
 Our first bike ride picnic down on the waterfront. I love bike ride picnics!
 So many succulents. I didn’t actually buy any because I need to stop being a plant whore.
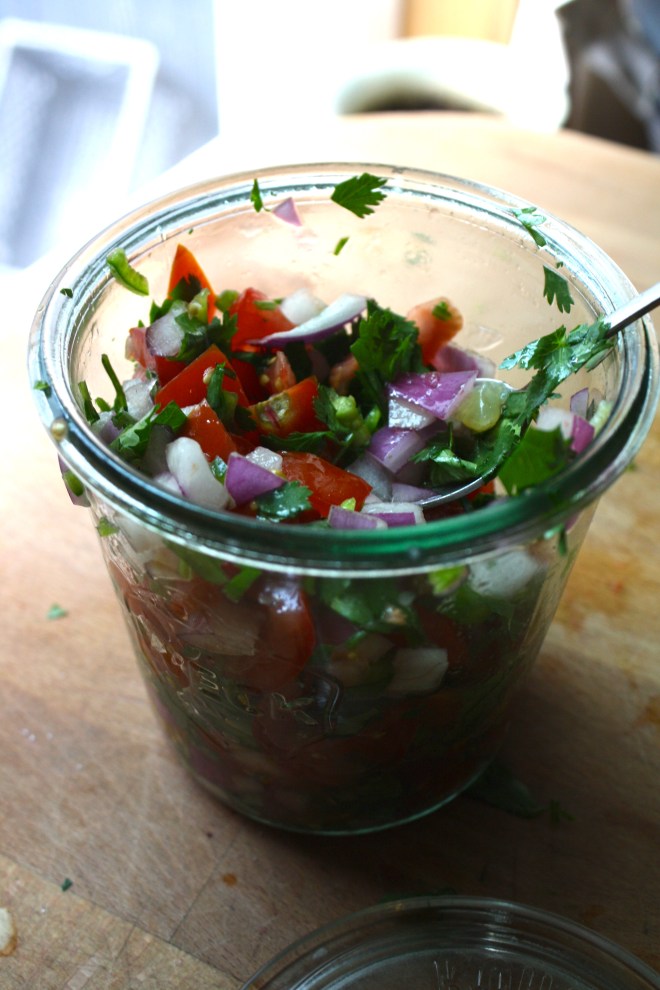 I have made a batch of this stuff evey day this week. I can’t stop eating it, it’s like eating summer. So good
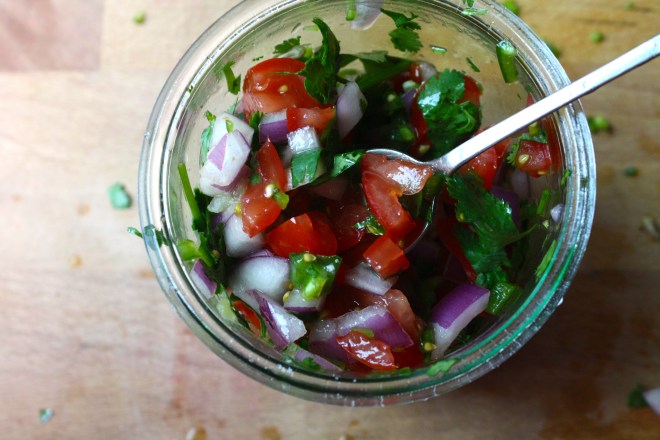 Happy Cinco de Mayo! And what better day to share my version of my oh so fantastic pico de gallo, or as I call it, super freshy salsa.
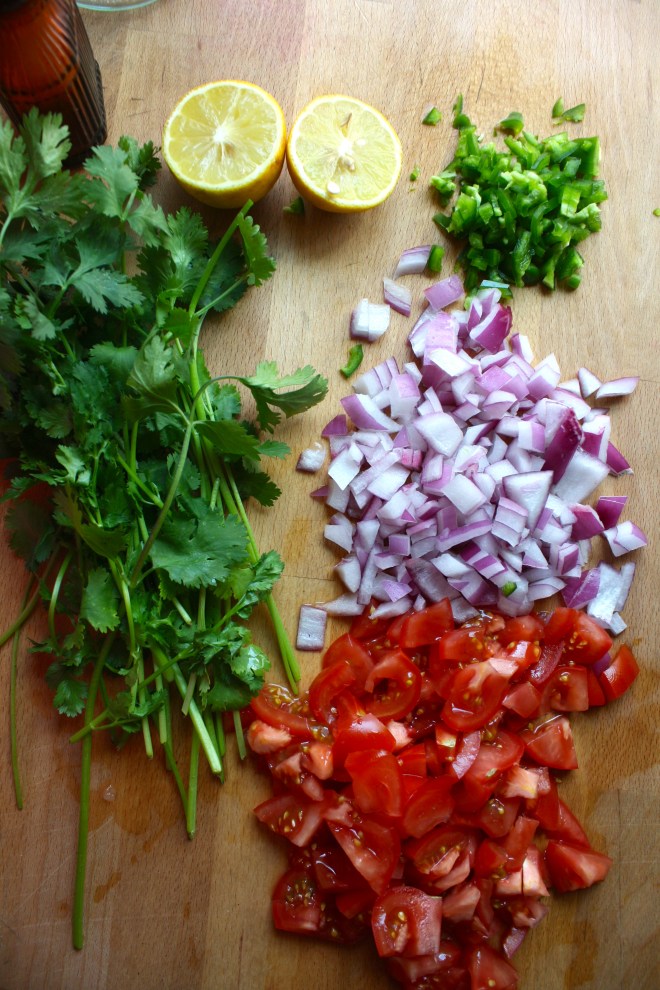 The stuff. Chopped Roma tomatoes, chopped red onion, a diced jalapeño, lemon, a bunch of cilantro, and salt.


 It’s been a long, packed, but very fantastic week. Everyday has been full of work, chores, family, and trying to get in a least one good bike ride or walk in. I made a list of a few important points to mention from the past week.
 The mister and the worlds biggest crayon, which is made of scraps of blue crayons from all over the world. I could totally use a big ass crayon like this.
 The coolest most badass 95 year old lady that I know (I know a few), Grammy Stem. And the little, getting a lift. (I could have used a lift too!)
 Brothers. The guy in the green is my Dad.
 Aftre dinner ice cream break.
 The sky has been on point all week long
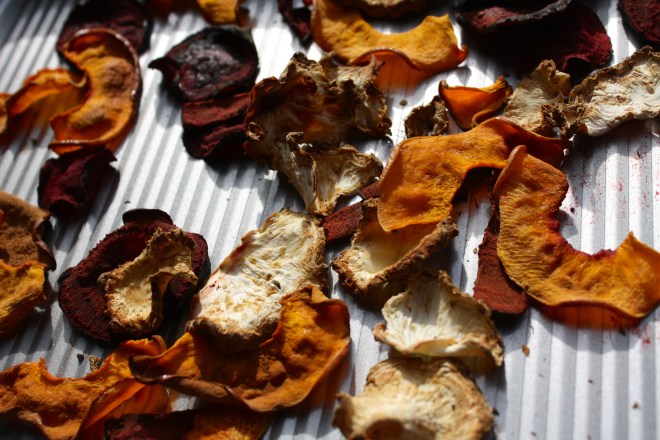 And made myself some veggie chips. The colors alone are delicious.
 And I am home. The mister and I woke up at 2:15 am Friday morning to drive to Easton PA and spend the weekend with family, going to the Crayola crayon factory, wondering a grave yard, and hearing some fantastic stories about my family from the mouth of my 95 year old grandmother. (I’ll show some pictures and tell you some stuff later this week) Than we drove back late last night… I don’t know how I am even awake right now…I am sooooo much tired! But that’s how I work I guess. The coffee is almost ready, calling my name, telling me its totally cool to drink it all.
 My forsythia bush in from of one of my houses… Always the first one to bloom.
  This is how washer sleeps in the warmer months.. All feet in the air.
  I ate it all and it was good.
 Two pretty ladies
 Veggies Plants!!!!
  Oh do I love a good Sunday. The picture above was taken last Sunday and what a glorious day that was. The mister and I took the pup hiking and it was the most spectacular of days. Sunny, 30 degrees and no wind..I could’t have asked for better weather.
  Playing on the frozen lake. It was so freaking cold and windy, but we just had to do it!
 Two of my favorite people in the world.
 And I made brunch with 2 more of my favorites.
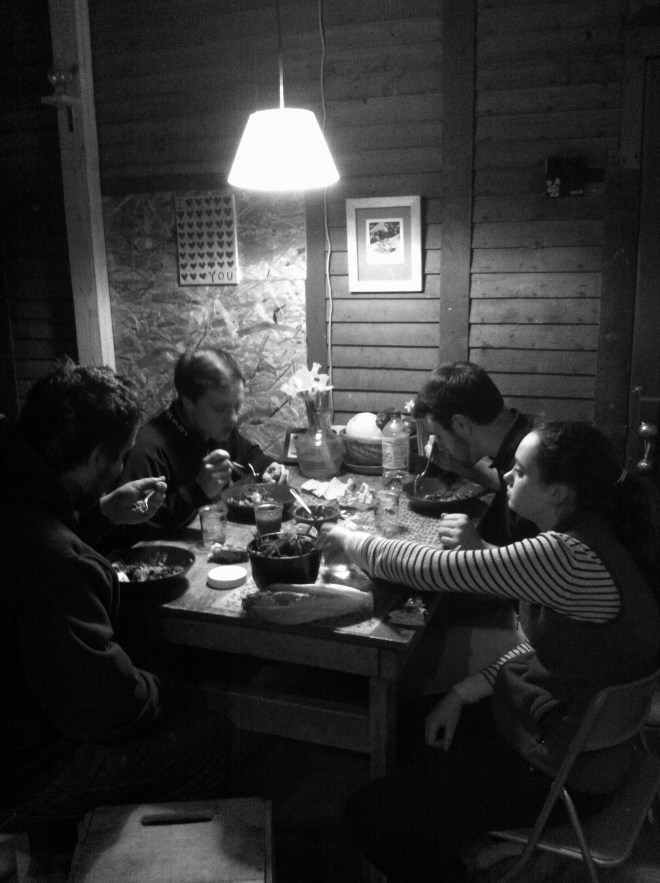 My little brothers (can I say little if they are bigger then me?) came over and we all had dinner together while listening to music from when they were born. Nothing like a few 17 year olds to make a person feel old.
 Blooming daffodils. I love to watch my flowers open up, it’s just as good as the flower itself.
  Oh boy we made it! Ate our way through another Thanksgiving. I hope yours was a good as mine, lot of family and friends…an abundance of pies, and lot of warm lovely goodness.


 I figured now is a good time to get this recipe out there before we get to far into spring and summer recipes because there is going to be a lot of banana ice cream filled recipe coming and I figured its a good idea to have the basic banana ice cream recipe ready for people to refer too. And because I made so much fantastic naner ice cream, I also made a cookies and cream naner ice cream for my sisters and the mister.
 The stuff you need for this ice cream…. Nice and ripe bananas, peeled and then frozen* That’s it.
 After all blended and smooth, either eat right away or scoop ice cream into a freezer safe container and stick in freezer. That’s the banana ice cream… And it is amazing and so so so so so addictive. I make a batch, think I am only going to eat a scoop, then find myself eating half of what I have made, but it’s ok cause it’s only bananas.
  One batch of banana ice cream, either freshly made, still in food processor or made ahead and placed in a food processor and given a good pulse to smooth it up.
 Now you have cookies and cream naner ice cream…. and everybody is happy.
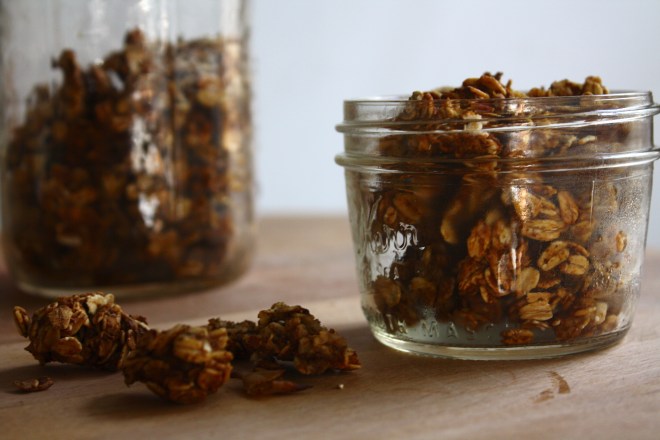 Chomp Chomp Chomp… The sound I make as I eat this freaking fantastic crunchy granola. You know it’s good when the person sitting next to you is annoyed by the sound of you face while eating. I eat a lot of crunchy stuff. And I am pretty sure I annoy the mister a lot.
 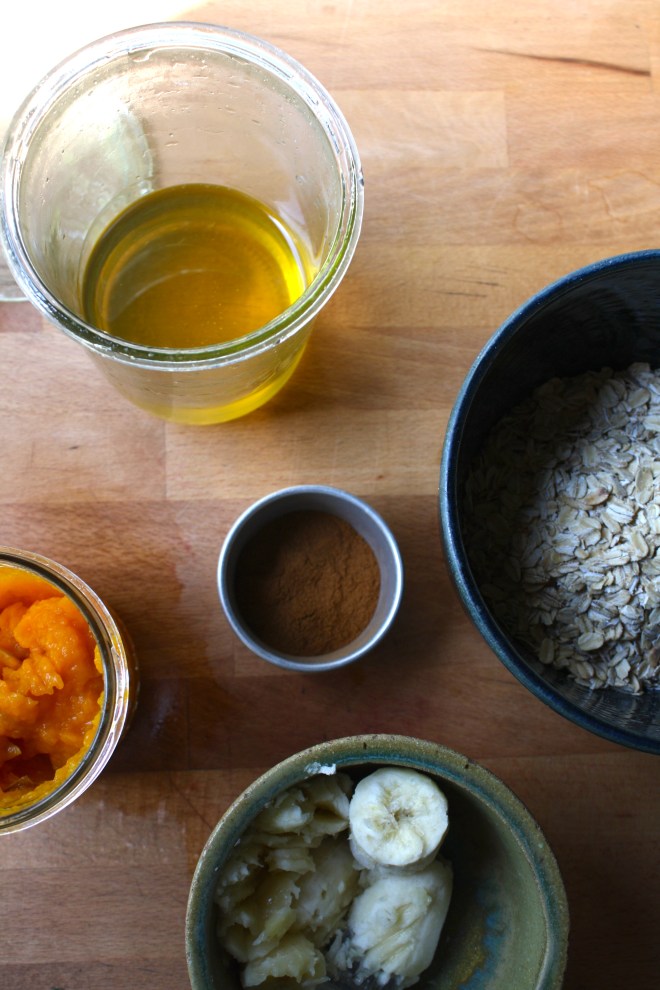 The simplest of stuff. 1 smashed banana, a cup of pureed butternut squash, Vietnamese cinnamon*, honey, and old fashion oats. (and a dash of salt, not shown)
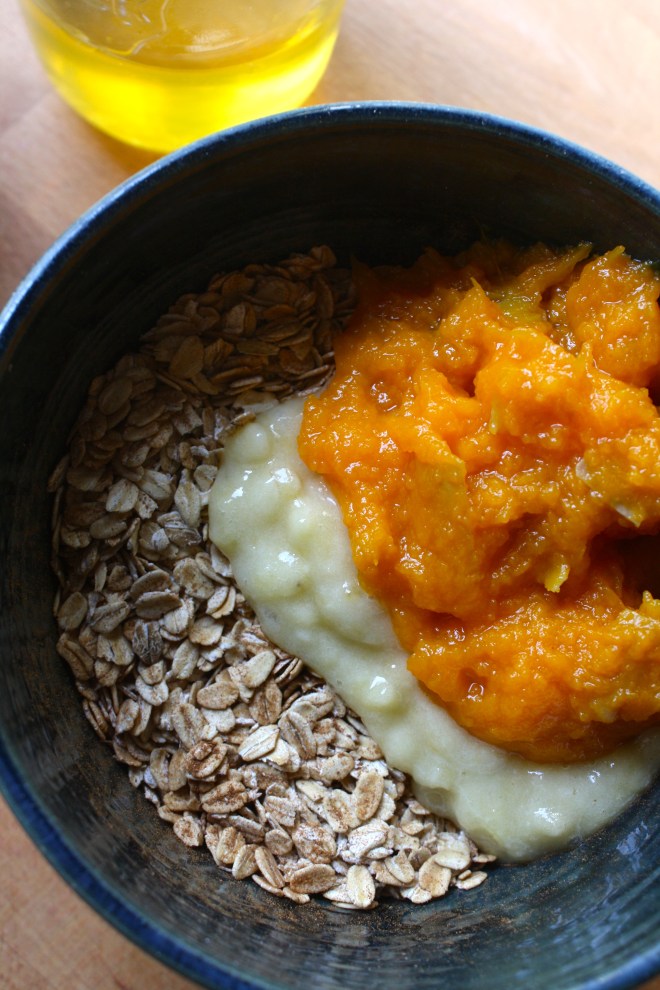 Toss the cinnamon and salt with the oats. Mix together the banana, squash and the sweetener and combine with the oats until full incorporated.
 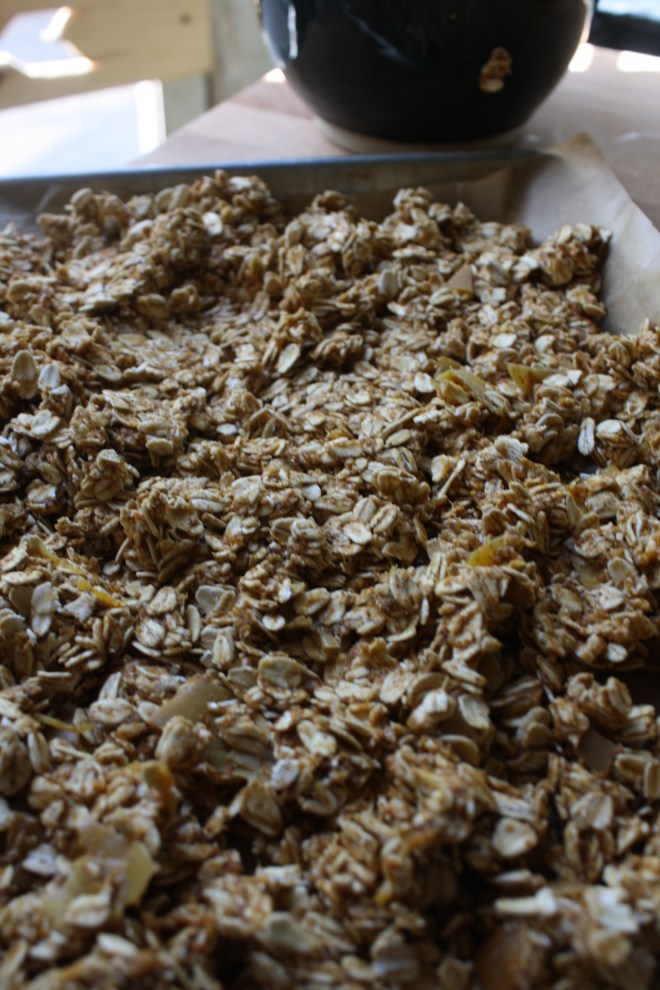 Dump the mixture on a parchment lined baking sheet and give it a little pat, you know, to settle all the bit and pieces together, all cozy and evenly spread out. Now stick into a preheated oven and after about 20 minutes, take out of oven and give the granola a toss, breaking apart any super big chunks or overly wet pieces. Put back into oven for another 20 minutes. (I like my granola super crispy crunchy so I cook it a little longer, like 30 more minutes)
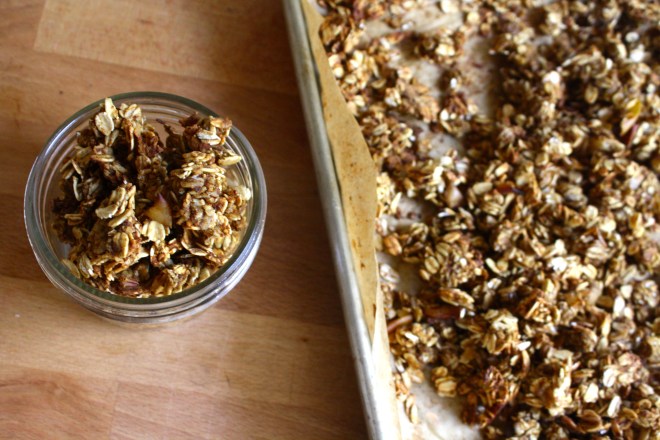 And when you are happy with the crunchiness of you granola, remove from oven and let cool, trying not to eat all of it while it sit’s on the counter looking all pretty and smelling like happiness.
 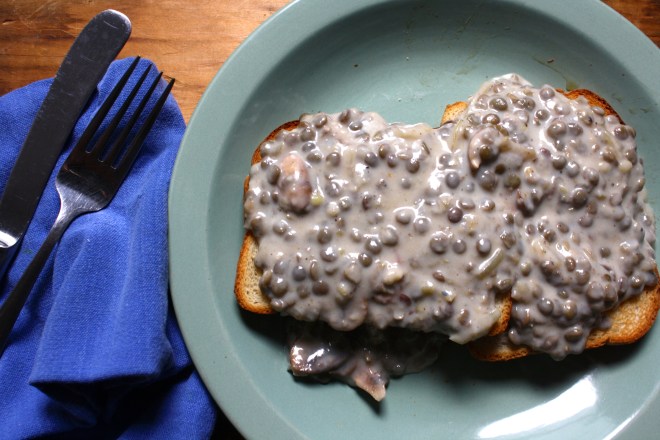 The other day the mister and I started reminiscing about some of our earliest memories of what our parents fed us or what they used to eat when we were growing up. One of the dishes that we both remember eating was the classic creamed beef on toast, or as my mom use to call it, shit on a shingle. Yup, shit on a shingle. (who ever started calling creamed meat on toast is a freaking genius) I think that as a kid, I liked the dish just for the mer fact that I could say the word shit and get away with it. I think my mom liked it for few reasons; she could make a big butt load of it really fast, for a crap load of kids, on the super cheap. And I think that she just really like it.
 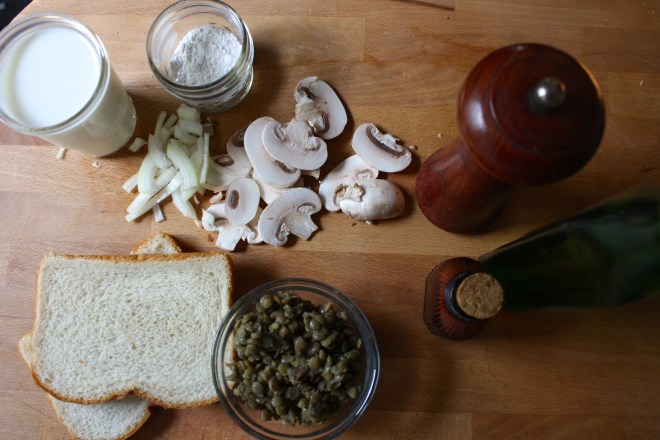 The shit….. A few mushrooms, a bit of onion, cooked lentils, flour, milk, oil, salt and pepper, and garlic powder. And the shingles.. 2 pieces of thick white country bread.
 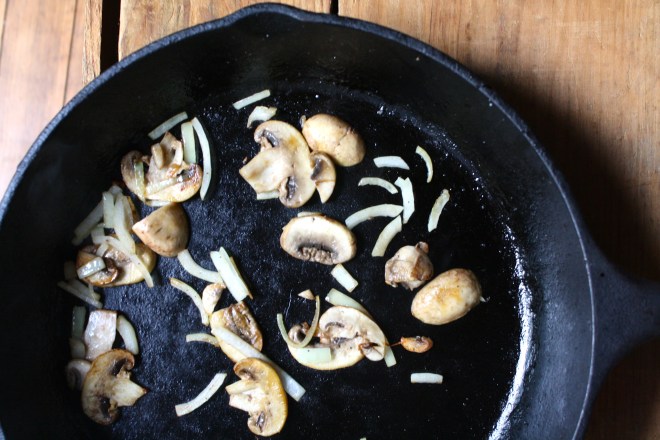 Slice the mushrooms and the onion and toss into a skillet with a drizzle of oil. Cook on medium heat until browned and fragrant..Remove from pan.
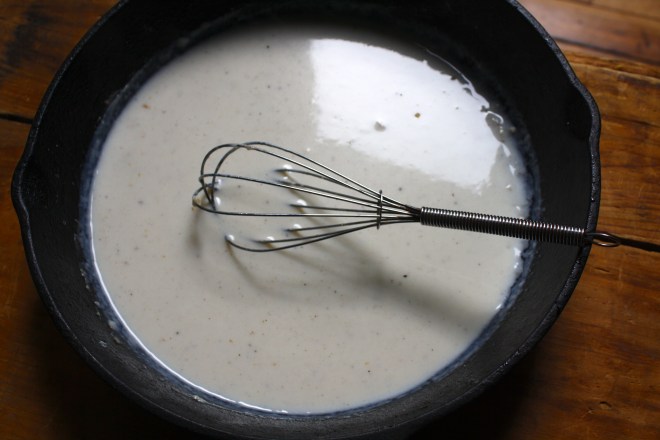 In the empty pan still on medium heat, add in the olive oil and the flour. Whisky constantly, slowly add in the milk. Keep whisking until sauce thickens. Remove from heat. Add in salt, pepper, and garlic powder.
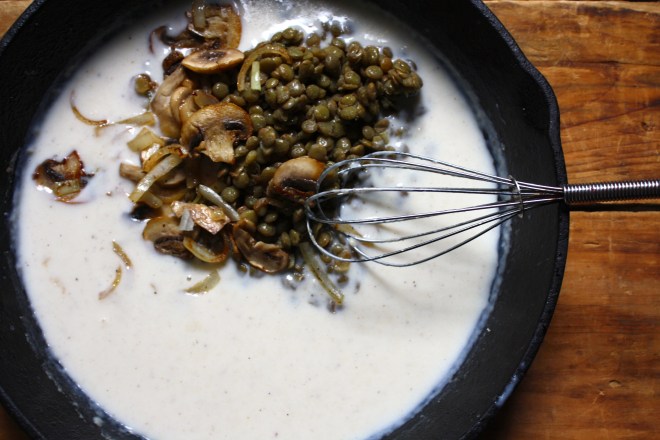 Add the mushrooms and the lentils into the sauce and give it a good mix. Oh, and don’t forget to toast up the bread.
 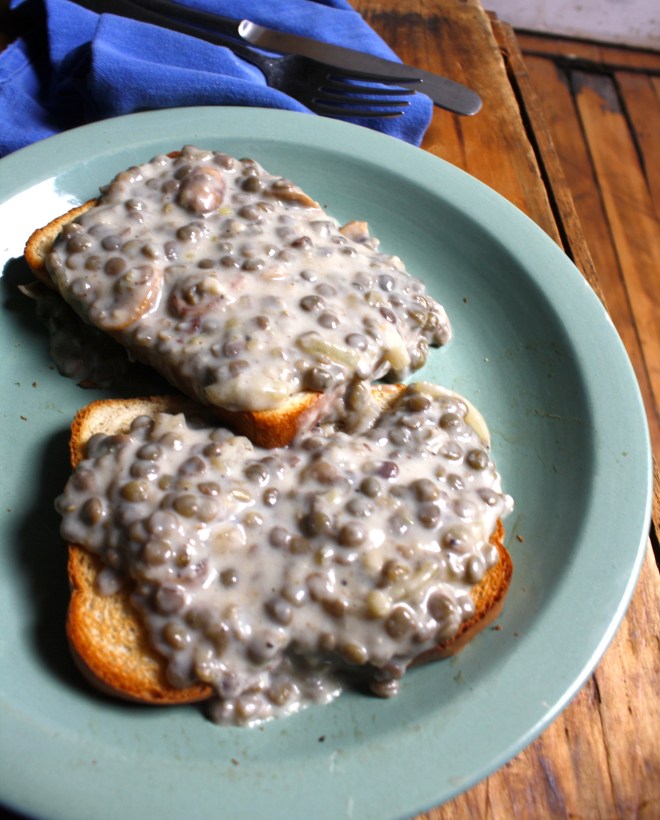 Now dump that shit all over those shingles! Oh the memories.
 Last week pineapples were on sale everywhere……So I bought 5. Don’t judge
  Stuff for the goodness. We got the kale, some avocado because all salads should have avocado and some cooked lentils because, well, all salads should have lentils (or beans or nuts.. so you could totally something else) Then a few sprigs of fresh dill, a clove of garlic, red wine vinegar, salt and a bowl of chunked up pineapple.
  The pineapple, dill, garlic, red wine vinegar, a splash of water and a pinch of salt get blended in a blender or whatever blending device you use. Go as smooth or chunky as you like, I recommend going smooth, but leaving a little chunk, like half blended.
 So good……So so good.


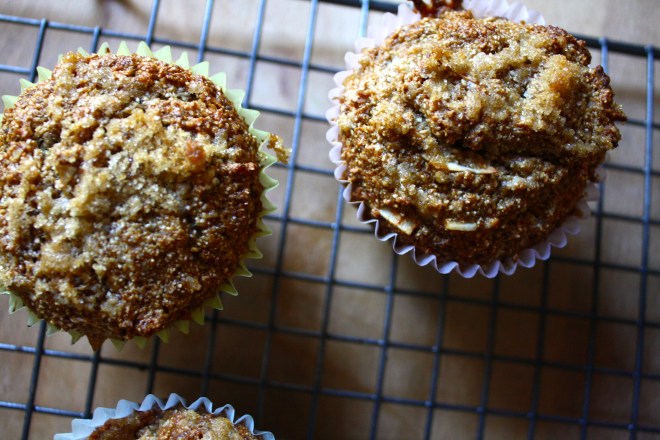
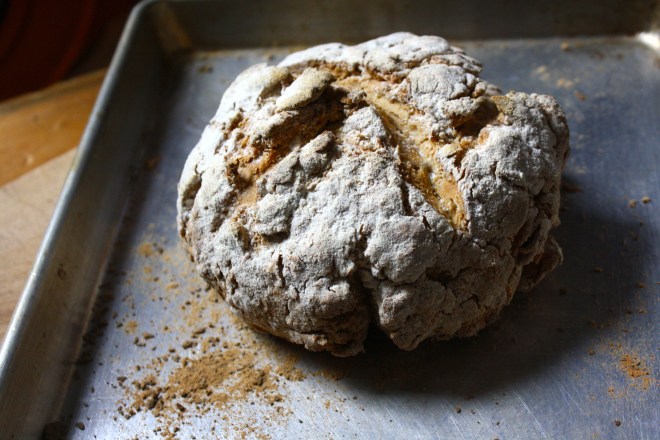 There is irish soda bread in your future. I can see it. A nice hardy hunk slathered in butter and honey, crumbs all over the place. So all you have to do know is make it.
 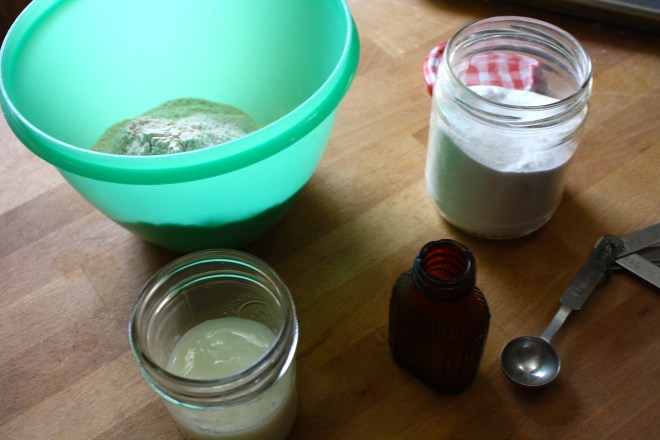 White whole wheat flour and all purpose flour mixed together. Salt baking soda and buttermilk. That’s it.
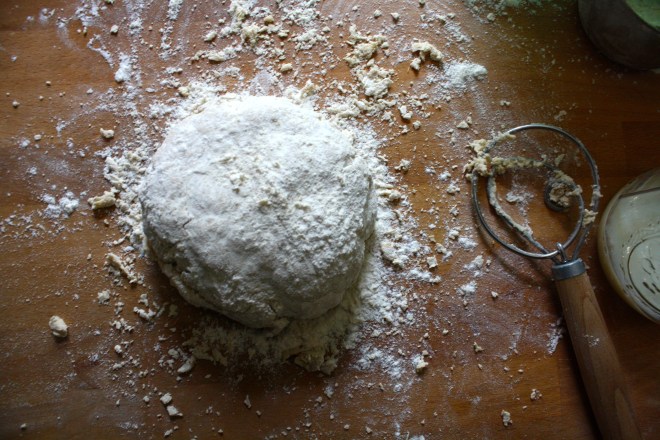 All the dry whisked together and in goes the buttermilk. Mix together until dough starts to form then dump onto a floured surface. Handling dough as little as possible, knead into ball.
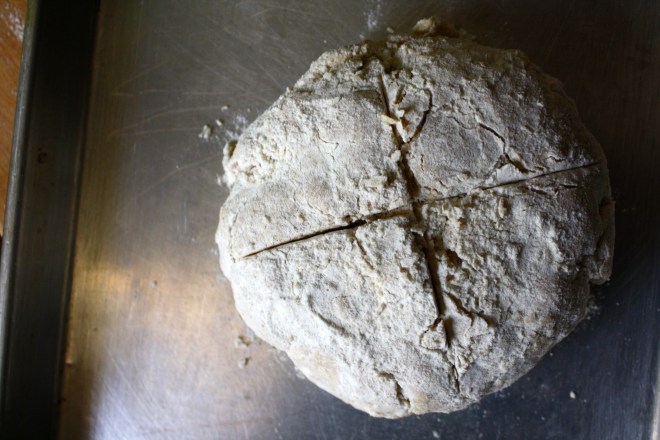 Place on a baking sheet and dust with flour. Take a sharp knife and cut an X through the top about 1/2 inch deep.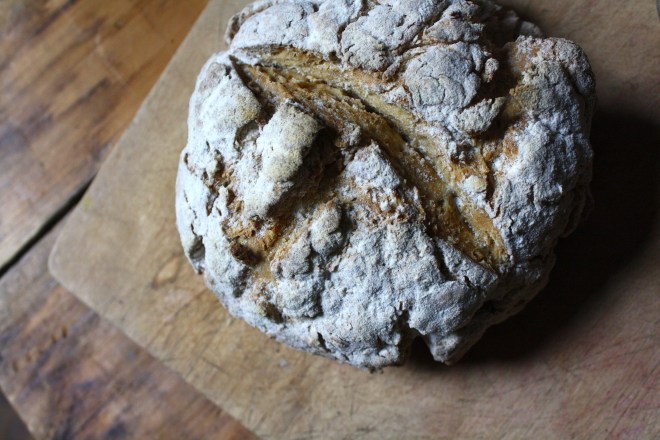

 TGIF!!!! For reals, because Monday-Thurday were monster days. And now that its friday, I can dig a hole and hide in it until it’s at least 30 degrees with some sunshine. (I might never get to come out.)
 Simple lemon cake stuff. Flour, baking powder and salt whisked together, Sugar and soft butter in a bowl. An egg, some vanilla, milk, and of course, the lemon.
  Frozen bites ready for the chocolate coating… Bittersweet chocolate chips and a little bit of coconut oil. Melted together all nice and shiny smooth.
 Now dip and slather those bites in the melted chocolate.
  Fully coated and placed on a rack for the chocolate to harden. I ended up sticking the rack in the freezer for 10 minutes…They harder really fast in there.
 It’s Mother’s Day weekend which means that you and I and everyone out there should feel the slightest bit obligated to at least do a little something nice for your mom for the mere fact that you were borned. And really what better way to celebrate mom than with food… It really is the least that you can do. (I think mom’s also like flowers and cards and handmade pasta necklaces) My mom is defiantly about the food. (she has had her fair share or pasta necklaces) A many years back on Mother’s day, this sweet little girl (me) made her mother a special breakfast treat…blueberry scones. And ever since that day, for every freaking holiday, birthday, whatever day, my mother requests (demands) a batch of those scones. She is always saying that these are her favorite treat and that no one has ever made them as good as I do. (I guess that just reiterates that I am her number 1 child)
 The stuff. Flour, baking soda, baking powder and salt. A bit of sugar, vanilla, buttermilk, and butter (use vegan butter and nut milk if you want to make them vegan) And of course we need the blueberries which can be fresh or frozen. I usually use fresh, but the store I stopped at only had really big containers of fresh that were like $1000 dollars a piece and the organic frozen happen to be on super sale. So you know, the cheap in me won that battle.
  So into the bowl goes all the dry stuff; flour, baking powder and soda, salt, and the sugar. Give it a good whisk.
 Now dump the blueberries into the flour mixture. Toss them around to give them a coat of flour. Add in the buttermilk and vanilla and give a little mix until liquid is absorbed. We are trying to handle the dough as little as possible.
 Turn mixture onto counter. It’s very loose, but thats what it should look like.
  Very gently and with as little handling as possible, gather dough up, knead a few times till everything just comes together. Press dough into a disk that is roughly an inch thick…. and it doesn’t need to be perfect.
  Cut the disk into even sized pieces. Do 6 big, 8 normal, maybe even 10 smaller. Whatever size you like. (I did 8) Place the scones onto a baking sheet, using a spatula to transfer, and sprinkle the tops with a little bit of sugar. Into a preheated oven for about 20 minutes.
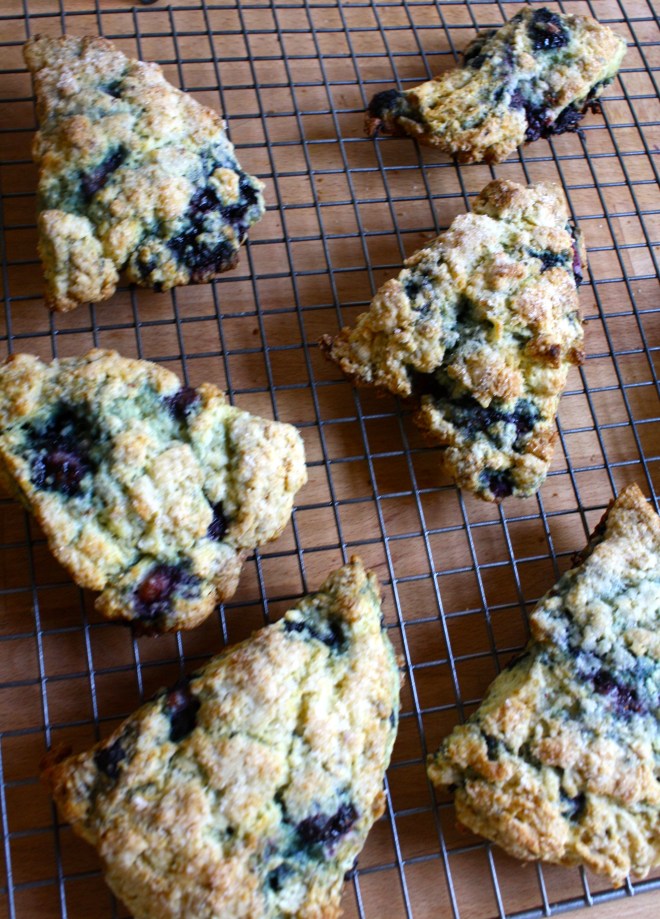 And when the scones look all nice and browned and a tester comes out clean. remove and either serve right away warm, preferably with huge cup of coffee or tea, or stick on a rack to cool before storing in air tight container.
 I swear I didn’t plan this, but today is officially Pi Day! Pi being the mathematical constant of the ratio of the circumference of a circle to its dimeter (did I say that right?) 3.1415…… And today’s date is 3.14.15. Whoa…I guess that means that this pie was meant to be.
  The stuff for the makings of pie… One single pie crust, flour, sugar and rhubarb. I mean, come on, this might be one of the simplest pies ever.
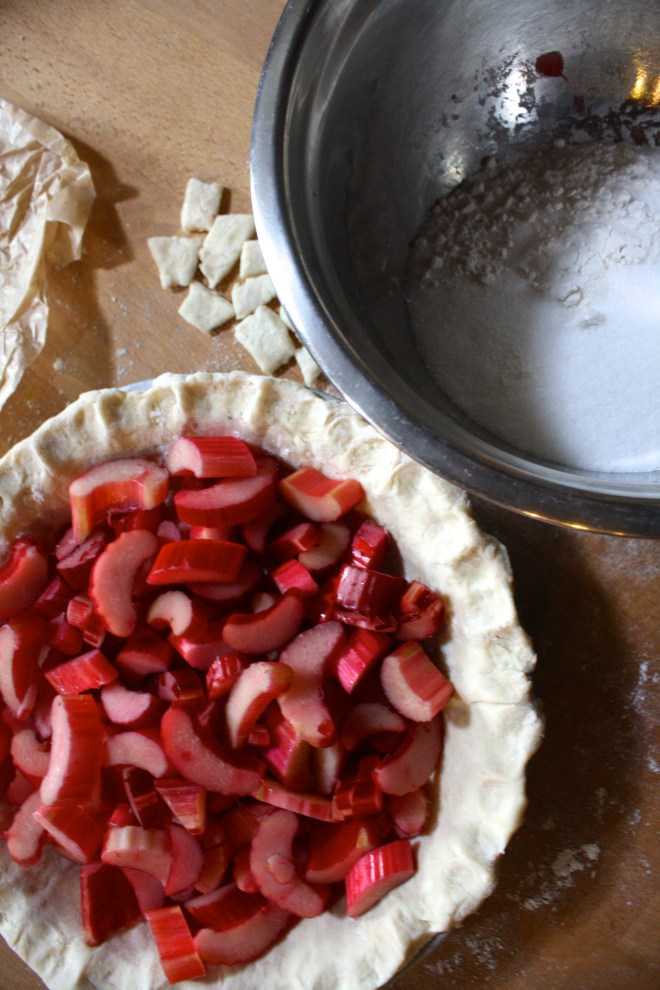 The chilled pie crust gets rolled out, placed into a pie plate, trimmed and made all pretty. The bottom is sprinkled with a 1/4 cup of sugar and stuck back into the fridge while the oven preheats to 350. Now is a good time to dice the rhubarb into inchish chunks. Once the oven is preheated, remove crust from fridge and add in the diced rhubarb.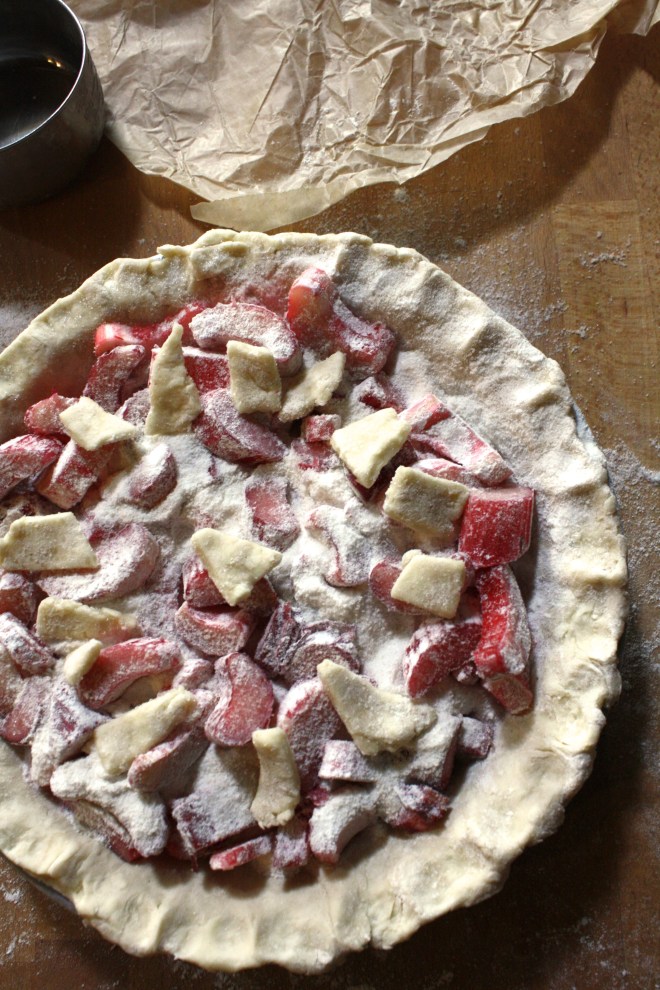
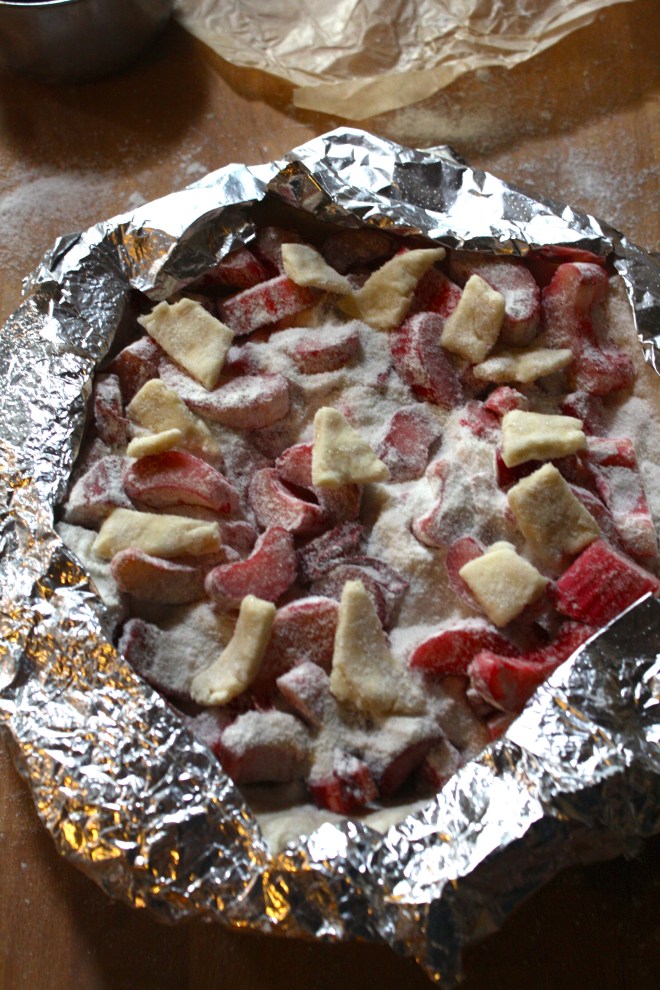 The remaining sugar and flour get mixed together in a bowl and dump on top of the rhubarb. Give it a tiny toss with you fingers just to get some of the mixture to sink down a little. (Don’t worry, the filling will be perfect when you do it like this) I also cut up the pie crust trimmings and placed on top… not necessary, but looks pretty and is a good use of the scraps.
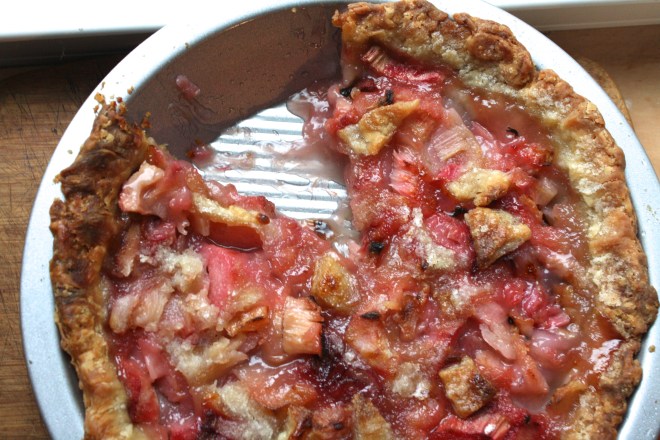 And then you take it from the oven and marvel at the beauty.
THE LOVELY CRAZY
September 19, 2015 by maximios • Blog
And I bet I am not the only one that got overly excited at $1.50 pineapple and bough themselves a few. We will just call ourselves opportunists. Now we have plenty of pineapples and don’t have to pay the $4 a piece prices. (Justification)
But if you don’t have a pineapple laying around, you must go get one. (Maybe if your lucky, there might still be some sales going on) because you must make this salad. I am on a mission to make everyone I know eat it because, for lake of a better way to say it…….It will rock your world.
Dill and pineapple are a serious match made in heaven. Pineapple, with its sweet, tangy, citrusness and dill with it’s super fresh earthiness. Mixed together with a few other helpers to create a fresh, clean, chunky, tangy, over the top, flavor. I could stop right there, but toss in a handful of lentils, some creamy avocado and a bed of kale…It’s like the best spring time, celebration on you tongue, happiness in you tummy, kind of salad.
A salad that will make you smile. (and maybe buy 5 pineapples)
The prep is done, now compile. Kale in bowl, top with lentils,. Toss on avocado chunks, and, last but not least, the blended pineapple dill mixture. So good……So so good.
Happy Friday!!
-C
So Good Pineapple Dill Kale Salad
Serves Two
Note. No fresh dill? You can use dried, just sub in 1 teaspoon for the fresh and after blending with the pineapple, let sit a little longer to really let the flavors meld together.
Place pineapple, dill, pinch of salt, vinegar and garlic into a blender or whatever you own that blends and blend stuff together, leaving it a little chunky. Let sit for 5-10 minutes.
Kale goes into a bowl and add the lentils and diced avocado. Pour the blended pineapple on. Toss around.
Now eat.
A few things I will bring in my hole:
But before I leave for my hole in the ground, I made these little cake bites to get my people through the weekend. Sweet little lemony bites of rich dense cake dipped into bittersweet chocolate. (I am just so nice) They have all the pleasure or cake without the need of a fork and are much easier to give away then a big slice of cake. Plus, they are fun to make. My little sister helped and did most of the chocolate dipping. Then she and another little used their mouths to clean up the chocolate mess. It was an afternoon of chocolate all over the kitchen fun day.
So make some bites to have and to share. Or if you, like me, are digging a hole to hide in, make a batch of bites to bring with you. That’s the beauty of cake covered in a harden chocolate shell, they travel really well. Simple lemon cake stuff. Flour, baking powder and salt whisked together, Sugar and soft butter in a bowl. An egg, some vanilla, milk, and of course, the lemon.
To make the batter, cream the soften butter with the sugar until light and fluffy. Zest lemon(1 big or 2 small) into bowl with the juice of the lemon(s), the vanilla and the egg. Beat until combined. Now beat in the dry and then the milk. Keep beating for another minute until all mixed. Batter should be light and fluffy.
Batter goes into a greased and floured 9×13 baking sheet and stuck into a 375 degree oven for about 30 minutes (You can use a 9×9 baking pan. Just bake fir another 10 minutes and you will end up with thicker bites). Remove from oven and let cool for a few minutes and flip to remove cake from baking sheet. Cut cake into small pieces (I cut 4×6 to get 24 bites) and place bake into sheet and into freezer (I stuck mine outside, it was -2 degrees ) for at least 2 hours.
Oh what a lovely sister I have.. Look at her dunk….. like a boss! Fully coated and placed on a rack for the chocolate to harden. I ended up sticking the rack in the freezer for 10 minutes…They harder really fast in there.
And now you have some it, bites of cake covered in chocolate. 1 bite, 2 bites…5 bites. Eat however many you want because its Friday and because there small little bites and just because you can.
Now if you need me, I’ll be in my hole.
-C
Chocolate Lemon Cake Bite
Add butter and sugar to a large bowl and beat on medium unit light and fluffy. Ass in vanilla egg, the zest of the lemon and the juice of the lemon. Beat to incorporate. Now beat in the dry and lastly the milk.
Grease and flour either a 9×9 pan or a 9×13 baking sheet. dump batter in and smooth out. Stick in oven and bake for about 3o minutes or until a toothpick stuck into the middle comes out clean. Remove and let cool for a few minutes on a wire rack. Flip cake to remove from pan. Cut cake into bit sized pieces, 4×6 is a good size, and place back on baking sheet and stick into freezer for at least 2 hours.
When cake bites are as good as frozen, get the chocolate ready. Take the chocolate and the coconut oil and either melt in a double boiler or the microwave. Mix until smooth and make sure to full incorporate the oil. Now remove the cake bites from the freezer and dip each bite into chocolate, trying to full coat all sides. Stick onto a wire rack or a parchment lined pan to harden. They can be stuck back into the freezer to harden faster.
Once chocolate has harden, your good to go!
First off.. Happy Saturday and Happy Valantines Day!
Once again, it is so F-ing cold out and I don’t want to leave my house! And because of the cold we decided to forgoing the traditional V day hike(kinda sad) but instead are going to just hang at home and watch movies. (which is actually kind of nice because now I get to stay all frumpy and warm , hanging out in my baggy old sweats and oversized sweater (so sexy right?)
Anyways.. being all cozy usually entails something warm and yummy to drink. Neither of us are really big on hot chocolate, (plus we don’t have the stuff to make it) and sure we could crack open the fancy bottle of wine we bought for dinner (4.99 Trader Joes Special!!!!) or we can save that and I can whip up something a little spicy sweet.
Warm winter lemonade!! We are both big on lemon in everything and I just bought a bunch of sweet meyers lemons, so I think it’s meant to be.
Sweet, a little spicy, and warning….Perfect for a day of cuddling on the couch or for something to warm you after being outside. Great for anyone who wants a little something tasty that isn’t chocolate or booze, even good for those that might be feeling a little under the weather. Kids and adults alike…. this winter lemonade works for it all.
So whip some up and stay warm!
And have a fantastic day!!!
-C
Warm Winter Lemonade
Serves 2
Slice lemon and place into a pot with water, cover, and bring to a boil. Once boiling, remove from heat and let sit for a minute or two. Transfer to a blender (or use a emulsifier) and blend until frothy. Place a tablespoon of the honey or whatever sweeter into each cup. (add more if you like) Strain lemon mixture in equal amounts into mugs. Stir and sprinkle with cinnamon.
If you don’t want to use the blender method, you can juice 1 lemon, split into two mugs , add sweetener and top with hot water.. Don’t forget the cinnamon!
The salad I made was a light, crisp, and citrusy thing of beauty. Not exactly what one would think to eat on a freezing my face off cold day, but hey, you can’t help what the body craves. Plus, if you make it for. lets say, a sister that is making french fries and hamburgers for dinner..then a light and citusy salad is just what you need. Feedback from the mouths that ate it….Fanstastic combo! Best Salad ever! Never going to eat anything else! Ok, not so dramatic, but this was a winner. And for real, this salad takes about five seconds to compile and all the ingredients are really accessible right now so really, why not?
Nice crisp kale. Thinly slices red onion for a nice bite. Orange for that sweet citrusy and juicy smack and avocado to add a perfect creamy finish. Lime to make it perfect.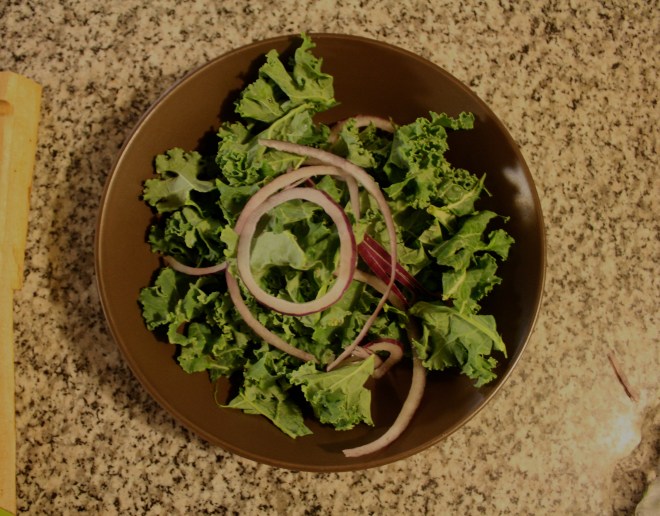 Start with the base layer of kale… then first goes the sliced onion. (Make sure it’s thinly sliced or else it will be to overpowering)
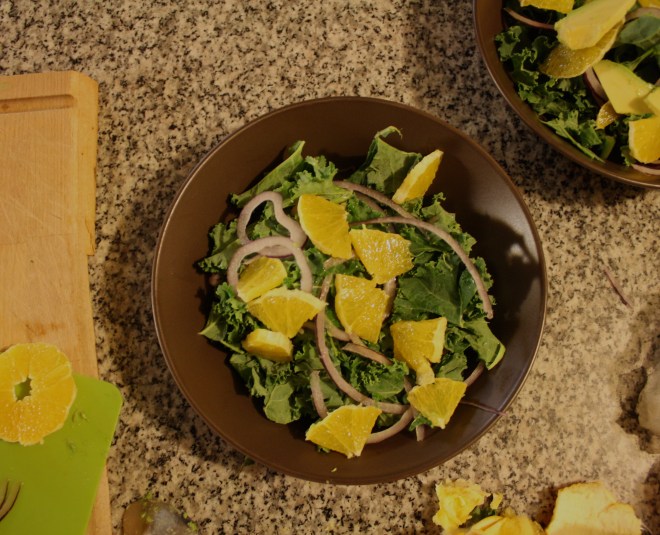 Add thinly sliced oranges…oh boy, your half way there!!!
Now you can stand back, take a picture, send to all your friends and make them jealous of you fantastically pretty and oh so delicious salad. They will ask, “What is that amazing looking dish you are eating?” Your response will be..”Check out the blog..the lovely crazy…and make it yourself! ” (yes, I am shamelessly plugging myself here)
Anyway, enjoy the day and try to keep warm!
-C
Citrus Avocado Salad (Makes 2)
Ingredients
Remove tough stems from kale and chop leaves into small month sized pieces. Thinly slice onion, peel and thinly slice orange and cut avocado into…yup you got it, thin slices.
Kale into bowls, top with onion, orange and avocado. Top with the juice of half a lime…Add a sprinkle of salt.