The past week was freaking gross hot, like sweaty, smelly, I want to live in the Costco walk in freezer hot. But today, well today was the most lovely day. A cool dry 70 with a nice breeze and sunshine. Then around dinnertime, a little bit of rain, followed by a rainbow. It was the most fantastic perfect weather.This is why I love living in Vermont. We get weather.
.Last night, dinner was all about trying to make some more room in the fridge for the farm share pick up tonight and to make something that I didn’t have to really watch. (the mr and I were moving the beehive to the roof of the house so I wanted to make something that I could leave on the stove and not have to babysit (just stir every now and then). With the weather being so freaking amazing, with a cool crispness in the air, I was craving something a little more on the warm and comfy side. And what do you know, the stuff I had left in the fridge (there is still a basket of zucchini on the table) was what was needed for a big pot of stewed summer ratatouille with lentils. It was everthing that I ever could need and want for a meal. Full of the best veggies and lentils, easy to make, nothing fancy to do. Just stick stuff into a pot and cook until done.
Cooler, light long sleeve, kind of weather. Enough rain where I didn’t have to water the garden, the most perfect pot of the best ratatouille shared with the mr. and a feeling of accomplishment and excitement (bees on the roof!).
The perfect night.
The stuff. Zucchini, yellow summer squash, eggplant, onion, tomatoes and lentils. And we have some fresh basil, fresh oregano, balsamic vinegar, olive oil, and some salt and pepper.
To get this party started, chop up the onion and toss it into a big heavy pot with a little olive oil and a sprinkle of salt. Stick on the stove on medium heat.
While the onions are cooking, mince up the garlic and chop up all the other veggie into medium sized chunks.
When the onions start to become translucent and smell fantastic, add in all the veggies and garlic. Give it a big stir and place back on the stove to cook for a few minutes to let the veggies release some of their liquid.
Then add in the lentils along with a equal amount of water and top with a lid.
After about 30 minutes, the lentils should be near done and the veggies tender, the tomatoes pretty much dissolved. Now chop up the basil and oregano and toss it in along with a few swigs of the balsamic vinegar. Give it a stir and keep on cooking for another 10ish more minutes or until the lentils are nice and tender.
Scoop onto bowl then into mouth. If you like, finish off with a bit more fresh basil or,ike the mr, top with parmesan cheese.
Have a fantastic day! So close to the weekend!!
-C
Makes 2-3 big servings (if serving with pastas or rice, its more like 4-5 servings)
1 medium zucchini
1 medium yellow summer squash
i medium onion
1 small eggplant
3-4 cloves garlic
1 cup dried lentils
1/2 cup water
3 medium to large tomatoes
handful fresh basil leaves
a few glugs of balsamic vinegar
couple sprigs of fresh oregano
olive oil
salt and pepper
Drizzle a little olive oil into a large pot. Dice up the onion and place on medium heat and cook for a few minutes. Mince up the garlic and chop up the remaining veggies into medium sized pieces. Once the onion is cooke a bit and strting to smell oh so nice, toss the veggies and garlic into the pot. Mix, sprinkle with salt and pepper and place a lid on it. Cook for a few minutes to draw out a bit of liquid from the veggies. Now add in the lentils and the water. Stick the lid back on and let cook for about 30 minutes on medium low heat or until the lentils are starting to soften.
When the lentils are mostly soft, but still have a bit of biet, dice the fresh herbs and toss into pot with a few swings of balsamic vinegar. Stir and cook for another 8-10 minutes or until the lentils are full cooked.
Remove from heat and ladle into bowls..
Serve with rice, pasta, bread, a big old pile of fresh greens, or just as it is.
Eats fantastic right aways, or cold late at night standing in front of the fridge..
This past weekend, the mr and I were out and about in the sticks of Vermont and got an eyeful of this very familiar sight of corn fields forever. It’s just part of the landscape.. Blue sky, big lush mountains, little rives and big fields of corn. It is ever so lovely… and so telling. Tall high corn fields just means two things. 1.We will be eating lots of corn, and, 2. the summer is winding down. So soon we will be talking apples and root veggies, but until then, we will just eat the corn and revel in what I consider one of the best and most beautiful times of the year here in Vermont.
And after seeing all the corn (and we have been getting a bunch in the farmshare) I realized that I need to step up my corn game.
What better why to fancy up some corn then to fancy up the stuff people like to smother on it…. butter.
Whenever I think about butter, I think about my sister, the one that, as a little kid, used sneak to the kitchen and eat whole sticks of butter. This (to me) just seemed like a pretty gross option for a snack, but you know, whatever floats your boat I guess.
Bur after making making this coconut butter, I can see the draw, for I would sure love to eat the entire contents of a jar of this butter. (I have been eating a spoonful here and there)
Lime cilantro coconut butter.. Its my new thing…corn or not.
The stuff. We have some lovely, super fresh from the farm, corn on the cob. Then for the coconut butter we have , unsweetended coconut flakes, a lime, som ecilantro and salt.
Dump coconut flakes into a food processor. Turn to on and let it go.
After about 7 minutes… you coconut will start to clump together and look like this. And maybe you are like, “this shit isn’t going to happen”.. well be patent. Scrap the coconut off the sides and keep the processor going.. scraping down the sides whenever you need to.
And eventually, after another 8-10 minutes, it will turn into this.. a nice creamy buttery butter.
Now add in the zest of the lime, the lime juice, a pinch of salt, and cilantro into the butter. Turn processor back on until combined.
And you got yourself some freak yeah cilantro lime coconut butter… ready to smother your corn with.
This amount is good for 6-8 corn cobs… Any extra is excitlent on any veggies, bread, cake, or spoon.
And stick that butter in a jar.
I dare you not to eat a spoonful right now. (I licked the bowl down clean)
So I hope I am not being presumptuous when I think that you know how to cook corn. Or maybe you have a specific way you like to cook your corn. But just in case, husk corn and stick either in a pot and boil until cooked,(about 8-10 minutes) or like me, char on the grill, or under the broiler.
So cook some corn….And smother it with the butter.
And there you have it, some freak yeah amazing lime cilantro coconut butter smothered on some corn.
So good…..so good.
Have a great day!
-C
1 1/2 cups dried unsweetened coconut flakes
1 lime
1/2 bunch of fresh cilantro (about a 1/4 cup chopped)
salt
1 tablespoon coconut oil (optional)
freshly cooked corn on the cob
Note. Any extra butter is good on anything and everyhitng!!!
Place coconut into a food prosser and turn to on. Prosse until coconut start to stick to sides. Stop, scrap down bowl, then conuitne to process. Repet this until the coconut has turned into a creamy buttery goodness.
Add the juice, the zest, a pinch of salt, and the cilantro to the butter. Pulse until combined. If you want to add in a little coconut oil here to make it a little smoother, go for it.
Scoop into a jar. When your corn is hot and ready, smother butter all over.
And eat. There swill be stuff stuck in your teeth..Don’t worry about it. Think of it as a snack for later.
Every year, the second weekend in August, the Stem family , siblings, cousins, even my 94 year old grandmother makes the trip from Easton PA, come together at, what we call, “the cabin.” (It’s more a house, but it started out as a cabin) . Its a little crazy, but such a good fun time.
This cabin, oh this place is magic. The air, the tree’s the streams, the mountains, and of course the people. It’s all the things that I love about life. Some of my earliest memories are from this place. Hanging out with my siblings, running around the meadow or through the woods. Playing in the swinging holes. My grandfather pulling taffy or making orange juice box houses with my grandmother. The giant rocking chair that my uncle made and all of us kids used to play on. So many camp fires and s mores. There are just so many memories because it’s been a part of my life, my whole life. It’s one of my favorite places in the world.
A little background on the place (what I can remember) Sometime in the late 70’s, my uncle and my grandparents bought a big chunk of land on the side of a mountain in the middle of nowhere Vt. After doing some clearing of trees, they went to building a cabin. (my aunt, grandmother, and dad helped a bit too). It was amazing, but quaint. A 2 story situation with a kitchen living area and one door to get in and out. At some point my grandparent ended up selling their share to my uncle and he took over the entry of the place. Over the years my uncle, (who is a carpenter, furniture designer,design professor, and all out crazy amazing person), continured to work on the place. He has added on a kitchen, a second floor bathroom, new this, and that, but never has it once felt like a patchworker pieced together place. And now the place is more like a amazing craftsman home, with just the right touches of cabin, but with two running toilets, a beautiful kitchen, electricity and running water ( There is even internet access, which sucks, but still).It is a little gem nestled on a side of a tiny mountain in one the most beautiful places.
So an awesome cabin in the woods with a bunch of crazy, but awesome people= Stem family reunion.
I probabaly have already told you, but August is for sure my favorite month of the year (well,one of my favorites)
There is bounties of bounties of fresh, sweet and colorful, oh so juicy, crispy crisp, just so f ing amazing, produce exploding all over the place. I have probably gained like 75 thousand pounds in the past month due to all of the fruits and veggies that I have been consuming. I am starting to consider it a full time job just to keep up with the eating.
Another reason why I love August so much is becauuse the days are still nice and warm, but the nights are starting to cool which means I get to make so much soup!!!!!.
This soup is the freshest freshy soup yet. Everything is from the farm and or the garden (except the salt pepper, vinegar and oil), some picked within hours of me making this.
. I am a lucky/spolied veggie brat.
Anyways. This soup. The fresh tomato base gives it a sweet, slightly acidic kick. So super creamy due to the lovely earthy stocks of the chard. Slightly spicy and earthy from the arugula* and chard green green. This soup… it just tastes so fresh and clean, yet hearty and satisfying. A perfect soup for a mid August night, eating outside, watching the sun slide behind the mountains and the temperature dropping just enough that you might want a light sweater. Or you can just eat it from the pot in the kitchen while watching TV. It’s good eating anyway you want.
*Here in America, it’s called arugula. Else where , it’s called rocket. I wish we all called it rocket, although I do like the name arugula, but for like my first born child or maybe a pet goldfish. Anyway, rocket is arugula, or vice versa.
Soup time!.
The stuff. Some big fresh tomatoes, a few stalks of chard, and a few handfuls of arugaula (aka rocket). A couple carrots, an onion, some garlic, salt and pepper and a bit of olive oil.. Oh, and I added some balsamic vinegar, which for some reason didn’t make it into the picture (sorry vinegar)
Start by removing the chard leaves from the stalks. Set aside leave with the arugula. Chop up the carrot, chard stems, onion and garlic and toss into a big pot with a drizzle of olive oil, a splash of water, and a sprinkle of salt and pepper. Stir around and stick o nthe stove on medium heat for about 10 minutes until the veggies start to soften up.
Now chop up the tomatoes into chunks and toss those right into the pot with the other stuff. Add in a few cups water and a few glugs of balazmic vinegar. Bring everything to a boil and then turn heat to medium low and place a lid on pot and let cook at medium heat for another 20 ish minutes, or until the tomatoes are falling apart.
Now that everything is all cooked up, blend it up.
And now take the chard leaves and the aruglula and chop into little pieces….into the pot they go.
Mix it all up.. and take the blender to the soup again….if you want a smaller sized bite.
Soup Into bowls..Then into mouth.
Happy August!!
And hey hey hey.. Have the best weekend!
-C
4-5 large fresh tomatoes
4 large stalks of rainbow chard
2-3 big handfuls of arugula
1 medium onion
1 large or 2 small carrots
4-5 garlic cloves
2-3glugs (about 2 tablespoons) balsamic vinegar
3 cups water
olive oil
salt and pepper
To start, remove stalks of chard from leaves and chop stalks, onion, carrot and garlic into chunks and place int a big pot with a drizzle of olive oil, a splash or water, and spinkle of salt and pepper. Place on stove on medium low heat sand cooke the veggies down until starting to soften and garlic is becoming fragrant. While that cooking, remove core from tomatoes and dice them up. Toss into pot with the cooked down veggies with the vinegar and water. Place a lid on the pot and let cook for about 20-25 minutes or until the tomatoes are falling apart.
When cooked, using with a hand blender or a normal blender, blend the soup until smooth. (if using blender, pour back into pot)
Now take the arugula and chard leaves and chop them into wee little picese and mix into soup. If you want to, blend the greens into the soup.. but not until smooth, unless thats what you want. Cook for another 5 minutes. Taste and season with more salt and pepper to taste.
Ladle into bowl and serve with lots of fresh cracked pepper, maybe a little balsamic drizzle or even some mustard (I at left overs with mustard and it rocked my world)
spoons work eel las eating utencils.
And now the cucumbers are growing shit crazy.
Every time I open the fridge, at least one (if not a few) come falling out from all the places that I have managed to squeeze them in. (the egg tray in the door is not a safe place for cucumbers) This is a slight problem, but a problem that I kind of like having.
This past weekend I had planned on doing a bunch of pickling and canning. Like a whole day of music blasting, dancing around the kitchen in a cute little apron with wooden spoon in hand, (pretending its a microphone) canning all sorts of fruits and veggies that a piling up in massive amounts for the winter months.
That didn’t happen, and I still have a million cucumbers and not a whole heck of a lot of time this week to inact my canning day day dream.
My simple solution. Cut um up, stick in a bowl with a some fresh dill, a lithe vinegar and leave them on the counter….. And watch as they disappear. It’s crazy. I find if you leave a bowl of cut up anything on the counter, anyone that walks by will stop and eat a few pieces (if not the whole bowl) It’s a scientific fact (no not really, but maybe)
As for my blissful canning day. It will be happening soon. But until then, this is the way to go with those all those cucks. (this works fantastic will zucchinis too!)
The stuff. Cucumbers, onion, fresh dill, salt, pepper, and red wine vinegar.
Slice up the cucumber and onion and toss into a bowl. Spinkle with salt, pepper, and lots of fresh chopped up dill. Splash in the vinegar and toss it all around.
Let it sit on the counter for at least 2 minutes, but the longer they sit, the more pickley they taste.
And eat. Leave on the counter until they are all gone..which won’t take too long.
Enjoy the Tuesday!
-C
2-3 medium to large cucumbers
1 medium sweet onion
a bunch of fresh dill
salt and pepper (fresh cracked is best)
red wine vinegar
Slice cucumber and onion into thin slices. and stick in a big bowl. Sprinkle with salt. pepper, chopped up dill. Pour on a few glugs of vinegar. Toss around, taste and adjust seasoning if needed and let sit on the counter for a few minute… or as long as you want*.
Eat all day long or until they are gone.
IF there are still cucumbers left over after 2 hours and you are worried about leaving food out all day (I don’t worry, but that’s me), stick in the fridge until you ar ready to eat them.
No matter what is going on in my day, seeing a blue sky like this puts a smile on my face….To bad that smile turned to ice and my face froze in place. Because for some reason, winter around here now means below zero all the time. I mean, I love winter, but I am not going to lie… I wouldn’t mind if the wind would stop blowing and we had a couple of days of above zero weather.. and maybe a good foot of snow. I guess I’ll just have to be patient, cause its bound to happen. I mean, we live in Vermont, and if nothing else, we get weather.
Anyways.. another week full of stuff that fills. I am a little taken aback that its already February… when was it January? Time just keeps going by fast and faster, (especially when I get cabin fever) and I think, “What have I done in the past year?” Well, I have done a lot. I was just looking through pictures from a year ago and found some of our tiny home in working progress. Not to many people can remodel a five unit house and a meat locker to live in, within a year.. by ourselves. (ourselves being Nick and I)..So yeah, that made me feel pretty freaking awesome and accomplished. (I needed to remember that because I haven’t been feeling it) But now I am feeling inspired and am looking forward to some new projects and fun things to come! (hopefully getting my pottery studio up and running, maybe another house remodel and lots of traveling!!…. take that winter blues!)
Anyway.. here are a few little bits from my week that made me happy.
The mister called these snow mounds goosebumps… I think that is exactly what they are
The only warm day this week. (20..woo whoo!) Took the little out for a sled ride. She spent the entire time dragging her hands in the fresh snow.
And oh how I cannot handle how freaking cute she is!! Plus, a shout out to my brother in law….MADLOVE!
Fresh snow..Even though it was -15, I had to stop and take this picture. The colors were amazing
Cabbage at the farm share pick up! Love ICF!!!
89 cents a pound for fresh organic cranberries. Score!! Made these Oatmeal fresh cranberry coconut chocolate chip cookies with them. Big hit.
This picture was taken exactly a year ago…..The mister and I were finally putting in the bathroom of our tiny little home…. And look at that awesome sink! (another amazing salvage yard find) If you ever need or want to remodel a bathroom, I suggest using a old cast iron utility sink. So practical, so functional, so pretty.….it makes me happy everyday!
Happy Sunday!
Happy February!
And if you are into it….
Happy Football Super bowl Game and or party! ( If you need any awesome fast party recipes, I have bunch, just check out the recipes page!)
-C
Another cold and blustery week… but it’s the middle of January in Vermont so its to be expected.( I just wish I could walk outside for more than 5 minutes without my nose ruining and having the snot freeze to my face) Yup, cold and busy. My Dad has come back to Vermont for a long visit (he moved to Michigan a few years ago… jerk) So while he is here I have been trying to put in as much time as possible with him all the while trying to do 8 million other things, I figured I owe him a little bit of my time (and lots of food) for helping to raise me…I am such a good daughter. (2 thumbs pointed at me with a big smirk..)
Let me take you through a few little happy highlights of my week.
The father and I went for a little hike with the pup on one of the milder temperature days… I drove to the trail, locked the car doors and off we went. After getting cold enough where I couldn’t feel my hands-feet-face… we made our way back to the car. And I reached for the keys…and shuffled around in my pockets….and felt around in all my pockets again…. and again. Finally, I had to admit it, I dropped the keys. I got a little panicky (I was so cold and the car key is like 300 bucks to replace) but we did the only thing we could do. I stuff everything back in my pockets and off we went in search of the key. We got lucky, my dad found the key only a few minutes into the trail!!! Hooray! A happy hike with a happy ending.
Me and this little made some donuts, but screw the donuts(sweet potato with chocolate frosting).. look at the overalls! I decided a long time ago that when I have kids, they will be wearing nothing but overalls. Osh Gosh FOREVER!
FARM SHARE PICK UP!!! I was starting to go through veggie withdrawals.
Shadow hearts for Valentines Day! I love Valentines Day..… or maybe I just love hearts and pink. Either way, I am getting ready for some V-day recipes! This one is a definite go….
And beet dyed coconut sprinkles…I mean, talk about happy.
A late Christmas gift from Nicks mom. Every year she gives us s few of her hand thrown pieces….. love!!
And I gave the mister a haircut!!! He has been asking me for about 2 months now to cut it, but for some reason we just haven’t gotten around to it. So finally this week it happened, and I can see his lovely face again!
How can you not be happy when your piece of ginger looks like a little man. (right after I took this picture I cut his legs off)
Flowers from our garden last summer….. Sunflowers are my favorite (these are teddy bear sunflowers)…. I love looking back at old picture, especially ones from opposite seasons, like flowers in winter or pictures of snow in summer. There like little glimpses of whats to come. I can not say it enough, I am so lucky to live in VT..we have excellent seasons so there is always something to look forward too!
So yeah, a few little happy happys…..
Hope you all have some happy happys too!
-C
For the past few days I have heard more complaining then happy. The biggest complaint…tummy issues. A week of gorging on heavy, rich, and indulgent foods is finally catching up with people, turning them into grump asses. I can handle a little grump, but its time to get get out of that funk and take care and stop bitching. May I make a suggestion? Eat this… You will be happy. Your body will feel clean and nurised. Your tummy will get back on track. It what I call satisfaction This salad is a complete meal .Chopped and shredded veggies atop a small heap of quinoa, tossed on a handful of lentils and topped with a dollop of lime avocado… Thats it and it is good. For the sake of picture-taking, I made a plate look all nice and pretty, with layers of colors, but to be honest with you, I rather toss into a big bowl, grab a moderately large-sized fork and food to face… and it’s just as pretty.(the bowl of food is pretty, not food on my face) Quick note: the vegetables that I used here are what I had at home. If you don’t have one or two of these specific veggies, don’t worry about it. Sub in something else, like pepper or spinach., Still have extra brussel sprouts, green beans or asparagus from thanksgiving? Go ahead and use those. If there is a specific veggie you know your stomach doesn’t tolerate well, then maybe avoid using it. This is a happy feel good salad!A pile of vegetables is always a good start to any meal, especially these veggies.. All but the avocado came from my farm share. This is one local organic meal of love.
Green Kale, purple cabbage, beets, red onion, carrots…I did a little shredding and some grating. I like to have different sized and textures in a salad.
Oh whats this? Diced butternut squash(from farm) sprinkle with salt and pepper waiting to be roasted. I am a huge believer in squash on salads…especially in a cold Vermont winter. A little bit of heartiness can really go along way. Quinoa.. 1 part quinoa to 2 parts water..Bring to a boil and let simmer until light and fluffy. When I make quinoa, I always make more than is going to be eaten, its great to have pre made for any meal. Quinoa goes with everything, even a sprinkle of cinnamon and diced up apple for a nice breakfast or snack. I was making this for dinner for my mister who sometimes doesn’t tolerate so many super raw veggies. So what I did and I recommend doing if you are worried about to many raw veggies at once, is to give them a really quick vinegar braise. I throw the veggie in a pan and drizzled red wine vinegar(you can use any vinegar you like) . Stuck a top on it and stuck it on the burner for a few minutes until the vinegar was gone. It just barely softens the veggies and helps infuse the vinegar.Also a little easier for some to digest. Me, I like to eat it completely raw. Barely steamed kale, just enough to soften it. Again. raw is awesome too. Half a lime, half an avocado and a clove or two of garlic… guacamole…Call it what you will.
Salad contstruction… Quinoa. Kale. Cabbage, onion and beets. Butternut squash. Carrots. Lentils and a nice sized scoop of avocado. But like I said, Bowl…,fork….. face. Tastes just as good. A super salad, full of flavor and healthy stuff, A salad that will fill you up, leave you feeling full, not gross. and is quite the looker if you ask me.
Super Salad
1/4 cup Quinoa
1/4 roasted Butternut squash
2-3 large Kale leaves
1/2 cup shredded Red Cabbage
1/4 grated Beet
1/8 cup sliced Red onion
1/4 cup grated Carrot
1/4 prepared lentils
1/4 of an Avocado
1/2 a lime
garlic
vinegar
salt and pepper
This is the list of stuff that is in this salad. This is not a recipe that need to be exact.. Use more of something you like, omit whatever you don’t. Just keep it simple and delicious. Dice up butternut into small pieces, place on baking sheet and roast till tender. Add quinoa to water, bring to boil, then turn down to simmer tip light ad fluffy. If you want steamed kale, stick kale in pot with a i/2 inch water and lid, and place on high for about 2 minutes, just until kale ha soften. The squash is roasting,(the smaller the pieces, the faster it goes) quinoa is cooking and kale is soften,. Now grate or chop you veggies. Want them less than raw, place in pan with a bit of vinegar or just water and stick a lid on it. Medium heat for a few minutes, or until the veggies are slightly soften.. Dont over cook, you still want the veggies to have a bite and keep the good for you stuff. Take avocado, chopped garlic and half lime and mash together. Now everything is prepared and ready..Place strategically in a bowl or plate, quinoa, kale, squab, cabbage,beets, onion, carrots, lentils, avocado, drizzle with straight up vinegar.……..Or just throw it all together. Fork to FACE!!!
I probabaly have already told you, but August is for sure my favorite month of the year (well,one of my favorites)
There is bounties of bounties of fresh, sweet and colorful, oh so juicy, crispy crisp, just so f ing amazing, produce exploding all over the place. I have probably gained like 75 thousand pounds in the past month due to all of the fruits and veggies that I have been consuming. I am starting to consider it a full time job just to keep up with the eating.
Another reason why I love August so much is becauuse the days are still nice and warm, but the nights are starting to cool which means I get to make so much soup!!!!!.
This soup is the freshest freshy soup yet. Everything is from the farm and or the garden (except the salt pepper, vinegar and oil), some picked within hours of me making this.
. I am a lucky/spolied veggie brat.
Anyways. This soup. The fresh tomato base gives it a sweet, slightly acidic kick. So super creamy due to the lovely earthy stocks of the chard. Slightly spicy and earthy from the arugula* and chard green green. This soup… it just tastes so fresh and clean, yet hearty and satisfying. A perfect soup for a mid August night, eating outside, watching the sun slide behind the mountains and the temperature dropping just enough that you might want a light sweater. Or you can just eat it from the pot in the kitchen while watching TV. It’s good eating anyway you want.
*Here in America, it’s called arugula. Else where , it’s called rocket. I wish we all called it rocket, although I do like the name arugula, but for like my first born child or maybe a pet goldfish. Anyway, rocket is arugula, or vice versa.
Soup time!.
The stuff. Some big fresh tomatoes, a few stalks of chard, and a few handfuls of arugaula (aka rocket). A couple carrots, an onion, some garlic, salt and pepper and a bit of olive oil.. Oh, and I added some balsamic vinegar, which for some reason didn’t make it into the picture (sorry vinegar)
Start by removing the chard leaves from the stalks. Set aside leave with the arugula. Chop up the carrot, chard stems, onion and garlic and toss into a big pot with a drizzle of olive oil, a splash of water, and a sprinkle of salt and pepper. Stir around and stick o nthe stove on medium heat for about 10 minutes until the veggies start to soften up.
Now chop up the tomatoes into chunks and toss those right into the pot with the other stuff. Add in a few cups water and a few glugs of balazmic vinegar. Bring everything to a boil and then turn heat to medium low and place a lid on pot and let cook at medium heat for another 20 ish minutes, or until the tomatoes are falling apart.
Now that everything is all cooked up, blend it up.
And now take the chard leaves and the aruglula and chop into little pieces….into the pot they go.
Mix it all up.. and take the blender to the soup again….if you want a smaller sized bite.
Soup Into bowls..Then into mouth.
Happy August!!
And hey hey hey.. Have the best weekend!
-C
4-5 large fresh tomatoes
4 large stalks of rainbow chard
2-3 big handfuls of arugula
1 medium onion
1 large or 2 small carrots
4-5 garlic cloves
2-3glugs (about 2 tablespoons) balsamic vinegar
3 cups water
olive oil
salt and pepper
To start, remove stalks of chard from leaves and chop stalks, onion, carrot and garlic into chunks and place int a big pot with a drizzle of olive oil, a splash or water, and spinkle of salt and pepper. Place on stove on medium low heat sand cooke the veggies down until starting to soften and garlic is becoming fragrant. While that cooking, remove core from tomatoes and dice them up. Toss into pot with the cooked down veggies with the vinegar and water. Place a lid on the pot and let cook for about 20-25 minutes or until the tomatoes are falling apart.
When cooked, using with a hand blender or a normal blender, blend the soup until smooth. (if using blender, pour back into pot)
Now take the arugula and chard leaves and chop them into wee little picese and mix into soup. If you want to, blend the greens into the soup.. but not until smooth, unless thats what you want. Cook for another 5 minutes. Taste and season with more salt and pepper to taste.
Ladle into bowl and serve with lots of fresh cracked pepper, maybe a little balsamic drizzle or even some mustard (I at left overs with mustard and it rocked my world)
Last week pineapples were on sale everywhere……So I bought 5. Don’t judge
And I bet I am not the only one that got overly excited at $1.50 pineapple and bough themselves a few. We will just call ourselves opportunists. Now we have plenty of pineapples and don’t have to pay the $4 a piece prices. (Justification)
But if you don’t have a pineapple laying around, you must go get one. (Maybe if your lucky, there might still be some sales going on) because you must make this salad. I am on a mission to make everyone I know eat it because, for lake of a better way to say it…….It will rock your world.
Dill and pineapple are a serious match made in heaven. Pineapple, with its sweet, tangy, citrusness and dill with it’s super fresh earthiness. Mixed together with a few other helpers to create a fresh, clean, chunky, tangy, over the top, flavor. I could stop right there, but toss in a handful of lentils, some creamy avocado and a bed of kale…It’s like the best spring time, celebration on you tongue, happiness in you tummy, kind of salad.
A salad that will make you smile. (and maybe buy 5 pineapples)
Stuff for the goodness. We got the kale, some avocado because all salads should have avocado and some cooked lentils because, well, all salads should have lentils (or beans or nuts.. so you could totally something else) Then a few sprigs of fresh dill, a clove of garlic, red wine vinegar, salt and a bowl of chunked up pineapple. The pineapple, dill, garlic, red wine vinegar, a splash of water and a pinch of salt get blended in a blender or whatever blending device you use. Go as smooth or chunky as you like, I recommend going smooth, but leaving a little chunk, like half blended.
The prep is done, now compile. Kale in bowl, top with lentils,. Toss on avocado chunks, and, last but not least, the blended pineapple dill mixture.So good……So so good.
Happy Friday!!
-C
So Good Pineapple Dill Kale Salad
Serves Two
3 cups washed and chopped Kale
1/2 a avocado, diced
1 cup fresh pineapple chunks
1-2 springs fresh dill
1 tablespoon Red Wine Vinegar
Salt
1/2 cup cooked lentils (or any bean or nut will do)
Note. No fresh dill? You can use dried, just sub in 1 teaspoon for the fresh and after blending with the pineapple, let sit a little longer to really let the flavors meld together.
Place pineapple, dill, pinch of salt, vinegar and garlic into a blender or whatever you own that blends and blend stuff together, leaving it a little chunky. Let sit for 5-10 minutes.
Kale goes into a bowl and add the lentils and diced avocado. Pour the blended pineapple on. Toss around.
Whenever me and the mister get invited / show up for dinner at someone’s house, I like to bring at least one thing to contribute to the meal. First, because I am nice like that. Secondly, because I get to make food for other people besides Nick and get new feedback on recipes. (Sometimes I think he tells me things taste amazing when they might not) And thirdly, its nice to mess up someone else’s kitchen besides my own. So last night we went to my sisters and I made a salad. A very easy and virtually mess free salad…….I still made a mess (I cleaned it up myself!)
The salad I made was a light, crisp, and citrusy thing of beauty. Not exactly what one would think to eat on a freezing my face off cold day, but hey, you can’t help what the body craves. Plus, if you make it for. lets say, a sister that is making french fries and hamburgers for dinner..then a light and citusy salad is just what you need. Feedback from the mouths that ate it….Fanstastic combo! Best Salad ever! Never going to eat anything else! Ok, not so dramatic, but this was a winner. And for real, this salad takes about five seconds to compile and all the ingredients are really accessible right now so really, why not?
Nice crisp kale. Thinly slices red onion for a nice bite. Orange for that sweet citrusy and juicy smack and avocado to add a perfect creamy finish. Lime to make it perfect. Start with the base layer of kale… then first goes the sliced onion. (Make sure it’s thinly sliced or else it will be to overpowering) Add thinly sliced oranges…oh boy, your half way there!!!
Top with thinly sliced avocado, a sprinkle of salt and drizzle with lime juice. I also served with an extra wedge of lime, there is never too much lime.
Now you can stand back, take a picture, send to all your friends and make them jealous of you fantastically pretty and oh so delicious salad. They will ask, “What is that amazing looking dish you are eating?” Your response will be..”Check out the blog..the lovely crazy…and make it yourself! ” (yes, I am shamelessly plugging myself here)
Anyway, enjoy the day and try to keep warm!
-C
Citrus Avocado Salad (Makes 2)
Ingredients
A few good handfuls of kale leaves
1 orange
1 avocado
1 lime
1/2 a red onion
Remove tough stems from kale and chop leaves into small month sized pieces. Thinly slice onion, peel and thinly slice orange and cut avocado into…yup you got it, thin slices.
Kale into bowls, top with onion, orange and avocado. Top with the juice of half a lime…Add a sprinkle of salt.
Guess what guys ….I got myself a sick vintage waffle/ griddle iron. I couldn’t be more thrilled!!! I found this thing at the local recycled goods store the other day, along with a very beautiful old white pyrex mixing bowl. It was one of my best thrift store scores! (Checking out the inventory and the condition of all the old things that day, I would say an old lady had just died and all her perfectly keep, mint condition kitchen stuff had just been donated. But it’s cool, cause I get the feeling that she was at least 90, with a big loving family, and was happy until the day she died. And I am sure she would be pleased that I have taken over the waffle maker. Thanks old lady!)
And now I am pretty sure that everything I make for the next week will be cooked on said waffle/griddle. I am serious, I already have a list of things to try and cook on it; cookies, biscuits, granola bars, potatoes, fruit, some type of pasta situations…. the list of possibilities is endless and I bet that at least 1/2 of these things will be totally awesome and amazing.
But first thing first. I need to make dinner.
So waffles for dinner!!
Note. These waffles are completely 100% fantastic for any meal you want to make them for. They consist of nothing more then beans, a shit ton of veggies, and just a bit of cornmeal. But don’t let that fool you because they are super packed full of so much flavor, have a really soft tender inside, with a nice crispy outside and are so super pretty. They are wonderful! The stuff. First, we got a big old pile of shredded up veggies which include; carrot, beet, sweet potato, onion, parsnip, celeriac, and a little bit of kale. A we got a bowl of rinsed and strained white beans, a little bit of cornmeal and salt, pepper, and garlic powder.
The makings of something amazing!Before you do anything. get your waffle iron out and preheat it.
While thats going on, take you beans, add 3/4 cup water and puree until smooth with whatever blending device want to like to use. (I used my hand blender…less to clean)Now collect all the shredded veggies and dump into a big bowl with the bean puree, the spices and the cornmeal. Mix until combined. The batter should be thick, but not dry. If its seems to wet, add more corn meal, or too dry, add a little more water.
Note how my batter turned a magical pink… I love beets, they make everything pretty! And check out that bowl!When your waffle iron is preheated, oil it if needed (if your not sure, add a little oil just to really make sure your waffles don’t stick) and take appropriate size spoonfuls of the batter and stick on iron. Close it and wait…..My iron has a little light that turns on when the waffles are done cooking, so I waited patiently (ok iI did open it a few time) until light tuned on and removed the perfectly cooked waffles.
Did I mention how awesome my new/old vintage iron is?
SO AWESOME!!
I made a little gaucamole and gave the mister and little bowl of plain Greek yogurt with lemon juice, but feel free to top, drizzle, or dump whatever you want onto these beauties…
Happy waffle Wednesday!!!
-C
Veggie Bean Wonder Waffles
Makes 8-10 waffles (in my iron) feeds 2-3 peeps
1 small carrot shredded
1 small parsnip shredded
1/2 a small celeriac root
1 small beet shredded
2 kale leaves chopped into tiny bits
1/2 an onion, shredded
1/2 a small sweet potato shredded
1/2 cup cornmeal
2 cups(or 1 can) cooked, rinsed and strained white beans
2 teaspoons garlic powder
teaspoon each salt and pepper
oil for iron(if needed)
Note on veggies… I used what I had in the fridge and shredded, it came to about 3 cups. If you don’t have these specific veggies or only want to use a few.. go for it. Just make sure to have 3 cups of whatever veggies you use.
Take you beans and blend them up with whatever device you would like to use. Once creamy, add to a bowl with the rest of the ingredients. Stir until combined.
Once the waffle iron is preheated, oil it( if needed) and place the recommended amount of batter right on it there. Close and cook until golden brown and waffly.
Serve on a plate with topping of your choice, A few suggestions.. Guacamole, salsa, hummus, mustard, greek yogurt… anything that tastes good to you.
Eat as breakfast, lunch or dinner…
Fork into face
I figured now is a good time to get this recipe out there before we get to far into spring and summer recipes because there is going to be a lot of banana ice cream filled recipe coming and I figured its a good idea to have the basic banana ice cream recipe ready for people to refer too. And because I made so much fantastic naner ice cream, I also made a cookies and cream naner ice cream for my sisters and the mister.
Comments that I got from my sisters and the mister when I made them this ice cream
-Sister one.”I give this my sister seal of approval.. It’s so good. The first dessert you have made that I liked! (not including all the other desserts that you have made that I liked)”
-Sister two- “Wow.. it looks like ice cream and feels like ice cream and tastes like ice cream.. You should make me this ice cream!” (I was confused too because I was pretty sure I just made her some)
-The mister- “I am so excited for my new fly fishing pole!”
Ok, so the naner ice cream isn’t new to the mister and he IS very much excited for his new fly fish pole. So excited that he forgot to tell me how amazing that I am and to thank me for making him a big bowl of yumminess. (It’s ok, I forgive him)
And yes, this is probably one of the easiest, most delicious, healthy and amazing frozen dessert that you will ever eat. You will probably find yourself buying mass amounts of bananas and stocking the freezer until things just start falling out. (which is also ok because it’s only bananas and you can’t have too many frozen bananas)
The stuff you need for this ice cream…. Nice and ripe bananas, peeled and then frozen* That’s it.
To make it, place frozen bananas into food processor and hit the on button. Process the crap out of the namers until nice and silky smooth.
*Note, the smaller the frozen chunks are , the faster and maybe a little easier for the blender to blend the naners into ice cream. So if you think of it, chop bananas into pieces before freezing or even after.
After all blended and smooth, either eat right away or scoop ice cream into a freezer safe container and stick in freezer. That’s the banana ice cream… And it is amazing and so so so so so addictive. I make a batch, think I am only going to eat a scoop, then find myself eating half of what I have made, but it’s ok cause it’s only bananas.
Now for the cookies and cream banana ice cream..One batch of banana ice cream, either freshly made, still in food processor or made ahead and placed in a food processor and given a good pulse to smooth it up.
Add cookies in, crushing a bit beforehand and pulse till combined. Now you have cookies and cream naner ice cream…. and everybody is happy.
Scoop into a cup, a bowl, a freezer safe container, or directly into your mouth. Be careful…. You can still get brain freeze from eating naner ice cream too fast!
Keep it real hump day drum bum!
-C
Basic Banana Ice Cream
Makes one batch. Good for 3-4 servings
4-5 ripe bananas peeled and frozen
Peel bananas and stick in a freezer bag or container and freeze. When bananas are completely frozen, break into pieces and stick into a food processor or blender and puree until silky smooth.
Eat right away or scoop into a freezer safe container for later.
Cookies and Cream Banana Ice Cream
1 batch banana ice cream
5-10 (depending on your cookie need) cream filled cookies like oreos or Trader Joe’s Joe Joe’s (These are gluten free)
In a food processor, blend banana ice cream with cookies.
Eat right away, with a utensil of choice in a container of choice.
Bowl licking is acceptable.
Before we left for the weekend, I was was trying my hardest to empty the fridge out of all food with the intention of leaning it empty so I could leave it open to defrost while were were gone. Unfortunately I was not able to make it happen. What I did make happen was emptying it almost completely so that when we got home, we had pretty much no food in the house, except for a few things that probably should be eaten. Plus one of the last things that I want to do after sitting in a car for 6 hours is go to the grocery store, or anywhere for that matter, so I was determined to make with what wet had in the fridge:
Carrots
half of a gigantic kohlrabi
soy milk
iced tea
bananas that needed to be frozen
strawberries
Perfect! A few carrots and half of a gigantic kohlrabi.. plus at the hotel we were staying at, there were fruit bowls in he lobby full apples. Every time I went past the apples (which was a lot) I grab one or two, so I have a few apples (I actually have a lot of apples now). All the things I need for a super awesome salad slaw. Apples with their nice sweet crispiness and kohlrabi with its cabbagey, crunchy earthiness, tossed together with some vinegar, some toasted walnuts and some carrots, I mean, so freaking good. And to make it a bit more of a meal, I made some lentils to go with it. But the best part was there was no need to leave the house!!
The stuff… A huge hunk of a bigger then my head kohlrabi (or 2 normal bulbs). A carrot, an apple, toasted walnuts, red wine vinegar, and some salt.
Pretty simple stuff going on here. Just peel and julienne the kohlrabi, carrot and apple. (no need to peel the carrot or apple unless you want too) and stick it all into a bowl. I used my mandolin, which is one of my favorite kitchen tools ever, but if you don’t have one, a box grater works too.Sprinkle with salt and a good glug glug of red wine vinegar. Chop up the walnuts (some big chunks and some very small pieces makes for good eating), toss it all together and, well that’s it. But wait…. let it sit for a few minutes before serving to really let the flavors draw out.And there we have it. Super fast, full of flavors and crunchy texture. A salad slaw after my own heart.
Serve it as it or add to a bed of greens, rice, or lentils… and make sure to save at least as little… cause its an awesome little pre-bed snack.
Happy Week!!
-C
Kohlrabi Apple Walnut Slaw
2 medium sized Kohlrabis
1 medium apple
1 small carrot
1/2 cup toasted walnuts
red wine vinegar
salt
In a large bowl, julienne kohlrabi (after peeled) apple and carrot. Sprinkle with salt, add in vinegar. Rough chop walnuts and toss the whole bit together. Let sit for at least 10 minutes, if not longer before serving. (A great salad to make ahead of time)
Eat as is, or toss onto a bed of greens, plate of rice or a bowl of lentils.
Any left overs only end up tasting better the next day.
Last night I had my sister and her kiddos come over for dinner. Nothing fancy, nothing to complicated, just something fast and something that I knew the littles would eat. Spaghetti and meatballs, except replace meatballs were bean balls So they came, we played, did a little drawing and had a bit of first grad gossip. Then came dinner time when I was told by one little that she was not going to eat.. She had pasta for lunch. Well I made her sit anyway and she mainly just ate carrots (I was ok with that) Then the other little was all into his pasta and bean balls, 1 down, 3 more to go, when the mister let slip that the meatballs were not really meat. He ate around the remaining balls, said he didn’t want them anymore. And my sister, well she doesn’t eat anything that is not pizza.
Good thing a neighbor stopped by while we were eating. He had a few of the balls and told me that they were amazing. I needed someone to tell me that.
So yeah, the littles were not overly enthused with the ball, but the Mister the Neighbor, and I thought that they were awesome and delicious. Maybe next time I will make sure that pasta was not lunch and tell Nick to keep his mouth shut and stop talking about balls at the dinner table.
I feel like I don’t need to tell you how to boil pasta or heat up the sauce, so I left that portion of the recipe out. I have faith that you are capable in doing that part without my instruction.
The bean ball stuff. Chickpeas (soaked and cooked or canned), sweet potato, carrot, onion, and some chick pea flour. Dried garlic, basil and oregano. Salt and pepper and a little bit of olive oil. Small chop all the veggies and toss them and the dry spices into a skillet with a drizzle or two of olive oil. Stick on medium heat and add about 1/4 cup of water to pan. Top with slid and let veggies cook down until soft and fragrant.
Add the cooked veggies to a food processor or blender with the rinsed and drained chickpeas. The mixture gets pulsed until combined, keeping a little bit of chunkiness. Now go warhead and taste the mixture. Add another pinch or two of salt , pepper or any of the spices that you think it need. Dump the mixture into a bowl and mix in the chickpea flour than stink the mixture into the fridge for a least a 1/2 hour. Cooling to off is really important to forming the balls. If you don’t, it’s much harder to keep mixture from falling apart and sticking to your hands.
After the mixture has had time to cool and set, start rolling the mixture into balls roughly the size of ping pong balls. In a shallow bowl, add a few tablespoons of the chickpea flour with a pinch of salt, pepper and garlic powder. Take each ball and roll in flour and place each ball on a well oiled baking sheet. When the balls are all rolled, stick into the oven and bake away for about 30-40 minutes, flipping balls after about 20. After you flip the balls, get the pasta ready so its finished about the same time the balls are done.You pasta and sauce is cooked and the balls are all crispy and oh so nice.
Serve balls over pasta with sauce and eat with a fork.
Your day is now complete.. balls and all.
Happy Weekend!
-C
Spaghetti and Bean Balls
makes about 20 balls
4 Cups (or 2 cans) Cooked, Rinsed and Drained ChickPeas
1 Small Sweet Potato
1 Small Onion
1 Carrot
1/4 Cup Chickpea Flour plus extra to roll balls in
1 Heaping Teaspoon Basil
1 Heaping Teaspoon Oregano
1 Heaping Teaspoon Garlic Powder
Olive or Vegetable Oil
Salt and Pepper
Your choice of Spaghetti (Use Vegan and or Gluten Free if needed) Prepared as package recommends
Marinara or Pasta Sauce of your choice
Preheat Oven to 425 degrees
Small dice the carrot, onion and sweet potato and toss into a skillet on medium high heat with a splash of oil. Add in the dry spices and add in about a quarter cup of water. stir and cover the skillet with a lid and let the veggies cook down until the water has evaporated and the veggies are tender.
Add rinsed and drained chickpeas to a food processor with the cooked veggie mixture. Pulse together until the mixture is combined and slightly smooth, but still with a little bit of texture left.Place bean mixture in a bowl and mix in the 1/4 cup of chickpea flour. and stick in the fridge for a least a 1/2 hour to cool. (Mixture can be made a day ahead if you want)
Once the mixture has time to cool and set up , remove from fridge and with a light head, roll mixture into ping-pong sized balls. In a separate shallow dish add a bit of chickpea flour with a pinch of salt and pepper. Roll each ball in the flour mixture and place balls on a well oiled baking sheet. Once balls ae made, stick into the oven and bake for about 30-40 minutes, flipping after about 20 minutes. The balls are done when the outsides are once and golden brown and crispy. After about 30 minutes, get to cooking your pasta and mariana sauce.
Once the pasta and sauce is done, plate it and toss on some of those awesome bean balls!
Bean balls also make fantastic bean ball sandwiches or bean balls on a toothpick.
TGIF!!!! For reals, because Monday-Thurday were monster days. And now that its friday, I can dig a hole and hide in it until it’s at least 30 degrees with some sunshine. (I might never get to come out.)
A few things I will bring in my hole:
food (lots of food and coffee, lots of coffee)
a soft blanket and pillow
a few books, preferably with pictures, on farming and gardening (think spring!)
the entire series of the Fresh Prince of Bel-air and a device to watch it on
toothpaste (I can use my finger to brush my teeth)
But before I leave for my hole in the ground, I made these little cake bites to get my people through the weekend. Sweet little lemony bites of rich dense cake dipped into bittersweet chocolate. (I am just so nice) They have all the pleasure or cake without the need of a fork and are much easier to give away then a big slice of cake. Plus, they are fun to make. My little sister helped and did most of the chocolate dipping. Then she and another little used their mouths to clean up the chocolate mess. It was an afternoon of chocolate all over the kitchen fun day.
So make some bites to have and to share. Or if you, like me, are digging a hole to hide in, make a batch of bites to bring with you. That’s the beauty of cake covered in a harden chocolate shell, they travel really well.Simple lemon cake stuff. Flour, baking powder and salt whisked together, Sugar and soft butter in a bowl. An egg, some vanilla, milk, and of course, the lemon.
To make the batter, cream the soften butter with the sugar until light and fluffy. Zest lemon(1 big or 2 small) into bowl with the juice of the lemon(s), the vanilla and the egg. Beat until combined. Now beat in the dry and then the milk. Keep beating for another minute until all mixed. Batter should be light and fluffy.
Batter goes into a greased and floured 9×13 baking sheet and stuck into a 375 degree oven for about 30 minutes (You can use a 9×9 baking pan. Just bake fir another 10 minutes and you will end up with thicker bites). Remove from oven and let cool for a few minutes and flip to remove cake from baking sheet. Cut cake into small pieces (I cut 4×6 to get 24 bites) and place bake into sheet and into freezer (I stuck mine outside, it was -2 degrees ) for at least 2 hours.
Frozen bites ready for the chocolate coating… Bittersweet chocolate chips and a little bit of coconut oil. Melted together all nice and shiny smooth.Now dip and slather those bites in the melted chocolate.
Oh what a lovely sister I have.. Look at her dunk….. like a boss!Fully coated and placed on a rack for the chocolate to harden. I ended up sticking the rack in the freezer for 10 minutes…They harder really fast in there.
And now you have some it, bites of cake covered in chocolate. 1 bite, 2 bites…5 bites. Eat however many you want because its Friday and because there small little bites and just because you can.
Now if you need me, I’ll be in my hole.
-C
Chocolate Lemon Cake Bite
1 1/2 cups all purpose flour
1 teaspoon baking powder
1 teaspoons salt
1 cup white sugar
1/2 cup (1 stick) soft butter
1 egg
1 teaspoon vanilla
1 cup milk
1 large or 2 small lemons
2 cups bittersweet chocolate chips
2 tablespoons coconut oil
Add butter and sugar to a large bowl and beat on medium unit light and fluffy. Ass in vanilla egg, the zest of the lemon and the juice of the lemon. Beat to incorporate. Now beat in the dry and lastly the milk.
Grease and flour either a 9×9 pan or a 9×13 baking sheet. dump batter in and smooth out. Stick in oven and bake for about 3o minutes or until a toothpick stuck into the middle comes out clean. Remove and let cool for a few minutes on a wire rack. Flip cake to remove from pan. Cut cake into bit sized pieces, 4×6 is a good size, and place back on baking sheet and stick into freezer for at least 2 hours.
When cake bites are as good as frozen, get the chocolate ready. Take the chocolate and the coconut oil and either melt in a double boiler or the microwave. Mix until smooth and make sure to full incorporate the oil. Now remove the cake bites from the freezer and dip each bite into chocolate, trying to full coat all sides. Stick onto a wire rack or a parchment lined pan to harden. They can be stuck back into the freezer to harden faster.
Once chocolate has harden, your good to go!
This weekend I made a stand of paper hearts that live all around the house. An early Valentines for my mister. We don’t do fancy dinners, store bought cards or gifts….. Handmade and pretty is what we do.
These hearts hang from the ceiling and toss pretty heart shadows on the walls…..and make both of us smile.
The making of stringed paper hearts is so very simple. What you need is..
One or more different colors of card stock paper
scissors
A sewing machine with thread..(can be hand sewn for sure)
To start, cut out a bunch of hearts, as many as you want. You can free form cut them (that’s what I did) or you can either make a template and rouse a cookie cutter or something and trace, if you want perfect uniform hearts.
Decide on a color pattern (I did red, pink, white, brown, repeat) or random is nice too.
Start sewing the hearts. (I used a scrap to get started..and use the scrap piece for tacking to the ceiling). You can either sew hearts close together or leave an inch or two in between each. One trick I have learned when sewing strands of paper is to give a little tension to the strand as you are sewing…it helps keep the machine from jamming up.
You are done when all the hearts are sewn… And hang them up or, if you want to save them for a surprise for Valentines day, wrap strand around a piece of cardboard. Leave up for a day, for a week, or like us, all year long.
Hearts everywhere…so simple, so pretty, so much love!
-C
I was informed yesterday that if I was going to make tortilla chips, that I better make some sweet ass dips to go with them. I kind of agree… tortilla chips need dip… or better yet, two dips. Queso and guacamole. It’s what needed to be done, and so I did it.
Guacamole is amazing… anything avocado is amazing…this guacamole is amazing. White bean guacamole is amazing. And not that we really care, but this guac is half the fat then straight up guacamole. Plus it’s packed full of protein making it a kind of super duper, must eat all of it, kind of dip. And sweet potato anything will make me happy. Making queso dip with sweet potato and cauliflower is probably one of my best food combos so far. (after eating a butt load, I felt like I was a genius and made an amazing discovery) Again, not that we need it to be, but this is also a fat-free, vegan, gluten-free, super healthy, packed full of B12, fiber and nutrients, dip for all kind of dip.…. just another reason why you cannot feel bad when you finish off half a batch before you get a chance to stick it in a serving bowl. (I might have done that)
Here is what you need for a good time:
−These tortilla chips ….Check.
−Some Chopped Veggies (I want the veggies)…..Check
−Cauliflower Sweet Potato Queso.…Check.
−White Bean Guacamole…Check.
You are now ready for it. It being this party, that party, the Super Bowl, or a Wednesday afternoon.
To the left we have the makings for the cauliflower sweet potato queso.. Steamed cauliflower, a baked sweet potato, nutritional yeast, garlic, and chopped up red onion, red bell pepper and jalapeño. To make all you need to do it take the chopped peppers, onion, and garlic and sauté for a few minutes just to slightly soften and bring out flavors. While that’s going on, take the steamed cauliflower and sweet potato(skin off..but eat it, or save it for soup or feed it to the dog) and puree together with a blender or food processor. Add in nutritional yeast, about a tablespoon or two of hot water and, salt and pepper to taste. Blend for about 5 minutes until super creamy smooth. Add in sautéed stuff and pulse just enough to incorporated the veggies but not complete blend in. Stick in a bowl.
To the right we have white bean guacamole stuff. Two cups (or one can) rinsed white beans, one ripe avocado, a lime, a few cloves of garlic,(I also added a bit of garlic powered…I like my garlic) and some chopped up red onion and tomato. Place beans, garlic, avocado and lime juice in a blender or food processor and blend until smooth. Add salt to taste and toss in the chopped tomato and onion. Blend for sec to mix that in…Stick in a bowl
Perfect…
To think that both of these dips took about 10 minutes total to make. (I had pre baked the cauliflower and sweet potato) And for real, I would spend much more time if I had too because both of these dips are so freaking good, I definitely will be making these on the regular.
So there , dips for those sweet ass chips or whatever you want to dip or them spread them on.
And he guys…It’s FRIDAY! Have a fantastic day!
-C
White Bean Guacamole
2 cups white beans (or 1 can) rinsed and drained
1 ripe avocado
3 cloves garlic
1 lime
1/4 small red onion
1 small tomato
1-2 teaspoons salt
Finley chop onion and tomato. Set aside. Place the beans, avocado, garlic, garlic powder, 1 teaspoon salt and the juice from one lime into a blender or food processor and blend until smooth. Add a splash of water if needed to help keep things moving. Taste and add more salt if needed. When smooth, add the onion and tomato and pulse a few times to mix in. Scoop into a serving dish and finish with a squeeze of lime and a bit of chopped onion and tomato.
Cauliflower Sweet Potato Queso
1 1/2 cups pre cooked steamed or roasted cauliflower
1 medium pre baked sweet potato
1/2 cup nutritional yeast
1-2 tablespoons hot water
1/2 a small red pepper
1/4 small red onion
1 jalapeño
3 cloves garlic
salt and pepper
Finely dice the red pepper, jalapeño, onion and garlic and sauté in a skillet for a few minutes until slightly soften and fragrant. Take the pre-cooked cauliflower, sweet potato (skin removed), and nutritional yeast and place in a blender or food processor. Blend for about 5 minutes until creamy and smooth. Add in a tablespoon of water to keep things moving. When completely smooth, add in sautéed veggies and pulse a few times to combine. Scoop into a serving dish. If your feeling it, top with scallions and cracked pepper.
Serve dips with chips, veggies or anything you want. Also make great spreads for sandwiches and crackers too!
Yes Please. Thank you very much. Sweet Potato custard (I don’t know what else to call it) topped with coconut. My taste buds have found themselves in heaven. I have found myself sticking my butt out of the fridge with spoon in hand. Hey there, like what you see?
Now that thanksgiving is over you might be thinking.. oh we can’t or, no we shouldn’t or, that it’s too much work. Well you can, you should, and it’s not. This custardy crustless pie is nothing short of awesome and is super easy to make. All you really have to do is puree and mix a few ingredients together and bake it. The obstacle here is trying not eat it all in one sitting, But you know what. that would be ok..You eat this and it tastes so good and you feel like you have used your days worth of guilt on dessert but guess what, you didn’t. This pie is actually pretty darn healthy, even maybe good for you. There is no sugar, no gluten, no dairy, no crap. Hardy sweet potatoes and sweet little dates with so many vitamins, chai and coconut for protein and health fat and cinnamon, which is good for everything. I mean, AMAZING Now you can have dessert and save your guilt for say, buying a new sweater when you really don’t need it or for canceling your dentist appointment because, let’s be honest, you really just don’t feel like going( Its ok, I rescheduled for next week). See, you must make this. Pie, sweater and no dentist…It’s a winner.
Custard ingredients. A whole lot of not much. Sweet potatoes are the star here. A few dates, chia seeds, and a bit of cinnamon spice. That’s it. Oh yes, this desert is 100% way acceptable for breakfast and comes with absolutely 0% quilt. Its magic.
If you have left over sweet potato, this is your chance to use them up, but if not, 3 sweet potatoes, stuck in the oven at 400 degrees for about 45 minutes or until they are fork tender.
While the potatoes are baking, chia seeds go into water to soak.. I remember the first time I used chia seeds and they turned into gel, I thought something was very wrong. They are suppose to turn gloppy, so if your concerned, don’t be. Now take your dates..MAKE SURE TO REMOVE PIT!!!..and stick in some warm water, just enough to cover. If you are familiar with dates and use them often, you might already have date paste on hand…just use that. otherwise. we are going to turn these dates into a paste by simply letting them sit in a bit of water to soften and then pureeing.. It’s a really simple process that you can do every time you use date paste in a recipe, but my suggestion is to make a big batch and save the rest. It will turn into a new thing for you. You will want to eat it by the spoon full and then some. It’s that good..
The potatoes are done and cooling… now is a good time to puree dates. The consistency doesn’t have to be silky smooth, but it doesn’t hurt to get close. Once the potatoes are cool enough to handle, remove skin( eat the skin) and stick into either a large bowl if you’re using a handle blender or emulsifier, or into the food processor. Puree those sweet roots of deliciousness, adding a splash of water or two if they need help whipping up. Add the chia seeds, the date paste, and spices….mix and POW!!. Go ahead, you must eat a bite….or two. Satisfied for now? Stick it into the fridge. Refrigerating for a bit to even over night makes the custard set up a smidge better, but you really don’t need to refrigerate. To be honest,, you don’t need to bake this either, just eat it like pudding(which is what I have been doing too) But you really want to bake it. Just stick the bowl in the fridge.
Now to make this custard even more awesome, we are going to add a little coconut topping. Here we have coconut flour, unsweetened coconut flakes, a little scoop of the custard filling and a little coconut oil
Mixed together for a bit of a crumble… and yea.
The custard is make.. The topping is ready. Take a pie plate and light oil with the coconut oil and dust with a bit of coconut flour. Transfer the sweet potato puree into plate and top with coconut topping. Move to oven and bake at 375 degrees for about half hour to 40 minutes…checking every now and then to make sure that coconut isn’t burning. Remove when top is golden brown
And one more thing, add a scoop of whipped coconut cream which I forget to photograph. All I did was whip a can of cold coconut cream with a tiny bit of vanilla. SOOOOOO GOOOOOD!!
There you have it, the best, easiest, healthy, crustless custardy pie that ever was or will be.
Sweet Potato Coconut Crustless Pie
Ingredients
Custard
3 medium sweet potatoes
3-4 dates pureed. Raserve a teapoon for topping
2 tablespoons chia seeds
6 tablespoons water
3 teaspoons Vietnamese cinnamon or pumpkin pie spice
1/2 teaspoon allspice
sprinkle of salt
Coconut topping
1/4 cup of coconut flour
2 tablespoons coconut oil
1 tablespoon prepared custard filling
1/4 cup of unsweetened coconut flakes
Whipped coconut cream… I bought a can of Trader Joes coconut cream, stuck in fridge for the day, and just opened the can, scooped the hardened cream into a bowl and whipped it up. I did add a tiny splash of vanilla, but that’s it…And oh man it is sooooo sooooo good.
Place sweet potatoes in oven at 400 degrees and bake for 40 minutes or until fork tender.
While the potatoes are baking, place chia seeds in 6 tablespoons of water to soak. Place dates into just enough warm water to cover. REMOVE THE PIT! Let chia seeds and date soak while potatoes are cooking. When the potatoes are out of the oven cooling, take dates and either place in food processor or emulsify until smooth.
After potatoes are cooked and cool enough to handle, remove skin and place flesh in bowl or food processor and puree, adding a small amount of water if needed to keep it moving. Mix in date paste, chia seeds and spices. Refrigerate for 1 hour to overnight.
For coconut topping, place all ingredients into a bowl and crumble together.
Grease a 9 inch pie plate with coconut oil and dust with coconut flour. Scoop custard into plate and coat with coconut topping. Place in oven at 375 degrees for half hut to 40 minutes or until topping is golden brown.
Remove and let cool. Top with coconut whipped cream and eat all to your face.. Maybe saving a little for breakfast or even sharing with someone you love.
My contribution to last nights dinner at my sisters…. Freshy fresh veggies spring rolls.I had about 30 minutes between work and getting over to my sisters house to throw something together so it needed to be something fast, easy, and something I could make without going to the store. She was making the main course (some teriyaki situation and rice) so I was doing up the veggies.
I had just bought a package of spring roll wrappers…. Bingo! The perfect and logical choice. I grab the wrappers, a variety of veggies and after spending 12 of my 30 minutes trying to scrub the oil based paint off of my face and hands, I still managed to completely prepare, construct, and take pictures of these lovely tasty spring rolls. and get over to my sisters in time for dinner.
Impressed?
Damn right!
The stuff. Carrot, beet, asparagus, red cabbage, and kohlrabi, which all (except asparagus, which I just cut into thirds) got cut into matchstick sized pieces with my mandoiln. Then there are the rice spring roll wrappers that we need to make the veggies into rolls. Also a bit of red wine vinegar to drizzle onto the veggies for a little extra zing. And lastly, soy, fresh ginger, and a couple cloves of garlic for a spicy salty dipping sauce.Start by having everything set out and ready to assemble. Fill a large shallow dish or baking sheet with really warm water. Working with one at a time,place a rice wrapper into water and let sit for about 10 seconds or until the paper starts to soften. Remove from water and place on a damp surface (just splash a little water on the counter) Take a little bit of everything and and place on the lower middle part of the paper. Fold in the sides first, then tuck and roll the wrapper as tightly as you can without ripping the wrapper.
Repeat until you have used up all you veggies.For the dipping sauce. Finely grate ginger and garlic and add to soy sauce. Stir… and it’s done.Freshy, pretty and fantastically delicious. And for real, took about 8 minutes to make. (I even had enough time to wash the dishes before we left!)
I am so awesome!
Hump Day Pow!!!!!
-C
Fresh Veggies Spring Rolls
Makes 8-10 but can easily be increased or decreased to desired amount
8-1o rice spring roll papers
Splash of Red wine or rice vinegar
1/4 cup soy or tamari sauce
2 cloves of garlic
teaspoon freshly grated ginger
1 medium carrot
1 medium beet
1/4 head of purple cabbage
10 thin fresh asparagus
1 small kohlrabi
Note… I used the veggies that I had in the fridge at the moment. If you have a bunch of veggies but not these particular ones, use what you have. Pretty much all veggies taste good inside a spring roll!
Gather your veggies and prep by either using a mandolin, a grater, or some sick knife skills, and julienne, shred, or slice you veggies into thin match sticks. Once all the veggies are prepared, sprinkle a little vinegar over the top.
For the rolls…Grab a large shallow vessel (a rimmed baking sheet works great) and add in warm water. Working one at a time, place the wrapper into the water for about 10 seconds or until the wrapper starts to soften. Remove and spread onto a clean, damp work surface. Gather a bit of each veggie that you are adding and place towards the bottom middle of the wrapper. Now fold the sides in over the pile of veggies. Then with the side closest to you, tuck and roll wrapper away from you, trying to keep it tight, but not to tight that it rips.. (Hopefully that makes since.) Place finished rolls onto a damp surface to keep from sticking and if not serving right away, drape with a damp towel or paper towel to keep from drying out.
For the soy ginger dipping sauce. Add grated ginger, minced garlic, and soy into a bowl and mix together. Serve with spring rolls.
Eat one, two, or a plateful. It’s nice to share but not a necessity.
I am such a sucker for the reduced price produce at the grocery store. I save at least half of the original price for stuff that might look a little weird or have a brown spot or something. Sometimes I can’t believe what ends up on in the bin, stuff that I wouldn’t consider reduced bin material, but hey, if they want to stick it in there, then I will be more than happy to buy it. A couple days ago I found some good looking roma tomatoes in that said reduced produce bin..the skins the tiniest bit wrinkled (like I could care less), least hen 50 cents a pound. Um, yea, I bought those and put them to good use.
Tomatoes roasted until they fell apart with a few other chunks of stuff, then piled onto a base of spinach and couscous. This meal cost me pennies and was stupid easy and fast to make. And pretty to boot. Perfect for a quick healthy meal on a busy day or maybe for those people looking for a tasty, not too completed dinner to make for a special someone for Valentines day? Or make just for yourself…its pretty much the perfectly dish. Anyone can get into it. And if you don’t happen to have a grocery store with a reduced produce bin full of tomatoes…it’s cool, you’ll just have to pay full price for the perfect ones.
So simple. A little olive oil in pan. Chunk the tomatoes and throw in pan with the chopped onion, carrot, cauliflower, garlic and chick peas. Drizzle a bit more oil and top with salt and pepper. Give it all a toss and stick into oven. That’s that. Just leave it in there until everything is so nice and soft and falling apart.
One of the best things about couscous is that you don’t even need to dirty a pot or a bowl to make it, just add dried couscous to the bowl you are going to eat out of with a cup of boiling water and a pinch of salt. (I added the spinach with the water too) After about 8 minutes, the couscous absorbs all the water and you just fluff it up with a fork. Easy, freaking Peasy!!! Out of the oven and piled on…..
I mean, if this isn’t one classy looking meal, then I don’t know what is.
Sprinkle with a little parmesan or nutritional yeast if you want and step back and admire. And now eat it to you face.
And barely any dishes to wash. No big mess to clean up. I could get used to that.
-C
Chunky Tomato and Stuff Couscous
Ingredients
Serves 2
3/4 cup Couscous
1 cup boiling water
Handful of chopped spinach
4-5 roma tomatoes chopped
1 medium carrot diced
Half of an onion diced
Cup or so of cauliflower (fresh or frozen)
Cup of prepared chick peas
4 or 5 cloves garlic minced
Olive oil to drizzle
Salt and pepper
Preheat oven to 400
Place onion, carrot, cauliflower,tomatoes, chick peas and garlic into a large skillet. Drizzle with olive oil, sprinkle with salt and pepper, and give everything a light toss. Stick into oven for 35-40 minutes until tomatoes are falling apart and everything is nice and roasted.
In a medium bowl, (or serving bowl) add cup of boiling water to dry couscous and spinach. Sprinkle with salt and cover. Let sit for at about 8 minutes, or until the couscous had fully absorbed all the water. Fluff with a fork and top with roasted tomato stuff.
Top with parmesan or nutritional yeast if you are into it.
Enjoy!
I was informed yesterday that if I was going to make tortilla chips, that I better make some sweet ass dips to go with them. I kind of agree… tortilla chips need dip… or better yet, two dips. Queso and guacamole. It’s what needed to be done, and so I did it.
Guacamole is amazing… anything avocado is amazing…this guacamole is amazing. White bean guacamole is amazing. And not that we really care, but this guac is half the fat then straight up guacamole. Plus it’s packed full of protein making it a kind of super duper, must eat all of it, kind of dip. And sweet potato anything will make me happy. Making queso dip with sweet potato and cauliflower is probably one of my best food combos so far. (after eating a butt load, I felt like I was a genius and made an amazing discovery) Again, not that we need it to be, but this is also a fat-free, vegan, gluten-free, super healthy, packed full of B12, fiber and nutrients, dip for all kind of dip.…. just another reason why you cannot feel bad when you finish off half a batch before you get a chance to stick it in a serving bowl. (I might have done that)
Here is what you need for a good time:
−These tortilla chips ….Check.
−Some Chopped Veggies (I want the veggies)…..Check
−Cauliflower Sweet Potato Queso.…Check.
−White Bean Guacamole…Check.
You are now ready for it. It being this party, that party, the Super Bowl, or a Wednesday afternoon.
To the left we have the makings for the cauliflower sweet potato queso.. Steamed cauliflower, a baked sweet potato, nutritional yeast, garlic, and chopped up red onion, red bell pepper and jalapeño. To make all you need to do it take the chopped peppers, onion, and garlic and sauté for a few minutes just to slightly soften and bring out flavors. While that’s going on, take the steamed cauliflower and sweet potato(skin off..but eat it, or save it for soup or feed it to the dog) and puree together with a blender or food processor. Add in nutritional yeast, about a tablespoon or two of hot water and, salt and pepper to taste. Blend for about 5 minutes until super creamy smooth. Add in sautéed stuff and pulse just enough to incorporated the veggies but not complete blend in. Stick in a bowl.
To the right we have white bean guacamole stuff. Two cups (or one can) rinsed white beans, one ripe avocado, a lime, a few cloves of garlic,(I also added a bit of garlic powered…I like my garlic) and some chopped up red onion and tomato. Place beans, garlic, avocado and lime juice in a blender or food processor and blend until smooth. Add salt to taste and toss in the chopped tomato and onion. Blend for sec to mix that in…Stick in a bowl
Perfect…
To think that both of these dips took about 10 minutes total to make. (I had pre baked the cauliflower and sweet potato) And for real, I would spend much more time if I had too because both of these dips are so freaking good, I definitely will be making these on the regular.
So there , dips for those sweet ass chips or whatever you want to dip or them spread them on.
And he guys…It’s FRIDAY! Have a fantastic day!
-C
White Bean Guacamole
2 cups white beans (or 1 can) rinsed and drained
1 ripe avocado
3 cloves garlic
1 lime
1/4 small red onion
1 small tomato
1-2 teaspoons salt
Finley chop onion and tomato. Set aside. Place the beans, avocado, garlic, garlic powder, 1 teaspoon salt and the juice from one lime into a blender or food processor and blend until smooth. Add a splash of water if needed to help keep things moving. Taste and add more salt if needed. When smooth, add the onion and tomato and pulse a few times to mix in. Scoop into a serving dish and finish with a squeeze of lime and a bit of chopped onion and tomato.
Cauliflower Sweet Potato Queso
1 1/2 cups pre cooked steamed or roasted cauliflower
1 medium pre baked sweet potato
1/2 cup nutritional yeast
1-2 tablespoons hot water
1/2 a small red pepper
1/4 small red onion
1 jalapeño
3 cloves garlic
salt and pepper
Finely dice the red pepper, jalapeño, onion and garlic and sauté in a skillet for a few minutes until slightly soften and fragrant. Take the pre-cooked cauliflower, sweet potato (skin removed), and nutritional yeast and place in a blender or food processor. Blend for about 5 minutes until creamy and smooth. Add in a tablespoon of water to keep things moving. When completely smooth, add in sautéed veggies and pulse a few times to combine. Scoop into a serving dish. If your feeling it, top with scallions and cracked pepper.
Serve dips with chips, veggies or anything you want. Also make great spreads for sandwiches and crackers too!
This year for Christmas my family decided to do a mid day brunch lunch thing. Everyone has their own little families that they do the morning with and then everyone goes their own ways that nigh(Nick and I do our own Christmas celebrating at night)…That leaves a chunk of mid day to hang, talk, play, exchange stockings and then usually someone gets a little pissed and yup, time to go. Its totally cool, we see each other too much anyway. So food wise, it was pretty basic. Eggs, hash browns, a ham, fruit and bagels… The hash browns were store bought, Me and nick did the eggs frittata style and the ham was just stuck in the oven….Not much to do. But then one of my lovely sisters requested gravy…..and so it was made. And a basic brunch was turned into a gravy laden food feast. And so you know, I am not a huge gravy fan, or I never really have the opportunity to eat gravy, its just not in my food rotation..until now. I was really impressed with myself on this one.
We have white mushrooms, kale, red onion, garlic, soy, nutritional yeast(if you don’t have, no worries, you can get away with not using it), sage and thyme and corn starch…
Dice up onion, mushroom and garlic… Into a pan on medium heat with a bit of olive oil…just to soften up
Toss in the spices, nutritional yeast and the soy sauce and let meld together for a minute or 3
Add 2 1/4 water and whisk in a tablespoon of corn starch….and let it simmer
Once the gravy gets to that super nice consistency…add in finely chopped kale and let gravy simmer for another 5 minutes or so
Transfer to a nice bowl or gravy boat, stick a ladle or big spoon and get to graying up all your food!!!!!
Everyone was to busy eating for me to get a good picture of the gravy on food, but trust….it was all over everything!
Mushroom Kale Gravy
Ingredients
7-8 white or cremini mushrooms
1/2 small red onion
2 kale leaves
1 1/2 tablespoons soy or tamari
1 teaspoon ground sage
1 teaspoon thyme
1 tablespoon nurtitional yeast
2-3 cloves garlic
2 1/4 cups water
tablespoon corn starch
Dice onion into small bits, slice mushrooms nice and thin and dice garlic into wee little pieces.. Toss into a skillet with a bit of olive oil on medium heat and let mixture soften and smell nice and fragrant. Toss in the dried herbs, nutritional yeast and soy sauce and let cook for another few minutes until the mixture sucks up all the soy sauce and the veggies start to brown.
Add in the water and whisk in the corn starch. Turn heat to low and let simmer until gravy starts to thicken. Finely chop the kale and toss into gravy when its about done.. Simmer for another 5 or so minutes or until you can’t wait any longer….Serve straight from the pan or transfer to a gravy holding device,. Pour gravy on everything!

 No matter what is going on in my day, seeing a blue sky like this puts a smile on my face….To bad that smile turned to ice and my face froze in place. Because for some reason, winter around here now means below zero all the time. I mean, I love winter, but I am not going to lie… I wouldn’t mind if the wind would stop blowing and we had a couple of days of above zero weather.. and maybe a good foot of snow. I guess I’ll just have to be patient, cause its bound to happen. I mean, we live in Vermont, and if nothing else, we get weather.
  The mister called these snow mounds goosebumps… I think that is exactly what they are
 And oh how I cannot handle how freaking cute she is!! Plus, a shout out to my brother in law….MADLOVE!
 Fresh snow..Even though it was -15, I had to stop and take this picture. The colors were amazing
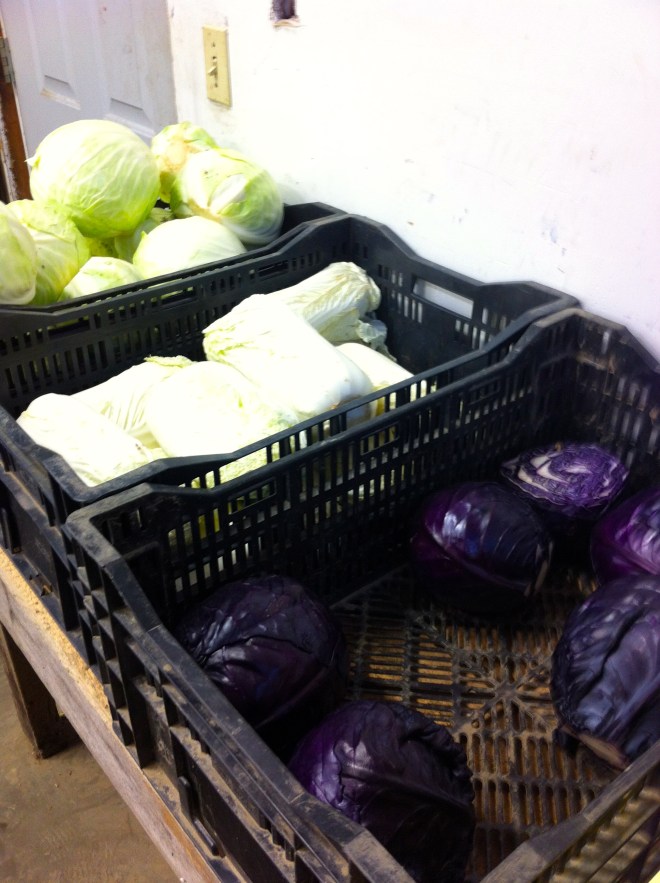 Cabbage at the farm share pick up! Love ICF!!!
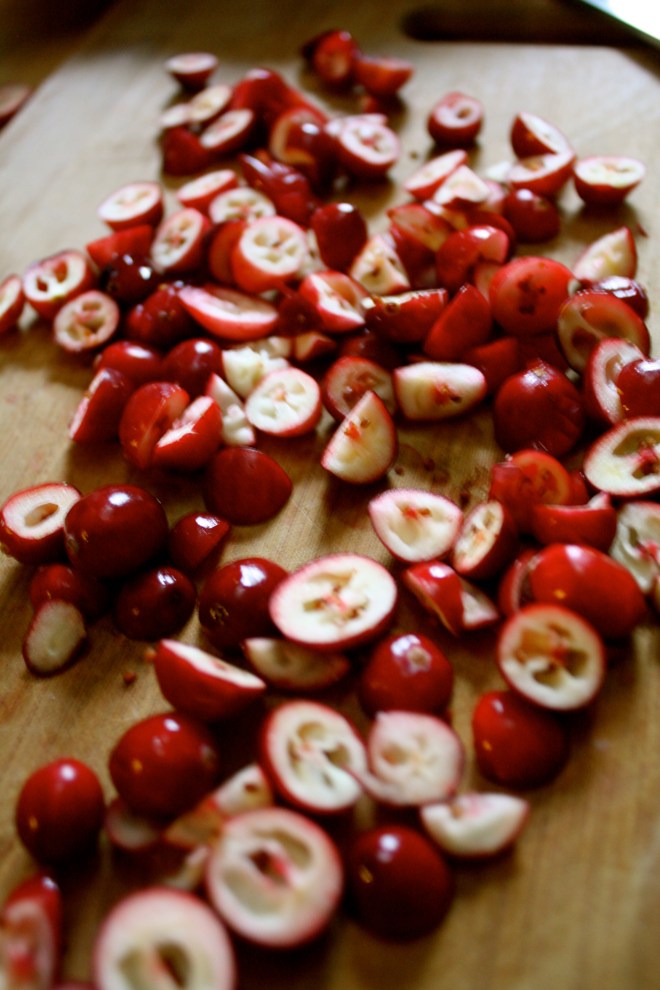 89 cents a pound for fresh organic cranberries. Score!! Made these Oatmeal fresh cranberry coconut chocolate chip cookies with them. Big hit.
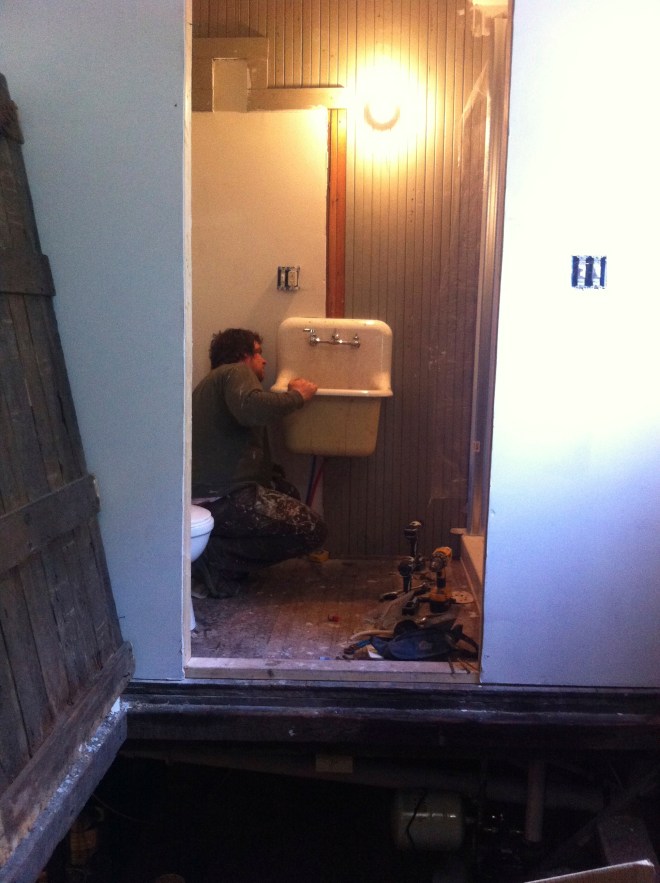 This picture was taken exactly a year ago…..The mister and I were finally putting in the bathroom of our tiny little home…. And look at that awesome sink! (another amazing salvage yard find) If you ever need or want to remodel a bathroom, I suggest using a old cast iron utility sink. So practical, so functional, so pretty.….it makes me happy everyday!
 Me and this little made some donuts, but screw the donuts(sweet potato with chocolate frosting).. look at the overalls! I decided a long time ago that when I have kids, they will be wearing nothing but overalls. Osh Gosh FOREVER!
  FARM SHARE PICK UP!!! I was starting to go through veggie withdrawals.
 Shadow hearts for Valentines Day! I love Valentines Day..… or maybe I just love hearts and pink. Either way, I am getting ready for some V-day recipes! This one is a definite go….
 And beet dyed coconut sprinkles…I mean, talk about happy.
  A late Christmas gift from Nicks mom. Every year she gives us s few of her hand thrown pieces….. love!!
 And I gave the mister a haircut!!! He has been asking me for about 2 months now to cut it, but for some reason we just haven’t gotten around to it. So finally this week it happened, and I can see his lovely face again!
 How can you not be happy when your piece of ginger looks like a little man. (right after I took this picture I cut his legs off)
 Flowers from our garden last summer….. Sunflowers are my favorite (these are teddy bear sunflowers)…. I love looking back at old picture, especially ones from opposite seasons, like flowers in winter or pictures of snow in summer. There like little glimpses of whats to come. I can not say it enough, I am so lucky to live in VT..we have excellent seasons so there is always something to look forward too!
 For the past few days I have heard more complaining then happy. The biggest complaint…tummy issues. A week of gorging on heavy, rich, and indulgent foods is finally catching up with people, turning them into grump asses. I can handle a little grump, but its time to get get out of that funk and take care and stop bitching. May I make a suggestion? Eat this… You will be happy. Your body will feel clean and nurised. Your tummy will get back on track. It what I call satisfaction This salad is a complete meal .Chopped and shredded veggies atop a small heap of quinoa, tossed on a handful of lentils and topped with a dollop of lime avocado… Thats it and it is good. For the sake of picture-taking, I made a plate look all nice and pretty, with layers of colors, but to be honest with you, I rather toss into a big bowl, grab a moderately large-sized fork and food to face… and it’s just as pretty.(the bowl of food is pretty, not food on my face) Quick note: the vegetables that I used here are what I had at home. If you don’t have one or two of these specific veggies, don’t worry about it. Sub in something else, like pepper or spinach., Still have extra brussel sprouts, green beans or asparagus from thanksgiving? Go ahead and use those. If there is a specific veggie you know your stomach doesn’t tolerate well, then maybe avoid using it. This is a happy feel good salad!
 A pile of vegetables is always a good start to any meal, especially these veggies.. All but the avocado came from my farm share. This is one local organic meal of love.
 Green Kale, purple cabbage, beets, red onion, carrots…I did a little shredding and some grating. I like to have different sized and textures in a salad.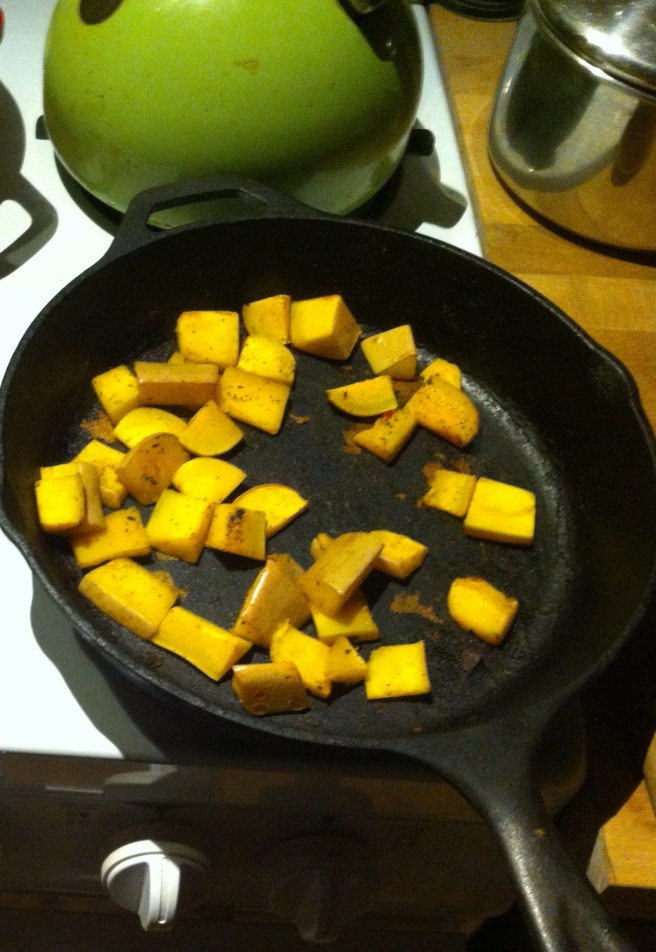
 Quinoa.. 1 part quinoa to 2 parts water..Bring to a boil and let simmer until light and fluffy. When I make quinoa, I always make more than is going to be eaten, its great to have pre made for any meal. Quinoa goes with everything, even a sprinkle of cinnamon and diced up apple for a nice breakfast or snack.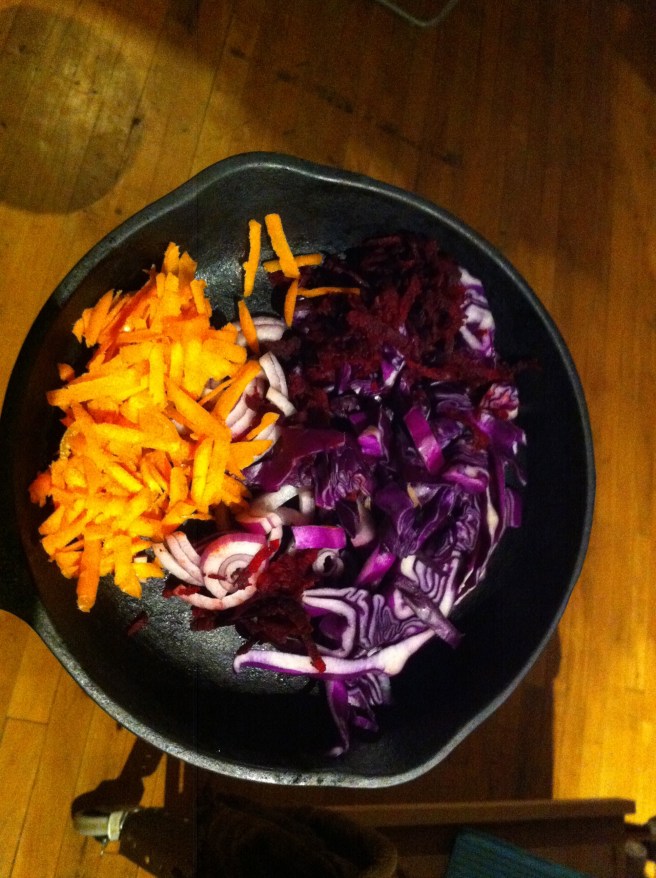
 Barely steamed kale, just enough to soften it. Again. raw is awesome too.
  Half a lime, half an avocado and a clove or two of garlic… guacamole…Call it what you will.
 Last week pineapples were on sale everywhere……So I bought 5. Don’t judge
  Stuff for the goodness. We got the kale, some avocado because all salads should have avocado and some cooked lentils because, well, all salads should have lentils (or beans or nuts.. so you could totally something else) Then a few sprigs of fresh dill, a clove of garlic, red wine vinegar, salt and a bowl of chunked up pineapple.
  The pineapple, dill, garlic, red wine vinegar, a splash of water and a pinch of salt get blended in a blender or whatever blending device you use. Go as smooth or chunky as you like, I recommend going smooth, but leaving a little chunk, like half blended.
 So good……So so good.
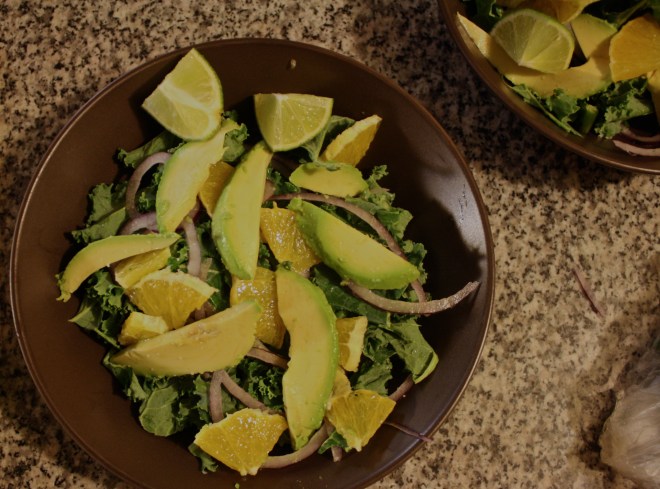 Whenever me and the mister get invited / show up for dinner at someone’s house, I like to bring at least one thing to contribute to the meal. First, because I am nice like that. Secondly, because I get to make food for other people besides Nick and get new feedback on recipes. (Sometimes I think he tells me things taste amazing when they might not) And thirdly, its nice to mess up someone else’s kitchen besides my own. So last night we went to my sisters and I made a salad. A very easy and virtually mess free salad…….I still made a mess (I cleaned it up myself!)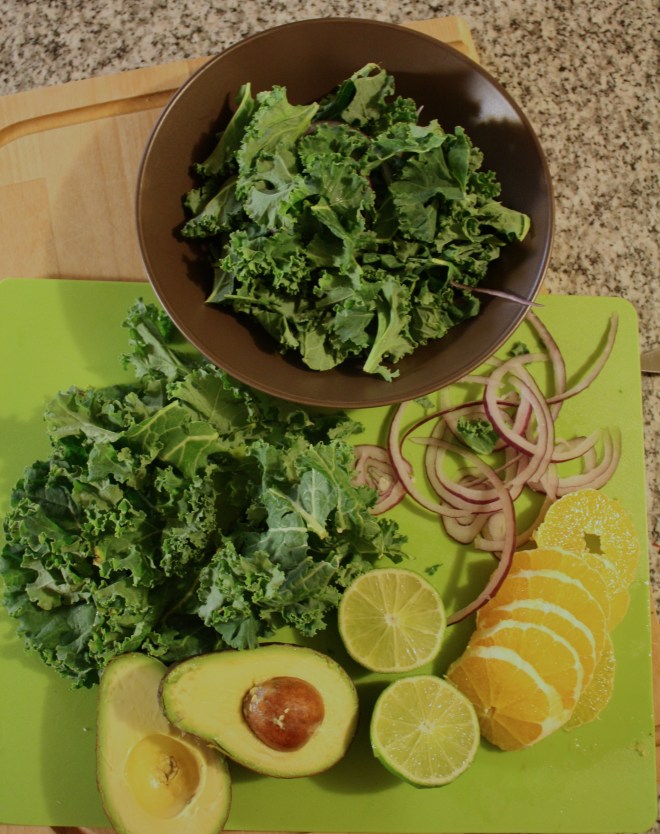
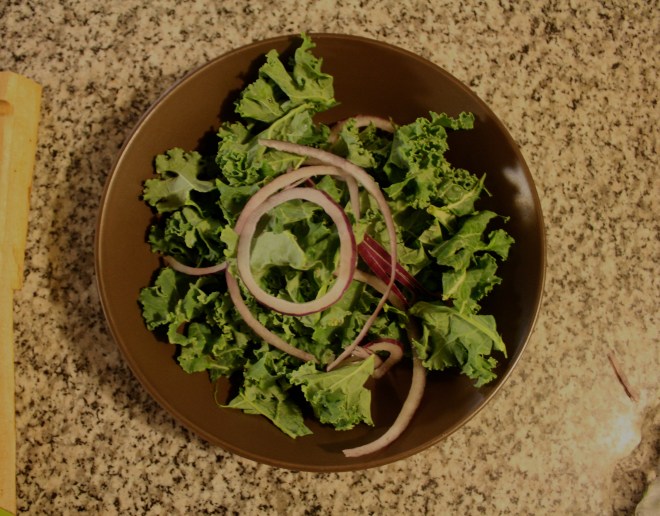 Start with the base layer of kale… then first goes the sliced onion. (Make sure it’s thinly sliced or else it will be to overpowering)
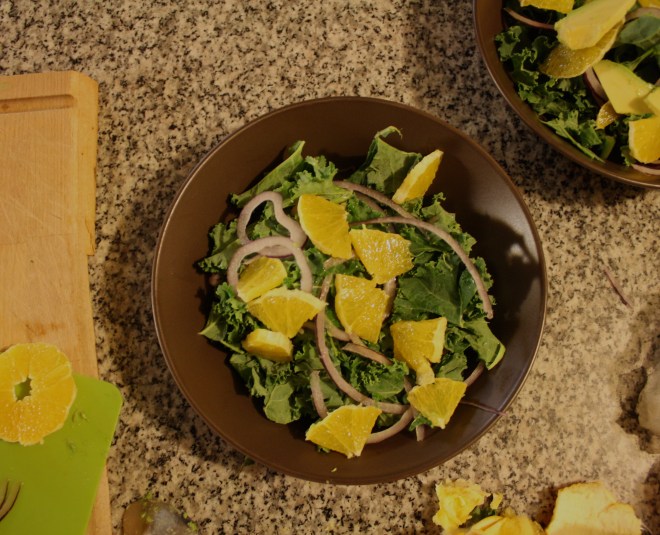 Add thinly sliced oranges…oh boy, your half way there!!!
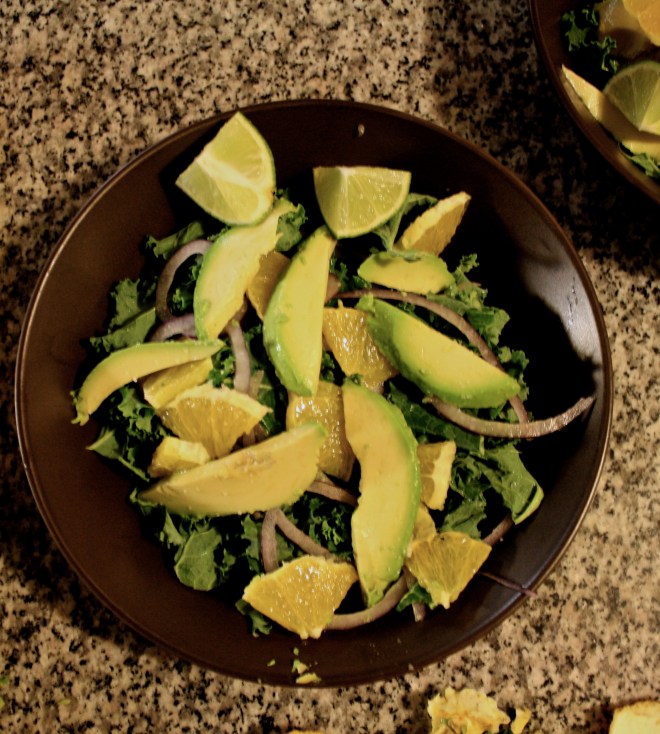 Top with thinly sliced avocado, a sprinkle of salt and drizzle with lime juice. I also served with an extra wedge of lime, there is never too much lime.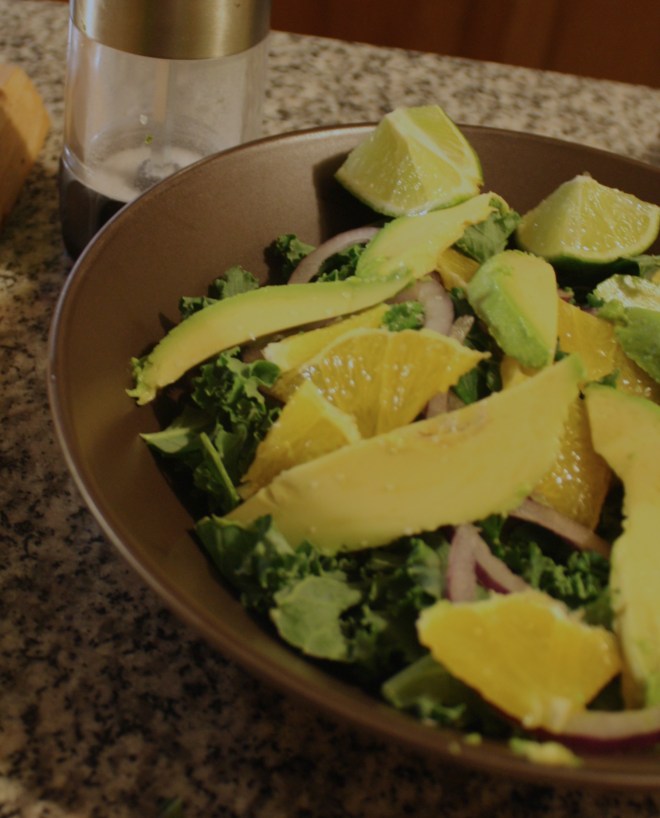


 I figured now is a good time to get this recipe out there before we get to far into spring and summer recipes because there is going to be a lot of banana ice cream filled recipe coming and I figured its a good idea to have the basic banana ice cream recipe ready for people to refer too. And because I made so much fantastic naner ice cream, I also made a cookies and cream naner ice cream for my sisters and the mister.
 The stuff you need for this ice cream…. Nice and ripe bananas, peeled and then frozen* That’s it.
 After all blended and smooth, either eat right away or scoop ice cream into a freezer safe container and stick in freezer. That’s the banana ice cream… And it is amazing and so so so so so addictive. I make a batch, think I am only going to eat a scoop, then find myself eating half of what I have made, but it’s ok cause it’s only bananas.
  One batch of banana ice cream, either freshly made, still in food processor or made ahead and placed in a food processor and given a good pulse to smooth it up.
 Now you have cookies and cream naner ice cream…. and everybody is happy.
 Before we left for the weekend, I was was trying my hardest to empty the fridge out of all food with the intention of leaning it empty so I could leave it open to defrost while were were gone. Unfortunately I was not able to make it happen. What I did make happen was emptying it almost completely so that when we got home, we had pretty much no food in the house, except for a few things that probably should be eaten. Plus one of the last things that I want to do after sitting in a car for 6 hours is go to the grocery store, or anywhere for that matter, so I was determined to make with what wet had in the fridge: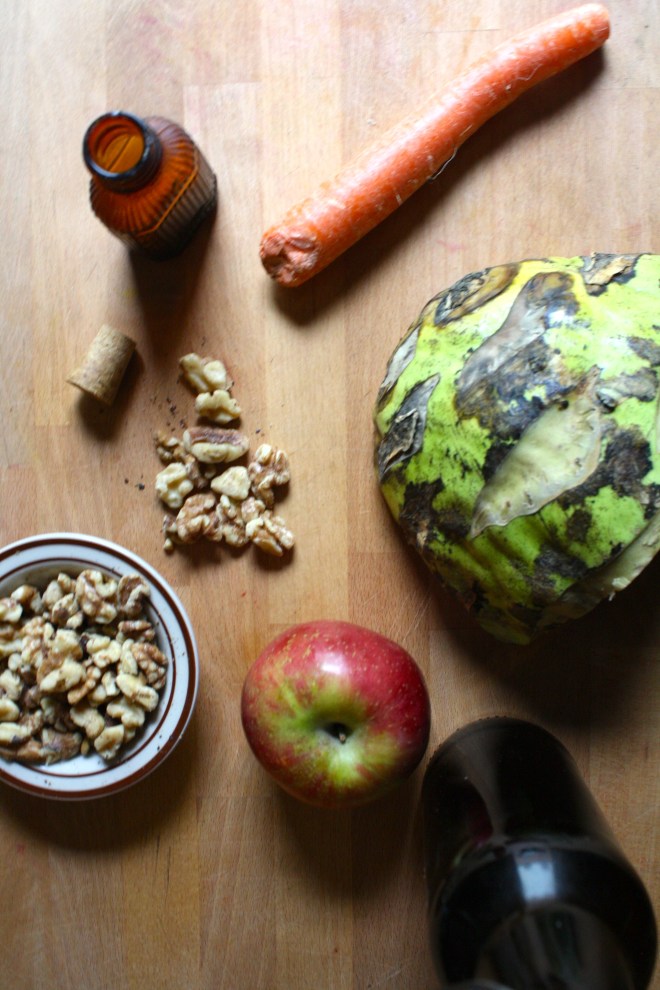
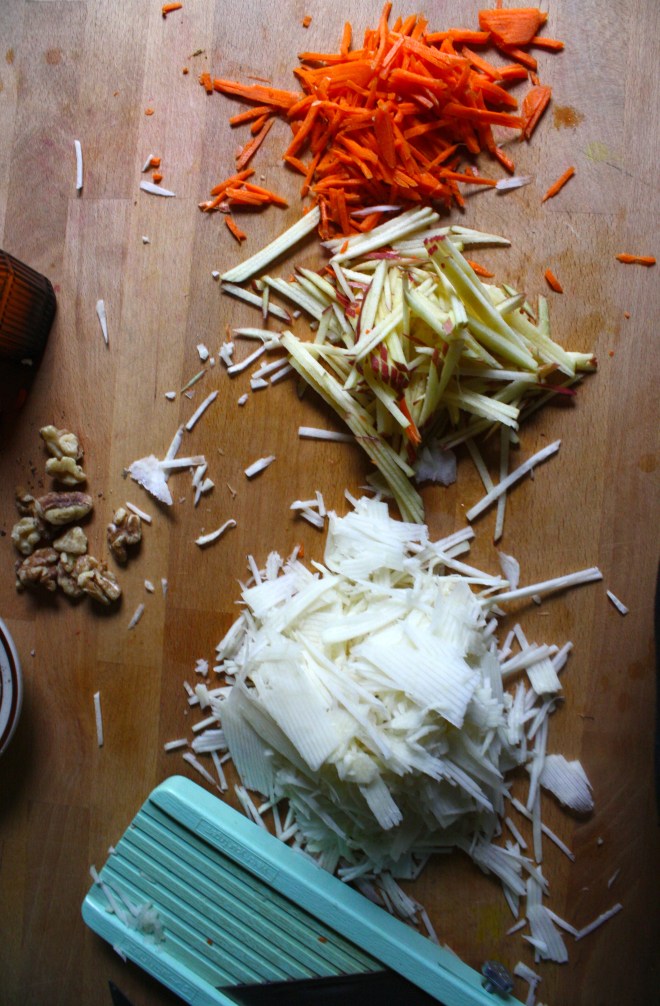 The stuff… A huge hunk of a bigger then my head kohlrabi (or 2 normal bulbs). A carrot, an apple, toasted walnuts, red wine vinegar, and some salt.
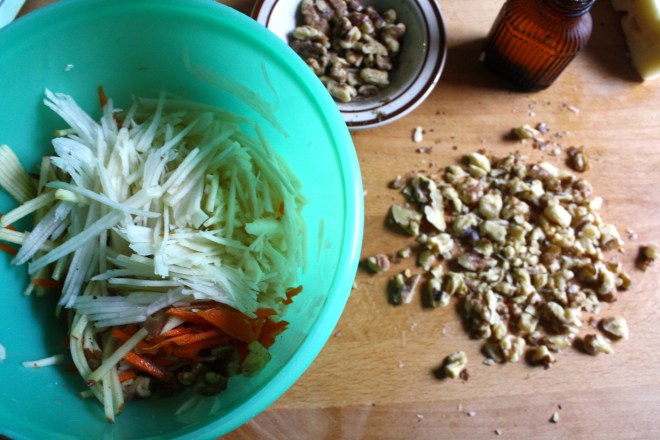 Sprinkle with salt and a good glug glug of red wine vinegar. Chop up the walnuts (some big chunks and some very small pieces makes for good eating), toss it all together and, well that’s it. But wait…. let it sit for a few minutes before serving to really let the flavors draw out.
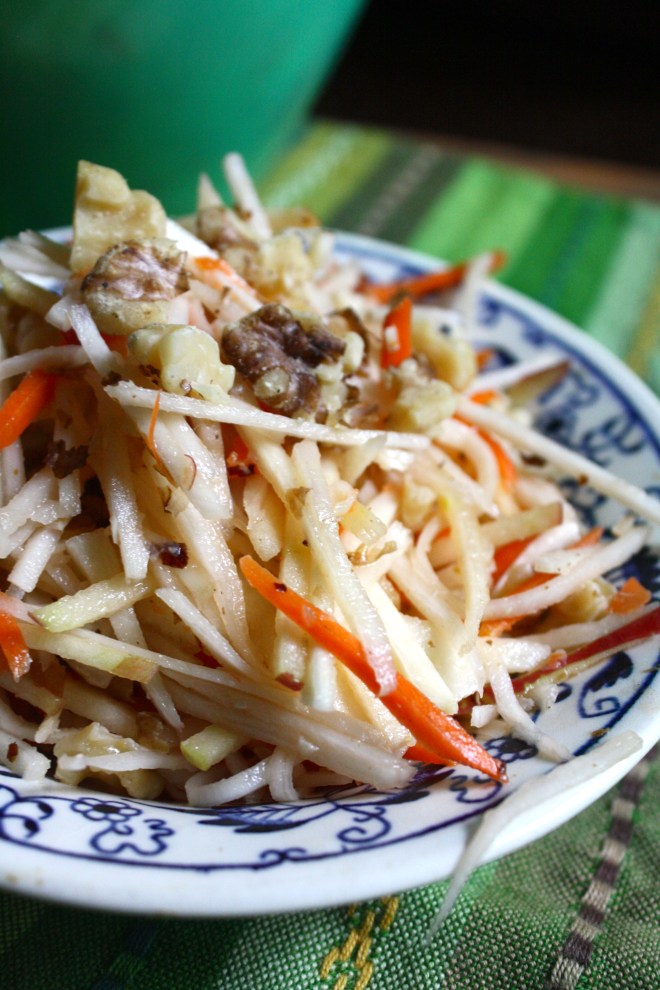 And there we have it. Super fast, full of flavors and crunchy texture. A salad slaw after my own heart.
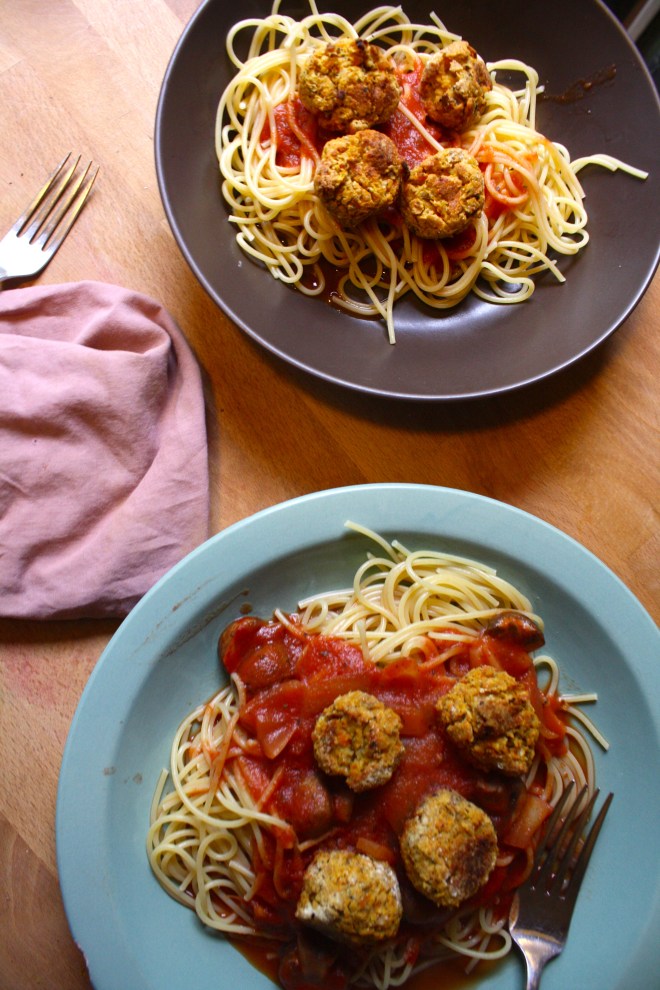 Last night I had my sister and her kiddos come over for dinner. Nothing fancy, nothing to complicated, just something fast and something that I knew the littles would eat. Spaghetti and meatballs, except replace meatballs were bean balls So they came, we played, did a little drawing and had a bit of first grad gossip. Then came dinner time when I was told by one little that she was not going to eat.. She had pasta for lunch. Well I made her sit anyway and she mainly just ate carrots (I was ok with that) Then the other little was all into his pasta and bean balls, 1 down, 3 more to go, when the mister let slip that the meatballs were not really meat. He ate around the remaining balls, said he didn’t want them anymore. And my sister, well she doesn’t eat anything that is not pizza.
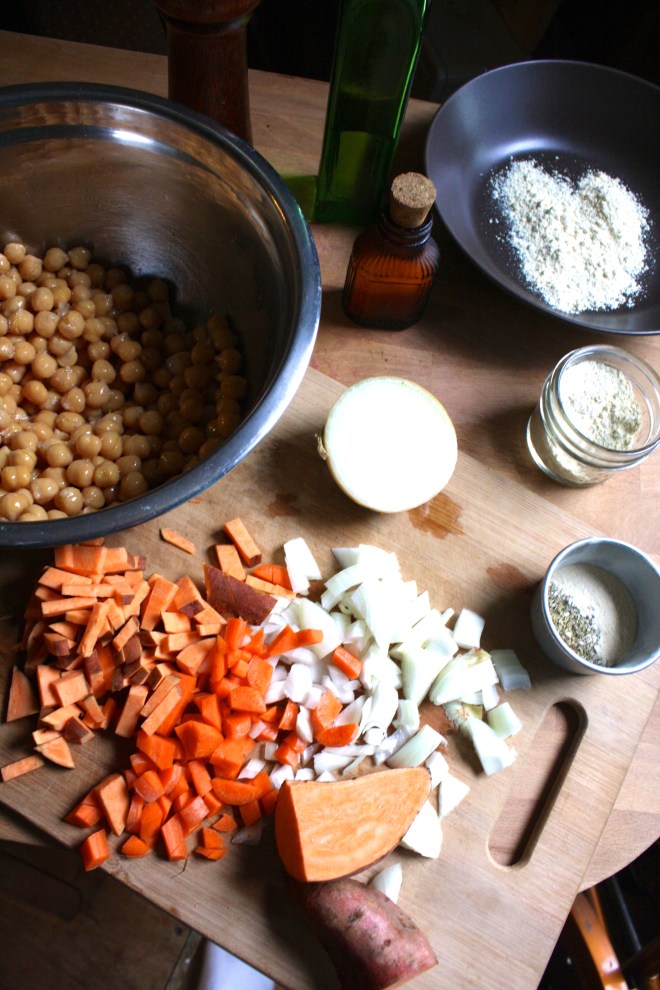 I feel like I don’t need to tell you how to boil pasta or heat up the sauce, so I left that portion of the recipe out. I have faith that you are capable in doing that part without my instruction.
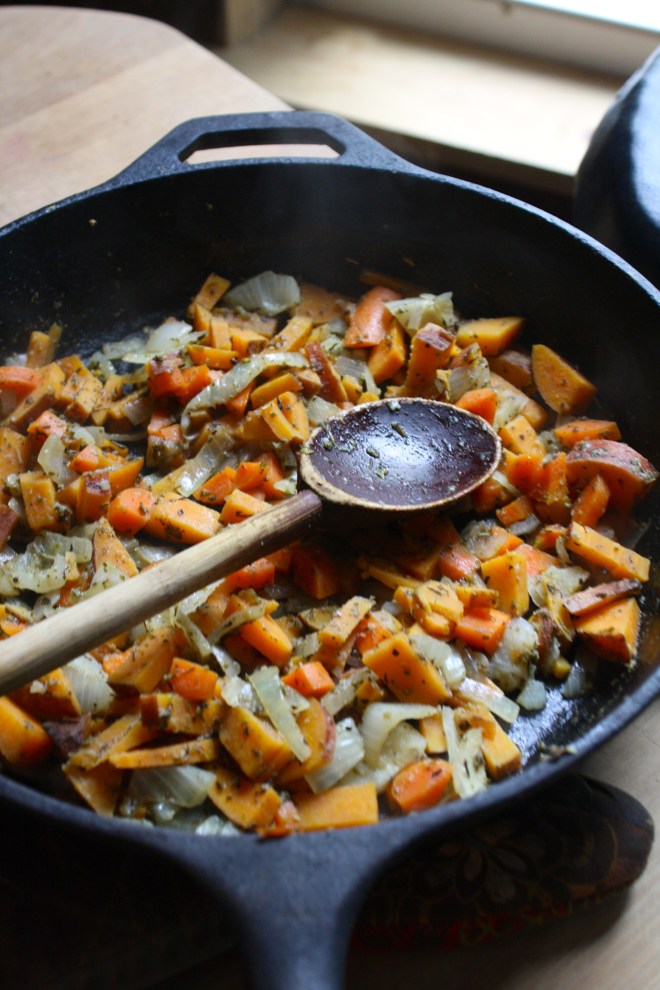 Small chop all the veggies and toss them and the dry spices into a skillet with a drizzle or two of olive oil. Stick on medium heat and add about 1/4 cup of water to pan. Top with slid and let veggies cook down until soft and fragrant.
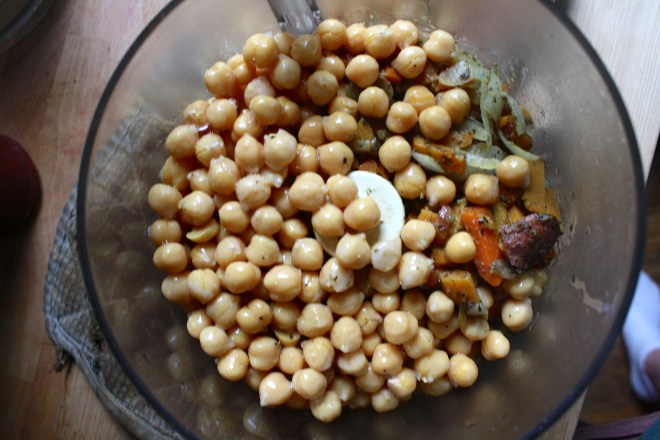 Add the cooked veggies to a food processor or blender with the rinsed and drained chickpeas.
 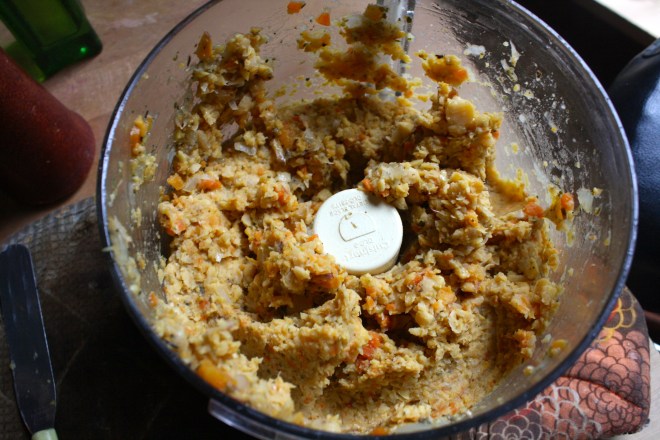 The mixture gets pulsed until combined, keeping a little bit of chunkiness. Now go warhead and taste the mixture. Add another pinch or two of salt , pepper or any of the spices that you think it need. Dump the mixture into a bowl and mix in the chickpea flour than stink the mixture into the fridge for a least a 1/2 hour. Cooling to off is really important to forming the balls. If you don’t, it’s much harder to keep mixture from falling apart and sticking to your hands.
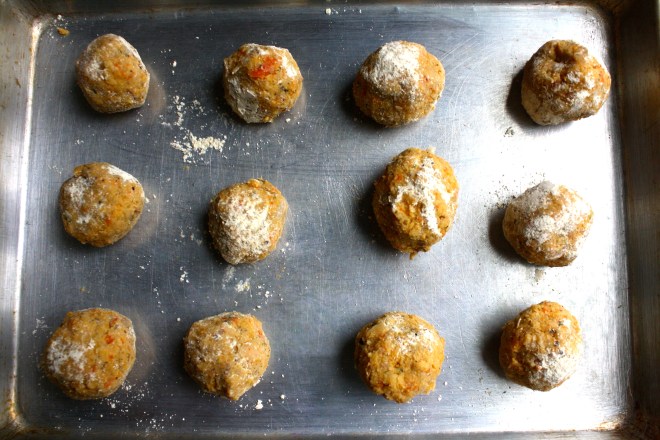 After the mixture has had time to cool and set, start rolling the mixture into balls roughly the size of ping pong balls. In a shallow bowl, add a few tablespoons of the chickpea flour with a pinch of salt, pepper and garlic powder. Take each ball and roll in flour and place each ball on a well oiled baking sheet. When the balls are all rolled, stick into the oven and bake away for about 30-40 minutes, flipping balls after about 20. After you flip the balls, get the pasta ready so its finished about the same time the balls are done.
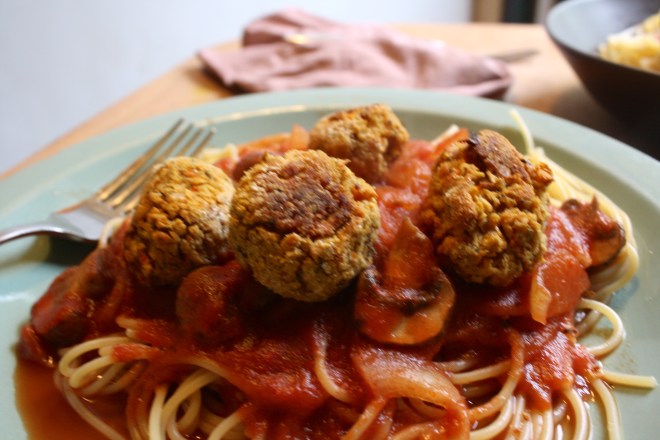 You pasta and sauce is cooked and the balls are all crispy and oh so nice.
 TGIF!!!! For reals, because Monday-Thurday were monster days. And now that its friday, I can dig a hole and hide in it until it’s at least 30 degrees with some sunshine. (I might never get to come out.)
 Simple lemon cake stuff. Flour, baking powder and salt whisked together, Sugar and soft butter in a bowl. An egg, some vanilla, milk, and of course, the lemon.
  Frozen bites ready for the chocolate coating… Bittersweet chocolate chips and a little bit of coconut oil. Melted together all nice and shiny smooth.
 Now dip and slather those bites in the melted chocolate.
  Fully coated and placed on a rack for the chocolate to harden. I ended up sticking the rack in the freezer for 10 minutes…They harder really fast in there.





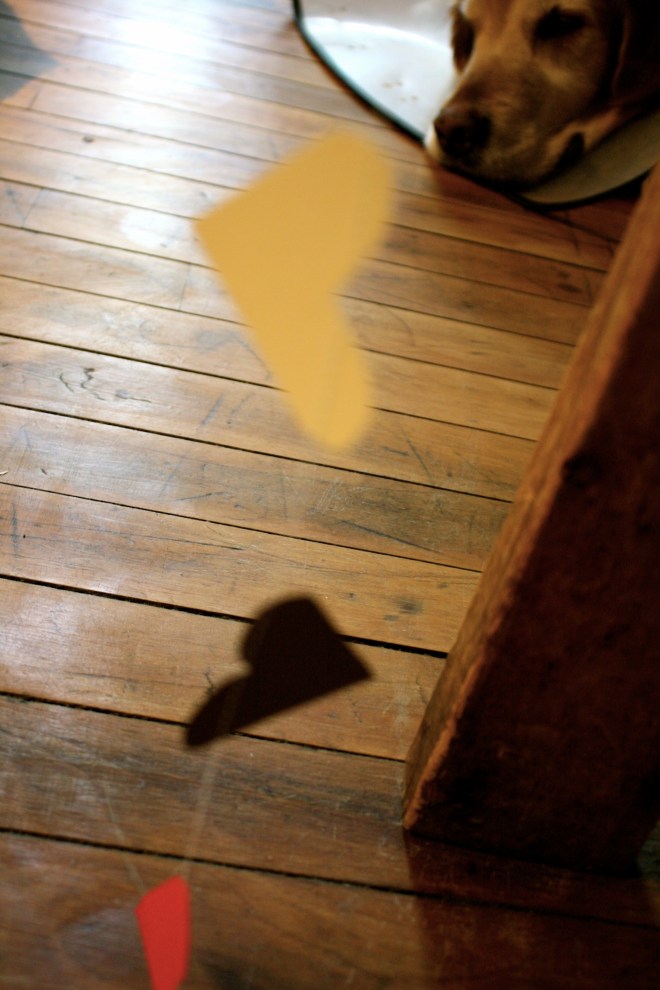
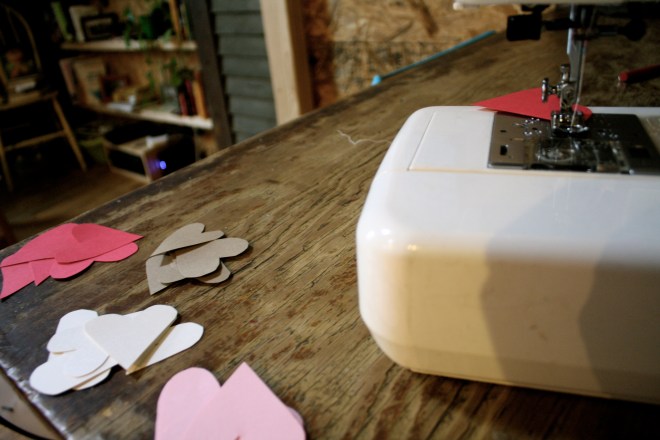
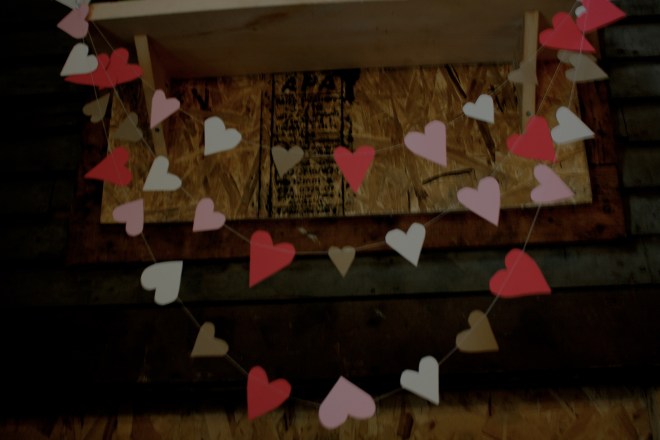
 I was informed yesterday that if I was going to make tortilla chips, that I better make some sweet ass dips to go with them. I kind of agree… tortilla chips need dip… or better yet, two dips. Queso and guacamole. It’s what needed to be done, and so I did it.

 Perfect…
 To think that both of these dips took about 10 minutes total to make. (I had pre baked the cauliflower and sweet potato) And for real, I would spend much more time if I had too because both of these dips are so freaking good, I definitely will be making these on the regular.
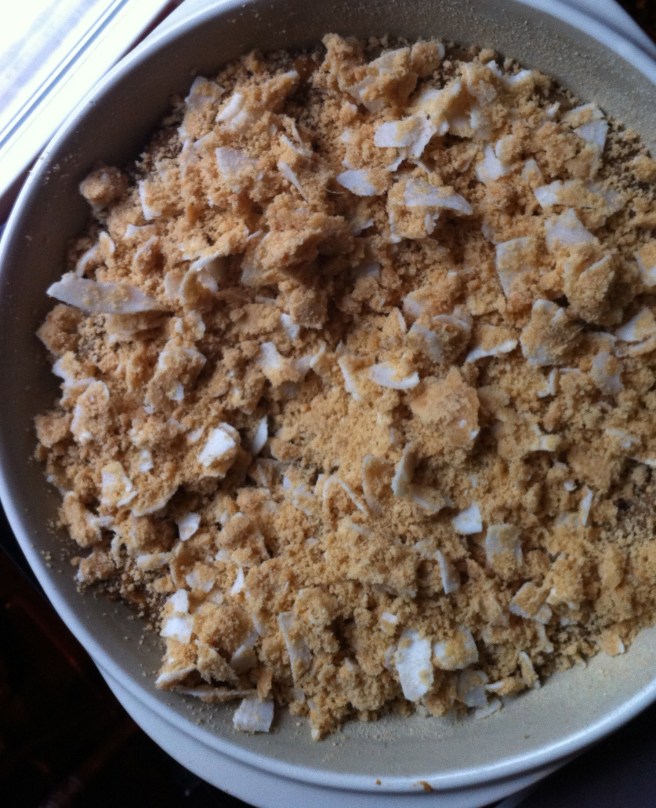 Yes Please. Thank you very much. Sweet Potato custard (I don’t know what else to call it) topped with coconut. My taste buds have found themselves in heaven. I have found myself sticking my butt out of the fridge with spoon in hand. Hey there, like what you see?
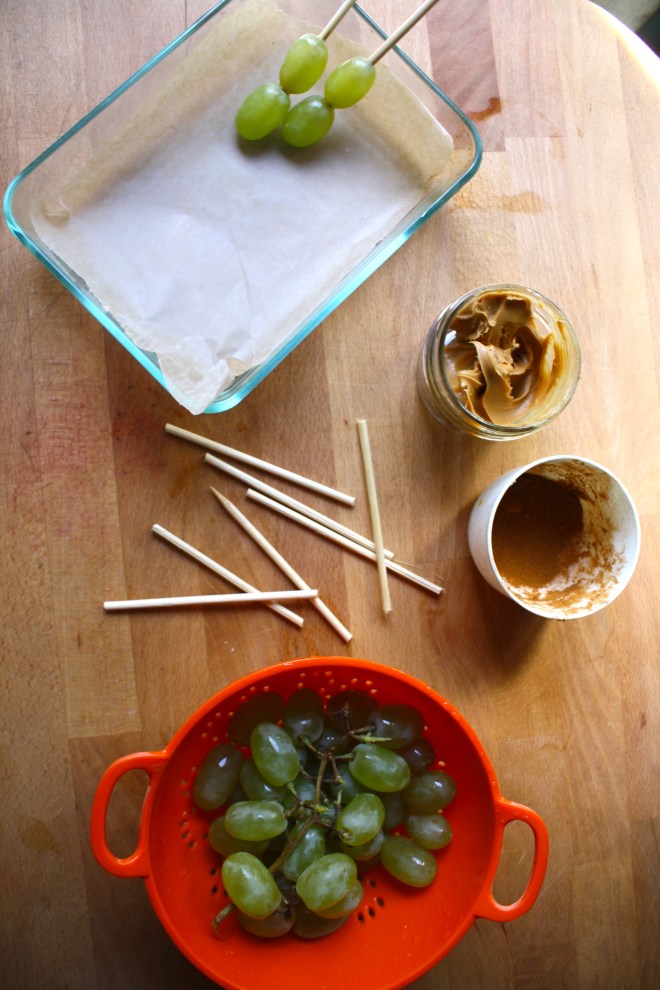 Custard ingredients. A whole lot of not much. Sweet potatoes are the star here. A few dates, chia seeds, and a bit of cinnamon spice. That’s it. Oh yes, this desert is 100% way acceptable for breakfast and comes with absolutely 0% quilt. Its magic.
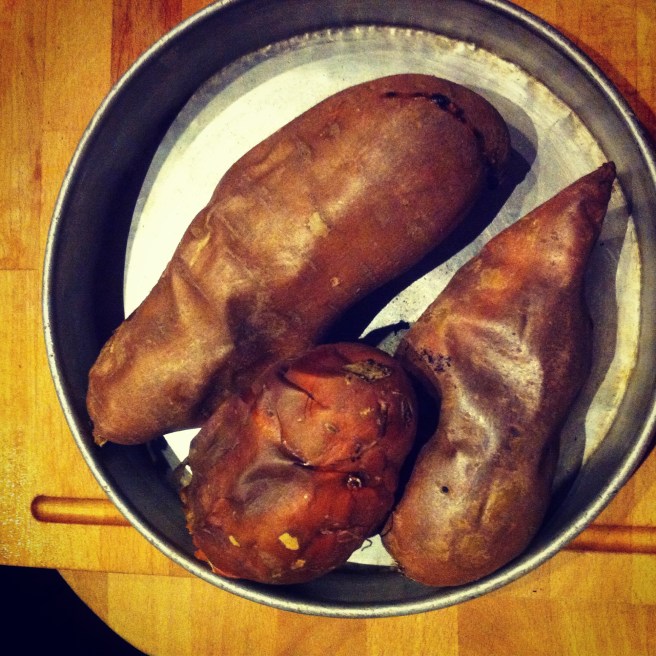 If you have left over sweet potato, this is your chance to use them up, but if not, 3 sweet potatoes, stuck in the oven at 400 degrees for about 45 minutes or until they are fork tender.
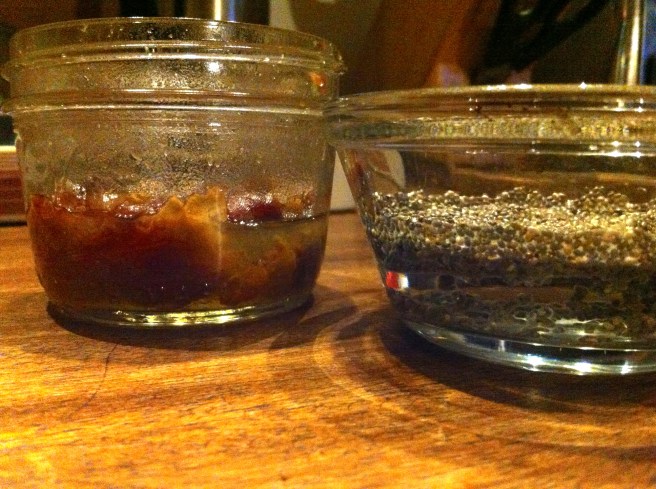 While the potatoes are baking, chia seeds go into water to soak.. I remember the first time I used chia seeds and they turned into gel, I thought something was very wrong. They are suppose to turn gloppy, so if your concerned, don’t be. Now take your dates..MAKE SURE TO REMOVE PIT!!!..and stick in some warm water, just enough to cover. If you are familiar with dates and use them often, you might already have date paste on hand…just use that. otherwise. we are going to turn these dates into a paste by simply letting them sit in a bit of water to soften and then pureeing.. It’s a really simple process that you can do every time you use date paste in a recipe, but my suggestion is to make a big batch and save the rest. It will turn into a new thing for you. You will want to eat it by the spoon full and then some. It’s that good..
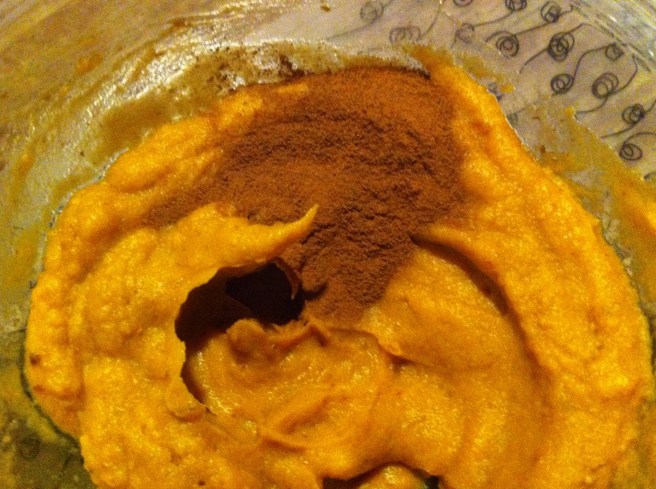 The potatoes are done and cooling… now is a good time to puree dates. The consistency doesn’t have to be silky smooth, but it doesn’t hurt to get close. Once the potatoes are cool enough to handle, remove skin( eat the skin) and stick into either a large bowl if you’re using a handle blender or emulsifier, or into the food processor. Puree those sweet roots of deliciousness, adding a splash of water or two if they need help whipping up. Add the chia seeds, the date paste, and spices….mix and POW!!. Go ahead, you must eat a bite….or two. Satisfied for now? Stick it into the fridge. Refrigerating for a bit to even over night makes the custard set up a smidge better, but you really don’t need to refrigerate. To be honest,, you don’t need to bake this either, just eat it like pudding(which is what I have been doing too) But you really want to bake it. Just stick the bowl in the fridge.
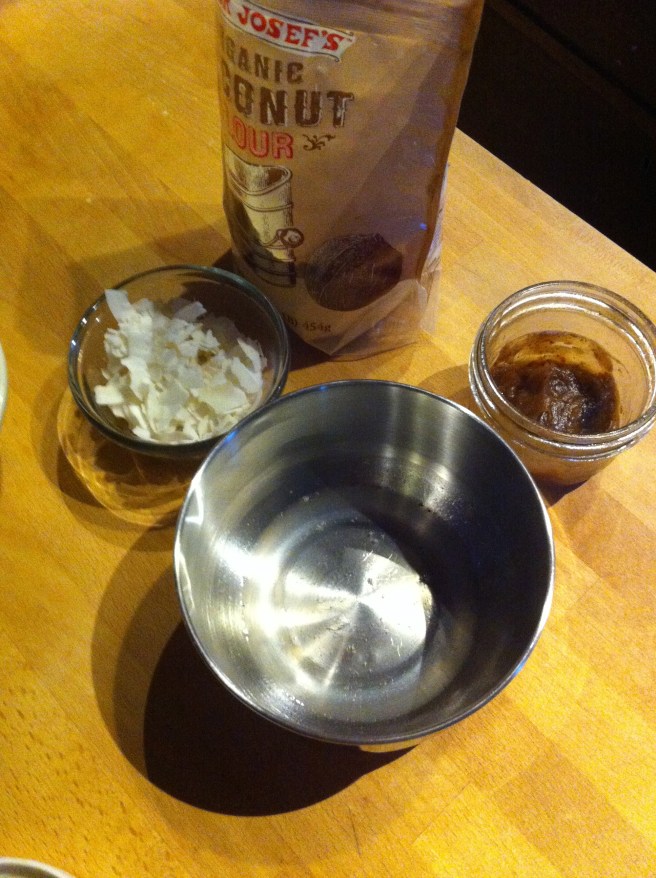 Now to make this custard even more awesome, we are going to add a little coconut topping. Here we have coconut flour, unsweetened coconut flakes, a little scoop of the custard filling and a little coconut oil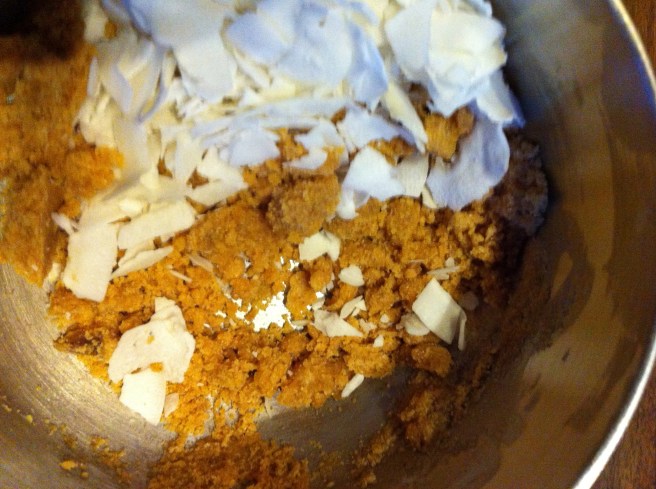
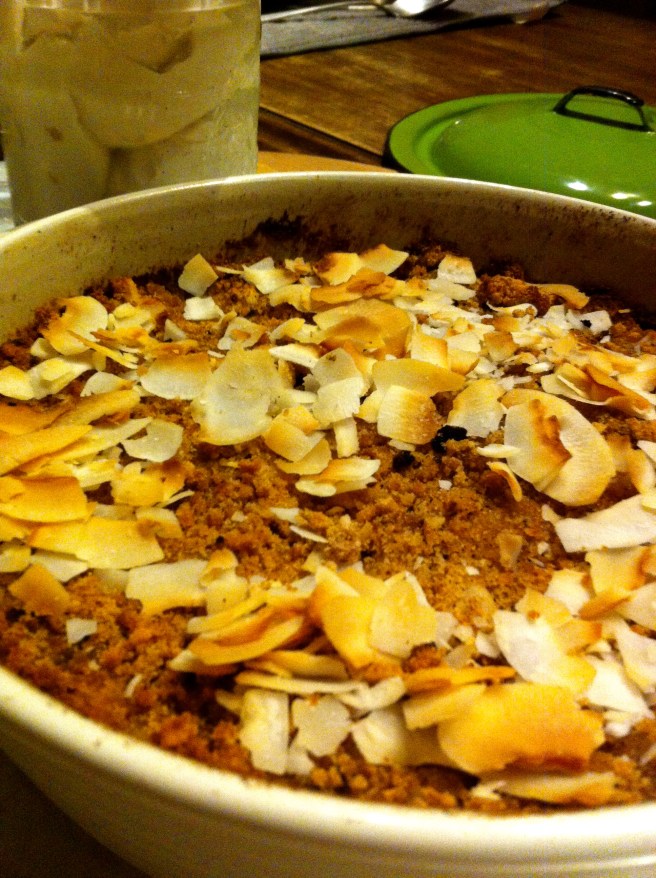
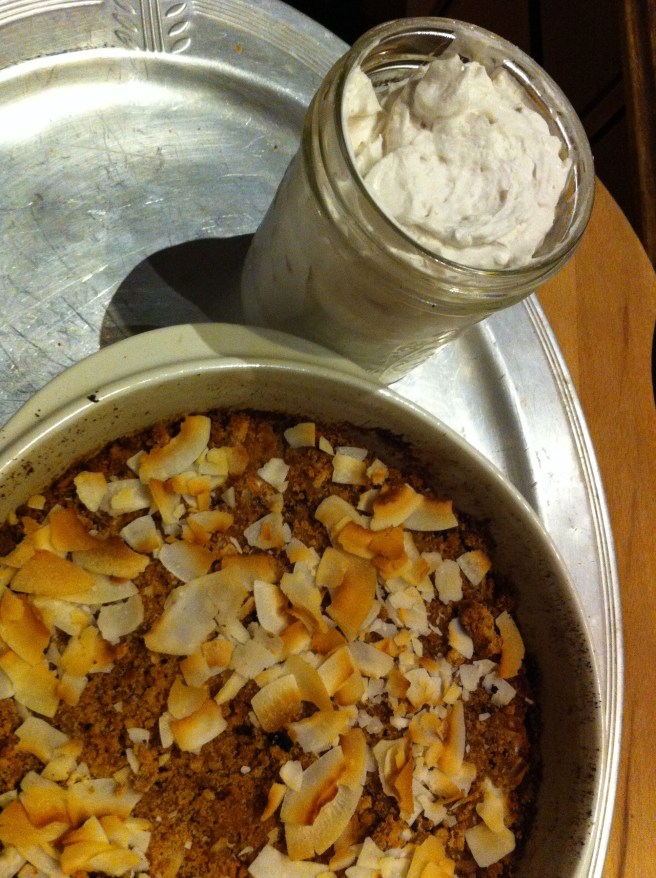


 I am such a sucker for the reduced price produce at the grocery store. I save at least half of the original price for stuff that might look a little weird or have a brown spot or something. Sometimes I can’t believe what ends up on in the bin, stuff that I wouldn’t consider reduced bin material, but hey, if they want to stick it in there, then I will be more than happy to buy it. A couple days ago I found some good looking roma tomatoes in that said reduced produce bin..the skins the tiniest bit wrinkled (like I could care less), least hen 50 cents a pound. Um, yea, I bought those and put them to good use.
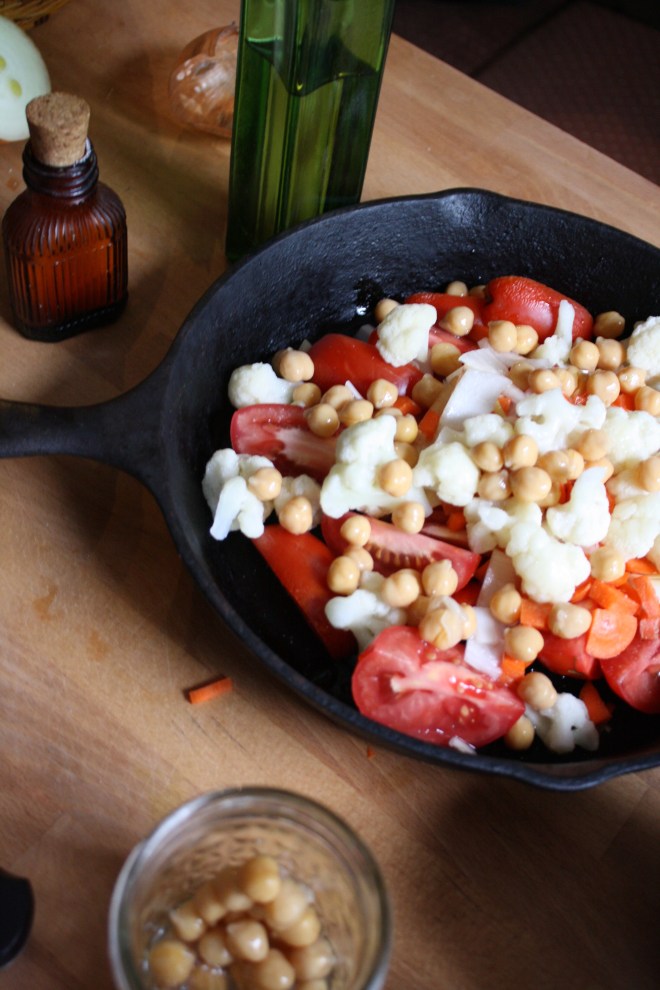 So simple. A little olive oil in pan. Chunk the tomatoes and throw in pan with the chopped onion, carrot, cauliflower, garlic and chick peas. Drizzle a bit more oil and top with salt and pepper. Give it all a toss and stick into oven. That’s that. Just leave it in there until everything is so nice and soft and falling apart.
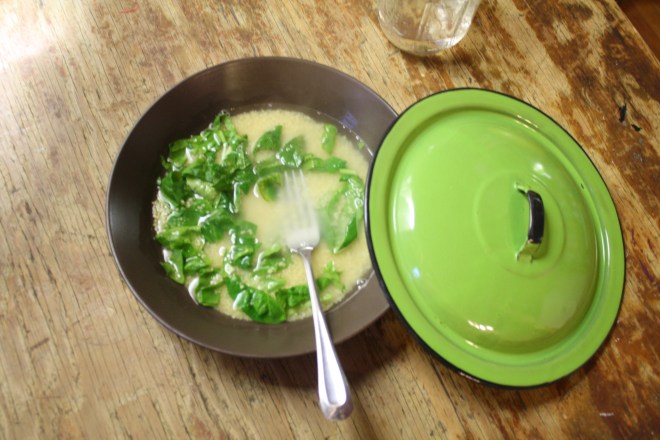 One of the best things about couscous is that you don’t even need to dirty a pot or a bowl to make it, just add dried couscous to the bowl you are going to eat out of with a cup of boiling water and a pinch of salt. (I added the spinach with the water too) After about 8 minutes, the couscous absorbs all the water and you just fluff it up with a fork. Easy, freaking Peasy!!!
 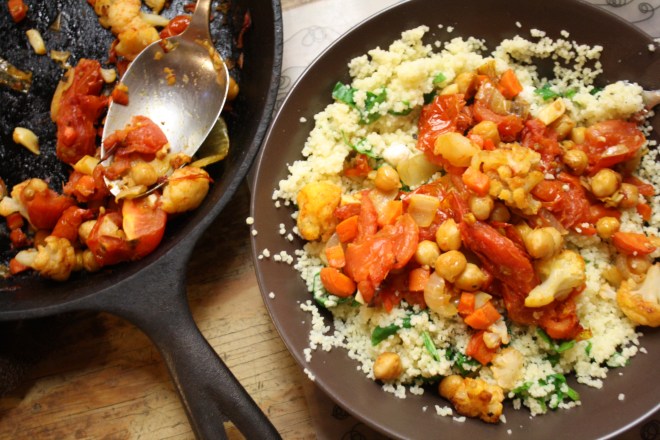 Out of the oven and piled on…..
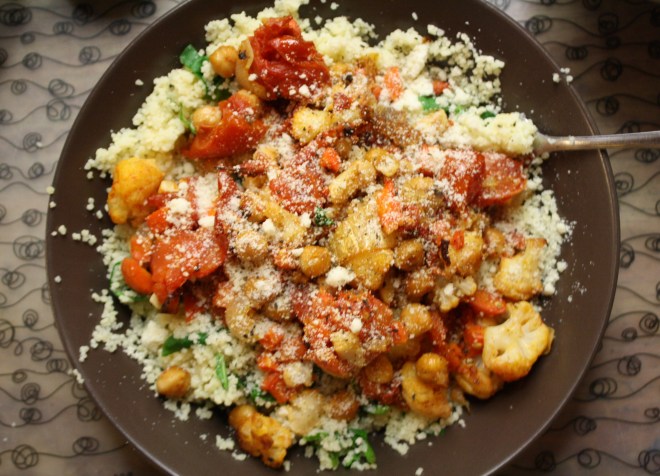 I mean, if this isn’t one classy looking meal, then I don’t know what is.
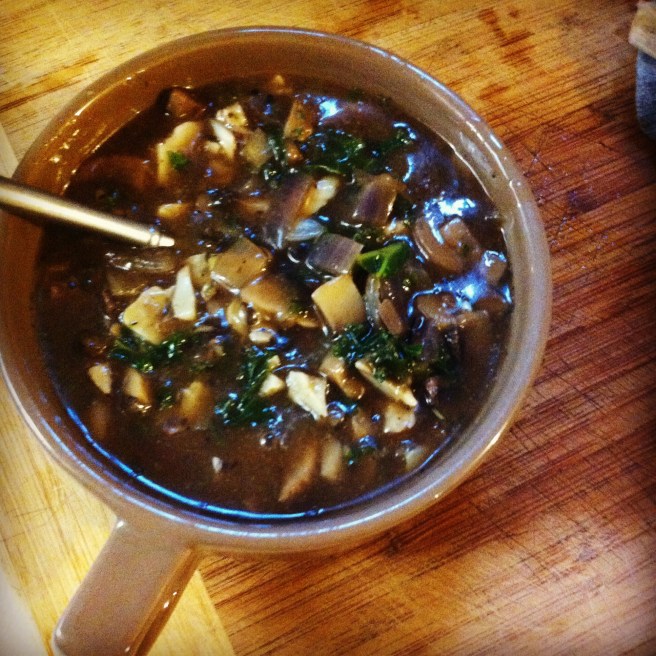 This year for Christmas my family decided to do a mid day brunch lunch thing. Everyone has their own little families that they do the morning with and then everyone goes their own ways that nigh(Nick and I do our own Christmas celebrating at night)…That leaves a chunk of mid day to hang, talk, play, exchange stockings and then usually someone gets a little pissed and yup, time to go. Its totally cool, we see each other too much anyway. So food wise, it was pretty basic. Eggs, hash browns, a ham, fruit and bagels… The hash browns were store bought, Me and nick did the eggs frittata style and the ham was just stuck in the oven….Not much to do. But then one of my lovely sisters requested gravy…..and so it was made. And a basic brunch was turned into a gravy laden food feast. And so you know, I am not a huge gravy fan, or I never really have the opportunity to eat gravy, its just not in my food rotation..until now. I was really impressed with myself on this one.
 We have white mushrooms, kale, red onion, garlic, soy, nutritional yeast(if you don’t have, no worries, you can get away with not using it), sage and thyme and corn starch…
 Dice up onion, mushroom and garlic… Into a pan on medium heat with a bit of olive oil…just to soften up
 Toss in the spices, nutritional yeast and the soy sauce and let meld together for a minute or 3
 Add 2 1/4 water and whisk in a tablespoon of corn starch….and let it simmer
 Once the gravy gets to that super nice consistency…add in finely chopped kale and let gravy simmer for another 5 minutes or so
 Transfer to a nice bowl or gravy boat, stick a ladle or big spoon and get to graying up all your food!!!!!
Lentil Ratatouille — The Lovely Crazy
September 19, 2015 by maximios • Blog
The past week was freaking gross hot, like sweaty, smelly, I want to live in the Costco walk in freezer hot. But today, well today was the most lovely day. A cool dry 70 with a nice breeze and sunshine. Then around dinnertime, a little bit of rain, followed by a rainbow. It was the most fantastic perfect weather.This is why I love living in Vermont. We get weather.
.Last night, dinner was all about trying to make some more room in the fridge for the farm share pick up tonight and to make something that I didn’t have to really watch. (the mr and I were moving the beehive to the roof of the house so I wanted to make something that I could leave on the stove and not have to babysit (just stir every now and then). With the weather being so freaking amazing, with a cool crispness in the air, I was craving something a little more on the warm and comfy side. And what do you know, the stuff I had left in the fridge (there is still a basket of zucchini on the table) was what was needed for a big pot of stewed summer ratatouille with lentils. It was everthing that I ever could need and want for a meal. Full of the best veggies and lentils, easy to make, nothing fancy to do. Just stick stuff into a pot and cook until done.
Cooler, light long sleeve, kind of weather. Enough rain where I didn’t have to water the garden, the most perfect pot of the best ratatouille shared with the mr. and a feeling of accomplishment and excitement (bees on the roof!).
The perfect night.
The stuff. Zucchini, yellow summer squash, eggplant, onion, tomatoes and lentils. And we have some fresh basil, fresh oregano, balsamic vinegar, olive oil, and some salt and pepper.
To get this party started, chop up the onion and toss it into a big heavy pot with a little olive oil and a sprinkle of salt. Stick on the stove on medium heat.
While the onions are cooking, mince up the garlic and chop up all the other veggie into medium sized chunks.
When the onions start to become translucent and smell fantastic, add in all the veggies and garlic. Give it a big stir and place back on the stove to cook for a few minutes to let the veggies release some of their liquid.
Then add in the lentils along with a equal amount of water and top with a lid.
After about 30 minutes, the lentils should be near done and the veggies tender, the tomatoes pretty much dissolved. Now chop up the basil and oregano and toss it in along with a few swigs of the balsamic vinegar. Give it a stir and keep on cooking for another 10ish more minutes or until the lentils are nice and tender.
Scoop onto bowl then into mouth. If you like, finish off with a bit more fresh basil or,ike the mr, top with parmesan cheese.
Have a fantastic day! So close to the weekend!!
-C
Makes 2-3 big servings (if serving with pastas or rice, its more like 4-5 servings)
Drizzle a little olive oil into a large pot. Dice up the onion and place on medium heat and cook for a few minutes. Mince up the garlic and chop up the remaining veggies into medium sized pieces. Once the onion is cooke a bit and strting to smell oh so nice, toss the veggies and garlic into the pot. Mix, sprinkle with salt and pepper and place a lid on it. Cook for a few minutes to draw out a bit of liquid from the veggies. Now add in the lentils and the water. Stick the lid back on and let cook for about 30 minutes on medium low heat or until the lentils are starting to soften.
When the lentils are mostly soft, but still have a bit of biet, dice the fresh herbs and toss into pot with a few swings of balsamic vinegar. Stir and cook for another 8-10 minutes or until the lentils are full cooked.
Remove from heat and ladle into bowls..
Serve with rice, pasta, bread, a big old pile of fresh greens, or just as it is.
Eats fantastic right aways, or cold late at night standing in front of the fridge..