Guess what guys ….I got myself a sick vintage waffle/ griddle iron. I couldn’t be more thrilled!!! I found this thing at the local recycled goods store the other day, along with a very beautiful old white pyrex mixing bowl. It was one of my best thrift store scores! (Checking out the inventory and the condition of all the old things that day, I would say an old lady had just died and all her perfectly keep, mint condition kitchen stuff had just been donated. But it’s cool, cause I get the feeling that she was at least 90, with a big loving family, and was happy until the day she died. And I am sure she would be pleased that I have taken over the waffle maker. Thanks old lady!)
And now I am pretty sure that everything I make for the next week will be cooked on said waffle/griddle. I am serious, I already have a list of things to try and cook on it; cookies, biscuits, granola bars, potatoes, fruit, some type of pasta situations…. the list of possibilities is endless and I bet that at least 1/2 of these things will be totally awesome and amazing.
But first thing first. I need to make dinner.
So waffles for dinner!!
Note. These waffles are completely 100% fantastic for any meal you want to make them for. They consist of nothing more then beans, a shit ton of veggies, and just a bit of cornmeal. But don’t let that fool you because they are super packed full of so much flavor, have a really soft tender inside, with a nice crispy outside and are so super pretty. They are wonderful! The stuff. First, we got a big old pile of shredded up veggies which include; carrot, beet, sweet potato, onion, parsnip, celeriac, and a little bit of kale. A we got a bowl of rinsed and strained white beans, a little bit of cornmeal and salt, pepper, and garlic powder.
The makings of something amazing!Before you do anything. get your waffle iron out and preheat it.
While thats going on, take you beans, add 3/4 cup water and puree until smooth with whatever blending device want to like to use. (I used my hand blender…less to clean)Now collect all the shredded veggies and dump into a big bowl with the bean puree, the spices and the cornmeal. Mix until combined. The batter should be thick, but not dry. If its seems to wet, add more corn meal, or too dry, add a little more water.
Note how my batter turned a magical pink… I love beets, they make everything pretty! And check out that bowl!When your waffle iron is preheated, oil it if needed (if your not sure, add a little oil just to really make sure your waffles don’t stick) and take appropriate size spoonfuls of the batter and stick on iron. Close it and wait…..My iron has a little light that turns on when the waffles are done cooking, so I waited patiently (ok iI did open it a few time) until light tuned on and removed the perfectly cooked waffles.
Did I mention how awesome my new/old vintage iron is?
SO AWESOME!!
I made a little gaucamole and gave the mister and little bowl of plain Greek yogurt with lemon juice, but feel free to top, drizzle, or dump whatever you want onto these beauties…
Happy waffle Wednesday!!!
-C
Veggie Bean Wonder Waffles
Makes 8-10 waffles (in my iron) feeds 2-3 peeps
1 small carrot shredded
1 small parsnip shredded
1/2 a small celeriac root
1 small beet shredded
2 kale leaves chopped into tiny bits
1/2 an onion, shredded
1/2 a small sweet potato shredded
1/2 cup cornmeal
2 cups(or 1 can) cooked, rinsed and strained white beans
2 teaspoons garlic powder
teaspoon each salt and pepper
oil for iron(if needed)
Note on veggies… I used what I had in the fridge and shredded, it came to about 3 cups. If you don’t have these specific veggies or only want to use a few.. go for it. Just make sure to have 3 cups of whatever veggies you use.
Take you beans and blend them up with whatever device you would like to use. Once creamy, add to a bowl with the rest of the ingredients. Stir until combined.
Once the waffle iron is preheated, oil it( if needed) and place the recommended amount of batter right on it there. Close and cook until golden brown and waffly.
Serve on a plate with topping of your choice, A few suggestions.. Guacamole, salsa, hummus, mustard, greek yogurt… anything that tastes good to you.
Eat as breakfast, lunch or dinner…
Fork into face
You ever make dish, completely on the fly, just to use something up (I have a lot of ripe tomatoes) with no real expectation, just because… Then have it be one of the best freaking things that you have ever made? This salad is one of those things.. maybe not the best thing I have ever made, but definitely the best salad I have ever made…. this week.
A salad compiled of all things amazing, taking just a few minutes to make and is the perfect balance of uber fresh with baby spinach, raw kale, and crunchy quick pickled onions. Then adding a touch of warmth with the sweet and juicy seared tomatoes and big chunks of creamy avocado.
I mean, for reals. ……Best Salad Ever !!!! (this week)
Now let’s do this.
The Stuff. A big bowl of baby spinach and chopped up kale, a few sliced up roma tomatoes, some super thinly sliced red onion, half an avocado, red wine vinegar and salt and pepper. Before you do anything, place the sliced onions into bowl, sprinkle with a pinch of salt and add a few glugs of the red wine vinegar. You want the onions to sit in the vinegar for at least 5 minutes on the counter cause the longer they sit the more crispy pickly they get. (after eating onions like this, you will never want to eat them any other way) Lightly oil a skillet and preheat to a medium heat. Once the skillet is hot, sprinkle the tomato slices with salt and pepper and place tomatoes right on in, snugly, but not overlapping. Let cook for about 3-4 minutes, or until the bottoms start to brown. Flip and cook other side for another few minutes.Once the tomatoes are seared on both sides, remove them gently from skillet and toss them on top of the bowl of greens.
Take the pickled onions and toss those right on top, with any of the residual vinegar, add dice and scoop the half of avocado and toss that on in as well.And now eat the best salad ever (this week).
Make the day good!
-C
Skillet Seared Tomato and Quick Pickled Onion Salad
Serves 2 as a side, 1 for a hungry eater
2 large or 3 smaller roma tomatoes
1/2 of a red onion
2-3 tablespoons red wine vinegar
1 1/2 cups baby spinach
1 1/2 cups chopped kale
salt pepper
1/2 a ripe avocado
olive oil (to grease pan)
Thinly slice red onion and place in a bowl. Add vinegar into a and sprinkle with salt. Let sit on counter for at least 5 minutes, if not longer,
Slice tomatoes into 1/2 inch thick rounds and sprinkle with a pitch or salt and pepper. Lightly oil a skillet and preheat it on medium heat. Once the skillet is preheated, stick the tomatoes on it (watch out for splattering tomato juice) Cook first side for about 3 minutes or until the bottom has browned, then flip and do the same for other side.
One tomatoes are seared, place directly onto the greens. Now dump the pickled onions and residual vinegar on top. And dice up avocado and add that on top too.
Now eat your salad, fork or fingers…
And I know, ba-daaaamn. So good.
My contribution to last nights dinner at my sisters…. Freshy fresh veggies spring rolls.I had about 30 minutes between work and getting over to my sisters house to throw something together so it needed to be something fast, easy, and something I could make without going to the store. She was making the main course (some teriyaki situation and rice) so I was doing up the veggies.
I had just bought a package of spring roll wrappers…. Bingo! The perfect and logical choice. I grab the wrappers, a variety of veggies and after spending 12 of my 30 minutes trying to scrub the oil based paint off of my face and hands, I still managed to completely prepare, construct, and take pictures of these lovely tasty spring rolls. and get over to my sisters in time for dinner.
Impressed?
Damn right!
The stuff. Carrot, beet, asparagus, red cabbage, and kohlrabi, which all (except asparagus, which I just cut into thirds) got cut into matchstick sized pieces with my mandoiln. Then there are the rice spring roll wrappers that we need to make the veggies into rolls. Also a bit of red wine vinegar to drizzle onto the veggies for a little extra zing. And lastly, soy, fresh ginger, and a couple cloves of garlic for a spicy salty dipping sauce.Start by having everything set out and ready to assemble. Fill a large shallow dish or baking sheet with really warm water. Working with one at a time,place a rice wrapper into water and let sit for about 10 seconds or until the paper starts to soften. Remove from water and place on a damp surface (just splash a little water on the counter) Take a little bit of everything and and place on the lower middle part of the paper. Fold in the sides first, then tuck and roll the wrapper as tightly as you can without ripping the wrapper.
Repeat until you have used up all you veggies.For the dipping sauce. Finely grate ginger and garlic and add to soy sauce. Stir… and it’s done.Freshy, pretty and fantastically delicious. And for real, took about 8 minutes to make. (I even had enough time to wash the dishes before we left!)
I am so awesome!
Hump Day Pow!!!!!
-C
Fresh Veggies Spring Rolls
Makes 8-10 but can easily be increased or decreased to desired amount
8-1o rice spring roll papers
Splash of Red wine or rice vinegar
1/4 cup soy or tamari sauce
2 cloves of garlic
teaspoon freshly grated ginger
1 medium carrot
1 medium beet
1/4 head of purple cabbage
10 thin fresh asparagus
1 small kohlrabi
Note… I used the veggies that I had in the fridge at the moment. If you have a bunch of veggies but not these particular ones, use what you have. Pretty much all veggies taste good inside a spring roll!
Gather your veggies and prep by either using a mandolin, a grater, or some sick knife skills, and julienne, shred, or slice you veggies into thin match sticks. Once all the veggies are prepared, sprinkle a little vinegar over the top.
For the rolls…Grab a large shallow vessel (a rimmed baking sheet works great) and add in warm water. Working one at a time, place the wrapper into the water for about 10 seconds or until the wrapper starts to soften. Remove and spread onto a clean, damp work surface. Gather a bit of each veggie that you are adding and place towards the bottom middle of the wrapper. Now fold the sides in over the pile of veggies. Then with the side closest to you, tuck and roll wrapper away from you, trying to keep it tight, but not to tight that it rips.. (Hopefully that makes since.) Place finished rolls onto a damp surface to keep from sticking and if not serving right away, drape with a damp towel or paper towel to keep from drying out.
For the soy ginger dipping sauce. Add grated ginger, minced garlic, and soy into a bowl and mix together. Serve with spring rolls.
Eat one, two, or a plateful. It’s nice to share but not a necessity.
Yesterday I spent the entire day (ok maybe not the entire day), but a the better part of the afternoon defrosting my freezer. Sure, I do the occasional chip chop here and there, just enough from around the freezer door so it will close, but ever few months I notice that everything in the fridge is not staying cold and that the freezer is not freezing stuff. Thats when I know its for real time to defrost. So a few days ago when I noticed my bananas were turing to liquid in the freezer, I knew it what I had to do….Completely empty the fridge and melt/hack away the 2-4 inches of ice build up that accumulated. It is such a freaking pain in the ass.So on this defrosting day, I took all the stuff from the freezer, stuck it in a cooler, and the rest of the stuff, which is basically all veggies, I just tossed on the table. As I am hacking away with a metal spatual, a wooden spoon, and a constant rotation of pots of boiling water, I was thinking about dinner. I figured I might as well just eat up as much of the veggies as I could, you know, so I didn’t have to put them back in the fridge. And also, I was getting pretty annoyed because this particular defrosting session was taking way longer the anticipated, which made making dinner seem like another pain in the ass. I figured I might as well just eat everything that is already out on the table, which pretty much narrowed down the “whats for dinner” conversations because it was already all over the place. And so dinner was a humongo salad for me, and for the mister, I made him a monster of a veggie sandwich. (my salad was exactly the same stuff as the sandwich, minus the bagel) Easy, fast, super duper yummy, pretty and piled so high with tons of veggies that the fridge is pretty much empty now.
Look at the is beast. I don’t call it a monster sandwich for nothing.
The stuff included in this monster veggie sandwich..
Romaine lettuce, tomato, avocado for there is not real sandwich without them. Thinly sliced radishes, cucumber,a and onion for nice crispy crunch. Shredded beets, carrots, and purple cabbage to give more crunch and a bit of sweetness. Then of course there needs to be something pickled, so I used banana peppers cause they are the SHIT!! And lastly some hummus for a nice creamy finish (plus a bit of protein) and yellow mustard because mustard on everything is just right. Heres to a mountain if goodness that is no longer in the fridge! Served with a another mountain of roasted parsnips and carrots (more stuff from the fridge) and a tall glass of iced tea.
Lucky that today is farm share pick up cause the fridge is pretty much on empty.
Yea it’s Thursday!!!!
-C
A Monster Veggie Sandwich
Note. This is just a guide.. Feel free to use whatever veggies you fancy.
Either a bagel, 2 slices of bread, or a big chunk of baguette (use a gluten free bread if you want or need too)
Hummus- Homemade or store bought
Mustard
Something pickled like pickles, banana peppers , jalapeños or all three
Lettuce, spinach or some kind of leafy green
Tomato
Avocado
Onion
Radishes
Cucumber
Shredded Carrots
Shredded Beets
Shredded Cabbage
To assemble. Ready your bread.. Toast if you want, and stick it on a plate
On either side, smear the hummus and the mustard.
Pick a side, start to stack by evenly disrupting veggies on top of veggies. Place the second piece of bread on top and giving a little smooth to keep it together.
And go at it. Cut in half or don’t. Have a napkin or a long sleeve ready to wipe your face.
Last week pineapples were on sale everywhere……So I bought 5. Don’t judge
And I bet I am not the only one that got overly excited at $1.50 pineapple and bough themselves a few. We will just call ourselves opportunists. Now we have plenty of pineapples and don’t have to pay the $4 a piece prices. (Justification)
But if you don’t have a pineapple laying around, you must go get one. (Maybe if your lucky, there might still be some sales going on) because you must make this salad. I am on a mission to make everyone I know eat it because, for lake of a better way to say it…….It will rock your world.
Dill and pineapple are a serious match made in heaven. Pineapple, with its sweet, tangy, citrusness and dill with it’s super fresh earthiness. Mixed together with a few other helpers to create a fresh, clean, chunky, tangy, over the top, flavor. I could stop right there, but toss in a handful of lentils, some creamy avocado and a bed of kale…It’s like the best spring time, celebration on you tongue, happiness in you tummy, kind of salad.
A salad that will make you smile. (and maybe buy 5 pineapples)
Stuff for the goodness. We got the kale, some avocado because all salads should have avocado and some cooked lentils because, well, all salads should have lentils (or beans or nuts.. so you could totally something else) Then a few sprigs of fresh dill, a clove of garlic, red wine vinegar, salt and a bowl of chunked up pineapple. The pineapple, dill, garlic, red wine vinegar, a splash of water and a pinch of salt get blended in a blender or whatever blending device you use. Go as smooth or chunky as you like, I recommend going smooth, but leaving a little chunk, like half blended.
The prep is done, now compile. Kale in bowl, top with lentils,. Toss on avocado chunks, and, last but not least, the blended pineapple dill mixture.So good……So so good.
Happy Friday!!
-C
So Good Pineapple Dill Kale Salad
Serves Two
3 cups washed and chopped Kale
1/2 a avocado, diced
1 cup fresh pineapple chunks
1-2 springs fresh dill
1 tablespoon Red Wine Vinegar
Salt
1/2 cup cooked lentils (or any bean or nut will do)
Note. No fresh dill? You can use dried, just sub in 1 teaspoon for the fresh and after blending with the pineapple, let sit a little longer to really let the flavors meld together.
Place pineapple, dill, pinch of salt, vinegar and garlic into a blender or whatever you own that blends and blend stuff together, leaving it a little chunky. Let sit for 5-10 minutes.
Kale goes into a bowl and add the lentils and diced avocado. Pour the blended pineapple on. Toss around.
Now eat.
Whenever my little sister comes over for dinner, I always end up making lentils in some form or another because she, like me, is awesome and loves a good lentil. It makes me so happy that she has such great taste in food and wants to eat what I make. It’s validation from a teenage girl which is the best kind of validation.
So last night when she came over after school for dinner and trash talk (she likes to verbally abuse Nick) we decided to make both of our favorites … Lentils AND sweet potatoes. How can you go wrong with that combo? Well I am telling you that you can’t. The rich creamy soft and slightly sweet sweet potato mixed up with the hearty, earthy, oh so fantastically tasty lentil. Add in a bit of kale and cheese if you wish and serve with salsa and guac… Whoa, it’s the best!!!
Such a great evening, I get to the cooking, the sister gets to the verbal abuse and the mister, begin the champ that he is, takes it and dishes it right back.
I am the greatest(coolest) sister.
Baked sweet potatoes, cooked lentils, chopped up kale and monetary jack cheese (Cheese is optional.. and make it vegan cheese if you want) And you don’t need then, but salsa and guacamole are the best toppings.. So you have them.
Cut the cooked potato in half lengthwise and scoop the flesh out into a bowl. With a fork, smooth the potato , sprinkle with salt and pepper and mix in lentils and kale.
Stuff the mixture back into the skins of the potato.
And add some cheese (The mister and the sister wanted lots of cheese, no cheese for me) and stick the potatoes into the oven and let bake for another 5 or so minutes or until the cheese is all melty or the top is nice and crispy.
Remove and plate… Serve with salsa and guacamole and maybe some corn chips.
I am the greatest sister
-C
Makes 2 serving
1 Large Sweet Potato
1 cup Prepared Lentils
1 cup Chopped Kale
1/2 cup Grated Monetary Jack Cheese (Vegan style or not)
Salsa (optional)
Guacamole(optional)
Place potato in oven at 400 degrees for 30-40 minutes or until soft a baked throughout.
While potato is baking, prepare lentils. 2 cups water to 1 cup lentils. Add water and lentil to pot, bring to a boil, add a sprinkle of salt, and reduce to simmer until lentils are tender.
When potato is cooked, remove potato and let cool for a few minutes. Cut in half lengthwise and scoop out most of the flesh out of the skins and place into a big bowl. WIth a fork, mash the potato a bit Add in the lentils and the kale, a sprinkle of salt and pepper, and mix to combine. Stuff the mixture back into the skins of the potatoes and top with cheese. (if using ) Place potatoes back into oven for 5-10 minutes until cheese is melty and bubbly or the top of the potato is a bit crispy. Remove from oven and serve on a plate with salsa and guacamole.
Eat and be happy.
As the weather gets warmer and the days get longer, my food brain turns to fresh colorful simple spring food. (which is totally a thing). Spring food is a combination of the last of the winters hardy root veggies combined with the springs bounty of fresh greens and early growers. Spring food is the best!
This lovely. oh so gorgeous salad has been on repeat in my meal repertoire. It’s so yummy and so simple. Beets and carrots roasted and sliced, tossed onto a bed of tender spinach and topped with a creamy, lemony avocado dressing. Fresh, fast, light, and filling. Everything a perfect spring salad needs. Not to mention it takes no time at all to make because with all this nice weather , we want to spend as much time basking in the warmth and glow of the sun. I might even take my spring salad outside today. Maybe.
Dressing stuff. A nice and ripe avocado, the juice of a juicy lemon, a bit of garlic powder (raw garlic is nice too, but grate it super fine) and salt. Simple simple and sometimes simple can be the best.All stuff get mashed super mashed until smooth and scooped into a jar with a lid. Add about 1/4- 1/2 cup water (depending on how thick you like it) and shake that jar all around.
That’s it. You now have super creamy avocado lemon dressing. Drizzle on anything and everything… especially this roasted carrot and beet salad..
A roasted beet and carrot, all sliced upTossed onto a bed of tender baby spinachAnd topped with creamy avocado dressing. Fantastic, so pretty, and makes the day super springy!
A salad suggestion…. Add some roasted chickpeas toasted nuts, or sunflower seeds to this or any salad. Adds a little proteins and the crispy crunch is a nice addition.
Enjoy the day..Smile lots
-C
Roasted Carrot Beet Salad and Avocado Lemon Dressing
Salad
2-3 cups Baby Spinach
1 large carrot
1 medium beet
Toasted nuts, beans, or seeds (Optional)
You can roast the veggies a few ways.. Slice the carrot and beet, place on a baking sheet and stick into the oven at 425 degrees until tender. Or you can just toss a the carrot and beet onto a baking sheet whole and roast.( What I usually do)
Once the veggies are roasted and cooled, thinly slice and toss onto the bed of baby spinach. Top with Avocado Lemon Dressing (recipe below) and some toasted crunchy thing.
Dressing
1 Ripe Avocado
1 lemon
1 teaspoon garlic powder
1 teaspoon salt
1/4- 1/2 cup water
Scoop avocado fruit into a bowl and mash with a fork until a paste is formed. Scoop mashed avocado into a jar and add remaining ingredients. Stick lid on jar and shake tip combined. Use on anything.
Dressing lasts a few days in the fridge. Should stay green, but add a layer of lemon juice to top to keep from browning.
When something goes on sale at the grocery store, I tend to buy it. Being that it is Valentines Day this week, all the stores are having specials on all sorts of sexy things… and strawberries are one of them. Now I am not a huge fan of buying produce that is terribly out of season, but I can’t help myself…a good deal is a good deal and the strawberries were a super good deal. I was just going to make some sweet ass strawberry jam or maybe a lovely strawberry cake with them (and I probably still will), but these strawberries are actually super juicy and full of flavor, and it’s always nice to eat some full flavor freshy strawberries… especially soaked in balsamic vinegar. And yeah, I think that this salad is pretty sexy, so it makes for a perfect Valentines day dish.
A handful of ingredients and 5 minutes will get you to a fantastic salad experience.
A bowl of baby spinach, a few chopped up strawberries*, half a sliced avocado and a small handful of toasted almonds.. Oh, and don’t forget the balsamic vinegar….
*Note.. Strawberries are kind of heart shaped already so if you want, reserve a few slices to fancy up you salad presentation, but chop up the rest into smaller pieces.
Pour the vinegar on the strawberries and let sit for at least 5 minutes. (the longer the strawberries can sit with the vinegar, the better)
Pile it on.. thinly slice avocado.. rough chopped toasted almonds… It’s pretty much as easy as it can get.And last but not least, toss on the balsamic soaked strawberries and drizzle the remaining vinegar. (if you made hearts, place on top to make pretty) Sprinkle with a pitch of salt and pepper and pow! Fancy, sexy, delicious salad.
Not to shabby for 5 minutes and a handful of ingredients. Anyone (don’t feed to a person with nut allergies) would be so syked to be fed a salad like this… You yourself should be pretty excited to eat a salad like this. Heck, I am excited to eat a salad like this!
A love salad for everyone and everyday!
YAY for Thursday and Happy meal planning!!!!
-C
♥ Balsamic Strawberries on Spinach Almond Avocado Salad ♥
Ingredients for 1 large or 2 small salads
3-4 ripe strawberries
handful of roasted almonds (slivers or whole)
1/2 avocado
2 tablespoons Balsamic Vinegar
3 cups baby spinach
Pinch of salt and pepper
Dice strawberries into small pieces (reserve a few whole slices for heart shapes if you want) and toss in a small bowl with the balsamic vinegar. Let sit for at least 5 minutes. Rinse and dry spinach. Place in a bowl(s) and top with thinly sliced avocado, chopped almonds and balsamic soaked strawberries. Drizzle the residual vinegar on top and sprinkle with a pinch of salt and pepper.
All day, everyday, there is something new and delicious to pick and eat. I have my CSA with the Interval Community Farm, which is in full swing, so I am picking up thousands of pounds of fresh produce every week. (maybe not quite that much, but so so much) Plus our lovely garden is starting to reward up with the prettiest veggies as well. I have so much fresh produce that I find myself mindless eating just to make more room in the fridge.(not to mention that my counters are also covered and I have a laundry basket full of yellow squash and zucchini on the table). I guess its getting about time to do a little canning and pickling… but until then, I will just have to solider on and keep on eating!
So this salad is completely inspired by the ever exploding contents of my fridge (and table, and counters). Fresh zucchini, corn,and peaches roasted and tossed together with fresh tomato, creamy avocado, and herbs into one big bowl.. It’s like eating summer… And it fantastic.
The stuff. Zucchini, corn, tomato, peach, and avocado. A lemon (not shown..it rolled under the couch and I couldn’t find it for a little while) and salt and pepper. Also not shown is the bunch of fresh cilantro that I added at the last minute
I initially wanted to grill this stuff, but I didn’t feel like starting the charcoal and getting that all situated, so I just used the oven. So if you want, use the grill.
Cut zucchini into long wedges and cut the peaches into a few large slices. Place on a lightly oiled pan or baking sheet, sprinkle with a little salt and pepper and stick into the oven at 425 degrees. Toss you corn into the oven too.. but I just stuck that on the oven rack.
While the stuff is roasting in the oven, chop the tomato into mouth sized chunks, and mash the avocado with the juice of the lemon( I finally found it) and a pitch or more of salt. Add enough water to make it slightly runny.
Afer about 15 minutes, the stuff in the oven should be done. You want the corn slightly charred and the peach and zucchini to be soft, but not mushy. Remove from oven and stick everything on a plate or baking sheet and let cool for a few minutes, or until cool enough to handle it.
And now cut the corn from the cob and dice the zucchini and peaches into chunks.
Toss it all into a bowl, give it a mix and smother with the avocado dressing.
And lastly, dice up and add a big ass handful of some freshly chopped herb.. (Cilantro is great, but basil is also just as nice) and toss that on top too!
So much color, so much tasty. This is all summer!
Happy Friday
BYE!
-C
Makes a meal for 1 or a side for 2
1 ripe peaches
1 medium zucchini
1 ear of corn
l medium tomato
1 avocado
juice of 1 lemon
salt and pepper
bunch of fresh cilantro or basil
Note..If i had the time to light up the charcoal to grill, I would have. So Feel free to cook the corn, zucchini and peach on the grill if you so do please.
Slice peach into 4 equal chunks and zucchini into 4-5 wedges. Place in a lightly oiled skillet and sprinkle with salt and pepper. Stick the pan and the corn, husk removed, into oven at 425 degrees for about 10-15 minutes, or until the corn is charred and the zucchini and peach is browning and slightly tender. While this is going on, dice up the tomato into chunks and smash the avocadoin a jar until smoothish with the juice of the lemon, salt and pepper, and enough water to thin it out so that its kind of pasty. (make it any consistency you like)
When veggies are done cooking, remove from oven and place on the counter or a plate and let sit until its cool enough to handle. When cooled off, dice the peach and zucchini into chunks and remove corn from the cob. Toss together with the tomato, sprinkle with a little salt and pepper, dump the mixed lemony avocado all over and top wit a heavy handful of some freshly chopped herb.
Serve warm or cold. Can be eaten with a fork or spoon.
Maybe you, like me, went a did a little strawberry picking this past weekend. And maybe you, like me, pick so so many that now you have an overload of the most perfect, if not slightly too ripe strawberries staring at you, waiting to be eaten or, at the very least, cooked into some magical cake, pie, cookie, or whatever. But lets face it, its Monday and maybe we do not exactly feel the need (or have the time) to make a cake, pie, cookie or whatever tonight. So that leaves us with a crap load of strawberries that need to be dealt with.
And sure, we can freeze them, but maybe you, like me, already have a freezer full of other stuff. And just because we don’t want to bake a cake, pie, cookies, or whatever tonight, doesn’t mean we don’t want something amazingly tasty and fantastic.
So that brings us to this super easy, oh so pretty, and ever so tasty way to move those strawberries….. Stick them in the oven and roast them. So simple and really truly amazing. When strawberries are roasted, they turn so tender and fall apart and release all of their juices that turn into a sweet syrup. They become almost jam like, but the flavors are way better, more complex. And there is no need for added sugar or any other stuff because the flavors and natural sweetness of the roasted strawberries stand on their own.
A few ways to which you might want to use roasted strawberries that will make your life better: Dump onto ice cream, yogurt, or make a strawberry shortcake or a strawberry fool. Scoop onto a green salad, mix into a bowl of quinoa, marinate some tofu, or add to roasted veggies. You can mix into muffin batter, into oatmeal, or add to a layer cake. They make a fantastic PB and J and the syrup in seltzer is a tasty drink. You can pretty much use them for anything. But MY favorite way to consume these…a bowl, a little spoon, and my mouth. Nothing else needed.
And if you didn’t happen to go strawberry picking this weekend. It’s cool, just pick some up from the closest farm stand near you. You can tell all your anyone thats asks that you picked them yourself. (not a lie, just a stretch cause you did, in fact, pick them up yourself)
Yea for Monday and for roasted strawberries! (Or at least yea for strawberries.)
All you need…A big (or small) bowl of strawberries.
Rinse those pretties and place them on a parchment lines baking sheet. (don’t skip parchment… these suckers get super thick and juicy.)
Here is the thing. These strawberries are picked from the lovely farm I get my CSA from.(How badass is it that we have a PYO part of the share). They are not like super market berries that are extra firm with dirty unappealing green tops. These little organic lovelys have tender little green tops…. I eat them. If you do not wish to eat the greens, just top the berry off before roasting.
So the berries, stick them in the oven at 450 degrees and roast them for about 35-45 minutes (depending on the size of your berries)
Pull them out when they start to get dark and slightly charred and the juice is thick and bubbly.
And scrap the berries, juice and all, right into a jar.
Eat with anything, everything and with nothing at all.
Happy Monday
-C
strawberries of any quantity
Place strawberries, with or without tops (your preference) on a parchment lined baking sheet. Place in a 450 degree oven and roasted foe about 45 minutes or until the berries are soft, mushy, starting to charr and have lots of bubbly juice, . When done, remove from oven and let cooll for for about 5 minutes. Transfer berries, juice and all, into jar.
Eat right away or stick in fridge. Juices thicken up when cooled.
Keeps about a week in fridge, but I highly doubt it will last the night.
When something goes on sale at the grocery store, I tend to buy it. Being that it is Valentines Day this week, all the stores are having specials on all sorts of sexy things… and strawberries are one of them. Now I am not a huge fan of buying produce that is terribly out of season, but I can’t help myself…a good deal is a good deal and the strawberries were a super good deal. I was just going to make some sweet ass strawberry jam or maybe a lovely strawberry cake with them (and I probably still will), but these strawberries are actually super juicy and full of flavor, and it’s always nice to eat some full flavor freshy strawberries… especially soaked in balsamic vinegar. And yeah, I think that this salad is pretty sexy, so it makes for a perfect Valentines day dish.
A handful of ingredients and 5 minutes will get you to a fantastic salad experience.
A bowl of baby spinach, a few chopped up strawberries*, half a sliced avocado and a small handful of toasted almonds.. Oh, and don’t forget the balsamic vinegar….
*Note.. Strawberries are kind of heart shaped already so if you want, reserve a few slices to fancy up you salad presentation, but chop up the rest into smaller pieces.
Pour the vinegar on the strawberries and let sit for at least 5 minutes. (the longer the strawberries can sit with the vinegar, the better)
Pile it on.. thinly slice avocado.. rough chopped toasted almonds… It’s pretty much as easy as it can get.And last but not least, toss on the balsamic soaked strawberries and drizzle the remaining vinegar. (if you made hearts, place on top to make pretty) Sprinkle with a pitch of salt and pepper and pow! Fancy, sexy, delicious salad.
Not to shabby for 5 minutes and a handful of ingredients. Anyone (don’t feed to a person with nut allergies) would be so syked to be fed a salad like this… You yourself should be pretty excited to eat a salad like this. Heck, I am excited to eat a salad like this!
A love salad for everyone and everyday!
YAY for Thursday and Happy meal planning!!!!
-C
♥ Balsamic Strawberries on Spinach Almond Avocado Salad ♥
Ingredients for 1 large or 2 small salads
3-4 ripe strawberries
handful of roasted almonds (slivers or whole)
1/2 avocado
2 tablespoons Balsamic Vinegar
3 cups baby spinach
Pinch of salt and pepper
Dice strawberries into small pieces (reserve a few whole slices for heart shapes if you want) and toss in a small bowl with the balsamic vinegar. Let sit for at least 5 minutes. Rinse and dry spinach. Place in a bowl(s) and top with thinly sliced avocado, chopped almonds and balsamic soaked strawberries. Drizzle the residual vinegar on top and sprinkle with a pinch of salt and pepper.
For a little while now, we have been telling this lady (my little sis) we would take her to the big city up north. She had never been, (which is crazy cause we live so close) and wanted to just explore and take some pictures. So last week when she finally finished school for the summer, the mr, this lady, and I made the trip.
I guess the best way to start a little road trip is with a bowl or egg noodle covered in the smelliest teriyaki sauce ever ( it was 9 in the morning). Gross as hell, but i give her credit for creativity. This lady has a fantastic (and pretty freaking dirty) mind.
And really, what’s a trip to Montreal without stopping at Ikea. It’s like a house ware themed playground. So much tomfoolery!
The mr. wants to know, “is it really frozen yogurt, cause it’s too good to be yogurt?” The lady just wants an Ikea closer so she can eat ice cream and hot dogs all day, everyday.
The balls we plastic and full of water….and after wondering aloud if the balls ever dropped, this one fell onto my head.
Once in the city, we parked and set out on foot. The goal for the day was to walk, see some cool shit, and get a good cup of coffee. All of which we did. So after a few hours, tired, hot and sun burnt (we forgot the sunscreen), we dragged ass back to the car and drove home.
Until next time. (maybe we’ll take her to a strip club)
It’s Mother’s Day weekend which means that you and I and everyone out there should feel the slightest bit obligated to at least do a little something nice for your mom for the mere fact that you were borned. And really what better way to celebrate mom than with food… It really is the least that you can do. (I think mom’s also like flowers and cards and handmade pasta necklaces) My mom is defiantly about the food. (she has had her fair share or pasta necklaces) A many years back on Mother’s day, this sweet little girl (me) made her mother a special breakfast treat…blueberry scones. And ever since that day, for every freaking holiday, birthday, whatever day, my mother requests (demands) a batch of those scones. She is always saying that these are her favorite treat and that no one has ever made them as good as I do. (I guess that just reiterates that I am her number 1 child)
And for the last few months my mom has been up my butt, trying to get me to make her some. Not going to lie, I have been saying I’ll get her a batch, but for some reason, I haven’t gotten around to making them. So two birds here.. Make the scones and she gets off my back for a least a little while (a month.. maybe 2) and I give her a fantastic Mothers day gift that I know she will love.
So here they are , oh mother of mine. Blueberry scones!
The stuff. Flour, baking soda, baking powder and salt. A bit of sugar, vanilla, buttermilk, and butter (use vegan butter and nut milk if you want to make them vegan) And of course we need the blueberries which can be fresh or frozen. I usually use fresh, but the store I stopped at only had really big containers of fresh that were like $1000 dollars a piece and the organic frozen happen to be on super sale. So you know, the cheap in me won that battle. So into the bowl goes all the dry stuff; flour, baking powder and soda, salt, and the sugar. Give it a good whisk.
Now for my special trick for a perfectly distributed cold butter in a pastry. Freeze your butter and grate it!
With a large wholed grater, grate the frozen butter directly into the bowl with the dry, stoping a few times to toss the butter chunks around so you don’t end up with a huge pile of grated butter. When it’s all grated, gently toss around so the butter is evenly distributed. Now dump the blueberries into the flour mixture. Toss them around to give them a coat of flour. Add in the buttermilk and vanilla and give a little mix until liquid is absorbed. We are trying to handle the dough as little as possible.Turn mixture onto counter. It’s very loose, but thats what it should look like. Very gently and with as little handling as possible, gather dough up, knead a few times till everything just comes together. Press dough into a disk that is roughly an inch thick…. and it doesn’t need to be perfect. Cut the disk into even sized pieces. Do 6 big, 8 normal, maybe even 10 smaller. Whatever size you like. (I did 8) Place the scones onto a baking sheet, using a spatula to transfer, and sprinkle the tops with a little bit of sugar. Into a preheated oven for about 20 minutes.And when the scones look all nice and browned and a tester comes out clean. remove and either serve right away warm, preferably with huge cup of coffee or tea, or stick on a rack to cool before storing in air tight container.
Perfect to serve as a breakfast pastry, at brunch, or even as a dessert. A nice little treat for a special lady. (dudes can eat them too)
Happy Mothers Day Mom! Thanks for having me!
And Happy Weekend!!!
-C
Blueberry Scones
2 cups all purpose flour
1/3 cup sugar plus 2 tablespoons to sprinkle on top
1 teaspoon baking powder
1 teaspoon baking soda
1/2 teaspoon salt
1/2 cup (1 stick) unsalted butter frozen or really cold (use non dairy butter like Earth Balance for vegan)
1 cup blueberries (fresh or frozen)
1 teaspoon vanilla
3/4 cup buttermilk (use non dairy milk for vegan)
Preheat oven t0 400 degrees
In a large bowl, whisk together flour, baking soda, baking powder, sugar, and salt. Take the frozen butter and grate directly into flour mixture, tossing around to evenly disrupted. Add in blueberries and toss around till coated with flour, then lastly, add vanilla to buttermilk and mix into mixture until just barely coming together. Turn mixture out onto counter and with your hands, knead mixture a few times until it forms a solid dough. Shape into a disk and smoosh down until about an inch thick. Cut into 6-10 triangles and place on a non greases baking sheet and sprinkle tops with remaining sugar. Stick into oven and bake for 20 minutes or until tops start turning a golden brown and a tester in the middle of a scone comes out clean.
Remove from baking sheet and serve warm or let cool on a rack.
Mom gets first dibs, and if she is willing to share, eat one yourself with your face.
I figured now is a good time to get this recipe out there before we get to far into spring and summer recipes because there is going to be a lot of banana ice cream filled recipe coming and I figured its a good idea to have the basic banana ice cream recipe ready for people to refer too. And because I made so much fantastic naner ice cream, I also made a cookies and cream naner ice cream for my sisters and the mister.
Comments that I got from my sisters and the mister when I made them this ice cream
-Sister one.”I give this my sister seal of approval.. It’s so good. The first dessert you have made that I liked! (not including all the other desserts that you have made that I liked)”
-Sister two- “Wow.. it looks like ice cream and feels like ice cream and tastes like ice cream.. You should make me this ice cream!” (I was confused too because I was pretty sure I just made her some)
-The mister- “I am so excited for my new fly fishing pole!”
Ok, so the naner ice cream isn’t new to the mister and he IS very much excited for his new fly fish pole. So excited that he forgot to tell me how amazing that I am and to thank me for making him a big bowl of yumminess. (It’s ok, I forgive him)
And yes, this is probably one of the easiest, most delicious, healthy and amazing frozen dessert that you will ever eat. You will probably find yourself buying mass amounts of bananas and stocking the freezer until things just start falling out. (which is also ok because it’s only bananas and you can’t have too many frozen bananas)
The stuff you need for this ice cream…. Nice and ripe bananas, peeled and then frozen* That’s it.
To make it, place frozen bananas into food processor and hit the on button. Process the crap out of the namers until nice and silky smooth.
*Note, the smaller the frozen chunks are , the faster and maybe a little easier for the blender to blend the naners into ice cream. So if you think of it, chop bananas into pieces before freezing or even after.
After all blended and smooth, either eat right away or scoop ice cream into a freezer safe container and stick in freezer. That’s the banana ice cream… And it is amazing and so so so so so addictive. I make a batch, think I am only going to eat a scoop, then find myself eating half of what I have made, but it’s ok cause it’s only bananas.
Now for the cookies and cream banana ice cream..One batch of banana ice cream, either freshly made, still in food processor or made ahead and placed in a food processor and given a good pulse to smooth it up.
Add cookies in, crushing a bit beforehand and pulse till combined. Now you have cookies and cream naner ice cream…. and everybody is happy.
Scoop into a cup, a bowl, a freezer safe container, or directly into your mouth. Be careful…. You can still get brain freeze from eating naner ice cream too fast!
Keep it real hump day drum bum!
-C
Basic Banana Ice Cream
Makes one batch. Good for 3-4 servings
4-5 ripe bananas peeled and frozen
Peel bananas and stick in a freezer bag or container and freeze. When bananas are completely frozen, break into pieces and stick into a food processor or blender and puree until silky smooth.
Eat right away or scoop into a freezer safe container for later.
Cookies and Cream Banana Ice Cream
1 batch banana ice cream
5-10 (depending on your cookie need) cream filled cookies like oreos or Trader Joe’s Joe Joe’s (These are gluten free)
In a food processor, blend banana ice cream with cookies.
Eat right away, with a utensil of choice in a container of choice.
Bowl licking is acceptable.
Chomp Chomp Chomp… The sound I make as I eat this freaking fantastic crunchy granola. You know it’s good when the person sitting next to you is annoyed by the sound of you face while eating. I eat a lot of crunchy stuff. And I am pretty sure I annoy the mister a lot.
Oh well, he will live, and he eats his fair share of annoying stuff too so we can just call it even.
So granola. I love it. I make a batch every few weeks or so, and I usually make it just for me. (I almost never make things just for me) I like to keep it simple but flavorful. A tad sweet, but not really, and crunchy, without the oily fried taste. I also like a variety of sizes, some big clusters and some small pieces.
This granola fits the bill perfectly. Made with 5 ingredients, no oil, and the perfect sweetness level. It’s one of my favorite flavors yet. And I know I said I made it just for me, but the mister really liked it too. (I can’t help sharing)
The simplest of stuff. 1 smashed banana, a cup of pureed butternut squash, Vietnamese cinnamon*, honey, and old fashion oats. (and a dash of salt, not shown)
*Note. I only ever use Vietnamese cinnamon because once I start using it, regular old cinnamon just won’t cut it anymore. It is a bit sweeter and a lot more spicy. If you don’t have it or don’t want to use it, use regular cinnamon and add in 1/2 a teaspoon of all spice.Toss the cinnamon and salt with the oats. Mix together the banana, squash and the sweetener and combine with the oats until full incorporated.
Another note. Because I made this granola for me and no body else, I actually omitted the honey (I think that banana abs squash make it sweet enough) But if I was making this for lets say, the mister, or a friend, I would use add a bit. The sweetness level and sweetener of choice is up to you, but 2-3 teaspoons of honey or maple syrup is usually sweet enough for people.
Dump the mixture on a parchment lined baking sheet and give it a little pat, you know, to settle all the bit and pieces together, all cozy and evenly spread out. Now stick into a preheated oven and after about 20 minutes, take out of oven and give the granola a toss, breaking apart any super big chunks or overly wet pieces. Put back into oven for another 20 minutes. (I like my granola super crispy crunchy so I cook it a little longer, like 30 more minutes)And when you are happy with the crunchiness of you granola, remove from oven and let cool, trying not to eat all of it while it sit’s on the counter looking all pretty and smelling like happiness.
Grab a bowl, stick the rest into a jar with a lid, hide it from others, and chomp chomp chomp away!
-C
Banana Butternut Granola
3 cups old fashion oats (use gluten free oats if needed)
1 ripe banana, mashed
1 cup butternut squash puree (can use canned)
2 tablespoons Vietnamese cinnamon (or 2 tablespoons regular cinnamon and 1/2 teaspoon of allspice)
1-3 tablespoon honey or sweetener of choice (use greater amount for sweeter)
dash of salt
Preheat oven to 375
In a large bowl, mix together oats, cinnamon and salt. Mix the mashed banana, squash, and sweetener of choice together and combine with the oats. If the mixture seems really dry, add in a very small splash of water to loosen just enough to mix.
Dump mixture onto a parchment lined baking sheet and evenly disperse the mixture. Give it a kind of smoosh to compact the oats and to make sure all its all the same thickness on the pan.
Stick into oven for 20 minutes. Remove and give granola a little toss, maybe breaking apart any really big chunks (unless you like really big chunks) and put back into oven for another 20 minutes. (30 for a crunchier granola) Remove from oven and let cool on baking sheet before storing in an air tight container. If you find that it is not as crunchy as you would like or is a few days old and lost some of its crunchiness, just stick it back into the oven for a few minutes to re crunch.
Eat as is, as a cold cereal, dip in peanut butter, add to popcorn or whatever way you want to eat it. No utensil required.
I had to share the last of the 5 pineapples cause if I didn’t, that would mean I ate 5 pineapples by myself. (I ate 4 pineapples by myself) So donuts were made and delivered to my sisters house where I proceeded to make her and her kids and another sister dinner. (hand made pizza on a weekday!) I then whipped out these pretty little upside down pineapple donuts for dessert, right after I cleaned up and made whipped cream. The kids were swallowing them hole and trying to steal just one more and my sister and the mister, well they had to eat their donuts all elegant like with forks. (weirdos)
I know I have said it before but just in case you forgot
I am the best sister/aunt ever!
The stuff. Flour, salt, and the baking soda whisked together into a bowl. Fresh pureed pineapple, milk, egg, melted butter, and white sugar. Than there is more melted butter, brown sugar and fresh pineapple for the upside down. This batter is pretty simple, just make sure to whisk all the dry really well. Dump all the wet stuff into the dry and mix until combined. Don’t over mix!Grease the donut pan really well and mix the brown sugar with the remaining melted butter
Drizzle the bottom of each donut round with the butter/ sugar mix then layer thinly sliced pieces of pineapple around the hole maker. (not as perfect as a pineapple ring, but still pretty)
Scoop donut batter on into the pan and stick into the oven preheated at 350 degrees. When donuts are all nice and golden brown, remove from oven and let sit and cool for about 5 minutes to give the donuts time to cool and the brown sugar to thicken. Dump donuts out onto a wires rackAnd serve them all upside down like. Maybe with a scoop of whipped cream or ice cream or nothing.
Donut Smiles!
-C
Pineapple Upside Down Donuts
Makes 12 donuts
1 cup flour
1 teaspoon baking soda
1 teaspoon salt
1/2 cup white sugar
6 tablespoons melted butter ( 1/2 s for batter 1/2 for sugar mixture)
1 egg
1/2 cup milk
1/2 cup pinapple puree (about 1 cup fresh pineapple chunks blended)
1/2 cup brown sugar
1 cup sliced pineapple
Note. I used fresh pineapple, but you could use canned. I think you would need a of rings (cut in half) and a an of chunks, blended up)
Preheat the oven to 350 and grease the donut pan(s)
In a large bowl, whisk together the flour, salt, sugar and baking soda. Melt 3 tablespoons of butter and mix that with into the flour mixture along with the pineapple puree, milk, and lastly the egg. Mix until combined.
Melt the remaining 3 tablespoons of butter and mix into the brown sugar. Drizzle (crumble) about a teaspoon of the mixture into the bottoms if each donut mold. Layer thinly sliced pineapple on top of that then scoop donut batter on top of that. Stick into the oven for about 10 minutes, or until donuts are gold brown and a tester comes out clean. Remove from oven and let cool for 5 or so minutes on a wire rack before turning out of pan.
If working with one pan, make sure to really clean the pan and re-grease before baking the second batch!
Serve donuts with a scoop of whipped cream and eat with your face.
I can’t stop eating these. They are like little balls of crack and I am an addict.
Frozen peanut butter grapes… I mean, I just can’t stop.
So you say you have never frozen your grapes? Well you should. It’s the only way I like to eat them anymore. I was never a huge grape fan, but one day long ago, I discovered the wonder that is the frozen grape and it is amazing, Now whenever grapes are on sale at the grocery store, I buy way to many and end up filling our tiny little freezer with jars and bowls of grapes. Then whenever the mister goes to grab the bag of frozen peas for his sore back or knees, there is almost always a frozen grape avalanche. Why I don’t put a lid on those containers is even a mystery to me. Oh, now I remember.. I want easy access.Oopen the freezer, grab a few grapes, and go on my way… not having a lid to take off makes the process a little easier.
Then one day, the frozen grape game turned into something else, something a little more decadent and even more addicting. Where it came from, I do not know. Maybe it’s some subconscious throwback to a childhood full of peanut butter and grape jelly sandwiches, or maybe it’s just that fact that I think peanut butter can pretty much go with anything. But no matter why, I started dipping those frozen grapes into peanut butter and never looked back. And now when I have grapes, it’s all I want to eat.
I am warning you now, once you start making these, watch out, because before you know it, you will develop a frozen grape addiction too. And littles.. they are as easily addicted to these as well. I have seen kids that hate grapes go totally bonkers for these. Just so you know.
The stuff you will need. Washed and drained fresh grapes (green or red. I usually use red but the green were half the price and the red ones didn’t taste very grapie*) Creamy peanut butter, skewers, and a little bit of cinnamon or cocoa powder (optional)
*Note. When you are the store, try before you buy. You know what I mean, eat a few while shopping aground. I say this because not all grape are created equal. Some taste way better than others. I have bought grapes before that didn’t taste like anything or that have really tough skins, and those just piss me off, so eating a few will guarantee that your money is being well spent and that the grapes won’t disappoint you.
Ok, so now let’s make these bad boys.
Simple simple. Two grapes per skewer (or toothpick) Lay on a wax paper covered dish or pan and stick them in the freezer until frozen. When the grapes are frozen, melt peanut butter. Take a big glob and stick in a tall skinny cup or bowl and stick in the microwave or heat in a sauce pan and then transfer to a tall skinny vessel. Take frozen skewed grapes and, one skewer at a time, dip in the peanut butter. Cover with as much or as little of the peanut butter as you want and place on wax paper. If you are feeling feisty, add a sprinkle or cinnamon or even a dash of cocoa powder. Or, this may seem a little crazy, but garlic powder is so F*ing good.(it’s worth at least giving it a try) When all grapes are dipped, place back into freezer for another 10 minutes or so to let the peanut butter set up a bit.
Whenever your ready… Eat. And be so happy. And always keep a back stock of frozen grapes in the freezer. They are the best.
Keep it realz.
-C
Peanut Butter Freezer Grapes
the quantity is up to you, but I recommend making a shit ton!
Creamy Peanut butter (I use organic creamy from Trader Joes, or natural skippy)
Green or Red Grapes
Cinnamon and or cocoa powder (Optional)
Toothpicks or skewers
Wash grapes and skewer 2 grapes onto a stick. Place on a flat surface and stick into the freezer until frozen, which usually takes about an hour.
Once grapes are frozen, stick a big glob of peanut butter into a tall skinny vessel (Like a juice cup or a 4 oz ball jar) and warm to a liquid constancy in the microwave (about 30-45 seconds) or if you don’t have a microwave, stick in a sauce pan, warm on stove, and pour into a glass (what I do)
Remove frozen grapes from freezer and dip into melted peanut butter. Place on a wax paper line tray or pan and sprinkle with cinnamon and or cocoa powder, or not, or a few (whatever you want) and stick back into freezer for another 10 minutes.
Eat as many as you want… Make so many because you will become addicted!
What is better for a bake sale then Oreo cookies? Oreo cookies made from scratch!.
So when my sister called and asked me to make something for my nephews bake sale to raise money for his basketball team, I couldn’t say no. (or I didn’t want to say no cause any good excuse to bake right!) Plus I had just found this awesome recipe on one of my favorite blogs, my name is yeh, for home made Oreos that I have been super excited to try, so it kind of worked out. But before I committed to the Oreo, I wanted to just double check with my nephew and see what he might want me to make because it was his bake sale.
This is the conversation we had. And yes, it was through text.
Me- “Hey bud, what do you want me to make for your bake sale? Cupcakes, cookies, donuts, or brownies”
Jack- ” Yea!”
Me- “Yea what?”
Jack- “Make that.”
Me- “Make what?….Hello!! What do you want me to make? Should I make Oreos?”
Jack- I WANT OREOS!”
Ok.. So it took a little while, but we got there. And after the the basketball game and the super successful bake sale..
ME-“Did you see the Oreos?”
Jack- “What do you mean?”
Me- “The Oreos I made for the bake sale…the ones you wanted me to make”
Jack- “There was a bake sale? I want Oreos”
Yup, that’s the attention span of my 13 year old nephew. Little shit head. But for real, I had so much fun making these cookies and I am definitely going to be making them again. Plus they were a super hit at the sale.
I am the best aunt! (and sister!)
Cookie Time! Whats going on here is brown sugar and butter have be beaten together until nice and fluffy Then a good big splash of vanilla and another 2 big splashes of coffee are added to that.(I sacrificed my last few sips of my coffee for these cookies) The dry stuff, flour, salt and cocoa powder, are whisked together, waiting to be added to the wet. Mix the dry ingredients into the wet and mix. I ended up just using my hand and kind of squish mixing everything together until in tuned into a nice lovely uniformed dough. Form the dough into 2 balls and give each a few kneads to get any air bubbles out. Place dough back into bowl and stick in the fridge to sit for 10-15 minutes( it makes the dough a little easier to work with)
Once the dough has had a little time to rest and cool, remove from fridge, one ball at a time. Place on a lightly cocoa or powdered sugar dusted surface and roll out the dough. Grab any size circle (or other shape) cookie cutter and get to shaping the cookies. Notice the tin can in the bowl? I could’t find my biscuit cutters anywhere but the can was the perfect size, and it worked really well. Keep a little bowl of either powered sugar of cocoa to dip the cutter in in between making the cookies. It really helps the dough from sticking and breaking.
When you have cut out your cookies, use a spatial and place them on a baking sheet. You can try to transfer with you hands, but you end up messing up the shape and most of them will break anyway.
Stick the cookies in the oven for about 15 minutes a batch and continute to roll and cut out the cookies until you have no dough left.
While the cookies are getting their cool on, make the cream filling. All you need is a stick of butter, about 4 cups of powdered sugar, some vanilla and a few splashes of heavy cream. Beat that all up until nice and creamy thick and spoon it into a pastry bag (I used a big old ziplock bag) to be piped on the cookies. Filling the cookies is for sure the best part. Separate the cookies into pairs and pipe a big blob of filling onto one of the two cookies. Take the names cookie and place on top, giving it a little smooth to the disperse the cream. Keep doing that until the cookies are all filled.
Stacks of cookies… Sold to the highest bidder! I was told that they sold out within the first half hour at $1.50 a pop….Should have charged $5…. for a good cause right?
And yes, even though he was being a space head and didn’t even care that I just made him like 50 bucks for his team, I still saved the kid one.He just had to give me either a hug or 5 bucks for it.
I got a hug. (I really wanted the 5 dollars)
-C
From Scratch Oreo Cookies
Adapted by Molly Yeh from My Name is Yeh!
The cookie (makes about 18 3 inch Oreos)
2 cups all purpose flour
1 cup cocoa powder
3/4 cup brown sugar
1 cup or 2 sticks soften butter (use earth balance for vegan)
1 teaspoon salt
1 teaspoon vanilla extract
2 tablespoons brewed coffee
The filling
1 stick soft butter (us earth balance for vegan)
2 tablespoons heavy or whipping cream (use a nut or soy milk for vegan)
4 cups powdered sugar
2 teaspoons vanilla extract
Cookies- In a large bowl cream together sugar and butter until light and fluffy. Add in vanilla and coffee and mix together. In another bowl, whisk together the flour, salt and cocoa powder. Add dry to wet and mix together unit a uniform dough forms. Dump out onto a lightly cocoa or powdered sugared surface and knead dough a few times. Split ball into two balls, place in bowl, and stick in the fridge for 15 or so minutes.
Preheat oven t0 325 degrees
When dough is chilled, remove one ball at a time, and roll dough out on a cocoa or powdered sugar dusted counter until its about 1/4 inch thick. With a round (any shape would work) cookie cutter, cut out as many cookies as you can. In between sits, dip cutter in a sugar and cocoa to keep the cookie from sticking. Transfer cut out cookies onto a baking sheet with a spatula. Take scraps, roll into a ball, and roll out again. Keep doing that until you can’t cut out any more. (You can either bake a weird shape cookie or just eat the dough)
Bake cookies for about 15 minutes or until the cookie has risen a bit and the tops have lost their glossiness and look cooked. Remove from oven and let cookies dry on a wire rack.
Make the filling
Filling- Beat together butter, sugar, vanilla, and cream until completely mixed and is at your optimal consistency. Add a drizzle more cream if you want to thin out or add more sugar for a thicker cream.
Stick the filling into a piping bag or ziplock bag an snip the end. With cookies in pairs, pipe a big dollop of filling onto one of the two cookies. Place the naked cookie onto the filled cookie and give a smooth to distribute the filling.
lick your fingers and eat a cookie.
If selling at a bake sale, charge $3 a cookie…. If it’s for a good cause.
I swear I didn’t plan this, but today is officially Pi Day! Pi being the mathematical constant of the ratio of the circumference of a circle to its dimeter (did I say that right?) 3.1415…… And today’s date is 3.14.15. Whoa…I guess that means that this pie was meant to be.
But the real reason I made this pie was for a surprise treat for the mister. He left for a couple of days and me being the super assume lady love of his, thought it would be nice for him to come home to his favorite dessert.. plain old rhubarb pie.( I know, I be the best) And it didn’t hurt that when I went to the grocery store, there was a big old pile of fresh, gorgeous rhubarb staring me right in the face, and on sale to boot.
The funniest thing. Me and the mister have been together for a very long time (12+ years….we started dating in high school, so I am not that old!) and I have known that his favorite dessert is plain rhubarb pie for ever. Every time we have one of our food discussions about our favorite foods, (which happens more than it should and usually consists of me running my mouth and him grunting or nodding once in a while) rhubarb pie always comes up. He even talks about the old lady who used to make him rhubarb pie for mowing her lawn. And guess what… I have never once made him a plain rhubarb pie. Why? Honestly, I have no idea. Maybe I secretly think I was going to screw up his one favorite dessert, or maybe I never quit had enough rhubarb for a pie, or maybe I am really just an awful lady. But for whatever reason, it doesn’t matter anymore because I finally made him a plain rhubarb pie.
The stuff for the makings of pie… One single pie crust, flour, sugar and rhubarb. I mean, come on, this might be one of the simplest pies ever.
Note…The first thing the mister said to me when he saw the pie was. “Where is the top crust? My response what “Screw you ass face” but then chuckled. This pie would be great with a top crust, but I was thinking how pretty it would be without it. And honestly, I only made a single crust. What I am saying is.. make a double crust if you want a top.
The chilled pie crust gets rolled out, placed into a pie plate, trimmed and made all pretty. The bottom is sprinkled with a 1/4 cup of sugar and stuck back into the fridge while the oven preheats to 350. Now is a good time to dice the rhubarb into inchish chunks. Once the oven is preheated, remove crust from fridge and add in the diced rhubarb.
The remaining sugar and flour get mixed together in a bowl and dump on top of the rhubarb. Give it a tiny toss with you fingers just to get some of the mixture to sink down a little. (Don’t worry, the filling will be perfect when you do it like this) I also cut up the pie crust trimmings and placed on top… not necessary, but looks pretty and is a good use of the scraps.
Now cover the entire pie with tinfoil. Cut and x through the middle and fold foil back to expose the filling but keep the crust covered. (so much easier than trying to squish strips of foil together..you know what I am talking about)
And then the pie is ready to be baked.
In the oven for 5o minutes with the foil, then 10 or so minutes without to finish.And then you take it from the oven and marvel at the beauty.
I am now truly the best super awesome lady love. I should get a freaking crown but would settle for a stand mixer or blender as a reward instead.
Important…..Let the pie cool completely (or just about) before cutting.The filling needs a bit of time to set.
Happy Saturday, Happy Weekend, Happy PI Pie Day!!!
-C
Rhubarb Pie
Single Pie Crust.. Recipe here
4-5 large Rhubarb Stocks (4 cups chopped)
1 1/4 cups white sugar
a hefty 1/3 cup flour
Make you pie crust.. and make sure it’s chilled!
Roll our pie crust and place in pie plate. Trim and make edge all nice and pretty. Add 1/4 cup of sugar to the bottom and stick back in the fridge to relax while you get the other stuff together.
Preheat oven to 350
Wash and dice rhubarb into inchish chunks. In a bowl, mix together 1 cup of sugar and the flour. Once the oven is preheated, remove crust from fridge and fill crust with the chopped up rhubarb. Now dump the sugar, flour mixture on top, slightly tossing it around with your fingers. Cover entire pie with tin foil and with a knife, cut an x through the middle of the foil. Fold foil back to expose the center of the pie, but keep the crust covered. Stick into oven. Bake for about an hour, removing the tin foil after about 50 minutes. Pie is done when the crust is golden brown and a fork or knife stuck into the middle of pie comes out with a thick jam like sauciness.
Let pie cool and set for a bit.
Slice. Serve on a plate with an eating utensil and maybe a scoop of vanilla bean ice cream. Lick plate clean.
Because it is cold outside. Because I had an hour to kill before I needed to leave the house and because I wanted to make a sweet treat for the mister (who had been dealing with frozen pipes all day) and for the little littles that I was going to hang out with. My original idea was to just make regular old snickerdoodles, but as I was riffling around my tea drawer for a mid day tea (it’s usually coffee, but I am trying to cut back on drinking one thousand cups a day) I got hit with a little inspiration. Chai tea spiced snickerdoodles. Yes! a nice black chai, full of flavors or cinnamon, ginger, cardamon, allspice, and pepper. So many good time tastes. And while I am at it, why not add some chocolate to that mix, because, well just because.
Chai, chocolate, and sugar equals….Bada da da….. awesome Cookies! And who doesn’t want awesome cookies?
The stuff…Flour, salt, baking powder, cinnamon, and allspice. Cocoa powder, brown and white sugar. Veggie Oil (you can use butter, or vegan butter instead for a chewier cookie) vanilla, a little vinegar and a nice cup of chai tea… Also a little bowl of cinnamon and sugar to doodle the cookies.
The sugars, oil, tea, vinegar, and vanilla go into a big bowl. Beat for a minute on medium, then add the rest of the stuff and beat some more until fully incorporated…. Simple simple.
Preheat the oven to 375 and get the cookies all dressed up in a cinnamon sugar suit by taking globs of dough and kind of rolling it into ball (perfection is not necessary) Drop dough balls into the cinnamon sugar and toss around to fully coat. Place on cookie sheet and give a good smoosh to flatten the cookie balls out to about 1/2 inch thick. Now into the oven for about 9-11 minutes to bake.
Aahhhh…….pulled from the oven and placed on a rack to cool. Fluffy, chewy, pillowy soft and spicy cookies. Oh the smell of so good!Made extra large to make extra little littles happy. The best part? I made each little sing me a song for a second cookie… I am the greatest!
Heres to a Happy Hump Day!
-C
Chocolate Chai Snickerdoodles
The stuff-
2 cups all purpose flour
1/3 cup cocoa powder
2 teaspoons baking powder
1 teaspoon cinnamon
1 teaspoon salt
1/2 teaspoon allspice
Chai teabag steeped in 1 1/4 cups boiling water
1 cup brown sugar
1/4 cup white sugar
3/4 cups vegetable oil (can substitute butter or vegan butter for a more chewy cookie)
1 teaspoon vanilla
1 teaspoon apple cider vinegar
2 tablespoons each of cinnamon and white sugar to coat cookie balls in
Preheat oven to 375
In a cup, steep tea bag in 1 1/4 cups boiling water. Let tea steep for 10 minutes.
In Large bowl, add sugars, oil, vanilla, vinegar and steeped tea and beat on medium speed for about 2 minutes. Add the rest of the ingredients (besides cinnamon and sugar for coating) and beat on low until everything is fully incorporated.
Add the cinnamon and sugar to a small bowl and mix together. Take globs of dough and roughly formed ball then drop into cinnamon sugar and toss to coat. Place coated balls on cooke sheet and smoosh down so cookies are about 1/2 inch thick. Place in oven for about 9-11 minutes or until cookies are just barely cooked through. Remove and let cool on a wire rack.
My suggestion for sharing….If they want one, make them sing and dance for it!
With that being said, the nature of my soups change seasonally. My summertime soups are usually on the lighter side, made with the fresh bounty of the season, and spiced more on the light and floral side, opposed to the really deep and warm spices that I use all winter long,
This corn chowder is made just right. It had the perfect balance of hearty and creamy from the potatoes and use of pureed onion cream, but still light and refreshing from the sweet fresh corn and the lemony fresh thyme. It is for sure a great summertime soup (chowder) Even the Mr. was even really into it, and he claims he doesn’t like corn. (I say bullshit to that.. he eats corn all the time)
Now to chowder!
The Stuff. Some super fresh corn on the cob, a couple onions, a few chopped up potatoes and a chopped up carrot. Then we have a little oil, a lemon, dried thyme and salt and pepper.
To start, take an onion, chop it up, and toss into a large heavy pot with a little olive oil and a sprinkle of salt. Stick pot on stove on medium heat and cook until onions are soft and traslutcent. When the onions are done, remove and add to a blender or bowl. (if using a hand blender) Add in the juice of the lemon and blend it all up until nice a smooth.
You have now made a nice creamy cream that will help make the final product more, well more creamy without the use of cream (lets say cream on more time !) .Set aside.
When the pot is empty again, add in the rest of the stuff, including the cobs of the corn, (they hold a butt load of flavor) the dried thyme, and salt and pepper. Place on stove and add enough water to completely submerge the veggies. Keep pot on a medium heat, add a lid, and stir ever once in a while. Cook until the potatoes are nice and tender. (when the potatoes are done, so is everything else)
Now that everything is all cooked up, remove the cobs and stir in the onion puree.
Now with a hand blender, blend up until the chowder is thick and smooth, but still nice and chunky. (If you are working with a blender, just remove about half of the soup and blend up, then dump back in) The optimal chunkiness is up to you , so blend, check the chunk, then blend a little more if needed. If you feel that the soup is to thick, add in a little more water, or to thin, just cook down o little longer.
Once you like the constituency,season to taste with salt and pepper and place pot back on a simmer until you are ready to serve.
And thats how we make corn chowder
It tastes best serves in the daintiest of the cups, sprinkled heavily with cracked pepper, and with a side of some cracker situation (Saltines would be best, but sometime there are only triscits in the house)
Summertime is for chowder!
HAPPY Humpday Wednesday!!!
-C
Makes a pot big enough for 4-6 nice decent sized servings
2 fresh ears of corn
3 medium (tennis ball sized) red or white potatoes
2 white or yellow onions
1 carrot
Juice of a lemon
1 tablespoon olive oil
1 1/2 tablespoons dried thyme
salt and pepper
To start, peel and dice one whole onion and toss into pot with olive oil and stick on medium heat. Cook onions until translucent and fragrant. Remove from pot and add cooked onions and the lemon juice to a blender and puree until smooth and set aside.
While you are cooking down the onions, dice up the carrot and onion, remove the corn kernels from the cob, and chop up the potatoes. Once you have removed the first batch of onions, toss in corn, onions, carrot, potatoes, and the dried thyme. Stir around in the pot on medium heat for a few minutes just to warm up the spices. Add the cobs into the pot and fill with enough water to cover the stuff in the pot. Place back on medium heat with a lid and cook for another 20ish minutes, or until potatoes are super tender and almost falling apart.
Remove cobs from pot and add in the onion puree. Now either remove about half the soup and place in the bender and blend up til smooth, or use a hand blender and blend up chowder until you get your desired chunkiness. If you think the chowder seems to thick, add in more water, or to thin, just cook down a little longer on the stove.
When ready to eat, ladle chowder into a cup or bowl and add lots of fresh cracked pepper.
Serve with a cracker and a spoon to eat it with.
You ever make dish, completely on the fly, just to use something up (I have a lot of ripe tomatoes) with no real expectation, just because… Then have it be one of the best freaking things that you have ever made? This salad is one of those things.. maybe not the best thing I have ever made, but definitely the best salad I have ever made…. this week.
A salad compiled of all things amazing, taking just a few minutes to make and is the perfect balance of uber fresh with baby spinach, raw kale, and crunchy quick pickled onions. Then adding a touch of warmth with the sweet and juicy seared tomatoes and big chunks of creamy avocado.
I mean, for reals. ……Best Salad Ever !!!! (this week)
Now let’s do this.
The Stuff. A big bowl of baby spinach and chopped up kale, a few sliced up roma tomatoes, some super thinly sliced red onion, half an avocado, red wine vinegar and salt and pepper. Before you do anything, place the sliced onions into bowl, sprinkle with a pinch of salt and add a few glugs of the red wine vinegar. You want the onions to sit in the vinegar for at least 5 minutes on the counter cause the longer they sit the more crispy pickly they get. (after eating onions like this, you will never want to eat them any other way) Lightly oil a skillet and preheat to a medium heat. Once the skillet is hot, sprinkle the tomato slices with salt and pepper and place tomatoes right on in, snugly, but not overlapping. Let cook for about 3-4 minutes, or until the bottoms start to brown. Flip and cook other side for another few minutes.Once the tomatoes are seared on both sides, remove them gently from skillet and toss them on top of the bowl of greens.
Take the pickled onions and toss those right on top, with any of the residual vinegar, add dice and scoop the half of avocado and toss that on in as well.And now eat the best salad ever (this week).
Make the day good!
-C
Skillet Seared Tomato and Quick Pickled Onion Salad
Serves 2 as a side, 1 for a hungry eater
2 large or 3 smaller roma tomatoes
1/2 of a red onion
2-3 tablespoons red wine vinegar
1 1/2 cups baby spinach
1 1/2 cups chopped kale
salt pepper
1/2 a ripe avocado
olive oil (to grease pan)
Thinly slice red onion and place in a bowl. Add vinegar into a and sprinkle with salt. Let sit on counter for at least 5 minutes, if not longer,
Slice tomatoes into 1/2 inch thick rounds and sprinkle with a pitch or salt and pepper. Lightly oil a skillet and preheat it on medium heat. Once the skillet is preheated, stick the tomatoes on it (watch out for splattering tomato juice) Cook first side for about 3 minutes or until the bottom has browned, then flip and do the same for other side.
One tomatoes are seared, place directly onto the greens. Now dump the pickled onions and residual vinegar on top. And dice up avocado and add that on top too.
Now eat your salad, fork or fingers…
And I know, ba-daaaamn. So good.
I figured now is a good time to get this recipe out there before we get to far into spring and summer recipes because there is going to be a lot of banana ice cream filled recipe coming and I figured its a good idea to have the basic banana ice cream recipe ready for people to refer too. And because I made so much fantastic naner ice cream, I also made a cookies and cream naner ice cream for my sisters and the mister.
Comments that I got from my sisters and the mister when I made them this ice cream
-Sister one.”I give this my sister seal of approval.. It’s so good. The first dessert you have made that I liked! (not including all the other desserts that you have made that I liked)”
-Sister two- “Wow.. it looks like ice cream and feels like ice cream and tastes like ice cream.. You should make me this ice cream!” (I was confused too because I was pretty sure I just made her some)
-The mister- “I am so excited for my new fly fishing pole!”
Ok, so the naner ice cream isn’t new to the mister and he IS very much excited for his new fly fish pole. So excited that he forgot to tell me how amazing that I am and to thank me for making him a big bowl of yumminess. (It’s ok, I forgive him)
And yes, this is probably one of the easiest, most delicious, healthy and amazing frozen dessert that you will ever eat. You will probably find yourself buying mass amounts of bananas and stocking the freezer until things just start falling out. (which is also ok because it’s only bananas and you can’t have too many frozen bananas)
The stuff you need for this ice cream…. Nice and ripe bananas, peeled and then frozen* That’s it.
To make it, place frozen bananas into food processor and hit the on button. Process the crap out of the namers until nice and silky smooth.
*Note, the smaller the frozen chunks are , the faster and maybe a little easier for the blender to blend the naners into ice cream. So if you think of it, chop bananas into pieces before freezing or even after.
After all blended and smooth, either eat right away or scoop ice cream into a freezer safe container and stick in freezer. That’s the banana ice cream… And it is amazing and so so so so so addictive. I make a batch, think I am only going to eat a scoop, then find myself eating half of what I have made, but it’s ok cause it’s only bananas.
Now for the cookies and cream banana ice cream..One batch of banana ice cream, either freshly made, still in food processor or made ahead and placed in a food processor and given a good pulse to smooth it up.
Add cookies in, crushing a bit beforehand and pulse till combined. Now you have cookies and cream naner ice cream…. and everybody is happy.
Scoop into a cup, a bowl, a freezer safe container, or directly into your mouth. Be careful…. You can still get brain freeze from eating naner ice cream too fast!
Keep it real hump day drum bum!
-C
Basic Banana Ice Cream
Makes one batch. Good for 3-4 servings
4-5 ripe bananas peeled and frozen
Peel bananas and stick in a freezer bag or container and freeze. When bananas are completely frozen, break into pieces and stick into a food processor or blender and puree until silky smooth.
Eat right away or scoop into a freezer safe container for later.
Cookies and Cream Banana Ice Cream
1 batch banana ice cream
5-10 (depending on your cookie need) cream filled cookies like oreos or Trader Joe’s Joe Joe’s (These are gluten free)
In a food processor, blend banana ice cream with cookies.
Eat right away, with a utensil of choice in a container of choice.
Bowl licking is acceptable.
I’ll let you know now, I am a make and eat soup all year long person. I can think of few things better then sitting outside, basking in the sun, hopefully with a light wind, a book in hand, enjoying a nice big cup of some good homemade soup. (Doesn’t that sound so freaking lovely?) This soup right here is perfect for just that. Parsnips are the best, kind of like a big white sweet, yet starchy carrots. And cooked together with a little bit of light and lemony thyme, rich earthy turmeric and a couple more chopped veggie….. you got yourself a nice thick and fragrant bowl of happiness that fills you up without weighing you down. It’s food you can eat that fills you up, leaves you feeling cozy, yet still wanting to hop on a bike or lace up the running shoes. Hearty without the feeling of all the heaviness.
A perfect soup for spring! (or summer, winter, or fall)
The stuff. Parsnips, carrots, onion and garlic. Thyme and turmeric, salt and pepper. the tinniest bit of oil and water (water not shown)Chop all the veggies and the garlic, drizzle a dutch oven or a pot with oil, toss in the veggies. Add the turmeric, the thyme, and 1/2 cup of water. Sweet sweating the veggies. Turn pot on medium and cook until the water completely cooks out. When the veggies start to brown and stick to the pot, deglaze with water. Give a good stir and keep cooking. Repeat the deglazing process until the veggies are super soft and ready to blend. (I did this 4 times.. it only took 10 minutes)Add enough water to cover the cooked veggies. And now blend the heck out of it.. Go as smooth or chunky as you want. I blended as smooth as I could get with this crappy immersion blender. (Blender on loan until I finally decide on, and buy a new one)And there you have it. Scoop into bowls, add lots of cracked black pepper, and go to town. I made enough to save a bowl for later… it didn’t last for later.
Soup so good.
-C
Parsnip Thyme and Turmeric Soup
4 large parsnips
2 carrots
1 whole onion
3-4 cloves garlic
2 teaspoons thyme
2 teaspoons turmeric
salt and pepper
olive oil
water
Dice up the parsnips, carrots, garlic and onion and place into a large dutch oven or pot. Drizzle with a bit of olive oil, sprinkle on the spices, salt and pepper and add about 1/2 cup of water. Turn heat on medium and start cooking down the veggies. Once the water evaporates and the veggies start to caramelize, deglaze pot with about a 1/2 cup of water. Give pot a stir, and continue to cook until water evaporates. Repeat this 2-3 more times until the veggies are super soft and fragrant.
When the veggies are ready, add enough water to the pot to submerge the veggies. Bust out the immersion blender or dump into a blending device and blend until smooth (or the consistency that you want) Have a cup of water ready to thin out if needed. When blended, taste for salt and pepper, add more if you want, and cook on low heat until you are ready to serve.
Garnish with a lot of good cracked pepper
Eat from a vessel, use a spoon
I was cleaning my spice shelf (I feel like I do this like once a week) and found some poppy seeds hiding behind some jars. Accidental spice findings happened more often the then one might think in my house.. I like to buy tiny baggies of spices with good intentions of using them, but because of their tiny size, I often lose them or forget about them due to that tininess. But I usually find those tiny little bags, and when I find them, I try to use them right away..(I don’t like having old spices around and no, I will not toss it) And it just so happened that I has a lemon in need of using.. and it was getting close to dinner time. I could wait and make lemon poppy seed cake or muffins, or just start dinner. Then I was like, ” I’ll just make lemon poppy seed pasta.” And so I did. And of course it needed to have lots of garlic and some kind of vegetable to round out the dish, (I know tomatoes are fruit but you know what I mean)
And the mister….He loved it. And I am sure you will too. How can you go wrong with lemon, garlic and poppy seeds all creamy and fragrant? You really can’t, Pus this recipe is so easily adaptable. It can be vegan and or gluten free..whatever you want it to be.
So if you are looking for a fast, delicious, and impressive looking dinner… look no further. You gots one right here!
Start by tuning oven on to 400 degrees. Chopped tomatoes and sprinkle in oil and salt and stick in the oven. Do this first because the rest of the meal only takes about 10 minutes..So fast!!!
Choose your pasta and get a pot of water boiling and start on the sauce.. which includes, olive oil, lots of garlic, flour, milk(any kind you use), lemon zest a little lemon juice, poppy seeds, salt and pepper.
The sauce is pretty much a basic roux…
Crush the garlic and stick into pot with the oil. Let simmer for a few minutes until you can smell the garlic, which smells like heaven. Whisk in the flour and then gradually whisk in the milk. Keep on low heat and continuously whisk until sauce has thickened and doesn’t run off a spoon. Add in lemon zest, the poppy seeds, and the salt and pepper. Mix it all up and turn off heat.
Once your pasta is cooked (cook however it says to on package), reserve about a 1/4 cup of pasta water and drain the rest. Add the pasta water and pasta the sauce. (the pasta water helps the sauce and noodles canooddle together)
And its all mixed up just waiting to be served…and the roasted tomatoes!
Scooped into a bowl with a scoop of the roasted tomatoes and some chopped chives, served with a couple wedges of lemon..just because.
And dinner is done…. and it took all of 15 minutes.
Thank me later.
-C
Lemon Garlic Poppyseed Pasta with roasted tomatoes
3 cups pasta (whatever you want..so it can be gluten free too)
3 tablespoons olive oil
3 tablespoons flour (use corn or arrowroot starch for gluten free)
2 cups milk (cow, hemp, soy…any kind you use)
6 cloves garlic
Zest of 1 lemon
1 tablespoon poppy seeds
2 roma tomatoes (optional but really good)
salt and pepper
Start by chopping tomatoes and placing them in a skillet or baking sheet, sprinkled in salt and a little bit of olive oil, and stick into a 400 degree oven
Bring a large pot of water to a boil add you pasta…cook to the boxes instructions.
While pastas is boiling, crush garlic and add to a pot with the olive oil. Heat on medium low heat until the garlic is fragrant and slightly brown. Now whisk in flour and then whisk in milk. Continue to whisk until sauce thickens to where it doesn’t run of a spoon. Add in the zest of 1 lemon, the poppy seeds and salt and pepper to taste. When pasta is done (should be around the same time the sauce is done) reserve about a 1/4 cup of pasta water and drain the pasta from the rest. Add water and pasta to the sauce and mix together.
Remove roasted tomatoes from the oven. Scoop pasta into bowls and top with a scoop of the tomatoes. (you can mix into pasta, but it will turn the sauce red and the tomatoes will fall apart)
Serve with a wedge of lemon and bring food to face!
Maybe you, like me, went a did a little strawberry picking this past weekend. And maybe you, like me, pick so so many that now you have an overload of the most perfect, if not slightly too ripe strawberries staring at you, waiting to be eaten or, at the very least, cooked into some magical cake, pie, cookie, or whatever. But lets face it, its Monday and maybe we do not exactly feel the need (or have the time) to make a cake, pie, cookie or whatever tonight. So that leaves us with a crap load of strawberries that need to be dealt with.
And sure, we can freeze them, but maybe you, like me, already have a freezer full of other stuff. And just because we don’t want to bake a cake, pie, cookies, or whatever tonight, doesn’t mean we don’t want something amazingly tasty and fantastic.
So that brings us to this super easy, oh so pretty, and ever so tasty way to move those strawberries….. Stick them in the oven and roast them. So simple and really truly amazing. When strawberries are roasted, they turn so tender and fall apart and release all of their juices that turn into a sweet syrup. They become almost jam like, but the flavors are way better, more complex. And there is no need for added sugar or any other stuff because the flavors and natural sweetness of the roasted strawberries stand on their own.
A few ways to which you might want to use roasted strawberries that will make your life better: Dump onto ice cream, yogurt, or make a strawberry shortcake or a strawberry fool. Scoop onto a green salad, mix into a bowl of quinoa, marinate some tofu, or add to roasted veggies. You can mix into muffin batter, into oatmeal, or add to a layer cake. They make a fantastic PB and J and the syrup in seltzer is a tasty drink. You can pretty much use them for anything. But MY favorite way to consume these…a bowl, a little spoon, and my mouth. Nothing else needed.
And if you didn’t happen to go strawberry picking this weekend. It’s cool, just pick some up from the closest farm stand near you. You can tell all your anyone thats asks that you picked them yourself. (not a lie, just a stretch cause you did, in fact, pick them up yourself)
Yea for Monday and for roasted strawberries! (Or at least yea for strawberries.)
All you need…A big (or small) bowl of strawberries.
Rinse those pretties and place them on a parchment lines baking sheet. (don’t skip parchment… these suckers get super thick and juicy.)
Here is the thing. These strawberries are picked from the lovely farm I get my CSA from.(How badass is it that we have a PYO part of the share). They are not like super market berries that are extra firm with dirty unappealing green tops. These little organic lovelys have tender little green tops…. I eat them. If you do not wish to eat the greens, just top the berry off before roasting.
So the berries, stick them in the oven at 450 degrees and roast them for about 35-45 minutes (depending on the size of your berries)
Pull them out when they start to get dark and slightly charred and the juice is thick and bubbly.
And scrap the berries, juice and all, right into a jar.
Eat with anything, everything and with nothing at all.
Happy Monday
-C
strawberries of any quantity
Place strawberries, with or without tops (your preference) on a parchment lined baking sheet. Place in a 450 degree oven and roasted foe about 45 minutes or until the berries are soft, mushy, starting to charr and have lots of bubbly juice, . When done, remove from oven and let cooll for for about 5 minutes. Transfer berries, juice and all, into jar.
Eat right away or stick in fridge. Juices thicken up when cooled.
Keeps about a week in fridge, but I highly doubt it will last the night.
I am kind of obsessed with pickled jalapeños… like I want to eat a whole jar with a fork and then drink the juice. So much hot and spicy love. One of my sisters is the same way, pickled hot pepper obsessed. We used to buy the humongo gallon sized jars of jalapeños at Costco and go through them in like a month. But sadly, Costco stopped selling those humongous jars and we have been left buying the itty bitty jars that actually fit in a normal fridge. (I know, so sad). And maybe because the jars were normal sized and I was more aware that I shouldn’t eat a of cup of jalapeños at one sitting, or just the mire fact that a tiny jar cost the same as a gallon, but the store bought little jars weren’t doing it for me anymore. And then fate happened. The grocery store was having a super sale on fresh jalapeños and I figured it was time to make make my own. Now I don’t think I can ever go back to those store bought jars of blah because the ones I made are the best freaking pickled jalapeños this girl has ever eaten. I might even start making my own gallon sized jars!!!!
Note….Don’t toss the pickled juice! It is a super yummy, full of flavor, liquid gold. You can use it as a straight up salad dressing or add to a homemade dressing. Add juice to soups, casseroles, marinades. Replace some of the liquid in a bread recipe and use the pickled juice. Use it in your favorite cocktail drinks. There is no end to what you can use the juice for.
-C
Pickled Jalapeños
for a half pint jar
8-10 Jalapeños
Apple cider Vinegar
1 teaspoon salt
Remove stem and seeds*of jalapeños and thinly slice. (I used a mandolin which works really well, but a sharp knife does the trick) Pack Jalapeños into a clean glass half pint jar and fill with half water/half apple cider vinegar and a teaspoon of salt. Dump into a pot with a lid, and bring to a boil. Take of heat and let cool for a few minutes. Stick back into jar (leave an inch of head room) Stick in fridge for at least a day. Eat your heart out.
I figured now is a good time to get this recipe out there before we get to far into spring and summer recipes because there is going to be a lot of banana ice cream filled recipe coming and I figured its a good idea to have the basic banana ice cream recipe ready for people to refer too. And because I made so much fantastic naner ice cream, I also made a cookies and cream naner ice cream for my sisters and the mister.
Comments that I got from my sisters and the mister when I made them this ice cream
-Sister one.”I give this my sister seal of approval.. It’s so good. The first dessert you have made that I liked! (not including all the other desserts that you have made that I liked)”
-Sister two- “Wow.. it looks like ice cream and feels like ice cream and tastes like ice cream.. You should make me this ice cream!” (I was confused too because I was pretty sure I just made her some)
-The mister- “I am so excited for my new fly fishing pole!”
Ok, so the naner ice cream isn’t new to the mister and he IS very much excited for his new fly fish pole. So excited that he forgot to tell me how amazing that I am and to thank me for making him a big bowl of yumminess. (It’s ok, I forgive him)
And yes, this is probably one of the easiest, most delicious, healthy and amazing frozen dessert that you will ever eat. You will probably find yourself buying mass amounts of bananas and stocking the freezer until things just start falling out. (which is also ok because it’s only bananas and you can’t have too many frozen bananas)
The stuff you need for this ice cream…. Nice and ripe bananas, peeled and then frozen* That’s it.
To make it, place frozen bananas into food processor and hit the on button. Process the crap out of the namers until nice and silky smooth.
*Note, the smaller the frozen chunks are , the faster and maybe a little easier for the blender to blend the naners into ice cream. So if you think of it, chop bananas into pieces before freezing or even after.
After all blended and smooth, either eat right away or scoop ice cream into a freezer safe container and stick in freezer. That’s the banana ice cream… And it is amazing and so so so so so addictive. I make a batch, think I am only going to eat a scoop, then find myself eating half of what I have made, but it’s ok cause it’s only bananas.
Now for the cookies and cream banana ice cream..One batch of banana ice cream, either freshly made, still in food processor or made ahead and placed in a food processor and given a good pulse to smooth it up.
Add cookies in, crushing a bit beforehand and pulse till combined. Now you have cookies and cream naner ice cream…. and everybody is happy.
Scoop into a cup, a bowl, a freezer safe container, or directly into your mouth. Be careful…. You can still get brain freeze from eating naner ice cream too fast!
Keep it real hump day drum bum!
-C
Basic Banana Ice Cream
Makes one batch. Good for 3-4 servings
4-5 ripe bananas peeled and frozen
Peel bananas and stick in a freezer bag or container and freeze. When bananas are completely frozen, break into pieces and stick into a food processor or blender and puree until silky smooth.
Eat right away or scoop into a freezer safe container for later.
Cookies and Cream Banana Ice Cream
1 batch banana ice cream
5-10 (depending on your cookie need) cream filled cookies like oreos or Trader Joe’s Joe Joe’s (These are gluten free)
In a food processor, blend banana ice cream with cookies.
Eat right away, with a utensil of choice in a container of choice.
Bowl licking is acceptable.
What is better for a bake sale then Oreo cookies? Oreo cookies made from scratch!.
So when my sister called and asked me to make something for my nephews bake sale to raise money for his basketball team, I couldn’t say no. (or I didn’t want to say no cause any good excuse to bake right!) Plus I had just found this awesome recipe on one of my favorite blogs, my name is yeh, for home made Oreos that I have been super excited to try, so it kind of worked out. But before I committed to the Oreo, I wanted to just double check with my nephew and see what he might want me to make because it was his bake sale.
This is the conversation we had. And yes, it was through text.
Me- “Hey bud, what do you want me to make for your bake sale? Cupcakes, cookies, donuts, or brownies”
Jack- ” Yea!”
Me- “Yea what?”
Jack- “Make that.”
Me- “Make what?….Hello!! What do you want me to make? Should I make Oreos?”
Jack- I WANT OREOS!”
Ok.. So it took a little while, but we got there. And after the the basketball game and the super successful bake sale..
ME-“Did you see the Oreos?”
Jack- “What do you mean?”
Me- “The Oreos I made for the bake sale…the ones you wanted me to make”
Jack- “There was a bake sale? I want Oreos”
Yup, that’s the attention span of my 13 year old nephew. Little shit head. But for real, I had so much fun making these cookies and I am definitely going to be making them again. Plus they were a super hit at the sale.
I am the best aunt! (and sister!)
Cookie Time! Whats going on here is brown sugar and butter have be beaten together until nice and fluffy Then a good big splash of vanilla and another 2 big splashes of coffee are added to that.(I sacrificed my last few sips of my coffee for these cookies) The dry stuff, flour, salt and cocoa powder, are whisked together, waiting to be added to the wet. Mix the dry ingredients into the wet and mix. I ended up just using my hand and kind of squish mixing everything together until in tuned into a nice lovely uniformed dough. Form the dough into 2 balls and give each a few kneads to get any air bubbles out. Place dough back into bowl and stick in the fridge to sit for 10-15 minutes( it makes the dough a little easier to work with)
Once the dough has had a little time to rest and cool, remove from fridge, one ball at a time. Place on a lightly cocoa or powdered sugar dusted surface and roll out the dough. Grab any size circle (or other shape) cookie cutter and get to shaping the cookies. Notice the tin can in the bowl? I could’t find my biscuit cutters anywhere but the can was the perfect size, and it worked really well. Keep a little bowl of either powered sugar of cocoa to dip the cutter in in between making the cookies. It really helps the dough from sticking and breaking.
When you have cut out your cookies, use a spatial and place them on a baking sheet. You can try to transfer with you hands, but you end up messing up the shape and most of them will break anyway.
Stick the cookies in the oven for about 15 minutes a batch and continute to roll and cut out the cookies until you have no dough left.
While the cookies are getting their cool on, make the cream filling. All you need is a stick of butter, about 4 cups of powdered sugar, some vanilla and a few splashes of heavy cream. Beat that all up until nice and creamy thick and spoon it into a pastry bag (I used a big old ziplock bag) to be piped on the cookies. Filling the cookies is for sure the best part. Separate the cookies into pairs and pipe a big blob of filling onto one of the two cookies. Take the names cookie and place on top, giving it a little smooth to the disperse the cream. Keep doing that until the cookies are all filled.
Stacks of cookies… Sold to the highest bidder! I was told that they sold out within the first half hour at $1.50 a pop….Should have charged $5…. for a good cause right?
And yes, even though he was being a space head and didn’t even care that I just made him like 50 bucks for his team, I still saved the kid one.He just had to give me either a hug or 5 bucks for it.
I got a hug. (I really wanted the 5 dollars)
-C
From Scratch Oreo Cookies
Adapted by Molly Yeh from My Name is Yeh!
The cookie (makes about 18 3 inch Oreos)
2 cups all purpose flour
1 cup cocoa powder
3/4 cup brown sugar
1 cup or 2 sticks soften butter (use earth balance for vegan)
1 teaspoon salt
1 teaspoon vanilla extract
2 tablespoons brewed coffee
The filling
1 stick soft butter (us earth balance for vegan)
2 tablespoons heavy or whipping cream (use a nut or soy milk for vegan)
4 cups powdered sugar
2 teaspoons vanilla extract
Cookies- In a large bowl cream together sugar and butter until light and fluffy. Add in vanilla and coffee and mix together. In another bowl, whisk together the flour, salt and cocoa powder. Add dry to wet and mix together unit a uniform dough forms. Dump out onto a lightly cocoa or powdered sugared surface and knead dough a few times. Split ball into two balls, place in bowl, and stick in the fridge for 15 or so minutes.
Preheat oven t0 325 degrees
When dough is chilled, remove one ball at a time, and roll dough out on a cocoa or powdered sugar dusted counter until its about 1/4 inch thick. With a round (any shape would work) cookie cutter, cut out as many cookies as you can. In between sits, dip cutter in a sugar and cocoa to keep the cookie from sticking. Transfer cut out cookies onto a baking sheet with a spatula. Take scraps, roll into a ball, and roll out again. Keep doing that until you can’t cut out any more. (You can either bake a weird shape cookie or just eat the dough)
Bake cookies for about 15 minutes or until the cookie has risen a bit and the tops have lost their glossiness and look cooked. Remove from oven and let cookies dry on a wire rack.
Make the filling
Filling- Beat together butter, sugar, vanilla, and cream until completely mixed and is at your optimal consistency. Add a drizzle more cream if you want to thin out or add more sugar for a thicker cream.
Stick the filling into a piping bag or ziplock bag an snip the end. With cookies in pairs, pipe a big dollop of filling onto one of the two cookies. Place the naked cookie onto the filled cookie and give a smooth to distribute the filling.
lick your fingers and eat a cookie.
If selling at a bake sale, charge $3 a cookie…. If it’s for a good cause.
Because it is cold outside. Because I had an hour to kill before I needed to leave the house and because I wanted to make a sweet treat for the mister (who had been dealing with frozen pipes all day) and for the little littles that I was going to hang out with. My original idea was to just make regular old snickerdoodles, but as I was riffling around my tea drawer for a mid day tea (it’s usually coffee, but I am trying to cut back on drinking one thousand cups a day) I got hit with a little inspiration. Chai tea spiced snickerdoodles. Yes! a nice black chai, full of flavors or cinnamon, ginger, cardamon, allspice, and pepper. So many good time tastes. And while I am at it, why not add some chocolate to that mix, because, well just because.
Chai, chocolate, and sugar equals….Bada da da….. awesome Cookies! And who doesn’t want awesome cookies?
The stuff…Flour, salt, baking powder, cinnamon, and allspice. Cocoa powder, brown and white sugar. Veggie Oil (you can use butter, or vegan butter instead for a chewier cookie) vanilla, a little vinegar and a nice cup of chai tea… Also a little bowl of cinnamon and sugar to doodle the cookies.
The sugars, oil, tea, vinegar, and vanilla go into a big bowl. Beat for a minute on medium, then add the rest of the stuff and beat some more until fully incorporated…. Simple simple.
Preheat the oven to 375 and get the cookies all dressed up in a cinnamon sugar suit by taking globs of dough and kind of rolling it into ball (perfection is not necessary) Drop dough balls into the cinnamon sugar and toss around to fully coat. Place on cookie sheet and give a good smoosh to flatten the cookie balls out to about 1/2 inch thick. Now into the oven for about 9-11 minutes to bake.
Aahhhh…….pulled from the oven and placed on a rack to cool. Fluffy, chewy, pillowy soft and spicy cookies. Oh the smell of so good!Made extra large to make extra little littles happy. The best part? I made each little sing me a song for a second cookie… I am the greatest!
Heres to a Happy Hump Day!
-C
Chocolate Chai Snickerdoodles
The stuff-
2 cups all purpose flour
1/3 cup cocoa powder
2 teaspoons baking powder
1 teaspoon cinnamon
1 teaspoon salt
1/2 teaspoon allspice
Chai teabag steeped in 1 1/4 cups boiling water
1 cup brown sugar
1/4 cup white sugar
3/4 cups vegetable oil (can substitute butter or vegan butter for a more chewy cookie)
1 teaspoon vanilla
1 teaspoon apple cider vinegar
2 tablespoons each of cinnamon and white sugar to coat cookie balls in
Preheat oven to 375
In a cup, steep tea bag in 1 1/4 cups boiling water. Let tea steep for 10 minutes.
In Large bowl, add sugars, oil, vanilla, vinegar and steeped tea and beat on medium speed for about 2 minutes. Add the rest of the ingredients (besides cinnamon and sugar for coating) and beat on low until everything is fully incorporated.
Add the cinnamon and sugar to a small bowl and mix together. Take globs of dough and roughly formed ball then drop into cinnamon sugar and toss to coat. Place coated balls on cooke sheet and smoosh down so cookies are about 1/2 inch thick. Place in oven for about 9-11 minutes or until cookies are just barely cooked through. Remove and let cool on a wire rack.
My suggestion for sharing….If they want one, make them sing and dance for it!
It hasn’t stopped snowing, the temperature is dropping fast (it’s getting to the point the dog doesn’t even want to be outside) and the mister is busy hand shoveling three long driveways. So I figured that in between all the laundry folding, plant watering , and all around sitting on my butt that I am doing INSIDE, that I would be so super nice and crank the stove up and make my love some cookies. I love making cookies, especially when I have chores to do. I think part of it is that cookies are baked in batches which breaks up the chores and gives a sort of rhythm to things. Plus everything is nice when the house smells like cookies. I was going to make chocolate chocolate chocolate cookies, but realized that I didn’t have cocoa powder, so I went with fresh cranberries (I just scored a pound of organic cranberries for 89 cents!) coconut flakes and chocolate chips. Plus I wanted to make them oatmeal because the mister likes oatmeal and oatmeal makes the cookies a little more hardy. (We need hardy when the temperature dips below zero) The verdict….. chewy, soft, slightly sweet oatmeal, bittersweet chocolate, nutty floral coconut, and the zing and pop of the fresh cranberries. He told me to hide them… hide so he will stop eating them….. because they be amazing!
The base of this cookie….We are using regular old fashion oats and flour. Salt, baking soda and baking powder. Vanilla, chia seeds in hot water, coconut oil white and brown sugar…. You know, all the cookie stuff. Then all the goodness.. Chocolate chips, coconut flakes, and fresh cranberries. Goodness. Oh yeah, and they are vegan…if that matters to you. Warm the coconut oil and mix with the white and brown sugars. Then add the chia seeds soaked in hot water. Stir until nice and silky smooth. In goes some more stuff. I just dumped all the dry right on in that bowl and mixed it up nice and nice. Chopped the fresh cranberries into chunks… One at a time…… Just kidding, I actually laid a cutting board on top of the cranberries, applied a little pressure and sliced through the cranberries.. Does that make sense? I hope so, because its is much easier and faster and the cranberries don’t all roll away. The chopped cranberries, coconut flakes and the chocolate chips go in to be mix all up. I used my hands to form the balls and gave each mound a little smoosh, but not completely flat. Then into a preheated 375 degree oven for about 13-15 minutes or until a nice golden brown. A cup of hot coffee and a plate of warm cookies… I am the nicest, right! (After his nice cookie rest I proceeded to do a little nagging, so the day evened out) So today is probably a great day for everyone to make cookies. It’s freezing out, its saturday and well, just cause. You might even be looking for a great recipe to make for that big party your going to. You should make these cookies. Have a Fantastic Weekend!!! -C
Preheat oven to 375 To start, take the chia seed and soak them in the 4 tablespoon hot water for a few minutes. Then in a large bowl, mix together the white and brown sugar with warmed coconut oil. Add in the gelled chia seeds and vanilla and stir until silky and combined. (the warm chia seeds will help everything mix together nicely) Now mix in all the dry. I start with the oats, dump on flour, toss in the baking powder and soda and salt. Mix until fully combines. If the dough seems to dry, add in another tablespoon or two of hot water. Chop the fresh cranberries into halves or smaller and dump them, the coconut and chocolate chips into the bowl of dough and mix. Using a scoop, spoons, or your hands, make little balls and place on a cookie sheet, giving each ball a little smoosh. Into the oven for 13-15 minutes or until golden brown. Remove and cool on rack. Eat a few and hide the rest for later.
WHAT! Is it really almost Thanksgiving? Got you dessert plan yet? Thanksgiving doesn’t have to be all pies, pies, pies… a cookie can be the perfect ending to any holiday meal. Don’t get me wrong, pie is awesome! I love to make pies, but whenever I show up to Thanksgiving dinner with the family, there are always maybe one or five too many. Yeah my mom thinks we all will eat 2 pies a piece This cookie is the perfect holiday combination. It says, yeah I am classy with my white chocolate chips. Cranberries are a nice seasonal flavor, and those pistachios.. this lady really went all out. WIth this cookie, you lose the formalities of pie. You don’t have to feel the pressure of eating piece after piece of pie. Eating cookies is a little easier. Grab a cookie and go for a walk. Have a piece of pie and chat for a while. Need little something.. well maybe another cookie. Watching a family movie after all the clean up and dishes are done? Why yes, a cookie is a no hassle movie snack. Bonus…Left overs are easily stored in tins or plastic baggies and there is no, Hey, where’s my freaking pie plate?
For real. People love these cookies but full disclosure: the small littles not as much. Their little mouths don’t yet appreciate the cranberries and pistachios as much as some folk. When we taste tested these cookies with the littles, the loved the cookie and they loved the white chocolate chip. A few(not all) picked out the cranberries and the $20 a pound pistachios. Needless to say, a batch of plan chocolate chip cookies always wins with the small people crowd.
If you are on dessert duty this Thanksgiving, I recommend making cookies.
So simple and so elegant. This combonation is the perfect balance of the sweet white chocolate, the tart cranberries, and the crunchy yum of the pistachio.
I don’t own a stand mixer… I know, it’s really sad, but I do have several littles who have lots of energy and are easily swayed to mix mix mix…Just give them the spoon and tell them they can lick it clean when they are done….. And so goes the sugar, butter, and vanilla..creamed together by the arms of babes. Makes the cookies taste better.
In goes the dry…These ladies knows how to stir!This guy got lucky. He got to stir in the goodies. I gave him his own bowl of chocolate for his skills. It’s important to pay the help.
So there you have it, a lovely cookie to share.
White Chocolate Chip Cran-Pistachio Cookies
Ingredients
1 cup (2 sticks) butter, softened
3/4 cup packed brown sugar
3/4 cup white sugar
2 egg
1 teaspoon vanilla
2 1/4 cups all-purpose flour
1 teaspoon baking soda
1 teaspoon salt
3/4 cup white chocolate chips
1/2 cup dried cranberries
1/2 cup pistachios
Preheat oven to 350
In a large bowl, cream together butter, brown and white sugar. Once light and fluffy, mix in both eggs and vanilla.
In separate bowl, whisk together flour, salt, baking soda. Slowly mix dry ingredients into wet. Add in the cranberries, pistachios and white chocolate chips. Mix until combined. refrigerate dough for 10-15 minutes before baking..
Drop dough on non greases cookie sheet. Place sheet on middle rack and cook for 9-12 minutes or until a slight golden brown.
Note: dough can be made up to a week in advanced and refrigerated.
Should make about 3 dozen… It really depends on the size you want.
I figured now is a good time to get this recipe out there before we get to far into spring and summer recipes because there is going to be a lot of banana ice cream filled recipe coming and I figured its a good idea to have the basic banana ice cream recipe ready for people to refer too. And because I made so much fantastic naner ice cream, I also made a cookies and cream naner ice cream for my sisters and the mister.
Comments that I got from my sisters and the mister when I made them this ice cream
-Sister one.”I give this my sister seal of approval.. It’s so good. The first dessert you have made that I liked! (not including all the other desserts that you have made that I liked)”
-Sister two- “Wow.. it looks like ice cream and feels like ice cream and tastes like ice cream.. You should make me this ice cream!” (I was confused too because I was pretty sure I just made her some)
-The mister- “I am so excited for my new fly fishing pole!”
Ok, so the naner ice cream isn’t new to the mister and he IS very much excited for his new fly fish pole. So excited that he forgot to tell me how amazing that I am and to thank me for making him a big bowl of yumminess. (It’s ok, I forgive him)
And yes, this is probably one of the easiest, most delicious, healthy and amazing frozen dessert that you will ever eat. You will probably find yourself buying mass amounts of bananas and stocking the freezer until things just start falling out. (which is also ok because it’s only bananas and you can’t have too many frozen bananas)
The stuff you need for this ice cream…. Nice and ripe bananas, peeled and then frozen* That’s it.
To make it, place frozen bananas into food processor and hit the on button. Process the crap out of the namers until nice and silky smooth.
*Note, the smaller the frozen chunks are , the faster and maybe a little easier for the blender to blend the naners into ice cream. So if you think of it, chop bananas into pieces before freezing or even after.
After all blended and smooth, either eat right away or scoop ice cream into a freezer safe container and stick in freezer. That’s the banana ice cream… And it is amazing and so so so so so addictive. I make a batch, think I am only going to eat a scoop, then find myself eating half of what I have made, but it’s ok cause it’s only bananas.
Now for the cookies and cream banana ice cream..One batch of banana ice cream, either freshly made, still in food processor or made ahead and placed in a food processor and given a good pulse to smooth it up.
Add cookies in, crushing a bit beforehand and pulse till combined. Now you have cookies and cream naner ice cream…. and everybody is happy.
Scoop into a cup, a bowl, a freezer safe container, or directly into your mouth. Be careful…. You can still get brain freeze from eating naner ice cream too fast!
Keep it real hump day drum bum!
-C
Basic Banana Ice Cream
Makes one batch. Good for 3-4 servings
4-5 ripe bananas peeled and frozen
Peel bananas and stick in a freezer bag or container and freeze. When bananas are completely frozen, break into pieces and stick into a food processor or blender and puree until silky smooth.
Eat right away or scoop into a freezer safe container for later.
Cookies and Cream Banana Ice Cream
1 batch banana ice cream
5-10 (depending on your cookie need) cream filled cookies like oreos or Trader Joe’s Joe Joe’s (These are gluten free)
In a food processor, blend banana ice cream with cookies.
Eat right away, with a utensil of choice in a container of choice.

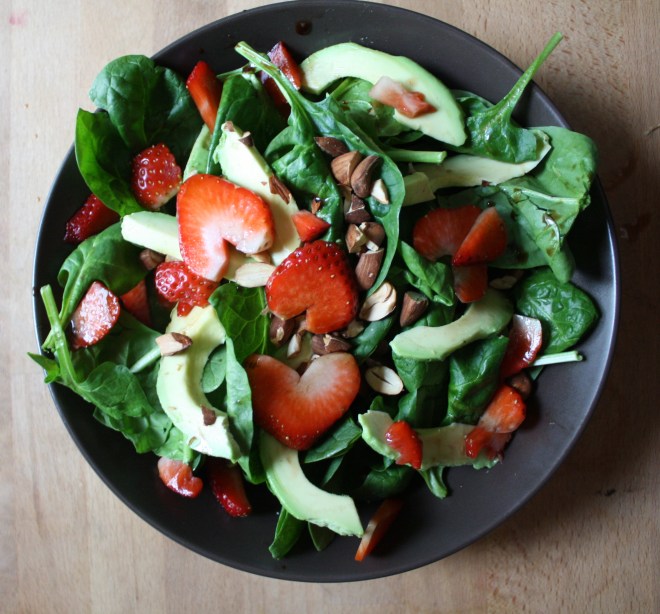 When something goes on sale at the grocery store, I tend to buy it. Being that it is Valentines Day this week, all the stores are having specials on all sorts of sexy things… and strawberries are one of them. Now I am not a huge fan of buying produce that is terribly out of season, but I can’t help myself…a good deal is a good deal and the strawberries were a super good deal. I was just going to make some sweet ass strawberry jam or maybe a lovely strawberry cake with them (and I probably still will), but these strawberries are actually super juicy and full of flavor, and it’s always nice to eat some full flavor freshy strawberries… especially soaked in balsamic vinegar. And yeah, I think that this salad is pretty sexy, so it makes for a perfect Valentines day dish.
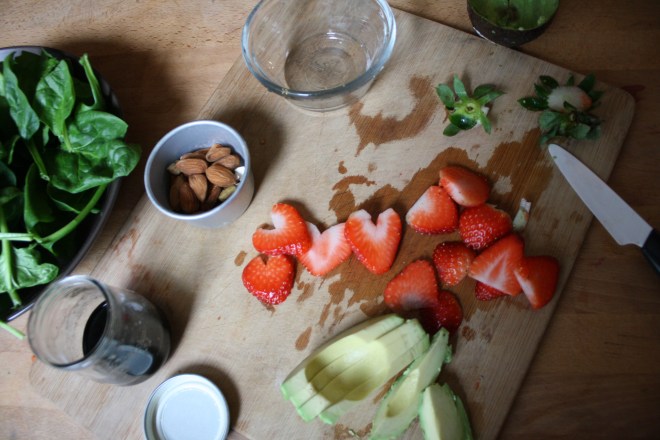 A handful of ingredients and 5 minutes will get you to a fantastic salad experience.
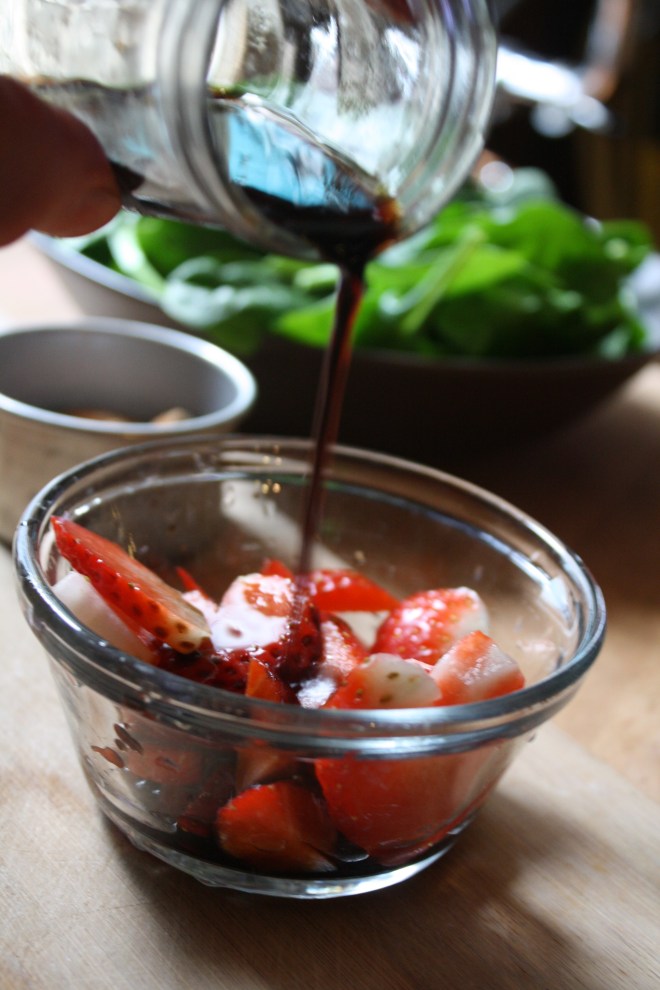 Pour the vinegar on the strawberries and let sit for at least 5 minutes. (the longer the strawberries can sit with the vinegar, the better)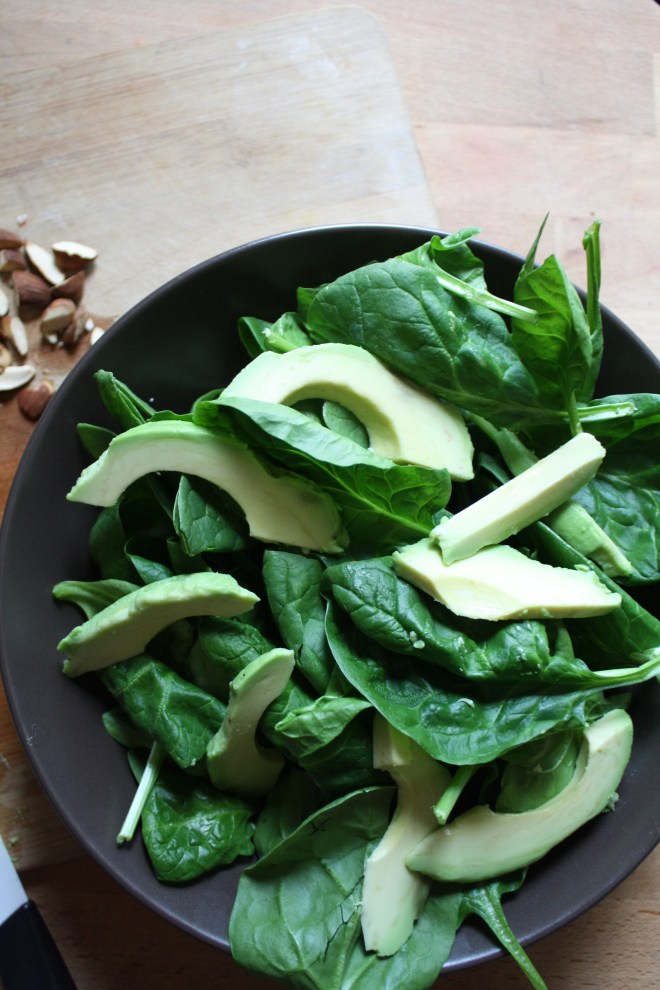
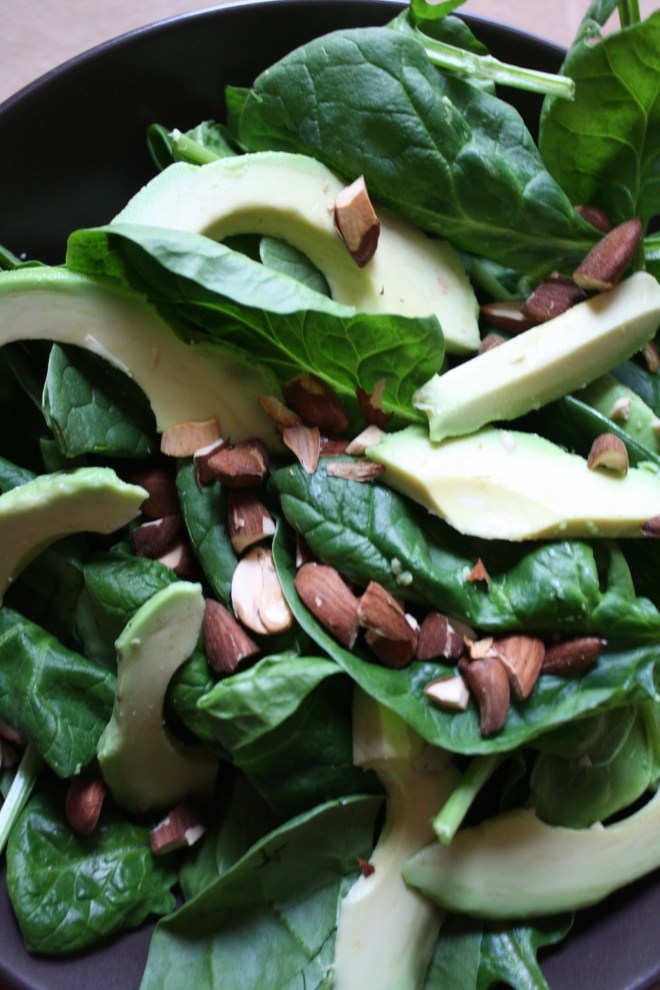 Pile it on.. thinly slice avocado.. rough chopped toasted almonds… It’s pretty much as easy as it can get.
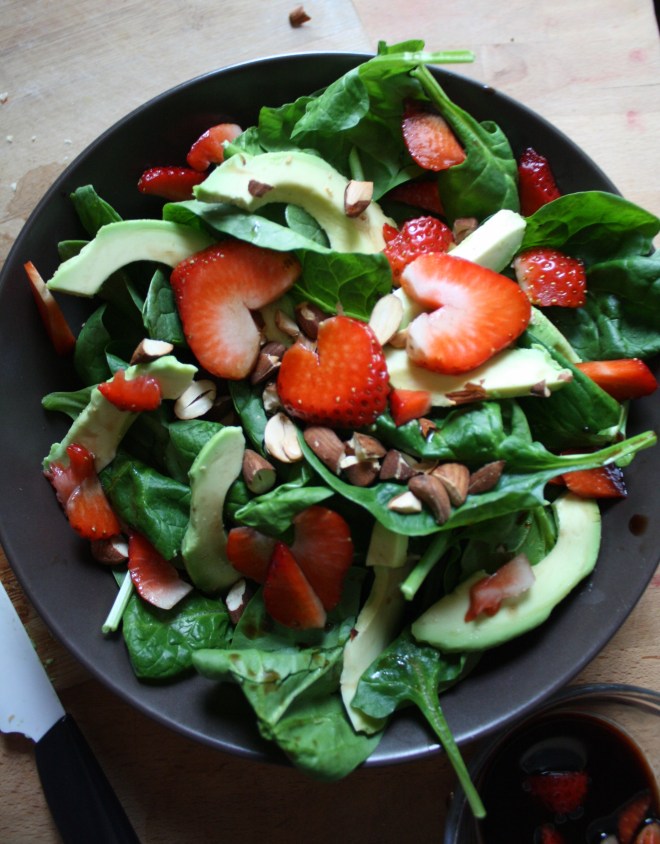 And last but not least, toss on the balsamic soaked strawberries and drizzle the remaining vinegar. (if you made hearts, place on top to make pretty) Sprinkle with a pitch of salt and pepper and pow! Fancy, sexy, delicious salad.
 It’s Mother’s Day weekend which means that you and I and everyone out there should feel the slightest bit obligated to at least do a little something nice for your mom for the mere fact that you were borned. And really what better way to celebrate mom than with food… It really is the least that you can do. (I think mom’s also like flowers and cards and handmade pasta necklaces) My mom is defiantly about the food. (she has had her fair share or pasta necklaces) A many years back on Mother’s day, this sweet little girl (me) made her mother a special breakfast treat…blueberry scones. And ever since that day, for every freaking holiday, birthday, whatever day, my mother requests (demands) a batch of those scones. She is always saying that these are her favorite treat and that no one has ever made them as good as I do. (I guess that just reiterates that I am her number 1 child)
 The stuff. Flour, baking soda, baking powder and salt. A bit of sugar, vanilla, buttermilk, and butter (use vegan butter and nut milk if you want to make them vegan) And of course we need the blueberries which can be fresh or frozen. I usually use fresh, but the store I stopped at only had really big containers of fresh that were like $1000 dollars a piece and the organic frozen happen to be on super sale. So you know, the cheap in me won that battle.
  So into the bowl goes all the dry stuff; flour, baking powder and soda, salt, and the sugar. Give it a good whisk.
 Now dump the blueberries into the flour mixture. Toss them around to give them a coat of flour. Add in the buttermilk and vanilla and give a little mix until liquid is absorbed. We are trying to handle the dough as little as possible.
 Turn mixture onto counter. It’s very loose, but thats what it should look like.
  Very gently and with as little handling as possible, gather dough up, knead a few times till everything just comes together. Press dough into a disk that is roughly an inch thick…. and it doesn’t need to be perfect.
  Cut the disk into even sized pieces. Do 6 big, 8 normal, maybe even 10 smaller. Whatever size you like. (I did 8) Place the scones onto a baking sheet, using a spatula to transfer, and sprinkle the tops with a little bit of sugar. Into a preheated oven for about 20 minutes.
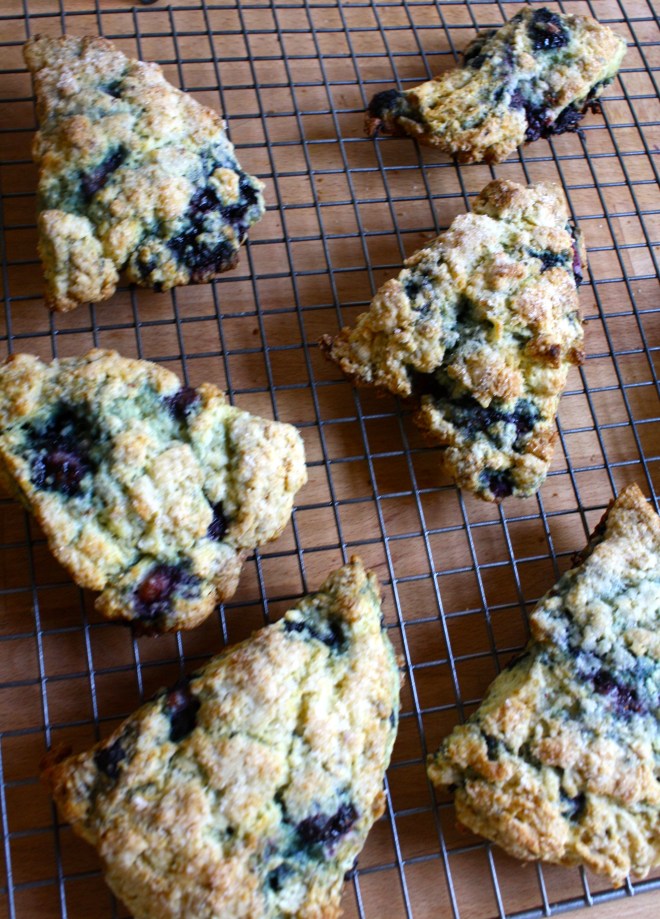 And when the scones look all nice and browned and a tester comes out clean. remove and either serve right away warm, preferably with huge cup of coffee or tea, or stick on a rack to cool before storing in air tight container.
 I figured now is a good time to get this recipe out there before we get to far into spring and summer recipes because there is going to be a lot of banana ice cream filled recipe coming and I figured its a good idea to have the basic banana ice cream recipe ready for people to refer too. And because I made so much fantastic naner ice cream, I also made a cookies and cream naner ice cream for my sisters and the mister.
 The stuff you need for this ice cream…. Nice and ripe bananas, peeled and then frozen* That’s it.
 After all blended and smooth, either eat right away or scoop ice cream into a freezer safe container and stick in freezer. That’s the banana ice cream… And it is amazing and so so so so so addictive. I make a batch, think I am only going to eat a scoop, then find myself eating half of what I have made, but it’s ok cause it’s only bananas.
  One batch of banana ice cream, either freshly made, still in food processor or made ahead and placed in a food processor and given a good pulse to smooth it up.
 Now you have cookies and cream naner ice cream…. and everybody is happy.
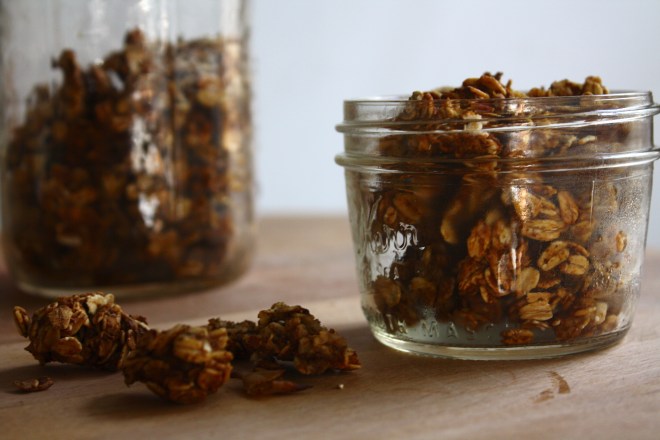 Chomp Chomp Chomp… The sound I make as I eat this freaking fantastic crunchy granola. You know it’s good when the person sitting next to you is annoyed by the sound of you face while eating. I eat a lot of crunchy stuff. And I am pretty sure I annoy the mister a lot.
 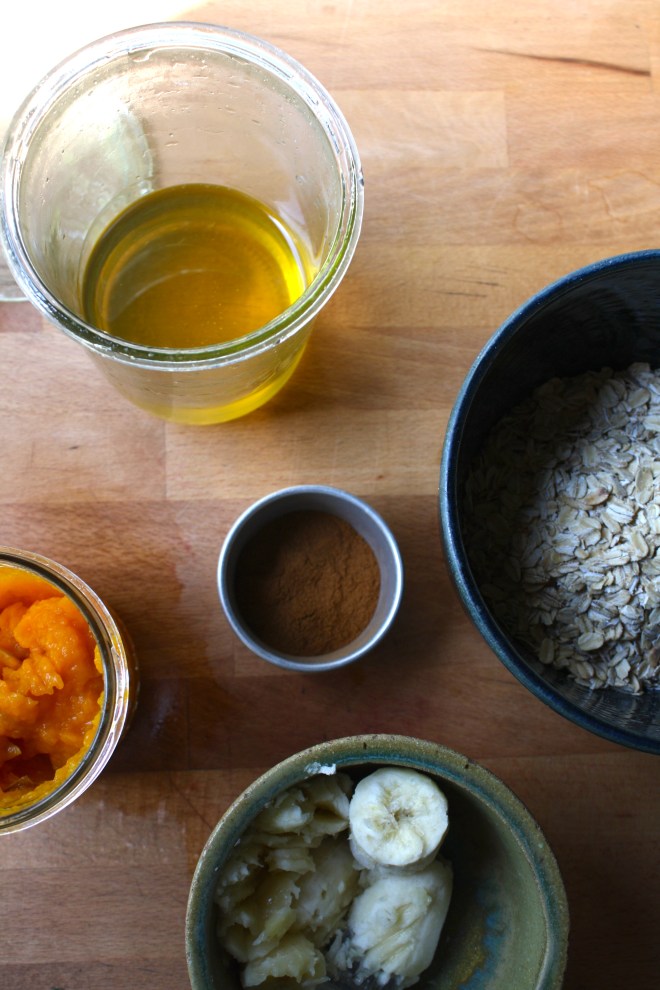 The simplest of stuff. 1 smashed banana, a cup of pureed butternut squash, Vietnamese cinnamon*, honey, and old fashion oats. (and a dash of salt, not shown)
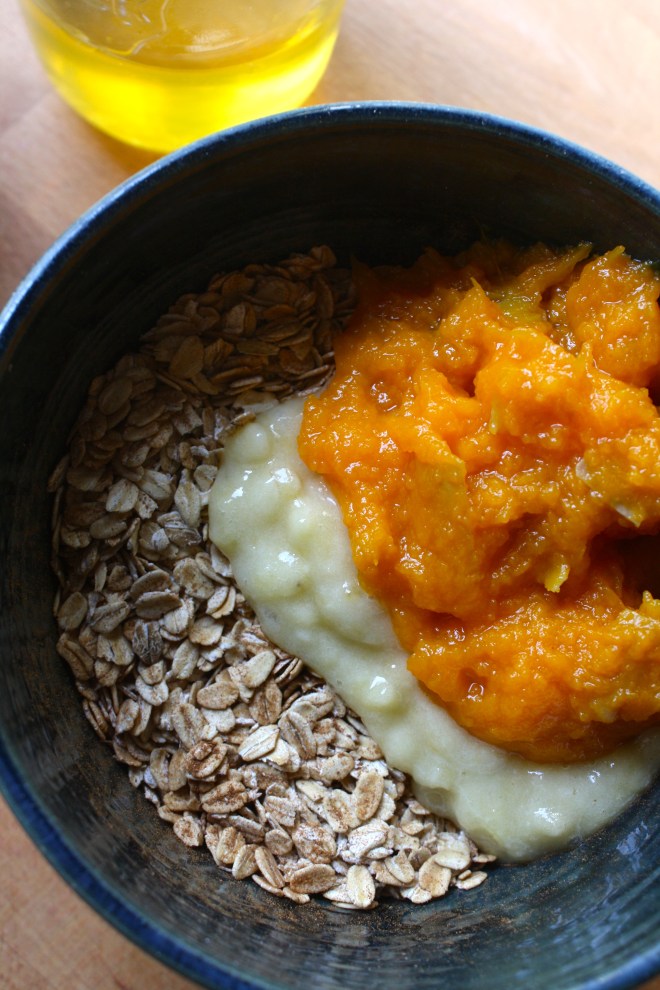 Toss the cinnamon and salt with the oats. Mix together the banana, squash and the sweetener and combine with the oats until full incorporated.
 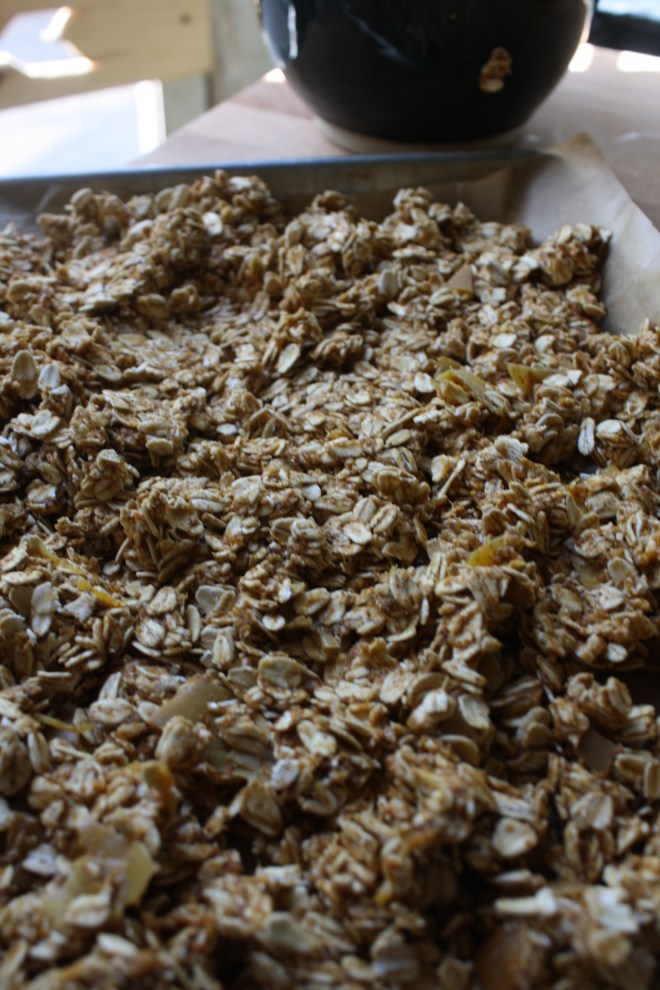 Dump the mixture on a parchment lined baking sheet and give it a little pat, you know, to settle all the bit and pieces together, all cozy and evenly spread out. Now stick into a preheated oven and after about 20 minutes, take out of oven and give the granola a toss, breaking apart any super big chunks or overly wet pieces. Put back into oven for another 20 minutes. (I like my granola super crispy crunchy so I cook it a little longer, like 30 more minutes)
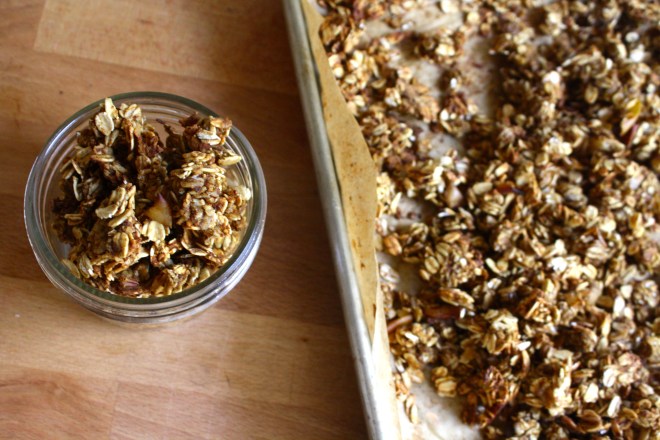 And when you are happy with the crunchiness of you granola, remove from oven and let cool, trying not to eat all of it while it sit’s on the counter looking all pretty and smelling like happiness.
 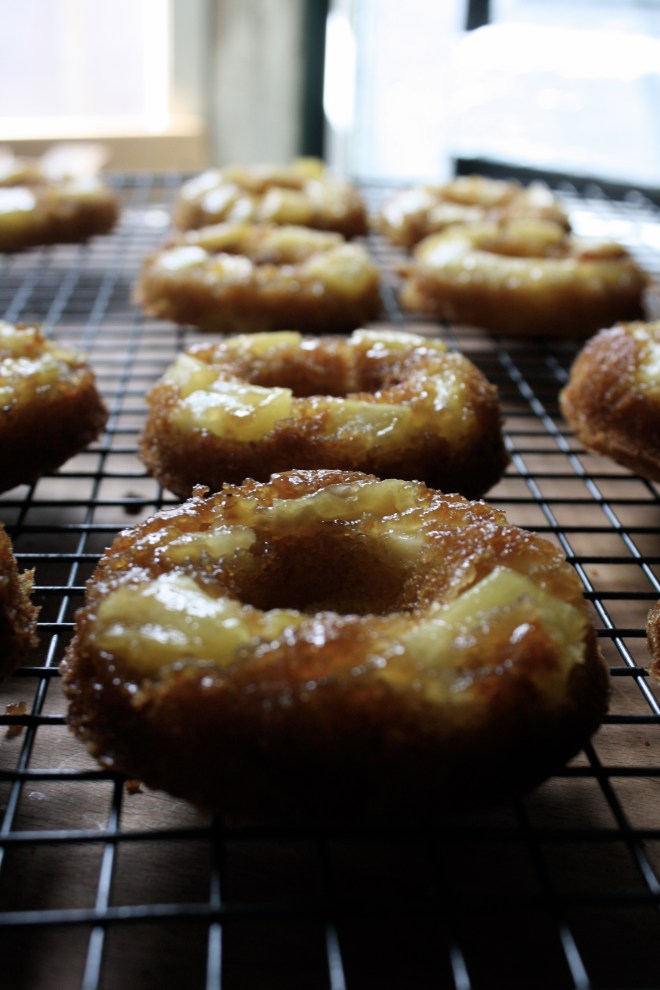 I had to share the last of the 5 pineapples cause if I didn’t, that would mean I ate 5 pineapples by myself. (I ate 4 pineapples by myself) So donuts were made and delivered to my sisters house where I proceeded to make her and her kids and another sister dinner. (hand made pizza on a weekday!) I then whipped out these pretty little upside down pineapple donuts for dessert, right after I cleaned up and made whipped cream. The kids were swallowing them hole and trying to steal just one more and my sister and the mister, well they had to eat their donuts all elegant like with forks. (weirdos)
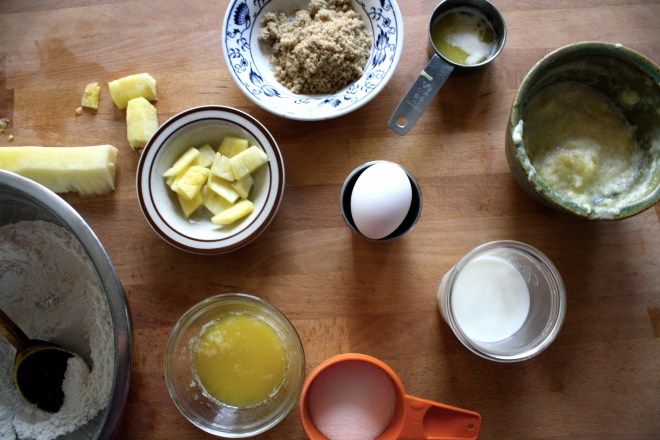 The stuff. Flour, salt, and the baking soda whisked together into a bowl. Fresh pureed pineapple, milk, egg, melted butter, and white sugar. Than there is more melted butter, brown sugar and fresh pineapple for the upside down.
 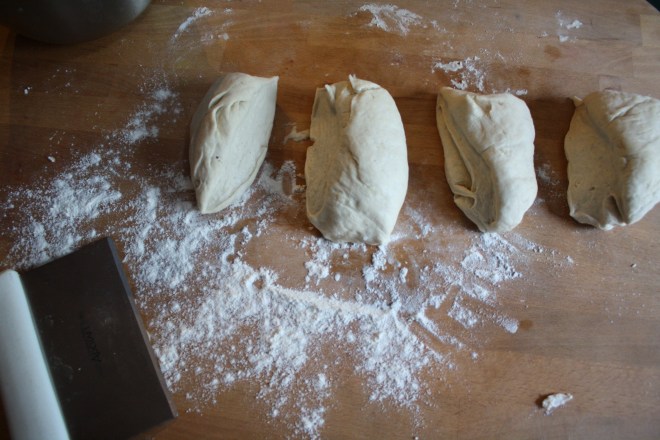 This batter is pretty simple, just make sure to whisk all the dry really well. Dump all the wet stuff into the dry and mix until combined. Don’t over mix!
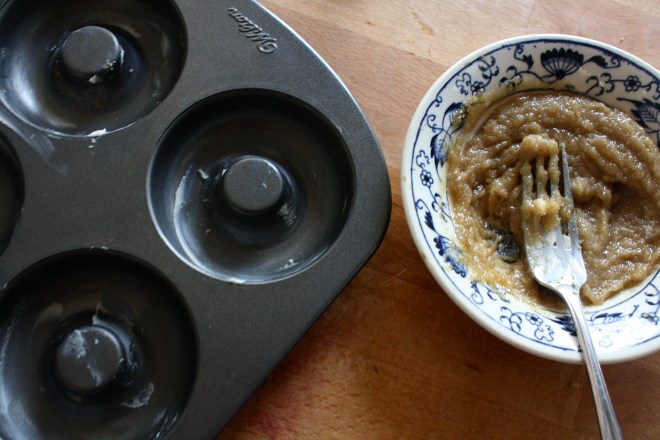 Grease the donut pan really well and mix the brown sugar with the remaining melted butter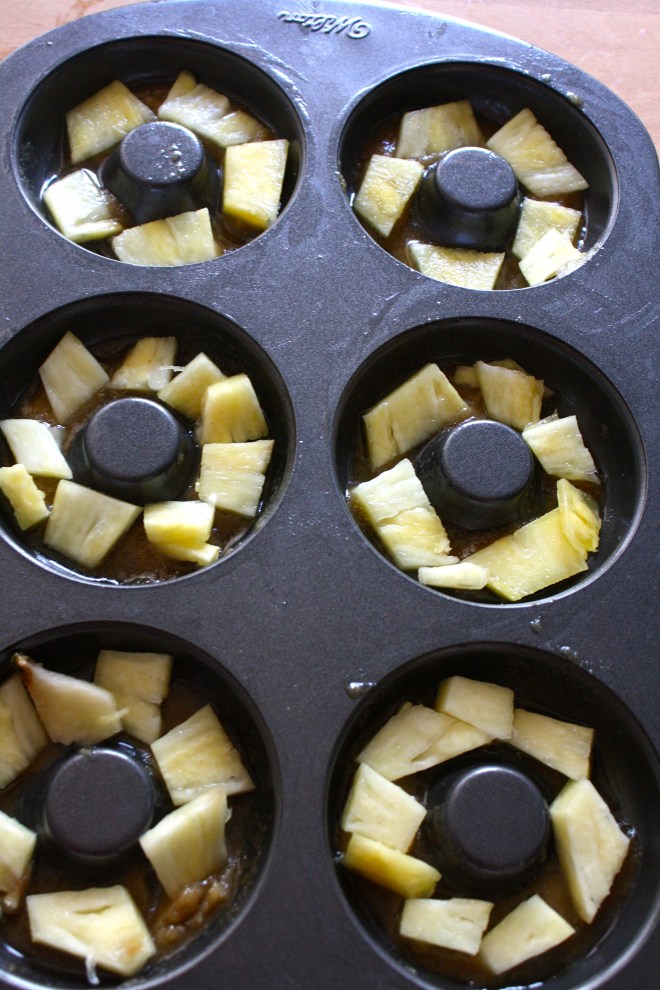
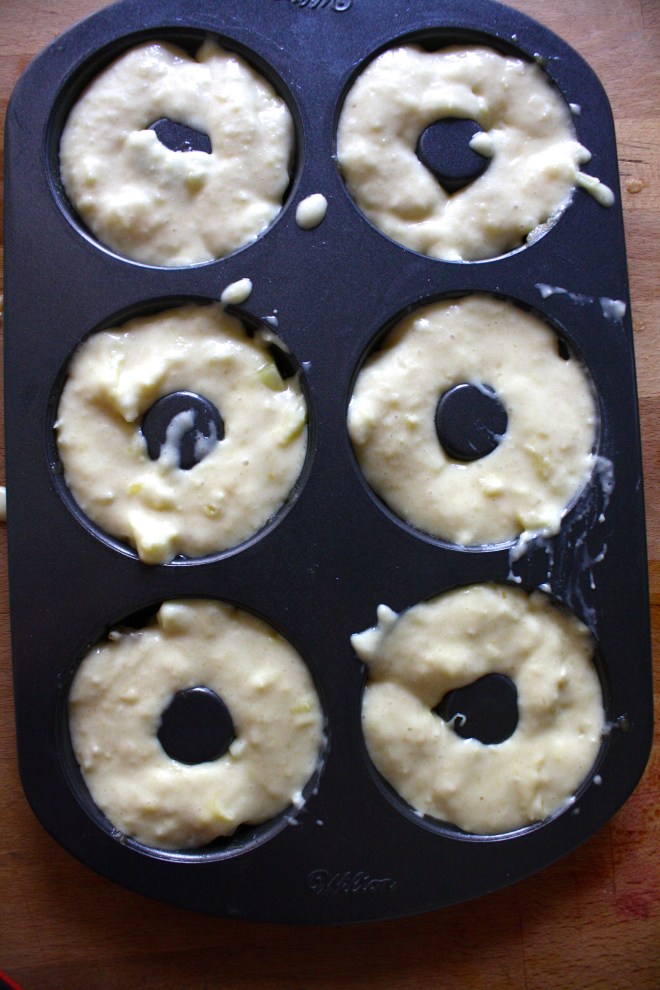 Drizzle the bottom of each donut round with the butter/ sugar mix then layer thinly sliced pieces of pineapple around the hole maker. (not as perfect as a pineapple ring, but still pretty)
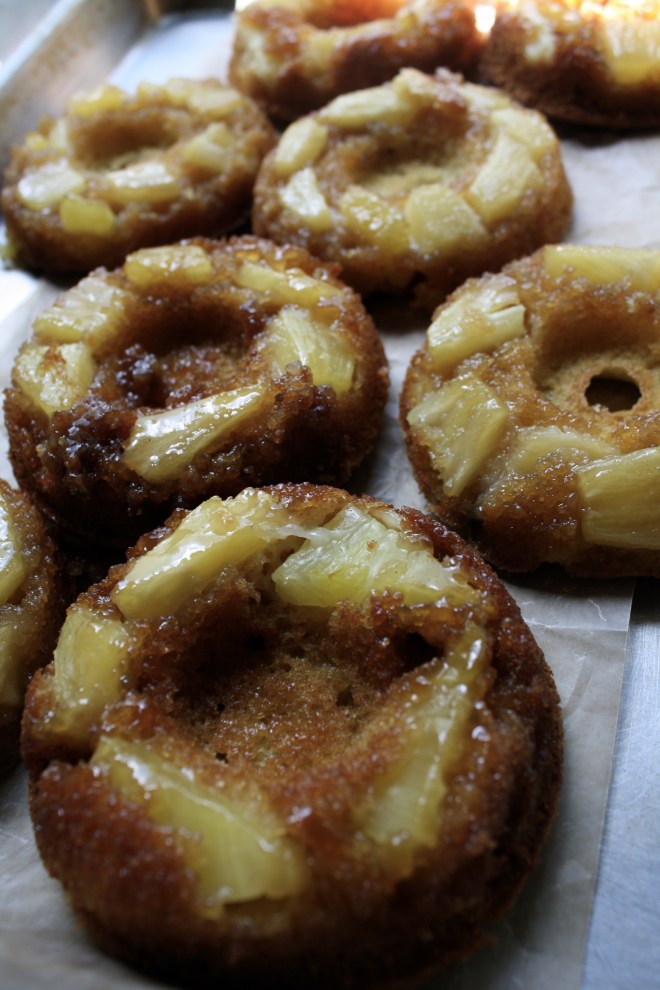 When donuts are all nice and golden brown, remove from oven and let sit and cool for about 5 minutes to give the donuts time to cool and the brown sugar to thicken. Dump donuts out onto a wires rack
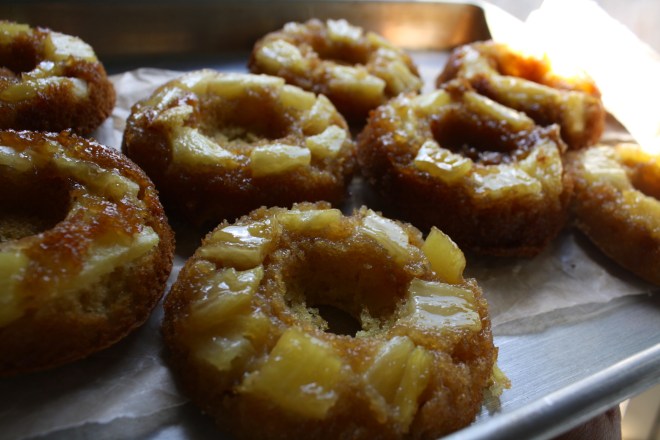 And serve them all upside down like. Maybe with a scoop of whipped cream or ice cream or nothing.
 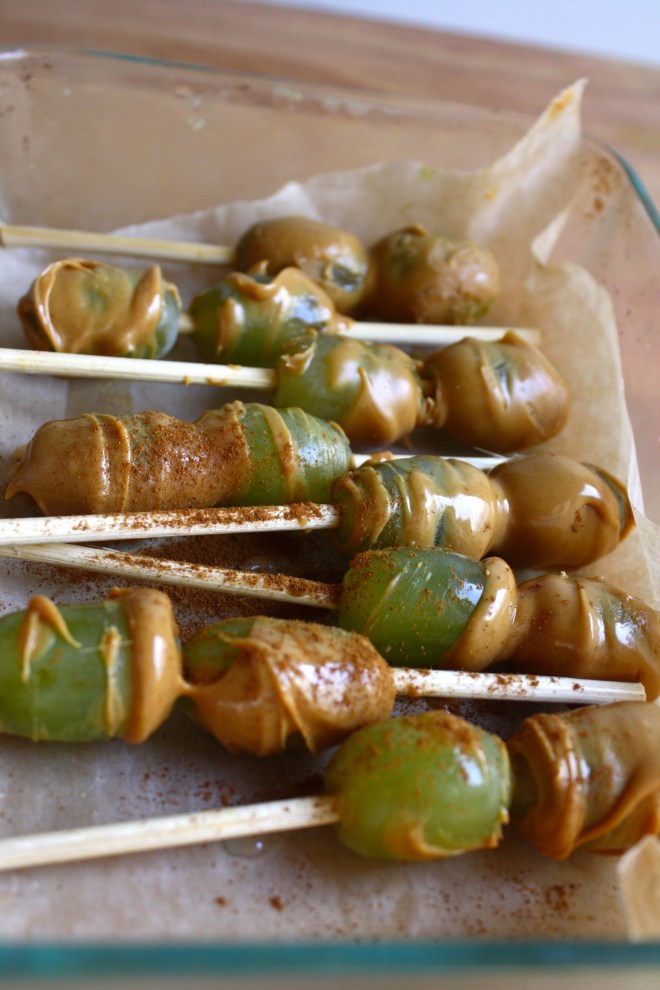 I can’t stop eating these. They are like little balls of crack and I am an addict.
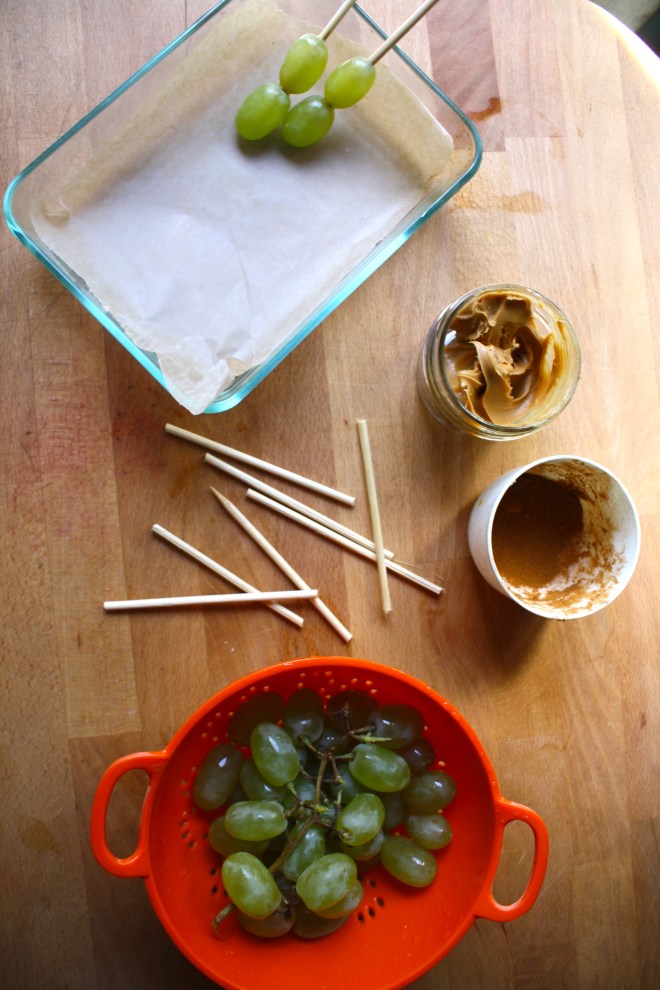 The stuff you will need. Washed and drained fresh grapes (green or red. I usually use red but the green were half the price and the red ones didn’t taste very grapie*) Creamy peanut butter, skewers, and a little bit of cinnamon or cocoa powder (optional)
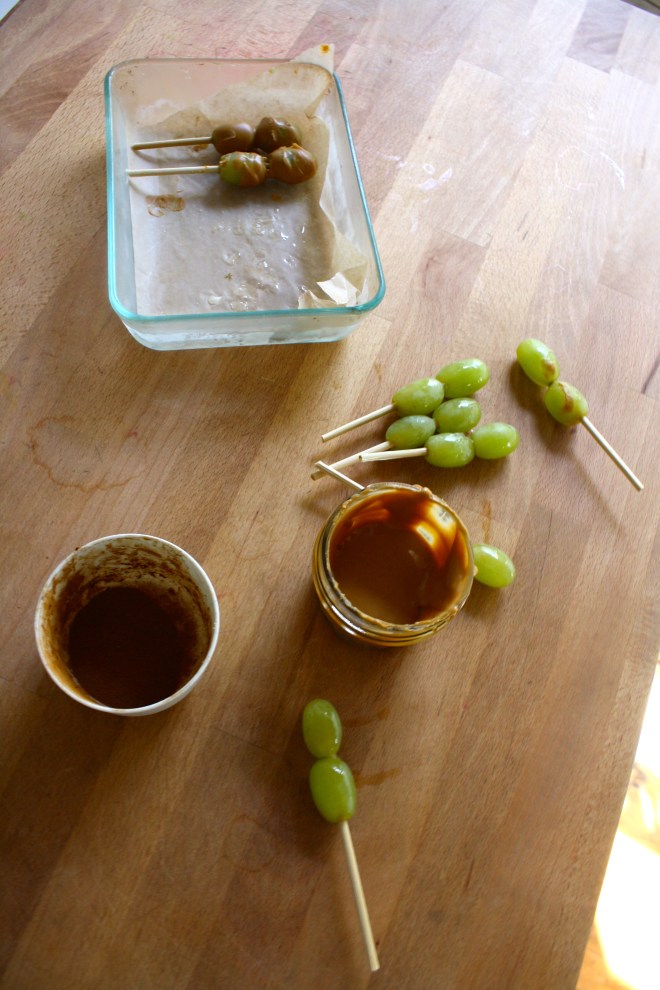 When the grapes are frozen, melt peanut butter. Take a big glob and stick in a tall skinny cup or bowl and stick in the microwave or heat in a sauce pan and then transfer to a tall skinny vessel. Take frozen skewed grapes and, one skewer at a time, dip in the peanut butter. Cover with as much or as little of the peanut butter as you want and place on wax paper. If you are feeling feisty, add a sprinkle or cinnamon or even a dash of cocoa powder. Or, this may seem a little crazy, but garlic powder is so F*ing good.(it’s worth at least giving it a try) When all grapes are dipped, place back into freezer for another 10 minutes or so to let the peanut butter set up a bit.
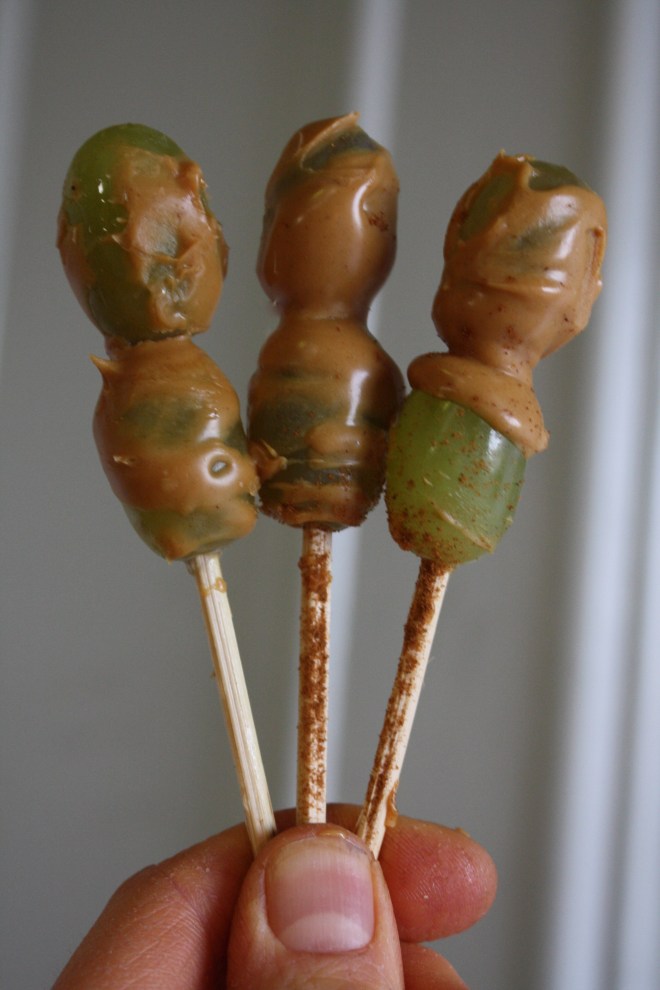 Whenever your ready… Eat. And be so happy. And always keep a back stock of frozen grapes in the freezer. They are the best.
 What is better for a bake sale then Oreo cookies? Oreo cookies made from scratch!.
 Cookie Time! Whats going on here is brown sugar and butter have be beaten together until nice and fluffy Then a good big splash of vanilla and another 2 big splashes of coffee are added to that.(I sacrificed my last few sips of my coffee for these cookies) The dry stuff, flour, salt and cocoa powder, are whisked together, waiting to be added to the wet.
  Mix the dry ingredients into the wet and mix. I ended up just using my hand and kind of squish mixing everything together until in tuned into a nice lovely uniformed dough. Form the dough into 2 balls and give each a few kneads to get any air bubbles out. Place dough back into bowl and stick in the fridge to sit for 10-15 minutes( it makes the dough a little easier to work with)
 Once the dough has had a little time to rest and cool, remove from fridge, one ball at a time. Place on a lightly cocoa or powdered sugar dusted surface and roll out the dough. Grab any size circle (or other shape) cookie cutter and get to shaping the cookies. Notice the tin can in the bowl? I could’t find my biscuit cutters anywhere but the can was the perfect size, and it worked really well. Keep a little bowl of either powered sugar of cocoa to dip the cutter in in between making the cookies. It really helps the dough from sticking and breaking.
  While the cookies are getting their cool on, make the cream filling. All you need is a stick of butter, about 4 cups of powdered sugar, some vanilla and a few splashes of heavy cream. Beat that all up until nice and creamy thick and spoon it into a pastry bag (I used a big old ziplock bag) to be piped on the cookies.
  Filling the cookies is for sure the best part. Separate the cookies into pairs and pipe a big blob of filling onto one of the two cookies. Take the names cookie and place on top, giving it a little smooth to the disperse the cream. Keep doing that until the cookies are all filled.
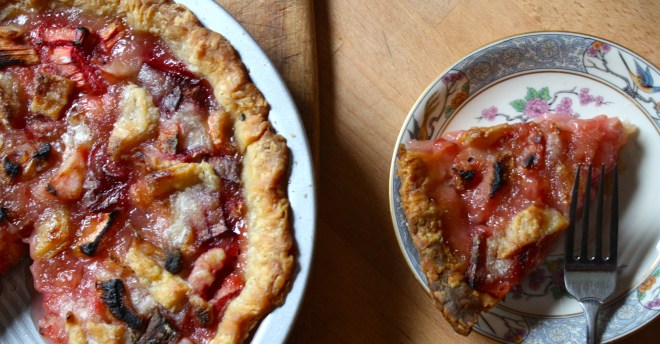
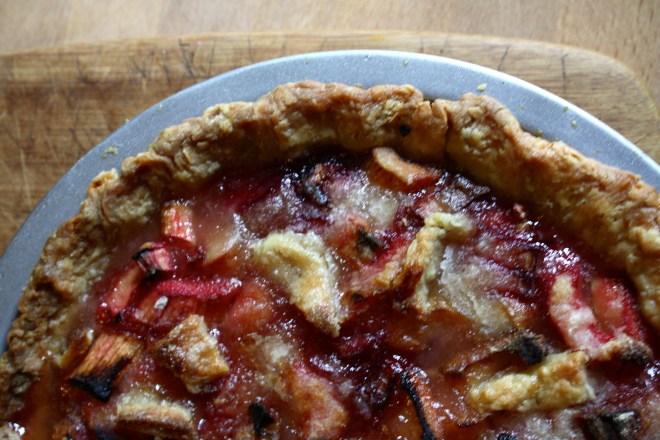 I swear I didn’t plan this, but today is officially Pi Day! Pi being the mathematical constant of the ratio of the circumference of a circle to its dimeter (did I say that right?) 3.1415…… And today’s date is 3.14.15. Whoa…I guess that means that this pie was meant to be.
 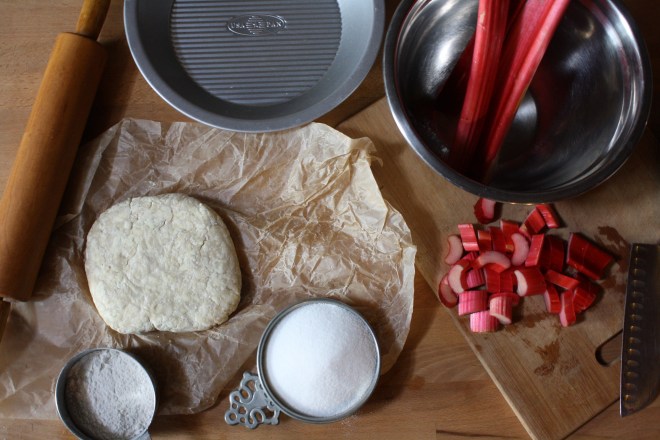 The stuff for the makings of pie… One single pie crust, flour, sugar and rhubarb. I mean, come on, this might be one of the simplest pies ever.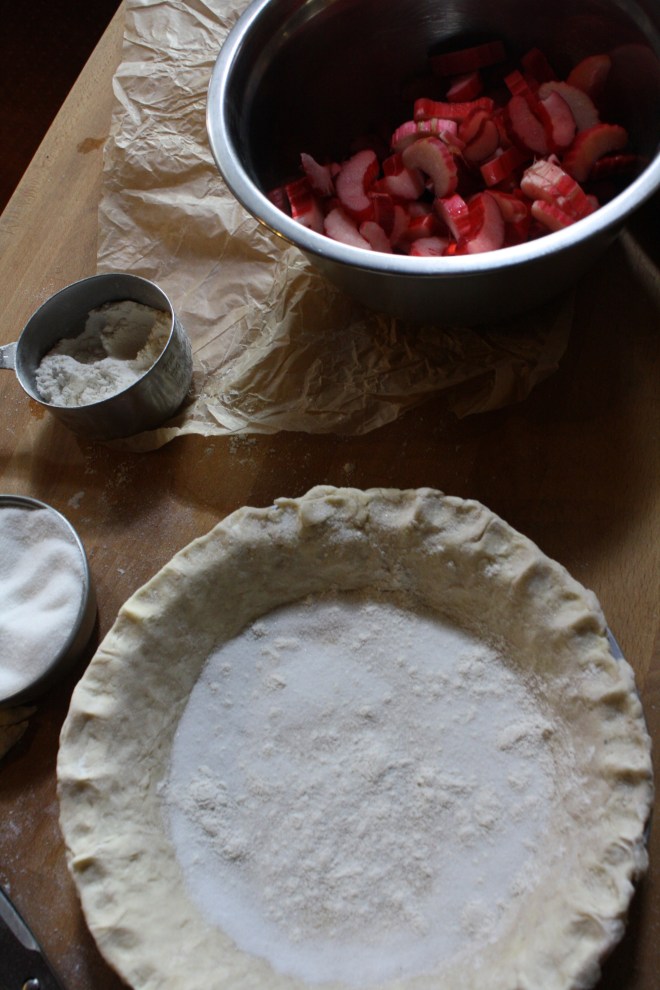
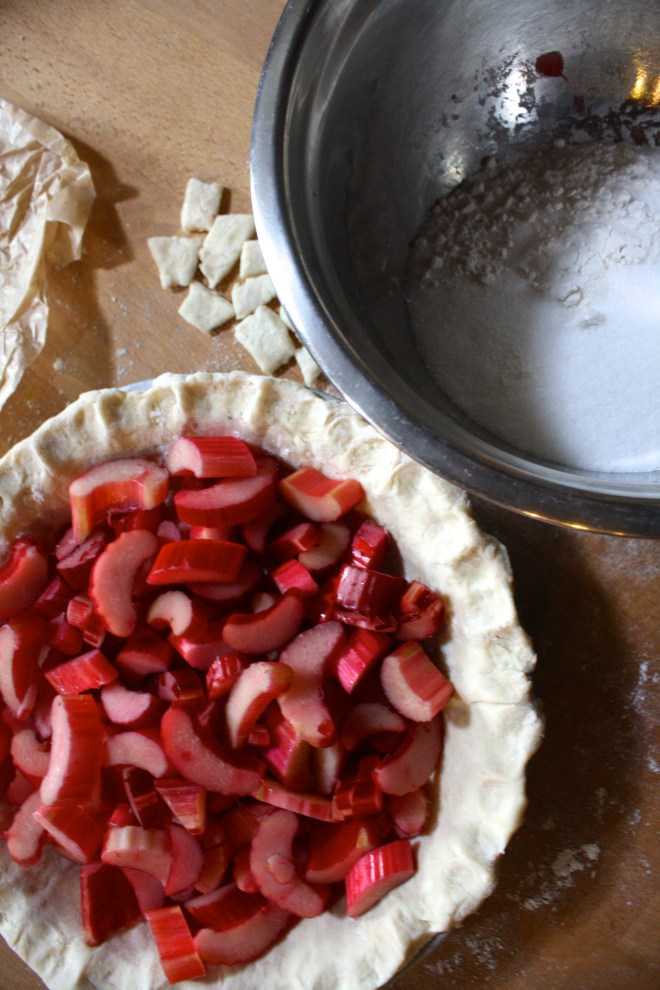 The chilled pie crust gets rolled out, placed into a pie plate, trimmed and made all pretty. The bottom is sprinkled with a 1/4 cup of sugar and stuck back into the fridge while the oven preheats to 350. Now is a good time to dice the rhubarb into inchish chunks. Once the oven is preheated, remove crust from fridge and add in the diced rhubarb.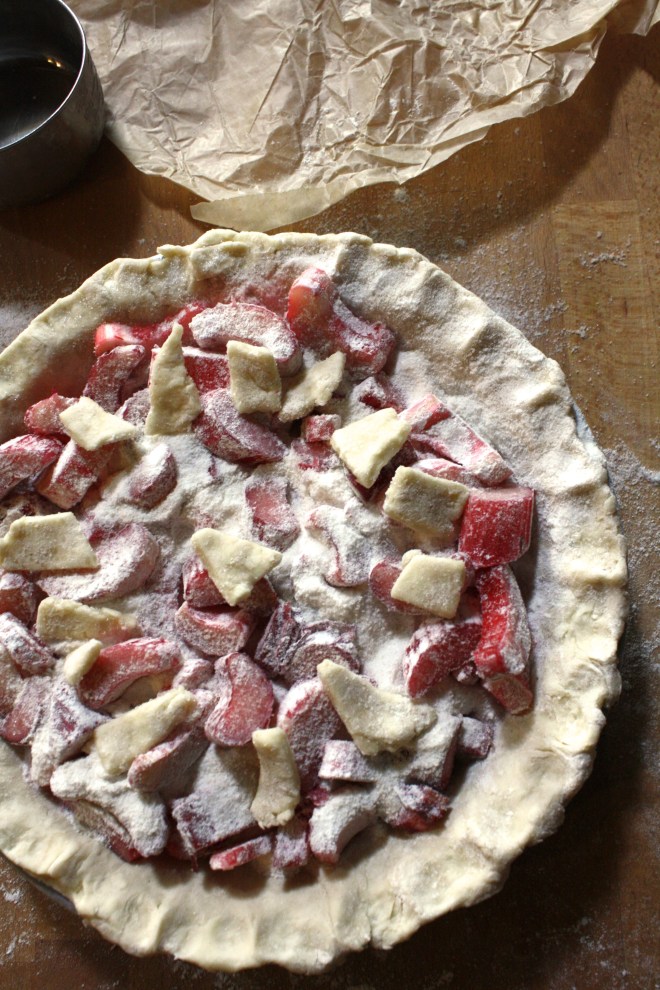
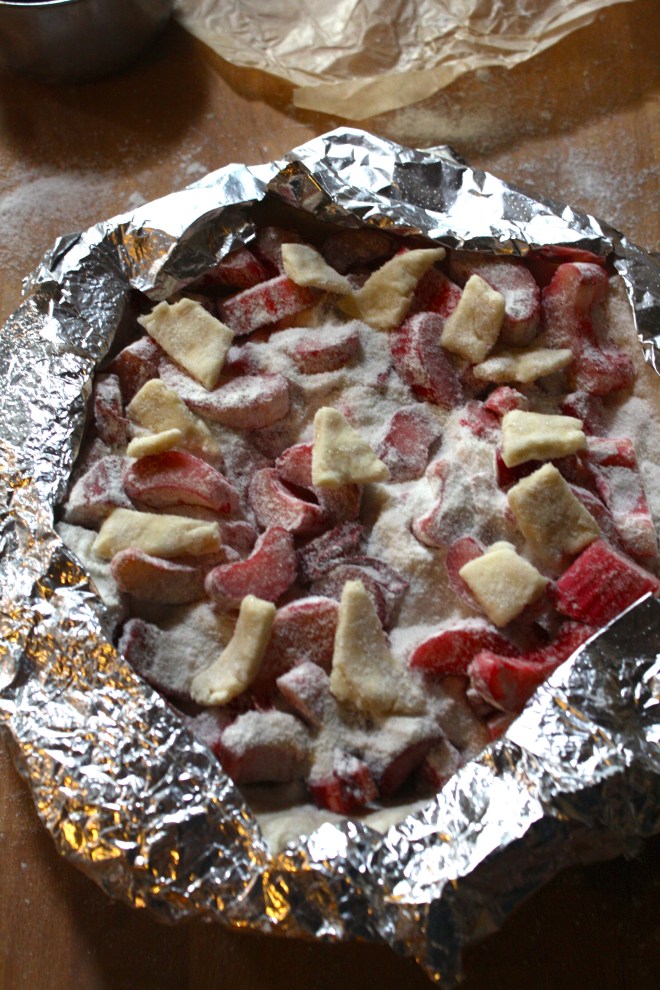 The remaining sugar and flour get mixed together in a bowl and dump on top of the rhubarb. Give it a tiny toss with you fingers just to get some of the mixture to sink down a little. (Don’t worry, the filling will be perfect when you do it like this) I also cut up the pie crust trimmings and placed on top… not necessary, but looks pretty and is a good use of the scraps.
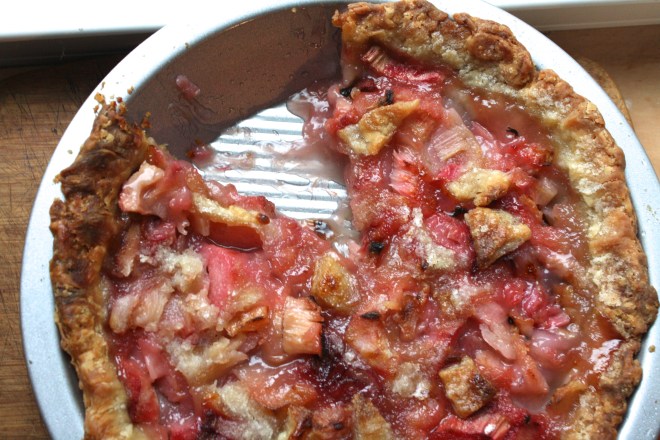 And then you take it from the oven and marvel at the beauty.
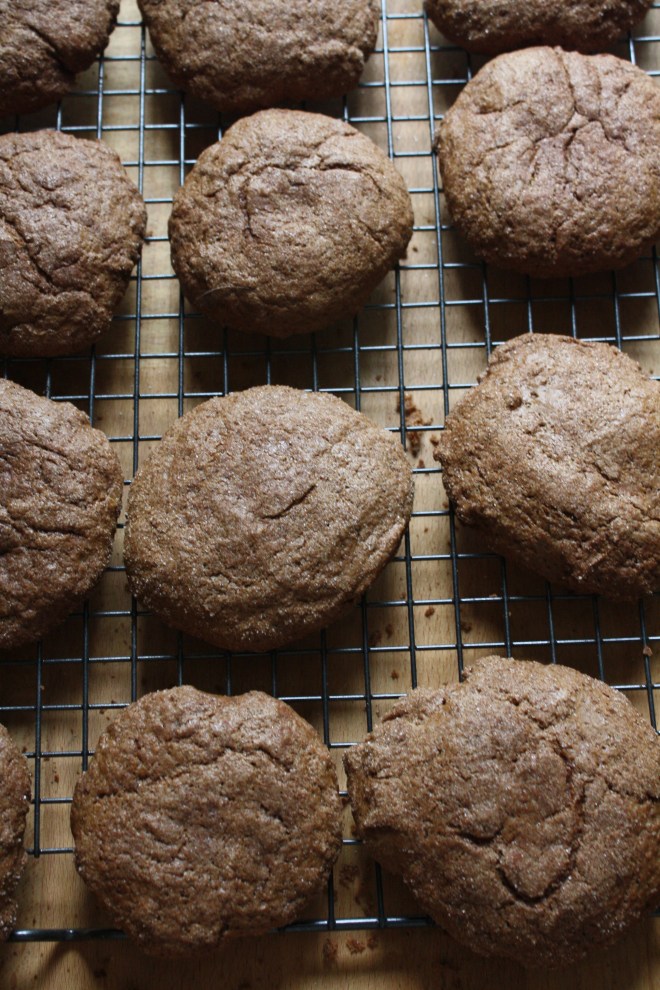 Because it is cold outside. Because I had an hour to kill before I needed to leave the house and because I wanted to make a sweet treat for the mister (who had been dealing with frozen pipes all day) and for the little littles that I was going to hang out with. My original idea was to just make regular old snickerdoodles, but as I was riffling around my tea drawer for a mid day tea (it’s usually coffee, but I am trying to cut back on drinking one thousand cups a day) I got hit with a little inspiration. Chai tea spiced snickerdoodles. Yes! a nice black chai, full of flavors or cinnamon, ginger, cardamon, allspice, and pepper. So many good time tastes. And while I am at it, why not add some chocolate to that mix, because, well just because.
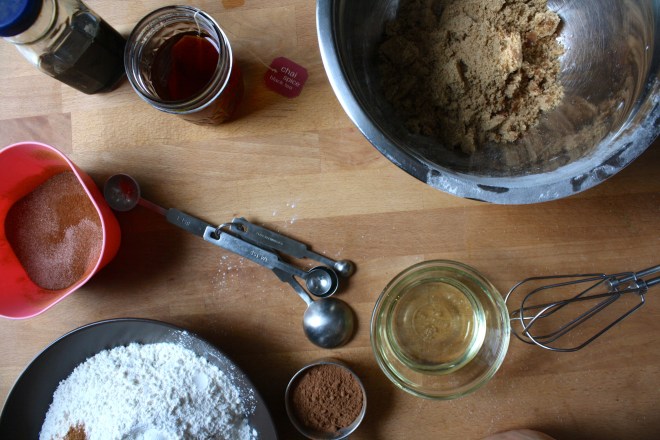 The stuff…Flour, salt, baking powder, cinnamon, and allspice. Cocoa powder, brown and white sugar. Veggie Oil (you can use butter, or vegan butter instead for a chewier cookie) vanilla, a little vinegar and a nice cup of chai tea… Also a little bowl of cinnamon and sugar to doodle the cookies.
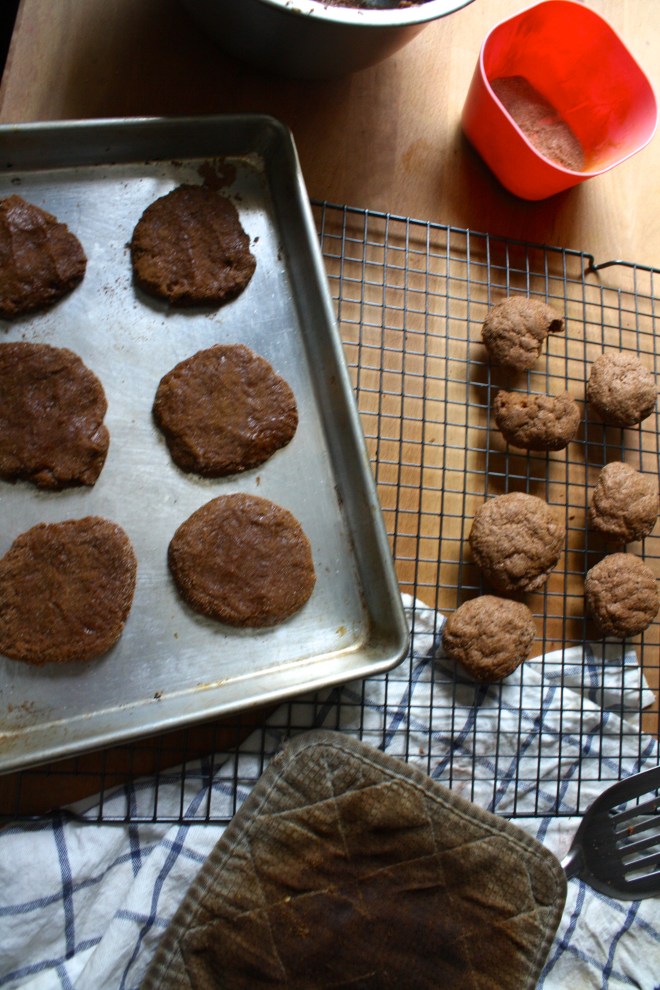 The sugars, oil, tea, vinegar, and vanilla go into a big bowl. Beat for a minute on medium, then add the rest of the stuff and beat some more until fully incorporated…. Simple simple.
 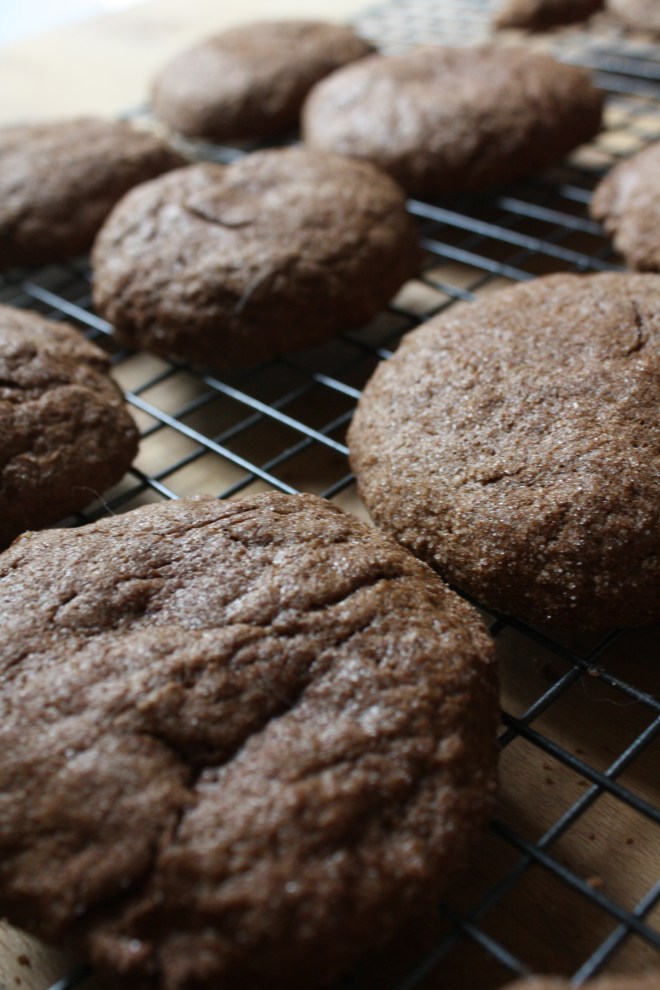 Aahhhh…….pulled from the oven and placed on a rack to cool. Fluffy, chewy, pillowy soft and spicy cookies. Oh the smell of so good!
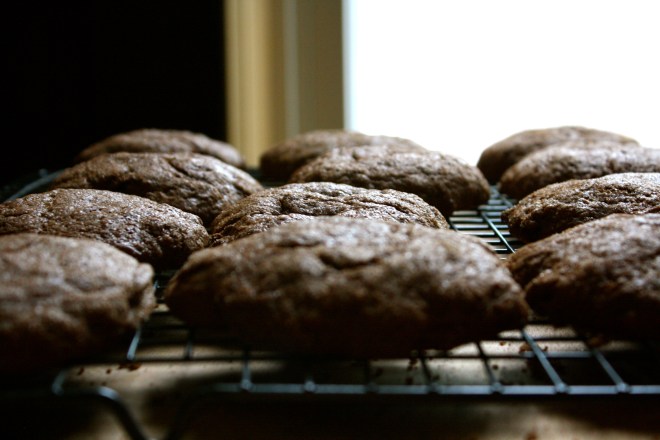 Made extra large to make extra little littles happy. The best part? I made each little sing me a song for a second cookie… I am the greatest!


 I’ll let you know now, I am a make and eat soup all year long person. I can think of few things better then sitting outside, basking in the sun, hopefully with a light wind, a book in hand, enjoying a nice big cup of some good homemade soup. (Doesn’t that sound so freaking lovely?) This soup right here is perfect for just that. Parsnips are the best, kind of like a big white sweet, yet starchy carrots. And cooked together with a little bit of light and lemony thyme, rich earthy turmeric and a couple more chopped veggie….. you got yourself a nice thick and fragrant bowl of happiness that fills you up without weighing you down. It’s food you can eat that fills you up, leaves you feeling cozy, yet still wanting to hop on a bike or lace up the running shoes. Hearty without the feeling of all the heaviness.
 The stuff. Parsnips, carrots, onion and garlic. Thyme and turmeric, salt and pepper. the tinniest bit of oil and water (water not shown)
 Chop all the veggies and the garlic, drizzle a dutch oven or a pot with oil, toss in the veggies. Add the turmeric, the thyme, and 1/2 cup of water.
  Sweet sweating the veggies. Turn pot on medium and cook until the water completely cooks out. When the veggies start to brown and stick to the pot, deglaze with water. Give a good stir and keep cooking. Repeat the deglazing process until the veggies are super soft and ready to blend. (I did this 4 times.. it only took 10 minutes)
 Add enough water to cover the cooked veggies.
  And now blend the heck out of it.. Go as smooth or chunky as you want. I blended as smooth as I could get with this crappy immersion blender. (Blender on loan until I finally decide on, and buy a new one)
 And there you have it. Scoop into bowls, add lots of cracked black pepper, and go to town. I made enough to save a bowl for later… it didn’t last for later.
  I was cleaning my spice shelf (I feel like I do this like once a week) and found some poppy seeds hiding behind some jars. Accidental spice findings happened more often the then one might think in my house.. I like to buy tiny baggies of spices with good intentions of using them, but because of their tiny size, I often lose them or forget about them due to that tininess. But I usually find those tiny little bags, and when I find them, I try to use them right away..(I don’t like having old spices around and no, I will not toss it) And it just so happened that I has a lemon in need of using.. and it was getting close to dinner time. I could wait and make lemon poppy seed cake or muffins, or just start dinner. Then I was like, ” I’ll just make lemon poppy seed pasta.” And so I did. And of course it needed to have lots of garlic and some kind of vegetable to round out the dish, (I know tomatoes are fruit but you know what I mean)
  Start by tuning oven on to 400 degrees. Chopped tomatoes and sprinkle in oil and salt and stick in the oven. Do this first because the rest of the meal only takes about 10 minutes..So fast!!!
 The sauce is pretty much a basic roux…
 Once your pasta is cooked (cook however it says to on package), reserve about a 1/4 cup of pasta water and drain the rest. Add the pasta water and pasta the sauce. (the pasta water helps the sauce and noodles canooddle together)
 And its all mixed up just waiting to be served…and the roasted tomatoes!
 Scooped into a bowl with a scoop of the roasted tomatoes and some chopped chives, served with a couple wedges of lemon..just because.
 I am kind of obsessed with pickled jalapeños… like I want to eat a whole jar with a fork and then drink the juice. So much hot and spicy love. One of my sisters is the same way, pickled hot pepper obsessed. We used to buy the humongo gallon sized jars of jalapeños at Costco and go through them in like a month. But sadly, Costco stopped selling those humongous jars and we have been left buying the itty bitty jars that actually fit in a normal fridge. (I know, so sad). And maybe because the jars were normal sized and I was more aware that I shouldn’t eat a of cup of jalapeños at one sitting, or just the mire fact that a tiny jar cost the same as a gallon, but the store bought little jars weren’t doing it for me anymore. And then fate happened. The grocery store was having a super sale on fresh jalapeños and I figured it was time to make make my own. Now I don’t think I can ever go back to those store bought jars of blah because the ones I made are the best freaking pickled jalapeños this girl has ever eaten. I might even start making my own gallon sized jars!!!!
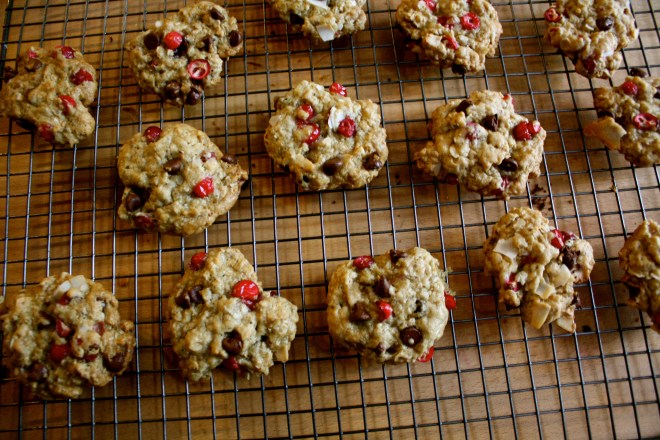 It hasn’t stopped snowing, the temperature is dropping fast (it’s getting to the point the dog doesn’t even want to be outside) and the mister is busy hand shoveling three long driveways. So I figured that in between all the laundry folding, plant watering , and all around sitting on my butt that I am doing INSIDE, that I would be so super nice and crank the stove up and make my love some cookies. I love making cookies, especially when I have chores to do. I think part of it is that cookies are baked in batches which breaks up the chores and gives a sort of rhythm to things. Plus everything is nice when the house smells like cookies. I was going to make chocolate chocolate chocolate cookies, but realized that I didn’t have cocoa powder, so I went with fresh cranberries (I just scored a pound of organic cranberries for 89 cents!) coconut flakes and chocolate chips. Plus I wanted to make them oatmeal because the mister likes oatmeal and oatmeal makes the cookies a little more hardy. (We need hardy when the temperature dips below zero) The verdict….. chewy, soft, slightly sweet oatmeal, bittersweet chocolate, nutty floral coconut, and the zing and pop of the fresh cranberries. He told me to hide them… hide so he will stop eating them….. because they be amazing!
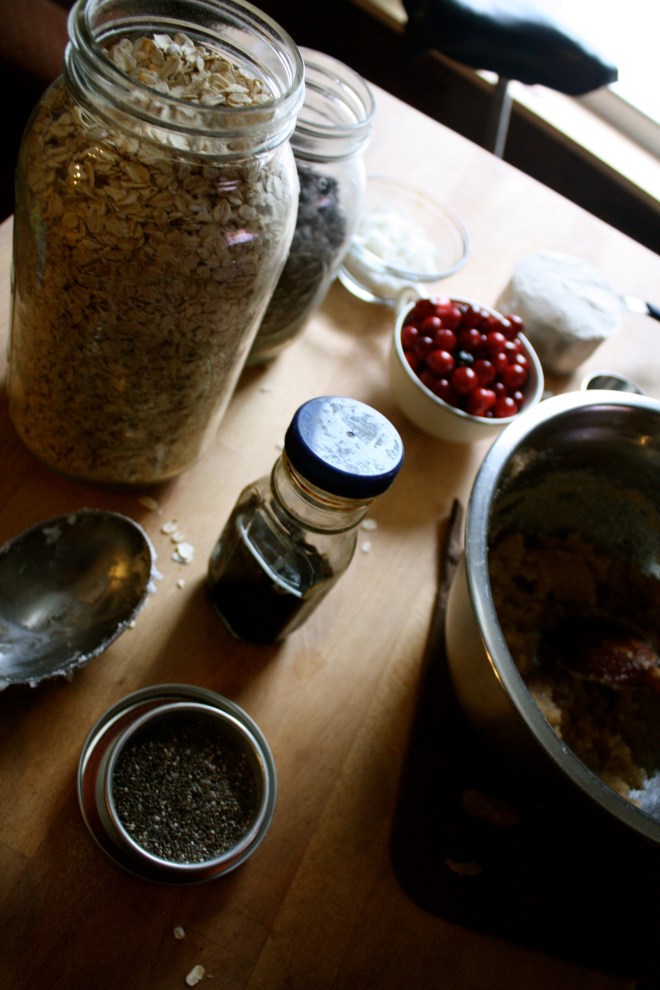 The base of this cookie….We are using regular old fashion oats and flour. Salt, baking soda and baking powder. Vanilla, chia seeds in hot water, coconut oil white and brown sugar…. You know, all the cookie stuff. Then all the goodness.. Chocolate chips, coconut flakes, and fresh cranberries. Goodness. Oh yeah, and they are vegan…if that matters to you.
 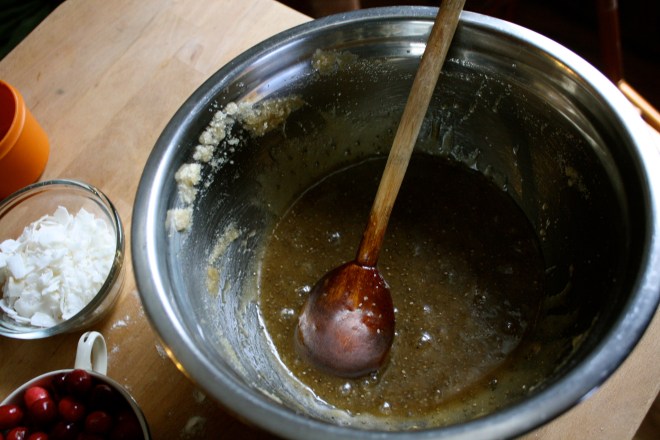 Warm the coconut oil and mix with the white and brown sugars. Then add the chia seeds soaked in hot water. Stir until nice and silky smooth.
 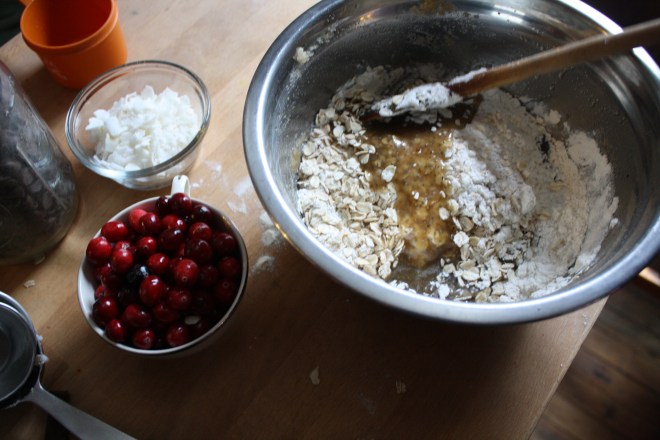 In goes some more stuff. I just dumped all the dry right on in that bowl and mixed it up nice and nice.
 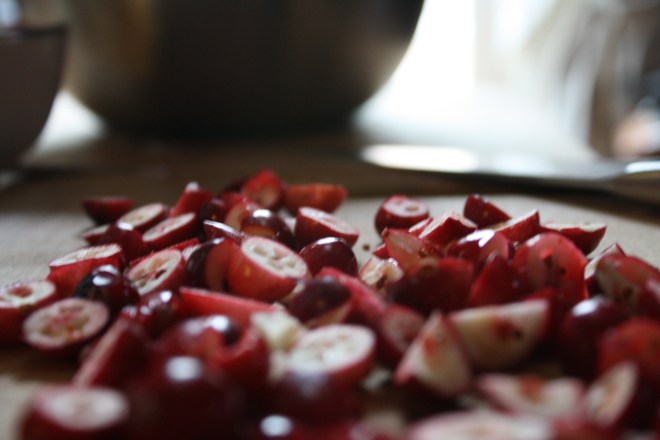 Chopped the fresh cranberries into chunks… One at a time…… Just kidding, I actually laid a cutting board on top of the cranberries, applied a little pressure and sliced through the cranberries.. Does that make sense? I hope so, because its is much easier and faster and the cranberries don’t all roll away.
 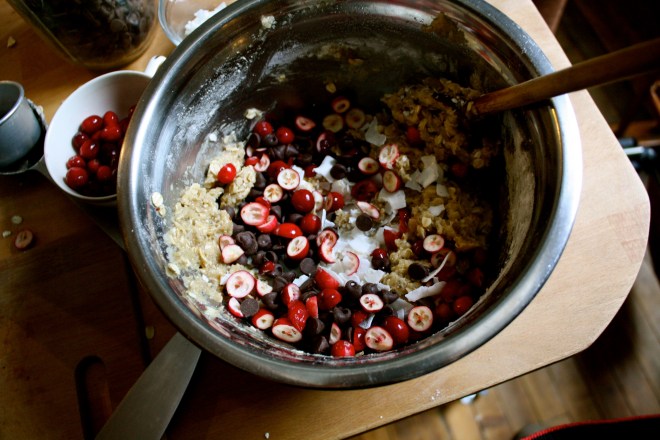 The chopped cranberries, coconut flakes and the chocolate chips go in to be mix all up.
 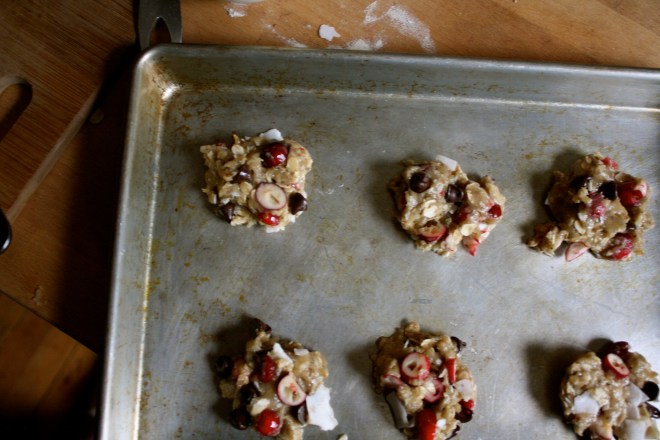 I used my hands to form the balls and gave each mound a little smoosh, but not completely flat. Then into a preheated 375 degree oven for about 13-15 minutes or until a nice golden brown.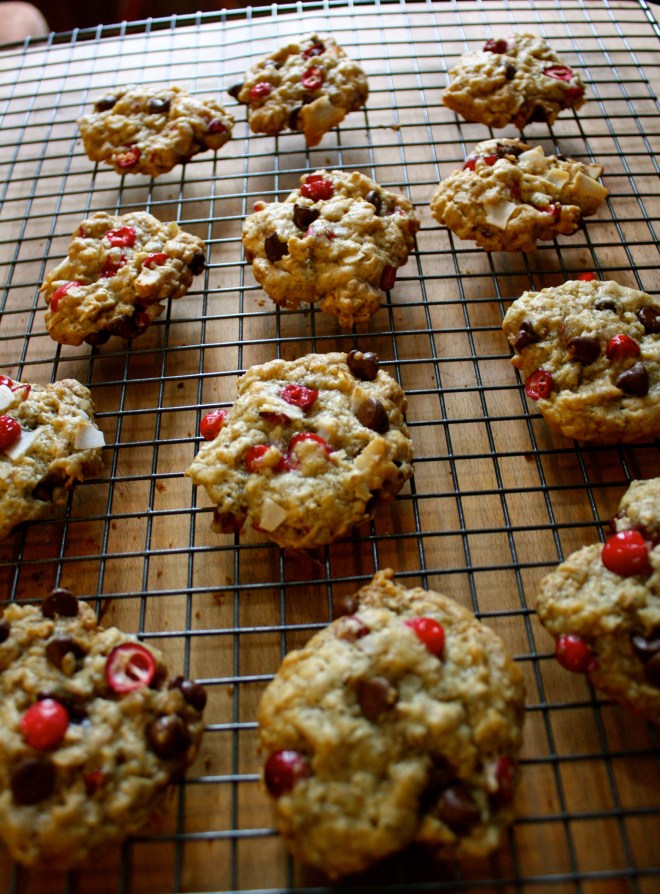
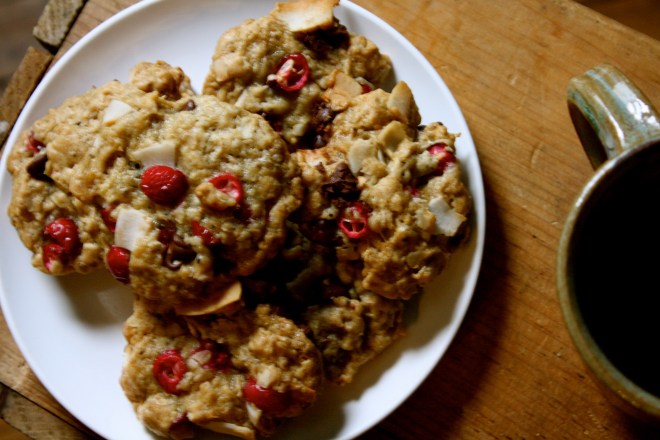 A cup of hot coffee and a plate of warm cookies… I am the nicest, right! (After his nice cookie rest I proceeded to do a little nagging, so the day evened out) So today is probably a great day for everyone to make cookies. It’s freezing out, its saturday and well, just cause. You might even be looking for a great recipe to make for that big party your going to. You should make these cookies. Have a Fantastic Weekend!!! -C
 WHAT! Is it really almost Thanksgiving? Got you dessert plan yet? Thanksgiving doesn’t have to be all pies, pies, pies… a cookie can be the perfect ending to any holiday meal. Don’t get me wrong, pie is awesome! I love to make pies, but whenever I show up to Thanksgiving dinner with the family, there are always maybe one or five too many. Yeah my mom thinks we all will eat 2 pies a piece This cookie is the perfect holiday combination. It says, yeah I am classy with my white chocolate chips. Cranberries are a nice seasonal flavor, and those pistachios.. this lady really went all out. WIth this cookie, you lose the formalities of pie. You don’t have to feel the pressure of eating piece after piece of pie. Eating cookies is a little easier. Grab a cookie and go for a walk. Have a piece of pie and chat for a while. Need little something.. well maybe another cookie. Watching a family movie after all the clean up and dishes are done? Why yes, a cookie is a no hassle movie snack. Bonus…Left overs are easily stored in tins or plastic baggies and there is no, Hey, where’s my freaking pie plate?
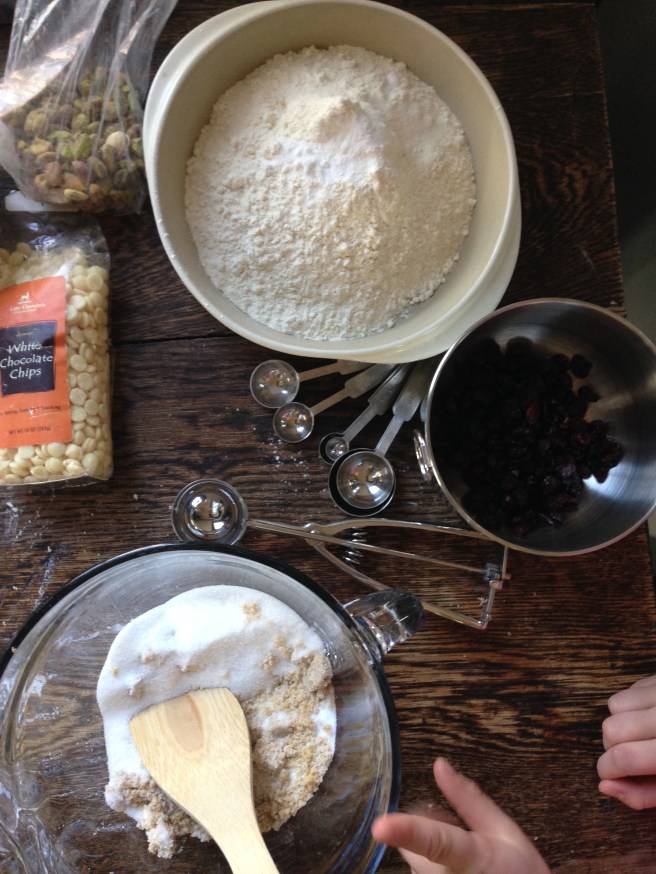 So simple and so elegant. This combonation is the perfect balance of the sweet white chocolate, the tart cranberries, and the crunchy yum of the pistachio.
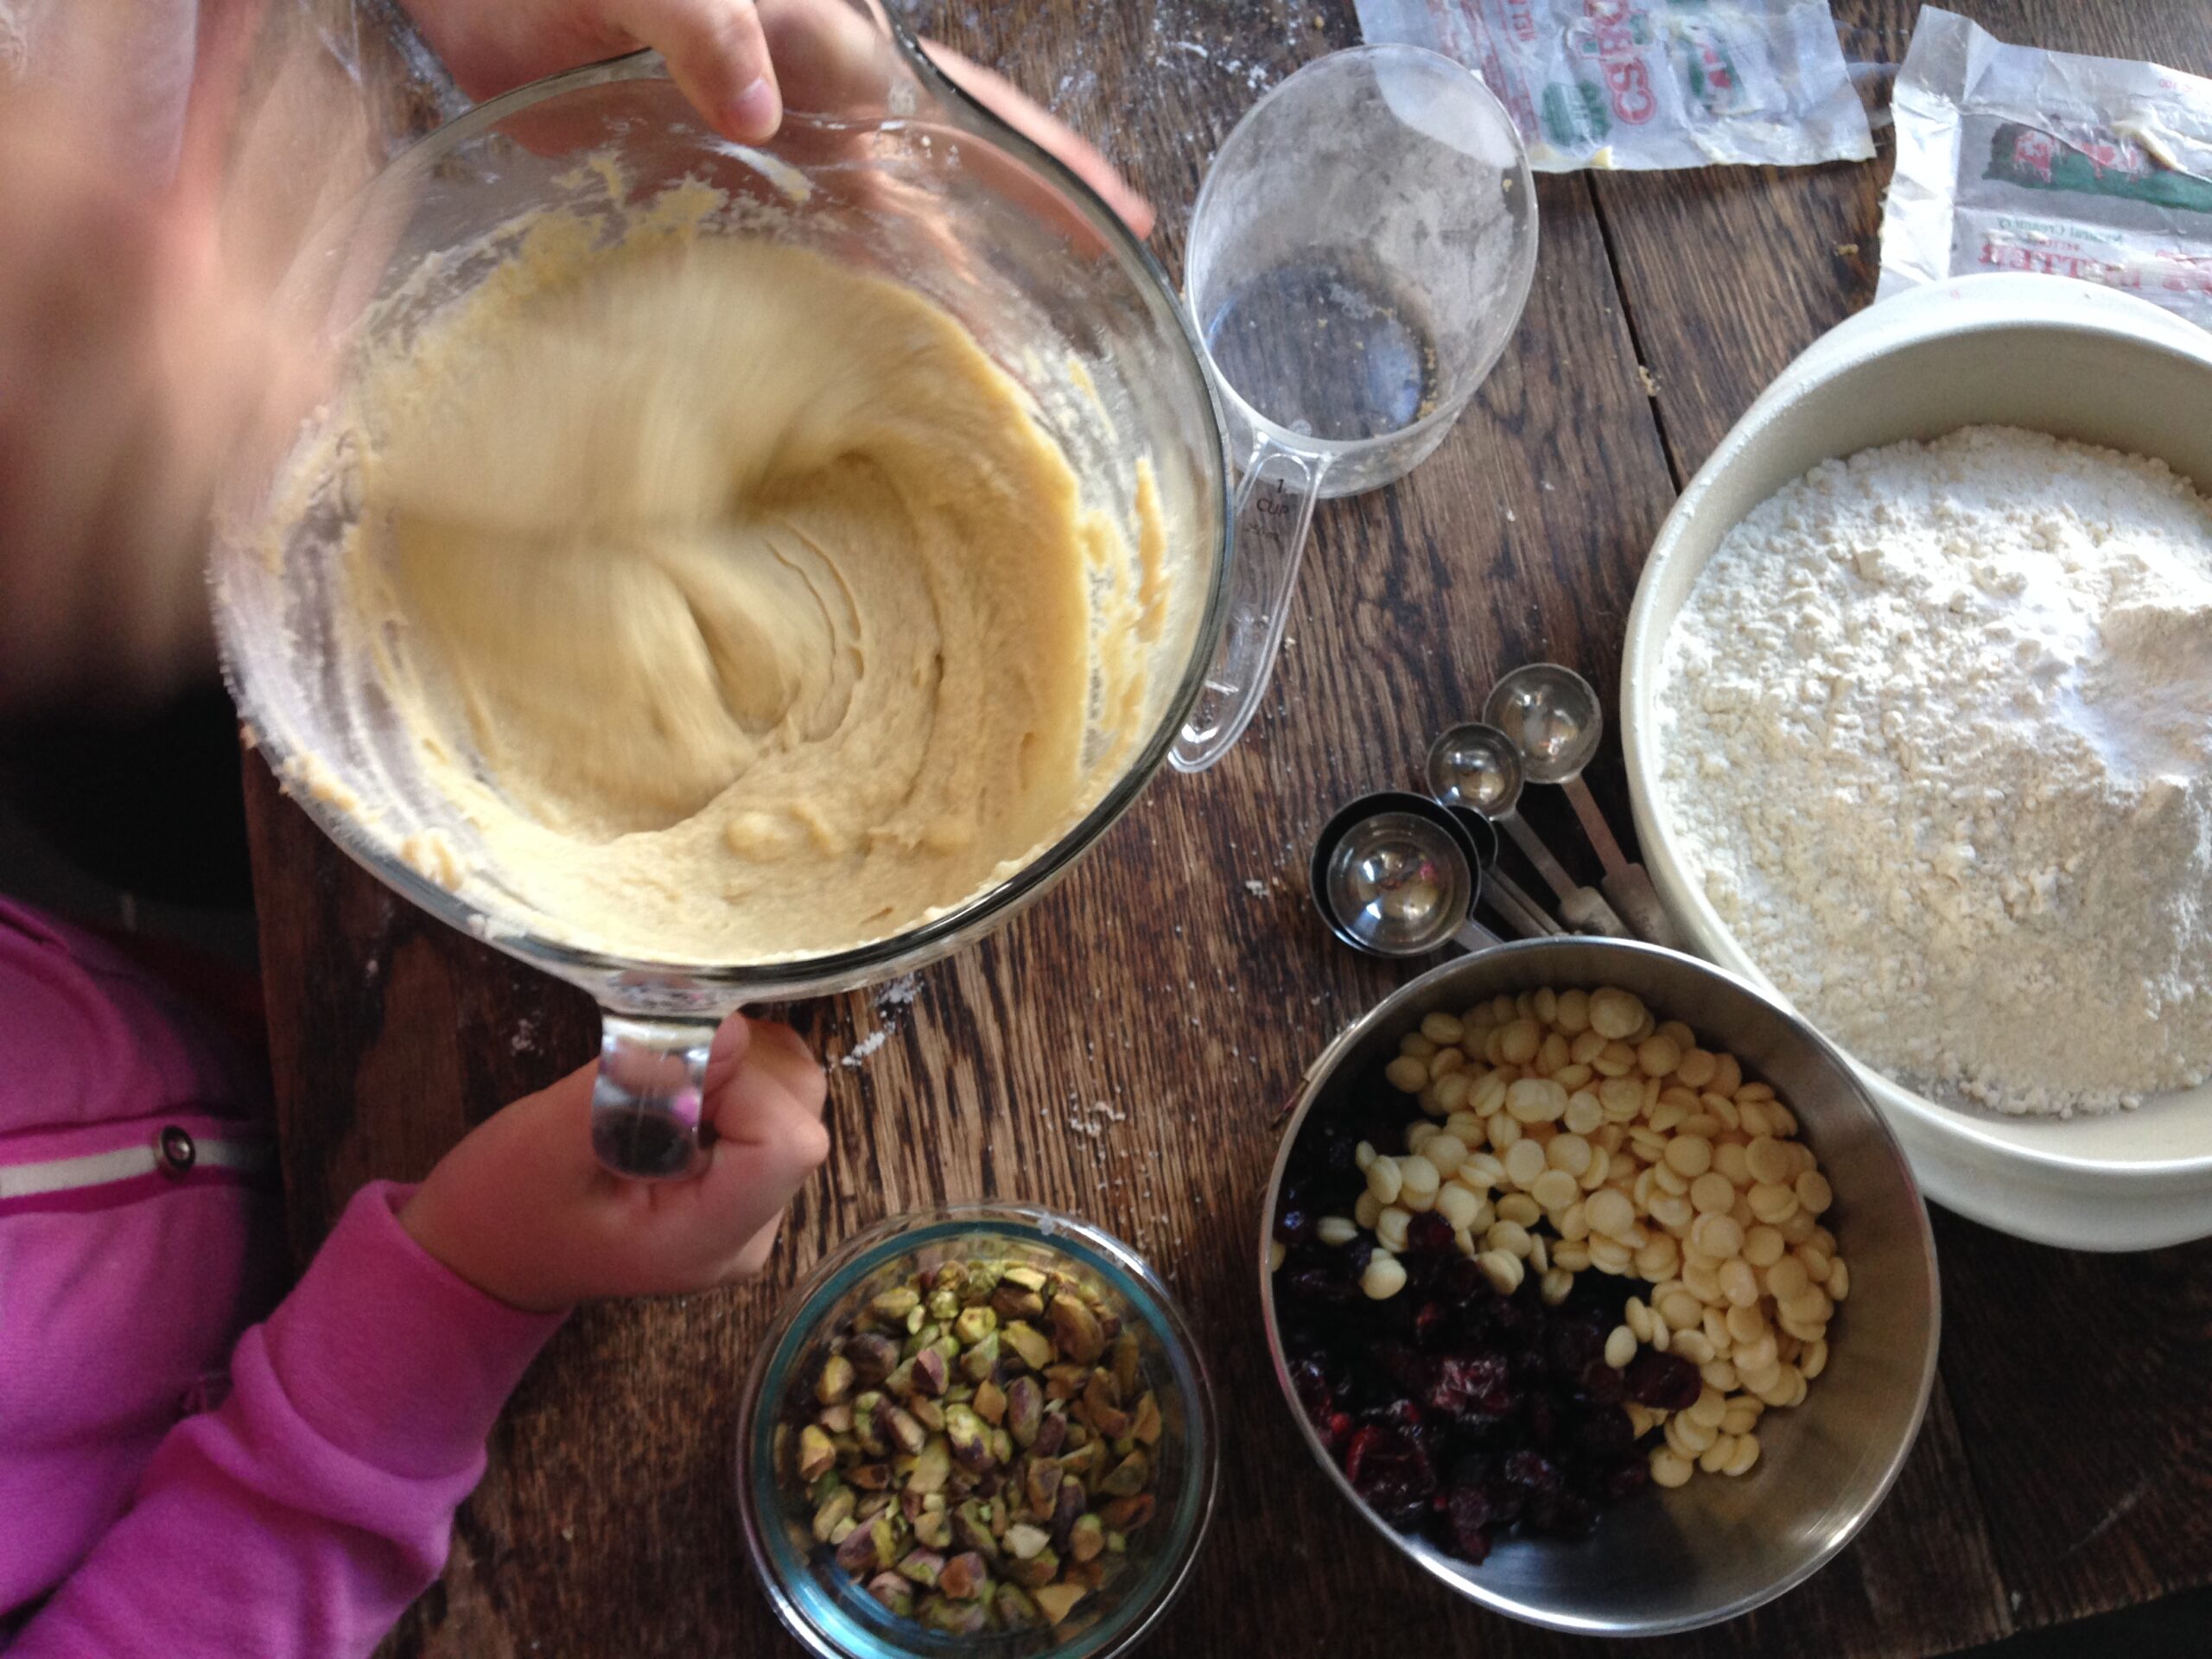 I don’t own a stand mixer… I know, it’s really sad, but I do have several littles who have lots of energy and are easily swayed to mix mix mix…Just give them the spoon and tell them they can lick it clean when they are done….. And so goes the sugar, butter, and vanilla..creamed together by the arms of babes. Makes the cookies taste better.
 In goes the dry…These ladies knows how to stir!
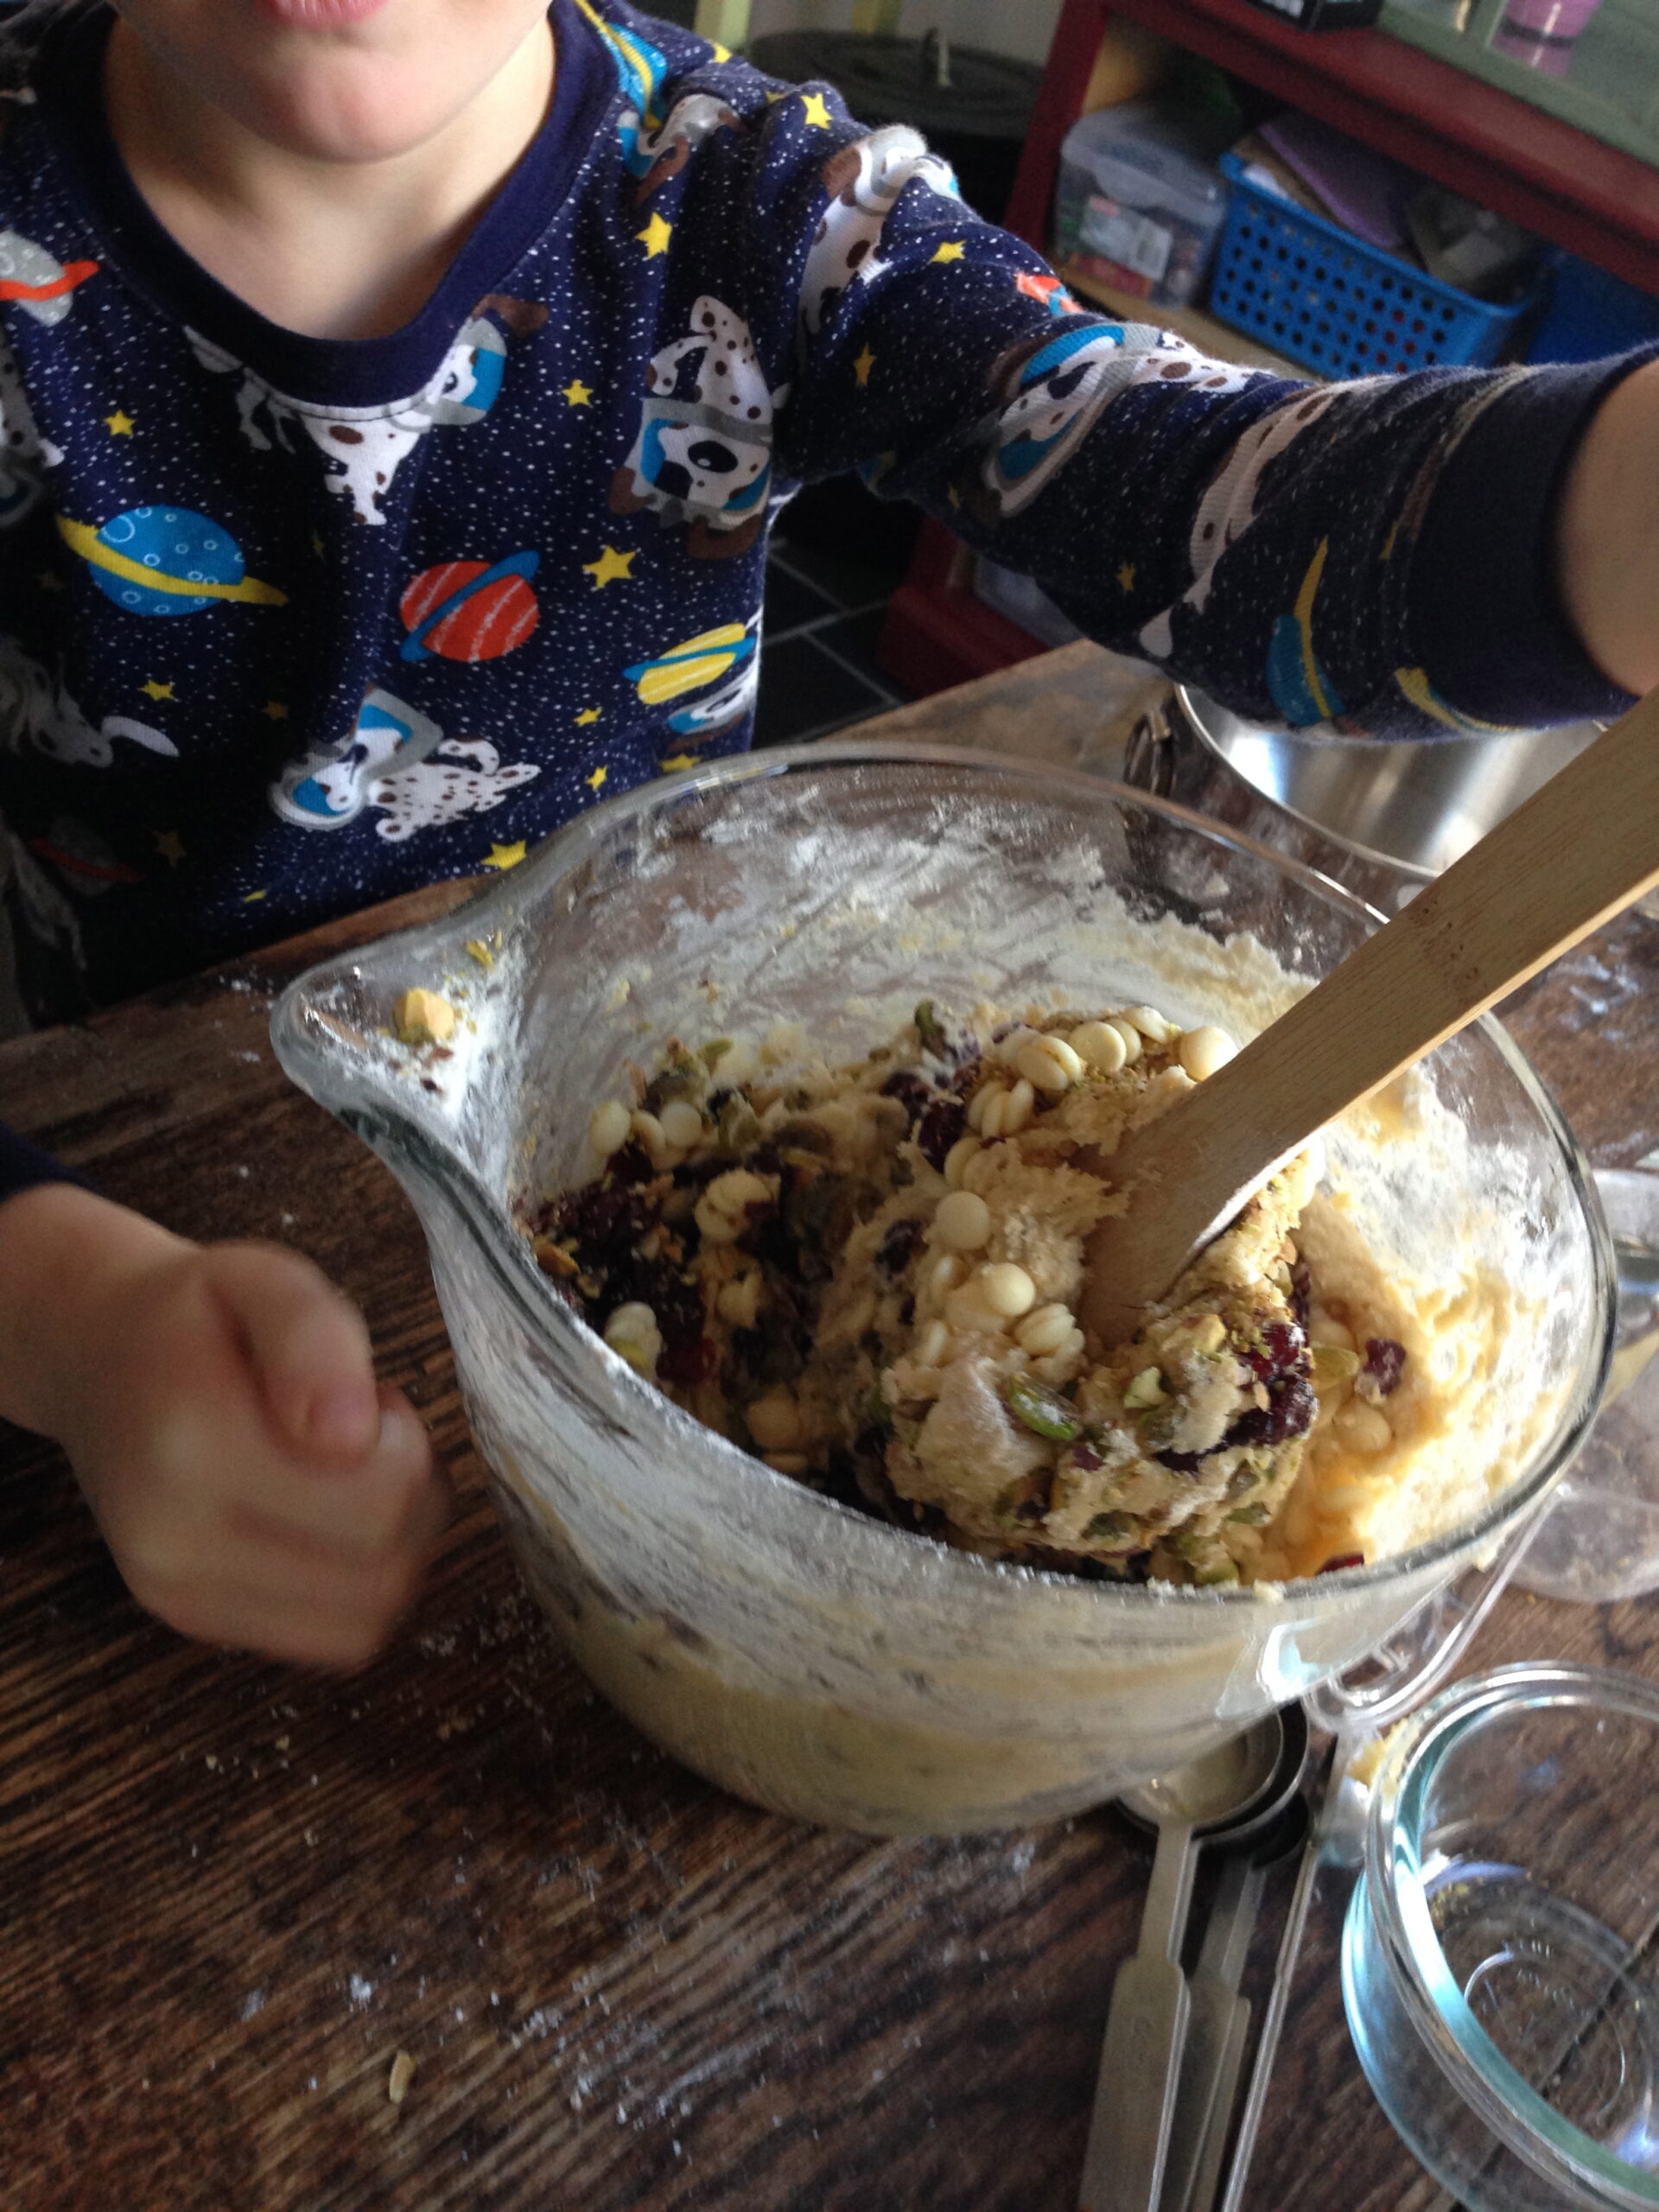 This guy got lucky. He got to stir in the goodies. I gave him his own bowl of chocolate for his skills. It’s important to pay the help.
 So there you have it, a lovely cookie to share.
THE LOVELY CRAZY
September 19, 2015 by maximios • Blog
Guess what guys ….I got myself a sick vintage waffle/ griddle iron. I couldn’t be more thrilled!!! I found this thing at the local recycled goods store the other day, along with a very beautiful old white pyrex mixing bowl. It was one of my best thrift store scores! (Checking out the inventory and the condition of all the old things that day, I would say an old lady had just died and all her perfectly keep, mint condition kitchen stuff had just been donated. But it’s cool, cause I get the feeling that she was at least 90, with a big loving family, and was happy until the day she died. And I am sure she would be pleased that I have taken over the waffle maker. Thanks old lady!)
And now I am pretty sure that everything I make for the next week will be cooked on said waffle/griddle. I am serious, I already have a list of things to try and cook on it; cookies, biscuits, granola bars, potatoes, fruit, some type of pasta situations…. the list of possibilities is endless and I bet that at least 1/2 of these things will be totally awesome and amazing.
But first thing first. I need to make dinner.
So waffles for dinner!!
Note. These waffles are completely 100% fantastic for any meal you want to make them for. They consist of nothing more then beans, a shit ton of veggies, and just a bit of cornmeal. But don’t let that fool you because they are super packed full of so much flavor, have a really soft tender inside, with a nice crispy outside and are so super pretty. They are wonderful! The stuff. First, we got a big old pile of shredded up veggies which include; carrot, beet, sweet potato, onion, parsnip, celeriac, and a little bit of kale. A we got a bowl of rinsed and strained white beans, a little bit of cornmeal and salt, pepper, and garlic powder.
The makings of something amazing!Before you do anything. get your waffle iron out and preheat it.
While thats going on, take you beans, add 3/4 cup water and puree until smooth with whatever blending device want to like to use. (I used my hand blender…less to clean)Now collect all the shredded veggies and dump into a big bowl with the bean puree, the spices and the cornmeal. Mix until combined. The batter should be thick, but not dry. If its seems to wet, add more corn meal, or too dry, add a little more water.
Note how my batter turned a magical pink… I love beets, they make everything pretty! And check out that bowl!When your waffle iron is preheated, oil it if needed (if your not sure, add a little oil just to really make sure your waffles don’t stick) and take appropriate size spoonfuls of the batter and stick on iron. Close it and wait…..My iron has a little light that turns on when the waffles are done cooking, so I waited patiently (ok iI did open it a few time) until light tuned on and removed the perfectly cooked waffles.
Did I mention how awesome my new/old vintage iron is?
SO AWESOME!!
I made a little gaucamole and gave the mister and little bowl of plain Greek yogurt with lemon juice, but feel free to top, drizzle, or dump whatever you want onto these beauties…
Happy waffle Wednesday!!!
-C
Veggie Bean Wonder Waffles
Makes 8-10 waffles (in my iron) feeds 2-3 peeps
Note on veggies… I used what I had in the fridge and shredded, it came to about 3 cups. If you don’t have these specific veggies or only want to use a few.. go for it. Just make sure to have 3 cups of whatever veggies you use.
Take you beans and blend them up with whatever device you would like to use. Once creamy, add to a bowl with the rest of the ingredients. Stir until combined.
Once the waffle iron is preheated, oil it( if needed) and place the recommended amount of batter right on it there. Close and cook until golden brown and waffly.
Serve on a plate with topping of your choice, A few suggestions.. Guacamole, salsa, hummus, mustard, greek yogurt… anything that tastes good to you.
Eat as breakfast, lunch or dinner…
Fork into face
You ever make dish, completely on the fly, just to use something up (I have a lot of ripe tomatoes) with no real expectation, just because… Then have it be one of the best freaking things that you have ever made? This salad is one of those things.. maybe not the best thing I have ever made, but definitely the best salad I have ever made…. this week.
A salad compiled of all things amazing, taking just a few minutes to make and is the perfect balance of uber fresh with baby spinach, raw kale, and crunchy quick pickled onions. Then adding a touch of warmth with the sweet and juicy seared tomatoes and big chunks of creamy avocado.
I mean, for reals. ……Best Salad Ever !!!! (this week)
Now let’s do this.
The Stuff. A big bowl of baby spinach and chopped up kale, a few sliced up roma tomatoes, some super thinly sliced red onion, half an avocado, red wine vinegar and salt and pepper. Before you do anything, place the sliced onions into bowl, sprinkle with a pinch of salt and add a few glugs of the red wine vinegar. You want the onions to sit in the vinegar for at least 5 minutes on the counter cause the longer they sit the more crispy pickly they get. (after eating onions like this, you will never want to eat them any other way) Lightly oil a skillet and preheat to a medium heat. Once the skillet is hot, sprinkle the tomato slices with salt and pepper and place tomatoes right on in, snugly, but not overlapping. Let cook for about 3-4 minutes, or until the bottoms start to brown. Flip and cook other side for another few minutes.Once the tomatoes are seared on both sides, remove them gently from skillet and toss them on top of the bowl of greens.
Take the pickled onions and toss those right on top, with any of the residual vinegar, add dice and scoop the half of avocado and toss that on in as well.And now eat the best salad ever (this week).
Make the day good!
-C
Skillet Seared Tomato and Quick Pickled Onion Salad
Serves 2 as a side, 1 for a hungry eater
Thinly slice red onion and place in a bowl. Add vinegar into a and sprinkle with salt. Let sit on counter for at least 5 minutes, if not longer,
Slice tomatoes into 1/2 inch thick rounds and sprinkle with a pitch or salt and pepper. Lightly oil a skillet and preheat it on medium heat. Once the skillet is preheated, stick the tomatoes on it (watch out for splattering tomato juice) Cook first side for about 3 minutes or until the bottom has browned, then flip and do the same for other side.
One tomatoes are seared, place directly onto the greens. Now dump the pickled onions and residual vinegar on top. And dice up avocado and add that on top too.
Now eat your salad, fork or fingers…
And I know, ba-daaaamn. So good.
My contribution to last nights dinner at my sisters…. Freshy fresh veggies spring rolls.I had about 30 minutes between work and getting over to my sisters house to throw something together so it needed to be something fast, easy, and something I could make without going to the store. She was making the main course (some teriyaki situation and rice) so I was doing up the veggies.
I had just bought a package of spring roll wrappers…. Bingo! The perfect and logical choice. I grab the wrappers, a variety of veggies and after spending 12 of my 30 minutes trying to scrub the oil based paint off of my face and hands, I still managed to completely prepare, construct, and take pictures of these lovely tasty spring rolls. and get over to my sisters in time for dinner.
Impressed?
Damn right!
The stuff. Carrot, beet, asparagus, red cabbage, and kohlrabi, which all (except asparagus, which I just cut into thirds) got cut into matchstick sized pieces with my mandoiln. Then there are the rice spring roll wrappers that we need to make the veggies into rolls. Also a bit of red wine vinegar to drizzle onto the veggies for a little extra zing. And lastly, soy, fresh ginger, and a couple cloves of garlic for a spicy salty dipping sauce.Start by having everything set out and ready to assemble. Fill a large shallow dish or baking sheet with really warm water. Working with one at a time,place a rice wrapper into water and let sit for about 10 seconds or until the paper starts to soften. Remove from water and place on a damp surface (just splash a little water on the counter) Take a little bit of everything and and place on the lower middle part of the paper. Fold in the sides first, then tuck and roll the wrapper as tightly as you can without ripping the wrapper.
Repeat until you have used up all you veggies.For the dipping sauce. Finely grate ginger and garlic and add to soy sauce. Stir… and it’s done.Freshy, pretty and fantastically delicious. And for real, took about 8 minutes to make. (I even had enough time to wash the dishes before we left!)
I am so awesome!
Hump Day Pow!!!!!
-C
Fresh Veggies Spring Rolls
Makes 8-10 but can easily be increased or decreased to desired amount
Note… I used the veggies that I had in the fridge at the moment. If you have a bunch of veggies but not these particular ones, use what you have. Pretty much all veggies taste good inside a spring roll!
Gather your veggies and prep by either using a mandolin, a grater, or some sick knife skills, and julienne, shred, or slice you veggies into thin match sticks. Once all the veggies are prepared, sprinkle a little vinegar over the top.
For the rolls…Grab a large shallow vessel (a rimmed baking sheet works great) and add in warm water. Working one at a time, place the wrapper into the water for about 10 seconds or until the wrapper starts to soften. Remove and spread onto a clean, damp work surface. Gather a bit of each veggie that you are adding and place towards the bottom middle of the wrapper. Now fold the sides in over the pile of veggies. Then with the side closest to you, tuck and roll wrapper away from you, trying to keep it tight, but not to tight that it rips.. (Hopefully that makes since.) Place finished rolls onto a damp surface to keep from sticking and if not serving right away, drape with a damp towel or paper towel to keep from drying out.
For the soy ginger dipping sauce. Add grated ginger, minced garlic, and soy into a bowl and mix together. Serve with spring rolls.
Eat one, two, or a plateful. It’s nice to share but not a necessity.
Yesterday I spent the entire day (ok maybe not the entire day), but a the better part of the afternoon defrosting my freezer. Sure, I do the occasional chip chop here and there, just enough from around the freezer door so it will close, but ever few months I notice that everything in the fridge is not staying cold and that the freezer is not freezing stuff. Thats when I know its for real time to defrost. So a few days ago when I noticed my bananas were turing to liquid in the freezer, I knew it what I had to do….Completely empty the fridge and melt/hack away the 2-4 inches of ice build up that accumulated. It is such a freaking pain in the ass.So on this defrosting day, I took all the stuff from the freezer, stuck it in a cooler, and the rest of the stuff, which is basically all veggies, I just tossed on the table. As I am hacking away with a metal spatual, a wooden spoon, and a constant rotation of pots of boiling water, I was thinking about dinner. I figured I might as well just eat up as much of the veggies as I could, you know, so I didn’t have to put them back in the fridge. And also, I was getting pretty annoyed because this particular defrosting session was taking way longer the anticipated, which made making dinner seem like another pain in the ass. I figured I might as well just eat everything that is already out on the table, which pretty much narrowed down the “whats for dinner” conversations because it was already all over the place. And so dinner was a humongo salad for me, and for the mister, I made him a monster of a veggie sandwich. (my salad was exactly the same stuff as the sandwich, minus the bagel) Easy, fast, super duper yummy, pretty and piled so high with tons of veggies that the fridge is pretty much empty now.
Look at the is beast. I don’t call it a monster sandwich for nothing.
The stuff included in this monster veggie sandwich..
Romaine lettuce, tomato, avocado for there is not real sandwich without them. Thinly sliced radishes, cucumber,a and onion for nice crispy crunch. Shredded beets, carrots, and purple cabbage to give more crunch and a bit of sweetness. Then of course there needs to be something pickled, so I used banana peppers cause they are the SHIT!! And lastly some hummus for a nice creamy finish (plus a bit of protein) and yellow mustard because mustard on everything is just right. Heres to a mountain if goodness that is no longer in the fridge! Served with a another mountain of roasted parsnips and carrots (more stuff from the fridge) and a tall glass of iced tea.
Lucky that today is farm share pick up cause the fridge is pretty much on empty.
Yea it’s Thursday!!!!
-C
A Monster Veggie Sandwich
Note. This is just a guide.. Feel free to use whatever veggies you fancy.
To assemble. Ready your bread.. Toast if you want, and stick it on a plate
On either side, smear the hummus and the mustard.
Pick a side, start to stack by evenly disrupting veggies on top of veggies. Place the second piece of bread on top and giving a little smooth to keep it together.
And go at it. Cut in half or don’t. Have a napkin or a long sleeve ready to wipe your face.
And I bet I am not the only one that got overly excited at $1.50 pineapple and bough themselves a few. We will just call ourselves opportunists. Now we have plenty of pineapples and don’t have to pay the $4 a piece prices. (Justification)
But if you don’t have a pineapple laying around, you must go get one. (Maybe if your lucky, there might still be some sales going on) because you must make this salad. I am on a mission to make everyone I know eat it because, for lake of a better way to say it…….It will rock your world.
Dill and pineapple are a serious match made in heaven. Pineapple, with its sweet, tangy, citrusness and dill with it’s super fresh earthiness. Mixed together with a few other helpers to create a fresh, clean, chunky, tangy, over the top, flavor. I could stop right there, but toss in a handful of lentils, some creamy avocado and a bed of kale…It’s like the best spring time, celebration on you tongue, happiness in you tummy, kind of salad.
A salad that will make you smile. (and maybe buy 5 pineapples)
The prep is done, now compile. Kale in bowl, top with lentils,. Toss on avocado chunks, and, last but not least, the blended pineapple dill mixture. So good……So so good.
Happy Friday!!
-C
So Good Pineapple Dill Kale Salad
Serves Two
Note. No fresh dill? You can use dried, just sub in 1 teaspoon for the fresh and after blending with the pineapple, let sit a little longer to really let the flavors meld together.
Place pineapple, dill, pinch of salt, vinegar and garlic into a blender or whatever you own that blends and blend stuff together, leaving it a little chunky. Let sit for 5-10 minutes.
Kale goes into a bowl and add the lentils and diced avocado. Pour the blended pineapple on. Toss around.
Now eat.
Whenever my little sister comes over for dinner, I always end up making lentils in some form or another because she, like me, is awesome and loves a good lentil. It makes me so happy that she has such great taste in food and wants to eat what I make. It’s validation from a teenage girl which is the best kind of validation.
So last night when she came over after school for dinner and trash talk (she likes to verbally abuse Nick) we decided to make both of our favorites … Lentils AND sweet potatoes. How can you go wrong with that combo? Well I am telling you that you can’t. The rich creamy soft and slightly sweet sweet potato mixed up with the hearty, earthy, oh so fantastically tasty lentil. Add in a bit of kale and cheese if you wish and serve with salsa and guac… Whoa, it’s the best!!!
Such a great evening, I get to the cooking, the sister gets to the verbal abuse and the mister, begin the champ that he is, takes it and dishes it right back.
I am the greatest(coolest) sister.
Baked sweet potatoes, cooked lentils, chopped up kale and monetary jack cheese (Cheese is optional.. and make it vegan cheese if you want) And you don’t need then, but salsa and guacamole are the best toppings.. So you have them.
Cut the cooked potato in half lengthwise and scoop the flesh out into a bowl. With a fork, smooth the potato , sprinkle with salt and pepper and mix in lentils and kale.
Stuff the mixture back into the skins of the potato.
And add some cheese (The mister and the sister wanted lots of cheese, no cheese for me) and stick the potatoes into the oven and let bake for another 5 or so minutes or until the cheese is all melty or the top is nice and crispy.
Remove and plate… Serve with salsa and guacamole and maybe some corn chips.
I am the greatest sister
-C
Makes 2 serving
Place potato in oven at 400 degrees for 30-40 minutes or until soft a baked throughout.
While potato is baking, prepare lentils. 2 cups water to 1 cup lentils. Add water and lentil to pot, bring to a boil, add a sprinkle of salt, and reduce to simmer until lentils are tender.
When potato is cooked, remove potato and let cool for a few minutes. Cut in half lengthwise and scoop out most of the flesh out of the skins and place into a big bowl. WIth a fork, mash the potato a bit Add in the lentils and the kale, a sprinkle of salt and pepper, and mix to combine. Stuff the mixture back into the skins of the potatoes and top with cheese. (if using ) Place potatoes back into oven for 5-10 minutes until cheese is melty and bubbly or the top of the potato is a bit crispy. Remove from oven and serve on a plate with salsa and guacamole.
Eat and be happy.
This lovely. oh so gorgeous salad has been on repeat in my meal repertoire. It’s so yummy and so simple. Beets and carrots roasted and sliced, tossed onto a bed of tender spinach and topped with a creamy, lemony avocado dressing. Fresh, fast, light, and filling. Everything a perfect spring salad needs. Not to mention it takes no time at all to make because with all this nice weather , we want to spend as much time basking in the warmth and glow of the sun. I might even take my spring salad outside today. Maybe.
That’s it. You now have super creamy avocado lemon dressing. Drizzle on anything and everything… especially this roasted carrot and beet salad..
A salad suggestion…. Add some roasted chickpeas toasted nuts, or sunflower seeds to this or any salad. Adds a little proteins and the crispy crunch is a nice addition.
Enjoy the day..Smile lots
-C
Roasted Carrot Beet Salad and Avocado Lemon Dressing
Salad
You can roast the veggies a few ways.. Slice the carrot and beet, place on a baking sheet and stick into the oven at 425 degrees until tender. Or you can just toss a the carrot and beet onto a baking sheet whole and roast.( What I usually do)
Once the veggies are roasted and cooled, thinly slice and toss onto the bed of baby spinach. Top with Avocado Lemon Dressing (recipe below) and some toasted crunchy thing.
Dressing
Scoop avocado fruit into a bowl and mash with a fork until a paste is formed. Scoop mashed avocado into a jar and add remaining ingredients. Stick lid on jar and shake tip combined. Use on anything.
Dressing lasts a few days in the fridge. Should stay green, but add a layer of lemon juice to top to keep from browning.
A bowl of baby spinach, a few chopped up strawberries*, half a sliced avocado and a small handful of toasted almonds.. Oh, and don’t forget the balsamic vinegar….
*Note.. Strawberries are kind of heart shaped already so if you want, reserve a few slices to fancy up you salad presentation, but chop up the rest into smaller pieces.
Not to shabby for 5 minutes and a handful of ingredients. Anyone (don’t feed to a person with nut allergies) would be so syked to be fed a salad like this… You yourself should be pretty excited to eat a salad like this. Heck, I am excited to eat a salad like this!
A love salad for everyone and everyday!
YAY for Thursday and Happy meal planning!!!!
-C
♥ Balsamic Strawberries on Spinach Almond Avocado Salad ♥
Ingredients for 1 large or 2 small salads
Dice strawberries into small pieces (reserve a few whole slices for heart shapes if you want) and toss in a small bowl with the balsamic vinegar. Let sit for at least 5 minutes. Rinse and dry spinach. Place in a bowl(s) and top with thinly sliced avocado, chopped almonds and balsamic soaked strawberries. Drizzle the residual vinegar on top and sprinkle with a pinch of salt and pepper.
Eat with a fork