
THE LOVELY CRAZY

You ever make dish, completely on the fly, just to use something up (I have a lot of ripe tomatoes) with no real expectation, just because… Then have it be one of the best freaking things that you have ever made? This salad is one of those things.. maybe not the best thing I have ever made, but definitely the best salad I have ever made…. this week.
A salad compiled of all things amazing, taking just a few minutes to make and is the perfect balance of uber fresh with baby spinach, raw kale, and crunchy quick pickled onions. Then adding a touch of warmth with the sweet and juicy seared tomatoes and big chunks of creamy avocado.
I mean, for reals. ……Best Salad Ever !!!! (this week)
Now let’s do this.


The Stuff. A big bowl of baby spinach and chopped up kale, a few sliced up roma tomatoes, some super thinly sliced red onion, half an avocado, red wine vinegar and salt and pepper. Before you do anything, place the sliced onions into bowl, sprinkle with a pinch of salt and add a few glugs of the red wine vinegar. You want the onions to sit in the vinegar for at least 5 minutes on the counter cause the longer they sit the more crispy pickly they get. (after eating onions like this, you will never want to eat them any other way) Lightly oil a skillet and preheat to a medium heat. Once the skillet is hot, sprinkle the tomato slices with salt and pepper and place tomatoes right on in, snugly, but not overlapping. Let cook for about 3-4 minutes, or until the bottoms start to brown. Flip and cook other side for another few minutes.Once the tomatoes are seared on both sides, remove them gently from skillet and toss them on top of the bowl of greens.

Take the pickled onions and toss those right on top, with any of the residual vinegar, add dice and scoop the half of avocado and toss that on in as well.And now eat the best salad ever (this week).
Make the day good!
-C
Skillet Seared Tomato and Quick Pickled Onion Salad
Serves 2 as a side, 1 for a hungry eater
- 2 large or 3 smaller roma tomatoes
- 1/2 of a red onion
- 2-3 tablespoons red wine vinegar
- 1 1/2 cups baby spinach
- 1 1/2 cups chopped kale
- salt pepper
- 1/2 a ripe avocado
- olive oil (to grease pan)
Thinly slice red onion and place in a bowl. Add vinegar into a and sprinkle with salt. Let sit on counter for at least 5 minutes, if not longer,
Slice tomatoes into 1/2 inch thick rounds and sprinkle with a pitch or salt and pepper. Lightly oil a skillet and preheat it on medium heat. Once the skillet is preheated, stick the tomatoes on it (watch out for splattering tomato juice) Cook first side for about 3 minutes or until the bottom has browned, then flip and do the same for other side.
One tomatoes are seared, place directly onto the greens. Now dump the pickled onions and residual vinegar on top. And dice up avocado and add that on top too.
Now eat your salad, fork or fingers…
And I know, ba-daaaamn. So good.

 I figured now is a good time to get this recipe out there before we get to far into spring and summer recipes because there is going to be a lot of banana ice cream filled recipe coming and I figured its a good idea to have the basic banana ice cream recipe ready for people to refer too. And because I made so much fantastic naner ice cream, I also made a cookies and cream naner ice cream for my sisters and the mister.
Comments that I got from my sisters and the mister when I made them this ice cream
-Sister one.”I give this my sister seal of approval.. It’s so good. The first dessert you have made that I liked! (not including all the other desserts that you have made that I liked)”
-Sister two- “Wow.. it looks like ice cream and feels like ice cream and tastes like ice cream.. You should make me this ice cream!” (I was confused too because I was pretty sure I just made her some)
-The mister- “I am so excited for my new fly fishing pole!”
Ok, so the naner ice cream isn’t new to the mister and he IS very much excited for his new fly fish pole. So excited that he forgot to tell me how amazing that I am and to thank me for making him a big bowl of yumminess. (It’s ok, I forgive him)
And yes, this is probably one of the easiest, most delicious, healthy and amazing frozen dessert that you will ever eat. You will probably find yourself buying mass amounts of bananas and stocking the freezer until things just start falling out. (which is also ok because it’s only bananas and you can’t have too many frozen bananas)

 The stuff you need for this ice cream…. Nice and ripe bananas, peeled and then frozen* That’s it.
To make it, place frozen bananas into food processor and hit the on button. Process the crap out of the namers until nice and silky smooth.
*Note, the smaller the frozen chunks are , the faster and maybe a little easier for the blender to blend the naners into ice cream. So if you think of it, chop bananas into pieces before freezing or even after.
 After all blended and smooth, either eat right away or scoop ice cream into a freezer safe container and stick in freezer. That’s the banana ice cream… And it is amazing and so so so so so addictive. I make a batch, think I am only going to eat a scoop, then find myself eating half of what I have made, but it’s ok cause it’s only bananas.
Now for the cookies and cream banana ice cream.. One batch of banana ice cream, either freshly made, still in food processor or made ahead and placed in a food processor and given a good pulse to smooth it up.
Add cookies in, crushing a bit beforehand and pulse till combined.  Now you have cookies and cream naner ice cream…. and everybody is happy.
Scoop into a cup, a bowl, a freezer safe container, or directly into your mouth. Be careful…. You can still get brain freeze from eating naner ice cream too fast!
Keep it real hump day drum bum!
-C
Basic Banana Ice Cream
Makes one batch. Good for 3-4 servings
- 4-5 ripe bananas peeled and frozen
Peel bananas and stick in a freezer bag or container and freeze. When bananas are completely frozen, break into pieces and stick into a food processor or blender and puree until silky smooth.
Eat right away or scoop into a freezer safe container for later.
Cookies and Cream Banana Ice Cream
- 1 batch banana ice cream
- 5-10 (depending on your cookie need) cream filled cookies like oreos or Trader Joe’s Joe Joe’s (These are gluten free)
In a food processor, blend banana ice cream with cookies.
Eat right away, with a utensil of choice in a container of choice.
Bowl licking is acceptable.
 Before we left for the weekend, I was was trying my hardest to empty the fridge out of all food with the intention of leaning it empty so I could leave it open to defrost while were were gone. Unfortunately I was not able to make it happen. What I did make happen was emptying it almost completely so that when we got home, we had pretty much no food in the house, except for a few things that probably should be eaten. Plus one of the last things that I want to do after sitting in a car for 6 hours is go to the grocery store, or anywhere for that matter, so I was determined to make with what wet had in the fridge:
- Carrots
- half of a gigantic kohlrabi
- soy milk
- iced tea
- bananas that needed to be frozen
- strawberries
Perfect! A few carrots and half of a gigantic kohlrabi.. plus at the hotel we were staying at, there were fruit bowls in he lobby full apples. Every time I went past the apples (which was a lot) I grab one or two, so I have a few apples (I actually have a lot of apples now). All the things I need for a super awesome salad slaw. Apples with their nice sweet crispiness and kohlrabi with its cabbagey, crunchy earthiness, tossed together with some vinegar, some toasted walnuts and some carrots, I mean, so freaking good. And to make it a bit more of a meal, I made some lentils to go with it. But the best part was there was no need to leave the house!!
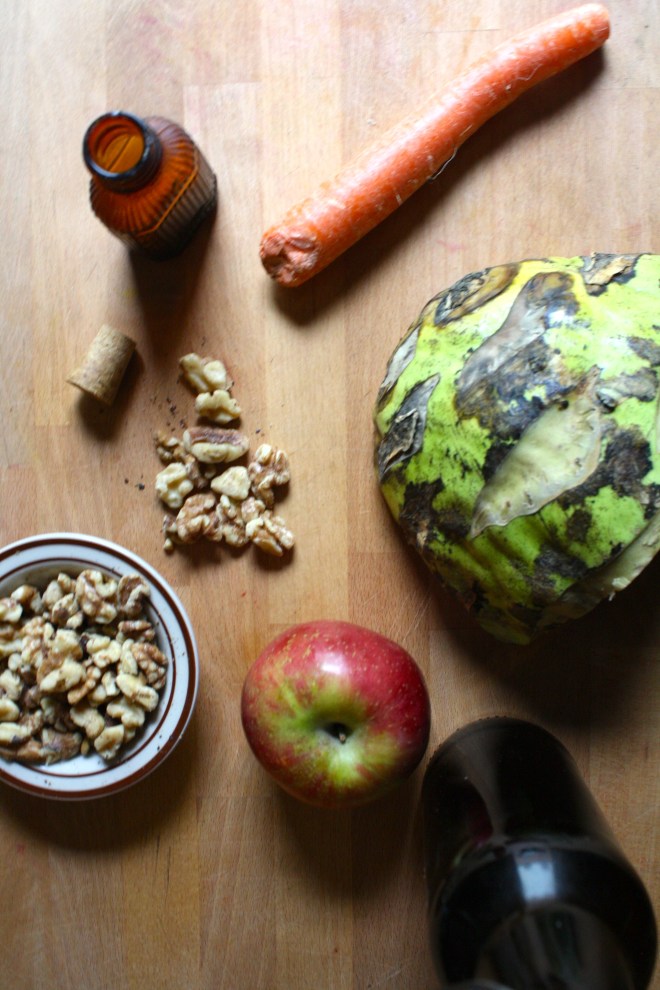
 The stuff… A huge hunk of a bigger then my head kohlrabi (or 2 normal bulbs). A carrot, an apple, toasted walnuts, red wine vinegar, and some salt.
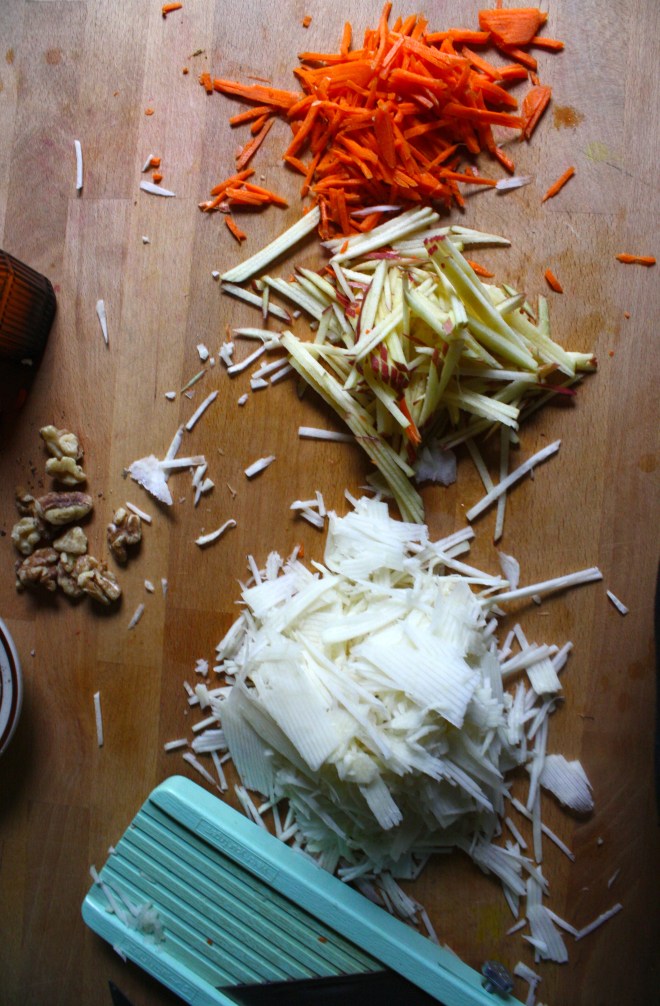
Pretty simple stuff going on here. Just peel and julienne the kohlrabi, carrot and apple. (no need to peel the carrot or apple unless you want too) and stick it all into a bowl. I used my mandolin, which is one of my favorite kitchen tools ever, but if you don’t have one, a box grater works too.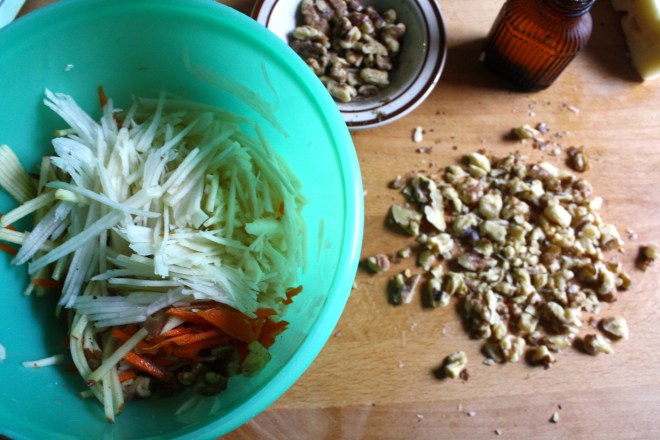 Sprinkle with salt and a good glug glug of red wine vinegar. Chop up the walnuts (some big chunks and some very small pieces makes for good eating), toss it all together and, well that’s it. But wait…. let it sit for a few minutes before serving to really let the flavors draw out.
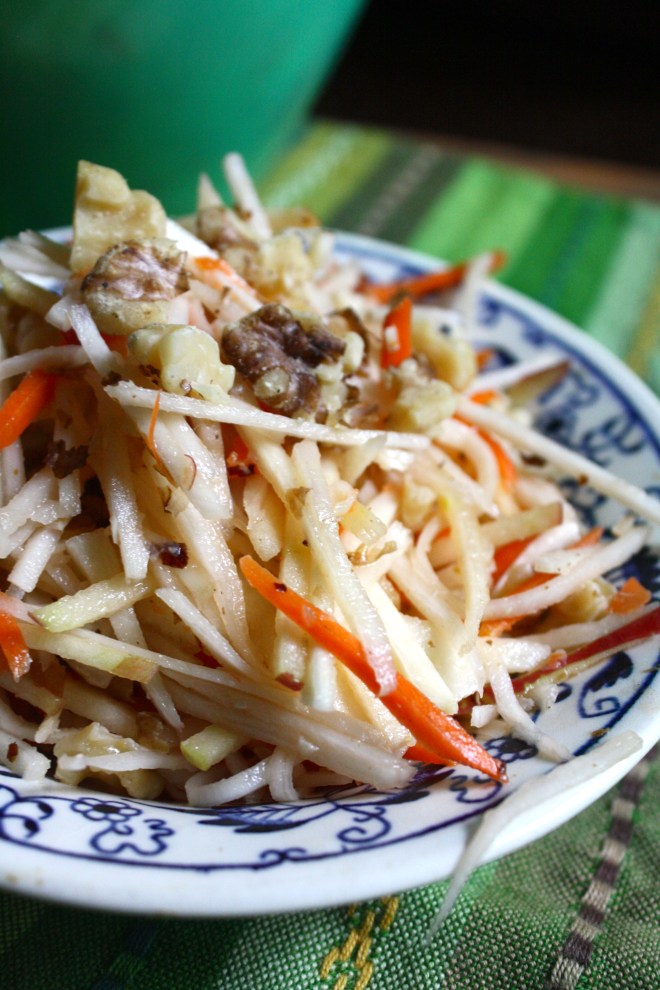 And there we have it. Super fast, full of flavors and crunchy texture. A salad slaw after my own heart.
Serve it as it or add to a bed of greens, rice, or lentils… and make sure to save at least as little… cause its an awesome little pre-bed snack.
Happy Week!!
-C
Kohlrabi Apple Walnut Slaw
- 2 medium sized Kohlrabis
- 1 medium apple
- 1 small carrot
- 1/2 cup toasted walnuts
- red wine vinegar
- salt
In a large bowl, julienne kohlrabi (after peeled) apple and carrot. Sprinkle with salt, add in vinegar. Rough chop walnuts and toss the whole bit together. Let sit for at least 10 minutes, if not longer before serving. (A great salad to make ahead of time)
Eat as is, or toss onto a bed of greens, plate of rice or a bowl of lentils.
Any left overs only end up tasting better the next day.
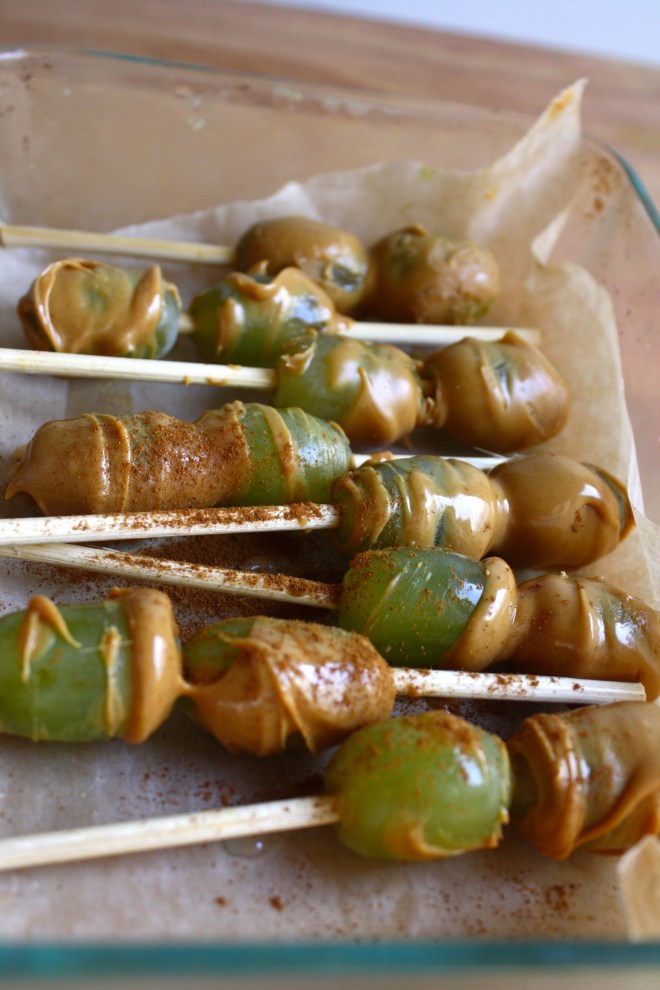 I can’t stop eating these. They are like little balls of crack and I am an addict.
Frozen peanut butter grapes… I mean, I just can’t stop.
So you say you have never frozen your grapes? Well you should. It’s the only way I like to eat them anymore. I was never a huge grape fan, but one day long ago, I discovered the wonder that is the frozen grape and it is amazing, Now whenever grapes are on sale at the grocery store, I buy way to many and end up filling our tiny little freezer with jars and bowls of grapes. Then whenever the mister goes to grab the bag of frozen peas for his sore back or knees, there is almost always a frozen grape avalanche. Why I don’t put a lid on those containers is even a mystery to me. Oh, now I remember.. I want easy access.Oopen the freezer, grab a few grapes, and go on my way… not having a lid to take off makes the process a little easier.
Then one day, the frozen grape game turned into something else, something a little more decadent and even more addicting. Where it came from, I do not know. Maybe it’s some subconscious throwback to a childhood full of peanut butter and grape jelly sandwiches, or maybe it’s just that fact that I think peanut butter can pretty much go with anything. But no matter why, I started dipping those frozen grapes into peanut butter and never looked back. And now when I have grapes, it’s all I want to eat.
I am warning you now, once you start making these, watch out, because before you know it, you will develop a frozen grape addiction too. And littles.. they are as easily addicted to these as well. I have seen kids that hate grapes go totally bonkers for these. Just so you know.
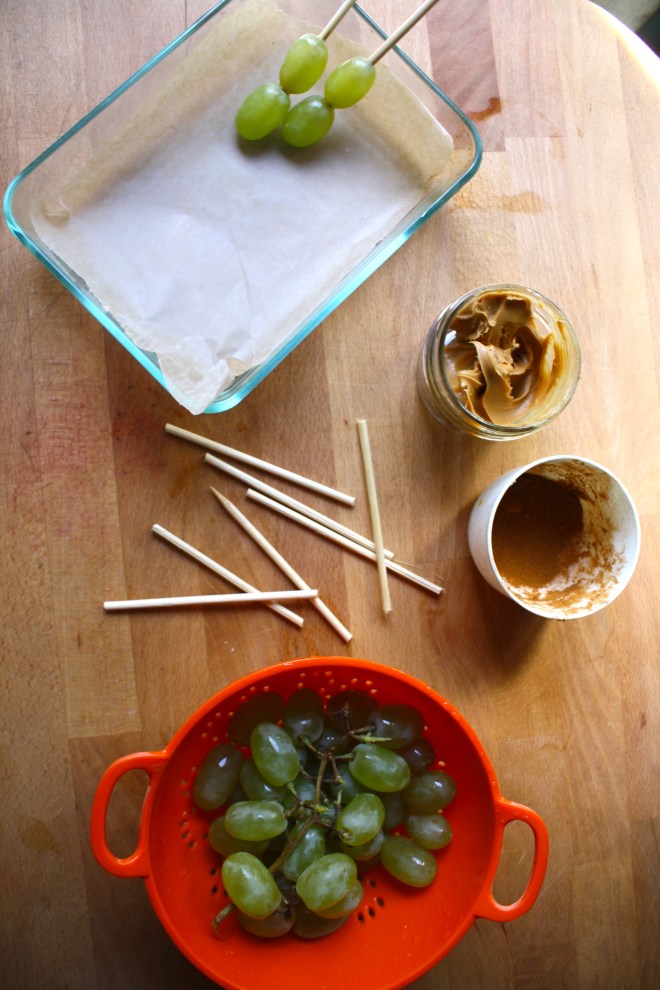 The stuff you will need. Washed and drained fresh grapes (green or red. I usually use red but the green were half the price and the red ones didn’t taste very grapie*) Creamy peanut butter, skewers, and a little bit of cinnamon or cocoa powder (optional)
*Note. When you are the store, try before you buy. You know what I mean, eat a few while shopping aground. I say this because not all grape are created equal. Some taste way better than others. I have bought grapes before that didn’t taste like anything or that have really tough skins, and those just piss me off, so eating a few will guarantee that your money is being well spent and that the grapes won’t disappoint you.
Ok, so now let’s make these bad boys.
Simple simple. Two grapes per skewer (or toothpick) Lay on a wax paper covered dish or pan and stick them in the freezer until frozen. 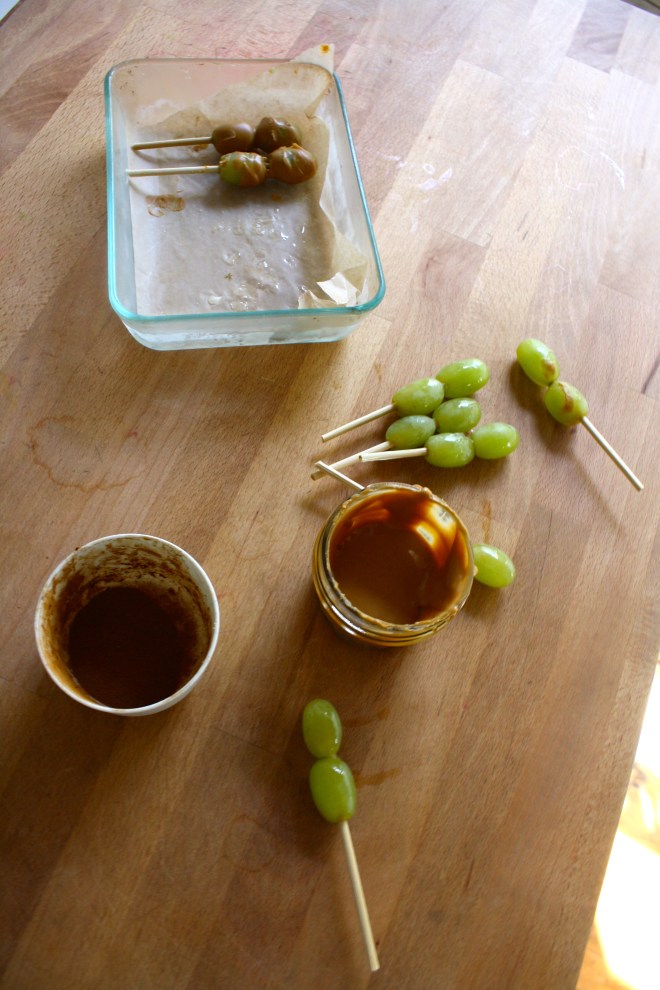 When the grapes are frozen, melt peanut butter. Take a big glob and stick in a tall skinny cup or bowl and stick in the microwave or heat in a sauce pan and then transfer to a tall skinny vessel. Take frozen skewed grapes and, one skewer at a time, dip in the peanut butter. Cover with as much or as little of the peanut butter as you want and place on wax paper. If you are feeling feisty, add a sprinkle or cinnamon or even a dash of cocoa powder. Or, this may seem a little crazy, but garlic powder is so F*ing good.(it’s worth at least giving it a try) When all grapes are dipped, place back into freezer for another 10 minutes or so to let the peanut butter set up a bit.
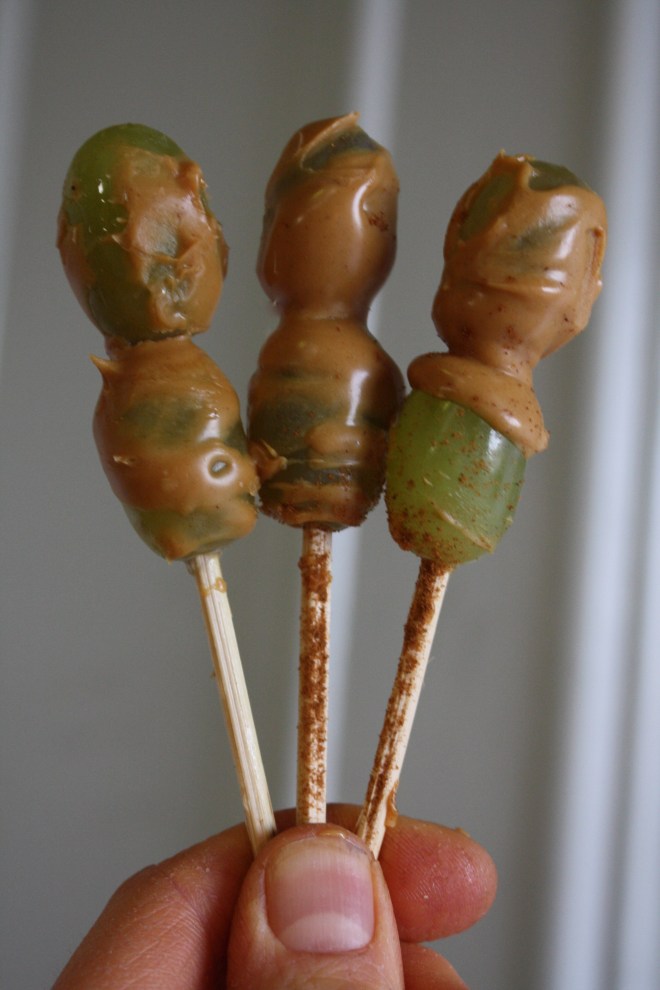 Whenever your ready… Eat. And be so happy. And always keep a back stock of frozen grapes in the freezer. They are the best.
Keep it realz.
-C
Peanut Butter Freezer Grapes
the quantity is up to you, but I recommend making a shit ton!
- Creamy Peanut butter (I use organic creamy from Trader Joes, or natural skippy)
- Green or Red Grapes
- Cinnamon and or cocoa powder (Optional)
- Toothpicks or skewers
Wash grapes and skewer 2 grapes onto a stick. Place on a flat surface and stick into the freezer until frozen, which usually takes about an hour.
Once grapes are frozen, stick a big glob of peanut butter into a tall skinny vessel (Like a juice cup or a 4 oz ball jar) and warm to a liquid constancy in the microwave (about 30-45 seconds) or if you don’t have a microwave, stick in a sauce pan, warm on stove, and pour into a glass (what I do)
Remove frozen grapes from freezer and dip into melted peanut butter. Place on a wax paper line tray or pan and sprinkle with cinnamon and or cocoa powder, or not, or a few (whatever you want) and stick back into freezer for another 10 minutes.
Eat as many as you want… Make so many because you will become addicted!
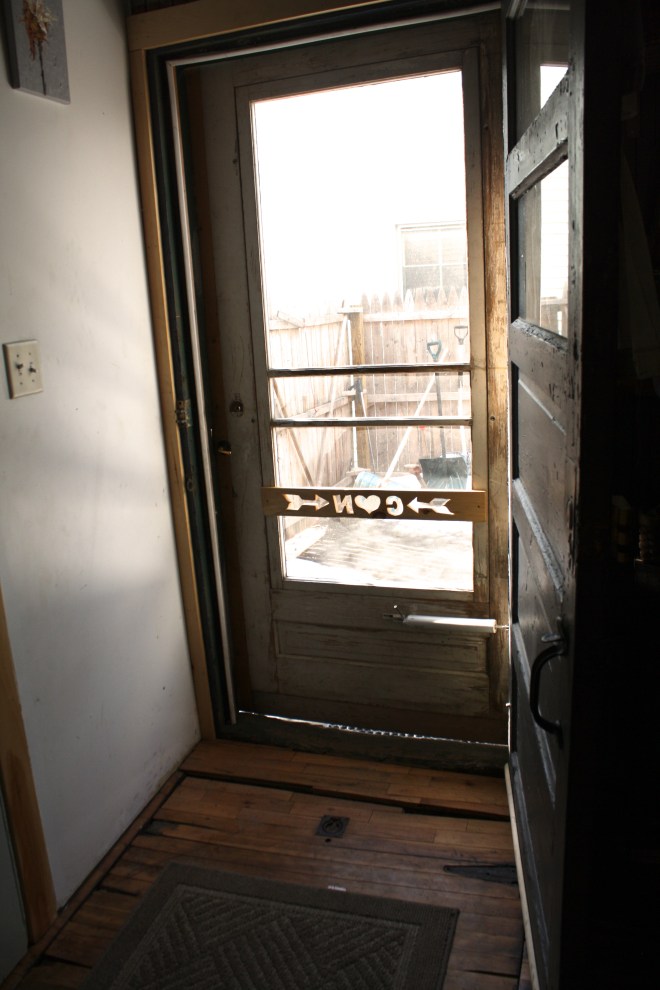 This week was good. Two days in a row the front door was open, the window was open and the heater was off, which pretty much made me that happiest person in the world. My spring cleaning brain has kicked in and I want to clean everything (even the walls). I even spent a good part of an afternoon moving and rearranging furniture. (The house ended up basically the same as when I started) And one of the best parts of the week….most of the snow melted! I am getting super hyped to start raking, cleaning, planting and weeding and and just getting really dirty! Oh how I love the spring!
Here are a few internet things from the week
– Ancient Grains are new again About time!
– This article about the chemistry of cookies is a good one….
– Oooohh pretty. String art
-How to Do Fishtail or Herringbone Braids Step by Step I need to start doing something with my hair besides a really sloppy pony tail that I don’t take out for days on end.
-I think I want to make this Honeycomb shelves.
And some real life happy 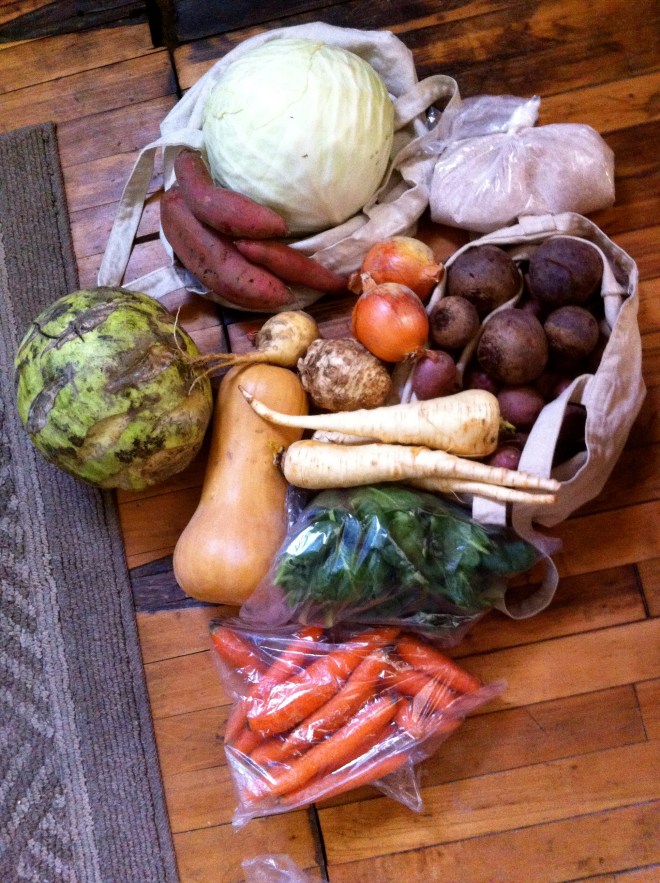 Oh Intervale Community Farm..I love you. I picked up my farm share and was especially pumped for another gigantic kohlrabi and some locally grown, locally milled wheat flour.
 The trees, they are a budding
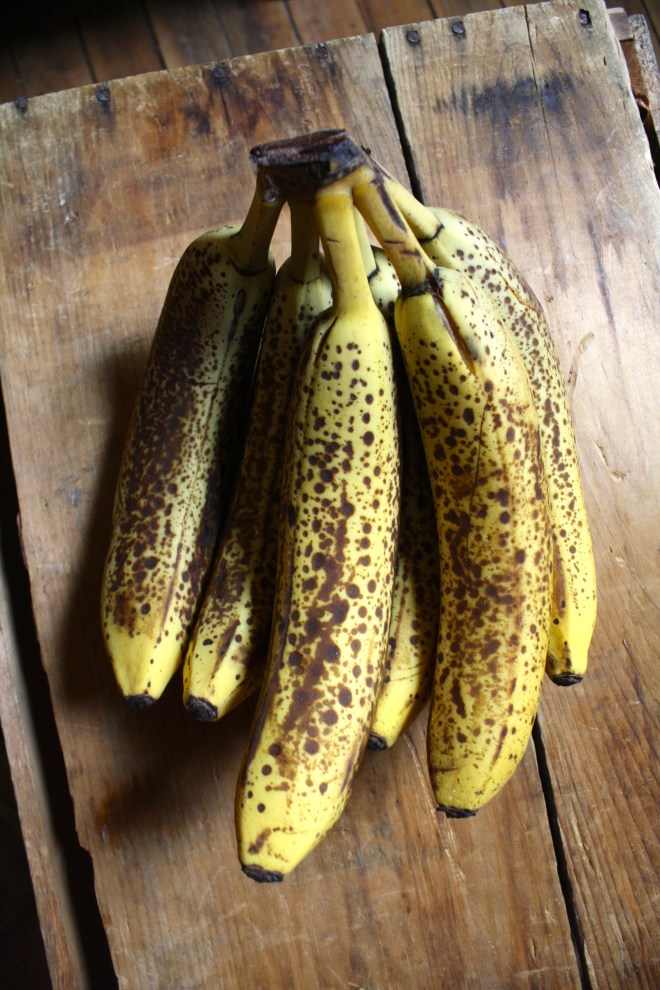 The perfect ripeness, destined for naner ice-cream!
 My sister and I took this little for a sled ride through the wood where there was snow (but it was 45 degrees!) The hike ended up with me pulling her through a field of mud. It was fantastic.
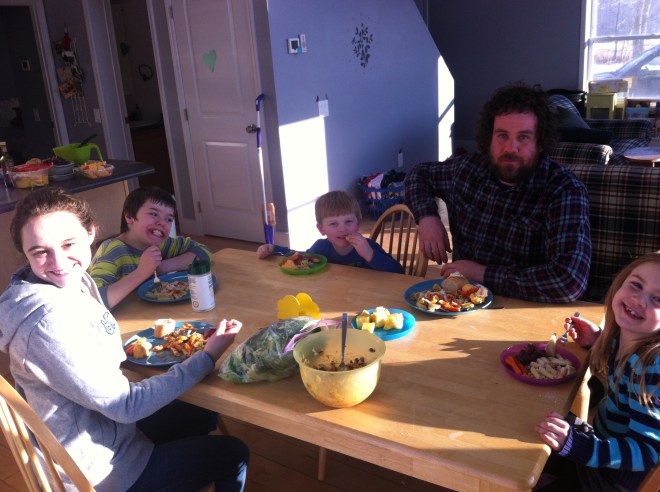 One year ago today. Dinner with my favorite people.
Hope your weeks was awesome and warm..Spring is just about here to stay!
Have a great week!
-C
 Oh do I love a good Sunday. The picture above was taken last Sunday and what a glorious day that was. The mister and I took the pup hiking and it was the most spectacular of days. Sunny, 30 degrees and no wind..I could’t have asked for better weather.
The rest of the week turned out alright. The weather went back to hell again and I was a little frantic and super busy, but all in all, good. I accomplished some things that needed to be done and got to spend time with just about everyone in my family. The highlight was when my sister slept over and we finally watched the Fault in our Stars while eating lots of food, cuddled together on the couch. (movie was good, but book was better. Books are always better) We then woke up early the next day and we (the mister too) journeyed across state lines to the closest Target where we purchased some hand soap, 2 seltzer waters and 2 jars of baby food. (I needed the jars) On our way out, the lady experienced her first ever taco from the taco bell in the food court before heading back to Vt. We spent the car ride singing terrible pop songs and eating the babyhood (Blueberries and sweet potato, and yes, they are tasty) We then came back tom my house, listened to more awesome music while she did her homework and I played on the computer and made dinner. It was the best.
Heres a few of this weeks happy bits from the internet.
– I will be making these wire baskets this week. I need storage and I love a good wire basket.
-I have been ending up on this website every night..Making plans
-I need this shirt!!! Feel free to buy it for me!
-Throw Back Song!… And yes, I was sure I was going to be Mrs. Zac Hanson when I was 11.
-My sister sent me this link, Wool and the Gang. So cool.
-These pictures made me laugh. I end up with veggies like this all the time.
And here are a few pictures of my real life happy…..
 Playing on the frozen lake. It was so freaking cold and windy, but we just had to do it!

Beach stairs. Hopefully soon they will be a little less icy and maybe even lead to some sand and not waist high drifts of snow.
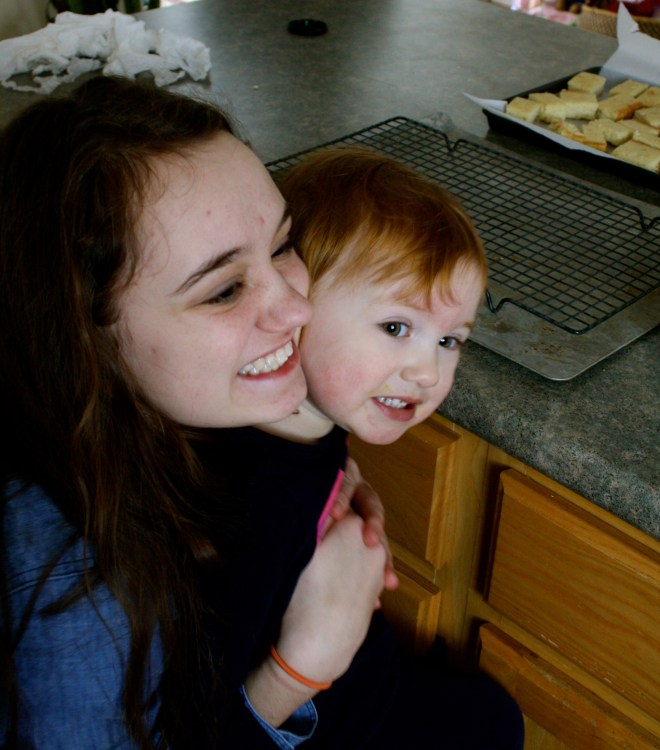 Two of my favorite people in the world.
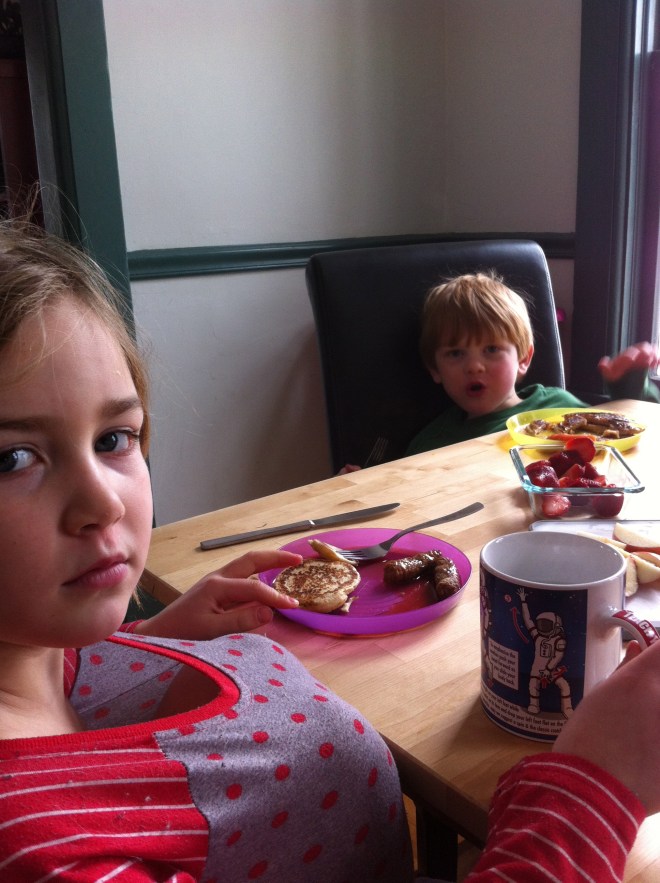 And I made brunch with 2 more of my favorites.
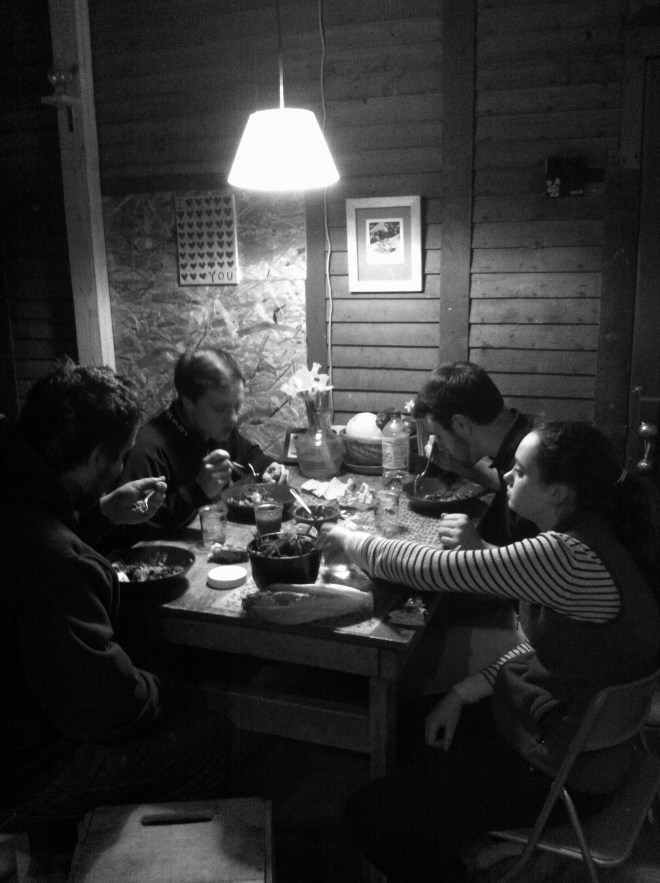 My little brothers (can I say little if they are bigger then me?) came over and we all had dinner together while listening to music from when they were born. Nothing like a few 17 year olds to make a person feel old.
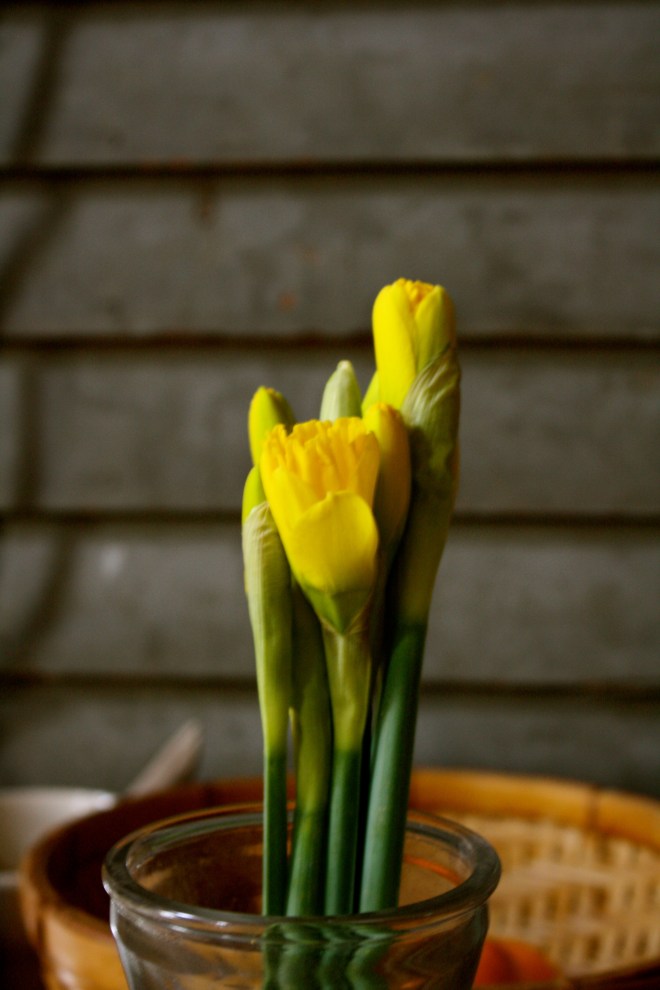 Blooming daffodils. I love to watch my flowers open up, it’s just as good as the flower itself.
Have the best first week of March ever!!!
-C
 Another week in the Siberian Express (and another catchy name for weather) The lake is completely frozen over and the snow piles are getting bigger then ever… We are in the dead of the winter, which means it an only get better from here.
Yes cold, but not a bad week. I have been getting our stuff together to start the ever daunting task of filing our taxes (blaaahhhhh), and the lovely mister has spent his week pretty much dealing with everyone’s frozen pipes (poor guy), but we have managed to fit in a little fun. Dinner with sisters. A day with a little that included a lunch date of clementines and mustard. We even went to a high school play that my littlest sister was in. (She was so freaking awesome!) Plus, this week I have really noticed the longer amounts of daylight happening. (I can’t wait for daylight savings) I can feel it in my inner most parts of myself..that its going to be spring soon!!! I just need to keep from freezing to death for a few more weeks.
Here is some fun internet stuff I have found this week.
- Ever wonder how mushrooms grow? Take a look inside a mushroom house.
- These Stuffed pets are pretty funny. If I were to bring home a stuffed animal that looked like the trash dog, he would almost certainly love it for about a week, but the moment he feels like he is not getting the adequate amount of attention, would stand in front of me and slowly tear it apart. (because that’s what he does)
- I want to make this Marbled paper… But am going to wait until I can do it outside, so maybe in like a few months
And a few bits from the real world
 This little is rocking out to some sweet tunes….We started out listening to Beck and ended up listening to Elmo. I guess that happens sometimes.
 Can I buy then all? I am a plant hoarder… and can never get enough. I took this picture, walked away to contemplate about weather or not to buy the purple one, went back and someone else had grabbed it. Bummer,…So instead I bought some fresh daffodils, YAY!
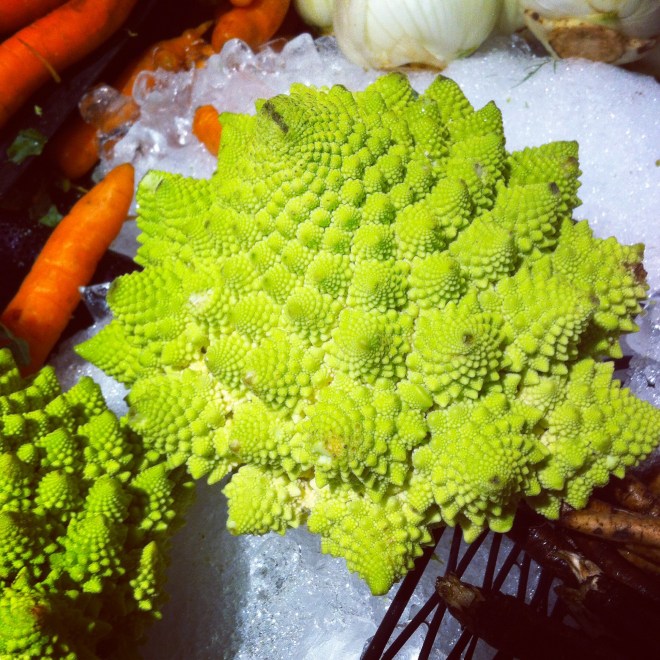 Romanesco. A cross between cauliflower, broccoli, cabbage, brussels sprouts, and a space ship. Pretty Pretty!

It took this guy about 5 minutes to cross over this bridge. The stick in this mouth was too long and would get stuck between the two railings. It was some funny shit.
 Of things to come!!!
Have a fantastically lovely week..It’s the last one of February!
-C
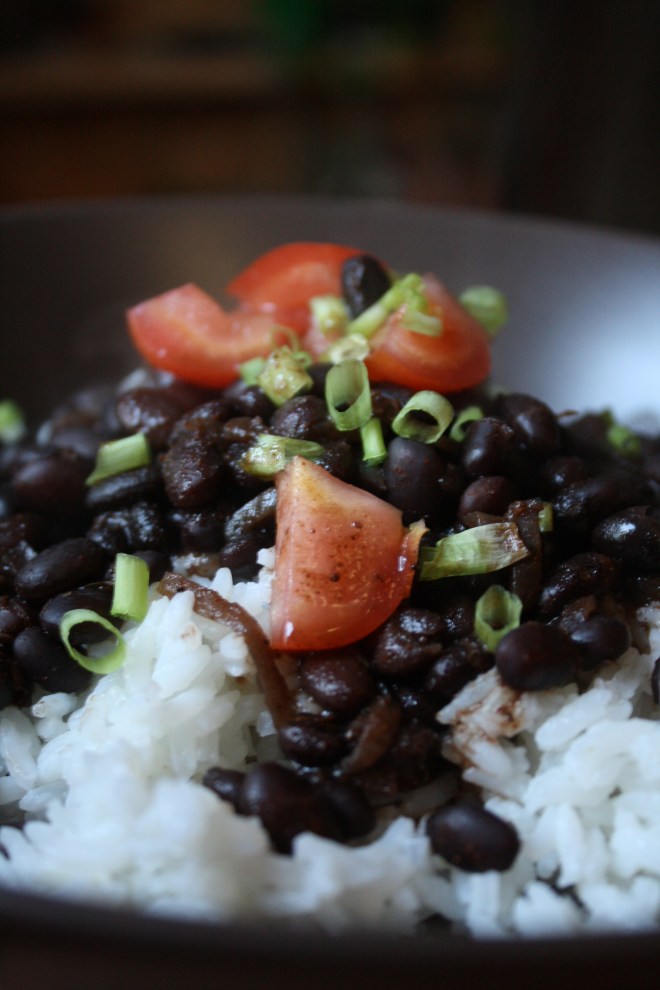 WOO WHOA!! MARDI GRAS! I wish I was down in New Orleans today celebrating… and soaking up some warmth and sunshine, catching beads, maybe even taking my shirt off(?!!?)
No, I keep my shirt on today because I am not like that, and also, I would die of hypothermia. Today I wear a shirt, underneath 5 other shirts ad sweaters. Because today is just another day of -20 below here in Vermont.
To keep me from going completely crazy, I am thinking of warm weather and I am thinking of New Orleans (love that place!) and the humongo celebration that’s been going on there for the past week. Everyone partying out in the streets. Big floats and beads all around. I might be feeling a little jealous, (more of the weather then the partying) but thats ok, I have TV to watch and a warm comforter to wrap myself up in. And maybe I should have done a post of fried donuts or of some type of alcohol party drink to celebrate the day, but I really just wanted to make something warm and spicy, so I went with some dank cajun beans. And also I wanted to sing…. “Beans Beans the musical fruit, the more you eat the more you toot!!” hehe
But for real, these beans are sooooo f-ing tasty and super versatile. You can serve the spicy beans with the rice or just eat just the beans. You could do the beans and add to a bed of kale (me) or add cheese, guacamole and a few corn tortillas to the mix (the mister). Simple to make, super tasty and full of flavor! And pretty freaking heathy to boot! This dish gets an A+!
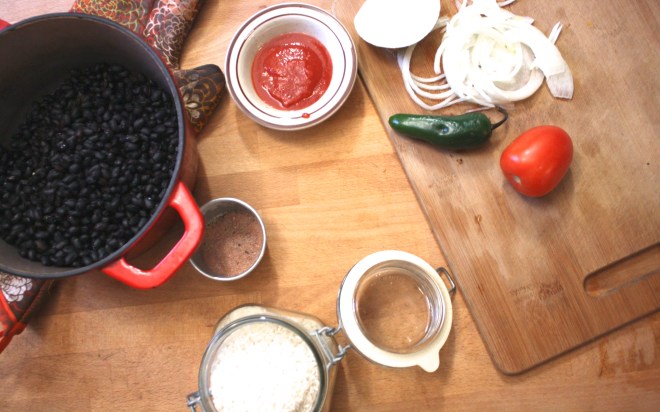
This dish is so full of flavor but so simple to make. We start with presoaked black beans drained and rinsed. Cajun seasoning (which is basically 1 part onion powder, thyme, oregano, and 2 parts paprika, garlic powder, cayenne power, and salt and pepper) Sliced onion and jalapeno, and a few tablespoons of tomato paste. Oh, and the rice.
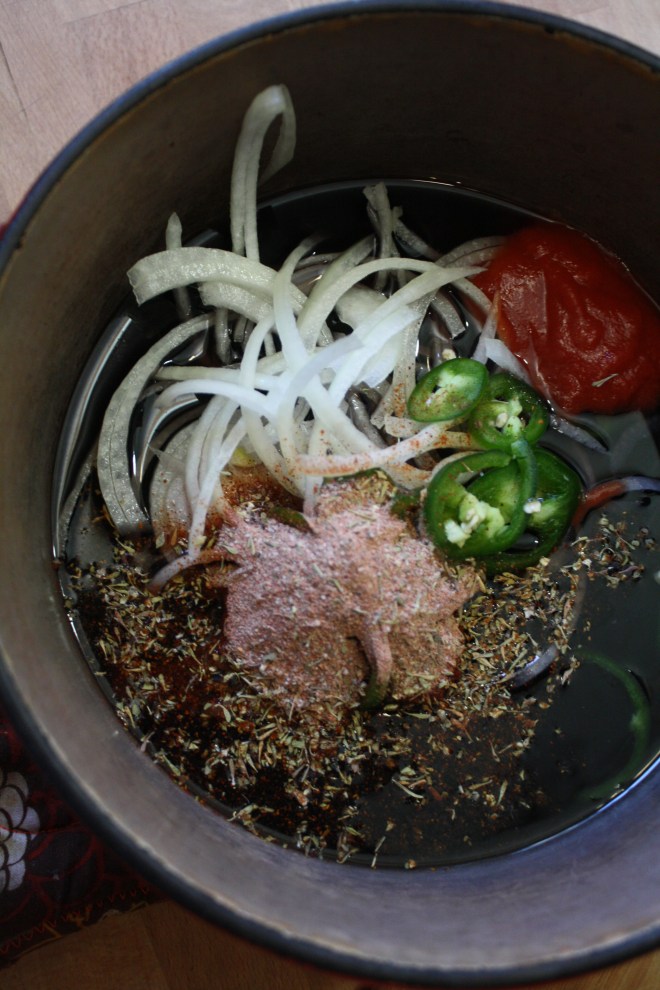
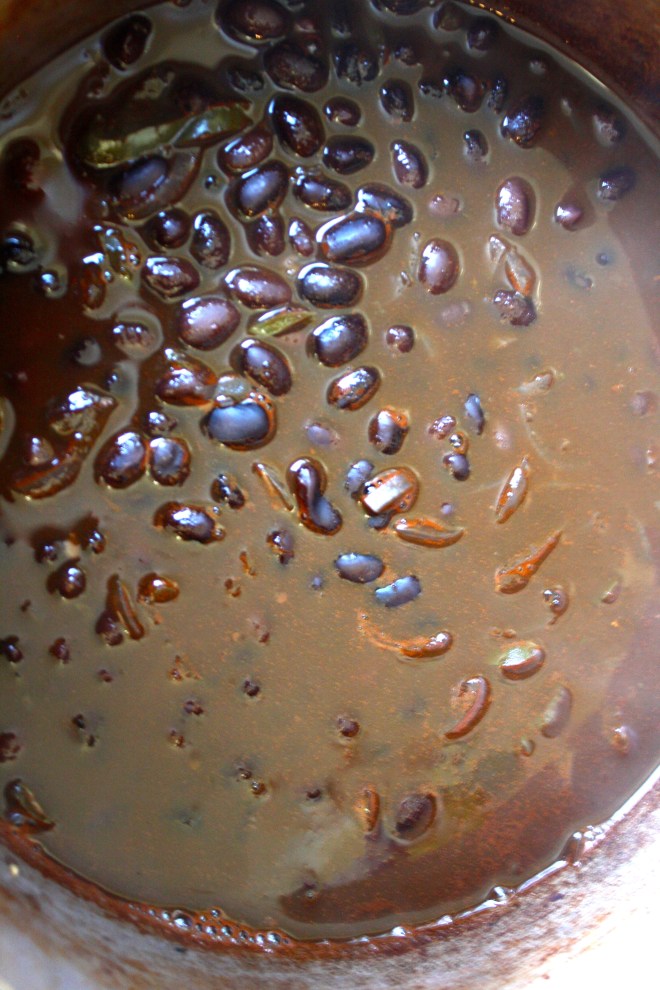 Beans are in a pot filled with water unit beans are completely sumerged. Add in the onion, jalapeño, tomato paste and cajun seasoning. Bring to a boil then cover with a lid and simmer for about 45 minutes….. After about a half hour, start up the rice. Water in pot with rice, bring to a boil, cover and simmer for 15-20 minutes.
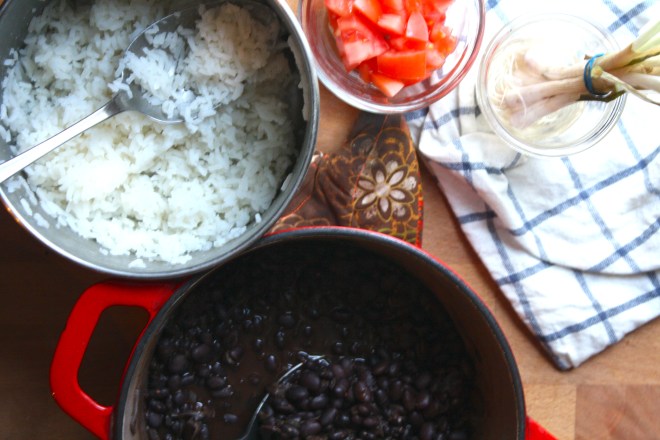 The rice is done and fluffed with at fork. The beans are cooked with just the tiniest bit of bite, bathing in a thick spicy tomatoey sauce. The chunks of onion and jalapeño have broken down and are hiding in every bite…. Oh so good!
Now get ready for the bowl!!! 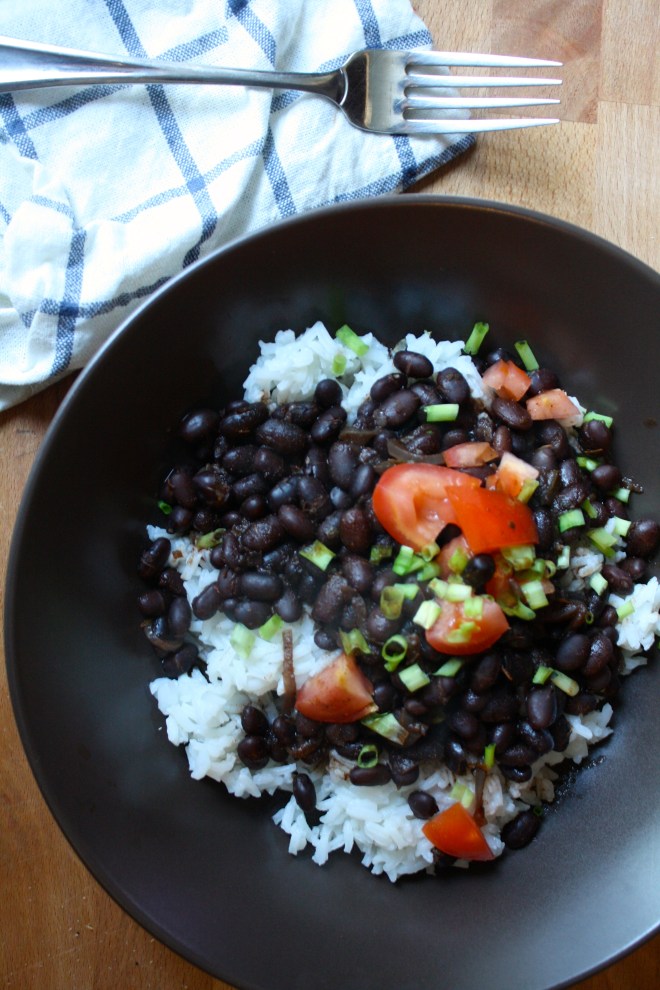 Bringing a little spice and nice to this crazy cold winter day or any fun festivities you may have planned.
Have a Fantastic Day.. Stay Warm or if you already are.. lucky you!
-C
Cajun Black Beans and Rice
Ingredients
- 1 1/2 cups dried black beans* soaked for at least 4 hours or overnight..Rinse and strained
- 2 tablespoons tomato paste
- 2 tablespoons Cajun seasoning
- salt and pepper
- 1 Jalapeño
- 1 small yellow onion
- 1 tomato (I used a large roma)
- 1 1/2 cup of dried rice plus 3 cups water
*If you want to use canned beans, go for it…Just sub in 2 cans rinsed and strained black beans and only add a cup of water to the beans. Pre sauté the onion and the jalapeño before adding to the beans and only simmer the beans for about 15 minutes.
Place you soaked beans into a pot and fill with water until the beans are completely summered. Slice the jalapeño and onion and add to the pot along with the tomato paste and the cajun seasoning. Bring to a boil then place a lid on it and turn heat down to low. Let simmer for about 45 minutes or until the beans are completely cooked.
When the beans are about half way done, add rice to water and bring to a boil. Once boiling, place a lid on pot and turn heat down to simmer and cook for about 15 minutes or until all water is absorbed and rice is tender. Fluff with a fork.
To sever. place a scoop of two of rice to a bowl and top with a scoop of two of beans.… Top with diced tomatoes and scallions… (The mister added shredded pepper jack to his and thought it was excellent)
Eat with a fork or spoon.

 Spicy, crispy cauliflower… um yes please. I really like cauliflower. The mister loves it, or at least likes it better than any other vegetable. So when he asked for spicy cauliflower, well yea I am going to make it because I am so nice and really, could I say no to a veggie request? (I might have said no if it involved deep frying) Also, I found fresh cauliflower on sale! ($2.25) I don’t usually cook fresh cauliflower, but I figured at that price, it wouldn’t be bad to cook a head. (If I am cooking cauliflower, which I do a lot, I just use frozen….casue it be waaaay cheaper)
  The stuff. Cauliflower, chopped and broken into pieces. Corn meal mixed with salt, pepper, onion and garlic powder, and because I made this for the mister, parmesan cheese. And in the green bowl, srirsachi and a little oil.
  The cauliflower gets a coat of the hot sauce and then tossed around in the corn meal mixture. Handling as little as possible, place coated pieces on a lightly oiled baking sheet and stick those suckers in the oven for about a half hour, taking them out and flipping half way.
 And take them out of the oven when pieces tuned golden brown, stik them on a plate, and serve immediately.
 Last week pineapples were on sale everywhere……So I bought 5. Don’t judge
  Stuff for the goodness. We got the kale, some avocado because all salads should have avocado and some cooked lentils because, well, all salads should have lentils (or beans or nuts.. so you could totally something else) Then a few sprigs of fresh dill, a clove of garlic, red wine vinegar, salt and a bowl of chunked up pineapple.
  The pineapple, dill, garlic, red wine vinegar, a splash of water and a pinch of salt get blended in a blender or whatever blending device you use. Go as smooth or chunky as you like, I recommend going smooth, but leaving a little chunk, like half blended.
 So good……So so good.
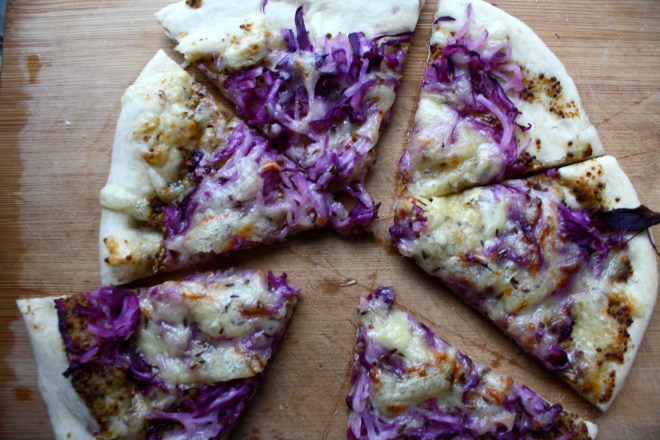 We made it ! FRIDAY!!! Fridays always make me think about Steve Urkel, you know, the geeky guy from the show Family Matters who’s catch phrase was “Did I do that?. Weird, I know, but when I was a kid, Fridays meant TGIF on abc (the Tv show line up) It was something I looked forward to all week. Get out of school, go home, have dinner (usually pizza) and spend the night in front of the Tv. And honestly, not mush has changed. We still keep Fridays the same. Work, Pizza, and Tv.. Just now its not Family Matters and Urkel, but Netflix binge watching and me making the mister a fancy ass pizza. But if Family Matters makes it to Netflix… I will for sure be watching that!
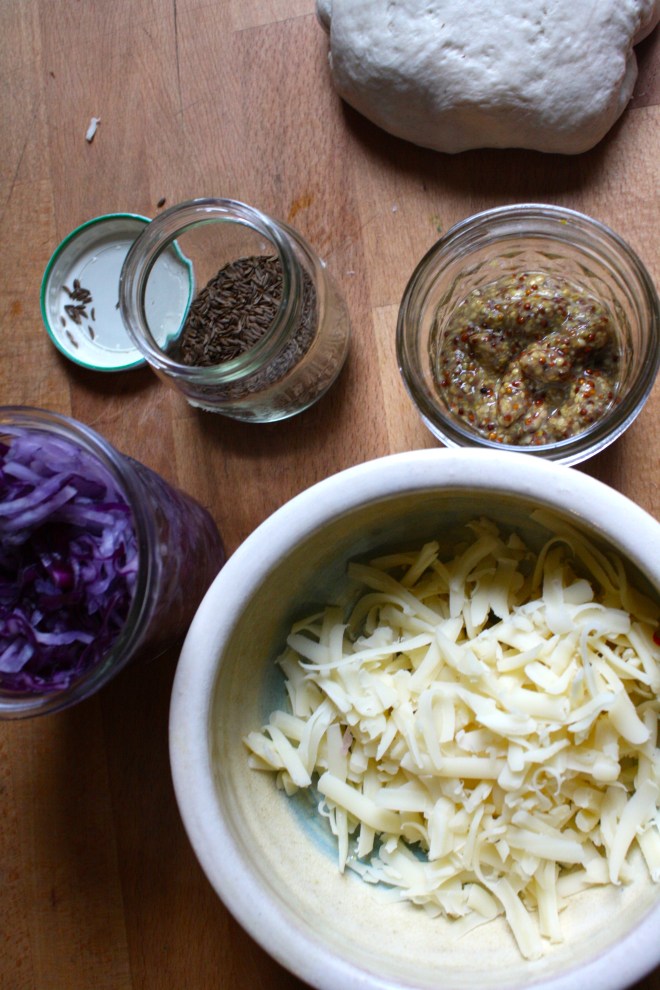 The stuff. Pizza dough, stone ground mustard, shredded swiss cheese, kraut, and caraway seeds.
 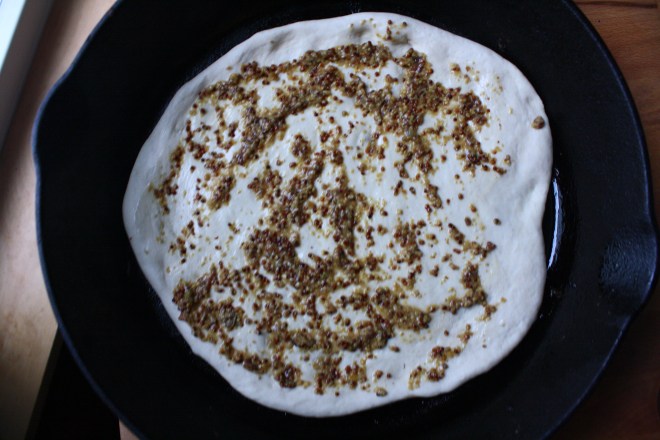 The dough is rolled out and smeared with the mustard. (The mister said I could have added more)
 Top that with the kraut
 Cheese goes next and a good sprinkle of caraway seeds too. Now stick that lovely into the oven.
 And after 15minutes, this is what you get… Bubbly, cheesy, crusty pizza. And it’s for real one of the prettiest pizzas that I ever have made.
  Slice and serve…. and eat in front of the TV.
 TGIF!!!! For reals, because Monday-Thurday were monster days. And now that its friday, I can dig a hole and hide in it until it’s at least 30 degrees with some sunshine. (I might never get to come out.)
 Simple lemon cake stuff. Flour, baking powder and salt whisked together, Sugar and soft butter in a bowl. An egg, some vanilla, milk, and of course, the lemon.
  Frozen bites ready for the chocolate coating… Bittersweet chocolate chips and a little bit of coconut oil. Melted together all nice and shiny smooth.
 Now dip and slather those bites in the melted chocolate.
  Fully coated and placed on a rack for the chocolate to harden. I ended up sticking the rack in the freezer for 10 minutes…They harder really fast in there.


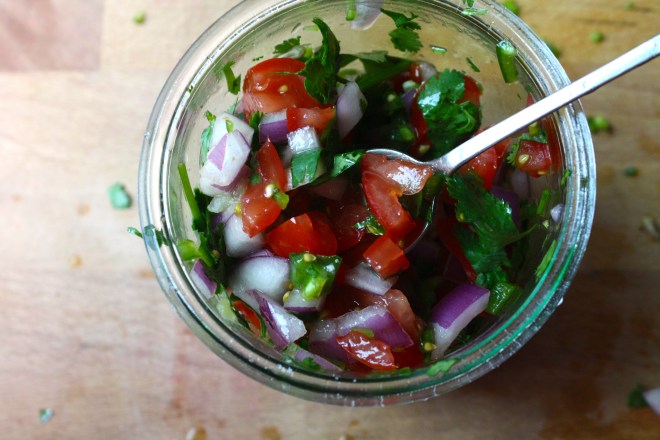 Happy Cinco de Mayo! And what better day to share my version of my oh so fantastic pico de gallo, or as I call it, super freshy salsa.
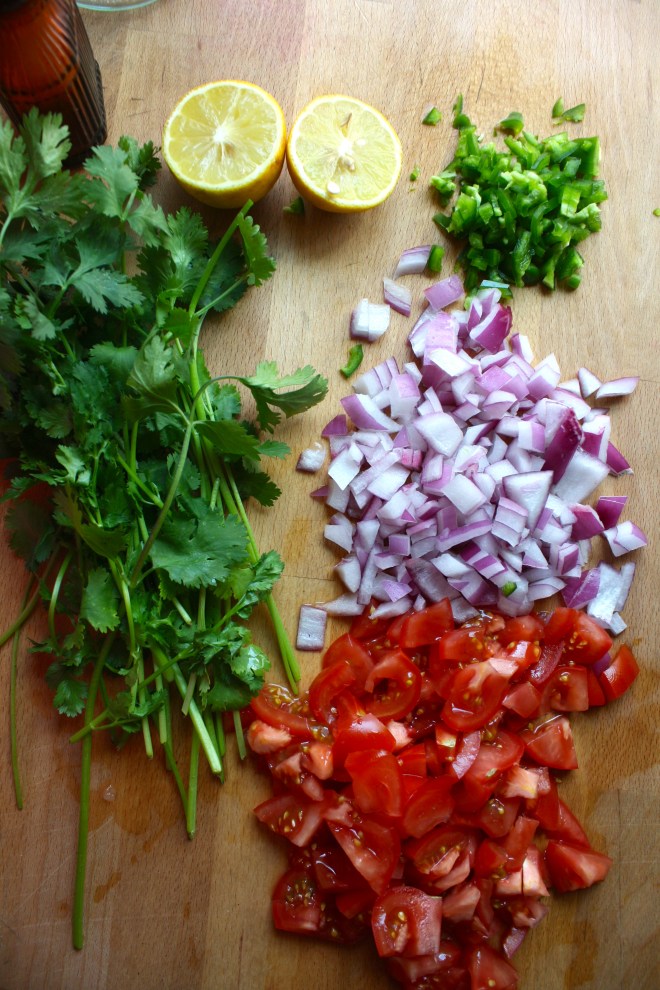 The stuff. Chopped Roma tomatoes, chopped red onion, a diced jalapeño, lemon, a bunch of cilantro, and salt.
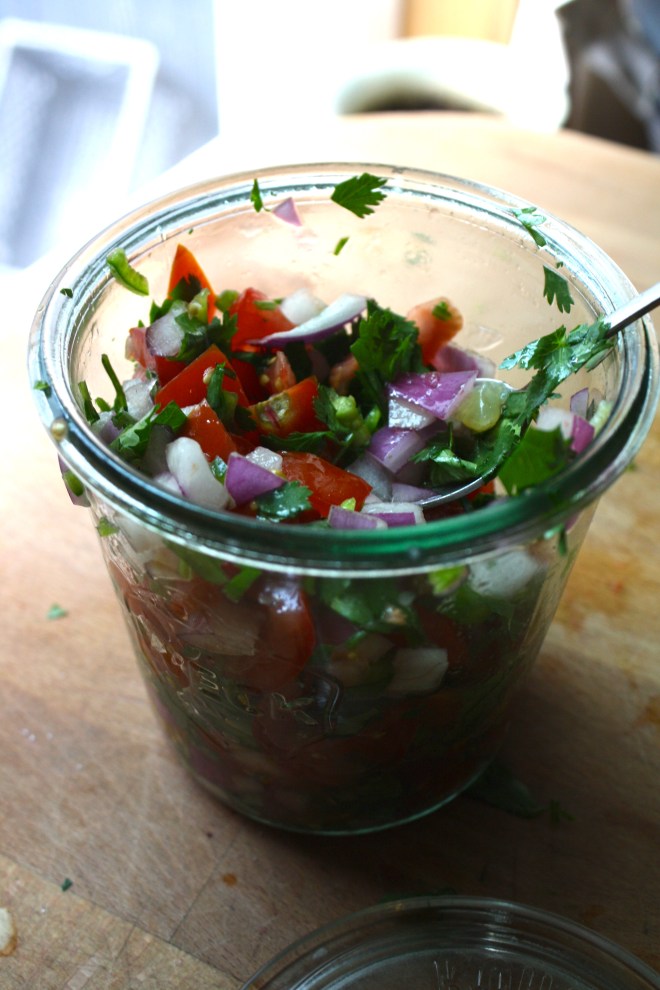 And thats it. Now eat… with something or without.
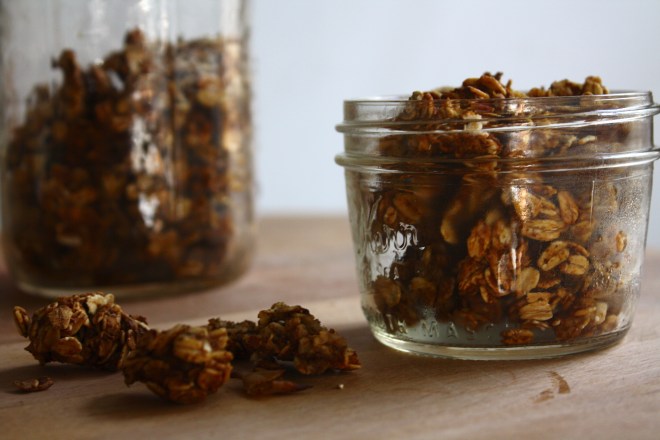 Chomp Chomp Chomp… The sound I make as I eat this freaking fantastic crunchy granola. You know it’s good when the person sitting next to you is annoyed by the sound of you face while eating. I eat a lot of crunchy stuff. And I am pretty sure I annoy the mister a lot.
 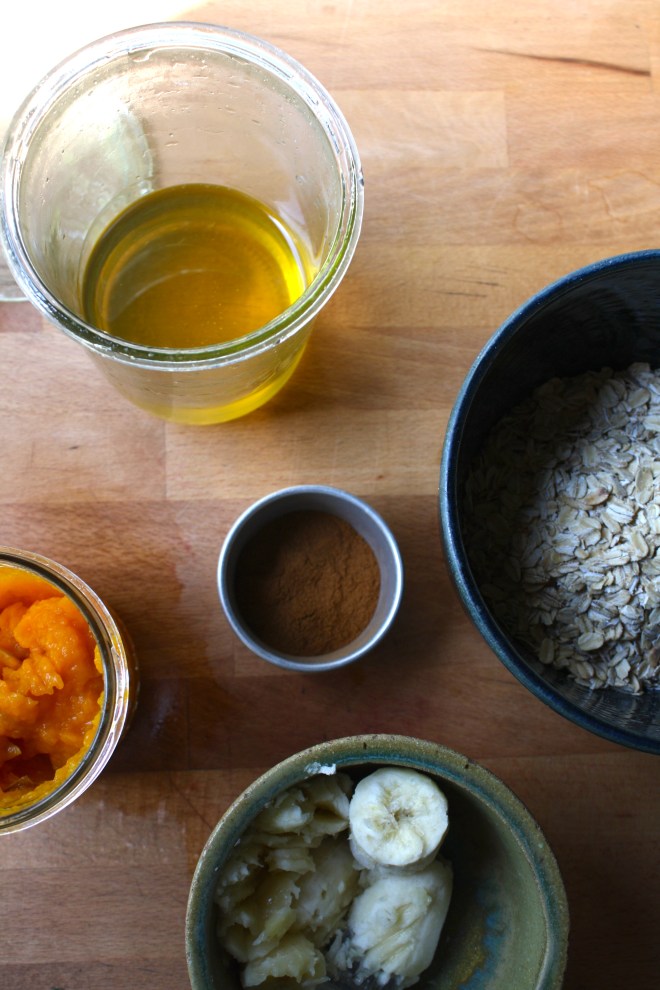 The simplest of stuff. 1 smashed banana, a cup of pureed butternut squash, Vietnamese cinnamon*, honey, and old fashion oats. (and a dash of salt, not shown)
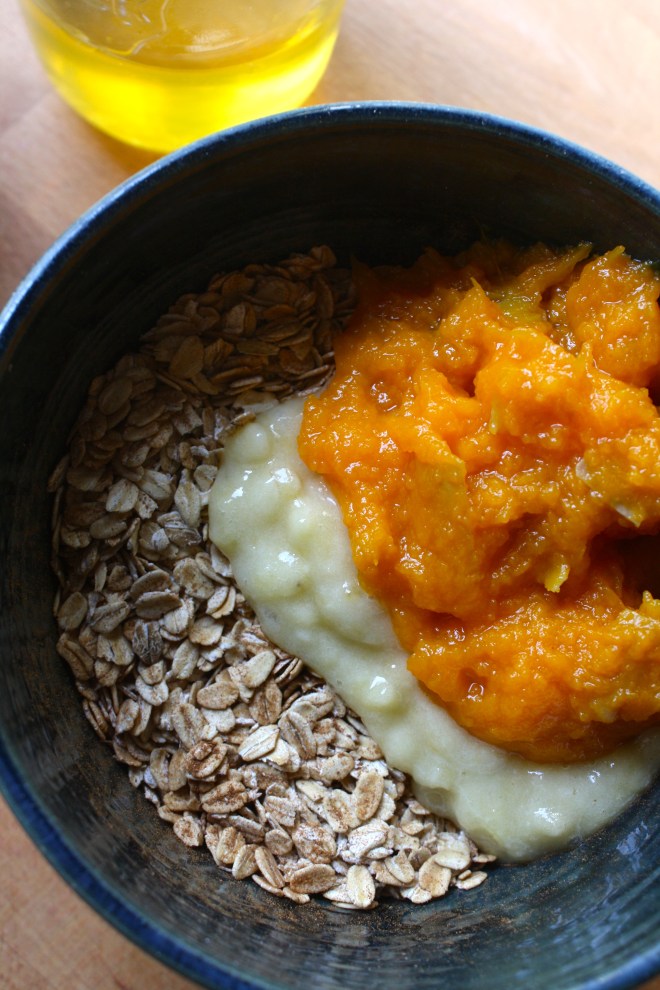 Toss the cinnamon and salt with the oats. Mix together the banana, squash and the sweetener and combine with the oats until full incorporated.
 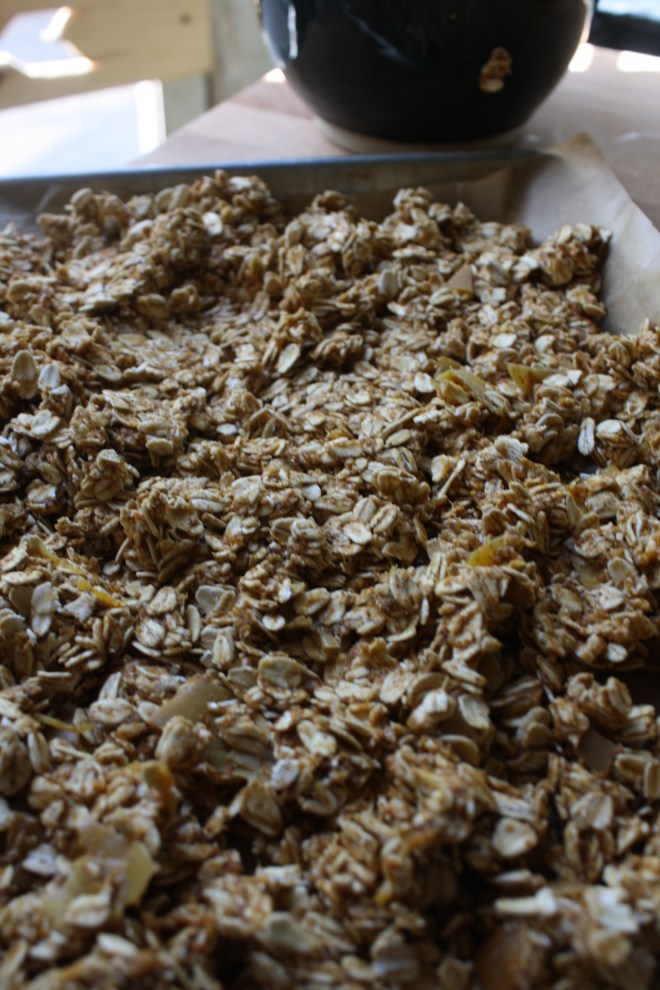 Dump the mixture on a parchment lined baking sheet and give it a little pat, you know, to settle all the bit and pieces together, all cozy and evenly spread out. Now stick into a preheated oven and after about 20 minutes, take out of oven and give the granola a toss, breaking apart any super big chunks or overly wet pieces. Put back into oven for another 20 minutes. (I like my granola super crispy crunchy so I cook it a little longer, like 30 more minutes)
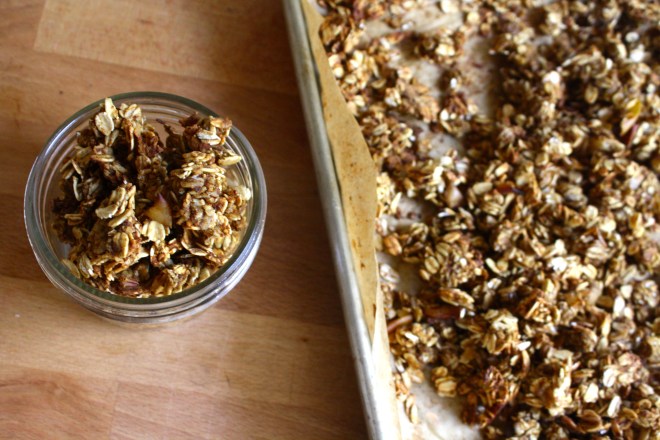 And when you are happy with the crunchiness of you granola, remove from oven and let cool, trying not to eat all of it while it sit’s on the counter looking all pretty and smelling like happiness.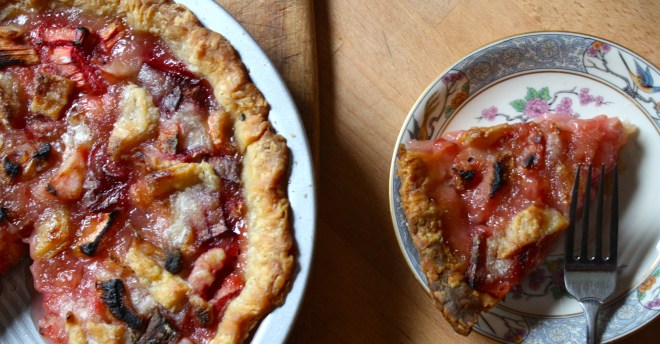
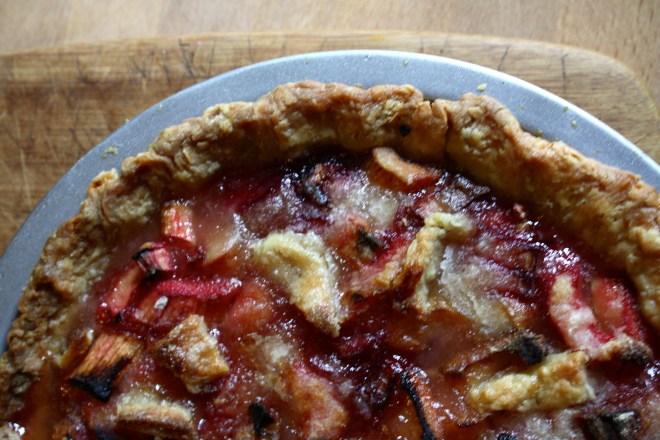 I swear I didn’t plan this, but today is officially Pi Day! Pi being the mathematical constant of the ratio of the circumference of a circle to its dimeter (did I say that right?) 3.1415…… And today’s date is 3.14.15. Whoa…I guess that means that this pie was meant to be.
 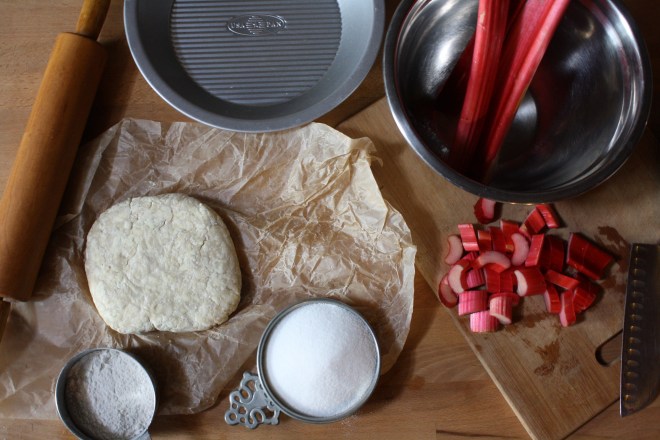 The stuff for the makings of pie… One single pie crust, flour, sugar and rhubarb. I mean, come on, this might be one of the simplest pies ever.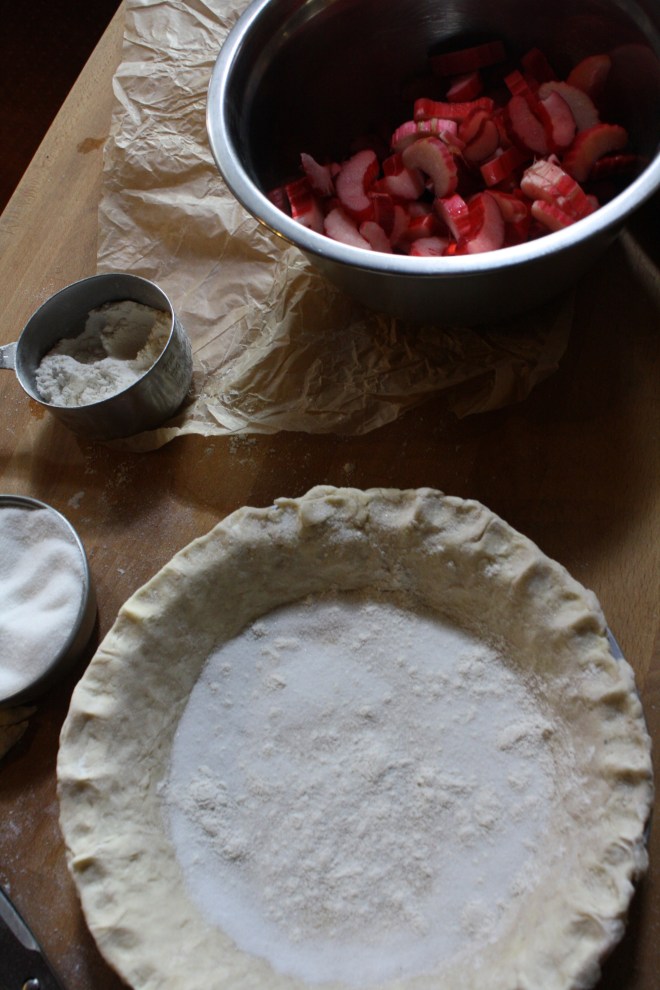
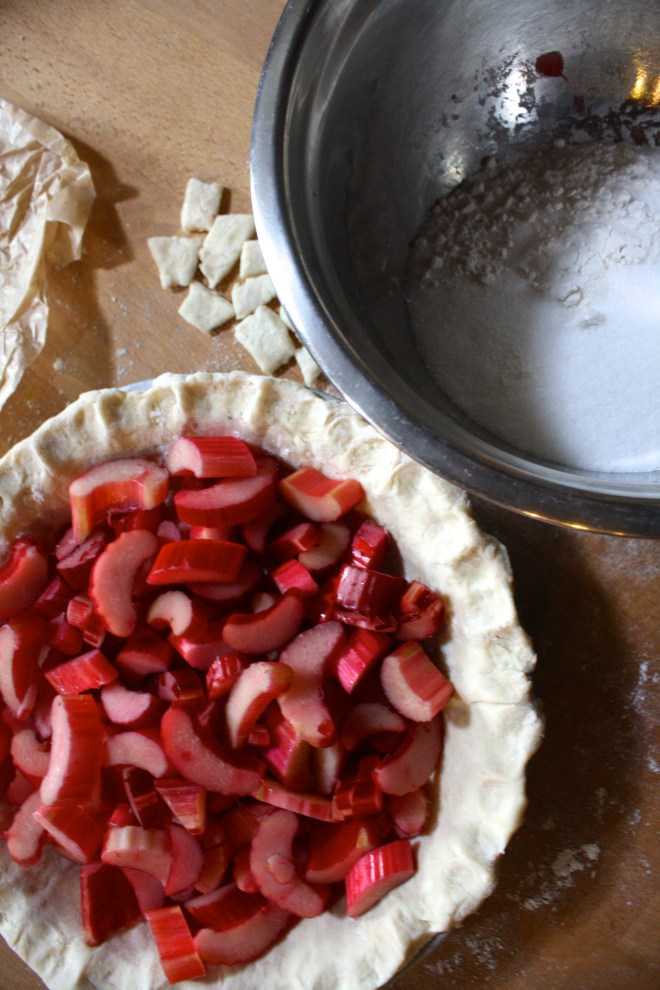 The chilled pie crust gets rolled out, placed into a pie plate, trimmed and made all pretty. The bottom is sprinkled with a 1/4 cup of sugar and stuck back into the fridge while the oven preheats to 350. Now is a good time to dice the rhubarb into inchish chunks. Once the oven is preheated, remove crust from fridge and add in the diced rhubarb.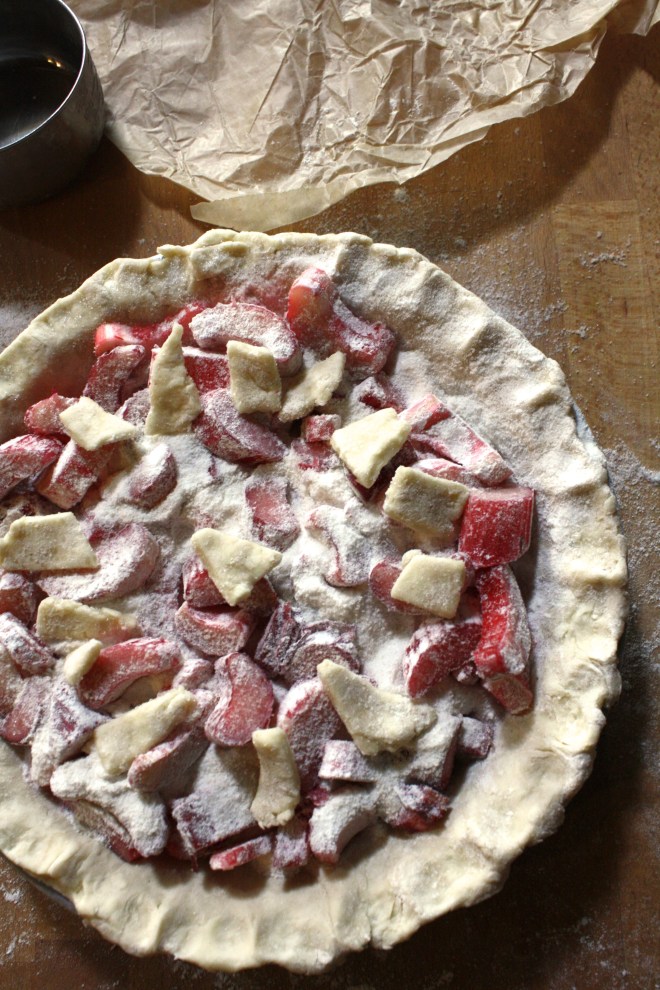
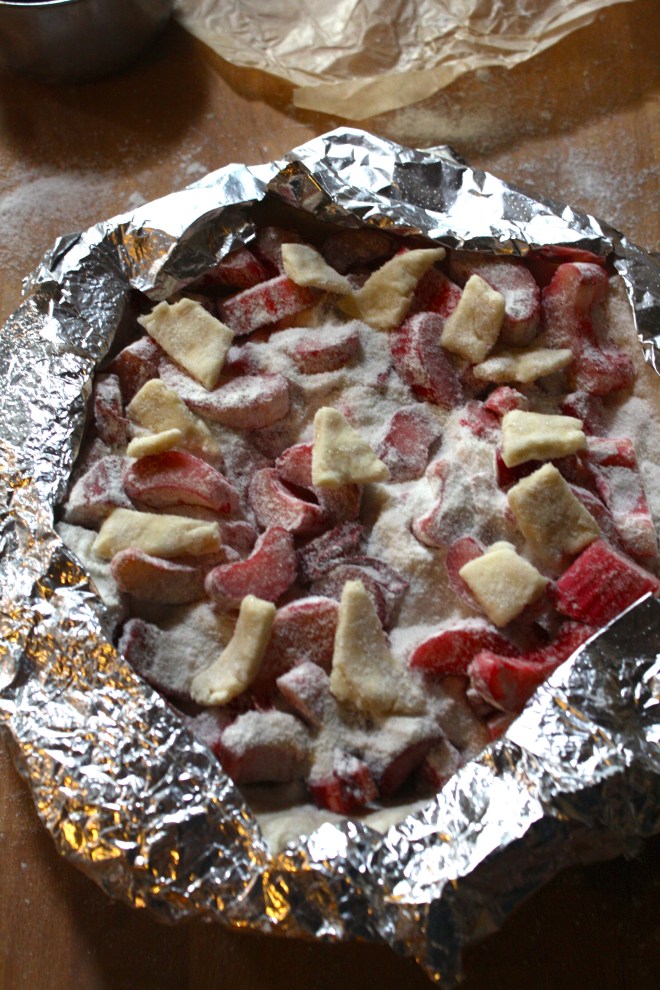 The remaining sugar and flour get mixed together in a bowl and dump on top of the rhubarb. Give it a tiny toss with you fingers just to get some of the mixture to sink down a little. (Don’t worry, the filling will be perfect when you do it like this) I also cut up the pie crust trimmings and placed on top… not necessary, but looks pretty and is a good use of the scraps.
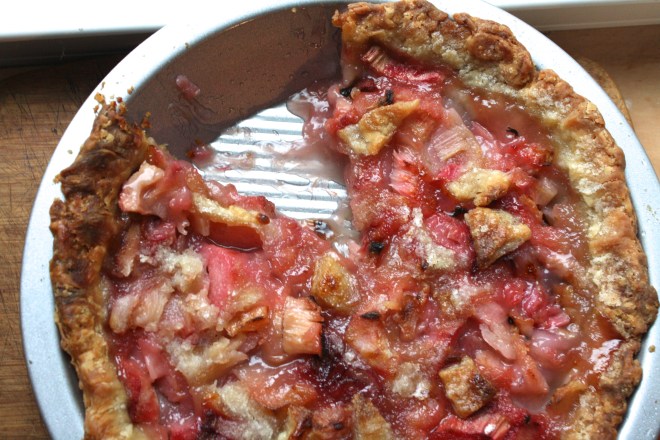 And then you take it from the oven and marvel at the beauty.
 It’s Mother’s Day weekend which means that you and I and everyone out there should feel the slightest bit obligated to at least do a little something nice for your mom for the mere fact that you were borned. And really what better way to celebrate mom than with food… It really is the least that you can do. (I think mom’s also like flowers and cards and handmade pasta necklaces) My mom is defiantly about the food. (she has had her fair share or pasta necklaces) A many years back on Mother’s day, this sweet little girl (me) made her mother a special breakfast treat…blueberry scones. And ever since that day, for every freaking holiday, birthday, whatever day, my mother requests (demands) a batch of those scones. She is always saying that these are her favorite treat and that no one has ever made them as good as I do. (I guess that just reiterates that I am her number 1 child)
 The stuff. Flour, baking soda, baking powder and salt. A bit of sugar, vanilla, buttermilk, and butter (use vegan butter and nut milk if you want to make them vegan) And of course we need the blueberries which can be fresh or frozen. I usually use fresh, but the store I stopped at only had really big containers of fresh that were like $1000 dollars a piece and the organic frozen happen to be on super sale. So you know, the cheap in me won that battle.
  So into the bowl goes all the dry stuff; flour, baking powder and soda, salt, and the sugar. Give it a good whisk.
 Now dump the blueberries into the flour mixture. Toss them around to give them a coat of flour. Add in the buttermilk and vanilla and give a little mix until liquid is absorbed. We are trying to handle the dough as little as possible.
 Turn mixture onto counter. It’s very loose, but thats what it should look like.
  Very gently and with as little handling as possible, gather dough up, knead a few times till everything just comes together. Press dough into a disk that is roughly an inch thick…. and it doesn’t need to be perfect.
  Cut the disk into even sized pieces. Do 6 big, 8 normal, maybe even 10 smaller. Whatever size you like. (I did 8) Place the scones onto a baking sheet, using a spatula to transfer, and sprinkle the tops with a little bit of sugar. Into a preheated oven for about 20 minutes.
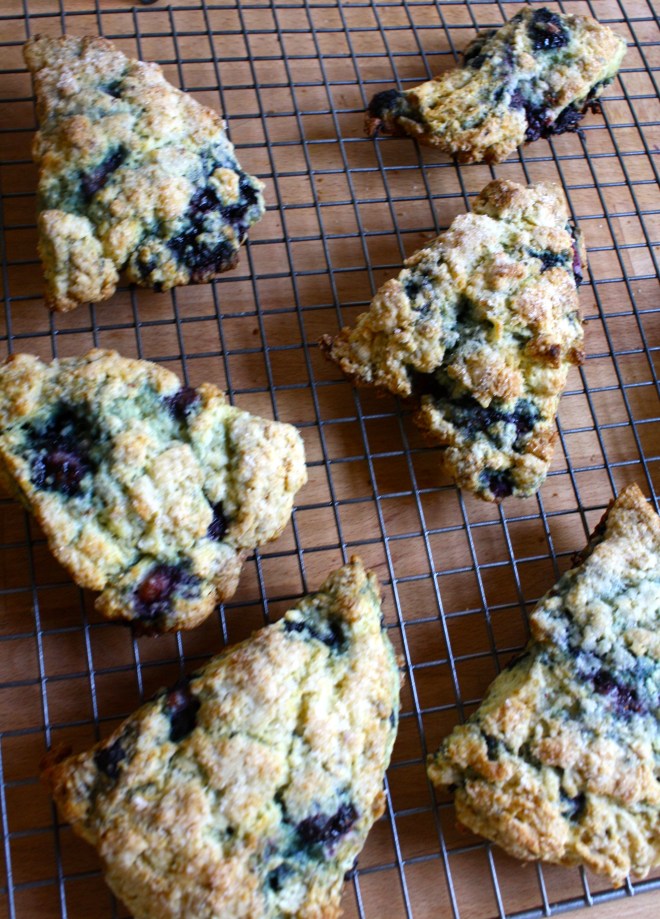 And when the scones look all nice and browned and a tester comes out clean. remove and either serve right away warm, preferably with huge cup of coffee or tea, or stick on a rack to cool before storing in air tight container.
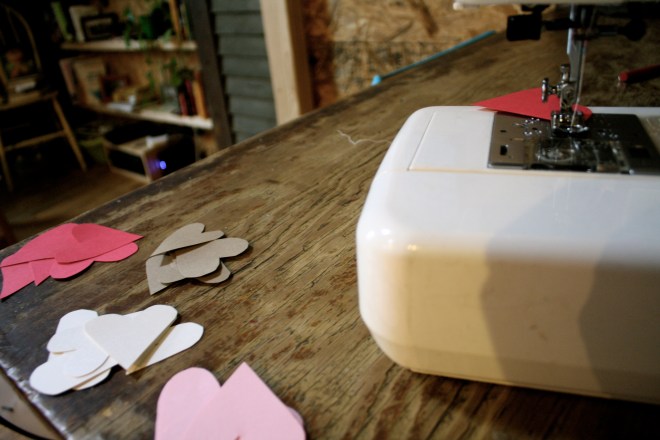
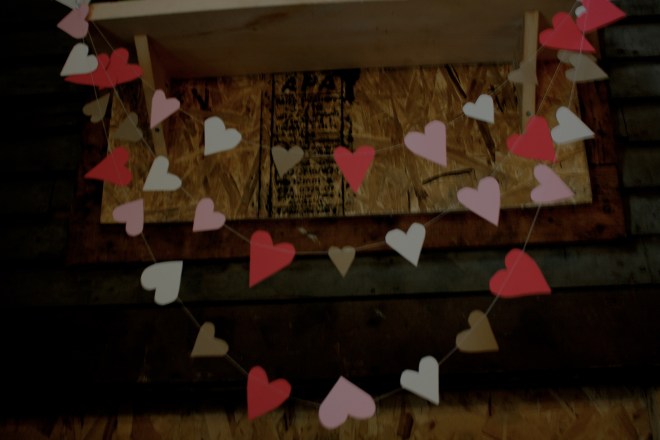
 Made from necessity, a seat near the door to sit and remove shoes, store winter stuff and doesn’t look like I threw a bunch of milk crates together..I threw them together and added a nice blanket, I’m classy like that. I do love a good milk crate…there has always been something so satisfying to me about a free plastic receptacle that has a world of uses. These three crates and some scrap wood have changed my entire living situation. The entryway of our 200 sq ft loft is now super functional, looks fantastic, and makes me happy. .All from a the scrape pile.
  It’s not what you think…we have a barn that is pretty much dedicated to scrap wood and some other building material that has come from buildings we have worked on. This picture does not do our scrap wood(and junk) pile any justice. It is pretty crazy, and drives me nuts. I don’t know how many times I have threatened a 30 yard dumpster, but you know what? When Nick or I are in need of some wood, we always find ourselves rummaging through the pile and can almost always find a piece of what we are looking for. The pile somehow always redeems itself, for that reason it still lives on(for now). Being that you as a sane person, you probably don’t have a barn full of scrap wood(and junk), so what you will need for this project is..
 Three milk crates..What I found was that there are some milk crates that are not the same size so make sure that you have three that are the same. These crates are 13x13x11.
 Measure and cut ply wood. The top and a bottom are the same measurements…Here comes some math…. three milk crates that are 13 inches long = 39 inches. One crate deep is 13 inches. . Cut two pieces 39.5 inches by 13 inches. (The extra 1/2 inch is so the crates can move in and out easier)
 Now measure and cut sides. Two pieces at 13×13.The crates are 11 inches high, but you need to add the extra 1.5 inches because of the thickness of the plywood. If your milk crates are a different height, use that measurement plus 1.5 inches.
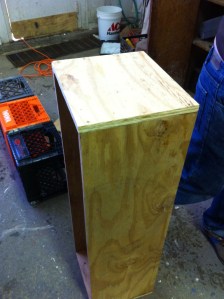
 I caught that piece of wood he is throwing at me. Ok, not really, but I could have. Here Nick is cutting four 10 inch pieces of 2×4 for the legs. We decided on 10 inch legs because we wanted a bench that was a little taller than the average chair, which is about 18 inches floor to seat. If you wanted to make the legs shorter or taller, by all means, I just wouldn’t go to much taller or you might not be able to sit conformably on it.
 After you have all your legs cut, mark out where you want to place them. We did a one inch recessed from the front and the side…but do whatever looks best to you. Mark where the legs go and place two screws into inch leg, screwing from the inside of the bench.
  And thats it… ..now you have the frame. Take a minute here to admire your handy wood working skills. If you are not into the raw wood look, this would be the time to paint it.
 With the crates inserted…Doesn’t it look magnificent! I choose these 3 crates for the colors and the patterns..I wish I has a grey crate that fit. That would have looked awesome.
 Test one……….the crate slides out perfectly and my mittens fit!!
 Now for the big test……….and it works!! My butt safely seated. My feet touch the ground and I can bend over and tie my shows… can’t get any better…
 But it did. The addition of a folded blanket as a cushion. I was going to make a cushion but found a really pretty blanket at the second-hand store that was perfect. It was 2 bucks and is actually way more practical than a cushion. I can wash this blanket, a hand-made cushion, I probably wouldn’t want to mess with that, plus a piece of foam alone cost like 25 bucks. The blanket was meant to be.

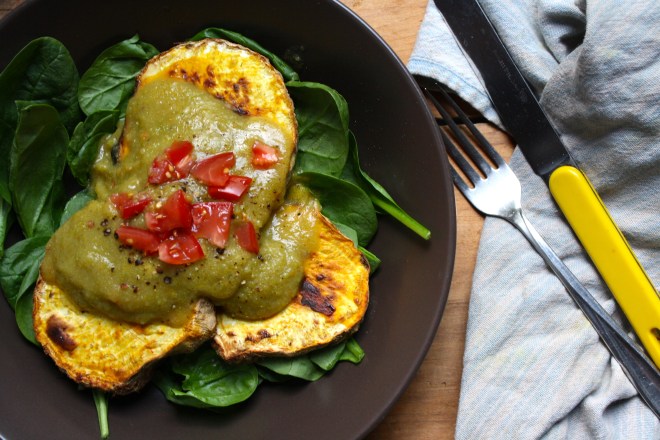 My winter farm share is coming to an end this week. One more pick and then a three week stretch until the summer share starts… WHAT AM I GOING TO DO!!! Stock up as much as I can is what.
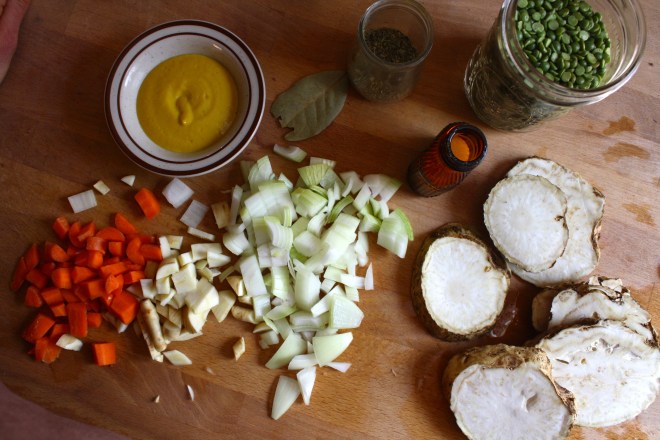 The stuff….For the split pea gravy we have a carrot, a parsnip and a large onion chopped into small chunks. Salt, thyme, a bay leaf and of course the split peas. Then there is the celeriac root* sliced into 1/2 inch thick rounds and some plain old yellow mustard .
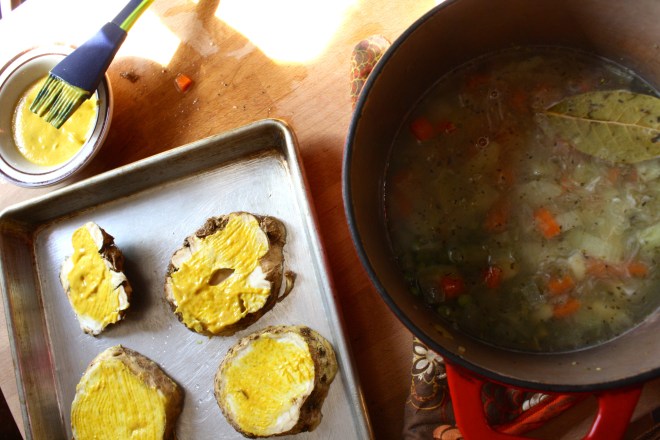 Toss the chopped parsnip, carrot, onion and the spices into a pot on medium heat and let veggies sweat a few minutes until tender. Add in the split peas and enough water to cover everything. Turn pot on high and bring to a boil, then cover and turn to low. Make sure to give the pot a good stir ever few minutes and add more water if needed
 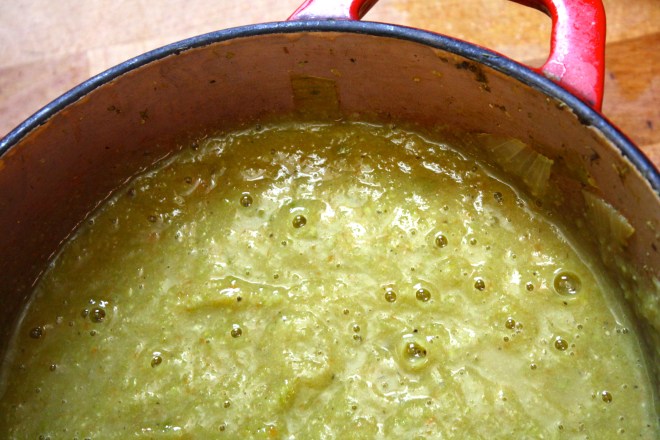 Once the peas have soften, remove the bay leaf and puree until smooth and oh so creamy. Taste and add more salt and pepper if needed. If you find that the gravy seems to thick, just add in more water until it’s the consistency that you want.
 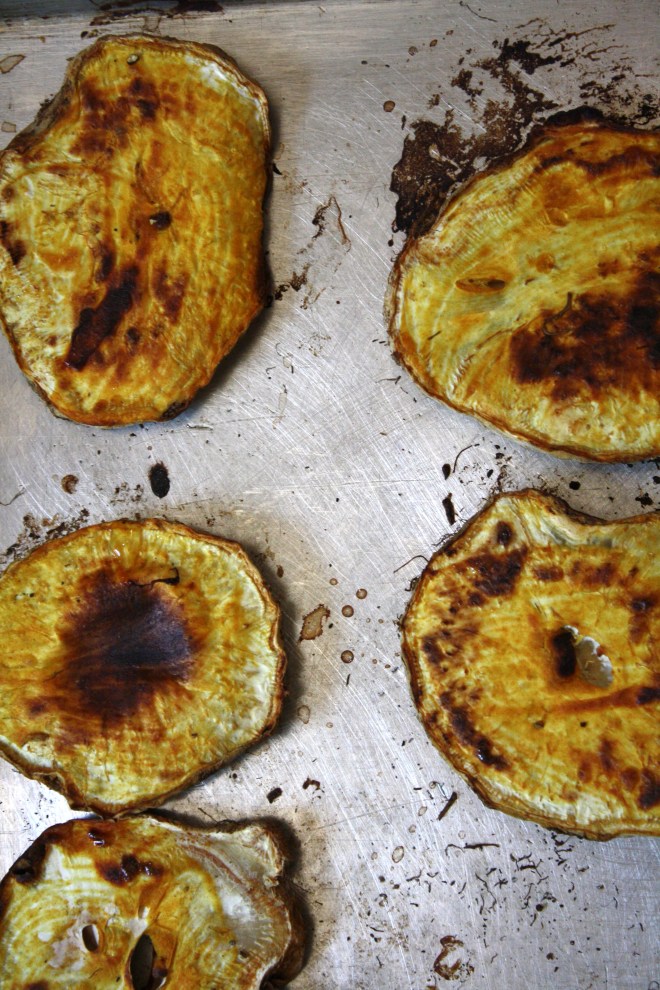 The gravy is made, the celeriac is roasted… now we are ready to eat!!
 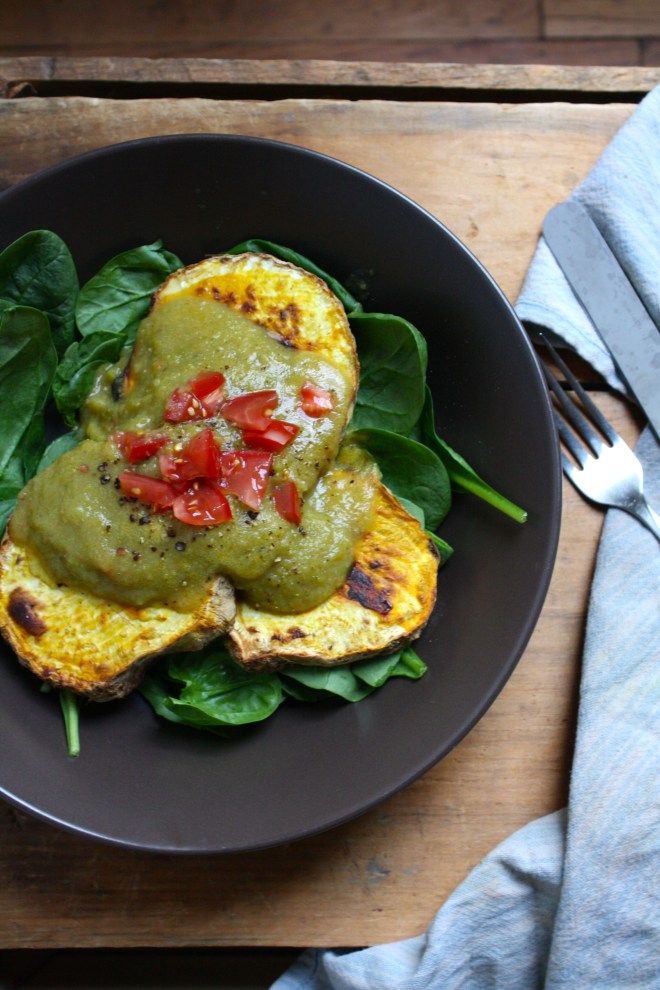 Stick the celeriac on a plate and dump good amount of that gravy right on top. Feel free to add a bed of spinach, or a grain or anything you want, because why not, and also some chopped tomatoes for a little acid and prettiness.
 I’ll let you know now, I am a make and eat soup all year long person. I can think of few things better then sitting outside, basking in the sun, hopefully with a light wind, a book in hand, enjoying a nice big cup of some good homemade soup. (Doesn’t that sound so freaking lovely?) This soup right here is perfect for just that. Parsnips are the best, kind of like a big white sweet, yet starchy carrots. And cooked together with a little bit of light and lemony thyme, rich earthy turmeric and a couple more chopped veggie….. you got yourself a nice thick and fragrant bowl of happiness that fills you up without weighing you down. It’s food you can eat that fills you up, leaves you feeling cozy, yet still wanting to hop on a bike or lace up the running shoes. Hearty without the feeling of all the heaviness.
 The stuff. Parsnips, carrots, onion and garlic. Thyme and turmeric, salt and pepper. the tinniest bit of oil and water (water not shown)
 Chop all the veggies and the garlic, drizzle a dutch oven or a pot with oil, toss in the veggies. Add the turmeric, the thyme, and 1/2 cup of water.
  Sweet sweating the veggies. Turn pot on medium and cook until the water completely cooks out. When the veggies start to brown and stick to the pot, deglaze with water. Give a good stir and keep cooking. Repeat the deglazing process until the veggies are super soft and ready to blend. (I did this 4 times.. it only took 10 minutes)
 Add enough water to cover the cooked veggies.
  And now blend the heck out of it.. Go as smooth or chunky as you want. I blended as smooth as I could get with this crappy immersion blender. (Blender on loan until I finally decide on, and buy a new one)
 And there you have it. Scoop into bowls, add lots of cracked black pepper, and go to town. I made enough to save a bowl for later… it didn’t last for later.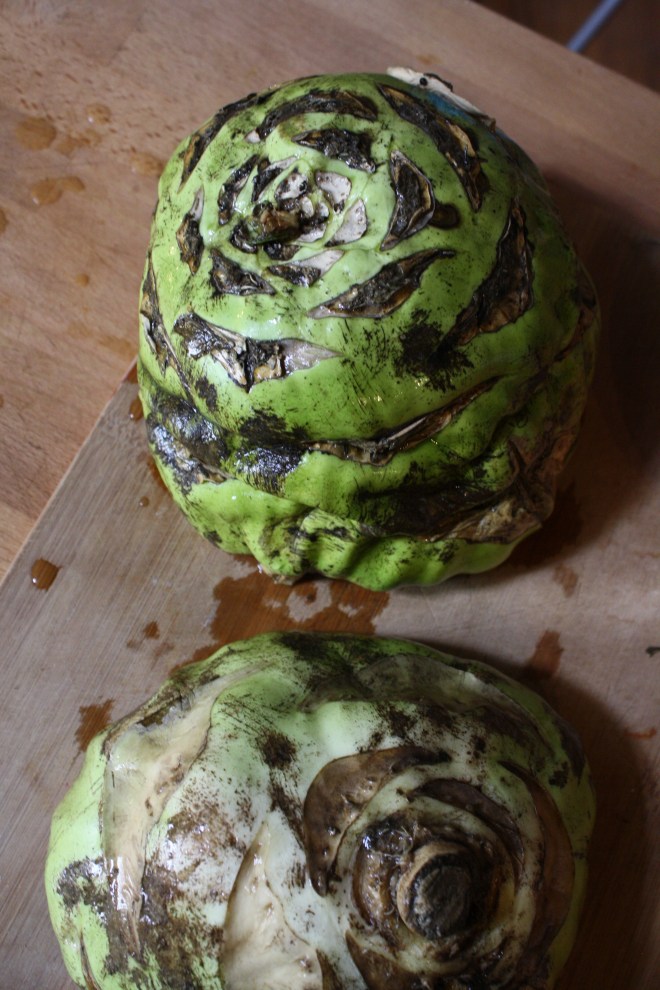
 I have never in my life seen, let alone received, a kohlrabi as big as the one I picked up from my farm share last week. It was, no joke, bigger then my head. (completely nuts) If I didn’t know the farm and the farmers of my CSA, I would have to question whether or not it was grown in radioactive sludge…(kind of like the dandelions in the Teenage Mutant Ninja Turtle movie from the 90’s)
 A gigantic kohlrabi cut in half ( I only used one of the halts) A whole yellow onion and 2 large carrots. I also added in 4 cloves or garlic
 All of those chopped veggies get thrown into a pot with two cups of water and a good sprinkle of salt and pepper. Cover and place on medium heat for about 20-25 minutes. (give a stir ever now and then) Keep cooking until the veggies are fork tender.
  Once the chunks are all cooked up, its time for the immersion blender. (or into a regular blender) Add in at least 3 cups of water, but more to thin out to your desired consistency and let it rip. Stop blending once the soup is nice and creamy. Taste and season with salt and pepper to taste. Leave on low heat to bring back to a good soup eating temperature.
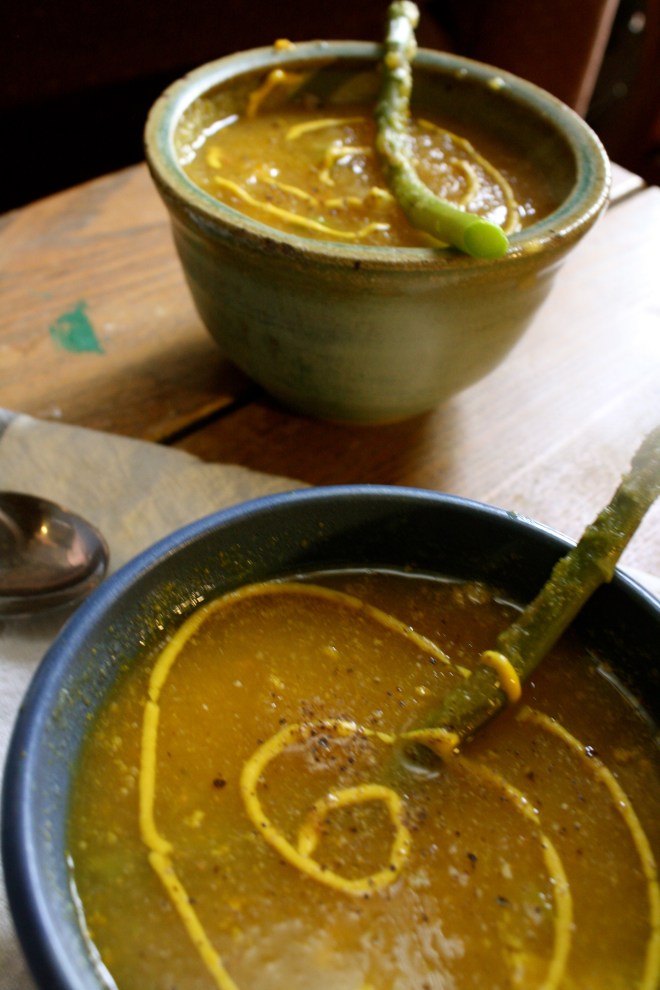
 Now the soup is done.. and you can eat it just as it is, but you should really add in the asparagus. It is just so f*ing good. Just grab a few spears, dice them nice and small, and throw into the soup pot. Let it cook for another 5 minutes and wa la..
  Soup is done. Ladle into bowls and if you want a little fancy presentation, add a swirl of mustard (it’s so good) and a whole cooked asparagus spear.
 You ever have one of those days where its 9 am and your ready to call it a day? . Yesterday was one of those day for me. Its spring vacation around here (more like an arctic vacation) and I had volunteered my day to babysitting/ hanging out with 2 of my nephews, ages 11 and 13. (I know, I am the greatest sister). I had all of these great ideas and plans of things to do, but when it came down to it, they wanted to do nothing but play video games and not really listen to anything I said. I basically had to drag them outside to go for a walk we me and that’s all I could get them to do My great little nephews, I love them so much, but yesterday they had their minds set on being little monsters.
 What we have going here…… Chopped up onion, celery, and carrot in a pot. Stick that pot on the stove for a few minutes on medium heat to start the cooking process. While that happening get the other stuff ready. A big can of diced tomatoes, hot sauce, worcestershire sauce*, prepared horseradish*, celery salt, garlic powder, salt and pepper And last but not least a good squirt of yellow mustard. Now add it all to the pot and bring to a boil. Turn down to low and stick a lid on it.
 After about 20 minutes the veggies should be soft and the flavors should all have melded together. Taste soup as it is cooking and add any more spice that you want.
 I stopped when I got to a smooth consistency with the littlest bit of texture.
 And there it is…served with a stock of celery and a wedge of lemon (I forgot to add them to the pictures!) A bloody Mary to take the edge off any drag of a cold weather day. And best part.. left over soup is great served chilled with a shot of vodka to loosen this Mary up!
THE LOVELY CRAZY
September 19, 2015 by maximios • Blog
My contribution to last nights dinner at my sisters…. Freshy fresh veggies spring rolls.I had about 30 minutes between work and getting over to my sisters house to throw something together so it needed to be something fast, easy, and something I could make without going to the store. She was making the main course (some teriyaki situation and rice) so I was doing up the veggies.
I had just bought a package of spring roll wrappers…. Bingo! The perfect and logical choice. I grab the wrappers, a variety of veggies and after spending 12 of my 30 minutes trying to scrub the oil based paint off of my face and hands, I still managed to completely prepare, construct, and take pictures of these lovely tasty spring rolls. and get over to my sisters in time for dinner.
Impressed?
Damn right!
The stuff. Carrot, beet, asparagus, red cabbage, and kohlrabi, which all (except asparagus, which I just cut into thirds) got cut into matchstick sized pieces with my mandoiln. Then there are the rice spring roll wrappers that we need to make the veggies into rolls. Also a bit of red wine vinegar to drizzle onto the veggies for a little extra zing. And lastly, soy, fresh ginger, and a couple cloves of garlic for a spicy salty dipping sauce.Start by having everything set out and ready to assemble. Fill a large shallow dish or baking sheet with really warm water. Working with one at a time,place a rice wrapper into water and let sit for about 10 seconds or until the paper starts to soften. Remove from water and place on a damp surface (just splash a little water on the counter) Take a little bit of everything and and place on the lower middle part of the paper. Fold in the sides first, then tuck and roll the wrapper as tightly as you can without ripping the wrapper.
Repeat until you have used up all you veggies.For the dipping sauce. Finely grate ginger and garlic and add to soy sauce. Stir… and it’s done.Freshy, pretty and fantastically delicious. And for real, took about 8 minutes to make. (I even had enough time to wash the dishes before we left!)
I am so awesome!
Hump Day Pow!!!!!
-C
Fresh Veggies Spring Rolls
Makes 8-10 but can easily be increased or decreased to desired amount
Note… I used the veggies that I had in the fridge at the moment. If you have a bunch of veggies but not these particular ones, use what you have. Pretty much all veggies taste good inside a spring roll!
Gather your veggies and prep by either using a mandolin, a grater, or some sick knife skills, and julienne, shred, or slice you veggies into thin match sticks. Once all the veggies are prepared, sprinkle a little vinegar over the top.
For the rolls…Grab a large shallow vessel (a rimmed baking sheet works great) and add in warm water. Working one at a time, place the wrapper into the water for about 10 seconds or until the wrapper starts to soften. Remove and spread onto a clean, damp work surface. Gather a bit of each veggie that you are adding and place towards the bottom middle of the wrapper. Now fold the sides in over the pile of veggies. Then with the side closest to you, tuck and roll wrapper away from you, trying to keep it tight, but not to tight that it rips.. (Hopefully that makes since.) Place finished rolls onto a damp surface to keep from sticking and if not serving right away, drape with a damp towel or paper towel to keep from drying out.
For the soy ginger dipping sauce. Add grated ginger, minced garlic, and soy into a bowl and mix together. Serve with spring rolls.
Eat one, two, or a plateful. It’s nice to share but not a necessity.