I spent a lot of time indoors this week, due to the fact that my eyelids would freeze shut when going out for more than a few minute..(for real, walking to the gym the other day, I had my head tightly wrapped and the condensation from my breath went up, into my eyes, and froze.) I mean, I love winter, I love the cold, but I am not a huge fan of -30 with wind chill… I get cold bones. After that morning, the mister insisted on diving me…Love. So we (me, Nick, and especially Washer) might have felt a little trapped this week, and when trapped inside, we get a little antsy, but we have been trying to make the most of it. Cooking, baking, cleaning, drawing, reading, knitting, drinking lots of coffee and tea, and overall trying to stay warm (and sane) Yup. trying to ward of the cabin fever, especially this year, living in a little tiny bit of a room with one window..has been a little difficult. And I know it’s going to be a bitch when it hits. But it’s all cool, We have plans in the making, places to look forward to, things to see. It always helps to have an adventure awaiting to keep the fever at bay.
Anyway, not a bad week, maybe a little stuffy, but nothing to complain to much about. Here are a few of highlights that made(make) me happy.
The kitchen, living room, dinning room, office…all over great room., covered in piles of clothes. Sometimes listening to music and folding laundry can be so, I don’t know, peaceful. I just felt happy at this moment. (might be the fact that I know have some clean clothes and dish cloths)
The trash dog and I went for a lovely little hike by ourselves…It was so nice to get out of the house. We both really really really needed it that day. And look how handsome he looks.. so red against the world.
Standing in line at the grocery store, saw this magazine and started to laugh. I love Oprah…but now…I really love Oprah. Best magazine cover ever!
Another picture of the pup. Letting his rino toy have the bed. A little pathetic…A lot cute
I am doing little recipe testing and this situation in this pot is so freaking good! Just trying to work out a few technical kinks.
I love to look up… don’t forget to look up.
I made a large quantity of banana dream (what I call banana ice cream). This stuff is like crack.. Once I start eating it, I can’t stop. I might overdose on bananas but I am ok with that.
I went to a granite and marble showroom this week. And like whoa, so freaking cool. Walking among huge pieces of gorgeous slabs of stone is kind of magical… and a little cold.
A basket of roots….More like a basket of rainbows.
I currently don’t have a pretty vase of zinnias on my table, (these beauts are from this past summer) but I really wish I did. Fresh flowers are one of my favorite things. This picture has inspired me, I am on the hunt for some pretty fresh.
I have been meaning do a post on seltzer and syrups for a while now and this one is perfect… Everyone around me has been getting sick and I am trying my hardest to not get anything.
Citrus and ginger…. Two of my favorite things, combined into one super refreshing, light and crisp, thirst quenching drink. Tasty and packed full of vitamin C from the citrus and blood warming, tummy healing ginger. Its kind of a feel better elixir, a good for you drink, a sparkler pop. A drink everyone can get into (the mister even liked it), And it has no added sugars or nasty coloring, it can’t get much better.
Feeling Happy, feeling crappy, or just plain feeling, this drink is a good for it all.
I made the ginger date simple syrup ahead of time.. All I did what chop 2 1/2 tablespoons fresh ginger and about 3 tablespoons pitted dates and added to a pot with a cup of water. Simmered the stuff until the dates were mostly dissolved, about 15 minutes, took off the heat and pureed it. I let it steep for another 5 minutes and strained….no biggy. This is a milder sweet simple syrup. If you like sweeter add more dates or even add a bit of honey… Do what tastes the best to you.
Juice the lime and blood orange…..so much pretty!
I ended up with about 12 tablespoons of juice from a the lime and the orange.. If you need or want to, juice an additional orange and lime.
Add 2-3 tablespoons of the fresh juice per 12oz glass and add about 2-3 tablespoons of the ginger date syrup…(adjust amounts to you taste) Top off with cold plain seltzer water and maybe an ice-cube or two. ( I would have if I had thought to make ice)
So lovely…. so nice. I really got into these flavors. This drink has the ability to make you feel warm and cozy while being cold and fresh. It makes me happy.
Double thumbs up here!
Stay un-sick!
-C
Ingredients
2 1/2 tablespoons fresh chopped ginger
3 tablespoons chopped dates (more if you want sweeter)
1 cup water
1 lime
1 blood orange
Plain Seltzer water
Ice (optional)
For the ginger date syrup
In a small pot on low heat, add chopped dates and ginger to a cup of water. Simmer until dates have mostly dissolved, about 15 minutes. remove from heat and puree with either a blender to a hand emulsifier. Let steep for another 5 minutes and strain, reserving the pulp (add it to soup or salad dressing). Let completely cool.
To assemble drink, juice blood orange, and lime. Add about 3 tablespoons of the ginger syrup and 2-3 tablespoons of the citrus juice per 12 0z cup. Top with plain seltzer water, give it a light swirl with a spoon or straw and add ice cube if you want. Now have at it!
You ever make dish, completely on the fly, just to use something up (I have a lot of ripe tomatoes) with no real expectation, just because… Then have it be one of the best freaking things that you have ever made? This salad is one of those things.. maybe not the best thing I have ever made, but definitely the best salad I have ever made…. this week.
A salad compiled of all things amazing, taking just a few minutes to make and is the perfect balance of uber fresh with baby spinach, raw kale, and crunchy quick pickled onions. Then adding a touch of warmth with the sweet and juicy seared tomatoes and big chunks of creamy avocado.
I mean, for reals. ……Best Salad Ever !!!! (this week)
Now let’s do this.
The Stuff. A big bowl of baby spinach and chopped up kale, a few sliced up roma tomatoes, some super thinly sliced red onion, half an avocado, red wine vinegar and salt and pepper. Before you do anything, place the sliced onions into bowl, sprinkle with a pinch of salt and add a few glugs of the red wine vinegar. You want the onions to sit in the vinegar for at least 5 minutes on the counter cause the longer they sit the more crispy pickly they get. (after eating onions like this, you will never want to eat them any other way) Lightly oil a skillet and preheat to a medium heat. Once the skillet is hot, sprinkle the tomato slices with salt and pepper and place tomatoes right on in, snugly, but not overlapping. Let cook for about 3-4 minutes, or until the bottoms start to brown. Flip and cook other side for another few minutes.Once the tomatoes are seared on both sides, remove them gently from skillet and toss them on top of the bowl of greens.
Take the pickled onions and toss those right on top, with any of the residual vinegar, add dice and scoop the half of avocado and toss that on in as well.And now eat the best salad ever (this week).
Make the day good!
-C
Skillet Seared Tomato and Quick Pickled Onion Salad
Serves 2 as a side, 1 for a hungry eater
2 large or 3 smaller roma tomatoes
1/2 of a red onion
2-3 tablespoons red wine vinegar
1 1/2 cups baby spinach
1 1/2 cups chopped kale
salt pepper
1/2 a ripe avocado
olive oil (to grease pan)
Thinly slice red onion and place in a bowl. Add vinegar into a and sprinkle with salt. Let sit on counter for at least 5 minutes, if not longer,
Slice tomatoes into 1/2 inch thick rounds and sprinkle with a pitch or salt and pepper. Lightly oil a skillet and preheat it on medium heat. Once the skillet is preheated, stick the tomatoes on it (watch out for splattering tomato juice) Cook first side for about 3 minutes or until the bottom has browned, then flip and do the same for other side.
One tomatoes are seared, place directly onto the greens. Now dump the pickled onions and residual vinegar on top. And dice up avocado and add that on top too.
Before we get to the fries, I just want to mention that yesterday was one of those fantastic winter days that reminds me why I love living in Vermont. Pretty white snow everywhere, the sun was out, and 20 degrees without a gust of wind. The trash dog an I were even able to go for a little hike. It was so nice and soooo sooo needed! Anyways, the other day as me, my sister and the mister where putting together one more piece of Ikea furniture, (I am the master at Ikea assembling!) a little runs into the room and presents the mister with a Dominos pizza. Yup, a whole pizza just for him. Why you might ask? Well I guess my sister was delivered the wrong pizza and the place didn’t want it back and she didn’t want it, so she gave it to him.
A whole pizza to himself. I didn’t mind too much..he was just going to be eating it for lunch and dinner until it was out of the fridge. But for dinner I did want him to eat something of the vegetable matter that didn’t come out of a box. I was going to make him a big salad, but then realized that would mean sharing the last of the greens that I had for MY dinner and I was not about to do that, so I made him parsnip and carrot fries instead. No biggy, just some slicing, a little tossing and a bit of time in the old oven. And I figured I might as well make a nice sauce for those fries because I be so very nice.
The biggest problem that I ran into when I made these fries was that I didn’t make enough, so you should probably make twice as many as you think you will eat. If you end up not eating them all (which you probably will), well then you now have a great start for a soup or a nice addition to a salad. Either way, you will eat them because they are amazing and addicting… and as healthy as can be!
The carrots and the parsnips are all sliced up into big matchsticks and ready to be baked to crispy browned perfection. I added the oil to the pan to toss the fries in and then sprinkled with a fair amount of salt and pepper. If you don’t have and or want to use a cast iron pan, a baking sheet works just the same.
Oh saucy sauce stuff. Tomato puree, sriracha, and yellow mustard. Add a little bit of honey to lighten it up (can use brown sugar if keeping it vegan), a splash of apple cider vinegar and a couple minced cloves of garlic. Topped off with the smokey delightful spice of cumin. I cold eat this on everything…and I kind of did.
All mixed up in an oven safe dish, I stuck it into the oven for a about 8 minutes until it got a little bubbly, just to let all the flavors fuse together…
Fries are done, Sauce is ready. Served in super cute tea cups.(from now on I want to serve everything in tea cups.) A perfect side dish, snack, or even a light meal. It lead the mister to ask the question…What pizza?
Happy Day!
-C
Parsnip and Carrot Fries with Smokey Sriracha Sauce
Wash and trim carrots and parsnips and cut into large matchsticks (any shape is good, just make them all uniform) Toss with oil and sprinkle with salt and pepper. Place on cast iron pan or baking sheet and stick in oven for 30 or so minutes, and rotating after about 20. The fries are done when crispy and brown.
For the sauce. Mince garlic and add to all the sauce ingredients in an oven safe bowl. stick into oven for about 8 minutes until slightly bubbly and hot.
Dip fries in sauce
Happy Hanukkah!!! Today is the first day of the festival of lights and I wanted to send a little love towards those who celebrate it.
I am not going to lie, I don’t know much about Hanukkah but I do know that its customary to eat fried foods during the holiday. The oil represents the miracle of the oil that burned for eight days ands.nights when it should have lasted for only one night. That’s a cool reason to celebrate.. So a lot of food eaten during the holiday is fried, therefore I must fry, and what better than potato latkes.
I don’t usually fry anything. But again, I don’t think I used as much oil with these as I could have..just enough to cook and not stick. Hey, it’s the holidays and this oil had meaning so it’s completely a ok to eat a little fried, just make sure to eat lots of good healthy stuff too!
I didn’t actually use all the potatoes in the picture, but I wish I did. There was the perfect amount for dinner for two people, but I wanted to make a few extra for left overs….there were none. Oh well. I did a matchstick dice for the apples.. I didn’t want the apples to be to chunky and I didn’t want them to turn into sauce so the match stick worked well. After I diced the apples, I squeezed a little lemon over the top to keep the apple from turning brown.
I start grating the potatoes and onion, and whoa! Imagine my surprise when one of the potatoes was purple… I got pretty excited.The color is so beautiful. and made the latkes look so nice…It was meant to be.Super squeeze the juices out of the grated potato and onion. If you don’t get most of the liquid out, the potato won’t crisp up and will fall apart and be and it will be gross. So SQUEEZE! Add in the egg, cornstarch, salt and pepper and mix it on up. Did I mention that I was making these for the mister and the GF sister..No flour, just cornstarch. I think they might have come out even better without the flour…so yeah, these babies are gluten-free.
Your mixture is going to start to get a little watery again. Its cool, just squeeze it out with your hands and smash into patties.Enough oil to cover the bottom of the pan on medium heat. Test the oil to make sure its hot enough before sticking the latke n the pan. To test, sprinkle water in pan, if it sizzles, its ready.Working in batches, fry each latke on each side for around 5 minutes..you don’t want to cook to fast or the inside of the latkes will be raw. I always do a tester and feed it to nick. He’s my guinea pig….He said they were awesome.. With every batch made, stick on a wire rack and keep in the oven to stay warm. The rack keeps the bottom from getting soggy on the pan… so use it. Roasted apples are the BOMB!!! Its like eating apple sauce sticks or little bites of heaven(A bit dramatic, but these are so good) I roasted mine for 20 minutes, until they were nice and soft but not completely failing apart. If you are into it, add a touch of cinnamon…I did’t this time, but you bet I am going to be making myself a big ol bowl of roasted apples this week, and yes, I will top with cinnamon. A bowl of apple slaw, sour cream and lemon wedges….I put the latkes on a nice little pile of greens. A very good idea. A dinner worth celebrating! I also served the latkes with roasted chickpeas and cailflower…for more of a meal…( Mini recipe… Cauilfower and chick peas drizzled in olive oil, tossed in salt pepper and garlic, roasted 30 minutes and topped with lemon) A little added veggie and protein….I am looking out for you people.
There we have it…my variation on a traditional food. Enjoy your fried pancakes of potato and onion, they are a food worth a celebration.
HAPPY HANUKKAH!
Potato Latkes with Roasted Apple Slaw
Ingredients
3 medium potatoes
half of a small onion
2 eggs
2 tablespoons corn starch
vegetable oil
salt and pepper
2 medium apples
sour cream(optional)
Wash and cut apples into match sticks… Place on a parchment lined baking sheet and stick in oven. Let roast for 15-20 minutes or until the apple is nice and soft. Remove and set aside.
In a large bowl, grate the potatoes and the onion. Transfer the mixture into a clean towel and squeeze the crap out of it to remove as much liquid as possible. Return to bowl and add the two eggs, corn starch and salt and pepper. In a large skillet on medium heat, drizzle enough oil to completely cover the bottom..Work in batches and after each batch, add a bit more oil to cover the pan. Once the oil is hot place squashed latkes into oil. Fry each side until crispy and brown, about 3-5 minutes. When fully cooked, place on a wire rack in the oven to stay warm and crisp. When ready to serve, top with roasted apples and a dollop of sour cream. You can serve the latkes on top a bed of greens..Its a good way to make the pancakes more meal like.
Enjoy
Sometimes, no matter whats going on with the week, Monday seems like, well, like a Monday. I drag a little on Mondays. I think it stems from the Monday through Friday school week that was beaten into me for 16 plus years. Hate Mondays, Love Fridays.. Yup, I blame the public educational system(I have to blame someone) I want my day back. I don’t want to feel the drag today. I am going to have a fantastic day. I’m getting excited, pumped up and ready for the week. I am turning my Mondays into fun days. Funday Monday…Yes, yes I did just say that. . See, don’t we all feel better already?
On this Funday, I don’t want to worry all day what I am going to make for dinner, I just want something tasty and easy. .Whats better than a plate of fries?……. a plate of roasted rutabaga fries! Yes! See, we are already having a great day. A plate of fries, easy, delicious and nutritious. Not a bad start to the week. You can eat them with just about anything, a grilled cheese tomato and avocado sandwich, a bowl of curried lentil soup..or just straight up eat a big old pile of these roasted rutafries (That a word, I swear) Just have fun with it. Its funday Monday after all.
One large rutabaga… This one fed 2 as a side… but if your eating just the fries, eat a whole one to your face. It’s totally cool.Chop the rutabaga into fries and toss with a smidge of oil, salt, pepper and ground up rosemary. Don’t like the rosemary… don’t use it. Maybe try something else like sage or garlic and onion powder or curry powder. Just use whatever you like. Throw into a 425 degree oven for 20 minutes, give them a flip and back in for another 15, Simple. Easy.
Remove from oven when crisped to your liking and eat.
Yes, this was a dinner of rutafries and brussel sprouts, is that a problem? I don’t think so .A suggestion, .dip in mustard….its fantastic, but go the ketchup route if that s your fancy.
Alright people..Have a great day and remember to not let today be a drag of a Monday, make it fun, looking forward to a plate of rutafries for dinner and think of how great the rest of the week is going to be!( I might have been a motivational speaker in a past life)
I can’t stop eating these. They are like little balls of crack and I am an addict.
Frozen peanut butter grapes… I mean, I just can’t stop.
So you say you have never frozen your grapes? Well you should. It’s the only way I like to eat them anymore. I was never a huge grape fan, but one day long ago, I discovered the wonder that is the frozen grape and it is amazing, Now whenever grapes are on sale at the grocery store, I buy way to many and end up filling our tiny little freezer with jars and bowls of grapes. Then whenever the mister goes to grab the bag of frozen peas for his sore back or knees, there is almost always a frozen grape avalanche. Why I don’t put a lid on those containers is even a mystery to me. Oh, now I remember.. I want easy access.Oopen the freezer, grab a few grapes, and go on my way… not having a lid to take off makes the process a little easier.
Then one day, the frozen grape game turned into something else, something a little more decadent and even more addicting. Where it came from, I do not know. Maybe it’s some subconscious throwback to a childhood full of peanut butter and grape jelly sandwiches, or maybe it’s just that fact that I think peanut butter can pretty much go with anything. But no matter why, I started dipping those frozen grapes into peanut butter and never looked back. And now when I have grapes, it’s all I want to eat.
I am warning you now, once you start making these, watch out, because before you know it, you will develop a frozen grape addiction too. And littles.. they are as easily addicted to these as well. I have seen kids that hate grapes go totally bonkers for these. Just so you know.
The stuff you will need. Washed and drained fresh grapes (green or red. I usually use red but the green were half the price and the red ones didn’t taste very grapie*) Creamy peanut butter, skewers, and a little bit of cinnamon or cocoa powder (optional)
*Note. When you are the store, try before you buy. You know what I mean, eat a few while shopping aground. I say this because not all grape are created equal. Some taste way better than others. I have bought grapes before that didn’t taste like anything or that have really tough skins, and those just piss me off, so eating a few will guarantee that your money is being well spent and that the grapes won’t disappoint you.
Ok, so now let’s make these bad boys.
Simple simple. Two grapes per skewer (or toothpick) Lay on a wax paper covered dish or pan and stick them in the freezer until frozen. When the grapes are frozen, melt peanut butter. Take a big glob and stick in a tall skinny cup or bowl and stick in the microwave or heat in a sauce pan and then transfer to a tall skinny vessel. Take frozen skewed grapes and, one skewer at a time, dip in the peanut butter. Cover with as much or as little of the peanut butter as you want and place on wax paper. If you are feeling feisty, add a sprinkle or cinnamon or even a dash of cocoa powder. Or, this may seem a little crazy, but garlic powder is so F*ing good.(it’s worth at least giving it a try) When all grapes are dipped, place back into freezer for another 10 minutes or so to let the peanut butter set up a bit.
Whenever your ready… Eat. And be so happy. And always keep a back stock of frozen grapes in the freezer. They are the best.
Keep it realz.
-C
the quantity is up to you, but I recommend making a shit ton!
Creamy Peanut butter (I use organic creamy from Trader Joes, or natural skippy)
Green or Red Grapes
Cinnamon and or cocoa powder (Optional)
Toothpicks or skewers
Wash grapes and skewer 2 grapes onto a stick. Place on a flat surface and stick into the freezer until frozen, which usually takes about an hour.
Once grapes are frozen, stick a big glob of peanut butter into a tall skinny vessel (Like a juice cup or a 4 oz ball jar) and warm to a liquid constancy in the microwave (about 30-45 seconds) or if you don’t have a microwave, stick in a sauce pan, warm on stove, and pour into a glass (what I do)
Remove frozen grapes from freezer and dip into melted peanut butter. Place on a wax paper line tray or pan and sprinkle with cinnamon and or cocoa powder, or not, or a few (whatever you want) and stick back into freezer for another 10 minutes.
Eat as many as you want… Make so many because you will become addicted!
I figured now is a good time to get this recipe out there before we get to far into spring and summer recipes because there is going to be a lot of banana ice cream filled recipe coming and I figured its a good idea to have the basic banana ice cream recipe ready for people to refer too. And because I made so much fantastic naner ice cream, I also made a cookies and cream naner ice cream for my sisters and the mister.
Comments that I got from my sisters and the mister when I made them this ice cream
-Sister one.”I give this my sister seal of approval.. It’s so good. The first dessert you have made that I liked! (not including all the other desserts that you have made that I liked)”
-Sister two- “Wow.. it looks like ice cream and feels like ice cream and tastes like ice cream.. You should make me this ice cream!” (I was confused too because I was pretty sure I just made her some)
-The mister- “I am so excited for my new fly fishing pole!”
Ok, so the naner ice cream isn’t new to the mister and he IS very much excited for his new fly fish pole. So excited that he forgot to tell me how amazing that I am and to thank me for making him a big bowl of yumminess. (It’s ok, I forgive him)
And yes, this is probably one of the easiest, most delicious, healthy and amazing frozen dessert that you will ever eat. You will probably find yourself buying mass amounts of bananas and stocking the freezer until things just start falling out. (which is also ok because it’s only bananas and you can’t have too many frozen bananas)
The stuff you need for this ice cream…. Nice and ripe bananas, peeled and then frozen* That’s it.
To make it, place frozen bananas into food processor and hit the on button. Process the crap out of the namers until nice and silky smooth.
*Note, the smaller the frozen chunks are , the faster and maybe a little easier for the blender to blend the naners into ice cream. So if you think of it, chop bananas into pieces before freezing or even after.
After all blended and smooth, either eat right away or scoop ice cream into a freezer safe container and stick in freezer. That’s the banana ice cream… And it is amazing and so so so so so addictive. I make a batch, think I am only going to eat a scoop, then find myself eating half of what I have made, but it’s ok cause it’s only bananas.
Now for the cookies and cream banana ice cream..One batch of banana ice cream, either freshly made, still in food processor or made ahead and placed in a food processor and given a good pulse to smooth it up.
Add cookies in, crushing a bit beforehand and pulse till combined. Now you have cookies and cream naner ice cream…. and everybody is happy.
Scoop into a cup, a bowl, a freezer safe container, or directly into your mouth. Be careful…. You can still get brain freeze from eating naner ice cream too fast!
Keep it real hump day drum bum!
-C
Basic Banana Ice Cream
Makes one batch. Good for 3-4 servings
4-5 ripe bananas peeled and frozen
Peel bananas and stick in a freezer bag or container and freeze. When bananas are completely frozen, break into pieces and stick into a food processor or blender and puree until silky smooth.
Eat right away or scoop into a freezer safe container for later.
Cookies and Cream Banana Ice Cream
1 batch banana ice cream
5-10 (depending on your cookie need) cream filled cookies like oreos or Trader Joe’s Joe Joe’s (These are gluten free)
In a food processor, blend banana ice cream with cookies.
Eat right away, with a utensil of choice in a container of choice.
Yesterday The mister and I went for a walk, a long walk. I was wearing a sweater, a light jacket and I left the mittens and hat at home. There was sunshine, huge puddles and mud. Birds were chirping. It was amazing.
After our nice long walk, we got home and I needed to start dinner. It was a little later than I usually so I wanted fast and easy I usually always have pesto in my fridge (I had to make some, but it only takes 5 minutes) because when it’s in there, I can whip up a big awesome meal in the time it takes to boil some pasta or quinoa or smear on toast or toss with potatoes. It really can be used on everything and can be made out of just about anything. Kale and walnuts are just one of so many fantastic combos. And frozen ravioli is always in the freezer too. I used just plain cheese, but use whatever kind you like.
Together, pesto and ravioli, well that’s a quick, easy, and tasty meal, perfect for a spring evening, And yea, there will be left over pesto from this recipe… just stick it in the fridge or freezer….you will be glad you have it.
Pesto stuff. Kale, walnuts, parmesan cheese(nutritional yeast to keep it vegan), garlic, lemon, olive oil, and salt and pepper.
A few little pre steps before the blending.. Toast the walnuts. Just toss onto a dry skillet and stick on medium heat for about 5 minutes or until they start to become née and fragrant. Remove from skillet and add in a bit of water. Add in chopped or ripped kale and cover to let the kale tenderize, but only for about 2 minutes. (you want the kale to still be crispy and fresh tasting) Drain water and add kale, garlic, toasted walnuts, cheese and the juice of the lemon into a food processor. Turn on and slowly add in olive oil until you get to a nice paste, adding more oil to get to your desired consistency. Oh and don’t forget to salt and pepper to taste!
Straight up frozen ravioli goes onto an oiled baking sheet.(make sure that non are overlapping) Place into an oven at 400 degrees for about 15-18 minutes, flipping after 10. If you want to add mushroom and a few more walnuts, just toss them onto the ravioli when you are flipping over the ravioli.
When the ravioli is nice and brown and crispy, remove from oven and dump the ravioli and the mushrooms into a bowl. Add a big old scoop of the freshly made pesto and toss around.
Look at this… fresh, crunchy, light and happy. Kinda like a spring day.
I am the best lady, making the mister a pretty yummy dinner.
Have a great Tuesday!
-C
Kale Pesto and Baked Ravioli
4-5 cups chopped Kale
1/2 cup Parmesan Cheese ( Nutritional Yeast to make it vegan)
1/2 cup Walnuts
1/4-1/2 cup Olive Oil
4-5 Cloves Garlic
1 Lemon
Salt and Pepper
1 bag of frozen ravioli(use vegan or gluten-free if you want)
3-4 mushrooms
Note..There will be plenty of left over pesto… Just fridge or freeze it
Place walnuts in a skillet and toast on medium heat for about 3-5 minutes or until the nuts become fragrant. In the same skillet, add enough water to cover bottom and add in all the kale. Place a lid on it and let kale wilt on medium heat for about a minutes or 2, Take off heat. Add walnuts. garlic, cheese, salt and pepper, and juice of lemon to a food processor. Blend. Now add in the kale and blend, slowly adding olive oil until a thick paste forms. You can add as much oil as you want to make it as thick or thin as you like.
Preheat oven to 400
Place frozen ravioli on an oiled baking sheet, making sure none are overlapping. Place into oven for about 15-18 minutes, removing after 8 minutes to flip. When you take the ravioli out to flip, slice up the mushrooms and grab a few more walnuts and toss onto baking sheet with the ravioli. When the ravioli’s are nicely browned and toasty, remove (mushrooms and walnuts too) and place into bowl. Add a big scoop of pesto and toss to mix.
Serve and eat.. fork is optional.
Note..Add a thin layer to the top of any left over pesto to keep it fresh and from turning black
Not only is it the first week of summer, it’s also popsicle week! Billy over at the sweet ass blog Wit and Vinegar hosts a little (actually quite large) bloggers party that share all sorts of fun and fantastic popsicle recipes and presents that list to the world. There are popsicle flavors up the wazoo…Pretty stinkin cool right.
So my contribution to the world of popsicle eaters is one of my all time favorites (maybe the absolute best one yet).. Carrot Ginger Orange.
For those who know me, this flavor combination should come as no surprise. Carrots are my thing. I eat them all day, every day. Sure I eat a shit ton of other stuff, but always carrots. Carrots are in my breakfast,lunch, and dinner. If I need a snack, I grab a carrot. There is just something so satisfying not to mention so easy about carrots. Eaten alone, with mustard or hummus, or dipped in peanut butter of cinnamon..Carrots can do just about anything. I mean I eat so many carrots that no shit, my skin is a slight tint of orange (seriously for reals. Something about an abundance of carotene) Crazy I know, but what can I say. I really like carrots. %u00a0%u00a0%u00a0%u00a0%u00a0%u00a0%u00a0 (that’s what I say when people ask me why I am glowing orange)
So naturally the carrot made it’s way into my popscile mold. And now it’s for real. Carrots really can do anything.
Another win for carrots everywhere.
And popsicles.. Just in time for that hot as shit weekend we are about to have.
GO POPSICLES CO!
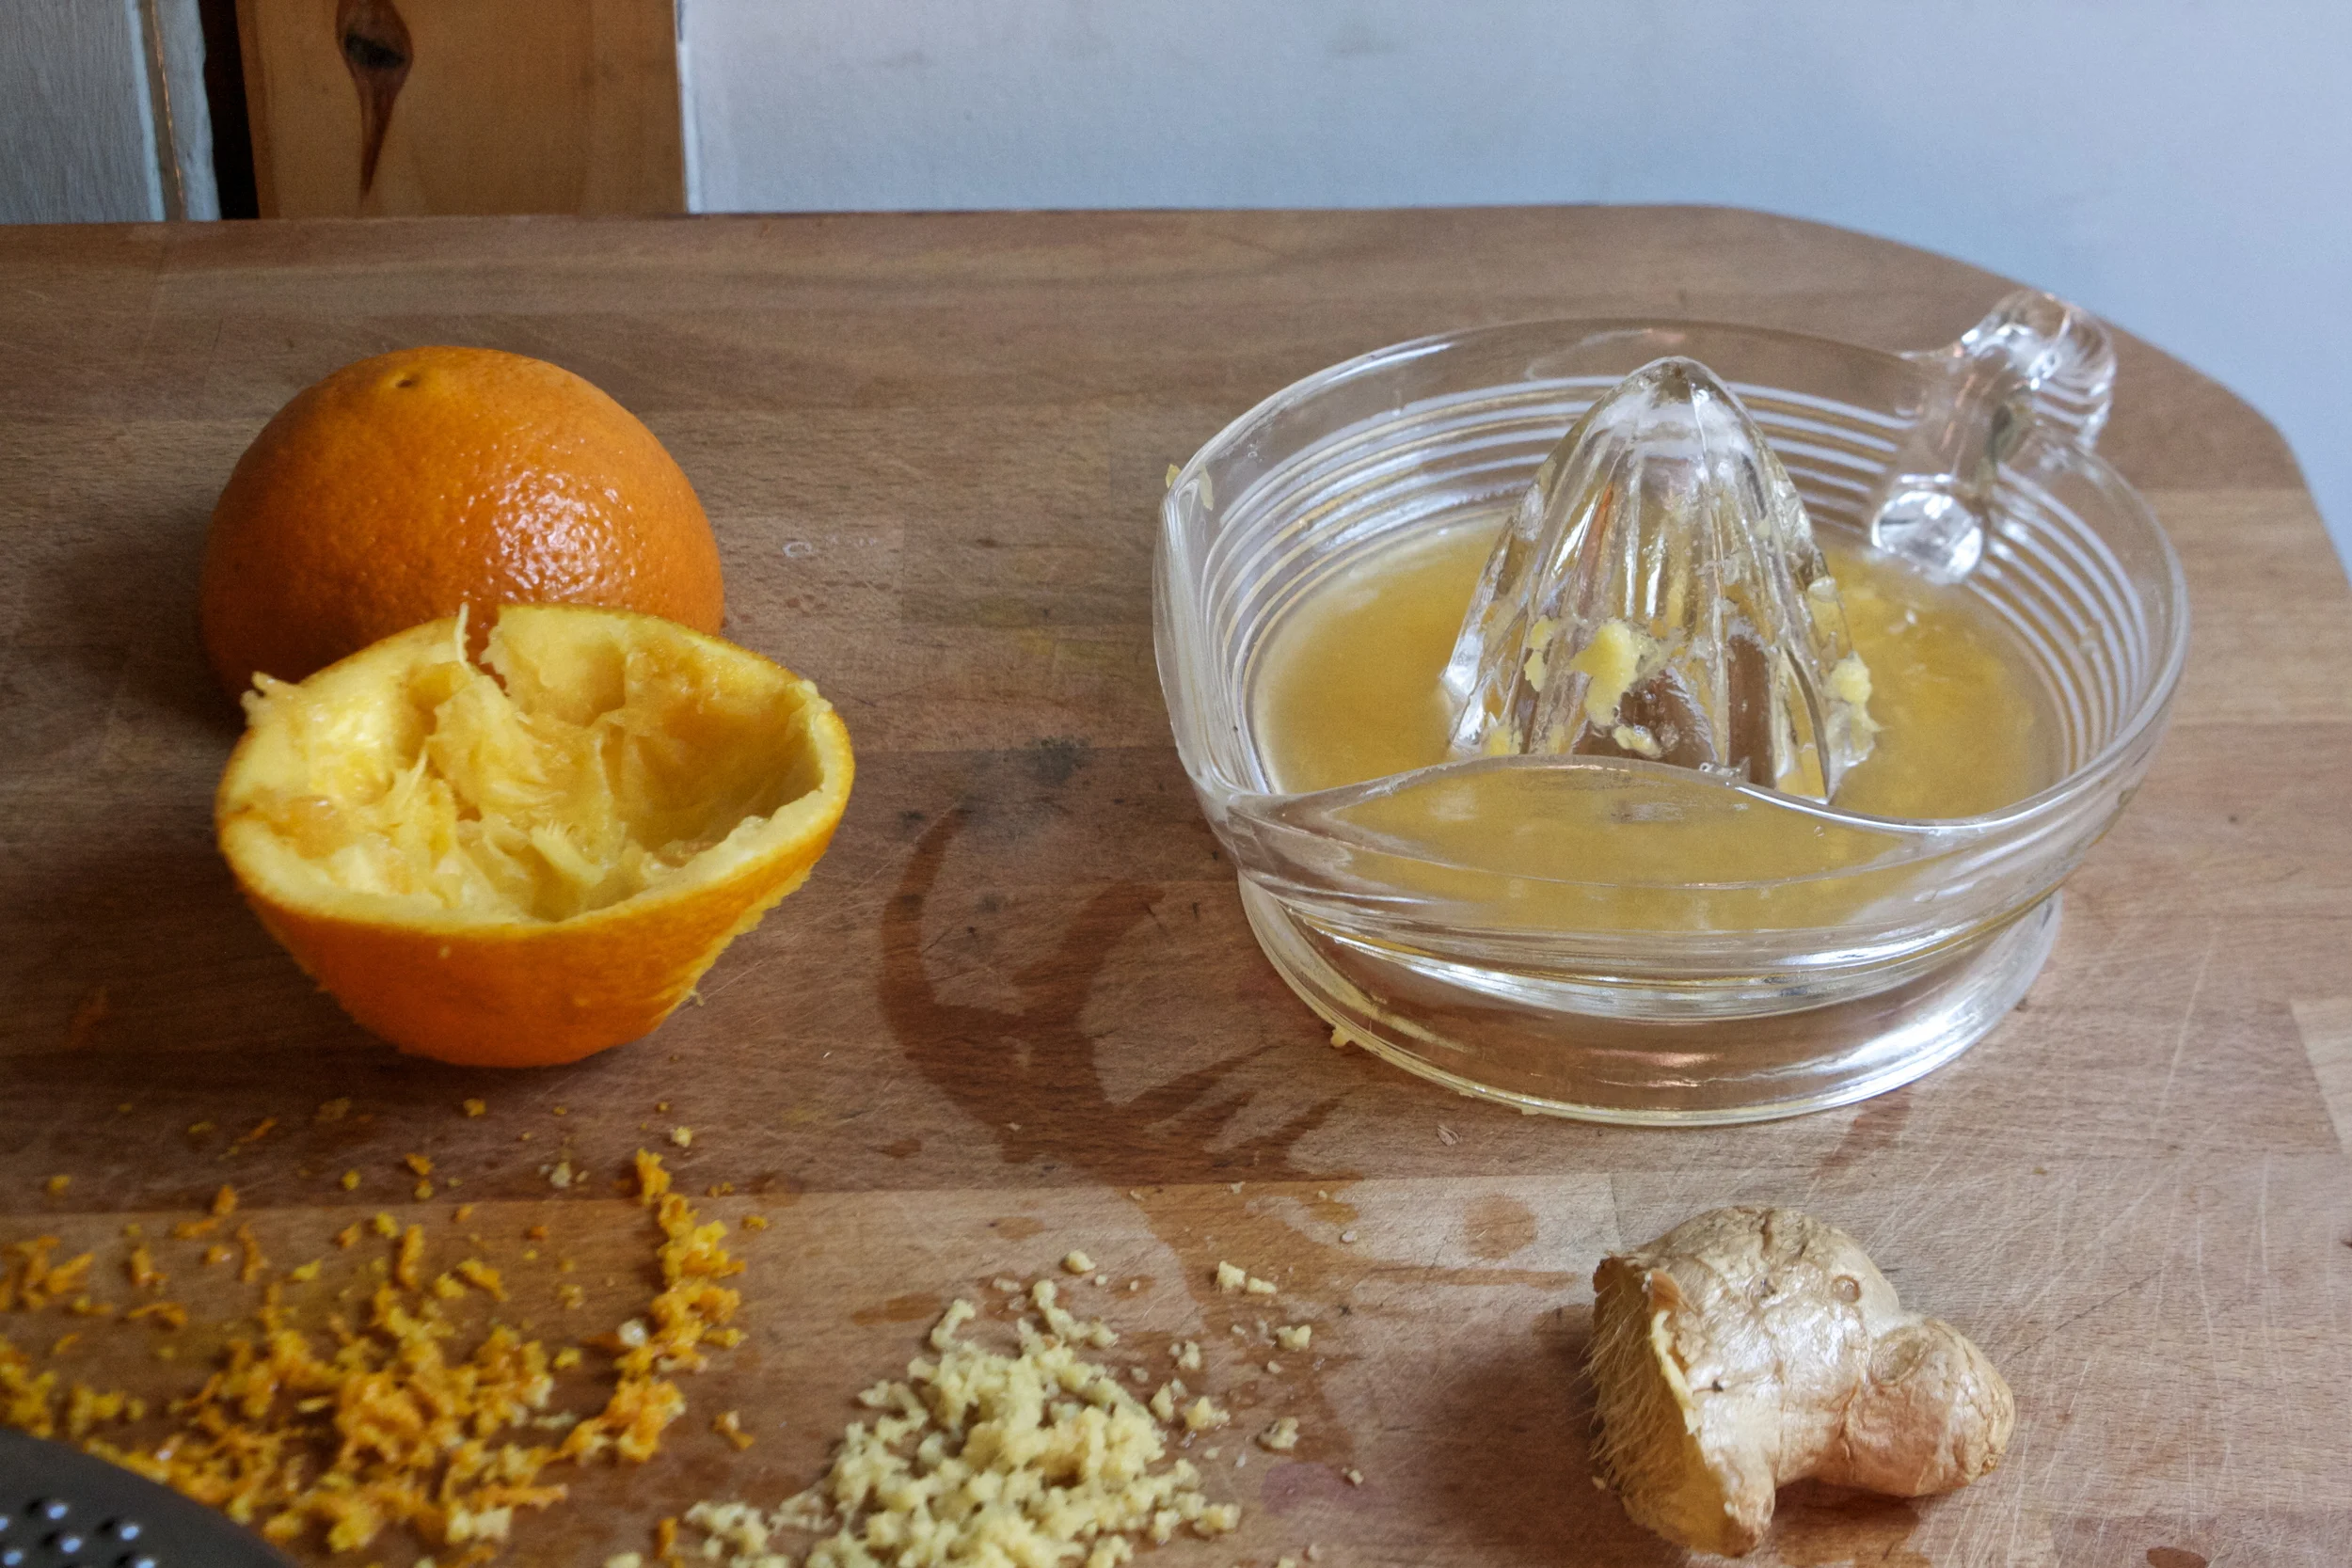
The stuff. Carrots, an orange, some fresh ginger, and some water. Simple simple and no, I didn’t forget the sweetener… these pops have no need (although if you want, go ahead and add a smidge or splash of something sweet)
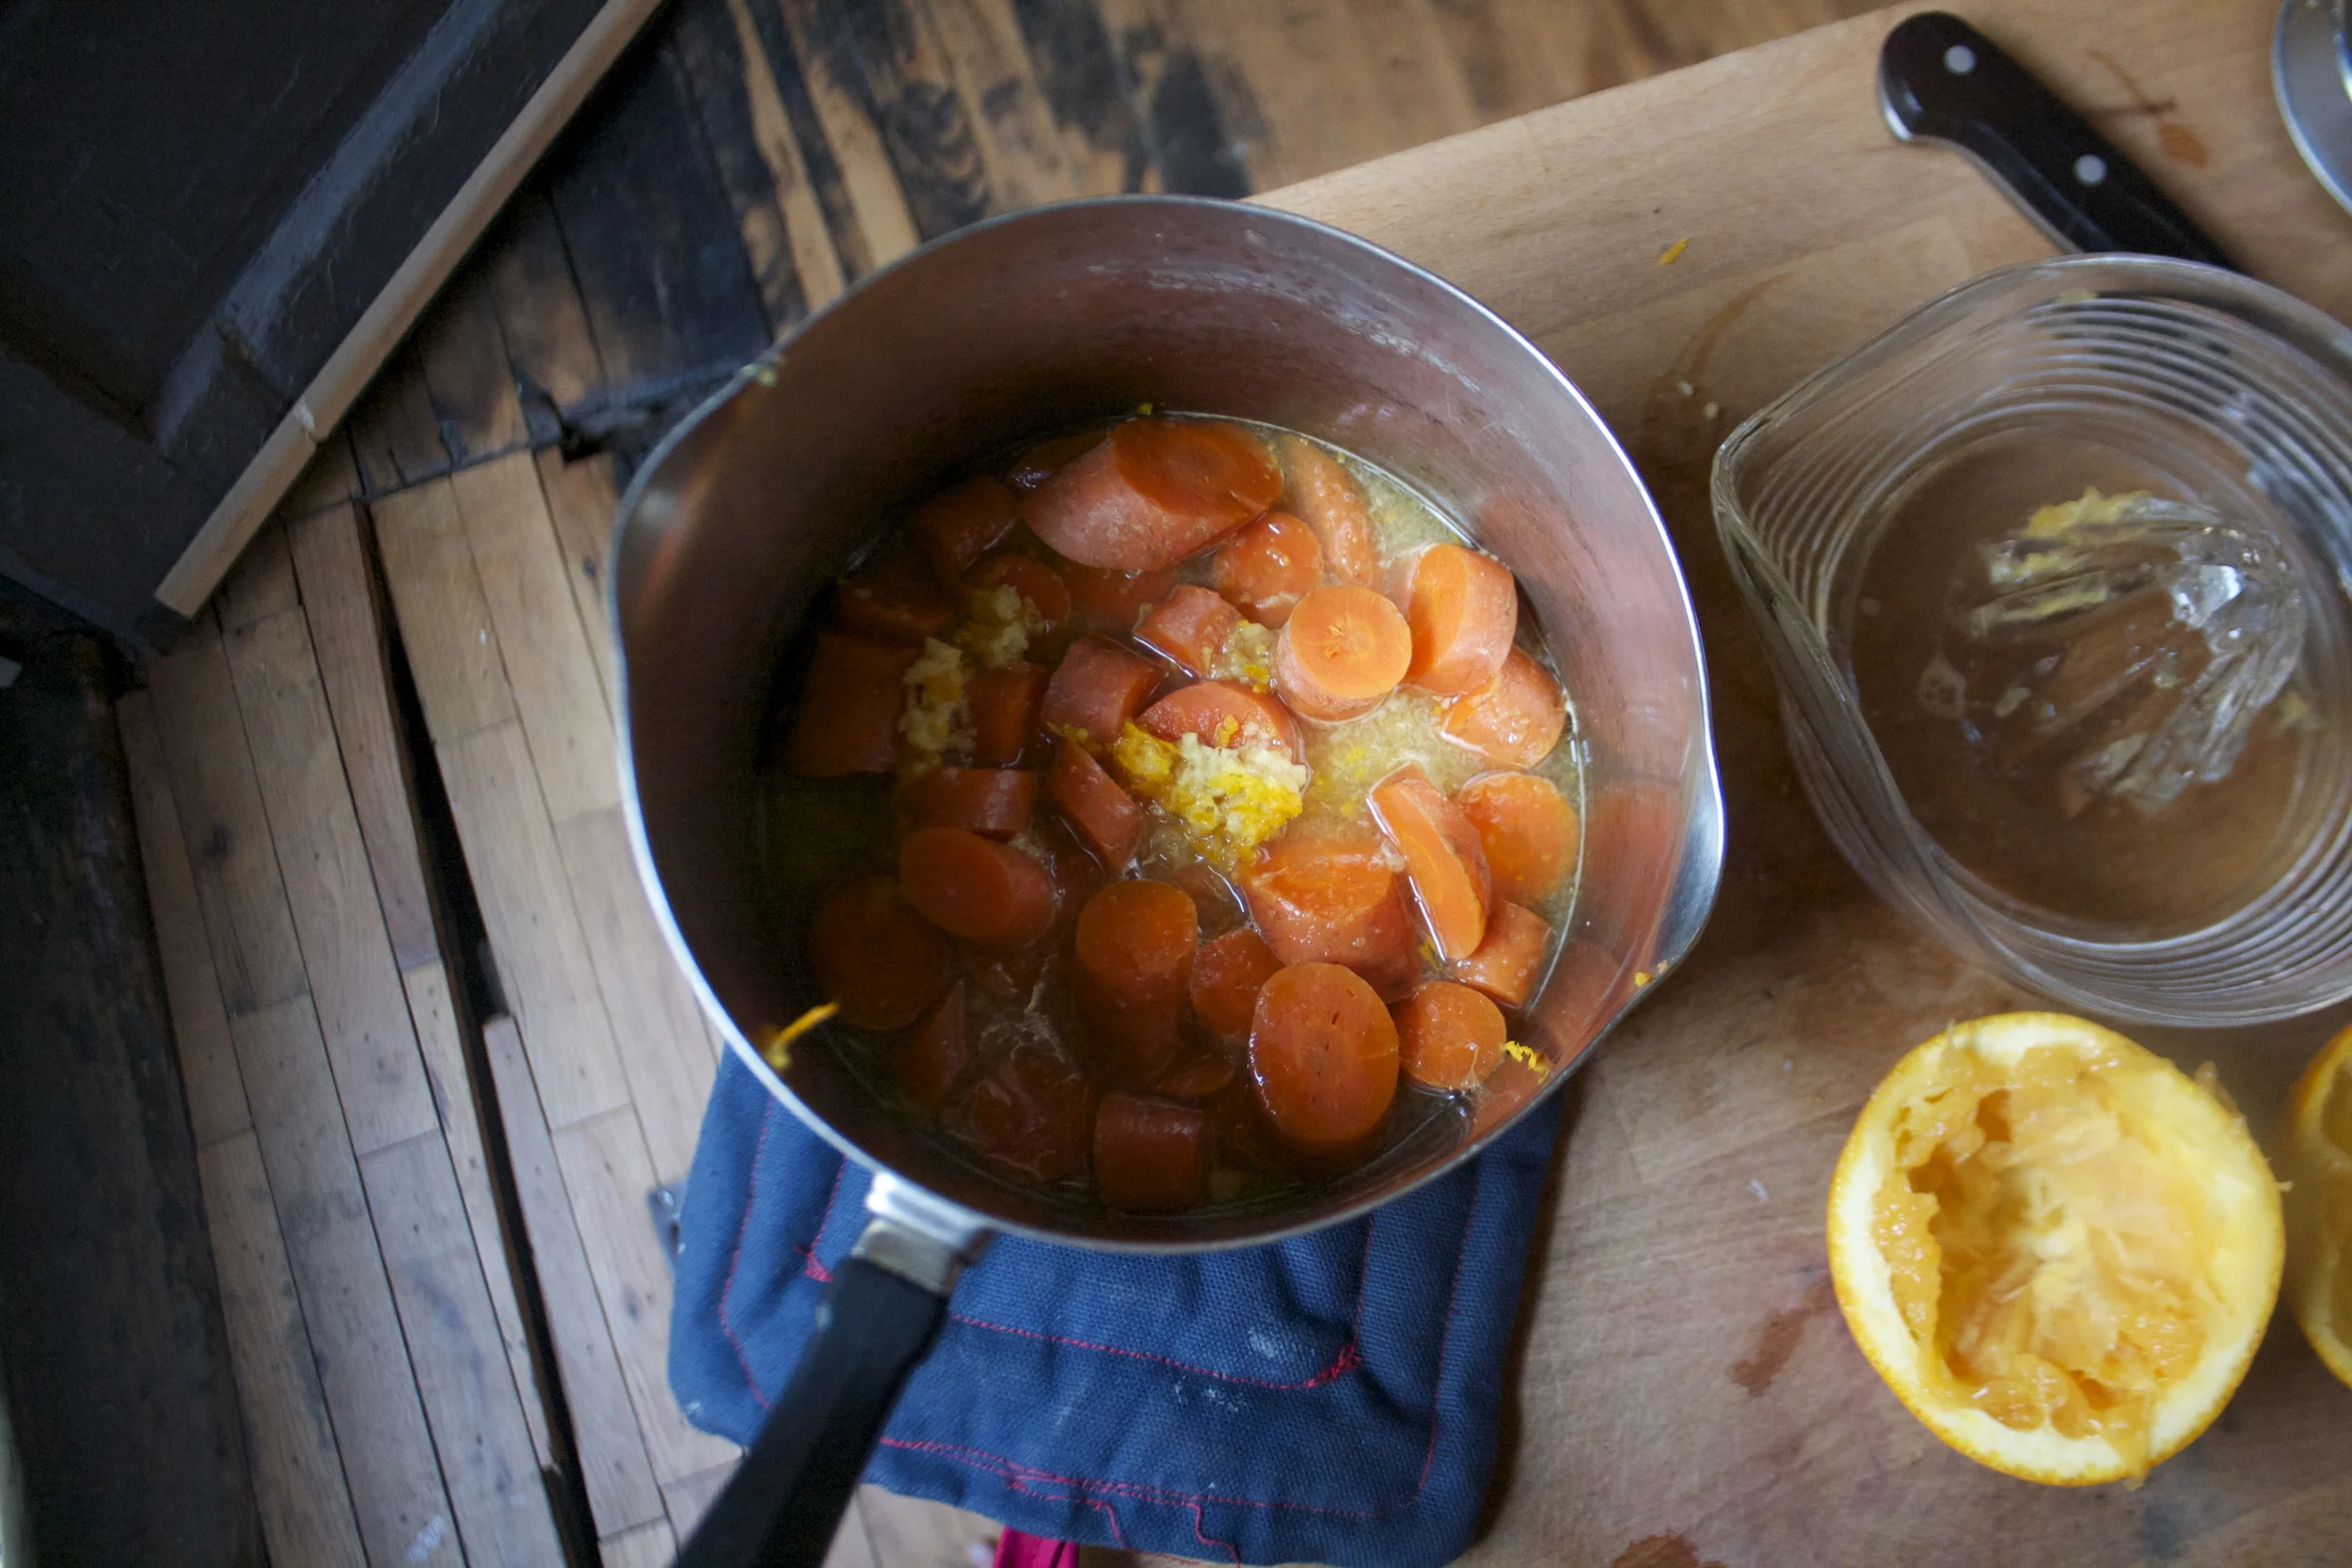
Start by chopping up the carrots and sticking them into a pot with some water. Not a lot, just enough that it almost cover the carrots, and stick that pot onto the stove, cover and cook on medium heat until tender. Make sure to check that the water doesn’t completely evaporate or you will have burnt carrots which taste just fine, but not as a sweet popsicle
While the carrots are tenderizing, zest the orange then juice it and grate up some fresh ginger.
Once the carrots are fork tender, dump in the juice, the zest, and the ginger. Stick pot back on heat for just a few more minutes to meld the flavor together.
Dump the contents of the pot into the blender and blend blend blend until smooth.
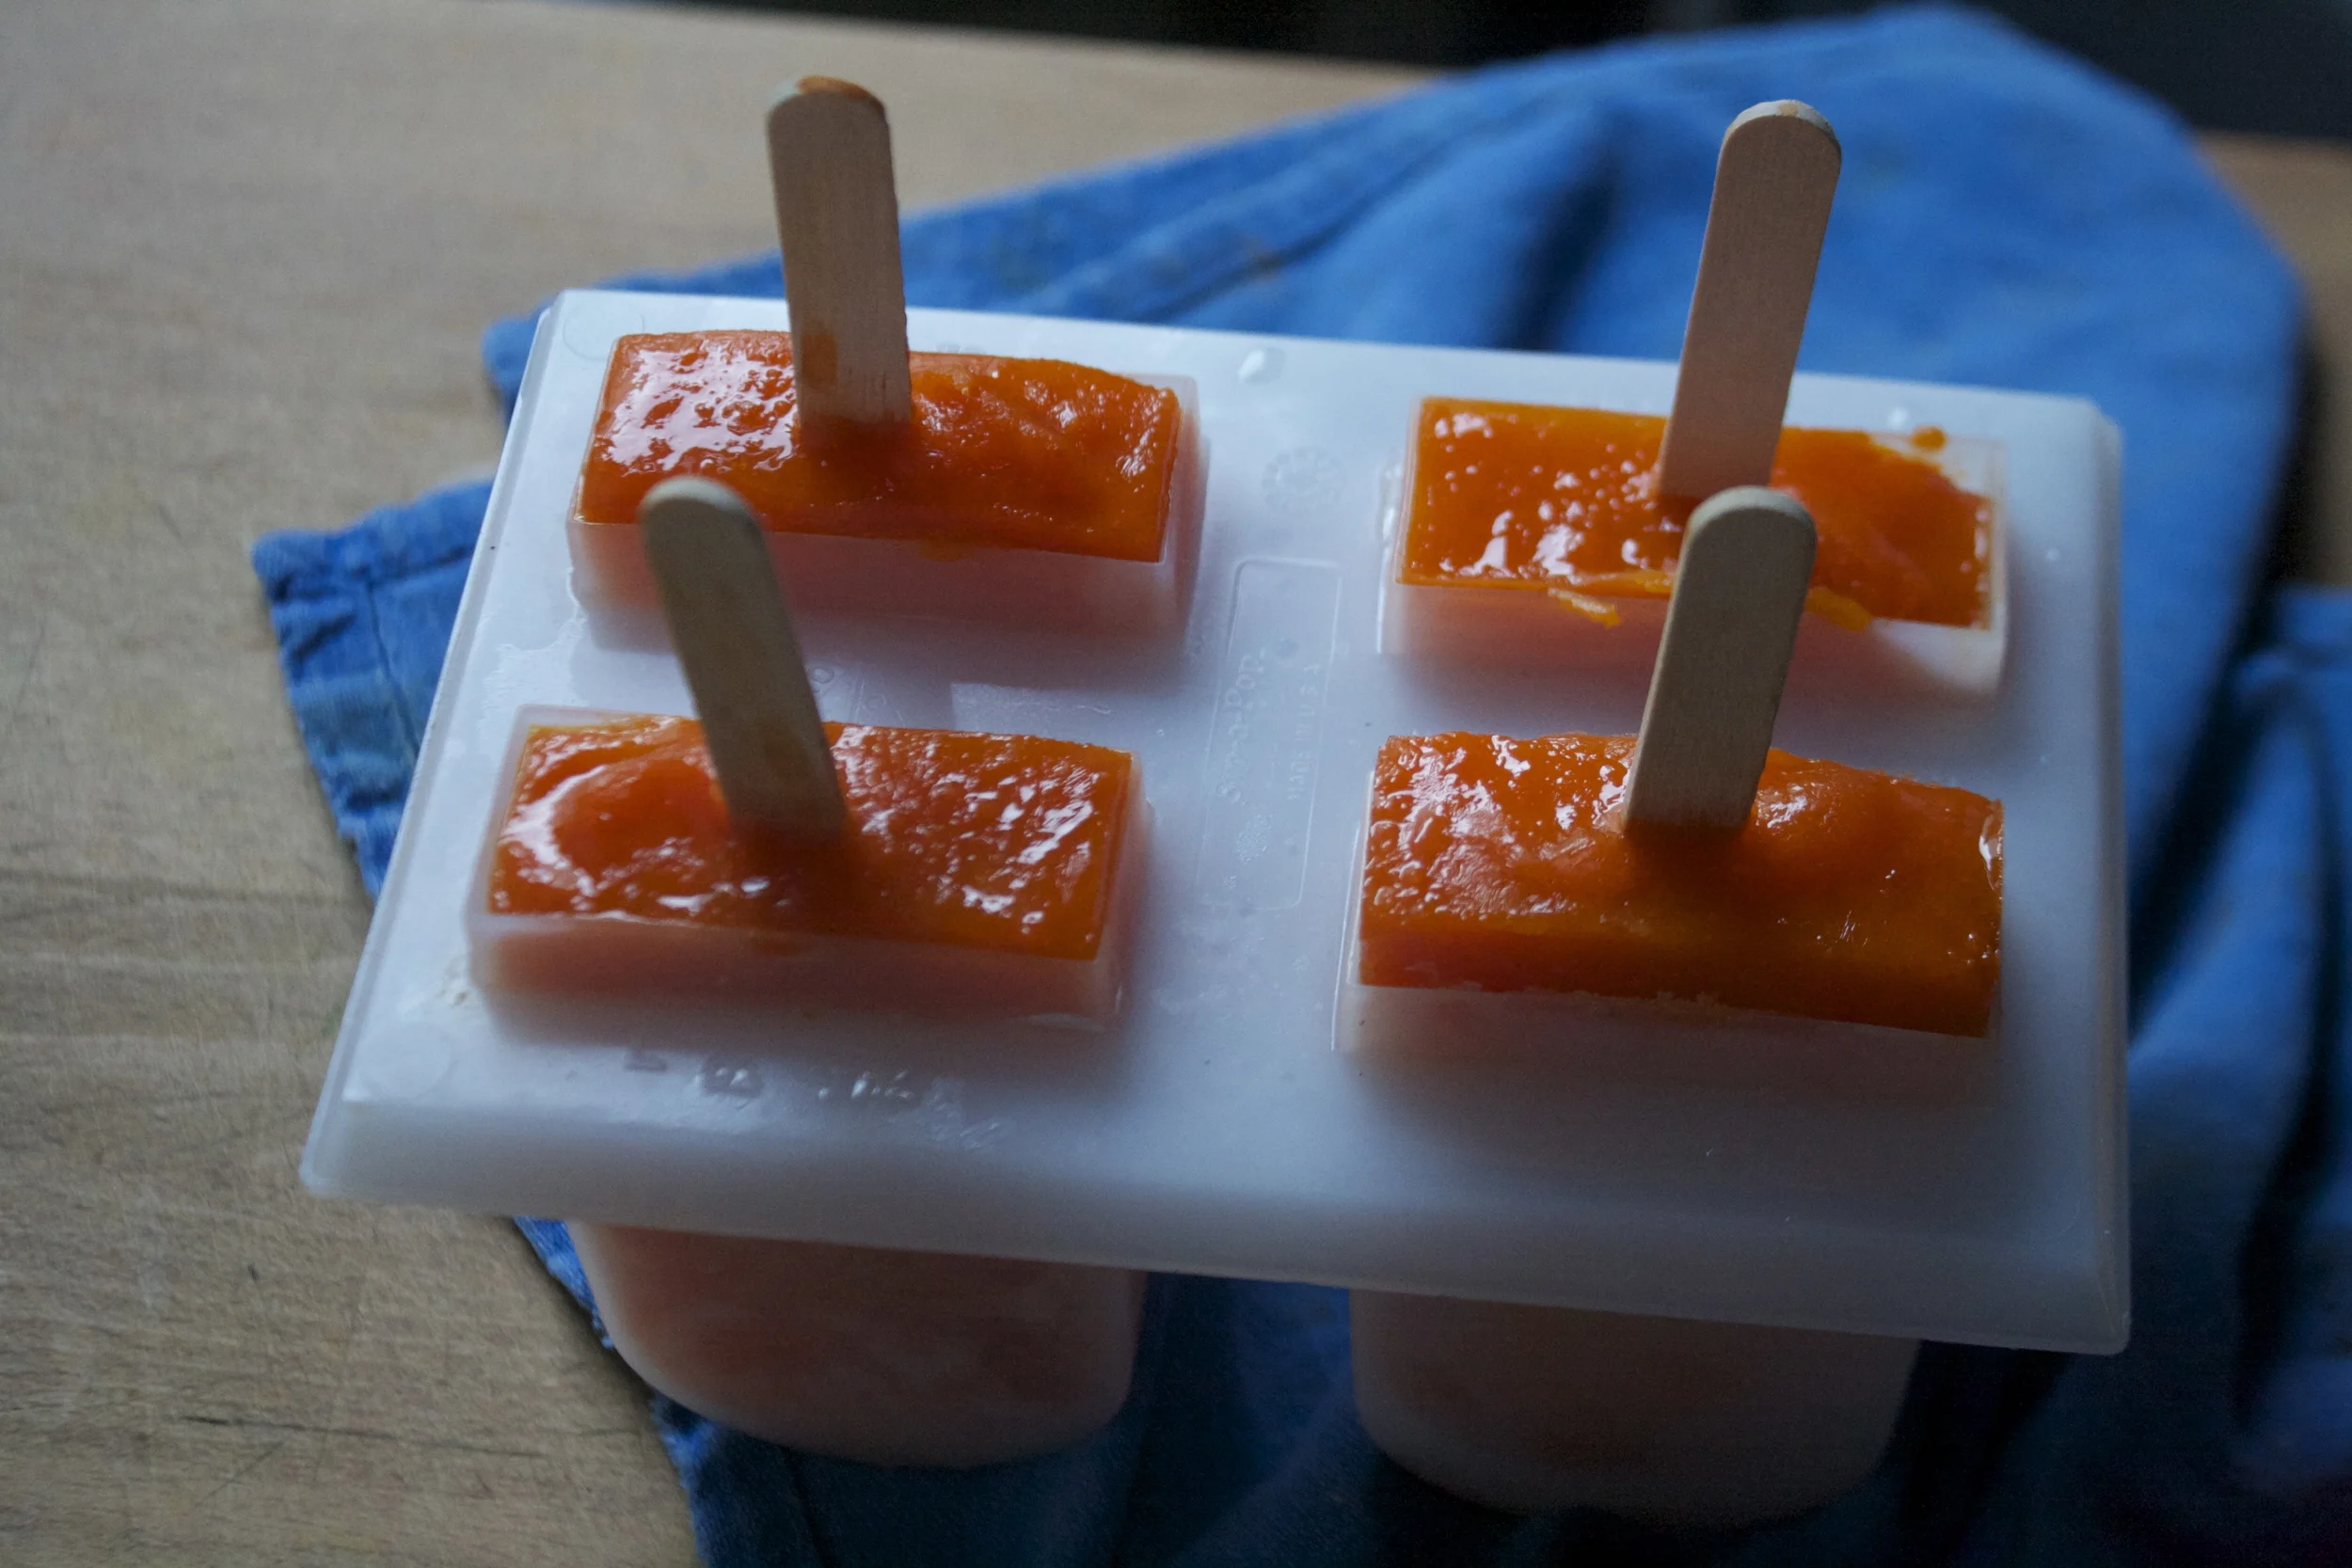
Grab your mold and pour blended mixture into it.. Because the mixture is thick, you don’t have to wait to stick the sticks in so go ahead and do that now.
And into the freezer they go!
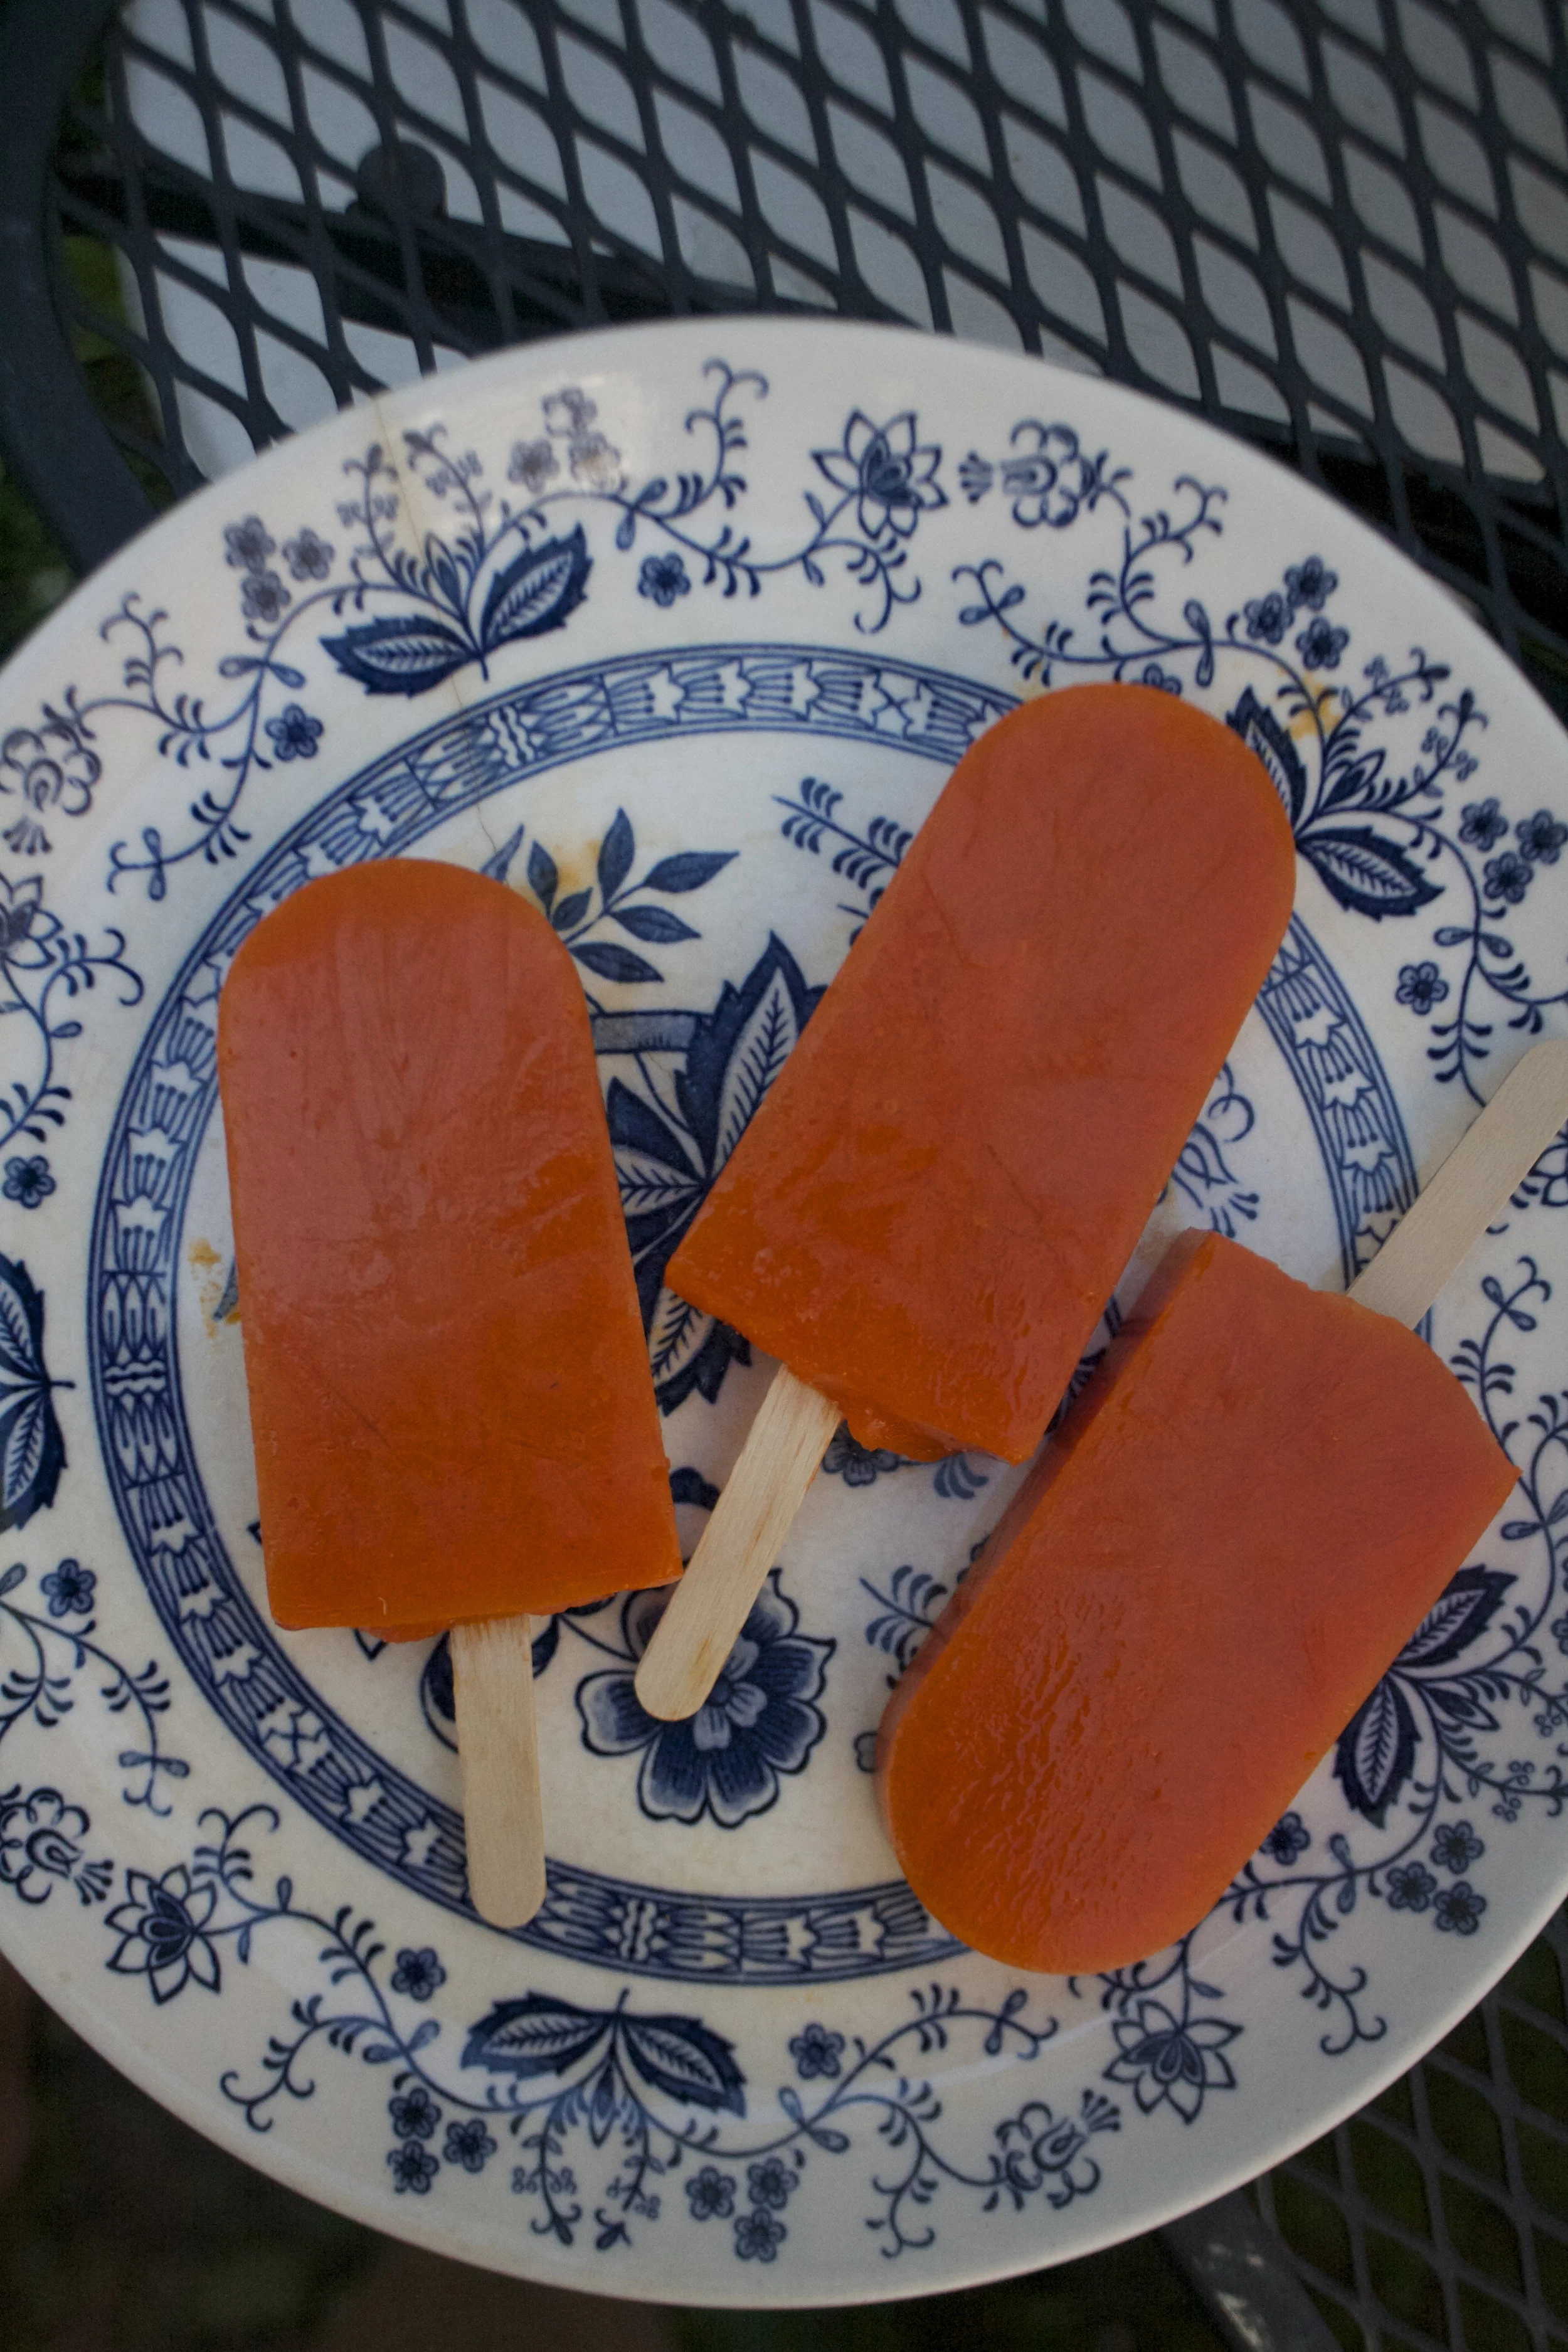
Serious popsicle goodness right there.
Happy Popsicle Week. Go ahead and make them all!
-C
Makes about four or five 3.5 oz popsicles
3 medium sized carrots
1 orange (zest and juice)
1-2 teaspoons fresh ginger
water
Note. I did not use and sweetener and did not miss it but if you really think you need it, add a little bit of honey or sugar. But really, they are sweet enough so maybe give them a chance without it.
Start by chopping the carrots up into coins and stick them into a pot with enough water to just about cover the carrots. Stick on stove on medium heat and place a lid on the pot. Cook carrots until tender.
While that’s happening, zest and juice orange and grate up the fresh ginger. (I used 1 teaspoon of ginger at first, but after I blended it, I decided that I wanted a little more so I added another teaspoon)%u00a0 Once the carrots are soft, dump in all the juice, zest and ginger. keep on heat for a few more minutes to let the flavors all meld together.
%u00a0And now dump the pot of carrot goods into the blender and blend the crap out of it until smooth. (add in a splash or two of water if needed. Taste your puree and if you want more ginger, add it it.( can also decide now if you want any sweetener..
Now pour the mixture into you popsicle molds and follow the mold directions on how to use it (add popsicle sticks and stick it in the freezer)
Freeze until frozen.
Remove from freezer and let sit until pops slip from mold.
I have a bag of coconut flour that I need to use up so I have made coconut snack cake a few times the past couple weeks. Once with orange instead of lime. Once I added chocolate chips. This time I stepped it up made a little glaze action, toasted a little coconut for some extra coconutiness and took these here pictures and wrote down the recipe. Just. For. You.
Not that I don%u2019t know already that my snack cake creation is good, but I guess it was just super A+++. I threw this one together right before the mr and I headed down to PA to hang with my dad. As soon as he (and sister and nephews) started in on it, well the responses were more then average. My dad even snuck a piece off and hid it for later. They really, really, really were into it. Wanted me to make another right then and there. Normally I would but my dad doesn%u2019t keep coconut flour on hand and I don%u2019t make it a habit to travel with any myself. (I might have to change that.) Next time he will know to stock the coconut flour.
I didn%u2019t realize my people were such coconut people. Good thing for them that I like coconut people. As a matter of fact, I consider myself a coconut person. And coconut is not code for awesome, but I am that too. HA
Anyway enough about me. Coconut snack cake is what you want to know about. It is soft and dense. Moist, not overly sweet. Lots of lime and coconut flavor and is just perfect for snack time. Eat it with a fork on a plate with coffee or tea or grab an piece and eat it walking down the street while thinking about green leaves and warmer weather. Or wherever and whenever. If you make it then it%u2019s up to you when and where you eat it. That only seems fair.
Now to the snack cake of your coconut lime dreams.
The stuff. Gonna need all purpose flour, coconut flour, salt, baking soda, baking powder, a couple flax eggs, some warmed coconut oil, plant milk, brown sugar, vanilla extra, apple sider vinegar, a couple lime, some powdered sugar, and some lightly toasted shredded coconut.
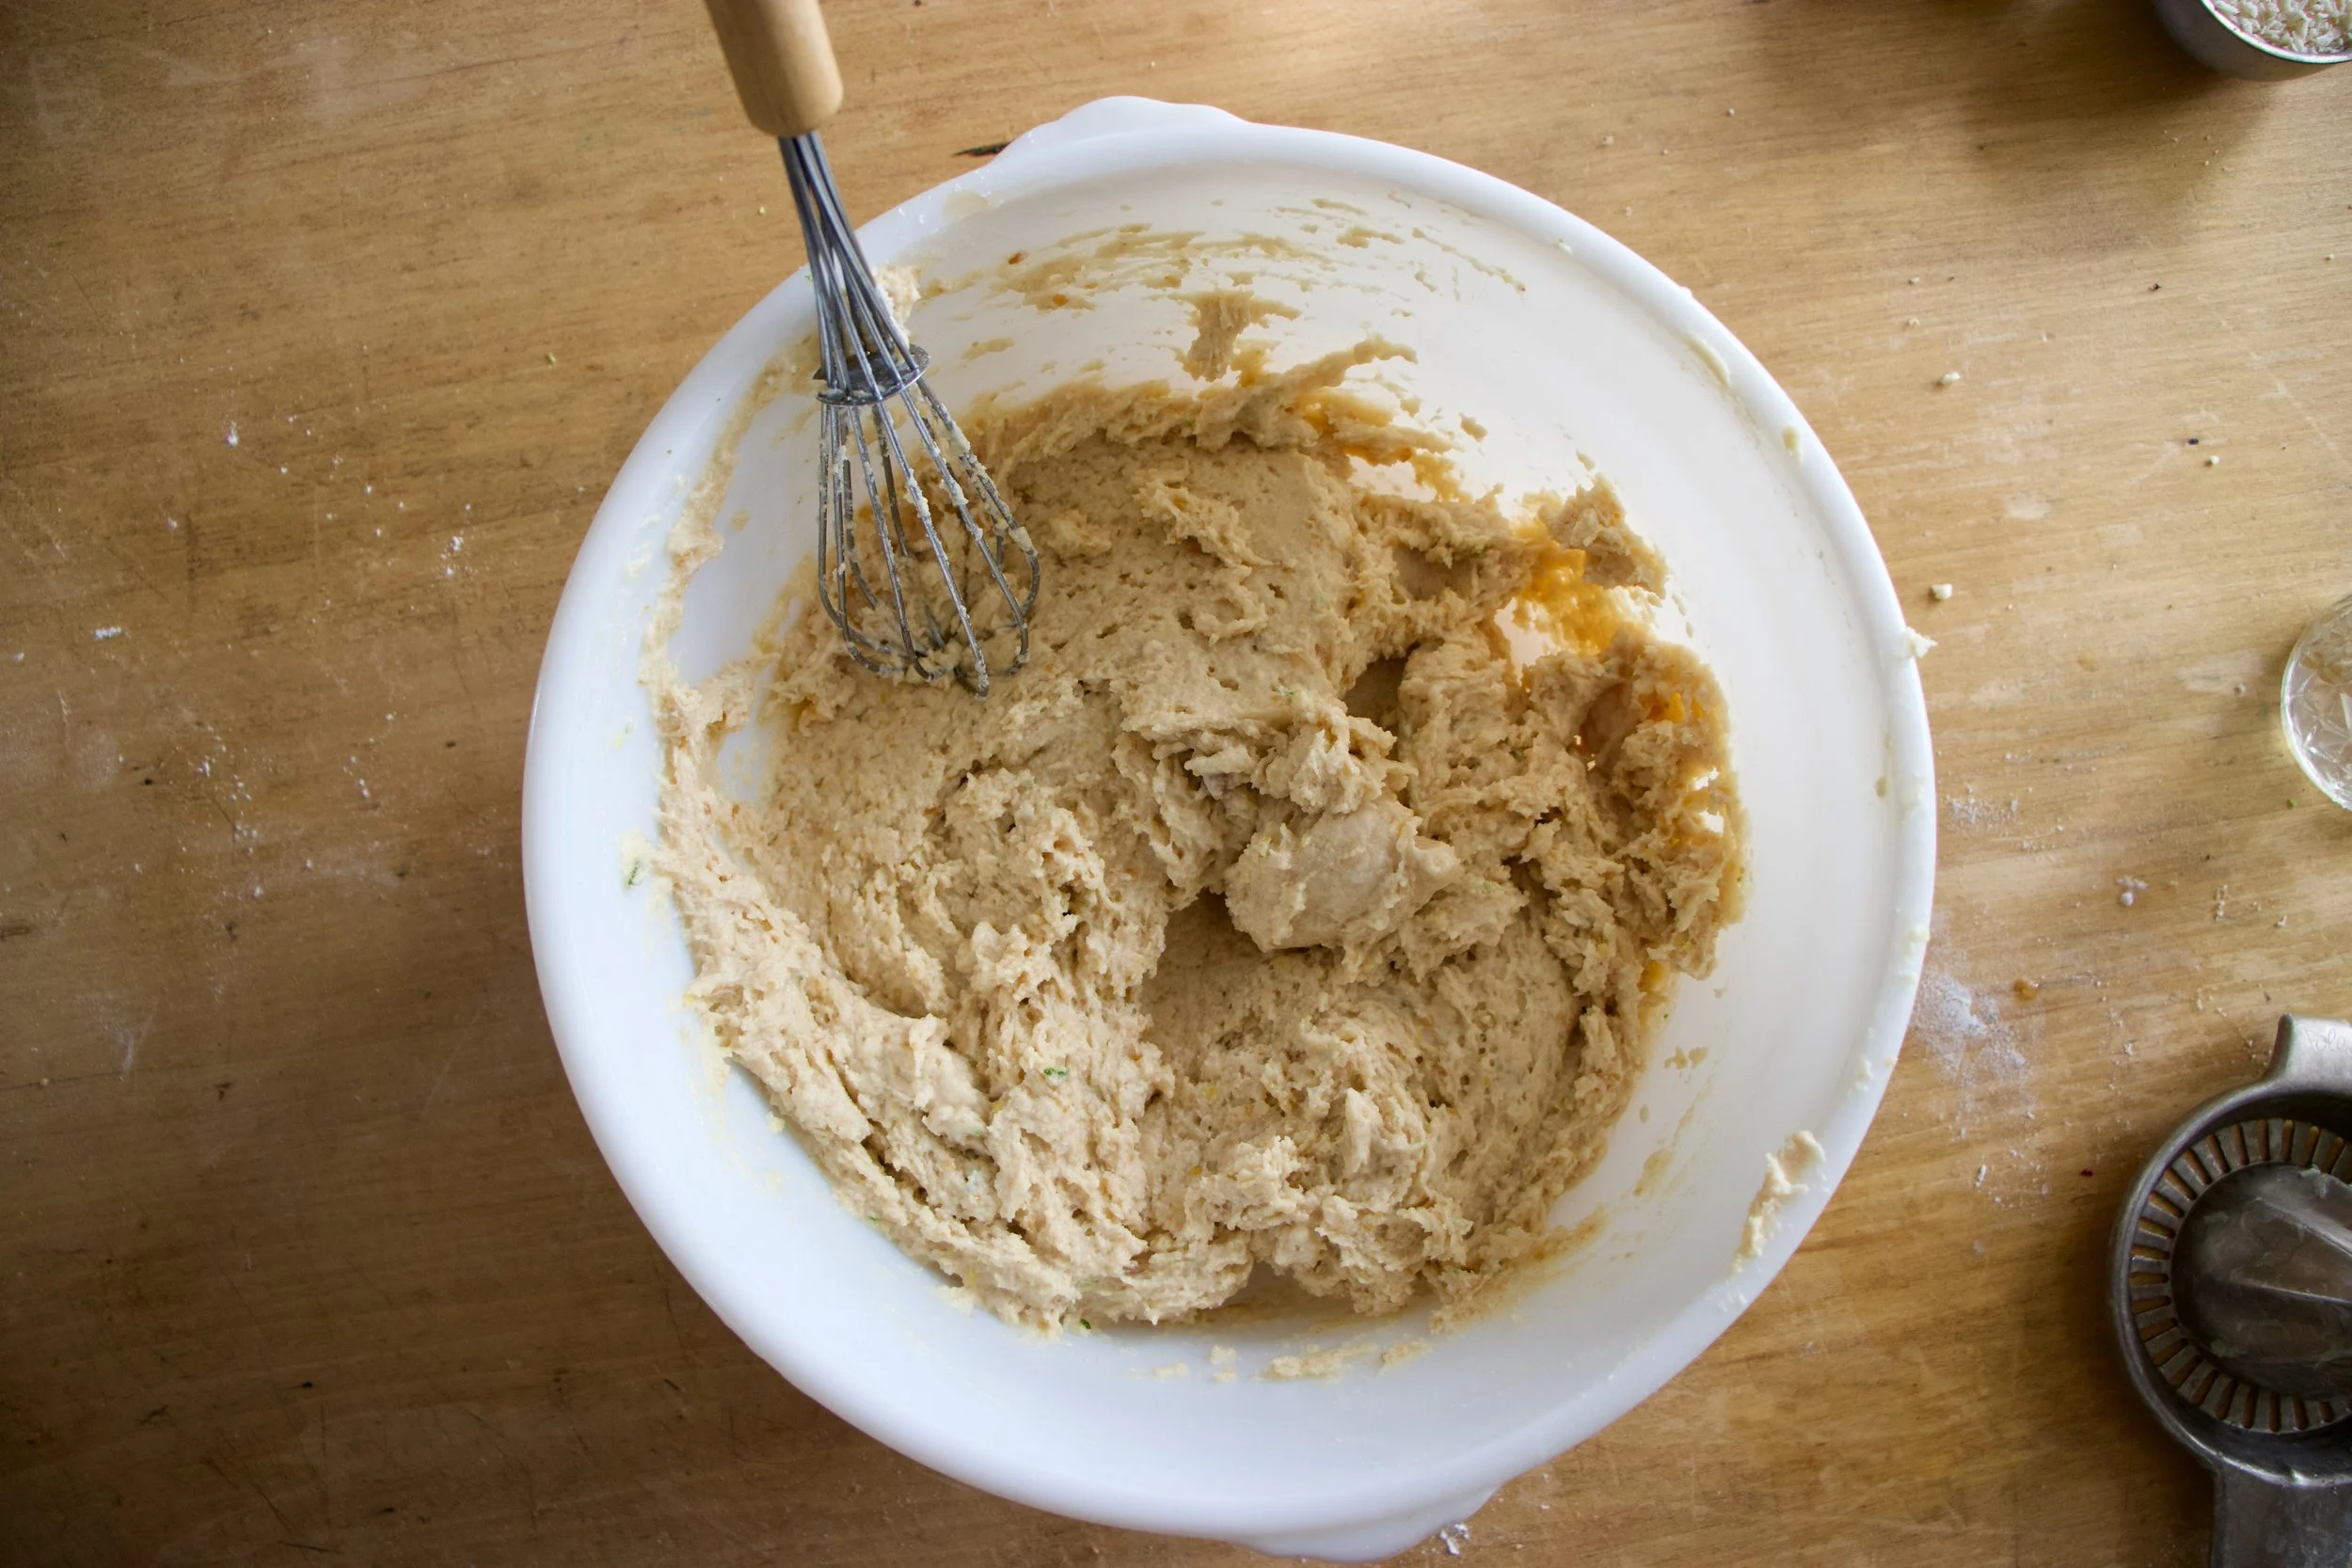
Grab a big bowl. Add in the brown sugar, flax eggs, warmed coconut oil, apple cider vinegar, and vanilla. Mix it all up until evenly incorporated.
Dump in the flours, baking soda and powder, and salt. Zest in lime, squeeze in lime juice and start to mix. Add in the milk as you are mixing.
Cake batter mixed and done. Now to bake it.
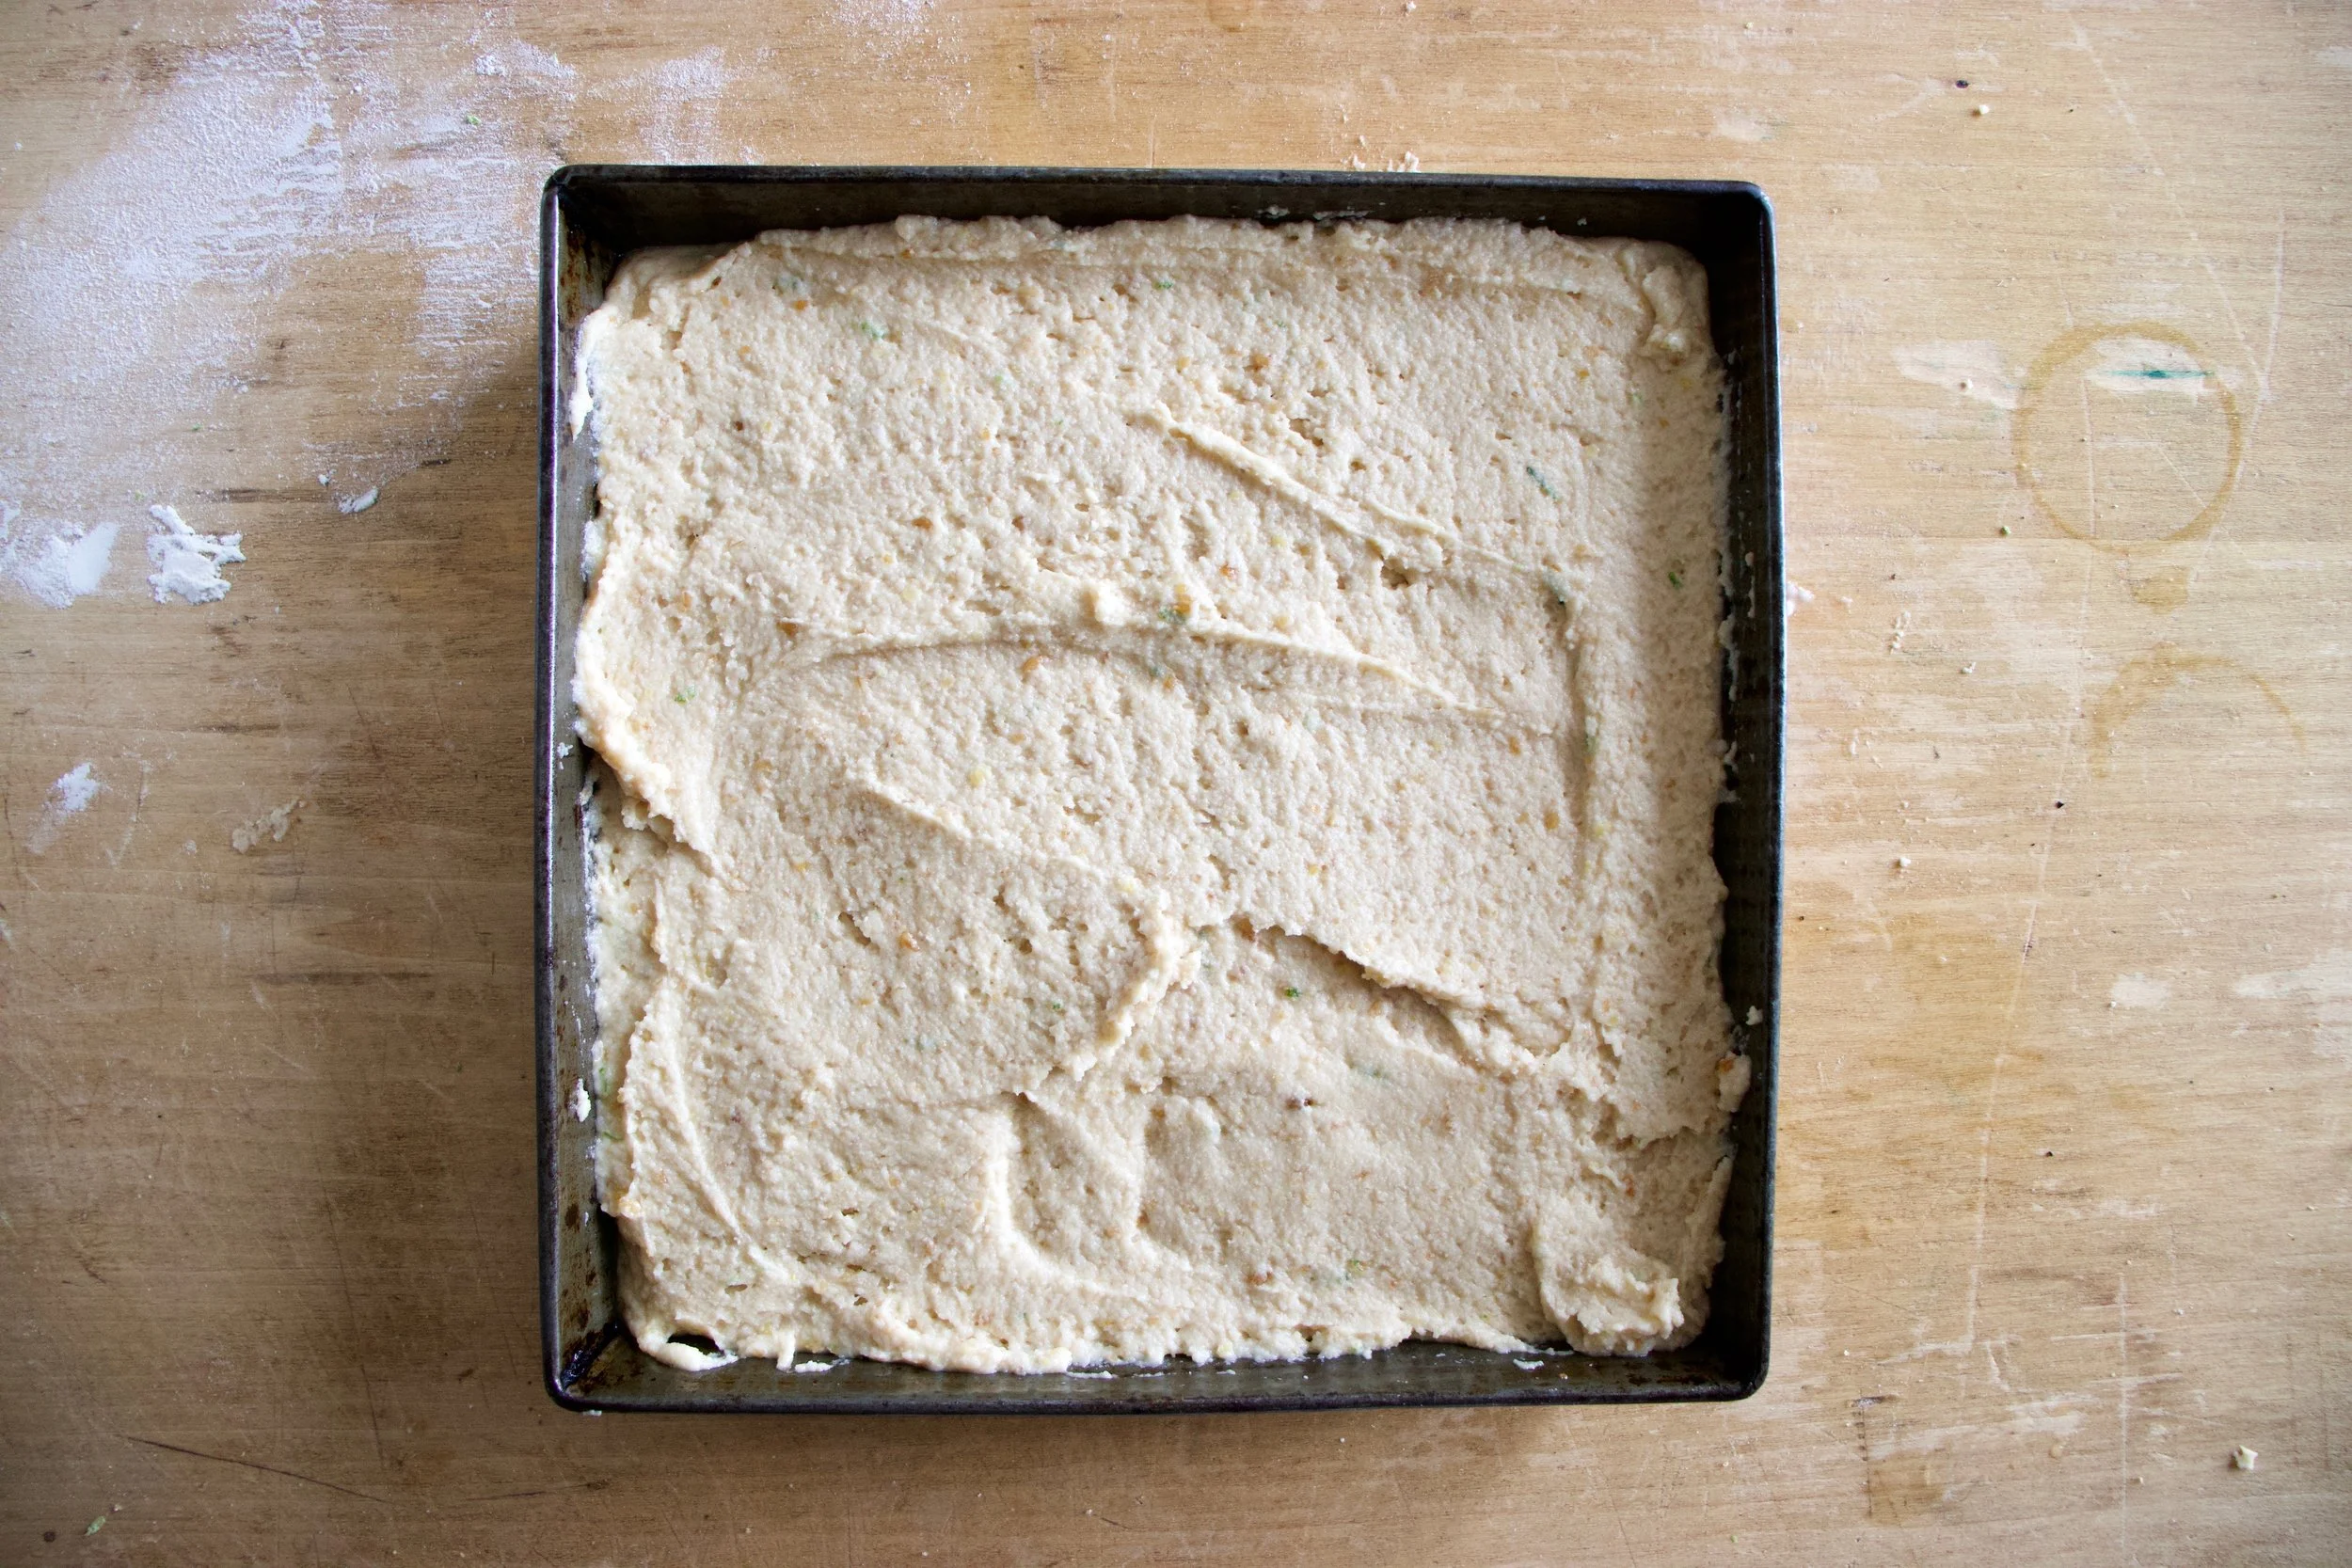
Dump the cake batter into a well greased baking pan and level it off with a spoon or spatula.
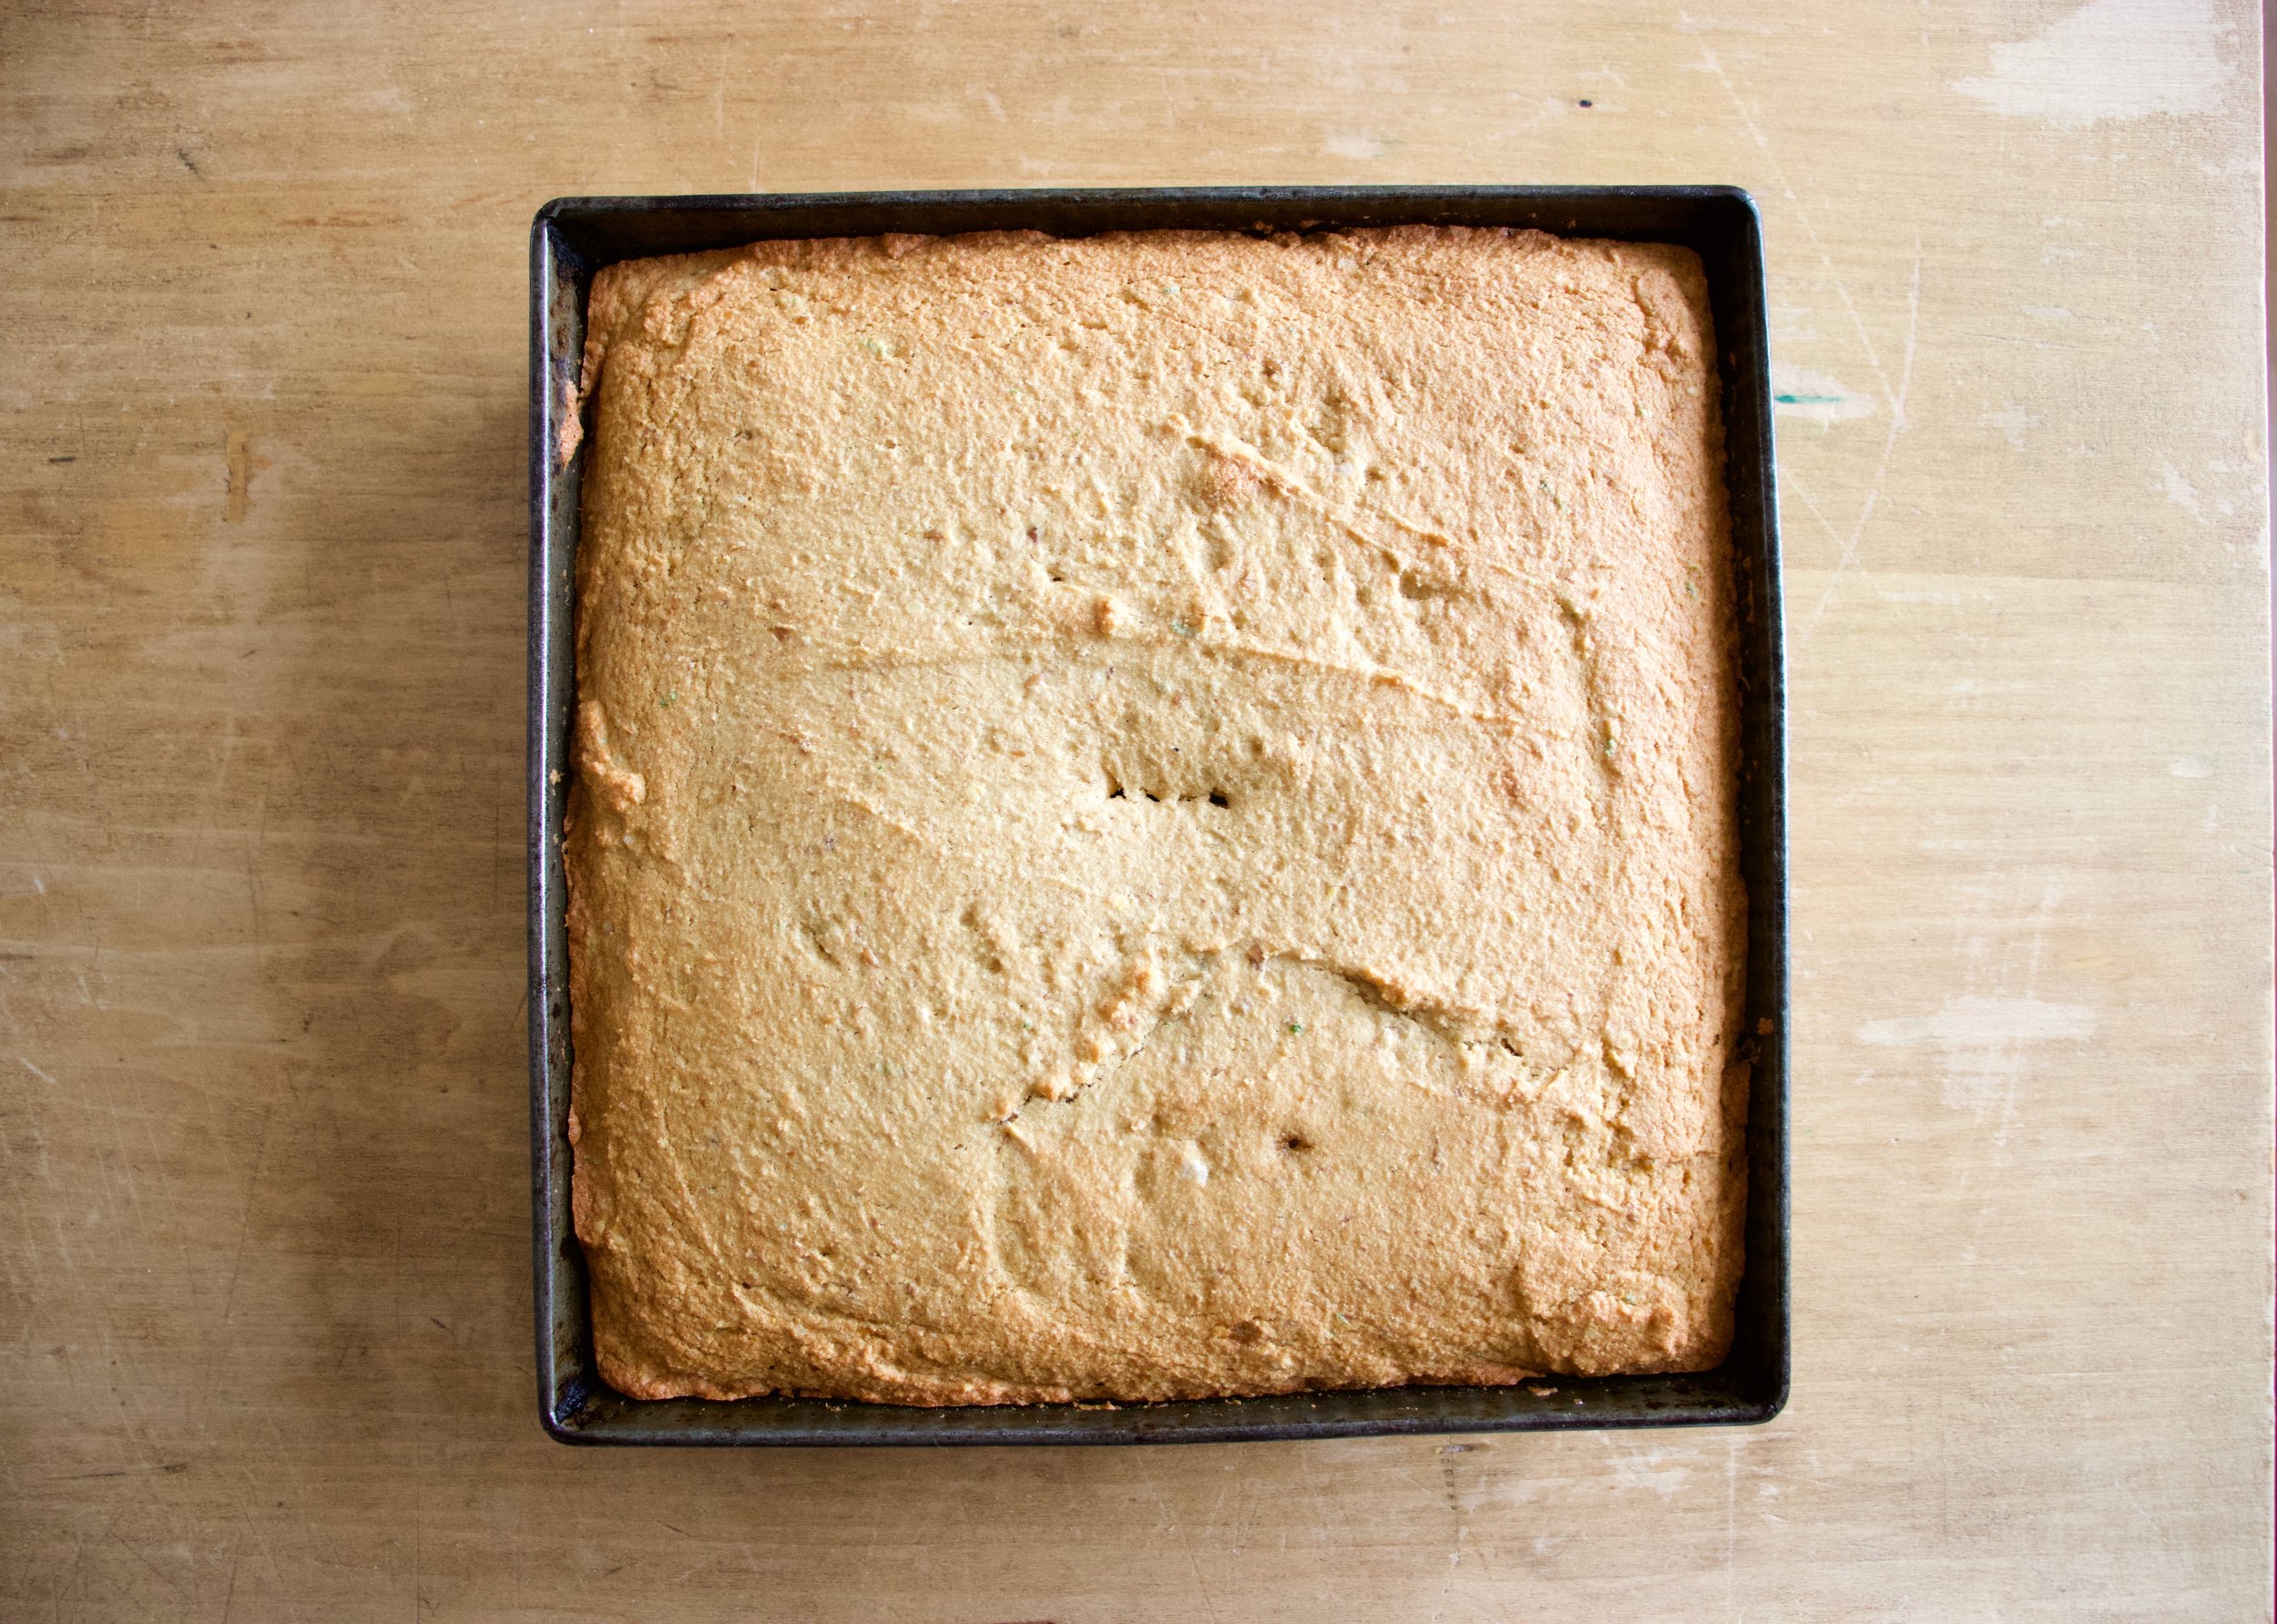
Now it%u2019s oven time to bake into a great and well cake.
A cake out of the oven, great and well. Golden brown and smells of all the goodness that a coconut cake could possible smell.
While cake is cooling, which it should be now, make the glaze. Powdered sugar, lime zest, and lime juice. Mix until it%u2019s glazy.
Pour the glaze all over cooled cake.
Don%u2019t forget the shredded coconut. Get it on before the glaze starts to set.
And then it%u2019s just the matter of cutting cake%u2026%u2026.
You know once you cut it, that means snack time right? Coconut lime snack cake for all of your coconut time, lime time, hungry snack time needs.
Keep it good.
-C
Makes a 9×9 cake
1 1/2 cups all purpose flour
1/2 cup coconut flour
3/4 packed cup brown sugar
1 teaspoon salt
1 teaspoon baking soda
1 teaspoon baking powder
1/2 cup coconut oil (warmed to liquid)
1 1/4 cup plant milk (I used almond)
2 flax eggs (2 tablespoons ground flax seeds with 1/2 cup warm water)
1 teaspoon vanilla
1 tablespoon apple cider vinegar
A lime
For the glaze
3/4 cup powdered sugar
a lime
1/4 cup or so toasted shredded coconut to sprinkle on top (optional)
Preheat oven to 350
In a large bowl, mix together the bbrown sugar, flax eggs, warmed coconut oil, vanilla, and apple cider vinegar until completely incorporated. Next dump in the flour, coconut flour, salt, baking soda and baking powder. Zest the lime into bowl. Start mixing, adding in the juice of the lime and the plant milk. Mix it all together until completely incorporated.
Dump mixture into a well greases 9×9 baking pan and level off with a spoon or spatula. Place into oven and bake for 30-35 minutes or until golden brown and a tester stuck into the middle of cake comes out clean.
Once baked, remove from oven, let cool in pan for a few minutes then carefully remove cake from pan and let cool on a wire rack.
While cake is cooling, make the glaze. Just zest other lime into powered sugar then add the juice (or as much juice as you needed) of the lime until a pourable glaze forms. If your lime is not particularly juicy enough and the glaze is still really thin, just add a splash of water to thin out as needed.
And when cake is completely cooled, pour glaze all over cake and cover with toasted coconut flakes.
Now cut. And eat.
Store left over cake in a air tight container for 3-4 days. Individual pieces freeze well for all your future snacking needs.
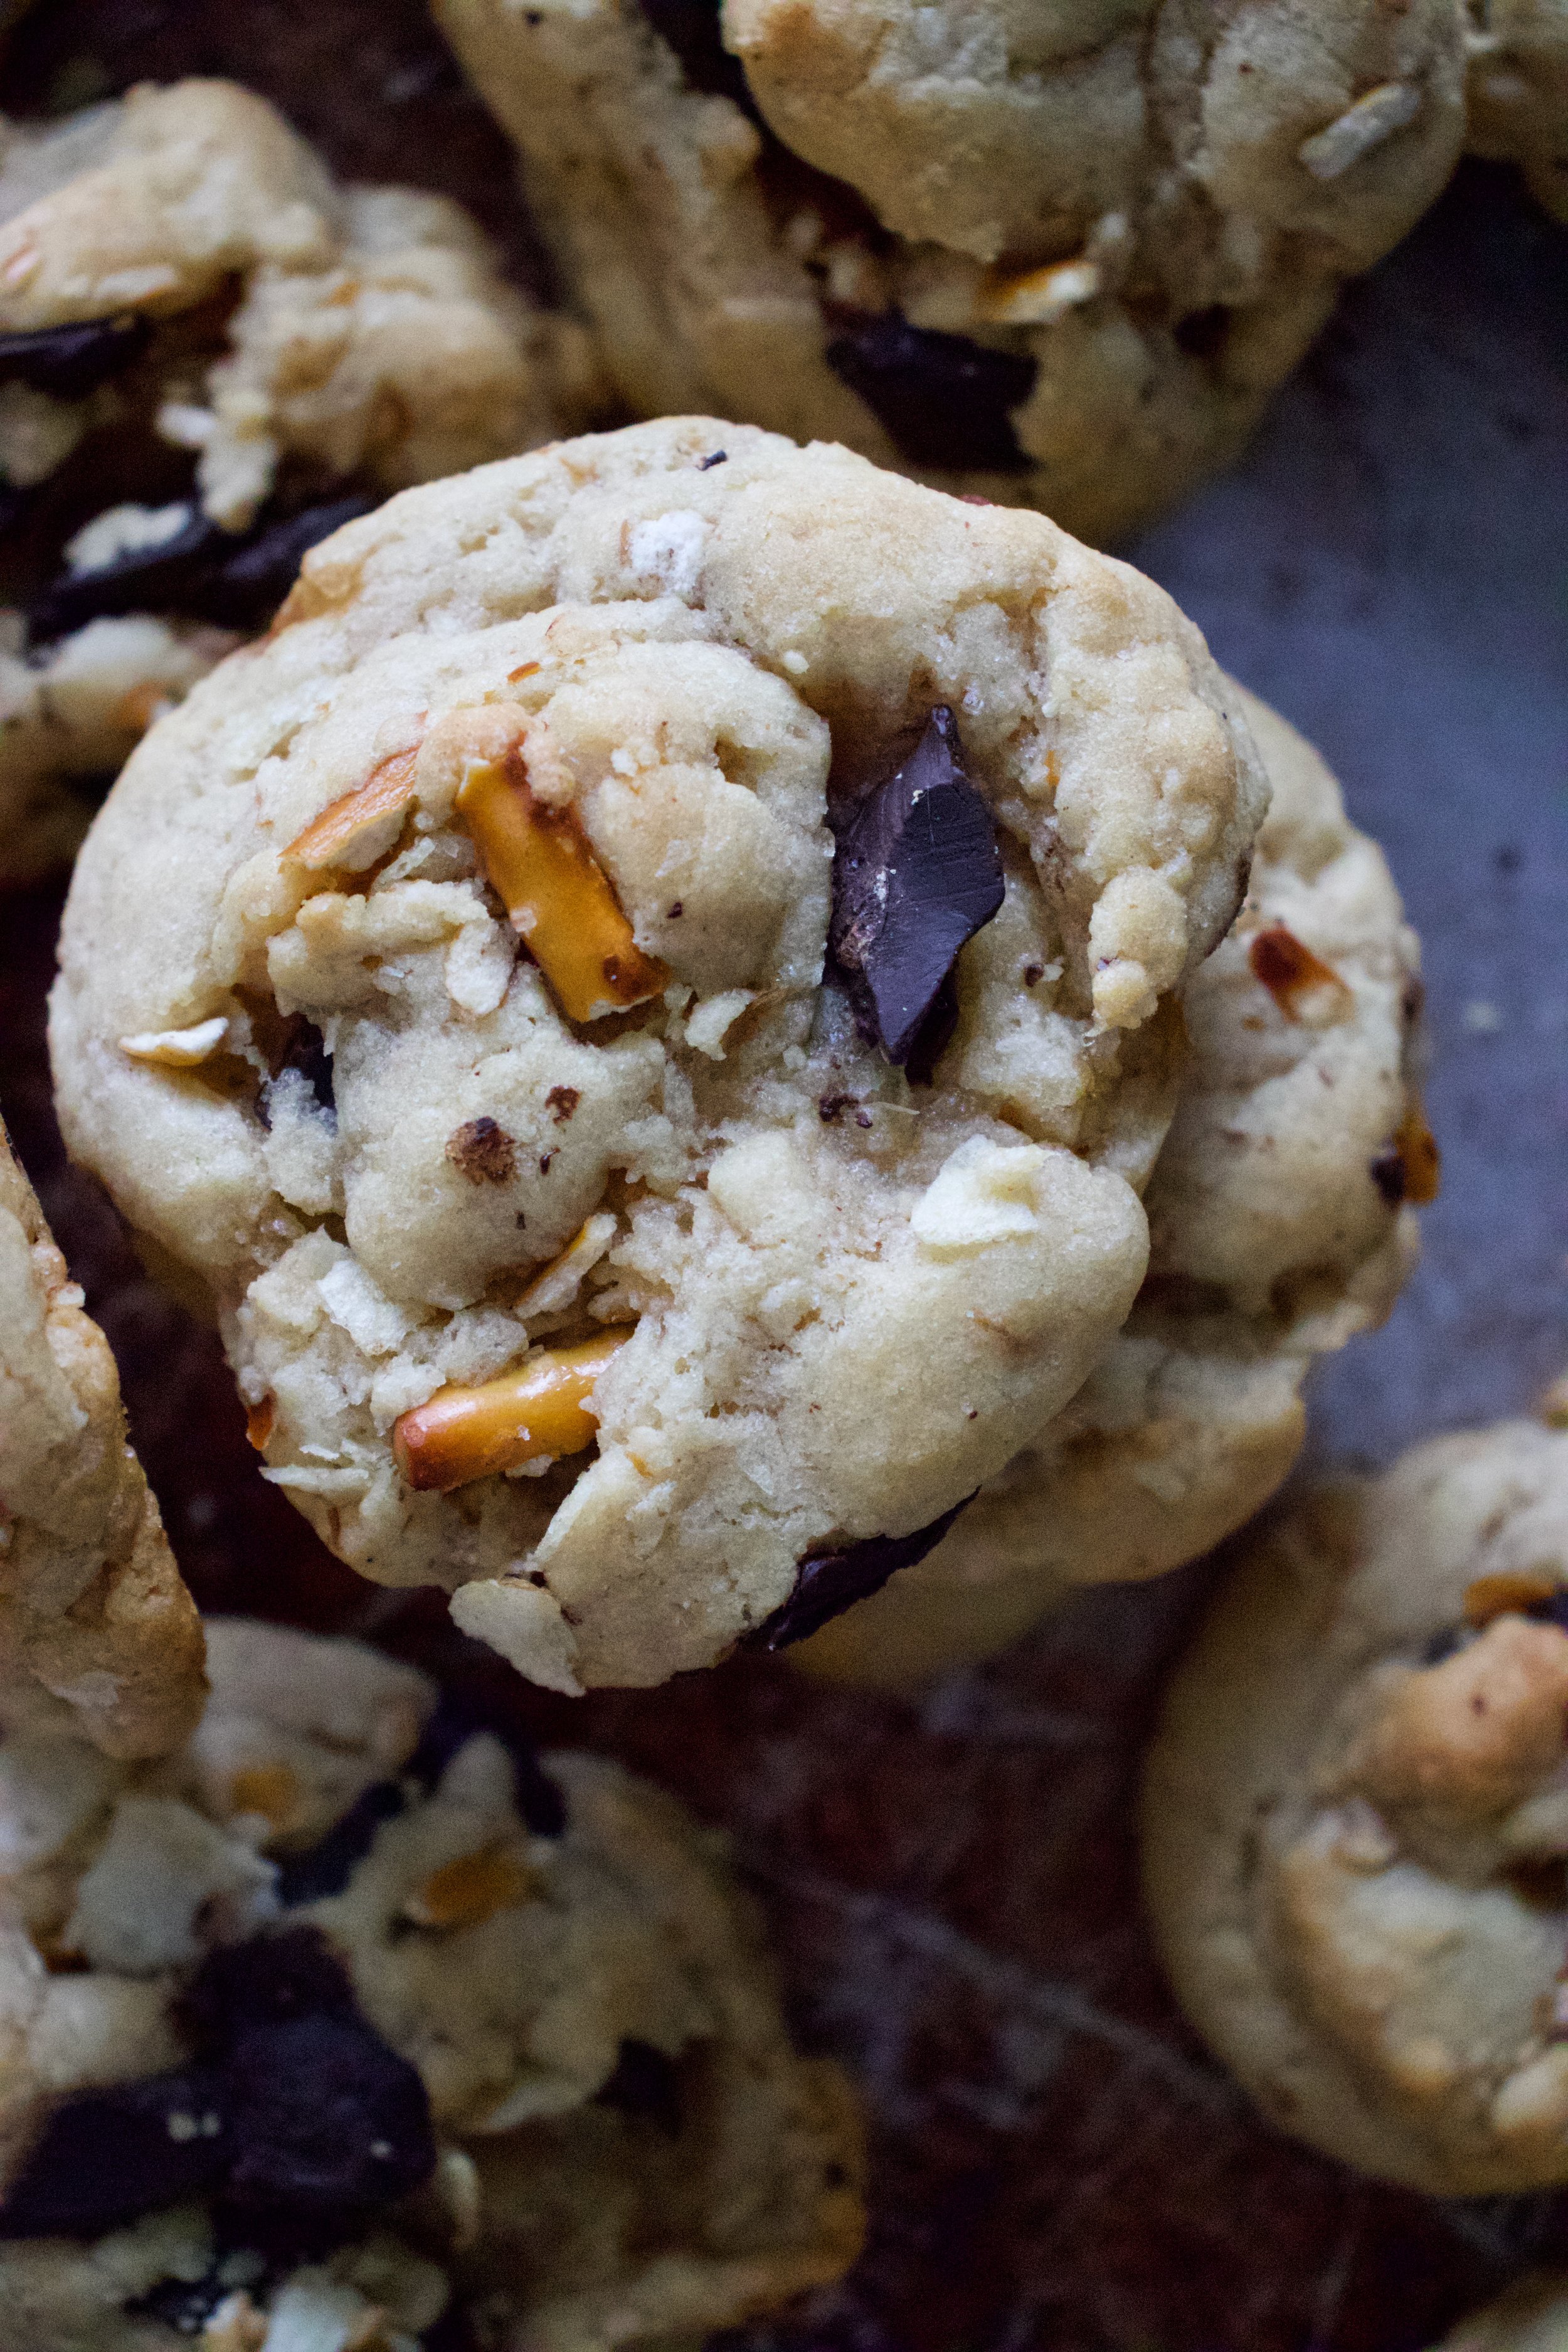
What with all the holiday and family get togethers we have had over here at my house the past few week, we have had quite a few bags of chips and pretzels left over. Always almost empty%u2026 Always dumped into the compost because I mean, I am not so keen on seeing bags of little bits of chips and pretzels in the pantry that I know will never get eaten. Plus it is not like I am saving carrots or grapes or anything I would eat, it%u2019s junk food. But still. I hate the food waste. That is why I made these cookies. To not waste food. And because we had people coming over to the house for dinner and I cannot not have something for dessert. That would be just wrong. And lastly because I am pretty sure that chips and pretzel pieces only make a plain chocolate chunk cookie into an amazing sweet and salty cookie that will just blow your mind.
And I was right. I made the cookies, I feed them to the mr, the sister, friends and all the littles and they just couldn%u2019t get enough.
Current thought. I am sitting here typing and have come to the conclusion that I should start a bakery that makes cookies out of people almost empty bags of chips, like a Cheeto dust cookie, or a peanut butter Funyun cookie or chocolate chocolate chip Dorito cookie.
Yes. this is a good idea. Oh man, I am a genius.
But back to theeese cookies. Start with these. I%u2019ll let you know when I open the storefront to Garbage Cookies (that is what I’ll call the place) You can stand in line for the peanut butter Funyun cookies. I have a feeling about that flavor. Until then%u2026
To the cookies!
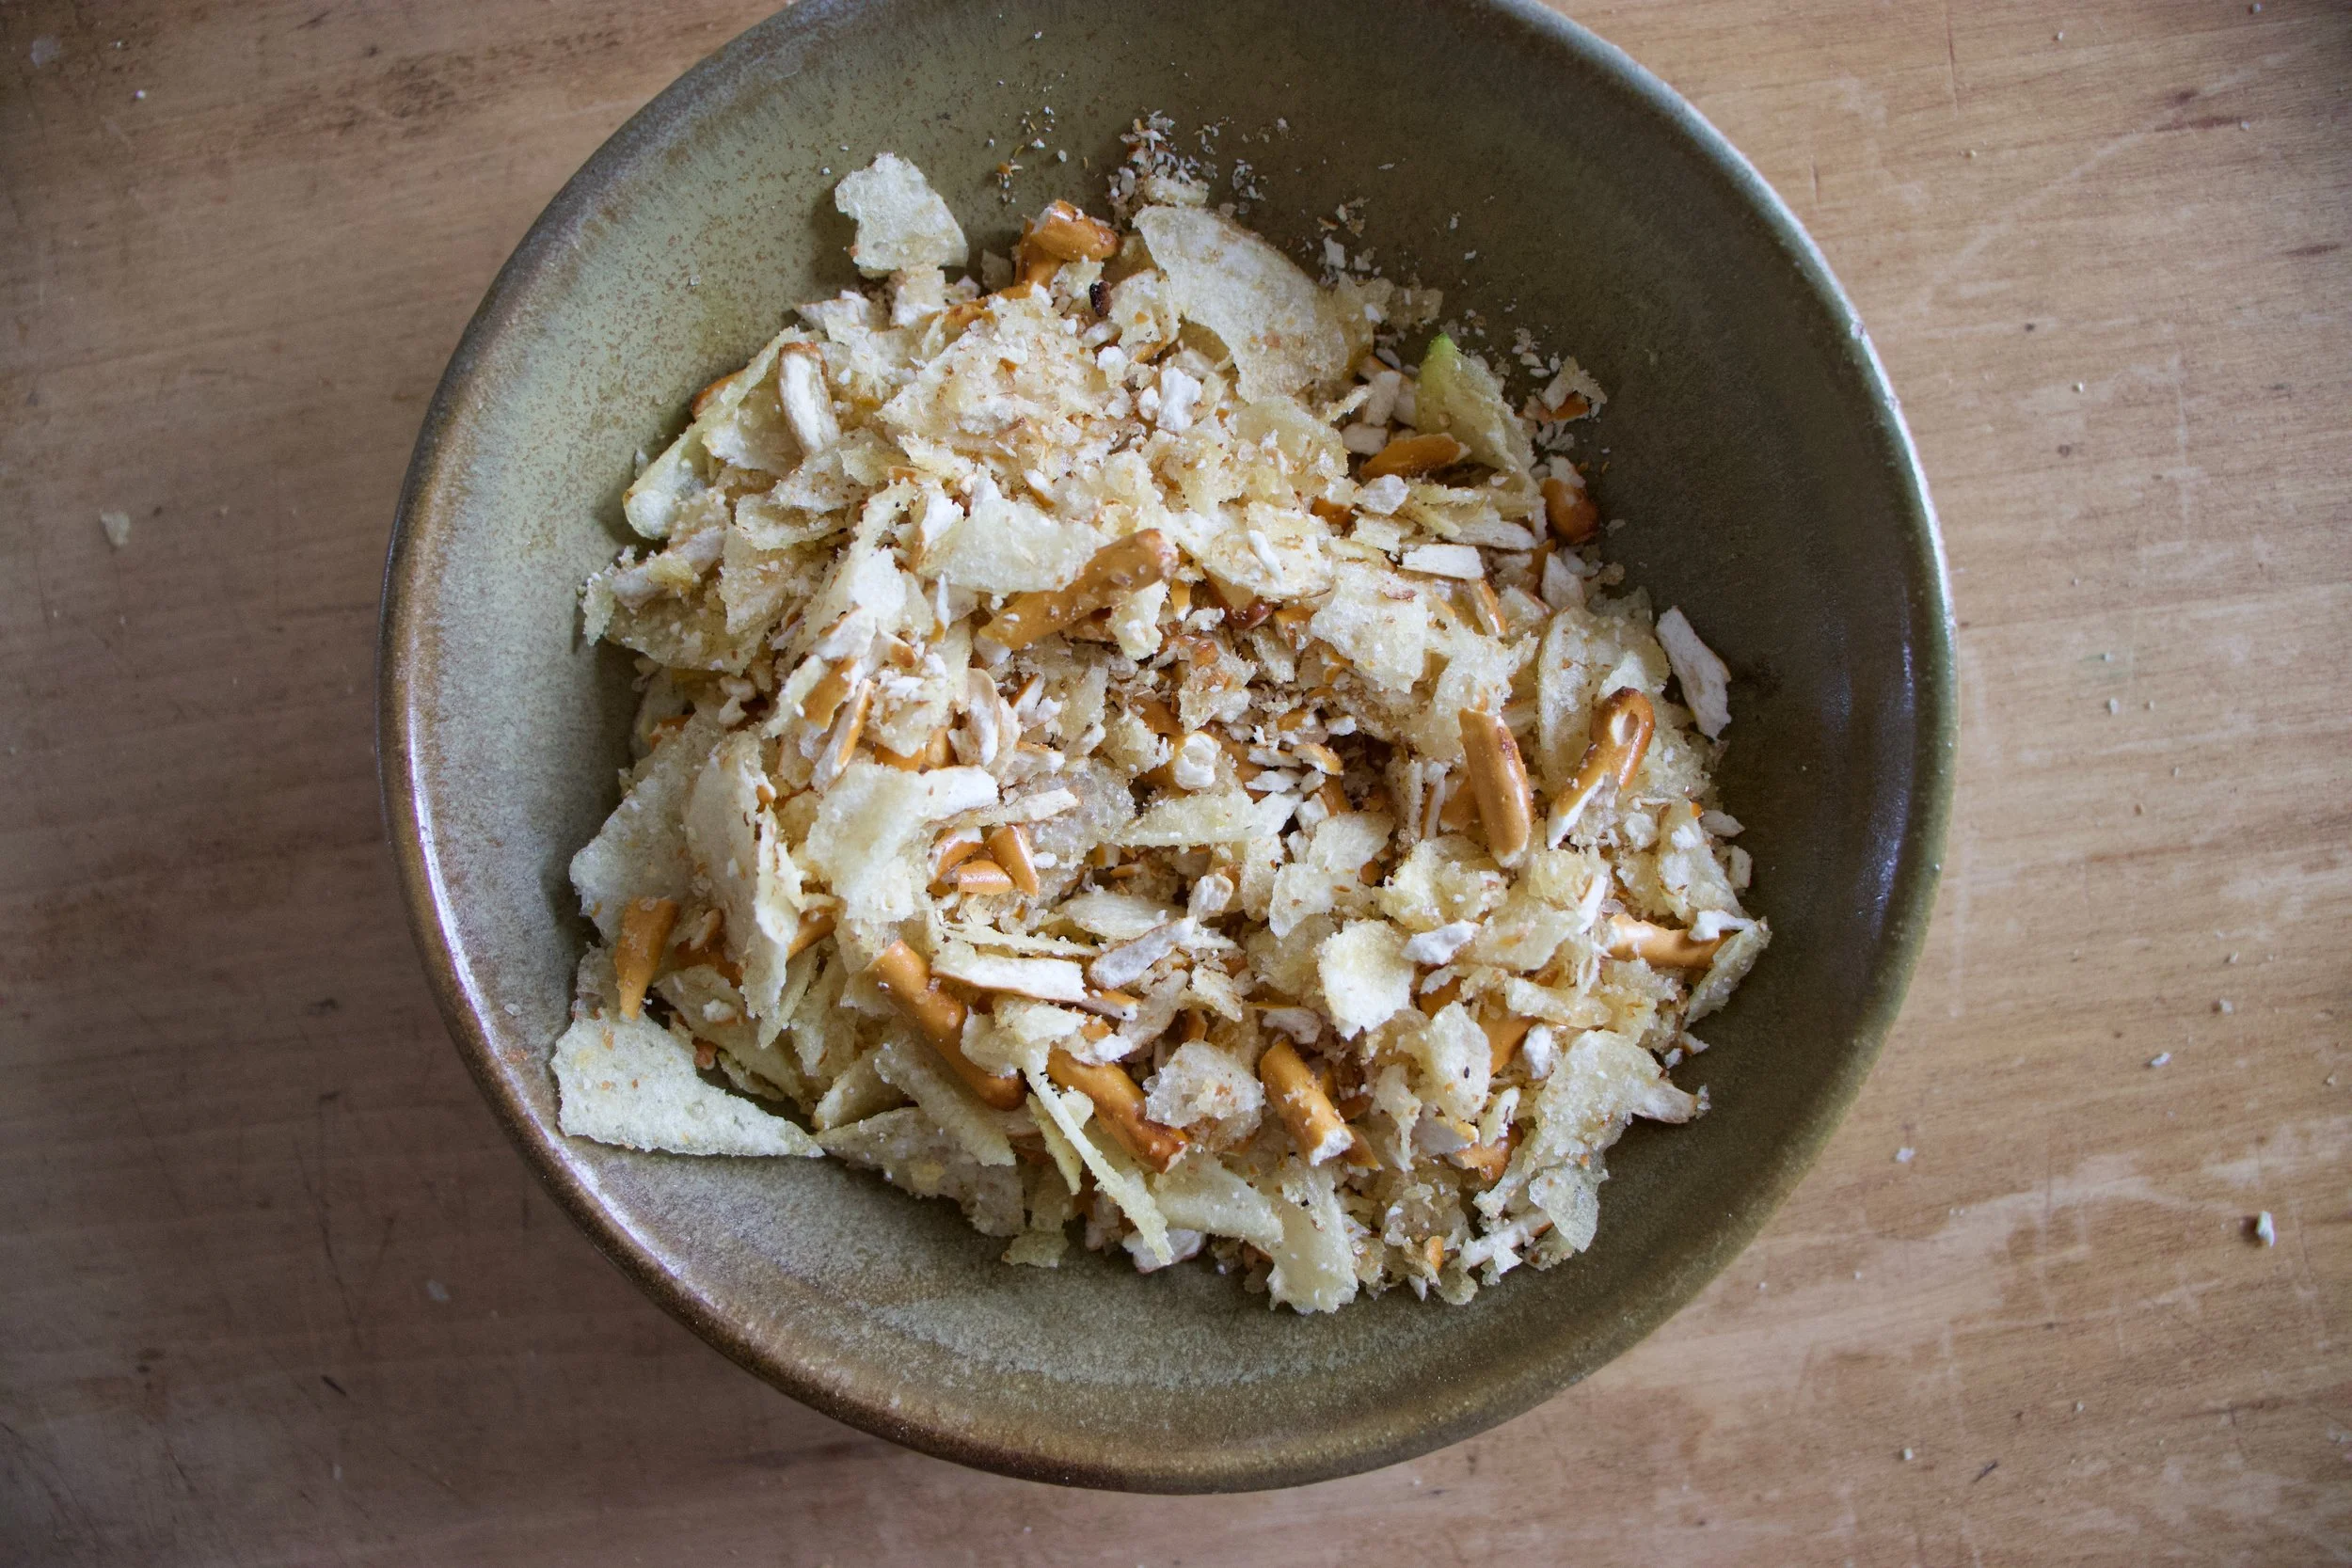
The stuff. The small bowl has flour, baking powder and baking soda. The big bowl has brown and white sugar. Then you need oil, almond milk, vanilla, chocolate chunks, some pretzels and some plain salted potatoes chips.
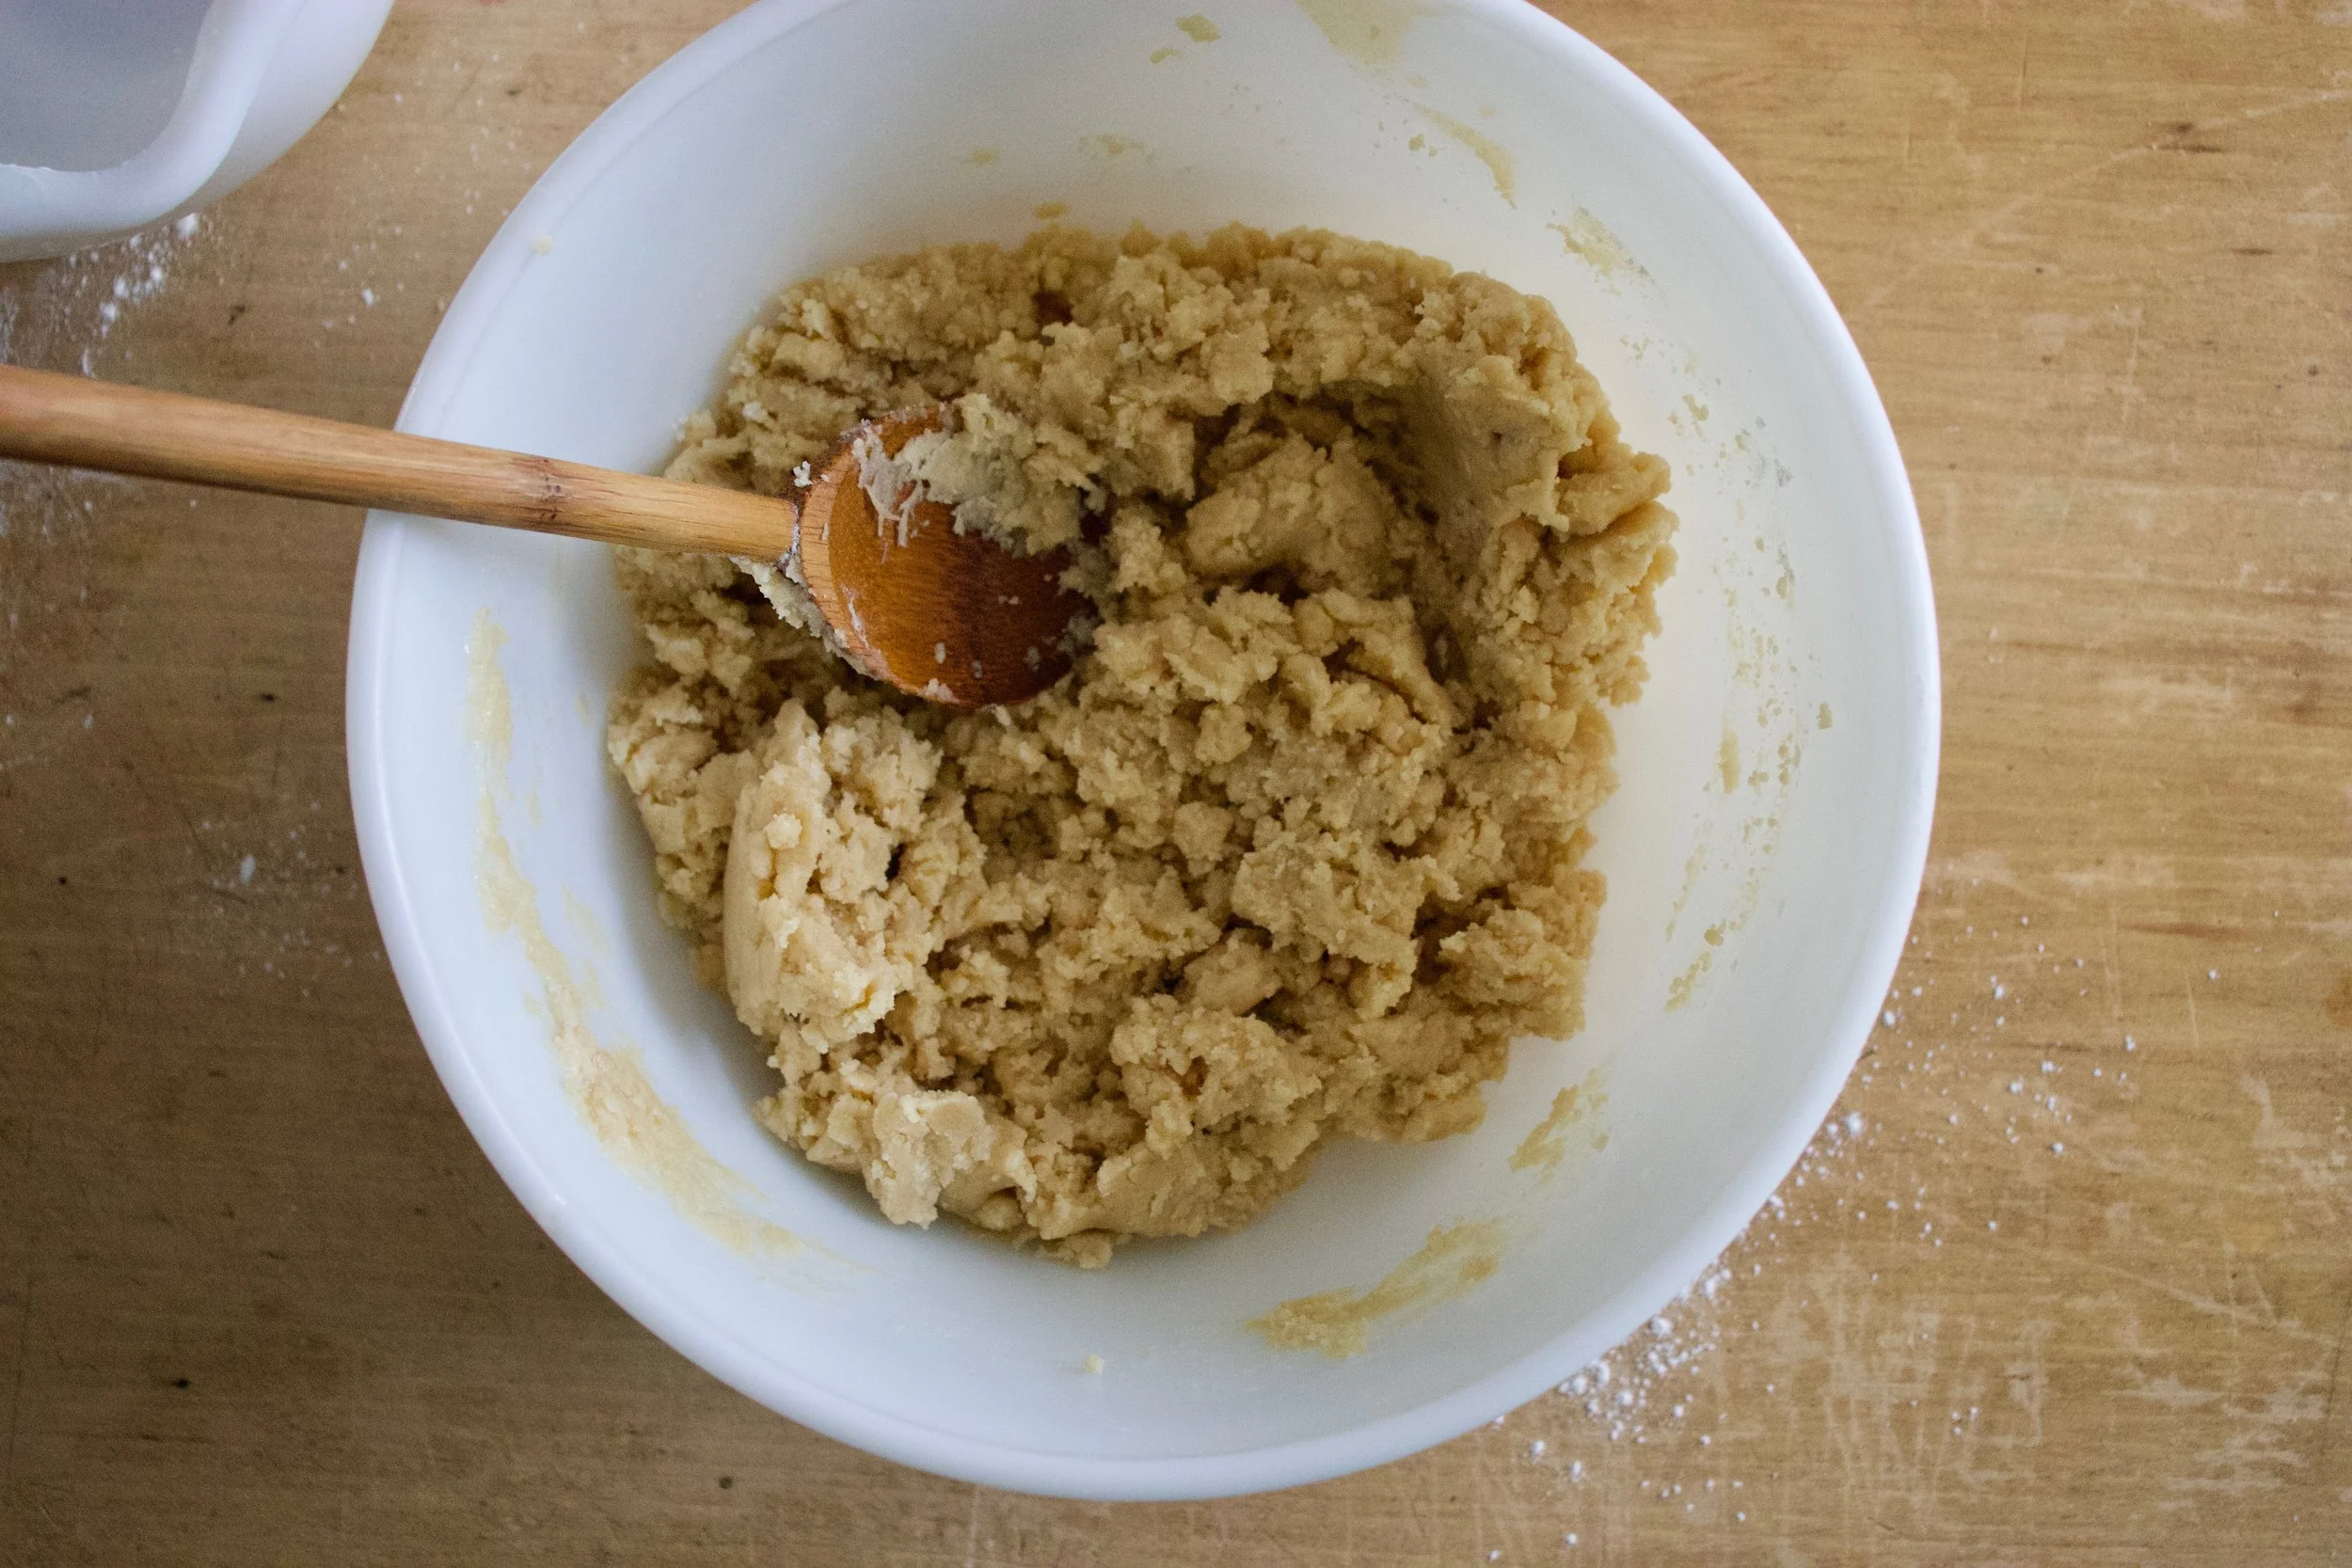
Start with the wet. Mix the oil, the milk, and the vanilla into the sugars until completely smooth
Whisk together the dry stuff.
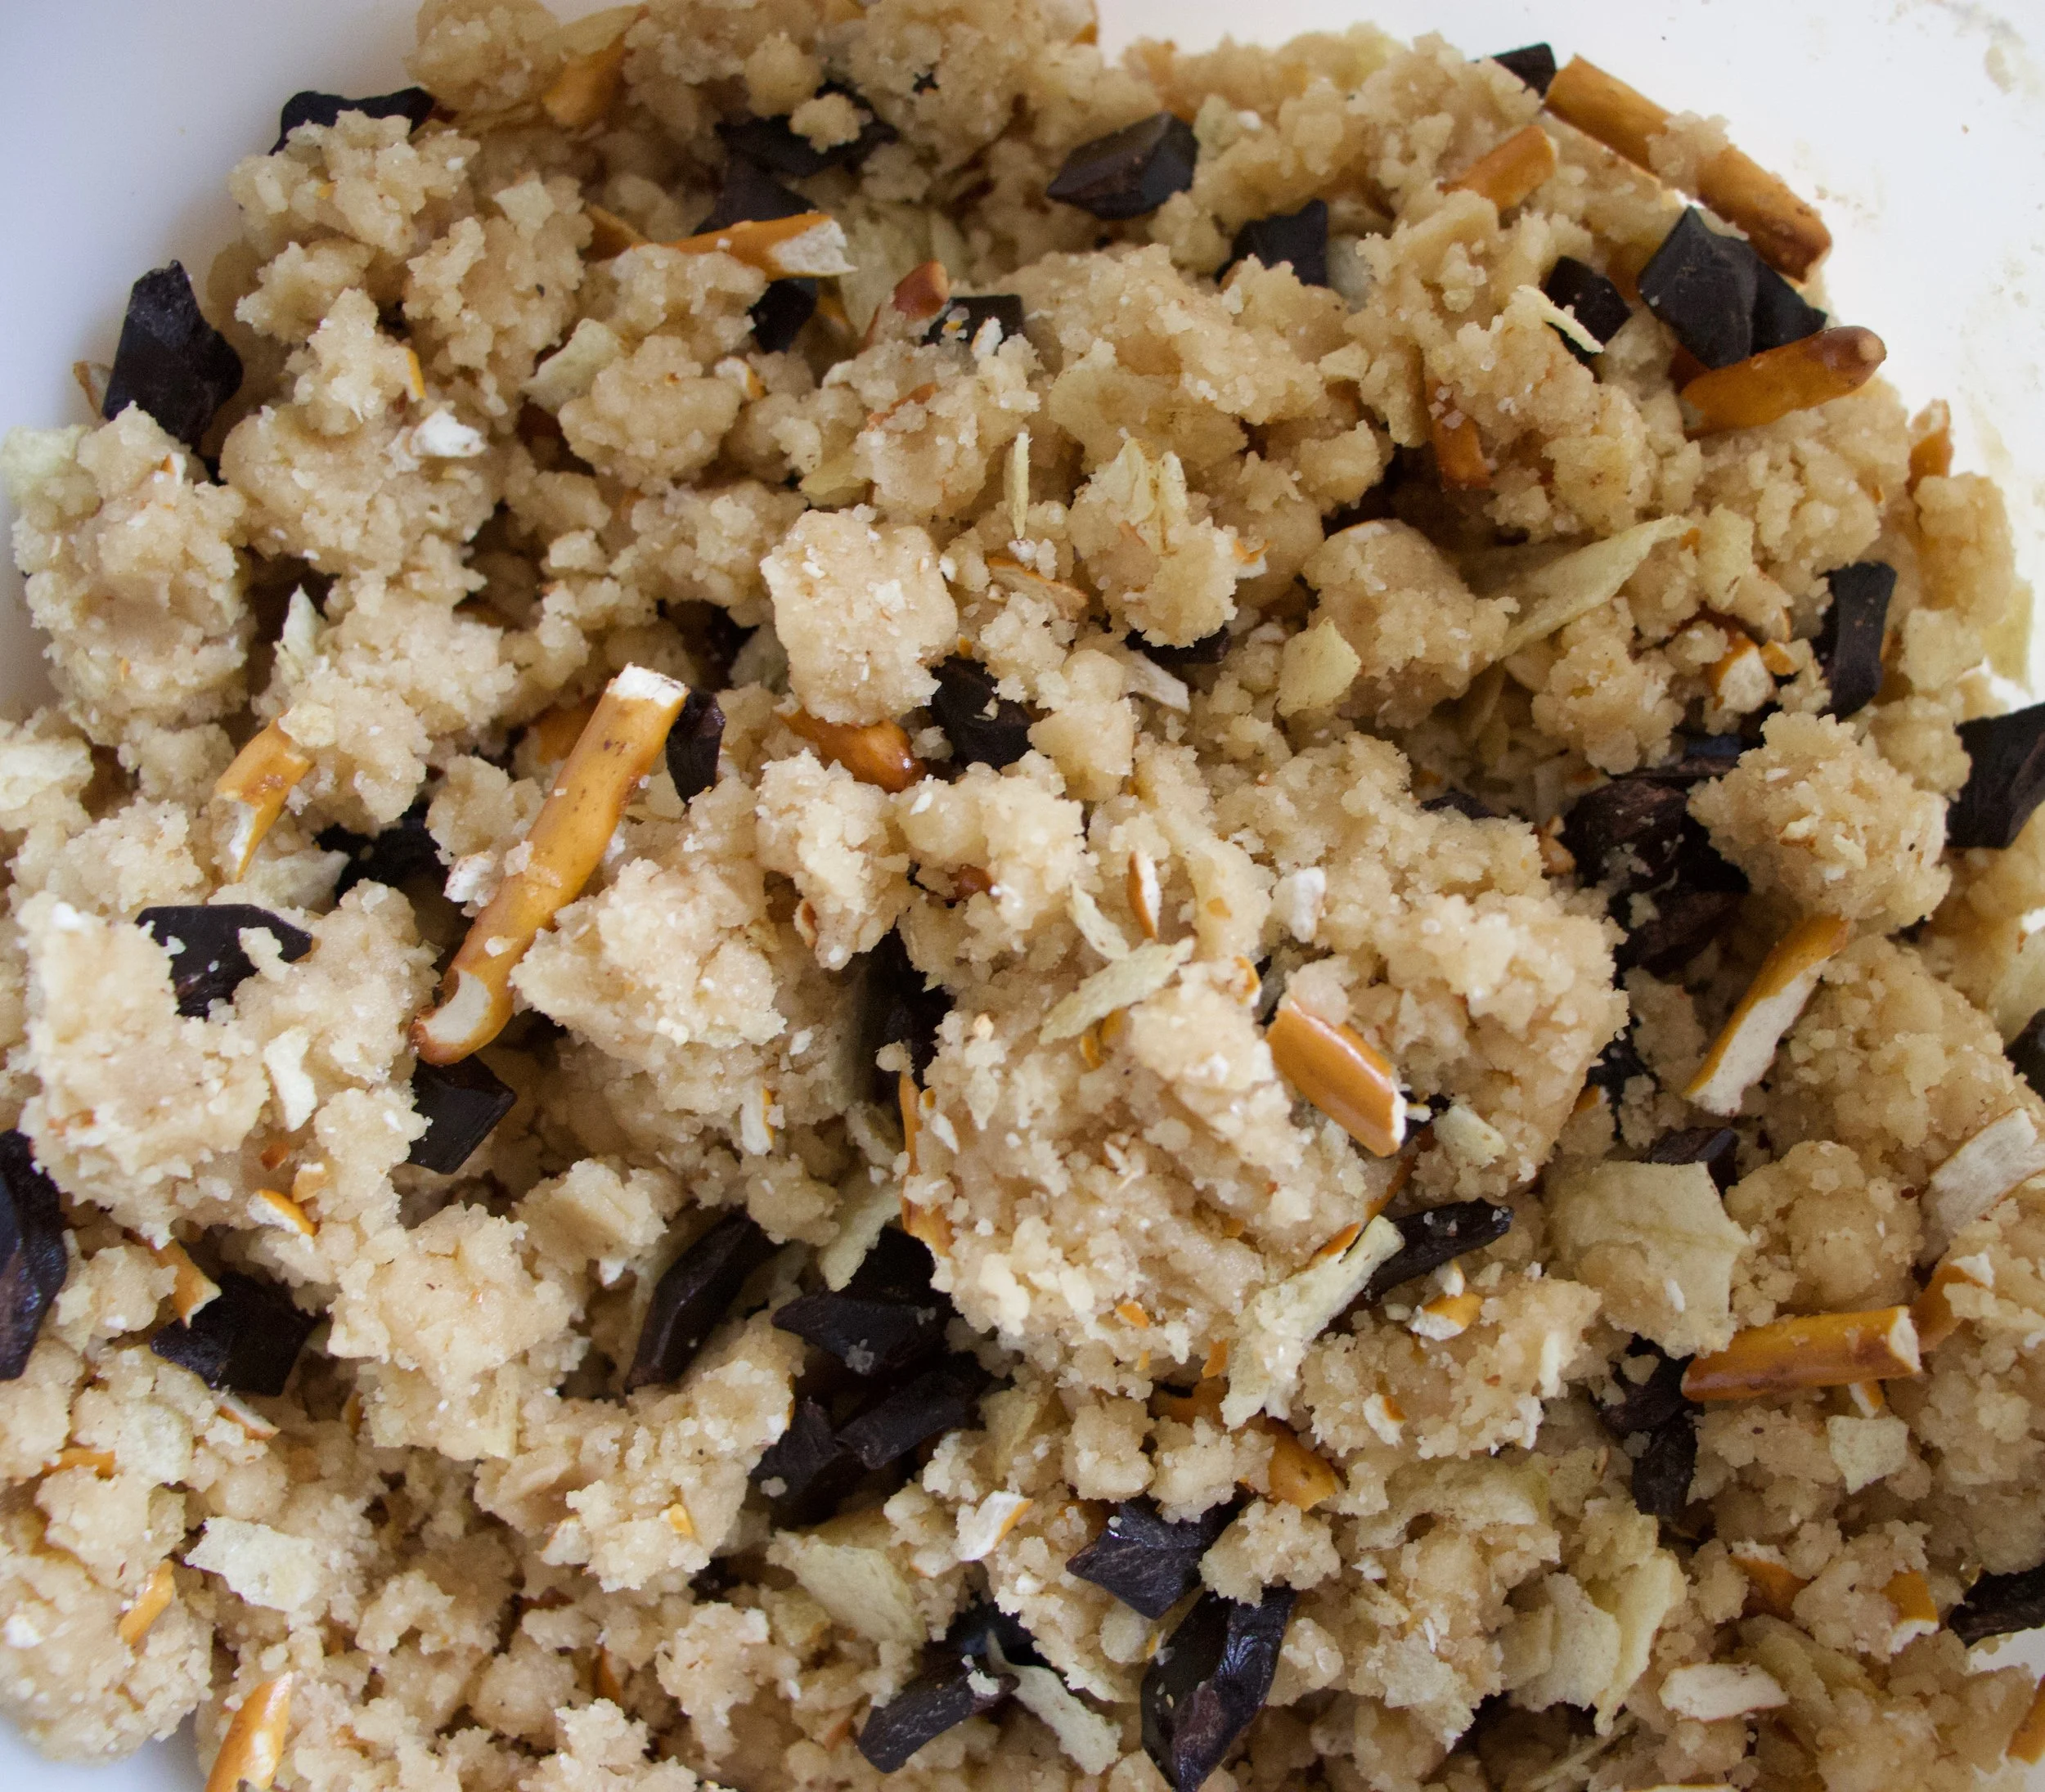
And mix until its a cookie dough. Now here is the thing, you need to stick the dough in the fridge for a couple hours and if you mix in the chips and pretzels now, well I think that might make them extrealemy soggy, so hold off. For now, cover dough and refrigerate for 2-4 hours.
When the time comes for baking, grab the mix ins and with whatever method you chose, crush the chips and pretzels into small bits. (avoid turning into a dust, you want bits)
All salty and crumbly and ready to go
Grab the dough from fridge and dump in the stuff that needs to go in (crushed chips and pretzels and chocolate chunks).
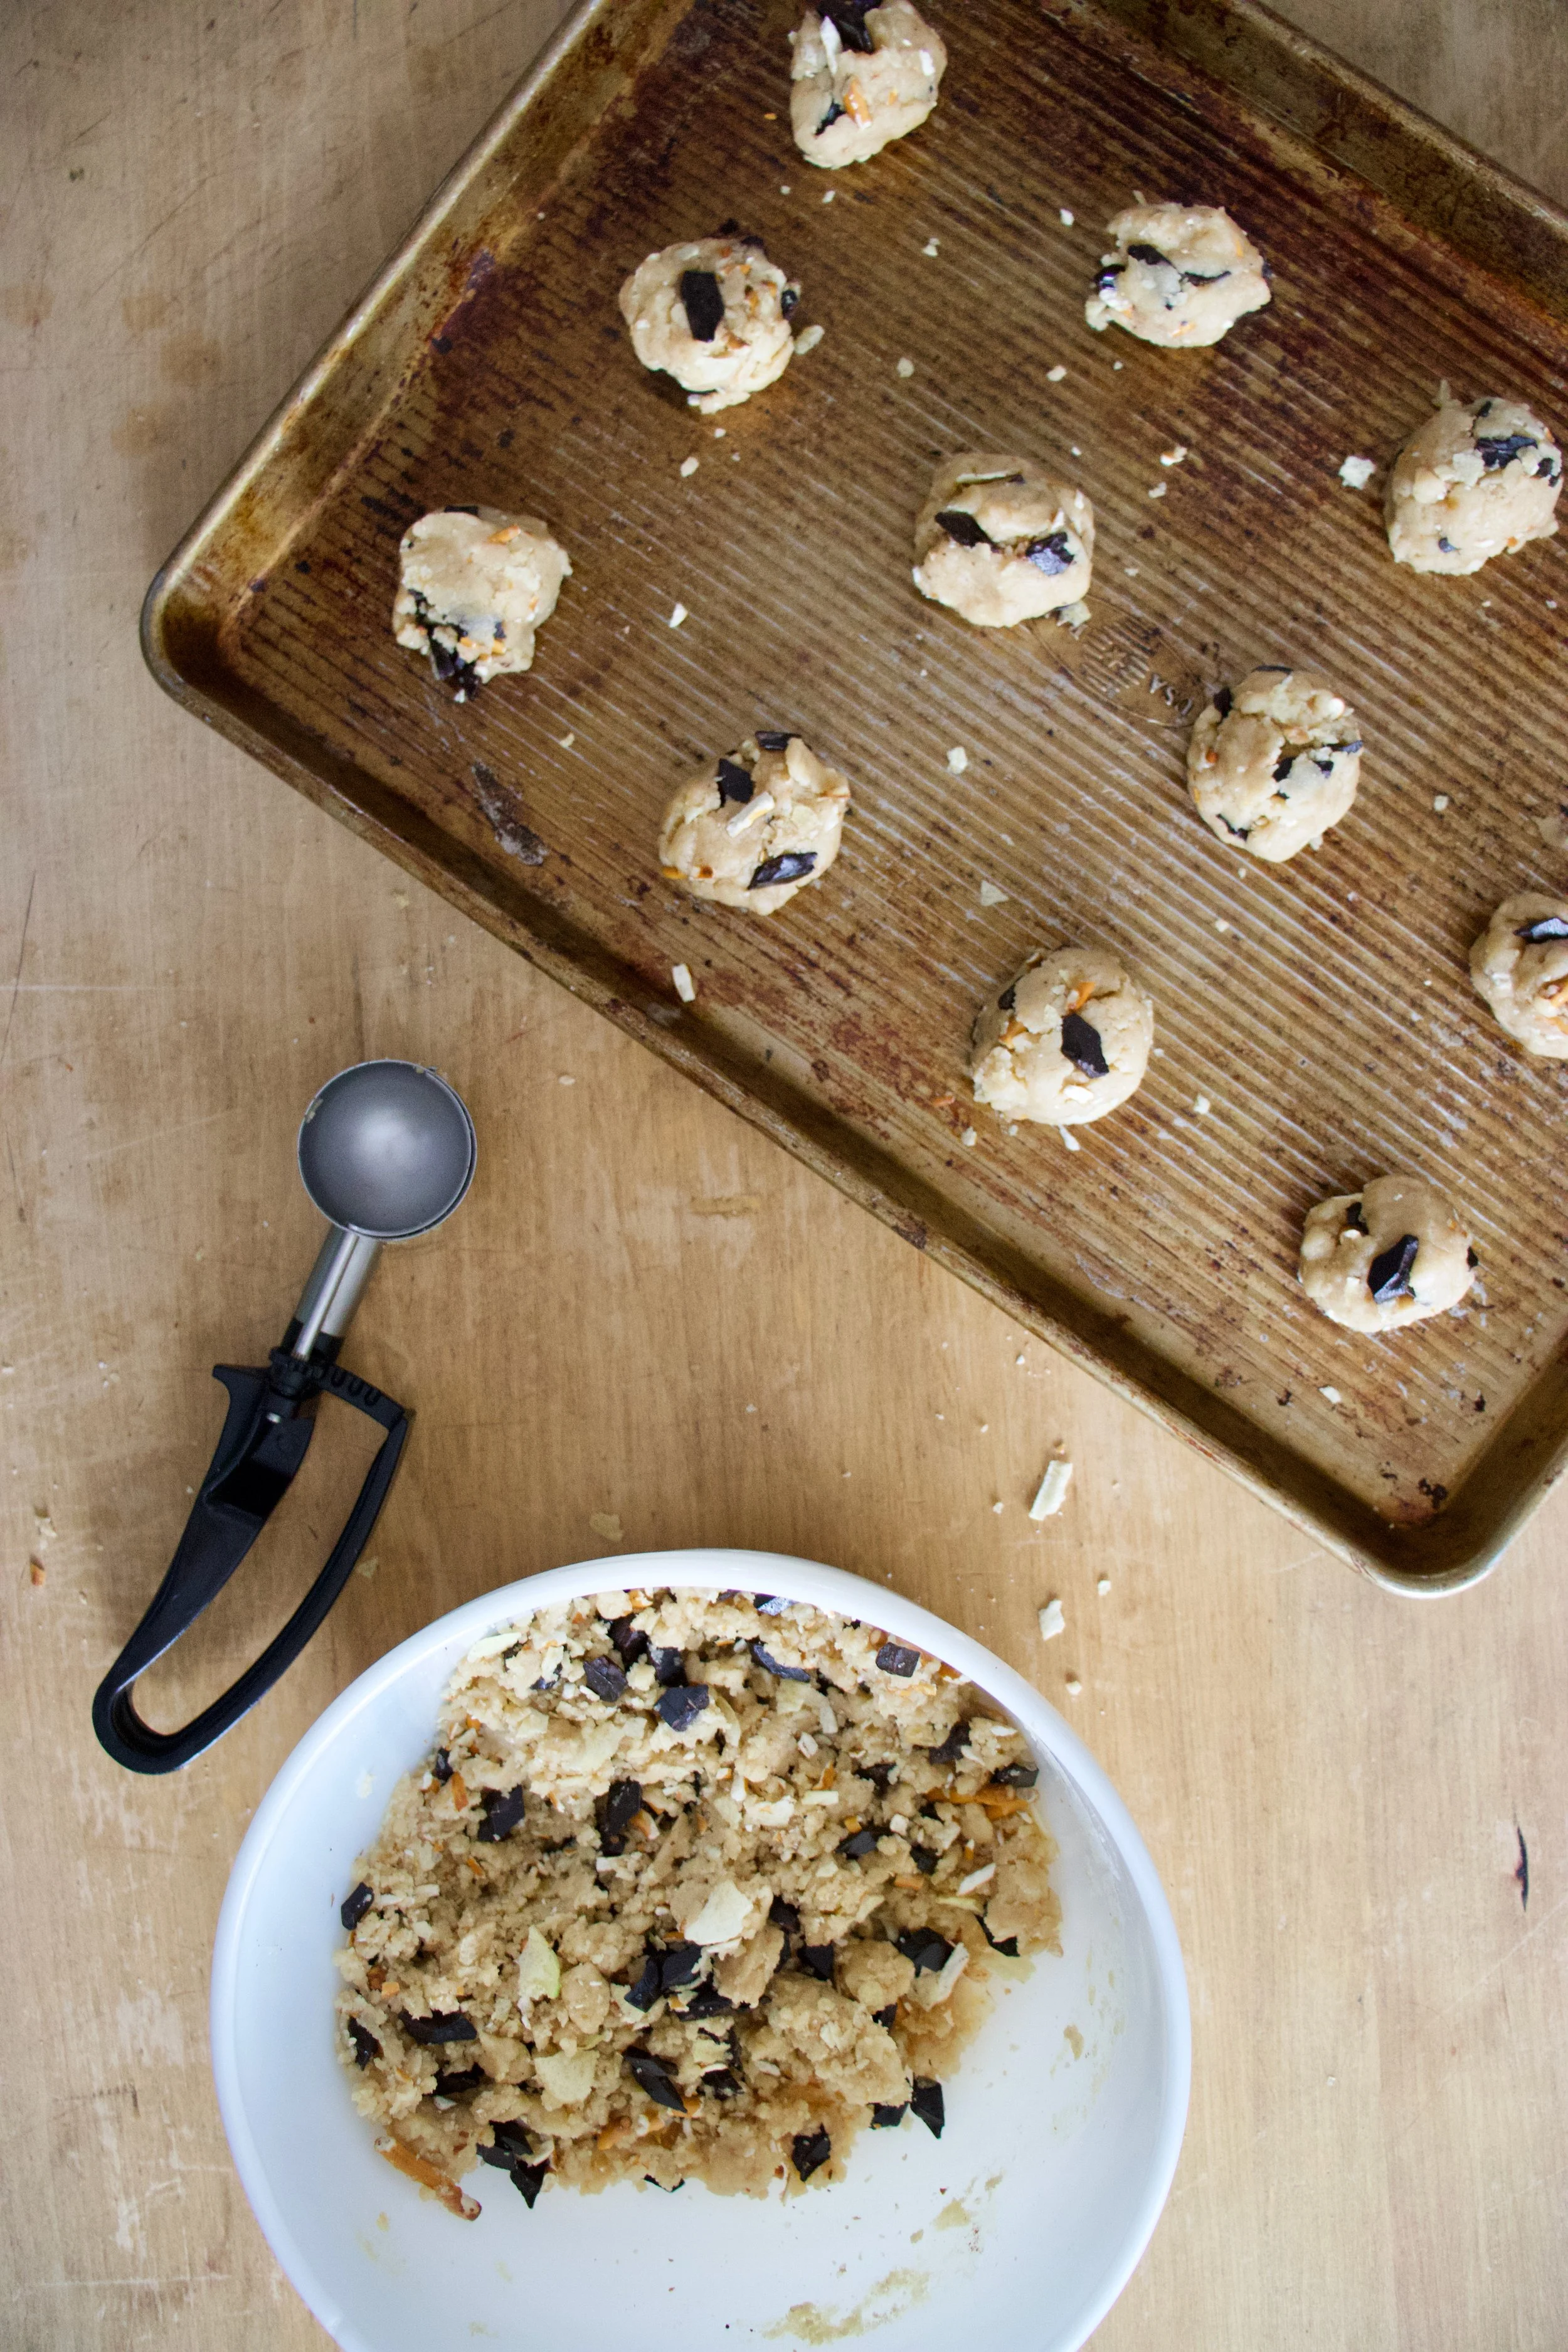
Scoop dough into balls and place on a baking sheet.
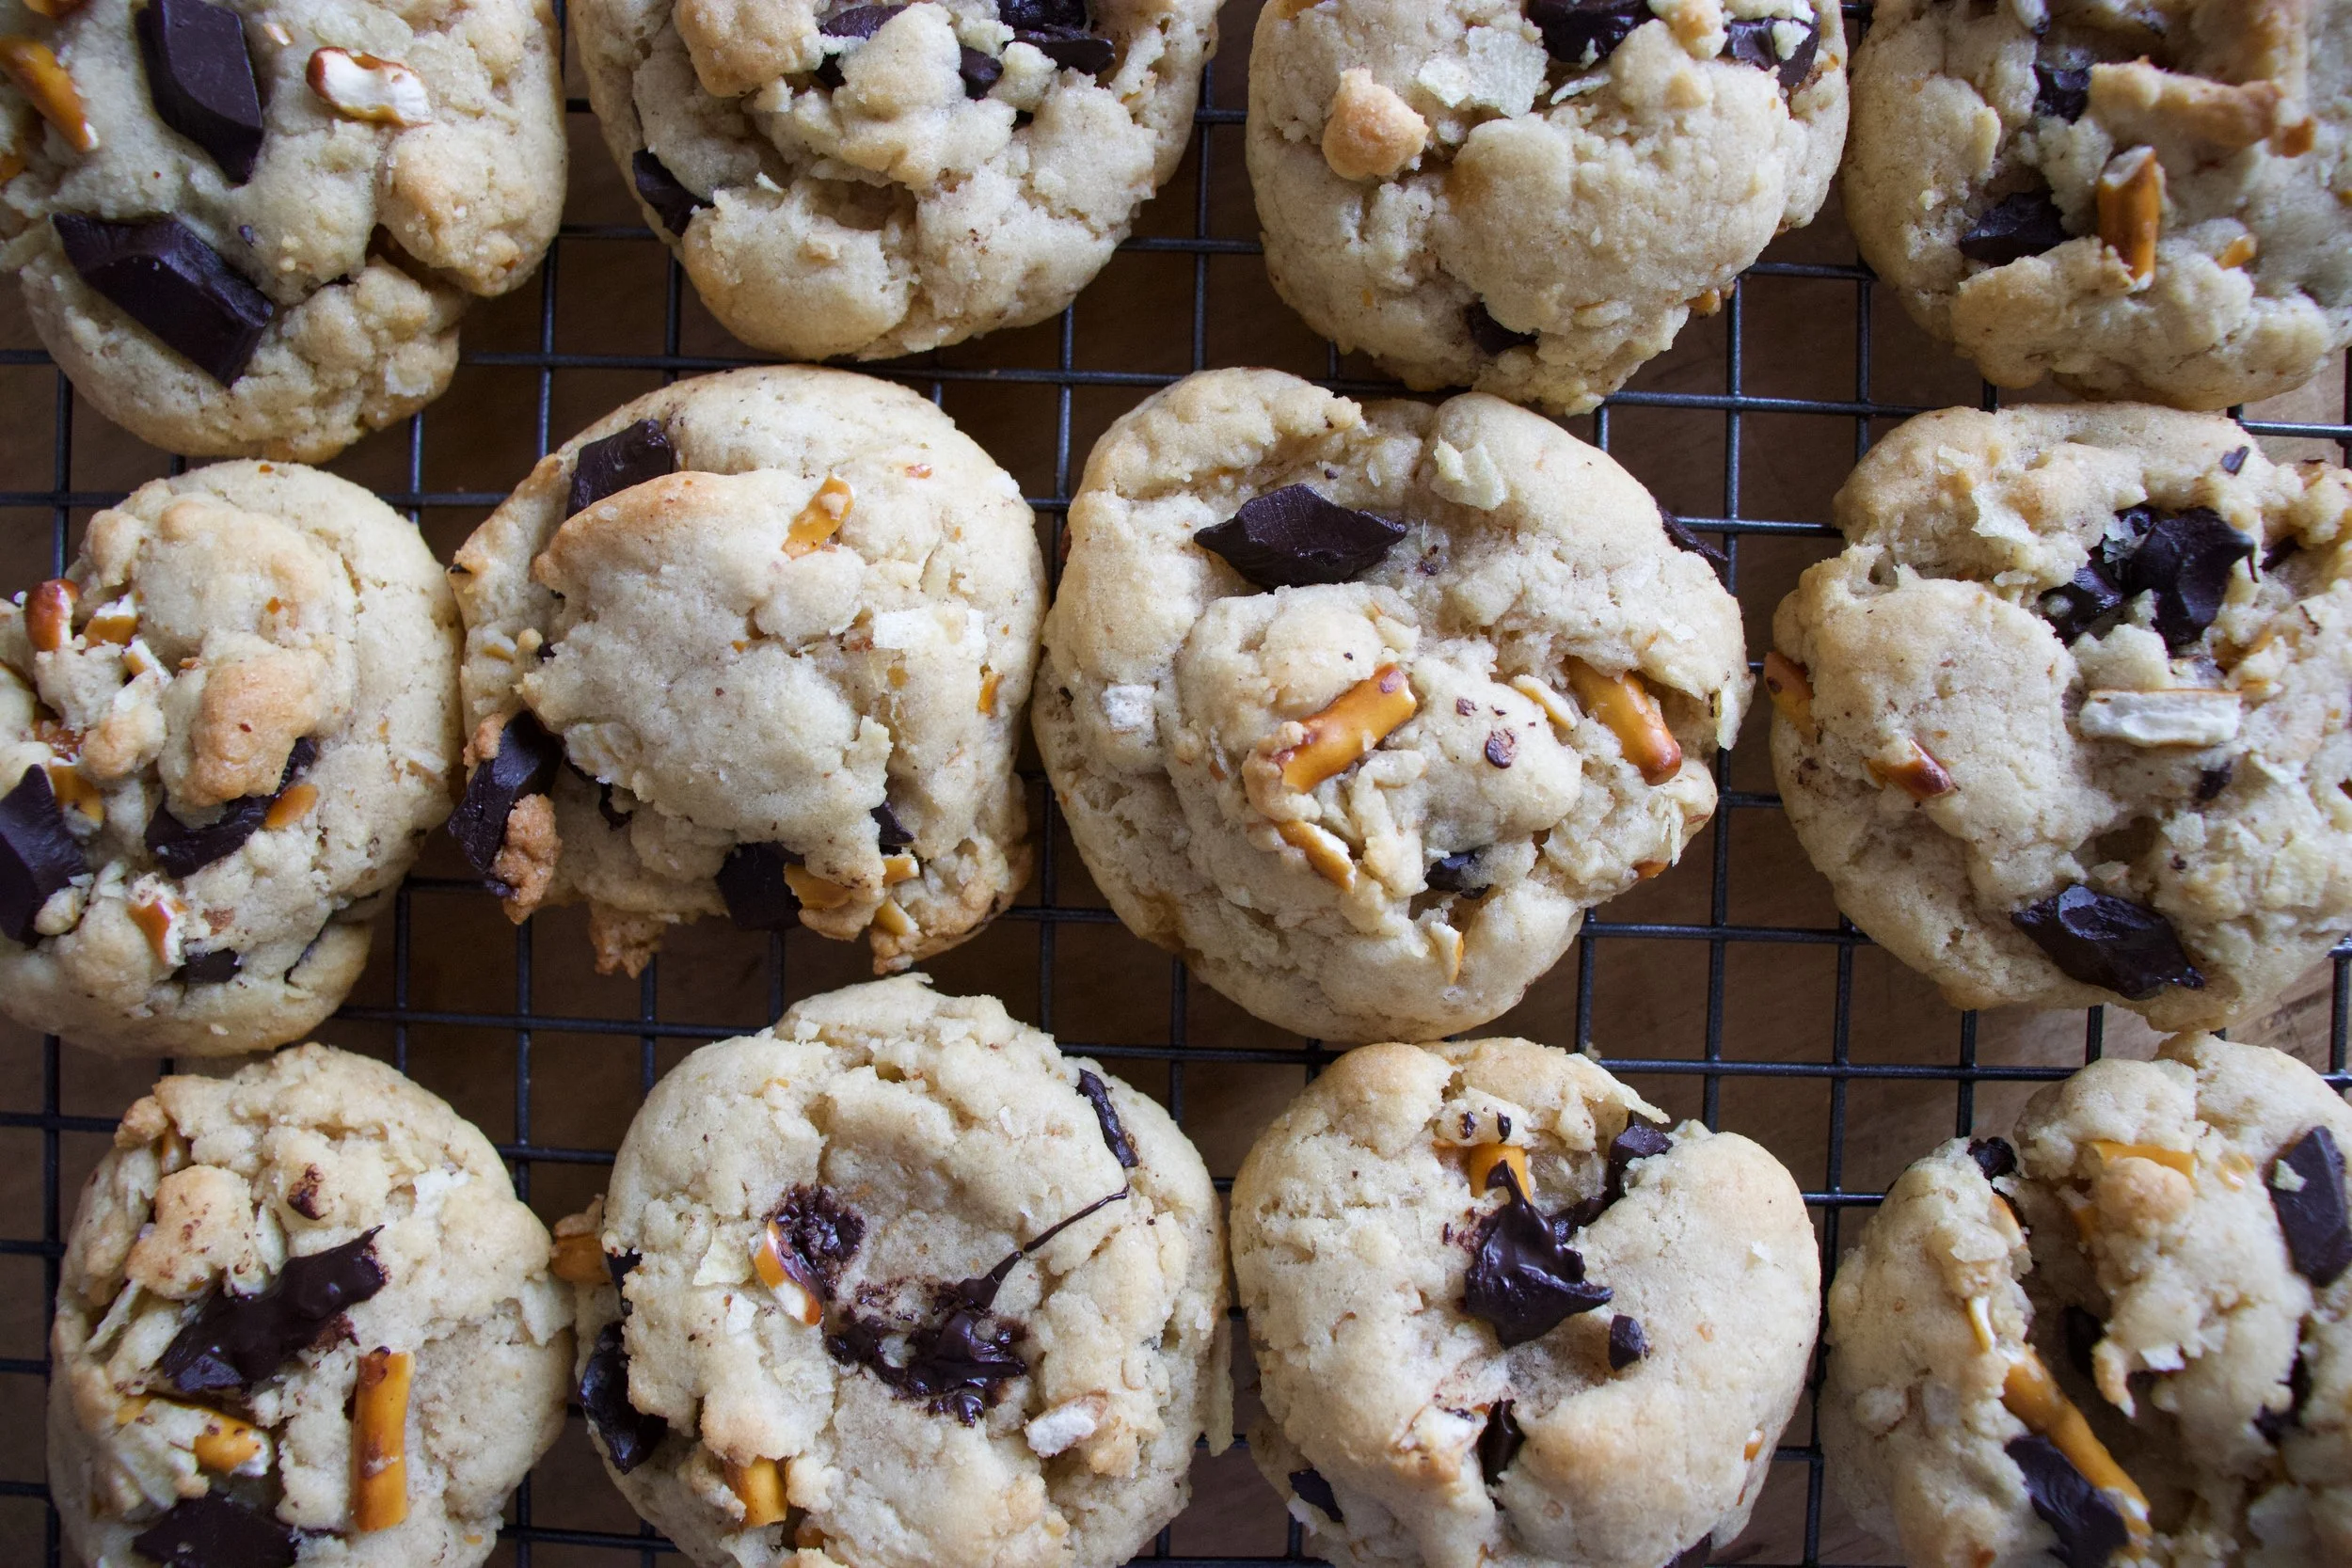
Into the oven and out they come all golden brown and smelling like yes and mmmmmm.
Get those cookies on a wire rack to cool and to free up the baking sheet to keep baking.
Look at this proud cookie. Chips, pretzels, and chocolate chunks all on display.
Now is when you get yourself a plate, pile it up high, and eat.
Remember, sharing is caring so maybe share a cookie or two. (but like you don%u2019t HAVE to)
Stay happy this weekend.
-C
makes about 2 dozen cookies
2 cup all purpose flour
1 teaspoon baking soda
1/2 teaspoon baking powder
1/2 cup packed brown sugar
1/2 cup white sugar
1/2 cup canola oil
1 teaspoon vanilla
6 tablespoons plant milk
1/2 cup crushed potato chip
1/2 cup crushed pretzels pieces
3/4 cup chocolate chunks or chips
In a large bowl, mix together the sugars, oil, milk, and vanilla until completely combined. In a separate bowl, whisk together the flour, baking powder and soda. Dump the dry into the wet and mix until the dough comes together. Gather the dough together in the bowl and cover with plastic and stick in the fridge to rest for at least 2 hour and up to a day.
When ready to bake, preheat oven to 350
Right before you take the dough from fridge, get your chocolate chunks, pretzels, and chips out. If the chips and pretzels are not already in little bits, place them in a bag (just use the chip bag if you have it) and smash with a heavy object until you turn the chips and pretzels into bits. Be carful that you don%u2019t turn it all into a dust, look for small bits. Pull dough from fridge and mix the stuff in. Scoop out balls of dough and place on baking sheets. Bake cookies in oven for 11-12 minutes or until lightly browed. Remove from oven and immediately transfer cookies to a wire rack to cool.
And now you eat.
Store uneaten cookie in a airtight container for up to a week or freeze them but I doubt you will have too. The cookies went fast.


 I have been meaning do a post on seltzer and syrups for a while now and this one is perfect… Everyone around me has been getting sick and I am trying my hardest to not get anything.


 So lovely…. so nice. I really got into these flavors. This drink has the ability to make you feel warm and cozy while being cold and fresh. It makes me happy.


 Before we get to the fries, I just want to mention that yesterday was one of those fantastic winter days that reminds me why I love living in Vermont. Pretty white snow everywhere, the sun was out, and 20 degrees without a gust of wind. The trash dog an I were even able to go for a little hike. It was so nice and soooo sooo needed! Anyways, the other day as me, my sister and the mister where putting together one more piece of Ikea furniture, (I am the master at Ikea assembling!) a little runs into the room and presents the mister with a Dominos pizza. Yup, a whole pizza just for him. Why you might ask? Well I guess my sister was delivered the wrong pizza and the place didn’t want it back and she didn’t want it, so she gave it to him.
 The carrots and the parsnips are all sliced up into big matchsticks and ready to be baked to crispy browned perfection. I added the oil to the pan to toss the fries in and then sprinkled with a fair amount of salt and pepper. If you don’t have and or want to use a cast iron pan, a baking sheet works just the same.
 Oh saucy sauce stuff. Tomato puree, sriracha, and yellow mustard. Add a little bit of honey to lighten it up (can use brown sugar if keeping it vegan), a splash of apple cider vinegar and a couple minced cloves of garlic. Topped off with the smokey delightful spice of cumin. I cold eat this on everything…and I kind of did.
  Fries are done, Sauce is ready. Served in super cute tea cups.(from now on I want to serve everything in tea cups.) A perfect side dish, snack, or even a light meal. It lead the mister to ask the question…What pizza?
  Happy Hanukkah!!! Today is the first day of the festival of lights and I wanted to send a little love towards those who celebrate it.
 I didn’t actually use all the potatoes in the picture, but I wish I did. There was the perfect amount for dinner for two people, but I wanted to make a few extra for left overs….there were none. Oh well.
 I did a matchstick dice for the apples.. I didn’t want the apples to be to chunky and I didn’t want them to turn into sauce so the match stick worked well. After I diced the apples, I squeezed a little lemon over the top to keep the apple from turning brown.
 I start grating the potatoes and onion, and whoa! Imagine my surprise when one of the potatoes was purple… I got pretty excited.The color is so beautiful. and made the latkes look so nice…It was meant to be.
 Super squeeze the juices out of the grated potato and onion. If you don’t get most of the liquid out, the potato won’t crisp up and will fall apart and be and it will be gross. So SQUEEZE!
 Add in the egg, cornstarch, salt and pepper and mix it on up. Did I mention that I was making these for the mister and the GF sister..No flour, just cornstarch. I think they might have come out even better without the flour…so yeah, these babies are gluten-free.
 Your mixture is going to start to get a little watery again. Its cool, just squeeze it out with your hands and smash into patties.
 Enough oil to cover the bottom of the pan on medium heat. Test the oil to make sure its hot enough before sticking the latke n the pan. To test, sprinkle water in pan, if it sizzles, its ready.Working in batches, fry each latke on each side for around 5 minutes..you don’t want to cook to fast or the inside of the latkes will be raw. I always do a tester and feed it to nick. He’s my guinea pig….He said they were awesome..
 With every batch made, stick on a wire rack and keep in the oven to stay warm. The rack keeps the bottom from getting soggy on the pan… so use it.
  Roasted apples are the BOMB!!! Its like eating apple sauce sticks or little bites of heaven(A bit dramatic, but these are so good) I roasted mine for 20 minutes, until they were nice and soft but not completely failing apart. If you are into it, add a touch of cinnamon…I did’t this time, but you bet I am going to be making myself a big ol bowl of roasted apples this week, and yes, I will top with cinnamon.
  A bowl of apple slaw, sour cream and lemon wedges….I put the latkes on a nice little pile of greens. A very good idea. A dinner worth celebrating!
  I also served the latkes with roasted chickpeas and cailflower…for more of a meal…( Mini recipe… Cauilfower and chick peas drizzled in olive oil, tossed in salt pepper and garlic, roasted 30 minutes and topped with lemon) A little added veggie and protein….I am looking out for you people.
 There we have it…my variation on a traditional food. Enjoy your fried pancakes of potato and onion, they are a food worth a celebration.
 Sometimes, no matter whats going on with the week, Monday seems like, well, like a Monday. I drag a little on Mondays. I think it stems from the Monday through Friday school week that was beaten into me for 16 plus years. Hate Mondays, Love Fridays.. Yup, I blame the public educational system(I have to blame someone) I want my day back. I don’t want to feel the drag today. I am going to have a fantastic day. I’m getting excited, pumped up and ready for the week. I am turning my Mondays into fun days. Funday Monday…Yes, yes I did just say that. . See, don’t we all feel better already?
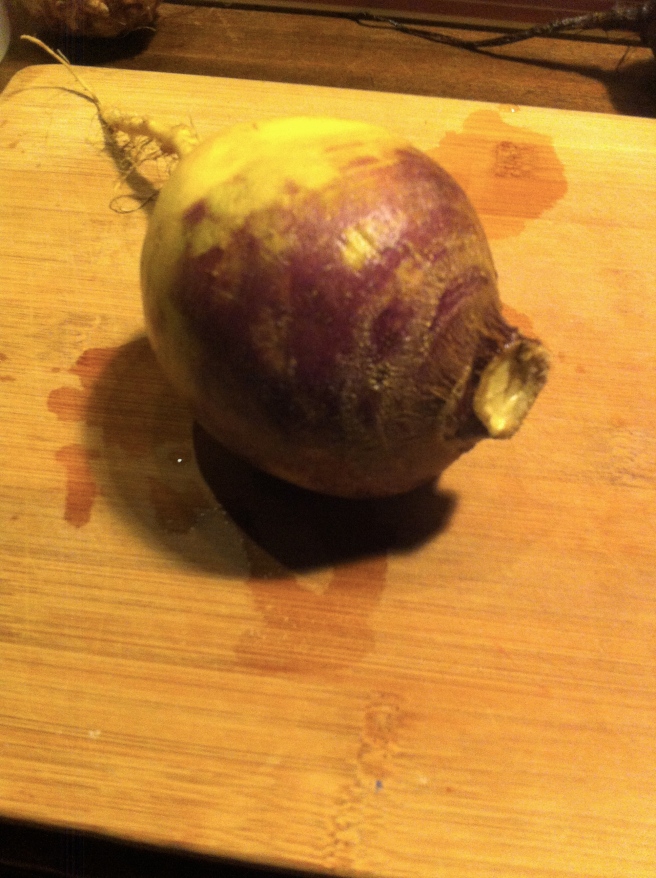 One large rutabaga… This one fed 2 as a side… but if your eating just the fries, eat a whole one to your face. It’s totally cool.
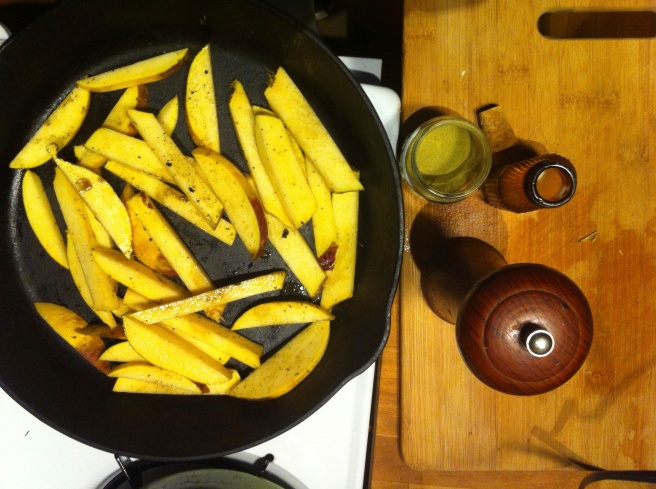 Chop the rutabaga into fries and toss with a smidge of oil, salt, pepper and ground up rosemary. Don’t like the rosemary… don’t use it. Maybe try something else like sage or garlic and onion powder or curry powder. Just use whatever you like. Throw into a 425 degree oven for 20 minutes, give them a flip and back in for another 15, Simple. Easy.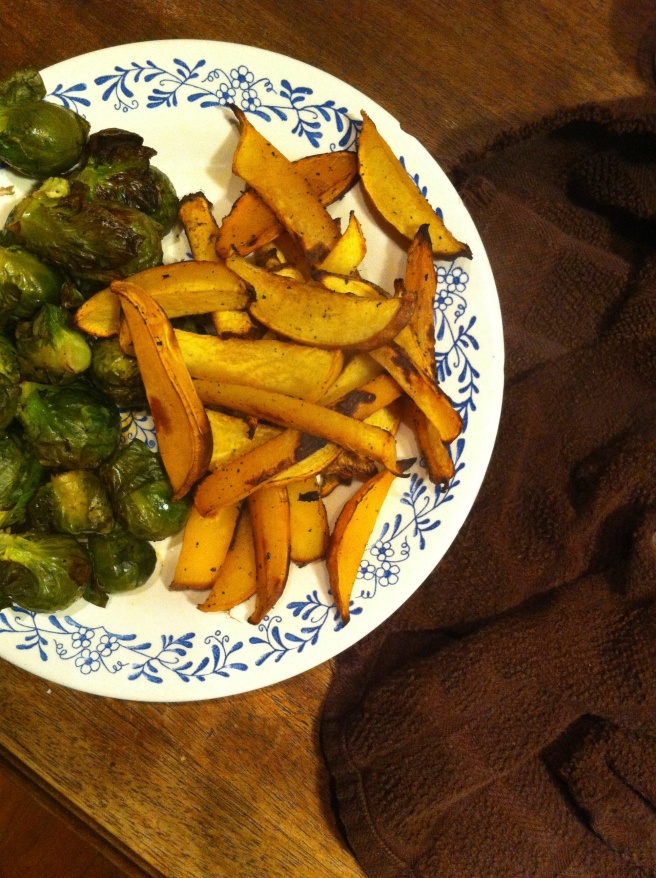
 I can’t stop eating these. They are like little balls of crack and I am an addict.
 The stuff you will need. Washed and drained fresh grapes (green or red. I usually use red but the green were half the price and the red ones didn’t taste very grapie*) Creamy peanut butter, skewers, and a little bit of cinnamon or cocoa powder (optional)
 When the grapes are frozen, melt peanut butter. Take a big glob and stick in a tall skinny cup or bowl and stick in the microwave or heat in a sauce pan and then transfer to a tall skinny vessel. Take frozen skewed grapes and, one skewer at a time, dip in the peanut butter. Cover with as much or as little of the peanut butter as you want and place on wax paper. If you are feeling feisty, add a sprinkle or cinnamon or even a dash of cocoa powder. Or, this may seem a little crazy, but garlic powder is so F*ing good.(it’s worth at least giving it a try) When all grapes are dipped, place back into freezer for another 10 minutes or so to let the peanut butter set up a bit.
 Whenever your ready… Eat. And be so happy. And always keep a back stock of frozen grapes in the freezer. They are the best.
 I figured now is a good time to get this recipe out there before we get to far into spring and summer recipes because there is going to be a lot of banana ice cream filled recipe coming and I figured its a good idea to have the basic banana ice cream recipe ready for people to refer too. And because I made so much fantastic naner ice cream, I also made a cookies and cream naner ice cream for my sisters and the mister.
 The stuff you need for this ice cream…. Nice and ripe bananas, peeled and then frozen* That’s it.
 After all blended and smooth, either eat right away or scoop ice cream into a freezer safe container and stick in freezer. That’s the banana ice cream… And it is amazing and so so so so so addictive. I make a batch, think I am only going to eat a scoop, then find myself eating half of what I have made, but it’s ok cause it’s only bananas.
  One batch of banana ice cream, either freshly made, still in food processor or made ahead and placed in a food processor and given a good pulse to smooth it up.
 Now you have cookies and cream naner ice cream…. and everybody is happy.
 HOORAY FOR SPRING!!!!!!!
 Pesto stuff. Kale, walnuts, parmesan cheese(nutritional yeast to keep it vegan), garlic, lemon, olive oil, and salt and pepper.
 Straight up frozen ravioli goes onto an oiled baking sheet.(make sure that non are overlapping) Place into an oven at 400 degrees for about 15-18 minutes, flipping after 10. If you want to add mushroom and a few more walnuts, just toss them onto the ravioli when you are flipping over the ravioli.
  Look at this… fresh, crunchy, light and happy. Kinda like a spring day.







THE LOVELY CRAZY
November 12, 2019 by maximios • Blog
I spent a lot of time indoors this week, due to the fact that my eyelids would freeze shut when going out for more than a few minute..(for real, walking to the gym the other day, I had my head tightly wrapped and the condensation from my breath went up, into my eyes, and froze.) I mean, I love winter, I love the cold, but I am not a huge fan of -30 with wind chill… I get cold bones. After that morning, the mister insisted on diving me…Love. So we (me, Nick, and especially Washer) might have felt a little trapped this week, and when trapped inside, we get a little antsy, but we have been trying to make the most of it. Cooking, baking, cleaning, drawing, reading, knitting, drinking lots of coffee and tea, and overall trying to stay warm (and sane) Yup. trying to ward of the cabin fever, especially this year, living in a little tiny bit of a room with one window..has been a little difficult. And I know it’s going to be a bitch when it hits. But it’s all cool, We have plans in the making, places to look forward to, things to see. It always helps to have an adventure awaiting to keep the fever at bay.
Anyway, not a bad week, maybe a little stuffy, but nothing to complain to much about. Here are a few of highlights that made(make) me happy.
The trash dog and I went for a lovely little hike by ourselves…It was so nice to get out of the house. We both really really really needed it that day. And look how handsome he looks.. so red against the world.
I love to look up… don’t forget to look up.
I made a large quantity of banana dream (what I call banana ice cream). This stuff is like crack.. Once I start eating it, I can’t stop. I might overdose on bananas but I am ok with that.
I went to a granite and marble showroom this week. And like whoa, so freaking cool. Walking among huge pieces of gorgeous slabs of stone is kind of magical… and a little cold.
A basket of roots….More like a basket of rainbows.
I currently don’t have a pretty vase of zinnias on my table, (these beauts are from this past summer) but I really wish I did. Fresh flowers are one of my favorite things. This picture has inspired me, I am on the hunt for some pretty fresh.
That sums up the week…Stay warm!
-C