It%u2019s hot out and we are thirsty. Water is good, water is great, but sometimes a little somethin%u2019 somethin%u2019 is called for, for you know, being that we need to deal with it being so freaking hot out. and sticky and gross. (BLAH. This past week we have had some temperatures it had make me crankers.)
Anyway, what is more refreshing then cucumber? Not much. And so we blend up cucumber, add some mint and lime juice and stick it into a glass with ice and bubbles. What can be more refreshing then that? Plus look at how pretty it is. Bright ass green. A true summertime drink.
To the Spritzer!
The stuff. A thin skinned cucumber, a lime, a spring of mint, club soda, and if you want, a little simple syrup.
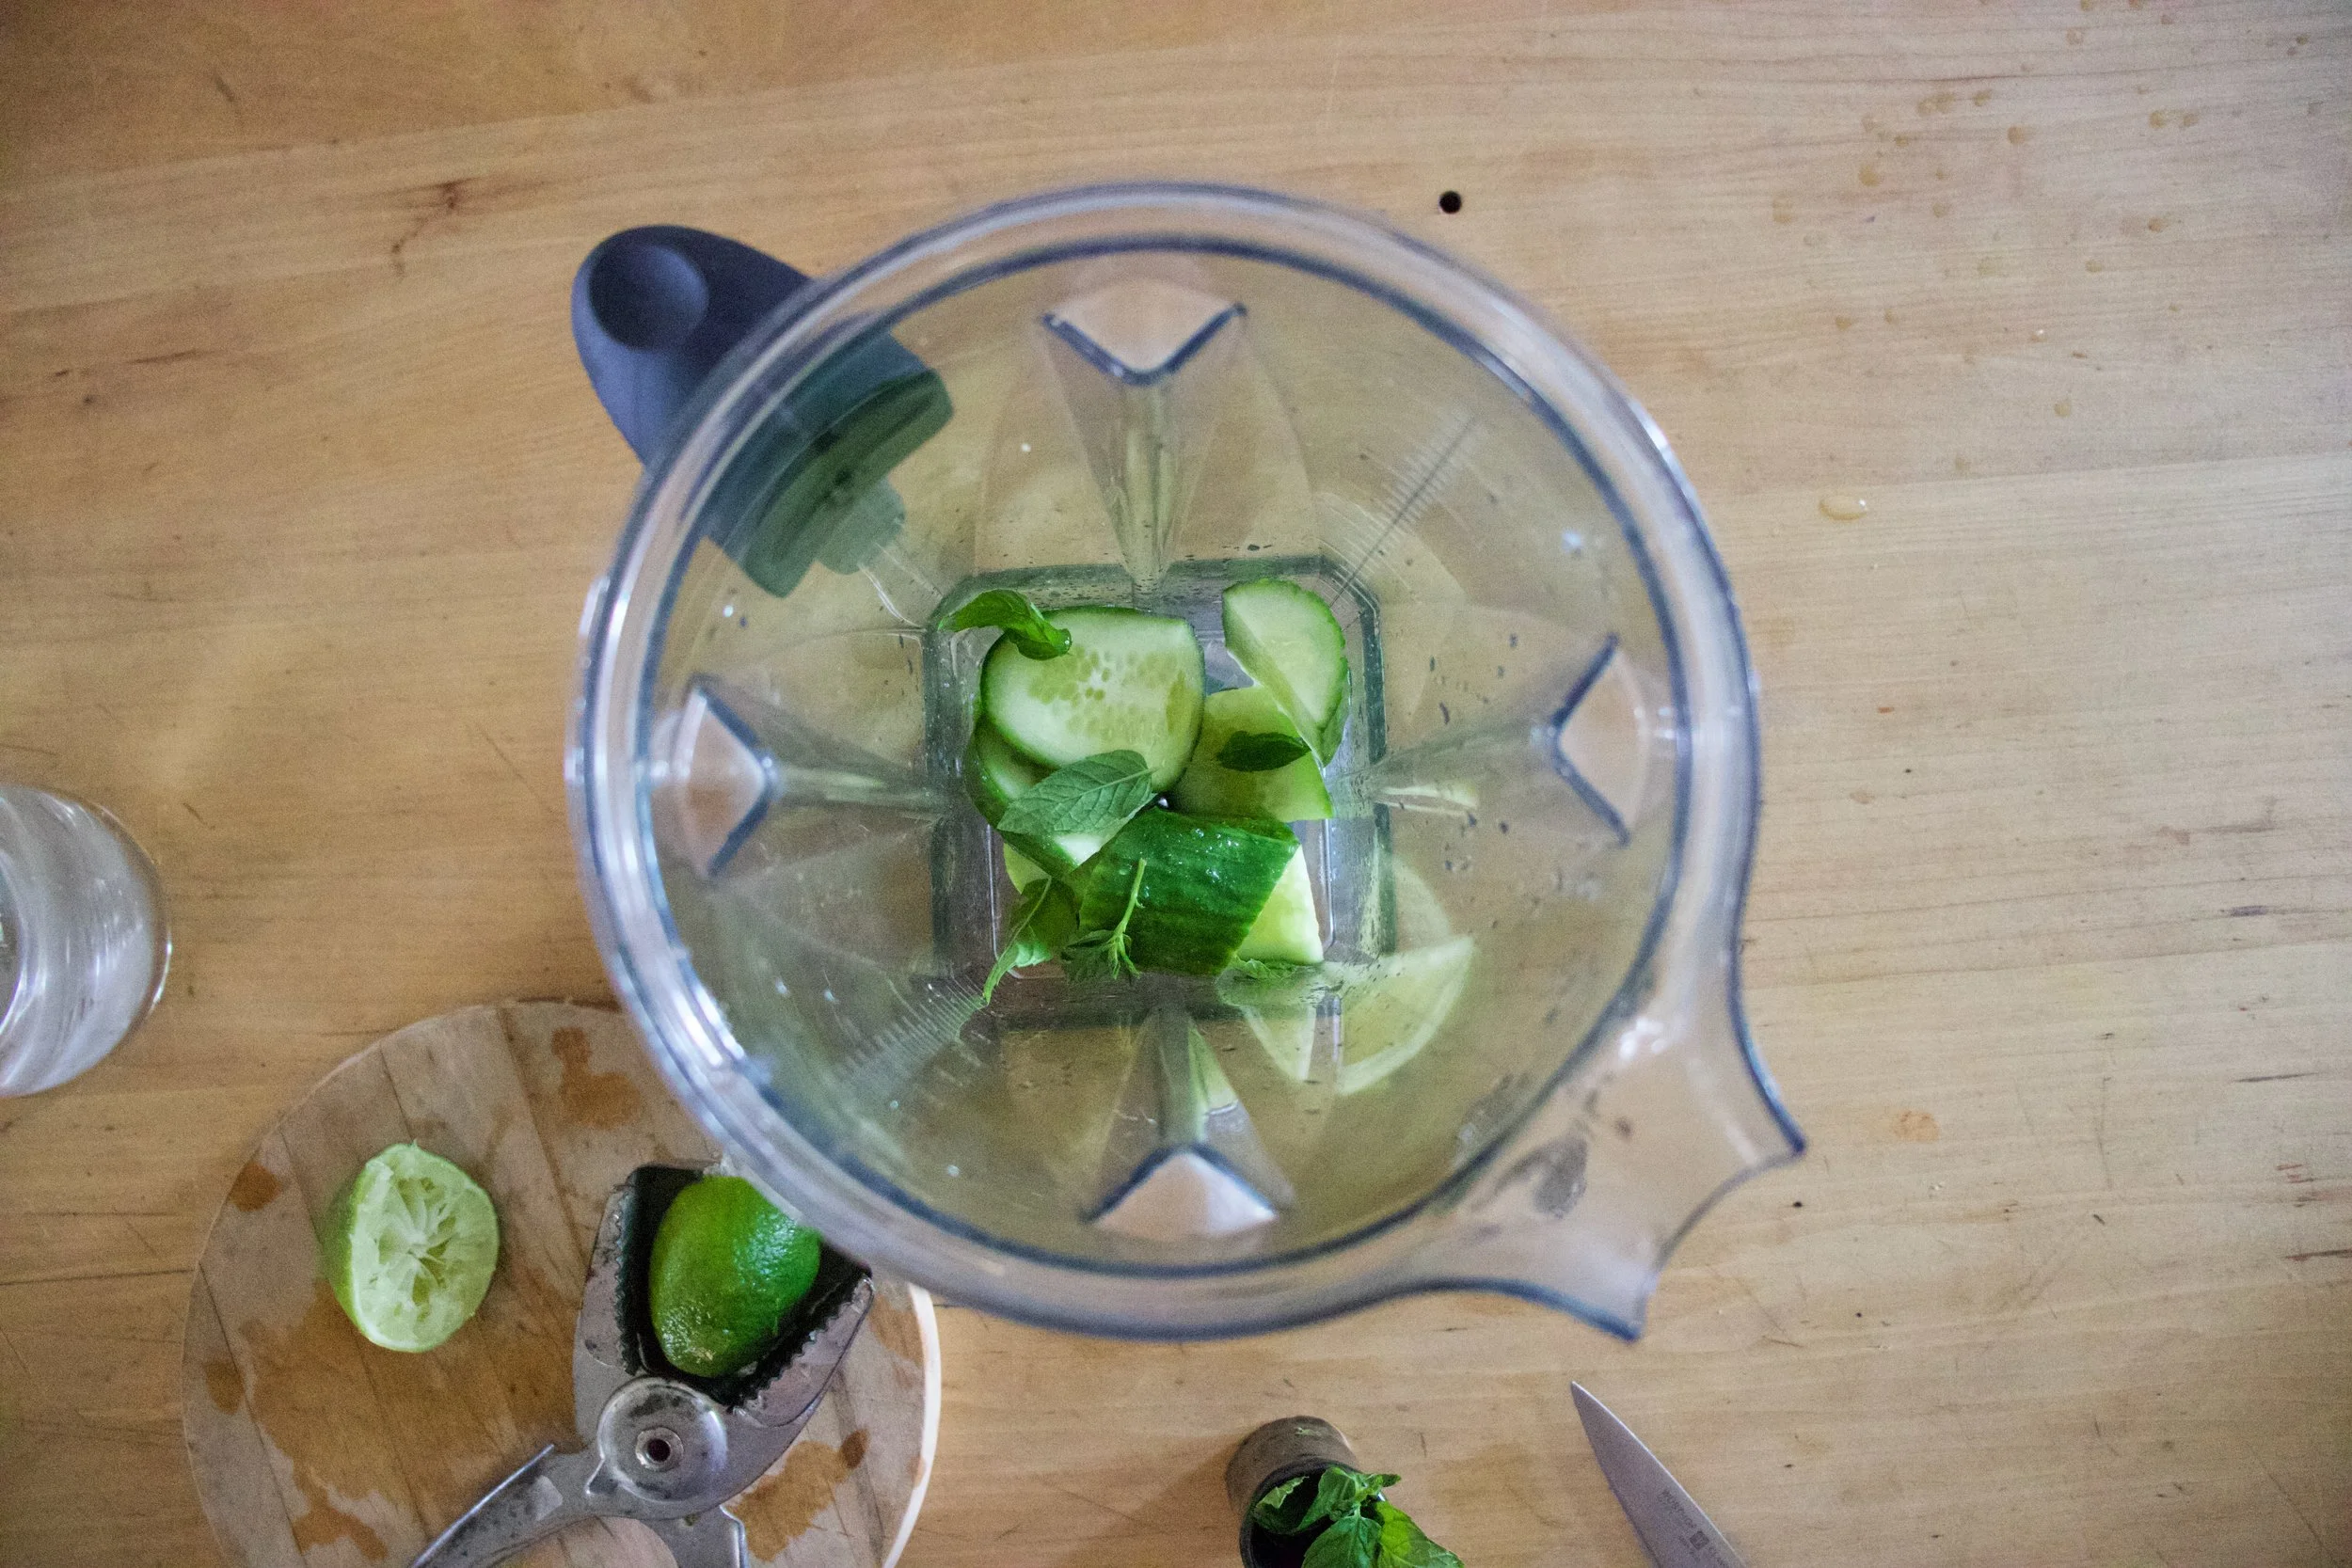
Chunk up the cucumber and into the blender it goes with the juice of the lime and a couple mint leaves.
Grab a couple glasses, add in some ice, and fill each glass half way with the cucumber juice. (mix in liquid sweetener in now if you want it.)
Top off with club soda, a mint leaf and a few slices of cucumber and you are golden cool and fancy free.
Stay cool%u2026..as a cucumber.. HAHA!
Makes 2 or 3 drinks
1 cucumber (thin skinned and 6-8 inches long)
a lime
a few mint leaves
club soda or plain seltzer
1-2 teaspoons liquid sweetener (optional)
Take cucumber and place into blender along with the juice of the lime and a couple mint leaves. Blend until smooth. Grab a couple glass, fill each with ice, then fill each glasses half way with cucumber mixture. Add in any liquid sweetener if using and stir. (I recommend trying without sweetness, that is that way I like it, and then add sweetener if you need it.) Top glasses off with club soda. Garnish with sliced cucumber, lime wedges, and or mint leaves if you want.
I figured now is a good time to get this recipe out there before we get to far into spring and summer recipes because there is going to be a lot of banana ice cream filled recipe coming and I figured its a good idea to have the basic banana ice cream recipe ready for people to refer too. And because I made so much fantastic naner ice cream, I also made a cookies and cream naner ice cream for my sisters and the mister.
Comments that I got from my sisters and the mister when I made them this ice cream
-Sister one.”I give this my sister seal of approval.. It’s so good. The first dessert you have made that I liked! (not including all the other desserts that you have made that I liked)”
-Sister two- “Wow.. it looks like ice cream and feels like ice cream and tastes like ice cream.. You should make me this ice cream!” (I was confused too because I was pretty sure I just made her some)
-The mister- “I am so excited for my new fly fishing pole!”
Ok, so the naner ice cream isn’t new to the mister and he IS very much excited for his new fly fish pole. So excited that he forgot to tell me how amazing that I am and to thank me for making him a big bowl of yumminess. (It’s ok, I forgive him)
And yes, this is probably one of the easiest, most delicious, healthy and amazing frozen dessert that you will ever eat. You will probably find yourself buying mass amounts of bananas and stocking the freezer until things just start falling out. (which is also ok because it’s only bananas and you can’t have too many frozen bananas)
The stuff you need for this ice cream…. Nice and ripe bananas, peeled and then frozen* That’s it.
To make it, place frozen bananas into food processor and hit the on button. Process the crap out of the namers until nice and silky smooth.
*Note, the smaller the frozen chunks are , the faster and maybe a little easier for the blender to blend the naners into ice cream. So if you think of it, chop bananas into pieces before freezing or even after.
After all blended and smooth, either eat right away or scoop ice cream into a freezer safe container and stick in freezer. That’s the banana ice cream… And it is amazing and so so so so so addictive. I make a batch, think I am only going to eat a scoop, then find myself eating half of what I have made, but it’s ok cause it’s only bananas.
Now for the cookies and cream banana ice cream..One batch of banana ice cream, either freshly made, still in food processor or made ahead and placed in a food processor and given a good pulse to smooth it up.
Add cookies in, crushing a bit beforehand and pulse till combined. Now you have cookies and cream naner ice cream…. and everybody is happy.
Scoop into a cup, a bowl, a freezer safe container, or directly into your mouth. Be careful…. You can still get brain freeze from eating naner ice cream too fast!
Keep it real hump day drum bum!
-C
Basic Banana Ice Cream
Makes one batch. Good for 3-4 servings
4-5 ripe bananas peeled and frozen
Peel bananas and stick in a freezer bag or container and freeze. When bananas are completely frozen, break into pieces and stick into a food processor or blender and puree until silky smooth.
Eat right away or scoop into a freezer safe container for later.
Cookies and Cream Banana Ice Cream
1 batch banana ice cream
5-10 (depending on your cookie need) cream filled cookies like oreos or Trader Joe’s Joe Joe’s (These are gluten free)
In a food processor, blend banana ice cream with cookies.
Eat right away, with a utensil of choice in a container of choice.
TGIF!!!! For reals, because Monday-Thurday were monster days. And now that its friday, I can dig a hole and hide in it until it’s at least 30 degrees with some sunshine. (I might never get to come out.)
A few things I will bring in my hole:
food (lots of food and coffee, lots of coffee)
a soft blanket and pillow
a few books, preferably with pictures, on farming and gardening (think spring!)
the entire series of the Fresh Prince of Bel-air and a device to watch it on
toothpaste (I can use my finger to brush my teeth)
But before I leave for my hole in the ground, I made these little cake bites to get my people through the weekend. Sweet little lemony bites of rich dense cake dipped into bittersweet chocolate. (I am just so nice) They have all the pleasure or cake without the need of a fork and are much easier to give away then a big slice of cake. Plus, they are fun to make. My little sister helped and did most of the chocolate dipping. Then she and another little used their mouths to clean up the chocolate mess. It was an afternoon of chocolate all over the kitchen fun day.
So make some bites to have and to share. Or if you, like me, are digging a hole to hide in, make a batch of bites to bring with you. That’s the beauty of cake covered in a harden chocolate shell, they travel really well.Simple lemon cake stuff. Flour, baking powder and salt whisked together, Sugar and soft butter in a bowl. An egg, some vanilla, milk, and of course, the lemon.
To make the batter, cream the soften butter with the sugar until light and fluffy. Zest lemon(1 big or 2 small) into bowl with the juice of the lemon(s), the vanilla and the egg. Beat until combined. Now beat in the dry and then the milk. Keep beating for another minute until all mixed. Batter should be light and fluffy.
Batter goes into a greased and floured 9×13 baking sheet and stuck into a 375 degree oven for about 30 minutes (You can use a 9×9 baking pan. Just bake fir another 10 minutes and you will end up with thicker bites). Remove from oven and let cool for a few minutes and flip to remove cake from baking sheet. Cut cake into small pieces (I cut 4×6 to get 24 bites) and place bake into sheet and into freezer (I stuck mine outside, it was -2 degrees ) for at least 2 hours.
Frozen bites ready for the chocolate coating… Bittersweet chocolate chips and a little bit of coconut oil. Melted together all nice and shiny smooth.Now dip and slather those bites in the melted chocolate.
Oh what a lovely sister I have.. Look at her dunk….. like a boss!Fully coated and placed on a rack for the chocolate to harden. I ended up sticking the rack in the freezer for 10 minutes…They harder really fast in there.
And now you have some it, bites of cake covered in chocolate. 1 bite, 2 bites…5 bites. Eat however many you want because its Friday and because there small little bites and just because you can.
Now if you need me, I’ll be in my hole.
-C
Chocolate Lemon Cake Bite
1 1/2 cups all purpose flour
1 teaspoon baking powder
1 teaspoons salt
1 cup white sugar
1/2 cup (1 stick) soft butter
1 egg
1 teaspoon vanilla
1 cup milk
1 large or 2 small lemons
2 cups bittersweet chocolate chips
2 tablespoons coconut oil
Add butter and sugar to a large bowl and beat on medium unit light and fluffy. Ass in vanilla egg, the zest of the lemon and the juice of the lemon. Beat to incorporate. Now beat in the dry and lastly the milk.
Grease and flour either a 9×9 pan or a 9×13 baking sheet. dump batter in and smooth out. Stick in oven and bake for about 3o minutes or until a toothpick stuck into the middle comes out clean. Remove and let cool for a few minutes on a wire rack. Flip cake to remove from pan. Cut cake into bit sized pieces, 4×6 is a good size, and place back on baking sheet and stick into freezer for at least 2 hours.
When cake bites are as good as frozen, get the chocolate ready. Take the chocolate and the coconut oil and either melt in a double boiler or the microwave. Mix until smooth and make sure to full incorporate the oil. Now remove the cake bites from the freezer and dip each bite into chocolate, trying to full coat all sides. Stick onto a wire rack or a parchment lined pan to harden. They can be stuck back into the freezer to harden faster.
Have you heard of switchel? A lot of people haven’t so don’t feel bad if you don’t know what the hell I am talking about (like my computer. It keeps auto correcting switchel to switched). So switchel. It’s basically a drink made from water and apple cider vinegar. But wait, don’t grimace and click away, it’s also has fresh ginger, lime, and maple syrup mixed in and is really really really freaking refreshing and tasty and just really good. I guess it was even used back I the day as a sort of sports drink, like Gatorade because it has all sorts of electrolytes and anti-inflammatory properties from the ginger.%u00a0%u00a0Plus apple cider vinegar has got all sorted or health benefits,%u00a0so it’s a tasty treat with benefits. Who doesn’t love the benefits?%u00a0
You can drink the switchel %u00a0straight up hot or cold, add it to seltzer for a bubbly soda like drink or even %u00a0mix some cocktails with it. I enjoy a nice cold glass when I am feeling thirsty but what I usually do it fill up half a %u00a0jar with boiling water, then fill the rest of the jar up with the cold switchel. It’s a nice tangy, spicy,%u00a0refreshing and warming drink that I look forward to every day. I even got the littles to try it.%u00a0%u00a0One thought it to be nasty (can’t win them all), but the other one really liked it too, so you know it’s not just me that thinks it good.%u00a0
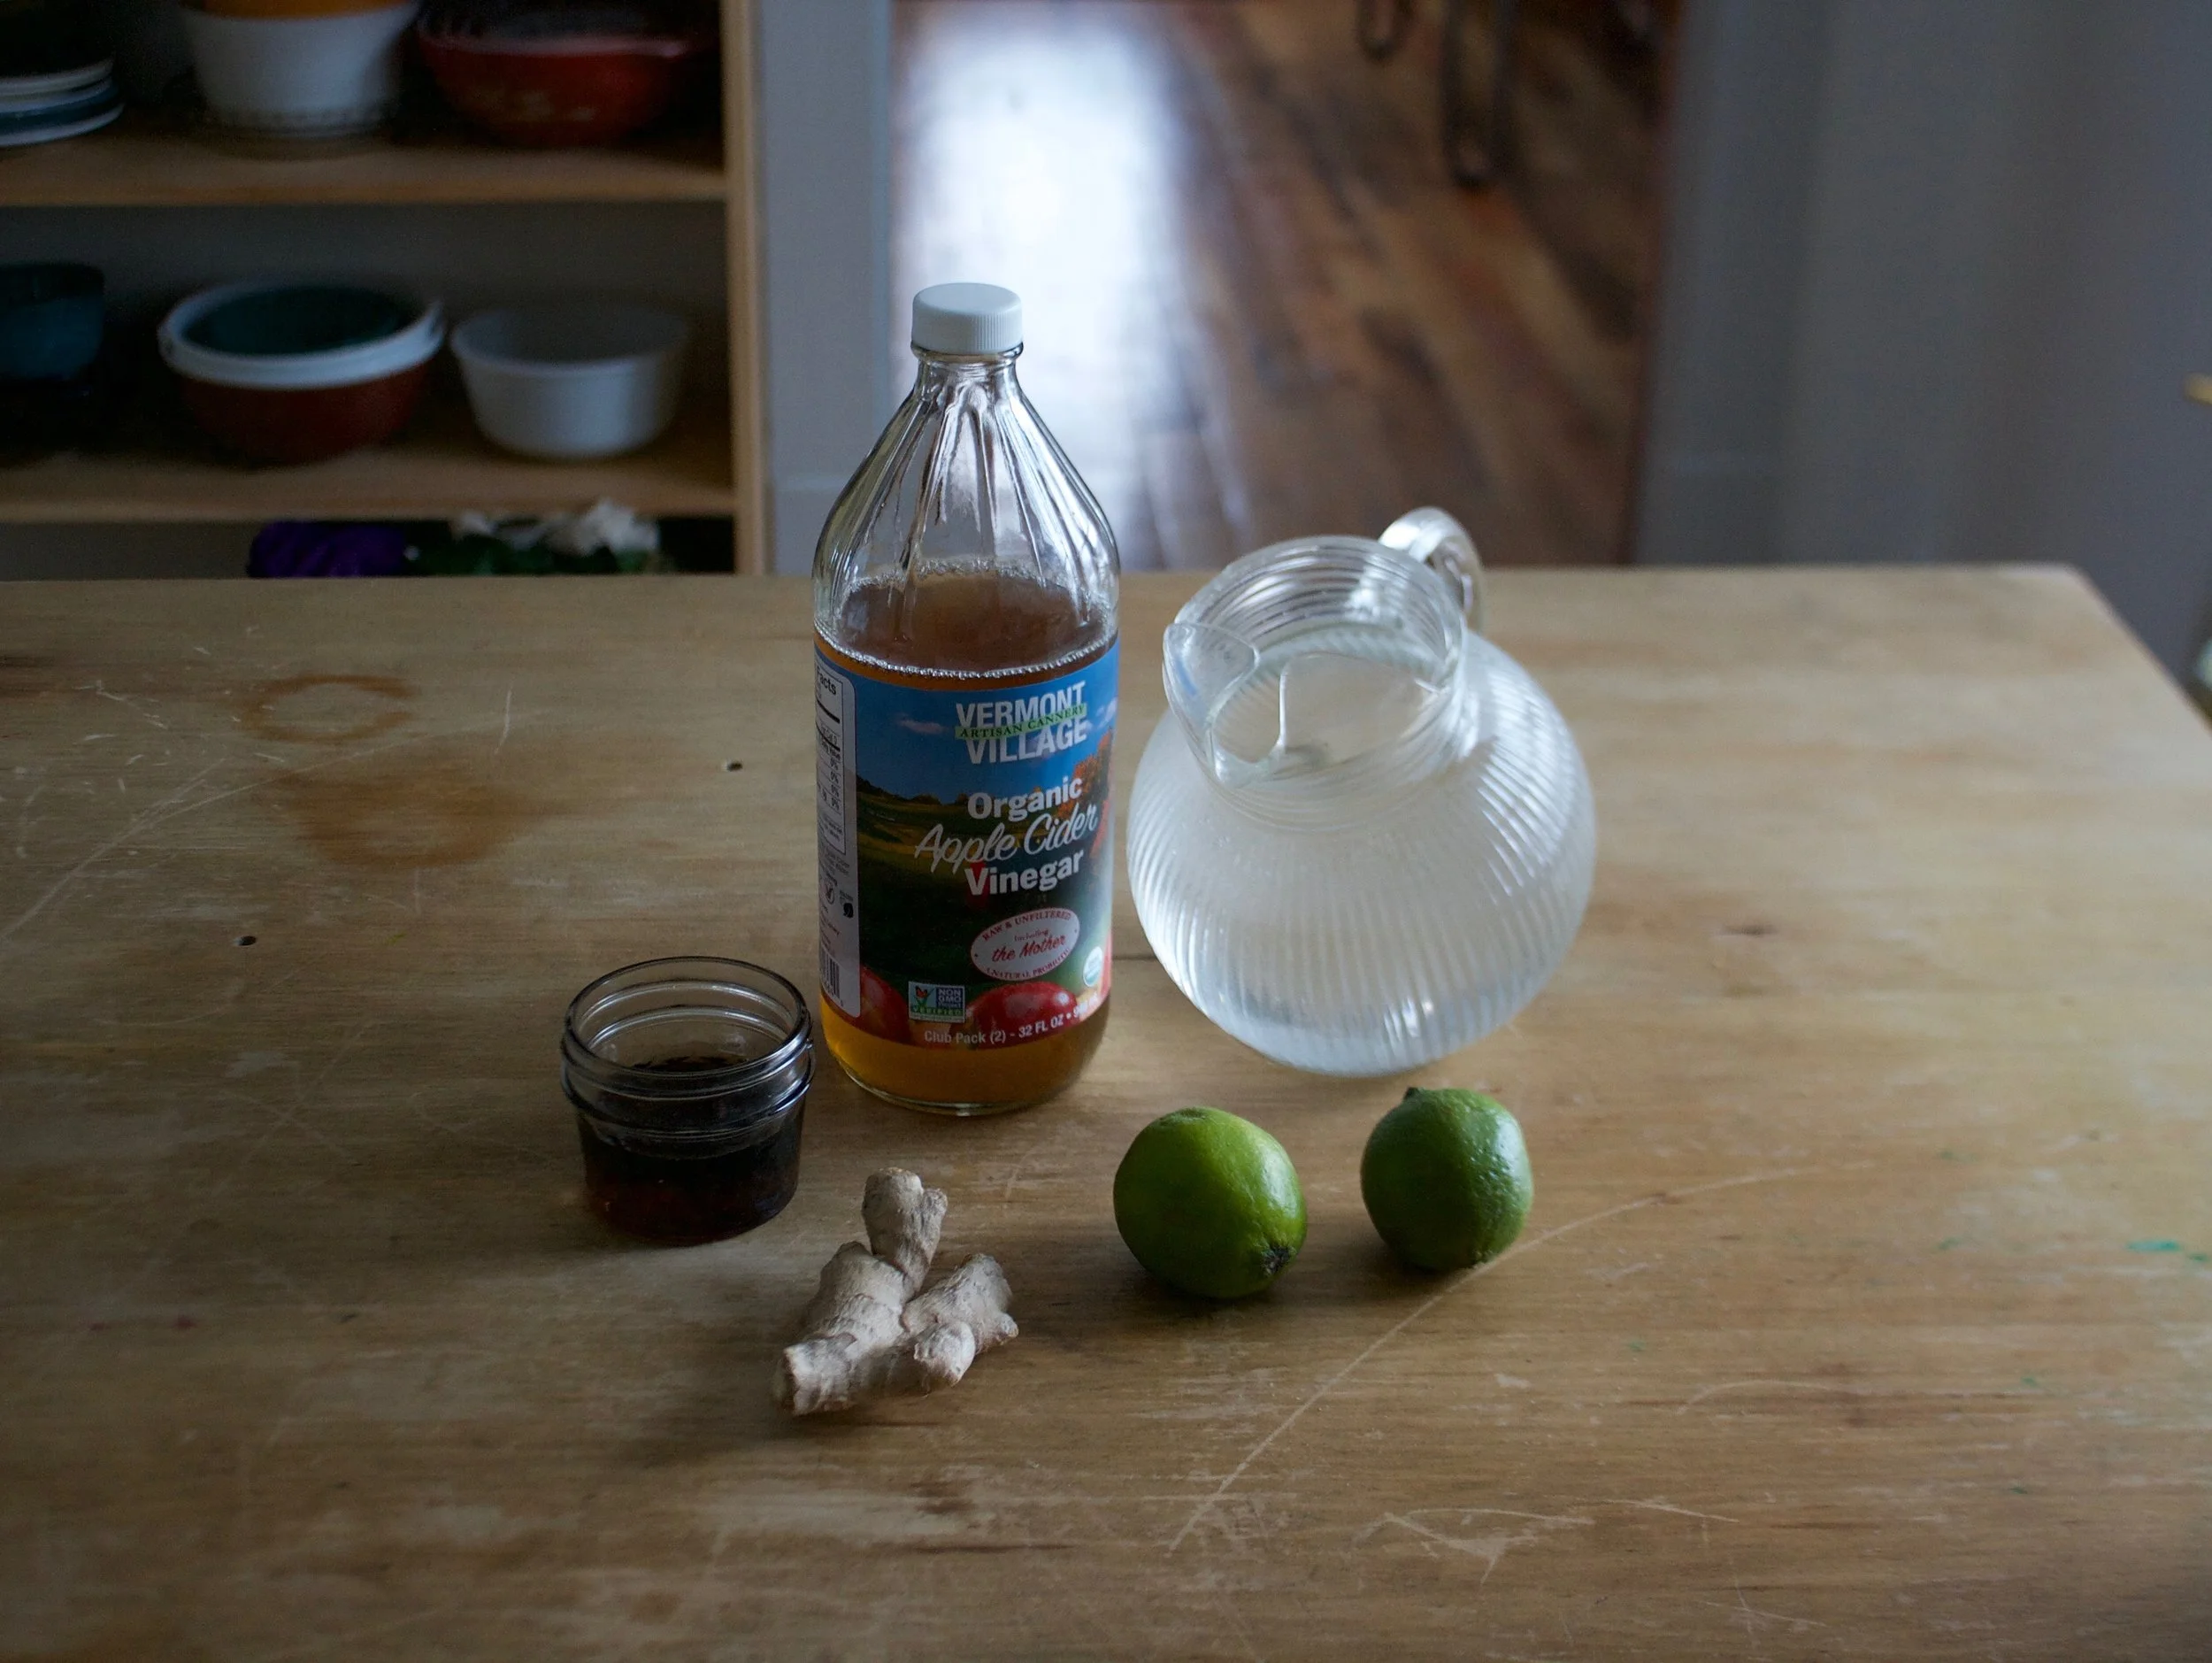
The stuff. Apple cider vinegar (the good stuff that is raw and has the mother), fresh ginger, limes, maple syrup, and water.%u00a0
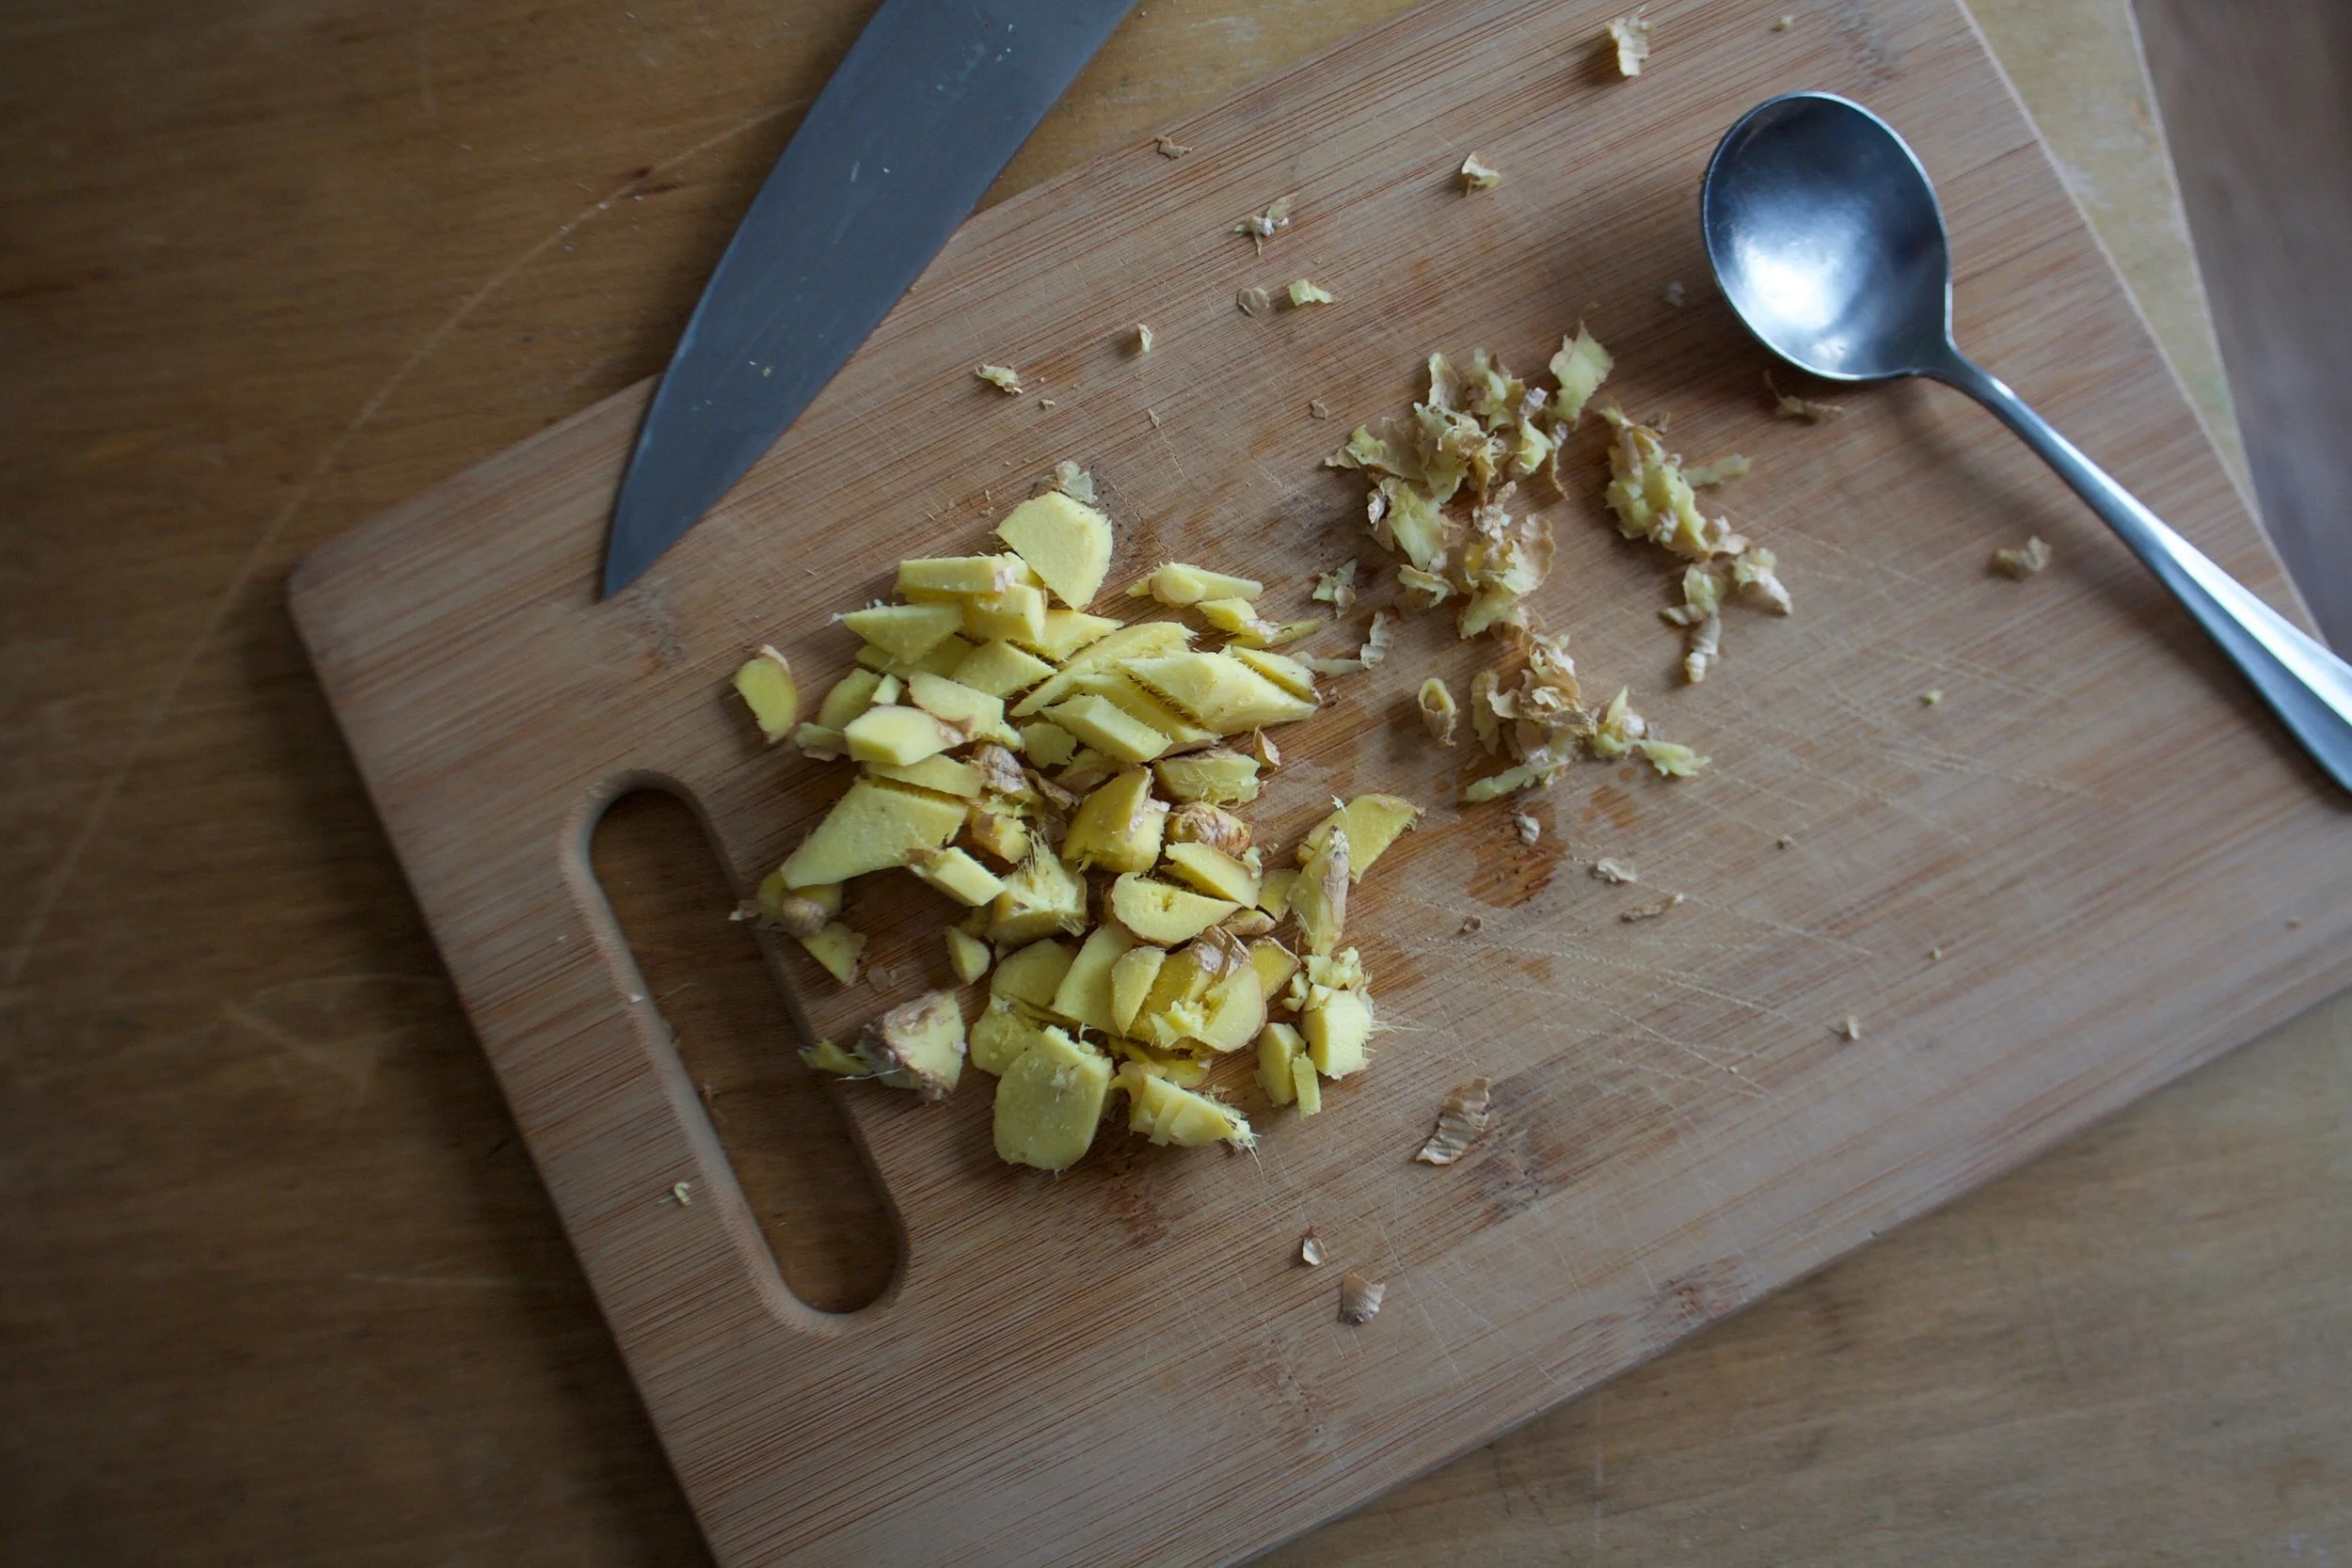
Fresh ginger is the best. Give it a little peel with a spoon, just to maximize gingerness exposure then chop into small pieces.%u00a0
Ginger and water goes into big pot. Bring it to a boil then turn down to a high simmer for 10-15 minutes to really get the ginger infused into that water.%u00a0
After it’s cooled a bit, strain the now ginger water into a pitcher or a big jar.
Add in the vinegar, the juice of the limes and a bit maple syrup. Start off with a little maple, you can alway add more later if needed.%u00a0
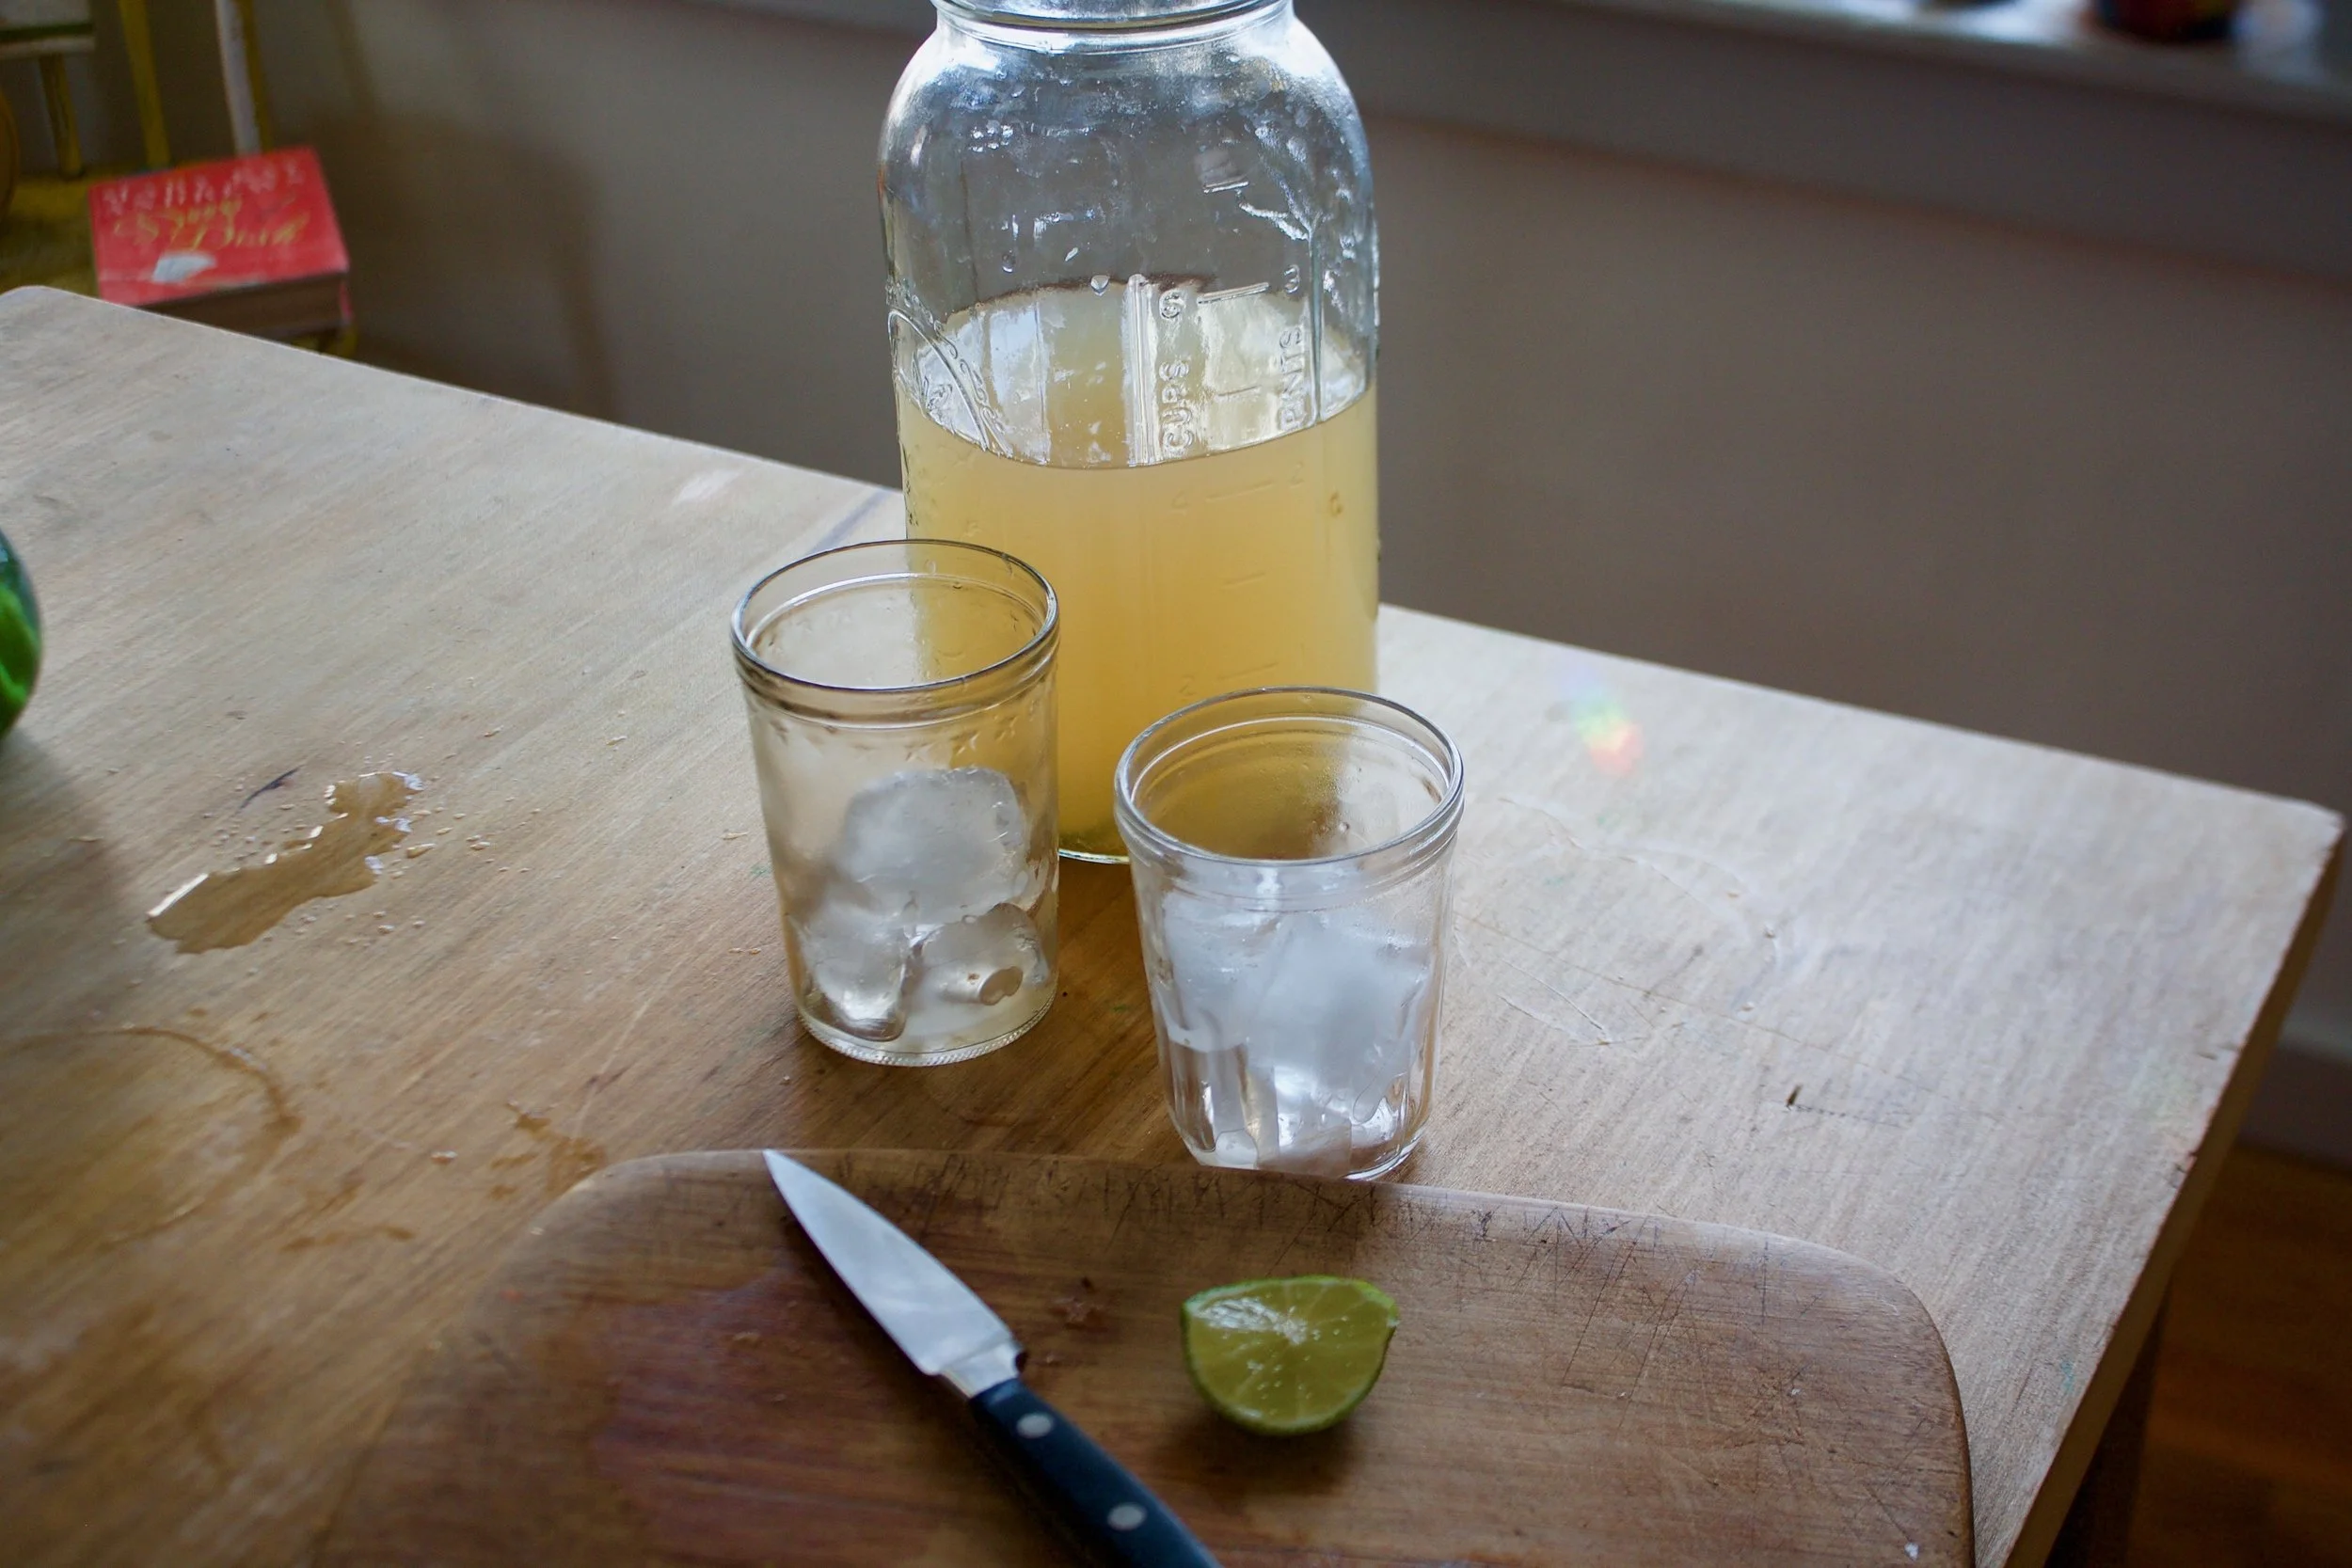
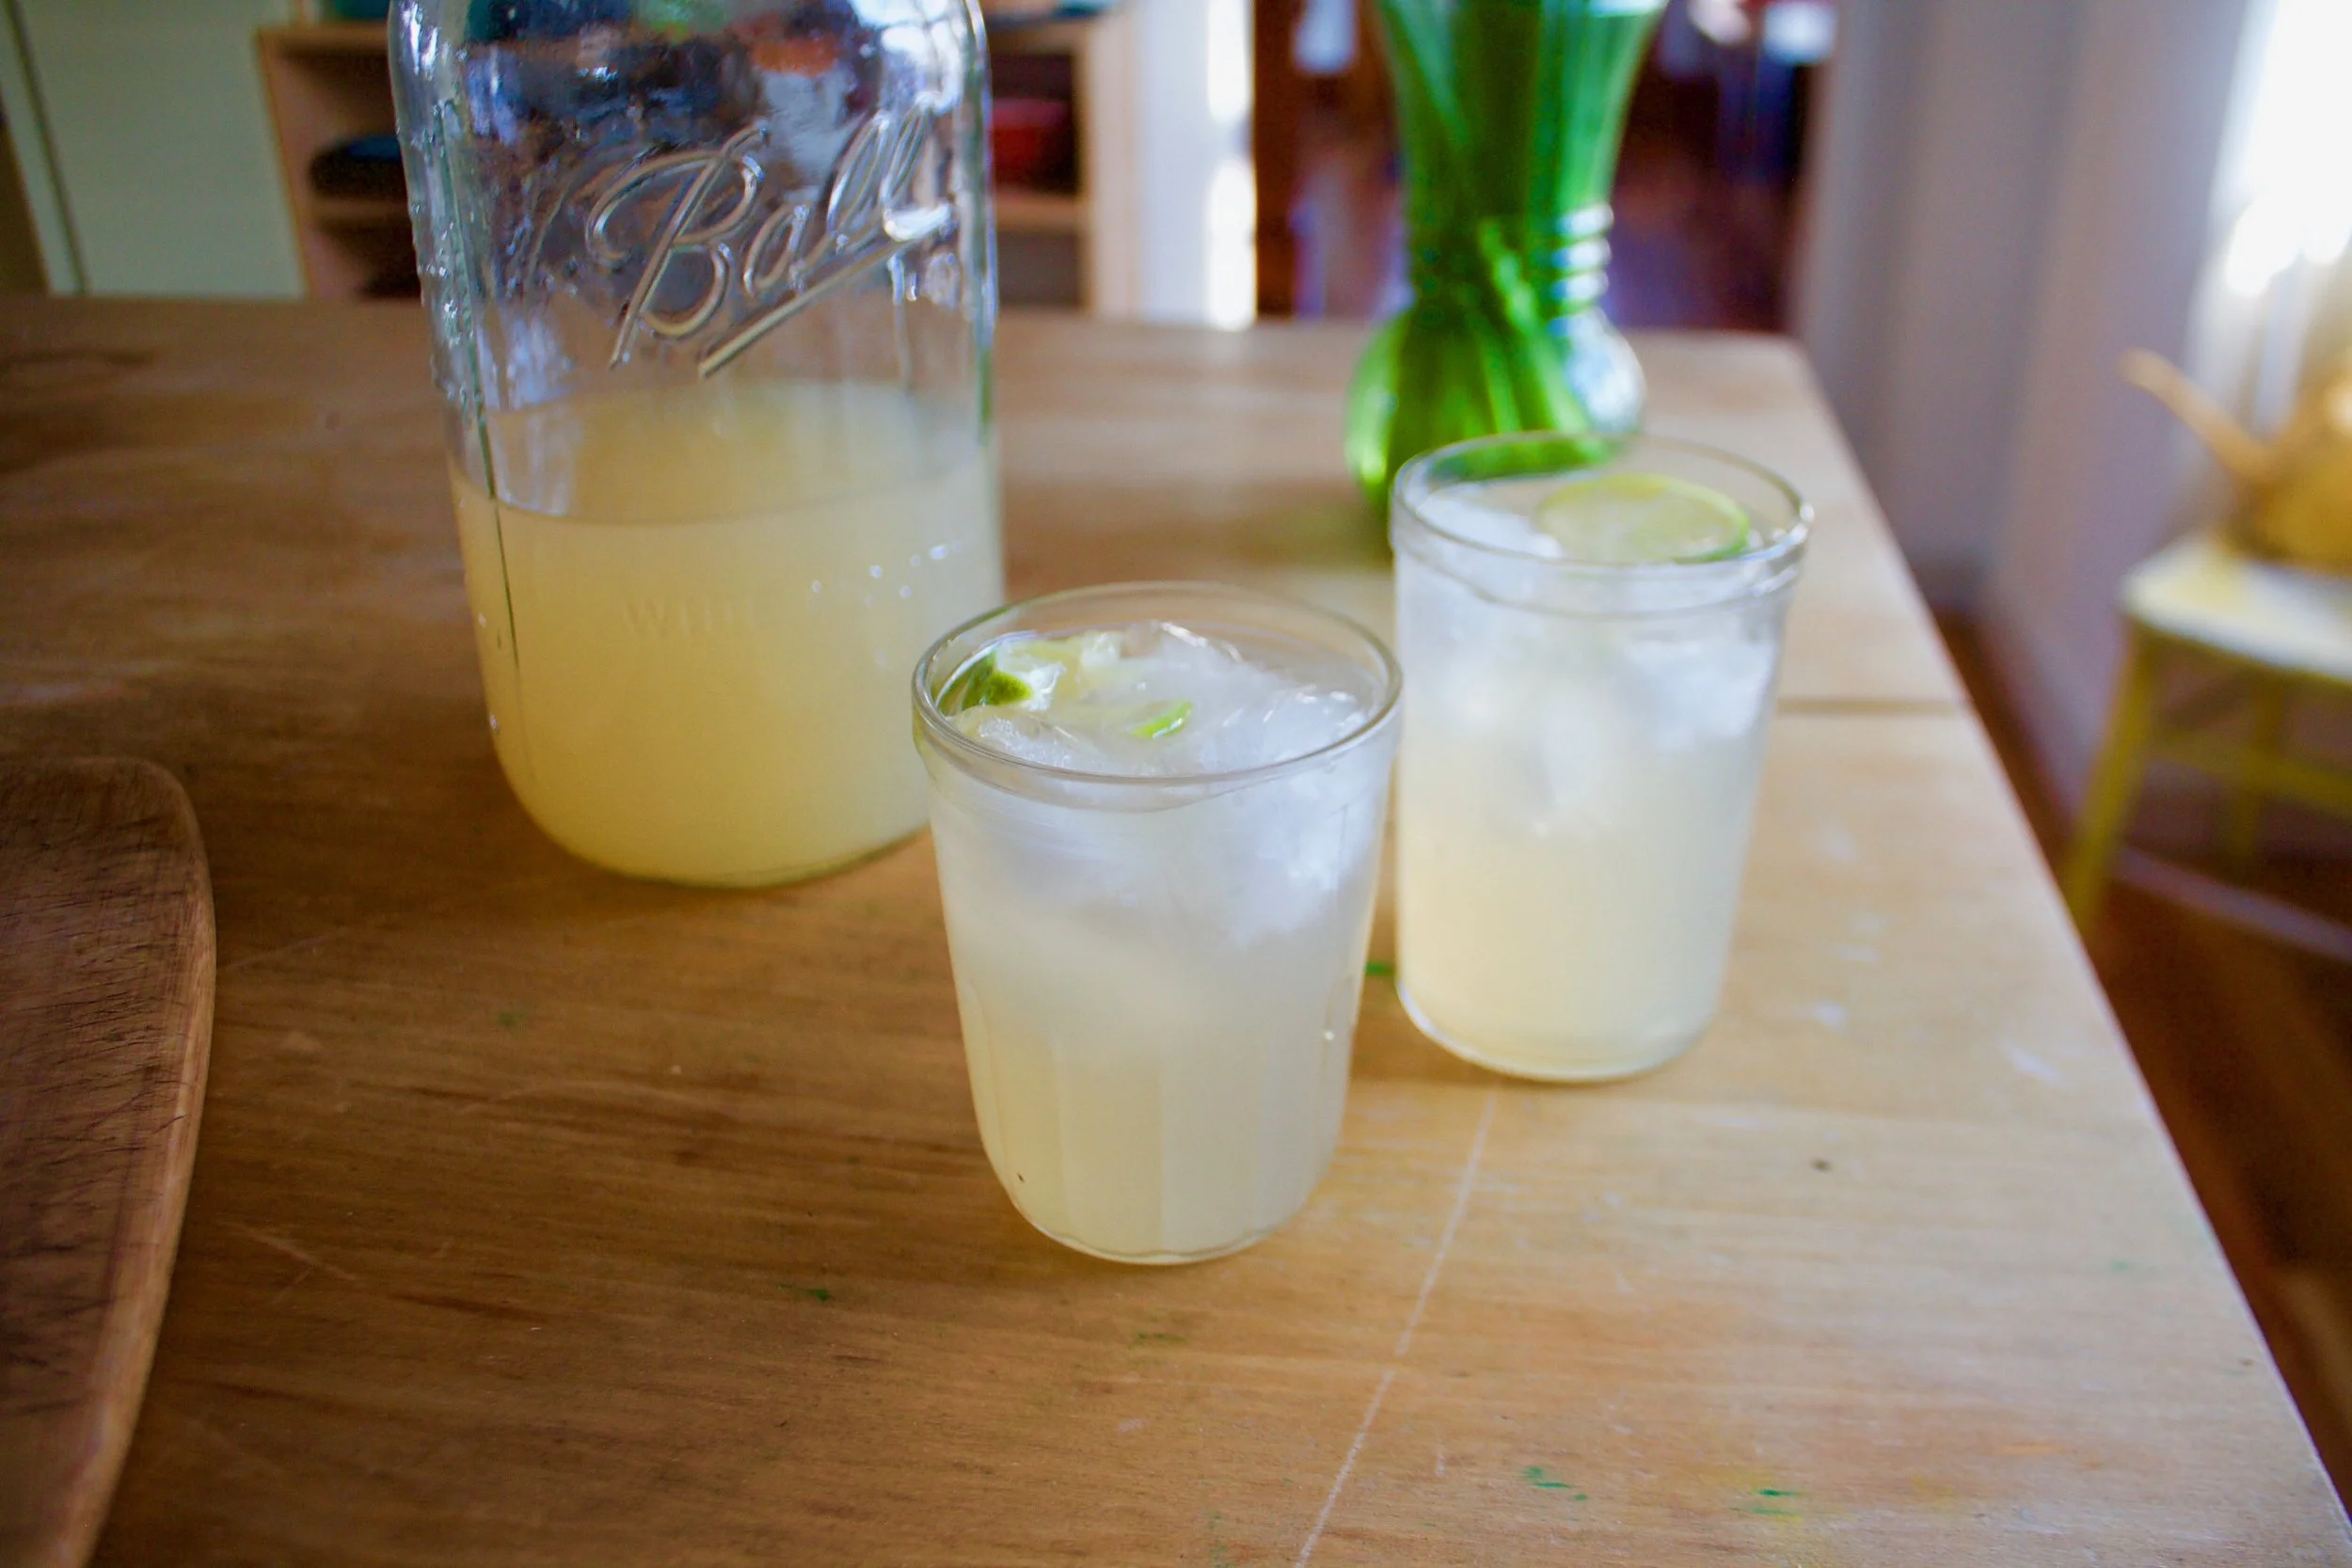
After the switchel has some time in the fridge to cool (at least 2 hours, but I like it best when it’s sat overnight) grab a glass ,some ice cubes, and a slice of lime. It’s go time.%u00a0
A drink to you my friends
-C
Makes bout 6%u00a0 cups%u00a0
1/2 cup raw apple cider vinegar (with the mother. Braggs is a popular option)%u00a0
5-6 inch piece of fresh ginger%u00a0
2 limes
5 1/2 cups water
1-4 tablespoons maple syrup%u00a0
With a spoon, gently peel ginger . Not perfectly, just get some of the skin off. Chop it into small pieces and place it into a large pot with the water. Bring to a boil then let simmer for 10-15 minutes. Strain ginger water int a large pitcher or jar.
Add in the apple cider vieager, the juice of the limes, and a tablespoon or two of maple syrup. Give it a good stir then place in the fridge until cold (about two hours but overnight is best)%u00a0
When it’s cold, give it a good stir again, taste, and if it needs more maple, add it in. And then it’s ready.
You can drink it on ice, maybe add some seltzer to it, or mix it into some fancy cocktail. It can also be reheated for a nice spicy warming treat.%u00a0
Short of the long… I am trashed. We just got back from a 6 1/2 hour drive from the Poconos where I now have a sweet ass new summertime home in the woods (actually not mine, but my dad just bought a house and moved there so it’s pretty much mine..haha)%u00a0 Summer fun time all the time long. A short few days for an initial, get to know the place and see the new house, go hiking, biking, more hiking, and basically run around and play with the dogs and the neighborhood deer, visit. It was an all out exhausting, amazing time. (I would tell you more about it, but right now my mind is mush I I am surprised Ian even type right now)%u00a0 So now we are back home to maybe get a few hours of sleep and then back to the house for few hours of work. Got to get ready for the boom truck of a million pieces of sheet rock that are coming in the morning!
Now I am really, really freaking tired and need to like, for real, sleep for a bit before I keel over. Oh thanks the world for coffee cause today is going to be a couple pot of coffee kind of day. Wish me luck.
Some stuff the from the early week internet browsing.
-Not sure if I would want to stick my head in a one after all the other people have. Levitating Clouds Provide a Dreamlike Resting Place During the Festival des Architectures Vives
-I think we could be best friends. Meet a Woman Who Keeps 500 Plants in Her Brooklyn Apartment
–How to Keep Berries Fresh for Longer
-So into these Origami Bird Lights.
-I have got to try and make this mozzarella aquafaba cheese
-It’s that time of year again. Canning here we come! Making Fruit Jelly Using Apples for Pectin
I am channeling all my summer time feels here in hopes for warmer weather. As of yesterday there was still a pile of snow outside of my house and I am still leaving every morning in a hat, mittens, and a winter jacket.
I want t-shirts and shorts, I want sandals, and I want to set my winter jacket on fire (not really, but kinda).
This cold weather has crept back into my soul and I needed something to remind me that there will be warmer days to come and I will soon be bitching about how hot I am and blah blah blah.. you know how it goes.
So I make lemonade. This lemonade as inspired by my favorite tea as of late, raspberry zinger. It’s a nice and tangy tart and really tasty. I make great big jar of it at night and add a little squeeze or two of lemon to it for that little extra zing. I figured if it tastes good hot, it will taste great cold, which in fact, it does. It taste really freaking good. And it just occurred to me that there is probably a little subliminal inspiration from Beyonce in wanting lemonade, so thanks for the B.
Anyway, it’s suppose to me nice and seasonably warm this weekend. Maybe bust out your lemonade game and try a batch of this one.
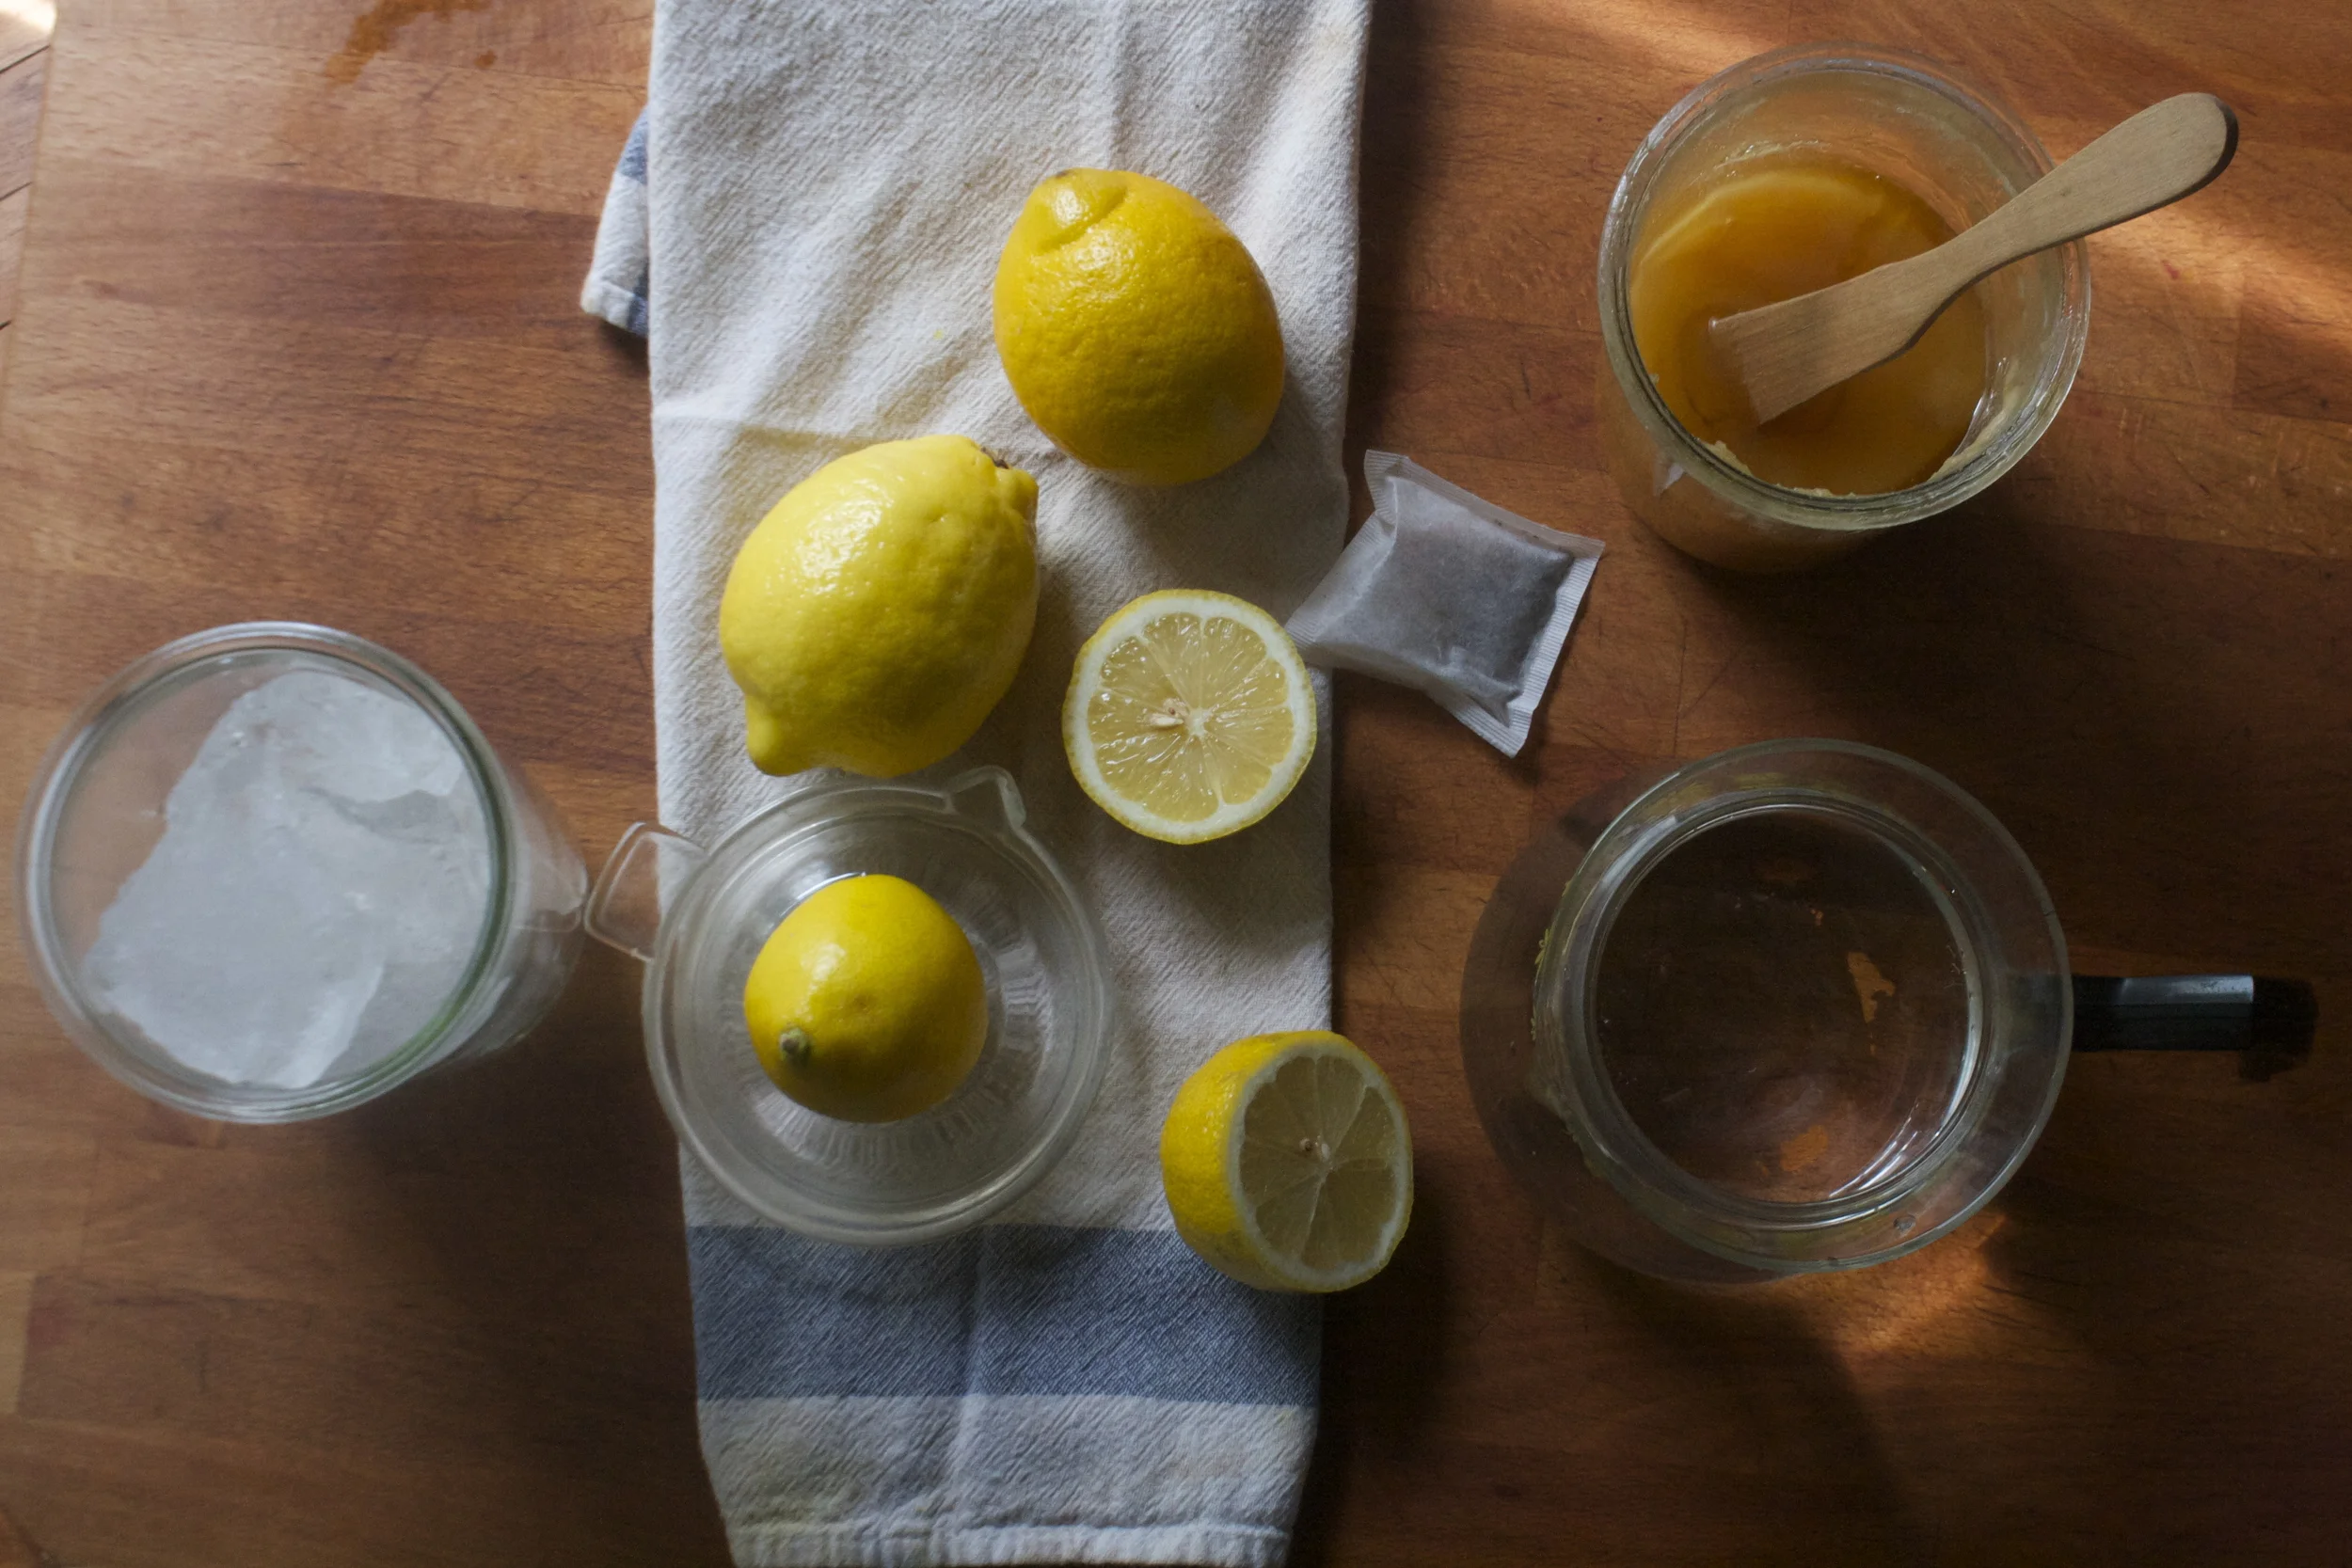
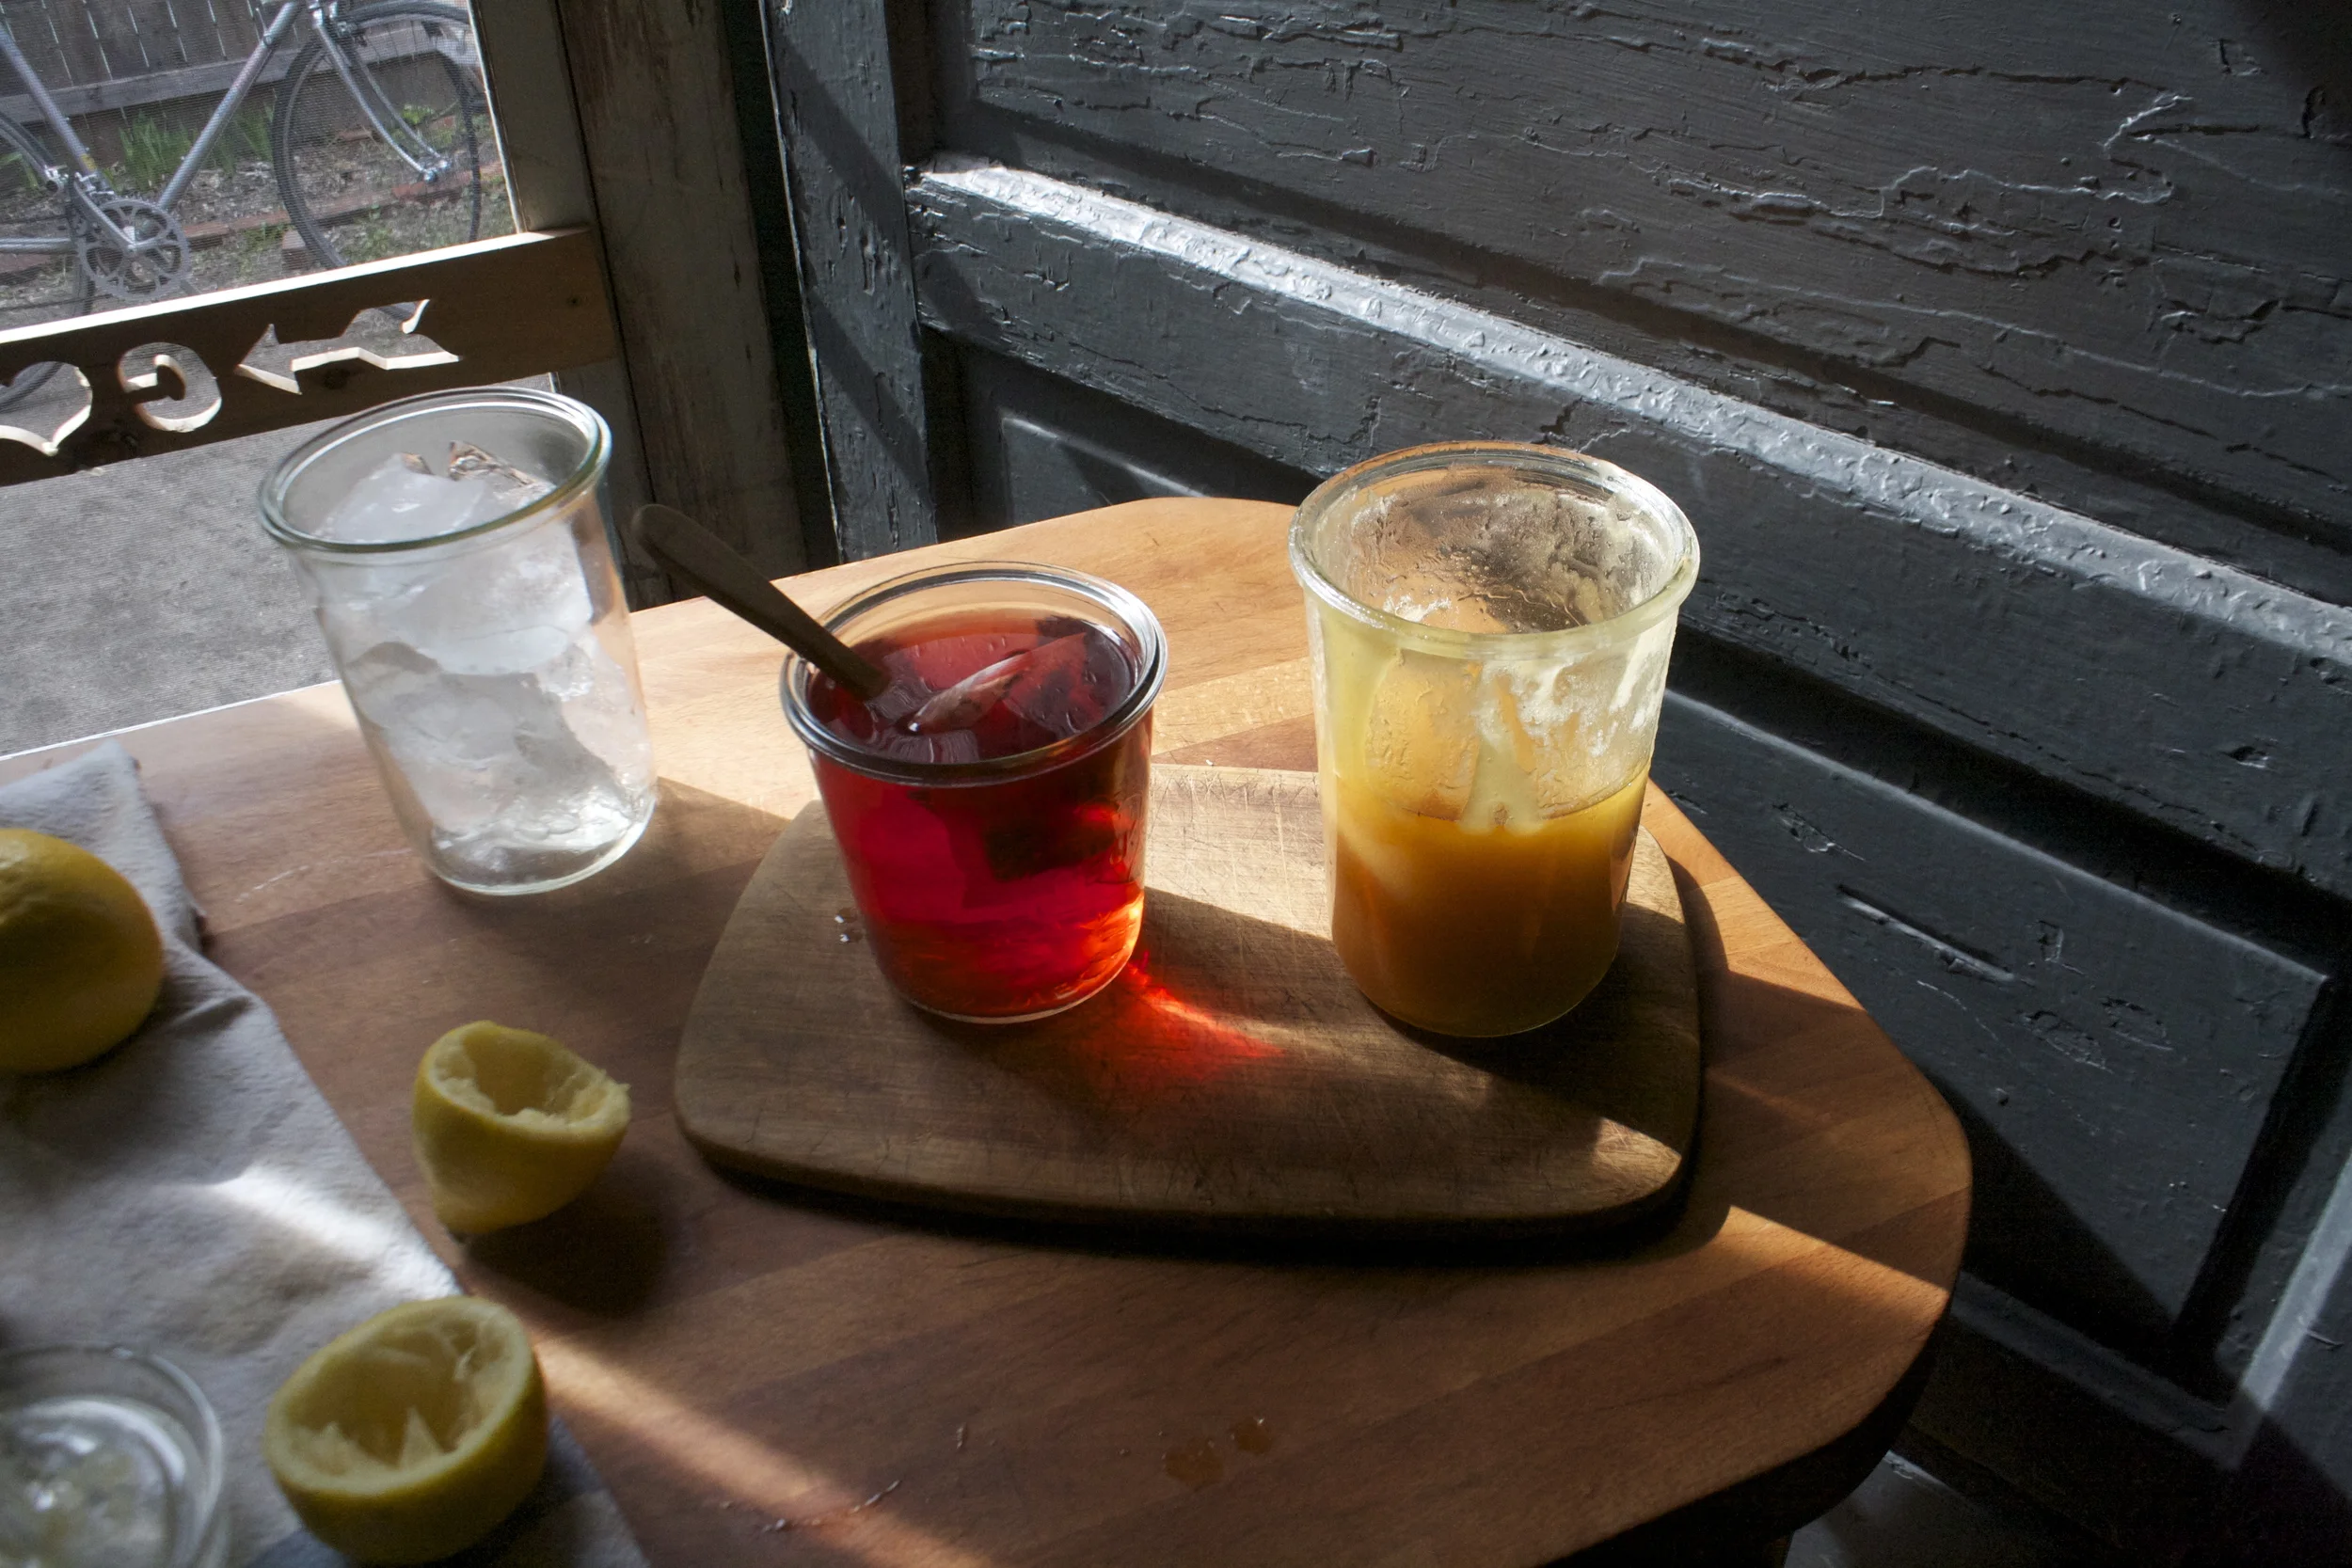
The stuff. Lemons, a raspberry zinger tea bag, honey (or any sweetener you like to use) water and ice.
Bring some of that water to aalmost boil and pour it over the tea bag (make sure you stick the bag into a jar or pitcher)
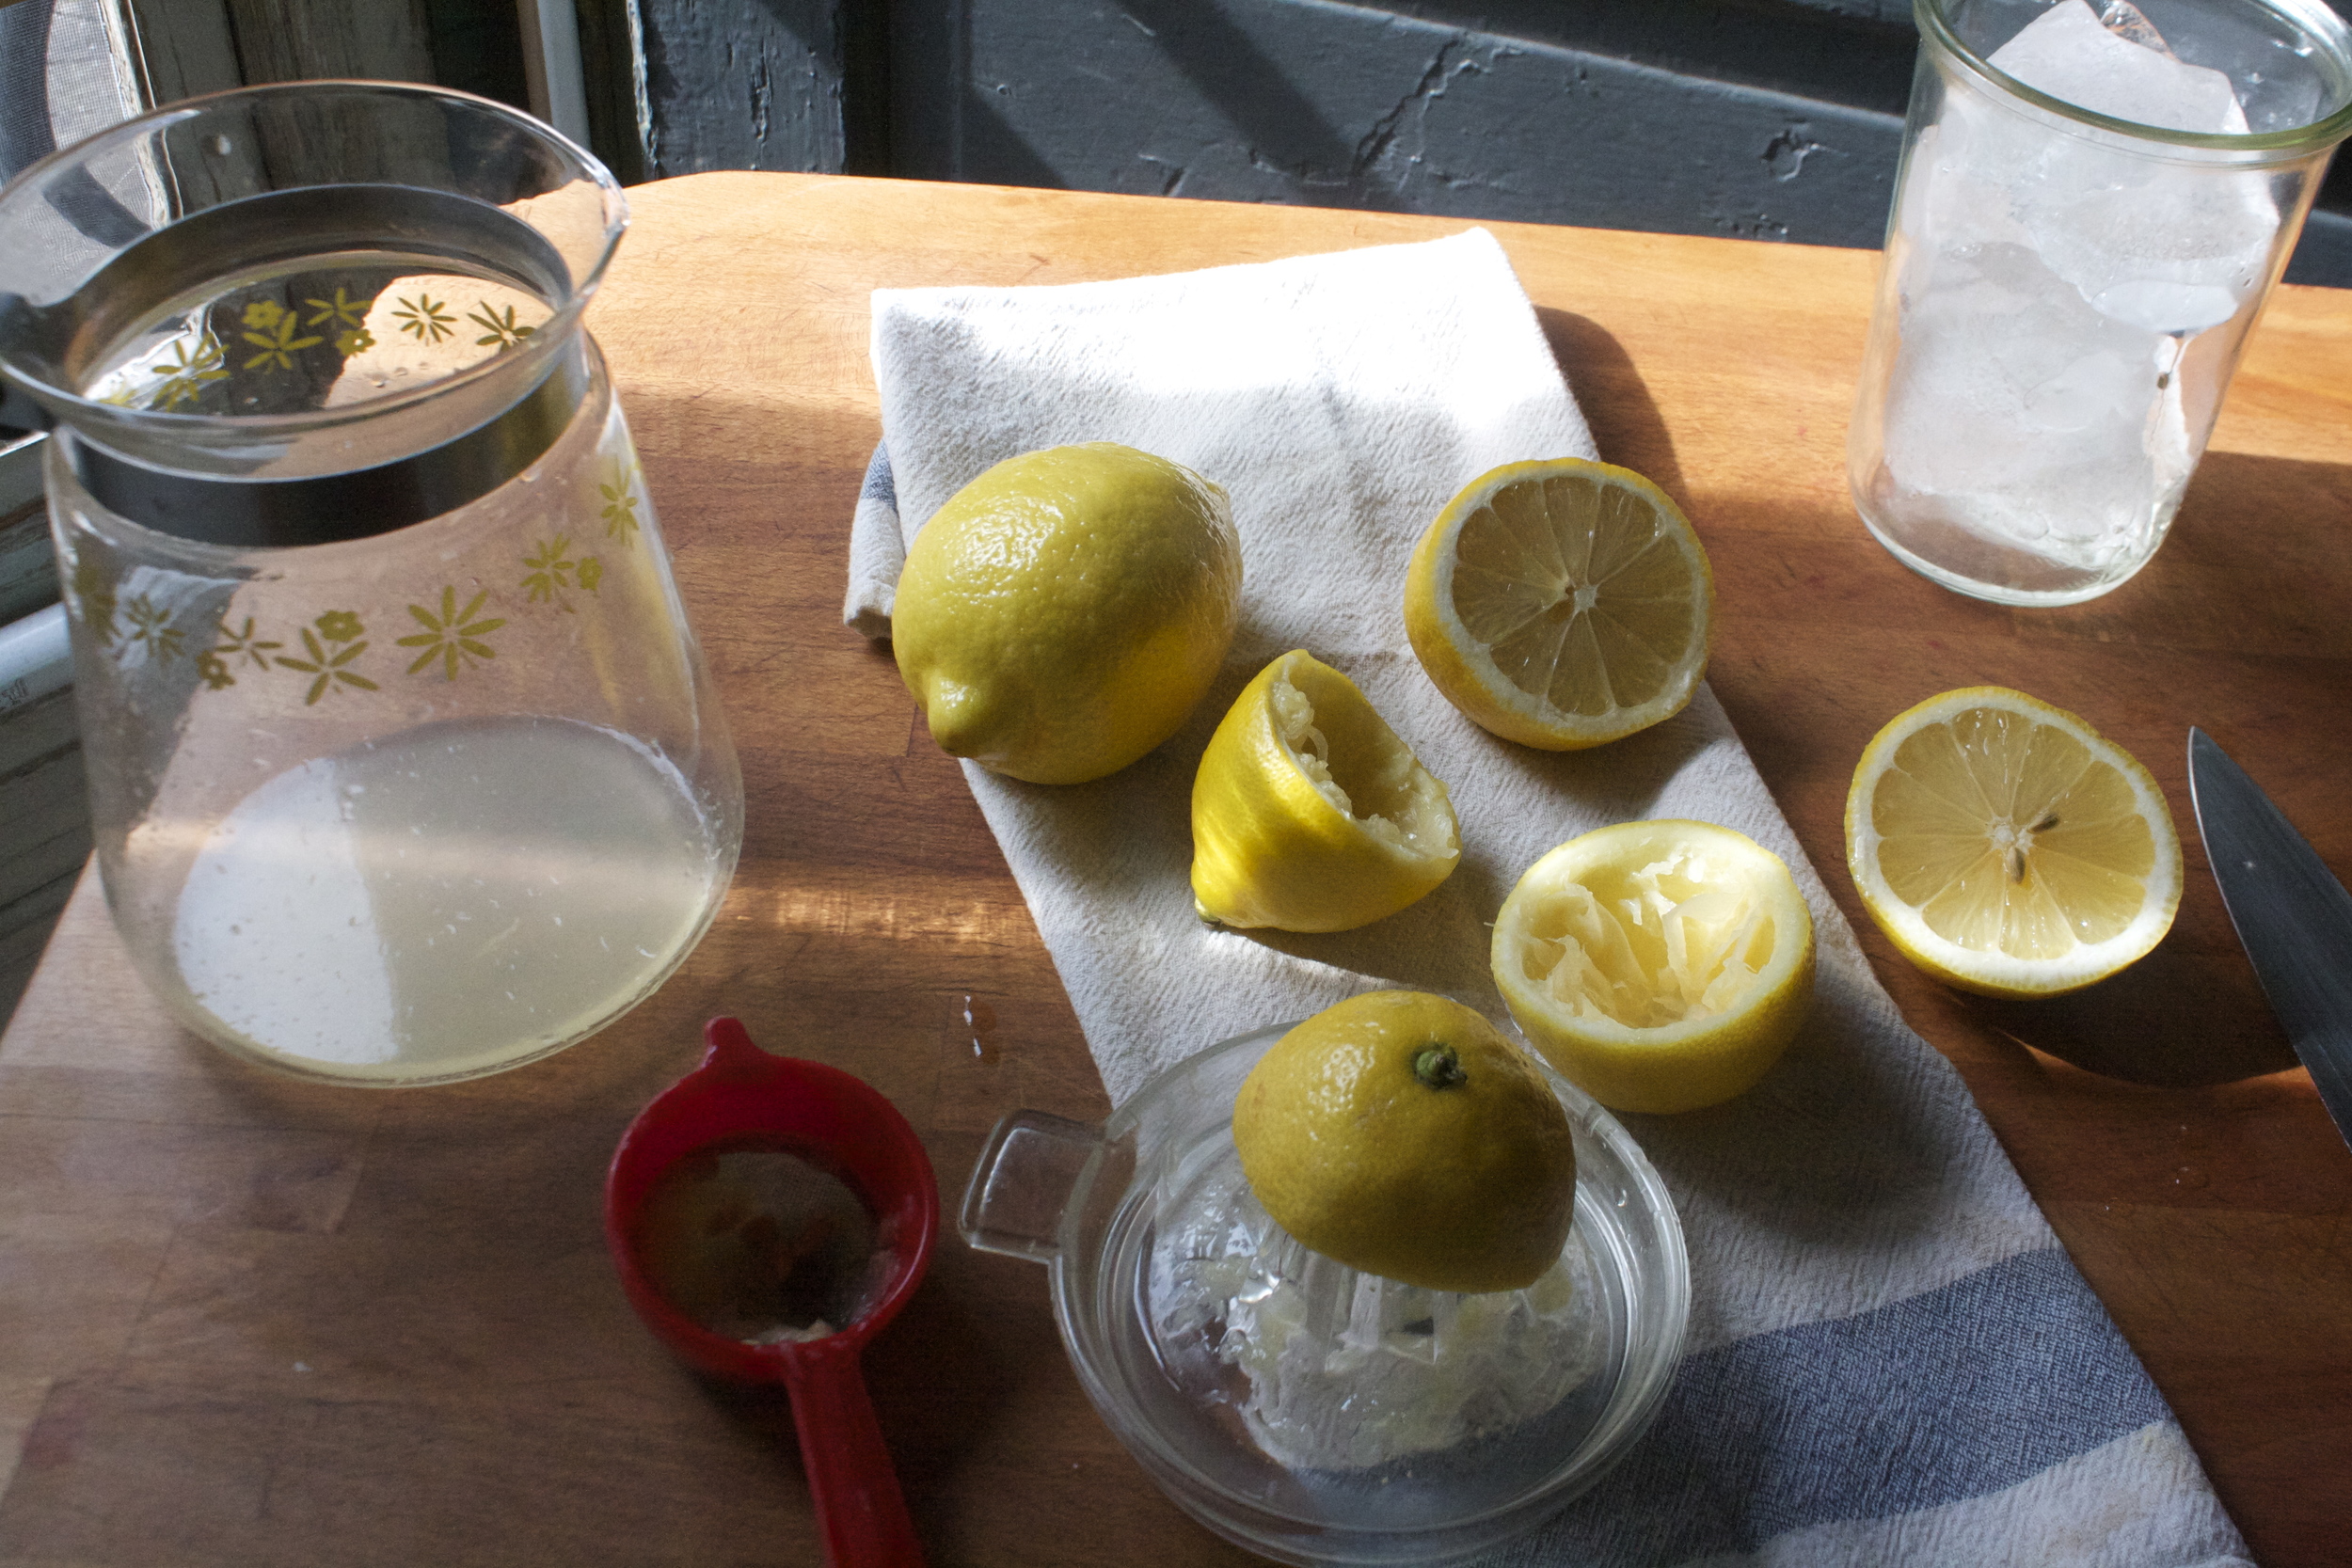
While the tea is steeping, juice the lemons. And a personal preference, you can strain out the pulp or not. I use the strainer to catch the seeds but then stick the pulp back in cause I like pulp. All up to you.
While the tea is steeping and still hot, add in any sweetener that you want to use. ( I used a little honey) Stir until that sweetness is all dissolved.
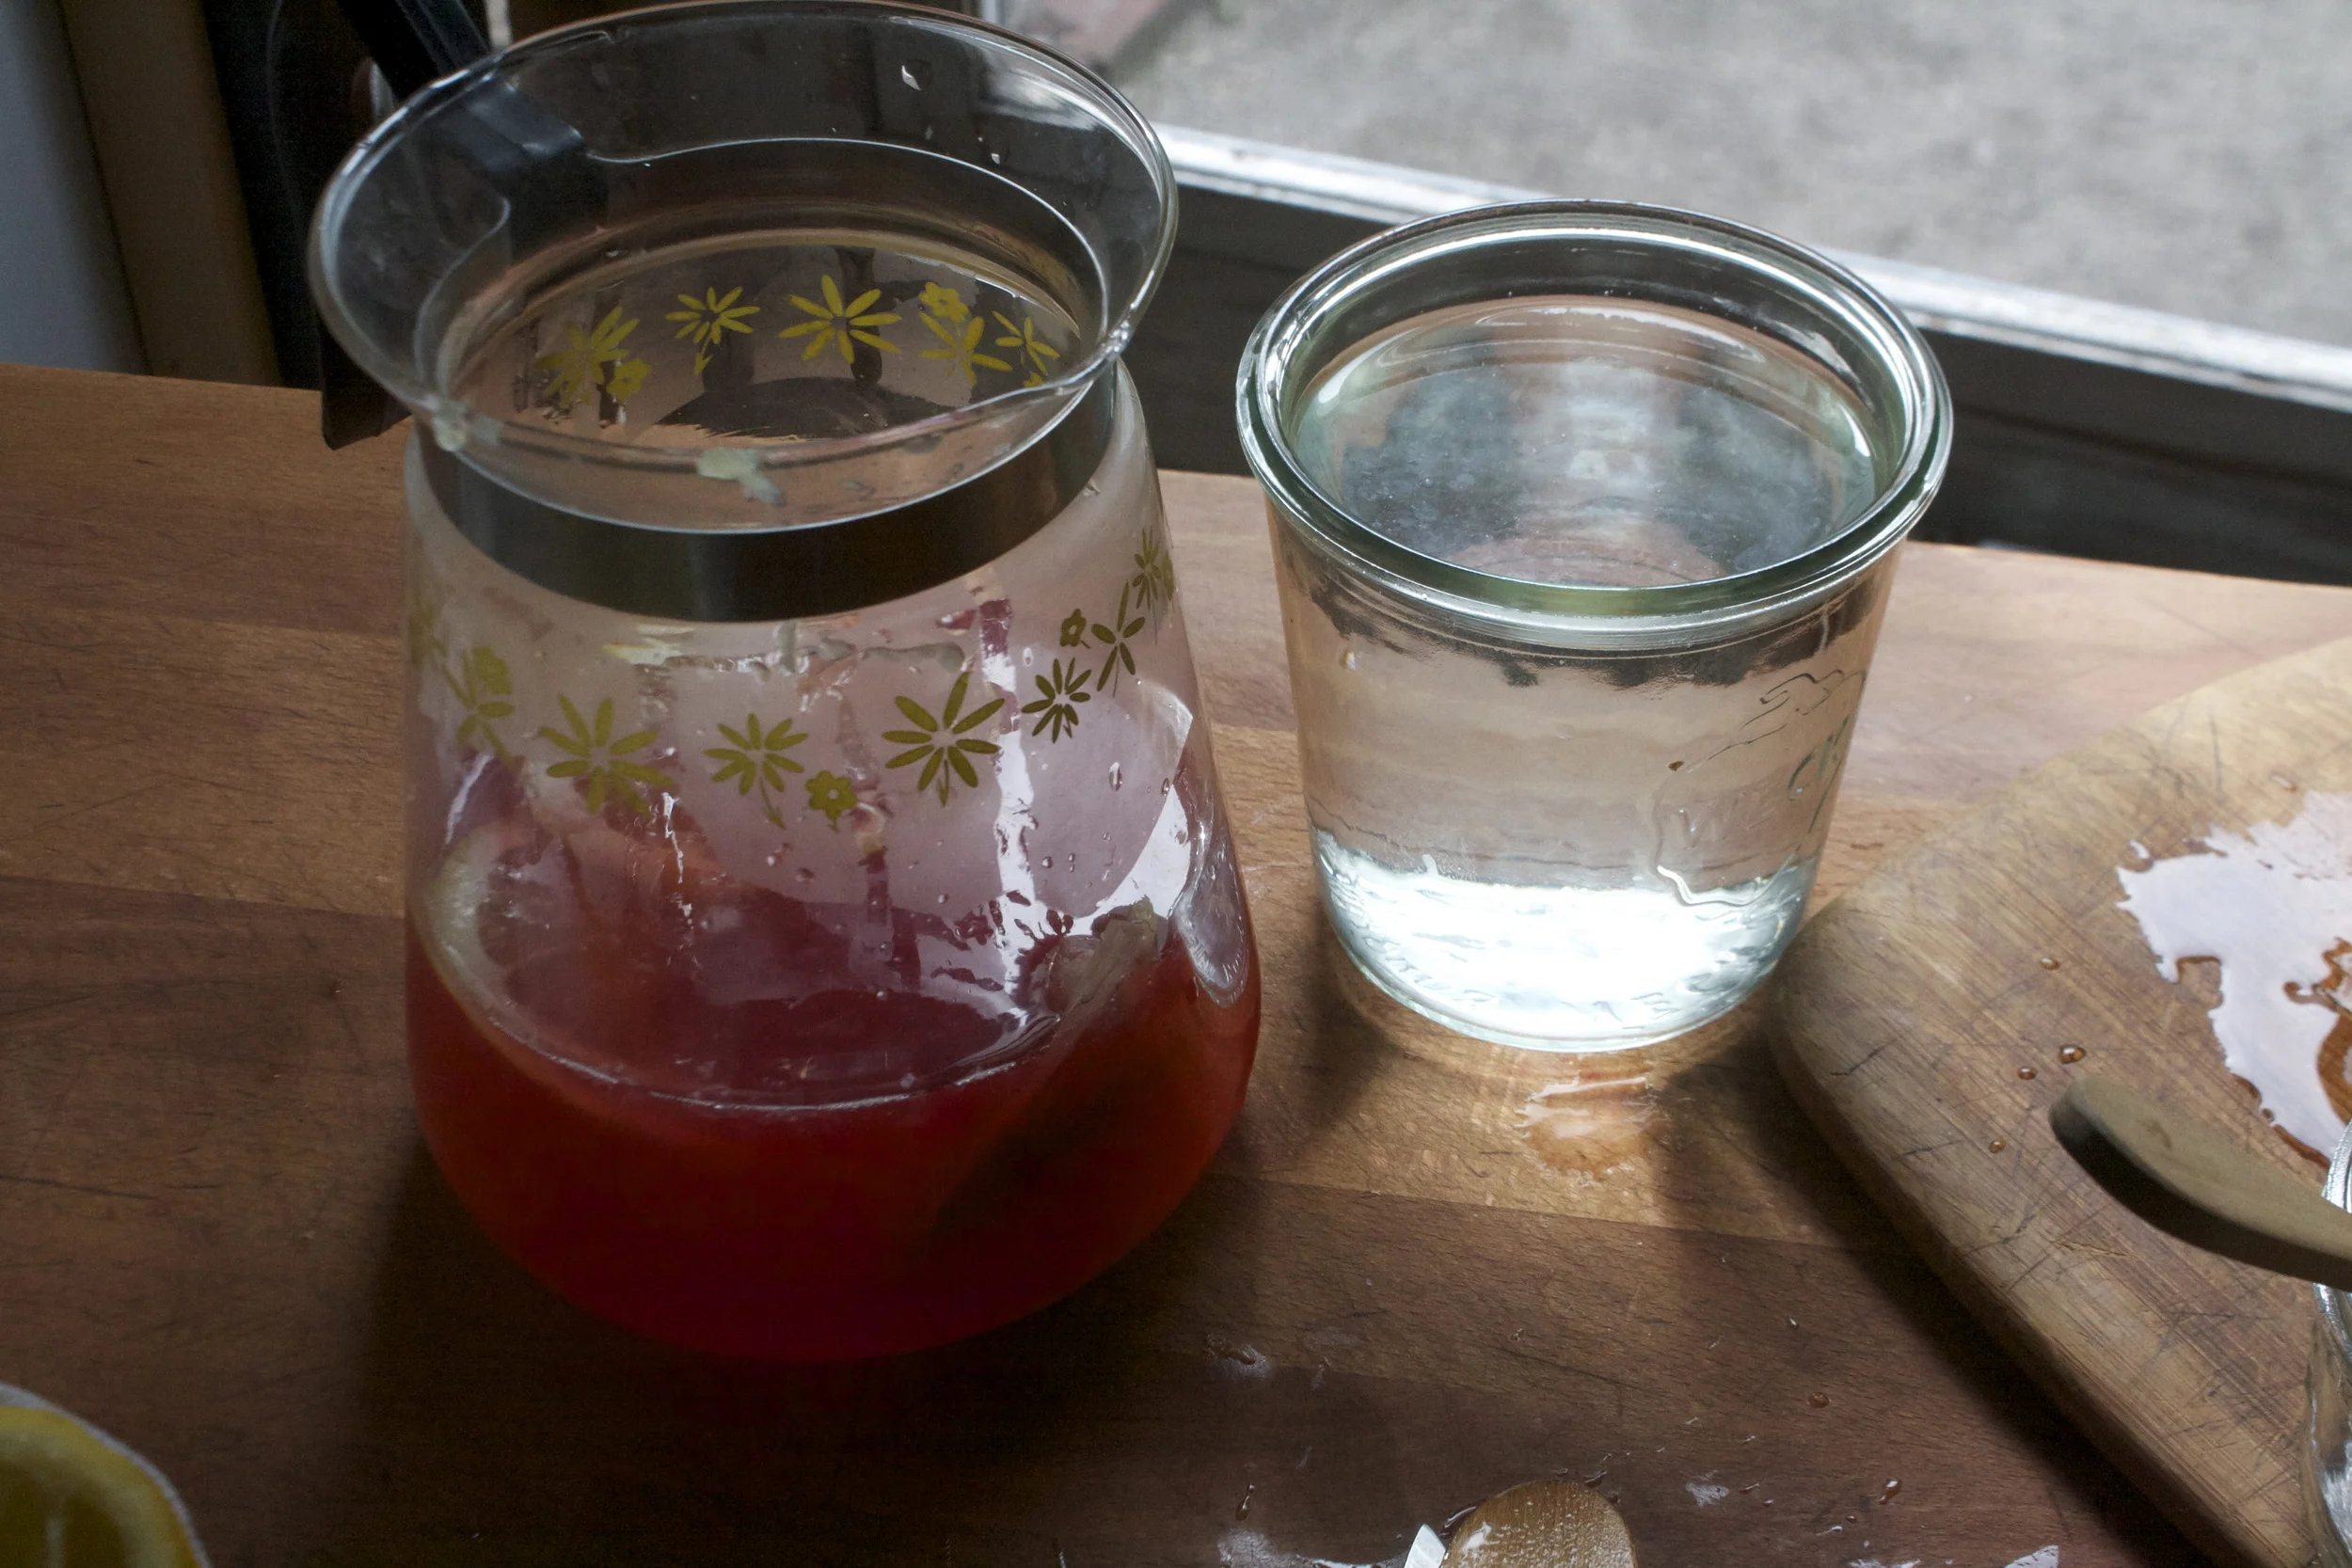
And after the tea has had a good steep, dump the brewed tea into the pitcher with the lemon juice then add in the really cold water. Stir it all around.
Add acouple thin slices of lemon to make it all fancy anda few big chunks of ice to make it super cold
Refreshing, crispy, tangy with a touch of sweet….Perfect for all those warm summer days to come (hopefully)
Have a great weekend people.
-C
Makes 5 cups
1 raspberry zinger tea bag( I used Celestial Seasonings)
3/4 cup fresh lemon juice (3-5 lemons, depending on size)
Anywhere between no to 1/2 cup of sweeter (can use sugar, honey or maple, I like a touch of honey)
4 cups water (2 hot, 2 cold)
ice
Place tea bag in 2 cups of hot water (can be done directly in a pitcher) Add in the sweetener while its still hot and mix until completely dissolved. Let steep for about 10 minutes.
Remove tea bag and add in the lemon juice, 2 more cups of cold water and mix, Top with ice and garnish with a few more lemon slices if your feeling fanciful.
Serve in a glass full of ice with a wedge of lemon and a smile on you face.
TGIF!!!! For reals, because Monday-Thurday were monster days. And now that its friday, I can dig a hole and hide in it until it’s at least 30 degrees with some sunshine. (I might never get to come out.)
A few things I will bring in my hole:
food (lots of food and coffee, lots of coffee)
a soft blanket and pillow
a few books, preferably with pictures, on farming and gardening (think spring!)
the entire series of the Fresh Prince of Bel-air and a device to watch it on
toothpaste (I can use my finger to brush my teeth)
But before I leave for my hole in the ground, I made these little cake bites to get my people through the weekend. Sweet little lemony bites of rich dense cake dipped into bittersweet chocolate. (I am just so nice) They have all the pleasure or cake without the need of a fork and are much easier to give away then a big slice of cake. Plus, they are fun to make. My little sister helped and did most of the chocolate dipping. Then she and another little used their mouths to clean up the chocolate mess. It was an afternoon of chocolate all over the kitchen fun day.
So make some bites to have and to share. Or if you, like me, are digging a hole to hide in, make a batch of bites to bring with you. That’s the beauty of cake covered in a harden chocolate shell, they travel really well.Simple lemon cake stuff. Flour, baking powder and salt whisked together, Sugar and soft butter in a bowl. An egg, some vanilla, milk, and of course, the lemon.
To make the batter, cream the soften butter with the sugar until light and fluffy. Zest lemon(1 big or 2 small) into bowl with the juice of the lemon(s), the vanilla and the egg. Beat until combined. Now beat in the dry and then the milk. Keep beating for another minute until all mixed. Batter should be light and fluffy.
Batter goes into a greased and floured 9×13 baking sheet and stuck into a 375 degree oven for about 30 minutes (You can use a 9×9 baking pan. Just bake fir another 10 minutes and you will end up with thicker bites). Remove from oven and let cool for a few minutes and flip to remove cake from baking sheet. Cut cake into small pieces (I cut 4×6 to get 24 bites) and place bake into sheet and into freezer (I stuck mine outside, it was -2 degrees ) for at least 2 hours.
Frozen bites ready for the chocolate coating… Bittersweet chocolate chips and a little bit of coconut oil. Melted together all nice and shiny smooth.Now dip and slather those bites in the melted chocolate.
Oh what a lovely sister I have.. Look at her dunk….. like a boss!Fully coated and placed on a rack for the chocolate to harden. I ended up sticking the rack in the freezer for 10 minutes…They harder really fast in there.
And now you have some it, bites of cake covered in chocolate. 1 bite, 2 bites…5 bites. Eat however many you want because its Friday and because there small little bites and just because you can.
Now if you need me, I’ll be in my hole.
-C
Chocolate Lemon Cake Bite
1 1/2 cups all purpose flour
1 teaspoon baking powder
1 teaspoons salt
1 cup white sugar
1/2 cup (1 stick) soft butter
1 egg
1 teaspoon vanilla
1 cup milk
1 large or 2 small lemons
2 cups bittersweet chocolate chips
2 tablespoons coconut oil
Add butter and sugar to a large bowl and beat on medium unit light and fluffy. Ass in vanilla egg, the zest of the lemon and the juice of the lemon. Beat to incorporate. Now beat in the dry and lastly the milk.
Grease and flour either a 9×9 pan or a 9×13 baking sheet. dump batter in and smooth out. Stick in oven and bake for about 3o minutes or until a toothpick stuck into the middle comes out clean. Remove and let cool for a few minutes on a wire rack. Flip cake to remove from pan. Cut cake into bit sized pieces, 4×6 is a good size, and place back on baking sheet and stick into freezer for at least 2 hours.
When cake bites are as good as frozen, get the chocolate ready. Take the chocolate and the coconut oil and either melt in a double boiler or the microwave. Mix until smooth and make sure to full incorporate the oil. Now remove the cake bites from the freezer and dip each bite into chocolate, trying to full coat all sides. Stick onto a wire rack or a parchment lined pan to harden. They can be stuck back into the freezer to harden faster.
Once chocolate has harden, your good to go!
Because it is cold outside. Because I had an hour to kill before I needed to leave the house and because I wanted to make a sweet treat for the mister (who had been dealing with frozen pipes all day) and for the little littles that I was going to hang out with. My original idea was to just make regular old snickerdoodles, but as I was riffling around my tea drawer for a mid day tea (it’s usually coffee, but I am trying to cut back on drinking one thousand cups a day) I got hit with a little inspiration. Chai tea spiced snickerdoodles. Yes! a nice black chai, full of flavors or cinnamon, ginger, cardamon, allspice, and pepper. So many good time tastes. And while I am at it, why not add some chocolate to that mix, because, well just because.
Chai, chocolate, and sugar equals….Bada da da….. awesome Cookies! And who doesn’t want awesome cookies?
The stuff…Flour, salt, baking powder, cinnamon, and allspice. Cocoa powder, brown and white sugar. Veggie Oil (you can use butter, or vegan butter instead for a chewier cookie) vanilla, a little vinegar and a nice cup of chai tea… Also a little bowl of cinnamon and sugar to doodle the cookies.
The sugars, oil, tea, vinegar, and vanilla go into a big bowl. Beat for a minute on medium, then add the rest of the stuff and beat some more until fully incorporated…. Simple simple.
Preheat the oven to 375 and get the cookies all dressed up in a cinnamon sugar suit by taking globs of dough and kind of rolling it into ball (perfection is not necessary) Drop dough balls into the cinnamon sugar and toss around to fully coat. Place on cookie sheet and give a good smoosh to flatten the cookie balls out to about 1/2 inch thick. Now into the oven for about 9-11 minutes to bake.
Aahhhh…….pulled from the oven and placed on a rack to cool. Fluffy, chewy, pillowy soft and spicy cookies. Oh the smell of so good!Made extra large to make extra little littles happy. The best part? I made each little sing me a song for a second cookie… I am the greatest!
Heres to a Happy Hump Day!
-C
Chocolate Chai Snickerdoodles
The stuff-
2 cups all purpose flour
1/3 cup cocoa powder
2 teaspoons baking powder
1 teaspoon cinnamon
1 teaspoon salt
1/2 teaspoon allspice
Chai teabag steeped in 1 1/4 cups boiling water
1 cup brown sugar
1/4 cup white sugar
3/4 cups vegetable oil (can substitute butter or vegan butter for a more chewy cookie)
1 teaspoon vanilla
1 teaspoon apple cider vinegar
2 tablespoons each of cinnamon and white sugar to coat cookie balls in
Preheat oven to 375
In a cup, steep tea bag in 1 1/4 cups boiling water. Let tea steep for 10 minutes.
In Large bowl, add sugars, oil, vanilla, vinegar and steeped tea and beat on medium speed for about 2 minutes. Add the rest of the ingredients (besides cinnamon and sugar for coating) and beat on low until everything is fully incorporated.
Add the cinnamon and sugar to a small bowl and mix together. Take globs of dough and roughly formed ball then drop into cinnamon sugar and toss to coat. Place coated balls on cooke sheet and smoosh down so cookies are about 1/2 inch thick. Place in oven for about 9-11 minutes or until cookies are just barely cooked through. Remove and let cool on a wire rack.
My suggestion for sharing….If they want one, make them sing and dance for it!
Those are some for real chocolate chip cookies…….for real.
This is probably one of the first recipes that I ever really knew by heart. Some recipes I can bring up in my head, but if I haven’t used it in a while, I usually have to check to make sure I got it right… Not these… Chocolate chip cookie are forever imprinted in my brain.
Chocolate chip may seem like a simple cookie, but trust me, its more complex then one may think. There are so many little factors that really affect the over all cookie: The baking temperature, the exact perfect time to pull the cookies out of the oven. Weather the butter is hand mixed or beaten, softened or melted. The color of the baking sheet and how long you leave the cookie on the sheet before placing on the coloring rack…….This cookie is as much about method as it is about ingredients. ….But don’t let that scare you..you got this. Just don’t think that these are a mindless act of baking. You have to be committed, keeping on the oven the whole time these cookies are baking………….. It’s so worth it.
Full disclosure here…I have been making these cookies the same way for so long so I am not exactly sure, but this might actually be the same recipe as toll house. I haven’t looked….Either way…I have tried out other chocolate chip recipes and this one has always come out on top.
As usual, I forgot an ingredient in the line up…the chocolate chips, oh and the pinch of salt.. But rest assure, even though not pictured, there are indeed chocolate chips in these cookies!
Pre heat the oven to 375.
Room temperature butter creamed with both the white and brown sugar. Before you add the butter to the sugar, smash any of the big chunks of brown sugar. The key to my recipe is not melting butter or using an electric beater, it’s all hand mixin, no electric mixing(you could use a kitchen aid, but I don’t have one so I think you should use a wooden spoon too), plus it’s a good arm work out. Mix mix mix. I find smearing on the side of the bowl helps too. Mix/smear until both sugar and butter is a unified color and consistency, Once that happens, add the two room temperature eggs, the vanilla and mix a little more,
When everything is mixed, add the dry ingredients and mix that until fully incorpaerterd….
Take a minute here and sniff……I love the smell of cookie dough, it’s a happy smell.Now for the chocolate chips. I use only 1 1/2 cups of chocolate chips… You want just enough in each cookie, but don’t want to overwhelm it with too much chocolate. The cookie is as much of the star as the chocolate. See how may cookie sheet is nice and silver and clean? For a long time I used a very dirty and dark baking sheet. I would make cookies and they always seem to come out slightly burnt. Got myself a new baking sheet and……perfect cookies. If your baking sheet is dark, I would recommend using parchment paper.
Your ready to scoop and bake….my suggestion. Make 2-4 cookies for your first batch, or what I call the tester batch. I swear, there is some law of the universe that says the first batch always is overcooked. I have excepted that and learned to only make a couple for the first batch Scoop mounds of your preferable size(I do a spoonful) and place on sheet with each mound having good amount of spreading space. Place in preheated oven..
Now here is the really important part!!!!Baking time is essential to how your cookie turns out. If you want a more soft and chewy cookie, bake for about 7-9 minutes or until the cookies are just barely turning brown…just barely. They might seem a little undercooked, but the cookies will cook a bit more once pulled from the oven Trust…I know what I am talking about. .Let them cool for about a minute on sheet before transferring them to rack. If you like more crunchy milk dipping cookie..bake for 9-11 minutes or until they are golden brown.
Lovely right…
Now you have gone and done it…Made fantastic cookies!!! Maybe you are going to share? No pressure, but it is the holiday season. For real, you can’t go wrong with a chocolate chip cookie, every loves it. and then will in turn love you too.
Get people to like you with Cookies!!!! hahahaha… but you know its true!
Perfect Chocolate Chip Cookie
2 1/4 cups all-purpose flour
1 teaspoon baking soda
1 teaspoon salt
3/4 cup brown sugar
3/4 white sugar
1 cup (two sticks) unsalted butter at room temperature
2 eggs
teaspoon vanilla
1 1/2 cups chocolate chips
Preheat oven to 375.
In a bowl, whisk together flour, salt and baking soda
In a large bowl with a wooden spoon, cream together the brown and white sugar with the room temperature butter. Add eggs and vanilla and stir. Now add the dry ingredients and….. then the chocolate chips.
On a light-colored baking sheet to a parchment line sheet, use a spoon and drop a constant size mound of dough, leaving room for expansion. Place in oven for 7-9 minus until cookie is barely turning brown. Remove and let sit on sheet for another minute before transferring to cooling rack. Keep doing this until all of you dough is gone…
My winter farm share is coming to an end this week. One more pick and then a three week stretch until the summer share starts… WHAT AM I GOING TO DO!!! Stock up as much as I can is what.
I have been strategic about the roots and veggies that I have chosen to bring home the past few weeks.(My farm lets you pick what you want) I know what I can buy at the store, things like carrots and potatoes, so I have been passing those up, but the roots like beets and celeriac… I have been bringing home baskets of those and hoarding them in the fridge and basement in preparation for the laps in farm fresh food and knowing that if I want to by these at the store it s going to coast me a million dollars a pound. (a for real million dollars)
Yup, lots of roots around here, especially celeriac root which is fantastic. I am kind of obsessed with celeriac, with its fibrous, knobby exterior, soft but almost meaty texture inside, and a flavor that is close to celery but so much better. I don’t know why it has taken me so long to do a posting featuring this amazing root vegetable (I eat it almost every day)
So here, an amazingly tasty, hearty but not heavy, celeriac recipe. Perfect for spring and the change into summer…. Mustard roasted celeriac with an fanatic split peas gravy that will have you licking you bowl clean.
The stuff….For the split pea gravy we have a carrot, a parsnip and a large onion chopped into small chunks. Salt, thyme, a bay leaf and of course the split peas. Then there is the celeriac root* sliced into 1/2 inch thick rounds and some plain old yellow mustard .
*Note. I don’t peel my celeriac root. I really enjoy the fibrous exterior but realize that some don’t(The mister does not like it) so peel it if you want.
Toss the chopped parsnip, carrot, onion and the spices into a pot on medium heat and let veggies sweat a few minutes until tender. Add in the split peas and enough water to cover everything. Turn pot on high and bring to a boil, then cover and turn to low. Make sure to give the pot a good stir ever few minutes and add more water if needed
While the gravy is cooking, take the celeriac rounds and brush each side with yellow mustard, sprinkle with pepper, and place on a baking sheet. Stick into the oven to roast for about 25 minutes, flipping the rounds after about 10 minutes.
Once the peas have soften, remove the bay leaf and puree until smooth and oh so creamy. Taste and add more salt and pepper if needed. If you find that the gravy seems to thick, just add in more water until it’s the consistency that you want. The gravy is made, the celeriac is roasted… now we are ready to eat!! Stick the celeriac on a plate and dump good amount of that gravy right on top. Feel free to add a bed of spinach, or a grain or anything you want, because why not, and also some chopped tomatoes for a little acid and prettiness.
Serve with the fanciest knife and fork you can find. Extra yellow mustard and sriracha sauce are great condiments to have close by.
Happy Tuesday!
-C
Mustard Roasted Celeriac with Split Pea Gravy
2 medium celeriac roots
6 tablespoons mustard
1 large carrot
1 medium parsnip
1 large yellow onion
2/3 cup split peas
2-3 cups water
1 bay leaf
2 teaspoons thyme or italian spice mix
salt and pepper
spinach (optional)
diced tomatoes(optional)
Preheat oven to 400 degrees
Small dice the carrot, parsnip and onion and throw into a large pot. Spinkle with salt and pepper, add in the thyme and bay leaf and add a splash of water. Stick on stove on medium heat and stir. Let cook until the veggies become soft and fragrant. Now add in the split peas and 2 cups of water. Bring to a boil then cover and turn heat down to medium low. Let cook until the split peas become tender (about 25 minutes) string on occasion and adding more water if the peas are not completely summered while cooking.
Once the peas are tender, let cool for a few minutes, remove bay leaf, and either dump into a blender or blend with an immersion blender until nice and creamy. If gravy seems to thick, add in more water.
Scrub or peel celeriac roots and slice them into 1/2 inch think rounds. Place on a baking sheet and brush mustard on both sides and spindle with pepper. Stick into oven for about 10 minutes, flip, then back into the oven for another 15 or so minutes, or unit the celeriac is tender.
When the celeriac is done remove from oven and stick a few rounds on a bed of spinach (or not, or any kind of grain or green you like) Top with a hearty helping of the gravy and toss on some chopped up tomatoes.
Eat with at knife and fork like a fancy person.
I have never in my life seen, let alone received, a kohlrabi as big as the one I picked up from my farm share last week. It was, no joke, bigger then my head. (completely nuts) If I didn’t know the farm and the farmers of my CSA, I would have to question whether or not it was grown in radioactive sludge…(kind of like the dandelions in the Teenage Mutant Ninja Turtle movie from the 90’s)
What is a kohlrabi you ask? It’s kind of a cross between a turnip and a cabbage that is usually the size of a baseball. It can be eaten raw (I like chunks dipped in mustard) or cooked. (roasted chunks dipped in mustard) It pairs well with sweet stuff like apples and honey, or in any savory stuff. Its one of my favorite vegetables (I say that about them all!)
So now that you know about kohlrabi (if you didn’t already) its time to get yourself some and make this soup. Because for real, I am not kidding when I say that this is one of the best soups that I have ever made. You really must try it. And do it soon because hopefully in the next few weeks the soup weather will turn into fresh pea weather and we might not want soup as much (I eat soup all year long)
A gigantic kohlrabi cut in half ( I only used one of the halts) A whole yellow onion and 2 large carrots. I also added in 4 cloves or garlic
Peel the kohlrabis tough skin off and chop up into chunks. Chop the carrot, garlic and onion as well .
All of those chopped veggies get thrown into a pot with two cups of water and a good sprinkle of salt and pepper. Cover and place on medium heat for about 20-25 minutes. (give a stir ever now and then) Keep cooking until the veggies are fork tender.
Once the chunks are all cooked up, its time for the immersion blender. (or into a regular blender) Add in at least 3 cups of water, but more to thin out to your desired consistency and let it rip. Stop blending once the soup is nice and creamy. Taste and season with salt and pepper to taste. Leave on low heat to bring back to a good soup eating temperature.
Now the soup is done.. and you can eat it just as it is, but you should really add in the asparagus. It is just so f*ing good. Just grab a few spears, dice them nice and small, and throw into the soup pot. Let it cook for another 5 minutes and wa la.. Soup is done. Ladle into bowls and if you want a little fancy presentation, add a swirl of mustard (it’s so good) and a whole cooked asparagus spear.
And eat one of the greatest soups ever!
Happy Day Wednesday!
-C
Creamy Kohlrabi Soup with Asparagus
3-4 kohlrabi (or 4 cups chopped Kohlrabi)
2 large carrots
1 large onion
4 or more cloves of garlic
Salt and Pepper
4-6 spears of Asparagus (extra if you want to garnish)
Yellow Mustard (optional)
Peel outer layer of kohlrabis. Roughly chop the onion, carrot, kohlrabi and garlic and stick it all into large dutch oven or stock pot. Add water until veggies are half submerged . Add a good sprinkle of salt and pepper and place on burner on medium heat and cover. Check ever 5 or so minutes and give the pot a good stir. After about 25 minutes, all the veggies should be very tender and almost fall apart when stuck with a fork. With an immersion blender or regular blender, blend till smooth, adding water until soup is at your desired constancy. Return soup to medium heat. Small dice asparagus and add to pot. (I added 2 extra whole pieces and fished them put once cooked for garnish.) Keep on heat for another 5-10 minutes until asparagus is cooked.
Scoop into bowl and squirt top with yellow mustard and top with a spear of cooked asparagus.
Eat with a spoon and lick bowl clean.
Miraculous.
And the best part, it’s as easy as eating way to many slices of pie! Roasted beets, rutabaga and sweet potato. A little salt…A food processor…no joke, so easy and it tastes so freaking good. A real show stopper. Everyone will whip out their phones to snap a pic.
Let me break this down for you. Rutabaga. Sweet Potato. Beet. That’s what I was working with. I chose these roots for color as well as for taste. Separately the flavors are amazing. Together they are out of this world. If you wanted you could omit any of these and sub in, lets say, pureed cauliflower, or maybe parsnips. I would stay away from potato, it’s a little to starchy, but maybe acorn or butternut squash. Oh man, now I want to make celeriac, carrot and acorn squash marble. Pureed vegetables are trouble for me. I can’t stop eating when they are around. I know, but don’t judge, instead lets prepare.
Peel the rutabaga..To be honest, I don’t peel, but this one that I got at the grocery store had a layer of wax on it…so yeah, I decided to peel that. You can also peel the beet if you want, but again, I don’t do that.
I diced up the baga and the beet, and tossed into separate pans to roast. I gave each pan a tiny splash of oil and a sprinkle of salt. The sweet potato, well that just got tossed into the oven as it was. I wouldn’t mix the beet with the rutabaga, the juice will turn it pink. Here the thing, If you want to boil or steam you veggies, go right ahead. I roast because I like the roasted flavor and its easier for me to throw things into the oven on a cast iron pan then to boil onto of my tiny stove. Bonus, I don’t wash my cast iron so less dishes! Just make sure with any method, your vegetables are cooked throughout and that they are tasty.
So you got a pile of roasted rutabaga, a pile of roasted beets and a baked sweet potato.
Remove the flesh from the skin of the sweet potato.. then eat it. Ok you don’t have to eat it but it is SOOOOOOO good. At least try it.I used my handy emulsion blender to puree everything but a food mill or a food processor is equally as good. Puree each root separately . Start with the rutabaga. Go to the sweet potato, then end with the beet. That way you don’t have to clean in between purees. Add little amounts of water when pureeing if it needs a little help to loosen up. Blend until smooth.
Three beautiful purees. My sister and I stood in the kitchen prior to preparing the plate and stuck our fingers in the puree. That right, and we licked then and went back in for seconds. In my family, as long as there is not disease being transmitted, a little bit of shared germs is ok. So now that you have tasted and tried not to eat to much of the purees, let’s get crazy….I just took a spoon and threw piles in that bowl. I could have done more of a checkerboard pattern to make it a more uniform marble, but I just went for it. Do it any way you want. Don’t be afraid, you can’t screw this up!I took a fork and kind of rain it throw the top to start the effect. I then took a cake knife and just leaved it out. That’s what I did and then I was done. After all the oohing and aching, I stuck the dish into the oven for another 10 minutes just to keep hot, but you can serve this at room temp as well. Now tell me that isn’t a thing of beauty. I fell in love. I want to puree and marble everything. This could be my thing.Empty bowl…Ok, I’ll admit I ate half of it..I couldn’t help it. Next time I will have to make a bigger batch.
P.S. You could totally make this dish today and serve it tomorrow. Just plastic wrap the top and refrigerate. When your getting ready for you meal, stick in oven for 20 minutes or until it’s the temperature you want it.
Happy Thanksgiving and Yeah!
Marbled Roots
Choose at least two, preferable three contrasting root vegetables. I;ll give you the version in the pictures.
1 large beet
1 medium rutabaga
1 large sweet potato
olive oil
salt
Preheat oven to 425
Dice rutabaga and beet. Toss with splash of oil and sprinkle of salt. Place on spereate baking sheets and move to oven. Place whole sweet potato in oven Cook until veggies are fork tender, usually about 40 minutes.
Remove veggies and place into separate containers and puree each veggie, starting with the lightest colored one. Add small amounts of water to help loosen if needed.
In a shallow casserole dish or pie plate, pile small amount of puree in dish, alternating the colors. With a knife, swirl the veggies around…Dont go to crazy or it will end up blended. You could stop here, I know, it looks amazing, but I finish it all off by taking a cake knife and smooth out the top.
Pop the roots back into the oven for another 10-15 minutes just to completely warm and meld the flavors together.
How cool are you now? People will be talking about you marbled roots for weeks.. maybe even until next thanksgiving.
It%u2019s hot out and we are thirsty. Water is good, water is great, but sometimes a little somethin%u2019 somethin%u2019 is called for, for you know, being that we need to deal with it being so freaking hot out. and sticky and gross. (BLAH. This past week we have had some temperatures it had make me crankers.)
Anyway, what is more refreshing then cucumber? Not much. And so we blend up cucumber, add some mint and lime juice and stick it into a glass with ice and bubbles. What can be more refreshing then that? Plus look at how pretty it is. Bright ass green. A true summertime drink.
To the Spritzer!
The stuff. A thin skinned cucumber, a lime, a spring of mint, club soda, and if you want, a little simple syrup.
Chunk up the cucumber and into the blender it goes with the juice of the lime and a couple mint leaves.
Grab a couple glasses, add in some ice, and fill each glass half way with the cucumber juice. (mix in liquid sweetener in now if you want it.)
Top off with club soda, a mint leaf and a few slices of cucumber and you are golden cool and fancy free.
Stay cool%u2026..as a cucumber.. HAHA!
Makes 2 or 3 drinks
1 cucumber (thin skinned and 6-8 inches long)
a lime
a few mint leaves
club soda or plain seltzer
1-2 teaspoons liquid sweetener (optional)
Take cucumber and place into blender along with the juice of the lime and a couple mint leaves. Blend until smooth. Grab a couple glass, fill each with ice, then fill each glasses half way with cucumber mixture. Add in any liquid sweetener if using and stir. (I recommend trying without sweetness, that is that way I like it, and then add sweetener if you need it.) Top glasses off with club soda. Garnish with sliced cucumber, lime wedges, and or mint leaves if you want.
Summertime is in full swing. Hot ass days, garden fresh veggies, zucchinis as big as whales, and did I mention that hot ass heat? If you have been around here before, you know how well I handle the heat. (NOT WELL AT ALL!)
I think we are all hot these days. But really, lets just focus on the good things, like fresh summa veggies!
This sandwich is all about summertime and not having to turn on a single flame or heat source and takes all of 5 minutes to make. Zucchini because it is everywhere, beans for more substance and they are delicious, all mixed up in a creamy bean and tahini sauce. Super fast, fresh and oh so delicious. I made a big batch for sandwiches but also I was just eating it with a fork. It%u2019s a tasty one that will be on the summer rotation for sure for the next few months, or until the zucchini runs out and I dare to turn the oven on again. (Ok, I am being a whine ass. It%u2019s not THAT bad and I did turn the oven on, early morning, to bake bread. So yeah.) But for real. This is a great, super fast, throw together, fresh, light but filling, sandwich situation for any and all of your summertime eating needs. What more do we need? The mr said all he needed with the sandwich were chips. Chips and a nice cold drink.
Done sir. Done.
Now to the sandwich!
The stuff. White beans, a zucchini, and a fresh spring onion. Also some tahini, a lemon, a few cloves of garlic, a little vinegar and water, and salt and pepper. And to serve as a sandwich you need bread. lettuce, and tomato. Well you only need the bread, but you get what I am saying.
Fist off. Half the white beans go into blender or jar with the tahini, the juice of the lemon, garlic, vinegar and a splash of water. Blended unit nice and creamy smooth. And yes, it is basically hummus but whatever.
Julienne the zucchini and chop up the onion.
Note. You don%u2019t have a mandolin or done%u2019t want to julienne with a knife, well just chop the zucchini into small little chunks.
Bean, onion, and zucchini in a bowl. Add in the bean tahini mixture and mix. And ta da, all done. All of 5 minutes and no heat. Good for us.
Now here is the thing. This salad is ready to eat now. You can continue onto the sandwich path or just eat it like it is with a fork. What I really liked to do is scoop spoonfuls into lettuce cups with a slice of tomato and a squirt or mustard. So yes sandwich, but also whatever else you want it to be.
But as a sandwich%u2026. Bread. And lettuce and tomato and heck, whatever else you want to throw on there. (Again, mustard is A+)
Now stop. Sandwich time.
Stay cool!
-C
makes 3-4 sandwiches
1 medium sized zucchini
2 1/2 cups cooked and strained white beans (a can will do)
1 spring onion (or a small white or red onion)
3 tablespoons tahini
2-3 cloves minced garlic
1 lemon
1 tablespoon white or red wine vinegar
2-3 tablespoons warm water
salt and pepper
And to serve as a sandwich
bread or wrap of your choice
tomato slices
lettuce
anything else you want
Place half of the beans, tahini, garlic, juice of the lemon, and the vinegar into a jar and use a immersion blender or a regular blender and blend until creamy smooth. Add in a tablespoon at a time of water until the consistency is just slightly thinner then hummus.
Grab zucchini and using a mandolin or a knife and julienne it. (You can also just cut into small little cubes.) Dice the onion up into small pieces and toss with zucchini, onion, and the other half of beans into a big bowl. Dump the bean tahini mixture all over and veggies bean mixture and toss around. Add salt and pepper to taste.
To make it a sandwich%u2026 Place a scoop onto a bread situation, add some lettuce and tomato and whatever else you want, and eat it.


 I figured now is a good time to get this recipe out there before we get to far into spring and summer recipes because there is going to be a lot of banana ice cream filled recipe coming and I figured its a good idea to have the basic banana ice cream recipe ready for people to refer too. And because I made so much fantastic naner ice cream, I also made a cookies and cream naner ice cream for my sisters and the mister.
 The stuff you need for this ice cream…. Nice and ripe bananas, peeled and then frozen* That’s it.
 After all blended and smooth, either eat right away or scoop ice cream into a freezer safe container and stick in freezer. That’s the banana ice cream… And it is amazing and so so so so so addictive. I make a batch, think I am only going to eat a scoop, then find myself eating half of what I have made, but it’s ok cause it’s only bananas.
  One batch of banana ice cream, either freshly made, still in food processor or made ahead and placed in a food processor and given a good pulse to smooth it up.
 Now you have cookies and cream naner ice cream…. and everybody is happy.
 TGIF!!!! For reals, because Monday-Thurday were monster days. And now that its friday, I can dig a hole and hide in it until it’s at least 30 degrees with some sunshine. (I might never get to come out.)
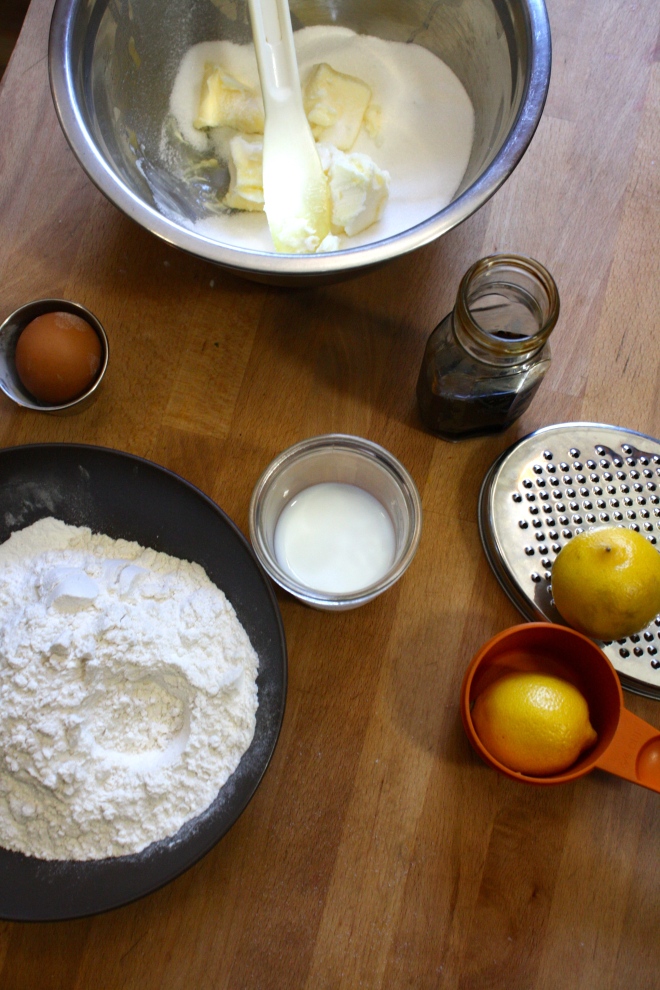 Simple lemon cake stuff. Flour, baking powder and salt whisked together, Sugar and soft butter in a bowl. An egg, some vanilla, milk, and of course, the lemon.
  Frozen bites ready for the chocolate coating… Bittersweet chocolate chips and a little bit of coconut oil. Melted together all nice and shiny smooth.
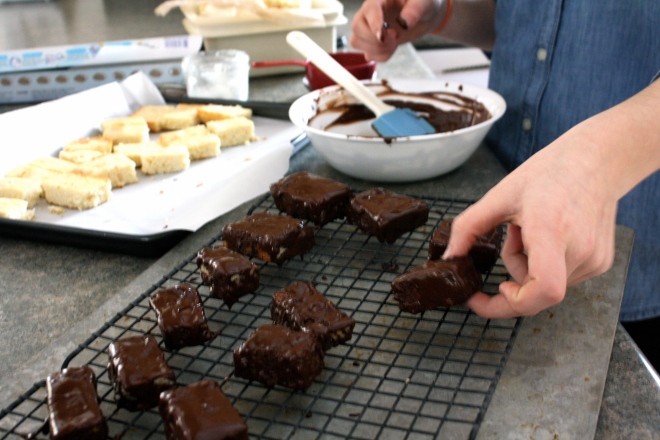 Now dip and slather those bites in the melted chocolate.
  Fully coated and placed on a rack for the chocolate to harden. I ended up sticking the rack in the freezer for 10 minutes…They harder really fast in there.


















 Because it is cold outside. Because I had an hour to kill before I needed to leave the house and because I wanted to make a sweet treat for the mister (who had been dealing with frozen pipes all day) and for the little littles that I was going to hang out with. My original idea was to just make regular old snickerdoodles, but as I was riffling around my tea drawer for a mid day tea (it’s usually coffee, but I am trying to cut back on drinking one thousand cups a day) I got hit with a little inspiration. Chai tea spiced snickerdoodles. Yes! a nice black chai, full of flavors or cinnamon, ginger, cardamon, allspice, and pepper. So many good time tastes. And while I am at it, why not add some chocolate to that mix, because, well just because.
 The stuff…Flour, salt, baking powder, cinnamon, and allspice. Cocoa powder, brown and white sugar. Veggie Oil (you can use butter, or vegan butter instead for a chewier cookie) vanilla, a little vinegar and a nice cup of chai tea… Also a little bowl of cinnamon and sugar to doodle the cookies.
 The sugars, oil, tea, vinegar, and vanilla go into a big bowl. Beat for a minute on medium, then add the rest of the stuff and beat some more until fully incorporated…. Simple simple.
  Aahhhh…….pulled from the oven and placed on a rack to cool. Fluffy, chewy, pillowy soft and spicy cookies. Oh the smell of so good!
 Made extra large to make extra little littles happy. The best part? I made each little sing me a song for a second cookie… I am the greatest!
 Those are some for real chocolate chip cookies…….for real.
 As usual, I forgot an ingredient in the line up…the chocolate chips, oh and the pinch of salt.. But rest assure, even though not pictured, there are indeed chocolate chips in these cookies!

 When everything is mixed, add the dry ingredients and mix that until fully incorpaerterd….
 Now for the chocolate chips. I use only 1 1/2 cups of chocolate chips… You want just enough in each cookie, but don’t want to overwhelm it with too much chocolate. The cookie is as much of the star as the chocolate.
  See how may cookie sheet is nice and silver and clean? For a long time I used a very dirty and dark baking sheet. I would make cookies and they always seem to come out slightly burnt. Got myself a new baking sheet and……perfect cookies. If your baking sheet is dark, I would recommend using parchment paper.
 Lovely right…
 My winter farm share is coming to an end this week. One more pick and then a three week stretch until the summer share starts… WHAT AM I GOING TO DO!!! Stock up as much as I can is what.
 The stuff….For the split pea gravy we have a carrot, a parsnip and a large onion chopped into small chunks. Salt, thyme, a bay leaf and of course the split peas. Then there is the celeriac root* sliced into 1/2 inch thick rounds and some plain old yellow mustard .
 Toss the chopped parsnip, carrot, onion and the spices into a pot on medium heat and let veggies sweat a few minutes until tender. Add in the split peas and enough water to cover everything. Turn pot on high and bring to a boil, then cover and turn to low. Make sure to give the pot a good stir ever few minutes and add more water if needed
  Once the peas have soften, remove the bay leaf and puree until smooth and oh so creamy. Taste and add more salt and pepper if needed. If you find that the gravy seems to thick, just add in more water until it’s the consistency that you want.
  The gravy is made, the celeriac is roasted… now we are ready to eat!!
  Stick the celeriac on a plate and dump good amount of that gravy right on top. Feel free to add a bed of spinach, or a grain or anything you want, because why not, and also some chopped tomatoes for a little acid and prettiness.
 I have never in my life seen, let alone received, a kohlrabi as big as the one I picked up from my farm share last week. It was, no joke, bigger then my head. (completely nuts) If I didn’t know the farm and the farmers of my CSA, I would have to question whether or not it was grown in radioactive sludge…(kind of like the dandelions in the Teenage Mutant Ninja Turtle movie from the 90’s)
 A gigantic kohlrabi cut in half ( I only used one of the halts) A whole yellow onion and 2 large carrots. I also added in 4 cloves or garlic
 All of those chopped veggies get thrown into a pot with two cups of water and a good sprinkle of salt and pepper. Cover and place on medium heat for about 20-25 minutes. (give a stir ever now and then) Keep cooking until the veggies are fork tender.
  Once the chunks are all cooked up, its time for the immersion blender. (or into a regular blender) Add in at least 3 cups of water, but more to thin out to your desired consistency and let it rip. Stop blending once the soup is nice and creamy. Taste and season with salt and pepper to taste. Leave on low heat to bring back to a good soup eating temperature.
 Now the soup is done.. and you can eat it just as it is, but you should really add in the asparagus. It is just so f*ing good. Just grab a few spears, dice them nice and small, and throw into the soup pot. Let it cook for another 5 minutes and wa la..
  Soup is done. Ladle into bowls and if you want a little fancy presentation, add a swirl of mustard (it’s so good) and a whole cooked asparagus spear.
 Miraculous.
 Rutabaga. Sweet Potato. Beet. That’s what I was working with. I chose these roots for color as well as for taste. Separately the flavors are amazing. Together they are out of this world. If you wanted you could omit any of these and sub in, lets say, pureed cauliflower, or maybe parsnips. I would stay away from potato, it’s a little to starchy, but maybe acorn or butternut squash. Oh man, now I want to make celeriac, carrot and acorn squash marble. Pureed vegetables are trouble for me. I can’t stop eating when they are around. I know, but don’t judge, instead lets prepare.


 So you got a pile of roasted rutabaga, a pile of roasted beets and a baked sweet potato.
 I used my handy emulsion blender to puree everything but a food mill or a food processor is equally as good. Puree each root separately . Start with the rutabaga. Go to the sweet potato, then end with the beet. That way you don’t have to clean in between purees. Add little amounts of water when pureeing if it needs a little help to loosen up. Blend until smooth.
 I just took a spoon and threw piles in that bowl. I could have done more of a checkerboard pattern to make it a more uniform marble, but I just went for it. Do it any way you want. Don’t be afraid, you can’t screw this up!
 I took a fork and kind of rain it throw the top to start the effect. I then took a cake knife and just leaved it out. That’s what I did and then I was done. After all the oohing and aching, I stuck the dish into the oven for another 10 minutes just to keep hot, but you can serve this at room temp as well.
 Now tell me that isn’t a thing of beauty. I fell in love. I want to puree and marble everything. This could be my thing.
 Empty bowl…Ok, I’ll admit I ate half of it..I couldn’t help it. Next time I will have to make a bigger batch.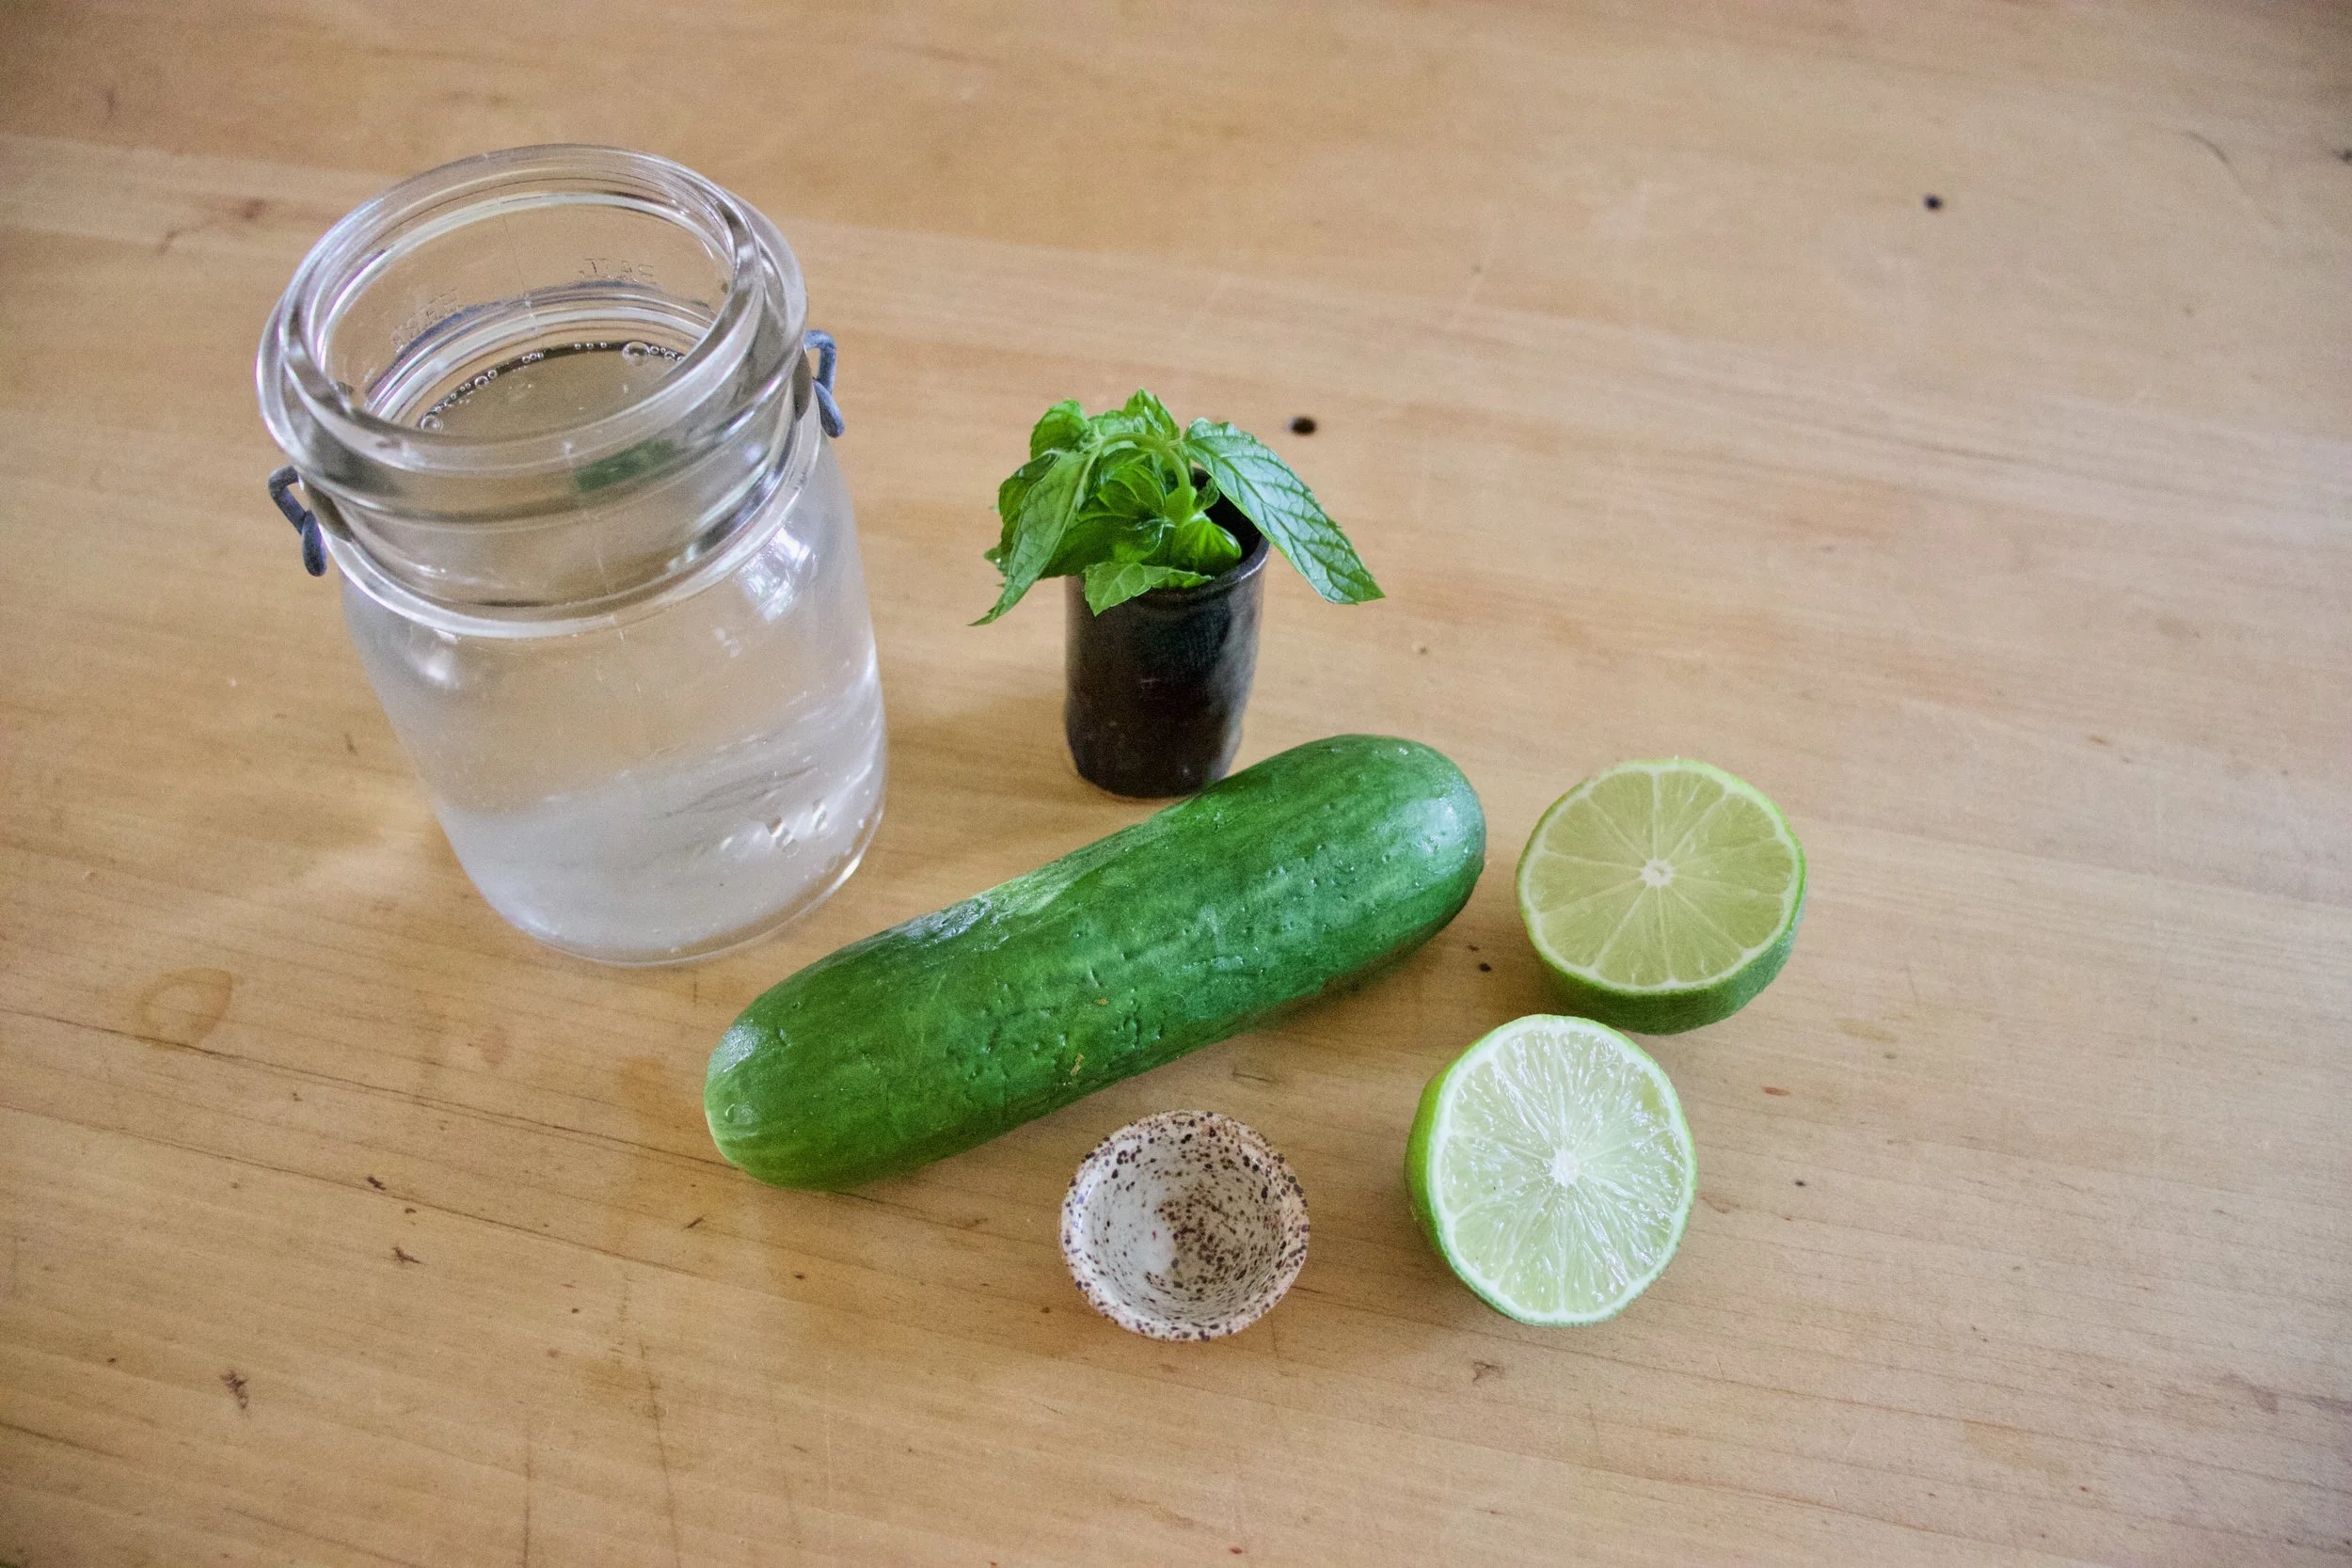


THE LOVELY CRAZY
October 15, 2019 by maximios • Blog
It%u2019s hot out and we are thirsty. Water is good, water is great, but sometimes a little somethin%u2019 somethin%u2019 is called for, for you know, being that we need to deal with it being so freaking hot out. and sticky and gross. (BLAH. This past week we have had some temperatures it had make me crankers.)
Anyway, what is more refreshing then cucumber? Not much. And so we blend up cucumber, add some mint and lime juice and stick it into a glass with ice and bubbles. What can be more refreshing then that? Plus look at how pretty it is. Bright ass green. A true summertime drink.
To the Spritzer!
The stuff. A thin skinned cucumber, a lime, a spring of mint, club soda, and if you want, a little simple syrup.
Chunk up the cucumber and into the blender it goes with the juice of the lime and a couple mint leaves.
Grab a couple glasses, add in some ice, and fill each glass half way with the cucumber juice. (mix in liquid sweetener in now if you want it.)
Top off with club soda, a mint leaf and a few slices of cucumber and you are golden cool and fancy free.
Stay cool%u2026..as a cucumber.. HAHA!
Makes 2 or 3 drinks
1 cucumber (thin skinned and 6-8 inches long)
a lime
a few mint leaves
club soda or plain seltzer
1-2 teaspoons liquid sweetener (optional)
Take cucumber and place into blender along with the juice of the lime and a couple mint leaves. Blend until smooth. Grab a couple glass, fill each with ice, then fill each glasses half way with cucumber mixture. Add in any liquid sweetener if using and stir. (I recommend trying without sweetness, that is that way I like it, and then add sweetener if you need it.) Top glasses off with club soda. Garnish with sliced cucumber, lime wedges, and or mint leaves if you want.
Drink away.