I am finally getting to the point in the kitchen that I have stuff for food other then lentils and carrots. Slowly I am restocking all the food and spices that I have let myself run out of when we started the moving out process. It has been a great purge, especially for all of my spices, which I have (or had) so many of and some where maybe not as fresh as they should be. Slowly I have been dumping those not so fresh spices into the crock pot with beans and replacing with freshy fresh ones.
The other day I did a spice run at the coop. Bulk spices are the way to go but sometime I can get a little out of hand. A pinch of this, a cup of that. I want them all, but I was pretty good. Just a few for now, and nothing to crazy.%u00a0 One that I did get was dill, lots and lot of freshly dried dill (I might have gone a little overboard with the amount I bought. I guess I was worried I might run out of dill, but its ok, I will for sure use it.). What to do with dill? Well toss pretty much anything with some dill and vinegar and you got yourself a dill pickle of sorts which is great.%u00a0 I just so happen to have a pickle craving and not a pickle in the house so me and my abundance of dill went and pickled potatoes to make french fries. And I must say, these fries are freaking amazing.%u00a0 Everything fantastic about dill pickles and french fries all in one. Baked because I don’t fry things, and not at all french. These fries are just what I needed to hit my dill pickle craving and use up some of my abundance of dill.
Here’s to the pickle fries. Mouth puckering goodness!
The stuff. A few russet potatoes and some vinegar. Salt, pepper, garlic powder, onion powder, and dill are the spices to use. And olive oil, which is not pictured but necessary.
First off, cut up the potatoes into fries. Cutthe potato in half, then cut that half in half, then each half of half into strips… easy easy. Toss the now fries into a big bowl of cold water as you go. (It removes some of the starch so your fries are not soggy)
Stain the starchy water from the bowl then dump the vinegar in with the potatoes, tossing as you go. And now you wait. Stick the potatoes into the fridge for about 1/2 hour to an hour, tossing the them around ever 10 minutes or so. (the longer they are in there, the more vinegar they will absorb)
Now preheat. Strain the vinegar out of bowl, drizzle potatoes with olive oil and toss until evenly coasted then sprinkle on the spices.
Pretty potatoes, looking good enough to eat(but don’t eat raw potatoes, that is gross and will make you sick)
Single layer on a baking sheet, ready for the oven.
Baked until golden crispy and nice. Didn’t even wait for a plate, just some mustard and off we go.
Dill pickle french fries. So good.
Bye
-C
should serve 2 people
3 Russet Potatoes
1/4 cup white vinegar
2 teaspoons dill
1 tablespoon salt
1 teaspoon onion powder
1 teaspoon garlic powder
i teaspoon pepper
2-3 tablespoons olive oil
Rinse potatoes then cut lengthwise into 4 equal pieces. Then cut each slice into long strips about 1/2 inch . Place the cut potato into a bowl of cold water and toss them around to remove a bit of the starch. Drain the water then dump the vinegar onto the potato and toss around. Let sit for 30- 60 minutes in the fridge, tossing ever 10 minutes or so.
Preheat oven to 400.
Once the oven is hot, pour off the vinegar from the potatoes (can be reserved for cleaning) Drizzle the potatoes with olive oil, making sure they are evenly coated, then mix all the spices together and sprinkle all over potatoes. Place coated fries single layer on a baking sheet and into the oven they go. Bake for about 45 minutes flipping after about 25. Fries are done when they are golden brown and crispy.
Serve with ketchup, mustard or whatever you like on fries or pickles.
I know what you are thinking, you are thinking “It’s Memorial Day weekend. Unofficial start of summer. Lots of BBQ’s now I have to make a potato salad!” (it’s a law right?) and “I want a pickle, dill to be specific”. Ok, maybe you weren’t thinking that, but I was. (I often think about pickles…)
Pickles. And potato salad. It only made sense to make a pickled potato salad. So make it I did. And oh boy oh boy, there is nothing better then a rich and creamy salad consisting of potatoes other then a rich and creamy and pickle tart salad of potatoes. I hit the nail right on the head with this one. The mr and I ate the entire salad all to ourselves and way to fast. Now it is gone and I didn’t get a chance to share with anyone. But it’s ok, cause this is definitely going into the summertime potato salad rotation.
Now you are thinking “creamy dill pickle potato salad.. this girl is a genius!” and to that, I say yes. I would have to agree with you on that. (hehe)
And to all who may not be a pickle fan, or need to make 2 potato salads, (it is always good to have a variety of potato dishes at any BBQ ) try this guacamole potato salad, another favorite.
The stuff. Potatoes of course and half a sweet onion, a cup or so of navy beans in the aquafaba ( bean water), left over pickle juice, fresh dill, dried dill, garlic, olive oil ,salt and a pepper.%u00a0
Yes there is a lemon pictured, but I was actually using that to squeeze into my water so yeah, not needed in the potato salad but you should grab a lemon and a big tall glass of water and drink it. Keep yourself hydrated.
Get the potatoes going. Chop them up into small piece and place into a big pot. Cover with cold water and add in a good bit of salt. Stick the pot on the stove and boil those taters.
While potatoes are boiling, strain the aquafaba (bean water) from the beans.
And chop the onion into little pieces and stick into a big bowl along with the strained (and now rinsed) beans.%u00a0 Pour in half the pickle juice and give it a good toss then set aside and let the pickle juice do it’s thing.
Now it’s the sauce time. Blend up aquafaba, garlic,%u00a0 dried dill, a little pickle juice and pinch of salt. As your blending, pour in olive oil until the sauce becomes rich and creamy dill sauce (vegan mayo my friends)
The potatoes are boiled until fork tender and drained..
Toss the strained potatoes back into the pot and add in the bean/ onion mix and the rest of the pickle juice. Give it all a good toss and stick the pot into the fridge for about an hour until the potatoes are cool.
And now we assemble. The cooled off pickle juice infused potatoes, beans, and onions are stuck into a bowl (or just leave in the pot if you want) and slathered with the creamy dill sauce and mixed with as much fresh dill as you want and lots of freshly cracked pepper
And a pickle. If you have one, I highly, HIGHLY, recommend chopping one up and adding it… I mean it is a pickled potato salad after all.
So now you have a great,%u00a0 fantastic, knock your socks off, salad to make for any of your weekend BBQ needs.
Your welcome.
Now have a great, extra long weekend!
-C
Serve 4-6
5-6 red potatoes
1 cup pickle juice (use a good pickle juice that you like the taste of)
A small sweet yellow onion (or half a big one)
1 cup navy beans
3-4 tablespoons aquafaba (bean water)
1/2 cup olive oil
2-3 cloves garlic
1 tablespoon dried dill
a handful of fresh dill
salt and pepper
pickles (optional)
Chop up the potatoes into mouth little chunks ans place into a pot . Rinse them and them cover about with about an extra inch of cold water, Ad d in a a good sprnkle of salt (like a tablespoon) and stick on the stove. Bring the pot to a rapid boil then turn heat down a bit to a low boil and cook until the potatoes are fork tender.
While potatoes are boils, strain you beans away from the aquafaba, and keeping about 3-4 tablespoons of the liquid. Rinse the beans and place into a big bowl. Chop the onion into little pieces and add that in with the beans and about 1/2 of the pickle juice. Set aside
Now grab the strained bean juice, about a tablespoon of pickle juice, the garlic, and the dried dill,%u00a0 Either with a hand blender or regular blender, start blending all that together while slowly pouring in olive oil (about 1/2 a cup ) until the sauce is thick and creamy. Season with salt and pepper to taste and place in fridge to hang until you need it.
And once the potatoes are cooked, strain them then add them back to the pot along with the bean/onion mixture and the rest of the pickle juice. Toss around to coat evenly and place into the fridge to cool. After about a half hour its a good idea to give it a toss to make sure the juice is getting to all the potatoes.
Once potatoes are cooled, dump into a serving bowl. (or just keep in pot) It’s ok if there is a little remaining liquid.. it will get sucked up by the potatoes. Get the sauce from the fridge and pour it and toss it around to evenly coat all those yummy potatoes. Chop up fresh dill and toss that in too (as much fresh dill as you like.. more is better!) And lately, if you have a spare pickle or two, chop it up and add it on in (or place in a bowl on the side for people add in themselves)
I added the pickle. You should add the pickle. It is so good with the pickle
Like any potato salad, serve with your favorite foods and keep in the fridge when not being eaten.
The bounty of spring is upon us. Asparagus is everywhere and I have been embracing it.. smelly pee and all. And along with all my spring veggies and smells, I have grabbing for more springy spices. I go through seasonal spice kicks, like cinnamon and ginger in the fall, curries and chills in the winter. And for spring, I am big on sumac. If you haven’t heard of it or tasted it, it kind of taste like a tangy salty lemon..without actually having any salt. And its a really pretty, a bright red, almost purple color. I use it on a lot of things, especially veggies and bean dishes, sometimes as a lemon replacer, but mostly to add another level of tangy flavor. It’s fantastic, really great for all those springy time dishes. Nice and bright!
This dish is perfect made and eaten right away, but it’s one of those dishes that tastes even better the day after. Also it’s good and safe to serve room temperature. (think lunch box or a picnic!) And did I mention healthy? Protein packed quinoa and the lean green asparagus, I mean come on. You won’t feel an ounce of guilt for eating a hugmongo bowl of this stuff because you should, so it’s totally ok.
Eat away!
The stuff of the stuff. Quinoa and asparagus for the base. Sumac, lemon, garlic, onion, salt and pepper and a little splash of oil for the dressing.
Note. Sumac is not always the easiest spice to find. I know that its available online (what isn’t) and that some health food store or herbal apothecaries carry it, but i have ye tot see it at a conventional supermarket. And once you find it, buy a good amount cause you will also fall in love with it and use it on everything.
Start by making the dressing. You want to have it sit for at least 10 minutes. It will be perfect by the time the quinoa is done. Mince the garlic, dice the onion and juice the lemon. Stick it all into a jar with the sumac, a pinch of salt and pepper and about a teaspoons worth of olive oil. Stick a lid on the jar and shake shake shake. and let it sit.
Now you should make the quinoa.. Water and quinoa go into pot, high heat until boiling, topped with a lid and set to simmer for about 15 minutes.
When the quinoa is simmering, cook up the asparagus. Add a drizzle of oil, to a pan and a few splashes of water. Place trimmed and chopped asparagus to pan and sprinkle with salt. Cook on medium heat for about 8 minutes, or until cooked but still has a nice crunch to it. Take off heat and add the dressing to pan. Let it sit and marinate for a few minutes.When the quinoa is tender, fluff with a fork and add to the skillet with the asparagus and dressing. Toss around to make sure all the quinoa gets dressed. Take a taste.. does it need a little salt and pepper? Add a pinch if it does.Pile into a bowl, add a bit of cracked pepper.. and eat.
Or… Idea! Make this dish and pack it into a jar. Maybe grab a baguette and some hummus os some other tasty foods and take yourself and a friend out for a picnic.
So much good .
Keep it real yo
-C
serves 3-4 as a side dish or 2 as a main meal.
1 cup quinoa
2 cups water
8-10 asparagus
olive oil
For the Dressing
1 tablespoon sumac
1/2 small red onion
2-3 cloves garlic
Juice of 1 jumbo lemon or 2 small lemons
2 teaspoons olive oil
salt and pepper
Start but making the dressing. Mince the garlic and finely dice the onion. Place in a jar with the sumac, the juice of the lemon, a pinch of salt and pepper, and a little splash of oil. Top the jar and shake the crap out of it for a minute. Let sit and meld. (This dressing can be made ahead of time and is fantastic on all sorts of everything)
In a large pot, add water, quinoa and a spindle of salt. Bring to a boil, cover , and reduce heat to simmer. Let cook for about 15 minutes or until water has completely absorbed. When the quinoa gets going, trim the woody parts of the asparagus and chop the remain asparagus into inch long pieces. Toss into a lightly oiled skillet with a few splashes of water, sprinkle with salt and put on medium heat for about 8 minutes, or until asparagus is cooked, but still crispy. Take off heat and add the sumac dressing. Once the quinoa is done, fluff it with a fork and toss it with the sumac dressed asparagus. Scoop into a bowl, add some cracked pepper. Bring food to face and eat.
Any leftover? This dish is fantastic serves cold or at room temperature.
Would you believe me that I totally forgot that it is St Patricks day and that this bread was in no way inspired by that? Well it’s true. What inspired this soda bread was the Great British Bake Off which I am currently watching over again. (yes, over again but it is just such a good show and makes me feel like I can bake anything.)
%u00a0I make fresh bread just about every day, but I %u00a0mostly use my sourdough culture or if I am running low on time, yeast, but I never think about making a loaf of a savory quick bread. When I think quick bread or soda bread, my mind goes to bananas or berries, or anything sweet. After seeing all the contestants making all sorts of crazy stuffed and flavored savory breads I was all like, “why don’t I ever do that?” So I did, all high on inspiration (every time I watch the show I feel the need to bake). I basically opened the spice drawer and grabbed a jar which was fennel, then figured lemon is a fine right pair so lemon fennel it was to be and yeah. I wanted to go a little more crazy (like they did on the show)%u00a0and add a ribbon or pesto or chunks of some veggies or beans or whatever but this was good for the moment and good it was indeed.
And the smell of this bread…. The hole house filled up with the scent that I could only describe as amazingly lovely. It made me think of %u00a0gardens full of spring flower blooms, a clothes line full of sun bleach white linen, or the feeling of soft warn dirt %u00a0under your feet for the first time after a long winter.%u00a0I swear I am not high. It just smelled so very good.%u00a0
After it was baked and cooled, but still slightly warm I cut into it and gave the mr a piece. The first piece the mr liked, the second he ate with mozzarella cheese which did not go well with him,%u00a0but after that found that he really likes it with peanut butter, or plan, with a bit of butter. What that means is that you should just make it and eat it however you suits you because a quick savory bread is always a good choice when a choice is needed. And your house will smell amazing too.%u00a0
The stuff. White and wheat flours, baking soda and baking powder, salt, fennel, soy milk, lemons, honey, and oil.%u00a0
All the dry, the fennel and the lemon zest into big bowl.%u00a0
Lemon juice, oil, and Haney got mixed together with the milk. Let this mixture sit for about 5 minutes so the lemon sours the milk a bit.%u00a0
Wet into dry and mix around with a fork until combined. Dump onto a floured surface and form a ball.%u00a0
Take the dough and place it on a lightly floured baking sheet then take a knife or dough scraper and give the dough a big deep X. Get about half an to an inch deep.%u00a0
And Ito the oven it goes.%u00a0
Just a mere 4o minutes later you have a crisp and golden loaf that smells like springtime and loveliness.
Give it a little time to cool down but grab a slice when it’s still a bit warm and eat it up. If you have butter to jam or honey on hand, it’s not necessary but welcomed.%u00a0
-C
Makes 1 loaf
1 1/2 cups all purpose flour
1 1/2 cups whole wheat flour
2 tablespoons fennel seeds
1 teaspoon salt
1 teaspoon baking soda
1 teaspoons baking powder
1 cup soy milk
2 tablespoon lemon juice
1 tablespoon lemon zest%u00a0
2 tablespoons vegetable oil
2 tablespoon honey or maple syrup
Preheat oven to 375
In a large bowl mix together the flours, baking soda and powder, salt, fennel, and the lemon zest. In a separate bowl or jar, mix together the milk, lemon juice, honey or maple, and oil. Let sit for 3-5 minutes so the milk gets a chance to lightly sour.%u00a0
Dump wet mixture into dry and mix around until %u00a0incorporated. Dump dough onto a floured surface and form a ball then place dough onto a lightly flour baking sheet and either with a knife or dough scrapper, score the top with a x about an inch deep. Place into oven and bake for %u00a040-45 minutes or until a nice deep golden brown and a tater stuck into the loaf comes out clean.%u00a0
Remove from oven and let cool on a rack.
Cut into it while it’s a tad but warm and serve naked or with butter and honey or whatever you want.%u00a0
Bread keeps for 2-3 days or is good to be frozen sliced up.%u00a0
Right now it is all about the holiday cookies. There are the chocolate ones, the filled ones, the nutty ones and all at the other ones, but really, what is the holiday without a good basic sugar cookie covered in way to much icing and sprinkles? Not right it what it is.
So to kick off holiday cookie baking I had a cookie decorating and pizza %u00a0party with the littles and big littles. Cookies, icing and frosting, and so many sprinkles. I went the smart route with preparation and precut all the cookies before the party. I was thinking that I would have everyone cut there own cookies out but then I was thinking %u00a0a bunch of little and hot pans and more likely then not burnt cookies. I just didn’t want to deal with it and it was a good choice on my part. I am so smart.%u00a0
These cookies are kind of your basic sugar cookies with a little lemon twist. The lemon adds that extra something, a little zip behind the sweetness, especially after all the glaze.%u00a0And they can be baked to be slightly soft or to have a nice crisp edge. A good, tasty, %u00a0all around cookie, perfect for any holiday cookie party.%u00a0
And just a warning about cookie parties. There will be madness and states of being that only an emense amount of sugar can produce.
The stuff. Flour, baking powder sugar, and salt. Squash puree, earth balance, vanilla, and some lemons.%u00a0
Sugar, butter, puree, lemon zest, lemon juice and the vanilla get cozy into big bowl and then mixed together.
Some people prefer to do this step with an electric beater but I like to use a wooden spoon because arm powder. Either way, make sure the mixtures is completely mixed and that there are no huge chunks of butter.%u00a0
Now add in the dry and mix mix mix until if forms a dough.
%u00a0Don’t be afraid to use your hands here.. I started out with the spoon and finish with my hands. It is much easier.
The dough needs a little time in the fridge so wrap it in plastic (or a large plastic bag) and stick in the fridge for a least and hour or up to a day.%u00a0
When your ready for cookie cutting time, remove dough and let sit on counter for a few minutes to warm up. Then place on a lightly floured surface and roll out about 1/4 inch thick (you can go a little thinner if you like)
And keep gathering and rolling ou the dough until all the dough is a cookie.
Bake the cookies for anywhere between 10-13 minutes. This is dependent on if you like a softer cookie or one with more of a crunch.%u00a0
And you are probably going to want to make some glaze,%u00a0which is super simple. Powedred sugar, water, corn syrup, and vanilla extract.%u00a0
You of course need to get crafty with colors so color the icing %u00a0to your liking.
Then it’s all about decorating. The mr and I did a few cookies ourselves before the cookie party began. We figured we wouldn’t really get a chance to once all the littles showed up. We were right.%u00a0
Also I bought brand new synthetic paint brushes (important that they are new) to use to paint on the glaze. It was a very good idea. We loved it and so did all the little.%u00a0
Our cookie masterpieces. Who doesn’t love a rapper snowman?
Let the party begin. I ended up making 3 batches of cookies because the more cookies the better. And again, so smart to have the cookies all precut and ready. I couldn’t imagine having to deal with cutting cookies with everyone. There would have been tears (most likely mine)%u00a0
Christmas music on, happy little littles, it started out so wholesome and good.%u00a0%u00a0Glaze, frosting, so many sprinkles. I could smell the sugar in the air. I also said that there was to be no cookie eating until after dinner so naturally I think that each little ate about 5 cookies before dinner. It would have been worse if I had they could eat any at all.%u00a0
And then we ate dinner and more cookies and they all went freaking crazy. Like running around screaming, stoping once in a while to maybe think they might throw up,%u00a0%u00a0then kept on running and screaming. %u00a0Sugar can do crazy things.%u00a0
%u00a0Just a few of the creations from the night. There were snowmen, 3D trees and reindeer, and stars. I guess I don’t have a snowflake which bummed me out but stars made do. And yes, that is indeed a target employee cookie.. so awesome.
All in all, the party was a success. The cookies came out great. The decorations were on point. The littles and big littles had fun and were all in a sugar coma by the end of the night.%u00a0%u00a0Annnd my house is covered in a light film of stickiness.%u00a0
Enjoy your weekend and make lots of cookies because that is what you are suppose to do.%u00a0
-C
makes 20-25 cookies (all depending on you shapes ands sizes of cutters)
Cookie
2 1/4 %u00a0cups flour%u00a0
1/2 teaspoon salt
1 teaspoon baking powder
1/4 cup squash puree
3/4 cup white sugar
1 teaspoon vanilla
1/2 cup room temp %u00a0vegan butter
1 tablespoons lemon juice
2 teaspoons lemon zest
Icing%u00a0
2 tablespoons corn syrup
2 cups powdered sugar
2 tablespoons plant milk or water
1 teaspoon extract (vanilla, almond, or lemon)%u00a0%u00a0
food coloring (optional)%u00a0
preheat oven to 350
In a large bowl beat %u00a0together butter, sugar, vanilla, squash, lemon zest and lemon juice until fully incorporated. Add in flour, salt, and baling powder and mix until it all comes together. When dough gets a little hard to mix with a spoon, use your hands and compress the dough into a ball. %u00a0Take dough and wrap in plastic wrap or place in a zip lock pulled to dough tight and place in the fridge for at least 1 hour or up to a day.
After the dough has had time in the fridge, remove and let sit for a few minutes.. Lightly flour the counter and roll dough out to about a quart inch thick. Grab your cookie cutter and cut away at rolled out dough. Place cut cookies on a baking sheet, gather up remaining dough and roll out all over again. Repeat process until all the dough has been used. Place cookies %u00a0in oven and bake for 10 minutes or until cookies are just barely turning golden brown. %u00a0If you like a crispier cookies, cook for 2-3 minutes longer.%u00a0Remove and place on a cooling rack to cool.%u00a0
Prepare your icing.
Mix all the ingerdients together until full incorporated. Color to your liking.%u00a0
And once the cookies are %u00a0cool its time to start you decorating! You can dip, pour, paint, or pip icing onto cookies. Embellish with sprinkles and candies.
Eat your cookies%u00a0
My little twin brothers birthday was yesterday, and when I say little, I mean younger, cause these dudes are not small and 18 isn’t little. But really, all I can think is “What the F**K. When did that happen?”%u00a0 It seems like just yesterday that I was baby sitting these kids, watching Rugrats and Toy Story on loop. Playing with mr. lemon head, blowing bubbles and drawing with sidewalk chalk. All the boxes of mac ans cheese, cups of chocolate with a little milk and the fruitthat needed to be cut up in order for them to eat it. They were so cute and sweet and they loved their big sister (me) so much Now when I see them, if they decided to come out of their rooms,%u00a0 they talk about which colleges they want to go to, their jobs, girls (if I pry) and things that I have no need to listen to (sports, video games, stuff boys walk about). And because they are bigger then me, I usually get roughed up a little when ever I see them.(I kind of deserve it cause when they were babied I dropped them each at least once) They are pretty much all grown up, although they still drink too much chocolate milk, still like their fruit pre-cut, and I think that they still secretly watch Toy Story on loop.
Never to old for Toy Story.
The cookies were made for their birthday. I was going to make a cake, but my mom was on that with 2 ice cream cakes and another regular one(just in case two was not enough) and I was not about to do a cake to compete with boxed ice cream cakes from the grocery store. I know my family, they liked their carnival ice cream cakes.%u00a0 But one of the twins asked me to make him a special dessert, something with lemon. So I made him these here lemon cookies and I added strawberry jam because I wanted to and it felt right. Look at me being the best sister.
But just because it’s not your birthday you can still have these cookies. It’s citrus season so everything should be citrusy and bright and it’s just the right amount of time between Christmas cookies and now so you can make these cookies no problem. Just don’t eat them all at once.
The stuff. Flour, baking powder and soda, and a little salt. Then earth balance, a chia egg, vanilla, turbinado sugar, a lemon and some strawberry jam.
Sugar, earth balance, vanilla, and the chia egg go into the bowl.
And cream it all together.
Then the dry ingredients get mix together into a bowl with the zest of the lemon then dumped into the wet with the juice of the lemon.
Mix together until a stiff, but soft dough forms.
Roll dough into little balls and with an object of your choosing (I used a chop stick) squish the cookies down a bit in a starburst like pattern then push the center of each cookie in a bit to create a little well for the jam to go.
Place the cookies on a baking sheet and fill the centers with jam and into the oven they go!
And after a good few minutes in the oven, remove from baking sheet and set to cool for a least a minute (never eat super hot jam.. you will be sorry)
And there you have it, Happy Birthday Cookies! Or just cookies, but happy cookies non the less!
Have a great weekend!
-C
Makes about 24 cookies
2 cups all purpose flour
1/2 teaspoon baking powder
1/2 teaspoon baking soda
1/2 teaspoon salt
1 cup turbinado sugar
1/2 cup from temperature earth balance
1 large lemon (zest and about 3 tablespoons of juice)
about a 1/3 cup of strawberry jam (or any flavor you want)
In a large bowl, cream together the earth balance, sugar, vanilla and chia egg. In another bowl whisk together the flour, baking soda and powder, salt and the zest of the lemon. Dump the dry into wet and mix together along with about 3 tablespoons of lemon juice until a dough forms.
preheat oven to 350
Roll dough into little palm sized balls then give them a little squish to slightly flatten them. With a chop stick or fork, press lines around the center of the cookie then take your finger and push in the center a little to create a small well.%u00a0 Place cookies on a baking sheet and fill each well with about 1/2 teaspoon jam. Place in oven and bake for about 10until the cookies have puffed up a little and the jam has spread. Remove one from sheet ans if the bottom is golden brown, then they are done. (The tops do not brown much) They may seem a little under baked, but once they cool, they will be perfect.%u00a0 Remove the rest from baking sheet and let cool on a wire rack.
Eat cookies.
My oldest sister graduated from nursing school this past weekend (wahoo!) and the friends and family had a party for her. I made these cupcakes for the party.But really, I made them just for her.
See, she is not a lady big on sweets. When I asked her what kind of dessert she wanted me to make her, she said if I could make a cake out of french fries, well that would be great. (I was close to making a french fry cake) But instead, I went a slightly different route and made cakes out of thing that I know she loves and can eat. Jalape%u00f1os because she is obsessed. Strawberries cause she likes her some fruit and are in season and I think, go with everything. Avocado frosting because she loves avocado and cornmeal because it makes the cakes a tad less sweet and a little more hearty. I also used GF flour cause she is GF.%u00a0
%u00a0Wow, I am the best sister. And here are a few more reasons why..
I went to the party (I am not a big party person.. But I did have fun and her friends were cool)
I changed into a clean outfit for her party (I really didn’t want to)
I stayed out past my 6 (I made it until 7.. what!!!)
I make her food
I am awesome (I think so anyway)
So yeah. The cupcakes. The Nurse lady totally got down with these. I am pretty sure that I heard the words, amazing and oh my good, %u00a0while they were being noshed on. The day after, %u00a0the nurse lady told me that they were the talk of the party (bullshit, but thanks)
Whatever, I was just glad she liked them.
The stuff. For the cupcakes; cornmeal and some pre blended gluten free flour. Sugar, salt, baking powder and baking soda. Soy milk (use whatever milk you want) oil, apple cider vinegar, strawberries and a couple jalape%u00f1os . For the icing; an avocado, a lemon, and some powdered sugar.
This is not a%u00a0hard batter to work, no need for a mixer or to cream anything, it can all be done with a wooden spoon.
%u00a0First, preheat the oven.
Then trim and tiny dice the strawberries, remove seeds and tiny dice the jalape%u00f1os and toss it all into a bowl. Sprinkle with a bit of sugar.
In a large mixing bowl, whisk together the flour, cornmeal, baking soda and powder, salt and sugar. Then add in the rest of the stuff. Stir together until combined.Now fold in the chopped berries and jalape%u00f1os and scoop batter into a well greased (or lined) cupcake tin.
Stick into oven to bake%u2026
Check cakes after 20 minutes and remove from oven when they are golden brown and a tester comes out clean when poked.
Remove from pan and place on a wire rake to cool.%u00a0
While the cakes are a coolin, add avocado to a blender with the zest of half a lemon and the juice of that half of lemon and blend smooth. %u00a0Add in the sugar and blend. %u00a0
The icing should be thick, but spreadable. Using your judgement and you taste buds, add more sugar %u00a0if the icing seems to thin or lemon juice if it seems to dry.
And once the cakes are cooled, spread with icing and top with sliced strawberries.
Your welcome Nurse Shannon!
Happy Friday!!!
-C
Jalape%u00f1o Strawberry Cornmeal Cupcakes with Avocado Frosting
makes 24 cupcakes
1 1/2 cup gluten-free flour blend (if you don’t need or want it gluten-free, just use all-purpose flour)
1 1/2 cups cornmeal
3/4 cup white sugar
1 teaspoon salt
2 teaspoons baking soda
2 teaspoons baking powder
1 tablespoon apple cider vinegar
2 cups nut or plant milk
1/2 cup oil
1 1/2 cups diced fresh strawberries
2 jalape%u00f1os
For the frosting
1 whole avocado
1/2 lemon (zest and juice)
2-2 1/2 cups powdered sugar
Pre heat oven to 350
Wash, trim and dice strawberries into little pieces and toss into a bowl. Remove stem and seeds from jalepenos and dice into small pieces.. add to bowl. Sprinkle with a little sugar.
In a large bowl, combine flour, cornmeal, baking soda, powder, salt, and sugar and whisk together. Now add in the oil, milk, and vinegar and mix together with a wood spoon until combined. Lastly, fold in the strawberries and jalape%u00f1os.
Scoop mixture into well greased (or lined) cupcake tin and stick into oven. Bake for about 20-25 minutes, or until cakes are gold brown and a tester comes out clean. Remove from oven, remove form tin, and sick on a wire rack to cool.%u00a0
While the cakes are cooling, take the avocado, sugar, and the zest and juice of half a lemon and blend with your choice of blending drive until smooth. %u00a0The icing should be thick enough to If the icing is to runny, add more sugar, or to thick, a little more lemon juice.
Now Ice cupcakes and top with sliced strawberries.
Eat for breakfast, lunch, dinner or dessert.
No utensils required, just some teeth.%u00a0
My flowers are coming up, I have packed away my winter jacket, and I haven’t worn anything but sandals for the past week. Plus yesterday I made the first batch of sun tea and saw my first hot air balloon of the season (which lead to a heated discussion with the mister about how hot air balloons take flight. We were both kinda right, but me more than him)So yeah, %u00a0it’s for real%u2026 Winter is gone and spring has sprung, or more like spring sprung then bounced cause now it’s basically summer weather. Not complaining, but I hope we get a least a few more weeks of pleasant, not hot and humid weather.%u00a0
Anyway. Sun tea, one of my favorite summer time drinks. Made by infusing regular old teas with water by using the almighty power of sun.
Why do we want to make iced tea this way instead of just using boiling water? Well you can still do that, but sun tea makes a more mellow, lovely, and I find, more sweeter tea. It brings out more complex flavors that you don’t get with the boiling water method. %u00a0And it’s nice to know that it took zero effort on my part to make the drink (not that boiling water takes that much effort, but still)
It can be made with any variety %u00a0of teas, infused with other fresh herbs, dried spices, or even chunks of fruit. You can also make the teas and add flavors after the infusing is over. Have fun and play with flavor combos.
A few of my%u00a0favorite sun tea%u00a0combinations
Any mellow black tea like orange pekoe or english breakfast with a few springs of mint
Chamomile and mint%u00a0
Green with a fruity tea, like blueberry or pomegranate
Lemon Zinger with a few springs of Rosemary
These are just a few of the endless possible flavors. And you don’t have to get fancy with it either, you can totally use plain old lipton tea bags (I still do that too)
Now harness the sunshine and feel awesome and fancy by making some tea!
Woo Hoo Wednesday!
-C
SUN TEA
%u00a0What you’ll need
Tea- Either bags or loose leaf
Water- Preferably Filtered
A glass jar with a lid
Sunshine
I %u00a0use a ratio of 1 tea bag or 1 tablespoon loose leaf tea per 2 cups of water. And I usually make my teas in half gallon ball jars so I use 4-5 teabags or tablespoons of tea. (makes just enough tea for 4-6 tall glasses, depending on you glass size) %u00a0If it’s a mint tea, I usually use a little less because I find that mint teas can become to strong and bitter so I %u00a0use 3 teas bags or tablespoons of loose.
Directions
Place tea loose or bags into jar. Fill with water, leaving about an inch for tea expansion, place lid on tight, and stick in the sun for anywhere between 3-5 hours %u00a0(depending on how strong you like your tea). When tea is infused to your liking, remove teabags or strain the loose tea and stick into the fridge to chill. Serve as is %u00a0in a drinking vessel with a few ice cubes and add sweetener if that’s what you do.
Drink within a day or two, then rinse jar and make a new batch!
%u00a0Happy Cinco de Mayo! And what better day to share my version of %u00a0my oh so fantastic pico de gallo, or as I call it, super freshy salsa.
I love me some freshy salsa, It makes me oh so happy.%u00a0
%u00a0I make this stuff all the time, especially during the warmer months and tomato season. I usually make a batch right before a meal, just enough to eat right away, but sometimes I ‘ll make a big batched of it, thinking I’ll save some for the next day. %u00a0 It never makes it past the second day in the fridge because it’s just one of those things that when you see it, you want to eat it. Weird but true. And it’s totally ok to do so cause it’s basically eating a big bowl of healthy goodness, so eat on!
It takes no time to prepare, tastes super refreshing, goes on everything, and it’s just so freaking tasty. You can eat it with tacos and chips (the mister) or like me, I like to add it to everything; salads, popcorn, or directly in my mouth.%u00a0
Make one batch, make 4, it doesn’t matter cause you will eat it all, and need to make more.
The stuff. Chopped Roma tomatoes, chopped red onion, a diced jalape%u00f1o, lemon, a bunch of cilantro, and salt.
Stick all the chopped stuff into a jar and add in the juice of the lemon. Roughly chop the cilantro and add that on in with a sprinkle of salt.%u00a0
Mix it up%u2026.And thats it. Now eat%u2026 with something or without.
A spoon out of the jar is one of my favorite ways to go at it.
Happy Cinco de Mayo, Happy Tuesday!
-C
Pico de Gallo%u2026 Freshy Salsa
4-5 Roma Tomatoes
1 small red onion
1-2 jalape%u00f1os (Depending on heat preference)
1 lemon or lime
salt
1 bunch of cilantro (don’t use it if you don’t like it)
Chop tomatoes and onion and toss into a bowl or jar. %u00a0Cut seeds from jalape%u00f1o(s) and dice up into little bitty pieces and add that to the tomato and onion. Roughly chop the cilantro and toss that in as well with the juice of the lemon or lime. Sprinkle with salt. Stir, let sit for a minutes, taste and then add more salt if needed.%u00a0
Eat right away or make ahead and store in the fridge until ready to use.
Goes great with corn chips, tacos, toss onto salads or eat as is standing in front of the fridge. If someone is judging you, they are stupid.
The bounty of spring is upon us. Asparagus is everywhere and I have been embracing it.. smelly pee and all.%u00a0 And along with all my spring veggies and smells, %u00a0I have grabbing for more springy spices. I go through seasonal spice kicks, like cinnamon and ginger in the fall, curries and chills in the winter. And for spring, I am big on sumac. If you haven’t heard of it or tasted it, it kind of taste like a tangy salty lemon..without actually having any salt. And its a really pretty, a bright red, almost purple color. I use it on a lot of things, especially veggies and bean dishes, sometimes as a lemon replacer, but mostly to add another level of tangy flavor.%u00a0It’s fantastic, really great for all those springy time dishes. Nice and bright!
%u00a0This dish is perfect made and eaten right away, but it’s one of those dishes that tastes even better the day after. Also it’s good and safe to serve room temperature. (think lunch box or a picnic!) And did I mention healthy? Protein packed quinoa and the lean green asparagus, I mean come on. You won’t feel an ounce of guilt for eating a hugmongo bowl of this stuff because you should, so it’s totally ok.
Eat away!%u00a0
The stuff of the stuff. Quinoa and asparagus for the base. Sumac, lemon, garlic, onion, salt and pepper and a little splash of oil for the dressing.%u00a0
Note. Sumac is not always the easiest spice to find. I know that its available online (what isn’t) and that some health food store or herbal apothecaries carry it, but i have ye tot see it at a conventional supermarket. And once you find it, buy a good amount cause you will also fall in love with it and use it on everything.%u00a0
%u00a0 %u00a0 %u00a0Start by making the dressing. You want to have it sit for at least 10 minutes. It will be perfect by the time the quinoa is done. Mince the garlic, dice the onion and juice the lemon. Stick it all into a jar with the sumac, a pinch of salt and pepper and about a teaspoons worth of olive oil. Stick a lid on the jar and shake shake shake. and let it sit.
Now you should make the quinoa.. Water and quinoa go into pot, high heat until boiling, %u00a0topped with a lid and set to simmer for about 15 minutes.%u00a0
When the quinoa is simmering, cook up the asparagus. Add a drizzle of oil, to a pan and a few splashes of water. Place trimmed and chopped asparagus to pan and sprinkle with salt. Cook on medium heat for about 8 minutes, or until cooked but still has a nice crunch to it. Take off heat and add the dressing to pan. %u00a0Let it sit and marinate for a few minutes.When the quinoa is tender, fluff with a fork and add to the skillet with the asparagus and dressing. Toss around to make sure all the quinoa gets dressed. Take a taste.. does it need a little salt and pepper? Add a pinch if it does.Pile into a bowl, add a bit of cracked pepper.. and eat.
Or%u2026 Idea! Make this dish and pack it into a jar. Maybe grab a baguette and some hummus os some other %u00a0tasty foods and take yourself and a friend out for a picnic.%u00a0
So much good .
Keep it real yo
-C
Quinoa and Asparagus with Sumac Dressing
serves 3-4 %u00a0as a side dish or 2 as a main meal.%u00a0
1 cup quinoa
2 cups water
8-10 asparagus%u00a0
olive oil
For the Dressing
1 tablespoon sumac
1/2 small red onion
2-3 cloves garlic
Juice of 1 jumbo lemon or 2 small lemons
2 teaspoons olive oil
salt and pepper
Start but making the dressing. Mince the garlic and finely dice the onion. Place in a %u00a0jar with the sumac, the juice of the lemon, a pinch of salt and pepper, and a little splash of oil. Top the jar and shake the crap out of it for a minute. Let sit and meld. (This dressing can be made ahead of time and is fantastic on all sorts of everything)
In a large pot, add water, quinoa and a spindle of salt. Bring to a boil, cover , and reduce heat to simmer. Let cook for about 15 minutes or until water has completely absorbed. %u00a0When the quinoa gets going, trim the woody parts of the asparagus and chop the remain asparagus into inch long pieces. Toss into a lightly oiled skillet with a few splashes of water, sprinkle with salt and put on medium heat for about 8 minutes, or until asparagus is cooked, but still crispy. Take off heat and add the sumac dressing. Once the quinoa is done, fluff it with a fork and toss it with the sumac dressed asparagus. Scoop into a bowl, add some cracked pepper. Bring food to face and eat.%u00a0
Any leftover? This dish is fantastic serves cold or at room temperature.
Peas scream spring to me. The bright green color with that nice bright fresh taste%u2026.. kind of like a fresh spring day. Ah spring, so lovely, so nice, so hasn’t made its way here yet. So I guess I am left to eat my spring.%u00a0And what better way to highlight those lovely spring tastes? A fantastic pesto my friends, and it can be made lickidy split.
Pesto is one of those things that I am constantly making, and not just the kind most people think of with basil and nuts, I pesto everything..peppers, greens, carrots, squash. %u00a0And yea, I used this post to make a pesto pasta dish, but pesto has so many other fantastic uses. Like as a sandwich or wrap spread or a dip for veggies and crackers. I have used it as a soup base, a pizza sauce, on roasted potatoes and marinated tofu with pestos. It can also be thinned down and used as a salad dressing. See, so many uses.%u00a0
And this pea pesto is no exception. It has such a great light, almost fruity, super bright taste. I mean, it’s peas so it taste just like peas but somehow even better. It really works in my mouth. I could eat a bowl of this stuff and be happy.%u00a0
Whatever you plan on using it for, make the pesto. You will be thanking me later.%u00a0
Pesto Stuff. We got the peas, garlic, lemon, oil, cheese if you please, and salt. %u00a0Take a handful of peas and set aside for later. Juice the lemon and take that and the rest of the stuff and stick in%u00a0a food processor and puree until smooth.%u00a0
Oh my, so green, so good. %u00a0I first made it without cheese and %u00a0scooped a little out for me. It was perfect. Like the most brilliant bright pea flavor ever. It made me happy. After I added in the cheese, the mister said it tasted even better%u2026. so cheese or not, it’s going to be good!The%u00a0pesto is made, and it only took about 2 seconds, now boil up the pasta. %u00a0If you were a thinker, you could start the pasta and make the pesto while its boiling. (I wasn’t being a thinker) I used bow ties cause they are super cute, but use whatever pasta you’re feeling. Shells or the ones that look like little brains would be good options.
Once the pasta is cooked, strain, reserving about 1/4 cup of the water. Add that bit of water back to the pot, add in the pesto, give a stir and dump pasta back into the pot. Toss in a handful of peas, maybe sprinkle some cheese and give it a good crack of some pepper.
Into a bowl and served with a fork to eat it with. %u00a0A super green fresh springy meal of happiness. And all under 15 minutes in the kitchen.
Oh you want to thank me for this…
Hey, not a problem%u2026.not a problem at all.
-C
Spring Pea Pesto and Bow Ties
Makes enough pesto to coat a pound of cooked pasta and have some left over for sandwiches or to spread on crackers.
1 lb. fresh or frozen peas (thawed if frozen)
1 lemon
4-5 cloves garlic
2 ish tablespoons of olive oil
1/4 cup parmesan, really or vegan (optional)
salt
1 lb (an average box) of bow tie pasta (use any whole wheat, vegan, gluten free variety)
Place peas, (remove a handful and set aside to toss into the pasta) garlic, the juice of the lemon, olive oil and the parmesan (if you are using) into a food processor. Blend until smooth. Taste and salt as needed.
Pasta%u2026 Boil per instructions on box. Strain pastas but save about a 1/4 cup of starchy water. Toss pasta, starchy water and pesto together, adding in the handful or more of the whole peas. Sprinkle with more parmesan and or cracked pepper ,if wanted, and serve in big bowls.%u00a0
Oh yes, It is Sunday and man oh boy, am I beat. Yesterday the mr and I spent the day digging 2 1/2 foot holes for fence posts at the new house. It was actually pretty great because we got to spend the day outside and it was the most lovely day, all sunny and warm. The only problem we had was that the fence line landed on top of all the most gnarly tree roots and it took about an hour of hacking away per hole. We got to 6 and have 11 more to go (Ouch!) SO yeah, a little sore, but luckily the hardest part is done and we are going to take today off from fencing and be hang with the fam (cause it;s mothers day)
Which brings me to a my, “Happy Mothers Day to all you ladies out there being mommas and all out wonderful human beings!” You have the hardest job of all and today you deserve all the breakfast, lunch, dinner, flowers, naps, macaroni necklaces and then some. Take the day and do you forget about the to do list. IT can wait until tomorrow.
As for me, I am not an actual mom, but I have enough litttles in my life that I am kinda like a part time momma. So after an afternoon of family and mom ladies and feeding them all lunch, I am going home, walking the pup (I am his momma) and taking a nap myself. I am greatly looking forward to it.
Again, Happy Mothers Day, (especially you mom.. Love you!)
The internet fun stuff from the week.
-If you are one of those people who leaves everything (the phone and computer plugged in all day, read this. Just How Much Power Do Your Electronics Use When They Are %u2018Off%u2019?.
– Funny, kinda sad, but really cool. Eat Your Heart Out. A series of words remembered
from break-ups reimagined as something sweet.
-I keep looking at these boots. The ease of off and on with all the style of a rubber sole and brown! I really want them… someday.
-Bathroom Inspiration. We are doing bathroom next!
– The broccoli is my favorite. Japanese Lego Master Builds Delicious-Looking Creations From Blocks
–Perception vs. Reality. Perception is its own reality when you%u2019re eating.
-All sorts of pretty. Cherry Blossoms Flood the Inokashira Park Lake in Tokyo
-Check out these DUCKS!
-I am freaking obsessed with this wood flooring.If I had a million dollars to blow, I would put it throughout the whole house.
-Awesome photos from the 2016 National Geographic Travel Photographer of the Year Contest
Pictures of all the great things this week. So much color!
Guess what guys ….I got myself a sick vintage waffle/ griddle iron. I couldn’t be more thrilled!!! I found this thing at the local recycled goods store the other day, along with a very beautiful old white pyrex mixing bowl. It was one of my best thrift store scores! (Checking out the inventory and the condition of all the old things that day, I would say an old lady had just died and all her perfectly keep, mint condition kitchen stuff had just been donated. But it’s cool, cause I get the feeling that she was at least 90, with a big loving family, and was happy until the day she died. And I am sure she would be pleased that I have taken over the waffle maker. Thanks old lady!)
And now I am pretty sure that everything I make for the next week will be cooked on said waffle/griddle. I am serious, I already have a list of things to try and cook on it; cookies, biscuits, granola bars, potatoes, fruit, some type of pasta situations…. the list of possibilities is endless and I bet that at least 1/2 of these things will be totally awesome and amazing.
But first thing first. I need to make dinner.
So waffles for dinner!!
Note. These waffles are completely 100% fantastic for any meal you want to make them for. They consist of nothing more then beans, a shit ton of veggies, and just a bit of cornmeal. But don’t let that fool you because they are super packed full of so much flavor, have a really soft tender inside, with a nice crispy outside and are so super pretty. They are wonderful! The stuff. First, we got a big old pile of shredded up veggies which include; carrot, beet, sweet potato, onion, parsnip, celeriac, and a little bit of kale. A we got a bowl of rinsed and strained white beans, a little bit of cornmeal and salt, pepper, and garlic powder.
The makings of something amazing!Before you do anything. get your waffle iron out and preheat it.
While thats going on, take you beans, add 3/4 cup water and puree until smooth with whatever blending device want to like to use. (I used my hand blender…less to clean)Now collect all the shredded veggies and dump into a big bowl with the bean puree, the spices and the cornmeal. Mix until combined. The batter should be thick, but not dry. If its seems to wet, add more corn meal, or too dry, add a little more water.
Note how my batter turned a magical pink… I love beets, they make everything pretty! And check out that bowl!When your waffle iron is preheated, oil it if needed (if your not sure, add a little oil just to really make sure your waffles don’t stick) and take appropriate size spoonfuls of the batter and stick on iron. Close it and wait…..My iron has a little light that turns on when the waffles are done cooking, so I waited patiently (ok iI did open it a few time) until light tuned on and removed the perfectly cooked waffles.
Did I mention how awesome my new/old vintage iron is?
SO AWESOME!!
I made a little gaucamole and gave the mister and little bowl of plain Greek yogurt with lemon juice, but feel free to top, drizzle, or dump whatever you want onto these beauties…
Happy waffle Wednesday!!!
-C
Veggie Bean Wonder Waffles
Makes 8-10 waffles (in my iron) feeds 2-3 peeps
1 small carrot shredded
1 small parsnip shredded
1/2 a small celeriac root
1 small beet shredded
2 kale leaves chopped into tiny bits
1/2 an onion, shredded
1/2 a small sweet potato shredded
1/2 cup cornmeal
2 cups(or 1 can) cooked, rinsed and strained white beans
2 teaspoons garlic powder
teaspoon each salt and pepper
oil for iron(if needed)
Note on veggies… I used what I had in the fridge and shredded, it came to about 3 cups. If you don’t have these specific veggies or only want to use a few.. go for it. Just make sure to have 3 cups of whatever veggies you use.
Take you beans and blend them up with whatever device you would like to use. Once creamy, add to a bowl with the rest of the ingredients. Stir until combined.
Once the waffle iron is preheated, oil it( if needed) and place the recommended amount of batter right on it there. Close and cook until golden brown and waffly.
Serve on a plate with topping of your choice, A few suggestions.. Guacamole, salsa, hummus, mustard, greek yogurt… anything that tastes good to you.
Eat as breakfast, lunch or dinner…
Fork into face
Happy Cinco de Mayo! And what better day to share my version of my oh so fantastic pico de gallo, or as I call it, super freshy salsa.
I love me some freshy salsa, It makes me oh so happy.
I make this stuff all the time, especially during the warmer months and tomato season. I usually make a batch right before a meal, just enough to eat right away, but sometimes I ‘ll make a big batched of it, thinking I’ll save some for the next day. It never makes it past the second day in the fridge because it’s just one of those things that when you see it, you want to eat it. Weird but true. And it’s totally ok to do so cause it’s basically eating a big bowl of healthy goodness, so eat on!
It takes no time to prepare, tastes super refreshing, goes on everything, and it’s just so freaking tasty. You can eat it with tacos and chips (the mister) or like me, I like to add it to everything; salads, popcorn, or directly in my mouth.
Make one batch, make 4, it doesn’t matter cause you will eat it all, and need to make more.
The stuff. Chopped Roma tomatoes, chopped red onion, a diced jalapeño, lemon, a bunch of cilantro, and salt.
Stick all the chopped stuff into a jar and add in the juice of the lemon. Roughly chop the cilantro and add that on in with a sprinkle of salt.
Mix it up….And thats it. Now eat… with something or without.
A spoon out of the jar is one of my favorite ways to go at it.
Happy Cinco de Mayo, Happy Tuesday!
-C
Pico de Gallo… Freshy Salsa
4-5 Roma Tomatoes
1 small red onion
1-2 jalapeños (Depending on heat preference)
1 lemon or lime
salt
1 bunch of cilantro (don’t use it if you don’t like it)
Chop tomatoes and onion and toss into a bowl or jar. Cut seeds from jalapeño(s) and dice up into little bitty pieces and add that to the tomato and onion. Roughly chop the cilantro and toss that in as well with the juice of the lemon or lime. Sprinkle with salt. Stir, let sit for a minutes, taste and then add more salt if needed.
Eat right away or make ahead and store in the fridge until ready to use.
Goes great with corn chips, tacos, toss onto salads or eat as is standing in front of the fridge. If someone is judging you, they are stupid.
I have never in my life seen, let alone received, a kohlrabi as big as the one I picked up from my farm share last week. It was, no joke, bigger then my head. (completely nuts) If I didn’t know the farm and the farmers of my CSA, I would have to question whether or not it was grown in radioactive sludge…(kind of like the dandelions in the Teenage Mutant Ninja Turtle movie from the 90’s)
What is a kohlrabi you ask? It’s kind of a cross between a turnip and a cabbage that is usually the size of a baseball. It can be eaten raw (I like chunks dipped in mustard) or cooked. (roasted chunks dipped in mustard) It pairs well with sweet stuff like apples and honey, or in any savory stuff. Its one of my favorite vegetables (I say that about them all!)
So now that you know about kohlrabi (if you didn’t already) its time to get yourself some and make this soup. Because for real, I am not kidding when I say that this is one of the best soups that I have ever made. You really must try it. And do it soon because hopefully in the next few weeks the soup weather will turn into fresh pea weather and we might not want soup as much (I eat soup all year long)
A gigantic kohlrabi cut in half ( I only used one of the halts) A whole yellow onion and 2 large carrots. I also added in 4 cloves or garlic
Peel the kohlrabis tough skin off and chop up into chunks. Chop the carrot, garlic and onion as well .
All of those chopped veggies get thrown into a pot with two cups of water and a good sprinkle of salt and pepper. Cover and place on medium heat for about 20-25 minutes. (give a stir ever now and then) Keep cooking until the veggies are fork tender.
Once the chunks are all cooked up, its time for the immersion blender. (or into a regular blender) Add in at least 3 cups of water, but more to thin out to your desired consistency and let it rip. Stop blending once the soup is nice and creamy. Taste and season with salt and pepper to taste. Leave on low heat to bring back to a good soup eating temperature.
Now the soup is done.. and you can eat it just as it is, but you should really add in the asparagus. It is just so f*ing good. Just grab a few spears, dice them nice and small, and throw into the soup pot. Let it cook for another 5 minutes and wa la.. Soup is done. Ladle into bowls and if you want a little fancy presentation, add a swirl of mustard (it’s so good) and a whole cooked asparagus spear.
And eat one of the greatest soups ever!
Happy Day Wednesday!
-C
Creamy Kohlrabi Soup with Asparagus
3-4 kohlrabi (or 4 cups chopped Kohlrabi)
2 large carrots
1 large onion
4 or more cloves of garlic
Salt and Pepper
4-6 spears of Asparagus (extra if you want to garnish)
Yellow Mustard (optional)
Peel outer layer of kohlrabis. Roughly chop the onion, carrot, kohlrabi and garlic and stick it all into large dutch oven or stock pot. Add water until veggies are half submerged . Add a good sprinkle of salt and pepper and place on burner on medium heat and cover. Check ever 5 or so minutes and give the pot a good stir. After about 25 minutes, all the veggies should be very tender and almost fall apart when stuck with a fork. With an immersion blender or regular blender, blend till smooth, adding water until soup is at your desired constancy. Return soup to medium heat. Small dice asparagus and add to pot. (I added 2 extra whole pieces and fished them put once cooked for garnish.) Keep on heat for another 5-10 minutes until asparagus is cooked.
Scoop into bowl and squirt top with yellow mustard and top with a spear of cooked asparagus.
Eat with a spoon and lick bowl clean.
I was informed yesterday that if I was going to make tortilla chips, that I better make some sweet ass dips to go with them. I kind of agree… tortilla chips need dip… or better yet, two dips. Queso and guacamole. It’s what needed to be done, and so I did it.
Guacamole is amazing… anything avocado is amazing…this guacamole is amazing. White bean guacamole is amazing. And not that we really care, but this guac is half the fat then straight up guacamole. Plus it’s packed full of protein making it a kind of super duper, must eat all of it, kind of dip. And sweet potato anything will make me happy. Making queso dip with sweet potato and cauliflower is probably one of my best food combos so far. (after eating a butt load, I felt like I was a genius and made an amazing discovery) Again, not that we need it to be, but this is also a fat-free, vegan, gluten-free, super healthy, packed full of B12, fiber and nutrients, dip for all kind of dip.…. just another reason why you cannot feel bad when you finish off half a batch before you get a chance to stick it in a serving bowl. (I might have done that)
Here is what you need for a good time:
−These tortilla chips ….Check.
−Some Chopped Veggies (I want the veggies)…..Check
−Cauliflower Sweet Potato Queso.…Check.
−White Bean Guacamole…Check.
You are now ready for it. It being this party, that party, the Super Bowl, or a Wednesday afternoon.
To the left we have the makings for the cauliflower sweet potato queso.. Steamed cauliflower, a baked sweet potato, nutritional yeast, garlic, and chopped up red onion, red bell pepper and jalapeño. To make all you need to do it take the chopped peppers, onion, and garlic and sauté for a few minutes just to slightly soften and bring out flavors. While that’s going on, take the steamed cauliflower and sweet potato(skin off..but eat it, or save it for soup or feed it to the dog) and puree together with a blender or food processor. Add in nutritional yeast, about a tablespoon or two of hot water and, salt and pepper to taste. Blend for about 5 minutes until super creamy smooth. Add in sautéed stuff and pulse just enough to incorporated the veggies but not complete blend in. Stick in a bowl.
To the right we have white bean guacamole stuff. Two cups (or one can) rinsed white beans, one ripe avocado, a lime, a few cloves of garlic,(I also added a bit of garlic powered…I like my garlic) and some chopped up red onion and tomato. Place beans, garlic, avocado and lime juice in a blender or food processor and blend until smooth. Add salt to taste and toss in the chopped tomato and onion. Blend for sec to mix that in…Stick in a bowl
Perfect…
To think that both of these dips took about 10 minutes total to make. (I had pre baked the cauliflower and sweet potato) And for real, I would spend much more time if I had too because both of these dips are so freaking good, I definitely will be making these on the regular.
So there , dips for those sweet ass chips or whatever you want to dip or them spread them on.
And he guys…It’s FRIDAY! Have a fantastic day!
-C
White Bean Guacamole
2 cups white beans (or 1 can) rinsed and drained
1 ripe avocado
3 cloves garlic
1 lime
1/4 small red onion
1 small tomato
1-2 teaspoons salt
Finley chop onion and tomato. Set aside. Place the beans, avocado, garlic, garlic powder, 1 teaspoon salt and the juice from one lime into a blender or food processor and blend until smooth. Add a splash of water if needed to help keep things moving. Taste and add more salt if needed. When smooth, add the onion and tomato and pulse a few times to mix in. Scoop into a serving dish and finish with a squeeze of lime and a bit of chopped onion and tomato.
Cauliflower Sweet Potato Queso
1 1/2 cups pre cooked steamed or roasted cauliflower
1 medium pre baked sweet potato
1/2 cup nutritional yeast
1-2 tablespoons hot water
1/2 a small red pepper
1/4 small red onion
1 jalapeño
3 cloves garlic
salt and pepper
Finely dice the red pepper, jalapeño, onion and garlic and sauté in a skillet for a few minutes until slightly soften and fragrant. Take the pre-cooked cauliflower, sweet potato (skin removed), and nutritional yeast and place in a blender or food processor. Blend for about 5 minutes until creamy and smooth. Add in a tablespoon of water to keep things moving. When completely smooth, add in sautéed veggies and pulse a few times to combine. Scoop into a serving dish. If your feeling it, top with scallions and cracked pepper.
Serve dips with chips, veggies or anything you want. Also make great spreads for sandwiches and crackers too!
CHILI MONDAY!Well it is, but I am talking about making some super duper, yes I’ll have seconds, tummy filling, bone warming, pumpkin chili.. And heathy oh so healthy to boot. Reals, it’s the best.
This pumpkin chili recipe had evolved over the years. The first time I made pumpkin chili was for my very first dinner party that I threw back in college. Instead of cutting the pumpkin and adding it into the chili, I chopped the little pumpkins in half, roasted them, and used the halves as bowls..A good idea except no one at the pumpkin and I was left with a bunch of slobbered on roasted pumpkin halves. ( I probably should have said something, but being a few drinks in, I didn’t think to say anything about the edible bowls and I don’t think I noticed the abandoned pumpkins until the next morning). After that somewhat failed attempt, I started adding the pumpkin to the chili and left the drinking tip after the food is served. ( I learned so much in college)
But yeah, this recipe has traveled a few years with me and every time I make it, I always think, jeez, why don’t I make this every weekend. Well maybe now I will.
Don’t let this spread scare you.. it’s just veggies from the fridge, a chopped up pie pumpkin and pre soaked beans. Oh and some canned tomato and spices. It took about 10 minutes of hands on time and one big pot. No big mess to clean up and you can get rid of those veggies in the fridge that are on the way out. WIN WIN WIN!
All the chopped veggies, the chopped pumpkin go into the pot with salt. pepper , and spices.( I added a fresh jalapeno and about 5 cloves of garlic to this mixture) Let the mixture sweat for about 5 minutes, giving it a quick stir or two.
Now toss in the beans and the tomatoes… Add a cans worth of water as well. Bring to a boil, then turn to low heat and cover.
A last minute addition.. I added a few chopped up kale leaves. I wanted a little more bright color and adding kale to anything is a good idea.
I added a little sliced avocado to one of the bowls (I only had enough for one) and cut up some lime wedges to squeeze on top. (I did, Nick didn’t)
Best chili I have made in a long time…and yes, there is a bunch of left over which is fantastic because now I have lunch for the next couple days…
HOORAY FOR FOOD!!!
Have a good Monday!
-C
small sugar pie pumpkin
2 cups dried beans..I used a 1 1/2 cups black and 1/2 cup kidney or 2 cans of beans
28 oz can of crushed or diced tomatoes
1 small onion
1 small
1 carrot
1 /4 head of cabbage
a small broccoli crown
1/4 head of cauliflower
a few kale leaves
1 jalapeño
5 cloves garlic
2 tablespoons chili powder
2 tablespoons cumin
1 tablespoon coriander
salt and pepper
Either the night before or morning of, presoak dried beans..(beans in pot with about 4 cups water and a sprinkle of salt)
Take pumpkin and slice in half, de-seed and chop flesh into little chunks. (You can peel it if you want, but really, there is no reason to) Rough chop all the veggies (minus the kale) and stick into a large pot with the pumpkin. Pot on medium heat.. let the veggies sweat for about five minutes. Now add the garlic and the spices and let cook for a few more minutes.
When the mixture starts to become fragrant… drain, rinse and add presoaked (or canned) beans. Then the tomatoes, and 1 1/2 cans worth of water.
Bring chili to a boil then cover and reduce heat to low. Let cook for about an hour, giving it a stir every now and then………
Add in chopped kale a few minutes before serving
Serve in a bowl and top with sliced lime, avocado, a sprinkle of cheese….Whatever you want.
I love mustard, and when I say love, I mean LOVE. I eat it on anything and everything. And not just small quaintites, I buy jumbo sized containers of the stuff because I go through it so fast. Over the past few years I even started taking down others with my mustard eating obsession. Sisters, brothers, even some of the littles are now mustard eating feens. One of my little nieces is now just as bad as me. I don’t think I have seen her eat a single meal without a side of mustard. Her favorite snack, clementines and mustard, although sometimes she skips the clementines and just goes in with her fingers. Oh so good. I think that child could possible be mine. And yes, it’s mostly the yellow grocery store variety of mustard being consumed, but yellow mustard is just the tip of the ice berg. There is a whole world of flavors, textures and colors when it comes to the humble mustard seed. Whole grain mustard, to me, is one of the best and easiest to adapt to any persons specific taste. You can make it plan or add in just about any spice, vinegar, even a little sweetness that you might like. One of my favorite variations of this mustard is to skip the vinegar and use picked jalapeño juice. Aah, my mouth is watering just thinking about it.
So if you are anything of a mustard connoisseur, you really must, at least once, make your own batch.(It’s so easy!) And you will love it and share it with all your friends and they will think you are a bad ass for making your own mustard and your life will just be so great. All because you are now a mustard maker. Yes.
Yellow mustard seeds, brown mustard seeds, apple cider vinegar and salt. The most basic ingredients.
Note- If you want, add in a pinch of any spice that you want.. Chili flakes, granulated garlic, turmeric…. And you can use the vinegar of your choice. I like apple cider because its mellow with a slight sweetness but white or sherry or any vinegar would be great. Even left over picked juice is fantastic too.
In a large jar, combine the mustard seed , twice as much vinegar and a pinch of salt. Cover and let sit for on the counter overnight until the seeds have soften and look almost like caviar.
Now blend those seeds. You might want to add another splash or two of vinegar to help blend and to thin out a bit. Chose how creamy or seeded you like you mustard. I like to make it creamy but seedy so I blend it half way to creamy.
Taste and add another pinch of salt if its needed and……..
You have got mustard! Make sure you have a good snack ready to eat with it.. My go to is carrots. I could eat this all day long.
Enjoy and have a great Tuesday full of mustard and stuff!
-C
1/4 Cup Brown Mustard Seeds
1/4 Cup Brown Mustard Seeds
1 Cup Apple Cider Vinegar
1 Teaspoon Salt
Optional..A pinch of Garlic Graduals, Red Pepper Flakes, Curry Powder (Anything you want)
Combine all ingredients into a large jar that has at least a few extras inches for the seed to expand. Leave on counter for 8-12 hours.
Once seeds are nice and soft and have expanded, either eat as is (Mustard seed caviar) or blend the seeds to desired consistency (I like it half smooth, half seedy) Add a pinch more or salt and another splash or two of vinegar to help blend.
The mr is a saltines fanatic. I personally don’t get it, but he really, truly loves a good fresh package of those salty crispy crackers, and loves to make a little cracker crumb mess. (I think it does it to drive me crazy)
%u00a0The other night during a particularly crumby saltine cracker snack, he declared that the saltine people (who are these people?) must come out with flavored saltines. I then continued to burst his bubble and told him I am pretty sure the saltine people have, in fact, come out with flavors, but he was skeptical and did not believe my words. Whatever dude.
But then I got to thinking, “why the hell haven’t I made flavored saltine crackers yet?” So make flavored crackers I did. I know that the mr is really into dill pickled chips (beause I can smell the when he eats them) and I have been buying these mammoth jars of pickles from the Costco superstore (I love pickles but more then that I need the gigantic jars). so I had me a shit ton of pickle juice. It was meant to be.
The first time I made the crackers, I did a really small batch and wasn’t expecting anything amazing, just going for a decent whatever cracker. But no, the few that I managed to make, the mr went nuts for. He told me they were the best fucking cracker that he has ever had and I now have to make them for him all the time, and that it is now a birthday tradition (it was his birthday). He said they were the prefect dilly-ness, the pefrect texture and just the right amount of salt. Perfection.
Well that made me happy so instead of waiting for his next birthday, I just made a big batch. Again, more proof that I am the best girlfriend ever!
The stuff. Flour, dill pickle juice, olive oil and some dried dill and salt.
Flour into a bowl gets drizzled with olive oil and mix around with a fork.
%u00a0Then in goes the pickles juice , same deal, mix together with a fork until the mixture forms a dough. (almost resembling a pie dough)
Place dough down on counter. Let it sit there for a few minutes to give it time to rest.
After the rest, roll the dough out as thinly as you can (try for about an 1/8 inch).
I found that when I slightly damped the counter that the dough was easier to roll. It might be because I have wood counter top so this may or may not work for you, but is worth a try.
And with a knife or dough cutter (or fancy cracker cutting tool), trim off sides (if you want) and cut into 2 inch squares.
Note. IF you want to, poke a couple little wholes into the tops of the crackers. Doing so will prevent the crackers from poofing up (I was told the poof is good)
And place the crackers on a baking sheet, brush tops with the pickle juice, then sprinkle with chopped dill and a tiny bit of salt.
Stick into the preheated oven.
Bakeuntil they start to turn a light golden brown and arepoofing up a little (go ahead and grab one now for quality control)
These crackers be cracking. And wouldn’t you know it, they are already all gone. Next time I make them I am going to have to hide them.
Have a great weekend!
-C
Makes about fifty 2×2 crackers
1 cup all purpose flour
6-8 tablespoons pickle juice
3 tablespoon olive oil
finishing salt to taste
tablespoon chopped dried dill
Preheat oven to 350
Place flour into a shallow bowl and drizzle the olive oil in. Mix around with a fork. Grab pickle juice and drizzle in 6 tablespoons of the juice and mix with the fork until a dough forms. Add in another tablespoon or two if the dough needs more moisture to come together.
Form dough into a ball and let rest on the counter for a few minutes (good time to wash the dirty dishes)
After the rest, take the dough and roll it out to about 1/8 inch or as thinly as you can. Weirdly enough, I found that I was able to roll my dough out better when I damped my counter. The dough didn’t slide around and it still lifted up easily with a spatula.. but do what works for you.
Once you have rolled the dough, trim sides to clean lines and cut into 2×2 inch squares (you can cut into any shape and or size you like) Any trimming reform into a ball, roll out, and make a few more. (If you want a more authentic looking cracker, you can poke little whole into them. Doing this also make the crackers not poof up when bakes)
Place crackers on a lightly colored (or parchment lined) baking sheet. Brush each cracker top with a little pickle juice and sprinkle the tops with salt and dill. Place in the oven to bake for about 12 minutes or until the crackers have poofed up and are turning slightly brown.
Remove from oven, let cool completely and either eat right away or place in a air tight container for later.
These crackers had no later.
What are you going to be doing this weekend? Are you dressing up all crazy, taking a little or two door to door for bite sized pieces of candy, or are you maybe giving out candy? Are you going to some spectacular Halloween party, or are you thinking more tricks then treats and are planning on TP-ing the neighbors or creating some mischief around town.%u00a0
Whatever you are doing, it’s sounds like it’s going to be a blast. Just note,%u00a0if you are being mischievous %u00a0don’t be an asshole about it. Stealing candy from kids is wrong,(steal your candy from adults) and TP is cool but spray paint and things that are permanent are not. And stay away from my houses!%u00a0
Anyway, the Halloween situation %u00a0is always the same with me and the mr. We say that we need to do something fun and different every year. Maybe a party, or even just some human intreat ion. But just like every year, we give in to our inner hermits. Our Halloween night will be as followed: Lock ourselves in the house, drawing the shades,(note that we would totally give out candy, but our door is down a very narrow and dark driveway, behind a fence, and pretty much inaccessible to people) watch a movie %u00a0(thinking Donnie Darko or maybe even old reruns of Halloween Rosanne.)%u00a0eat popcorn,and go to sleep at a very reasonable hour. %u00a0And now that I say it out loud, our evening sounds like the most perfect way to spend the night. Especially because of the popcorn.
Let’s just stop and think about this popcorn a minute%u2026%u2026…
Ok, so do you get it now?. This is an epic popcorn combo.%u00a0Mustard is for everything. A slightly sweet honey mustard all drizzled on %u00a0popcorn, well that’s just craziness. And if you are like the mr., the pretzel crumble just takes it over the top. If we had made plans, I would probably have to cancel just so I can stay in an eat this popcorn.
And I have a hunch that this flavor combination will pair very well with a handful or two of some halloween candies.%u00a0
POPCORN TIME!!!!!
The stuff. A big ass bowl of air popped popcorn. %u00a0Spicy brown mustard (can use any mustard) honey (can use maple) a little olive oil and a few pretzel sticks. (can use any pretzel shape you like)
Bag the pretzels, grap something heavy (rolling pin works great) and smash the pretzels into tiny little bits.
In a little pot ) mix mustard, oil and honey together. Place on medium %u00a0heat and mix continuously until the mixture is hot and a nice liquid pourable consistency.%u00a0
Now you can do this any way you want, but my way is probably the best. Dividie popcorn in two bowls and drizzle each bowl with equal amounts of mustard sauce.
Flip one of the bowls ontop of the other and shake the crap oiut of it.(or until the popcorn is evenly coated)
And the popcorn is all nice and evenly coasted.%u00a0Now dump in the crushed pretzel and repeat the double bowl shake.
Check it out%u2026 Some fantastical popcorn
Now don’t you want to turn the lights off and snuggle on the couch with this bowl?
Share if you want, but hey, it’s just popcorn so you can taotally eat it all yourself.%u00a0
Happy Friday.. And Happy Halloween
-C
makes 10 cups (enough to share between 2 people)
10 ish cups of air popped popcorn
3 tablespoon spicy brown mustard
2 tablespoons honey (sub maple or agave if vegan)
1 tablespoon olive oil
3-4 pretzel rods (or whatever shape) which makes about 1/2 a cup smashed (use gluten free if needed)
Take pretzels and place them in a bag of some sort and using something heavy (like a rolling pin)%u00a0smash the pretzels until they are a smallish crumb (some big shanks are good too)
In a small sauce pot, combine the mustard, honey, oil, and mix to combine. Stick pot on stove and heat on medium until sauce is hot and liquidy. (can get the same result by using a microwave safe bowl and sticking it in a microwave at 20 second intervals until %u00a0hot)
Evenly distribute popcorn into two big bowls. Take the warmed up sauce and drizzle all over popcorn in %u00a0each bowl the, for the fun part,%u00a0flip one bowl onto the other and shake the popcorn all around to evenly coat. Remove a bowl, toss in the pretzel crumbs and pieces and place the bowl back on. Shake again.
Popcorn is ready,%u00a0now eating it!
I eat vegetables like I breath air%u2026 constantly and almost mindlessly. %u00a0Some people are addicted to sugar or coffee, but me, I am addicted to veggies. ( I am also extremely addicted to coffee) This is my truth, but I am ok with it. %u00a0
All week long I have been hearing about this big game going on this weekend, something to do with a ball and running up and down a field%u2026.not quite sure, but I think it might be a big deal to some people.(I know it’s the Super Bowl, and I have heard about some deflated balls, but that’s the extent of my knowledge) %u00a0I have also have been hearing a lot of party planning around this game, food planning, which is something that I do understand. So I wanted to bring a party snack to the mix, and because of my addiction, my mind goes straight to vegetable. I know that there is traditionally a lot of meat, cheese and hot sauce at these said parties, and that’s totally cool, but I think everyone wants to have a least one awesome meatless cheese-less piece of food to snack on during half time. %u00a0So I give the people what they want.%u00a0
So simple, fast and easy to make. Tasty and healthy as can be. Grab and eat with you hands%u2026. and nice to look at. We got the whole package here. %u00a0%u00a0
Pretty much a little bit of everything that I have in my fridge%u2026.Shredded red cabbage, carrots, beets. Some sliced of red onion, tomato and red pepper. Hummus and a little mashed avocado
Yes, it may look like a mess, but that’s just me trying to make five different things at once. But really, making %u00a0these wraps are simple simple. Just take rinsed and dried green or red leaf lettuce, smear on hummus and mashed avocado and pile on the veggies. Roll and stick with a toothpick to keep from unrolling. See%u2026. simple.So many colors%u2026%u2026 so much pretty.%u00a0Wrapped and rolled…Sliced down the middle, just to see all the pretty inside.
These might be veggie wraps, but man, look at those sausage fingers%u2026(hehehe)
Make for lunch, dinner, party, or snack. Eat them for breakfast, dessert or midnight nosh. Whenever, wherever%u2026..YUMMY YUMMY YUM!%u00a0
Happy hump day!%u00a0
-C
Lettuce Wraps%u00a0
Ingredients
Use whatever you want%u2026 but this is what I included in mine
Green leaf lettuce
Shredded red cabbage
shredded %u00a0beets
shredded carrots
%u00a0thinly sliced tomato
thinly sliced red pepper
thinly sliced red onion
hummus
avocado
With each wrap, take a large lettuce leaf and cut out the crunchy rib.(you can slice it up thinly and add to wrap. Smear %u00a0leaf with hummus and smashed avocado, then layer on a bit of each of the veggies. Wrap or roll leaf in on the veggies and stick a toothpick in center to keep from unrolling.%u00a0
Place on a plate and eat or share%u2026 Extras are fantastic to have in the fridge!
I feel like this salad is kind of a summery salad, or better yet, a salad that highlights all the best of what summer has to bring. All the fresh tender dill that is still growing (but not for long) , all the brightly colored and amazing veggies that are being harvested and are nearing the end (bye fresh cucumbers.) This salad might just be my little last hurrah of summer cooking before it is all root veggies and dried herbs and hot and hearty food. And not going to lie and say that I am sad to see summer go because I am so so ready for it to be over, but I will miss all the fresh fresh produce. And I will especially miss all the fresh dill because fresh dill is seriously the best.
Eat up what is left of summer now before it%u2019s too late!
The stuff. Quinoa, a bunch of dill, a cucumber, a pepper, an onion, and some cherry tomatoes. Also a clove of garlic, some salt and pepper, and red wine vinegar.
Mince the garlic, chop the onion, mince the pepper and the cucumber, half the tomatoes, and last but noblest, rough chop the dill.
All that goodness goes into. big bow, along with a sprinkle of salt and pepper, and the vinegar Tossed around and left to meld.
Uncooked quinoa with water turns to cooked quinoa
Quinoa meets the bowl of veggies
And after a good mix, viola!
You got yourself a yummers fresh dill and veggie quinoa salad.
-C
serves 3-5 as a side or 2 as a meal
1 cup uncooked quinoa
2 cups water
I bunch fresh dill (like a 1/3 cup chopped%u2026 But use as much as you want)
1/2 a small red onion
1 clove garlic
1 small Persian cucumer
1/2 of a sweet red or yellow pepper
handful or two of cherry tomatoes
4 tablespoons red wine vinegar
salt and pepper to taste
Start by cooking the quinoa. Place the water and the uncooked quinoa into a medium sized pot. Place on high heat until sorts to boil, then reduce heat to a simmer and place lid on the pot. Let cook for about 15 minutes, checking at 10 minutes, to see if all the water has absorbed. When it has, remove from heat and let sit for a few more minutes then fluff with a fork.
While the quinoa id cooking, mince the garlic and chop all the veggies into small little pieces. Place into a big bowl. Chop up the fresh dill and toss into bowl too, along with the vinegar and a good sprinkle of salt and pepper. Mix it all around and let sit on the counter for a little so the veggies get nice and vinegary. Once quinoa is cooked and fluffed, dump into the bowl and mix around. Season with more salt and pepper if needed. Eat warm or refrigerate and eat cold. It%u2019s defiantly one of those salads that taste great right away but tastes even better the next day.
My family is big. And my family is crazy. This makes for interesting gift giving.Over the years as we have all gotten older and started having littles, our gift giving has evolved. We use to buy each other presents, but then that got a little to intense and expensive. Then we started coming up withweird gift games where we had to buy 10 things made out of wood or glass and did a kind of white elephant things, which was fun, but we all ended up with wooden spoons and shot glasses.%u00a0 Or the stockings. We did stockings for a few years where we all stuffed something into each of the stockings, but that got kinda lame when everyone started stuffing packs of gum into them….It was getting to be kinda ridiculous. So this year we decided to give secret Santa a try. The deal is that the 9 older siblings drew names and then the 9 cousins drew names, all with a spending limit of $25. It works out for the best because the littles get to have a little fun and participate, and the adults don’t have to go and blow stupid money for kinda stupid shit.%u00a0 Everyone is responsible for one persons gift of happiness….. And they better make it good!
But one of the things that I love about Christmas is making all the little something. One year I made them each a veggie shaped pillow, and another they each got a hand made box. (I love to give handmade gifts.)So this year I still wanted to give each of the littles a little something too. And not anything to crazy, just something small. And now that we are not stuffing stockings with gum, I figured it wouldn’t hurt to give them each a little candy.%u00a0 They all like chocolate so chocolate it was.%u00a0 And to zaz it up a little, I popped some quinoa to add some crunch and dear I say, a bit of healthy protein, to the candy. ( sneaky sneaky)
And bonus. this bark can be made in like 5 minutes (1/2 hour to cool) . Wrapped into little wax paper packages with a cute little string, its a super simple, easy, but sweet gift that almost anyone would enjoy (even if you make it and give it to yourself)%u00a0 And no, you don’t have to make it specifically for the holidays, this is just a great little bit of chocolate snack that can be made whenever you damn well please to make it!
The stuff. Chocolate chips (milk, semi sweet, dark, or a mixture) and uncooked quinoa.
Popped quinoa. Fun stuff. Working in small batched,%u00a0 all you need to do is stick the a layer of uncooked quinoa into a heavy bottom pot, turn heat onto high, grab a spoon and mix the quinoa constantly until it starts to pop. (The seeds will pop up, but as long as you pot is big, they should stay inside) When it starts popping, turn heat down to medium low and continue to stir until the quinoa is golden brown and stops popping as frequently. Don’t over pop it our else you will burn it!
Dump the popped quinoa into a holding vessel and pop some more.
Now melt the chocolate. I used the double boiler method (pot of simmering water and a glass bowl) but if you have a microwave, go ahead ans use it.(chocolate in a glass bowl, microwave for 30 second intervals until melted)
Either way you choose, just melt down the chocolate until nice and silky smooth.
Mix the popped quinoa into the melted chocolate…
Then scrap onto a wax paper lined baking sheet and spread out to about 1/4-1/2 inch thick.
Place in the fridge to set up
Once the chocolate has harden, break that shit apart! Big pieces, little pieces. All up to you.
And do what your going to do with it. (wrapped in wax paper with a sting looks so nice if you giving it as a gift)
So simple, so good, so the perfect heartfelt, maybe a little last minutes, gift. Or just a nice little sweet snack with a healthy little kick to it.
And I probably won’t be posting until after the holiday so…
Merry Christmas, Happy Holidays, blah!!!!!
Bye!
-C
makes 3 cups of bark
2 cups chocolate chips (any kind you like)
1 cup dried quinoa
To pop quinoa, add enough quinoa to cover the bottom of a heavy bottom pot. Turn heat on high and slowly stir the quinoa until it starts to pop. Once it’s popping, turn down to low and continue to stir until all the quinoa is nice and golden brown and the popping isn’t as frequent. Dump the quinoa into a bowl ans continue on until you have popped all of it.
To melt chocolate, either use a double boiler (glass boil on top a low boiling pot of water. Add chocolate to bowl and mix until melted) Or use the microwave. (Heat in glass bowl at 30 second intervals until melted)
Combine the popped quinoa to the melted chocolate, mix until combined then pour out onto a wax paper lined baking sheet. Spread the chocolate to about 1/4 inch to a 1/2 inch thick with a spatula and place in he fridge to set.
Once chocolate is hard, remove from fridge and break into chunks.
And eat, share, and save a little for later.
Store whatever uneaten candy away from heat.
The bounty of spring is upon us. Asparagus is everywhere and I have been embracing it.. smelly pee and all.%u00a0 And along with all my spring veggies and smells, %u00a0I have grabbing for more springy spices. I go through seasonal spice kicks, like cinnamon and ginger in the fall, curries and chills in the winter. And for spring, I am big on sumac. If you haven’t heard of it or tasted it, it kind of taste like a tangy salty lemon..without actually having any salt. And its a really pretty, a bright red, almost purple color. I use it on a lot of things, especially veggies and bean dishes, sometimes as a lemon replacer, but mostly to add another level of tangy flavor.%u00a0It’s fantastic, really great for all those springy time dishes. Nice and bright!
%u00a0This dish is perfect made and eaten right away, but it’s one of those dishes that tastes even better the day after. Also it’s good and safe to serve room temperature. (think lunch box or a picnic!) And did I mention healthy? Protein packed quinoa and the lean green asparagus, I mean come on. You won’t feel an ounce of guilt for eating a hugmongo bowl of this stuff because you should, so it’s totally ok.
Eat away!%u00a0
The stuff of the stuff. Quinoa and asparagus for the base. Sumac, lemon, garlic, onion, salt and pepper and a little splash of oil for the dressing.%u00a0
Note. Sumac is not always the easiest spice to find. I know that its available online (what isn’t) and that some health food store or herbal apothecaries carry it, but i have ye tot see it at a conventional supermarket. And once you find it, buy a good amount cause you will also fall in love with it and use it on everything.%u00a0
%u00a0 %u00a0 %u00a0Start by making the dressing. You want to have it sit for at least 10 minutes. It will be perfect by the time the quinoa is done. Mince the garlic, dice the onion and juice the lemon. Stick it all into a jar with the sumac, a pinch of salt and pepper and about a teaspoons worth of olive oil. Stick a lid on the jar and shake shake shake. and let it sit.
Now you should make the quinoa.. Water and quinoa go into pot, high heat until boiling, %u00a0topped with a lid and set to simmer for about 15 minutes.%u00a0
When the quinoa is simmering, cook up the asparagus. Add a drizzle of oil, to a pan and a few splashes of water. Place trimmed and chopped asparagus to pan and sprinkle with salt. Cook on medium heat for about 8 minutes, or until cooked but still has a nice crunch to it. Take off heat and add the dressing to pan. %u00a0Let it sit and marinate for a few minutes.When the quinoa is tender, fluff with a fork and add to the skillet with the asparagus and dressing. Toss around to make sure all the quinoa gets dressed. Take a taste.. does it need a little salt and pepper? Add a pinch if it does.Pile into a bowl, add a bit of cracked pepper.. and eat.
Or%u2026 Idea! Make this dish and pack it into a jar. Maybe grab a baguette and some hummus os some other %u00a0tasty foods and take yourself and a friend out for a picnic.%u00a0
So much good .
Keep it real yo
-C
Quinoa and Asparagus with Sumac Dressing
serves 3-4 %u00a0as a side dish or 2 as a main meal.%u00a0
1 cup quinoa
2 cups water
8-10 asparagus%u00a0
olive oil
For the Dressing
1 tablespoon sumac
1/2 small red onion
2-3 cloves garlic
Juice of 1 jumbo lemon or 2 small lemons
2 teaspoons olive oil
salt and pepper
Start but making the dressing. Mince the garlic and finely dice the onion. Place in a %u00a0jar with the sumac, the juice of the lemon, a pinch of salt and pepper, and a little splash of oil. Top the jar and shake the crap out of it for a minute. Let sit and meld. (This dressing can be made ahead of time and is fantastic on all sorts of everything)
In a large pot, add water, quinoa and a spindle of salt. Bring to a boil, cover , and reduce heat to simmer. Let cook for about 15 minutes or until water has completely absorbed. %u00a0When the quinoa gets going, trim the woody parts of the asparagus and chop the remain asparagus into inch long pieces. Toss into a lightly oiled skillet with a few splashes of water, sprinkle with salt and put on medium heat for about 8 minutes, or until asparagus is cooked, but still crispy. Take off heat and add the sumac dressing. Once the quinoa is done, fluff it with a fork and toss it with the sumac dressed asparagus. Scoop into a bowl, add some cracked pepper. Bring food to face and eat.%u00a0
Any leftover? This dish is fantastic serves cold or at room temperature.
For the past few days I have heard more complaining then happy. The biggest complaint%u2026tummy issues. %u00a0A week of gorging on heavy, rich, and indulgent foods is finally catching up with people, turning them into grump asses. I can handle a little grump, %u00a0but its time to get get out of that funk and take care and stop bitching. May I make a suggestion? Eat this%u2026 You will be happy. %u00a0Your body will feel clean and nurised. Your tummy will get back on track. %u00a0 It what I call satisfaction This salad is a complete meal .Chopped and shredded veggies atop a small heap of quinoa, tossed on a handful of lentils and topped with a dollop of lime avocado%u2026 Thats it and it is good. For the sake of picture-taking, I made a plate look all nice and pretty, with layers of %u00a0colors, but to be honest with you, I rather toss into a big bowl, grab a moderately large-sized fork and %u00a0food to face%u2026 and it’s just as pretty.(the bowl of food is pretty, not food on my face) Quick note: the vegetables that I used here %u00a0are what I had at home. If you don’t have one or two of these specific veggies, don’t worry about it. Sub in something else, like pepper or spinach., Still have extra brussel sprouts, green beans or asparagus from thanksgiving? Go ahead and use those. If there is a specific veggie you know your stomach doesn’t tolerate well, then maybe avoid using it. This is a happy feel good salad!A pile of vegetables is always a good start to any meal, especially these veggies.. All but the avocado came from my farm share. This is one %u00a0local organic meal of love.
Green Kale, purple cabbage, beets, red onion, carrots%u2026I did a little shredding and some grating. I like to have different sized and textures in a salad.
Oh whats this? Diced butternut squash(from farm) sprinkle with salt and pepper waiting to be roasted. I am a huge believer in squash on salads%u2026especially in a cold Vermont winter. A little bit of heartiness can really go along way.%u00a0Quinoa.. 1 part quinoa to 2 parts water..Bring to a boil and let simmer until light and fluffy. When I make quinoa, I always make more than is going to be eaten, its great to have pre made for any meal. %u00a0Quinoa goes with everything, even a sprinkle of cinnamon and diced up apple for a nice breakfast or snack.%u00a0I was making this for dinner for my mister who sometimes doesn’t tolerate so many super raw veggies. So what I did and I recommend doing if you are worried about to many raw veggies at once, is to give them a really quick vinegar braise. I throw the veggie in a pan and drizzled red wine vinegar(you can use any vinegar you like) . Stuck a top on it and stuck it on the burner for a few minutes until the vinegar was gone. It just barely softens the veggies and %u00a0helps infuse the vinegar.Also a little easier for some to digest. Me, I like to eat it completely raw.%u00a0Barely steamed kale, just enough to soften it. Again. raw is awesome too. Half a lime, half an avocado and a clove or two of garlic… guacamole%u2026Call it what you will.
Salad contstruction%u2026 Quinoa. Kale. Cabbage, onion and beets. %u00a0Butternut squash. Carrots. Lentils and a nice sized scoop of avocado. But like I said, Bowl%u2026,fork%u2026.. face. Tastes just as good. A super salad, full of flavor and healthy stuff, A salad that will %u00a0fill you up, leave you feeling full, %u00a0not gross. and is quite the looker if you ask me.
Super Salad
1/4 cup Quinoa
1/4 roasted Butternut squash
2-3 large Kale leaves
1/2 cup shredded Red Cabbage
1/4 %u00a0grated Beet
1/8 cup sliced Red onion
1/4 cup grated Carrot
1/4 prepared lentils
1/4 of an Avocado
1/2 a lime
garlic
vinegar
salt and pepper
This is the list of stuff that is in this salad. This is not a recipe that need to be exact.. Use more of something you like, omit whatever you don’t. Just keep it simple and delicious. Dice up butternut into small pieces, place on baking sheet and roast till tender. %u00a0Add quinoa to water, bring to boil, then turn down to simmer %u00a0tip light ad fluffy. If you want steamed kale, stick kale in pot with a i/2 inch water and lid, and place on high for about 2 minutes, just until kale ha soften. The squash is roasting,(the smaller the pieces, the faster it goes) %u00a0quinoa is cooking and kale is soften,. Now grate or chop you veggies. Want them less than raw, place in pan with a bit of vinegar or just water and stick a lid on it. Medium heat for a few minutes, or until the veggies are slightly soften.. Dont over cook, you still want the veggies to have a bite and keep the good for you stuff. %u00a0Take avocado, chopped garlic and half lime and mash together. %u00a0Now everything is prepared and ready..Place strategically in a bowl or plate, quinoa, kale, squab, cabbage,beets, onion, carrots, lentils, avocado, drizzle with straight up vinegar.%u2026%u2026..Or just throw it all together. Fork to FACE!!!
Yesterday I spent the entire day (ok maybe not the entire day), but a the better part of the afternoon defrosting my freezer. Sure, I do the occasional chip chop here and there, just enough from around the freezer door so it will close, but ever few months I notice that everything in the fridge is not staying cold and that the freezer is not freezing stuff. Thats when I know its for real time to defrost. So a few days ago when I noticed my bananas were turing to liquid in the freezer, I knew it what I had to do….Completely empty the fridge and melt/hack away the 2-4 inches of ice build up that accumulated. It is such a freaking pain in the ass.So on this defrosting day, I took all the stuff from the freezer, stuck it in a cooler, and the rest of the stuff, which is basically all veggies, I just tossed on the table. As I am hacking away with a metal spatual, a wooden spoon, and a constant rotation of pots of boiling water, I was thinking about dinner. I figured I might as well just eat up as much of the veggies as I could, you know, so I didn’t have to put them back in the fridge. And also, I was getting pretty annoyed because this particular defrosting session was taking way longer the anticipated, which made making dinner seem like another pain in the ass. I figured I might as well just eat everything that is already out on the table, which pretty much narrowed down the “whats for dinner” conversations because it was already all over the place. And so dinner was a humongo salad for me, and for the mister, I made him a monster of a veggie sandwich. (my salad was exactly the same stuff as the sandwich, minus the bagel) Easy, fast, super duper yummy, pretty and piled so high with tons of veggies that the fridge is pretty much empty now.
Look at the is beast. I don’t call it a monster sandwich for nothing.
The stuff included in this monster veggie sandwich..
Romaine lettuce, tomato, avocado for there is not real sandwich without them. Thinly sliced radishes, cucumber,a and onion for nice crispy crunch. Shredded beets, carrots, and purple cabbage to give more crunch and a bit of sweetness. Then of course there needs to be something pickled, so I used banana peppers cause they are the SHIT!! And lastly some hummus for a nice creamy finish (plus a bit of protein) and yellow mustard because mustard on everything is just right. Heres to a mountain if goodness that is no longer in the fridge! Served with a another mountain of roasted parsnips and carrots (more stuff from the fridge) and a tall glass of iced tea.
Lucky that today is farm share pick up cause the fridge is pretty much on empty.
Yea it’s Thursday!!!!
-C
Note. This is just a guide.. Feel free to use whatever veggies you fancy.
Either a bagel, 2 slices of bread, or a big chunk of baguette (use a gluten free bread if you want or need too)
Hummus- Homemade or store bought
Mustard
Something pickled like pickles, banana peppers , jalapeños or all three
Lettuce, spinach or some kind of leafy green
Tomato
Avocado
Onion
Radishes
Cucumber
Shredded Carrots
Shredded Beets
Shredded Cabbage
To assemble. Ready your bread.. Toast if you want, and stick it on a plate
On either side, smear the hummus and the mustard.
Pick a side, start to stack by evenly disrupting veggies on top of veggies. Place the second piece of bread on top and giving a little smooth to keep it together.
And go at it. Cut in half or don’t. Have a napkin or a long sleeve ready to wipe your face.
My winter farm share is coming to an end this week. One more pick and then a three week stretch until the summer share starts… WHAT AM I GOING TO DO!!! Stock up as much as I can is what.
I have been strategic about the roots and veggies that I have chosen to bring home the past few weeks.(My farm lets you pick what you want) I know what I can buy at the store, things like carrots and potatoes, so I have been passing those up, but the roots like beets and celeriac… I have been bringing home baskets of those and hoarding them in the fridge and basement in preparation for the laps in farm fresh food and knowing that if I want to by these at the store it s going to coast me a million dollars a pound. (a for real million dollars)
Yup, lots of roots around here, especially celeriac root which is fantastic. I am kind of obsessed with celeriac, with its fibrous, knobby exterior, soft but almost meaty texture inside, and a flavor that is close to celery but so much better. I don’t know why it has taken me so long to do a posting featuring this amazing root vegetable (I eat it almost every day)
So here, an amazingly tasty, hearty but not heavy, celeriac recipe. Perfect for spring and the change into summer…. Mustard roasted celeriac with an fanatic split peas gravy that will have you licking you bowl clean.
The stuff….For the split pea gravy we have a carrot, a parsnip and a large onion chopped into small chunks. Salt, thyme, a bay leaf and of course the split peas. Then there is the celeriac root* sliced into 1/2 inch thick rounds and some plain old yellow mustard .
*Note. I don’t peel my celeriac root. I really enjoy the fibrous exterior but realize that some don’t(The mister does not like it) so peel it if you want.
Toss the chopped parsnip, carrot, onion and the spices into a pot on medium heat and let veggies sweat a few minutes until tender. Add in the split peas and enough water to cover everything. Turn pot on high and bring to a boil, then cover and turn to low. Make sure to give the pot a good stir ever few minutes and add more water if needed
While the gravy is cooking, take the celeriac rounds and brush each side with yellow mustard, sprinkle with pepper, and place on a baking sheet. Stick into the oven to roast for about 25 minutes, flipping the rounds after about 10 minutes.
Once the peas have soften, remove the bay leaf and puree until smooth and oh so creamy. Taste and add more salt and pepper if needed. If you find that the gravy seems to thick, just add in more water until it’s the consistency that you want. The gravy is made, the celeriac is roasted… now we are ready to eat!! Stick the celeriac on a plate and dump good amount of that gravy right on top. Feel free to add a bed of spinach, or a grain or anything you want, because why not, and also some chopped tomatoes for a little acid and prettiness.
Serve with the fanciest knife and fork you can find. Extra yellow mustard and sriracha sauce are great condiments to have close by.
Happy Tuesday!
-C
2 medium celeriac roots
6 tablespoons mustard
1 large carrot
1 medium parsnip
1 large yellow onion
2/3 cup split peas
2-3 cups water
1 bay leaf
2 teaspoons thyme or italian spice mix
salt and pepper
spinach (optional)
diced tomatoes(optional)
Preheat oven to 400 degrees
Small dice the carrot, parsnip and onion and throw into a large pot. Spinkle with salt and pepper, add in the thyme and bay leaf and add a splash of water. Stick on stove on medium heat and stir. Let cook until the veggies become soft and fragrant. Now add in the split peas and 2 cups of water. Bring to a boil then cover and turn heat down to medium low. Let cook until the split peas become tender (about 25 minutes) string on occasion and adding more water if the peas are not completely summered while cooking.
Once the peas are tender, let cool for a few minutes, remove bay leaf, and either dump into a blender or blend with an immersion blender until nice and creamy. If gravy seems to thick, add in more water.
Scrub or peel celeriac roots and slice them into 1/2 inch think rounds. Place on a baking sheet and brush mustard on both sides and spindle with pepper. Stick into oven for about 10 minutes, flip, then back into the oven for another 15 or so minutes, or unit the celeriac is tender.
When the celeriac is done remove from oven and stick a few rounds on a bed of spinach (or not, or any kind of grain or green you like) Top with a hearty helping of the gravy and toss on some chopped up tomatoes.

 The bounty of spring is upon us. Asparagus is everywhere and I have been embracing it.. smelly pee and all. And along with all my spring veggies and smells, I have grabbing for more springy spices. I go through seasonal spice kicks, like cinnamon and ginger in the fall, curries and chills in the winter. And for spring, I am big on sumac. If you haven’t heard of it or tasted it, it kind of taste like a tangy salty lemon..without actually having any salt. And its a really pretty, a bright red, almost purple color. I use it on a lot of things, especially veggies and bean dishes, sometimes as a lemon replacer, but mostly to add another level of tangy flavor. It’s fantastic, really great for all those springy time dishes. Nice and bright!
 The stuff of the stuff. Quinoa and asparagus for the base. Sumac, lemon, garlic, onion, salt and pepper and a little splash of oil for the dressing.
 Start by making the dressing. You want to have it sit for at least 10 minutes. It will be perfect by the time the quinoa is done. Mince the garlic, dice the onion and juice the lemon. Stick it all into a jar with the sumac, a pinch of salt and pepper and about a teaspoons worth of olive oil. Stick a lid on the jar and shake shake shake. and let it sit.
 When the quinoa is simmering, cook up the asparagus. Add a drizzle of oil, to a pan and a few splashes of water. Place trimmed and chopped asparagus to pan and sprinkle with salt. Cook on medium heat for about 8 minutes, or until cooked but still has a nice crunch to it. Take off heat and add the dressing to pan. Let it sit and marinate for a few minutes.
 When the quinoa is tender, fluff with a fork and add to the skillet with the asparagus and dressing. Toss around to make sure all the quinoa gets dressed. Take a taste.. does it need a little salt and pepper? Add a pinch if it does.
 Pile into a bowl, add a bit of cracked pepper.. and eat.
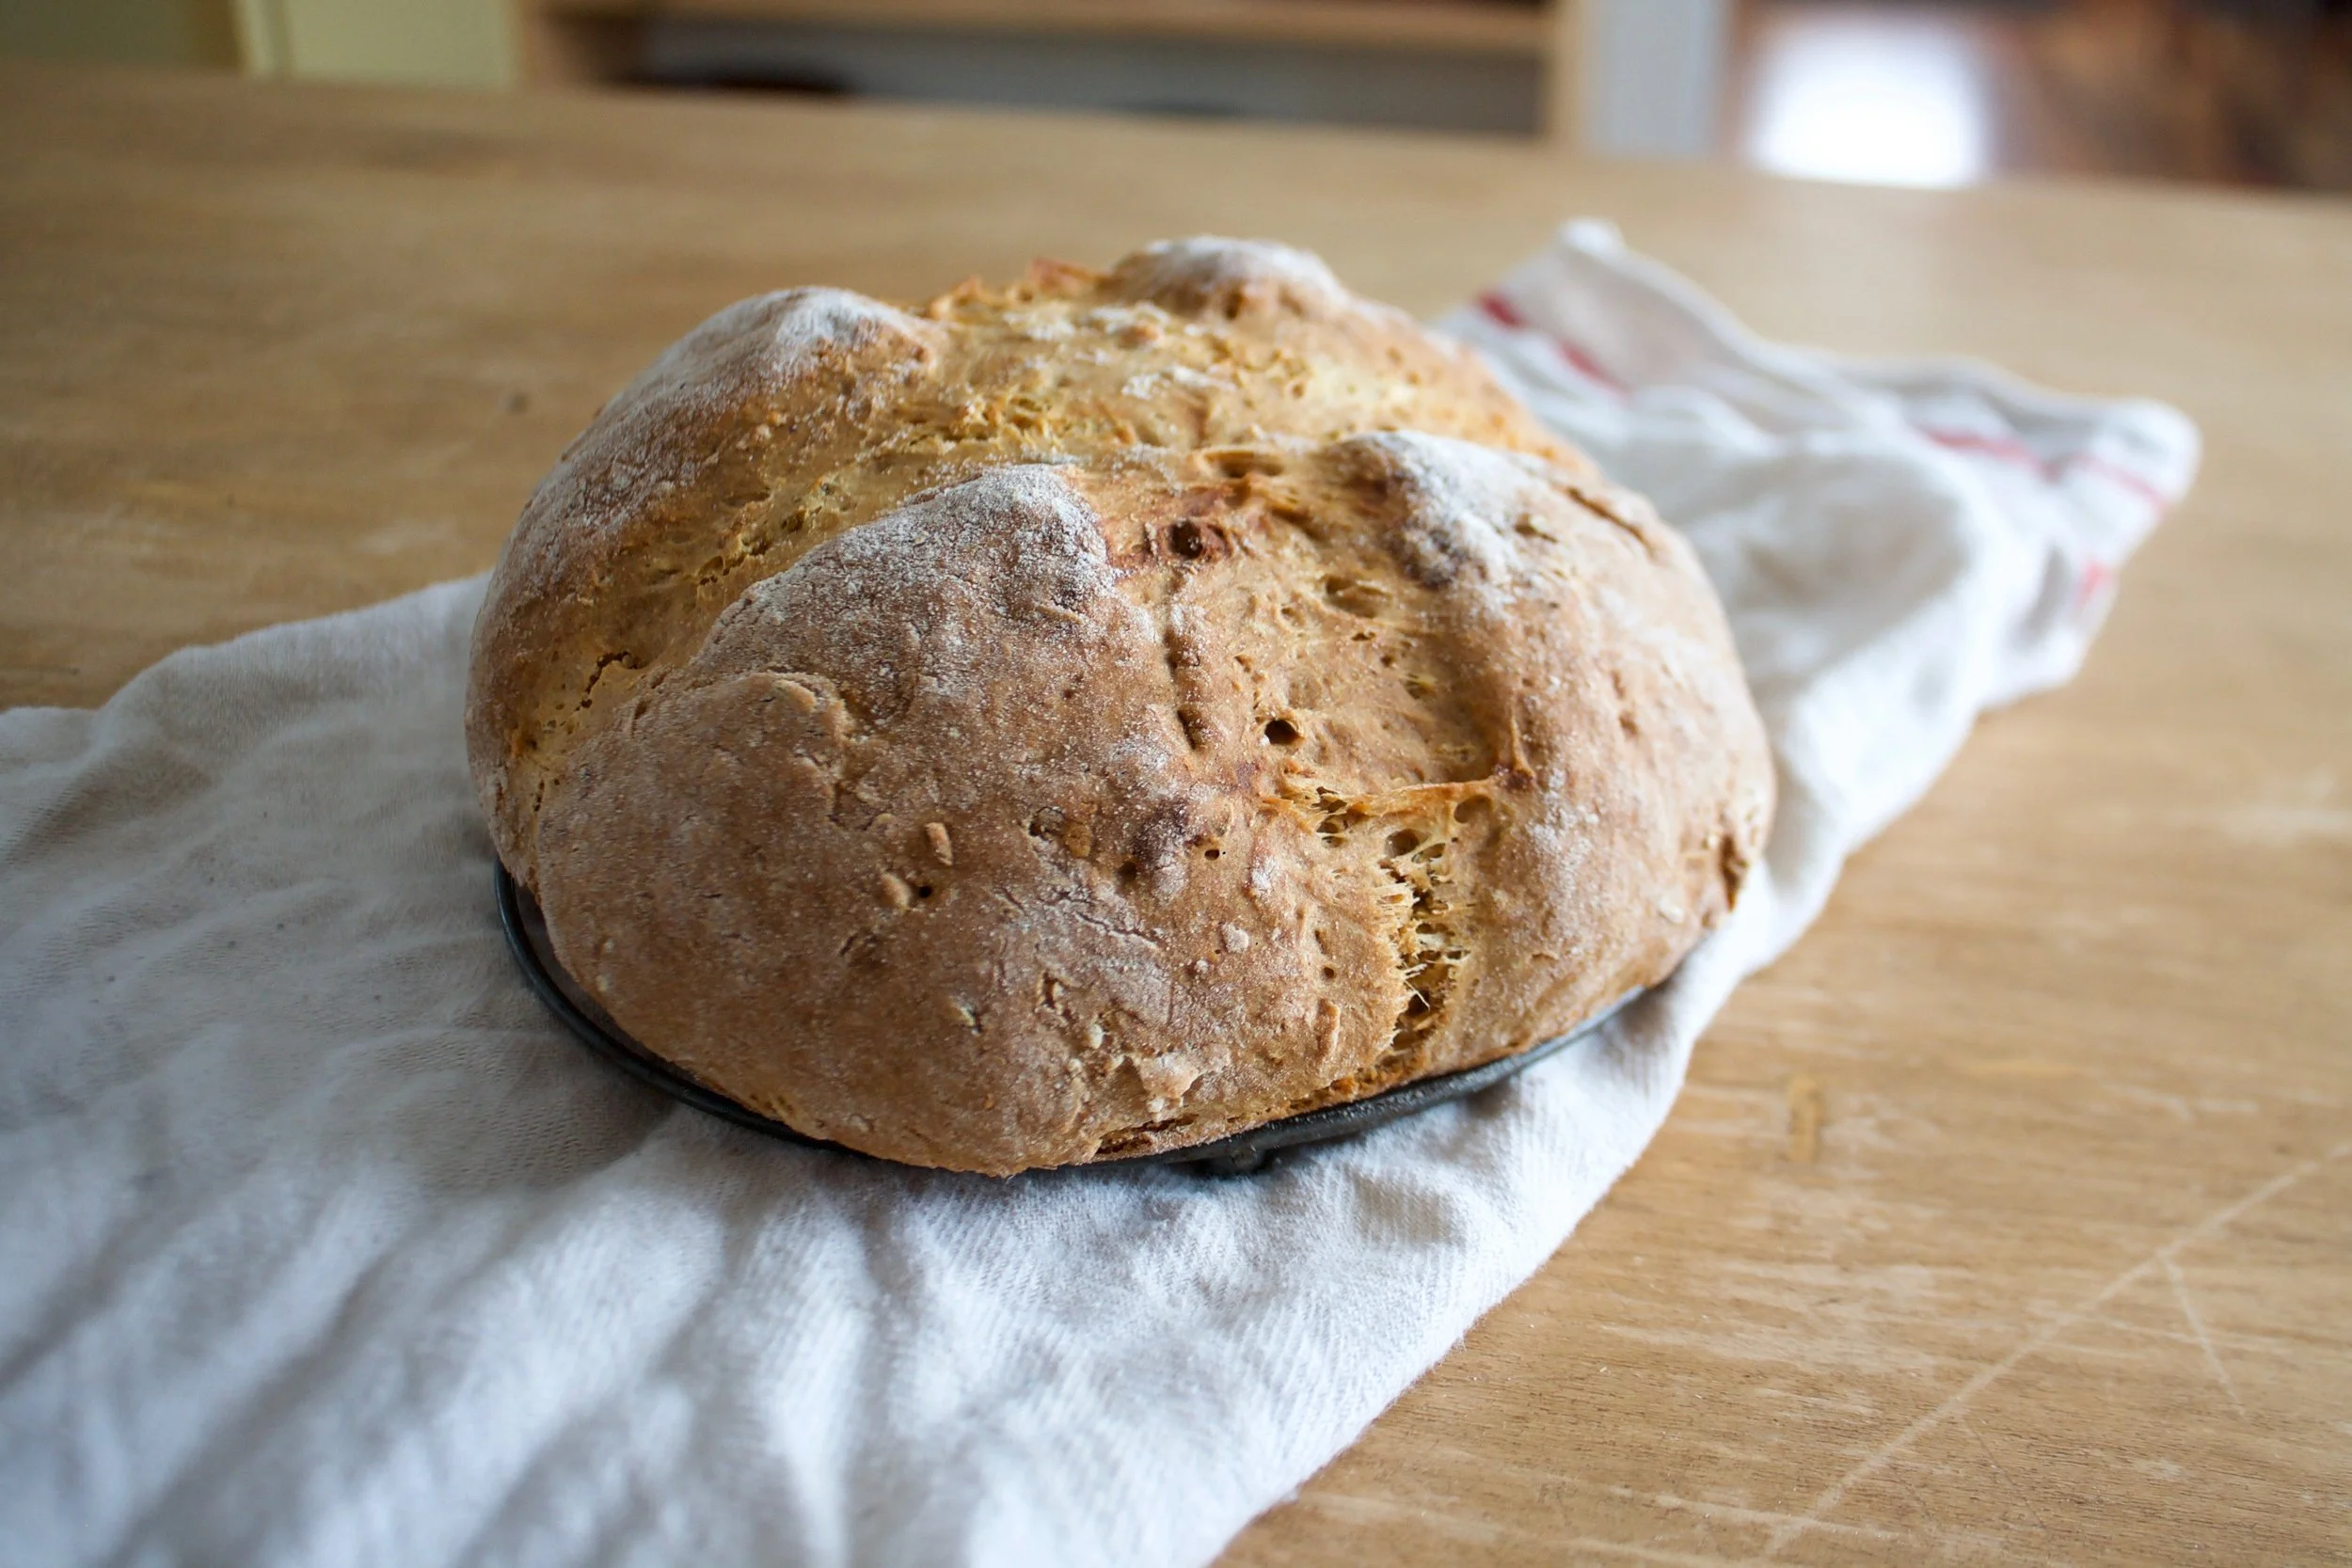
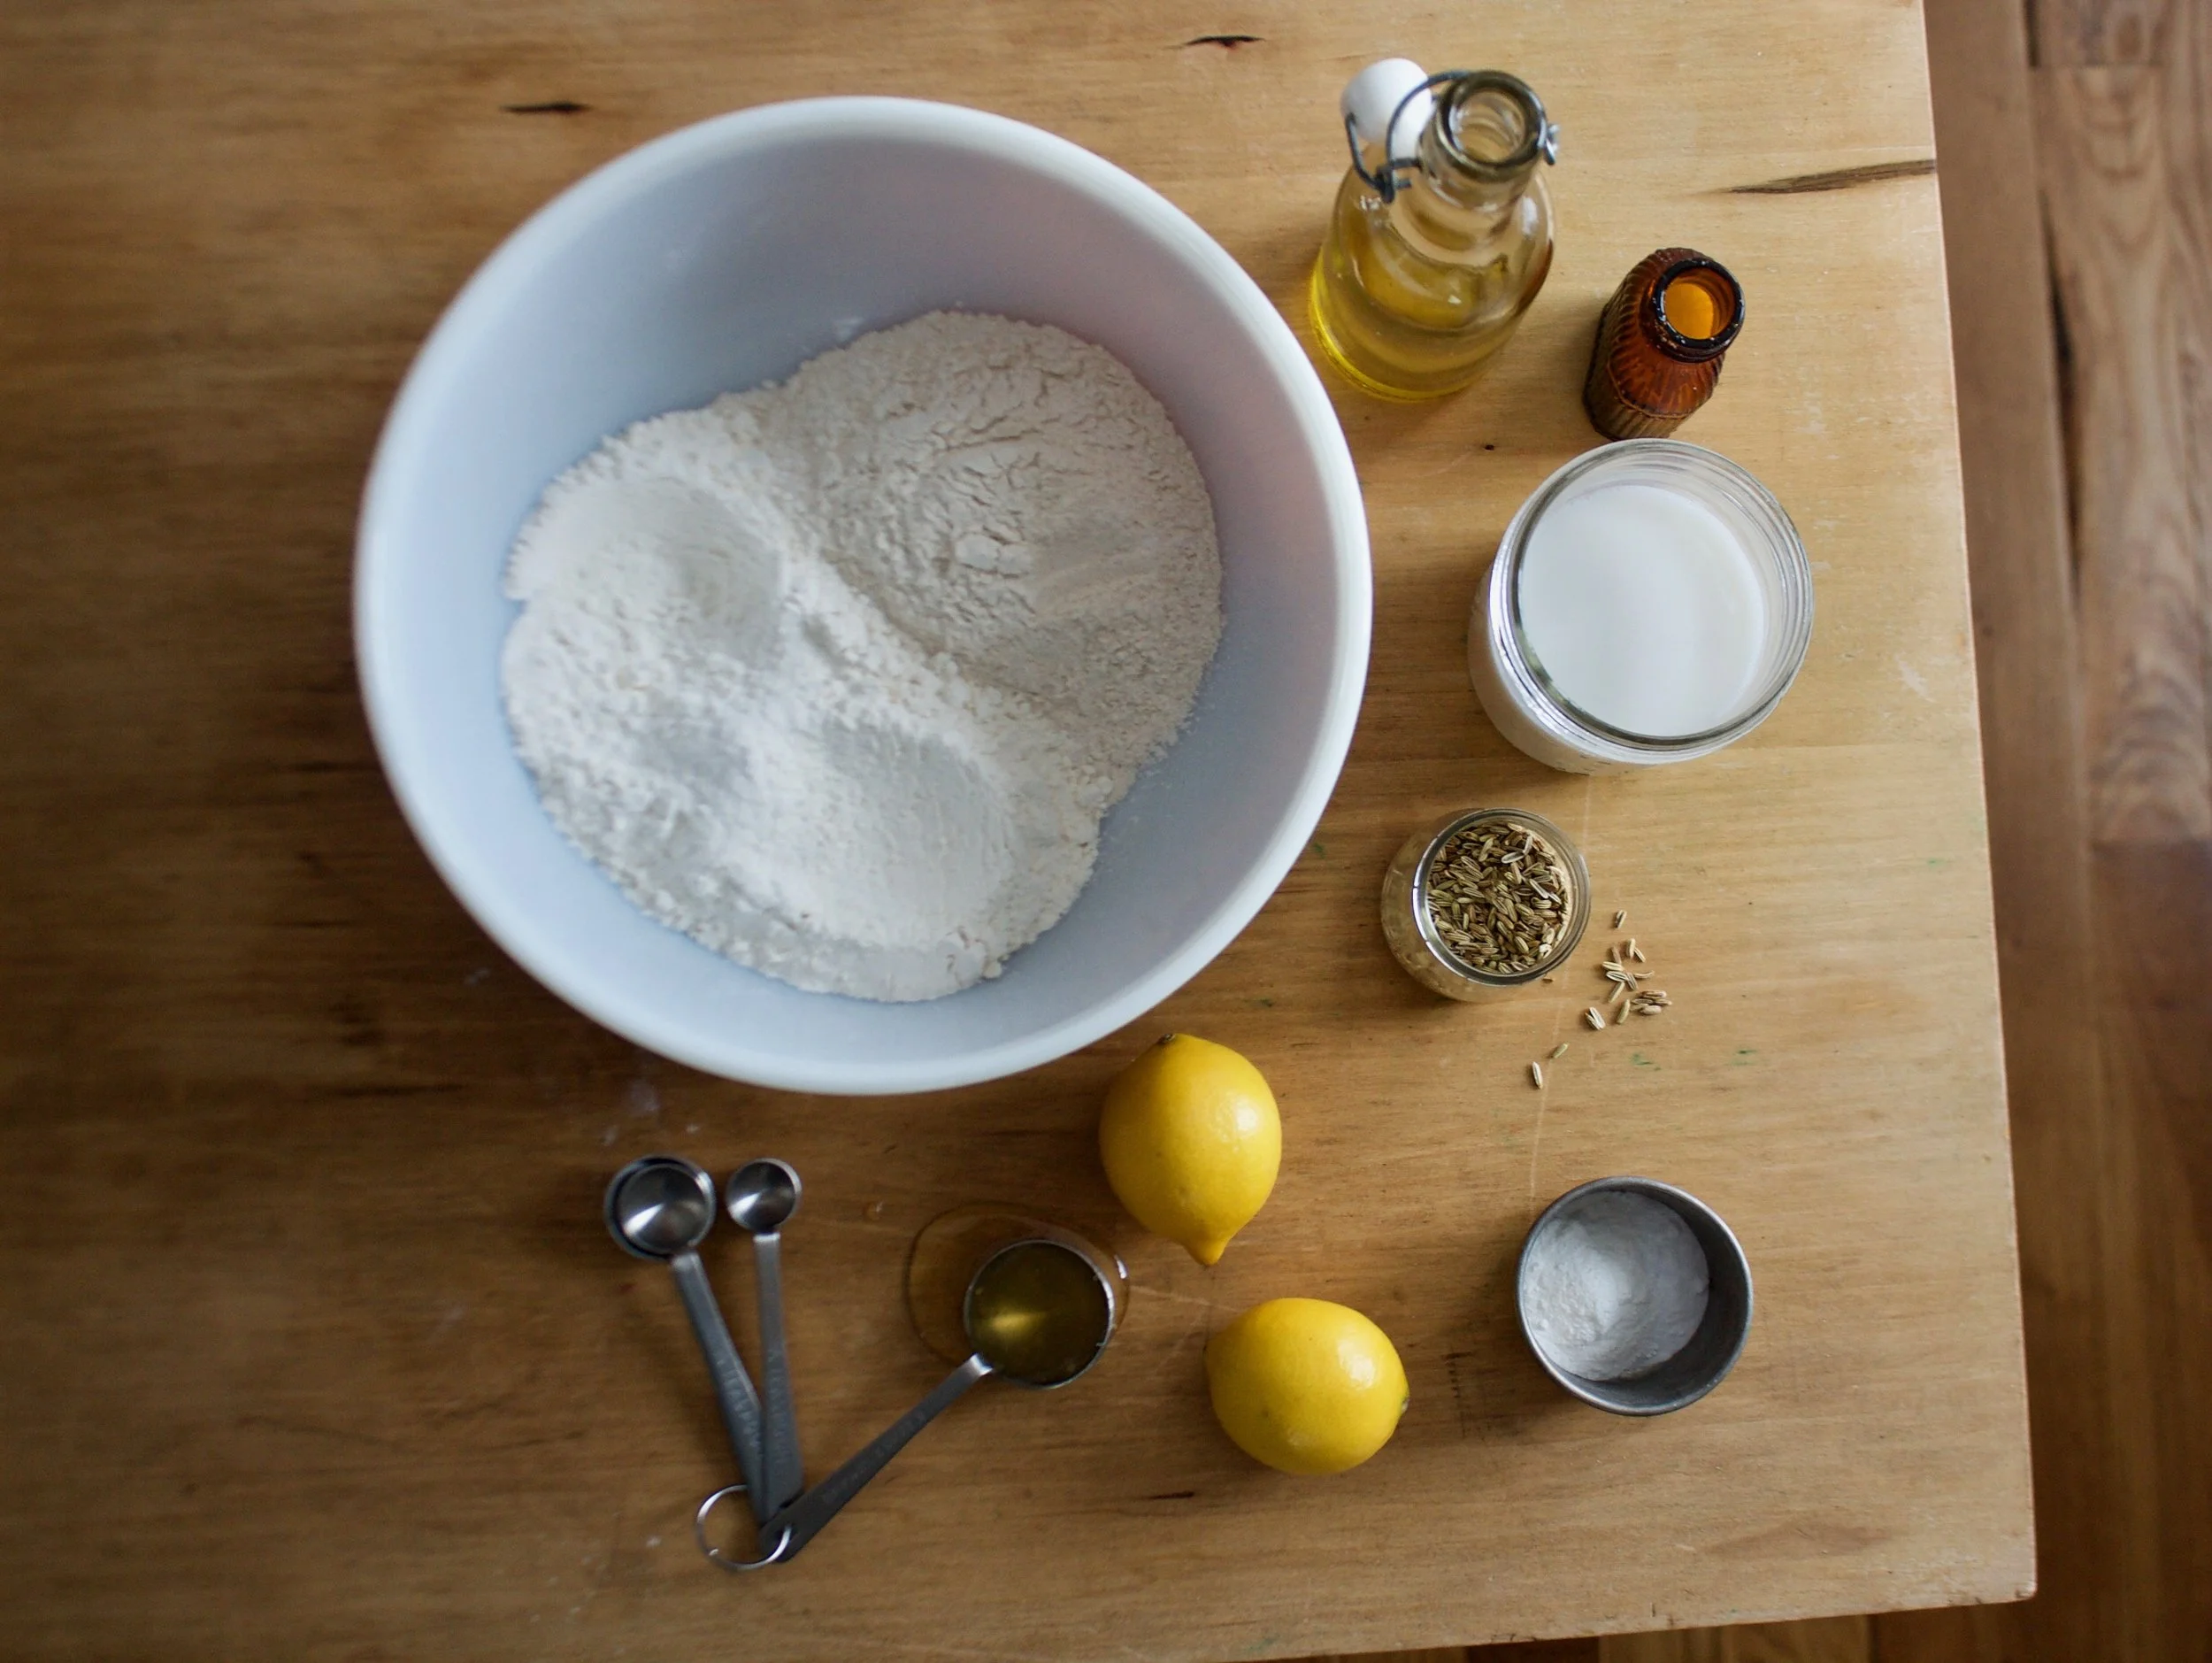
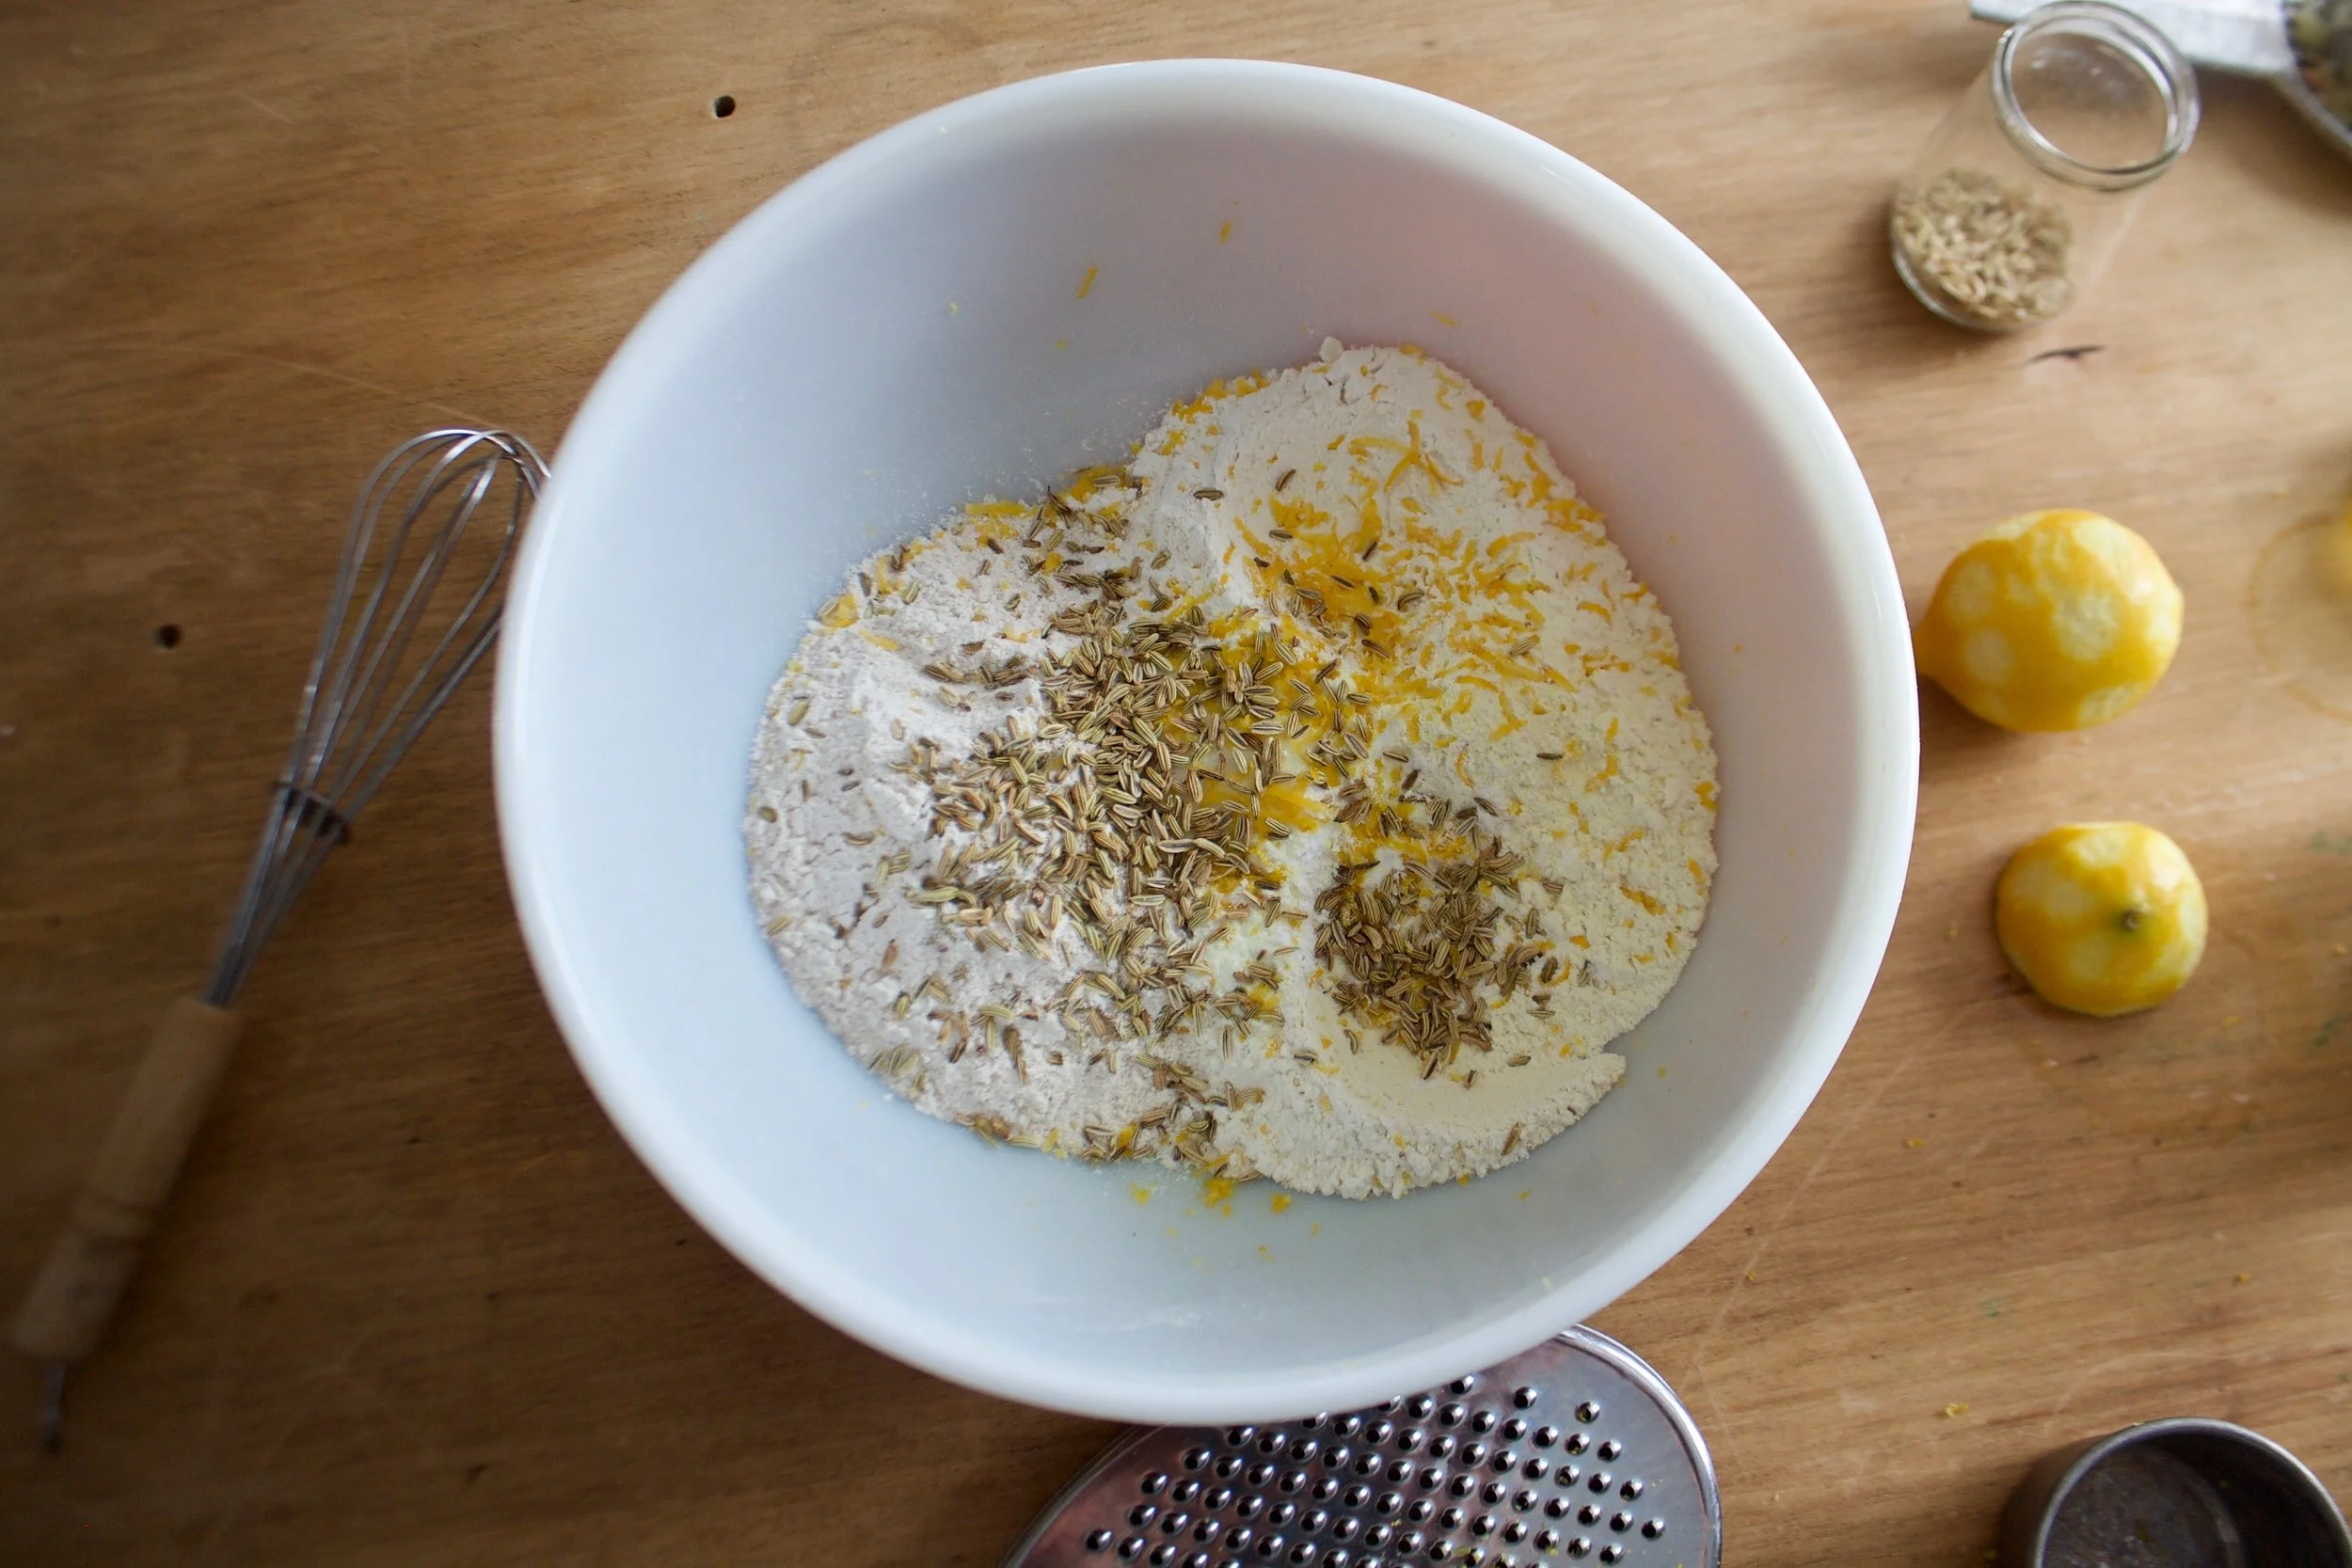
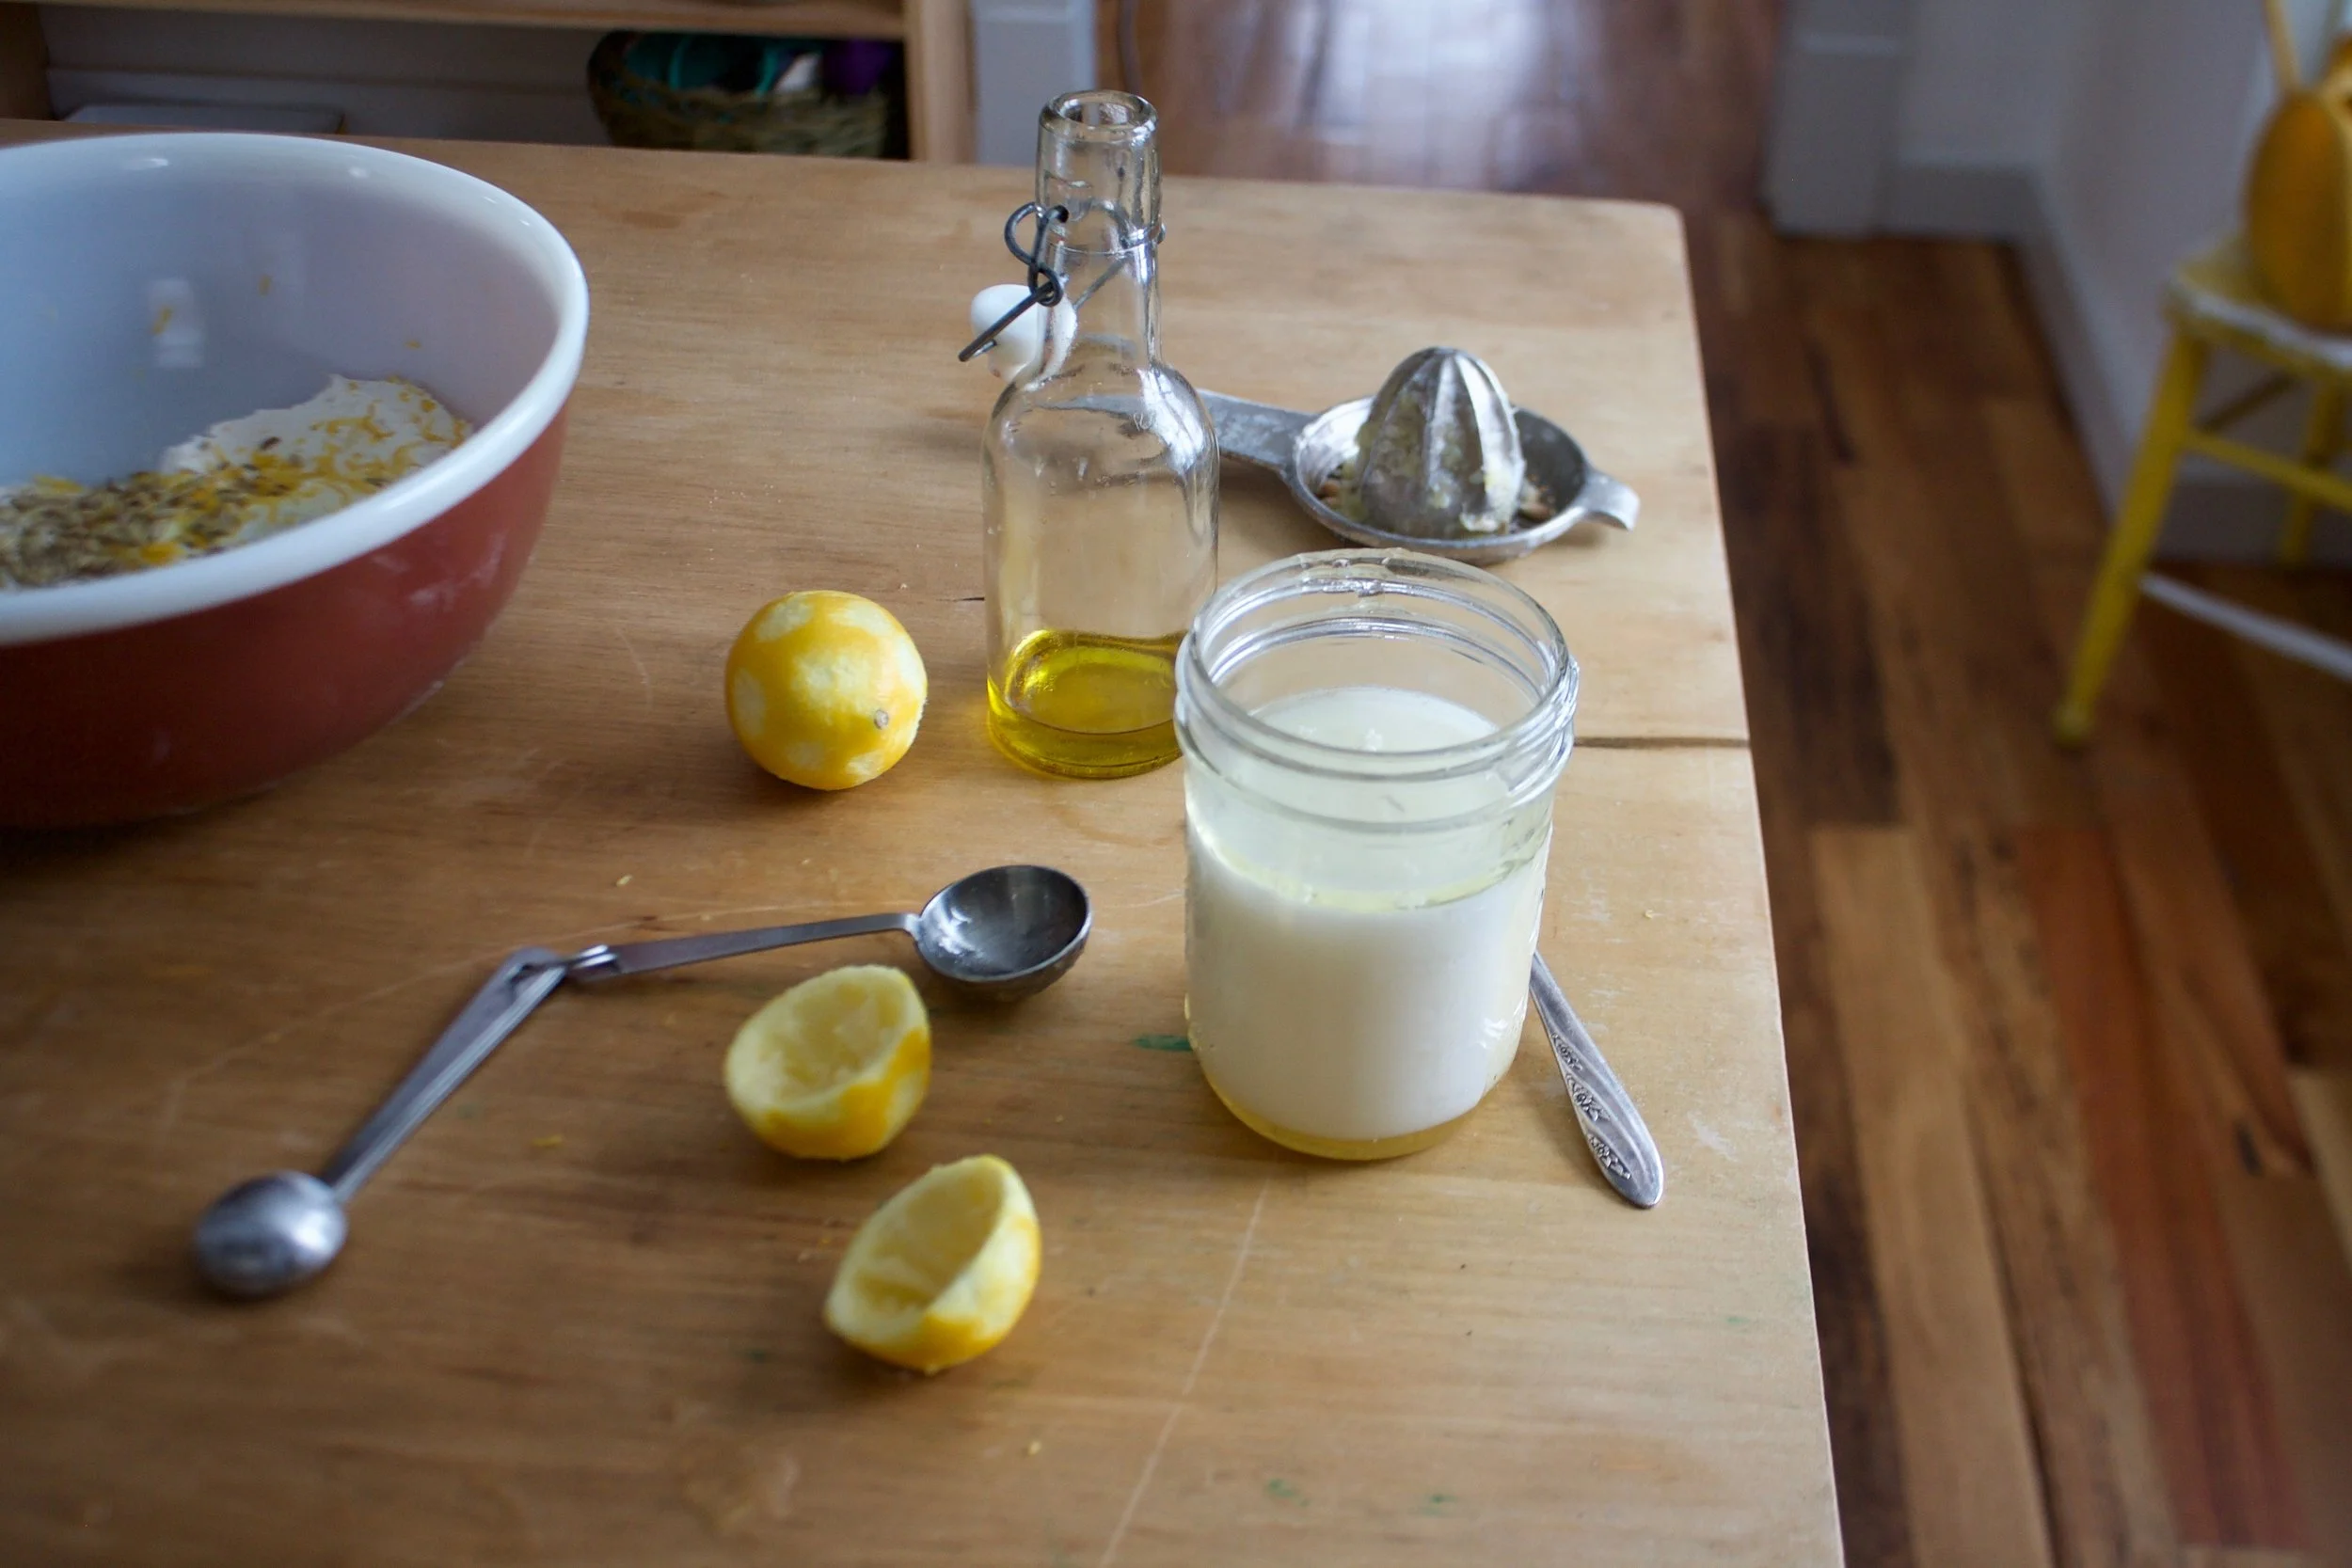
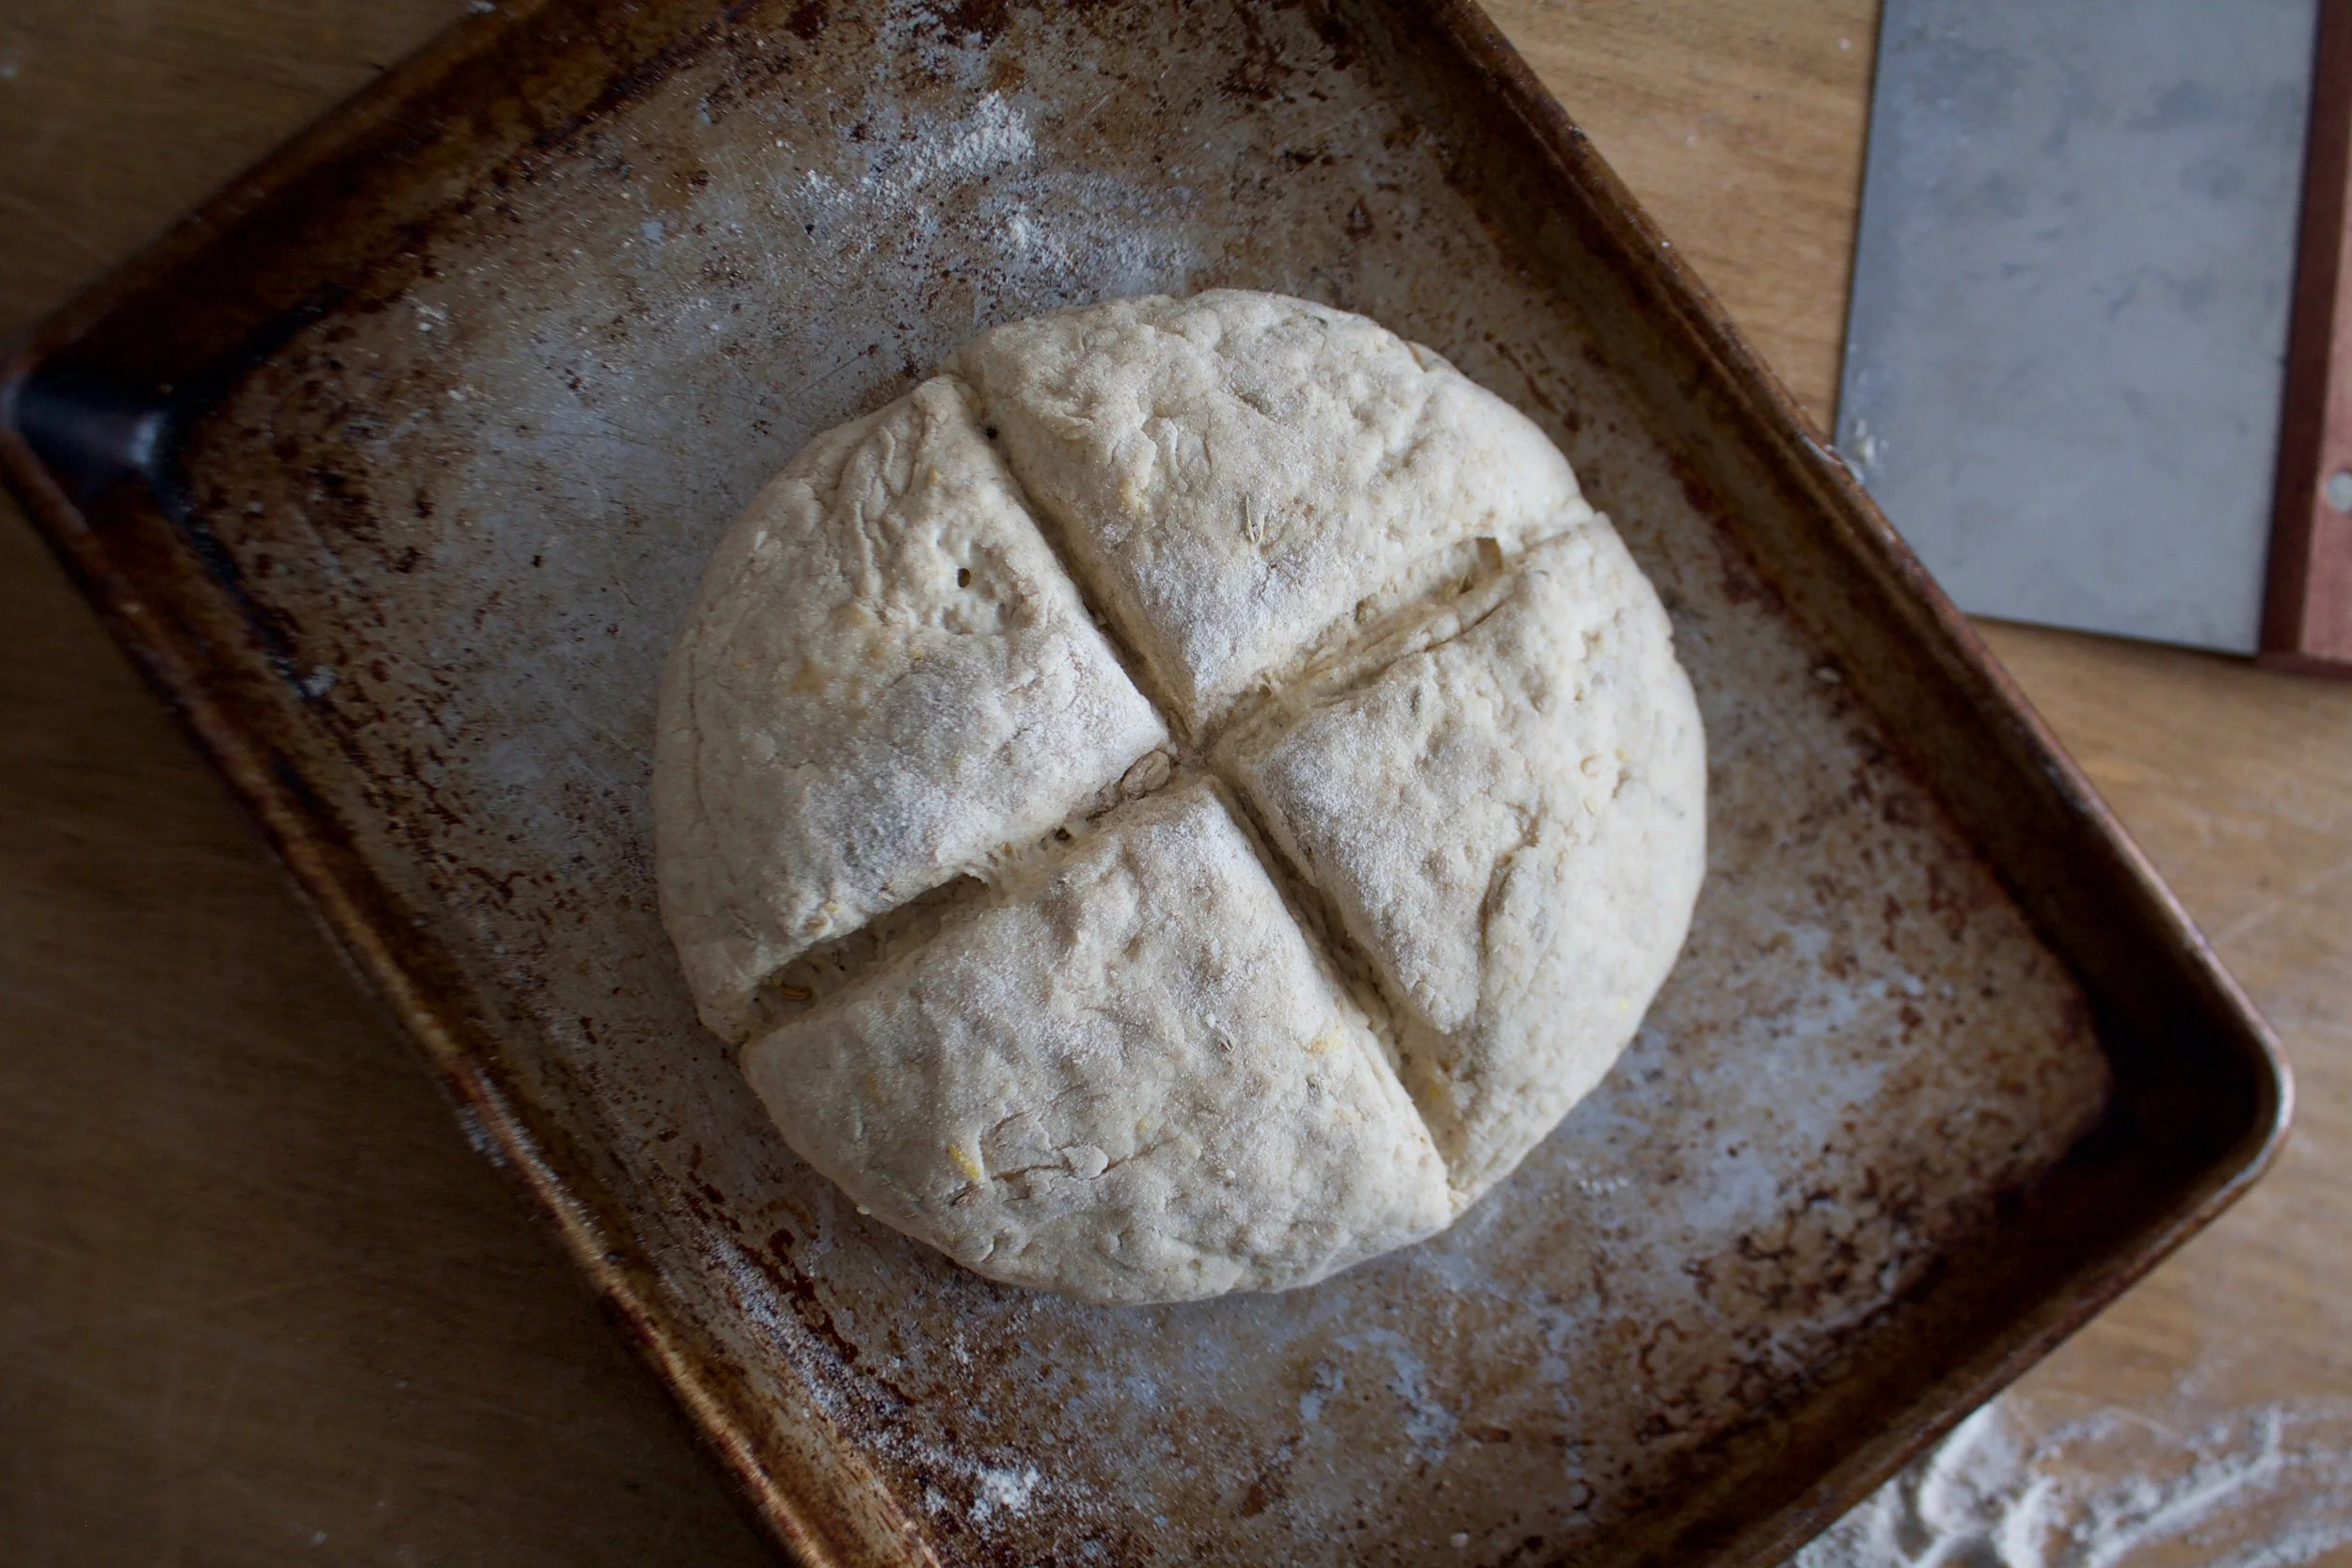
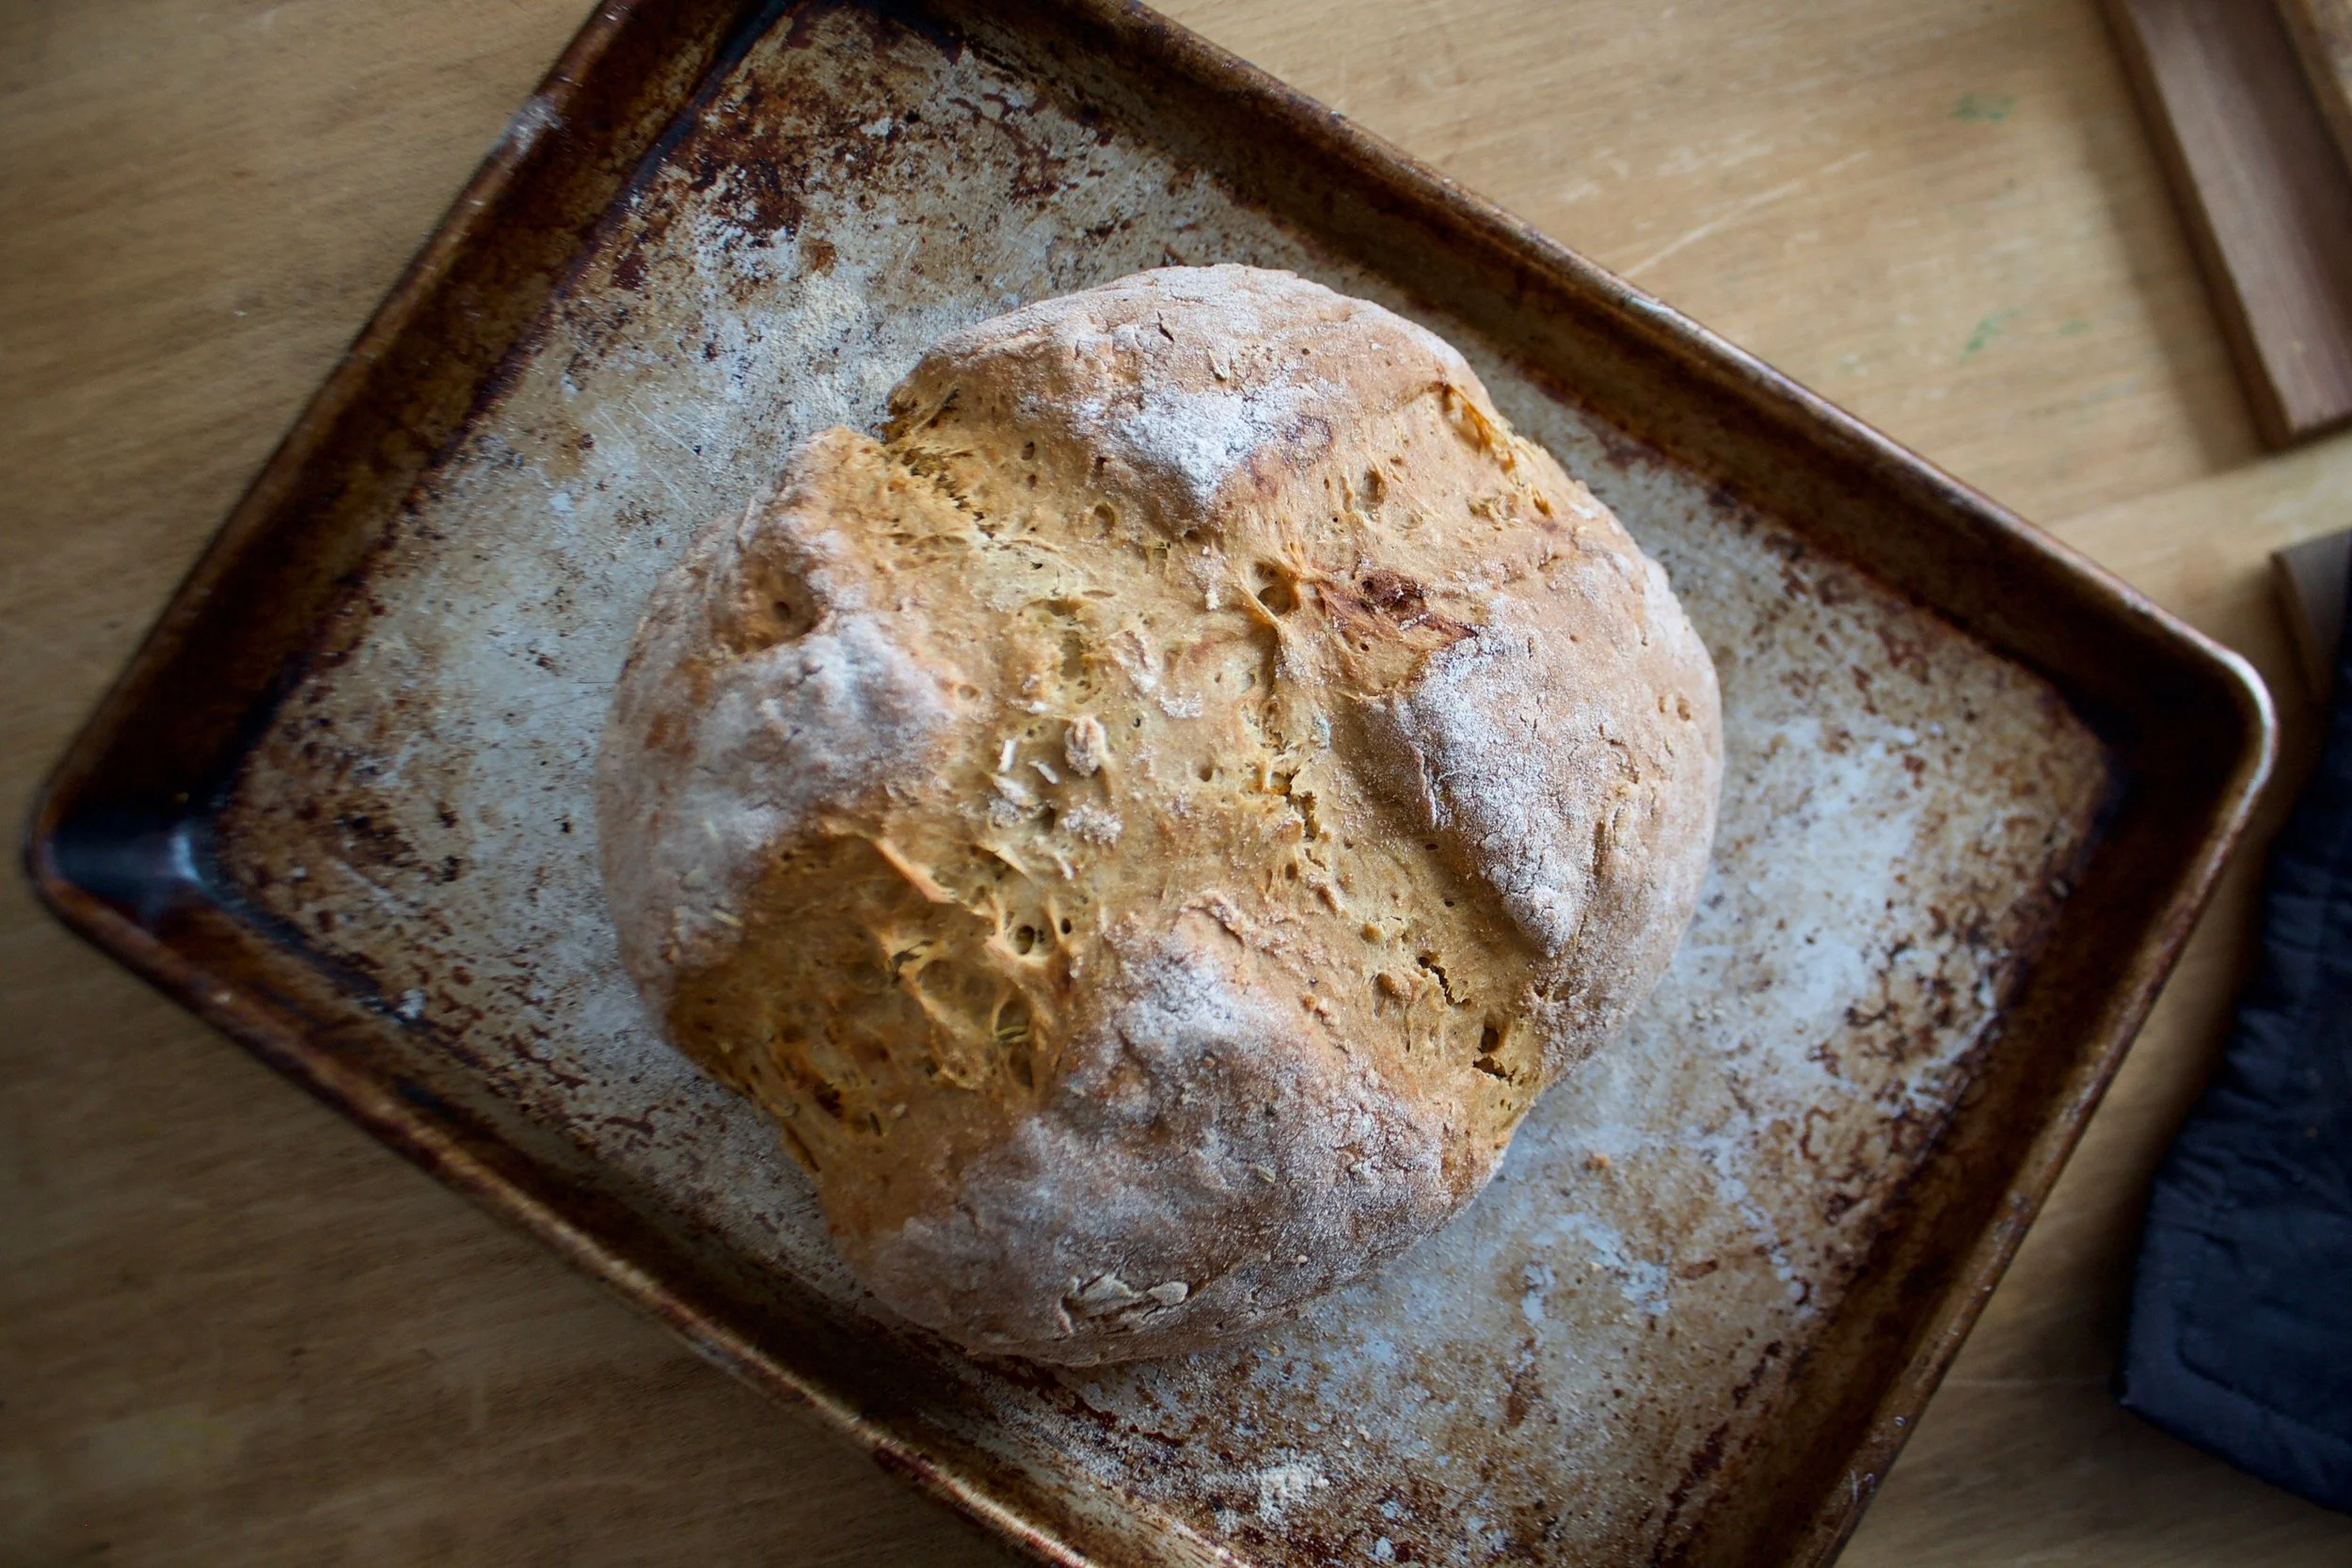


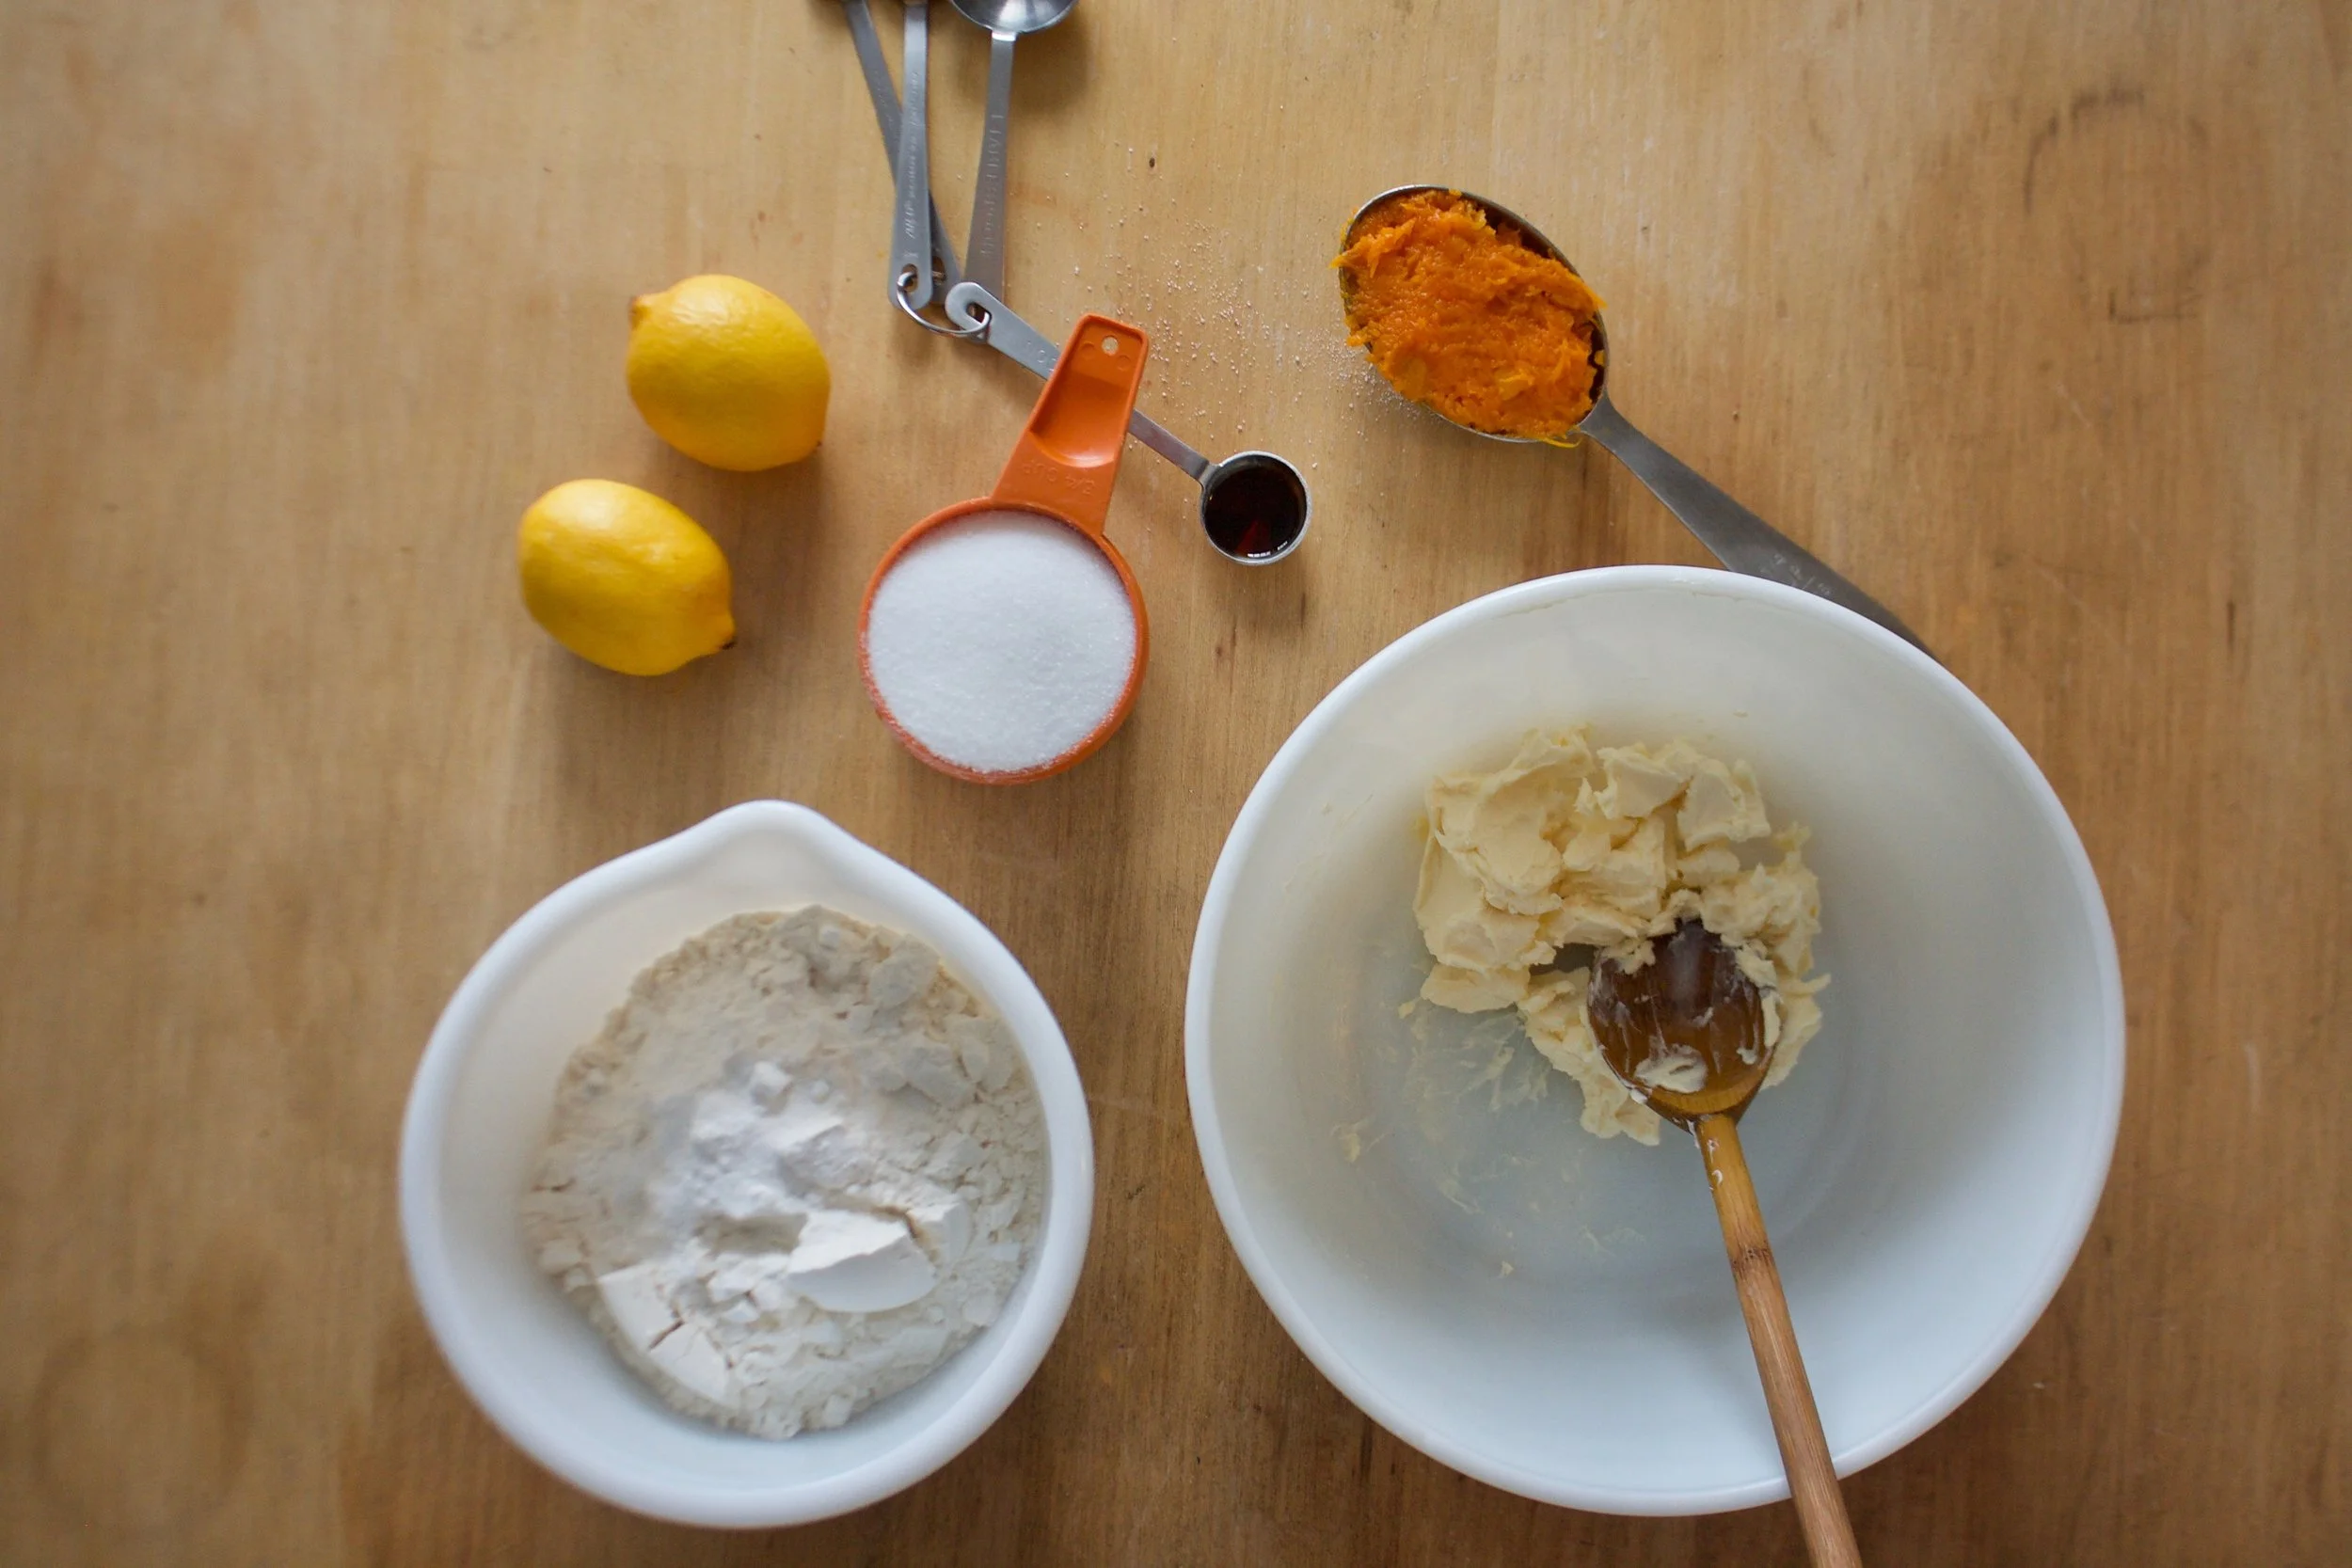
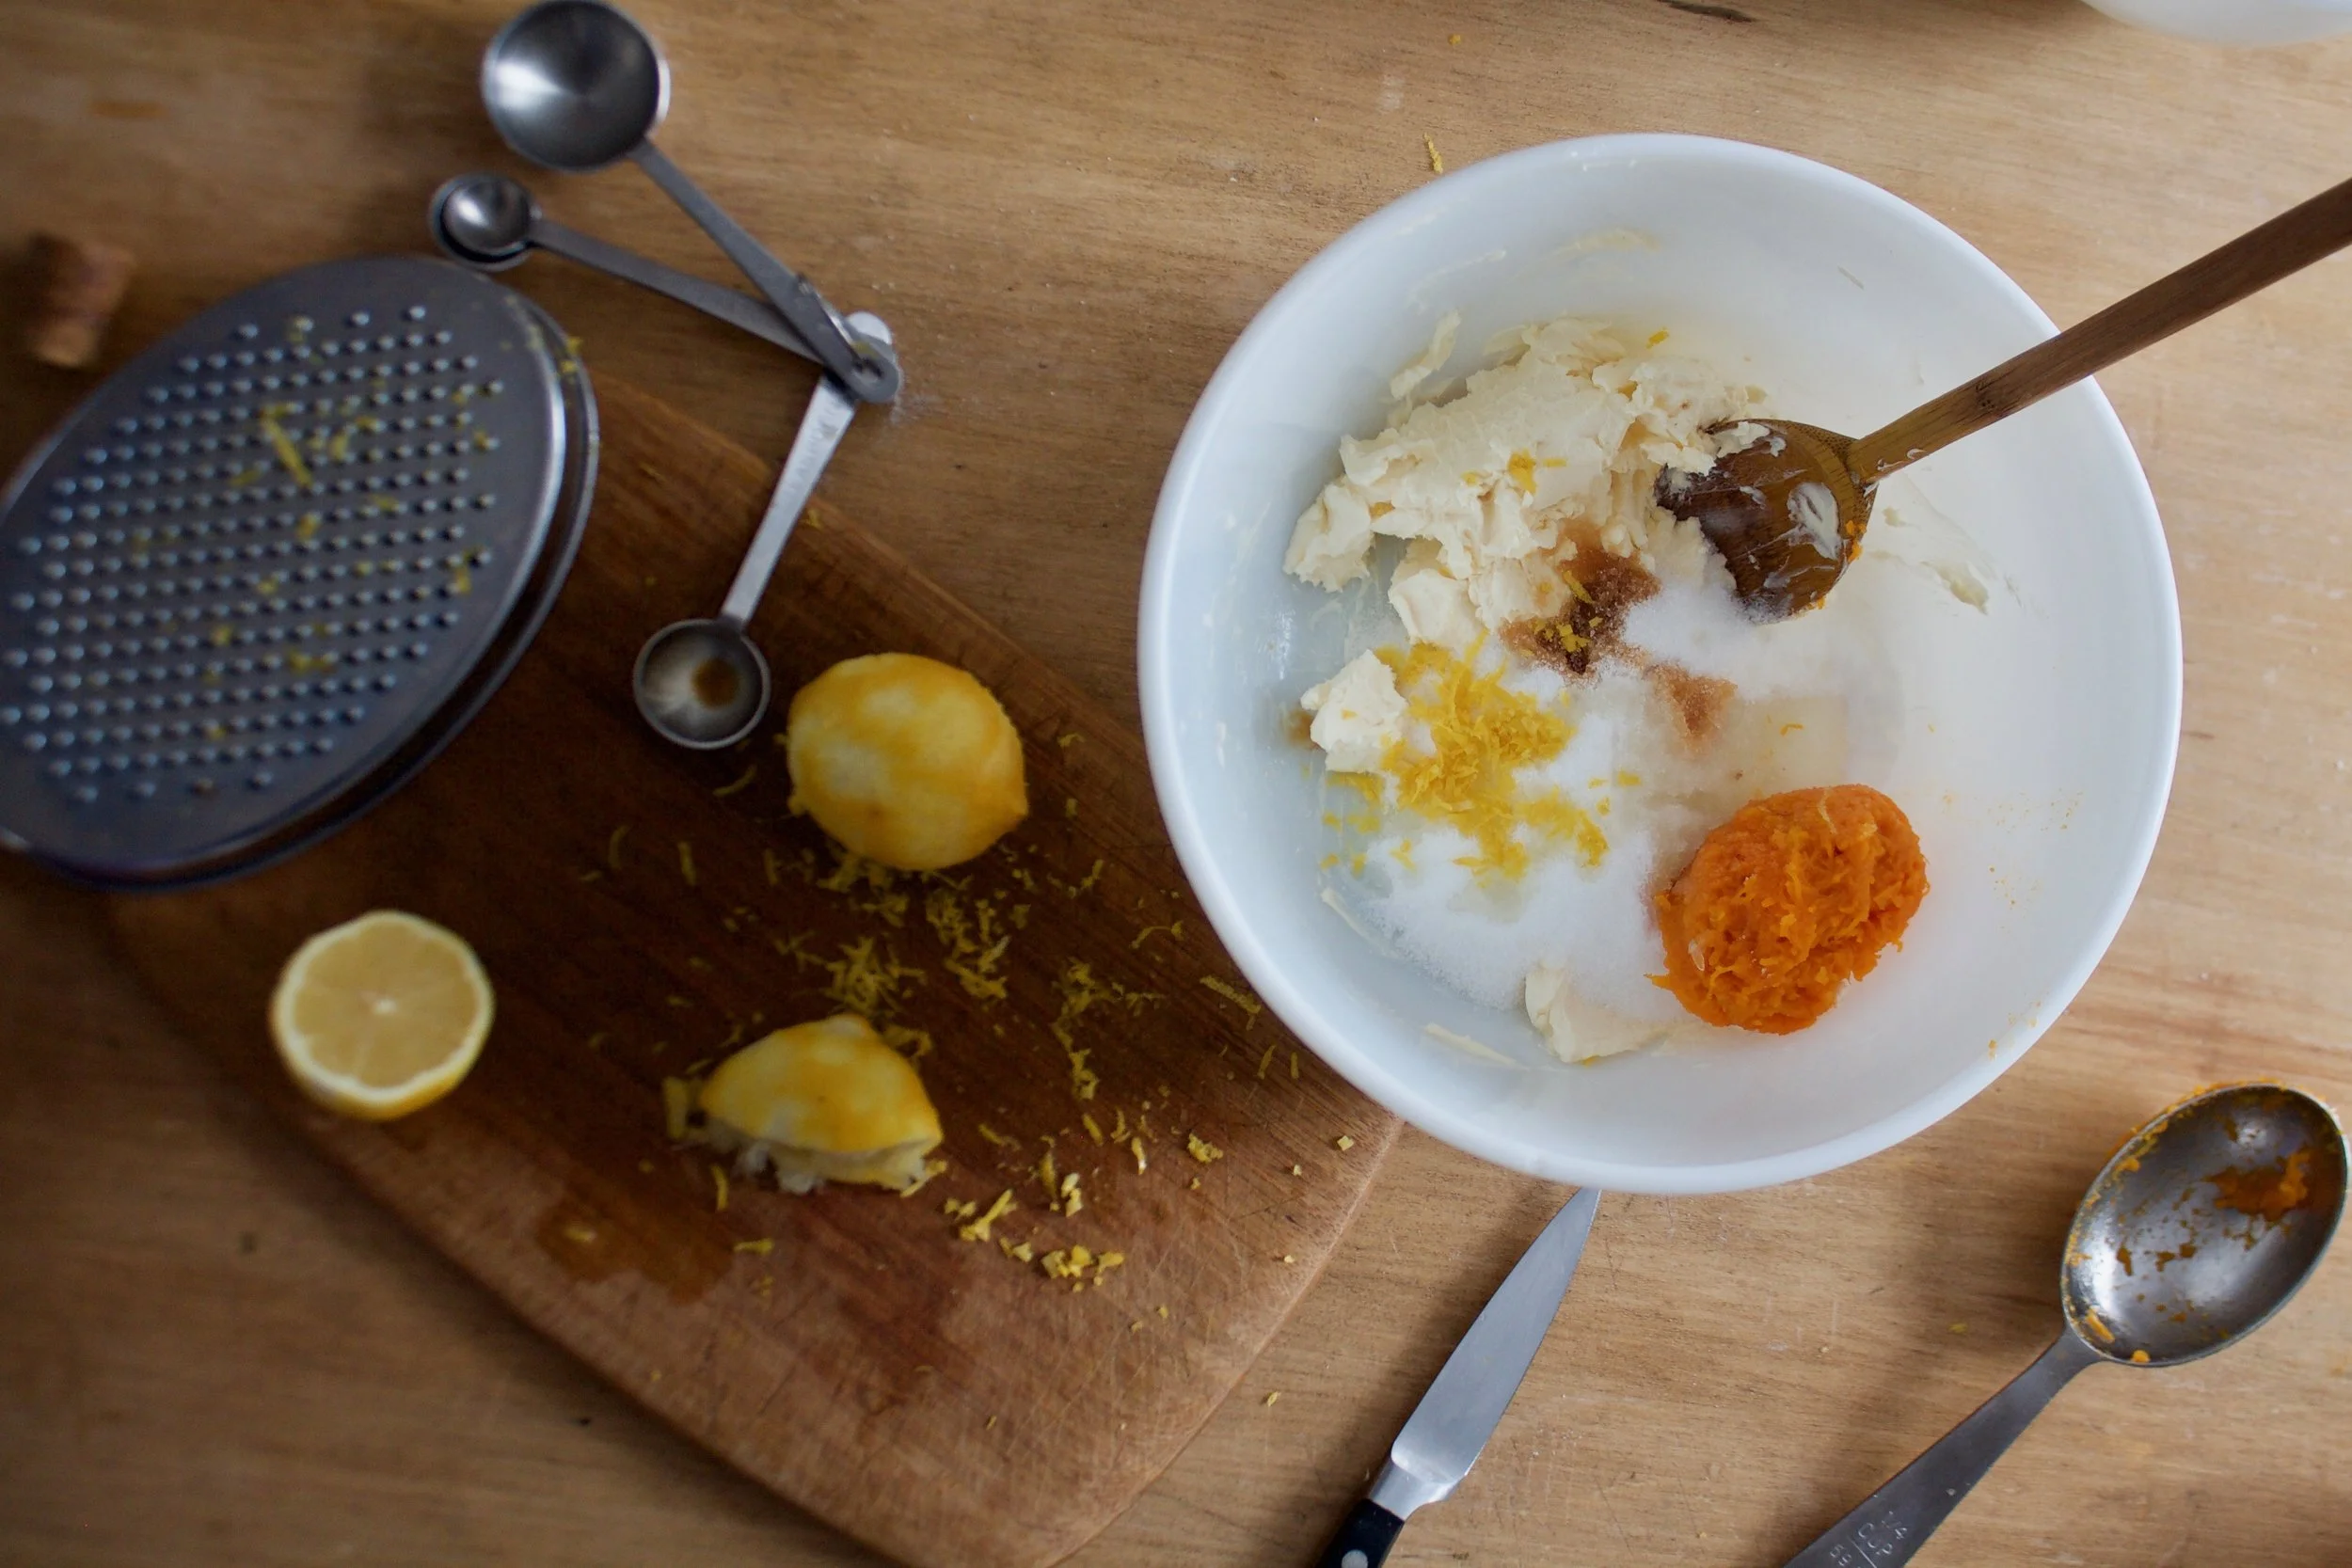
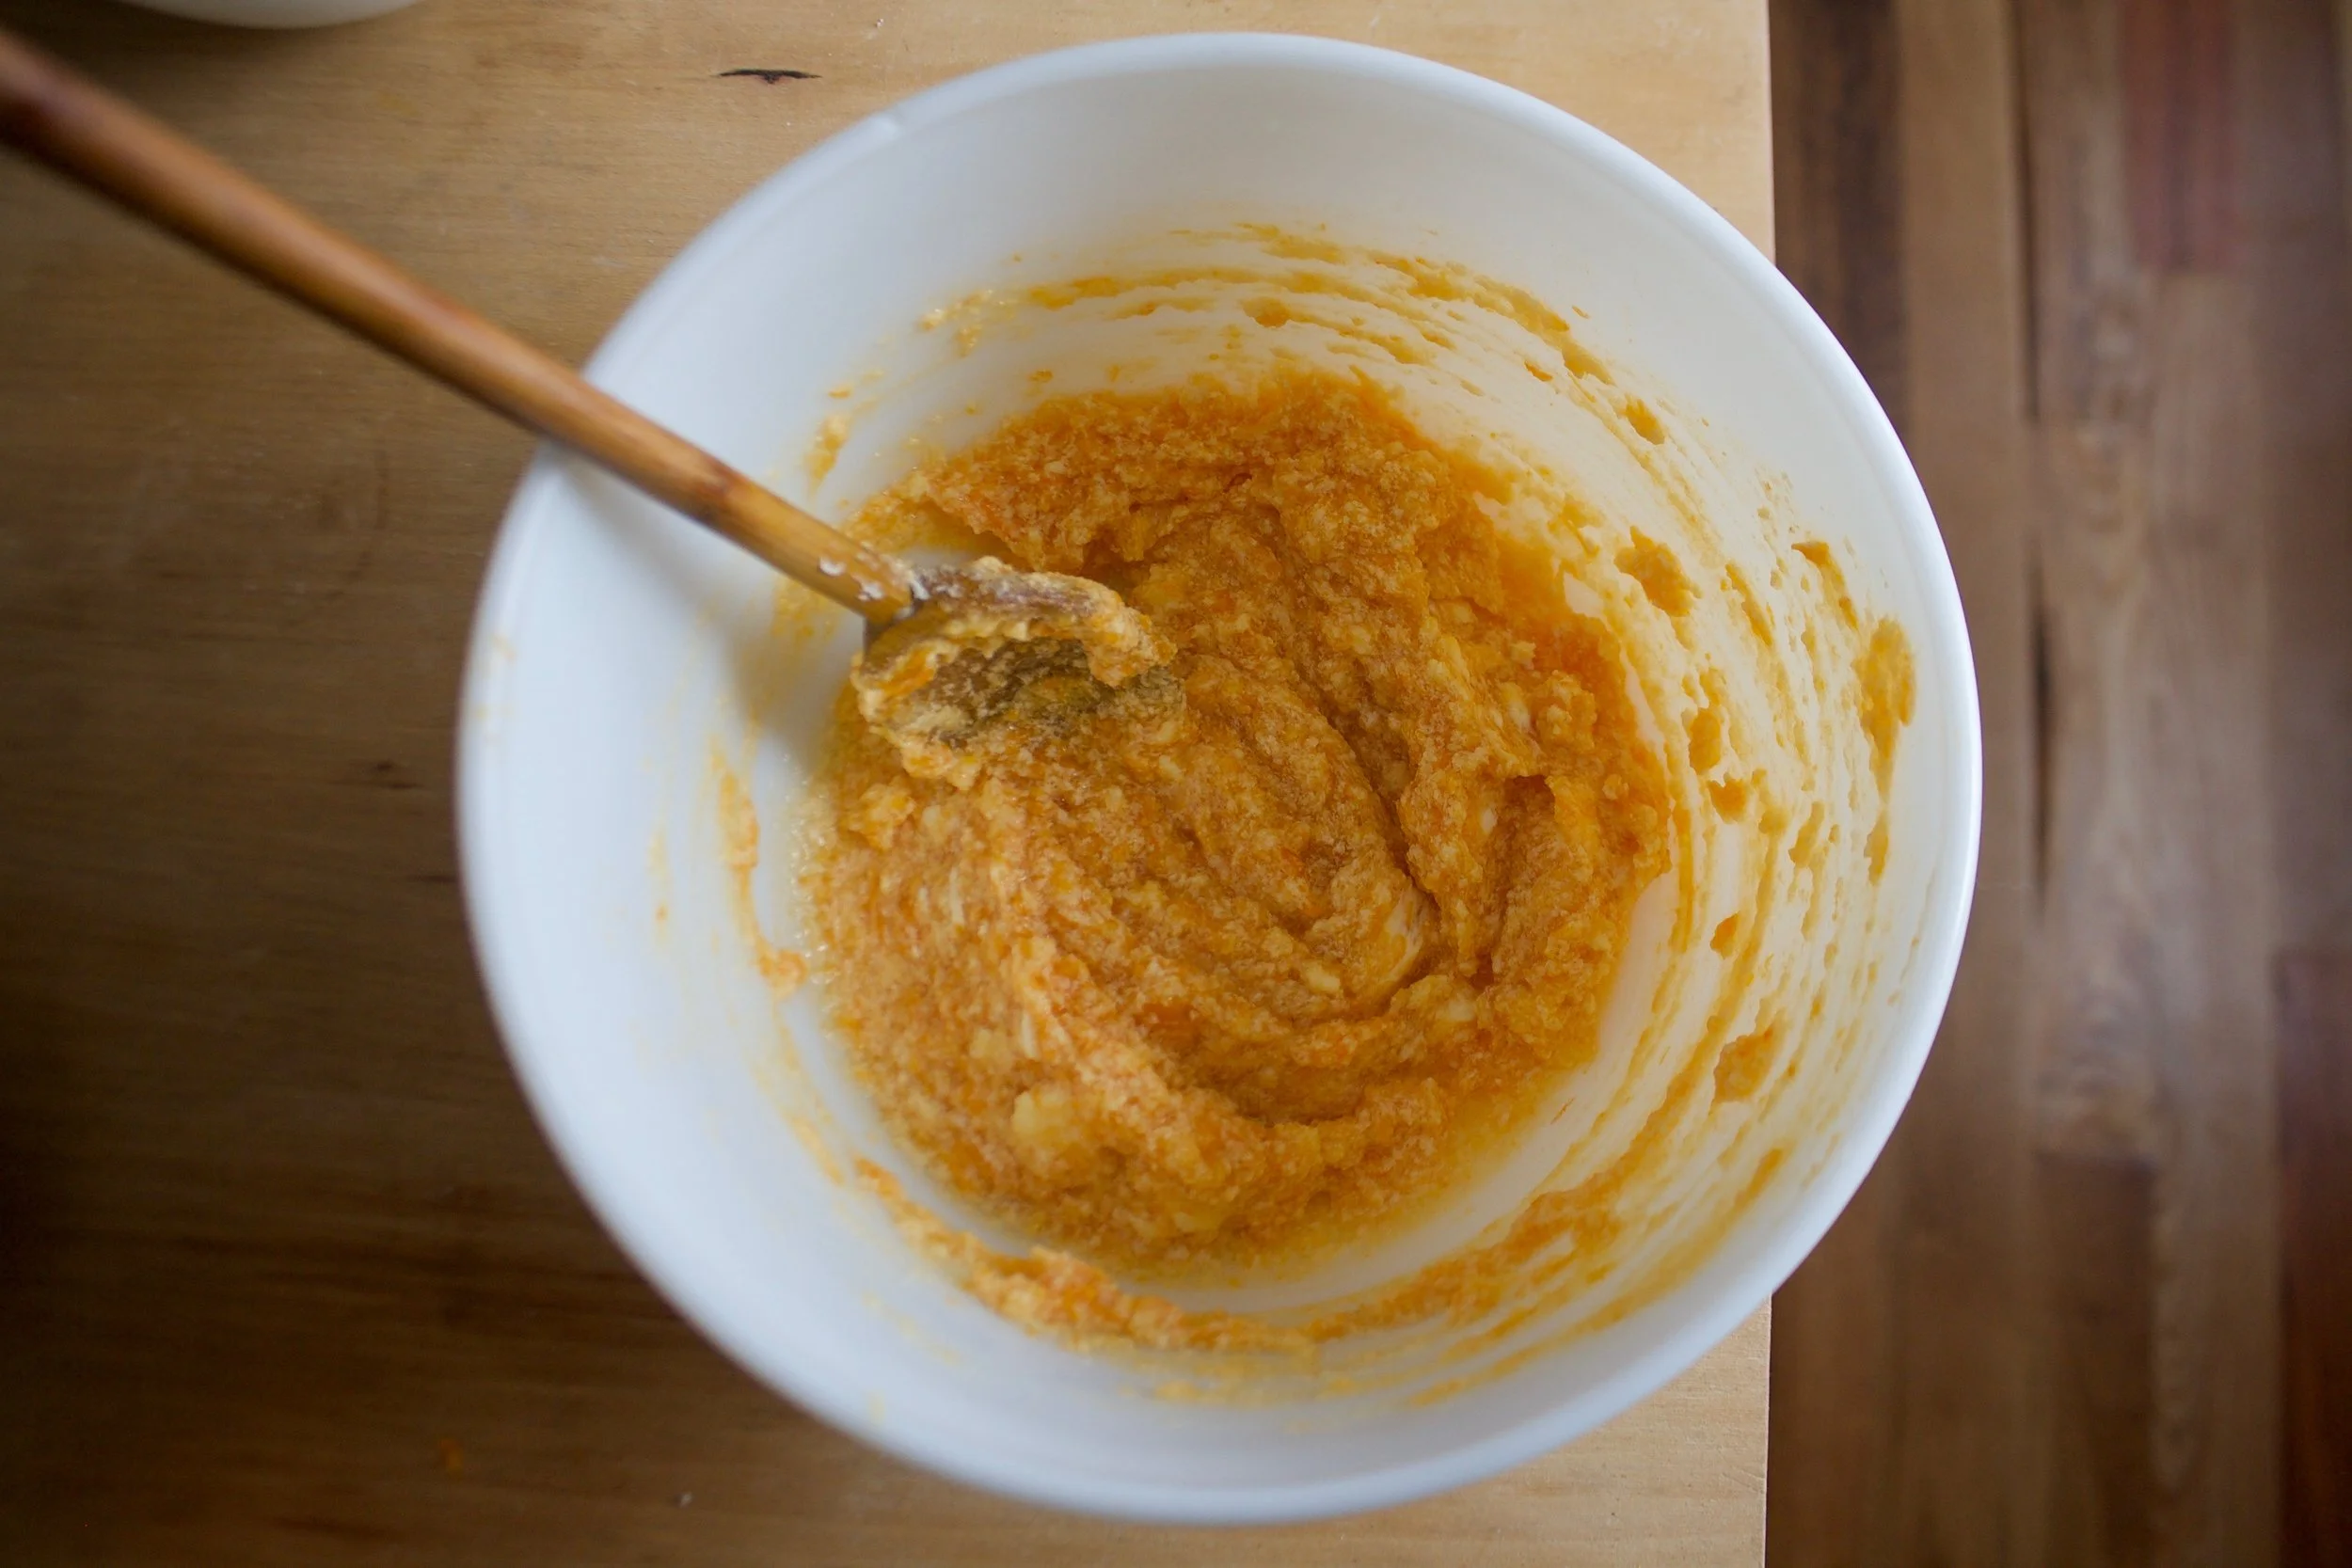
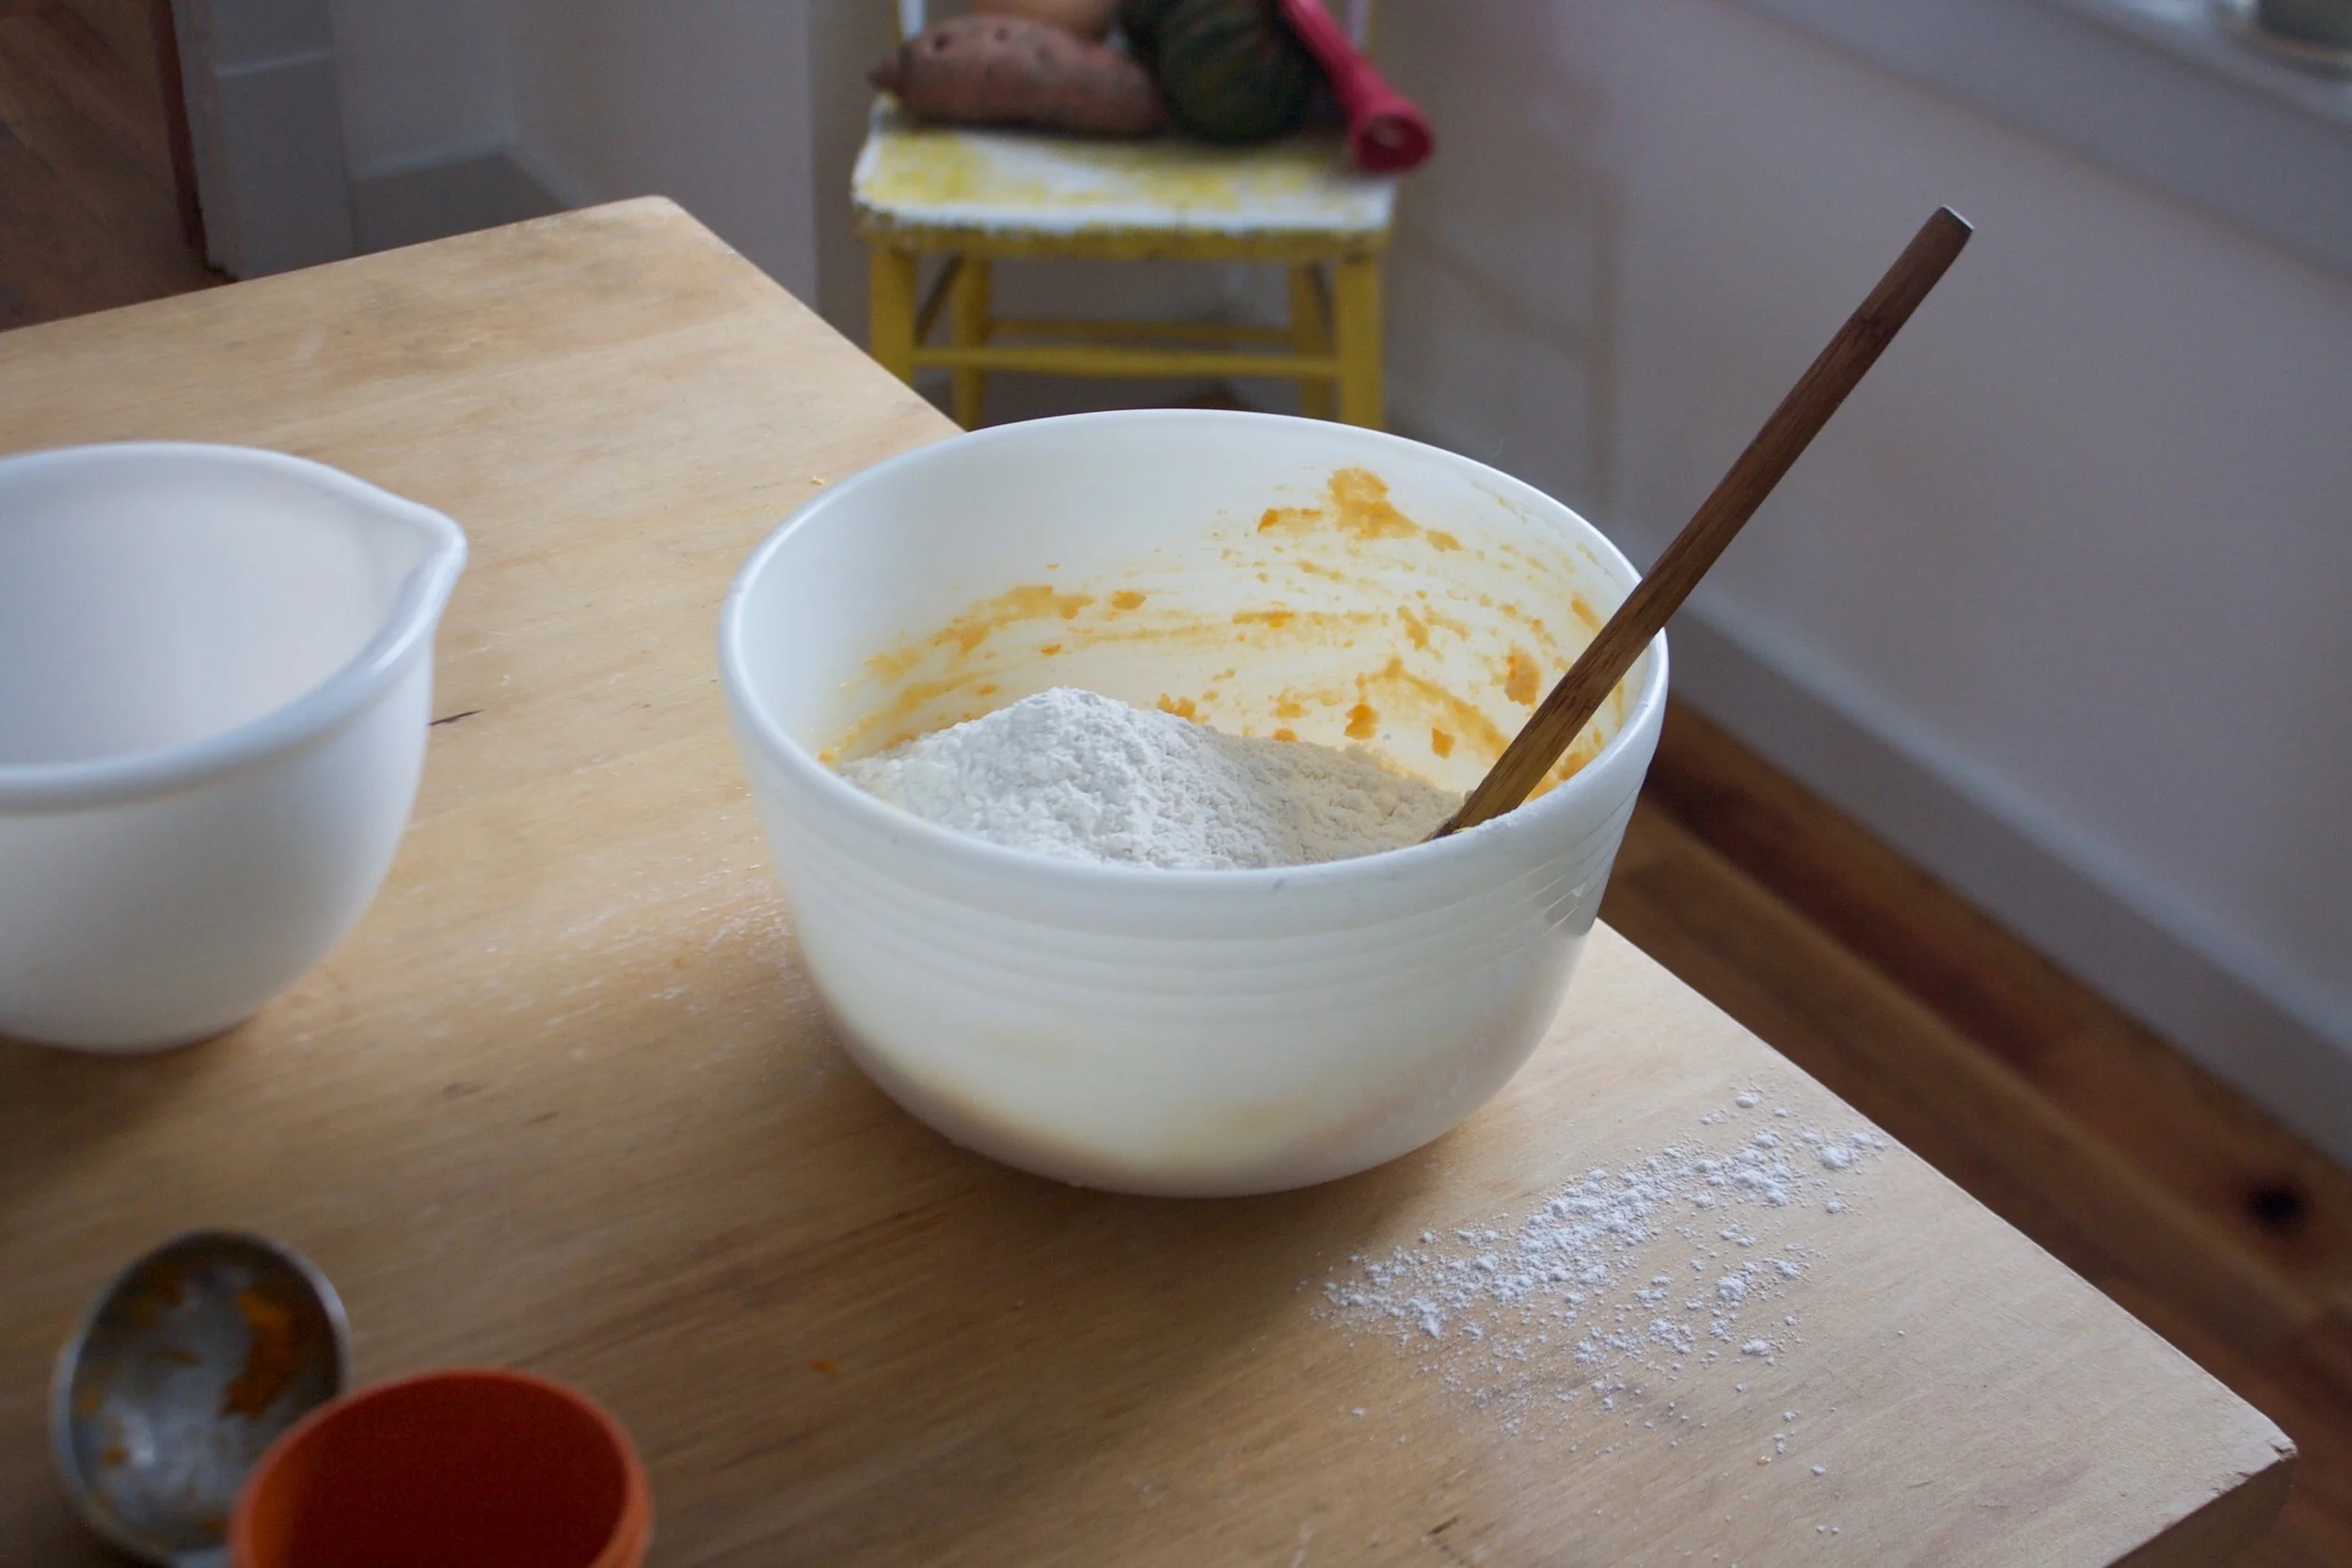
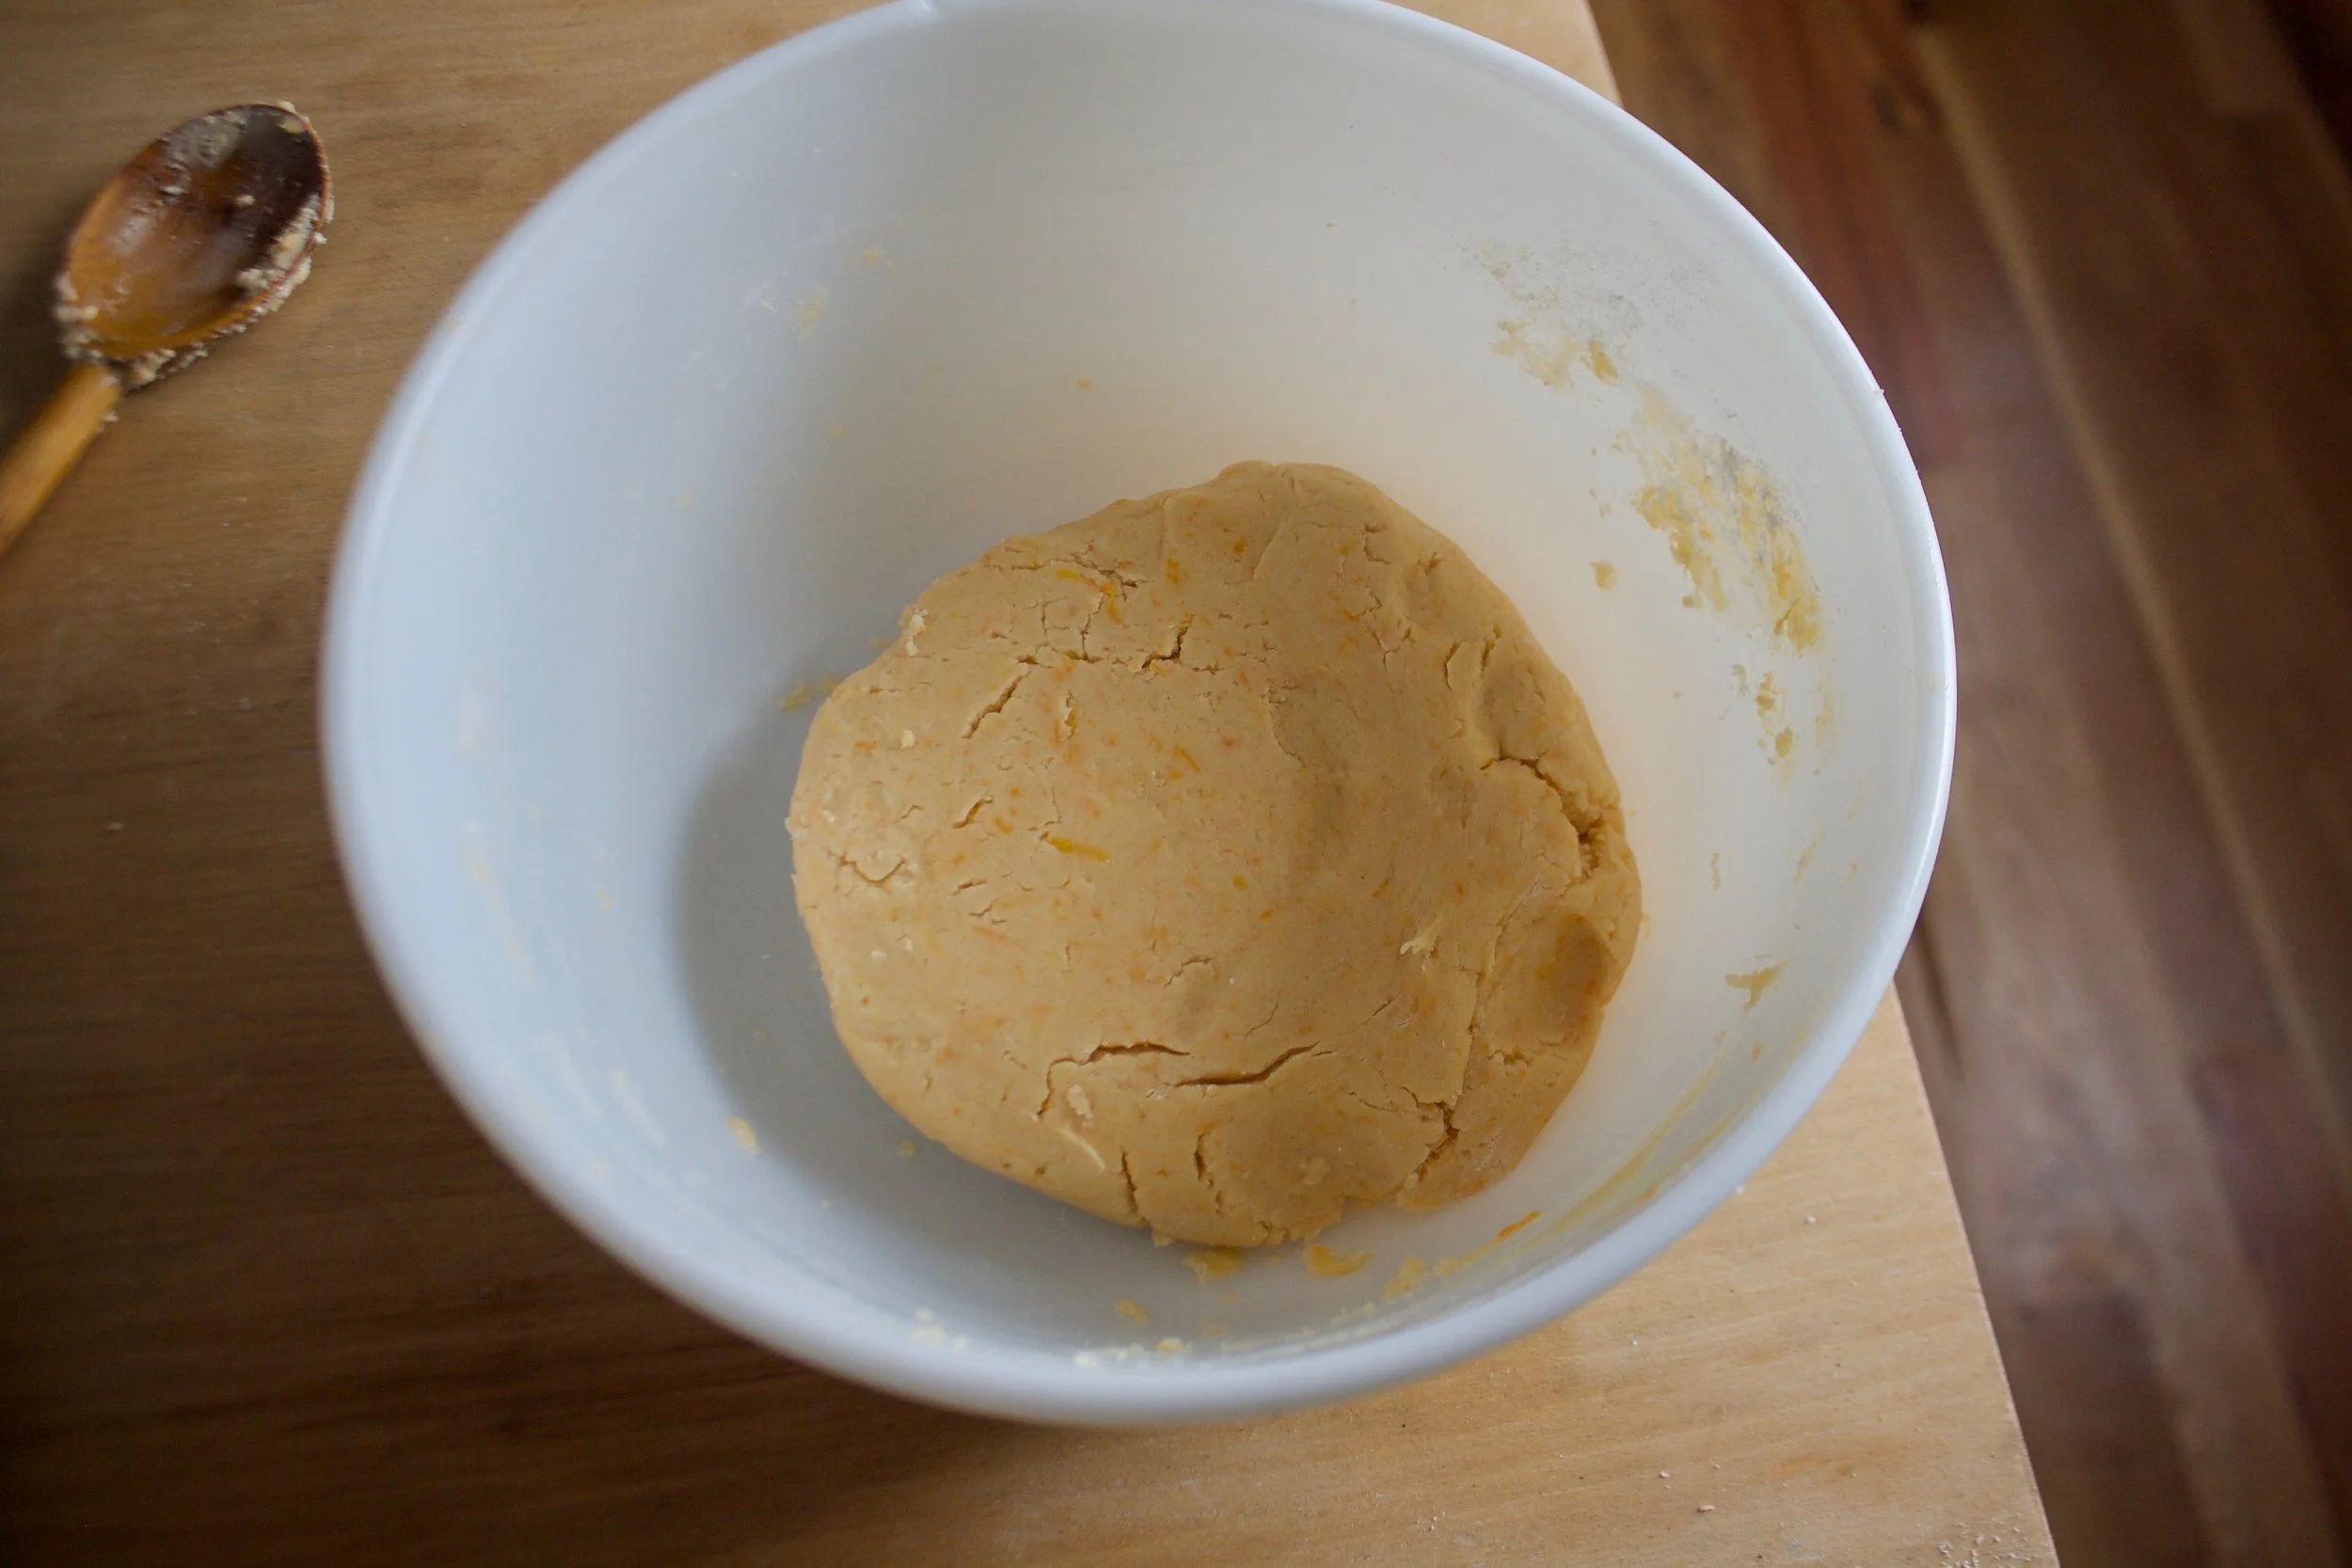
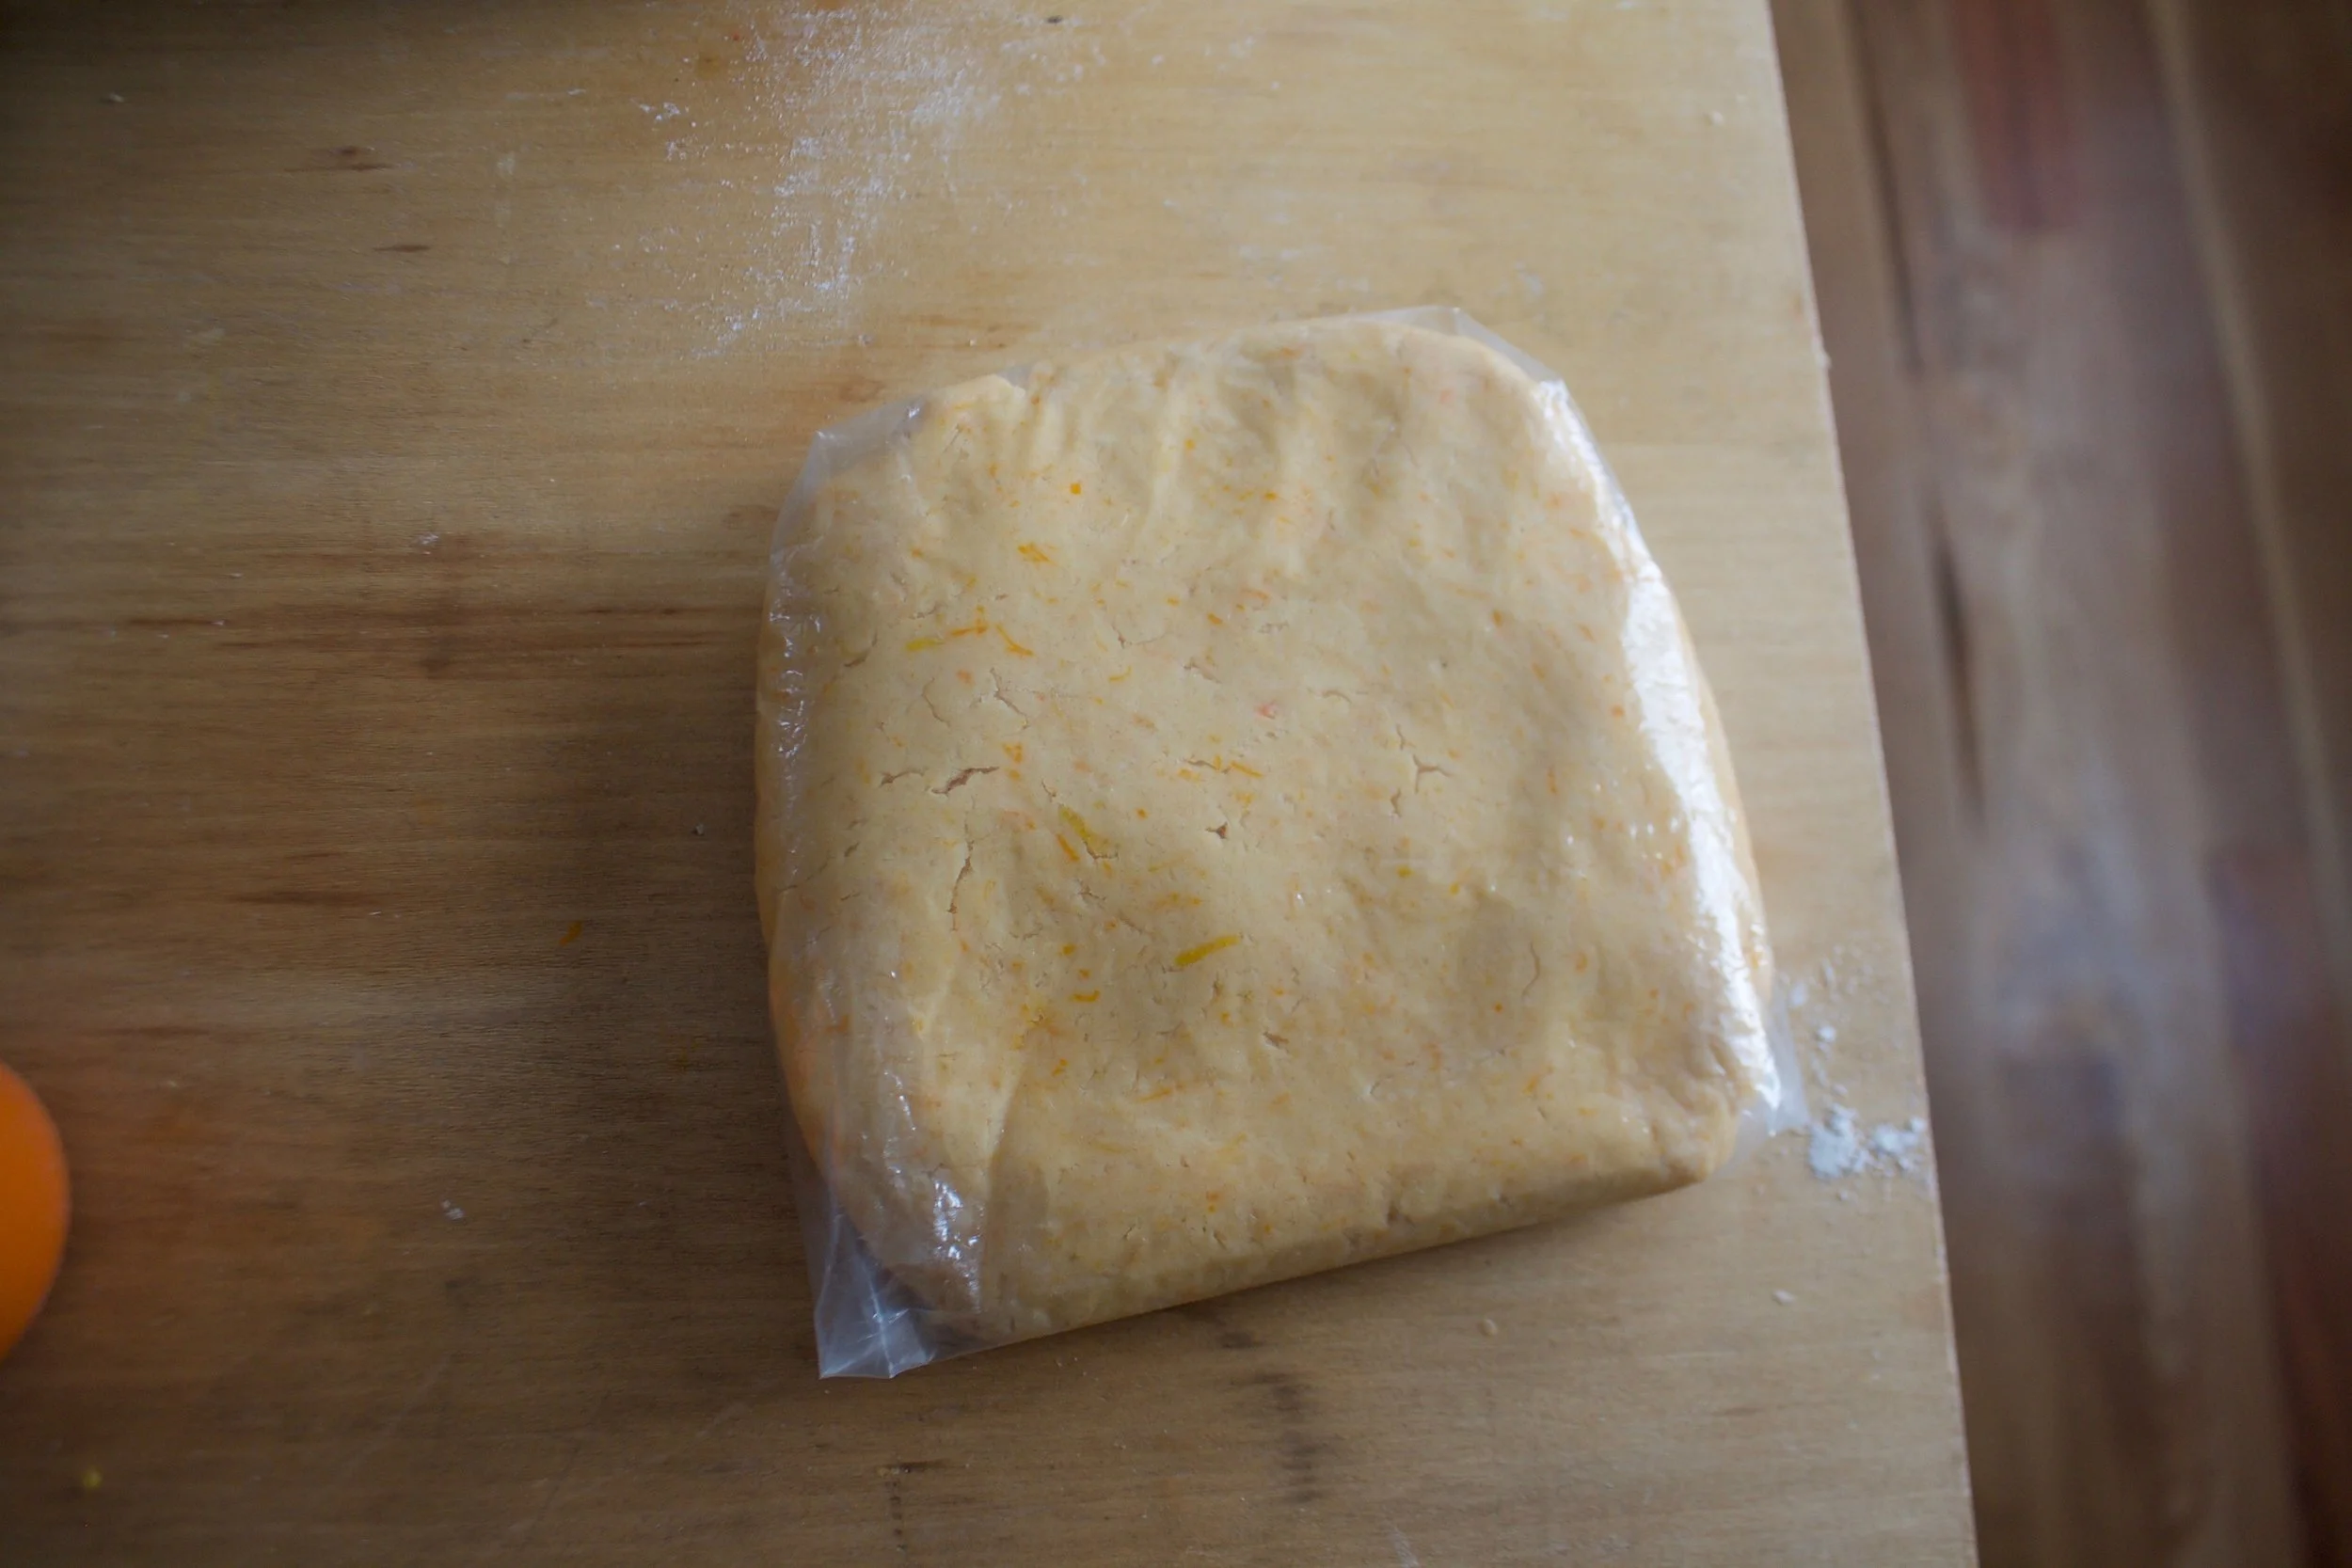


 %u00a0Happy Cinco de Mayo! And what better day to share my version of %u00a0my oh so fantastic pico de gallo, or as I call it, super freshy salsa.
 The stuff. Chopped Roma tomatoes, chopped red onion, a diced jalape%u00f1o, lemon, a bunch of cilantro, and salt.
 And thats it. Now eat%u2026 with something or without.
 Peas scream spring to me. The bright green color with that nice bright fresh taste%u2026.. kind of like a fresh spring day. Ah spring, so lovely, so nice, so hasn’t made its way here yet. So I guess I am left to eat my spring.%u00a0And what better way to highlight those lovely spring tastes? A fantastic pesto my friends, and it can be made lickidy split.
 Pesto Stuff. We got the peas, garlic, lemon, oil, cheese if you please, and salt. %u00a0
 Take a handful of peas and set aside for later. Juice the lemon and take that and the rest of the stuff and stick in%u00a0a food processor and puree until smooth.%u00a0
 The%u00a0pesto is made, and it only took about 2 seconds, now boil up the pasta. %u00a0If you were a thinker, you could start the pasta and make the pesto while its boiling. (I wasn’t being a thinker) I used bow ties cause they are super cute, but use whatever pasta you’re feeling. Shells or the ones that look like little brains would be good options.
 Into a bowl and served with a fork to eat it with. %u00a0A super green fresh springy meal of happiness. And all under 15 minutes in the kitchen.


 I have never in my life seen, let alone received, a kohlrabi as big as the one I picked up from my farm share last week. It was, no joke, bigger then my head. (completely nuts) If I didn’t know the farm and the farmers of my CSA, I would have to question whether or not it was grown in radioactive sludge…(kind of like the dandelions in the Teenage Mutant Ninja Turtle movie from the 90’s)
 A gigantic kohlrabi cut in half ( I only used one of the halts) A whole yellow onion and 2 large carrots. I also added in 4 cloves or garlic
 All of those chopped veggies get thrown into a pot with two cups of water and a good sprinkle of salt and pepper. Cover and place on medium heat for about 20-25 minutes. (give a stir ever now and then) Keep cooking until the veggies are fork tender.
  Once the chunks are all cooked up, its time for the immersion blender. (or into a regular blender) Add in at least 3 cups of water, but more to thin out to your desired consistency and let it rip. Stop blending once the soup is nice and creamy. Taste and season with salt and pepper to taste. Leave on low heat to bring back to a good soup eating temperature.
 Now the soup is done.. and you can eat it just as it is, but you should really add in the asparagus. It is just so f*ing good. Just grab a few spears, dice them nice and small, and throw into the soup pot. Let it cook for another 5 minutes and wa la..
  Soup is done. Ladle into bowls and if you want a little fancy presentation, add a swirl of mustard (it’s so good) and a whole cooked asparagus spear.
 I was informed yesterday that if I was going to make tortilla chips, that I better make some sweet ass dips to go with them. I kind of agree… tortilla chips need dip… or better yet, two dips. Queso and guacamole. It’s what needed to be done, and so I did it.

 Perfect…
 To think that both of these dips took about 10 minutes total to make. (I had pre baked the cauliflower and sweet potato) And for real, I would spend much more time if I had too because both of these dips are so freaking good, I definitely will be making these on the regular.


 I love mustard, and when I say love, I mean LOVE. I eat it on anything and everything. And not just small quaintites, I buy jumbo sized containers of the stuff because I go through it so fast. Over the past few years I even started taking down others with my mustard eating obsession. Sisters, brothers, even some of the littles are now mustard eating feens. One of my little nieces is now just as bad as me. I don’t think I have seen her eat a single meal without a side of mustard. Her favorite snack, clementines and mustard, although sometimes she skips the clementines and just goes in with her fingers. Oh so good. I think that child could possible be mine. And yes, it’s mostly the yellow grocery store variety of mustard being consumed, but yellow mustard is just the tip of the ice berg. There is a whole world of flavors, textures and colors when it comes to the humble mustard seed. Whole grain mustard, to me, is one of the best and easiest to adapt to any persons specific taste. You can make it plan or add in just about any spice, vinegar, even a little sweetness that you might like. One of my favorite variations of this mustard is to skip the vinegar and use picked jalapeño juice. Aah, my mouth is watering just thinking about it.
 Yellow mustard seeds, brown mustard seeds, apple cider vinegar and salt. The most basic ingredients.
 In a large jar, combine the mustard seed , twice as much vinegar and a pinch of salt. Cover and let sit for on the counter overnight until the seeds have soften and look almost like caviar.
  Now blend those seeds. You might want to add another splash or two of vinegar to help blend and to thin out a bit. Chose how creamy or seeded you like you mustard. I like to make it creamy but seedy so I blend it half way to creamy.
 You have got mustard! Make sure you have a good snack ready to eat with it.. My go to is carrots. I could eat this all day long.
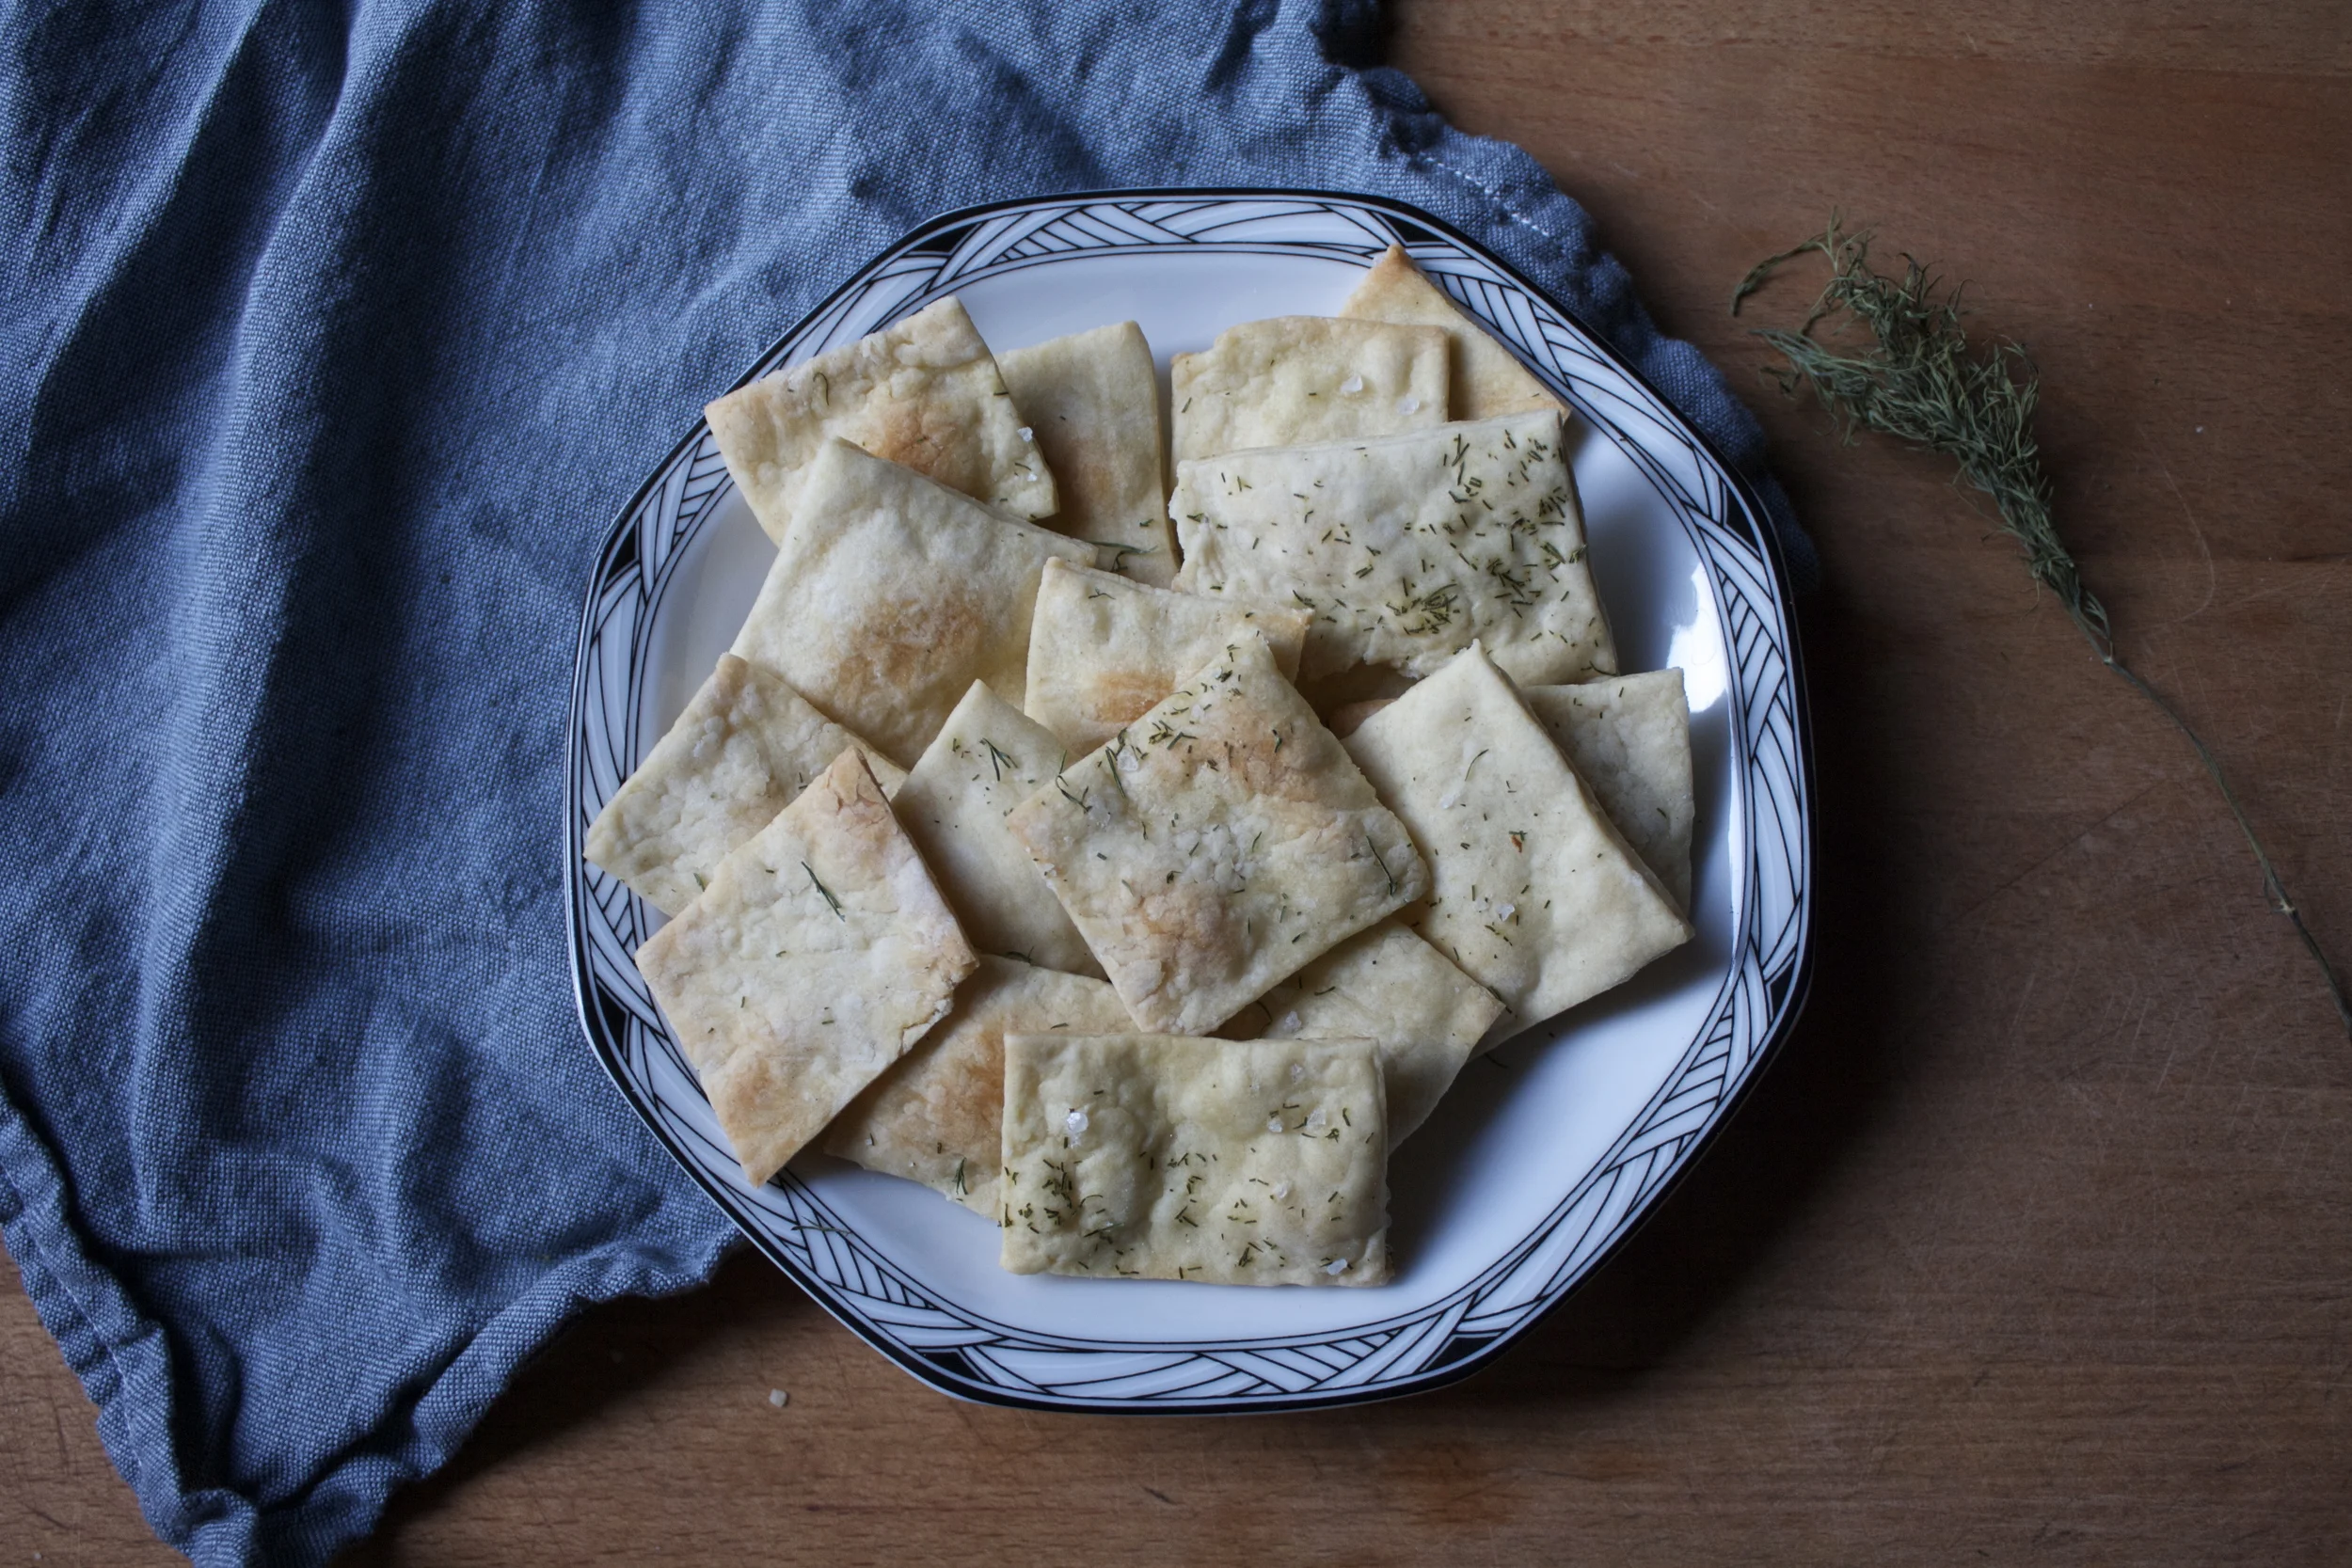
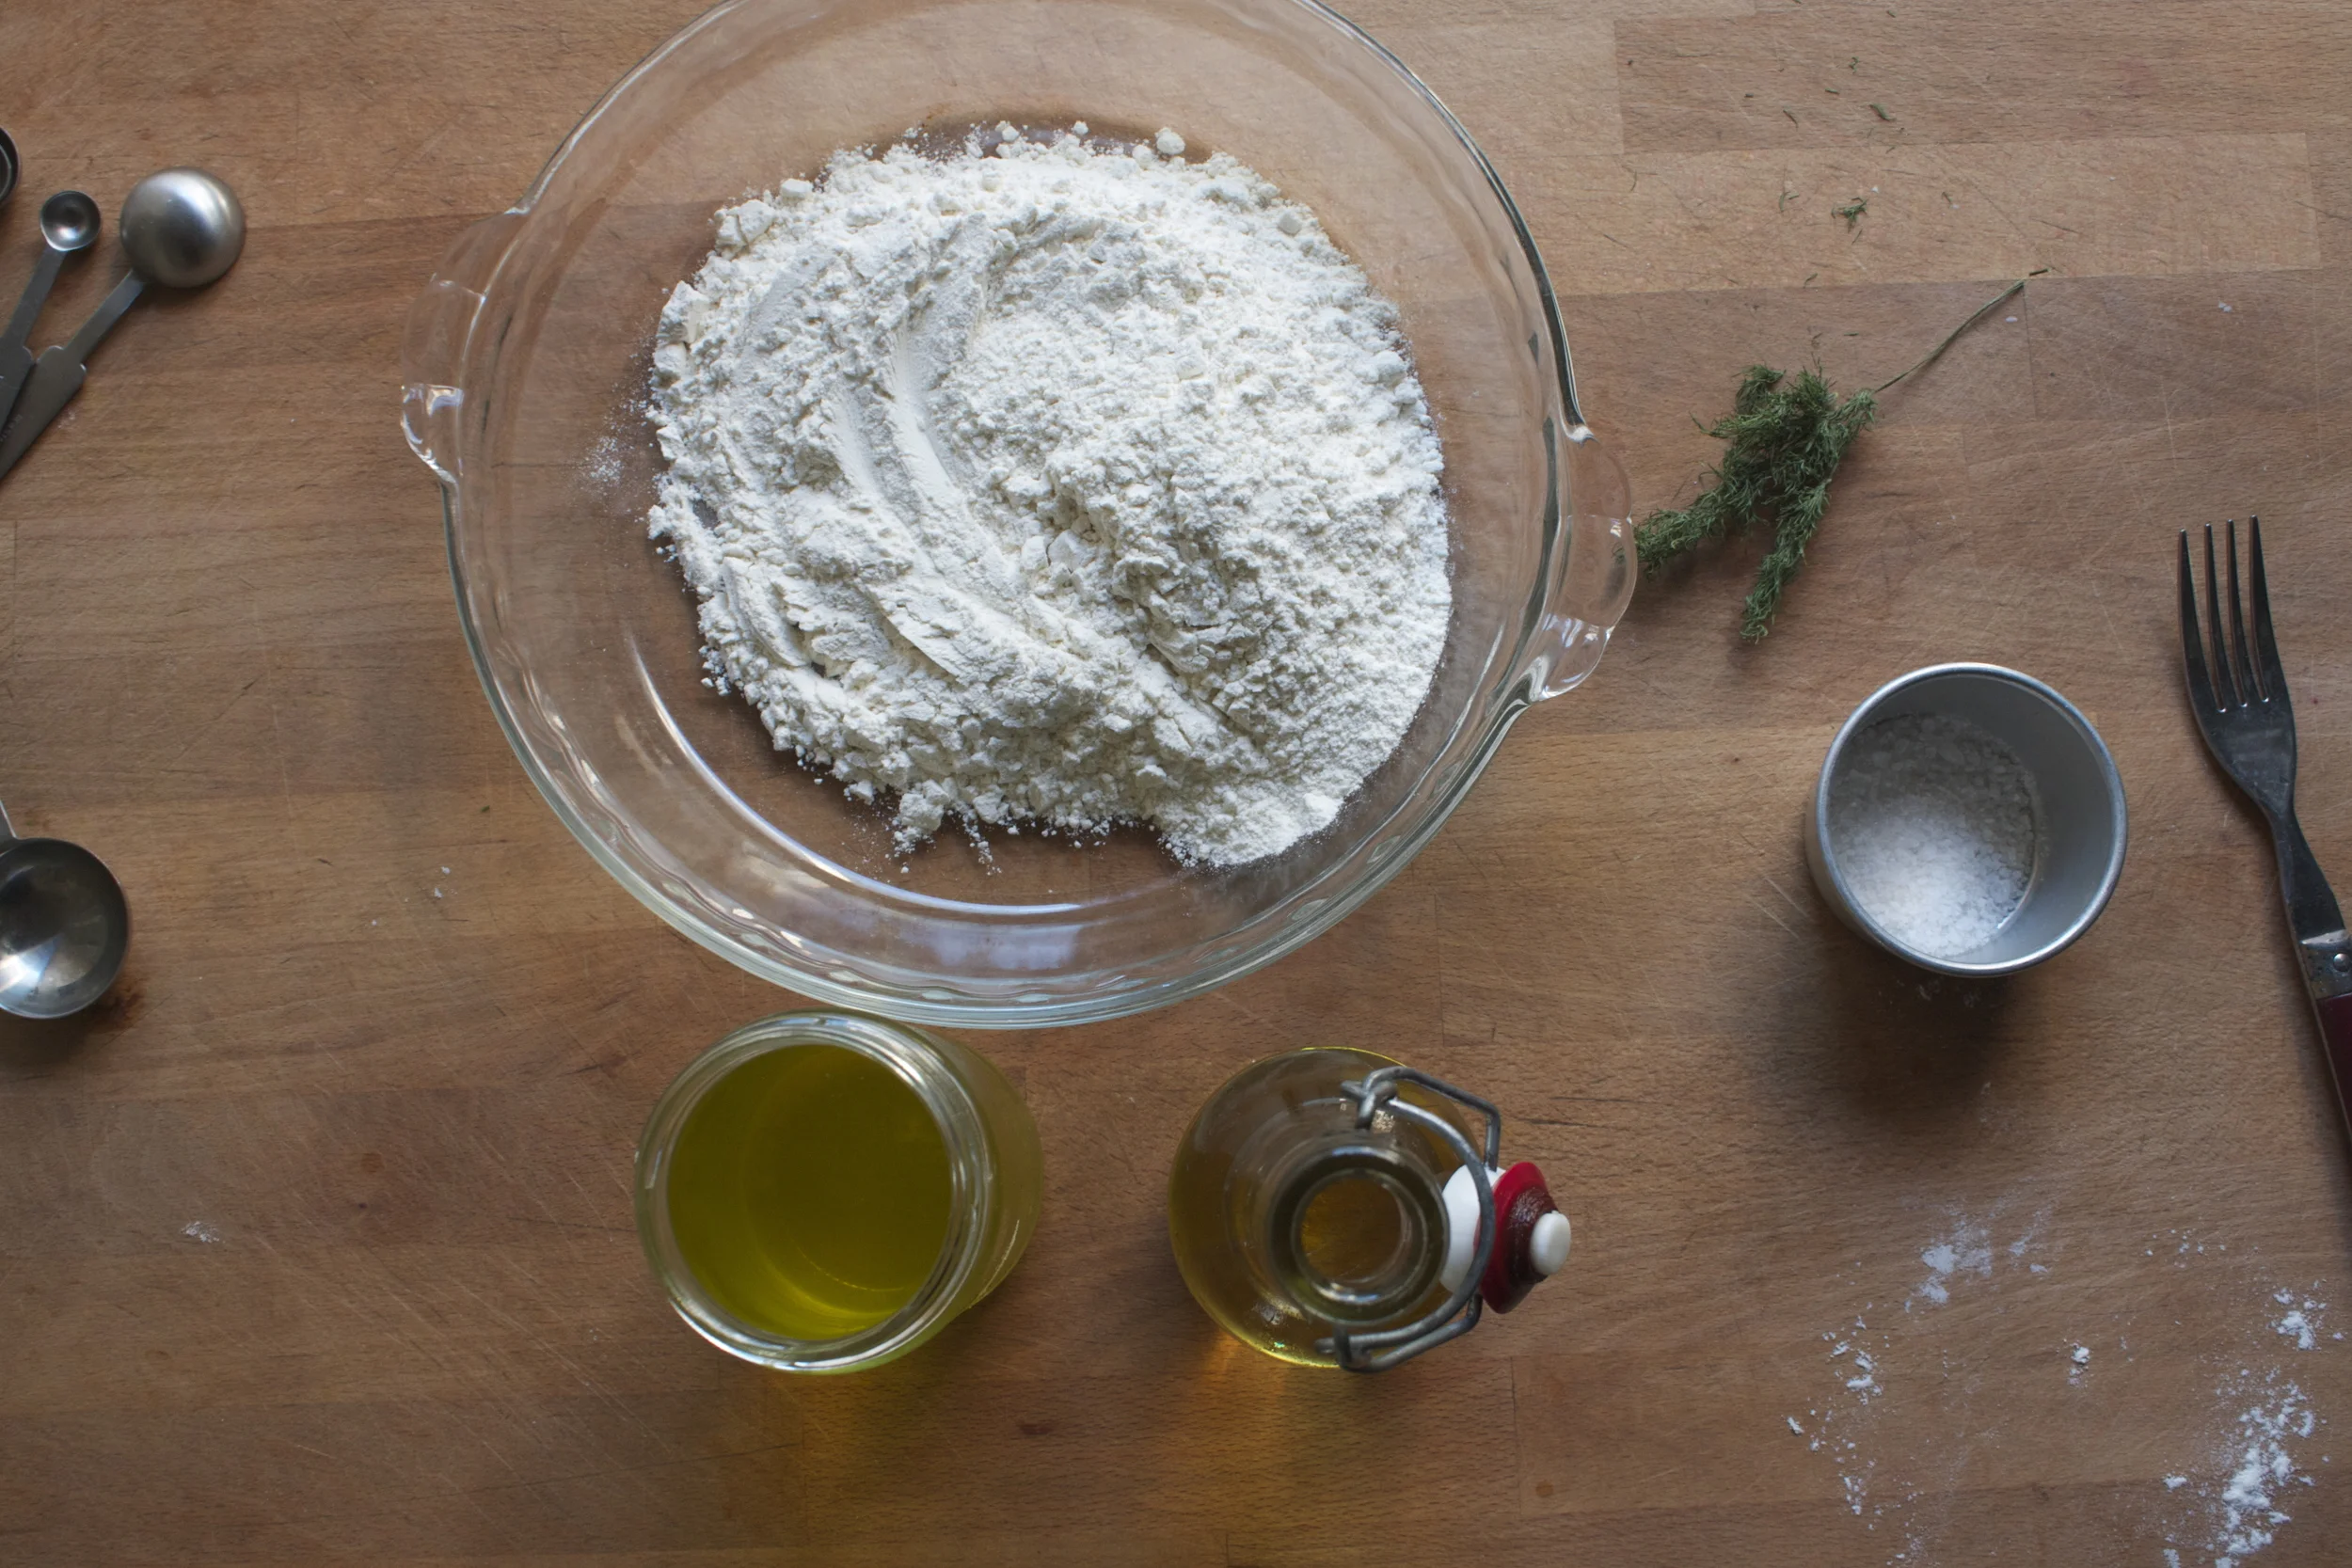

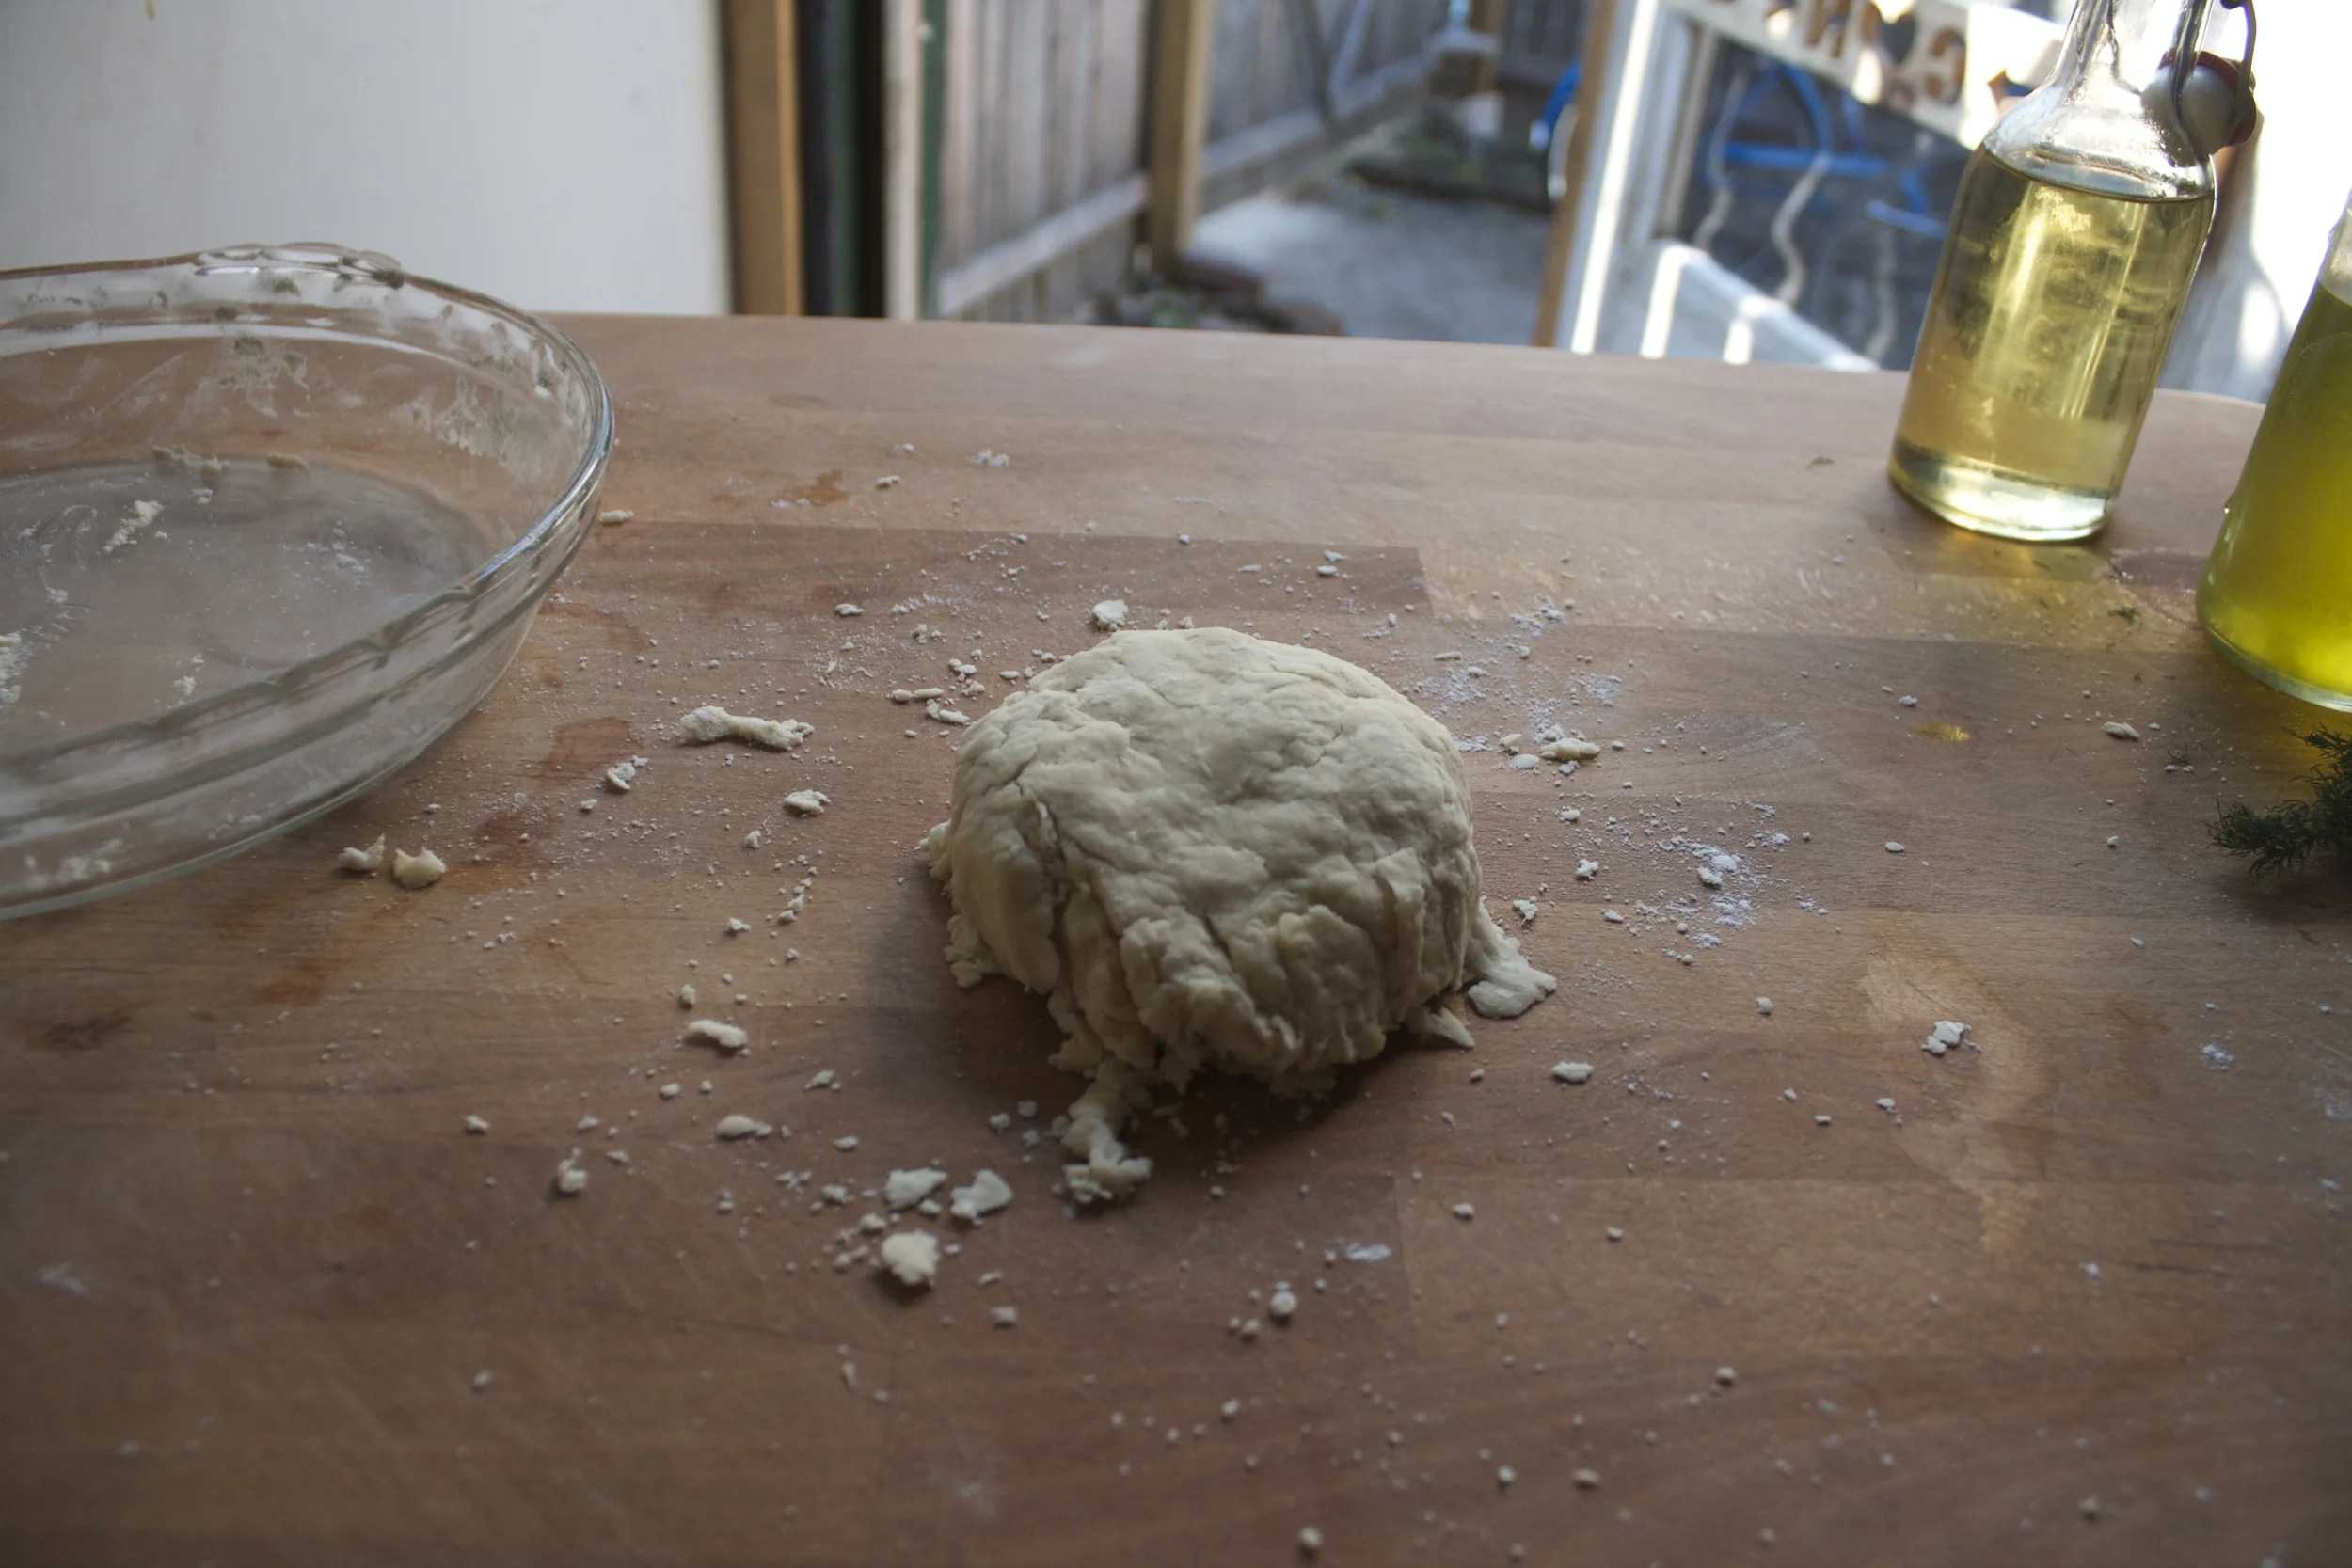

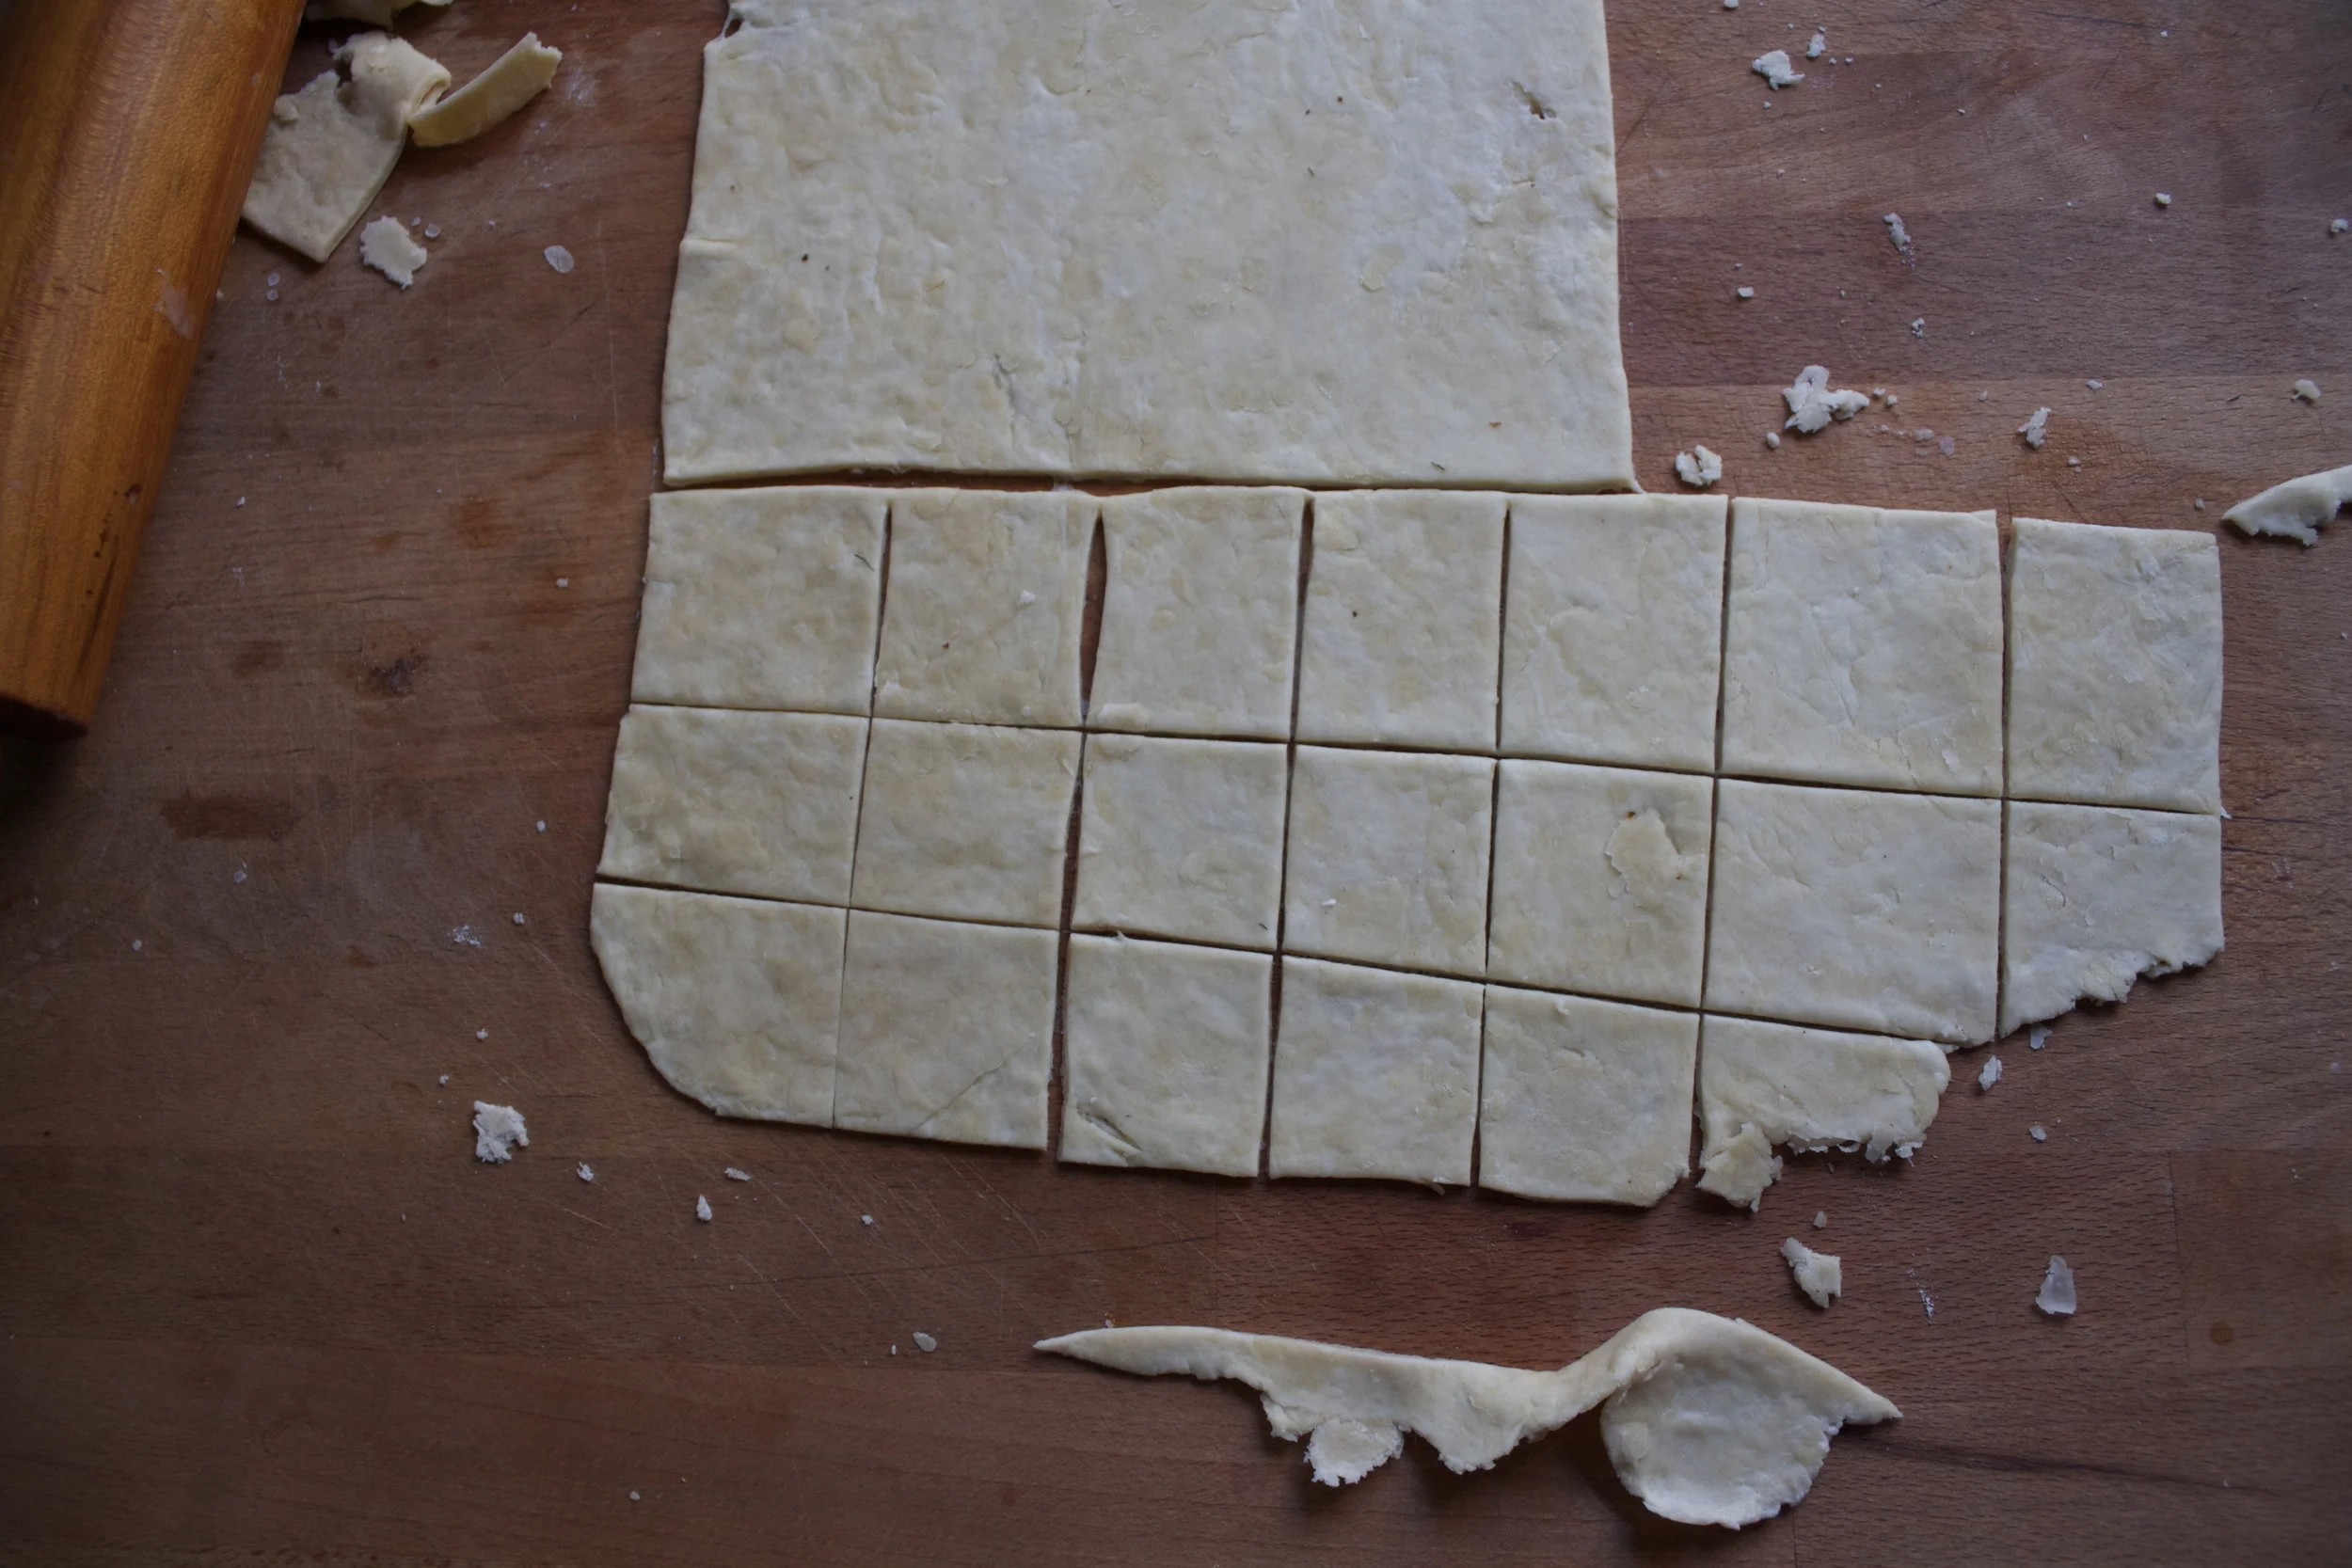
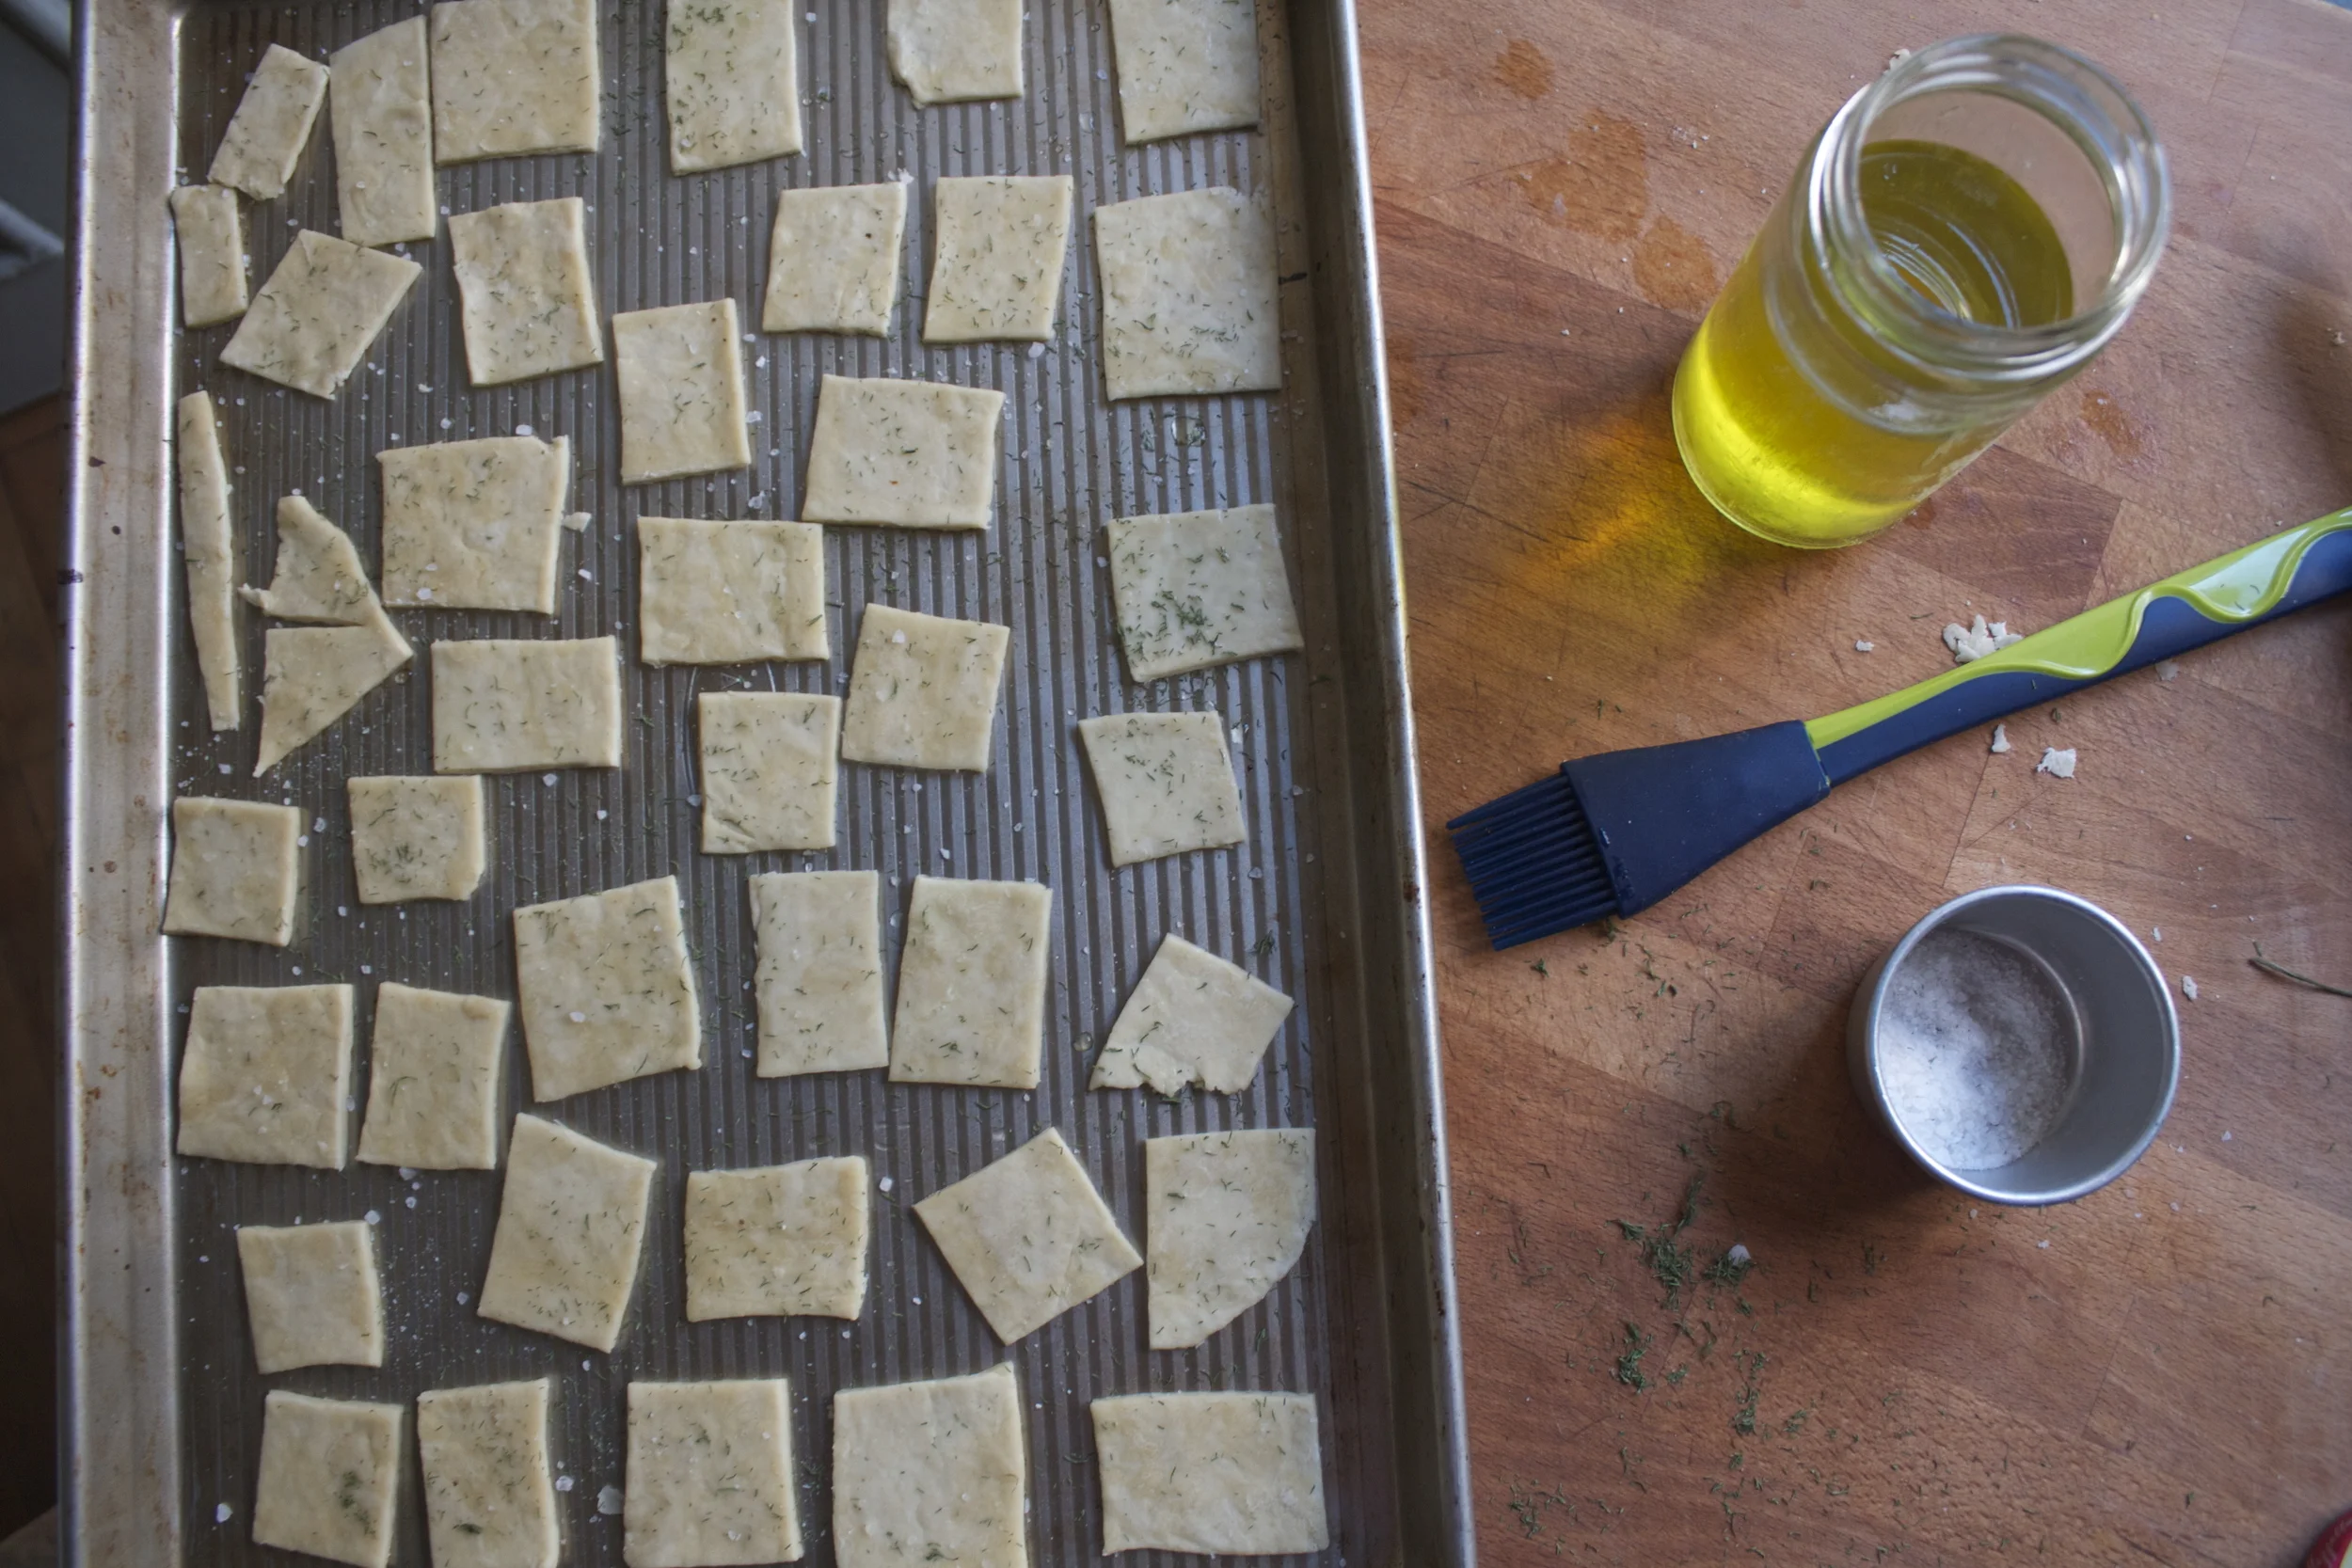
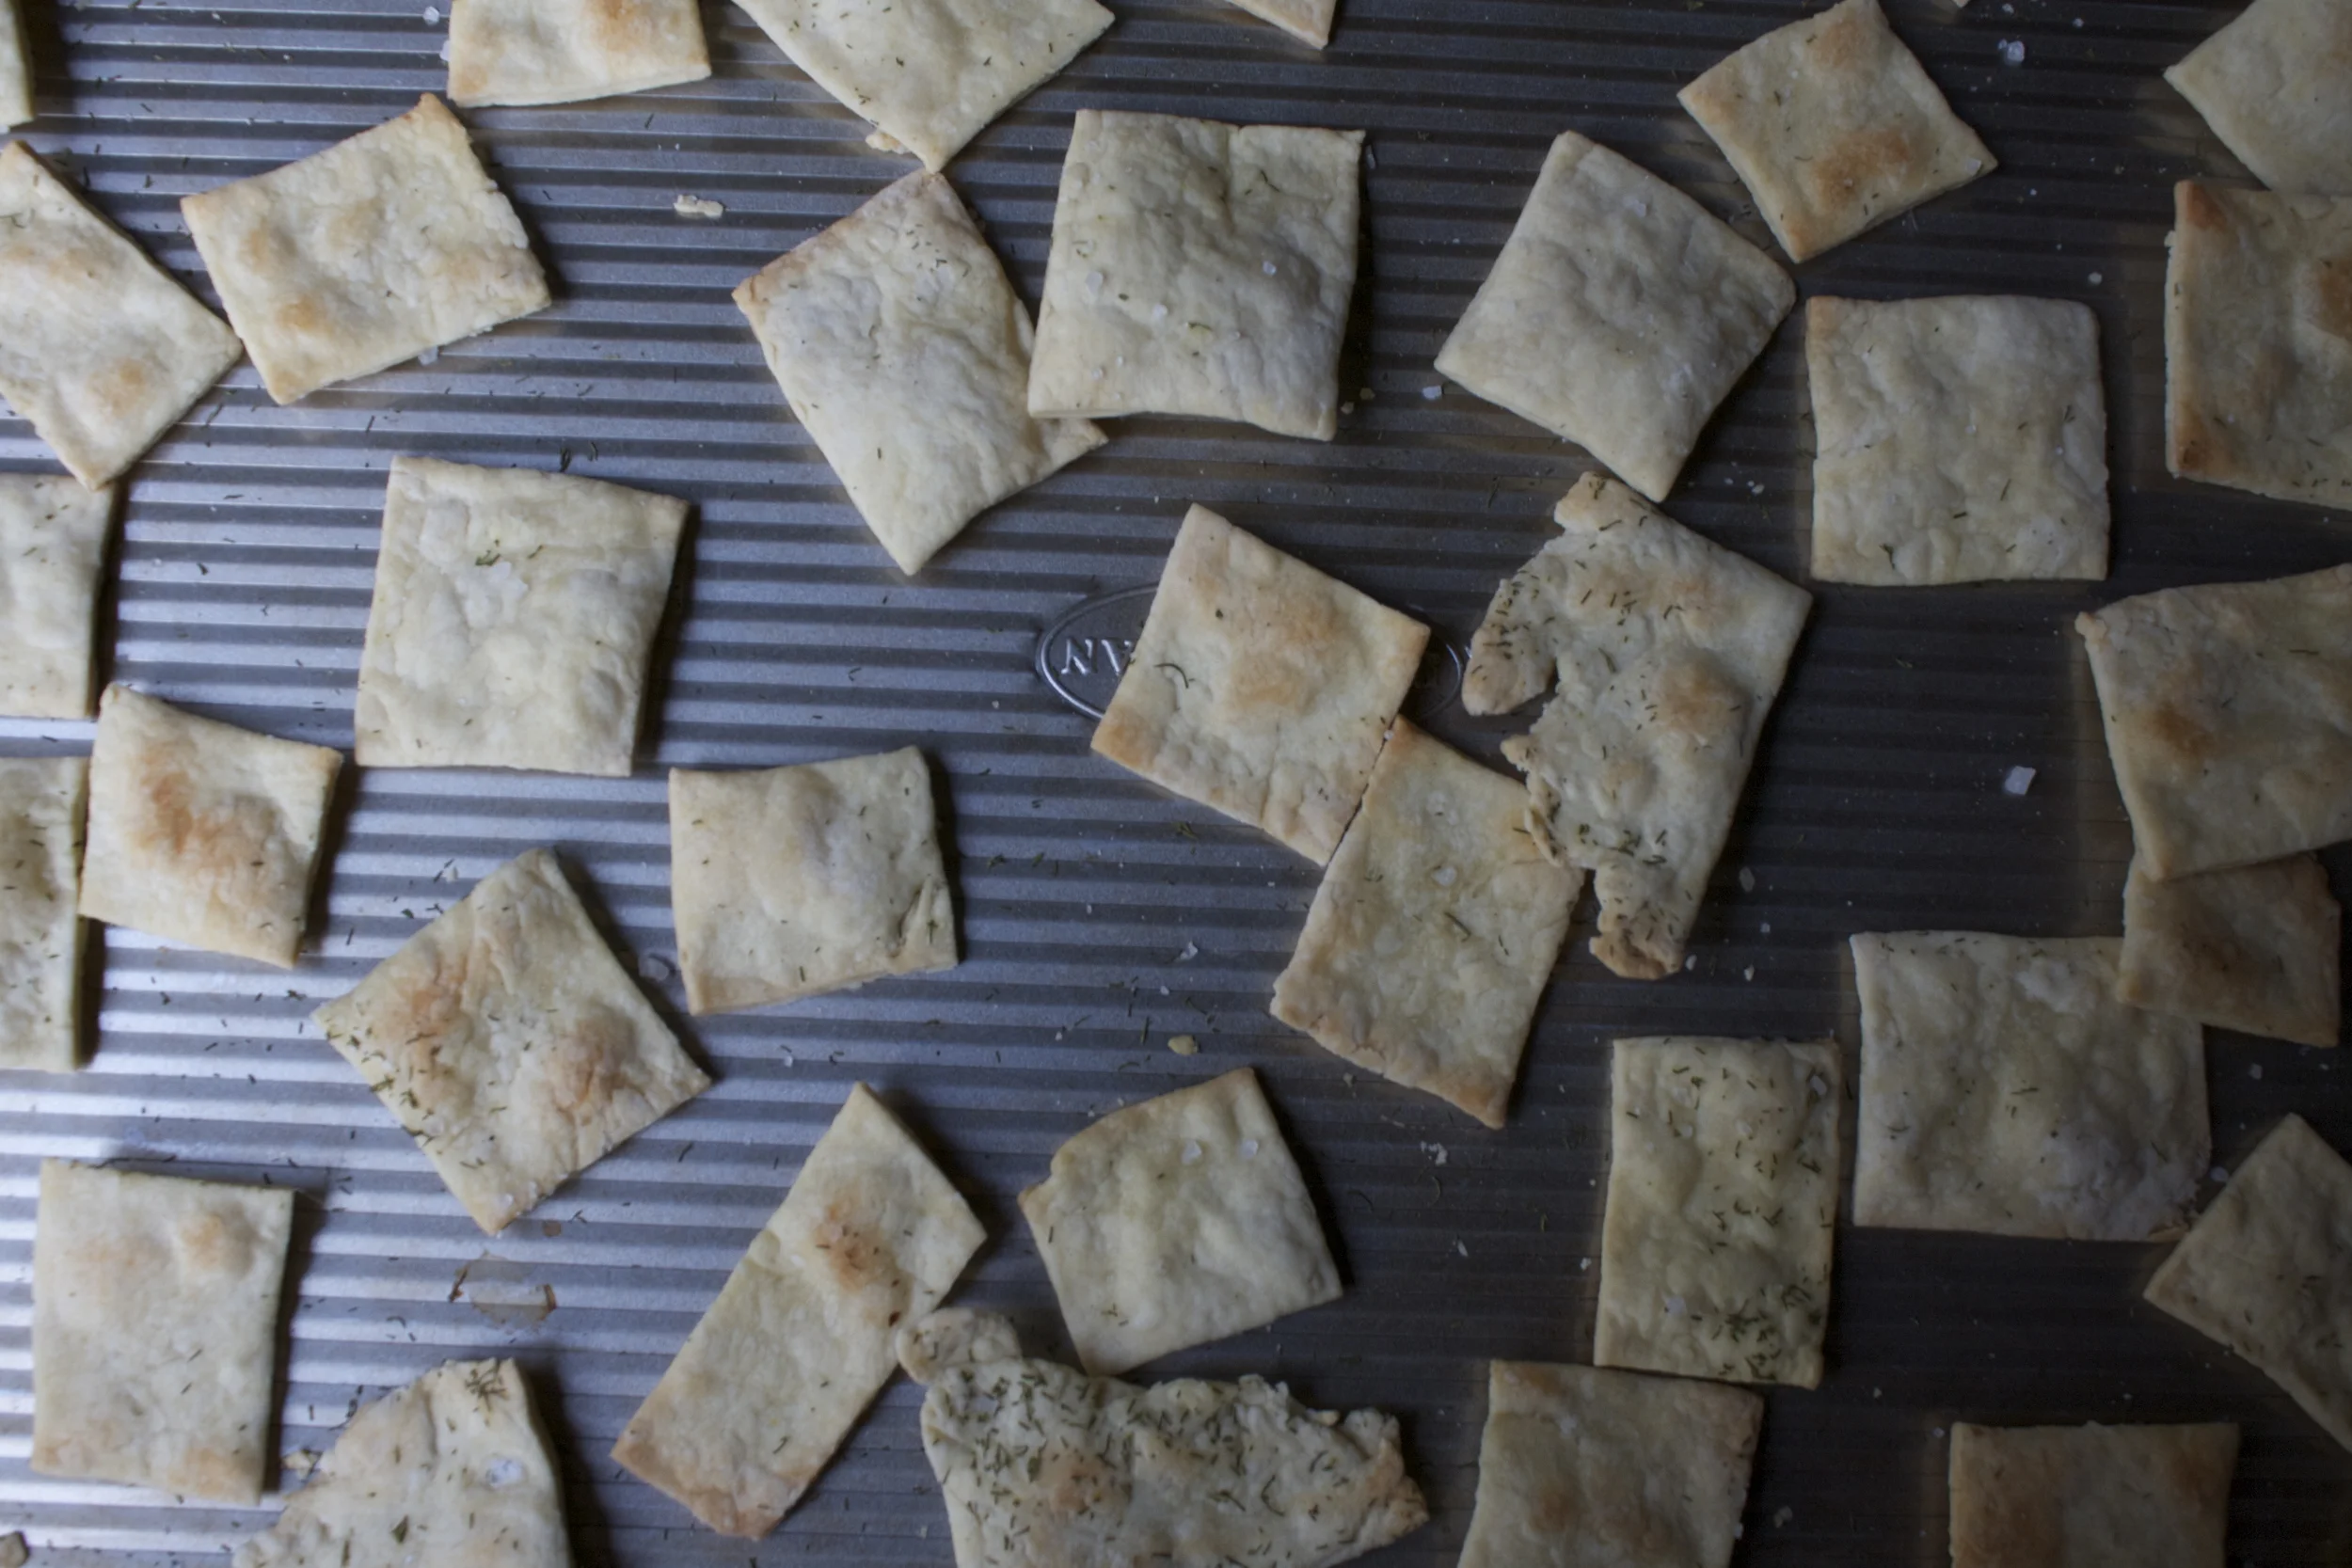


 I eat vegetables like I breath air%u2026 constantly and almost mindlessly. %u00a0Some people are addicted to sugar or coffee, but me, I am addicted to veggies. ( I am also extremely addicted to coffee) This is my truth, but I am ok with it. %u00a0
 Pretty much a little bit of everything that I have in my fridge%u2026.Shredded red cabbage, carrots, beets. Some sliced of red onion, tomato and red pepper. Hummus and a little mashed avocado
 Yes, it may look like a mess, but that’s just me trying to make five different things at once. But really, making %u00a0these wraps are simple simple. Just take rinsed and dried green or red leaf lettuce, smear on hummus and mashed avocado and pile on the veggies. Roll and stick with a toothpick to keep from unrolling. See%u2026. simple.
 So many colors%u2026%u2026 so much pretty.%u00a0
 Wrapped and rolled…Sliced down the middle, just to see all the pretty inside.
 These might be veggie wraps, but man, look at those sausage fingers%u2026(hehehe)


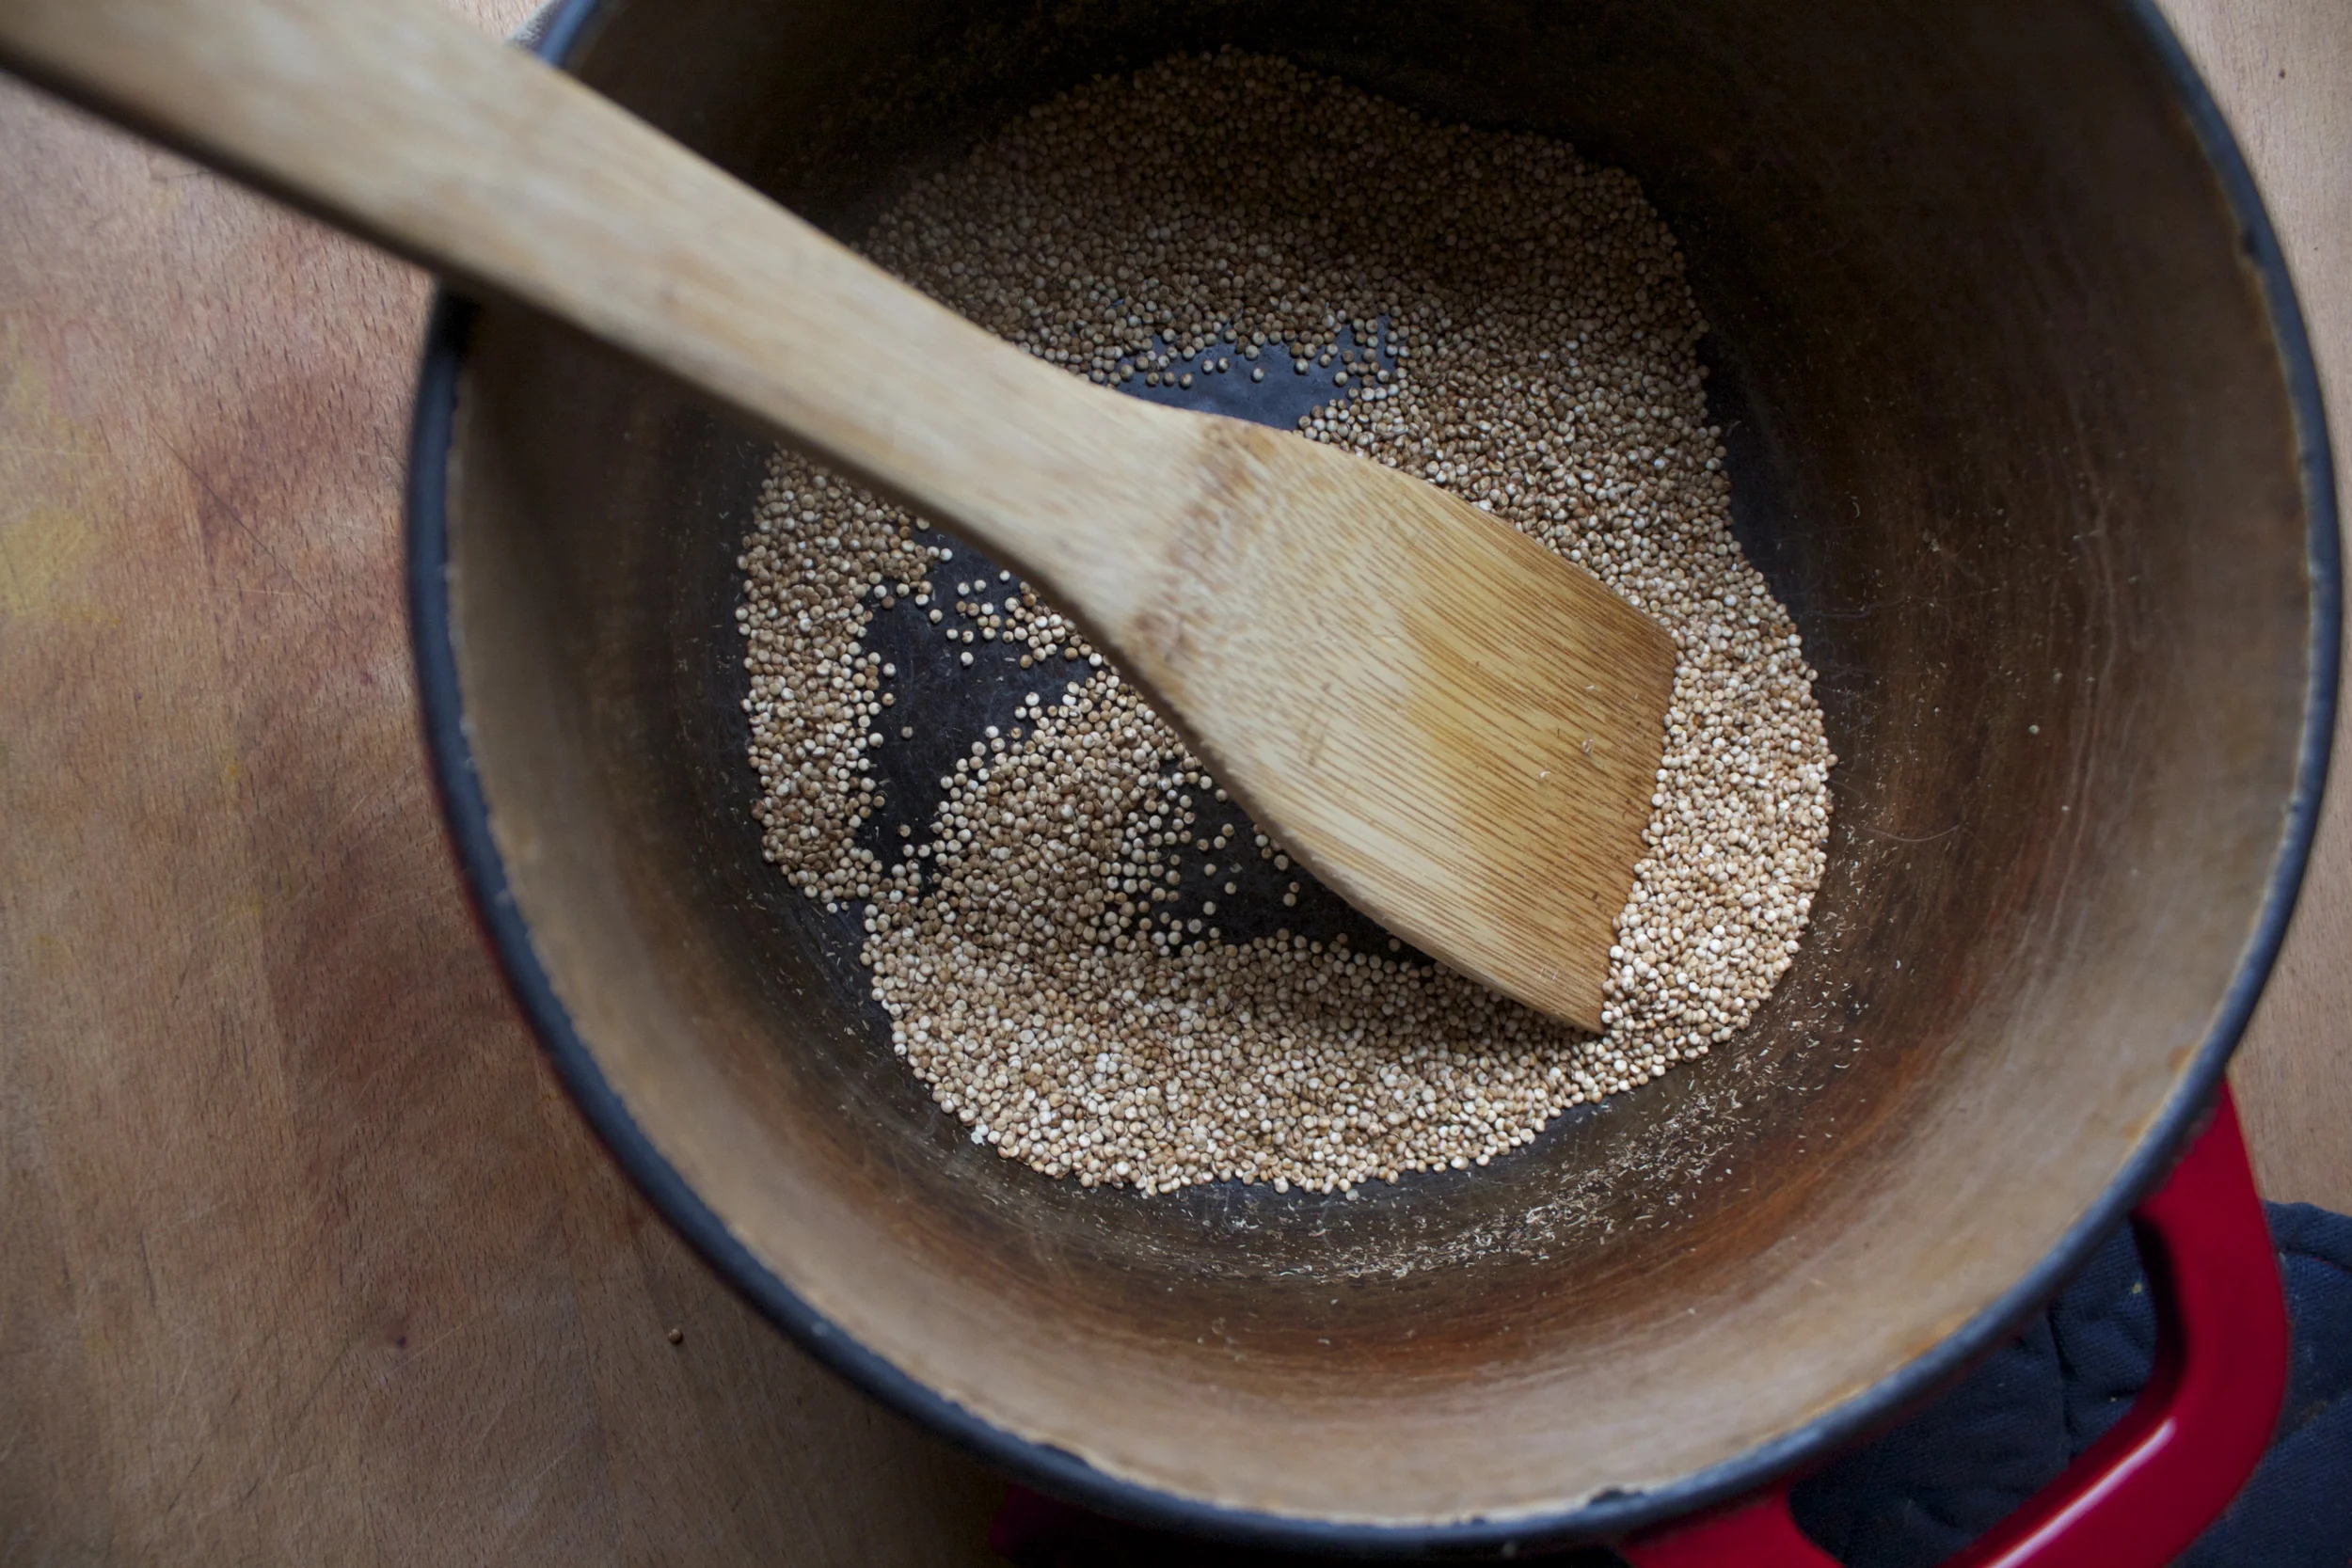

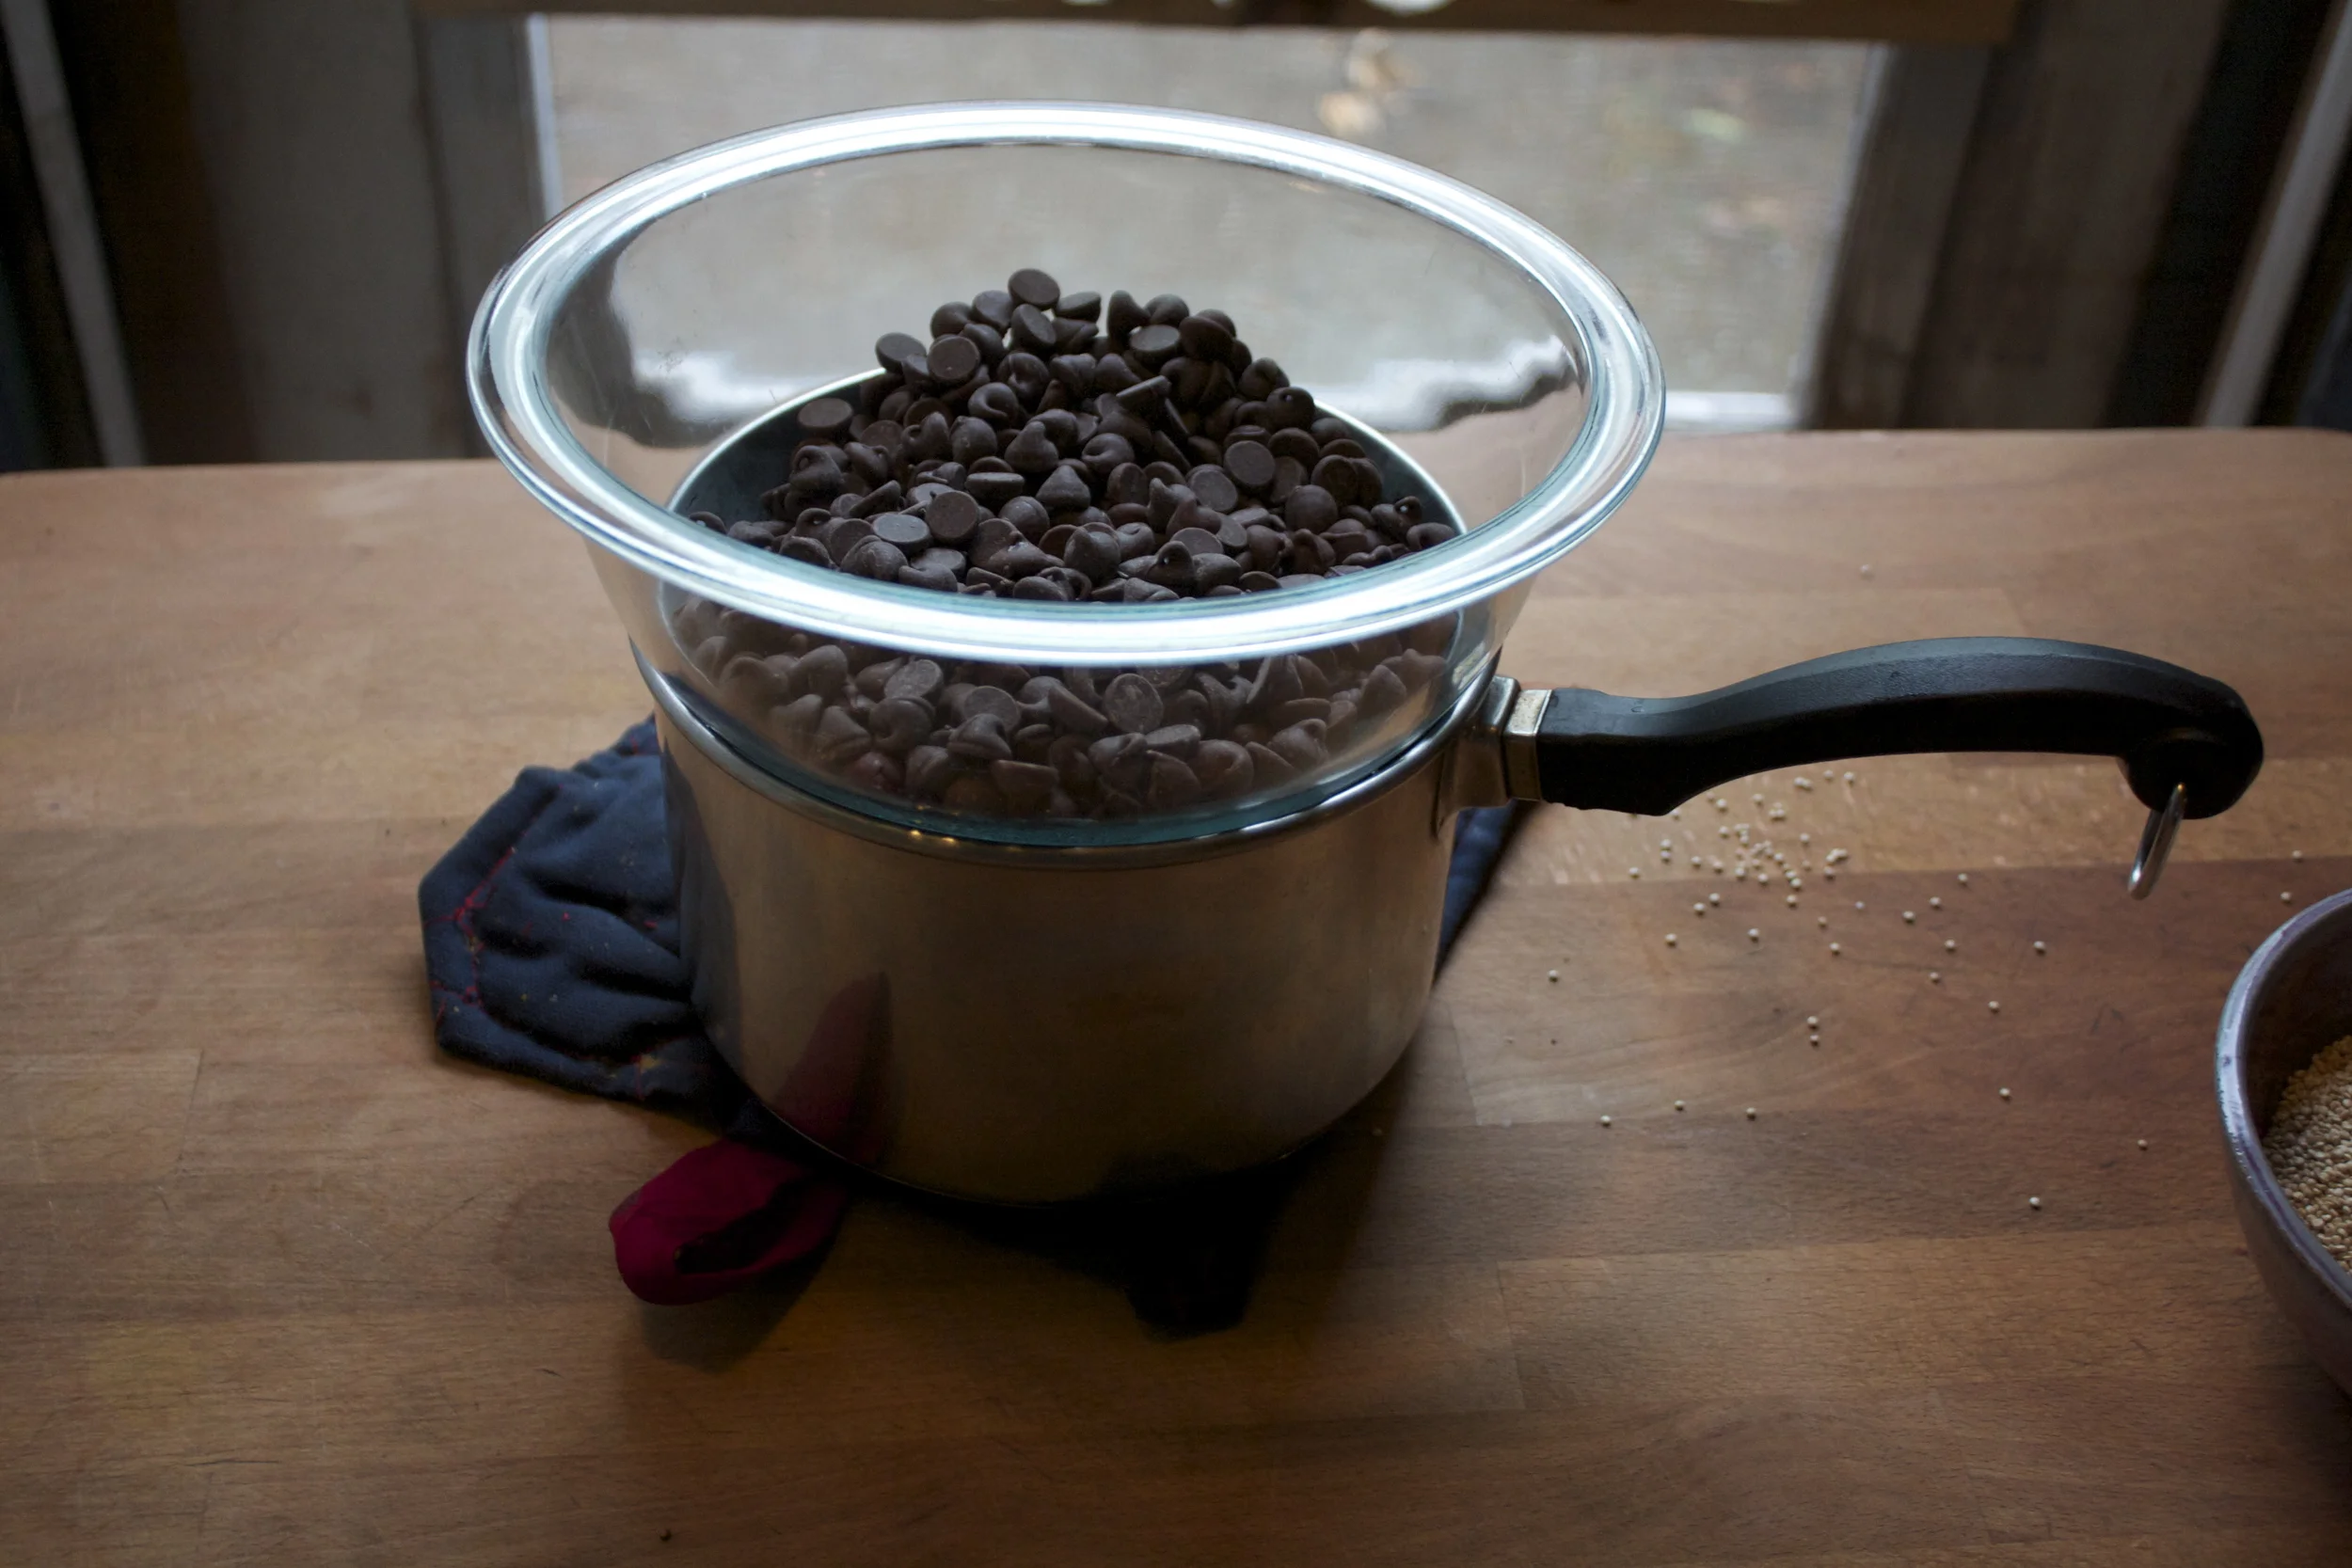
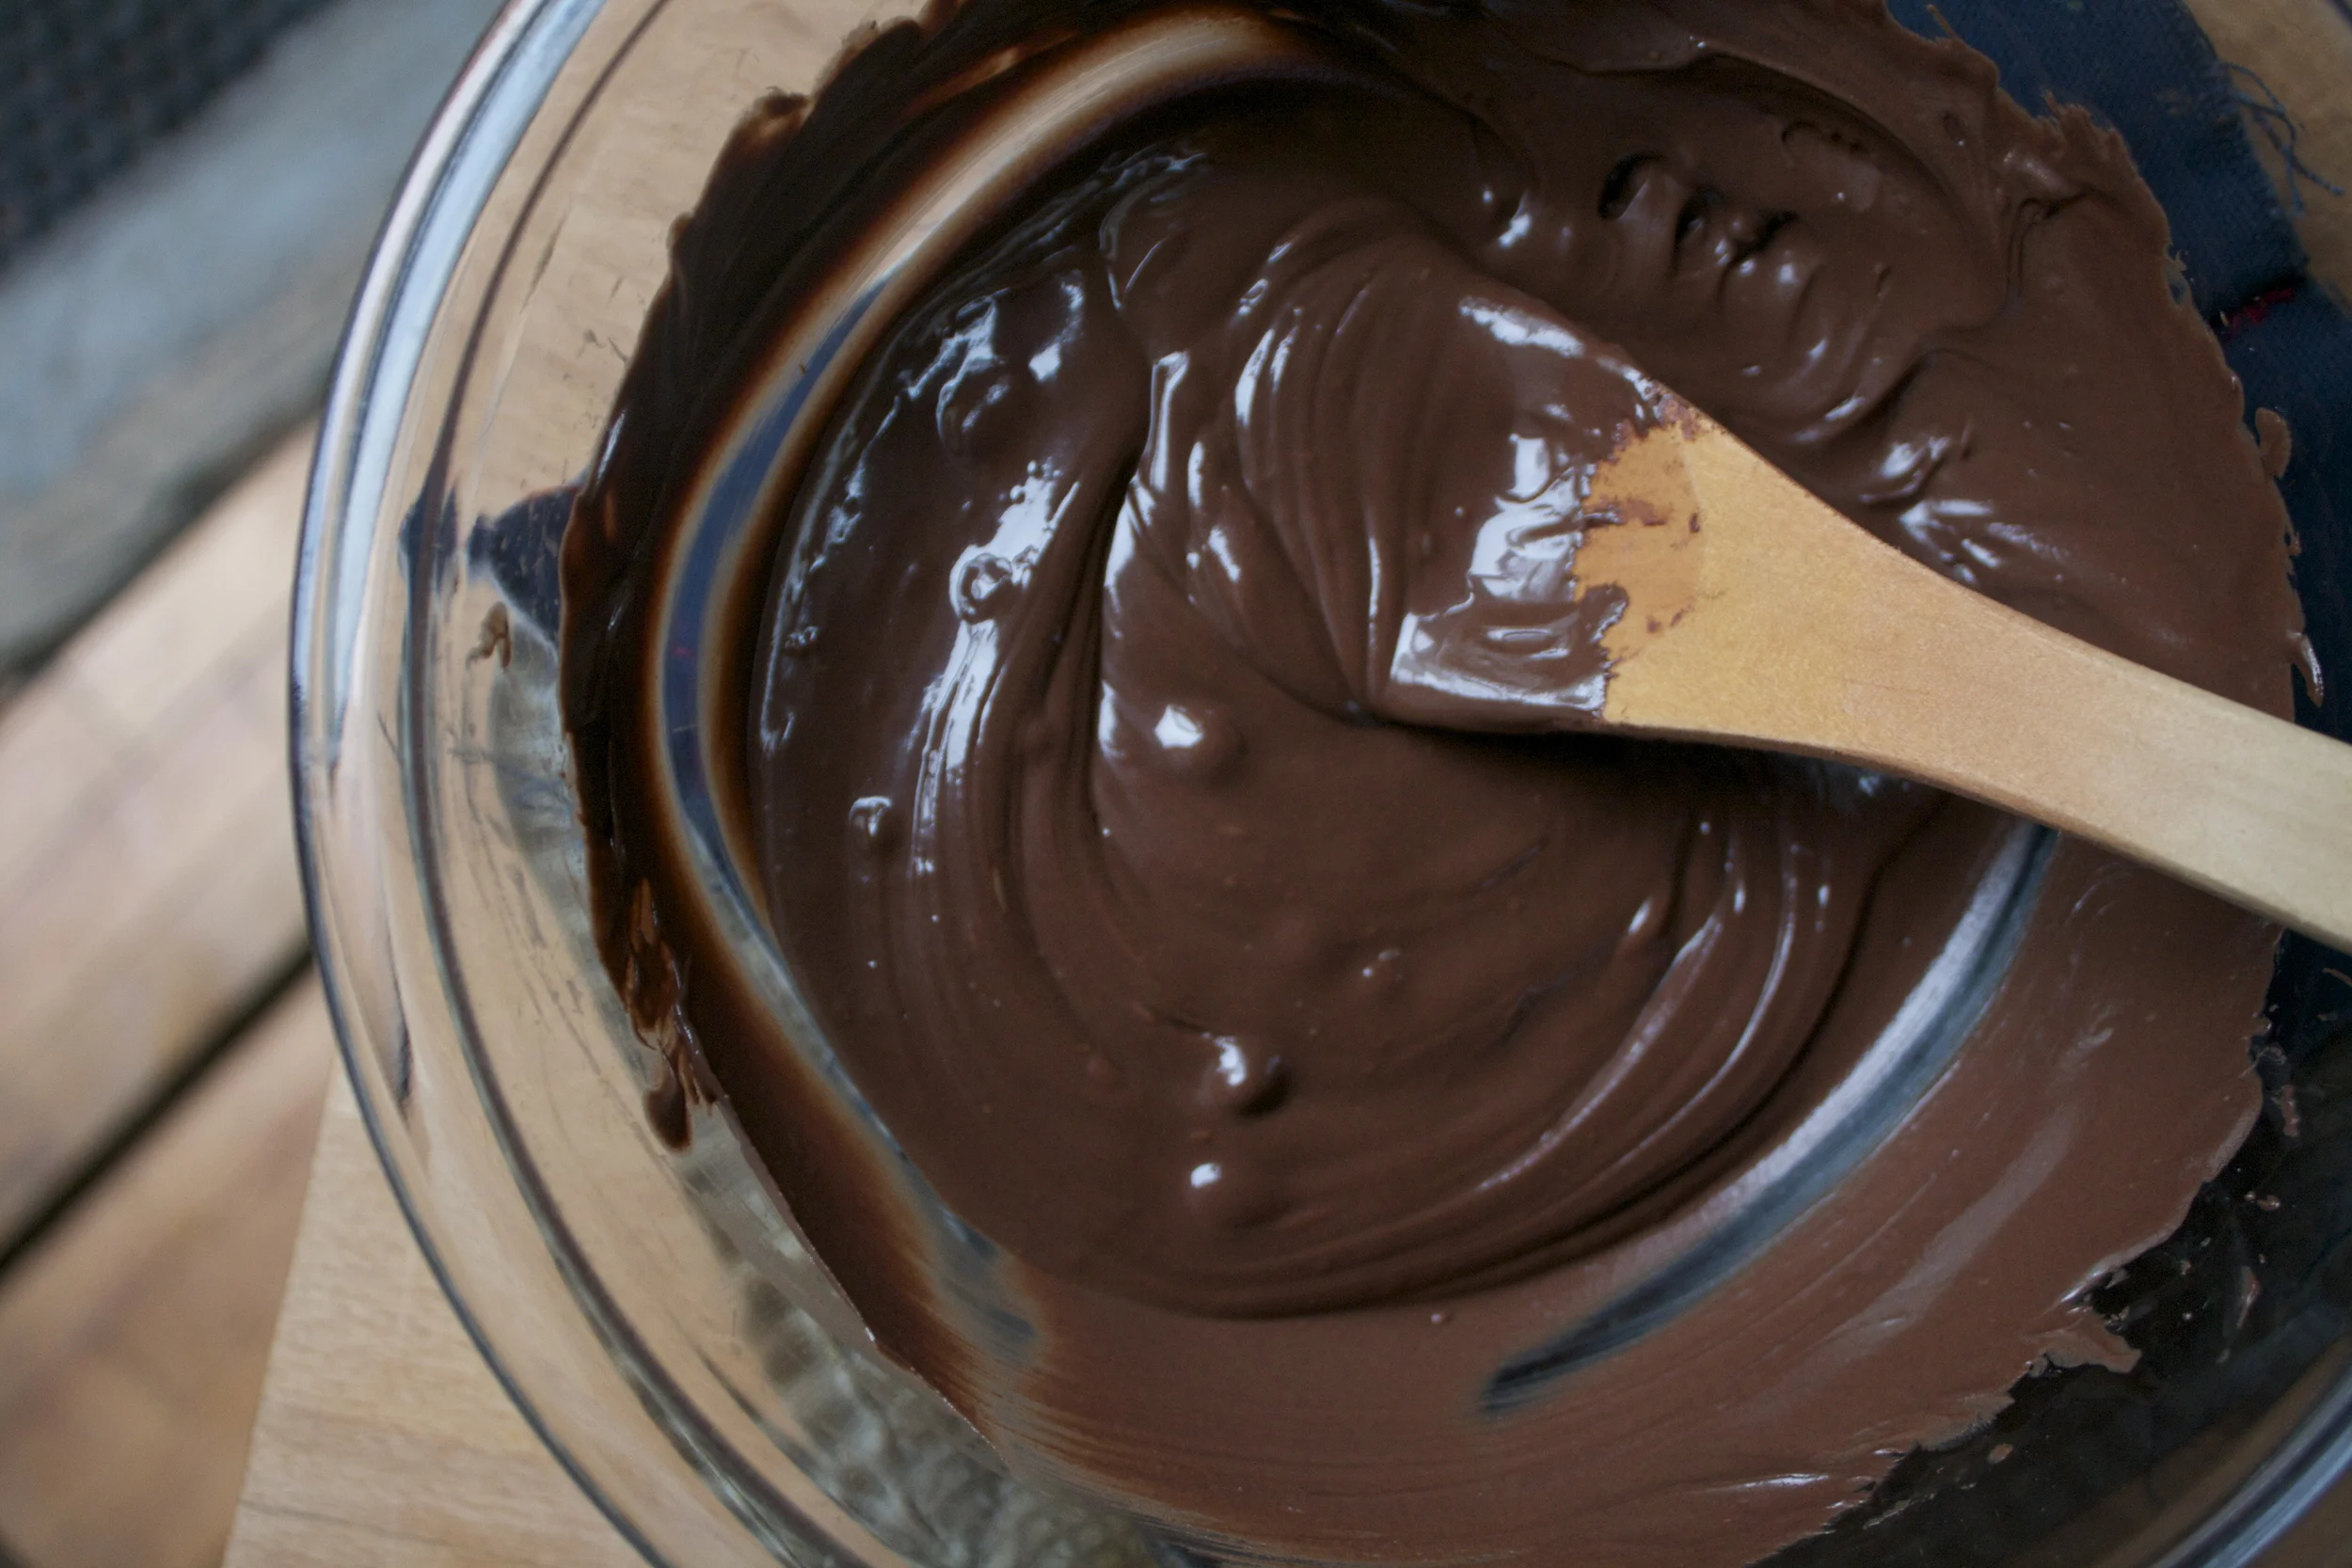
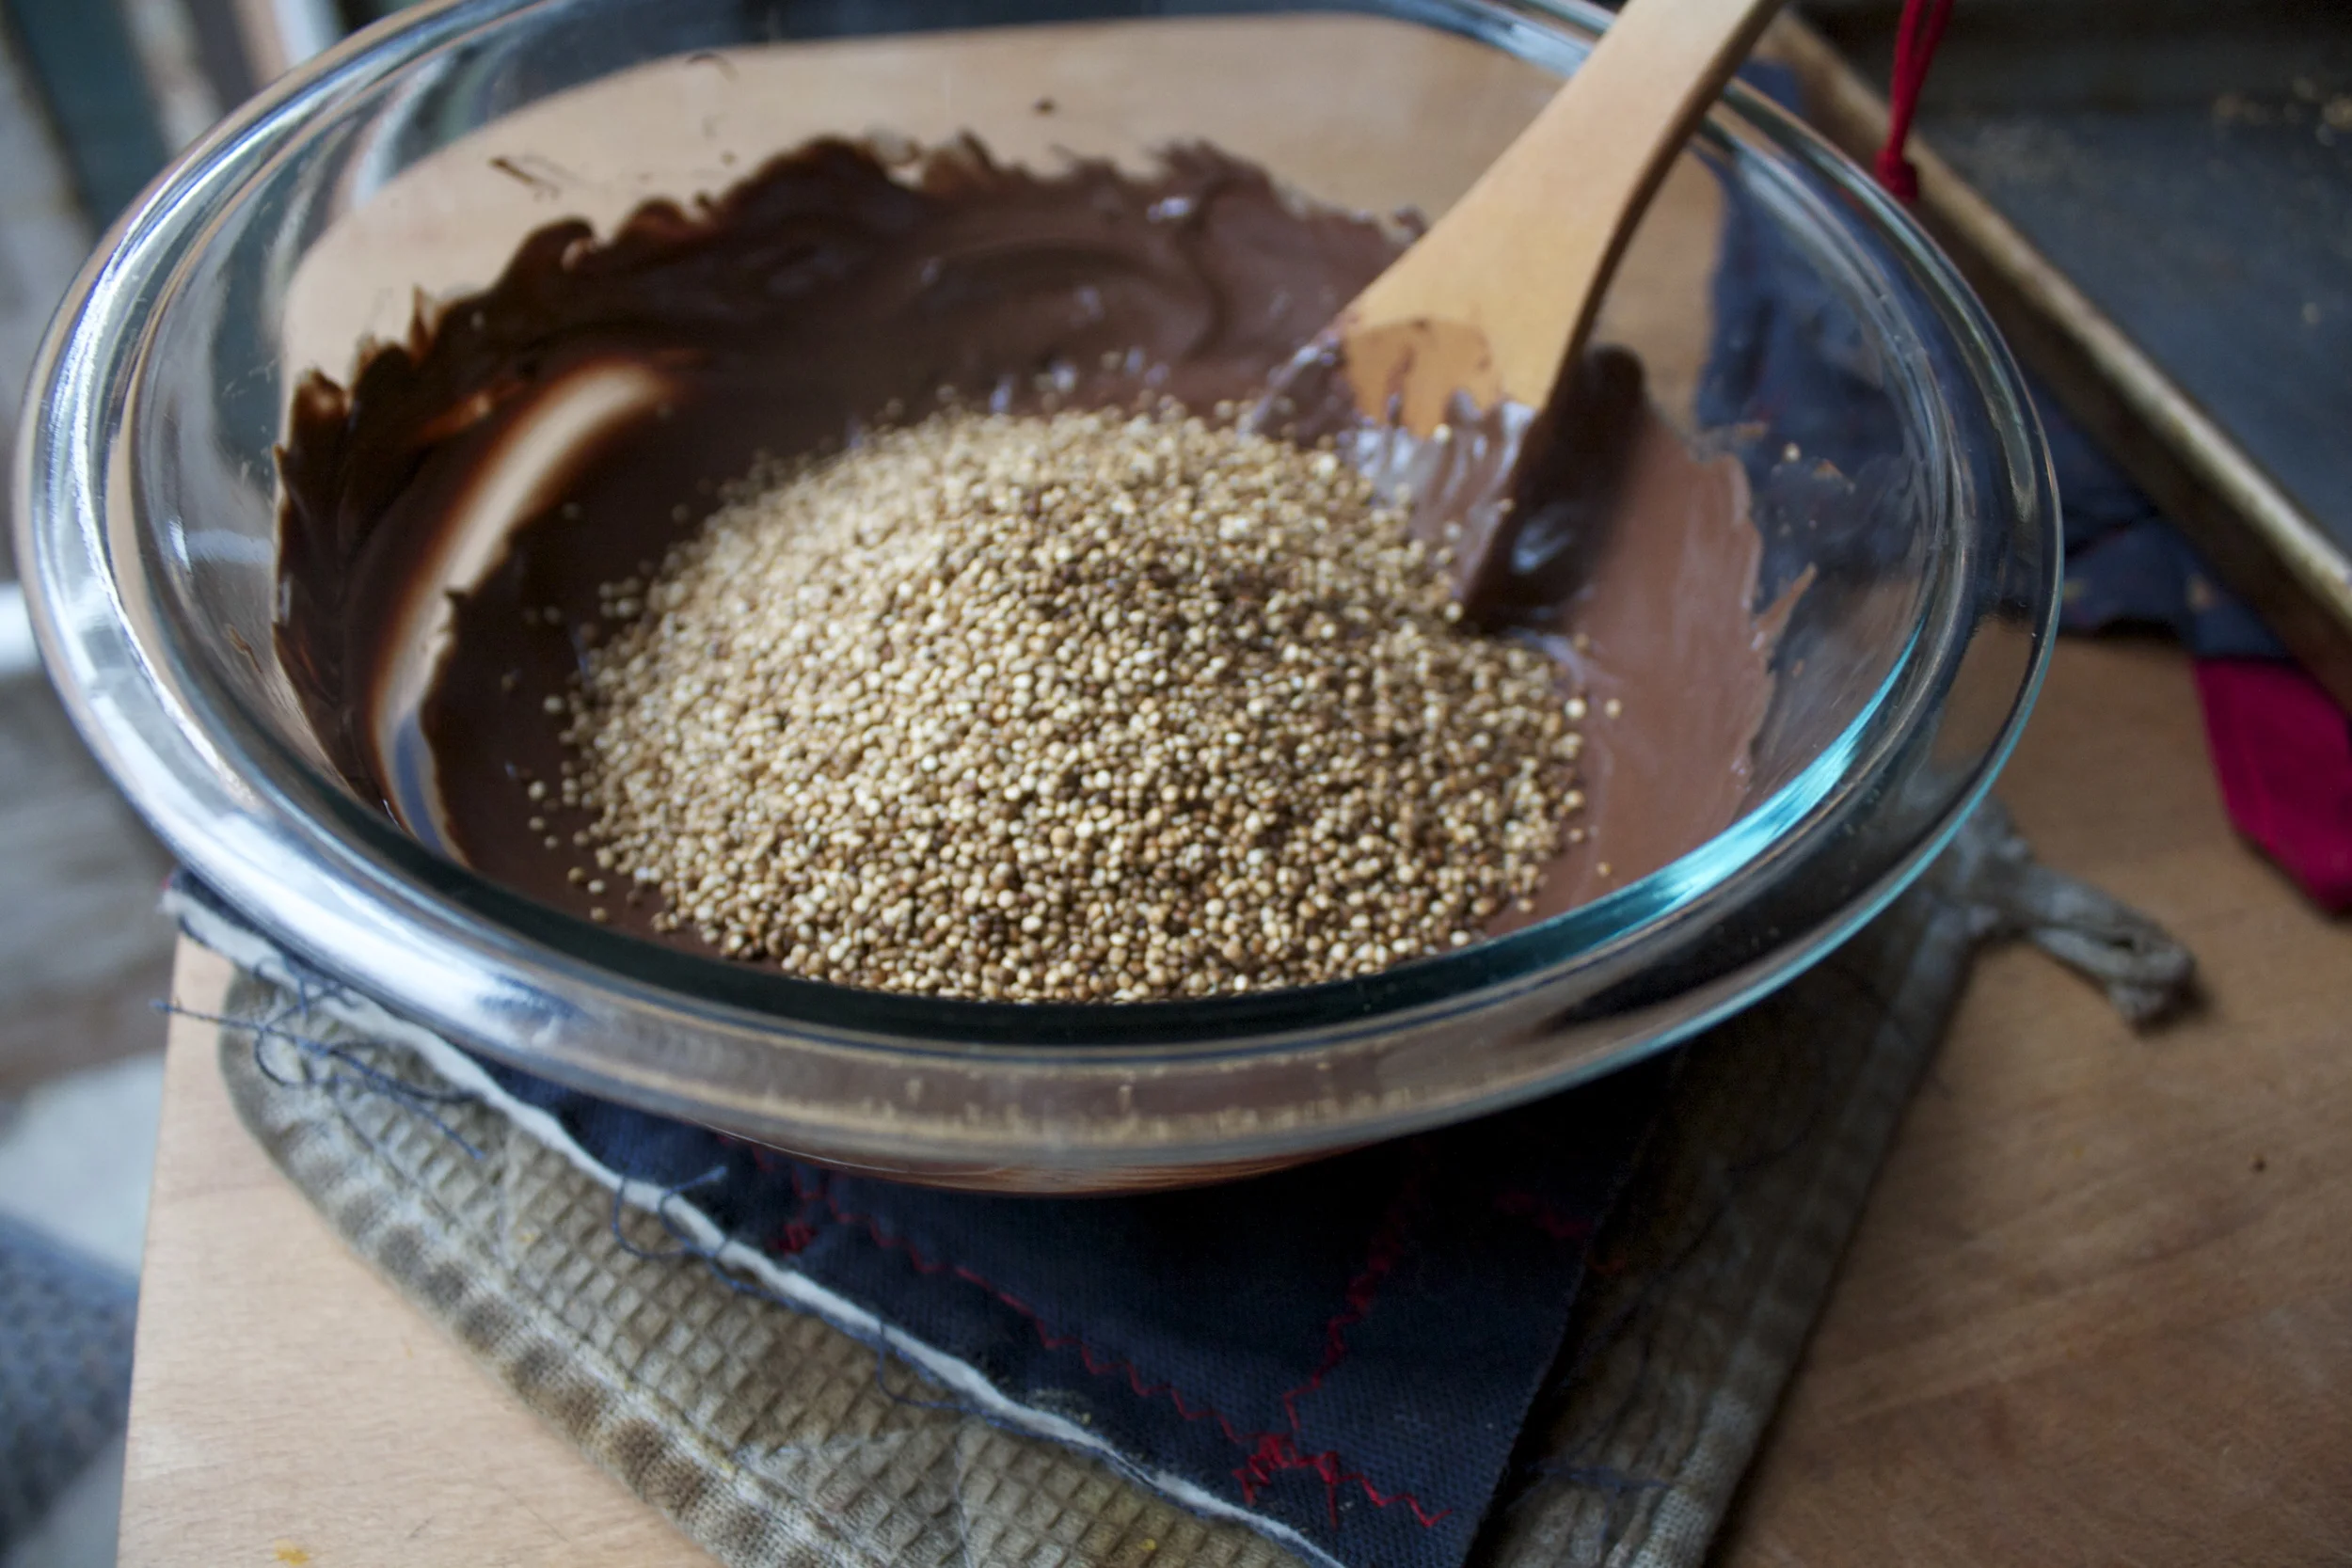
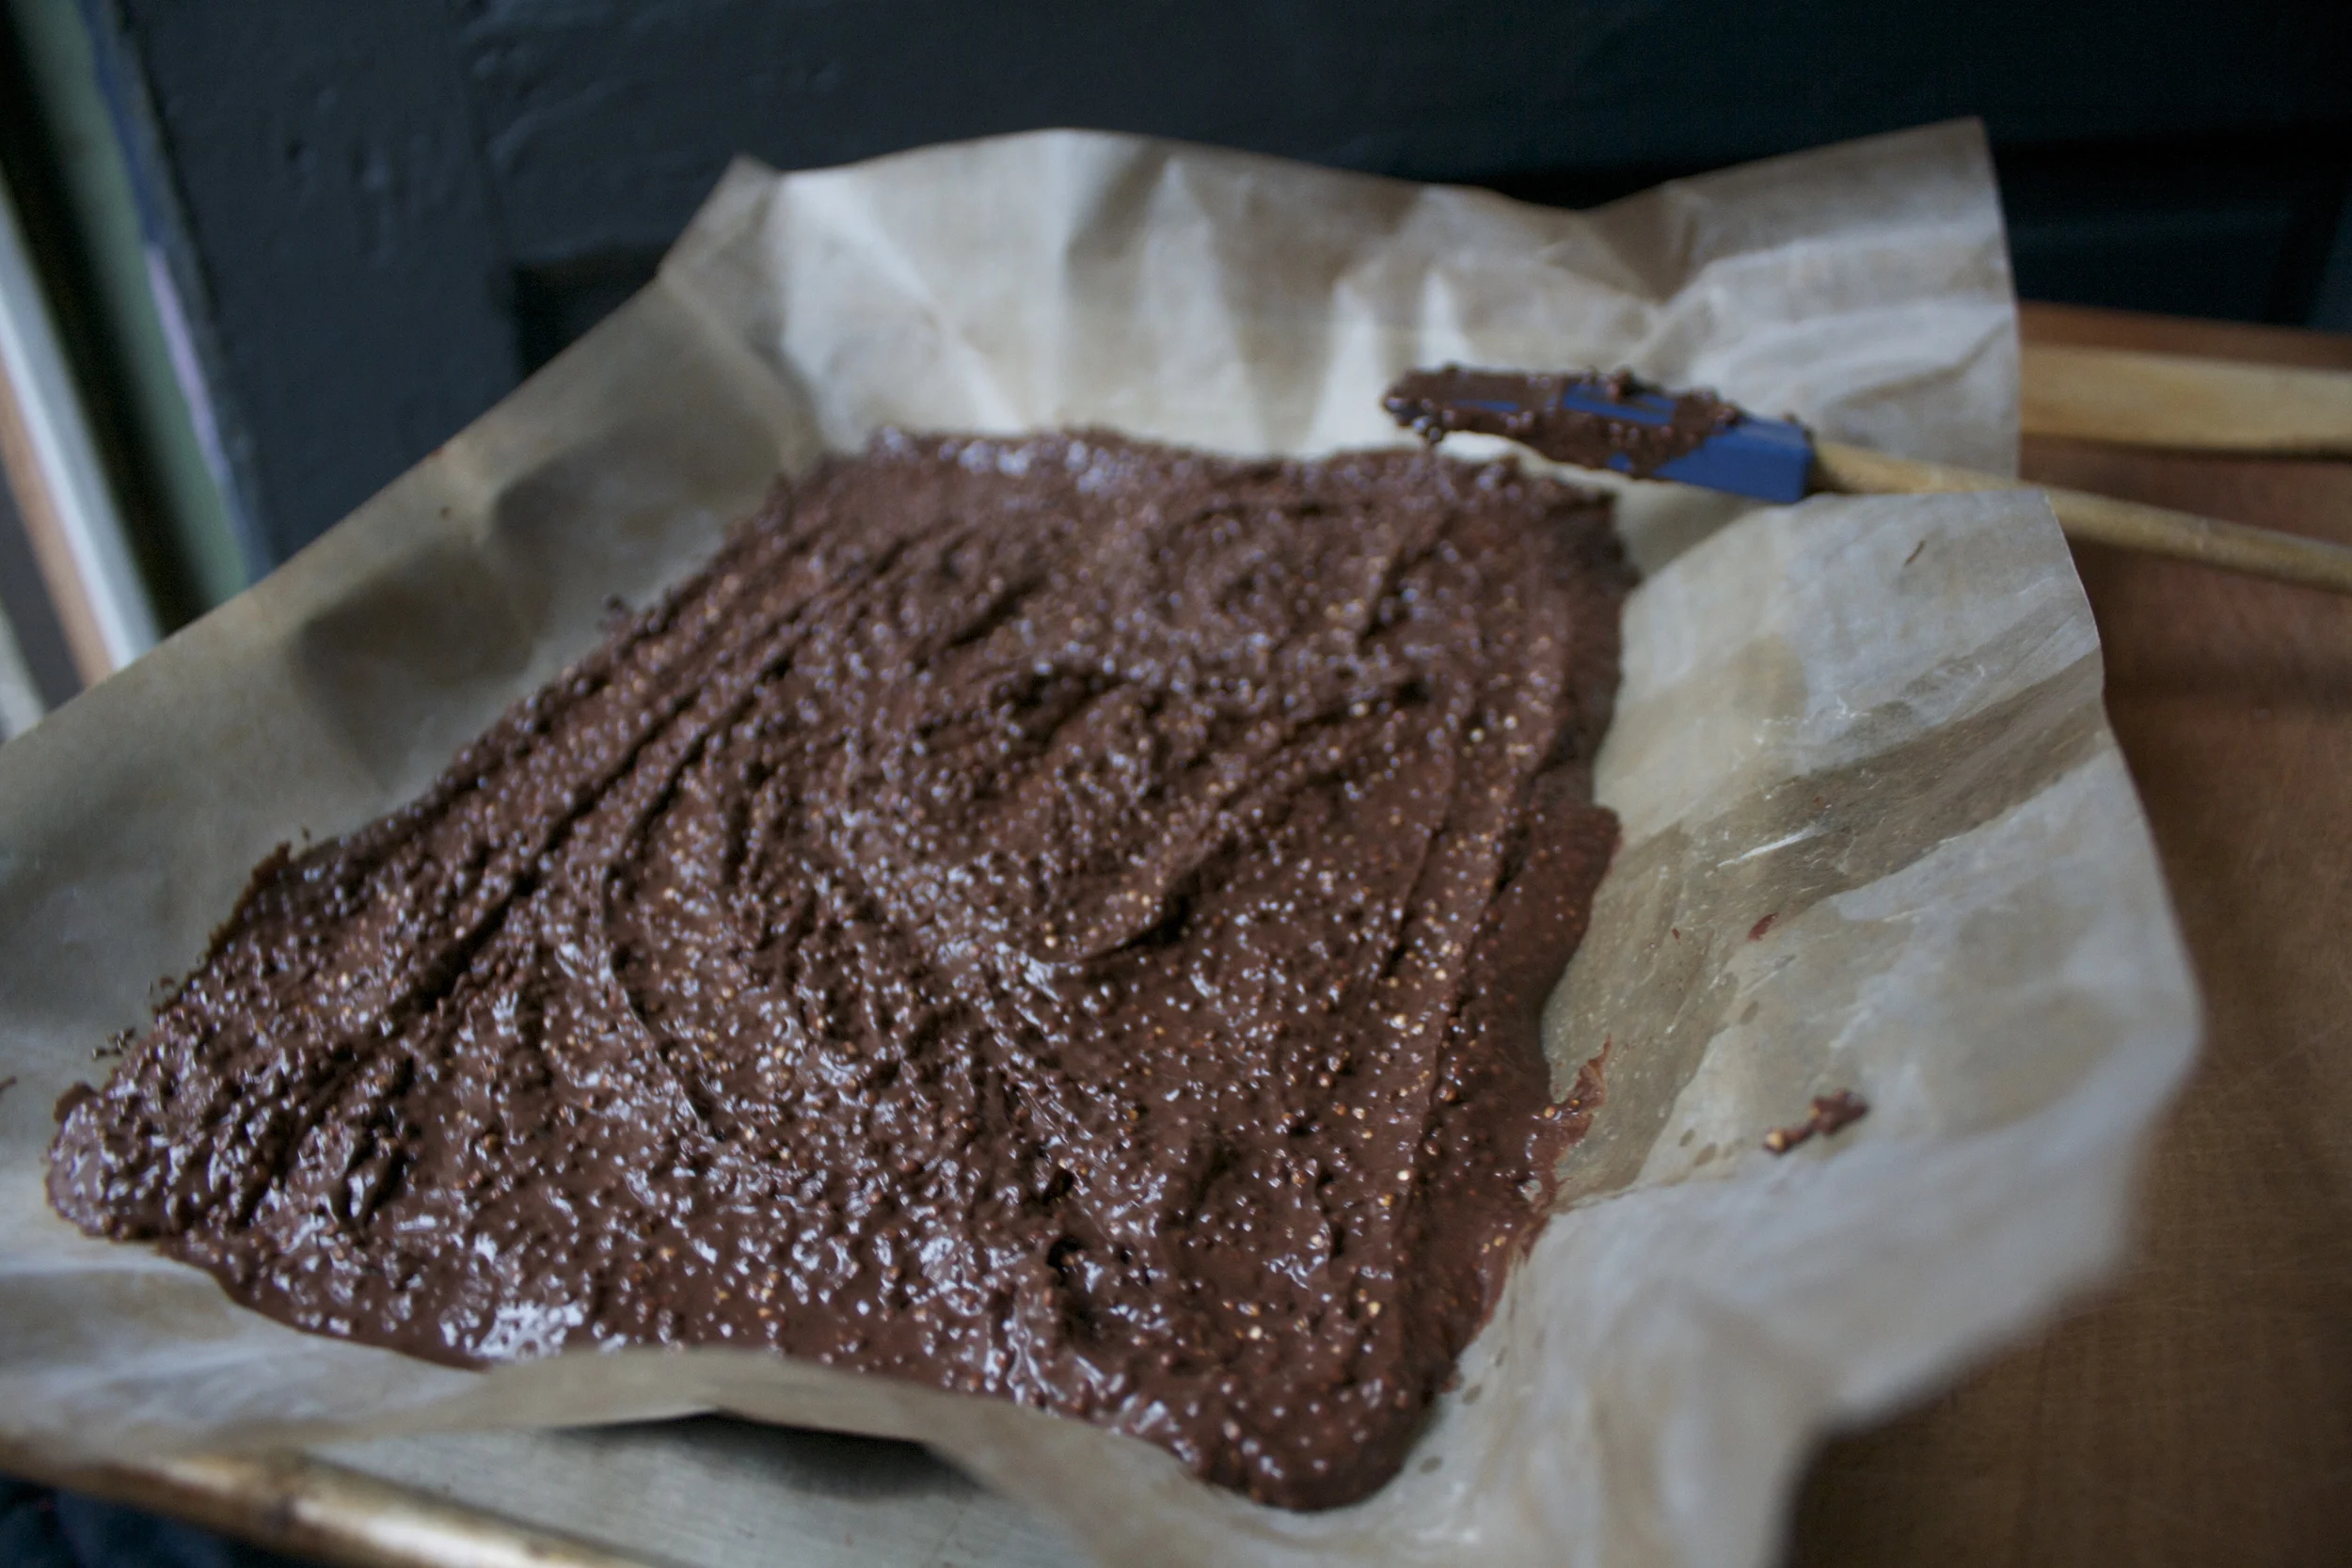


 For the past few days I have heard more complaining then happy. The biggest complaint%u2026tummy issues. %u00a0A week of gorging on heavy, rich, and indulgent foods is finally catching up with people, turning them into grump asses. I can handle a little grump, %u00a0but its time to get get out of that funk and take care and stop bitching. May I make a suggestion? Eat this%u2026 You will be happy. %u00a0Your body will feel clean and nurised. Your tummy will get back on track. %u00a0 It what I call satisfaction This salad is a complete meal .Chopped and shredded veggies atop a small heap of quinoa, tossed on a handful of lentils and topped with a dollop of lime avocado%u2026 Thats it and it is good. For the sake of picture-taking, I made a plate look all nice and pretty, with layers of %u00a0colors, but to be honest with you, I rather toss into a big bowl, grab a moderately large-sized fork and %u00a0food to face%u2026 and it’s just as pretty.(the bowl of food is pretty, not food on my face) Quick note: the vegetables that I used here %u00a0are what I had at home. If you don’t have one or two of these specific veggies, don’t worry about it. Sub in something else, like pepper or spinach., Still have extra brussel sprouts, green beans or asparagus from thanksgiving? Go ahead and use those. If there is a specific veggie you know your stomach doesn’t tolerate well, then maybe avoid using it. This is a happy feel good salad!
 A pile of vegetables is always a good start to any meal, especially these veggies.. All but the avocado came from my farm share. This is one %u00a0local organic meal of love.
 Green Kale, purple cabbage, beets, red onion, carrots%u2026I did a little shredding and some grating. I like to have different sized and textures in a salad.
 Quinoa.. 1 part quinoa to 2 parts water..Bring to a boil and let simmer until light and fluffy. When I make quinoa, I always make more than is going to be eaten, its great to have pre made for any meal. %u00a0Quinoa goes with everything, even a sprinkle of cinnamon and diced up apple for a nice breakfast or snack.%u00a0
 Barely steamed kale, just enough to soften it. Again. raw is awesome too.
  Half a lime, half an avocado and a clove or two of garlic… guacamole%u2026Call it what you will.


 My winter farm share is coming to an end this week. One more pick and then a three week stretch until the summer share starts… WHAT AM I GOING TO DO!!! Stock up as much as I can is what.
 The stuff….For the split pea gravy we have a carrot, a parsnip and a large onion chopped into small chunks. Salt, thyme, a bay leaf and of course the split peas. Then there is the celeriac root* sliced into 1/2 inch thick rounds and some plain old yellow mustard .
 Toss the chopped parsnip, carrot, onion and the spices into a pot on medium heat and let veggies sweat a few minutes until tender. Add in the split peas and enough water to cover everything. Turn pot on high and bring to a boil, then cover and turn to low. Make sure to give the pot a good stir ever few minutes and add more water if needed
  Once the peas have soften, remove the bay leaf and puree until smooth and oh so creamy. Taste and add more salt and pepper if needed. If you find that the gravy seems to thick, just add in more water until it’s the consistency that you want.
  The gravy is made, the celeriac is roasted… now we are ready to eat!!
  Stick the celeriac on a plate and dump good amount of that gravy right on top. Feel free to add a bed of spinach, or a grain or anything you want, because why not, and also some chopped tomatoes for a little acid and prettiness.
THE LOVELY CRAZY
September 18, 2019 by maximios • Blog
I am finally getting to the point in the kitchen that I have stuff for food other then lentils and carrots. Slowly I am restocking all the food and spices that I have let myself run out of when we started the moving out process. It has been a great purge, especially for all of my spices, which I have (or had) so many of and some where maybe not as fresh as they should be. Slowly I have been dumping those not so fresh spices into the crock pot with beans and replacing with freshy fresh ones.
The other day I did a spice run at the coop. Bulk spices are the way to go but sometime I can get a little out of hand. A pinch of this, a cup of that. I want them all, but I was pretty good. Just a few for now, and nothing to crazy.%u00a0 One that I did get was dill, lots and lot of freshly dried dill (I might have gone a little overboard with the amount I bought. I guess I was worried I might run out of dill, but its ok, I will for sure use it.). What to do with dill? Well toss pretty much anything with some dill and vinegar and you got yourself a dill pickle of sorts which is great.%u00a0 I just so happen to have a pickle craving and not a pickle in the house so me and my abundance of dill went and pickled potatoes to make french fries. And I must say, these fries are freaking amazing.%u00a0 Everything fantastic about dill pickles and french fries all in one. Baked because I don’t fry things, and not at all french. These fries are just what I needed to hit my dill pickle craving and use up some of my abundance of dill.
Here’s to the pickle fries. Mouth puckering goodness!
The stuff. A few russet potatoes and some vinegar. Salt, pepper, garlic powder, onion powder, and dill are the spices to use. And olive oil, which is not pictured but necessary.
First off, cut up the potatoes into fries. Cutthe potato in half, then cut that half in half, then each half of half into strips… easy easy. Toss the now fries into a big bowl of cold water as you go. (It removes some of the starch so your fries are not soggy)
Stain the starchy water from the bowl then dump the vinegar in with the potatoes, tossing as you go. And now you wait. Stick the potatoes into the fridge for about 1/2 hour to an hour, tossing the them around ever 10 minutes or so. (the longer they are in there, the more vinegar they will absorb)
Now preheat. Strain the vinegar out of bowl, drizzle potatoes with olive oil and toss until evenly coasted then sprinkle on the spices.
Pretty potatoes, looking good enough to eat(but don’t eat raw potatoes, that is gross and will make you sick)
Single layer on a baking sheet, ready for the oven.
Baked until golden crispy and nice. Didn’t even wait for a plate, just some mustard and off we go.
Dill pickle french fries. So good.
Bye
-C
should serve 2 people
Rinse potatoes then cut lengthwise into 4 equal pieces. Then cut each slice into long strips about 1/2 inch . Place the cut potato into a bowl of cold water and toss them around to remove a bit of the starch. Drain the water then dump the vinegar onto the potato and toss around. Let sit for 30- 60 minutes in the fridge, tossing ever 10 minutes or so.
Preheat oven to 400.
Once the oven is hot, pour off the vinegar from the potatoes (can be reserved for cleaning) Drizzle the potatoes with olive oil, making sure they are evenly coated, then mix all the spices together and sprinkle all over potatoes. Place coated fries single layer on a baking sheet and into the oven they go. Bake for about 45 minutes flipping after about 25. Fries are done when they are golden brown and crispy.
Serve with ketchup, mustard or whatever you like on fries or pickles.
I know what you are thinking, you are thinking “It’s Memorial Day weekend. Unofficial start of summer. Lots of BBQ’s now I have to make a potato salad!” (it’s a law right?) and “I want a pickle, dill to be specific”. Ok, maybe you weren’t thinking that, but I was. (I often think about pickles…)
Pickles. And potato salad. It only made sense to make a pickled potato salad. So make it I did. And oh boy oh boy, there is nothing better then a rich and creamy salad consisting of potatoes other then a rich and creamy and pickle tart salad of potatoes. I hit the nail right on the head with this one. The mr and I ate the entire salad all to ourselves and way to fast. Now it is gone and I didn’t get a chance to share with anyone. But it’s ok, cause this is definitely going into the summertime potato salad rotation.
Now you are thinking “creamy dill pickle potato salad.. this girl is a genius!” and to that, I say yes. I would have to agree with you on that. (hehe)
And to all who may not be a pickle fan, or need to make 2 potato salads, (it is always good to have a variety of potato dishes at any BBQ ) try this guacamole potato salad, another favorite.
The stuff. Potatoes of course and half a sweet onion, a cup or so of navy beans in the aquafaba ( bean water), left over pickle juice, fresh dill, dried dill, garlic, olive oil ,salt and a pepper.%u00a0
Yes there is a lemon pictured, but I was actually using that to squeeze into my water so yeah, not needed in the potato salad but you should grab a lemon and a big tall glass of water and drink it. Keep yourself hydrated.
Get the potatoes going. Chop them up into small piece and place into a big pot. Cover with cold water and add in a good bit of salt. Stick the pot on the stove and boil those taters.
While potatoes are boiling, strain the aquafaba (bean water) from the beans.
And chop the onion into little pieces and stick into a big bowl along with the strained (and now rinsed) beans.%u00a0 Pour in half the pickle juice and give it a good toss then set aside and let the pickle juice do it’s thing.
Now it’s the sauce time. Blend up aquafaba, garlic,%u00a0 dried dill, a little pickle juice and pinch of salt. As your blending, pour in olive oil until the sauce becomes rich and creamy dill sauce (vegan mayo my friends)
The potatoes are boiled until fork tender and drained..
Toss the strained potatoes back into the pot and add in the bean/ onion mix and the rest of the pickle juice. Give it all a good toss and stick the pot into the fridge for about an hour until the potatoes are cool.
And now we assemble. The cooled off pickle juice infused potatoes, beans, and onions are stuck into a bowl (or just leave in the pot if you want) and slathered with the creamy dill sauce and mixed with as much fresh dill as you want and lots of freshly cracked pepper
And a pickle. If you have one, I highly, HIGHLY, recommend chopping one up and adding it… I mean it is a pickled potato salad after all.
So now you have a great,%u00a0 fantastic, knock your socks off, salad to make for any of your weekend BBQ needs.
Your welcome.
Now have a great, extra long weekend!
-C
Serve 4-6
Chop up the potatoes into mouth little chunks ans place into a pot . Rinse them and them cover about with about an extra inch of cold water, Ad d in a a good sprnkle of salt (like a tablespoon) and stick on the stove. Bring the pot to a rapid boil then turn heat down a bit to a low boil and cook until the potatoes are fork tender.
While potatoes are boils, strain you beans away from the aquafaba, and keeping about 3-4 tablespoons of the liquid. Rinse the beans and place into a big bowl. Chop the onion into little pieces and add that in with the beans and about 1/2 of the pickle juice. Set aside
Now grab the strained bean juice, about a tablespoon of pickle juice, the garlic, and the dried dill,%u00a0 Either with a hand blender or regular blender, start blending all that together while slowly pouring in olive oil (about 1/2 a cup ) until the sauce is thick and creamy. Season with salt and pepper to taste and place in fridge to hang until you need it.
And once the potatoes are cooked, strain them then add them back to the pot along with the bean/onion mixture and the rest of the pickle juice. Toss around to coat evenly and place into the fridge to cool. After about a half hour its a good idea to give it a toss to make sure the juice is getting to all the potatoes.
Once potatoes are cooled, dump into a serving bowl. (or just keep in pot) It’s ok if there is a little remaining liquid.. it will get sucked up by the potatoes. Get the sauce from the fridge and pour it and toss it around to evenly coat all those yummy potatoes. Chop up fresh dill and toss that in too (as much fresh dill as you like.. more is better!) And lately, if you have a spare pickle or two, chop it up and add it on in (or place in a bowl on the side for people add in themselves)
I added the pickle. You should add the pickle. It is so good with the pickle
Like any potato salad, serve with your favorite foods and keep in the fridge when not being eaten.