I have been so excited all week to make this star bread.%u00a0About a week ago, while perusing %u00a0King Arthur Flour recipes, I saw this %u00a0amazing star shaped cinnamon bun situation and just knew that I had to make it. I checked the recipe, made a a bunch of tweaks (made it vegan and a little simpler) and set a date with the oven. I figured that Friday was the day because well, this bread is basically a really pretty cinnamon bun and cinnamon buns are great for the weekend and plus the temperature in the world dropped to like super freaking freazing cold and what better way to stay warm then to crank the oven.%u00a0
And make it I did. And honestly. this was one of the most satisfying bread bakes that I have had in a while. It is just so dang pretty and smells so good and was honestly way easier to make then it looks (seriously, really simple). I don’t know if I am ever going to be ale to make cinnamon buns the regular way again. I mean look at this. %u00a0And best to let you know that it feeds a crowd, which is fantastic if you are going to be having any big family/friend gatherings in the next month or two. (or if you are just awesome and want to eat the whole thing to your face). Think about it, if you make this for the people (or yourself) %u00a0how cool and awesome and fancy you are going to seem. It’s really a win win win all around here so I don’t see a reason to not make it. Trust me, and thank me later.%u00a0
The stuff of stars. Flour. salt. yeast and soy milk. A little oil, sugar, mashed sweet potato, earth balance %u00a0and cinnamon.%u00a0
To start, a %u00a0couple of tablespoons sugar and the yeast go into the warm soy milk to kick start that yeast and get mixed together.
Salt, oil, and mashed sweet potato go into the big bowl with the flour.
Then the yeast mixture gets pouted in too. Get ready to mix. And mix.
And after mixing, some kneading. %u00a0A well floured surface with a extra flour on the side is needed here. You are going to want to knead the dough for about 5 minutes, adding a little flour whenever the dough gets to sticky.%u00a0
Once the dough is nice and smooth looking, cover it in oil and stick it into a bowl and cover it %u00a0and let %u00a0rise for about an hour.%u00a0
Make your cinnamon sugar mixture while waiting .%u00a0
Dough doubled in size and dumped onto the well flour counter.%u00a0
Take a dough cutter or knife and divided the dough %u00a0into four equal pieces and roll each piece into ball.
While keeping your surface well floured, roll a dough ball into circle (or as close to a circle as you can get it) about 12 inched wide%u00a0
Place rolled dough onto parchment paper and cover the surface with %u00a0earth balance. Then sprinkle a third of the cinnamon sugar mixture all over that.
Grab another ball of dough and roll it out the same size as the first and place on top the first dough. Repeat the earth balance and sugar mixture and then cover that with another rolled out dough. Earth balance and sugar mixture one more time, then the last dough.
All stacked up.Take the rolling pin and give the whole stacked thing a gentle little roll, just to make sure all layers are stuck together.
The fun part. Grab a small circle cutter or lid (I used small jar lid) and place directly in the middle. Take your dough cutter and score your cuts. Score into quarters then each corner into six pieces. You end up with twenty-four pieces.%u00a0There needs to be a even amount of pieces in order for the design to work so you could do %u00a022-16 pieces. I wouldn’t %u00a0go less.
To get the twist, grab a piece in each hand, give a little tug and twist the pieces towards each other 3 times. Take the ends and kind of tuck and pinch them together. %u00a0Repeat until all the pieces care twisted.%u00a0
%u00a0This is probably the most pretty cinnamon thing I have ever seen.%u00a0
Slide the star on the parchment onto a baking sheet and cover to rise and rest for about half hour or so and get the oven preheated.
After the second rise and right before you stick it into he oven, brush the top with a little plant milk.
And into the hot oven it goes.%u00a0
Aaaaa. So freaking pretty!%u00a0
After a few minutes, if you decided you want a little glaze action, go for it. I made up a super simple one, just a splash of vanilla in powder sugar with a splash of milk.%u00a0
Drizzled and ready for action.%u00a0
makes 12-13 servings%u00a0
For the dough%u00a0
2 3/4%u00a0 cups all purpose flour plus more for kneading.
1/4 cup mashed sweet potato *
1 1/4 cup warm soy (or any plant) milk plus 1 tablespoon to brush on pre bake
1/4 cup neutral oil plus 1 tablespoon to coat dough
1 packet or 2 teaspoon yeast
2 tablespoons sugar%u00a0
1 teaspoon salt
for filling
7 tablespoons %u00a0sugar
2 tablespoon cinnamon
3 tablespoons room temperature earth balance
For icing (optional)
1/2 teaspoon vanilla
1/2 cup powdered sugar
2-3 teaspoons plant milk
*I just mashed up a 1/4 cup of a roated sweet potato that I had in the fridge. If you don’t have a roasted potato laying around, you can steam of roast a sweet potato and mash it up for this.%u00a0
Measure milk into a large jar or bowl. Mix in 2 tablespoons sugar and the yeast. Set aside to activate.%u00a0In a large bowl mix together the flour and salt. Add in the sweet potato,%u00a0oil, and the soy yeast mixture. Mix together with a wooden spoon or dough spoon until you can’t. If the dough seems really wet, add in another 1/4 cup of flour. %u00a0Once mixed as well was you can get it, dump the dough onto well floured surface. Start kneading the dough, adding a little flour as you go if needed. Knead for about 5 minutes or until the dough is a nice soft but not to sticky uniform ball. Cover dough with a little oil and place into large clean bowl. Cover with a towel and let dough rise in a warm place for about an hour or until it doubles in size.
Mix the cinnamon and sugar together while waiting.
Once dough has risen, dump it onto a well floured surface and divide into 4 equal pieces. Roll each piece into a ball then grab the first ball and roll out into a large circle about 12 inches wide. Don’t worry hear if the circle is not perfect, its going to be fine. Place first circle onto piece of parchment paper and cover the surface with 1 tablespoon of earth balance. Sprinkle with a third of the cinnamon sugar mixture. Grab another dough ball and roll out to the same size as the first and place onto of the cinnamon sugared dough. Repeat the earth balance cinnamon sugar and top with another rolled out dough. Once more with the remaining earth balance and cinnamon sugar and top with the last rolled out dough. Take rolling pin and give the whole stacked thing a little roll to make sure it’s all stuck together well.
For the design part. Grab a small circle shaped thing about 2 inches wide (I used a jar lid) and place directly in the center of the dough. Take a dough cutter or sharpe knife and lightly score into quarters then each quarter into 6 pieces You could also cut less pieces, but the main thing you need is to have an even number of pieces for the design to work.%u00a0Once your lines are good, cut the lines by pushing down into the dough and not slicing back and forth. %u00a0Grab a piece in each hand and gently %u00a0twist the pieces towards each other 3 times then pinch the ends together. Repeat until all the pieces are twisted together. Slide the star onto a large baking sheet, cover, and let rest and rise for another 1/2 hour.%u00a0
Preheat oven to 400
When the star is risen again and right before it’s going into the oven, brush the top with a little plant milk. Pop it into the oven and bake for about 20- 25 minutes, or until the top is a nice deep gold brown.
Remove from oven and let cool a little bit. If you want a little icing, mix together the vanilla, powdered sugar, and plant milk. Wait until the star is less the hot and drizzle all over.
And now it’s time to get at it. Eat what you want and store the rest in an air tight container.%u00a0
Pineapples have been on sale all week long. I think it’s because Easter and I guess people need pineapples for Easter for some reason. Does Pineapple have anything to do with bunnies or Jesus? I think not. Pretty sure it has something to do with cake or ham or some shit, but I honestly don’t care because I just like the fact that I can buy a few (like 3) pineapples without breaking the bank. (I think I am going to buy 3 more for the dehydrator) Plus it is always good to have a pineapple or 3 on the counter at home. You never know when you are going to need one. So lets give a shout out to the Easter bunny and Jesus. Thanks for the cheap pineapples. HA!
So now you are have those pineapples, you are going want to eat them. And maybe you don’t want to eat them with cake or ham or some shit. You are going to want to eat it the best way…In a stir fry.
This is by far one of my favorite stir fry combinations. Pineapple does amazing things when cooked a bit, especially with soy, broccoli, and tofu. This dish definitely let’s pineapple reach it’s full pineapple potential. It is so good that tI think I might even prefer my pineapple cooked along with savory stuff. It is just so right and seriously so freaking good. The mr even get excited for it and he is not the excitable kind of guy. Plus it’s fast (especially if you have already cut up your pineapple) and easy because stir fry and that’s what stir fries are. Fast and easy, just like……….(insert your favorite fast and easy person and then chuckle)
And don’t try to use canned pineapple because no. Just get the fresh one,even if it’s not on sale. It’s a must.
The stuff. A pineapple (you are only going to need 1/3 of this, but you can never have too much fresh pineapple on hand), a big head of broccoli, a little cabbage, and some firm tofu. Also need some soy, a few cloves of garlic, a little fresh ginger, a bit of oil, and pepper.
Dice up the tofu into cubes and place on a clean dish towel to absorb some moisture.
Grab the fresh pineapple. Cut it up the way you do, but the easiest way for me is to cut in half the cut that half into fourths then cut the skin away. You are going to have a lot of extra pineapple so snack as you need too. I always eat like half of what I am cutting up and end up with pineapple gut. SO maybe watch yourself.
Pour some soy into a cup and mince the garlic and ginger.
Garlic, ginger, soy. Looking good.
Cut up about 2ish (or more if you want) pineapple into small mouth sized pieces. Break Broccoli head into small florets and shredded the cabbage.
Tofu into a lightly oiled hot skillet with a splash of soy, cooked until a nice crisp brown on all sides. Once it is cooked, remove from pan and set aside.
It’s the broccolis turn. Add in the florets and a splash of water to start cooking down for a few minutes, it need the head start.
Once the broccoli turns bright green and is slightly less raw, add in the pineapple and cook until the broccoli is slightly tender and the pineapple starts to caramalize which will take about 5-7 minutes.
Add the tofu back in along with the shredded cabbage and dump the soy ginger garlic mixture all over.. Keep cooking and stirring around until everything is hot and the liquid has mostly been absorbed.
That’s some stir fry ladies and gentlemen.
You might want some rice to accompany your stir fry so think about it and have it ready. Other then that, it’s food to face time.
Enjoy the best stir fry ever.
Bye.
-C
serves 2
1/3 of a fresh pineapple (about 2 cups cubed)
1/2 block firm tofu
a large head of broccoli (about 2 1/2-3 cups of florets)
1/4 head of red or green cabbage (about a cup shredded)
2-3 cloves garlic
3 tablespoons soy or tamari
1 tablespoon freshly grated ginger
pepper
Cooked rice to serve with (Optional)
Cube tofu into 1 inch pieces and either place on a dry towel to absorb the moisture or place the tofu into the microwave and heat for 2 minutes. When you take it out of the microwave there will be a lot of liquid…pour it off and pat the tofu dry.
Cube fresh pineapple into similar sized pieces and break broccoli into small florets. Shred cabbage.
Mince garlic and add to a bowl or jar with the grated ginger and soy sauce.
Place a large skillet on the stove an medium heat. Drizzle in a little olive oil. Once oil is hot, place the tofu in with a splash of soy, cooking until all sides are a nice dark browned. Remove the tofu from pan and add the in the broccoli. Add a splash of water and cook for 5 minutes. Then add in the pineapple and cook for another 5-7 minutes or until the pineapple starts to caramelize and the broccoli os no longer raw. Add the tofu back in along with the shredded cabbage and pour the soy garlic ginger mixture all over. Sprinkle with pepper to taste. Cook for another 5 minutes or until the liquid has cooked down.
Serve with rice or quinoa and extra soy if needed.
I feel like tofu sometimes get a bad rap. I don’t think that anyone in my family (or most of them) would willingly eat tofu even though they have no clue what it tastes like. They say they don’t like it but that’s bullshit because they have just never tried it. They all just think that only crunchy hippies are allowed to eat it or if they do eat it, they will turn into a crunchy hippie. Either way, they are butt heads and are missing out. I think one of the big reasons some people don’t like it is that they think tofu is suppose to be a meat replacement. That is wrong. Tofu is tofu(which is soy) and is not trying to be meat.
In our house we eat tofu a couple times a week. Sometimes as a main meal or sometimes in soups or bread or pie, or where ever I feel like I want it, but mostly just a quick sear and into the belly it goes. There are so many ways to prepare and flavor it but honesty, more times then not, my go to is simple. Lemon, pepper, salt. It’s quick, easy, super tasty, goes with everything and I always have the ingredients.
So to all those who think tofu is gross, I say, try it or if you have really tried it, try it again. And then if you still think it’s gross, well ok then. And to all those who like tofu, you will like this. And you are cool.
The stuff. Extra firm tofu, a couple small lemons, salt, pepper, and some olive oil.
Fist off, cut up tofu. I like to cut in talk, then into fourths, thne into squares and those square into little triangles. But you can cut it into strips or square… whatever you like, just make sure that each piece isn’t more then 1/2 inch thick.
Once cut up, place the tofu onto a clean dry towel, cover with another towel, and press, trying to remove as much liquid as you can without tuning tofu into mush. I will usually let the tofu sit on out on the counter like this for a little while,
Once you are ready for cooking, preheat a skillet with a drizzle of olive oil and optional, preheat the oven. Mix together the salt ans pepper then sprinkle both sides of the tofu with it.
Zest lemons and cut in half so they are ready to juice.
Place tofu pieces into hot skillet, single layer and squeeze some lemon all over. Sear the tofu until the bottoms are a nice deep brown. Flip and repeat, adding more lemon juice.
Once the tofu is cooked both sides, sprinkle with the lemon zest. Now here is a personal preference. I like my tofu a bit more on the cooked side so I slide the skillet of tofu into the oven for 10 minutes or so. The mr like it just as it is. So either way. I say try it before the oven and stick it in if you think it needs to cook more.
And it’s done.
Tofu with a side of broccoli. Not a bad dinner, not bad at all.
-C
serves 2-3
1 package extra firm tofu
2 small lemons
1 1/2 teaspoons salt (or more to taste)
1 tablespoon crushed pepper
olive oil
Remove tofu from package and cut in half. Cut each half into fourths then cut each forth into square then each square in half diagonally. Or cut tofu into whatever shape and thickness you like, just don’t make the pieces to small or more then 1/2 inch thick. Once cut, place on to a clean dry towel and cover, pressing gently to remove as much excess water without squishing it.
*Preheat oven to 400 (Option. See below)
Mix together the salt and pepper then start to preheat an oven safe skillet on medium high heat with a drizzle of olive oil. Zest the lemons and cut in half.. Once the skillet is hot, sprinkle the tofu, front and back, with the salt and pepper mixture. Place half the tofu(if you pan is not big enough, cook in 2 batches) into hot pan and squeeze the juice of a lemon (or half a lemon if doing batches) on top. Let tofu cook until the bottom is a nice deep brown. Flip all the pieces , add the juice of other lemon(or half a lemon if doing batches) and cook until the bottom is a deep brown. Once cooked, sprinkle the tofu with the zest of the lemon.
*Option. After I cook the tofu on the stove top, I usually stick the tofu, (in the skillet) into a hot oven for 10-15 minutes to give it more of a hearty texture. The mr prefers the tofu much softer so I will skip this step for him.
Serve right away with some broccoli, rice, or whatever floats your boat.
Last week I bought this nice hunk of locally made tofu to bring to my sisters for dinner. I was planning on making T.A.L.T.’s, but when I told her what I planned on making, she turned it down. She asked, ” is there bacon with that? If not, I don’t really feel like tofu”. And I was like, “No there is not F**king bacon….. when did I mention bacon?”
We still went over for dinner, Just me,her,and the Mr. I brought myself a big salad. The other two ended up eating a frozen pizza and blue cheese dressing (I think they might have eaten dressing with a little bit of pizza…barf) But whatever, her lose, cause I made the T.A.L.T.’s a few days later. They were amazing (the tofu was soo good!) and I am pretty sure she would have loved them. Oh well, now she will just have to make them for herself if she ever decided to she wants one.
So here.. To everyone and to Shannon….. How to make a T.A.L.T. .. There is NO BACON!
The stuff… Some nice firm tofu, half a ripe avocado,lettuce (I used baby greens), and some sliced up fresh and tasty tomato. To spice up the tofu, we use galic powder, salt pepper, and a nice smokey paprika. Oh.. and a big hunk of a soft and crusty baguette to stick it all in.
To get this TALT going, thinly slice up as about a 1/3 of a block of tofu. (for one sandwich) Or slice up the whole thing to make more sandwiches.
On a plate or in a bowl, mix together the garlic powder, paprika and a little salt and pepper. Gently dredge both sides of each piece in the mixute.
Paprika is so bright and pretty.
Place the tofu in a lightly oiled and preheated skillet on medium heat. Cook each side until crispy and golden brown.
Slice you bread open and toast if you want. Scoop avocado onto the bread( a little on both sides). Add the tomato and the seasoned tofu and last but not least, pile on the greens.
TA DA! A Sandwich… a damn good one at that .
-C
Makes on 6-8 inch sandwich
1/3 block of extra firm tofu*
1/2 of a ripe avocado
1 small tomato thinly slices
a handful of baby greens or a few lettuce leaves
A 6-8inch hunk of a soft and crusty baguette (use a gluten free bread of choice if needed)
1 tablespoon SMOKEY paprika*
1 tablespoon garlic powder*
salt and pepper.*
*Note.. This is enough for one sandwich. If making more then one, use the whole block, or even if you not, you might as well cook the whole thing for and have some extra for later use. If you do cook it all, just add another tablespoon or so of the paprika and the garlic powder.
Remove tofu from package and stick between a clean dish towel. Press as much liquid out as you can without smooshing it. Cut tofu into 1/4 inch thick slabs. Mix the spices with a pinch of salt and pepper in a shall bowl or plate and dredge both side of the tofu in the mixture. Lightly oil and preheat a skillet to medium heat. When the tofu is seasoned, stick onto skillet and cook each side until crispy and brown. Remove from heat and let cool for a minute. (If you like you tofu a little more on the crunchy and dried out side you can stick the tofu in the oven for a few minutes)
To assemble. Slice bread, toast if you want. Place equal amounts of avocado on each side of bread. Layer on the sliced tomatoes, the cooked tofu and add on the greens. Close up sandwich and place on a plate.
Bite, chew, swallow.
Smile
I usually base my meals on what I know I have for food in the house and what I know needs to be eaten. I was a little surprised when muling around in the freezer to find a block of extra firm tofu. (I don’t remember buying). Maybe a tofu fairy left it in there for me, or maybe it has been in there for years and I just am now stumbling upon it. Either way, I found it and it had to be eaten. So I cooked it up, and I cooked it up nice and good. Tofu is a pretty vertical food, being that its basically a flavorless block of protein. It can go sweet or savory, mashed, chopped or blended. Add fresh garlic, any type of sauce or even peanut butter. (the possibilities are quite endless) I was going for a dinner dish so I decided on a simple cubed tofu with lots of ginger and garlic (so good to ward of those winter sicko bugs out there) and baked it up nice and crispy with fresh bright green broccoli and soba noodle. Quick, easy, tasty and healthy.. I did it again. Thanks tofu fairy!
This noodle dish is super easy to make and take only about a half hour. We start with extra firm tofu, a package of buckwheat soba noodle, a nice big broccoli crown, honey, fresh ginger, garlic and soy sauce. oil for pan and lime for a finish. Nothing fancy. Dice the tofu into small cubes and place onto a clean dish towel and pat dry…It really helps the tofu suck in more flavor and become nice a and crispy.
Tofu get moved into a lightly oiled skillet, ready to go into a hot oven. Why baked instead of sautéed on the stove? I find that the tofu keeps it shape and crisps up better when baked. But do whatever you want….. But just bake it.
While the tofu is baking, make up the sauce. Grate about 2 tablespoons of fresh ginger and4 large cloves of garlic into a bowl. Whisk together with 2 tablespoons honey, 1/3 cup soy ( tamari or brags aminos works too) and 1/3 cup of warm water. Taste it, and if you think it needs more anything, add it. I actually used 6 cloves of garlic, but I really wanted a garlic packed sauce.
Oh and start a pot of water to boil noodles in.
After 15 ish minutes, give tofu a flip, then after about 25 minutes, the tofu should be nearly done. Remove from the oven and toss in the chopped broccoli and 1/3 cup of the sauce. Its a little watery but thats what you want, it will cook down in the oven. Now stick the skillet goes back into the oven and boil the soba noodle.
Another 10 minutes in the oven and the sauce starts to caramelize and the broccoli is cooked but still nice and crisp. Remove skillets from oven and toss in the cooked noodles and the rest of the dressing. Toss and toss and place on a plate, or a bowl, or if your into it, just eat out of the pan. (it happens)
I added a small handful of fresh shopped cabbage to add a bit more crunchy bite. I also added a squeeze of lime juice on top for a nice acidic finish. Lemon works and even a slash of vinegar would be nice, but plain is good too. What ever you do, just EAT!
A quicky yummy, noodley dinner! And leave a little extra for left overs because these noodles are fantastic cold… think lunch, or a later that night fridge snack.
keep it in the reals!
-C
Ginger Soy Tofu and Broccoli Soba Noodles
Ingredients
1 package of extra firm tofu
1 package Soba noodle
1 large crown of fresh Broccoli
2 tablespoons grated fresh ginger
3-4 cloves garlic
1/3 cup low sodium soy sauce
1/3 cup water
2 tablespoons honey (or brown sugar for vegan)
Lime wedges(Optional)
Chopped cabbage(optional)
coconut or oil for skillet
Preheat oven to 425
Remove tofu from package, cut into cubes and lay on a clean dish towel and pat dry.
Tofu goes into a oiled skillet and placed in oven for 25 minutes. Give tofu a flip after about 15 minutes. While tofu is baking, make the dressing, chop the broccoli and boil water for soba noodles.
For dressing, grate fresh ginger and garlic into a bowl. Whisk together with soy, water and honey (or brown sugar).
When water is at a boil, add soba noodle and cook until done ( about 6-8 minutes..Follow instructions of package)
When tofu has baked for 20 minutes, remove skillet, toss in chopped broccoli and 1/2 cup of soy ginger dressing Return skillet to oven for another 10 minutes or until dressing just starts to caramelize. Remove for oven and toss in cooked soba noodles and the rest of dressing. If you want a little more veggie bit, add in some fresh chopped cabbage. Plate and serve with a wedge of lime or lemon or even a sprinkle of red wine vinegar.
I feel like tofu sometimes get a bad rap. I don’t think that anyone in my family (or most of them) would willingly eat tofu even though they have no clue what it tastes like. They say they don’t like it but that’s bullshit because they have just never tried it. They all just think that only crunchy hippies are allowed to eat it or if they do eat it, they will turn into a crunchy hippie. Either way, they are butt heads and are missing out. I think one of the big reasons some people don’t like it is that they think tofu is suppose to be a meat replacement. That is wrong. Tofu is tofu(which is soy) and is not trying to be meat.
In our house we eat tofu a couple times a week. Sometimes as a main meal or sometimes in soups or bread or pie, or where ever I feel like I want it, but mostly just a quick sear and into the belly it goes. There are so many ways to prepare and flavor it but honesty, more times then not, my go to is simple. Lemon, pepper, salt. It’s quick, easy, super tasty, goes with everything and I always have the ingredients.
So to all those who think tofu is gross, I say, try it or if you have really tried it, try it again. And then if you still think it’s gross, well ok then. And to all those who like tofu, you will like this. And you are cool.
The stuff. Extra firm tofu, a couple small lemons, salt, pepper, and some olive oil.
Fist off, cut up tofu. I like to cut in talk, then into fourths, thne into squares and those square into little triangles. But you can cut it into strips or square… whatever you like, just make sure that each piece isn’t more then 1/2 inch thick.
Once cut up, place the tofu onto a clean dry towel, cover with another towel, and press, trying to remove as much liquid as you can without tuning tofu into mush. I will usually let the tofu sit on out on the counter like this for a little while,
Once you are ready for cooking, preheat a skillet with a drizzle of olive oil and optional, preheat the oven. Mix together the salt ans pepper then sprinkle both sides of the tofu with it.
Zest lemons and cut in half so they are ready to juice.
Place tofu pieces into hot skillet, single layer and squeeze some lemon all over. Sear the tofu until the bottoms are a nice deep brown. Flip and repeat, adding more lemon juice.
Once the tofu is cooked both sides, sprinkle with the lemon zest. Now here is a personal preference. I like my tofu a bit more on the cooked side so I slide the skillet of tofu into the oven for 10 minutes or so. The mr like it just as it is. So either way. I say try it before the oven and stick it in if you think it needs to cook more.
And it’s done.
Tofu with a side of broccoli. Not a bad dinner, not bad at all.
-C
serves 2-3
1 package extra firm tofu
2 small lemons
1 1/2 teaspoons salt (or more to taste)
1 tablespoon crushed pepper
olive oil
Remove tofu from package and cut in half. Cut each half into fourths then cut each forth into square then each square in half diagonally. Or cut tofu into whatever shape and thickness you like, just don’t make the pieces to small or more then 1/2 inch thick. Once cut, place on to a clean dry towel and cover, pressing gently to remove as much excess water without squishing it.
*Preheat oven to 400 (Option. See below)
Mix together the salt and pepper then start to preheat an oven safe skillet on medium high heat with a drizzle of olive oil. Zest the lemons and cut in half.. Once the skillet is hot, sprinkle the tofu, front and back, with the salt and pepper mixture. Place half the tofu(if you pan is not big enough, cook in 2 batches) into hot pan and squeeze the juice of a lemon (or half a lemon if doing batches) on top. Let tofu cook until the bottom is a nice deep brown. Flip all the pieces , add the juice of other lemon(or half a lemon if doing batches) and cook until the bottom is a deep brown. Once cooked, sprinkle the tofu with the zest of the lemon.
*Option. After I cook the tofu on the stove top, I usually stick the tofu, (in the skillet) into a hot oven for 10-15 minutes to give it more of a hearty texture. The mr prefers the tofu much softer so I will skip this step for him.
Serve right away with some broccoli, rice, or whatever floats your boat.
It’s been a bit of a cold and dreary week. The damp has seeped into my bones and I have been walking around with blue lips and white fingers. It might not have helped that we turned the heat off a couple of weeks ago, I love spring weather but so many cold wet days takes it’s toll. It’s ok though because the weather is only getting better from here. And plus there is so much green stuff happening in the world that I don’t really mind being a soggy mess. The tree buds make me smile.
Easter came and went yet the mr is still finding plastic filled with candy in the yard. He was one of the people that hid the over 100 eggs so part of me thinks he hid a few in hard to reach spots for himself to find later.(or that’s what I would have done) We had some littles spend the night, fling popcorn all over the place, watched Fantastic Beast and Where to Find Them (finally) and made a catapult and a board game. Those littles man, they are some cool people. And worked, or tried to at least. Most of the work we need to do is outside right now and because the week has been so up and down with weather we have found ourselves in a up and down, run around, get in and get out type of week. Projects started and keep piling on and we just need a good few stretches of weather to make a dent in the list. I feel like this is what happens every year, but this year just seems like everything at once. It’s probably just because we are getting old, or it’s getting old. Either way.
Today is suppose to a gem of day which means we are going to be outside working. Windows need to be scraped and glazed, we are going to get out the new giant torch and start burning some of the siding for the house, and we need to get on building the raised beds for the veggies. (The little lettuce and kale plants are screaming at me for more space!) I will probably take some time to sit in the middle of the yard with a book and watch for sunshine, you know, to see where the garden beds should go. And coffee. Cups and cups of it because I think that is what I need today. Happy Spring guys!
Oh, and happy birthday Rick.
What I saw on the internet.
– Scientists and Their Allies Stage Unprecedented Worldwide Protest. We need to listen to these people!
-Everything we do has an effect on he planet, including what we eat. How Our Diets Impact The Planet
–It’s Not Just You — ‘Allergy Brain’ Is Real. And I get it,sometimes really bad. Blah.
-What the hell is in a unicorn frappuccino anyway? I am guessing it is just a bag of sugar with some food coloring. Baristas Are Having Meltdowns Over Starbucks’s Unicorn Frappuccino
–It Turns Out That Salty Foods Don’t Actually Make You Thirsty. But I still think it does.
-The mr andI have talked about buying land and setting up a few cool trailers as a bnb kinda like this. This place is now on the list of places to go when in Texas. THIS TEXAS HOTEL DOESN’T HAVE ROOMS—ONLY TRAILERS AND YURTS—AND IT’S INCREDIBLE
-Is It Safe To Eat Moldy Bread? The mr might find it annoying, but this is why I freeze all bread stuff after a few days so it won’t mold.
-Love these little ceramic figures.
-These drawings on dirty cars are pretty amazing.
-From ‘F-Bomb’ To ‘Photobomb,’ How The Dictionary Keeps Up With English
Every part of my body hurts today. Over the past few days the mr and I have hauled more then a ton of construction trash out of the back yard and drove it to the dump (finally), cleaned the crap out of the yard , picked up the large load of cedar for the siding of the addition and cleared out the basement. Nonstop tossing and picking shit up is catching up with me, but man does it feel good to get all things done, outside no less. And in a t shirt. It’s a gratifying pain.
On top of all that we have been plugging away at the front porch, the mr has been scrapping and prepping one of the apartment building for a new coat of paint (not exactly excited to have to paint 2 very large buildings in the next 2 months) and I accomplished finishing the taxes. All we need to do now is send them all of out money and a few vital organs. Worst case scenario is we air bnb out the house far a little while in live in the teepee the kids built in the back yard. I mean the thing even has lights so it would be kind nice. Glamping but without all the glam. I think it would be great.
It’s Sunday and Easter so that means family. Everyone is coming over hear for lunch, bubbles, sidewalk chalk and hula hooping. There will of course be an egg hunt which is always fun to watch. Nine or so littles running around trying to find candy filled plastic eggs without getting into a fist fight. Its ruthless and pretty freaking comical. (especially when you hide all the eggs high in the trees and hide them empty while the adults sit back and eat candy ) I figured since we cleaned the yard of all the nails and rusty metal and it’s so freaking nice out that everyone needs to enjoy it and stay out of my clean house. Haha (but really)
Hope you all are finding your day full of happy spring things too!
The week of interneting
-People are just eating that much better, hippies or not. The Hippies Have Won. But FYI, just because it’s granola doesn’t make it healthy.
–The Original Natural Remedy for Burnout: Nature. For real. The woods makes everything better for me.
-Back at looking at tiles for the downstairs bathroom. Loving these CEMENT TILES FROM POPHAM DESIGN
–The Hippie Toothbrush Experiment. I have been using the Radius for years. It’s like hairbrush for your mouth.
-Love these DIY plywood picture frames. I have a shit ton of scrap wood so it’s on my list to do.
-Really like these Storybook Illustrations of People Communing with Nature by Jin Xingye
-There Are More Than 60,000 Tree Species Worldwide. Lets try to keep them around.
-What do you think of wallpaper on ceilings? I have never tried wallpaper but I have painted a few of our ceilings (a good shiny gold ceiling always makes me happy)
–Why Is Time In A Hurry?
-This is what you are suppose to do with all the peeps in your Easter basket.
I found another bag of frozen rhubarb in the chest freezer which is never a bad thing, but my rhubarb patch outside is growing strong and I will have all the fresh rhubarb I could possible eat within the next few weeks. So found rhubarb just means I need to eat it right fast before the fresh stuff comes in. (I haven%u2019t had a problem with that. it%u2019s almost gone already). Plus the other day while I was digging up and transplanting raspberry bushes to the back yard, my neighbor came over and gave me a gallon of frozen raspberries, harvested from said bushes that I was currently planting in my yard. Score for me! Free bushes and berries%u2026I have such nice neighbors.
So the logical thing to do with my new found and giving bounty was of course to hurry up and bake something. Cobbler. Why cobbler? Well, why not? I figured the mr would really like it and eat it and I also didn%u2019t want to make anything to fussy because I was just to dang busy spending all of my extra time outside doing outside things. And cobbler, it%u2019s not fussy because it is basically biscuits and jam baked up all together. Not a lot to think about and comes out looking all homey and sweet and smelling all nice and cozy. Doesn%u2019t that sound nice? And not a pain in the ass?
And best part. A made cobbler works as dessert or breakfasts or just a snack. Just asked the mr. He ate it for all the reasons. With a dollop of yogurt or cream of course because he is fancy like that.
And yeah the fruit I used was frozen, but fresh works just the same here too.
Now, lets get to that cobbler.
The stuff. Raspberries (frozen), rhubarb (frozen), sugar, flour, salt, baking power, cinnamon ,almond milk, apple cider vinegar, cornstarch, and oil.
Raspberries, rhubarb, sugar, cinnamon, cornstarch. Its all there in the bowl. Just needs to be mixed. So mix it.
Dump fruit mixture into well greased 8 inch pan and pop it into a hot oven to get a head start on baking.
While the fruits in the oven, make the biscuit dough. Mix the dry together then mix in the wet until just incorporated and a sticky dough forms.
Pulled from the oven, the fruit is starting to cook down and whoa, it just smells so good!
Drop on the biscuits dough on top of the fruit (careful of the hot pan). Evenly if possible, but don%u2019t work to hard to make it look perfect. Imperfection makes it look perfect, you know?
Once biscuits are on, lightly brush the tops with a little milk and sprinkle with more sugar then pop it back into the oven for another 25-30 minutes or until the biscuits are baked.
Pulled from the oven with a bubbly filling and a golden brown biscuity top. Things are looking good here.
And now it%u2019s time.
Dig on in my friend. Sever with something creamy like whipped coconut cream or some type of yogurt or ice cream situation of your choice. And again, this can be your breakfast.
Happy spring people!
-C
make a a 8 inch round which serves 5-6
For the Filling
2 cups raspberries (fresh or frozen)
2 cups rhubarb chopped into 1/2 inch to inch long pieces (fresh or frozen)
1 1/2 tablespoons corn starch
3/4 -1 cup sugar (lesser amount if you like a little more tartness. I used lesser amount)
1 teaspoon cinnamon
For the dough
1 cups all purpose flour
1 1/2 teaspoon baking powder
1/2 teaspoon salt
3 tablespoons sugar
3 tablespoons neutral flavored oil
1/2 cup plant based milk
1 teaspoon apple cider vinegar
Preheat oven to 350.
In a large bowl mix together the rhubarb and raspberries with the corn starch, sugar, and cinnamon. Grease a 8 inch round pan the is at least 2 inches deep (can use a slightly large pan or a square) and dump in fruit mixture. Place into oven to bake for about 15 minutes or the fruit starts to break down.
While fruit is baking, mix up biscuit dough. Flour, salt, 2 tablespoons sugar, and baking powder go in a large bowl and mixed until combined. Add in the oil, the milk, and the vinegar. Mix until just incorporated and a dough has formed.
Remove the fruit cooking from the oven. Turn heat up to 375.
Carefully drop spoonfuls of biscuit batter on top of fruit. Brush the top of the biscuits with a little milk and sprinkle with remaining tablespoon sugar. Place the pan back into the oven and bake for another 25-30 minutes or until the biscuits are all nice and golden brown on top.
Remove from oven and let cool for a few minutes before serving. Serve warm with a scoop or dollop of soothing creamy (coconut cream, yogurt, ice cream%u2026..whatever floats your boat.)
Left overs can be stored in pan, just cover it with something and place in fridge. Can be eaten cold to or reheated in microwave or oven.
It%u2019s a smoothie. And no, we have never really been smoothie people in this house, but what can I say, sometimes smoothies happen, especially when you have about 20 ripe bananas in the fruit bowl with no room in the freezer and no need for 7 loafs of banana bread.
So I smoothied. And I like it (a lot).
This is a smoothie of simplicity. Nothing fancy. Simplest of simple. Straight to the point. And all sorts of good.
You might think, does this simple smoothie you speak of taste very good? Yes, yes indeed it does. It is all sorts of fantastic. Basically if you like creamy, nutty, oaty, bananery things, you will like this. And it%u2019s a perfect breakfast, snack, dessert, or just wanting a little treat like thing that is not garbage food. A smoothie of all smoothies with the most basic ingredients. And takes about 15 seconds to whip up. Can%u2019t complain about that.
To the smoothie goodness!
The stuff. A ripe banana, some old fashion rolled oats, a pinch of salt, water, and a smidge of maple syrup if you want it.
Everything goes into blender.
And blended until smooth. Hence the word smoothie.
Pour it into a cup (or if you are feeling primal, drink it straight from the blender%u2026 it%u2019s totally cool)
And done.
A banana oat smoothie.
Let the good time roll!
-C
makes 1 smoothie
1 very ripe banana
1/3 cup raw old fashion oats
1 1/2 cups water
pinch of salt
a tablespoon or two of any sweetener you like (optional)
a pinch of cinnamon (optional)
Place everything into a blender and blend until smooth. Pour into a cup, sprinkle with cinnamon if you wish, and drink right away.
I am sadly at my last few bags of frozen garden foods from last season. As of now I have a bag of tomatoes, a couple bags of shredded zucchini, and a bag of rhubarb. Well, had a bag of rhubarb. I think I have eaten almost all of it already. My rhubarb patch better get up and producing stalks soon. And as for the rest of the veggies that I will require. Guess I am going to be surviving mostly on roots from farm share (we are getting a lot more greens though!!!!) and probably doing a bit more grocery shopping then I care too. A few more months. I can do it.
Anyway, enough about my freezer and lack of fresh produce problems.
Here in Vermont maple season is well on it%u2019s way making it a perfect time for anything maple. And rhubarb. Yeah I am using my frozen rhubarb from last year, but any time now (after the snow melts) there will be plenty of stalks for the taking. There will be so much maple and so much fresh rhubarb which are the perfect taste combination. Exciting times! And when added to oatmeal, things just get more gooder. (I know gooder is not a word but I think it should be) Oatmeal, especially baked, is the stuff where all gooder things start.
Have you had baked oatmeal yet? It truly is fantastic. Not at all gummy and gloopy like stove topped cooked oatmeal (but I like it like that too). It still has a good bite to it while still being soft and creamy and boy oh boy is it just the bees knees. With the addition of some crunchy almond friends, well even better. Trust me. If you are a oatmeal eater, you must try it baked. Best part is that it can be eaten as breakfast but also I have been serving it to the mr for dessert with a healthy drizzle of more maple. It%u2019s that good friends. From breakfast to dessert. Everyone is happy.
To the baked oatmeal.
The stuff. Old fashion oats, cinnamon, salt, baking powder, rhubarb (fresh or frozen), REAL maple syrup, some plant milk, a few flax eggs, a bit of tahini, and some almonds.
To start. Oats, cinnamon. salt, baking powder and almonds get a quick toss together in a big bowl.
If you rhubarb is not already chopped up into inch long pieces, do that. I already did before freezing it so yea me. Once its chopped, layer almost all of it (reserve a few small needful to toss on top) into a lightly greased 9×9 inch baking dish then cover evenly with the oat mixture.
In now empty bowl mix together the milk, the flax eggs, the tahini, and the maple until evenly incorporated.
Pour the wet mixture all over the oats and let it absorb.
Once the liquid is all absorbed , top with any left over almonds and the left over rhubarb. For good looks.
Pop into a hot oven to bake.
Golden brown with crispy edges. Rhubarb and maple baked oatmeal for all your maple, oaty and rhubarbie needs.
Fresh from the oven scooped warm into bowls. Top with extra maple if thats what you should want do.
Enjoy and happy maple season!
-C
Make a 9×9 pan of oatmeal
2 1/2 cups old fashion oats (make sure gluten free if need be)
2 1/2 cups fresh or frozen rhubarb chopped into inch long pieces
1 1/2 cup plant milk (water works but it won%u2019t be as creamy)
1/2 cup chopped almonds (optional)
Preheat oven to 375
Lightly grease a 9×9 inch baking pan (I used metal because it makes for crisper edges but glass works too) and dump 2 cups of the rhubarb in and evenly distribute on the bottom. In a large bowl mis the oats, the baking powder, salt, and cinnamon together. Mix in chopped nuts if you are using. Evenly cover rhubarb with oat mixture. In now empty bowl mix together the milk, flax eggs, maple syrup, and tahini until evenly incorporated. Pour mixture over oats. Let the mixture sit for a few minutes until the oats have abosbed all the liquid. Toss the rest of the diced rhubarb and a few more chop nuts to the top and pop into the oven to bake.
Bake for 30-40 minutes (shorter time for a wetter oatmeal, longer for a denser crispier oatmeal)
Once baked to your likeness, remove from oven and let cool for a few minutes just so it is not super hot. Scoop into bowls and serve warm with extra maple and milk or whatever you might want to serve with it.
Left overs last great in fridge for 3-4 days or individual portions can be frozen for a month or two. Just pop into microwave for a couple minutes to warm up.
What is any good holiday season without some sort of gingerbread? Am I right, or am I right? I am right. The smell alone smacks a smile on my face. Spicy and sweet and all sorts of comforting. If smells could be objects, the smell of gingerbread would be a warm soft blanket that you can curl up next to a fire, with hot beverages and a good book. Yup, that is exactly what gingerbread smells like.
Gingerbread cookies were an option for all the gingerbread goodness but right now there is a heavy influx of people making cookies of the gingerbread variety so I figured I should do something a little different and honestly, a heck of a lot easier and faster. Plus scones are a way more expectable breakfast food then cookies (who am I kidding, cookies are a completely expectable for breakfast) and I was looking for a good breakfast treat to feed the mr this week because its his birthday week and I wanted a little something special for him for breakfast. I know, I am just so great.
Anyway, these scones fit the holiday gingerbread bill. I mixed them up, added the chocolate chips for a little extra something, then tossed them into the oven and bathed in the smell as they were baking. Pulled them from the oven, poured some coffee, and set out a delightful afternoon snack for the mr, right after he was finished laying on the freezing ground trying to fix the tire on the truck. I think he really appreciated the smell of a warm blanket. And he really enjoyed the scones too. All birthday week long.
So what are you doing this weekend? I think probably making scones. Yeah, do that.
Here we go.
The stuff. In the bowl there is flour, old fashion oats, baking soda and baking powder, and salt. Also need the spices of ginger, cinnamon, clove, and black pepper. Molasses, brown sugar, vegan butter, soy milk, and chocolate chips finish of the list.
In the bowl add in all the spices and the brownl sugar. Mix until completely combined and there are no brown sugar lumps. Drop in the cold butter and cut it in with a fork. You don%u2019t want it blended, you want the butter in little bits.
You want it to look like this. Crumbly.
Toss in the chocolate chip.
Dump the molasses into the milk and mix until combined. Doing this helps minimize the amount of mixing you do which will help make sure your scones are not tuff. So don%u2019t not do this.
Pour the molasses milk into the mixture
With a fork, lightly fold and mix batter until it just starts to come together.
Dump dough out onto a lightly flour surface and gather together with your hands.
Flatten into a big disk and cut into 8 equal wedges. Or as equal as you want to make them%u2026 you could even make a few more wedges if you want more. You do you.
Place the scones onto a baking sheet. Brush a little milk on each then sprinkle the tops with a little brown sugar and some oats.
Pop them into preheated oven and let bake.
Gold brown and ready for the world.
After letting them cool for a bit on a wire rack, stack onto a plate and feed them to your people. And yourself of course.
Chocolate chip oatmeal gingerbread scone and a cup of coffee. A perfection in all the ways.
Enjoy the weekend. It will be great, especially if you make some of these scones.
-C
Makes 8 scones
2 cups all purpose flour
1/2 cup old fashion oats plus 1/4 cup to sprinkle on top
1 1/2 teaspoons baking powder
1/2 teaspoon baking soda
1 teaspoon salt
2 teaspoons ground ginger
2 teaspoon cinnamon
1/2 teaspoon fresh ground pepper
1/4 teaspoon cloves
1/3 cup packed light brown sugar plus 2 tablespoons more to sprinkle on top
2 tablespoons molasses
1/2 cup cold vegan butter
2/3 cup soy or your favorite plant milk
2/3 cup semi sweet chocolate chips
Preheat oven to 375
In a large bowl, whisk together the flour, oats, baking powder and soda, salt, all the spices, and the brown sugar. Make sure there are no big lumps of brown sugar in the mixture. Once dry mixture is all mixed up, cut in (do not blend in) the cold vegan butter until the mixture looks crumbly. Toss in the chocolate chips.
Grab your measure out milk and mix in the molasses until completely mixed together. Dump the mixture into the bowl of dry and lightly mix with a fork until a dough forms. Dump out the dough onto a lightly floured surface and bring it all together with your hands .Flatten dough out into a circle about and inch thick them with a knife or dough scraper, cut into 8 even sized wedges. Place scones onto a baking sheet and lightly brush a little milk onto the tops.. Mix together the extra oats and brown sugar and sprinkle on the tops. Place into preheated oven and bake for 25-28 minutes, or until nice and golden brown. Once baked, remove and place on a wire rack to cool.
Eat. Store left over scones in an airtight container at room temperature for 3-4 days. Individual scones freeze well.
Who doesn’t like a good bun, right? %u00a0And just because this is where my mind wonders, peachy sweet buns. Doesn’t that sound like a pick up line or something you say to your significant other. Like, “Oh hey peachy sweet buns, you are looking good. Woo hoo”…….. Anyway, this is not about anyones peachy sweet buns, it it about actually sweet buns so u-hum, yeah.%u00a0
I am not trying to float my own boat here, but I am really really good at making buns, and you know what, I bet that you are too. They may seem a little intimidating, but really, it’s quite easy. I think what throws some people off is the yeasted dough and having to knead and waiting for the dough to rise,%u00a0but don’t let that stop you from sweet sweet buns. They are no harder to make then a boxed cake (maybe a little harder) and the results are by far more amazing and delightful (we don’t use the word delightful enough around here) then any old box or pre-made thing will ever be. Ever. Freshly made buns are what is right in this world.
If you are awesome and decide to make buns like any good person with a baking itch or a need for some sweet bun goodness does, make them peachy because its peach season and how can a peach bun not be that much more amazing? %u00a0Just think. Soft sweet dough, jammy cinnamon peaches, covered in a sweet lemony glaze……
Go on now, go and get yourself some peachy sweet buns.
The stuff. Flour and salt in the bowl, melted earth balance, brown sugar, yeast, warm soy milk, cane sugar, cinnamon, powdered sugar, a couple of lemons, and af course, peaches.
Warm (not hot) soy milk, yeast, cane sugar, an melted (but again, not hot) earth balance go into a big bowl and get whisked around. Then add in the flour and salt ans mix around until you just can’t.
Time to knead. Dump the dough ad all the little bits onto a flour surface. Gather it all together and knead away, for about 5-8 minutes, or until the dough looks like….
This. Nice and soft and glossy. %u00a0Lightly grease the bowl ans stick the dough back into it, covered with a towel, and set for about 1 hour to rise and double in size.%u00a0
As soon as the dough is set ti rise, start on your peach filling. Chop up enough peaches that you have about 2 1/2 cups of chunks.
Brown sugar and peach chunks go into a pot and stuck on a medium heat until they start to bubble then set to a low simmer for about 20 minutes or until the peaches all break apart and reduce by half.
Add in the cinnamon and stir.. Peachy goodness. Now quick and stick that shit in the fridge or freezer to cool down.
BOOM. Dough did what it’s job and doubled. Time o make the buns.%u00a0
Place the dough on a lightly floured surface and roll our into a rectangle of sorts that is about 1/2 an inch thick%u00a0
Cover the surface with all the peachy jammy goodness, and sprinkle on the remaining finely chopped peaches.
And roll, as tightly as you can, without squeezing all the filling out. I roll towards me, but roll away from you if it is easier. %u00a0It might get a little sloppy… it’s ok, just lick your fingers and keep going.%u00a0
Rolled and cut into 12 pieces.
Place the rolls carefully onto a grease and parchment lined baking 9×13 baking dish. In my picture I used a baking pan, which was not what I wanted to do, but I wasn’t thinking properly and so that’s what I did. Something with sides is preferable, but the baking pan did the job so really, your call.%u00a0
When you place the buns in the dish, place them toughen a bit, it helps then bake up high instead of out. %u00a0And any remaining go on jam that spilled out can get scraped right on top of the buns,%u00a0if you didn’t already eat it.
Now into the preheated oven these %u00a0babies go.
Look at those beauts. And they smell. A-MAZ-ING!!%u00a0
Right away get that glaze made. Powdered sugar, lemon zest, ans lemon juice. Super easy, just add the zest and juice to sugar and mix until smooth and glaze.%u00a0
Pour glaze over warm buns. Make sure to hit them all or someone is going to be pissed they didn’t get enough glaze…..%u00a0
Then it’s really just up to you whether you wait for coffee or tea or not, but really, just eat right away. There should be very little time between newly glazed buns and a bun in your face.
Enjoy the peaches!
-C
Makes 12 Buns
For the Dough%u00a0
3 1/2 cups all purposes flour
1/4 %u00a0cup cane sugar
1 cup warm soy milk
2 teaspoon or 1 packet yeast
4 tablespoons melted vegan butter%u00a0
1 teaspoon salt
For the Filling%u00a0
3-4 good sized ripe peaches (about 3 cups chopped peaches)
3/4 cup brown sugar
1 tablespoon cinnamon
Juice of half a lemon
For the Glaze
1 lemons
1 1/2 cup powered sugar
In a large bowl mix together the yeast,%u00a0warm (not hot) soy milk,%u00a0sugar, and melted but cooled butter. Now add in %u00a0the salt and the flour. Mix until it’s too hard to mix then dump it all onto a lightly floured surface and knead for 7-10 minutes until the dough is %u00a0soft, elastic-y,%u00a0and smooth. Place dough back into a clean lightly greased bowl and drape with a damp towel. Let dough rise for about 1 to 1.5 hours or until it has doubled in size.
While the dough is rising, chop the peaches up until you have about 3 cups.%u00a0Place 2 1/2 cups of the %u00a0peaches into a medium sized pot with the brown sugar and lemon juice and stick on medium heat. Set the rest aside. Cook for about 20 minutes, stirring and mashing with a wooden spoon every few minutes,%u00a0until mixture has become thick and reduced by about 1/2. Remove from heat, stir in cinnamon,%u00a0%u00a0and place in fridge to cool.%u00a0
Once thee dough has doubled, dump onto a flour surface and roll our into a retacnge that is about 1/2 inch thick %u00a0Grab your peach mixture and spread the mixture evenly over the dough. Evenly distribute %u00a0the remaining chopped peaches over jam. %u00a0And then it’s the to roll.
Start from the long side and start to roll toward the other end, keeping it as tight as possible without squeezing out all the filling. %u00a0Once rolled, slice into 12 even sized buns.
Place on a lightly greased and parchment lined 9×13 inch baking sheet or pan and let rest and rest for another20 minutes or so. OR if you want to wait to bake them off,%u00a0cover them with plastic and set into the fridge for up to 24 hours. When you are ready to bake, remove from fridge and let the buns set on counter to come to room temperature before baking.%u00a0
Preheat oven to 350.
Place rolls into oven. Bake for 30-35 minutes or until all the buns have gotten a nice golden brown on top, and if you want to take the internal temp, that the temp has reached 190.%u00a0
Once the buns are done %u00a0baking, mix together the zest and juice of the lemon and powdered sugar. If the glaze seems to thick, add more juice or water, to think, add more sugar. Pour glaze all over warm (but not hot) buns.
And now all you need to do is serve up those buns right away, nice and warned.
Any left overs should be stored in the fridge for 3-4 days but should definitely be warmed up in the microwave for a minute or two before serving. They also freeze well too.%u00a0
The day started off with rhubarb soup and ended in cinnamon walnut rhubarb bread. The bread was a star,%u00a0the soup, not so much, which sucked because I was so excited and so sure it was going be fantastic. Tomatoes, rhubarb, and fresh ginger.%u00a0Doesn’t that sound good? I still have hopes for the combination, but the batch I made was way way to acidic and thick and spicy because I added so much fresh ginger to it that it made the mr’s eye water and my nose run a little. So yeah, the soup needed work, but I was not going to end my day of rhubarb cooking with a fail. Also I felt like I owed it to the mr to make him something that he found edible. He really did not like the soup.
I knew the mr wanted (or at least he hinted at) pie but I had no time for pie. I already spent the morning making not so good soup and I had shit I needed to do. Pie would just take a little to long.%u00a0Quick bread was more in my time frame. A few minutes to chop and mix,%u00a0toss it into the oven for a while. and done.%u00a0%u00a0I had time to cleaned up, run to the post office and bank (I should probably tell you not to leave your oven on when you are not in the house, but I do, but only for short periods of time. And don’t tell the mr. He will kill me) and come back to the house not on fire and fresh cinnamon walnut rhubarb bread. I felt redemption,%u00a0even this it was not pie. The mr didn’t complain, not one bit.%u00a0
And by the way, the soup made it’s way into a different batch of soup that had other stuff in it and it WAS fantastic.%u00a0
The stuff. Rhubarb and walnuts and a bowl with flour, baking soda, baking powder, cinnamon, and salt. Also have coconut oil, brown sugar, soy milk, and a little dish or more brown sugar, cinnamon, and coconut oil for the topping.%u00a0
Chop rhubarb and walnuts into small pieces, not tiny pieces, but not big ones either.%u00a0
Mix the brown sugar and coconut oil into dry mixture, then add in the milk and vinegar and mix until just incorporated (don’t over mix).
Don’t forget to mix in the rhubarb and walnut pieces.%u00a0
Pour batter into a greased pan and then its %u00a0time for the cinnamon sugar topping. (cinnamon+sugar+coconut oil=rainbows?)
Cinnamon sugar topping %u00a0gets crumbled on and I found a few stray walnuts so I tossed those on top too. %u00a0
Now it’s time for the oven.
Look at that, fresh from the oven. So handsome.%u00a0%u00a0Pop it out of the tin and get it onto a wire rack to cool.%u00a0
And when it’s cooled a little and you are ready to take a seat, you slice and eat.
-C
makes one loaf
2 1/4 cup all purpose flour
3/4 cups brown sugar%u00a0
1 teaspoon baking soda
1 teaspoon baking powder
1 teaspoon salt
1 tablespoon cinnamon
1 cup soy or another plant milk
1/2 cup coconut oil (melted and cooled)
1 tablespoon apple cider vinegar
3 stalks rhubarb (2 cups chopped)
1/2 cup walnuts
Cinnamon Sugar Topping
1 tablespoon melted coconut oil
2 tablespoons brown sugar
1 hefty tablespoon cinnamon%u00a0
Preheat oven to 350
Chop rhubarb into small 1/2 inch pieces. If your walnuts are whole, chop those up into small pieces as well.
In a large bowl, combine the flour, salt, baking soda, baking powder, and cinnamon. Mix together then add in the brown sugar and %u00a0the melted coconut oil and mix. Then add in the say milk %u00a0and apple cider vinegar and mix until all is incorporated. %u00a0Stir in the chopped rhubarbd and walnuts.
Pour batter into a well greases bread pan. For the cinnamon topping, just add the cinnamon and brown sugar to the melted coconut oil and mix. %u00a0Crumble the mixture on top of the bread. if you have a few more walnuts, you can toss those on top too.%u00a0Pop bread into preheated oven.
Bake for 60 -70 minutes %u00a0or until a tester stuck into the middle comes out clean.
Remove from pan and let cool on wire rack. When ready, cut and eat.
Bread lasts 3 day in airtight container on counter, a few days longer in the fridge. %u00a0Freezes well.%u00a0
We need fresh, we need green, we need color.
We need salad. %u00a0
The other night I made Megan’s birthday dinner which consisted of pizza and salad. The pizza was pizza and everyone loved it and ate it, but what surprised me was how everyone was really into the salad. A big ass bowl or fresh greens with onions and I think carrots and cabbage and some cranberries I pulled form the freezer and candies almonds. Simple and not fussy, and everyone was just so happy to eat it. I felt like a salad genus and now I am full on into making fun awesome spring salads. (I have to keep reminding myself that yes, it is indeed spring.%u00a0So what we got snow yesterday, it will melt, right????%u00a0)%u00a0
So I bring to you a a bowl of fresh crispy spring greens with crunch and bite and creaminess and flavor. A salad that will bring you joy and satisfaction and maybe even anticipation for your next salad adventure.%u00a0Not to mention a salad that looks so dang pretty.%u00a0
Get into the green. You will be as happy as a rabbit in a garden.%u00a0
The stuff. Greens, red onion, an avocado, almonds, blueberries, and a lemon. Also need some maple syrup, olive oil, red wine vinegar, and salt and pepper.%u00a0
A couple teaspoons of maple %u00a0go in with the almonds. Really toss make sure they are all coated.
Place the almonds into a hot skillet cook for about 5-7 minutes or until the maple has become sticky and the almonds no longer raw.%u00a0
When they are done,%u00a0dump them onto a piece of parchment to cool. Don worry if they clung a little, you can break them apart once they are hard.%u00a0
Easy ass dressing. Blueberries. juice from the lemon, olive oil, vinegar, a tiny splash of maple, and a good pinch or pepper.%u00a0
Blended then done. Taste and season with salt if needed.%u00a0
Avocado gets cut into small chunks and the onion get s thinly sliced.
It’s all ready, so now make a salad
Makes 2-3 %u00a0salads%u00a0
1/4 pound greens ( I used spring mix but mesclun mix or spinach is good too)%u00a0
1/2 %u00a0red onion
1 avocado
For the Almonds%u00a0
1/3 cup raw halved or slivered almonds
2 teaspoons maple syrup%u00a0
For the Blueberry lemon Vinaigrette%u00a0
1/3 cup blueberries (I used %u00a0frozen)
1 lemon
1 Tablespoon olive oil
2 Tablespoon red wine vinegar
1/2 teaspoon maple syrup
pinch or salt
pinch or pepper
To make the %u00a0candied almonds, preheat a skillet to on medium heat on top of the stove.%u00a0Place almonds into a small bowl and drizzle with maple syrup. Stir to coat. When the pan is hot, dump the maple covered almond into it and spread them out. Cook for a 3 minutes, then give a stir and cook for a 3 or so more minutes or until the maple has evaporated and the almonds are starting to brown. Dump the almonds directly onto a piece of parchment paper to cool and hardened. Do worry if they stick together a bit, you can break them apart after.%u00a0
To make the vinaigrette,%u00a0place the berries into a jar (if using stick blender) or blender with the juice of the lemon, olive oil, vinegar, maple, and a pinch of pepper Blend until smooth. Taste then add a very small pinch of salt or more to taste.%u00a0
For salad. Thinly slice the onion and dice the avocado. Place greens into bowl(s) and toss with onions and avocado. Top with %u00a0candied almonds and drizzle all over with the vinaigrette. Grab a fork and eat.
Any left over dressing will last in fridge for about a week and left over almonds will be good for.a few weeks in a airtight container.%u00a0%u00a0%u00a0
I have had a shit ton of rhubarb in the freezer all winter and the other day I just needed it gone so I made a big old batch of rhubarb jam. I was actually saving the rhubarb to make the mr a pie for his birthday, but that was like 2 months ago and he ended up with ice cream sandwiches and that is why the rhubarb was still there. Oops. But now we have rhubarb jam. And I think I was feeling a little guilty about not making the pie so I, like the nicest girlfriend in the entire universe (self proclaimed yes, but so so true), used that jam to make little hand pies. And in the shape of hearts no less because hearts are amazing and it doesn’t hurt that it is Valentine Day next week.%u00a0%u00a0
%u00a0Valentines Day. What does that even mean? I think the primary meaning of Valentines Day is that all things should be in the shape of hearts. The rest is to be determined by however you may feel about the day. Whether you hate it or love it, (we love it, It’s an excuse to take the day off and cover the house in hearts) you get to make the day yours. Just make sure that whatever you do, you make it with hearts. And with pie.%u00a0
These heart pies make for great little additions to hand made Valentines day cards ( I see maybe for a kids class), are great for breakfast because they are basically just like heart shaped pop tarts,%u00a0or even for an evening of bindge watching Netflix with a loved one or by yourself. It’s pie my friends. Eat it whenever, and with whomever you want.
Also, hearts are not just for Valentines Day. And pie sure the hell isn’t either. They both just happen to work for the occasion.%u00a0
The stuff. Basically just pie crust things. Flour, a little sugar, salt, coconut oil, and ice water. Then you need jam. Jam or perseveres of any flavor(s)%u00a0%u00a0you like. I used grape and rhubarb and %u00a0had raspberry here, but I didn’t use it because I didn’t want to open it.%u00a0
Make the crust. Flour gets mixed with the salt and sugar %u00a0and the the coconut oil gets cut in until it %u00a0looks all crumbly.
The water is added %u00a0in tablespoons until a shaggy from forms.
Dump the dough onto the counter to gather all together and rest for a bit. Or if you like, wrap in plastic and refrigerate %u00a0for up to a day or two.
After the dough got a good rest, roll it out and cut your hearts out. (Not your actual heart. Please and thank you)
Half of the hearts get a dollop of jam
Then each heart gets a top and crimped together with a fork. Poke a little hole into the tops to allow for steam to escape then all of the hearts get stuck into the fridge (or place on the back porch) to get nice and cold for a bit.
%u00a0After the chill, off they go into the hot oven to bake and be.
Look at these cuties. A little jam overflow, but all is good.%u00a0
I decided last minute that they needed a little something. Powdered sugar, lime zest, and lime juice. The easiest of glazes. You could do lemon, or vanilla, or almond, or even melt a little chocolate and drizzle that on. Next time I will do chocolate because because.%u00a0
Drizzle that glaze all over.%u00a0
There you have it. The cutest little hand pies ever .
Share if you like, or just eat them all. They are your hearts so do what you will.%u00a0
-C
makes 18 %u00a0three inch pies
2 1/4 cup flour
1 teaspoon salr
1 tablespoon sugar
8 tablespoons ice water
3/4 cup solid coconut oil
about 1 1/4 cups of some sweet ass jam (any kind you have)
1 cup powdered sugar
1 lemon or lime%u00a0
Combine the flour, salt and sugar in a large bowl. add coconut oil in large chunks then with a pastry cutter or a fork (I used a fork) cut the oil into the flour until the flour looks crumbly and there are lots of tiny little chunks of coconut oil throughout the mixture. Add in 5 of the tablespoons ice water, toss around, then add in another 3. Mix around until the dough starts to come together when squished. If it still seems too dry, add in a tablespoon or 2 more water. (I always end up using a little more in the winter months) You want the dough to just be able to come together. Dump dough onto counter and press and smoosh dough into a ball. Let dough sit for 1/2 hour or wrap in plastic and place in fridge and using within the next day or two.%u00a0
After the dough has had some time to sit, flour the counter and roll it out to about 1/2 inch thick. Take a cookie cutter ( I used a 3 inch at the widest part heart cookie cutter) and cut out the hearts (or whatever shape you want) Make sure you have 2 cutouts for each hand pie. After you have cut out as many as you can, gather dough into a ball and roll out again. Repeat until dough it gone.%u00a0
To assemble.
Place a tablespoon of jam into the middle of half of the cut out hearts . Gently place the remaining heart cut outs on top of those.%u00a0. Take a fork and press the edges together and then with the fork or a knife, pierce of cut a small slit into the tops to allow the steam to escape while baking. I did this directly on the baking sheet but found out after it was easier to do on the counter and then move it to the baking sheet. Do what ever it easier for you. Once they are all assembled and on the baking sheet,%u00a0refrigerate for 15 minutes.%u00a0
Preheat oven to 350
After the time in the fridge, remove and place directly into the hot oven. Bake for 20-25 minutes or until the bottoms are a nice %u00a0%u00a0golden brown. The tops will be slightly pale so check the bottoms.%u00a0
Remove and let cool on the baking sheet.%u00a0
While they are cooing, make the glaze. Zest the lime and juice the lime and combine with the sugar. If it is too runny, add a little more sugar, too dry, add in a splash of water. Once the pies are cooled,%u00a0drizzle each one with icing.
Now you have a bunch of cute little heart shaped hand pies and you should probably eat one (or a few)
I think that my favorite thing abut summer is probably the food. Yeah, no, definitely all the food. If it weren’t for all the delicious amazing things that grow during these summer months, I would probably hate summer. Well, I mean, not hate it because summer is nice when it it nice, but lately it has not been so nice and so I am trying to make myself feel better by finding all the good things that I like about summer. Summer trees, summer flowers, the smell of fresh cut grass, river rocks, summer sandals, summer… well that’s what I got right now. But summer produce, that is the best and what keeps me happy when I am extremely over heated and over sunned and just want a blast of cold air accompanied by some dark clouds, a sweater and the smell of decomposing leaves. Obviously I am being a little crank butt, and I actually do usually like me some summertime, I am just over this summer. To hot, to humid, to dry. I am ready to move on.
But back to the good parts of summer that I am not over. The food. The corn is flowing steadily (I am getting on average 10 pieces of corn a week from the farm. That is a lot of corn for 2 people, one of which says he doesn’t like corn), the kale is growing in super abundance in the garden, and it’s is for sure blueberry season. When we have those three things and we toss in a avocado, as little onion, and lots of lime juice , BAM, another super fantastic summertime eating time, reason that summer can be a ok. Makes all the heat a little worth it.
I am telling you, this is my new favorite food combination. Blueberries are magical (I think so anyway) and really add the perfect little sweetness, tartness, and texture to this salad. Crisping up the kale and corn elevates the deliciousness, and avocado always is welcome is any salad situation. This is one of those salads that you will make for yourself and then immediately want to make for someone you like because it is so good you want to share. OR you just want to make it for yourself again because you could share or you could just eat more of it yourself. It’s ok either way, you do you.
The stuff. A cob of fresh corn. some fresh blueberries, a bunch of dinosaur kale, a lime, an avocado, a piece of a sweet onion, sea salt, pepper, and a little oil.
First off preheat the oven then cut the corn off the cob.
Then deal with the kale. Each leaf needs just the slightest bit of oil. The easiest way to do this is to dump a little oil into your hands and grab each piece of kale and rub your oily hands all over the kale.
After the kale is oiled, chop it into chunks. First place the corn on a baking sheet then add the kale on top. Placet it into the oven to get all crispy… The kale will might get crispy before the corn, which is fine because you can remove the kale then pop the corn back into the oven for a few more minutes to keep cooking if you want. Or you might just want to call it cooked, it’s your call.
I popped the corn back into the oven to get a little more color. I like a real crispy corn.
Cut up some onion and avocado into chunks.
And time to compile. Kale, onions, corn, avocado, blueberries, and lime juice. And don’t or get a sprinkle of sea salt and pepper.
Toss it all around and be delighted.
Just look at that salad. Who wouldn’t want to eat that?
Heres to summer salads….The reason I can barely stand the heat!
-C
makes one salad
10 or so large Lacinato (Dinosaur) Kale leaves
1 fresh cob of corn
1/2 of an avocado
1/2 cup fresh blueberries
1/4 of a sweet onion (about 1/4 cup diced)
1 lime
teaspoon olive oil
sea salt and pepper
Preheat oven to 350
Cut the corn off the con and place on a lightly oiled baking sheet. Take a little oil and rub into hands then grab the kale leaves ans rub oil all over them. Once oiled, rough chop into medium sized pieces (don’t chop small, it will shrink a lot in the oven). Place chopped kale on top of corn and stick into hot oven. Bake until the kale is crispy, about 12-15 minutes.. What closely after 10 minutes to prevent burning.
Remove the kale from the baking sheet and place in a large bowl. The corn will be cooked, but if you want to make it a little crispier , just toss it back into the oven for a few minutes. Once corn is to your liking, remove from pan and toss into two with the kale.
Small dice up some onion and dice up half of the avocado. Toss into the bowl with the kale and corn. And the blueberries, add those in. Sprinkle the whole shebang with a little sea salt and pepper and squeeze the juice of at least half of a lime all over (use the whole lie if you want) Give it all one last toss and that is it.
Eat your new favorite salad. Think about making it for all your favorite friends and family and how impressed they will be because this is one of those impressive salads. T
I think that my favorite thing abut summer is probably the food. Yeah, no, definitely all the food. If it weren’t for all the delicious amazing things that grow during these summer months, I would probably hate summer. Well, I mean, not hate it because summer is nice when it it nice, but lately it has not been so nice and so I am trying to make myself feel better by finding all the good things that I like about summer. Summer trees, summer flowers, the smell of fresh cut grass, river rocks, summer sandals, summer… well that’s what I got right now. But summer produce, that is the best and what keeps me happy when I am extremely over heated and over sunned and just want a blast of cold air accompanied by some dark clouds, a sweater and the smell of decomposing leaves. Obviously I am being a little crank butt, and I actually do usually like me some summertime, I am just over this summer. To hot, to humid, to dry. I am ready to move on.
But back to the good parts of summer that I am not over. The food. The corn is flowing steadily (I am getting on average 10 pieces of corn a week from the farm. That is a lot of corn for 2 people, one of which says he doesn’t like corn), the kale is growing in super abundance in the garden, and it’s is for sure blueberry season. When we have those three things and we toss in a avocado, as little onion, and lots of lime juice , BAM, another super fantastic summertime eating time, reason that summer can be a ok. Makes all the heat a little worth it.
I am telling you, this is my new favorite food combination. Blueberries are magical (I think so anyway) and really add the perfect little sweetness, tartness, and texture to this salad. Crisping up the kale and corn elevates the deliciousness, and avocado always is welcome is any salad situation. This is one of those salads that you will make for yourself and then immediately want to make for someone you like because it is so good you want to share. OR you just want to make it for yourself again because you could share or you could just eat more of it yourself. It’s ok either way, you do you.
The stuff. A cob of fresh corn. some fresh blueberries, a bunch of dinosaur kale, a lime, an avocado, a piece of a sweet onion, sea salt, pepper, and a little oil.
First off preheat the oven then cut the corn off the cob.
Then deal with the kale. Each leaf needs just the slightest bit of oil. The easiest way to do this is to dump a little oil into your hands and grab each piece of kale and rub your oily hands all over the kale.
After the kale is oiled, chop it into chunks. First place the corn on a baking sheet then add the kale on top. Placet it into the oven to get all crispy… The kale will might get crispy before the corn, which is fine because you can remove the kale then pop the corn back into the oven for a few more minutes to keep cooking if you want. Or you might just want to call it cooked, it’s your call.
I popped the corn back into the oven to get a little more color. I like a real crispy corn.
Cut up some onion and avocado into chunks.
And time to compile. Kale, onions, corn, avocado, blueberries, and lime juice. And don’t or get a sprinkle of sea salt and pepper.
Toss it all around and be delighted.
Just look at that salad. Who wouldn’t want to eat that?
Heres to summer salads….The reason I can barely stand the heat!
-C
makes one salad
10 or so large Lacinato (Dinosaur) Kale leaves
1 fresh cob of corn
1/2 of an avocado
1/2 cup fresh blueberries
1/4 of a sweet onion (about 1/4 cup diced)
1 lime
teaspoon olive oil
sea salt and pepper
Preheat oven to 350
Cut the corn off the con and place on a lightly oiled baking sheet. Take a little oil and rub into hands then grab the kale leaves ans rub oil all over them. Once oiled, rough chop into medium sized pieces (don’t chop small, it will shrink a lot in the oven). Place chopped kale on top of corn and stick into hot oven. Bake until the kale is crispy, about 12-15 minutes.. What closely after 10 minutes to prevent burning.
Remove the kale from the baking sheet and place in a large bowl. The corn will be cooked, but if you want to make it a little crispier , just toss it back into the oven for a few minutes. Once corn is to your liking, remove from pan and toss into two with the kale.
Small dice up some onion and dice up half of the avocado. Toss into the bowl with the kale and corn. And the blueberries, add those in. Sprinkle the whole shebang with a little sea salt and pepper and squeeze the juice of at least half of a lime all over (use the whole lie if you want) Give it all one last toss and that is it.
Eat your new favorite salad. Think about making it for all your favorite friends and family and how impressed they will be because this is one of those impressive salads. T
I am running extremely low on food in my house, like there isn’t a can of beans or a box of pasta left. Yeah, I have a few zucchini left, but I think that mr might be getting a bit sick of it. (He has had zucchini noodles for lunch and dinner for the past few day). And I was going to go to the grocery store before dinner, but then I didn’t. Why? well because I didn’t really feel like it.
Turns out that I didn’t need to go to the store for dinner.I had a few mushrooms, an onion, and a few stalks of chard left in the fridge. (but pretty much nothing else) I just bought a 25 lb bag of flour so I am all stocked up on that and last minute I found a avocado that I thought was a beet in the fridge. All I needed to make a dinner, and a quick and easy, and really tasty one to boot. Plus being so mother F*ing hot, it was perfect because there was no need to turn on the oven.
Now the question is,now that dinner was made and being that the fridge is so empty, should I clean and defrost it? Answer is yes, yes I should, but am I going to? Probably not. I just don’t have it in me to stand in font of the fridge, hacking ice away with a large spoon and boiling water for an hour. It’s to hot. I’ll do it later.
The stuff. Flour, baking powder, olive oil, salt ans water for the skillet bread. A few humngo stalks of red chard, a couple mushrooms (I would have used a few more if I had them). an onion, and a few cloves of garlic. Missing is the pepper and the avocado and lemon that I found while rummaging the fridge.
The bread is super easy. Just whisk together the flour salt, and baking soda then add in the oil. Mix until it’s crumbly then mix in the water until it turns into a soft dough. Gather into a ball and stick in bowl then into fridge for a few minutes to let the dough rest.
After the dough has rested, take it and cut into 4 equal pieces. Roll each piece into ball and then roll out as flat as you can. Heat up a skillet to high heat and once hot, place rolled out flat onto (dry) skillet. Cook first side for about 3-4 minutes or until browned and cook, then turn heat down a bit, flip and cook other side until browned. Remove bread, turn heat back up, and repeat with remaining flats.
For the rest. Remove the leafy part of the chard and set aside .Thinly hop up the mushrooms, onion, and the chard stalk. Mince up the garlic. Toss it all (not the garlic yet)into a lightly oiled skillet , season with salt and pepper, and cook on medium heat until starting to brown. Now toss in a few splashes of water and the minced garlic, mix around, and cover wit a lid. Cook for another 8-10 minutes until the veggies are nice and soft.
Cooked and ready, but wait, chop up the chard leaves and toss them into skillet. Another splash of water and a few more minutes under a lid will wilt them up real quick.
Skillet beads are made, veggies are all nice and cooked up. The avocado and lemon where found, sliced.
Not bad for a last minute-lean out the fridge of all food-dinner. Not bad at all.
Don’t melt
-C
Make 4 flatbread
For the skillet bread
1 cup all purpose flour
1 teaspoon baking powder
1 teaspoon salt
2 tablespoons olive oil
4-5 tablespoons cold water
For the rest
2-4 white mushrooms
2-3 large stalks of chard (any color)
1 sweet onion
2-3 cloves garlic
salt and pepper
olive oil
water
An avocado and a lemon (optional)
To make the skillet bread. Mix together the flour, salt, and baking soda in a large bowl. Pour in olive oil and mix until crumbly then add in 4 tablespoons of water (5 if it seems to dry) until a dough forms. Gather dough into a ball, stick in bowl and cover, and place in the fridge to rest for about 10 minutes. Once dough has chilled, remove and cut into 4 equal sized pieces. Roll each piece into a ball then, on a clean surface, roll out as flat as you can. Grab a skillet and place on high heat. Once skillet has heated up, place a rolled out dough on hot, un-oiled surface and let cook for about 3-4 minutes or until the bottom cooked with golden brown spots. Turn heat to medium and flip bread. Cook the other side for another 4-5 minutes or until browned. Remove flat and turn heat back up. Cook the rest of the bread like the first one.
For the rest. Remove leafy parts of the chard from the stalk and set aside. Take stalk and chop into pieces about 1/ 2 inch think. Slice onion and mushrooms up as thinly as you can. Mince garlic. Garb a skillet, stick on medium heat and drizzle with a little olive oil. Toss in chard stalk, onions, and mushrooms, sprinkle with salt and pepper and mix around until the stuff starts to brown a bit. Add in a few good splashed of water and the garlic and then place a lid on the skillet. Cook for about 10 minutes, giving the mixture a good stir every few minutes. Once the veggies are all soft and yummy, chop up the remaining chard leafs and place them into the skillet. Add another splash of water and place the lid back on. Cook until the leaves have wilted.
To assemble. Flat bread on plate. Scoop some of the sauteed veggie mixture on top. A few slices of avocado on top with a squeeze of lemon juice and a bit of cracked pepper…You are good to go.
I think that my favorite thing abut summer is probably the food. Yeah, no, definitely all the food. If it weren’t for all the delicious amazing things that grow during these summer months, I would probably hate summer. Well, I mean, not hate it because summer is nice when it it nice, but lately it has not been so nice and so I am trying to make myself feel better by finding all the good things that I like about summer. Summer trees, summer flowers, the smell of fresh cut grass, river rocks, summer sandals, summer… well that’s what I got right now. But summer produce, that is the best and what keeps me happy when I am extremely over heated and over sunned and just want a blast of cold air accompanied by some dark clouds, a sweater and the smell of decomposing leaves. Obviously I am being a little crank butt, and I actually do usually like me some summertime, I am just over this summer. To hot, to humid, to dry. I am ready to move on.
But back to the good parts of summer that I am not over. The food. The corn is flowing steadily (I am getting on average 10 pieces of corn a week from the farm. That is a lot of corn for 2 people, one of which says he doesn’t like corn), the kale is growing in super abundance in the garden, and it’s is for sure blueberry season. When we have those three things and we toss in a avocado, as little onion, and lots of lime juice , BAM, another super fantastic summertime eating time, reason that summer can be a ok. Makes all the heat a little worth it.
I am telling you, this is my new favorite food combination. Blueberries are magical (I think so anyway) and really add the perfect little sweetness, tartness, and texture to this salad. Crisping up the kale and corn elevates the deliciousness, and avocado always is welcome is any salad situation. This is one of those salads that you will make for yourself and then immediately want to make for someone you like because it is so good you want to share. OR you just want to make it for yourself again because you could share or you could just eat more of it yourself. It’s ok either way, you do you.
The stuff. A cob of fresh corn. some fresh blueberries, a bunch of dinosaur kale, a lime, an avocado, a piece of a sweet onion, sea salt, pepper, and a little oil.
First off preheat the oven then cut the corn off the cob.
Then deal with the kale. Each leaf needs just the slightest bit of oil. The easiest way to do this is to dump a little oil into your hands and grab each piece of kale and rub your oily hands all over the kale.
After the kale is oiled, chop it into chunks. First place the corn on a baking sheet then add the kale on top. Placet it into the oven to get all crispy… The kale will might get crispy before the corn, which is fine because you can remove the kale then pop the corn back into the oven for a few more minutes to keep cooking if you want. Or you might just want to call it cooked, it’s your call.
I popped the corn back into the oven to get a little more color. I like a real crispy corn.
Cut up some onion and avocado into chunks.
And time to compile. Kale, onions, corn, avocado, blueberries, and lime juice. And don’t or get a sprinkle of sea salt and pepper.
Toss it all around and be delighted.
Just look at that salad. Who wouldn’t want to eat that?
Heres to summer salads….The reason I can barely stand the heat!
-C
makes one salad
10 or so large Lacinato (Dinosaur) Kale leaves
1 fresh cob of corn
1/2 of an avocado
1/2 cup fresh blueberries
1/4 of a sweet onion (about 1/4 cup diced)
1 lime
teaspoon olive oil
sea salt and pepper
Preheat oven to 350
Cut the corn off the con and place on a lightly oiled baking sheet. Take a little oil and rub into hands then grab the kale leaves ans rub oil all over them. Once oiled, rough chop into medium sized pieces (don’t chop small, it will shrink a lot in the oven). Place chopped kale on top of corn and stick into hot oven. Bake until the kale is crispy, about 12-15 minutes.. What closely after 10 minutes to prevent burning.
Remove the kale from the baking sheet and place in a large bowl. The corn will be cooked, but if you want to make it a little crispier , just toss it back into the oven for a few minutes. Once corn is to your liking, remove from pan and toss into two with the kale.
Small dice up some onion and dice up half of the avocado. Toss into the bowl with the kale and corn. And the blueberries, add those in. Sprinkle the whole shebang with a little sea salt and pepper and squeeze the juice of at least half of a lime all over (use the whole lie if you want) Give it all one last toss and that is it.
Eat your new favorite salad. Think about making it for all your favorite friends and family and how impressed they will be because this is one of those impressive salads. T
I got my first few ears or corn from the farm share this week which is exciting because I wait until we get corn from the farm to eat it. I figure that we get so much from the farm that there is no freaking way I am going to buy it and plus I know that that corn was picked a few hours before I got it. If you are going to eat corn, it needs to be fresh (life lesson).
Have I told you that the mr hates corn? I am pretty sure I have. I also have a theory that he really doesn’t hate it so I just go ahead and make food with corn in it. Then he eats it, likes it, and I am all like” AHA, you like corn be-otch! I win!” (not sure what I win). But then the next time I mention we have fresh corn and how would he like it he is all like, I hate corn. It’s a game we keep on playing.
So I got fresh corn, lots of tomatoes, and the kale is growing strong out back. I figured I would give the mr a break from all the zucchini for the night and make he a nice warm summer salad with the corn that he “hates”.
The mr ate it all and didn’t even mention corn so now I am thinking that he just hates the word corn and if I don’t say the word then there will be no problem. HA HA, I am a genius.
The stuff. A tomato, a ear of corn, some kale, a little balsamic vinegar, oil, and salt and pepper.
Chop the tomato and remove the corn from the cob.
Toss into an oven safe skillet with a drizzle of oil and a pinch of salt.
Now stick it into the oven
After about 10 minutes the tomato has fallen apart and the corn is all nice and tender.
While the skillet is still hot the vinegar goes in and the (chopped) kale goes in. Mix it all around until the kale wilts. And be careful, the pan is hot.
Dump it into a bowl, sprinkle with pepper, grab a fork, and you are on.
Happy eating.
-C
makes a salad for one or two small side salads
1 medium tasty tomato
1 ear of corn
like 4-5 good sized kale leaves
2-3 tablespoons balsamic vinegar
oil of choice (i used avocado oil)
salt and pepper
You can cook this in or on the stove. I did it in the stove because I was baking anyway
Preheat oven to 425
Remove corn from cob and chop tomato into medium sized chunks. Toss into a oven safe skillet with a drizzle of oil and a little pinch of salt. Stick in oven and cook until the corn is tender and the tomatoes have fallen apart, about 10 minutes. Remove from oven and mix in vinegar. Chop kale into mouth sized pieces and toss into hot skillet. Mix around until kale starts to wilt. And it’s done. Serve with a pinch of pepper.
As I sit here writing this, mind you typing is not a terribly labor intestive activity, I am drip drip dripping sweat… It’s just not right.
And today will be as hot as shit fuck. But its support to get so much better tomorrow. So that’s it, not more complaining. Everything is all good.
Now lets talk about this salad. This is such a fresh, clean, and full flavor salad made of just a few simple ingredients, the star being the fennel. Almost licorice-y and sweet, yet still has a crisp earthiness, it pairs so well with onion and kale and dressed with just lemon juice. Simple, easy, and very much satisfying. Kind of the perfect salad to make when you don’t want to make anything because the world is a sauna and nothing hurts you soul more then to think of turning on the oven.(full disclosure. Stove burn does go on for a few minutes.. but only a few)
Maybe you have never had fennel or think you don’t like it, Well if you haven’t had it, you must, and if you think you don’t like it, you should try it again. Up until recently, I kind of discarded fennel as a mah veggie. I didn’t hate it, but I never really cared for it, and I definitely did not seek it out. But this past year, for some odd reason (I blame/thank old age) I have really gotten into the yummy bulb. I have even gone out of my way to find it. And last week I was much excited when I went to farm share pick up and found that there was crate of fennel. Woo HOO!
Sweet fennel+hot weather and no desire to move = Fennel onion carrot salad
The stuff. A bulb of fennel (this was a big one so I use half of it),a medium onion , a big carrot, a bunch of kale, salt, pepper, a little olive oil and a lemon (I ended up using 2 smallish lemons)
Take you fennel and either with a mandolin or a knife, thinly slice the bulb. Do the same with the onion.
Toss the sliced fennel and onion into a lightly oiled skillet and sprinkle with a dash of salt. Place on medium low heat and cook jjust until the veggies are soften and starting to brown.
Chop the kale into pieces small enough to fit into your mouth and julienne or shred the carrot.
Compile the stuff. Juice the lemon. Kale into a bowl, dump most tot the lemon juice on that and sprinkle with salt and mix around (I used my hands). Dump the sautéed fennel onion onto of that and top with the carrot and the rest of the juice.
TA DA! Now that’s some pretty.
And toss it all around. I like to add a few thinly slices of raw fennel and lots of fresh cracked pepper.
Share with a friend. Or not. (a not for me)
Happy hump de dump day. Stay cool friends!
-C
Makes a big salad for one, or a few smaller sized side salads.
1 small or half of a large bulb of fennel
i medium white or hello onion
1 large carrot
a bunch of kale (like 3-4 cups chopped)
1 large juicy lemon (or two small lemons)
With either a mandolin or using a knife, slice up the fennel and onion super thin. Toss into a lightly oiled skillet, sprinkle with salt, and stick on the stove on medium low heat. Stir and let cook down for 5-8 minutes or until the fennel and onion have soften and are starting to brown.
While thats cooking, chop up the kale into small pieces and julienne or shred the carrot.
Place kale into bowl, juice the lemon and drizzle most of the juice all over the kale and give it a good mix. Dump on the cooked fennel onion and top with the carrots and a the rest of the lemon juice.. Sprinkle with salt and pepper to taste and give it a good toss. Top with a few fresh shaving of fennel.
Share with a friend, or eat it all to your self.
It seems that everywhere I turn this week, there corn. So much so that its coming out of my ears…..get it.. ears! (yes I am that lame)
Yup, its now officially (but unofficially) summer and that means 2 things, well 3 things. First, we eat corn. Secondly, It’s hot out, and get so hot in our little tiny loft that having the oven on is like torture so I avoid it at all costs. And lastly, I seem to always have less time(or forget) to make dinner cause, you know, I am outside running around with my head cut off.
The solution to the last two…..Quesadillas.
I probably make the mister quesadillas at least 5 time a week. They are just so easy to make (takes about 8 minutes) are full of some kind of veggie situation and lots of cheese (which is the misters favorite food group). You can make one, for a quick lunch, or very easily make 10 to feed a few people for a easy dinner. (everyone likes a quesadilla!). And even though I cooked these particular ones inside, quesadillas are great made outside on the grill. They just make so much sense.
And so it goes.
Summertime + corn = Charred corn and kale quesadillas.
The Stuff. Freshy freshy corn on the cob. A few flour tortillas, a bunch of chopped kale and some shredded cheese. (I used pepper jack)
With a sharp knife, cut the corn off the cob. I find using a deep bowl works best to catch corn, and you could even invert another little bowl inside to rest the cob for easier cutting (I skipped extra bowl.. once less dish to wash)
While you are cutting the corn, preheat a large pan on medium high heat.
Once the pan is hot, toss the corn kernels right on into it and sprinkle with salt and pepper Let cook for a minutes or two, then give it a stir and cook for another minute.
After about 4 minutes the corn turns bright yellow and starts to char. Remove pan from heat and toss in the chopped up kale.
And compile the quesadilla. Tortilla, grated cheese, corn and kale, more cheese if you please, and top with anther tortilla. Place assembled quesadilla into the pan and place on medium heat. Cook both sides until brown and cheese is ooey gooey.
Remove from pan and cut into triangles (or any shape you want)
Serve right away. Can be eaten on a napkin, plate, or directly off the counter.
Not needed, but it would be nice of you to serve with a little avocado, salsa, or sour cream.
Happy Tuesday!
-C
Makes two 8 inch quesadillas
Four 8 inch flour tortillas (use gluten free if needed)
2 ears of fresh corn
3-4 larges kale leaves
1 cup* shredded pepper jack cheese (use vegan cheese if needed)
*Note. Use more cheese if you want
Preheat a large pan on medium high. While the pan is heating up, cut the corn from the cob. Once pan is hot, toss corn kernels into hot skillet and sprinkle with a pinch of salt and pepper. Give corn a stir after a few minutes. Once the kernels start to turn bright yellow and get a little charred, remove pan from heat. Chop up kale into little pieces and toss into pan with the corn while the pan is still hot. Mix around and let the kale wilt a bit from the residual heat.
Ready your tortilla. Place half the cheese onto totilla, add on half of the corn and kale mixture, sprinkle with a bit more cheese and top with another tortilla. Place onto now empty pan and heat up quesadilla until brown on both sides and chesse is melty. Remove from skillet and cut into triangle. Repeat for the second quesadilla.
Serve right away with or without some guacamole, salsa, or sour cream.
plates are not required.
Guess what guys ….I got myself a sick vintage waffle/ griddle iron. I couldn’t be more thrilled!!! I found this thing at the local recycled goods store the other day, along with a very beautiful old white pyrex mixing bowl. It was one of my best thrift store scores! (Checking out the inventory and the condition of all the old things that day, I would say an old lady had just died and all her perfectly keep, mint condition kitchen stuff had just been donated. But it’s cool, cause I get the feeling that she was at least 90, with a big loving family, and was happy until the day she died. And I am sure she would be pleased that I have taken over the waffle maker. Thanks old lady!)
And now I am pretty sure that everything I make for the next week will be cooked on said waffle/griddle. I am serious, I already have a list of things to try and cook on it; cookies, biscuits, granola bars, potatoes, fruit, some type of pasta situations…. the list of possibilities is endless and I bet that at least 1/2 of these things will be totally awesome and amazing.
But first thing first. I need to make dinner.
So waffles for dinner!!
Note. These waffles are completely 100% fantastic for any meal you want to make them for. They consist of nothing more then beans, a shit ton of veggies, and just a bit of cornmeal. But don’t let that fool you because they are super packed full of so much flavor, have a really soft tender inside, with a nice crispy outside and are so super pretty. They are wonderful! The stuff. First, we got a big old pile of shredded up veggies which include; carrot, beet, sweet potato, onion, parsnip, celeriac, and a little bit of kale. A we got a bowl of rinsed and strained white beans, a little bit of cornmeal and salt, pepper, and garlic powder.
The makings of something amazing!Before you do anything. get your waffle iron out and preheat it.
While thats going on, take you beans, add 3/4 cup water and puree until smooth with whatever blending device want to like to use. (I used my hand blender…less to clean)Now collect all the shredded veggies and dump into a big bowl with the bean puree, the spices and the cornmeal. Mix until combined. The batter should be thick, but not dry. If its seems to wet, add more corn meal, or too dry, add a little more water.
Note how my batter turned a magical pink… I love beets, they make everything pretty! And check out that bowl!When your waffle iron is preheated, oil it if needed (if your not sure, add a little oil just to really make sure your waffles don’t stick) and take appropriate size spoonfuls of the batter and stick on iron. Close it and wait…..My iron has a little light that turns on when the waffles are done cooking, so I waited patiently (ok iI did open it a few time) until light tuned on and removed the perfectly cooked waffles.
Did I mention how awesome my new/old vintage iron is?
SO AWESOME!!
I made a little gaucamole and gave the mister and little bowl of plain Greek yogurt with lemon juice, but feel free to top, drizzle, or dump whatever you want onto these beauties…
Happy waffle Wednesday!!!
-C
Veggie Bean Wonder Waffles
Makes 8-10 waffles (in my iron) feeds 2-3 peeps
1 small carrot shredded
1 small parsnip shredded
1/2 a small celeriac root
1 small beet shredded
2 kale leaves chopped into tiny bits
1/2 an onion, shredded
1/2 a small sweet potato shredded
1/2 cup cornmeal
2 cups(or 1 can) cooked, rinsed and strained white beans
2 teaspoons garlic powder
teaspoon each salt and pepper
oil for iron(if needed)
Note on veggies… I used what I had in the fridge and shredded, it came to about 3 cups. If you don’t have these specific veggies or only want to use a few.. go for it. Just make sure to have 3 cups of whatever veggies you use.
Take you beans and blend them up with whatever device you would like to use. Once creamy, add to a bowl with the rest of the ingredients. Stir until combined.
Once the waffle iron is preheated, oil it( if needed) and place the recommended amount of batter right on it there. Close and cook until golden brown and waffly.
Serve on a plate with topping of your choice, A few suggestions.. Guacamole, salsa, hummus, mustard, greek yogurt… anything that tastes good to you.
Eat as breakfast, lunch or dinner…
Fork into face
You ever make dish, completely on the fly, just to use something up (I have a lot of ripe tomatoes) with no real expectation, just because… Then have it be one of the best freaking things that you have ever made? This salad is one of those things.. maybe not the best thing I have ever made, but definitely the best salad I have ever made…. this week.
A salad compiled of all things amazing, taking just a few minutes to make and is the perfect balance of uber fresh with baby spinach, raw kale, and crunchy quick pickled onions. Then adding a touch of warmth with the sweet and juicy seared tomatoes and big chunks of creamy avocado.
I mean, for reals. ……Best Salad Ever !!!! (this week)
Now let’s do this.
The Stuff. A big bowl of baby spinach and chopped up kale, a few sliced up roma tomatoes, some super thinly sliced red onion, half an avocado, red wine vinegar and salt and pepper. Before you do anything, place the sliced onions into bowl, sprinkle with a pinch of salt and add a few glugs of the red wine vinegar. You want the onions to sit in the vinegar for at least 5 minutes on the counter cause the longer they sit the more crispy pickly they get. (after eating onions like this, you will never want to eat them any other way) Lightly oil a skillet and preheat to a medium heat. Once the skillet is hot, sprinkle the tomato slices with salt and pepper and place tomatoes right on in, snugly, but not overlapping. Let cook for about 3-4 minutes, or until the bottoms start to brown. Flip and cook other side for another few minutes.Once the tomatoes are seared on both sides, remove them gently from skillet and toss them on top of the bowl of greens.
Take the pickled onions and toss those right on top, with any of the residual vinegar, add dice and scoop the half of avocado and toss that on in as well.And now eat the best salad ever (this week).
Make the day good!
-C
Skillet Seared Tomato and Quick Pickled Onion Salad
Serves 2 as a side, 1 for a hungry eater
2 large or 3 smaller roma tomatoes
1/2 of a red onion
2-3 tablespoons red wine vinegar
1 1/2 cups baby spinach
1 1/2 cups chopped kale
salt pepper
1/2 a ripe avocado
olive oil (to grease pan)
Thinly slice red onion and place in a bowl. Add vinegar into a and sprinkle with salt. Let sit on counter for at least 5 minutes, if not longer,
Slice tomatoes into 1/2 inch thick rounds and sprinkle with a pitch or salt and pepper. Lightly oil a skillet and preheat it on medium heat. Once the skillet is preheated, stick the tomatoes on it (watch out for splattering tomato juice) Cook first side for about 3 minutes or until the bottom has browned, then flip and do the same for other side.
One tomatoes are seared, place directly onto the greens. Now dump the pickled onions and residual vinegar on top. And dice up avocado and add that on top too.
Now eat your salad, fork or fingers…
And I know, ba-daaaamn. So good.
Last week pineapples were on sale everywhere……So I bought 5. Don’t judge
And I bet I am not the only one that got overly excited at $1.50 pineapple and bough themselves a few. We will just call ourselves opportunists. Now we have plenty of pineapples and don’t have to pay the $4 a piece prices. (Justification)
But if you don’t have a pineapple laying around, you must go get one. (Maybe if your lucky, there might still be some sales going on) because you must make this salad. I am on a mission to make everyone I know eat it because, for lake of a better way to say it…….It will rock your world.
Dill and pineapple are a serious match made in heaven. Pineapple, with its sweet, tangy, citrusness and dill with it’s super fresh earthiness. Mixed together with a few other helpers to create a fresh, clean, chunky, tangy, over the top, flavor. I could stop right there, but toss in a handful of lentils, some creamy avocado and a bed of kale…It’s like the best spring time, celebration on you tongue, happiness in you tummy, kind of salad.
A salad that will make you smile. (and maybe buy 5 pineapples)
Stuff for the goodness. We got the kale, some avocado because all salads should have avocado and some cooked lentils because, well, all salads should have lentils (or beans or nuts.. so you could totally something else) Then a few sprigs of fresh dill, a clove of garlic, red wine vinegar, salt and a bowl of chunked up pineapple. The pineapple, dill, garlic, red wine vinegar, a splash of water and a pinch of salt get blended in a blender or whatever blending device you use. Go as smooth or chunky as you like, I recommend going smooth, but leaving a little chunk, like half blended.
The prep is done, now compile. Kale in bowl, top with lentils,. Toss on avocado chunks, and, last but not least, the blended pineapple dill mixture.So good……So so good.
Happy Friday!!
-C
So Good Pineapple Dill Kale Salad
Serves Two
3 cups washed and chopped Kale
1/2 a avocado, diced
1 cup fresh pineapple chunks
1-2 springs fresh dill
1 tablespoon Red Wine Vinegar
Salt
1/2 cup cooked lentils (or any bean or nut will do)
Note. No fresh dill? You can use dried, just sub in 1 teaspoon for the fresh and after blending with the pineapple, let sit a little longer to really let the flavors meld together.
Place pineapple, dill, pinch of salt, vinegar and garlic into a blender or whatever you own that blends and blend stuff together, leaving it a little chunky. Let sit for 5-10 minutes.
Kale goes into a bowl and add the lentils and diced avocado. Pour the blended pineapple on. Toss around.
Now eat.
Whenever my little sister comes over for dinner, I always end up making lentils in some form or another because she, like me, is awesome and loves a good lentil. It makes me so happy that she has such great taste in food and wants to eat what I make. It’s validation from a teenage girl which is the best kind of validation.
So last night when she came over after school for dinner and trash talk (she likes to verbally abuse Nick) we decided to make both of our favorites … Lentils AND sweet potatoes. How can you go wrong with that combo? Well I am telling you that you can’t. The rich creamy soft and slightly sweet sweet potato mixed up with the hearty, earthy, oh so fantastically tasty lentil. Add in a bit of kale and cheese if you wish and serve with salsa and guac… Whoa, it’s the best!!!
Such a great evening, I get to the cooking, the sister gets to the verbal abuse and the mister, begin the champ that he is, takes it and dishes it right back.
I am the greatest(coolest) sister.
Baked sweet potatoes, cooked lentils, chopped up kale and monetary jack cheese (Cheese is optional.. and make it vegan cheese if you want) And you don’t need then, but salsa and guacamole are the best toppings.. So you have them.
Cut the cooked potato in half lengthwise and scoop the flesh out into a bowl. With a fork, smooth the potato , sprinkle with salt and pepper and mix in lentils and kale.
Stuff the mixture back into the skins of the potato.
And add some cheese (The mister and the sister wanted lots of cheese, no cheese for me) and stick the potatoes into the oven and let bake for another 5 or so minutes or until the cheese is all melty or the top is nice and crispy.
Remove and plate… Serve with salsa and guacamole and maybe some corn chips.
I am the greatest sister
-C
Makes 2 serving
1 Large Sweet Potato
1 cup Prepared Lentils
1 cup Chopped Kale
1/2 cup Grated Monetary Jack Cheese (Vegan style or not)
Salsa (optional)
Guacamole(optional)
Place potato in oven at 400 degrees for 30-40 minutes or until soft a baked throughout.
While potato is baking, prepare lentils. 2 cups water to 1 cup lentils. Add water and lentil to pot, bring to a boil, add a sprinkle of salt, and reduce to simmer until lentils are tender.
When potato is cooked, remove potato and let cool for a few minutes. Cut in half lengthwise and scoop out most of the flesh out of the skins and place into a big bowl. WIth a fork, mash the potato a bit Add in the lentils and the kale, a sprinkle of salt and pepper, and mix to combine. Stuff the mixture back into the skins of the potatoes and top with cheese. (if using ) Place potatoes back into oven for 5-10 minutes until cheese is melty and bubbly or the top of the potato is a bit crispy. Remove from oven and serve on a plate with salsa and guacamole.
August for real. What happened to the year? This summer is just flying by and even though it has been so freaking dumb hot for like ever, It feels like it just begun. I bet it’s because of the heat, that my brain is not functioning right and that I have lost all concept of time. But you know what August means.. August means soon to be fall. And that is just fine by me because I really am craving some apples and I miss my sweaters. Oh how I miss them so.
Last week started off at Bread and Puppet which was awesome per usual. Lots of big puppets, lot of people in white, people sprawled all over the grass. Politically charged, funny and beautiful. I am always so entranced when we go to the circus. If you are anywhere near Glover VT on a Sunday this summer, go, check it out, it’s freaking awesome. And right down the road from the puppet field is Jes’s farm where ee tried out her new Hipcamp site. The spot was great, the views were awesome, and the mr was right near a stream so he was a happy fisher. I on the other hand was just excited to be away from town. Read for a while and crawled int the tent as soon as the sun went down (kind of similar to my bedtime routine at hime too) And sure there was a tick (the mr), a leech,(also the mr) and a lot of peeing on ones foot while squatting (me) but other then that, it was fantastic and just what we needed.
Then we returned and did life. Had dinner with my mom and the littles, placed Coco in a planter, made Miley and Judah gigantic ice cream cones, and watched Barb make all the best faces a happy, peppy 18 year old girl can make. Wednesday Nicks sister Emma came over for dinner and shot the shit with us for a while then Thursday came around which entailed lots of mid summer running around, fixing this, doing that, farm share (so many tomatoes) and getting ready to leave the coming day.
Friday Shannon, Megan, the mr, and I hopped into the car and drove down to Rhode Island for the afternoon to spend some time with our Uncle Seth. The mr drove the whole way there while Megan squeaked and squealed in the back set and us girls counted and organized the amount of times and where we moved to growing up (I was at 19 times by 16.. I guess we were a family of gypsies). Had a good lunch with David, checked out a grave yard and a giant glass circle, then made our way over to Seths loft for a visit. We were all in need of a good Seth visit. Just to hear him laugh or see him smile was such a great gift. And after our visit we went to Whole Foods to buy Whole Foods, and jumped back into the car, the mr driving the whole time, Megan squeaking and squealing in the back set, until we made it home…..Very late. I feel asleep for a few hours, woke up, went to work, loaded and unload some kilns, came home, cleaned the house, then pass the fuck out. It was a long week.
The mr and I are doing Sunday like we did last week. We both have a few things to do this morning but then we are going to meet at home for lunch and head out. Where to, not exactly sure, but we aren’t coming back until tomorrow morning. The camping stuff is still out, the weather is suppose to be hot and humid but sunny, so there really isn’t any reason to no run away up a mountain or into the woods. And I think I deserve a good long day of not talking to anyone. Camp coffee, a good book, and a soft place to set my head. It will be good.
Internet reading from the week.
-WHen anyone complains about any anything, the first thing I ask is if they have had any water lately… Most people, especially littles, say no. Off Your Mental Game? You Could Be Mildly Dehydrated
–Which Vision Of Farming Is Better For The Planet?.
-Kind of in love with these Improvised Wall Tapestries Crafted with Vibrant Thread Combinations. I want rub my face into them.
–These animals spend their whole lives waiting to have sex, and then they die. So there is that.
–When Your Name Doesn’t Feel Like You. I can totally see show this could be a thing that some people have to deal with. I like my name, and I think it totally fits me. But I have known (take my uncle Seth for example) people that have hanged their names. I mean, it’s something you have to deal with for your entire life so you know, own it or change it I guess.
-I would barf if I lived here, but it’s cool. A Colorful, Geometric Wonderland That Might Feel Like You’ve Jumped Inside a Kaleidoscope
–Why Does It Seem Like Everyone Is Getting Sick from Salad? This is one good reason (of many) to eat as locally as you can and know exactly where your food comes from.
–How Explorers Sleep in Extreme Spots. Whoa.
-I have definitely rented a book because of its pretty flower cover (I just picked up My Absolute Darling) How Publishing’s Floral-Print Trend Came to Rule the World’s Bookshelves. I really appreciate a good cover. For some reason pictures of people on overs bother me.
–For More Flavorful Desserts, Forget This Ingredient. IT would probably benefit more then just flavor too.


 I usually base my meals on what I know I have for food in the house and what I know needs to be eaten. I was a little surprised when muling around in the freezer to find a block of extra firm tofu. (I don’t remember buying). Maybe a tofu fairy left it in there for me, or maybe it has been in there for years and I just am now stumbling upon it. Either way, I found it and it had to be eaten. So I cooked it up, and I cooked it up nice and good. Tofu is a pretty vertical food, being that its basically a flavorless block of protein. It can go sweet or savory, mashed, chopped or blended. Add fresh garlic, any type of sauce or even peanut butter. (the possibilities are quite endless) I was going for a dinner dish so I decided on a simple cubed tofu with lots of ginger and garlic (so good to ward of those winter sicko bugs out there) and baked it up nice and crispy with fresh bright green broccoli and soba noodle. Quick, easy, tasty and healthy.. I did it again. Thanks tofu fairy!
 This noodle dish is super easy to make and take only about a half hour. We start with extra firm tofu, a package of buckwheat soba noodle, a nice big broccoli crown, honey, fresh ginger, garlic and soy sauce. oil for pan and lime for a finish. Nothing fancy.
 Dice the tofu into small cubes and place onto a clean dish towel and pat dry…It really helps the tofu suck in more flavor and become nice a and crispy.
 Tofu get moved into a lightly oiled skillet, ready to go into a hot oven. Why baked instead of sautéed on the stove? I find that the tofu keeps it shape and crisps up better when baked. But do whatever you want….. But just bake it.
 While the tofu is baking, make up the sauce. Grate about 2 tablespoons of fresh ginger and4 large cloves of garlic into a bowl. Whisk together with 2 tablespoons honey, 1/3 cup soy ( tamari or brags aminos works too) and 1/3 cup of warm water. Taste it, and if you think it needs more anything, add it. I actually used 6 cloves of garlic, but I really wanted a garlic packed sauce.
  After 15 ish minutes, give tofu a flip, then after about 25 minutes, the tofu should be nearly done. Remove from the oven and toss in the chopped broccoli and 1/3 cup of the sauce. Its a little watery but thats what you want, it will cook down in the oven. Now stick the skillet goes back into the oven and boil the soba noodle.
 Another 10 minutes in the oven and the sauce starts to caramelize and the broccoli is cooked but still nice and crisp. Remove skillets from oven and toss in the cooked noodles and the rest of the dressing. Toss and toss and place on a plate, or a bowl, or if your into it, just eat out of the pan. (it happens)


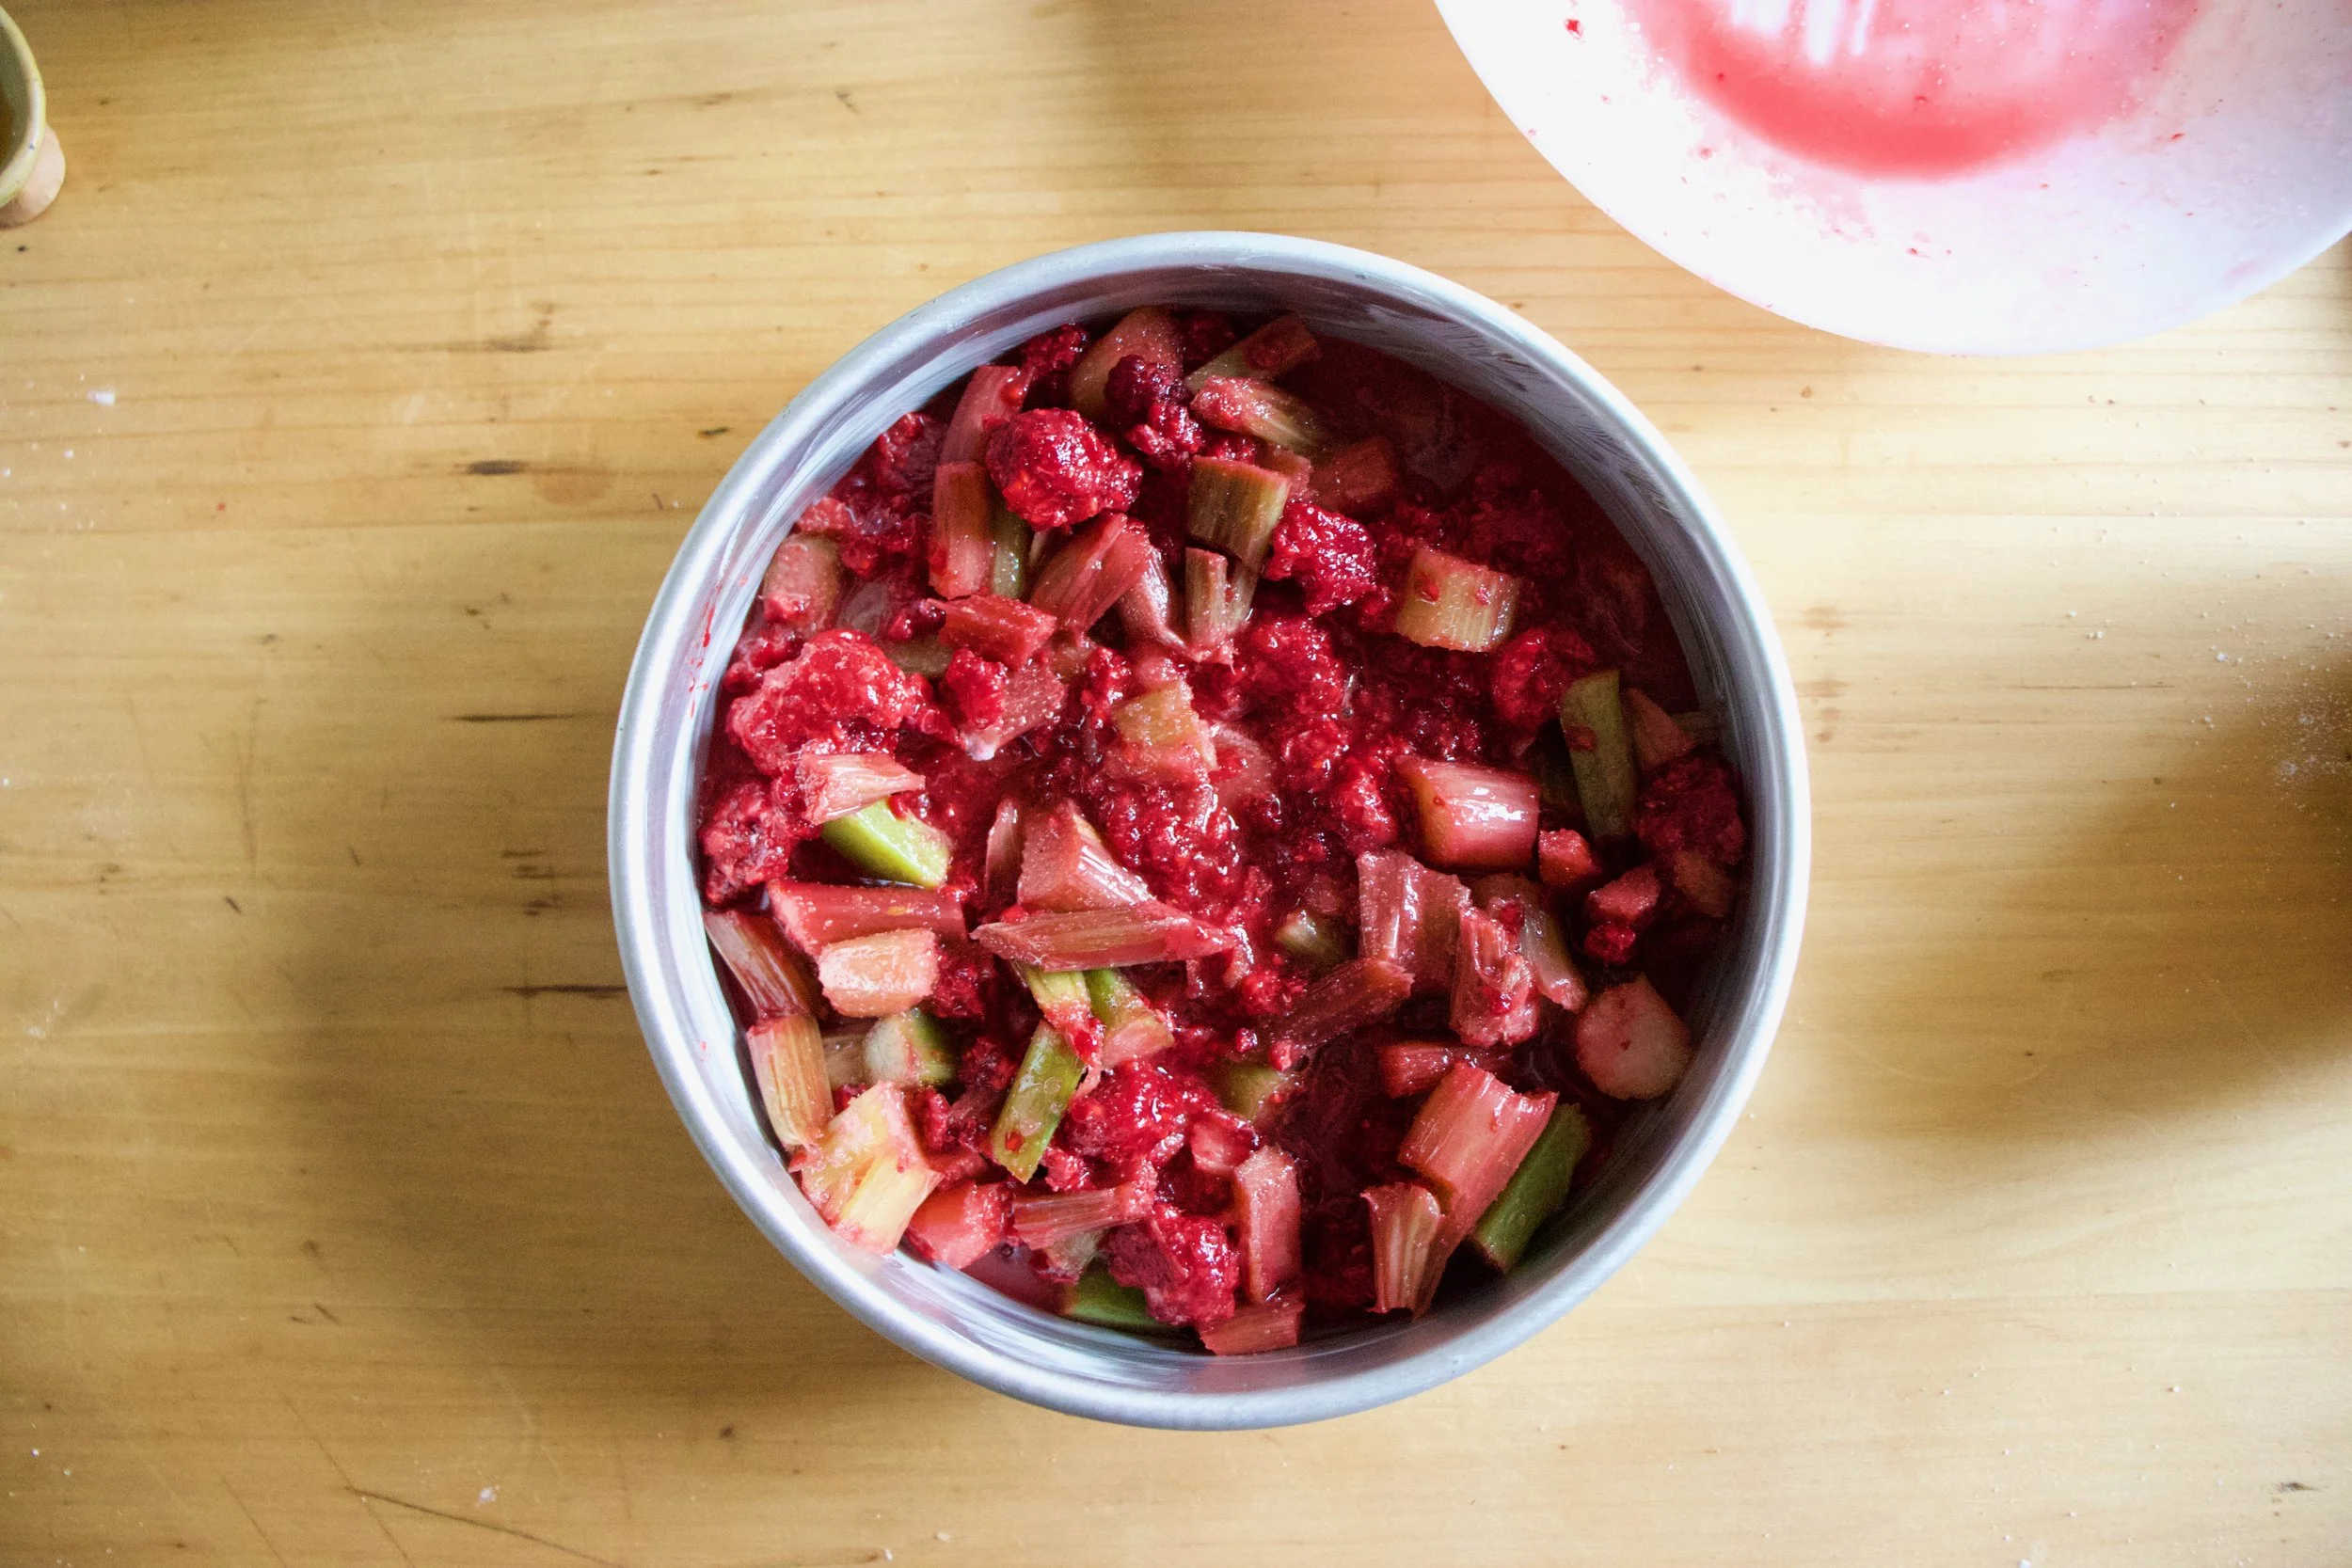
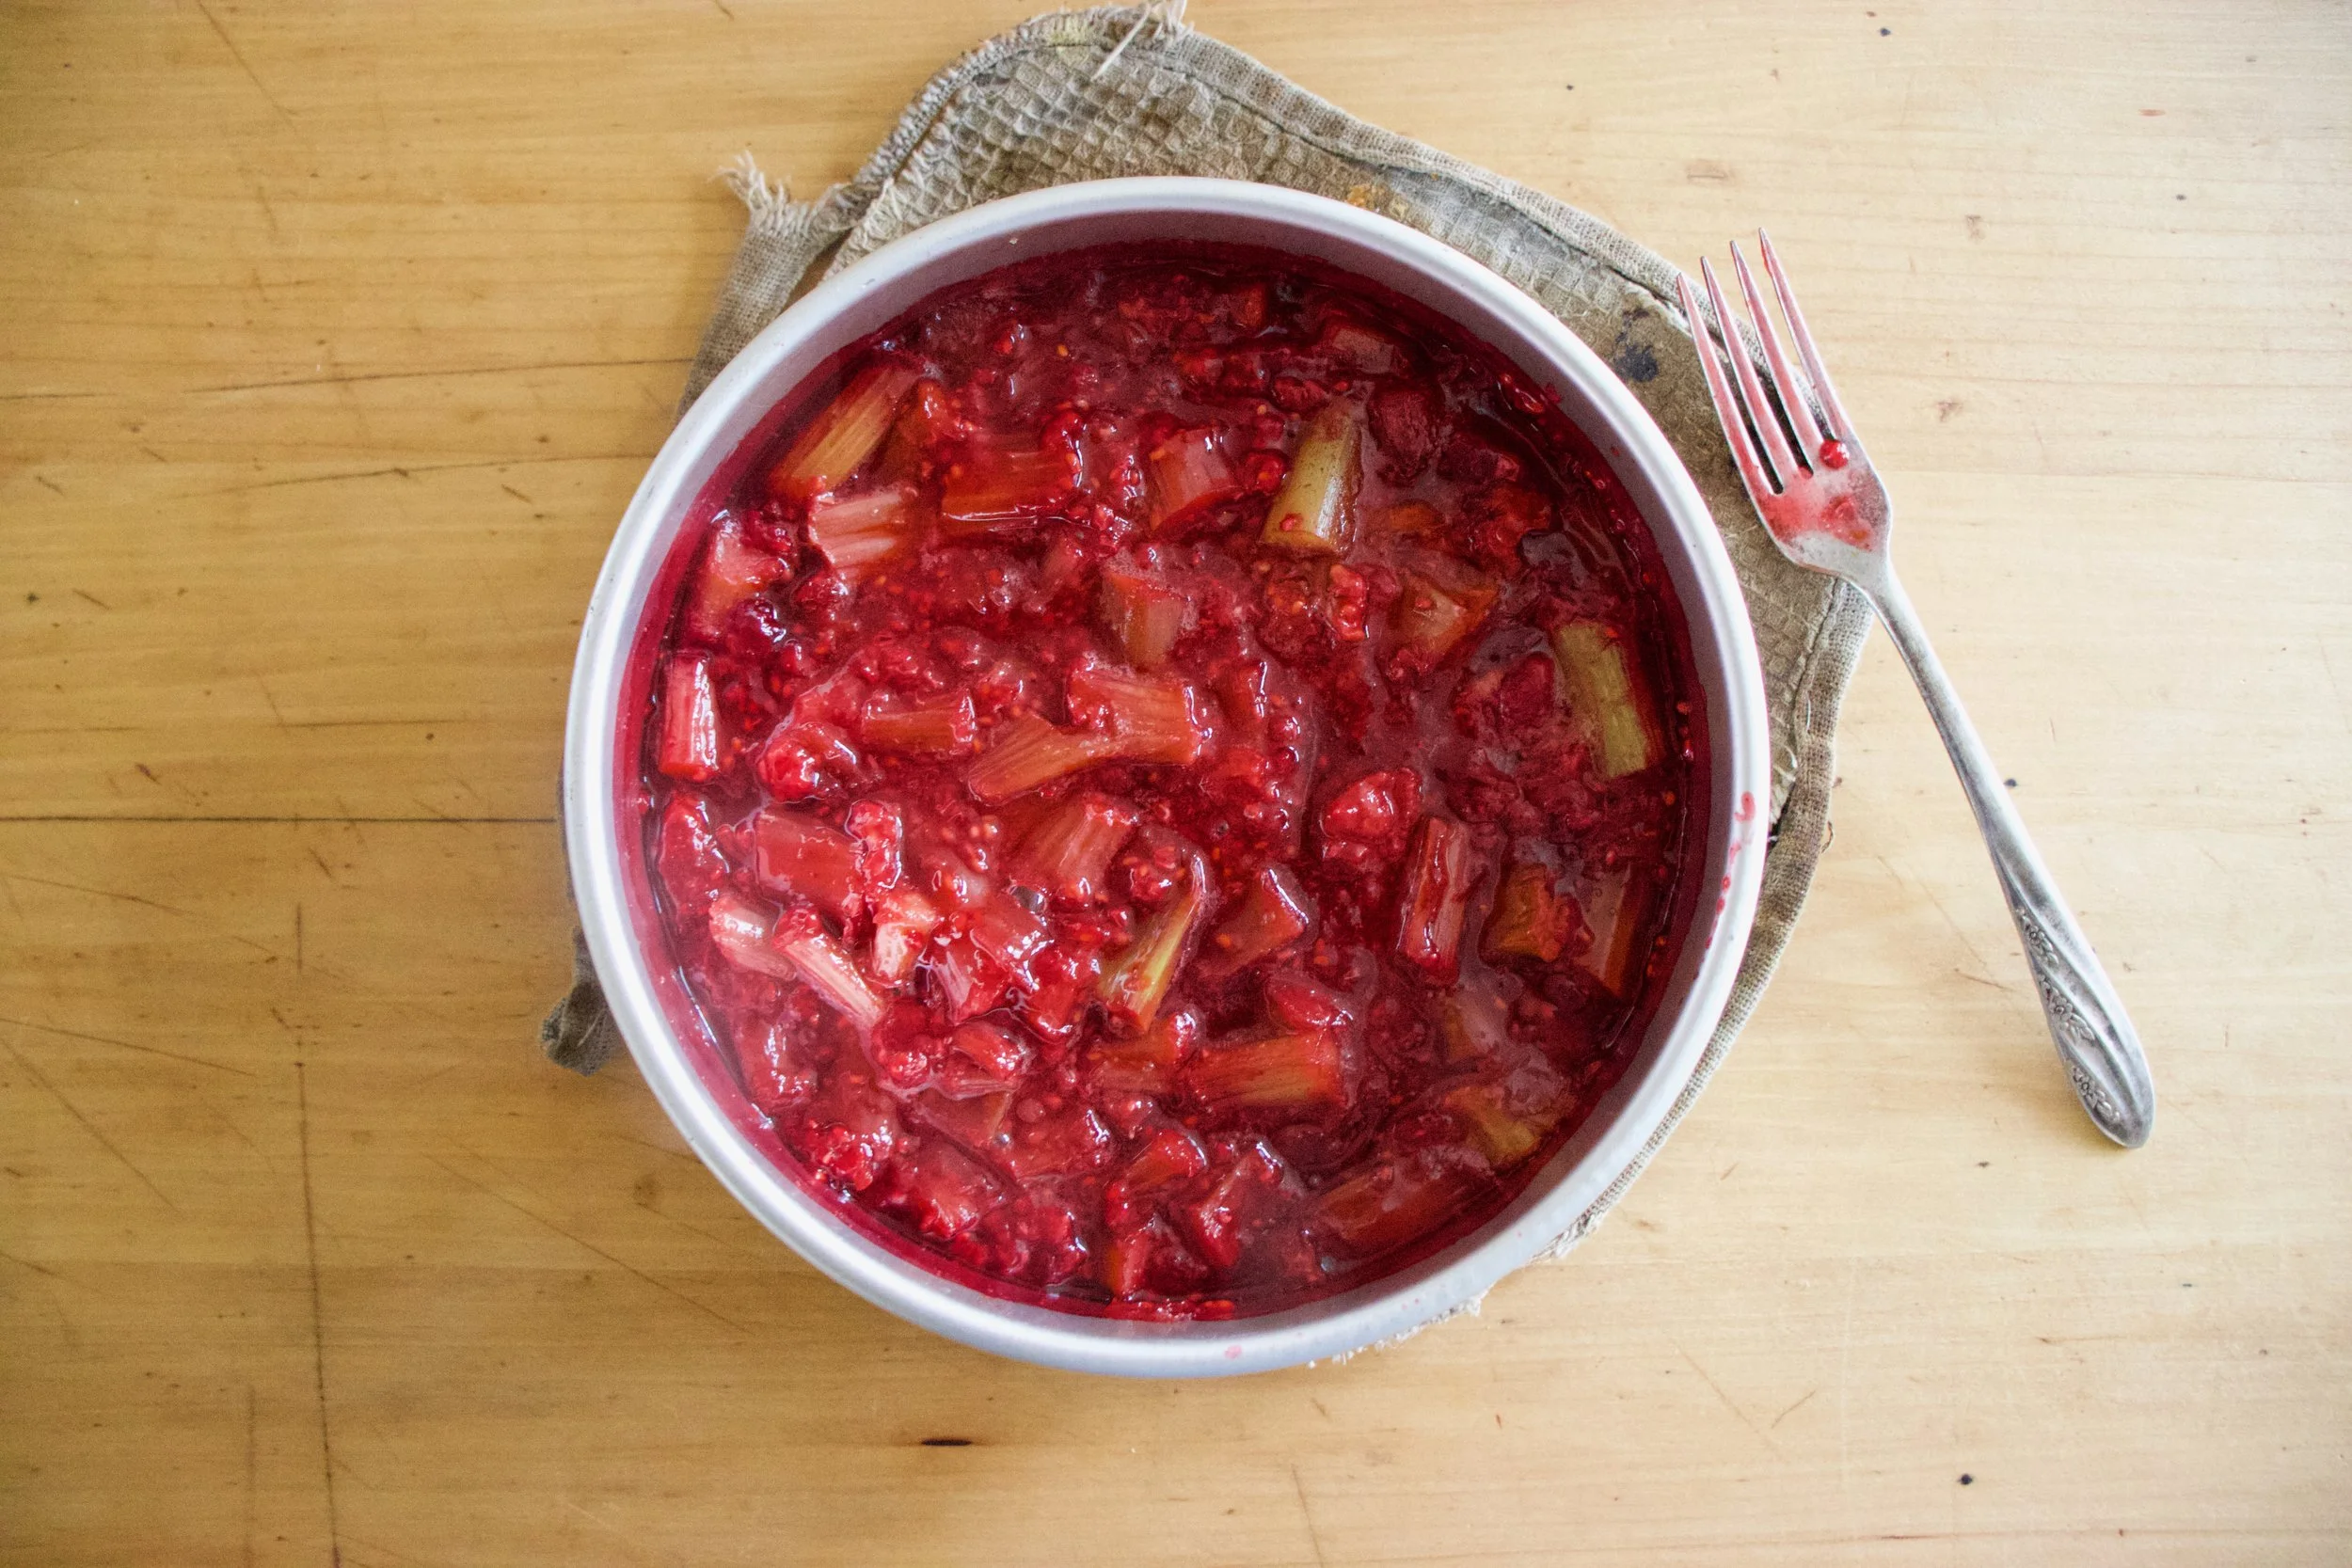


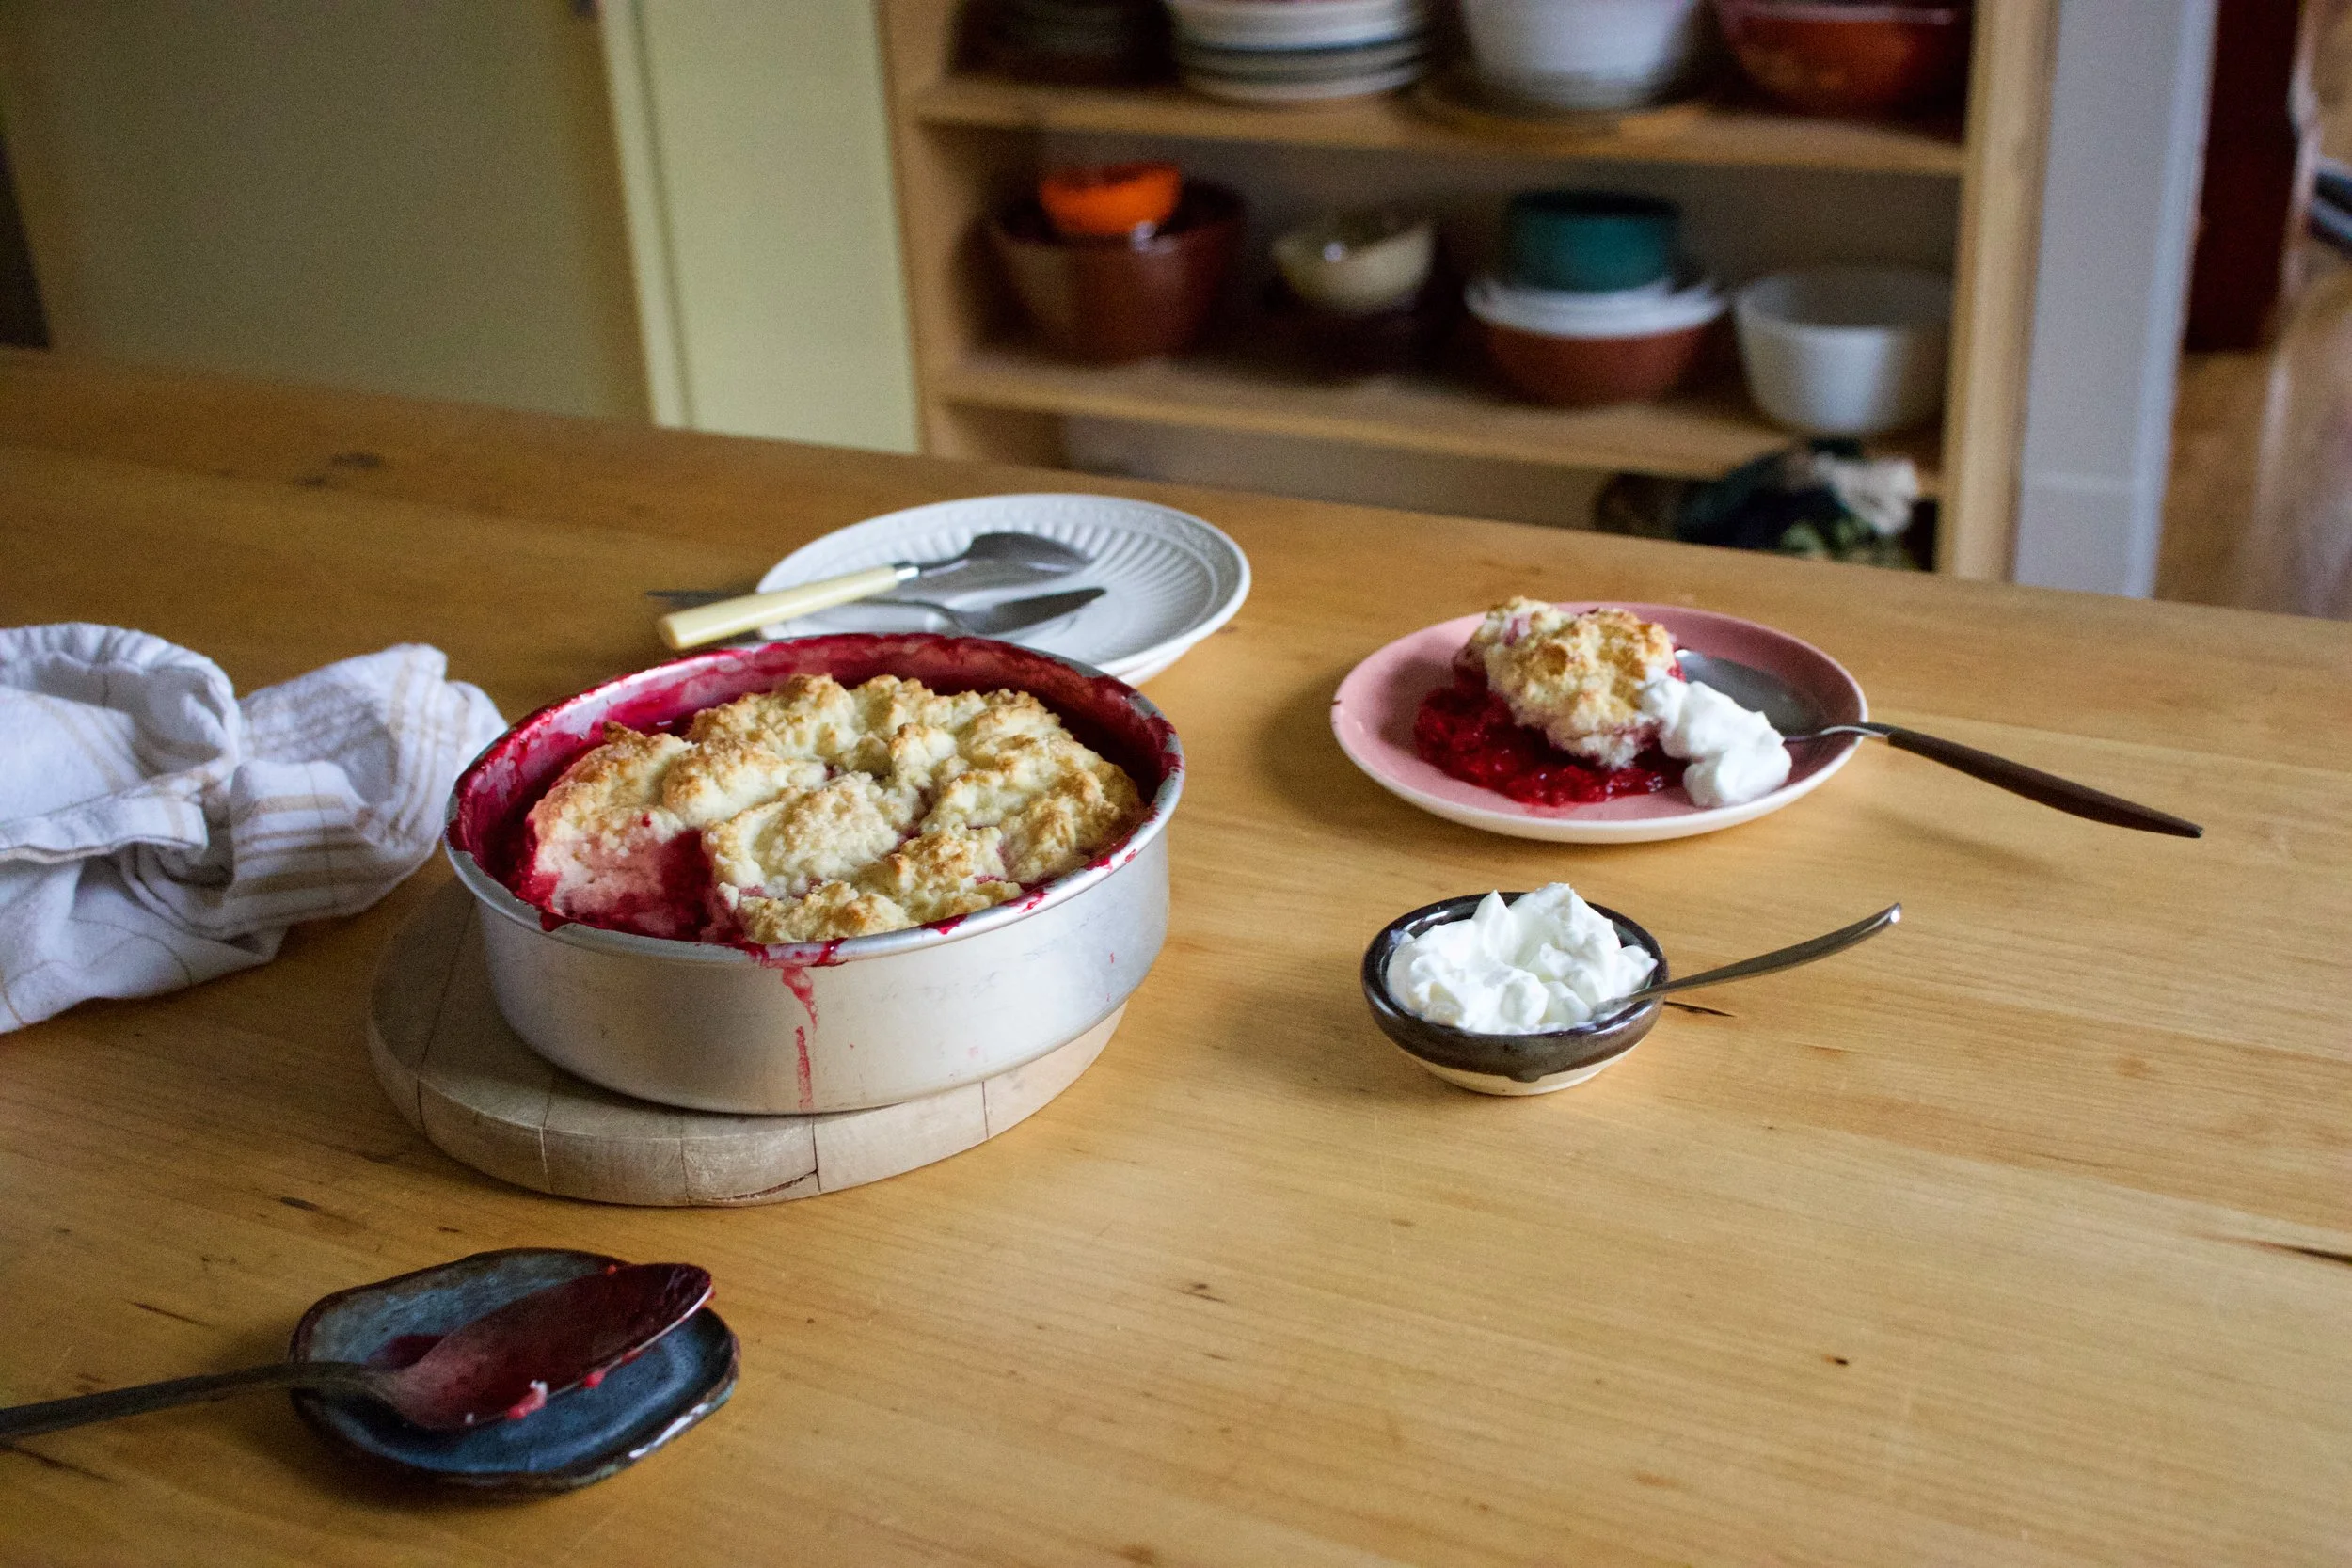
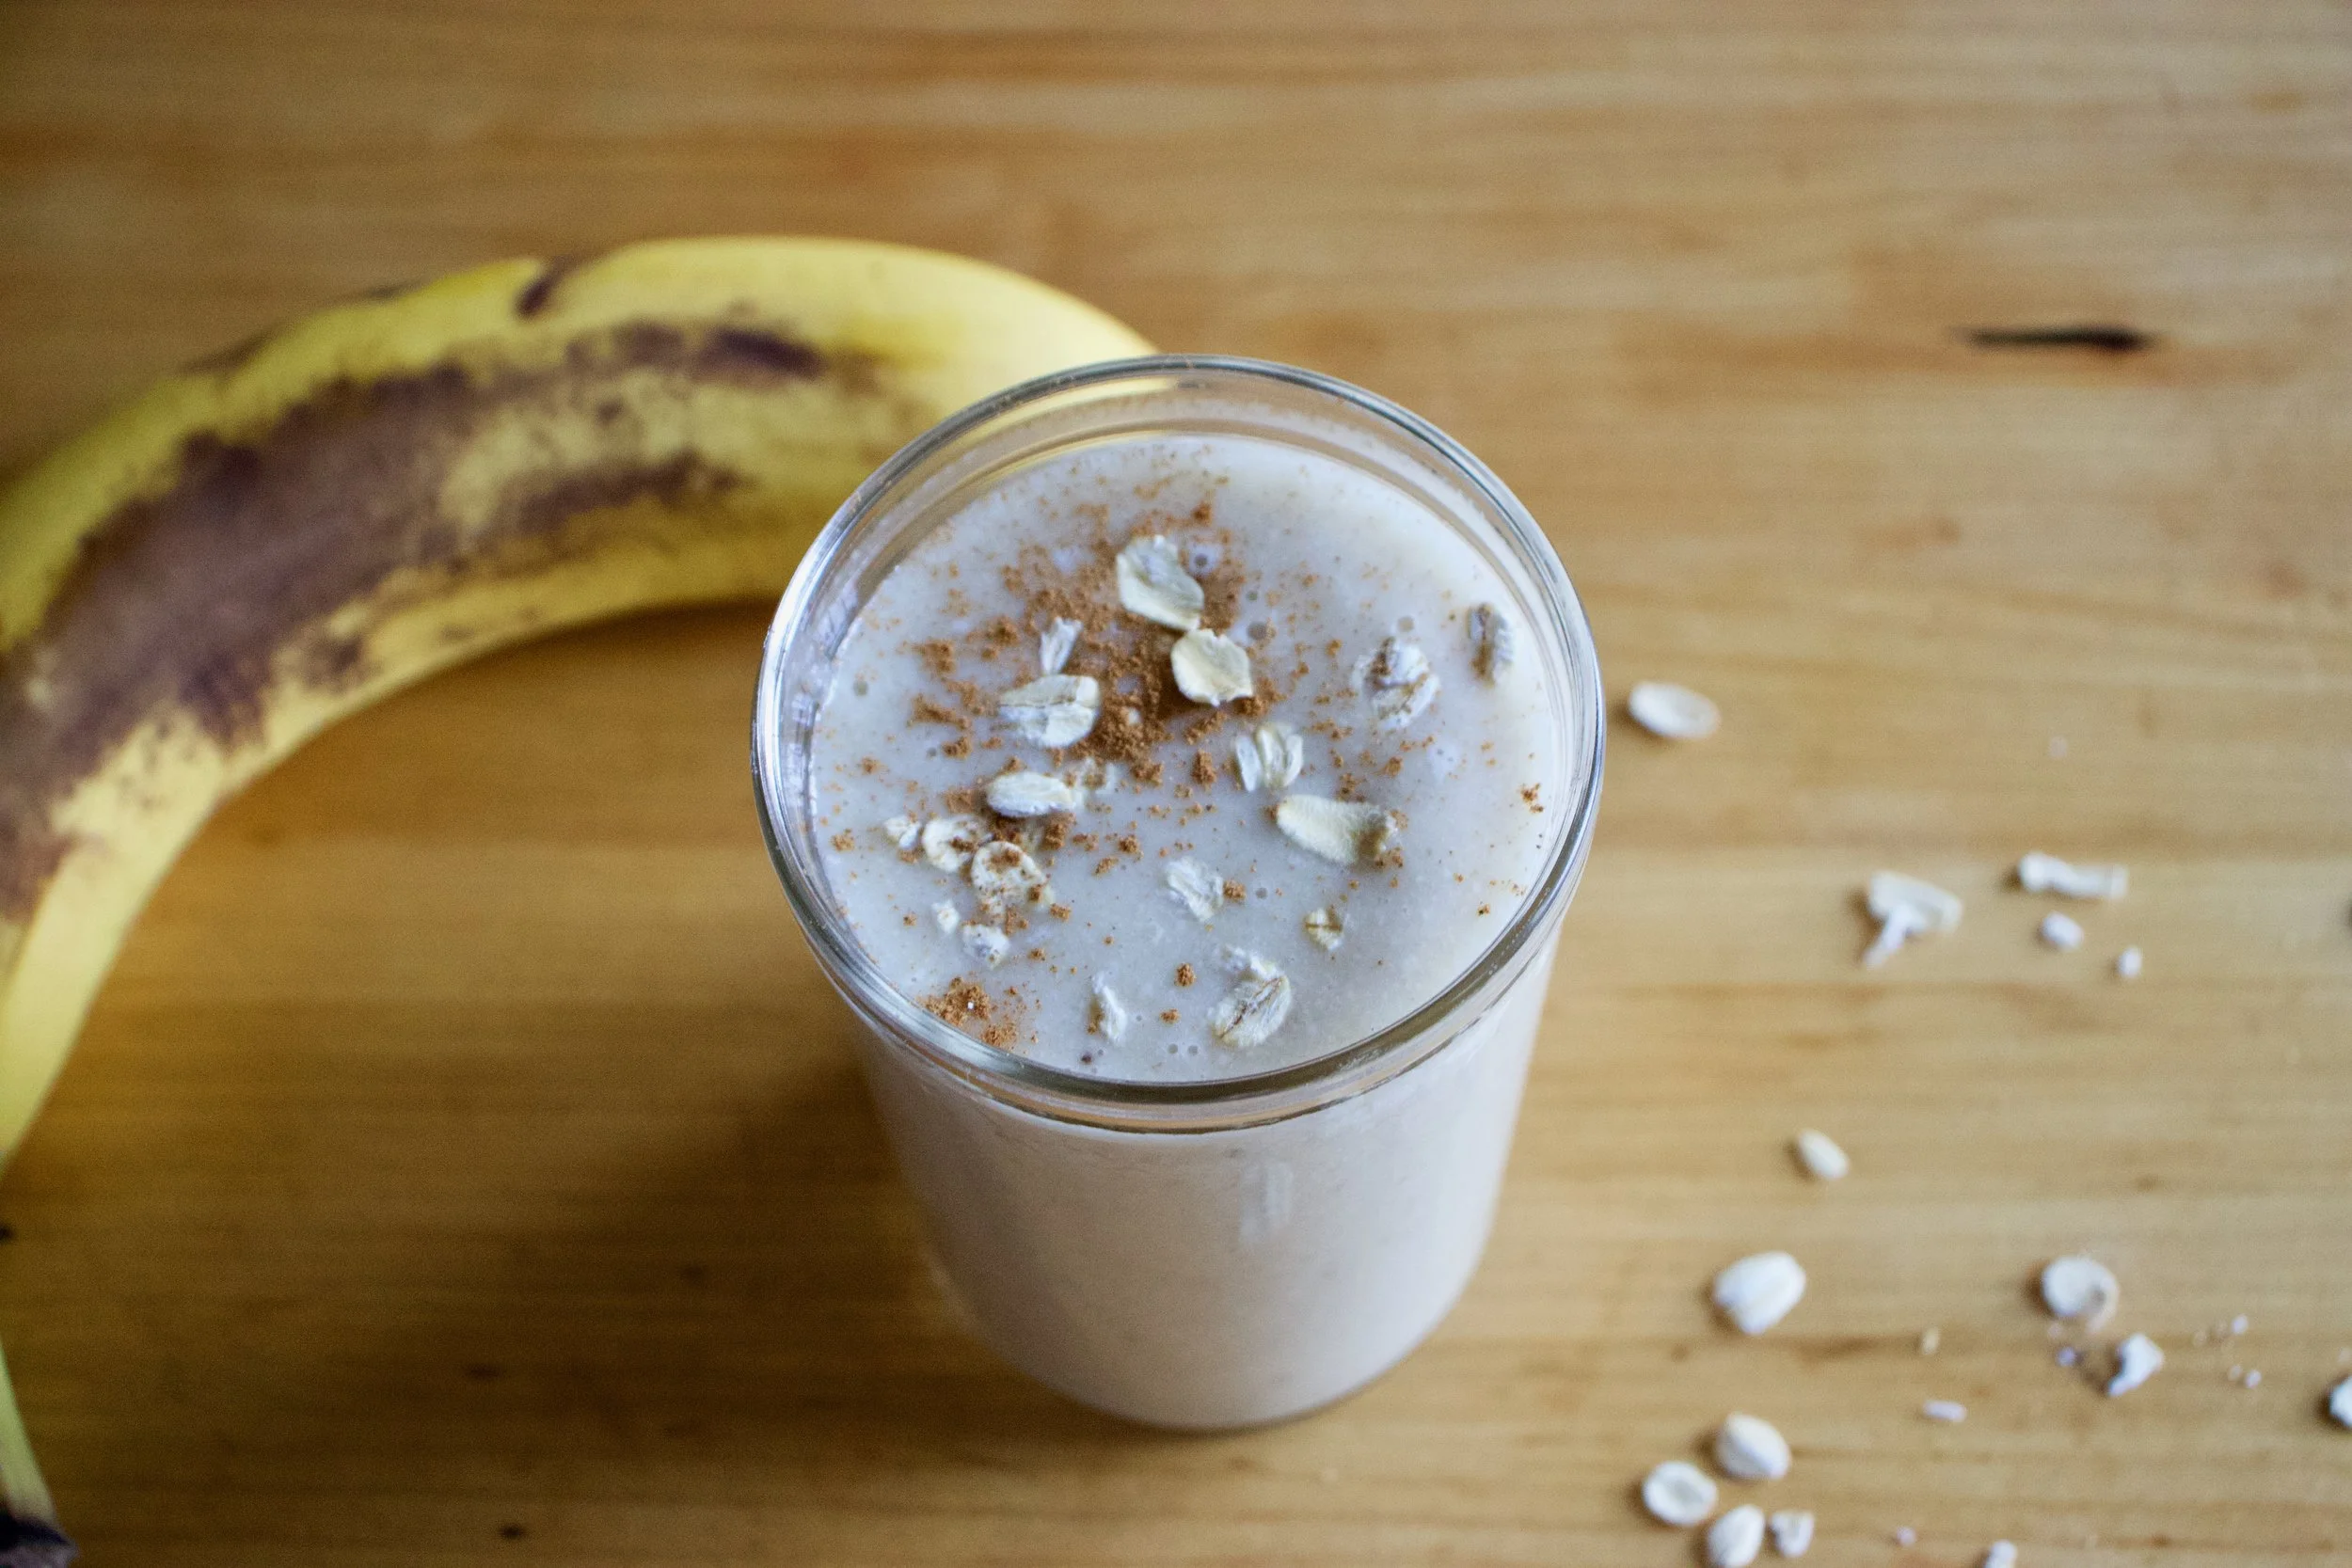

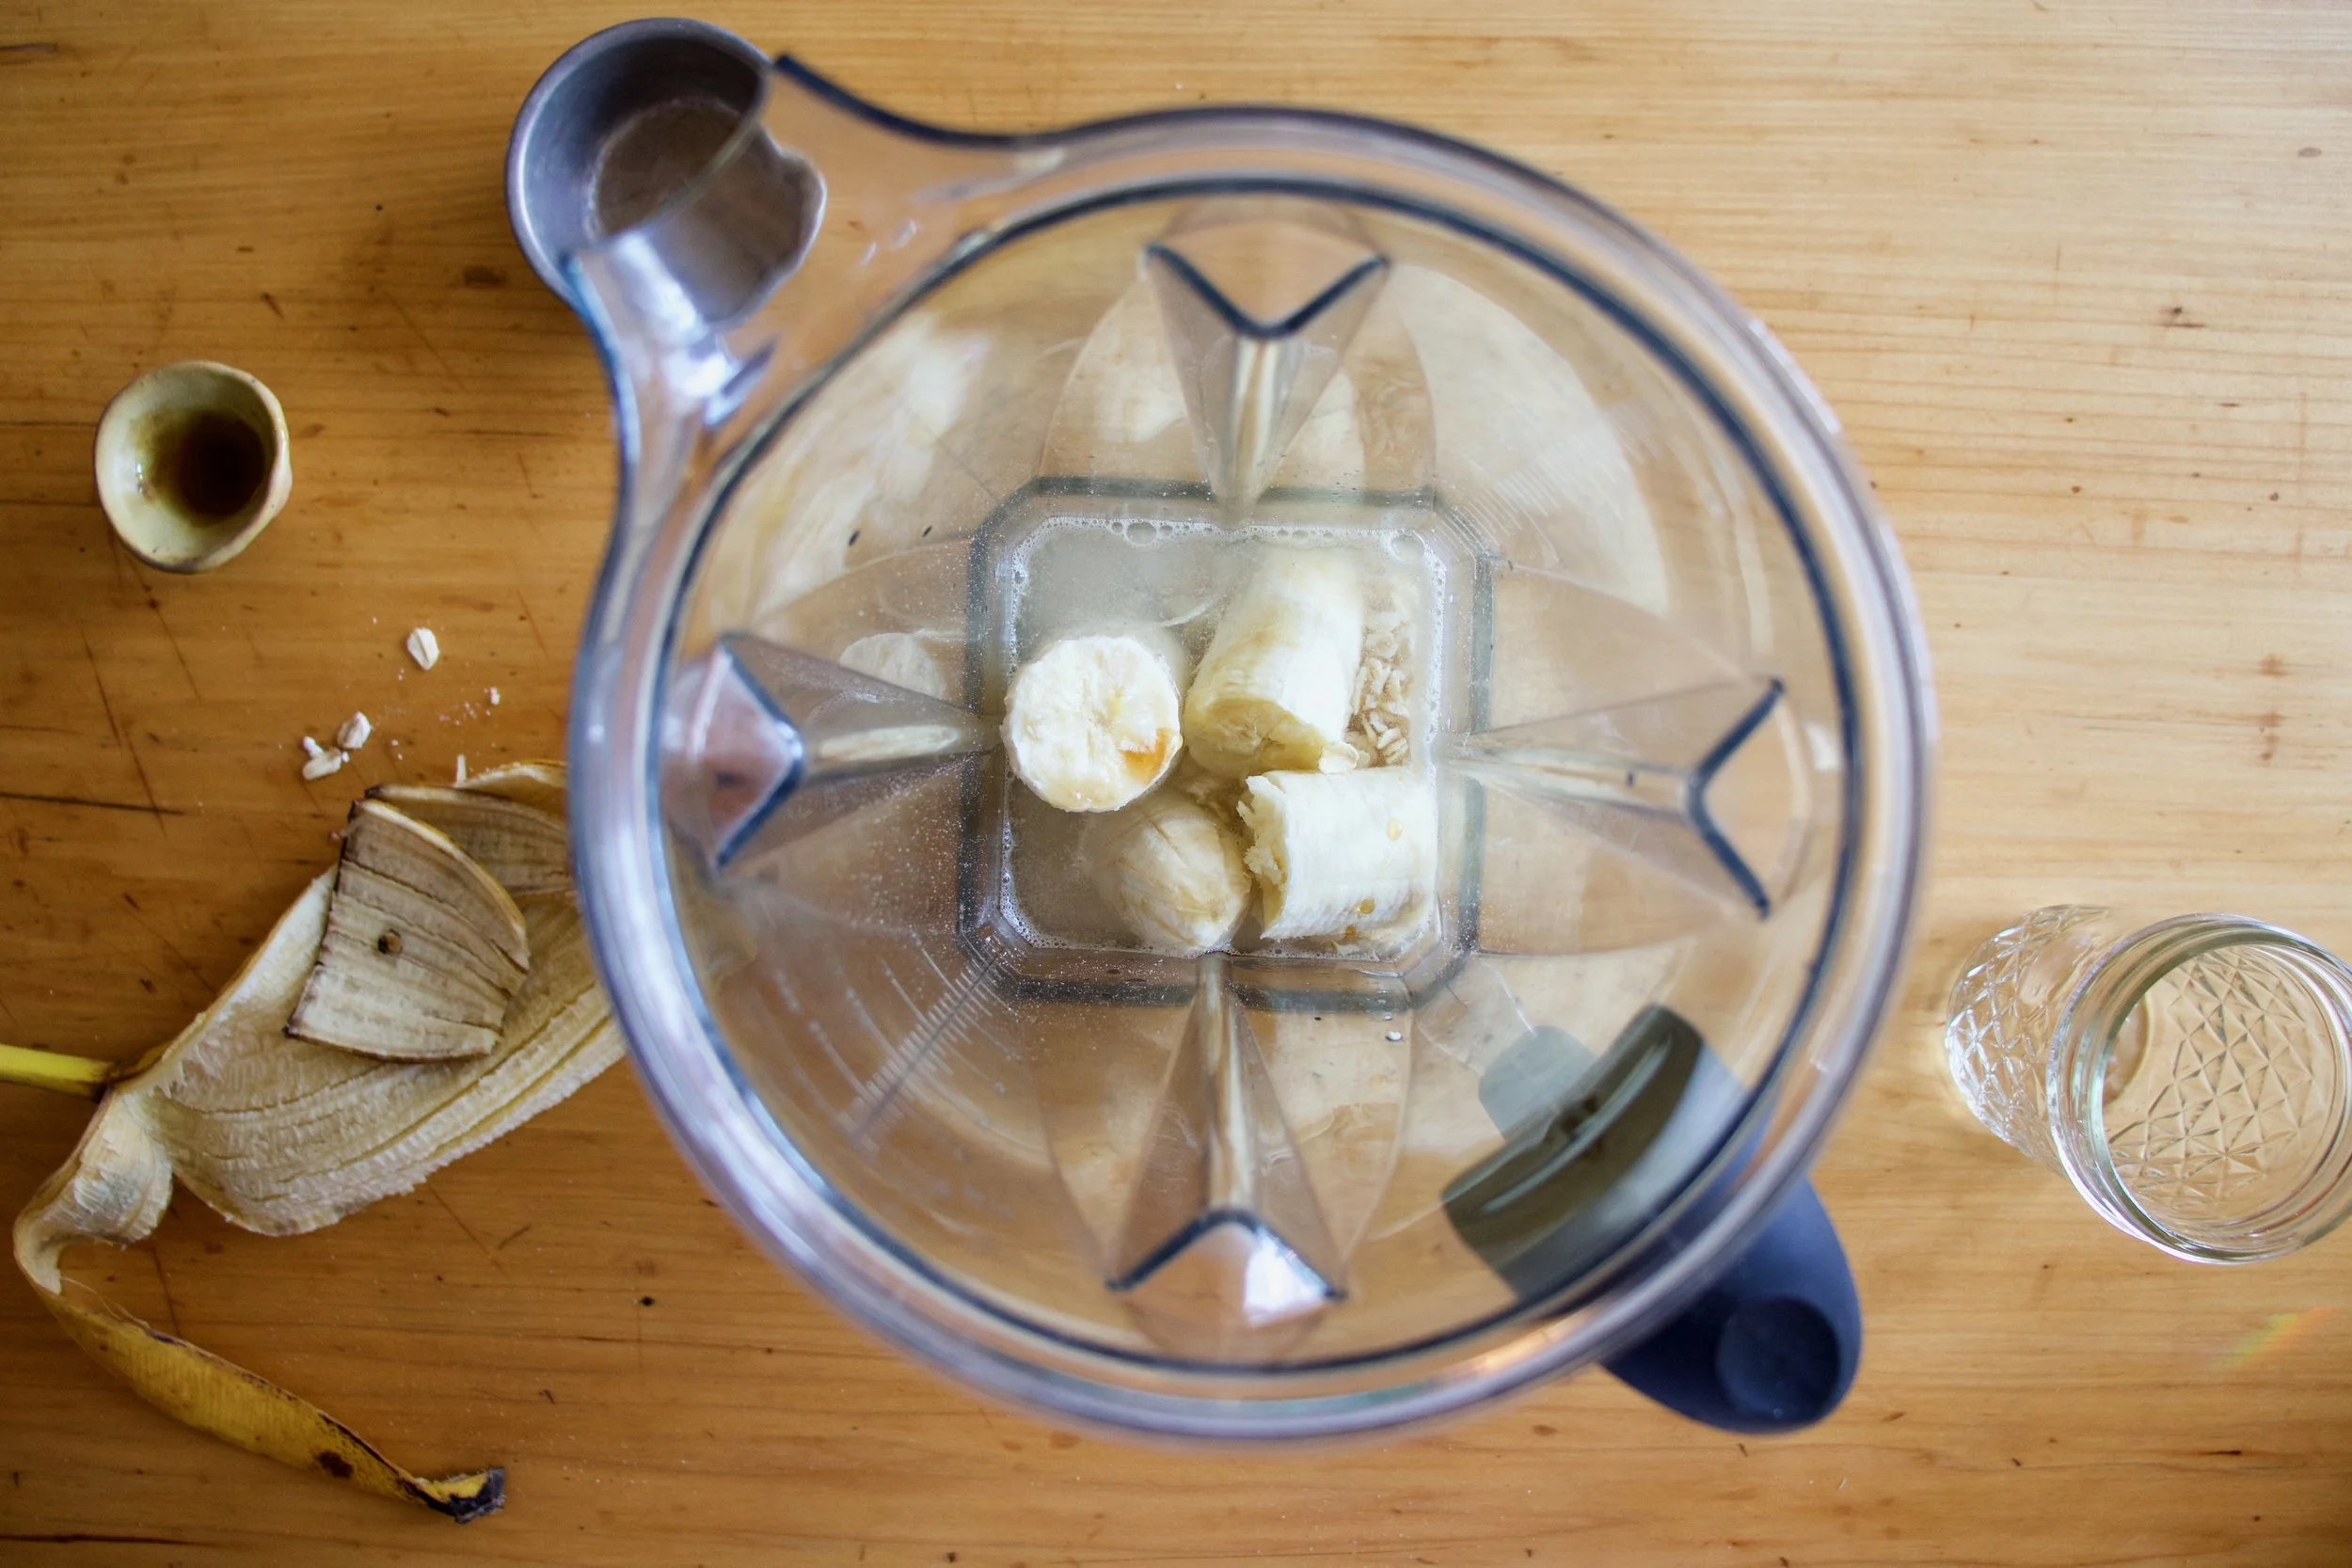

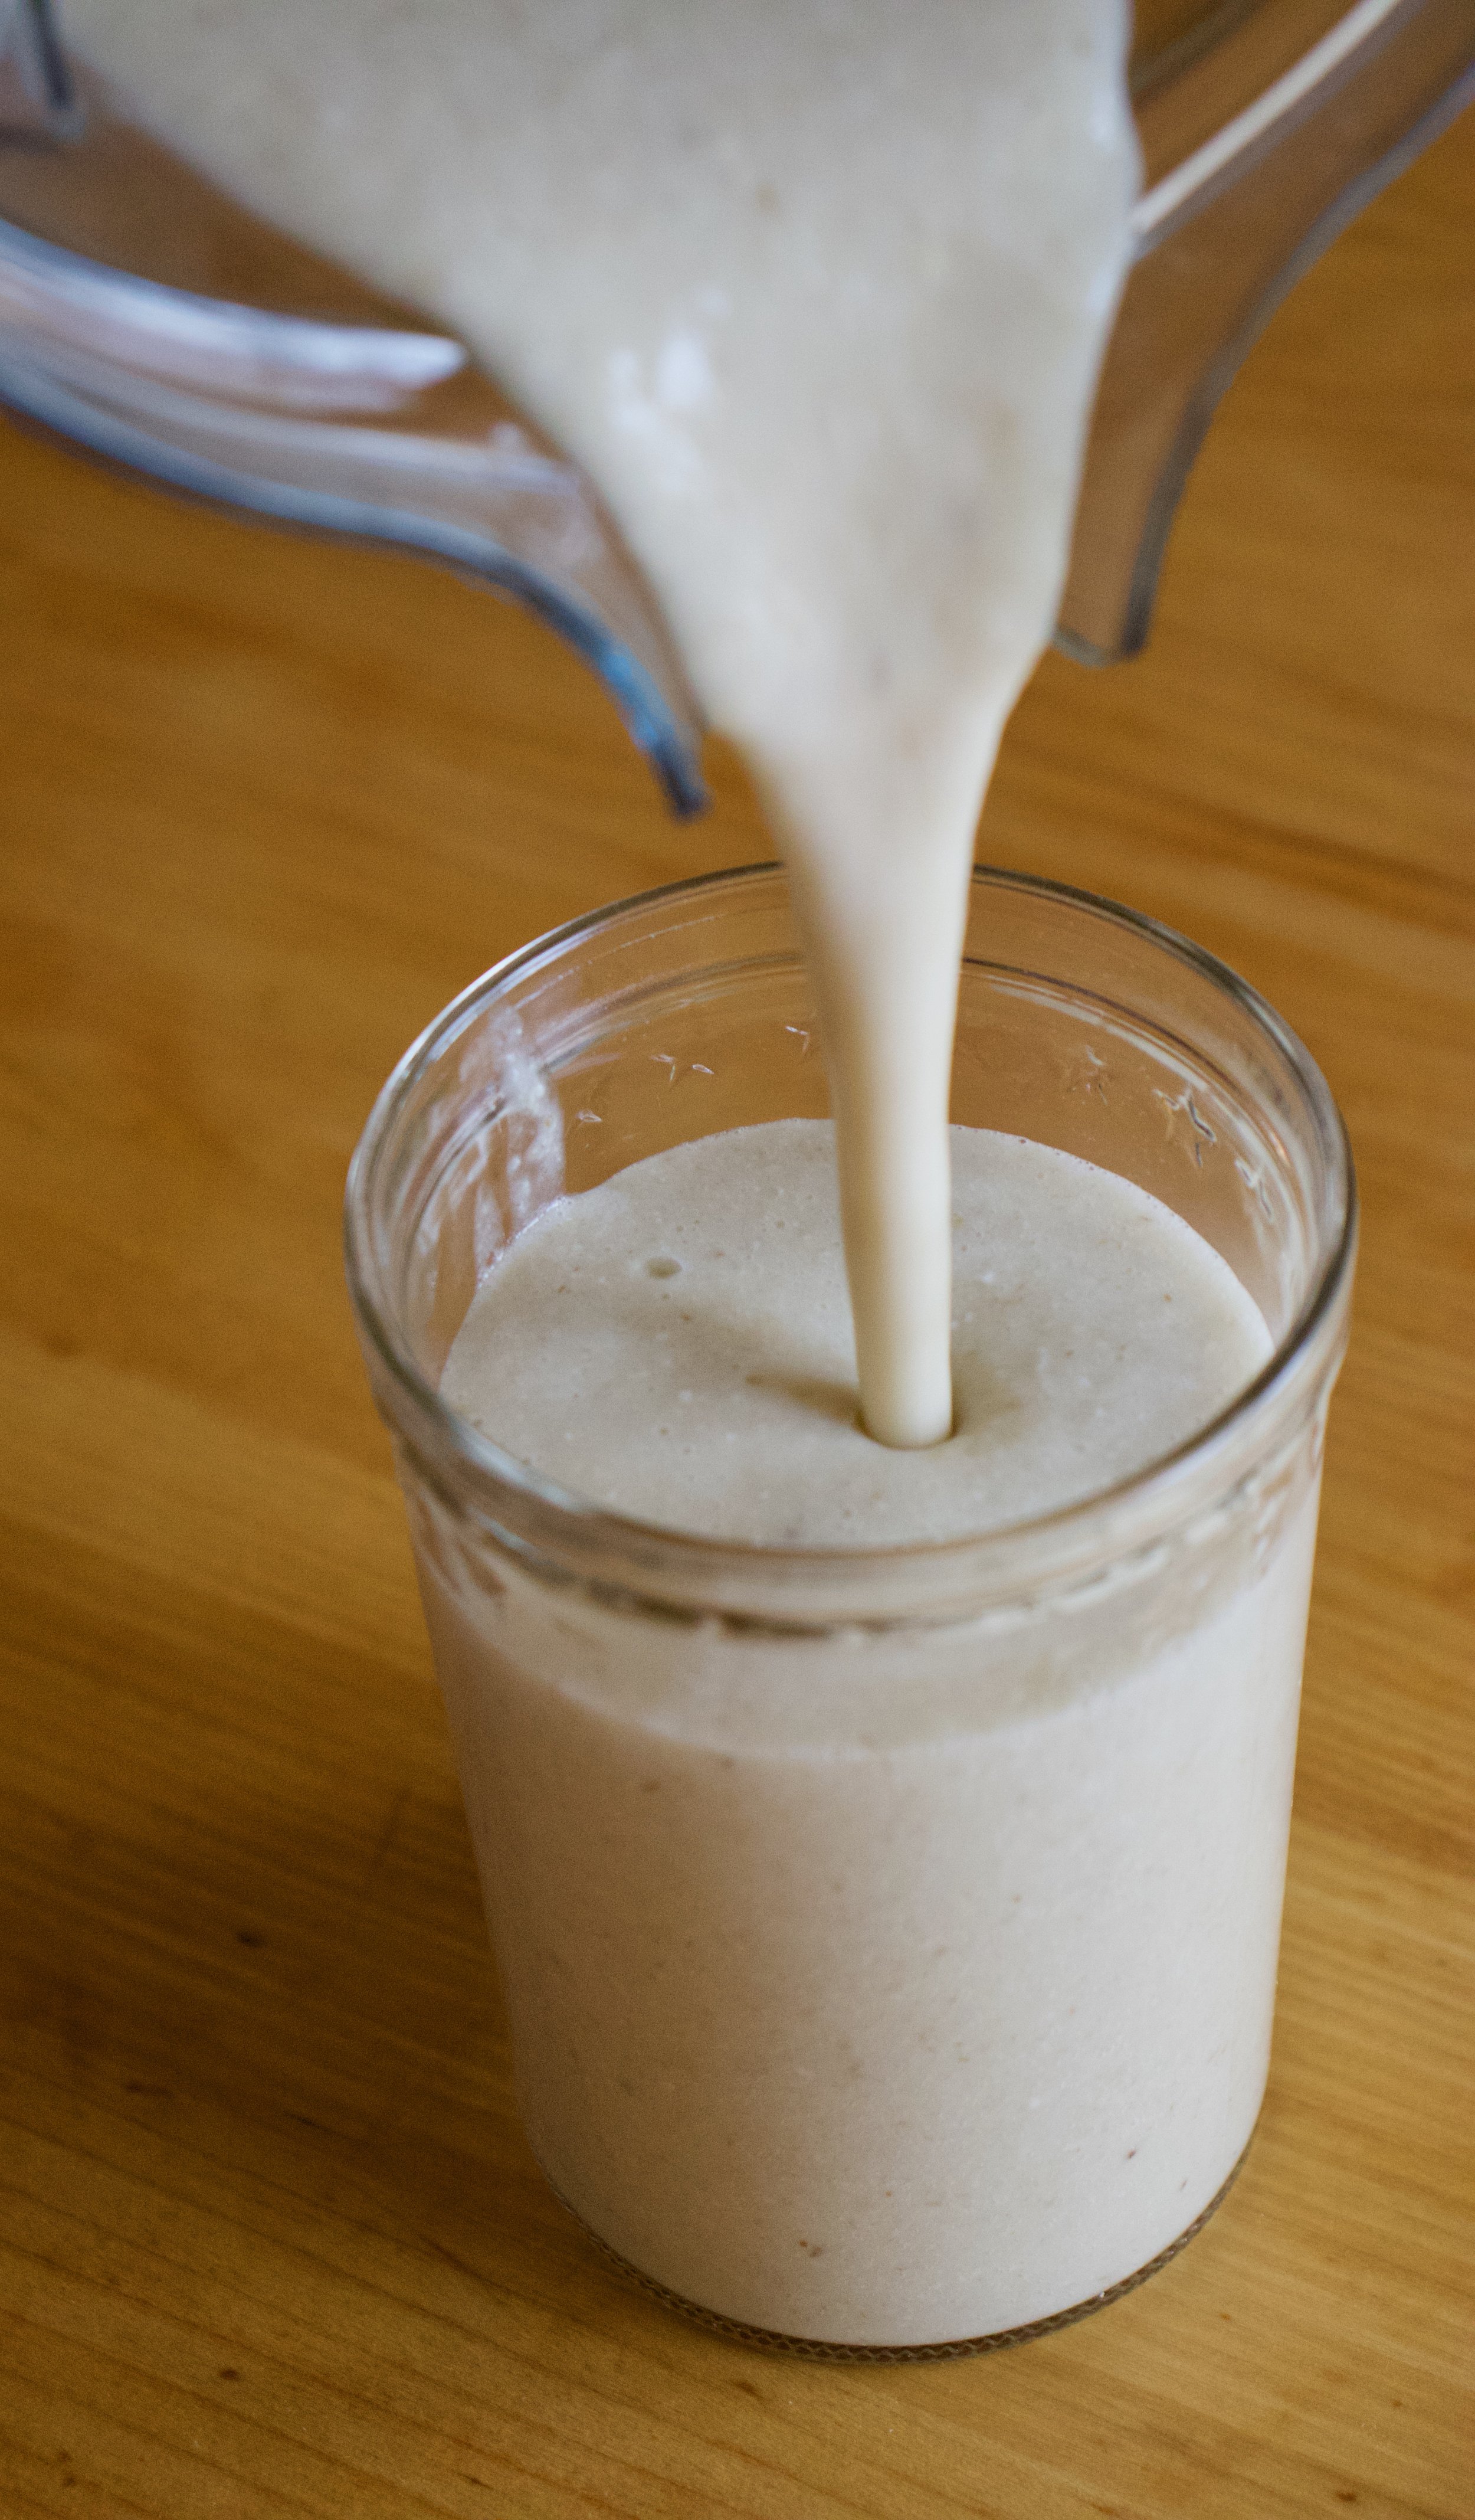


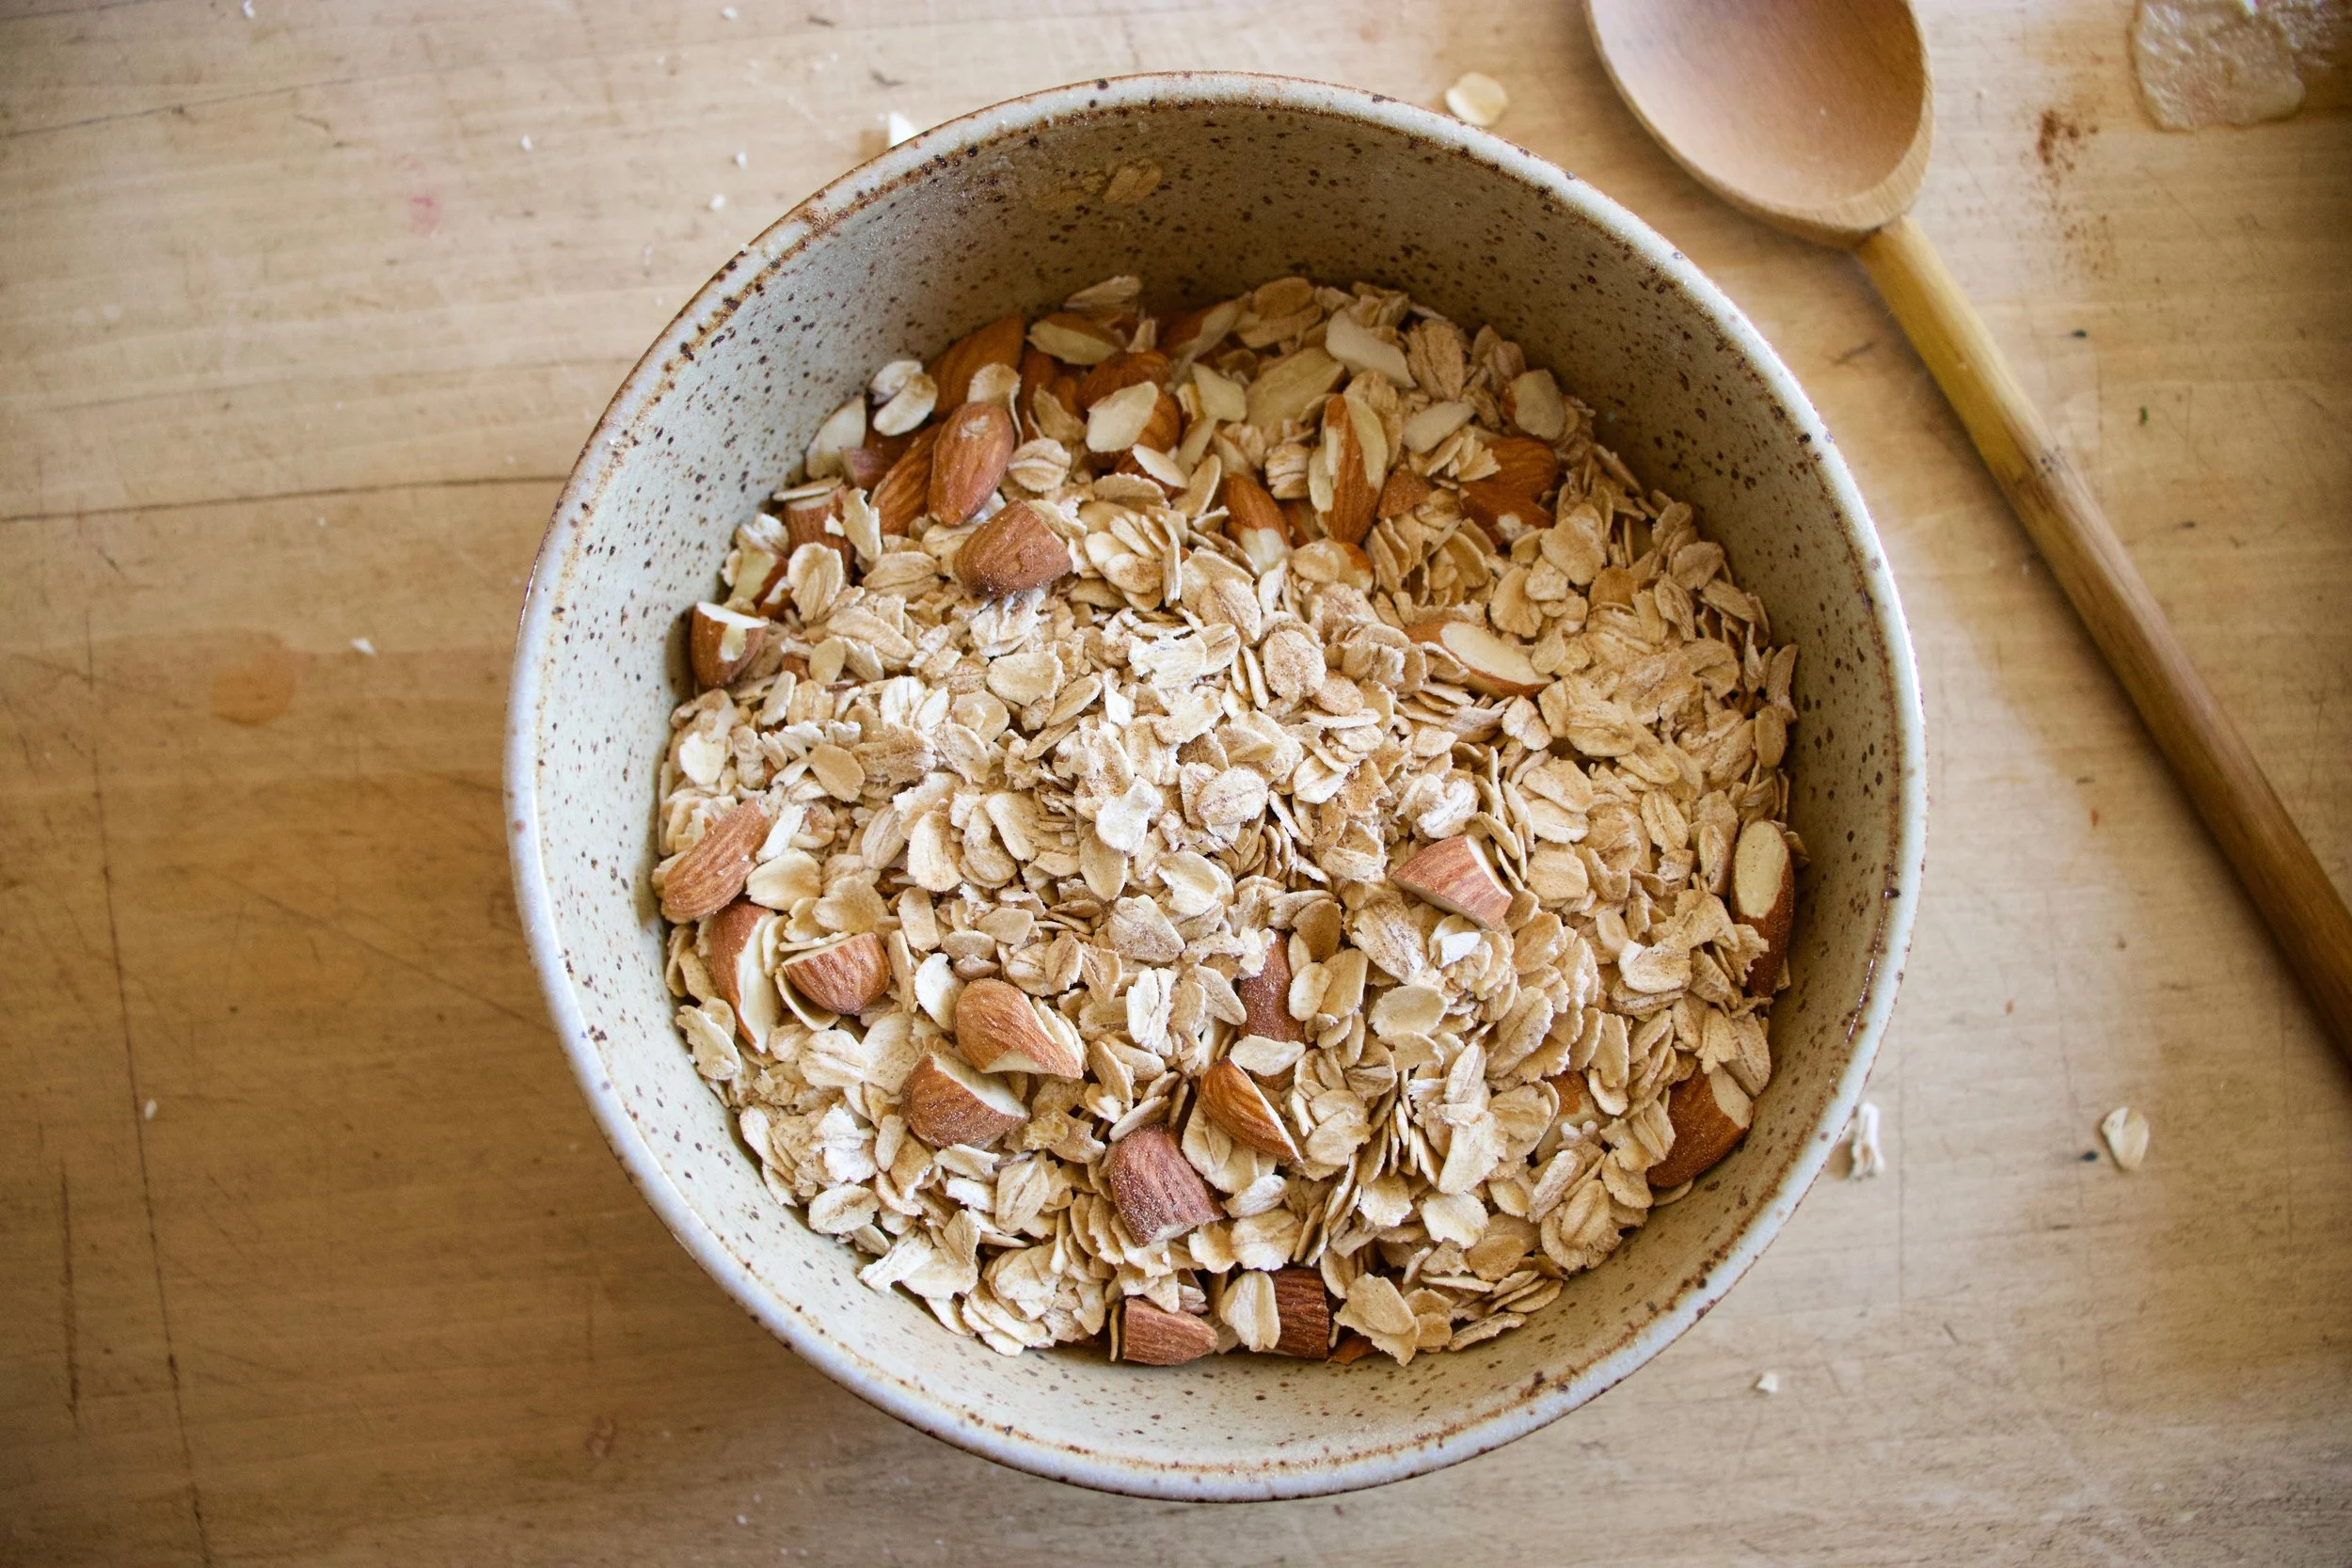


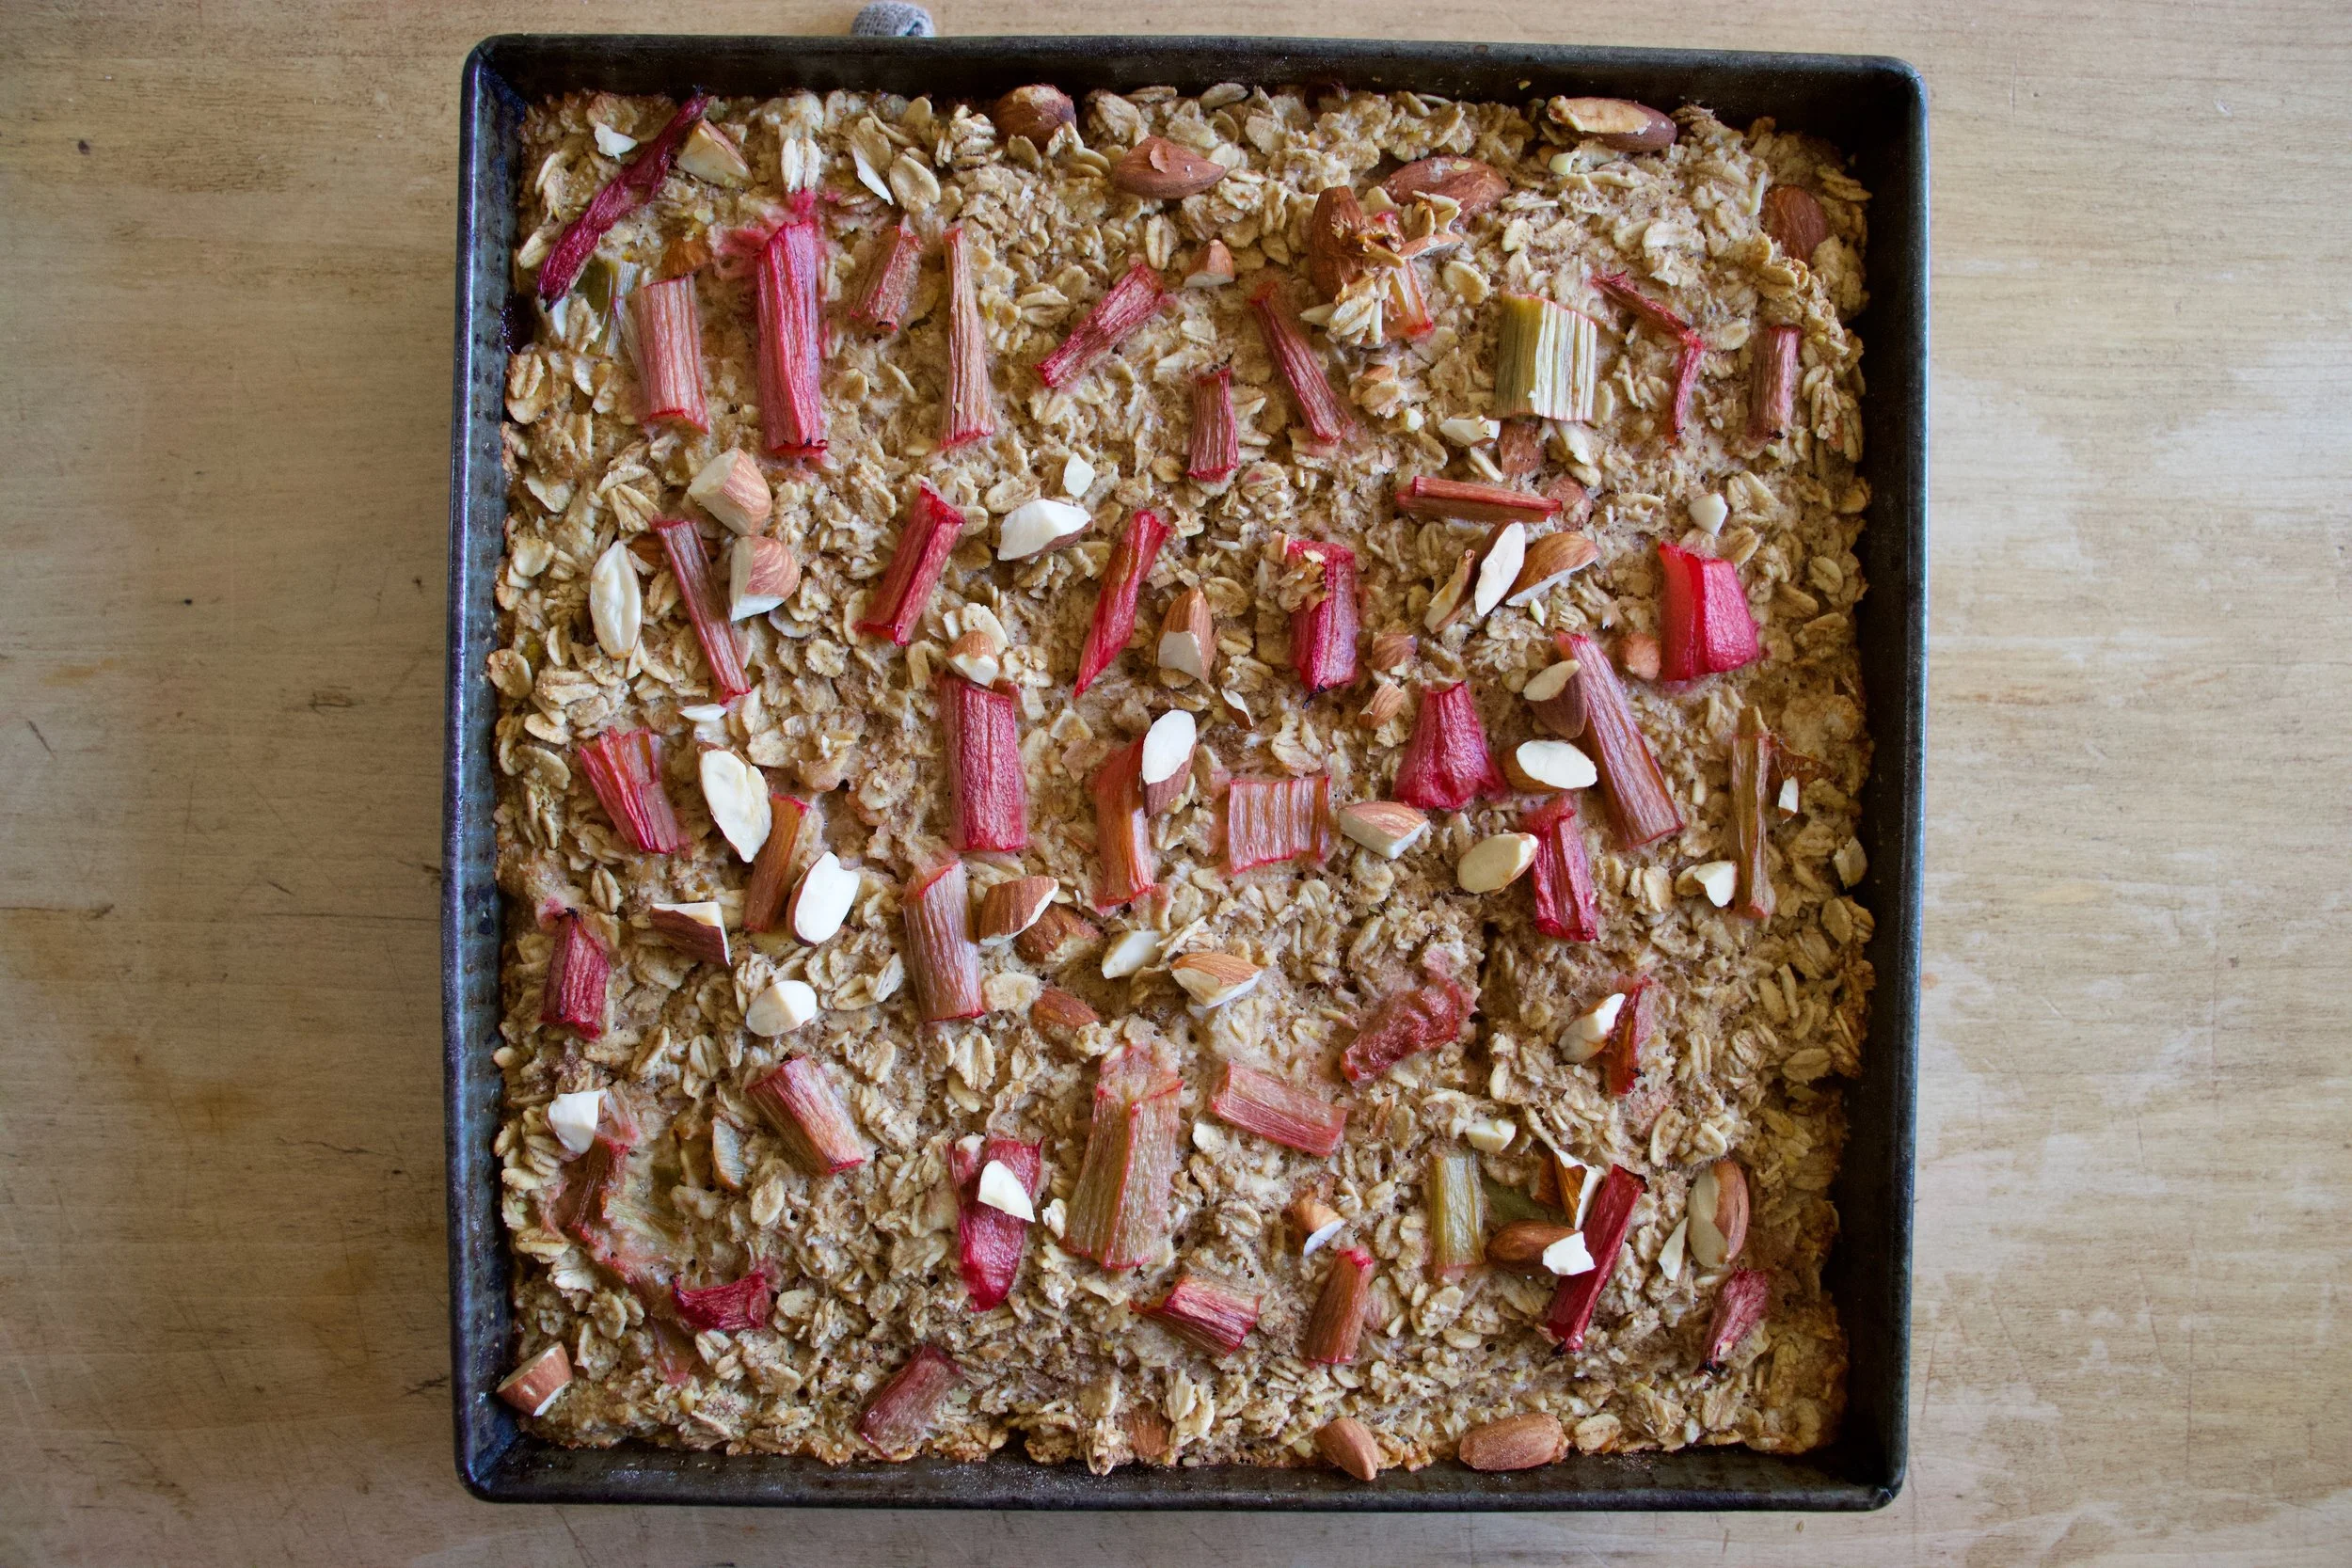
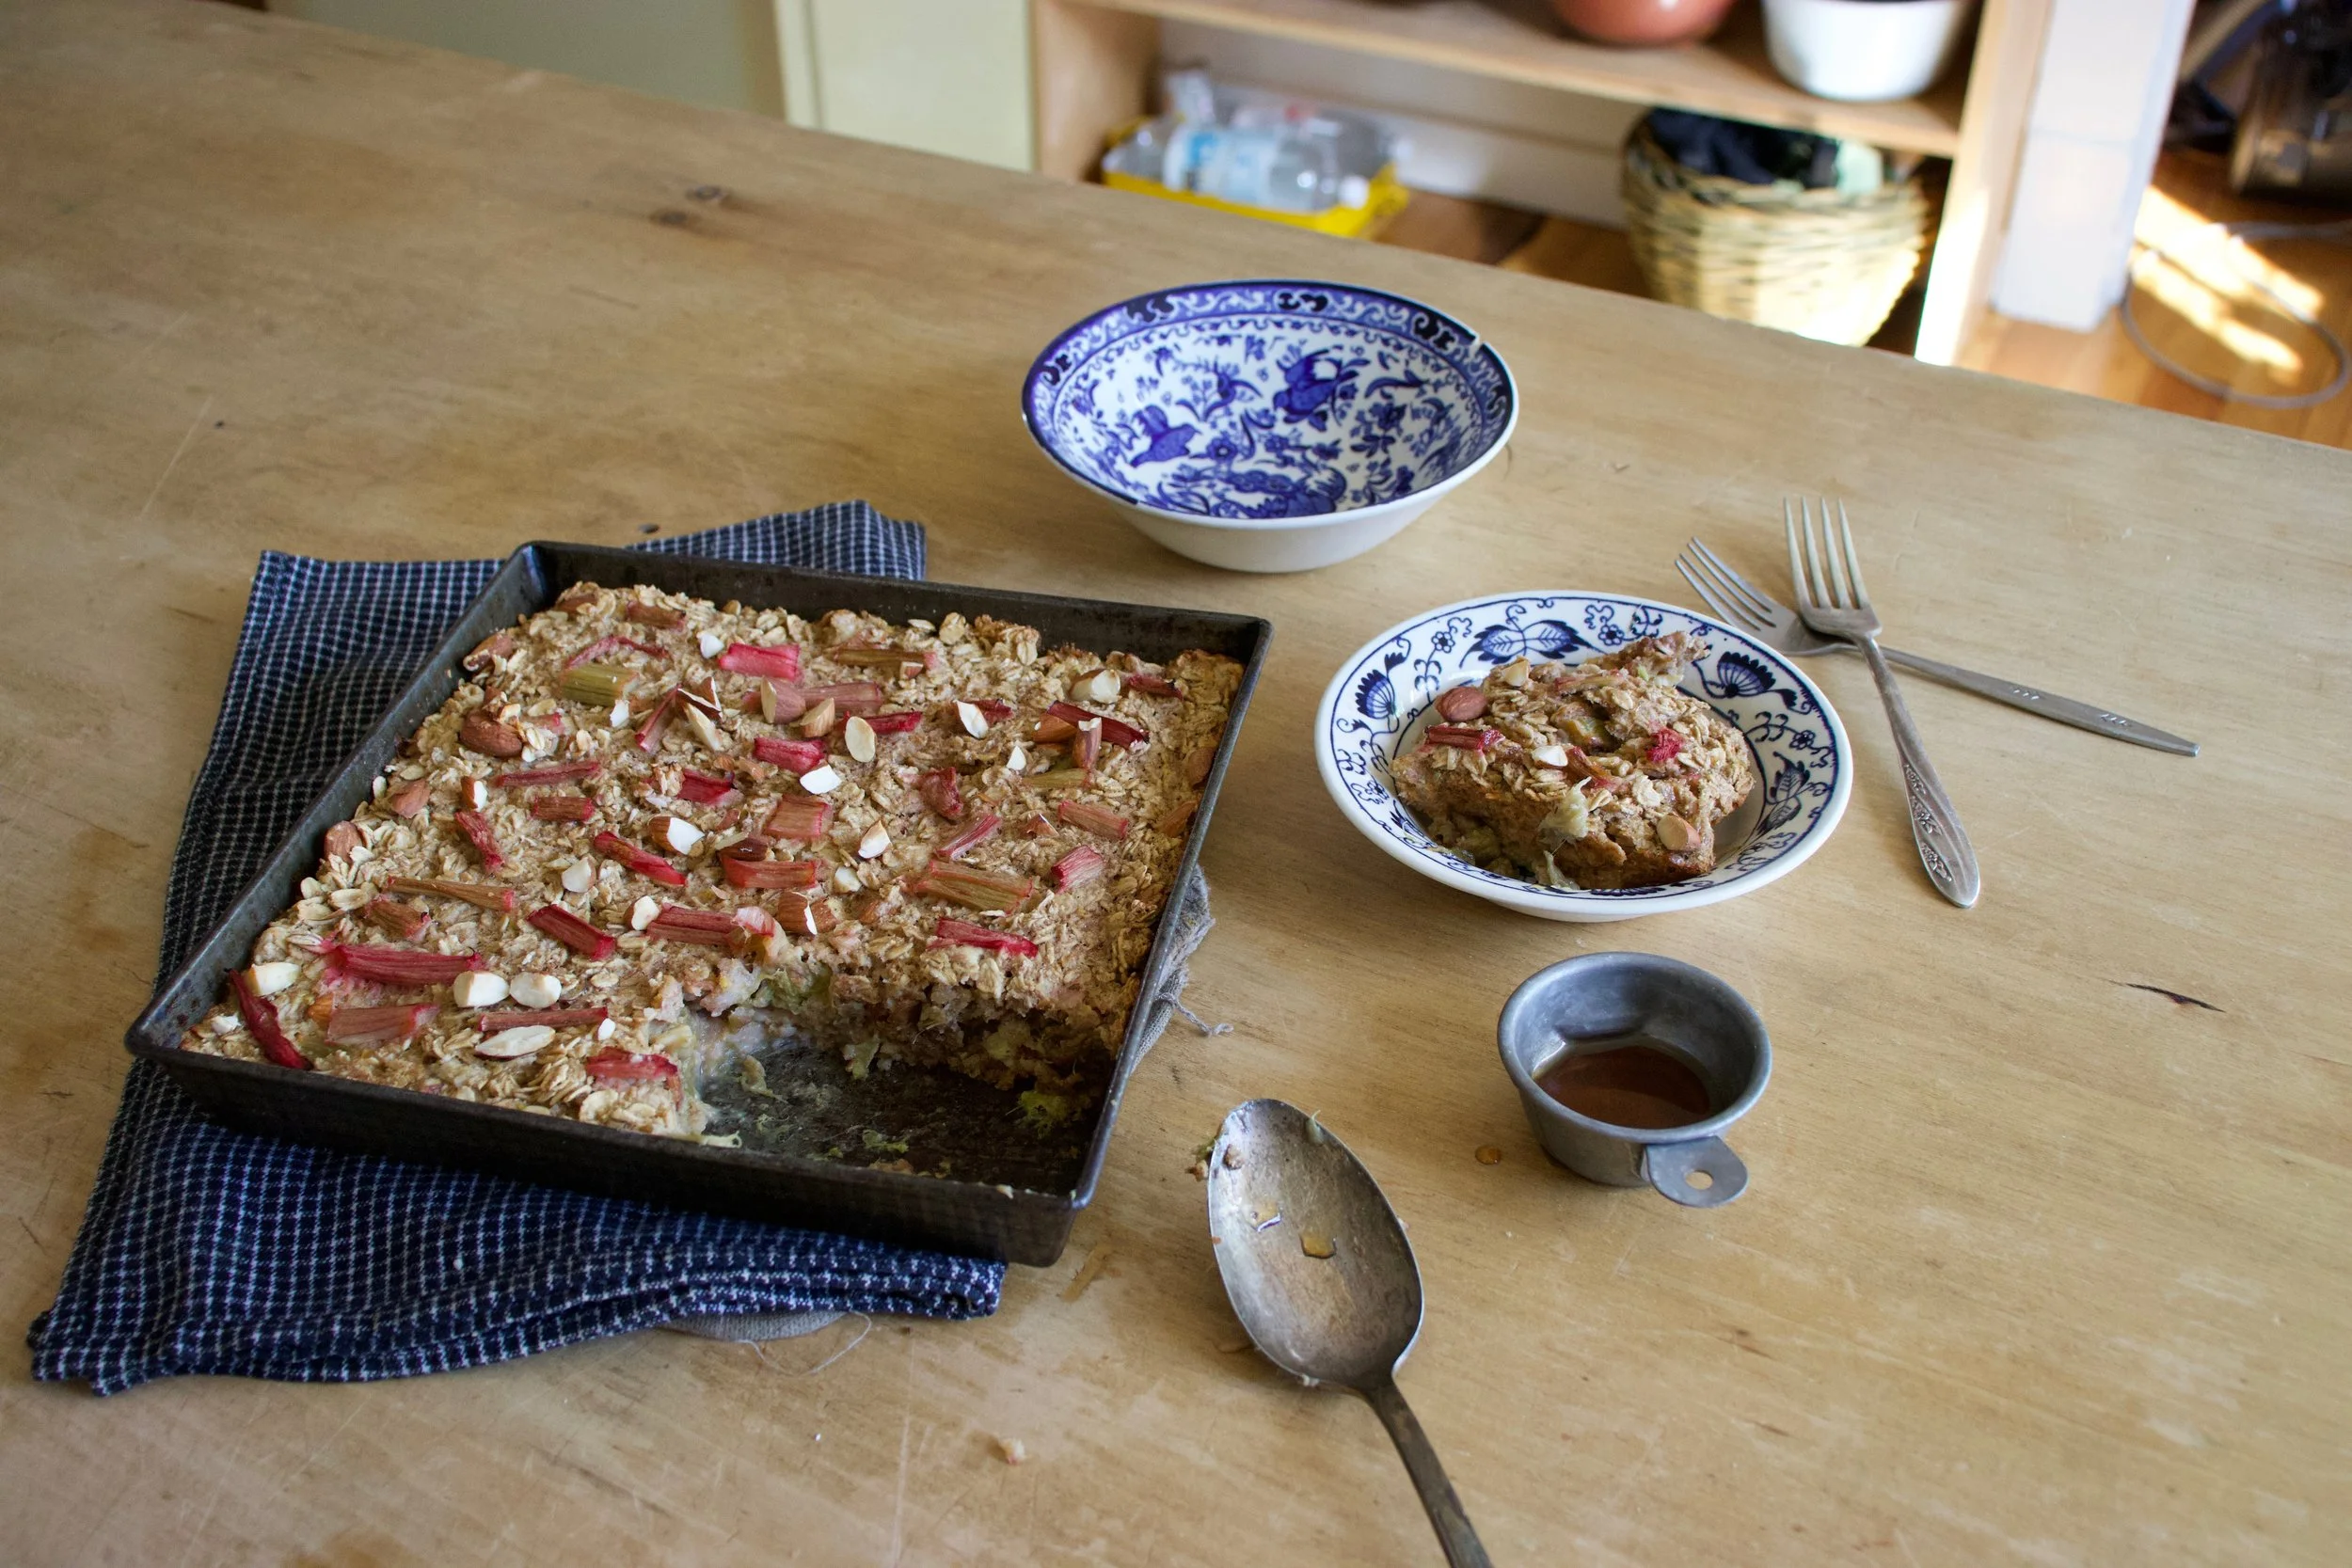


 Last week pineapples were on sale everywhere……So I bought 5. Don’t judge
  Stuff for the goodness. We got the kale, some avocado because all salads should have avocado and some cooked lentils because, well, all salads should have lentils (or beans or nuts.. so you could totally something else) Then a few sprigs of fresh dill, a clove of garlic, red wine vinegar, salt and a bowl of chunked up pineapple.
  The pineapple, dill, garlic, red wine vinegar, a splash of water and a pinch of salt get blended in a blender or whatever blending device you use. Go as smooth or chunky as you like, I recommend going smooth, but leaving a little chunk, like half blended.
 So good……So so good.


THE LOVELY CRAZY
August 18, 2019 by maximios • Blog
I have been so excited all week to make this star bread.%u00a0About a week ago, while perusing %u00a0King Arthur Flour recipes, I saw this %u00a0amazing star shaped cinnamon bun situation and just knew that I had to make it. I checked the recipe, made a a bunch of tweaks (made it vegan and a little simpler) and set a date with the oven. I figured that Friday was the day because well, this bread is basically a really pretty cinnamon bun and cinnamon buns are great for the weekend and plus the temperature in the world dropped to like super freaking freazing cold and what better way to stay warm then to crank the oven.%u00a0
And make it I did. And honestly. this was one of the most satisfying bread bakes that I have had in a while. It is just so dang pretty and smells so good and was honestly way easier to make then it looks (seriously, really simple). I don’t know if I am ever going to be ale to make cinnamon buns the regular way again. I mean look at this. %u00a0And best to let you know that it feeds a crowd, which is fantastic if you are going to be having any big family/friend gatherings in the next month or two. (or if you are just awesome and want to eat the whole thing to your face). Think about it, if you make this for the people (or yourself) %u00a0how cool and awesome and fancy you are going to seem. It’s really a win win win all around here so I don’t see a reason to not make it. Trust me, and thank me later.%u00a0
The stuff of stars. Flour. salt. yeast and soy milk. A little oil, sugar, mashed sweet potato, earth balance %u00a0and cinnamon.%u00a0
To start, a %u00a0couple of tablespoons sugar and the yeast go into the warm soy milk to kick start that yeast and get mixed together.
Salt, oil, and mashed sweet potato go into the big bowl with the flour.
Then the yeast mixture gets pouted in too. Get ready to mix. And mix.
And after mixing, some kneading. %u00a0A well floured surface with a extra flour on the side is needed here. You are going to want to knead the dough for about 5 minutes, adding a little flour whenever the dough gets to sticky.%u00a0
Once the dough is nice and smooth looking, cover it in oil and stick it into a bowl and cover it %u00a0and let %u00a0rise for about an hour.%u00a0
Make your cinnamon sugar mixture while waiting .%u00a0
Dough doubled in size and dumped onto the well flour counter.%u00a0
Take a dough cutter or knife and divided the dough %u00a0into four equal pieces and roll each piece into ball.
While keeping your surface well floured, roll a dough ball into circle (or as close to a circle as you can get it) about 12 inched wide%u00a0
Place rolled dough onto parchment paper and cover the surface with %u00a0earth balance. Then sprinkle a third of the cinnamon sugar mixture all over that.
Grab another ball of dough and roll it out the same size as the first and place on top the first dough. Repeat the earth balance and sugar mixture and then cover that with another rolled out dough. Earth balance and sugar mixture one more time, then the last dough.
All stacked up.Take the rolling pin and give the whole stacked thing a gentle little roll, just to make sure all layers are stuck together.
The fun part. Grab a small circle cutter or lid (I used small jar lid) and place directly in the middle. Take your dough cutter and score your cuts. Score into quarters then each corner into six pieces. You end up with twenty-four pieces.%u00a0There needs to be a even amount of pieces in order for the design to work so you could do %u00a022-16 pieces. I wouldn’t %u00a0go less.
To get the twist, grab a piece in each hand, give a little tug and twist the pieces towards each other 3 times. Take the ends and kind of tuck and pinch them together. %u00a0Repeat until all the pieces care twisted.%u00a0
%u00a0This is probably the most pretty cinnamon thing I have ever seen.%u00a0
Slide the star on the parchment onto a baking sheet and cover to rise and rest for about half hour or so and get the oven preheated.
After the second rise and right before you stick it into he oven, brush the top with a little plant milk.
And into the hot oven it goes.%u00a0
Aaaaa. So freaking pretty!%u00a0
After a few minutes, if you decided you want a little glaze action, go for it. I made up a super simple one, just a splash of vanilla in powder sugar with a splash of milk.%u00a0
Drizzled and ready for action.%u00a0
makes 12-13 servings%u00a0
For the dough%u00a0
for filling
For icing (optional)
*I just mashed up a 1/4 cup of a roated sweet potato that I had in the fridge. If you don’t have a roasted potato laying around, you can steam of roast a sweet potato and mash it up for this.%u00a0
Measure milk into a large jar or bowl. Mix in 2 tablespoons sugar and the yeast. Set aside to activate.%u00a0In a large bowl mix together the flour and salt. Add in the sweet potato,%u00a0oil, and the soy yeast mixture. Mix together with a wooden spoon or dough spoon until you can’t. If the dough seems really wet, add in another 1/4 cup of flour. %u00a0Once mixed as well was you can get it, dump the dough onto well floured surface. Start kneading the dough, adding a little flour as you go if needed. Knead for about 5 minutes or until the dough is a nice soft but not to sticky uniform ball. Cover dough with a little oil and place into large clean bowl. Cover with a towel and let dough rise in a warm place for about an hour or until it doubles in size.
Mix the cinnamon and sugar together while waiting.
Once dough has risen, dump it onto a well floured surface and divide into 4 equal pieces. Roll each piece into a ball then grab the first ball and roll out into a large circle about 12 inches wide. Don’t worry hear if the circle is not perfect, its going to be fine. Place first circle onto piece of parchment paper and cover the surface with 1 tablespoon of earth balance. Sprinkle with a third of the cinnamon sugar mixture. Grab another dough ball and roll out to the same size as the first and place onto of the cinnamon sugared dough. Repeat the earth balance cinnamon sugar and top with another rolled out dough. Once more with the remaining earth balance and cinnamon sugar and top with the last rolled out dough. Take rolling pin and give the whole stacked thing a little roll to make sure it’s all stuck together well.
For the design part. Grab a small circle shaped thing about 2 inches wide (I used a jar lid) and place directly in the center of the dough. Take a dough cutter or sharpe knife and lightly score into quarters then each quarter into 6 pieces You could also cut less pieces, but the main thing you need is to have an even number of pieces for the design to work.%u00a0Once your lines are good, cut the lines by pushing down into the dough and not slicing back and forth. %u00a0Grab a piece in each hand and gently %u00a0twist the pieces towards each other 3 times then pinch the ends together. Repeat until all the pieces are twisted together. Slide the star onto a large baking sheet, cover, and let rest and rise for another 1/2 hour.%u00a0
Preheat oven to 400
When the star is risen again and right before it’s going into the oven, brush the top with a little plant milk. Pop it into the oven and bake for about 20- 25 minutes, or until the top is a nice deep gold brown.
Remove from oven and let cool a little bit. If you want a little icing, mix together the vanilla, powdered sugar, and plant milk. Wait until the star is less the hot and drizzle all over.
And now it’s time to get at it. Eat what you want and store the rest in an air tight container.%u00a0