It’s officially kinda official. WE MOVED IN!!!! And yeah sure, we might not have a kitchen or a 100% functional shower, but hey, who needs that when you got a real freakin bed to sleep in. (we are showering and preparing food at the loft) Going form sleeping on a futon on wooden slates in a crawl space to our real bed, with a real frame, all in a giant room with windows….. It’s hella crazy.
Other then the move in, the week has been pretty jammed packed. Still spending every minute plugging away at the house all while making sure all of our tenants are keeping warm with working heaters. (we have spent way to much time at the plumbing supply store this week) Barb, the mr and I ditched a day of work and school to travel to the north and hit up the land of Canadian Ikea. The mission was simple. Get a kitchen sink and maybe a cool rug or a shelving unit, and for barb and the mr, to eat as many hot dogs as they could. Success was had. We go the sink, I got a jar and a rug, towels were bought and an obscene amount of hot dogs were eaten (I think they each ate somewhere between3.5 and 5, plus a fro-yo. Me I was happy with my carrots) We we home before dark and spent the remainder of the day hanging up the Christmas lights. It was a grand day indeed.
As for the mr, well he went and turned himself one year older. And what did we do? We went and had a happy birthday party with family and friends at the newly unfinished house. It was all sorts of fantastic. We frantically ran around to pick up all the construction mess, tossed some plywood on the cabinet frames, ran all over to make paper lanterns for the light bulbs hanging from the ceiling and cleaned the toilet. I made huge vats of soup and kept the warm in slow cookers (I am now a new owner of a vintage 70’s crock pot so I guess I need to learn how to use it) and we borrowed an electric griddle, cut up some veggies and fruit and had a soup and grilled cheese party. (shout out to barb for helping me cut all the everything, oh and having the first official dance party with me) A classic homemade vanilla cake with some Duncan Hines frosting and ice cream topped off the night. I must also mention that even with a house full of people, including a bunch of littles, there was barely any food wasted. My brother even asked where he could find my compost bin to toss the orange peels. That might have been the highlight of the night. After the evening my ass was tired so off to bed we went. Then I woke up. Nothing beats waking up at 5am the day after a party to a plywood covered pile of soup crusted dirty dishes. 2 hours later, a rag, some peppermint Dr. Bronners and the bathroom sink made things look good again. And now the house is full of every chair we have ever owned, every piece of mismatched bowl, plate, cup,jar, and spoon we could find, and a freezer full of wheat bread and lots of carrot sticks.
Yup, things are moving along. Pretty soon I’ll be cooking up a storm in new kitchen and will be bring you all some food posts to boot. The appliances are set to arrive tomorrow and all we have left to do is build the cabinets, run a few water lines, pour a concrete counter………
Today the mr have to remove the 500 plates, cups, bowls and spoons out and the rest of the birthday cake out of the kitchen area and get back to work to makingt he real kitchen thing happen. But the coffee pot and all the coffee has found it’s permanent home. I’ll have coffee all day long. Whoa hoo!
Things I saw and read on the internet that you can now see and read too.
-Not really a “gingerbread house” but what ev, it pretty fantastical. How To Build An Indestructible Gingerbread House. Gummy bear epoxy seems so right.
-Speaking of gingerbread houses. Holiday gingerbread cookies have a dark and violent past
–Cute Animation Imagines How Day Turns into Night
-A hairy tail has be found. First Dinosaur Tail Found Preserved in Amber
-This is a good guide with lots of good recipes. The Search is Over: This Map Will Find Your Sugar Cookie Soulmate
–I want this.
-Now I know where I have seen you before. Scientists Think Your Face Evolved to Look Like an Ape’s Butt
–Why Nutrition News Contradicts Itself All the Time. One day my diet is super healthy and the next, I am probably going to die cause of it. Damned if you do, damned if you don’t. (nah, I think I am good)
–A Brighter Outlook Could Translate To A Longer Life. Doing it
-I get excited every year when this list comes out (I know, I a dork). NPR’s Book Concierge Our Guide To 2016’s Great Reads
Picture fun time.
I made him throw this sock away….. It was time.
Have a fantasticday.
It is super chilly and dark out and the smell of jelly donuts is wafting in from open windows (it’s coming from the donut factory down the street) and I am thinking about grabbing the wool blanket from the packed away winter stuff and crawling back into bed, just for a little while longer until the coffee is done brewing. (4am wake up this morning and I am feeling like a nap is in order soon, even if it is 6am) This is the stuff of the best fall morning. Now if this could be my all day.#lifegosls
The week was a week, but a good week at that. Started getting squash with the farm share which lead to a discussion between me and the mr about what our absolute #1 food we could live off of forever (him, pizza.Me, super roasted kombucha squash covered in nut butter) I made a sheet birthday cake that also contained about an entire package of oreo cookies for a newly 15 year old Jackson that is making me feel old. There was a dinner here and a dinner there and just a lot of people and family. We haven’t spent much time at home or by ourselves this week so I am definitely ready for a quite day all to my lonesome. My brain is on overload.
We ordered the downstairs flooring!!! Come this Wednesday, the mr and I will be unloading 40 or so bundles of some pretty white “utility grade” oak. We also found some floor tile for the bathroom for dirt cheap at the resourse store( tiny white squares.. nothing fancy but looks sharp) Flooring is for real you guys. Once we lay this stuff it’s over. We are good and yeah. (until 2 hours later when we realize we have a million other things to accomplish) But all is good. We have flooring.
So today is going to be a fun one. The mr, my brother and I are going to attempt to move the 10 million pound radiators from the back yard to the upstairs….. Going to be oh so much fun (no, not it is no) Once we move them, I am going to finish painting them and the mr will install them. Whoa hoo! Plumbers are coming soon to hook up the new boiler so we have to get all this shit ready. WORK WORK WORK WORK WORK!
How about you? Got any fun activities planned for this here fantastic fall weekend? Find something enjoyable, preferably outside, and try to stay away from reading all about the politics. We all need a break from that.
Internet stuff that kept me interested.
– Do yourself a favor and go outside. This Is Your Brain on Nature
– Almost finished this book and about to start this one.
– I like honey crisps all right, but I am a mac girl for always. (and they are usually one of the cheaper varieties) Why Are Honeycrisps So Much More Expensive Than Other Apples?
-Breadfruit came from testicles and other weird myths. THE WORLD’S BEST FOOD-BASED CREATION MYTHS
-How can trees not have secret lives. A Web Of Trees And Their ‘Hidden’ Lives
– And this. Today in Terrifying Bird News, Pigeons Know How to Read
-This would be my bliss (with an added coffee bar) Secluded Library In The Woods
-I got my information from Meryl Strep in The Devil Wears Prada (love the movie) How Trends Trickle Down. The circuitous path of ideas in food and fashion.
-Breaking Taboo, Swedish Scientist Seeks To Edit DNA Of Healthy Human Embryos. I am officially scared.
-I think this might be my next knitting project. Purl Soho Pullover
Some pics from the past week.
My morning walks as of lately have had me doing a bit of raspberry, cherry tomato, and husk cherry picking. Can it gt any better then that? (I sometimes pick flowers too). And yesterday I got my first pie pumpkin of the season. It is so cute and pumpkiny that I kind of want to keep it sitting on my counter for a while, but no.. My plan is to roast that shit for dinner tonight and eat it all to my face. There will be plenty of pumpkins to decorate with soon. This one is meant for my belly.
But before pumpkin, the mr and I ARE GOING to figure out the paint situation. I have never in my life had such a hard time picking colors for any apartment or house we have painted (and we have painted a lot) We nailed the wall color(on the second try) and both love it. I spent a good part of the week repainting the entire upstairs, but now we need to figure out the trim. I picked out a lovely grey that I looked fantastic for about a minute, but now I kind of hate it. I blame it on all the light and angles of the space. No two walls look the same color so I might just have to go with white trim and call it a day. Either way we go, I need to get the paint at least picked out today, its driving me fucking crazy.
I really should stop bitching, we have had such a productive week. We ended up picking up a new set of cast iron radiators, which I will tell you was no easy feat (the first or second time we did it, each of those things weight like a 800 lbs a piece) The old ones we got were not big enough to heat the space efficiently but the new ones, they are perfect and pretty and work. Score on that one. (thanks Mark the plumber) And while I was painting away upstairs, the mr was downstairs doing all sorts of stuff like moving all the tools and trash out, figuring out the radiant flooring for the first floor and sanding and painting the ceilings. The house looks so good that I am almost tempted to just move on in now, but then I think back to all the places we have lived during construction and the temptation goes away. Far far away. I can wait, at least for a bathroom with a sink that is not a hose and bucket.
Yup, another busy crray cray week. After we get paint, I think I am going to crash for a while, let my body and brain have a little time to shut off. We really should try to go apple picking or something, but honestly, I think we are both just really tired and could use a bit of time not doing anything. I say this but I know the mr will keep on working until his arms fall off, me, I will just fall asleep on the floor.
One thing I really need to do at some point today is to bust out all of my cozy sweaters. I am so very excited because sweaters are my jam and I have me aplenty of them. My wardrobe triples once the sweaters come out and I don’t look like such a bum wearing all my big baggy paint covered t shirts. A sweater classes me up bit.
Yes, I can be classy (kinda)
Internet findings from the week.
-What a bad ass lady. Urban Beekeeper Delivers Pollinators by Bike to Community Gardens Across Chicago
–A Dictionary Is Telling Everyone to Calm Down About Using ‘Literally’ Wrong
-So jealous. I would have loved to have taken a coffee class in college. STEM To Steam: How Coffee Is Perking Up Engineering Education
-Thinking we might go with black doors. (maybe, what do you think?)
-Always thought these windows were a bit strange.The Bizarre Story Behind This Common Home Amenity In Vermont
-I am serial lane switcher. To Pick the Fastest Line, Follow People With the Most Items
–The Power Vegetables Pantry. The 12 ingredients that will supercharge your vegetable cooking.
-This dude spent a lot of time and energy figuring out how to best drink a coke. (coca-cola, not coke like the drug) The 24-Year-Old Coca-Cola Virgin
-This place has got to be amazing. WHERE DOES LOST AIRLINE LUGGAGE GO? TO AMERICA’S GREATEST THRIFT STORE.
-I have a mini dance party to this song every day. Also love it cause it reminds me of Alana and Abby from Broad City (when is season 4 coming???? I NEED it)
Now for a few pictures
Funny story. Our basement floods a little every year in the spring. I think that a lot of people around here have slight problem with basement water, the houses being so old and all. So when earlier this week we had a massive thaw and a bunch of rain, the mr preemptively set up the sub pump to keep the water away. All day he was checking the pump and all day it poured butthe basement stayed dry. He turned it off that night after it had stopped raining. We woke up to the most beautiful bright blue sky, the temperature so warm that I didn’t need to wear a jacket and to 3 inches of water in the basement. STUPID!!!!! But that happened and yeah. The mr spent a good few hours moving all of our stuff, (we store a lot of stuff in the basement) shop vac-ing and pumping up the water .He did such a good job that it was almost like it never happened. The only really wet thing was a big laundry basket of stuff. I wanted to wash itasap so it wouldn’t mold so when I got home, into the washer it went. (the washer is in the basement too) Go to change the load to the dryer and guess what.. the mr took the washer machine house out of the main drain to use it for the shop vac, and no, we forgot to stick the hose back in. We re-flooded the mother F-ing basement!!!!!AAAAAAAAHHHHHHHHHH!!!!!!!
But it’s kinda funny right?
Anyway the week has been heavy on the crazy. My Dad has been here so we have been spending a lot of time with the family doing family things all week. Over at the house we have pretty much gutted the kitchen (anyone want free kitchen cabinets?) and the mr is almost done muding the first floor. Once that happens we can move in (Just kidding… not even close) but we are well on our way. And the next project we tackle is going to be fun fun (rip the roof off!)
And the father of mine is leaving today, (which makes me a little sad) I have no kiddos in my care, the water from the basement is pretty much gone and I don’t want to do a damn thing that involves work. It’s a down day for sure. No people, no fuss. I have a new book on hold at the library, although I am kinda torn. Should I start a new book or binge watch Fuller House? (can I take more family drama?) Have you watched it yet? Do me a favor if you have, let me know if it’s going to ruin the Tanner family for me.
Hoping your day, as well as mine, is gong to be a good one!
Interesting internet stuff from the week.
-Are you a open broiler or a closed broiler. I am neither.. my broiler is the bottom draw of the stove and doesn’t work unless pushed in. Can You Leave the Oven Door Closed While Broiling?
I was planning on making pita bread this week and just happen to stumble upon this article. The 7 Rules of Perfect Pita Bread
-Holding a bag of enough powdered caffeine to kill several people… whoa. Caffeine For Sale: The Hidden Trade Of The World’s Favorite Stimulant
-What is the word for finally getting words for all he emotions I felt but couldn’t explain? 40 Words For Emotions You’ve Felt, But Couldn’t Explain
-I know!!!!!. ARTISANAL WATER IS OUT OF CONTROL AND STUPID
-This article really hit home for me. To Anyone Who Thinks They’re Falling Behind In Life
-A tree inside.. yes, I would like one in every room please.
-I love cool (well done) street art.. Quirky New Chalk Characters on the Streets of Ann Arbor by David Zinn
-Maybe next knitting project Knit Fruits and Veggies by ‘MapleApple’
-I am not going to lie.. I love Chrissy Teigen and although I probably won”t cook any of the food in her book, I am still looking forward to giving it a read. Chrissy Teigen’s ‘Cravings’ and the Search for Cookbook Credibility
New baby, lots and lots of littles, and laying the flooring. Never a dull moment over here.
Erin finally popped and pushed out a humongous adorable little human (Emersion Reed Scott… I call him murder) so while she has been doing that and hanging out in the hospital, her littles have been my littles. Needless to say, my house got trashed, my fridge is empty, and all the printer paper is gone. We ate all the beans and apples in the house. Spent after schooldays drawing and making weird shaped out of scrap wood and nails while the mr and I worked. Not to take away from my sister pushing out a gigantic human from her body, but hell, my body/mind are fried. Taking the littles is easy (feed them, let them loose on Nick, homework, watch Malcom in the middle, brush teeth, bed) but laying floor is hard. Lots and lots of tiny pieces of floor that need to be hammered and bent and fanagled. So many nails, nailing for hours and having all the pressure of not nailing into the radiant heat tubing. My body has contoured into a semi permanent bent shape and red tubes are floating over my closed eyelids. The mr on his hands and knees for hours with so many slivers… It’s fucking painful. But we love it (the floor) and the bit of pain is worth it. As for the littles, the are so awesome. They can stay with us forever. Oh yeah, and my Dad has made his way back tot he state where he left all of his children for a visit so we have been doing all that family stuff too. If only I could figure out how to get paid for being with my family.(we could do a reality tv show but I don’t think America could handle that)
I am cooking food, I just haven’t had a lot of time to like clean dishes, make things pretty, and catch good enough light to take pictures but I am hoping to get a little time to make an epic cake this coming week. I want to bake plus I want to start a project and see it finished within a few hours. I miss posting recipes and and I think everyone around me needs some cake. So look for that (thinking some kind of pumpkin chocolate situation)
And as for today, the littles are back home with their mother so the mr and I are going to floor some more until our bodies give out then drive into the mountains for a well earned visual spectacular of color. And coffee. So much coffee.
Just for a laugh… Judah says to us the first time we went up to the hospital to see his mom and new baby bro .”holy haha. Look guys look. He is eating moms nipples.” He couldn’t stop laughing. That kid, oh boy is he awesome. He also said that the baby makes sounds like a big fart. I agree.
Internet stuff I found during my late night browsing sessions.
-Dude, I might just have to move to Japan. Japan Wants to Reward You for Safe Driving—with Coffee
–HOW VANILLA BECAME THE WORLD’S FAVORITE FLAVOR..is it yours?
-Into all of these hammocks. 5 Hammock Hybrids for Extreme Relaxation
-To the insurance company that doesn’t want to renew our house insurance policy because of our garden looks like we lack “pride of ownership” (for real what they said) Eight Reasons NOT to Clean Up in the Garden
-Ah, love this house.
–Do You Wish Time Would Slow Down? Yes, yes I do
-We are keeping the downstairs all white and light and bright. Inspirations
– “Extreme bees, extreme people.” Six Scientists, 1,000 Miles, One Prize: The Arctic Bumblebee
-This is fantastic. To bad I didn’t know this hack in art school. Ingenious Hack for Sketching with Two Point Perspective Using an Elastic String
-I have blown up a few carrots in the microwave in my day. Snap, Crackle, Kale: The Science Of Why Veggies Spark In The Microwave
And a few pics.
Enjoy the rest of your weekend!
-C
Yesterday the mr and I bought windows! It was a total fluke but when we went to get our winter tires changed to our summer one (GOOD BYE WINTER), my brother in law (who was doing the tire change) gave us the keys to his truck and sent us to be productive with ourselves instead of sitting in the customer lounge drinking all the free coffee. So we ended up at the hardware store with the truck and no real expectations for anything other then browsing. But lo and behold we stumbles onto the windows that were just meant to be. So we bought them, loaded them into the truck (I don’t know how we would have fit them all into our little car..truck meant to be) and brought them to their new home. We now have six new wood interior, al clad exterior double hung windows (yet to be insulted) minus wait for it, one very large front door window.
Yup, I smashed the front door window. When we brought the windows we also bought a bunch of 2×4’s. While unloading them, I accidentally, but on purpose, smashed threw the front door with the wood. The door was starting to close on me and instead of just letting it, my reflexes got the better of me and I threw the wood, right into the window and apparently almost took the mr’s head off at the same time. Mother FUCKER!
Good times.
So that sums up the week. Some great ups, some down downs. Feeling lots of feels. Working a lot but spending time doing things like a little hike with the family and the pup, a trip across the lake with my mom and little sister to the Target, and the mr and I took a trip to see his brother and sister in law and the new addition to the family.. A 12 day old little nugget that is just to freaking cute. And it’s spring and the weather is amazing so I am trying to get out into the gardens and get that going too.
As for today, we are going going to keep plugging away at the house, gots to the keep the momentum going while it’s good. But I am for sure going to make a trip to the library, and plop my butt in some sunshine with a steaming cup of coffee and a good read at some point today. A little work, a little relaxation… And so much coffee!
Internet fun finds from the week.
– You can now do you business on this 18 karat gold toilet, on display and in use at the Guggenheim. The line might not be worth the wait.
-Check out this 100 year old lady boss. I hope if I make it to 100 that I can be as kick ass as her.
–Runners High. It’s for real
-I love this idea, but a problem I might encounter is that I would start drawing, not stop, then completely abandon my To Do list. Try Drawing Your To-Do List Instead of Writing It
-Oh Prince, you will be missed. Music and hair.. Prince’s Hair Styles From 1978 To 2013
–Plant Porn
-I have tried meditation and I am so so, but this seems like it would be perfect for me. This new kind of meditation has you listen to cuss words
– Funky and colorful interior inspirations.
– And I am kinda in love with Dusty Rose Pink Velvet Seating.. just not sure the mr would be into it.
-I am in the market for new sheets and these or these are my new favorite (but kinda expensive)
And some fun time pictures.
I figured now is a good time to get this recipe out there before we get to far into spring and summer recipes because there is going to be a lot of banana ice cream filled recipe coming and I figured its a good idea to have the basic banana ice cream recipe ready for people to refer too. And because I made so much fantastic naner ice cream, I also made a cookies and cream naner ice cream for my sisters and the mister.
Comments that I got from my sisters and the mister when I made them this ice cream
-Sister one.”I give this my sister seal of approval.. It’s so good. The first dessert you have made that I liked! (not including all the other desserts that you have made that I liked)”
-Sister two- “Wow.. it looks like ice cream and feels like ice cream and tastes like ice cream.. You should make me this ice cream!” (I was confused too because I was pretty sure I just made her some)
-The mister- “I am so excited for my new fly fishing pole!”
Ok, so the naner ice cream isn’t new to the mister and he IS very much excited for his new fly fish pole. So excited that he forgot to tell me how amazing that I am and to thank me for making him a big bowl of yumminess. (It’s ok, I forgive him)
And yes, this is probably one of the easiest, most delicious, healthy and amazing frozen dessert that you will ever eat. You will probably find yourself buying mass amounts of bananas and stocking the freezer until things just start falling out. (which is also ok because it’s only bananas and you can’t have too many frozen bananas)
The stuff you need for this ice cream…. Nice and ripe bananas, peeled and then frozen* That’s it.
To make it, place frozen bananas into food processor and hit the on button. Process the crap out of the namers until nice and silky smooth.
*Note, the smaller the frozen chunks are , the faster and maybe a little easier for the blender to blend the naners into ice cream. So if you think of it, chop bananas into pieces before freezing or even after.
After all blended and smooth, either eat right away or scoop ice cream into a freezer safe container and stick in freezer. That’s the banana ice cream… And it is amazing and so so so so so addictive. I make a batch, think I am only going to eat a scoop, then find myself eating half of what I have made, but it’s ok cause it’s only bananas.
Now for the cookies and cream banana ice cream..One batch of banana ice cream, either freshly made, still in food processor or made ahead and placed in a food processor and given a good pulse to smooth it up.
Add cookies in, crushing a bit beforehand and pulse till combined. Now you have cookies and cream naner ice cream…. and everybody is happy.
Scoop into a cup, a bowl, a freezer safe container, or directly into your mouth. Be careful…. You can still get brain freeze from eating naner ice cream too fast!
Keep it real hump day drum bum!
-C
Basic Banana Ice Cream
Makes one batch. Good for 3-4 servings
4-5 ripe bananas peeled and frozen
Peel bananas and stick in a freezer bag or container and freeze. When bananas are completely frozen, break into pieces and stick into a food processor or blender and puree until silky smooth.
Eat right away or scoop into a freezer safe container for later.
Cookies and Cream Banana Ice Cream
1 batch banana ice cream
5-10 (depending on your cookie need) cream filled cookies like oreos or Trader Joe’s Joe Joe’s (These are gluten free)
In a food processor, blend banana ice cream with cookies.
Eat right away, with a utensil of choice in a container of choice.
The trees are on fire, the sky has been lighting up like a masterpiece and the temperatures have been on the cooler, crisper side. I am one lucky lady to be living in such a beautiful place. If you don’t know the awesomeness of fall in Vermont, you should put it on your life list cause it’s amazing and will bring you so many good feelings.
Another super productive week for the books. We finished laying all the hardwood downstairs then went straight to tiling the bathroom which was awesome cause it was my first real tiling project and now that floor is down too. But man did it do a number on me. The one thing the mr always bitches about are his knees, and now I now why. Kneeling on anything, especially cement board, for 5 hours pretty much will kill your shit. I might be a little whinny, but crap on a shoe do my knees hurt. (now I am done complaining) What else……..Oh yeah, a large quantities of construction waste was brought to the dump that has bee accumulating in large piles in the back yard..(that was fun) I invented a new sport, storage unit parkor (I am really good at climbing and jumping around packed storage units), and got to see the new little monster baby while doing it. Then my little brother came over for a while to help carry the cast iron bathtub from the backyard to the upstairs. (thanks Paul!) I even made a point during the week to stay home for just enough time to made donuts with sprinkles while I sat in front of the oven knitting cause I was freezing my ass off. And I ate 2 roasted pumpkins, an acorn squash, and a sweet potato this week. Feeling pretty good about life.
So I don’t know about today. We might or might not work. We may or may not run away to the woods.(I need to be with the trees for a while) Most likely both. But one thing is for sure, I will be icing my knees. And drinking a butt load of coffee. And eating the butternut squash I picked it yesterday. I am a winter squash addict.
The things I clicked on and reading doing the internet this week.
-Have you noticed the crazy moon lately? How to See the Hunter’s Supermoon This Weekend
– How We Got ‘Bark’ for Dogs, ‘Quack’ for Ducks, and Other Words for Animal Sounds
-A classic pencil is so underrated. Trace The Remarkable History Of The Humble Pencil
– Incredible Origami Animals.. Like super incredible
-Lots of sweetbread, muffins, and all sorts of baking things in my future. The Best Way to Store Quick Breads and Muffins
-This guy tasted a shit load of butter for his Fancy Butter Taste Test
–Photo Of An Elephant Snuggling An Ostrich because it made me smile and is really freaking cute
– Check out this This Triangular House.. Its pretty crazy cool
–Can We Trust the Cooking Methods on the Back of the Bag? Question everything!
–Bob Dylan Wins Nobel Prize, Redefining Boundaries of Literature.His words are beautiful.
Yawn, stretch, throw on some pants and back to it.
But it’s taking a whole lot of will power to get up and go. It’s just too perfect out to do much of anything. Is it weird that I love this cold and rainy weather? These are the days that I can spend all day in a ball of blankets on the couch next to a window looking out with hot beverages and good books.. I will get there soon, but not today. We started tiling the bathroom wall yesterday and need to finish it, along with he rest of the house.
This week flew by fast. It included a very quick foliage drive(stopped by a river so the mr could fly fish), Barbara turning 17 while watching her field hockey game, a tiny little baby that fell in love with me and wants me to be it’s new mommy, and the scraping and painting of so much everything. I think the highlight was when the 17 year old Barb stopped by the house to bring us coffee, hung out with us, and lent me her sweater that I love but probably won’t ever get a chance to wear cause all I wear are grubby, paint stained clothes. But none the less, it was great and maybe I’ll just wear the sweater to bed. And the colors. Every time I walk out of the house and see all the trees, all the colors…it just blows my mind. So good.
Other then that, not much else. I am giving myself a political detox for a few days before i barf, eating lots of roasted celeriac and missing my kitchen. I can’t freaking wait to spend all day cooking in baking in my kitchen. I can’t freakin wait!
And now I got to find those pants.
Internet for the looking.
–Everyone Should Make Time for Daydreaming. I do me a lot of it.
-The Difference Between Pepitas and the Seeds from Your Halloween Pumpkin
–6 Things You Need To Know About Cycling On The Sidewalk. I sometimes bike the sidewalk, but only when I have to and very slowly.
– Maybe this is the reason I hate wearing shoes. ABSORB EARTH’S FREE FLOWING ELECTRONS THROUGH THE SOLES OF YOUR FEET(EARTHING)
-Read this book this week. One of my new favorite books. It changed the way I look at the world, especially trees.
-Forget Tomayto/Tomahto: The Real Debate Is, Should It Be Refrigerated? II never do unless it’s 100% necessary
-feel like this is a close representation of my knitting basket. A Mass of Tangled Red Yarn Unravels from a Loom to Overtake a Brazilian Chapel
-What Tree Is that has been a frequent question. Trees With Leaves – A Deciduous Tree Leaf Key
-Speaking of trees, I would live in this tree house.The tree alone is pretty amazing.
– A little preemptive in looking, but I told myself I that I get to buy knew sheets and duvet cover when we move into the house (I am a linens slut) This bed set is looking good, although can’t go wrong with these either.
And pictures.
The trees are on fire, the sky has been lighting up like a masterpiece and the temperatures have been on the cooler, crisper side. I am one lucky lady to be living in such a beautiful place. If you don’t know the awesomeness of fall in Vermont, you should put it on your life list cause it’s amazing and will bring you so many good feelings.
Another super productive week for the books. We finished laying all the hardwood downstairs then went straight to tiling the bathroom which was awesome cause it was my first real tiling project and now that floor is down too. But man did it do a number on me. The one thing the mr always bitches about are his knees, and now I now why. Kneeling on anything, especially cement board, for 5 hours pretty much will kill your shit. I might be a little whinny, but crap on a shoe do my knees hurt. (now I am done complaining) What else……..Oh yeah, a large quantities of construction waste was brought to the dump that has bee accumulating in large piles in the back yard..(that was fun) I invented a new sport, storage unit parkor (I am really good at climbing and jumping around packed storage units), and got to see the new little monster baby while doing it. Then my little brother came over for a while to help carry the cast iron bathtub from the backyard to the upstairs. (thanks Paul!) I even made a point during the week to stay home for just enough time to made donuts with sprinkles while I sat in front of the oven knitting cause I was freezing my ass off. And I ate 2 roasted pumpkins, an acorn squash, and a sweet potato this week. Feeling pretty good about life.
So I don’t know about today. We might or might not work. We may or may not run away to the woods.(I need to be with the trees for a while) Most likely both. But one thing is for sure, I will be icing my knees. And drinking a butt load of coffee. And eating the butternut squash I picked it yesterday. I am a winter squash addict.
The things I clicked on and reading doing the internet this week.
-Have you noticed the crazy moon lately? How to See the Hunter’s Supermoon This Weekend
– How We Got ‘Bark’ for Dogs, ‘Quack’ for Ducks, and Other Words for Animal Sounds
-A classic pencil is so underrated. Trace The Remarkable History Of The Humble Pencil
– Incredible Origami Animals.. Like super incredible
-Lots of sweetbread, muffins, and all sorts of baking things in my future. The Best Way to Store Quick Breads and Muffins
-This guy tasted a shit load of butter for his Fancy Butter Taste Test
–Photo Of An Elephant Snuggling An Ostrich because it made me smile and is really freaking cute
– Check out this This Triangular House.. Its pretty crazy cool
–Can We Trust the Cooking Methods on the Back of the Bag? Question everything!
–Bob Dylan Wins Nobel Prize, Redefining Boundaries of Literature.His words are beautiful.
The week in some picture
New baby, lots and lots of littles, and laying the flooring. Never a dull moment over here.
Erin finally popped and pushed out a humongous adorable little human (Emersion Reed Scott… I call him murder) so while she has been doing that and hanging out in the hospital, her littles have been my littles. Needless to say, my house got trashed, my fridge is empty, and all the printer paper is gone. We ate all the beans and apples in the house. Spent after schooldays drawing and making weird shaped out of scrap wood and nails while the mr and I worked. Not to take away from my sister pushing out a gigantic human from her body, but hell, my body/mind are fried. Taking the littles is easy (feed them, let them loose on Nick, homework, watch Malcom in the middle, brush teeth, bed) but laying floor is hard. Lots and lots of tiny pieces of floor that need to be hammered and bent and fanagled. So many nails, nailing for hours and having all the pressure of not nailing into the radiant heat tubing. My body has contoured into a semi permanent bent shape and red tubes are floating over my closed eyelids. The mr on his hands and knees for hours with so many slivers… It’s fucking painful. But we love it (the floor) and the bit of pain is worth it. As for the littles, the are so awesome. They can stay with us forever. Oh yeah, and my Dad has made his way back tot he state where he left all of his children for a visit so we have been doing all that family stuff too. If only I could figure out how to get paid for being with my family.(we could do a reality tv show but I don’t think America could handle that)
I am cooking food, I just haven’t had a lot of time to like clean dishes, make things pretty, and catch good enough light to take pictures but I am hoping to get a little time to make an epic cake this coming week. I want to bake plus I want to start a project and see it finished within a few hours. I miss posting recipes and and I think everyone around me needs some cake. So look for that (thinking some kind of pumpkin chocolate situation)
And as for today, the littles are back home with their mother so the mr and I are going to floor some more until our bodies give out then drive into the mountains for a well earned visual spectacular of color. And coffee. So much coffee.
Just for a laugh… Judah says to us the first time we went up to the hospital to see his mom and new baby bro .”holy haha. Look guys look. He is eating moms nipples.” He couldn’t stop laughing. That kid, oh boy is he awesome. He also said that the baby makes sounds like a big fart. I agree.
Internet stuff I found during my late night browsing sessions.
-Dude, I might just have to move to Japan. Japan Wants to Reward You for Safe Driving—with Coffee
–HOW VANILLA BECAME THE WORLD’S FAVORITE FLAVOR..is it yours?
-Into all of these hammocks. 5 Hammock Hybrids for Extreme Relaxation
-To the insurance company that doesn’t want to renew our house insurance policy because of our garden looks like we lack “pride of ownership” (for real what they said) Eight Reasons NOT to Clean Up in the Garden
-Ah, love this house.
–Do You Wish Time Would Slow Down? Yes, yes I do
-We are keeping the downstairs all white and light and bright. Inspirations
– “Extreme bees, extreme people.” Six Scientists, 1,000 Miles, One Prize: The Arctic Bumblebee
-This is fantastic. To bad I didn’t know this hack in art school. Ingenious Hack for Sketching with Two Point Perspective Using an Elastic String
-I have blown up a few carrots in the microwave in my day. Snap, Crackle, Kale: The Science Of Why Veggies Spark In The Microwave
As a reward to ourselves for finishing the floor laying week (what a freaking week, I will share some pictures soon) I stayed home for a little while yesterday morning and made some donuts for the mr ( I got to bake and do a little knitting and he got donuts.) Initially I was gonna make a cake, had it on my agenda for a cake at some point this week, but last minutes I felt the need to use my unused donut pan. I think it was a good call. Donuts don’t require as much pumpkin puree. I roasted a pumpkin a few days ago for the purpose of baking a cake with it but have slowly eaten most of it (on accident) so that there was just enough left to make the donuts. I have no willpower when it comes to roasted squash, I can’t stop eating it.
Anyway, I had me a mighty fine morning of trashing the kitchen, using my pretty mixing bowls, basking in the glory of the residual heat coming from the oven, and making the house smell all nice and fall spicy. And now there are donuts in the house with lots of sprinkles and only the mr to eat them. He really really likes them, like a lot. (me “don’t eat all those f*ing donuts dude, save some for later!”)
Another reason donuts were a good call, they are easy to share. Maybe I should go drop off a few to a friend. Any takers?
The donut stuff. Flour, baking soda, baking powder, and salt are in that bowl. Then we have pumpkin puree(homemade or canned) soy milk(or any milk), brown sugar, cinnamon, oil, and apple cider vinegar
All the wet stuff gets mixed together and the dry stuff plus the cinnamon gets whisked together too.
Wet into dry and mixed until combined.
Scoop batter into well greased donut pan and don’t do what I did and overfill (I always forget not to overfill). My fist batch came out a little bit bigger the expected with holes. No biggie.
Once pan is filled, pan goes into preheated oven. Bake until golden perfection (about 15-18 minutes or until a tester comes out clean)
Slightly overflown donuts cooked to all the goodness and popped out of the pan to cool on a cooling rack.
Glaze stuff. Powdered sugar, cocoa powder, a pinch of salt, a splash of vanilla, and a bit of soy milk….Mix it all together and that’s that.
Completely cooled donuts (very important to be completely cooled) go heads down into the bowl of glaze.
All glazed and looking good but I think somethings missing…..
Pumpkin, chocolate, sprinkles. BOOM!!!
Happy Friday!!!!
makes 10 donuts
For donuts
1 1/4 cups all purpose flour
1 teaspoon baking powder
1 teaspoon baking soda
1/2 teaspoon salt
1 tablespoon cinnamon
1/2 cup pumpkin puree
1/2 cup brown sugar
1/2 cup soy milk (any milk works)
3 tablespoons neutral oil like canola
1 tablespoon apple cider vinegar
For the glaze
7 heaping tablespoons powdered sugar
2 tablespoons cocoa powder
2 tablespoons soy milk
splash vanilla
pinch of salt
sprinkles!!!!…optional
Preheat oven to 350
In a big bowl, mix together the flour, baking powder and baking soda, salt, and the cinnamon. In a separate bowl mix together the pumpkin puree, sugar, soy milk, oil and the apple cider vinegar. Dump the wet mixture into the dry and mix until combined.
Ready the donut pan by really making sure it is well grease. Fill each donut mold about a 3/4 way full. I use a spoon but you could transfer that batter to a piping bag if you want. Place pan into oven and bake for 15-18 minutes or until the donuts are golden brown and a fork stabbed into one comes out clean. Pop donuts out of mold and let cool completely on a cooling rack.
Note. I have one pan that does 6 at a time. I had to wash, dry and re-grease the panto bake all the donuts.
Once donuts are cooled, gather the glaze ingredients. In a shallow bowl whisk together the sugar, cocoa, and salt. Add in a splash of vanilla and then the soy. Mix together until a glossy not to thick but not to thin consistency . If its too thick, add in another splash of milk, to think, more powdered sugar.
To glaze, take each donut and place face down in glaze and give it a little twirl. Remove and place back on cooling rack (glaze size up) and cover with sprinkles. (optional)
Then eat the donuts
Any uneaten can be placed in airtight container for 2-3 days or can be stuck into freezer.
New baby, lots and lots of littles, and laying the flooring. Never a dull moment over here.
Erin finally popped and pushed out a humongous adorable little human (Emersion Reed Scott… I call him murder) so while she has been doing that and hanging out in the hospital, her littles have been my littles. Needless to say, my house got trashed, my fridge is empty, and all the printer paper is gone. We ate all the beans and apples in the house. Spent after schooldays drawing and making weird shaped out of scrap wood and nails while the mr and I worked. Not to take away from my sister pushing out a gigantic human from her body, but hell, my body/mind are fried. Taking the littles is easy (feed them, let them loose on Nick, homework, watch Malcom in the middle, brush teeth, bed) but laying floor is hard. Lots and lots of tiny pieces of floor that need to be hammered and bent and fanagled. So many nails, nailing for hours and having all the pressure of not nailing into the radiant heat tubing. My body has contoured into a semi permanent bent shape and red tubes are floating over my closed eyelids. The mr on his hands and knees for hours with so many slivers… It’s fucking painful. But we love it (the floor) and the bit of pain is worth it. As for the littles, the are so awesome. They can stay with us forever. Oh yeah, and my Dad has made his way back tot he state where he left all of his children for a visit so we have been doing all that family stuff too. If only I could figure out how to get paid for being with my family.(we could do a reality tv show but I don’t think America could handle that)
I am cooking food, I just haven’t had a lot of time to like clean dishes, make things pretty, and catch good enough light to take pictures but I am hoping to get a little time to make an epic cake this coming week. I want to bake plus I want to start a project and see it finished within a few hours. I miss posting recipes and and I think everyone around me needs some cake. So look for that (thinking some kind of pumpkin chocolate situation)
And as for today, the littles are back home with their mother so the mr and I are going to floor some more until our bodies give out then drive into the mountains for a well earned visual spectacular of color. And coffee. So much coffee.
Just for a laugh… Judah says to us the first time we went up to the hospital to see his mom and new baby bro .”holy haha. Look guys look. He is eating moms nipples.” He couldn’t stop laughing. That kid, oh boy is he awesome. He also said that the baby makes sounds like a big fart. I agree.
Internet stuff I found during my late night browsing sessions.
-Dude, I might just have to move to Japan. Japan Wants to Reward You for Safe Driving—with Coffee
–HOW VANILLA BECAME THE WORLD’S FAVORITE FLAVOR..is it yours?
-Into all of these hammocks. 5 Hammock Hybrids for Extreme Relaxation
-To the insurance company that doesn’t want to renew our house insurance policy because of our garden looks like we lack “pride of ownership” (for real what they said) Eight Reasons NOT to Clean Up in the Garden
-Ah, love this house.
–Do You Wish Time Would Slow Down? Yes, yes I do
-We are keeping the downstairs all white and light and bright. Inspirations
– “Extreme bees, extreme people.” Six Scientists, 1,000 Miles, One Prize: The Arctic Bumblebee
-This is fantastic. To bad I didn’t know this hack in art school. Ingenious Hack for Sketching with Two Point Perspective Using an Elastic String
-I have blown up a few carrots in the microwave in my day. Snap, Crackle, Kale: The Science Of Why Veggies Spark In The Microwave
And a few pics.
Enjoy the rest of your weekend!
-C
Sweet, sweet Vermont. Things around these parts he been oh so nice. Warm days (not hot) and cool nights. The colors are starting to show on the trees. People are starting to wear clothes again and eating apple things and drinking those darn pumpkin spice lattes. I still haven’t gone apple picking yet (I’ve been waiting for at least a good week of cool temps so the apples get nice and sweet) but I did eat a pumpkin this week. And the sky, the sky has been nothing but pretty. I have been loving it all.
Straight up a crazy, full week. Lots of family dinners, bunk bed building, and mathematical problems solving in order to lay the tubes for heat in the floor. We went to a wedding (congrats Alex and Allison!) were we saw an eagle and I ate all the fresh figs from the cheese platter.(sorry, not sorry) Over at the house the mr and I made the decision to rip out all the old flooring on the first floor down to the sub floor so the radiant heat can go under the new floor instead of coming up from the basement. I know, I know, we need to stop ripping shit out and just finish putting it all back together. We are getting there. Lucky me I didn’t have to do to much of the floor ripping, more just the pulling of all the stupid nails left. Not the funniest job, but I have gotten pretty good at de-nailig floors. I could market my new de-nailing skills and make millions. Yeah, sounds about right.
On a sad note, I killed another freaking immersion blender so now I have to pull out the big blender every time I want some smooth soup. Me being me, I almost burned my face off when I went to blend some boiling hot soupand the lid was not on tight and hot soup splashed my face. (I am fine, minor burn left on my ear) Lesson learned. Now I wait for soup to not be so hot and check the mother f-ing lid. Oh, and my bike tire finally fell off completely which really sent my life through a loop. I know I have been saying all summer that I was going to get a new tire but the duck tape was working oh so well (no, not really) And because I waited until the tire fell off and I wanted to save 20 bucks by ordering a new tire online, I had to ride around town all week on the mr’s bike which really sucked a big one. Thank UPS man for delivering me my new tire. All is well now(besides needing a new brake pad and handle bar tape, but that will happen in time) and I can go back to my own bike. I have missed it so much.
Today the mr and I are going to plug away some more with tube laying on the floor. He is starting to worry about getting a source of heat in the house soon. I say as long as we have some type heat by November, we are all set. And if the weather is decent and not pouring rain later, I am going to break in my new bike tire with a heavy trip to the library. My stack of returns is getting pretty ridiculous. (8 books high)
What I saw on the internet this week.
– Tricky tricky sons of bitches.. 50 Years Ago, Sugar Industry Quietly Paid Scientists To Point Blame At Fat
-These are some crazy photos. Winners of the 2016 British Wildlife Photography Awards
-Sad truths. Three Foods That Might Not Survive Modern Diseases
-I don’t know if I would do this but it’s pretty cool. Body Marbling Is A New Festival Trend That Turns Your Skin Into Art
-This is not a joke (I thought it was) Self-Driving Shopping Carts May Be the Way of the Future. I don’t think I like this, not one bit.
-We have our cat Only. We do nit snuggle him cause he is evil and likes to dig his claws in, so I am ok with this. Doctors Rudely Warn Public Not to Snuggle Kittens
-It has happened to me and it freaked me the f out. Ever wake up to a numb, dead arm? Here’s what’s happening.
-As a seltzer water drinker myself, this was all the right. A Millennial’s Guide to Seltzer
-Researching siding for the addition. Think we are going with the Shou Sugi Ban method. We get to set stuff on fire!!!
–5 Ways to Tell If Your Knife Needs Sharpening. I try to keep mine sharpened not only because cutting food withsharp knife make sense but the danger is for real. The duller the knife, the more likely I am to cut my dang finger off.
Some pictures of the happenings.
House update.. Check it out! Our entire upstairs is wires, the plumbing is ran, (not hooked up to anything yet) and completely insulated. It’s freaking sea foam green crazy up there.
Now the next big step up hear is sheetrock! That’s going to be a bitch of a week, but for the mean timewe have left the upstairs alone because we are waiting to get a rough inspection from the city. And so we get to enjoy the green for just a bit longer.
For now we have ventured back down stairs. A few unseen things have been done likethe re- supportingof the floor with beams in the basement and running all the water lines and elecrrical from upstairs to the basement. We started tackling the clean up of the windows, there has beenlots of sheetrock patching and mudding and adding in light switched and outlets to all the boxes. And recently we have decided that we are going to either rip up the wide softwood downstairs and patch in oak or, if we cant find the right flooring to match, we are going to re-floor the entire downstairs, you know, just to make things a little harder on ourselves.
So yeah, this is where we are at. It’s all smooth sailing from here!
Everyone is asking how that house is going so I figured an update was in order.
Around the beginning of March we hired a guy (with another guy that was like 80 years old) to remove the back roof and to frame out the addition. We were planning on doing it ourselves but when it came down to it, it was going to take to long and was not something that I was entirely comfortable doing. It was still winter out, I have never removed a roof, and it just seemed like it was better to just have someone that does it all the time do it. And oh am I glade we did. These guys were awesome and a little nuts. We had a start date for a Tuesday, but on Monday morning, the mr gets a phone call from the head guy asking if he was going to go to the house and let him in. “Of course, I’ll be there at 8 tomorrow” said the mr. “No, we are here right now” said the roof ripper off man. “Ok, be right over” and the mr rushes over to the house. When he gets there, the guys were already in the house. The had claimed onto the roof and started ripping it off from the outside.
And then two days later , the roof was gone and the skeleton of the addition was up. It was fantastic and amazing and we were so excited. SO worth hiring it out!!!!
Our next move was the roof,(to keep out the snow ans rain) which those guys ended up came back and throwing on for us. That was another job we were planning on doing, but when the mr crawled onto the roof to measure for materials, he came back down and said to me”hell no. not doing it” (He is terribly afraid of heights)
After the roof went up, we still had a lot of demo to do. It took us a few days to finish removing the rest of the walls and all the layers of flooring. Then it got really freaking cold out so we boarded off the upstairs with insulation and did some stuff downstairs.
We were on a good roll, getting shit done, about to start framing, then the shittest shit ever happened and Sean died. We didn’t go back over to the house for like 2 weeks. (shit head, you were suppose to help us) We lost all motivation and I was in no state to be doing any work that required power tools or crow bars.( I probably would have cut a hand off or accidentally set the house on fire) So yeah, no house work. But over these past 2 weeks we have slowly gotten back into the swing of things. We have cleaned up the upstairs, framed out all the wall and are moving right along. Next is windows, (which is now more just a matter of picking some we like and ordering them) running all the electrical, plumping the bathroom, insulation the ceiling and walls, then getting an inspection! But that will be a breeze…. haha.
So that’s what’s been going on in the house. Fun fun fun!
Hopefully I will have another update on other parts of the house for you guys soon!
I am cold. And I know I shouldn’t be complaining, that it is still winter and those fluke days of 60’s and 70’s where not suppose to happen, but still. I am freaking cold. I just wan to ditch the jacket and mittens and to live in sweaters all day long. Is that too much to ask? #sweaterlady
Last weekend the mr and I went down and over to PA to visit Dad and family. It was a blast. We got to see my grandmother and aunt and uncle on the farm and just get out of town for a few days. When we got home we clonked out then decided to rip up the porch. The plan was to wait until spring to do it, but the weekend was so warm and springy that we were like screw it, let’s just do this and ripped it up. Then we spent half of the week tip toeing over thin wooden beams to get into and out of the house while hunting for decking and fixing the structure. Good thing the mr thought to stick a note on the door because leaving the house at 530 am when I am not exactly at my sharpest and it’s dark outside… more then once that little sign saved me from disaster. After a long long day of 6 hardware stores hunting for decking, we finally found what we needed. (no one had enough in stock or what they did have was shit) And then the weather turned on us to a brutal blast of freaking cold. I was all, “Lets just wait until next week to finish”, but not the mr. He was out there cutting and screwing and being an all around bad ass and laid down the new porch. I stayed inside, made hot soup and started collecting all the papers for taxes. Neither of us were having fun. But we do have a new porch, well kinda. The floor is down and now we just need to build the rest. That will come next week. And I do have a large stsck of papers. We get stuff done.
The past few days with also involved some littles, having my house trashed, and just the anxious feeling like there is much to do now and only so much more to come, I really need a down day and so does the mr.(his plan is to replace a toilet in one of the apartments today. He never stops) I am gonna rest my aching bones for a bit, buy a new toothbrush, make some bread (oven heat!) and try not to dread the gigantic pile of tax papers awaiting me for tomorrow (who a I kidding, it’s going to take all week)
Internet sightings
-This made me happy. SHOT OF HAPPINESS FOR YOU
-Of course plants make life better. Want to Live Longer? This Study Suggests It’s Time to Turn Over a New Leaf
–Burmese Tofu (a.k.a. Chickpea Flour Tofu) On my list of things to make this week
-I have always really liked the visual of cracked roads. This is even better. Street Kintsugi: Artist Rachel Sussman Repairs the Roads with Gold
-This is pretty freaking sweet. Architect Turns Old Cement Factory Into His Home,
–Do Showers Make Oranges Taste Better? I don’t know about you, but I am good with keeping it a mystery.
-This lady is amazing. She wasn’t even trying, just doing life. What Makes Mira Rai Run?
–How To Clean and Season an Old, Rusty Cast Iron Skillet I have a few in need of some love.
-We are looking ot start the downstairs bathroom soon and I would really like a pattern tiled floor..
-I remember thinking about who the heck thought to shape sugar into cubes and that that person was a genius. HOW THE VICTORIAN OBSESSION FOR ORDER CREATED THE HUMBLE SUGAR CUBE
Picture from the week.
Sweet, sweet Vermont. Things around these parts he been oh so nice. Warm days (not hot) and cool nights. The colors are starting to show on the trees. People are starting to wear clothes again and eating apple things and drinking those darn pumpkin spice lattes. I still haven’t gone apple picking yet (I’ve been waiting for at least a good week of cool temps so the apples get nice and sweet) but I did eat a pumpkin this week. And the sky, the sky has been nothing but pretty. I have been loving it all.
Straight up a crazy, full week. Lots of family dinners, bunk bed building, and mathematical problems solving in order to lay the tubes for heat in the floor. We went to a wedding (congrats Alex and Allison!) were we saw an eagle and I ate all the fresh figs from the cheese platter.(sorry, not sorry) Over at the house the mr and I made the decision to rip out all the old flooring on the first floor down to the sub floor so the radiant heat can go under the new floor instead of coming up from the basement. I know, I know, we need to stop ripping shit out and just finish putting it all back together. We are getting there. Lucky me I didn’t have to do to much of the floor ripping, more just the pulling of all the stupid nails left. Not the funniest job, but I have gotten pretty good at de-nailig floors. I could market my new de-nailing skills and make millions. Yeah, sounds about right.
On a sad note, I killed another freaking immersion blender so now I have to pull out the big blender every time I want some smooth soup. Me being me, I almost burned my face off when I went to blend some boiling hot soupand the lid was not on tight and hot soup splashed my face. (I am fine, minor burn left on my ear) Lesson learned. Now I wait for soup to not be so hot and check the mother f-ing lid. Oh, and my bike tire finally fell off completely which really sent my life through a loop. I know I have been saying all summer that I was going to get a new tire but the duck tape was working oh so well (no, not really) And because I waited until the tire fell off and I wanted to save 20 bucks by ordering a new tire online, I had to ride around town all week on the mr’s bike which really sucked a big one. Thank UPS man for delivering me my new tire. All is well now(besides needing a new brake pad and handle bar tape, but that will happen in time) and I can go back to my own bike. I have missed it so much.
Today the mr and I are going to plug away some more with tube laying on the floor. He is starting to worry about getting a source of heat in the house soon. I say as long as we have some type heat by November, we are all set. And if the weather is decent and not pouring rain later, I am going to break in my new bike tire with a heavy trip to the library. My stack of returns is getting pretty ridiculous. (8 books high)
What I saw on the internet this week.
– Tricky tricky sons of bitches.. 50 Years Ago, Sugar Industry Quietly Paid Scientists To Point Blame At Fat
-These are some crazy photos. Winners of the 2016 British Wildlife Photography Awards
-Sad truths. Three Foods That Might Not Survive Modern Diseases
-I don’t know if I would do this but it’s pretty cool. Body Marbling Is A New Festival Trend That Turns Your Skin Into Art
-This is not a joke (I thought it was) Self-Driving Shopping Carts May Be the Way of the Future. I don’t think I like this, not one bit.
-We have our cat Only. We do nit snuggle him cause he is evil and likes to dig his claws in, so I am ok with this. Doctors Rudely Warn Public Not to Snuggle Kittens
-It has happened to me and it freaked me the f out. Ever wake up to a numb, dead arm? Here’s what’s happening.
-As a seltzer water drinker myself, this was all the right. A Millennial’s Guide to Seltzer
-Researching siding for the addition. Think we are going with the Shou Sugi Ban method. We get to set stuff on fire!!!
–5 Ways to Tell If Your Knife Needs Sharpening. I try to keep mine sharpened not only because cutting food withsharp knife make sense but the danger is for real. The duller the knife, the more likely I am to cut my dang finger off.
Some pictures of the happenings.
Last Sunday of August. Phew, we blew through this month fast.
The past week has been one of many accomplishments. Things at the house are moving along with vigor. You can tell a real difference when you walk into the house because the entire first floor is covered in a thick coating of white dust that came from all the sanding upstairs. But hey, now those walls are all primed and ready for paint!
Highlight of the week. I was at the grocery store and there was local, freshly picked, paula red apple totes for sale. It’s officially apple time. I was so happy I bought like 10 pound and eaten half of them. Does this mean I can unpack all my sweaters and flannel sheets? I don’t know about you, but I am more then ready for some cool fall weather and just a change in season. This summer was hard (emotionally ans physically) and I am over it. Bring on the pretty leaves and warm apple cider, just don’t get to cold to fast before we get any heating installed in the house.
Speaking of heating. I think for today the mr is prepping the new boiler and on demand hot water heater at the house.( This guy, man he is like a superhero, he can do it all) l Me, I think I will be spending a good chunk of time just cleaning up dust. And I will make lunch and bring us coffee. I’ll be good at that.
Internet stuff for internet browsing if you want to browse the internet.
-To all those super duper , always obnoxiously happy people. You’re Not Supposed to Be Happy All the Time
–Gorgeous Architectural Watercolors
–Why Do We Love Some Animals But Eat Others?. Think about it.
-We(or me) are picking paint for the house!!!! Going with all white walls but which white(there are thousands!) No-Fail White Paint Colors Edwards Droplet and Seed Pearl are nice.(but weird ass names) What do you think?
–10 INSPIRING CHILDREN’S PLAYSPACES. Am I told old to play on these?
-Elmore Mt. Bread! Back in the early days, the mr and I used to save our pennies to buy fresh baguettes from them. Bread Grains: The Last Frontier In The Locavore Movement
-I am going to live forever! Friendships Might Not Help You Live Longer, But Family Does
–Tiny animals with tiny casts.
-I love this little bungalow
-And because we all love her of some version of her (don’t deny it) Britney Spears has been a pop icon for 20 years. To understand her, you need to understand her hair.
And a few pictures…I kept the camera away most of the week, didn’t want to get it full of dust.
Where did the past week go. I feel like the days are just flying by and before I know there is going to be snow on the ground. I mention snow cause right now I am to stinking hot and my eyes itch like crazy (allergies) that I am fantasizing of cooler days, cozy sweaters, and no mosquitoes. And apples. I am very excited for apple season. It will all be happening soon enough so I should just stop whining and enjoy the sunshine and tomatoes.
Like that picture of the mr right there? We ended up pulling that claw foot tub out of a yurt in the middle of the woods. That was fun, a little crazy given that we were dragging 600lb of cast iron on a tiny little hobbit path, and I might have ripped half the skin off of my finger while moving it, but hey, we got a sweet ass tub that’s got a little history.
Not much new news. The week was full of work so I don’t need to tell you about that but I did manage to make a cake this week. I am really starting to miss my kitchen time but so soon I’ll have a brand new kitchen to cook in so kitchen time for now will have to wait. Yesterday we played hooky for the afternoon and headed out of town to check out a vintage camper show. So many sweet little campers and cute old people that drive around the country in them. It was so cool seeing what people do with a little metal shell on wheels. Life goals right there.
On this fine Sunday the mr and I will find ourselves over at the house, doing some house work, talking about the floors once again. The upstairs is no longer a crazy work zone so I get to move all the tools and lifts downstairs and into the basement, clean,and get ready for priming, painting and eventually sanding the floors. I can just barely see the light at the end of the tunnel.
My internet browsing history this week.
-Love the modern cabin look
-The firefly of the ocean I had to look it up after cause I didn’t believe it was a real thing. Blue Rivers of Bioluminescent Shrimp
–Simple little trivets that I think I have to make
-The Best Time to Do Stuff You Hate Is When You’re at Your Happiest.
-To me, cooking anything down, sweet it savory, to a jam like consistency is a jam. What Makes A Jam A Jam? Surge In Savory Spreads Presents Riddles For Purists
-The mr loves the smell of pools. Little does he know. EVERY SWIMMING
POOL IS FULL OF PEE. hahaha, he is smelling pee.
-Pesticides on Produce: The New ‘Dirty Dozen’ List
-Toast beer?Sound interesting. Artisanal Food Waste: Can You Turn Scraps Into Premium Products?
-The dark side of a food trend. This explains why many are requesting that we STOP eating avocados.
-I think we are going with this tile for bathroom floor….to boring?
And pictures from the week.
Washer Stem. October 30, 2005- July 24, 2016
I am a pretty trashed person right now. 2 weeks ago our puppy dog, Washer, died.
Yeah, you can kick me in the stomach, I am sure it would feel better then this.
First question everyone asks “What happened?” Long story short, for some reason, whether it was something he ate or just from playing way to hard, his stomach flipped inside of him, twisted, then died. There was the animal hospital and surgery and it all happened so fast…. blah, it’s still pretty hard to think and talk about. But yeah, he went from being good and healthy to not within hours and the vets did what they could, but they just couldn’t save him.
How am I doing? Honestly, I am not great but am starting to come out of the hole a bit. For a while there I just feel apart. Washer wasn’t a pet to us, he was pretty much our life, my life. Just about every single thing we did, we did together. All of our decisions, from the smallest things like day to day activities to buying a house revolved around him. (we would have never bought a house that didn’t have a giant yard for him). He went to work with us, on all errands, (he loved a good car ride) family events, everything. I think the only places that he never went was to the gym with me and into the grocery store (the mr and him would wait in the car). I can count on both hands the times over his life that we have left him with other people. Washer was our family…is our family and his absence has been overwhelming.
And yes, he was a dog, but he was more then that to me. He was my soul mate, my best friend, my baby. I spent more time talking or just hanging with him then anybody else. We experienced the world together and he showed me things in life that I otherwise might have never seen. Countless sunrise walks. So many sunsets. All the early mornings in winter when the world is perfectly still, the moon is out, and the snow is falling. All of the outdoors, countless hikes, endless swims.(he could swim forever) He took us out into the world, even when we wanted nothing more then to hide away.
He was all unconditional love and unabashed happiness. And he could totally be a complete ass, but he knew it and always felt guilty afterwards (you could tell cause he looked atyou with the sad eyes) He gave so much and never wanted anything from us other then love, well, and food.
And now I am trying to figure out how to be without him. Waking up in the morning, I still find myself looking for him. When I walk out the front door, I still reach for his leash and a poop bag. And that feeling like I need to get home to my pup, like he is waiting for me, it hasn’t gone away. I still wake up every morning and go for a walk and the mr and I still go for a walk every day after dinner. We pick him flowers and talk about about all the amazing and stupid things he used to do and how much he did for us. It is crazy looking back at our life over the past 11 years and knowing he was part of almost every moment.
So yeah, I am kinda feeling lost right now. I miss him more then I could ever imagine. I know he lived a freaking fantastic, healthy, and long life, and for that I can take a little comfort. But man, I was not ready for him to go. I guess I never would have been. ( I secretly thought he would live forever, or at least another 50 or so years)
He is one of the greatest loves of my life and I am so fucking lucky to be able to say that.
The best dog that ever was (for us), even when he was being a jerk face.
Love you forever puppy.
Hello to a long summer weekend full of all things sparkly and red white and blue. Hard to believe that it’s already July 4th weekend. We are already deep into summer and I need to get on and do some serious summering.
We put in our time this week for sure, 8-12 hour days, some days at the house until 8pm. We had a deadline and had to bust some crazy ass to get what we needed to get done done before the insulators came. Phew.. we did it, and now all I can say is that the mr and I are pretty bad ass. As for the house, it’s just smooth sailing from here. (haha, yeah right)
Another big thing this week. Jeff Dad moved back, well not back to VT, but back east, close to where he grew up in PA. This is of much excitement for myself and the rest of my siblings. Now instead of being 14 (more like 20) hours away, he is only be 5 hours away. That is just enough away that we can see him whenever we want, but far enough that we don’t have to see him when we don’t. Plus he is only about an hour outside of NYC..so you know, party party in the city.
Today is a weird Sunday, cause it feels like a Saturday, which makes me feel like I need to put on my work pants and get to it. Lucky for me, the mr has plans for a fishing adventure and if he going on an adventure, then I am too! I am going to pack some food, my watercolors and a book try to just relax today. Maybe we will bring the new tent (we finally bought a new tent that is not our tiny backpacking tent with a hole in it) and just come home sometime tomorrow. You are not suppose to work on a holiday, right? Hum, sounds like a good plan to me.
Fun and informative internet from the week.
-I feel like I might know a few people that need to read this. HOW TO SAFELY PLAY WITH FIREWORKS WITHOUT BLOWING AN ARM OFF
So much summer fruit means it’s pie time. A Professional Baker’s Tips for Baking Pies Smarter, Not Harder
-Any or all of your favorite blogs (mine or not, whatever.. but mine) NOMINATE YOUR FAVORITE FOOD BLOGS FOR THE 2016 SAVEUR BLOG AWARDS
-My aunt was growing ancient wheats before all the the cool kids,because she is so cool. Nothing Says ‘Hip’ Like Ancient Wheat
-Pretty freaking crazy. A Miniature Landscape of Elephants Carved From the Tip of a Pencil
-I was curious so I looked it up, and now I know. How Cinnamon is Harvested in Indonesia
-Diggin this house, especially the kitchen counters (we are 99% sure we are pouring kitchen concrete counters!!?!)
-Totally in love with these landscape oil paintings.
–This album has been on repeat all week. It’s is one of my favorites and also the first cassette (remember those?) that I ever bought.
-Finally, no more sneaky sneaky. G.M.O.s in Food? Vermonters Will Know.
And a few snaps from the week.
Whenever we bring the pup over to the new house, he immediately grabs his ball and runs to the back door. Usually I let him out for a minute but have to drag him back in and have him lay down while we work. But at the end of each day, I bring him out back again and throw the ball with him. He is so happy and cute and goofy which makes me so happy. He really has taken to the house and having him there, being so comfortable and happy really makes the house feel like home. It’s a great feeling.
The past week.. what a week. So much, so much. Lots of family, lots of work, lots of trying to clean and organize. We finished up what we needed to get done at the new house before the contractors come on Monday (we hired some people to remove some not so good stuff from the attic) so wehave this coming up week to get our shit together, makes sure all the other houses and stuff of life here is taken care of when were are gone and maybe even book a few places to sleep. (we have yet to book a single one.) But hey, we are young and adventurous, and we’llfigure it out. (I hope)
And I am still deciding weather or not I should unplug the fridge while we are gone or stock the freezer with food to eat when we get back. Oh man, decisions decisions.
But enough about me, how did the first week of the year go for you? I know, we didn’t win the power ball so that sucks, but are you feeling like the year started off good? Still keeping your resolutions and staying away from the cookies and making your bed everyday? Don’t worry if it didn’t stick and you, at this moment, are eating a box of cookies in a very messy bed. It’s totally cool to do. Cookies in a messy bed might just be what you need right now. So I say go for it. (just maybe don’t make a habit of it)
Stuff to look at while eating your cookies or doing whatever.
-I am a list maker of lists that include finding the list of the lists.that I lost -A Neuroscientist on the Calming Powers of the To-Do List
-I am for sure going to be making some of this Vegan Fish Sauce
-What Exactly is Malt? It’s not what I thought.
–This home looks like a lovely place to live
-Some Bathroom inspiration for the new house
-Whoa now. How Real Is Reality?
– I want to live here and here.. part time of course
-I don’t get excited for tv easily, but this show…. I laugh every time I see a commercial for it. I am excited!
-Some good information. Non-Dairy Milks: Which to Make, Which to Buy
-Would you buy a $100 donut? (your answer should be no)
Winter squash season is in full swing. I have already started to hoard them in all the nooks and crannies around the house. There are sugar pumpkins on the stairs, buttercups on the floor and delicatas all over the counter. Ever meal, breakfast, lunch or dinner needs to have some squash. House rule.
This hear spaghetti squash has been sitting on a stool for about a week, looming in it’s size and just waiting for me to bake it off. The spaghetti squash at farm share have been bigger then a small child so I have been a little hesitant to bake it until the mr was down with eating it with me too.
What I love about this dish is that it is really simple and easy to make.We have been working later these past few days so when we get home, we really just want to eat and go to bed (not really….kinda really) The initial baking of the squash takes a little time, but its zero hands on and can be done ahead of time. And the rest, take like 8 minutes tops. Also a lot of time people forget that you can eat a spaghetti squash with things other then tomato sauce. (although that’s good too) But really, the sky is the limit. Squash goes with everything.
So dinner. I had the squash and went with what I had in the fridge. Beans are great, fresh pico is amazing, all atop a big pile of some warm spaghetti squash. Well that is just what we call a winner. A winner dinner!!!
The stuff. A spaghetti squash (maybe go for a smaller sized one if you don’t want a lot of left overs) precooked or canned black beans, a red pepper, and some red onion. Also need garlic, cumin (crushed or seeds) salt and pepper, olive oil, and fresh cilantro. And lastly some home made or store bought pico de gallo or any of your favorite salsa.
You don’t see it here, but the squash went into the oven about an hour ago to cook. I did nothing to it besides stab it once andjust stuck the entire thing right on in and cranked up the heat. Simple, easy.
Ok, so when the squash has been baking for a while, start getting the rest of thestuff ready. Small dice up the red pepper and the onion and toss it into a lightly oiled hot skillet to sweat down a bit.
Once the pepper and onion are nice and soft, toss in the cumin and minced garlic. Cook a little longer until the seeds and garlic are fragrant and cooked.
Add in the beans and mix it all around. Taste, add a little salt and pepper if it needs it, and set aside.
Spaghetti-ing the squash. I took it out of the oven when it was fork tender, sliced it in half on a baking sheet and let it cool off for just a minute. Scooped the seed out then scraped the cooked squash with a fork. Fun times, just watch you your hands, the squash is hot.
And your ready for food. Squash in a bowl, topped with some black bean mixture and a hearty amount of fresh pico. Serve it with lots (or none if you don’t like it) cilantro and a wedge of lemon(or lime)
This is some good stuff friends, some really good stuff.
Alright, now I have to get ready. We are taking a handful of the little pumpkin picking….A few more pumpkins to add to the stash.
-C
Serves 2-3
1 medium spaghetti squash
2-3 cups cooked black beans (or a can)
1 teaspoon cumin seeds (or crushed cumin)
a red pepper
a small red onion
2-3 cloves garlic
olive oil
1 cup fresh Pico de gallo or any of your fav salsa.
salt and pepper
a lemon or lime
fresh cilantro (optional)
To cook the squash. Preheat oven to 400. Grab squash a stab a small hole in it so when its baking it does bot explode (this has happened to me a few times) then stick the whole squash into the oven. Let bake for 45 minutes to an hour (depending on size) It is done when it is soft and fork tender. Once done, pull squash from oven, cut in half and let cool for a minutes. Once cool enough to handle, scoop out the seeds then start scraping the flesh with a fork to create spaghetti like strands.
For the beans. Small chop up the red pepper ans onion and toss into a hot skillet with a little splash of olive oil. Sweat the pepper and onion on medium heat and when they are close to done, mince up the garlic and toss that in along with the cumin seeds and a pinch of salt ans pepper (if needed) Keep cooking until the garlic is cooked and the cumin if fragrant.
To assemble. Grab a bowl and fill with a good amount of the cooked squash, top it with a big scoop of the black bean mixture and you desired amount of fresh pico or salsa. Add lots of extra cilantro and serve with a lemon or lime wedge to squeeze on top.
Now eat it.
Note….Any left overs make a fantastic cold salad or wrapped in a tortilla.
I know that sometime some of the foods that I eat might seem a little strange to people. But think about it. Isn’t there something that you eat that other people think is kinda weird or that you know might be a little on the strange side and yet you love it.
So apple lentils. I know some people think it’s weird, but trust me, it’s not, it’s actually pretty freaking magical. Lentils, especially red lentils, have a mild, nutty flavor that make them perfect to use in any type of dish, sweet or savory. And so nutritional value, with protein up the wazoo, these little guys are mega fantastic and yeah. SO don’t knock it till you try it.
Now first off, YAY for apple season!!! Aren’t we just so happy for fresh delicious apples? I am, so much so that I have made up a super cool apple jig where my head bobs up and down and my legs shift and convulse all over the place. ( could be mistaken for a seizure) It’s a sight to see for sure. And a second YAY for warm food again. The past week or two I have been waking up to temps in the 50’s giving the world just enough chill for a cozy morning sweater, a throw blanket and a nice hot bowl of breakfast porridge. (It also taste fantastic made ahead then eaten cold if the world decides to get warm again) My morning have been great, all cuddled on the couch with a book. my coffee, ad a bowl of apple lentil porridge. Best way to start the day.
The stuff. An apple, some red lentils, water, and some cinnamon. You can also add some maple or brown sugar to the mix if you want more sweetness.
Firstly, water ans lentils go into a pot and placed on the stove until the the water is boiling.
While that is happening, chop up you apple. Big pieces, little pieces, or both. I like both because the smaller pieces kinda of dissolve in the lentils and the bigger chunks will keep shape.
So once your lentils have started to boil, dump inmost (save a little bit to toss on after the lentils are cooked) of the chopped up apple and a good pinch or two of cinnamon. Mix it all around and place back on heat on low so simmer and cook.
Soft and all cooked to perfection. Gorgeous.
Dump the porridge into a bowl, add on the left over chunks of apples and give it another good sprinkle of cinnamon.
Breakfast of champions right here.
And because it’s what I eat every day…I am a champion.
You can be one too! (just eat some lentils)
-C
Makes one serving but can easily be double
1/2 cup dried red lentils
1 cup water
an apple ( mac, honey crisp, paula red are good varieties)
1 teaspoon or so of cinnamon
Optional… Add a little sweetener like maple or brown sugar if you want
Stick water and lentils go into a pot and bring to a boil. Chop apple into pieces, some big, some small or all the same size. Once the lentils are boiling, dump in most of the chopped apple (save about 1/4 of it for later) into the pot and sprinkle with cinnamon. Stir around, reduce heat to a low and cook until the lentils are soft (about 10 minutes) Once they are cooked, taste and decide if you need sweetener. If you do, add a teaspoon or two of whatever in now and mix around then,transfer the lentil goodness into a bowl, toss on remaining apple chunks, sprinkle with cinnamon, and go to town.
Spoon to mouth. Happiness.
What a week, what a week. I have barely had time to think, let alone cook food.
I had the rhubarb that was in need of cooking, the corn is all over the place all super fresh, and I had me a few minutes in between running around to make some food.
I made this (what I now realize is succotash, which is such a fantastic word for food) a few weeks back, fell in love with it so I wanted to make it again. I also wanted to see if the mr would like it this time (he didn’t so much the last time) Says he is not a corn fan. But I don’t know, I still think he loves corn and just wants to be a pain in my ass and tell me he doesn’t. I figured that this time I made it, he would finally declare his love of corn, I mean, there is butt load of rhubarb in it too. And big creamy lima beans and nice sweet onion, and tomatoes. Yes it has a lot of corn, but it has so much more.
Well, he didn’t declare his love of corn. He did have a big scoop on his dinner plate, ate a bite or two then, picked out all the lima beans and chunks of rhubarb then told me that corn love wasn’t going to happen. He also aid that I should stop messing with the rhubarb and just make another pie.
What a butt face.
Whatever, more for me! And if you are awesome and you like sweet corn, tart rhubarb (corn and rhubarb together is the best) ,and are in need of a great summer side for any and all of your summertime food time needs, this is a winner. Super fast and easy to make, eaten warm or cold, and keeps well. It screams BBQ time. (Or 10 o’clock at night, standing in front of the fridge, eaten with a big spoon) It’s good whenever.
The stuff. Rhubarb, fresh corn, and some cooked lima beans. Also need a tomato, a sweet onion, red wine vinegar, salt ans pepper, a little olive oil and water (not pictured) and a few sprigs of fresh parsley.
The onion and rhubarb gets chopped up and tossed into a big skillet with a tiny bit of olive oil and a few splashes of water and place on the stove to cook a bit.
Corn needs to come off the cob. Do it the way you like, but I find holding corn vertical in a big bowl and cutting it down works best.
Slightly soft rhubarb and onions, ready for the other stuff.
Dump the corn, the tomato (chop it up first) the lima beans(drained) and a few splashes of vinegar into the skillet. Stir it all up and keep on heat for a few more minutes until the corn is just barely cooked and all the flavors have had a few minutes to meld.
Toss in some fresh chopped up parsley and season with salt and pepper…..
Into a pretty bowl for eating now or eating later.
This big ass bowl is all for me!!!!
Have the greatest weekend!
-C
2 ears of corn
4 fat stalks rhubarb (mine where about 10 inches long)
2 cups cooked lima beans
1/2 a sweet onion
1 tomato
fresh parsley
salt and pepper
few tablespoons red wine vinegar
olive oil
a few splashes of water
Chop the onion into small pieces then chop the rhubarb into smallish chunks. Toss the rhubarb and onion into a skillet with just a tiny bit of olive oil and a few splashes water. Place on the stove on medium heat and cook until the onion and rhubarb are slightly tender, but not to soft. If you need to, add a bit more water to the skillet to keep the stuff from browning or burning.
While the rhubarb is cooking, remove the corn from the cob and chop up the tomato into small chunks. Toss the corn, the tomato, the lima beans (drained) into the skillet with the rhubarb and onion. Pour in about 2-3 tablespoons of vinegar and season with salt and pepper. Mix and cook for another few minutes just until the corn get slightly cooked and all the flavors have had a few minutes to meld.
Remove from heat and dump into a bowl. Chop up a handful of fresh parsley and sprinkle all over
Serve right away warm or stick in the fridge and serve cold later.
I eat a lot of hummus. Like a lot. Every day, all day long. (seriously, I am always snacking on veggies dipped in hummus) So I am sorry to all around me that my breath always smells.. (I blame all the garlic in the hummus.)
Recently, during a particularly browsey grocery shop, I ended up in the hummus case (I always end up there) and found a new hummus flavor. Pineapple jalapeno, WHAT. I grabbed it right then and there, convinced that hummus gods were rewarding me for all of my hummus eating and have made me my very own flavor.
Got home, tossed all the groceries into the fridge and busted open the new hummus, a bag of carrots, and went at it. Oh man, it was good.(to often the store bought hummus flavors are not so great) The flavors were all there, sweet and spicy, and creamy. It was fantastic, I ate almost all of it and I knew I had to make my own.
And I did and you know what, it was even freaking better! (Fresh it the best!)
So If you are a hummus person of any kind, this is a fantastic exciting flavor that will make you all sorts of happy.
The stuff for the hummus: chickpeas, tahini, olive oil, garlic, and salt and pepper. And for flavor add ins, fresh pineapple and a jalapeno pepper.
Chickpeas (rinsed and drained) go into the food processor with some tahini, the juice of the lemon and salt and pepper.. The garlic I actually pulsed in the processor first (to avoid big raw hunks) and some olive oil are also going in on this.
Blended until a smooth, creamy perfection.
Now for the fun stuff. Dice up the pineapple and remove seeds (or not) from the jalapeno and dice that up too
Toss it all (minus a few little pieces of garnish if you want) into that creamy dreamy hummus.
Pulse pulse pulse until the chunks of stuff are all incorporated . Make it super chunky or super smooth, up to you. I like mine kinda chunky, but not too chunky, if you know what I mean.
Into a big bowl, topped with a few little diced up pieces of jalapeno and pineapple, you know, for prettiness. And lots of cracked pepper.. Lots.
Now eat. With whatever ( I like veggies or just give me a spoon, Ican eat hummus all by itself)
Hummus for life!
-C
Makes about 2 1/2cups
2 1/2 chickpeas
2-3 cloves garlic
2 tablespoons tahini
1 lemon
2 tablespoons olive oil
3/4 cup fresh pineapple
1-2 jalapenos
salt and pepper
Rinsed and drain chickpeas. Add garlic and a little olive oil to the food processor and pulse until the garlic is a little minced. Add in the drained chickpeas, tahini, a sprinkle of salt ans pepper, the juice of the lemon and another tablespoon of olive oil and blend until smooth.
Dice up pineapple into smaller chunks and remove seeds (if you want) from the jalapeno and chop that into smaller pieces . Add to the hummus and pulse until combined. You can leave it chunky or blend until smooth. Just stop blending when you reach you desired consistency . Garnish with more chopped pineapple and jalapeno and lots of freshly ground pepper.
Serve with whatever you eat your hummus with.
Store left over (there probably won’t be any) in a container in the fridge.
Spring is happening, my plants are popping out of the ground, I found a gigantic rhubarb patch in the back yard of the new house…. Life is feeling fresh full of possibilities. And soon, so soon, ‘ll get some veggie plants in the ground and the farm share begins…. life will be filled with all the freshest yummy foods. I can’t wait.
But until then, I grocery shop. And this week has been a good week for shopping. Why, cause it CInco de Mayo this week ,which is one of my favorite holidays cause avocados, mangoes, and limes all go on crazy sale. I can buy 20 avocados for the price of what like 5 would normally cost. And I take full advantage of the sales (my fridge is currently housing a shit tone of avocados, mangoes, and limes) I will be eating like a queen for days!
And what does one make with all these good things? Well I made tostada! A tostada is pretty much a cross between a taco and a humngo, fully loaded nacho. Stuff all piled high onto a crispy (usually fried but I bake mine) corn tortilla. Its fantastic in all the ways and super simple to make. This particular tostada highlights all the good stuff on sale, Mango salsa , avocados cream with lots of lime, all onto a pile of the yummiest refried black beans. (my mouth is watering thinking about it),
And people, Cinco de Mayo is but once a year, but these tostada should be made all year round!
The stuff. Precooked (or canned) black beans, a sweet ripe mango, an avocado, some shredded red cabbage one red onion, one jalapeno, and a few limes. Also need a few cloves of garlic, at least 4 corn tortillas (mine are home made but you can get store bought) some coconut oil, slt ans pepper, and a bunch of fresh cilantro.
Start with making the mango salsa. Cut the mango into little chucks. ( I do this but halving mango, scoring each side into chunks then scooping the fruit out with a spoon..easy) Dice half of the red onion into little pieces as well as the seeded jalapeno. Toss it all into a bowl or jar, sprinkle with a pinch of salt and pepper, mix in the juice of a lime, and add in as much fresh cilantro as you like (or none if oyu don’t like)
There is it, mango salsa.
To make the avocado cream just place the avocado (peel and pit removed) into a bowl or blender with a clove of garlic, the juice of a lime, a splash of water, and a sprinkle or two of salt. Blend until smooth, adding more water until the consistency is to you liking.
That’s it.
And now for the beans. Start by tiny dicing up the other half of the onion and a few cloves of garlic and place into a skillet with a teaspoon or two of coconut oil. (can use any oil you like). Add in a splash of water and a sprinkle of salt an place on stove on medium heat and cook.
After the onions have gotten nice and soft, dump in the bean (liquid and all) Keep onheat and cook until the beans are hot and the liquid starts to thicken.
Grab a fork. Fork to beans. Mash’em up to make them officially refried.
And lastly, a little oil rubbed onto the corn tortillas and then placed into a hot oven to get crispy.
All the stuff, ready to go…. And go there, go there NOW!!!
Beans, cabbage, mango salsa, and avocado cream, all piled onto a toasted, crispy tortilla. A few fresh sprigs of cilantro and a slice of lime… This is for real something all amazing.
Eat the greatness (and not just for Cinco de Mayo)
-C
Makes 4-6 tostadas
mango salsa stuff
1 ripe mango
1 jalapeno
1/2 a red onion
1 lime
salt and pepper
fresh cilantro*
for the refried black beans
2 cups (1 can) prepared black beans
2 cloves garlic
1/2 red onion
1-2teaspoons coconut oil (can use any oil you like)
the avocado cream
1 ripe avocado
1 lime
salt and pepper
a tablespoon or two of water
and the following
4-6 corn tortillas
small bowl of thinly shredded red cabbage
a little extra oil for tortillas
fresh cilantro *
Note. Omit cilantro if you don’t like it.
Start with making the salsa cause the longer it sits, the better it tastes. Cut mango away form pit and score each half into cubes with a knife. Garb a spoon and scoop the mango meat away from the skin. Stick into a bowl. Finely chop half a red onion and de-seed the jalapeno and dice that up too and toss all that into with the mango. Sprinkle with a pinch of salt, add in the juice of a lime and add in as much or as little fresh cilantro as you like. Set aside. Also while your at it, toss the cabbage with a little salt and that that sit out as well.
Preheat oven to 400
Now on to the Avocado cream. Place avocado (sans peel and pit) into a blender (or a a bowl and use a hand blender) with the juice of a lime and a clove of garlic. Blend until smooth, adding about 2-3 tablespoons of water until nice ans creamy smooth. Add salt to taste and mix.
Next take the other half of the red onion and dice into very small little pieces. Mince up the garlic and toss both into a pan with a teaspoon or 2 of coconut oil and a few splashes of water. Cook on medium low until onion is nice and soft. Add in black beans (bean water and all) and mix together. Season with salt (if needed…canned beans are usually salty enough) and pepper. Continue to cook beans until hot and bubbly then take a fork or a potato masher and smash the beans until a the beans are all mushed and refried like. Feel free to make then smoother by sticking them in a blender if you want. Add more water to thin out as well.
And lastly, get those corn tortillas into the oven to crisp up. What I did is took a bit of coconut oil and coasted my hands with it then rubbed the tortillas on both side. Or you can brush on melted oil if you don’t want to do that. When lightly oiled, stick them into the oven and bake until crispy, flipping them after about 4 minutes and finishing after another 4-5. (you can gauge your liking on crispy)
Now compile the tostadas
Take a crispy tortilla, smother with refried beans, top with a little red cabbage then a big scoop (or two) or the mango salsa and a big spoonful of avocado cream. Add more fresh cilantro on top and serve with a slice of lime..
No utensils needed, just eat with your hands.
Holy crap, I swear that everyone in my family is made up of pasta and meat. Over the past few weeks with all of the family spending so many meals together and nobody really in the mood to get fancy and do much cooking, the dinner go to’s have been either some type of pasta, potato, or bread with meat dish. Super meat and starchy as hell. (there is usually a veggie somewhere) Good thing I pack my own lettuce and carrots where ever I go.(no joke) But can’t blame them really. Food has not been top priority. If they will eat pasta, well then that’s what they will eat and the veggies are starting to make there way back. (I am making zucchini noodles for family dinner tonight)
But yesterday the mr and I spent the day just the two of us (it has been so long) and made dinner at home. I, as well as the mr, wanted nothing to do with pasta, potatoes, or bread. (he even passed up pizza…. what the WHAT) Just simple dinner with no one to cook for, no picky little littles to have to contend with and a fridge full of all the prettiest fresh veggies I can eat!
We (really me) went all out fresh with a hugmongo salad of broccoli and lentils. Super quick and easy to make, really fresh, crispy, and hardy. A salad just for us, although I think I might make it again for tonight to bring to the sisters house for dinner.
A salad that that makes me (and the mr) happy to eat and will make you happy too!
The stuff. A nice nig head of broccoli, a small red onion, half an avocado, some dried lentils, water, red wine vinegar and salt and pepper.
Start by getting those lentils and water into a pot and on the stove to cook. Bring to boil then turn to a simmer, stick on a lid and let cook until lentils are tender but not mushy. (about 20 minutes)
Once you have got those going, chop up the broccoli and the onion into little bits(various size is a ok)
Toss those chopped up veggies into anice bowl and add a good few splashes of vinegar and sprinkle with salt ans pepper. Give it a good toss and let it sit on the counter to meld while the lentils are cooking.
Oh hey, those lentils be cooked. Dump the whole pot (if there is little extra liquid, dump that in too) into the bowl of chopped veggies and toss it all around.
And lastly , slice up the avocado into chunks (smallish sized) and gently mix that in.
Hooray! A no pasta, starch, mayo smothered salad for everyone!
Happy eating.
-C
Serves 3-4 as a side. 2 as a meal
1 big head of broccoli (about 2 1/2-3 cups chopped)
1/2 cup dried green lentils
1 1/4 cup water
a small red onion
1/2 of a ripe avocado
around 1/4 cup red wine vinegar
salt and pepper
Place dried lentils into a pot with water. Bring to a boil then turn heat to a simmer and place a lid on pot. Cook for about 20 minutes or until the lentils are cooked, but still firm. If you think the lentils are still under cooked and there is not liquid in the pot, add another 1/4 cup.
While the lentils are cooking, grab a big bowl. Chop the broccoli into little pieces and toss into that bowl. Also chop up the red onion into thin slices then into smaller pieces (or big if you like it like that) and toss that in with the broccoli. Drizzle the chop with vinegar and sprinkle with salt. Set aside until the lentils are cooked.
Once the lentils are done and still hot, dump them in with the chop. Give a really good mix to combine it all then grab your avocado, cut it into little chunk and add it in and gently give it a toss. Season with more salt and pepper and if needed.
This is a salad that tastes good just made, really good 10 minutes later, but tastes best after sitting for an hour or two.
Whenever you decide to eat it, just grab a fork and dig in!
Every year I look forward to St Patrick’s day.. And not because I am Irish, (which I am) or because I want to drink on excess (which I do not) and no, green eggs and ham are not something that I plan on making. No Ido not look forward to any of those things (although I actually do like to pinch the littles that wear no green and talk about pots of gold and rainbows) I love this time of year because cabbage is always on a freaking super sale everywhere you go. Something that is usually 80-99 cents a pound goes down to like 20 cents a pound. And for someone that eats like 10 heads of cabbage a week, this is a hug savings. SO yeah, I buy so so much (I have already bought 12 heads, but I actually plan on buying a full case before the sale is over)
No, I am not crazy, I will eat it all….. and I am going to be making so much sauerkraut. Woo hoo!
But until then. A cabbage pot roast. Yes. I remember growing up my mom would make pot roasts once in a while. A big pot full of big chunks of veggies topped with a big slab of some kind of meat. I never liked the meat, but I always loved the big chunks of the veggies at the bottom of the pot. So I figured I would make a big pot roast, replace the meat with a head of cabbage (I have so much) and add beans because protein and because they are just so good. . And when it’s all cooked and said and done, you end up with a big pot of plump and so flavorful veggies and beans and the most tender wedged of roasted braised cabbage. This is my kind of pot roast.
Now go quick.. the cabbage sales will be over soon.
The stuff. One good sized head of cabbage, a few carrots, a big onion, and a hunk of rutabaga. Also have some dried kidney beans, caraway and fennel seeds, dried ground mustard, a bay leaf, some garlic, and salt and pepper. And water… water is needed.
Note. You can use just caraway or just fennel and you can replace or even add a potato in place of the rutabaga.
Dried beans, fennel and caraway into a pot with water. Stick the pot on the stove ans bring to a boil, then to a simmer to give the beans a quick head start before going into the oven.
While the beans are simmering, dice up the garlic and chop up the veggies into big chunks… you don’t want small chunks or they will kind of turn to mush while cooking.
And turn over the cabbage head, take a knife, and slice a deep x into the core. DO THIS or else the inside of the cabbage will not cook through. Oh and preheat the oven to 375.
Beans looking a bit plumped..
Top those beans with all the chopped veggies,(don’t stir them in., you want to keep the bean under submerged in the water) sprinkle those with the mustard, salt and pepper and place that lovely cabbage head right on top…
Place a lid on the pot and slide it into the oven to cook away. It’s going to take a bit of time (about an hour) but it’s pretty much hands off. Just take a look after about 45 minutes, check the bean doneness, add in another cup or so of water and place lid bacck on and cook for another 12-20 minutes until the beans are done. When they are, take the lid off, crank the oven to 450 and cook for another 15 or so minutes until the cabbage gets all golden brown
Look at that… Tender roasted veggies, plump beans. Everything about this is right.
Grab a knife and cut the cabbage (its so tender) into big wedges.
A wedge into a bowl along with a big spoonful or two of the beans and veggies..
Finished with a dash of salt and pepper and (not shown here,) lots of mustard.. Oh cabbage… you are so good!
Eat away and Happy St Patrick’s Day.
-C
serves 3-4
1 cup dried kidney beans
3-4 cups water
a medium sized head of cabbage
2-3 carrots
1 large onion
a potato or a a small rutabaga(or both)
1 heaping teaspoon caraway seeds
1 heaping teaspoon fennel seeds
1 heaping teaspoon ground mustard
a bay leaf
salt and pepper
Place the fennel, the caraway, and the bay leaf into a large dutch oven along with the dried beans and 3 cups of water. Place on the stove and being to a boil then, turn heat to low and simmer the beans for about 15 minutes.
While beans are simmering, chop up the carrot, onion and rutabaga into big chunks and dice up the garlic. Take head of cabbage and slice a deep x into the core.
Preheat oven to 375
Once the beans have simmered a bit, add in the chunks of veggies, the ground mustard and salt and pepper (Don’t stir, you want to keep the bean submerged in the water). Place the head of cabbage right on top of the veggies and sprinkle with salt and pepper.
Place a lid on the pot and stick the whole thing into the oven. After about 45 minutes, check the roast and the beans for doneness and adding in another cup of water id needed. Back into oven with the lid for another 15-20 minutes or until the beans are tender Onnce they are, remove the lid form the pot and crank the oven up to 425. Cook for another 15 minutes or so until the cabbage turns a nice golden brown.
Remove from oven, let cool for a few minutes, cut the cabbage head into wedges and serve it up with big spoonfuls of beans and veggies.
Eat until your full.
.
The other night at a dinner with my family, I was explaining to my dad ans sisters about a cookie that I have been making for myself that is coconut flour, sweet potato and lentils (I’ll share that recipe at some point) and all those ass faces were making fun of me. They couldn’t understand how I could make anything taste like a cookie with lentils. And not going to lie, I was slightly offended , not for myself but on the lentils behalf. Lentils can do and be anything!
Fast forward to the next nights dinner (we had a lot a family dinners). I was in charge of a dessert. I had recently took a trip to the store where the bananas where on sale for .30 a pound… So I bough a few (like 20) and had quite a few ripe naners that were in need of being consumed. Banana bread is it. And because I was going to prove my point to the fam that they are all asses and have no idea about anything, I made the bread with beans in it. (the lentils are for me)
Long store short.. The bread was excepted into the mouths of the people with smiles ans yums. No one had any idea that there was anything different about it, only that is was so fantastic and that it was gone within the hour. I did tell everyone after the first few bites that I made it with beans and a lot less sugar then most but no one cared. The kids were actually excited that it had beans in it because it meant that they could have seconds. My dad asked for the recipe, and the rest of the people.. well they didn’t care, just ate it and yeah.
See, beans in bread is a great idea.. So what do you think of my lentil cookies now? HA
To the bread. Go banana bean, GO!
The stuff. We got some flour in a bowl with baking powder, baking soda, and a pinch of salt. Then we have a few ripe bananas, a cup of beans (in bean water), a bit of oil, brown sugar, some cinnamon, and a nip of vanilla.
There should be apple cider vinegar in there…. so pretend it is.
Start off by blending 1 of the bananas up with the beans (use you blending method of choice) until pretty smooth (some chunks are fine, just not super bean chunks)
Then add in the second banana and mash it in, but leave it chunky (I just used the blender part to mash it up… why dirty a fork?)
Not into chunky, then blend it as well, the chunky/ smooth factor is up to you.
The rest of the wet stuff goes into the bowl (don’t forget the vinegar) and gets all mixed together with the naner beans.
Then the wet goes into the dry.
And mixed up until just incorporated.
Dump the mixtureinto a well greased bread pan. Grab that third banana and cut it length wise into thirds and press the pieces into the top of the mixture. This step is optional and also open to interpretation. The designs a banana can make………….
And into the oven it goes!
Baked to a golden perfection, remove from he oven and set to cool.
And after completely cooled (f you can wait that long) grab a knife, cut yourself a hunk, and go about your day knowing you made the right choice by eating sweet ass banana bread that happens to have a good does of beans in it.
One could almost consider this a health food! (almost)
-Have yourself a fine day
-C
Makes one loaf
2 cups white whole wet or regular all purpose flour
1/2 cup brown sugar
1/4 cup oil (like canola)
2 ripe bananas (plus optional 1 for topping)
1 cup white beans in the bean juice
2 teaspoons baking powder
1 teaspoon baking soda
1 teaspoon apple cider vinegar
1 teaspoon vanilla
1 teaspoon salt
1 tablespoon cinnamon
Preheat the oven to 375
In a large bowl, combine the flour with the baking soda and powder, the a salt, and the cinnamon. In either the blender or a separate bowl using a hand blender, blend on of the bananas with the beans and bean water until pretty smooth. Once blended, mash in the remaining banana (can puree until smooth if you are not into chunks of banana) Now mix in the oil, vinegar, vanilla and the sugar. Mix until combined then mix into the dry until just combined.
Pour batter into a well greased bread pan and if you want, slice the extra banana into thirds and gently press into the top of the batter. And now stick it into the oven. Bake until golden brown and all pretty like and a tester stick in the middle comes out clean. (about 50 minutes)
Remove from oven and let cool in pan for a few minutes then flip out and let cool completely on a wire rack. When cooled, slice it on up into desired thickness and eat away, whether it be naked (you or the bread) or smothered with peanut butter, jam, butter or whatever.
Cooled bread is fine on the counter covered for a day but should be stored in a air tight bag in the fridge if longer then that..
As a reward to ourselves for finishing the floor laying week (what a freaking week, I will share some pictures soon) I stayed home for a little while yesterday morning and made some donuts for the mr ( I got to bake and do a little knitting and he got donuts.) Initially I was gonna make a cake, had it on my agenda for a cake at some point this week, but last minutes I felt the need to use my unused donut pan. I think it was a good call. Donuts don’t require as much pumpkin puree. I roasted a pumpkin a few days ago for the purpose of baking a cake with it but have slowly eaten most of it (on accident) so that there was just enough left to make the donuts. I have no willpower when it comes to roasted squash, I can’t stop eating it.
Anyway, I had me a mighty fine morning of trashing the kitchen, using my pretty mixing bowls, basking in the glory of the residual heat coming from the oven, and making the house smell all nice and fall spicy. And now there are donuts in the house with lots of sprinkles and only the mr to eat them. He really really likes them, like a lot. (me “don’t eat all those f*ing donuts dude, save some for later!”)
Another reason donuts were a good call, they are easy to share. Maybe I should go drop off a few to a friend. Any takers?
The donut stuff. Flour, baking soda, baking powder, and salt are in that bowl. Then we have pumpkin puree(homemade or canned) soy milk(or any milk), brown sugar, cinnamon, oil, and apple cider vinegar
All the wet stuff gets mixed together and the dry stuff plus the cinnamon gets whisked together too.
Wet into dry and mixed until combined.
Scoop batter into well greased donut pan and don’t do what I did and overfill (I always forget not to overfill). My fist batch came out a little bit bigger the expected with holes. No biggie.
Once pan is filled, pan goes into preheated oven. Bake until golden perfection (about 15-18 minutes or until a tester comes out clean)
Slightly overflown donuts cooked to all the goodness and popped out of the pan to cool on a cooling rack.
Glaze stuff. Powdered sugar, cocoa powder, a pinch of salt, a splash of vanilla, and a bit of soy milk….Mix it all together and that’s that.
Completely cooled donuts (very important to be completely cooled) go heads down into the bowl of glaze.
All glazed and looking good but I think somethings missing…..
Pumpkin, chocolate, sprinkles. BOOM!!!
Happy Friday!!!!
makes 10 donuts
For donuts
1 1/4 cups all purpose flour
1 teaspoon baking powder
1 teaspoon baking soda
1/2 teaspoon salt
1 tablespoon cinnamon
1/2 cup pumpkin puree
1/2 cup brown sugar
1/2 cup soy milk (any milk works)
3 tablespoons neutral oil like canola
1 tablespoon apple cider vinegar
For the glaze
7 heaping tablespoons powdered sugar
2 tablespoons cocoa powder
2 tablespoons soy milk
splash vanilla
pinch of salt
sprinkles!!!!…optional
Preheat oven to 350
In a big bowl, mix together the flour, baking powder and baking soda, salt, and the cinnamon. In a separate bowl mix together the pumpkin puree, sugar, soy milk, oil and the apple cider vinegar. Dump the wet mixture into the dry and mix until combined.
Ready the donut pan by really making sure it is well grease. Fill each donut mold about a 3/4 way full. I use a spoon but you could transfer that batter to a piping bag if you want. Place pan into oven and bake for 15-18 minutes or until the donuts are golden brown and a fork stabbed into one comes out clean. Pop donuts out of mold and let cool completely on a cooling rack.
Note. I have one pan that does 6 at a time. I had to wash, dry and re-grease the panto bake all the donuts.
Once donuts are cooled, gather the glaze ingredients. In a shallow bowl whisk together the sugar, cocoa, and salt. Add in a splash of vanilla and then the soy. Mix together until a glossy not to thick but not to thin consistency . If its too thick, add in another splash of milk, to think, more powdered sugar.
To glaze, take each donut and place face down in glaze and give it a little twirl. Remove and place back on cooling rack (glaze size up) and cover with sprinkles. (optional)
Then eat the donuts
Any uneaten can be placed in airtight container for 2-3 days or can be stuck into freezer.
It’s Mother’s Day weekend which means that you and I and everyone out there should feel the slightest bit obligated to at least do a little something nice for your mom for the mere fact that you were borned. And really what better way to celebrate mom than with food… It really is the least that you can do. (I think mom’s also like flowers and cards and handmade pasta necklaces) My mom is defiantly about the food. (she has had her fair share or pasta necklaces) A many years back on Mother’s day, this sweet little girl (me) made her mother a special breakfast treat…blueberry scones. And ever since that day, for every freaking holiday, birthday, whatever day, my mother requests (demands) a batch of those scones. She is always saying that these are her favorite treat and that no one has ever made them as good as I do. (I guess that just reiterates that I am her number 1 child)
And for the last few months my mom has been up my butt, trying to get me to make her some. Not going to lie, I have been saying I’ll get her a batch, but for some reason, I haven’t gotten around to making them. So two birds here.. Make the scones and she gets off my back for a least a little while (a month.. maybe 2) and I give her a fantastic Mothers day gift that I know she will love.
So here they are , oh mother of mine. Blueberry scones!
The stuff. Flour, baking soda, baking powder and salt. A bit of sugar, vanilla, buttermilk, and butter (use vegan butter and nut milk if you want to make them vegan) And of course we need the blueberries which can be fresh or frozen. I usually use fresh, but the store I stopped at only had really big containers of fresh that were like $1000 dollars a piece and the organic frozen happen to be on super sale. So you know, the cheap in me won that battle. So into the bowl goes all the dry stuff; flour, baking powder and soda, salt, and the sugar. Give it a good whisk.
Now for my special trick for a perfectly distributed cold butter in a pastry. Freeze your butter and grate it!
With a large wholed grater, grate the frozen butter directly into the bowl with the dry, stoping a few times to toss the butter chunks around so you don’t end up with a huge pile of grated butter. When it’s all grated, gently toss around so the butter is evenly distributed. Now dump the blueberries into the flour mixture. Toss them around to give them a coat of flour. Add in the buttermilk and vanilla and give a little mix until liquid is absorbed. We are trying to handle the dough as little as possible.Turn mixture onto counter. It’s very loose, but thats what it should look like. Very gently and with as little handling as possible, gather dough up, knead a few times till everything just comes together. Press dough into a disk that is roughly an inch thick…. and it doesn’t need to be perfect. Cut the disk into even sized pieces. Do 6 big, 8 normal, maybe even 10 smaller. Whatever size you like. (I did 8) Place the scones onto a baking sheet, using a spatula to transfer, and sprinkle the tops with a little bit of sugar. Into a preheated oven for about 20 minutes.And when the scones look all nice and browned and a tester comes out clean. remove and either serve right away warm, preferably with huge cup of coffee or tea, or stick on a rack to cool before storing in air tight container.
Perfect to serve as a breakfast pastry, at brunch, or even as a dessert. A nice little treat for a special lady. (dudes can eat them too)
Happy Mothers Day Mom! Thanks for having me!
And Happy Weekend!!!
-C
Blueberry Scones
2 cups all purpose flour
1/3 cup sugar plus 2 tablespoons to sprinkle on top
1 teaspoon baking powder
1 teaspoon baking soda
1/2 teaspoon salt
1/2 cup (1 stick) unsalted butter frozen or really cold (use non dairy butter like Earth Balance for vegan)
1 cup blueberries (fresh or frozen)
1 teaspoon vanilla
3/4 cup buttermilk (use non dairy milk for vegan)
Preheat oven t0 400 degrees
In a large bowl, whisk together flour, baking soda, baking powder, sugar, and salt. Take the frozen butter and grate directly into flour mixture, tossing around to evenly disrupted. Add in blueberries and toss around till coated with flour, then lastly, add vanilla to buttermilk and mix into mixture until just barely coming together. Turn mixture out onto counter and with your hands, knead mixture a few times until it forms a solid dough. Shape into a disk and smoosh down until about an inch thick. Cut into 6-10 triangles and place on a non greases baking sheet and sprinkle tops with remaining sugar. Stick into oven and bake for 20 minutes or until tops start turning a golden brown and a tester in the middle of a scone comes out clean.
Remove from baking sheet and serve warm or let cool on a rack.
Mom gets first dibs, and if she is willing to share, eat one yourself with your face.
I had to share the last of the 5 pineapples cause if I didn’t, that would mean I ate 5 pineapples by myself. (I ate 4 pineapples by myself) So donuts were made and delivered to my sisters house where I proceeded to make her and her kids and another sister dinner. (hand made pizza on a weekday!) I then whipped out these pretty little upside down pineapple donuts for dessert, right after I cleaned up and made whipped cream. The kids were swallowing them hole and trying to steal just one more and my sister and the mister, well they had to eat their donuts all elegant like with forks. (weirdos)
I know I have said it before but just in case you forgot
I am the best sister/aunt ever!
The stuff. Flour, salt, and the baking soda whisked together into a bowl. Fresh pureed pineapple, milk, egg, melted butter, and white sugar. Than there is more melted butter, brown sugar and fresh pineapple for the upside down. This batter is pretty simple, just make sure to whisk all the dry really well. Dump all the wet stuff into the dry and mix until combined. Don’t over mix!Grease the donut pan really well and mix the brown sugar with the remaining melted butter
Drizzle the bottom of each donut round with the butter/ sugar mix then layer thinly sliced pieces of pineapple around the hole maker. (not as perfect as a pineapple ring, but still pretty)
Scoop donut batter on into the pan and stick into the oven preheated at 350 degrees. When donuts are all nice and golden brown, remove from oven and let sit and cool for about 5 minutes to give the donuts time to cool and the brown sugar to thicken. Dump donuts out onto a wires rackAnd serve them all upside down like. Maybe with a scoop of whipped cream or ice cream or nothing.
Donut Smiles!
-C
Pineapple Upside Down Donuts
Makes 12 donuts
1 cup flour
1 teaspoon baking soda
1 teaspoon salt
1/2 cup white sugar
6 tablespoons melted butter ( 1/2 s for batter 1/2 for sugar mixture)
1 egg
1/2 cup milk
1/2 cup pinapple puree (about 1 cup fresh pineapple chunks blended)
1/2 cup brown sugar
1 cup sliced pineapple
Note. I used fresh pineapple, but you could use canned. I think you would need a of rings (cut in half) and a an of chunks, blended up)
Preheat the oven to 350 and grease the donut pan(s)
In a large bowl, whisk together the flour, salt, sugar and baking soda. Melt 3 tablespoons of butter and mix that with into the flour mixture along with the pineapple puree, milk, and lastly the egg. Mix until combined.
Melt the remaining 3 tablespoons of butter and mix into the brown sugar. Drizzle (crumble) about a teaspoon of the mixture into the bottoms if each donut mold. Layer thinly sliced pineapple on top of that then scoop donut batter on top of that. Stick into the oven for about 10 minutes, or until donuts are gold brown and a tester comes out clean. Remove from oven and let cool for 5 or so minutes on a wire rack before turning out of pan.
If working with one pan, make sure to really clean the pan and re-grease before baking the second batch!
Serve donuts with a scoop of whipped cream and eat with your face.
My Moms birthday was this past week, and naturally, I made the cake for our big family birthday gathering. (and I bought and made dinner and cleaned everything up, although the mister did do all the dinner dishes) Word to my sisters… You guys suck! (but I still love you)
Every year my mom asks for the same cake. Strawberry with Lemon frosting. Then a few years ago, other people in the family started asking for the same one. Now there is a weird strawberry cake thing going on between some of my family members. They have taken claim of the strawberry cake and don’t want me to make it for anyone else but them. They think that because I make them this awesome cake that they are somehow special. Well guess what people.. Your only special for one day, then you go back to being normal.
I have a family full of a bunch of weirdoes.
Anyways, My mom said she wanted the usual strawberry cake, but as cup cakes, or actually she asked me to make the little square cakes. I was kind of confused when she said square cakes because well, what the hell was she talking about? But then I remembered that a long time ago I use to have a square cupcake pan. (I lost in somehow) So no, I couldn’t make the cakes square, but I sure could make them cute. And cute as hell is what I did.
Cake Stuff. Flour, baking soda, baking powder, and salt whisked together in a bowl. Butter, a little oil, vanilla, eggs and buttermilk. Then of course we have strawberries cause it wouldn’t be a strawberry cake with out them.First things first. Wash, trim and dice up the strawberries. Stick them into a pot and sprinkle with a few tablespoons of sugar. Heat on low and let the strawberries cook for about 10 minutes, stirring frequently, until they turn into a thick syrup. The sugar and the butter get beaten together until light and fluffy. Then goes in the oil, eggs, and vanilla. The milk is then added to the strawberry mixture. Add half the dry mixture to the wet, mix, then mix in half the strawberry mixture to that. Mix the rest of the dry in and finish off with the strawberry mixture.
Pour batter into well greased and parchment lined baking sheet (or pans). Stick cake into preheated oven for about 35 minutes, rotating cakes after 15 minutes. Cake is done when it starts turning a light gold brown and a cake tester stuck in the middle comes out clean. Cake gets pulled from the oven and set on a rack to cool.
I actually wrapped the cake when it was cool enough and stuck outside for a few hours. It didn’t completely freeze, but it was close. Frozen cake is easier to cut then soft non frozen cake. No necessary, but if you have the time….
While the cake is cooling, make the frosting. Powdered Sugar, a stick of butter, cream cheese, lemon zest, lemon juice, and vanilla get mixed together until it turns into a big bowl of thick lemony frosting. Tomato can cutout. (I couldn’t find my biscuit cutters) A biscuit or cookie cutter would probably work a little better.. The cakes kept getting stuck in the can. Frost the cake!! Place frosting into a piping bag or a big plastic zip lock with the tip cut off. 2 rounds to a cake. A squeeze of frosting goes on one, topped with another and given a little smoosh. A nice big dollop of frosting on top then…. Sprinkles!!!! Or sliced strawberries (my mom doesn’t like sprinkles..I know)
So freaking cute. I don’t know if I can make a normal cake again.
Mom gets the bigger 3 tiered cake.. and a few more of the little ones.
HAPPY BIRTHDAY MOM!
-C
Strawberry Cake with Lemon Cream Cheese Frosting
makes 16 two tiers cupcakes or can be made in three 8 inch cake pans
The Cake
3 Cups All Purpose Flour
1 Teaspoon Salt
1 Teaspoon Baking Soda
1 Teaspoon Baking Powder
1/2 Cup or one Stick Soften Butter
1/3 Cup Vegetable Oil
3 Eggs
1 teaspoon Vanilla
1 Cup milk
1 Cup Sugar plus 2 Tablespoons
1 lb Fresh Strawberries (Can use Frozen, just let them thaw )
The Frosting
4 1/2 Cups Powdered Sugar
1 Stick Soften Butter
4 oz Cream Cheese (Half a block)
Zest of a Lemon
1-2 Tablespoons Lemon Juice
1 teaspoon Vanilla
pinch of salt
Preheat oven to 375
Grease a parchment lined 13×18 high rimmed baking sheet and dust with flour. If you baking sheet isn’t as big as mine, use whatever size you have and make a few cupcakes on the side. Or make one , 3 tiered cake with 8 inch cake pans. I trust that you can find a way to bake all this cake batter.
Wash, trim and dice strawberries. Toss them in a medium sauce pan and sprinkle with 2 tablespoons of sugar. Place on low heat and cook for about 10 minutes until strawberries break down and turn into a thick syrup. Take of heat and let cool.
Combine flour, salt, baking powder and soda in a bowl and whisk together, In another large bowl, add butter and sugar together and beat on medium until light and fluffy. Add in oil, vanilla and eggs. Beat together. Now add the milk to the strawberries and mix together. Beat in half the dry into the wet, add in half the strawberry mixture, then the rest of the dry, and finish off with the rest of the strawberry mixture.
Pour batter into prepare baking sheet (or pans) and place in oven. Check cake after about 15 minutes and rotate to help insure an even bake. Bake for another 15- 20 minutes, or until cake starts to turn golden brown and a tester (toothpick) comes out clean.
Remove from oven and let completely cool. (Not necessary, but once cake is cooled , wrap with plastic wrap and stick cake into the freezer of a little while before cutting the circles.. its makes it a little easier)
While cake is cooling, make the frosting. Place all ingredients in a big bowl and beat together until a nice soft but sturdy frosting forms. If. you frosting seems to thick add in a splash of milk. To thin.. add a little more sugar.
When the cake is cooled, get to it. With you cookie or biscuit cuter dipped in powdered sugar, cut as many circles as you can.
Fun Time!! Frost the cakes. Place frosting into a pastry bag, or like me, a large zip lock bag with the tip cut off. Partner up all the cake rounds and go through and give one of each of the pairs a good dollop of frosting. Top with the remaining cake, give it a lithe smooshto make sure they stick, and squeeze a nice dollop of frosting on top. Finish off with sliced strawberries and lots of sprinkles.
Sing Happy Birthday and eat!
What is better for a bake sale then Oreo cookies? Oreo cookies made from scratch!.
So when my sister called and asked me to make something for my nephews bake sale to raise money for his basketball team, I couldn’t say no. (or I didn’t want to say no cause any good excuse to bake right!) Plus I had just found this awesome recipe on one of my favorite blogs, my name is yeh, for home made Oreos that I have been super excited to try, so it kind of worked out. But before I committed to the Oreo, I wanted to just double check with my nephew and see what he might want me to make because it was his bake sale.
This is the conversation we had. And yes, it was through text.
Me- “Hey bud, what do you want me to make for your bake sale? Cupcakes, cookies, donuts, or brownies”
Jack- ” Yea!”
Me- “Yea what?”
Jack- “Make that.”
Me- “Make what?….Hello!! What do you want me to make? Should I make Oreos?”
Jack- I WANT OREOS!”
Ok.. So it took a little while, but we got there. And after the the basketball game and the super successful bake sale..
ME-“Did you see the Oreos?”
Jack- “What do you mean?”
Me- “The Oreos I made for the bake sale…the ones you wanted me to make”
Jack- “There was a bake sale? I want Oreos”
Yup, that’s the attention span of my 13 year old nephew. Little shit head. But for real, I had so much fun making these cookies and I am definitely going to be making them again. Plus they were a super hit at the sale.
I am the best aunt! (and sister!)
Cookie Time! Whats going on here is brown sugar and butter have be beaten together until nice and fluffy Then a good big splash of vanilla and another 2 big splashes of coffee are added to that.(I sacrificed my last few sips of my coffee for these cookies) The dry stuff, flour, salt and cocoa powder, are whisked together, waiting to be added to the wet. Mix the dry ingredients into the wet and mix. I ended up just using my hand and kind of squish mixing everything together until in tuned into a nice lovely uniformed dough. Form the dough into 2 balls and give each a few kneads to get any air bubbles out. Place dough back into bowl and stick in the fridge to sit for 10-15 minutes( it makes the dough a little easier to work with)
Once the dough has had a little time to rest and cool, remove from fridge, one ball at a time. Place on a lightly cocoa or powdered sugar dusted surface and roll out the dough. Grab any size circle (or other shape) cookie cutter and get to shaping the cookies. Notice the tin can in the bowl? I could’t find my biscuit cutters anywhere but the can was the perfect size, and it worked really well. Keep a little bowl of either powered sugar of cocoa to dip the cutter in in between making the cookies. It really helps the dough from sticking and breaking.
When you have cut out your cookies, use a spatial and place them on a baking sheet. You can try to transfer with you hands, but you end up messing up the shape and most of them will break anyway.
Stick the cookies in the oven for about 15 minutes a batch and continute to roll and cut out the cookies until you have no dough left.
While the cookies are getting their cool on, make the cream filling. All you need is a stick of butter, about 4 cups of powdered sugar, some vanilla and a few splashes of heavy cream. Beat that all up until nice and creamy thick and spoon it into a pastry bag (I used a big old ziplock bag) to be piped on the cookies. Filling the cookies is for sure the best part. Separate the cookies into pairs and pipe a big blob of filling onto one of the two cookies. Take the names cookie and place on top, giving it a little smooth to the disperse the cream. Keep doing that until the cookies are all filled.
Stacks of cookies… Sold to the highest bidder! I was told that they sold out within the first half hour at $1.50 a pop….Should have charged $5…. for a good cause right?
And yes, even though he was being a space head and didn’t even care that I just made him like 50 bucks for his team, I still saved the kid one.He just had to give me either a hug or 5 bucks for it.
I got a hug. (I really wanted the 5 dollars)
-C
From Scratch Oreo Cookies
Adapted by Molly Yeh from My Name is Yeh!
The cookie (makes about 18 3 inch Oreos)
2 cups all purpose flour
1 cup cocoa powder
3/4 cup brown sugar
1 cup or 2 sticks soften butter (use earth balance for vegan)
1 teaspoon salt
1 teaspoon vanilla extract
2 tablespoons brewed coffee
The filling
1 stick soft butter (us earth balance for vegan)
2 tablespoons heavy or whipping cream (use a nut or soy milk for vegan)
4 cups powdered sugar
2 teaspoons vanilla extract
Cookies- In a large bowl cream together sugar and butter until light and fluffy. Add in vanilla and coffee and mix together. In another bowl, whisk together the flour, salt and cocoa powder. Add dry to wet and mix together unit a uniform dough forms. Dump out onto a lightly cocoa or powdered sugared surface and knead dough a few times. Split ball into two balls, place in bowl, and stick in the fridge for 15 or so minutes.
Preheat oven t0 325 degrees
When dough is chilled, remove one ball at a time, and roll dough out on a cocoa or powdered sugar dusted counter until its about 1/4 inch thick. With a round (any shape would work) cookie cutter, cut out as many cookies as you can. In between sits, dip cutter in a sugar and cocoa to keep the cookie from sticking. Transfer cut out cookies onto a baking sheet with a spatula. Take scraps, roll into a ball, and roll out again. Keep doing that until you can’t cut out any more. (You can either bake a weird shape cookie or just eat the dough)
Bake cookies for about 15 minutes or until the cookie has risen a bit and the tops have lost their glossiness and look cooked. Remove from oven and let cookies dry on a wire rack.
Make the filling
Filling- Beat together butter, sugar, vanilla, and cream until completely mixed and is at your optimal consistency. Add a drizzle more cream if you want to thin out or add more sugar for a thicker cream.
Stick the filling into a piping bag or ziplock bag an snip the end. With cookies in pairs, pipe a big dollop of filling onto one of the two cookies. Place the naked cookie onto the filled cookie and give a smooth to distribute the filling.
lick your fingers and eat a cookie.
If selling at a bake sale, charge $3 a cookie…. If it’s for a good cause.
First day of Spring!! Well kind of I guess. I think it actually starts at like 6:20 tonight, when the temperature is going to dip back done to 10.(Spring my ass) I don’t know about you people out there but here in Vermont, we are really hanging on to winter. I have to keep telling myself…” It will be warmer soon and you’ll be looking forward to this weather in a few months.. so stop bitching!” I give myself good pep talks.
Anyway, last week at the farm share pick up, there was a nice little surprise. We got a few pounds of some sweet locally grown and milled whole wheat flour. There was a little sign with the information about the wheat and where it came from, but in my haste of gathering all of my other veggies, I failed to take notes and forgot the name of the farm that it came from. But I do know that my farm traded some celeriac for the wheat. I was really excited because I am really into the idea of using locally grown grains and I don’t know, it just made me really happy, especially because it was a trade. Food framing and local sharing is stuff that makes me happy.
I wanted to make something to kind of showcase the hearty, nutty flavor of the wheat and I also wanted to make something that my mister would eat for breakfast. Well what better way to do that then with muffins! Banana coconut whole wheat (that just happen to be vegan) Hearty, fruity, and smells like the word lovely and the color yellow. A few to eat and a few to share. Hanging at home, running away or getting ready for a day of spring cleaning….This is a great weekend to make muffins!
The stuff… Light, nutty local whole wheat flour, ripe oh ripe bananas and coconut flakes are the stars in this muffin… But we need the other stuff too. Brown sugar, vanilla, coconut oil and a chia egg. Baking powder, baking soda, and last but not least, salt.
Yup, that sounds about right The salt, baking soda, and baking powder are whisked together. The banana and all the rest of the stuff are mixed up… Then mix the wet mixture into the dry. Stir until combined and then add in the coconut flakes,Scoop mixture into 12 lined muffin cups… A scoop like mine works very nicely. Don’t have one, well I recommend you get yourself one. Until then, use a spoon. Something I always do when baking any muffin is sprinkle the tops of each muffin with a bit of sugar or brown sugar. It melts and caramelizes and adds a sweet little crunch to the tops.
Now stick the muffins into the oven. Remove from oven when they look like this, nice and golden brown. Also good idea to check with a tester stuck into the middle. When it comes out clean, they are done.12 happy little muffins cooling on a rack, waiting to be eaten with you mouth.
Doesn’t the sight of pretty food make you happy, like sing a song happy? Muffins, whoa yah!! Friday yah yah!! Spring…What, Yah!! Yah…Yah Yah!!!
Terrible I know, but at least you were spared hearing my actual voice.
Have a great weekend. Do lots of springy stuff!
-C
2 Cups Whole Wheat Flour
4 Ripe bananas
1 Teaspoon Baking Soda
1/2 Teaspoon Baking Powder
1 teaspoon Salt
1 teaspoon Vanilla Extract
3/4 Cup Brown Sugar
1/3 cup melted Coconut Oil
1 Tablespoon Chia Seeds + 3 Tablespoons warm water
1/2 Cup Unsweetened Coconut Flakes
Preheat oven to 350
In a small bowl, mix 3 tablespoons warm water to the chia seeds and let sit for at least 5 minutes (10 is better) In a large bowl, peel and mash the bananas until they turn into a kind of chunky soupy puree. Add in brown sugar, chia seed mixture, vanilla extract, and the melted coconut oil (make sure it’s melted or it won’t incorporate into the mixture) Mix together. In another bowl, whisk together the flour, baking soda, baking powder and salt. Mix the wet mixture with the dry until combined then mix in the coconut flakes.
Line a 12 cup muffin tin and fill each cup about 3/4 the way up with batter. Sprinkle each muffin with brown sugar and place in oven on center rack. Bake for 25-30 minutes or until the tops 0f the muffins are golden brown and a tester inserted into the middle comes out clean.
Remove muffins from tin and let cool.
Serve as is or maybe with a smudge of coconut butter, or anything you want really.
No need for fork, just use you mouth.
TGIF!!!! For reals, because Monday-Thurday were monster days. And now that its friday, I can dig a hole and hide in it until it’s at least 30 degrees with some sunshine. (I might never get to come out.)
A few things I will bring in my hole:
food (lots of food and coffee, lots of coffee)
a soft blanket and pillow
a few books, preferably with pictures, on farming and gardening (think spring!)
the entire series of the Fresh Prince of Bel-air and a device to watch it on
toothpaste (I can use my finger to brush my teeth)
But before I leave for my hole in the ground, I made these little cake bites to get my people through the weekend. Sweet little lemony bites of rich dense cake dipped into bittersweet chocolate. (I am just so nice) They have all the pleasure or cake without the need of a fork and are much easier to give away then a big slice of cake. Plus, they are fun to make. My little sister helped and did most of the chocolate dipping. Then she and another little used their mouths to clean up the chocolate mess. It was an afternoon of chocolate all over the kitchen fun day.
So make some bites to have and to share. Or if you, like me, are digging a hole to hide in, make a batch of bites to bring with you. That’s the beauty of cake covered in a harden chocolate shell, they travel really well.Simple lemon cake stuff. Flour, baking powder and salt whisked together, Sugar and soft butter in a bowl. An egg, some vanilla, milk, and of course, the lemon.
To make the batter, cream the soften butter with the sugar until light and fluffy. Zest lemon(1 big or 2 small) into bowl with the juice of the lemon(s), the vanilla and the egg. Beat until combined. Now beat in the dry and then the milk. Keep beating for another minute until all mixed. Batter should be light and fluffy.
February…FEBRUARY! Jeez the past month just flew on by. I am making it my mission in this hear month to make it last as long as I can. How I am doing that, well still haven’t figured it quite out yet and we are already 5 days in. If you got any ideas, let me know.
Past week was same old same old, blah blah blah. I did get a phone call from my local plant lady (yes I have a plant lady) about a sweet ass rubber plant that came into the store. I ran there in a quick hurry and bought myself that plant as my belated birthday plant. It is big and green and all sorts of pretty. And the pantry, it is now100% done, or until I decide I want more shelves again. I give you a tour once I restock and clean it up a bit. Big exciting things. Ha
So are you watching the Super Bowl today? I are not. Not that I have a problem with people who do, heck, I think it’s awesome that people can get so jazzed about a game, but for me, I just don’t care. Never like sports on tv. Don’t care for commercials, and I don’t eat buffalo wings. What I am going to do is grab a book, a soft blanket, and a bowl of popcorn covered in peanut butter and snuggle on the couch. That sounds super to me.
Internet I looked at this week.
–Weird and Fascinating Ways Animals Use Poop.
-This is amazing. If you know me, I have a weird thing about stickers of any kind )and candy wrappers). The make me gag. Stickers are gross. Sticky, Gooey Produce Stickers Are on Their Way Out
-Kids Say They Like Their Pets More Than They Like Their Siblings. Makes sense.
-I get enough sleep but still want to go camping. Any takers? Not Getting Enough Sleep? Camping In February Might Help
–“Painting” A Portrait With 20,000 Seeds. Whoa.
-I hate talking on the phone, I always have (even before texting), and avoid it at all costs.It seems weird not talking to a person face to face (I text now, but not very much). Psychologists Explain Your Phone Anxiety (and How to Get Over It)
–TIPS FOR CONTACTING YOUR ELECTED OFFICIALS because they need to hear from us.
-I made a big jug of this Hot sauce this week. We have been eating it on everything.
A few pictures from the week
If a big ass pile of balloon animals (and balloon swords and flowers) doesn’t make you crack a smile, well then, that just sucks for you.
A couple of littles slept over this week and took over the house with balloons. Not only did the kids bring their own balloon kits, but the mr has a crap load of balloons himself that he inherited from my late brother-in- law Richard (he would be so happy to know that the mr uses these balloons to drive me crazy….thanks dude) And to top it off, we stopped over at the loft with the kids to grab a few things and there was as large bag of blown up party balloons that must have blown into our yard. Those also ended up in the car ans back at the house. Seriously, the house was flooded with balloons. It was kinda amazing.
This week has gone by like a blur. The mr finally got his wish and got himself a couple of fish. One is a gold fish which he named Lefty, and the other might be a goldfish that I named Dead -in- Two- Weeks (yes, I am an asshole). I am not exactly thrilled to have fish for a few reasons, mainly that I have been fish traumatized. Back in college the mr went through a fish faze. He would get a beta fish, name it, feed it, love it, then a week later the thing would jump form it’s fish bowl and commit fish suicide. It happened 3 times. So yeah, fish don’t do it for me, but the mr is happy so I deal. Plus these fish are goldfish and the tank has a cool lid that grows plants. We shall see.
There was some other stuff, like apartment stuff that happened this week, but mainly it was a quite week. We did finally tackle the kitchen pantry which I painted pink,and started putting up the shelves. Now i just need to pick a color tile for the floor and just get it finished already because once that happens the kitchen will basically be all done. And I will be so happy and I will take lots of picture to show you.
And it’s Sunday. You got any plans? Doing anything spectacular? I am still not feeling 100% which I blame on the weather. Super cold and crazy warm… the ups and downs really screw with me. (but those warm days were really so nice) Winter just needs to dump some snow and let me be cozy for a bit. (not happening this week) But what can you do? For me, I hope to keep it slow today, maybe do some napping, reading, drinking of too much coffee. Just as long as I order the flooring, I should be all set.
Some of the internet browsing I did this week.
-It’s 6 am, I am running at the gym, and I get a text from the mr. It’s a link to this, Dyson 360 Eye. Why he was looking at vacuums at 6am, i could not tell you but what I can tell you is no cleaning robots. NO.
-The world after a snow storm always makes me so happy and peaceful. There’s actually a scientific reason why the world gets quieter after it snows.
–The More You Swear, the More Honest You Are. Fuck yeah.
-I think I might try this for the mr this week. Roast Pasta Before Cooking it.
-I love mustard and am very interested in trying some on this list. THE MODERN PANTRY GUIDE TO THE WORLD’S BEST MUSTARDS
-Saving my pennies for a someday purchase of this Staub Round Cocotte. But this one by Martha is really good too and sooooo much cheaper.
-Muffins are basically cupcakes that people eat fro breakfast, don’t be fooled. Why Muffins Are a Trap.
–Walking In America Remains Dangerous. I would be lying if I said I was never afraid of getting hit.
–Bees Have Just Made the Endangered-Species List. It sucks that it has come to this, but it’s good that there is awareness and protection now.
-This dude is pretty badass. Sweater Selfies: Man Knits His Way Around The World
I feel like we are officially doing winter now. Snow and chill for the next three months. Some people might not be excited for any of it, but me, I am excited to get out in some snow covered woods and take it all in. I love me some winter.
This past week was a week of trying to feel not sick (still feeling a little sick) and to get myself all organized for the year. Not a new years resolutions, just a tax man thing. Aggh, already thinking of taxes.. lets just not right now. Besides that, not to much else. We babysat, worked, I tested out my new wood carving knives that the mr got me for Christmas and almost cut my hand off (which means tha they are really good). The week kind of flew by, but oh yeah, the kitchen, it’s like pretty much DONE!!!! I have a working sink, faucet, cabinet doors, and have been using the stove all week. It’s amazing, and strange and I am looking forward to lots and lots of kitchen time. There are still things that need doing, but last night I prepared our entire meal on the kitchen counter and not on the dining table or floor. It was a pretty great feeling.
Today. Got a day full of events. Most pressing is that my twin bros are doing 19 today (Happy Birthday Shitheads) and are coming over in a few hours for some home made cinnamon buns that I need to go make. So I should go do that.
Interneting from the week.
–How the World’s Smallest Birds Survive the Winter. On the list of things to know.
-This seems like a positive start to a new year. The Year of Conquering Negative Thinking
–Every Single Food Trend That’s Been Predicted for 2017
-Interesting read. And more sugar in yogurt then ice cream..jeeze. The case for eliminating sugar. All of it.
-The strange and amazing things that happen. On This German Island, The Breakers Bring Gifts Ashore: Thousands Of Toys
Amazon Has a Patent for Floating Blimp Warehouses. I heard this a few days ago on the news… What the fuck? Is this for real what we are moving towards?
I love road art. Artist ‘Roadsworth’ Uses Public Streets as a Canvas for Art and Activism
-You learn something new about your food every day.
– Being an aunt to a nephew with deadly nut allergies is scary…I have almost killed him a few times. Giving Babies Peanut Butter Could Actually Prevent Peanut Allergies
A few pictures this past week.
Happy New Year! Hope you are all waking up to sunshine in your strut, happiness in you mouth, and kindness in your soul.
So much has happened in the past few weeks. Holidays full of family, friends, birthdays (Happy to Cam, Anthony, and Judah) and all around craziness. My phone got run over by a car(still works!!!),we finally changed the summer tires to snows (thanks Justin!) and Only has now officially moved in behind the couch and is enjoying the life of an indoor cat. We are getting so close with house, so so close. I know a few weeks ago I told you we about the counter top and how excited I was to un-mold it. Well what I don’t think I told you was that we un-molded it and it was fantastic. Then, trying to remove the sink mold from the middle with a hammer, I cracked it! AAAGGGHHHH. That was suck a bitch if a day. But we took it it stride and just made another one. And that one, that one is even better and amazing and is all nice and perfectly perfect. Once we did that we threw up a tile wall, hood vent, light fixtures and all sorts of little things that I can’t remember. Last night we slid the stove into place and fired it up for the first time! It was really stinky and great and I made the mr a pizza for all of his excellent work bringing me fire. It was so freaking satisfying to use an oven and feel slightly normal again. Now all we need to do is finish the cabinets, find a faucet that doesn’t suck, hook up the sink, and a bunch of other stuff and we will be all set. But the oven works so the coming weeks are going to be full of so much oven food so watch out! (i can’t wait to start posting more recipes!!!!)
On top of all the life stuff, I have been sicko all week, and so has the mr. Actually, he has been sick for two weeks and then lovingly gave me his ick. And it sucks. I am tired and snotty and sore and cranks. I have been eating large quantities of raw garlic, swiging apple cider vinegar, and drinking turmeric tea all day. (so I don’t smell the greatest) I bought elderberries to make some syrup a little while back but left them at the loft and we let my dad stay there this week so I didn’t want to go ransack the place looking for them. He is gone now so I’ll go find them and make us a wellness potion. We will be tops soon!
So 2017. You got any resolutions or plans? Me, no resolutions, just to keep on living with intention, kindness and love and to continue to pursue my goals. We have plans for some travels (cross country awesomeness part 2), plans for some life stuff, so we got things. But basically I am just looking forward to making this year good, and to be better with where I place my camera. (I can never seem to find it when I want to take pictures)
Sunday. With today, I am going to relax and recoup. Drink my fluids (tea and coffee) take my naps, and wash the sheets (everyone should start a new year with clean sheets!)
Internet links to click if you like.
-Happiness vs meaning…How about some of both. In 2017, Pursue Meaning Instead of Happiness.
–15 of Carrie Fisher’s Best, Most Honest Feminist Quotes.
-I already charge my cellphone on the machines at the gym, but it it floated , well that would be swell. Floating Gym In Paris Uses Human Energy To Sail Down The Seine River
–A Short Catalog of Foods Discontinued in 2016
-Life is bigger then all of us. As A Rough Year Ends, We Turn To The Cosmos For Some Perspective
–Cross stitching awesomeness
– Maybe 2017 will be the year that I wear pretty things. I really like this dress.
–The Best Things We Read and Ate This Year
-I really want to go back to Iceland.(maybe we will this summer?!) 15+ Iceland Photos You Won’t Believe Are From This Planet
-There is sugar in everything. How Much Sugar Can You Avoid Today?
Pictures of some of the crazy.
Today is the day, the moment of truth. The concrete counter tops that we poured a few days ago are getting un-molded, flipped, and set into place. I am so super excited and very much scared. Finally we will have a counter and we will be that much closer to a finished kitchen. But what if? What if something happens between removing the mold and placing the counter, like what if it doesn’t fit right or maybe it breaks? I shouldn’t be even thinking about that. It will be great and awesome and the best freaking counter ever. (and Ikea is only a few hours away and sell emergency counter tops)
The house. Oh have we got ourselves a little gem. All week we have been staying here, doing all our living here (minus showers, we take those at the loft) and still managing to get a bit of work done here. Working in the place you live is such a bitch. Plus it’s the holidays which makes everything not covered in tinsel and lights seem unimportant, but we are getting there. A few more weeks and I tell you, we will most likely have ourselves a pretty nearly done 98% livable house.
Even though the house might not be perfect, we still had a the littles over for a school night sleep over where we finished decorating the tree, watched the Santa Clause, made claims on table settings and ate black beans for breakfast. That was a tough morning with -20 cold and no desire to leave the house. We might have been a few minutes late for school, but hey, I never drive in the mornings and didn’t realize 20 minutes wasn’t enough time to compete with the crazy ass traffic. And they might not have been late, so yeah. (I didn’t ask) What else….Well have been on the hunt for doors and glass for doors and all the odds and ends that we need. Every day it seems we end up at the hardware store, the junk store, or the salvage yard looking of that one thing that may or may not exist. It is driving me nuts. The mr, he is really good at the back and forth. Me, not so much. I really wish there was a store made for just me that sold (or gave me for free) everything that I could possible need. Doors, carrots, socks. That would be great. Oh and my crock pot. It has turned into the center of our living because it’s not our main source of hot food. It has been entirely new territory for me (never used a crock pot before last week) and there were a few soups that might not have so great, but I think I have got the hang of it and we have been eating hot food from the crock like champs. I’ll have to share some of my soups and tips with you guys soon. (once the kitchen is done there will be sooooo many new recipes and food fun coming your way!)
So besides the counter tops today, I think I have some serious cleaning to do. The loft is a mess, the house is getting a little on the dusty side, and the pile of dirty clothes has gotten out of hand. I might drag the hamper to the loft, be domestic for the afternoon and do some chores. A little Christmas music, lots of coffee, and amazon prime last minute gift shopping. It should be an interesting afternoon to say the least.
Links brought to you by the internet.
-I want this, it would bring me so much joy. This Infinity Galaxy Puzzle Has No Beginning or End
–5 of Humanity’s Best Ideas of What Dreams Actually Are
-Lapland is on my travel bucket list. 10+ Reasons Why Lapland Is The Most Magical Place To Celebrate Christmas
–Meet The Spleen, The Strange Little Organ That Can Multiply
-Gift idea for your stinky loved ones. Shreddies flatulence filtering garments
-The mr and I are starting to plan our next cross country trip. National Parks all the way (free days are great but if you are planning on going to a lot of parks, get the pass) WHEN TO VISIT ANY US NATIONAL PARK FOR FREE IN 2017
-An Eleven-Story-Tall Tree Hugger Sprouts on the Side of a Building in Chile. Imagine painting that…..
-Food is always a good present.10 Last-Minute Recipes to Make for Homemade Food Gifts
The week in pictures.
Yes that is a giant tree monster about to eat a Christmas tree. So good.
Have a great day!
It’s officially kinda official. WE MOVED IN!!!! And yeah sure, we might not have a kitchen or a 100% functional shower, but hey, who needs that when you got a real freakin bed to sleep in. (we are showering and preparing food at the loft) Going form sleeping on a futon on wooden slates in a crawl space to our real bed, with a real frame, all in a giant room with windows….. It’s hella crazy.
Other then the move in, the week has been pretty jammed packed. Still spending every minute plugging away at the house all while making sure all of our tenants are keeping warm with working heaters. (we have spent way to much time at the plumbing supply store this week) Barb, the mr and I ditched a day of work and school to travel to the north and hit up the land of Canadian Ikea. The mission was simple. Get a kitchen sink and maybe a cool rug or a shelving unit, and for barb and the mr, to eat as many hot dogs as they could. Success was had. We go the sink, I got a jar and a rug, towels were bought and an obscene amount of hot dogs were eaten (I think they each ate somewhere between3.5 and 5, plus a fro-yo. Me I was happy with my carrots) We we home before dark and spent the remainder of the day hanging up the Christmas lights. It was a grand day indeed.
As for the mr, well he went and turned himself one year older. And what did we do? We went and had a happy birthday party with family and friends at the newly unfinished house. It was all sorts of fantastic. We frantically ran around to pick up all the construction mess, tossed some plywood on the cabinet frames, ran all over to make paper lanterns for the light bulbs hanging from the ceiling and cleaned the toilet. I made huge vats of soup and kept the warm in slow cookers (I am now a new owner of a vintage 70’s crock pot so I guess I need to learn how to use it) and we borrowed an electric griddle, cut up some veggies and fruit and had a soup and grilled cheese party. (shout out to barb for helping me cut all the everything, oh and having the first official dance party with me) A classic homemade vanilla cake with some Duncan Hines frosting and ice cream topped off the night. I must also mention that even with a house full of people, including a bunch of littles, there was barely any food wasted. My brother even asked where he could find my compost bin to toss the orange peels. That might have been the highlight of the night. After the evening my ass was tired so off to bed we went. Then I woke up. Nothing beats waking up at 5am the day after a party to a plywood covered pile of soup crusted dirty dishes. 2 hours later, a rag, some peppermint Dr. Bronners and the bathroom sink made things look good again. And now the house is full of every chair we have ever owned, every piece of mismatched bowl, plate, cup,jar, and spoon we could find, and a freezer full of wheat bread and lots of carrot sticks.
Yup, things are moving along. Pretty soon I’ll be cooking up a storm in new kitchen and will be bring you all some food posts to boot. The appliances are set to arrive tomorrow and all we have left to do is build the cabinets, run a few water lines, pour a concrete counter………
Today the mr have to remove the 500 plates, cups, bowls and spoons out and the rest of the birthday cake out of the kitchen area and get back to work to makingt he real kitchen thing happen. But the coffee pot and all the coffee has found it’s permanent home. I’ll have coffee all day long. Whoa hoo!
Things I saw and read on the internet that you can now see and read too.
-Not really a “gingerbread house” but what ev, it pretty fantastical. How To Build An Indestructible Gingerbread House. Gummy bear epoxy seems so right.
-Speaking of gingerbread houses. Holiday gingerbread cookies have a dark and violent past
–Cute Animation Imagines How Day Turns into Night
-A hairy tail has be found. First Dinosaur Tail Found Preserved in Amber
-This is a good guide with lots of good recipes. The Search is Over: This Map Will Find Your Sugar Cookie Soulmate
–I want this.
-Now I know where I have seen you before. Scientists Think Your Face Evolved to Look Like an Ape’s Butt
–Why Nutrition News Contradicts Itself All the Time. One day my diet is super healthy and the next, I am probably going to die cause of it. Damned if you do, damned if you don’t. (nah, I think I am good)
–A Brighter Outlook Could Translate To A Longer Life. Doing it
-I get excited every year when this list comes out (I know, I a dork). NPR’s Book Concierge Our Guide To 2016’s Great Reads
Picture fun time.
I made him throw this sock away….. It was time.
Have a fantasticday.
I know it’s early an I know it’s Sunday, but other than that I am having a hard time concentrating on much of anything. All I can think about is paint color, well that and the kitchen stove. (I am getting closer to making that decision. I am secretly hoping Bluestar will just gift me one.) Oh, and how I want to hang some lights on the house because what is the point of having a house without hanging the holiday lights. So I guess I am thinking, just not very clearly.
How was your week? Good I hope. Ours was kind of quite. We spent most of our time at the house working and feeling sick. I might have convinced myself at the beginning of the week that I had listeria due to the fact that I ate a shit ton of some hummus that was recalled due to contamination. But I am alive so I think I am ok. We did get to see lots of family, spend a little time in some woods, and even got to take a afternoon nap .(mostly because I was sick) And it snowed!!!! There is no more snow now, but there was and it was so white and fluffy and great. I am looking forward to having an actual winter this year with some actual snow.
The mr and I are working our butts off, trying to maybe move in soon, like as soon as possible. Yesterday at the house, the mr was downstairs patching up the pantry walls and I was upstairs, painting. The plan was to touch up all the paint and to paint the closet doors. Sounds simple right? Well it wasn’t. Long story short, I spent the entire day painting, hating, remixing, then repainting the closet doors in the bedroom. I didn’t get to anything else. I almost tore my eyes out of my head. I seriously repainted those freaking doors5 times, each time thinking that I likes the color. Then an hour later, after painting front ans back of both doors (they are louved so they take longer) then I would hate the color and start all over again. I was going a little crazy. I blame it on the fumes.
Today I am going to bring over a scented candle (to mask he smell of urethane), put on some Christmas tunes, touch up all the paint in the bedrooms and bathroom upstairs and paint those stupid closet doors one last time, color be damned. We are getting there. It’s going to be great
There might even be some time to bust out the Xmas lights!
Internet for the looking.
-My hometown. America’s First All-Renewable-Energy City
–Your Brain Can Barely Handle Conversation and Eye Contact at the Same Time.
–Cool Ass Lamps. The peacock is the best.
-My siblings.. Best friends, worst enemies. Love them all to pieces even when I want to punch them in the face. Give Thanks For Siblings: They Can Make Us Healthier And Happier
-I could spend forever in one of these (Cornell is my favorite). THE 15 MOST BEAUTIFUL COLLEGE LIBRARIES IN AMERICA
-Maybe someday I will sit around and make bird houses, but they have to be this cool. These Modernist Houses Are Literally For the Birds
-Can’t wait to go crazy and cover my life with all the green, it makes me happy. Green and Peaceful
-So I for sure talk to myself, sometimes just saying lists out loud, but sometimes….The mr always thinks I am talking to him. I have to tell him to stop budding in on my conversation. The Running Conversation in Your Head
-The mr always get me purple carrots in my stocking and my birthday. WTF ARE PURPLE CARROTS AND WHERE DID THEY COME FROM?


 I figured now is a good time to get this recipe out there before we get to far into spring and summer recipes because there is going to be a lot of banana ice cream filled recipe coming and I figured its a good idea to have the basic banana ice cream recipe ready for people to refer too. And because I made so much fantastic naner ice cream, I also made a cookies and cream naner ice cream for my sisters and the mister.
 The stuff you need for this ice cream…. Nice and ripe bananas, peeled and then frozen* That’s it.
 After all blended and smooth, either eat right away or scoop ice cream into a freezer safe container and stick in freezer. That’s the banana ice cream… And it is amazing and so so so so so addictive. I make a batch, think I am only going to eat a scoop, then find myself eating half of what I have made, but it’s ok cause it’s only bananas.
  One batch of banana ice cream, either freshly made, still in food processor or made ahead and placed in a food processor and given a good pulse to smooth it up.
 Now you have cookies and cream naner ice cream…. and everybody is happy.

 It’s Mother’s Day weekend which means that you and I and everyone out there should feel the slightest bit obligated to at least do a little something nice for your mom for the mere fact that you were borned. And really what better way to celebrate mom than with food… It really is the least that you can do. (I think mom’s also like flowers and cards and handmade pasta necklaces) My mom is defiantly about the food. (she has had her fair share or pasta necklaces) A many years back on Mother’s day, this sweet little girl (me) made her mother a special breakfast treat…blueberry scones. And ever since that day, for every freaking holiday, birthday, whatever day, my mother requests (demands) a batch of those scones. She is always saying that these are her favorite treat and that no one has ever made them as good as I do. (I guess that just reiterates that I am her number 1 child)
 The stuff. Flour, baking soda, baking powder and salt. A bit of sugar, vanilla, buttermilk, and butter (use vegan butter and nut milk if you want to make them vegan) And of course we need the blueberries which can be fresh or frozen. I usually use fresh, but the store I stopped at only had really big containers of fresh that were like $1000 dollars a piece and the organic frozen happen to be on super sale. So you know, the cheap in me won that battle.
  So into the bowl goes all the dry stuff; flour, baking powder and soda, salt, and the sugar. Give it a good whisk.
 Now dump the blueberries into the flour mixture. Toss them around to give them a coat of flour. Add in the buttermilk and vanilla and give a little mix until liquid is absorbed. We are trying to handle the dough as little as possible.
 Turn mixture onto counter. It’s very loose, but thats what it should look like.
  Very gently and with as little handling as possible, gather dough up, knead a few times till everything just comes together. Press dough into a disk that is roughly an inch thick…. and it doesn’t need to be perfect.
  Cut the disk into even sized pieces. Do 6 big, 8 normal, maybe even 10 smaller. Whatever size you like. (I did 8) Place the scones onto a baking sheet, using a spatula to transfer, and sprinkle the tops with a little bit of sugar. Into a preheated oven for about 20 minutes.
 And when the scones look all nice and browned and a tester comes out clean. remove and either serve right away warm, preferably with huge cup of coffee or tea, or stick on a rack to cool before storing in air tight container.
 I had to share the last of the 5 pineapples cause if I didn’t, that would mean I ate 5 pineapples by myself. (I ate 4 pineapples by myself) So donuts were made and delivered to my sisters house where I proceeded to make her and her kids and another sister dinner. (hand made pizza on a weekday!) I then whipped out these pretty little upside down pineapple donuts for dessert, right after I cleaned up and made whipped cream. The kids were swallowing them hole and trying to steal just one more and my sister and the mister, well they had to eat their donuts all elegant like with forks. (weirdos)
 The stuff. Flour, salt, and the baking soda whisked together into a bowl. Fresh pureed pineapple, milk, egg, melted butter, and white sugar. Than there is more melted butter, brown sugar and fresh pineapple for the upside down.
  This batter is pretty simple, just make sure to whisk all the dry really well. Dump all the wet stuff into the dry and mix until combined. Don’t over mix!
 Grease the donut pan really well and mix the brown sugar with the remaining melted butter
 Drizzle the bottom of each donut round with the butter/ sugar mix then layer thinly sliced pieces of pineapple around the hole maker. (not as perfect as a pineapple ring, but still pretty)
 When donuts are all nice and golden brown, remove from oven and let sit and cool for about 5 minutes to give the donuts time to cool and the brown sugar to thicken. Dump donuts out onto a wires rack
 And serve them all upside down like. Maybe with a scoop of whipped cream or ice cream or nothing.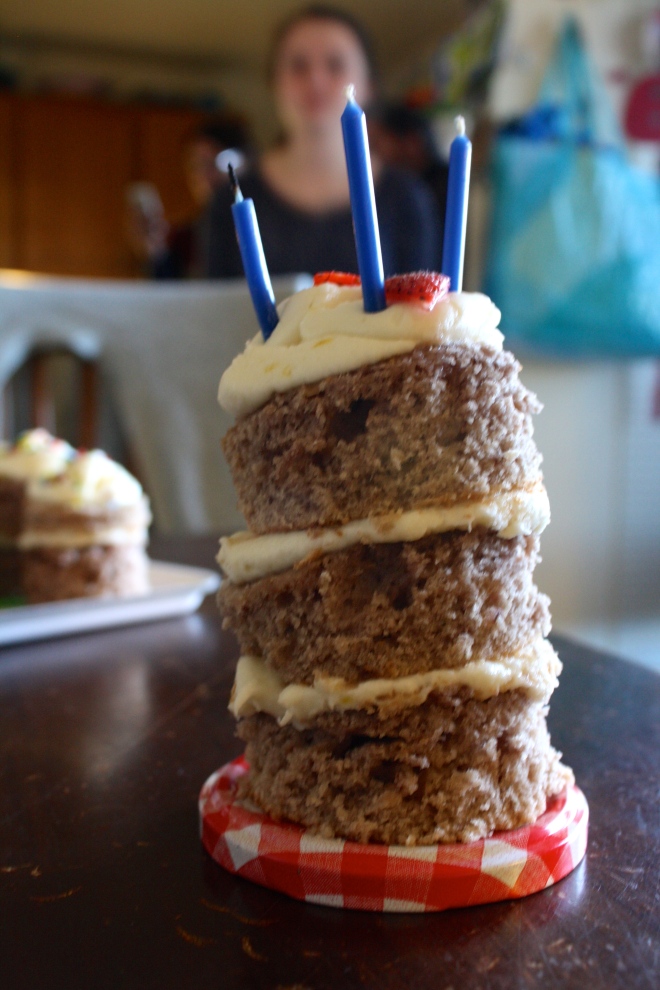
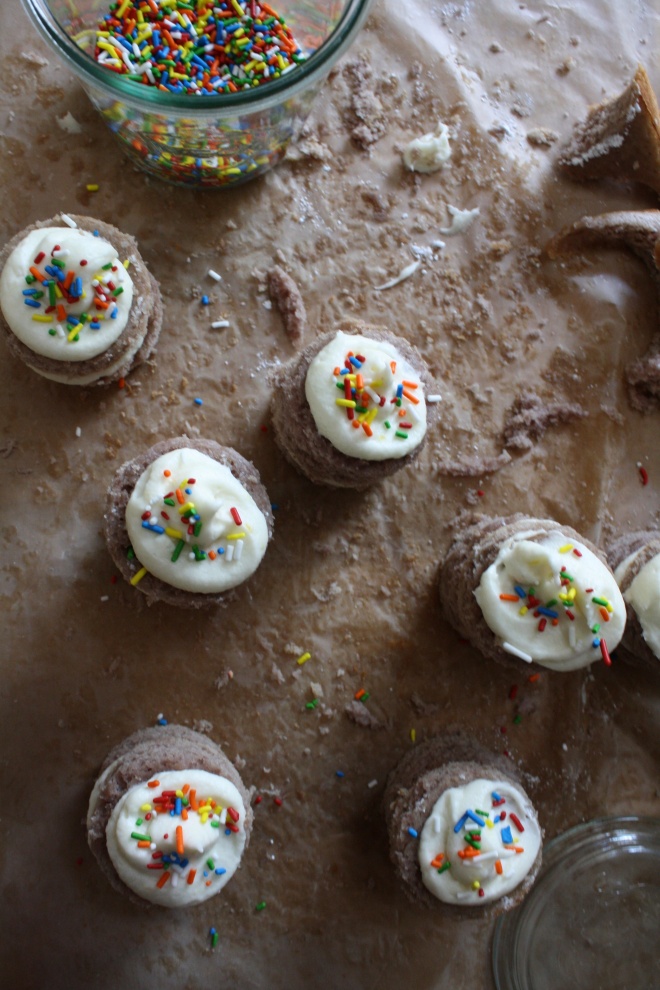
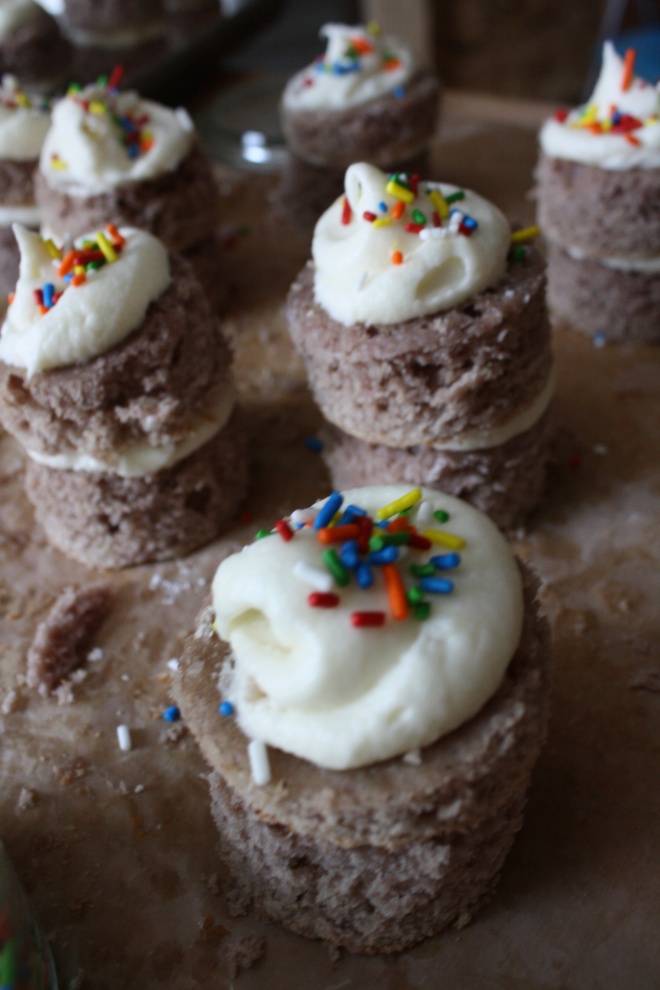 My Moms birthday was this past week, and naturally, I made the cake for our big family birthday gathering. (and I bought and made dinner and cleaned everything up, although the mister did do all the dinner dishes) Word to my sisters… You guys suck! (but I still love you)
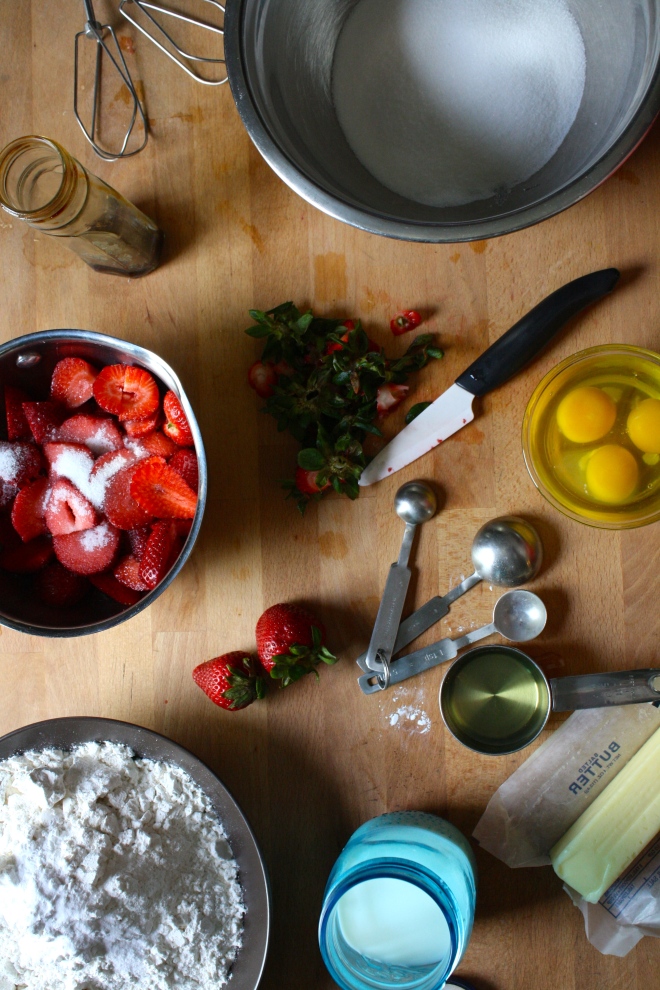 Cake Stuff. Flour, baking soda, baking powder, and salt whisked together in a bowl. Butter, a little oil, vanilla, eggs and buttermilk. Then of course we have strawberries cause it wouldn’t be a strawberry cake with out them.
 First things first. Wash, trim and dice up the strawberries. Stick them into a pot and sprinkle with a few tablespoons of sugar. Heat on low and let the strawberries cook for about 10 minutes, stirring frequently, until they turn into a thick syrup.
  The sugar and the butter get beaten together until light and fluffy. Then goes in the oil, eggs, and vanilla. The milk is then added to the strawberry mixture. Add half the dry mixture to the wet, mix, then mix in half the strawberry mixture to that. Mix the rest of the dry in and finish off with the strawberry mixture.
 Cake gets pulled from the oven and set on a rack to cool.
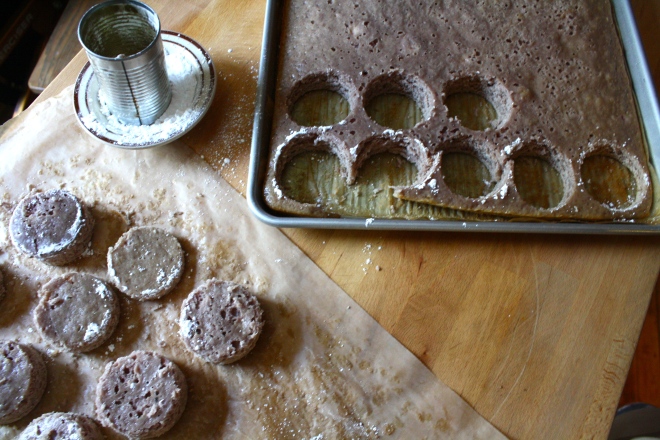 Tomato can cutout. (I couldn’t find my biscuit cutters) A biscuit or cookie cutter would probably work a little better.. The cakes kept getting stuck in the can.
 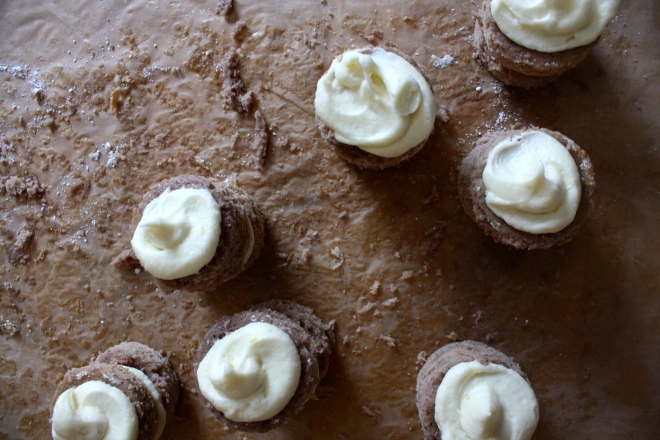 Frost the cake!! Place frosting into a piping bag or a big plastic zip lock with the tip cut off. 2 rounds to a cake. A squeeze of frosting goes on one, topped with another and given a little smoosh. A nice big dollop of frosting on top then….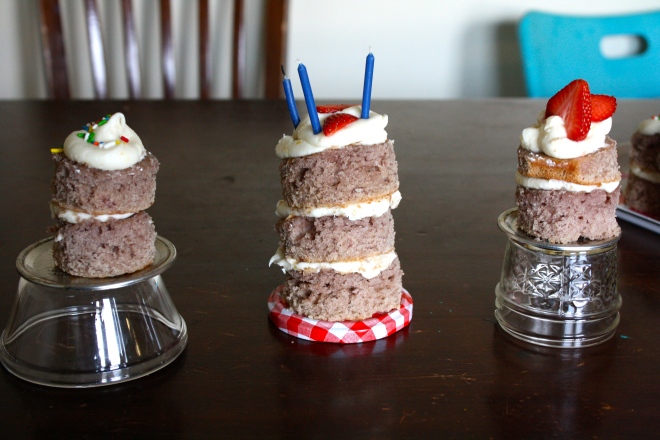
 What is better for a bake sale then Oreo cookies? Oreo cookies made from scratch!.
 Cookie Time! Whats going on here is brown sugar and butter have be beaten together until nice and fluffy Then a good big splash of vanilla and another 2 big splashes of coffee are added to that.(I sacrificed my last few sips of my coffee for these cookies) The dry stuff, flour, salt and cocoa powder, are whisked together, waiting to be added to the wet.
  Mix the dry ingredients into the wet and mix. I ended up just using my hand and kind of squish mixing everything together until in tuned into a nice lovely uniformed dough. Form the dough into 2 balls and give each a few kneads to get any air bubbles out. Place dough back into bowl and stick in the fridge to sit for 10-15 minutes( it makes the dough a little easier to work with)
 Once the dough has had a little time to rest and cool, remove from fridge, one ball at a time. Place on a lightly cocoa or powdered sugar dusted surface and roll out the dough. Grab any size circle (or other shape) cookie cutter and get to shaping the cookies. Notice the tin can in the bowl? I could’t find my biscuit cutters anywhere but the can was the perfect size, and it worked really well. Keep a little bowl of either powered sugar of cocoa to dip the cutter in in between making the cookies. It really helps the dough from sticking and breaking.
  While the cookies are getting their cool on, make the cream filling. All you need is a stick of butter, about 4 cups of powdered sugar, some vanilla and a few splashes of heavy cream. Beat that all up until nice and creamy thick and spoon it into a pastry bag (I used a big old ziplock bag) to be piped on the cookies.
  Filling the cookies is for sure the best part. Separate the cookies into pairs and pipe a big blob of filling onto one of the two cookies. Take the names cookie and place on top, giving it a little smooth to the disperse the cream. Keep doing that until the cookies are all filled.


 TGIF!!!! For reals, because Monday-Thurday were monster days. And now that its friday, I can dig a hole and hide in it until it’s at least 30 degrees with some sunshine. (I might never get to come out.)
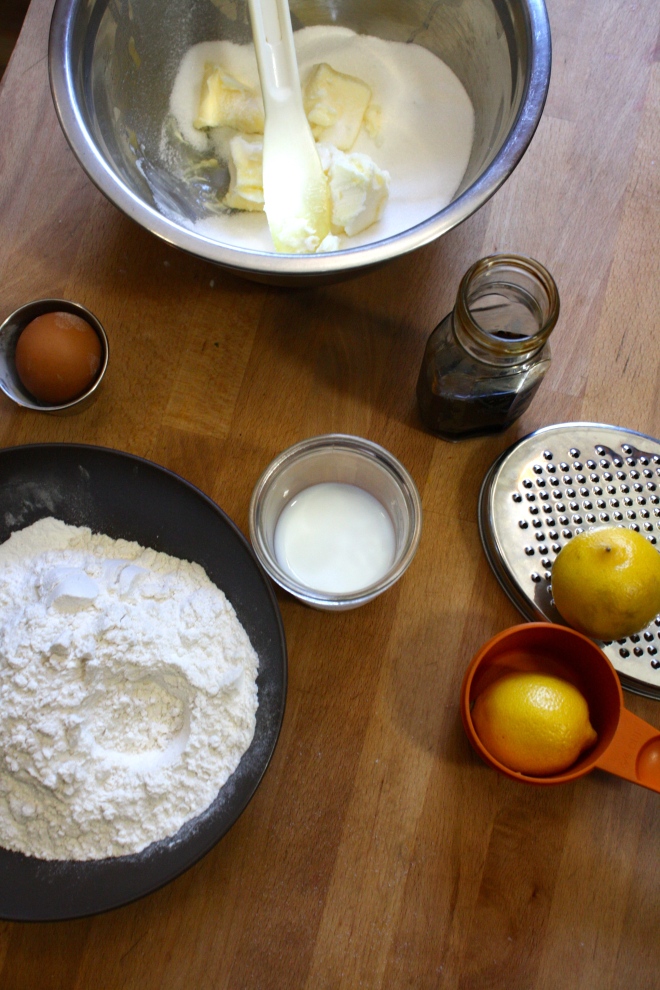 Simple lemon cake stuff. Flour, baking powder and salt whisked together, Sugar and soft butter in a bowl. An egg, some vanilla, milk, and of course, the lemon.


THE LOVELY CRAZY
March 19, 2017 by maximios • Blog
It’s officially kinda official. WE MOVED IN!!!! And yeah sure, we might not have a kitchen or a 100% functional shower, but hey, who needs that when you got a real freakin bed to sleep in. (we are showering and preparing food at the loft) Going form sleeping on a futon on wooden slates in a crawl space to our real bed, with a real frame, all in a giant room with windows….. It’s hella crazy.
Other then the move in, the week has been pretty jammed packed. Still spending every minute plugging away at the house all while making sure all of our tenants are keeping warm with working heaters. (we have spent way to much time at the plumbing supply store this week) Barb, the mr and I ditched a day of work and school to travel to the north and hit up the land of Canadian Ikea. The mission was simple. Get a kitchen sink and maybe a cool rug or a shelving unit, and for barb and the mr, to eat as many hot dogs as they could. Success was had. We go the sink, I got a jar and a rug, towels were bought and an obscene amount of hot dogs were eaten (I think they each ate somewhere between3.5 and 5, plus a fro-yo. Me I was happy with my carrots) We we home before dark and spent the remainder of the day hanging up the Christmas lights. It was a grand day indeed.
As for the mr, well he went and turned himself one year older. And what did we do? We went and had a happy birthday party with family and friends at the newly unfinished house. It was all sorts of fantastic. We frantically ran around to pick up all the construction mess, tossed some plywood on the cabinet frames, ran all over to make paper lanterns for the light bulbs hanging from the ceiling and cleaned the toilet. I made huge vats of soup and kept the warm in slow cookers (I am now a new owner of a vintage 70’s crock pot so I guess I need to learn how to use it) and we borrowed an electric griddle, cut up some veggies and fruit and had a soup and grilled cheese party. (shout out to barb for helping me cut all the everything, oh and having the first official dance party with me) A classic homemade vanilla cake with some Duncan Hines frosting and ice cream topped off the night. I must also mention that even with a house full of people, including a bunch of littles, there was barely any food wasted. My brother even asked where he could find my compost bin to toss the orange peels. That might have been the highlight of the night. After the evening my ass was tired so off to bed we went. Then I woke up. Nothing beats waking up at 5am the day after a party to a plywood covered pile of soup crusted dirty dishes. 2 hours later, a rag, some peppermint Dr. Bronners and the bathroom sink made things look good again. And now the house is full of every chair we have ever owned, every piece of mismatched bowl, plate, cup,jar, and spoon we could find, and a freezer full of wheat bread and lots of carrot sticks.
Yup, things are moving along. Pretty soon I’ll be cooking up a storm in new kitchen and will be bring you all some food posts to boot. The appliances are set to arrive tomorrow and all we have left to do is build the cabinets, run a few water lines, pour a concrete counter………
Today the mr have to remove the 500 plates, cups, bowls and spoons out and the rest of the birthday cake out of the kitchen area and get back to work to makingt he real kitchen thing happen. But the coffee pot and all the coffee has found it’s permanent home. I’ll have coffee all day long. Whoa hoo!
Things I saw and read on the internet that you can now see and read too.
-Not really a “gingerbread house” but what ev, it pretty fantastical. How To Build An Indestructible Gingerbread House. Gummy bear epoxy seems so right.
-Speaking of gingerbread houses. Holiday gingerbread cookies have a dark and violent past
–Cute Animation Imagines How Day Turns into Night
-A hairy tail has be found. First Dinosaur Tail Found Preserved in Amber
-This is a good guide with lots of good recipes. The Search is Over: This Map Will Find Your Sugar Cookie Soulmate
–I want this.
-Now I know where I have seen you before. Scientists Think Your Face Evolved to Look Like an Ape’s Butt
–Why Nutrition News Contradicts Itself All the Time. One day my diet is super healthy and the next, I am probably going to die cause of it. Damned if you do, damned if you don’t. (nah, I think I am good)
–A Brighter Outlook Could Translate To A Longer Life. Doing it
-I get excited every year when this list comes out (I know, I a dork). NPR’s Book Concierge Our Guide To 2016’s Great Reads
Picture fun time.
I made him throw this sock away….. It was time.
Have a fantasticday.
It is super chilly and dark out and the smell of jelly donuts is wafting in from open windows (it’s coming from the donut factory down the street) and I am thinking about grabbing the wool blanket from the packed away winter stuff and crawling back into bed, just for a little while longer until the coffee is done brewing. (4am wake up this morning and I am feeling like a nap is in order soon, even if it is 6am) This is the stuff of the best fall morning. Now if this could be my all day.#lifegosls
The week was a week, but a good week at that. Started getting squash with the farm share which lead to a discussion between me and the mr about what our absolute #1 food we could live off of forever (him, pizza.Me, super roasted kombucha squash covered in nut butter) I made a sheet birthday cake that also contained about an entire package of oreo cookies for a newly 15 year old Jackson that is making me feel old. There was a dinner here and a dinner there and just a lot of people and family. We haven’t spent much time at home or by ourselves this week so I am definitely ready for a quite day all to my lonesome. My brain is on overload.
We ordered the downstairs flooring!!! Come this Wednesday, the mr and I will be unloading 40 or so bundles of some pretty white “utility grade” oak. We also found some floor tile for the bathroom for dirt cheap at the resourse store( tiny white squares.. nothing fancy but looks sharp) Flooring is for real you guys. Once we lay this stuff it’s over. We are good and yeah. (until 2 hours later when we realize we have a million other things to accomplish) But all is good. We have flooring.
So today is going to be a fun one. The mr, my brother and I are going to attempt to move the 10 million pound radiators from the back yard to the upstairs….. Going to be oh so much fun (no, not it is no) Once we move them, I am going to finish painting them and the mr will install them. Whoa hoo! Plumbers are coming soon to hook up the new boiler so we have to get all this shit ready. WORK WORK WORK WORK WORK!
How about you? Got any fun activities planned for this here fantastic fall weekend? Find something enjoyable, preferably outside, and try to stay away from reading all about the politics. We all need a break from that.
Internet stuff that kept me interested.
– Do yourself a favor and go outside. This Is Your Brain on Nature
– Almost finished this book and about to start this one.
– I like honey crisps all right, but I am a mac girl for always. (and they are usually one of the cheaper varieties) Why Are Honeycrisps So Much More Expensive Than Other Apples?
-Breadfruit came from testicles and other weird myths. THE WORLD’S BEST FOOD-BASED CREATION MYTHS
-How can trees not have secret lives. A Web Of Trees And Their ‘Hidden’ Lives
– And this. Today in Terrifying Bird News, Pigeons Know How to Read
-This would be my bliss (with an added coffee bar) Secluded Library In The Woods
-I got my information from Meryl Strep in The Devil Wears Prada (love the movie) How Trends Trickle Down. The circuitous path of ideas in food and fashion.
-Breaking Taboo, Swedish Scientist Seeks To Edit DNA Of Healthy Human Embryos. I am officially scared.
-I think this might be my next knitting project. Purl Soho Pullover
Some pics from the past week.
My morning walks as of lately have had me doing a bit of raspberry, cherry tomato, and husk cherry picking. Can it gt any better then that? (I sometimes pick flowers too). And yesterday I got my first pie pumpkin of the season. It is so cute and pumpkiny that I kind of want to keep it sitting on my counter for a while, but no.. My plan is to roast that shit for dinner tonight and eat it all to my face. There will be plenty of pumpkins to decorate with soon. This one is meant for my belly.
But before pumpkin, the mr and I ARE GOING to figure out the paint situation. I have never in my life had such a hard time picking colors for any apartment or house we have painted (and we have painted a lot) We nailed the wall color(on the second try) and both love it. I spent a good part of the week repainting the entire upstairs, but now we need to figure out the trim. I picked out a lovely grey that I looked fantastic for about a minute, but now I kind of hate it. I blame it on all the light and angles of the space. No two walls look the same color so I might just have to go with white trim and call it a day. Either way we go, I need to get the paint at least picked out today, its driving me fucking crazy.
I really should stop bitching, we have had such a productive week. We ended up picking up a new set of cast iron radiators, which I will tell you was no easy feat (the first or second time we did it, each of those things weight like a 800 lbs a piece) The old ones we got were not big enough to heat the space efficiently but the new ones, they are perfect and pretty and work. Score on that one. (thanks Mark the plumber) And while I was painting away upstairs, the mr was downstairs doing all sorts of stuff like moving all the tools and trash out, figuring out the radiant flooring for the first floor and sanding and painting the ceilings. The house looks so good that I am almost tempted to just move on in now, but then I think back to all the places we have lived during construction and the temptation goes away. Far far away. I can wait, at least for a bathroom with a sink that is not a hose and bucket.
Yup, another busy crray cray week. After we get paint, I think I am going to crash for a while, let my body and brain have a little time to shut off. We really should try to go apple picking or something, but honestly, I think we are both just really tired and could use a bit of time not doing anything. I say this but I know the mr will keep on working until his arms fall off, me, I will just fall asleep on the floor.
One thing I really need to do at some point today is to bust out all of my cozy sweaters. I am so very excited because sweaters are my jam and I have me aplenty of them. My wardrobe triples once the sweaters come out and I don’t look like such a bum wearing all my big baggy paint covered t shirts. A sweater classes me up bit.
Yes, I can be classy (kinda)
Internet findings from the week.
-What a bad ass lady. Urban Beekeeper Delivers Pollinators by Bike to Community Gardens Across Chicago
–A Dictionary Is Telling Everyone to Calm Down About Using ‘Literally’ Wrong
-So jealous. I would have loved to have taken a coffee class in college. STEM To Steam: How Coffee Is Perking Up Engineering Education
-Thinking we might go with black doors. (maybe, what do you think?)
-Always thought these windows were a bit strange.The Bizarre Story Behind This Common Home Amenity In Vermont
-I am serial lane switcher. To Pick the Fastest Line, Follow People With the Most Items
–The Power Vegetables Pantry. The 12 ingredients that will supercharge your vegetable cooking.
-This dude spent a lot of time and energy figuring out how to best drink a coke. (coca-cola, not coke like the drug) The 24-Year-Old Coca-Cola Virgin
-This place has got to be amazing. WHERE DOES LOST AIRLINE LUGGAGE GO? TO AMERICA’S GREATEST THRIFT STORE.
-I have a mini dance party to this song every day. Also love it cause it reminds me of Alana and Abby from Broad City (when is season 4 coming???? I NEED it)
Now for a few pictures
Funny story. Our basement floods a little every year in the spring. I think that a lot of people around here have slight problem with basement water, the houses being so old and all. So when earlier this week we had a massive thaw and a bunch of rain, the mr preemptively set up the sub pump to keep the water away. All day he was checking the pump and all day it poured butthe basement stayed dry. He turned it off that night after it had stopped raining. We woke up to the most beautiful bright blue sky, the temperature so warm that I didn’t need to wear a jacket and to 3 inches of water in the basement. STUPID!!!!! But that happened and yeah. The mr spent a good few hours moving all of our stuff, (we store a lot of stuff in the basement) shop vac-ing and pumping up the water .He did such a good job that it was almost like it never happened. The only really wet thing was a big laundry basket of stuff. I wanted to wash itasap so it wouldn’t mold so when I got home, into the washer it went. (the washer is in the basement too) Go to change the load to the dryer and guess what.. the mr took the washer machine house out of the main drain to use it for the shop vac, and no, we forgot to stick the hose back in. We re-flooded the mother F-ing basement!!!!!AAAAAAAAHHHHHHHHHH!!!!!!!
But it’s kinda funny right?
Anyway the week has been heavy on the crazy. My Dad has been here so we have been spending a lot of time with the family doing family things all week. Over at the house we have pretty much gutted the kitchen (anyone want free kitchen cabinets?) and the mr is almost done muding the first floor. Once that happens we can move in (Just kidding… not even close) but we are well on our way. And the next project we tackle is going to be fun fun (rip the roof off!)
And the father of mine is leaving today, (which makes me a little sad) I have no kiddos in my care, the water from the basement is pretty much gone and I don’t want to do a damn thing that involves work. It’s a down day for sure. No people, no fuss. I have a new book on hold at the library, although I am kinda torn. Should I start a new book or binge watch Fuller House? (can I take more family drama?) Have you watched it yet? Do me a favor if you have, let me know if it’s going to ruin the Tanner family for me.
Hoping your day, as well as mine, is gong to be a good one!
Interesting internet stuff from the week.
-Are you a open broiler or a closed broiler. I am neither.. my broiler is the bottom draw of the stove and doesn’t work unless pushed in. Can You Leave the Oven Door Closed While Broiling?
I was planning on making pita bread this week and just happen to stumble upon this article. The 7 Rules of Perfect Pita Bread
-Holding a bag of enough powdered caffeine to kill several people… whoa. Caffeine For Sale: The Hidden Trade Of The World’s Favorite Stimulant
-What is the word for finally getting words for all he emotions I felt but couldn’t explain? 40 Words For Emotions You’ve Felt, But Couldn’t Explain
-I know!!!!!. ARTISANAL WATER IS OUT OF CONTROL AND STUPID
-This article really hit home for me. To Anyone Who Thinks They’re Falling Behind In Life
-A tree inside.. yes, I would like one in every room please.
-I love cool (well done) street art.. Quirky New Chalk Characters on the Streets of Ann Arbor by David Zinn
-Maybe next knitting project Knit Fruits and Veggies by ‘MapleApple’
-I am not going to lie.. I love Chrissy Teigen and although I probably won”t cook any of the food in her book, I am still looking forward to giving it a read. Chrissy Teigen’s ‘Cravings’ and the Search for Cookbook Credibility
And some pictures.