
THE LOVELY CRAZY
 Wowzers.. What was I thinking! I know, the same thing you are…YES YES YES!!! Gluten free what now.. My lovely sister is on that ban wagon. She has been having”issues” lately(so many, it’s hard to pin point) and says she is feeling better without the gluten. Me being the lovely person that I am want to feed my poor sister, make her happy with food. I HAD to prepare that lady a dinner and it had to be pizza cause I know how much she likes her pizza. So I brain storm. What would be a good gluten-free pizza crust? I could do the obvious and get gluten-free flour, but to be honest, that’s some expensive stuff and I really didn’t feel like going to the store. I wanted to work with what I had in the house….and ah ha, there it is, cornmeal.. With a little bit of water I can turn that into some polenta and a super gluten-free pizza crust.
So in walks polenta(if polenta could walk) What goes good with polenta? Caramelized onions, mushrooms and yes, my last delicate squash.(I am too nice) A nice base of marinara sauce and a bit of parmesan cheese mixed into the crust and sprinkled on top…..a complete work of genius that I was proud to serve to the gluten free lady.
Note. I have to make this clear, just because this pizza is gluten-free doesn’t mean that a person that is not gluten-free cannot eat this. Anyone and Everyone should eat this pizza.
 There really isn’t a whole lot of ingredients to this pizza… Cornmeal for the polenta. Marinara sauce….I used jarred marinara because it was a little easier and we don’t always need to make things from scratch…Lots of onions(2 finely sliced), handful of sliced mushrooms, thinly sliced squash and parmesan cheese. Most of the prep takes place at the same time, but that’s good, we can multi task, just have everything pre chopped and ready to go. First thing first, start the polenta


There are so many different ratios and directions on how to prepare polenta, so if you feel like your way is better, I trust you. What I did for this crust was 1 cup cornmeal to about 2 1/4 cups water. The main thing is the finished product. You want a pasty paste that is spreadable but not overly watery.
Bring the water to a boil and constantly whisk while gradually pouring in the cornmeal. After a minute to two, it should be pretty well incorporated and there shouldn’t be to many lumps. Turn the heat down to simmer and stir a lot until the polenta starts to pull away for the sides of the pot. Really scrap the bottom of the pot so it doesn’t burn. Once its done, add in a 1/4 cup of parmesan( if you want to keep it vegan, just don’t add it) and salt and pepper.

 On a well oiled baking sheet or pizza sheet..spread the polenta into the shape of your desire. I went with a somewhat circular shape, but now that I think of it, I wish I had been more creative, like maybe a triangle or even the shape of a bus….Yeah, a bus shaped pizza would have been cool.
This crust needs to be pre baked so stick it in the oven.It should take about 20ish minutes.

 You can do this pre crust or at the same time, but roast your sliced squash. Place single layers squash on an oiled pan, salt and pepper, then into the oven. It should take 10 minutes on each side.


You got the crust in, the squash in, now we need to caramelize the onions. You may be thinking that 2 onions is a lot, and it kind of is, but you want a lot. A tiny bit of oil into a skillet and all the onions. medium low heat with a lid, string on occasion. When the onions start to caramelize, add the mushrooms and cook until onions are nice and soft and the mushrooms are no longer raw. By the time you done with this task…everything should be ready….time to assemble!


First marinara…then the roasted squash.

 I Sprinkle a layer of parmesan cheese and pile on those onions and mushrooms,. Sprinkle with a little more cheese. ( use vegan cheese or no cheese if you want it vegan) Back into the oven for another 15 minutes to give everything some time to crisp and melt.
  Remove from oven and appreciate…That is one good looking pizza. I took a long spatial and run under the crust just to make sure if wasn’t stuck. I also found that if you let it cool for a few minutes before serving, the polenta gets a little stiffer and easier to handle, but not necessary.
Its time to eat! And I know that it was a success. This is my gauge for how good it was…I stopped by the next day to drop a xmas tree stand off to her(again, look at how nice I am) and she was eating lunch…the left over pizza. That might not seem like anything to you but to me… She doesn’t eat leftovers. Sure, she will stick them in the fridge, but that’s where they stay until she tosses into the garbage. The pizza was leftover good….That is good!
Polenta Delicata Caramelized Onions and Mushroom Pizza
Ingredients
- 1 cup polenta (Cornmeal)
- 1 tablespoon olive oil, plus more for the pan
- 2 1/4 cup water
- 1/2 cup grated Parmesan(omit if making vegan)
- 1/2 of Marinara sauce
- 1 small delicata squash
- 2 medium onions
- 8-10 mushrooms
- 2 gloves garlic
Directions
Pre heat oven to 425
In a medium saucepan, bring 2¼ cups water to a boil. Whisking constantly, slowly add the cornmeal while constantly whisking. Once full incorporated, turn to low and stir for a few minutes until the polenta starts to thicken and pull away from the sides. Stir in 1/4 cup of parmesan (if using). Salt and pepper to taste. Genously oil a pizza sheet to a cookie sheet and spread the polenta mixture about a 1/2 thick. Place into oven and bake for 20-25 minutes or until crust is a nice golden brown.
While the crust is cooking, place thinly sliced squash on an oiled baking sheet and sprinkle with salt and pepper. Place in oven at the same time as crust, flipping squash after 10 minutes. Cook until fork tender, about 20 minutes.
While the crust and squash is baking, caramelize the onions. In a large skillet with a bit of oil. toss in onions and a little salt. Cook on medium low heat with a lid, giving them a good stir every now and then. Once onions are nicely cooked down, toss in the mushrooms. Continue to cook unit mushrooms are no longer raw.
Remove crust and squash from oven and let cool for a minute. Now just pile stuff on. Spread marinara sauce evenly around crust. Add squash and top with cheese. Dump the onions and mushroom on top and sprinkle with a bit more cheese.(Again, use vegan or no cheese to keep it vegan) Place back into oven for another 20 minutes.
Remove and let cool for a few minutes………..and then eat eat eat!!!
A good side dish for this pizza…a nice light arugula salad. Hey, you could even just toss some greens right on top of this pie, that would be fantastic too!
Enjoy and be awesome!
 I don’t think I need to tell anyone about how weird the past few weeks of weather have been, so I will just leave it alone because we don’t need to keep thinking about how stupid cold it is outside or that the next week is only suppose to get worse. Booooo, but oh well. More time for cooking, reading, and trolling the internet (I have spent a little more time then usual getting sucked into the world-wide web.) Beacause I have been spending a little more time interneting, I have added an addition to my usual happy bits, a few links that I have stumbled upon that I think are cool and of things that I want or want to make… Cool internet stuff…..a bit of internet happy.
  I got to hang out with my little sister for the first time in like a month… She is just so busy being busy. I guess high school,play practices and boys and friends can fill up ones time at 15… but I miss her so much! I was very excited that she was able to hang out with me this week. What did we do? Well we spent most of out time together taking pictures of her in my glasses, making food and then taking pictures of her eating food. (She is eating whipped carob moose… like one should eat it) A fantastic day of silliness.
  I have been feeling like I might be fighting off an illness so I have been eating this Turmeric Ginger Garlic Carrot soup which I have been adding cabbage and topping with these pickled heart beet, all week long. So tasty and full of so much good.
 Oh yeah. Me, the mister, my sister, and her lovely little little went to Ikea this week. (the littles first international trip!!! Over the border and into Montreal) And of course at the end of any good shopping trip there is some type of food…. She was so excited for the hot dog and frozen yogurt cone at check out. Champion food eater this one is.
 And what’s not to love about pretty flowers (primrose)…..Sadly this is not a current picture. I need to get me some color today.




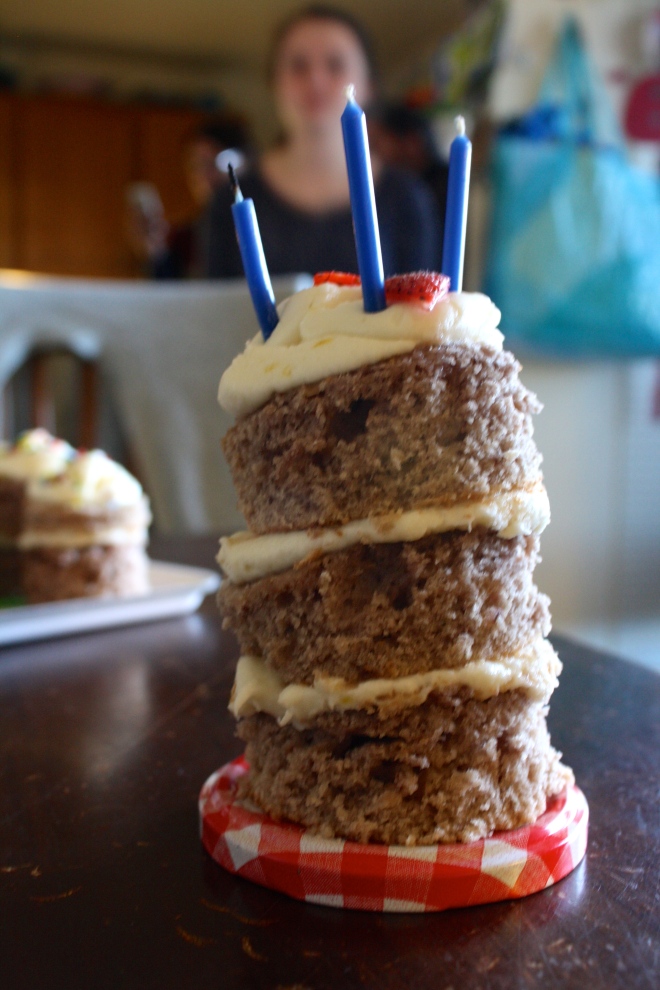
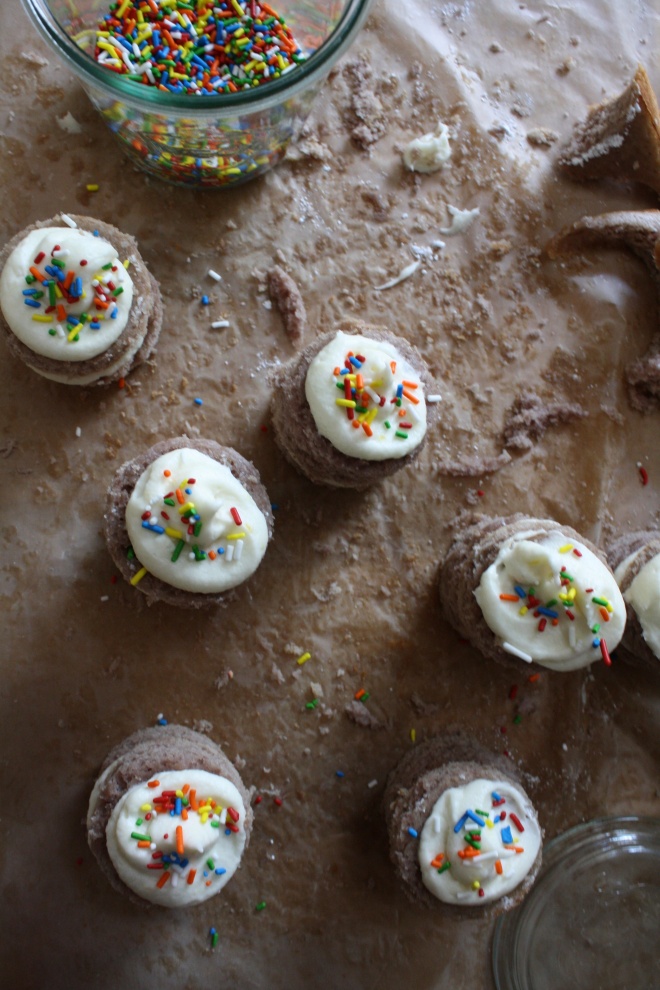
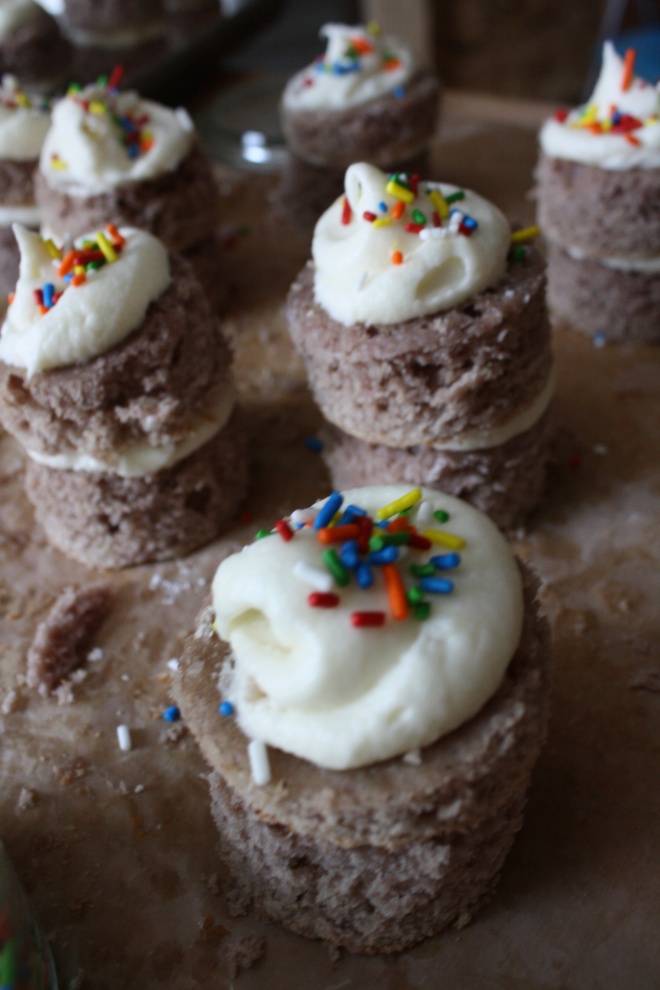 My Moms birthday was this past week, and naturally, I made the cake for our big family birthday gathering. (and I bought and made dinner and cleaned everything up, although the mister did do all the dinner dishes) Word to my sisters… You guys suck! (but I still love you)
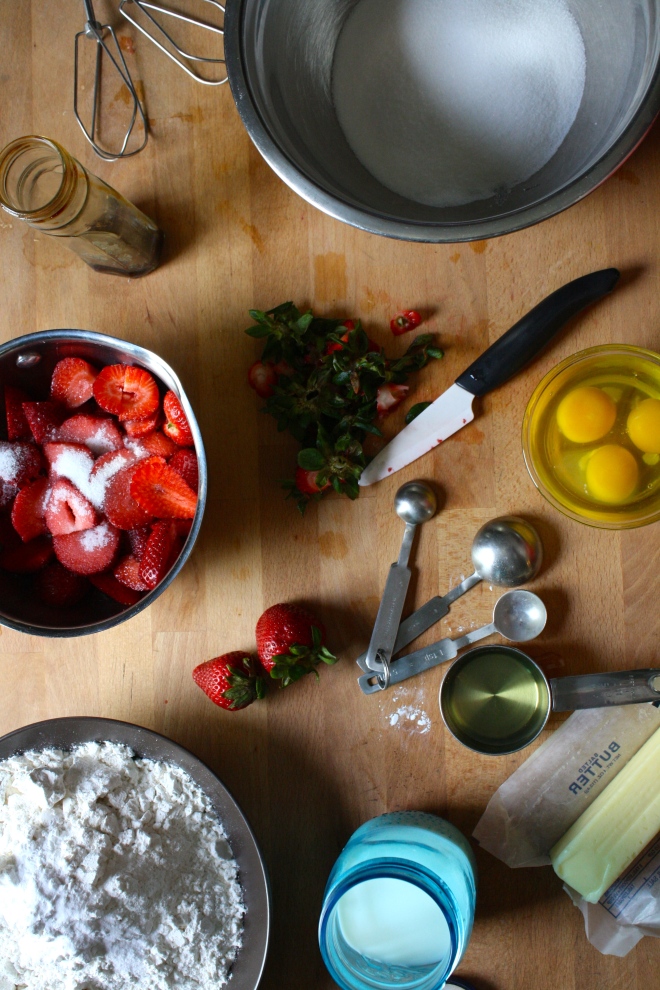 Cake Stuff. Flour, baking soda, baking powder, and salt whisked together in a bowl. Butter, a little oil, vanilla, eggs and buttermilk. Then of course we have strawberries cause it wouldn’t be a strawberry cake with out them.
 First things first. Wash, trim and dice up the strawberries. Stick them into a pot and sprinkle with a few tablespoons of sugar. Heat on low and let the strawberries cook for about 10 minutes, stirring frequently, until they turn into a thick syrup.
  The sugar and the butter get beaten together until light and fluffy. Then goes in the oil, eggs, and vanilla. The milk is then added to the strawberry mixture. Add half the dry mixture to the wet, mix, then mix in half the strawberry mixture to that. Mix the rest of the dry in and finish off with the strawberry mixture.
 Cake gets pulled from the oven and set on a rack to cool.
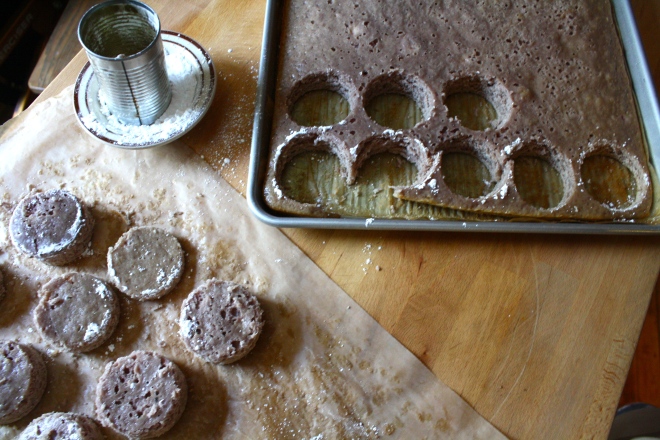 Tomato can cutout. (I couldn’t find my biscuit cutters) A biscuit or cookie cutter would probably work a little better.. The cakes kept getting stuck in the can.
 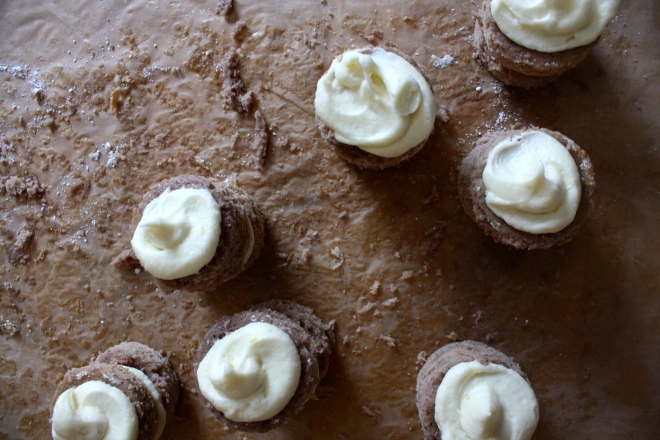 Frost the cake!! Place frosting into a piping bag or a big plastic zip lock with the tip cut off. 2 rounds to a cake. A squeeze of frosting goes on one, topped with another and given a little smoosh. A nice big dollop of frosting on top then….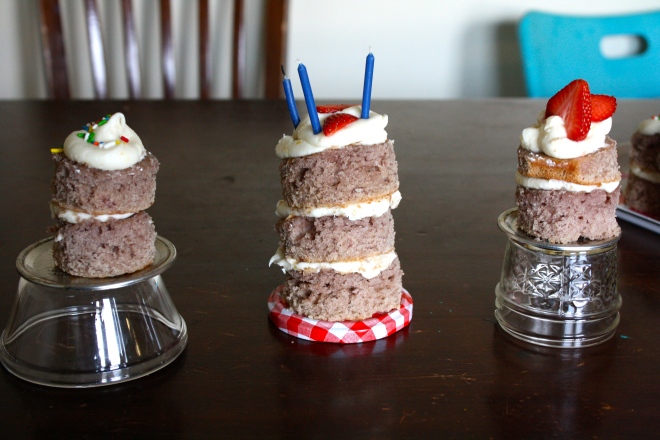


 Weird week. I feel like I have been so busy, but can’t quite figure out with what. I guess winter can do that to you, you know, when leaving the house kind of feels like a chore. Yup, it’s mid February when its cold, windy, snowy, and kind of mah. But it’s cool cause I feel like it’s all down hill from now. Soon we will be looking at an extra hour of daylight and hopefully some above freezing temps! (I think we have had a record amount of days below freezing here in VT) No, I am not complaining, just looking forward to getting out of hibernation.
 It was farm share week and yes, that’s a kohlrabi bulb. And no, I have never in my life seen a kohlrabi as big as this one. It is for real bigger then my head. If I didn’t know my farm was organic, I would think that they were growing these in toxic sludge. Wondering what I am going to do with it? Come back this week and see.
 Oh my love… A few days ago I had my super comfy warm rag wool mittens stolen from me at the gym. I know, I was so pissed, but hopefully whom ever stole them is getting good use out of them. Anyway, to my Valentines Day surprise, the mister got me a new pair and sewed a heart into the palm of one. So freaking cute right!
 I like to take a look back at old pictures when I am feeling the crazy.. This one makes me think of summer and our honey bees. (That’s the mister digging into the top bar hive)
 The blue sky! And oh man am I craving some traveling. I think this was taken somewhere is Colorado. I want to go back.
 So the mister wants to know…”Why would anyone ever buy those crappy english muffins from the store when they could be eating these?”
 Everything all mixed together, dumped onto a floured surface and kneaded for 10 minutes by hand…..If you have a stand mixer, you can use it if you want, but you are missing out on the fun of doing it by hand….
 When dough has doubled, punch down and plop out onto floured surface. Dust the bottom of a griddle or in my case, two cast iron pans, with corn meal. Divide dough into 8-10 equal balls and smash into 2 inch thick disks.
  Place on griddle or pans and sprinkle more corn meal on top of each E.M. Cover and let rise for another 15 minute.
  Now the E.M.s have rested, turn the griddle (or pans) on to low heat. Once your griddle (or pans) gets hot, continue to cook that side for another 7-10 minutes, or until golden brown. Flip and cook other side for 10-12 minutes or until golden brown. Once browned, check for doneness with a thermometer. The inside should reach 200 degrees.( if you don’t have a thermometer, fork split one open and check…. you are going to eat it anyway) If the outside cooked faster then the inside, no worries, just pop them into the oven at 350 for 8-10 minutes. I had to pop mine into the oven for to cook completely.
 Remove form griddle, let cool a bit, and ……Fresh, fluffy fat, fantastic….Everything and more that a real english muffin should be. Split open with a fork and……. the nooks and crannies! So spot on. Serve with anything your heart desires…I served these with whipped honey butter…. and eat the only kind of E.M. you will ever again eat. Grocery store english muffins be damned!
Kohlrabi Apple Walnut Slaw — The Lovely Crazy
September 19, 2015 by maximios • Blog
Perfect! A few carrots and half of a gigantic kohlrabi.. plus at the hotel we were staying at, there were fruit bowls in he lobby full apples. Every time I went past the apples (which was a lot) I grab one or two, so I have a few apples (I actually have a lot of apples now). All the things I need for a super awesome salad slaw. Apples with their nice sweet crispiness and kohlrabi with its cabbagey, crunchy earthiness, tossed together with some vinegar, some toasted walnuts and some carrots, I mean, so freaking good. And to make it a bit more of a meal, I made some lentils to go with it. But the best part was there was no need to leave the house!!
Pretty simple stuff going on here. Just peel and julienne the kohlrabi, carrot and apple. (no need to peel the carrot or apple unless you want too) and stick it all into a bowl. I used my mandolin, which is one of my favorite kitchen tools ever, but if you don’t have one, a box grater works too. Sprinkle with salt and a good glug glug of red wine vinegar. Chop up the walnuts (some big chunks and some very small pieces makes for good eating), toss it all together and, well that’s it. But wait…. let it sit for a few minutes before serving to really let the flavors draw out.
 And there we have it. Super fast, full of flavors and crunchy texture. A salad slaw after my own heart.
Serve it as it or add to a bed of greens, rice, or lentils… and make sure to save at least as little… cause its an awesome little pre-bed snack.
Happy Week!!
-C
In a large bowl, julienne kohlrabi (after peeled) apple and carrot. Sprinkle with salt, add in vinegar. Rough chop walnuts and toss the whole bit together. Let sit for at least 10 minutes, if not longer before serving. (A great salad to make ahead of time)
Eat as is, or toss onto a bed of greens, plate of rice or a bowl of lentils.
Any left overs only end up tasting better the next day.